The Lidless Eye - Achievement Screenshots Guide
[1] INTRODUCTiON

 The Lidless Eye
Complete the investigation of the Cult of the Lidless Eye.
All you have to do during this side quest is to find total of 7 Lidless Eye scrolls. You can get them on specific locations from chests or as a drop from defeated enemies/bosses.
This guide will help you to find them all through screenshots consecutively. It's very important to not miss any, because you wouldn't able to get some of them later in story progress. Unfortunately if you forget to take some of them, you'll have to do this quest again on next playthrough. The only scrolls you would be able to collect again are these from chests.
IMPORTANT NOTES:
- this is NOT story based achievement and it could be easily missed,
- collect all scrolls consecutively, do NOT forget any of them,
- follow this guide and check closely attached screenshots,
- coop playthrough - every player collects scrolls separately.
[2] PLAYTHROUGH
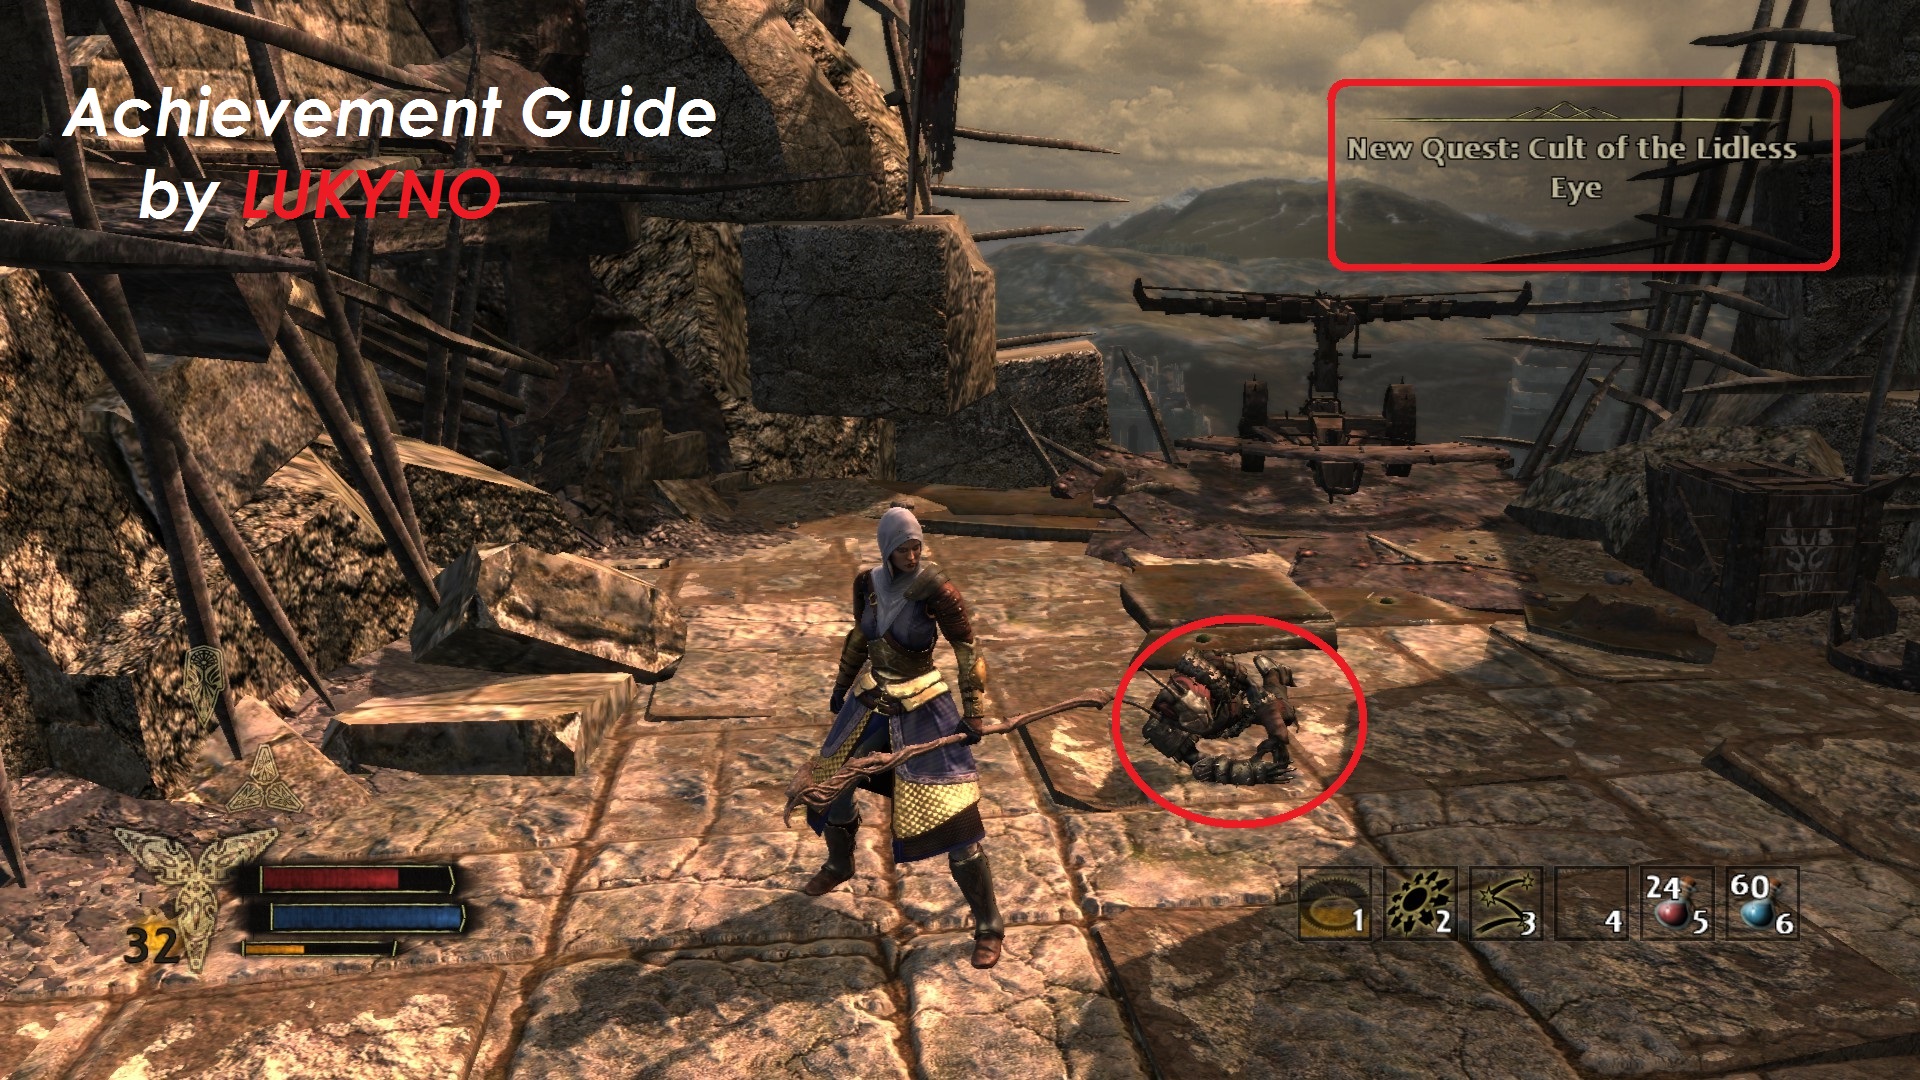
SCROLL 1 of 7 & BEGiNNiNG Of THE QUEST:
- Locatioin: Fornost - The Battlements
- Method of obtaining: enemy drop (mage)
As soon as you start location called Battlements, you must push two war machines from the edge. Near first war machine will be enemy mage. Simply kill him and collect your first scroll.
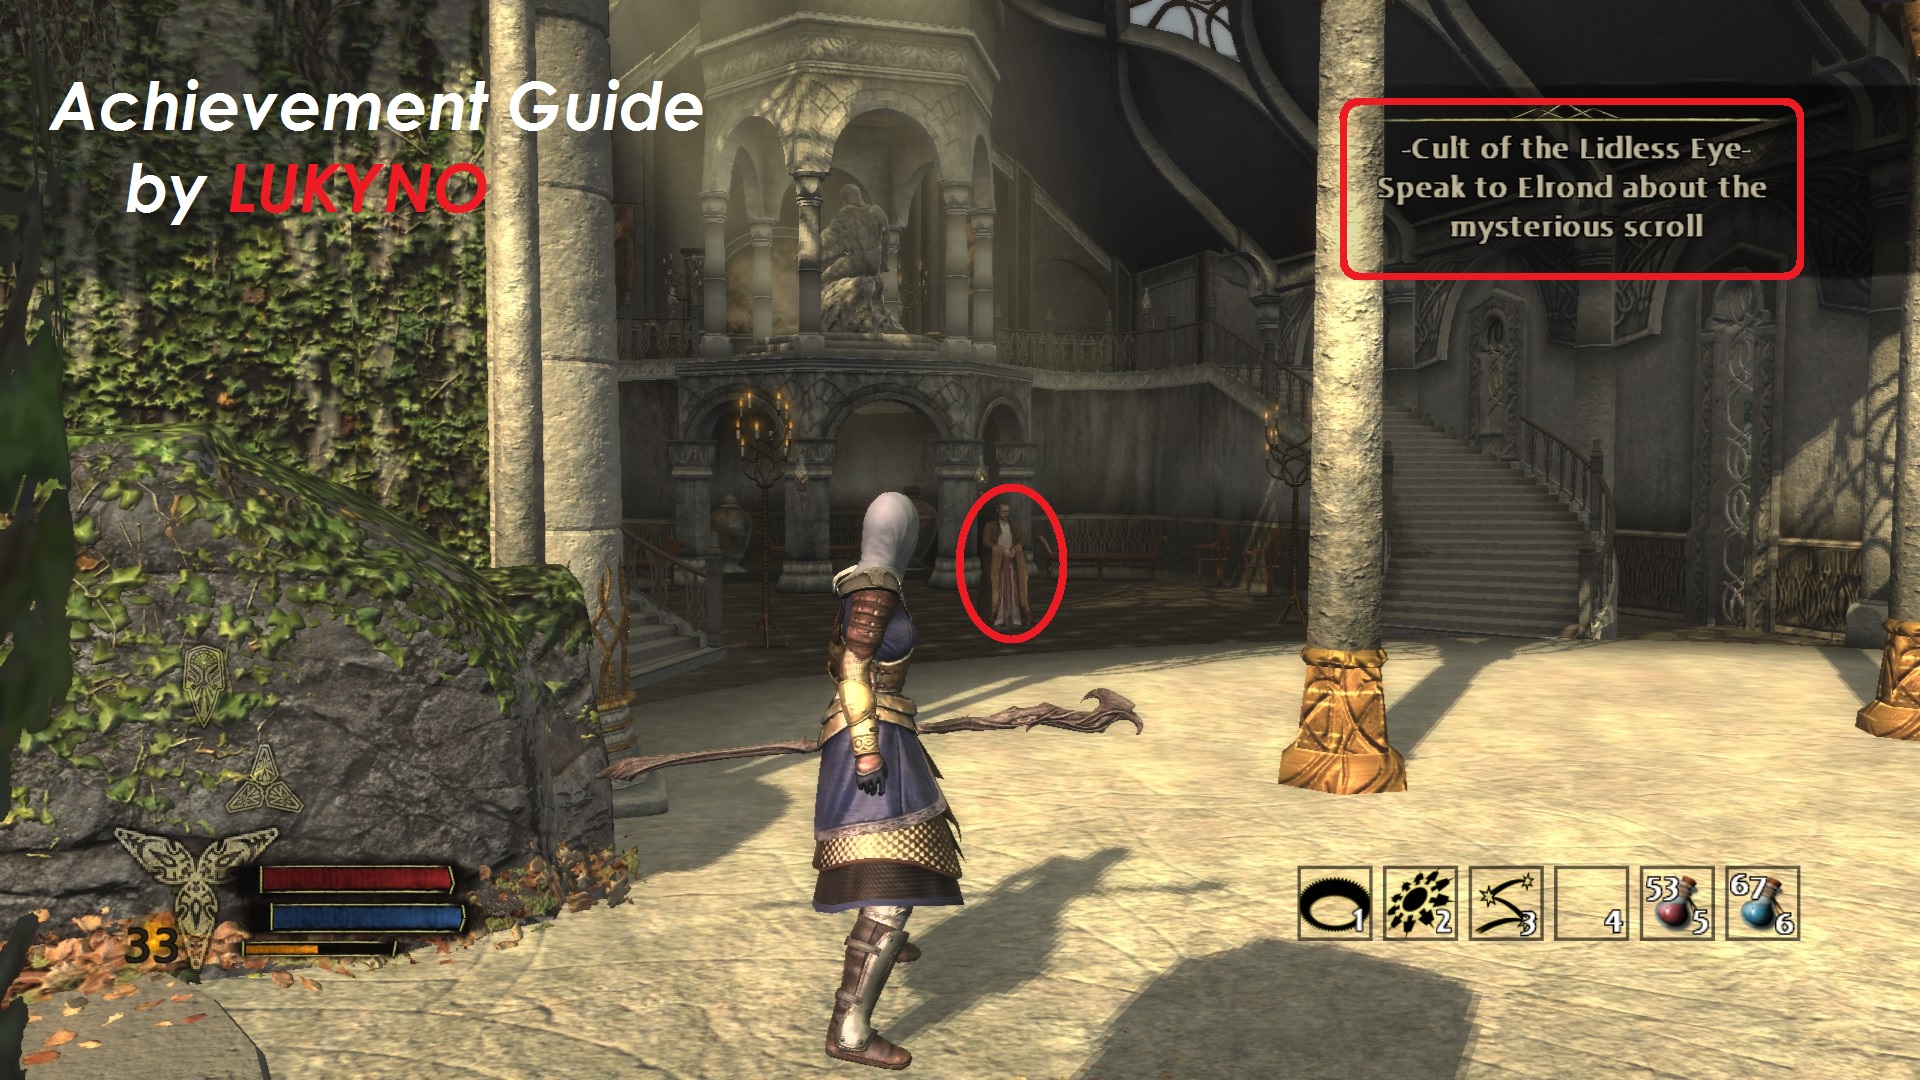
IMPORTANT!
When you reach to Rivendell for the first time, don't forget to talk with Elrond! Chat with him about strange scroll you found in Fornost. After that the quest will be activated. If you forget to talk with him about Lidless Eye scrolls, the game script won't start!
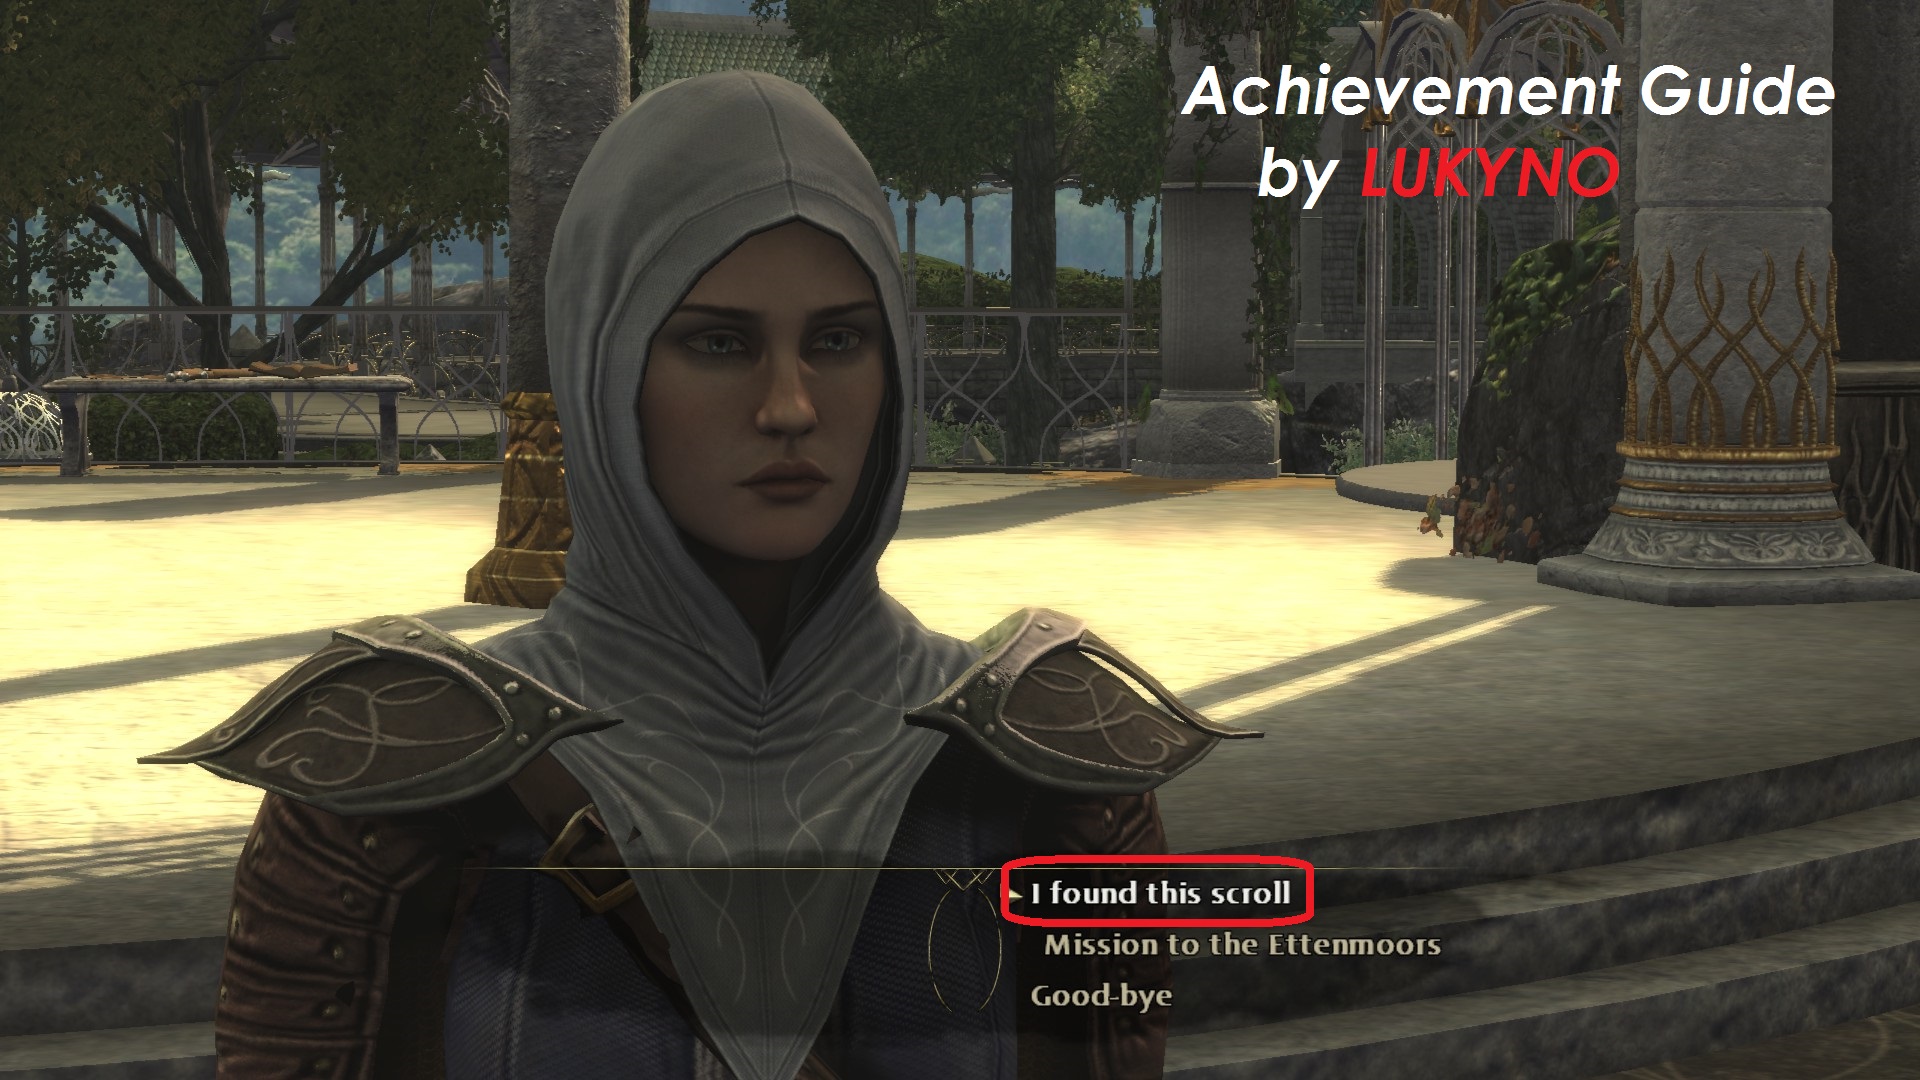 As you can see on screenshot, your progress in the Lidless Eye quest will be updated.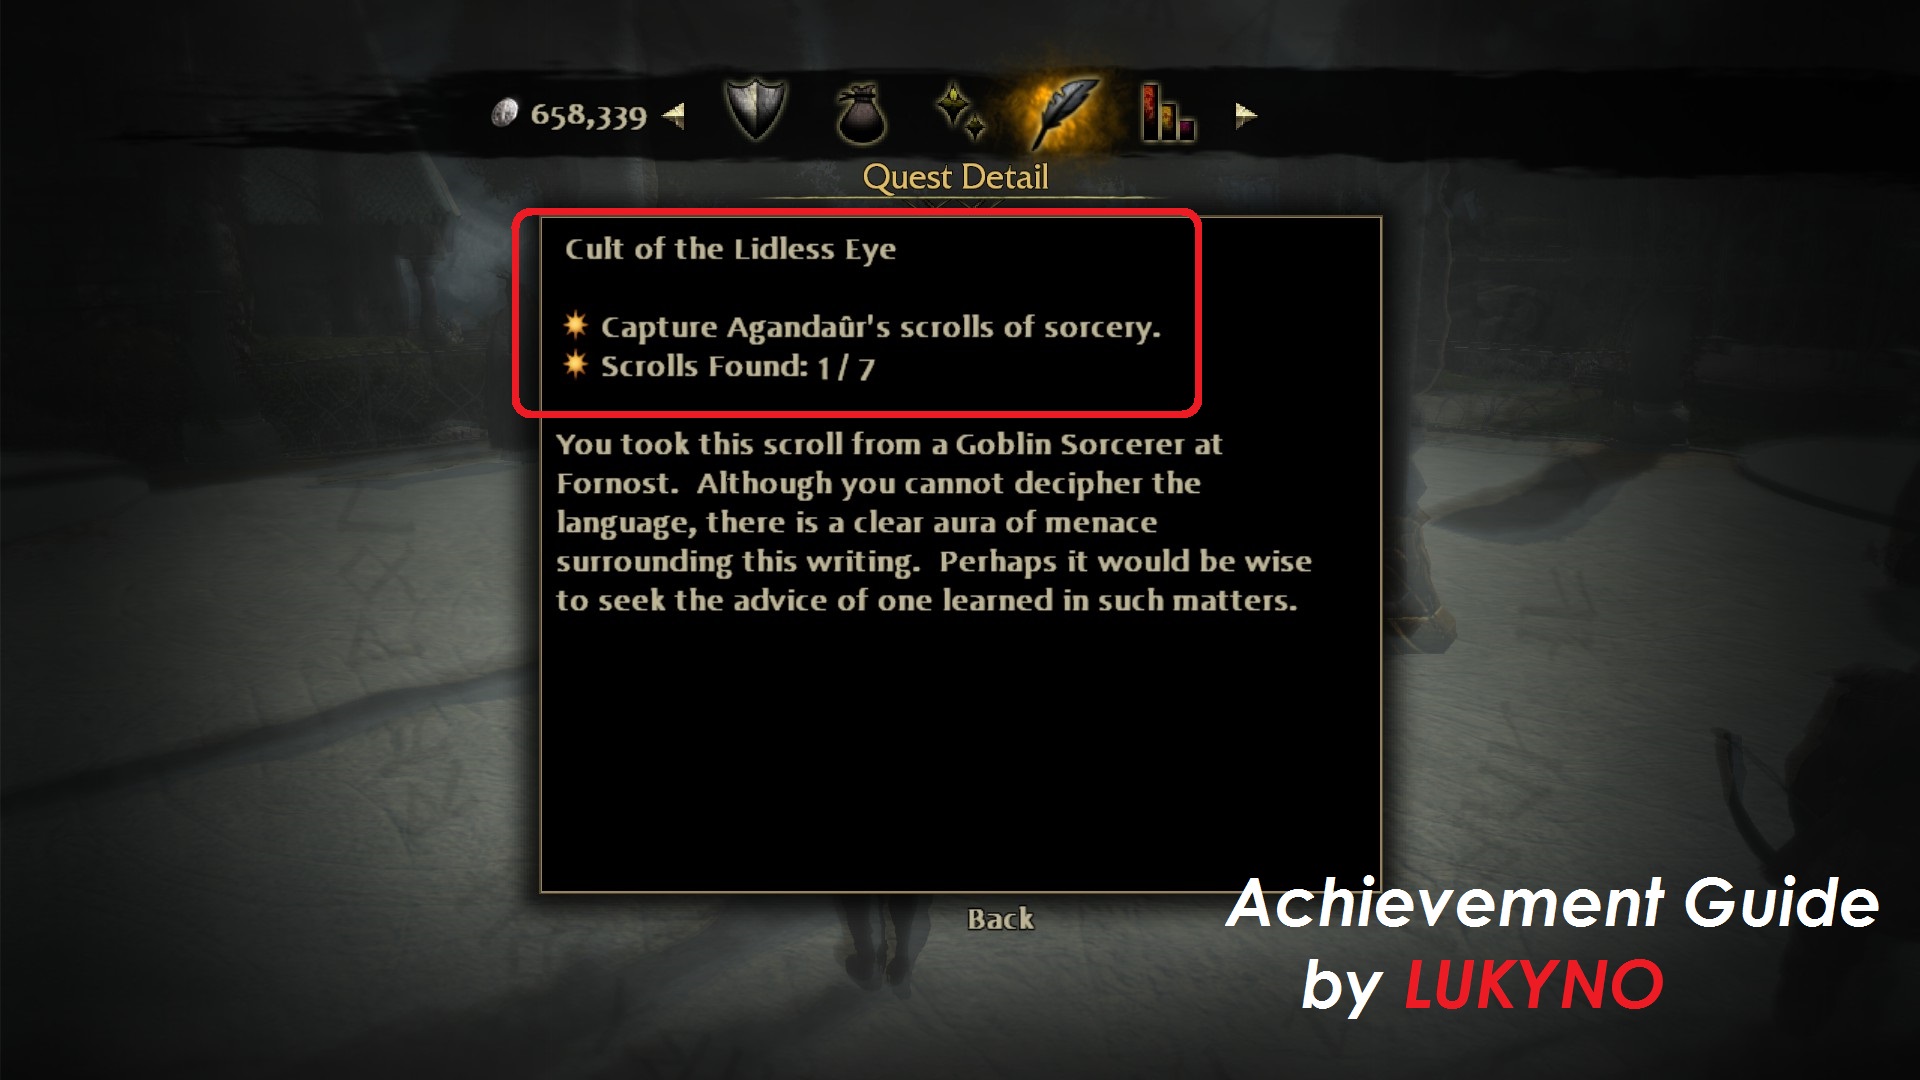
_______________________________________________________________________________
SCROLL 2 of 7:
- Location: Ettenmoors - Coldfells
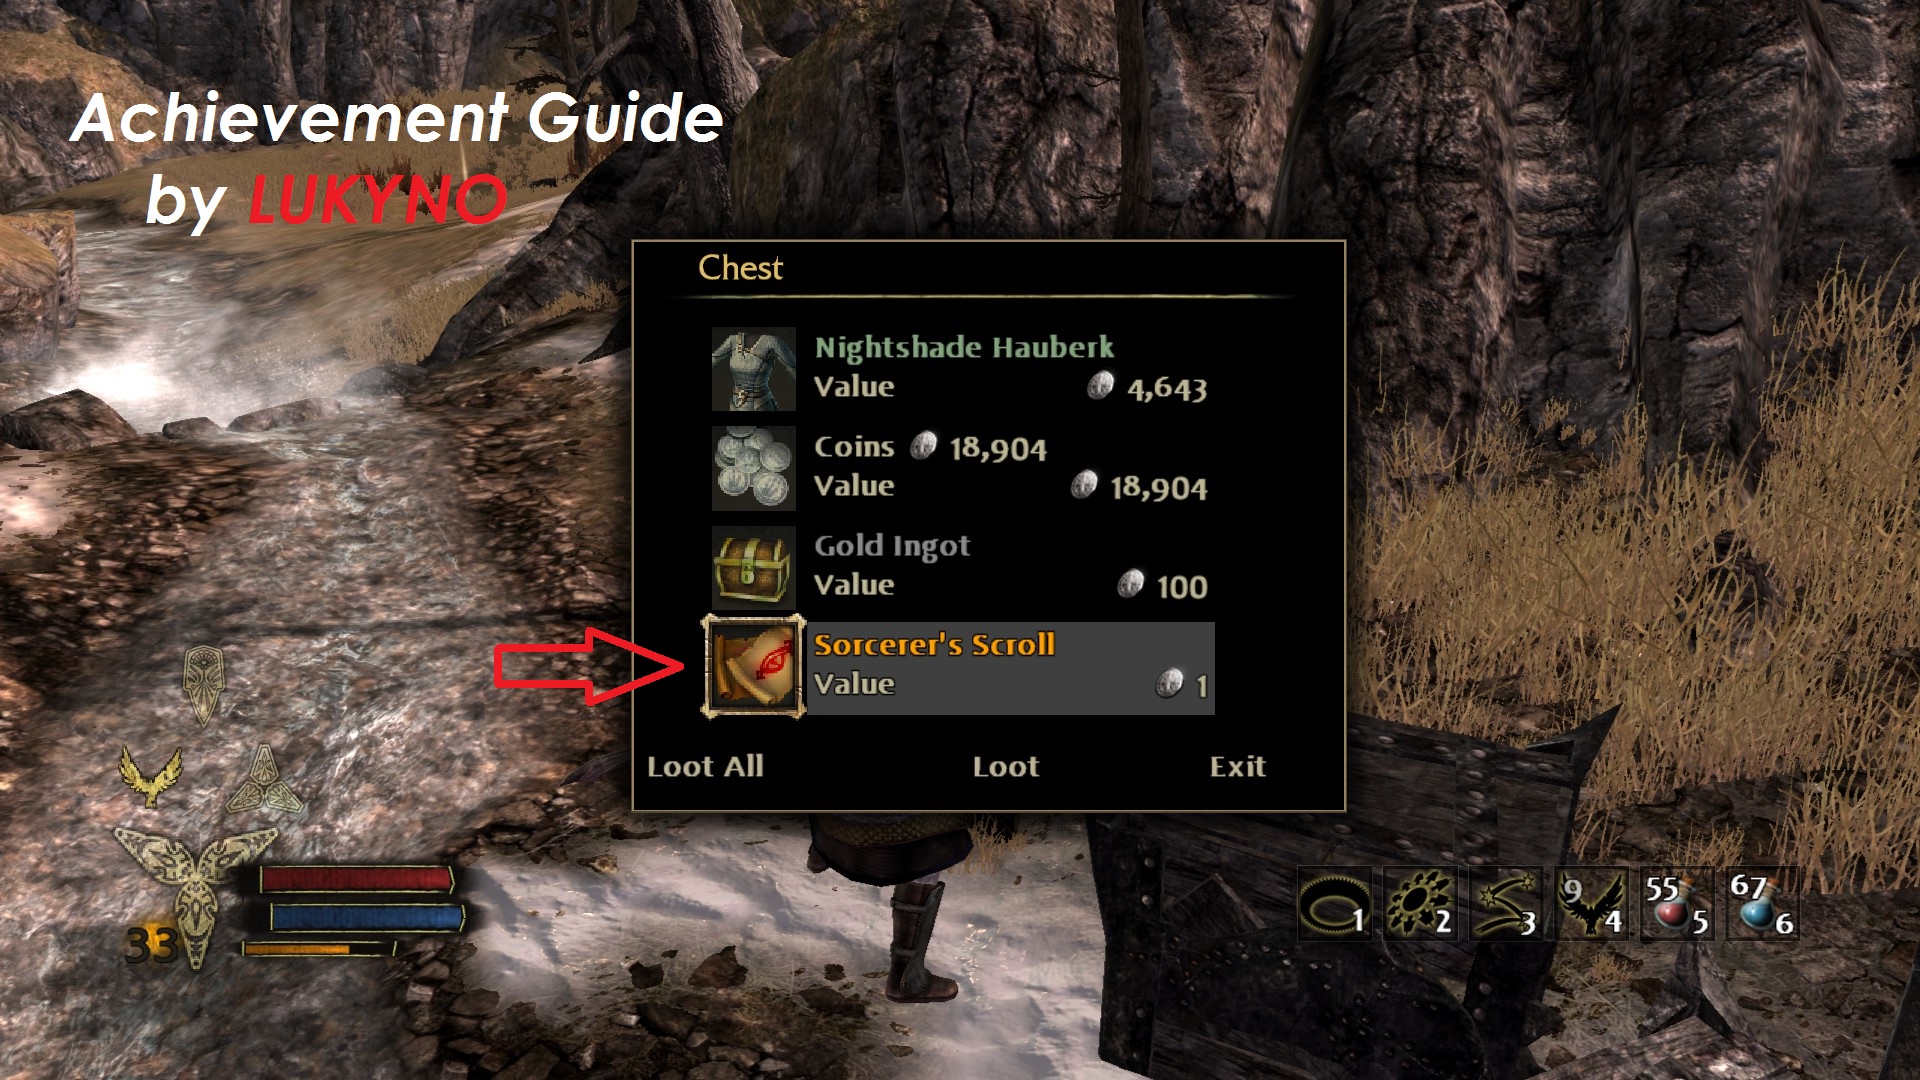
- Method of obtaining: hidden chest
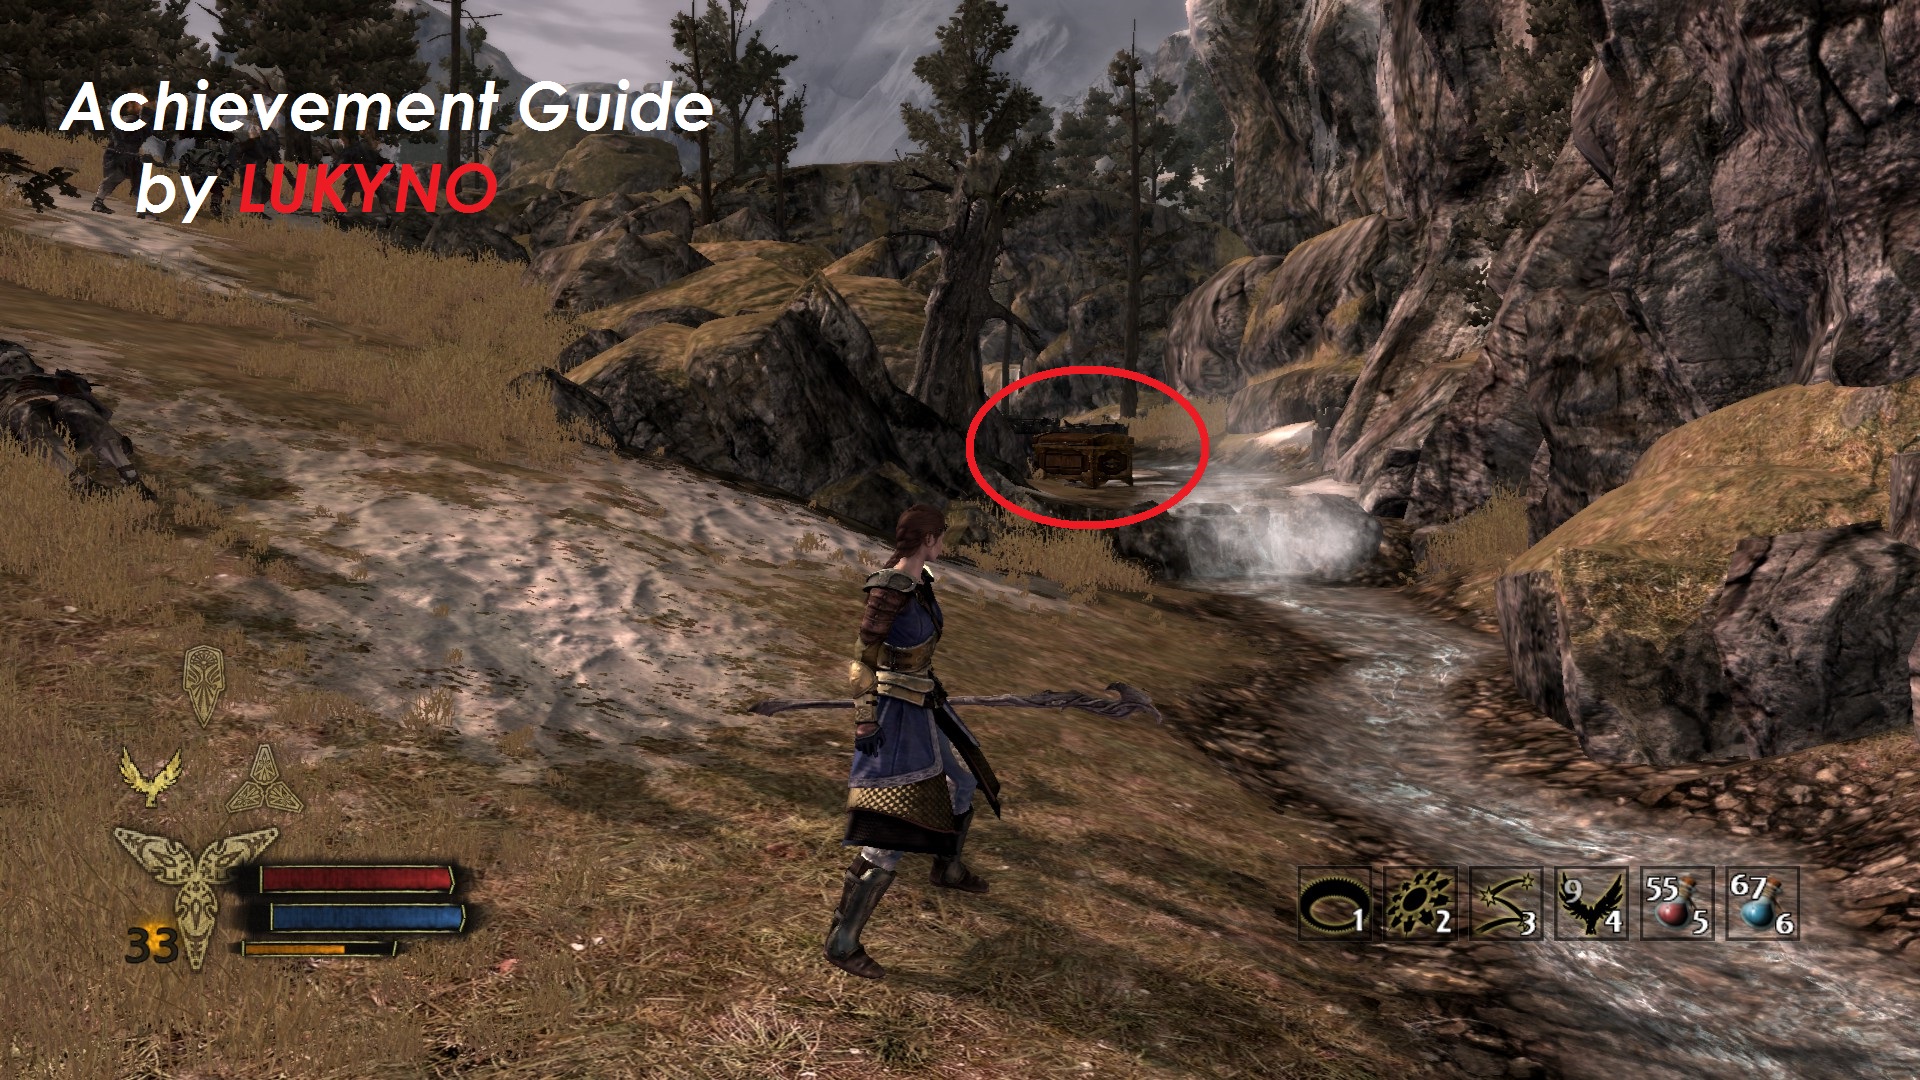
After the battle with troll and conversation with Belaram, you'll come to a little creek soon. Go to the left and kill some enemies. Than jump from the rock and go to the right along the creek. Now you can loot the hidden chest and take your 2nd scroll.
_______________________________________________________________________________
SCROLL 3 of 7:
- Location: Ettenmoors - High Moors
- Method of obtaining: enemy drop (mage)
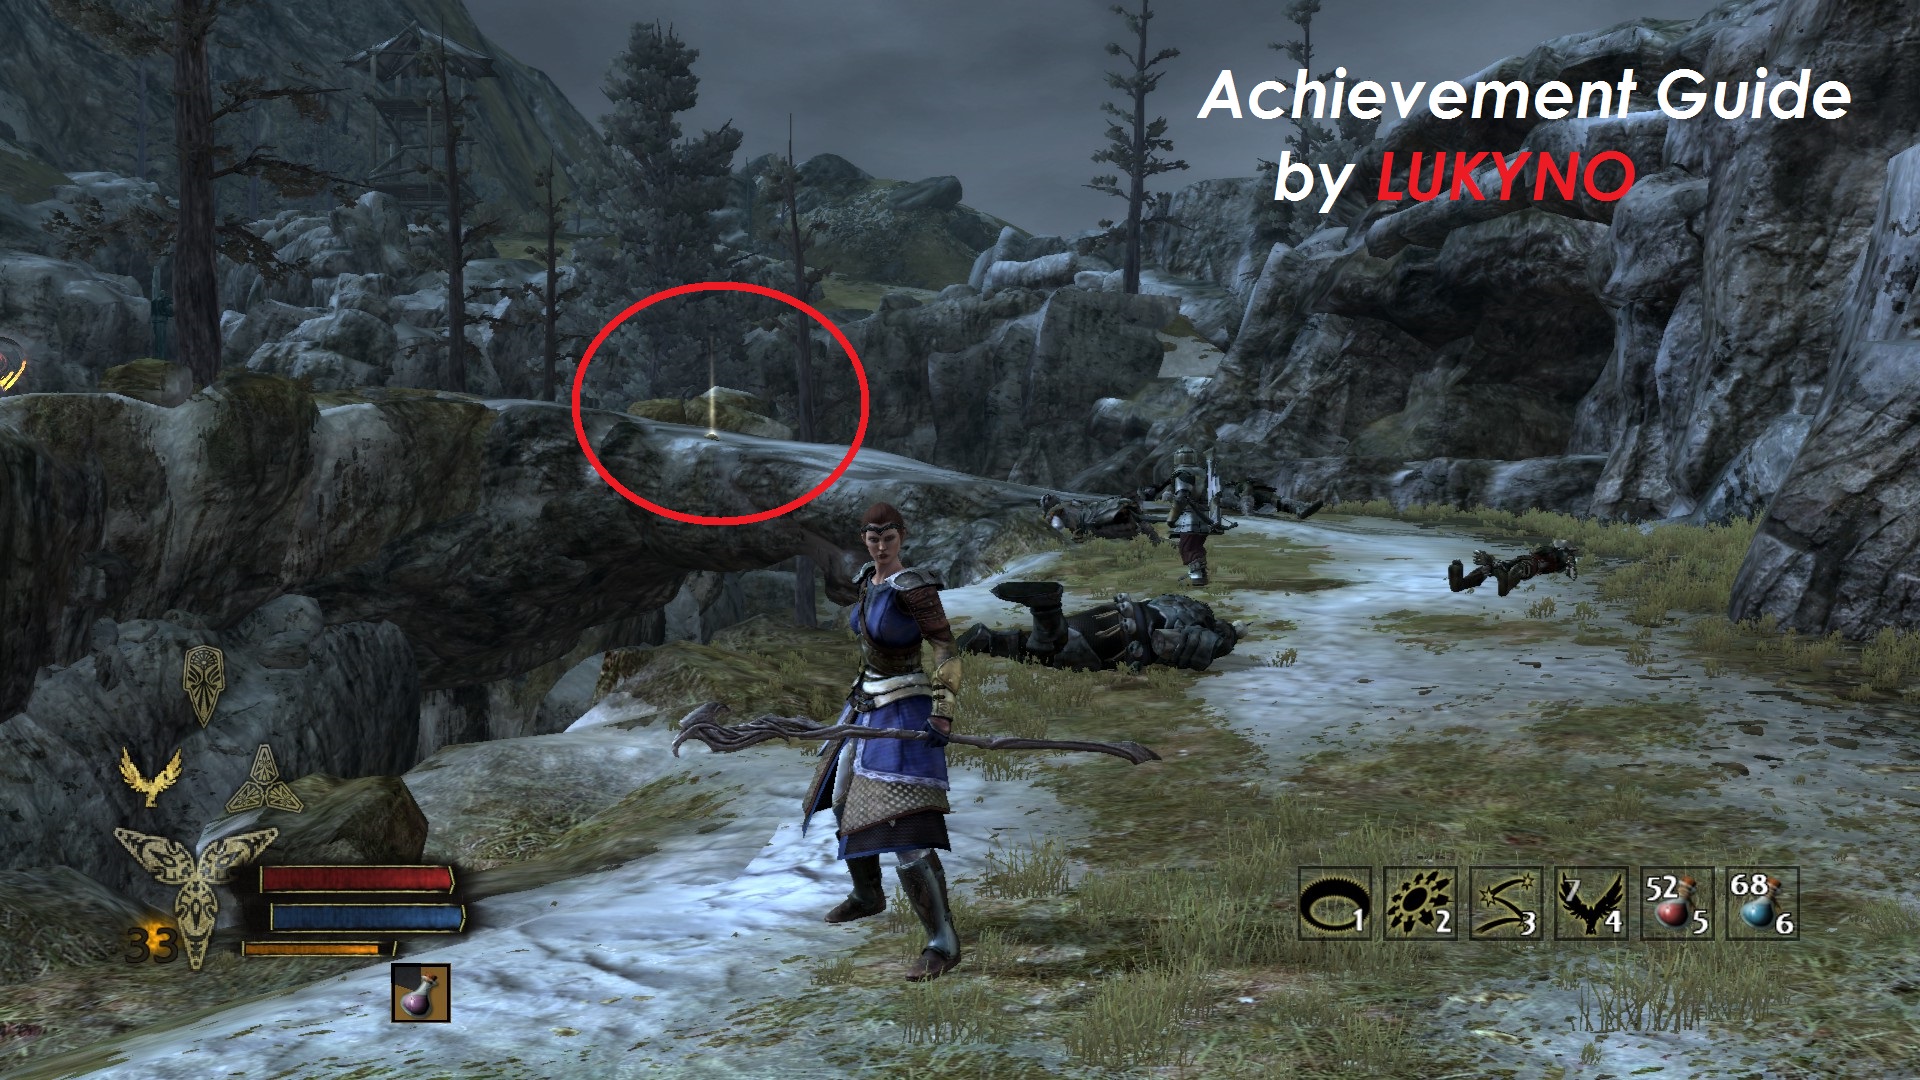
After a couple of fights with enemies, you'll see natural stone bridge. Somewhere near or on that bridge you can loot dead mage and take your third scroll.
_______________________________________________________________________________
SCROLL 4 of 7:
- Location: Mount Gundabad
- Method of obtaining: hidden chest
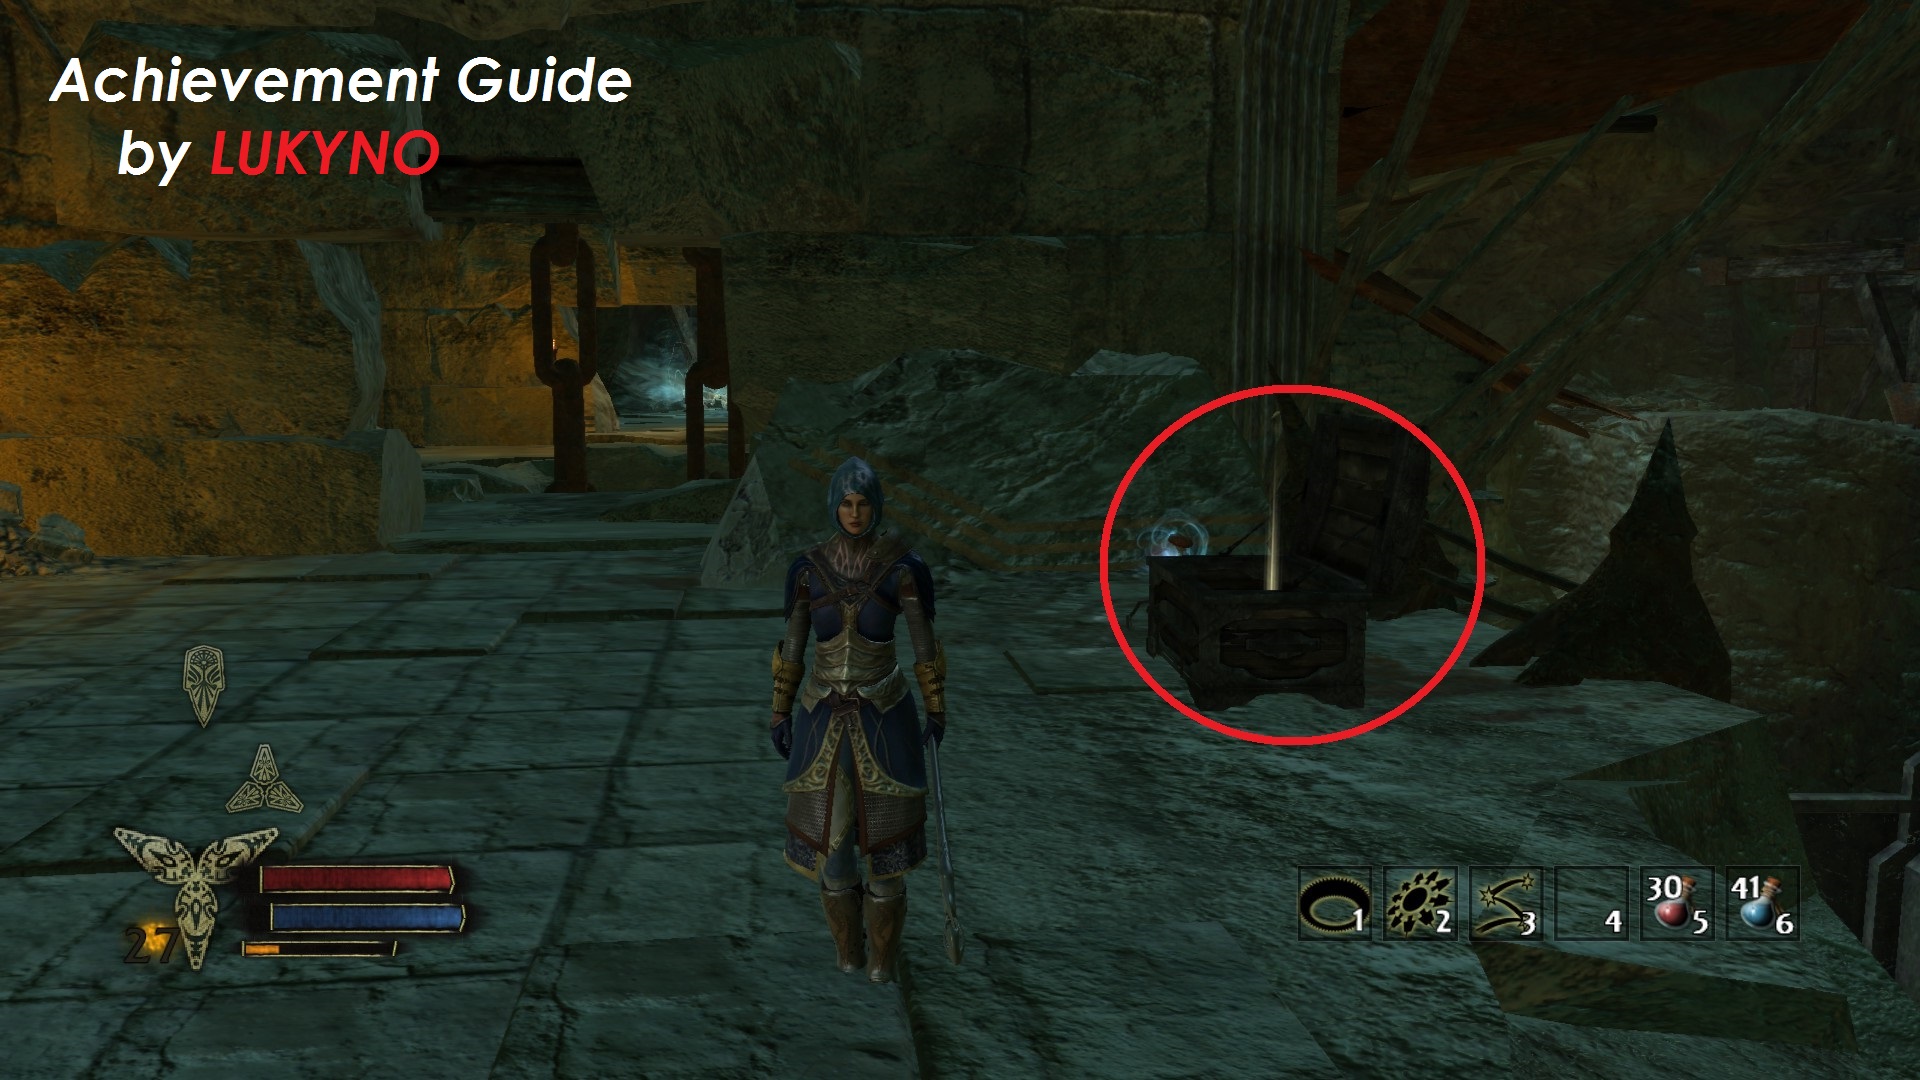
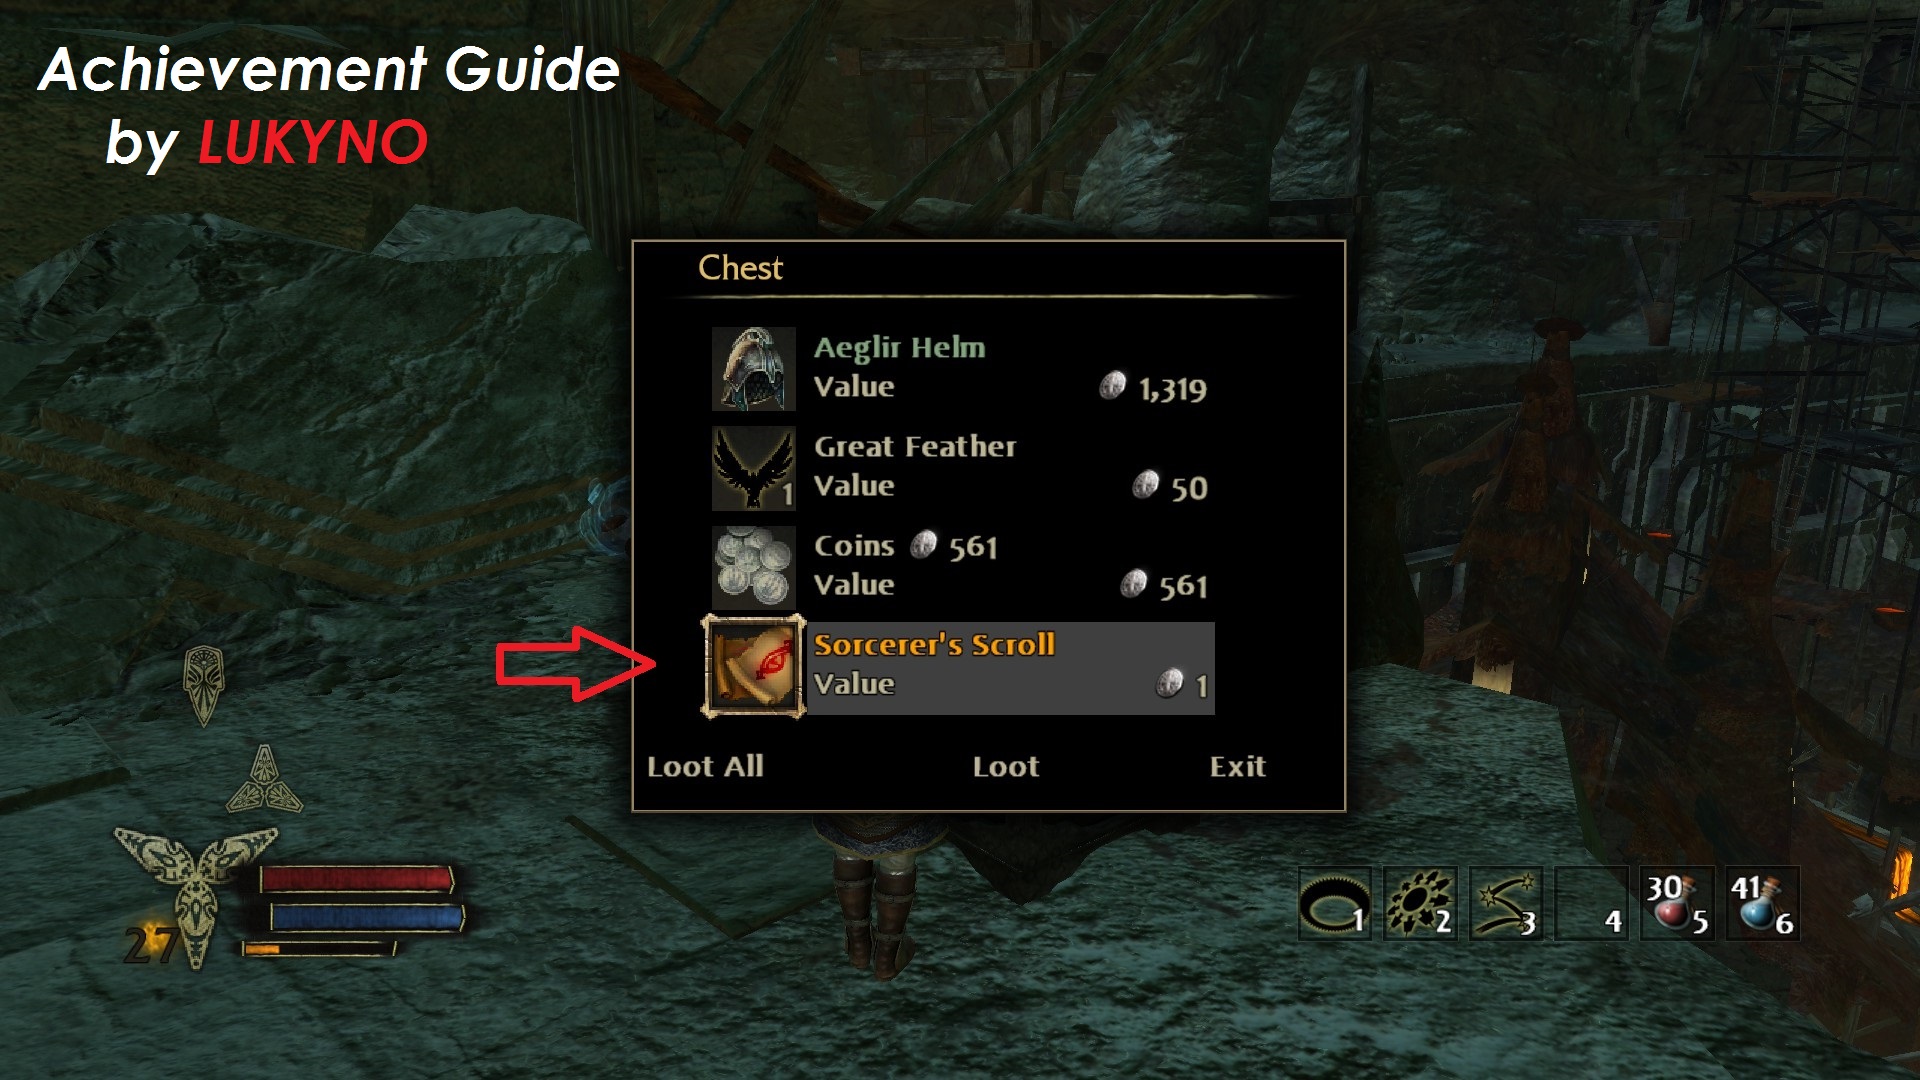
When you go through Mount Gundabad location, you'll see a big chain inside a tower. In the second tower, you'll have to go downstairs and there don't forget to go to the left. There is your 4th scroll hidden in the chest. On the opposite side is checkpoint area.
_______________________________________________________________________________
SCROLL 5 of 7:
- Location: Mirkwood
- Method of obtaining: boss drop (Wulfrun)
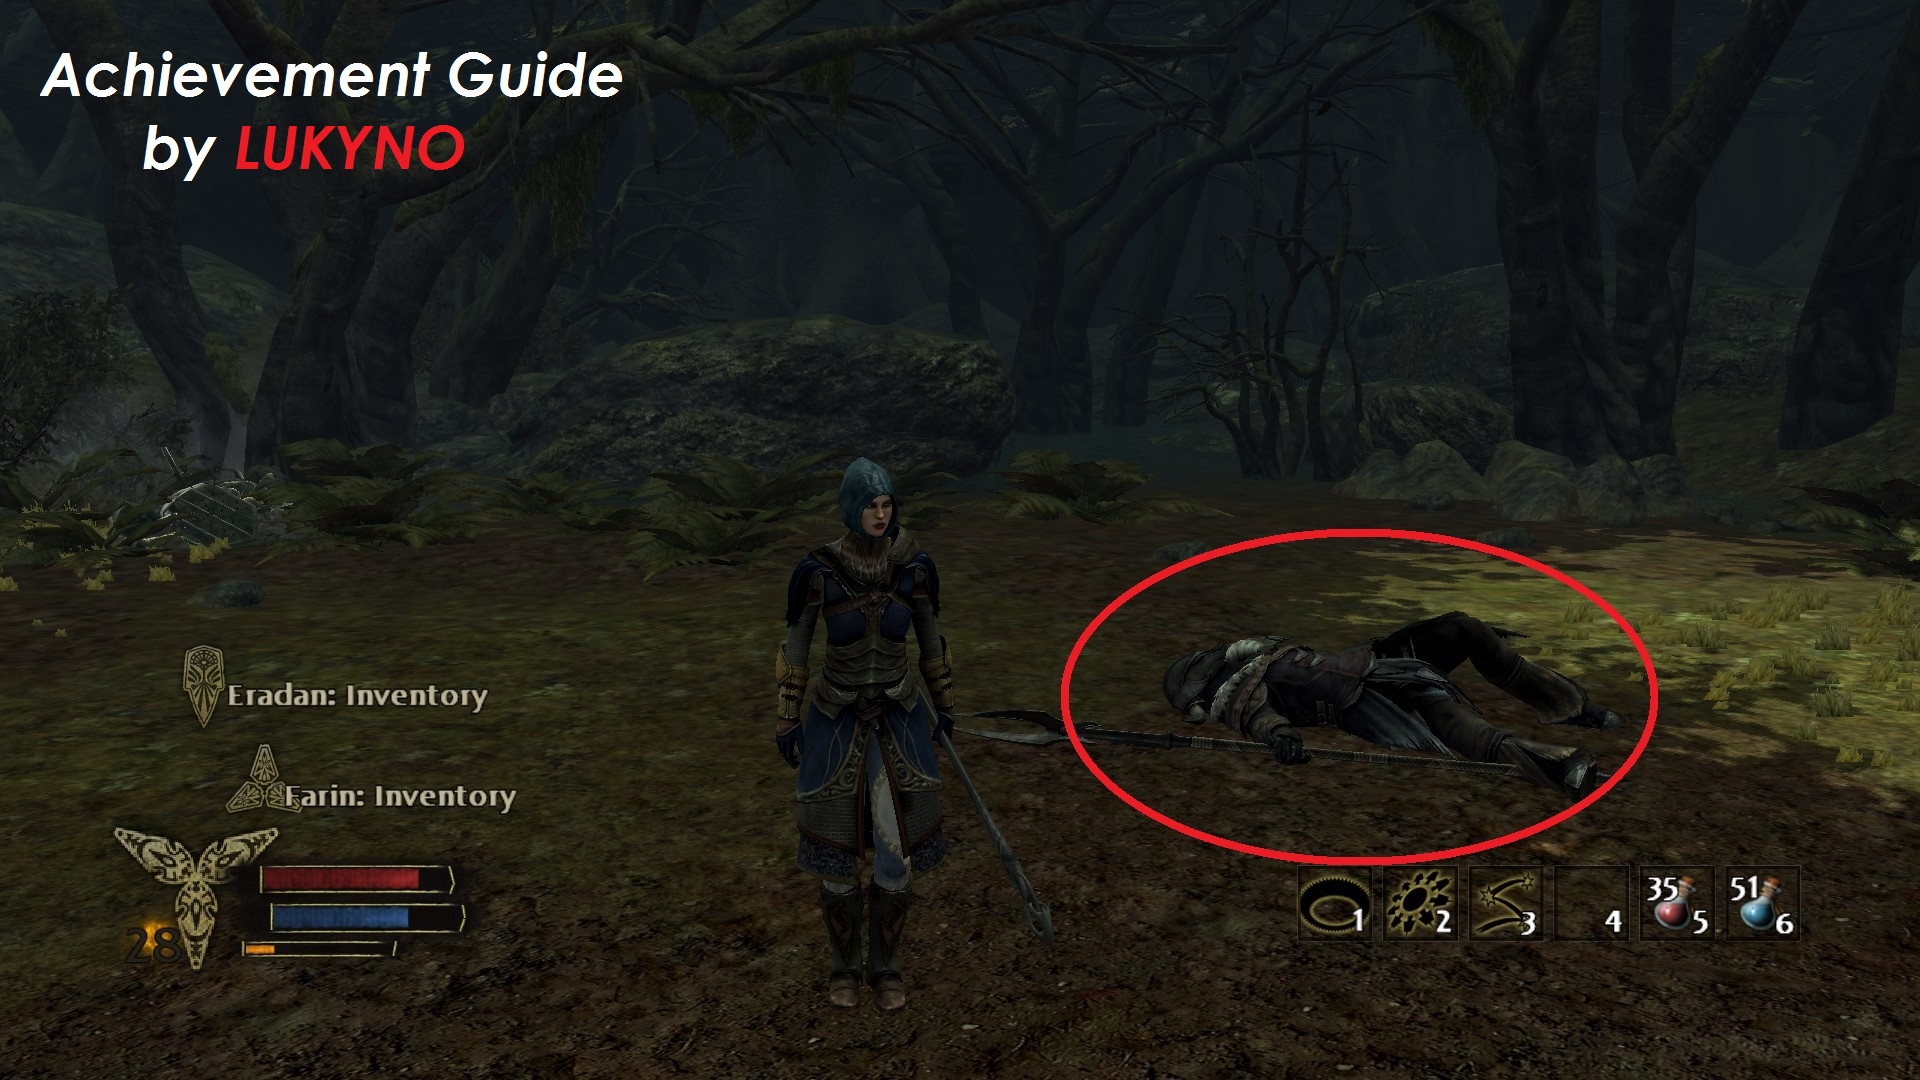
Once you arrive to Mirkwood, the boss battle will start. Kill Wulfrun to get 5th scroll. Be sure that you collected dropped scroll from his corpse before continuing!
_______________________________________________________________________________
SCROLL 6 of 7:
- Location: Urgost Lair - The Great Mountains
- Method of obtaining: enemy drop (mage)
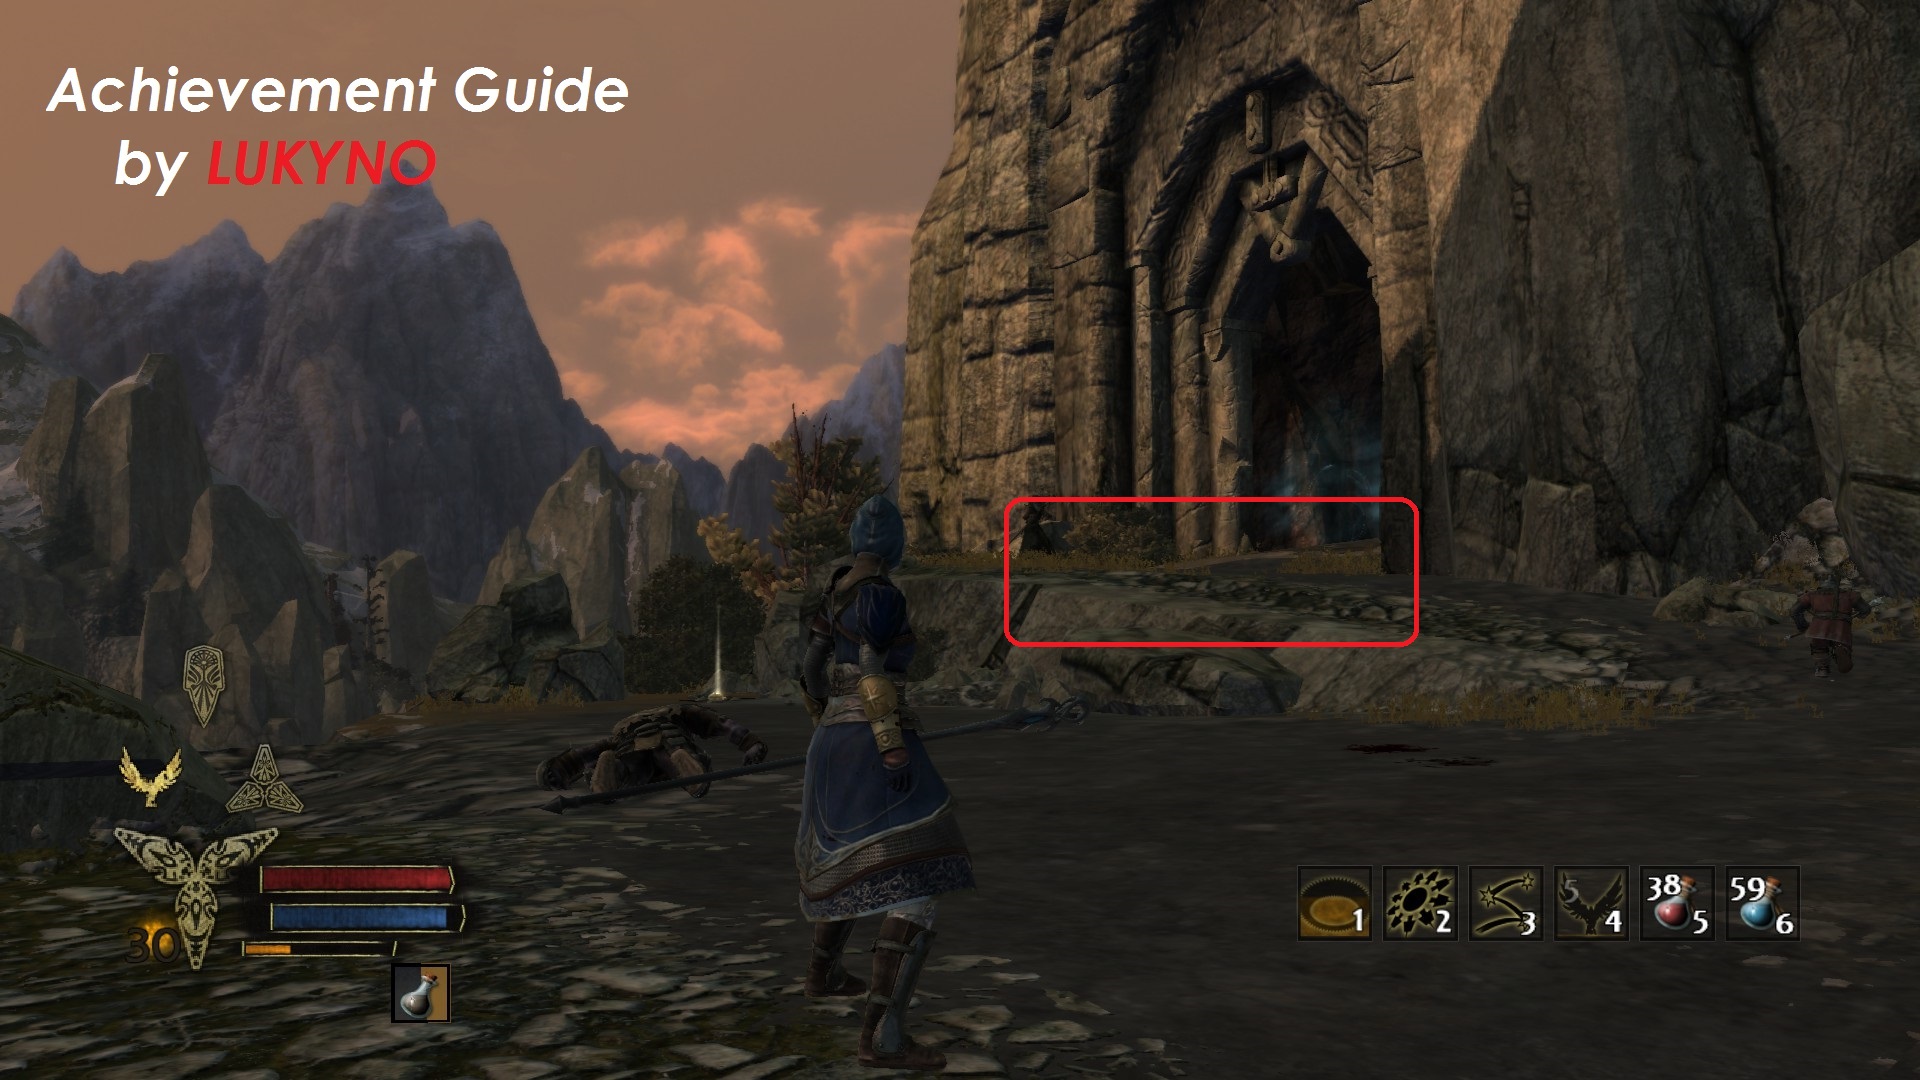
The 6th scroll will be dropped from mage next to big gate. Just kill some enemies nearby and don't forget to loot dead mage. It's not possible to miss this area, because you have to continue in story progress through the big gate to meet another boss.
_______________________________________________________________________________
SCROLL 7 of 7:
- Location: Urgost Lair
- Method of obtaining: boss drop (Carn Dum captain)
The last 7th scroll will be dropped from Carn Dum captain at the end of Urgost Lair location. Again, be sure you got it before continuing in your journey.
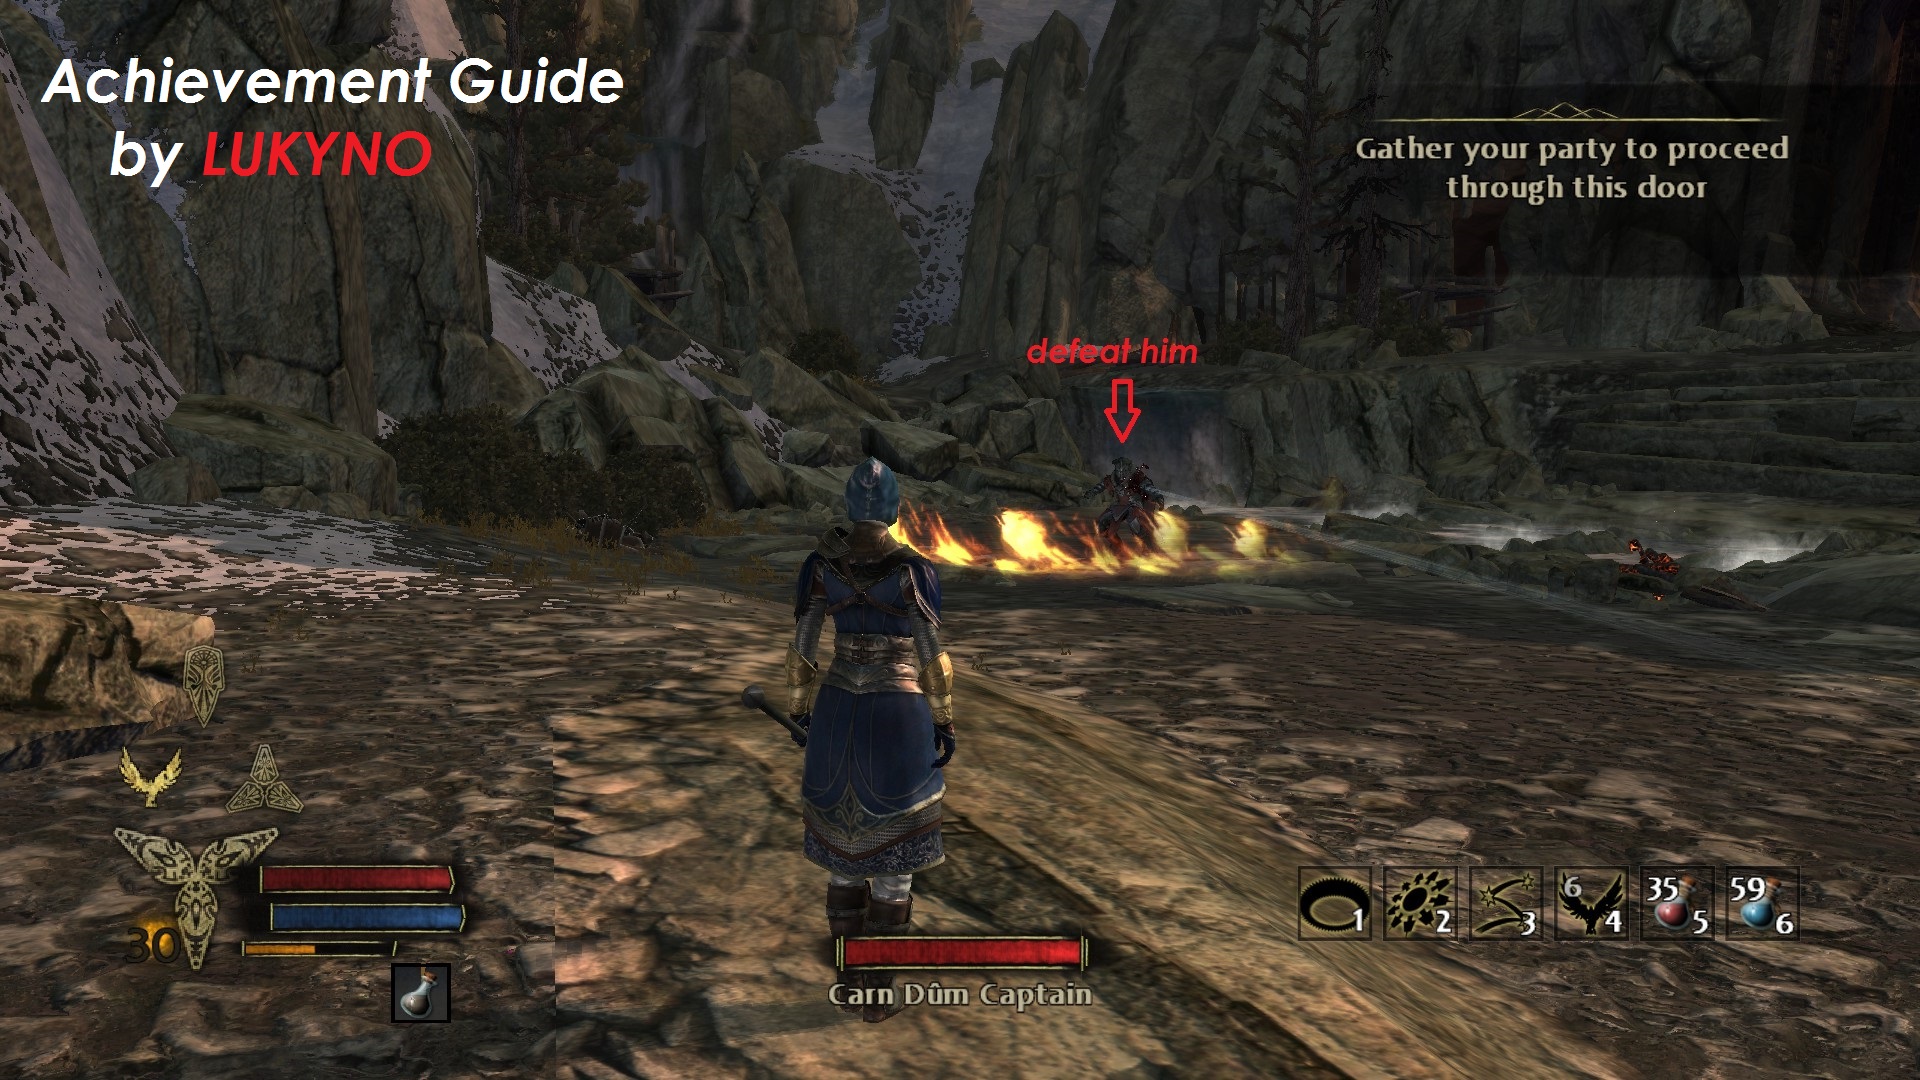
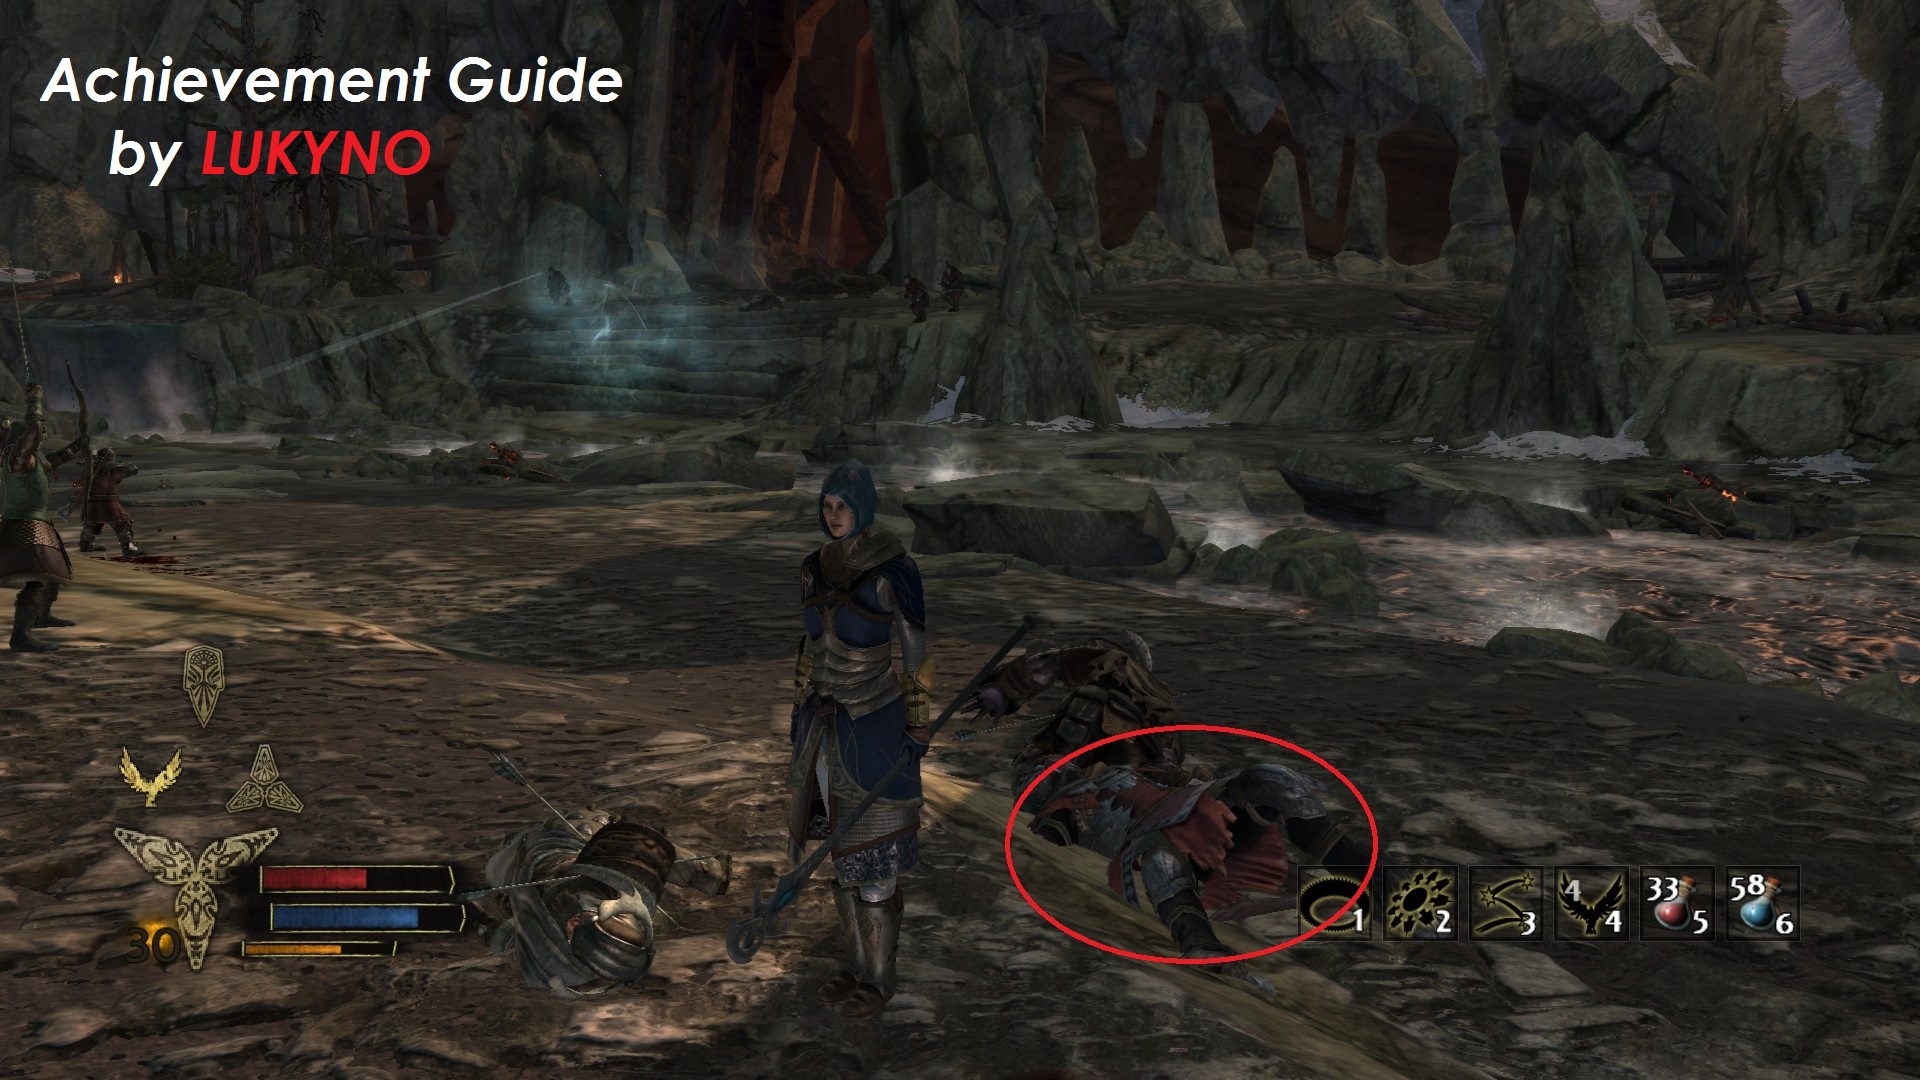
Now it's time to speak with dragon and than help dwarves to defend their homeland, but they can wait. You should travel to Rivendell first to talk with Elrond again and finish this quest.
[3] COMPLETiON
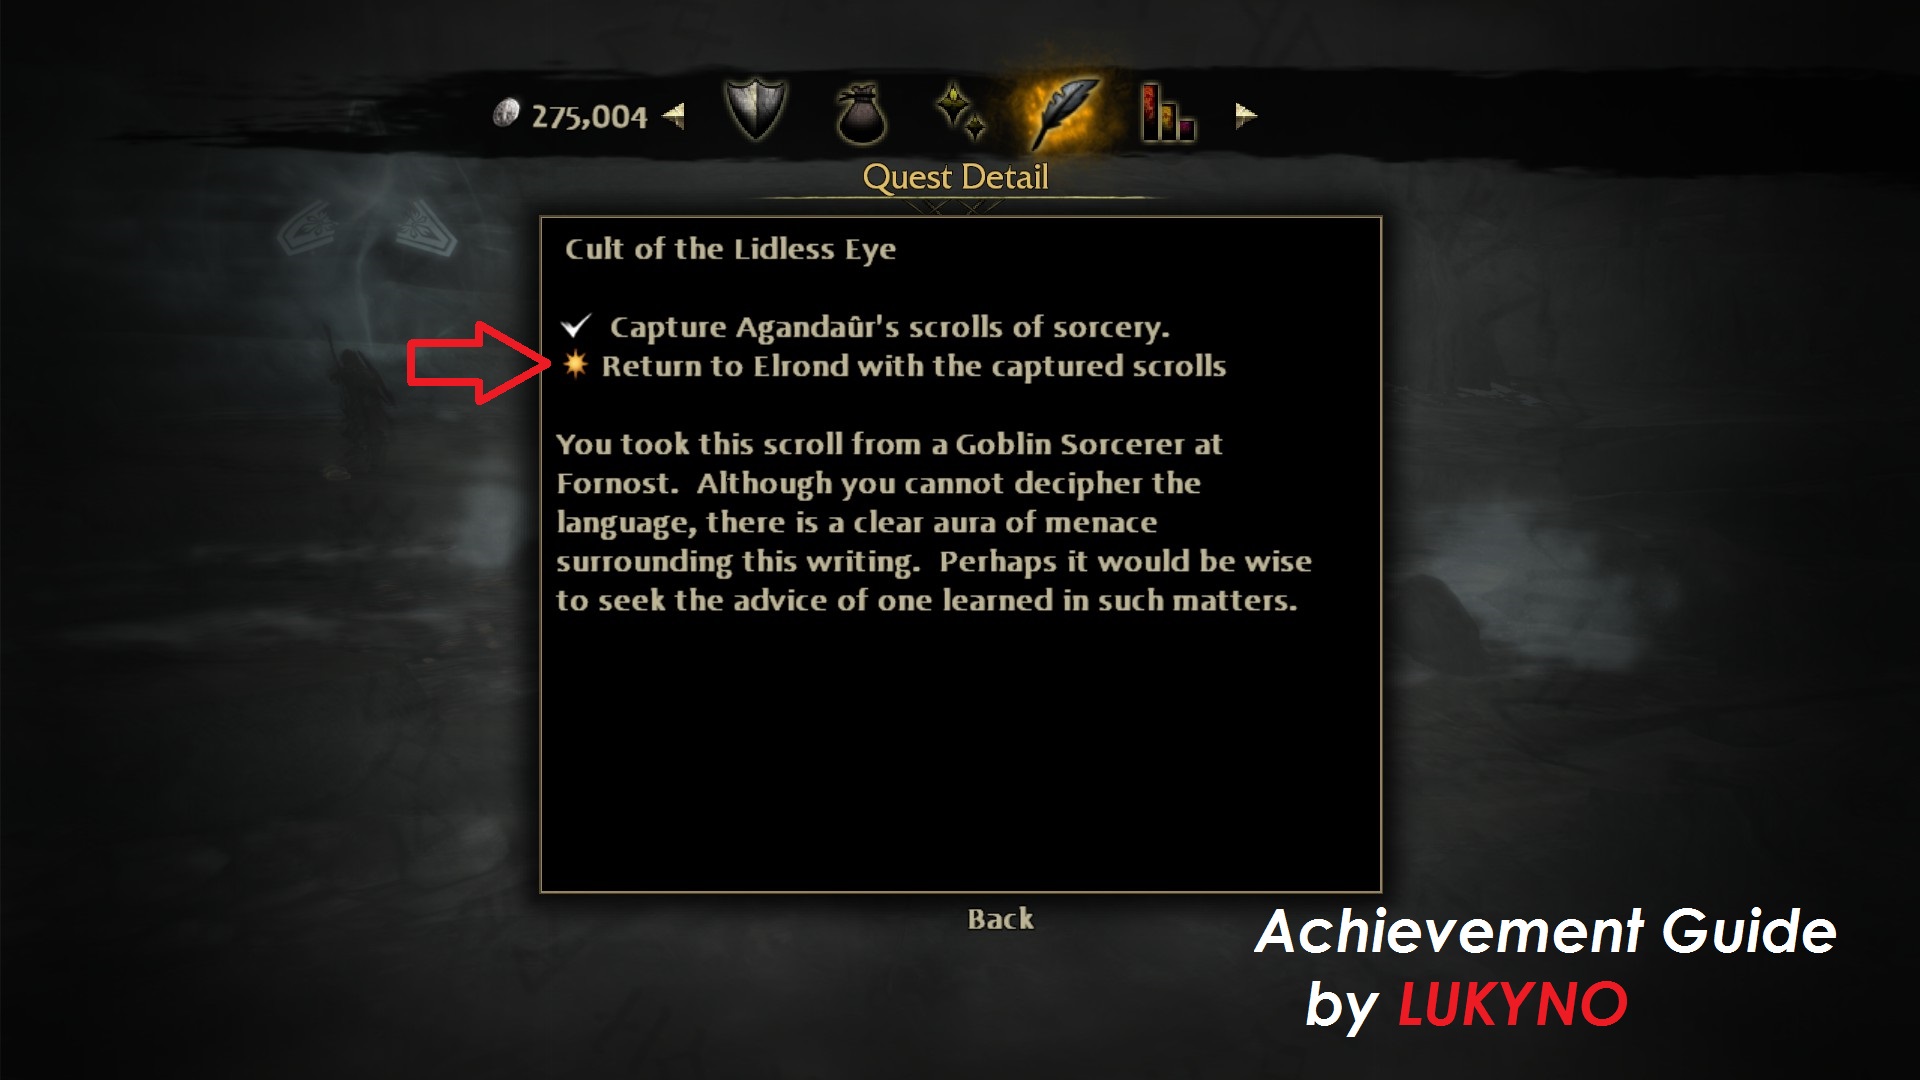
You defeated Carn Dun and collected the last 7th scroll. You should be on your way to Rivendell to meet Agent Smith.
As you can see on screenshot, your progress in the Lidless Eye quest will be updated.
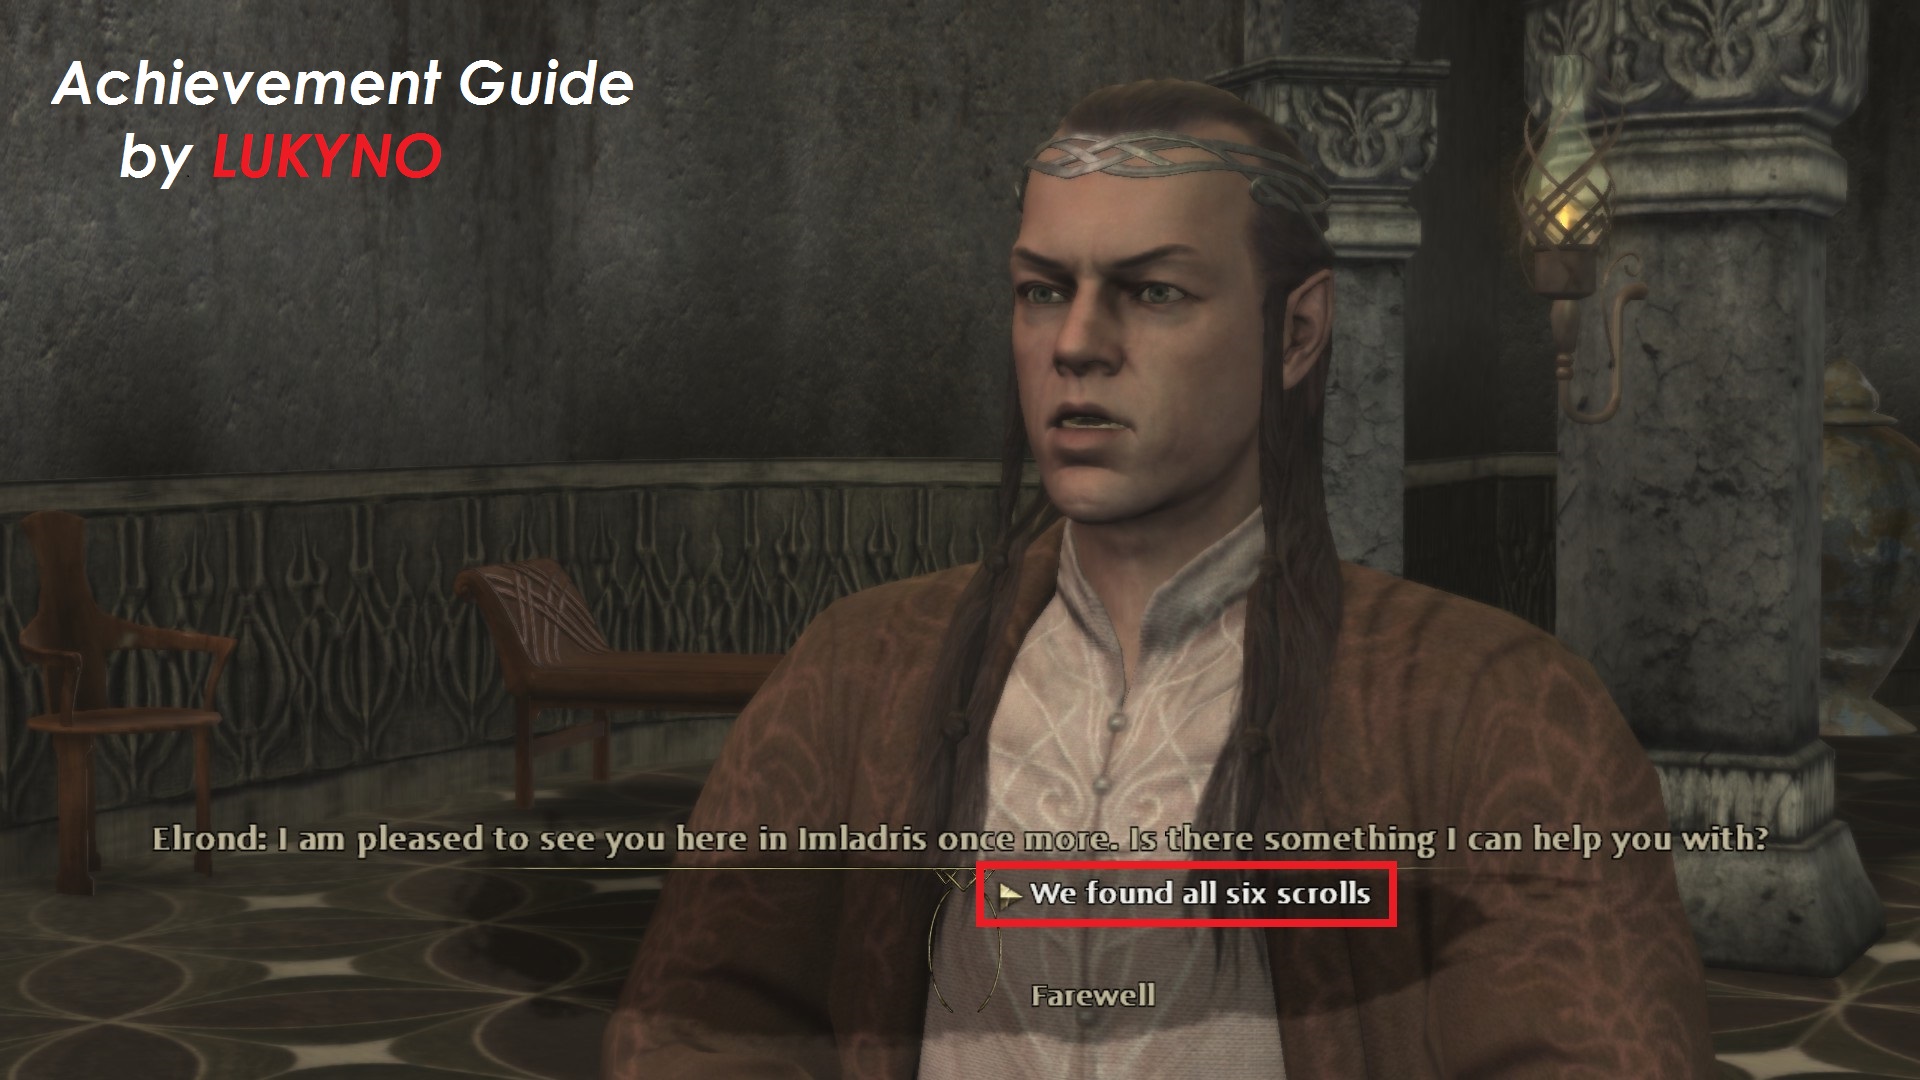
Once you begin to talk with Elrond, new conversation option will be available.
Just one click and it's over!
_______________________________________________________________________________
You completed the investigation of the Cult of the Lidless Eye.
Enjoy your sweet achievement which was obtained by 6.5%* of players.
* 06/04/2014
As you can see on screenshot, your progress in the Lidless Eye quest will be updated.
Once you begin to talk with Elrond, new conversation option will be available.
Just one click and it's over!
_______________________________________________________________________________
CONGRATULATiONS!
You completed the investigation of the Cult of the Lidless Eye.
Enjoy your sweet achievement which was obtained by 6.5%* of players.
* 06/04/2014
🏆
Beat The Lord of the Rings: War in the North's achievements?
Flex it — let your friends know you pulled it off.
More The Lord of the Rings: War in the North guides
- 10 hardest achievements★ 4 (173)13k views171 ♥3 minUpdated Feb 15, 2014
- WitN General Guide + Farin In-Depth (Solo+Co-Op)★ 4 (121)8.8k views121 ♥30 min
- How to play War in the North in COUCH CO-OP ON PC! (2-3 Gamepads!/One Gamepad + Kb/m)(1-3 SCREENS)★ 4 (46)7.1k views90 ♥9 minUpdated Oct 14, 2016
- Описание навыков класса Ведунья (Андриэль).★ 5 (170)6.3k views82 ♥6 minRussianUpdated Sep 8, 2016
- Описание навыков класса Следопыт (Эрадан).★ 4 (132)6.3k views65 ♥6 minRussianUpdated Apr 30, 2013
- Руководство по достижениям в The Lord of the Rings: War in the North★ 4 (320)5.5k views203 ♥4 minRussianUpdated Jan 10, 2016





This guide was created by its original author on the Steam Community. Are you the author and want it removed? Request removal.