The Might DPS Master Guide
Introduction
One of DCUO's greatest strengths is its unprecedented level of build customization options. There are a staggering number of loadout possibilities before even considering the order, flow, clipping, comboing, timing, and strengths & weaknesses of each move. While some players really enjoy testing the hell out of a power to find the strongest combinations, it can be a real challenge and some just want to get to the action.
This guide was created to help players excel as best as possible in any situation on any power while providing a meaningful, objective (ie. not based on public hearsay) overview of the meta and general balance. In here you'll find the best builds for elite endgame content, notes on how/when to use them and their respective strengths and weaknesses, demos of how to carry them out, fundamental & advanced techniques, an overview of each powers' supercharge choices, and tips on how to best digest all of this information and put it into practice. I hope you find this guide helpful.
If using any aspect of this guide externally (eg. videos, other guides), please link back to it.
The Might Master Thread on the official DCUO forums[forums.daybreakgames.com] remains the ideal place to discuss the matters herein. I will continue to monitor, update, and provide feedback there was well.
This guide was created to help players excel as best as possible in any situation on any power while providing a meaningful, objective (ie. not based on public hearsay) overview of the meta and general balance. In here you'll find the best builds for elite endgame content, notes on how/when to use them and their respective strengths and weaknesses, demos of how to carry them out, fundamental & advanced techniques, an overview of each powers' supercharge choices, and tips on how to best digest all of this information and put it into practice. I hope you find this guide helpful.
If using any aspect of this guide externally (eg. videos, other guides), please link back to it.
The Might Master Thread on the official DCUO forums[forums.daybreakgames.com] remains the ideal place to discuss the matters herein. I will continue to monitor, update, and provide feedback there was well.
Contributors


Big thank you to the following people for helping with testing or guide feedback over the years:
AimForTheKnee
Chains
cott0n
Cyber Sin
Davis Xavier
Deity Supreme
Dolkka
HawkGem
Hisoka X
kingxkhaos
L T
Lowtie
ObsidianChill
Pale Rage
Raizel Etrama
Rejchadar
Temporal Titan
Timer
Titan
topdoggplayer201
Von Bl17zZ


Update Notes (Ver 2.00.0.0)
Major Update 11 Nov 2021: 2.00.0.0
- All powers' Supercharge Analysis sections complete.
- Full SC Analysis spreadsheet linked and updated. Also added to op of forum post.
- Further elaborated on the exact damage sources that Berserk listens for and re-applies and updated usage notes.
- Further elaborated upon the importance of clipping Ally summon with Berserk in Rage melee builds.
- Added Might-based Battle Troll sections for every Troll power for both solo buff Battle Troll and full DPS-Troll + Battle Troll group configurations with and without niche artifacts.
- Added Might-based Battle Tank sections for every Tank power.
- Added a viable pure Lernaea's Amulet rotation for Light.
- Added an "Easy Mode" Lernaea's Amulet rotation for Nature that doesn't rely on Poison juggling.
- Added write-ups/recommendations/guidance for every artifact remotely relevant to DPS in the Artifact Analysis section.
- Add write-ups for every Ally in new Ally Analysis section.
- Added DPS Literacy section with various relevant notes/explanations.
- Added Skill Point / Augment / Mod discussion section.
- Added "AV's Recommendations" sections to every power where I advise on the rotations & artifacts I use personally along with any pertinent notes not previously provided. Will be gradually adding content videos to these sections as examples over a long period of time as well.
- Updated Combat Pets section to reflect current performances.
- Various spelling/grammar corrections & tweaks (ongoing).
Update 17 Sep 2021: 1.99.7.0
- Added true, 150% max range rotations to every power that's capable (13/15 are).
Update 25 Jun 2021: 1.99.6.1
- Added notes to Rage ST section and Meta Tracker & Hierarchy sheets to point out that a Rage player can melee DPS in full Tank gear and they'd still have the hardest hitting rotations in the game while gaining the survivability they need to make the approach more practical/viable.
Update 18 May 2021: 1.99.6.0
- Added Pied Piper's Flute to Tactical Swap section of Advanced Techniques. Added videos demonstrating its best-case Min:Max uses as well as a general caution.
- Updated Meta/Balance Overview for approximate CR342 values. The performances relative to one another are unchanged but the values are updated for max CR/SP.
- Made a tweak to Celestial's All-In rotation that makes it safer (less bursty, more evenly spread power consumption making it easier to heal) and easier to execute (simpler to transition into Plague from a tap cancel, since it can't be combo'd if the power button is pressed multiple times before the combo input).
Update 04 Apr 2021: 1.99.5.3 - Ice Tweak
- Added note to Ice's Lernaea's Amulet rotations that they're best used in raid situations or when a tank is present, as when you're top DPS otherwise you'll be interrupted a lot.
- Added a note to Ice's General Purpose rotations with guidance on how to modify the rotation flow slightly vs targets that will die quickly in order to achieve better up-front burst without sacrificing DPS.
Update 11 Mar 2021: 1.99.5.2 - Clean Munitions
- Added a new Lernaea's Amulet rotation to Munitions that, though a bit frustrating and risky, lets the power deal competent clean ST damage while retaining the option to toggle AoE when desired
- Added the new rotation's performances to the Meta Overview spreadsheet
- Added the BiS multi-range capable Mental build's multi-target performance to Meta Overview and Objective Hierarchy
- Added a new line for "Munitions (ST/AoE Toggle)" to the Objective Hierarchy spreadsheet
- Corrected a minor math error in Objective Hierarchy
- Minor change to Meta/Balance Overview section to reflect that Munitions is capable of passable clean ST with Amulet
Update 10 Mar 2021: 1.99.5.1 - Elec PI Sharing
- Added two new boss rotations for Electricity to be used if a Gadgets Troll, Electricity healer, or another support player popping Electrostatic Pulse Devices can establish Electrify (ie. what Grim should already be doing), bringing the power in line with others without the aid of Circuit Breaker.
- Added the new rotations' performances to the Meta Overview spreadsheet
- Added a new line for "Electricity (Pi Sharing) to the Objective Hierarchy spreadsheet to show where the power stands if PI isn't an issue (and to reflect approximately where it could be if Grim applied the correct PI).
Update 07 Mar 2021: 1.99.5 - "Underdog"
- Added new/better Lernaea's Amulet rotations for Atomic, Ice, Nature, and Rage, bringing them all in line with the rest of the pack.
- Frost Blast is now working without any damage cutoff issues so added additional general Frost Blast rotations to Ice
- Added an additional La-Mort rotation to Ice. Actual in-content performance will be higher and it is also the tankiest, most survivable DPS rotation in the game in addition to being the power's highest non-Amulet DPS option.
- Re-tested and refined all Lernaea's Amulet performance values
- Corrected some minor math errors using incorrect Might values (they ended up coming out in the wash anyways)
- Added multi-target performance values for each power's best or most viable rotations.
- Added an Objective Hierarchy tab to the Meta/Balance Overview speadsheet[docs.google.com]
- Added a brief caution that Strat (and similar artis that don't predominately buff our stats themselves) has poor synergy with La-Mort
- Updated the Meta Overview sections and adjusted the subjective order to better reflect the objective hierarchy while still factoring the qualitative considerations covered in the tracker spreadsheet.
Update 20 Feb 2021: 1.99.4
- Added the "Understanding the ST/AoE Spectrum of Boss Rotation Performance" and put an additional note in the Meta Overview section itself to further emphasize that the current Meta Overview is heavily weighted towards pure 1-target performance and doesn't factor the content-specific strengths/weaknesses of more splash-heavy powers like Atomic, Rage, Water, Ice, etc in their boss rotations. (The AoE performance of ST rotations and ST performance of AoE rotations will be added to the tracker and factored into the Meta Overview in the near future).
- Temporarily removed the Pet/Henchmen Analysis spreadsheet link pending revision
- Temporarily modified/removed most of each power's SC Analysis sections while I overhaul how the information/analysis is presented to be all inclusive and allow for cross-power comparison.... but I'm leaving the excess pictures because they make me happy, damnit!
Update 5 Feb 2021: 1.99.3
- Added a critical Sorcery boss fight rotation I'd forgotten to include, including demo vid and addition to the Meta Overview Spreadsheet.
- Updated pet tracker to reflect that Dark Construct Bat is once again BiS for the time being. The parser spreadsheets have not yet been updated.
Update 21 Jan 2021: 1.99.2
- Updated pet tracker spreadsheet with new parse sets for Brainiac Drone Pet and Paradox Gazer following their buff.
- Updated Trinket Pets & Henchmen section to identify Brainiac Drone as current BiS pet (Note: This may change again)
- Added OC's raw performance parse spreadsheet to Consumables section to reinforce calculations
Update 14 Jan 2021: 1.99.1
- Added additional Lernaea's Amulet notes to Advanced Techniques' Tac Swap Friendliness section
- Added the Trinket Pets & Henchmen Section
- Added ObsidianChill as a contributor; linked to his general pet analysis thread and collaborated on testing/discussion of the small army of new pets added with Anniversary Event
Update Notes (Continued)
Update 06 Jan 2021: 1.99.0
- Added an additional Celestial ST variant with slightly more damage but more vulnerability to interrupt.
- Added Rage's approximate Lernaea's Amulet performance to the Meta/Balance Overview Spreadsheet
- Updated the Meta/Balance Overview section and overall balance hierarchy to account for reasonably safe Lernaea's Amulet performance and SC factors while keeping it weighted towards practical boss performance. As a result, Nature has moved down considerably. Electricity has moved up considerably. Quantum, Earth, and Rage have moved up slightly to moderately. Overall ST balance is tighter thanks to Amulet and the hierarchy's outliers aren't as extreme and the "weaker" powers are capable of outperforming others in multi-target boss fights.
- Updated power overview descriptions in the Meta/Balance Overview section as well its summary.
- Added a "Special Case" section to Ice's Supercharge Analysis to include an Ice Elemental SC dump approach that can be used to safely deal extreme burst AoE damage during add phases in boss fights.
- Added "PI Sharing" and "Rotation Recovery" sections to Fundamental Knowledge.
- Added some PI Sharing lines to the Meta/Balance Overview Spreadsheet so show relative/approximate potential gains if rotations that typically require Grimorium Verum coordinate PI with teammates so they can use a different artifact.
- Added a "Swap Friendliness" section to Advanced Techniques to highlight some of the quirks of certain mainline artifacts when they're unequipped or re-equipped.
Update 02 Jan 2021: 1.98.5
- Added more accurate CR331 Unbuffed Approximate DPS (Max SP) values for all Lernaea's Amulet rotations in the Meta Overview spreadsheet (except for Sorcery's as the math is harder due to the build).
- Added Atomic's Lernaea's Amulet rotations to Meta Overview spreadsheet (previously omitted in error).
- Added additional notes to Atomic/Celestial's Lernaea's Amulet rotations in guide to reflect that the Safety Net variant is actually the riskier of the two due to relative power cost and/or positioning considerations.
- Added additional notes/comments to Meta Overview spreadsheet and adjusted some qualitative assessment values/notes.
- Added additional comment to Meta Overview section of guide prior to spreadsheet link cautioning that group setup and builds can have a slight to moderate variable effect on performance.
Update 29 Dec 2020: 1.98.4
- Corrected a typo on Ice's Mid-Range AoE (Steady Variant). The video demo was correct, just omitted the 2nd Ice Boulder Strike prior to repeat in the write-up.
- Added a critical caution to Sorcery regarding liability of temporary pets (ie. trinket/henchmen) in Source Shard builds.
Update 21 Nov 2020: 1.98.3
- Added a Consumables section demonstrating the buff percentages in different basic builds.
Update 19 Oct 2020: 1.98.2
- Added an additional Fire ST rotation (Hybrid).
Update 07 Oct 2020: 1.98.1
- Added an additional Atomic Point Blank AoE option.
Update 06 Oct 2020: 1.98
- OG version has been cmpletely migrated from DCUO Forums. All powers completely updated and retested for previously unavailable artifact combos and all demo videos updated (almost 300 in total now).
- Added both 3-target and 8-target demos for AoE-focus rotations.
- Removed excessively "niche" rotations (eg. the plethora of Rage utility builds).
- Updated to reflect new Artifact Analysis policy (rotations still indicate when specific artifacts are required and the relative performance for each power is still pretty clear though(.
- Added complete meta analysis
- Build meta spreadsheet for quick reference
- Added lots of DC reference images.
- Added further explanations regarding power balance and liability considerations and additional guidance on how to find the right rotation for a given situation.
- Added entries to fundamental knowledge, including how damage splitting works and the factors around which its balance hinges.
- Removed most ranged Solar Amp rotations, as they were barely viable (but functional) to begin with. Of the remaining ones, only Fire's is a truly advisable option due to the power's AoE PI situation.
 YouTube's codec did something wonky with the gamma on my first huge batch of uploads and I didn't catch it for a long time, so ~2/3 of videos are pretty dark. I don't think it inhibits their demo value in any way, just a bit annoying. Please let me know if a video is too dark for you.
- Added an additional Celestial ST variant with slightly more damage but more vulnerability to interrupt.
- Added Rage's approximate Lernaea's Amulet performance to the Meta/Balance Overview Spreadsheet
- Updated the Meta/Balance Overview section and overall balance hierarchy to account for reasonably safe Lernaea's Amulet performance and SC factors while keeping it weighted towards practical boss performance. As a result, Nature has moved down considerably. Electricity has moved up considerably. Quantum, Earth, and Rage have moved up slightly to moderately. Overall ST balance is tighter thanks to Amulet and the hierarchy's outliers aren't as extreme and the "weaker" powers are capable of outperforming others in multi-target boss fights.
- Updated power overview descriptions in the Meta/Balance Overview section as well its summary.
- Added a "Special Case" section to Ice's Supercharge Analysis to include an Ice Elemental SC dump approach that can be used to safely deal extreme burst AoE damage during add phases in boss fights.
- Added "PI Sharing" and "Rotation Recovery" sections to Fundamental Knowledge.
- Added some PI Sharing lines to the Meta/Balance Overview Spreadsheet so show relative/approximate potential gains if rotations that typically require Grimorium Verum coordinate PI with teammates so they can use a different artifact.
- Added a "Swap Friendliness" section to Advanced Techniques to highlight some of the quirks of certain mainline artifacts when they're unequipped or re-equipped.
Update 02 Jan 2021: 1.98.5
- Added more accurate CR331 Unbuffed Approximate DPS (Max SP) values for all Lernaea's Amulet rotations in the Meta Overview spreadsheet (except for Sorcery's as the math is harder due to the build).
- Added Atomic's Lernaea's Amulet rotations to Meta Overview spreadsheet (previously omitted in error).
- Added additional notes to Atomic/Celestial's Lernaea's Amulet rotations in guide to reflect that the Safety Net variant is actually the riskier of the two due to relative power cost and/or positioning considerations.
- Added additional notes/comments to Meta Overview spreadsheet and adjusted some qualitative assessment values/notes.
- Added additional comment to Meta Overview section of guide prior to spreadsheet link cautioning that group setup and builds can have a slight to moderate variable effect on performance.
Update 29 Dec 2020: 1.98.4
- Corrected a typo on Ice's Mid-Range AoE (Steady Variant). The video demo was correct, just omitted the 2nd Ice Boulder Strike prior to repeat in the write-up.
- Added a critical caution to Sorcery regarding liability of temporary pets (ie. trinket/henchmen) in Source Shard builds.
Update 21 Nov 2020: 1.98.3
- Added a Consumables section demonstrating the buff percentages in different basic builds.
Update 19 Oct 2020: 1.98.2
- Added an additional Fire ST rotation (Hybrid).
Update 07 Oct 2020: 1.98.1
- Added an additional Atomic Point Blank AoE option.
Update 06 Oct 2020: 1.98
- OG version has been cmpletely migrated from DCUO Forums. All powers completely updated and retested for previously unavailable artifact combos and all demo videos updated (almost 300 in total now).
- Added both 3-target and 8-target demos for AoE-focus rotations.
- Removed excessively "niche" rotations (eg. the plethora of Rage utility builds).
- Updated to reflect new Artifact Analysis policy (rotations still indicate when specific artifacts are required and the relative performance for each power is still pretty clear though(.
- Added complete meta analysis
- Build meta spreadsheet for quick reference
- Added lots of DC reference images.
- Added further explanations regarding power balance and liability considerations and additional guidance on how to find the right rotation for a given situation.
- Added entries to fundamental knowledge, including how damage splitting works and the factors around which its balance hinges.
- Removed most ranged Solar Amp rotations, as they were barely viable (but functional) to begin with. Of the remaining ones, only Fire's is a truly advisable option due to the power's AoE PI situation.
Known Issues
YouTube's codec did something wonky with the gamma on my first huge batch of uploads and I didn't catch it for a long time, so ~2/3 of videos are pretty dark. I don't think it inhibits their demo value in any way, just a bit annoying. Please let me know if a video is too dark for you.
Test Server Setup
 For those who want to be able to test rotations without investing in artifacts or changing powers, you can download the test server here[launch.daybreakgames.com]. Further, this guide[forums.daybreakgames.com] will demonstrate how to set yourself up and make a quick League Hall with all buffs to make testing more accurate.
Important Note: You cannot be logged into Test and Live with the same account at the same time. You may want to create a new free account specifically for Test Server.
Fundamental Knowledge & Techniques

Clipping
Clipping is the act of superimposing additional powers/attacks/effects over others and gaining the benefit of all powers/attacks/effects used while drastically cutting down on animation time. Of note:- Most combos (power and weapon) can be clipped by other powers/attacks/effects.
- Things like shields, breakouts, and self-buffs can often be clipped onto most other attacks.
- Rarely, some attacks lose large portions of their damage if clipped.
- Clipping can be used to guarantee that a desired effect occurs, eg. clipping Robot Sidekick summon guarantees the summon will be successful.
Clipping is an excellent way of increasing DPS but that doesn't mean that the best DPS is always achieved with a rotation that relies on clipping.
Dashing
Dashing is a mechanic available to Acrobatic and Superspeed characters. When in combat, with movement mode turned on and not-attacking, we can cycle our Fast Movement button for short bursts of speed. Not only is this useful for dodging attacks and dealing with mechanics but it can help our DPS by keeping us in range against a mobile boss or by helping us reach the next group of trash mobs sooner. Unfortunately, Flight characters can't do this but they do get to fly over the mechanics in a lot of fights.https://youtu.be/wJxQdCbvLM4
Mastering this technique is one of the most effective ways to improve your play.
Note: You can't dash if you're grounded. In fights where the devs don't want you to be able to do this, you'll be grounded the entire time.
Jump Cancelling & Bunny Hopping
Jumping during attacks has several potential benefits/consequences:- We can cancel some attacks early in order to dodge mechanics (eg. Heat Vision).
- For powers/attacks that would normally root us in place, jumping can unlock our movement and allow us to reposition during our rotation without cancelling the effect of some powers/attacks.
- Jumping during some attacks will cancel some or all the damage/effect (eg. Soul Barrage, Soul Storm), so be careful.
It's important to learn what effect jumping has on the powers in your rotation. We've tried to highlight major jump cancel points in the guide but experiment and get comfortable with your rotation.
Tap Cancelling
Certain channeled or long-cast powers can be cancelled with a melee or ranged tap. In addition to being handy for allowing us to dodge mechanics, this can provide combat benefits in that:- We maximize the DPS of certain powers by cancelling them early, greatly increasing their viability (eg. Freezing Breath and Sonic Shout achieve maximum ST DPS when cancelled after 2-3 ticks of damage and Channel Hate can have the non-damage dovetail removed with a well-timed tap).
- It lets us better fit certain powers into rotation (eg. Whirling Dervish can be cancelled early to improve rotation flow and to increase overall DPS).
Tap Queueing
Most powers allow us to queue subsequent attacks onto them to occur automatically as soon as the current power ends. This can be used allow Might players to queue and clip ranged taps onto most powers, adding bonus damage to every attack and procing our Blast Adapters regularly. Of note:- Most channeled powers allow us to do a ranged tap at any time during the cast without issue but some will either instantly cancel channeling, reduce the overall duration of channeling, or in some cases prevent us from being able to block cancel the channel. We've noted which channeled powers do not allow tap queueing (as well as the specific behavioural quirks) at the top of each power's section.
- Non-channeled powers can still be tap queued onto but we need to either learn the specific time where we can start to queue (most powers won't queue if you try too early), or spam ranged taps during the cast (this is easier initially when learning a power but once the timing is down it's easier to just tap once when appropriate).
- Remember to maintain rotation flow. Getting the tap in is pointless if we're not still also seamlessly flowing through the rotation.
- We can get a tap in at the end of "queue-unfriendly" channeled powers if we time the tap correctly (after the last tick, when our hands first start coming down from the channel) but you need to do a cost:benefit analysis to determine if you personally accept the risk of cutting off a might tick or delaying the rotation. It's generally more reliable to simply not tap queue onto the few powers like that unless necessary.
Any weapon is fine for Tap Queueing but:
- Rifle grenades hit the hardest (a few hundred more than other weapons) but the damage splits after one with multiple targets present
- Bow and Duel Wield come next in the hierarchy, only slightly behind (~90% as much damage as Rifle grenades)
- Then comes Staff, Two Handed, Hand Blasters, Shield, One Handed, and Martial Arts slightly behind that (~81% damage as Rifle grenades)
- Then Brawling and Dual Pistols bring up the rear. (~71-76% as much damage as Rifle grenades).
Support DPS
In Alert, Event, and Open World content, there is a 12% group DPS penalty incurred for each redundant role. Ie. 2x DPS in an alert results in a 12% reduction in overall group DPS and 3x DPS results in a 24% reduction in group DPS. There is no innate penalty for DPSing in our support roles, however, so with a few minor tweaks we can switch roles while maintaining our personal output but drastically improving group DPS. The required changes vary for each power (read your DPS power descriptions to see the effect role has on them, if any). Eg. Fire can't effectively DPS with Absorb Heat while in Tank role due to it dealing increased healing instead of increased damage. Stat Calculation Rules
The way the game calculates our stats is as follows:Stat Total = (Sum of Raw Stats) x [100% + (Sum of % Stat Modifiers)]
Where,
- Sum of Raw Stats is the combined total of all of our base stats, gear, raw arti stats, augs, SP, consumables, and certain buff contributions (eg Tetra group buff), and
- Sum of % Stat Modifiers is the combined total of all the +X% boosts from base/league buffs, Home Turf mods, the % boost from artis, certain consumables, etc.
Damage Split Rules
The most common AoE split rule in the game is "splits after two targets." However, some attacks split after one, three, or four targets and some don't split at all (splits after three/four is more prevalent in LPVE). The way the balance for non-split attacks works is that they do below average damage on 2-3 targets and above average damage on 8 targets, averaging out in the middle. Whenever there is a non-split element in a rotation, the average must be taken of that rotation's 3 target and 8 target performance to determine it's actual potency.PI Sharing
Some powers's best rotations rely on Grimorium Verum to establish PI. It may be possible to coordinate with teammates who can establish the PI instead as part of their normal rotation, freeing us up to use a stronger artifact. Similarly, a tank can use consumables to apply any PI as well. Though not critical, communicating this ahead of time can result in a boost to personal and group DPS.Rotation Recovery
Part of transitioning from Sparring Target performance to in-content performance is knowing how to recover when our rotation is interrupted. This will vary for every power and rotation, so it's important to have a general idea of which attacks are the hardest-hitting and how long our PI can last. It's not always ideal to pick up a rotation where we left off if the delay results in a stronger attack further in the order coming off cooldown or would result in attacks landing without PI active.
Advanced Techniques
Bounce Tanking
With Explosive Block and Empowered Channeling combined, a high SP Might DPS can reliably tank a boss while a Tank is being revived without issue by bouncing the boss off our block repeatedly, generally triggering the AI to lunge again. With practice, we can even angle and time our blocks to aim bounced enemies wherever we want them. It is an extremely effective means of keeping otherwise lethal mobs under control until the tank is back in the fight.Tactical Swapping of Artifacts
You do not have to do this in order to be effective. This is just a next-level min:max technique.The value of many artifacts is maximized by only swapping them in for use at an appropriate time then swapping them back out quickly. This is best done during channeling / channel-like attacks or during animations (eg. Orbital Strike, Orbital Supply Drop, certain unclippable summons), but it can be done at any time if the player is fast enough.
Note:
- It is easier to do on Console or with a controller than it is with a mouse, as the game always defaults to our cursor position so if we try to use our keyboard but the mouse is hovering over our inventory, the game will think we want to be navigating where our mouse is.
- If on PC, be mindful of how you move your mouse and, if needed, pre-load your inventory a second before actually doing the tac swap to get the cursor in position.
- If on Console, you will need to load your inventory once you're in the instance prior to doing any tac swaps so your UI defaults to inventory when you open it.
Some of these swap techniques may seem challenging at first but become second nature with practice. We can pull these off safely in every fight in the game as long as we're mindful of the chat log notifications & mechanics and it will result in a massive gain for overall DPS output.
Here's some demos/explanations of the most import swap artifacts being tac swapped:
Dead King's Scepter
By swapping this in & out, we not only gain 100% of the value of its Orbital Strike and pet/henchmen cooldown reduction but we also retain the 30s of Enhanced Orbital Assistance even if we immediately swap it out after dropping Orbital Strike. This is because Enhanced Orbital Assistance is a buff tied to our character, not to the artifact itself.
Orbital Assistance's damage is stat-based, not CR-based, and can therefore crit. We will get 8-10 procs after swapping, effectively giving us an additional ~20-40% (depending on crits) guaranteed to hit (as long as we're attacking) ST damage to our Orbital Strike every time we use it on top of the DPS gains gleaned from more frequent pet, trinket, and Orbital Strike activation.
We effectively get ~95%+ of the mechanical value from Dead King's Scepter by only swapping it in for activation.
Philosopher's Stone
As with Enhanced Orbital Assistance, Alchemical Bond is a buff tied to our character, not to the artifact itself. We can immediately remove the artifact and still retain the 2x duration DMG buff from our Supply Drop.
This is in addition to the dramatically reduced Supply Drop cooldown and the much larger diameter.
We effectively get 100% of the mechanical value from Philosopher's Stone by only swapping it in for activation.
Tetrahedron of Urgrund
Tetrahedron's group Might buff persists for 12s from the last power that hits, meaning we don't have to always keep it on to maintain the buff. Also, if we put it on mid-channeling, the next tick (that cost power) of channeled damage will proc the effect. However, non-initial DoT ticks will not proc the buff; "active" damage only.
We can maintain 100% of Tetrahedron's mechanical value via (very) active Tac Swap management or while swapping other artis in & out, making it the ideal Tac Swap companion arti.
Scrap of the Soul Cloak
Scrap's mechanic description is a bit misleading or, at best, omits some critical information. First, it doesn't just increase our max SC, it also increases our current existing SC by a factor of 1.27 when we put it on. This is why when we have full SC with it off, we still have full SC when we put it on. Similarly, when we remove it, our current SC is reduced back to a factor of 1.
This means that we get the full benefit of the "increases Supercharge generation by 27%" aspect of the artifact whether or not we're actually wearing it, meaning there's virtually no reason to ever mainline this arti except in cases where there simply isn't time to swap it.
We get 100% of Scrap of the Soul Cloak's mechanical value by only swapping it in for activations.
La-Mort Card
La-Mort's Impending Doom stacks rest on the target, not the artifact, and will only fall off if 60s passes without the target taking damage from your finisher. As such, as long as we swap La-Mort in for a finisher activation at least once every 60s, we can retain a full Impending Doom stack without keeping La-Mort on. To do this without a DPS loss, however, requires placing a channeled ability before our finisher then swapping La-Mort back out during our finisher channel, so it's more challenging than other tac swaps and not really worth it in the long run.
We can get 100% of La-Mort Card's mechanical value by only swapping it in for Finishers, but it's challenging, requires changing the order of our rotation, and precludes the use of some other, stronger Tac Swap techniques.
Eye of Gemini
We retain 100% of the mechanical value of Eye of Gemini if we swap it out immediately after popping an SC. However, its mechanic isn't generally as valuable as Scrap of the Soul Cloak's and we can only afford to swap one w/o sacrificing significant rotation DPS, so we don't recommend this for most situations.
Extreme Tactical Swap
Note: Every power is capable of doing this without suffering a rotational DPS loss.Min:Max Swap
Note: You don't have to do the Scepter swap combined with the Stone+Scrap+SC combo all at the same time, this just just demos them all at once to show how it all works.
Scepter>Henchmen+Pet (swap Orbital Strike during animation)>Orbital Strike (swap Stone during animation)>instacast power clipped with Supply Drop (swap Scrap during animation)>stat trinket + Bottled City Soder + Neo/CB/Berserk or other SC>HV or a comparable channeled power (swap aritfacts during channel)>continue with normal rotation
Before doing this sort of thing, know the mechanics, know where to stand, and know when not to do it in any given raid.
One Man Army
If we want to put a lot of effort in, we can have our cake and eat it to by permanently maintaining the group's Tetra while only wearing Tetra for a fraction of our rotation. This requires that we maintain a high level of situational awareness and know fights very well, however. Tetra lasts for 12s so gauge the length of the rotation to determine how frequently we need to do this. If we time it perfectly, we can swap it in & out quickly during a channeled power (as per above) but we don't have to and it's a bit more awkward to do it that way.
Advanced Techniques (Continued)
Swap Friendliness
Not all artifacts swap on/off as cleanly as others. Some will result in a rotation hiccup or similar issue when equipped or unequipped. For example, when considering the artifacts that spend the most amount of the time equipped:Solar Amplifier
Solar Amp is one of the least swap friendly artifacts and should almost never be considered for the hotswap position. Removing it while casting Amplified Heat Vision interrupts the power, incurs additional swap delays, and just derps the game up in general for several seconds.
The Strategist Card
The Strategist Card comes off cleanly but when we re-equip it, our character stops whatever they're doing and flails their arms in front of them, interrupting any channeled/charged powers. However, removing the Card does not cancel existing Tactical Advantage procs. This means it's still advantageous to have this in the hotswap slot in Solar/Trans/Strat builds but it's best to carefully time the re-equip by watching for cast completion. Eg. If requip would occur during Amplified Heat Vision, wait until we can see the burst effect or just before.
Source Shard
Removing Source Shard does not remove any existing Godwave Strength effects from our pets and we will still hear the growl sound when the cooldown reset procs. However, removing Source Shard also removes Godwave Strength from our bar and the cooldown won't actually reset if it isn't in the loadout (this is also why Gadgets/Mental using Source need Godwave on both bars). It's still viable in the hotswap slot but be aware we may miss a cooldown reset.
Tetrahedron of Urgrund
Tetrahedron's group might buff lasts for 12s since the last time we connected a Might power when the artifact was equipped, making it the best artifact in the game for the swap slot.
La-Mort Card
As per the extreme tac swap example above, the applied La-Mort stacks remain on the target even if La-Mort is unequipped. It can also be swapped cleanly. This allows for some interesting but extremely challenging active swapping.
Grimorium Verum
The Grimorium Verum applied PI vanishes the instant this is unequipped. Unfortunately, on powers that need Grim it still remains the best swap option. It also takes 2 active-type attacks to re-summon the pet once re-equipped.
The Transformation Card
No ill effect on swap but the loss of the crit buff is generally not ideal, so we want to keep swaps as fast and tight as possible when this is in the hotswap slot.
Quislet
No real ill effect for swapping Quislet aside from the temporary loss of pet damage. Like Grim, it takes 2 active-type attacks for the pet to re-summon.
Lernaea's Amulet
No ill effect for swapping Lernaea's Amulet but the Offering timer keeps ticking while it's off and if we don't re-equip and cast something within 6s of the previous power consumption, it will wear off. This means we have to be careful not to try to do too many swaps back to back without casting in order to maintain our stacks. Similarly, this means we have less wiggle room when swapping during long, one-time cost channels like Absorb Heat and Channel Hate. How much time we have varies so it's something a player needs to feel out with their rotation. I strongly advise against swapping this artifact in/out.
Pied Piper's Flute
This artifact uses the exact same proc programming as Tetra, meaning once we swap it on we have to deal active yellow damage (ie. power must be spent on the damage sourch with the arti equipped for it to start listening for SCs). Once procced, we retain the buff for 12s even if the arti is removed, meaning we equip it, proc it, and remove it for either Scrap or Trans without losing the effect, making it an extremely potent "have your cake and eat it too" swap arti... but one that requires the most intensive swapping in the game to maximize. Example (don't have to do the Scepter swap w pets/orbital at the start obviously):
https://youtu.be/tBZTd7P-WEQ
https://youtu.be/kc8Q-GaM2yE
https://youtu.be/RlWpXeMQsZU
CAUTION: These are the longest swap chains in the game and it's important to know when it's safe to do this. Identify the mechanic that will kill you if you get caught off guard and wait until you know that mechanic won't happen for a little while.
The remaining artifacts that we're swapping for, Dead King's Scepter, Philosopher's Stone, and Scrap of the Soul cloak are all maximized in swap and have no ill effects or quirks. Eye of Gemini can also be swapped in and out if desired instead of Scrap, but attempting to do both together results in a damage loss due to the time it takes.
Artifact Analysis
 The developers have, historically, altered some artifacts on a whim well after official release, dramatically undercutting their value after thousands of players had already invested in them. As such, we caution that any time/effort/money invested into the artifact system could be ultimately wasted. Our advice is to be extremely careful when investing in artifacts in general and assume that what you get might not be what you paid for down the road.
Important Artifact Notes & Considerations
Credit to the DCUO Wiki[dcuniverseonline.fandom.com] for some of the arti images.Note: This will not include discussion of artifacts that have exclusive support functionality but will cover artifacts that have some use or support to DPS in some form or another.
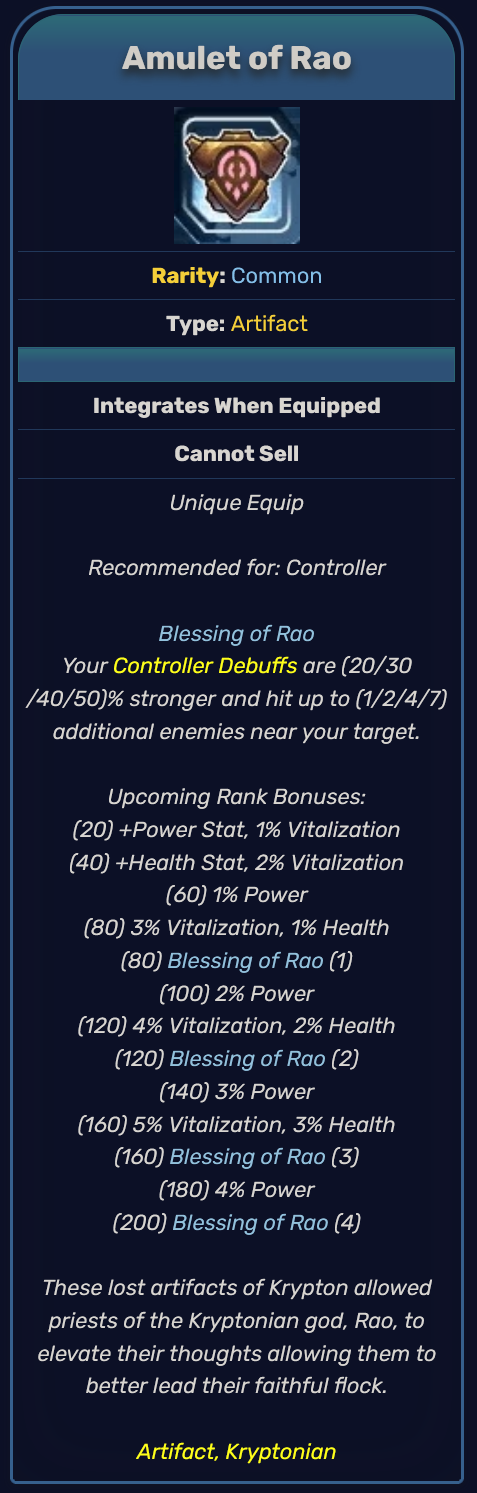
Amulet of Rao
Raw Stats:5100 Health
4781 Power
557 Vitalization
Amulet of Rao is one of the most powerful artifacts in group content, if not the most powerful. The difference an extra 5% attack & defense reduction makes is increasingly substantial the higher the difference between the boss and the players. No group should be without Rao-enhanced debuffs.
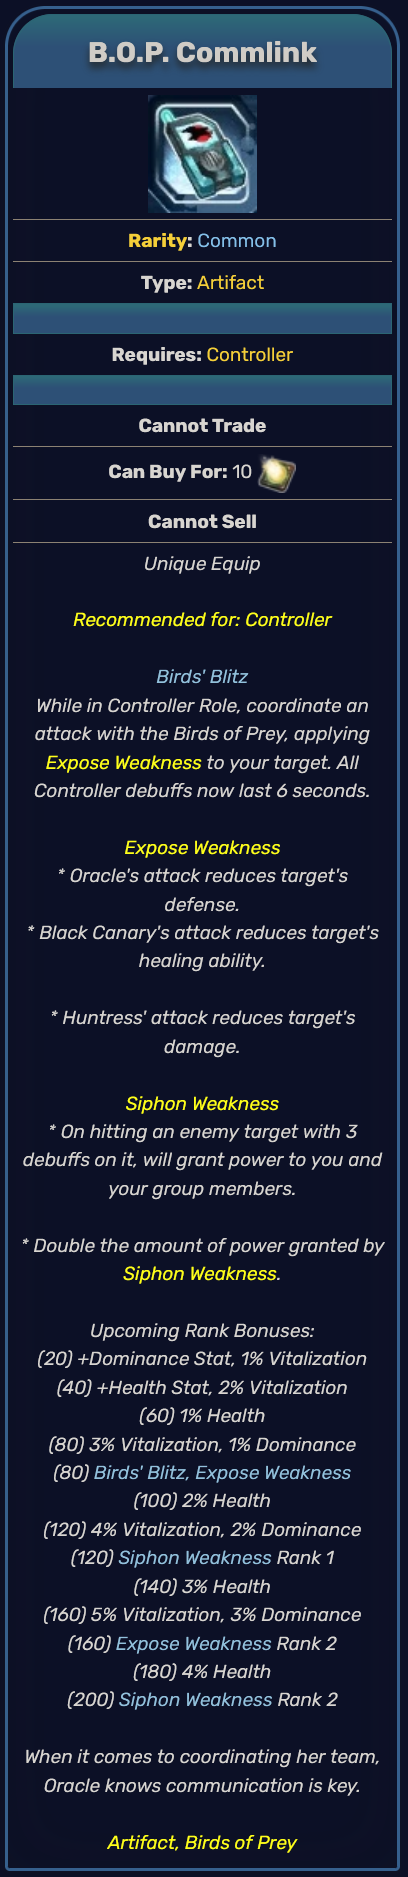
B.O.P. Commlink
Raw Stats:6375 Health
557 Vitalization
382 Dominance
Needs to be paired with Amulet of Rao. Useful in some Full-DPS-Spec/Debuff Battle Troll + Buff Battle Troll group configurations but not critical for them. Though better on some powers than others, the fact it empowers some powers to do stronger Battle Troll rotations combined with providing some extra power on top of what the "pure" Troll's giving is nice. See respective Battle Troll sections for each Troll power.
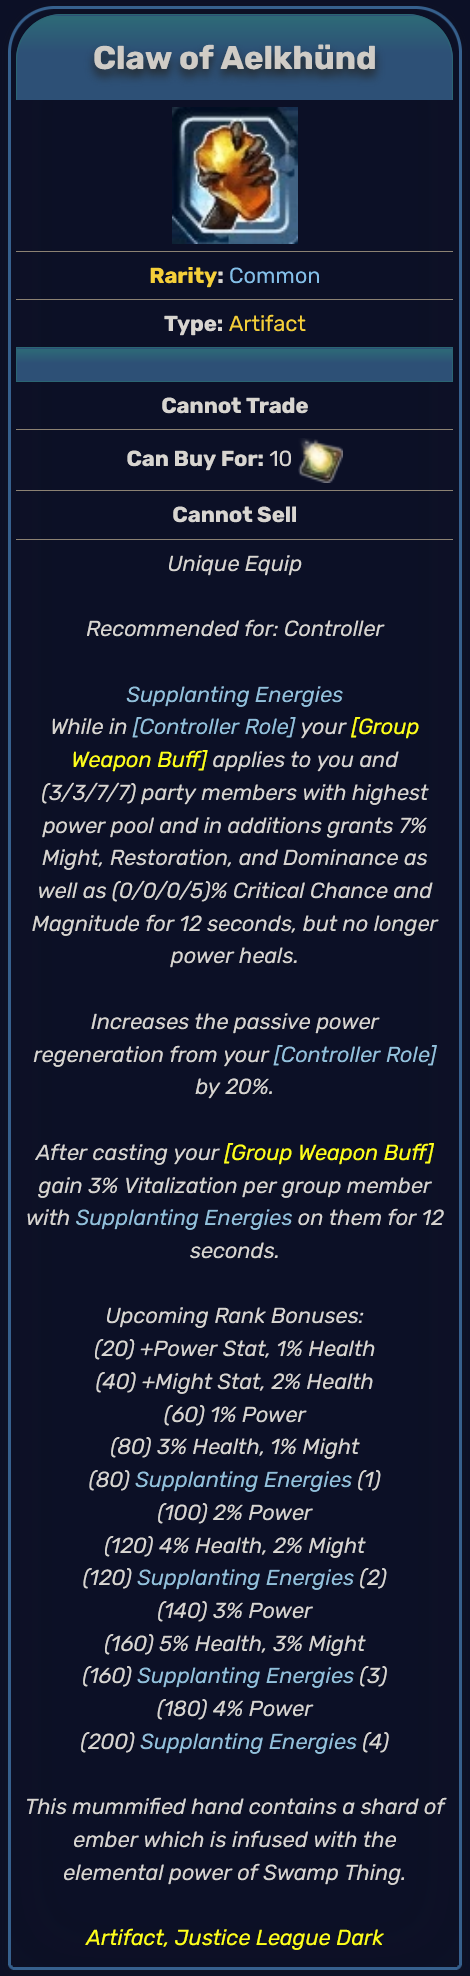
Claw of Aelkhund
Raw Stats:4462 Health
4781 Power
765 Might
Claw is a potent buff artifact and one no raid group should be without. At level 200, the 3% Vit buff per group member also gives this incredible synergy with both Entwined Rings of Azar and (for Prec-based groups) Parasite's Power Harness in groups where another player can run the Tetra or Cog.
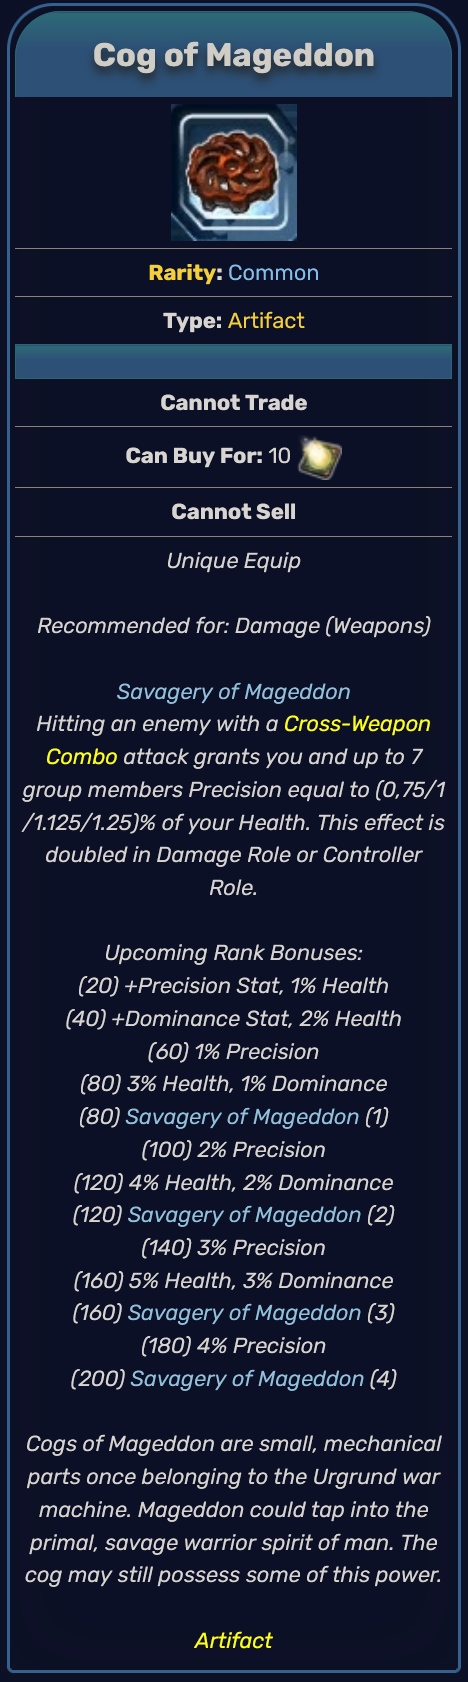
Cog of Mageddon
Raw Stats:7650 Health
796 Precision
382 Dominance
Listed due to the fact battle buff Trolls will have to use it sometimes for Precs, unless they can run their own. The Troll will need to incorporate a Weapon Mastery combo into their Troll rotation in such cases, if not doing so already.
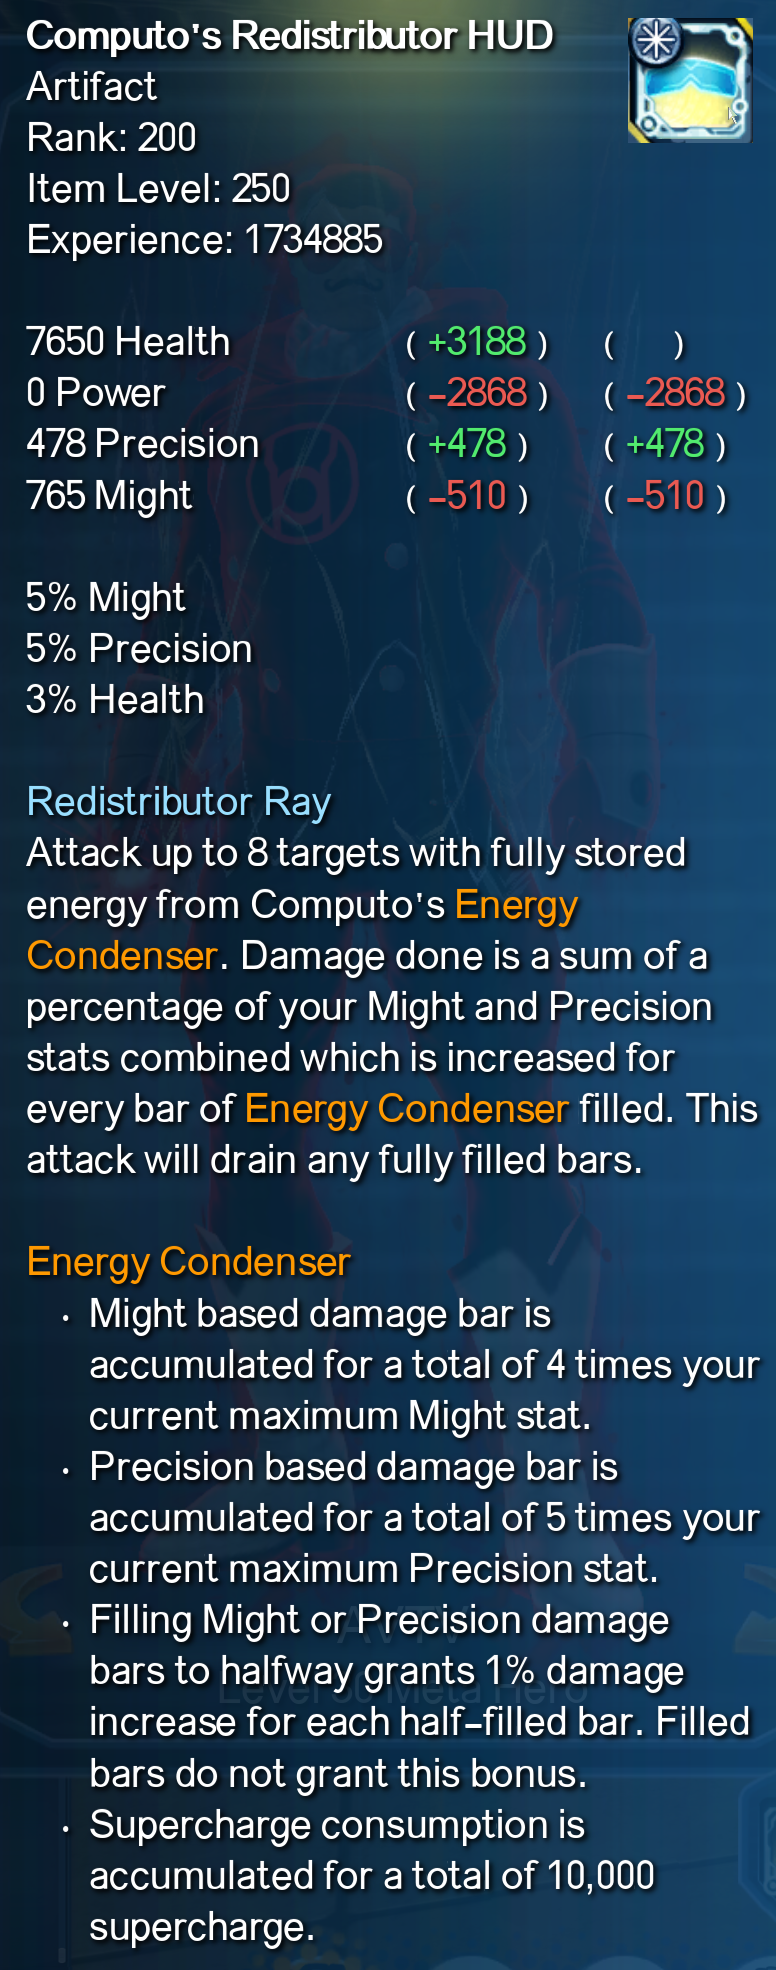
Computo's Redistributor HUD
Designed for Hybrid DPS builds, this artifact opens up a whole new can of testing worms. If you're intent on trying this, be aware that the amount of Prec/Pet damage required to fill the Prec meter is noticeably less than the amount of Might damage required to fill the Might meter, so it's important to strike an appropriate balance to optimize procs.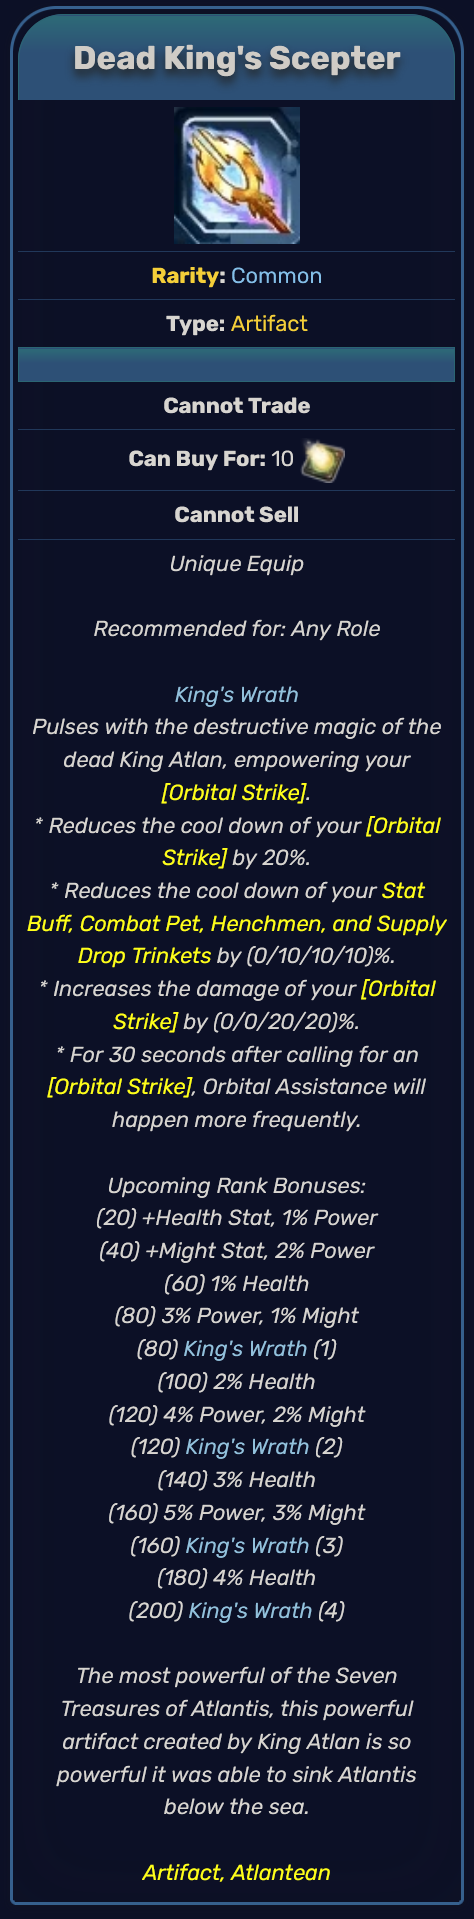
Dead King's Scepter
Raw Stats:5100 Health
4781 Power
557 Vitalization
Note: Orbital Assistance is tied to combat stats and can only proc on one target at a time.
One of the game's most potent artifacts when swapped in & out at appropriate times (see Advanced Techniques). The combination of reduced cooldown, increased Orbital Strike damage, and Enhanced Orbital Assistance after using Orbital Strike dramatically increase both our Orbital Strike's burst damage and the amount of damage our combined Orbital Strikes deal in a single raid. Every player should try to max this for swaps or, at the very least, they should take it to lvl 80 for the reduced CD.
Dilustel Refractor
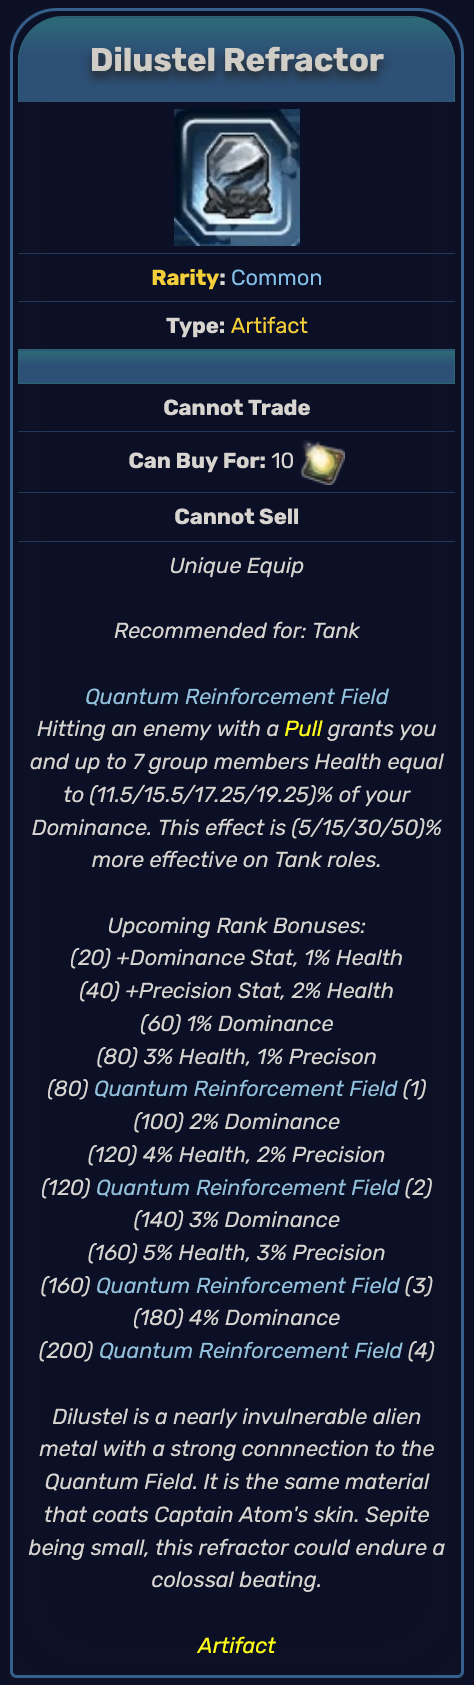
Raw Stats:7650 Health
478 Precision
637 Dominance
By increasing the group's Health dramatically, this also noticeably increases the potency of Health related buff artifacts like Tetrahedron of Urgrund. As such, in a competent group, any Tank that can run this without harming their survivability should do so.
Entwined Rings of Azar
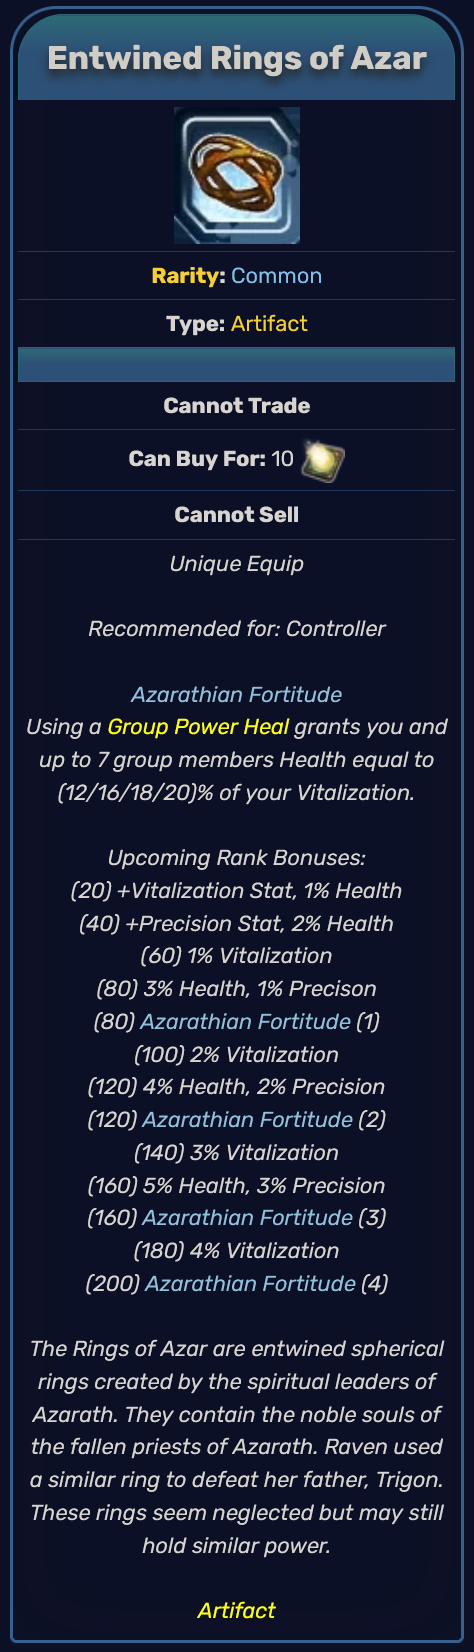
Raw Stats:7650 Health
478 Precision
398 Vitalization
As with Dilustel Refractor, this will noticeably increase the potency of health related buff artifacts like Tetrahedron of Urgrund. Also, it's based on the Troll's Vitalization so their running it doesn't require them to artificially jack their Health up to maximize it (which is especially nice since Troll is extremely SP thirsty to begin with). Similarly, in groups, it has outstanding Synergy with lvl 200 Claw of Aelkhund due to Claw's extreme Vitalization buff. In a solo troll comp, a DPS with the most Health should run Tetra/Cog to free the Troll up to run Rings. This can also be easily run in a 2x battle troll comp.

Eye of Gemini
Raw Stats:6375 Health
6693 Power
Note: Ally damage contributes towards Pollux' Gaze.
For Healers, this is a must as the constant SC feed provided by Castor's Watch increases the group's DPS dramatically. For DPS, however, this is situational and extremely overrated. It is an outstanding artifact on a weak DPS (or on a Troll), and a terrible artifact on a strong DPS. Multiple players running EoG can somewhat cheese Pollux' Gaze by stealing damage/procs from other peoples' EoGs but this is a worst strategy than just using stronger swap artifacts. Running it over better options will lower a strong DPS' personal damage contributions while cheesing AoE damage from the group. The most effective use of EoG is for the weakest DPS in a group (or a Troll) to run it and spam Pollux' Gaze while everyone else stacks on them and maximizes their own personal output instead of trying to leach group damage. The group's DPS is maximized with only the weaker member's buffing the group with Pollux' Gaze while the stronger members min:max appropriately.
Pollux' Gaze proc splits after one and hits everything within red reticle range 360 degrees around the player. It is extremely bad (see Cheesing in DPS Literacy section) in any fight where that results in damage being dealt inefficiently.
Important: The green/red circles do NOT indicate the SC generation field's / DPS repeater fields' locations, they only indicate the area in which a player wearing a 200 EoG will receive the 5% stat buff. The SC generation field and DPS repeater field actually follow the EoG caster, invisibly, and the "aura" has the same radius as the circles do. Eg if a healer drops a green circle and runs across the map, no one in the green circle will get SC. It's very stupid... I know... but that's how it all works...
Grimbor's Chains
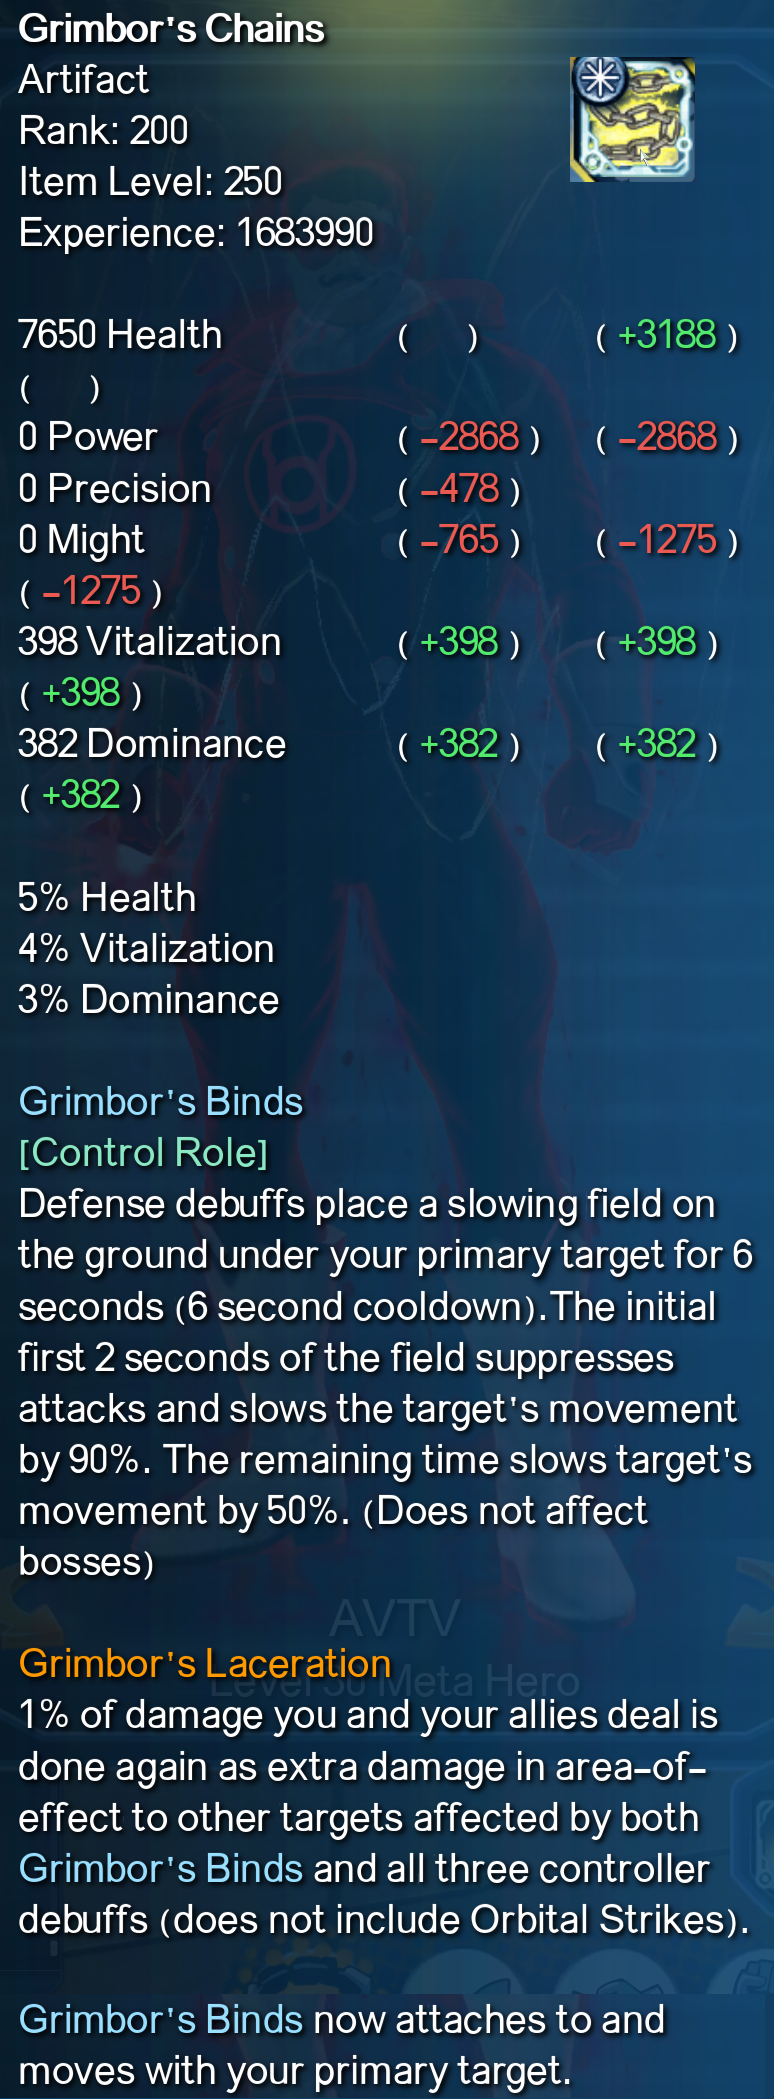
An underrated but situational artifact that has good synergy with B.O.P. Commlink and Amulet of Rao on a Debuff DPS-Troll. 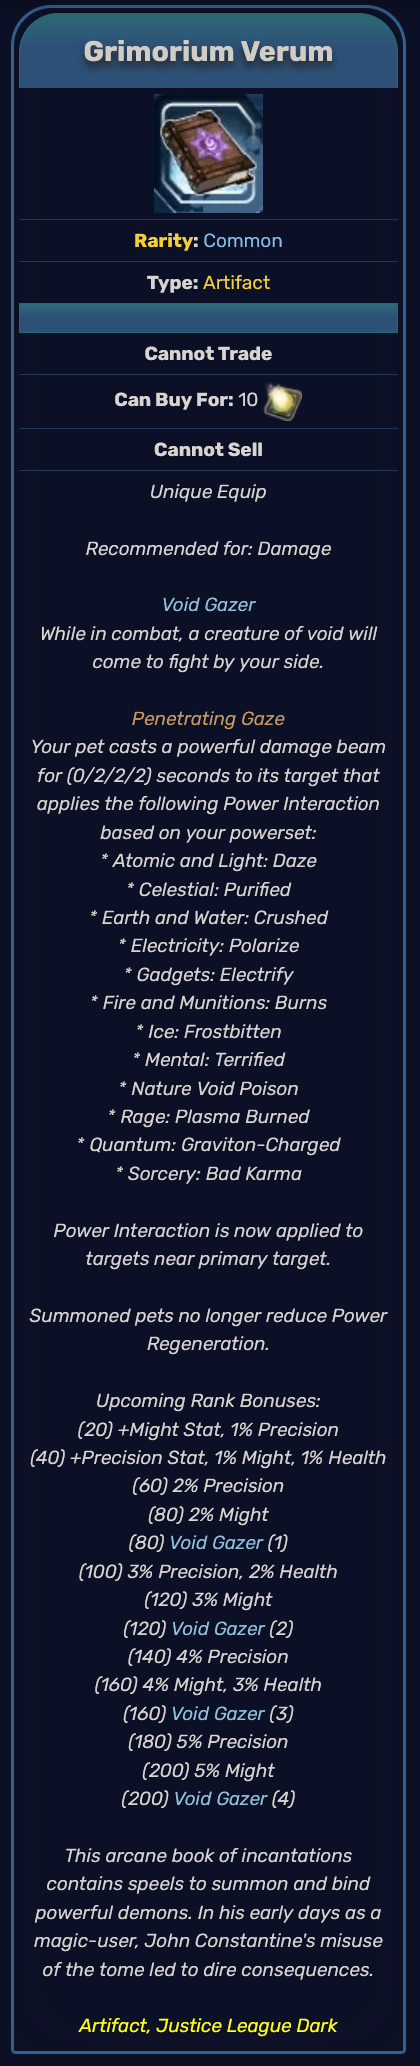
Grimorium Verum
4462 Health478 Precision
765 Might[/i]
Virtually mandatory on certain powers where establishing their own PI would otherwise result in a big DPS loss. However, in any situation where such powers can coordinate with group members and leach off of each other's PIs to reduce Grim use and free up that arti slot, they should do so.
Artifact Analysis (Continued)
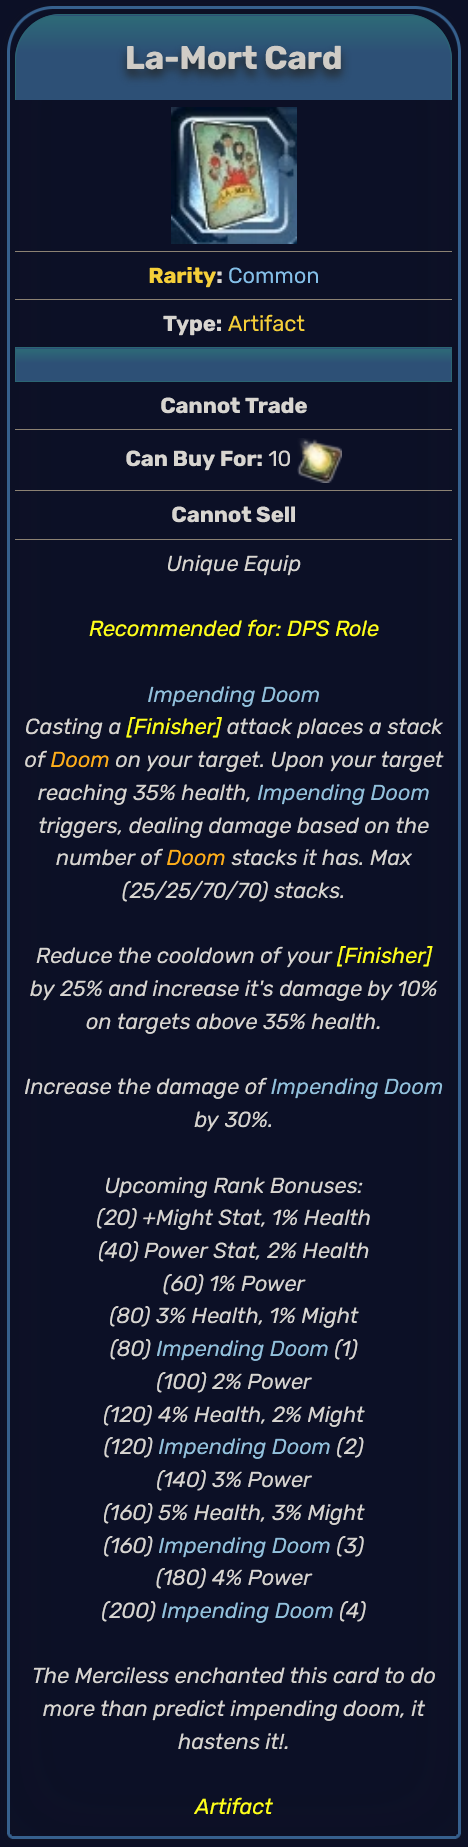
La-Mort Card
Raw Stats:4462 Health
2868 Power
1275 Might
Note: Impending Doom contributes to Berserk damage.
Absolutely GOATed on Rage Melee and decent (but not BiS) on other powers. Also interesting for fights where a boss becomes more dangerous near death, as multiple DPS running this combined with saving the rest of their burst damage for the final phase can deal extremely high burst damage following the Impending Doom procs.
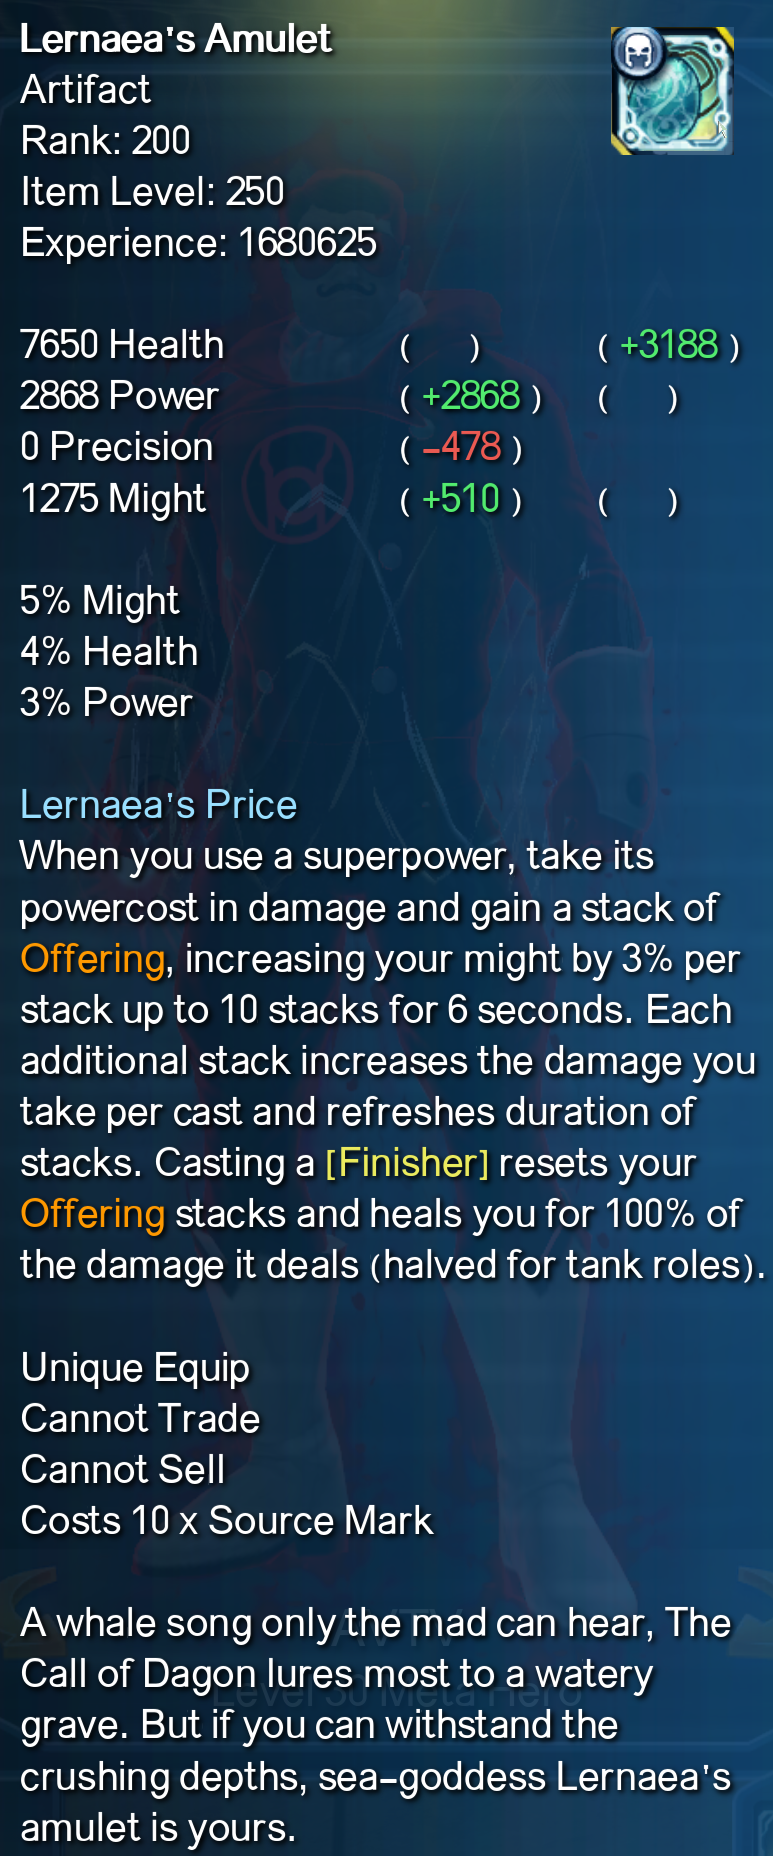
Lernaea's Amulet
One of the most versatile artifacts in the game. This can be used to maximize a player's DPS in group content with a healer present or it can be used to improve survivability without a healer (or if the healer is bad). Competent endgame Might players should have this and know how to use it effectively.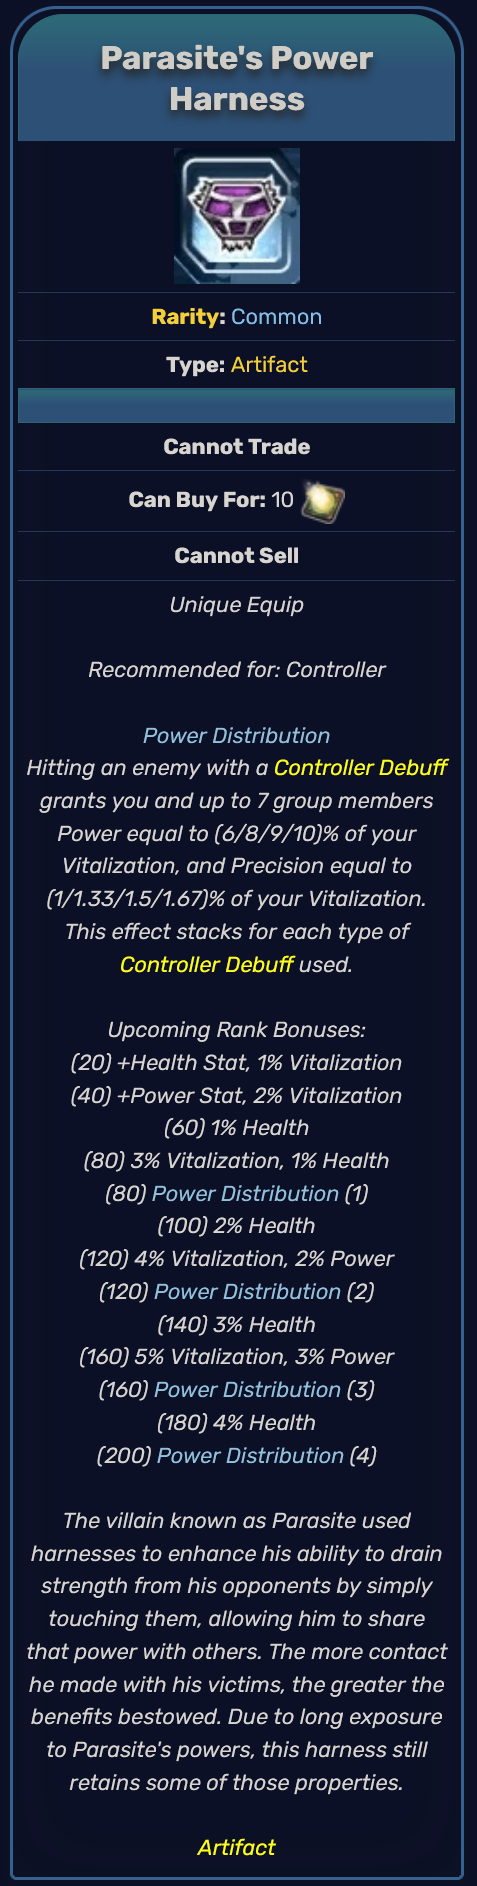
Parasite's Power Harness
Raw Stats:6375 Health
2868 Power
557 Vitalization
This is rarely seen anymore but should be run by a Troll in full-Prec groups while another player runs Cog (since this can only be utilized by a Troll). When using this, the Troll must ensure they're applying all three debuffs for maximum buff effectiveness. Good synergy with Claw of Aelkhund.
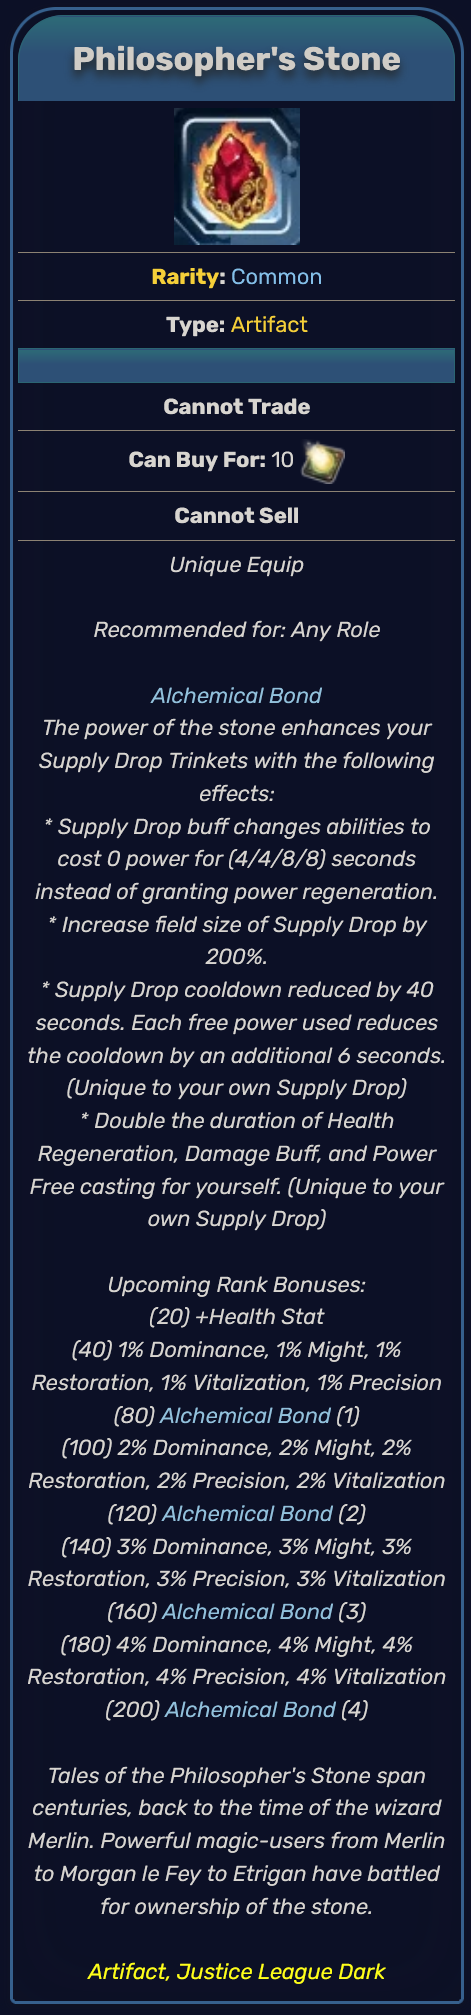
Philosopher's Stone
Raw Stats:3187 Health
6693 Power
1115 Precision
1785 Might
Potent swap artifact (see Advanced Techniques), doubling the effect duration of Supply Drop's DPS buff. Also, since this reduces power costs to zero for its duration, this has great synergy with Lernaea's Amulet. The cooldown reduction should not be underestimated (though it doesn't work quite as described in the tooltip).
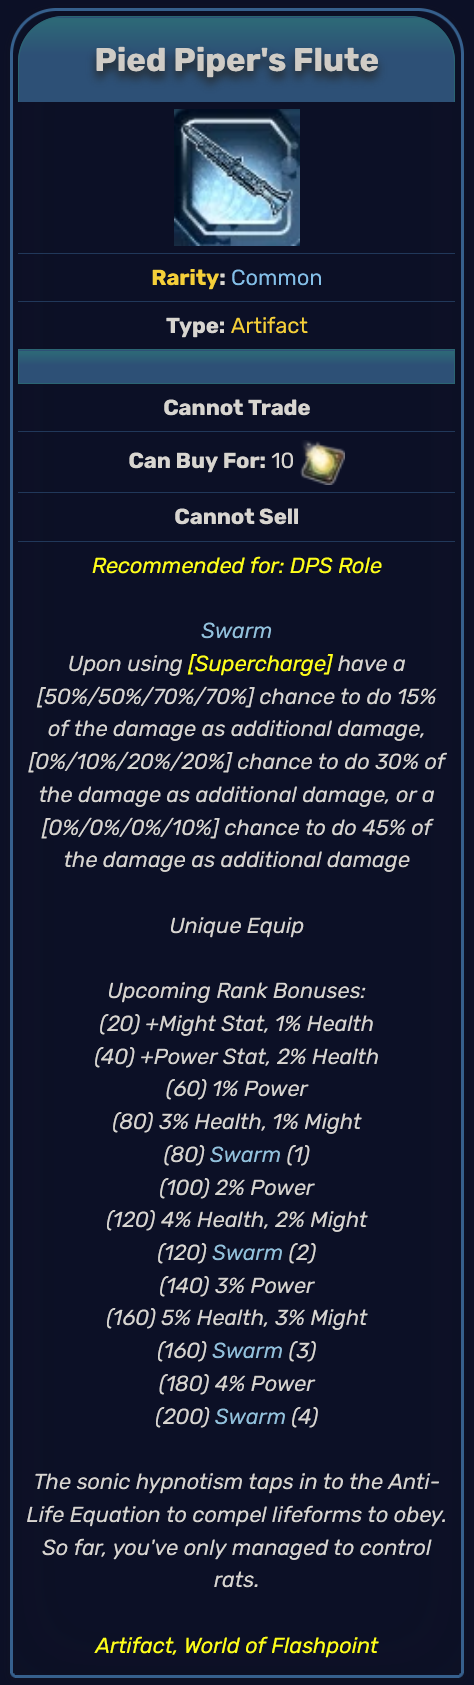
Pied Piper's Flute
Raw Stats:7650 Health
2868 Power
1275 Might
One of the most fun artifacts in the game and a potent swap artifact (see Advanced Techniques). The rats are a long-range pbAoE cone, so the player can either aim them for maximum AoE or adjust position to land them all on a single target.
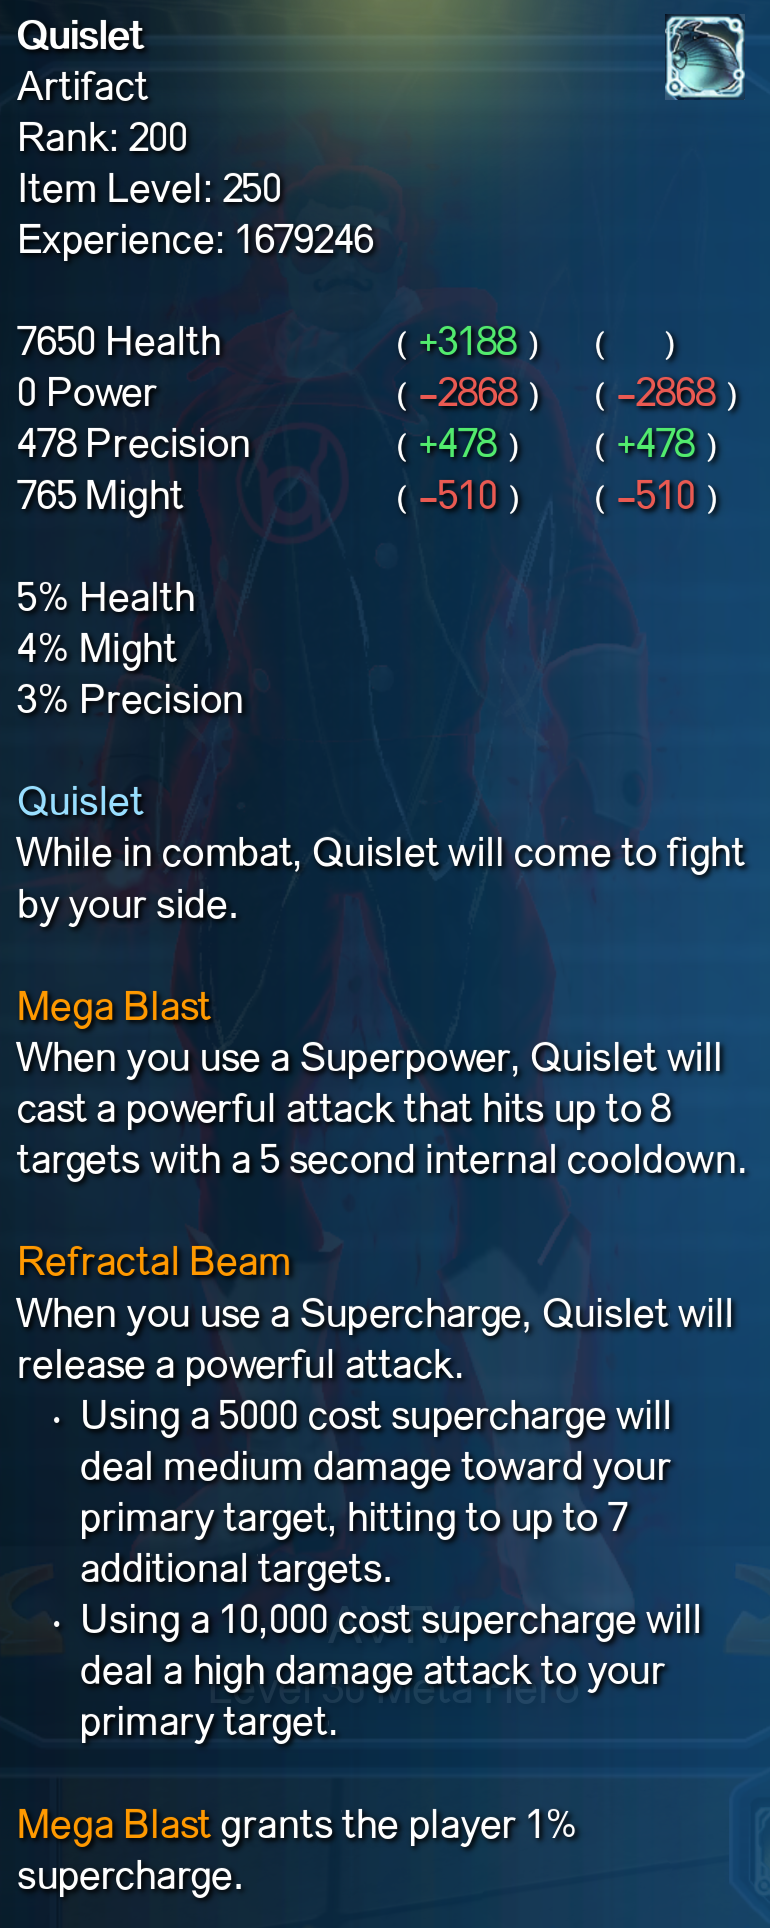
Quislet
Quislet has excellent synergy with Sourch Shard but is a potent artifact on its own on any power that can fit it. Since Berserk re-applies pet damage as well, Quislet is an extremely effective artifact for Rage Melee.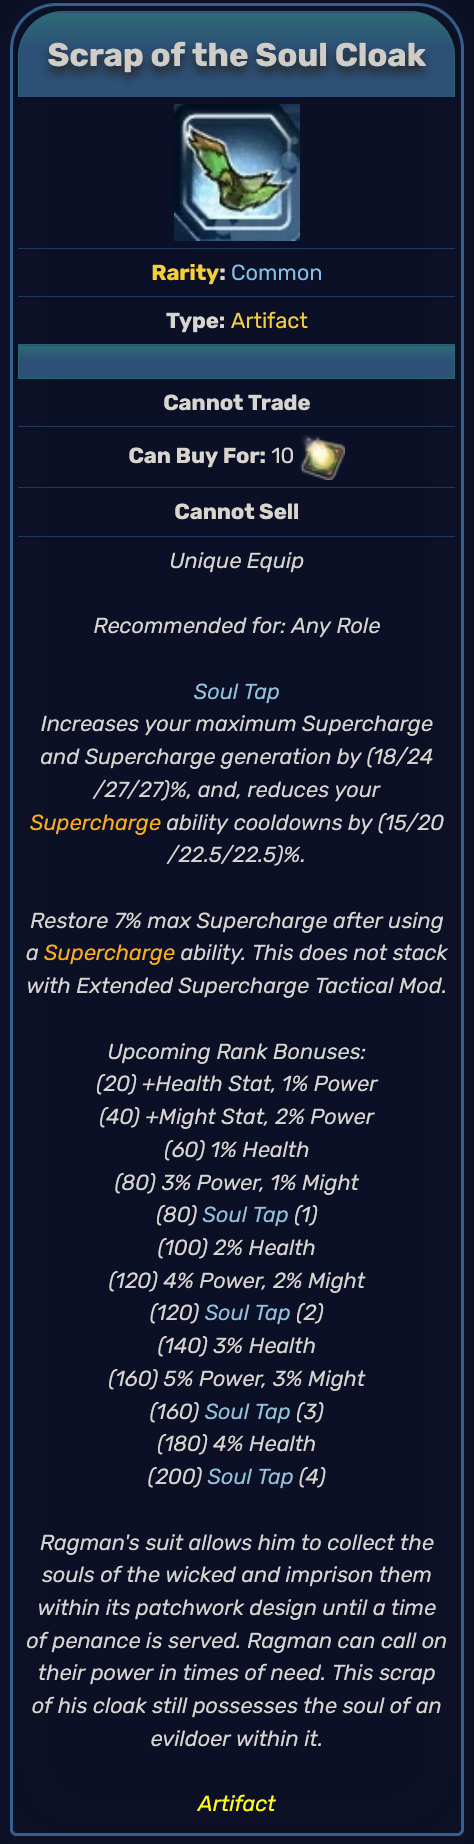
Scrap of the Soul Cloak
Raw Stats:6375 Health
6693 Power
765 Might
Extremely useful swap artifact. It must be understood that you get the full benefit of the increased SC gain whether or not you actually have the artifact equipped. This is because the act of equipping the artifact multiplies your entire existing SC pool by 1.27. This, combined with the reduced cooldown and 7% SC refund, makes this one of the most capable artifacts when it comes to maximizing the DMG:SC ratio of Supercharge attacks. Further, Scrap of the Soul Cloak makes extremely potent Neo Venom Boost buffed 10k SC combos possible.
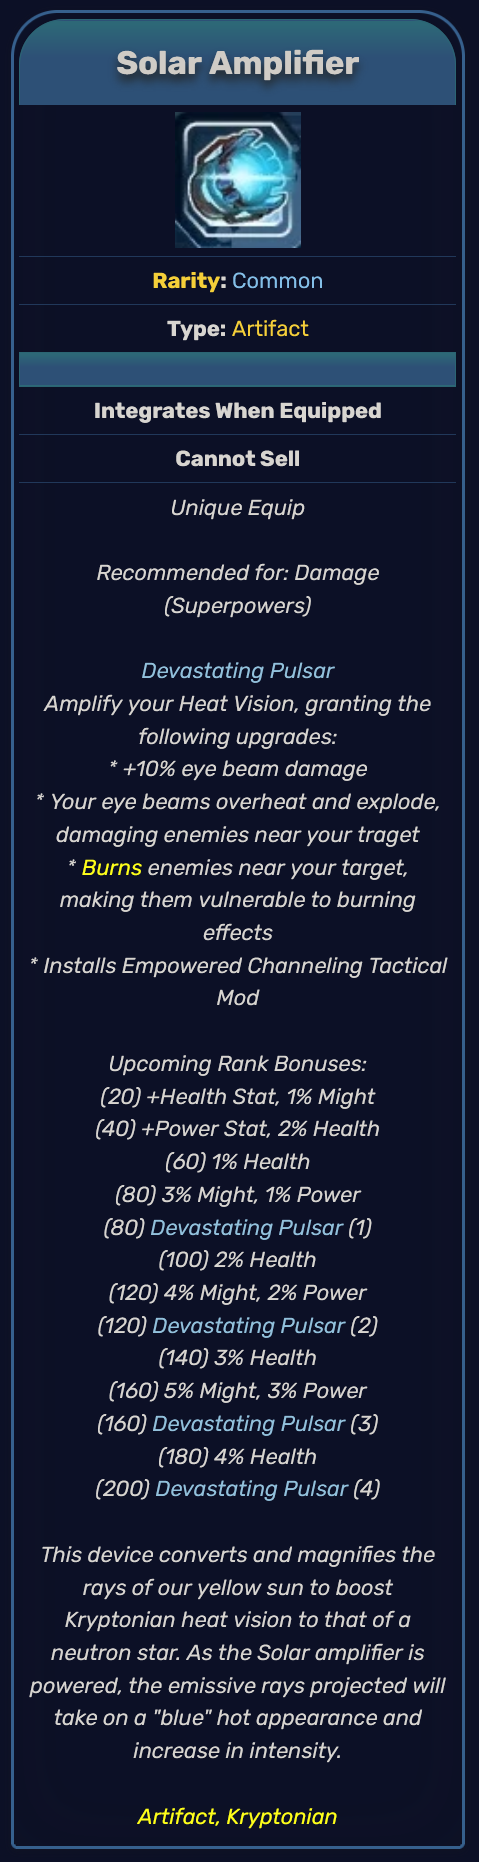
Solar Amplifier
Raw Stats:6375 Health
2868 Power
1785 Might
A very potent ST Might artifact and the one that most powers should initially focus on getting to 200. The free Empowered Channeling mod frees up the hand slot for Max Damage to be used while protecting channels and improving survivability.
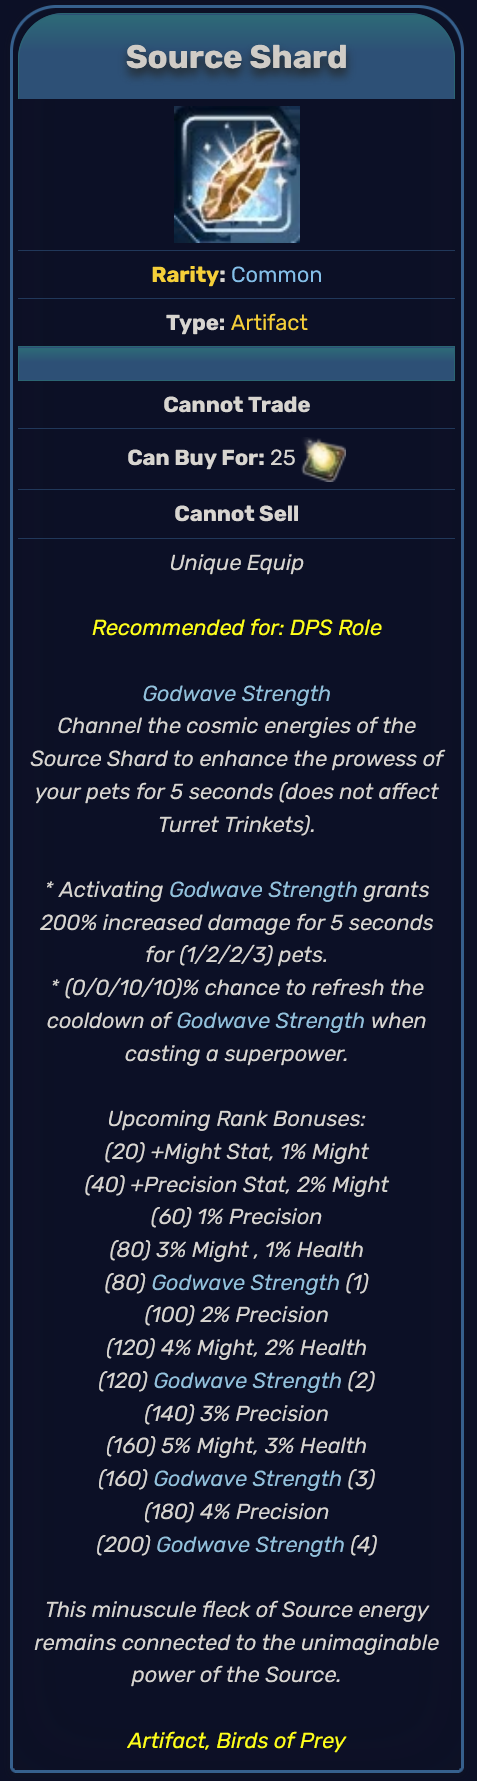
Source Shard
Raw Stats:7650 Health
478 Precision
1275 Might
Extremely strong (but not BiS for general purposes) on Sorcery. For all other powers, this remains a potent utility artifact in that it enables strong, extreme long range rotation options that come in handy for certain feats and in specific situations. Also enables rotations that are generally very easy to do but still do reasonable damage.
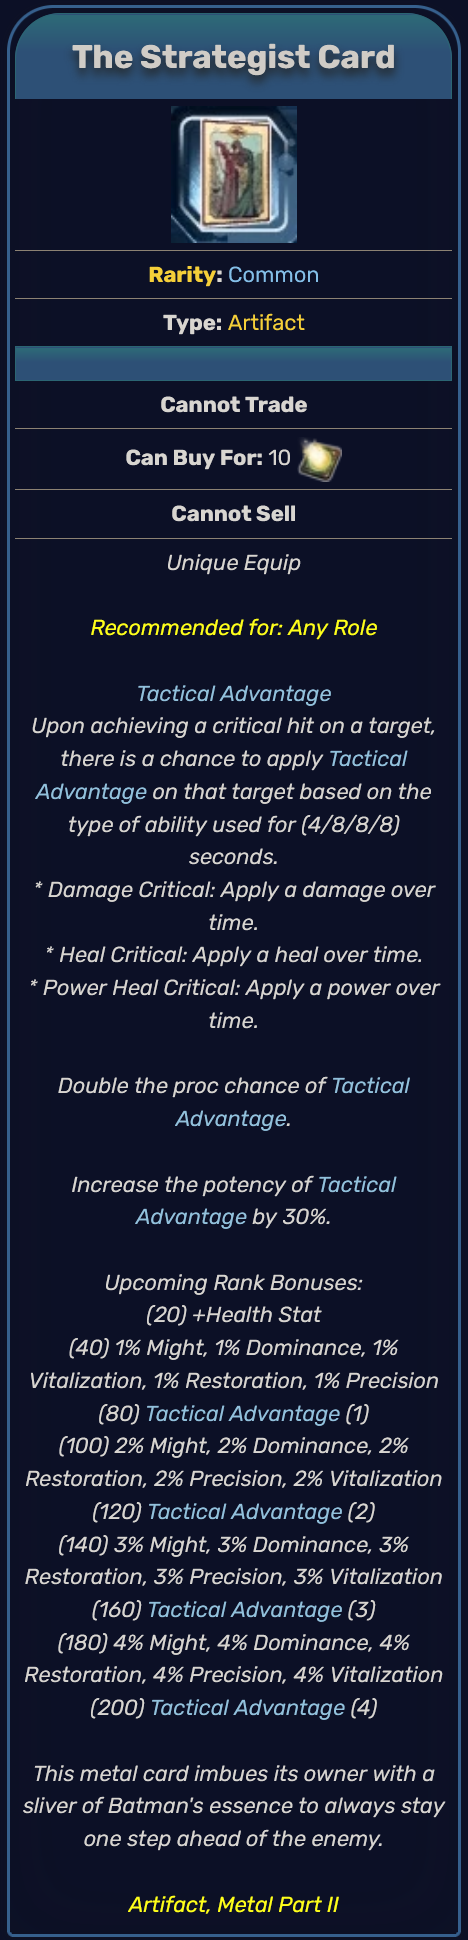
The Strategist Card
Raw Stats:3187 Health
6693 Power
Note: Tactical Advantage is tied to our combat stats and can proc on up to 8 targets at a time with each proc being unique, therefore mimicking the behaviour of a non-split attack.
One of the strongest AoE DPS artifacts in the game (assuming the targets live long enough for the procs to do their work). This is an excellent multi-function artifact on Fire & Atomic Battle Tanks due to the combination of DPS procs and heal procs. For pure DPS, the artifact tends to be overrated/overused in that it is usually not in the top three BiS options for the power but it is, nonetheless, capable. Like The Transformation Card, this is a good multi-role artifact with excellent bang for your buck.
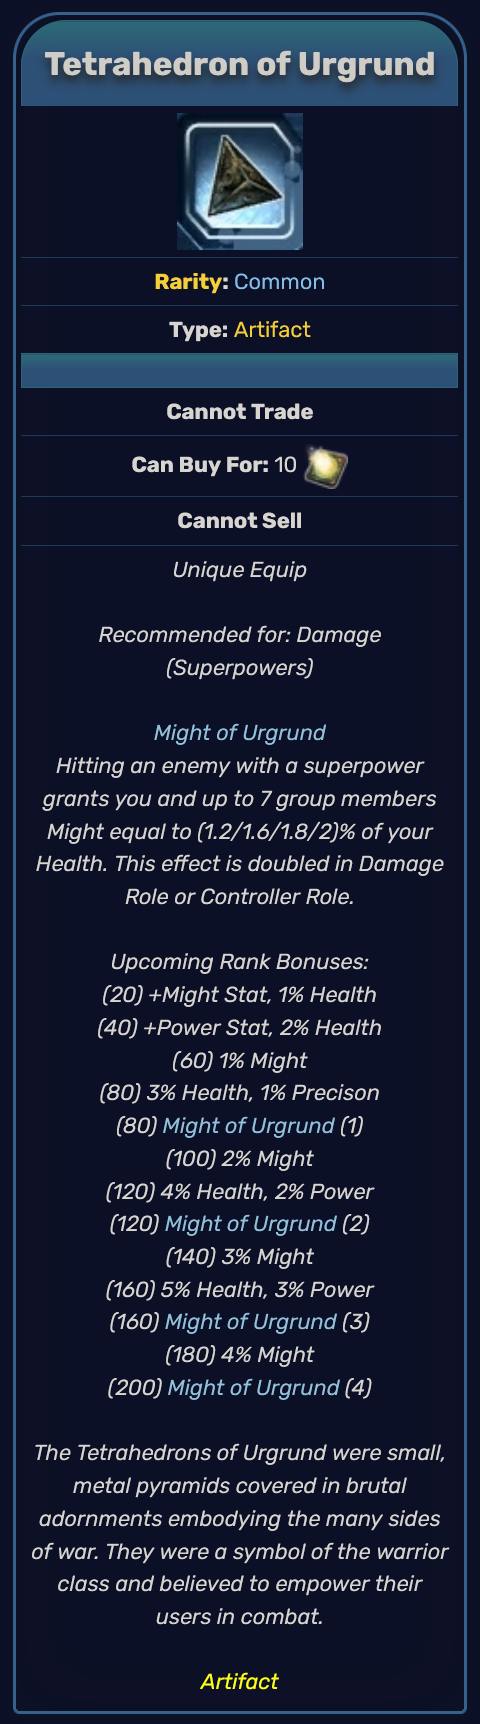
Tetrahedron of Urgrund
Raw Stats:7650 Health
2868 Power
1275 Might
Note: The buff refreshes for 12s every time yellow damage is dealt with the artifact equipped (see Advanced Techniques).
One of the most important Might artifacts. Buff Trolls frequently run this but it is usually better for the DPS with the highest Health to run it instead to free the Troll up to run Entwined Rings of Azar. The Might granted by this artifact counts as raw Might, meaning it will still be buffed further by each player's personal % modifiers at any given time. This has outstanding synergy with Lernaea's Amulet.
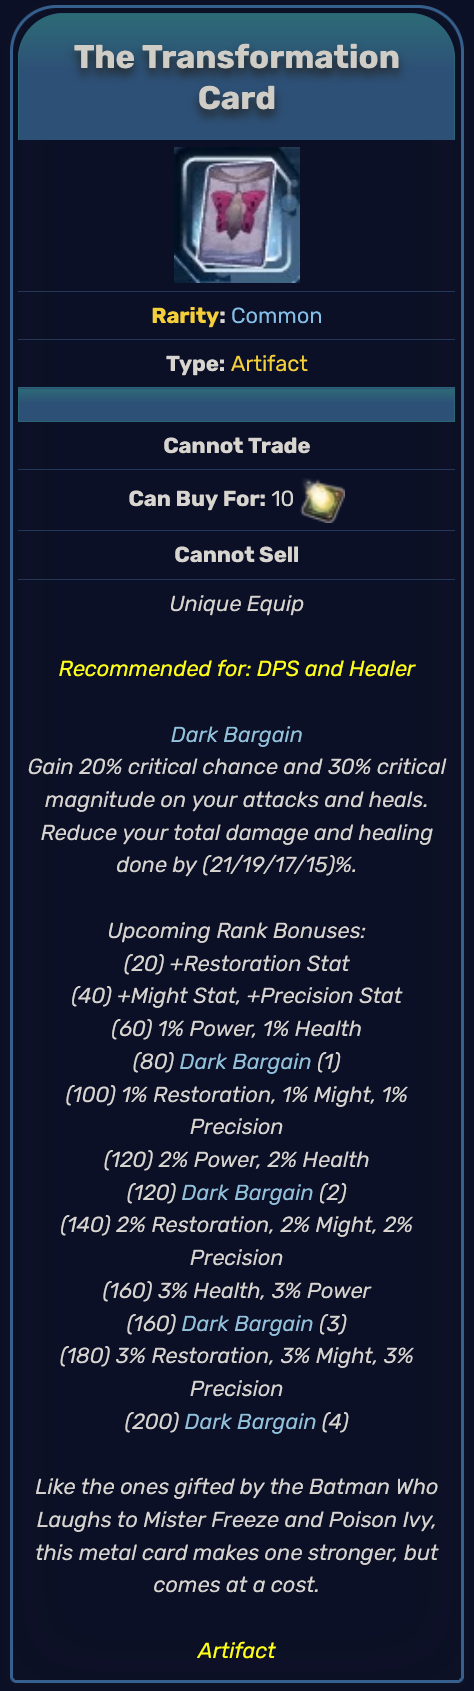
The Transformation Card
Raw Stats:478 Precision
765 Might
382 Restoration
This is typically the third best artifact for most powers. A potent multi-function, multi-role artifact, The Transformation Card has excellent synergy with buffs in general (due to how crit buffs and raw buffs interact multiplicatively in the damage equation) and it is a great bang-for-your-buck artifact. The Transformation Card is an absolute must for Rage's ranged DPS in order to fully maximize the Neo + Infuriate combo.
Ally Analysis
General Notes:
- If you can afford it, the Alliance catalysts required for leveling Allies can usually be found on the broker for quite cheap between Ally releases and spikes predictably when new allies come out. It's a good strategy to set a price range that works for you and stock up over time in the off season.- Ally exp is a loot option from the new Wondrous Time Capsule. It comes in 3.5k, 5k, 10k, and 20k variants, all of which are usually more valuable than the common drops (but always be careful not to choose exp over the rare/valuable drops). Opening Wondrous Time Capsules is, by far, the fastest and most efficient/effective means of gaining Ally exp.
The Batman Who Laughs
Luck of the Draw is a solid option for all roles and currently one of the best options for ranged DPS considerations.Toxic Encore is a potent debuff best utilized by a Troll or Tank. While a DPS can proc this as well, we generally don't want them to be forced into using a finisher unless they were already planning on it.
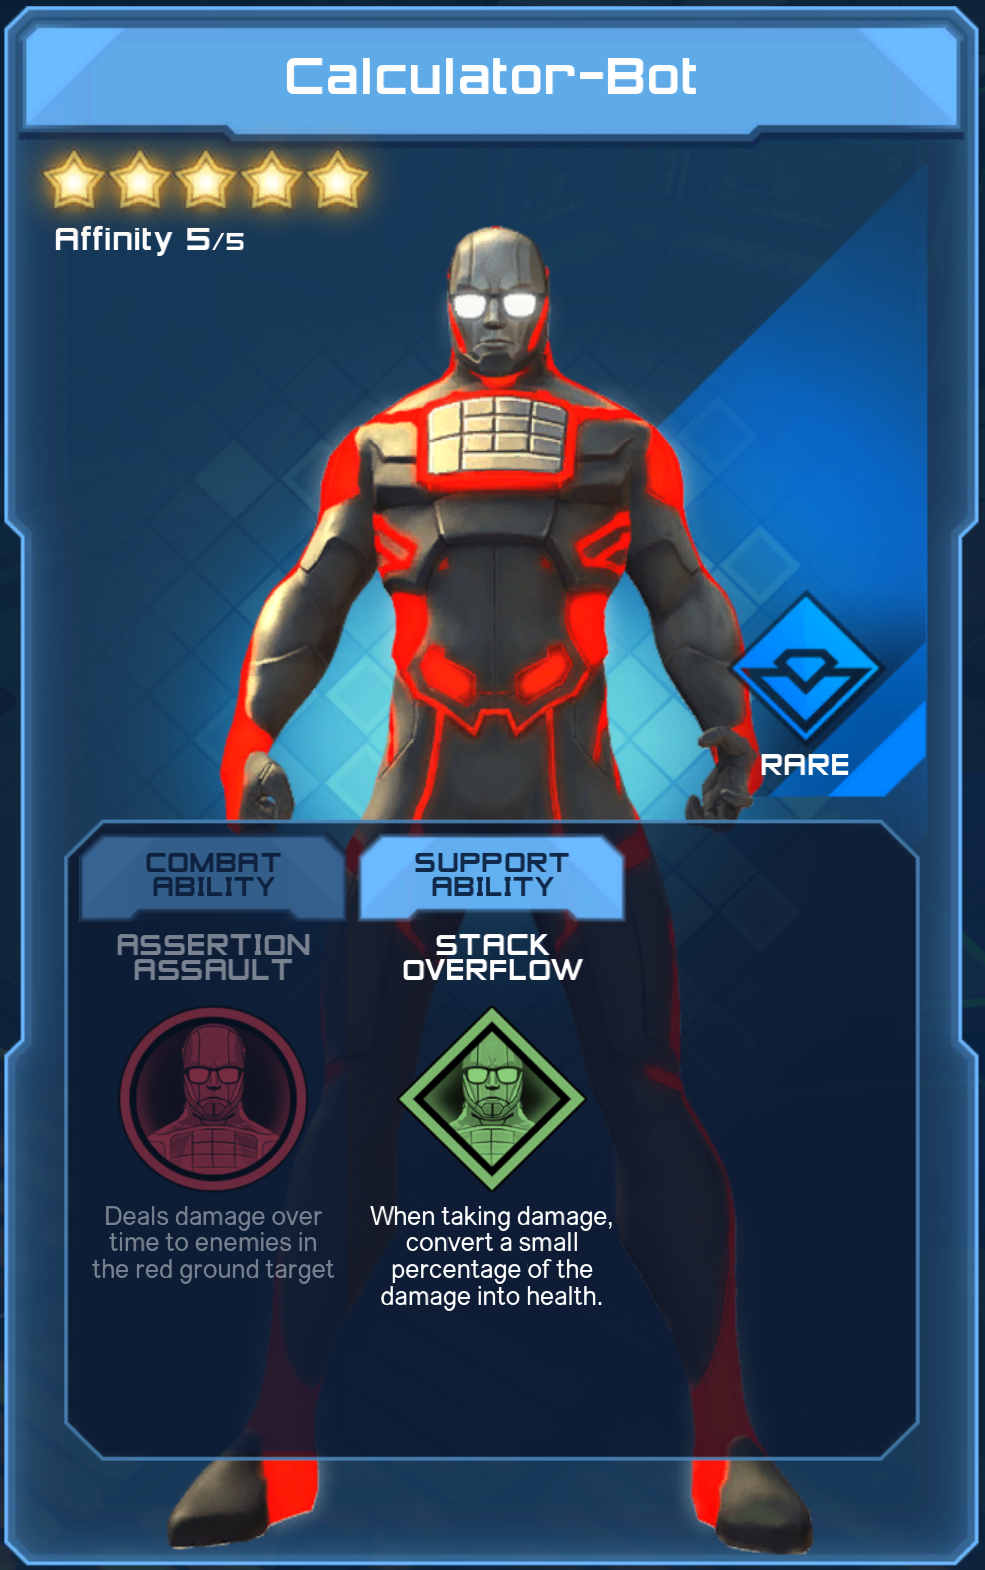
Calculator Bot
Both Assertion Assault and Stack Overflow are extremely bad to the point that Calculator-Bot isn't worth leveling for any reason.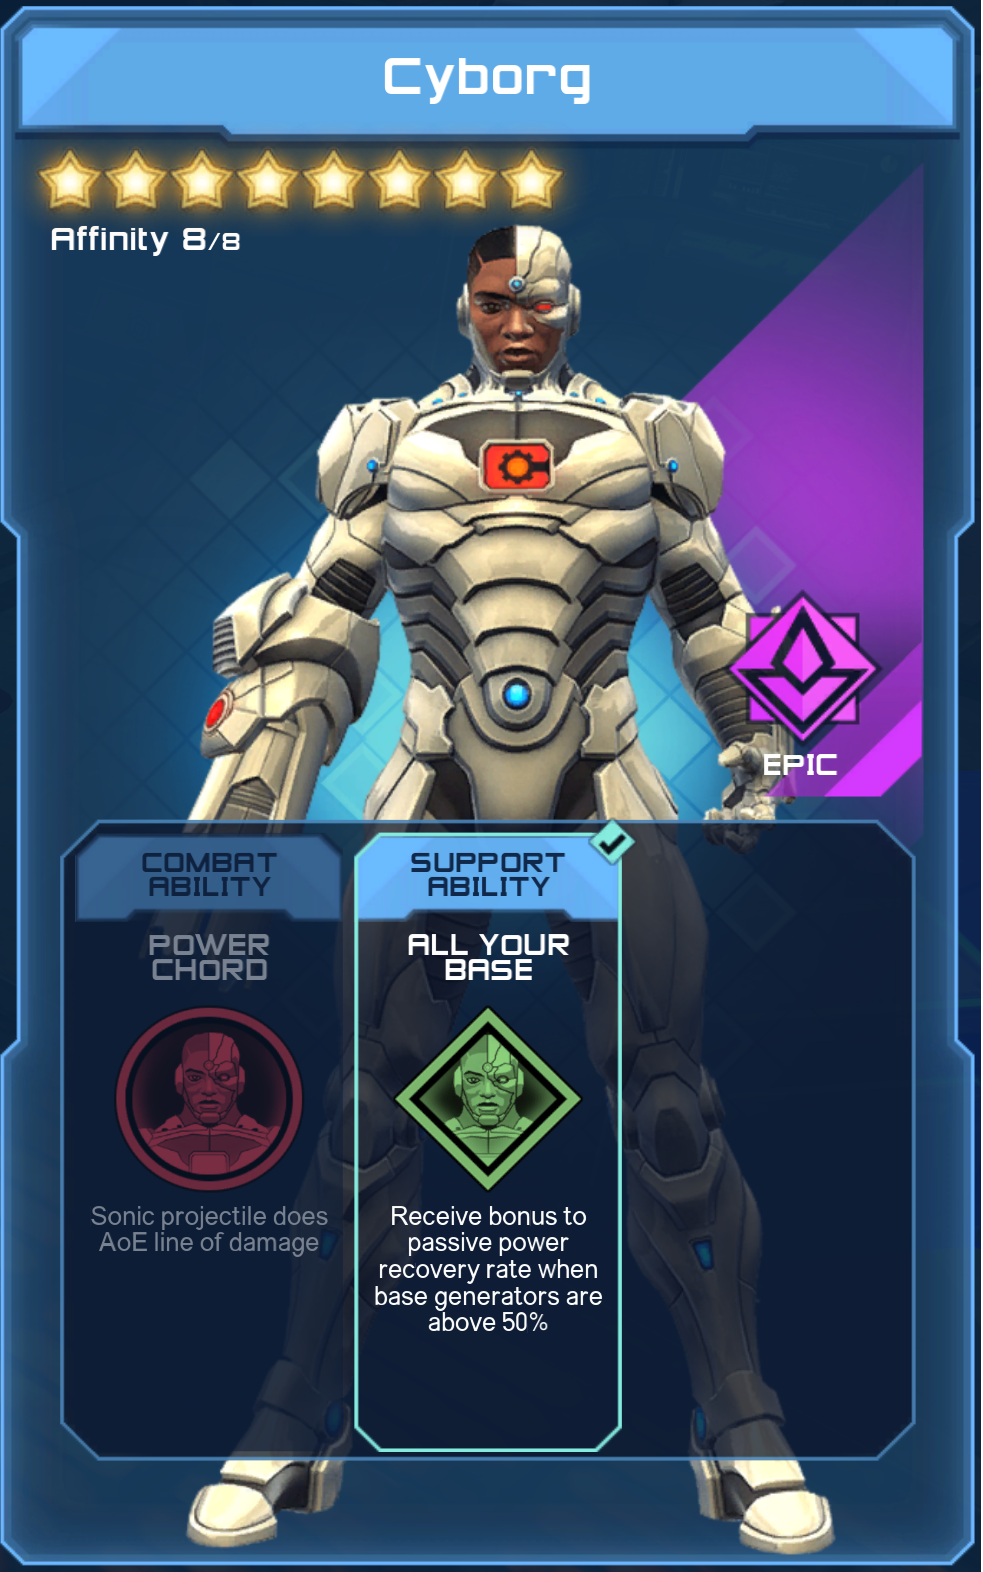
Cyborg
Power Chord is the best AoE Ally attack. The "projectile" from which the damage bursts emanate can get hung up on terrain, allowing Cyborg to proc additional attacks on the same target. Similarly, it will continue in a line for a great distance so it's worth lining our shots up. For ST damage, it can only hope to compete with Allies that receive 2x boss damage bonus if the target is confined in a small space or next to a wall, however.All Your Base is to powers that have extreme power requirements as Grimorium Verum is to powers that need its PI. It is a superb passive for any power with steep power rotation costs. It is also a boon to support roles.
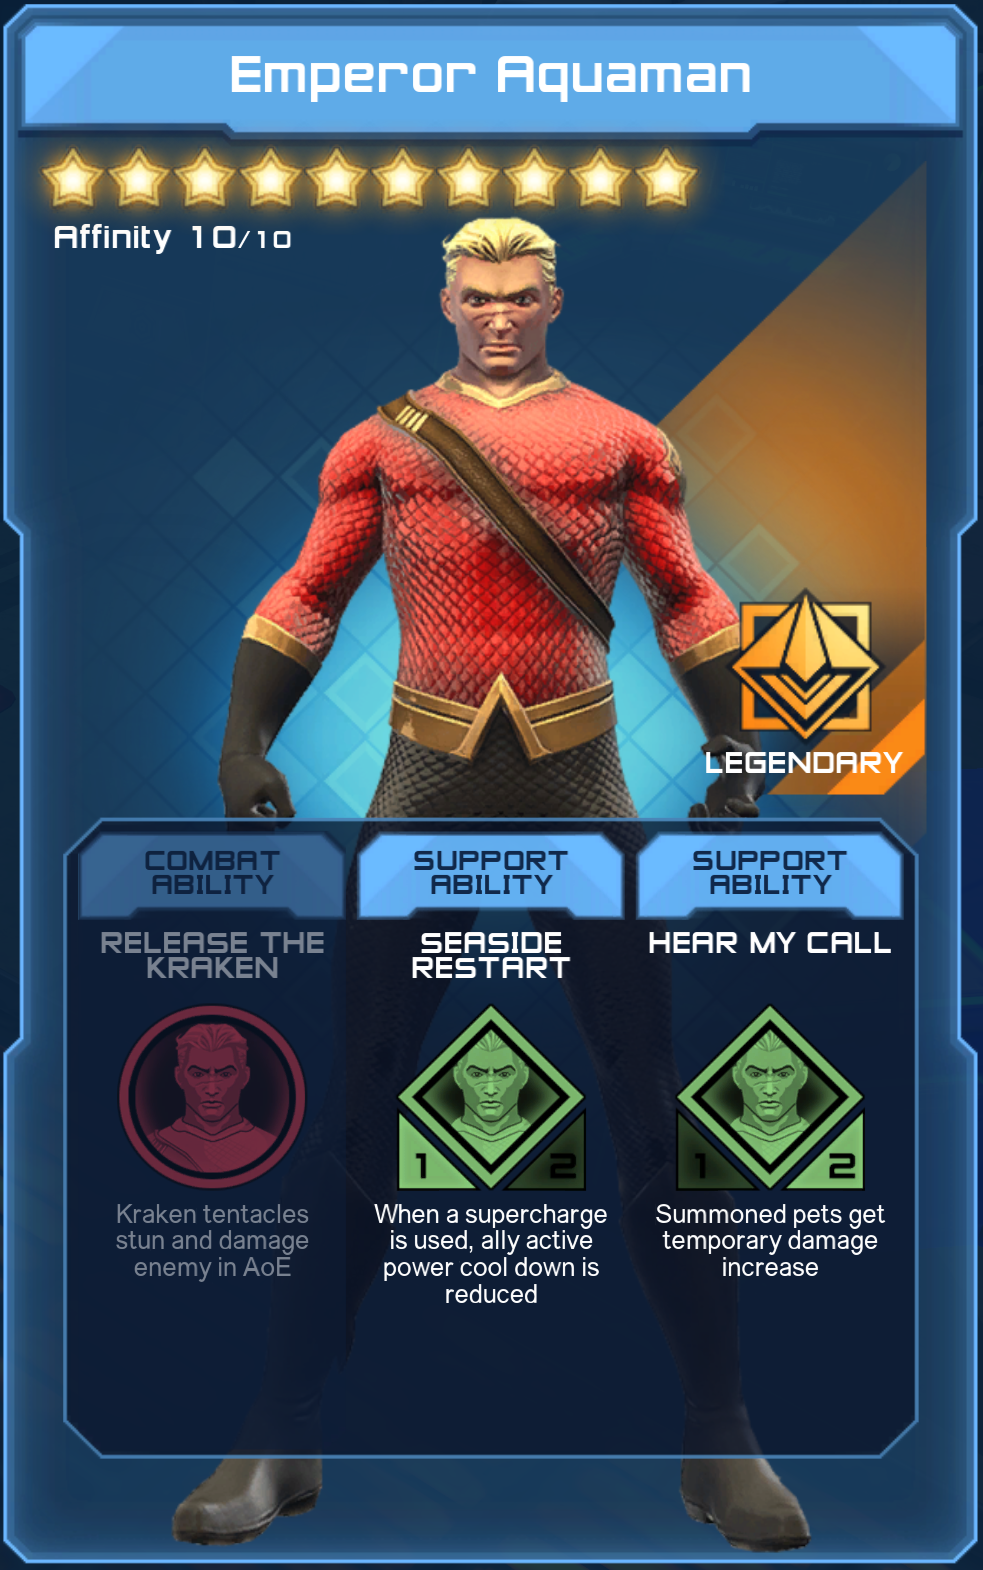
Emperor Aquaman
Release the Kraken doesn't deal great damage but it is a wide-area crowd control that ignores Dominance requirements. Seaside Restart is one of the most potent Ally passives, allowing players to effectively net several more offensive Ally summons per raid when used effectively and net millions of bonus damage in so doing. Anyone who can fit it should strongly consider running this.
Hear My Call grants pets a buff when the player takes damage. While it looks good on paper, it is fairly situational compared to Seaside Restart and it will generally only be the better option, even in pet builds, in situations where the player has reduced SC generation and the boss will die before Seaside Restart would allow for additional offensive Ally summons.
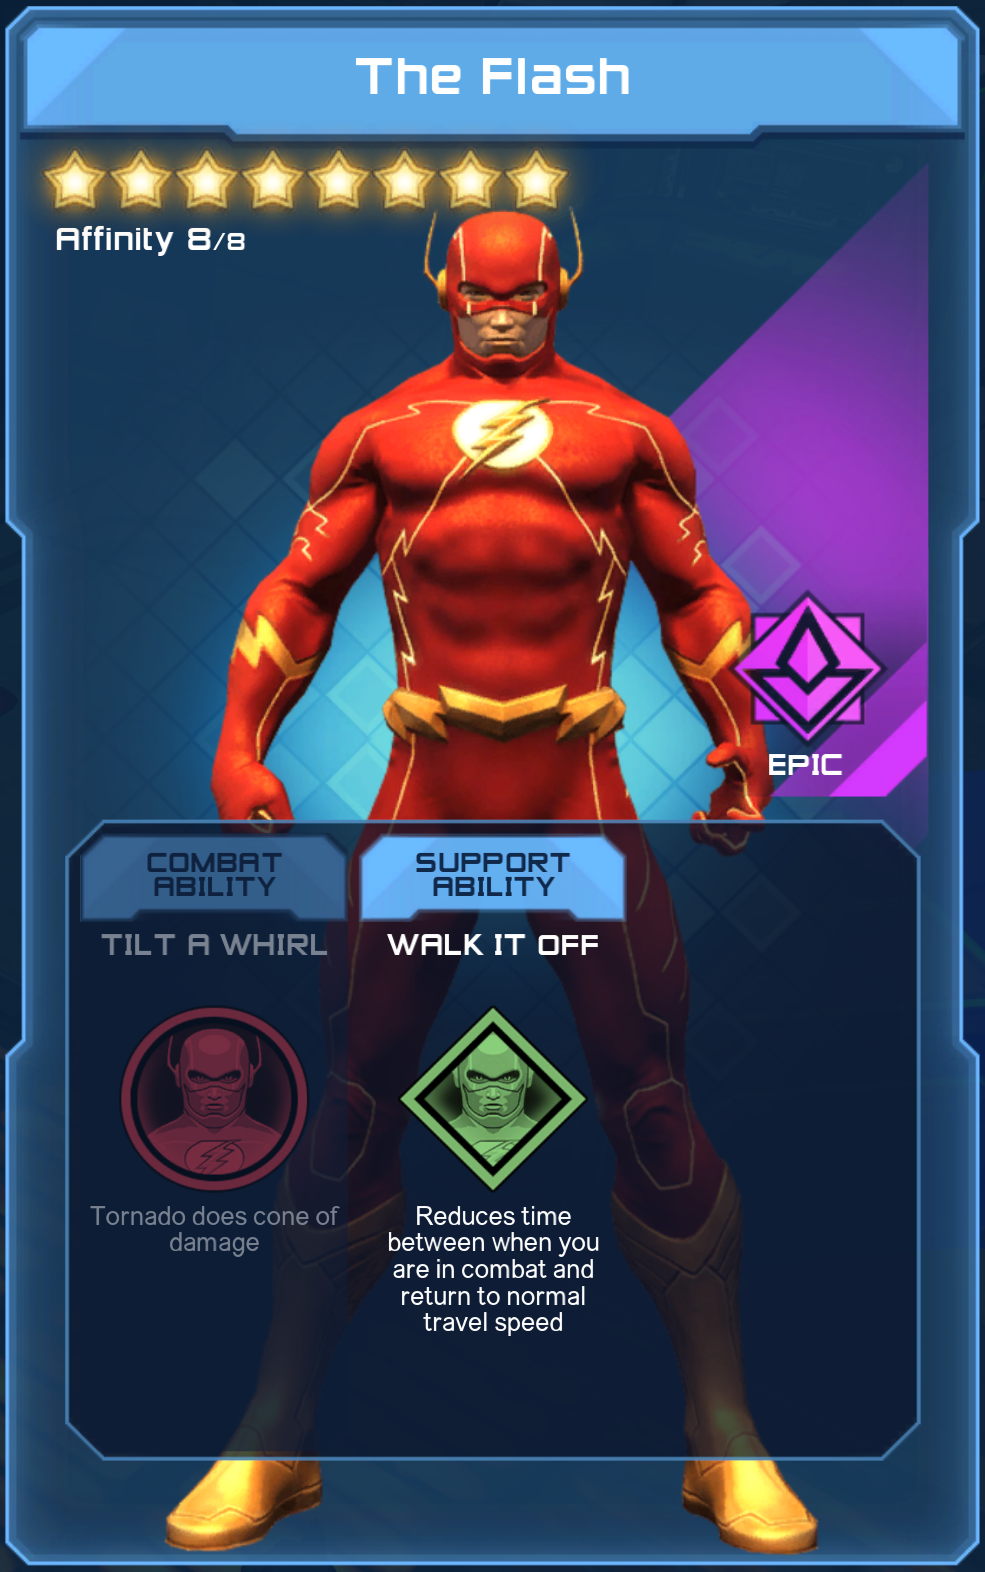
The Flash
Tilt A Whirl does competent AoE damage. While it can't reach Cyborg's peak potential, it will do its nominal damage every time and this Ally doesn't have as important a passive tied to it.Walk It Off, while not impressive on paper, is extremely effective at saving time when spamming solo content or open world dailies (especially when combined with Professor Zoom's passive). It is also a reasonable option for anyone trying to improve their pickup game in large arenas (the wording on the passive isn't quite right in that you can still be "in combat," you just re-attain full movement freedom sooner).
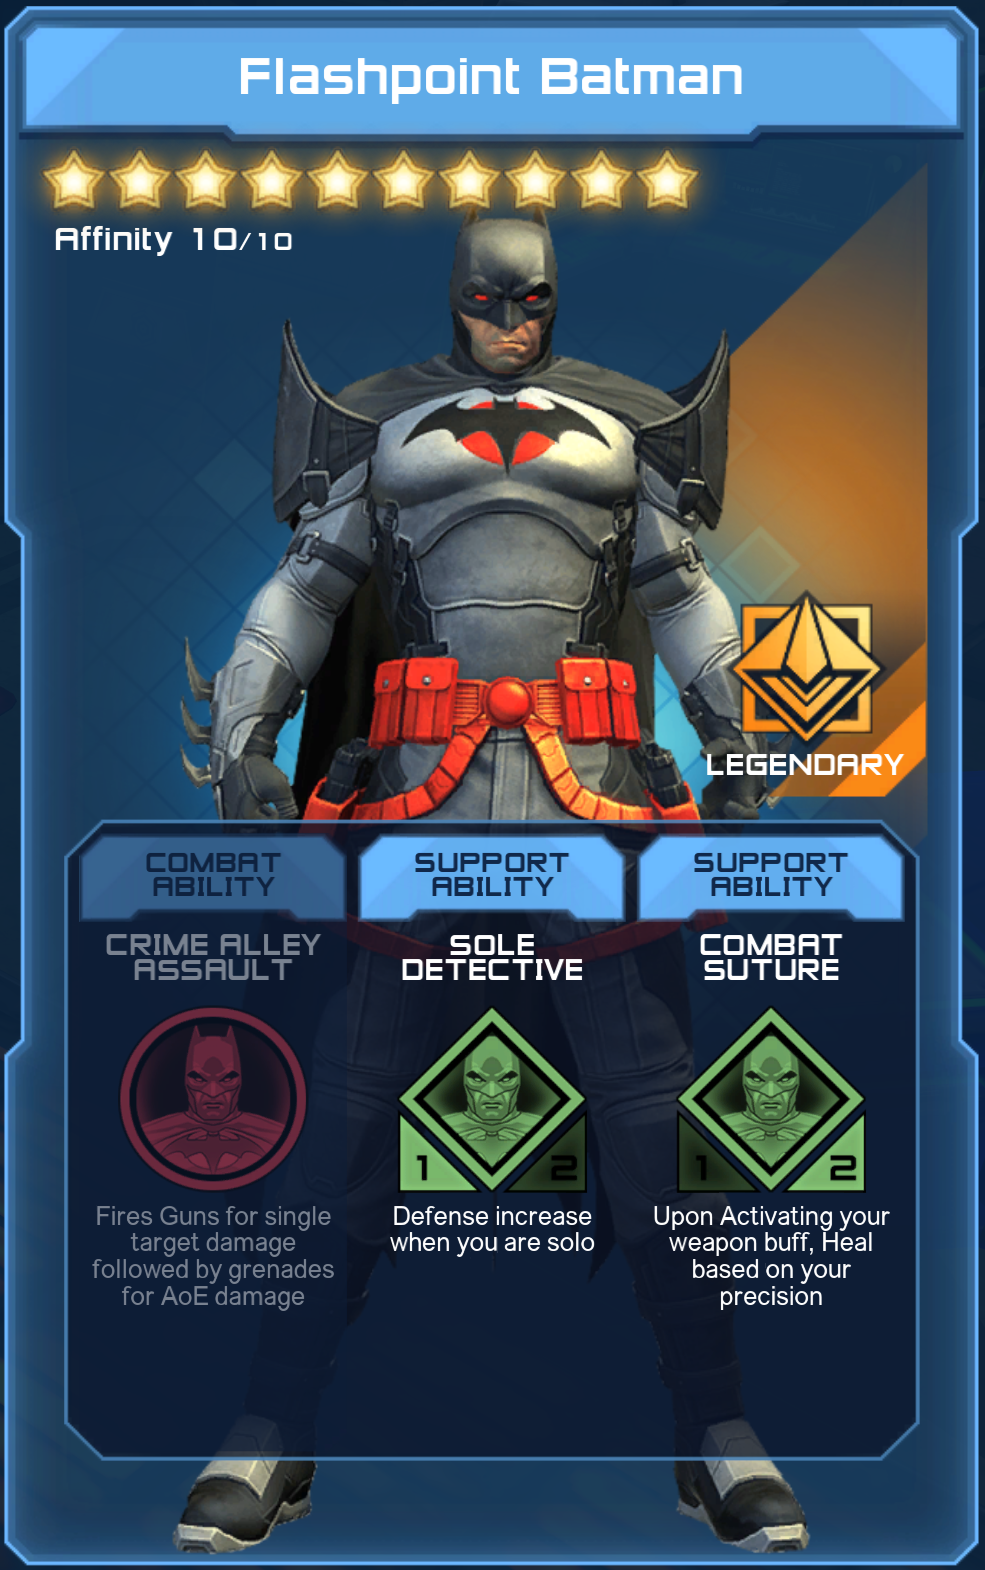
Flashpoint Batman
The pistol attack portion of Crime Alley Assault does 2x boss damage but the triple grenades at the end do not. Unfortunately, this results in this losing to House of Legends Bot still for ST while not being as bursty or effective an AoE option as pure AoE Allies.Sole Detective provides a hearty Defense buff and should be used by all pure Tanks and strongly considered for Battle Tanks. Further, the distance one has to be from other party members for the full buff to kick in is small enough that a Tank running this will still get the full benefit much of the time in large arenas, like FFe's. This is also an artifact that a Rage Melee can consider when meleeing in DPS role with Tank gear on in Elite content.
Combat Suture offers Prec players a heal but this isn't generally potent enough to justify its use over better options.
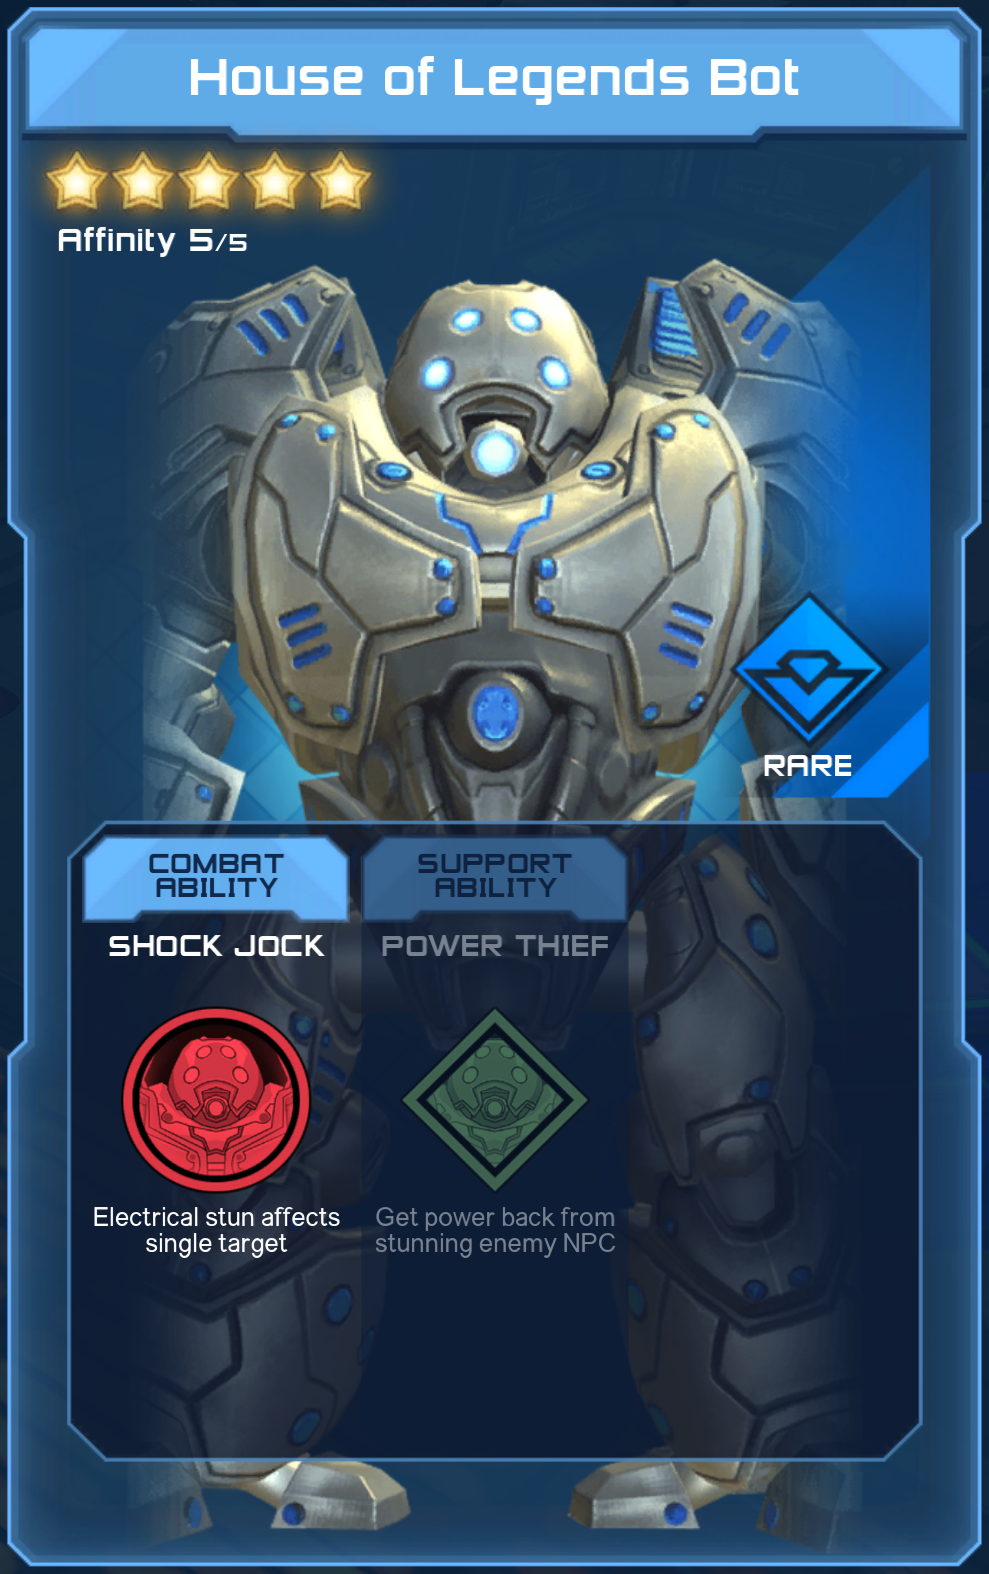
House of Legends Bot
Shock Jock deals 2x damage to bosses, making it the strongest and most affordable offensive Ally option in the game.Power Thief only procs when a player successfully crowd controls an enemy and sees the "Stunned" text on the screen. If something stuns but does not yield the "Stunned" text, it will not proc this. Any stun method that successfully elicits the "Stunned" text will proc Power Thief.
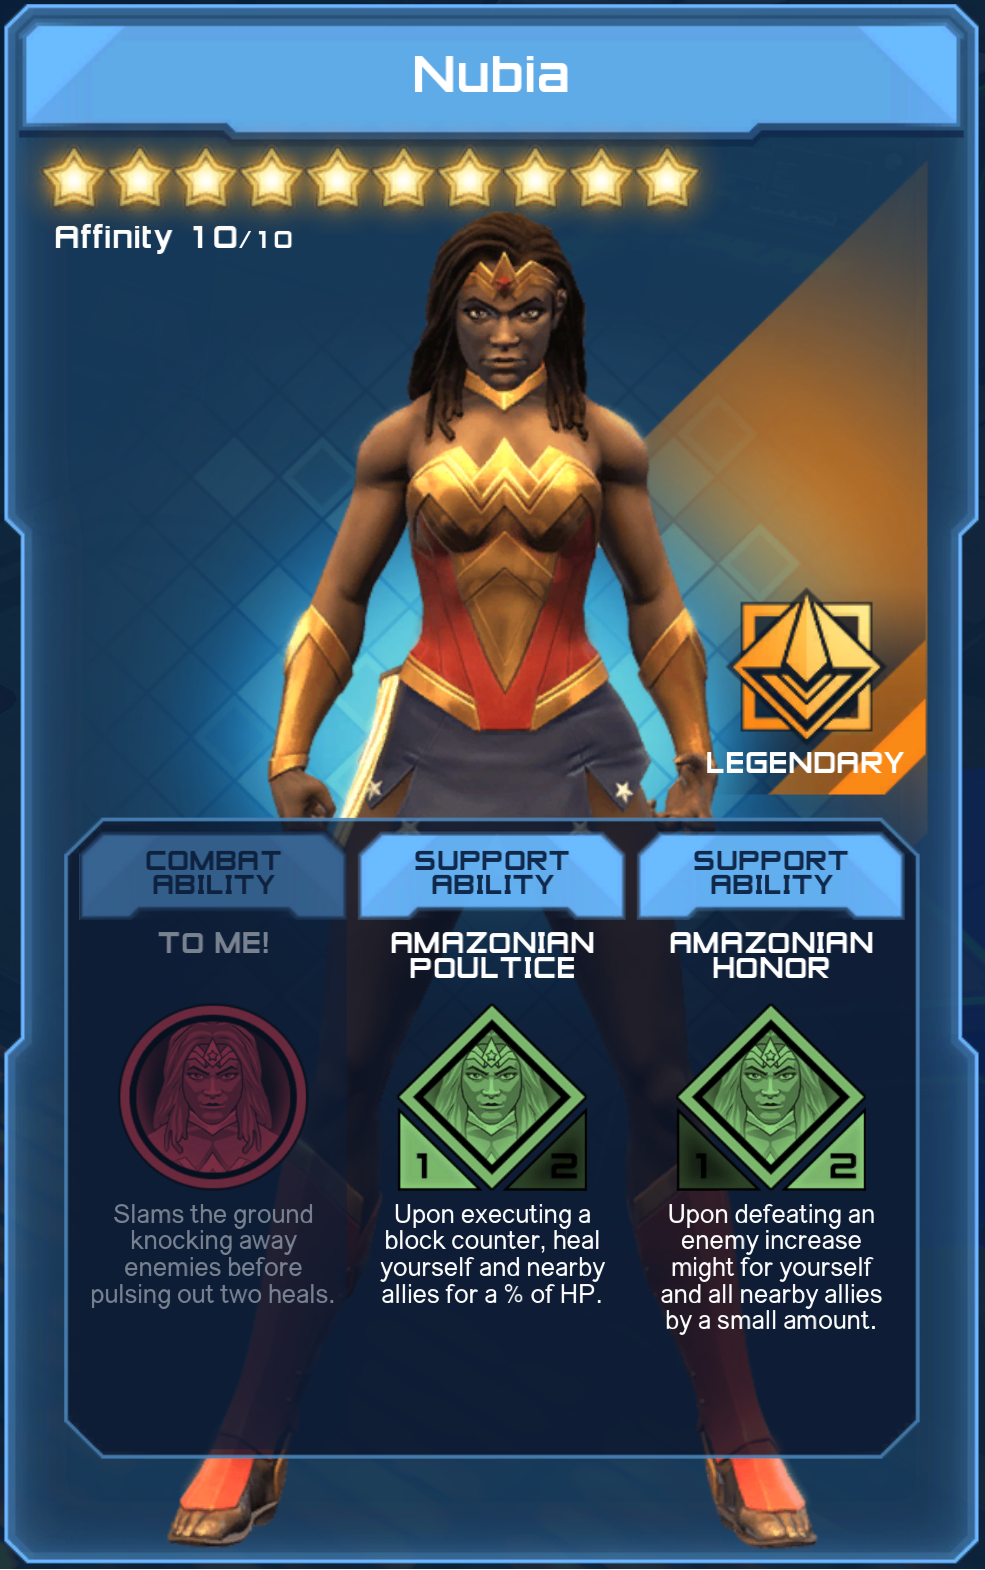
Nubia
Like Emperor Aquaman, Nubia's To Me! has a crowd control that ignores Dominance requirements. It also does some healing, making it an interesting option but still not one that's generally worth it versus better offensive choices.Amazonian Poultice is interesting in that, when blocking, the Tank will take some damage so the heal pulse is guaranteed to have at least some benefit. However, the value of this is situational vs better options.
Amazonian Honour is a situationally solid passive but one that should be coordinated amongst group members. While multiple players running it can better sustain the uptime by refreshing the proc, more than a few in a group is pretty bad. Also, this will frequently have little to no effect where it matters most, ie. in a lot of boss fights. In any boss that has adds that we don't want to kill (or only kill infrequently) or no adds at all, this passive is useless. It's a great group buff for hallways and a situationally okayish buff for some bosses, but not typically worth the slot vs something like Emperor Aquaman's Seaside Restart.
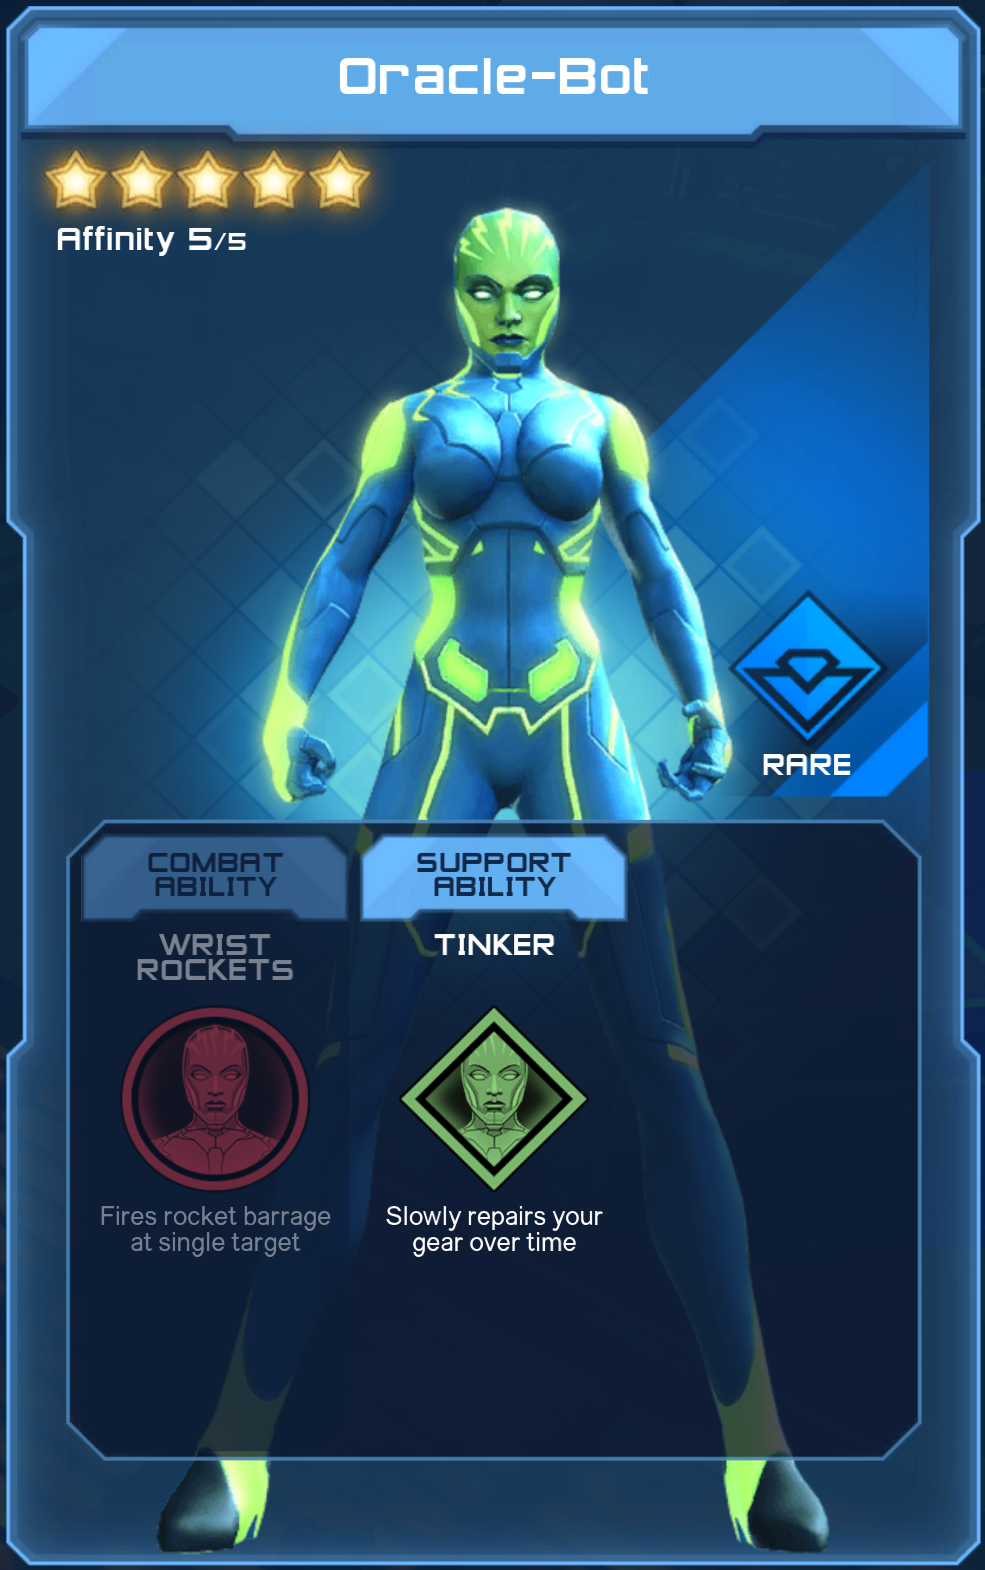
Oracle Bot
Wrist Rockets does quick burst ST damage but doesn't benefit from the 2x boss damage bonus that House of Legends Bot does, so it's not particularly useful.Tinker is a nice quality of life passive but in terms of improving actual performance it's not worth a damn.
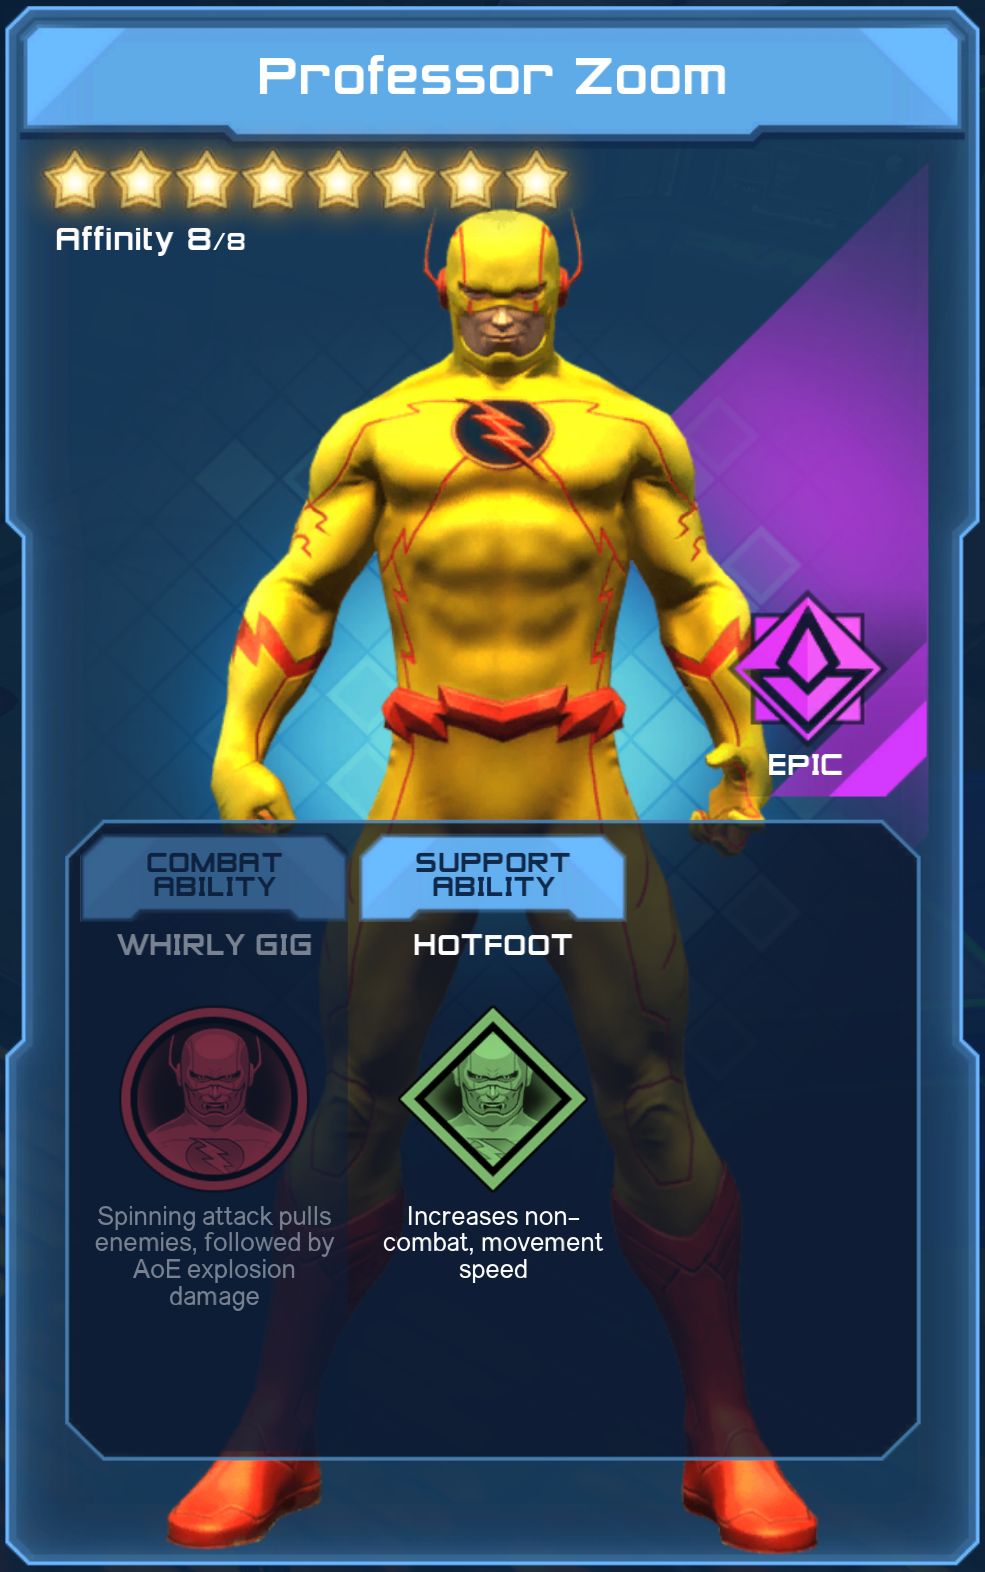
Professor Zoom
Whirly Gig is a passable AoE option for hallways and the pull can be convenient but, like Flash, Professor Zoom loses to Cyborg for hallway AoE.Hotfoot, as with Flash's Walk It Off, is exceptional for improving runtimes when spamming solos or for saving time on open world dailies, especially when the two are paired together. However, it can make traversing tight spaces more challenging on Superspeed and Acrobatic characters without practice.
Ally Analysis (Continued)
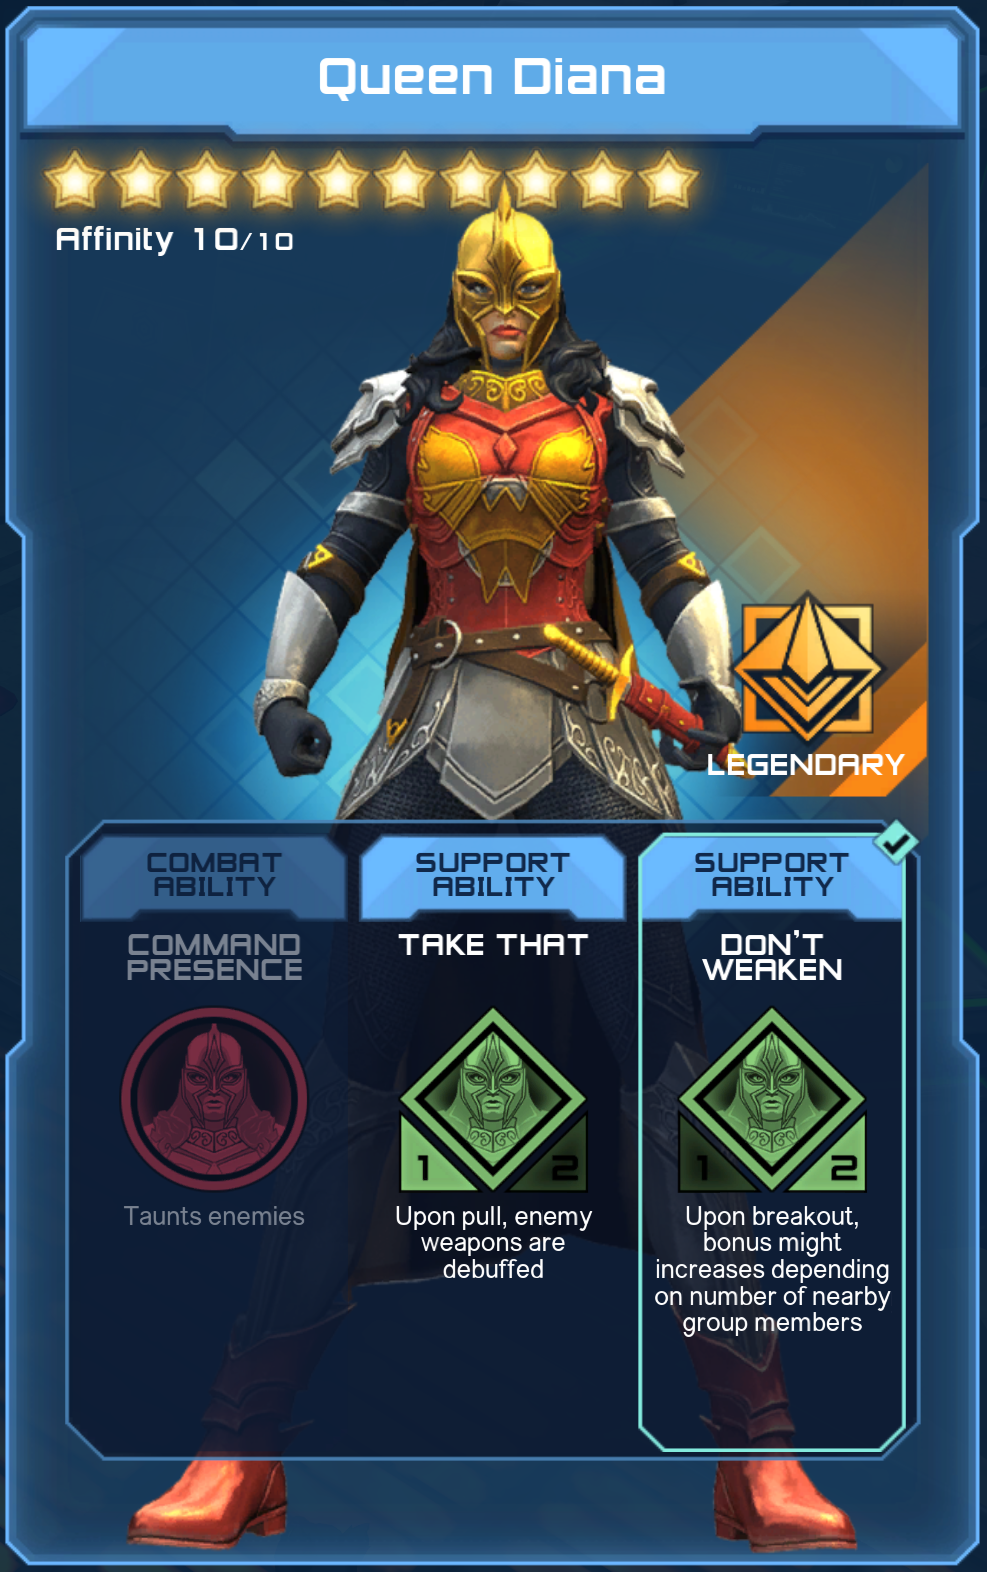
Queen Diana
Command Presence would arguably be useful in small doses in SM to guarantee a pickup. Take That affects enemies that are actually, physically pulled. Ie. it doesn't work like other "activate on pull" effects that proc just by the act of using a pull, proccing Take That requires the pull to actually move the enemy (so it doesn't work on bosses). It reduces the damage of enemy weapon attacks & combos by 5% but has no effect on special attacks. Great for Tanks in fights with adds that use combos (most fights), useless for fights with adds that only use special attacks (eg. CoU Trigon's eyes).
Don't Weaken is one of the best Ally passives for a player using Might-based attacks and a must-have for Rage melee DPS and Battle Tanking. The buff is potent and there are a lot of fights where we breakout enough for it to be worthwhile at range. That said, adjust accordingly for the content.
Skill Points, Augments, & Home Turf/Generator/Affinity Mods Overview

Skill Points
SP is super important to maximizing your performance. This is especially true in harder content, where having max SP both caps our your DPS stats and significantly boosts your survivability. Best practice for SP assignment is as follows:Weapons
Do not assign any additional points to your weapon unless all other viable options have been exhausted and you can unlock your mastery point without impeding the effectiveness of your lunge spam. 99.999999% of players will never want to put points here for Might DPS.Movement
Regardless of movement type, all players obviously want at least one point into their movement mode for the increased mobility. Beyond that:- A few rotations on certain powers can benefit from using Tornado Pull or Zip-Tie Attack.
- Most melee rotations, including Rage melee, benefit from using Whirling Dervish.
- The breakout resistance and breakout refund innates should be avoided except for on Rage melee, where they are virtually mandatory.
- A player planning on spamming EoG and parking themselves on the stronger DPS might want to consider the 2500 cost SCs.
Iconic Powers
Your unlocks here will depend on specific rotations. Neo Venom Boost, Heat Vision, Freezing Breath, and Robot Sidekick will be the most frequently used options. Sonic Cry and Sonic Shout are used in a few rotations. Super-Strength is optional as a quality of life measure but don't expect it to notably boost attacks like Ice Boulder or Light Weight.Stat Points
1. You'll pretty much always want Focus: Superpowered (with the caveat that Battle Trolls can still get mileage from Focus: Hybrid as maintaining an appropriate amount of Vitalization can be difficult.2. Max out Critical Attack Chance and Critical Attack Damage
3. Max out Might and Power then put your remaining points into Health*.
4. If you have any points left you can either assign them to Precision, your weapon, or to Innate resistances.
*If you don't have enough points in Health, you will really feel it in Elite. Low SP players will likely want to walk Might & Health up to 100 together before focusing on Might to ensure they don't get constantly wrecked.
Augments
Predictably, you'll always want your Might Origin Augs fully leveled. For Battle Tanking in Elite content, you will sometimes need to adjust the amount of Tank gear you have equipped or wear some Dominance Origin Augs in order to meet the minimum for crowd control. Try to keep at least one set of episode specific augs as well.
Home Turf Mods
Weapon: Blast AdaptorHead: Supercharged SC (for fully nutted play you also want a second head piece in inventory with your 2nd SCs Supercharged mod already equipped to it)
Neck: Escalating Might V, almost always.
Back: Breakout Protection is worth it over Berserk, as we breakout frequently but are almost never in the Berserk range (also it often doesn't even work). There are a few instances where a player might want to consider a cooldown reduction option but it's rare.
Chest: Penetrating Strikes, almost always.
Legs: Whichever Restorative power option you might actually use in your rotation, if any.
Hands: Max Damage on most powers (unless running channels and not using Solar Amp, in which case you'll want to consider Empowered Channeling). On Gadgets/Mental, you'll want to use Improved Stealth (and this will be mandatory if using Lernaea's Amulet).
Feet: You'll generally want either Dashing Combos (if using Whirling Dervish) or Explosive Block. Explosive Block is a much better defensive option for a DPS than Tumbling Master because: a) Explosive Block locks enemies into that range where the AI is stupid and always tries to lunge, greatly minimizing their threat while also reducing their uptime (which is important because if we're actually countering then it means we're the top DPS and the Tank is getting picked up); b) If we're rolling around with Tumbling Master on and have hate, a non-tank will die from an unblocked Elite boss' lunge anyways so the counter protection is useless; and c) the additional frames added to the rolls by Tumbling Master actually makes them slower and more dangerous than just rolling normally and quickly (especially since the extra frames don't actually increased the Dodge window at all).
Generator Mods
Health & Power: All HealthSupport: Dominance for Tanks, Vitalization for Trolls, Restoration for Healers
Offense: All Might
Affinity Mods
Type A Mod: MightType B Mod: Might
Type C Mod: Any
Type D Mod: Soul Link
Combat Pets, Turrets, & Henchmen
The individual rotations and demo vids in this guide identify which loadout pets to use in each rotation, so this section will be kept updated with current BiS picks for different situations for trinket and henchmen pets.
While we were looking at the slew of new pets recently added, OC discovered that pets with beam attacks penetrate multiple enemies without splitting. as seen here:
https://youtu.be/CNEcunpqpME
Note: Most newer pets have a (sometimes invisible) beam as their primary ranged attack and are capable of doing this as well, meaning they are also capable of extreme AoE performance in add-heavy fights (but with the caveat it's RNG-heavy based on relative & changing position).
ObsidianChill has some excellent general pet resources in this thread[forums.daybreakgames.com], including a cursory overview of the approximate ranking of every pet. We'll be heavily scrutinizing new pets/henchmen as they're released for different situations in addition to conducting deeper analysis of the best pets available and pitting them against newcomers.
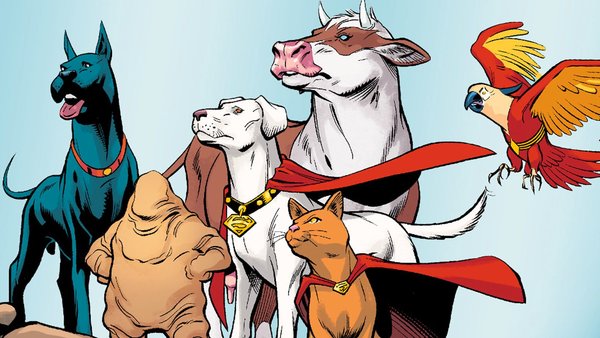
Special Case: Bootility Belt
Most people who use the Bootility Belt have an armoury where they pop the boos before combat then switch to their normal armoury. This is a net DPS loss vs just using Freeze Drone or a T3 pet because the Boo Family only does 12-15% (basically one power cast's worth of damage) more damage and the delay incurred by the swap + time spent before combat is a DPS loss in excess of the pet gain. However, if a player wants to do the absolutely sweatiest tac swapping in the game, they can enjoy the full benefits of the bootility belt without any of the (usual) drawbacks as demonstrated here:
https://youtu.be/8iB83nsaVUk
This is obviously an insane amount of work requiring us to move individual trinkets in and out of the final Utility Belt slot in addition to quickly swapping the Bootility belt on and off when summoning the Boos. This comes with the cost that you'll have to basically remember how much is left on your normal cooldowns. I don't believe this is worth the effort because, again, we only gain a single power cast's worth of damage for an insane amount of swap work.
Special Case: Turrets
Note: Turret-class pets gain no benefit from Godwave Strength and do not work with Berserk.
ST Turrets, though doing considerably less damage than BiS pets, deal all of their damage very quickly. This makes them useful for ST burst DPS checks, like Grail's Omega Level Pardon. Unlike full-duration pets, the ST Turret's beams do not penetrate multiple enemies and they are range-limited, dealing zero damage if our target moves out of range.
AoE Turrets will deal a short, high DPS burst of AoE damage but likely less damage overall than a BiS pet with penetration factored. It's worth considering for fights with critical multi-target burn checks or add phases or sometimes against hallway adds but they shouldn't be used 100% of the time and should absolutely never be used for ST.
The Water Golems are the strongest henchmen for ST by a wide margin and deal solid AoE damage as well, making them ideal for all situations.
While we were looking at the slew of new pets recently added, OC discovered that pets with beam attacks penetrate multiple enemies without splitting. as seen here:
https://youtu.be/CNEcunpqpME
Note: Most newer pets have a (sometimes invisible) beam as their primary ranged attack and are capable of doing this as well, meaning they are also capable of extreme AoE performance in add-heavy fights (but with the caveat it's RNG-heavy based on relative & changing position).
Pet Analysis
Note: It does not appear that power-specific henchmen (eg. Reapers, Golems, and Amazonians) benefit from PI. Similarly, their finishers do not appear to benefit from target health being below 35%. Their powers generally follow the same split rules as the player versions but not always.ObsidianChill has some excellent general pet resources in this thread[forums.daybreakgames.com], including a cursory overview of the approximate ranking of every pet. We'll be heavily scrutinizing new pets/henchmen as they're released for different situations in addition to conducting deeper analysis of the best pets available and pitting them against newcomers.
Trinket Pets
General BiS: Freeze Drone (or, if you don't have that, any of the T3 pets are fine as they're only approximately 2% less avg damage). In addition to its higher damage, it can also root enemies in place in ice, a unique capability for a pet with such strong DPS. Special Case: Bootility Belt
Most people who use the Bootility Belt have an armoury where they pop the boos before combat then switch to their normal armoury. This is a net DPS loss vs just using Freeze Drone or a T3 pet because the Boo Family only does 12-15% (basically one power cast's worth of damage) more damage and the delay incurred by the swap + time spent before combat is a DPS loss in excess of the pet gain. However, if a player wants to do the absolutely sweatiest tac swapping in the game, they can enjoy the full benefits of the bootility belt without any of the (usual) drawbacks as demonstrated here:
https://youtu.be/8iB83nsaVUk
This is obviously an insane amount of work requiring us to move individual trinkets in and out of the final Utility Belt slot in addition to quickly swapping the Bootility belt on and off when summoning the Boos. This comes with the cost that you'll have to basically remember how much is left on your normal cooldowns. I don't believe this is worth the effort because, again, we only gain a single power cast's worth of damage for an insane amount of swap work.
Special Case: Turrets
Note: Turret-class pets gain no benefit from Godwave Strength and do not work with Berserk.
ST Turrets, though doing considerably less damage than BiS pets, deal all of their damage very quickly. This makes them useful for ST burst DPS checks, like Grail's Omega Level Pardon. Unlike full-duration pets, the ST Turret's beams do not penetrate multiple enemies and they are range-limited, dealing zero damage if our target moves out of range.
AoE Turrets will deal a short, high DPS burst of AoE damage but likely less damage overall than a BiS pet with penetration factored. It's worth considering for fights with critical multi-target burn checks or add phases or sometimes against hallway adds but they shouldn't be used 100% of the time and should absolutely never be used for ST.
Henchmen
BiS: Water Golems (Obtained as a random drop from Deepwater Elemental in Anniversary: Anti-Matter Zone or can be bought from broker)The Water Golems are the strongest henchmen for ST by a wide margin and deal solid AoE damage as well, making them ideal for all situations.
Consumables
Nitro Soder
The cheap, do-it-yourself buff option. Depending on the overall potency of our combined Might modifiers (not including Elite weapon buff) and artifact setup, current-tier Nitros will provide ~3.4-4.7% more Might to a max CR, max SP player. They do not stack with other Soders or foods and wear off on KO, however.Seasonal Food
In general, we're best off stockpiling the 5% buff seasonal foods during seasonal events to last us until the next time seasonal food is available. They stack with one another (ie. it's possible to have +5% DMG, Health, and Healing active at the same time) and they don't wear off when we die. Nitros can exceed them by a fraction in certain builds with a full group with Elite weapon procs but seasonal will be the best and most convenient bang for our buck in a fight. They overwrite Soders and vice versa.Hera's Ambrosia
Hera's Ambrosia can only be activated in Wonderverse content but it remains active after we've consumed it, even if we leave Wonderverse content. It stacks with food/soder. It does not wear off when knocked out.Compound Omega
Compound Omega is a 5% buff to all primary stats for the entire group. It stacks with food/soder and Ambrosia and does not wear off on KO.
Calculating Overall Gains
Notes: - This neglects the additional Might gains of Tetra bearer gaining 5 or 10% more Health from Compound or Compound + Food, which is non-negligible.
- "Base DPS" below refers to the non-pet portion of DPS that is actually being affected by our buffs.
Trans Builds
Note: This merely reflects the % gains on base when using a Trans build and does not mean that the best base DPS will necessarily be achieved with a Trans build.
Nitro + Ambrosia + Compound
Min
Gain = {[(Base DPS x 1.084 x 49 x 2.36) + (Base DPS x 1.084 x 51)] x 0.85 / 100 - [(Base DPS x 46 x 2.36) + (Base DPS x 54)] x 0.85 / 100}
Gain = 1.53 - 1.38 = 0.15 = 15%
Max
Gain = {[(Base DPS x 1.097 x 49 x 2.36) + (Base DPS x 1.097 x 51)] x 0.85 / 100 - [(Base DPS x 46 x 2.36) + (Base DPS x 54)] x 0.85 / 100}
Gain = 1.55 - 1.38 = 0.17 = 17%
Therefore, depending on build, ~15-17% DPS gains in Trans builds with Nitro + Ambrosia + Compound, less the fraction of damage coming from non-Might associated sources unaffected by Nitro.
Seasonal Food + Ambrosia + Compound
Gain = {[(Base DPS x 1.05 x 49 x 2.36) + (Base DPS x 1.05 x 51)] x 1.05 x 0.85 / 100 - [(Base DPS x 46 x 2.36) + (Base DPS x 54)] x 0.85 / 100}
Gain = 1.56 - 1.38 = 0.18 = 18%
Therefore ~18% gains to non-pet damage in Trans builds with Seasonal + Ambrosia + Compound.
Non-Trans Builds
Nitro + Ambrosia + Compound
Min
Gain = {[(Base DPS x 1.084 x 29 x 2.06) + (Base DPS x 1.084 x 71)] / 100 - [(Base DPS x 26 x 2.06) + (Base DPS x 74)] / 100}
Gain = 1.42 - 1.28 = 0.14 = 14%
Max
Gain = {[(Base DPS x 1.097 x 29 x 2.06) + (Base DPS x 1.097 x 71)] / 100 - [(Base DPS x 26 x 2.06) + (Base DPS x 74)] / 100}
Gain = 1.43 - 1.28 = 0.15 = 15%
Therefore, depending on build, ~14-15% DPS gains in non-Trans builds with Nitro + Ambrosia + Compound, less the fraction of damage coming from non-Might associated sources unaffected by Nitro.
Seasonal Food + Ambrosia + Compound
Gain = {[(Base DPS x 1.05 x 29 x 2.06) + (Base DPS x 1.05 x 71)] x 1.05 / 100 - [(Base DPS x 26 x 2.06) + (Base DPS x 74)] / 100}
Gain = 1.44 - 1.28 = 0.16 = 18%
Therefore ~16% gains to non-pet damage in non-Trans builds with Seasonal + Ambrosia + Compound.
Takeaways
Note: "DPS" below is referring to the portion of DPS that can actually be affected by food. If assessing the relative gains of any rotation due to food, we have to first subtract pet DPS and any other DPS coming from damage sources unaffected by the buffs we're using.- Trans builds will gain ~15-17% DPS with Nitro + Ambrosia + Compound and 18% DPS with Seasonal + Ambrosia + Compound.
- Non-Trans builds will gain ~14-15% DPS with Nitro + Ambrosia + Compound and 16% DPS with Seasonal + Ambrosia + Compound.
- In comparing both Nitro to Seasonal and buffs on Trans vs on non-Trans, the 1-3% differences are extremely difficult to discern in actual content or when parsing (as are all differences of ~3% or less, especially in Trans builds). If you can swing it, it's worth stockpiling seasonal food for the slightly better buff and the convenience of it not wearing off on KO but in terms of noticeable gains, Nitro will also get the job done just fine.
Click here[docs.google.com] for a raw performance comparison.
DPS "Literacy" - Understanding the Language of Violence
The Scorecard
An important part of being a good DPS is understanding the scorecard columns and knowing which types of damage are important at what times.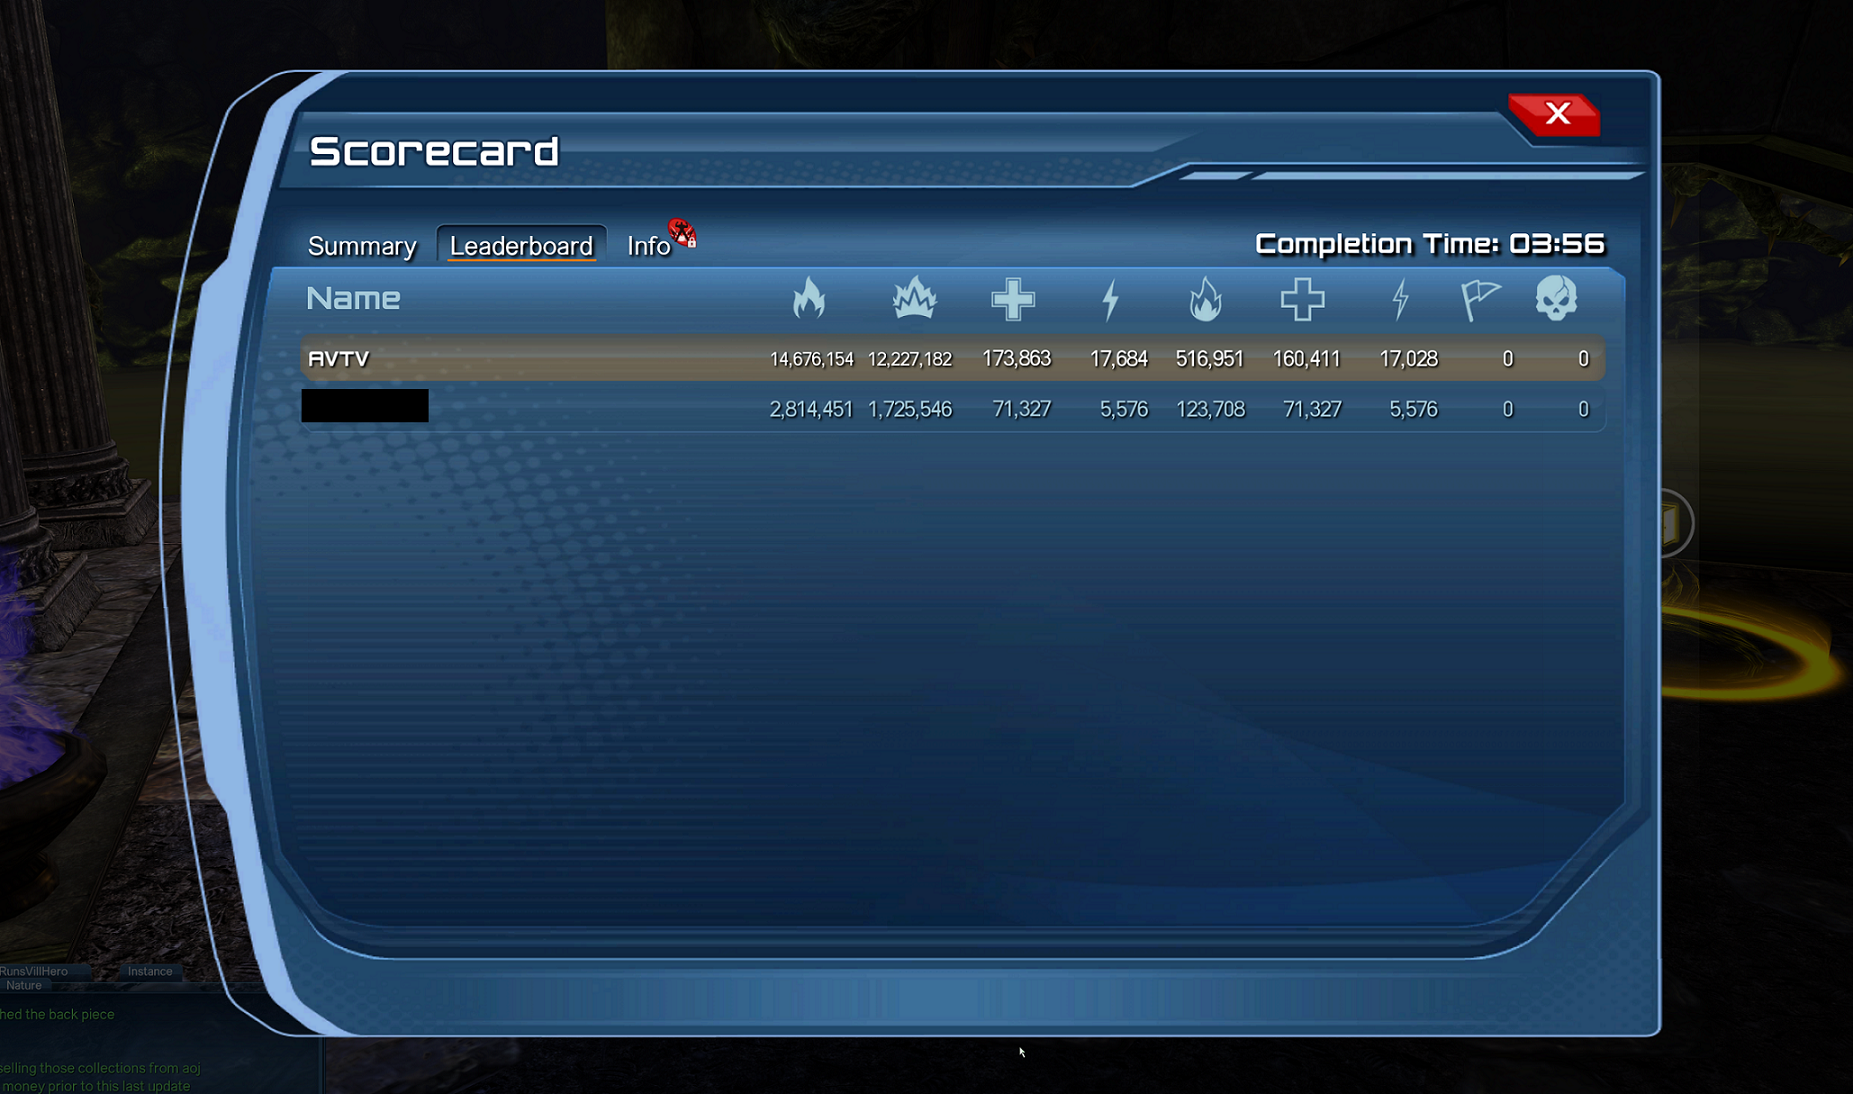
The first column is the "Damage Done" column. This factors in all of the damage you've dealt to all targets and includes both bosses and trash mobs.
The second column is the "Boss Damage Done" column. It exclusively counts damage dealt to bosses.
Understanding the difference between those clulumns is critical because we want to be able to DPS for maximum impact.
DPSing for Maximum Impact
Most players can dish out somewhat passable damage in the Damage Done column but fail to perform in Boss Damage. This really sucks because, unsurprisingly, it's a far more common issue for groups to fail due to poor boss damage as opposed to how well they can AoE zerg hallway trash that can't kill them anyways. A DPS that can do well in the General Damage column but not in the Boss Damage column is not a good DPS.There are instances where the general column is semi-important, like in certain speed feats or during add phases in boss fights where the tank is struggling unless the adds are killed quickly, but it is critical that DPS achieve maximum competency in dishing out Boss Damage as that is always important. Similarly, it is much easier to do atrocious ST damage than it is to do bad AoE damage and the amount of splash on ST rotations combined with all of our various AoE burst tools is usually more then sufficient for dealing with trash mobs in boss fights. All that said, players should still have dedicated setups for hallway AoE and for boss fight ST, which is why this guide differentiates rotations into those categories.
Cheesing
The opposite of DPSing for max impact is cheesing. This is behaviour wherein a DPS does something that doesn't deal the kind of damage that's most effective with the express intent of maximizing their general damage even if the situation doesn't call for it. Examples include killing stuff that doesn't need to be attacked, running unnecessarily dirty/AoE loadouts/artis in boss fights with adds that we don't actually want to damage, killing adds in boss fights that infinitely respawn and don't need to die, etc.... Basically intentionally or unknowingly (due to inexperience) playing poorly to increase numbers artificially. Aggro Succession
A good DPS who tops the scorecard needs to recognize that they're almost always going to be the backup "tank" in that they're next in line for hate. A lot of mechanics also target the 2nd highest person on the hate table. Successful groups need to understand and appreciate the flow of aggro succession as it dictates the correct pickup order, who will likely get the most mechanics, etc. ISe is an excellent raid to build appreciation for this.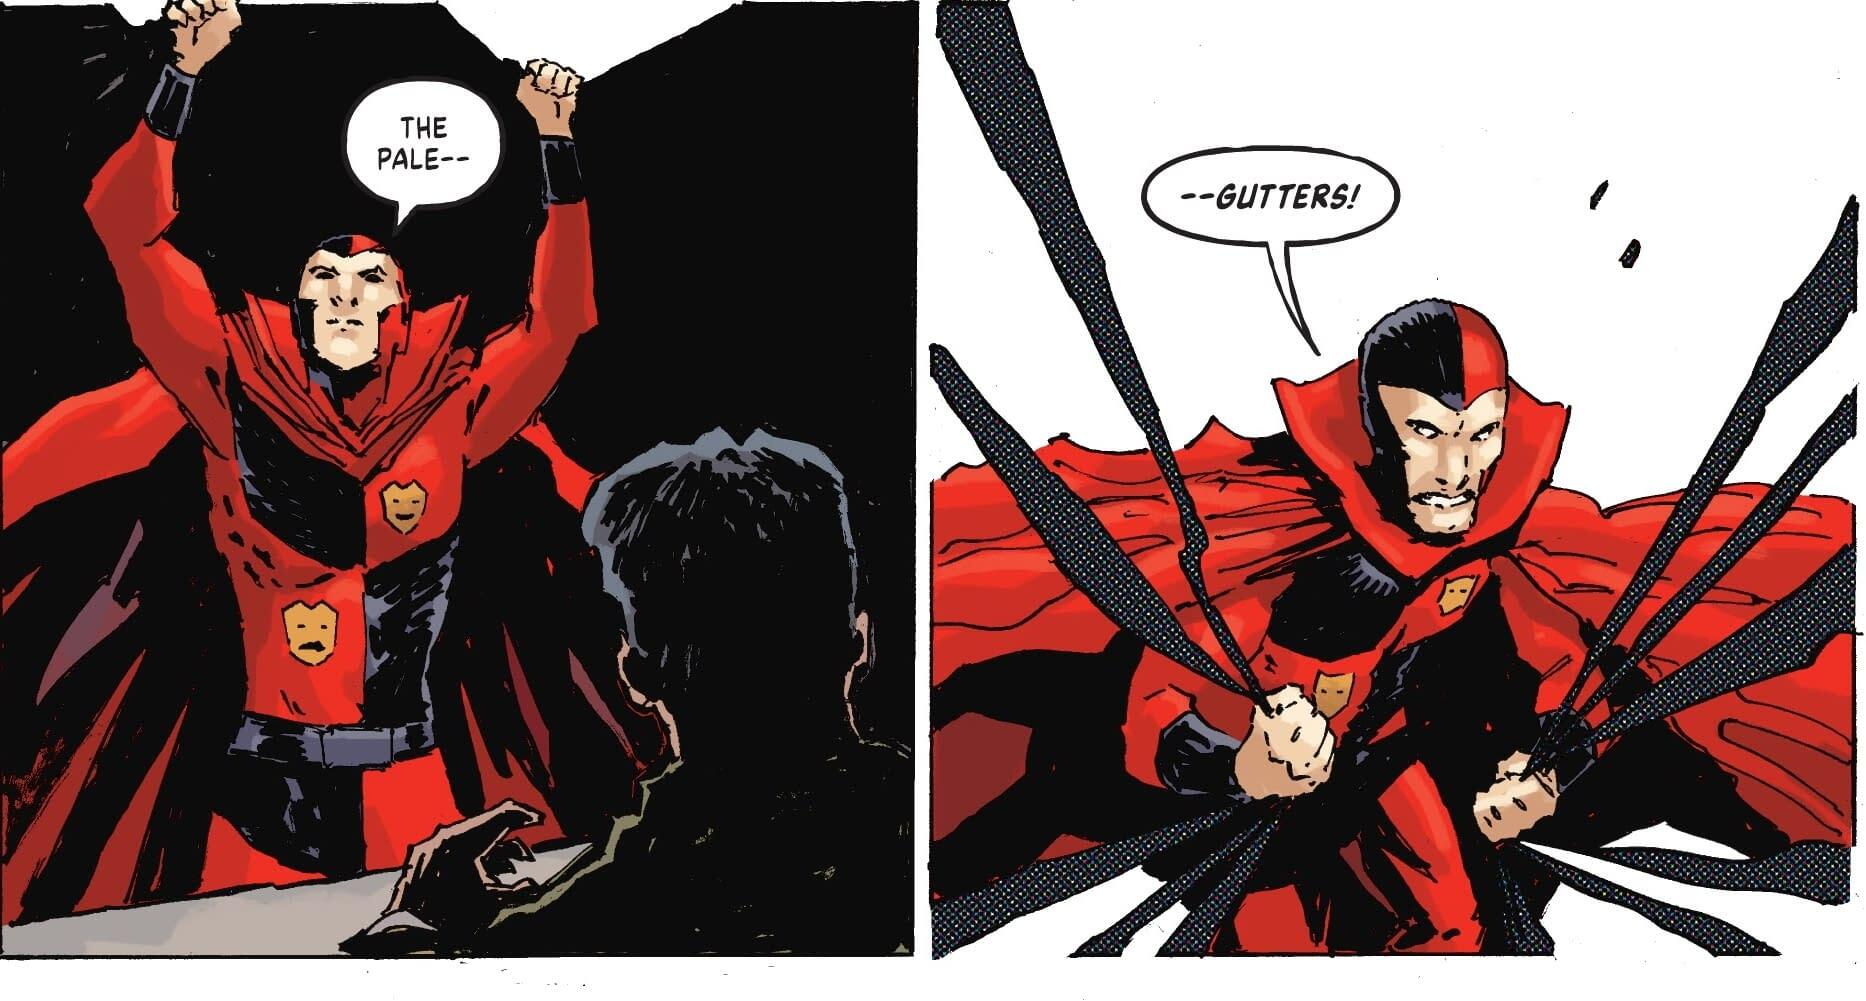
Dispelling Myths and Correcting Errors
Here we'll go through some of the most common and irritating misconceptions in DCUO:10s Parser
The #1 warning sign that a player's DPS results are out to lunch is if they're using 10s parser, and nothing else, for testing purposes. About a decade ago, Trolls used to "heal" players' power bars the same way Healers heal our Health. The best rotations in the game took multiple Trolls (up to five sometimes) to keep powered. It was so bad that it was basically impossible to test without Trolls in the group and Sparring Targets didn't restore power back then either.... So... as a quality of life measure, the 10s combat parser window was added to the game as a stop-gap measure to fill in for real testing. There are some major problems with 10s parsers that make them unreliable for testing. First, with the exception of spammables, not a single power in the game has a base 10 duration or cooldown.... powers fit into 3s, 6s, and 12s time slots in our rotations. Second, the 10s windows make bursty powers look phenomenal due to human bias introduced as the numbers come in, even if they result in lower average damage than steady/consistent powers. Basically, 10s parses are almost completely worthless with the exception of being used to analyze the initial 10s of a hallway AoE rotation to maximize potential in situations where the hallway adds are unlikely to survive for longer.
The absolute bare minimum parse duration players should be using is 60s, as it's the lowest common denominator that all power time slots fit into. Realistically, however, if a player wants the most accurate results they should be shooting for at least ~2min parses if not using The Transformation Card and ~4-10min if they are using The Transformation Card (the greater the Crit Rate and differential between Dmg and Crit Dmg, the longer we need to parse for accurate results). For rotations with a finisher in it, the player should stop DPSing once they reach the finisher's bonus damage threshold and repeat as many times as needed for a clear average to emerge.
Global Crit Chance/Damage
The #2 warning sign not to trust a player's results is if they insinuate that a power is only good if it crits or that a power has crit potential that differs from that of other powers (with the exception, of course, of special cases like Quantum's Time Bomb). Your Crit Chance, observable in your stat menu, is the same for pretty much everything you do that can crit. When something does crit, the damage the crit deals will be proportional to your Crit Damage multiplier. Certain items, consumables, artifacts, and powers can modify those values but at any given time, the crit potential of your crit-able powers is the same, based on your crit stats.
Slow, bursty powers, like 1-hit Supercharges, tend to feel good when they crit and bad when they don't crit. It's important to recognize that whether or not it crits at a given time has nothing to do with its overall value, however. The total average performance is all that matters, and there's pretty much no case where we ever want to take an overall worse power in our rotation just because it subjectively looks/feels better over a stronger bursty option that will have a wider min:max. Conversely, we would never want to take a bursty option just because it could crit higher over a better, consistent option if the latter resulted in the best performance. Optimal overall performance is what matters.

"sO-aNd-So TeChNiQuE i DoN't LiKe Is An ExPlOiT!!!111oNe"
"Exploit" is a phrase that gets thrown around pretty thoughtlessly in this community. Here are some examples I've seen relatively recently:Long Range Attacks
The maximum enemy engagement range for DCUO combat extends about 50% farther than the range within which our targeting reticle stays red. Every power in the game has at least one attack that can hit from up to 150% range, 13 out of 15 powers can actually do competent rotations from that range, and within that range pets will engage and remain engaged. The use of long ranged attacks is not an exploit and the value of such attacks depends entirely on the content.Rolling
Shouldn't have to say this.... but rolling is not an exploit. Similarly, players can roll quickly by either spamming the roll input or perfectly timing it. Rolls place the player into an evasion state and consecutive rolls provide a blanket evasive posture (but with dangerous gaps in between).
DPS "Literacy" - Understanding the Language of Violence (Continued)
Clipping
...... Shouldn't have to say this either but clipping is not an exploit... and the devs have confirmed that for years... which they also shouldn't have to do. Clipping is one of the most fundamental aspects of the game and the clippability of every power/trinket/consumable is different. Stealth/Invis Procedures
While there are a few possible exploits that can be done in Stealth (one of which is actively worse than doing it normally) the act of clipping Stealth/Invisibility onto a power, then doing the in-Stealth/Invis non-exit power, jump cancelling it, then doing the in-Stealth/Invis special exit power and clipping it with any number of things that follow normal clipping and SC-cost rules is not an exploit. Further, if Stealth and Invis didn't behave that way, Gadgets and Mental would be atrocious powers as they're extremely reliant on those procedures (eg. if they can't consistently do their mid/close range executions, they go from having some of the highest boss DPS to some of the lowest).Gear/Aritfact Swapping
Much like clipping, our ability to swap gear and artifacts in combat is not an exploit and different artifacts have different degrees of swap potential (see Advanced Techniques). Swap behaviour is part of the testing process for new artifacts and the act of swapping is both dangerous and skill intensive.Suppressor Turret Jump Cancelling
While this isn't very good, especially since they buffed the pet to do the highest damage of all tray pets, the act of clipping with Suppressor Turret is not currently (in and of itself) technically an exploit. Its current (ridiculous) behaviour was intentional for some reason. Again, though, taking advantage of the clip isn't as good as taking advantage of the pet (yes, even though the dumb clip/summon behaviour sucks compared to the summon behaviour of other pets).
Blatant Cheating
Some of the things players complain about are genuine cheating, such as:Macroing
The act of programming command inputs into a macro via any method to simplify combat inputs is blatant cheating.Speedhacking
Speedhacking is obviously blatant cheating and should be recorded & reported to the devs whenever/wherever you see it. Be sure to include as much information as possible, including the zone and approximate time at which it was witnessed.Abusing Map or Boss Behaviour
The degree to which this is an exploit is relative to the offense. Is it something that happened naturally and provided an abnormal benefit (eg. Armoured Robotic Custodian getting permanently stuck)? Then it's not your fault. Did you intentionally force an enemy to ellicit an unnatural behaviour (eg. going out of your way to get Armoured Robotic Custodian stuck as a strategy)? Than you're clearly exploiting. A good example of intentional abuse would be using the invisible pathway to re-enter CoU last boss. One of the worst offenses for this was when Origin Crisis was current and players would use Clown Box to get outside the regular map and cheese the boss (for which some players were banned).Basically, just don't be shady when it comes to abnormal behaviour. If something just happens out of the blue it's one thing.... if you deliberately cause a glitch to happen, however, you're cheating.
Ride-alongs
A ride-along is when a player who isn't personally cheating runs with a player (or players) who they know are cheating and with the express purpose of benefiting from those cheats. Examples include running with a group that they know has a speedhacker in it or running with a group where people are exploiting. This is at least equally scummy as them cheating themselves and will badly harm your reputation.Item/Cash Duplication Glitches
Not related to DPS but obviously cheating and scummy in its own right.
Understanding Balance and Power Liability
 There's a lot more to the game than simply running the loadouts that perform the best versus Sparring Targets. Similarly, there's more to this guide than simply always picking the rotations with the biggest numbers.
https://youtu.be/GlrlspPrSHc?t=162
Every power, superpower, and supercharge has a spectrum of strengths and weaknesses that need to be taken into account in different situations. Things that hit hard in and of themselves tend to have a catch, or a liability. Things that hit light tend to be liability free or have other bonuses tied to them. The key is to find the most effective balance. The most important aspect of this is understanding the most critical shortcomings of certain power types. The guide tries to mitigate these factors as best as possible, most notably by abstaining from the use of damage fields whenever it can, but obviously we simply have to deal with and adapt to most of the below factors.
Charged/Long-Cast Attacks
Examples: Frost Blast, Fireburst, Mass Detonation, etcThese are powers/attacks with an extended casting period during which we're vulnerable to interrupt. They generally deal above average burst damage in and of themselves but with the added detriment that we will absolutely outright lose the casts sometimes. As such, any rotation with Charged/Long-Cast attacks will not perform as well in content as it does vs Sparring Targets.
Channeled Attacks
Examples: All finishers except for Eviscerating Chain, Heat Vision, Freezing Breath, Sonic Shout, Absorb Heat, Channel Hate, Avalanche, Chain Gun, etc etc (see Empowering Channeling mod in game for complete list)Channeling is like Long-Cast with the benefit of doling the damage out gradually over time, helping to mitigate some of the liability in that if we do get interrupted, we've still dealt some damage. Empowered Channeling also helps with interruption but it isn't perfect, especially in Elite content. Also, the flow of a rotation generally depends on a channeled power running full duration, and interrupts can leave gaps where we're waiting for cooldowns. As such, rotations with channeled attacks run the risk of not doing as well in content as they do vs Sparring Targets (but to a lesser degree compared to long-cast powers).
Combos
Example: Most of Light's and Celestial's powers, many of Atomic's powers, many of Rage's powers, Multi-Net Launcher, Ebb, etc.There are two general types of combos:
1. Combos where each stage of the combo does damage. This is the most common type of combo, seen on all powers except for Celestial. While still vulnerable to interrupt, it isn't a complete wash if we can't finish the combo. However, the biggest hit is usually at the end of the combo so it's still a given that rotations with combos will do a bit less in actual content than they do vs Sparring Targets.
2. Comboes where only the first and last inputs result in an effect or damage. This is how Celestial combos work, with some requiring us to go through two or three highly vulnerable stages before the important damage happens. These can be very vulnerable to damage loss and, unless used in the right situations, not do as well in content as they do vs Sparring Targets.
Clipping
Powers that combo also demand clipping, and the actual performance of a combo rotation depends upon the clipping accuracy and skill of the player while they continue to maintain situational awareness and respond to mechanics. Some rotations require more skillful/frequent/aggressive clipping than others, and some rotations have clipping that doesn't seem very intense but actually makes a big difference. Eg. Water's Ebb/Flow combo is simple enough but the number of frames we can shave off has a big impact on the rotation's effectiveness because of how it fits in rotations. Conversely, Rage's melee combos and clips are extremely fast and aggressive but they're also pretty forgiving and have non-stop audio queues to give us preemptive feedback. Regardless, no one is perfect and we can expect to lose some damage in content while clipping.Tap/Jump Cancelling
Cancelling is like clipping for certain non-combo powers, allowing us to exit them early while maximizing our damage and improving rotation flow. Simpler than combo clipping but still carries a slight chance for damage loss in content.Projectiles
Examples: Electrostatic Bomb, Soul Barrage, Soul Storm, Soul Bolt, Terror Tendrils, etc.Most attacks are either a guaranteed hit or hitscan, but projectiles have to actually travel to the target. If the target ends up not being where your projectile was aimed, there's a chance to lose all of the damage. Old-school projectile rules required each individual projectile to hit but the new system grants full credit if any of the projectiles graze any target. Still, there's an increasing risk the farther we are away that our attack won't connect. This can be mitigated by tanking against a wall or flying above a target but these aren't always options and some high mobility fights will result in heavy losses while using projectile attacks.
Damage Fields
Examples: Circle of Destruction, Debris Field, Inferno, Electrocute, Galling Eruption, Psychic Prison, etc.Damage fields are large areas that deal damage over time to any enemies standing within them. They generally have 12s cooldowns and often, but not always. also apply a PI. In most cases, the field is placed at the feat of our target. This is actually a liability because it prevents the kind of strategic placement we can achieve with a self-targeted field like Psychic Prison. When enemies leave a damage field, they stop taking damage, making damage fields extremely vulnerable to damage loss in most applications and especially vulnerable to damage loss if attempting to use them in raid hallways.
Targeted Auras
Examples: Corrupted Retribution, Lift, Overheat, Spontaneous Combustion (effectively), etc.Targeted aura are like damage fields connected to a specific enemy, causing that enemy to damage other enemies around them. The primary drawback of this is that these auras usually have a much smaller range and if the target with the aura dies, the aura is lost. As these are generally of most value in hallway builds where everything tends to die quickly, losing some of the damage in content is a guarantee.
DoT Sustainment
Example: Nature onlyMany Nature rotations have to sustain stacking poison DoTs with Harvest or Thorn Burst to maintain effective DPS. While not intrinsically challenging to do, the repercussions of failing to sustain the DoTs are pretty extreme and some content guarantees DoT reset.
Survivability
Examples: Absorb Heat, Meteor, Ice Boulder, Lernaea's AmuletSometimes, the best attacks at our disposal are also the most dangerous and we'll be fine right up until we're not. It's important to factor in the things that can/will sometimes get us killed when considering overall balance and performance.
Understanding the ST/AoE Spectrum of Boss Rotation Performance
 Every power in DCUO has very specific strengths and weaknesses in both its DPS and support roles. The overall balance at the moment with those factored in is actually quite stellar and predominately content dependent, with SC performance further narrowing the powers' performances to the point the differences are purely academic. From a DPS perspective, the factors affecting balance in content are range and splash (in boss rotations).
Every power has comparable hallway-clear AoE options but every power's ST rotations are on a spectrum from "ultra clean pure single target damage" to "absolutely filthy ST but hella good splash." The Meta Overview below is currently heavily weighted towards pure ST performance without factoring that splash-factor in that causes different powers to do better/worse in different content. Other factors can also come into play. For example, Munitions does very good ST damage with very good splash damage but if it were to try to deal good damage to a dedicated target with other targets around, it would struggle more than any other power in so doing. The Meta Overview will be refined to include these factors but in the meantime, please keep this in mind. Balance is tighter than it appears in that the "bottom" performers are all hella splashy such that they can crush the "top" performers in multi-target boss fights or boss fights with consistent add elements and vice versa.
Meta/Balance Overview
Here is a breakdown of all of the rotations covered herein:
Note:
- Group setup can have a slight to moderate variable effect on the performance indicated.
- Some powers have to give up using a pet to run two SCs
- Additional factors and considerations may affect performance.
Meta/Balance Overview[docs.google.com]
It primarily uses the Objective Hierarchy but also assesses the following criteria:
Skill Requirement: How challenging a rotation is to execute. Factors that affect this are combo/clip/cancel intensity/timing, variability, and on-the-fly adjustments (eg. when using Lernaea's Amulet). Note that the "average" rotation is not based on only those rotations covered here but rotations in general. Since these rotations have all been created to maximize performance, they tend to skew well above average.
Knowledge Requirement: How critical it is to know the mechanics of any given content to effectively perform the rotation and survive. Factors affecting this are channeling, use of anything that can get us killed, use of vulnerable combos (the more vulnerable, the more knowledge required), knowing when it's not safe to cast a power with Lernaea's Amulet, effective use of damage fields, etc. Of not, also incorporated in this category is the concept of knowing when not to use a certain rotation.
Output: Lists the results of all demos herein. While not an exhaustive average, performance is generally pretty close given the extended testing period. Wherever large crit swings create a broad spread, a tilde (~) is used to identify the approximate range (eg. most commonly seen on all La-Mort builds to factor in the variability of the proc crit). In the case of AoE focus builds, 3 target and 8 target performance is included, as well as the overall average DPS. Better performers are highlighted green, poor performers are highlighted red, and solid options with hefty caveats are highlighted yellow.
Max CR/SP Equivalent Output This column shows the approximate damage an unbuffed max CR/SP character does doing the same rotation. This is determined by testing a stable rotation on test and on live then applying the ratio to all rotations.
Risk of Damage Loss: This is a reflection of how vulnerable a rotation's composition is to losing damage in actual content relative to their intended application. The more of the previously discussed liabilities present, the greater the risk. This does not intrinsically include damage loss due to dying.
Risk of KO: How likely a rotation is to get us killed. This is generally only a factor for melee ranged builds and builds using Lernaea's Amulet but it's still worth considering if only to identify the dangerous aspects of a rotation.
Notes: While this section isn't as practically oriented as the notes in the guide itself, it points out any of the strengths/weaknesses leading to the rankings of all of the above categories.
With all of those combined, we can generally see most of the justification for certain things performing this way.

Here we'll go through each power in the (relative) descending performance order and briefly discuss factors affecting balance in actual content. The ordering itself weighs boss performance heaviest and considers power costs/spikes when looking at much weight it gives to Lernaea's Amulet performance.
Note:
- Despite ranking the powers like this, the balance in the game atm is quite good and even the "weakest" ST powersets become the strongest in multi-boss scenarios or ST scenarios with a constant splash component.
-Powers with unique range-specific requirements are listed separately since we can't effectively be at certain ranges at certain times.
Rage Melee is still an absolute monstrosity in both ST and AoE performance. However, that obviously comes with the big catch that it's extremely vulnerable to both damage loss and, in the case of bosses, KO. Given how vulnerable and niche it is, it's generally justifiable for its performance to be as high as it is in that it needs to hit hard to compensate for how frequently it either gets knocked around or has to stop in order to not die.
In keeping with the Mario Kart reference, Rage Melee can be considered to be "Very Heavy" in terms of consistently, like Bowser if Bowser had half the turning radius but twice the acceleration.
Despite its unprecedented unpopularity, Mental is an excellent power with potent DPS. It doesn't have to get as close as gadgets does to pull its craziest numbers off but it does have to carefully position its critical damage field and is extremely vulnerable to damage loss. Fortunately, even if we can't land the field, Mental's long range performance is still on par with other powers. That said, the heavy damage field reliance does result in a risk:reward scenario that likely makes Mental's performance justifiable.Mental's boss rotations also have slightly below average multi-target performance,
Mental is like a more manageable "Heavy," like Donkey Kong.

Heavy hitting at all ranges but BiS is reliant on non-stop channeling intermixed with snappy combo clipping to achieve peak boss performance. BiS has exceptionally, irredeemably dirty boss damage. Only capable of competitive clean ST with Lernaea's Amulet via a relatively challenging and risky rotation. Both rotations have increased risk of damage loss. This is somewhat mitigated by, in the case of BiS, its high mobility but most cancel effects are room-wide. While survivability isn't generally an issue (except when attempting clean ST), keeping the guns blazing at times is. Also, despite how dirty BiS, Muni's best boss rotation's multi-target performance is only slightly above average compared to the field.
Barely "Heavy," owing only to the addition of the Multi-Net Combo clipping requirement to max out boss performance.[/i
Gadgets has excellent short range performance but the proximity places it at risk in Elite content and the range limitation is such that it can be difficult to reliably execute this variant without substantial losses. Gadgets Boss rotation executions all have some of the worst multi-target performance of all powers.
Still "Heavy," due to the potential to lose big damage chunks, but bordering on "Medium Heavy."
Note:
- Group setup can have a slight to moderate variable effect on the performance indicated.
- Some powers have to give up using a pet to run two SCs
- Additional factors and considerations may affect performance.
Meta/Balance Overview[docs.google.com]
It primarily uses the Objective Hierarchy but also assesses the following criteria:
Skill Requirement: How challenging a rotation is to execute. Factors that affect this are combo/clip/cancel intensity/timing, variability, and on-the-fly adjustments (eg. when using Lernaea's Amulet). Note that the "average" rotation is not based on only those rotations covered here but rotations in general. Since these rotations have all been created to maximize performance, they tend to skew well above average.
Knowledge Requirement: How critical it is to know the mechanics of any given content to effectively perform the rotation and survive. Factors affecting this are channeling, use of anything that can get us killed, use of vulnerable combos (the more vulnerable, the more knowledge required), knowing when it's not safe to cast a power with Lernaea's Amulet, effective use of damage fields, etc. Of not, also incorporated in this category is the concept of knowing when not to use a certain rotation.
Output: Lists the results of all demos herein. While not an exhaustive average, performance is generally pretty close given the extended testing period. Wherever large crit swings create a broad spread, a tilde (~) is used to identify the approximate range (eg. most commonly seen on all La-Mort builds to factor in the variability of the proc crit). In the case of AoE focus builds, 3 target and 8 target performance is included, as well as the overall average DPS. Better performers are highlighted green, poor performers are highlighted red, and solid options with hefty caveats are highlighted yellow.
Max CR/SP Equivalent Output This column shows the approximate damage an unbuffed max CR/SP character does doing the same rotation. This is determined by testing a stable rotation on test and on live then applying the ratio to all rotations.
Risk of Damage Loss: This is a reflection of how vulnerable a rotation's composition is to losing damage in actual content relative to their intended application. The more of the previously discussed liabilities present, the greater the risk. This does not intrinsically include damage loss due to dying.
Risk of KO: How likely a rotation is to get us killed. This is generally only a factor for melee ranged builds and builds using Lernaea's Amulet but it's still worth considering if only to identify the dangerous aspects of a rotation.
Notes: While this section isn't as practically oriented as the notes in the guide itself, it points out any of the strengths/weaknesses leading to the rankings of all of the above categories.
With all of those combined, we can generally see most of the justification for certain things performing this way.
Raw Performance Hierarchy
Here we'll go through each power in the (relative) descending performance order and briefly discuss factors affecting balance in actual content. The ordering itself weighs boss performance heaviest and considers power costs/spikes when looking at much weight it gives to Lernaea's Amulet performance.
Note:
- Despite ranking the powers like this, the balance in the game atm is quite good and even the "weakest" ST powersets become the strongest in multi-boss scenarios or ST scenarios with a constant splash component.
-Powers with unique range-specific requirements are listed separately since we can't effectively be at certain ranges at certain times.
- THIS IS BASED PREDOMINATELY ON BASE DPS PERFORMANCE (IE. WITHOUT USING SC). WITH SC QUALITY FACTORED IN AND NORMAL GREEN EOG USE, ALL POWERS ARE EXTREMELY CLOSE TO EACH OTHER IN PERFORMANCE.
1. Rage Melee
Rage Melee is still an absolute monstrosity in both ST and AoE performance. However, that obviously comes with the big catch that it's extremely vulnerable to both damage loss and, in the case of bosses, KO. Given how vulnerable and niche it is, it's generally justifiable for its performance to be as high as it is in that it needs to hit hard to compensate for how frequently it either gets knocked around or has to stop in order to not die.
In keeping with the Mario Kart reference, Rage Melee can be considered to be "Very Heavy" in terms of consistently, like Bowser if Bowser had half the turning radius but twice the acceleration.
2. Mental
Despite its unprecedented unpopularity, Mental is an excellent power with potent DPS. It doesn't have to get as close as gadgets does to pull its craziest numbers off but it does have to carefully position its critical damage field and is extremely vulnerable to damage loss. Fortunately, even if we can't land the field, Mental's long range performance is still on par with other powers. That said, the heavy damage field reliance does result in a risk:reward scenario that likely makes Mental's performance justifiable.Mental's boss rotations also have slightly below average multi-target performance,
Mental is like a more manageable "Heavy," like Donkey Kong.
3. Munitions
Heavy hitting at all ranges but BiS is reliant on non-stop channeling intermixed with snappy combo clipping to achieve peak boss performance. BiS has exceptionally, irredeemably dirty boss damage. Only capable of competitive clean ST with Lernaea's Amulet via a relatively challenging and risky rotation. Both rotations have increased risk of damage loss. This is somewhat mitigated by, in the case of BiS, its high mobility but most cancel effects are room-wide. While survivability isn't generally an issue (except when attempting clean ST), keeping the guns blazing at times is. Also, despite how dirty BiS, Muni's best boss rotation's multi-target performance is only slightly above average compared to the field.
Barely "Heavy," owing only to the addition of the Multi-Net Combo clipping requirement to max out boss performance.[/i
4. Gadgets (Short Range)
Gadgets has excellent short range performance but the proximity places it at risk in Elite content and the range limitation is such that it can be difficult to reliably execute this variant without substantial losses. Gadgets Boss rotation executions all have some of the worst multi-target performance of all powers.
Still "Heavy," due to the potential to lose big damage chunks, but bordering on "Medium Heavy."
Meta/Balance Overview (Continued)
5. Celestial
Celestial's mechanics can seem daunting to newcomers but it's a capable and relatively safe (from damage loss) power when used correctly. It can fluidly adjust its ST:AoE performance ratio in boss fights as required (and is capable than even greater AoE potential in boss fights then shown via Consume Soul's combo). Vulnerable to interrupt due to its "all or nothing" combos, which is somewhat mitigated via the combos used. Requires more knowledge than most powers in order to be aware of which combos will reliably work in which situations. Even while still focusing a primary target, Celestial's multi-target boss performance is decent.
Another firmly "Medium Heavy" power. If Fire is the Mario of the game, Celestial is the Luigi.
6. Light
Ranking before Quantum due to better-rounded performance. Relies on clean, tight clipping. Light DPS combos are fairly vulnerable to interrupt and they're "all or nothing" burst-type sources in that when we have to stop to deal with mechanics, our damage stops almost completely. Its actual in-content performance appears to justify its sparring target performance and Light is extremely power hungry. Second worst multi-target performance of all boss rotations (but way ahead of Quantum's still).
Light is "Heavy." it loses more than other powers when constantly interrupted
7. Earth
Relies on a fair bit of cancelling and clipping to max itself out but less vulnerable to interrupt than similar powers while dealing a mix of ST and AoE from range. Simple and capable. Its best boss rotations have solid multi-target performance.
Earth performs like a "Medium Heavy" bordering on a "Heavy."
8. Atomic (Mid-Range)

Heavy reliance on 3-stage combo clipping and fairly vulnerable to interrupt but solid ST performance combined with the 3rd best multi-target performance of boss rotations. A "one size fits all" power.
In terms of execution, Atomic is a "Heavy" bordering on a "Medium Heavy."
9. Fire
Similar to Munitions but with a simpler execution and more capability of dealing clean damage when desired. Despite being an ST specialist, Fire's multi-target performance on its boss rotations doesn't fall too far behind other powers. Like Muni, Fire is very vulnerable to grounding & physics effects that can cancel channeling. Also suffers from an extremely dangerous channel queue bug (like Muni/Ice) which prevents canceling/blocking at times without clearing the queue..Improved mobility in both ST and AoE builds helps to mitigate some of these concerns.
Fire is firmly a "Medium Heavy" power, essentially the Mario of the pack. Not too crazy, somewhat susceptible to losses, but adaptable and well rounded.
10. Gadgets (Mid-Range)
This is the most likely/common Gadgets execution to occur in Elite content due to boss movement and/or lethal proximity punishment mechanics. With barely below average ST performance combined with below average multi-target performance in boss fights, Gadgets needs to get in as many short-range rotations as it can.
11. Quantum

Simple, effective, and resilient. Its hallway AoE options are infuriatingly well balanced and nuanced. However, despite its ST performance being higher than several of the powers we've already looked at,its best boss rotations have the worst multi-target performance of all powers by a wide margin, necessitating dedicated builds for pure ST and mixed-target boss situations.
Quantum is "medium," the Yoshi of the group.
12. Ice
Ice is competent in both clean ST and multi-target boss fight situations in addition to being extremely effective against large groups of hallways adds. Some of its bugs/quirks appear to have been fixed, giving it access to some stronger rotations. However, the nature of how its damage is dealt in boss fights will result in some inconsistent performance (but which averages out to be solid overall). Ice also has one of the best La-Mort rotations and its also the most tanky DPS rotation in the game.
Ice place can range from light to heavy depending on whether or not Frost Blast or Ice Boulder is used.
13. Sorcery
Capable of solid pet and non-pet builds. Sorcery's rotations are extremey simple to execute and effective in both ST and multi-target boss situations. The primary detractor of its best rotations is that they're heavily reliant on projectiles. Needs to adjust for boss-mobility more than most other powers.
Sorcery is "Light," effectively the Toad of the game.
14. Nature
Here we start to get into the multi-target specialists, ie. powers with slightly below average ST damage but well above average multi-target performance in their boss rotations. Nature is competent enough in ST but its best boss rotations have extreme AoE capability. It's relatively safe to use with Lernaea's Amulet due to its heavy use of low-cost powers. It's non-Amulet rotations are also more vulnerable to damage loss.
Its rotations execute like they're light but its potential for catastrophic DPS loss if Poisons are lost makes it a medium to medium heavy overall
15. Water
Similar to Nature, Water's ST performance is slightly below average but it has above average multi-target performance in boss fights. It's also much less vulnerable to damage loss and its combos are well hardened.
Water's execution is "Medium Heavy."
16. Rage Ranged
Same boat as Water/Nature. Slightly below average ST but well above average multi-target performance on its boss rotations.
17. Atomic (Long-Range)
Slightly lower damage than Water/Nature/Rage ranged but 4th best multi-target boss fight performance. As we can see, the trend of DPS shifting from clean ST to AOE continues.
18. Electricity
It's important to note that if we factor Circuit Breaker, Electricity is actually right in the middle of the pack for ST performance. Without Circuit Breaker, however, Elec has the 2nd weakest ST output in the game combined with the 3rd weakest multi-target potential on its strongest boss rotation. It also struggles to adjust its ST:AOE performance spectrum without drastically undercutting one or the other. It does have the potential to use the single most powerful raw AoE rotation in the game... but the ST performance on it is abysmal, its heavily dependent on non-split damage and long-lasting, stationary targets which makes it too situational to increase the power's standing.
Electricity is the "Very Light" Baby Mario of the game.
Meta/Balance Overview (Continued)
19. Gadgets (Long-Range)
When forced to execute its rotations beyond short/mid range, which can be the case in some Elite content, Gadgets has the single weakest ST performance in the game combined with one of the weakest multi-target performances of all boss rotations. It is critical that gadgets stay as close to its target as possible as often as possible.
Summary
The game is fairly well balanced when we look at both single and multi-target performance, though how content is designed can see certain powers suffering more than others. Any power will do well in the right hands but a few powers have a moderate advantage in 100% ST environments while others have a significant advantage in mixed/AoE boss fights. The top-performing ST powers also tend to have greater liability attached in actual content that informs/justifies their raw max potential, but this is content dependent. Real-world factors tend to balance the powers even further.
Lernaea's Amulet has proven to be an excellent equalizer and it has resulted in the performance spread being narrowed considerably, with the powers that were previously the worst off being, generally, the safest to use it with. However, it should be noted that some powers do almost as well with pretty much any artifact combo while others require very specific combos. This isn't an issue for overall balance but it's something to consider for players on a shoestring or who like to mix it up a lot.
Lastly, it's important to reiterate that with SCs factored in, all of the powers are extremely close to one another. The "best" powers tend to have the worst SCs, or the SCs with the most limitations/vulnerabilities and the "worst" powers have the best SCs, with more reliability and no vulnerabilities. As long as a group has a reasonable/normal amount of Green EoG SC feed, there is no reason for a player to underperform on any power.
Which Rotations to Use and How to Perform
While I've tried to narrow it down to the most effective and potentially useful builds, there's still a lot to choose from here. In the next section, there is a Meta Overview spreadsheet that shows the approximate performance of each listed rotation in addition to the skill/knowledge requirements, risk levels, and notes. If completely uncertain, that can be a good starting point but the guide itself still has the critical demos and more detailed notes.
 There's more to doing well than simply knowing the loadout/rotation though. Once you've identified which rotation you want to use, it's important to become proficient with it against sparring targets (which generally doesn't take long at all) to ensure you can do it flawlessly in combat without losing situational awareness. Especially important is getting any combo, clipping, or cancelling timing down as well as understanding which moves allow you to jump or move during them and which don't. Similarly, we also want to identify the best places to activate our supercharges/pets/etc during the rotation, where we can most effectively clip Robot Sidekick, etc.
 Lastly, and this can only come with actual experience/exposure, it's important to be comfortable with the mechanics of any given content to mitigate any potential damage losses. Knowing where to stand and what to do when in Elite is slightly more important than being proficient with a rotation in that the best player in the world does zero damage if they're dead.
Rotation Nomenclature/Glossary
Structure:

Rotations generally follow the following structure in this guide:
Power 1 > Power 2 (instruction/note/caveat)(instruction/note/caveat) > Power 3 > Power 2 > Repeat
Sometimes, only certain parts of the rotation are repeated after the initial cycle. This is indicated as follows:
Power 1 > [Power 2 (instruction/note/caveat)(instruction/note/caveat) > Power 3 > Power 2 > Repeat portion in square brackets only]
Common Terms:
(clipped with): Indicates the power this is informing is to be clipped with the next power in the rotation.
(x ticks)(tap cancel): Indicates, on a channeled power or similar, that a specific action is to be taken after x damage ticks. It's important to note that "x" is the number of ticks we want to occur, not the number of ticks we're waiting to see before tap cancelling (ie. we can get 2 ticks of Freezing Breath when tap cancelling about halfway between the first and second tick).
(combo): Indicates to do the power's only combo. This is generally used for single-stage combos but also applies to multi-stage combos where the intermediate stages have no effect (eg. Celestial).
(full combo): Indicates to do all stages of a multi-stage combo where each stage does damage.
(1x combo): Indicates the number of stages to carry out of a multi-stage combo where each stage deals damage.
(+2 combo): Indicates how many times to do a self-repeating combo
(Minigun Combo): Indicates to do a specific combo on a power with multiple potential combo options (eg. Celestial, Light).
(jump cancel): Indicates to jump cancel the power once the effect is guaranteed to occur. Be careful that the timing is right, as some powers can be jump cancelled too early.
*: Indicates there is a specific note pertaining to the element marked by the asterisk. General notes are usually presented without asterisks.
Rotation Types
The guide is separated into "Boss Rotations" (ie. those with an ST focus), and "Raid Hallway Rotations" (ie. those with an AoE focus). Taking a boss rotation into a hallway situation will result in poor performance in that context and vice versa. DPS should have separate armouries for bosses and for raid hallways, as each requires a unique approach.
Atomic - Boss (ST Focus) Rotations
General Note: Due to many rotations requiring the use of Atom-Powered Assault in order to activate our Quark-Gluon Aura, using the +2% Crit Rate head mod is a viable alternative to the normal SC refund choices.

Heat Vision > Neutron Bomb (full combo)(clipped with) > Neutron Bomb (clipped with) > Atom-Powered Assault > [Heat Vision > Neutron Bomb (full combo)(clipped with) > Geiger Beam > Repeat portion in square brackets only unless you need to reactivate Quark-Gluon Aura]
https://youtu.be/3SzwhGVtWHg
https://youtu.be/Y7XoZiYMTg8
Note: Slightly less damage than the Quark-Gluon variant but less vulnerable to damage loss due to combo interrupt in actual combat.
Heat Vision > Freezing Breath* (2 ticks)(tap cancel) > Geiger Beam > Particle Beam** > Heat Vision > Particle Beam** > Geiger Beam > Freezing Breath (2 ticks)(tap cancel) > Heat Vision > Particle Beam** > Geiger Beam > Particle Beam** > Repeat
https://youtu.be/jqC68h5SF38
* If even cleaner damage is required or if other enemies we don't want to damage are too close, do Particle Beam instead of Freezing Breath.
** If Acrobatic and you don't want to have to use Grimorium Verum, Particle Beam may be replaced with Zip Tie Attack.
* Whenever Godwave Strength is off cooldown, use it instead of Particle Beam. If Acrobatic, Zip Tie Attack may be used instead of Particle Beam.
https://youtu.be/wZOpFNPUQZI
Note: Remember to alternate activation of combat pet and henchmen, using the strongest pet/henchmen available. Does not buff turret-class pets. Ideal for situations where a boss will frequently force players to stop their rotations to deal with mechanics, as the pets can continue DPSing the boss when we can't.
* Once the Quark-Gluon Aura is active, when it's off cooldown we can clip the full combo Neutron Bomb with Neutron Bomb (clipped with) > Atom-Powered Assault without hurting our rotation's DPS, as shown in the demo video.
https://youtu.be/p_ZX0onx0-8
https://youtu.be/Y7XoZiYMTg8
or
Geiger Beam > Heat Vision > Neutron Bomb (1x combo)(clipped with) > Geiger Beam > Neutron Bomb (1x combo)(clipped with) > Heat Vision > Geiger Beam > Neutron Bomb (1x combo)(clipped with) > Freezing Breath (3 ticks)(tap cancel) > Repeat
https://youtu.be/A4EmIUeQznY
Loadout: Freezing Breath, Neutron Bomb, Nuclear Burst, Atom Splitter, Robot Sidekick, SC
Long Range Execution
Freezing Breath (2 ticks)(tap cancel) > Neutron Bomb (full combo)(clipped with) > Nuclear Burst (full combo)(clipped with) > Neutron Bomb (full combo)(clipped with) > Repeat
https://youtu.be/pGrU9OhJqAE
Mid Range Execution
Freezing Breath (2 ticks)(tap cancel) > Neutron Bomb (full combo)(clipped with) > Atom Splitter (full combo)(clipped with) > Neutron Bomb (full combo)(clipped with) > Repeat
https://youtu.be/7Y9g7CLnPyw
General Purpose Variants
Quark-Gluon Aura
Optimal for most boss fight situations but fairly vulnerable to interrupt due to reliance on multi-stage power combos. Consider using one of the other variants in interrupt-heavy fights.Heat Vision > Neutron Bomb (full combo)(clipped with) > Neutron Bomb (clipped with) > Atom-Powered Assault > [Heat Vision > Neutron Bomb (full combo)(clipped with) > Geiger Beam > Repeat portion in square brackets only unless you need to reactivate Quark-Gluon Aura]
https://youtu.be/3SzwhGVtWHg
Freezing Breath
Heat Vision > Freezing Breath (2 ticks)(tap cancel) > Geiger Beam > Neutron Bomb (1x combo)(clipped with) > Heat Vision > Neutron Bomb (1x combo)(clipped with) > Geiger Beam > Freezing Breath (2 ticks)(tap cancel) > Heat Vision > Neutron Bomb (1x combo)(clipped with) > Geiger Beam > Neutron Bomb (1x combo)(clipped with) > Repeathttps://youtu.be/Y7XoZiYMTg8
Note: Slightly less damage than the Quark-Gluon variant but less vulnerable to damage loss due to combo interrupt in actual combat.
Cleaner ST
Note: Grimorium Verum PIHeat Vision > Freezing Breath* (2 ticks)(tap cancel) > Geiger Beam > Particle Beam** > Heat Vision > Particle Beam** > Geiger Beam > Freezing Breath (2 ticks)(tap cancel) > Heat Vision > Particle Beam** > Geiger Beam > Particle Beam** > Repeat
https://youtu.be/jqC68h5SF38
* If even cleaner damage is required or if other enemies we don't want to damage are too close, do Particle Beam instead of Freezing Breath.
** If Acrobatic and you don't want to have to use Grimorium Verum, Particle Beam may be replaced with Zip Tie Attack.
Source Shard
Heat Vision > Particle Beam* > Geiger Beam > Particle Beam* > Repeat* Whenever Godwave Strength is off cooldown, use it instead of Particle Beam. If Acrobatic, Zip Tie Attack may be used instead of Particle Beam.
https://youtu.be/wZOpFNPUQZI
Note: Remember to alternate activation of combat pet and henchmen, using the strongest pet/henchmen available. Does not buff turret-class pets. Ideal for situations where a boss will frequently force players to stop their rotations to deal with mechanics, as the pets can continue DPSing the boss when we can't.
La-Mort Variants
Quark-Gluon Aura
Geiger Beam > Heat Vision > Neutron Bomb (1x combo)(clipped with) > Geiger Beam > Neutron Bomb (full combo)(clipped with) > Neutron Bomb (clipped with) > Atom-Powered Assault > [Geiger Beam > Heat Vision > Neutron Bomb (1x combo)(clipped with) > Geiger Beam > Neutron Bomb (full combo)* > Repeat portion in square brackes only]* Once the Quark-Gluon Aura is active, when it's off cooldown we can clip the full combo Neutron Bomb with Neutron Bomb (clipped with) > Atom-Powered Assault without hurting our rotation's DPS, as shown in the demo video.
https://youtu.be/p_ZX0onx0-8
Freezing Breath
Geiger Beam > Heat Vision > Neutron Bomb (1x combo)(clipped with) > Geiger Beam > Freezing Breath (3 ticks)(tap cancel) > Neutron Bomb (1x combo)(clipped with) > Repeathttps://youtu.be/Y7XoZiYMTg8
or
Geiger Beam > Heat Vision > Neutron Bomb (1x combo)(clipped with) > Geiger Beam > Neutron Bomb (1x combo)(clipped with) > Heat Vision > Geiger Beam > Neutron Bomb (1x combo)(clipped with) > Freezing Breath (3 ticks)(tap cancel) > Repeat
https://youtu.be/A4EmIUeQznY
Lernaea's Amulet All-In
Note: This has no out for the Amulet, meaning we are completely dependent on the healers and we need to know when to not cast to avoid killing ourselves. High risk, high reward. Advised to only use with players you know.Loadout: Freezing Breath, Neutron Bomb, Nuclear Burst, Atom Splitter, Robot Sidekick, SC
Long Range Execution
Freezing Breath (2 ticks)(tap cancel) > Neutron Bomb (full combo)(clipped with) > Nuclear Burst (full combo)(clipped with) > Neutron Bomb (full combo)(clipped with) > Repeat
https://youtu.be/pGrU9OhJqAE
Mid Range Execution
Freezing Breath (2 ticks)(tap cancel) > Neutron Bomb (full combo)(clipped with) > Atom Splitter (full combo)(clipped with) > Neutron Bomb (full combo)(clipped with) > Repeat
https://youtu.be/7Y9g7CLnPyw
Lernaea's Amulet Safety Net
Use either the Long or the Mid range variant above then replace Nuclear Burst or Atom Spliiter (whichever you won't be using) on your bar with either finisher, a personal shield, Atom-Powered Assault (for faster Aura activations), or a second supercharge.
Atomic - Raid Hallway (AoE Focus) Rotations
Short/Mid Range Variants
Freezing Breath + Quark-Gluon Aura
Freezing Breath (2-ticks)(tap cancel) > Neutron Bomb (full combo)(clipped with) > Geiger Blast (clipped with) > Atom-Powered Assault > Neutron Bomb (full combo)(clipped with) > Repeat [clipping Geiger Blast with Atom-Powered Assault when available]https://youtu.be/6yFmbb2pGq4
https://youtu.be/Kpy05uo6F7s
Sonic Cry + Quark-Gluon Aura
Sonic Cry > Neutron Bomb (full combo)(clipped with) > Geiger Blast (clipped with) > Atom-Powered Assault > Neutron Bomb (full combo)(clipped with) > Geiger Blast > Neutron Bomb (full combo)(clipped with) > Geiger Blast > Neutron Bomb (full combo)(clipped with) > Repeat
https://youtu.be/G3qHP56aE5o
https://youtu.be/NDGQ6YP9h6Y
Point Blank Variants
Grimorium Verum + Quark-Gluon Aura
Note: If targets are near death, do Geiger Blast instead of re-applying Electron Flare.Neutron Bomb (full combo)(clipped with) > Electron Flare (clipped with) > Atom-Powered Assault > Neutron Bomb (full combo)(clipped with) > Geiger Blast > Neutron Bomb (full combo)(clipped with) > Geiger Blast > Neutron Bomb (full combo)(clipped with) > Geiger Blast > Repeat
https://youtu.be/c4SHxNpUmjA
https://youtu.be/KG0gte5cKVE
Non-Quark-Gluon Sonic Cry
Note: If targets are near death, do Geiger Blast instead of re-applying Electron Flare.Atom-Splitter (full combo)(clipped with) > Sonic Cry > Electron Flare > [Atom-Splitter (full combo)(clipped with) > Sonic Cry > Geiger Blast > Atom-Splitter (full combo)(clipped with) > Sonic Cry > Geiger Blast > Atom-Splitter (full combo)(clipped with) > Electron Flare > Geiger Blast > Repeat portion in square brackets only]
https://youtu.be/ybQQAnIfm8E
https://youtu.be/tBId7lrrILk
Whirling Dervish + Grimorium Verum
Whirling Dervish (3 ticks)(Dashing Combo)(clipped with) > Atom Splitter (full combo)(clipped with) > Electron Flare > Whirling Dervish (3 ticks)(Dashing Combo)(clipped with) > Atom Splitter (full combo)(clipped) > Geiger Blast > Whirling Dervish (3 ticks)(Dashing Combo)(clipped with) > Atom Splitter (full combo)(clipped with) > Geiger Blast > Repeat https://youtu.be/KfSSpZ2oWUk
https://youtu.be/qUJdIl3_HEQ
Note: If targets are near death, do Geiger Blast instead of re-applying Electron Flare.
Whirling Dervish + Quark-Gluon Aura
Whirling Dervish (1-3 ticks)(Dashing Combo)(clipped with) > Atom Splitter (full combo)(clipped with) > Geiger Blast (clipped with) > Atom-Powered Assault > Whirling Dervish (1-3 ticks)(Dashing Combo)(clipped with) > Atom Splitter (full combo)(clipped with) >Geiger Blast > Whirling Dervish (1-3 ticks)(Dashing Combo)(clipped with) > Atom Splitter (full combo)(clipped with) > Geiger Blast > Repeathttps://youtu.be/A8Bd3UhnNVA
https://youtu.be/k905qGh3frs
Full Range Variants
Heat Vision
Poor initial damage better suited for large groups of long-lived adds.Heat Vision > Neutron Bomb (full combo)(clipped with) > Nuclear Burst (1x combo)(clipped with) > Atom-Powered Assault > [Heat Vision > Neutron Bomb (full combo)(clipped with) > Nuclear Burst (full combo)(clipped with) > Repeat portion in square brackets only unless Quark-Gluon Aura needs to be reactivated]
https://youtu.be/lrDfE-eZQSg
https://youtu.be/Ujs4dm4-Dow
Atomic - 150% / True Max Range Rotation
This is designed to allow the player to fight from as far away from their target as possible while they and their pets are still able to land hits. It should only be used in rare instances where something is lethally buggy (eg. STU PZe on release), or where there are heavy range/positioning considerations where the consistency of being able to hit from so far can offset the reduced damage. It's a capability players should be aware of but not use often, if at all.
Anti-Matter Bomb > Repeat, popping Godwave Strength off cooldown and immediately before using SC.
Note: This is demo'd with an SC that intentionally doesn't deal damage or hit the boss to show the base performance, for which Quislet's SC proc is a factor. In practice, you would move in/out for an offensive SC and fill the remaining slot with clips.
Anti-Matter Bomb > Repeat, popping Godwave Strength off cooldown and immediately before using SC.
Note: This is demo'd with an SC that intentionally doesn't deal damage or hit the boss to show the base performance, for which Quislet's SC proc is a factor. In practice, you would move in/out for an offensive SC and fill the remaining slot with clips.
Atomic - Battle Tanking
Important: Sometimes it will be critical to ensure you reach the Dominance requirement to crowd control enemies while other times you can ignore it. The necessity varies from instance to instance.
Note: The content difficulty a player can rock this in will vary based on each player's knowledge and skill level and, in the highest content, the quality of the healer. This is generally ideal for Elite Alerts and anything around that difficulty level, but overkill for anything that doesn't actually need a tank at all.
For battle tanking with Atomic, I recommend using a variant of the "Whirling Dervish + Quark-Gluon Aura" AoE rotaion, replacing Atom-Powered Assault with Proton Remedy:
Whirling Dervish (1-3 ticks)(Dashing Combo)(clipped with) > Atom Splitter (full combo)(clipped with) > Geiger Blast (clipped with) > Proton Remedy > Whirling Dervish (1-3 ticks)(Dashing Combo)(clipped with) > Atom Splitter (full combo)(clipped with) >Geiger Blast > Whirling Dervish (1-3 ticks)(Dashing Combo)(clipped with) > Atom Splitter (full combo)(clipped with) > Geiger Blast > Repeat
https://youtu.be/WeV1_swMLPU
The amount of actual tank gear you'll need to wear, if any, will vary from instance to instance. In full tank gear, this can pretty safely sustain Lernaea's Amulet with Proton Remedy and Atom Splitter heals even with weaker healers, but adjust as needed. Recommend Grimorium Verum for PI for Geiger Blast, but if someone else is already applying Dazed PI it can be replaced.
Depending on SC feed, you may want to replace RSK with Radiation burn to run 2x SCs. If even more tankiness is needed, RSK can also be dropped for a shield or more utility.
If battle tanking current tier elite raids or SM content where the more aggressive approach proves untenable, you can modify a pure-tank build to incorporate a pet DPS Source Shard build.
Note: The content difficulty a player can rock this in will vary based on each player's knowledge and skill level and, in the highest content, the quality of the healer. This is generally ideal for Elite Alerts and anything around that difficulty level, but overkill for anything that doesn't actually need a tank at all.
For battle tanking with Atomic, I recommend using a variant of the "Whirling Dervish + Quark-Gluon Aura" AoE rotaion, replacing Atom-Powered Assault with Proton Remedy:
Whirling Dervish (1-3 ticks)(Dashing Combo)(clipped with) > Atom Splitter (full combo)(clipped with) > Geiger Blast (clipped with) > Proton Remedy > Whirling Dervish (1-3 ticks)(Dashing Combo)(clipped with) > Atom Splitter (full combo)(clipped with) >Geiger Blast > Whirling Dervish (1-3 ticks)(Dashing Combo)(clipped with) > Atom Splitter (full combo)(clipped with) > Geiger Blast > Repeat
https://youtu.be/WeV1_swMLPU
The amount of actual tank gear you'll need to wear, if any, will vary from instance to instance. In full tank gear, this can pretty safely sustain Lernaea's Amulet with Proton Remedy and Atom Splitter heals even with weaker healers, but adjust as needed. Recommend Grimorium Verum for PI for Geiger Blast, but if someone else is already applying Dazed PI it can be replaced.
Depending on SC feed, you may want to replace RSK with Radiation burn to run 2x SCs. If even more tankiness is needed, RSK can also be dropped for a shield or more utility.
If battle tanking current tier elite raids or SM content where the more aggressive approach proves untenable, you can modify a pure-tank build to incorporate a pet DPS Source Shard build.
Atomic - Supercharge Analysis
Full Analysis
See the Atomic lines of the Supercharge Analysis spreadsheet[docs.google.com] for a detailed breakdown of exactly what each SC does, how it works, its limitations & considerations, and DMG:SC for ST & AoE with cast-time losses factored.
Note: Just because a given SC outperforms others vs Sparring Targets does not mean it is necessarily the best choice for all situations. Pick the best SC for the situation based on the range, ST/AoE, and vulnerability considerations at hand and be sure to factor green EoG feeding.
For Boss Fights
Best-case min:max is achieved via tac swapping artifacts to do a Neo Venom Boost enhanced Radiation Burn buffed by Pied Piper's Flute. This requires the use of Scrap of the Soul Cloak. Please note, however, that that is not required to perform well with the power and Neo + Atomic Blast is a passable alternative. Similarly, if we want to make life very easy, it's also possible to fit 2x Atomic Blasts into a single Piper's Flute proc window (but I still personally prefer min:maxing with Neo > damaging SC). If a boss is very near death, it's generally better to just pop one SC and save the rest (unless it's the last boss or the situation is desperate).
Proper technique for dumping 15k SC is as per the Advanced Techniques section but requires a bit more skill to do quickly without incurring some additional rotation losses (but isn't hard with practice). Again, you don't need to do this to perform well.
For Raid Trash Clear
Depending on the quantity/quality of adds in a given raid and how chonky they are, we can either do full nut Neo>flute 10ks with our boss loadout (which has decent AoE potential already so can be used in hallways if desired), or we can just run Neo or Radiation Burn in the AoE loadout and simply dump some when we know we'll have it back in time for boss, just to ensure we're not sitting on a full bar unnecessarily. Best approach depends on the content.
Atomic: AV's Recommendations
Solo/Alerts
For low-member content, I will either just run the Lernaea's Amulet All-In Mid Range variant, replacing Nuclear Burst with Geiger Beam for the Amulet reset / self-heal, or I'll run the Battle Tank rotation in full DPS.Boss ST
For boss fights, I always use either the Lernaea's Amulet All-In Long Range or Mid Range rotations. However, I commit to one or the other to free myself up to run 2x SCs (I only ever use Radiation Burn while buffed by Neo Venom Boost). In fights where the bosses move too much or have other factors that would make sitting in mid range impractical, I run Freezing Breath, Neutron Bomb, Nuclear Burst, Robot Sidekick, Neo Venom Boost, and Radiation Burn.
In fights where I can safely sit in mid range, I use Freezing Breath, Neutron Bomb, Atom Splitter, Robot Sidekick, Neo Venom Boost, and Radiation Burn.
For Raid Hallway AoE
For hallways I'll either just keep using my boss rotation (it's already pretty AoE heavy) or I'll switch to the Whirling Dervish + Quark-Gluon Aura Point Blank variant.Artifacts
BiS for Solo/Alerts & Boss ST is Lernaea's Amulet + The Transformation Card + Quislet. BiS for Hallway AoE is Lernaea's Amulet + The Strategist Card (or Quislet) + The Transformation Card. In both cases, if no one has a stronger Tetrahedron of Urgrund buff than you, you'll generally want to use that over Quislet or Trans.Ally Passives
Emperor Aquaman's Seaside Restart + The Batman Who Laughs' Luck of the Draw or Queen Diana's Don't Weaken *If the Troll can't keep you powered, replace this with Cyborg's All Your Base
Additional Guidance
- Position carefully to minimize combo interruptions.- Since we're limited to Cursed Idol, doing full-nut Neo + Cursed Idol executions at the proper times is pretty critical to our performance.
Celestial - Boss (ST Focus) Rotations
Important Power Notes
- We cannot queue taps onto Defile- Every time we cast Plague, we move a step forward. We can jump during combo-able powers to maintain position without losing the ability to combo.
- If certain powers are pressed again after they're activated, their combos can no longer be executed. Be careful when activating such powers to avoid damage loss.
- Rotations featuring Plague cannot show the true maximum damage potential on Sparring Targets due to the fact that if our Plague target dies, it will spread it to other targets for free.
- Factor interruptions and delays into how long a rotation is allowed to run before re-applying PI, where applicable.

General Purpose
ST Execution
Heat Vision > Divine Light > Defile > Consume Soul > Heat Vision > Consume Soul > Defile > Consume Soul > Heat Vision > Consume Soul > Defile > Consume Soul > Repeathttps://youtu.be/QGkMaILFCoM
or (Combo Variant)
Note: More damage but more vulnerable to interrupt.
Divine Light (combo) > Heat Vision > Consume Soul > Defile > Consume Soul > Heat Vision > Consume Soul > Repeat
https://youtu.be/OP9k4dXzzj8
AoE Execution
Get in closer (while staying out of danger) and use this when more AoE is desired for adds.Heat Vision > Divine Light > Defile > Consume Soul (combo)(clipped with) > Heat Vision > Consume Soul (combo)(clipped with) > Defile > Consume Soul (combo)(clipped with) > Heat Vision > Consume Soul (combo)(clipped with) > Defile > Divine Light > Heat Vision > Consume Soul (combo)(clipped with) > Defile > Consume Soul (combo)(clipped with) > Heat Vision > Consume Soul (combo)(clipped with) > Defile > Consume Soul (combo)(clipped with) > Repeat
https://youtu.be/hc_RviESF3E
https://youtu.be/T6Lc6iZXsMk
Source Shard
Heat Vision > Consume Soul* > Defile > Consume Soul* > Repeat* Whenever it's available, use Godwave Strength instead of Consume Soul (see video).
https://youtu.be/MWo31G4yxaY
Notes:
- If multiple targets are present and AoE is desired, we can do the Consume Soul + combo as per the General Purpose (AoE Execution) rotation.
- Remember to alternate activation of combat pet and henchmen, using the strongest pet/henchmen available. Does not buff turret-class pets. Ideal for situations where a boss will frequently force players to stop their rotations to deal with mechanics, as the pets can continue DPSing the boss when we can't.
La-Mort Variants
Freezing Breath Variant
Note: If multiple targets are present and AoE is desired, we can do the Consume Soul + combo as per the General Purpose (AoE Execution) rotation.Defile > Heat Vision > Consume Soul > Defile > Freezing Breath (3 ticks)(tap cancel) > Consume Soul > Repeat
https://youtu.be/OKeClBDAii0
or
Defile > Heat Vision > Consume Soul > Defile > Consume Soul > Heat Vision > Defile > Consume Soul > Freezing Breath (3 ticks)(tap cancel) > Repeat
https://youtu.be/lrGQ2OoqtbM
Plague Variant
Defile > Plague (Divine Light combo)(clipped with) > Consume Soul > Defile > Heat Vision > Consume Soul > Repeathttps://youtu.be/5btKqbTt2OM
Notes:
- This is fairly vulnerable to interrupt due to Plague's slow 3-stage combo. As the Freezing Breath variant can be protected by Empowered Channeling, it will generally outperform this.
- If multiple targets are present and AoE is desired, we can do the Consume Soul + combo as per the General Purpose (AoE Execution) rotation.
Lernaea's Amulet Safety Net
- Demoed with Amulet actually on. Performance better with healer support.- Riskier than All-In when maintaining 10 stacks of Offering due to higher overall power cost.
- Very high risk even with excellent healers due to power cost
Plague (combo)(clipped with) > Consume Soul > Heat Vision > Consume Soul > Repeat as best as able while popping Defile if healing or Offering reset is required
https://youtu.be/EdurEIzcMw0
Lernaea's Amulet All-In Variants
Note: - These have no out for the Amulet, meaning we are completely dependent on the healers and we need to know when to not cast to avoid killing ourselves. High risk, high reward. These should only be used with people you know. Do not use these if the healers are struggling in the slightest.
- Safer for holding 10 stacks of Offering than Safety Net version due to lower average power cost.
Plague Variant
Heat Vision > Plague (combo)(clipped with) > Freezing Breath (2 ticks)(tap cancel) > Consume Soul > Repeathttps://youtu.be/ngaYEStD58E
Notes:
- This is vulnerable to interrupt due to Plague's slow 3-stage combo but it is less Power (read: Health) hungry than the Grimorium Verum variant below.
- Accidentally recorded the demo with the wrong DPS mods in but the Meta Tracker Overview reflects the correct performance from more in-depth parsing with the correct mods.
Grimorium Verum Variant (EXTREME RISK)
Heat Vision > Consume Soul > Plague > Consume Soul > Freezing Breath (2 ticks)(tap cancel) > Consume Soul > Repeathttps://youtu.be/qpqBYbwgMB4
Note: This has an extremely high power cost and will deal ~50k damage to the user every few seconds. Only to be used in very specific safe situations with extremely skilled healers. Borderline suicidal.
Celestial - Raid Hallway (AoE Focus) Rotations
Important Power Notes
- We cannot queue taps onto Defile- Every time we cast Plague, we move a step forward. We can jump during combo-able powers to maintain position without losing the ability to combo.
- If certain powers are pressed again after they're activated, their combos can no longer be executed. Be careful when activating such powers to avoid damage loss.
- Rotations featuring Plague cannot show the true maximum damage potential on Sparring Targets due to the fact that if our Plague target dies, it will spread it to other targets for free.
- Factor interruptions and delays into how long a rotation is allowed to run before re-applying PI, where applicable.
Mid Range Variants
Plague Variant
Consistent damage regardless of situation.Note: Plague's full combo is required for PI. Position carefully.
Plague (combo)(clipped with) > Blight (combo)(clipped with) > Admonish (combo)(clipped with) > Freezing Breath (2 ticks)(tap cancel) > Repeat
https://youtu.be/e_hYwmSucPg
https://youtu.be/0TJC99wjtrA
or
Plague (combo)(clipped with) > Blight (combo)(clipped with) > Wrath of the Presence (combo)(clipped with) > Freezing Breath (2 ticks)(tap cancel) > Repeat
https://youtu.be/gHCvgQG_vxI
https://youtu.be/h6GnuT6nw5E
Note: Despite video showing point blank execution, this can be done from mid range as with the Admonish version below. Plague's full combo is again required for PI application.
Heat Vision Variant
Inferior damage to smaller groups of adds but more potential damage to large groups of closely packed adds. Less combo dependent. Less bursty.Heat Vision > Plague (combo)(clipped with) > Admonish (combo)(clipped with) > Freezing Breath (2 ticks)(tap cancel) > Repeat
https://youtu.be/2JbDg64cSu0
https://youtu.be/W9nEuleAtn4
Notes:
- Wrath of the Presence + combo may be substituted for Blight/Admonish at a slight loss to make the rotation slightly burstier

Point Blank Variants
Blight Variant
Slightly more comboing, slightly burstier, no Plague bonus damageWhirling Dervish (3 ticks)(Dashing combo)(clipped with) > Wrath of the Presence (combo)(clipped with) > Divine Light > Whirling Dervish (3 ticks)(Dashing Combo)(clipped with) > Wrath of the Presence (combo)(clipped with) > Blight (combo)(clipped with) > Whirling Dervish (3 ticks)(Dashing Combo)(clipped with) > Wrath of the Presence (combo)(clipped with) > Wrath of the Presence (combo)(clipped with > Repeat
https://youtu.be/nyLWpe4j7A4
https://youtu.be/Imczukg5KZs
Note: If all targets are near death, consider doing another Wrath combo instead of the Blight combo (burst vs DoT)
Anoint Variant
Burstiest Short Range variant and may be done with Critical Anoint III vice SC refund head mod.Whirling Dervish (3 ticks)(Dashing Combo)(clipped with) > Wrath of the Presence (combo)(clipped with) > Divine Light (clipped with) > Anoint > Whirling Dervish (3 ticks)(Dashing Combo)(clipped with) > Wrath of the Presence (combo)(clipped with) > Wrath of the Presence (combo)(clipped with) > Whirling Dervish (3 ticks)(Dashing Combo)(clipped with) > Wrath of the Presence (combo)(clipped with) > Wrath of the Presence (combo)(clipped with) > Repeat
https://youtu.be/pSvODdQ1ZIs
https://youtu.be/Tmy04cFvPUE
Min Combo Variant
Slightly more resilient to interrupt than other Short Range variants but damage more dependent on effective Plague targeting and spreading.Whirling Dervish (3 ticks)(Dashing Combo)(clipped with) > Wrath of the Presence (combo)(clipped with) > Divine Light > Whirling Dervish (3 ticks)(Dashing Combo)(clipped with) > Wrath of the Presence (combo)(clipped with) > Plague > Whirling Dervish (3 ticks)(Dashing Combo)(clipped with) > Wrath of the Presence (combo)(clipped with) > Wrath of the Presence (combo)(clipped with) > Repeat
https://youtu.be/dwp2z__TiWU
https://youtu.be/pcA7jBz8zmA
Backup PI Variant
Most vulnerable to interrupt, demanding careful positioning. Able to apply PI more frequently.Whirling Dervish (3 ticks)(Dashing Combo)(clipped with) > Wrath of the Presence (combo)(clipped with) > Divine Light > Whirling Dervish (3 ticks)(Dashing Combo)(clipped with) > Plague (combo)(clipped with) > Whirling Dervish (3 ticks)(Dashing Combo)(clipped with) > Wrath of the Presence (combo)(clipped with) > Wrath of the Presence (combo)(clipped with) > Repeat
https://youtu.be/YVpdm5jcGXE
https://youtu.be/edpuxR4NonU
Note: Order may be varied as required to ensure even PI distribution during pulls.
Full Range
Weaker initial, burst, and overall damage output. Better suited for large groups of adds that will survive for long enough to get the full value of all of the dots. Has the advantage of range, guaranteeing no interrupts.Heat Vision > Divine Light (combo)(clipped with) > Plague (combo)(clipped with) > Freezing Breath (2 ticks)(tap cancel) > Heat Vision > Plague (combo) > Freezing Breath (2 ticks)(tap cancel) > Repeat
https://youtu.be/prOu3uF55s0
https://youtu.be/A02_RFwUXwY
Celestial - 150% / True Max Range Rotation
This is designed to allow the player to fight from as far away from their target as possible while they and their pets are still able to land hits. It should only be used in rare instances where something is lethally buggy (eg. STU PZe on release), or where there are heavy range/positioning considerations where the consistency of being able to hit from so far can offset the reduced damage. It's a capability players should be aware of but not use often, if at all.
Retribution (combo)(clipped with) > Wither (combo)(clipped with) > Repeat, popping Godwave Strength off cooldown and immediately before using SC
Note: This is demo'd with an SC that intentionally doesn't deal damage or hit the boss to show the base performance, for which Quislet's SC proc is a factor. In practice, you would move in/out for an offensive SC and fill the remaining slot with clips.
Retribution (combo)(clipped with) > Wither (combo)(clipped with) > Repeat, popping Godwave Strength off cooldown and immediately before using SC
Note: This is demo'd with an SC that intentionally doesn't deal damage or hit the boss to show the base performance, for which Quislet's SC proc is a factor. In practice, you would move in/out for an offensive SC and fill the remaining slot with clips.
Celestial - Supercharge Analysis
Full Analysis
See the Celestial lines of the Supercharge Analysis spreadsheet[docs.google.com] for a detailed breakdown of exactly what each SC does, how it works, its limitations & considerations, and DMG:SC for ST & AoE with cast-time losses factored.
Note: Just because a given SC outperforms others vs Sparring Targets does not mean it is necessarily the best choice for all situations. Pick the best SC for the situation based on the range, ST/AoE, and vulnerability considerations at hand and be sure to factor green EoG feeding.
For Boss Fights
Celestial's SC situation is absolutely horrendous. Cursed Idol is the only realistic option. It does "passable" but below average damage by itself and its procs are dependent on trash mobs dying, so it never really feels good to use despite its massive AoE. Regardless, best-case SC min:max for the power is to do Neo Venom Boost enhanced Cursed Idol reinforced with Pied Piper's Flute. Thankfully, since it's a 5k, we can do this very frequently with normal green EoG income to help compensate for its lack of kick.
Despite Celestial's above average base boss performance, its ST situation makes it one of the most limited powers in the game for many situations and it significantly lowers its real-world performance ceiling. Relative to effectively every other power.
For Raid Trash Clear
Celestial has just about the most average hallway AoE rotations in the game. Unfortunately, in a competent group, the vast majority of hallway adds will be dead before the full value of Neo Venom Boost or Cursed Idol can be realized, but they still remain the best options. Neither is a particularly outstanding pick and we need to try to balance not sitting on a full SC bar with not accidentally wasting most of a SC on a group or cluster of adds unless they'll live long enough.
Celestial: AV's Recommendations
Solo/Alerts
There's really no great way to do Celestial without a Tank present if you're a good DPS.... You will have hate and you will get irritated at having to do point bank combos while dealing with constant cc. Depending on how annoyed I feel like being, I'll either run the General Purpose rotation, the Lernaea's Amulet Safety Net rotation, or the Blight Variant Point Blank AoE rotation. In all cases, I'll usually replace Robot Sidekick with Cursed Idol to do Neo into Cursed.Boss ST
For boss fights, I always use the Lernaea's Amulet All-In rotation's Plague Variant but I will also replace Robot Sidekick with Cursed Idol to do Neo'd Cursed Idols. If the healer is bad I will either do the same but with the Safety Net variant or I'll use Defile instead of Robot Sidekick/Cursed Idol, depending on how much green EoG feed there is. For Raid Hallway AoE
For hallways I'll either use the Mid Range Plague Variants, the Heat Vision Variant, or Blight Variant of the Point Blank rotation depending on the content.Artifacts
BiS for Solo/Alerts & Boss ST is Solar Amplifier + Lernaea's Amulet + Tetrahedron of Urgrund (or The Transformation Card if someone else can rock Tetra). BiS for Hallway AoEwill vary depending on which rotation you're using but will be some variation of Lernaea's Amulet, The Transformation Card, The Strategist Card, Tetrahedron of Urgrund, and/or Solar Amplifier. Ally Passives
Emperor Aquaman's Seaside Restart + The Batman Who Laughs' Luck of the Draw or Queen Diana's Don't Weaken *If the Troll can't keep you powered, replace this with Cyborg's All Your Base
Earth - Boss (ST Focus) Rotations
Important Power Notes
- Do not "reset" Jackhammer while comboing it. There is a misconception that DPS is increased by re-using the power but the higher damage on the initial hit comes with a major tempo loss and this practice ends up lowering overall DPS considerably.- Rotations relying on Debris Field are vulnerable to damage loss due to target positioning and occasionally inability to apply PI due to cooldown.
- If Jackhammer is pressed a second time after it's been activated, it can no longer combo. However, the power can be queued so there's no reason to press it more than once.
- Without Fortify Golem, Crystal loses to Robot Sidekick
General Purpose
Grimorium Verum PIHeat Vision > Freezing Breath (2 ticks)(tap cancel) > Sandblast > Upheaval (combo x1)(clipped with) > Heat Vision > Upheval (combo x1)(clipped with) > Sandblast > Freezing Breath (2 ticks)(tap cancel) > Heat Vision > Upheaval (combo x1)(clipped with) > Sandblast > Upheaval (combo x1)(clipped with) > Repeat
https://youtu.be/P1DtL81Zt6g
Note: If cleaner ST is required, we may substitute Zip Tie Attack, Pebble Blast, or Tornado Pull in for Upheaval but at a notable DPS loss.
Source Shard
Heat Vision > Upheaval* (+1 combo)(clipped with) > Sandblast > Upheaval* (+1 combo)(clipped with) > Repeat* Whenever it's available, use Godwave Strength instead of Upheaval (see video).
https://youtu.be/dxyxuJ2TcXM
Notes:
- Crystal variants are DPS loss without sacrificing SC slot.
- Remember to alternate activation of combat pet and henchmen, using the strongest pet/henchmen available. Does not buff turret-class pets. Ideal for situations where a boss will frequently force players to stop their rotations to deal with mechanics, as the pets can continue DPSing the boss when we can't.
La-Mort Variants
Grimorium Verum PI
Sandblast > Heat Vision > Upheaval (+1 combo)(clipped with) > Sandblast > Freezing Breath (3 ticks)(tap cancel) > Upheaval (+1 combo)(clipped with) > Repeathttps://youtu.be/4WZVn3cJjp8
or
Sandblast > Heat Vision > Upheaval (+1 combo)(clipped with) > Sandblast > Upheaval (+1 combo)(clipped with) > Heat Vision > Sandblast > Upheaval (+1 combo)(clipped with) > Freezing Breath (3 ticks)(tap cancel) > Repeat
https://youtu.be/-FuZlp87gzc
Debris Field PI
Slightly more damage than Grimorium Verum variants but highly vulnerable to DPS lose due to target movement.Sandblast > Heat Vision > Debris Field > Sandblast > Upheaval (+3 combo)(clipped with) > Sandblast > Heat Vision > Upheaval (+1 combo)(clipped with) > Sandblast > Upheaval (+3 combo)(clipped with) > Repeat
https://youtu.be/ge-IXLd1AXk
or
Sandblast > Heat Vision > Debris Field > Sandblast > Upheaval (+1 combo)(clipped with) > Heat Vision > Sandblast > Upheaval (+3 combo)(clipped with) > Repeat
https://youtu.be/ECwAEptZA2w
Lernaea's Amulet Safety Net
Demoed with Amulet actually on. Performance better with healer support.Grimorium Verum PI
Heat Vision > Upheaval (+2 combo)(clipped with) > Freezing Breath (2 ticks)(tap cancel) > Upheaval (+2 combo)(clipped with) > Repeat as best as able while popping Sandblast if healing or Offering reset is required
https://youtu.be/kyFEjFFKJhM

Lernaea's Amulet All-In Variants
Note: These have no out for the Amulet, meaning we are completely dependent on the healers and we need to know when to not cast to avoid killing ourselves. High risk, high reward. These should only be used with people you know. Do not use these if the healers are struggling in the slightest.Full Range Grimorium Verum Variant
3-PowerSlightly less ST damage potential and more vulnerable to interrupt but access to an additional loadout slot for a utility power (eg. shield) or additional SC.
Heat Vision > Upheaval (+2 combo)(clipped with) > Freezing Breath (2 ticks)(tap cancel) > Upheaval (+1 combo)(clipped with) > Repeat
https://youtu.be/itFJ0JYbjpM
or
4-Power
Slightly more ST damage potential and less vulnerable to interrupt.
Heat Vision > Upheaval (+1 combo)(clipped with) > Pebble Blast > Freezing Breath (2 ticks)(tap cancel) > Upheaval (+1 combo)(clipped with) > Repeat
https://youtu.be/n27rgZQWtAs
Full Range Debris Field Variant
More damage but vulnerable to DPS loss due to target leaving Debris Field.Debris Field > Heat Vision > Upheaval (+2 combo)(clipped with) > Freezing Breath (2 ticks)(tap cancel) > Upheaval (+1 combo)(clipped with) > Heat Vision > Upheaval (+2 combo)(clipped with) > Freezing Breath (2 ticks)(tap cancel) > Upheaval (+1 combo)(clipped with) > Repeat
https://youtu.be/VOBEdVmyBAY
Full Range Crystal Variant
Heat Vision > Upheaval (+1 combo)(clipped with) > Fortify Golem > Freezing Breath (2 ticks)(tap cancel) > Upheaval (+1 combo)(clipped with) > Repeathttps://youtu.be/tL-nSHjORVc
Short/Mid Range Variant
Heat Vision > Tectonic Break (clipped with) > Unstoppable > Jackhammer (+6 combo)(clipped with) > Repeathttps://youtu.be/QKwpxmXYr8g
Point Blank Variant
Whirling Dervish (3 ticks)(Dashing Combo)(clipped with) > Tectonic Break (clipped with) > Unstoppable > Jackhammer (+9 combo)(clipped with) > Repeathttps://youtu.be/ToPT1zKiuKk
Earth - Raid Hallway (AoE Focus) Rotations
Important Power Notes
- Do not "reset" Jackhammer while comboing it. There is a misconception that DPS is increased by re-using the power but the higher damage on the initial hit comes with a major tempo loss and this practice ends up lowering overall DPS considerably.- Rotations relying on Debris Field are vulnerable to damage loss due to target positioning and occasionally inability to apply PI due to cooldown.
- If Jackhammer is pressed a second time after it's been activated, it can no longer combo. However, the power can be queued so there's no reason to press it more than once.
- Without Fortify Golem, Crystal loses to Robot Sidekick
Short/Mid Range Variants
Freezing Breath + Jackhammer
Less damage than Whirling Dervish variant and uses a conal pbAoE vice full 360 pbAoEs but can be done from farther away so less vulnerable to KO/interrupt.Freezing Breath (2 ticks)(tap cancel) > Tectonic Break (clipped with) > Unstoppable > Jackhammer (+12 combo)(clipped with) > Repeat
https://youtu.be/tvkC4mVbQXE
https://youtu.be/ZtbPM60rizk
Point Blank Variants
Whirling Dervish + Jackhammer
Highest raw output AoE rotation for the power.Whirling Dervish (3 ticks)(Dashing Combo)(clipped with) > Tectonic Break (clipped with) > Unstoppable > Jackhammer (+9 combo)(clipped with) > Repeat
https://youtu.be/ykOk_pHrPr4
https://youtu.be/xlyxidn-VfA
Full Range Variants
Rumblecrush Variant
Lower max damage but most reliable Full Range PI application and bursty.[Freezing Breath (2 ticks)(tap cancel) > Rumblecrush > Upheaval (+2 combo)(clipped with) > Striking Stones > Upheaval (+2 combo)(clipped with)]* > Freezing Brehath (2 ticks)(tap cancel) > Striking Stones > Upheaval (+2 combo)(clipped with) > Striking Stones > Upheaval (+2 combo)(clipped with) > Repeat
* Repeat portion in square breaks anytime new targets are present without PI or can be reapplied every rotation if desired
https://youtu.be/O9YzDmYVOgU
https://youtu.be/fY3M8gd-0HY
Debris Field Variant
Higher damage but less bursty and more potential for DPS loss due to moving targets or lack of PI availability.Freezing Breath (2 ticks)(tap cancel) > Debris Field > Upheaval (+2 combo)(clipped with) > Striking Stones > Upheaval (+2 combo)(clipped with) > Freezing Breath (2 ticks)(tap cancel) > Striking Stones > Upheaval (+2 combo)(clipped with) > Striking Stones > Upheaval (+2 combo)(clipped with) > Repeat
https://youtu.be/hMoWfRkocbg
https://youtu.be/BaWnSQtudfQ
Heat Vision
Least bursty option, poor initial damage, most vulnerable to interrupt. Better performance when dealing with large groups of closely packed adds that will stay alive for a while. Prone to losing the Heat Vision burst in content due to bugs.Rumblecrush PI
Heat Vision > Upheaval (+1 combo)(clipped with) > Rumblecrush > Freezing Breath (2 ticks)(tap cancel) > Upheaval (+1 combo)(clipped with) > Repeat
https://youtu.be/33xNjLYniyM
https://youtu.be/tGMQWrMgRk4
or
Debris Field PI
Debris Field > Heat Vision > Upheaval (+2 combo)(clipped with) > Freezing Breath (2 ticks)(tap cancel) > Upheaval (+1 combo)(clipped with) > Heat Vision > Upheaval (+2 combo)(clipped with)
https://youtu.be/J1PC6F3croE
https://youtu.be/QSkd2kxUCDA
General Substitution Note: Shards may be substituted for Striking Stones in any of the above rotations at a moderate cost to range, a slight cost to long-term damage, and a slight increase to initial burst damage (hits slightly harder but has a slightly longer dovetail). It's a bit awkward as it's a mid-range conal pbAoE that advances our character every time we use it, however.
Earth - 150% / True Max Range Rotation
This is designed to allow the player to fight from as far away from their target as possible while they and their pets are still able to land hits. It should only be used in rare instances where something is lethally buggy (eg. STU PZe on release), or where there are heavy range/positioning considerations where the consistency of being able to hit from so far can offset the reduced damage. It's a capability players should be aware of but not use often, if at all.
Rumblecrush > Striking Stones > Fortify Golem > Rumblecrush > Striking Stones > *Godwave Strength > Repeat
*Only ever pop Godwave Strength in this position of the rotation to minimize downtime. This seems counter intuitive not always combining it with Fortify Golem (like we would on Sorcery) but the alternative is a high probability of major rotation downtime whenever Godwave doesn't reset for us. Always pop Godwave Strength before any SC.
Note: This is demo'd with an SC that intentionally doesn't deal damage or hit the boss to show the base performance, for which Quislet's SC proc is a factor. In practice, you would move in/out for an offensive SC and fill the remaining slot with clips.
Rumblecrush > Striking Stones > Fortify Golem > Rumblecrush > Striking Stones > *Godwave Strength > Repeat
*Only ever pop Godwave Strength in this position of the rotation to minimize downtime. This seems counter intuitive not always combining it with Fortify Golem (like we would on Sorcery) but the alternative is a high probability of major rotation downtime whenever Godwave doesn't reset for us. Always pop Godwave Strength before any SC.
Note: This is demo'd with an SC that intentionally doesn't deal damage or hit the boss to show the base performance, for which Quislet's SC proc is a factor. In practice, you would move in/out for an offensive SC and fill the remaining slot with clips.
Earth - Battle Tanking
Important: Sometimes it will be critical to ensure you reach the Dominance requirement to crowd control enemies while other times you can ignore it. The necessity varies from instance to instance.
Note: The content difficulty a player can rock this in will vary based on each player's knowledge and skill level and, in the highest content, the quality of the healer. This is generally ideal for Elite Alerts and anything around that difficulty level, but overkill for anything that doesn't actually need a tank at all.
For battle tanking with Earth, I recommend using the Point Blank Variant from the boss section:
Whirling Dervish (3 ticks)(Dashing Combo)(clipped with) > Tectonic Break (clipped with) > Unstoppable > Jackhammer (+9 combo)(clipped with) > Repeat
https://youtu.be/ht57fUenWls
The amount of actual tank gear you'll need to wear, if any, will vary from instance to instance. This can pretty safely sustain Lernaea's Amulet due to the extreme low cost of Jackhammer spam, but adjust as needed. It's important to understand that this doesn't hit over a huge area and that it doesn't have a pull, so you'll have to be aggressive about lunging around and tagging new mobs when needed.
Depending on SC feed, you may want to replace RSK with Entomb or, if swapping Scrap, Meteor Shower to run 2x SCs. If even more tankiness is needed, RSK can also be dropped for a shield or more utility.
If battle tanking current tier elite raids or SM content where the more aggressive approach proves untenable, you can modify a pure-tank build to incorporate a pet DPS Source Shard build.
Note: The content difficulty a player can rock this in will vary based on each player's knowledge and skill level and, in the highest content, the quality of the healer. This is generally ideal for Elite Alerts and anything around that difficulty level, but overkill for anything that doesn't actually need a tank at all.
For battle tanking with Earth, I recommend using the Point Blank Variant from the boss section:
Whirling Dervish (3 ticks)(Dashing Combo)(clipped with) > Tectonic Break (clipped with) > Unstoppable > Jackhammer (+9 combo)(clipped with) > Repeat
https://youtu.be/ht57fUenWls
The amount of actual tank gear you'll need to wear, if any, will vary from instance to instance. This can pretty safely sustain Lernaea's Amulet due to the extreme low cost of Jackhammer spam, but adjust as needed. It's important to understand that this doesn't hit over a huge area and that it doesn't have a pull, so you'll have to be aggressive about lunging around and tagging new mobs when needed.
Depending on SC feed, you may want to replace RSK with Entomb or, if swapping Scrap, Meteor Shower to run 2x SCs. If even more tankiness is needed, RSK can also be dropped for a shield or more utility.
If battle tanking current tier elite raids or SM content where the more aggressive approach proves untenable, you can modify a pure-tank build to incorporate a pet DPS Source Shard build.
Earth - Supercharge Analysis
Full Analysis
See the Earth lines of the Supercharge Analysis spreadsheet[docs.google.com] for a detailed breakdown of exactly what each SC does, how it works, its limitations & considerations, and DMG:SC for ST & AoE with cast-time losses factored.
Note: Just because a given SC outperforms others vs Sparring Targets does not mean it is necessarily the best choice for all situations. Pick the best SC for the situation based on the range, ST/AoE, and vulnerability considerations at hand and be sure to factor green EoG feeding.
For Boss Fights
Min:max can be achieved with either Neo > Entomb or Neo > Meteor Shower (requires Scrap).
For Raid Trash Clear
Recommended to use either Neo > Entomb or Entomb by itself. In content with lots of time between bosses, you might still consider Neo > Meteor Shower as an option but try to ensure you'll arrive at the boss fights with a full bar regardless sof which method you go with.
Earth: AV's Recommendations
Solo/Alerts
For low-member content I'll use either the Lernaea's Amulet Safety Net rotation or the Point Blank Lernaea's Amulet All-In variant with Sandblast instead of Robot Sidekick. Boss ST
For boss fights, I always use the Lernaea's Amulet All-In 3-Power Variant with Neo Venom Boost and Meteor Shower (used together). For Raid Hallway AoE
For hallways, I'll either continue to use my Boss ST loadout or switch to the Whirling Dervish + Jackhammer Point Blank Hallway AoE rotation.Artifacts
BiS for Solo/Alerts & Boss ST is Solar Amplifier + Lernaea's Amulet + Grimorium Verum (or The Transformation Card/Tetrahedron of Urgrund if you're able to use someone else's Crushed PI). BiS for the melee hallway rotation is Lernaea's Amulet + The Transformation Card + The Strategist CardAlly Passives
Emperor Aquaman's Seaside Restart + The Batman Who Laughs' Luck of the Draw or Queen Diana's Don't Weaken *If the Troll can't keep you powered, replace this with Cyborg's All Your Base
Additional Guidance
- Neo + Entomb is also viable but less DMG:SC overall than Neo + Meteor Shower. - Like all Grimorium Verum PI powers, it's important for players benefiting from Crushed PI to coordinate so no everyone is running Grim. Similarly, it's important to communicate who will wear the Tetra, since a Grim power really can't unless someone else is establishing PI for them.
- Practice Upheaval clipping, as you can clip it earlier than it appears you'd be able to.
Electricity - Boss (ST Focus) Rotations
Important Power Notes
- Do not queue taps onto Ionic Drain, as it will end the channel early.- Arc Lightning and Tesla Ball are non-split damage. They do poor initial damage unless hitting larger groups of adds.
- Due to having weak (for ST) PI applicators and a useless Grim interaction, the only way to reach the ST level of other powers without relying on Circuit Breaker is to PI share (ie. have a tank/troll/heal apply Electrify for you via either a consumable or Arc Lightning from an Elec healer).
Lernaea's Amulet PI Sharing All-In
Important: These PI Share rotations require another player to establish PI for youHeat Vision Variant Variant
Loadout: Heat Vision, Electrogenesis, Freezing Breath, Tesla Blast, Robot Sidekick, SCHeat Vision > Electrogenesis > Tesla Blast* > Tesla Blast* > Tesla Blast* > Heat Vision > Tesla Blast* > Tesla Blast* > Tesla Blast* > Tesla Blast* > Repeat
*Whenever Freezing Breath is off cooldown, do Freezing Breath (2 ticks)(tap cancel) instead of Tesla Blast
https://youtu.be/xErAsX1_YuE
Electrocute Variant
Notes:- Higher maximum DPS potential but much greater potential for DPS loss due to the damage field
- Electrocute makes it very hard for the group to see, even with outlines turned on, and is easily the most obnoxious attack in the entire game
Loadout: Electrogenesis, Electrocute, Freezing Breath, Tesla Blast, Robot Sidekick, SC
Electrogenesis > Electrocute > Tesla Blast* > Tesla Blast > Tesla Blast* > Tesla Blast* > Tesla Blast* > Tesla Blast* > Tesla Blast* > Tesla Blast* > Repeat
*Whenever Freezing Breath is off cooldown, do Freezing Breath (2 ticks)(tap cancel) instead of Tesla Blast
https://youtu.be/Zn0erE3T-0w
Lernaea's Amulet All-In
Strongest ST performance for the power (with Lernaea's Amulet actually on) and relatively safe with support present due to the low power costs involved. Still, this has no out for the Amulet, meaning we are dependent on the healers and need to know when to not cast to avoid killing ourselves. Heat Vision > Freezing Breath (2 ticks)(tap cancel) > Voltaic Bolt > Tesla Blast > Tesla Blast > Heat Vision > Freezing Breath (2 ticks)(tap cancel) > Tesla Blast > Tesla Blast > Tesla Blast > Repeat
https://youtu.be/Rv7Sv3QQ83c
Notes:
- If a safety net is desired, can replace Freezing Breath with Ionic Drain (but only activate it when you want to heal or remove Offering stacks).
- You may have to spam the input to get the range taps onto each Tesla Blast but it's worth it.
Lernaea's Amulet Safety Net
Demoed with Amulet actually on. Performance better with healer support.Heat Vision Variant
Heat Vision > Voltaic Bolt > Tesla Blast > Tesla Blast > Test Blast > Heat Vision > Tesla Blast > Tesla Blast > Tesla Bast > Tesla Blast > Repeat as best as able while popping Ionic drain if healing or Offering reset is requiredhttps://youtu.be/on2XIzrIBlQ
Spammier Variant
Electrogenesis > Voltaic Bolt > Tesla Blast > Tesla Blast > Tesla Blast > Tesla Blast > Tesla Blast > Tesla Blast > Tesla Blast > Tesla Blast > Tesla Blast > Tesla Blast > Ionic Drain > Repeat as best as able while popping Ionic drain if healing or Offering reset is requiredhttps://youtu.be/QE1coz3JTH4
General Purpose Variants
Electrified Variant
Best damage and cleanest STHeat Vision > Voltaic Bolt > Ionic Drain > Tesla Blast > Heat Vision > Tesla Blast > Ionic Drain > Tesla Blast > Repeat
https://youtu.be/1ZPxO9CM_9A
Polarized Variant
Less ST damage but better all round performance in mixed ST/AoE situations.Grimorium Verum PI
Heat Vision > Freezing Breath (2 ticks)(tap cancel) > Ionic Drain > Electrostatic Bomb > Heat Vision > Electrostatic Bomb > Ionic Drain > Freezing Breath (2 ticks)(tap cancel) > Heat Vision > Electrostatic Bomb > Ionic Drain > Electrostatic Bomb > Repeat
https://youtu.be/UZTtgUYsUsg
Note: Electrostatic Bomb is a projectile attack. It has a wide detonation area but can miss, so not ideal for all situations and you may want to stay at mid range or closer depending on how mobile the boss is.
Source Shard
Heat Vision > Electrostatic Bomb* > Ionic Drain > Electrostatic Bomb* > Repeat* Whenever it's available, use Godwave Strength instead of Electrostatic Bomb (see video).
https://youtu.be/NhESPMirq-4
Note: Remember to alternate activation of combat pet and henchmen, using the strongest pet/henchmen available. Does not buff turret-class pets. Ideal for situations where a boss will frequently force players to stop their rotations to deal with mechanics, as the pets can continue DPSing the boss when we can't.
La-Mort
Focused Variant
Ionic Drain > Heat Vision > Voltaic Bolt > Ionic Drain > Tesla Blast > Heat Vision > Ionic Drain > Tesla Blast > Tesla Blast > Tesla Blast > Repeat
https://youtu.be/rqWw01DglfM
Splashy Variant
Slightly less ST damage but better in mixed ST/AoE situations.Grimorium Verum PI
Ionic Drain > Heat Vision > Electrostatic Bomb > Ionic Drain > Freezing Breath (3 ticks)(tap cancel) > Electrostatic Bomb > Repeat
https://youtu.be/SM_SgrB00x0
or
Ionic Drain > Heat Vision > Electrostatic Bomb > Ionic Drain > Electrostatic Bomb > Heat Vision > Ionic Drain > Electrostatic Bomb > Freezing Breath (3 ticks)(tap cancel) > Repeat
https://youtu.be/E7DR2Ypd-TU
Electricity - Raid Hallway (AoE Focus) Rotations
Full Range
Only slightly behind the Point Blank build below but with essentially no real vulnerability to interrupt/KO.Freezing Breath (2 ticks)(tap cancel) > Arc Lightning > Voltaic Blast > Tesla Ball > Arc Lightning > Voltaic Blast > Repeat
https://youtu.be/upBxjg4jfy8
https://youtu.be/j9vCf673gbo
Point Blank
Highest and burstiest raw output but most vulnerable to interrupt/KO.Whirling Dervish (3 ticks)(tap cancel) > Arc Lightning > Voltaic Blast > Electrostatic Bomb > Repeat
https://youtu.be/Uah2AAeiL5s
https://youtu.be/A5UNd0PgCXw
Note: Use of Grimorium Verum not required but acceptable if one lacks other options. Optimal performance with this is achieved by using Electrostatic Bomb without PI while using artifacts that benefit the entire rotation.
Wrath of God
Despite the name, this rotation is actually a complete paper tiger that will almost never perform well in actual content. This is due to it suffering from almost every possible rotational weakness and limitation as follows:- Arc Lightning, Tesla Ball, and Heat Vision DoT are non-split, performing below average on 1-3 targets and above average on 4-8 targets
- Electrogenesis is a damage aura applied to the two viable targets that are closest to the caster. If those targets die or don't stay in range of other targets, this loses a lot of damage.
- Heat Vision is vulnerable to interrupt and the burst can bug out due to target loss or (post-nerf) for seemingly any reason. The burst & DoT will be completely lost a non-negligible number of times in any given run.
- Electrocute is a damage field vulnerable to heavy DPS loss vs targets that move out of it.
- This is extremely DoT heavy and does poor initial burst damage, taking a while to reach its full potential. Similarly, by the time it does reach full potential everything tends to be dead or near-death and this rarely gets an opportunity to shine.
This rotation is only really competitive when used against large, stationary groups of relatively tanky adds or if there is a significant performance gap between you and the other DPS such that adds are living considerably longer than they normally would be. Not viable for most raid hallways.
Arc Lightning > Tesla Ball > Electrogenesis > Arc Lightning > Heat Vision > Arc Lightning > Tesla Ball > Electrocute > Arc Lightning > Heat Vision > Repeat
https://youtu.be/GV_5jv23JHI
https://youtu.be/Hr0glzEwpOI
Electricity - Supercharge Analysis
Full Analysis
See the Electricity lines of the Supercharge Analysis spreadsheet[docs.google.com] for a detailed breakdown of exactly what each SC does, how it works, its limitations & considerations, and DMG:SC for ST & AoE with cast-time losses factored.
Note: Just because a given SC outperforms others vs Sparring Targets does not mean it is necessarily the best choice for all situations. Pick the best SC for the situation based on the range, ST/AoE, and vulnerability considerations at hand and be sure to factor green EoG feeding.
TLDR For Boss Fights
The best SCs to use will depend on whether you're using the cleaner ST variants in boss fights or brute-forcing the AoE rotations for ST situations. If using ST, both Circuit Breaker into Megavolt and Neo Venom Boost into Circuit Breaker into Megavolt (requires Scrap) are viable. If brute-forcing an AoE rotation, Circuit Breaker into Megavolt is the best option.
For Raid Trash Clear
For hallways, either Circuit Breaker or Megavolt by themselves or combined together are viable.
Electricity: AV's Recommendations
For Raid Hallway AoE
I'll always use the Full Range hallway AoE rotation.Boss ST
For boss fights, if there are going to be adds that we actually want damaged/killed, I will brute force the Full Range hallway AoE rotation for ST by replacing Robot Sidekick with Megavolt to do Circuit Breaker into Megavolt.If the fight has no/limited AoE component or damaging/killing adds isn't desirable, I will ideally use the Lernaea's Amulet PI Sharing All-In rotation's Heat Vision Variant (or just the self-PI All-In if I have to). If PI sharing, I will drop Robot Sidekick to run 3x SCs and do Circuit Breaker into Neo Venom Boost into Megavolt (requires Scrap swap). If I have to set my own PI I'll drop Robot Sidekick to do Circuit Breaker into Megavolt.
Solo/Alerts
For weaker content, unless doing something specific that merits using an unmodified rotation, it depends on how I'm feeling. I'll usually either do the Lernaea's Amulet Safety Net rotation but replace Voltaic Bolt with Arc Lightning (nothing will live long enough for Voltaic Bolt to be worth it) but sometimes I'll just run the Point Blank Hallway AoE rotation with Lernaea's Amulet on and a finisher instead of Robot Sidekick. Really you can mix/modify your rotations in a number of ways so long as you don't rely entirely on your non-split attacks or long DoTs. You could also run Grim and make a E Bomb rotation. Elec is a bit of an awkward power for weaker content. Artifacts
BiS for Solo/Alerts & Boss ST is generally Solar Amplifier + Lernaea's Amulet + The Transformation Card/Tetrahedron of Urgrund). BiS for the hallway rotation is Lernaea's Amulet + The Transformation Card (or Tetra if no one else can run it) + The Strategist Card.Ally Passives
Emperor Aquaman's Seaside Restart + The Batman Who Laughs' Luck of the Draw or Queen Diana's Don't Weaken *If the Troll can't keep you powered, which is extremely unlikely for Elec, replace this with Cyborg's All Your Base
Additional Guidance
- Know when to use Elec's clean ST option and when to use its full-on AoE option in boss fights. There are a lot of fights where cheesing the non-split AoE damage will cause damage by killing things that we don't want dead.- Modify your Solo/Alert rotation to suit your personal tastes. There's no really no perfect way to do it, just try to make sure it's bursty.
Fire - Boss (ST Focus) Rotations
Important Power Notes
- Queueing taps onto Absorb Heat will prevent you from being able to cancel it in any way. This bug can also occur randomly during group content due to external effects. Be cautious.
General Purpose Variants
Hybrid Variant
High output and gives us the ability to adjust rotation for clean ST or AoE splash situations. Also not vulnerable to Spontaneous Combustion's potential damage losses.Heat Vision > Absorb Heat > Snuff Out* > Freezing Breath** (2 ticks)(tap cancel) > Repeat
* When more splash/AoE is desired, skip Snuff Out. There will be a very slight delay before Freezing Breath can be activated.
** When clean ST is desired, skip Freezing Breath
https://youtu.be/2A0QDBVdSa8
Dirty Variant
High output and much more AoE/splash but less Empowered Channeling support. Ideal for most situations. Alternating Combustion and Freezing Breath like this results in a small but notable gain vs running Freezing Breath or Spontaneous Combustion independently.Alternating Iteration
Heat Vision > Absorb Heat > Freezing Breath (2 ticks)(tap cancel) > Heat Vision > Absorb Heat > Spontaneous Combustion > Repeat
https://youtu.be/AO34OhT6B_s
Notes:
- If targets are near death such that they won't survive for Spontaneous Combustion to proc multiple times, wait the split second to do Freezing Breath again instead.
- If rotation is interrupted/delayed, do Freezing Breath (since it will be off cooldown) instead of Spontaneous Conbustion.
- Damage skews slightly more ST than the Left to Right Iteration below. Good when focusing a target.
or
Left to Right Iteration
Heat Vision > Absorb Heat > Spontaneous Combustion > Freezing Breath (2 ticks)(tap cancel) > Repeat
https://youtu.be/Q5iDM6UZ4uE
Notes:
- Slightly less damage and doesn't have the same capacity to regain some DPS if delayed/interrupted but simpler execution.
- Damage skews slightly more AoE than the Alternating Iteration above. Good for when we want to eliminate adds..
Clean Variant
Clean, focused damage but despite Empowered Channeling, this is still vulnerable to interrupt. The only splash damage comes from Heat Vision's burst or targets walking through the beams.Heat Vision > Absorb Heat > Snuff Out > Repeat
https://youtu.be/Qh6gt6Ejs28
Note: The 4th slot can either be used for a utility power (eg. shield), or for a backup power to be used when we want to clip something with Robot Sidekick, Neo-Venom Boost, etc.
Bugfix / Support DPS Variant
These are alternatives for fights where the Absorb Heat cancellation bug might prove a significant issue. These can also be used to full-DPS while in Tank role to circumvent the 12% DMG penalty incurred for having duplicate roles in alerts, events, and open world content, since Absorb Heat does poor DPS in Tank role.Short/Mid Range Iteration
Best performance but limited range.
Heat Vision > Spontaneous Combustion > Snuff Out > Flashpoint > Repeat
https://youtu.be/ndPBPFdYgj8
or
Dual 6s Iteration
Decent full range performance but depends on clean, effective Freezing Breath execution. Slightly insulated against rotation delays and interrupts.
Heat Vision > Spontaneous Combustion > Snuff Out > Freezing Breath (2 ticks)(tap cancel) > Repeat
https://youtu.be/ySy8CJnkSNc
or
Wildfire Iteration
Heat Vision > Spontaneous Combustion > Snuff Out > Wildfire > Repeat
https://youtu.be/jJRdCNTCAQA
Source Shard
Pop Godwave Strength anytime it's off cooldown (see video). The length of channeling helps ensure we're rarely, if ever, overwriting our existing buff.Heat Vision > Absorb Heat > Snuff Out > Repeat
https://youtu.be/upfx7nGRDkU
Note: Remember to alternate activation of combat pet and henchmen, using the strongest pet/henchmen available. Does not buff turret-class pets. Ideal for situations where a boss will frequently force players to stop their rotations to deal with mechanics, as the pets can continue DPSing the boss when we can't.
La-Mort Variants
Absorb Heat Variant
Snuff Out > Heat Vision > Freezing Breath (2 ticks)(tap cancel) > Snuff Out > Absorb Heat > Repeathttps://youtu.be/q5EzNgI8pQI
or
Note: If trying to avoid the Absorb Heat block cancel bug, any of the below iterations will work for whatever your preferred playstyle and engagement range is.
Bugfix/Support DPS Variants
Note: All following variants are comparable in practice but have applications in that they have different effective ranges and varying degrees of splashiness.Flashpoint + Fireburst Variant
Snuff Out > Heat Vision > Flashpoint > Snuff Out > Fireburst > Flashpoint > Repeat
https://youtu.be/4DEeJAqihkk
or
Snuff Out > Heat Vision > Flashpoint > Snuff Out > Flashpoint > Heat Vision > Snuff Out > Flashpoint > Fireburst > Repeat
https://youtu.be/pHgzBDSdvVM
Wildfire + Freezing Breath Variant
Snuff Out > Heat Vision > Wildfire > Snuff Out > Freezing Breath (3 ticks)(tap cancel) > Wildfire > Repeat
https://youtu.be/A4j_LB_-2mU
or
Snuff Out > Heat Vision > Wildfire > Snuff Out > Wildfire > Heat Vision > Snuff Out > Wildfire > Freezing Breath (3 ticks)(tap cancel) > Repeat
https://youtu.be/AetIKQX8w08
Flashpoint + Freezing Breath Variant
Snuff Out > Heat Vision > Flashpoint > Snuff Out > Freezing Breath (3 ticks)(tap cancel) > Flashpoint > Repeat
https://youtu.be/i4Vn1o11KJU
or
Snuff Out> Heat Vision > Flashpoint > Snuff Out > Flash Point > Heat Vision > Snuff Out > Flashpoint > Freezing Breath (3 ticks)(tap cancel)
https://youtu.be/EAPLcov0u-0
Lernaea's Amulet Safety Net
Heat Vision > Absorb Heat > Freezing Breath (2 ticks)(tap cancel) > Heat Vision > Absorb Heat > Snuff Out > Repeathttps://youtu.be/XqXJ2Osp-uw
Note: This can also be used as an "All-In" rotation with a safety net by only activating Snuff Out when required.
Lernaea's Amulet All-In
Note: This has no out for the Amulet, meaning we are completely dependent on the healers and we need to know when to not cast to avoid killing ourselves. High risk, high reward. This should only be used with people you know. Do not use this if the healers are struggling in the slightest.Heat Vision > Absorb Heat > Freezing Breath (2 ticks)(tap cancel) > Heat Vision > Absorb Heat > Spontaneous Combustion > Repeat
https://youtu.be/AO34OhT6B_s
Fire - Raid Hallway (AoE Focus) Rotations
Point Blank Variants
Flame Cascade Variant
Vulnerable to interrupt. Take advantage of the mobility of Dervish and Cascade to position wisely & carefully.Whirling Dervish (3 ticks)(Dashing Combo)(clipped with) > Flashpoint > Enflame > Flame Cascade > Whirling Dervish (3 ticks)(Dashing Combo)(clipped with) > Flashpoint > Flame Cascade > Flame Cascade > Whirling Dervish (3 ticks)(Dashing Combo)(clipped with) > Flashpoint > Flame Cascade > Flame Cascade > Repeat
https://youtu.be/FAx9XiWi4tM
https://youtu.be/MFvtjguU5EU
Mass Detonation Variant
Higher potential by a slim margin but extremely vulnerable to interrupt and any rotational delays have the potential to result in significant DPS loss due to how tight the PI timing is with the final cast before reset.Whirling Dervish (3 ticks)(Dashing Combo)(clipped with) > Enflame > Mass Detonation > Whirling Dervish (3 ticks)(Dashing Combo)(clipped with) > Flashpoint > Mass Detonation > Whirling Dervish (3 ticks)(Dashing Combo)(clipped with) > Flashpoint > Mass Detonation > Repeat
https://youtu.be/0AKszAcsHMM
https://youtu.be/f6OEe9O3Iwk
Mid Range Variants
Heat Vision Variant
Rounded but vulnerable and below average initial burst potential. PI is entirely dependent on Heat Vision not being interrupted, the burst not bugging out, and the limited splash radius hitting all targets. Target and position carefully.Heat Vision > Spontaneous Combustion > Fireburst > Freezing Breath (2 ticks)(tap cancel) > Repeat
https://youtu.be/HnBuoJ_uCoQ
https://youtu.be/I6rie8quCqM
Meteor Strike Variant
Lower base DPS but improved SC gain for more Fireball Barrage spam in hallways.Meteor Strike > Spontaneous Combustion > Fireburst > Mass Detonation > Repeat
https://youtu.be/GvlLc3RlxRY
https://youtu.be/EU9RHLtIkNg
Grimorium Verum Variant
3-Power IterationCan use the free slot for an additional SC or for a backup power in case we get knocked out of rotation. Generally consistent performance but Grim isn't always quick with applying PI to newly pulled targets.
Freezing Breath (2 ticks)(tap cancel) > Mass Detonation > Fireburst > Mass Detonation > Repeat
https://youtu.be/_Z9RcI6y5pA
https://youtu.be/ym5wTNskbk0
or
4-Power Iteration
Slightly less damage than 3-Power Iteration but a bit burstier and less vulnerable to interrupt.
Freezing Breath (2 ticks)(tap cancel) > Flame Cascade > Spontaneous Combustion > Fireburst > Flame Cascade > Repeat
https://youtu.be/CxoTA3ew0RI
https://youtu.be/zvIv7M46cp4
Inferno Variant
High damage potential but vulnerable to losses due to lack of PI availability and targets leaving damage field. Better suited for large groups of stationary targets.Inferno > Freezing Breath (2 ticks)(tap cancel) > Mass Detonation > Fireburst > Mass Detonation > Freezing Breath (2 ticks)(tap cancel) > Mass Detonation > Fireburst > Mass Detonation > Repeat
https://youtu.be/wDyqArHAUis
https://youtu.be/Zf_xXRNA7qk
Engulf Variant
Lowest damage but most consistent PI application.Freezing Breath (2 ticks)(tap cancel) > Engulf > Mass Detonation > Fireburst > Engulf > Freezing Breath (2 ticks)(tap cancel) > Mass Detonation > Fireburst > Mass Detonation > Repeat
https://youtu.be/IkZCQr1zwLk
https://youtu.be/M0MUvjeiWMA
Fire - 150% / True Max Range Rotations
This is designed to allow the player to fight from as far away from their target as possible while they and their pets are still able to land hits. It should only be used in rare instances where something is lethally buggy (eg. STU PZe on release), or where there are heavy range/positioning considerations where the consistency of being able to hit from so far can offset the reduced damage. It's a capability players should be aware of but not use often, if at all.
Mass Detonation > Wildfire > Repeat, popping Godwave Strength off cooldown and immediately before using SC.
Note: If you want to sacrifice some overall DPS for more frequently available mass burst potential, you can also do Meteor Strike > Mass Detonation > Wildfire > Mass Detonation > Repeat. Spontaneous Combustion also technically hits from this range but you're 100% at the mercy of your teammates for the additional procs, since this has such a low hit count per rotation.
Note: This is demo'd with an SC that intentionally doesn't deal damage or hit the boss to show the base performance, for which Quislet's SC proc is a factor. In practice, you would move in/out for an offensive SC and fill the remaining slot with clips.
Mass Detonation > Wildfire > Repeat, popping Godwave Strength off cooldown and immediately before using SC.
Note: If you want to sacrifice some overall DPS for more frequently available mass burst potential, you can also do Meteor Strike > Mass Detonation > Wildfire > Mass Detonation > Repeat. Spontaneous Combustion also technically hits from this range but you're 100% at the mercy of your teammates for the additional procs, since this has such a low hit count per rotation.
Note: This is demo'd with an SC that intentionally doesn't deal damage or hit the boss to show the base performance, for which Quislet's SC proc is a factor. In practice, you would move in/out for an offensive SC and fill the remaining slot with clips.
Fire - Battle Tanking
Important: Sometimes it will be critical to ensure you reach the Dominance requirement to crowd control enemies while other times you can ignore it. The necessity varies from instance to instance.
Note: The content difficulty a player can rock this in will vary based on each player's knowledge and skill level and, in the highest content, the quality of the healer. This is generally ideal for Elite Alerts and anything around that difficulty level, but overkill for anything that doesn't actually need a tank at all.
Note: Thanks to Fire's enhanced healing received and the contributions of its self heals, a high end player can pretty safely battle tank most bosses that it's able to safely face tank while pure tanking.
Battle tanking with Fire requires unique rotations due to the vulnerabilities and Tank role changes with Fire's most critical DPS powers.
If using Lernaea's Amulet:
Heat Vision > Flashpoint* > Whirling Dervish (4-5 ticks)(Dashing Combos) > Flashpoint > repeat
*If needed, for more healing or if a pull or larger CC is required, Flashpoint can be replaced with Backdraft for a notable DPS loss.
https://youtu.be/lF17fYzdBDQ
If not using Lernaea's Amulet & wanting to focus ST:
Heat Vision > Flashpoint* > Snuff Out > Flashpoint > repeat
*If needed, for more healing or if a pull or larger CC is required, Flashpoint can be replaced with Backdraft for a notable DPS loss.
https://youtu.be/eUrFjvXyDpY
The amount of actual tank gear you'll need to wear, if any, will vary from instance to instance. This can pretty safely sustain Lernaea's Amulet with a passable healer due to the long channel periods and Stoke Flames combined with Flashpoint keeping everything permanently knocked down, but adjust as needed.
Depending on SC feed, you may want to replace RSK with Fireball Barrage or, if swapping Scrap, Volcanic Camality to run 2x SCs. If even more tankiness is needed, RSK can also be dropped for a shield or more utility.
If battle tanking current tier elite raids or SM content where the more aggressive approach proves untenable and the boss can't be face-tanked, you can modify a pure-tank ranged build to incorporate a pet DPS Source Shard build.
Note: The content difficulty a player can rock this in will vary based on each player's knowledge and skill level and, in the highest content, the quality of the healer. This is generally ideal for Elite Alerts and anything around that difficulty level, but overkill for anything that doesn't actually need a tank at all.
Note: Thanks to Fire's enhanced healing received and the contributions of its self heals, a high end player can pretty safely battle tank most bosses that it's able to safely face tank while pure tanking.
Battle tanking with Fire requires unique rotations due to the vulnerabilities and Tank role changes with Fire's most critical DPS powers.
If using Lernaea's Amulet:
Heat Vision > Flashpoint* > Whirling Dervish (4-5 ticks)(Dashing Combos) > Flashpoint > repeat
*If needed, for more healing or if a pull or larger CC is required, Flashpoint can be replaced with Backdraft for a notable DPS loss.
https://youtu.be/lF17fYzdBDQ
If not using Lernaea's Amulet & wanting to focus ST:
Heat Vision > Flashpoint* > Snuff Out > Flashpoint > repeat
*If needed, for more healing or if a pull or larger CC is required, Flashpoint can be replaced with Backdraft for a notable DPS loss.
https://youtu.be/eUrFjvXyDpY
The amount of actual tank gear you'll need to wear, if any, will vary from instance to instance. This can pretty safely sustain Lernaea's Amulet with a passable healer due to the long channel periods and Stoke Flames combined with Flashpoint keeping everything permanently knocked down, but adjust as needed.
Depending on SC feed, you may want to replace RSK with Fireball Barrage or, if swapping Scrap, Volcanic Camality to run 2x SCs. If even more tankiness is needed, RSK can also be dropped for a shield or more utility.
If battle tanking current tier elite raids or SM content where the more aggressive approach proves untenable and the boss can't be face-tanked, you can modify a pure-tank ranged build to incorporate a pet DPS Source Shard build.
Fire - Supercharge Analysis
Full Analysis
See the Fire lines of the Supercharge Analysis spreadsheet[docs.google.com] for a detailed breakdown of exactly what each SC does, how it works, its limitations & considerations, and DMG:SC for ST & AoE with cast-time losses factored.
Note: Just because a given SC outperforms others vs Sparring Targets does not mean it is necessarily the best choice for all situations. Pick the best SC for the situation based on the range, ST/AoE, and vulnerability considerations at hand and be sure to factor green EoG feeding.
For Boss Fights
Optimal min:max is achieved with Neo Venom Boost into Volcanic Calamity (requires Scrap) but Neo Venom Boost into Fireball Barrage can do just as well in the long run.
There are a lot of strings attached with Fire's SCs. For Volcanic Calamity, you'll want to verbally coordinate with your tank to "hold the boss steady" when using it like you would with an Orbital Strike. Similarly, vs extremely chaotic and mobile bosses (eg. Lady Blackhawk, Eye of Ekron) you need to wait for their vulnerable stationary periods (ie. rotating 360 cone attacks) before dropping it, or else just use Fireball Barrage instead.
If using Fireball Barrage, it's important to understand that the farther you are away, the more balls will miss. Similarly, these projectiles follow the same tracking rules that allow us to cheese enemy projectiles by jumping, meaning if you use them against a moving target you will miss badly. The best way to use Fireball Barrage is to lunge into point blank rage, blast the boss, then roll out quickly.
For Raid Trash Clear
Recommended to use either Neo Venom Boost into Fireball Barrage or Fireball Barrage by itself for hallways.
Fire: AV's Recommendations
Solo/Alerts
I use the Lernaea's Amulet Safety Net rotation but I only pop Snuff Out if I absolutely need to. I will usually replace Robot Sidekick with Volcanic Calamity to do Neo into Calamity but it depends on the run.Boss ST
For boss fights, I always use the Lernaea's Amulet All-In rotation but I replace Spontaneous Combustion with Volcanic Calamity.For Raid Hallway AoE
For hallways, I'll either continue to use my Boss ST loadout but hold Freezing Breath for all 4-ticks anytime it's hitting 2+ targets or I'll switch armoury to the Mid Range Heat Vision Variant.Artifacts
BiS for all of my personal picks here is Solar Amplifier + Lernaea's Amulet + The Transformation Card (or Tetrahedron of Urgrund if no one else is running it). If there are a lot of adds in the hallways in the raid you're running, you might consider using Strat instead of Trans.Ally Passives
Emperor Aquaman's Seaside Restart + The Batman Who Laughs' Luck of the Draw or Queen Diana's Don't Weaken *If the Troll can't keep you powered, which is extremely unlikely on Fire, replace this with Cyborg's All Your Base
Additional Guidance
- Fire seems chill but maxing it out means cranking up your APM by cycling targets intelligently, taking advantage of the long channels to swap aggressively, and taking advantage of the mobility to avoid DPS losses. It is the most average power in the game and takes skill & experience to max out.- Practice hitting menu/escape twice quickly to cancel your Absorb Heat queue. You will get locked out of cancelling it frequently and that unlocks it.
Gadgets - Boss (ST Focus) Rotations
Important Power Notes
- Unlike Robot Sidekick, Suppressor Turret activation cannot be clipped. Attempting to do so cancels the summon.Critical ST Stealth Notes
- If using Taser Pull to exit Stealth (not recommended, but viable for Mid/Long Range), you must precede Paralyzing Dart and Stealth with a ranged tap in order to proc Stealth's damage. Failing to do so or taking too long with the clip results in loss of the Stealth proc. - It's fairly easy to pop powers too quickly when using Stealth. This can result in: 1. If using Taser Pull (beyond Cuff 'em range) to exit, leaving Stealth before Stealth damage can proc; and 2. If using Cryo-foam to exit, accidentally activating a power on our DPS bar before we enter Stealth, immediately cancelling it. Be deliberate about Stealth activations.
- While Taser Pull can be used to exit Stealth at any range, it's recommended to instead use Cryo-foam when beyond Cuff 'em range. This is because Taser pull requires us to wait a split second to activate to ensure we don't leave Stealth before it procs whereas Cryo-foam can proc Stealth in its own right, removing a potential error from the equation.
- Is using Lernaea's Amulet, the Improved Stealth hand mod is mandatory. Without it, the Offering damage immediately cancels Stealth. Improved Stealth is recommended in general.
- Some weapons gain increased attack speed for ~1s after exiting Stealth if the clips and jump cancels are done just right, allowing us to execute additional taps.
- If you accidentally jump too high during a Mid Range Cuff 'em > Taser Pull (again, exiting with Taser Pull isn't recommended) jump cancel, wait a split second to reach the ground before activating any channeled power or it will instantly cancel.
- Get used to the range limits of Surprise Attack (slightly inside mid-range) and Cuff 'em (mid range) on a Sparring Target and know when to use which range variation based on current position relative to target.
- The 4-power clip exit of Stealth does less damage in most scenarios than the appropriate range-specific variant and it removes our ability to carry all variants + multiple SCs on our bar without incurring losses elsewhere. Despite the public sentiment, it is weaker than the Stealth loadouts listed below for the overwhelming majority of situations, especially for a Might player.
La-Mort
DPS Bar: Paralyzing Dart, Stealth, Photon Blast, Heat Vision, Taser Pull, Suppressor TurretStealth Bar: Taser Pull, Cuff' em, Surprise Attack, Suppressor Turret, SC, and one free slot for anything you want
Short Range Rotation
Photon Blast > Heat Vision > Taser Pull > Photon Blast > [Paralyzing Dart (clipped with) > Stealth (clipped with) > Cuff 'em (jump cancel)(clipped with) > Surprise Attack > Taser Pull > Photon Blast > Heat Vision > Taser Pull > Photon Blast > Taser Pull > Heat Vision > Photon Blast > Repeat portion in square brackets only]
https://youtu.be/-8iphau51IY
Mid/Long Range Rotation
Photon Blast > Heat Vision > Taser Pull > Photon Blast > [Paralyzing Dart (clipped with) > Stealth (clipped with) > Cuff 'em (jump cancel)(clipped with) > Taser Pull > Taser Pull > Taser Pull > Photon Blast > Heat Vision > Taser Pull > Photon Blast > Taser Pull > Heat Vision > Photon Blast > Repeat portion in square brackets only]
https://youtu.be/G61_jxzrwVM
https://youtu.be/GF_Xv9XKjsc
Notes:
- By exiting Stealth with Cuff 'em + Taser Pull at mid/long range, we can do two additional non-Stealth Taser Pulls before the next Photon Blast when this is done correctly. Don't forget to precede Paralyzing Dart with a tap to ensure Stealth's damage procs.
- Though not technically required at long range, recommended that we still do Cuff 'em as it guarantees we can't accidentally exit Stealth before the damage procs.
General Purpose Variants
Clean & Smooth Variant
DPS Bar: Paralyzing Dart, Stealth, Heat Vision, Taser Pull, Photon Blast, Suppressor TurretStealth Bar: Taser Pull, Cuff' em, Surprise Attack, Cryo-foam*, Suppressor Turret, SC
*Cryo-foam in slot 4 is optional, but recommended. See Critical ST Stealth Notes
Short Range Rotation
Heat Vision > Taser Pull > Photon Blast > Paralyzing Dart (clipped with) > Stealth (clipped with) > Cuff'em (jump cancel)(clipped with) > Surprise Attack > Heat Vision > Taser Pull > Photon Blast > Taser Pull > Repeat
https://youtu.be/4dC8T0ORqpE
Damage higher than shown due to Stealth bug prolonging combat exit here.
Mid Range Rotation
Heat Vision > Taser Pull > Photon Blast > Paralyzing Dart (clipped with) > Stealth (clipped with) > Cuff'em (jump cancel)(clipped with) > Taser Pull > Heat Vision > Taser Pull > Photon Blast > Taser Pull > Repeat
https://youtu.be/j7cPsSiuYaU
Long Range Rotation
Heat Vision > Taser Pull > Photon Blast > Paralyzing Dart (clipped with) > Stealth > Cryo-foam > Heat Vision > Taser Pull > Photon Blast > Taser Pull > Repeat
https://youtu.be/G2N_-bG3A5k
Nice & Sloppy Variant
Performance is comparable to the Smooth & Clean variant before factoring in finisher bonus damage at low target health but this has a wider DPS min:max. It's very hard to mess this variant up.DPS Bar: Paralyzing Dart, Stealth, Freezing Breath, Heat Vision, Taser Pull, Suppressor Turret
Stealth Bar: Taser Pull, Cuff' em, Surprise Attack, Cryo-foam*, Suppressor Turret, SC
*Cryo-foam in slot 4 is optional, but recommended. See Critical ST Stealth Notes
Short Range Rotation
Freezing Breath (2 ticks)(tap cancel) > Heat Vision > Taser Pull > Paralyzing Dart (clipped with) > Stealth (clipped with) > Cuff'em (jump cancel)(clipped with) > Surprise Attack > [Continue to spam Freezing Breath, Heat Vision, and Taser Pull at will, prioritizing Freezing Breath and Heat Vision but being careful to ensure the timing lines up with when Stealth gets off cooldown > Paralyzing Dart (clipped with) > Stealth (clipped with) > Cuff-'em (jump cancel)(clipped with) > Surprise Attack > Repeat portion in square brackets]
https://youtu.be/hu6-BtE25J8
Mid/Long Range Rotation
Freezing Breath (2 ticks)(tap cancel) > Heat Vision > Taser Pull > Paralyzing Dart (clipped with) > Stealth (clipped with) > Cuff'em (jump cancel)(clipped with) > Taser Pull > [Continue to spam Freezing Breath, Heat Vision, and Taser Pull at will, prioritizing Freezing Breath and Heat Vision but being careful to ensure the timing lines up with when Stealth gets off cooldown > Paralyzing Dart (clipped with) > Stealth (clipped with) > Cuff-'em (jump cancel)(clipped with) > Taser Pull > Repeat portion in square brackets]
https://youtu.be/GwCihhB1cJo
Long Range Rotation
Freezing Breath (2 ticks)(tap cancel) > Heat Vision > Taser Pull > Paralyzing Dart (clipped with) > Stealth > Cryo-foam > [Continue to spam Freezing Breath, Heat Vision, and Taser Pull at will, prioritizing Freezing Breath and Heat Vision but being careful to ensure the timing lines up with when Stealth gets off cooldown > Paralyzing Dart (clipped with) > Stealth > Cryo-foam > Repeat portion in square brackets]
https://youtu.be/72gZxzG5v_w
Gadgets - Boss (ST Focus) Rotations (Continued)
Source Shard
Main Bar: Godwave Strength, Stealth, Heat Vision, Taser Pull, Photon Blast, Suppressor TurretStealth Bar: Cryo-foam, Cuff' em, Surprise Attack, Godwave Strength*, Suppressor Turret, SC
* Godwave Strength's cooldown reset can only proc if it's on the active bar when we hear the artifact growl. It's possible to leave it off the Stealth bar but it's recommended to leave it on in order to ensure procs aren't missed.
Note: Remember to alternate activation of combat pet and henchmen, using the strongest pet/henchmen available. Does not buff turret-class pets. Ideal for situations where a boss will frequently force players to stop their rotations to deal with mechanics, as the pets can continue DPSing the boss when we can't.
Short Range Rotation
[Heat Vision > Taser Pull > Photon Blast]* > Godwave Strength (clipped with) > Stealth (clipped with) > Cuff'em (jump cancel)(clipped with) > Surprise Attack > Repeat
* Repeat the portion in square brackets until both Godwave Strength and Stealth are off cooldown together.
https://youtu.be/FOZQI6VeByY
Mid Range Rotation
[Heat Vision > Taser Pull > Photon Blast]* > Godwave Strength (clipped with) > Stealth (clipped with) > Cuff'em (jump cancel)(clipped with) > Cryo-foam > Repeat
* Repeat the portion in square brackets until both Godwave Strength and Stealth are off cooldown together.
https://youtu.be/5RT-IVV7Zyo
Long Range Rotation
[Heat Vision > Taser Pull > Photon Blast]* > Godwave Strength (clipped with) > Stealth > Cryo-foam > Repeat
* Repeat the portion in square brackets until both Godwave Strength and Stealth are off cooldown together.
https://youtu.be/IM2-oTbpooE
Lernaea's Amulet Safety Net
Main Bar: Paralyzing Dart, Stealth, Heat Vision, Taser Pull, Photon Blast, Suppressor TurretStealth Bar: Taser Pull, Cuff' em, Surprise Attack, Cryo-foam, Suppressor Turret, SC
Critical Note: Improved Stealth hand mod is mandatory to prevent self-inflicted damage from immediately cancelling Stealth.
Short Range Rotation
Heat Vision > Taser Pull > [Paralyzing Dart (clipped with) > Stealth (clipped with) > Cuff 'em (jump cancel)(clipped with) > Surprise Attack > continue to spam Taser Pull and Heat Vision until Stealth is ready again, popping Photon Blast when needed to keep from dying > Repeat portion in square brackets only]
https://youtu.be/-BBrNISxEDA
Mid/Long Range Rotation
Heat Vision > Taser Pull > [Paralyzing Dart (clipped with) > Stealth (clipped with) > Cuff 'em (jump cancel)(clipped with) > Taser Pull > continue to spam Taser Pull and Heat Vision until Stealth is ready again, popping Photon Blast when needed to keep from dying > Repeat portion in square brackets only]
https://youtu.be/_5ByzT3eC5g
https://youtu.be/STczEm_Wk5I
Lernaea's Amulet All-In
The General Purpose "Nice & Sloppy" variant can be used for All-In and is slightly more potent than the above safety net version.DPS Bar: Paralyzing Dart, Stealth, Freezing Breath, Heat Vision, Taser Pull, Suppressor Turret
Stealth Bar: Taser Pull, Cuff' em, Surprise Attack, Cryo-foam*, Suppressor Turret, SC
*Cryo-foam in slot 4 is optional, but recommended. See Critical ST Stealth Notes. We can also use Taser Pull exits as per the notes if we want a loose safety net by placing Photon Blast on the Stealth Bar.
Short Range Rotation
Freezing Breath (2 ticks)(tap cancel) > Heat Vision > Taser Pull > Paralyzing Dart (clipped with) > Stealth (clipped with) > Cuff'em (jump cancel)(clipped with) > Surprise Attack > [Continue to spam Freezing Breath, Heat Vision, and Taser Pull at will, prioritizing Freezing Breath and Heat Vision but being careful to ensure the timing lines up with when Stealth gets off cooldown > Paralyzing Dart (clipped with) > Stealth (clipped with) > Cuff-'em (jump cancel)(clipped with) > Surprise Attack > Repeat portion in square brackets]
https://youtu.be/hu6-BtE25J8
Mid/Long Range Rotation
Freezing Breath (2 ticks)(tap cancel) > Heat Vision > Taser Pull > Paralyzing Dart (clipped with) > Stealth (clipped with) > Cuff'em (jump cancel)(clipped with) > Taser Pull > [Continue to spam Freezing Breath, Heat Vision, and Taser Pull at will, prioritizing Freezing Breath and Heat Vision but being careful to ensure the timing lines up with when Stealth gets off cooldown > Paralyzing Dart (clipped with) > Stealth (clipped with) > Cuff-'em (jump cancel)(clipped with) > Taser Pull > Repeat portion in square brackets]
https://youtu.be/GwCihhB1cJo
Long Range Rotation
Freezing Breath (2 ticks)(tap cancel) > Heat Vision > Taser Pull > Paralyzing Dart (clipped with) > Stealth > Cryo-foam > [Continue to spam Freezing Breath, Heat Vision, and Taser Pull at will, prioritizing Freezing Breath and Heat Vision but being careful to ensure the timing lines up with when Stealth gets off cooldown > Paralyzing Dart (clipped with) > Stealth > Cryo-foam > Repeat portion in square brackets]
https://youtu.be/72gZxzG5v_w
Gadgets - Raid Hallway (AoE Focus) Rotations
Important Power Notes
- Though mines will only explode in close proximity to targets (or after a set amount of time), the detonation radius is relatively massive. The same is true of EMP./i]
Point Blank Variants
Mine Loadout Variant
Better initial spike damage and burstier overall. If using The Strategist Card, this will generally do slightly more on small groups and slightly less on large groups when compared to the Fear Gas variant.Main Bar: Whirling Dervish, Thermite Mine, Implosion Mine, Paralyzing Dart, Stealth, Suppressor Turret
Stealth Bar: SC, SC, Suppressor Turret, Cuff 'em, EMP Pulse, Surprise Attack
Whirling Dervish (3 ticks)(Dashing Combo)(clipped with) > Thermite Mine > Implosion Mine > Paralyzing Dart (clipped with) > Stealth (clipped with) > EMP Pulse > Whirling Dervish (3 ticks)(Dashing Combo)(clipped with) > Thermite Mine > Implosion Mine > Paralyzing Dart > Whirling Dervish (3 ticks)(Dashing Combo)(clipped with > Thermite Mine > Implosion Mine > Paralyzing Dart > Repeat
https://youtu.be/jwEuE--mPAQ
https://youtu.be/OLJ2Q5lwypM
Feargas Loadout Variant
If using The Strategist Card, this will generally do slightly less DPS against small groups of adds and slightly more to large groups of adds compared to the previous variant.Main Bar: Whirling Dervish, Thermite Mine, Fear Gas, Paralyzing Dart, Stealth, Suppressor Turret
Stealth Bar: SC, SC, Suppressor Turret, Cuff 'em, EMP Pulse, Surprise Attack
Whirling Dervish (3 ticks)(Dashing Combo)(clipped with) > Thermite Mine > Fear Gas > Paralyzing Dart (clipped with) > Stealth (clipped with) > EMP Pulse > Whirling Dervish (3 ticks)(Dashing Combo)(clipped with) > Thermite Mine > Fear Gas > Paralyzing Dart > Whirling Dervish (3 ticks)(Dashing Combo)(clipped with > Thermite Mine > Fear Gas > Paralyzing Dart > Repeat
https://youtu.be/C8aMO-5BDKo
https://youtu.be/Sd2oWVgemSE

Short/Mid Range
Main Bar: Thermite Mine, Implosion Mine, Fear Gas, Paralyzing Dart, Stealth, Suppressor TurretStealth Bar: SC, SC, Suppressor Turret, Cuff 'em, EMP Pulse, Surprise Attack
Thermite Mine > Implosion Mine > Fear Gas > Paralyzing Dart (clipped with) > Stealth (clipped with) > EMP Pulse > Thermite Mine > Implosion Mine > Fear Gas > Paralyzing Dart > Thermite Mine > Implosion Mine > Fear Gas > Paralyzing Dart > Repeat
https://youtu.be/ey2Dy1h_Axo
https://youtu.be/NMVfi_2gFa4
Long Range Variants
Frosty Variant
Main Bar: Heat Vision, Cryo-foam, Paralyzing Dart, Stealth, Freezing Breath, Suppressor TurretStealth Bar: SC, SC, Suppressor Turret, Fear Gas, Cuff 'em, Surprise Attack
Heat Vision > Cryo-foam > Paralyzing Dart (clipped with) > Stealth (clipped with) > Fear Gas > Cryo-foam > Freezing Breath (2 ticks)(tap cancel) > Heat Vision > Cryo-foam > Paralyzing Dart > Cryo-foam > Freezing Breath (2 ticks)(tap cancel) > Repeat
https://youtu.be/vSGL9gUMO4I
https://youtu.be/2iSRbPdcdTg
Gassy Variant
Main Bar: Heat Vision, Cryo-foam, Fear Gas, Paralyzing Dart, Stealth, Suppressor TurretStealth Bar: SC, SC, Suppressor Turret, Cryo-foam, Cuff 'em, Surprise Attack
Heat Vision > Cryo-foam > Fear Gas > Paralyzing Dart (clipped with) > Stealth (clipped with) > Cryo-foam > Heat Vision > Cryo-foam > Fear Gas > Paralyzing Dart > Cryo-foam > Repeat
https://youtu.be/eGXVmu0y6OM
https://youtu.be/-z7Mv3hNrF0
Gadgets - 150% / True Max Range Rotation
This is designed to allow the player to fight from as far away from their target as possible while they and their pets are still able to land hits. It should only be used in rare instances where something is lethally buggy (eg. STU PZe on release), or where there are heavy range/positioning considerations where the consistency of being able to hit from so far can offset the reduced damage. It's a capability players should be aware of but not use often, if at all.
Cryo-foam > Paralyzing Dart > Fear Gas > Repeat, popping Godwave Strength off cooldown and immediately before using SC
Note: This is demo'd with an SC that intentionally doesn't deal damage or hit the boss to show the base performance, for which Quislet's SC proc is a factor. In practice, you would move in/out for an offensive SC and fill the remaining slot with clips.
Cryo-foam > Paralyzing Dart > Fear Gas > Repeat, popping Godwave Strength off cooldown and immediately before using SC
Note: This is demo'd with an SC that intentionally doesn't deal damage or hit the boss to show the base performance, for which Quislet's SC proc is a factor. In practice, you would move in/out for an offensive SC and fill the remaining slot with clips.
Gadgets - Battle Trolling
There are different battle troll options depending on group configuration:
Main Bar:Gauss Grenade*, Stealth, Heat Vision, Paralyzing Dart, Defibrillator, Photon Blast
Stealth Bar: Cryo-foam, Cuff 'em, Surprise Attack, Neo-Venom Boost, Bunker Buster, Battle Drone
*Stasis Field is also viable (less damage but greater SC generation) but encase can be problematic and annoying.
Gauss Grenade (clipped with) > Stealth (clipped with) > Cuff 'em (jump cancel) > Surprise Attack* > Heat Vision > Paralyzing Dart (clipped with) > Defibrillator > Photon Blast > Gauss Grenade > Heat Vision > Paralyzing Dart (clipped with) > Defibrillator > Photon Blast > repeat
*If out of Surprise Attack range, do Cryo-foam instead.
https://youtu.be/MqzaokAHCME
Note: My Stealth bar accidentally had Heat Vision where Neo-Venom Boost should have been in this demo.
- Compatible with Lernaea's Amulet, if desired.
- It's also an option for the DPS Troll to spam EoG on the DPS (viability of this approach depends on how strong the DPS Troll is vs the pure DPS and is more viable if the Troll DPS is weak).
Main Bar:Paralyzing Dart, Stealth, Heat Vision, Birds' Blitz, Taser Pull, Suppressor Turret
Stealth Bar: Cryo-foam, Cuff 'em, Surprise Attack, Neo-Venom Boost, Bunker Buster, Suppressor Turret
Birds' Blits > Taser Pull > Paralyzing Dart (clipped with) > Stealth (clipped with) > Cuff 'em (jump cancel) > Surprise Attack* > Heat Vision > Birds' Blits > Taser Pull > Taser Pull > Taser Pull > Heat Vision > Repeat
*If out of Surprise Attack range, do Cryo-foam instead.
https://youtu.be/MYC4kNqlS6U
b]Main Bar:[/b]Whirling Dervish, Thermite Mine, Implosion Mine, Birds' Blitz, Stealth, Suppressor Turret
Stealth Bar: Suppressor Turret, Bunker Buster, Neo-Venom Boost, Cuff 'em, EMP Pulse, Surprise Attack
Birds' Blitz (clipped with) > Stealth (clipped with) > EMP Pulse > Whirling Dervish (3 ticks)(Dashing Combos)(clipped with) > Thermite Mine > Implosion Mine > Birds' Blitz > Whirling Dervish (3 ticks)(Dashing Combos)(clipped with) > Thermite Mine > Implosion Mine > Birds' Blitz > Whirling Dervish (3 ticks)(Dashing Combos)(clipped with) > Thermite Mine > Implosion Mine > repeat
Note: I derped and did the wrong number of ticks for Dervish in the demo, so the re-up on Chains is off. Also, in an actual group the damage will be higher due to Chains re-applying the entire groups damage.
https://youtu.be/9ON3YPWlwWY
Main Bar: Defibrillator, Stealth, Heat Vision, Paralyzing Dart, Photon Blast, Suppressor Turret
Stealth Bar: Cryo-foam, Cuff 'em, Surprise Attack, Neo-Venom Boost, Battle Drone, Suppressor Turret
Paralyzing Dart (clipped with) > Defibrillator > Photon Blast > Paralyzing Dart (clipped with) > Stealth (clipped with) > Cuff 'em (jump cancel) > Surprise Attack* > Heat Vision > Paralyzing Dart (clipped with) > Defibrillator > Photon Blast > Paralyzing Dart > Heat Vision > repeat
* When out of Surprise Attack Range, do Cryo-foam instead
https://youtu.be/EUHbtWDcvfY
1. Solo Buff/Battle Troll
Note: This is designed for a Might-based group. If you need to proc Cog of Mageddon you can throw a Weapon Mastery in at appropriate intervals (or a Prec DPS can run their own Cog).Main Bar:Gauss Grenade*, Stealth, Heat Vision, Paralyzing Dart, Defibrillator, Photon Blast
Stealth Bar: Cryo-foam, Cuff 'em, Surprise Attack, Neo-Venom Boost, Bunker Buster, Battle Drone
*Stasis Field is also viable (less damage but greater SC generation) but encase can be problematic and annoying.
Gauss Grenade (clipped with) > Stealth (clipped with) > Cuff 'em (jump cancel) > Surprise Attack* > Heat Vision > Paralyzing Dart (clipped with) > Defibrillator > Photon Blast > Gauss Grenade > Heat Vision > Paralyzing Dart (clipped with) > Defibrillator > Photon Blast > repeat
*If out of Surprise Attack range, do Cryo-foam instead.
https://youtu.be/MqzaokAHCME
Note: My Stealth bar accidentally had Heat Vision where Neo-Venom Boost should have been in this demo.
2. 2-Troll Config: Full DPS-Spec Debuff Troll + Battle Buff Troll (Raid Only)
This group config is what B.O.P. Commlink was made for, essentially (but you don't need B.O.P. Commlink to take advantage of this approach with most Troll powers). One player goes Troll in full DPS gear/spec with B.O.P. Commlink (if needed), Amulet of Rao, and either a DPS artifact or, in AoE (or other specific) situations, sometimes Grimbor's Chains and does what's effectively a pure DPS rotation with Birds' Blitz injected (when it's needed). This frees the "Pure" / Buff Troll up to use a bit more damaging rotations thanks to not having to run some weaker debuff powers and also allows them to run additional buff or DPS artifacts. The net DPS gain to the group is higher than a solo Troll group config with the caveat that it's basically impossible to setup outside of League runs (most people won't have the artis for the DPS Troll, since they can pretty much only reliably be used in concert with another Troll also having specific artis).(In 2-Troll Setup Only) Debuff/DPS Troll's Rotations:
Notes:- Compatible with Lernaea's Amulet, if desired.
- It's also an option for the DPS Troll to spam EoG on the DPS (viability of this approach depends on how strong the DPS Troll is vs the pure DPS and is more viable if the Troll DPS is weak).
For Bosses:
Important: You can also just do the Solo Buff/Battle Troll rotation from above and replace Defibrillator & Battle Drone with Robot Sidekick. That also has the benefit of not leaving the small gaps between debuffs that Birds' Blitz does when used with a rotation using Stealth.Main Bar:Paralyzing Dart, Stealth, Heat Vision, Birds' Blitz, Taser Pull, Suppressor Turret
Stealth Bar: Cryo-foam, Cuff 'em, Surprise Attack, Neo-Venom Boost, Bunker Buster, Suppressor Turret
Birds' Blits > Taser Pull > Paralyzing Dart (clipped with) > Stealth (clipped with) > Cuff 'em (jump cancel) > Surprise Attack* > Heat Vision > Birds' Blits > Taser Pull > Taser Pull > Taser Pull > Heat Vision > Repeat
*If out of Surprise Attack range, do Cryo-foam instead.
https://youtu.be/MYC4kNqlS6U
For Hallway AoE:
b]Main Bar:[/b]Whirling Dervish, Thermite Mine, Implosion Mine, Birds' Blitz, Stealth, Suppressor Turret
Stealth Bar: Suppressor Turret, Bunker Buster, Neo-Venom Boost, Cuff 'em, EMP Pulse, Surprise Attack
Birds' Blitz (clipped with) > Stealth (clipped with) > EMP Pulse > Whirling Dervish (3 ticks)(Dashing Combos)(clipped with) > Thermite Mine > Implosion Mine > Birds' Blitz > Whirling Dervish (3 ticks)(Dashing Combos)(clipped with) > Thermite Mine > Implosion Mine > Birds' Blitz > Whirling Dervish (3 ticks)(Dashing Combos)(clipped with) > Thermite Mine > Implosion Mine > repeat
Note: I derped and did the wrong number of ticks for Dervish in the demo, so the re-up on Chains is off. Also, in an actual group the damage will be higher due to Chains re-applying the entire groups damage.
https://youtu.be/9ON3YPWlwWY
(In 2-Troll Setup Only) Buff Troll's Rotation:
Note: This is designed for a Might-based group. If you need to proc Cog of Mageddon, you can throw a Weapon Mastery in at appropriate intervals to keep it active (or a Prec DPS can run their own Cog).Main Bar: Defibrillator, Stealth, Heat Vision, Paralyzing Dart, Photon Blast, Suppressor Turret
Stealth Bar: Cryo-foam, Cuff 'em, Surprise Attack, Neo-Venom Boost, Battle Drone, Suppressor Turret
Paralyzing Dart (clipped with) > Defibrillator > Photon Blast > Paralyzing Dart (clipped with) > Stealth (clipped with) > Cuff 'em (jump cancel) > Surprise Attack* > Heat Vision > Paralyzing Dart (clipped with) > Defibrillator > Photon Blast > Paralyzing Dart > Heat Vision > repeat
* When out of Surprise Attack Range, do Cryo-foam instead
https://youtu.be/EUHbtWDcvfY
Gadgets - Supercharge Analysis
Full Analysis
See the Gadgets lines of the Supercharge Analysis spreadsheet[docs.google.com] for a detailed breakdown of exactly what each SC does, how it works, its limitations & considerations, and DMG:SC for ST & AoE with cast-time losses factored.
Note: Just because a given SC outperforms others vs Sparring Targets does not mean it is necessarily the best choice for all situations. Pick the best SC for the situation at hand and be sure to factor green EoG feeding.
For Boss Fights
All of Gadgets offensive SCs are kinda awful. Min:Max is achieved with Neo Venom Boost into Bunker Buster (requires Scrap) but be sure to verbally coordinate with the tank to keep the boss stationary. Vs highly mobile enemies, you have to wair for their stationary/vulnerable phases to drop this without losing SC. Barring a full-nut SC dump, in pure ST situations, Neo Venom Boost alone will get you by as it's significantly more potent than ST Asphyxiation gas, even when the latter is buffed by Neo. In multi-target boss situations, if you don't have Scrap you may still consider Neo into Asphyxiation.
Note: As per below, the full nut tac swap for Gadgets is a bit more complicated and has to be done over two different Stealth activations. This effectively precludes the inclusion of a Stone swap without incurring rotational losses (if you lead with Stone, it will generally still have worn off before the damage SC is used).
https://youtu.be/ZCurMQCj4ow
In practice, we'd be using Lernaea's Amulet instead of Quislet.
TLDR For Raid Trash Clear
Despite its inefficiency, Neo Venom Boost is the best choice due to Gadgets hallway AoE being one of the hardest hitting AoE rotations. That said, there's no reason not to have either Bunker Buster or Asphyxiation Gas in the Stealth bar as well for when we can do a full dump during long periods between bosses.

Gadgets: AV's Recommendations
Solo/Alerts
I will generally run the Lernaea's Amulet Safety Net rotation for this type of content.Boss ST
For boss fights, I will usually use the Lernaea's Amulet All-In Rotation while running both Neo Venom Boost and Bunker Buster in my Stealth bar (see Gadgets Supercharge Analysis for proper execution).For Raid Hallway AoE
I will pretty much always run the Point Blank rotation's Mine Loadout Variant, as it's one of the hardest hitting AoE rotations in the game.Artifacts
BiS for Solo/Alerts & Boss ST is Solar Amplifier + Lernaea's Amulet + The Transformation Card (or Tetrahedron of Urgrund if no one else is running it). BiS for the melee hallway rotation is Lernaea's Amulet + The Transformation Card + The Strategist Card.Ally Passives
Emperor Aquaman's Seaside Restart + The Batman Who Laughs' Luck of the Draw or Queen Diana's Don't Weaken *If the Troll can't keep you powered, replace this with Cyborg's All Your Base
Additional Guidance
- Get good at being in range when you need to pop Stealth, as Surprise Attack is critical to Gadgets' performance.- Suppressor Turret hits like a truck and is worth keeping summoned.
- Be aware that Gadget's best boss rotations have very poor AoE. If content requires AoE burst in a boss fight, you'll want to consider saving your SC and trinkets for it.
Ice - Boss (ST Focus) Rotations
Important Power Notes
- Ice Boulder has poor target penetration. It can hit multiple targets but only if they are very tightly packed. Virtually any spacing can result in the boulder breaking early.- Be sure to use the Super-Strength Iconic Power if using Ice Boulder.
- After summoning an Ice Boulder, we cannot block until it is dropped or thrown.
- Summoning Ice Boulder instantly grants us full movement speed, even in combat.
- Frost Blast'sis now working reliably (it appears to have been queue locked to prevent anything from cancelling the damage).
- Frost Blast is a great power when used correctly but in short spurts it is less consistent due to the nature of how it deals a massive burst of damage after a long cast. This averages out well over extended periods but in short encounters it will be feast or famine.
- If cleaner ST is required, Frost Snipe or Zip Tie Attack may be substituted for Ice Boulder Strike in applicable ST rotations.
General Purpose Variants
These are recommended for daily content or content where a tank isn't present.Ice Boulder Strike Variant
Heat Vision > Freezing Breath (2 ticks)(tap cancel) > Glacier Flash > Ice Boulder Strike > Heat Vision > Ice Boulder Strike > Glacier Flash > Freezing Breath (2 ticks)(tap cancel) >Heat Vision > Ice Boulder Strike > Glacier Flash >Ice Boulder Strike > RepeatNote: Against enemies with low health such as those in alerts and other low-man content, you will often be better off initiating with Freezing Breath (2 ticks)(tap cancel) > Ice Boulder Strike > Heat Vision before adopting the above rotation (or skipping an additional Ice Boulder Strike and jumping straight to finisher depending on how much health the targets have). This is because IBS takes a second to hit after casting, so this has slightly better up-front burst potential and allows us to better adjust our flow based on the situation after the initial volley.
https://youtu.be/ECwntpQgrL8
Ice Boulder Variant
Heat Vision > Ice Boulder (thrown) > Glacier Flash > Freezing Breath (2 ticks)(tap cancel) > Repeathttps://youtu.be/UPCJ139Rw-4
Source Shard Variants
Ice Boulder Strike Variant
Note: Remember to alternate activation of combat pet and henchmen, using the strongest pet/henchmen available. Does not buff turret-class pets. Ideal for situations where a boss will frequently force players to stop their rotations to deal with mechanics, as the pets can continue DPSing the boss when we can't.Heat Vision> Ice Boulder Strike* > Glacier Flash > Ice Boulder Strike* > Repeat
* Use Godwave Strength instead of Ice Boulder Strike whenever it's off cooldown. (See video).
https://youtu.be/-5MCS7i999o
Ice Boulder Variant
Heat Vision > Ice Boulder (thrown) > Glacier Flash > RepeatNote: Pop Godwave Strength whenever it's off cooldown. (See video).
https://youtu.be/kjXNfrX3OXM
La-Mort Variants
Frost Blast Variant
Put Reflection in the4th loadout slot but only use it when CC'd, forced to stop rotation to move for mechanics, or to clip other activations. Please note that the added damage from Reflection isn't factored into the performance on the meta tracker and that this is, as a result, both the safest and highest DPS non-Amulet rotation for the power.Glacier Flash > Ice Boulder (thrown) > Frost Blast > Repeat
https://youtu.be/U99GxUiw-WY
Alternating Variant
Freezing Breath (2 ticks)(tap cancel) > [Glacier Flash > Ice Boulder Strike > Heat Vision > Glacier Flash > Ice Boulder Strike > Freezing Breath (3 ticks)(tap cancel) > Repeat portion in square brackets]https://youtu.be/I7iZ5GoyL4A
Heat Vision Focus Variant
Freezing Breath (2 ticks)(tap cancel) > [Glacier Flash > Heat Vision > Ice Boulder Strike > Glacier Flash > Ice Boulder Strike > Heat Vision > Glacier Flash > Ice Boulder Strike > Freezing Breath (3 ticks)(tap cancel) > Repeat portion in square bracets]https://youtu.be/tSBDkHMHCUQ

Lernaea's Amulet Safety Net
We can either put Glacier Flash in the 4th slot so we can an Offerin reset or we can put Reflection there. Reflection is unlikely to get any damage due to going down fast from Offering ticks but it can let us stay at 10 stacks and/or cover us if the healers need a second while also proccing Ice Armour for +35% Defense, balancing out our Offering overallIce Boulder (thrown) > Frost Blast > Heat Vision > Repeat [activating Glacier Flash/Reflection whenever we need to not die]
https://youtu.be/fJT1FOL4c7A
Lernaea's Amulet All-In
Notes: - This has no out for the Amulet, meaning we are completely dependent on the healers and we need to know when to not cast to avoid killing ourselves. High risk, high reward. This should only be used with people you know. Do not use this if the healers are struggling in general. This is content-dependent and not safe or recommended for a number of endgame boss fights. For highest levels of overall group play only.
- These should only be used when a Tank is present, as when you're the top DPS otherwise you'll be constantly interrupted during Frost Blast and Ice Boulder. These are excellent for raids but not ideal for daily content.
Frost Blast Variant
Freezing Breath > Ice Boulder (thrown) > Frost Blast > Heat Vision > Repeathttps://youtu.be/isx-Z8gQ5Yc
Sonic Cry Variant
Freezing Breath > Ice Boulder (thrown) > Frost Blast > Sonic Cry > Repeathttps://youtu.be/LamBKIuq7CQ
Ice Boulder Strike Variant
Less damage than the above iterations but the damage is less vulnerable to interrupt.Ice Boulder (thrown) > [Heat Vision > Ice Boulder Strike > Freezing Breath (2 ticks)(tap cancel) > Ice Boulder (thrown) > Ice Boulder Strike > Repeat portion in square brackets]
https://youtu.be/WCTJYTMIDKU
Ice - Raid Hallway (AoE Focus) Rotations
Mid Range Variants
Steady Variant
Freezing Breath (2 ticks)(tap cancel) > Impaling Ice > Ice Boulder Strike > Avalanche > Ice Boulder Strike > Repeathttps://youtu.be/Ui2RRbbpPlc
https://youtu.be/df8toQwokYo
Heat Vision Variant
Worse vs small groups, only slightly better for large groups (over a prolonged period), more vulnerable to damage loss, and worse initial damage. Despite the sparring target average appearing to only be slightly behind the previous variant, this is inferior for most normal applications.Heat Vision > Freezing Breath (2 ticks)(tap cancel) > Impaling Ice > Avalanche > Repeat
https://youtu.be/LNT5AB1DKV0
https://youtu.be/57PH4pA0-x0
Point Blank Variants
Conal pbAoE 5-Power Variant
Notes:- Can be done with Robot Sidekick, as per demo, but as this runs Impaling Ice a SC will likely be better.
- Impossible to actually demonstrate true 8-target performance due to heavy use of conal pbAoEs. When using this, remain on the outside of add groups and keep all targets in front to maximize output.
Whirling Dervish (3 ticks)(Dashing Combo)(clipped with) > Freezing Breath (2 ticks)(tap cancel) > Frost Slam > Ice Boulder Strike > Whirling Dervish (3 ticks)(Dashing Combo)(clipped with) > Impaling Ice > Frost Slam > Ice Boulder Strike > Repeat
https://youtu.be/c-AJsMfUFCc
See Notes
Standard Variant
Whirling Dervish (3 ticks)(Dashing Combo)(clipped with) > Resonating Gale > Ice Boulder Strike > Frost Slam > Repeathttps://youtu.be/VCZW-_7l1_s
https://youtu.be/ZXYJ254AsJQ
Long Range
Heat Vision > Freezing Breath (2 ticks)(tap cancel) > Ice Boulder Strike > Avalanche > Repeathttps://youtu.be/f3tYe3QQ7Rs
https://youtu.be/PEEi-bMpxoU
Ice - 150% / True Max Range Rotation
These are designed to allow the player to fight from as far away from their target as possible while they and their pets are still able to land hits. They should only be used in rare instances where something is lethally buggy (eg. STU PZe on release), or where there are heavy range/positioning considerations where the consistency of being able to hit from so far can offset the reduced damage. It's a capability players should be aware of but not use often, if at all.

Ice Boulder Strike > Snowball > Snowball > Repeat, popping Godwave Strength off cooldown and immediately before using SC
or
Ice Boulder Strike > Snowball > Snowball > Repeat, popping Snow Devil and Godwave Strength off cooldown and always Godwave Strength immediately before using SC
Note: The Snow Devil, since it'll create a 4th and 5th semi-permanent pet, will make it hard to reliably land Godwave Strength on Quislet before using SC. Try to position carefully or visually confirm the effect is active on Quislet.
Note: These are demo'd with an SC that intentionally doesn't deal damage or hit the boss to show the base performance, for which Quislet's SC proc is a factor. In practice, you would move in/out for an offensive SC and fill the remaining slot with clips.
Ice Boulder Strike > Snowball > Snowball > Repeat, popping Godwave Strength off cooldown and immediately before using SC
or
Ice Boulder Strike > Snowball > Snowball > Repeat, popping Snow Devil and Godwave Strength off cooldown and always Godwave Strength immediately before using SC
Note: The Snow Devil, since it'll create a 4th and 5th semi-permanent pet, will make it hard to reliably land Godwave Strength on Quislet before using SC. Try to position carefully or visually confirm the effect is active on Quislet.
Note: These are demo'd with an SC that intentionally doesn't deal damage or hit the boss to show the base performance, for which Quislet's SC proc is a factor. In practice, you would move in/out for an offensive SC and fill the remaining slot with clips.
Ice - Battle Tanking
Important: Sometimes it will be critical to ensure you reach the Dominance requirement to crowd control enemies while other times you can ignore it. The necessity varies from instance to instance.
Note: The content difficulty a player can rock this in will vary based on each player's knowledge and skill level and, in the highest content, the quality of the healer. This is generally ideal for Elite Alerts and anything around that difficulty level, but overkill for anything that doesn't actually need a tank at all.
Battle tanking with Ice requires unique rotations due to Ice Armour being linked to shield activation.
Compatible with Lernaea's Amulet
Heat Vision > Frost Slam (clipped with) > Reflection > Whirling Dervish (4-5 ticks)(Dashing Combos) > Frost Slam > repeat
https://youtu.be/-lx767Z4GQQ
Incompatible with Lernaea's Amulet:
This has lower damage but is tankier due to Empowered Channeling and can be done from range.
Reflection > Heat Vision > Avalanche > Glacier Flash > repeat, popping Reflection off cooldown
https://youtu.be/daKAkhk6VWo
The amount of actual tank gear you'll need to wear, if any, will vary from instance to instance. This can pretty safely sustain Lernaea's Amulet with a passable healer due thanks to Ice's extremely high innate defense.
Depending on SC feed, you may want to replace RSK with Blizzard. If even more tankiness is needed, RSK can also be dropped for more shields or utility.
If battle tanking current tier elite raids or SM content where the more aggressive approach proves untenable and the boss can't be face-tanked, you can modify a pure-tank ranged build to incorporate a pet DPS source shard build. My Season 2 SM tank guide has a good example of this:
https://youtu.be/G5zvFK1UCIE
Note: The content difficulty a player can rock this in will vary based on each player's knowledge and skill level and, in the highest content, the quality of the healer. This is generally ideal for Elite Alerts and anything around that difficulty level, but overkill for anything that doesn't actually need a tank at all.
Battle tanking with Ice requires unique rotations due to Ice Armour being linked to shield activation.
Compatible with Lernaea's Amulet
Heat Vision > Frost Slam (clipped with) > Reflection > Whirling Dervish (4-5 ticks)(Dashing Combos) > Frost Slam > repeat
https://youtu.be/-lx767Z4GQQ
Incompatible with Lernaea's Amulet:
This has lower damage but is tankier due to Empowered Channeling and can be done from range.
Reflection > Heat Vision > Avalanche > Glacier Flash > repeat, popping Reflection off cooldown
https://youtu.be/daKAkhk6VWo
The amount of actual tank gear you'll need to wear, if any, will vary from instance to instance. This can pretty safely sustain Lernaea's Amulet with a passable healer due thanks to Ice's extremely high innate defense.
Depending on SC feed, you may want to replace RSK with Blizzard. If even more tankiness is needed, RSK can also be dropped for more shields or utility.
If battle tanking current tier elite raids or SM content where the more aggressive approach proves untenable and the boss can't be face-tanked, you can modify a pure-tank ranged build to incorporate a pet DPS source shard build. My Season 2 SM tank guide has a good example of this:
https://youtu.be/G5zvFK1UCIE
Ice - Supercharge Analysis

Full Analysis
See the Ice lines of the Supercharge Analysis spreadsheet[docs.google.com] for a detailed breakdown of exactly what each SC does, how it works, its limitations & considerations, and DMG:SC for ST & AoE with cast-time losses factored.
Note: Just because a given SC outperforms others vs Sparring Targets does not mean it is necessarily the best choice for all situations. Pick the best SC for the situation based on the range, ST/AoE, and vulnerability considerations at hand and be sure to factor green EoG feeding.
For Boss Fights
Used correctly, Blizzard is one of the best and most SC efficient SCs in the game. However, since it's a 6s damage field its important to verbally coordinate with your tank to keep targets in it when you're about to cast it. SC Min:Max is achieved by doing Neo Venom Boost into Blizzard.
We can also technically do Neo into Ice Elemental into Blizzard but the duration of Ice Elemental combined with the loss of Iconic/Movement tray abilities results in our Elemental form DPS suffering greatly, making Elemental inferior to Neo despite its stronger raw buff.

For Raid Trash Clear
Either Blizzard by itself or Neo into Blizzard remain the best options. Knowing how and when to use Blizzard is very important to Ice play.

Ice: AV's Recommendations
Solo/Alerts
Unfortunately, Ice's best rotations for this are either extreme overkill and extremely vulnerable to interrupt when you have hate, so unless there's a tank I'll usually just run Standard Variant of the Point Blank Hallway AoE Rotation with Lernaea's Amulet on and Glacier Flash in place of Robot Sidekick. Alternatively, I'll sometimes do the Long Range Hallway AoE Rotation for low member content. If you're too weak still to be the top DPS, you can safely run the Learnaea's Amulet All-In Frost Blast Variant in alerts still but as soon as you reach the point where you always have hate, you'll see why I don't use it without a Tank present.Boss ST
For boss fights, I always use the Lernaea's Amulet All-In Frost Blast Variant as it is extremely fun and hits like a truck on crack. I will usually replace Robot Sidekick with Blizzard and do Neo Venom Boost into Blizzard, coordinated with the Tank.For Raid Hallway AoE
For hallways, I always use the Mid-Range Steady Variant accompanied by careful Blizzard spam.Artifacts
BiS for Solo/Alerts will vary based on personal rotation choice. For Boss ST it's Solar Amplifier + Lernaea's Amulet + The Transformation Card (or Tetrahedron of Urgrund if no one else is able). BiS for the hallway rotation is Lernaea's Amulet + The Transformation Card + The Strategist CardAlly Passives
Emperor Aquaman's Seaside Restart + The Batman Who Laughs' Luck of the Draw or Queen Diana's Don't Weaken *If the Troll can't keep you powered, replace this with Cyborg's All Your Base
Additional Guidance
- Since Frost Blast is a big chunk of power, be ready to cancel it if needed, if you take a big hit before the cast, to save yourself from Amulet.- Use Frost Blast's mobility to avoid having to cancel it.
- If Ice Boulder Strike is hitting the ceiling in certain content, you'll wanna consider subbing it out or changing rotations.
- Blizzard is super important to Ice's performance, as the 10% SC refund head mod for it makes it extremely DC:SC efficient. Communicate with your tank like you would with an Orbital Strike to ensure your target stays put for the duration.
Light - Boss (ST Focus) Rotations
Important Power Notes
- Taps cannot be queued onto Light Blast.- Know when to start each combo to avoid losing damage.
- Almost every Light rotation requires Grimorium Verum PI to avoid a significant DPS loss. Communicate with teammates to see if another player is already applying Dazed, in which case it may be possible to use a different artifact.
- Despite Light Blast being an AoE, La-Mort stacks are only applied to the primary target of each cast.
Lernaea's Amulet
Loadout: Heat Vision, Grasping Hand, Hand Clap, Freezing Breath, Robot Sidekick, SCHeat Vision > Grasping Hand (Grasping Hand Pull combo)(clipped with) > Hand Clap (full Hand Clap combo)(clipped with) > Freezing Breath (2 ticks*)(tap cancel) > Grasping Hand (Grasping Hand Pull combo)(clipped with) > repeat
*When you want to do more AoE to adds, do all 4 ticks of Freezing Breath
https://youtu.be/CbZnpUEWIc0
La-Mort
Grimorium Verum PILoadout: Light Blast, Hand Clap, Grasping Hand, Light Barrier, Robot Sidekick, SC
Notes:
- Use Light Barrier in response to being crowd controlled or when otherwise forced to stop rotation. In addition to being a shield and breakout, it will reflect damage.
ST Execution
Adjust which variant is used based on the situation.Clappy Variant
Lower La-Mort proc at 35% but higher non-La-Mort rotation DPS.
Light Blast > Hand Clap (full Hand Clap combo)(clipped with) > Grasping Hand (Grasping Hand Pull Combo)(clipped with) > Hand Clap (full Hand Clap combo)(clipped with) > Repeat
https://youtu.be/0b91T8oWj1g
or
Grabby Variant
Compromise between La-mort proc and non-La-Mort rotation DPS.
Light Blast > Grasping Hand (Grasping Hand Pull Combo)(clipped with) > Hand Clap (full Hand Clap combo)(clipped with > Grasping Hand (Grasping Hand Pull Combo)(clipped with) > Repeat
https://youtu.be/_AmHWcxx0rQ
or
Blasty Variant
Most frequent finisher use and La-Mort stacking.
Light Blast > Hand Clap (full Hand Clap combo)(clipped with) > Grasping Hand (Grasping Hand Pull Combo)(clipped with) > Repeat
https://youtu.be/nIt4m5n4uQU
AoE Execution
Light Blast (Minigun combo)(Ram combo) > Repeat
Notes:
- If targets aren't too spread out, switch between them every time Light Blast is used to evenly distribute La-Mort stacks on the initial pre-combo tick (stacks give diminishing returns, with initial stacks granting the most bonus damage per stack). If targets are spread out, focus the central targets to ensure Minigun can hit everything.
- Begin the Minigun combo immediately.
- Do the Ram combo a split second before Light Blast comes off cooldown. (See video).
https://youtu.be/sfLceonwb3Y
Unable to demonstrate 8 Target La-Mort switching due to how spread out the targets are.
No Fear / Fear Incarnate (La-Mort + Lernaea's Amulet)
Min:Maxes Light Blast frequency and Offering stacks per Light Blast.Grimorium Verum PI
Grabby Variant
Light Blast > Grasping Hand (Grasping Hand Pull combo)(clipped with) > Hand Clap (full Hand Clap combo)(clipped with) > Grasping Hand (Grasping Hand Pull combo) > Repeathttps://youtu.be/BFAVqq0ZMCg
Clappy Variant
Less frequent La-Mort application but one additional Offering stack per reset.Light Blast > Hand Clap (full Hand Clap combo)(clipped with) > Grasping Hand (Grasping Hand Pull combo) > Hand Clap (full Hand Clap combo)(clipped with) > Repeat
https://youtu.be/6lB0chP_c9A
Note: Exited combat in demo before La-Mort proc. Add ~1000 DPS for average proc damage.
General Purpose
Loadout: Heat Vision, Hand Clap, Grasping Hand, Light Blast, Robot Sidekick, SCGrimorium Verum PI
ST Execution
Adjust variant for the situation at hand. Below 35% target health, do Hybrid Execution instead.Clappy Variant
Moderate vulnerability to interrupt.
Heat Vision > Hand Clap (full Hand Clap combo)(clipped with) > Grasping Hand (Grasping Hand Pull combo)(clipped with) > Hand Clap (full Hand Clap combo)(clipped with) > Repeat
https://youtu.be/u0UcNDjT7y8
or
Clappier Variant
Greatest vulnerability to interrupt.
Heat Vision > Hand Clap (full Hand Clap combo)(clipped with) > Hand Clap (full Hand Clap combo)(clipped with) > Repeat
https://youtu.be/PfQzB9C94SY
or
Grabby Variant
Least vulnerability to interrupt.
Heat Vision > Grasping Hand (Grasping Hand Pull combo)(clipped with) > Hand Clap (full Hand Clap combo)(clipped with) > Grasping Hand (Grasping Hand Pull combo)(clipped with) > Repeat
https://youtu.be/WUjFcj7bP8k
Hybrid Execution
Use this when more splash is desirable while still predominately focusing the primary target, or when boss health is below 35%.Heat Vision > Hand Clap (full Hand Clap combo)(clipped with) > Grasping Hand (Grasping Hand Pull combo)(clipped with) > Light Blast > Repeat
https://youtu.be/0x1YBeUmX4U
AoE Execution
Use this for clearing adds during a boss fight. If a specific add needs to die before others, consider focusing it with ST or Hybrid Execution first depending on the priority.Heat Vision > Light Blast (Minigun combo + Ram combo) > Repeat
Notes:
- Begin the Minigun combo immediately.
- Do the Ram combo the exact moment Heat Vision comes off cooldown.
https://youtu.be/b_47j8uVDo8
https://youtu.be/iFvjEdA2gXE
Source Shard Variants
Note: Remember to alternate activation of combat pet and henchmen, using the strongest pet/henchmen available. Does not buff turret-class pets. Ideal for situations where a boss will frequently force players to stop their rotations to deal with mechanics, as the pets can continue DPSing the boss when we can't.Strict ST Variant
Highest output by a slight margin but at the cost of almost entirely sacrificing AoE functionality.Heat Vision > Hand Clap (full Hand Clap combo)(clipped with) > Grasping Hand* (Grasping Hand Pull combo)(clipped with) > Hand Clap (full Hand Clap combo)(clipped with) > Repeat
* When it's off cooldown, use Godwave Strength instead of Grasping Hand. (See video).
https://youtu.be/t8lfr1yvUws
General Purpose Variant
Retains ST, Hybrid, and AoE Executions.Loadout: Heat Vision, Hand Clap, Light Blast, Godwave Strength, Robot Sidekick, SC
ST Execution
Below 35% target health, do Hybrid Execution instead.
Heat Vision > Hand Clap (full Hand Clap combo)(clipped with) > Hand Clap (full Hand Clap combo)(clipped with) > Repeat
When it's off cooldown, do Godwave Strength in between Hand Clap activations. (See video).
https://youtu.be/-VYjA7iMLdM
Hybrid Execution
Use this when more splash is desirable while still predominately focusing the primary target, or when boss health is below 35%.
Heat Vision > Hand Clap (full Hand Clap combo)(clipped with) > Light Blast > Repeat
Activate Godwave Strength whenever it's off cooldown.
https://youtu.be/s8sNlDTQWbI
AoE Execution
See non-Source Shard General Purpose AoE Execution for demo. Consider tac swapping The Strategist Card in momentarily for critical add clear.
Heat Vision > Light Blast (Minigun combo + Ram combo) > Repeat
Notes:
- Do not activate Godwave Strength.
- Begin the Minigun combo immediately.
- Do the Ram combo the exact moment Heat Vision comes off cooldown.
Light - Raid Hallway (AoE Focus) Rotations
Important Power Notes
- Taps cannot be queued onto Light Blast.- Know when to start each combo to avoid losing damage.
- Almost every Light rotation requires Grimorium Verum PI to avoid a significant DPS loss. Communicate with teammates to see if another player is already applying Dazed, in which case it may be possible to use a different artifact.
- Despite Light Blast being an AoE, La-Mort stacks are only applied to the primary target of each cast.
- Despite hitting harder, Entrap's Swing combo cannot be clipped early like its Impact combo can. Swing's first tick of damage doesn't actually trigger until the 2nd swing starts, limiting its usefulness.
Point Blank Variants
Notes:- If new targets become available without PI, consider restarting at Entrap at any time, where applicable.
- Every 20s, tap cancel Light Weight (instead of doing the Light Weight combo) in order to proc Blast Adapter.[/i[
Chop 'em Variant
Entrap (Impact Combo)(clipped with) > Whip Thrash (1x Whip Thrash combo)(clipped with) > Light Weight (~4 ticks)(Light Weight combo)(clipped with) > Whip Thrash (1x Whip Thrash combo)(clipped with) > Chainsaw (1x Chainsaw combo)(clipped with) > Whip Thrash (1x Whip Thrash combo)(clipped with) > Light Weight (~4 ticks)(Light Weight combo)(clipped with) > Whip Thrash (1x Whip Thrash combo)(clipped with) > Chainsaw (1x Chainsaw combo)(clipped with) > Repeathttps://youtu.be/JmjmZf0j0jw
https://youtu.be/b3XmUvdXMUU
Smack 'em Variant
Notes:- When all or most of the targets are in front, clip back into Whip Thrash as early as possible.
- When surrounded by targets, hold Light Weight for ~4 ticks and Whirling Dervish for ~3 ticks.
Entrap (Impact Combo)(clipped with) > Whip Thrash (1x Whip Thrash combo)(clipped with) > Light Weight (Light Weight combo)(clipped with) > Whip Thrash (1x Whip Thrash combo)(clipped with) > Whirling Dervish (Dashing Combo)(clipped with) > Whip Thrash (1x Whip Thrash combo)(clipped with) > Light Weight (Light Weight combo)(clipped with) > Whip Thrash (1x Whip Thrash combo)(clipped with) > Whirling Dervish (Dashing Combo)(clipped with) > Repeat
https://youtu.be/3SD_spBsjsY
https://youtu.be/mWgRF6rM138
Grimorium Verum PI Variant
Whirling Dervish (Dashing Combo)(clipped with) > Whip Thrash (1x Whip Thrash combo)(clipped with) > Light Weight (Light Weight combo)(clipped with) > Whip Thrash (1x Whip Thrash combo)(clipped with) > Repeathttps://youtu.be/kNpNgmydLB8
https://youtu.be/m2u8ikBHWAg
Full Range
Entrap (Impact combo)(clipped with) > Light Blast (Minigun combo)(Ram combo)(clipped with) > Ram (Fan combo)(clipped with) > Freezing Breath (2 ticks)(tap cancel) > Repeat
Notes:
- Begin the Minigun combo immediately.
- Do the Ram combo as the final Minigun tick is happening (this is approximately when the cooldown meter passes the top edge of the circle at the bottom right of the loadout slot to the left. (See video).
https://youtu.be/Zj3LO-gZkVo
https://youtu.be/aZ9AgviWShA
Light - 150% / True Max Range Rotation
This is designed to allow the player to fight from as far away from their target as possible while they and their pets are still able to land hits. It should only be used in rare instances where something is lethally buggy (eg. STU PZe on release), or where there are heavy range/positioning considerations where the consistency of being able to hit from so far can offset the reduced damage. It's a capability players should be aware of but not use often, if at all.
Chompers > Entrap > Spikequake* > Repeat, *popping Godwave Strength instead of Spikequake* whenever it's off cooldown and immediately before using SC
Note: This is demo'd with an SC that intentionally doesn't deal damage or hit the boss to show the base performance, for which Quislet's SC proc is a factor. In practice, you would move in/out for an offensive SC and fill the remaining slot with clips.
Chompers > Entrap > Spikequake* > Repeat, *popping Godwave Strength instead of Spikequake* whenever it's off cooldown and immediately before using SC
Note: This is demo'd with an SC that intentionally doesn't deal damage or hit the boss to show the base performance, for which Quislet's SC proc is a factor. In practice, you would move in/out for an offensive SC and fill the remaining slot with clips.
Light - Battle Trolling
There are different battle troll options depending on group configuration:
*If you want the SC gen, you can replace Chompers with Light Weight Strike but at the cost of lower DPS.
**If the group/content doesn't need your group shield, you can replace this with a damage SC
Chompers** (clipped with) > Recharge** > Hand Clap (full Hand Clap combo)(clipped with) > Grasping Hand (Grasping Hand Pull combo*)(clipped with) > Light Blast > repeat
*Only do the Grasping Hand Pull combo on targets you either can't pull or actually intend to pull.
**If desired, Chompers + Recharge can be done less frequently so increase DPS a bit but doing it each rotation helps reduce power cost and ensures group buffs are always fresh.
https://youtu.be/u0FqzSfKgpw
Grasping Hand* > Light Blast (Minigun combo)(6 ticks**)(Ram combo) > Chompers (clipped with) > Recharge
*If you need to pull something, do the Grasping Hand Pull combo
**You'll want to initiate the Ram combo shortly after the 5th tick so it clips with the 6th tick
https://youtu.be/i2qzP_TyzG8
*Light Weight Strike can be done more often if the debuff or SC gain is desired.
https://youtu.be/uH40T1WLkhw
Since Light's best DPS powers already have the most critical debuffs (Attack & Defense) built-in, I do not recommend running B.O.P. Commlink or Grimbor's Chains with it in a 2-Troll group config as it's unnecessary and lowers the DPS Troll's damage.
Note: This is designed for a Might-based group. If you need to proc Cog of Mageddon, you can throw a Weapon Mastery in at appropriate intervals to keep it active (or a Prec DPS can run their own Cog).
*Can replace Robot Sidekick with a 2nd SC or a utility power if desired.
ST Execution
Grasping Hand (Grasping Hand Pull combo)(clipped with) > Light Blast > Heat Vision > Hand Clap (full Hand Clap combo)(clipped with) > Repeat
https://youtu.be/Ltx1deXHBm0
AoE Execution
Grasping Hand* > Light Blast (Minigun combo)(6 ticks**)(Ram Combo) > Heat Vision > repeat
*If you want to pull your target, do the Grasping Hand Pull combo. If you don't need Attack Debuff what you're attacking, you can remove Grasping Hand from the rotation to increase damage slightly.
**You'll want to initiate the Ram combo shortly after the 5th tick so it clips with the 6th tick
https://youtu.be/rOvlqv1P2Lg
1. Solo Buff/Battle Troll
Note: This is designed for a Might-based group. If you need to proc Cog of Mageddon you can throw a Weapon Mastery in at appropriate intervals (or a Prec DPS can run their own Cog).For Bosses:
Loadout: Chompers*, Recharge, Hand Clap, Grasping Hand, Light Blast, Group Shielding***If you want the SC gen, you can replace Chompers with Light Weight Strike but at the cost of lower DPS.
**If the group/content doesn't need your group shield, you can replace this with a damage SC
ST Execution
This is a effectively a Troll modified version of the General Purpose rotation's hybrid execution.Chompers** (clipped with) > Recharge** > Hand Clap (full Hand Clap combo)(clipped with) > Grasping Hand (Grasping Hand Pull combo*)(clipped with) > Light Blast > repeat
*Only do the Grasping Hand Pull combo on targets you either can't pull or actually intend to pull.
**If desired, Chompers + Recharge can be done less frequently so increase DPS a bit but doing it each rotation helps reduce power cost and ensures group buffs are always fresh.
https://youtu.be/u0FqzSfKgpw
AoE Execution
Not recommended for hallways vs a melee rotation but it's important to know this for AoE situations in boss fights.Grasping Hand* > Light Blast (Minigun combo)(6 ticks**)(Ram combo) > Chompers (clipped with) > Recharge
*If you need to pull something, do the Grasping Hand Pull combo
**You'll want to initiate the Ram combo shortly after the 5th tick so it clips with the 6th tick
https://youtu.be/i2qzP_TyzG8
For Hallways:
Light Weight Strike* (clipped with) > Recharge > Whirling Dervish (Dashing Combos)(clipped with) > Whip Thrash (1x Whip Thrash combo)(clipped with) > Light Weight (Light Weight combo*) > Whip Thrash (1x Whip Thrash combo)(clipped with) > Whirling Dervish (Dashing Combos)(clipped with) > Whip Thrash (1x Whip Thrash combo)(clipped with) > Light Weight (Light Weight combo*) > Whip Thrash (1x Whip Thrash combo)(clipped with) > repeat*Light Weight Strike can be done more often if the debuff or SC gain is desired.
https://youtu.be/uH40T1WLkhw
2. 2-Troll Config: Full DPS-Spec Debuff Troll + Battle Buff Troll (Raid Only)
This group config is what B.O.P. Commlink was made for, essentially (but you don't need B.O.P. Commlink to take advantage of this approach with most Troll powers). One player goes Troll in full DPS gear/spec with B.O.P. Commlink (if needed), Amulet of Rao, and either a DPS artifact or, in AoE (or other specific) situations, sometimes Grimbor's Chains and does what's effectively a pure DPS rotation with Birds' Blitz injected (when it's needed). This frees the "Pure" / Buff Troll up to use a bit more damaging rotations thanks to not having to run some weaker debuff powers and also allows them to run additional buff or DPS artifacts. The net DPS gain to the group is higher than a solo Troll group config with the caveat that it's basically impossible to setup outside of League runs (most people won't have the artis for the DPS Troll, since they can pretty much only reliably be used in concert with another Troll also having specific artis).Since Light's best DPS powers already have the most critical debuffs (Attack & Defense) built-in, I do not recommend running B.O.P. Commlink or Grimbor's Chains with it in a 2-Troll group config as it's unnecessary and lowers the DPS Troll's damage.
Note: This is designed for a Might-based group. If you need to proc Cog of Mageddon, you can throw a Weapon Mastery in at appropriate intervals to keep it active (or a Prec DPS can run their own Cog).
(In 2-Troll Setup Only) Debuff/DPS Troll's Rotations:
Note: It's also an option for the DPS Troll to spam EoG on the DPS (viability of this approach depends on how strong the DPS Troll is vs the pure DPS and is more viable if the Troll DPS is weak).For Bosses:
Loadout: Heat Vision, Hand Clap, Grasping Hand, Light Blast, Robot Sidekick*, Neo-Venom Boost*Can replace Robot Sidekick with a 2nd SC or a utility power if desired.
ST Execution
Grasping Hand (Grasping Hand Pull combo)(clipped with) > Light Blast > Heat Vision > Hand Clap (full Hand Clap combo)(clipped with) > Repeat
https://youtu.be/Ltx1deXHBm0
AoE Execution
Grasping Hand* > Light Blast (Minigun combo)(6 ticks**)(Ram Combo) > Heat Vision > repeat
*If you want to pull your target, do the Grasping Hand Pull combo. If you don't need Attack Debuff what you're attacking, you can remove Grasping Hand from the rotation to increase damage slightly.
**You'll want to initiate the Ram combo shortly after the 5th tick so it clips with the 6th tick
https://youtu.be/rOvlqv1P2Lg
For Hallway AoE:
Same as the Solo Battle/Buff Troll's melee hallway rotation above but you can replace Recharge with Robot Sidekick.(In 2-Troll Setup Only) Buff Troll's Rotation:
Same as Solo Battle/Buff Troll Rotations. Light already uses all its best DPS powers in its Troll rotation anyways, so the primary benefit it derives from a 2-Troll group config is additional artifact freedom to better buff the group or enhance its own DPS.Light - Supercharge Analysis
Full Analysis
See the Light lines of the Supercharge Analysis spreadsheet[docs.google.com] for a detailed breakdown of exactly what each SC does, how it works, its limitations & considerations, and DMG:SC for ST & AoE with cast-time losses factored.

Note: Just because a given SC outperforms others vs Sparring Targets does not mean it is necessarily the best choice for all situations. Pick the best SC for the situation based on the range, ST/AoE, and vulnerability considerations at hand and be sure to factor green EoG feeding.
For Boss Fights
Min:Max is achieved by doing Neo Venom Boost into Strafing Run (requires Scrap). However, be sure to communicate with the tank to keep the target stationary during cast, as the blast radius is relatively small. If not swapping, Neo by itself will be the best choice unless you are getting more green EoG than you can spend, in which case you might want to run Strafing Run exclusively.
Strafing Run is a strong SC but it's easy to miss completely. Be careful with it and coordinate accordingly.
For Raid Trash Clear
Recommended to just use Neo in hallways, due to Lights extremely high melee AoE damage combined with the fact its other SCs simply aren't very good (especially so vs squishy mobs that are moving around a lot).
Light: AV's Recommendations
Solo/Alerts
I'll generally run either the La-Mort Rotation or the La-Mort + Lernaea's Amulet Rotation for weaker content.Boss ST
For raid bosses, I always use the Lernaea's Amulet Rotation but I replace Robot Sidekick with Strafing Run.For Raid Hallway AoE
For hallways, I almost always use the Grimorium Verum Variant of the Point Blank Rotation.Artifacts
Solo/Alert BiS will vary heavily based on rotation choices. For my Boss ST preference for raids, however, it's Solar Amplifier + Lernaea's Amulet + Grimorium Verum (or The Transformation Card or Tetrahedron of Urgrund if you're able to use someone else's PI). BiS for the hallway rotation is Lernaea's Amulet + The Transformation Card + Grimorium Verum (but in content with tons of adds you might consider using Strat instead of Trans or doing a non-Grim variant to run both instead).Ally Passives
Emperor Aquaman's Seaside Restart + The Batman Who Laughs' Luck of the Draw or Queen Diana's Don't Weaken *If the Troll can't keep you powered, replace this with Cyborg's All Your Base
Additional Guidance
- If using the Lernaea's Amulet Boss ST rotation, it's critical that you also do full nut Neo Venom Boost into Strafing Run executions because the base DPS is lower than that of the power's non-Amulet All-In rotations (it's designed for the 10-stack Neo'd SC advantage to compensate for that).- Be proficient at clipping on the earliest possible frames.
- Be aware that, no matter what, every viable Boss ST rotation you'd consider using has atrocious splash/AoE potential, so in some situations you may want to save SC/Trinkets of adds if the group can't handle them without additional burst.
Mental - Boss (ST Focus) Rotations
Important Power Notes
- With some weapons, attack speed increases for ~1s after exiting Invisibility if done perfectly, allowing additional taps to be spammed. - Don't be too aggressive with Ambush: Sleep jump cancel, as cancelling too early annul's the damage. See the videos.
- Invisibility doesn't end and the bar doesn't reset until the exit-attack's animation (including anything clipped onto it) is complete. The reason we use Freezing Breath to exit in long range cases is because it instantly cancels when cast mid-jump, allowing for the optimal balance between cast damage and getting us back into rotation as opposed to other options with large dovetails. Be sure to jump high when cancelling Ambush: Sleep to guarantee a 1-tick Freezing Breath insta-cancel and a smooth transition back into the meat of the rotation.
- Ambush: Sleep is effective to max red-target range and Ambush: Pain Blast is effective to mid range.

General Purpose
DPS Bar: Psychic Prison, Invisibility, Heat Vision, Telekinetic Pull, Terrorize, and Robot SidekickInvisiBar (TM): Freezing Breath, Ambush: Sleep, Ambush: Pain Blast, Reflect Pain*, Robot Sidekick, and SC.
* Reflect Pain optional. Can replace with any utility power or SC.
Mid Range Execution
Psychic Prison (clipped with) > Invisibility (clipped with) > Ambush: Sleep (jump cancel) > Ambush: Pain Blast > Heat Vision > Telekinetic Pull > Terrorize > Psychic Prison > Heat Vision > Telekinetic Pull > Terrorize > Repeathttps://youtu.be/JQKqWwerDe4
Long Range Execution
Telekinetic Pull (clipped with) > Invisibility (clipped with) > Ambush: Sleep (jump cancel) > Freezing Breath (cancels midair) > Heat Vision > Telekinetic Pull > Terrorize > Telekinetic Pull > Heat Vision > Telekinetic Pull > Terrorize > Repeathttps://youtu.be/VTjxtlUkKOw
La-Mort
DPS Bar: Psychic Prison, Invisibility, Terrorize, Heat Vision, Telekinetic Pull, and Robot SidekickInvisiBar (TM): Freezing Breath, Ambush: Sleep, Ambush: Pain Blast, Reflect Pain*, Robot Sidekick, and SC.
* Reflect Pain optional. Can replace with any utility power or SC.
Mid Range Execution
Terrorize > Psychic Prison (clipped with) > Invisibility (clipped with) > Ambush: Sleep (jump cancel) > Ambush: Pain Blast > Telekinetic Pull > Terrorize > Heat Vision > Telekinetic Pull > Terrorize > Telekinetic Pull > Heat Vision > Repeathttps://youtu.be/dQKtblkO1Ls
Long Range Execution
Terrorize > Invisibility (clipped with) > Ambush: Sleep (jump cancel) > Freezing Breath (cancels midair) > Telekinetic Pull > Terrorize > Heat Vision > Telekinetic Pull > Terrorize > Telekinetic Pull > Heat Vision > Repeathttps://youtu.be/UUMkxL1nQyw
Lernaea's Amulet "All-In"
Notes: - These have a (very) loose safety net on the InvisiBar (TM), but these builds remain extremely dangerous on Mental due to the activation frequency of high cost powers. We are still almost completely dependent on the healers and we need to know when to not cast to avoid killing ourselves. Extremely high risk, high reward. These should only be used with people you know. Do not use these if the healers are struggling in the slightest. It is likely that this will be survivable for long in few situations.
- If using Lernaea's Amulet, the Improved Stealth hand mod is mandatory in order to prevent self-inflicted damage from auto-exiting Invisible.
Range Limited Variant
DPS Bar: Psychic Prison, Invisibility, Heat Vision, Telekinetic Pull, Telekinetic Bolt, and Robot SidekickInvisiBar (TM): Freezing Breath, Ambush: Sleep, Ambush: Pain Blast, Terrorize, Robot Sidekick, and SC
Note: This is also "all-in" in that it has no un-broken long range execution, requiring that we remain in mid range throughout.
Psychic Prison (clipped with) > Invisibility (clipped with) > Ambush: Sleep (jump cancel) > Ambush: Pain Blast > Heat Vision > Telekinetic Pull > Telekinetic Bolt > Psychic Prison > Telekinetic Pull > Heat Vision > Telekinetic Pull > Telekinetic Bolt > Repeat
https://youtu.be/Z6BaXfesE6w
All Ranges Variant
DPS Bar: Phantom Flames, Invisibility, Heat Vision, Telekinetic Pull, Telekinetic Bolt, and Robot SidekickInvisiBar (TM): Freezing Breath, Ambush: Sleep, Ambush: Pain Blast, Terrorize, Robot Sidekick, and SC
Mid Range Execution
Phantom Flames (clipped with) > Invisibility (clipped with) > Ambush: Sleep (jump cancel) > Ambush: Pain Blast > Heat Vision > Telekinetic Pull > Telekinetic Bolt > Phantom Flames > Telekinetic Pull > Heat Vision > Telekinetic Pull > Telekinetic Bolt > Repeat
https://youtu.be/WaLhnpL1NJQ
Long Range Execution
Phantom Flames (clipped with) > Invisibility (clipped with) > Ambush: Sleep (jump cancel) > Freezing Breath (cancels midair) > Heat Vision > Telekinetic Pull > Telekinetic Bolt > Phantom Flames > Telekinetic Pull > Heat Vision > Telekinetic Pull > Telekinetic Bolt > Repeat
https://youtu.be/xg7qI6lCKD4
Source Shard
DPS Bar: Godwave Strength, Invisibility, Heat Vision, Telekinetic Pull, Terrorize, and Robot SidekickInvisiBar (TM): Freezing Breath, Ambush: Sleep, Ambush: Pain Blast, Godwave Strength*, Robot Sidekick, and SC
* Godwave Strength's cooldown reset can only proc if it's on the active bar when we hear the artifact growl. It's possible to leave it off the InvisiBar (TM) but it's recommended to leave it on in order to ensure procs aren't missed.
Note: Remember to alternate activation of combat pet and henchmen, using the strongest pet/henchmen available. Does not buff turret-class pets. Ideal for situations where a boss will frequently force players to stop their rotations to deal with mechanics, as the pets can continue DPSing the boss when we can't.
Mid Range Execution
Godwave Strength (clipped with) > Invisibility (clipped with) > Ambush: Sleep (jump cancel) > Ambush: Pain Blast > Heat Vision > Telekinetic Pull > Terrorize > Telekinetic Pull > Heat Vision > Telekinetic Pull > Terrorize > Repeat* Repeat the portion in square brackets until both Godwave Strength and Stealth are off cooldown together.
https://youtu.be/V3hVLkAIrfw
Long Range Execution
{Heat Vision > Terrorize}* > Godwave Strength (clipped with) > Invisibility (clipped with) > Ambush: Sleep (jump cancel) > Freezing Breath (cancels midair) > [Heat Vision > Telekinetic Pull > Terrorize > Telekinetic Pull > Heat Vision > Telekinetic Pull > Terrorize > Repeat]*** Only do the portion in squiggly brackets on initial engagement. This is to apply DoT and allow Grimorium Verum time to summon and engage before activating the first Godwave Strength,
** Repeat the portion in square brackets until both Godwave Strength and Stealth are off cooldown together.
https://youtu.be/JMERo0R6urM
Mental - Raid Hallway (AoE Focus) Rotations
Important Power Notes
- With some weapons, attack speed increases for ~1s after exiting Invisibility if done perfectly, allowing additional taps to be spammed. - Don't be too aggressive with Ambush: Sleep jump cancel, as cancelling too early annul's the damage. See the videos.
Point Blank Variants
General Purpose
DPS Bar: Whirling Dervish, Psychic Prison, Terror Tendrils, Mass Terror, Invisibility, Robot SidekickInvisiBar (TM): Reflect Pain*, SC, Robot Sidekick, Freezing Breath*, Ambush: Sleep, Ambush: Pain Blast
* Optional
Whirling Dervish (3 ticks)(Dashing Combo)(clipped with) > Psychic Prison > [Terror Tendrils > Mass Terror (clipped with) > Invisibility (clipped with) > Ambush: Sleep (jump cancel) > Ambush: Pain Blast > Whirling Dervish (3 ticks)(Dashing Combo)(clipped with) > Psychic Prison > Terror Tendrils > Mass Terror (clipped with) > Whirling Dervish (3 ticks)(Dashing Combo)(clipped with) > Terror Tendrils > Mass Terror > Psychic Prison > Whirling Dervish (3 ticks)(Dashing Combo)(clipped with) > Repeat portion in square brackets]
https://youtu.be/hyvHcfggo-I
https://youtu.be/Y2kG3PUXy70
Chunky Variant
Notably less max DPS but no DoT reliance. 100% burst.DPS Bar: Whirling Dervish, Terror Tendrils, Mass Terror, Telekinetic Bolt, Invisibility, Robot Sidekick
InvisiBar (TM): Freezing Breath*, Reflect Pain*, SC, Robot Sidekick, Ambush: Sleep, Ambush: Pain Blast
* Optional
Whirling Dervish (3 ticks)(Dashing Combo)(clipped with) > Terror Tendrils > Mass Terror > Telekinetic Bolt (clipped with) > Invisibility (clipped with) > Ambush: Sleep (jump cancel) > Ambush: Pain Blast > Whirling Dervish (3 ticks)(Dashing Combo)(clipped with) > Terror Tendrils > Mass Terror > Telekinetic Bolt > Whirling Dervish (3 ticks)(Dashing Combo)(clipped with) > Terror Tendrils > Mass Terror > Telekinetic Bolt > Repeat
https://youtu.be/SNmQlfUz2Jc
https://youtu.be/wn0yI2puAu0
Mid Range
DPS Bar: Terror Tendrils, Psychic Prison, Mass Terror, Phantom Flames, Invisibility, Robot SidekickInvisiBar (TM): Reflect Pain*, SC, Robot Sidekick, Freezing Breath*, Ambush: Sleep, Ambush: Pain Blast
Terror Tendrils > Psychic Prison > Terror Tendrils > Mass Terror > Terror Tendrils > Phantom Flames (clipped with) > Invisibility (clipped with) > Ambush: Sleep (jump cancel) > Ambush: Pain Blast > Terror Tendrils > Psychic Prison > Terror Tendrils > Mass Terror > Terror Tendrils > Phantom Flames > Terror Tendrils > Mass Terror > Repeat
https://youtu.be/9xIMSCUIQkA
https://youtu.be/YL7N_mJvC4c
Mental - 150% / True Max Range Rotations
These are designed to allow the player to fight from as far away from their target as possible while they and their pets are still able to land hits. They should only be used in rare instances where something is lethally buggy (eg. STU PZe on release), or where there are heavy range/positioning considerations where the consistency of being able to hit from so far can offset the reduced damage. It's a capability players should be aware of but not use often, if at all.
Mass Levitation > Pyrokinesis > Mass Terror > Phantom Flames > Pyrokinesis > Mass Terror > Repeat
or, with Source Shard,
Phantom Flames > Mass Terror > Psychic Shock > Psychic Shock > Mass Terror > Psychic Shock > Repeat, popping Godwave Strength off cooldown and immediately before using SC
Note: Try your best to make every 6th cast be Phantom Flames to maintain it without overwriting. The demo vid here is a bit sloppy.
Note: These are demo'd with an SC that intentionally doesn't deal damage or hit the boss to show the base performance, for which Quislet's SC proc is a factor. In practice, you would move in/out for an offensive SC and fill the remaining slot with clips.
Mass Levitation > Pyrokinesis > Mass Terror > Phantom Flames > Pyrokinesis > Mass Terror > Repeat
or, with Source Shard,
Phantom Flames > Mass Terror > Psychic Shock > Psychic Shock > Mass Terror > Psychic Shock > Repeat, popping Godwave Strength off cooldown and immediately before using SC
Note: Try your best to make every 6th cast be Phantom Flames to maintain it without overwriting. The demo vid here is a bit sloppy.
Note: These are demo'd with an SC that intentionally doesn't deal damage or hit the boss to show the base performance, for which Quislet's SC proc is a factor. In practice, you would move in/out for an offensive SC and fill the remaining slot with clips.
Mental - Battle Trolling
There are different battle troll options depending on group configuration:
Stealth Bar: Freezing Breath, Ambush: Sleep, Ambush: Pain Blast, Neo-Venom Boost, Bolt Barrage, Bastion
*Psychic Prison can be used instead, with the caveat that the rotation becomes more range restricted, for a slight damage gain if you don't need Attack Debuff.
Psychic Shock (clipped with) > Psychic Empowerment > Terrorize > Phantom Flames (clipped with) > Invisibility (clipped with) > Ambush: Sleep (jump cancel) > Ambush: Pain Blast** > Heat Vision > Psychic Shock (clipped with) > Psychic Empowerment > Terrorize > Phantom Flames > Heat Vision > repeat
**If out of range for Ambush: Pain Blast, do Freezing Breath instead (either while still airborne from the jump cancel or immediately tap cancelling it).
https://youtu.be/wgMKWL7fnkQ
Stealth Bar: Bastion, Bolt Barrage, Neo-Venom Boost, Ambush: Sleep, Ambush: Pain Blast, Freezing Breath
Psychic Shock (clipped with) > Psychic Empowerment > Terror Tendrils > Phantom Flames (clipped with) > Invisibility (slight pause*) > Freezing Breath (4 ticks)(tap cancel**) > Terror Tendrils > Psychic Prison > Terror Tendrils > Psychic Shock (clipped with) > Psychic Empowerment > Terror Tendrils > Phantom Flames > Terror Tendrils > Psychic Prison > Invisibility (slight pause*) > Freezing Breath (4 ticks)(tap cancel**) > Terror Tendrils > Psychic Shock (clipped with) > Psychic Empowerment > Terror Tendrils > Phantom Flames > Terror Tendrils > Psychic Prison > Terror Tendrils > repeat
*If you spam your input rapidly, Freezing Breath will only do a single tick before forcing an Invis exit. You'll still get credit for the Invis damage proc, but it's better to let Freezing Breath run its course.
**We're technically letting this go full duration but this is the most convenient place to get a weapon tap in so remember to do so while exiting Invisibility.
https://youtu.be/iRuubmo4d5M
Main Bar: Phantom Flames*, Invisibility, Heat Vision, Terrorize, Robot Sidekick
Stealth Bar: Freezing Breath, Ambush: Sleep, Ambush: Pain Blast, Neo-Venom Boost, Bolt Barrage, Robot Sidekick
*Psychic Prison can be used instead, with the caveat that the rotation becomes more range restricted and that there will be Attack Debuff gaps due to the slight delay incurred when using Invisibility with B.O.P. Commlink.
Birds' Blitz > Terrorize > Phantom Flames (clipped with) > Invisibility (clipped with) > Ambush: Sleep (jump cancel) > Ambush: Pain Blast** > Heat Vision > Birds' Blitz > Terrorize > Phantom Flames > Heat Vision > repeat
**If out of range for Ambush: Pain Blast, do Freezing Breath instead (either while still airborne from the jump cancel or immediately tap cancelling it).
https://youtu.be/hrrQIeRPCWI
Main Bar: Psychic Prison*, Invisibility, Heat Vision, Telekinetic Pull, Psychic Empowerment, Terrorize
Stealth Bar: Freezing Breath, Ambush: Sleep, Ambush: Pain Blast, Neo-Venom Boost, Bolt Barrage, Bastion
*If you don't want to be quite as range limited, Psychic Prison can be replaced with Phantom Flames
Telekinetic Pull (clipped with) > Psychic Empowerment > Terrorize > Psychic Prison (clipped with) > Invisibility (clipped with) > Ambush: Sleep (jump cancel) > Ambush: Pain Blast** > Heat Vision > Telekinetic Pull (clipped with) > Psychic Empowerment > Terrorize > Psychic Prison > Heat Vision > repeat
**If out of range for Ambush: Pain Blast, do Freezing Breath instead (either while still airborne from the jump cancel or immediately tap cancelling it).
https://youtu.be/KzclYldNnpA
Stealth Bar: Bastion, Bolt Barrage, Neo-Venom Boost, Freezing Breath, Ambush: Pain Blast, Ambush: Sleep
Whirling Dervish (3 ticks)(Dashing Combos)(clipped with) > Psychic Prison (clipped with) > Psychic Empowerment > Terror Tendrils > Mass Terror (clipped with) > Invisibility (clipped with) > Ambush: Sleep (jump cancel) > Ambush: Pain Blast > Whirling Dervish (3 ticks)(Dashing Combos)(clipped with) > Psychic Prison (clipped with) > Psychic Empowerment > Terror Tendrils > Mass Terror > Whirling Dervish (3 ticks)(Dashing Combos)(clipped with) > Terror Tendrils > Mass Terror > Psychic Prison (clipped with) > Psychic Empowerment > Whirling Dervish (3 ticks)(Dashing Combos)(clipped with) > Terror Tendrils > Mass Terror (clipped with) > Invisibility (clipped with) > Ambush: Sleep (jump cancel) > Ambush: Pain Blast > repeat, clipping Mass Terror with Invisibility when able.
https://youtu.be/Z4JKYXlyd4E
1. Solo Buff/Battle Troll
Note: This is designed for a Might-based group. If you need to proc Cog of Mageddon you can throw a Weapon Mastery in at appropriate intervals (or a Prec DPS can run their own Cog).For Bosses:
Main Bar: Phantom Flames*, Invisibility, Heat Vision, Psychic Shock, Psychic Empowerment, TerrorizeStealth Bar: Freezing Breath, Ambush: Sleep, Ambush: Pain Blast, Neo-Venom Boost, Bolt Barrage, Bastion
*Psychic Prison can be used instead, with the caveat that the rotation becomes more range restricted, for a slight damage gain if you don't need Attack Debuff.
Psychic Shock (clipped with) > Psychic Empowerment > Terrorize > Phantom Flames (clipped with) > Invisibility (clipped with) > Ambush: Sleep (jump cancel) > Ambush: Pain Blast** > Heat Vision > Psychic Shock (clipped with) > Psychic Empowerment > Terrorize > Phantom Flames > Heat Vision > repeat
**If out of range for Ambush: Pain Blast, do Freezing Breath instead (either while still airborne from the jump cancel or immediately tap cancelling it).
https://youtu.be/wgMKWL7fnkQ
For Hallway AoE:
Main Bar: Psychic Shock, Psychic Empowerment, Terror Tendrils, Phantom Flames, Psychic Prison, InvisibilityStealth Bar: Bastion, Bolt Barrage, Neo-Venom Boost, Ambush: Sleep, Ambush: Pain Blast, Freezing Breath
Psychic Shock (clipped with) > Psychic Empowerment > Terror Tendrils > Phantom Flames (clipped with) > Invisibility (slight pause*) > Freezing Breath (4 ticks)(tap cancel**) > Terror Tendrils > Psychic Prison > Terror Tendrils > Psychic Shock (clipped with) > Psychic Empowerment > Terror Tendrils > Phantom Flames > Terror Tendrils > Psychic Prison > Invisibility (slight pause*) > Freezing Breath (4 ticks)(tap cancel**) > Terror Tendrils > Psychic Shock (clipped with) > Psychic Empowerment > Terror Tendrils > Phantom Flames > Terror Tendrils > Psychic Prison > Terror Tendrils > repeat
*If you spam your input rapidly, Freezing Breath will only do a single tick before forcing an Invis exit. You'll still get credit for the Invis damage proc, but it's better to let Freezing Breath run its course.
**We're technically letting this go full duration but this is the most convenient place to get a weapon tap in so remember to do so while exiting Invisibility.
https://youtu.be/iRuubmo4d5M
2. 2-Troll Config: Full DPS-Spec Debuff Troll + Battle Buff Troll (Raid Only)
This group config is what B.O.P. Commlink was made for, essentially (but you don't need B.O.P. Commlink to take advantage of this approach with most Troll powers). One player goes Troll in full DPS gear/spec with B.O.P. Commlink (if needed), Amulet of Rao, and either a DPS artifact or, in AoE (or other specific) situations, sometimes Grimbor's Chains and does what's effectively a pure DPS rotation with Birds' Blitz injected (when it's needed). This frees the "Pure" / Buff Troll up to use a bit more damaging rotations thanks to not having to run some weaker debuff powers and also allows them to run additional buff or DPS artifacts. The net DPS gain to the group is higher than a solo Troll group config with the caveat that it's basically impossible to setup outside of League runs (most people won't have the artis for the DPS Troll, since they can pretty much only reliably be used in concert with another Troll also having specific artis).(In 2-Troll Setup Only) Debuff/DPS Troll's Rotations:
Note: It's also an option for the DPS Troll to spam EoG on the DPS (viability of this approach depends on how strong the DPS Troll is vs the pure DPS and is more viable if the Troll DPS is weak).For Bosses:
Important: You can also just do the Solo Buff/Battle Troll rotation from above and replace Psychic Empowerment & Bastion with Robot Sidekick. That has the advantage of not having the tiny debuff gaps that Birds' Blitz leaves when used with Invis and frees up an artifact slot.Main Bar: Phantom Flames*, Invisibility, Heat Vision, Terrorize, Robot Sidekick
Stealth Bar: Freezing Breath, Ambush: Sleep, Ambush: Pain Blast, Neo-Venom Boost, Bolt Barrage, Robot Sidekick
*Psychic Prison can be used instead, with the caveat that the rotation becomes more range restricted and that there will be Attack Debuff gaps due to the slight delay incurred when using Invisibility with B.O.P. Commlink.
Birds' Blitz > Terrorize > Phantom Flames (clipped with) > Invisibility (clipped with) > Ambush: Sleep (jump cancel) > Ambush: Pain Blast** > Heat Vision > Birds' Blitz > Terrorize > Phantom Flames > Heat Vision > repeat
**If out of range for Ambush: Pain Blast, do Freezing Breath instead (either while still airborne from the jump cancel or immediately tap cancelling it).
https://youtu.be/hrrQIeRPCWI
For Hallway AoE:
Use the same rotation as the Solo Buff/Battle Troll hallway AoE above, replacing Psychic Empowerment & Bastion with Robot Sidekick.(In 2-Troll Setup Only) Buff Troll's Rotation:
Note: This is designed for a Might-based group. If you need to proc Cog of Mageddon, you can throw a Weapon Mastery in at appropriate intervals to keep it active (or a Prec DPS can run their own Cog).Main Bar: Psychic Prison*, Invisibility, Heat Vision, Telekinetic Pull, Psychic Empowerment, Terrorize
Stealth Bar: Freezing Breath, Ambush: Sleep, Ambush: Pain Blast, Neo-Venom Boost, Bolt Barrage, Bastion
*If you don't want to be quite as range limited, Psychic Prison can be replaced with Phantom Flames
Telekinetic Pull (clipped with) > Psychic Empowerment > Terrorize > Psychic Prison (clipped with) > Invisibility (clipped with) > Ambush: Sleep (jump cancel) > Ambush: Pain Blast** > Heat Vision > Telekinetic Pull (clipped with) > Psychic Empowerment > Terrorize > Psychic Prison > Heat Vision > repeat
**If out of range for Ambush: Pain Blast, do Freezing Breath instead (either while still airborne from the jump cancel or immediately tap cancelling it).
https://youtu.be/KzclYldNnpA
For Hallway AoE:
Main Bar: Whirling Dervish, Psychic Prison, Psychic Empowerment, Terror Tendrils, Mass Terror, InvisibilityStealth Bar: Bastion, Bolt Barrage, Neo-Venom Boost, Freezing Breath, Ambush: Pain Blast, Ambush: Sleep
Whirling Dervish (3 ticks)(Dashing Combos)(clipped with) > Psychic Prison (clipped with) > Psychic Empowerment > Terror Tendrils > Mass Terror (clipped with) > Invisibility (clipped with) > Ambush: Sleep (jump cancel) > Ambush: Pain Blast > Whirling Dervish (3 ticks)(Dashing Combos)(clipped with) > Psychic Prison (clipped with) > Psychic Empowerment > Terror Tendrils > Mass Terror > Whirling Dervish (3 ticks)(Dashing Combos)(clipped with) > Terror Tendrils > Mass Terror > Psychic Prison (clipped with) > Psychic Empowerment > Whirling Dervish (3 ticks)(Dashing Combos)(clipped with) > Terror Tendrils > Mass Terror (clipped with) > Invisibility (clipped with) > Ambush: Sleep (jump cancel) > Ambush: Pain Blast > repeat, clipping Mass Terror with Invisibility when able.
https://youtu.be/Z4JKYXlyd4E
Mental - Supercharge Analysis

Full Analysis
See the Mental lines of the Supercharge Analysis spreadsheet[docs.google.com] for a detailed breakdown of exactly what each SC does, how it works, its limitations & considerations, and DMG:SC for ST & AoE with cast-time losses factored.
Note: Just because a given SC outperforms others vs Sparring Targets does not mean it is necessarily the best choice for all situations. Pick the best SC for the situation based on the range, ST/AoE, and vulnerability considerations at hand and be sure to factor green EoG feeding.
For Boss Fights
Min:Max is achieved via Neo Venom Boost into Bolt Barrage. However, that requires Scrap and a more complex tac swap than other powers, as per below.
https://youtu.be/N2kUxUMiOv0
This is just a demo. In practice, we'd be using Lernaea's Amulet instead of Quislet.
However, tac swapping is not required to perform well on the power and we could also simply use Neo Venom Boost and Bolt Barrage independently or Neo Venom Boost + Mass Hysteria. My personal preference is to abstain from Mass Hysteria, as the pet DPS contribution is not enhanced by other buffs.
Bolt Barrage, like Fireball Barrage, must be used carefully as it is an og projectile. If used against a moving target or at a great distance, you will miss most/all of your shot. Best use is to lunge into close or point blank range to use it then re-position.
For Raid Trash Clear
Mental has extremely strong hallway AoE. As such, Neo Venom Boost can be used exclusively (but there's no reason to not also have Bolt Barrage in the Invis bar if we need to dump some SC).
Mental: AV's Recommendations
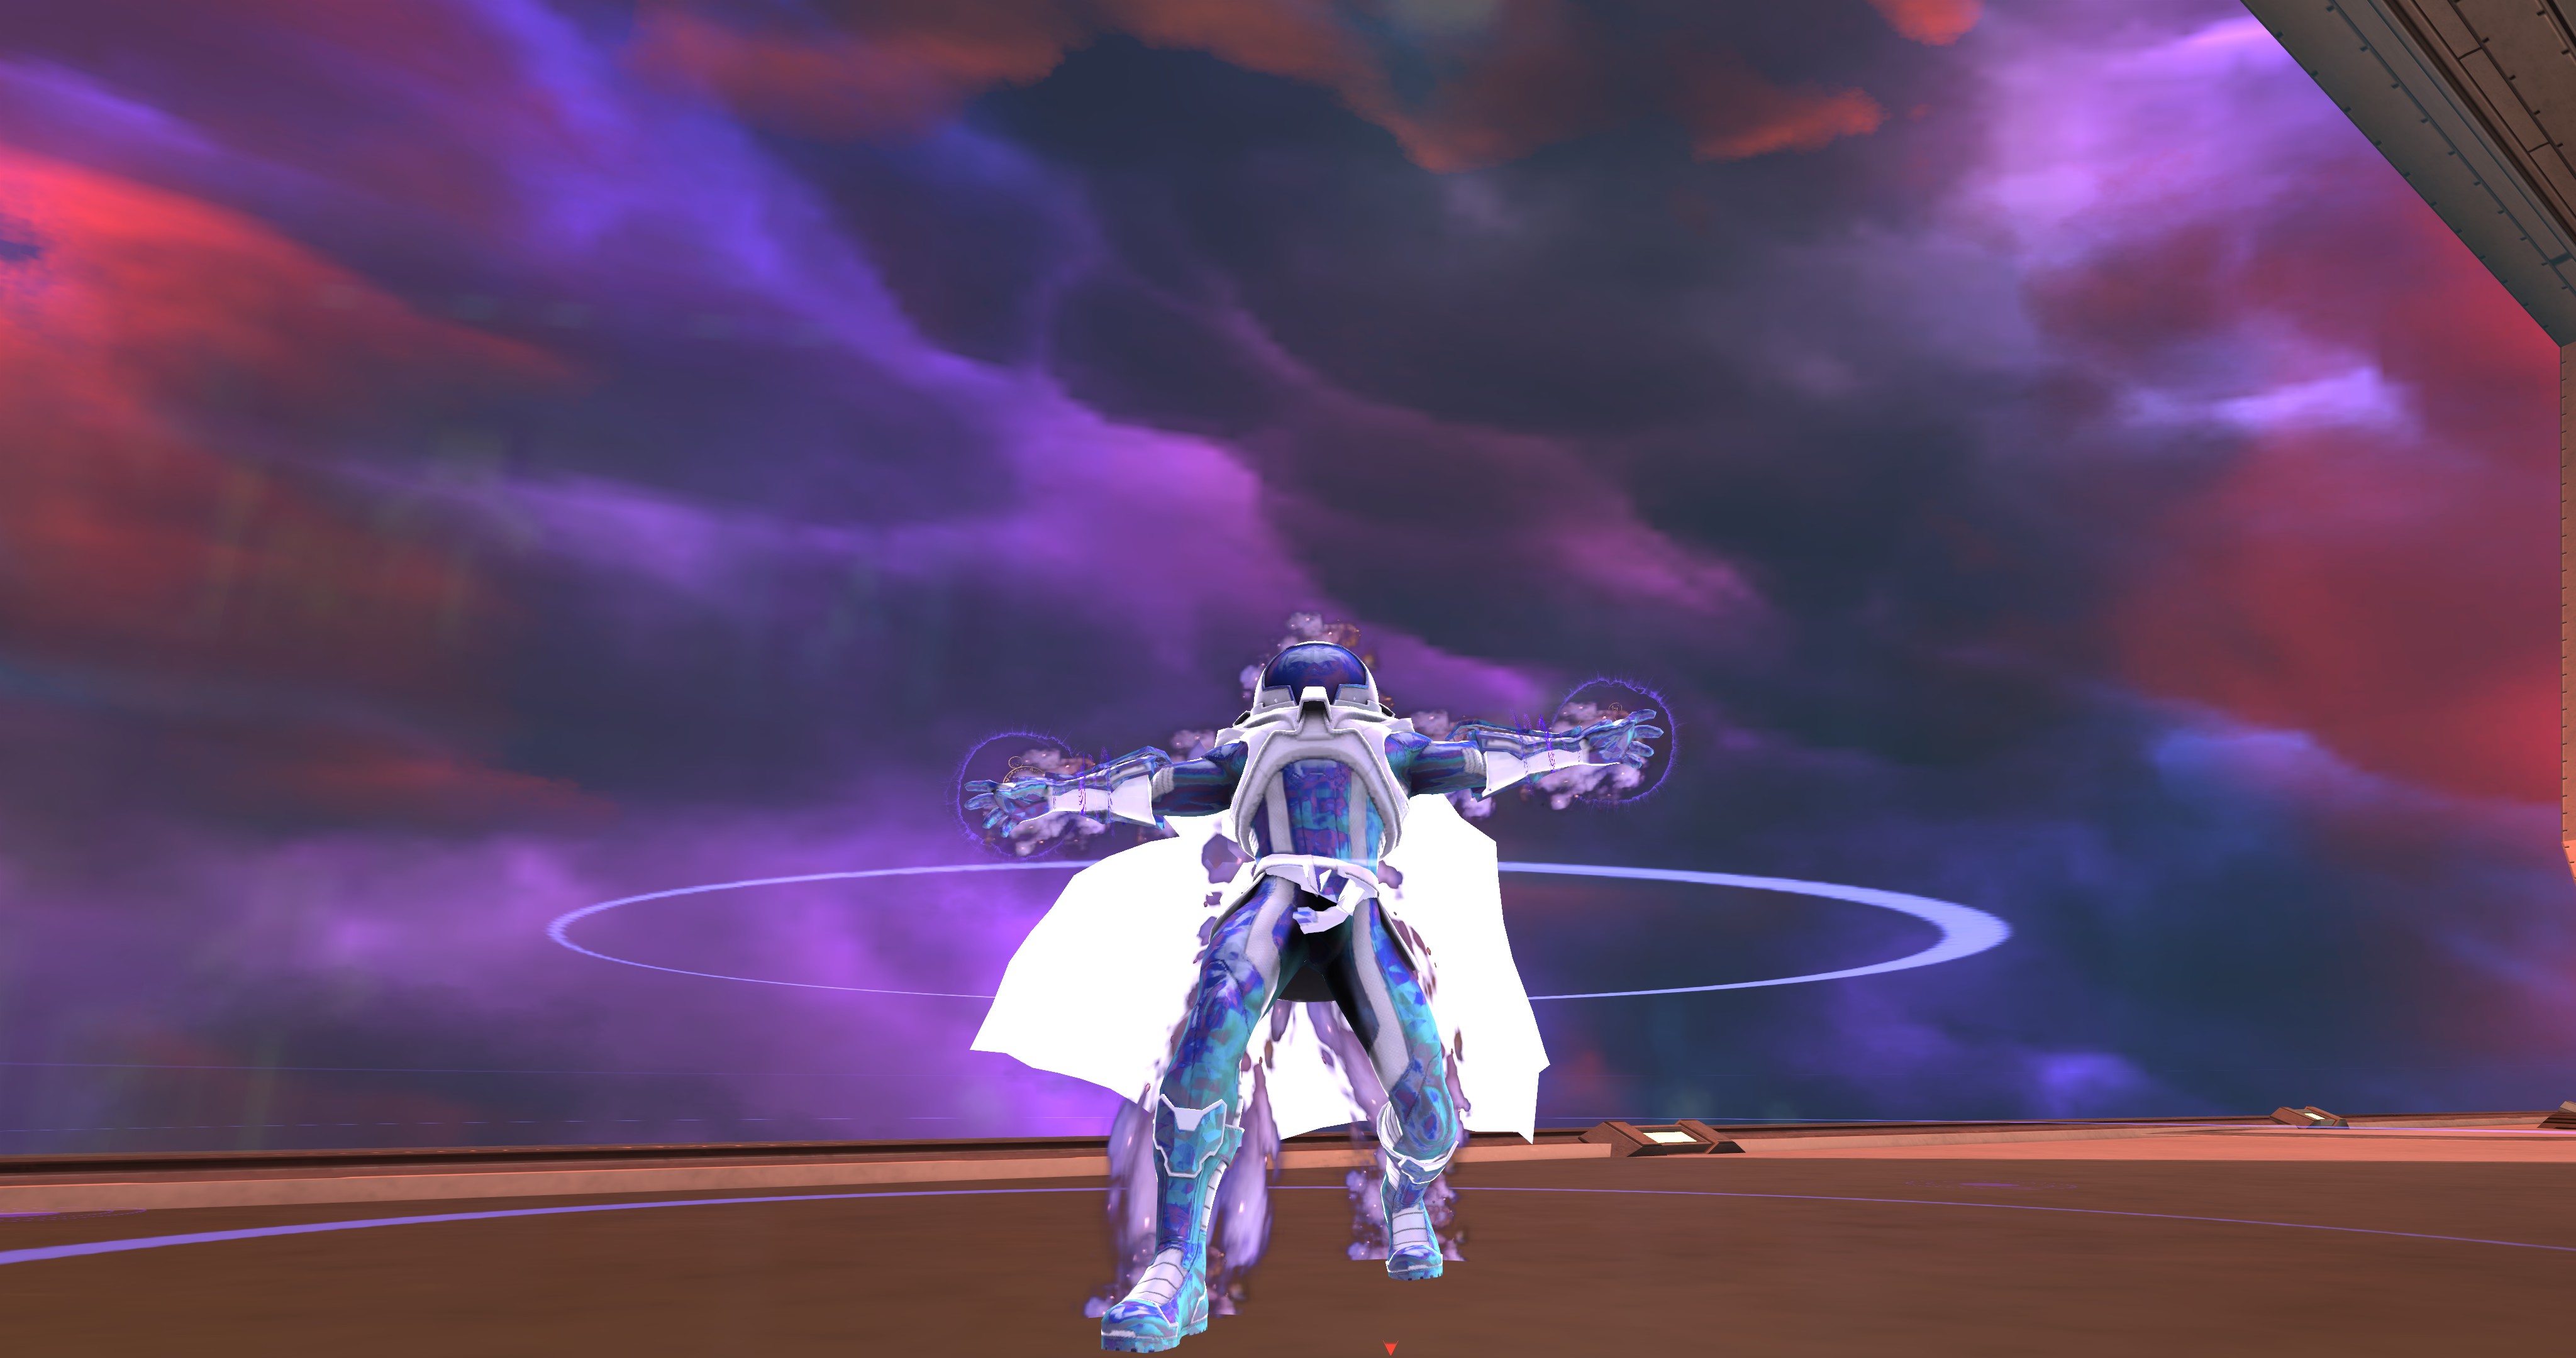
Solo/Alerts
If there isn't a capable healer present, I'll use the General Purpose ST rotation. If there is a capable healer, I'll use the Lernaea's Amulet "All-In" rotation but run both Neo Venom Boost and Bolt Barrage in Invisibility. Boss ST
For raid boss fights, I always use the Lernaea's Amulet All-In rotation with Neo Venom Boost and Bolt Barrage in Invisibility (see Mental Supercharge Analysis for proper execution).For Raid Hallway AoE
Whether I use the General Purpose Point Blank Rotation or the Mid Range Rotation depends on how annoying/dangerous the adds are in a given raid.Artifacts
BiS for Solo/Alerts will be either Solar Amplifier + Lernaea's Amulet + The Transformation Car (or Tetra if no one else can) or Solar + Trans + Strat if not running Amulet. For Boss ST it's Solar Amplifier + Lernaea's Amulet + The Transformation Card (or Tetrahedron of Urgrund if no one else is able). BiS for the hallway rotation is Lernaea's Amulet + The Transformation Card + The Strategist Card.Ally Passives
Emperor Aquaman's Seaside Restart + The Batman Who Laughs' Luck of the Draw or Queen Diana's Don't Weaken *If the Troll can't keep you powered, replace this with Cyborg's All Your Base
Additional Guidance
- Be aware that Mental's powers are costly so you'll have to be a bit more careful with Amulet.- If you can't reliably sit in mid range for Psychic Prison in a given boss fight, you'll have to switch to a rotation that doesn't use it. You may want to also consider doing so versus bosses that move around constantly (or you can get even closer if Psychic Prison being planted nearer to them will keep them in its AoE).
Munitions - Boss (ST Focus) Rotations
Important Power Notes
- Chain Gun has a different PI benefit than other powers. Most powers deal moderate damage without PI and gain a slight boost with PI present. Chain Gun does terrible damage without PI but its damage is doubled with PI present.[- Decide whether to do Net-Retractor combo or Multi-Net Retractor combo based on the situation.
General Purpose
Heat Vision > Freezing Breath (2 ticks)(tap cancel) > Chain Gun > Multi-Net Launcher (combo)(clipped with) > Heat Vision > Multi-Net Launcher (combo)(clipped with) > Chain Gun > Freezing Breath (2 ticks)(tap cancel) > Heat Vision > Multi-Net Launcher (combo)(clipped with) > Chain Gun > Multi-Net Launcher (combo)(clipped with) > Repeathttps://youtu.be/gFnBkiOhE8w
Lernaea's Amulet Safety Net Variants
Chain Gun Variant
Heat Vision > Multi-Net Launcher (combo)(clipped with) > Chain Gun > Multi-Net Launcher (combo)(clipped with) > RepeatUse Small Package when in need of healing or Offering reset
https://youtu.be/0zSsK156Fp0
ST/AoE Toggle Variant
See equivalent below in All-In but use Small Package in 4th loadout slot.
Lernaea's Amulet All-In Variants
Note: These have no out for the Amulet, meaning we are completely dependent on the healers and we need to know when to not cast to avoid killing ourselves. High risk, high reward. These should only be used with people you know. Do not use these if the healers are struggling.Chain Gun Variant
Same as General Purpose above.Heat Vision > Freezing Breath (2 ticks)(tap cancel) > Chain Gun > Multi-Net Launcher (combo)(clipped with) > Heat Vision > Multi-Net Launcher (combo)(clipped with) > Chain Gun > Freezing Breath (2 ticks)(tap cancel) > Heat Vision > Multi-Net Launcher (combo)(clipped with) > Chain Gun > Multi-Net Launcher (combo)(clipped with) > Repeat
https://youtu.be/gFnBkiOhE8w
ST/AoE Toggle Variant
Notes:- This is much harder to consistently do without hiccups/delays than it appears and is, imo, the most challenging/frustrating rotation to execute for extended periods. Spamming inputs will result in lost/delayed combos, so strongly encourage practicing this until you have the timing down flawlessly from sound/feel alone before taking it into content.
- The reason we cycle Freezing Breath instead of doing it on every rotation is because when we do it this way, we get to shave several more frames off our rotation time than usual and get the best DPS results.
- This spams mid-cost combos non-stop so it's likely one of the more dangerous Amulet builds while still likely remaining viable.
- With back to back Multi-Net Launcher combos, suggest doing your combo input when your character pulls the trigger and pressing to activate the next Multi-Net Launcher when your character finishes leaning all the way forward. When transitioning from Multi-Net Launcher to Heat Vision or Freezing Breath, clip the combo as soon as your character starts leaning forward.
- If you're not getting a consistent, uninterrupted combo/power flow you'll have to practice the timing more.
- If you get delayed by mechanics/interrupts such that your Freezing Breath cooldown gets a full reset relative to your rotation, restart at the very beginning. We're effectively "walking" Freezing Breath down the combo line each time to get the full benefit of clipping with it.
- We can either put Rocket Retreat/Jump**, Survival, a 2nd SC, or Small Package in our 4th loadout slot. Rocket Jump/Retreat are more potent shields and Survival and add mobility/escape, Survival cleanses aggro, a 2nd SC yields best overall DPS gains, and Small Package allows this to serve as a Safety Net Variant.
- Optionally, this can be done without Freezing Breath at a slight ST DPS loss and moderate AoE DPS loss but which allows us to run two of the above optional loadout additions. However, Freezing Breath helps with tac swaps so I recommend leaving it in.
Heat Vision > Freezing Breath (2 ticks)(tap cancel) > Multi-Net Launcher (combo*)(clipped with) > Multi-Net Launcher (combo*)(clipped with) > Multi-Net Launcher (combo*)(clipped with) > Heat Vision > Multi-Net Launcher (combo*)(clipped with) > Freezing Breath (2 ticks)(tap cancel) > Multi-Net Launcher (combo*)(clipped with) > Multi-Net Launcher (combo*)(clipped with) > Heat Vision > Multi-Net Launcher (combo*)(clipped with) > Multi-Net Launcher (combo*)(clipped with) > Freezing Breath (2 ticks)(tap cancel) > Heat Vision > Multi-Net Launcher (combo*)(clipped with) > Multi-Net Launcher (combo*)(clipped with) > Multi-Net Launcher (combo*)(clipped with) > Freezing Breath (2 ticks)(tap cancel) > Heat Vision > Multi-Net Launcher (combo*)(clipped with) > Multi-Net Launcher (combo*)(clipped with) > Multi-Net Launcher (combo*)(clipped with) > Multi-Net Launcher (combo*)(clipped with) > Repeat
* For clean ST do Net Retractor and for more AoE do Multi-Net Retractor.
https://youtu.be/bIfVRJ3zsZg
** If using Rocket Retreat/Jump, press jump immediately after activating the power to enable maximum GTFO as seen here:
https://youtu.be/yrypxz1V4AQ
La-Mort
Small Package > Heat Vision > Multi-Net Launcher (combo)(clipped with) > Small Package > Multi-Net Launcher (combo)(clipped with) > Chain Gun > Repeathttps://youtu.be/l7xKgsQheWM
Source Shard
Heat Vision > Multi-Net Launcher* (combo)(clipped with) > Chain Gun > Heat Vision > Multi-Net Launcher* (combo)(clipped with) > Repeat* Use Godwave Strength when it's available instead of Multi-Net Launcher. (See video)
https://youtu.be/uyIuF5VDnd0
Munitions - Raid Hallway (AoE Focus) Rotations
Full Range
Flak Cannon > [Chain Gun > Multi-Net Launcher (combo)(clipped with) > Freezing Breath (2 ticks)(tap cancel) > Multi-Net Launcher (combo)(clipped with) > Chain Gun > Multi-Net Launcher (combo)(clipped with) > Flak Cannon > Multi-Net Launcher (combo)(clipped with) > Repeat portion in square brackets]https://youtu.be/_SseLbtNyJs
https://youtu.be/hiSboArOAnI
Point Blank
Whirling Dervish (3 ticks)(Dashing Combo)(clipped with) > Flak Cannon > Chain Gun > 'Splosion > Repeathttps://youtu.be/JNvUoBXm-dw
https://youtu.be/5gAll6XG7TI
Munitions - 150% / True Max Range Rotation
This is designed to allow the player to fight from as far away from their target as possible while they and their pets are still able to land hits. It should only be used in rare instances where something is lethally buggy (eg. STU PZe on release), or where there are heavy range/positioning considerations where the consistency of being able to hit from so far can offset the reduced damage. It's a capability players should be aware of but not use often, if at all.
Mini-Nuke > Multi-Net Launcher > Multi-Net Launcher > Multi-Net Launcher > Multi-Net Launcher > Multi-Net Launcher > Repeat, popping Godwave Strength off cooldown and immediately before using SC.
Note: Number of Multi-Net Launchers you can comfortably squeeze in between Mini-Nukes will vary from 4-5 with server delay
Note: This is demo'd with an SC that intentionally doesn't deal damage or hit the boss to show the base performance, for which Quislet's SC proc is a factor. In practice, you would move in/out for an offensive SC and fill the remaining slot with clips.
Mini-Nuke > Multi-Net Launcher > Multi-Net Launcher > Multi-Net Launcher > Multi-Net Launcher > Multi-Net Launcher > Repeat, popping Godwave Strength off cooldown and immediately before using SC.
Note: Number of Multi-Net Launchers you can comfortably squeeze in between Mini-Nukes will vary from 4-5 with server delay
Note: This is demo'd with an SC that intentionally doesn't deal damage or hit the boss to show the base performance, for which Quislet's SC proc is a factor. In practice, you would move in/out for an offensive SC and fill the remaining slot with clips.
Munitions - Battle Trolling
There are different battle troll options depending on group configuration:
Smoke Grenade Launcher > [Flak Cannon (clipped with) > Reload > Multi-Net Launcher (combo)(clipped with) > Chain Gun > Multi-Net Launcher (combo)(clipped with) > Smoke Grenade Launcher > Multi-Net Launcher (combo)(clipped with) > Chain Gun > Multi-Net Launcher (combo)(clipped with) > repeat portion in square brackets]
For ST, do the Net Retractor combo. For AoE, do the Multi-Net Retractor combo
https://youtu.be/GM7IoqgJ97U
https://youtu.be/fej2S6z2BHQ
Birds' Blitz > Heat Vision > Chain Gun > Multi-Net Launcher (combo)(clipped with) > repeat
https://youtu.be/F6Zz3wB_Prk
Flak Cannon (clipped with) > Reload > Multi-Net Launcher (combo)(clipped with) > Chain Gun > Multi-Net Launcher (combo)(clipped with) > Freezing Breath (2 ticks)(tap cancel) > Multi-Net Launcher (combo)(clipped with) > Chain Gun > Multi-Net Launcher (combo)(clipped with) > repeat
https://youtu.be/PSV43fNBhPs
https://youtu.be/Xi816y48ipw
1. Solo Buff/Battle Troll
Note: This is designed for a Might-based group. If you need to proc Cog of Mageddon you can throw a Weapon Mastery in at appropriate intervals (or a Prec DPS can run their own Cog).Smoke Grenade Launcher > [Flak Cannon (clipped with) > Reload > Multi-Net Launcher (combo)(clipped with) > Chain Gun > Multi-Net Launcher (combo)(clipped with) > Smoke Grenade Launcher > Multi-Net Launcher (combo)(clipped with) > Chain Gun > Multi-Net Launcher (combo)(clipped with) > repeat portion in square brackets]
For ST, do the Net Retractor combo. For AoE, do the Multi-Net Retractor combo
https://youtu.be/GM7IoqgJ97U
https://youtu.be/fej2S6z2BHQ
2. 2-Troll Config: Full DPS-Spec Debuff Troll + Battle Buff Troll (Raid Only)
This group config is what B.O.P. Commlink was made for, essentially (but you don't need B.O.P. Commlink to take advantage of this approach with most Troll powers). One player goes Troll in full DPS gear/spec with B.O.P. Commlink (if needed), Amulet of Rao, and either a DPS artifact or, in AoE (or other specific) situations, sometimes Grimbor's Chains and does what's effectively a pure DPS rotation with Birds' Blitz injected (when it's needed). This frees the "Pure" / Buff Troll up to use a bit more damaging rotations thanks to not having to run some weaker debuff powers and also allows them to run additional buff or DPS artifacts. The net DPS gain to the group is higher than a solo Troll group config with the caveat that it's basically impossible to setup outside of League runs (most people won't have the artis for the DPS Troll, since they can pretty much only reliably be used in concert with another Troll also having specific artis).(In 2-Troll Setup Only) Debuff/DPS Troll's Rotations:
Note: It's also an option for the DPS Troll to spam EoG on the DPS (viability of this approach depends on how strong the DPS Troll is vs the pure DPS and is more viable if the Troll DPS is weak).For Bosses:
Important: You can also just do the Solo Buff/Battle Troll rotation from above and replace Reload with Robot Sidekick or a second SC.Birds' Blitz > Heat Vision > Chain Gun > Multi-Net Launcher (combo)(clipped with) > repeat
https://youtu.be/F6Zz3wB_Prk
For Hallway AoE:
Use the same rotation as the Solo Buff/Battle Troll above, replacing Reload with Robot Sidekick.(In 2-Troll Setup Only) Buff Troll's Rotation:
Note: This is designed for a Might-based group. If you need to proc Cog of Mageddon, you can throw a Weapon Mastery in at appropriate intervals to keep it active (or a Prec DPS can run their own Cog).Flak Cannon (clipped with) > Reload > Multi-Net Launcher (combo)(clipped with) > Chain Gun > Multi-Net Launcher (combo)(clipped with) > Freezing Breath (2 ticks)(tap cancel) > Multi-Net Launcher (combo)(clipped with) > Chain Gun > Multi-Net Launcher (combo)(clipped with) > repeat
https://youtu.be/PSV43fNBhPs
https://youtu.be/Xi816y48ipw
Munitions - Supercharge Analysis
Full Analysis
See the Munitions lines of the Supercharge Analysis spreadsheet[docs.google.com] for a detailed breakdown of exactly what each SC does, how it works, its limitations & considerations, and DMG:SC for ST & AoE with cast-time losses factored.
Note: Just because a given SC outperforms others vs Sparring Targets does not mean it is necessarily the best choice for all situations. Pick the best SC for the situation based on the range, ST/AoE, and vulnerability considerations at hand and be sure to factor green EoG feeding.
TLDR For Boss Fights
Min:Max is achieved by doing Neo Venom Boost into Biggun (requires Scrap) but using them both and activating Biggun when needed to avoid sitting on a full bar while Neo is on cooldown is a fine alternative.
Be very careful when using Biggun as the cast, though relatively short, can be countered or interrupted by knockback & comparable physics effects. This negates all of the damage it would do and still drains your SC.
For Raid Trash Clear
Munitions' base AoE DPS is high enough that either Neo or Biggun by itself is a fine hallway option. Try not to waste too much SC on trash mobs so as to ensure you arrive at the boss with just about a full bar.
Munitions: AV's Recommendations
Solo/Alerts
For Solos/Alerts/Open World I'll always use the Lernaea's Amulet All-In rotation. I will also usually replace Robot Sidekick with Biggun.Boss ST
For boss fights, I will generally use the Lernaea's Safety Net rotation while replacing Small Package with Biggun to make it an All-In.For Raid Hallway AoE
For hallways, whether I use the Full Range Rotation or the Point Blank Rotation depends on how annoying/dangerous the adds are in a given raid. Both are extremely effective. I usually end up using the Full Range.Artifacts
BiS for Solo/Alerts and for Boss ST is Solar Amplifier + Lernaea's Amulet + The Transformation Card (or Tetrahedron of Urgrund if no one else is able). BiS for the hallway rotation is Lernaea's Amulet + The Transformation Card + The Strategist Card.Ally Passives
Emperor Aquaman's Seaside Restart + The Batman Who Laughs' Luck of the Draw or Queen Diana's Don't Weaken *If the Troll can't keep you powered, replace this with Cyborg's All Your Base
Additional Guidance
- Do not. Lose. Biggun. Munitions has high base DPS but that comes with the caveat that Biggun can be interrupted by physics nudges/cc and lost completely after you've paid for it. Be careful when using it.
Nature - Boss (ST Focus) Rotations
Important Power Notes
- Savage Growth does not activate combat movement mode (but it will not deactivate combat movement if another attack has been used)- All Poison lasts exactly 12s from application or refresh.
- Grimorium Verum's Void Poison PI counts towards Roar for extra damage, despite not dealing damage in and of itself.
- Neither Harvest nor Thorn Burst have to actually hit anything in order to spread and refresh Poison. Ie. the damage-dealing aspect of the powers is separate from the Poison interaction. This can be used to maintain Poison on a target we don't otherwise want to hit for whatever reason (eg. Reflectors). If that's the case, be sure to un-target before using Harvest or to be out of range before using Thorn Burst.
- Due to the enhanced prec damage of both Wolf and Gorilla forms, it's important to be sure to always get taps in while spamming rotation.
- Neo-Venom Boost can be clipped onto a form change SC.
- Harvest will sometimes move us a step forwards.
- Wolf Form sinks ~6 inches into the ground so his paws disappears and it looks like it's half satyr and now you can't unsee it either.
General ST Notes:
- The key to Nature ST is time and SC management. Keeping Poison refreshed is absolutely critical, as loss of Poison dramatically reduces overall DPS. Without Poison being maintained, Nature will have the worst performance of all powers.
- These rotations are executed in pristine conditions without risk of interruption. In actual content, remember that we only have 12s before we lose Poison if we don't refresh. If the rotation gets delayed for any reason, re-apply earlier. Do not strictly adhere to the rotation order if faced with interruptions or delays.
- If entering a phase where there's any risk of not being able to re-apply Poison in time (eg. Zeus when about to be caged, Grail's mind control), reapply immediately before and after.
- Getting knocked out of form without SC to immediately re-enter it is a catastrophic DPS loss. In fights with a high risk of form loss, consider prioritizing having backup SC over doing the optimal Neo + form dump.
- Consider tac swapping Scrap of the Soul Cloak for SC activation, especially if there's no green circle spam. This both improves DPS by allowing for more Neo + Form combos and it improves the central SC management issue.
Focused Variant
Notes: - For bosses with no or minimal add presence, use Primal Wolf form and consider using the Critical Primal Wolf head mod.
- Encouraged to be Super Speed, as Tornado Pull's long dovetail is not detrimental in this case since it allows a few more Poison ticks to occur before reset when the rotation flows naturally.
* If you want to live dangerously, you can replace Return to Normal with either Neo-Venom Boost or Freezing Breath we're not recommending this due to the extreme liability associated with losing Poison and not being able to re-apply it without being KO'd.
Tornado Pull Iteration
This still leaves a comfortable gap between the last pre-refresh power and Harvest but it's tight enough we want to be more careful with any rotation delays/interrupts when using this.DPS Bar: Vine Lash, Serpent Call, Briar, Primal Wolf Form, Neo-Venom Boost, Robot Sidekick
Wolf Bar: Heat Vision, Tornado Pull, Impaling Thorns, Harvest, Robot Sidekick, Return to Normal*
Vine Lash > Serpent Call > Briar > Primal Wolf Form > [Heat Vision > Harvest > Impaling Thorns > Tornado Pull > Heat Vision > Tornado Pull > Impaling Thorns > Harvest > Heat Vision > Tornado Pull > Impaling Thorns > Tornado Pull > Repeat portion in square brackets]
https://youtu.be/SDUTdnD6zOg
Voracious Plants / Zip Tie Attack Iteration
Less ST damage but more of a safety margin on Poison refresh and Voracious Plants will perform better in multi-target situations.DPS Bar: Vine Lash, Serpent Call, Briar, Primal Wolf Form, Neo-Venom Boost, Robot Sidekick
Wolf Bar: Heat Vision, Voracious Plants**, Impaling Thorns, Harvest, Robot Sidekick, Return to Normal*
** Zip Tie Attack can be substituted for Voracious Plants. Difference in ST performance is negligible but sacrifices AoE for cleaner ST if desired.
Vine Lash > Serpent Call > Briar > Primal Wolf Form > [Heat Vision > Harvest > Impaling Thorns > Voracious Plants > Heat Vision > Voracious Plants > Impaling Thorns > Harvest > Heat Vision > Voracious Plants > Impaling Thorns > Voracious Plants > Repeat portion in square brackets]
https://youtu.be/iRPhHZ0YRaY
Splashy Variant
Notes:- For bosses with a heavy or critical add presence, consider using Gorilla Form in order to take advantage of the Impaling Thorns AoE.
- In-form instacast power can be modified to adjust the ratio of ST:AoE output.
- Using Gorilla Form prevents us from doing the potent Neo-Venom Boost + Primal Wolf Form combo.
- Gorilla Form can allow for better SC management if that's proving to be an issue.
Voracious Plants / Zip Tie Attack Iteration
DPS Bar: Vine Lash, Serpent Call, Briar, Gorilla Form, Neo-Venom Boost, Robot SidekickGorilla Bar: Heat Vision, Voracious Plants**, Impaling Thorns, Harvest, Robot Sidekick, Return to Normal*
** Zip Tie Attack can be substituted for Voracious Plants. Difference in ST performance is negligible but sacrifices AoE for cleaner ST if desired.
Vine Lash > Serpent Call > Briar > Gorilla Form > [Heat Vision > Harvest > Impaling Thorns > Voracious Plants > Heat Vision > Voracious Plants > Impaling Thorns > Harvest > Heat Vision > Voracious Plants > Impaling Thorns > Voracious Plants > Repeat portion in square brackets]
https://youtu.be/0atMtbOW2Zk
https://youtu.be/-wH09tVV1RE
Tornado Pull Iteration
DPS Bar: Vine Lash, Serpent Call, Briar, Gorilla Form, Neo-Venom Boost, Robot SidekickWolf Bar: Heat Vision, Tornado Pull, Impaling Thorns, Harvest, Robot Sidekick, Return to Normal*
Vine Lash > Serpent Call > Briar > Gorilla Form > [Heat Vision > Harvest > Impaling Thorns > Tornado Pull > Heat Vision > Tornado Pull > Impaling Thorns > Harvest > Heat Vision > Tornado Pull > Impaling Thorns > Tornado Pull > Repeat portion in square brackets]
https://youtu.be/kKnCx7CM2xY
Training Wheels Variant
If a player is struggling with maintaining poison or SC, they might consider keeping their poisons in their form bar and their core DPS rotation on their DPS bar. This sacrifices peak performance but reduces the impact of losing DoTs. This is not recommended in general, merely a safety net / insurance technique if having a hard time learning mechanics.
Lernaea's Amulet All-In
Mid Range Variant
DPS Bar: Briar, Vine Lash, Serpent Call, Robot Sidekick (or Voracious Plants), Neo Venom Boost, Primal Wolf FormPrimal Wolf Bar: Return to Normal, Freezing Breath, Sonic Cry, Voracious Plants, Harvest, Robot Sidekick (or Tornado Pull)
Briar > Vine Lash > Serpent Call > Primal Wolf Form > Harvest > [Freezing Breath (2 ticks)(tap cancel) > Sonic Cry (2 ticks)(tap cancel) > Voracious Plants* > Voracious Plants > Voracious Plants > Voracious Plants > Harvest > Repeat portion in square brackets]
* If using Tornado Pull instead of Robot Sidekick, replace this cast with Tornado Pull in ST situations
https://youtu.be/epxpL4PSLh0
Nature - Boss (ST Focus) Rotations (Continued)
Long Range Variant
Comparable damage with or without Solar AmplifierDPS Bar: Briar, Vine Lash, Serpent Call, Robot Sidekick, Neo Venom Boost, Primal Wolf Form
Primal Wolf Bar: Return to Normal, Heat Vision, Tornado Pull, Voracious Plants, Harvest, Robot Sidekick
Briar > Vine Lash > Serpent Call > Primal Wolf Form > Harvest > [Heat Vision > Tornado Pull* > Voracious Plants > Voracious Plants > Harvest > Repeat portion in square brackets]
* In multi-target situations, do another Voracious Plants instead of Tornado Pull
See Safety Net equivalent below for demo (same rotation, only difference is the presence of Robot Sidekick instead of having finisher on bar)
Easy-Mode Variant
Grimorium Verum PIHeat Vision > Voracious Plants > Voracious Plants > Freezing Breath (2 ticks)(tap cancel) > Voracious Plants > Voracious Plants > repeat
Notes:
-This saves us from having to deal with the obnoxious Poison refreshes, still has excellent splash damage, has an extremely low power cost, allows us to run both RSK and 2x SC, and frees up our time to focus on tactics. This is also the only viable way for Nature to do a 15k SC dump.
- Be sure to do 2x 2 Voracious Plants instead of 1x 4 Voracious Plants. Doing it in pairs like this gives us more weapon taps and has smoother flow & better damage.
https://youtu.be/CqfMN_y8Qds
Lernaea's Amulet Safety Net
Mid Range Variant
DPS Bar: Briar, Vine Lash, Serpent Call, Voracious Plants, Neo Venom Boost, Primal Wolf FormPrimal Wolf Bar: Return to Normal, Freezing Breath, Sonic Cry, Voracious Plants, Harvest, Impaling Thorns
Briar > Vine Lash > Serpent Call > Primal Wolf Form > Harvest > [Freezing Breath (2 ticks)(tap cancel) > Sonic Cry (2 ticks)(tap cancel) > Voracious Plants > Voracious Plants > Voracious Plants > Voracious Plants > Harvest > Repeat portion in square brackets]
https://youtu.be/Lloc4I6CW8g
Long Range Variant
Comparable damage with or without Solar AmplifierDPS Bar: Briar, Vine Lash, Serpent Call, Voracious Plants, Neo Venom Boost, Primal Wolf Form
Primal Wolf Bar: Return to Normal, Heat Vision, Tornado Pull, Voracious Plants, Harvest, Impaling Thorns
Briar > Vine Lash > Serpent Call > Primal Wolf Form > Harvest > [Heat Vision > Tornado Pull* > Voracious Plants > Voracious Plants > Harvest > Repeat portion in square brackets]
* In multi-target situations, do another Voracious Plants instead of Tornado Pull
https://youtu.be/EpOFQph1qww
Nature - Raid Hallway (AoE Focus) Rotations
Important Power Notes
- It is critical to arrive at bosses with at least enough SC to do one form change and preferable to arrive at bosses with full SC.- If green circles are being spammed, or in especially long hallway sections, consider replacing a Poison applicator with either Neo-Venom Boost or a movement SC (but while still try to arrive at the bosses with full SC).
- These rotations require us to manually add Return to Normal to the bar prior to the boss (or to conduct them in human form). Consider quickly doing this prior to the final group of adds before each boss to ensure you're not stuck in combat.
- Primal Wolf form is recommended to take advantage of Super Speed.
- Thorn Burst doesn't have to hit anything to spread and refresh Poison.
Content/Team Note
- In Reg, or when playing with good DPS in content with few hallway mobs, you may find you get better results by applying less Poison and going directly into the bursty aspect of the rotation sooner. If the adds are getting absolutely melted you may find it worth replacing Thorn Burst with Roar.- If there's frequent green circle spam, replace one of these with Neo-Venom Boost or a movement SC. Generally not worth using Robot Sidekick over an additional Poison, however.[/i]
* The DPS bar isn't technically necessary but it's good to have it setup this way in case we get KO'd for some reason.
Full Bar
DPS Bar*: Savage Growth, Sonic Cry, Thorn Burst, Vine Lash, Serpent Call, Primal Wolf Form Wolf Bar: Savage Growth, Sonic Cry, Thorn Burst, Vine Lash**, Serpent Call**, Briar**
Briar > Serpent Call > Vine Lash > [Thorn Burst > Savage Growth > Sonic Cry > Repeat portion in square brackets until add-group is dead but restart from beginning on fresh groups]
https://youtu.be/GadwMaUOu_w
https://youtu.be/yFsmZ2dlR1s
Super Speed
Slightly burstier output.DPS Bar*: Whirling Dervish, Savage Growth, Sonic Cry, Thorn Burst, Serpent Call, Primal Wolf Form
Wolf Bar: Whirling Dervish, Savage Growth, Sonic Cry, Thorn Burst, Vine Lash**, Serpent Call**
https://youtu.be/0v8Y-7av6Cg
https://youtu.be/GyyYK-sTpBY
Nature - 150% / True Max Range Rotation
This is designed to allow the player to fight from as far away from their target as possible while they and their pets are still able to land hits. It should only be used in rare instances where something is lethally buggy (eg. STU PZe on release), or where there are heavy range/positioning considerations where the consistency of being able to hit from so far can offset the reduced damage. It's a capability players should be aware of but not use often, if at all.
Voracious Plants > Repeat, popping Godwave Strength off cooldown and immediately before using SC.
Note: This is demo'd with an SC that intentionally doesn't deal/boost damage or hit the boss to show the base performance, for which Quislet's SC proc is a factor. In practice, you would move in/out for an offensive SC and fill the remaining slot with clips.
Voracious Plants > Repeat, popping Godwave Strength off cooldown and immediately before using SC.
Note: This is demo'd with an SC that intentionally doesn't deal/boost damage or hit the boss to show the base performance, for which Quislet's SC proc is a factor. In practice, you would move in/out for an offensive SC and fill the remaining slot with clips.
Nature - Supercharge Analysis
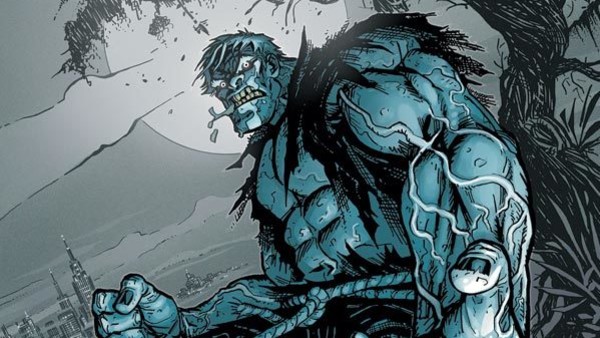
Full Analysis
See the Nature lines of the Supercharge Analysis spreadsheet[docs.google.com] for a detailed breakdown of exactly what each SC does, how it works, its limitations & considerations, and DMG:SC for ST & AoE with cast-time losses factored.
Note: Just because a given SC outperforms others vs Sparring Targets does not mean it is necessarily the best choice for all situations. Pick the best SC for the situation based on the range, ST/AoE, and vulnerability considerations at hand and be sure to factor green EoG feeding.
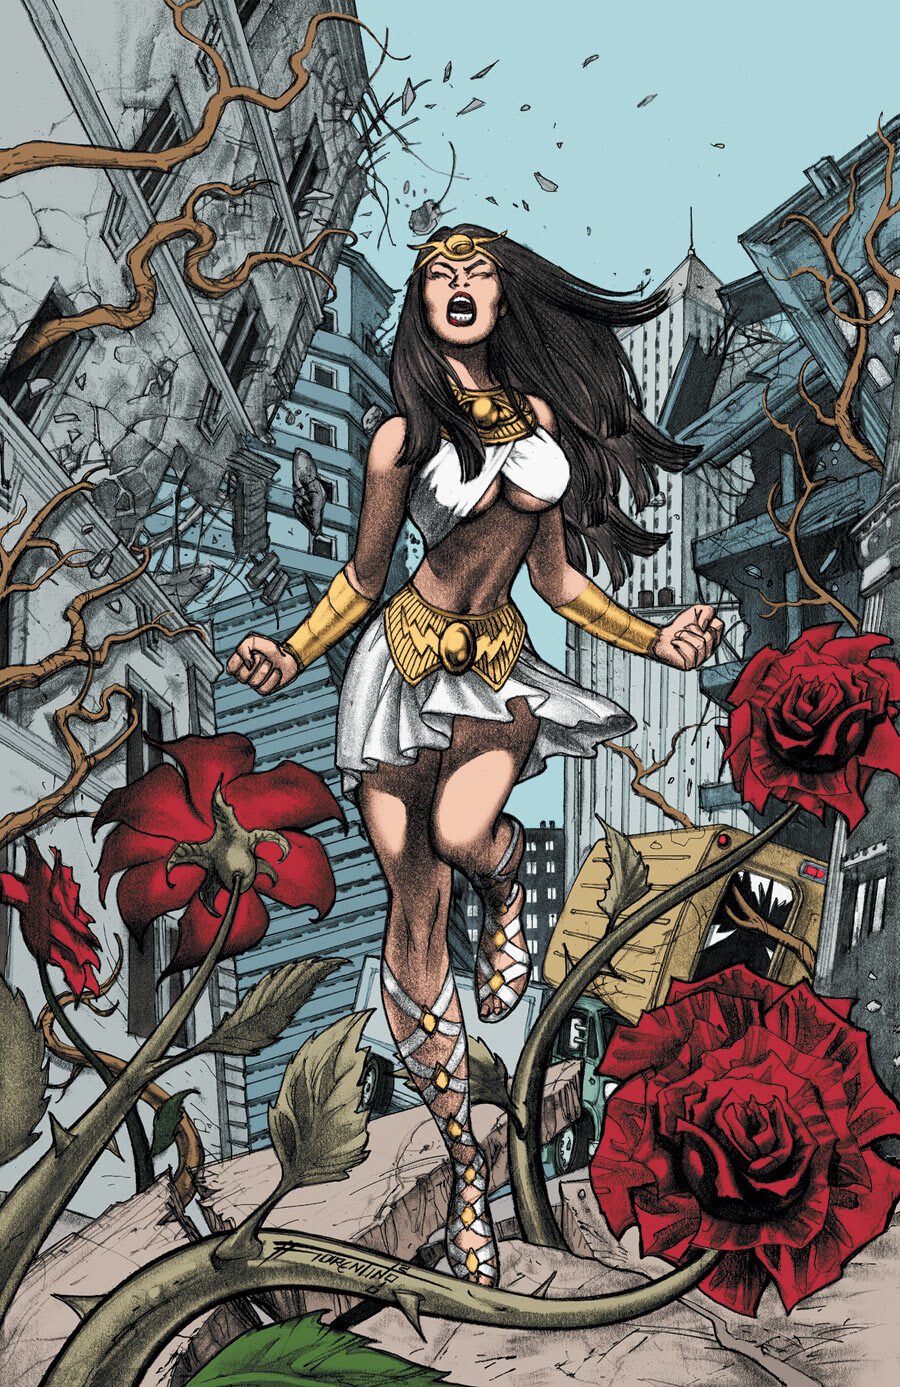
For Boss Fights
- If using the risky rotations where all of your dots are on your DPS bar and your primary rotation is on your Wolf bar, the best min:max SC usage is Neo Venom and Primal Wolf Form activated together due to the multiplicative nature of raw dmg and crit interactions in the damage equations. - If doing the "Insurance Policy" type rotations, which still involve poison management but retain a passable backup rotation on the DPS bar in case you get knocked out of form with no SC.
- If doing the simplified non-Poison-management rotations, SC min:max is achieved by doing either Neo + Primal Wolf or Neo into Carnivorous Plants (the latter requires Scrap). Swapping isn't necessary to perform well but it is the peak that DPS should strive for with this rotation.

For Raid Trash Clear
If using a Poison management type rotation in the boss fights, I suggest just using either Neo or Primal Wolf (or both) in hallways to ensure you arrive at the boss with full SC due to how critical SC management is with those rotations.
If using the bursty non-Poison-management type rotations, you can use 10ks in the hallways if you want (but still try to have full or nearly full SC approaching the bosses).
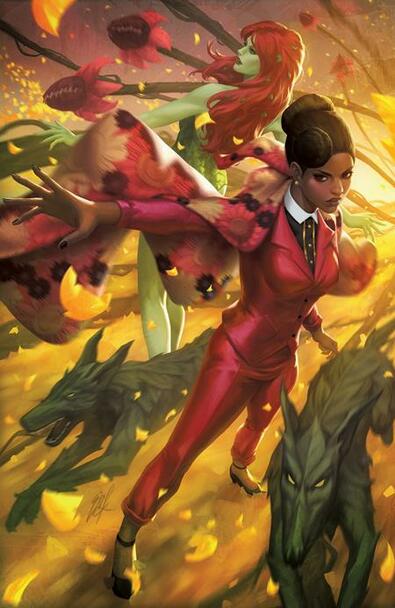
Nature: AV's Recommendations
Solo/Alerts
I'll generally stick to the Lernaea's Amulet All-In Easy-Mode Variant, replacing Robot Sidekick with Impaling Thorns, due to the fact that nothing will live long enough for Poison to be worth it and because the more meticulous variants are extremely aggravating when you have hate all the time. Boss ST
For boss fights, unless it's a very simple Tank & Spank with virtually no phases that threaten to cost Poison refresh, I'll run the Lernaea's Amulet Easy Mode Variant. If Poison refresh is relatively assured, I'll run a modification of the Lernaea's Amulet All-In Long Range Variant where, on the Wolf bar, I replace Return to Normal and Impaling Thorns with Neo Venom Boost and Savage Growth (but that's a hyper-committed and risky rotation designed to allow for both full dual-form Poison advantage and full nut Neo 10ks).For Raid Hallway AoE
For hallways, if I was already using the Lernaea's Amulet All-In Easy Mode boss rotation I'll usually stick with that. If the other DPS is bad enough that Poison will get full value, however, I'll switch to the Super Speed Point Blank Rotation.Artifacts
BiS for Solo/Alerts/Boss ST will be either Solar Amplifier + Lernaea's Amulet + The Transformation Card (or Tetrahedron of Urgrund if no one else is able) or Solar + Amulet + Grim if doing the Easy Mode Variant. BiS for the melee hallway rotation is Lernaea's Amulet + The Transformation Card + The Strategist Card.Ally Passives
Emperor Aquaman's Seaside Restart + The Batman Who Laughs' Luck of the Draw or Queen Diana's Don't Weaken *If the Troll can't keep you powered, replace this with Cyborg's All Your Base
Additional Guidance
- Running/maintaining Poison and form changes is extremely annoying and vulnerable to DPS loss such that I only recommend it in the most straight forward of fights. Losing Poison due to mechanics/phases or losing form and not having the SC to get back in right away are devastating losses. Remember that the Easy Mode Variant's capacity to do full nut Neo 10ks can compensate for the base DPS difference.
Quantum - Boss (ST Focus) Rotations
Important Power Notes
- Taps cannot be queued onto Energy Expulsion.
General Purpose
Grimorium Verum PIAll-In Variant
This can also be used with Lernaea's Amulet with no safety net.Heat Vision > Gravitonic Field > Einstein's Ray > Freezing Breath (2 ticks)(tap cancel) > Gravitonic Field > Repeat
https://youtu.be/YwL7NfxbGJs
Freezing Breath Variant (Non-Amulet)
Heat Vision > Freezing Breath (2 ticks)(tap cancel) > Energy Expulsion > Gravitonic Field > Heat Vision > Gravitonic Field > Energy Expulsion > Freezing Breath > Heat Vision > Gravitonic Field > Energy Expulsion > Gravitonic Field > Repeathttps://youtu.be/Z4CuUafnqns
Quantum Tunneling Variant
Slightly less average DPS but better mobility and survivability. Not compatible with Amulet.Heat Vision > Gravitonic Field > Energy Expulsion > Gravitonic Field > Repeat
https://youtu.be/oYeS9JexPcM

La-Mort Variants
Grimorium Verum PIEinstein's Ray Variant
Energy Expulsion > Heat Vision > Gravitonic Field > Energy Expulsion > Einstein's Ray > Gravitonic Field > Einstein's Ray > Repeat
https://youtu.be/3qt0azwa2gc
Freezing Breath Variant
Comparable average DPS, more AoE, more vulnerable to interrupt.Energy Expulsion > Gravitonic Field > Heat Vision > Energy Expulsion > Gravitonic Field > Freezing Breath (3 ticks)(tap cancel)
https://youtu.be/z9w-iw3j1kk
La-Mort + Source Shard
Energy Expulsion > Einstein's Ray > Gravitonic Field > Einstein's Ray > RepeatWhen it's off cooldown, use Godwave Strength instead of one instance of Einstein's Ray. (See video).
https://youtu.be/5vPXKHFYfE4
Note: Remember to alternate activation of combat pet and henchmen, using the strongest pet/henchmen available. Does not buff turret-class pets.
Source Shard
Heat Vision > Gravitonic Field* > Energy Expulsion > Gravitonic Field* > Repeat* When it's available, use Godwave Strength instead of Gravitonic Field. (See video).
Note: Remember to alternate activation of combat pet and henchmen, using the strongest pet/henchmen available. Does not buff turret-class pets. Ideal for situations where a boss will frequently force players to stop their rotations to deal with mechanics, as the pets can continue DPSing the boss when we can't.
https://youtu.be/PLuXMb0ZTHo
Lernaea's Amulet Safety Net
Grimorium Verum PIEnergy Expulsion > Einstein's Ray > Gravitonic Field > Einstein's Ray > Heat Vision > Einstein's Ray > Gravitonic Field > Einstein's Ray > Repeat
Use Energy Expulsion earlier if healing or Offering reset is required.
https://youtu.be/K0bdupE5sSw
Lernaea's Amulet All-In
See General Purpose's All-in variant. Note: This has no out for the Amulet, meaning we are completely dependent on the healers and we need to know when to not cast to avoid killing ourselves. High risk, high reward. This should only be used with people you know. Do not use this if the healers are struggling in general. This is content-dependent and not safe or recommended for a number of endgame boss fights. For highest levels of overall group play only.
Quantum - Raid Hallway (AoE Focus) Rotations
Mid Range
Sonic Shout (2 ticks)(tap cancel) > Distortion Wave > Warp Barrage > Time Shift > Freezing Breath (2 ticks)(tap cancel) > Distortion Wave > Warp Barrage > RepeatNotes:
- Time Shift is a conal pbAoE. There should no issues applying it to everything at mid range but be careful of short range angles. Same applies to Sonic Shout.
- Most any combination of Alcubierre Wave/Distortion Wave/Warp Barrage/Lift/Singularity in a similar format has competent ranged performance (which is great but makes testing infuriating). This iteration appears to be the best and also the burstiest.
- Sonic Cry will receive a notable damage increase if a teammate is applying Dazed PI.
https://youtu.be/CzY6N263iVI
https://youtu.be/9A9G9YfZNYI
Point Blank
Target the add that's most likely to live longest at any given time with Lift. These DoTs/fields are relatively short lived so not a great liability, but burstier substitutions can be made if desired as per the Mid Range notes.S L A
Whirling Dervish (3 ticks)(Dashing Combo)(clipped with) > Singularity > Lift > Alcubierre Wave > Repeathttps://youtu.be/ck-6LlK95Wg
https://youtu.be/IYVvJoh4e9I
5-Power Variant
Whirling Dervish (3 ticks)(Dashing Combo)(clipped with) > Singularity > Lift > Alcubierre Wave > Whirling Dervish (3 ticks)(Dashing Combo)(clipped with) > Lift > Alcubierre Wave > Freezing Breath (2 ticks)(tap cancel) > Repeathttps://youtu.be/-Ejrgl05WxA
https://youtu.be/XHub8sIF-Ls
Grimorium Verum Variant
Whirling Dervish (3 ticks)(Dashing Combo)(clipped with) > Distortion Wave > Lift > Alcubierre Wave > Repeathttps://youtu.be/NlXeSQxWCUI
https://youtu.be/pChC9EZsNLA
Quantum - 150% / True Max Range Rotation
This is designed to allow the player to fight from as far away from their target as possible while they and their pets are still able to land hits. It should only be used in rare instances where something is lethally buggy (eg. STU PZe on release), or where there are heavy range/positioning considerations where the consistency of being able to hit from so far can offset the reduced damage. It's a capability players should be aware of but not use often, if at all.

Anomaly > Singularity > Gravity Bomb > *Godwave Strength > Singularity > Gravity Bomb > Repeat
*Only ever pop Godwave Strength in this position of the rotation to minimize downtime. Always pop Godwave Strength before any SC.
Note: This is demo'd with an SC that intentionally doesn't deal damage or hit the boss to show the base performance, for which Quislet's SC proc is a factor. In practice, you would move in/out for an offensive SC and fill the remaining slot with clips.
Anomaly > Singularity > Gravity Bomb > *Godwave Strength > Singularity > Gravity Bomb > Repeat
*Only ever pop Godwave Strength in this position of the rotation to minimize downtime. Always pop Godwave Strength before any SC.
Note: This is demo'd with an SC that intentionally doesn't deal damage or hit the boss to show the base performance, for which Quislet's SC proc is a factor. In practice, you would move in/out for an offensive SC and fill the remaining slot with clips.
Quantum - Battle Trolling
There are different battle troll options depending on group configuration:

https://youtu.be/RW5qiUlMXYg
or, for fights where you'll almost always be hitting two bosses at the same time or a boss and tons of adds (that you actually do want to damage) consistently:
Singularity (clipped with) > Temporal Extortion > Lift > Alcubierre Wave* > Freezing Breath (2-ticks)(tap cancel) > Lift > Alcubierre Wave* > repeat
*Using Alcubierre Wave forces us to stay in mid-range. If you don't want to have to deal with that, replace Alcubierre Wave with Warp Barrage.
https://youtu.be/UL0EswuK8J0
https://youtu.be/iTsO4pIll3s
Birds' Blitz > Heat Vision > Gravitonic Field > Energy Expulsion > repeat
https://youtu.be/Af_qPKIu4DU
https://youtu.be/OXs9vJN68Wg
or
Singularity (clipped with) > Temporal Extortion > Heat Vision > Gravitonic Field > Energy Expulsion > Gravitonic Field > Heat Vision > Singularity (clipped with) > Temporal Extortion > Energy Expulsion > Gravitonic Field > Heat Vision > Gravitonic Field > Energy Expulsion > repeat
https://youtu.be/Aqff_rIgWZ8
1. Solo Buff/Battle Troll
Note: This is designed for a Might-based group. If you need to proc Cog of Mageddon you can throw a Weapon Mastery in at appropriate intervals (or a Prec DPS can run their own Cog).For Bosses:
Warp Barrage > [Singularity (clipped with) > Temporal Extortion > Gravitonic Field > Einstein's Ray > Warp Barrage > Gravitonic Field > Einstein's Ray > repeat portion in square brackets]https://youtu.be/RW5qiUlMXYg
or, for fights where you'll almost always be hitting two bosses at the same time or a boss and tons of adds (that you actually do want to damage) consistently:
Singularity (clipped with) > Temporal Extortion > Lift > Alcubierre Wave* > Freezing Breath (2-ticks)(tap cancel) > Lift > Alcubierre Wave* > repeat
*Using Alcubierre Wave forces us to stay in mid-range. If you don't want to have to deal with that, replace Alcubierre Wave with Warp Barrage.
https://youtu.be/UL0EswuK8J0
For Hallway AoE:
Whirling Dervish (3 ticks)(Dashing Combos)(clipped with) > Singularity (clipped with) > Temporal Extortion > Lift > Alcubierre Wave > repeathttps://youtu.be/iTsO4pIll3s
2. 2-Troll Config: Full DPS-Spec Debuff Troll + Battle Buff Troll (Raid Only)
This group config is what B.O.P. Commlink was made for, essentially (but you don't need B.O.P. Commlink to take advantage of this approach with most Troll powers). One player goes Troll in full DPS gear/spec with B.O.P. Commlink (if needed), Amulet of Rao, and either a DPS artifact or, in AoE (or other specific) situations, sometimes Grimbor's Chains and does what's effectively a pure DPS rotation with Birds' Blitz injected (when it's needed). This frees the "Pure" / Buff Troll up to use a bit more damaging rotations thanks to not having to run some weaker debuff powers and also allows them to run additional buff or DPS artifacts. The net DPS gain to the group is higher than a solo Troll group config with the caveat that it's basically impossible to setup outside of League runs (most people won't have the artis for the DPS Troll, since they can pretty much only reliably be used in concert with another Troll also having specific artis).(In 2-Troll Setup Only) Debuff/DPS Troll's Rotations:
Note: It's also an option for the DPS Troll to spam EoG on the DPS (viability of this approach depends on how strong the DPS Troll is vs the pure DPS and is more viable if the Troll DPS is weak).For Bosses:
Important: You can also just do the Solo Buff/Battle Troll rotation from above and replace Temporal Extortion with Robot Sidekick or a second SC.Birds' Blitz > Heat Vision > Gravitonic Field > Energy Expulsion > repeat
https://youtu.be/Af_qPKIu4DU
For Hallway AoE:
Use the same rotation as the Solo Buff/Battle Troll above, replacing Temporal Extortion with Robot Sidekick.(In 2-Troll Setup Only) Buff Troll's Rotation:
Note: This is designed for a Might-based group. If you need to proc Cog of Mageddon, you can throw a Weapon Mastery in at appropriate intervals to keep it active (or a Prec DPS can run their own Cog).For Bosses:
Heat Vision > Gravitonic Field (clipped with) > Temporal Extortion > Energy Expulsion > Gravitonic Field > repeathttps://youtu.be/OXs9vJN68Wg
or
Singularity (clipped with) > Temporal Extortion > Heat Vision > Gravitonic Field > Energy Expulsion > Gravitonic Field > Heat Vision > Singularity (clipped with) > Temporal Extortion > Energy Expulsion > Gravitonic Field > Heat Vision > Gravitonic Field > Energy Expulsion > repeat
https://youtu.be/Aqff_rIgWZ8
For Hallway AoE:
Use the same rotation as the Solo Buff/Battle Troll above.
Quantum - Supercharge Analysis

Full Analysis
See the Quantum lines of the Supercharge Analysis spreadsheet[docs.google.com] for a detailed breakdown of exactly what each SC does, how it works, its limitations & considerations, and DMG:SC for ST & AoE with cast-time losses factored.
Note: Just because a given SC outperforms others vs Sparring Targets does not mean it is necessarily the best choice for all situations. Pick the best SC for the situation based on the range, ST/AoE, and vulnerability considerations at hand and be sure to factor green EoG feeding.
For Boss Fights
Min:max is achieved with Neo Venom Boost into Oblivion (requires Scrap swap). Tac swapping isn't mandatory to perform well, however, and the two can be used independently of one another if needed.
For Raid Trash Clear
We can use either Oblivion or Neo Venom Boost in hallways with the caveat that the goal is to not waste SC by sitting on a full bar while ensuring we still arrive at bosses with at or near a full bar.
Quantum: AV's Recommendations
Solo/Alerts
I'll usually use the Lernaea's Amulet Safety Net rotation for this kind of content.Boss ST
For raid boss fights, I always use the Lernaea's Amulet All-In rotation but I'll replace Robot Sidekick with Oblivion.For Raid Hallway AoE
For hallways, I tend to use the Point Blank S L A Variant but if the adds are particularly annoying or dangerous I'll use the Mid Range rotation instead.Artifacts
BiS for Solo/Alerts and Boss ST is Solar Amplifier + Lernaea's Amulet + Grimorium Verum (or Trans/Tetra in the off chance you can leach off another Quantum's PI). BiS for the hallway rotations is Lernaea's Amulet + The Transformation Card + The Strategist CardAlly Passives
Emperor Aquaman's Seaside Restart + The Batman Who Laughs' Luck of the Draw or Queen Diana's Don't Weaken *If the Troll can't keep you powered, replace this with Cyborg's All Your Base
Additional Guidance
- Be aware that Quantum's best Boss ST rotations have non-existent AoE potential. If the group needs help with adds you can modify them for more AoE or simply save trinkets/SC for adds.- If you're likely to be anywhere near the top of the scoreboard/hate table, do NOT run Quantum Tunneling as you will screw up aggro succession and make aggro-linked mechanics unpredictable.
Rage - Boss (ST Focus) Rotations
Important Power Notes
- Despite tracking to target, Outrage's first hit may not deal damage at times if initiated from >50% range.- Channel Hate can be tap canceled.
- Pressing Frenetic Bombardment more than once prevents comboing.
- Eviscerating Chain and its Eviscerate combo count as separate finishers for the purposes of La-Mort
- Rage is somewhat "musical" in nature (like Killer Instinct) in that the bassy melee hits and growls have a pattern that forms "songs" which inform us as to how efficiently we're clipping/comboing. Just like Killer Instinct, if our inputs are slightly off, the "songs" will sound slower or wrong. It's a good idea to take advantage of this, as it frees up a lot of attention to maintain situational awareness and improve performance. Similarly, Channel Hate has simple, lilting notes tied to each tick, making it easy to tap cancel without watching the hit counter.
Boss Melee
Notes: - Powerful but potentially not viable for all bosses and requires that careful attention be paid to positioning and mechanics, in addition to properly timing Berserk.
- We can DPS in full Tank gear and still have the highest DPS in the game with these, as the practical Might difference between full tank gear and full DPS gear is <7%. Also, full tank gear would likely be slight overkill and a player could achieve sufficient survivability with partial Tank gear.
Super Speed Variant
Violence PIViolence > Outrage (full combo)(clipped with) > Lacerate (2 ticks)(tap cancel) > Whirling Dervish (2 ticks)(Dashing Combo)(clipped with) > Eviscerating Chain > Outrage (full combo)(clipped with) > Lacerate (2 ticks)(tap cancel) > Whirling Dervish (2 ticks)(Dashing Combo)(clipped with) > Eviscerating Chain > Outrage (full combo)(clipped with) > Lacerate (2 ticks)(tap cancel) > Whirling Dervish (2 ticks)(Dashing Combo)(clipped with) > Eviscerating Chain > Repeat
https://youtu.be/l6B5Z1tDuhY
Grimorium Verum PI
Outrage (full combo)(clipped with) > Lacerate (2 ticks)(tap cancel) > Whirling Dervish (2 ticks)(Dashing Combo)(clipped with) > Eviscerating Chain > Repeat
https://youtu.be/vOTtcA3F8-M
Pure Rage Variant
Violence > Outrage (full combo)(clipped with) > Lacerate (2-3 ticks)(tap cancel) > Eviscerating Chain (combo)(clipped with) > Outrage (full combo)(clipped with) > Lacerate (3 ticks)(tap cancel) > Eviscerating Chain (combo)(clipped with) > Outrage (full combo)(clipped with) > Lacerate (3 ticks)(tap cancel) > Eviscerating Chain (combo)(clipped with) > Repeathttps://youtu.be/_X4Xfsd0Lew
General Purpose Variants
Dreadful Rage (Long Range)
Plasma Retch > Freezing Breath (2 ticks)(tap cancel) > Dreadful Blast (full combo)(cipped with) > Heat Vision > Dreadful Blast (full combo)(clipped with) > Repeathttps://youtu.be/Bic3Z1Z3Rmw
Focused Rage (Long Range)
Heat Vision > Freezing Breath (2 ticks)(tap cancel) > Channel Hate (6 ticks)(tap cancel) > Heat Vision > Dreadful Blast (1x combo)(clipped with) > Channel Hate (6 ticks)(tap cancel) > Repeathttps://youtu.be/B18S7H2EufE
Screaming Rage (Mid Range)
Fairly even mix of ST and splash damage.Heat Vision > Freezing Breath (2 ticks)(tap cancel) > Channel Hate (6 ticks)(tap cancel) > Heat Vision > Sonic Cry (2 ticks)(tap cancel) > Channel Hate (6 ticks)(tap cancel) > Repeat
https://youtu.be/Q1WPQrwg61k
Indiscriminate Rage (Mid Range)
Heavy, dirty splash. Ideal for multi-boss fights or for bosses with notable add phases.Galling Eruption > Heat Vision > Dreadful Blast (full combo)(clipped with) > Frenetic Bombardment (full combo)(clipped with) > Heat Vision > Dreadful Blast (full combo)(clipped with) > Frenetic Bombardment (full combo)(clipped with) > Repeat
https://youtu.be/IkHnV_LrFoU
Lernaea's Amulet All-In
Note: Any of the other General Purpose rotations can be used as a Lernaea's Amulet build.Best Rounded Variant
Plasma Retch > Freezing Breath (2 ticks)(tap cancel) > Dreadful Blast (full combo)(cipped with) > Heat Vision > Dreadful Blast (full combo)(clipped with) > Repeathttps://youtu.be/F4Pq8XYXbDw
Fast-Charging Variant
This does less ST damage than the above variant but more AoE damage and charges to 10 stacks extremely quickly. Relatively safe as far as Amulet rotations go.Plasma Retch > Freezing Breath (2 ticks)(tap cancel) > Dreadful Blast (full combo)(cipped with) > Frenetic Bombardment (full combo)(clipped with) > Dreadful Blast (full combo)(clipped with) > Repeat
https://youtu.be/qPpNV0Nwpcw
Lernaea's Amulet "Safety Net"
The single most dangerous build in the entire game but it comes with the hardest hitting ST if a healer can keep you alive (and you can pull it off while dealing with mechanics).Note: Any of the other Melee rotation general approaches can do this simply by skipping Eviscerating Chain except when you want to reset Offering, but this is the only one worth doing if you're mad enough to go down this road.
Violence > Outrage (full combo)(clipped with) > Lascerate (2 ticks)(tap cancel) > Whirling Dervish (2 ticks)(Dashing Combo)(clipped with) > Outrage (full combo)(clipped with) > Lascerate (2 ticks)(tap cancel) > Whirling Dervish (2 ticks)(Dashing Combo)(clipped with) > Outrage (full combo)(clipped with) > Lascerate (2 ticks)(tap cancel) > Whirling Dervish (2 ticks)(Dashing Combo)(clipped with) > Repeat
https://youtu.be/LHtOSmnCgWk
Rage - Raid Hallway (AoE Focus) Rotations
Important Power Notes
- Despite tracking to target, Outrage's first hit may not deal damage at times if initiated from range. Do a normal lunge prior to activating it when first engaging a new group of adds to avoid damage loss.
Point Blank Variants
Super Speed Variant
Violence > Outrage (full combo)(clipped with) > Lacerate (1-2 ticks)(tap cancel) > Whirling Dervish (2-3 ticks)(Dashing Combo)(clipped with) > Outrage (full combo)(clipped with) > Lacerate (1-2 ticks)(tap cancel) > Whirling Dervish (2-3 ticks)(Dashing Combo)(clipped with) > Outrage (full combo)(clipped with) > Lacerate (1-2 ticks)(tap cancel) > Whirling Dervish (2-3 ticks)(Dashing Combo)(clipped with) > Repeathttps://youtu.be/QTMRtq_nW9o
https://youtu.be/6g25rdppCc4
Sonic Cry Variant
Left-to-Right IterationViolence > Outrage (full combo)(clipped with) > Sonic Cry > Lacerate (2 ticks)(tap cancel) > Outrage (full combo)(clipped with) > Sonic Cry > Lacerate (2 ticks)(tap cancel) > Outrage (full combo)(clipped with) > Sonic Cry > Lacerate (2 ticks)(tap cancel) > Repeat
https://youtu.be/sOh6fPmad5g
https://youtu.be/lIBGfbgaSVI
Alternating Iteration
Violence > Outrage (full combo)(clipped with) > Lacerate (1-2 ticks)(tap cancel) > Sonic Cry > Outrage (full combo)(clipped with) > Lacerate (1-2 ticks)(tap cancel) > Sonic Cry > Outrage (full combo)(clipped with) > Lacerate (1-2 ticks)(tap cancel) > Sonic Cry > Repeat
https://youtu.be/Tt-rXXTp7D0
https://youtu.be/FGRCMAsu5Vs
Pure Rage Variant
Slightly underrepresented on 8-target Sparring Targets due to PI range having a greater impact with this than with the Sonic Cry variant.Alternating Iteration
Violence > Outrage (full combo)(clipped with) > Lacerate (2 ticks)(tap cancel) > Revenge (combo)(clipped with) > Outrage (full combo)(clipped with) > Lacerate (2 ticks)(tap cancel) > Revenge (combo)(clipped with) > Outrage (full combo)(clipped with) > Lacerate (2 ticks)(tap cancel) > Revenge (combo)(clipped with) > Repeat
https://youtu.be/NTev_wa35kU
https://youtu.be/xN-zqEXypSI
Left-to-Right Iteration
Violence > Outrage (full combo)(clipped with) > Revenge (combo)(clipped with) > Lacerate (2 ticks)(tap cancel) > Outrage (full combo)(clipped with) > Revenge (combo)(clipped with) > Lacerate (2 ticks)(tap cancel) > Outrage (full combo)(clipped with) > Revenge (combo)(clipped with) > Lacerate (2 ticks)(tap cancel) > Repeat
https://youtu.be/rDQ7VqybYEI
https://youtu.be/G1Fz0fJXmyo
Full Range
Freezing Breath (2 ticks)(tap cancel) > Plasma Retch > Dreadful Blast (full combo)(clipped with) > Frenetic Bombardment (full combo)(clipped with) > Dreadful Blast (full combo)(clipped with) > Repeathttps://youtu.be/-FJOhav8gec
https://youtu.be/zcBBhXGqxQs
Rage - 150% / True Max Range Rotations
These are designed to allow the player to fight from as far away from their target as possible while they and their pets are still able to land hits. They should only be used in rare instances where something is lethally buggy (eg. STU PZe on release), or where there are heavy range/positioning considerations where the consistency of being able to hit from so far can offset the reduced damage. It's a capability players should be aware of but not use often, if at all.
Dreadful Blast (full combo)(clipped with) > Frenetic Bombardment (full combo)(clipped with) > Repeat, popping Godwave Strength off cooldown and immediately before using SC
or, without Source Shard,
Dreadful Blast (full combo)(clipped with) > Frenetic Bombardment (full combo)(clipped with) > Repeat
Note: These are demo'd with an SC that intentionally doesn't deal damage or hit the boss to show the base performance, for which Quislet's SC proc is a factor. In practice, you would move in/out for an offensive SC and fill the remaining slot with clips.
Dreadful Blast (full combo)(clipped with) > Frenetic Bombardment (full combo)(clipped with) > Repeat, popping Godwave Strength off cooldown and immediately before using SC
or, without Source Shard,
Dreadful Blast (full combo)(clipped with) > Frenetic Bombardment (full combo)(clipped with) > Repeat
Note: These are demo'd with an SC that intentionally doesn't deal damage or hit the boss to show the base performance, for which Quislet's SC proc is a factor. In practice, you would move in/out for an offensive SC and fill the remaining slot with clips.
Rage - Battle Tanking
Important: Sometimes it will be critical to ensure you reach the Dominance requirement to crowd control enemies while other times you can ignore it. The necessity varies from instance to instance.
Note: The content difficulty a player can rock this in will vary based on each player's knowledge and skill level and, in the highest content, the quality of the healer. This is generally ideal for Elite Alerts and anything around that difficulty level, but overkill for anything that doesn't actually need a tank at all.
Rage can either do a traditional battle tank build or, thanks to Berserk repeating pet damage as well, a pure tank build with bursts of extreme pet DPS.
Some of Rage's best offensive powers have a longer cooldown when in Tank role than they do when in DPS role, so traditional battle tanking with Rage requires some timing adjustments.
Important: Rage Melee DPS in full tank gear is also a viable means of battle tanking by virtue of the fact that you're still the hardest hitting thing on the field and always at the top of the hate list.
Outrage (full combo)(clipped with) > Lacerate (3-4 ticks)(tap cancel) > Whilring Dervish (3-4 ticks)(Dashing Combos)(clipped with) > Eviscerating Chain (combo)(clipped with) > Repeat
Important: As much as possible, save pets/henchmen/Ally for when you Berserk.
https://youtu.be/5QT05ajKRdg
La-Mort shouldn't be used with this. Since Outrage's 6s cooldown in Tank role would still be a limfac anyways, we don't get the same benefit from La-Mort while battle tanking as we do while DPSing.
Robot Sidekick can also be replaced with Godwave Strength, if desired, while always popping it immediately before and clipping it with Berserk for stronger procs. If more tankiness is needed, RSK can instead be replaced with any power that grants Fervor or, in extreme cases, Severe Punishment (but be careful to never miss a cooldown and only activate it when the mitigation is needed, as popping it is a DPS loss).
The amount of actual tank gear you'll need to wear, if any, will vary from instance to instance.
If battle tanking current tier elite raids or SM content where the more aggressive approach proves untenable and the boss can't be face-tanked, you can modify a pure-tank ranged build to incorporate a pet DPS Source Shard build.
Note: The content difficulty a player can rock this in will vary based on each player's knowledge and skill level and, in the highest content, the quality of the healer. This is generally ideal for Elite Alerts and anything around that difficulty level, but overkill for anything that doesn't actually need a tank at all.
Rage can either do a traditional battle tank build or, thanks to Berserk repeating pet damage as well, a pure tank build with bursts of extreme pet DPS.
Some of Rage's best offensive powers have a longer cooldown when in Tank role than they do when in DPS role, so traditional battle tanking with Rage requires some timing adjustments.
Important: Rage Melee DPS in full tank gear is also a viable means of battle tanking by virtue of the fact that you're still the hardest hitting thing on the field and always at the top of the hate list.
Outrage (full combo)(clipped with) > Lacerate (3-4 ticks)(tap cancel) > Whilring Dervish (3-4 ticks)(Dashing Combos)(clipped with) > Eviscerating Chain (combo)(clipped with) > Repeat
Important: As much as possible, save pets/henchmen/Ally for when you Berserk.
https://youtu.be/5QT05ajKRdg
La-Mort shouldn't be used with this. Since Outrage's 6s cooldown in Tank role would still be a limfac anyways, we don't get the same benefit from La-Mort while battle tanking as we do while DPSing.
Robot Sidekick can also be replaced with Godwave Strength, if desired, while always popping it immediately before and clipping it with Berserk for stronger procs. If more tankiness is needed, RSK can instead be replaced with any power that grants Fervor or, in extreme cases, Severe Punishment (but be careful to never miss a cooldown and only activate it when the mitigation is needed, as popping it is a DPS loss).
The amount of actual tank gear you'll need to wear, if any, will vary from instance to instance.
If battle tanking current tier elite raids or SM content where the more aggressive approach proves untenable and the boss can't be face-tanked, you can modify a pure-tank ranged build to incorporate a pet DPS Source Shard build.
Rage - Supercharge Analysis
Full Analysis
See the Rage lines of the Supercharge Analysis spreadsheet[docs.google.com] for a detailed breakdown of exactly what each SC does, how it works, its limitations & considerations, and DMG:SC for ST & AoE with cast-time losses factored.
Note: Just because a given SC outperforms others vs Sparring Targets does not mean it is necessarily the best choice for all situations. Pick the best SC for the situation based on the range, ST/AoE, and vulnerability considerations at hand and be sure to factor green EoG feeding.
Berserk re-applies damage caused by your weapon attacks, powers, non-turret pets (including special pet attacks like Quislet's Refractal Beam), henchment, allies, The Strategist Card, and La Mort burst procs. It does not re-apply damage from Orbital Strikes or Dead King's Sceptre's Orbital Assistance or turret pets.
For Boss Fights
For Melee:For bosses, min:max can be achieved (if using Trans) by either doing Infuriate and Berserk together or by just doing Berserk independently. The overall damage of both approaches is comparable with the following caveats/pros & cons:
Infuriate + Berserk (with Trans):
- We have cc immunity for the duration of Berserk and, with Trans on in a group with a standard buff Troll, a ~95% Crit Rate with almost 3x Crit Damage.
- By dumping 10k all at once, it's easier to stack this SC execution with our Supply Drop, Trinket, and Soder buffs for maximum effect.
- Berserk benefits from pet/ally damage but Infuriate does not improve pet/ally damage
- Slightly less efficient due to the timeframe of this making full helmet swaps w Flute proc & Scrap swap totally unpractical.
Berserk Only:
- 12s CD means we can easily activate 2-3 Berserks during the duration of summoned trinket pet and henchmen (though, if doing that, we'd only have our ally damage apply to the first summon)
- More efficient SC use overall with better/simpler swap potential
- More difficult to take advantage of full nut buff stacking
Regardless of which route you pick, only summon your pet, henchmen, and ally in conjunction with Berserk and try to time Berserk so that your La Mort proc occurs during it. Saving your ally for Berserk is especially important since we'll generally want Cyborg (we'll usually need the power) and Queen Diana Breakout passives (we breakout a lot in melee) so we won't be able to run the Aquaman Ally CD reduction.
For Ranged:
Neo Venom Boost & Infuriate should be activated concurrently (and we should be using Trans). Since Infuriate is only 8s while Neo Venom Boost is 15s, we can still easily do full nut buffs & swaps to fully min:max, unlike with the melee use. This results, overall, in 7s of dmg +40% and 8s of dmg+40% with an almost perfect crit rate at almost 3x crit damage on top of that. It is very important to Rage's ranged boss ST performance min:max that these two SCs be used together properly.
For Raid Trash Clear
For Melee:
Suggest just using Berserk by itself and activating when there's enough healthy adds to survive the duration, while still being careful to arrive at the bosses with full SC.
For Ranged:
Suggest just using Neo Venom Boost in hallways to ensure we're not sitting on a full bar unnecessarily. Rage ranged AoE is still fast & devastating enough that this will still be the most efficient option without having to dump a ton of our bar. If desired, Neo & Infuriate could be used together but that's kinda overkill for raid trash and only the chonkiest of hallway clusters would withstand it for the duration if the group is any good.
Rage: AV's Recommendations
Solo/Alerts
I'll always run the Grimorium Verum PI variant of the Boss Melee rotation but I'll actually replace Grimorium Verum with Quislet. In Elite alerts, this requires you to wear full Tank gear while in DPS role and Fortified Assault (and potentially Hearty, depending on your SP).Boss ST
For boss fights, if the Elite boss has unavoidable point-blank 1-shots and I'm forced to range, I'll do the Lernaea's Amulet All-In "Best Rounded Variant" but I'll replace Robot Sidekick with Infuriate. Otherwise, I'll do the Grimorium Verum Variant of the Boss Melee rotation with Quislet instead of Grim. It's prudent, when meleeing in Elite, to be in full Tank gear in DPS role with Fortified Assault at minimum, but it's not always required depending on the content.For Raid Hallway AoE
For hallways, all of Rage's AoE rotations are extremely powerful. If I'm meleeing bosses, I'll tend to just keep using the same Boss Melee rotation (but I'll skip Eviscerating Chain unless I want to focus a specific mob). I'll sometimes use the Full Range hallway rotation.Artifacts
For Melee - Quislet/Grimorium Verum + La-Mort Card + Trans/TetraFor Ranged ST - Solar Amplifier + Lernaea's Amulet + Trans/Tetra
For Ranged AoE - Lernaea's Amulet + Trans + Strat
Ally Passives
For Melee - Cyborg's All Your Base* + Queen Diana's Don't Weaken***You'll almost certainly need this but if the Troll is somehow able to keep you reliably powered then this can be replaced with Emperor Aquama's Seaside Restart, The Batman Who Laugh's Luck of the Draw, or, if in Elite, Flashpoint Batman's Sole Detective.
**Vs Elite boses, you may want to consider replacing this with Flashpoint Batman's Sole Detective... but try to avoid it as Don't Weaken is extremely potent on Rage Melee due to how often we use Breakout.
For Ranged - Emperor Aquaman's Seaside Restart + Queen Diana's Don't Weaken***
***If the Troll can't keep you powered, replace this with Cyborg's All Your Base
Additional Guidance
- Rage Melee is the most skill intensive DPS in the game and requires the player to understand their powers hit/clip times/delays and ranges well. Eg. vs very squishy targets you'll often want to immediately clip Outrage on the second hit, and you'll often want to land the first hit of E Chain on once target but plant the combo on another, etc. Just takes practice.- Despite hitting so hard, Rage Melee actually has the most difficulty soloing stuff and relies on Berserk to race tough mobs down. This is because Rage hits and holds aggro on everythiiiiiiiing and permanently sits in range of all the enemy's most dangerous combos instead of picking stuff off cleanly from range. You need to be hyper-aggressive and use your cc and ST bursts to your advantage to stagger mobs and eliminate threats quickly.
- Maximizing Rage's Ranged ST performance requires effective combination of Infuriate + Neo Venom Boost. Because of this, The Transformation Card is virtually mandatory.
- The La-Mort card is virtually mandatory for Rage Melee due to the extreme buff it gives the power without making it rely on Lernaea's Amulet in melee range.
- Melee tac swapping requires soft commitment to your swap choice for a little while, as attempting to swap back to best-case artis will hurt DPS with Berserk up. Basically we commit to the swap until we're finished as many Berserks as we want to do then switch back on a Lacerate or Dervish
- For Melee, I very strongly encourage the use of the entire Resistance & Breakout Refund tree of your Movement SP, as power consumption is through the roof.
Examples
Rage Melee Content Execution with Full Tac Swaps
https://youtu.be/rip6XvO2Y0M
Sorcery - Boss (ST Focus) Rotations
Important Power Notes
- Many of Sorcery's most important attacks are projectile, but they follow the new projectile rules wherein only one needs to hit to get credit for the lot (and if some projectiles hit targets that are far enough apart, they can proc again). If anyone is curious to see the difference, the old projectile rules are still in the game in LPVE Lex Luthor's green missile attack, where every individual projectile has to hit to count. Although Sorcery can still miss, it's a lot harder to do and this can be mitigated by standing a bit closer to the intended target. For some extremely mobile bosses, it will still be prudent to use a non-projectile variant.- Most of Sorcery's powers are receptive of tap queueing, so try to always get the extra hits in as that bonus damage adds up.
- Attempting to jump during Soul Barrage or Soul Storm will unlock movement but it will also cancel any remaining projectiles that haven't yet been fired.
- Source Shard's Godwave Strength buff procs on the three closest pets. This means that if we summon a trinket pet or henchmen in a Source + Grim + Quislet build (ie. One of Sorcery's best ST builds), there is a solid chance they will end up "stealing" the Godwave buff from Fury and preventing the massive Godwave + Offering/Refractal Beam proc from happening. This results in temporary pets causing a ~6-8% DPS loss even after factoring in their damage with Godwave unless we're extremely lucky and able to keep Fury/Quizlet close (not feasible in elite). Also, we cannot simply use Green Crystal Turret or Anti-Matter Turret to circumvent this issue because they still absorb the Godwave buff if they're close enough despite not benefiting from it.

Ecrous DrahS + Trom-Al
Final Ruin > Vengeance* > Vengeance* > Vengeance* > Vengeance* > Repeat* See video. When Godwave Strength is off cooldown, do Godwave Strength > Offering instead of two instances of Vengeance. Only do four casts between Final Ruins. Activating Offering by itself is ok but try to time it so Godwave Stength isn't waiting long for it. Never activate Godwave Strength without Offering.
https://youtu.be/g289jXhqtDQ
S'aeanrel Teluma Lla-Ni + Ecrous DrahS
Soul Barrage > Vengeance > Vengeance > Vengeance > repeatNotes:
- When Godwave Strength is off cooldown, do Godwave Strength > Offering (but be aware that both are 300 cost powers and will hit harder with Amulet). Activating Offering by itself is ok but try to time it so Godwave Stength isn't waiting long for it. Never activate Godwave Strength without Offering.
- To increase the AoE splash you can do two Vengeances between Soul Barrage instead of three.
- To burn cleaner ST, Vengeance can be spammed exclusively.
- If desired, Soul Barrage can be dropped to add a second SC.
https://youtu.be/tPZoRDEccS8
S'aeanrel Teluma Lla-Ni/Ytefas Ten+ Ecrous DrahS (Naelc TS)
Final Ruin* > [Vengeance** > Repeat portion in square brackets]* When healing or Offering reset is required, use Final Ruin
** See video. When Godwave Strength is off cooldown, do Godwave Strength > Offering (but be aware that both are 300 cost powers and will hit harder with Amulet). Activating Offering by itself is ok but try to time it so Godwave Stength isn't waiting long for it. Never activate Godwave Strength without Offering.
https://youtu.be/iTYy1ygHqDw
S'aeanrel Teluma (Non-Ecruos)
Lla-Ni
Grimorium Verum PIHeat Vision > Soul Barrage > Shard of Life > Freezing Breath (2 ticks)(tap cancel) > Soul Barrage > Repeat
https://youtu.be/mBRPFCRBpk0
Lareneg Esoprup
Elcric fo Noitcurtsed
Heat Vision > Circle of Destruction > Final Ruin > Soul Barrage > Heat Vision > Soul Barrage > Heat Vision > Final Ruin > Soul Barrage > Repeathttps://youtu.be/R9vccY0evk0
Muiromirg Murev
Heat Vision > Freezing Breath (2 ticks)(tap cancel) > Final Ruin > Soul Barrage > Heat Vision > Soul Barrage > Final Ruin > Freezing Breath (2 ticks)(tap cancel) > Heat Vision > Soul Barrage > Final Ruin > Soul Barrage > Repeathttps://youtu.be/ZtXJBjOrsCM
Gnillik Dleif
Lower pure ST damage but better performance in multi-boss fights or boss fights with notable add phases while still directing a large portion of the damage towards the intended target.Circle of Destruction > Soul Barrage > Heat Vision > Soul Barrage > Shard of Life > Condemn > Soul Barrage > Heat Vision > Soul Barrage > Shard of Life > Repeat
https://youtu.be/cHE0MILCrj4
Sorcery - Raid Hallway (AoE Focus) Rotations
Lluf Egnar
Muiromirg Murev IP
Freezing Breath (2 ticks)(tap cancel) > Soul Barrage > Soul Storm > Shard of Life > Soul Barrage > Soul Storm > Repeathttps://youtu.be/-gosJCIY5wM
https://youtu.be/7KTNaUT2RtE
Fles IP
Soul Siphon > Soul Barrage > Soul Storm > Shard of Life > Soul Barrage > Soul Storm > Repeathttps://youtu.be/110lAYvszXI
https://youtu.be/0yVTStgYaek
Tniop Knalb
Muiromirg Murev
Whirling Dervish (3 ticks)(Dashing Combo)(clipped with) > Soul Barrage > Soul Storm > Karmic Backlash > Repeathttps://youtu.be/dIp_AYSp9ew
https://youtu.be/9sH6YWsAkrU
Evif-Rewop Noitatumsnart
Whirling Dervish (3 ticks)(Dashing Combo)(clipped with) > Transmutation > Soul Barrage > Soul Storm > Whirling Dervish (3 ticks)(Dashing Combo)(clipped with) > Soul Barrage > Soul Storm > Karmic Backlash > Repeathttps://youtu.be/xdVQF2Dv7v8
https://youtu.be/QEjnckLzPiY
Noitatumsnart
Whirling Dervish (3 ticks)(Dashing Combo)(clipped with) > Transmutation > Soul Barrage > Soul Storm > Repeathttps://youtu.be/duQugKu5b7o
https://youtu.be/NJ_B819ewJM
Sorcery - 150% / True Max Range Rotation
This is designed to allow the player to fight from as far away from their target as possible while they and their pets are still able to land hits. It should only be used in rare instances where something is lethally buggy (eg. STU PZe on release), or where there are heavy range/positioning considerations where the consistency of being able to hit from so far can offset the reduced damage. It's a capability players should be aware of but not use often, if at all.
Soul Barrage > Soul Bolt > Offering > Soul Bolt > Soul Barrage > Soul Bolt > Soul Bolt > Soul Bolt > Repeat, popping Godwave Strength immediately after Soul Bolt whenever it's off cooldown and immediately before using SC.
Note: This is demo'd with an SC that intentionally doesn't deal damage or hit the boss to show the base performance, for which Quislet's SC proc is a factor. In practice, you would move in/out for an offensive SC and fill the remaining slot with clips.
Soul Barrage > Soul Bolt > Offering > Soul Bolt > Soul Barrage > Soul Bolt > Soul Bolt > Soul Bolt > Repeat, popping Godwave Strength immediately after Soul Bolt whenever it's off cooldown and immediately before using SC.
Note: This is demo'd with an SC that intentionally doesn't deal damage or hit the boss to show the base performance, for which Quislet's SC proc is a factor. In practice, you would move in/out for an offensive SC and fill the remaining slot with clips.
Sorcery - Supercharge Analysis
Full Analysis
See the Sorcery lines of the Supercharge Analysis spreadsheet[docs.google.com] for a detailed breakdown of exactly what each SC does, how it works, its limitations & considerations, and DMG:SC for ST & AoE with cast-time losses factored.
Note: Just because a given SC outperforms others vs Sparring Targets does not mean it is necessarily the best choice for all situations. Pick the best SC for the situation based on the range, ST/AoE, and vulnerability considerations at hand and be sure to factor green EoG feeding.
For Boss Fights
Regardless of build, ST min:Max is achieved by doing Neo Venom Boost into Polymorph. Damage wise, Polymorph is like a ST equivalent to Entomb but since it's multi-hit its damage will more reliable approach its average instead of varying wildly based on a single crit. For fights with multiple bosses being damaged concurrently, Neo Venom Boost into Baleful Transmogrification will still beat Gran Summoning (even if using Hear my Call).
For Raid Trash Clear
We can use either Baleful Transmogrification, Neo Venom Boost, or the two together but try to arrive at bosses with a full SC bar.
Sorcery: AV's Recommendations
Solo/Alerts
I'll either run the S'aeanrel Teluma Lla-Ni/Ytefas Ten + Ecrous DrahS rotation or the S'aeanrel Teluma (Non-Ecruos) rotation with Final Ruin in the place of Robot Sidekick.Boss ST
For boss fights, I pretty much always use the S'aeanrel Teluma (Non-Ecruos) rotation but I drop Robot Sidekick in order to run both Neo Venom Boost and Polymorph. The pet builds are also very good.For Raid Hallway AoE
For hallways, tend to prefer the Lluf Egnar Muiromirg Murev IP rotation.Artifacts
For Ecrous DrahS rotations - Grimorium Verum + Source Shard + Lernaea's AmuletFor S'aeanrel Teluma (Non-Ecruos) - Solar Amplifier + Lernaea's Amulet + Grimorium Verum
For Lluf Egnar in hallways - Lernaea's Amulet + Grimorium Verum + Trans/Strat
Ally Passives
Emperor Aquaman's Seaside Restart + The Batman Who Laughs' Luck of the Draw or Queen Diana's Don't Weaken *If the Troll can't keep you powered, replace this with Cyborg's All Your Base
Additional Guidance
- The pet DPS builds aren't to be underestimated (but they suffer due to not being able to fit full nut 2x SC).- In the off chance you can leach off another Sorcery players' PI, in a pet build you can replace Grimorium Verum with Quislet.
- Polymorph is an extremely potent ST SC, basically an ST version of Entomb in terms of damage, and should not be underestimated.
Water - Boss (ST Focus) Rotations
Important Power Notes
- Ranged taps cannot be queued onto Torrent.- Tsunami Strikes cannot be clipped without losing the damage.

La-Mort
Torrent > Ebb (combo)(clipped with) > Heat Vision > Torrent > Ebb (combo)(clipped with) > Freezing Breath (3 ticks)(tap cancel) > Repeathttps://youtu.be/6CH5i3df0Ig
Lernaea's Amulet All-In
This can also be used as General Porpoise without Lernaea's AmuletHeat Vision > Ebb (combo)(clipped with) > Depth Charge > Freezing Breath (2 ticks)(tap cancel) > Ebb (combo)(clipped with) > Repeat
https://youtu.be/zMB-4OjO1rc
General Porpoise
Ebb & Flow Variant
Heat Vision > Freezing Breath (2 ticks)(tap cancel) > Torrent > Ebb (combo)(clipped with) > Heat Vision > Ebb (combo)(clipped with) > Torrent > Freezing Breath (2 ticks)(tap cancel) > Heat Vision > Ebb (combo)(clipped with) > Torrent > Ebb (combo)(clipped with) > Repeathttps://youtu.be/Rq4dRSwpU1U
or
Heat Vision > Drown > Torrent > Ebb (combo)(clipped with) > Heat Vision > Ebb (combo)(clipped with) > Torrent > Ebb (combo)(clipped with) > Repeat
https://youtu.be/hUQhBWsRx_4
Mid Range Variant
Heat Vision > Torrent > Freezing Breath (3 ticks)(tap cancel) > Heat Vision > Torrent > Sonic Cry (3 ticks)(tap cancel) > Repeathttps://youtu.be/XvYM5qAwgss
Depth Charge Variant
Heat Vision > Drown > Torrent > Depth Charge > Heat Vision > Depth Charge > Torrent > Depth Charge > Repeathttps://youtu.be/SSFRsy53Hyk
Bubble Variant
Use Accelerate Bubble back mod.Heat Vision > Depth Charge (clipped with) > Bubble* > Torrent > Depth Charge > Repeat
* When available.
https://youtu.be/ZSL9Kuq9FJI
Water - Raid Hallway (AoE Focus) Rotations
Full Range
DPS output higher than shown due to presence of Supercharge Generator.Drown > Ebb (combo)(clipped with) > Depth Charge > Freezing Breath (2 ticks)(tap cancel) > Ebb (combo)(clipped with) > Depth Charge > Repeat
https://youtu.be/r1WXlMpwPC8
https://youtu.be/G5oavm2Zug4
Mid Range
Freezing Breath (2 ticks)(tap cancel) > Ebb (combo)(clipped with) > Depth Charge > Sonic Cry (2 ticks)(tap cancel) > Ebb (combo)(clipped with) > Depth Charge > Repeathttps://youtu.be/4OdwMX4iplk
https://youtu.be/Hsf78Xok-yY
Point Blank
Whirling Dervish (3 ticks)(Dashing Combo)(clipped with) > Crashing Wave > Depth Charge* > Ebb (combo)(clipped with) > Repeat* This is a conal pbAoE so try to keep most enemies in line of sight.
https://youtu.be/JCBQKkUopLg
https://youtu.be/T0Qj2siSp5E
Water - Supercharge Analysis
Full Analysis
See the Celestial lines of the Supercharge Analysis spreadsheet[docs.google.com] for a detailed breakdown of exactly what each SC does, how it works, its limitations & considerations, and DMG:SC for ST & AoE with cast-time losses factored.
Note: Just because a given SC outperforms others vs Sparring Targets does not mean it is necessarily the best choice for all situations. Pick the best SC for the situation based on the range, ST/AoE, and vulnerability considerations at hand and be sure to factor green EoG feeding.
For Boss Fights
Min:max is achieved with Neo Venom Boost into Call of the Deep (requires Scrap swap). However, tac swaps aren't necessary to perform acceptably and the two can also be used independently. Similarly, Call of the Deep and Whirlpool have almost identical DMG:SC so Neo into Whirlpool is also a viable alternative (but coordinate with the tank to ensure your targets remain stationary).
 For Raid Trash Clear
Any one or combination of Neo Venom Boost, Call of the Deep, and/or Whirlpool are fine for hallways. If using Whirlpool, try to ensure your targets will remain in the damage field for the 5s duration and that they have enough health that they won't die before eating all of the ticks.

Water: AV's Recommendations
Solo/Alerts
I'll run the Lernaea's Amulet All-In rotation and, if no/weak healer, I'll replace Robot Sidekick with Torrent.Boss ST
For boss fights, I always run the Lernaea's Amulet All-In rotation but I'll replace Robot Sidekick with Call of the DeepFor Raid Hallway AoE
Depending on the circumstances I'll either continue to use my boss rotation, or switch to the Full Range or Point Blank Hallway Rotation depending on how annoying/dangerous the adds are.Artifacts
For ST - Solar Amplifier + Lernaea's Amulet + Grimorium VerumFor hallway rotations - Lernaea's Amulet + Trans + Strat
Ally Passives
Emperor Aquaman's Seaside Restart + The Batman Who Laughs' Luck of the Draw or Queen Diana's Don't Weaken *If the Troll can't keep you powered, replace this with Cyborg's All Your Base
Additional Guidance
- You can clip the Flow combo quite early. Practice until you can nail it on the first possible frames every time.- The Full Range hallway rotation has the advantage of an SC Generator, so it's more feasible to do 10ks or Neo + 10ks in the hallways with it and still be full for bosses.
More DC Universe Online guides
- Episodes and DLC content.★ 5 (533)36k views527 ♥15 minUpdated May 11
- Casual Solo Player's Guide From Fresh Level 30, to CR 84★ 5 (250)17k views485 ♥85 minUpdated Aug 17, 2014
- Easy/Fast Treasure Chest Farming★ 4 (116)10k views147 ♥1 minUpdated Feb 17, 2016
- BECOMING A TANK!★ 4 (105)6.8k views116 ♥7 minUpdated Jan 11, 2014
- BECOMNG A TROLLER!★ 4 (60)6.6k views70 ♥3 minUpdated Jan 10, 2014
- Coordinate your wardrobe★ 4 (74)5.4k views109 ♥4 minUpdated Nov 25, 2019




This guide was created by its original author on the Steam Community. Are you the author and want it removed? Request removal.