The Over Preppers Guide To Green Hell
Once More With Leptonia
- Get a few stones and get your starting tools
- Stone Axe
- Stone Blade
- Spear of some kind
- Coconuts 1-2 bidons (whole coconut, and 1 rope) at least, and 4 bowls
- Armor~ Stick armor is the easiest to craft (2 rope, 3 sticks, 1 banana leaf)
- Armor~Leaf armor will do the trick quick just get a banana leaf and 2 rope, by far the easiest armor to craft, and quickest.
- Stone Axe
- While getting the beginning steps out of the way make note of your coordinates, if you can readily remember any major locations near those feel free to head to any of those.
- MUD~ Mud is your friend, set up 1-2 mud mixers since most builds require 4 or more mud bricks
- BLUEPRINTS~Yes there are some that are worth a trek through the Amazon while others can wait.~ Water source, and sustainability are crucial but not vital; coconuts can override a water source but not for long term. If using the bowl method I would suggest between 5-10 coconut bowls.
It's important to know your major blueprint locations, and find essentials quickly to properly establish a "hunker down" base. If you are unsure of any locations or would like a quicker way to locate them please feel free to reference the lower sections of this guide.
- Personal Preferred Start Locations for Beginning Bases
- Drug Facility~51W 27S~
- Docks~51W 19S~
- Drug Facility~51W 27S~
Maps Maps and more Maps
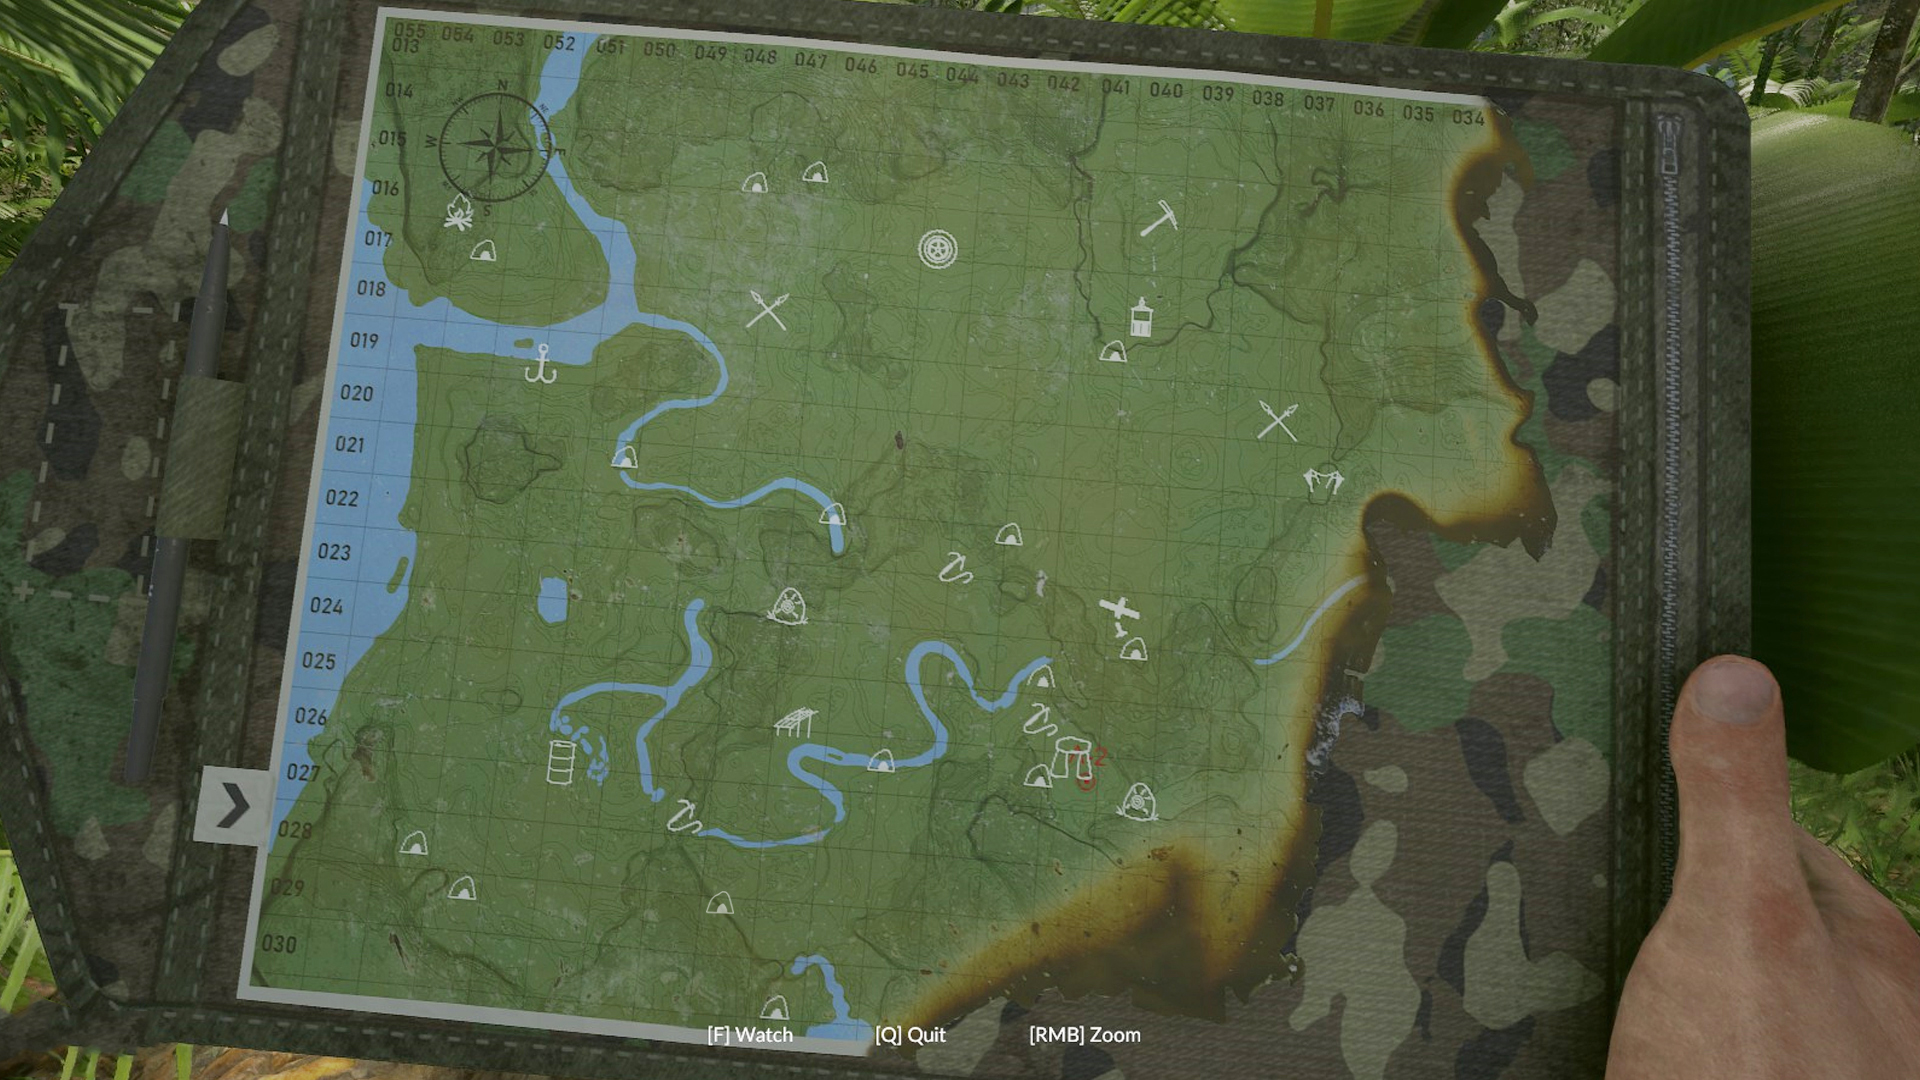 Map 1
Map 1- Found at the Drug Facility at 51W 27S
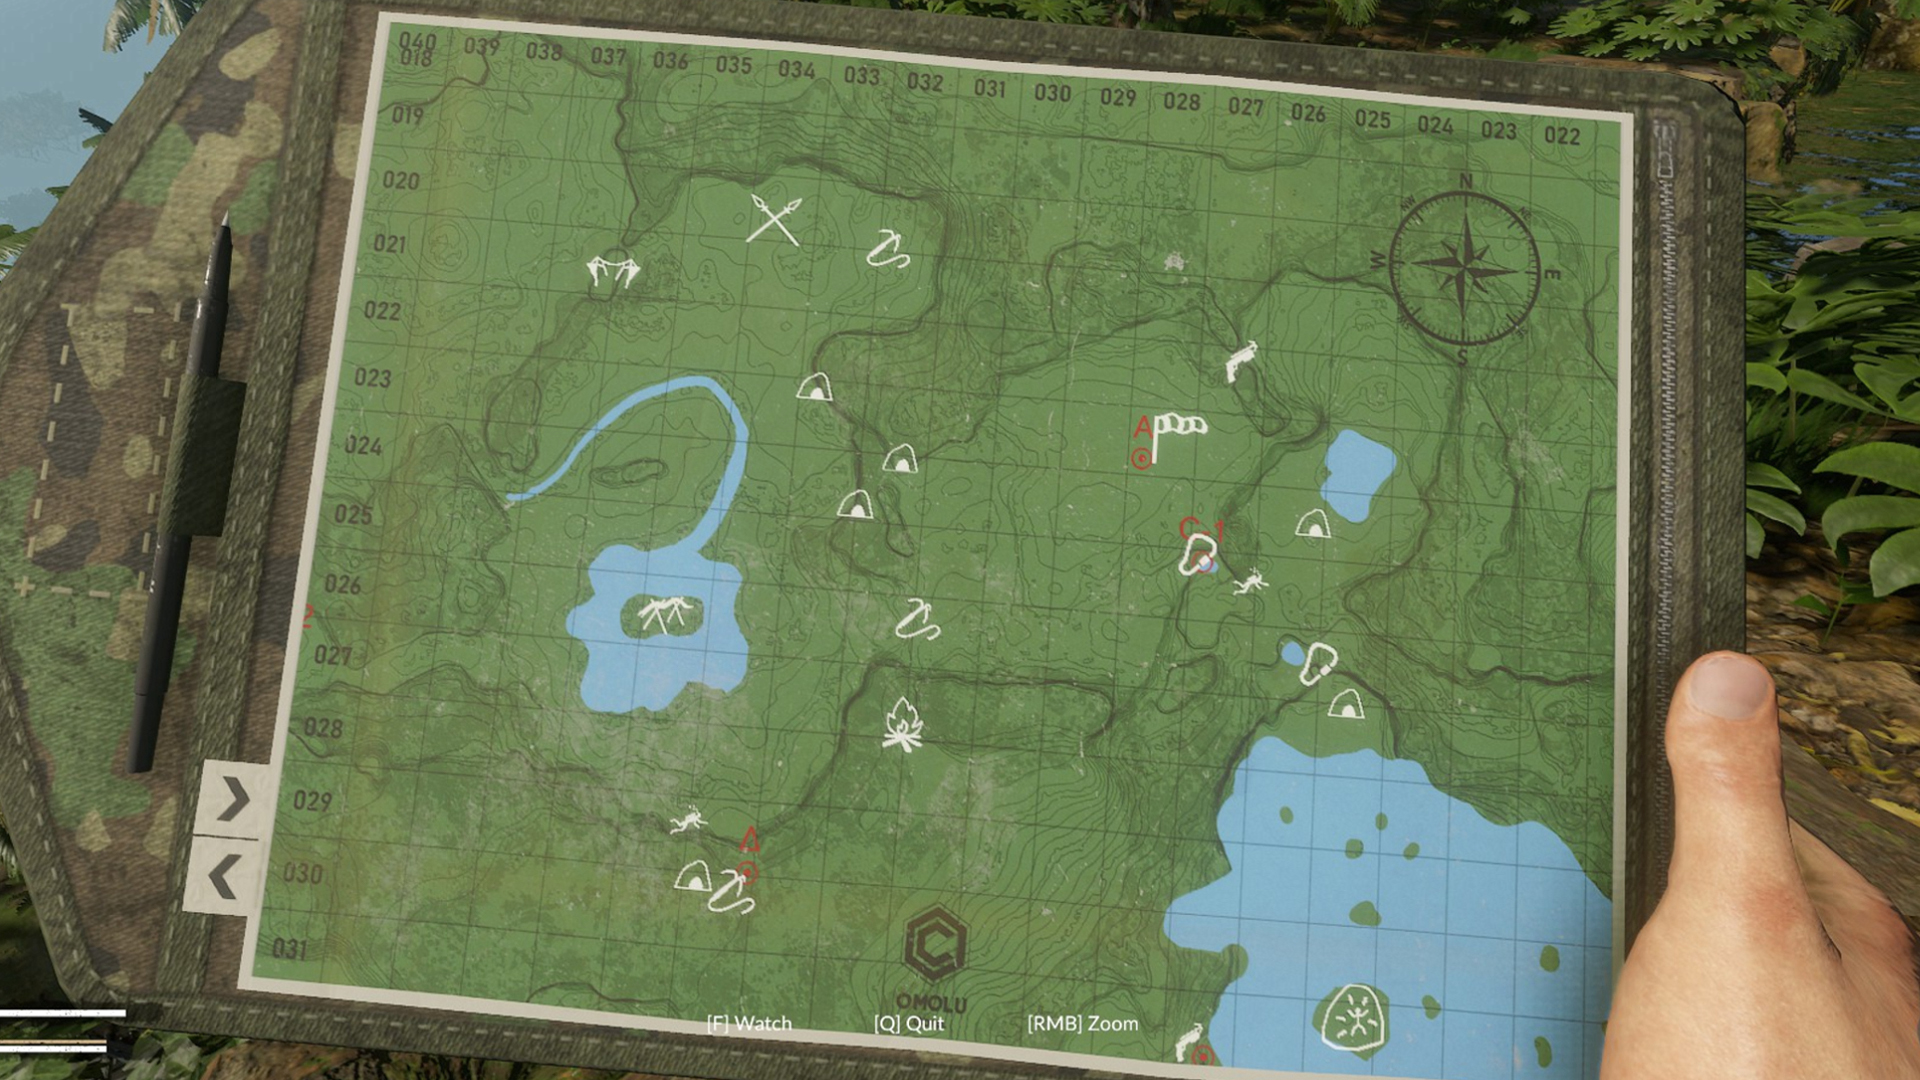 Map 2
Map 2- Found at the Air Port 29W 22S
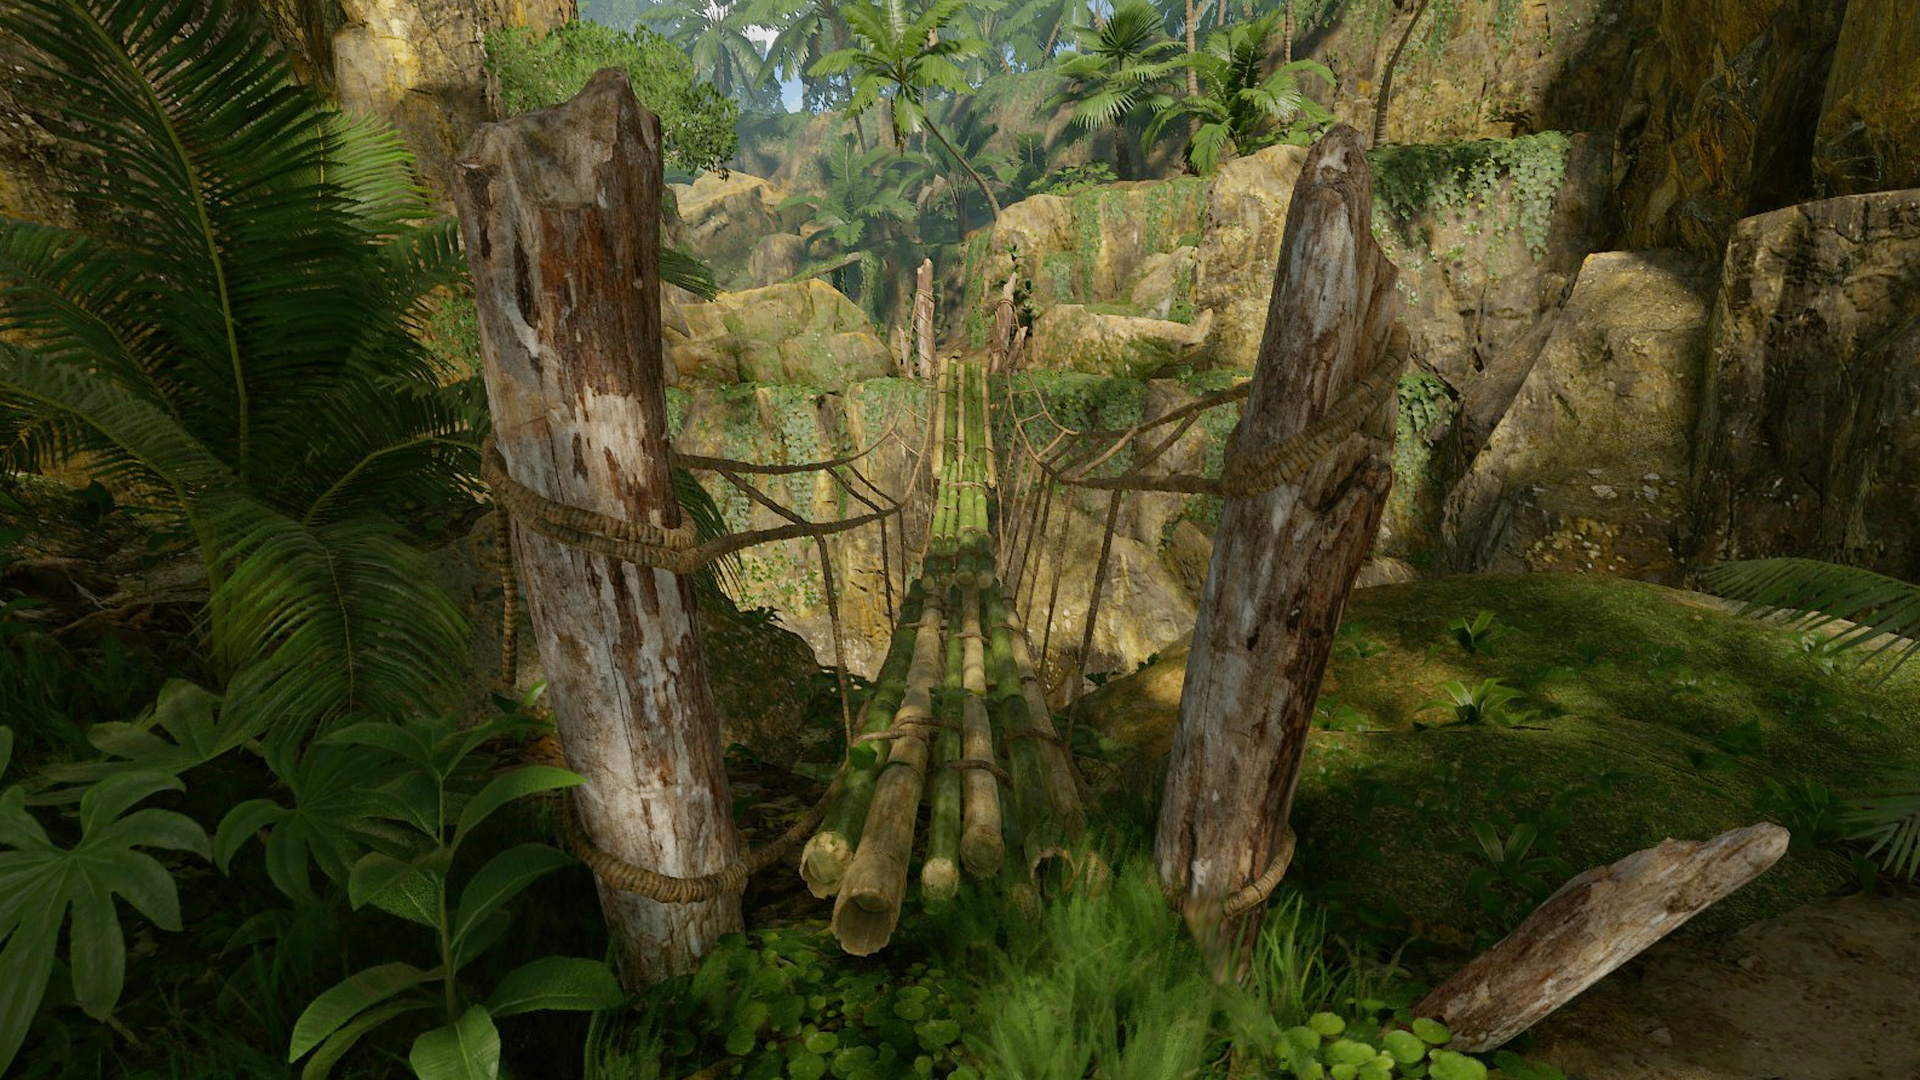
- ~Note~ you'll need to get to the bamboo bridge and anaconda island prior to getting to the airport~
- Bamboo bridge is at 37W 20S
- Anaconda Island is at 35W 25S
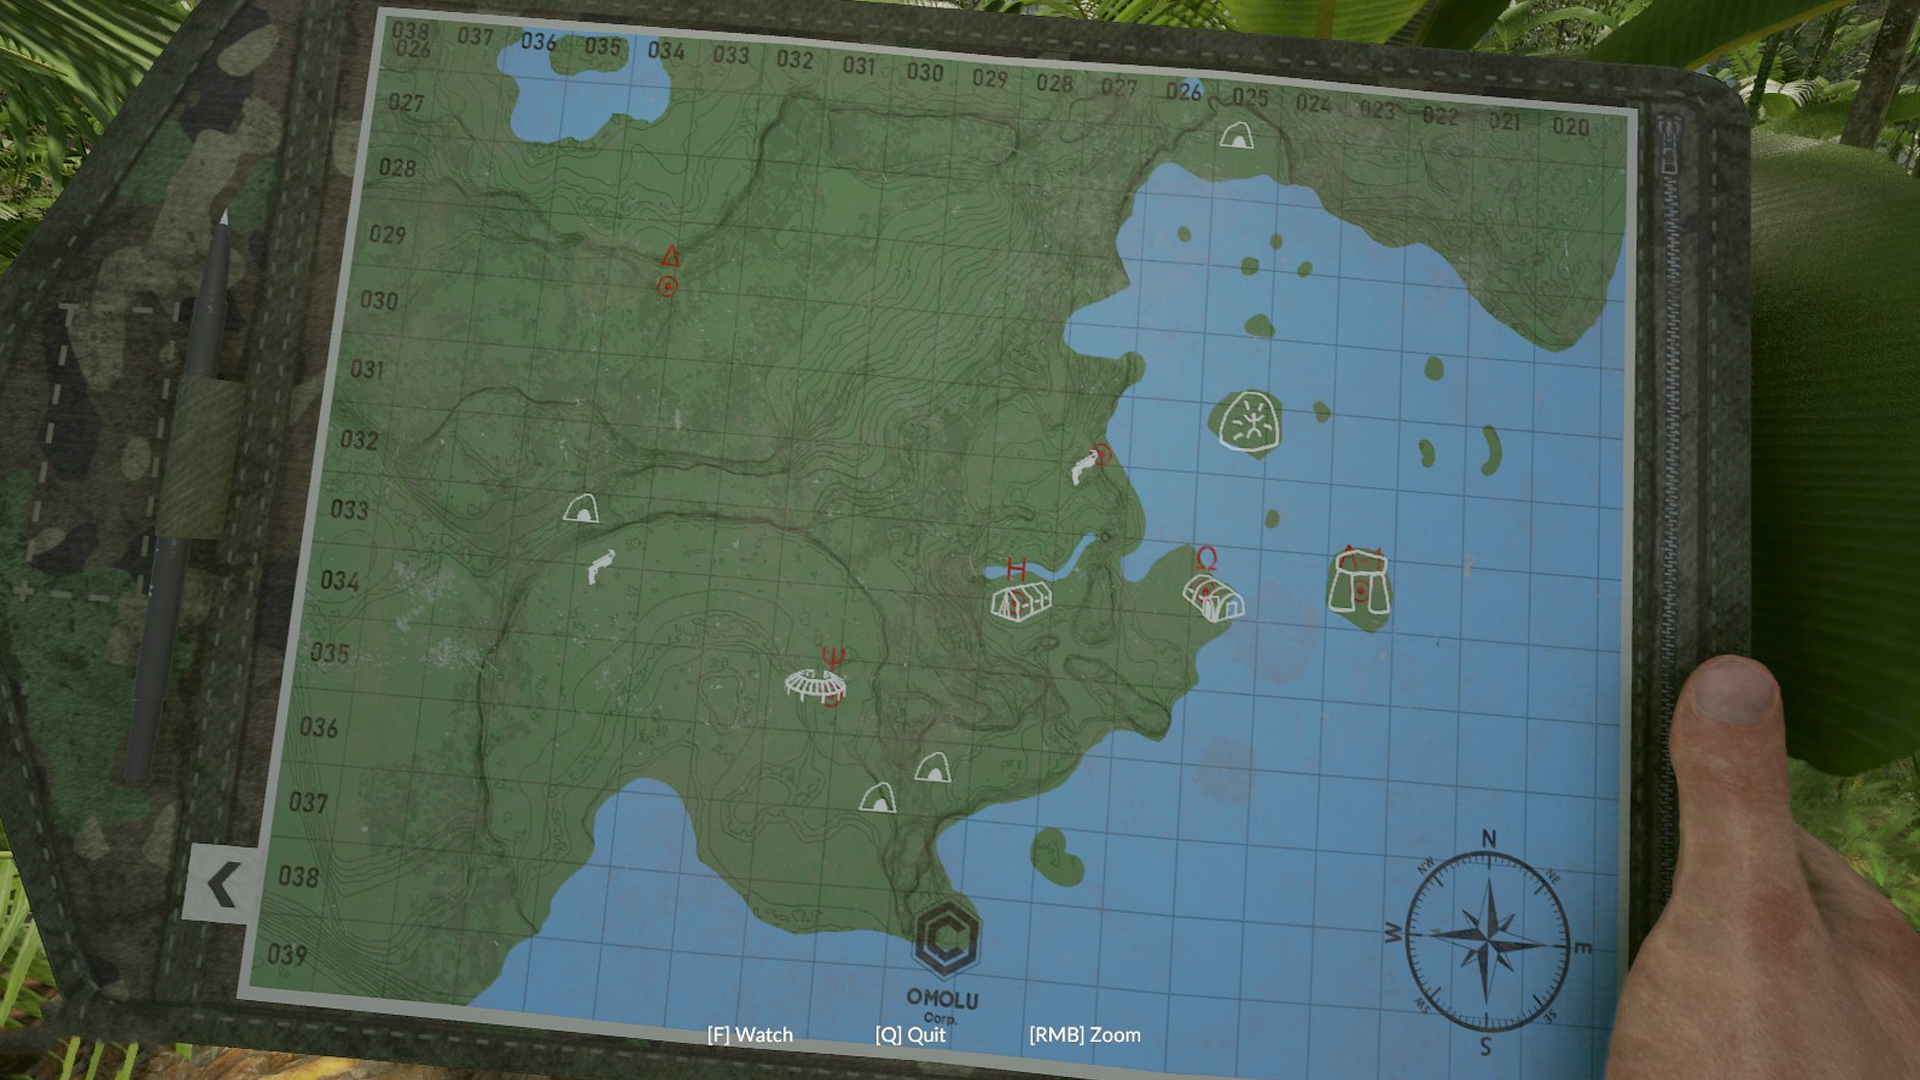 Map 3
Map 3- Located at Omega Camp 25W 33S
- ~Note~ you'll travel through the wetlands or swamp area before reaching the camp~
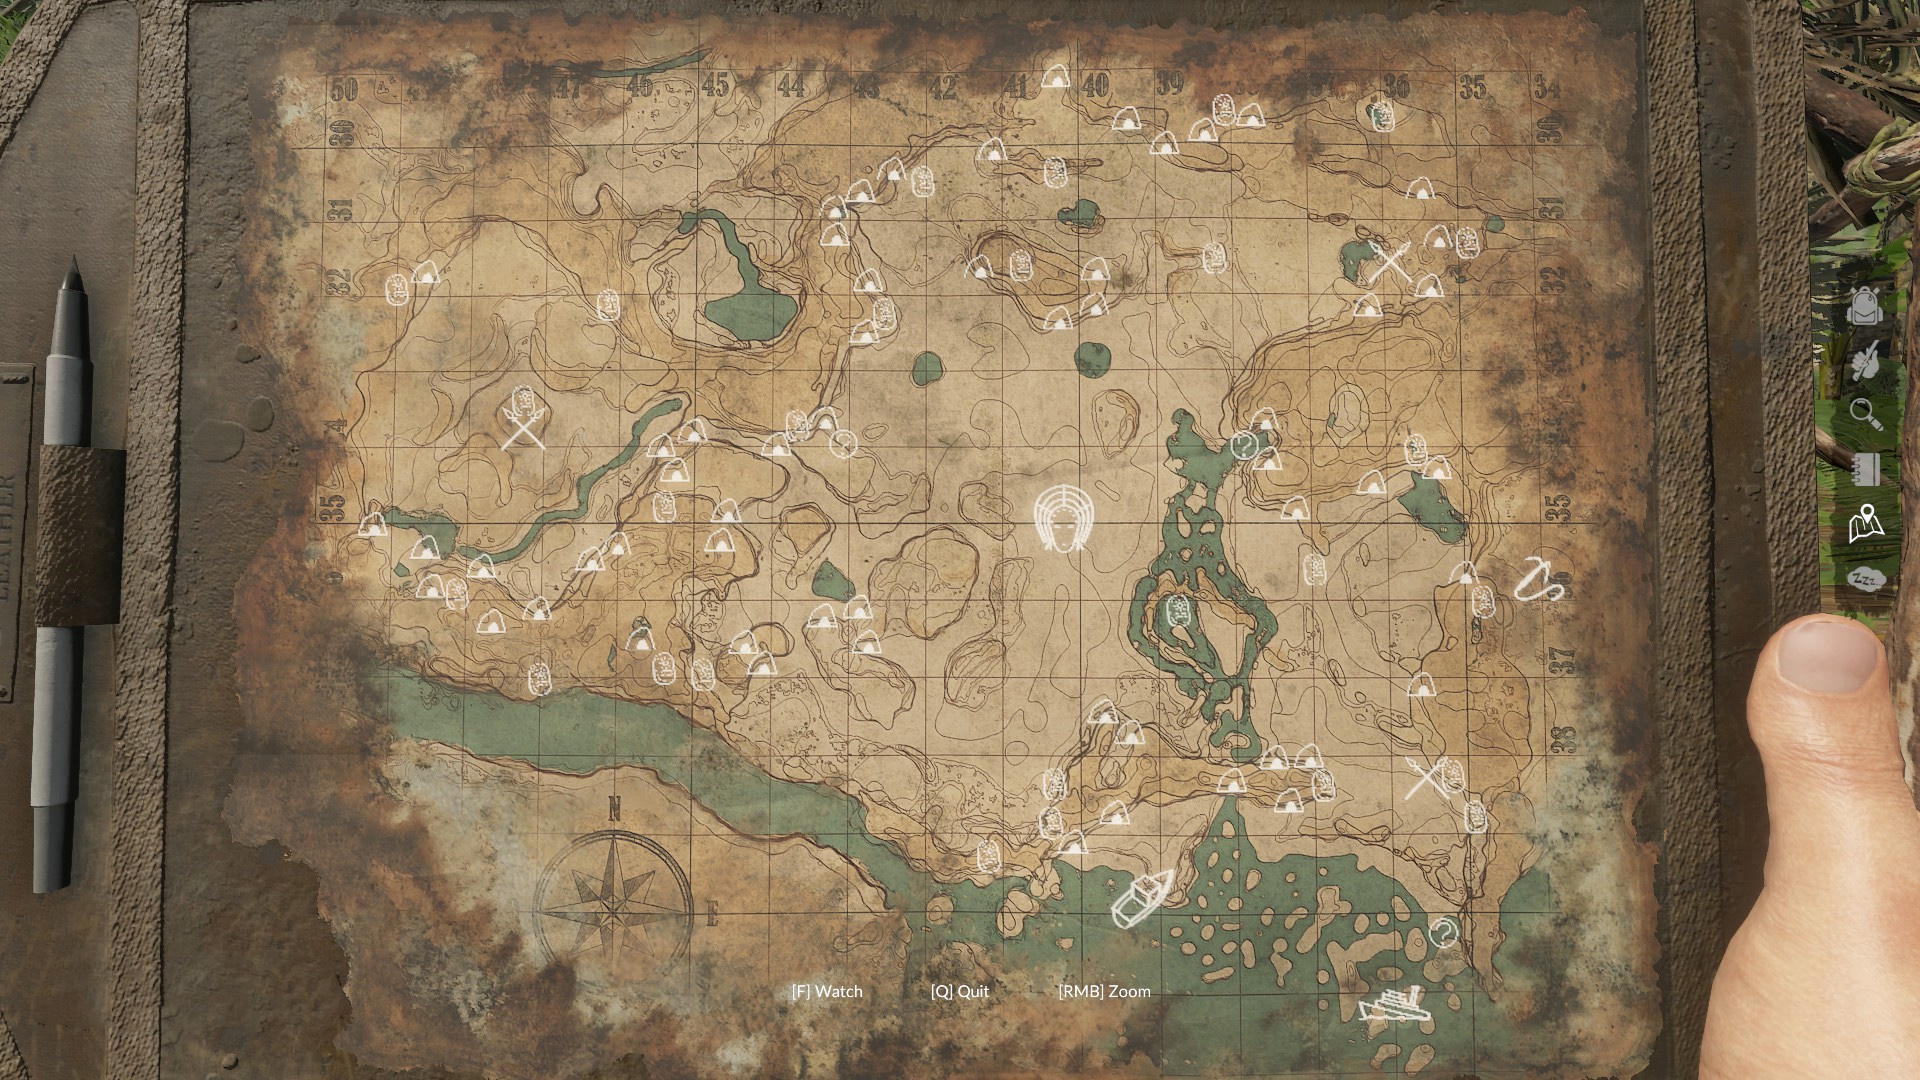 Map 4***OPTIONAL***
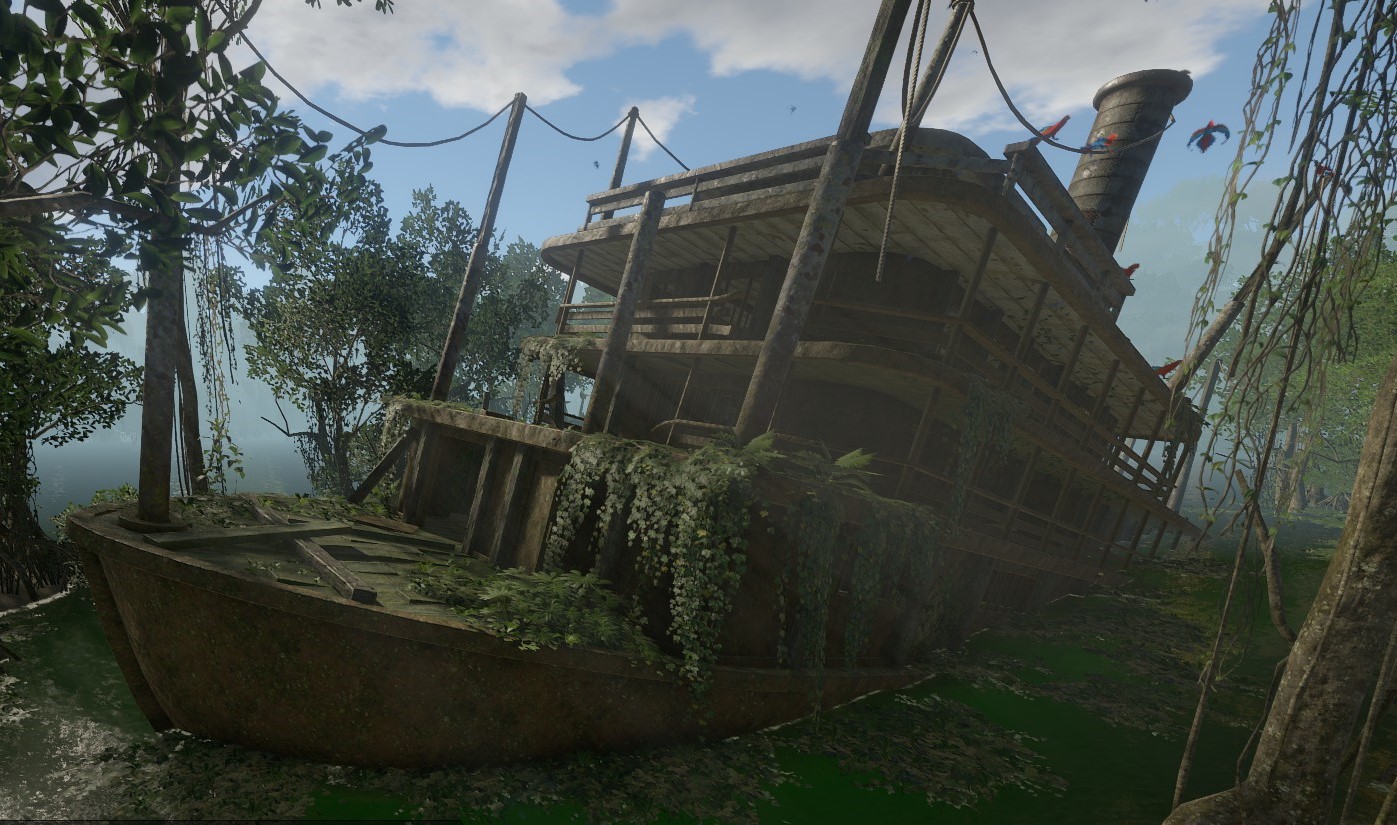
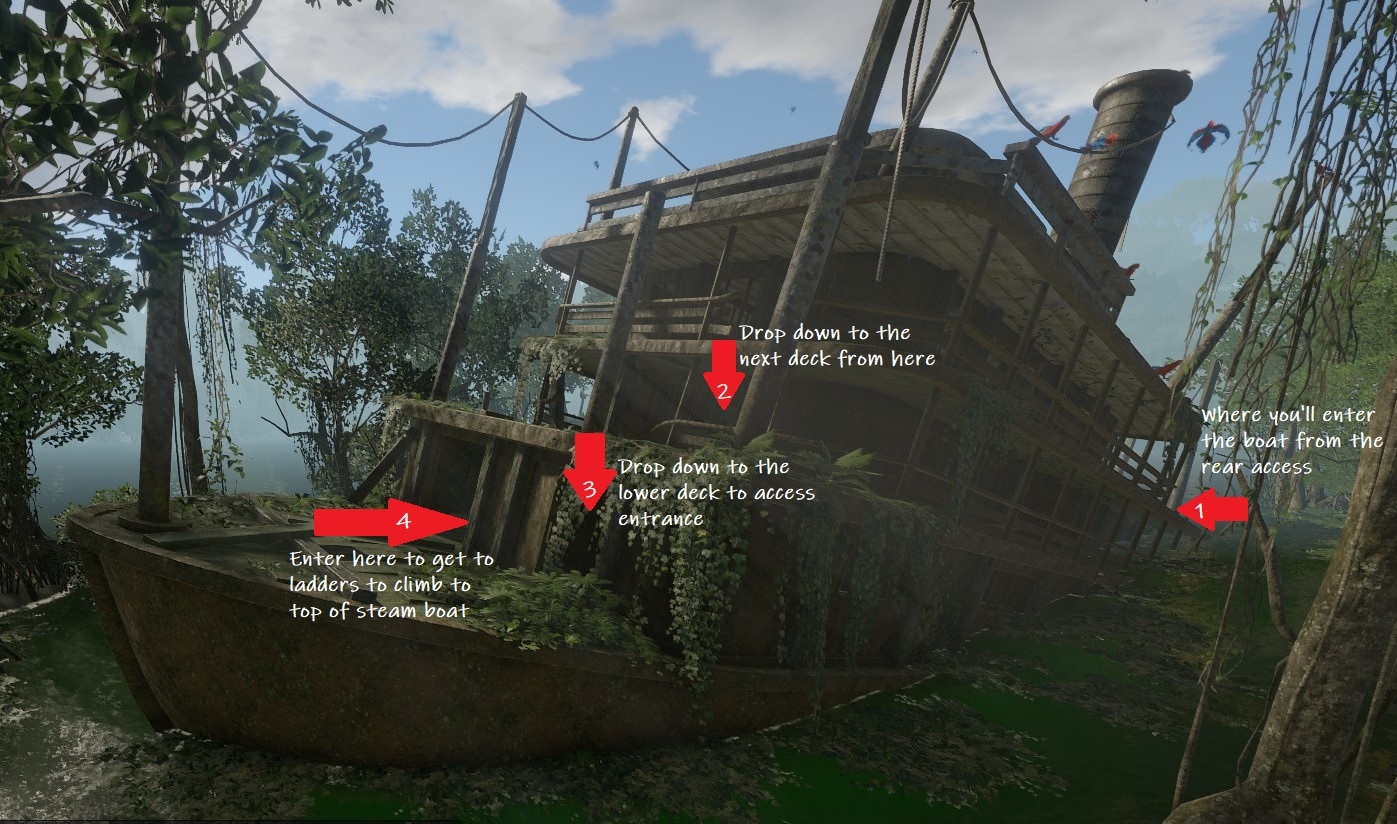
- Located on the steamboat in the accessible part of the new areas of The Spirits of Amazonia DLC
- the steamboat is located at 36W 42S
- ~Note~ the map is on the top deck of the boat, first you'll swim through to the first deck landing and then carefully drop down to the next deck below, and once more. After that you should be able to swim through the area and up the ladder, and again. You'll have to jump carefully and you'll be on the upper most deck, the map is inside a box just inside the white upper deck house.
Locations are everything
- Abandoned Camp~ 46W 26S
- East Native Village~ 37W 19S
- West Native Village~ 47W 18S
- Docks~ 51W 19S
- Bamboo Camp~ 52W 17S
- Jeep~ 44W 17S
- Plane Crash~ 40W 24S
- Drug Facility~ 51W 27S
- Scorpion Cave~ 52W 16S
- Bamboo Bridge~ 37W 20S
- Anaconda Island~ 35W 25S
- Omega Camp~ 25W 33S
- Air Port~ 29W 22S
- The Main Village~ 31W 53S
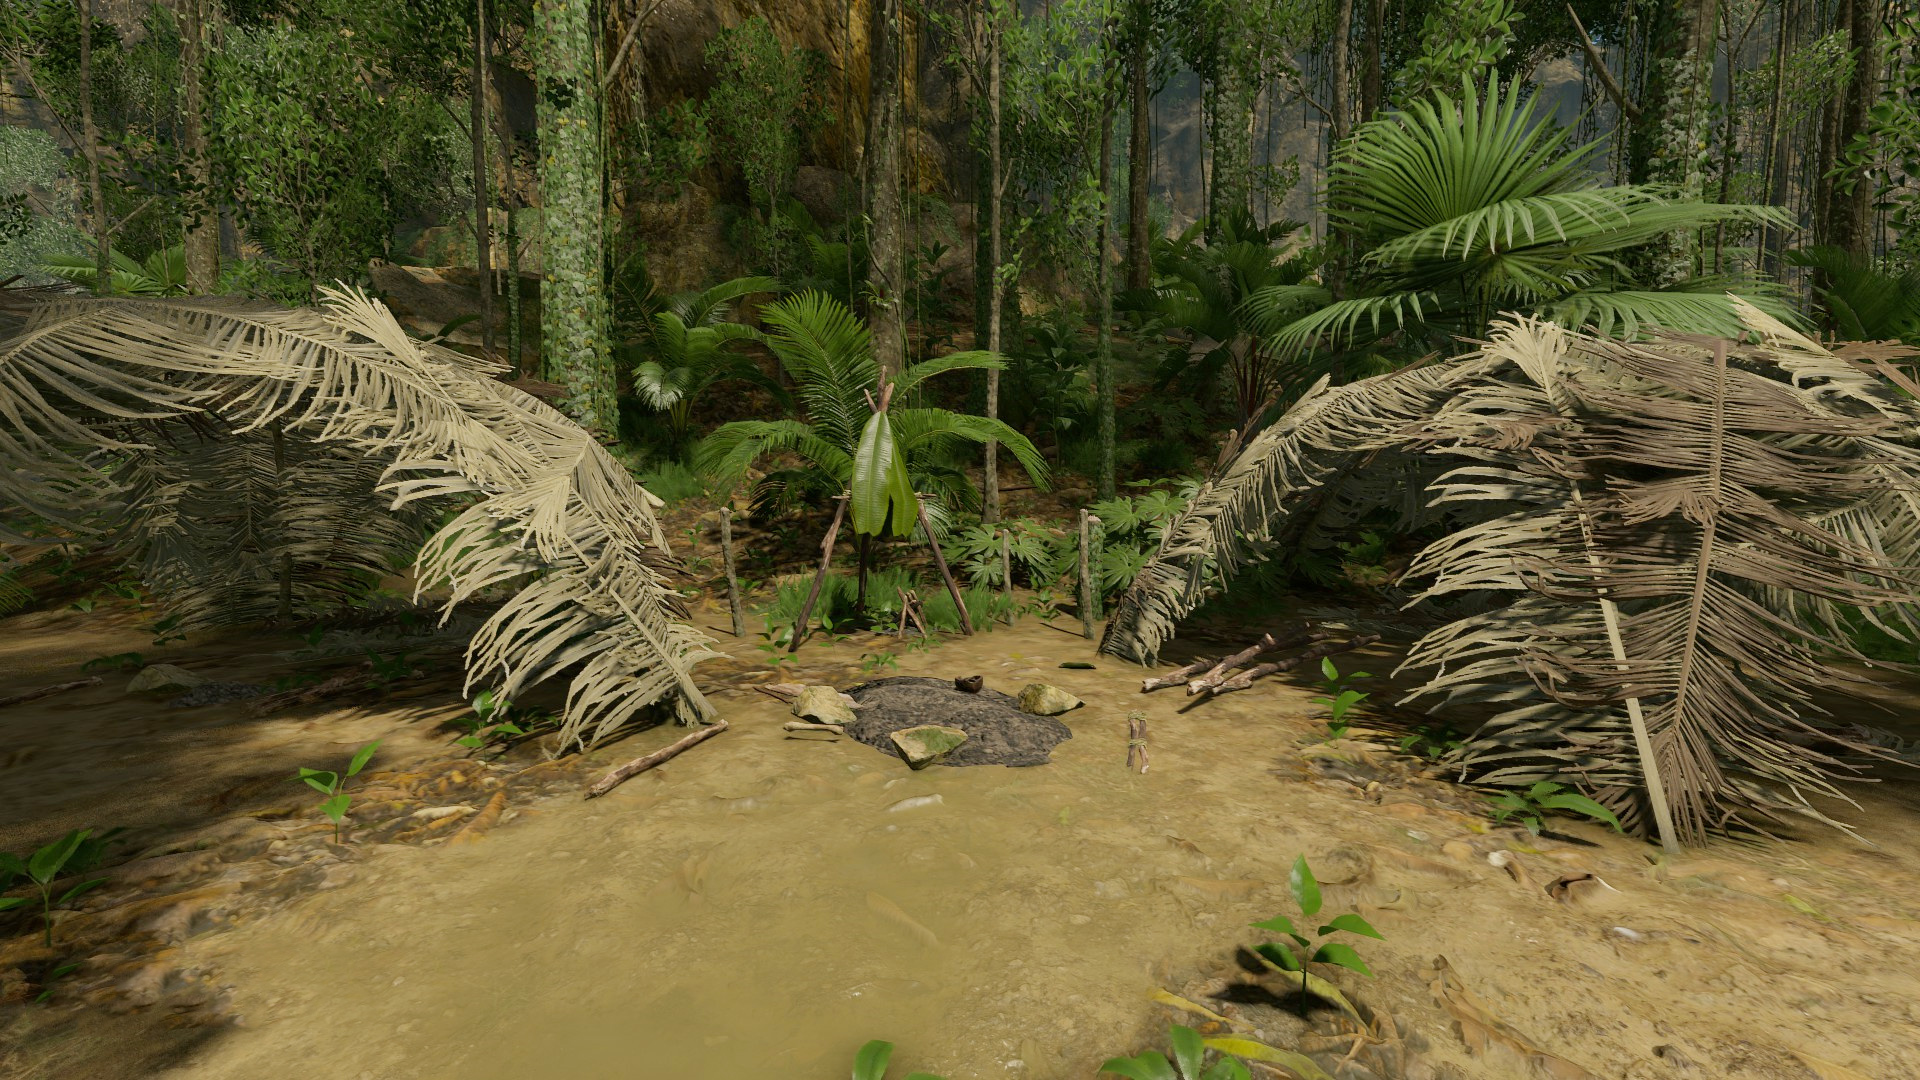
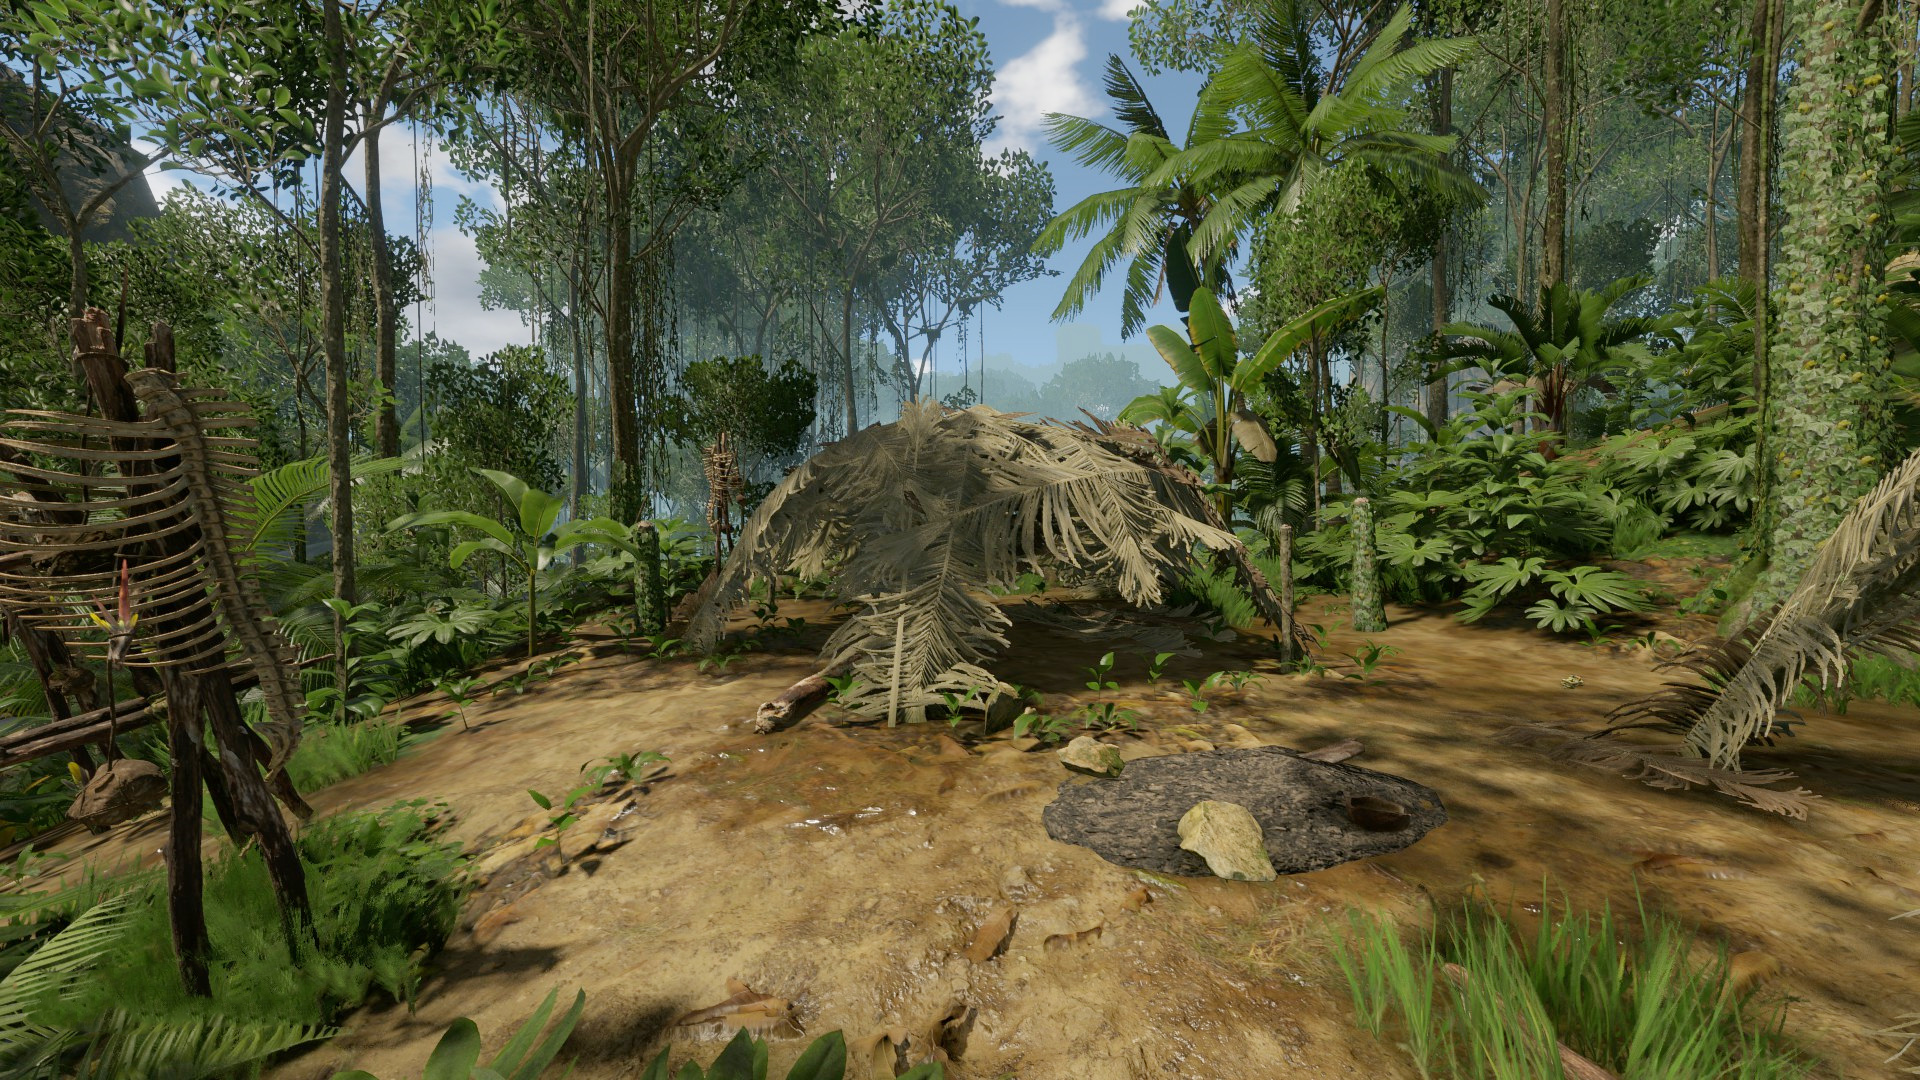
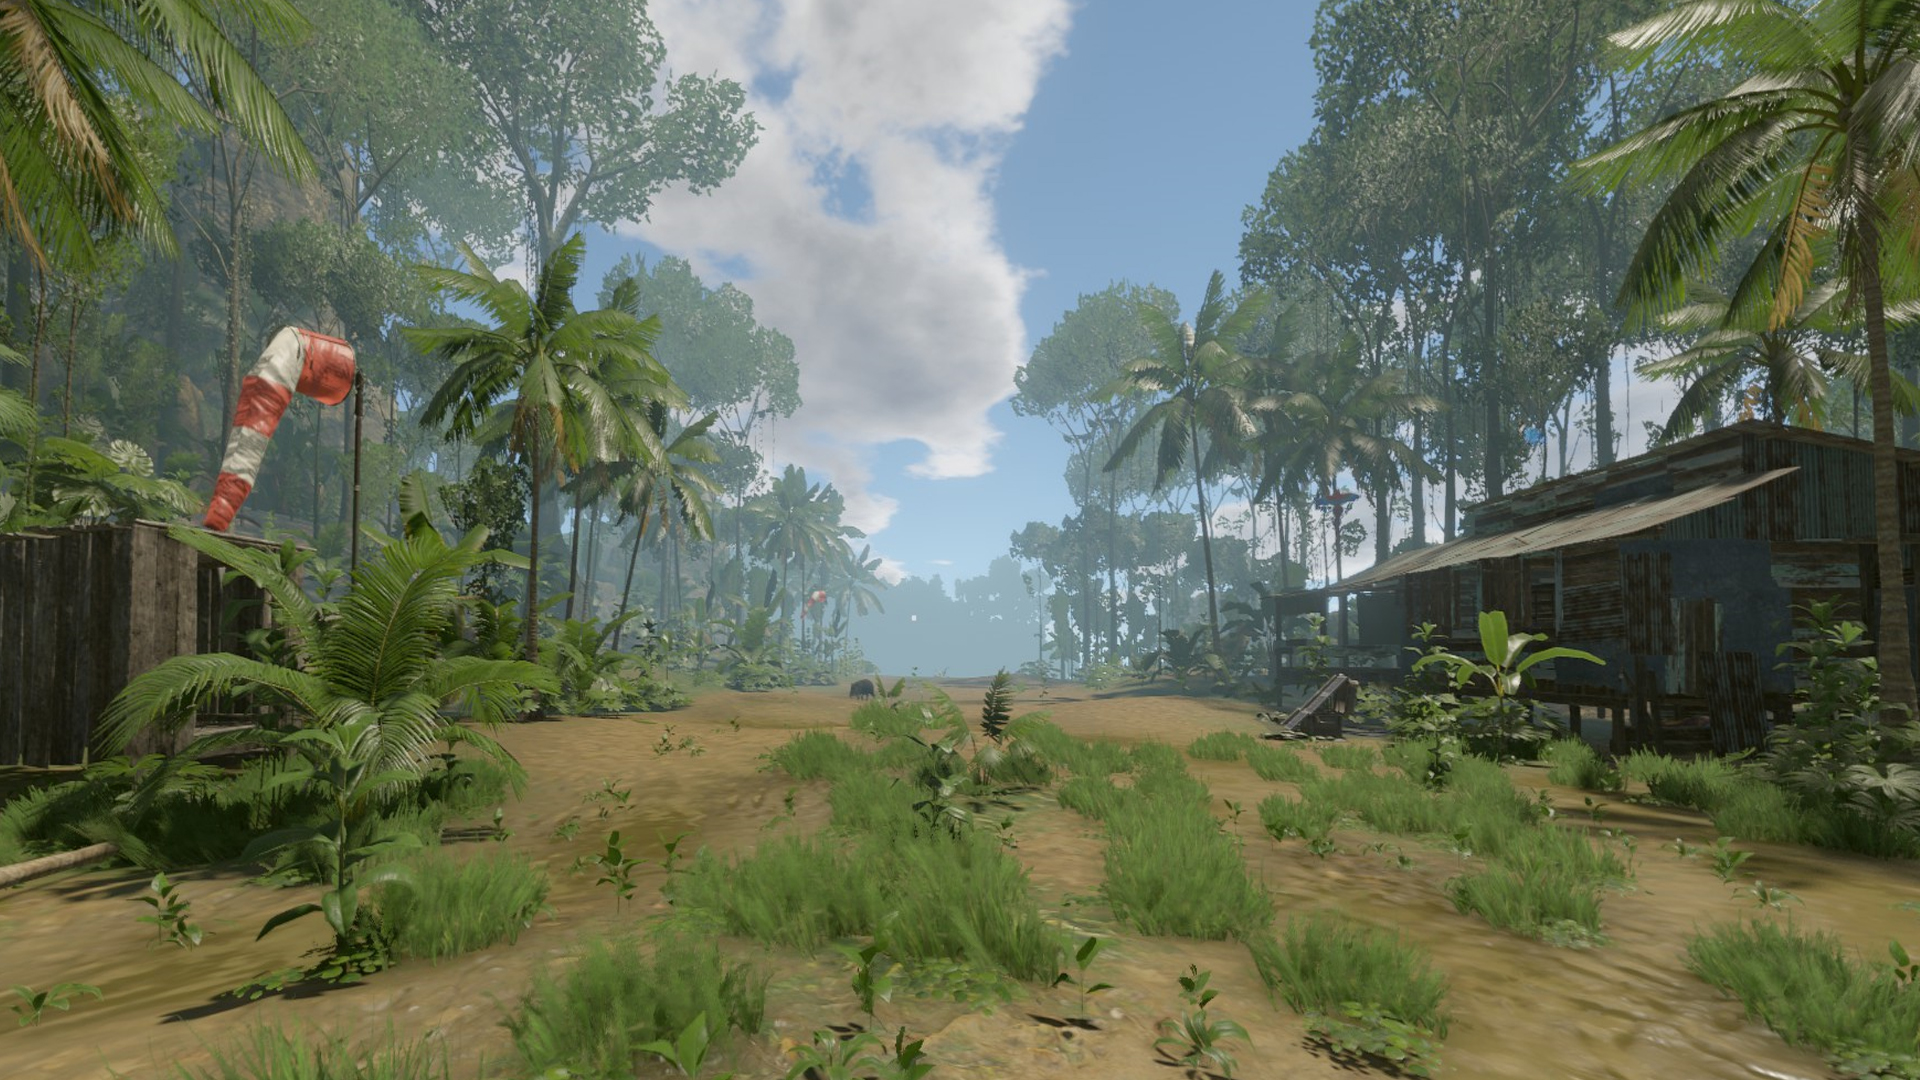
Including this location since just past the banana grove there is a quaint area near water and plenty of resources for base building. Beware of tribesmen, big cats, and the other usual threats.
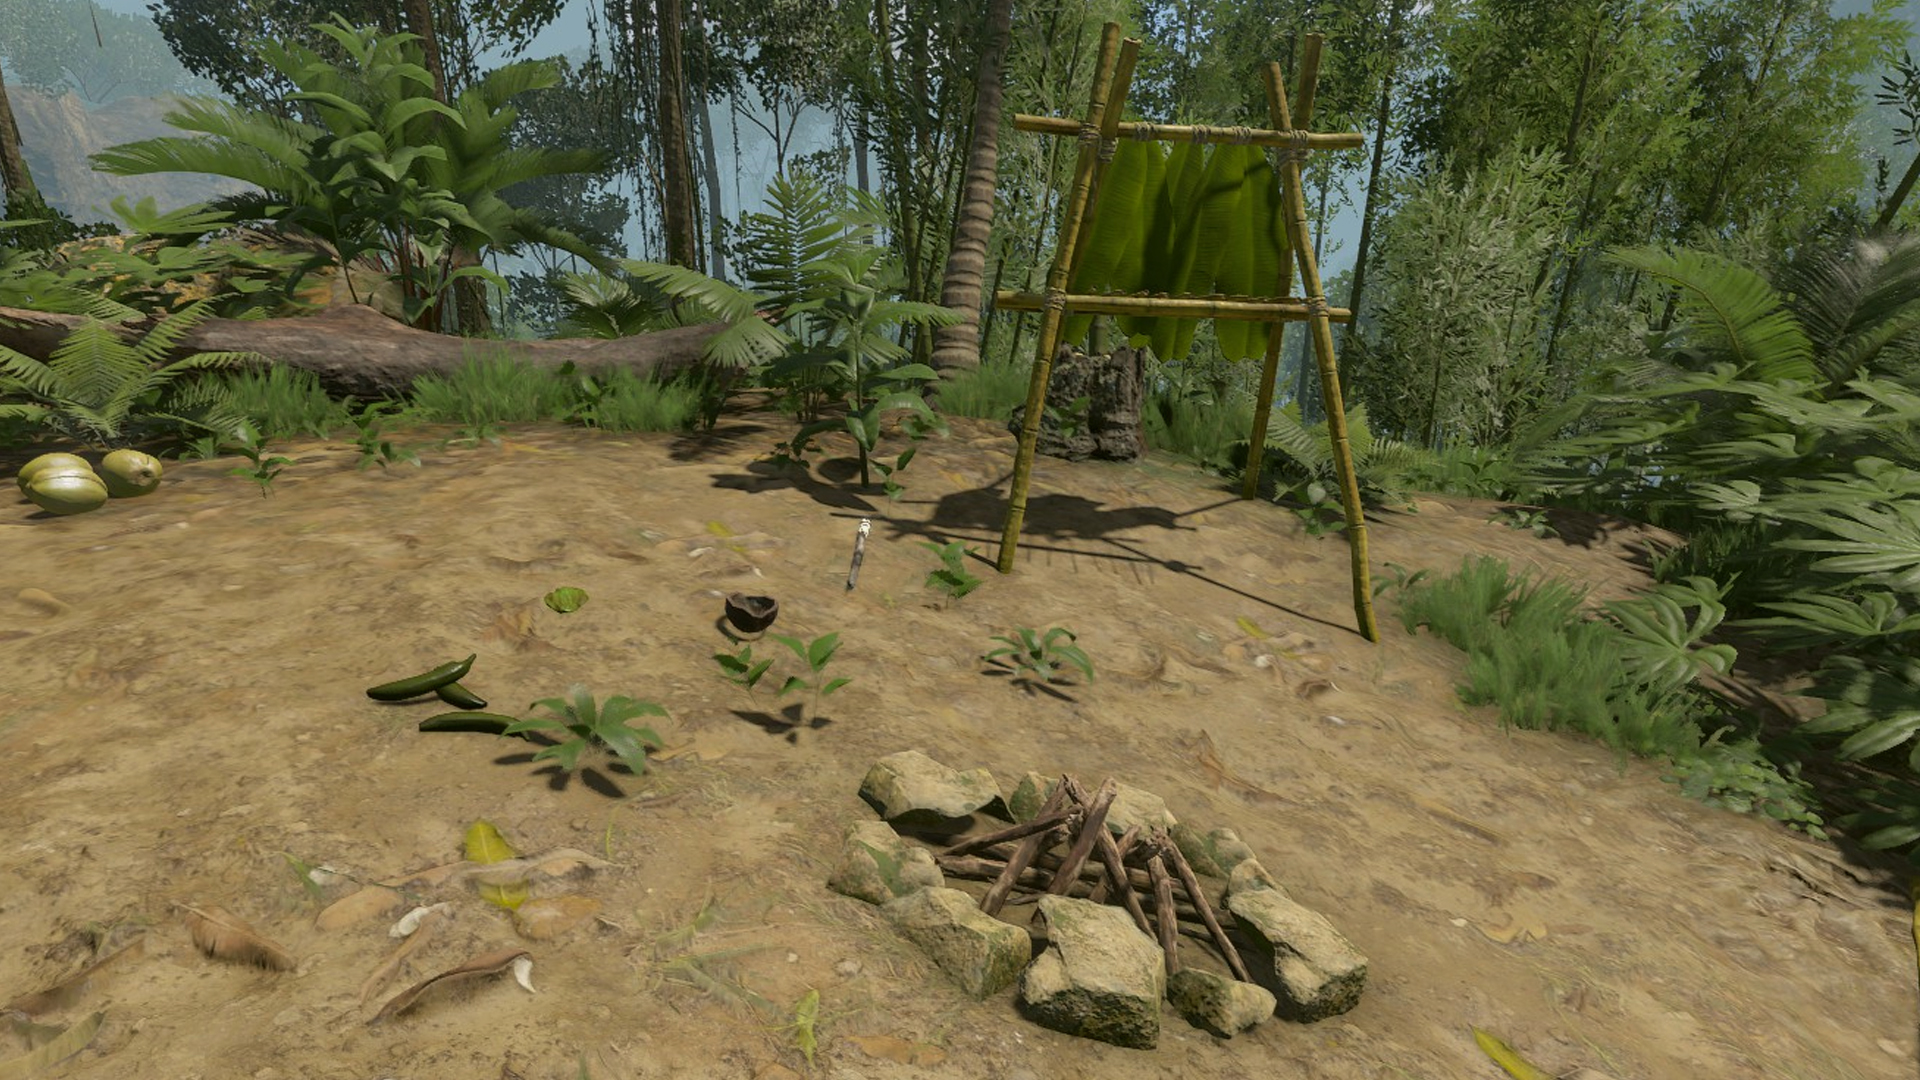
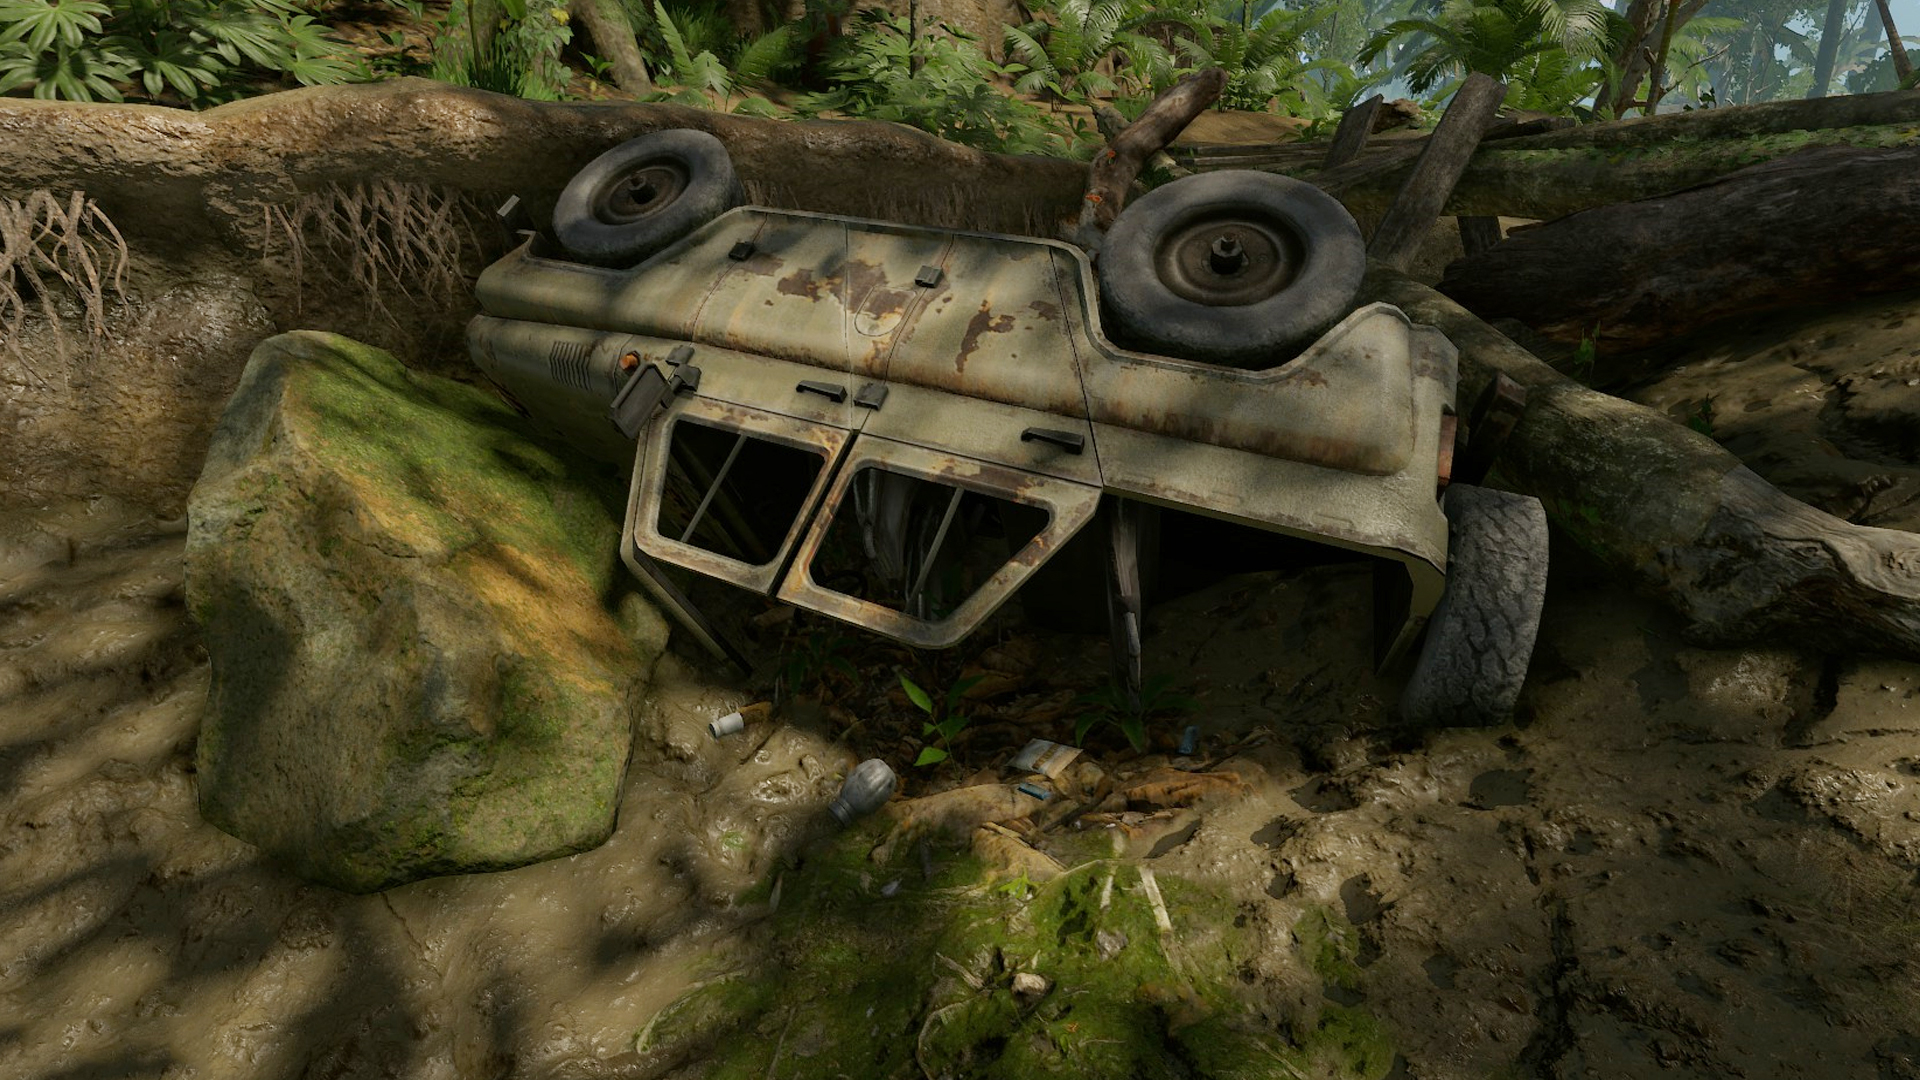
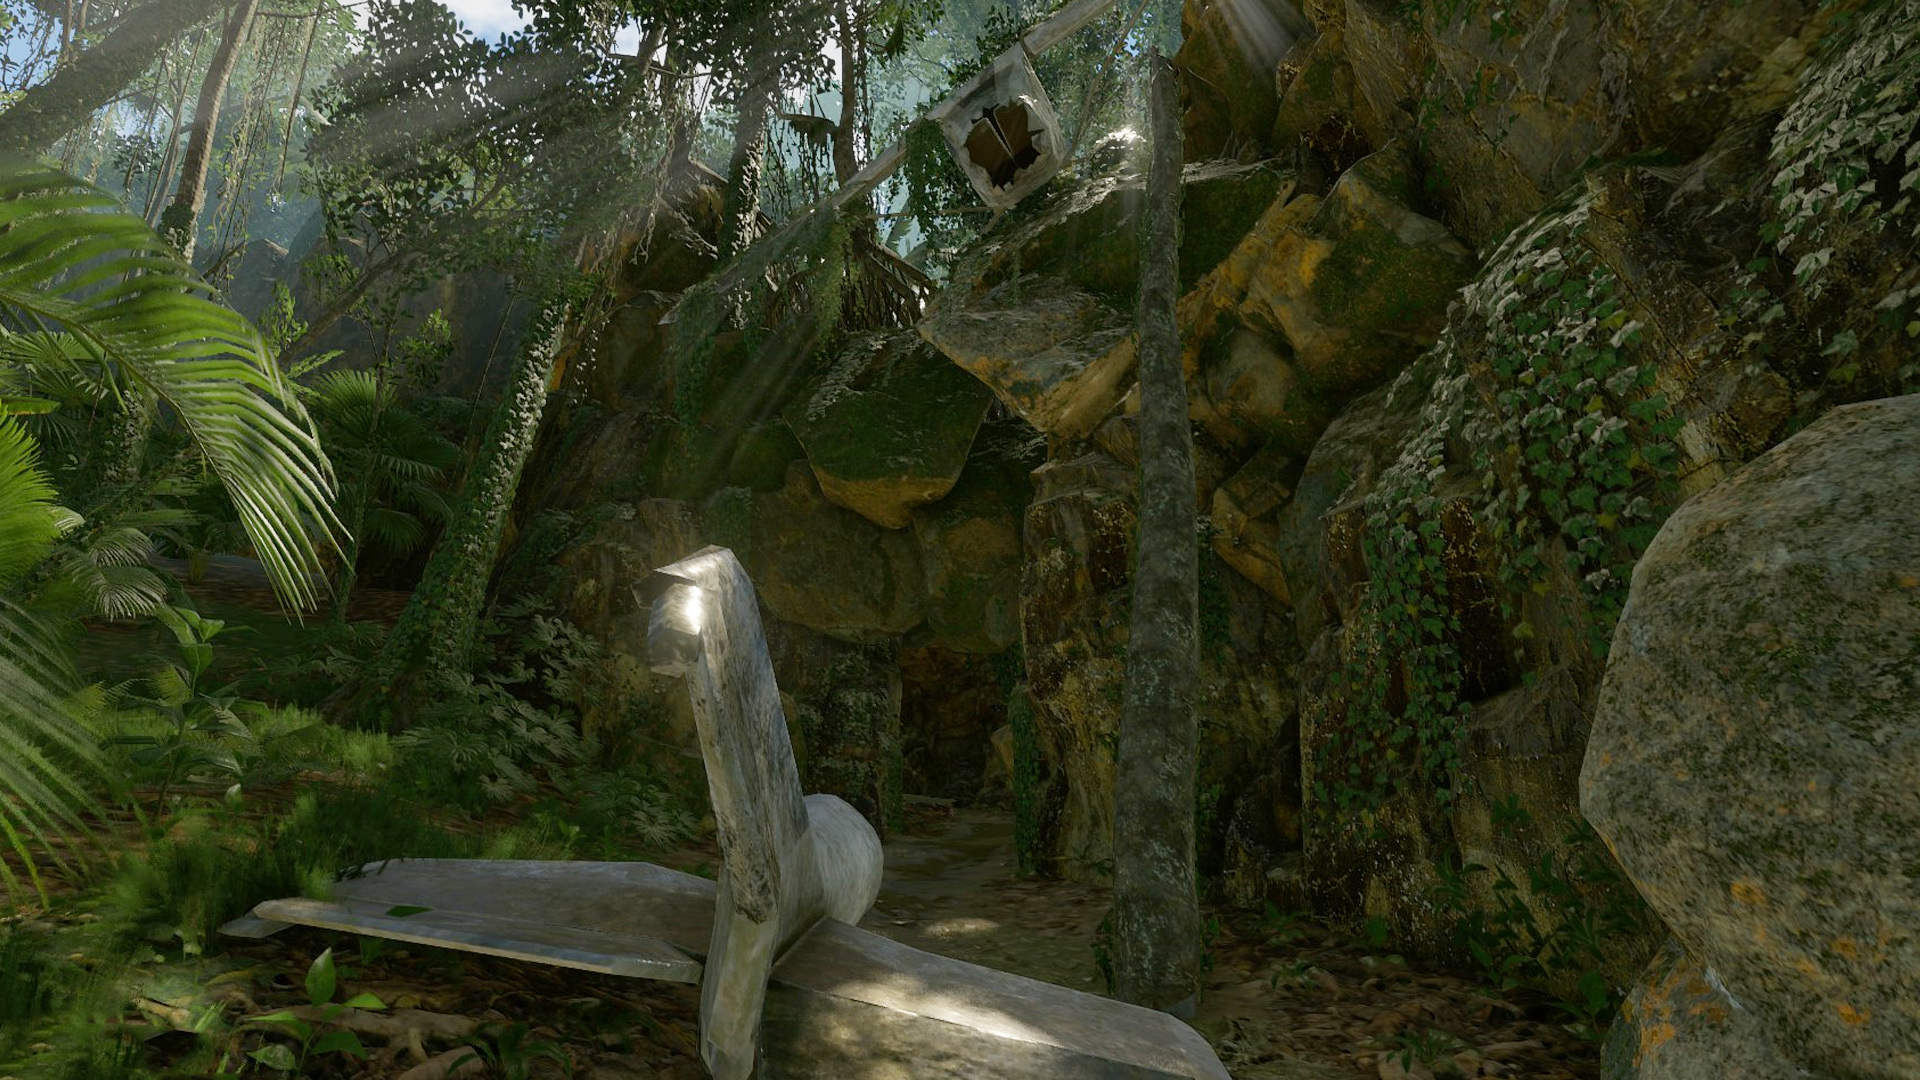
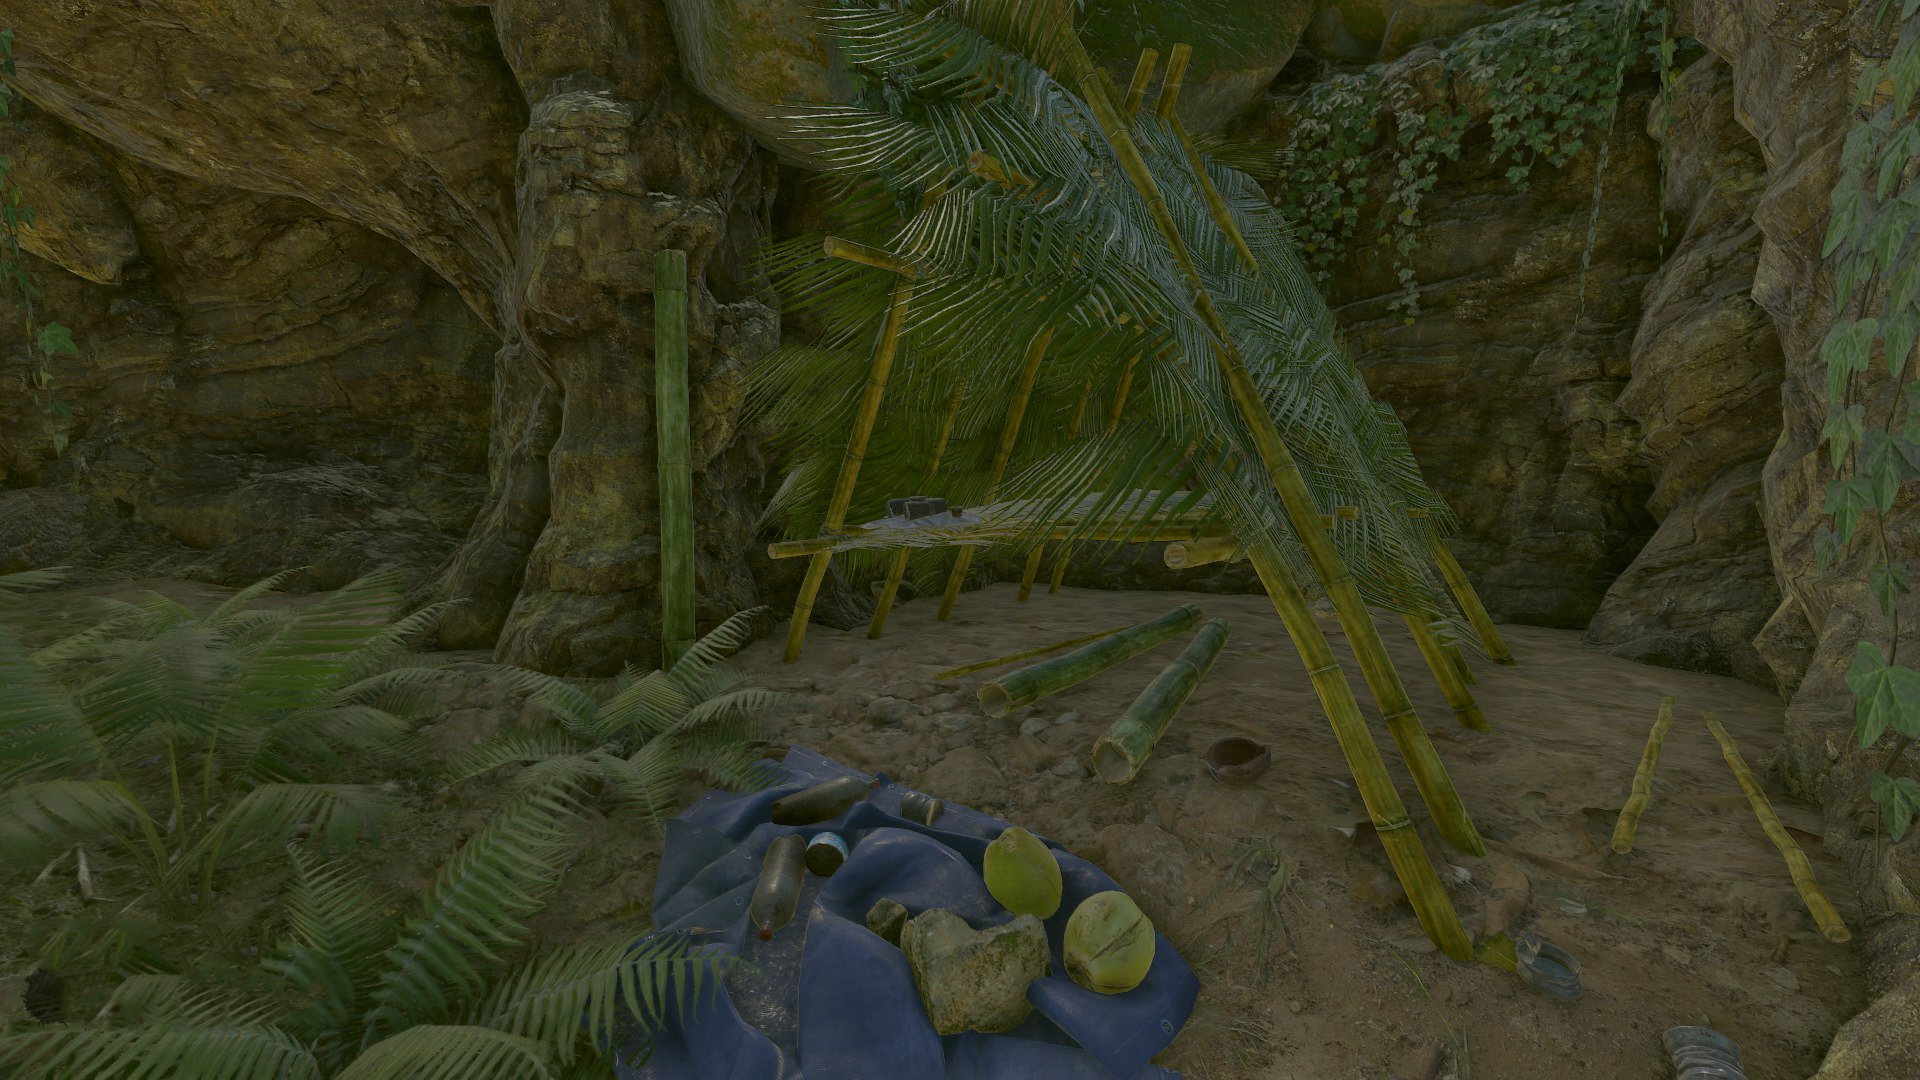
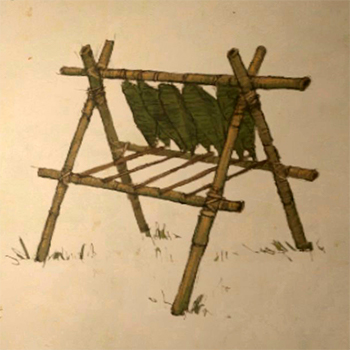
Blueprints to know
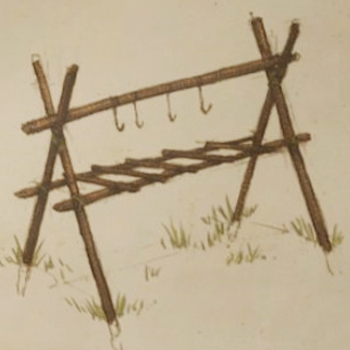
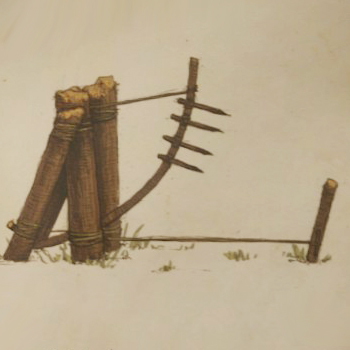
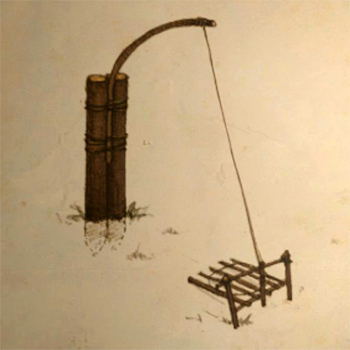
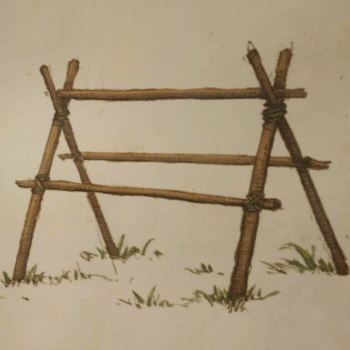
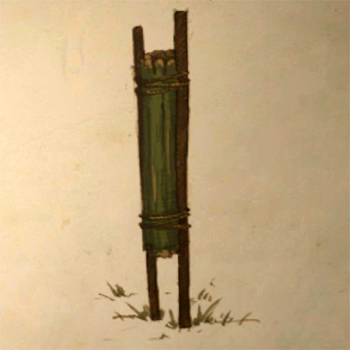
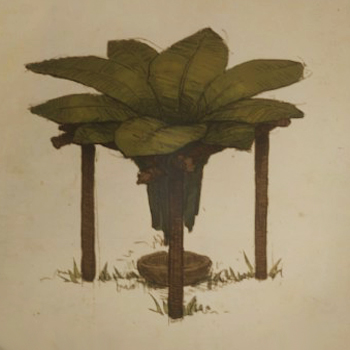
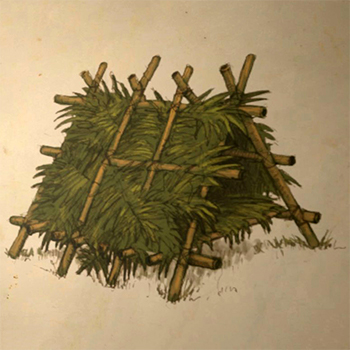
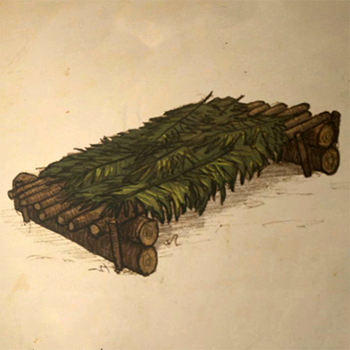
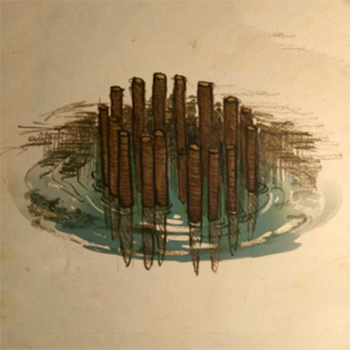
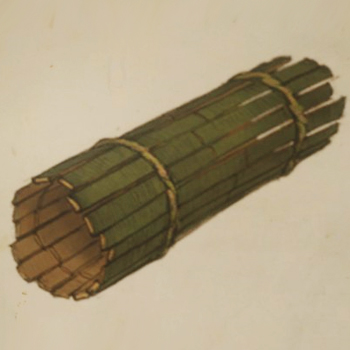
~*~LARGE~*~
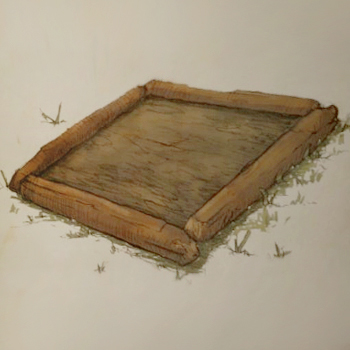
~*~Small~*~
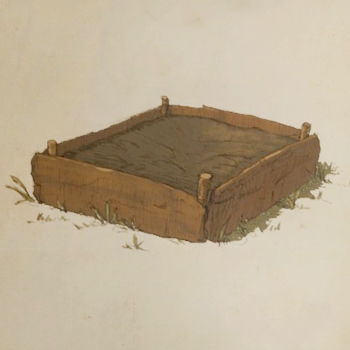
Just go to any water edge and select take mud, will unlock the majority of mud building blueprints, most importantly the mud mixer
organization of enough storage racks/stands, and the storage boxes can be difficult in a smaller building area
Preferred Base of Operations Locations By Whimsical Agony & RICO
- Docks
~Tribes do visit occasionally, and will sneak attack. Stay low and there is an easy archery sniping spot for the Black Caiman. Also note that the Jaguar does prowl the river bed between the docks area and the area cappies seem to spawn into the game. - Drug Facility
~Tribes tend to stay to the bamboo side of the facility, or back by the banana trees, there is a jaguar that can and will attack his area of patrol spans the island across from the facility and down into the "water" area of the facility.
~Also note there is a way to basically spam kill the armadillos and have maxed out armor in no time. setting up killer traps on the bamboo side of the facility. Suggested amounts, and locations to follow. - Anaconda Island
~Predators are PLENTY! Tribesmen there's not many issues with them here, but both big cats can be found on the land surrounding the island. Ant hills are also PLENTY on the land surrounding the island.~~in my opinion this is the least sustainable base location in the game currently, that is unless you don't mind the threats; lack of "readily" available supplies near by; specifically speaking about ROPE (there's hardly any readily there when needed), and traveling across Cayman` waters it has some potential then. This is just my personal opinion ~Whimsical Agony~
- Bamboo Camp
This can be the second MOST easiest and SAFEST place to make a base, although it may might be far away from your starting place but with some basic armor and some food you can reach the place in no time. Once you reach the destination you'll have plenty food (fishing place nearby) and it is like a small island so you don't need to bother about natives or big cats. The bamboo camp is across the river from the fishing docks, up the hill, watch out for the ant hills there's one on either side of approach.~While rope tends to be the hardest resource to maintain while building here, there are ways to avoid that struggle. The building area is nearly cleared out for you already even though it's a little small it is close to the scorpion cave where you can find the medium bamboo shelter (great for sleeping off the ground if you haven't come across the log bed blueprint yet.)
Now while in story mode this location is safe from most threats in game, it is a natural spawn location for tribesmen in survival, and can be a little tricky to figure out how to covertly take over the location. I am unsure if building in this spot while in survival will spawn the tribesmen in the middle of your build, or if they will spawn at a different near by location. - Omega Camp
NOW THIS is the BEST place to be. Although you need to keep playing the game in order to know where you are, once you reach there, you have a really GOOD area for fishing and berries. You'll have not to worry about cats about natives, Maybe worry a lil bit about the Black Caiman but it is not regular to be near the Omega Camp.~This location is a great place for most resources, and with the new rates of spawns and growth the location becomes more of a sustainable base.The size of the area does limit you slightly as to how you build or just how expansive you build but it does provide a good sized area for building even if it's just a base between bases set up in your game. Bamboo is one of the harder resources to get in this location, but you can always grow it via your planters.
In survival I have come across tribesmen spawning in the back side of the camp more towards the back wall of the area, and the caiman does appear occasionally (mostly near the grappling hook area, the initial area of the map, and near the lambda story location.) Most other threats tend to be water related, I haven't ran across any big cats in the area currently.~East Native Village is actually a decent place to get a good starter base going, not really when it comes to mud, but that's doable with a little travel. Plenty of food, resources, and a friendly puma that shows up every so often. All in all not a bad spot to have set up especially for transitioning between the main area, and anaconda island area.
~While the abandoned village has ample resources it lacks any readily available bamboo; which is essential for building true water sustainability. (The mud water purifirer requires 1 bamboo stick for completion; which you could just bring with you from another area though.) There's plenty of dirty water you can boil, and there is a "very" friendly jaguar that's your neighbor, but the area is otherwise very good for getting up a very nice base. Just remember to keep a bamboo stick with you before you head that way.
Base Basics By RICO
- It will depend on what mode are you playing:
Story MODE:
- At the begining of the game, that is actually a really good place to be and make a Main Base ontougth is really far away from everything.
- But you got plenty food and natural defenses from the natives and cats (but they can reach you sometimes)
- IT'S one of the Oasis place.
- Now you can do mostly everything here, from a stick house to a mud house, once you cross the little log bridge you can hunt some animals for the bones and fruits.
- As i told, this is really far away from everything but it is nice to begin the base operation for the first time then you can move on once you are secure.
Coordinates 45W 32S
Survival MODE:There is actually a obvius place to make a Main Base Operation and in our opinion it will be the Fishing Docks for many reasons
Near the place you may be attack by cats and natives, but you can also make a real good base and put defenses near the paths.
You'll have no problem with food and watter because there is fish and armadillo nearby. Coordinates 51W 19S
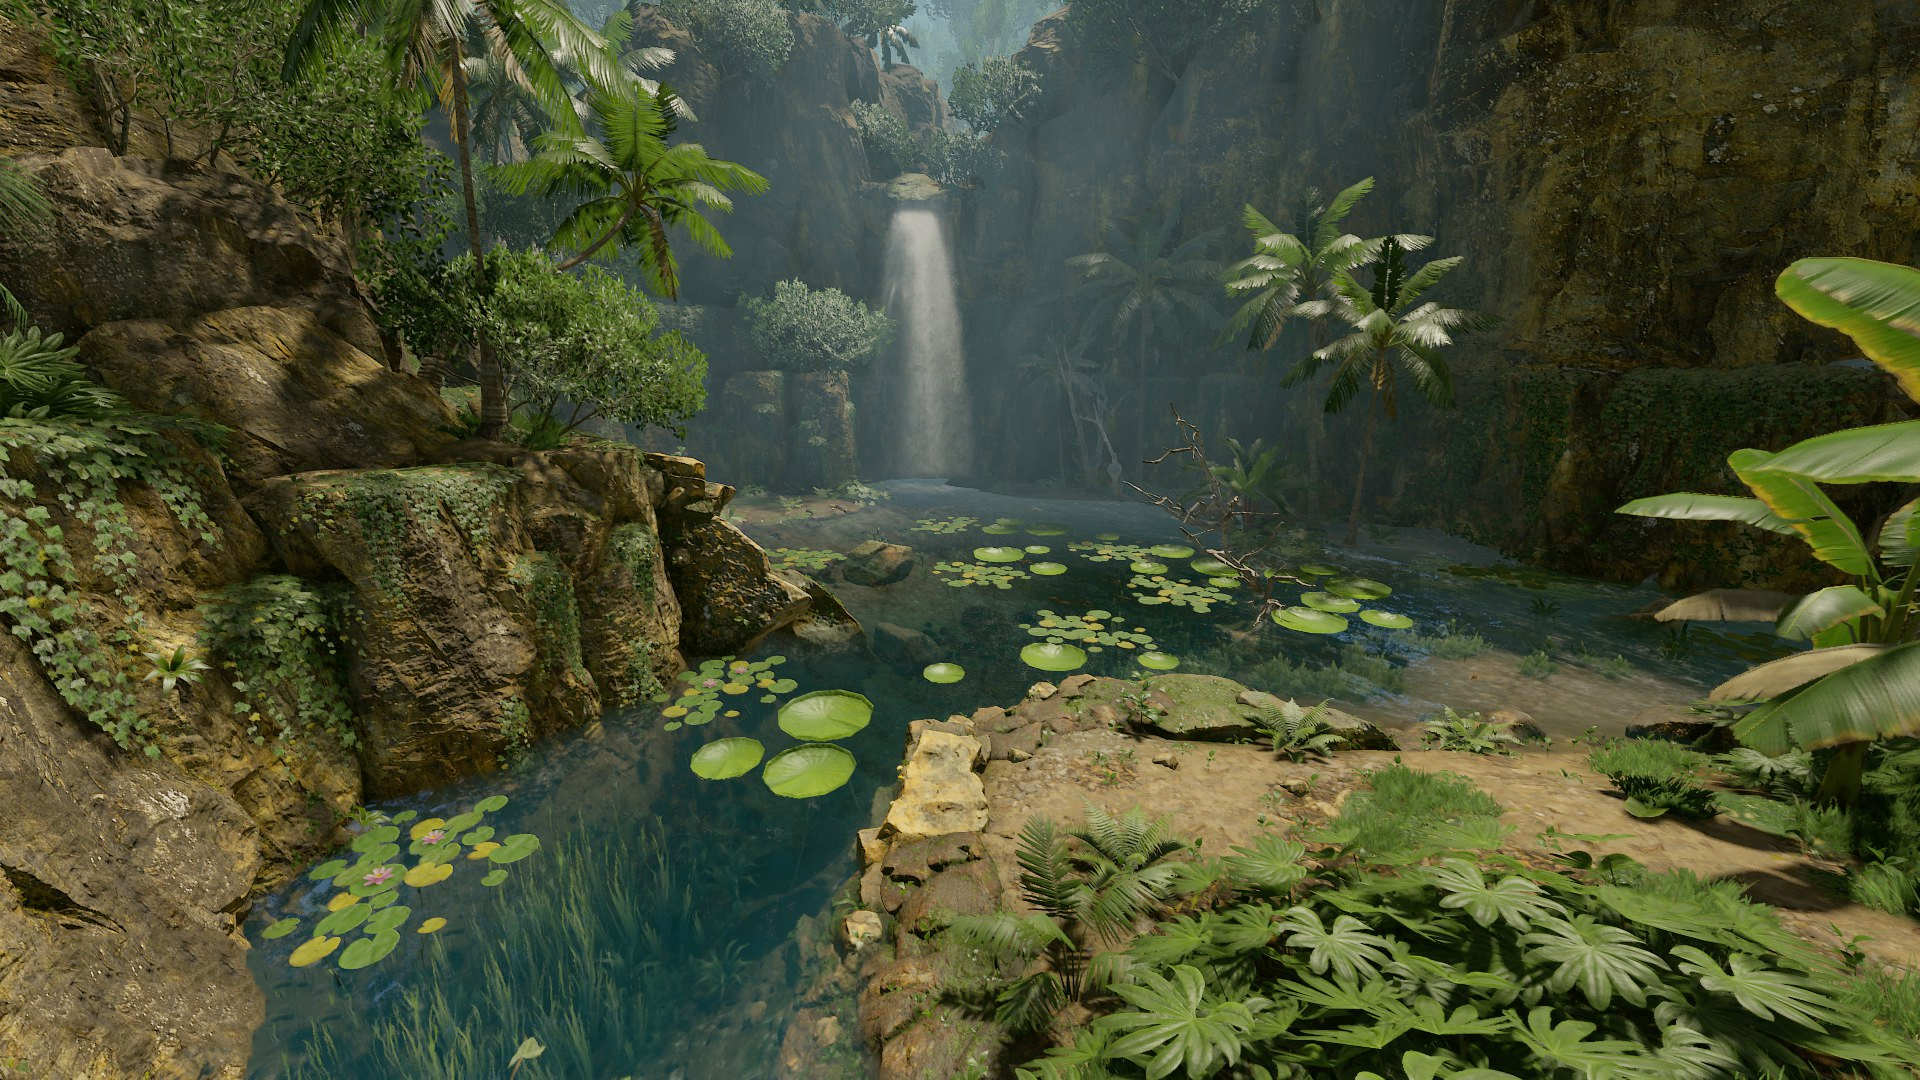
- If you have any problems with one of your main bases you can always return to this place and make on if any problem reach you.
- This place is called "Bamboo Camp",now here in any modes is a really good place to be. You'll find some building, so what you need to do is, make some traps in any case someone just pass by, and then chill out.
- The food and watter will never by a problem here, since you have bamboo you can make the watter collector and food, well too much fish nearby also.
- Mud and sticks and bamboo, so you can really make a palace of your like.
- Coordinates 52W 17S
Base Basics By WhimsicalAgony
However if you also do as many have and extend the easier game levels and play them more like a survival mode with the option of moving forward within the story line; some of the survival methods will make the later parts of the story line even easier and quicker.
For game play within story mode
*Mud Mixer
*Storage
*Forge
*Furnace
*Fireside wall, or larger area for cooking
*Traps for the ability to get the items required for higher armor or easier food.
*Personal preference goes more for the mud water filter system as it has a higher output and easier to keep fresh clean water available.
*Drier or Smoker for longer lasting food items, but in easier game modes the found food items are usually enough to survive on.
*Planters only if you are finding it difficult to locate some of the better flora and fauna items such as the bandage plant, or bamboo, or better carbohydrate items.
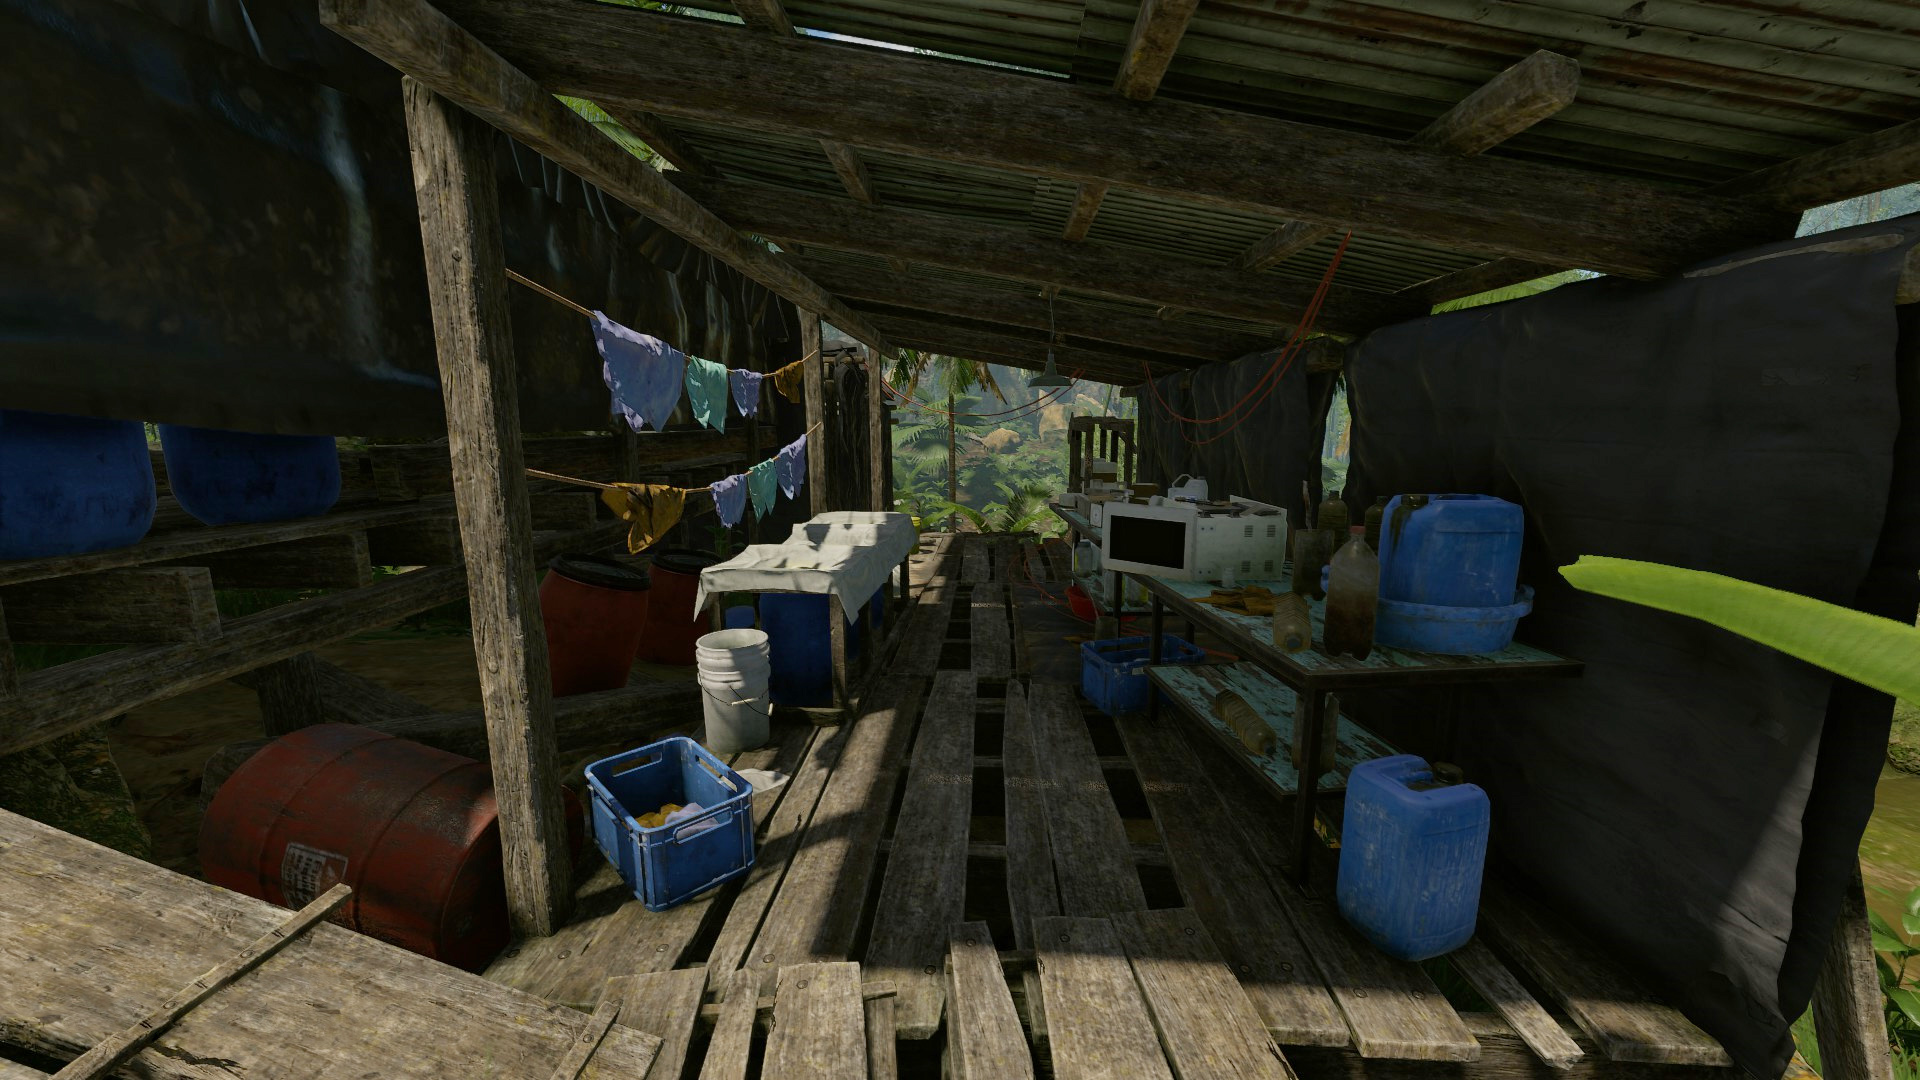
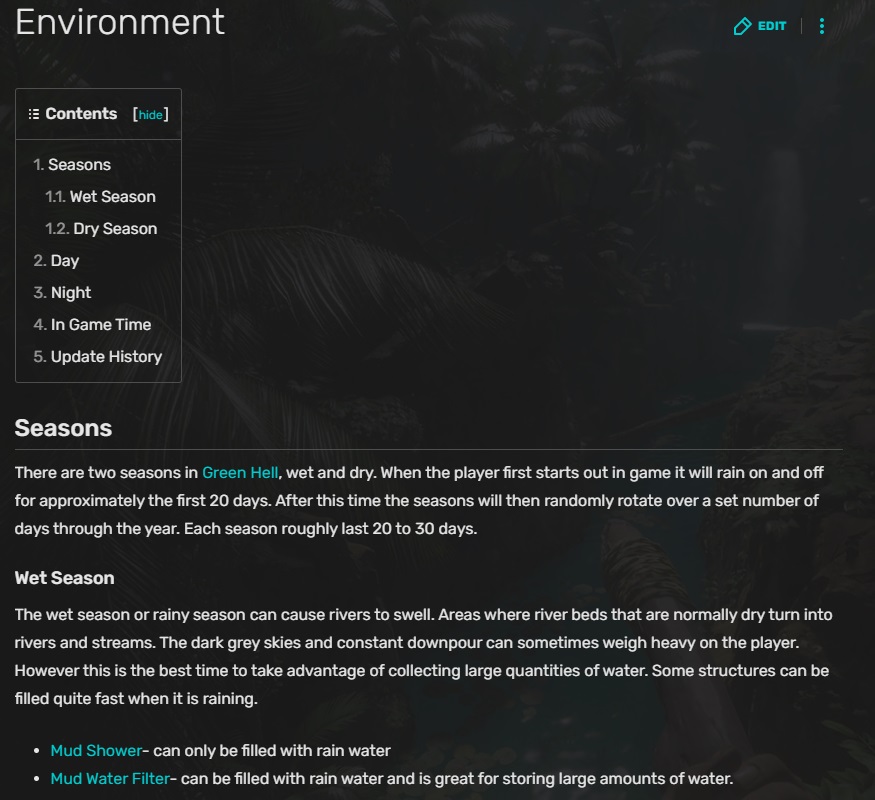
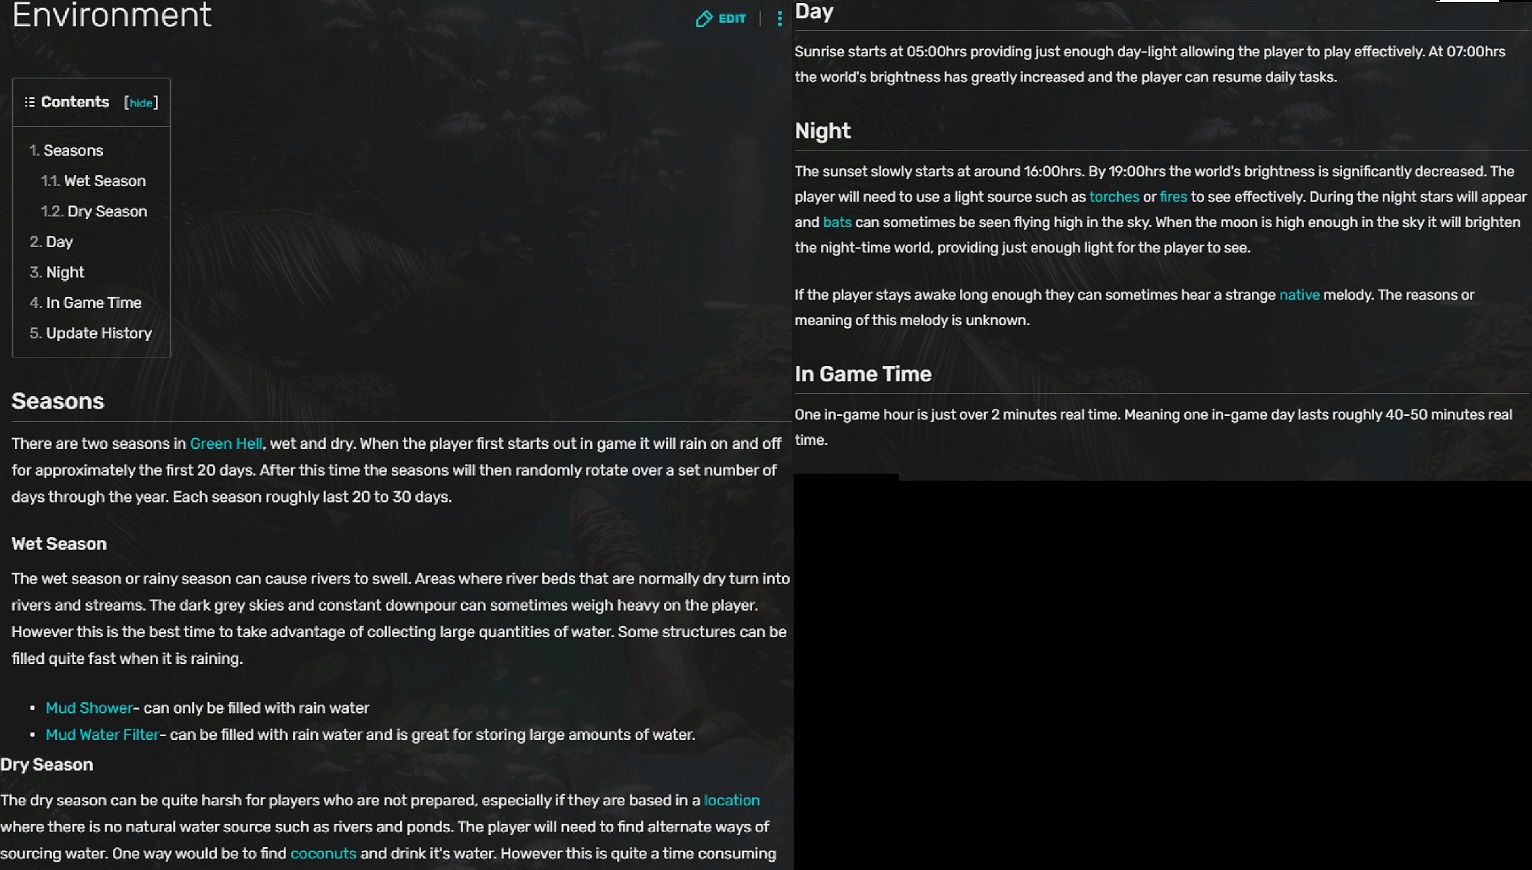
- when constructing your first base of operations; where ever you decide to set up camp for the first time it is VITAL that you have access to water, and the ability to make a mud mixer or two to get your base going.
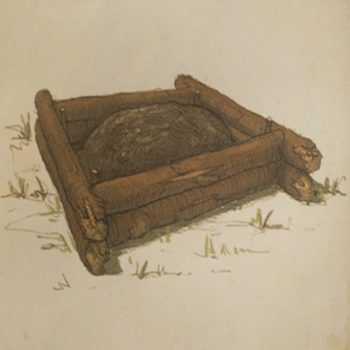
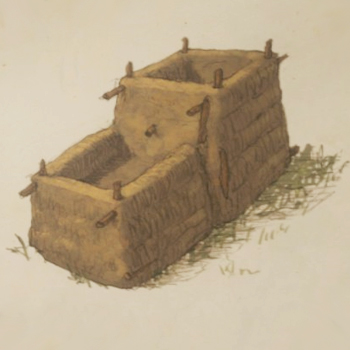
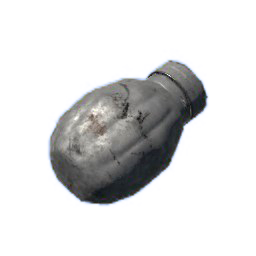
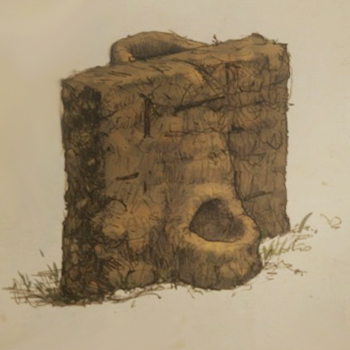
Flora, Consumables, Fauna, and More By RICO
Whats the most important- What you can eat (and not) and what you need to eat in soup - all here!
MUSHROOMS and OTHERS
The Light Blue One is the god of all of them: ¿Why? - Because they give you +10 energy and removes -2 parasites and some Carbs.-
-Photo here-
The Red One easy to get and best friend of dirt: They removes -1 parasites so if you in a hurry just have them on your backpack and dont worry about eating dirty.
-Photo here-
The Yellow One: There 2 types of this one - You can eat them there's no problem and in the Night you can see them with some kind of neon colors: They give you +5 energy and Carbs.
-Photo here-
The Creepy Mushroom with Spiders Webs: You can eat them allways on suop if not well you'll get sick, bad. They give you +15 Carbs on a soup.
-Photo here-
The Umbrella One -(Unknown Mushroom)-: Only in caves: You can eat them Straigth away and is really usefull. They give you +2 Energy -1 Fever and -10 to Hydration.
-Photo here-
Guanabana Fruit-: Its tricky to find but not hard.-When you collect them from the three you can eat them straigth away and they give +8 Hydration and -2 removes Parasites and some +Carbs.-
-Photo here-
Banana- what to say its Banana-: If you find them just eat them they give you plenty of + Carbs and can be harvest to get the seeds.
-Photo Here-
Unknown Fruit 2-: This one is a really usefull one tricky to find too-: This one give + Hydration and +Carbs and can be eaten straigth away.
-Photo Here-
Monstera Deliciosa Fruit-: Okay this one is a tricky and if you choose wrong it sickes you really bad.
Theres 2 types- one is called "The Monstera Deliciosa Flower" it can be collect them directly from the plant but can be eaten because it sickes you (you can let it dry and plant on a large box).
-Photo here-
And the Monstera Deliciosa Fruit this one is the God of all fruist (kinda)-: This one can eat straigth away and gives you +Carbs +Protein +10 Energy +3 Sanity.
-Photo Here-
Unknown Bulb (or Cassava Bulb because is collected from the Cassava Bush)-: This bush with some red flowers gives you this fruit that can be cooked "no eat it raw" and gives you tons of carbs.
+50 Carbs +10 Energy and some Hydration.
-Photo here-
Unknown Nut-: The nut it gives you really good carbs +15 and last 3 days to spoil (really handy).
-photo here-
Heart of Palm-: Not hard to find but it may take you some time , This one is found on Young Palm Tree that has some colors on the top so you can really find them quickly. One chopped down the palm tree you'll find the heart of palm wich gives you +45 Carbs and if eated in soup it gives you +40 Carbs and +10 Energy.
-photo here-
Food and More By Whimsical Agony
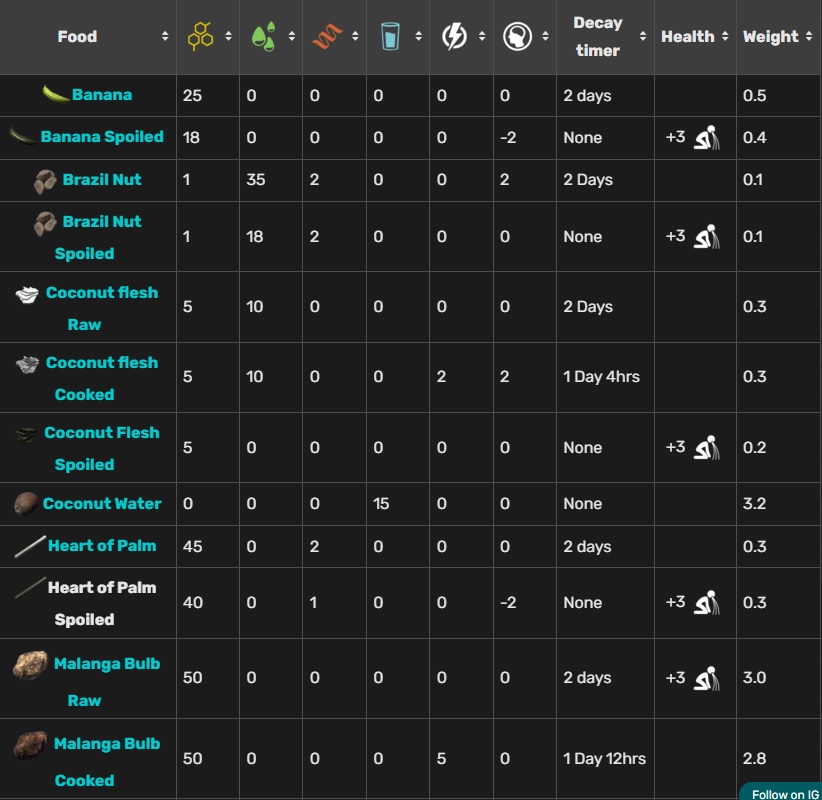
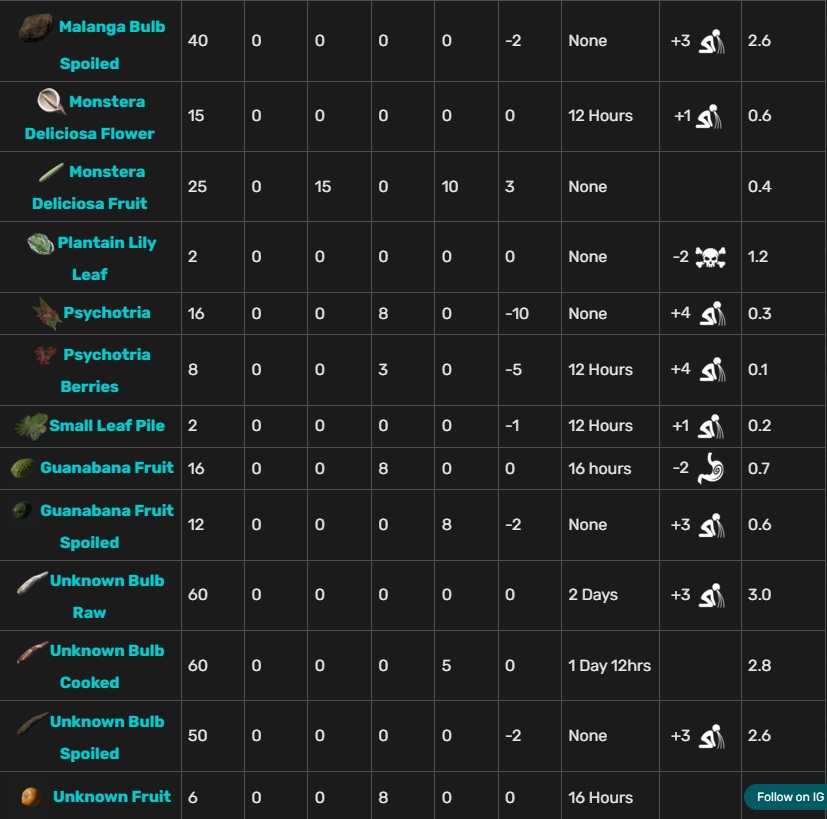
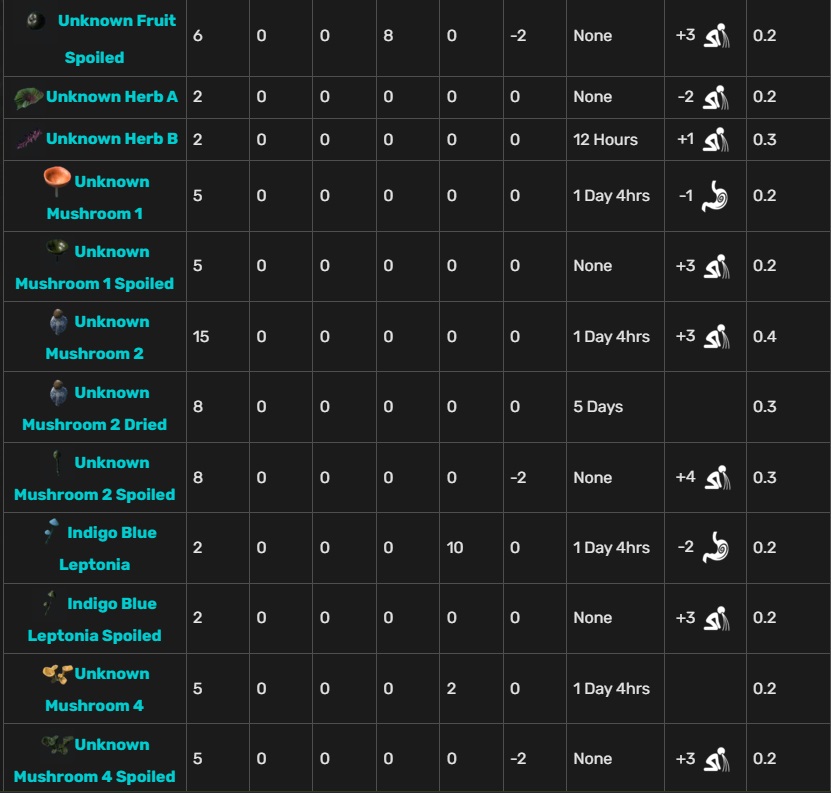
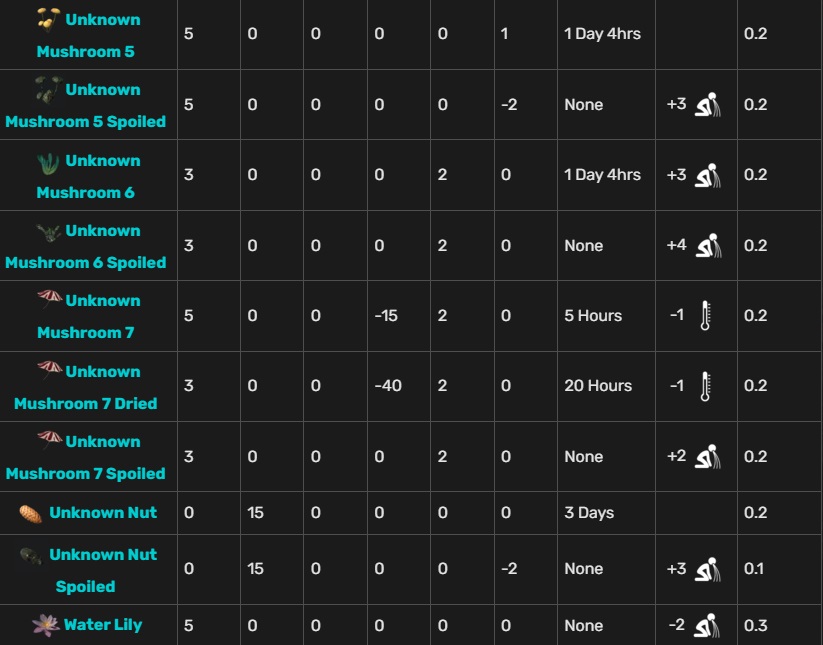
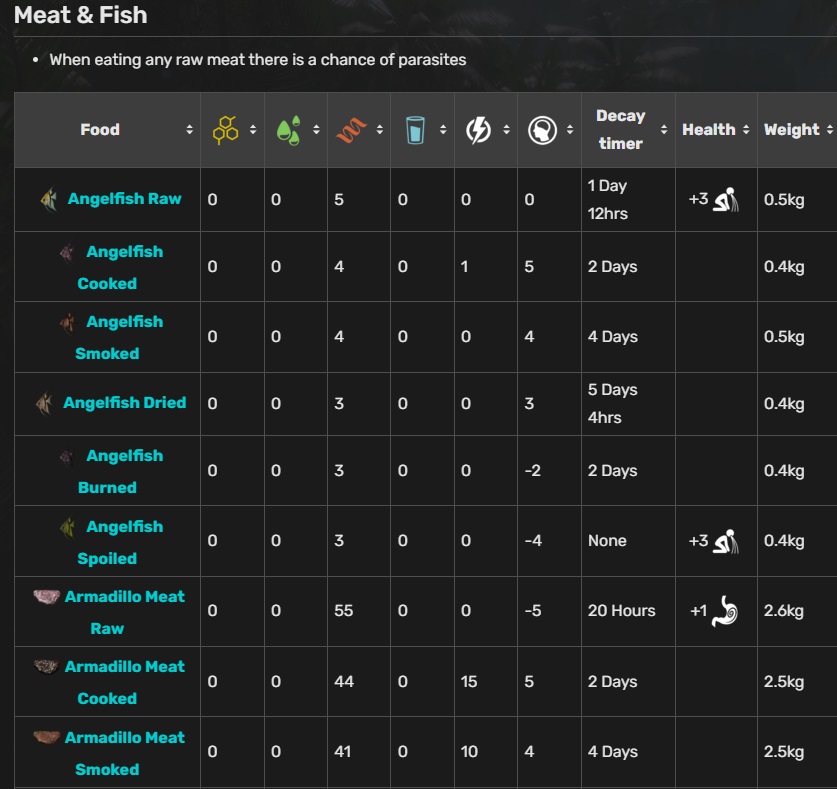
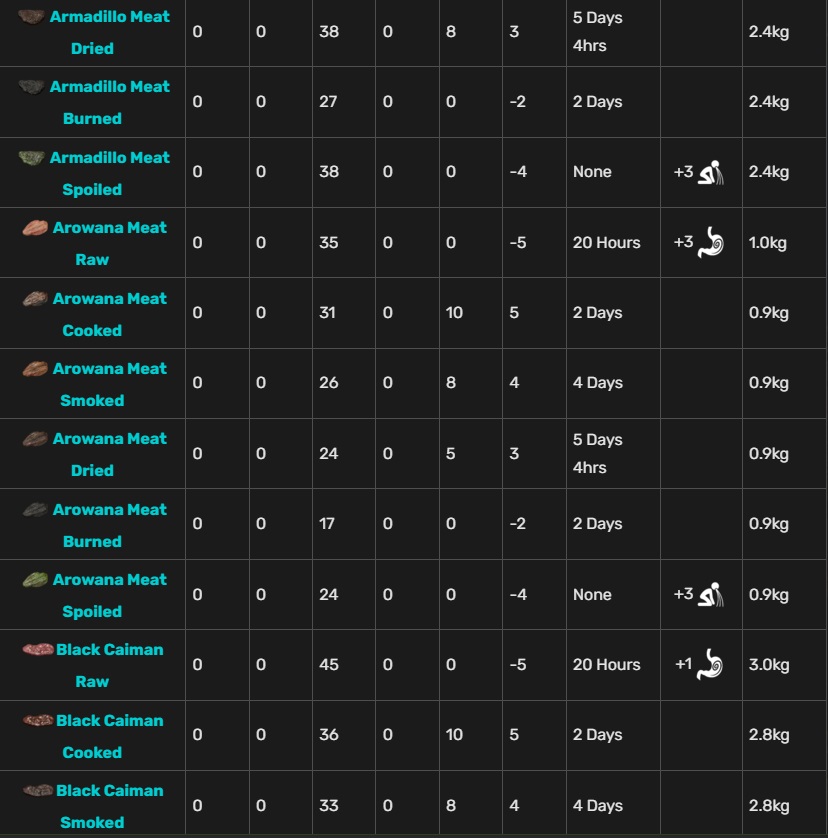
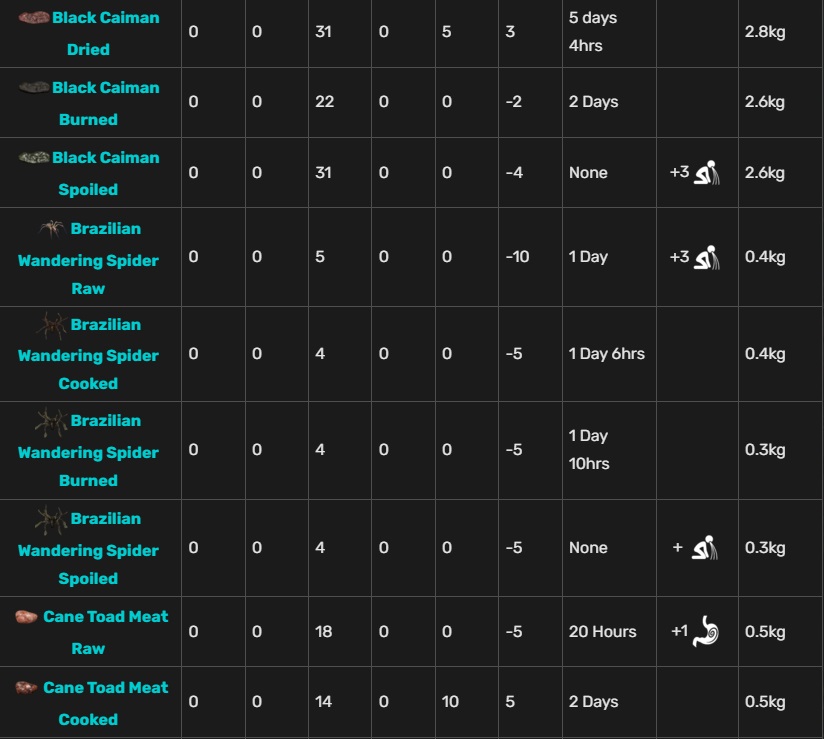
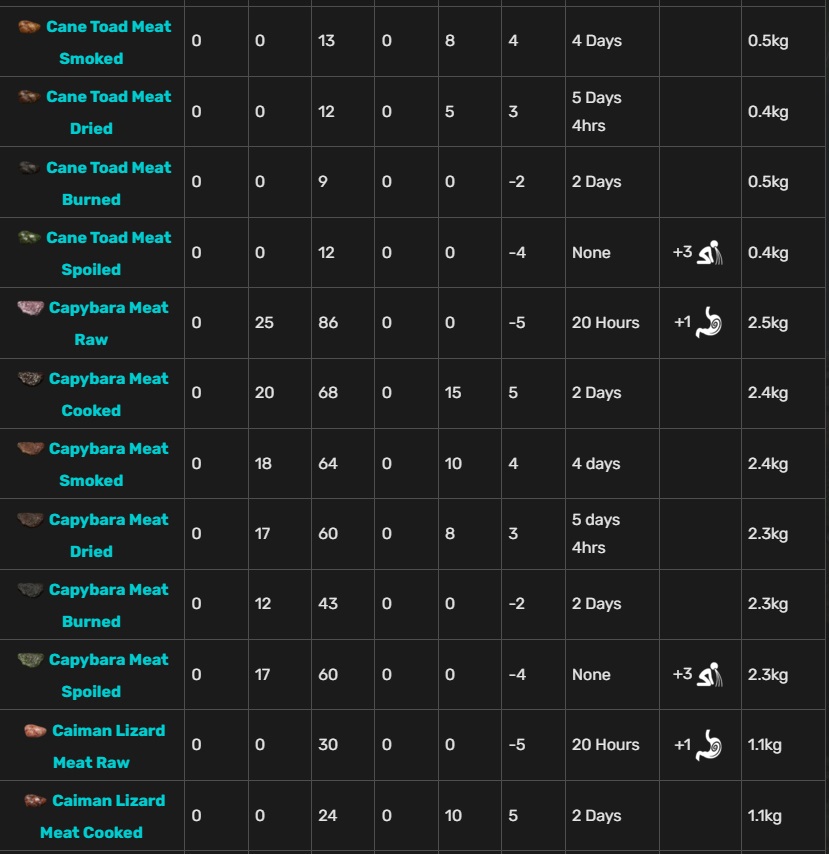
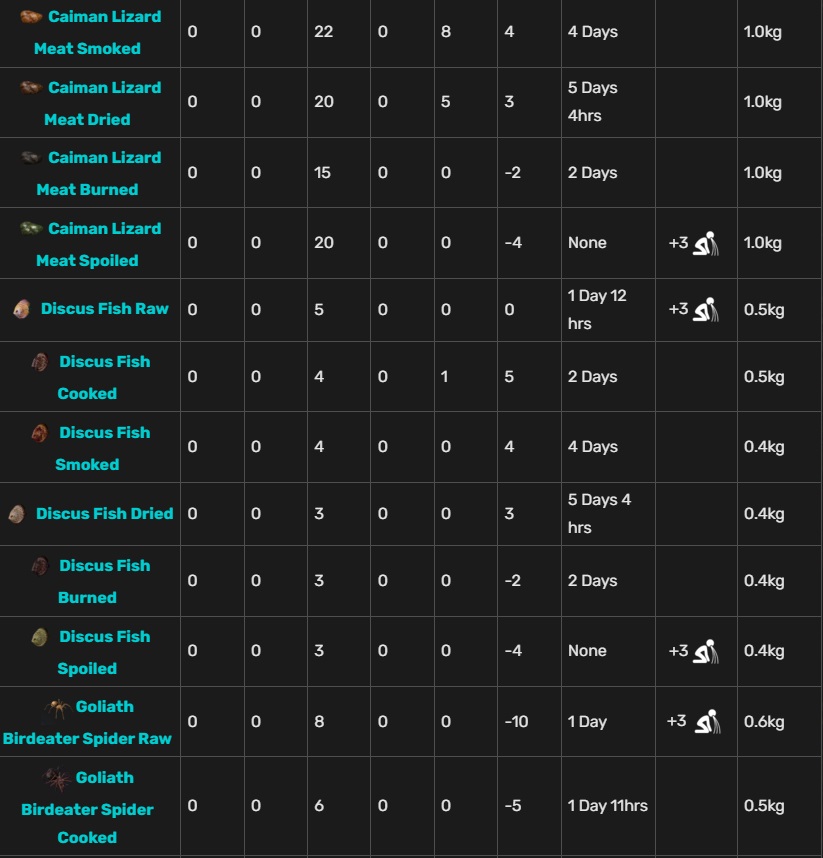
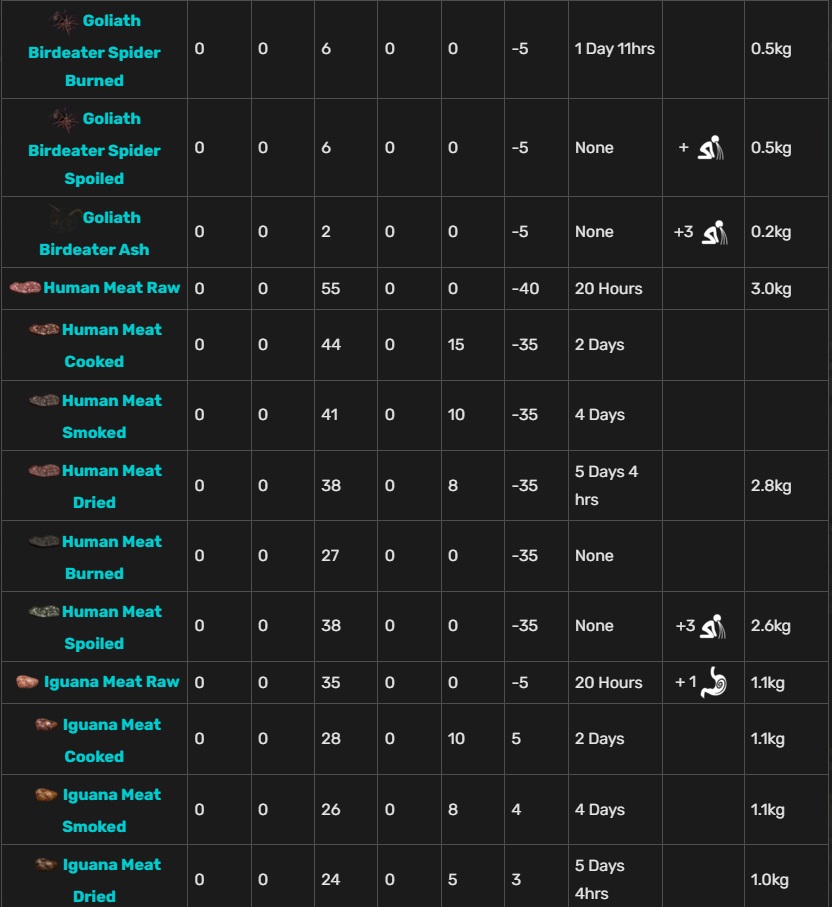
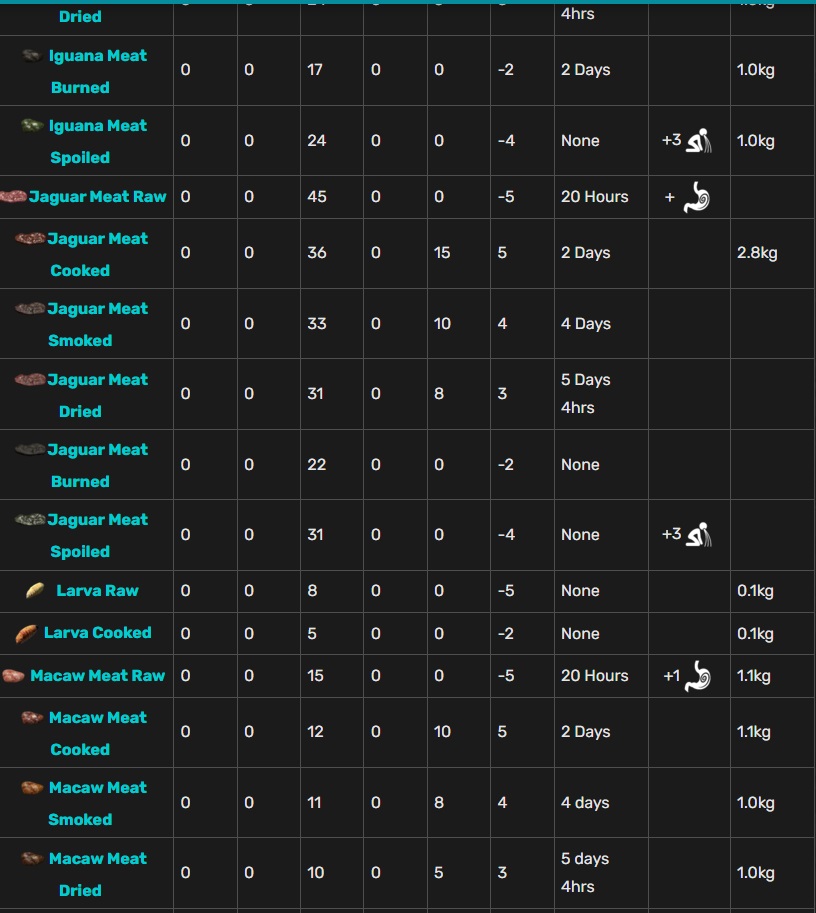
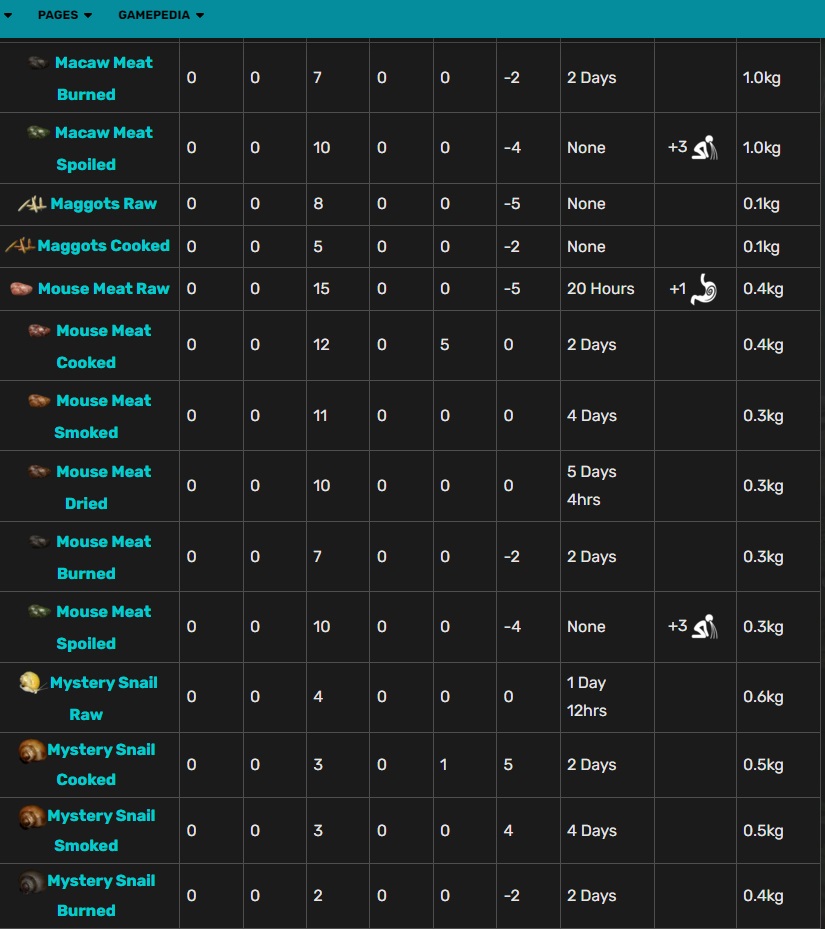
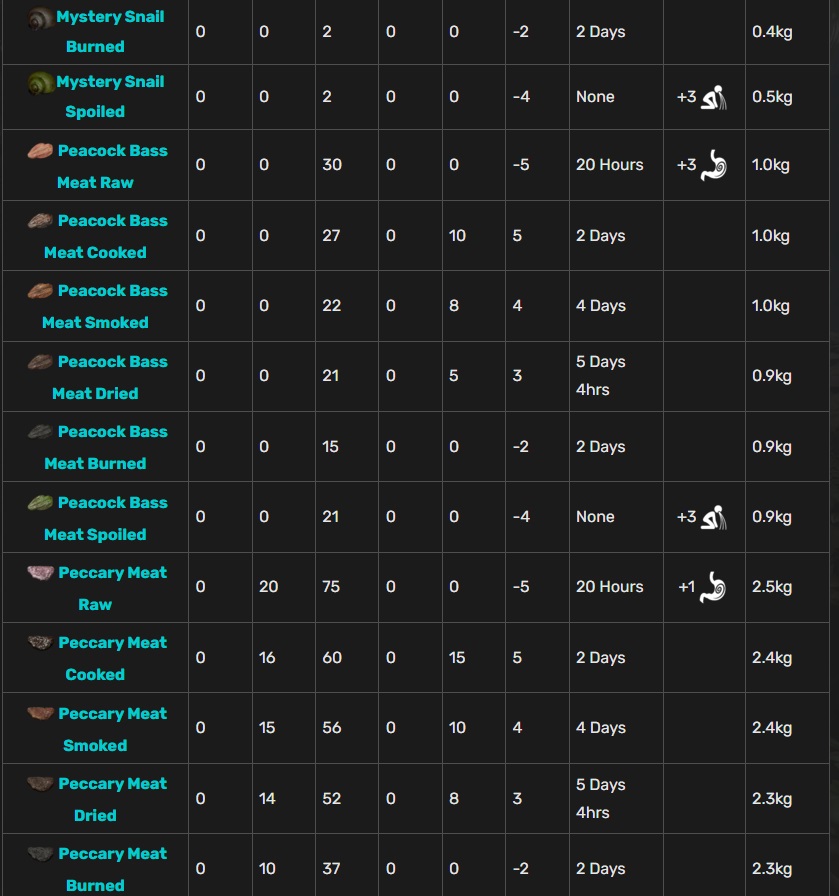
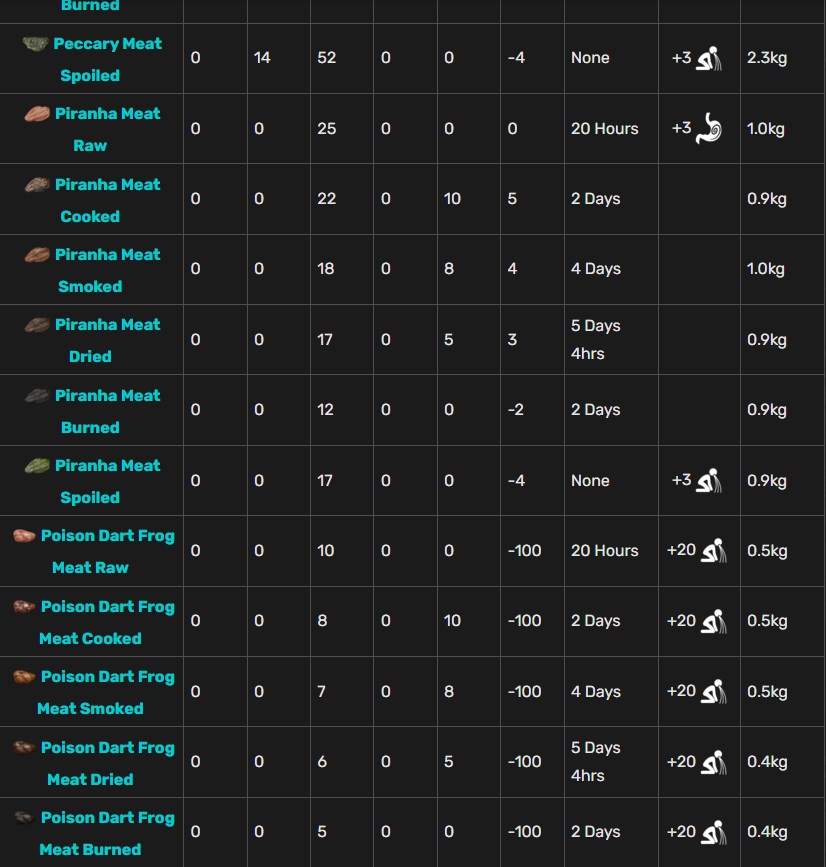
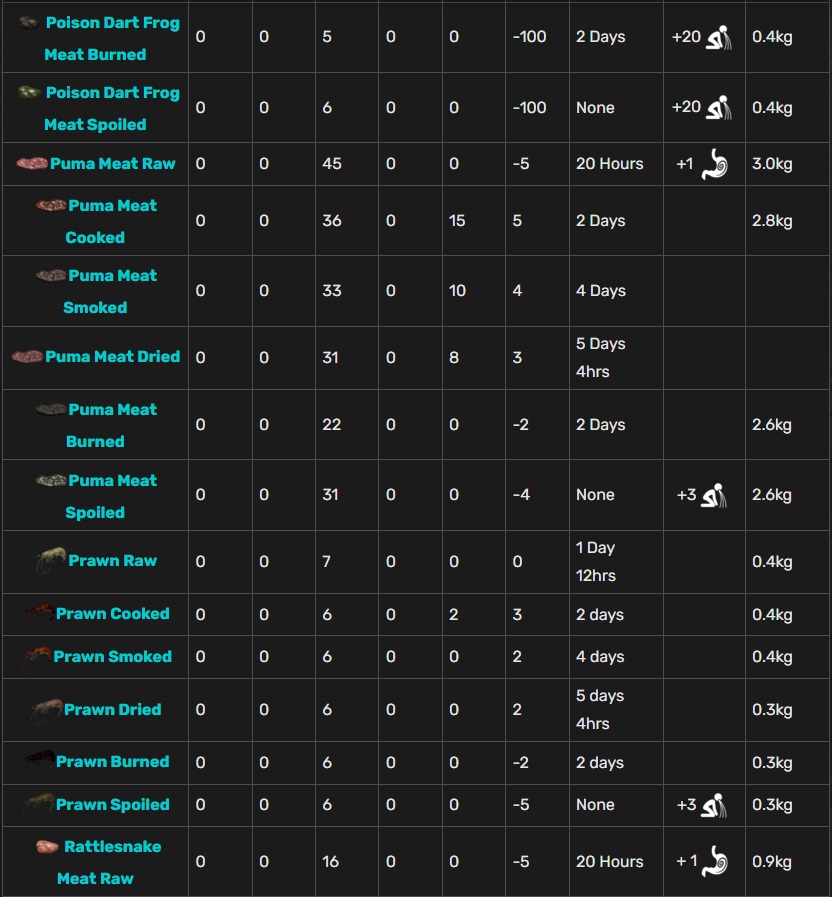
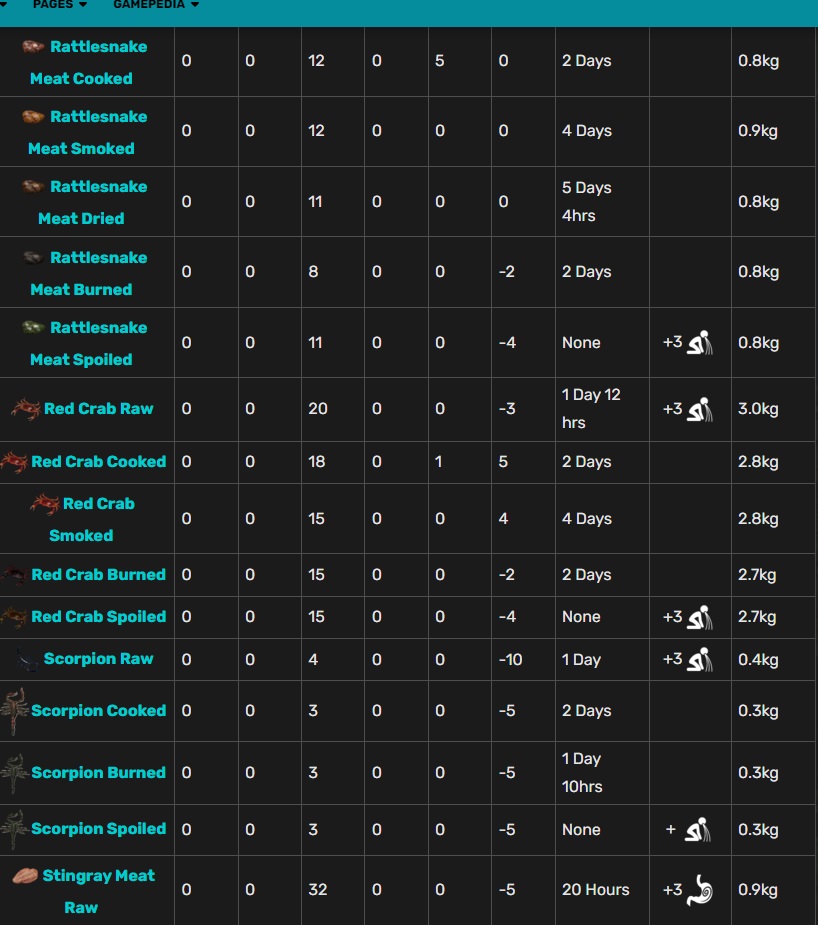
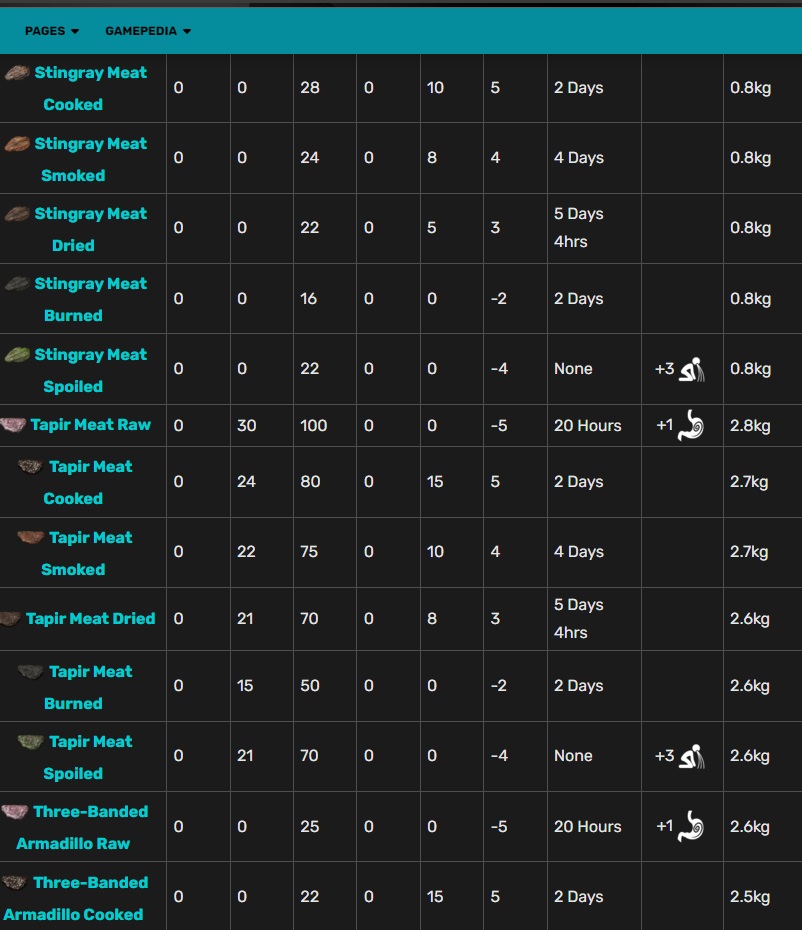
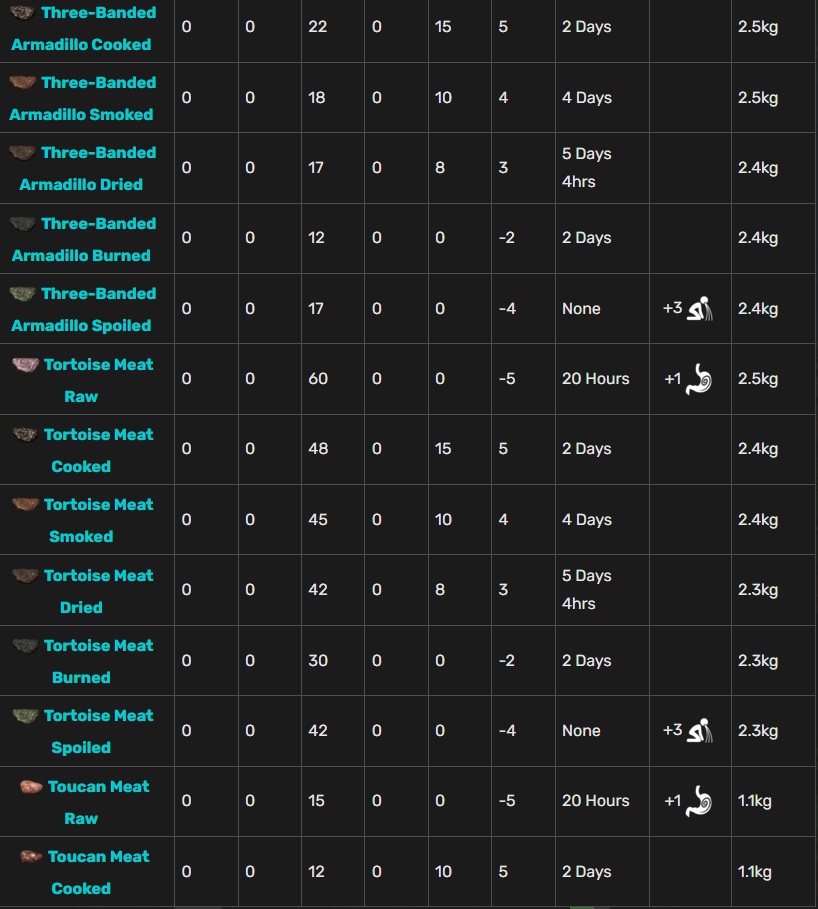
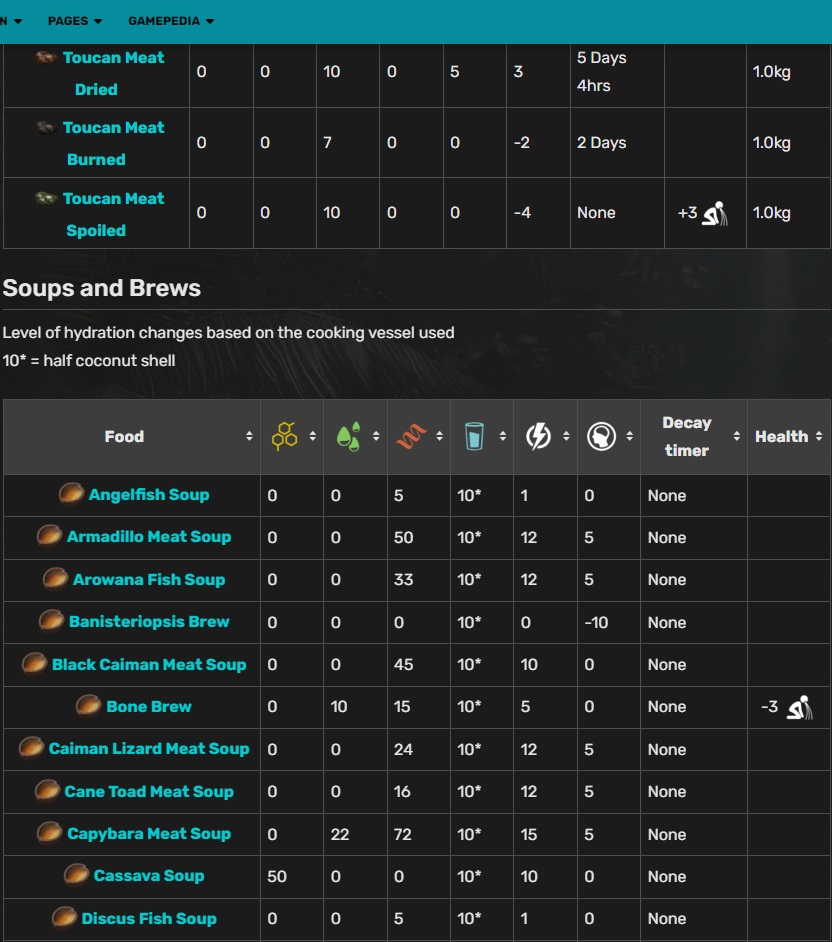
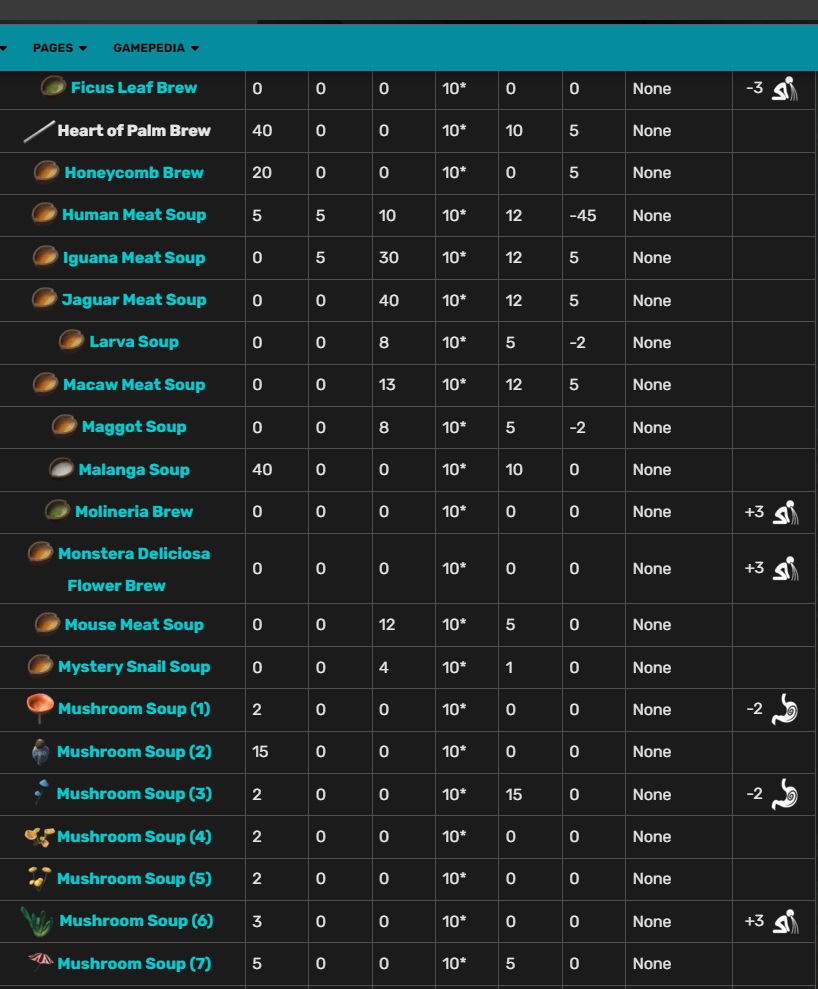
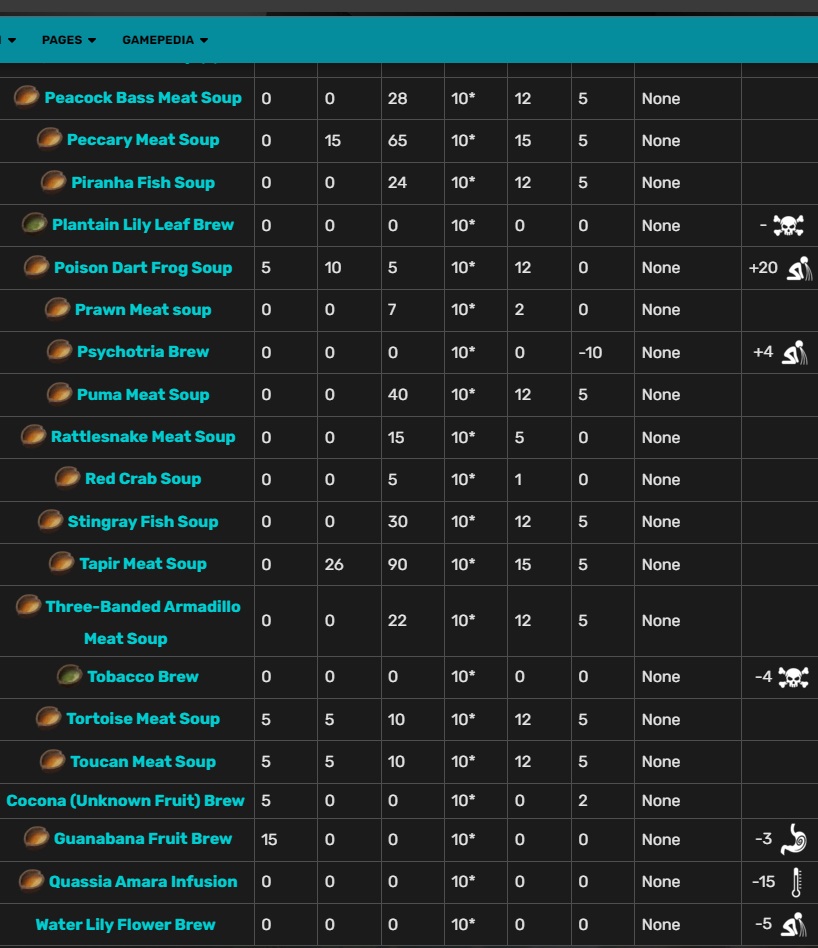
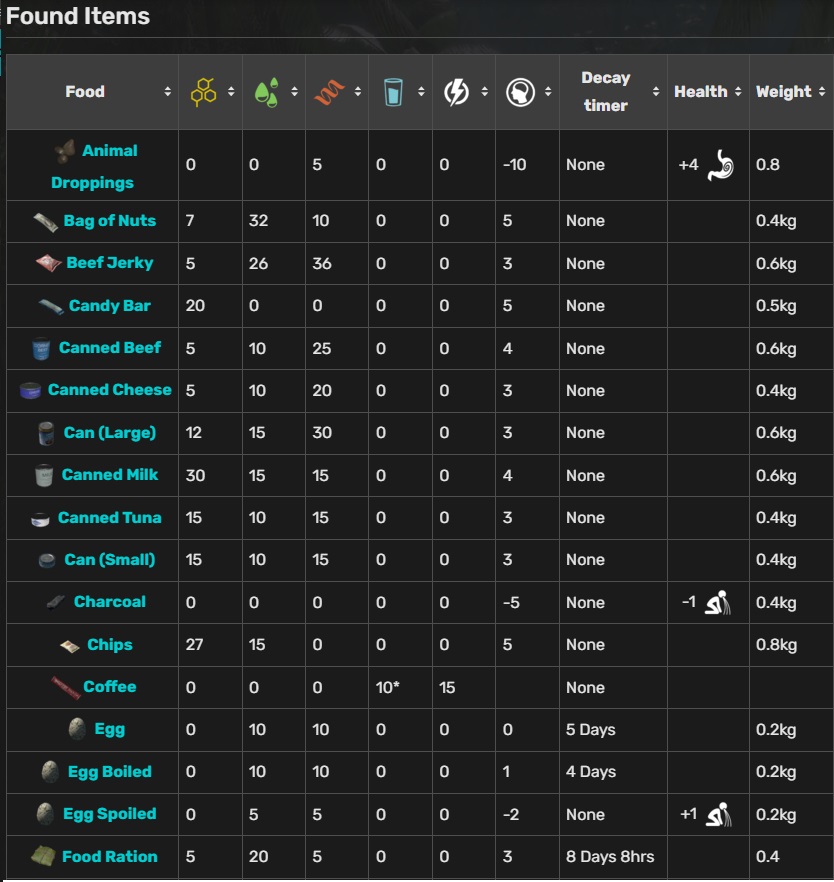
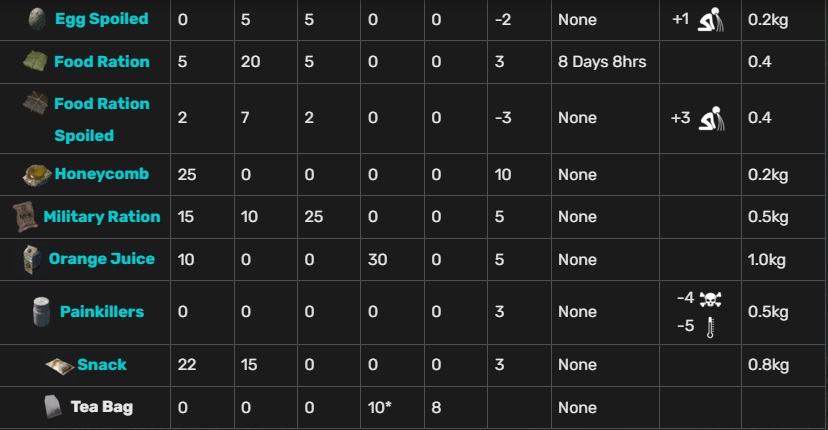
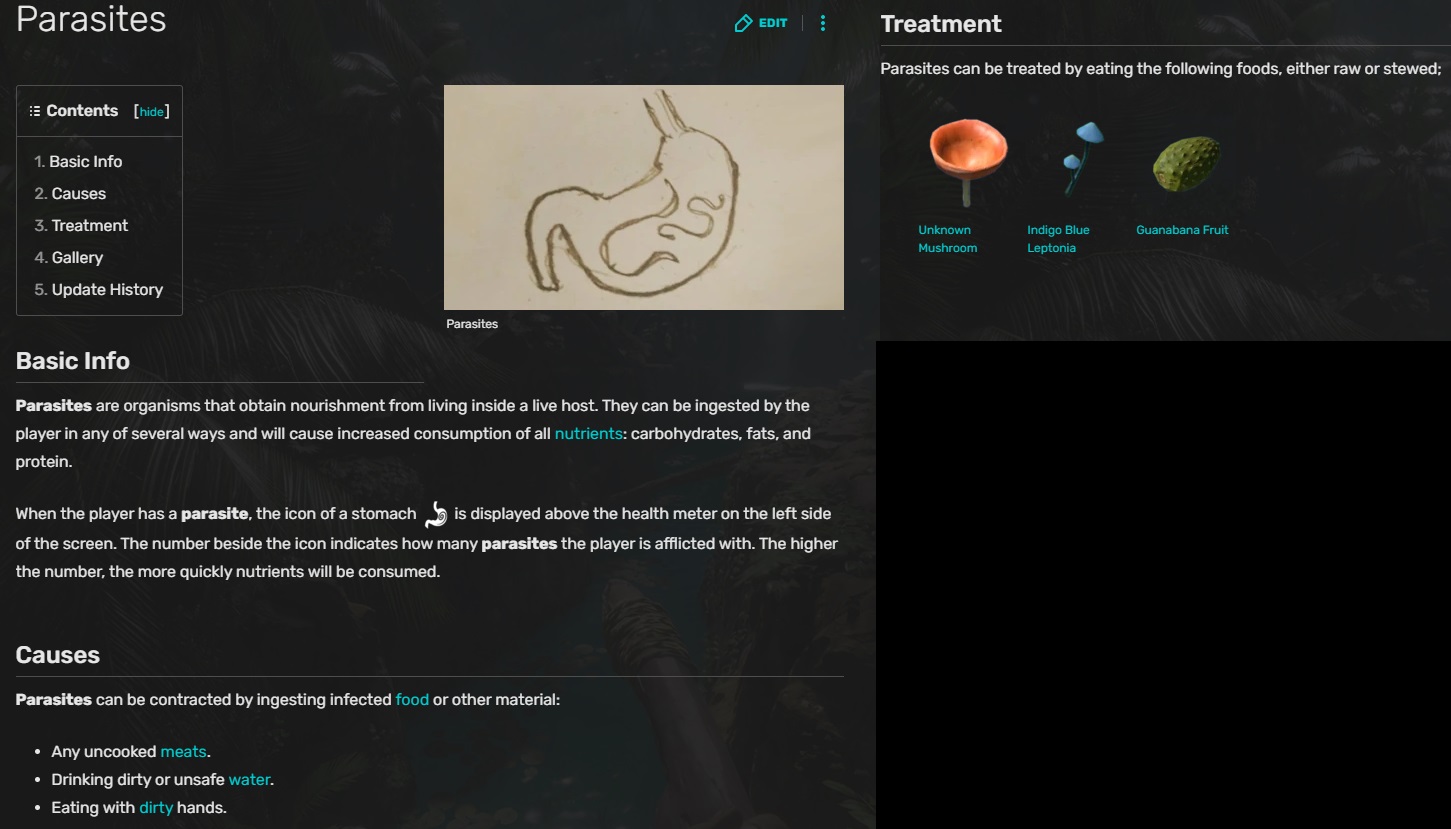
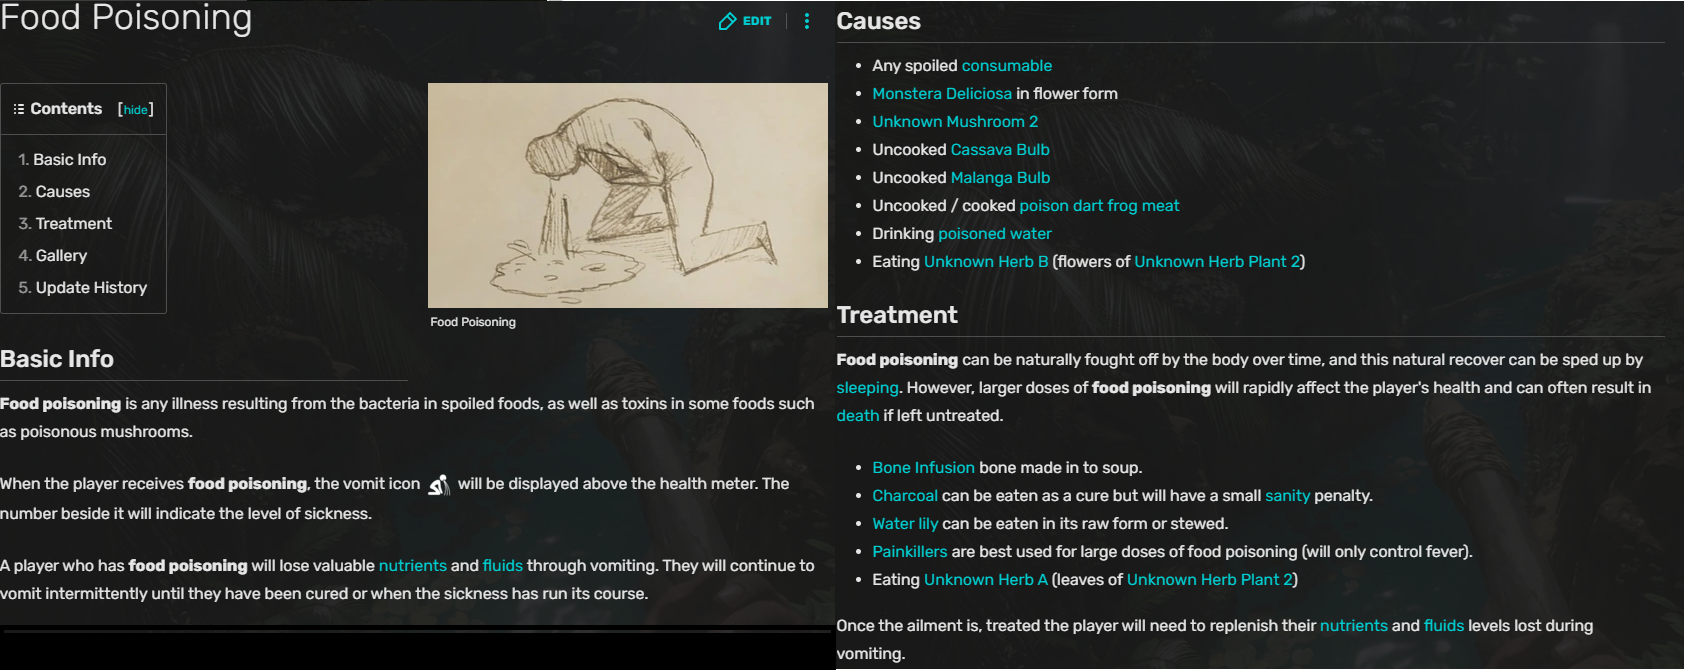
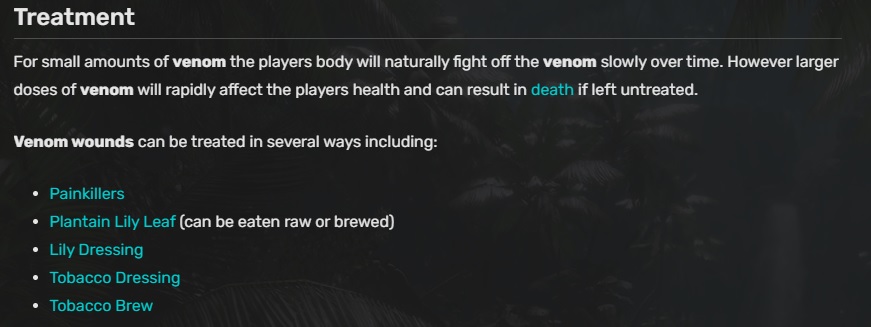
These effects are: Food Poisoning, and Parasites, both are easily taken care of with the right methods following the Wiki again as referance:
- 1~Parasites~
- 2~Food Poisoning~
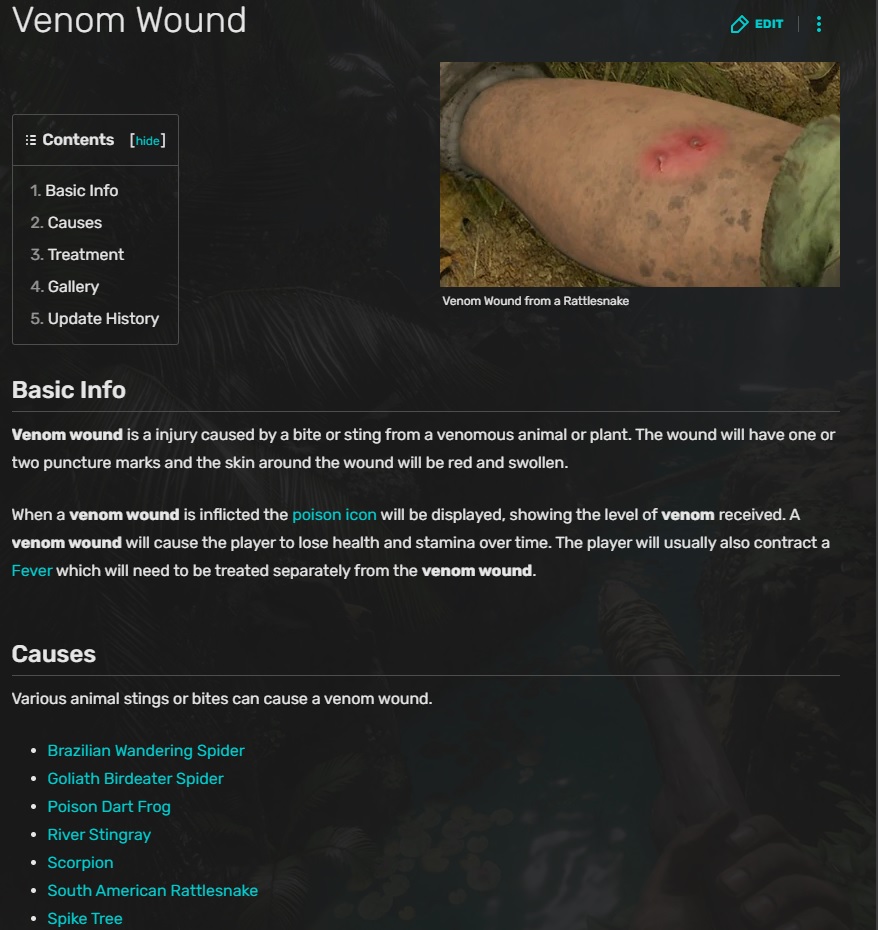
- 3~Poison or Venom~
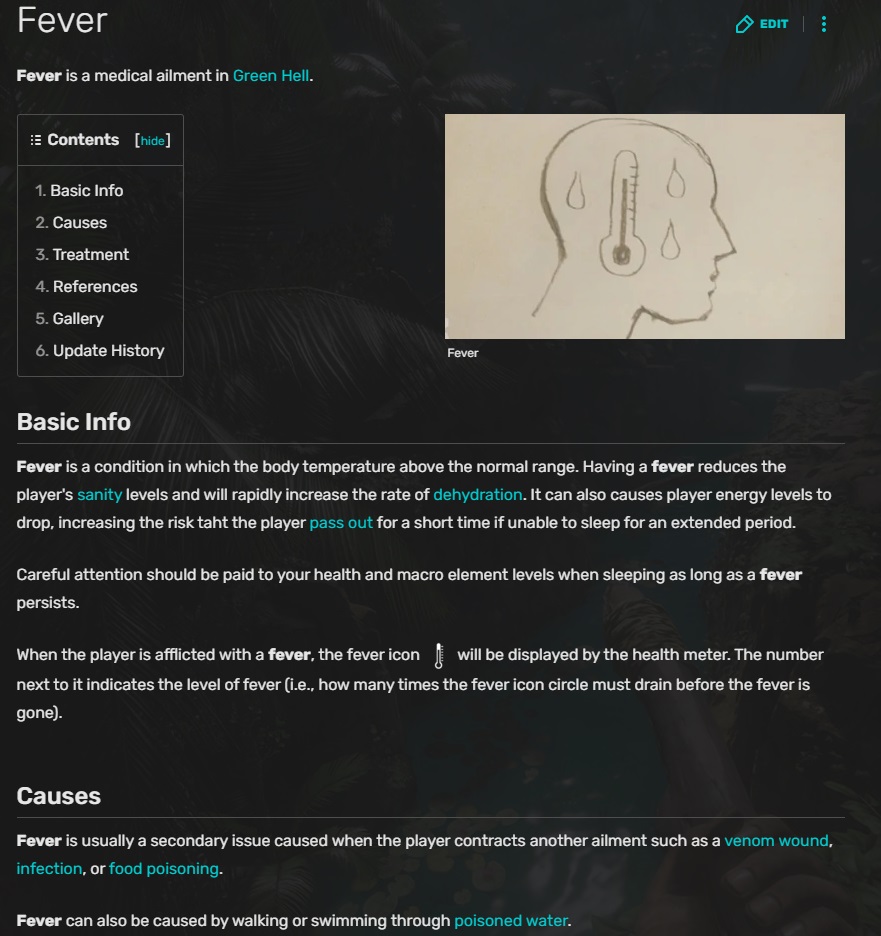
- 4~Fever~
[previewicon=26198189;sizeOriginal,inline;treatment3.jpg][/previewicon][/previewico




Exploits, "Cheats", Tips, and Tricks
None of the tips/tricks/exploits/cheats listed are actually cheating or exploiting the game, rather just the situations in which you can benefit from certain game mechanics. All the following tips/tricks/exploits/cheats have personally been tested and should be used in your own game at your own digression.
It is highly advised saving your game before attempting in your own personal game.
**An important note about this trick, if you find that the armadillo isn't spawning or they aren't rapidly getting you decked out in armadillo armor please save and exit the game, close your game out and reload into your save. It can occasionally be buggy or glitchy.**
Placement, items required, and suggestions
- Killer Trap
- 4 logs
- 1 long stick
- 7 rope
- 1 stick
- 4 small sticks
- 4 logs
- Bait
- Raw Meat; human, armadillo, and peccary seem to be the preferred raw meats but any will do
- Mushrooms have varied results; the capped mushroom tends to work out better than the others
- Other baits; rotten or spoiled foods, nuts, berries, and eggs seem to have lower success rates but do work.
- Raw Meat; human, armadillo, and peccary seem to be the preferred raw meats but any will do
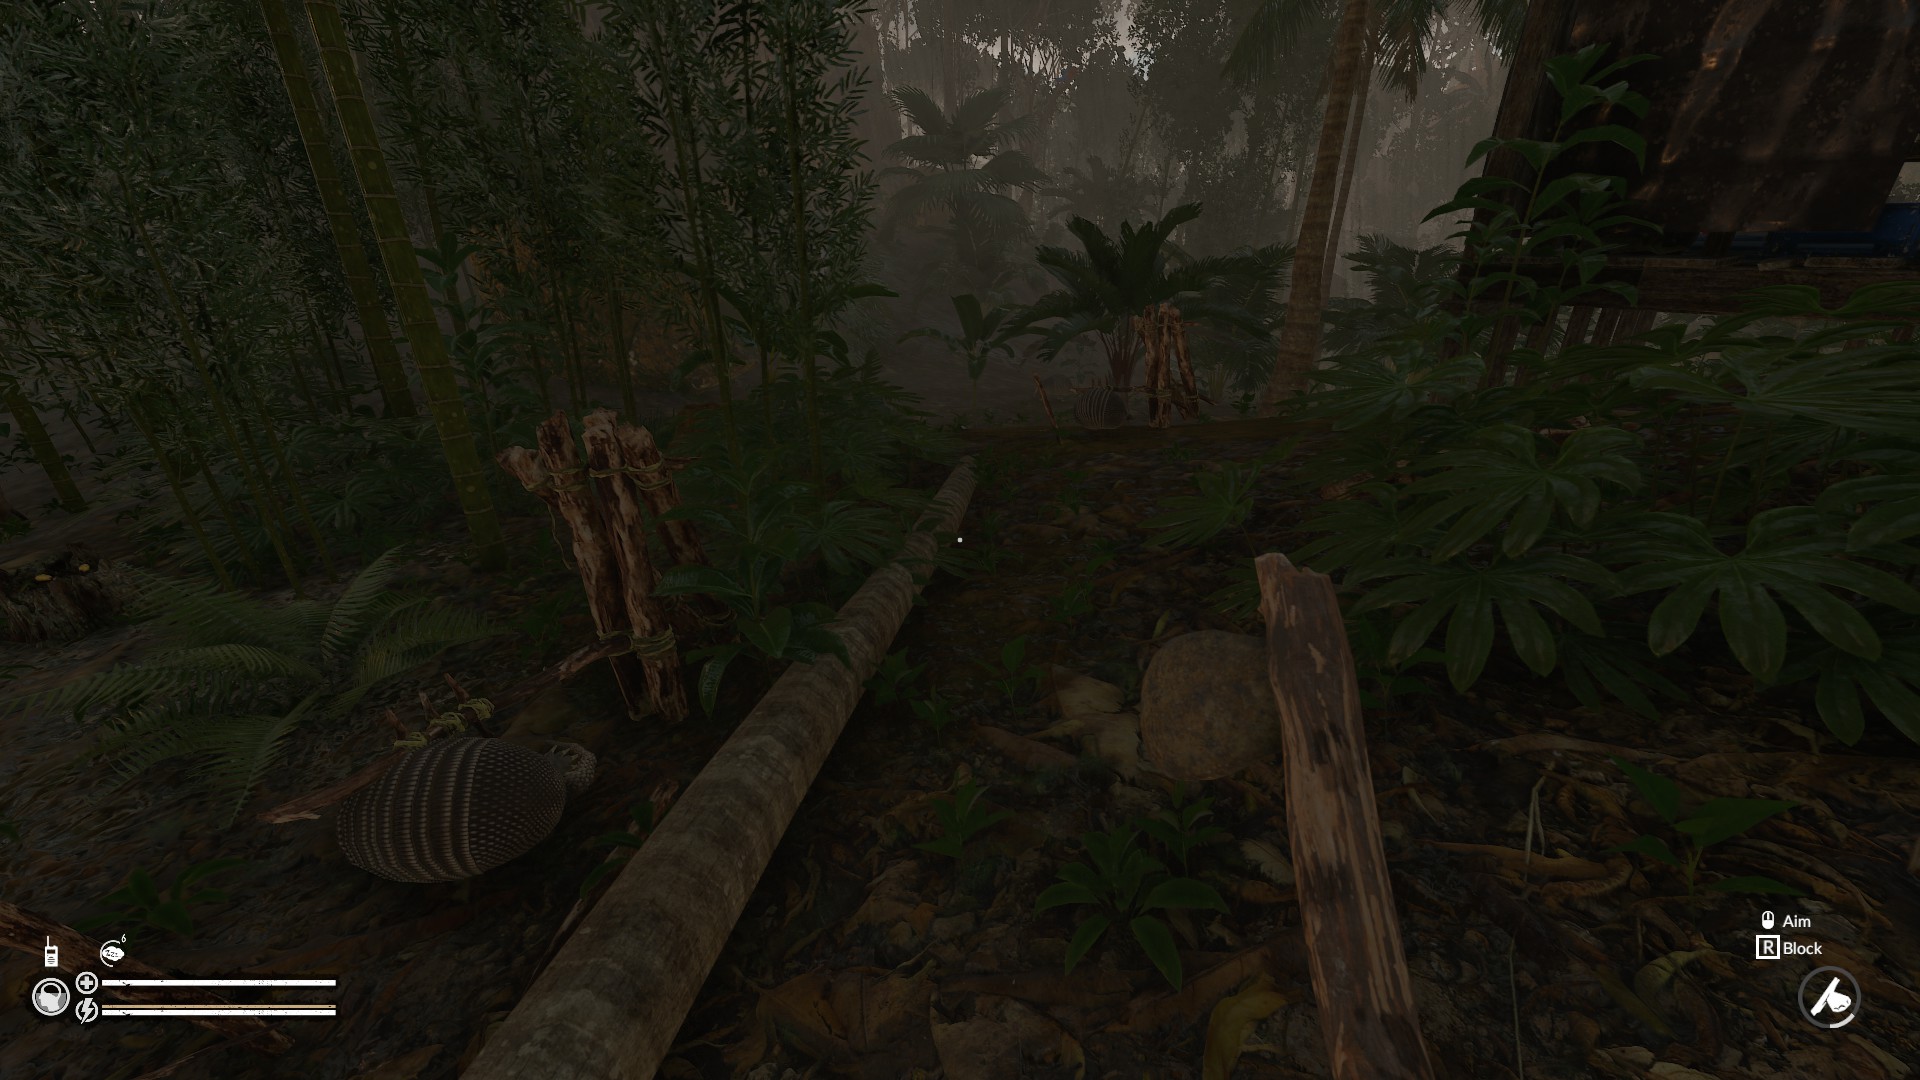
- Placement Using the fallen palm tree logs as guides place 2-4 killer traps
- Place one just after the ant hill going towards the water
- Place one just before the ant hill closer to the edge of the den building
- Place one slightly before the non-vine covered tree along the same fallen logs
- Place one closer to the end of the fallen palm tree farthest away from the den buildings
- Place one just after the ant hill going towards the water
- having more than 2 is optional, since two were VERY productive and had more than enough to fully deck out 100% armor.
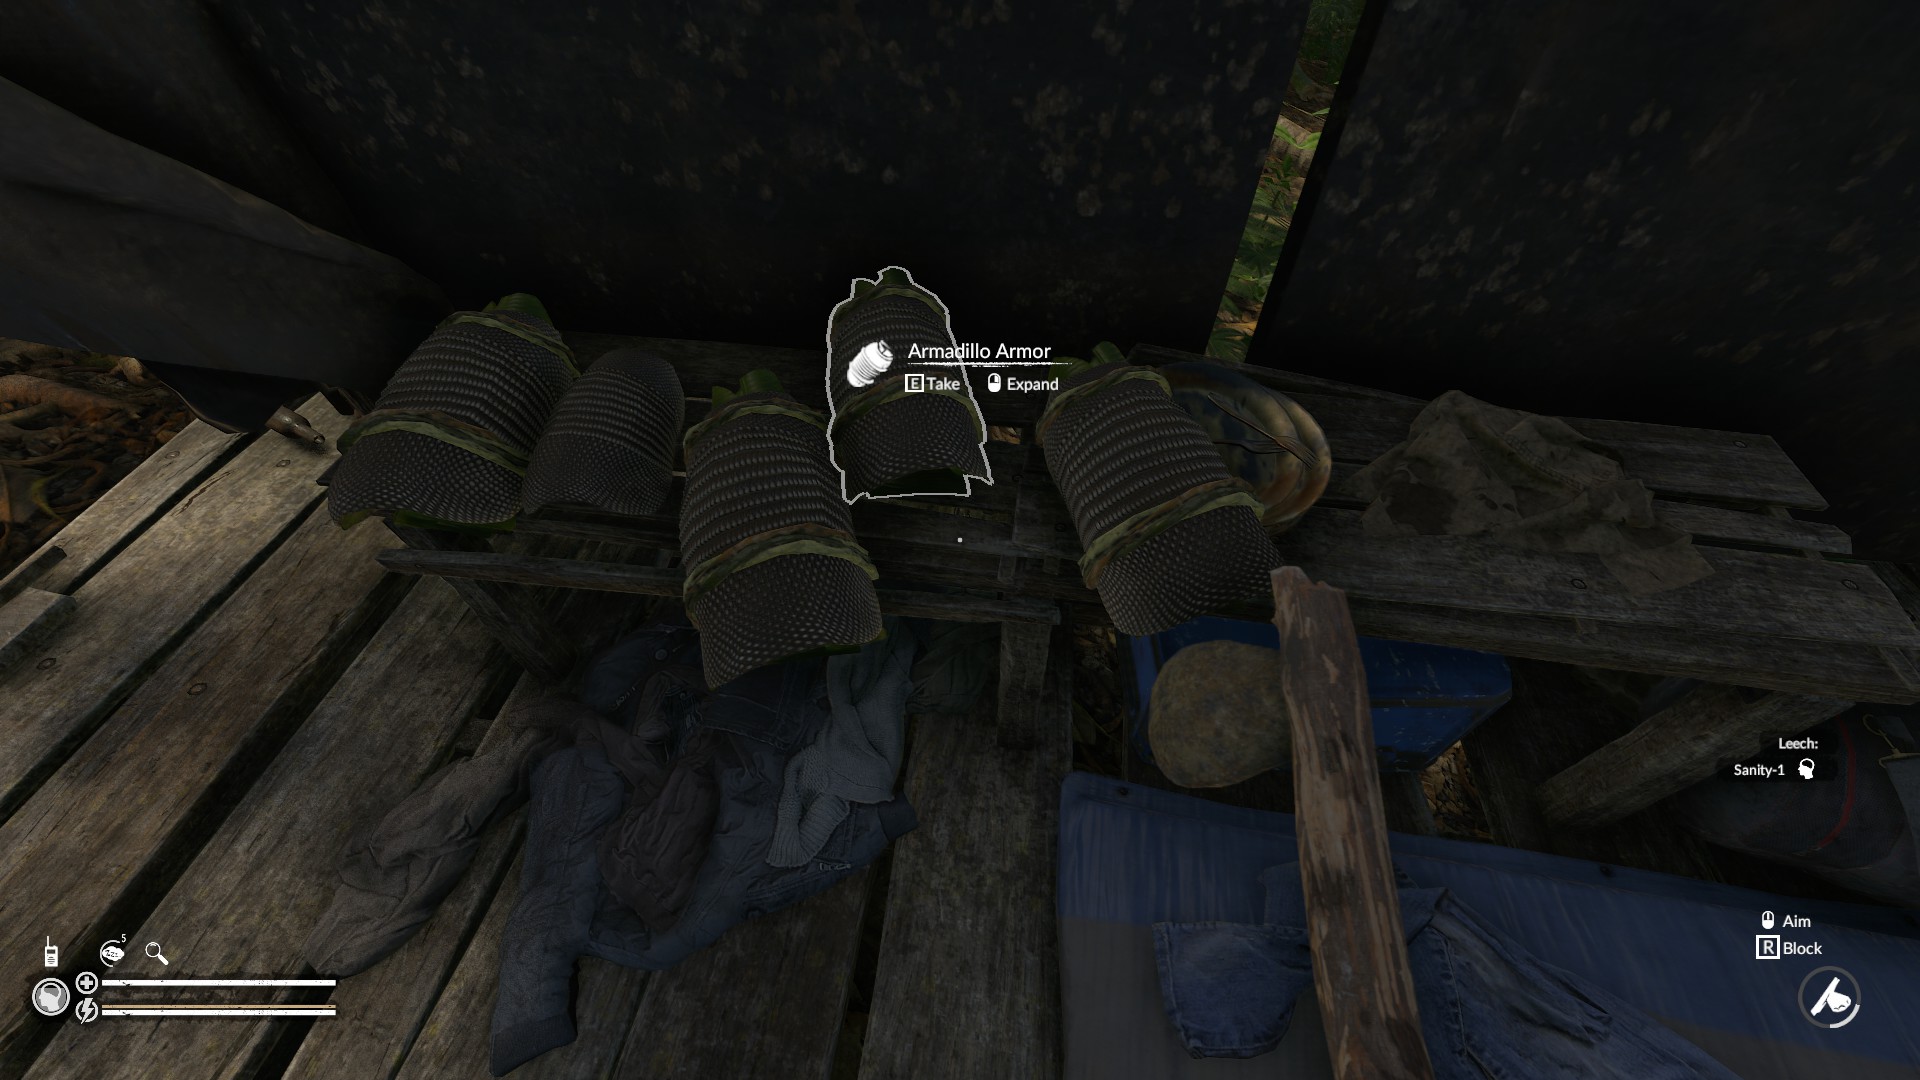
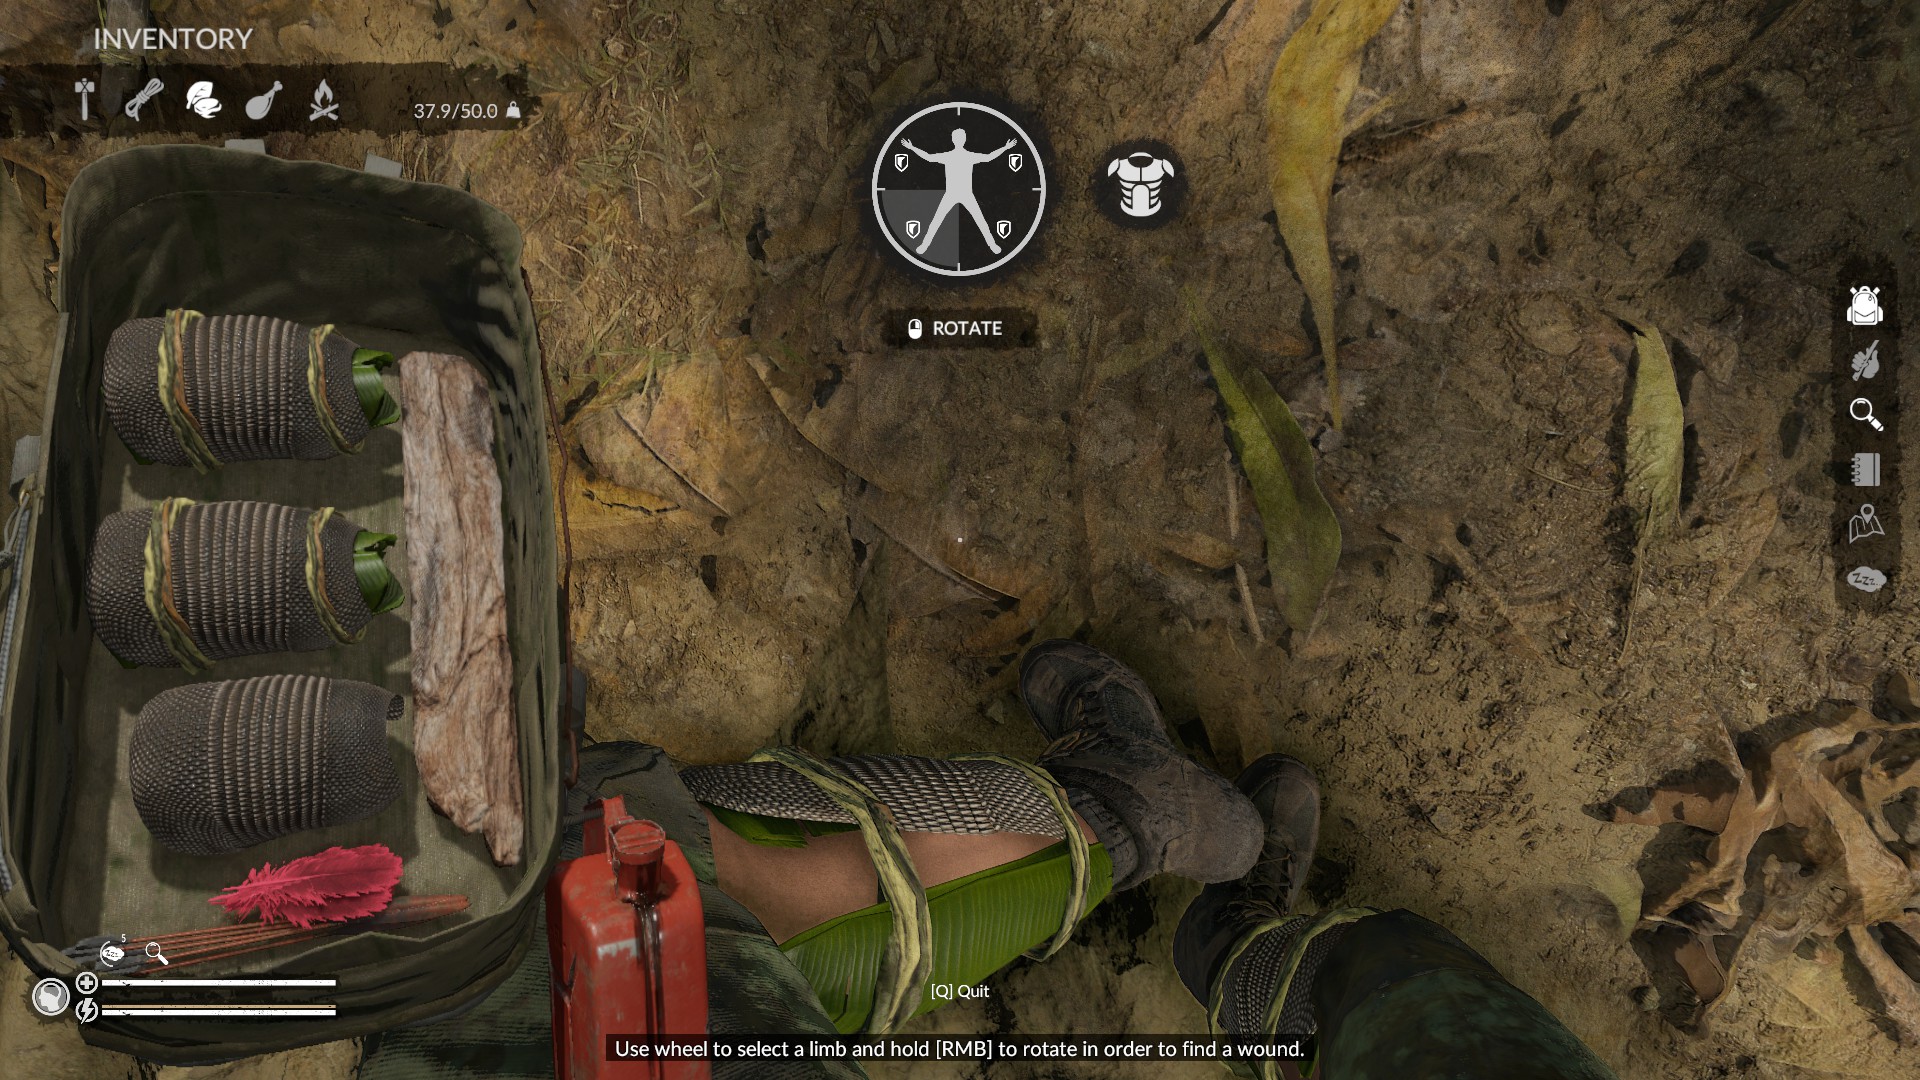
This may not happen for all players, but I've had this happen consistently within my own game
- Save game once area is clear of any and all rope available
- If you want to make double sure save again, nothing wrong with a just checking save
- Quit the game, not to the desktop but to the game main menu
- Load the game you saved
- Survey the area and see if your rope has re-spawned
CRAFTING
~The tedious task of creation in game can be infuriating to say the least; right click or drag and repeat until crafted. BUT...there is another way. This speeds the crafting process up slightly and allows a little more freedom to scan your surroundings.
- Make sure items such as banana leaves have already been handled once so they can be grabbed while accessing the crafting table
- Get items either grouped or placed close together for easy grabbing during the process; this can be circumvented by right clicking and dragging the mouse while your backpack is open but not performing any other actions while in your backpack
This can be beneficial when harvesting mud bricks, or most resources since you can pull up your backpack, open the crafting table, and then place the items you're wanting to transport (more than 1 mud brick, or 3 logs...) Careful to avoid walking over trunks, logs, or other ambient objects since that can force close the crafting table and drop or scatter all materials you're carrying, also pay attention to your total weight keep it below 50lbs or close to it - Once the items are grouped together open your crafting table and simply drag the materials for item to the table and craft away.
Note this does not allow or give the you the ability to craft multiples of an item in at a single time but does allow for a faster more streamlined process to the crafting process.
~*~Looking around while attempting this is achieved by clicking and holding the right mouse button on the playable screen outside of the backpack and dragging in a direction that allows you a better view of what your surroundings are.
~*~This can be beneficial when harvesting mud bricks, or most resources since you can pull up your backpack, open the crafting table, and then place the items you're wanting to transport (more than 1 mud brick, or 3 logs...) Careful to avoid walking over trunks, logs, or other ambient objects since that can force close the crafting table and drop or scatter all materials you're carrying
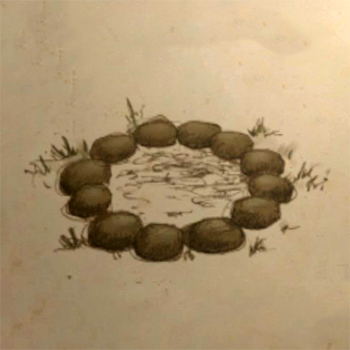
~Small Fire~ will last for 12 in game hours, standard blueprint already known ~Adding a stone ring~ to the small fire will increase the burn time to 15 hours and 20 minutes; the blueprint is found at the Bamboo Camp, or the Abandoned Village
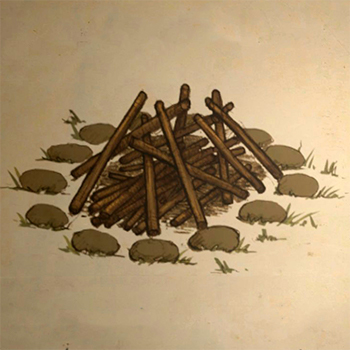
 ~Camp Fire~ will last for 20 in game hours and it's blueprint can be found in a few different locations; Abandoned Village, Anaconda Island, Drug Den, and Bamboo Camp
 ~Mud Fireside Wall~ Does Not increase the in game burn time of the small fire, but does increase the cooking spaces from 2 to 4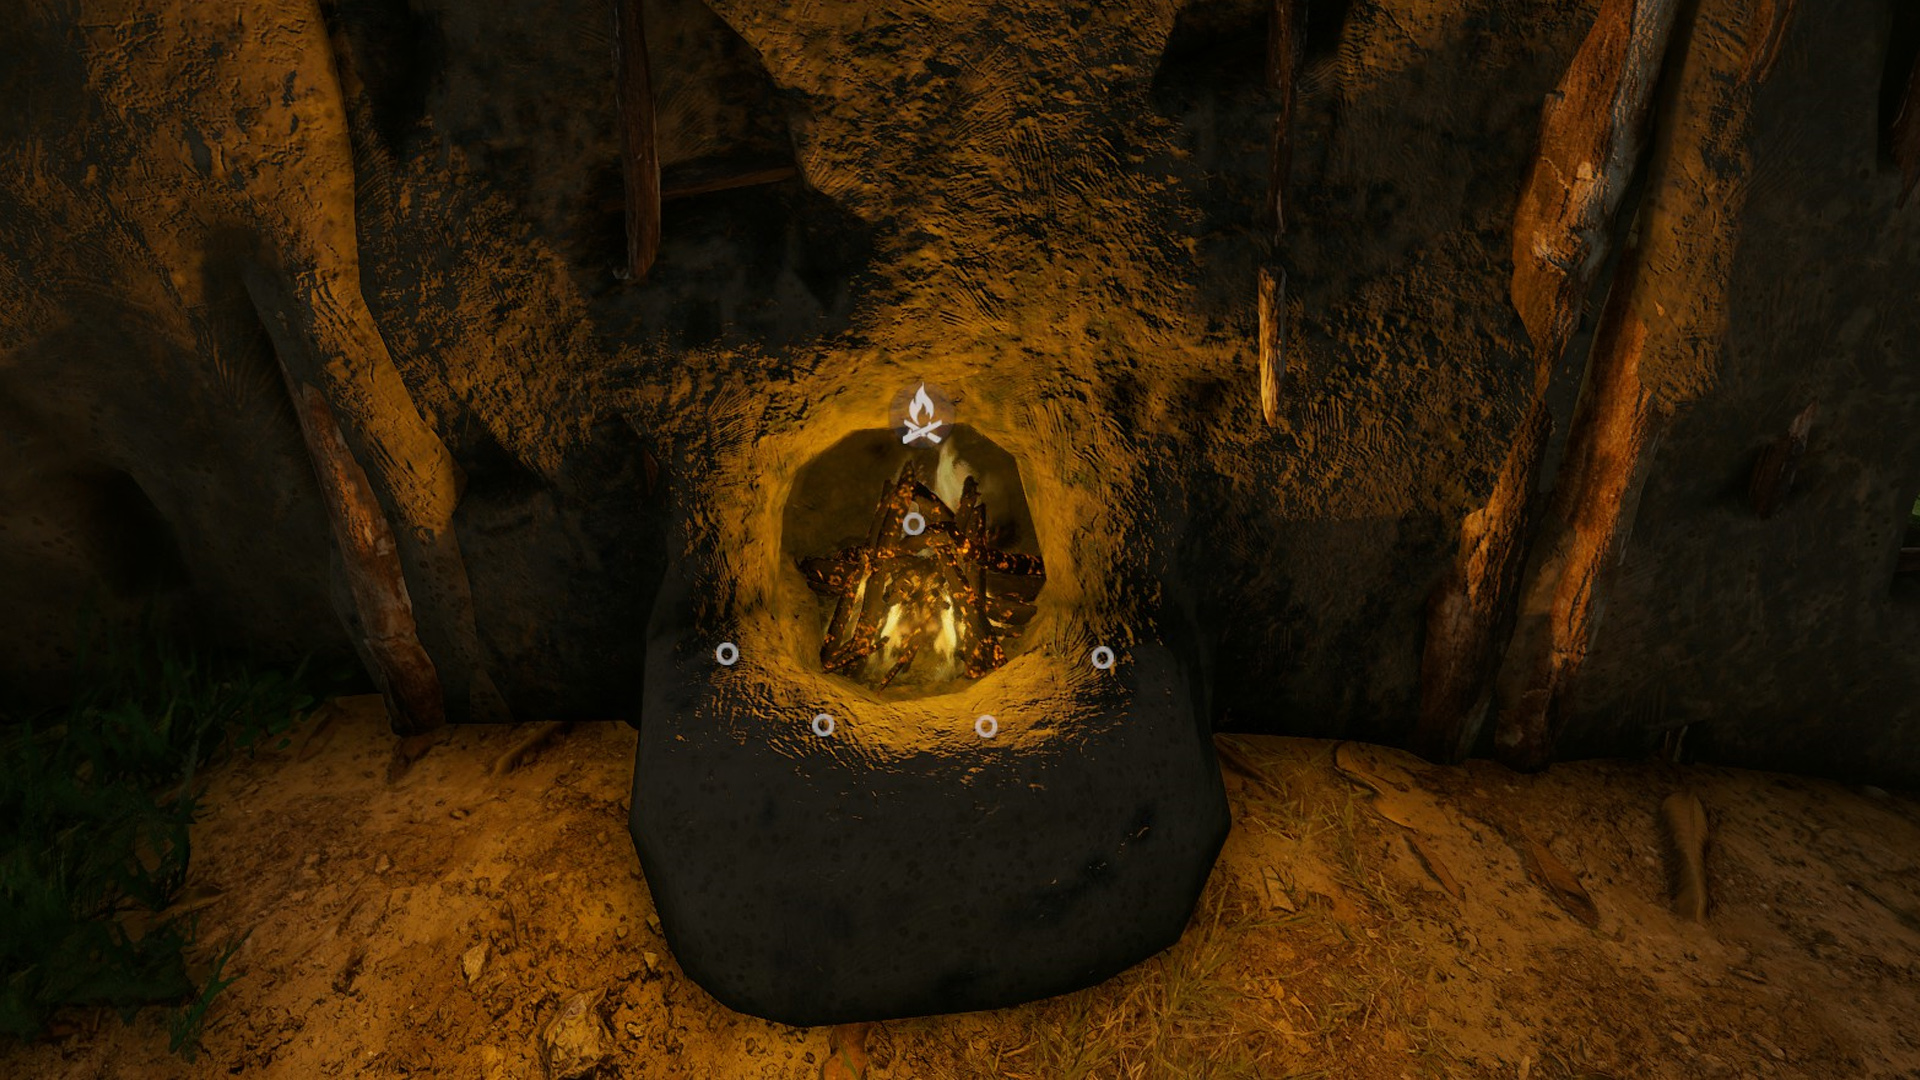
Inventory Management
- ~*~Bow The bow and arrows are ESSENTIAL thanks to them being a one or two kill
- ~*~ArrowsI carry one stack of arrows 5 or 6 is in a single stack it doesn't weigh much so you should be quick on your feet still
- ~*~Axes An axe of any kind
- ~*~Spear A spear of any kind
- ~*~Bandage I typically carry an ash bandage, a lilly, and a tobacco to make sure I can take care of any wound gotten just traveling
- ~*~Bidon i prefer the bidon gotten from the jeep because it holds 100 water compared to 40 with the coconut bidon but weight wise the coconut bidon is more beneficial
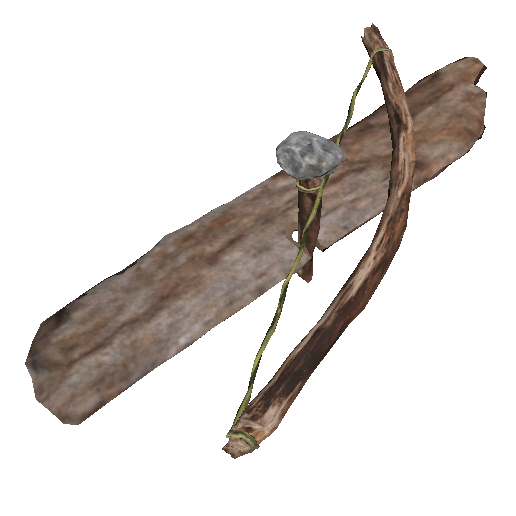
- ~*~The Fire Bow great for starting fires while energy is low, it does require a bow, small stone, small stick, and a plank.
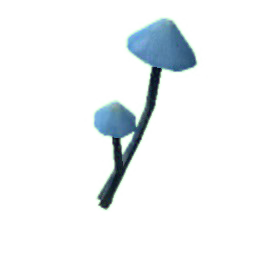
- ~*~Mushrooms I typically carry three different ones in their stacks of 3,
The blue mushroom for energy
the orange mushroom to take care of parasites or something similar,
and the smaller yellow mushroom for sanity increase if sanity gets low.
- ~*~Maggots I know they're gross but they do help either as bait for traps, or infected wounds. It helps to just have them handy just in case.
- ~*~Sticks & Rope & Stones
~Don't carry a full load of sticks but hold just a few that way your weight stays down
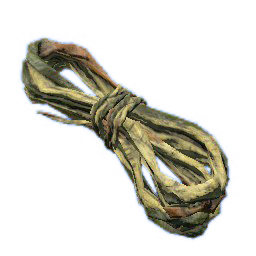
~Rope I tend to carry a full load of rope, not sure why but rope seems to be a big need
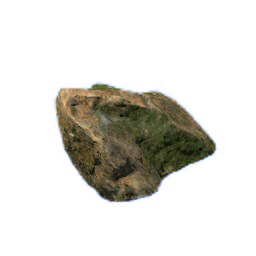
~The stones I carry at least two or three to ensure I can craft another blade or axe
Hunkering Down for the Long Haul
So, what can we do in what mode or where to set up a settlement.
now, you can choose in story (This is actually the best opcion Because it gives you path to the entire game place).-
Why not in survival? Well you can of course you can but its "limited" on some places,but not that many.-
So, once you choose for example...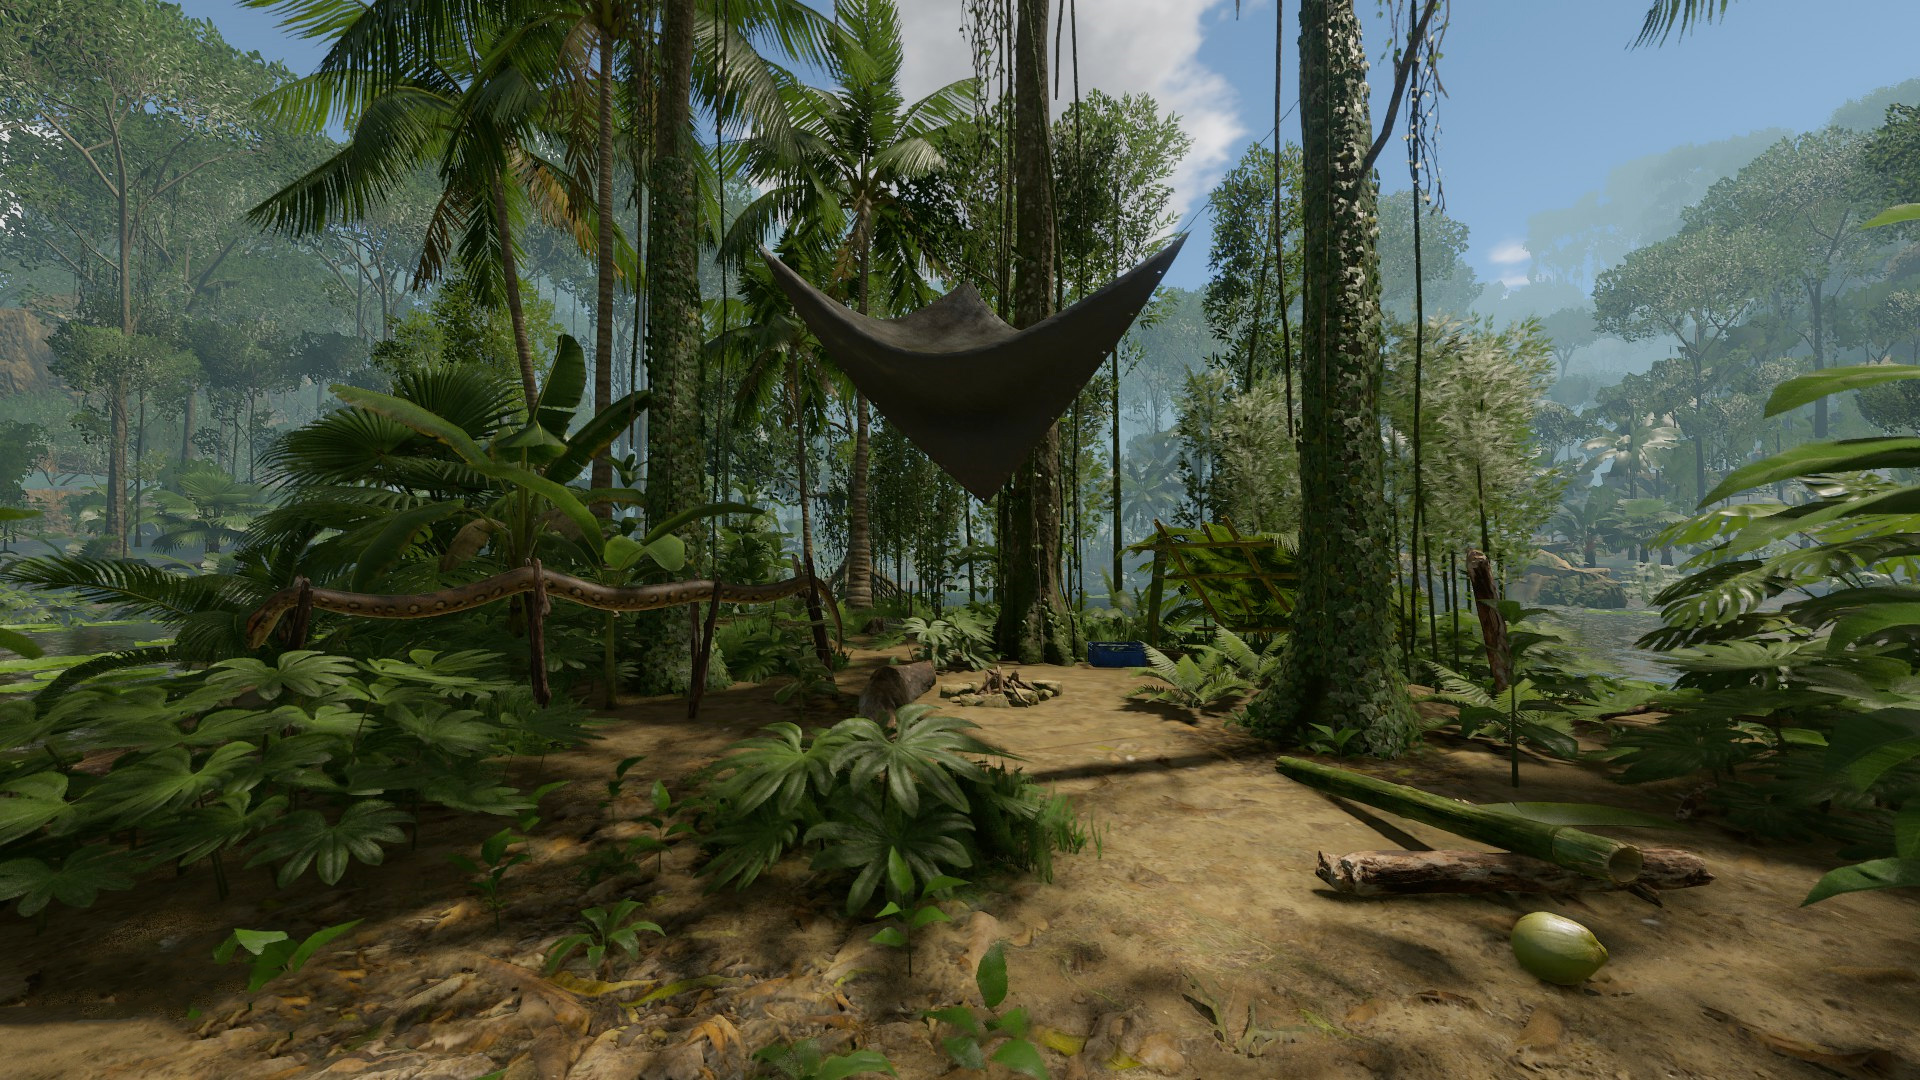 Anaconda island, there you can build a good defence and a good attack for depredators and natives
You have a watter source by just walking around, and you can destroy the near houses to build your own palace with defenses.-
Fish, fish all day and of course (passin the wooden bridge) you have tapir where you can put them traps.-
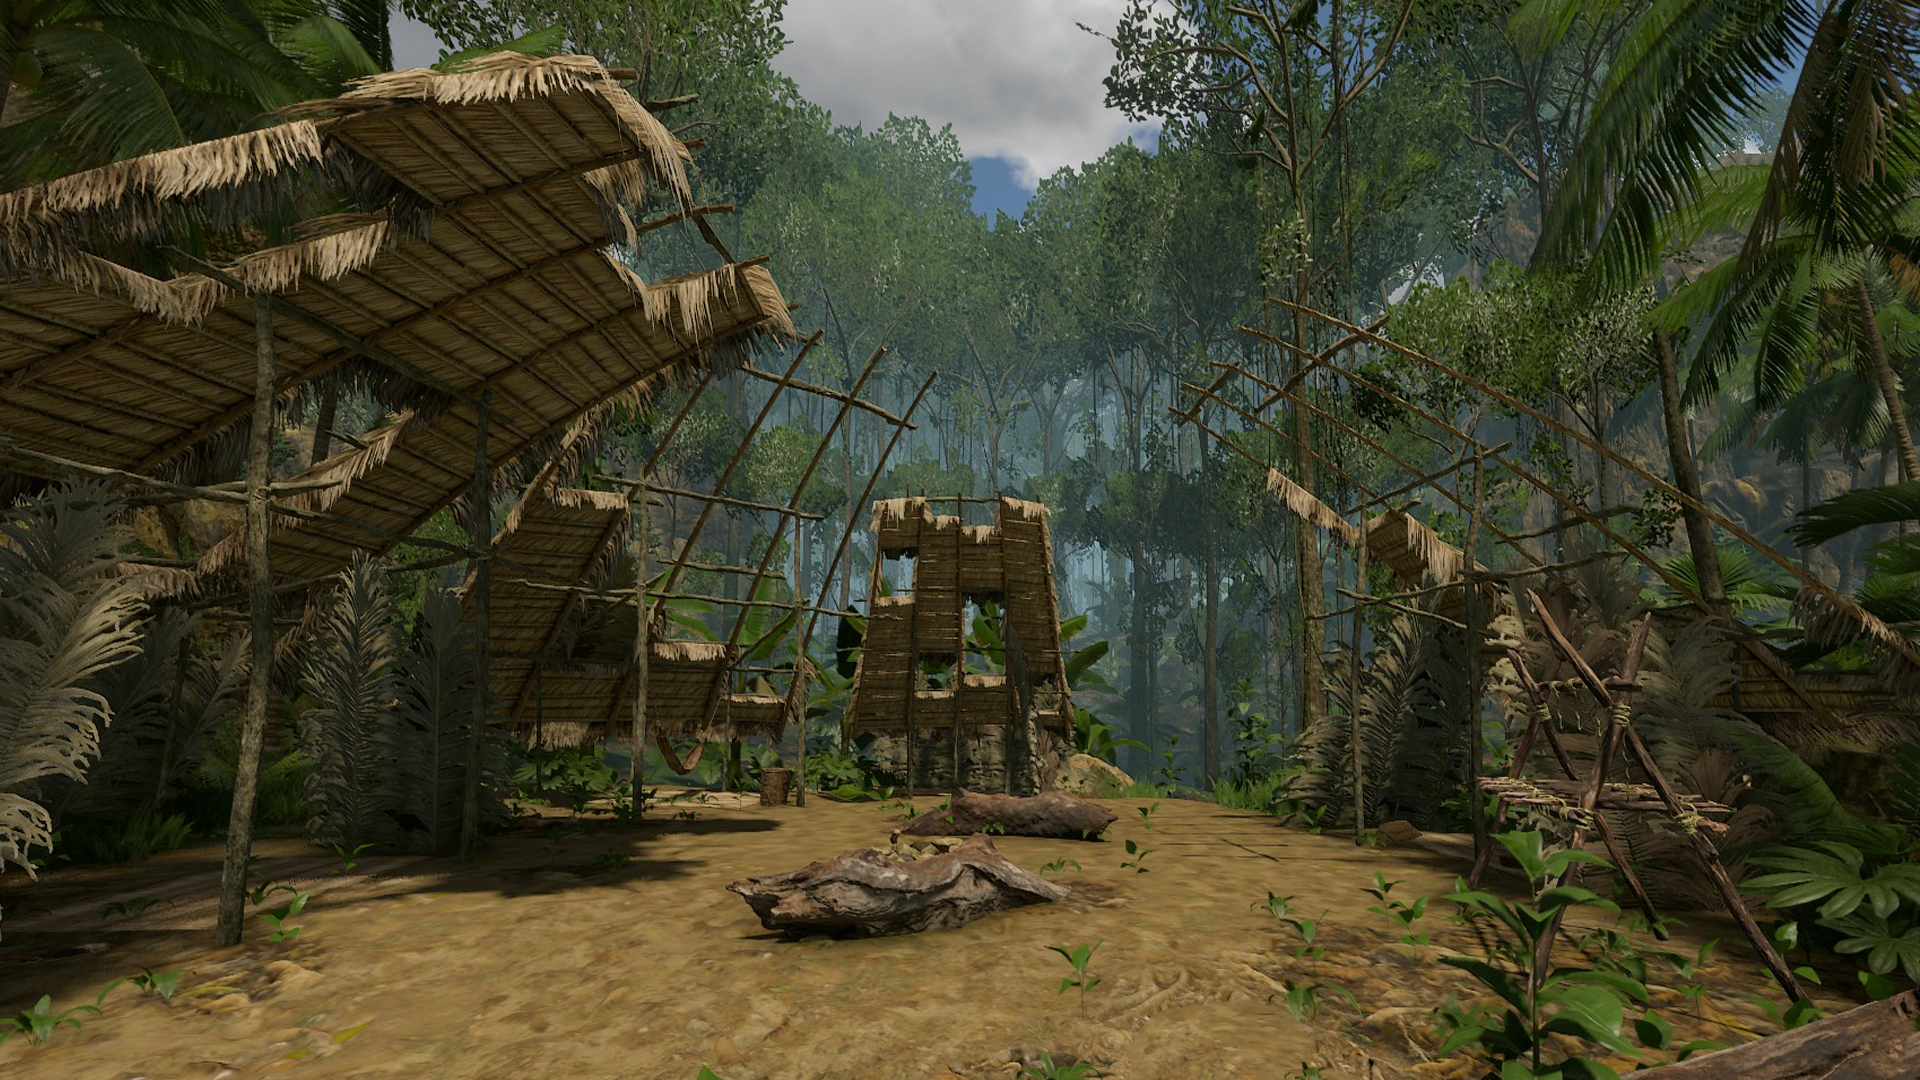 Yeah you know this place if you had played the game just less than an hour.-
Now, this place is way easier, you have lot of pigs on one side of the path, watter source and good vegtables.-
¡Warning! well no, take it easy, this a good spawn of big cats also,soo be on your toes.-
There are a another places for example this ones.-Watter, fishes, cocconut and a big island where to build or get your bamboo's.-
This one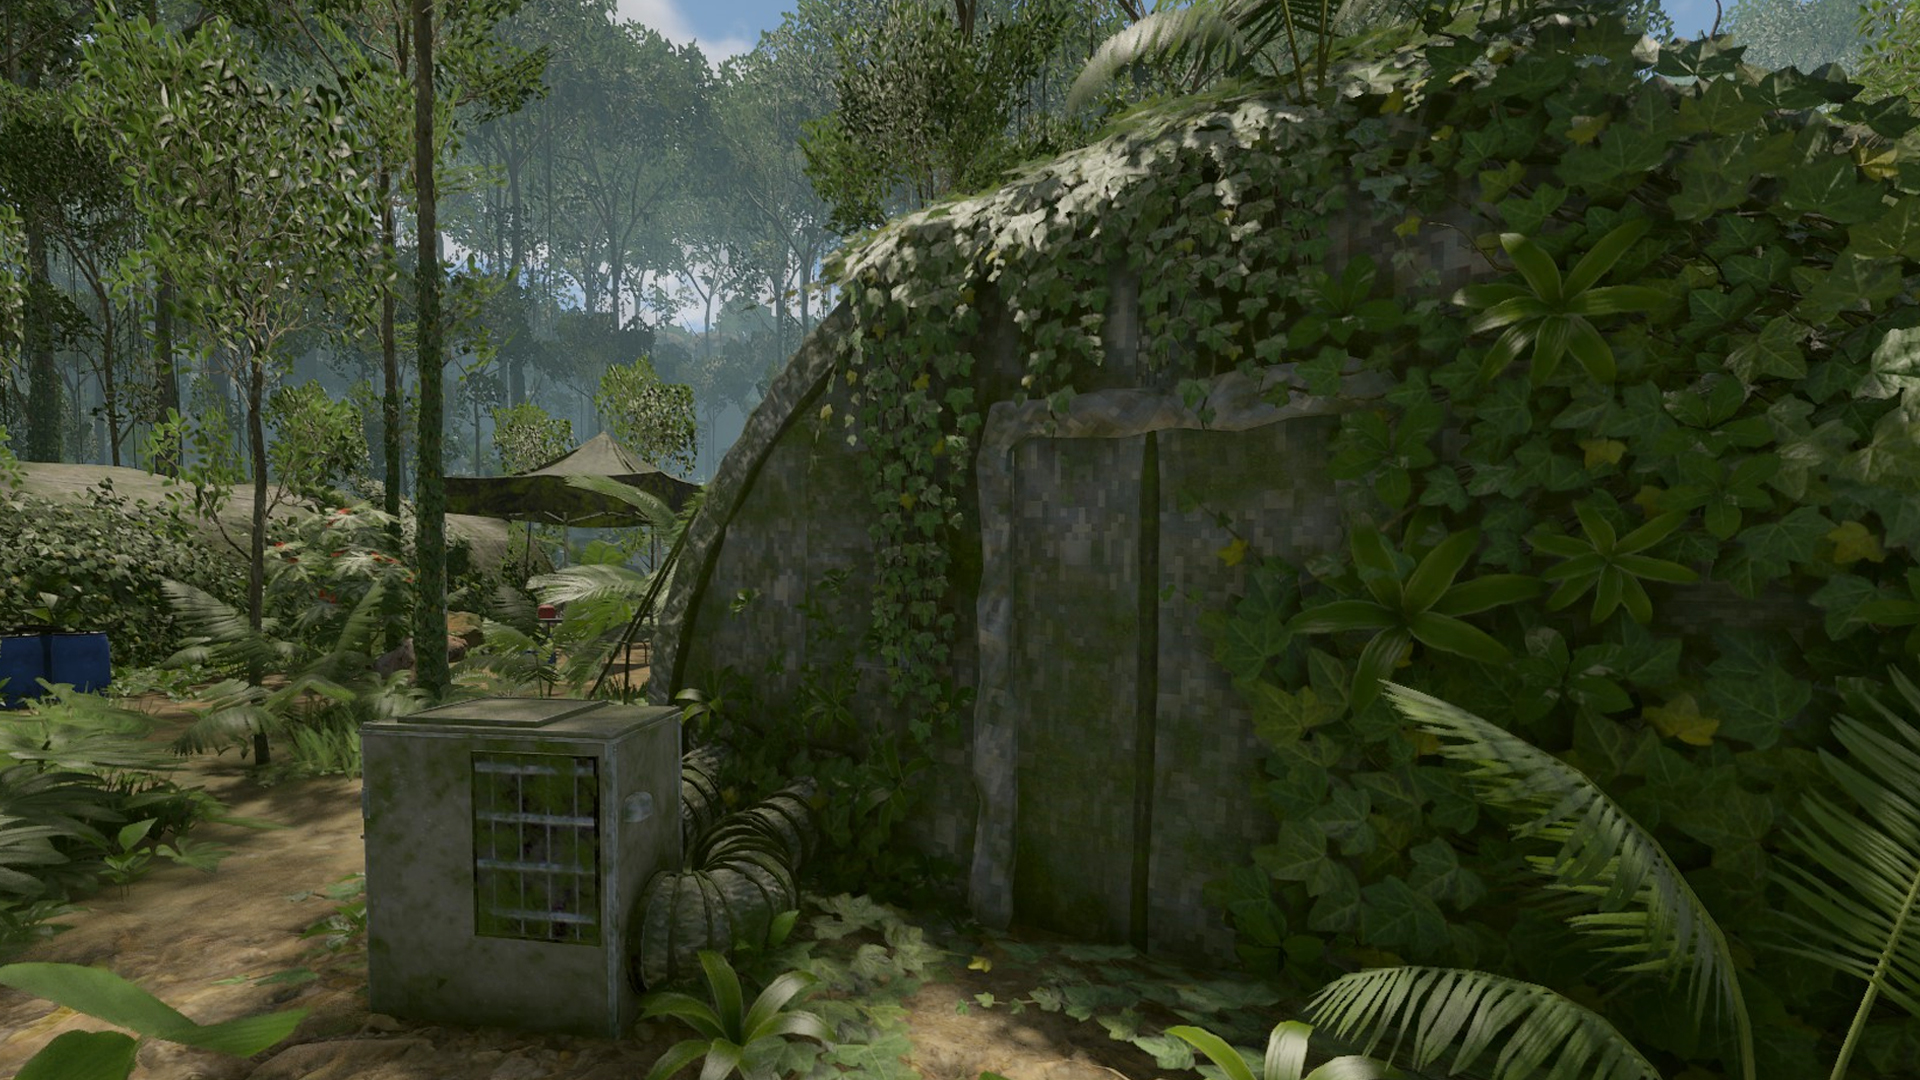 Now, this place is the best on late game, because you cant (well its not that well tested) get attacked by cat or natives, watter and fishes are all around you, its a big place to build something big, and get a long life.-
Reference's Used
This section will contain any sites, individuals, any information in this guide has used.
In English class this would be called the works cited page, I am going to list all sources that I knowingly used to obtain the information in this guide, and will give any credit to all resources used. If I miss anything in giving credit to any creators of any information, images, or other game content I am deeply sorry and will credit those as soon as I am made aware of it.
Thanks again for viewing this guide and taking the time to visit the sites or individuals that have assisted with this guide.- Green Hell Complete Survival, Story, and DLC Guide★ 5 (1.1k)47k views2.1k ♥45 minUpdated Oct 11, 2022
- SURVIVAL BOOK★ 5 (504)24k views1.1k ♥5 minUpdated Feb 8, 2025
- 🔥ГИГАНТСКОЕ РУКОВОДСТВО ПО GREEN HELL🔥 (Сюжет, крафты, флора и фауна и т.д)★ 5 (353)23k views864 ♥17 minRussianUpdated Feb 8, 2022
- 100% Achievement and Survival Guide - You won't need anything else.★ 5 (534)23k views1.2k ♥31 minUpdated Aug 8, 2021
- Green Hell basics to survive★ 5 (212)19k views293 ♥4 minUpdated May 30, 2021
- Green Hell Overlay Map★ 5 (239)17k views598 ♥1 min


- Upgrading to PremiumTeam Fortress 2★ 5 (20k)1441k views11k ♥6 minUpdated May 11, 2022
- No More Room in Hell Official ManualNo More Room in Hell★ 5 (2.8k)569k views2.1k ♥29 minUpdated Apr 22, 2019
- NMRiH Community Hosting GuidesNo More Room in Hell★ 5 (526)351k views653 ♥1 minUpdated Aug 10, 2022
- How to 'Git Gud' Soon™MORDHAU★ 5 (2k)318k views3k ♥68 minUpdated Nov 16, 2024
- Лучшие кооперативные игры SteamPAYDAY 2★ 5 (1.5k)315k views2.1k ♥56 minRussianUpdated Apr 27, 2025
- Desert Eagle Heat Treated | Blue GemCounter-Strike 2★ 5 (1.6k)292k views1.5k ♥2 minUpdated Jan 16





This guide was created by its original author on the Steam Community. Are you the author and want it removed? Request removal.