The Sims 3 Enhanced Vanilla Graphics
Introduction
Hello!
Welcome to my guide for The Sims 3 and how to improve its graphics while still keeping the vanilla look and feel!
Use this as a base to add other graphical mods later on or just to improve the overall visual fidelity of the vanilla game.
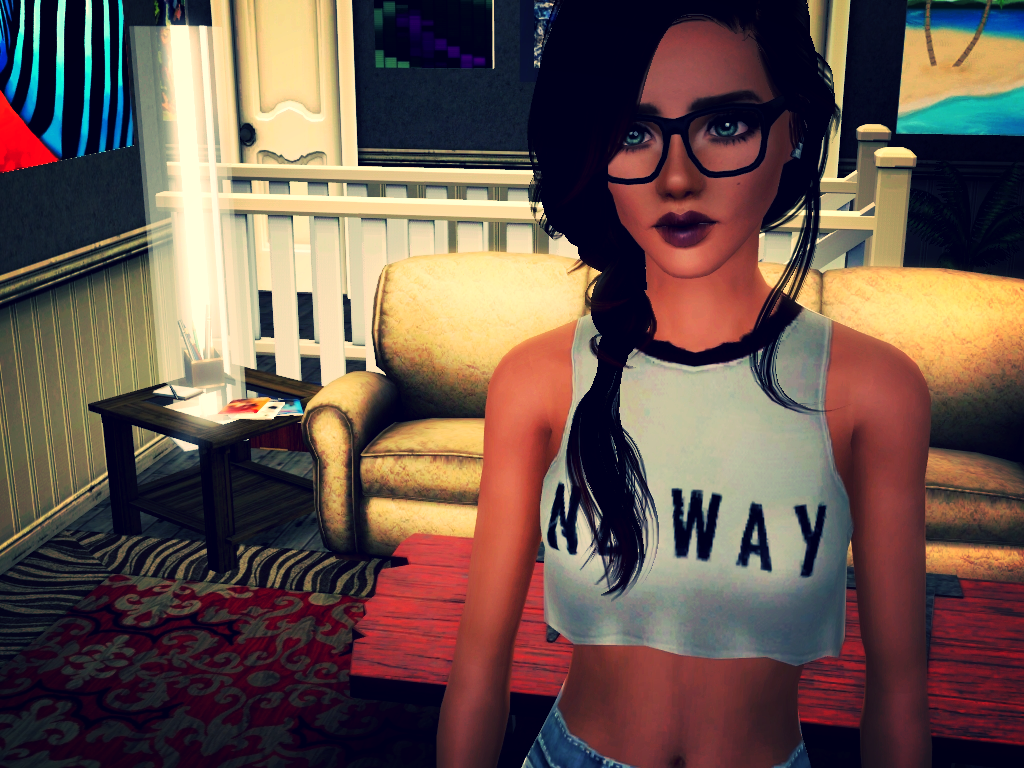
These are the mods and tweaks I personally use for my game to look as it does as seen here below in the images i have captures while playing
https://steamcommunity.com/sharedfiles/filedetails/?id=2697892405
https://steamcommunity.com/sharedfiles/filedetails/?id=2399408961
https://steamcommunity.com/sharedfiles/filedetails/?id=2505119296
https://steamcommunity.com/sharedfiles/filedetails/?id=2734954533
https://steamcommunity.com/sharedfiles/filedetails/?id=2818800467
https://steamcommunity.com/sharedfiles/filedetails/?id=2786861172
there are more on my profile also! :D
Welcome to my guide for The Sims 3 and how to improve its graphics while still keeping the vanilla look and feel!
Use this as a base to add other graphical mods later on or just to improve the overall visual fidelity of the vanilla game.
These are the mods and tweaks I personally use for my game to look as it does as seen here below in the images i have captures while playing
https://steamcommunity.com/sharedfiles/filedetails/?id=2697892405
https://steamcommunity.com/sharedfiles/filedetails/?id=2399408961
https://steamcommunity.com/sharedfiles/filedetails/?id=2505119296
https://steamcommunity.com/sharedfiles/filedetails/?id=2734954533
https://steamcommunity.com/sharedfiles/filedetails/?id=2818800467
https://steamcommunity.com/sharedfiles/filedetails/?id=2786861172
there are more on my profile also! :D
Getting Started!
Steps in this guide will have catagories like...
- Screenshots Only - Not recommended for game-play mostly only for taking screenshots.
- Game-Play - Okay to use for everyday Game-Play use.
Step 1 - Setting Up The Game
Make sure that you have followed this guide first as it will make the game run better and this guide will be using some of the mods and frameworks from the performance guide.
https://steamcommunity.com/sharedfiles/filedetails/?id=1131162350
https://steamcommunity.com/sharedfiles/filedetails/?id=1131162350
Step 2 - Shader Tweaks (Game-Play)
Shader Tweaks makes improvements and fixes to some of the shaders in The Sims 3. Like making the bloom in game less blinding to look at and graphical fixes!
This may not work on certain types AMD GPU! If you experience any graphical glitches while using an AMD GPU removing this mod should fix any issues!
Step 1: Download Pixel Shader Modding Framework from HERE[lazyduchess.tumblr.com]
Once downloaded Inside the 7zip archive there will be these files...
"wininet.dll" from Shadow Extender is not needed as Ultimate ASI Loader from the performance guide will load the .asi plugin!
Place them into the games Bin folder found at...
Steam 1.67 - "Steam\steamapps\common\The Sims 3\Game\Bin"
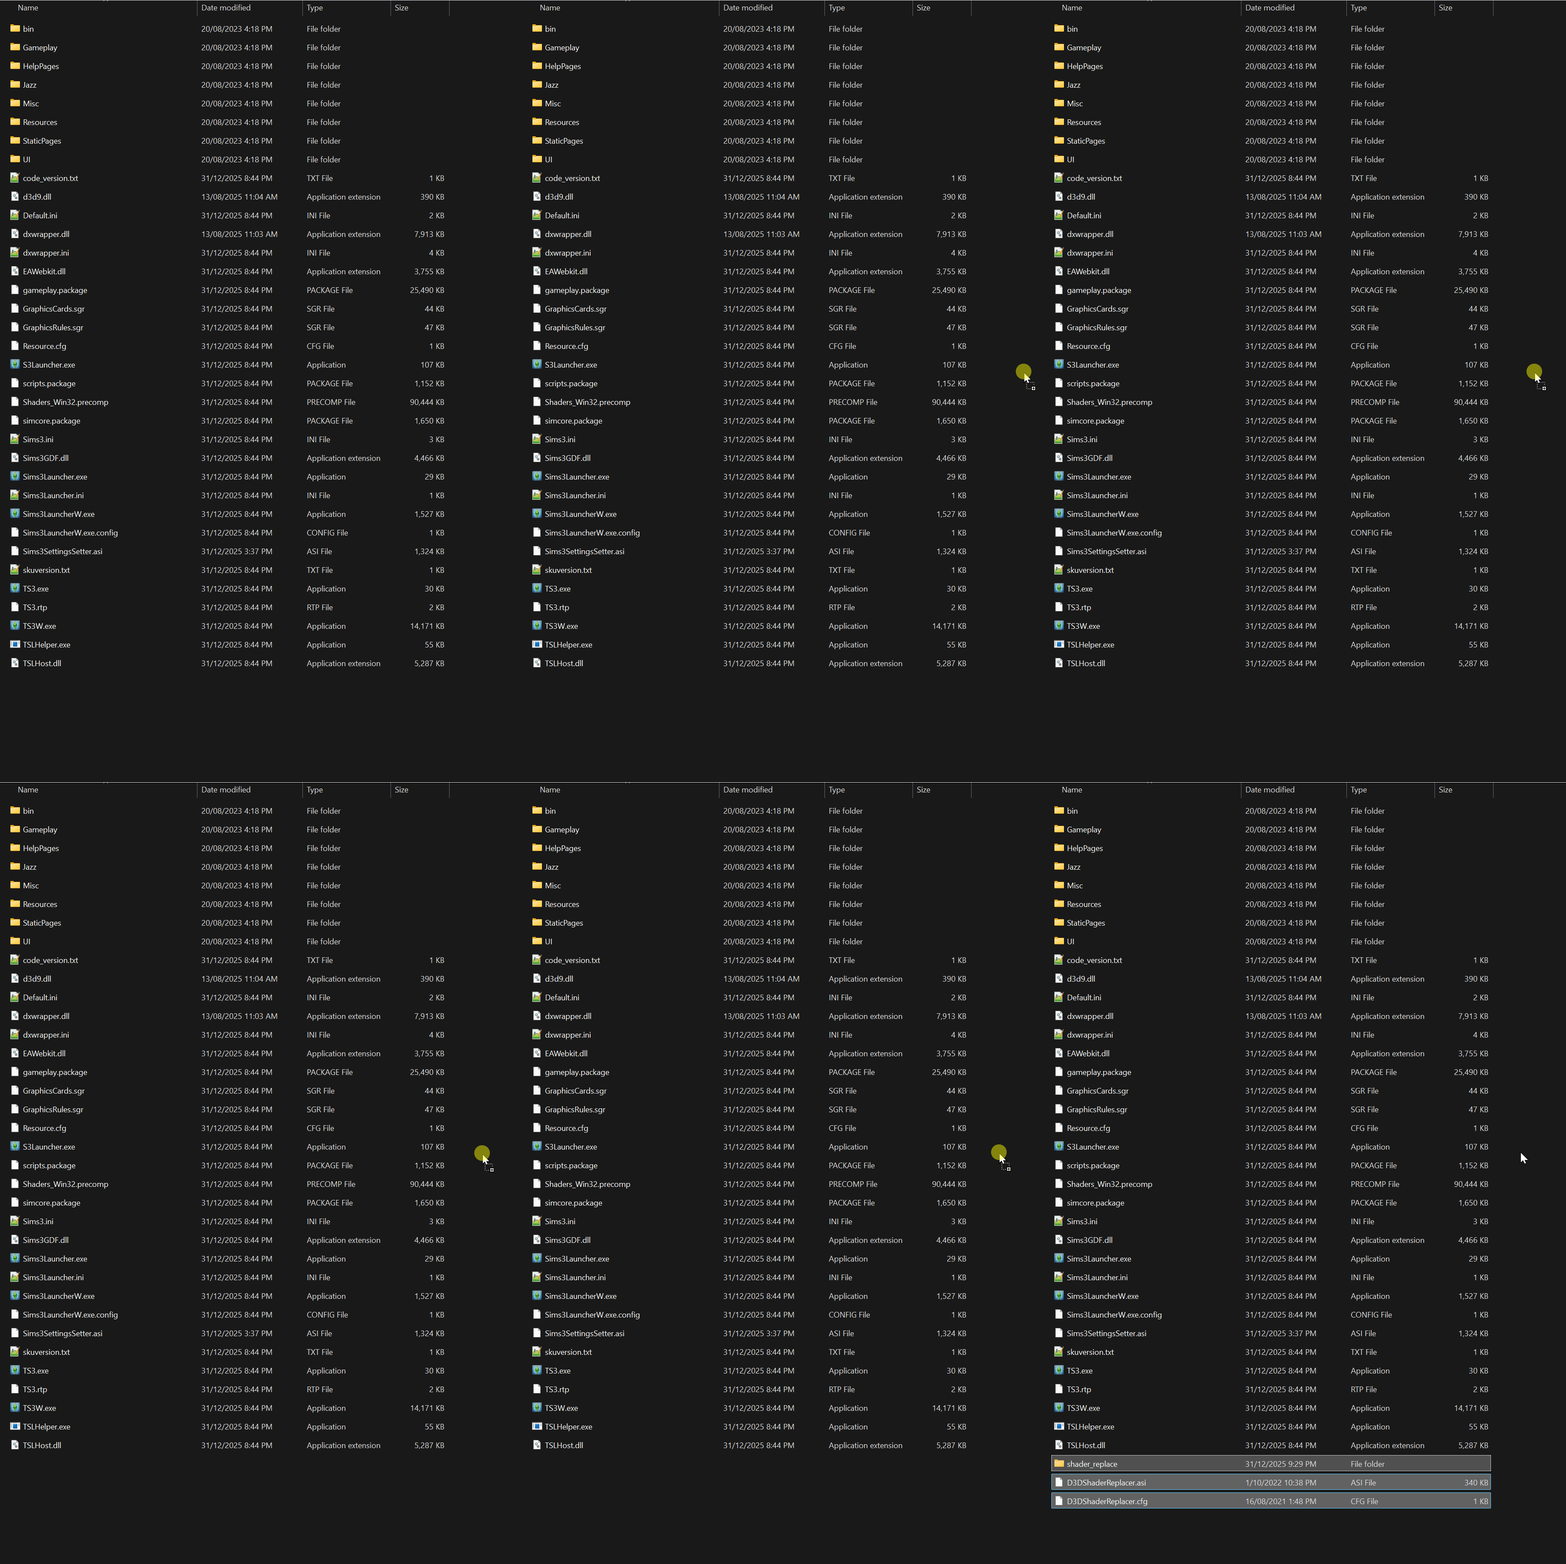
Step 2: Next you will need to download Shader Tweaks it can be found HERE![lazyduchess.tumblr.com]
Once downloaded, extract Shader Tweaks file contents in the same location as "Pixel Modding Framework" was just installed in the games "bin" folder
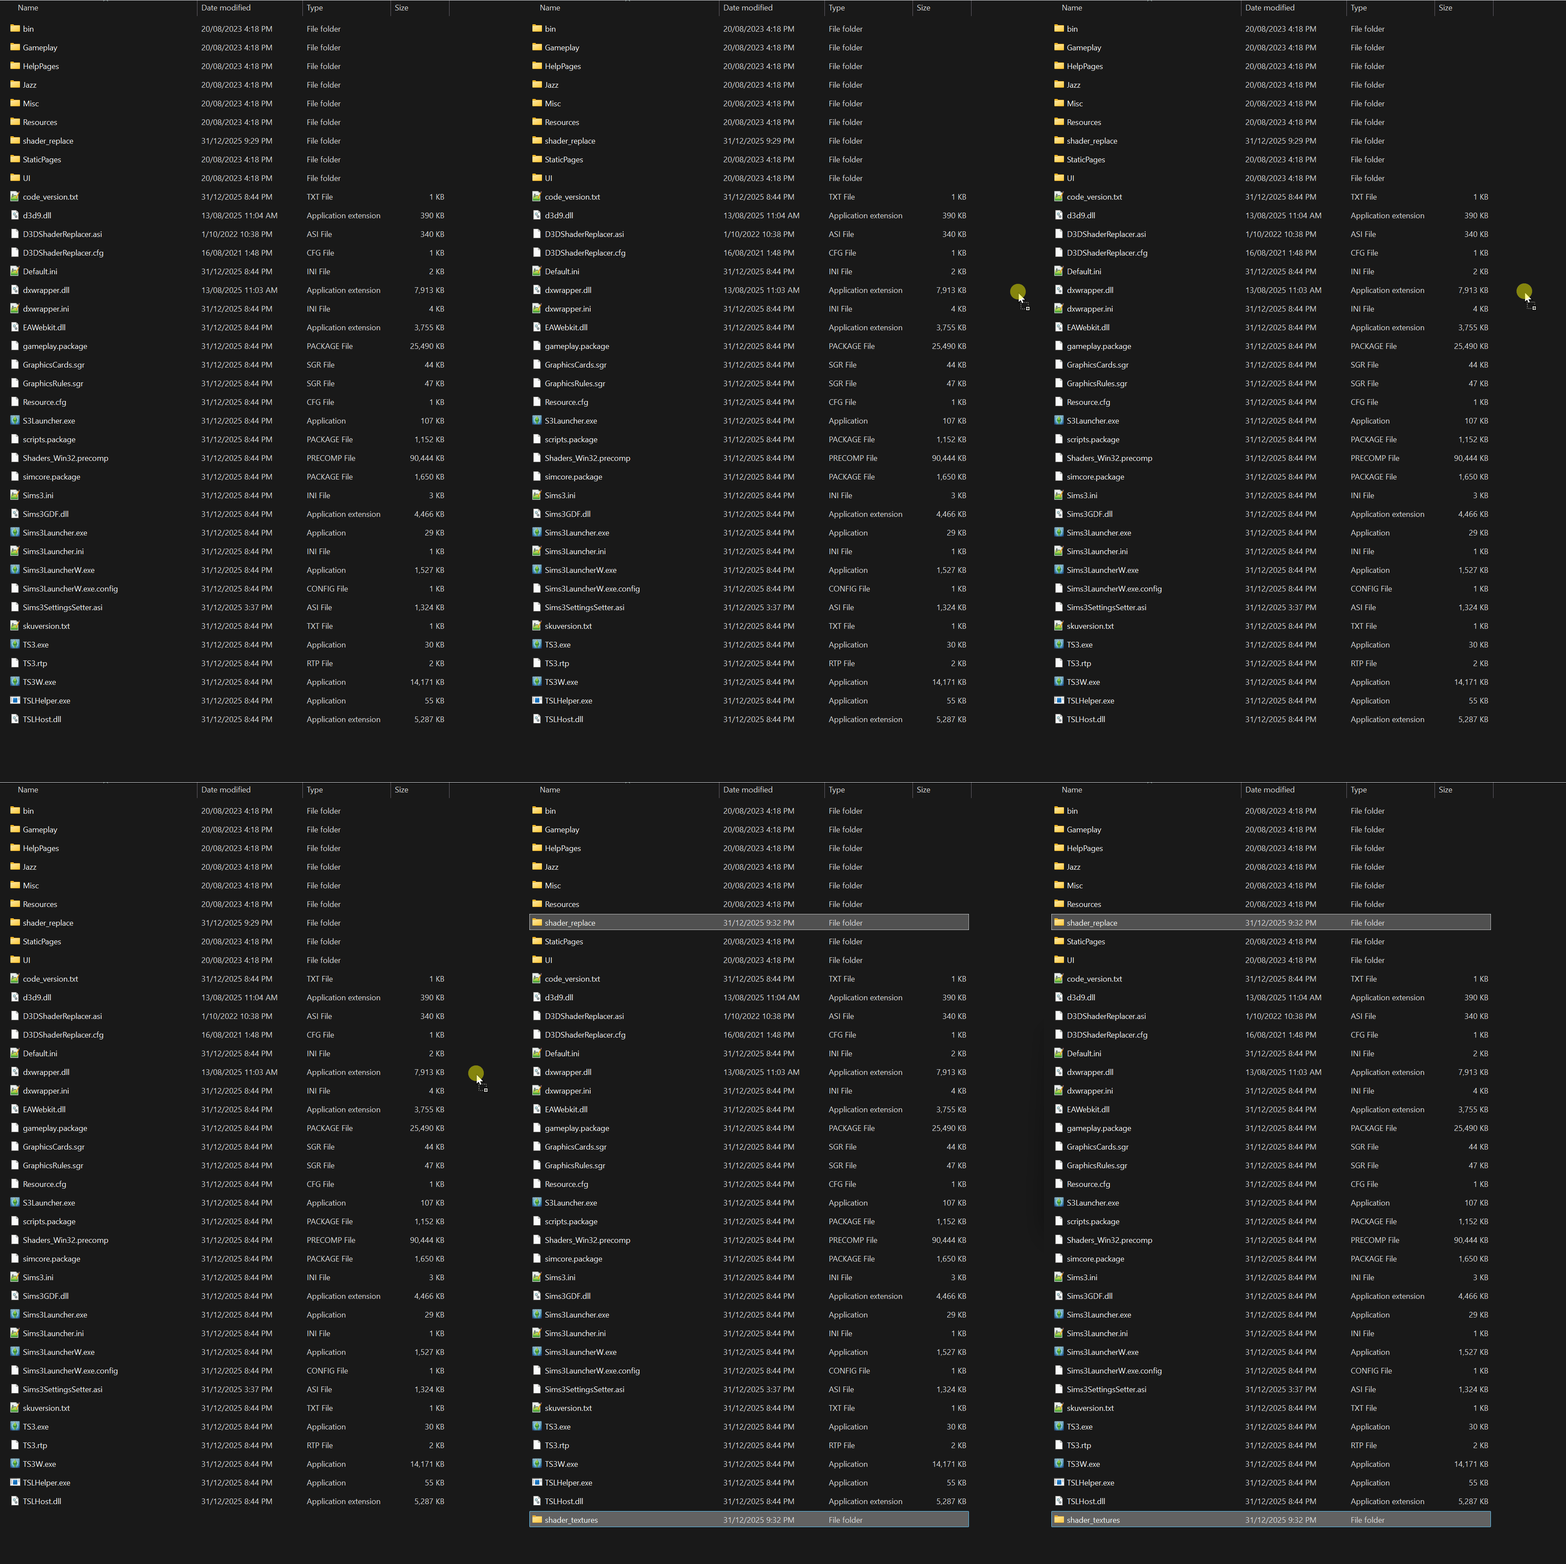
Step 3: Shader Tweaks has now been installed!
This may not work on certain types AMD GPU! If you experience any graphical glitches while using an AMD GPU removing this mod should fix any issues!
Step 1: Download Pixel Shader Modding Framework from HERE[lazyduchess.tumblr.com]
Once downloaded Inside the 7zip archive there will be these files...
- shader_replace
- D3DShaderReplacer.cfg
- D3DShaderReplacer.asi
"wininet.dll" from Shadow Extender is not needed as Ultimate ASI Loader from the performance guide will load the .asi plugin!
Place them into the games Bin folder found at...
Steam 1.67 - "Steam\steamapps\common\The Sims 3\Game\Bin"
Step 2: Next you will need to download Shader Tweaks it can be found HERE![lazyduchess.tumblr.com]
Once downloaded, extract Shader Tweaks file contents in the same location as "Pixel Modding Framework" was just installed in the games "bin" folder
Make sure to overwrite all files when being asked after placing the shader tweaks files!
Step 3: Shader Tweaks has now been installed!
If you are getting Error Code: "Error: 126" when launching the game make sure you have...
- The latest Microsoft Visual C++ Redistributable installed on your PC it can be found HERE![learn.microsoft.com]
This is the one you will need to download!
- Check that your anti-virus protection is blocking the mod!
Consider supporting Lazy Duchess for all their amazing work? You can HERE![www.patreon.com]
Step 3 - Extended Shadow Distance (Screenshots Only & Game-Play*)
*This mod can be used in normal game-play might make the game slower on non gaming PCs or depending on the preset chosen!
To extend the distance of the shadows draw distance Shadow Extender will be used. It extends the distance at which shadows are rendered by the game from the centre of the camera and the edges of the screen. Sims 3 Setting Setter (S3SS) will also be used to edit some shadow values instead of manually editing game files.
Step 1 - Download Shadow Extender HERE[lazyduchess.tumblr.com]
Once downloaded you will need to go to the games "Bin" folder found here...
Steam 1.67 - "Steam\steamapps\common\The Sims 3\Game\Bin"
Next extract the contents of the "Shadow Extender" Mods file into the "Bin" Folder. The files you need are...
"wininet.dll" from Shadow Extender is not needed as Ultimate ASI Loader from the performance guide will load the .asi plugin!
Place them into the games bin folder...
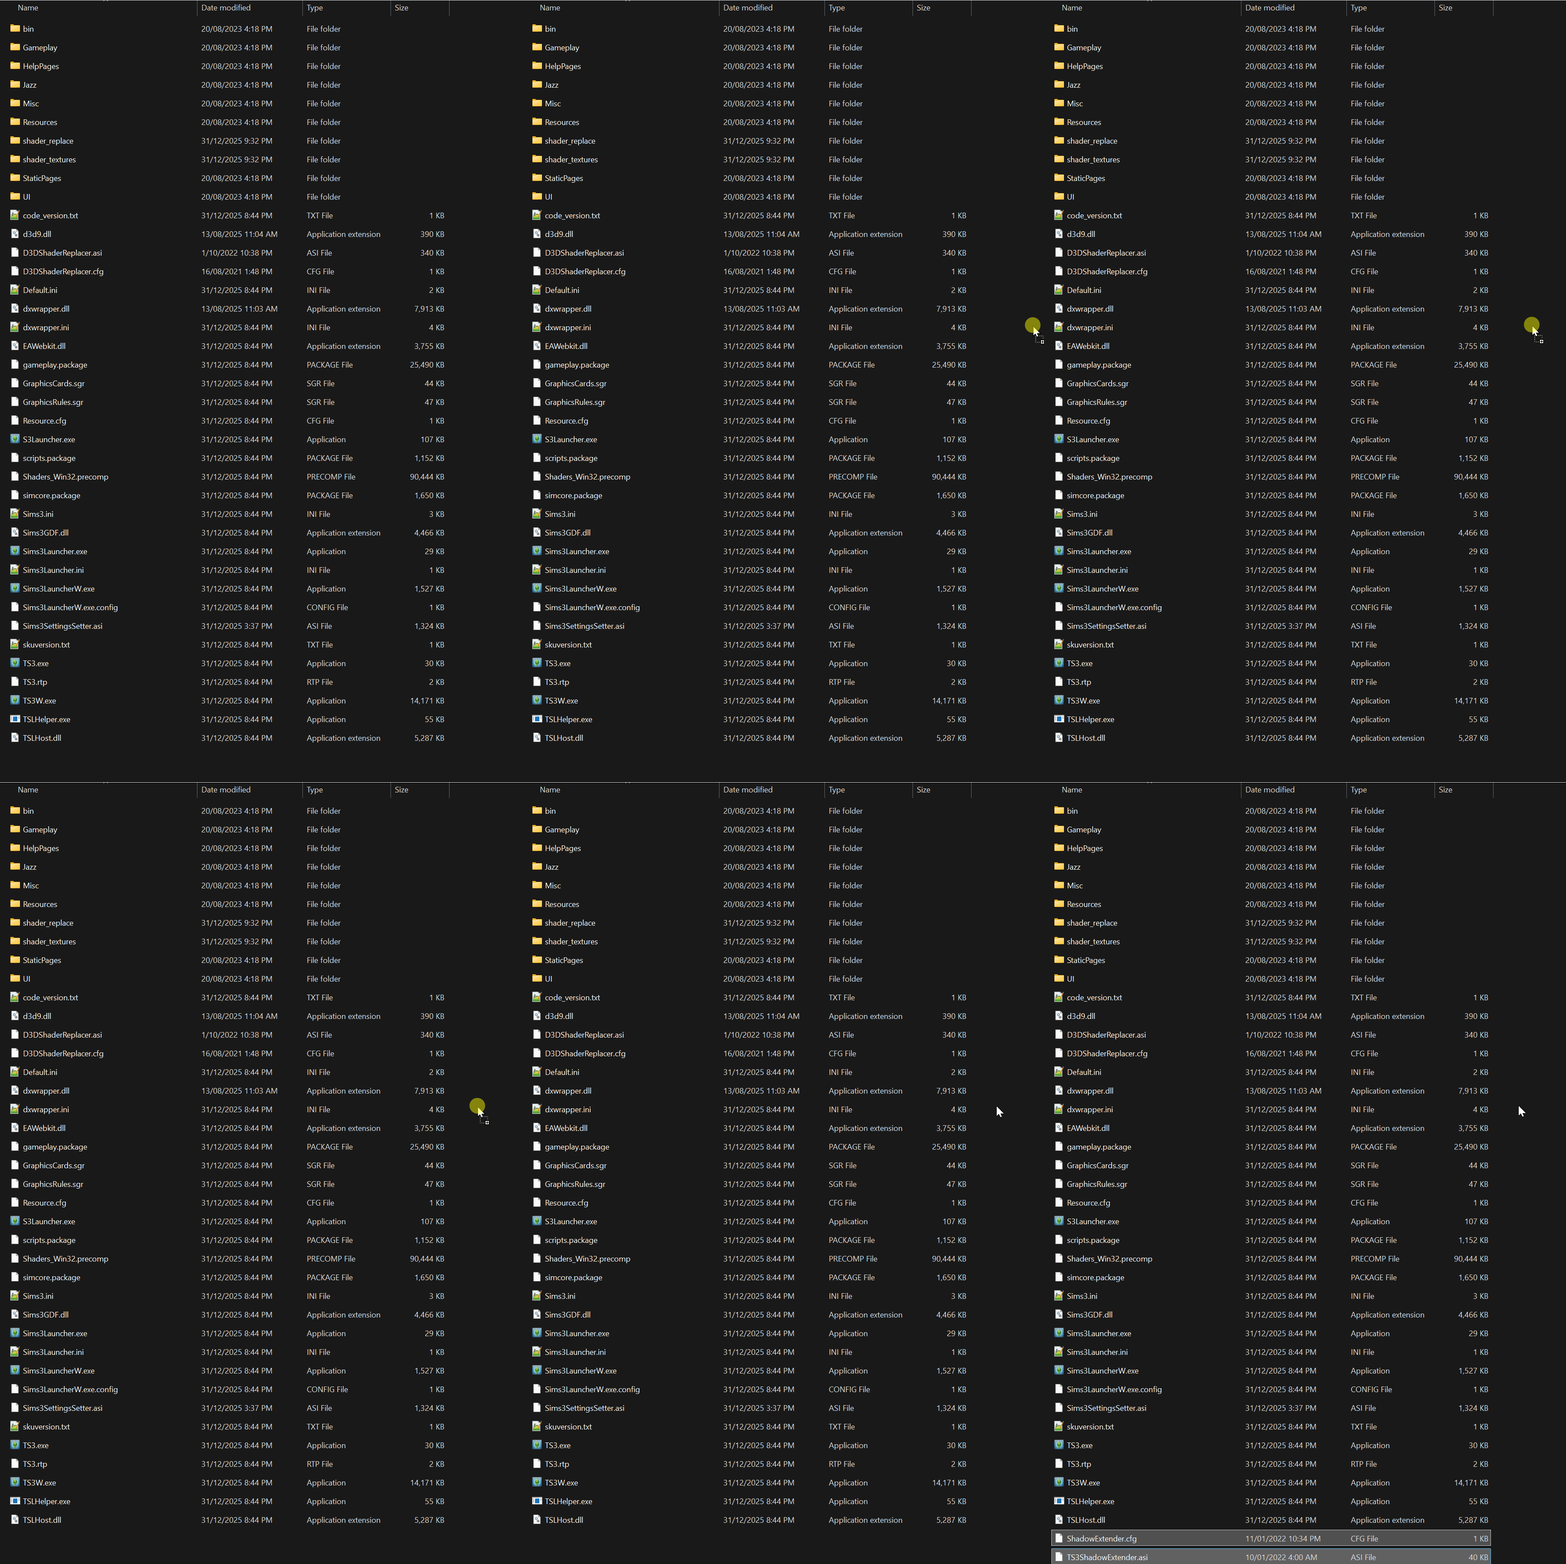
In the download file there will also be a "Preset Folder" this is were you select which quality preset you would like to have, higher number means further distance. Do keep in mind that depending on your PC performance may vary!
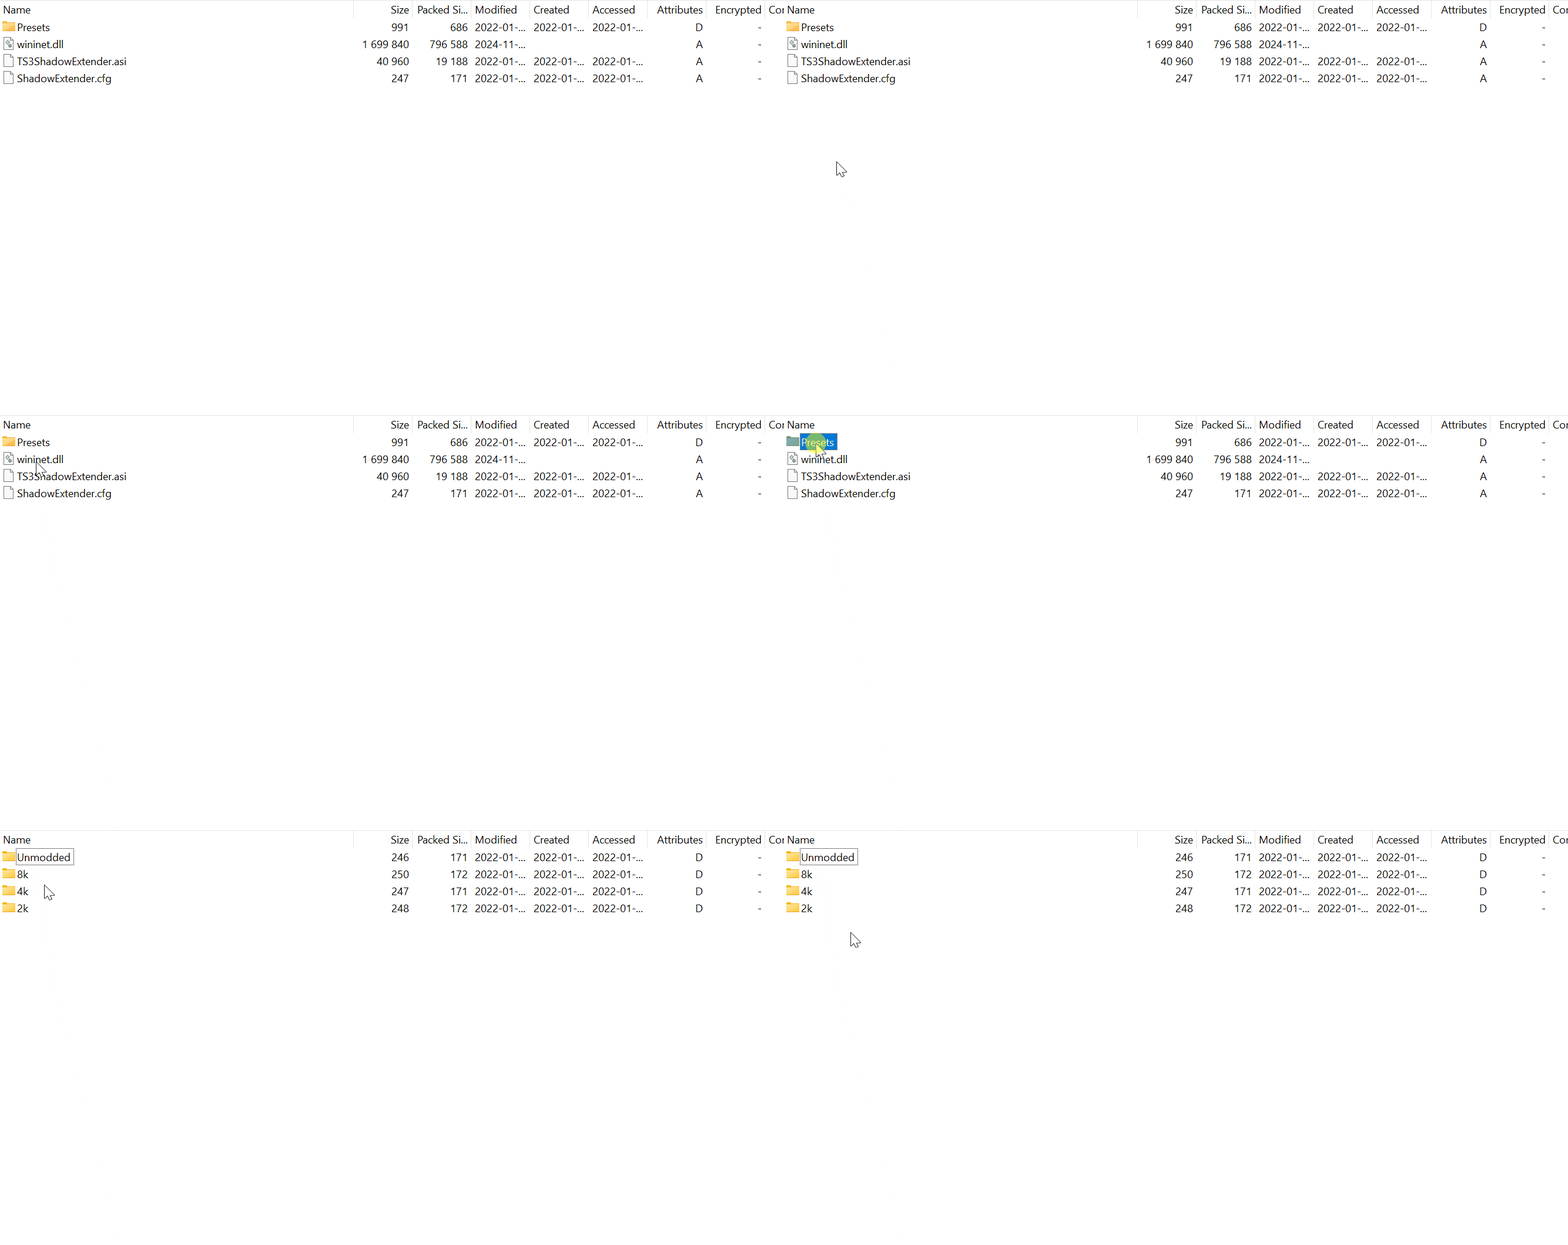
Once you have selected a preset open the file and drag the "ShadowExtender.cfg" inside the option into the games "bin" folder were the mod was just installed and overwrite any files when asked.
Step 2: Once all files have been placed into the games "bin" folder launch the game. Once the game has loaded into the main menu screen press by default the "Insert" key to bring up S3SS.
When S3SS UI has appeared navigate to the "Config Values" Tab.
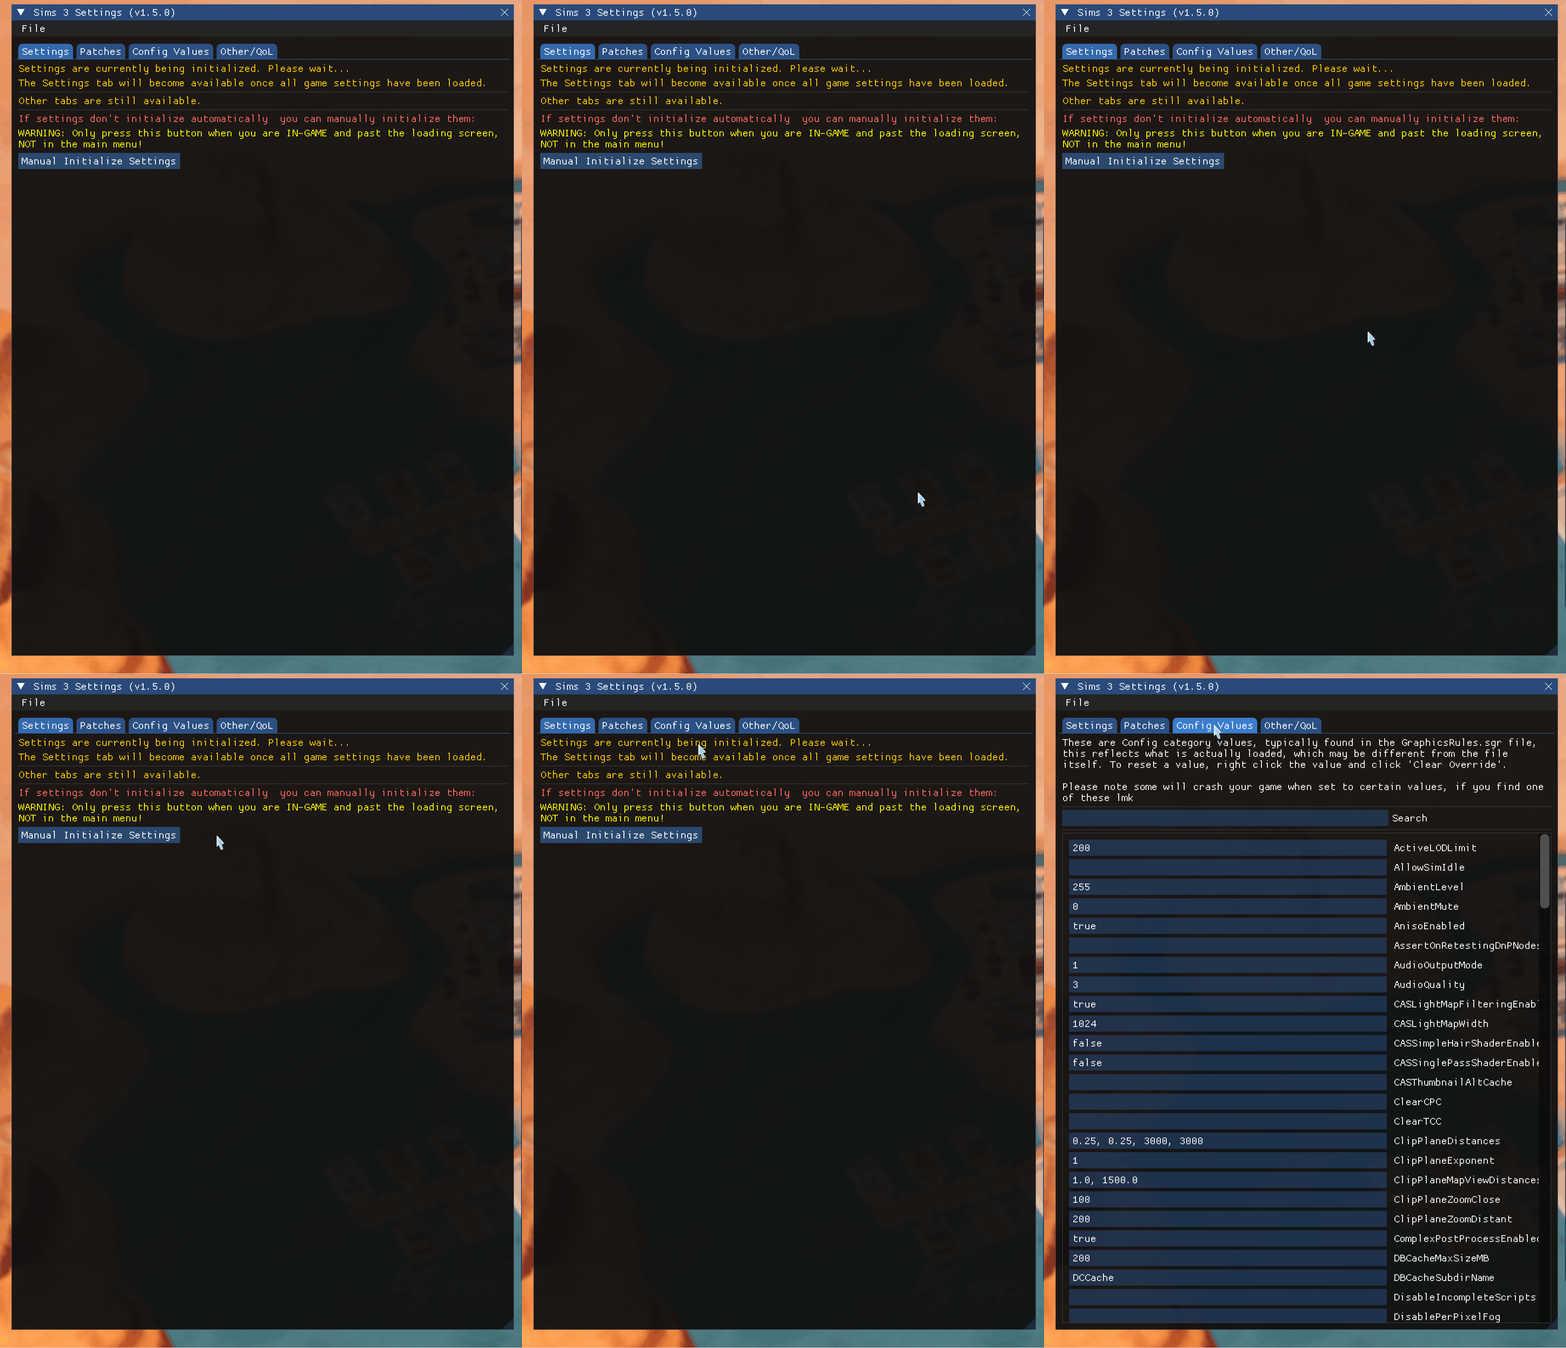
Once the "Config Values" tab has been selected click on the search bar and type in this setting.
When searched the setting should be the only setting in the menu.

In the box next to the setting put in the following values for corresponding to the quality preset you picked.
Once this is done at the top click the "File" Tab and press save to save the changes.
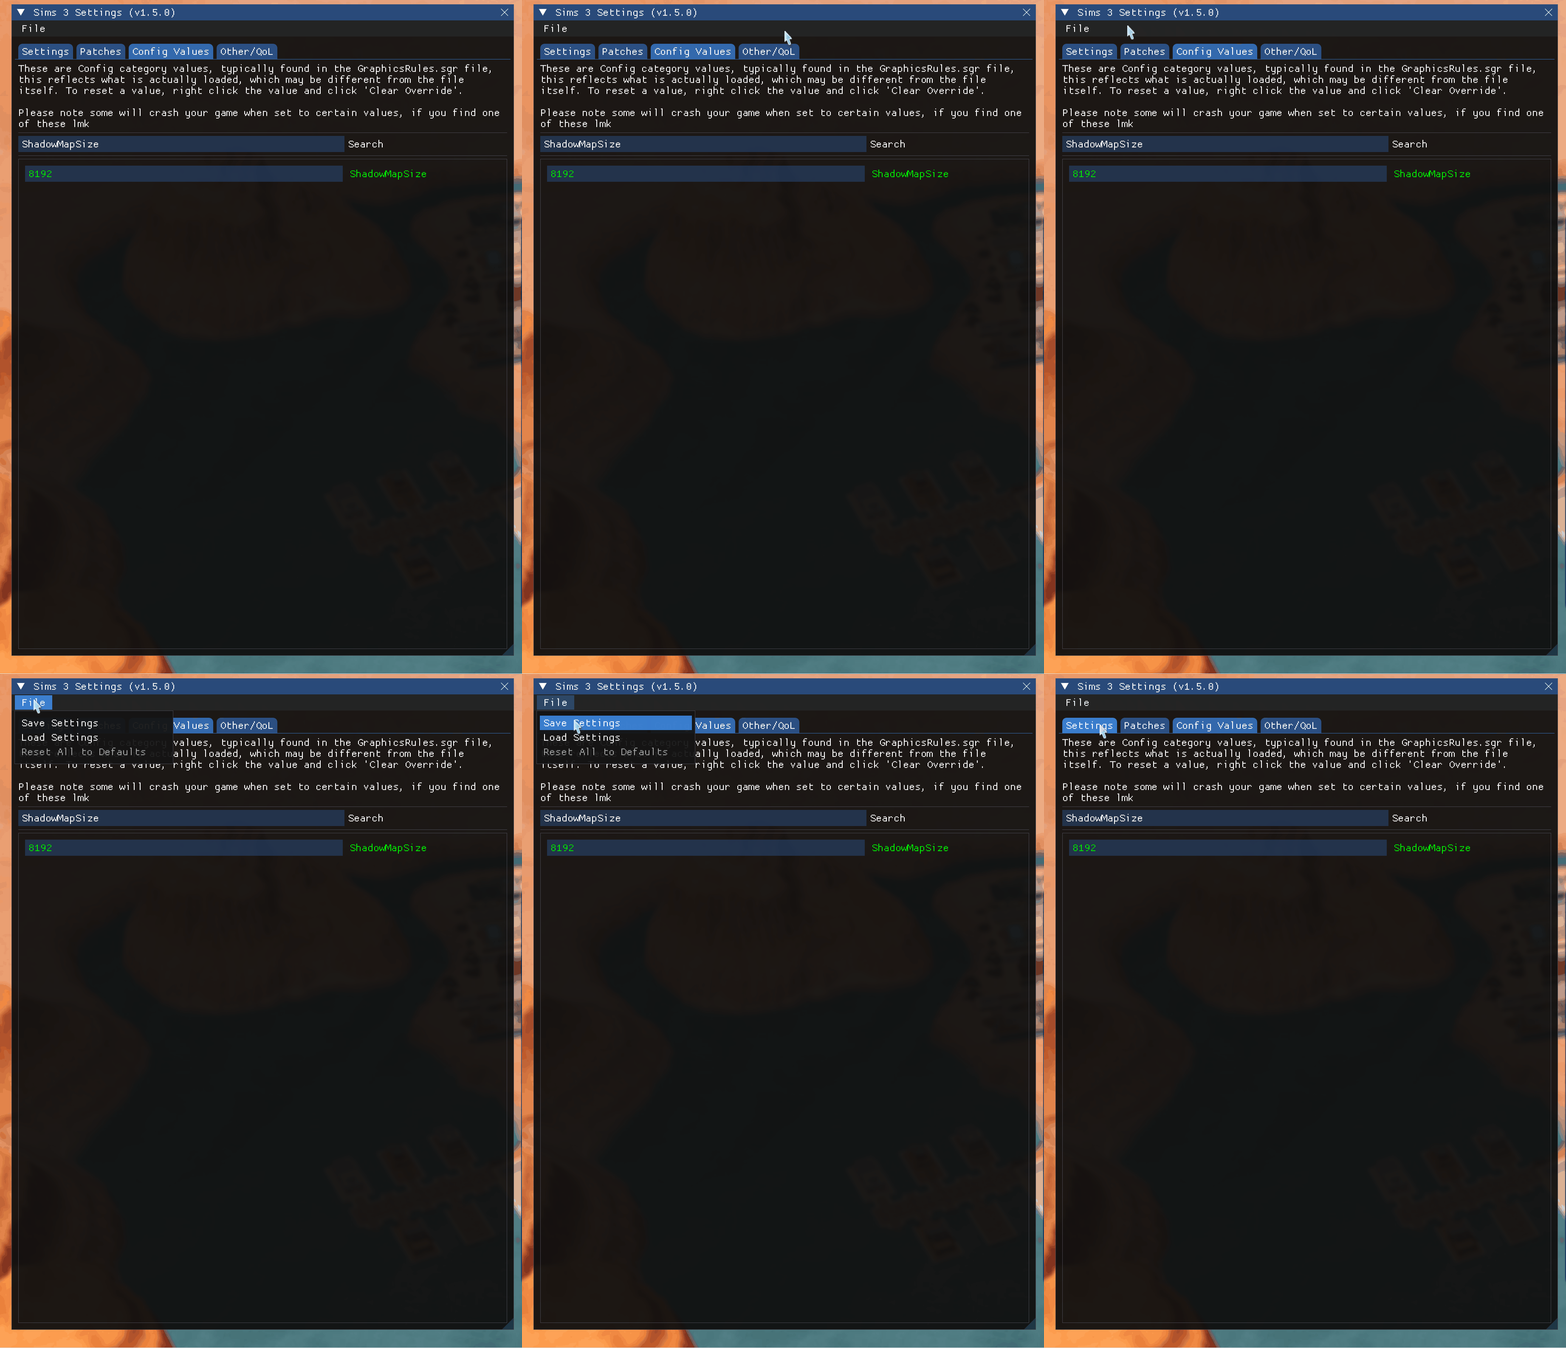
Step 3 - Shadows will now have a greater render distance.
If you feel the shadows are still a bit pixelated you can bump up the shadow quiality up a little bit.
Consider supporting Lazy Duchess for all their amazing work with Shadow Extender? You can HERE![www.patreon.com]
To extend the distance of the shadows draw distance Shadow Extender will be used. It extends the distance at which shadows are rendered by the game from the centre of the camera and the edges of the screen. Sims 3 Setting Setter (S3SS) will also be used to edit some shadow values instead of manually editing game files.
Step 1 - Download Shadow Extender HERE[lazyduchess.tumblr.com]
Once downloaded you will need to go to the games "Bin" folder found here...
Steam 1.67 - "Steam\steamapps\common\The Sims 3\Game\Bin"
Next extract the contents of the "Shadow Extender" Mods file into the "Bin" Folder. The files you need are...
- TS3ShadowExtender.asi
- ShadowExtender.cfg
"wininet.dll" from Shadow Extender is not needed as Ultimate ASI Loader from the performance guide will load the .asi plugin!
Place them into the games bin folder...
In the download file there will also be a "Preset Folder" this is were you select which quality preset you would like to have, higher number means further distance. Do keep in mind that depending on your PC performance may vary!
Once you have selected a preset open the file and drag the "ShadowExtender.cfg" inside the option into the games "bin" folder were the mod was just installed and overwrite any files when asked.
Step 2: Once all files have been placed into the games "bin" folder launch the game. Once the game has loaded into the main menu screen press by default the "Insert" key to bring up S3SS.
When S3SS UI has appeared navigate to the "Config Values" Tab.
Once the "Config Values" tab has been selected click on the search bar and type in this setting.
ShadowMapSize
When searched the setting should be the only setting in the menu.
In the box next to the setting put in the following values for corresponding to the quality preset you picked.
- 2k 2048
- 4k 4096
- 8k 8192
Once this is done at the top click the "File" Tab and press save to save the changes.
Step 3 - Shadows will now have a greater render distance.
If you feel the shadows are still a bit pixelated you can bump up the shadow quiality up a little bit.
- 2k 4096
- 4k 8192
- 8k 15630
Consider supporting Lazy Duchess for all their amazing work with Shadow Extender? You can HERE![www.patreon.com]
Step 4 - Split Level Lighting Fix (Game-Play)
A new method using Sims 3 Setting setter has released that is more performance friendly. This section will be updated soon!
Sims 3 Setting Setter fixes the issue at an engine level restoring the original functionality made by EA in the release version of the game before the World Adventures Expansion patch where is was broken/disabled.
Lazy duchess Split level lighting fix fixes the issue by placing invisible lights around placed lights giving the effect of the light traveling up mutple levels. this could have performance issues for the game or some PC setups as the mod is placing more objects for the game to track.
The Lazy Duchess version does include interior split level lighing at some performance cost. The Sims 3 Setting Setter version does not include indoor split level lighting fix, It only includes outdoor lights as it was in the original version of the base game but is done at an engine level so its more performance friendly.
Step 5 - Mods (Game-Play)
Base Game Compatible Mods
Here are some mods that are base game compatible that I also use,
these Mods will be installed into your games "Mods" folder found at...
"Documents\Electronic Arts\The Sims 3\mods\Packages"
There are two different folders present inside the mods folder for different types of mods...
Mods with the "🟩" icon go into the "Packages" Folder.
Mods with the "🟥" icon go into the "Overrides" Folder.
Here are some mods that are base game compatible that I also use,
these Mods will be installed into your games "Mods" folder found at...
"Documents\Electronic Arts\The Sims 3\mods\Packages"
There are two different folders present inside the mods folder for different types of mods...
Mods with the "🟩" icon go into the "Packages" Folder.
Mods with the "🟥" icon go into the "Overrides" Folder.
- 🟩 Reworked & Improved EA Lights[modthesims.info] - Makes the EA default lighting less harsh on the eyes and a bit more realistic. (should be compatible with all outdoor lighting overhaul mods)
Consider supporting Simsi45 for all their amazing work? You can HERE![www.patreon.com] - 🟩 Improved Environmental Shadows[modthesims.info] - Improves the outdoor shadows to look less washed out and a bit more realistic. (should be compatible with all outdoor lighting mods)
Consider supporting Simsi45 for all their amazing work? You can HERE![www.patreon.com] - 🟩 HD head line effects[xiasimla.tumblr.com] - Makes headline effects such as speech and thought bubbles HD.
- 🟩 High Quality Headline Effects[modthesims.info] - Enhances the quality of head line effect icons in game.
- 🟥 Default Overrides For Bare Walls[aminovas.tumblr.com] - Makes the texture for the dry walls much better! There are multiple options I personally use the option "Drywall" for the best look, ONLY USE ONE OPTION at a time!
- 🟥 CircusWolf DEFAULT Ceiling TS2 AL Style[drive.google.com] - Default replacer for the ceiling textures, ceiling will now use the more detailed texture from The Sims 2. I'm providing a mirror link since I downloaded this mod years ago and I can't find the original posters page anymore, if the creator would not like me to host it let me know and i will remove the mirror link!
F.A.Q Section
Q: I'm getting strange graphics glitches on my sims in game and in CAS!
A: Try removing shader tweaks and launch the game and see if the problem still persists.
Change log Section
- 02/02/2022 - Posted the guide for public viewing!
- 03/02/2022 - Fixed a mistake were I said "Pixel Shader Modding Framework" is needed for "extended Shadows" in "Step 3" its not needed for that mod to function, although keep "Pixel Shader Modding Framework" installed if you have "Shader Tweaks" "Step 2" Installed!
- 06/02/2022 - Added "Step 5 - Mods" to the guide this will contain base game compatible graphical mods. Also made some changes to "Getting Started".
- 10/02/2022 - Added "HD head line effects" to the mods section.
- 02/04/2022 - Added "Default Overrides For Bare Walls" and "CircusWolf DEFAULT Ceiling TS2 AL Style" to the "mods" section
- 23/04/2022 - Added "TS3 HD Textures Series - Terrain Pack" to "Step 5 - Mods".
- 10/06/2022 - Added a F.A.Q Section.2023
- 18/01/2023 - Updated the guide to have a detailed step by step section on installing/setting up a Mods folder.
- 15/07/2023 - Updated "Step 2 - Shader Tweaks by Lazyduchess" so its more east to follow installation.2024
- 22/06/2024 - Added the mod "High Quality Headline Effects" under the "Step 5 - Mods" section.
- 13/11/2024 - Updated sections of the guide "Step 2 - Shader Tweaks" & "Step 3 - Shadow Extender" to resemble newer versions of the mods. Added "Step 4 - Split Level Lighting Fix". Removed notices about EA app users needing to use the Lazy Duchess launcher as new versions of .asi mods no longer require the launcher, the launcher can still be used if you wish to keep using it.2025
- 24/01/2025 - Added throughout the guide on how to get .ASI mods working on Linux / Steam Deck installs of the game.
- 05/02/2025 - Removed the "Windows Only" Title from mods that use "wininet.dll" loader as they also work on Linux and Steam Deck with a launch setting applied after testing on steam deck to confirm they all work. The launch setting can be found in the "Getting Started" Section of the guide.
- 04/04/2025 - Removed Steam deck setup information as it now has its own guide on how to setup and install mods on the steam deck.
- 26/11/2025 - Removed support for the EA App Version of the game (1.69). I do not own that version of the game so I can not test if mods work for it or not.
- 31/12/2025 - Removed references to "wininet.dll" as its been replaced by dxwrapper on the main performance guide remove "wininet.dll" and follow the new dxwrapper section in the bug fix and performance guide to get .asi mods to load.2026
- 26/01/2025 - Updated the FAQ Section about wininet.dll.
- 01/02/2026 - List of changes...
- Removed the section "Step 5 - Increased Sim Render Quality (Screenshots Only)" as Sims 3 Setting Setter has a better built in alternative to uncompress sim textures. To revert the changes set "RenderSimTextureSizes" and "CASRenderTargetSize" back to "2048".
- Updated the guide to include Ultimate ASI Loader.
- Removed the section "Step 5 - Increased Sim Render Quality (Screenshots Only)" as Sims 3 Setting Setter has a better built in alternative to uncompress sim textures. To revert the changes set "RenderSimTextureSizes" and "CASRenderTargetSize" back to "2048".
- 19/02/2026 - List of changes...
- Removed the Step "Step 1 - Graphics Control Panel Options" as DXVK now handels these settings.
- 30/04/2026 - Removed Shadow Extender step for now as Sims 3 Setting Setter can extend shadows without editing the game files. Will add an updated method using S3SS in the future.
- 08/05/2026 - Added back the step on how to extend the shadow distance of the game with new methods using shadow extender and Sims 3 Setting Setter.
2022
More The Sims™ 3 guides
- The Sims 3 Performance & Bug Fix Guide 2026★ 5 (2.6k)108k views7.1k ♥41 minUpdated Jul 17
- Very Basic & Useful Mods★ 5 (612)46k views1.2k ♥7 minUpdated Jan 17, 2021
- The Sims(TM) 3 Cheats★ 5 (921)39k views1.8k ♥4 minUpdated Jun 5, 2016
- Toubleshooting for The Sims 3★ 5 (457)29k views983 ♥45 minUpdated Jan 2, 2022
- How to make Mac & Cheese According to the Sims 3★ 5 (1.2k)26k views671 ♥5 minUpdated Aug 28, 2016
- How to Hobo: A sims guide★ 5 (405)22k views494 ♥5 minUpdated Feb 16, 2015


This guide was created by its original author on the Steam Community. Are you the author and want it removed? Request removal.