The Ultimate Solo's Manual (Endgame Guide - Version 2.12)
INTRO
I have one question for you: do you want to become the ultimate legend of Night City? If you want to make a name for yourself, reach the major leagues, become a millionaire, use the best weapons around, complete your vast collection of vehicles, and take on Cyberpunk endgame with such ease that you can settle for one playstyle, or change playstyles like you change clothes, then this is most definitely the guide for you.
I must clarify that by different playstyles, I mean changing between different operating systems for your cyberware (Cyberdeck, Sandevistan, and Berserk) and achieving great overall performance from every playstyle. You can even specialise in any weapon category that tickles your fancy, all from one build where you will never need to change your attribute points ever again!
But that's when you reach level 60 and if you haven't reached that stage yet, then let's assume that you're starting a new playthrough from the very beginning. We will cover how to start off with a new playthrough, how to economically progress through it, the best weapons to keep an eye out for in each group category, the best allocation of attribute points at level 60 and then finally, the endgame phase along with shapeshifting the build to promote and enhance different playstyles.
NEW PLAYTHROUGH

When starting a new playthrough, I recommend allocating your first attribute points during character customisation like this:
5 BODY
4 REFLEXES
5 TECHNICAL ABILITY
4 COOL
4 INTELLIGENCE
Right from the word go, you have access to all the basic Rookie level starter perks from all five attributes. And you make the open world more accessible early on by investing an extra point each in Body and Technical Ability. When V levels up, do NOT instantly spend your attribute points: you don't unlock access to more perks until you reach level 9 and then level 15 in any attribute, and the bonuses per level are so negligible that there's absolutely no tangible benefit to just spending attribute points as soon as you gain them. Unfortunately, one of the worst decisions CDPR made for version 2.0 was to implement scaling attribute checks – these same checks could be low in requirement early in a playthrough, but then require more attribute points than before when V levels up.
In light of this, the best thing to do is reserve your spare attribute points until you come across attribute checks, either in dialogue or the open world, before you spend them. Most dialogue checks will tell you that you have insufficient points in the specific attribute, but there are a few other dialogue checks that will be invisible and not an option unless you have the necessary amount of points invested in that attribute. The good thing though is that you can boost that attribute in the middle of a conversation, and the missing dialogue option will reveal itself once you exit the menu.
If you want V to level up as quickly as possible, there is nothing better than focusing on main missions and side jobs first and foremost. The faster you increase your level, the sooner you will notice that higher tiers of weapons, items and cyberware will become more apparent throughout Night City. By level 40, vendors will start selling the tier 5 versions of their wares.
ATTRIBUTES
While we are on the subject, it's best to state at this early stage in the playthrough what our ultimate end goal is, so that V is fully prepared and as versatile as can be when reaching level 60. You can change cyberware, weapons, clothes, vehicles, and even perks as many times as you like in Cyberpunk. But in a single playthrough, you only get one time to change your attributes if you are not satisfied with them. Once that change is made, you cannot go back. So it's important to deal with attributes first just to establish our sense of direction. Here is what I strongly recommend:
15 BODY
15 REFLEXES
20 TECHNICAL ABILITY
16 COOL
15 INTELLIGENCE
I have theorised and tested the ♥♥♥♥ out of how to allocate the attribute points best in order to optimally min-max Cyberpunk in the endgame phase regardless of playstyle, and every time, it always comes down to this specific loadout. You might question why we only have one attribute maxed out to 20 and miss out on access to several capstone perks in the process. That's because when it comes to overall efficiency as well as versatility, V's potential is at its highest when you have unlocked access to all the Phenom level perks which require at least 15 points invested in each attribute to tap into. The Phenom perks make more of an overall difference than the Legend level capstone perks.
The vast majority of capstone perks at Legend level, really only offer very slim quality-of-life increases at best in the grand scheme of things. And if you try to unlock access to as many of them as possible, you significantly diminish and sacrifice V's potential in other areas and even risk making the entire playthrough less accessible and less complete overall. So we'll take a closer look at each attribute in finer detail.
15 BODY
15 REFLEXES
20 TECHNICAL ABILITY
16 COOL
15 INTELLIGENCE
I have theorised and tested the ♥♥♥♥ out of how to allocate the attribute points best in order to optimally min-max Cyberpunk in the endgame phase regardless of playstyle, and every time, it always comes down to this specific loadout. You might question why we only have one attribute maxed out to 20 and miss out on access to several capstone perks in the process. That's because when it comes to overall efficiency as well as versatility, V's potential is at its highest when you have unlocked access to all the Phenom level perks which require at least 15 points invested in each attribute to tap into. The Phenom perks make more of an overall difference than the Legend level capstone perks.
The vast majority of capstone perks at Legend level, really only offer very slim quality-of-life increases at best in the grand scheme of things. And if you try to unlock access to as many of them as possible, you significantly diminish and sacrifice V's potential in other areas and even risk making the entire playthrough less accessible and less complete overall. So we'll take a closer look at each attribute in finer detail.
BODY
Body is easily a 15, no question about it. Yes, there is a slight risk that your Body count isn't high enough (pardon the pun) in certain dialogue checks depending on how early or late you are into the playthrough when they take place. But the main benefit of having 20 Body is far more to do with being able to tackle any physical obstacle in the open world that has a Body check. And guess what? Even with just 15 attribute points invested, you can still bypass 20 Body checks, simply by equipping a tier 5 pair of Gorilla Arms!
With 15 Body, the best benefit is being able to use Adrenaline Rush: a key perk in your defensive capabilities. Additionally, if you like your shotguns or LMGs, you get a chance to obliterate enemies and even use that as a way to further enhance Adrenaline Rush. If you love your Gorilla Arms or running around with the best blunt melee weapon in the game, all the relevant perks up to Phenom level cover everything you need.
If you are going to invest in making yourself proficient with shotguns and/or LMGs, do not waste a perk point on Bullet Ballet: it is bugged and doesn't function according to its own description.
Are we missing out on Rip and Tear? No, and I say that confidently while acknowledging at the same time that it's one of the better capstone perks in the game. True, your DPS potential with shotguns is incredible with this capstone perk. But if you want to massively increase your shotgun performance, you want to be using Sandevistan and this is where a bizarre problem occurs: there's a little-known glitch where if you use a quick melee attack during Sandevistan, you cannot then fire your shotgun again until after you've first deactivated Sandevistan. You would have to constantly toggle it on and off at the right times in order to justify using the capstone in the first place. It's doable, but can get incredibly annoying and tedious pretty quickly!
Are we missing out on Onslaught? Absolutely not! This only benefits LMGs which get almost no love in Cyberpunk. There are only two iconic LMGs which didn't even exist in the game until the DLC arrived. And even though you can use it from range, it just doesn't have the raw, destructive power that the best iconic shotguns possess. As for the capstone perk itself, the 20% magazine refill draws ammo from your reserves; it is NOT free ammo gained out of nothing! So at best, it's an absurdly minor quality-of-life increase for an unpopular weapon category.
Are we missing out on Pain to Gain? For one particular playstyle, maybe. But overall, not really. 20% recharge of your health item is a nice bonus to have, but it only works while Adrenaline Rush is active so it's not going to be every single time you neutralise an enemy. Good capstone perk? Definitely. But is it worth investing all the way to 20 Body? Definitely not. No matter the playstyle, you can survive the toughest challenges in Cyberpunk for long periods without Pain to Gain.
Are we missing out on Finisher: Savage Sling? Hell no! Don't get me wrong, it's a cool capstone, but it's far more of a luxury feature than anything necessary. Besides, you automatically get finishers for all (bladed and blunt) melee weapons, Gorilla Arms included, when you use Berserk cyberware. Hell, the best blunt melee weapon in the game is the one blunt melee weapon that is LEAST in need of a finisher!
With 15 Body, the best benefit is being able to use Adrenaline Rush: a key perk in your defensive capabilities. Additionally, if you like your shotguns or LMGs, you get a chance to obliterate enemies and even use that as a way to further enhance Adrenaline Rush. If you love your Gorilla Arms or running around with the best blunt melee weapon in the game, all the relevant perks up to Phenom level cover everything you need.
If you are going to invest in making yourself proficient with shotguns and/or LMGs, do not waste a perk point on Bullet Ballet: it is bugged and doesn't function according to its own description.
Are we missing out on Rip and Tear? No, and I say that confidently while acknowledging at the same time that it's one of the better capstone perks in the game. True, your DPS potential with shotguns is incredible with this capstone perk. But if you want to massively increase your shotgun performance, you want to be using Sandevistan and this is where a bizarre problem occurs: there's a little-known glitch where if you use a quick melee attack during Sandevistan, you cannot then fire your shotgun again until after you've first deactivated Sandevistan. You would have to constantly toggle it on and off at the right times in order to justify using the capstone in the first place. It's doable, but can get incredibly annoying and tedious pretty quickly!
Are we missing out on Onslaught? Absolutely not! This only benefits LMGs which get almost no love in Cyberpunk. There are only two iconic LMGs which didn't even exist in the game until the DLC arrived. And even though you can use it from range, it just doesn't have the raw, destructive power that the best iconic shotguns possess. As for the capstone perk itself, the 20% magazine refill draws ammo from your reserves; it is NOT free ammo gained out of nothing! So at best, it's an absurdly minor quality-of-life increase for an unpopular weapon category.
Are we missing out on Pain to Gain? For one particular playstyle, maybe. But overall, not really. 20% recharge of your health item is a nice bonus to have, but it only works while Adrenaline Rush is active so it's not going to be every single time you neutralise an enemy. Good capstone perk? Definitely. But is it worth investing all the way to 20 Body? Definitely not. No matter the playstyle, you can survive the toughest challenges in Cyberpunk for long periods without Pain to Gain.
Are we missing out on Finisher: Savage Sling? Hell no! Don't get me wrong, it's a cool capstone, but it's far more of a luxury feature than anything necessary. Besides, you automatically get finishers for all (bladed and blunt) melee weapons, Gorilla Arms included, when you use Berserk cyberware. Hell, the best blunt melee weapon in the game is the one blunt melee weapon that is LEAST in need of a finisher!
REFLEXES
Reflexes is even more of a definite 15 than Body! The unparalleled boost to defence and quality-of-life regarding general movement with both dash and air dash, is a sin to miss out on. Your melee DPS with the bladed weapon perks is crucial to invest in, and Sharpshooter with its relevant perks does a lot for your assault rifles and SMGs. With one or two exceptions, it's mostly blue dialogue lines where you will find attribute checks in Reflexes. I don't recall a single occasion where 15 Reflexes was too low to be denied the option. So there is no worthwhile open world benefit to pushing all the way to 20 Reflexes. But what about the capstone perks?
Are we missing out on Salt in the Wound? Ultimately, no. This capstone perk only benefits assault rifles, and the range of iconic assault rifles in this game is not particularly impressive, unfortunately. There is one iconic assault rifle that would be very nice to bolster with the capstone perk, however, you must first complete the final story mission (by going with Rogue) in order to obtain it. And even then, you have to consistently land your shots without fail, on the same target no less, just to enjoy the bonus damage. It sounds a bit too circumstantial for a capstone perk that is located at the end of an attribute which has no open world incentive for being maxed out to 20, let alone just for the sake of only one worthy assault rifle.
Are we missing out on Submachine Fun? Your SMGs will say yes you are missing out because of the extra fire rate and skipping reloading altogether, but your ammo reserves will thank you for it! Using one SMG alone is enough to burn through ammo at a rapid rate, but if you're relying on two different SMGS in a long battle, it might not be that long before you run out of ammo and have to resort to another weapon that doesn't need handgun ammo in order to be used! Besides, there is always going to be one SMG that's better than another in direct comparison, and this can negatively impact your performance just because you might have the wrong SMG for the wrong time or the wrong scenario. The capstone perk can be both a boon and a hindrance.
Are we missing out on Tailwind? Truthfully, you never needed it in the first place! It's very easy to get sucked in because by its description, it does sell itself really well. Gaining stamina from air dashes and double jumps, who in their right mind wouldn't want that?! But I was curious enough to test it out one time and the result surprised me. The quickest way to get about Night City when on foot, is to dash > jump > air dash > jump again, and perform it in a way where you cover the most distance in a single leap in the shortest possible time. If you do this movement correctly, whatever stamina it cost you to do it, will be fully recovered by the time you land on your feet. If you don't need Tailwind to be able to do that indefinitely, then you don't need Tailwind full stop!
Are we missing out on Slaughterhouse? In terms of DPS, not at all. Your melee damage potential is so vast that bleeding damage on top of it is rather insignificant. The extra stamina boost from finishers would be appreciated with one playstyle in particular, but that's nowhere near enough of a reason by itself to blow 20 attribute points on Reflexes.
Are we missing out on Salt in the Wound? Ultimately, no. This capstone perk only benefits assault rifles, and the range of iconic assault rifles in this game is not particularly impressive, unfortunately. There is one iconic assault rifle that would be very nice to bolster with the capstone perk, however, you must first complete the final story mission (by going with Rogue) in order to obtain it. And even then, you have to consistently land your shots without fail, on the same target no less, just to enjoy the bonus damage. It sounds a bit too circumstantial for a capstone perk that is located at the end of an attribute which has no open world incentive for being maxed out to 20, let alone just for the sake of only one worthy assault rifle.
Are we missing out on Submachine Fun? Your SMGs will say yes you are missing out because of the extra fire rate and skipping reloading altogether, but your ammo reserves will thank you for it! Using one SMG alone is enough to burn through ammo at a rapid rate, but if you're relying on two different SMGS in a long battle, it might not be that long before you run out of ammo and have to resort to another weapon that doesn't need handgun ammo in order to be used! Besides, there is always going to be one SMG that's better than another in direct comparison, and this can negatively impact your performance just because you might have the wrong SMG for the wrong time or the wrong scenario. The capstone perk can be both a boon and a hindrance.
Are we missing out on Tailwind? Truthfully, you never needed it in the first place! It's very easy to get sucked in because by its description, it does sell itself really well. Gaining stamina from air dashes and double jumps, who in their right mind wouldn't want that?! But I was curious enough to test it out one time and the result surprised me. The quickest way to get about Night City when on foot, is to dash > jump > air dash > jump again, and perform it in a way where you cover the most distance in a single leap in the shortest possible time. If you do this movement correctly, whatever stamina it cost you to do it, will be fully recovered by the time you land on your feet. If you don't need Tailwind to be able to do that indefinitely, then you don't need Tailwind full stop!
Are we missing out on Slaughterhouse? In terms of DPS, not at all. Your melee damage potential is so vast that bleeding damage on top of it is rather insignificant. The extra stamina boost from finishers would be appreciated with one playstyle in particular, but that's nowhere near enough of a reason by itself to blow 20 attribute points on Reflexes.
TECHNICAL ABILITY
If you have 15 points in every attribute, then only one of them can be maxed out to 20 with the remaining points. And no matter what build idea or playstyle you have in mind, it should ALWAYS be Technical Ability! Unlike Body which enjoys bonus points for open world attribute checks from Gorilla Arms, Technical Ability does not enjoy the same benefit from any cyberware. So there is strong incentive in the open world alone (and also for key dialogue options) to max out this attribute so that you can bypass any technical issue.
Not only that, but it houses Edgerunner which is the absolute number one capstone perk in the game! Reducing max health by 25% is a price I'm happy to pay if it means that we can push 50 cyberware capacity beyond our default limit. And make no mistake about it, cyberware capacity is arguably the most precious resource you can accumulate, and it's also quite limited. The quality of your cyberware and the synergy of specific pieces combined, are what allow V to make the biggest difference, more than any weapon. Because we've maxed out TA, we have access to the other capstone perks so there's no risk of missing out!
Not only that, but it houses Edgerunner which is the absolute number one capstone perk in the game! Reducing max health by 25% is a price I'm happy to pay if it means that we can push 50 cyberware capacity beyond our default limit. And make no mistake about it, cyberware capacity is arguably the most precious resource you can accumulate, and it's also quite limited. The quality of your cyberware and the synergy of specific pieces combined, are what allow V to make the biggest difference, more than any weapon. Because we've maxed out TA, we have access to the other capstone perks so there's no risk of missing out!
COOL
Like Reflexes, this is absolutely a 15 with no dialogue or open world incentive to push it to 20. The only reason it has the final point to make it 16 is because we get bonus crit damage per attribute point invested in Cool. Yes, it's more about stealth, and certain weapon types that may or may not be so appealing to you. But it's still much better to boost the overall utility and versatility of the build, instead of just sacrificing it for very circumstantial capstone perks. If nothing else, crouch-sprinting is a cool extra to have!
Are we missing out on Nerves of Tungsten-Steel? Yes, a little, I won't lie about that. It's definitely one of the best overall capstone perks, and it targets three different weapon categories with two really nice DPS buffs. But there is one weapon in the game that benefits from Focus and Deadeye, and massively outperforms any other weapon that enjoys the same benefits. It leaves every revolver in the dust, yields DPS beyond anything a precision rifle can churn out, and makes sniper rifles envious with its single-shot damage potential. And that weapon happens to be a pistol, the one weapon type that gets zero benefit from this capstone perk.
Are we missing out on Run 'N' Gun? No, not even with the best pistol in the game in your hand. It's a very minor quality-of-life increase at best. Sure, you can aim to activate Focus and then let go and shoot from the hip to enjoy constant Deadeye. But the best pistol in the game happens to fire a guaranteed crit shot with the first bullet from a fresh magazine, and can be equipped with a legendary XC-10 Cetus silencer that gives you guaranteed crit hits while undetected.
Are we missing out on Style Over Substance? It depends on a few things. Are you trying to make some noise and create mayhem? Then yes, it will benefit the best throwing weapon in the game significantly. But if you want to stealthily take down enemies instead, then guaranteed crits with the best throwing weapon is not a wise idea, thus you must downgrade to something else in order to not raise any alarms. As for the guaranteed crit hits themselves, the means of triggering them make the capstone perk a bit convoluted to put into practice, and it further constrains you into using Sandevistan which is by far the best operating system for throwing weapons.
Are we missing out on Nerves of Tungsten-Steel? Yes, a little, I won't lie about that. It's definitely one of the best overall capstone perks, and it targets three different weapon categories with two really nice DPS buffs. But there is one weapon in the game that benefits from Focus and Deadeye, and massively outperforms any other weapon that enjoys the same benefits. It leaves every revolver in the dust, yields DPS beyond anything a precision rifle can churn out, and makes sniper rifles envious with its single-shot damage potential. And that weapon happens to be a pistol, the one weapon type that gets zero benefit from this capstone perk.
Are we missing out on Run 'N' Gun? No, not even with the best pistol in the game in your hand. It's a very minor quality-of-life increase at best. Sure, you can aim to activate Focus and then let go and shoot from the hip to enjoy constant Deadeye. But the best pistol in the game happens to fire a guaranteed crit shot with the first bullet from a fresh magazine, and can be equipped with a legendary XC-10 Cetus silencer that gives you guaranteed crit hits while undetected.
Are we missing out on Style Over Substance? It depends on a few things. Are you trying to make some noise and create mayhem? Then yes, it will benefit the best throwing weapon in the game significantly. But if you want to stealthily take down enemies instead, then guaranteed crits with the best throwing weapon is not a wise idea, thus you must downgrade to something else in order to not raise any alarms. As for the guaranteed crit hits themselves, the means of triggering them make the capstone perk a bit convoluted to put into practice, and it further constrains you into using Sandevistan which is by far the best operating system for throwing weapons.
INTELLIGENCE
Until patch 2.02, it was worth having 20 Intelligence if netrunning was your primary playstyle. But they've nerfed the total quickhack damage potential enough with the latest patches, where you may as well put 15 in it like every other attribute. Even if you have zero intention of being a netrunner come endgame, you do start off the playthrough with a Militech Paraline cyberdeck as your operating system, and you can use it (or even better, switch to the Tetratronic Rippler and upgrade that or buy higher tiers of it when available) to rack up Netrunner XP for bonus perk points, and to also earn more eddies as you advance through Night City. If nothing else, having 15 Intelligence is useful for key dialogue options and attribute checks in main missions and side jobs, as well as being able to hack the vast majority of access points and devices on offer.
The Intelligence attribute can eat up a lot of perk points easily when investing in it to become a Netrunner. If you want to be able to one-shot standard and elite enemies in endgame, with or without stealth, I can tell you how to achieve that later on but for now in the earlier stages, I'll tell you about the following perks which are unnecessary or even bugged. The perk Warning: Explosive Hazard is bugged as it doesn't increase explosive damage. The two perks Counter-A-Hack and Copy-Paste are not bad but a waste of perk points if you already have a certain handy piece of cyberware in your frontal cortex. Queue Prioritization is also bugged and does not work as stated.
Data Recycler bizarrely functions to some degree while simultaneously being partially bugged, to the point where it is absolutely a waste of a perk point regardless. Not only has its potential been nerfed with patch 2.02 but if you do enough testing with it, you'll realise that the perk description misses out a crucial detail. When you down an enemy with a combat quickhack like Short Circuit or Synapse Burnout, the next quickhack in the queue already starts uploading for a millisecond when they are neutralised, ergo Data Recycler IGNORES the next quickhack in the queue, and skips over it so that it only refunds you for the next one, assuming there even is a next one at all! We won't have Queue Mastery thus we can only upload 3 quickhacks max in our queues. And in order to one-shot enemies as an endgame Netrunner, we need our best combat quickhack to come second in all of the queues it features in. With all these factors considered, Data Recycler will have zero effect or benefit for our netrunning shenanigans.
As an endgame Netrunner, you have enough quickhack damage potential without the following perks: Proximate Propagation, Encryption, Subordination, Icepick, Shadowrunnner, and System Overwhelm. You will want almost all the perks relevant to Overclock in any serious netrunning build, but the only exception to that is Power Surge. You should always activate Overclock first before you start quickhacking and/or engaging enemies, so you should be at full health anyway. And with about 95-99% of all the scenarios in which you use Overclock, you'll easily keep that single instance running if you're playing it correctly and using the best combat quickhack for the job, thus never needing to reactivate Overclock the majority of the time.
Are we missing out on Queue Mastery? If you asked that question before patch 2.02 then I would have said yes. Back then, it was efficient netrunning to queue 4 quickhacks, as you could exploit a loophole with the Data Recycler perk (where it refunded the full default RAM costs of the remaining quickhacks, NOT the reduced costs) to almost fully restore your RAM after neutralising an enemy. But CDPR closed that loophole with patch 2.02 by making sure that Data Recycler refunds the actual costs (reductions included) so you can no longer get a worthwhile RAM refund beforehand. So nowadays? No, we're not missing out on Queue Mastery because in terms of costs to RAM (and health during Overclock) it's way more efficient to queue up just 3 quickhacks.
Are we missing out on Spillover? It might feel like you are missing out, but not in totality. It actually hurts your netrunning if you're trying to employ stealth because even if you try and mask your progress, a non-covert quickhack could still spread out and consequently allow the enemy to trace you. Even then, you still need to upload the same quickhack queues to each individual enemy in order to benefit from the upload order and synergy of the quickhacks. And we'll still be able to one-shot standard and elite enemies without Spillover anyway, stealth or no stealth.
Are we missing out on Smart Synergy? It's not bad but it doesn't serve any great purpose. Enemies have to be under the influence of quickhacks just so your smart weapons get the bonus 25% damage. If you've had the opportunity and enough RAM and health to quickhack enemies in the first place, it would be much quicker to kill them with just quickhacks alone. To make the capstone perk even more redundant, there are only two smart weapons really worth using in endgame, and they're still not even close to your best source of DPS against tougher enemies anyway.
The Intelligence attribute can eat up a lot of perk points easily when investing in it to become a Netrunner. If you want to be able to one-shot standard and elite enemies in endgame, with or without stealth, I can tell you how to achieve that later on but for now in the earlier stages, I'll tell you about the following perks which are unnecessary or even bugged. The perk Warning: Explosive Hazard is bugged as it doesn't increase explosive damage. The two perks Counter-A-Hack and Copy-Paste are not bad but a waste of perk points if you already have a certain handy piece of cyberware in your frontal cortex. Queue Prioritization is also bugged and does not work as stated.
Data Recycler bizarrely functions to some degree while simultaneously being partially bugged, to the point where it is absolutely a waste of a perk point regardless. Not only has its potential been nerfed with patch 2.02 but if you do enough testing with it, you'll realise that the perk description misses out a crucial detail. When you down an enemy with a combat quickhack like Short Circuit or Synapse Burnout, the next quickhack in the queue already starts uploading for a millisecond when they are neutralised, ergo Data Recycler IGNORES the next quickhack in the queue, and skips over it so that it only refunds you for the next one, assuming there even is a next one at all! We won't have Queue Mastery thus we can only upload 3 quickhacks max in our queues. And in order to one-shot enemies as an endgame Netrunner, we need our best combat quickhack to come second in all of the queues it features in. With all these factors considered, Data Recycler will have zero effect or benefit for our netrunning shenanigans.
As an endgame Netrunner, you have enough quickhack damage potential without the following perks: Proximate Propagation, Encryption, Subordination, Icepick, Shadowrunnner, and System Overwhelm. You will want almost all the perks relevant to Overclock in any serious netrunning build, but the only exception to that is Power Surge. You should always activate Overclock first before you start quickhacking and/or engaging enemies, so you should be at full health anyway. And with about 95-99% of all the scenarios in which you use Overclock, you'll easily keep that single instance running if you're playing it correctly and using the best combat quickhack for the job, thus never needing to reactivate Overclock the majority of the time.
Are we missing out on Queue Mastery? If you asked that question before patch 2.02 then I would have said yes. Back then, it was efficient netrunning to queue 4 quickhacks, as you could exploit a loophole with the Data Recycler perk (where it refunded the full default RAM costs of the remaining quickhacks, NOT the reduced costs) to almost fully restore your RAM after neutralising an enemy. But CDPR closed that loophole with patch 2.02 by making sure that Data Recycler refunds the actual costs (reductions included) so you can no longer get a worthwhile RAM refund beforehand. So nowadays? No, we're not missing out on Queue Mastery because in terms of costs to RAM (and health during Overclock) it's way more efficient to queue up just 3 quickhacks.
Are we missing out on Spillover? It might feel like you are missing out, but not in totality. It actually hurts your netrunning if you're trying to employ stealth because even if you try and mask your progress, a non-covert quickhack could still spread out and consequently allow the enemy to trace you. Even then, you still need to upload the same quickhack queues to each individual enemy in order to benefit from the upload order and synergy of the quickhacks. And we'll still be able to one-shot standard and elite enemies without Spillover anyway, stealth or no stealth.
Are we missing out on Smart Synergy? It's not bad but it doesn't serve any great purpose. Enemies have to be under the influence of quickhacks just so your smart weapons get the bonus 25% damage. If you've had the opportunity and enough RAM and health to quickhack enemies in the first place, it would be much quicker to kill them with just quickhacks alone. To make the capstone perk even more redundant, there are only two smart weapons really worth using in endgame, and they're still not even close to your best source of DPS against tougher enemies anyway.
ECONOMY

Different players are going to have different opinions about how best to advance through Night City on your way to the major leagues. You can have the difficulty set to Very Hard and still make life much easier for V, if you take a more economical approach to your playthrough. I will not tell you how to use cheats or exploits in terms of raking in an absurd amount of eddies in the shortest time possible - you can find such things on Youtube if you want. I will only tell you what is possible by playing the game organically. If you can think like a competent economist and make your way through Night City accordingly, you can easily collect everything in your path and still have enough spare to comfortably be a millionaire.
Save up eddies for cyberware – This is your number one priority in terms of how you spend your money, as your choices of cyberware and the quality of it, are what make the biggest difference for V in any playthrough. If you're ever thinking of spending money early in your playthrough, only spend it on cyberware and whenever it's mandatory to spend eddies in main missions and side jobs.
Only purchase iconic weapons – Iconic weapons that can only be acquired by purchasing them from specific vendors are an obvious exception to the general rule, which is that you should NEVER waste your money on a non-iconic weapon. No weapons vendor will ever sell a single weapon at the highest possible tier, and no matter what stage of the playthrough you find yourself in, there are always plenty of weapons out in the open world of the same quality or better, so it's absolutely pointless to buy them.
Sort out your junk - As tempting as it may be to offload all your junk at the same time, it's not the smartest thing to do, economically speaking. There are certain pieces that will sell for 500 eddies each and that's a no-brainer. But the cheapest pieces only sell for 3 eddies a pop. They provide more overall value by being disassembled for tier 1 crafting components instead. Think about it: if you sell 30 junk items for 3 eddies each, that's 90 eddies for you. Or alternatively, you can disassemble those 30 pieces of junk, and use the 30 tier 1 crafting components to craft a tier 1 weapon, and then sell that for hundreds of eddies. Now THAT is being economically smart!
Use your tier 1 crafting components wisely - It's actually a good thing that selling your crafting components is no longer possible like it was in the past - you would not get value for your eddies! DO NOT blow all the tier 1 components by converting them via upgrades into tier 5 components, as that is an incredibly wasteful ratio of 625 to 1. Crafting ammo is the main purpose of tier 1 components. But if you have enough spare tier 1 components, you want to use them first to upgrade your cyberware and iconic weapons to tier 1+, and then upgrade the components themselves to tier 2 with a more preferable 5 to 1 ratio. In terms of what makes economic sense, upgrading tier 1 components to tier 3 is my personal limit as the ratio of 25 to 1 is barely justifiable, considering how scarce tier 3 crafting components can be. Then I would start crafting tier 1 weapons for eddies and save a few for ammo when needed.
Crafting components first, eddies second – Disassembling weapons gives you a more scarce resource than eddies, and also gives you bonus XP for your Engineer skill. Crafting components become increasingly valuable the higher in tier varieties they get, and you simply can never find enough of them out in the open world. You need crafting components if you want to upgrade your iconic weapons, but especially earlier on in the playthrough, they're very useful for upgrading your cyberware. One reason is because it saves eddies compared to buying all your cyberware at tier 5 from ripperdocs later on, and another reason is the next big tip. But to sum it all up, by the time your cyberware and iconic weapons are upgraded to tier 4+, stop disassembling and start selling any weapons or clothes you find that are below tier 5.
Use the full potential of the Chipware Connoisseur perk – This is a perk that you will eventually not need in endgame when you have all the fully upgraded cyberware you could possibly want. But when upgrading cyberware, it gives you a lot more options to endow your V with the type of bonus stats you want. Come endgame, you can have more specific bonuses such as extra melee damage, headshot damage, stealth damage, health item recharge speed, mitigation strength, and others that you may desire. You don't have as many options to choose from if you simply buy your cyberware at higher tiers, and it will cost you more money to buy the higher tier versions too. It's more effective overall to buy your desired cyberware at the lowest tiers available on the market, and use Chipware Connoisseur to give you as many different options on the menu. It's a sorely underrated perk but when used correctly, it WILL save you plenty of eddies!
Only upgrade the iconics you intend to use – This is especially true once all your old iconics have been upgraded to tier 4+ or 5. It takes 275 tier 5 crafting components to upgrade a tier 5 to tier 5++. You can upgrade tier 4 components to tier 5 as the ratio is only 5 to 1, if you so choose. But even if you disassemble all the tier 4 gear just to upgrade the components like I used to recommend in the past, it's only going to give you enough for a small handful of iconics to be upgraded to tier 5++, which conversely means missing out on a MOUNTAIN of eddies!
Be a Netrunner – Hacking access points and devices is no secret, but you increase your money-making potential significantly by upgrading your cyberdeck and using the Forcekill Cypher perk. The more you can extract from each access point, the more you will add to your overall bank balance. Even if you do not like netrunning, it is worth sucking it up early in the playthrough so you can accrue more eddies, more quickhack crafting components, and more quickhack crafting specs if not the quickhacks themselves. Speaking of which...
Craft and sell quickhacks – Crafting quickhacks gives you bonus XP for both Netrunner and Engineer skills. Selling quickhacks can quickly earn you as many eddies as you would selling your unwanted weapons. DO NOT upgrade quickhack crafting components; just craft as many quickhack copies as quantitatively possible, regardless of their tiers. Any quickhack will cost the same amount of crafting components as another quickhack of the same tier, but some quickhacks sell for more eddies than others. To get more value for your quickhack crafting components, craft tiers 2 and 3 combat quickhacks, and tiers 4 and 5 ultimate quickhacks. NEVER craft iconics as they sell for the same eddies as tier 5 quickhacks but waste far more components!
Cars and apartments are luxury purchases – Ergo, you do NOT need to buy them early on in the playthrough. V's Megatower H10 apartment in Little China has the closest fast travel point to a drop point, a bed, and personal stash out of all forms of accommodation in Night City. And some of the best vehicles in the game can be acquired free of charge, even early on in the playthrough. You should not even consider buying anything from El Capitan until you gain access to Dogtown and can take on vehicle contracts for him. Patch 2.11 has changed the discounts you get from the Autofixer. Beforehand, it made economic sense to get one discount of 24% before purchasing a vehicle. But now you need to do at least two vehicle contracts to match that. I will explain this in more detail in a later section.
FREE VEHICLES

Even if you are the most avid completionist, you should take it easy on the gas in terms of amassing your own private collection of vehicles as you progress through the playthrough. You should most definitely wait until you have enough spare eddies before focusing on expanding your list. But at the same time, there are some vehicles out there that will not cost you a single eurodollar to acquire. Better yet, there are a few that you can acquire for free, almost immediately after the Heist has concluded, sparing the need to buy or steal. I am only going to mention four vehicles: two cars and two bikes, two of them being great on tarmac, two of them being great off-road, all of them costing zero eddies, and also where to find them all.
Rayfield Caliburn "Murkmobile" belonged to Murk Man who is Night City's biggest reference to Batman. Apart from being painted in black, there is nothing unique in stats or performance about this particular Rayfield Caliburn model. But that's not really a complaint considering that it is the one car in Night City with the highest top speed of well over 200 mph! You do not need a single eddie to your name in order to add this beast to your collection. However, you must complete the main mission Ghost Town and also max out your Street Cred to 50 before it becomes available to you via the relevant side quest, which is in the same mine tunnel that Panam drives through during Ghost Town when hunting down Nash.
Quadra Type-66 "Hoon" is basically the free alternative to the Wingate. Although the latter does have slightly better performance overall, it's pointless to nitpick over such small details when one of these options demands tens of thousands of eddies, while the other option is sat waiting for you in an abandoned warehouse in Northside, Watson. Nothing in terms of story to spoil with this one: Hoon being a reference as well as the signature number of 43, this rally car is actually dedicated to Ken Block, a real-life rally driver and Youtube star who tragically lost his life in January 2023, may he rest in peace. It drives very well on all terrain, but is especially useful going off-road in the Badlands.
Jackie's ARCH is one of the best-performing bikes in the entire game. I will not spoil any story details as to how you come into possession of it. All I will say is that after the Heist, you can obtain it after completing the side job Heroes. If you chose the Nomad life path and have high enough Technical Ability, while outside the All Foods plant during The Pickup main mission, V can recommend to Jackie that he makes changes to the exhaust. The bike will then become Jackie's Tuned ARCH, weighing a tiny bit more but also sporting extra horsepower.
Scorpion's Apollo is your best option if you're a complete bike fanatic but have to go off-road in the Badlands. Again, I am not spoiling any story details as to why you come across this dirt bike at all, but all you need to do is just complete the main mission Life During Wartime.
CYBERWARE
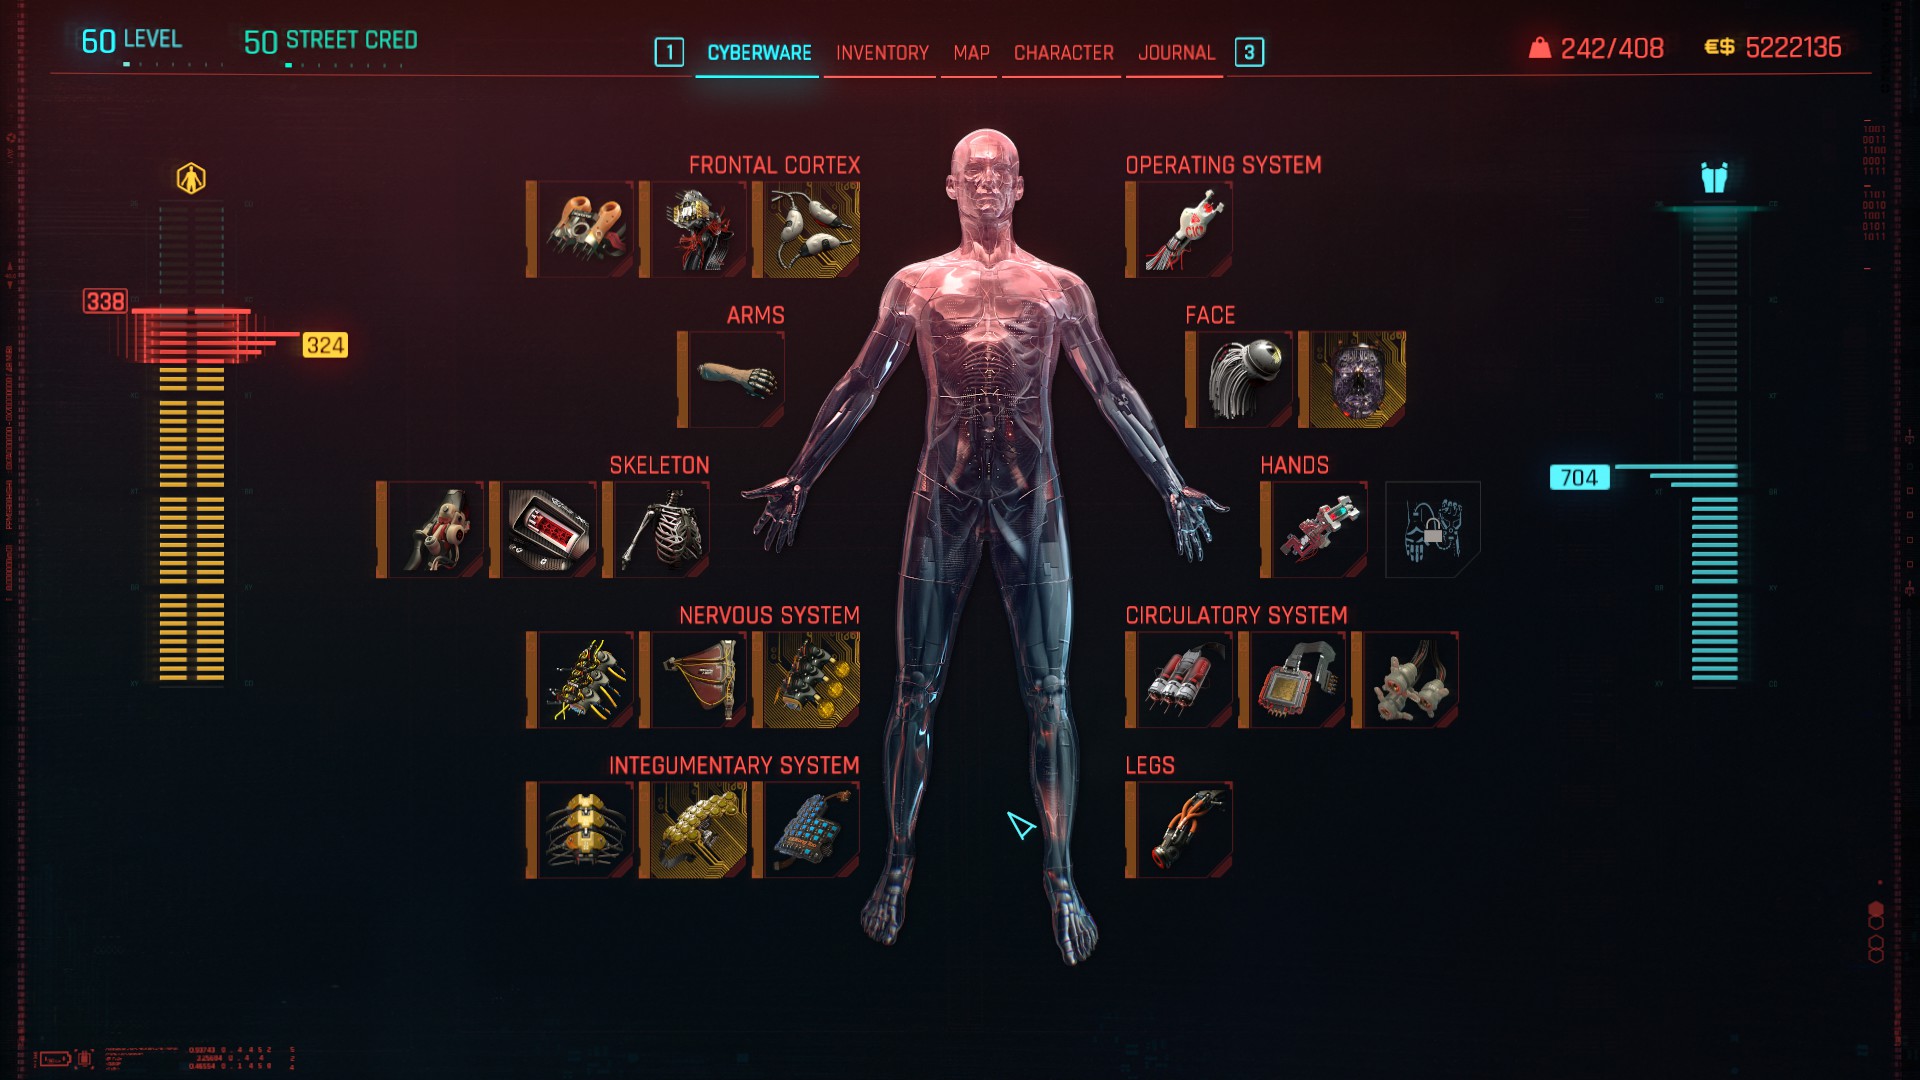
The first thing that needs to be said on the topic is that cyberware capacity is hugely important. The information regarding how to accumulate cyberware capacity and what the max capacity limit is, seems to change depending on who you ask. But this is what I know so far and seems to be the most accurate information since patch 2.1. Here is how cyberware capacity works and how you can boost it with the following:
- Default cyberware capacity = 24 (starting at level 1)
- +3 cyberware capacity per level up = 177 (from level 2 to level 60)
- Engineer skill progression = 15
- Tier 2 shard = +2 capacity per shard, 12 shards in total = 24*
- Tier 3 shard = +3 capacity per shard, 4 shards in total = 12
- Tier 4 shard = +4 capacity per shard, 5 shards in total = 20**
- Tier 5 shard = +6 capacity per shard, 2 shards in total = 12
- Max value of Renaissance Punk perk = 20
- Edgerunner capstone perk = 50 (spare capacity beyond the limit)
- Tier 5++ Chrome Compressor = 70 (for your Operating System)
* = 7 shards in Night City, 5 shards dropped by cyberpsychos in Dogtown.
** = 1 shard found when looting the stadium garage in Dogtown - must be at least level 30.
Even though the Chrome Compressor can in theory take your cyberware capacity way above 400 in total, it comes at the expense of not being able to use a Cyberdeck, Sandevistan, or Berserk. This consequently forces you into a more 'naked' playstyle, where you are expected to splash out on more expensive and/or iconic pieces of cyberware to make up for the absence of a true operating system.
So the true maximum possible capacity for this particular build can reach up to 354. But just because that's the max limit, does not mean you will necessarily hit it. There are still issues regarding cyberware shard drops that CDPR need to fix. As of writing this, my cap in my current playthrough is 347. That's because I entered Dogtown long before I hit level 30, so I think I missed out on that single tier 4 shard. But I'm also missing one last tier 3 shard, and I can't be sure that it did drop from an enemy during a car chase and I couldn't stop to retrieve it, or maybe it was a glitched item on a corpse that I could neither see nor pick up. The problem with shards is that if they drop and then they disappear because you never picked them up, they're gone for good. So really make sure to sweep an area for ALL manners of loot wherever you go!
If you add up the cost tally of all the compulsory pieces of cyberware listed below, it totals to 275 cyberware capacity. You have just two empty cyberware slots left to fill up. We also need an Operating System, and we still have one slot free for the Nervous System, both of which will require certain pieces of cyberware in accordance with the desired playstyle in endgame. Although 354 may be the max limit, it is not imperative to reach that amount. Honestly, the true max amount you'll ever need for the most cyberware-expensive playstyle in this build is 338 or 340, depending on which cyberware you use for your hands. But as long as you follow everything in this guide to the letter, and your cyberware capacity reaches one of those figures, you're golden!
It's important to note that we are NOT choosing our cyberware for the sake of increasing max armour. That is why you will not see armour-only pieces that require very little capacity being listed. It's what each piece of cyberware brings to the table that matters, anything that buffs armour is just an added extra not worth mentioning. Having said that, if you're able to fill out all of the available cyberware slots even with just really cheap pieces, go for it as it is worth being able to use the Cyborg perk for reduced cooldown. But as a priority, save your spare cyberware capacity for the operating systems and their corresponding key cyberware in the endgame variations.
For each piece of cyberware, I will state in bold text the earliest level ranges you can purchase each piece for the lowest amount of eddies, followed by the cyberware capacity cost in brackets. Remember, you WANT to get your cyberware as early as possible because not only does it save you way more eddies further down the line, but it also allows you to explore more options in terms of bonus stats, when you upgrade your cyberware in conjunction with the Chipware Connoisseur perk. Operating Systems are the exception to the rule because there are no 'options' for bonus stats with them so if you want to, you can wait until level 40 and then buy the tier 5 versions. Or better yet, wait until you find them out in the open world.
FRONTAL CORTEX
Axolotl has a hefty price tag in terms of cyberware capacity but each time you neutralise an enemy, it reduces the cooldowns on all of your cyberware, and it also adds extra duration to your operating system regardless of your playstyle. You can buy the tier 4 version from any Dogtown ripperdoc between levels 30 to 39, loot it from a Dogtown airdrop, or located in V's Stash as a reward from Regina Watson via the side job Last Call, after completing all 23 gigs for her. (48)
Self-ICE is every enemy netrunner's worst nightmare! It's a very inexpensive piece of cyberware that prevents you from being on the wrong end of quickhacks such as Cyberware Malfunction, Reboot Optics or Weapon Glitch. It does operate on a cooldown, but it gets dramatically shortened with each upgrade in tier (up to just 20 seconds by tier 5) and having 15 Intelligence further deducts another 7.5 seconds. The remaining cooldown duration will be short enough where even the contributions of Axolotl and the Cyborg perk are overkill, but rest assured that this crucial piece of cyberware will make enemy netrunners wish they didn't bother hacking you in the first place! You can buy the tier 3 version from any ripperdoc between levels 20 to 29. (5)
Mechatronic Core is another very cheap piece of cyberware for your frontal cortex. Fully upgraded, it can give you as much as 40% extra damage against mechs, drones, robots and turrets. You might not fight such enemies as often as humans but for only 5 cyberware capacity, 40% bonus damage is very generous! You can buy the tier 1 version from any ripperdoc between levels 1 to 9. (5)
Self-ICE is every enemy netrunner's worst nightmare! It's a very inexpensive piece of cyberware that prevents you from being on the wrong end of quickhacks such as Cyberware Malfunction, Reboot Optics or Weapon Glitch. It does operate on a cooldown, but it gets dramatically shortened with each upgrade in tier (up to just 20 seconds by tier 5) and having 15 Intelligence further deducts another 7.5 seconds. The remaining cooldown duration will be short enough where even the contributions of Axolotl and the Cyborg perk are overkill, but rest assured that this crucial piece of cyberware will make enemy netrunners wish they didn't bother hacking you in the first place! You can buy the tier 3 version from any ripperdoc between levels 20 to 29. (5)
Mechatronic Core is another very cheap piece of cyberware for your frontal cortex. Fully upgraded, it can give you as much as 40% extra damage against mechs, drones, robots and turrets. You might not fight such enemies as often as humans but for only 5 cyberware capacity, 40% bonus damage is very generous! You can buy the tier 1 version from any ripperdoc between levels 1 to 9. (5)
ARMS
Electrifying Gorilla Arms might make your hands look ugly, but they are probably the best arm cyberware you can have. They are certainly the most versatile as at tier 5, they can give you +6 to Body when it comes to attribute checks regarding physical objects. With these arms on top of having 15 Body, you will be able to physically bypass any obstacle or intimidate your way through a conversation, even if it demands 20 Body. The electrifying variant also allows you to be effective when against mechs, robots and drones. And one particularly good benefit is that because we have 20 Technical Ability, we get the full 10% bonus damage for this cyberware. You can buy the tier 2 version from any ripperdoc between levels 10 to 19. (8)
Update: it never used to be the case in the past, but ever since I started a new playthrough after patch 2.1, I've been able to use the extra Body points provided by Gorilla Arms, to pass dialogue checks when my amount of invested points was not enough. I do not know if this is a pleasant bug or fully intended. All I know is that it wasn't possible in the past to rely on Gorilla Arms to boost your Body count in dialogue checks, but now I can pass anything in dialogue including 20 Body checks, despite having only 14 or 15 attribute points.
Update: it never used to be the case in the past, but ever since I started a new playthrough after patch 2.1, I've been able to use the extra Body points provided by Gorilla Arms, to pass dialogue checks when my amount of invested points was not enough. I do not know if this is a pleasant bug or fully intended. All I know is that it wasn't possible in the past to rely on Gorilla Arms to boost your Body count in dialogue checks, but now I can pass anything in dialogue including 20 Body checks, despite having only 14 or 15 attribute points.
SKELETON
Epimorphic Skeleton is quite costly for cyberware, but is superior to any other form of skeletal cyberware that places heavy emphasis on armour, negating any need for the likes of Para Bellum or Rara Avis. As well as providing a decent amount of max armour, more importantly you get bonus max health which can make up for some of the deficit imposed by the Edgerunner capstone perk. You can buy the tier 4 version from any ripperdoc between levels 30 to 39. (32 with All Things Cyber perk)
Dense Marrow can offer as much as +27% melee damage when fully upgraded, which is major considering that melee damage is essential when going up against MaxTac and bosses. The 20% stamina penalty is obviously not ideal, but your perks and skills should provide you with reductions in stamina costs. When using Berserk which has zero stamina cost while it is active, this piece of cyberware is all upside and no downside! You can buy the tier 2 version from any ripperdoc between levels 10 to 19. (13 with All Things Cyber perk)
Spring Joints seems unpopular and questionable as a choice, but it does provide the equivalent of almost 20% damage reduction and once you're accustomed to utilising mitigation often, you will find that the bonus to mitigation strength more than justifies Spring Joints being a fixture in this build. You can buy the tier 2 version from any ripperdoc between levels 10 to 19. (13 with All Things Cyber perk)
Dense Marrow can offer as much as +27% melee damage when fully upgraded, which is major considering that melee damage is essential when going up against MaxTac and bosses. The 20% stamina penalty is obviously not ideal, but your perks and skills should provide you with reductions in stamina costs. When using Berserk which has zero stamina cost while it is active, this piece of cyberware is all upside and no downside! You can buy the tier 2 version from any ripperdoc between levels 10 to 19. (13 with All Things Cyber perk)
Spring Joints seems unpopular and questionable as a choice, but it does provide the equivalent of almost 20% damage reduction and once you're accustomed to utilising mitigation often, you will find that the bonus to mitigation strength more than justifies Spring Joints being a fixture in this build. You can buy the tier 2 version from any ripperdoc between levels 10 to 19. (13 with All Things Cyber perk)
NERVOUS SYSTEM
Note: one of the three slots for the Nervous System is reserved for two different pieces of iconic cyberware, only equipping one of them based on your choice of playstyle in endgame.
Neofiber might not seem worthwhile but believe me when I say: it is an underrated piece of cyberware that plays the very discreet role of a silent hero. As a form of defence, mitigation does not get the attention it deserves, so any buff to mitigation strength is worth it! And even the low mitigation chance plays a very useful role as you shall soon see. You can buy the tier 3 version from any ripperdoc between levels 20 to 29. (12)
Kerenzikov is essential to this build, even if you can only activate it by dodging/dashing while aiming down sights with ranged weapons. But a really important point to mention is that you can activate it frequently as it has a very short cooldown, not including any reductions to cooldown durations in general. This, Neofiber and Spring Joints will all make perfect sense with the next piece of cyberware on the list! You can buy the tier 2 version from any ripperdoc between levels 10 to 19. (14)
Neofiber might not seem worthwhile but believe me when I say: it is an underrated piece of cyberware that plays the very discreet role of a silent hero. As a form of defence, mitigation does not get the attention it deserves, so any buff to mitigation strength is worth it! And even the low mitigation chance plays a very useful role as you shall soon see. You can buy the tier 3 version from any ripperdoc between levels 20 to 29. (12)
Kerenzikov is essential to this build, even if you can only activate it by dodging/dashing while aiming down sights with ranged weapons. But a really important point to mention is that you can activate it frequently as it has a very short cooldown, not including any reductions to cooldown durations in general. This, Neofiber and Spring Joints will all make perfect sense with the next piece of cyberware on the list! You can buy the tier 2 version from any ripperdoc between levels 10 to 19. (14)
INTEGUMENTARY SYSTEM
Defenzikov is sorely underrated, and a huge component of our versatile build! Each time Kerenzikov ends, you get +90% mitigation chance (from the tier 5 version of this cyberware) for a few seconds! And by the time those few seconds are over, you are pretty much ready to activate the Kerenzikov combo again. But remember when I said that Neofiber would play a very useful role? Combine the 10% mitigation chance from that with this, and we can pretty much get almost 100% constant uptime of 100% mitigation chance while we are using our ranged weapons! Then combine all of this with Spring Joints and you're pretty much taking your mitigation strength up to about 80%! For 4 pieces of cyberware offering this much synergy in terms of defence, it's possibly the wisest 55 cyberware capacity you could ever spend! You can buy the tier 3 version from any ripperdoc between levels 20 to 29. (16 with All Things Cyber perk)
Countershell is a piece of cyberware that flies under many players' radar but after having tested it extensively, it merits replacing the Peripheral Inverse as even having used it in the most difficult playstyle to survive wave after wave of MaxTac, it passed with flying colours in testing! This is because if you take 35% or more damage within 3 seconds, you then get +50% mitigation chance for 4 seconds. There is a brief cooldown to endure but that's not too much of a concern. The point is that if you combine this cyberware with the Heat Shield perk (10% mitigation chance per stack of Pyromania) then you have the potential means to get 100% mitigation chance when you're engaged in melee combat which is a HUGE deal! But even without the benefit of Heat Shield, the combined mitigation chance from Countershell + Neofiber means that on paper, you get slightly more effective damage reduction (against all forms of damage) than you do from Peripheral Inverse which is proximity-based and doesn't protect you from gunshots or ranged attacks further than 6 metres away. You can buy the tier 1 version from any ripperdoc between levels 1 to 9. (10 with All Things Cyber perk)
Optical Camo is actually very important and becomes the best gadget to have equipped in your quickslot by far, seeing as the Relic perks from the Phantom Liberty DLC give it far more utility to take advantage of. Now yes, you can use this without it being in your gadget quickslot if you have the Vanishing Act perk. However, you will not gain the benefits of the Relic's bonuses if you do this. By having Optical Camo in your quickslot, you can use it to potentially get out of the combat state which is a massive deal as it grants you many options. You can disengage and then re-engage in combat again with the benefit of stealth damage bonuses, you can craft more ammo if you're low, and you can use the +150% health recharge speed from the Health Freak perk in case you are low or empty on health charges. You can buy the tier 2 version from any ripperdoc between levels 10 to 19. (16 with All Things Cyber perk)
Countershell is a piece of cyberware that flies under many players' radar but after having tested it extensively, it merits replacing the Peripheral Inverse as even having used it in the most difficult playstyle to survive wave after wave of MaxTac, it passed with flying colours in testing! This is because if you take 35% or more damage within 3 seconds, you then get +50% mitigation chance for 4 seconds. There is a brief cooldown to endure but that's not too much of a concern. The point is that if you combine this cyberware with the Heat Shield perk (10% mitigation chance per stack of Pyromania) then you have the potential means to get 100% mitigation chance when you're engaged in melee combat which is a HUGE deal! But even without the benefit of Heat Shield, the combined mitigation chance from Countershell + Neofiber means that on paper, you get slightly more effective damage reduction (against all forms of damage) than you do from Peripheral Inverse which is proximity-based and doesn't protect you from gunshots or ranged attacks further than 6 metres away. You can buy the tier 1 version from any ripperdoc between levels 1 to 9. (10 with All Things Cyber perk)
Optical Camo is actually very important and becomes the best gadget to have equipped in your quickslot by far, seeing as the Relic perks from the Phantom Liberty DLC give it far more utility to take advantage of. Now yes, you can use this without it being in your gadget quickslot if you have the Vanishing Act perk. However, you will not gain the benefits of the Relic's bonuses if you do this. By having Optical Camo in your quickslot, you can use it to potentially get out of the combat state which is a massive deal as it grants you many options. You can disengage and then re-engage in combat again with the benefit of stealth damage bonuses, you can craft more ammo if you're low, and you can use the +150% health recharge speed from the Health Freak perk in case you are low or empty on health charges. You can buy the tier 2 version from any ripperdoc between levels 10 to 19. (16 with All Things Cyber perk)
FACE
Kiroshi “Cockatrice” Optics are by far the best optics in the market, but they cost a steep 30 cyberware capacity to equip! The bonus 35% crit chance can suddenly elevate quite a few weapons in prominence compared to trying to use them without these iconic optics. If cyberware capacity is an issue though or if you are using weapons where they land guaranteed crit hits without requiring a high crit chance, then feel free to downgrade to the Basic Kiroshi Optics. The Cockatrice optics are not that essential for Sandevistan builds as they can still be reasonably high in crit chance without them. You can buy the tier 4 version from any Dogtown ripperdoc between levels 30 to 39, or loot it from a Dogtown airdrop. (30)
HANDS
Smart Link might not be cost-free compared to the Tyger Claw Tattoos in terms of cyberware capacity, but having it equipped allows you to use smart weapons whenever you please, and there are two particular smart weapons in the game worth using, especially if you end up being a Netrunner come endgame. Unlike the tattoos, you can also upgrade it so that it can provide you with different bonus stats, including ones such as melee damage which is always useful. But even if I myself had zero intentions of using smart weapons in endgame, I would still equip Smart Link just because it's cheap, it can provide good bonus stats, you need to fill up the Hands slot with something in order to benefit from the Cyborg perk, and the range of cyberware for hands is one of the least exciting in my honest opinion. Or just simply equip the Ballistic Coprocessor to fill the Hands slot and upgrade that for good bonus stats - at least you get that for free from Vik early in the game. You can buy the tier 1 version from any ripperdoc between levels 1 to 9. (4)
CIRCULATORY SYSTEM
Blood Pump is something that once you try, you can never go back to ordinary health charges. Why bother with either MaxDoc or Bounce Back when there is a cyberware that literally combines the best of both worlds, and activates instantly rather than you having to go through the animation of chugging a health item? You can buy the tier 2 version from any ripperdoc between levels 10 to 19. (15)
Biomonitor has great synergy with Blood Pump as the former automatically activates the latter when your health drops below 35%, and gives it a boost to effectiveness at the same time. I must warn you: there is a small chance that you could still die despite this activating, in the event that the last amount of damage you sustained was far too great. However, if you have mitigation constantly active, then this should not be a problem. The main benefit of this is that you don't have to focus on your health bar so much as it's all set to autopilot. You can buy the tier 2 version from any ripperdoc between levels 10 to 19. (14)
Microrotors is another piece of cyberware that significantly boosts melee DPS, as much as 25% faster attack speed when fully upgraded. If you love your katanas like I do, then this cyberware is non-negotiable in my opinion. You can buy the tier 1 version from any ripperdoc between levels 1 to 9. (12)
Biomonitor has great synergy with Blood Pump as the former automatically activates the latter when your health drops below 35%, and gives it a boost to effectiveness at the same time. I must warn you: there is a small chance that you could still die despite this activating, in the event that the last amount of damage you sustained was far too great. However, if you have mitigation constantly active, then this should not be a problem. The main benefit of this is that you don't have to focus on your health bar so much as it's all set to autopilot. You can buy the tier 2 version from any ripperdoc between levels 10 to 19. (14)
Microrotors is another piece of cyberware that significantly boosts melee DPS, as much as 25% faster attack speed when fully upgraded. If you love your katanas like I do, then this cyberware is non-negotiable in my opinion. You can buy the tier 1 version from any ripperdoc between levels 1 to 9. (12)
LEGS
Reinforced Tendons is such a quality-of-life piece of cyberware that it's hard to look at anything else to equip your legs with. Not only does the double-jump feature allow you to get more verticality, but it combines so well with dash and air dash that you're able to travel from A to B on foot surprisingly quickly. The added potential for parkour is self-evident as you can easily vault over enemies, seek high ground that they can't reach, or vault over walls or rooftops to escape the cops that pursue you. You can buy the tier 2 version from any ripperdoc between levels 10 to 19. (8)
WEAPONS
After having conducted further testing, I've decided to expand much further on weapons because although I stand by the ones I have already mentioned, I've come across interesting findings in my test results. Although there are some perks that benefit more than one weapon category, I'm not going to ignore the other categories like before. I will cover each weapon category and give my honest verdicts on what I believe to be the best iconic picks. For the most part, you can expect the iconics to be the best possible choices of their respective categories. The two best benefits of iconic weapons is that there is almost always a way to acquire them, and you can always eventually upgrade them to tier 5++.
However, due to the potency of certain weapon mods and the potential combos and end results they can create, it is feasible for a select few non-iconic weapons to steal the show. One mod in particular, the Equalizer mod, can be equipped with any type of ranged weapon regardless of it being power, smart, or tech. Even if they cannot adequately match the leading iconics, they are at least viable options if you do not appreciate said iconics that much. But there are certain hurdles you must negotiate with non-iconic weapons: you can never obtain a tier 5++ weapon by buying or crafting one, and upgrading the tiers of weapons is reserved only for the iconics.
Even at level 60, weapons can drop at all sorts of various tiers, as well as drop with anything in the range of max number of mod slots to none at all. And while you can replace unwanted sights and muzzles with superior tier 5 versions, unfortunately the game does not let you replace or remove the mods that the weapons are already equipped with. Therefore, if you have your eyes set on a particular non-iconic weapon when blazing your way through your enemies all across Night City, you are totally relying on RNG to gift you a tier 5++ drop with the maximum number of empty mod slots.
So now that you are fully aware of the facts, this is why when we cover each weapon category, I'm going to say what I view to be the best iconic picks, followed by the best non-iconic weapons if you insist on going that particular route. But before we look at the standout weapons I have in mind, I need to give a section to a particular range of weaponry, all provided by the same manufacturer. Love them or hate them or be indifferent towards them, I feel it would be wrong of me to not give an honourable mention to this one corporation.
However, due to the potency of certain weapon mods and the potential combos and end results they can create, it is feasible for a select few non-iconic weapons to steal the show. One mod in particular, the Equalizer mod, can be equipped with any type of ranged weapon regardless of it being power, smart, or tech. Even if they cannot adequately match the leading iconics, they are at least viable options if you do not appreciate said iconics that much. But there are certain hurdles you must negotiate with non-iconic weapons: you can never obtain a tier 5++ weapon by buying or crafting one, and upgrading the tiers of weapons is reserved only for the iconics.
Even at level 60, weapons can drop at all sorts of various tiers, as well as drop with anything in the range of max number of mod slots to none at all. And while you can replace unwanted sights and muzzles with superior tier 5 versions, unfortunately the game does not let you replace or remove the mods that the weapons are already equipped with. Therefore, if you have your eyes set on a particular non-iconic weapon when blazing your way through your enemies all across Night City, you are totally relying on RNG to gift you a tier 5++ drop with the maximum number of empty mod slots.
So now that you are fully aware of the facts, this is why when we cover each weapon category, I'm going to say what I view to be the best iconic picks, followed by the best non-iconic weapons if you insist on going that particular route. But before we look at the standout weapons I have in mind, I need to give a section to a particular range of weaponry, all provided by the same manufacturer. Love them or hate them or be indifferent towards them, I feel it would be wrong of me to not give an honourable mention to this one corporation.
MILITECH WEAPONS
In my humble opinion, Militech beats Arasaka and all the others in terms of being the overall best corporation when it comes to their range of weapons, enough to merit its own section. That does not mean the individual weapons themselves are the absolute best of their respective categories, but for the purposes of venturing through the early and middle stages of the game at the very least, you cannot go wrong with Militech firearms. And if during endgame you happen to find any tier 5++ drops with the maximum number of (empty) mod slots available, then you might be wise to hold onto them or put them in your personal stash at the very least.
Furthermore, if you are in Dogtown, be on the lookout for Militech weapons that have been modified by the BARGHEST troops and differ from the base models. The one consistent bonus with all BARGHEST weapons over the original models is that they always have +25% armour penetration. However, these modifications have their own pros and cons: the performance of some BARGHEST firearms may be a net positive, but you might find a few of them worth skipping over and sticking to the originals. It really depends on what you prefer in terms of gun performance.
M-10AF Lexington is a surprisingly solid pistol despite its relatively low base damage. That's because you can hold down the trigger to make it fire full-auto. There is also an iconic X-MOD2 version with 50% extra headshot damage that you can upgrade to tier 5++ and then customise with tier 5 mods, instead of waiting for a random drop in the open world. Compared to the base model, the BARGHEST variation has 25% armour penetration, 25% extra fire rate and a slight increase in base damage. But it also has reduced weapon handling and 25% less headshot damage. Use a Kanetsugu sight and an RC-7 Dybbuk muzzle brake for attachments. Due to its full-auto fire as a power weapon, I would highly recommend using Pyro as well as Pinpoint mods.
M-76e Omaha is the tech pistol that the iconic Lizzie is based on. By default, it's a semi-automatic pistol but when charged, it fires 3 projectiles per shot, in a burst-fire volley of 3 shots, meaning a total of 9 projectiles per volley. It's quite a devastating barrage if you can land the shots, but beware of the recoil! The BARGHEST variant has a magazine size of 12 instead of 9, meaning you can burst-fire an extra volley before having to reload, but at the cost of both effective range and weapon handling. You can attach a Kanetsugu sight but as a tech weapon, I would recommend Spinetickler and C-Thru as the go-to mods.
Ticon is like the Omaha but in reverse. It burst-fires 3 shots when you tap it, but you charge it up to expend those 3 bullets in a single shot. I would actually argue that a well-modded Ticon is superior to Solomon Reed's iconic Pariah, seeing as the latter tries to be a 'stealth' tech pistol but lacks the base damage to make stealthy gameplay feasible. There is no BARGHEST variant of this tech pistol, and I recommend the same sight and mods as for the Omaha above.
M-179e Achilles is a nice tech precision rifle which serves as the base model for the iconic Widow Maker. It's an easily misunderstood gun: although it is a tech weapon, it's better used more like a semi-automatic assault rifle that you can tap-fire, as it has less base damage but a much faster fire rate than the SOR-22. Ideally, you only want to charge up for Bolt shots when you need to shoot through cover. There is also an iconic X-MOD2 close to one of the Militech data terminals for the Relic in Dogtown, which might put you off at first considering that it has about 20% less base damage than the original. But to compensate for that, it has superior fire rate, effective range, weapon handling, 33% extra magazine size, and 25% extra headshot damage. There is no BARGHEST variant available. By far, the two best mods for this tech precision rifle are the C-Thru and the Headtoll mods: they make the most sense with the gun's dynamic design.
M251s Ajax is an assault rifle I've always been fond of, and I certainly would choose a basic Ajax any day over its iconic counterpart Moron Labe. I would easily kit this out with a Kanetsugu sight, an RC-7 Strigoi muzzle brake, and Pyro and Ready Steady mods. The BARGHEST model is interesting: it has 30% more base damage! However, it has 40% reduced effective range, 40% reduced weapon handling, and a reduced magazine size, from 30 down to 20. If you are comfortable with those differences, you may want to consider the iconic Pit Bull from a Dogtown airdrop, although that weapon only has the sight and muzzle, no mod slots like the Ajax.
M221 Saratoga is an SMG that performs well which is not surprising considering that it serves as the base model for two iconic SMGs, the Fenrir and the Problem Solver. I would use the exact same attachments and mods as I would for the Ajax. The BARGHEST variant is definitely worth considering though: same magazine size reduction as the Ajax, but 10% extra base damage, and 25% extra headshot damage multiplier.
Mk. 31 HMG is literally the only heavy machine gun model in Cyberpunk and is officially a Militech weapon. Either enemies drop the ones they try using against you, or you can rip them off from the Militech Aegis turret bases they're stuck to. It comes with its own ammo and packs quite a punch. No attachments or mods, no BARGHEST variants or anything like that. Just make sure you have the perk Like a Feather so you're not slowed down while carrying it.
Crusher has always been one of my favourite shotguns since the game was released. It might not boast impressive base damage compared to most other shotguns, but the handling and performance of this single-barrel shotgun is something I do appreciate, especially as it reloads an entire magazine in one motion instead of reloading each individual shell one-by-one. Bizarrely, the original model of this shotgun does not have an iconic cousin but unless it was an X-MOD2 variant, you could not mod it anyway. And if there is one weapon type that you want to mod more than any other, it is shotguns! Why? Because of the Kneel mod: +25% chance to dismember and kill an enemy by shooting them in the leg. Fun fact: this mod bonus applies to ALL the projectiles in a single shotgun blast! The tier 5 version is the only one that exists, and the sole means to get your hands on it is to buy it from weapons vendors when you've reached at least level 40. This mod eviscerates standard and elite enemies, but sadly has no impact on MaxTac agents or bosses.
But what about the BARGHEST variant? It has slightly more base damage, 15% extra headshot damage, and 33% extra effective range. As for the penalties, reduced weapon handling, a reduced magazine size from 12 down to 8, and REDUCED PROJECTILE COUNT PER SHOT, from 5 down to 3! That last detail is NOT good for the Kneel mod! You may as well use the iconic Amstaff instead which is based on the BARGHEST variant of the Crusher. My recommendation: find a tier 5++ original Crusher, attach a Kanetsugu sight, fix it with the Kneel mod first, and then the Pyro mod as the damage-over-time is not reduced by an enemy's armour, making up for the headshot-focused shotgun's complete lack of armour penetration.
Furthermore, if you are in Dogtown, be on the lookout for Militech weapons that have been modified by the BARGHEST troops and differ from the base models. The one consistent bonus with all BARGHEST weapons over the original models is that they always have +25% armour penetration. However, these modifications have their own pros and cons: the performance of some BARGHEST firearms may be a net positive, but you might find a few of them worth skipping over and sticking to the originals. It really depends on what you prefer in terms of gun performance.
M-10AF Lexington is a surprisingly solid pistol despite its relatively low base damage. That's because you can hold down the trigger to make it fire full-auto. There is also an iconic X-MOD2 version with 50% extra headshot damage that you can upgrade to tier 5++ and then customise with tier 5 mods, instead of waiting for a random drop in the open world. Compared to the base model, the BARGHEST variation has 25% armour penetration, 25% extra fire rate and a slight increase in base damage. But it also has reduced weapon handling and 25% less headshot damage. Use a Kanetsugu sight and an RC-7 Dybbuk muzzle brake for attachments. Due to its full-auto fire as a power weapon, I would highly recommend using Pyro as well as Pinpoint mods.
M-76e Omaha is the tech pistol that the iconic Lizzie is based on. By default, it's a semi-automatic pistol but when charged, it fires 3 projectiles per shot, in a burst-fire volley of 3 shots, meaning a total of 9 projectiles per volley. It's quite a devastating barrage if you can land the shots, but beware of the recoil! The BARGHEST variant has a magazine size of 12 instead of 9, meaning you can burst-fire an extra volley before having to reload, but at the cost of both effective range and weapon handling. You can attach a Kanetsugu sight but as a tech weapon, I would recommend Spinetickler and C-Thru as the go-to mods.
Ticon is like the Omaha but in reverse. It burst-fires 3 shots when you tap it, but you charge it up to expend those 3 bullets in a single shot. I would actually argue that a well-modded Ticon is superior to Solomon Reed's iconic Pariah, seeing as the latter tries to be a 'stealth' tech pistol but lacks the base damage to make stealthy gameplay feasible. There is no BARGHEST variant of this tech pistol, and I recommend the same sight and mods as for the Omaha above.
M-179e Achilles is a nice tech precision rifle which serves as the base model for the iconic Widow Maker. It's an easily misunderstood gun: although it is a tech weapon, it's better used more like a semi-automatic assault rifle that you can tap-fire, as it has less base damage but a much faster fire rate than the SOR-22. Ideally, you only want to charge up for Bolt shots when you need to shoot through cover. There is also an iconic X-MOD2 close to one of the Militech data terminals for the Relic in Dogtown, which might put you off at first considering that it has about 20% less base damage than the original. But to compensate for that, it has superior fire rate, effective range, weapon handling, 33% extra magazine size, and 25% extra headshot damage. There is no BARGHEST variant available. By far, the two best mods for this tech precision rifle are the C-Thru and the Headtoll mods: they make the most sense with the gun's dynamic design.
M251s Ajax is an assault rifle I've always been fond of, and I certainly would choose a basic Ajax any day over its iconic counterpart Moron Labe. I would easily kit this out with a Kanetsugu sight, an RC-7 Strigoi muzzle brake, and Pyro and Ready Steady mods. The BARGHEST model is interesting: it has 30% more base damage! However, it has 40% reduced effective range, 40% reduced weapon handling, and a reduced magazine size, from 30 down to 20. If you are comfortable with those differences, you may want to consider the iconic Pit Bull from a Dogtown airdrop, although that weapon only has the sight and muzzle, no mod slots like the Ajax.
M221 Saratoga is an SMG that performs well which is not surprising considering that it serves as the base model for two iconic SMGs, the Fenrir and the Problem Solver. I would use the exact same attachments and mods as I would for the Ajax. The BARGHEST variant is definitely worth considering though: same magazine size reduction as the Ajax, but 10% extra base damage, and 25% extra headshot damage multiplier.
Mk. 31 HMG is literally the only heavy machine gun model in Cyberpunk and is officially a Militech weapon. Either enemies drop the ones they try using against you, or you can rip them off from the Militech Aegis turret bases they're stuck to. It comes with its own ammo and packs quite a punch. No attachments or mods, no BARGHEST variants or anything like that. Just make sure you have the perk Like a Feather so you're not slowed down while carrying it.
Crusher has always been one of my favourite shotguns since the game was released. It might not boast impressive base damage compared to most other shotguns, but the handling and performance of this single-barrel shotgun is something I do appreciate, especially as it reloads an entire magazine in one motion instead of reloading each individual shell one-by-one. Bizarrely, the original model of this shotgun does not have an iconic cousin but unless it was an X-MOD2 variant, you could not mod it anyway. And if there is one weapon type that you want to mod more than any other, it is shotguns! Why? Because of the Kneel mod: +25% chance to dismember and kill an enemy by shooting them in the leg. Fun fact: this mod bonus applies to ALL the projectiles in a single shotgun blast! The tier 5 version is the only one that exists, and the sole means to get your hands on it is to buy it from weapons vendors when you've reached at least level 40. This mod eviscerates standard and elite enemies, but sadly has no impact on MaxTac agents or bosses.
But what about the BARGHEST variant? It has slightly more base damage, 15% extra headshot damage, and 33% extra effective range. As for the penalties, reduced weapon handling, a reduced magazine size from 12 down to 8, and REDUCED PROJECTILE COUNT PER SHOT, from 5 down to 3! That last detail is NOT good for the Kneel mod! You may as well use the iconic Amstaff instead which is based on the BARGHEST variant of the Crusher. My recommendation: find a tier 5++ original Crusher, attach a Kanetsugu sight, fix it with the Kneel mod first, and then the Pyro mod as the damage-over-time is not reduced by an enemy's armour, making up for the headshot-focused shotgun's complete lack of armour penetration.
BLADED WEAPONS (MELEE)

Butcher's Cleaver is an iconic knife that you cannot throw, but functions just like any other blade. Yes, you can block and deflect bullets with this thing just like a katana. And no, it's not easy for my biased self to admit that this thing is superior to the ENTIRE collection of iconic katanas the game has to offer, but it's the truth! It didn't take long for me to test it with the weakest playstyle for melee combat to realise that it's more reliable for killing bosses and MaxTac than any iconic katana. At tier 5++, it just creeps over 200 base damage - that's almost 25% more than the Tsumetogi, and 35% more than both Jinchu-Maru and Byakko.
Now in terms of each swing, it does have about 16% slower swing rate and 25% more stamina consumption. However, it has a 40% bleed chance and when you get an enemy bleeding, it speeds up the swing rate and reduces the stamina cost, pretty much matching all iconic katanas in performance while beating them in raw damage. So in other words, this thing gets better when you fight tougher enemies. Placide would have been a lot smarter and more dangerous if he had simply carried this iconic blade with him at all times! (Located in Rolland's Butcher Shop in Pacifica, after Placide has butchered the poor chicken, during the main mission M'ap Tann Pèlen. Or if you miss that, you can buy it from Herold Lowe inside the stadium in Dogtown.)
Katana is the overall best non-iconic blade with the right mods, but it's a pain to find one that is tier 5++ with two empty mod slots! If CDPR ever added one last iconic weapon to the roster, I would want it to be a Katana X-MOD2. When it comes to bladed weapons, they do better with fast attacks, thus you want a fast swing rate with low stamina cost, two boxes that all Katanas both iconic and non-iconic, have ticked.
Now here comes a tough question: which mods do you use? Now personally, I myself would not waste the Chimera Core on getting the iconic Severance mod. That is NOT to say that it is bad or worthless: on the contrary, it's quite good, like any of the iconic mods! The mod functions on a percentage chance that makes the most logical sense with a melee weapon that has relatively low base damage, but fast enough swing rate to get multiple hits in more quickly, ergo the Katana is THE most ideal blade for that very function. However, it doesn't come into effect until an enemy is below 50% of their max health, and if you use Chipware Connoisseur to stack melee damage bonuses on your cyberware like I do in this build, then Severance has a MUCH smaller window to operate within, and you honestly might not notice the difference.
For the record, in my current playthrough at the time of writing this section, I have used the perk to amass 95% extra melee damage from my cyberware bonus stats alone – that does not even include Dense Marrow's bonus which would make it more than 120% melee damage! Believe me when I say with that amount of bonus melee damage, Beat on the Brat side jobs have NEVER been so easy! The difference in DPS output from that alone is far more significant and applies across the board, no matter how much health an enemy has. On top of such a strong foundation, Severance would be nothing more than skimping on a very thin layer of icing for the cake!
Because of the absurdly high melee damage, even crit-bleeding from the Bleedout mod feels inconsequential, and you have to be MAD to deduct 10% base damage just for 3 extra seconds of bleeding from the Haemocide mod! Even though the Slice 'Em Up mod has a strong Byakko-esque downside vibe to it that doesn't help you against single targets or bosses, it's definitely the best of the bladed weapon mods and will certainly make a noticeable difference against MaxTac. The tier 5 version is the only version of it that exists though, which means you only obtain it by purchasing it and you have to be at least level 40 to do so. The only one I've seen so far, I bought from the melee weapons vendor in Pacifica.
Airstrike is pretty damn good for leap attacks with +25% crit chance and +70% crit damage, as well as providing 70% knockdown chance for landing a midair crit hit. It makes one-hit kills on standard and elite enemies far more likely considering the build has fairly high crit chance already. And if you were going to double-stack the same mod on the Katana, I would argue that Airstrike gives the most accumulative value overall. But the single best mod is definitely Cyclone: all you have to do is a sprint attack - sprint at an enemy and then do a fast swipe - and you have 4 seconds of an unrelenting attack combo, the exact same combo that the iconic Byakko is renowned for, but with the noticeable addition of each successful swipe stacking 5% faster swing rate, up to a maximum of a 35% increase!
Let me reiterate that vital point: all you have to do to unleash such a barrage is a simple sprint attack. Do you know what that means? It means that with just the Cyclone mod alone, a non-iconic Katana can surpass the Byakko, the iconic blade that allegedly has the best DPS out of all the katanas in the game, yet needs a kill in order to do that. At the same tiers, a standard Katana has the same base damage and stats as the Byakko. But because you can perform a sprint attack on any enemy, lone bosses included, and get faster swing rate as you keep hacking away at your target, the Cyclone mod simply allows your standard Katana to outperform all the iconic katanas, regardless of it being Byakko, Jinchu-Maru or even the Tsumetogi with its 10% extra base damage. After doing more testing, although it is possible to stack two Cyclone mods, all this really does is increase the duration of the swinging effect after doing a sprint attack, up to as much as 8 seconds. Despite doubling up on Cyclone, each stack of faster swing rate still only lasts for 2 seconds, and melee attack speed bonuses always cap at a total of +100% regardless of the source. Therefore, I don't recommend fitting a second Cyclone mod.
As for the second mod slot, I personally would pick Airstrike so that you can make your leap attacks more lethal and give them 70% knockdown chance if your target survives the initial hit. Slice 'Em Up is also a worthwhile option for the second mod slot if you're fine with having a kill-dependent bonus that only lasts for 5 seconds. But to be honest, you also increase your chances of getting finisher prompts by stacking melee damage on cyberware. With both Airstrike and Cyclone, the Katana comfortably outperforms the Byakko, and I believe that it can also beat the Butcher's Cleaver in a DPS race!
BLUNT WEAPONS (MELEE)
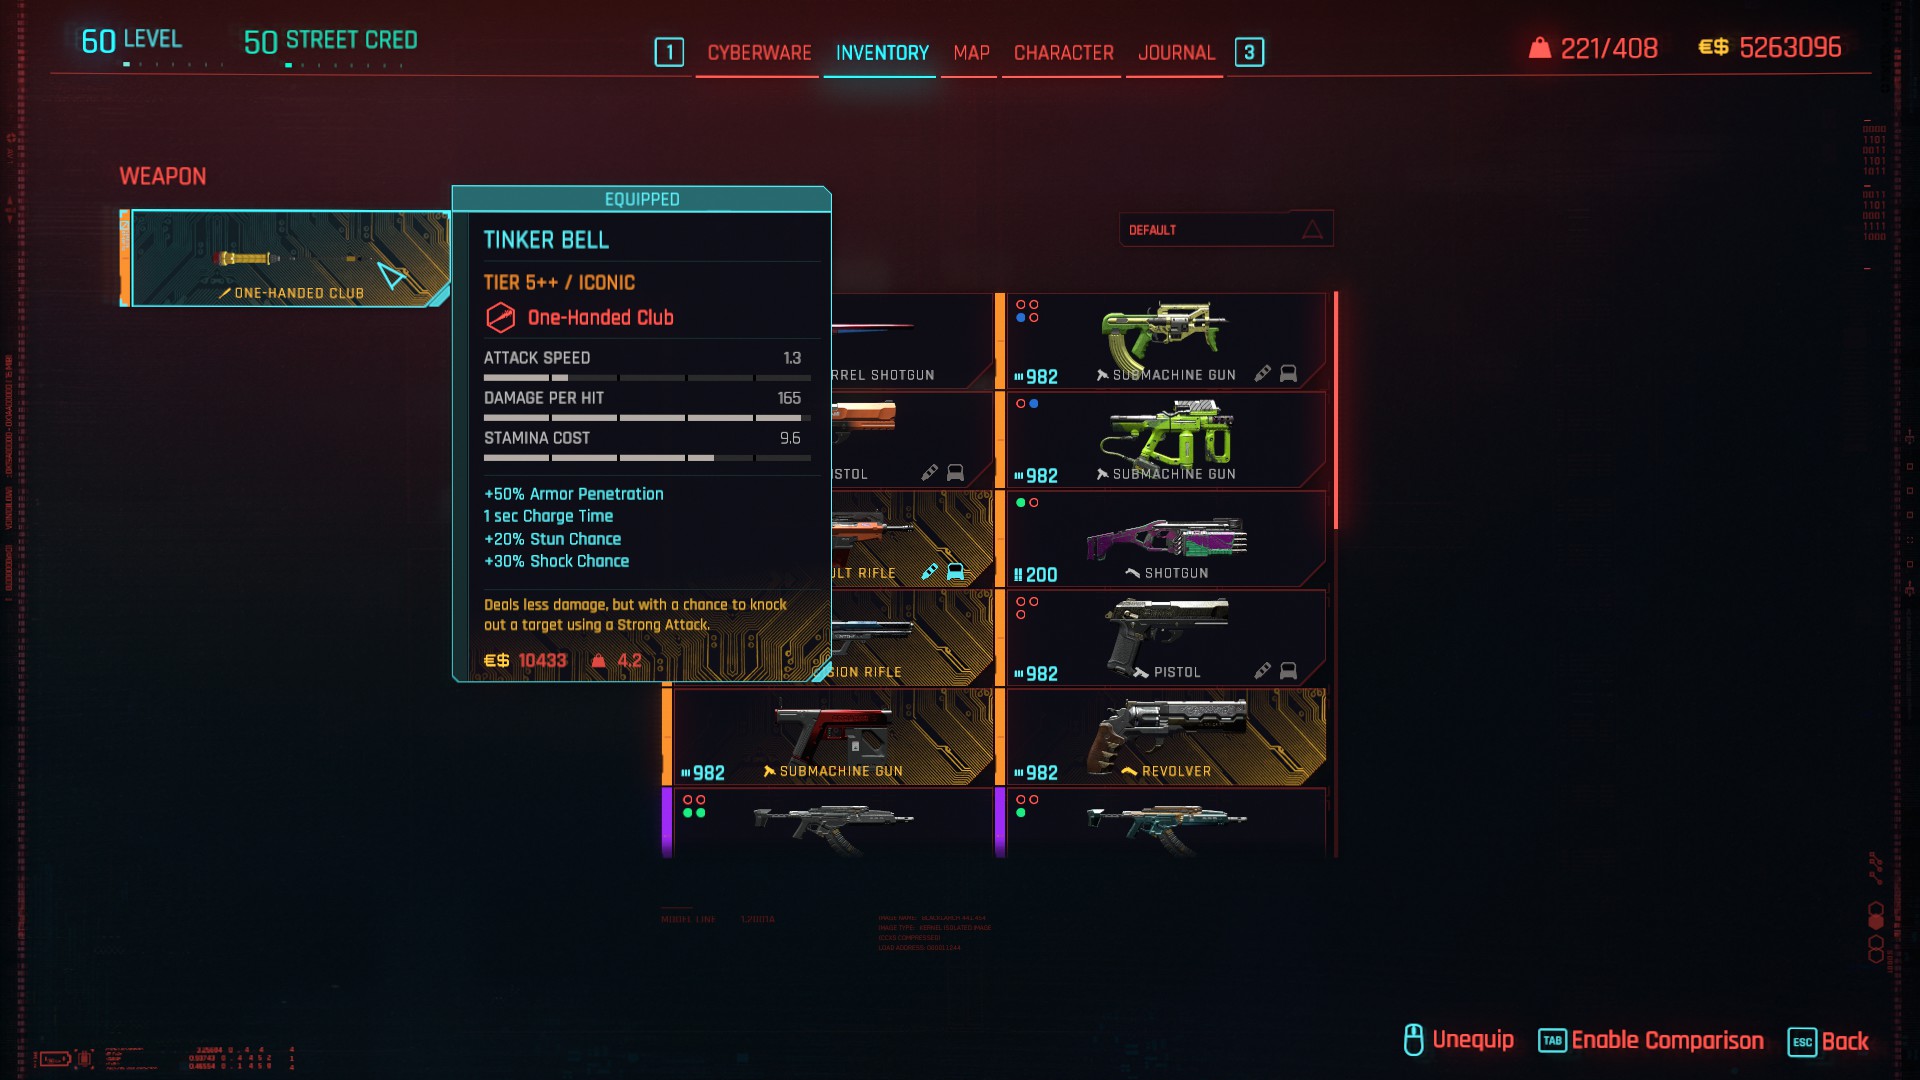
Tinker Bell looks like a meme weapon. Hell, it IS a meme weapon! But I'm being 100% serious when I say that you are wasting your time if you are looking at any other blunt melee weapon than this iconic cattle prod. You can drop Sasquatch's Hammer, abort the Baby Boomer and turn off Sir John Phallustiff. Because Tinker Bell is so ridiculously effective, that you can make MaxTac die... of sheer embarrassment! Ever wanted to see a MaxTac agent's health go from 100% to zero in just one hit? Well, Tinker Bell gives you a 20% chance to do just that if RNGesus blesses your strong hits! But even if he is not with you in spirit, you can still use this iconic melee weapon to stun MaxTac agents long enough to get behind them and snap their necks. If you have a bizarre aversion towards using katanas or bladed melee weapons, then this is THE melee weapon you should be procuring and using everywhere you go. Need I say more?! (Located in the control room of the house at Edgewood Farm that belongs to Anthony Harris, obtained during the side job The Hunt.)

Baseball Bat sounds very basic and straightforward as a non-iconic choice, but it's reliable and gets the job done. You can even find the iconic X-MOD2 version in Dogtown which surprisingly, does not even know the term 'compensation' as it matches the original version in every sense, while providing superior bleeding chance! And being an iconic, you can upgrade it to tier 5++ instead of relying on RNG to do its thing.
Like with the Katana, I personally would kit this out with both Airstrike and Cyclone. The former functions very well with Superhero Landings, and the latter helps speed up a melee weapon that has a slow swing rate by default. But also spare a bit of consideration for the Barbarian mod as that has potential to shine against MaxTac and bosses. With the right mods equipped, this would have been arguably the best overall blunt weapon in the game had Tinker Bell not existed. It's also because of that particular iconic weapon being able to potentially one-shot most things including MaxTac, as well as my prior explanation concerning bladed melee weapons, that I don't think it is wise to waste the iconic Severance Mod on the Baseball Bat, if you were flirting with such an idea. Not only does it already have fairly high base damage for a melee weapon, but it also has a slow swing rate, meaning it's a poor choice for fitting it with Severance.
THROWING WEAPONS (MELEE)
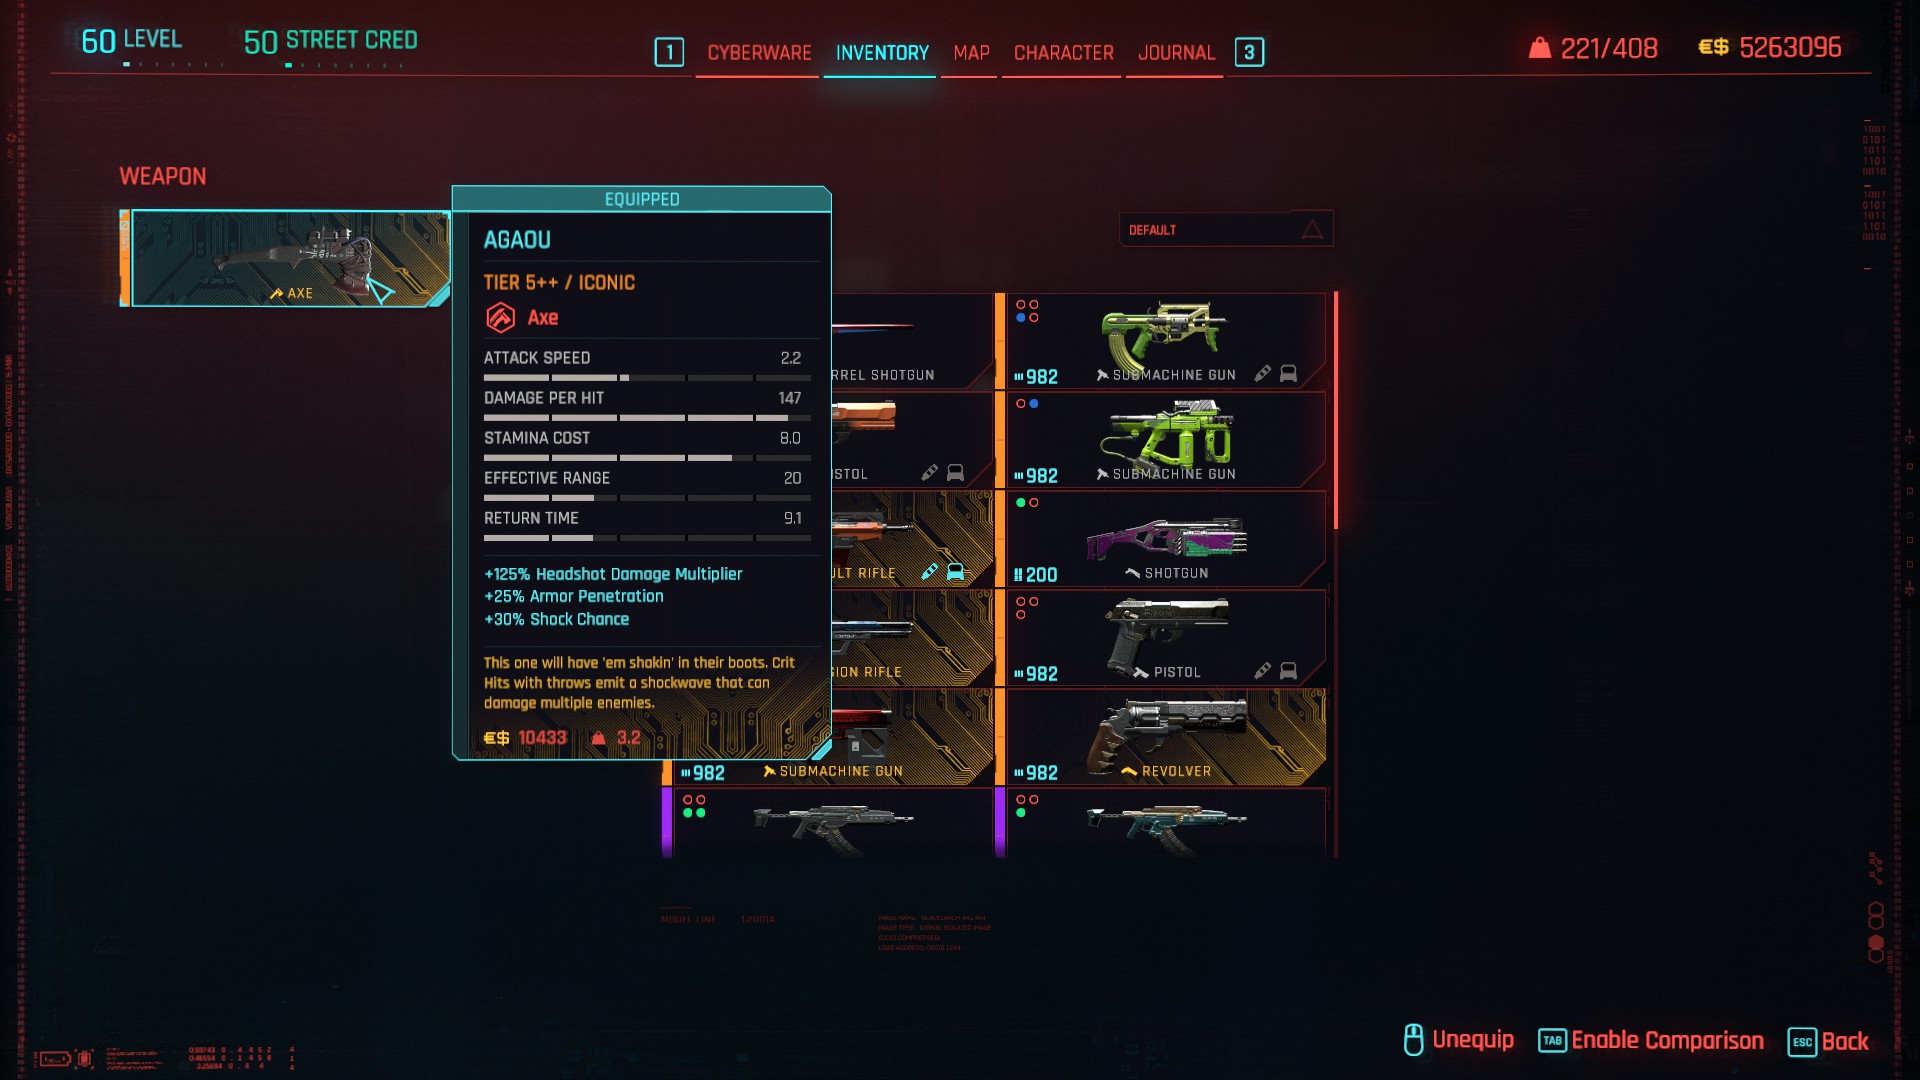
Agaou covers all your throwing weapon DPS needs except for stealth. But in a weapon category that is predominantly about knives, it's actually an iconic Tomahawk that steals the show and performs best overall. It just does more damage, has higher crit chance than most throwing weapons, and crit hits create shock explosions that can tag multiple enemies. The last part is the reason why it can hinder your efforts when it comes to stealth though. (Located in Dogtown, dropped by Ayo Zarin in Increased Criminal Activity: Voodoo Boys.)

Claw is a great non-iconic throwing weapon simply because it can have the highest base damage, which is very good for turning it into a weapon optimised for stealth, something the Agaou sucks at. Because throwing weapons are deemed to be melee weapons as well, you can actually equip a Silencio mod for +100% crit chance and +50% crit damage while crouched and undetected, and this will still work when using it as a ranged weapon! You can further accentuate this stealth DPS with a tier 5 version of Pax where you get 20% bonus damage outside of combat and zero penalties during combat. Oh, and did I mention that as of patch 2.1, there is an X-MOD2 version of the Claw, that can be found by climbing to the very top of the pyramid that is Mr. Hands' Heavy Hearts in Dogtown? Granted, it may deal fractionally less base damage than the original while matching it in headshot damage and armour penetration, but is superior in every other stat relevant to throwing weapons, and can be upgraded to tier 5++ due to it being iconic.
PISTOLS
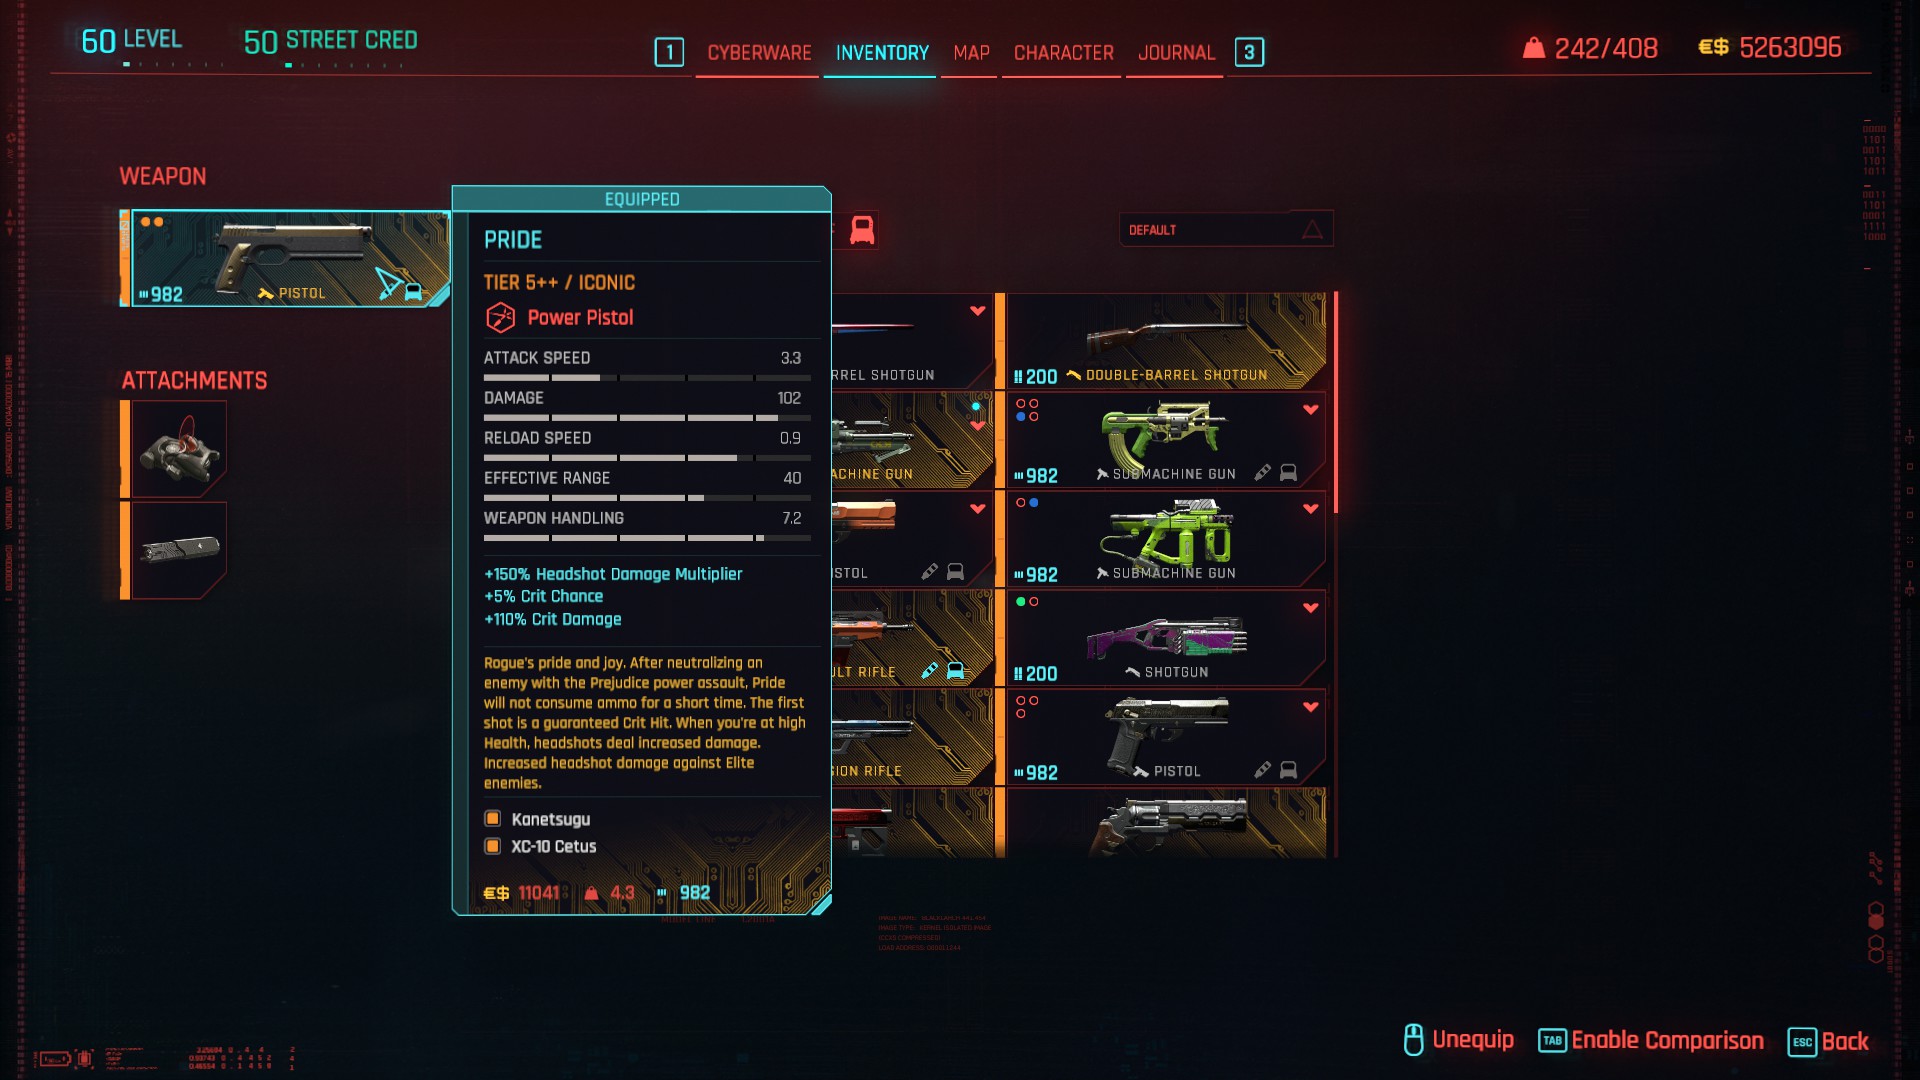
Pride is Rogue's iconic pistol that you can pick up at the end of the final story mission of the game by going with her. Then after completing the story in that way, you must reload from the 'Point of No Return' but it is so worth doing all of that if you're looking to use one weapon that benefits from Focus and Deadeye. The first bullet fired from a new magazine is a guaranteed crit hit. Pride also deals +100% crit damage, and +10% headshot damage against elite enemies, the ones with skull icons above their heads. Is that still not enough for you? When your health is above 75%, Pride gives you 420% headshot damage! Oh, and you can also equip it with a legendary XC-10 Cetus silencer so it can do 150% bonus stealth damage AND guaranteed critical hits as long as you remain undetected, unironically customising it to become the best stealth weapon in the game. This pistol does more damage with a single bullet than any other pistol, revolver, precision rifle, or sniper rifle! (Located in Arasaka Tower, immediately after the final boss fight during the main mission Knockin' on Heaven's Door.)
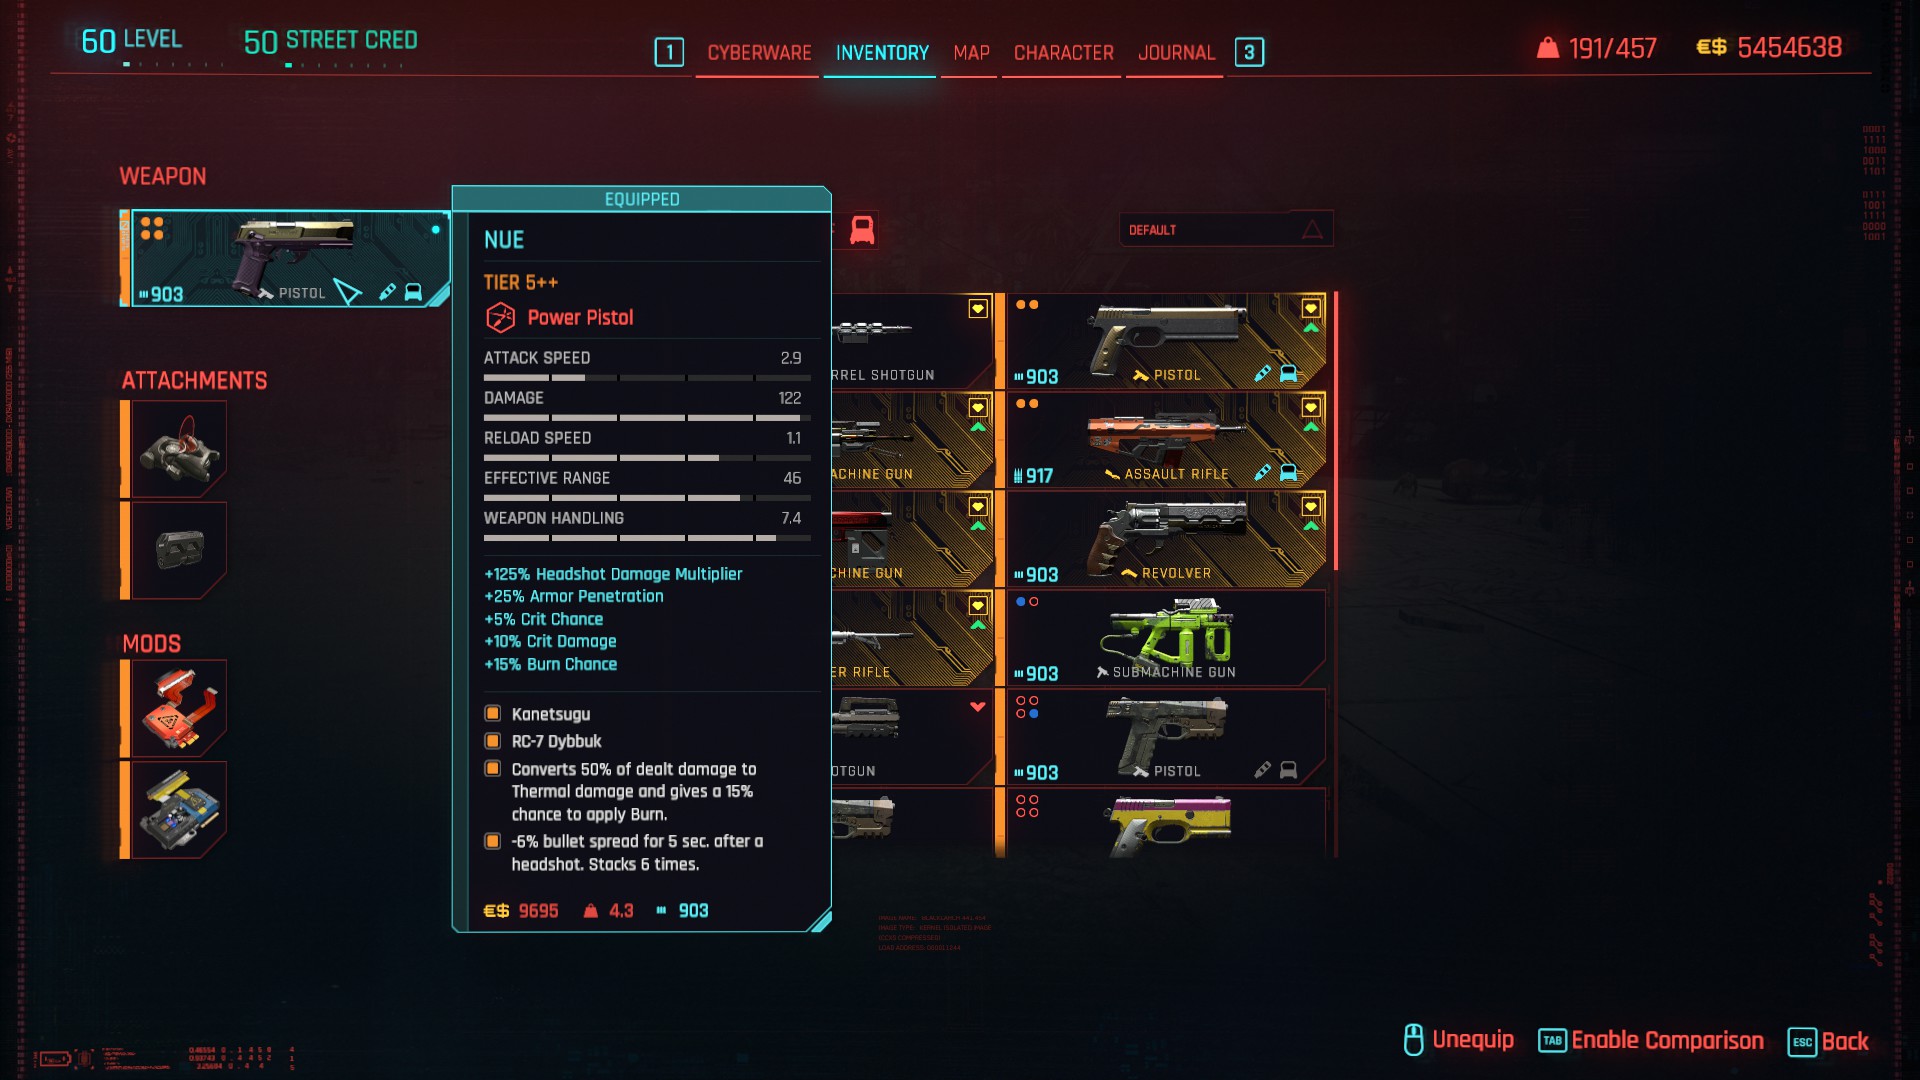
Nue looks and feels like the Desert Eagle of the Cyberpunk world. It's the pistol that inspires the iconic trio of La Chingona Dorada, Death and Taxes, and Riskit. Seeing as no other pistol can hold a candle to Pride in terms of its single-shot damage and how that works in stealth, we may as well look to a more combat-focused pistol instead. The Militech Lexington is a very good option but easily eats up a lot of bullets for a pistol. The Tsunami corporation actually did well with the Nue, I prefer it to the similar Arasaka-made Tamayura. Equip this with a Kanetsugu sight, an RC-7 Dybbuk muzzle brake, and Pyro and Pinpoint mods. If you want more oomph against elite enemies, feel free to swap a mod out for the Equalizer. But if you want a non-iconic stealth pistol instead, then the Nue is still your best option: just attach the XC-10 Cetus silencer on the end, and use the Equalizer and Pax mods. Some pistols do combat well but are poor choices for stealth, and other pistols are the opposite. In my experience, the Nue feels like the best overall non-iconic pistol that performs well in both!
REVOLVERS
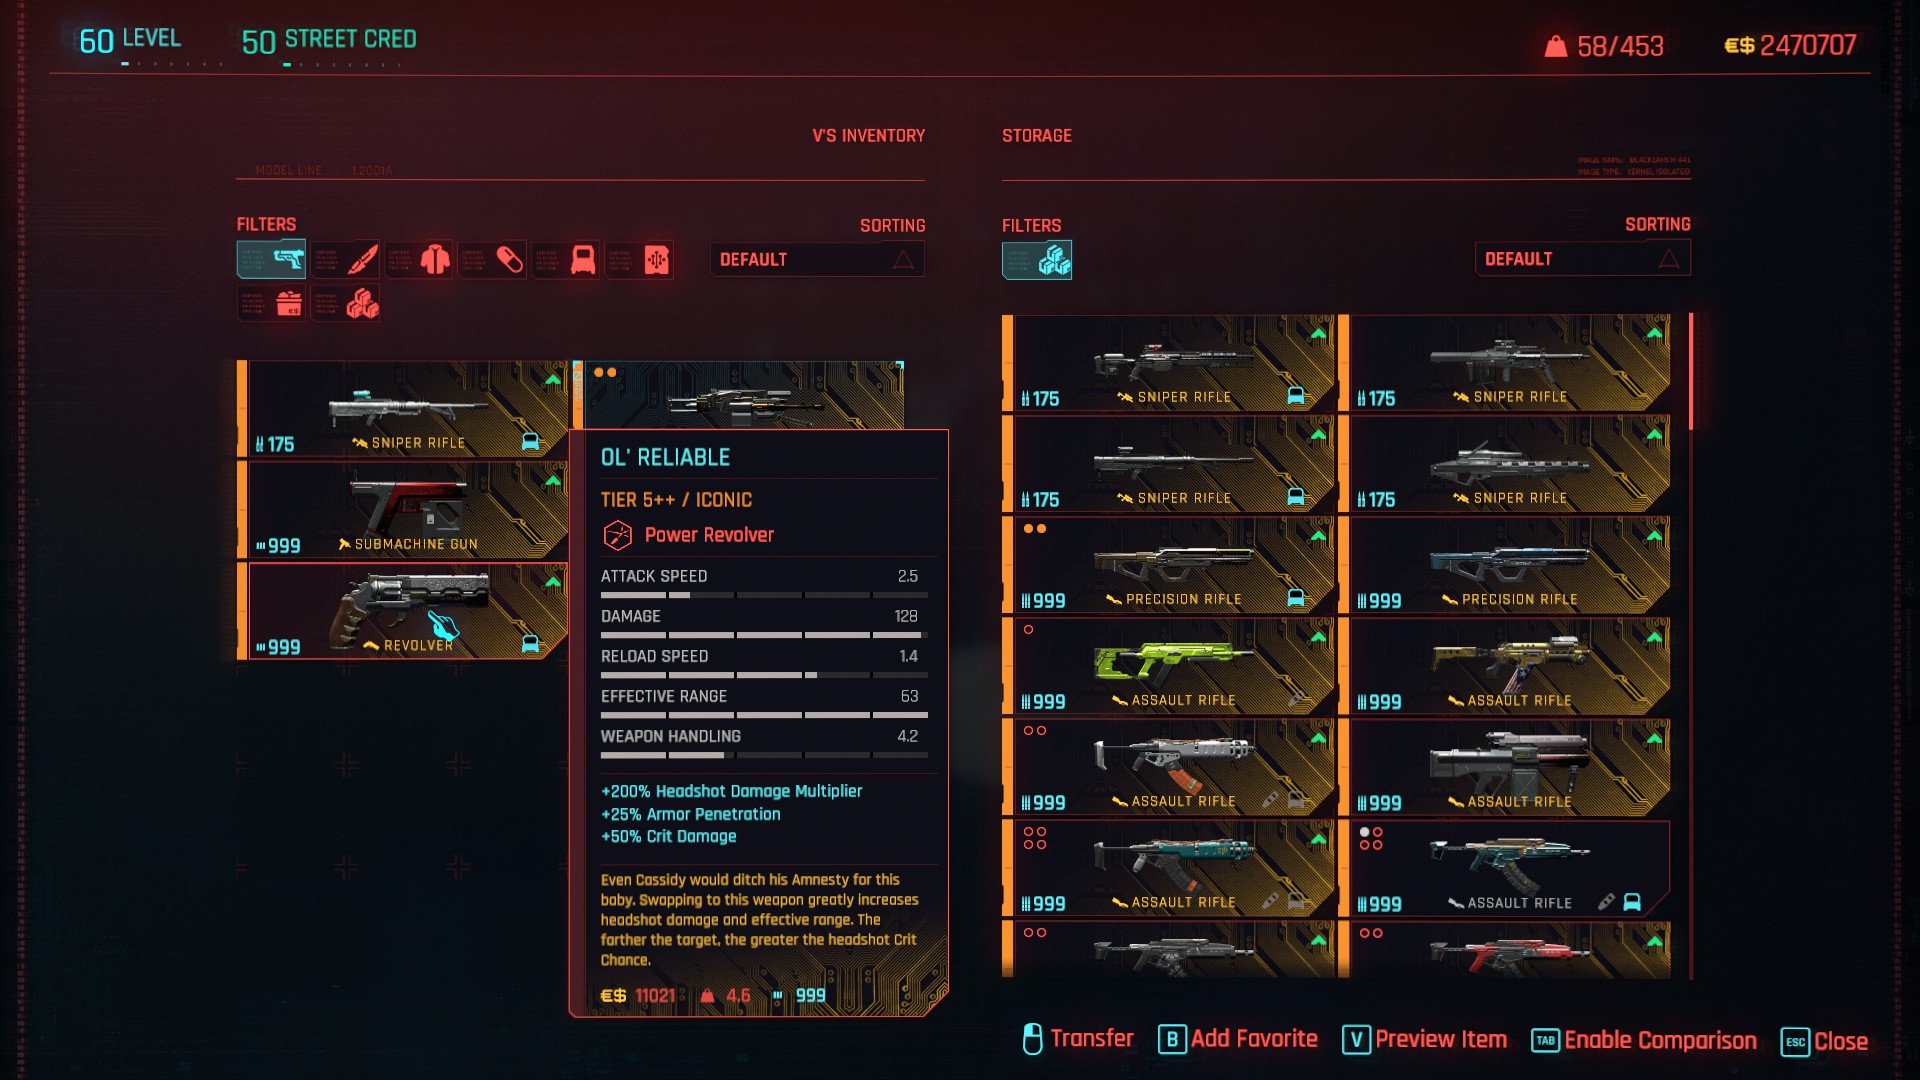
Ol' Reliable is my personal pick out of a very closely-matched trio of impressive iconic Overture models. Now yes, I'm well aware that when engaged in combat, the Archangel suddenly bumps itself up to 220% headshot damage and 100% shock chance. But what Archangel lacks in the trio is bonus crit damage, and this hurts especially in a build where we have high crit chance. I also know that Amnesty allows you to pull the trigger much faster while dealing +50% crit damage if you land crit hits. But it is very much a close-quarters revolver with short effective range, plus the recoil and bullet spread of shooting it so quickly is not going to do you many favours in terms of landing headshots.
Ol' Reliable however, has far more effective range, a scope to make it easier to land distant headshots, and the same bonus +50% crit damage as the Amnesty. Additionally, for 10 seconds after swapping to it, it deals 50% more headshot damage and has 30% more effective range. For each metre in distance you are away from the target, you get 1% extra headshot crit chance, and 1.2% extra headshot damage, both capping out at 35 metres away.
On top of a high crit chance thanks to this build, it's no exaggeration to say that almost every shot could be a crit hit! The iconic revolver's description was not lying when it said Cassidy might prefer this over the Amnesty – I know I do! The only dilemma with this weapon is that you need to take it from Dante Caruso, and his policy in regards to that, is very much over his dead body! (Located in Dogtown, dropped by Dante Caruso during the side job Shot by Both Sides.)
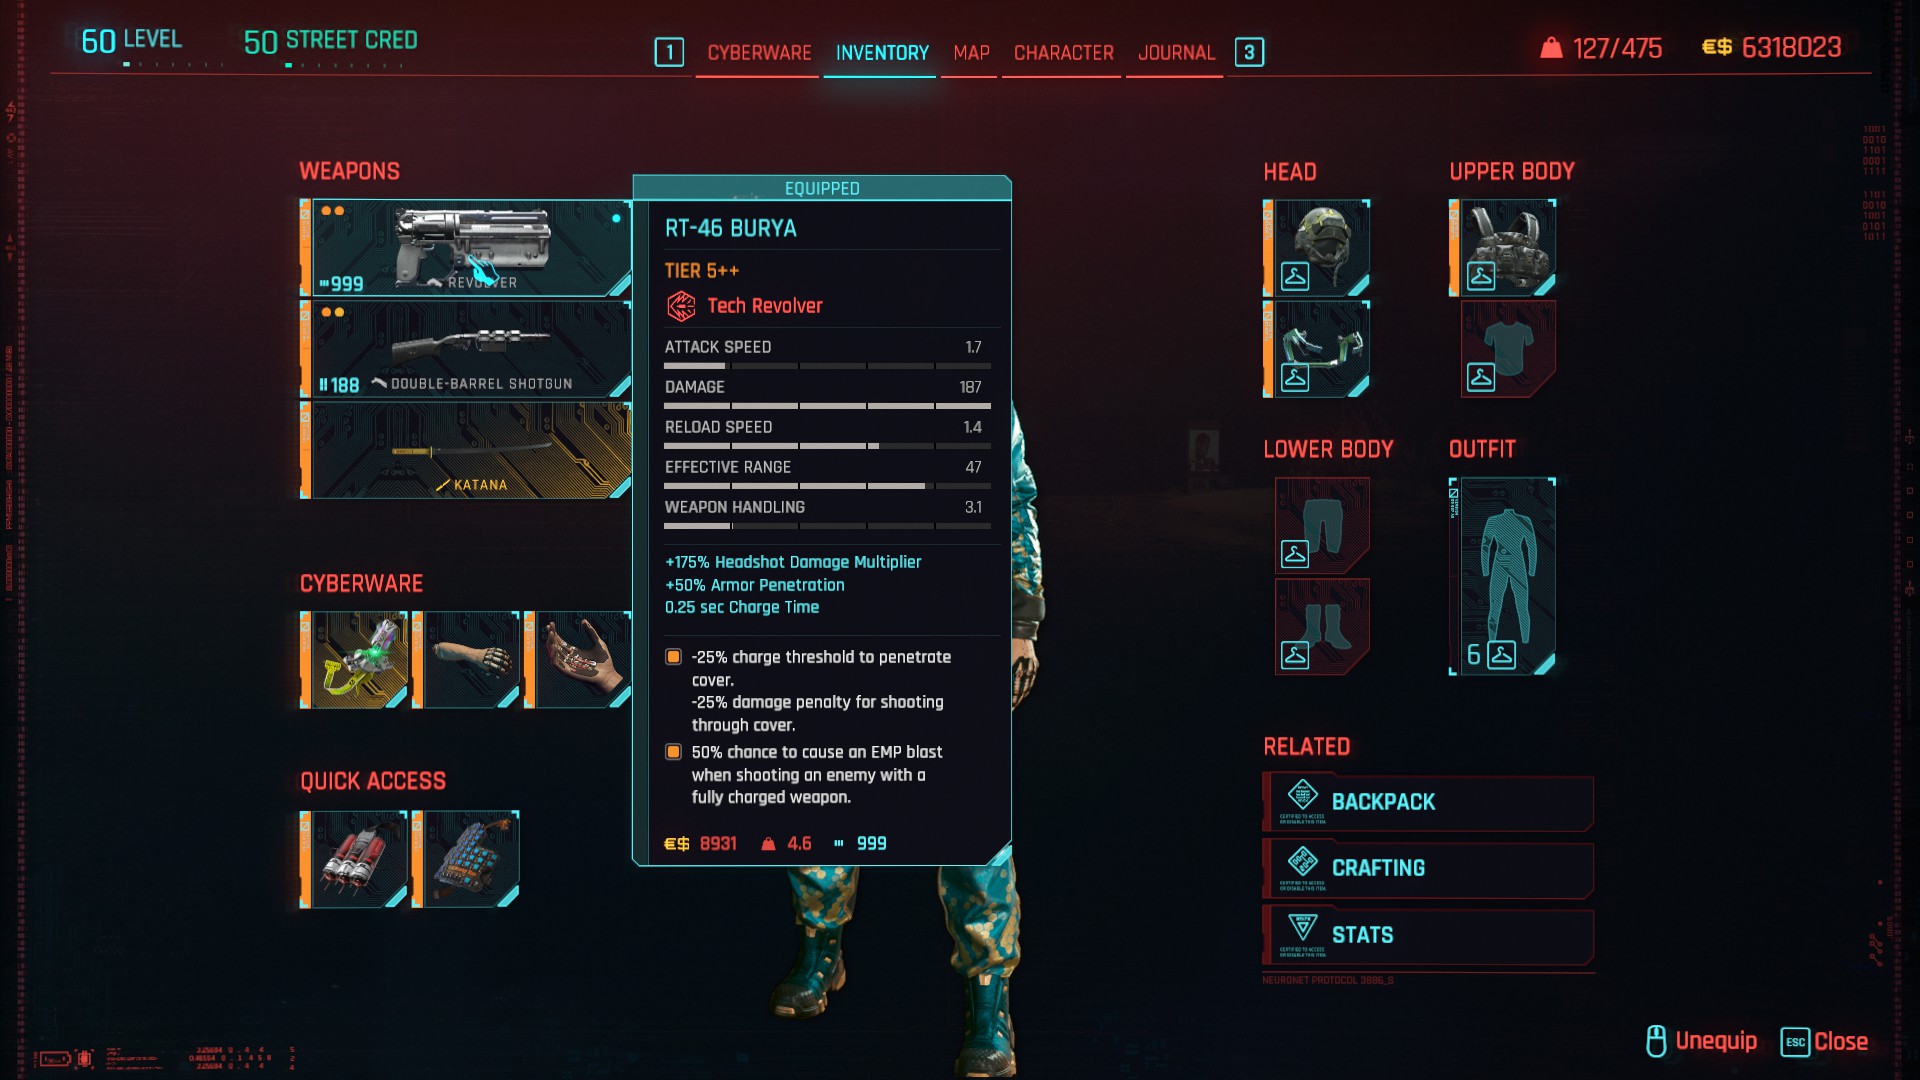
RT-46 Burya is a meaty tech revolver that actually doesn't require much to supersede its iconic variants. Ever since patch 2.0, CDPR gimped the Comrade's Hammer so badly, that it doesn't even do bonus headshot damage anymore, let alone no longer being able to penetrate walls and objects like a standard tech weapon can! Hell, even the Laika is an improvement over the Comrade's Hammer, and that's saying something considering it's part of a somewhat average collection of iconic incendiary Techtronika weapons.
As for the Burya, one criticism I have of it is that when using it on-foot in general combat, the bullet spread can make gameplay frustrating at times, making it something of an acquired taste: not everyone is going to love it. Having said that though, it's one of the best weapons you can wield during vehicle combat due to the combination of its high base damage, reasonably high headshot damage, and that 0.25-second charge duration. You can customise it into arguably the best weapon for vehicle combat in the entire game with the right mods in my honest opinion. And which mods would they be?
Well, if shots from power and smart weapons can also pierce through car bodywork, windows, and windscreens, then the C-Thru mod is somewhat irrelevant if we're talking strictly about vehicle combat alone. With the default charge duration being literally a quarter of a second, it's the one tech weapon in the game that benefits the least from the Supercharger mod. And honestly, none of the pistol / revolver mods are that appealing or beneficial for vehicle combat. In the absence of anything else, you would do better by doubling up on Equalizer mods.
But there is something else: the Spinetickler mod. Primarily, the EMP effect is more about applying shock damage-over-time, but I've noticed on a few occasions that it can help in blowing up vehicles that pursue you as well. With two Spinetickler mods, you get +100% chance to trigger the EMP effect, kind of like a tech weapon version of the iconic Archangel, but with more firepower. You may ask the question: if the EMP effect is so good, why on earth are we ignoring the DR12 Quasar? I did actually think that myself and tested it out on all the tech weapons capable of firing full-auto Bolt shots, including the Senkoh LX tech SMG. But the idea is only good in theory: in practice, the Spinetickler mod only applies to the first Bolt shot in a chain of full-auto gunfire. The Quasar literally has a third of the Burya's base damage as well, it doesn't always reliably fire a chain of full-auto shots when you try and even if you succeed, the recoil it generates is inconvenient as hell.
So as a mod, Spinetickler makes the most sense with a tech weapon that has a very brief charge duration where the span of time between landing a Bolt shot and fully charging it is less than a blink of an eye, and also has the potential to kill most standard and elite enemies in a single Bolt headshot, but might need a little something extra for those enemies that are still breathing after the headshot. There is no other tech weapon in the game that fits such a description better than the Burya. And if you use the Stuntjock perk to reduce overall bullet spread while driving, it becomes a LOT easier to land those headshots.
Seriously, I am of the opinion that the Burya is a better weapon on wheels than on-foot! If we're talking solely about revolvers, I would probably still stick with the Ol' Reliable in general combat just because as its namesake suggests, it does feel more reliable in landing headshots compared to the Burya, even though the tech revolver is easily capable of landing bigger damage numbers. But revolvers use handgun ammo and so with pistols in the picture, regardless of being in combat or stealth, I wouldn't see a reason to use Ol' Reliable instead of the iconic Pride pistol.
But when you are commandeering a vehicle and you cannot abandon it for whatever reason during combat, where you are limited to wielding pistols, revolvers, and SMGs, the Pride pistol doesn't have the benefit of stealth damage, and will lose its humongous bonus headshot damage if you fall below 75% of your max health, which is VERY common during vehicle combat! And as I said already, the Stuntjock perk makes it a lot easier to land your shots by significantly reducing the problematic bullet spread that is inherent to the Burya. If we're on-foot, I would not even put the Burya in my list of top 10 weapons. But when I need to shoot while driving or riding? As anecdotal as it sounds, I prefer the Burya over any iconic pistol, revolver, or SMG!
PRECISION RIFLES
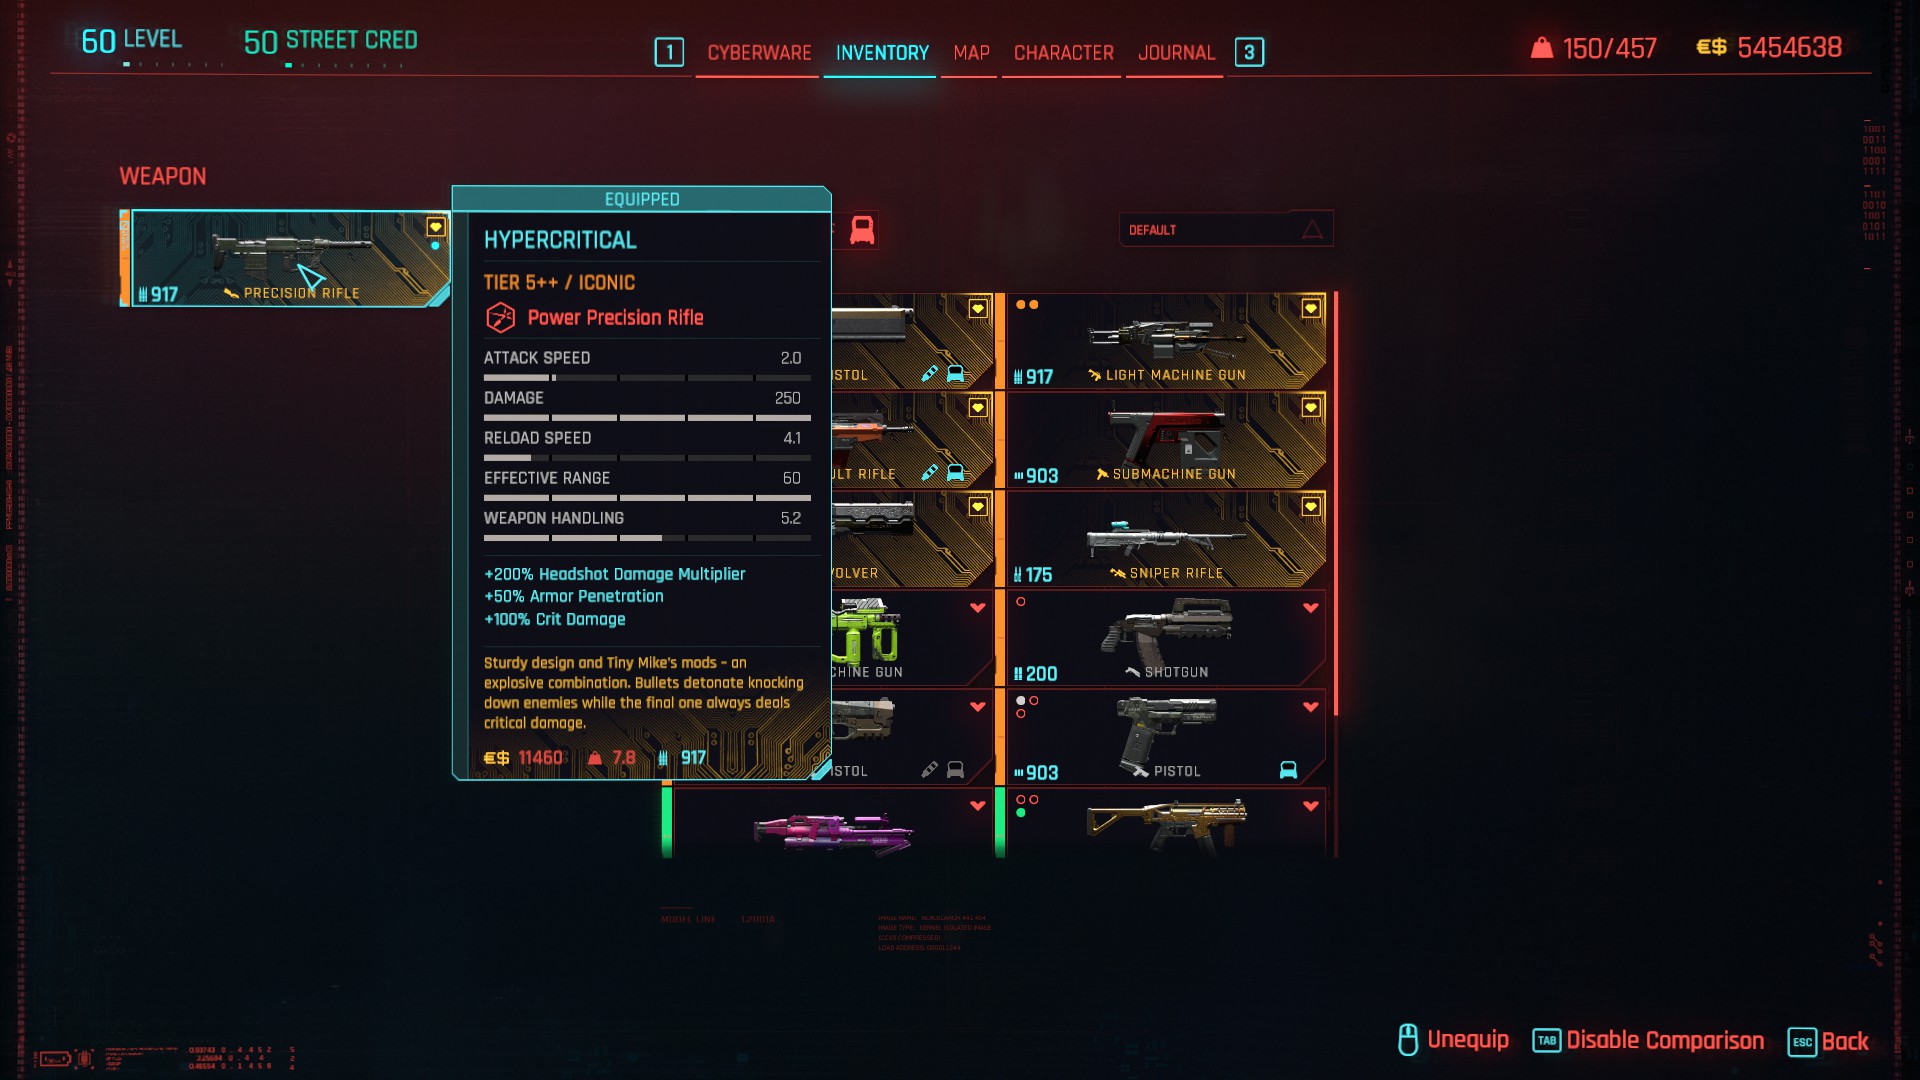
Hypercritical is an iconic Kolac precision rifle that annoys me solely for having a spectacularly awful reload duration of 4 seconds! Having said that, there are perks in the Cool tree to help alleviate that problem. It has high base damage, the explosive rounds knock down enemies, the final bullet in the magazine is guaranteed to deal critical damage if it lands, and the weapon deals +100% crit damage which is fantastic for a build such as ours which happens to have reasonably high crit chance across all different playstyles! Similar to Pride when compared to all other pistols, the Hypercritical dominates the category of precision rifles. (Located in Tiny Mike's apartment, obtained during the gig Concrete Cage Trap.)

SOR-22 is a precision rifle I regrettably slept on for quite a long time, as it does decent damage and feels quite nice to handle in combat, even in close-quarters to my surprise. Although I do like the Militech Achilles and even use its X-MOD2 variant in testing, it feels like the SOR-22 noticeably has more impact. It's a power weapon so it doesn't require charging. Although you can attach a Kanetsugu sight to this precision rifle, after enough testing, I reverted back to the SO-21 Saika holographic long scope. It may only have 5% bonus crit damage compared to the Kanetsugu's 10%, but it has +0.7 additional zoom instead of +0.35, and +30% effective range instead of just +12.5%. More importantly, it just seems to feel better and more reliable for aiming and landing headshots. As for mods, this weapon makes fantastic use of the Headtoll mod, so much so in fact that I would heavily recommend doubling up on the same mod, as the Headtoll bonuses do stack! With maximum stacks, that's 30% extra fire rate, reload speed and movement speed, 50% extra crit chance and crit damage, and +20% health restoration per headshot kill!
SNIPER RIFLES
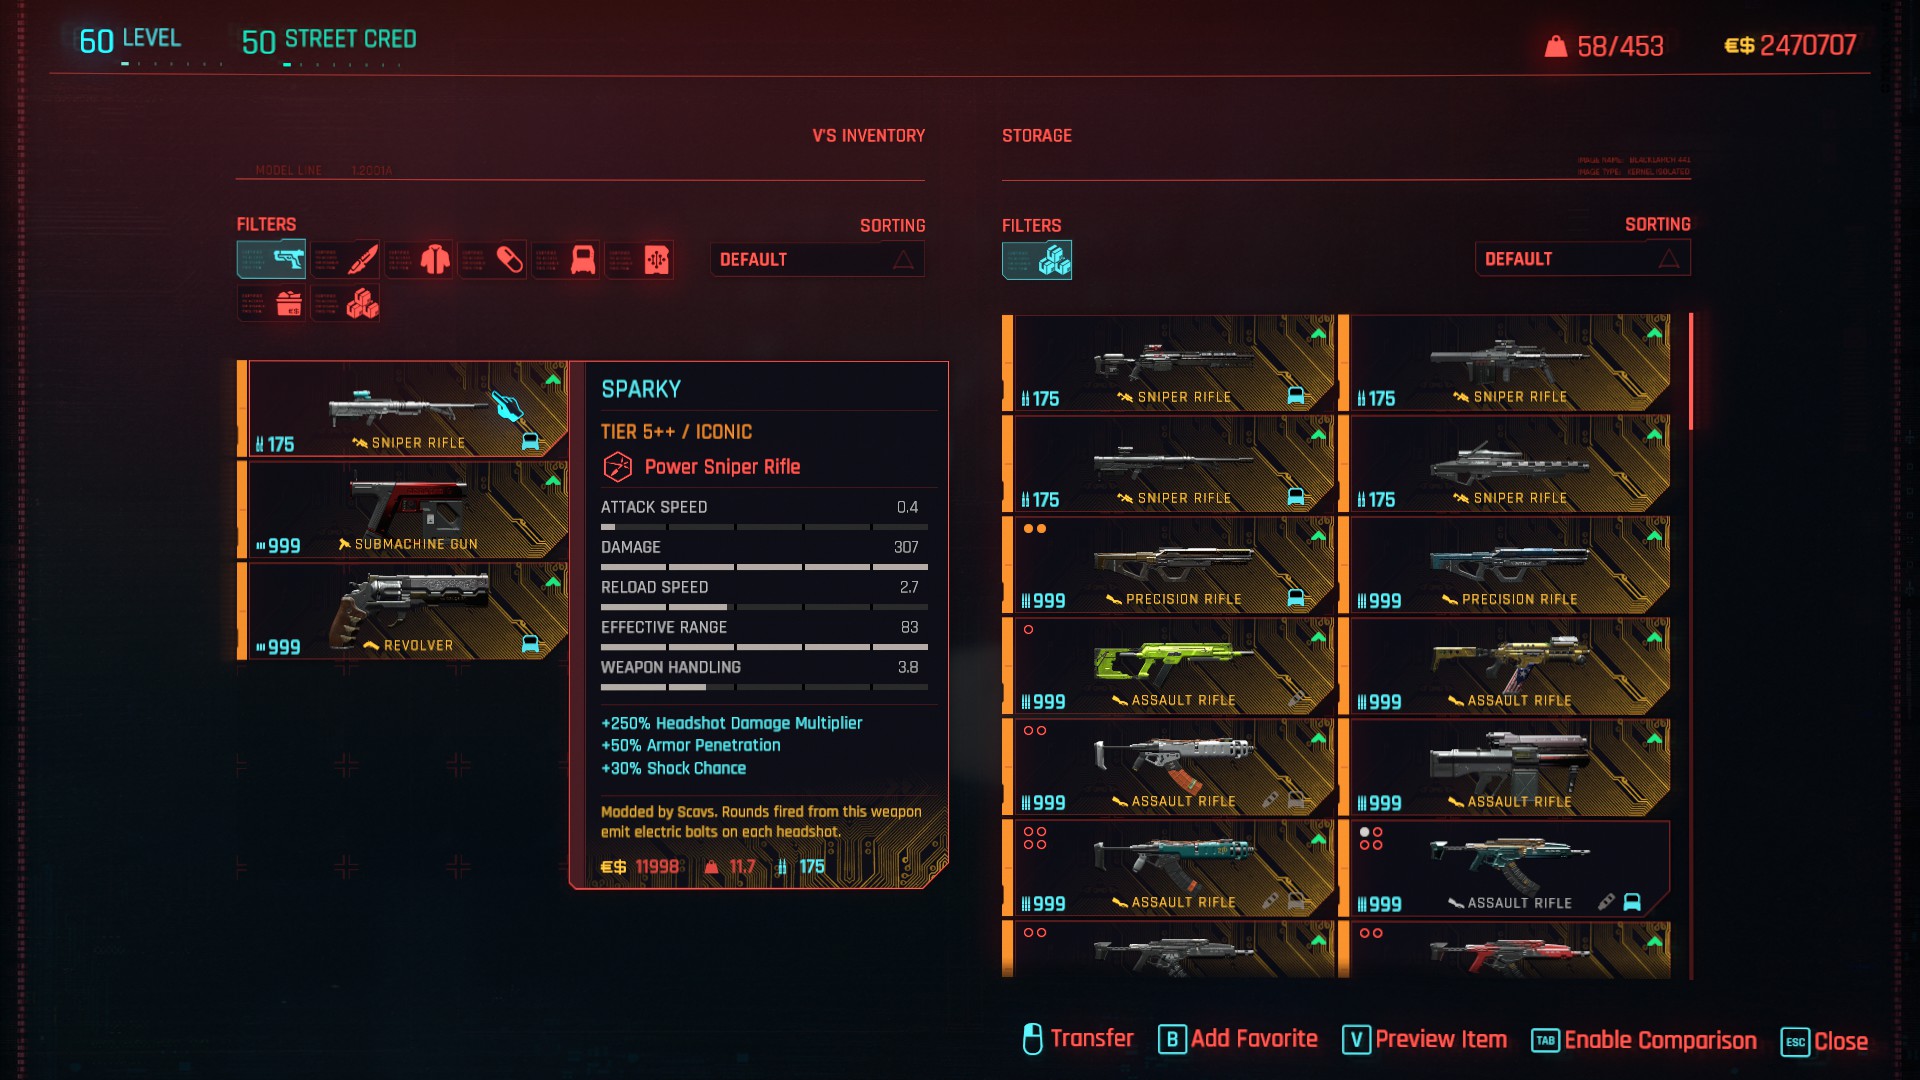
Sparky is one of the four iconic variants of the SPT32 Grad, but is lighter so you're not slowed down while carrying it, and it reloads a little faster as well. It does have 250% headshot damage instead of the usual 300%, but it has the chance to deal shock damage, and every time you land a headshot, the bullet produces a chain lightning effect (much like the capstone perk for tech weapons) which zaps up to two other enemies within a 7-metre radius. The lightning can also ignite enemies and make them burn. In other words, Sparky is that sniper rifle that understands when you need to deal with more than one target, and can eat away at their health to make them easier one-shots when you set your sights on them.
It's basically the power weapon version of the Rasetsu but with faster and better performance, which is ironic for a Grad. Using Sandevistan makes gameplay with sniper rifles so much easier, yet the process of charging tech weapons such as Rasetsu and Breakthrough is slowed down during Sandevistan. But all Grad models, despite being bolt-action, are not slowed down during Sandevistan which is why I'm of the opinion that with all scenarios considered, Sparky is the best pick among the iconic sniper rifles. (Located in Dogtown, inside a gated cache, the key to unlock it is dropped by the Arasaka drone in Increased Criminal Activity: SCAVENGERS.)
Nekomata wins the domain of non-iconic sniper rifles simply because it's the one least likely to screw you over! It's more reliable in its performance and you can charge it from hip-fire if needed, even if it has the lowest base damage to compensate for its superior handling. The SPT32 Grad has done a great service for its four iconic counterparts which include the likes of Sparky and Overwatch, and it's good to use with Sandevistan. However, the original model itself is a heavy weapon that slows down your movement: you would have no choice but to use the Fleetshot mod to make it lighter, and it has none of the special benefits that allow it to target more than one enemy. The Ashura is a good pick too, but it's a single-shot magazine with only marginally faster reload speed than the Nekomata. Plus, being a smart weapon, it doesn't always lock on to heads like you want it to, and modding smart weapons tends to be a fruitless endeavour anyway.
Believe it or not, despite being a Tsunami-made tech sniper rifle, Kurt Hansen and his troops got a hold of it and made their own BARGHEST variant! That in itself serves as the original model for the iconic Foxhound. Like any BARGHEST firearm, it has 25% extra armour penetration by default, and goes further by improving weapon handling and reducing charge time by 20%, from 1.25 seconds down to just 1 second. All in exchange for reducing the magazine capacity by a single bullet, from 4 down to 3. If you're used to reloading after just one or two shots anyway, then the BARGHEST variant will probably seem like a no-brainer to you.
There are some who swear that the Breakthrough (an iconic Nekomata) is the best sniper rifle in the game. While I would concur if someone said it was in the top 3 of iconic sniper rifles, landing headshots bypasses armour anyway, and the Shock Value perk also makes armour penetration redundant, even if it is +100%. You can penetrate walls and objects without charging the Breakthrough, but such shots will be weakened due to the damage penalties for shooting through cover, so you'll still want to charge it up for Bolt shots regardless. And considering that you should always try landing headshots, the bonus ricochet effect is so negligible and very unlikely to yield any noticeable results worth shouting about. The one true benefit is that it is easier to obtain the crafting spec for Breakthrough and upgrade it to the maximum tier.
However, if you're willing to put up with RNG, then it's just like how a well-modded Katana can be superior to the Byakko. I'm one of those contrarian figures who is of the opinion that if you can find a tier 5++ drop somewhere with empty mod slots, a well-modded Nekomata is superior to the Breakthrough. If you doubt what I say in this regard, pick up the next tier 5++ Nekomata you see regardless of how many mod slots it has, and swap out the default scope for a tier 5 Gaki. If you don't know what the Gaki is, it is a Tsunami-made scope designed exclusively for tech sniper rifles, so from a gameplay perspective, it can only ever be attached to Tsunami-made Nekomata models with a scope slot. But what makes this scope so bloody good is that the battery in it keeps the Nekomata PERMANENTLY half-charged as a new base minimum! Even when you tap-fire it without charging the weapon, the Gaki is making sure you always fire at 50% charge at the very least. It simultaneously boosts base damage AND halves the total charge duration!
And as for the mods? Both the Equalizer and the Supercharger are valid options. However, I feel like the Gaki scope is a combination of the best of both worlds: the default half-charge increases base damage and halves charge duration. Of course, I'm a fan of the Spinetickler mod and it would see more frequent use with reduced charge duration, but the Nekomata is so effective already with the Gaki scope that you don't notice Spinetickler as much. C-Thru is the best of the tech mods as it makes the non-iconic model like the Breakthrough: on top of default charged shots at 50% via the Gaki, you can tap-fire shots through cover due to 25% less charge required to penetrate walls and objects, and the mod also comes with a 25% reduction to the damage penalty for penetrating cover. If you really wanted to, you could double-up on the C-Thru mod to almost eradicate the damage penalty. Although it is a sniper rifle, the Nekomata is the best one you can mod with Headtoll, which gives it insane momentum when dealing with crowds.
Whichever mods you decide to use in the end, I think the Gaki tech sniper rifle scope alone makes the Nekomata superior to the Breakthrough in my eyes. And although I would save the iconic Wallpuncher mod for another non-iconic tech weapon, using it as a substitute for the Headtoll mod would make the Nekomata's superiority indisputable if it somehow was not already established: it would easily beat all other sniper rifles including all the iconics. But in my honest opinion, Headtoll makes the rifle a better general purpose weapon and I would personally choose that. The Nekomata is so good in fact, that Rogue takes it with her when storming Arasaka Tower. I just wish Rogue's Nekomata was obtainable somehow. She does wondrous things with her guns, and I'm 100% certain that hers would have been the best iconic sniper rifle in the game! Could you imagine an iconic Nekomata with a scope slot for a tier 5 Gaki and +100% crit damage?!
ASSAULT RIFLES
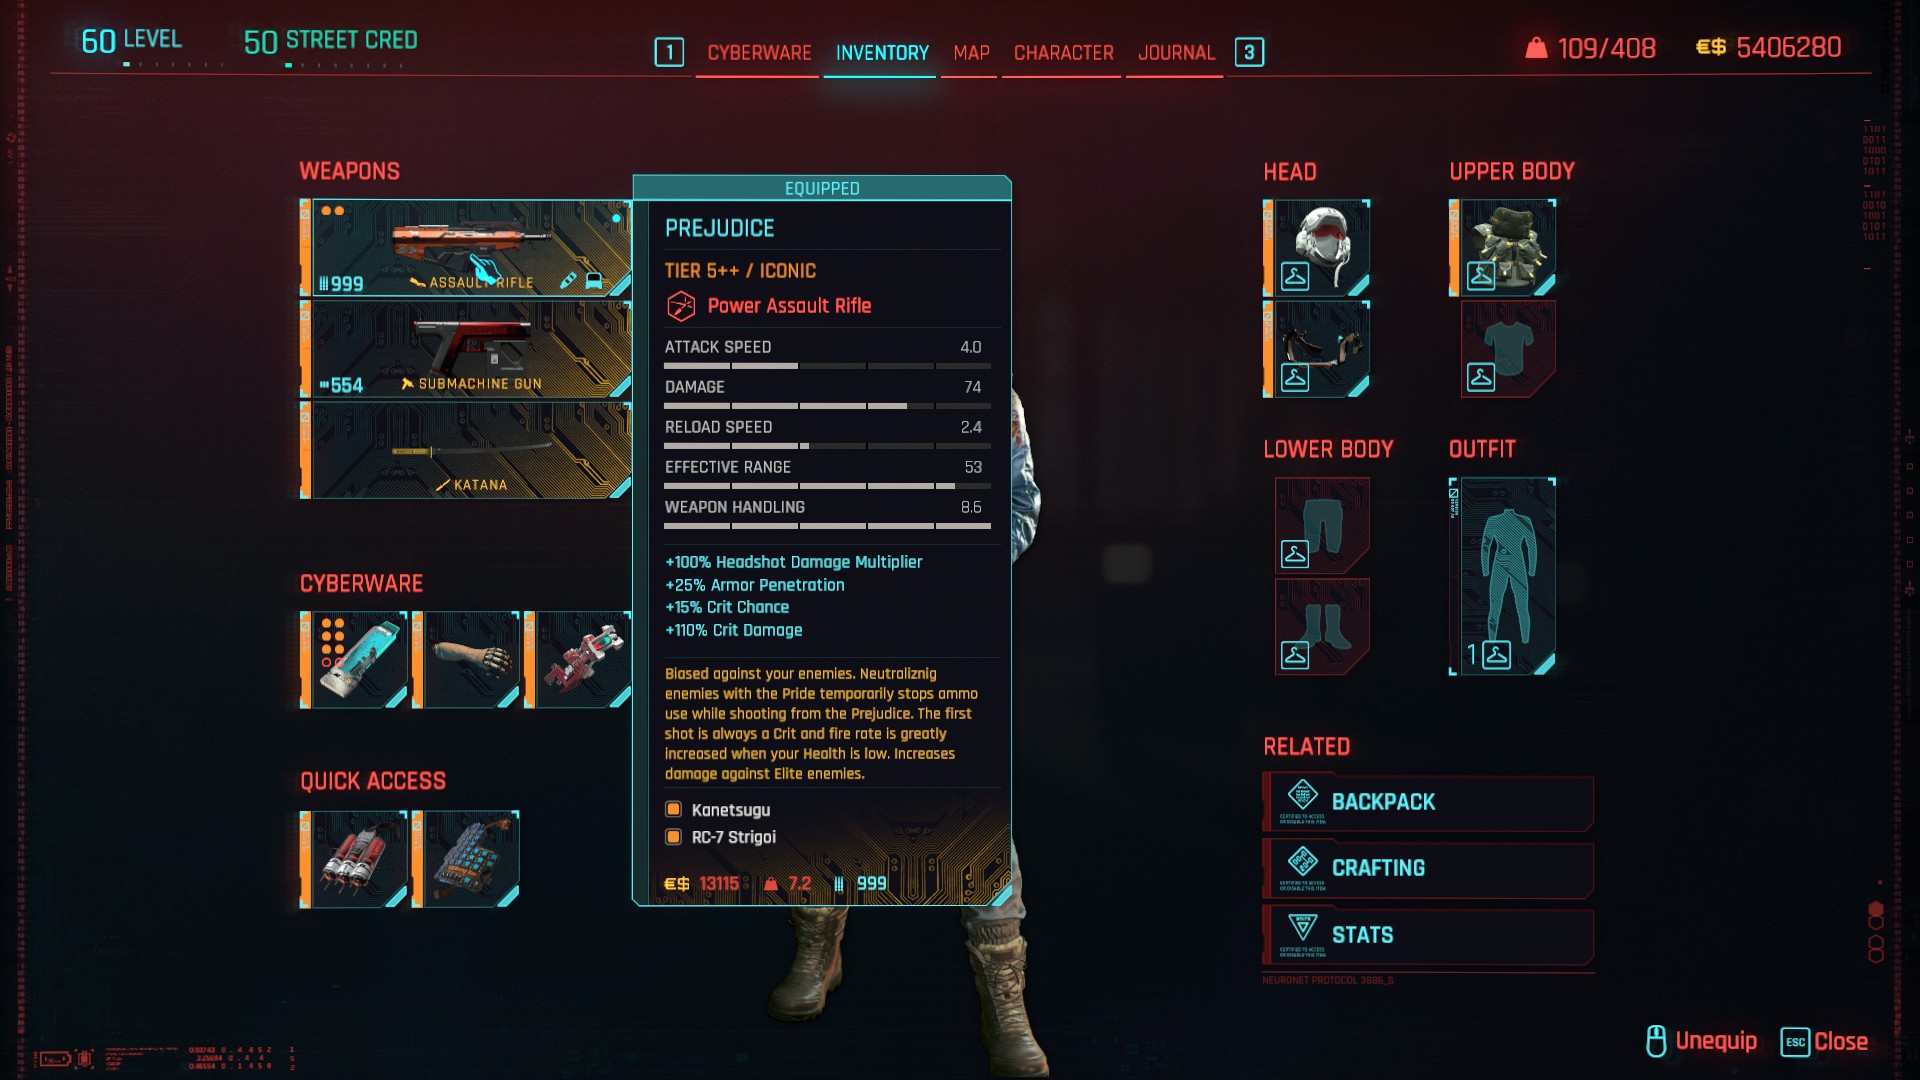
Prejudice is phenomenal compared to the overall lacklustre range of iconic assault rifles the game has to offer. As much as I love the Raiju tech SMG - the best out of a very impressive range of iconic SMGs, it's impossible to ignore just how much Rogue's iconic AR dominates both weapon categories and provides extra incentive for Johnny Silverhand to be in control for the final mission. If you kill an enemy with the Pride pistol, then Prejudice will not consume any ammo for the next 5 seconds. But that's a tiny extra compared to what this assault rifle is capable of.
Like Pride, the first hit from a new magazine is a guaranteed crit hit, it deals +100% crit damage and dishes out an extra 10% damage when used against elite enemies. But when your health gets below 40%, the fire rate increases by 40% and recoil is reduced by 33%. If you customise this with a tier 5 Kanetsugu sight and RC7-Strigoi muzzle, and have the Cockatrice Optics and the Practice Makes Perfect perk, you have enough crit chance to make EVERY shot a crit hit! If Pride is the best iconic stealth weapon, then Prejudice is most certainly the best iconic combat weapon in the game. Rogue is not just the Queen of fixers or Queen of the Afterlife: she is also the Queen of guns! (Located behind the bar in the Afterlife, during the main mission For Whom the Bell Tolls.)

Kyubi took me a while to warm up to but after playing around with it some more and experimenting with mods, it's now my favourite non-iconic AR in the game. If you don't mind going to Dogtown and diving to the bottom of a body of water, you can find the iconic X-MOD2 variety which has superior stats, including 150% bonus headshot damage. I used to recommend both the HJSH-18 Masamune and the Nowaki, both of them being Arasaka-made ARs, but they are very similar to each other in function, and they fall quite short compared to the extra 100% crit damage of the iconic Prejudice. I've also mentioned the Militech Ajax which is fully automatic.
What's great about the Kyubi though, is that it's a semi-automatic assault rifle that fills the void in that middle ground, between full-auto ARs and the slower fire rate of precision rifles. Each bullet does more damage, the semi-auto firing pattern wastes fewer bullets, and it allows you greater control of the Kyubi to more reliably land the shots where you want them to go. This is yet another model manufactured by the Tsunami Corporation, and considering they also made the Nue and the Nekomata, it makes me wish they had a more extensive range of weaponry. Even with such few weapons, they give Militech a run for their money! For optimal performance, I recommend that you equip the Kanetsugu sight, the RC-7 Strigoi muzzle brake, and both Pyro and Ready Steady mods.
SMGS
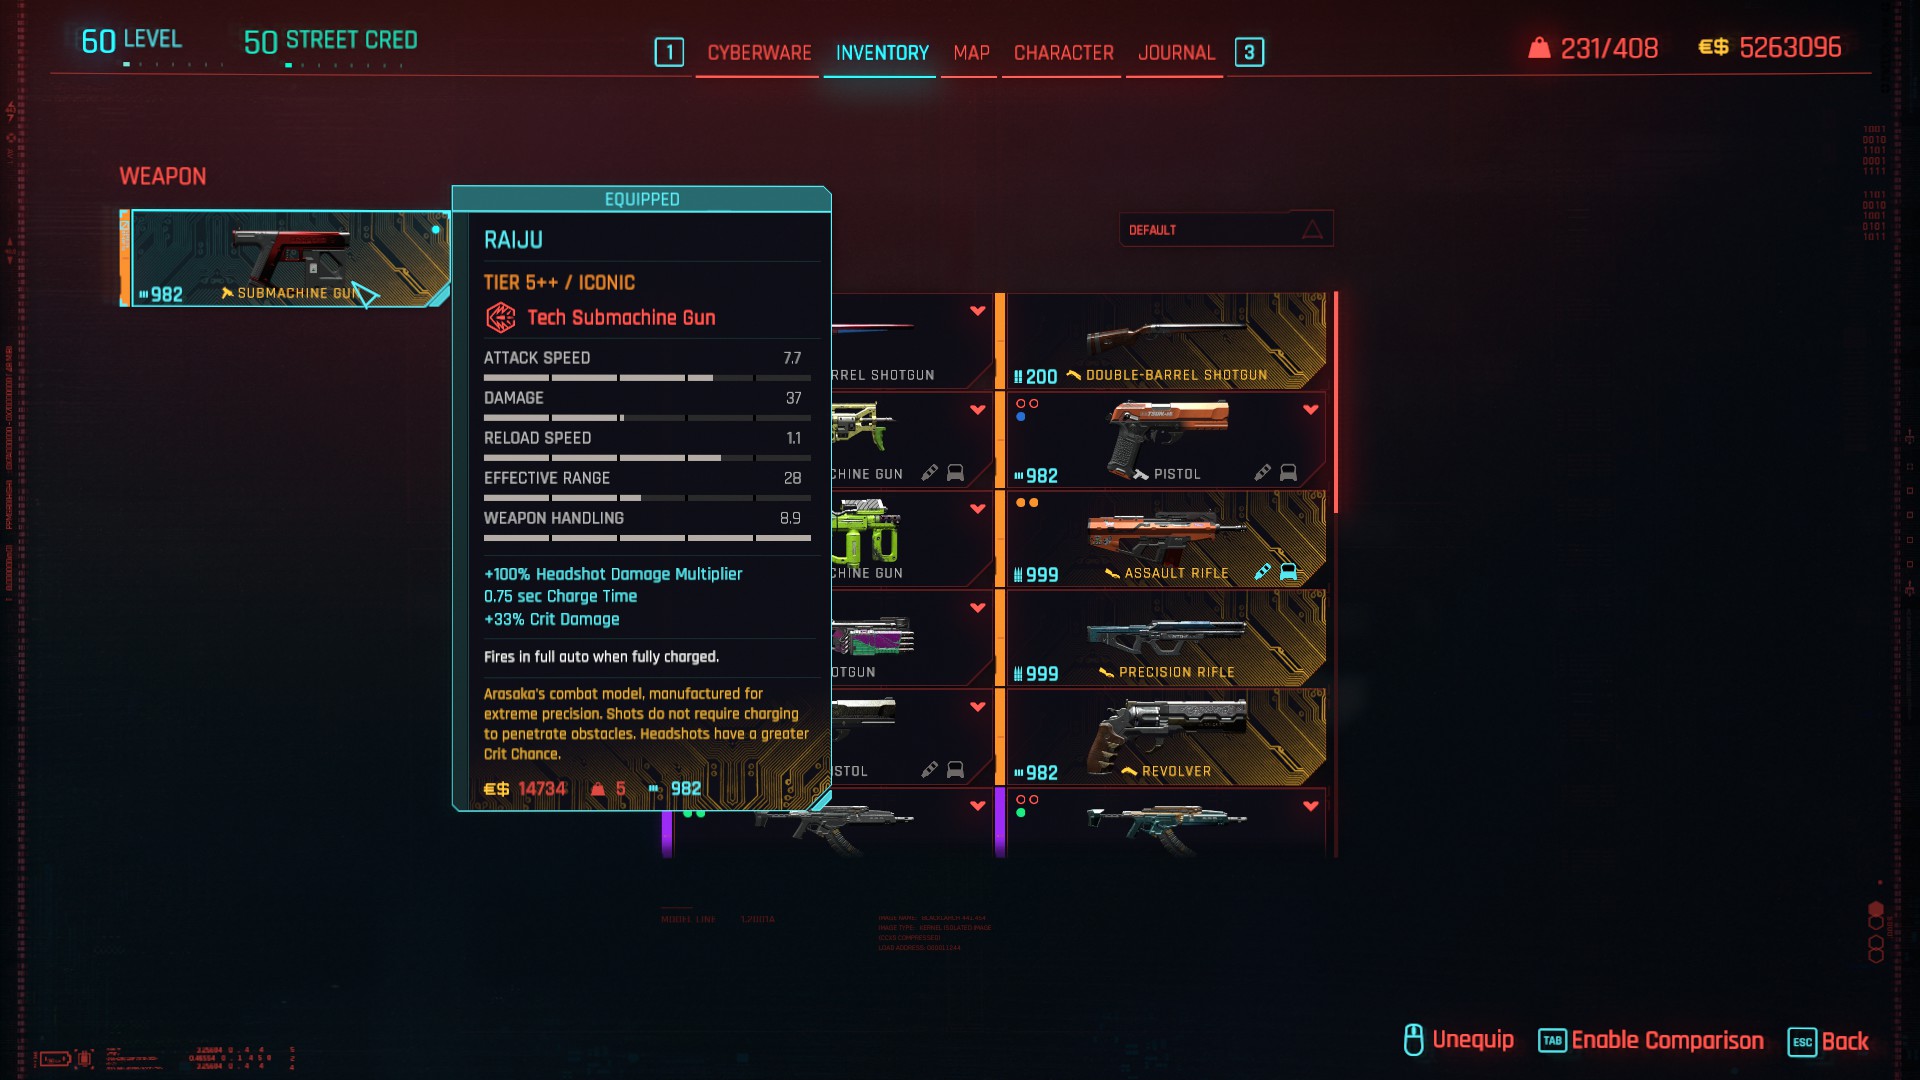
Raiju in my mind is undoubtedly the best SMG in the game. But I also view it as the best iconic tech weapon in the game. It can deal shock damage, it can dish out 33% extra crit damage, and has +33% crit chance when you land headshots. But the best thing about this weapon is that you don't even need to charge it, and it can still penetrate walls and objects! This is more impressive when you consider that tapping the trigger delivers a very fast burst-fire volley which actually does more DPS than the much slower fire rate of charging the weapon to deliver full-auto Bolt shots. And considering that pretty much all the tech weapon perks in the Technical Ability tree rely on you charging for Bolt shots, you can free up those perk points and get way more performance by focusing on the Sharpshooter perks in the Reflexes tree instead! (Located in Dogtown, inside a gated cache, the key to unlock it is dropped by Ross Ulmer in Increased Criminal Activity: BARGHEST.)
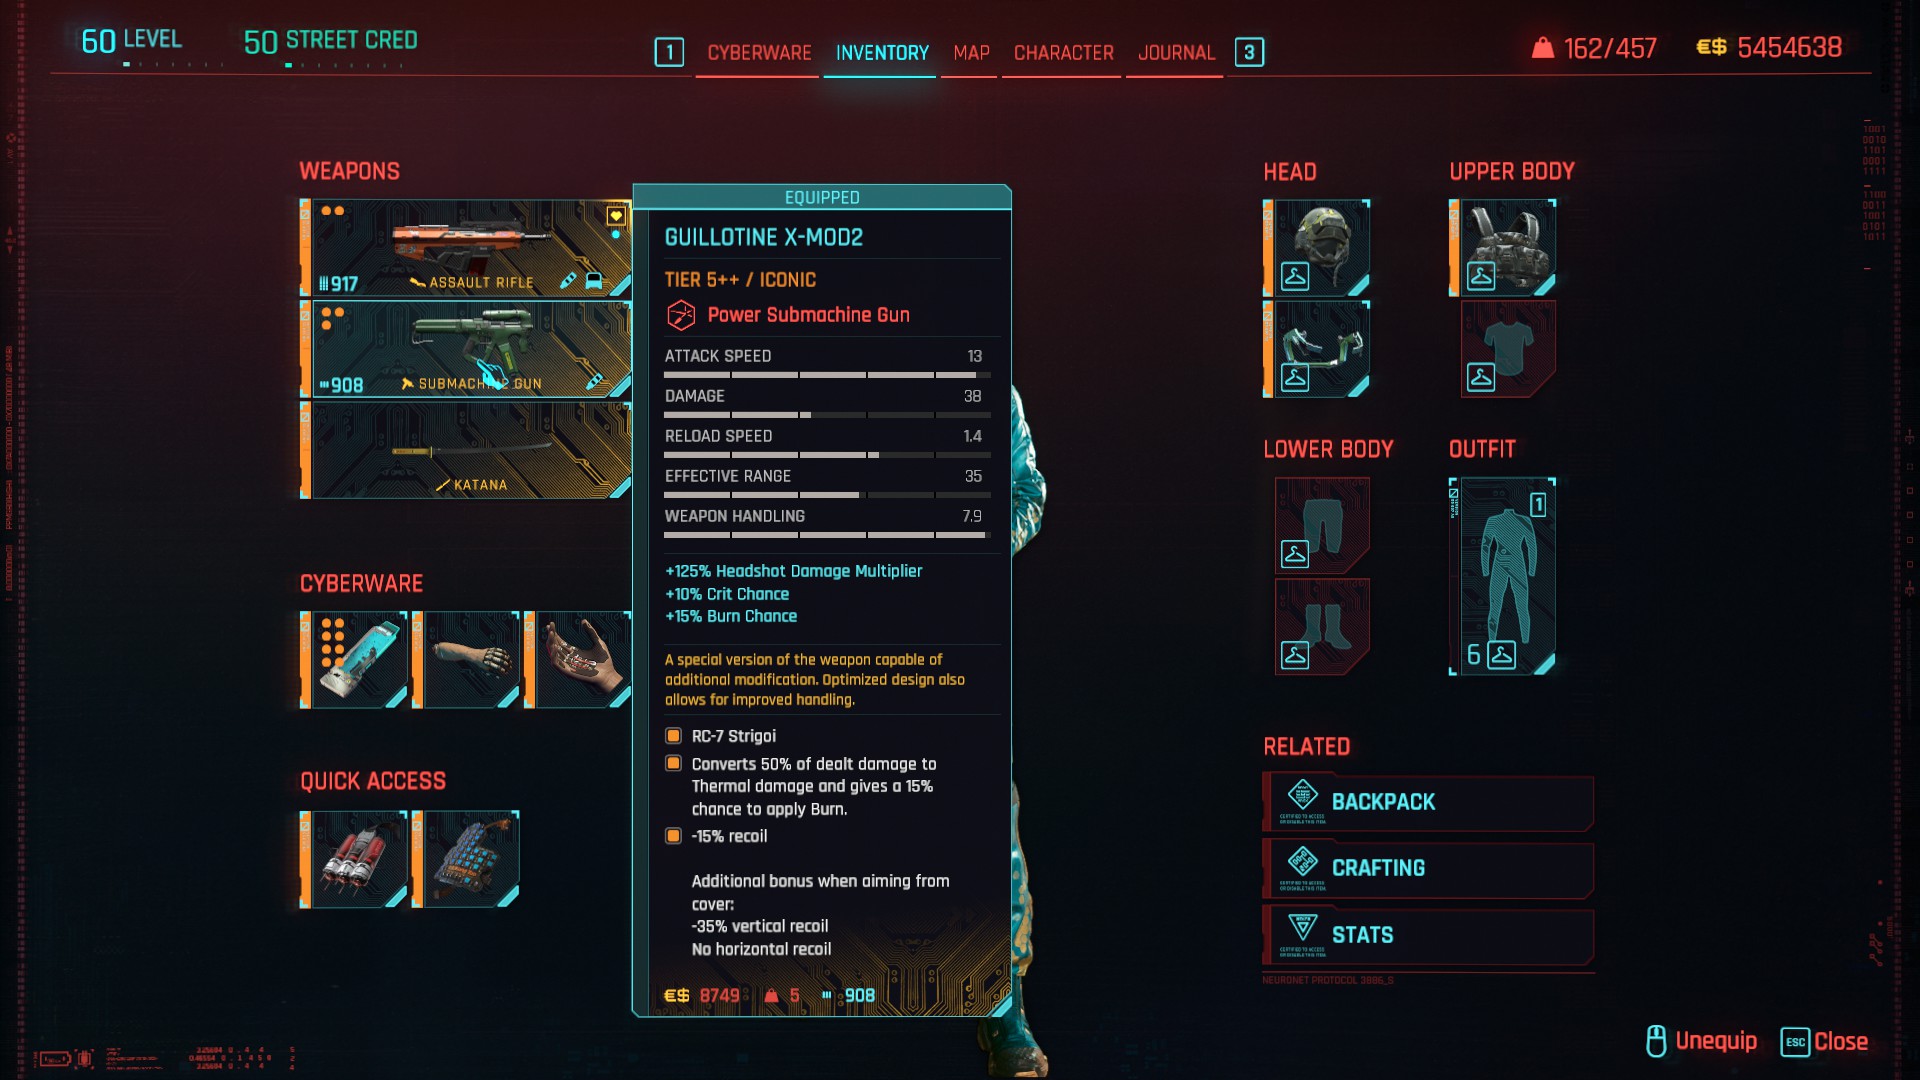
Guillotine is a weapon that I am guilty of not being patient enough with in the past, as well as being very sceptical of any weapon model manufactured by Budget Arms. But even though I still have a low opinion of the manufacturer, and the SMG comes with its own scope without any possibility of substituting it for a Kanetsugu sight, the Guillotine is something of an anomaly and shockingly performs pretty well despite its inherent drawbacks. It has a great blend of damage per bullet, fire rate, reload speed, and weapon handling to mitigate recoil and bullet spread. It's like two ugly parents somehow bred a child who grew up and started adulthood as a supermodel!
What about the Senkoh LX which I used to recommend before? I still like it but I had to face the facts eventually. Its iconic cousin, Raiju, does not need the tech weapon perks, whereas the Senkoh does: it is so reliant on Bolt shots to be effective and even then, it's still not a match for the Raiju with its most basic burst-fire rounds. I already mentioned the Militech Saratoga which is good, and the Arasaka-made Shigure is virtually similar to that. But overall, I must give props to the Guillotine: for once, Budget Arms did the opposite of f***ing things up! And like most good non-iconic weapons, Dogtown is home to this SMG's iconic X-MOD2 variant. Slap an RC-7 Strigoi muzzle brake on the end, and mod it with Pyro and Ready Steady.
LMGS

MA70 HB X-MOD2 is at the top by virtue of there not being many LMGs in the game whatsoever. Like the original model, it comes packing explosive rounds by default, so no need for the iconic Firecracker mod. But the X-MOD2 version also sports a Kanetsugu sight by default which is handy! The original may have slightly faster fire rate and 10 more bullets in the magazine, but this version has more effective range, better weapon handling, and 15% extra headshot damage. I usually prefer the Pyro and Ready Steady mods, the Equalizer works too. But seeing as it's a weapon type that certain Body perks will benefit you for having low stamina, the extra 15% stamina penalty per shot for using the Swiss Cheese mod is a blessing in disguise, especially as it adds to the armour penetration. (Located in Dogtown, inside the crashed Militech Valgus helicopter, near the Luxor High Wellness Spa.)
Mk. 31 HMG is being repeated here and yes, I know, it feels a little like cheating. But part of the appeal of using the heavy machine gun is precisely because it's spontaneous and in the moment, AND you do not have to worry about finding the perfect tier 5++ drop or the right mods. If you want to use it, rip apart a turret, or kill an enemy and steal it off his corpse, and get blasting!
SHOTGUNS
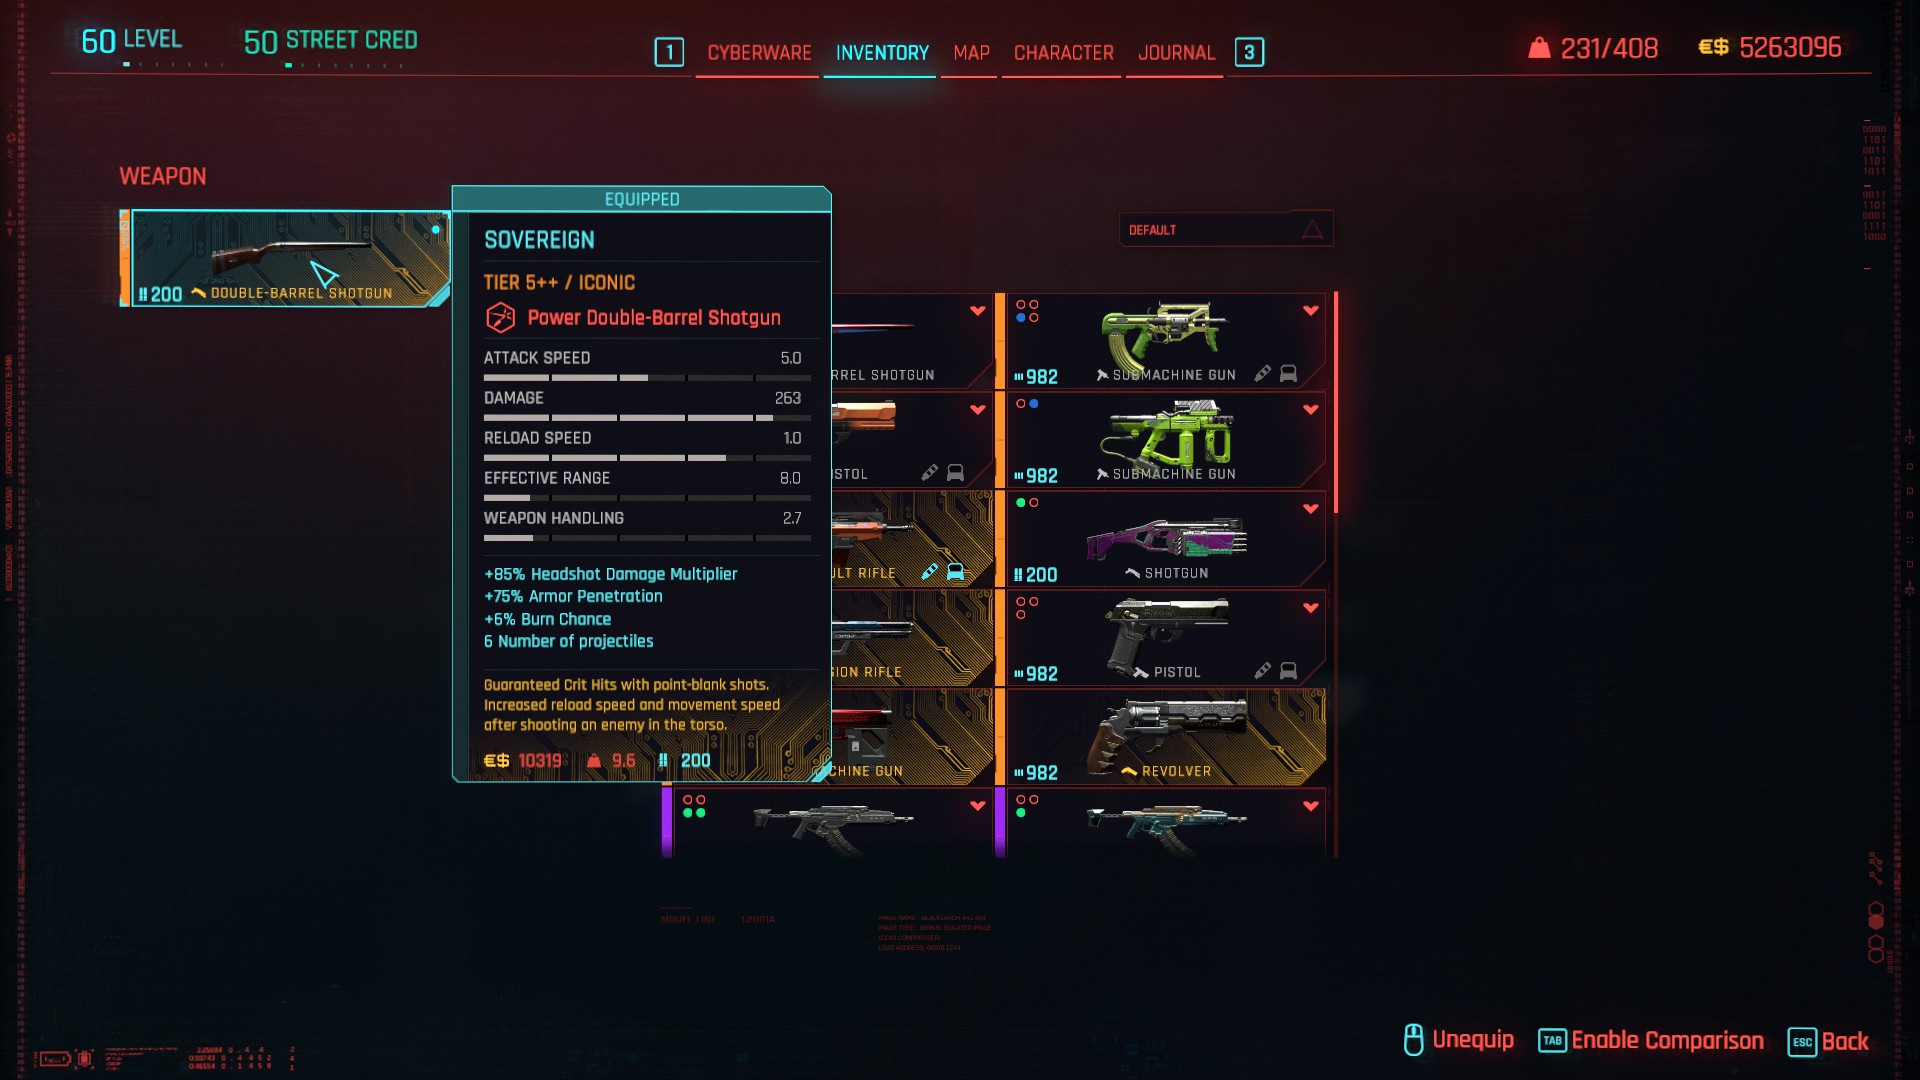
Sovereign is amazing if you love your shotguns and a seemingly fantastic choice of weapon for any build that allows you to get up close to enemies. Its base damage seems low because firing point-blank shots guarantees crit hits, and don't forget that it's a double-barrel shotgun so you're firing two shells at once! Additionally, hitting an enemy in the torso gives you both extra movement speed and reload speed which is no small matter considering that shotguns typically are slow and clunky to reload at the best of times.
The self-incinerating Dezerter has a LOT of base damage and explosive power, but it fires a lot of projectiles with quite a wide spread at the same time. The Order tech shotgun has a LENGTHY charge time of 3 seconds which can be more inconvenient than not. All the iconic variants based on the Carnage and Tactician both make you reload each shell individually. The Amstaff can be good but lacks that raw firepower, and although the Pozhar X-MOD2 can be devastating against standard and elite enemies with a Kneel mod, it woefully drops off in DPS against tougher enemies that refuse to kneel even if you have the mod that demands it by name!
With the Sovereign, it fires enough projectiles with the right amount of spread where as long as you're in range for the guaranteed crit hits, you can accurately place the shot where you want it to go and it will one-shot standard and elite enemies comfortably. And the DPS against tougher targets is solid and respectable. It is very reliable, user-friendly and not at all lacking in its potential DPS! (Located in Japantown, as a crafting spec, dropped by Shinobu Amai during the NCPD Scanner Hustle titled Suspected Organized Crime Activity: Modern Labor Market.)
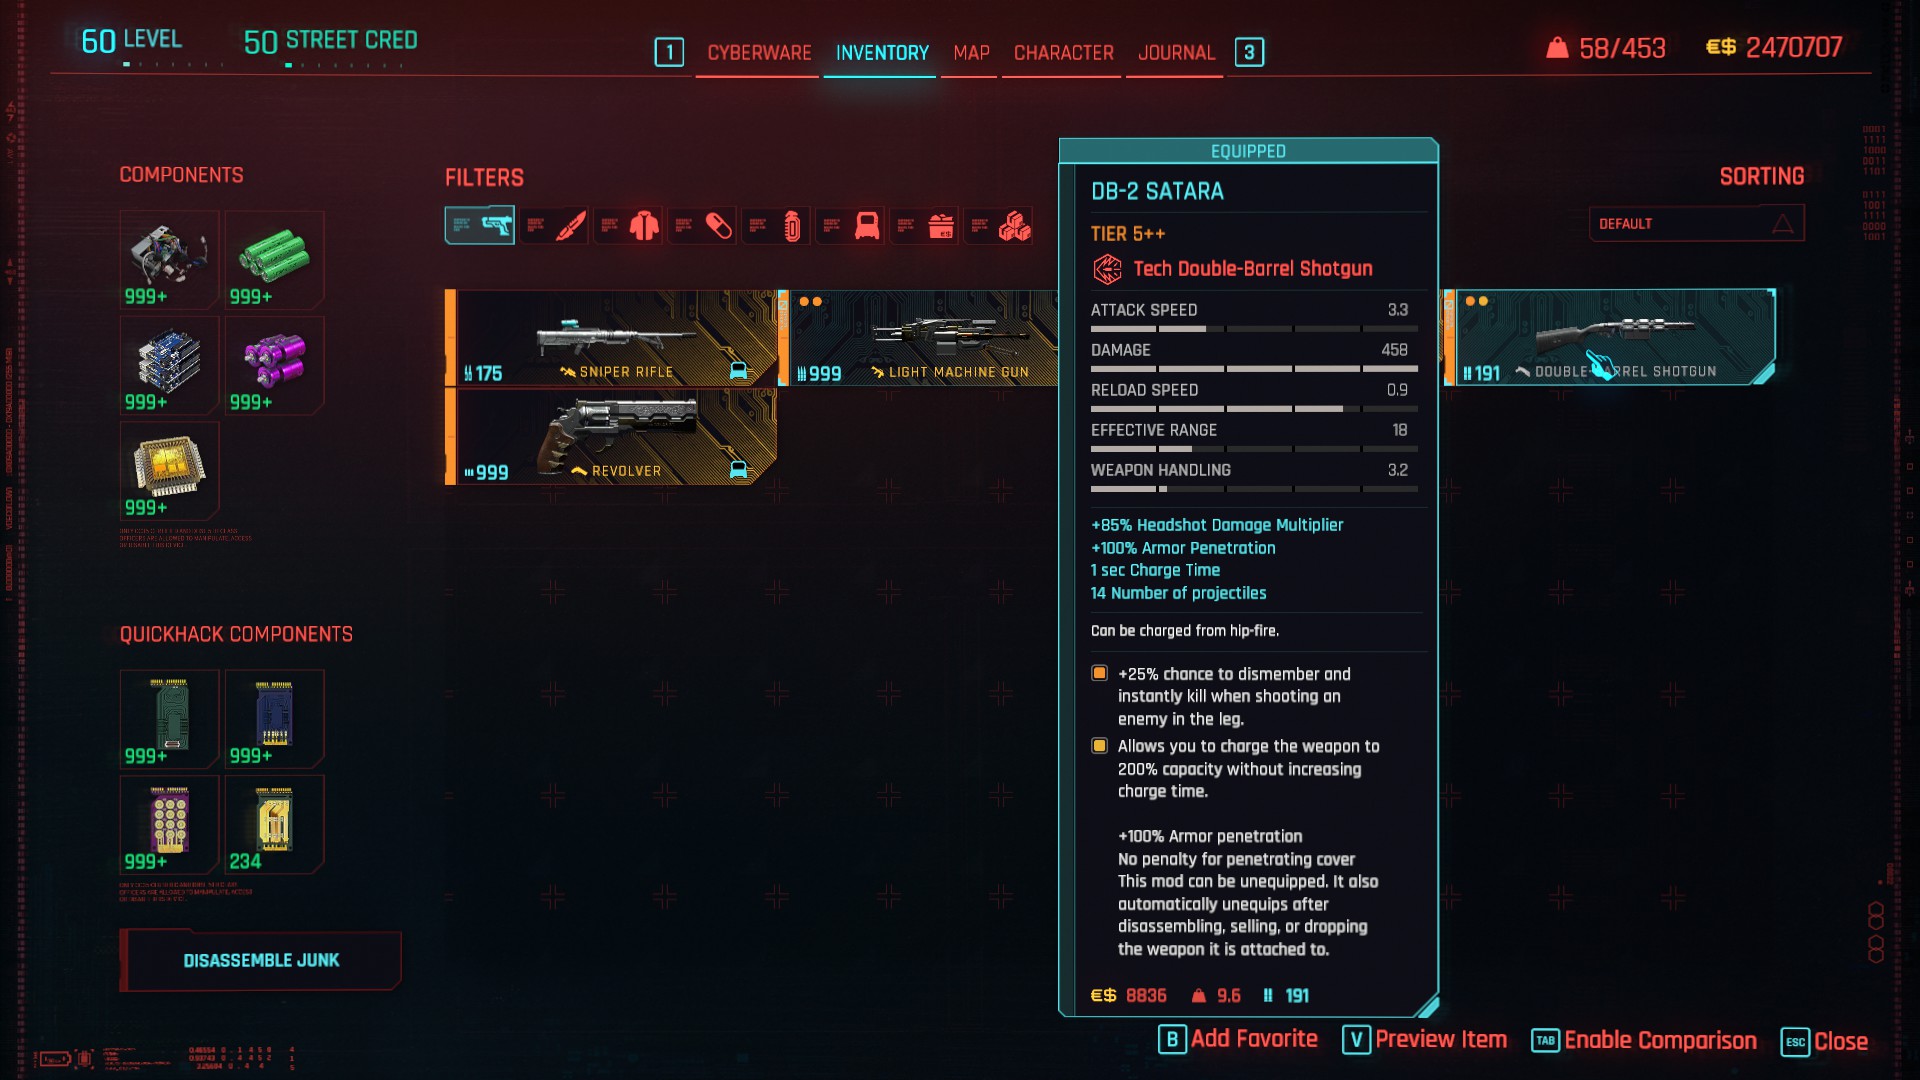
DB-2 Satara has a secret: with the right mods, it becomes the best shotgun AND the best non-iconic ranged weapon in the game by far! Unlike other double-barrel shotguns, it fires just one shell per shot, with each shell containing 14 projectiles. Not only does it have plenty of projectiles per shot to provide a smorgasbord for the Kneel mod, but you don't even need to charge the thing to make use of the mod either. Standard and elite enemies will cease to be an issue with a simple tap of the trigger.
But how about MaxTac agents and bosses? Well, if you've got the Chimera Core, I would STRONGLY advise you to convert it into the Wallpuncher mod! When you need to do large damage and/or penetrate walls, you can charge up to 200% capacity and also enjoy +100% armour penetration, with zero damage penalties for shooting through walls or objects. Modded this way, the Satara truly puts its iconic cousin Order to shame. But it also has the sheer destructive power and versatility to work with any playstyle, and not require you to be up close to the enemies most of the time like the Sovereign.
In a way, Sandevistan is still the best operating system for any shotgun, an optimally-modded Satara included, but this impressive tech shotgun plus the mods make Sandevistan less essential. It liberates you, the user, in the freedom it grants, as much as it can liberate dismembered legs from its victims! It's not often that I agree with the Cyberpunk Youtuber Sam Bram about what is the number 1 weapon for each category in his ranking videos, but he too notices just how insanely overpowered a Kneel + Wallpuncher-modded Satara really is. In terms of ranged weapons, in my eyes, it forms the (un)holy trinity along with Pride and Prejudice!
PERSONAL STASH
If you want an armoury that doubles as an impressive trophy cabinet, there are as many as 30 iconic weapons to be found in your adventures throughout Night City, that can then be proudly displayed each time you walk into any accommodation of yours and access your personal stash. Those 30 specific iconic weapons are:
Butcher's Cleaver
Byakko
Errata
Jinchu-Maru
Satori
Sasquatch's Hammer
Blue Fang
Headhunter
Nehan
Dying Night
La Chingona Dorada
Lexington X-MOD2
Malorian Arms 3516
Plan B
Seraph
Skippy
Archangel
Comrade's Hammer
Crash
Breakthrough
Overwatch
Moron Labe
Psalm 11:6
Buzzsaw
Yinglong
Ba Xing Chong
Bloody Maria
Mox
Sovereign
The Headsman
Obtaining every single weapon on this list isn't imperative for anything in particular, and you may well carry a few of these weapons with you at all times. However, if you so happen to experience a certain sensation of emptiness, or feel unfulfilled at the sight of an incomplete display of these iconic weapons, then fear not, for I have come up with a fantastic selection of 12 weapons to carry around with you, without ruining your display at home! Just 8 guns and 4 melee weapons are what I carry around with me whenever I want the spice of life that is variety. They are as follows:
Tsumetogi / Katana (tier 5++ with tier 5 Airstrike and Cyclone mods)
Tinker Bell
Agaou
Claw X-MOD 2 (with tier 5 Silencio and Pax mods)
Pride (with tier 5 Kanetsugu sight and XC-10 Cetus silencer)
Ol' Reliable / RT-46 Burya (tier 5++ with tier 5 Spinetickler mods x2)
Hypercritical
Sparky / Nekomata (tier 5++ with tier 5 Gaki scope, and tier 5 C-Thru and Headtoll mods)
Prejudice (with tier 5 Kanetsugu sight and RC-7 Strigoi muzzle brake)
Raiju
MA70 HB X-MOD2 (with tier 5 Pyro and Ready Steady mods)
Dezerter / DB-2 Satara (tier 5++ with Kneel and Wallpuncher mods)
Butcher's Cleaver
Byakko
Errata
Jinchu-Maru
Satori
Sasquatch's Hammer
Blue Fang
Headhunter
Nehan
Dying Night
La Chingona Dorada
Lexington X-MOD2
Malorian Arms 3516
Plan B
Seraph
Skippy
Archangel
Comrade's Hammer
Crash
Breakthrough
Overwatch
Moron Labe
Psalm 11:6
Buzzsaw
Yinglong
Ba Xing Chong
Bloody Maria
Mox
Sovereign
The Headsman
Obtaining every single weapon on this list isn't imperative for anything in particular, and you may well carry a few of these weapons with you at all times. However, if you so happen to experience a certain sensation of emptiness, or feel unfulfilled at the sight of an incomplete display of these iconic weapons, then fear not, for I have come up with a fantastic selection of 12 weapons to carry around with you, without ruining your display at home! Just 8 guns and 4 melee weapons are what I carry around with me whenever I want the spice of life that is variety. They are as follows:
Tsumetogi / Katana (tier 5++ with tier 5 Airstrike and Cyclone mods)
Tinker Bell
Agaou
Claw X-MOD 2 (with tier 5 Silencio and Pax mods)
Pride (with tier 5 Kanetsugu sight and XC-10 Cetus silencer)
Ol' Reliable / RT-46 Burya (tier 5++ with tier 5 Spinetickler mods x2)
Hypercritical
Sparky / Nekomata (tier 5++ with tier 5 Gaki scope, and tier 5 C-Thru and Headtoll mods)
Prejudice (with tier 5 Kanetsugu sight and RC-7 Strigoi muzzle brake)
Raiju
MA70 HB X-MOD2 (with tier 5 Pyro and Ready Steady mods)
Dezerter / DB-2 Satara (tier 5++ with Kneel and Wallpuncher mods)
OPTIMAL PROGRESSION
You are not obliged to follow what I am about to lay out here in terms of how to progress through a playthrough step-by-step. But if you want your V to get stronger as soon as possible while racking up as many eddies as you can along the way, and also having as much access to the open world as you possibly can, then here is what you need to know.
When starting a new playthrough with 7 attribute points to spend immediately, put +1 point into all 5 attributes, and an extra point each in Body and Technical Ability, as we mentioned in the New Playthrough section.
Each time you level up, save your attribute points until you really need them. For example, you don't need to put many points into Reflexes and Cool early on. In my current playthrough, they both were sitting at 6 by the time I had 20 Body functionally, 20 Technical Ability, and 15 Intelligence. That's because the other 3 attributes are used in key dialogue options and can unlock access to many things in the open world, whereas Reflexes and Cool really only unlock blue dialogue options and don't need to be that high early on.
You might find that you end up focusing on Technical Ability more at first. Body can be boosted by Gorilla Arms, but you need to balance that with investing enough points and upgrading the cyberware at the same time. With Intelligence, the vast majority of the access points and devices you can hack, scale at a slower rate when you level up. Although you still want to get to 15 Intelligence before you get to 15 Reflexes or 15 Cool, you should be perfectly capable of hacking at least 95% of all access points and devices by the time you reach 10 Intelligence.
The timing and the order in which you attempt to complete gigs and NCPD scanners is entirely up to you. You can hold off on them for a while if you want. Or you can tackle the ones in Watson at the earliest stage if you so desire. But some of the later gigs given to you by all the fixers are under the assumption that your V is at a higher level, and has high enough points in certain attributes to meet the checks, so be wary of this particular fact at lower levels.
In matters of junk, NEVER sell all your junk with a single key press! No matter what stage of the playthrough you find yourself in, there are only two things you ever need to do with your junk. If your pieces of junk are only worth 3 eddies each, disassemble them for tier 1 crafting components. If your pieces of junk are worth 500 eddies each, sell them!
Before you hack any access points and devices, make sure you have a perk point invested in the Forcekill Cypher perk. It is necessary to increase your chances of uploading all possible daemons and maximising your profits from Breach Protocol.
It is worth occasionally browsing through the wares of all the vendors who sell guns and melee weapons, just so that you can purchase the tier 3 versions of worthwhile weapon mods, especially ones that enemies do not seem to drop. And ones such as Kneel and Slice 'Em Up (which are only ever tier 5) can only be obtained by purchasing them.
Although you technically rent them out, you only have to do one-time payments to acquire the four forms of accommodation that ultimately are luxury possessions. But completing your private collection of vehicles costs about 10x more eddies in comparison. The 4 apartments in question cost a total of 230k eddies.
As long as you focus first on the cheapest vehicles that you can purchase from El Capitan, you can start the very first vehicle contract once you've reached Dogtown. But I would advise prioritising the rarer airdrops when in Dogtown, as you can pick up vehicle contracts anywhere across Night City. Even after patch 2.11, vehicle contracts can still eventually yield diminishing returns when you stack enough discounts without buying anything from the Autofixer, but this does not always apply consistently from what I've witnessed so far. Because the first few discounts each are worth 13% now, it seems that diminishing returns can strike randomly. What's annoying about this is that you're never really certain when a vehicle contract is going to have a lower discount than the ones before, until after you have completed it and then check the Autofixer app.
In one situation, I had four discounts for 52% off, but the next one brought me a lower total than the 65% I was expecting. In another case, I got two discounts of 26%, but the third one randomly only added 6% for a total of 32%, not 39%. I am not sure what exact calculations are going on with the changes CDPR introduced in patch 2.11, nor do I know why it's fine with stacking individual discounts of 13% until it has a mind of its own and starts giving diminishing returns at random intervals. But what I do know is that if you want to purchase every vehicle from the Autofixer and do it as close to the old system as possible, you are going to need at least 2 million eddies and match the old 24% discount. My recommendation: complete two vehicle contracts to amass a 26% discount, then buy a vehicle. Always do at least two contracts before purchasing from the Autofixer!
When starting a new playthrough with 7 attribute points to spend immediately, put +1 point into all 5 attributes, and an extra point each in Body and Technical Ability, as we mentioned in the New Playthrough section.
Each time you level up, save your attribute points until you really need them. For example, you don't need to put many points into Reflexes and Cool early on. In my current playthrough, they both were sitting at 6 by the time I had 20 Body functionally, 20 Technical Ability, and 15 Intelligence. That's because the other 3 attributes are used in key dialogue options and can unlock access to many things in the open world, whereas Reflexes and Cool really only unlock blue dialogue options and don't need to be that high early on.
You might find that you end up focusing on Technical Ability more at first. Body can be boosted by Gorilla Arms, but you need to balance that with investing enough points and upgrading the cyberware at the same time. With Intelligence, the vast majority of the access points and devices you can hack, scale at a slower rate when you level up. Although you still want to get to 15 Intelligence before you get to 15 Reflexes or 15 Cool, you should be perfectly capable of hacking at least 95% of all access points and devices by the time you reach 10 Intelligence.
The timing and the order in which you attempt to complete gigs and NCPD scanners is entirely up to you. You can hold off on them for a while if you want. Or you can tackle the ones in Watson at the earliest stage if you so desire. But some of the later gigs given to you by all the fixers are under the assumption that your V is at a higher level, and has high enough points in certain attributes to meet the checks, so be wary of this particular fact at lower levels.
In matters of junk, NEVER sell all your junk with a single key press! No matter what stage of the playthrough you find yourself in, there are only two things you ever need to do with your junk. If your pieces of junk are only worth 3 eddies each, disassemble them for tier 1 crafting components. If your pieces of junk are worth 500 eddies each, sell them!
Before you hack any access points and devices, make sure you have a perk point invested in the Forcekill Cypher perk. It is necessary to increase your chances of uploading all possible daemons and maximising your profits from Breach Protocol.
It is worth occasionally browsing through the wares of all the vendors who sell guns and melee weapons, just so that you can purchase the tier 3 versions of worthwhile weapon mods, especially ones that enemies do not seem to drop. And ones such as Kneel and Slice 'Em Up (which are only ever tier 5) can only be obtained by purchasing them.
Although you technically rent them out, you only have to do one-time payments to acquire the four forms of accommodation that ultimately are luxury possessions. But completing your private collection of vehicles costs about 10x more eddies in comparison. The 4 apartments in question cost a total of 230k eddies.
As long as you focus first on the cheapest vehicles that you can purchase from El Capitan, you can start the very first vehicle contract once you've reached Dogtown. But I would advise prioritising the rarer airdrops when in Dogtown, as you can pick up vehicle contracts anywhere across Night City. Even after patch 2.11, vehicle contracts can still eventually yield diminishing returns when you stack enough discounts without buying anything from the Autofixer, but this does not always apply consistently from what I've witnessed so far. Because the first few discounts each are worth 13% now, it seems that diminishing returns can strike randomly. What's annoying about this is that you're never really certain when a vehicle contract is going to have a lower discount than the ones before, until after you have completed it and then check the Autofixer app.
In one situation, I had four discounts for 52% off, but the next one brought me a lower total than the 65% I was expecting. In another case, I got two discounts of 26%, but the third one randomly only added 6% for a total of 32%, not 39%. I am not sure what exact calculations are going on with the changes CDPR introduced in patch 2.11, nor do I know why it's fine with stacking individual discounts of 13% until it has a mind of its own and starts giving diminishing returns at random intervals. But what I do know is that if you want to purchase every vehicle from the Autofixer and do it as close to the old system as possible, you are going to need at least 2 million eddies and match the old 24% discount. My recommendation: complete two vehicle contracts to amass a 26% discount, then buy a vehicle. Always do at least two contracts before purchasing from the Autofixer!
OPTIMAL PROGRESSION: CYBERWARE
At the beginning, ripperdocs will sell the tier 1 versions of their cyberware, until your V reaches level 10 and then they unveil their tier 2 wares. So while V is between levels 1 and 9, save up whatever eddies you can scrounge together to buy the tier 1 versions of the following cyberware:
Mechatronic Core
Countershell
Shock-n-Awe
Smart Link
Microrotors
No matter what tier of weapons and clothing you find, you should always disassemble anything you don't want to keep. The general rule of thumb is that if you have not upgraded all your cyberware and iconic weapons to tier 1+ yet, then get more tier 1 crafting components before you start selling tier 1 weapons for eddies, then get more tier 2 components to upgrade your cyberware and iconics to tier 2+ before you start selling tier 2 weapons, and vice versa.
Use the components to upgrade your cyberware first, starting with the Militech Paraline Cyberdeck. You do not need to buy it but if you do come across it in your travels, replace the Militech Paraline with the Tetratronic Rippler. When you go to a ripperdoc to upgrade, invest a point in the Chipware Connoisseur perk. When you are done receiving upgrades, disable the perk and reallocate the perk point to the Lucky Day perk to loot more crafting components in the open world. Always repeat this each time you visit a ripperdoc to upgrade your cyberware!
As for Chipware Connoisseur itself, there is an interesting fact about it: the perk itself is what provides the selection of specific bonuses, it is NOT contingent on the individual piece of cyberware itself. For example, if you wanted to upgrade your Kiroshi Optics, you can keep the same bonuses you have, or choose between two sets of alternative bonuses on offer. But if you change your mind and want to upgrade either Smart Link, Kerenzikov, or whatever else, then those two sets of alternative bonuses will still be the same as what was on offer when you were thinking of upgrading your Kiroshis!
This is how you utilise the perk so that all your pieces of cyberware that are able to provide bonus stats, can boost a particular bonus stat you have in mind. Me personally? I always go for bonus melee damage. But if you're an avid Netrunner 100% of the way, you can potentially stack quickhack damage. Or you can stack other things like bonus headshot damage, etc. But in my honest opinion, you cannot go wrong by stacking melee damage with Chipware Connoisseur.
When you have upgraded all your current cyberware and any iconic weapons at this early stage to tier 1+, you may consider the 5 to 1 ratio for upgrading components from tier 1 to tier 2, if you are running short on the latter. Alternatively, if you are comfortable with it, you may start using the components to craft tier 1 weapons for you to sell. But do save a small handful of components just in case you need to craft ammo if it becomes scarce.
From levels 10 to 19, ripperdocs will sell you the tier 2 versions of their cyberware. Before your V reaches level 20, save up eddies and buy the following:
Electrifying Gorilla Arms
Dense Marrow
Spring Joints
Kerenzikov
Stabber
Optical Camo
Blood Pump
Biomonitor
Reinforced Tendons
From this point onwards, when it comes to upgrading your cyberware, always prioritise Gorilla Arms first and spend your first crafting components of each relevant tier on upgrading it to the + tiers, because it's your overall best melee weapon in the early stages, and the sooner you can upgrade it, the more access you have thanks to the bonus Body points for attribute checks.
Second biggest upgrade priority is the Cyberdeck, as higher tiers means you have a larger buffer to work with during Breach Protocol, you can equip higher tier quickhacks, and you can also acquire more slots to equip more quickhacks. Then focus on upgrading the rest of your cyberware, then use your crafting components on upgrading your iconic weapons. You do this until it all reaches the + tiers, and when you don't need any more crafting components of that specific tier, you can sell unwanted weapons and clothing of that same tier to rake in more eddies.
From levels 20 to 29, ripperdocs will sell you the tier 3 versions of their cyberware, and Dogtown ripperdocs will start selling the tier 3 versions of certain pieces of iconic cyberware. Before your V reaches level 30, save up eddies and buy the following:
Self-ICE
Neofiber
Revulsor (Dogtown)
Adreno-Trigger (Dogtown)
Defenzikov
From levels 30 to 39, ripperdocs will sell you the tier 4 versions of their cyberware, and Dogtown ripperdocs will start selling the tier 4 versions of certain pieces of iconic cyberware. Before your V reaches level 40, save up eddies and buy the following:
Axolotl (Dogtown, or complete all of Regina Watson's gigs)
Epimorphic Skeleton
Kiroshi “Cockatrice” Optics (Dogtown)
Once you have done all the essential purchasing you need to do, you can either buy the tier 5 versions of the operating systems you want as early as level 40, or you can wait and save your money (and potentially save tier 5 crafting components) by finding them out in the open world. I obviously prefer to do the latter because I still use the Cyberdeck to maximise my profits each time I hack an access point or device with Breach Protocol. In other words, there is absolutely no need to rush in obtaining other operating systems.
Mechatronic Core
Countershell
Shock-n-Awe
Smart Link
Microrotors
No matter what tier of weapons and clothing you find, you should always disassemble anything you don't want to keep. The general rule of thumb is that if you have not upgraded all your cyberware and iconic weapons to tier 1+ yet, then get more tier 1 crafting components before you start selling tier 1 weapons for eddies, then get more tier 2 components to upgrade your cyberware and iconics to tier 2+ before you start selling tier 2 weapons, and vice versa.
Use the components to upgrade your cyberware first, starting with the Militech Paraline Cyberdeck. You do not need to buy it but if you do come across it in your travels, replace the Militech Paraline with the Tetratronic Rippler. When you go to a ripperdoc to upgrade, invest a point in the Chipware Connoisseur perk. When you are done receiving upgrades, disable the perk and reallocate the perk point to the Lucky Day perk to loot more crafting components in the open world. Always repeat this each time you visit a ripperdoc to upgrade your cyberware!
As for Chipware Connoisseur itself, there is an interesting fact about it: the perk itself is what provides the selection of specific bonuses, it is NOT contingent on the individual piece of cyberware itself. For example, if you wanted to upgrade your Kiroshi Optics, you can keep the same bonuses you have, or choose between two sets of alternative bonuses on offer. But if you change your mind and want to upgrade either Smart Link, Kerenzikov, or whatever else, then those two sets of alternative bonuses will still be the same as what was on offer when you were thinking of upgrading your Kiroshis!
This is how you utilise the perk so that all your pieces of cyberware that are able to provide bonus stats, can boost a particular bonus stat you have in mind. Me personally? I always go for bonus melee damage. But if you're an avid Netrunner 100% of the way, you can potentially stack quickhack damage. Or you can stack other things like bonus headshot damage, etc. But in my honest opinion, you cannot go wrong by stacking melee damage with Chipware Connoisseur.
When you have upgraded all your current cyberware and any iconic weapons at this early stage to tier 1+, you may consider the 5 to 1 ratio for upgrading components from tier 1 to tier 2, if you are running short on the latter. Alternatively, if you are comfortable with it, you may start using the components to craft tier 1 weapons for you to sell. But do save a small handful of components just in case you need to craft ammo if it becomes scarce.
From levels 10 to 19, ripperdocs will sell you the tier 2 versions of their cyberware. Before your V reaches level 20, save up eddies and buy the following:
Electrifying Gorilla Arms
Dense Marrow
Spring Joints
Kerenzikov
Stabber
Optical Camo
Blood Pump
Biomonitor
Reinforced Tendons
From this point onwards, when it comes to upgrading your cyberware, always prioritise Gorilla Arms first and spend your first crafting components of each relevant tier on upgrading it to the + tiers, because it's your overall best melee weapon in the early stages, and the sooner you can upgrade it, the more access you have thanks to the bonus Body points for attribute checks.
Second biggest upgrade priority is the Cyberdeck, as higher tiers means you have a larger buffer to work with during Breach Protocol, you can equip higher tier quickhacks, and you can also acquire more slots to equip more quickhacks. Then focus on upgrading the rest of your cyberware, then use your crafting components on upgrading your iconic weapons. You do this until it all reaches the + tiers, and when you don't need any more crafting components of that specific tier, you can sell unwanted weapons and clothing of that same tier to rake in more eddies.
From levels 20 to 29, ripperdocs will sell you the tier 3 versions of their cyberware, and Dogtown ripperdocs will start selling the tier 3 versions of certain pieces of iconic cyberware. Before your V reaches level 30, save up eddies and buy the following:
Self-ICE
Neofiber
Revulsor (Dogtown)
Adreno-Trigger (Dogtown)
Defenzikov
From levels 30 to 39, ripperdocs will sell you the tier 4 versions of their cyberware, and Dogtown ripperdocs will start selling the tier 4 versions of certain pieces of iconic cyberware. Before your V reaches level 40, save up eddies and buy the following:
Axolotl (Dogtown, or complete all of Regina Watson's gigs)
Epimorphic Skeleton
Kiroshi “Cockatrice” Optics (Dogtown)
Once you have done all the essential purchasing you need to do, you can either buy the tier 5 versions of the operating systems you want as early as level 40, or you can wait and save your money (and potentially save tier 5 crafting components) by finding them out in the open world. I obviously prefer to do the latter because I still use the Cyberdeck to maximise my profits each time I hack an access point or device with Breach Protocol. In other words, there is absolutely no need to rush in obtaining other operating systems.
OPTIMAL PROGRESSION: STORY
Note: I am going to lay out the following advice on the assumption that you know how the story goes and that you have already unlocked all the relevant Steam achievements regarding the story and the endings. If you do NOT yet know what happens, skip this section to avoid spoilers!
After the Heist, focus first on finding Evelyn Parker. In the interim period where Mr. Hands tries to get in contact with the Voodoo Boys on your behalf, use that time to do the main missions where you assist Takemura. But as a priority, you must complete the main missions that lead you to Pacifica and get in contact with Alt Cunningham, before Songbird will initiate first contact with you and invite you to Dogtown.
When you first enter Dogtown, do NOT deviate from the main missions Songbird gives you until after you have rescued President Myers! If you are doing this before level 30, you will miss out on a tier 4 shard in the stadium garage, but this is not a significant loss. You can still get a max cyberware capacity of up to 350, and we really only need 338 or 340 at the absolute max by level 60 for our build. It's better and more important to get into Dogtown as soon as possible, one reason being because there are important iconic pieces of cyberware that will become more expensive to purchase if left later on when your V is at higher levels.
Before you can enter the Black Sapphire, Mr. Hands needs you to help build up his reputation by doing gigs within Dogtown. He'll ask this of you directly if you do not take the initiative yourself after having rescued Myers or when Reed is away, escorting Myers back to Washington. So use the downtime from that to do gigs, as well as maybe any outstanding main missions with Takemura and/or trying to find Hellman. Speaking of which, you must find Hellman first in order to advance to the main mission where you and Takemura are trying to reach (and abduct) Hanako Arasaka.
There is no meaningful significance or difference to your playthrough if you choose to betray either Reed or Songbird. Whatever decision you make at that crucial junction, and whatever ending you go for in the aftermath, is entirely your call to make. Unlike the final mission, there is no point of return with the DLC, which is why I have deliberately avoided mentioning any weapon or piece of cyberware that is entirely reliant on the conclusion of the DLC going a fixed route, until now.
Having said all that, if you choose to betray Songbird because you have your eye on obtaining the crafting specs and the necessary tech to harness the power of the Blackwall for yourself, DO NOT choose the Militech Canto Cyberdeck! I cannot emphasise enough how VERY underwhelming and overrated it is! It costs more than twice the cyberware capacity of the Tetratronic Rippler to equip, it only has 4 quickhack slots, and all its special bonuses revolve completely around the Blackwall Gateway quickhack which unfortunately, has a mind of its own in how it operates.
As a Netrunner in endgame, you are nerfing yourself by trying to use the Canto. You NEED Overclock without exemption to use it and to spread it. That is, it has the potential to spread to other enemies, but doesn't always do so. And the first upload takes ages! And before you ask if it works well against bosses, the Canto demanded that I spend 185 RAM to Blackwall Adam Smasher! Regardless of whether we're talking about a versatile build like this one or going 100% Netrunner, I would not even put the Canto in the top three of a cyberdeck ranking list, no way!
On the other hand, the Erebus is a MUCH better SMG than the Canto is a cyberdeck! The Erebus actually feels like it could legitimately feature in the top 3 of an SMG ranking list. I don't think it's THE best overall SMG, not when the Raiju exists. But it certainly still is one of the best iconic SMGs available, and it can be used in any of the playstyles we can choose from in endgame. It functions more like a close-quarters autoshotgun, making it very deadly at shorter range, but the spread of the projectiles means that the drop-off in DPS is significant when you're not in close-enough proximity to land all the projectiles. Furthermore, against bosses, it won't have the Blackwall Gateway effect on their final 33% health, and the Cyberware Malfunction effect only has a 1% chance of triggering, compared to the usual 5% chance against any enemy that isn't a boss. That's why I see this more as a mobbing weapon against standard and elite enemies when engaging at close-range, and not as an ideal general purpose weapon.
If you care at all about completing your collection of tarot cards, then it is necessary to play through the Devil ending. If you do this first with Hanako being your only available option for getting into Arasaka Tower, you can grab the access token after killing Adam Smasher. Then when you load back to the point of no return, you will have the Devil card in your journal, and then you can storm the Ebunike with Rogue and unlock Smasher's personal armoury to grab the crafting spec for Ba Xing Chong all in one.
After that, you can then let Johnny take over as we take Rogue on a date. This will unlock Rogue as an option to storm Arasaka tower with when we let Johnny see us to the finish line. Doing this will allow you to pick up Prejudice at the Afterlife, Pride after killing Smasher, and also being able to scan the Judgement tarot card.
Although not imperative to do so, if you want to go even further after those two endings, complete all the side jobs for Panam to unlock the option to go with her and the Aldecaldos for the final mission. You'll have a chance to score the iconic Amnesty revolver, and grab the cool-looking Aldecaldos jacket, as well as give yourself a happy ending by leaving Night City!
After the Heist, focus first on finding Evelyn Parker. In the interim period where Mr. Hands tries to get in contact with the Voodoo Boys on your behalf, use that time to do the main missions where you assist Takemura. But as a priority, you must complete the main missions that lead you to Pacifica and get in contact with Alt Cunningham, before Songbird will initiate first contact with you and invite you to Dogtown.
When you first enter Dogtown, do NOT deviate from the main missions Songbird gives you until after you have rescued President Myers! If you are doing this before level 30, you will miss out on a tier 4 shard in the stadium garage, but this is not a significant loss. You can still get a max cyberware capacity of up to 350, and we really only need 338 or 340 at the absolute max by level 60 for our build. It's better and more important to get into Dogtown as soon as possible, one reason being because there are important iconic pieces of cyberware that will become more expensive to purchase if left later on when your V is at higher levels.
Before you can enter the Black Sapphire, Mr. Hands needs you to help build up his reputation by doing gigs within Dogtown. He'll ask this of you directly if you do not take the initiative yourself after having rescued Myers or when Reed is away, escorting Myers back to Washington. So use the downtime from that to do gigs, as well as maybe any outstanding main missions with Takemura and/or trying to find Hellman. Speaking of which, you must find Hellman first in order to advance to the main mission where you and Takemura are trying to reach (and abduct) Hanako Arasaka.
There is no meaningful significance or difference to your playthrough if you choose to betray either Reed or Songbird. Whatever decision you make at that crucial junction, and whatever ending you go for in the aftermath, is entirely your call to make. Unlike the final mission, there is no point of return with the DLC, which is why I have deliberately avoided mentioning any weapon or piece of cyberware that is entirely reliant on the conclusion of the DLC going a fixed route, until now.
Having said all that, if you choose to betray Songbird because you have your eye on obtaining the crafting specs and the necessary tech to harness the power of the Blackwall for yourself, DO NOT choose the Militech Canto Cyberdeck! I cannot emphasise enough how VERY underwhelming and overrated it is! It costs more than twice the cyberware capacity of the Tetratronic Rippler to equip, it only has 4 quickhack slots, and all its special bonuses revolve completely around the Blackwall Gateway quickhack which unfortunately, has a mind of its own in how it operates.
As a Netrunner in endgame, you are nerfing yourself by trying to use the Canto. You NEED Overclock without exemption to use it and to spread it. That is, it has the potential to spread to other enemies, but doesn't always do so. And the first upload takes ages! And before you ask if it works well against bosses, the Canto demanded that I spend 185 RAM to Blackwall Adam Smasher! Regardless of whether we're talking about a versatile build like this one or going 100% Netrunner, I would not even put the Canto in the top three of a cyberdeck ranking list, no way!
On the other hand, the Erebus is a MUCH better SMG than the Canto is a cyberdeck! The Erebus actually feels like it could legitimately feature in the top 3 of an SMG ranking list. I don't think it's THE best overall SMG, not when the Raiju exists. But it certainly still is one of the best iconic SMGs available, and it can be used in any of the playstyles we can choose from in endgame. It functions more like a close-quarters autoshotgun, making it very deadly at shorter range, but the spread of the projectiles means that the drop-off in DPS is significant when you're not in close-enough proximity to land all the projectiles. Furthermore, against bosses, it won't have the Blackwall Gateway effect on their final 33% health, and the Cyberware Malfunction effect only has a 1% chance of triggering, compared to the usual 5% chance against any enemy that isn't a boss. That's why I see this more as a mobbing weapon against standard and elite enemies when engaging at close-range, and not as an ideal general purpose weapon.
If you care at all about completing your collection of tarot cards, then it is necessary to play through the Devil ending. If you do this first with Hanako being your only available option for getting into Arasaka Tower, you can grab the access token after killing Adam Smasher. Then when you load back to the point of no return, you will have the Devil card in your journal, and then you can storm the Ebunike with Rogue and unlock Smasher's personal armoury to grab the crafting spec for Ba Xing Chong all in one.
After that, you can then let Johnny take over as we take Rogue on a date. This will unlock Rogue as an option to storm Arasaka tower with when we let Johnny see us to the finish line. Doing this will allow you to pick up Prejudice at the Afterlife, Pride after killing Smasher, and also being able to scan the Judgement tarot card.
Although not imperative to do so, if you want to go even further after those two endings, complete all the side jobs for Panam to unlock the option to go with her and the Aldecaldos for the final mission. You'll have a chance to score the iconic Amnesty revolver, and grab the cool-looking Aldecaldos jacket, as well as give yourself a happy ending by leaving Night City!
ENDGAME
So your V has finally reached level 60, your collection of cyberware and weapons is coming along nicely, and now the time has come where you really want to reach the ultimate tier of the major leagues. Thus we need to determine what exactly constitutes a viable, effective and proficient endgame build, and achieve that while simultaneously making it flexible enough to accommodate radically different playstyles when the mood strikes.
You can play the game on Very Hard difficulty and still get away with a lot of things. You can have a mediocre or subpar build that's still viable enough to handle the majority of the game. But if you want to gauge how strong your V really is, then the ultimate test of an endgame build is being able to use it to the point where you can handle yourself even if you accrue five felony stars, and can withstand a seemingly endless onslaught while going up against squads of NCPD and MaxTac. No other enemy or boss in the game, not even Adam Smasher, can compare to this test.
In testing my V against waves of NCPD and MaxTac in particular, I learnt a few interesting things. For starters, if you rely solely on ranged weapons, you are inevitably going to run out of ammunition. I don't care what ranged weapons you use, I don't even care if you use different types of weapons just to be able to utilise all the different ammo types. If you carry on such a battle for long enough, your reserves will run empty sooner or later. You can use tier 1 trading components to craft any ammunition, but you are blocked from doing this while the combat state is active. In that event, you have no choice but to try and lose the cops and get out of combat, so that you can craft.
And for those avid netrunners who rely on quickhacks for their main source of damage, it's a similar story in regards to RAM. Sure, you have Overclock, and there is much you can do to tinker with quickhacks in terms of queues, upload order, smart use of certain perks, etc. But then MaxTac shows up, and you eventually realise that the risk of going all-in on netrunning, far outweighs the reward. Even with your best efforts, the devs have nerfed the DPS potential of netrunning so hard into the ground, that you can no longer rely on that alone to fight MaxTac. You can still dispose of them as a netrunner of course, but it requires a different approach.
This is why no matter the playstyle, when it comes to DPS versus MaxTac or any boss for that matter, melee damage is king. Not only does it have good DPS, it also costs you neither ammunition nor RAM, only stamina. And there are ways of dealing with cost of stamina. Any worthy endgame build will utilise at least one melee weapon to make incredibly short work of the toughest foes. So when it comes to our builds, we will always prioritise perks that boost our performance and DPS output for our chosen melee weapon. Any ranged weapons you want to use are secondary in priority when it comes to spending your spare perk points. Before we get into specific playstyles though, I feel it is vital to elaborate further on our best forms of offence and defence, as they are key in terms of making a top-quality build and are especially core to this versatile build.
OFFENCE (CRITICAL HITS)
Critical damage is the peak DPS possible across all playstyles and with all weapons. By default, a crit hit deals 50% extra damage compared to a non-crit hit. But certain iconic weapons and operating systems allow you to really ramp up the crit damage dramatically. However, there is very little justification for huge boosts in crit damage unless we can attain a high enough crit chance first and foremost. Different playstyles will inevitably yield different figures of total crit chance, thus boosting crit chance is the first priority before thinking about bonus crit damage.
For example, if I'm using an operating system that doesn't give any boosts to crit chance such as when I decide to be an endgame Netrunner but am not feeling like using smart weapons, I would treat this as further incentive to use the Prejudice and the Raiju as my main ranged weapons, because they both benefit from the Sharpshooter and Practice Makes Perfect perks. And because of the total crit chance from the Kiroshi “Cockatrice” Optics, and the passive bonuses for having 15 Reflexes and using cyberware emphasising that attribute, then Practice Makes Perfect gives us an opportunity to hit 100% crit chance, and consistently reap the benefits of the bonus crit damage from both iconic weapons with every shot!
If you're a Sandevistan fan, it is totally in your best interests to max out the Shinobi skill bar to level 60 because while Sandevistan is active, you get +40% crit chance. If you combine this with the cyberware we mentioned above, this allows you to get 100% crit chance during Sandevistan, with ANY WEAPON in the game! So if you're more of a gun fanatic, Sandevistan is what you want. And I cannot keep quiet on a certain Berserk operating system that while active and with 15 Reflexes, gives you an extra 35% crit chance and 100% crit damage! If combat in close-quarters with a melee weapon is what gives you the most joy, then literally go Berserk!
Ultimately, with the right choice of cyberware, the majority of which we've already covered in previous sections, accumulating a high crit chance is not hard, and certain weapon choices can compensate for any playstyle or situation where total crit chance might be a bit low. I have already mentioned using the Chipware Connoisseur perk to edit and stack melee damage as a bonus stat on all your pieces of cyberware. Well, imagine over 100% bonus melee damage, with 100% crit chance, and more than 100% bonus crit damage!
In case you happen to ask such questions, what about other forms of bonus damage? Bonus stealth damage is cool yet rather self-explanatory, you can use stealth weapons and/or use Optical Camo to lean into that angle. Bonus headshot/weakspot damage is obviously worthwhile no matter what weapon you use. There is also armour penetration which can be beneficial, but it is only relevant when the enemy is wearing armour in the first place (which your Kiroshis can tell you if the target is wearing armour) and even if they do have armour, it does NOT apply when you land headshots.
This is why when you're checking out the stats on weapons, especially guns, almost all of them will have bonus headshot damage and some will have armour penetration. That's because depending on where you land your shot, you're inflicting one or the other, never both. Take the Militech Crusher shotgun for example: the original model has zero armour penetration, because you are expected to make full use of the 135% bonus headshot damage by going solely for headshots instead. Best way to think of armour penetration is as a form of insurance: if you go for a headshot, it's not necessary. But if you miss the headshot yet land it in the torso or limbs and the enemy happens to be wearing armour, at least you can negate some of their armour.
This is another reason why when I talked about non-iconic tech weapons, I said that the Wallpuncher mod makes the most sense with the Satara because it's a shotgun and so as well as ripping off the legs of standard and elite enemies with the Kneel mod, you'll also be aiming at the torsos and weakspots of bosses, and the Wallpuncher mod also gives you +100% armour penetration to make any enemy's armour irrelevant. Even if you use the Burya and/or Nekomata, you absolutely want to be landing headshots with those tech weapons, in which case, armour penetration becomes a lot less important in the grand scheme of things.
For example, if I'm using an operating system that doesn't give any boosts to crit chance such as when I decide to be an endgame Netrunner but am not feeling like using smart weapons, I would treat this as further incentive to use the Prejudice and the Raiju as my main ranged weapons, because they both benefit from the Sharpshooter and Practice Makes Perfect perks. And because of the total crit chance from the Kiroshi “Cockatrice” Optics, and the passive bonuses for having 15 Reflexes and using cyberware emphasising that attribute, then Practice Makes Perfect gives us an opportunity to hit 100% crit chance, and consistently reap the benefits of the bonus crit damage from both iconic weapons with every shot!
If you're a Sandevistan fan, it is totally in your best interests to max out the Shinobi skill bar to level 60 because while Sandevistan is active, you get +40% crit chance. If you combine this with the cyberware we mentioned above, this allows you to get 100% crit chance during Sandevistan, with ANY WEAPON in the game! So if you're more of a gun fanatic, Sandevistan is what you want. And I cannot keep quiet on a certain Berserk operating system that while active and with 15 Reflexes, gives you an extra 35% crit chance and 100% crit damage! If combat in close-quarters with a melee weapon is what gives you the most joy, then literally go Berserk!
Ultimately, with the right choice of cyberware, the majority of which we've already covered in previous sections, accumulating a high crit chance is not hard, and certain weapon choices can compensate for any playstyle or situation where total crit chance might be a bit low. I have already mentioned using the Chipware Connoisseur perk to edit and stack melee damage as a bonus stat on all your pieces of cyberware. Well, imagine over 100% bonus melee damage, with 100% crit chance, and more than 100% bonus crit damage!
In case you happen to ask such questions, what about other forms of bonus damage? Bonus stealth damage is cool yet rather self-explanatory, you can use stealth weapons and/or use Optical Camo to lean into that angle. Bonus headshot/weakspot damage is obviously worthwhile no matter what weapon you use. There is also armour penetration which can be beneficial, but it is only relevant when the enemy is wearing armour in the first place (which your Kiroshis can tell you if the target is wearing armour) and even if they do have armour, it does NOT apply when you land headshots.
This is why when you're checking out the stats on weapons, especially guns, almost all of them will have bonus headshot damage and some will have armour penetration. That's because depending on where you land your shot, you're inflicting one or the other, never both. Take the Militech Crusher shotgun for example: the original model has zero armour penetration, because you are expected to make full use of the 135% bonus headshot damage by going solely for headshots instead. Best way to think of armour penetration is as a form of insurance: if you go for a headshot, it's not necessary. But if you miss the headshot yet land it in the torso or limbs and the enemy happens to be wearing armour, at least you can negate some of their armour.
This is another reason why when I talked about non-iconic tech weapons, I said that the Wallpuncher mod makes the most sense with the Satara because it's a shotgun and so as well as ripping off the legs of standard and elite enemies with the Kneel mod, you'll also be aiming at the torsos and weakspots of bosses, and the Wallpuncher mod also gives you +100% armour penetration to make any enemy's armour irrelevant. Even if you use the Burya and/or Nekomata, you absolutely want to be landing headshots with those tech weapons, in which case, armour penetration becomes a lot less important in the grand scheme of things.
DEFENCE (MITIGATION)
Mitigation is without a doubt THE best form of defence in Cyberpunk 2077. Seriously, if you offered me 100% mitigation chance that is active unconditionally 24/7, and all I have to do in return is run around with literally ZERO to my armour, I would say a resounding 'YES' a million times over! The thing about mitigation is that when it's active, it will literally halve any damage you sustain at a bare minimum due to mitigation strength being 50% by default. Don't you notice a certain theme here like with crit chance? The best form of defence also has two stats to boost it, one being mitigation chance, the most important stat to prioritise before mitigation strength.
And once you've done enough to get yourself as close to 100% mitigation chance being active for as long as possible, then mitigation strength can allow you to take things further. There is a reason why mitigation strength is capped at 90%, otherwise it would be like running around with the iconic Militech Berserk cyberware being active 100% of the time. As far as I'm aware, the only form of health loss mitigation does not cover is health lost from spending more RAM than you have during Overclock if you're a Netrunner.
But mitigation has you covered on everything else! It could be gun damage, melee damage, quickhack damage, headshot damage, bonus damage from armour penetration, damage over time, and even fall damage! This is why I made such a big deal of the Kerenzikov + Neofiber + Spring Joints combo when we were talking about cyberware, because you get 100% mitigation chance, with 80% mitigation strength, for 100% of the time you're using ranged weapons. This is so unbelievably effective that with the Blood Pump + Biomonitor combo keeping me sufficiently healed, I do not feel the absence of Chitin and its health regen one bit.
The only potential downside to mitigation is that compared to the constant 100% chance with ranged weapons, it's not so simple to have while using melee weapons because you obviously can't activate Kerenzikov with a melee weapon in hand, not without activating it with a ranged weapon before swapping to a melee weapon. Enter Countershell which gives us +50% mitigation chance if we sustain enough damage within a few seconds. We also have the Heat Shield perk in every playstyle so that Pyromania gives us extra mitigation chance per stack as well as movement speed.
In an earlier iteration of this versatile build, I used to recommend both Proxishield and Peripheral Inverse as choices of defensive cyberware, using one or the other based on how much cyberware capacity you have in reserve. But after doing some theoretical maths and carrying out further testing, I could no longer justify using either cyberware when Countershell exists.
So how did I calculate this, and why does it matter? Well first of all, it matters because each piece of cyberware should serve a significant purpose in my opinion. As to how I calculated it, I calculated damage reduction numbers in a hypothetical scenario where the Peripheral Inverse was in its complete element – just one enemy in a melee fight – and compared it to how Countershell would perform in its place instead. I am not going to include mitigation chance from the Heat shield perk, but remember: we have 10% chance from Neofiber, and we still have a total of 80% mitigation strength from that plus Spring Joints. And because mitigation chance is a factor here, we are going to assume total damage sustained by 100 hits.
Let's say an enemy punches you for 100 damage each hit, for 100 hits total, and you're wearing the Peripheral Inverse. Well, that's 45% damage reduction, ergo 55 damage per hit. Times that by 100, you have 5,500 total damage. Now if the 10% mitigation chance from Neofiber kicks in, it could knock off anywhere between 500-800 damage. But then compare that to 60% mitigation chance with 80% mitigation strength. Ergo, you have 60 hits that deal only 20 damage, and combine that with 40 hits that do 100 damage. That totals to 5,200 damage.
So while the Peripheral Inverse works very well in close-quarters, one-on-one combat, it doesn't protect you from anything outside your 6-metre radius. Whereas mitigation chance on the other hand, has you covered no matter how the enemy is attacking you, whether they are close or far away from you, and can be further boosted by any explosions you happen to set off via the Heat Shield perk when it comes to you brandishing a melee weapon and going in for the kills. Now I'm sure a lot of you might be asking an obvious question: what about stacking armour?
And once you've done enough to get yourself as close to 100% mitigation chance being active for as long as possible, then mitigation strength can allow you to take things further. There is a reason why mitigation strength is capped at 90%, otherwise it would be like running around with the iconic Militech Berserk cyberware being active 100% of the time. As far as I'm aware, the only form of health loss mitigation does not cover is health lost from spending more RAM than you have during Overclock if you're a Netrunner.
But mitigation has you covered on everything else! It could be gun damage, melee damage, quickhack damage, headshot damage, bonus damage from armour penetration, damage over time, and even fall damage! This is why I made such a big deal of the Kerenzikov + Neofiber + Spring Joints combo when we were talking about cyberware, because you get 100% mitigation chance, with 80% mitigation strength, for 100% of the time you're using ranged weapons. This is so unbelievably effective that with the Blood Pump + Biomonitor combo keeping me sufficiently healed, I do not feel the absence of Chitin and its health regen one bit.
The only potential downside to mitigation is that compared to the constant 100% chance with ranged weapons, it's not so simple to have while using melee weapons because you obviously can't activate Kerenzikov with a melee weapon in hand, not without activating it with a ranged weapon before swapping to a melee weapon. Enter Countershell which gives us +50% mitigation chance if we sustain enough damage within a few seconds. We also have the Heat Shield perk in every playstyle so that Pyromania gives us extra mitigation chance per stack as well as movement speed.
In an earlier iteration of this versatile build, I used to recommend both Proxishield and Peripheral Inverse as choices of defensive cyberware, using one or the other based on how much cyberware capacity you have in reserve. But after doing some theoretical maths and carrying out further testing, I could no longer justify using either cyberware when Countershell exists.
So how did I calculate this, and why does it matter? Well first of all, it matters because each piece of cyberware should serve a significant purpose in my opinion. As to how I calculated it, I calculated damage reduction numbers in a hypothetical scenario where the Peripheral Inverse was in its complete element – just one enemy in a melee fight – and compared it to how Countershell would perform in its place instead. I am not going to include mitigation chance from the Heat shield perk, but remember: we have 10% chance from Neofiber, and we still have a total of 80% mitigation strength from that plus Spring Joints. And because mitigation chance is a factor here, we are going to assume total damage sustained by 100 hits.
Let's say an enemy punches you for 100 damage each hit, for 100 hits total, and you're wearing the Peripheral Inverse. Well, that's 45% damage reduction, ergo 55 damage per hit. Times that by 100, you have 5,500 total damage. Now if the 10% mitigation chance from Neofiber kicks in, it could knock off anywhere between 500-800 damage. But then compare that to 60% mitigation chance with 80% mitigation strength. Ergo, you have 60 hits that deal only 20 damage, and combine that with 40 hits that do 100 damage. That totals to 5,200 damage.
So while the Peripheral Inverse works very well in close-quarters, one-on-one combat, it doesn't protect you from anything outside your 6-metre radius. Whereas mitigation chance on the other hand, has you covered no matter how the enemy is attacking you, whether they are close or far away from you, and can be further boosted by any explosions you happen to set off via the Heat Shield perk when it comes to you brandishing a melee weapon and going in for the kills. Now I'm sure a lot of you might be asking an obvious question: what about stacking armour?
WHAT ABOUT ARMOUR?
In my honest opinion, armour is seriously overrated as well as absurdly complex. The more I learn about armour, the more I realise how vague a stat it truly is in Cyberpunk. Before patch 2.0, stacking armour was the best and most simple form of defence you could do. You didn't need to do any deep-dives into the mechanics or overthink it, as long as you stacked as much as you could equip, you could thrust yourself into any situation and be confident in brushing off a significant portion of incoming damage. But as someone who played the game a lot before patch 2.0, there is absolutely no question that armour has been drastically nerfed overall.
In numerous bouts of testing, I have tried to max out my armour capacity and see how long I could survive, and the results always seem to be both disappointing and not making much sense. And I am not alone in thinking this: there have been numerous reports from players complaining that even with 1500 armour, they can still get killed by as little as one, two, or three hits on Very Hard difficulty, and have no idea as to why they are still so fragile despite their stacked armour. So I felt that armour deserved its own section to clear up and resolve the cloud of ambiguity surrounding it.
I've been scouring through the Internet to find any solid pieces of information or documentation on how exactly armour works in Cyberpunk 2.0, and there really isn't much out there. But what little I did find, sheds enough light to make some sense of why it is the way it is. The effectiveness of armour has two different stats that are entirely contingent on your choice of difficulty, and these two stats do contribute to the damage reduction formula. To my surprise, both Hard and Very Hard difficulties share the same values as each other, and in terms of pure numbers, while marginal, they have higher armour effectiveness than what you would get on Easy and Normal difficulties!
However, while the numbers in the game's code say that this is true, they are separate factors from how much bonus damage enemies can dish out due to the difficulty setting. I could not find any official sources to confirm specific values, but one such source claimed that if you were to imagine Easy difficulty offering a damage multipler of x1, then Normal would be x3, Hard would be x6, and Very Hard would be x10! And everything I write in this guide as well as how I play Cyberpunk, is based on if you were playing on Very Hard difficulty. In basic terms, the net result is that each rise in difficulty level will make the enemies hit harder than ever before, despite your armour values being more effective compared to lower difficulty settings.
The damage reduction formula for armour also confirms that if their weapons are capable of it, the enemies can also use armour penetration against V and negate varying percentages of whatever the value of your armour happens to be. And if they land headshots on you, then they too can bypass your armour and benefit from the headshot damage multipliers of their weapons. This explains why you can have full health and be full to the brim with armour, but can still be killed by a single headshot from an enemy sniper on Very Hard difficulty.
Everything I've mentioned about armour so far, are things that do not get explained to you in detail by the game itself. All you get told about armour is if you go to your cyberware menu and hover over the armour bar on the right-hand side. It tells you that it protects you from everything except damage-over-time, which is NOT true at all, as there are other damage types besides damage-over-time that armour fails to protect you from.
But what is most interesting, is that the description will tell you how much damage your armour can reduce, and it's not stated what exact factors contribute to this value, but we know this value can be changed and it can be dependent on V's level as well as the total amount of armour equipped. If the listed value is correct, then this means that armour is subject to diminishing returns. For example, if your armour gives you 30% damage reduction regardless of whether you have 500 armour or 750, then it strongly suggests that the extra 250 armour is irrelevant. The highest value I've seen listed is 59%, but if we assumed that it's the same percentage at 1,000 as it is at 1,500 max armour, then you're unnecessarily wasting cyberware slots on 500 max armour.
To summarise armour, it doesn't protect you from headshots, armour penetration, damage over time or fall damage, and those are just the damage types I can instantly pick off the top of my head! It's such a vague stat that explains so little in-game, and is also subject to diminishing returns without even informing you. It's also why I do somewhat facepalm when I see Youtubers and Cyberpunk content creators still telling folks that stacking armour in terms of defence, is the best thing since sliced bread. Maybe before patch 2.0, but certainly not since!
When it comes to armour, think of it as the side dish to mitigation which is the main course as it easily offers higher damage reduction, and can protect you from the listed damage types that armour cannot. Armour is an extra that may or may not help, and is seen more as a bonus depending on which cyberware you use in the end. But as long as you focus on mitigation which is far more effective defence, then it shouldn't matter if your armour is 30% or 59%. By focusing on mitigation instead of armour, it allows us to equip better-quality cyberware which gives V the opportunity to do more cool things and adds to the overall versatility of this endgame build.
In numerous bouts of testing, I have tried to max out my armour capacity and see how long I could survive, and the results always seem to be both disappointing and not making much sense. And I am not alone in thinking this: there have been numerous reports from players complaining that even with 1500 armour, they can still get killed by as little as one, two, or three hits on Very Hard difficulty, and have no idea as to why they are still so fragile despite their stacked armour. So I felt that armour deserved its own section to clear up and resolve the cloud of ambiguity surrounding it.
I've been scouring through the Internet to find any solid pieces of information or documentation on how exactly armour works in Cyberpunk 2.0, and there really isn't much out there. But what little I did find, sheds enough light to make some sense of why it is the way it is. The effectiveness of armour has two different stats that are entirely contingent on your choice of difficulty, and these two stats do contribute to the damage reduction formula. To my surprise, both Hard and Very Hard difficulties share the same values as each other, and in terms of pure numbers, while marginal, they have higher armour effectiveness than what you would get on Easy and Normal difficulties!
However, while the numbers in the game's code say that this is true, they are separate factors from how much bonus damage enemies can dish out due to the difficulty setting. I could not find any official sources to confirm specific values, but one such source claimed that if you were to imagine Easy difficulty offering a damage multipler of x1, then Normal would be x3, Hard would be x6, and Very Hard would be x10! And everything I write in this guide as well as how I play Cyberpunk, is based on if you were playing on Very Hard difficulty. In basic terms, the net result is that each rise in difficulty level will make the enemies hit harder than ever before, despite your armour values being more effective compared to lower difficulty settings.
The damage reduction formula for armour also confirms that if their weapons are capable of it, the enemies can also use armour penetration against V and negate varying percentages of whatever the value of your armour happens to be. And if they land headshots on you, then they too can bypass your armour and benefit from the headshot damage multipliers of their weapons. This explains why you can have full health and be full to the brim with armour, but can still be killed by a single headshot from an enemy sniper on Very Hard difficulty.
Everything I've mentioned about armour so far, are things that do not get explained to you in detail by the game itself. All you get told about armour is if you go to your cyberware menu and hover over the armour bar on the right-hand side. It tells you that it protects you from everything except damage-over-time, which is NOT true at all, as there are other damage types besides damage-over-time that armour fails to protect you from.
But what is most interesting, is that the description will tell you how much damage your armour can reduce, and it's not stated what exact factors contribute to this value, but we know this value can be changed and it can be dependent on V's level as well as the total amount of armour equipped. If the listed value is correct, then this means that armour is subject to diminishing returns. For example, if your armour gives you 30% damage reduction regardless of whether you have 500 armour or 750, then it strongly suggests that the extra 250 armour is irrelevant. The highest value I've seen listed is 59%, but if we assumed that it's the same percentage at 1,000 as it is at 1,500 max armour, then you're unnecessarily wasting cyberware slots on 500 max armour.
To summarise armour, it doesn't protect you from headshots, armour penetration, damage over time or fall damage, and those are just the damage types I can instantly pick off the top of my head! It's such a vague stat that explains so little in-game, and is also subject to diminishing returns without even informing you. It's also why I do somewhat facepalm when I see Youtubers and Cyberpunk content creators still telling folks that stacking armour in terms of defence, is the best thing since sliced bread. Maybe before patch 2.0, but certainly not since!
When it comes to armour, think of it as the side dish to mitigation which is the main course as it easily offers higher damage reduction, and can protect you from the listed damage types that armour cannot. Armour is an extra that may or may not help, and is seen more as a bonus depending on which cyberware you use in the end. But as long as you focus on mitigation which is far more effective defence, then it shouldn't matter if your armour is 30% or 59%. By focusing on mitigation instead of armour, it allows us to equip better-quality cyberware which gives V the opportunity to do more cool things and adds to the overall versatility of this endgame build.
NETRUNNER
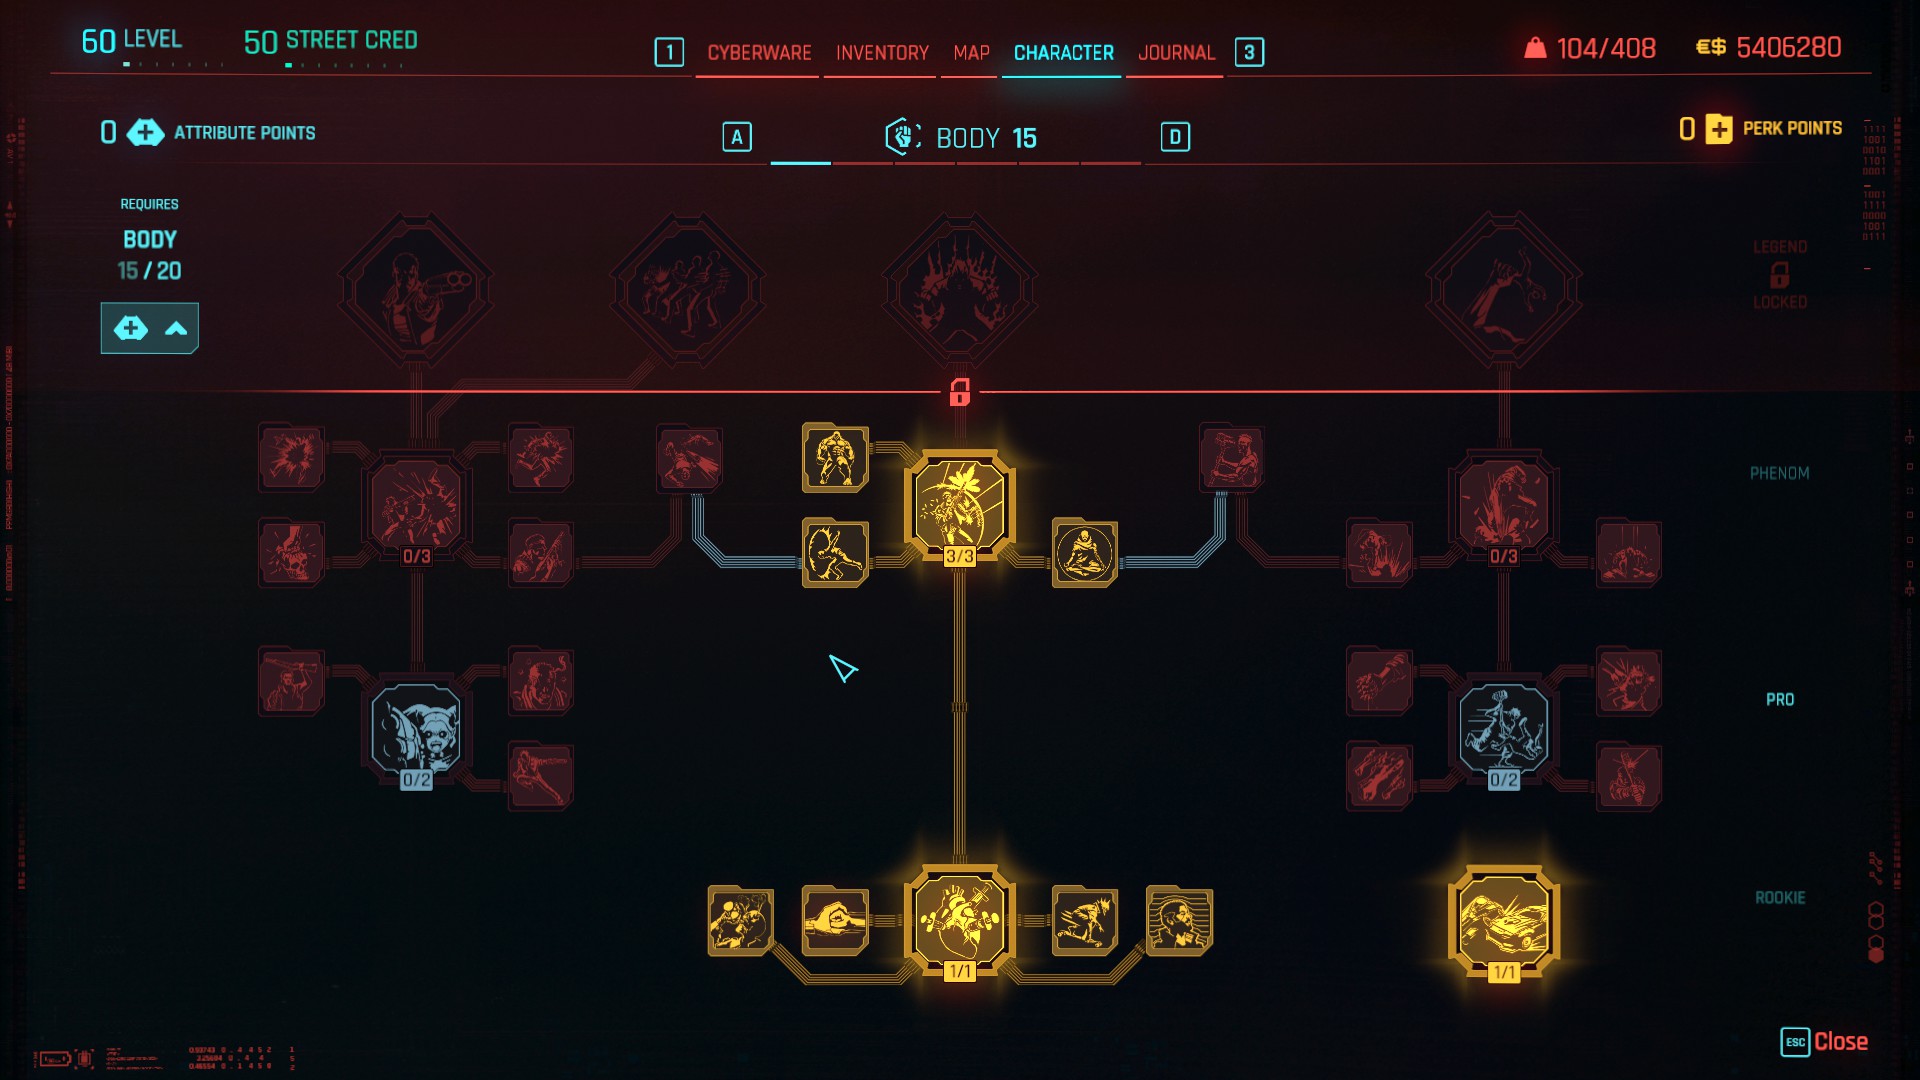
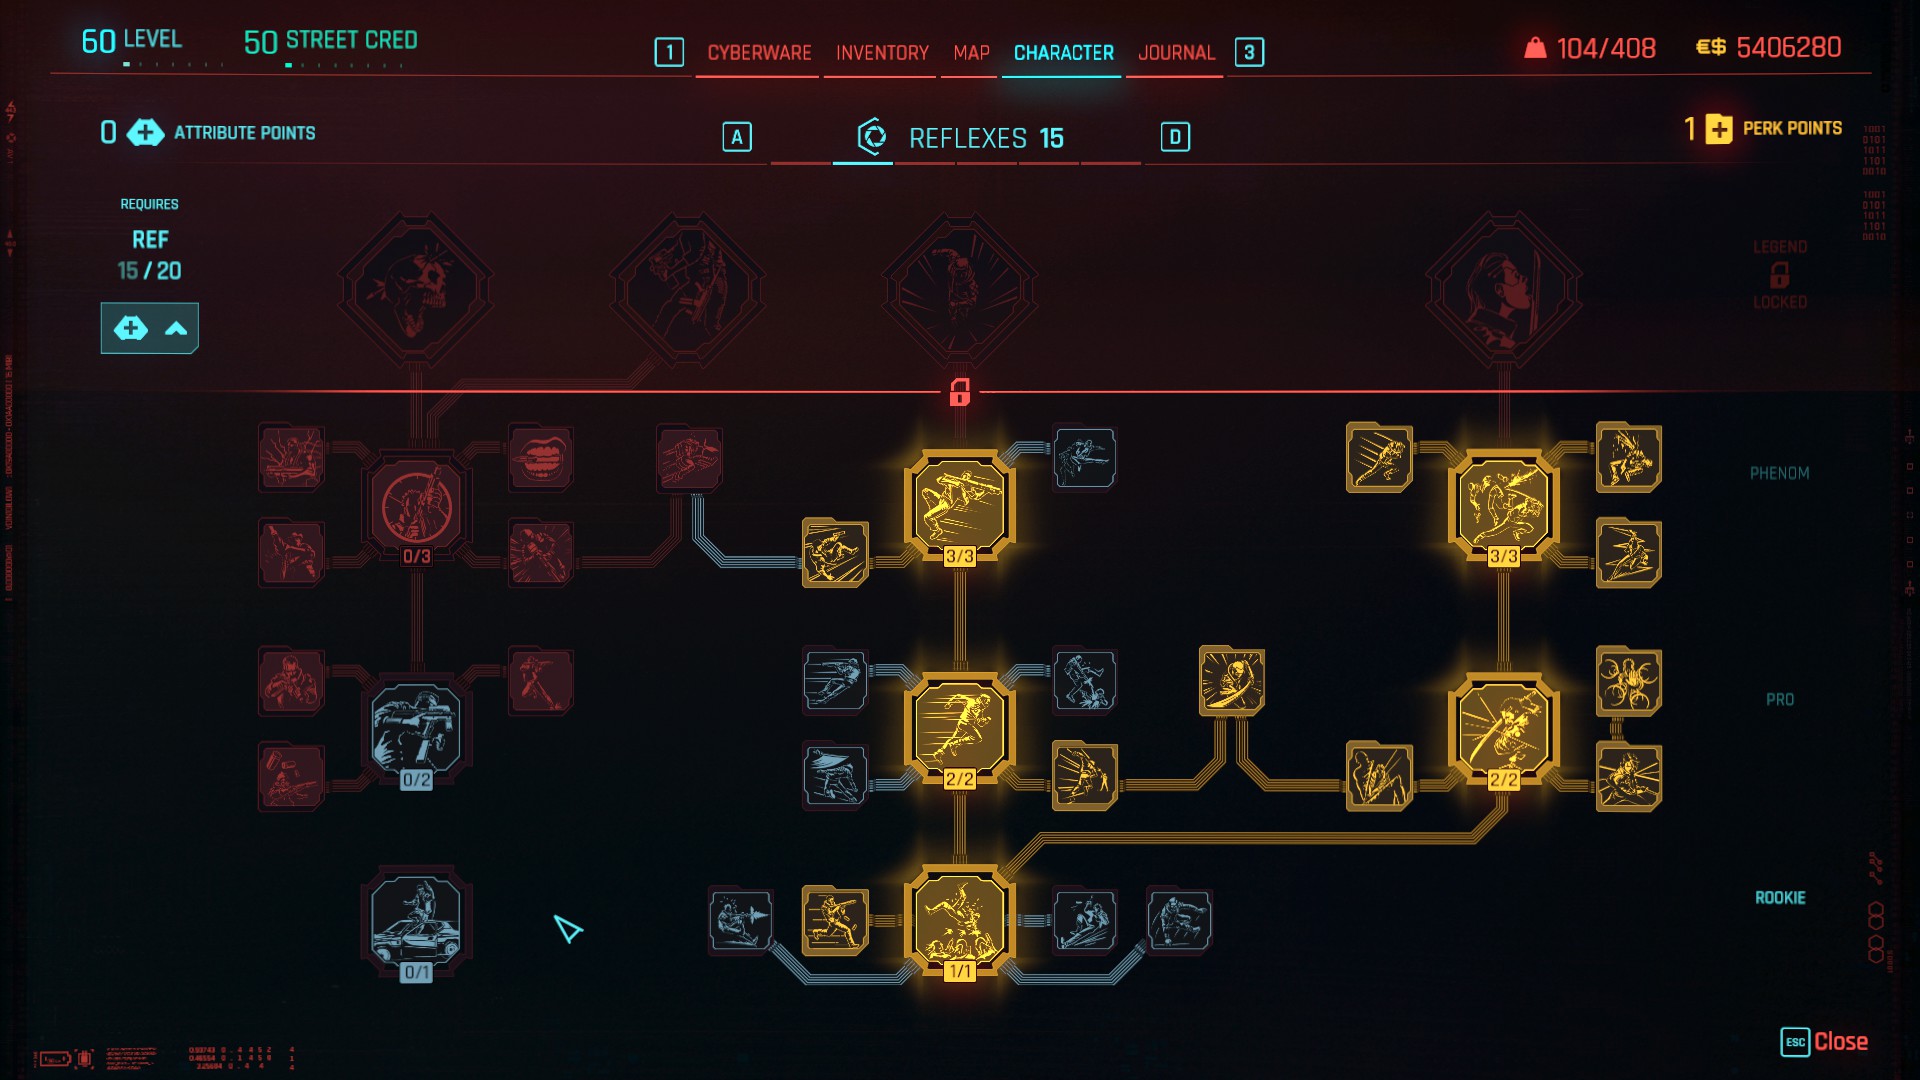
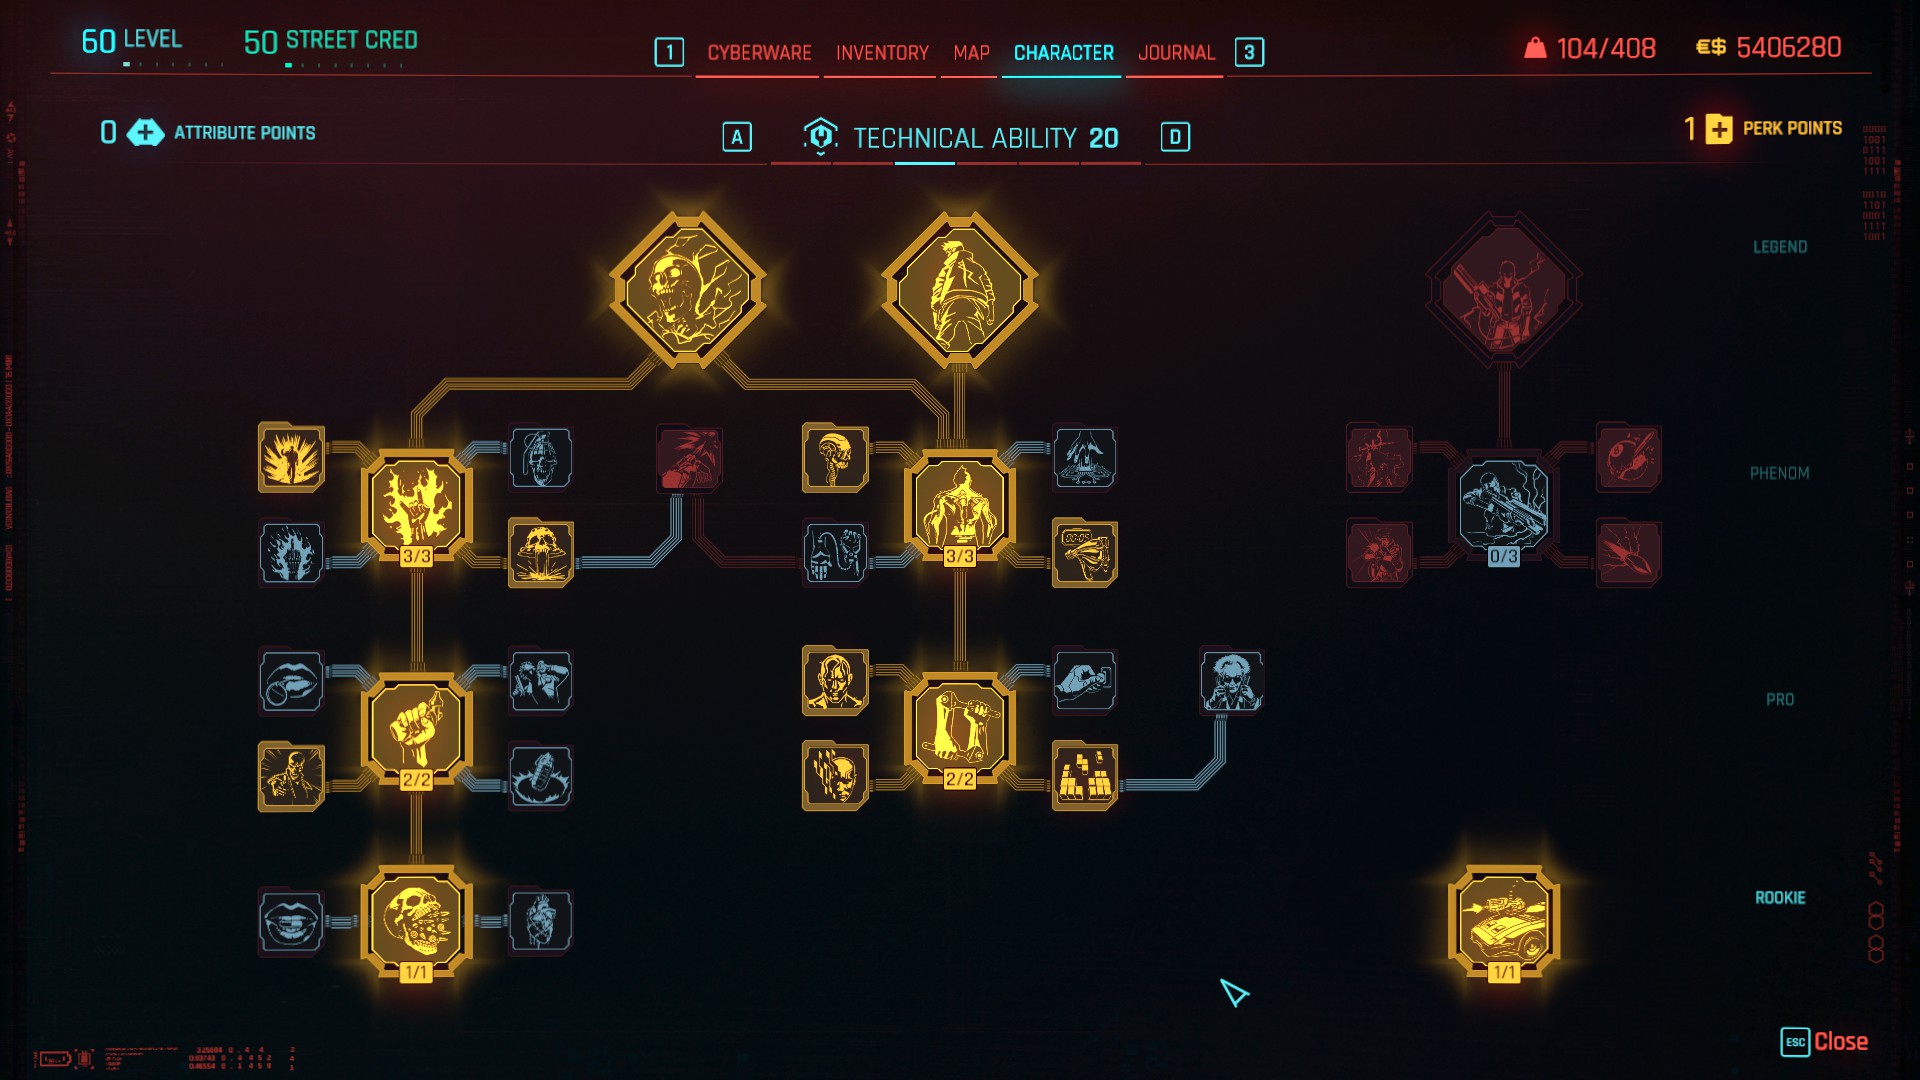
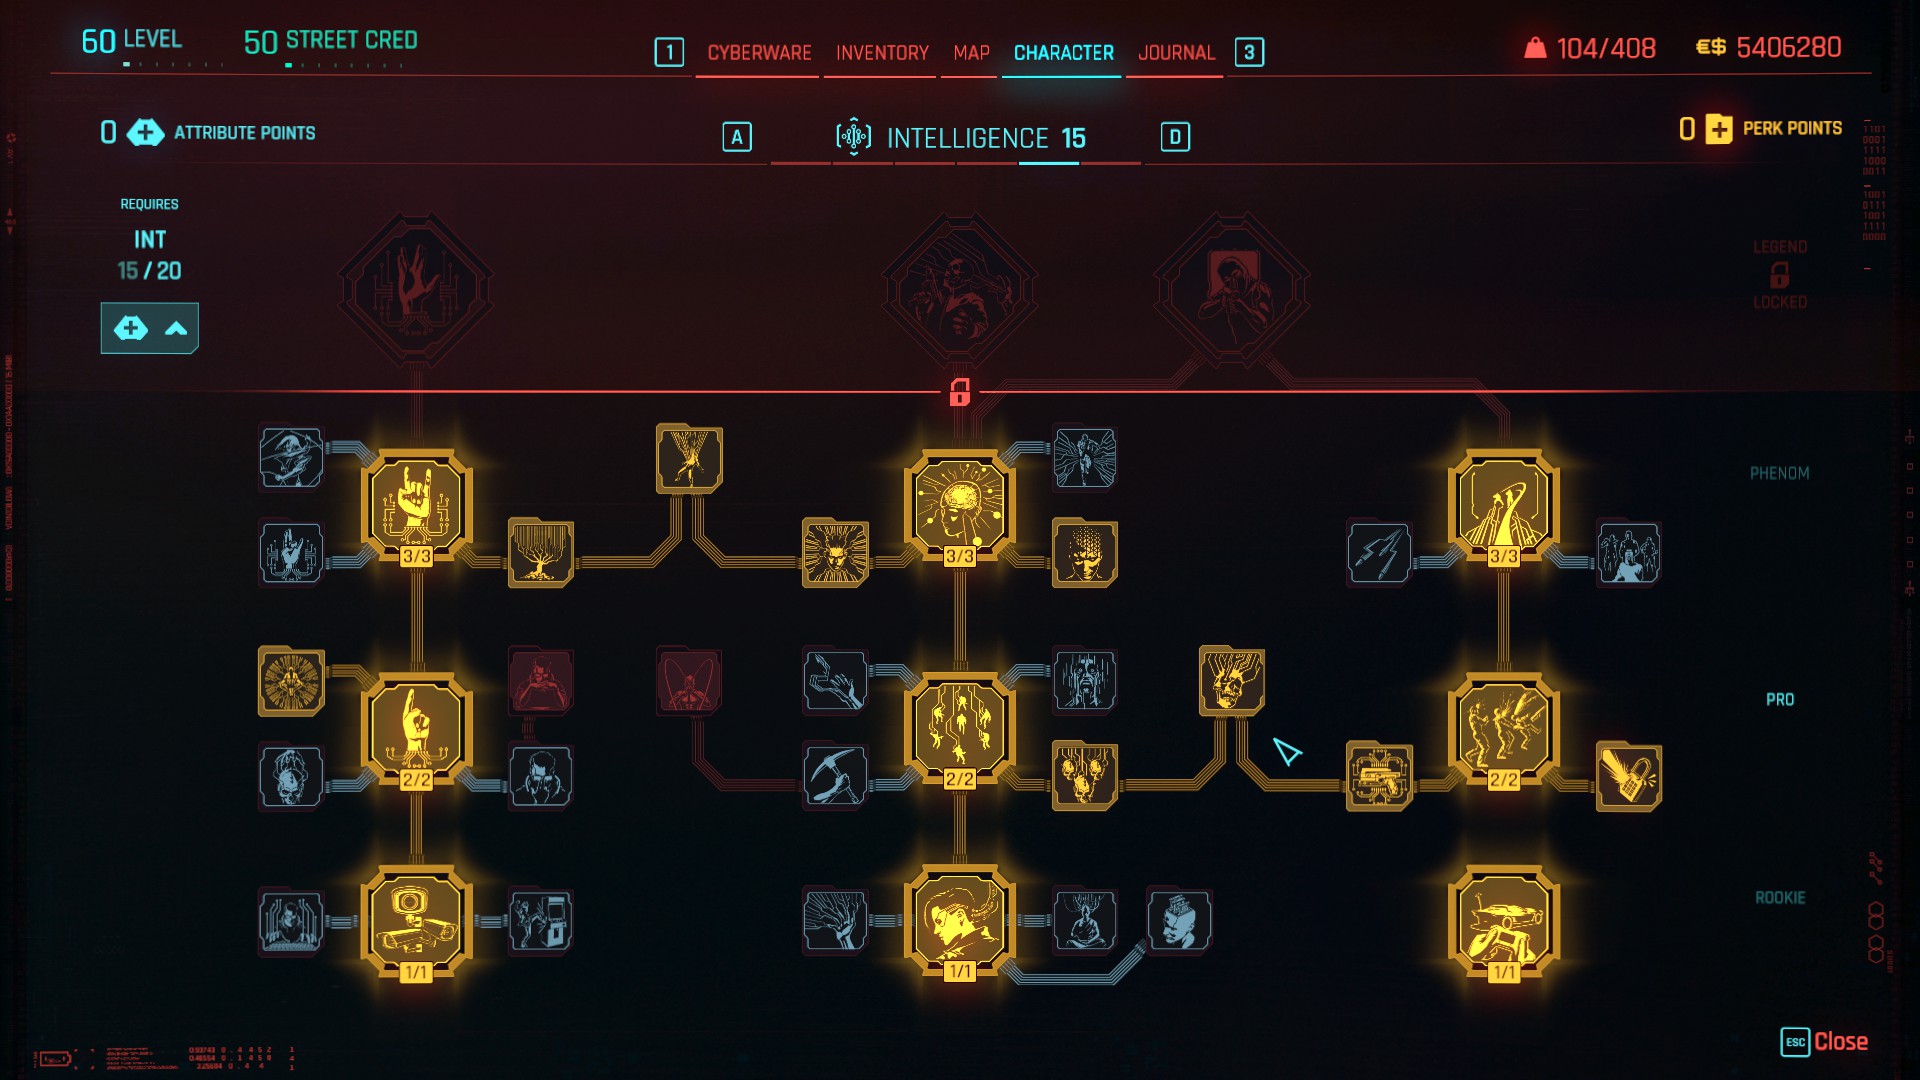
Example build - these are the perks I use for the Netrunner playstyle along with the following weapons: Yinglong, Ba Xing Chong, and Butcher's Cleaver.
Because the brunt of our DPS in this build is with melee damage, there is less emphasis on quickhack DPS as it would be overkill and a waste of cyberware capacity to focus on that. This explains why we are NOT using the COX-2 Cybersomatic Optimizer: it costs a staggering 50 cyberware capacity, it reduces max RAM capacity, and doesn't add much overall value to this particular build. It falls into that undesirable middle ground where it does too much damage for normal, weaker enemies, but still not enough damage to really trouble the likes of MaxTac. Here is the cyberware we'll be using:
Tetratronic Rippler is definitely the best overall Cyberdeck if we're talking about being able to generally handle any situation in Cyberpunk. It comes with a generous bonus of max RAM, it gives us a circumstance where our combat quickhacks can reap 40% bonus damage, it allows us to use both Reboot Optics and Weapon Glitch (free of charge) against enemies in range when activating Overclock, and our smart weapons get bonus damage when used against enemies under the effects of control quickhacks. And it's one of the cheapest cyberdecks in terms of cyberware capacity. (Operating System – 16)
Revulsor is game-changing if you have the capacity to equip it. We are neither using Sandevistan nor Berserk, thus we are not best-equipped for melee combat when we only have Overclock in this build variation. But when Revulsor activates, that's a really good time to go in and swing your melee weapon like crazy for the brief moments that time is on your side! You can buy the tier 3 version from any Dogtown ripperdoc between levels 20 to 29, or loot it from a Dogtown airdrop. (Nervous System - 35)

Yinglong is arguably the best smart weapon in the entire game, at least for focus-firing on single enemies. It actually has impressive bullet velocity for a smart weapon. But it also deals shock damage, and the EMP explosions it creates can also generate stacks of Pyromania + Heat Shield. And being an SMG, you can shoot enemies with it while driving! (Located in Wellsprings, Heywood, as a crafting spec, dropped by Denzel Cryer during the NCPD Scanner Hustle titled Suspected Organized Crime Activity: Living the Big Life.)
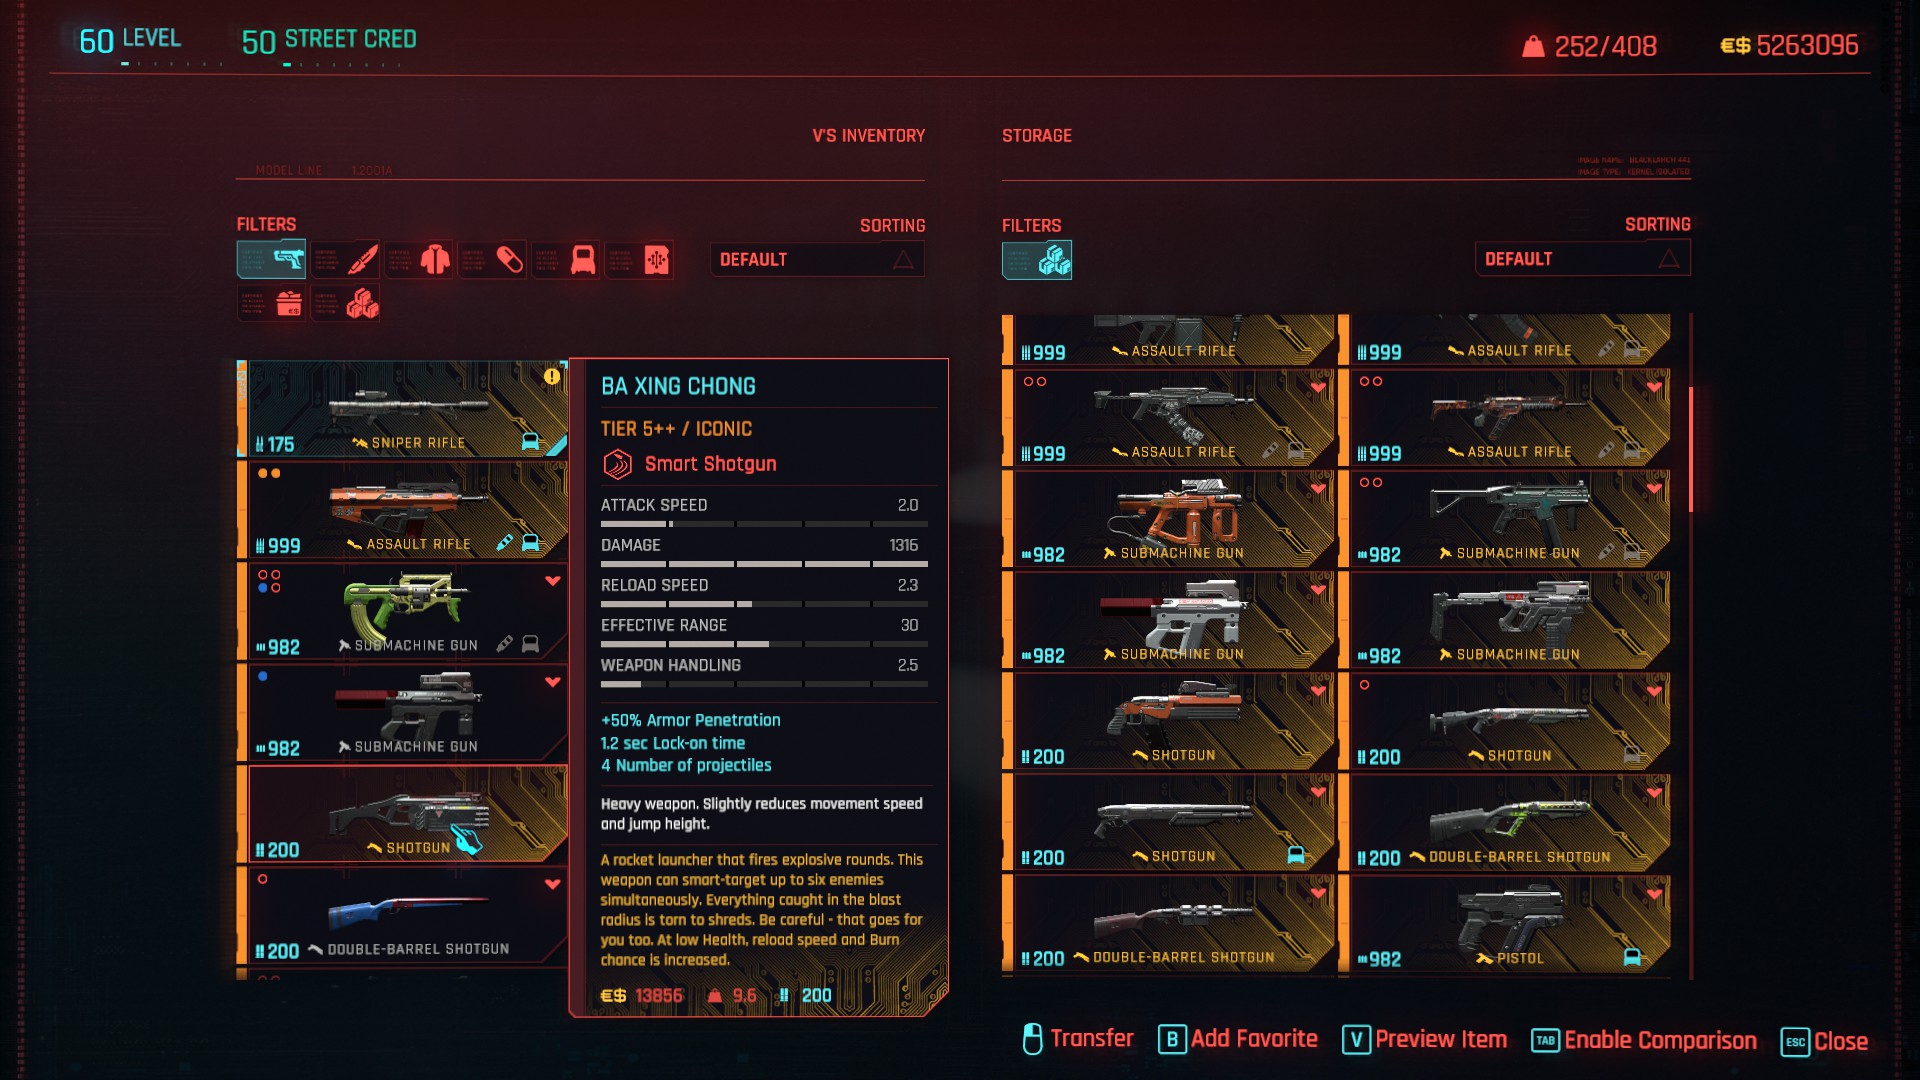
Ba Xing Chong is really good for targeting multiple enemies at the same time with its heavy base damage. While I prefer using Yinglong to kill enemies faster, what this smart shotgun does better than its smart SMG counterpart, is cause multiple explosions to very quickly rack up stacks of Pyromania! (Located aboard the Ebunike, as a crafting spec which you can only obtain after completing the main story and reloading from the point of no return. Contained in a chest inside a locked room which requires an Access Token you must loot at the end of the final story mission.)
For the record, you do NOT have to use smart weapons as a Netrunner if you do not want to. In fact, they get NO benefit from the bonus explosive damage of Pyromania, if that's what you were hoping for. Having said that, I would still strongly recommend using the two mentioned smart weapons above not just for their DPS, but for their utility in terms of generating Pyromania stacks, and the significant increase to mitigation chance due to the Heat Shield perk.
Now I will list all the quickhacks we will use, followed by specific recommended combos with their correct queue orders. The quickhack list will be presented as it should appear in-game, so you will want to equip them so that they appear in this order:
Cyberware Malfunction
Synapse Burnout
Sonic Shock
Reboot Optics
Weapon Glitch
Contagion
Cripple Movement
Overheat
Cyberware Malfunction > Synapse Burnout > Sonic Shock is the primary combo that can take down standard and elite enemies in just one queue. Cyberware Malfunction makes them susceptible to bonus damage, Synapse Burnout does more damage the less RAM you have, and Sonic Shock is here purely as the cheapest iconic quickhack to cast and is also non-combat, so it further boosts the damage of Synapse Burnout. Each foe neutralised by Synapse Burnout also extends the duration of Overclock by 3 seconds.
Cyberware Malfunction > Overheat > Contagion can be useful not just for causing damage and mayhem, but because it creates explosions which can also generate stacks of Pyromania. And where there is Pyromania, there is Heat Shield! Try and cast Overheat on the next potential target(s) before Contagion spreads to get multiple detonations. This combo becomes more valuable if you choose not to use the smart weapons mentioned above.
Cyberware Malfunction > Overheat > Cripple Movement is a highly recommended combo if you're going in for the attack with a melee weapon, especially against a boss or a MaxTac agent. Cyberware Malfunction allows you to do bonus damage. Overheat deals boosted damage-over-time, melts a percentage of their armour, and any attacks deal bonus thermal damage equal to 20% of the attack's physical damage. Cripple Movement doesn't just stop them from moving, but it also allows you to deal 15% bonus melee damage, it makes the target more susceptible to melee Finishers, and each Finisher you perform nets you +10% health and +4 RAM!
Cyberware Malfunction > Overheat > Cyberware Malfunction is what I would recommend instead if you are trying to take down tough, single targets with ranged weapons instead of melee weapons. The overall philosophy behind the queue order is mostly the same but unfortunately, the toughest targets in the game can't have their cyberware permanently disabled like standard and elite enemies. So double-stacking Cyberware Malfunction in this scenario, is purely so we can deal 30% bonus damage against the target. That, or if Overheat doesn't provide enough fire for you, knock yourself out by triple-stacking Cyberware Malfunction and going for 45% bonus damage!
Against standard and elite enemies, you can take down an entire squad with just quickhacks alone. But when MaxTac show up, you want to be ready for them with a fresh, new activation of Overclock so you can tag them with Reboot Optics and Weapon Glitch. Use the Kerenzikov combo to get 100% mitigation chance as you move towards them, swap to your melee weapon and then activate Overclock. Use the quickhack combo on one MaxTac agent for engaging in melee combat, and focus on them until they are dead. Then rinse and repeat. You do have to focus a little more and play smart with this build variation as it's the one most likely to get you killed when dealing with MaxTac. Then again, playing smart is a default requirement for any 'Intelligence' build!
SPEEDSTER


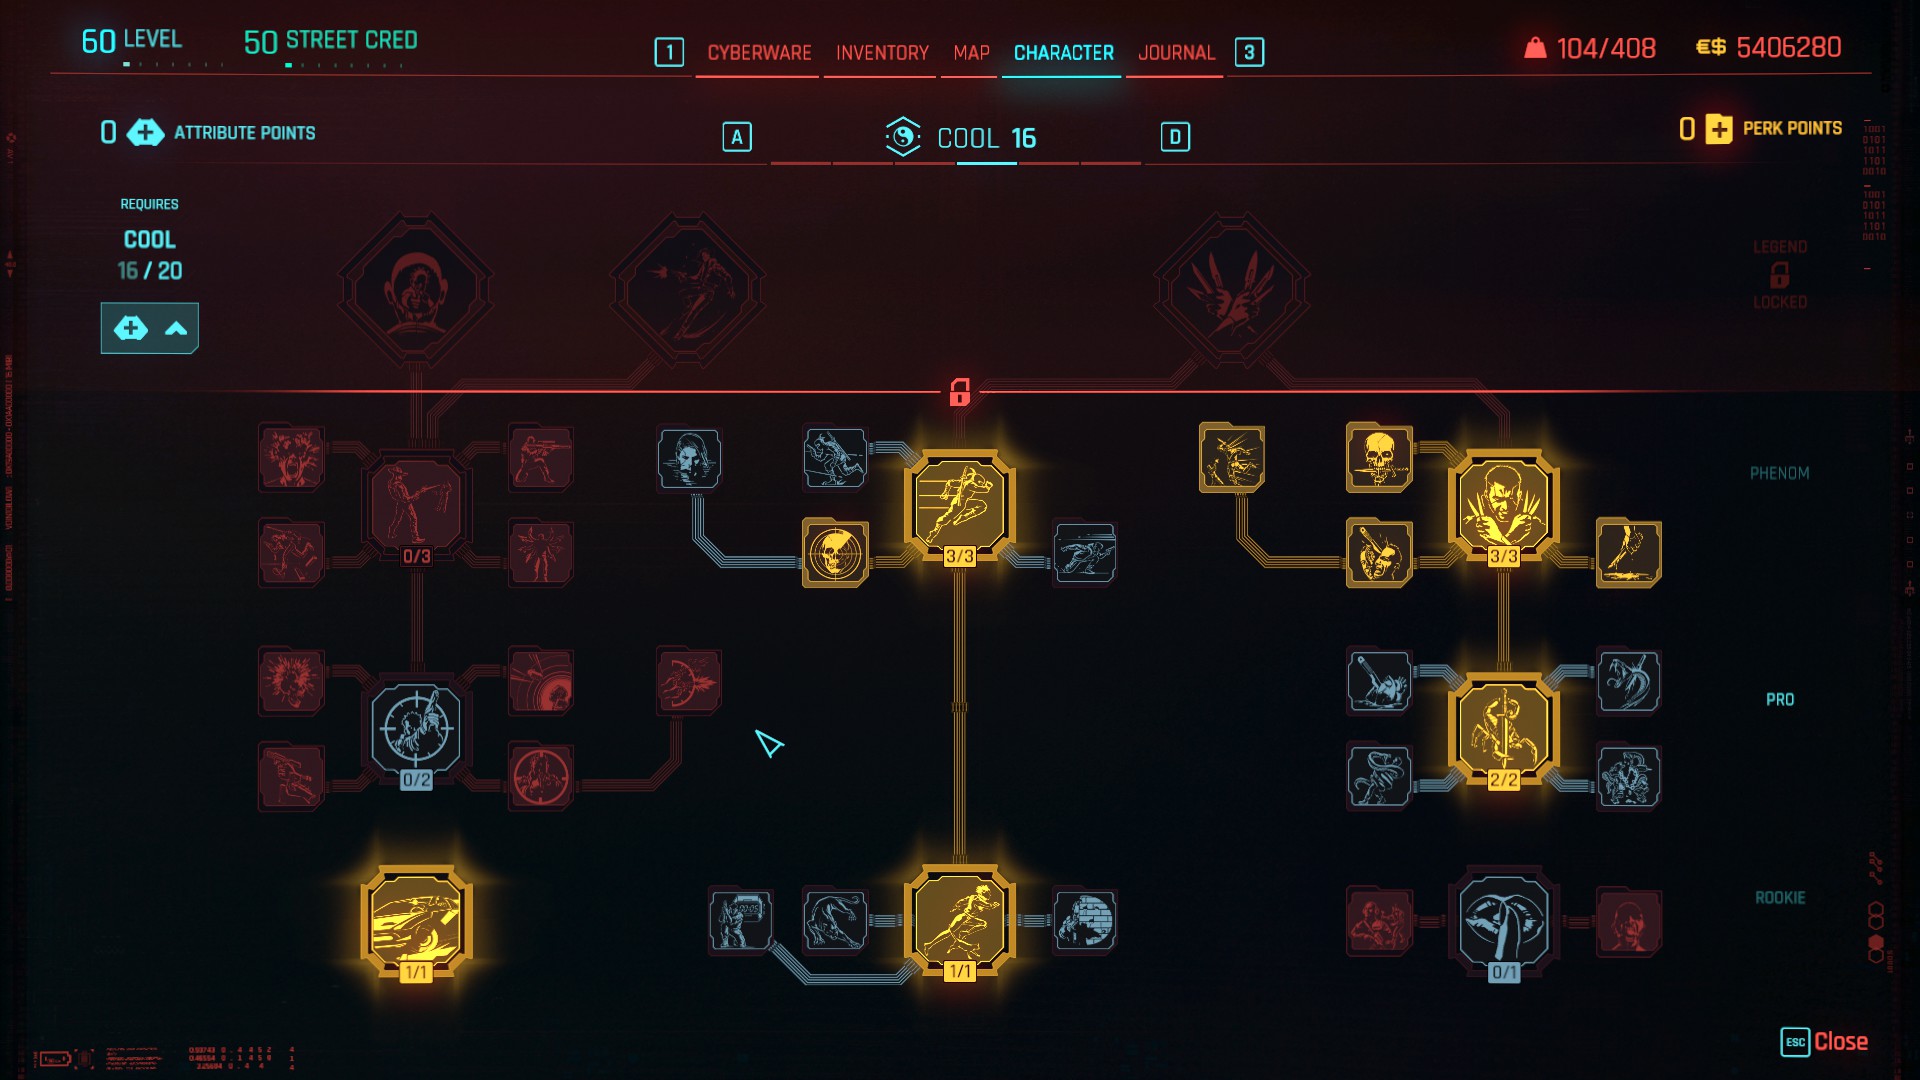
Example build - these are the perks I use for the Speedster playstyle along with the following weapons: Sovereign, Agaou, and Tinker Bell.
Sandevistan is the most popular operating system in Cyberpunk lore. It also happens to be the best operating system to use if you want to place more emphasis on ranged weapons, although it is versatile enough to also be used with melee weapons. If you love either shotguns or throwing weapons, then that is extra incentive to go all-in on Sandevistan as it really brings out the best performance in both weapon types. Slowing down time does more than just give you a distinct speed advantage: it allows you to attack or retreat more tactically, you can use it to reposition yourself, you can use it to generate more DPS and you can also use it to avoid a lot of hits.
Militech “Apogee” Sandevistan is the most expensive operating system in the market but totally worth it. You are able to toggle it on and off, even spamming it each time its duration comes to an end which is great for constantly triggering the Ticking Time Bomb capstone perk. With time being slowed by 85% except for yourself, you will feel like you have total control of the battlefield. If you're struggling with cyberware capacity really badly though, the Militech Falcon Sandevistan is a very minor and negligible downgrade that can still adequately do the same job. (Operating System – 44)
Adreno-Trigger grants you bonus movement speed when entering the combat state but because we have 15 Reflexes in this build, we get plenty of extra seconds to maintain that speed advantage! Because of Sandevistan as well as being costly for cyberware capacity, there is zero need to have the Revulsor in this build variation. So we might as well make ourselves even faster! You can buy the tier 3 version from any Dogtown ripperdoc between levels 20 to 29, or loot it from a Dogtown airdrop. (Nervous System - 20)
Because you can toggle the Apogee on and off at any charge rate, you have so many options at your disposal in this playstyle. You can wreak absolute havoc with any of the best weapons available, especially if you love the Sovereign and/or Agaou. In order to enhance this build variation, here are two important tips. One, activate Kerenzikov first for 100% mitigation chance, but WAIT until it is finished before activating Sandevistan. If you pop it too early, there's a glitch where Kerenzikov will slow you down despite Sandevistan being active.
And two, when you are engaging enemies with your melee weapon and want to stay with it for longer, consider spamming the Sandevistan key each time it comes to an end. What this does is constantly charge the EMP blast from the Ticking Time Bomb capstone perk. Not only can you stun and damage enemies with this, but every three seconds that it's being charged, you also gain 50% reduction to incoming damage on top of that. Because the capstone perk also makes you self-harm a little, it will count as two stacks of Pyromania if it also tags an enemy, ergo extra movement speed and extra mitigation chance via the Heat Shield perk. But beware, if you accidentally kill civilians or non-combatants with the EMP bombs, you will provoke the NCPD into getting involved, if you have not engaged them in combat already!

BERSERKER
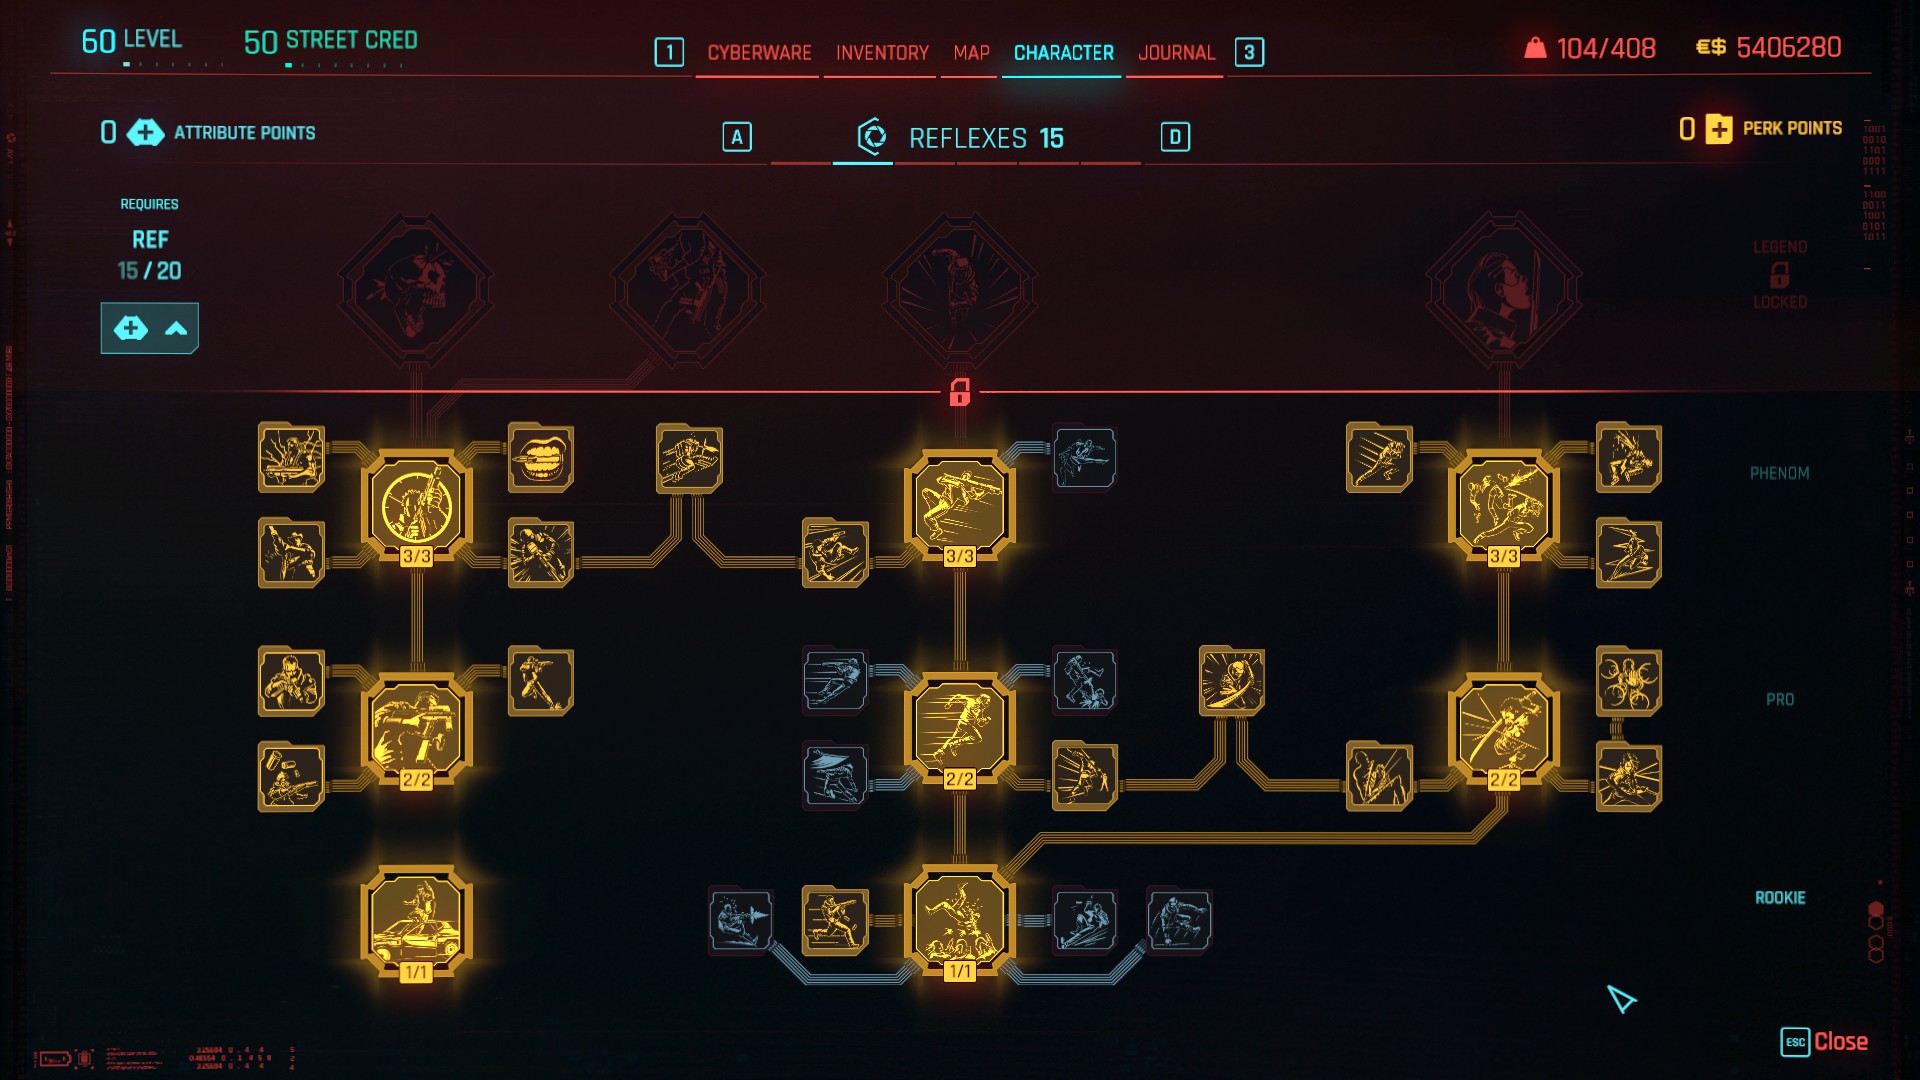
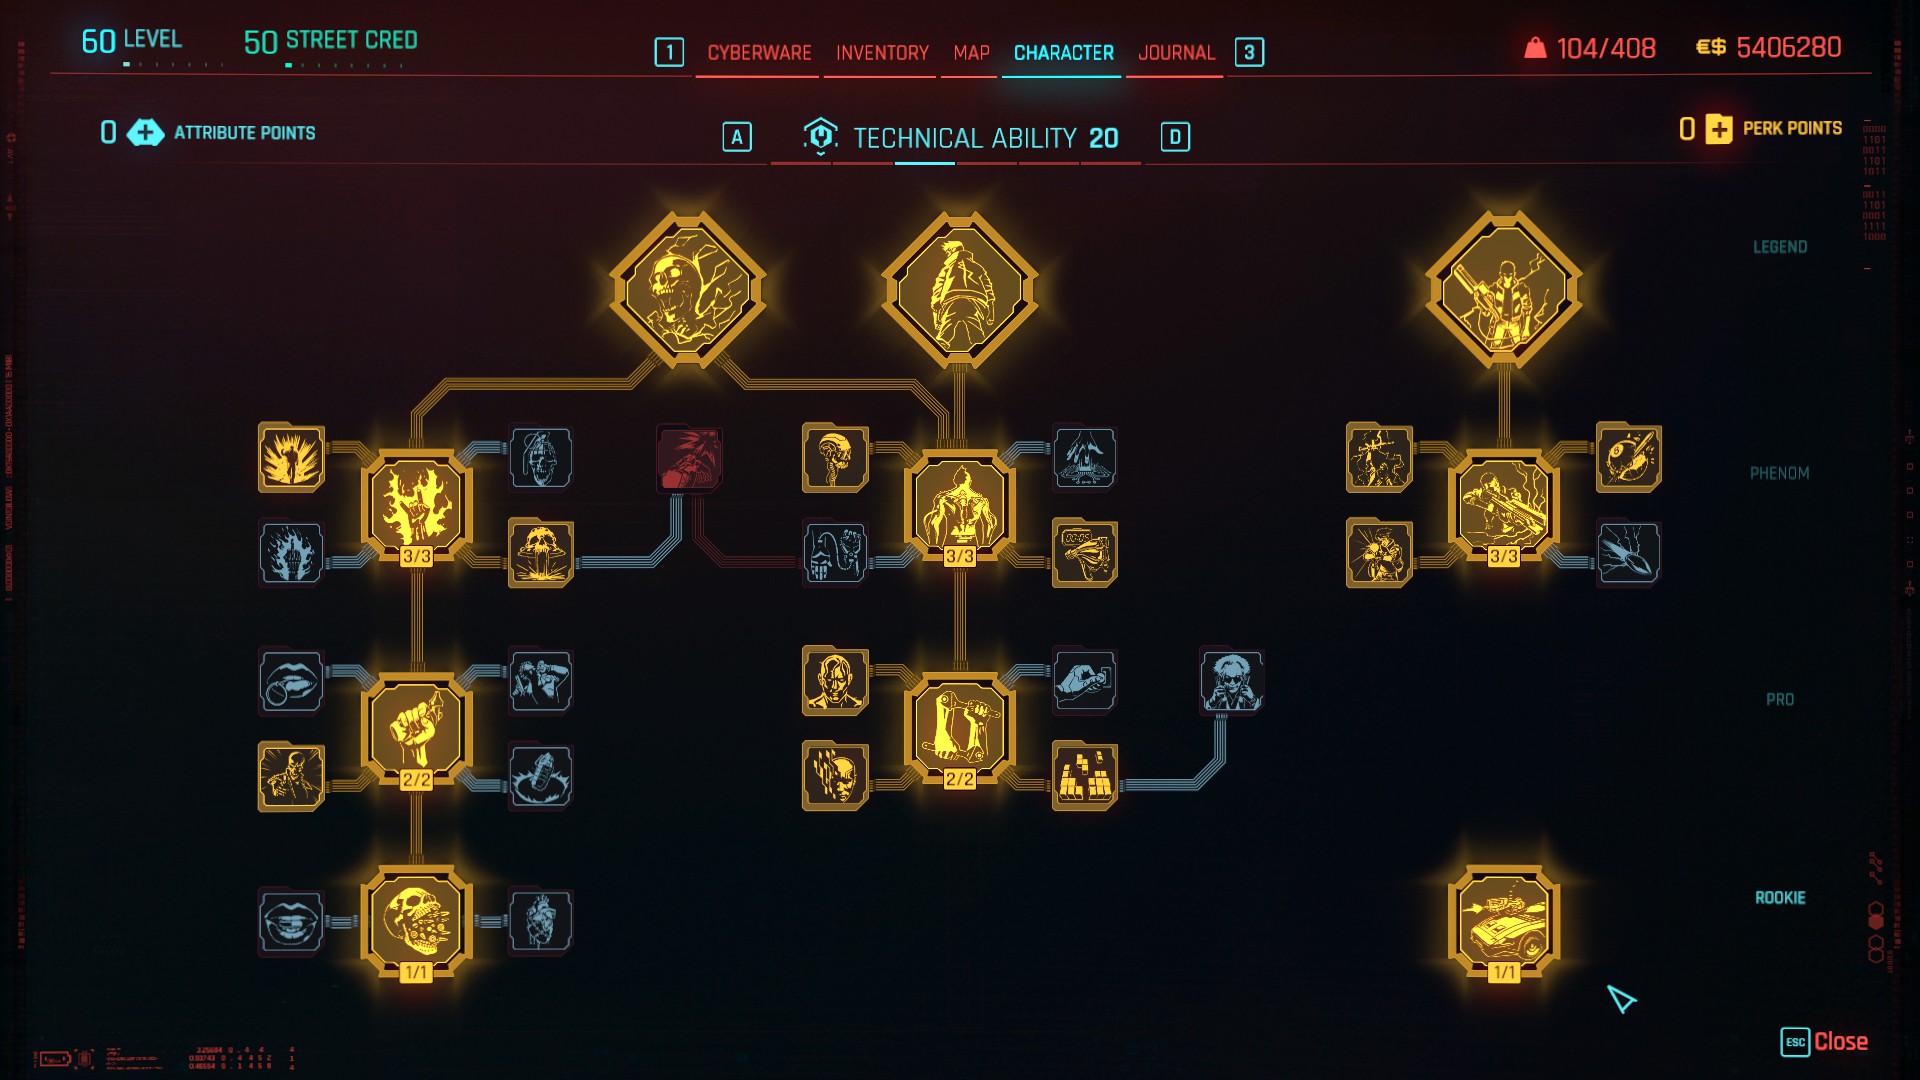

Example build - these are the perks I use for the Berserker playstyle along with the following weapons: Prejudice, Raiju, and Butcher's Cleaver.
Last but not least, my personal favourite playstyle of them all! In my honest opinion, the Berserk variation is the strongest of all three. It may force you into using only melee weapons, but it greatly enhances your melee damage potential which is what you want in the toughest battles against bosses and MaxTac. Fun fact: because the game's code perceives throwing weapons to be 'melee weapons' primarily, you can wield and throw such weapons like the Agaou while Berserk is active! Furthermore, you cannot die as you are incapable of going below 25% of your max health, your stamina costs are zero, and you will enjoy +30% melee attack speed.
This completely circumvents the downside of 100% mitigation chance only activating with ranged weapons during Kerenzikov, as whenever you activate Berserk to go in with melee, you are in demigod mode and thus mitigation ceases to be a concern! And even when Berserk is on cooldown and recharging, you can use Kerenzikov with ranged weapons to stay at 100% mitigation chance, forcing enemies to only deal 20% of their total damage if they hit you at all!
Biodyne Berserk is actually the one you want for this, not the iconic Militech version which costs 75% more cyberware in comparison and doesn't have great synergy with our health-related cyberware that functions on autopilot. What the Biodyne version gives is 50% damage reduction, +20% crit chance and a whopping bonus of +100% crit damage! If that wasn't enough for you, having 15 Reflexes nets you an additional 15% crit chance. (Operating System - 20)
Revulsor is not cheap being an iconic piece of cyberware. But it's one of those ones that undersells itself and seems to be more frequently active than what it says on the tin, and the Berserk operating system is especially good at extracting more usage out of it. It's basically a non-OS alternative to Sandevistan. So if you want to have your cake and eat it too, forget about Sandevistan, and combine Berserk with the Revulsor! You can buy the tier 3 version from any Dogtown ripperdoc between levels 20 to 29, or loot it from a Dogtown airdrop. (Nervous System – 35)
I should mention that as cool as Revulsor is, it's way more important in the Netrunner playstyle than the Berserker one. If you find that Revulsor doesn't do it for you, or you think that it doesn't trigger often enough to be worth using, then a cheaper alternative choice is the Stabber as this is what will allow you to have 100% crit chance, as long as you're wielding bladed and/or throwing weapons while Berserk is active. It does mean however that you would have to further constrain your choice of weaponry to truly maximise and justify the usage of this piece of cyberware. Having said that, I think bladed weapons make more sense to use during Berserk because of their general advantage with a faster swing rate that makes fast attacks the better overall option with them, whereas blunt weapons make more sense with Sandevistan because of their slower swing rate and more emphasis on using strong attacks instead.
I personally do not use Stabber myself because using it as a substitute for the Revulsor, would mean my chances of breaking into a state of Fury via the Edgerunner capstone perk would be 2.3% less, which is major considering that the max possible chance is 5%. And when Fury is active, you get +30% crit chance from that, as well as +50% crit damage and 10% bonus damage in general. And it would be incredibly foolish to give up on 100% mitigation chance by sacrificing either Kerenzikov or Neofiber. With all that in mind, the only condition I would use the Stabber is if my total cyberware capacity was not high enough for me to use the Revulsor on top of everything else. But if you have your mind set on the Stabber no matter what, you can buy the tier 2 version from any ripperdoc between levels 10 to 19. (12)
Note: because you have constant 100% mitigation chance with the Kerenzikov combo while Berserk is on cooldown, and you cannot die while Berserk is active, it is worth considering the option of swapping out Countershell for Shock-n-Awe, if you have the extra 10 cyberware capacity to spare. The DPS is not as significant as what your melee DPS is capable of, but every little helps against MaxTac and the tankiest bosses. The shock explosions also rack up stacks of Pyromania + Heat Shield. If you fully intend on being primarily a Berserker during endgame and Shock-n-Awe intrigues you, you can buy the tier 1 version from any ripperdoc between levels 1 to 9. (20 with All Things Cyber perk)
Although Sandevistan allows you to use blunt melee weapons and particularly Tinker Bell efficiently, there is no denying that Berserk does general melee combat better, especially with bladed weapons. What's more, unlike Sandevistan which does stop after a set duration even with charge remaining, Berserk does not stop until its charge has run out completely, meaning Axolotl can do a great job of extending it so long as you have momentum in your favour.
So just to recap: you can activate demigod mode, dash and slice your way through the enemy with zero stamina cost, get your melee weapon to reap 100% bonus crit damage when it lands crit hits, keep Berserk going indefinitely with Axolotl, enjoy Sandevistan at the same time as Berserk when the Revulsor kicks in at low enough health, enjoy any of your favourite ranged weapons with 100% mitigation chance the entire time Berserk is inactive or on cooldown, and all the while reserving the option to bail from the crime scene with Optical Camo. Do you understand now why Berserker is my absolute favourite endgame build variation in patch 2.0?

STREAKER (WHY NOT?)
Streaker is my own custom name for the more 'naked' playstyle where you forsake a conventional operating system so that you can sport the Chrome Compressor. I have been asked a very good question: why in a guide where I discuss a versatile build such as this one at great length, did I not previously include this substitute for an operating system? Well in order to best answer this question, we need to look at all the options on the table regarding cyberware. Obvious picks such as arms, hands, legs, and face easily have the best-in-slot cyberware already. We need to ask ourselves: what other alternatives exist, would they be good replacements for our chosen cyberware, and are they worth the extra capacity cost that the Chrome Compressor could cover?
For the frontal cortex, Axolotl is the best iconic cyberware for all playstyles, and is the superior version of the Newton Module. Kerenzikov Boost System would be a good option in a build where all playstyles use the Kerenzikov combo for 100% mitigation chance, but it doesn't add as much compared to Self-ICE and Mechatronic Core. Pretty much every other option for the frontal cortex is only beneficial if you're using a Cyberdeck. Quantum Tuner is good and makes the most sense in a Streaker build, but it's not a good idea to combine it with Axolotl as the cost is too much and the accumulative effect isn't as good as it might sound. It's one or the other, and I would always pick Axolotl because it works well with all playstyles.
The cyberware options for the skeleton are actually quite underwhelming when you look at them more closely. The vast majority of them place emphasis on stacking more and more armour which doesn't really interest us. Besides that, RAM Recoup and Feen-X are only relevant if you're playing Netrunner, and Titanium Bones is purely about quality-of-life if you're too lazy to sort out your inventory on a regular basis. Kinetic Frame is by far the weakest of the mitigation cyberware: only boosting chance by a small amount and under such a narrow circumstance to the point where it didn't do much of anything in testing. I myself would certainly not give up either Epimorphic Skeleton, Dense Marrow or Spring Joints for any of the alternatives. Just like the frontal cortex, there is nothing else for the skeleton that merits a slot or is worth the extra cost. On a similar note, the nervous system has interesting alternatives for different purposes, but all of them have such circumstantial requirements attached, that it doesn't really help sell them. With Kerenzikov, Neofiber, and the iconic pieces of cyberware that help accentuate the differing playstyles, none of the alternatives scream out as being worthy considerations.
The integumentary system and its range of cyberware is the one part of the anatomy that gave me the most food for thought when it came to theorising and testing, and that shows when my final choices were Optical Camo, Defenzikov, and either Countershell in general or Shock-N-Awe if you want to go 100% Berserker. The more recent Cogito Lattice demands that you be a Netrunner, while at the same time trying to sell us on stacking armour which is a boring and tiring theme by now. Nano-Plating helps with projectiles but not melee attacks. I've already mentioned both ProxiShield and Peripheral Inverse, and why they are not so good as advertised.
Pain Editor is absurdly overrated: it tries to sell you the double-whammy of bonus armour and minimal damage reduction, but neither are that impressive either together or on their own, and a capacity cost of 28 is so much to ask for so little in return. If you disagree with that, just remember that for 55 capacity, you can get 100% mitigation chance and 80% mitigation strength. Painducer is so bad that any ripperdoc that tries to sell you that ♥♥♥♥ deserves to be shot! The concept of it sounds good, until you put it into practice and realise that the damage-over-time acting as a form of damage reduction, PAUSES your health regen completely! Even with the benefit of mitigation, this atrocious piece of cyberware actually brought me more uncomfortably closer to death: totally the opposite desired effect!
Cellular Adapter does reward us for having 20 Technical Ability, but it also demands a perk point of its own as well as a cyberware slot, and the range of bonuses are not particularly exciting. For a long time, I had my eyes set on Chitin and figuring out how to incorporate that into the build despite its steep capacity cost of 40. I never cared about the extra chunk of armour it gave, just the health regen. But in order to get the maximum benefit from it, you need to invest enough attribute points to make up 20 Body, with or without Gorilla Arms. Another angle to be mindful of is that the extra health regen, combined with the effectiveness of mitigation, will make you less likely to activate Adrenaline Rush and its various benefits.
When I realised this in my testing, it further cemented the double-pick of the Blood Pump + Biomonitor combo for the circulatory system. That at least triggers Adrenaline Rush and yields sufficient health regeneration without Chitin in the picture to complicate things. The only question remaining was: is there a single piece of cyberware that merits replacing Microrotors? I used to play with Heal-on-Kill often a long time ago, but it got nerfed over time and it's not as beneficial or as necessary as it might have been perceived in the past. Besides Chitin, the only other piece of cyberware I used to think about often was Second Heart.
But after observing gameplay from others and doing my own testing, I realised that the ONLY reason why Second Heart was a coveted piece of cyberware in the first place, is because it's usually the players who place their misguided faith in armour protecting them from everything at all times, that tend to harp on the loudest about Second Heart. When you think about it, it's not that surprising at all. If all you know as a Cyberpunk player when it comes to defence, is just to stack more and more armour as best as you can, while unknowingly still being at risk of dying to a single, mighty headshot, you would want the insurance that Second Heart grants you. But because mitigation exists and does wonders for defence, all you need to do is keep it active for as long as possible, and no single shot or explosion will ever outright kill you in one blow from high/full health.
So to sum up my findings, if I was hell-bent on using the Chrome Compressor, I still would NOT change out any other cyberware despite the extra abundance in capacity. The reason for that is because after a lot of theorising and testing with my methodical approach, I genuinely believe that the build already has the best-in-slot choices for all the cyberware. Besides, the extra capacity would make it impossible for you to trigger the state of Fury from the Edgerunner capstone perk. In fact, the only good reason I can think of why you would want to use the Chrome Compressor, is if you didn't have high enough cyberware capacity or more specifically, you do not have access to Edgerunner in the first place. But that would mean deliberately choosing not to have 20 Technical Ability which if you really want to go that route, suit yourself. But in totality, it's quite a handicap!
At the end of the day, the Streaker playstyle may be enforced by the Chrome Compressor, but is not exclusive to the cyberware itself. You could just as well equip any operating system and simply choose NOT to activate it, and you'd be more likely to trigger the state of Fury by doing so. As an option, I am not stopping you from obtaining it or trying it out for your own curiosity, but it fundamentally does not add anything new or unique to the overall experience and performance of this versatile build. So while I acknowledge that the Chrome Compressor is a thing, my findings showed that there are more reasons to ignore it than to incorporate it.
For the frontal cortex, Axolotl is the best iconic cyberware for all playstyles, and is the superior version of the Newton Module. Kerenzikov Boost System would be a good option in a build where all playstyles use the Kerenzikov combo for 100% mitigation chance, but it doesn't add as much compared to Self-ICE and Mechatronic Core. Pretty much every other option for the frontal cortex is only beneficial if you're using a Cyberdeck. Quantum Tuner is good and makes the most sense in a Streaker build, but it's not a good idea to combine it with Axolotl as the cost is too much and the accumulative effect isn't as good as it might sound. It's one or the other, and I would always pick Axolotl because it works well with all playstyles.
The cyberware options for the skeleton are actually quite underwhelming when you look at them more closely. The vast majority of them place emphasis on stacking more and more armour which doesn't really interest us. Besides that, RAM Recoup and Feen-X are only relevant if you're playing Netrunner, and Titanium Bones is purely about quality-of-life if you're too lazy to sort out your inventory on a regular basis. Kinetic Frame is by far the weakest of the mitigation cyberware: only boosting chance by a small amount and under such a narrow circumstance to the point where it didn't do much of anything in testing. I myself would certainly not give up either Epimorphic Skeleton, Dense Marrow or Spring Joints for any of the alternatives. Just like the frontal cortex, there is nothing else for the skeleton that merits a slot or is worth the extra cost. On a similar note, the nervous system has interesting alternatives for different purposes, but all of them have such circumstantial requirements attached, that it doesn't really help sell them. With Kerenzikov, Neofiber, and the iconic pieces of cyberware that help accentuate the differing playstyles, none of the alternatives scream out as being worthy considerations.
The integumentary system and its range of cyberware is the one part of the anatomy that gave me the most food for thought when it came to theorising and testing, and that shows when my final choices were Optical Camo, Defenzikov, and either Countershell in general or Shock-N-Awe if you want to go 100% Berserker. The more recent Cogito Lattice demands that you be a Netrunner, while at the same time trying to sell us on stacking armour which is a boring and tiring theme by now. Nano-Plating helps with projectiles but not melee attacks. I've already mentioned both ProxiShield and Peripheral Inverse, and why they are not so good as advertised.
Pain Editor is absurdly overrated: it tries to sell you the double-whammy of bonus armour and minimal damage reduction, but neither are that impressive either together or on their own, and a capacity cost of 28 is so much to ask for so little in return. If you disagree with that, just remember that for 55 capacity, you can get 100% mitigation chance and 80% mitigation strength. Painducer is so bad that any ripperdoc that tries to sell you that ♥♥♥♥ deserves to be shot! The concept of it sounds good, until you put it into practice and realise that the damage-over-time acting as a form of damage reduction, PAUSES your health regen completely! Even with the benefit of mitigation, this atrocious piece of cyberware actually brought me more uncomfortably closer to death: totally the opposite desired effect!
Cellular Adapter does reward us for having 20 Technical Ability, but it also demands a perk point of its own as well as a cyberware slot, and the range of bonuses are not particularly exciting. For a long time, I had my eyes set on Chitin and figuring out how to incorporate that into the build despite its steep capacity cost of 40. I never cared about the extra chunk of armour it gave, just the health regen. But in order to get the maximum benefit from it, you need to invest enough attribute points to make up 20 Body, with or without Gorilla Arms. Another angle to be mindful of is that the extra health regen, combined with the effectiveness of mitigation, will make you less likely to activate Adrenaline Rush and its various benefits.
When I realised this in my testing, it further cemented the double-pick of the Blood Pump + Biomonitor combo for the circulatory system. That at least triggers Adrenaline Rush and yields sufficient health regeneration without Chitin in the picture to complicate things. The only question remaining was: is there a single piece of cyberware that merits replacing Microrotors? I used to play with Heal-on-Kill often a long time ago, but it got nerfed over time and it's not as beneficial or as necessary as it might have been perceived in the past. Besides Chitin, the only other piece of cyberware I used to think about often was Second Heart.
But after observing gameplay from others and doing my own testing, I realised that the ONLY reason why Second Heart was a coveted piece of cyberware in the first place, is because it's usually the players who place their misguided faith in armour protecting them from everything at all times, that tend to harp on the loudest about Second Heart. When you think about it, it's not that surprising at all. If all you know as a Cyberpunk player when it comes to defence, is just to stack more and more armour as best as you can, while unknowingly still being at risk of dying to a single, mighty headshot, you would want the insurance that Second Heart grants you. But because mitigation exists and does wonders for defence, all you need to do is keep it active for as long as possible, and no single shot or explosion will ever outright kill you in one blow from high/full health.
So to sum up my findings, if I was hell-bent on using the Chrome Compressor, I still would NOT change out any other cyberware despite the extra abundance in capacity. The reason for that is because after a lot of theorising and testing with my methodical approach, I genuinely believe that the build already has the best-in-slot choices for all the cyberware. Besides, the extra capacity would make it impossible for you to trigger the state of Fury from the Edgerunner capstone perk. In fact, the only good reason I can think of why you would want to use the Chrome Compressor, is if you didn't have high enough cyberware capacity or more specifically, you do not have access to Edgerunner in the first place. But that would mean deliberately choosing not to have 20 Technical Ability which if you really want to go that route, suit yourself. But in totality, it's quite a handicap!
At the end of the day, the Streaker playstyle may be enforced by the Chrome Compressor, but is not exclusive to the cyberware itself. You could just as well equip any operating system and simply choose NOT to activate it, and you'd be more likely to trigger the state of Fury by doing so. As an option, I am not stopping you from obtaining it or trying it out for your own curiosity, but it fundamentally does not add anything new or unique to the overall experience and performance of this versatile build. So while I acknowledge that the Chrome Compressor is a thing, my findings showed that there are more reasons to ignore it than to incorporate it.
MY ULTIMATE SOLO LOADOUT
After many countless hours of testing cyberware and weapons along with all their attachments and mods, I have settled on what I believe to be a 'meta' variant of this build. By that, I mean rocking a loadout that uses the most effective weapons possible across all scenarios. Before I get to the juicy and meaty content though, let's get the downsides of this over and done with first. For this loadout, you will need to get super-lucky with RNG regarding tier 5++ drops for certain non-iconic weapons, and we have to forsake being a Netrunner because the Intelligence tree demands a substantial amount of perk points, which would prevent us from being proficient with our selection of weapons. Of course, the allocation of attribute points remains the same no matter what. However, if you still want to be a Netrunner in endgame, then ignore this section!
But if you've been using a Cyberdeck the entire playthrough in order to contribute towards your overall fortune and are looking for a change of operating system, you'll be glad to know that you can still pick between either Berserk or Sandevistan. Depending on which one you want to choose when you next visit the ripperdoc, I am going to assume that you have already amassed all the previously mentioned cyberware earlier in the guide, and all you have to do is switch between these pieces of cyberware according to your current OS.
Biodyne Berserk | Militech “Apogee” Sandevistan
Revulsor | Adreno-Trigger
Shock-N-Awe | Countershell
When it comes to weaponry, I had to eliminate certain choices based on how they compare with each other, as well as what they do or do not bring to the table. We want to cut down the shortlist so that only the very best weapons for their respective scenarios get picked. As for the weapons themselves, at the very least, getting tier 5 mods should be simple enough. You just visit vendors all across Night City for the mods you want and buy enough of them so that you can upgrade them to tier 5. But getting tier 5++ non-iconic weapons with the maximum number of empty mod slots, is relying entirely on RNG to be kind to you.
These weapons have been chosen because they are solid base weapons, and it is the mods that enhance them so greatly that they become the absolute best weapons in Cyberpunk. So if you find a tier 5+ drop of any weapon on this list with two empty mod slots, just take it and roll with it until you get really lucky. The difference per tier is about 10% to 12% base damage but compared to tier 5++ iconic counterparts, that deficit in base damage can easily be offset by how the mods transform the function and performance of the following non-iconic weapons.
Katana modded with Airstrike and Cyclone. Being a bladed weapon, you can use it as a makeshift gun to block and deflect enemy bullets back at them. But it also has a fast swing rate and low stamina cost for a melee weapon. If your base melee damage is high enough, you can use Leap Attacks to dispose of enemies stealthily when given the opportunity. Airstrike enhances those attacks regardless of you being in combat or stealth. And as I said before, Cyclone turns your Katana into a better Byakko, one that you can swing relentlessly at single targets without having to find weak fodder to kill in advance.
DB-2 Satara modded with Kneel and Wallpuncher. I've already mentioned why the Kneel mod absolutely trivialises standard and elite enemies when aiming at their legs, and you don't have to charge this tech shotgun for it to have the same effect. But the iconic Wallpuncher mod is best served with the Satara. Out of all the non-iconic tech weapons, it has the highest base damage. But where it really shines is against enemies and bosses that have no head hitbox, meaning there is no chance of utilising a weapon's headshot damage multiplier against them. Luckily, the Satara does not care, and with the Wallpuncher mod, it can charge more potent Bolt shots with 200% capacity, +100% armour penetration, and zero damage penalties for penetrating cover. And because it's a shotgun, it triggers the Bloodlust perk for +50 Adrenaline after each dismemberment. If I'm in close-to-mid range, this tech shotgun is my gun to use!
Nekomata with Gaki scope attached and modded with C-Thru and Headtoll. This tech sniper rifle is my go-to weapon for mid-to-long range combat. It carries the usual +300% headshot damage multiplier, and it handles very well for a sniper. Gaki is a scope that a LOT of players sleep on, one I've not ever heard any Cyberpunk content creator mention even once. Every shot being half-charged at a minimum and subsequently halving the base charge duration? Yes please! With a C-Thru mod in addition, you've just turned a standard Nekomata into a better Breakthrough – you can tap-fire shots and they will penetrate cover, but they are half-charged AND there is a 25% reduction in the damage penalty for shooting through cover, so the Nekomata out-damages its iconic cousin which hogs the spotlight. And the gun's momentum with Headtoll in the second mod slot can be insane. But in terms of aiming for the head during full-on combat, I genuinely prefer this weapon over the best pistols, revolvers, precision rifles, assault rifles, and SMGs.
RT-46 Burya modded with Spinetickler x2. Personally, I still prefer to use the Nekomata when on-foot over this tech revolver. However, unless you're wielding the Katana while riding a bike, none of the already-mentioned weapons in this section can be used in combat while commandeering a vehicle. And I can't assume that you'll always ride on a bike, or drive a car that has its own weaponry. So this tech revolver makes the list as a substitute weapon to swap with the Nekomata when you go for a drive or a ride and expect trouble along the way, thus there is no need to blow a point on the Quick Draw perk. For a revolver, it's got similar base damage to the Nekomata. For a tech weapon, it has an insanely brief charge duration. C-Thru doesn't change anything when it comes to vehicle combat, so we double up on Spinetickler because the shock damage-over-time can help, and the EMP has a chance of blowing up the vehicles of those pursuing you. Even if you're struggling to land those headshots, there's a chance that the EMP will have your back!
With these weapons in mind, we obviously want to invest perk points in blades, shotguns, Deadeye weapons, and tech weapons. If you want to focus your melee strength on Gorilla Arms instead, take out the perk points for blades and put them towards blunt weapons. But we have to be economic with our allocation of perk points, and be as minimalist as possible in order to hit high proficiency with all the chosen weapon types we are using.
We ignore any perks that make little-to-no difference to our assortment of non-iconic weapons with their mods. Nor do we use the Lightning Storm perk for our tech weapons as it can mess with the timing of charged shots. We do not have enough spare perk points for crouch-sprinting, but this build variant is not focused on stealth, although you could use the Katana for that purpose. And there is neither a Cyberdeck nor any smart weapons being used, thus there are zero points invested in the Intelligence tree.
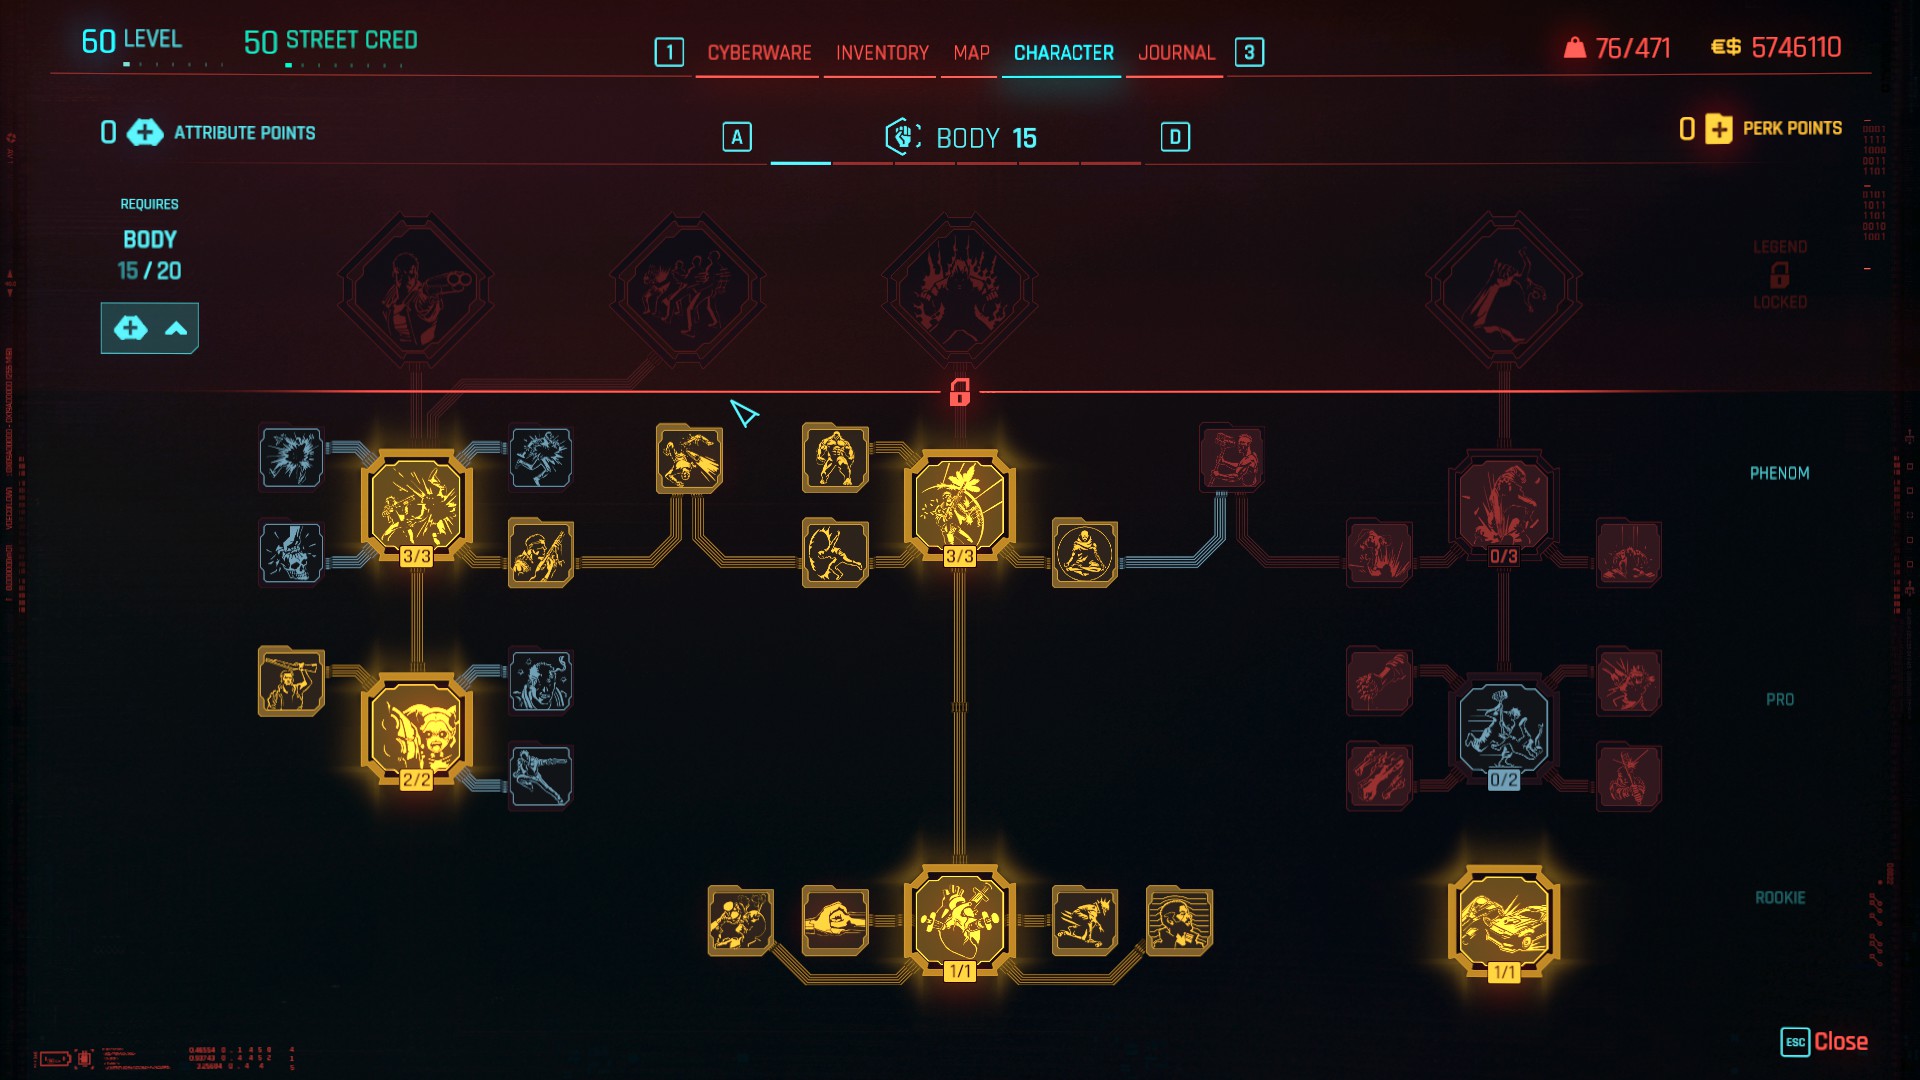
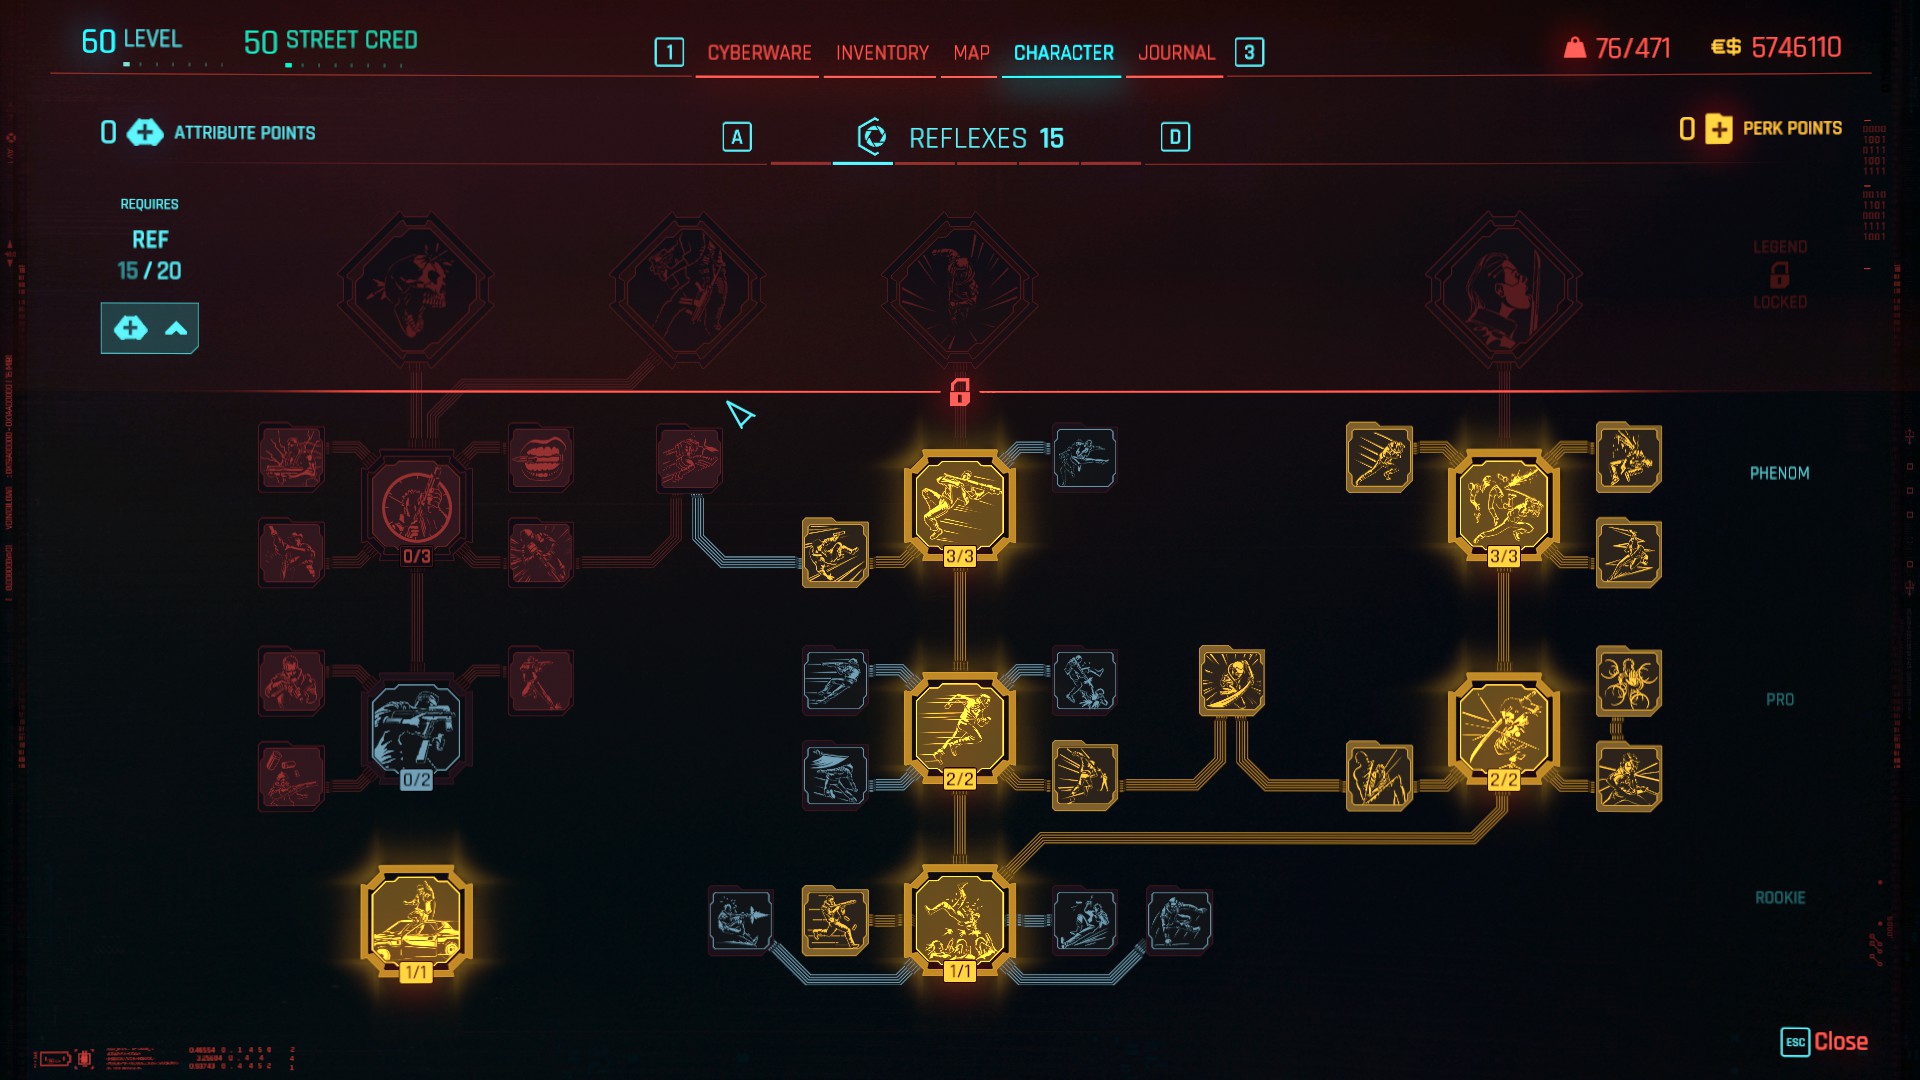
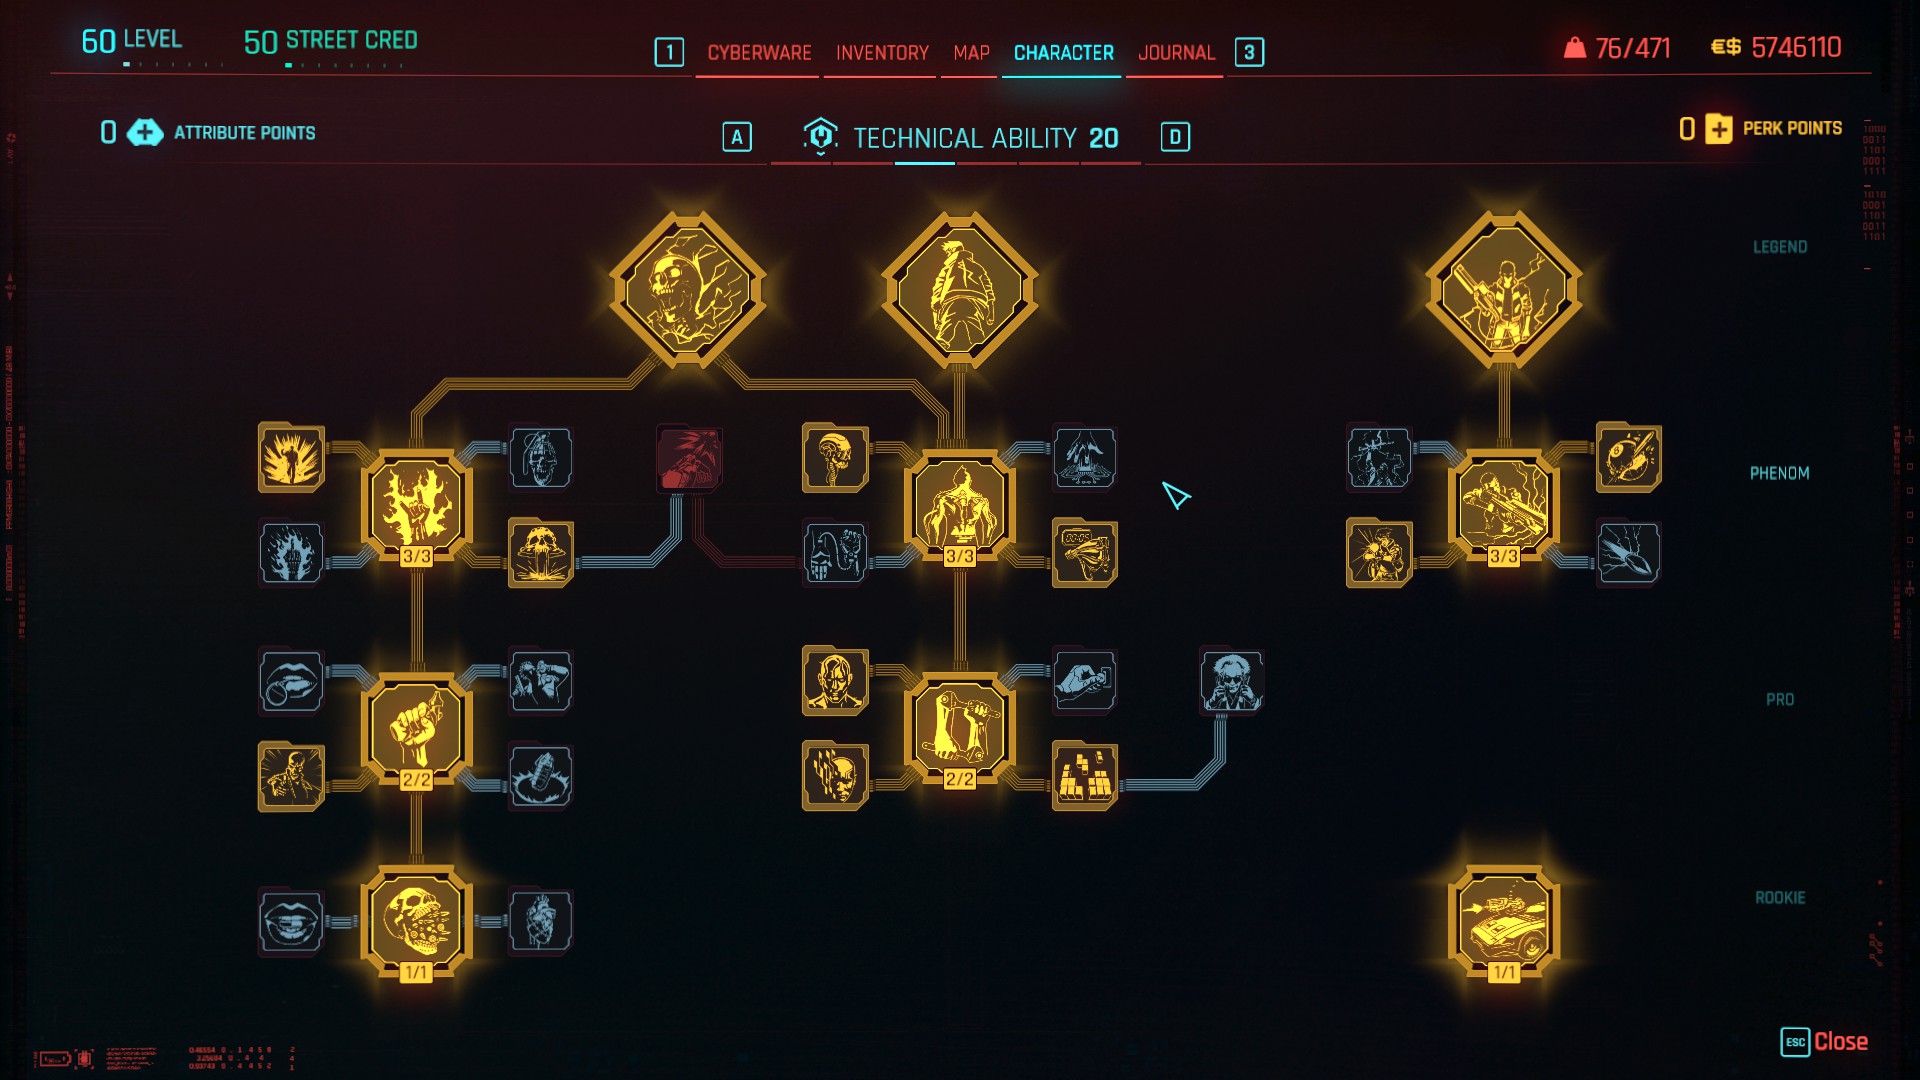
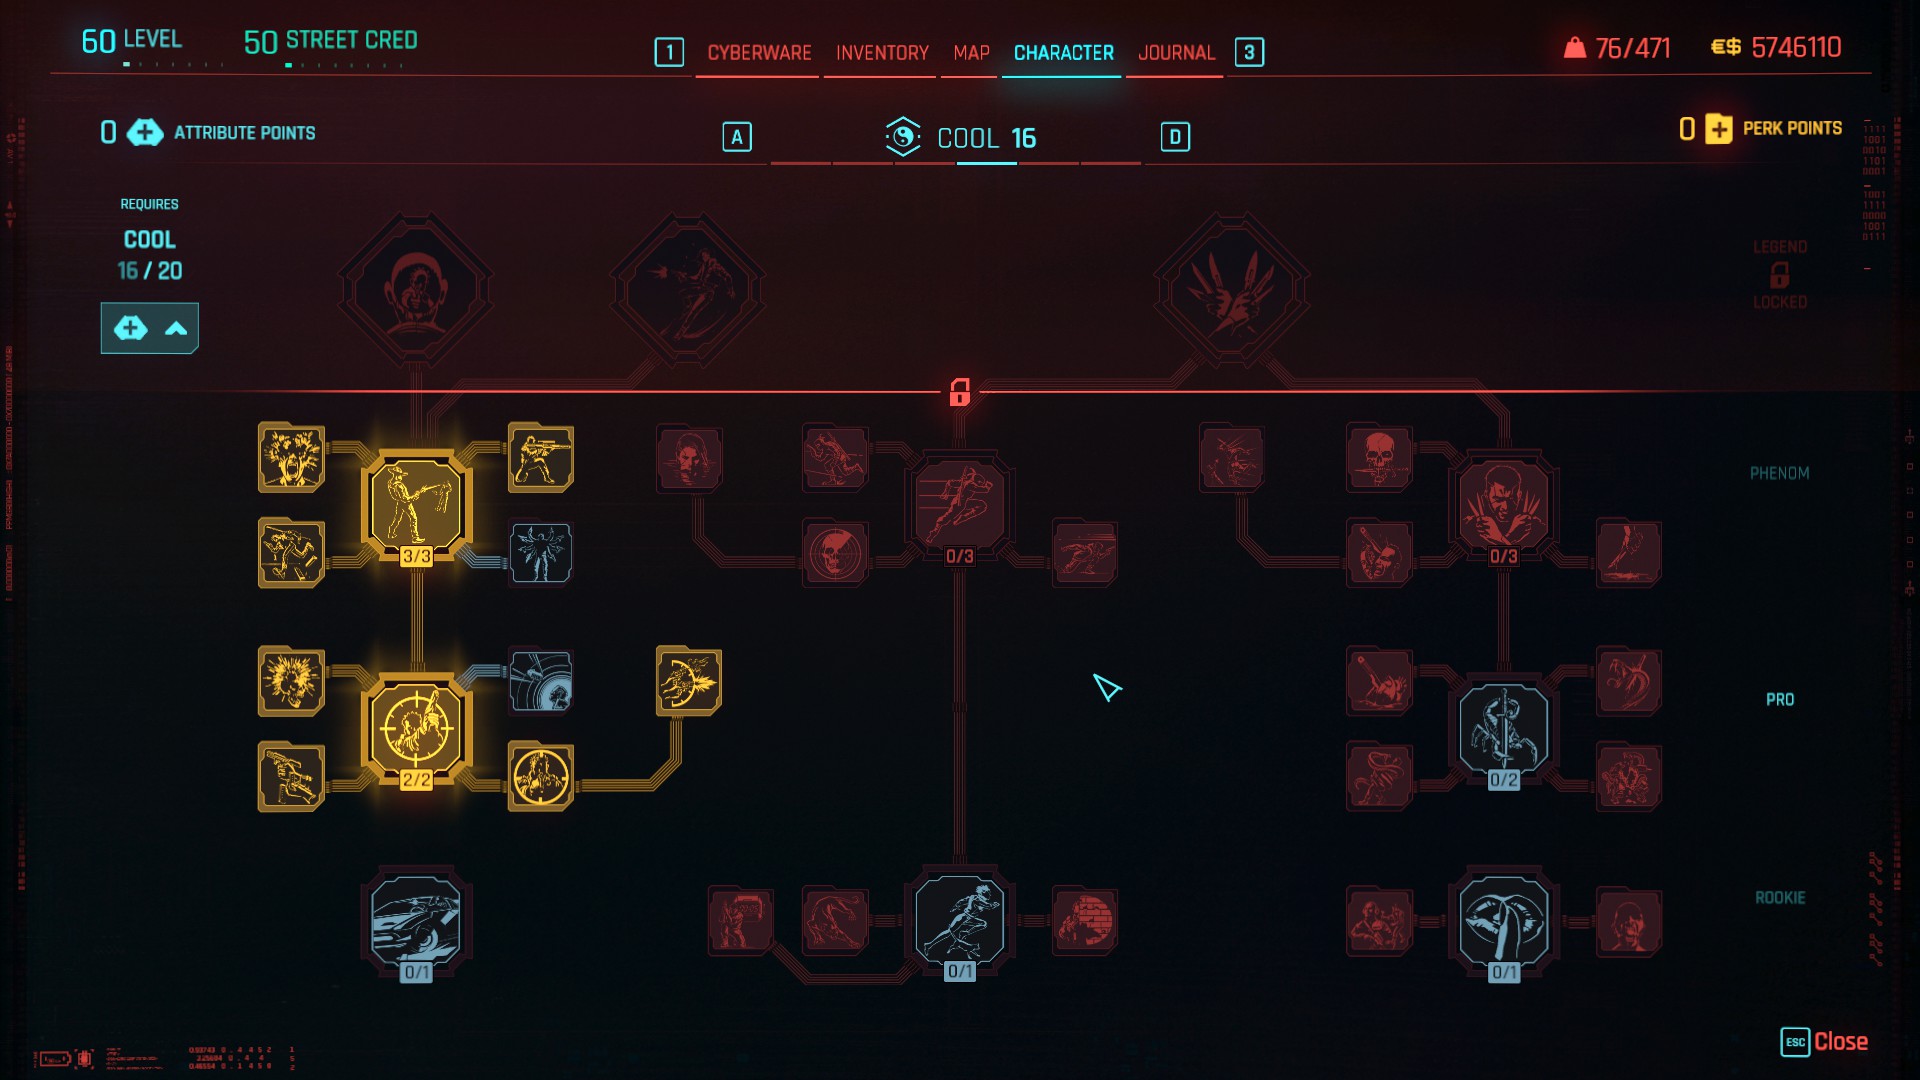
But if you've been using a Cyberdeck the entire playthrough in order to contribute towards your overall fortune and are looking for a change of operating system, you'll be glad to know that you can still pick between either Berserk or Sandevistan. Depending on which one you want to choose when you next visit the ripperdoc, I am going to assume that you have already amassed all the previously mentioned cyberware earlier in the guide, and all you have to do is switch between these pieces of cyberware according to your current OS.
Biodyne Berserk | Militech “Apogee” Sandevistan
Revulsor | Adreno-Trigger
Shock-N-Awe | Countershell
When it comes to weaponry, I had to eliminate certain choices based on how they compare with each other, as well as what they do or do not bring to the table. We want to cut down the shortlist so that only the very best weapons for their respective scenarios get picked. As for the weapons themselves, at the very least, getting tier 5 mods should be simple enough. You just visit vendors all across Night City for the mods you want and buy enough of them so that you can upgrade them to tier 5. But getting tier 5++ non-iconic weapons with the maximum number of empty mod slots, is relying entirely on RNG to be kind to you.
These weapons have been chosen because they are solid base weapons, and it is the mods that enhance them so greatly that they become the absolute best weapons in Cyberpunk. So if you find a tier 5+ drop of any weapon on this list with two empty mod slots, just take it and roll with it until you get really lucky. The difference per tier is about 10% to 12% base damage but compared to tier 5++ iconic counterparts, that deficit in base damage can easily be offset by how the mods transform the function and performance of the following non-iconic weapons.
Katana modded with Airstrike and Cyclone. Being a bladed weapon, you can use it as a makeshift gun to block and deflect enemy bullets back at them. But it also has a fast swing rate and low stamina cost for a melee weapon. If your base melee damage is high enough, you can use Leap Attacks to dispose of enemies stealthily when given the opportunity. Airstrike enhances those attacks regardless of you being in combat or stealth. And as I said before, Cyclone turns your Katana into a better Byakko, one that you can swing relentlessly at single targets without having to find weak fodder to kill in advance.
DB-2 Satara modded with Kneel and Wallpuncher. I've already mentioned why the Kneel mod absolutely trivialises standard and elite enemies when aiming at their legs, and you don't have to charge this tech shotgun for it to have the same effect. But the iconic Wallpuncher mod is best served with the Satara. Out of all the non-iconic tech weapons, it has the highest base damage. But where it really shines is against enemies and bosses that have no head hitbox, meaning there is no chance of utilising a weapon's headshot damage multiplier against them. Luckily, the Satara does not care, and with the Wallpuncher mod, it can charge more potent Bolt shots with 200% capacity, +100% armour penetration, and zero damage penalties for penetrating cover. And because it's a shotgun, it triggers the Bloodlust perk for +50 Adrenaline after each dismemberment. If I'm in close-to-mid range, this tech shotgun is my gun to use!
Nekomata with Gaki scope attached and modded with C-Thru and Headtoll. This tech sniper rifle is my go-to weapon for mid-to-long range combat. It carries the usual +300% headshot damage multiplier, and it handles very well for a sniper. Gaki is a scope that a LOT of players sleep on, one I've not ever heard any Cyberpunk content creator mention even once. Every shot being half-charged at a minimum and subsequently halving the base charge duration? Yes please! With a C-Thru mod in addition, you've just turned a standard Nekomata into a better Breakthrough – you can tap-fire shots and they will penetrate cover, but they are half-charged AND there is a 25% reduction in the damage penalty for shooting through cover, so the Nekomata out-damages its iconic cousin which hogs the spotlight. And the gun's momentum with Headtoll in the second mod slot can be insane. But in terms of aiming for the head during full-on combat, I genuinely prefer this weapon over the best pistols, revolvers, precision rifles, assault rifles, and SMGs.
RT-46 Burya modded with Spinetickler x2. Personally, I still prefer to use the Nekomata when on-foot over this tech revolver. However, unless you're wielding the Katana while riding a bike, none of the already-mentioned weapons in this section can be used in combat while commandeering a vehicle. And I can't assume that you'll always ride on a bike, or drive a car that has its own weaponry. So this tech revolver makes the list as a substitute weapon to swap with the Nekomata when you go for a drive or a ride and expect trouble along the way, thus there is no need to blow a point on the Quick Draw perk. For a revolver, it's got similar base damage to the Nekomata. For a tech weapon, it has an insanely brief charge duration. C-Thru doesn't change anything when it comes to vehicle combat, so we double up on Spinetickler because the shock damage-over-time can help, and the EMP has a chance of blowing up the vehicles of those pursuing you. Even if you're struggling to land those headshots, there's a chance that the EMP will have your back!
With these weapons in mind, we obviously want to invest perk points in blades, shotguns, Deadeye weapons, and tech weapons. If you want to focus your melee strength on Gorilla Arms instead, take out the perk points for blades and put them towards blunt weapons. But we have to be economic with our allocation of perk points, and be as minimalist as possible in order to hit high proficiency with all the chosen weapon types we are using.
We ignore any perks that make little-to-no difference to our assortment of non-iconic weapons with their mods. Nor do we use the Lightning Storm perk for our tech weapons as it can mess with the timing of charged shots. We do not have enough spare perk points for crouch-sprinting, but this build variant is not focused on stealth, although you could use the Katana for that purpose. And there is neither a Cyberdeck nor any smart weapons being used, thus there are zero points invested in the Intelligence tree.
FAQ
What if I don't own the Phantom Liberty DLC? Serious answer - why the hell do you not have it? You're missing out on a lot! But whatever your reasons are for not picking up the DLC, then there is no other choice but to read this guide under the assumption that you have 10 less attribute points. Therefore, deduct 10 points from either Cool or Intelligence, or any attribute you like the least. Yes, the build will be less versatile than when the level cap is at 60, but it's better to have access to Phenom level perks in 4 different attributes that you will end up using, rather than risk only having one or two attributes at that level.
Will I get the highest damage numbers from this build? The highest numbers? No, it's not about bragging over high numbers for more clicks on Youtube. This is a flexible build for multiple playstyles - it's focused on versatility more than specialising in just one narrow style. But will you get damage numbers that are high enough to get the job done efficiently? Of course, and that's all that matters. Unlike dedicating an entire playthrough to just being a Netrunner and risk getting bored when you have 20 Intelligence and have already used up your only opportunity to refund your attribute points, you will have ALL the essential choices available to you at any time. THAT is the true benefit of this endgame build, and worth sacrificing access to most of the capstone perks.
Are you sure that the Butcher's Cleaver is the best iconic blade in the game? What if I don't like it and prefer to use a katana? After further testing, yes, I am sure it is the best iconic blade. Bladed weapons have always been hotly-contested as a weapon category in terms of which is the best, simply because most players tend to focus hardcore on the iconic katanas - they're definitely more aesthetically pleasing than a butcher's knife! But after using the Butcher's Cleaver as a Netrunner and seeing the vast difference in DPS compared to my best choices of iconic katanas, the difference was night and day, and the weapon category ceased to be a contest in my mind. If a blade can perform THAT well in the Netrunner version of this build, it will comfortably wreak havoc with both Speedster and Berserker!
But if you insist on using a katana instead, then I've done LOTS of testing with all of the iconic katanas to know how that pecking order goes! And if you really must keep it iconic, then I would personally choose Tsumetogi or Jinchu-Maru sooner than the Byakko seeing as it's kill-dependent to be at its best. That said, I would say the best thing overall is to look out for a tier 5++ non-iconic Katana with two empty mod slots, and slot it with Cyclone and Airstrike. After all, the Cyclone mod turns your blade into the Byakko but better, as the only requirement is a sprint attack instead of a kill which is useless against lone bosses. If you can find it and mod it, you've got a blade that rivals the Butcher's Cleaver, and comfortably beats ALL the iconic katanas at the same time!
Can you show us the maths as to how exactly one weapon is better than another based on crit chance? Of course! First, we are going to assume that base damage has been fully upgraded to tier 5++ values and because we are assessing crit chance by percentages, we are going to do our calculations based on every 100 hits. By default, a crit hit does 50% extra damage, thus any figures affected by crit hits will be multiplied by 1.5. Then we will see where one weapon's DPS threshold is breached by another - that is how we calculate when a weapon with high base damage doesn't require as much crit chance compared to a weapon with lower base damage.
Butcher's Cleaver base damage = 201 | 201 x 100 = 20,100
We are taking the best blade's base damage and multiplying that by 100 hits to get the baseline figure needed to determine the thresholds compared to other blades.
Errata base damage = 133 | 133 x 1.5 = 199.5 | 199.5 x 100 = 19,950
Assuming that we had zero crit chance and no bonus crit damage, even the Errata with guaranteed crit hits on burning enemies would still do less damage on melee swings alone than a crit-less Butcher's Cleaver! Bonus crit damage will of course change the picture, but it's an uphill struggle for the Errata in comparison when the Butcher's Cleaver has just over 50% more base damage. Now let's look at the Scalpel and assume we had 100% total crit chance during Sandevistan.
Scalpel base damage = 148 | 148 x 1.5 = 222 | 222 x 100 = 22,200
So now we need to hypothesise what the Butcher's Cleaver would be capable of if it had 100% crit chance (which is possible with ANY weapon during Sandevistan I might add) and then keep on deducting the bonus crit damage per melee swing until it falls below the Scalpel's threshold.
Butcher's Cleaver base damage = 201 | 201 x 1.5 = 301.5 | 301.5 x 100 = 30,150
The Butcher's Cleaver deals an extra 100.5 damage per crit hit, thus 100.5 is our figure to subtract for every single percent until it crosses the threshold.
30,150 - (100.5 x 80) = 22,110
Butcher's Cleaver loses out to Scalpel's 22,200 tally when it has 20% crit chance or lower, so it needs about 25% in comparison. Both Jinchu-Maru and Byakko also share the same base damage as the Scalpel but do not have any traits specifically for extra crit chance. Although Jinchu-Maru does get a guaranteed crit hit on the third swing of a fast attack combo, so it doesn't need crit chance to be as high as for other blades. Tsumetogi has the highest base damage out of all the iconic katanas, but it will be in the exact same boat as the Butcher's Cleaver for crit chance as well, thus any DPS comparisons between the two blades are irrelevant.
Do you not think that the amount of armour in this build is low? It's just about half of the max capacity so yes, it's low. But if you're asking that question because you're not aware of the effectiveness of other defensive options, mitigation being a prime example, then you haven't explored or tested those options enough. Mitigation makes surviving gunfights so much easier than just merely hoping your armour is high enough or maxed out.
Do I have to use the same cyberware? You do not 'have to' in the strictest sense, but it does beg the question: what else would you use, and do you have the spare cyberware capacity for it? If you're thinking about replacing other things, what would it be? Would you sacrifice the automated Blood Pump + Biomonitor combo? Would you hurt your melee DPS by replacing Dense Marrow and/or Microrotors? If you knew just how good it is to go around with 100% mitigation chance and 80% mitigation strength, would you seriously entertain the idea of getting rid of any of the five pieces of cyberware that make that possible?!
Is there anything about this guide that you might revise in the future? Yes, it's definitely possible, especially if there should be any future patches that bring significant changes, or even a new iconic weapon that suddenly dominates its category. But I want to test a new playthrough from the beginning to see if the changes to cyberware capacity shard drop rates have truly taken effect, as that has the potential for significant changes.
Will I get the highest damage numbers from this build? The highest numbers? No, it's not about bragging over high numbers for more clicks on Youtube. This is a flexible build for multiple playstyles - it's focused on versatility more than specialising in just one narrow style. But will you get damage numbers that are high enough to get the job done efficiently? Of course, and that's all that matters. Unlike dedicating an entire playthrough to just being a Netrunner and risk getting bored when you have 20 Intelligence and have already used up your only opportunity to refund your attribute points, you will have ALL the essential choices available to you at any time. THAT is the true benefit of this endgame build, and worth sacrificing access to most of the capstone perks.
Are you sure that the Butcher's Cleaver is the best iconic blade in the game? What if I don't like it and prefer to use a katana? After further testing, yes, I am sure it is the best iconic blade. Bladed weapons have always been hotly-contested as a weapon category in terms of which is the best, simply because most players tend to focus hardcore on the iconic katanas - they're definitely more aesthetically pleasing than a butcher's knife! But after using the Butcher's Cleaver as a Netrunner and seeing the vast difference in DPS compared to my best choices of iconic katanas, the difference was night and day, and the weapon category ceased to be a contest in my mind. If a blade can perform THAT well in the Netrunner version of this build, it will comfortably wreak havoc with both Speedster and Berserker!
But if you insist on using a katana instead, then I've done LOTS of testing with all of the iconic katanas to know how that pecking order goes! And if you really must keep it iconic, then I would personally choose Tsumetogi or Jinchu-Maru sooner than the Byakko seeing as it's kill-dependent to be at its best. That said, I would say the best thing overall is to look out for a tier 5++ non-iconic Katana with two empty mod slots, and slot it with Cyclone and Airstrike. After all, the Cyclone mod turns your blade into the Byakko but better, as the only requirement is a sprint attack instead of a kill which is useless against lone bosses. If you can find it and mod it, you've got a blade that rivals the Butcher's Cleaver, and comfortably beats ALL the iconic katanas at the same time!
Can you show us the maths as to how exactly one weapon is better than another based on crit chance? Of course! First, we are going to assume that base damage has been fully upgraded to tier 5++ values and because we are assessing crit chance by percentages, we are going to do our calculations based on every 100 hits. By default, a crit hit does 50% extra damage, thus any figures affected by crit hits will be multiplied by 1.5. Then we will see where one weapon's DPS threshold is breached by another - that is how we calculate when a weapon with high base damage doesn't require as much crit chance compared to a weapon with lower base damage.
Butcher's Cleaver base damage = 201 | 201 x 100 = 20,100
We are taking the best blade's base damage and multiplying that by 100 hits to get the baseline figure needed to determine the thresholds compared to other blades.
Errata base damage = 133 | 133 x 1.5 = 199.5 | 199.5 x 100 = 19,950
Assuming that we had zero crit chance and no bonus crit damage, even the Errata with guaranteed crit hits on burning enemies would still do less damage on melee swings alone than a crit-less Butcher's Cleaver! Bonus crit damage will of course change the picture, but it's an uphill struggle for the Errata in comparison when the Butcher's Cleaver has just over 50% more base damage. Now let's look at the Scalpel and assume we had 100% total crit chance during Sandevistan.
Scalpel base damage = 148 | 148 x 1.5 = 222 | 222 x 100 = 22,200
So now we need to hypothesise what the Butcher's Cleaver would be capable of if it had 100% crit chance (which is possible with ANY weapon during Sandevistan I might add) and then keep on deducting the bonus crit damage per melee swing until it falls below the Scalpel's threshold.
Butcher's Cleaver base damage = 201 | 201 x 1.5 = 301.5 | 301.5 x 100 = 30,150
The Butcher's Cleaver deals an extra 100.5 damage per crit hit, thus 100.5 is our figure to subtract for every single percent until it crosses the threshold.
30,150 - (100.5 x 80) = 22,110
Butcher's Cleaver loses out to Scalpel's 22,200 tally when it has 20% crit chance or lower, so it needs about 25% in comparison. Both Jinchu-Maru and Byakko also share the same base damage as the Scalpel but do not have any traits specifically for extra crit chance. Although Jinchu-Maru does get a guaranteed crit hit on the third swing of a fast attack combo, so it doesn't need crit chance to be as high as for other blades. Tsumetogi has the highest base damage out of all the iconic katanas, but it will be in the exact same boat as the Butcher's Cleaver for crit chance as well, thus any DPS comparisons between the two blades are irrelevant.
Do you not think that the amount of armour in this build is low? It's just about half of the max capacity so yes, it's low. But if you're asking that question because you're not aware of the effectiveness of other defensive options, mitigation being a prime example, then you haven't explored or tested those options enough. Mitigation makes surviving gunfights so much easier than just merely hoping your armour is high enough or maxed out.
Do I have to use the same cyberware? You do not 'have to' in the strictest sense, but it does beg the question: what else would you use, and do you have the spare cyberware capacity for it? If you're thinking about replacing other things, what would it be? Would you sacrifice the automated Blood Pump + Biomonitor combo? Would you hurt your melee DPS by replacing Dense Marrow and/or Microrotors? If you knew just how good it is to go around with 100% mitigation chance and 80% mitigation strength, would you seriously entertain the idea of getting rid of any of the five pieces of cyberware that make that possible?!
Is there anything about this guide that you might revise in the future? Yes, it's definitely possible, especially if there should be any future patches that bring significant changes, or even a new iconic weapon that suddenly dominates its category. But I want to test a new playthrough from the beginning to see if the changes to cyberware capacity shard drop rates have truly taken effect, as that has the potential for significant changes.
CREDITS
This steam guide is excellent for finding each collectable perk shard all over Night City. As far as I am aware, there is a legitimate total of 82 perk points available to you. 13 of those can be found in the open world and collected, 59 perk points are awarded one-by-one each time V levels up, and you get another 10 perk points for reaching levels 15 and 35 in all five skill bars.
Another steam guide I strongly recommend is this one which shows you where to find all the hidden gems around Night City. There are a LOT of hidden gems to discover that you could easily pass by or overlook without even knowing they exist.
zKarmaa does not post much content on his channel compared to other content creators, but the videos he does post are incredibly informative and educational to say the least! I like to do my own testing of course, but he truly tests a LOT of things out and produces interesting findings in doing so. Do not overlook his work!
Sam Bram is a Cyberpunk 2077 content creator who offers deep insight into the game via many angles, mostly lore and hidden secrets. But he also does his own rankings for weapons, cyberware, and many other things. Definitely worth checking out!
T7 PDM is a content creator who covers different games, but has offered plenty of endgame builds for Cyberpunk 2077. It turns out he even has his own three-in-one build that has the same philosophy as the one I've mentioned in this guide, albeit with very different choices of cyberware. If you don't care about having a versatile build and only want to excel at just one or two things, he will have something more up your alley!
Another steam guide I strongly recommend is this one which shows you where to find all the hidden gems around Night City. There are a LOT of hidden gems to discover that you could easily pass by or overlook without even knowing they exist.
zKarmaa does not post much content on his channel compared to other content creators, but the videos he does post are incredibly informative and educational to say the least! I like to do my own testing of course, but he truly tests a LOT of things out and produces interesting findings in doing so. Do not overlook his work!
Sam Bram is a Cyberpunk 2077 content creator who offers deep insight into the game via many angles, mostly lore and hidden secrets. But he also does his own rankings for weapons, cyberware, and many other things. Definitely worth checking out!
T7 PDM is a content creator who covers different games, but has offered plenty of endgame builds for Cyberpunk 2077. It turns out he even has his own three-in-one build that has the same philosophy as the one I've mentioned in this guide, albeit with very different choices of cyberware. If you don't care about having a versatile build and only want to excel at just one or two things, he will have something more up your alley!
OUTRO
Of course, what you do with your V and how you experience your own playthrough is your prerogative. All that I offer here are my strongest recommendations based on my collation of experiences over multiple playthroughs. My experiences have led to my overall perception that the majority of capstone perks are overrated and don't offer as much value as having constant access to all the Phenom level perks in all attributes, and that I have a greater wealth of variety at my fingertips by going 20 Technical Ability and putting at least 15 points into all the other attributes.
But if you decide for example, that netrunning is not for you and you couldn't give a damn if you give up the option of using Overclock, then you could take 5 attribute points out of Intelligence and reallocate them to max out another attribute to 20, or even reallocate 10 points so that you can have up to three attributes maxed out at 20. You only get one chance per playthrough to refund and reallocate your attribute points, so just be 100% sure what it is that you want exactly if you make that decision for yourself. But let me remind you the specific reasons for my particular brand of madness here, and what you risk losing if you deviate away from it.
If you don't have 20 Technical Ability, you lose access to anything in the open world that requires that much investment, as well as placing a MASSIVE handicap upon yourself without the benefit of the Edgerunner capstone perk and its bonus cyberware capacity.
If you don't have at least 15 Body, you don't get the benefits of Adrenaline Rush and risk missing out on anything that requires 20 Body even if you are equipped with Gorilla Arms.
If you don't have at least 15 Reflexes, you miss out on the huge quality-of-life improvement that is Air Dash, being an expert blademaster, and being highly proficient with the best ranged combat weapon in the game.
If you don't have at least 15 Cool, you miss out on stealthy crouch-sprinting and being highly proficient with the best ranged stealth weapon in the game.
If you don't have at least 15 Intelligence, you sacrifice four major things, the first of which is your money-making potential and how it can quickly turn you into a millionaire, the second is that you lose access to anything in the open world that requires that much Intelligence, the third is that you risk not being able to properly use tier 5 Cyberdecks and quickhacks, and the fourth thing is Overclock which is so imperative to netrunning in endgame that without it, you are so gimped to the point that you should not even bother equipping a Cyberdeck.
But I can speak from my own experience when I say it's precisely because of tailoring V in this specific way, that I can easily take on Adam Smasher after patch 2.1, or even go up against wave after wave of MaxTac and their NCPD support, regardless of whether I'm a Netrunner, Speedster, or Berserker, and choose when to bail and live to tell the tale. That is precisely when you know that you have become the ultimate solo of Night City!

But if you decide for example, that netrunning is not for you and you couldn't give a damn if you give up the option of using Overclock, then you could take 5 attribute points out of Intelligence and reallocate them to max out another attribute to 20, or even reallocate 10 points so that you can have up to three attributes maxed out at 20. You only get one chance per playthrough to refund and reallocate your attribute points, so just be 100% sure what it is that you want exactly if you make that decision for yourself. But let me remind you the specific reasons for my particular brand of madness here, and what you risk losing if you deviate away from it.
If you don't have 20 Technical Ability, you lose access to anything in the open world that requires that much investment, as well as placing a MASSIVE handicap upon yourself without the benefit of the Edgerunner capstone perk and its bonus cyberware capacity.
If you don't have at least 15 Body, you don't get the benefits of Adrenaline Rush and risk missing out on anything that requires 20 Body even if you are equipped with Gorilla Arms.
If you don't have at least 15 Reflexes, you miss out on the huge quality-of-life improvement that is Air Dash, being an expert blademaster, and being highly proficient with the best ranged combat weapon in the game.
If you don't have at least 15 Cool, you miss out on stealthy crouch-sprinting and being highly proficient with the best ranged stealth weapon in the game.
If you don't have at least 15 Intelligence, you sacrifice four major things, the first of which is your money-making potential and how it can quickly turn you into a millionaire, the second is that you lose access to anything in the open world that requires that much Intelligence, the third is that you risk not being able to properly use tier 5 Cyberdecks and quickhacks, and the fourth thing is Overclock which is so imperative to netrunning in endgame that without it, you are so gimped to the point that you should not even bother equipping a Cyberdeck.
But I can speak from my own experience when I say it's precisely because of tailoring V in this specific way, that I can easily take on Adam Smasher after patch 2.1, or even go up against wave after wave of MaxTac and their NCPD support, regardless of whether I'm a Netrunner, Speedster, or Berserker, and choose when to bail and live to tell the tale. That is precisely when you know that you have become the ultimate solo of Night City!
More Cyberpunk 2077 guides
- Cyberpunk 2077 + DLC - 100% Achievement Guide★ 5 (2.5k)104k views5.2k ♥15 minUpdated May 24
- Cyberpunk 2077 Консольные команды 2.0★ 5 (560)73k views1.8k ♥31 minRussianUpdated Aug 4, 2025
- Free Legendary Armor Sets [2.0 WIP]★ 5 (2.2k)69k views5k ♥13 minUpdated Sep 26, 2023
- 🌇 𝐍𝐢𝐠𝐡𝐭 𝐂𝐢𝐭𝐲 𝐅𝐚𝐬𝐡𝐢𝐨𝐧™★ 5 (1.7k)64k views3.2k ♥38 minUpdated Jul 17
- Русская озвучка для DLC Phantom Liberty★ 5 (607)64k views1.4k ♥2 minRussianUpdated Aug 30, 2025
- ЛУЧШИЕ НАСТРОЙКИ - Повышение ФПС★ 5 (985)55k views2.5k ♥2 minRussianUpdated Dec 18, 2020



This guide was created by its original author on the Steam Community. Are you the author and want it removed? Request removal.