"Triforce" for Dummies v15.12
Table of contents
- What is Triforcing
- The Damagemodel
- Build Example - Simple mantle for a turret mount
- Build Example - Triforcing movement part connection points in 2D
- Build Example - Triforced Seat, the "Core"
- The Damagemodel 2.0 - Gunbrella effect
- Build Example - The Naglfar, a semi-plated SMG Hover
- Basic engagement rules
- Appendix
1. What in the name of deity-of-choice-here is "Triforcing" ?
"Triforcing" is a bit misleading name used as stand in because noone figured out something better that sticked. Prisms and Tetras have a number of triangular faces - that's all there is to it.
Triforcing as such thus has nothing to do with Temples, Swords, Fairies or princesses but more with using the knowledge of how the damage model works to get a swords edge thin advantage over your opponent. Hopefully.
That said it still works - however the introduction of self regen when you're out fo combat for 10 seconds and the thusly resulting loss in number of people playing medics leads to a scenario where constructing of efficient (and potentially visually peasing) robots with as little as possible parts is not necessary anymore. On the contrary - the now instant death death threshold of 25% of your bots maximum HP leads to a scenario where you will want as much raw HP (eg cubes - lots of them) as possible to not be oneshot by things like ... Plasma. Yeah they are still in game - I'm sad too.
2. The damagemodel is really easy to understand
Imagine damage to be an amount of fluid - say water. The amount of damage would thus correspond to the amount of water.
Now assume the blocks are buckets.
Buckets obviously can hold a certain amount of water till they are full.
Blocks can only hold a certain amount of damage before they break.
Remaining water overflows to adjacent buckets.
Remaining damage flows to adjacent blocks.
This is the critical point right here. By placing buckets of a certain shape in a certain way or pattern we can determine the direction the water flows in.
The rule is - basically - really simple -> damage only flows through faces/planes/areas but not through lines or points.
Take a Tetra. It has three planes. Those that you can connect other cubes to.
Take a Prism. It has four planes. Those that you can connect other cubes to.
Take a cube ... well you got it.
Let's asume we have an initiall impact (red) that would do enough damage to destroy five basic blocks total. Let's assign yellow to the blocks that receive their damage via the overflow from the initial impact and blue to the blocks that receive the damage from the yellow overflow (if there is still damage left in the pool).
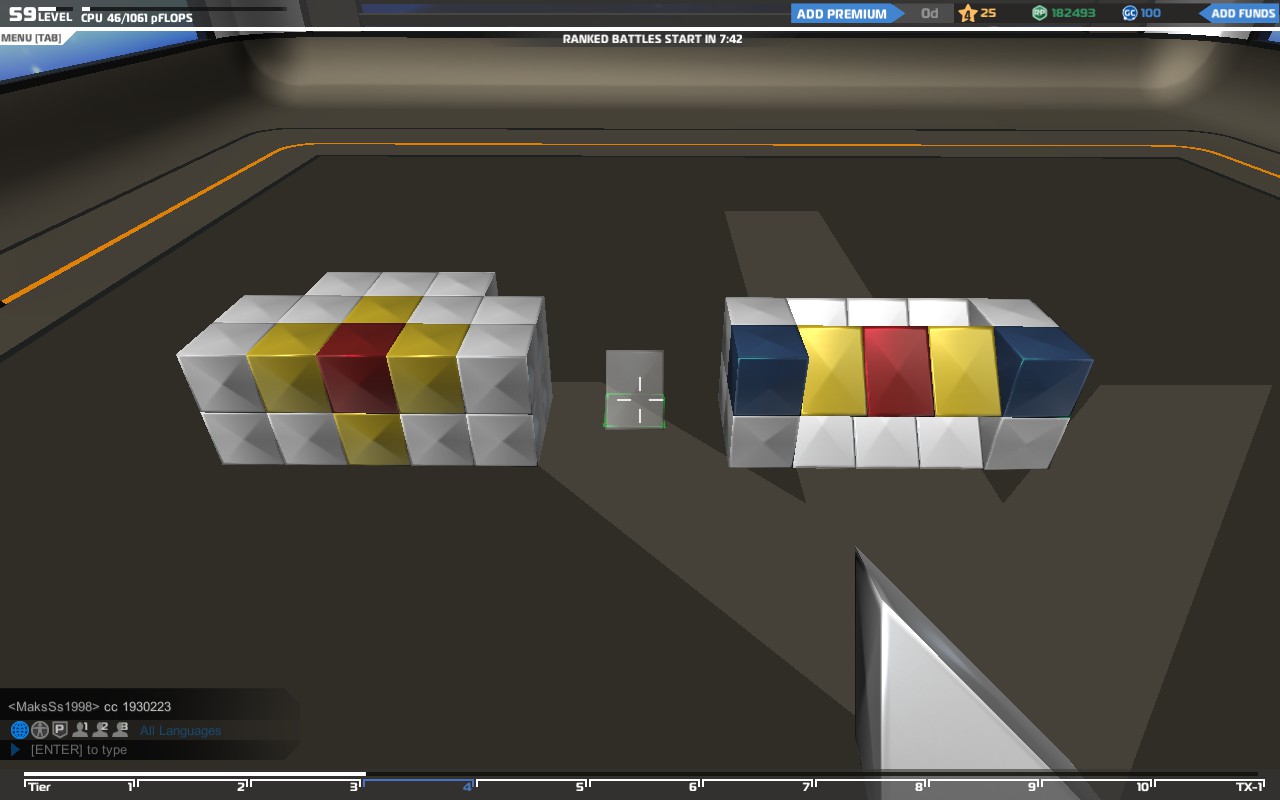 As we can see the massive armor made of cubes abosrbs the damage really well. However, compared to the simple prism triforced armor on the right the damage penetrates FARTHER INSIDE. Which is the direction you never want your damage to mitigate if you can avoid it. Insides are important. It's where all the things that make you work usually are located. Movement. Seat. Radar. Receiver. Jammer. Things like that. Disembowled tanks and robots work about as well as disembowled humans - not very.
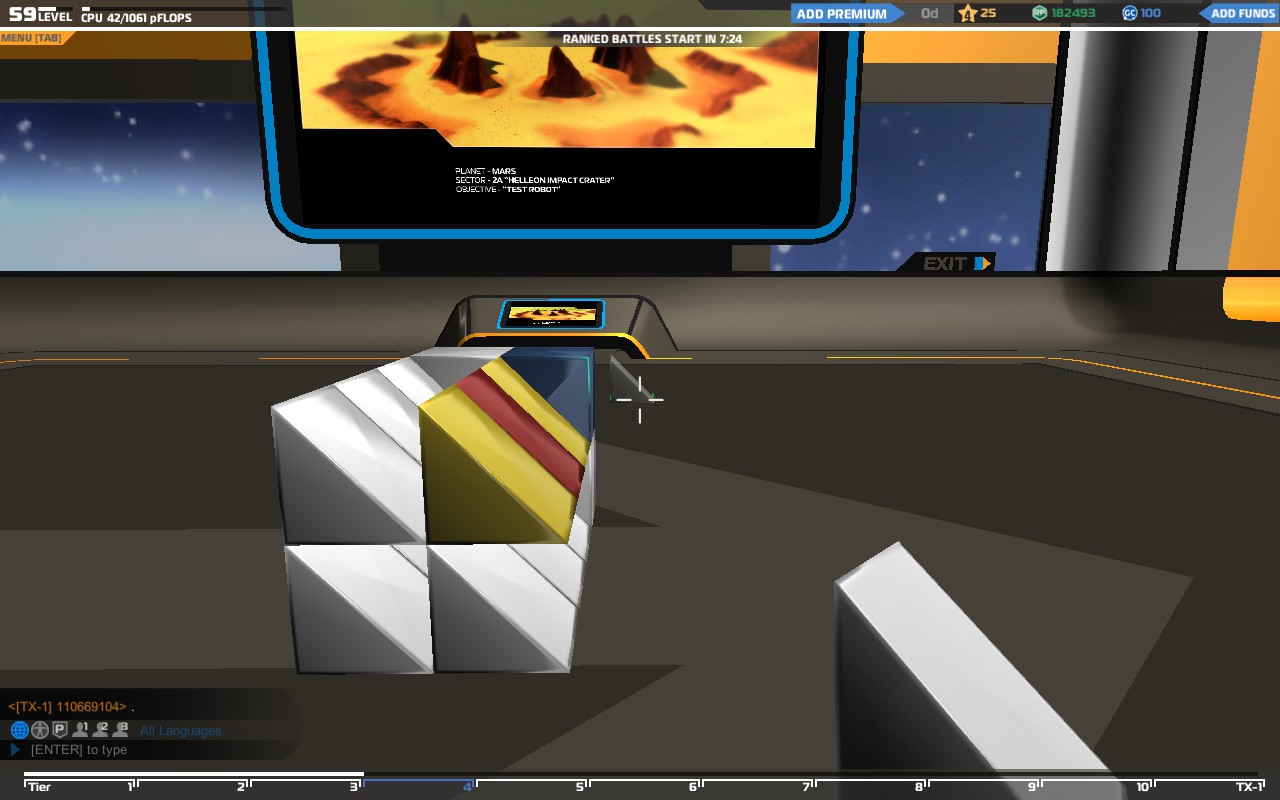 Cross section of above simple ablative prism armor.
[bittervet old man grumbling tone]
No these aren't premium colours, these are what the game once looked like.
[/bittervet]
3. Practical Application A - Turret Mount Mantles
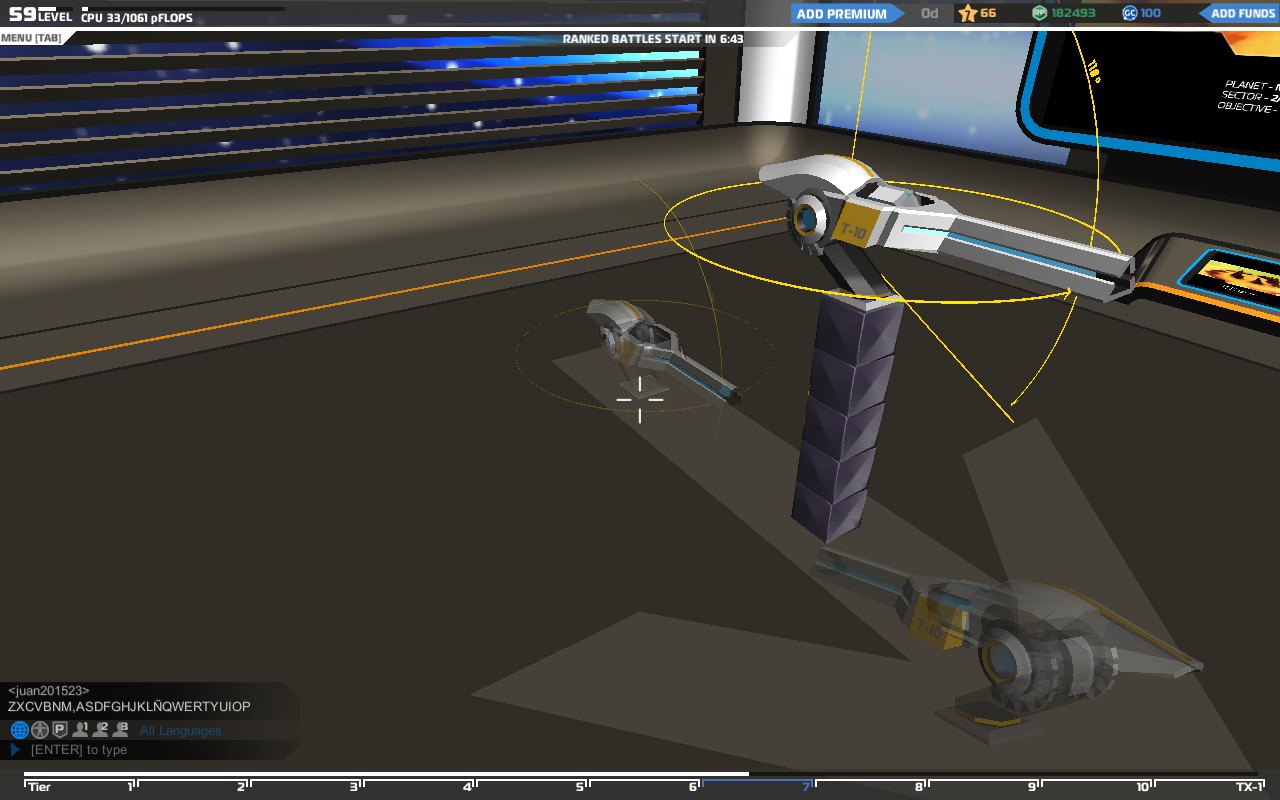 This is turret. Is mounted on skeletal structure - which is what I like to call the layer between the outer armor and my seat.
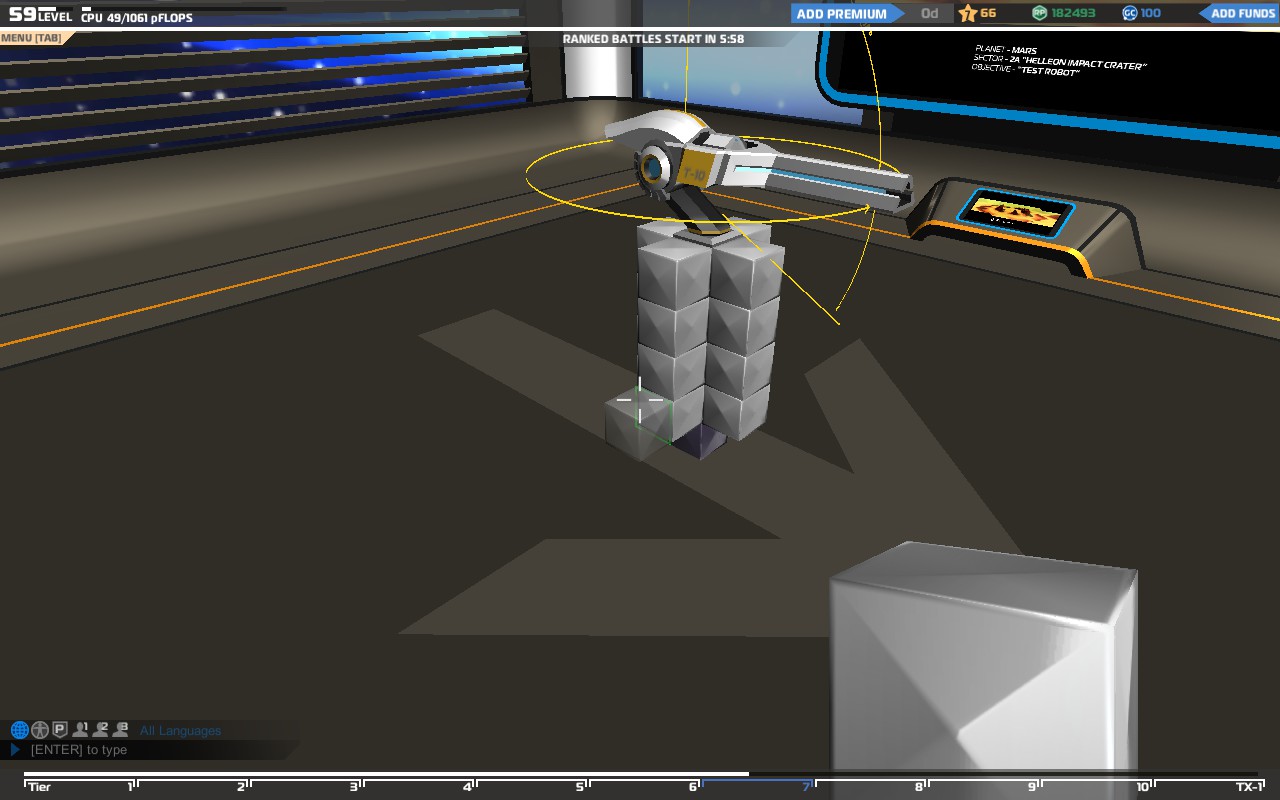 This is turret. Now with gantry.
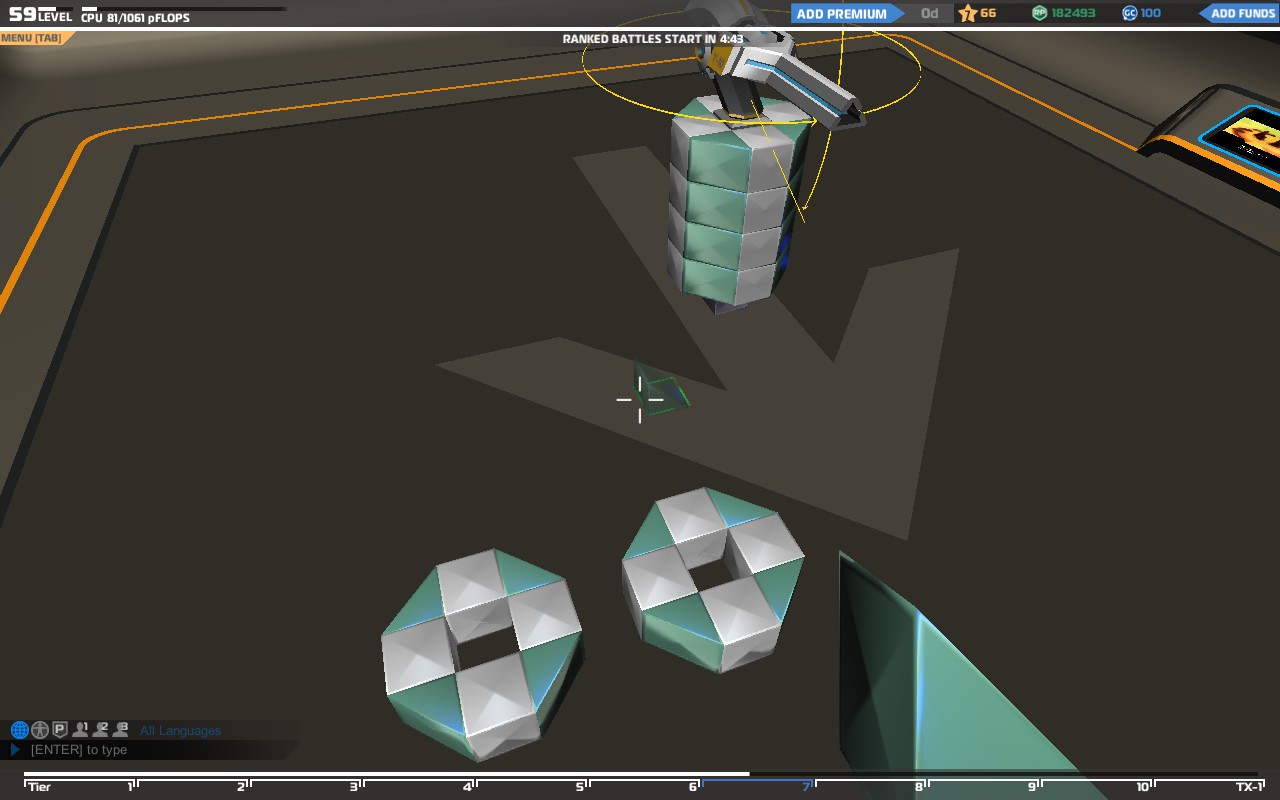 This is still turret. Now with half of the mantle assembled. Take note of the cross sections. Let's call the left one A and the right one B.
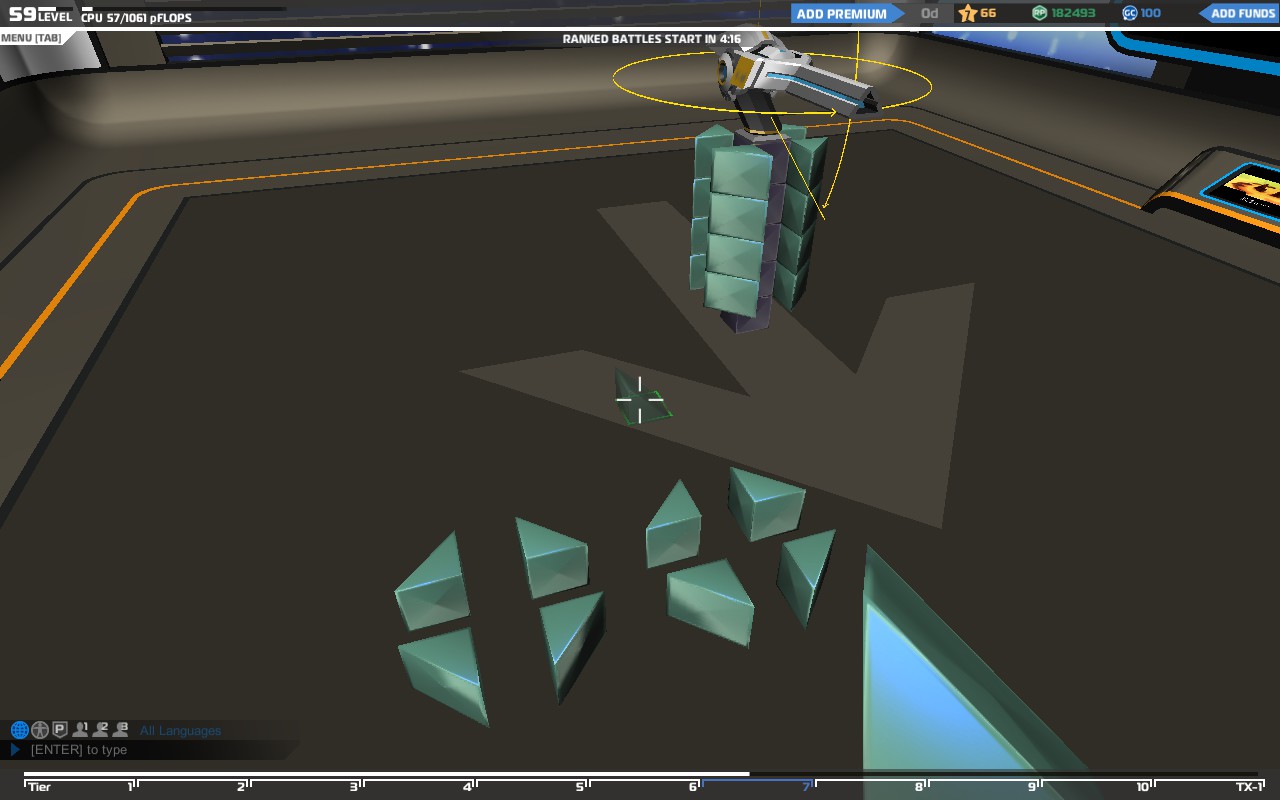 As above - now without gantry.
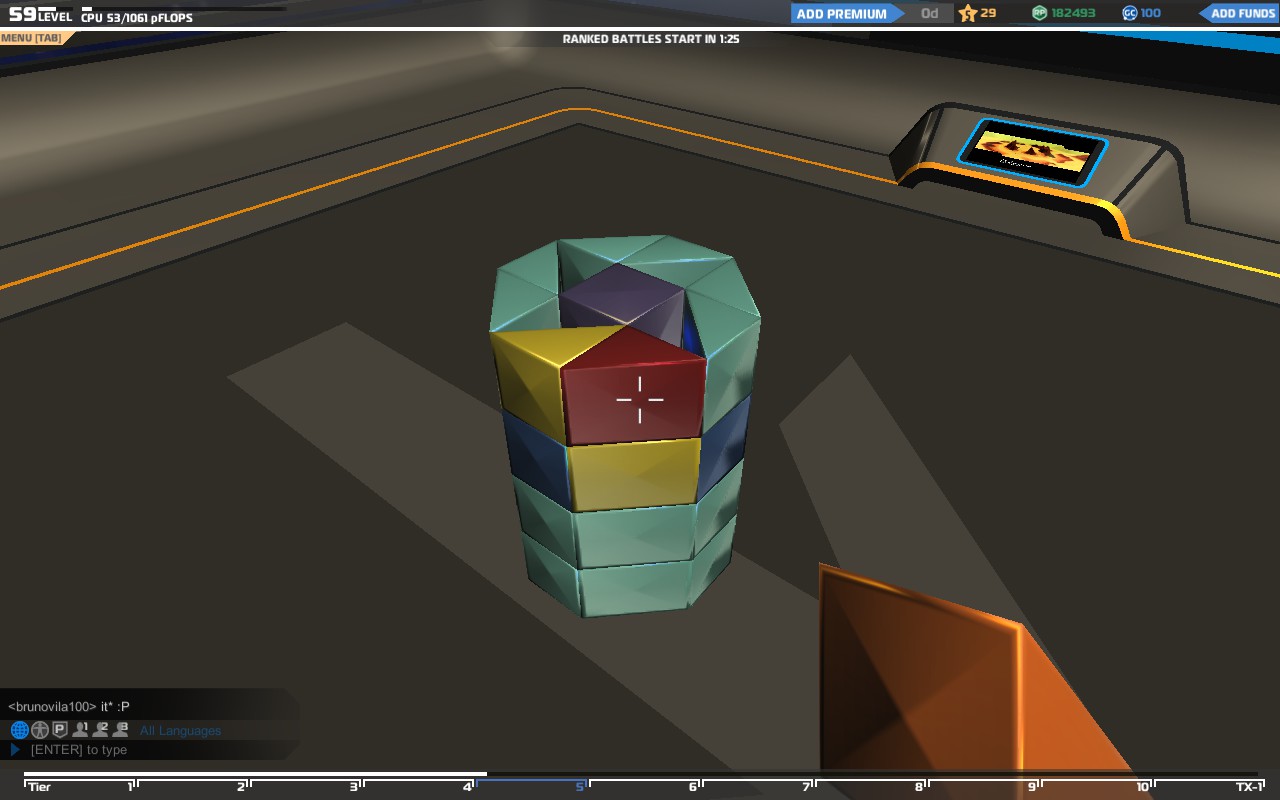
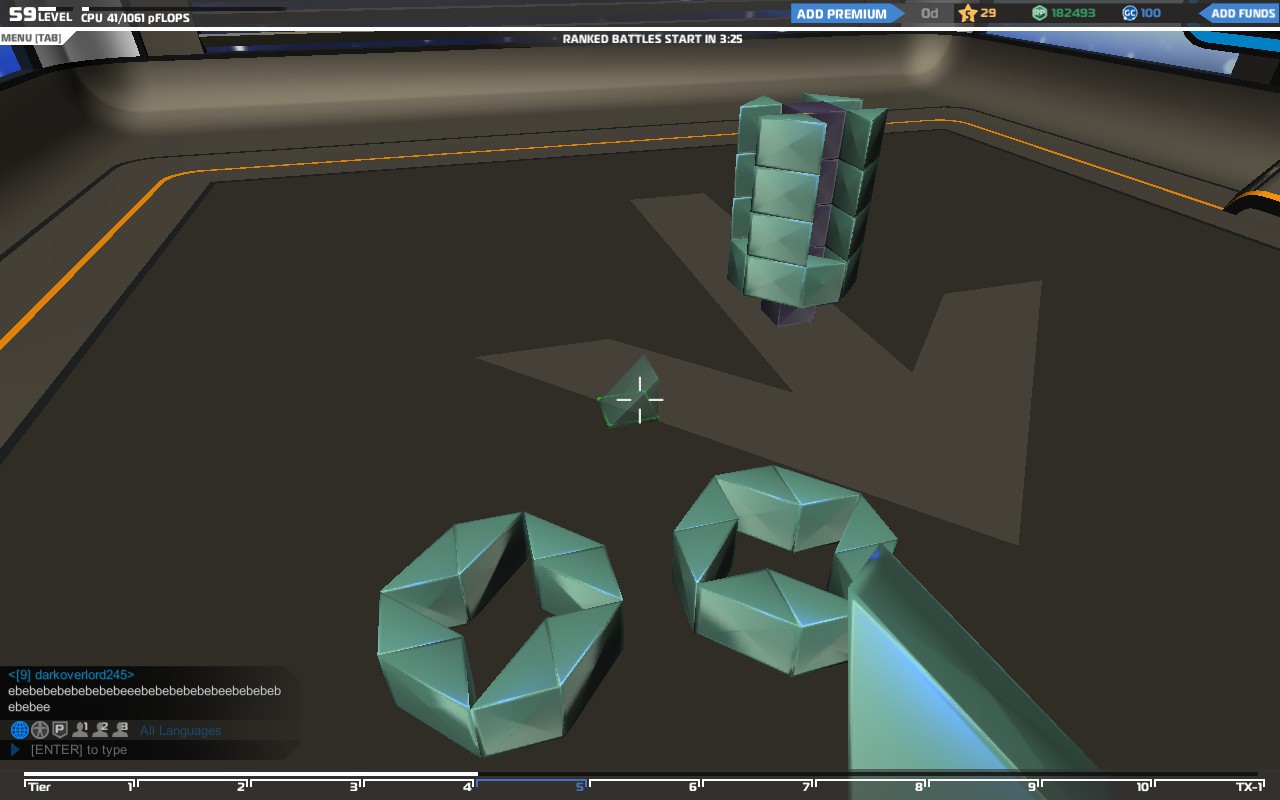 Take some more prisms and add them like this. Now complete the mantle around the turret mount skeletal structure by stacking these rings A and B in an alternating fashion.
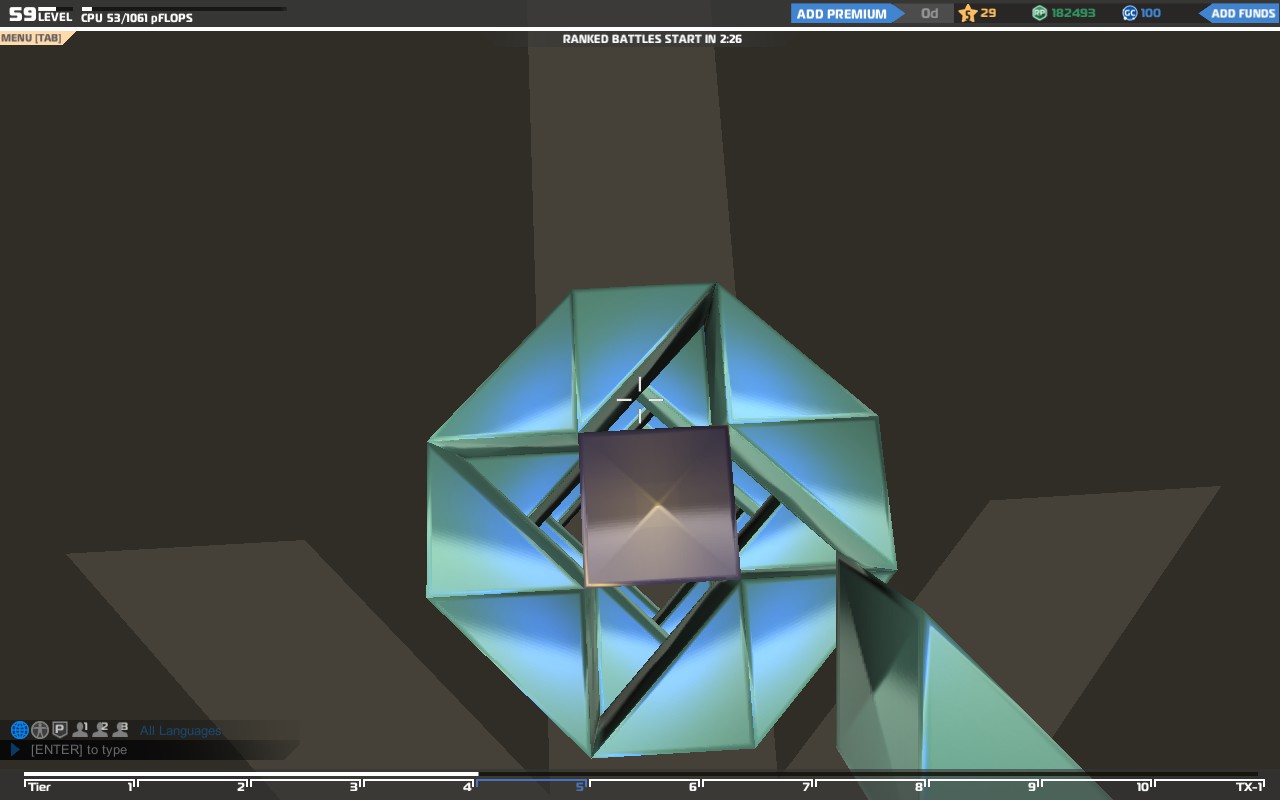
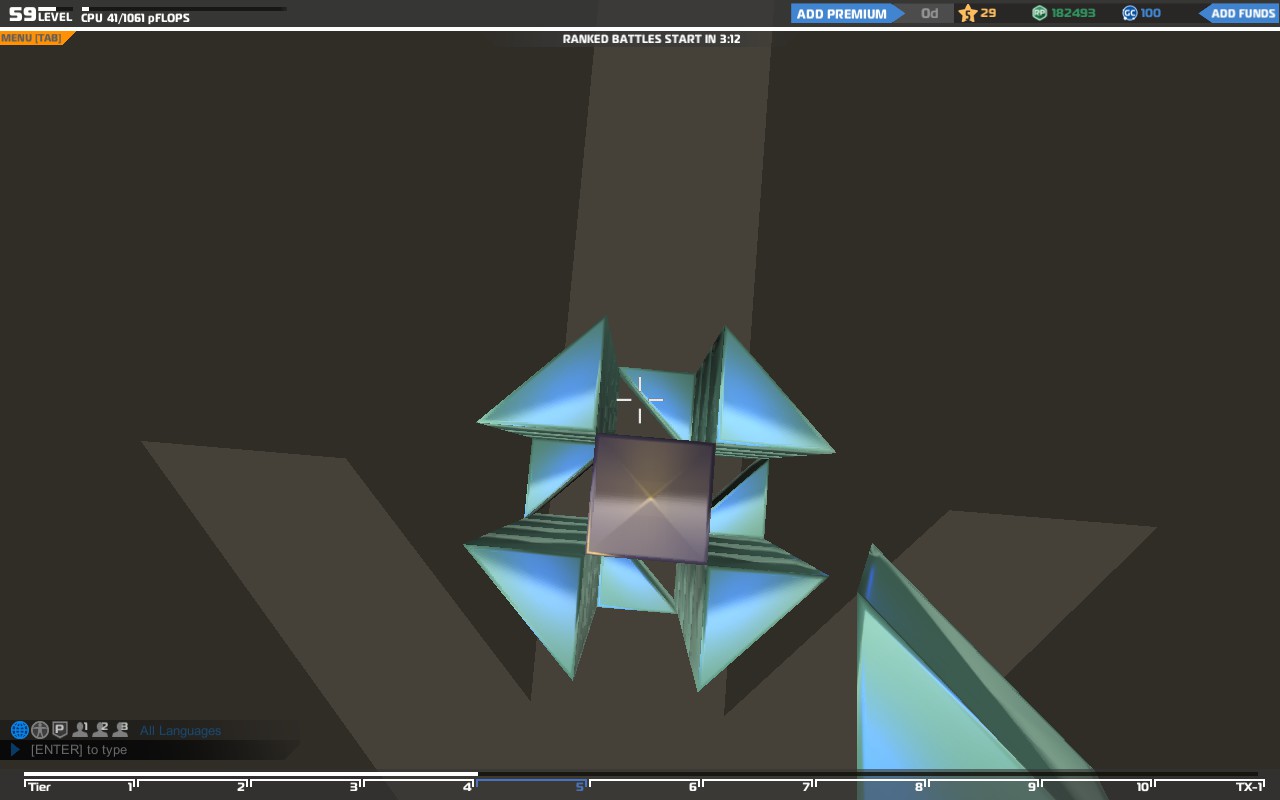 Turret mount directly from above. I started with B because - why not.
 B A B A B A B A ....
 Again - red initial impact. Now search for the faces that you can mount blocks to and that have blocks mounted to them. THis is where the damage will flow first (yellow) to continue in the same fashion (blue) till all the damage is depleted. As you might notice the block the turret of your choice is mounted to doesn't take damage. At least not from that shot.
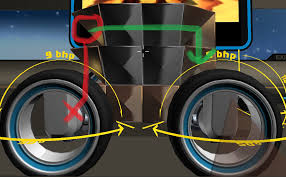
4. Practical Application B - Movement part mounts in 2 Dimensions
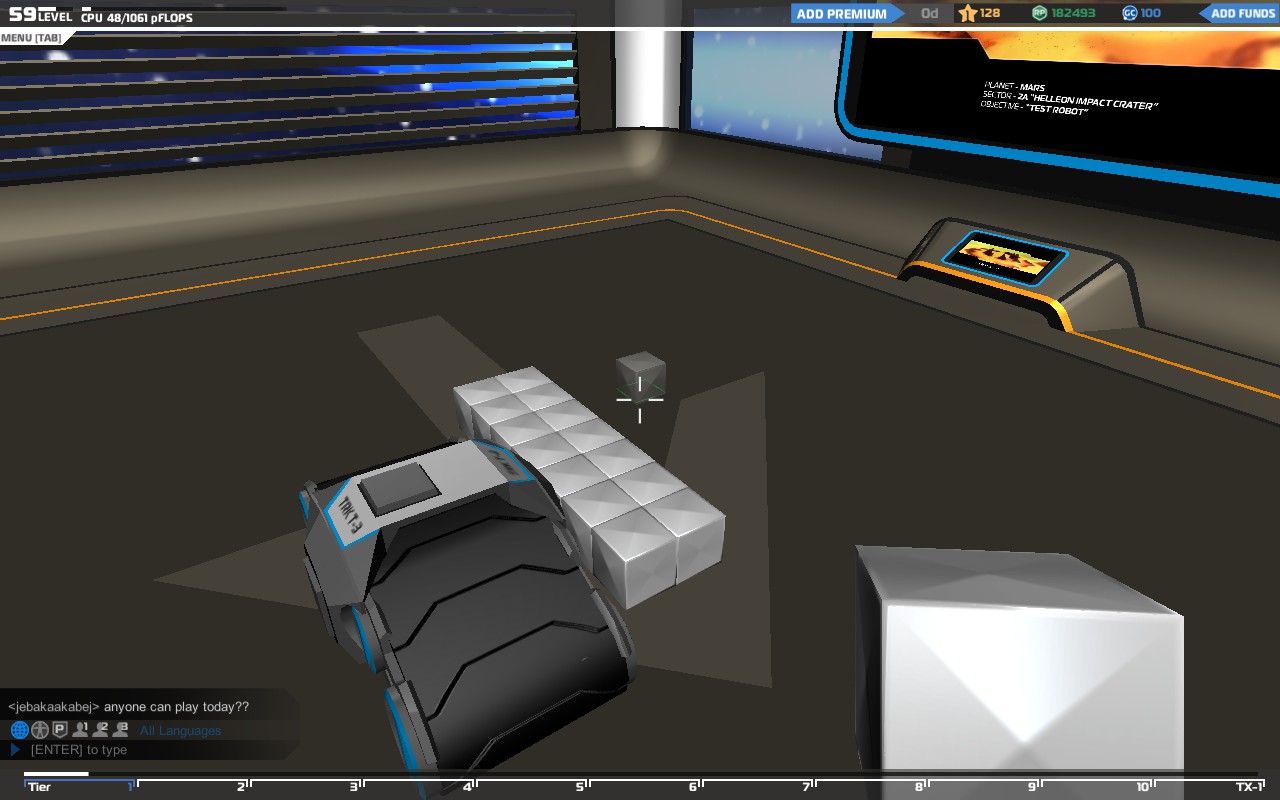 Here we see the standart massive armor in cross section. The same massive cubes will probably surface at some point and connect to the cubes below the seat and a big enough junk of damage can jsut beeline directly to those making your tank go boom. No fun that.
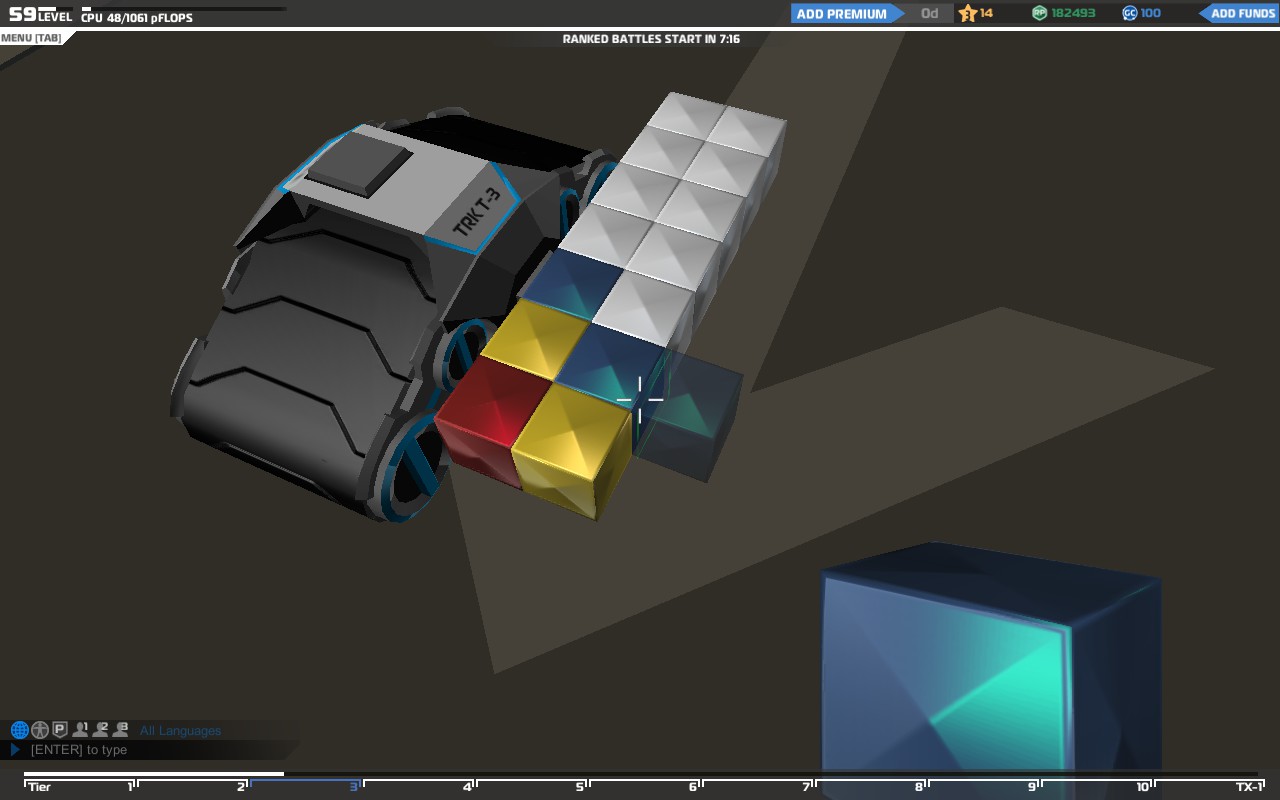 See here. Note how the connection to the tracks gets blown of. Say bye to your tracks. You are now a tank with a huge hole in your front AND side where once your tracks were. You are also immobile - sucks to be you.
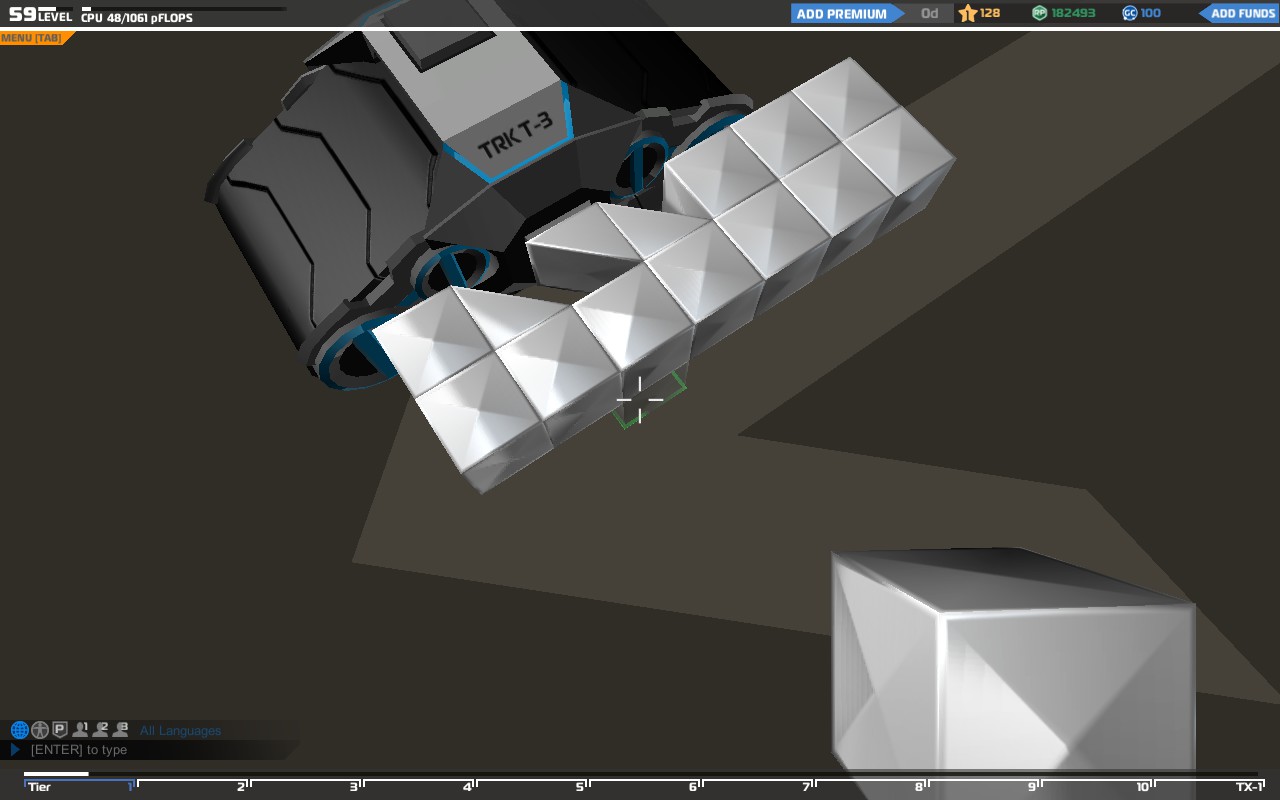 Here we totally ignore that there is another layer on top of the shown one and one below as well and simply triforce in the two dimensions we have. At this point you should be able to figure out how the damage flow looks if the point of impact and damage is identical.
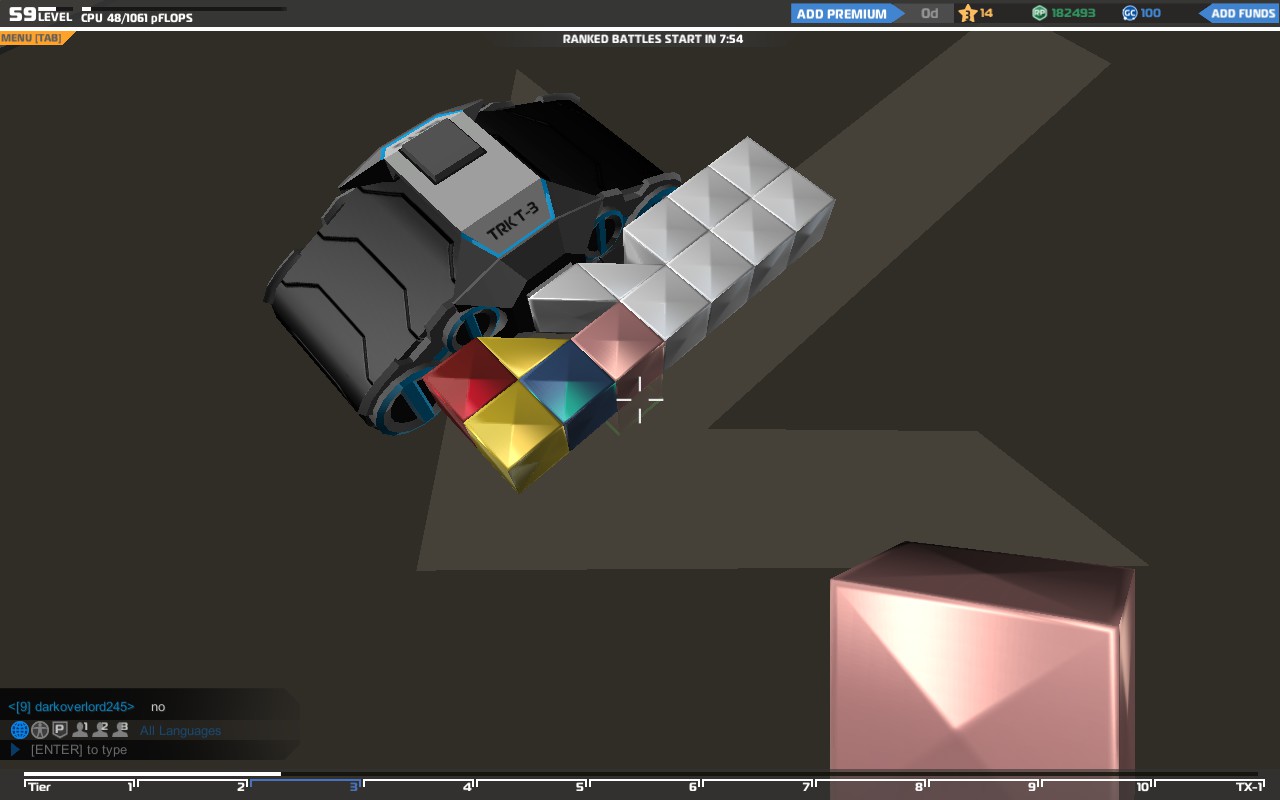 This is how. Since the damagepool wasn't exhausted with the blue cube the remaining damage became pink. Note how your tracks are not blown of. You are now a tank with a huge hole in the front, none in the side and can still move ... que Fluttershy yay.
5. Practical Application C - "Core in a Shell - Standalone Complex"
Your bot goes nuclear if the block below your seat explode.
At least your bot did do that back in the olden days of yore when things like "Pilot Seats" still existed. One might completely disregard the below section, regard is an an object example in triforcing, or ponder upon where the second generation seat that had way more conenction points than the below pictured one is in my examples.
(hint: I wasn't playing a lot when the newer-now-gone-allready-seat was a thing)
These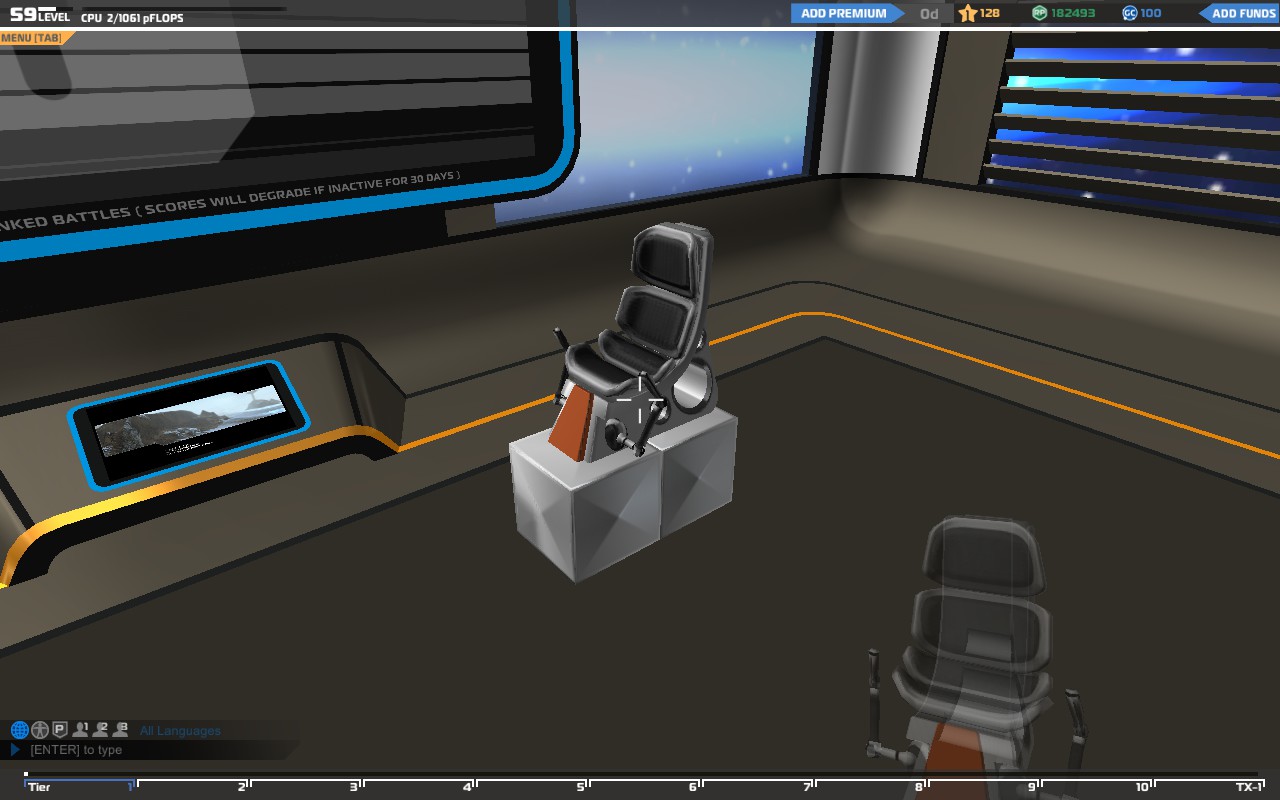 Proof
Proof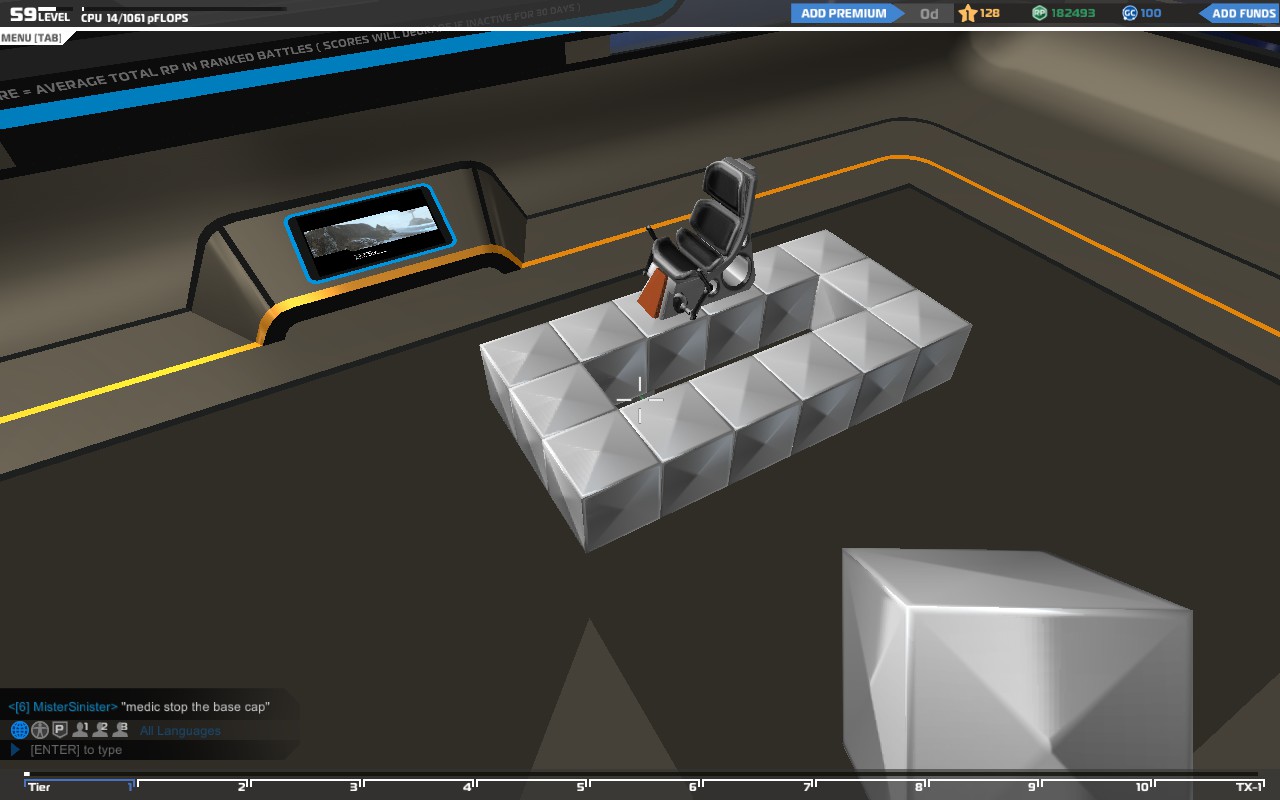
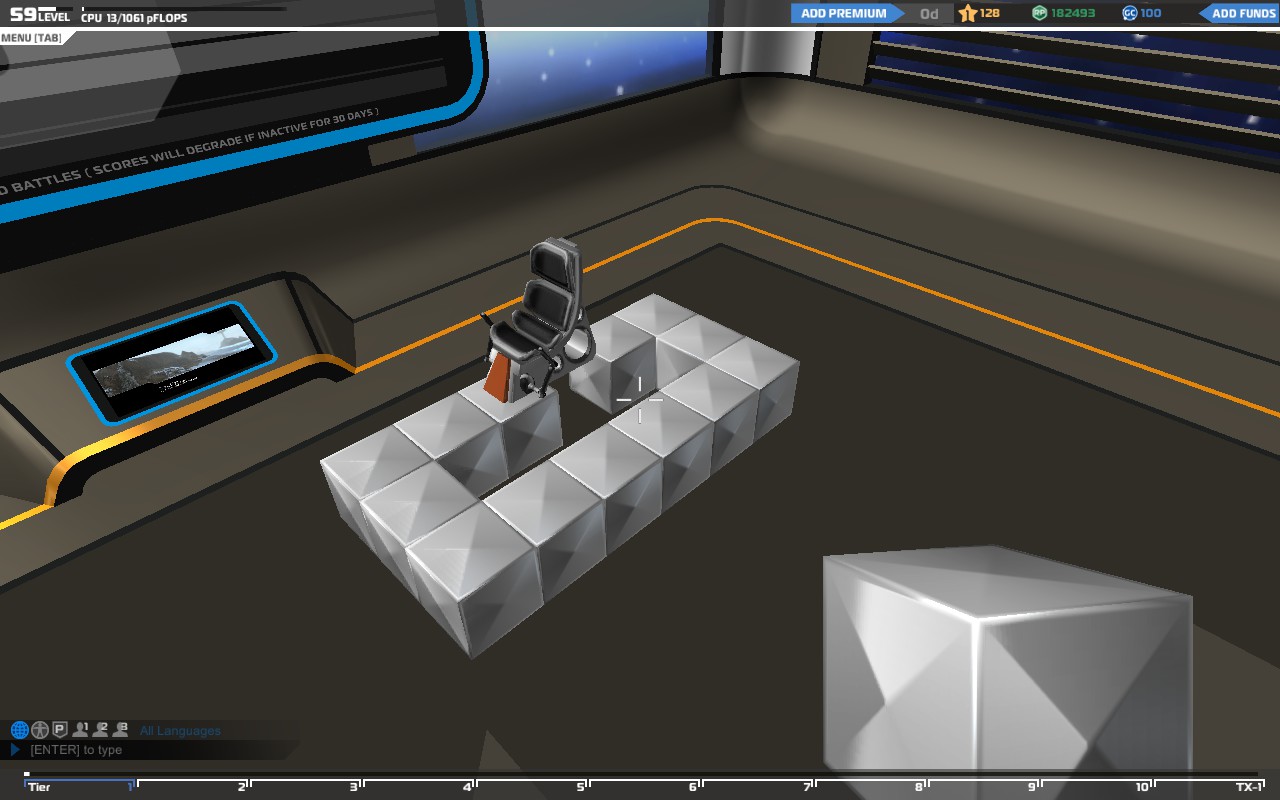
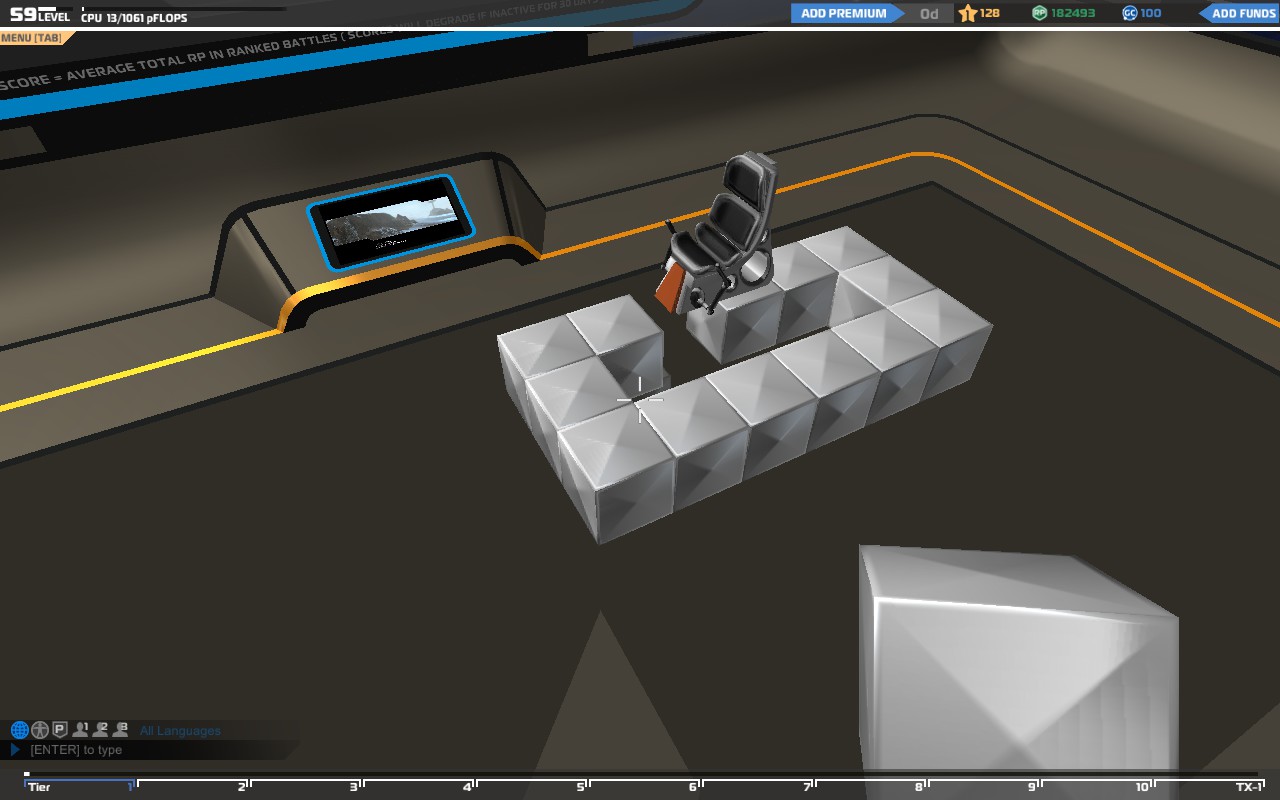
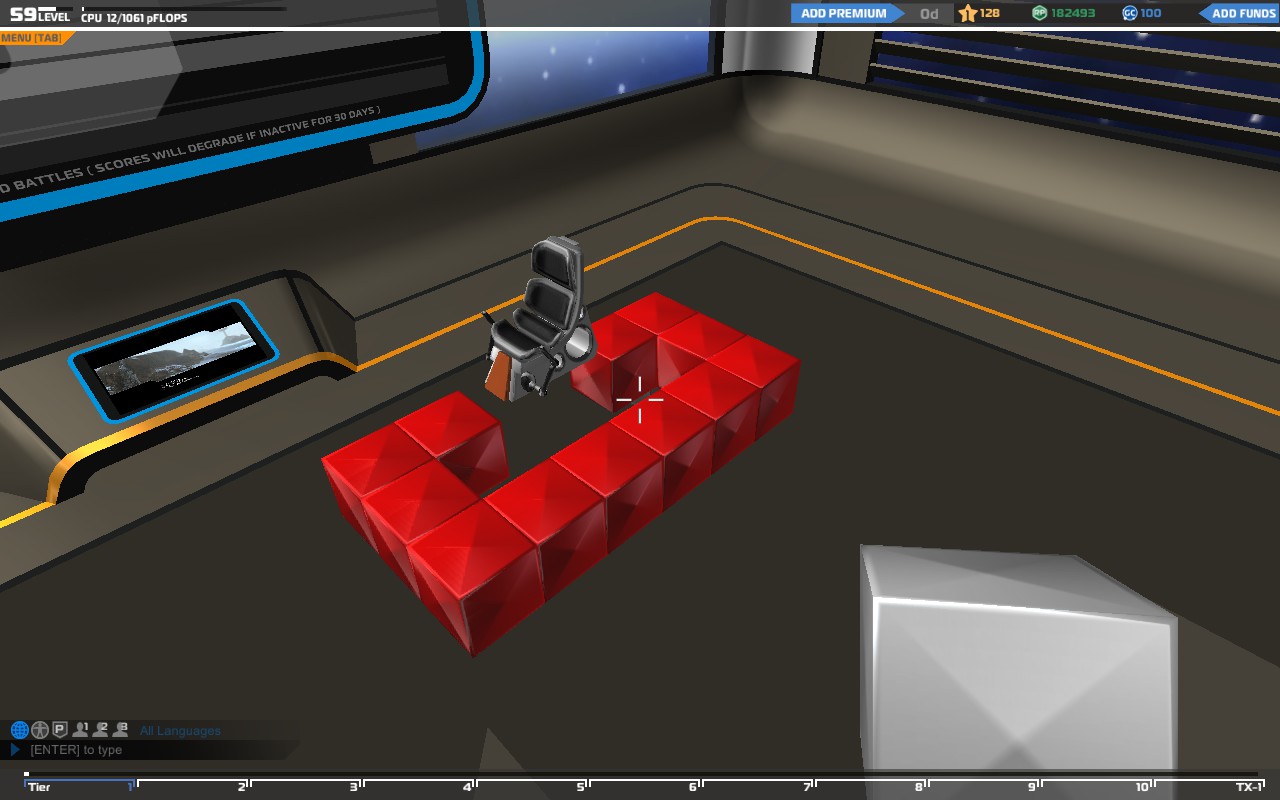 Solution:
The solution is really simple actually. Don't directly conenct them to each other.
That's all.
Here's some build example:
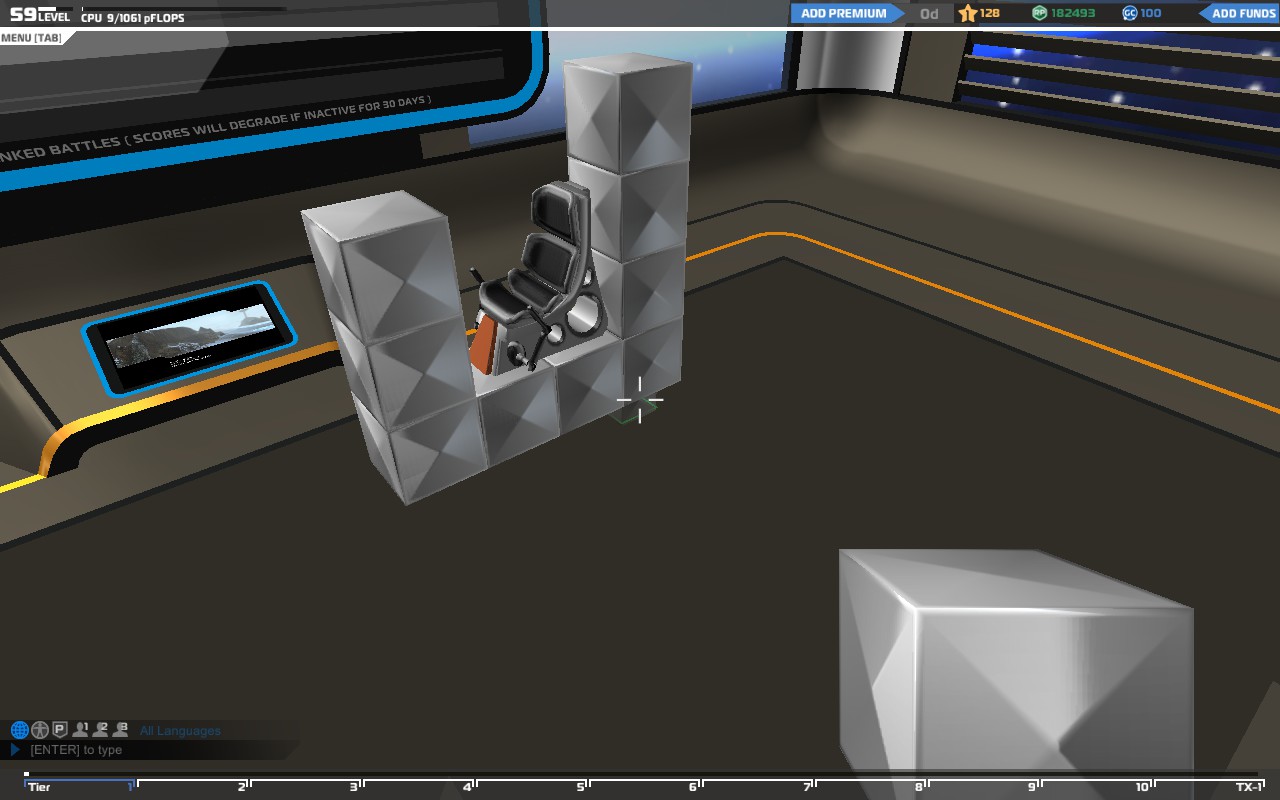
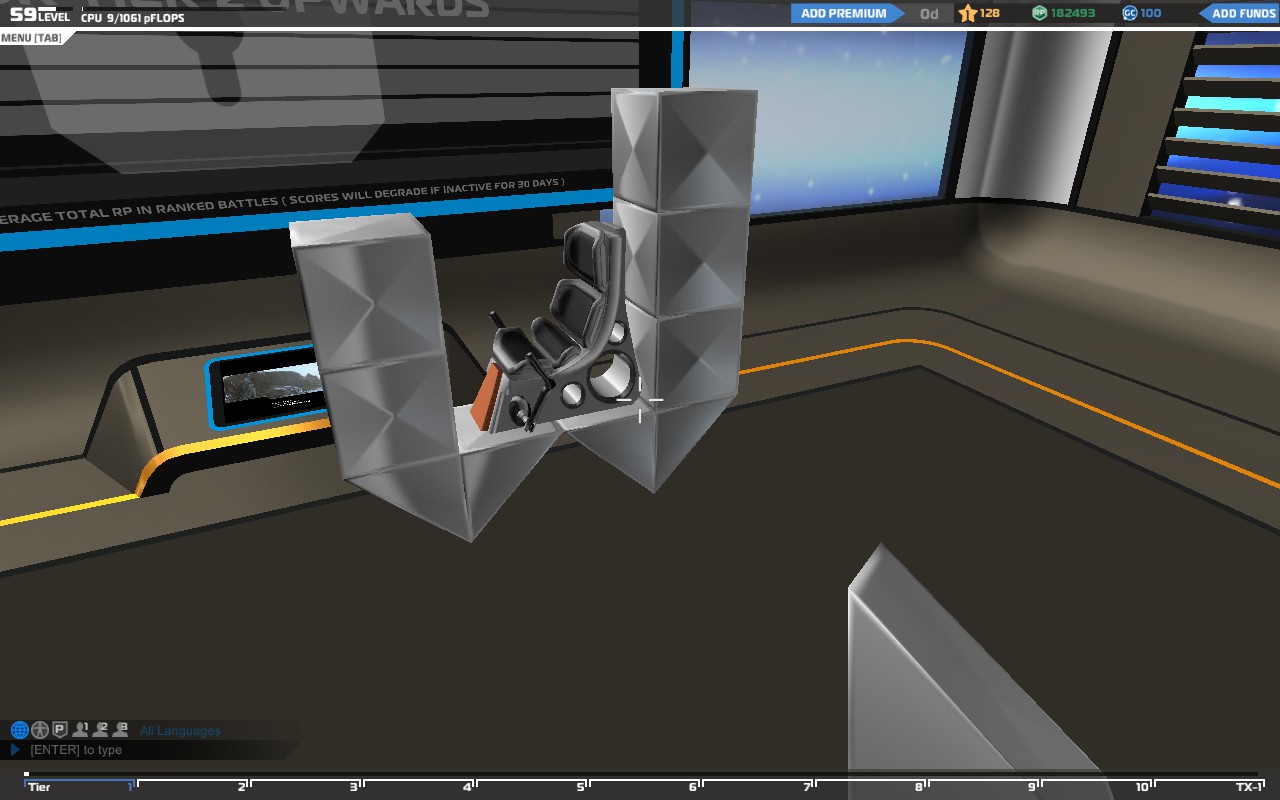 Variation A - Ribcage
Channels damage right into each rib. Good for single massive blows (overtiered Plasma and rails anyone?) but not very good against SMGs.
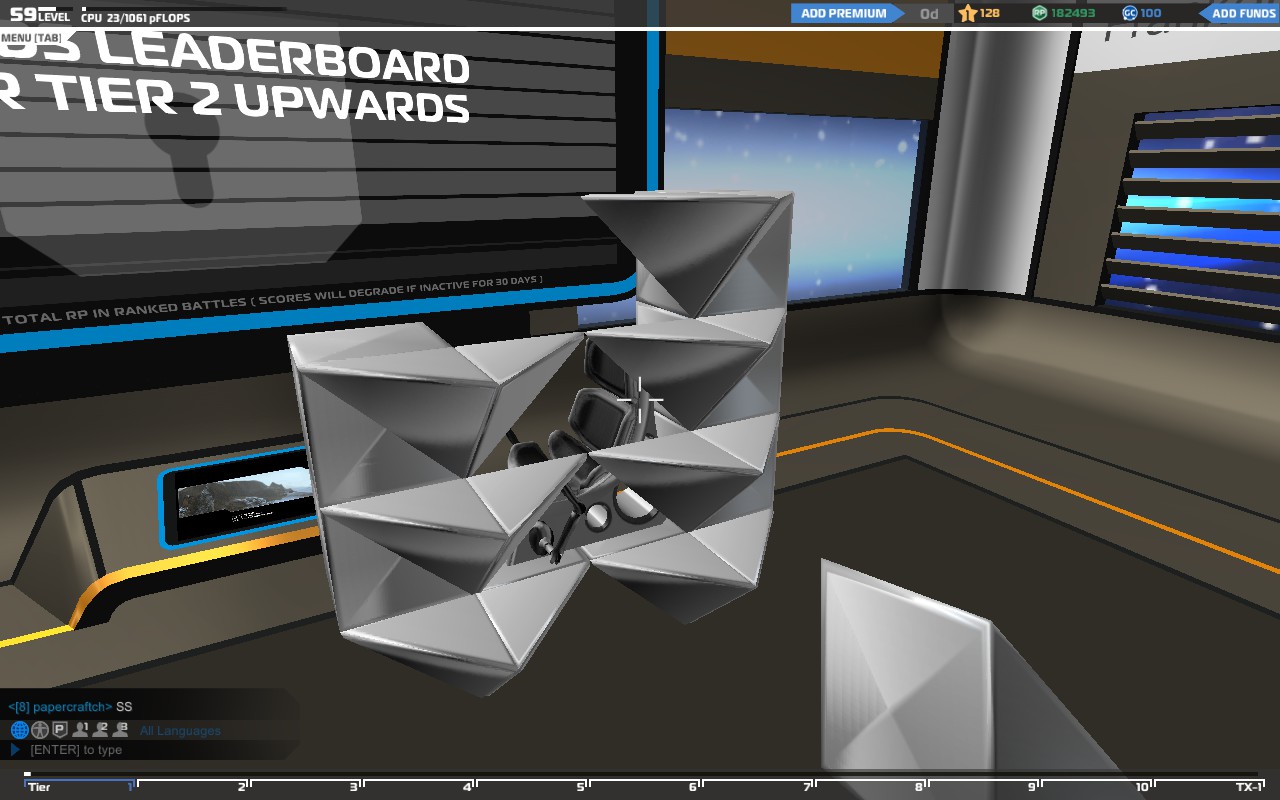
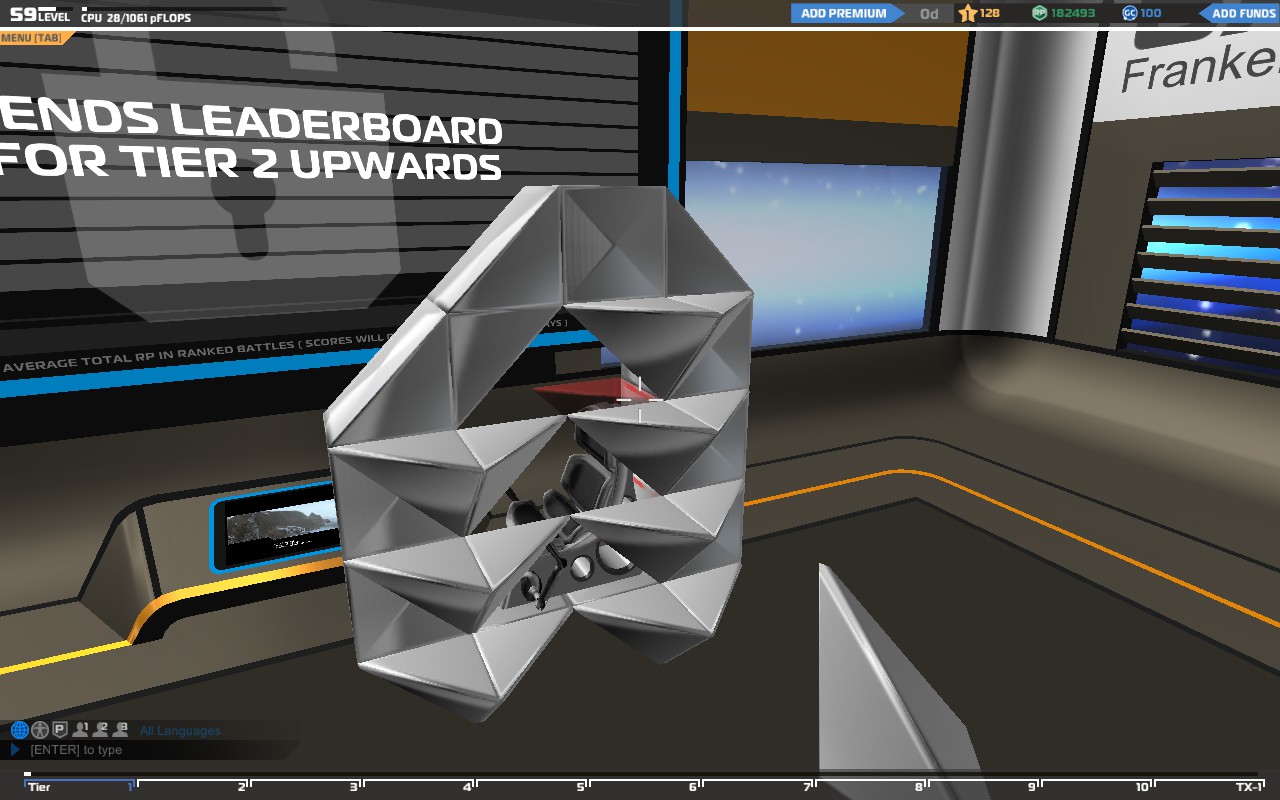 Variation B - Solid
More ways for the damage to flow. SMGs will still kill you and so will Plasma (you ARE down to the core after all) but it will take slightly longer for the SMG than with above.
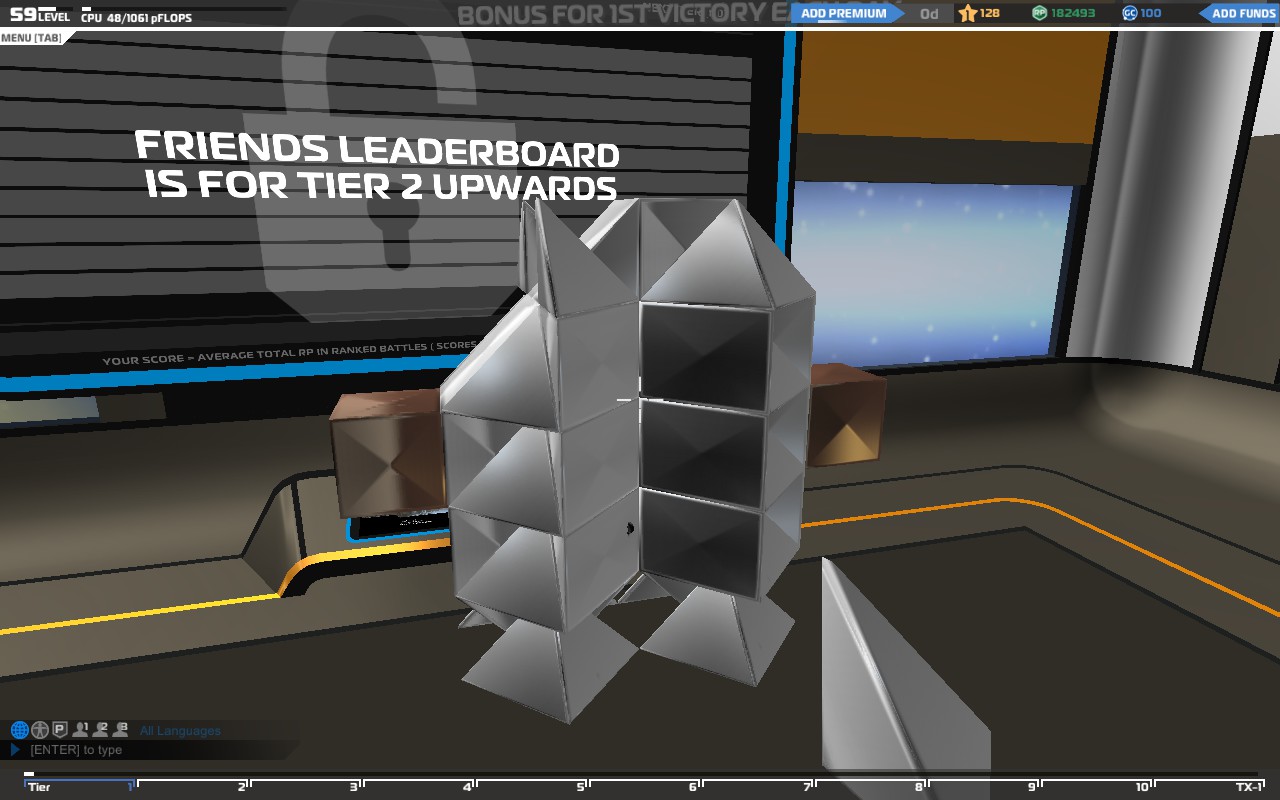
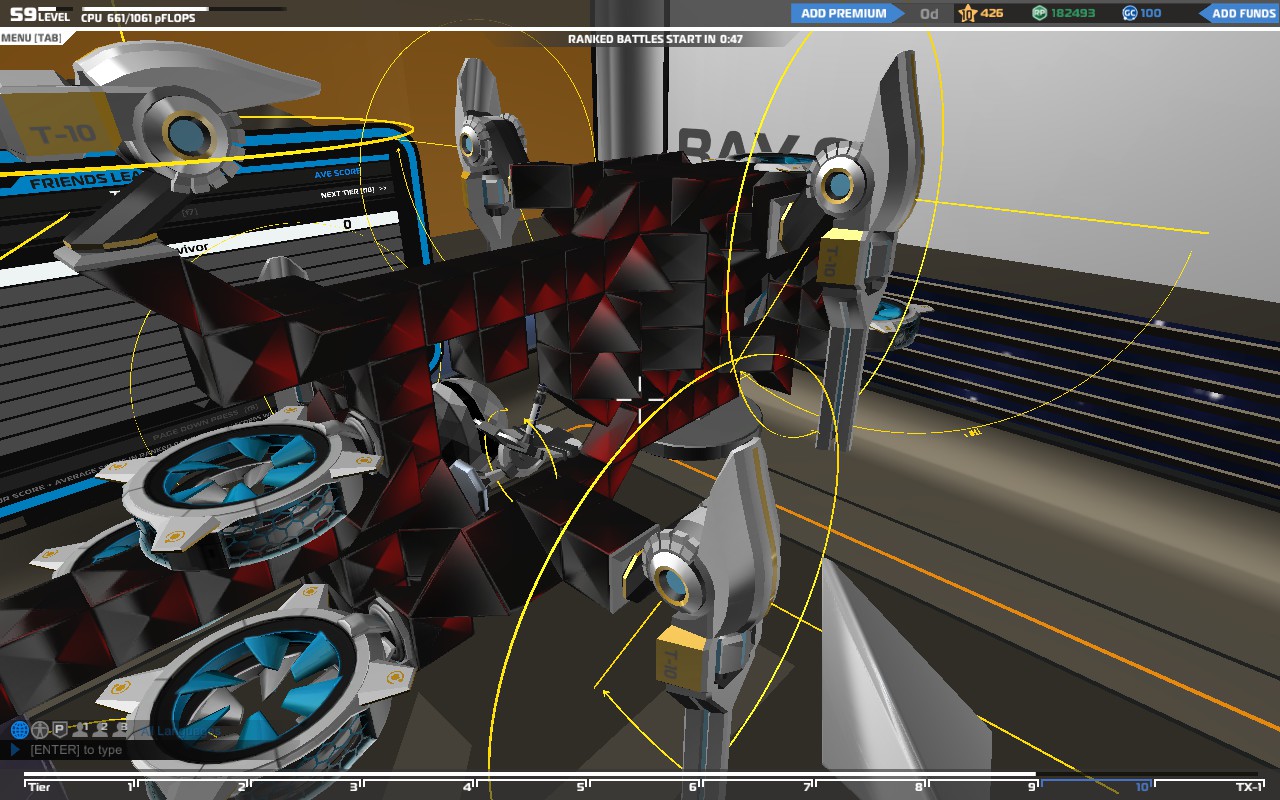
That's my current T10 SMG-Hover, the Naglfar, without EPs.
If you can overtier basic armourblocks this is a good place to overtier by one. In that case it might be a good idea to attach your overtiered hoverblades close to this. People will hate you just driving away. Doesn't work to well at higher tiers (T8+ ).
6. The exception proves the rule - or "Plasma OP 4 realz. Nerf IT!!!111"
To avoid people using insane amounts of SMGs as an ablative armorlayer AND for shooting people due to their high armor values there's an exception to the damage mechanic. The community likes to call this the Gunbrella effect.
Simply put IF a Plasma or Rail directly hits a weapon a specific percentage of that damage is DIRECTLY channeled into the block the weapon is connected to.
80% for Plasma
50% for Rails
While this is nothing to bothersome on lower tiers it makes T10 SMGs really bad against T10 Plasma. Why SMG and Plasma in my example?
Take a T4 SMG and put it next to a T10 SMG. MASSIVE difference in size.
Take a T4 Plasma and put it next to a T10 Plasma. Uhm... yeah not so much.
Now consider that you can easily overtier the connection point for say 8 T5 or 7 SMGs by +2 without to many side effects. This is NOT possible on T10 simply because there is no T10+2. The best one can do is take TX1 blocks which is only about +1.
Now for a more specific example.
Say a single T10 Plasma hits your gigantic T10 SMG. A T10 Plasma does roughly 22k damage. The basic damage model would say your T10 SMG eats about 20k and falls off channeling about 2k through the connection which is something about 2 and a bit T10 armour blocks. Your weapon would be gone and there would be a scratch in your paintjob. Oh well *shrugs*
HOWEVER that's not what happens.
The Plasma impacts with 22k on your SMG. The Gunbrella effect now puts 22k * 20% of the damage on your gun. That's a ridiculous 4400 damage roughly going into the ~20k armour the gun has. No problem. The remaining 80% are channeled into the connection. 19600 points of damage directly into the block your T10 SMG is mounted on. 933 points of damage of the 19600 estimated and your T10 connection is gone and so is your SMG. Theres still over 18k of damage left which will now eat through your tank. That's roughly 20 T10 blocks (actually calculating it to the decimal it's about 16-ish). Differently put it's about 8 to 10 times the damage to the tank one would expect.
Instead of creating the left mount, we create the right one. Twice the space needed, twice the CPU needed, twice as expensive - twice the armour value the damage has to eat through. Only about half the weight since it's made of Tetras instead of Cubes. Creating a 16 block turretmount is really hard by the way. Nearly impossible on ground based bots and still very damn hard for electroplated fliers (where it is easiest to pull probably).
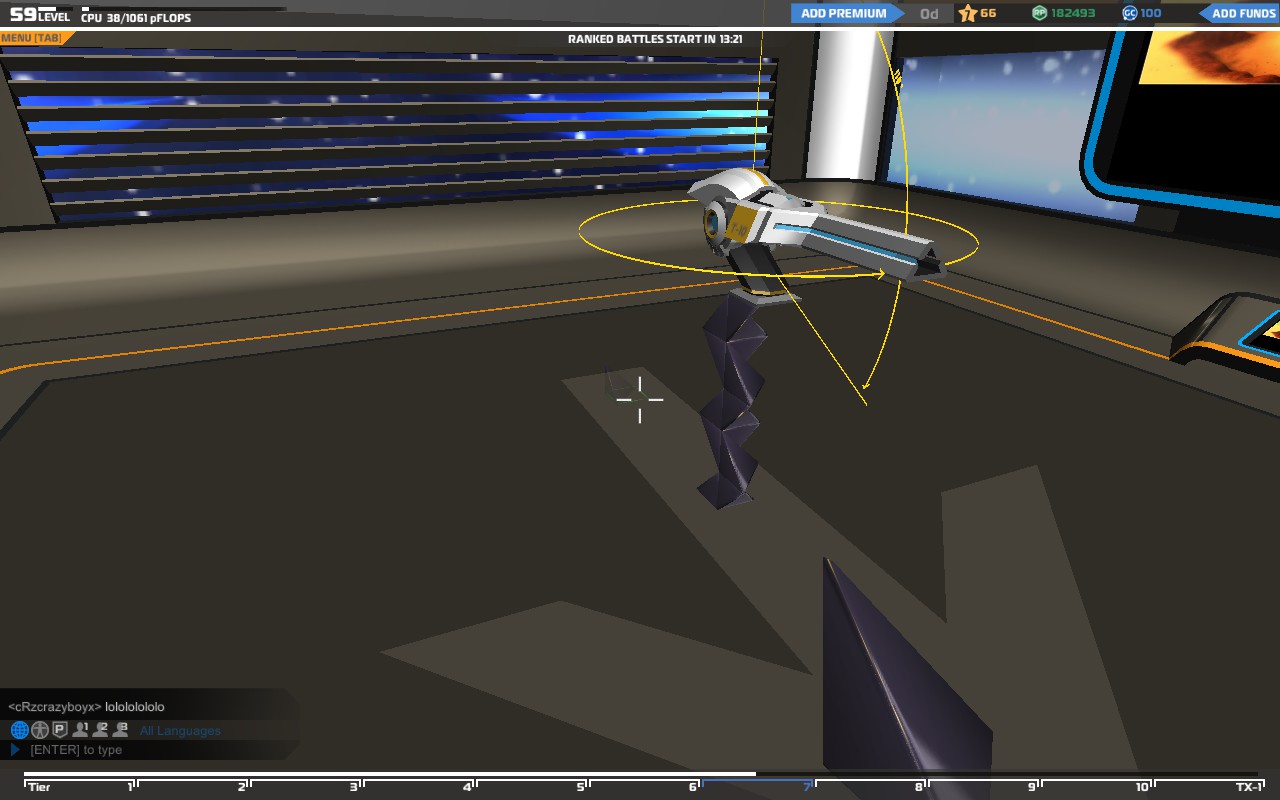
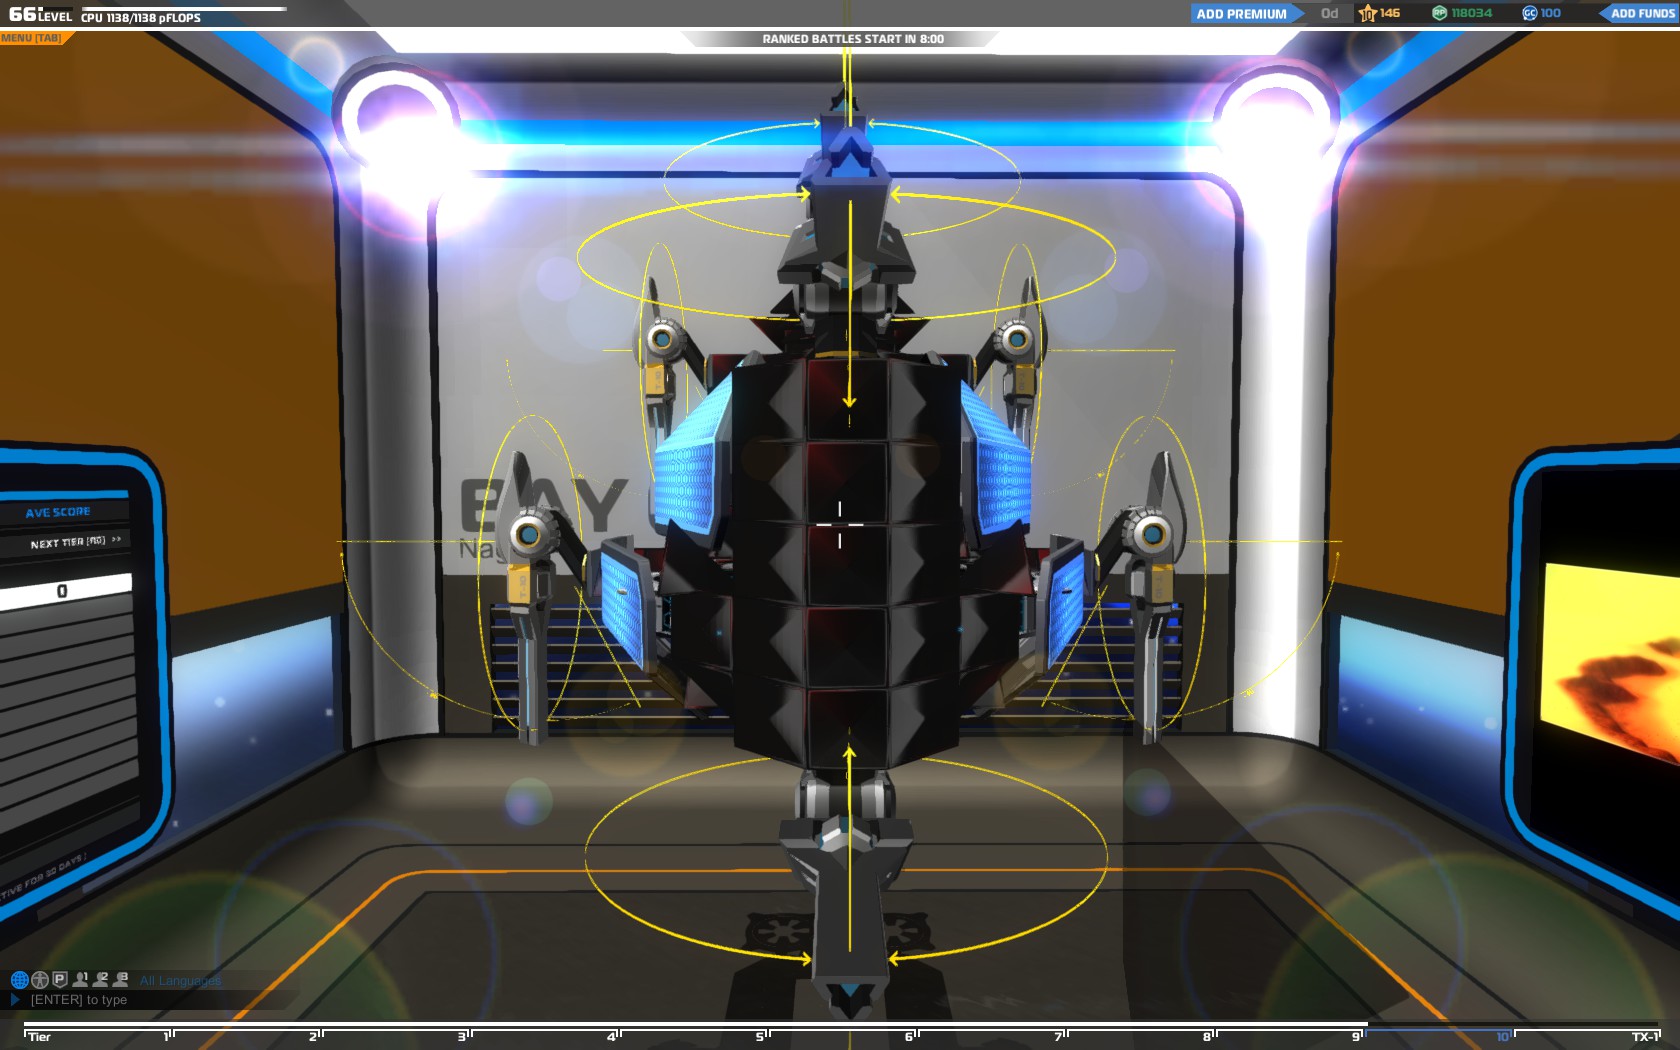
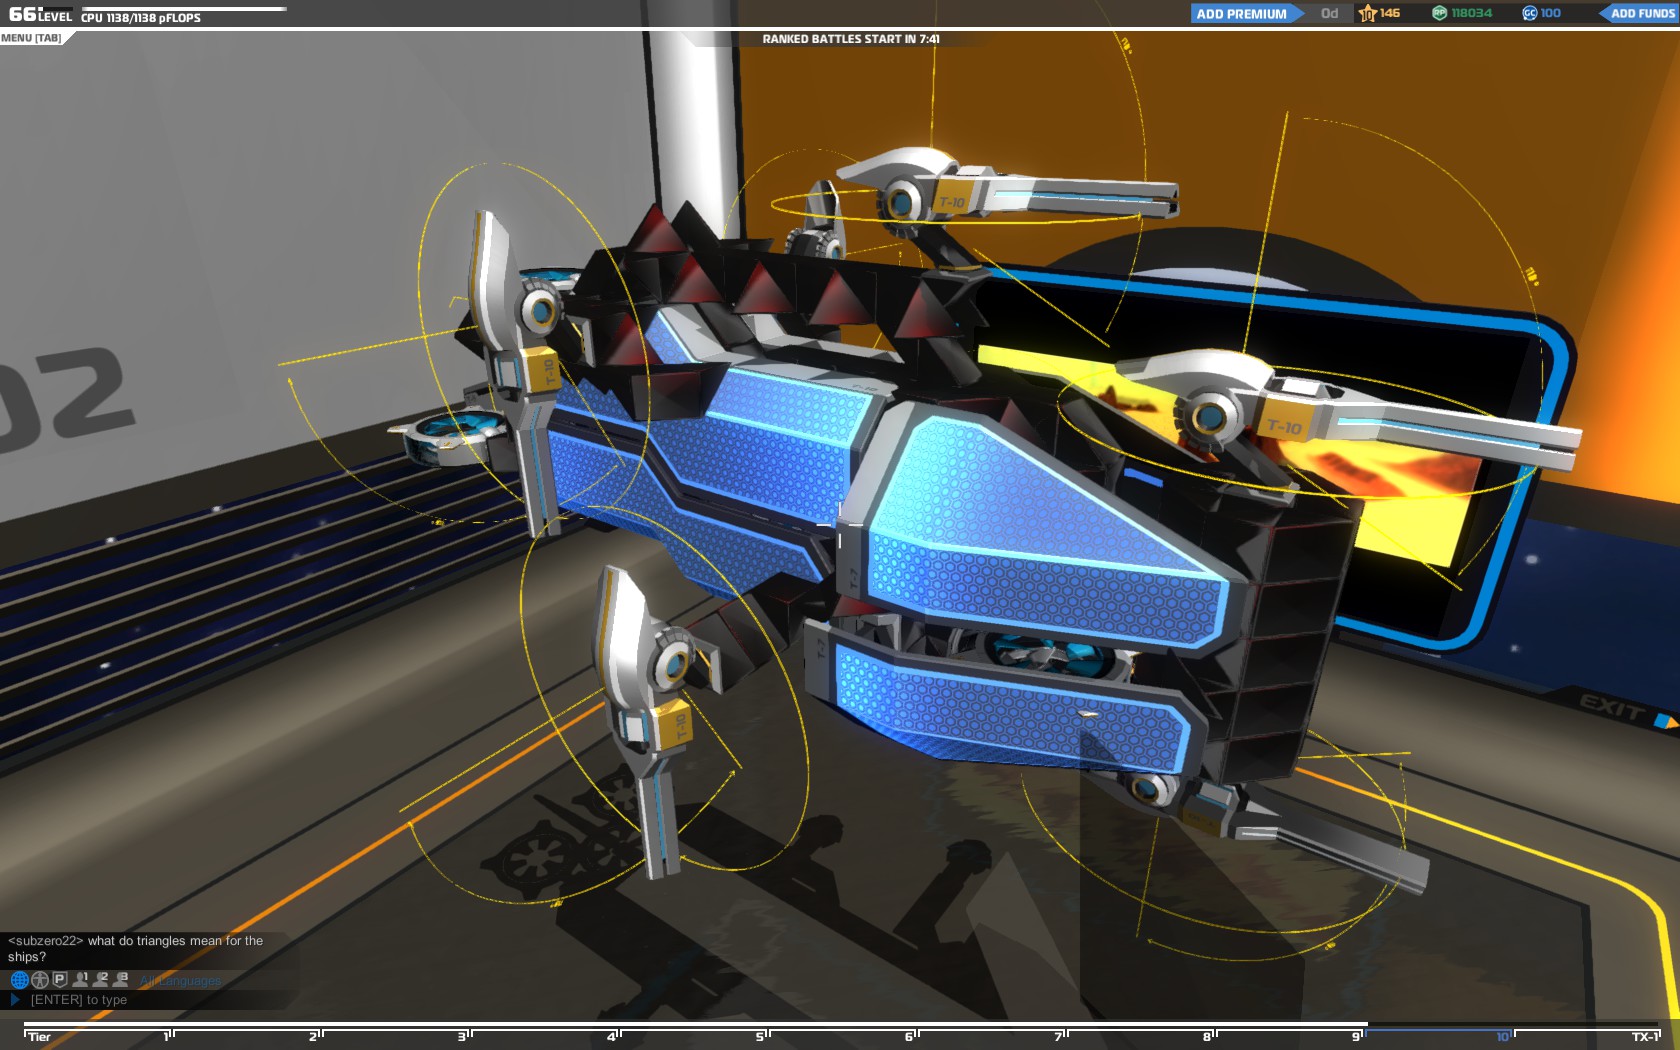
7. Practical Application D - The Naglfar
Here are some screenshots of my mainstay bot. I'll keep updating them until I consider it "finished" at which point I'll upload screenshots of me disassembling it so y'all can go crazy replicating it if you so desire.
Though you are welcome to replicate as is using the below screenshots now.
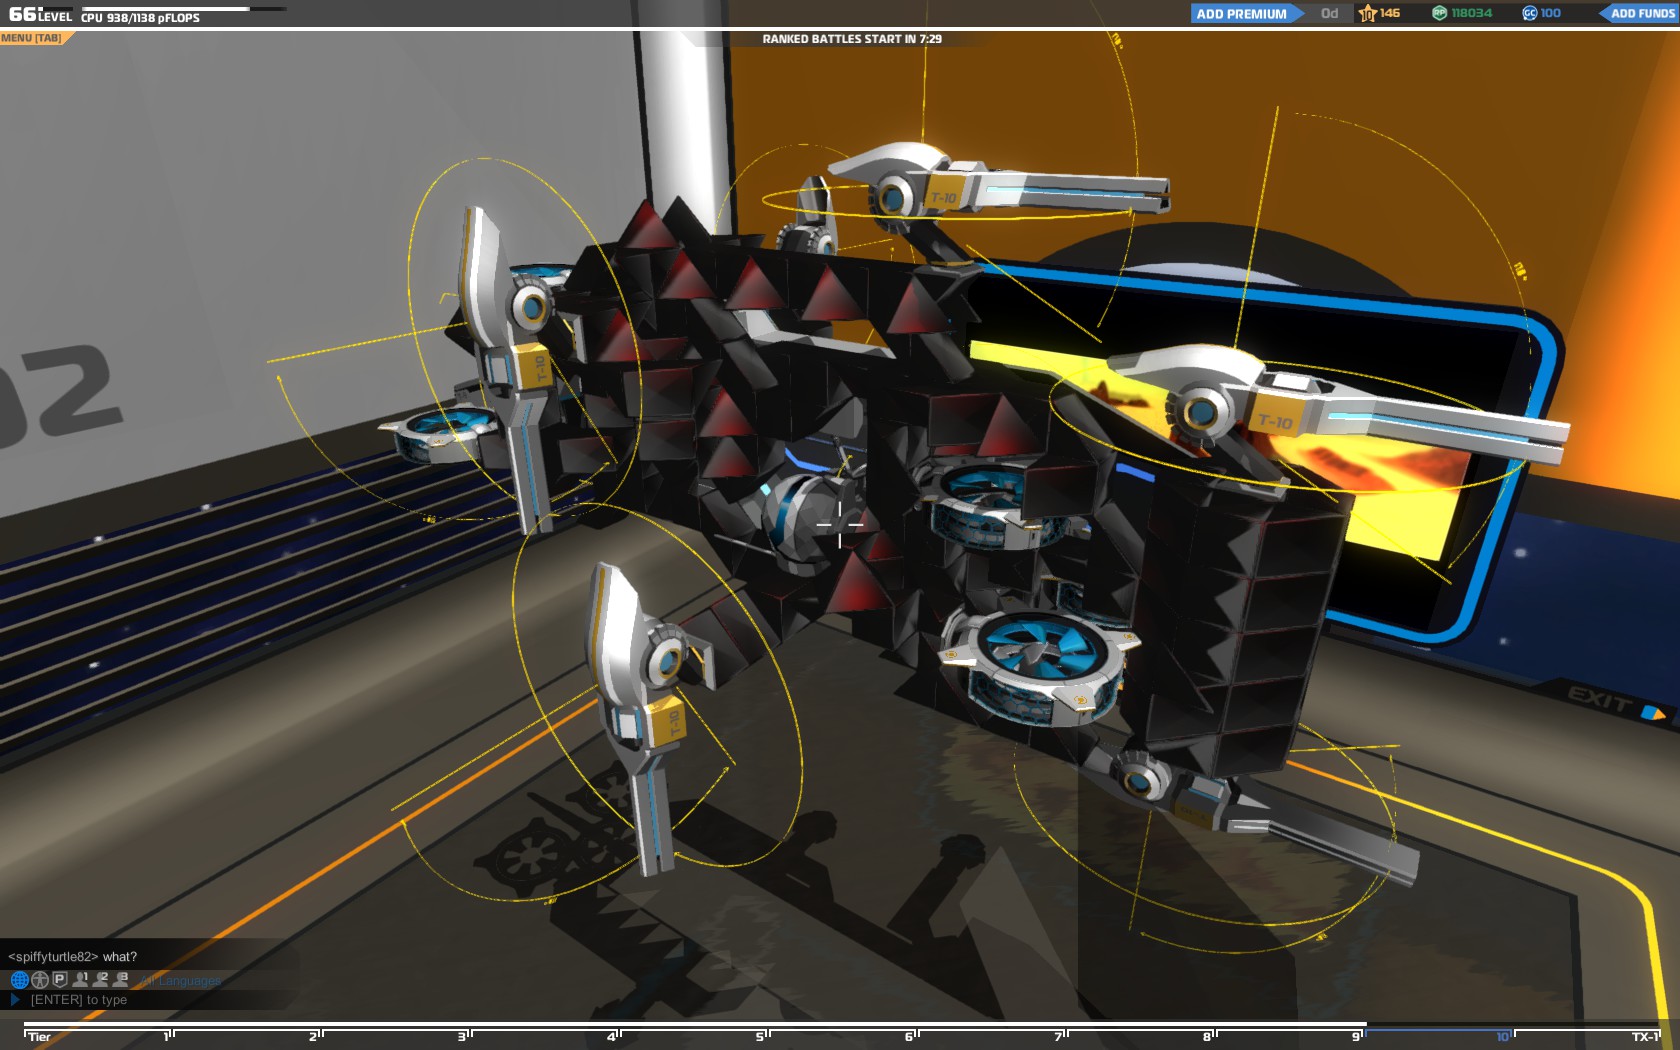
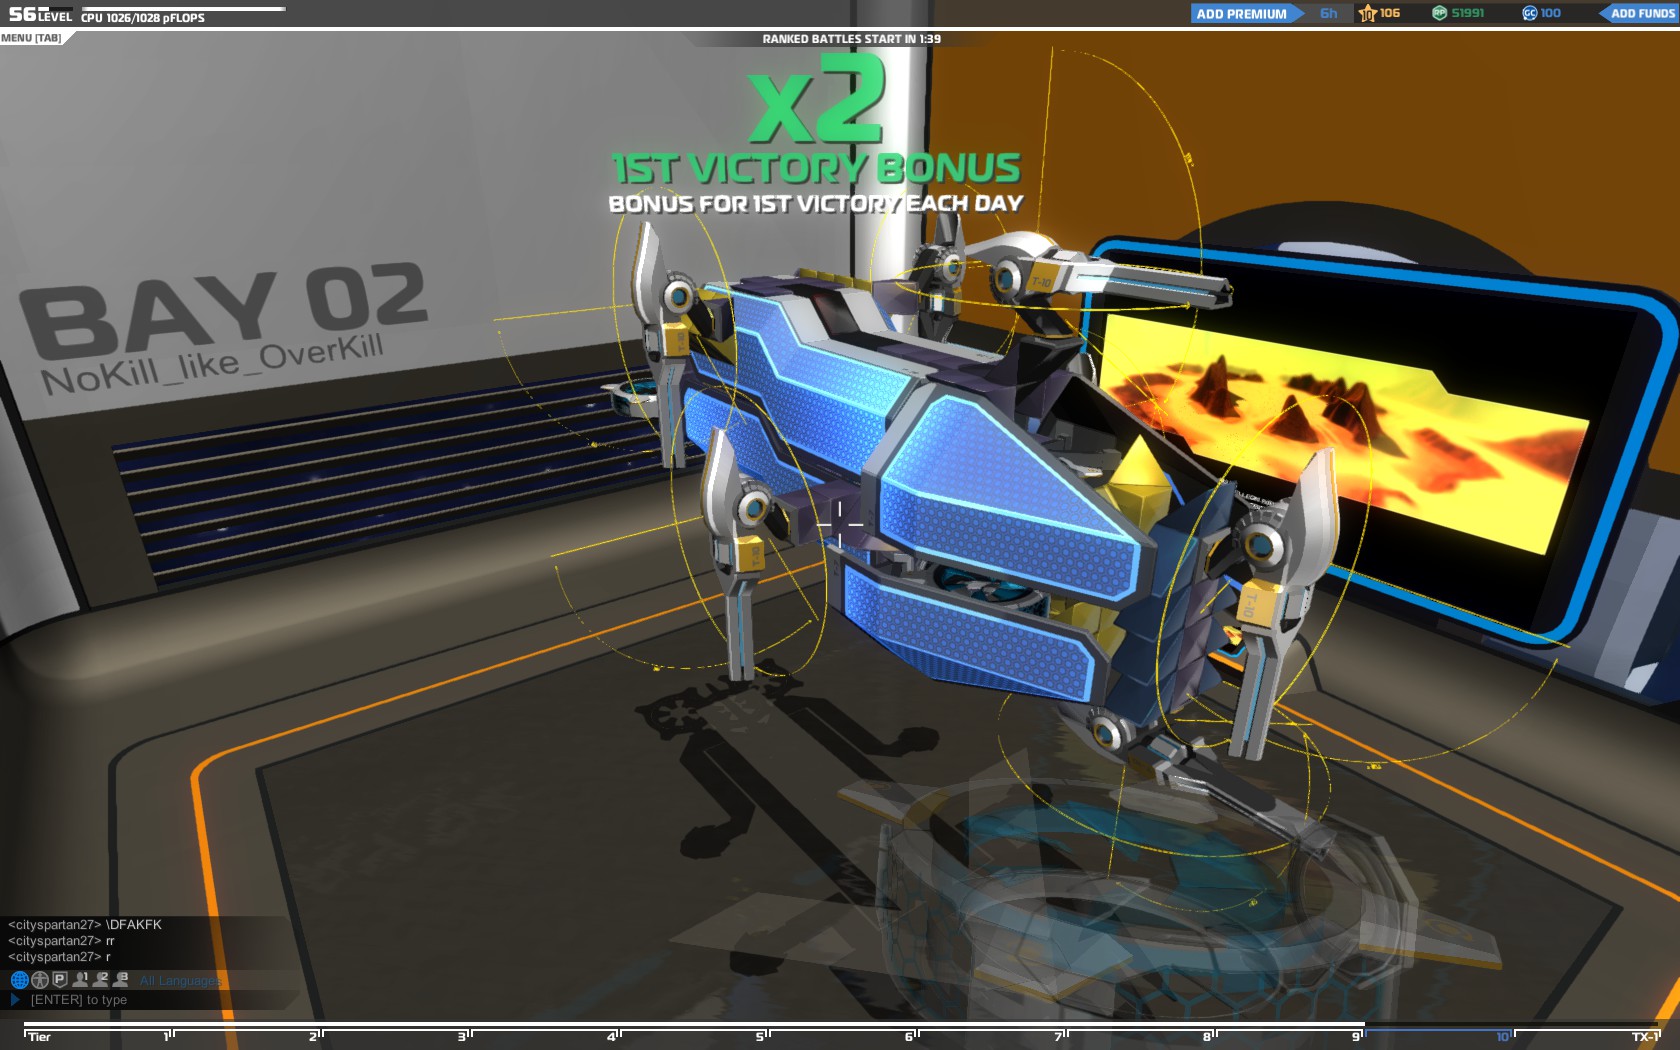
8. Rant - or how to play pretty please
- watch the minimap - get a radar
- watch the minimap - get a receiver
- watch the minimap - seriously...
- in case you can't - watch the chat so someone can tell you you're being flanked by a Mega <.<
- shooting the TX1 SMGs of of a Mega is easier than trying to blow it up directly - do so
- kill the Medic (insert a sneer here)
- "Drive me closer - I want to hit them with my sword!"
- really you can just drive up to most things and shred 'em... unless it's another SMG
- use RMB
- use RMB
- stop using LMB ALLREADY
- stick to the SMGs - that is right between frontline duty and the rest (Rails, Plasma) - sweet spot to heal all and everyone
- watch the minimap
- stop scanning the area while scoped - only scope to shoot if possible
- keep an eye out for enemy rail slug trails - trace their position and blow them to kingdom come
- SHOOT THE MEDIC*
- shoot where there are the most enemies to get the most out of your splash damage, maximising your DPS
- ???
- Profit!
*seriously ... shooting the Mega and keeping the SMGs down is job of your own Mega/SMG/Plasma. While most should try to destroy medics in between shooting of TX SMGs of the enemy Mega, Rails are in the best position to burst one down to critically damaged drastically reducing the HP/s the enemy team can put out.
9. References, further information etc pp
- Kostas RC - The Ultimate Robocraft Guide
Section: Advanced Building
- 123stw - "How to build with Prisms"[robocraftgame.com]
- dmaiski - "How to armor"[robocraftgame.com]
- stronkus - "Triforce Tryhard - A guide to the essentials"[robocraftgame.com]
- 0.5
- initiall release as "early access"
- it's late and dark and I'm sleepy, more to come
- initiall release as "early access"
- 0.6
- added "Practical Application C"
- added a section to the gunbrella effect
- still a lot of work to do
- added "Practical Application C"
- 0.6.5
- added a rant
- played around with idea for building guidelines based on movement type... massive undertaking that would be
- preparing more extensive examples, bots need to be actually proven viable beforehand though
- added screenshots of my mainstay SMG Hover, the Naglfar
- added a rant
- 15.11
- switched version naming to the AMD Catalyst one - year and month - makes checking when it was last updated really easy and is actually pretty logical
- logged in for the first time for real in MONTHS - lot of new stuff to check out
- considering above the guide will need some serious reworking, not sure when I'll get to that though
- switched version naming to the AMD Catalyst one - year and month - makes checking when it was last updated really easy and is actually pretty logical
- 15.12
- "updated" a bit to "Full Spectrum" patch
- Naval Mode★ 5 (629)22k views163 ♥1 minUpdated 22 Jun, 2022
- A Smarter Robocraft ~ V 1.0★ 4 (117)11k views91 ♥4 minUpdated 21 Jul, 2014
- Robot Equipment Classification★ 5 (169)6.2k views219 ♥104 minUpdated 14 Jan, 2018
- Types of Bots (Of the past)★ 4 (74)5k views73 ♥10 minUpdated 3 Jun, 2018
- TRIFORCE, The Future Of Armor(increase any armor by 30%)★ 3 (34)5k views23 ♥1 minSpanishUpdated 16 Feb, 2015
- Camouflage in Robocraft★ 4 (38)4.4k views31 ♥4 minUpdated 12 Jan, 2016


- Upgrading to PremiumTeam Fortress 2★ 5 (20k)1441k views11k ♥6 minUpdated May 11, 2022
- No More Room in Hell Official ManualNo More Room in Hell★ 5 (2.8k)569k views2.1k ♥29 minUpdated Apr 22, 2019
- NMRiH Community Hosting GuidesNo More Room in Hell★ 5 (526)351k views653 ♥1 minUpdated Aug 10, 2022
- ULTIMATE GUIDE FOR GAME DEV TYCOONGame Dev Tycoon★ 5 (5.8k)326k views10k ♥4 minUpdated 23 Jan, 2014
- How to 'Git Gud' Soon™MORDHAU★ 5 (2k)318k views3k ♥68 minUpdated Nov 16, 2024
- Лучшие кооперативные игры SteamPAYDAY 2★ 5 (1.5k)315k views2.1k ♥56 minRussianUpdated Apr 27, 2025






This guide was created by its original author on the Steam Community. Are you the author and want it removed? Request removal.