What should I do? Become a Veteran!
Prologue
Hi everyone, Welcome to this great Astroneer guide. I apologize for my English but I wanted to write this. This is not a normal guide but also a collection of the best astroneer guides. You will find so many contents. If you have created a guide that you consider valid let me know!
The purpose of this guide is to guide players through Missions and always present tips that you will find later. Although I will be taken for granted, I recommend that you first carry out the looking the Astropedia found in the game menu. If you want more detailed information I can advise you to visit the astroneer wiki, here is the link astroneer wiki site: https://astroneer.gamepedia.com/Astroneer_Wiki
When you want to accomplish a mission, check the next ones as well, some you can complete it together. You can check the help index on the right hand side to view the topics
I want to do a special thanks to the whole astroneer community that makes the game active, to Players who have taught many tips & tricks at me, and to Developers who created this wonderful game.
Remember that it's not what you get that makes a difference but the journey you take to get there.
The guide will be constantly updated but i stop talk, let's move on to the facts...
Missions
Basic tutorial
Astroneer contains interesting guides, that's why I wanted to offer you Fatin's guide: https://steamcommunity.com/sharedfiles/filedetails/?id=1641457781
I have rewritten and reworked it to be more in line with current versions of the game.
BEGINNING
After unpacking the initial items, it is wise to extract compound for tethers and lots of resin to start mass production of large platforms B
IMPORTANT MATERIALS
- Resin: for many Large Platforms B and Medium Storages
- Laterite: it will be used for your first soil centrifuge and to build basic vehicles/ships and Solid-Fuel Thruster
- Clay: get the Ceramic from smelting and print lots of Small Wind Turbines
- Zinc: you can get terrain tool mods and print a lots Small Batteries
SECONDARY MATERIALS
- Compound: useful for creating tethers and basic construction
- Organic: get it from from the surrounding flora or by Soil Centrifuge, to feed your Small Generators in periods of Power drought
- Malachite: important for obtaining work light and in the future solar panels
- Graphite: useful for creating Packagers to be used to carry multiple Research Items and repair
not completely exhausted Solid-Fuel Thruster (Tips and Tricks section)
- Quartz: useful for building lighthouses or smelting it into glass for future recipes
RESEARCH
Sometimes you can find strange things when you pass the cursor over it: "Unknown Research Item".
You can use it by insert it in a Research Chamber and getting Bytes, which can be spent on unlocking new tools and constructions (larger platforms, new Power sources, vehicles, etc...).
Search and use Research Sample to get Bytes instantly and fast enough, useful in the very early stages of the game, and if inserted into the Research Chamber you get x3 more.
BYTES USE
In the beginning, it is wise to use byte to unlock the following items:
- Large platform B
- Melting furnace
- Soil Centrifuge (obtainable through missions)
- Small Wind Turbine
It is better to start this way (in my opinion) because you will be able to solve the problem of power (partially) and materials such as clay, graphite, quartz, composite, resin and organi fairly quickly
MELTING FURNACE
It smelting different types of materials, here are the most important ones at the beginning:
- Clay: found on the surface allows you get Ceramic for print Mod Drill and Small Turbines.
- Malachite: found on the mountain allows you get Copper for print Worklight and Small Solar Pannels
- Sphalerite: found on the caves allows you get Zinc for print Boost Mod, Wide mod, and Small Batteries
- Laterite: found on the caves allows you get Alluminium for print Veicles and Small Shuttle.
SOIL CENTRIFUGE
It is a very important Module, obtained through the Re-Tooling mission, fill it with soil through small containers, to get the non-metal resources you need.
If you fail to complete the mission, you may want consider to unlocking it for 750 bytes.
GET READY FOR YOUR FIRST TRIP
Flying is a delicate process due to the limited use of the Solid-Fuel Thruster, correct use allows you to make a return trip. The first destination should be Desolo / Calidor due to the abundance of wolframite that will allow you to advance technologically. You can also go to Glacio to get Biggest Researches Items quickly or Vesania to get lithium start medium battery production to solve power problems at 95%. When you go to another planet, you will do it for 2 reasons: Quickly explore the planet and go back or Establish a new base.
When you leave on another planet, to establish a new base, take with you:
- Medium Storage: place it on the Shuttle in the Oxygenator Storage
- Qrtg or Small Generator with Organic)
- Medium printer (packed)
- Solid-Fuel Thruster (packed)
- 2 Medium Platforms B (packed)
- Medium Solar Panel (packed)
- 2 Small Wind Turbines (or other Qrtgs)
- 1 or more Small Batteries (if available or other Qrtgs)
- Oxygenator (packed)
- Aluminum
- Canister
- 2 Compound
- 3 Resin
After landing, Remember that you can move the shuttle manually to get your oxygen source as you explore. When you find a good spot to establish the new base, I recommend the North or South Pole, unpack the Oxygenerator, Small platforms and the Medium Printer, and quickly b Print Large Platform B and then a Soil Centrifuge using the resources you brought with you.
Planets Info & Gateway Chambers
LIST OF PLANETS
 Sylva Medium Sun and Wind
 Resource: Sphalerite (main) Malachite (secondary)
Gas: Nitrogen (100ppu), Hydrogen (75ppu)
Initial planet, useful for the collection Resources such as Aluminum, Copper, Sphalerite and main Gases of Hydrogen and Nitrogen
 Desolo High Sun, Low Wind
Resource: Wolframite (main) Sphalerite (secondary),
Gas (null)
-Planet useful only for the collection of Wolframite, which allows you to get your first technological leap
-Thanks to its small size, it makes fast access to the Astronium near the Core
 Calidor: High Sun, Low Wind,
 Resource Malachite (main) Wolframite (secondary),
Gas; Sulfur (100ppu), Hydrogen (50ppu)
-The Wolframite present on the surface makes it an ideal place to extract it quickly, especially if you place an Autoextractor on it. The strong Sun combined with large amounts of Malachite underground, with which you can create Solar Panels, make it tempting to create a main base on one either pole.
-The presence of Malachite and Wolframite, combined with Auto Extractors, make profitable the automatic production of scraps through the auto print (with small printer) and the shredding of Extenders and Floodlight.
 Vesania Low Sun, High Wind,
Resource: Lithium (main) Titanite (secondary),
Gas: Hydrogen (100ppu), Nitrogen (75ppu), Argon (50ppu)
-Useful in the early stages of the game to get a lot of lithium and solve Power problems.
Whenever you need Lithium, come to this planet.
 Novus High Sun, High Wind,
Resource: (Hematite (main) Lithium (secondary),
Gas: Methane (75 ppu), Hydrogen (25ppu)
-The useful resources are Iron and Methane, which allow you to get your second technological leap.
-The abundance of Wind and Sun make the production of large quantities of Power extremely profitable.
 Glacio Low Sun, High Wind
Resource: Titanite (main) Hematite (secondary),
Gas: Argon (100ppu)
Best Planet! If you like, establish a Great base here.
-The abundance of Iron on the surface and the availability of Argon, allow the production of Steel which makes you get your third technological leap.
-The abundance of excellent research on the surface and underground makes the generation of Bytes very profitable on this planet
-The abundant amount of Wind facilitates the generation of Power by inserting Small Wind Turbines on Medium Storage Silos created from Titanium. Use Batteries and Power problems will be just a bad memory.
-You can use Iron to build Extra-Large Platforms C, Titanium to build Medium Storage Silos, Steel to build Large Storage Silos
 Atrox Low Sun, Low Wind
 Resource: None, only basic resource
Gas: Methane (100ppu), Sulfur (75ppu), Nitrogen (50ppu), Helium (25ppu)
Useful Planet for collecting Gases and Soil. Use Helium to get your fourth tech jump.
- Go to the North Pole of the planet above the Gateway Chamber and build an Landing Pad and Atmospheric Condensers for extracting Gases. Use Generators, Solar Panels and Wind Turbines supported by Batteries for Gas Production, all of which will be replaced by RTG when available.
-The lack of cavities on the surface makes it very easy to extract Soil through Rover Grande and Drill 1 without a paver. Reached the first level of depth you will encounter the underground cloak that you will not be able to pierce. This is good so you won't be able to fall into the deep caves.
Inspired by TheClone and Amalie guide, you can take a look at it:
https://steamcommunity.com/sharedfiles/filedetails/?id=1715906986
I borrowed the table and add more information about the planets.
SylvaDesoloCalidorVesaniaNovusGlacioAtroxGATEWAY CHAMBERS
While exploring the planets, you will find these buildings on the surface. Power it for 30 seconds with the Power required to unlock and access the Gateway Engine located at the center of the planet.
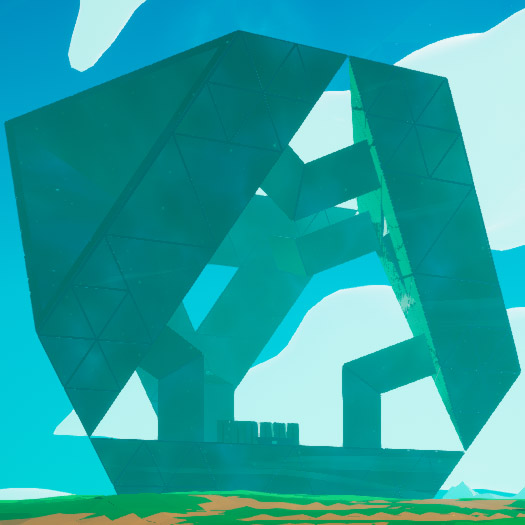
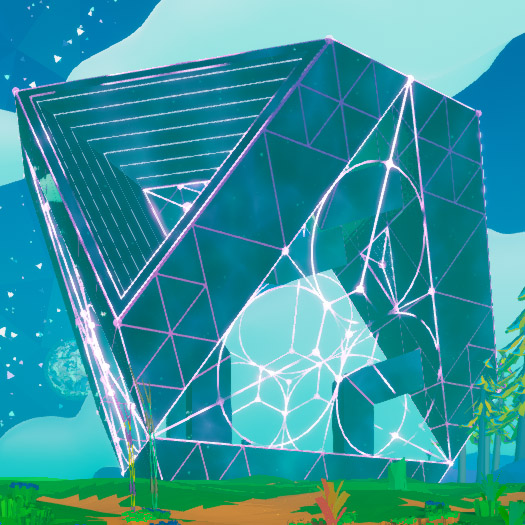
GATEWAY ENGINE
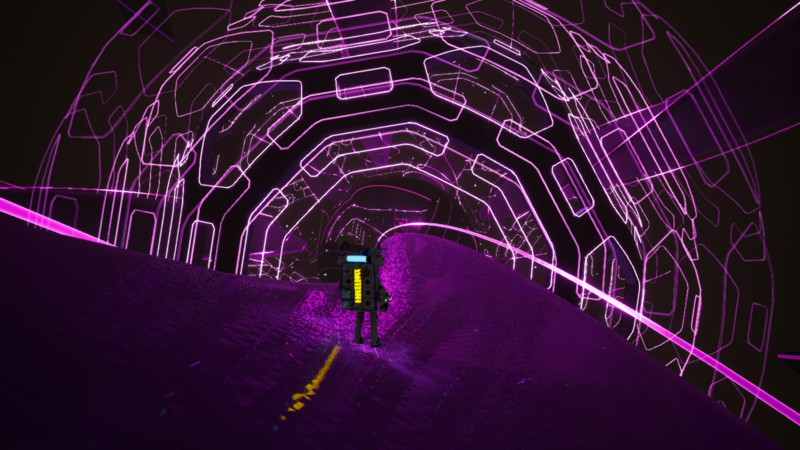
Located in the center of the planet, accessible after activating a Gateway Chamber, it is possible to insert the resource corresponding to the symbol inside it in order to unlock the teleportation functionality,between the Gateway Engine and Gateway Chamber.
INFORMATION SOURCES
I collected information from my experience in the game, from community players, from other community guides, from the game wiki https://astroneer.gamepedia.com/Astroneer_Wiki that I recommend reading for deepening your knowledge of the game. I hope it was useful, thanks for reading.
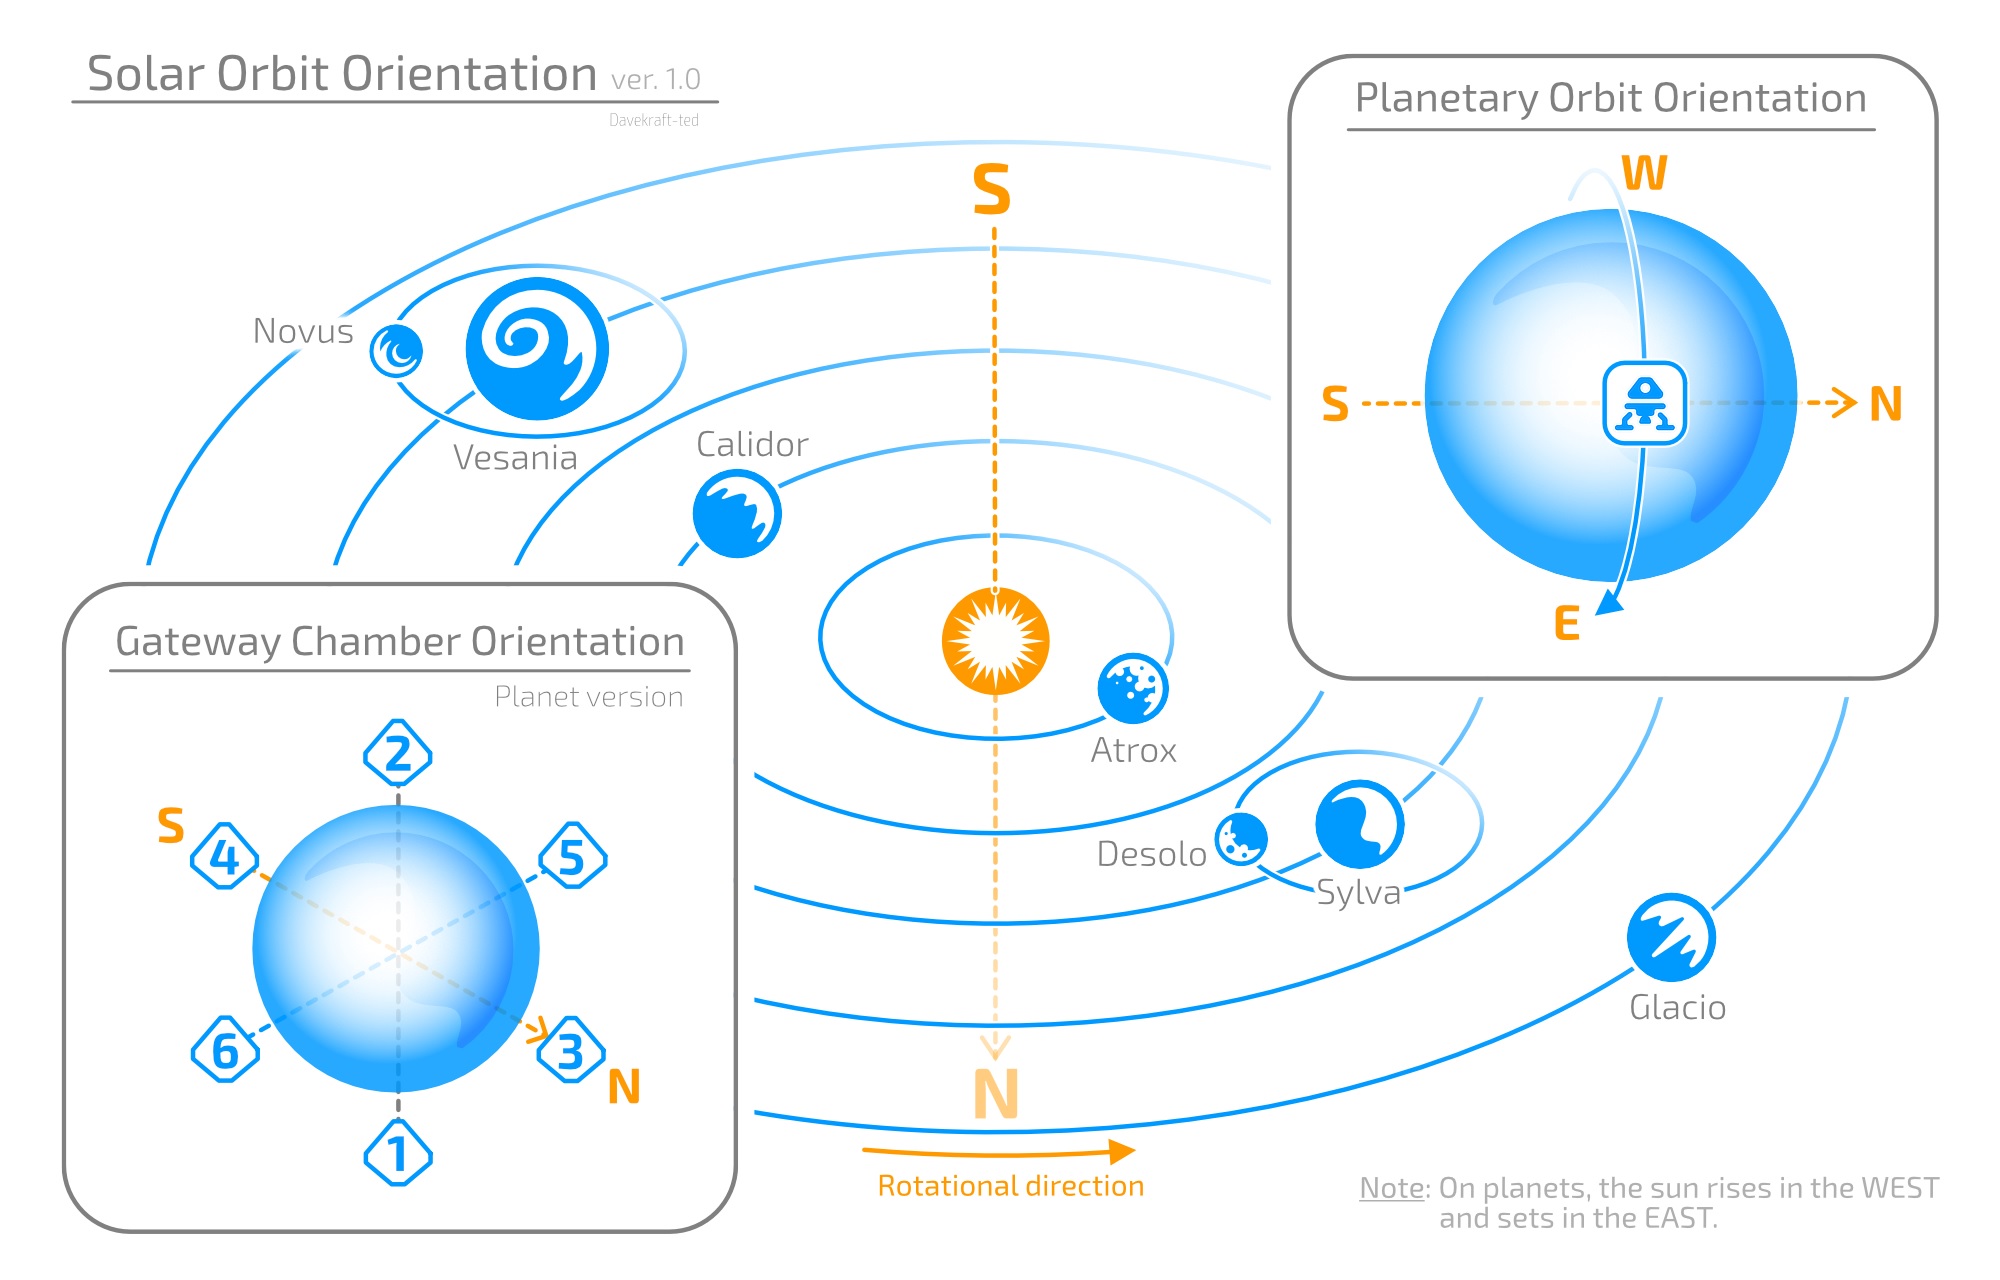
Planets Position & Orientation (Updating)
https://steamcommunity.com/sharedfiles/filedetails/?id=1867913240
....here is the map of the planets. You can see how the south and north poles are on the left and right respectively.
 COMPASS & POLES
The Compass is used to help the player navigate the planet. Players can activate the compass by pressing the control to open the Action Wheel (R on PC) and selecting the Compass icon. This can be used at any time, when the player is in our outside of a vehicle. It will show the player multiple different navpoints, as Beacons, Shelter, Shuttle, Rover, Inactive and Active Gateway Chambers, Probe after scanned, however not all of a certain type will be displayed, and will only show the player the nearest one. The compass will always point to the North pole of the planet, making the North and South poles excellent landmarks without navpoint. Here are also further advantages for setting up a base in these two areas:
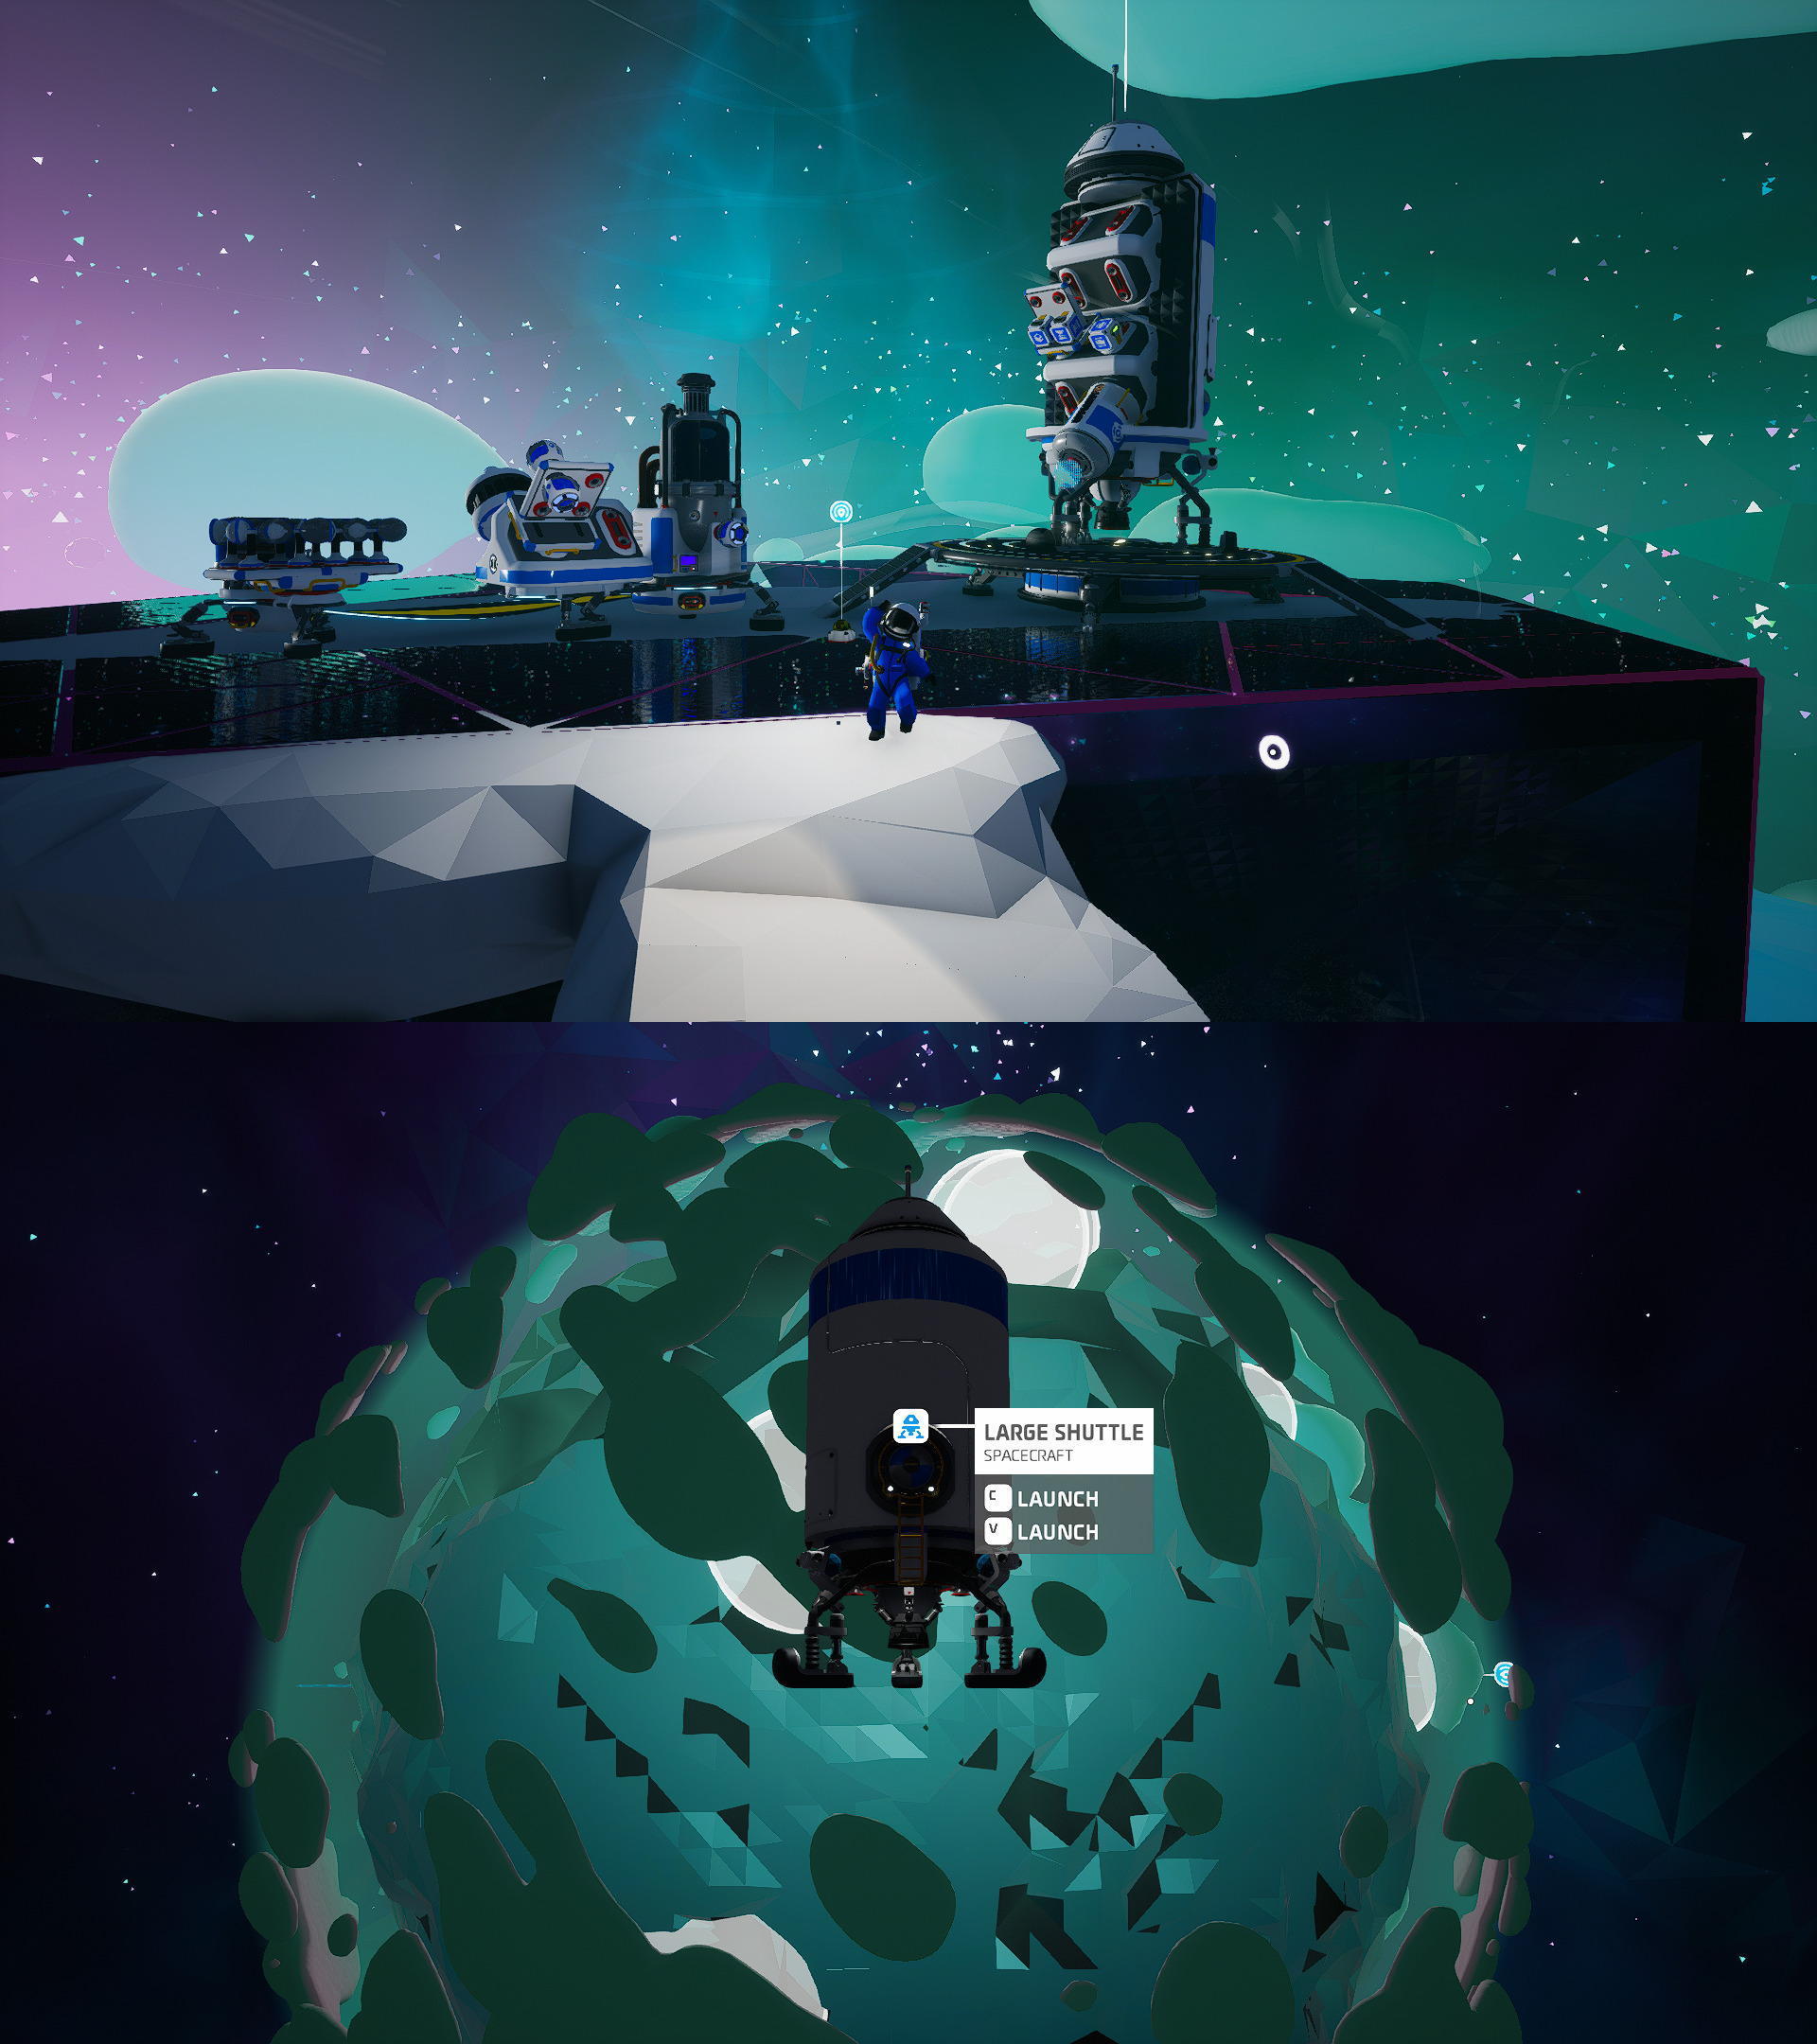 - You can't lose your base! Thanks to the compass you can find it anywhere on the planet you are (at least remember if it is in the north or south XD)
- You can create fast landing systems (consult RAPID LANDING PAD in Tips and Tricks)
- You can create quick access to gas on other planets
- You can get power from the sun 24/7 (See the Tips and Tricks and Power page)
- You can use the gateway chamber teleport stone and teleport to other bases that are its poles
Why deprive yourself of all these advantages and not build a foundation on one of the poles?
BEACONS When you explore on the surface of Planet, bring Quartz with you to use to create Beacons, which indicate where they are placed. Place Beacons as you move away from your base, before your base's signal is engulfed by the curvature of the planet. You can change the color of the Beacons as you walk away, which indicate where they are placed. I recommend placing Beacons along the path that leads from the base to the planet's North or South pole. When you get lost, you can use the Compass to return to the Poles and follow the trail of Beacons back to base.
Get a lot of Bytes, and Shuttle Tricks
Bytes can be a pain in the ass for many players. This section was created to introduce you to fast methods for collecting bytes. Get comfortable, let's get started!
The easiest and most profitable Research Items to collect are Glacio's special Research Items.Before leaving you will need different objects, and use different Tricks to be able to easily access them.
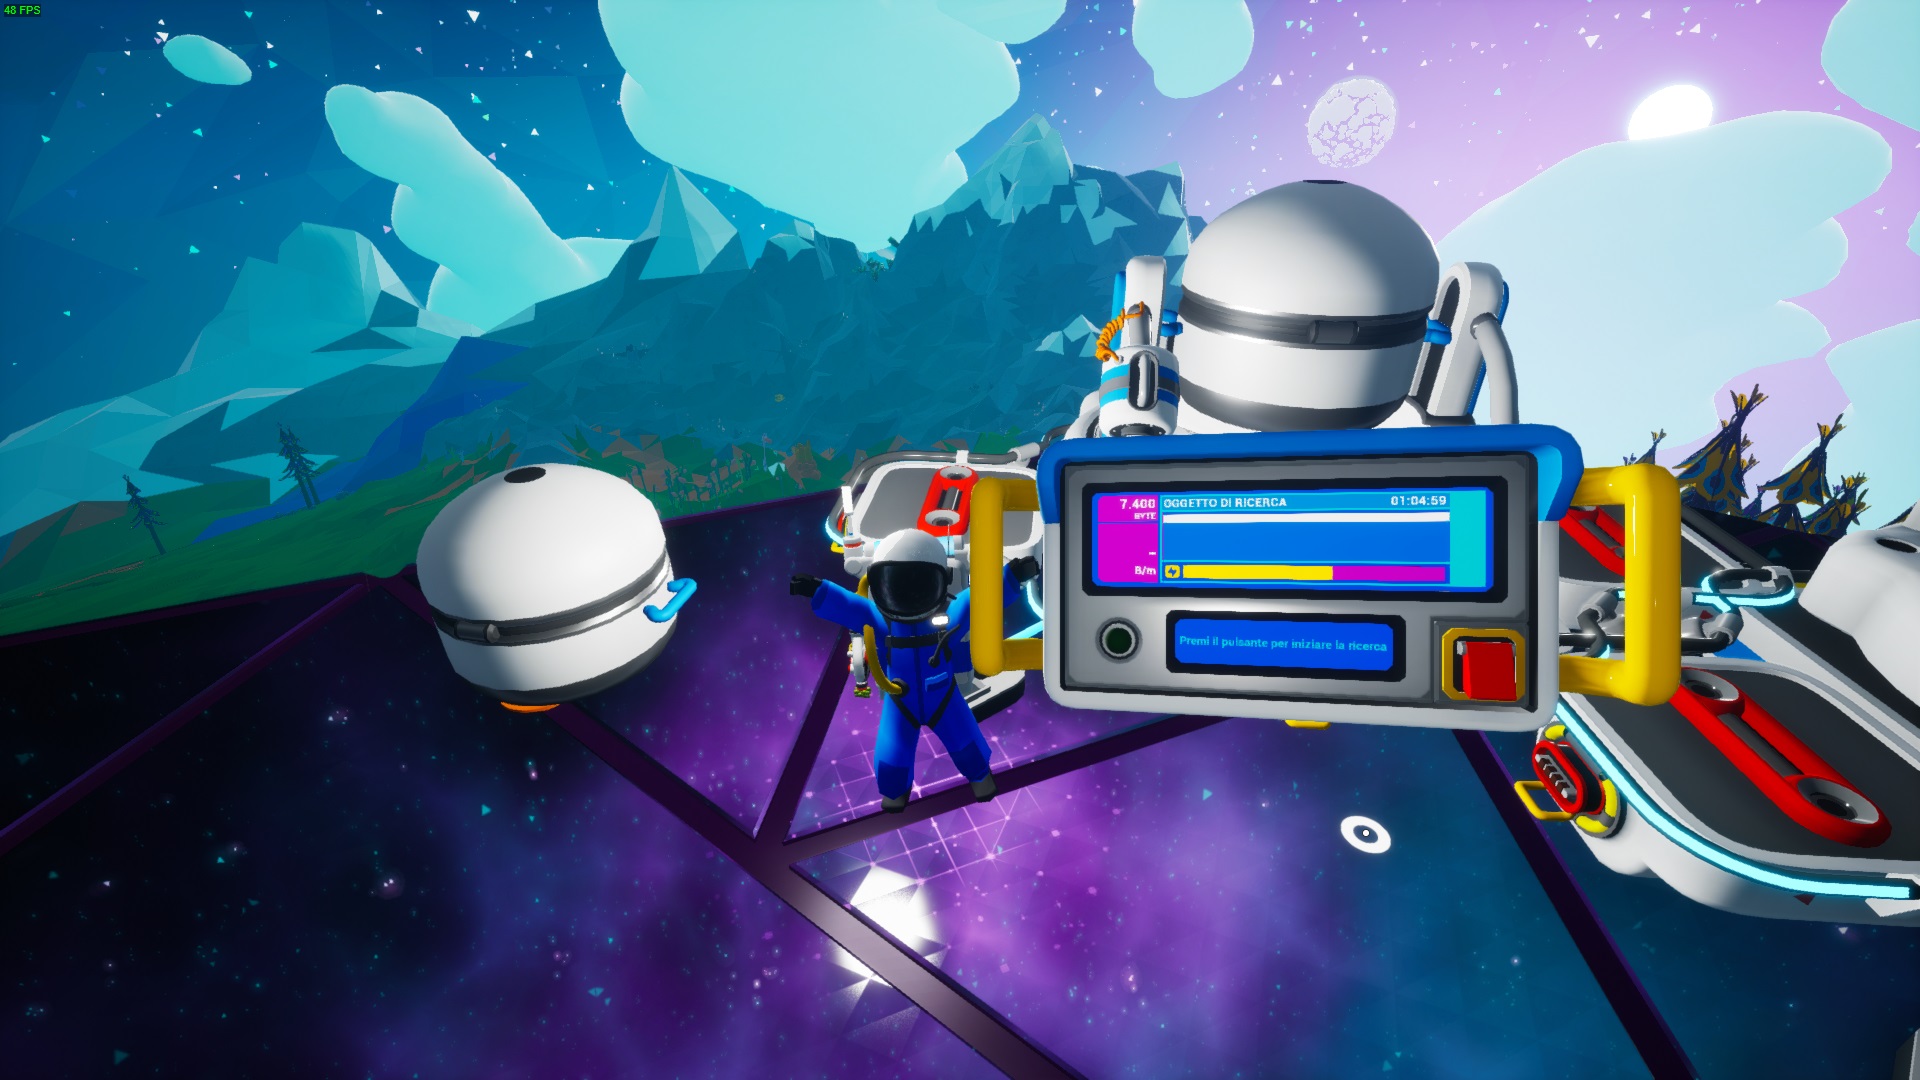
These are the research Items we're going to get -->
Create a Shuttle, with any thruster. Load the Shuttle with a Medium Storage or Storage Silo, you will not need the Oxygenator, the Shuttle itself will supply you with Oxygen.
Load the storage and the astroneer with 2 Ammonium, 3 Small Generators (with organic included), 1 qRTG and 6 or more Packagers or Graphite to make it (research Packagers before making the trip).
Now get on the Shuttle and head anywhere in Glacio. Now you can explore anywhere, by manually moving the shuttle to any point or place you want to go.
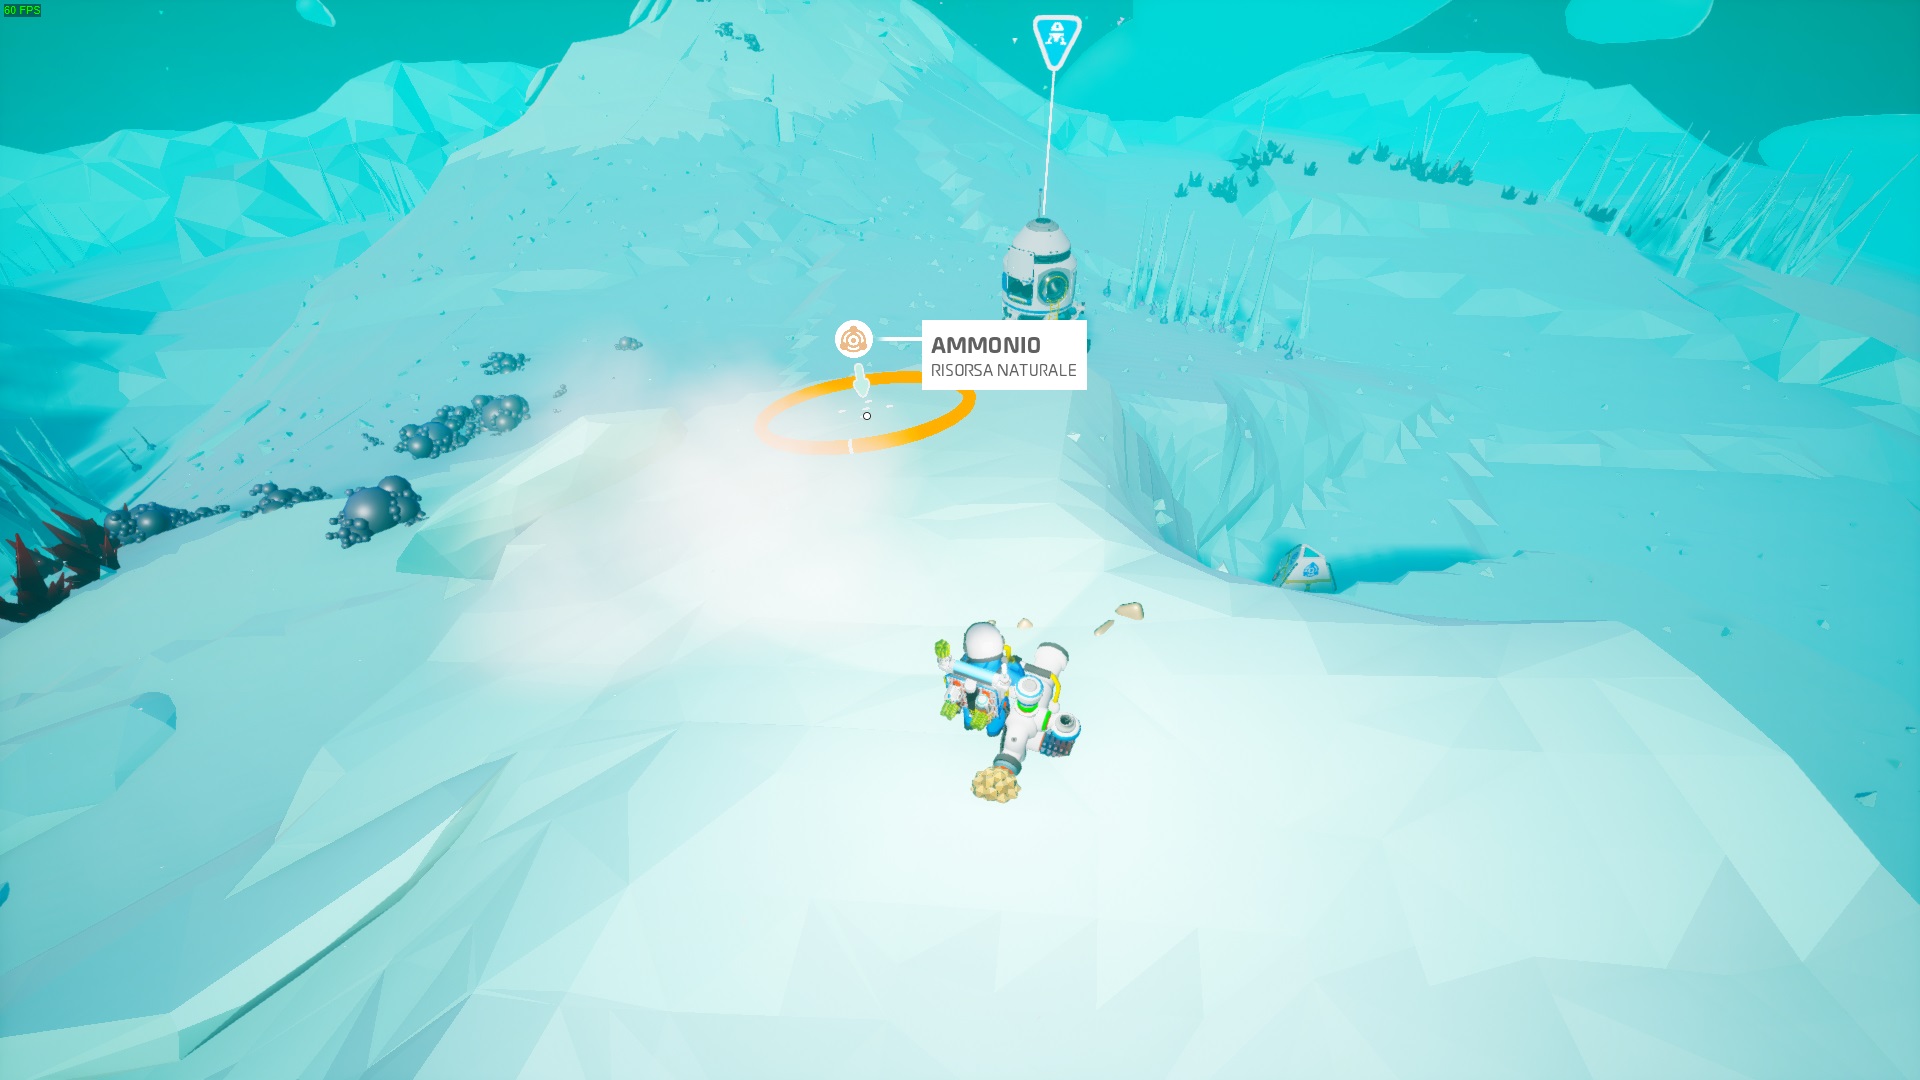 If you open the Terrain tool you can, take the Shuttle from a great distance, or even enter it, move quickly towards it.
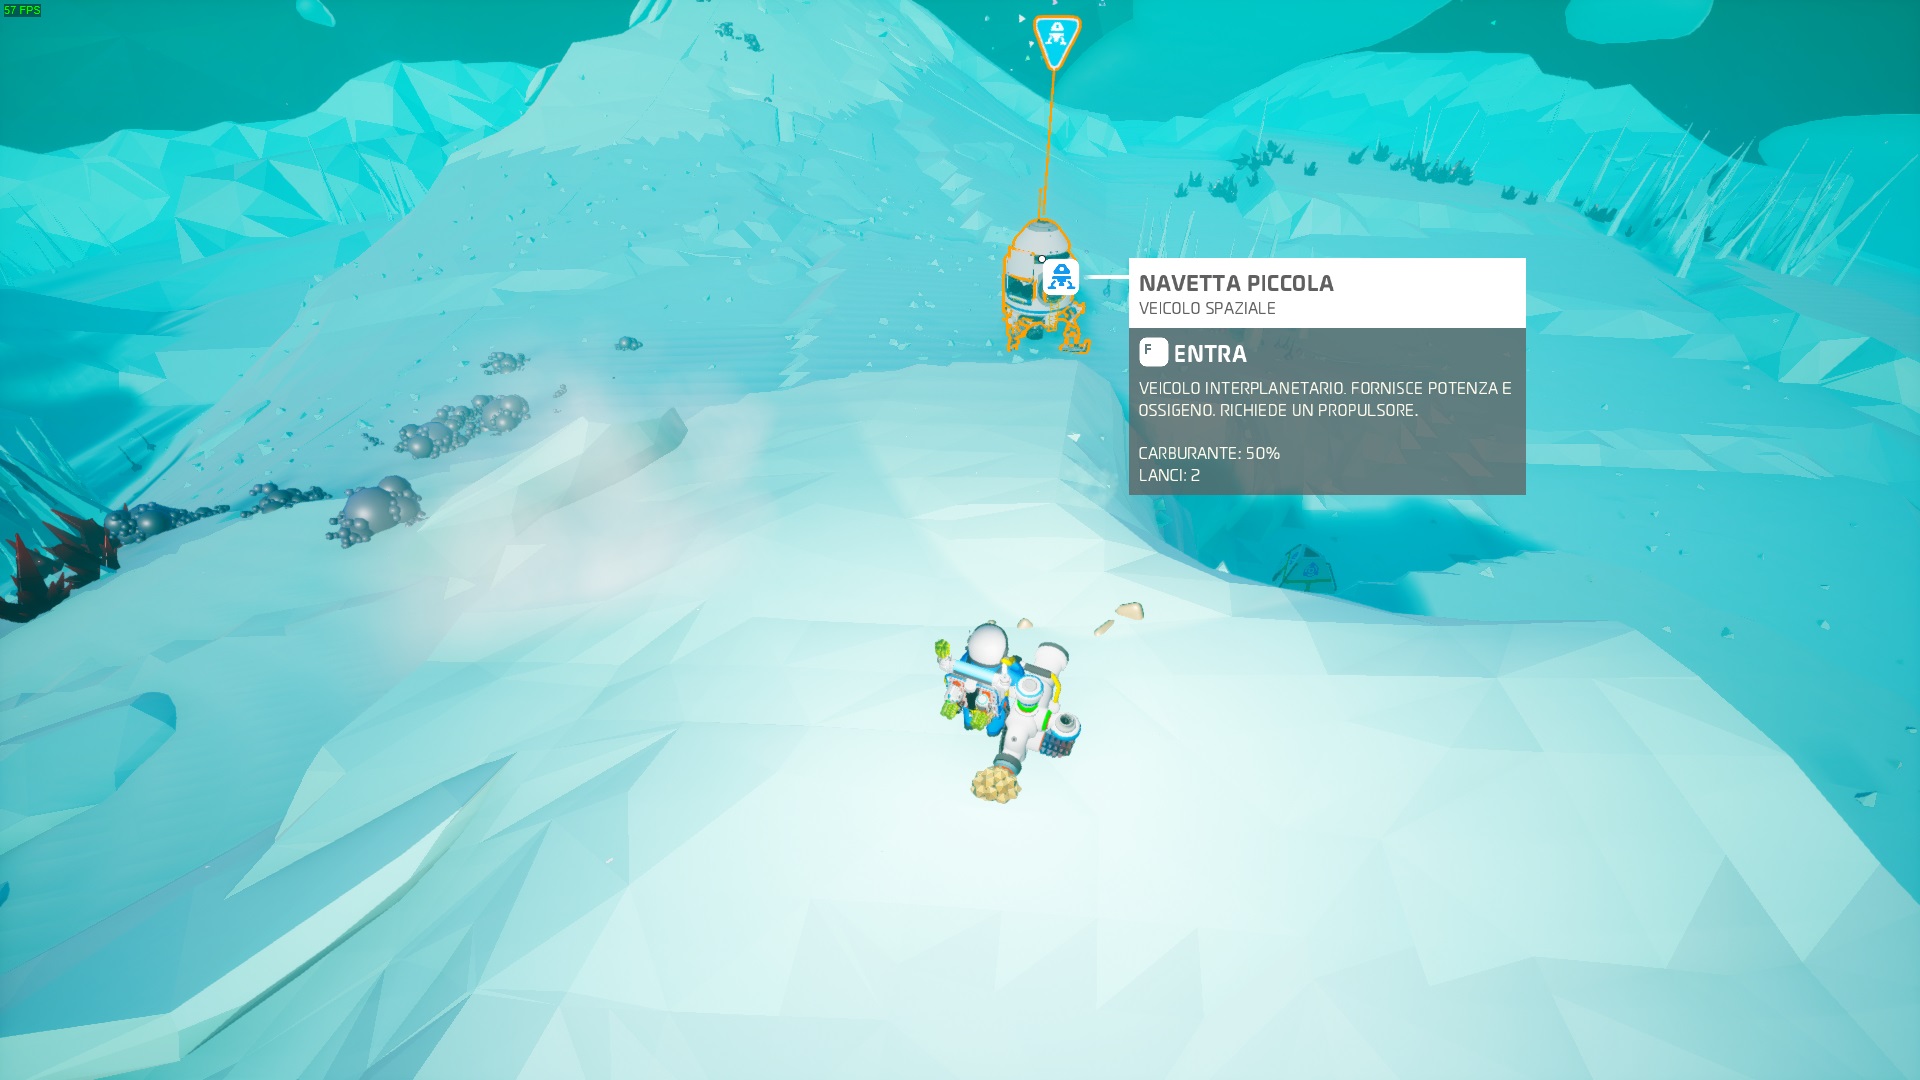
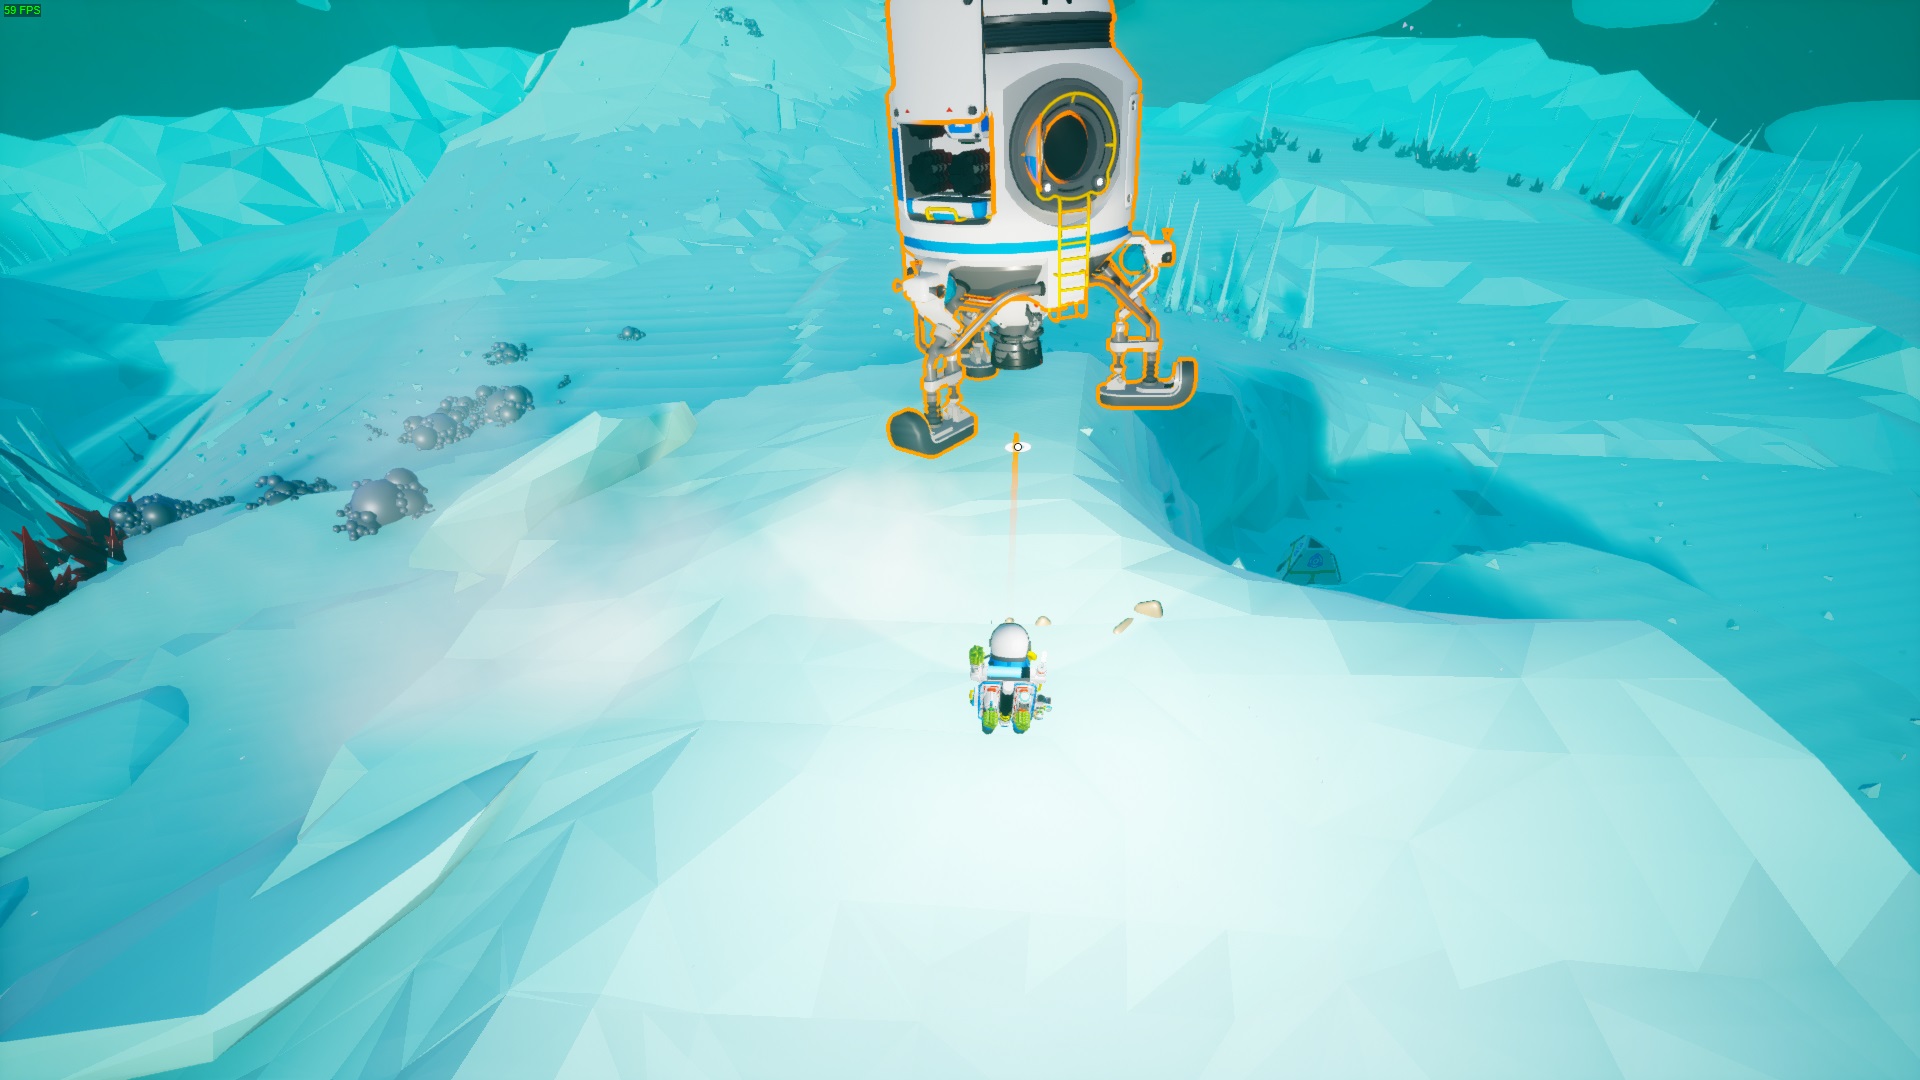
So let's proceed with the search for Special Research Items, you will quickly come across one of these three:
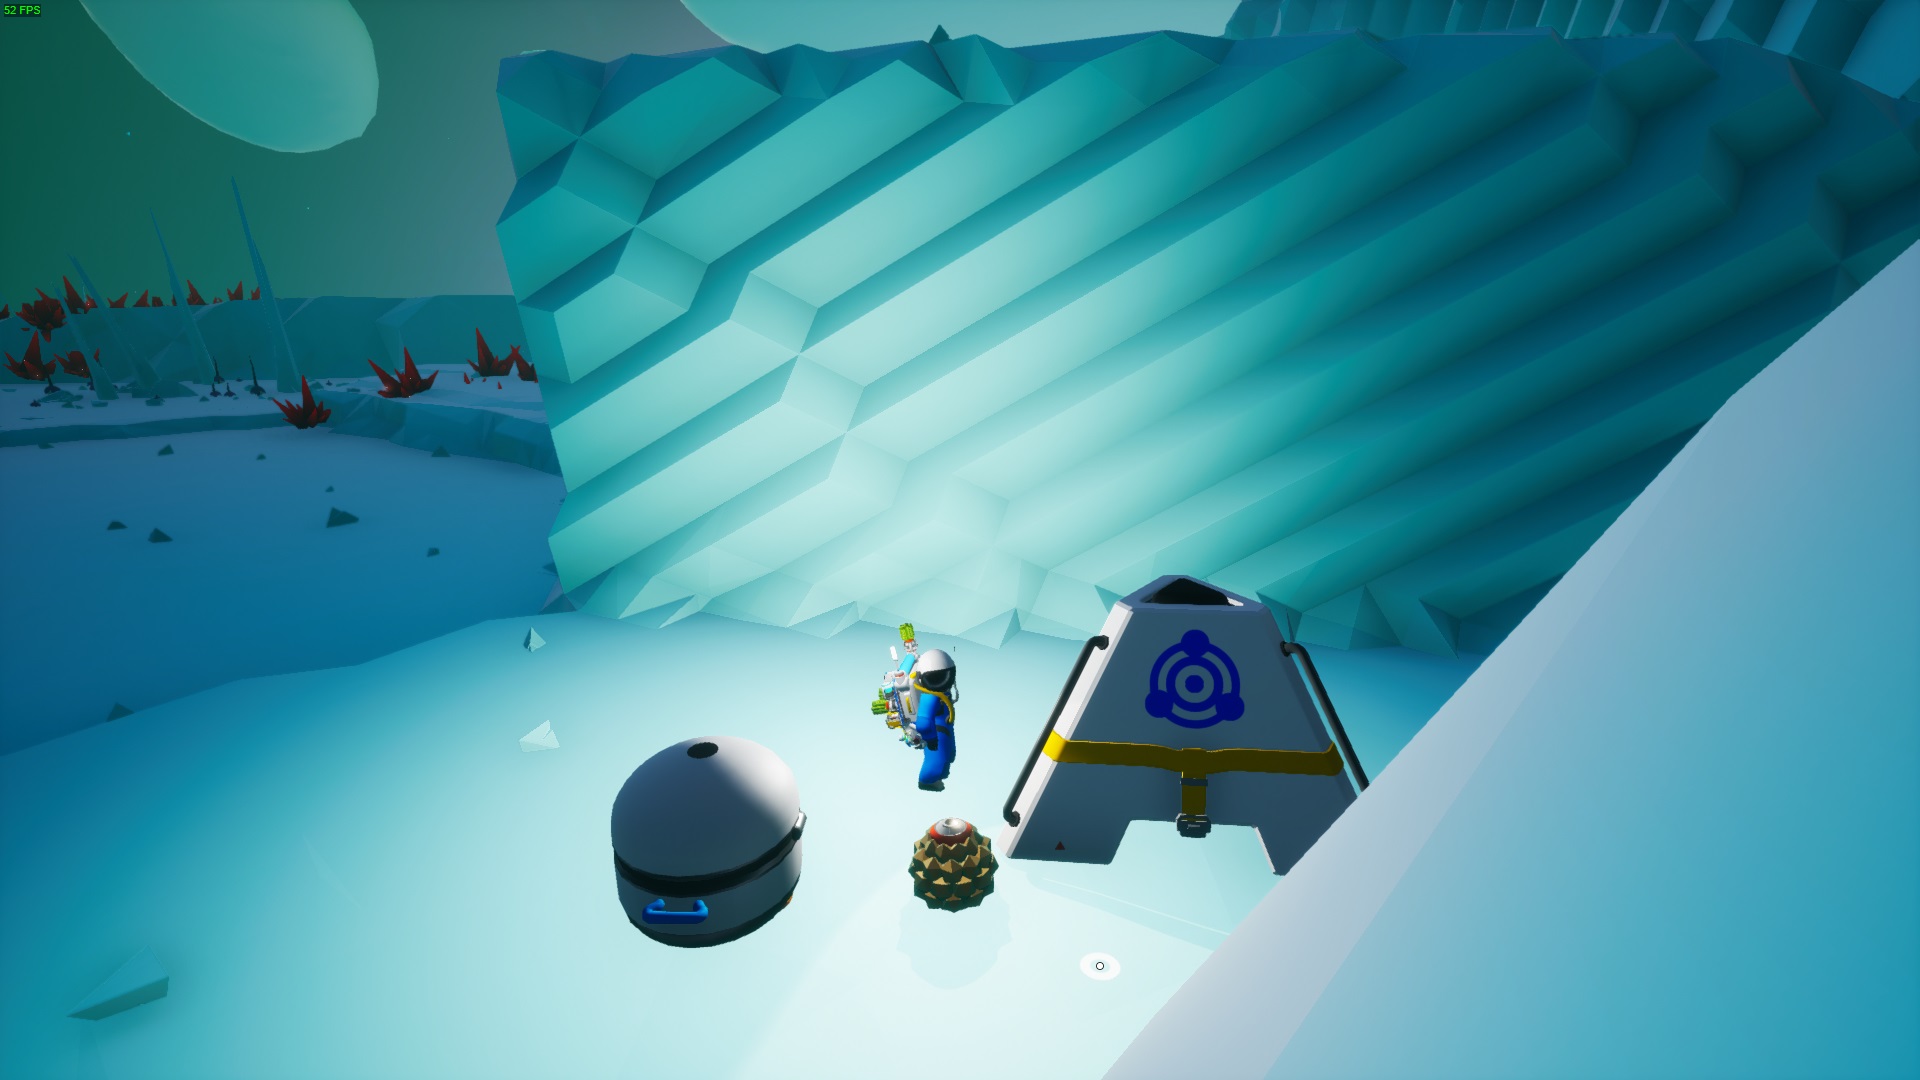
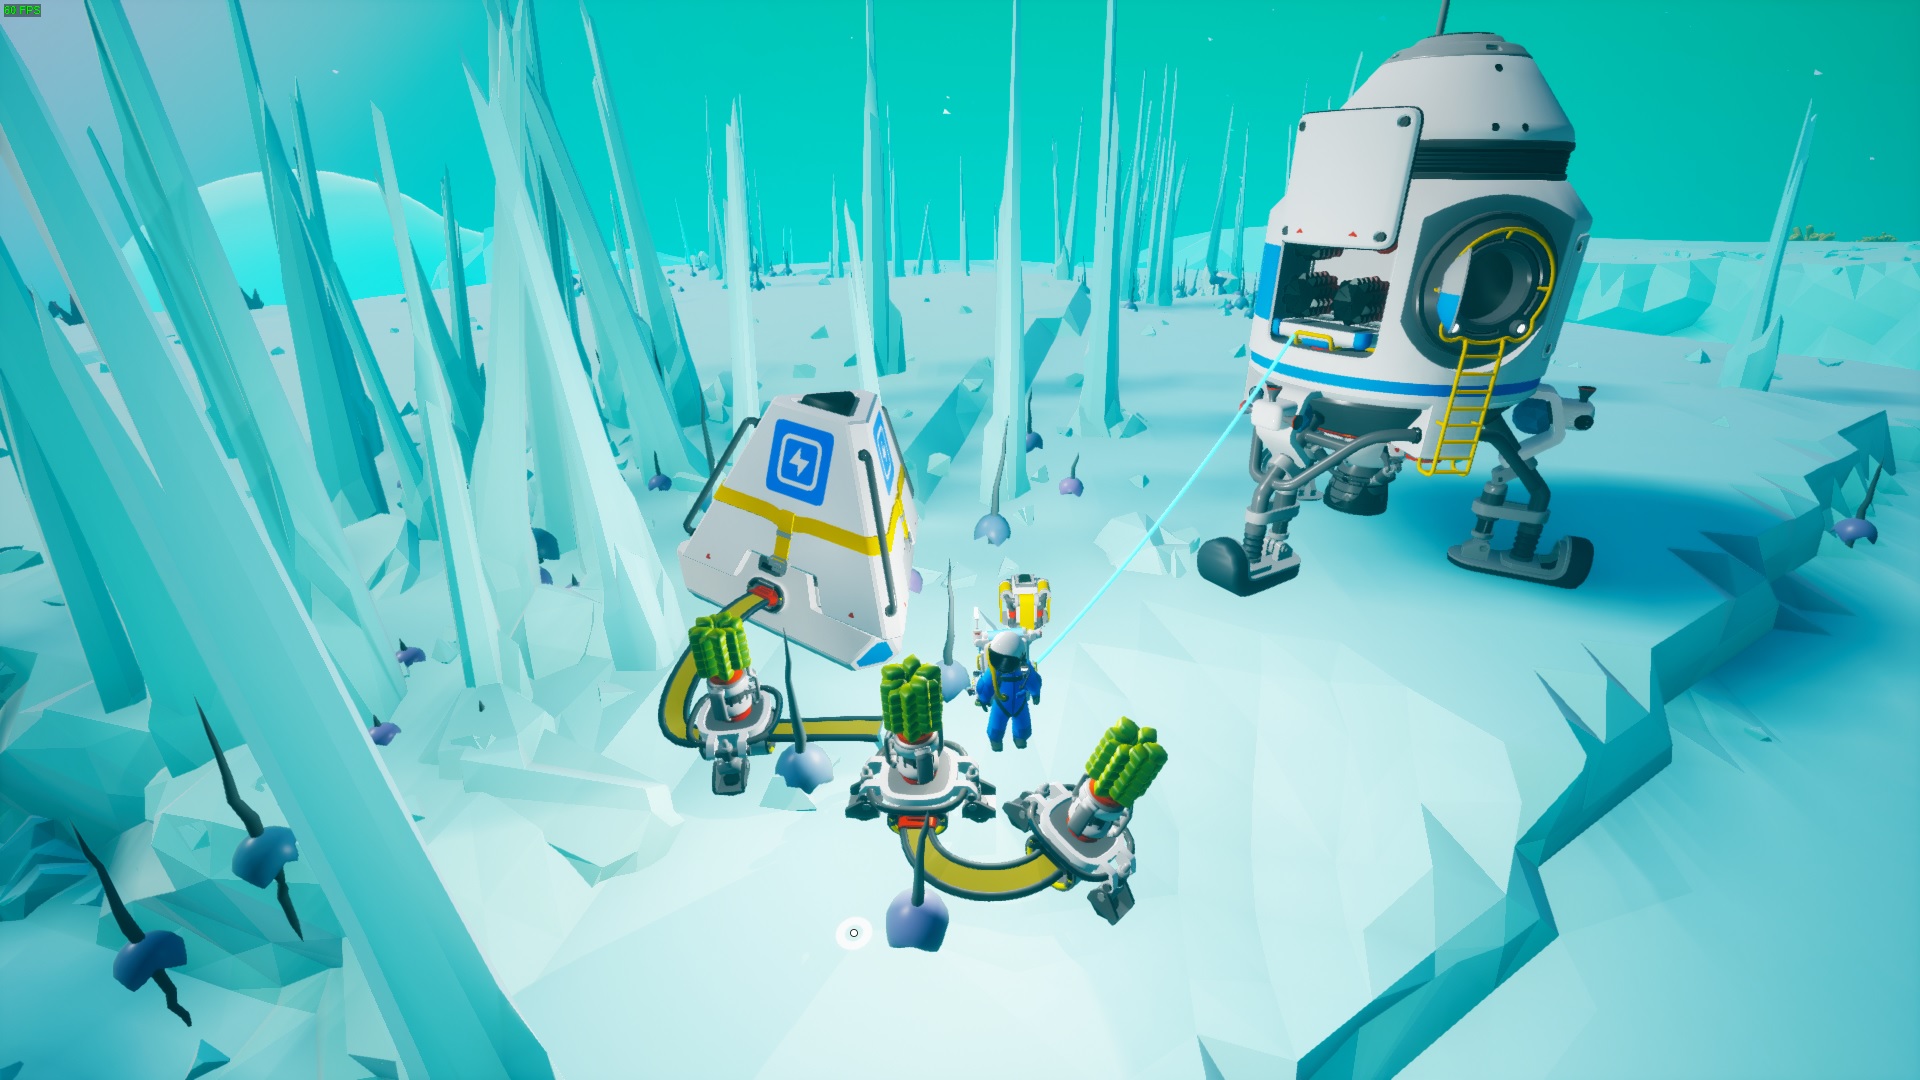
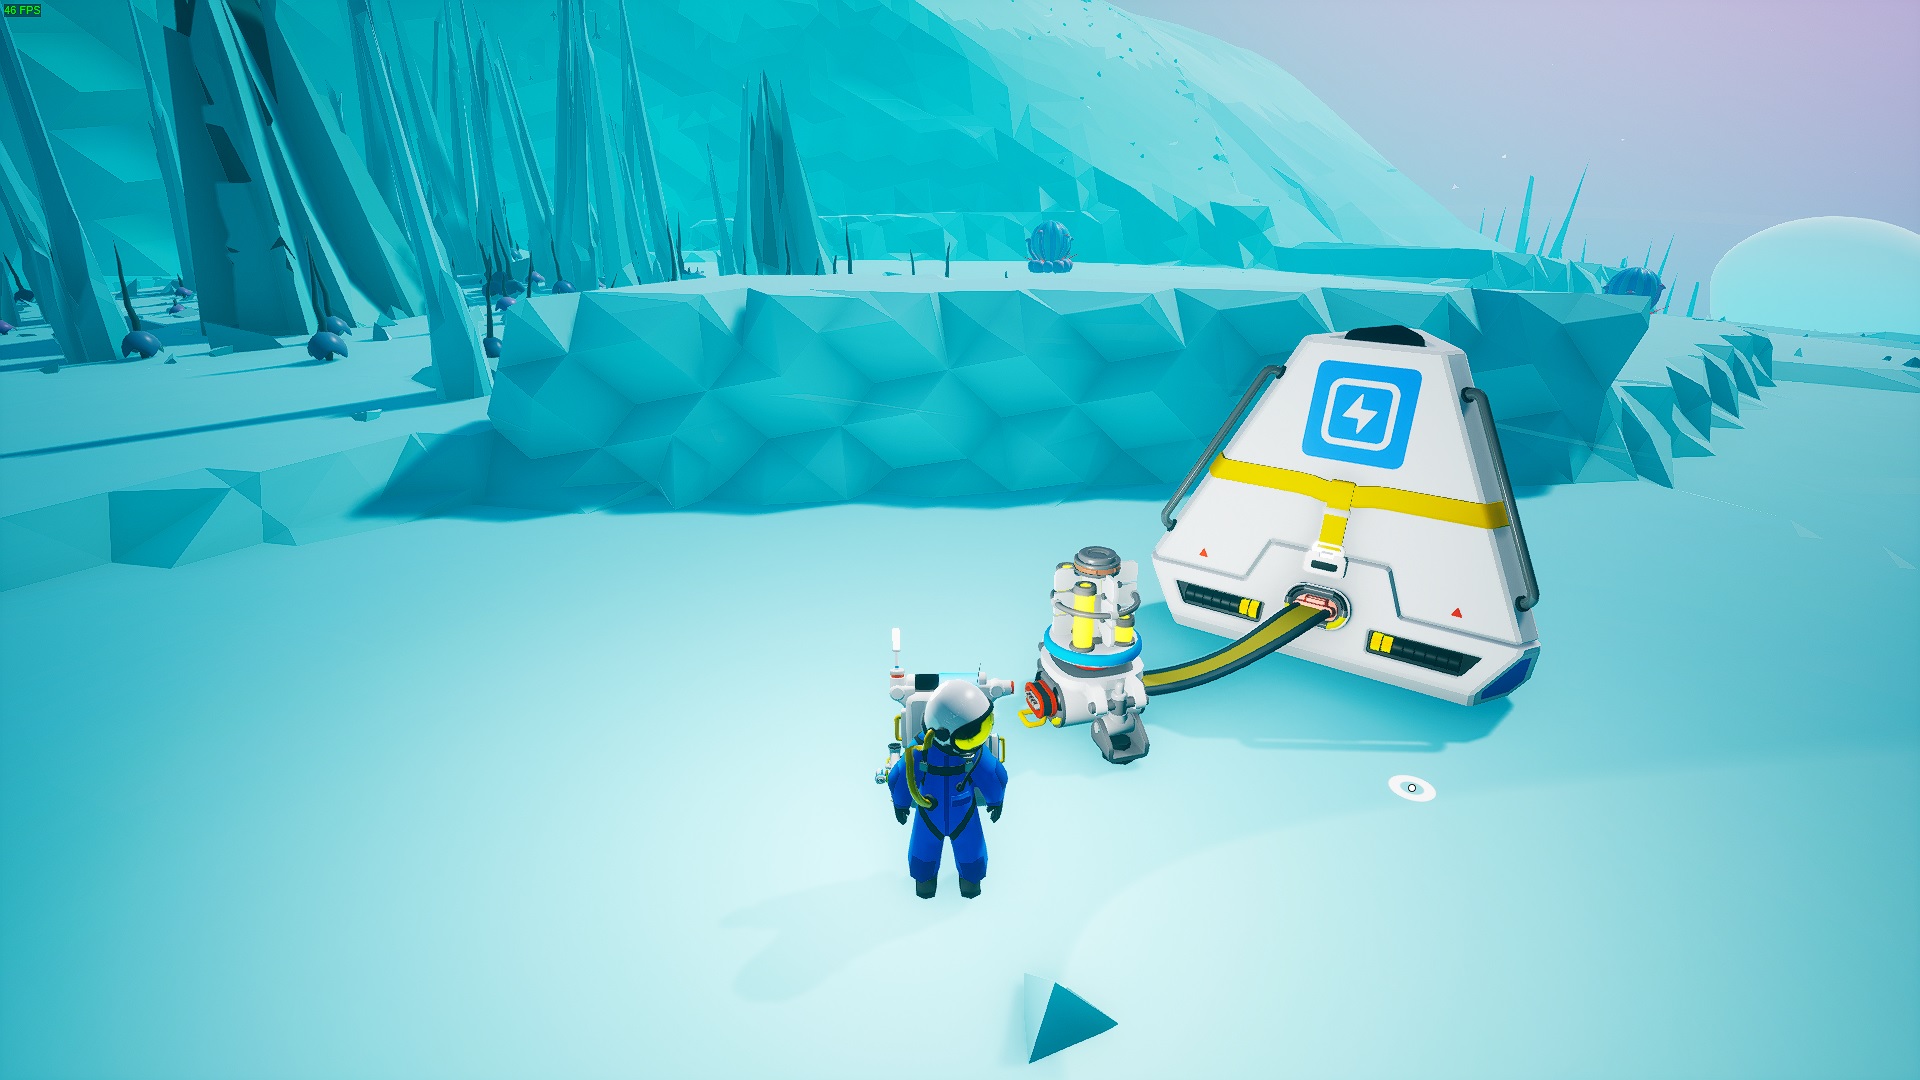
Use Packagers to shrink the researchers so that they can be transported to the Medium Storage or Storage Silo. Keep wandering around glacio until you run out of packages or are satisfied with the quest. Whenever you want, you can comfortably board your Shuttle and reap the benefits of your efforts through the Research Chambers of your main base. Happy collecting Bytes!
How to get Hoverboard and VTOL
But Johnny, what are the hoverboards and VTOLs specifically? You will find everything you need in the main astroneer wiki:
https://astroneer.fandom.com/wiki/Hoverboard
https://astroneer.fandom.com/wiki/VTOL?so=search
Tecnological Leap & Tier
This section aims to make people understand what is best to unlock before and after, although for some players it may seem obvious, for others it may be useful.
When you start a new game and find yourself on sylva, you will come to a dead end where you will not be able to craft items or structures due to the lack of resources on this planet. The Technological Leap is the need to go to another planet to collect the necessary and definite resourceto advance your technology. You can't develop too advanced technologies without intermediate ones, here are the steps to follow:
TEC. TIER 1 (no travel needed)
SYLVA Key resource: Zinc, Malachite(Copper), Hydrogen, Nitrogen
- Basic resource: Compound, Resin, Laterite, Clay, Quartz, Graphite, Ammonium, Organic
TEC. TIER 2
DESOLO/CALIDOR Key resource: Wolframite
- This resource is intended to be able to create your first Chemistry Lab.
VESANIA/NOVUS Key resource: Lithium
- Thanks to Lithium you can start the production of Batteries and in the future RTGs
TEC. TIER 2,5 (Tec Tier 2 recommended but not necessary)
GLACIO/NOVUS Key resource: Hematite(Iron)
- The Iron allows you to get your first Atmospheric Condenser to collect the Gases necessary for the advancement of the Tec. Tier. Other main uses are Extralarge Platform C, Shredders and Large Silos
GLACIO/VESANIA Key resource: Titanite(Titanium)
- Necessary to make Titanium Alloy (Tec Tier 2 necessary) and build the Large Shuttle and Hydrazine Jetpack. Pure Titanium is useful for making Medium Storage Silos.
TEC. TIER 3
GLACIO/VESANIA Key resource: Argon
- Key Gas to produce Steel using iron and coal. You can create High-Level modules such as Hydrazine Thruster, Extralarge Shredder and Auto Extractors
NOVUS/ATROX Key resource: Methane
- Start Silicone production to create the Paver to add to your Large Rover, also necessary for Shelters in case you want to use them.
TEC. TIER 4
ATROX Key resource: Helium
- RTG, RTG, RTG! Free Power the ultimate goal. Helium basically serves to produce Nano Carbon Alloy, the union of Titanium Alloy with Steel. You can build Large Canister if you like them.
Best Resources!
https://steamcommunity.com/sharedfiles/filedetails/?id=2447954457
You can also go to the "Devices and Automation" section to build more advanced "Soil Conversion Systems".
In Late Game you can also use the astronium to get any material you need except gases. Below is the guide that explains how to do this:
https://steamcommunity.com/sharedfiles/filedetails/?id=2606192655&searchtext=astronium+best
Chemistry Lab Overview & Blueprints
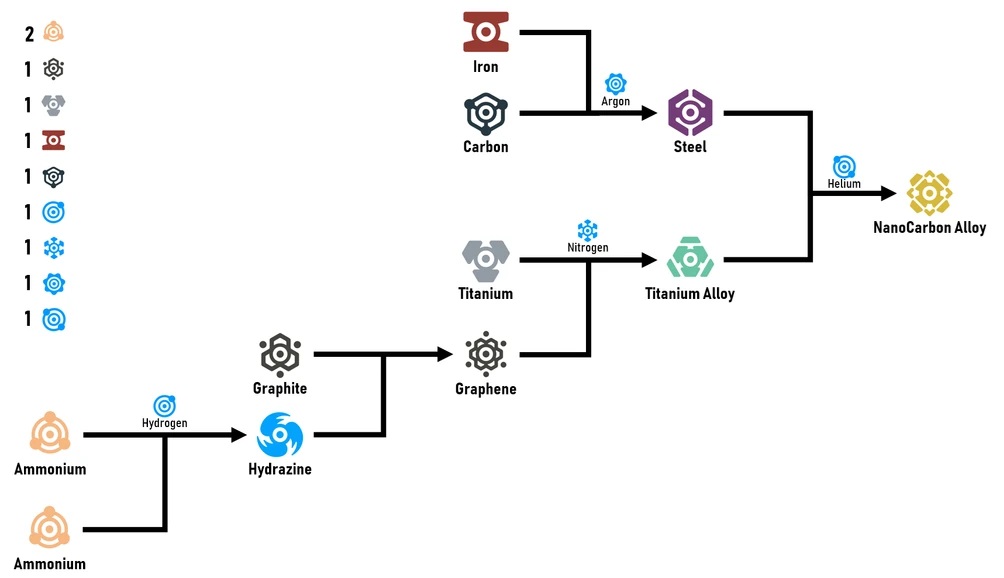
When I first used the Chemistry Lab, I soon realized how many tangled rounds of resources were needed to create the Nanocarbon Alloy. Now I know the recipes by heart by now, but for new players it could be a drama. Here is a immage that makes it easy to understand the steps to create the resources you will need.
Here is another image of the diagram more complete than the previous one
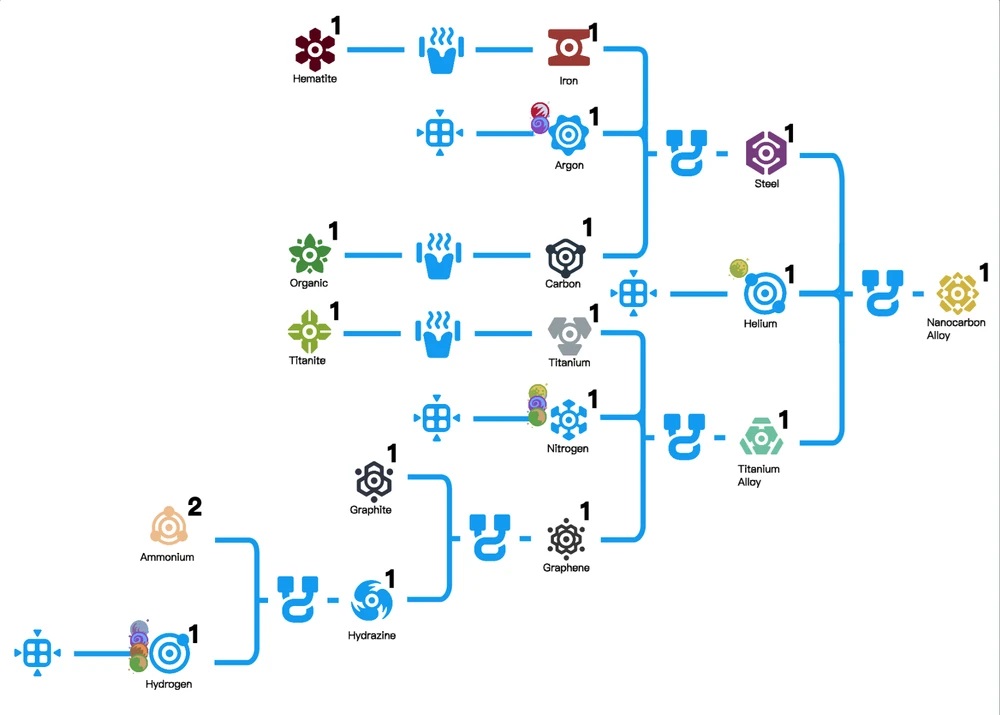
For a complete overview of other recipes, you can take a look at the guide well done.
https://steamcommunity.com/sharedfiles/filedetails/?id=2450279543
Tips and Tricks
This is the section as the title says. It might also be interesting to look at this little guide which is inherent in this section.
https://steamcommunity.com/sharedfiles/filedetails/?id=2376351924 Below you will find the experiences I have accumulated firsthand.
 SOLID THRUSTER REPAIR
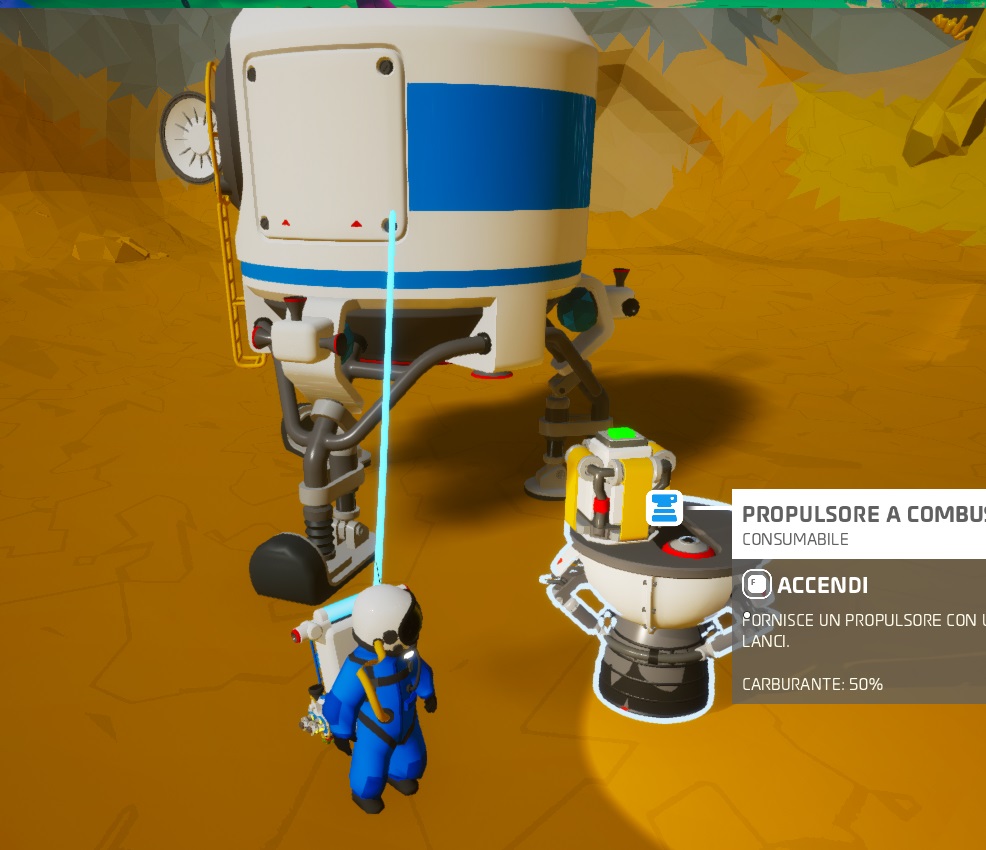
To avoid the tedious manufacturing of solid fuel powertrains and the constant search for materials for them, you can repair the latter by packing it through a packager, however, you will only be able to repair it when it has 75%, 50% or 25% use. Once the Solid Thrunster is packed, it can be unpacked to have it 100% working again. Repair is impossible if the Solid Thrunster is completely broken.
LONG DISTANCE INTERACTIONWhile holding the terrain tool open, you can interact with surrounding objects from a long distance.
You can use it to pick up objects at a long distance, or to have a safe distance to activate dynamite, or quickly access inside Shuttles and/or other Vehicles.
 MASSIVE DIGGING TOOL
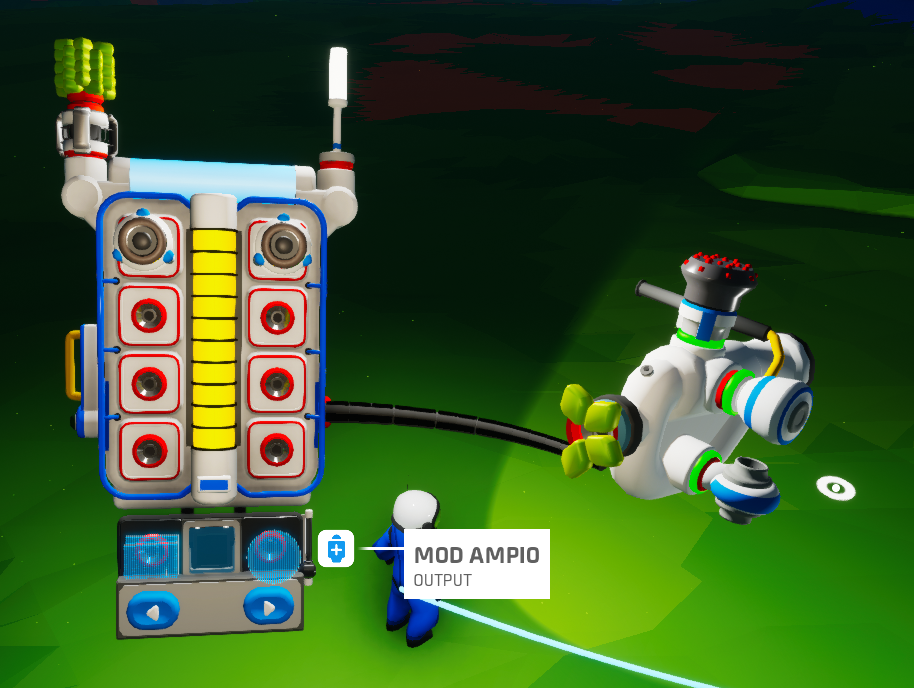
Made up da Drill mod 1, Wide Mod e Augment Mod, it is able to make you extract 3 times faster than the normal tool. You can operate the small generator in order to continue digging in the event of the power depletion.
Enable or disable Drill mod 1 to dig hard or not, and replace them with better ones to dig hardest dirt
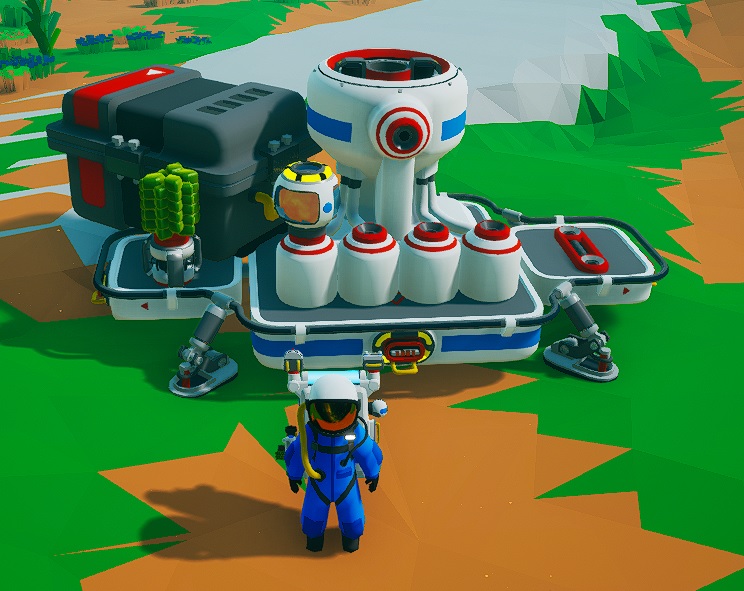 EXPLOSIVE FURNACE
If you place Hydrogen, Sulfur, Methane, or Hydrazine into the Smelting Furnace, it will explode.
If you want to open EXO Cache and you're out of Dynamite, place a Large Platform with Furnace and Exo Cache on or near the Melting Furnace, and after powering it with Generator/Battery up Active it remotely using the Long Distance Interaction trick to not get hit by the explosion and get Exo Chips Safe. Make sure you do this away from the base, to avoid unpleasant inconveniences.
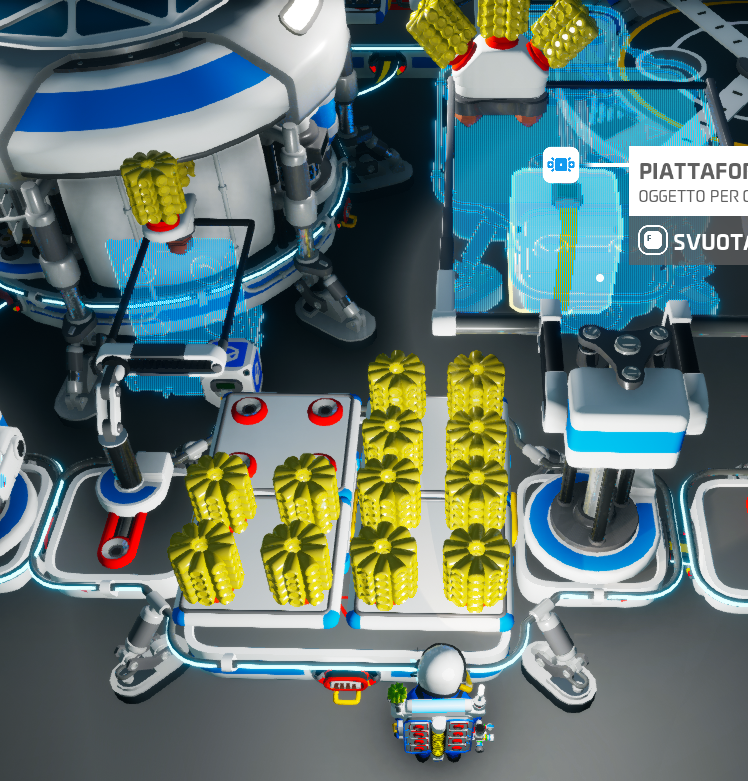 DEDICATED PRINTERS
Only production of platforms and storage.
You can create other platforms like this to create other dedicated structures.
One of the preferred dedicated printers is Mass Silos production.
I also use one of these configurations with variable printer.
You can easily insert the storages with resources inside so that the printers are always ready for use.
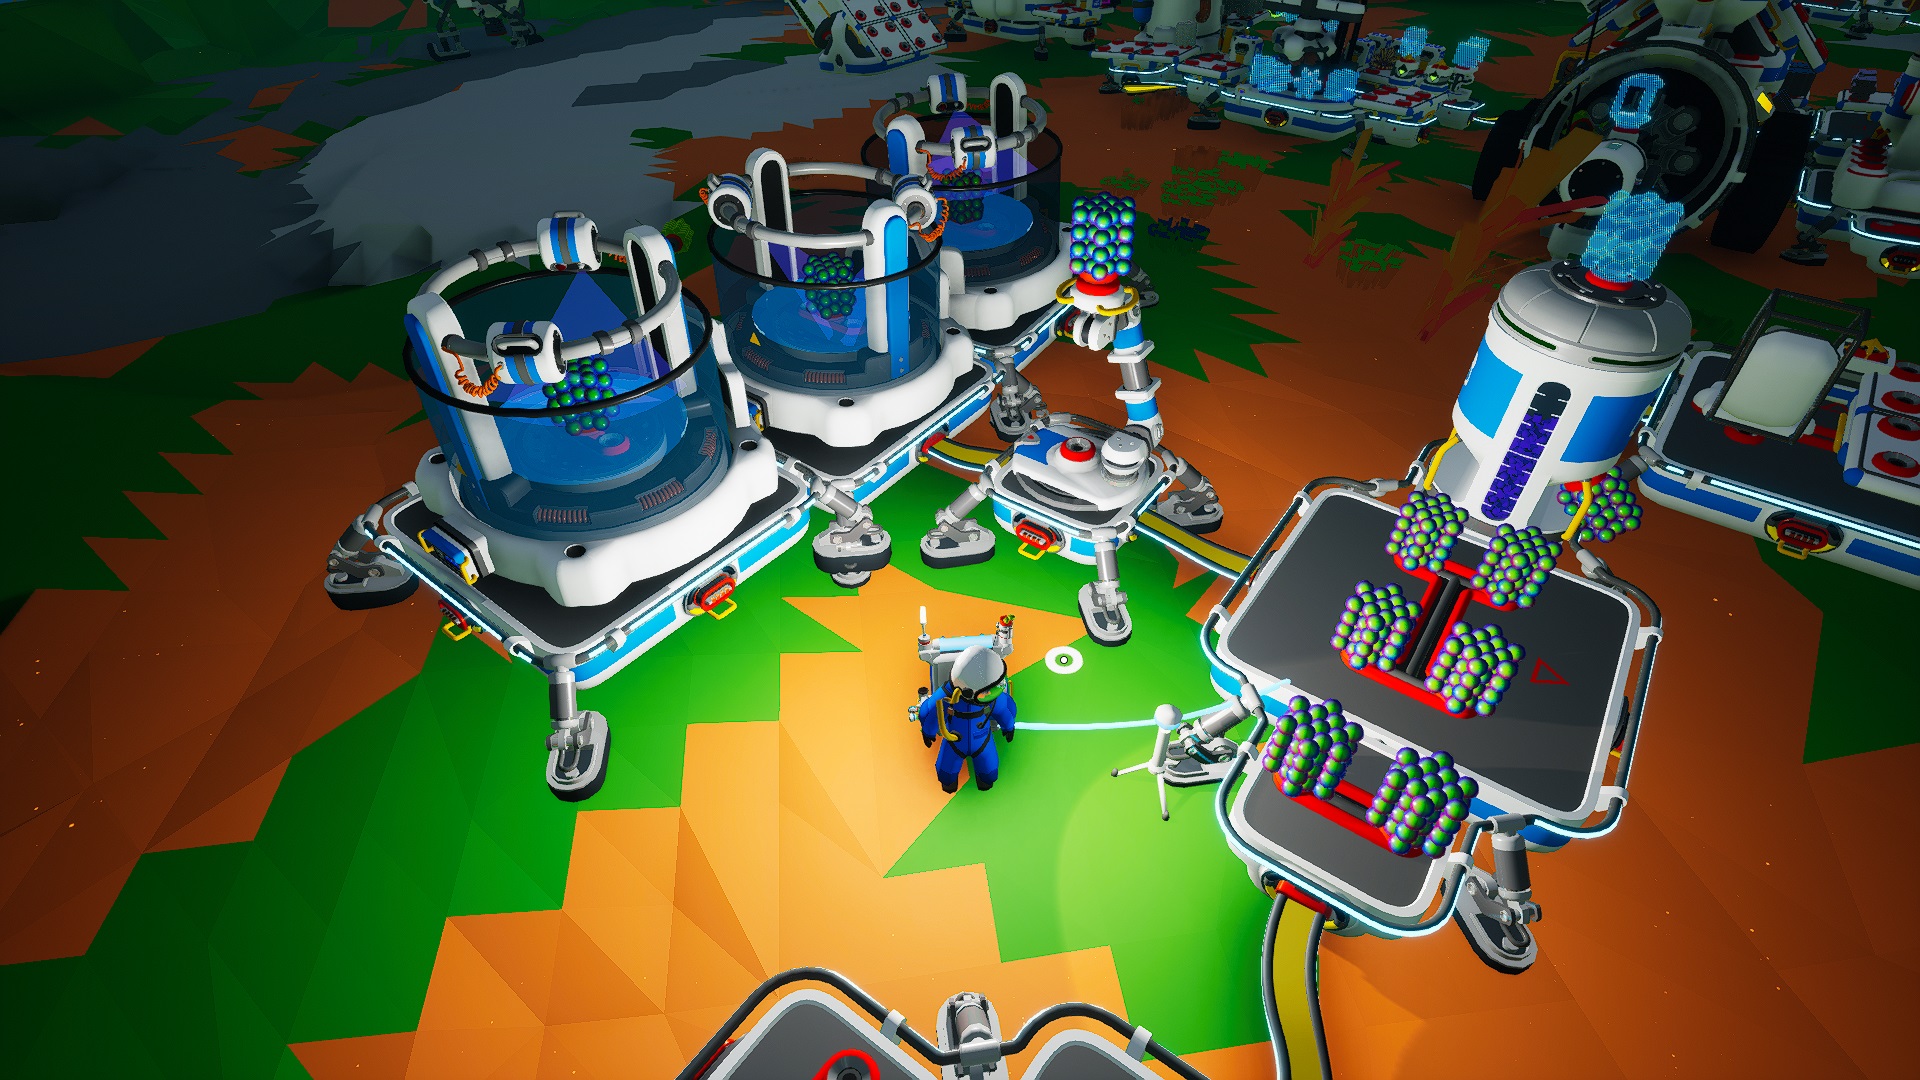 AUTORESEARCH
Insert a Autoarm (on a Small Platform) between 3 research chambers (on large platforms a) and a storage platform. Make sure that the blue zone of the autoarm can touch the 3 research chambers and the green zone the entire storage platform. You can then feed your search with any tier 1 research item, including any type of resource.
RAPID LANDING PADPlace a landing strip over the Gateway Chamber of one of the two poles (immage A), allow to obtain the landing bubble in most of the rotation time of the planet (image B). Landing from one base to another will be much more satisfying.
FAST GAS ACCESS (Kill two birds with one stone.)
Building an Atmospheric Condenser on the Gateway Chamber near the landing strip allows to obtain gas quickly from one planet to another. The favor gas planets are, sylva, glacio and atrox
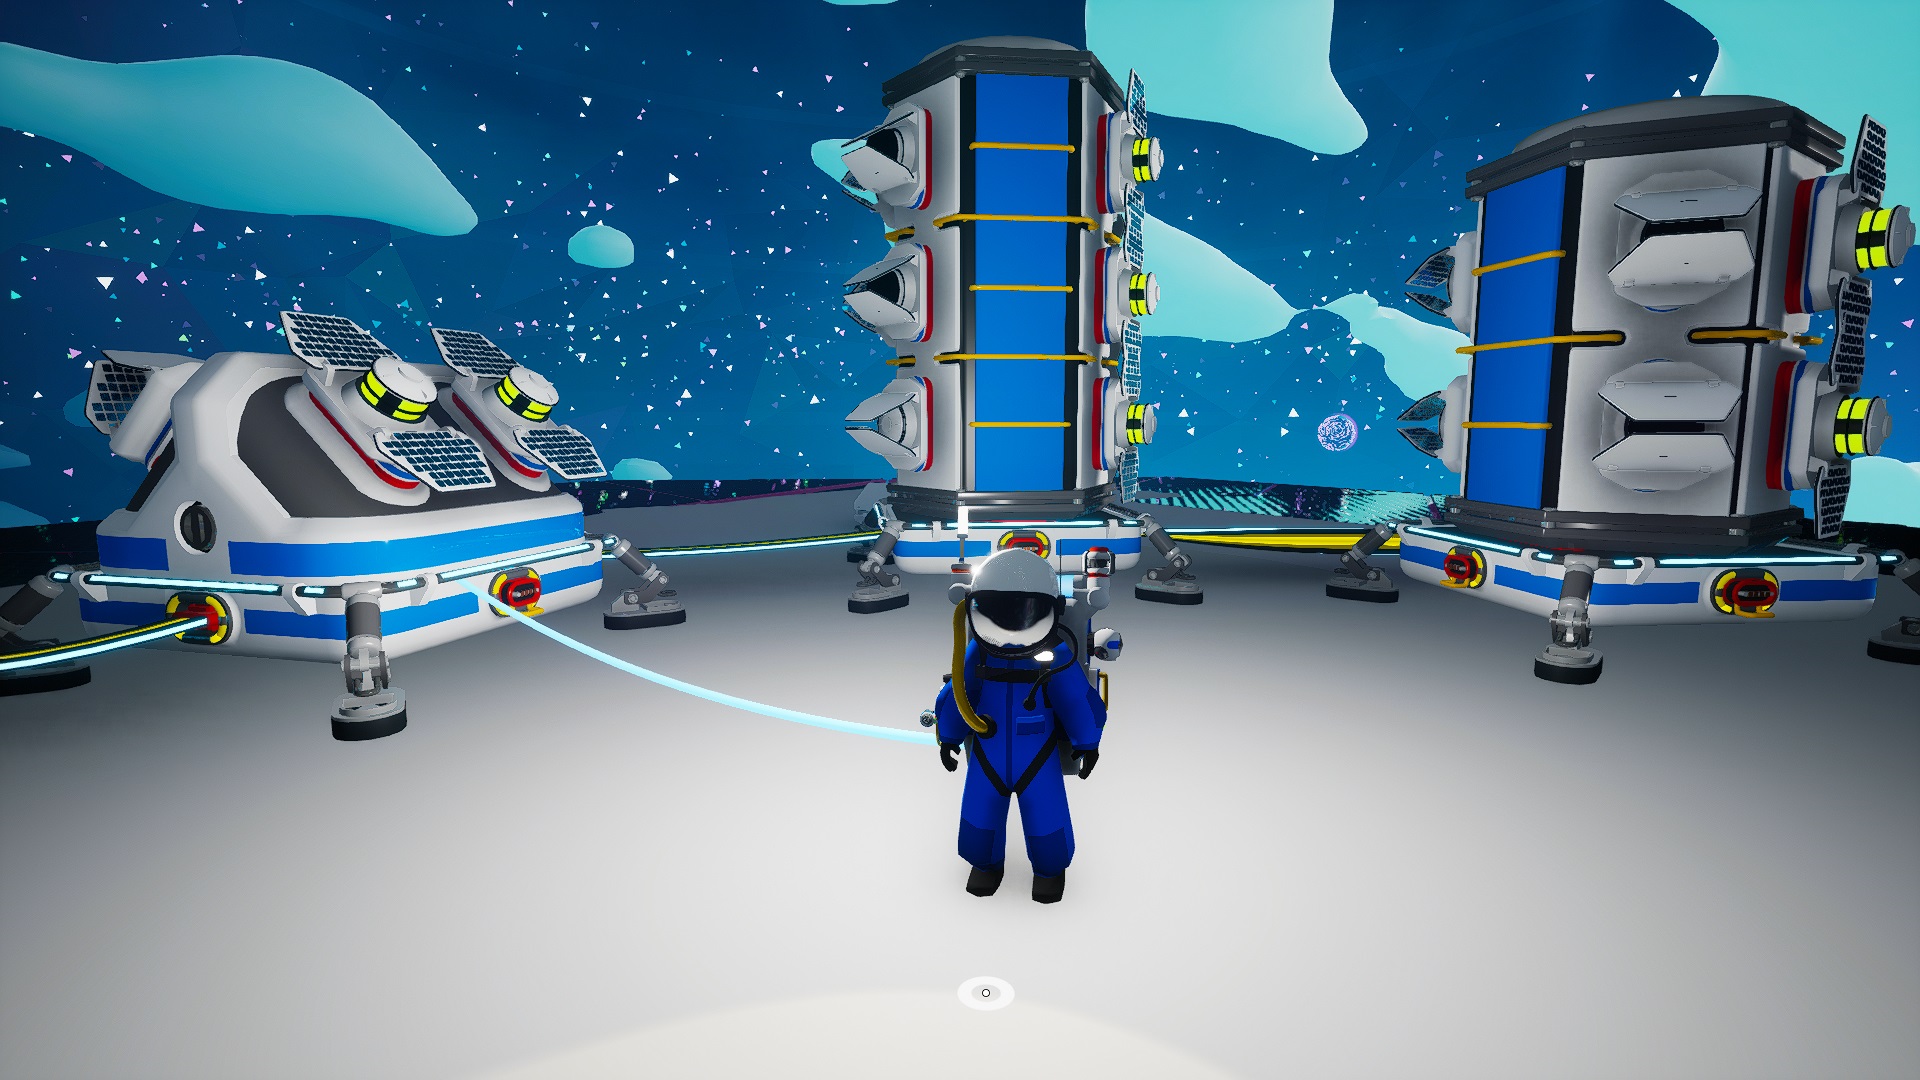 POLE SOLAR PANELS
Use Medium Solar Panels on an Gateway Chamber at the North/South Pole positioned on a Large Storage/Silo to have 50% of the panels always active!
You can place Solar Arrays in the all corners of the Gateway Chamber to achieve a similar effect.
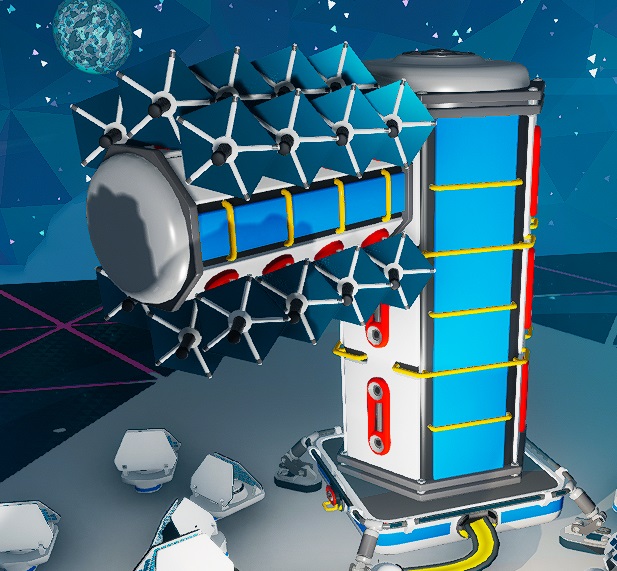 If you have a lot of copper, you can create Small Solar Panels and insert them in a Medium Storage or Storage Silo. Despite the great cost, they are able to rotate and this allows them to be active all time. For more information go to the Power: Tips and Tricks section
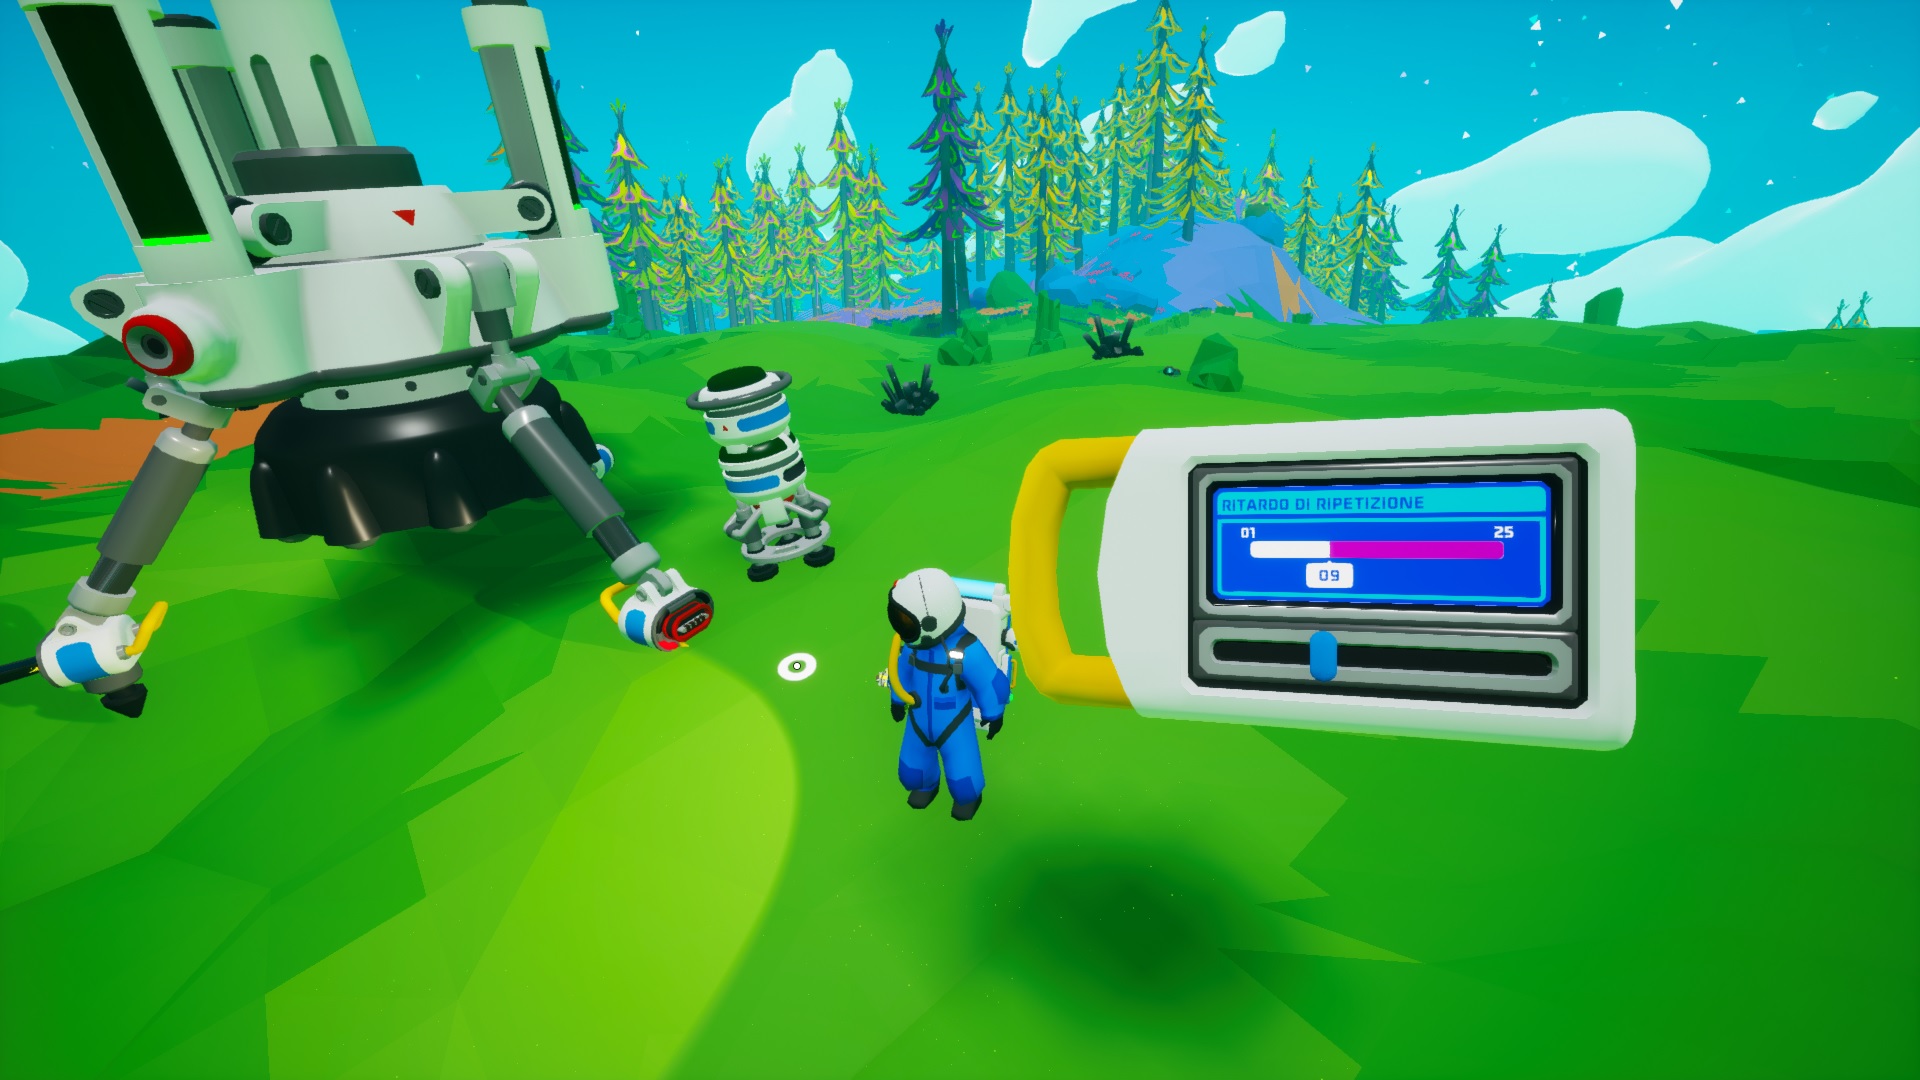 Auto Extractor Overclocking
You will find various videos on youtube about overclocking the auto extractor.
You can create a simpler version by using a single Delay Button set to 09 and stick a Proximity Button over it. Place these two Buttons near one or more Autoextractors to reap the benefits. Autoextractors used in this way require very little Power to be able to operate at nearly double their speed. You can look at the image on the right ---->
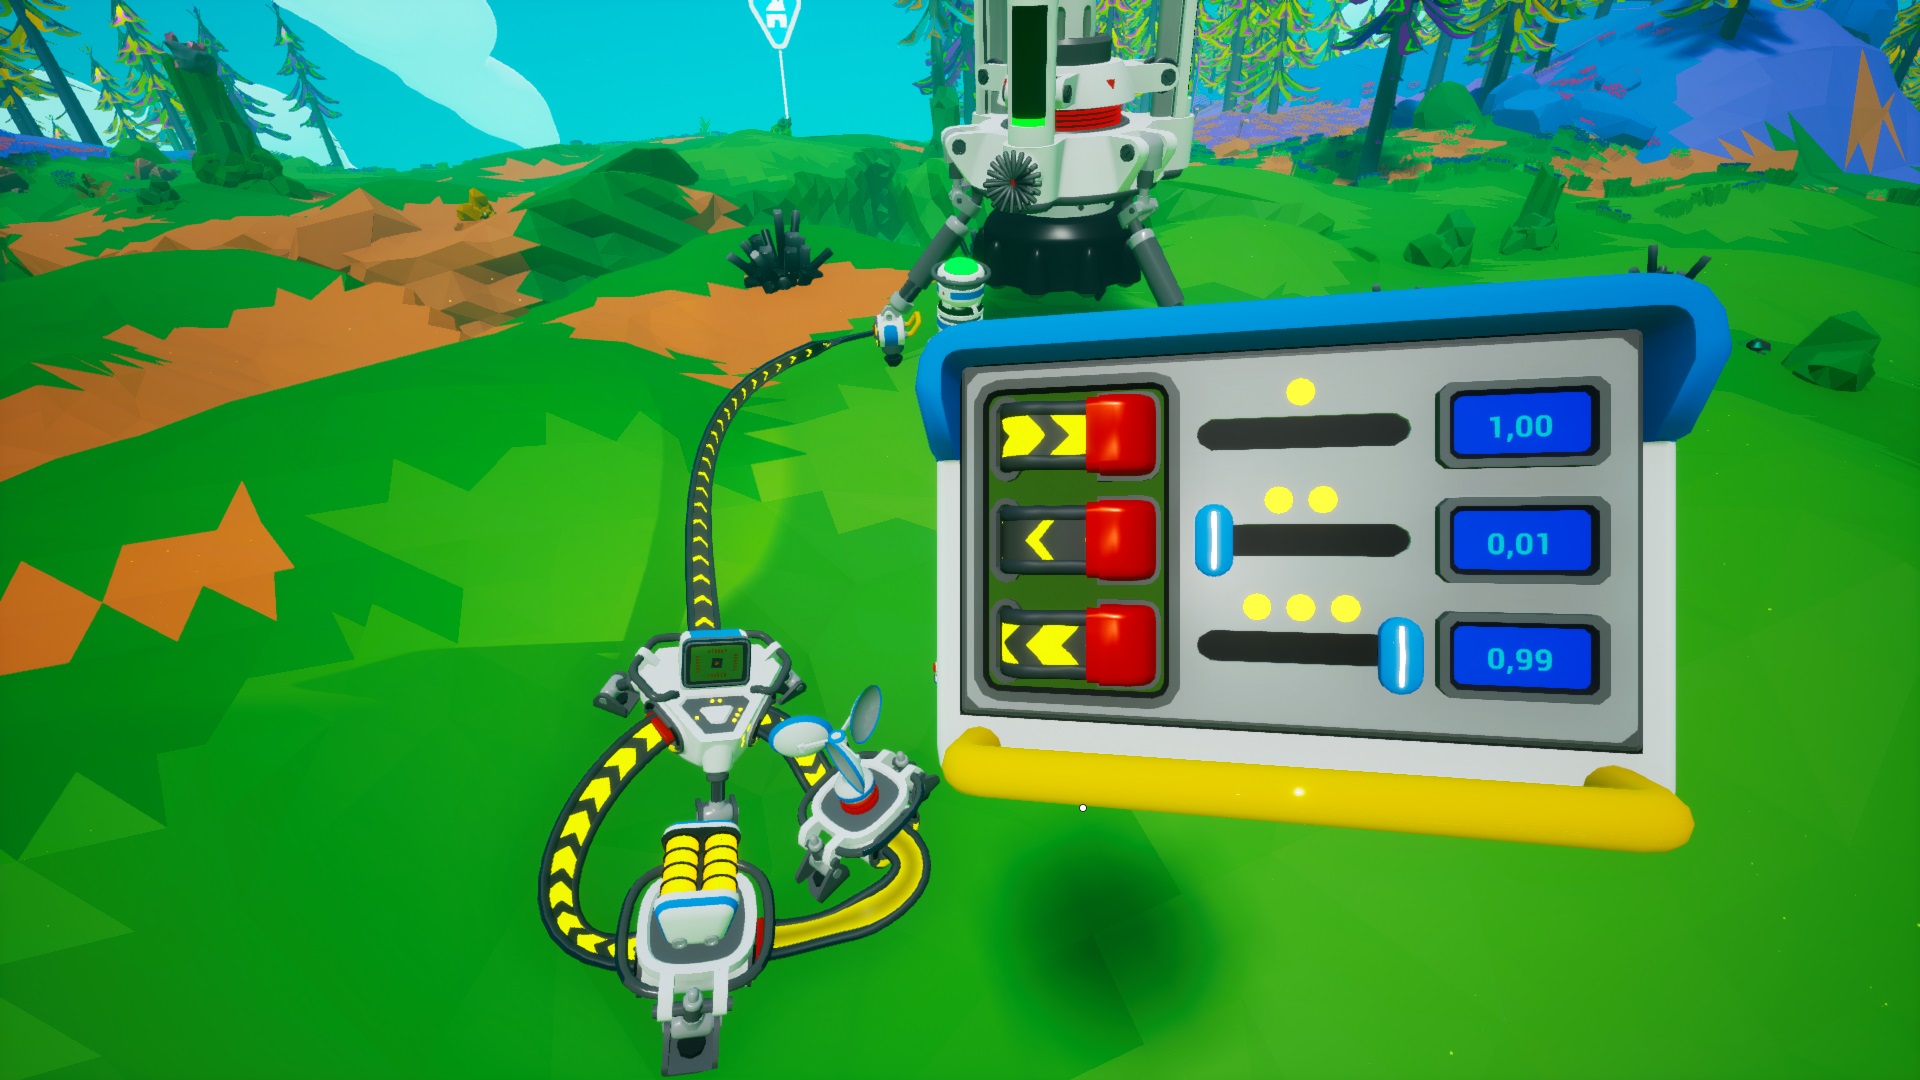 This device allows you to power all the overclocked Autoextractors using only 1 Separator, 1 small turbine and a small Battery. Remember to set the output power to the minimum, 0.01 in the separator
Tips and Tricks Video Channels
This is the channel where I started making videos on astroneer. I will insert everything that inspires me.
https://www.youtube.com/channel/UCTyzWKVfsipTcdOqeFc9ukQ/videos?view_as=subscriber
If you want you can also follow me on Twitch when I am an active player.
https://www.twitch.tv/johnnyzerg/videos
BUILDING A BASE IN THE NORTH
Bring with you an aluminum, 3 resins, a packaged medium printer and a medium platform, and an oxygen source. Feed everything with small or medium generators and build a Soil Centrifuge and subsequently a Melting Furnace as soon as possible. The production of quartz and glass begins in order to create small wind turbines that will serve to have access to reliable Power supported by an organic / carbon power plant.
BYTES BY SOIL (obsolete)
Tired of looking for research item around the ways?
Do you like automation and can't wait to see buildings that do the job for you?
Then this is for you!
The operation is very simple, extract the soil using a rover with a drill and insert it in the centrifuge of the soil, all through the steps will be converted into bytes!
Power: Everything you need to know!
I wanted to start by publishing the excellent "scuba." (outdated) guide to obtain detailed information on the production and use of Power:
https://steamcommunity.com/sharedfiles/filedetails/?id=1986307961
Instead I will tell you a little about my experience in this regard.
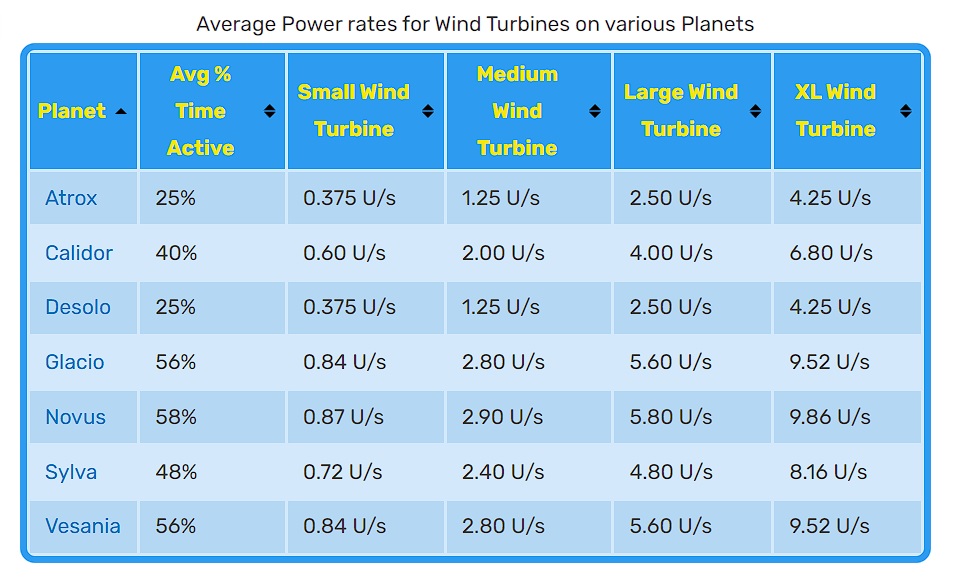 The Power given by the wind does not vary based on the positioning height of the turbine. Wind power also works in caves exactly as it does on the surface. The wind frequency varies from planet to planet. Personally, I prefer wind, which gives an excellent amount of Power and steadily enough over time and Small Turbines are cheap (Ceramic is relatively easy material to recieve during early-game, and can be easily mass-produced when paired with the Soil Centrifuge and Smelting Furnace.),
SOLAR
The Power given by the wind does not vary based on the positioning height of the turbine. Wind power also works in caves exactly as it does on the surface. The wind frequency varies from planet to planet. Personally, I prefer wind, which gives an excellent amount of Power and steadily enough over time and Small Turbines are cheap (Ceramic is relatively easy material to recieve during early-game, and can be easily mass-produced when paired with the Soil Centrifuge and Smelting Furnace.),
SOLAR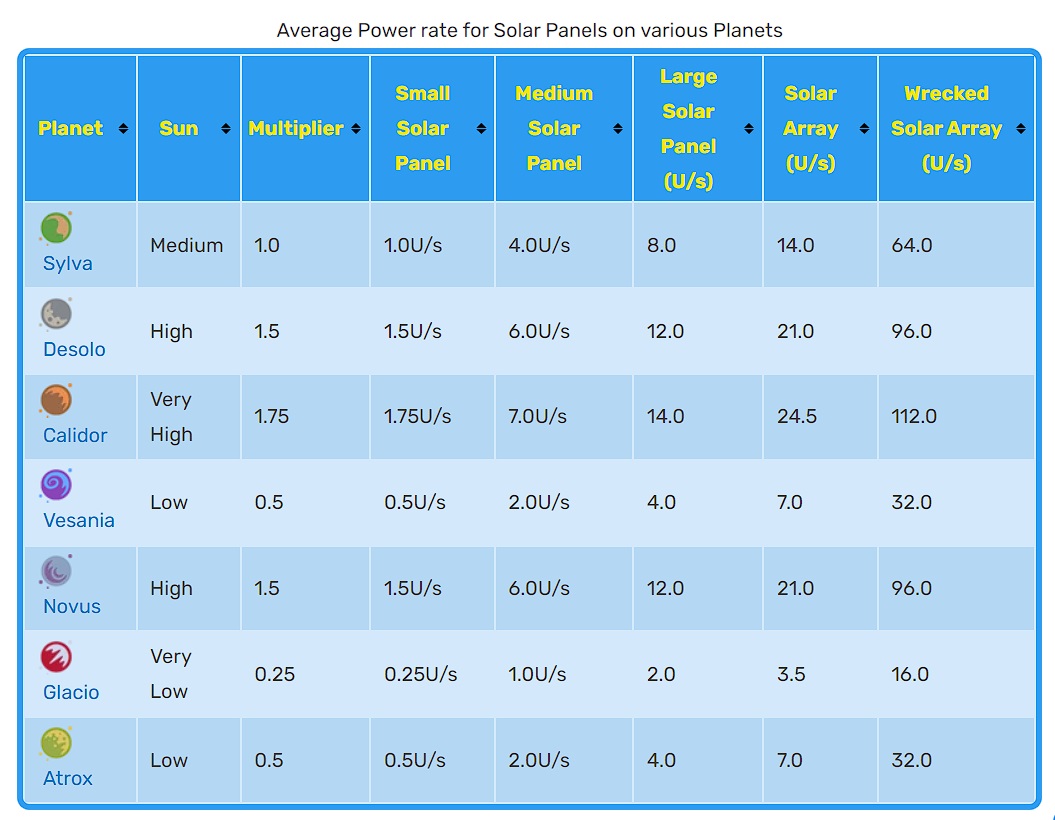 The day and night have the same duration and vary according to the planet and the lap they make to complete a daily cycle. However, the amount of solar Power produced depends on a fixed constant that each planet has. Solar Panels can be expensive (Copper) and gives a lot of Power but you will be left without during the night. However there is a way to get 24/7 sun by get Solar Panels on above a gateway Chamber (Power: Tips and Tricks -Poles Sun 24/7 Tricks section)
WIND vs SOLAR
Which is the better of the two? Depends
Solar Wins, if you are willing to use tricks, you can get a lot of power with Sun 24/7 on North or South pole Trick, you get the best production on Calidor! You can use this system on other planets as well, however I recommend using this trick on Planets with a High Sun Multiplier.
Wind Wins, If you are not willing to use the sun 24/7 then in my opinion Wind Turbines are best! They are cheap, they produce a lot for their cost, they are more constant in Power production, and the wind frequency is on average higher than the sun multiplier.Thanks to the small time intervals between one gust of wind and another, the batteries become much more reliable compared to the sun (so you will need many batteries to last through the night).
TURBINES TYPES
Small Wind Turbine Cost Ceramic, Product 1,5 U/s, Bytes 300
From the very low cost and the high yield, this makes all other power supply systems obsolete except RTG. Place them on a Medium Storage or Silo to produce a lot and save space. Use them in combination with Medium Batteries, to definitively solve Power problems!
The only flaw is that they can only be produced manually by your backpack printer, and this can be annoying for some players.
Medium Wind Turbine Cost Alluminium/Ceramic, Product 5U/s, Bytes 2500
The cost is not worth it, neither in terms of production nor space. Save your Bytes, use Small Turbines in one Medium Storage/Silo, However if you are willing to spend aluminum on it then it might be for you!
Large Wind Turbine Cost Alluminium Alloy, Glass, Ceramic, Product 10U/s, Bytes 3500
The cost is not worth it, neither in terms of production nor space. If you don't want to make Small Wind Turbines, you should use medium turbines, saving copper that you could use in other way. Save your Bytes to Research.
XL Wind Turbine Cost Iron, Ceramic, Graphene, Alluminium Alloy
Despite the cost of materials, it produces enough power and avoids the tedious mass-building of Small Turbines, with the advantage of not requiring the construction of Silos/Storage and Platforms to be positioned. This could be a great alternative to Small and Medium Wind Turbines.
SOLAR PANEL TYPES
Small Solar Panel Cost Copper, Product 1U/s, Bytes 300
It is the worst investment you can make. It provides too little Power to justify the price. Don't spend your bytes and resource on it. I have long disparaged small solar panels. And I was right if they are used in a normal way. However if they are placed inside a medium / silo storage on the top of a Gateway Chamber at the north / south pole, they work continuously day and night!
Medium Solar Panel Cost Copper/Glass, Product 4U/s, Bytes 2.000
The cost is worth the production, if you want to produce from solar you can use this. Excellent if you use 4 Medium Solar Panels on a Gateway Chamber at the north/south pole positioned on a large storage or Silo in order to have 50% of the panels always active! If you use a leveling block and place it face down, you can produce 24/7 power, and this is really great! (Power Tips and Tricks)
Large Solar Panel Cost Alluminium Alloy, Copper, Glass, Product 8 U/s Bytes 4,000
Despite its eye-catching aesthetic, don't print it! Compared to two Medium Solar Panels that cost 2 Copper 2 Glass, with this they are robbing your aluminum! Save your bytes and don't get fooled.
As with Medium Solar Panel, If you use a leveling block and place it face down, you can produce 24/7 power.
Solar Array Cost Copper/Glass/Plastic/Graphene, Product 14U/s, Bytes 6,250
The Solar array is 14x as powerful as the Small Solar and 3,5x as much as the Medium Solar.
Solar Arrays are an ideal match to bases which already have lots of Batteries for power storage, since they don't provide power at night. Their cost is good, but they give their best when used in pairs at diametrically opposed slopes on a Large/Extra Large Platform positioned above the South / North Pole Gateway Chamber. (Power Tips and Tricks). In this way 50% of them will always be active! As with Medium and Large Solar Panel, If you use a leveling block and place it face down, you can produce 24/7 power. This is the best you can get!
GENERATORS TYPES
Generators are a great way to generate Power when solar/wind is not available
Small Generator Cost Compound, Product 2U/s,
Use 1 Organic for 120 seconds.
Cheap and available makes it useful in the early stages of the game. Use in combination with a Tapper and auto arm for make an Automated Organic Power Plant (Power Tips and Tricks) to consistently generate power reliably from the early stages of the game.
Carry it in your backpack to feed the mods of the terrain tool. Use it when you need to build a new base.
If you don't have Q rtgs, Use 1 or 2 Small Generators on the Rover in combination with the drill to feed your Rover and extract Organic in the same way.
Medium Generator Cost Tungsten/Aluminum, Product 9U/s, Byte 3750
Use 1 Carbon for 120 seconds
If you find one at the start of the game, use it immediately for make an AutomatedCarbon Power Plant (Power Tips and Tricks) and forget about Power problems for a long time.
The bytes spent on it might be worth it.
BATTERY
Batteries are used to store Power and send it when required.
Small Battery Cost Zinc, Capacity: 32 U, Throughput Rate: 1 U/s, Bytes 2,000
In the past I have disparaged small batteries I considered them useless because of the little Power stored in it and the precious cost in Zinc. However, it is possible to place them in a medium storage silo and create a Battery Silos. Even if the price is insane (24 Zinc / 2 titanium) it use a only one Tier 2 Slot and get in total a x1,5 Capacity and a x5 Throughput Rate than a Medium Battery. Useful at the beginning of the game, when there is no lithium and bytes available for Medium Batteries.
Medium Battery Cost Lithium/Zinc, Capacity: 512 U, Throughput Rate: 5 U/s, 3,750 Bytes
It do their job fairly good and the cost is really worth investing. If you want to spend a little and store a lot use it. Place them on a large Storage or Large Storage Silo to save space and compact everything.
Power: part 2
RTG TYPES
RTGs are devices that provide a constant and infinite output of Power, regardless of weather conditions and external factors.
Field Shelter Cost Silicone/Graphene, Product 0,5U/s, Byte 8000
The Field Shelter can be good for players that wish to set up small, temporary bases while exploring the planets. They can be placed anywhere and, when finished in the area, can be packed up with a Icon Packager.png Packager to move it, unlike the normal Shelter that is unable to be packaged once placed.
The Field Shelter has 2 Cable Plugs and a single Small slot on top. It also provides oxygen and power with a modified Oxygenator and RTG in the back, providing half the power (0.5 Units/s) of a normal Shelter. Personally I don't use shelters to avoid wasting bytes and investing it better.
Shelter Cost Silicone/Graphene, Product 1U/s, Byte 0 (Unlocked)
Even though it produces twice as much as a Field Shelter, it has the disadvantage that once placed it cannot be moved by packers. As written above, I don't use shelters
Qrtg Product 1U/s
It can be obtained from missions or around the debris and caves. It only produces a 1U / s but never runs out. Use it to power backpack and vehicles (without modules).
RTG Cost Nanocarbon Alloy/Lithium, Product 4U/s, Byte 12,500
it is the last bastion of power. Can be placed on platforms to provide a steady stream of power at all times. The material requirements for producing an RTG are somewhat extreme and require visiting no less than two planets simply to acquire the necessary gasses for manufacturing the required metals. Build some these as soon as possible to power Vehicles, Autoextractors and Bases.
Power: Tips and Tricks Updates
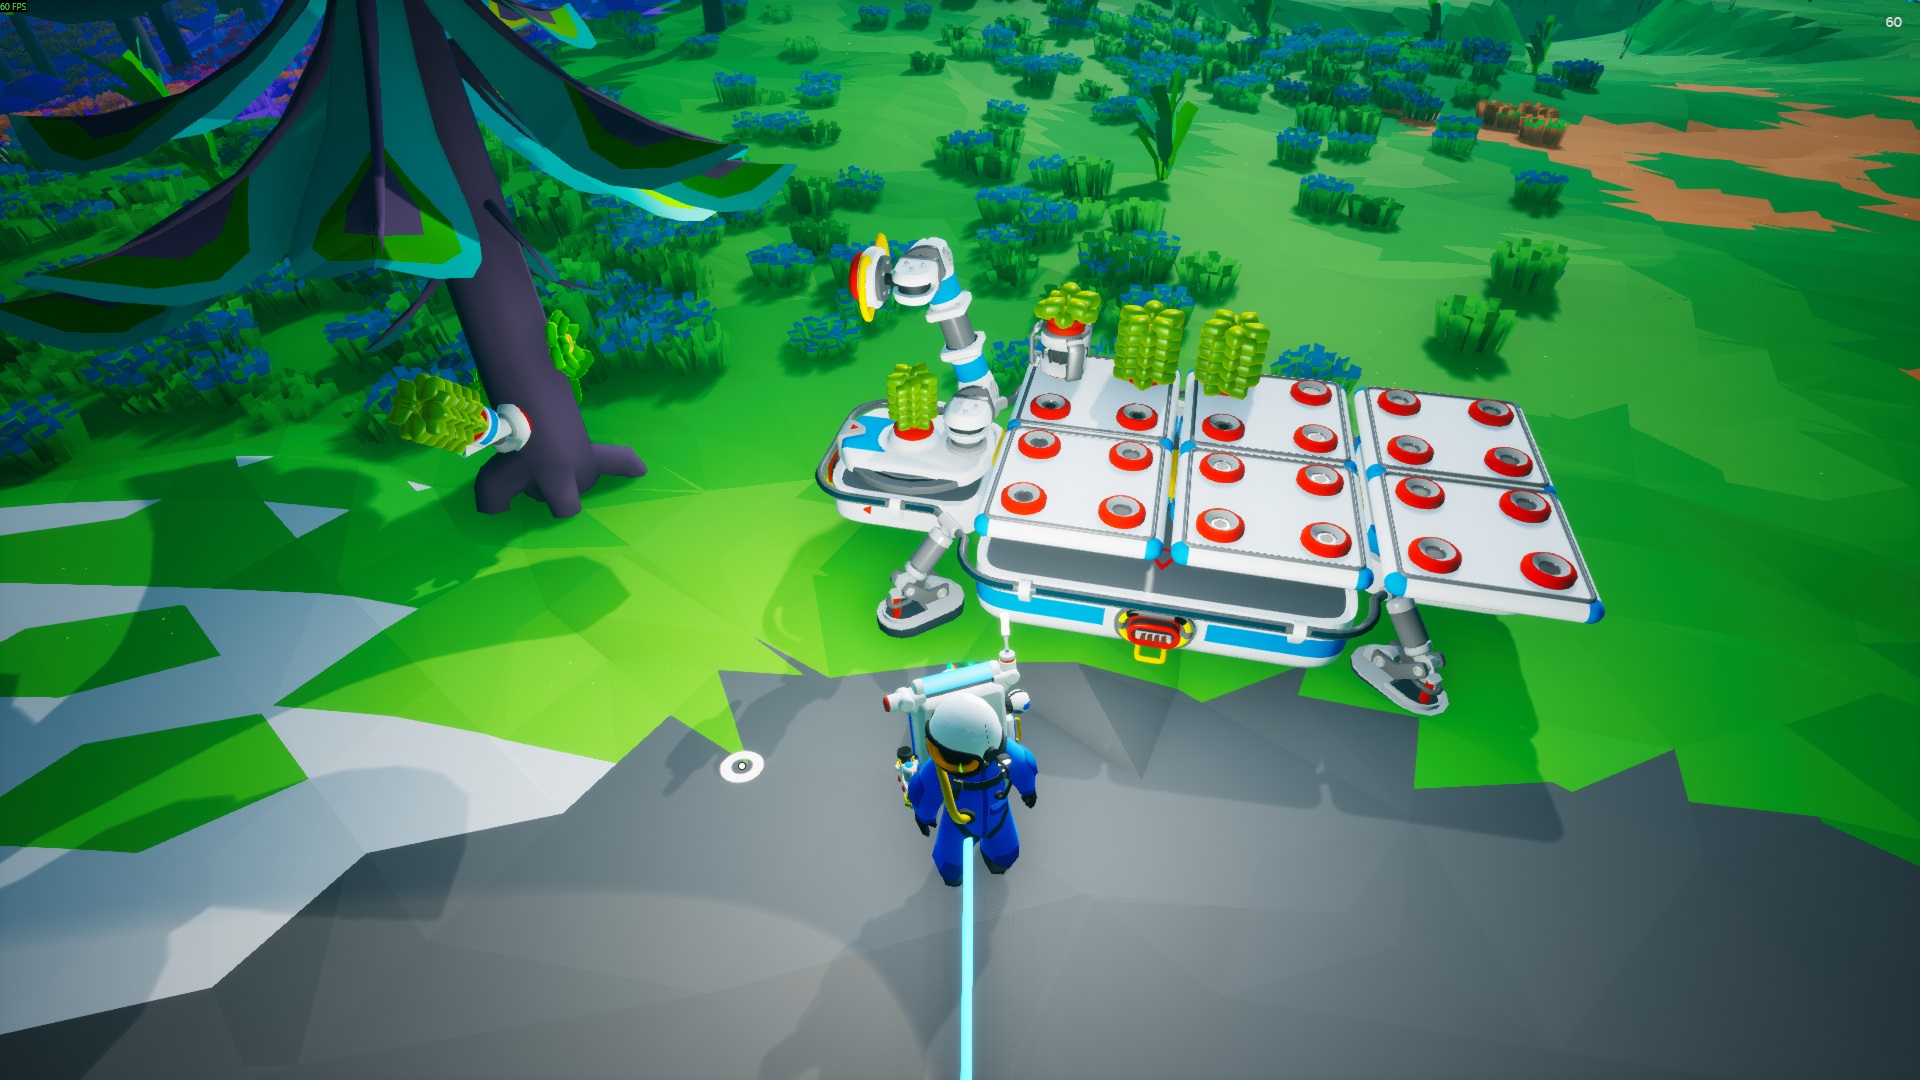
Use an Automated Arm to extract organic matter from a Tapper placed on a Plant, which will constantly Power a Small Generator that will power the entire extraction process. Plant additional Plants within the Auto Arm's range and add more Tappers and Small Generators if you want to increase the amount of Organic matter and Power you generate.
Automated Carbon Power Plant
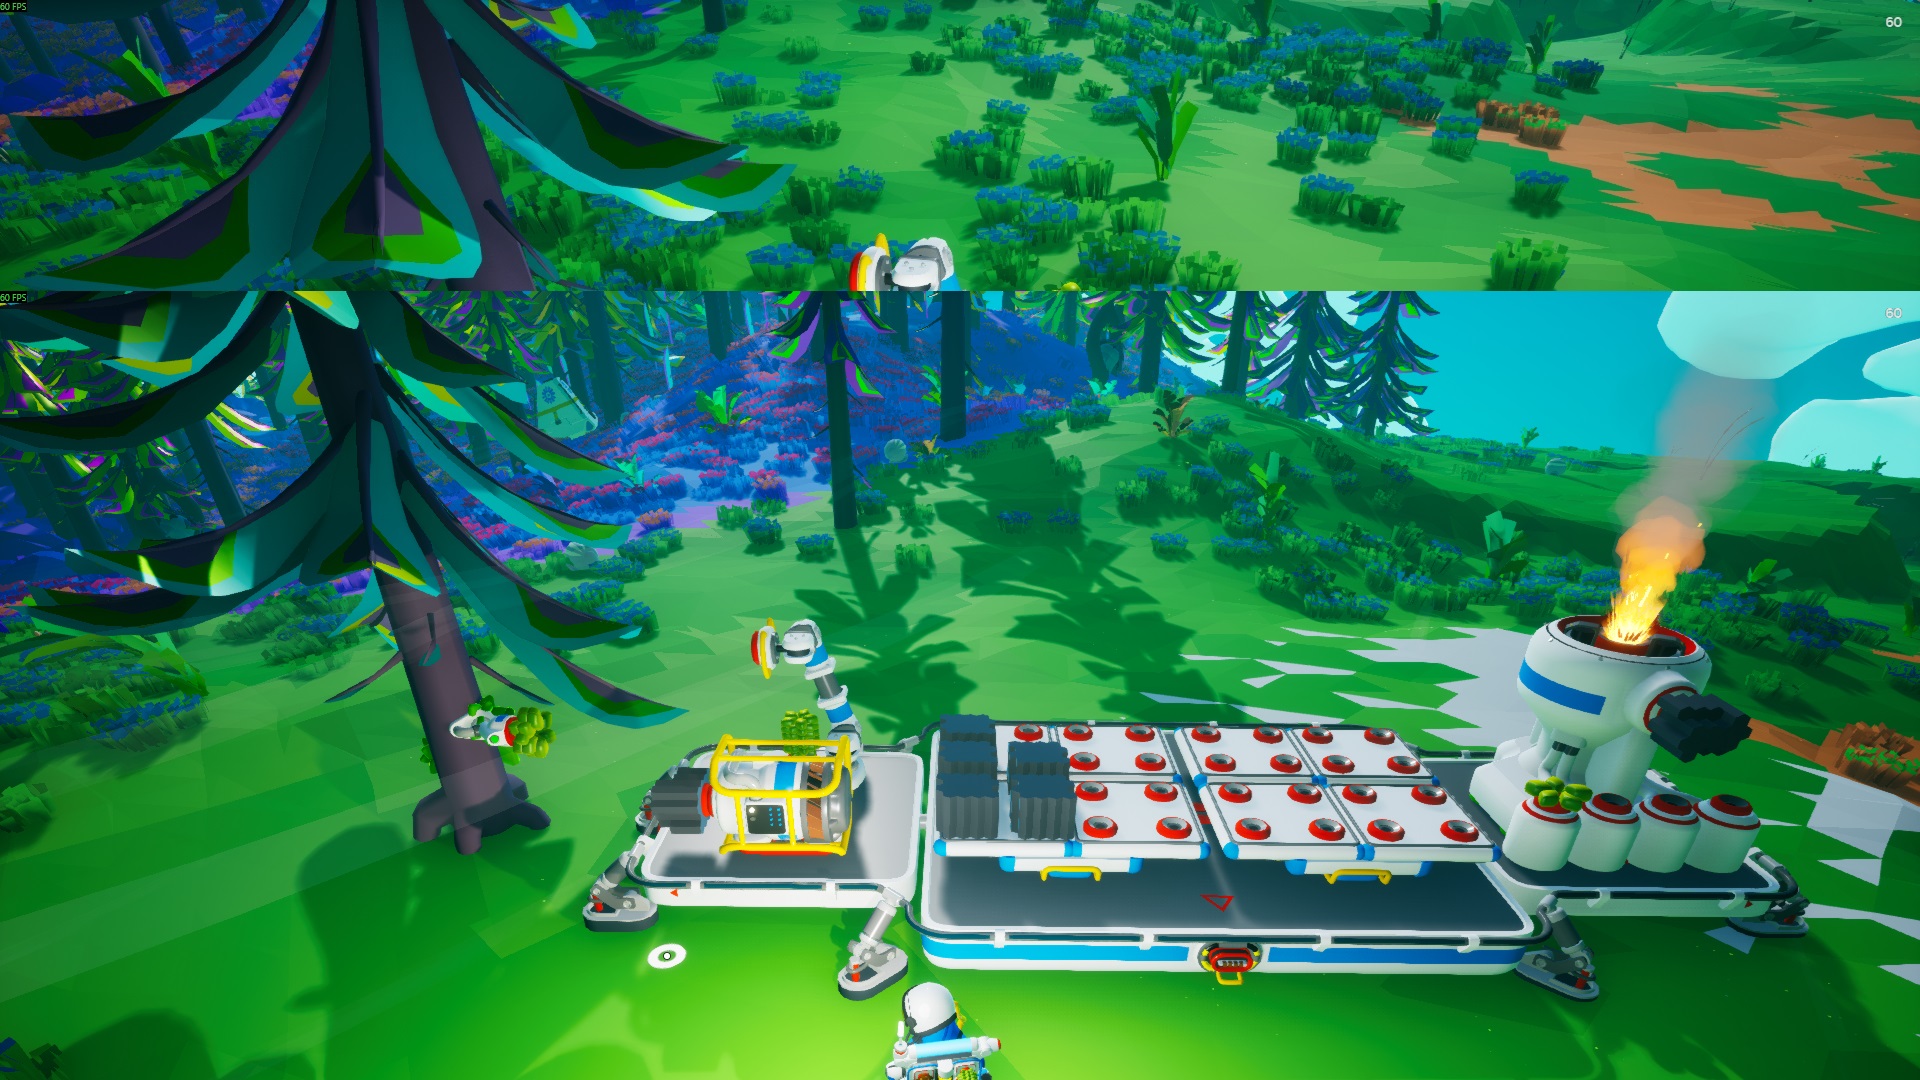 Similar to the previous system, use an Extra-Large C platform with an added Melting Furnace, and replace the Small Generator with the Medium Generator.
Power: Tips and Tricks
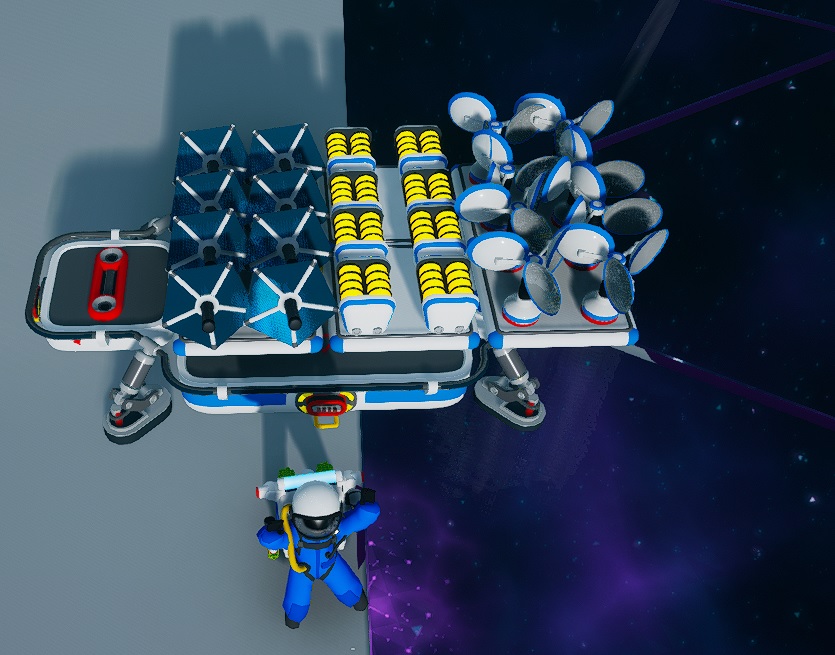 SMALL POWER STORAGE
Use Medium Storage to insert, Small Solar Panels, Small Turbines or Small Batteries to optimize space using them.
Small Panels Storage Cost 8 Copper, 2 ResinProduct 8 U/s
Made up of 8 Small Solar Panels, use it only if you are in the North or South Pole to make them work 24/7 although very expensive, it produces the Power equivalent of 2 RTG, and you can get it pretty soon.
Small Turbines Storage Cost 8 Ceramic, 2 Resin
Product 12 U/s
Very economical, made up of 8 Small Wind Turbines, it produces the equivalent of 3 RTG only when there is wind. It also produces how much 2,4 medium wind turbines, with the advantage of taking up less space. Build it as soon as possible and use it in large quantities to power your base. Great when combined with batteries. Use it to power Autoextractos before getting RTG or Large Rovers if supported by batteries. You should uses only Small Wind Turbines, and shred the Medium Turbines, the latter are outclassed
Small Batteries Storage Cost 8 Zinc , 2 Resin
Capacity: 256 U / Throughput Rate: 8 U/s
It can be easy to build if you find a Sphalerite underground vein on Sylva. It has a Capacity and a x2,5 Throughput Rate than a Medium Battery. Great in combo with Small Turbine Storage, you can use it on rover to replace it with Small Generators. Use it if you need to quickly create Batteries (no zinc) and don't want to use too many bytes for Medium Batteries.
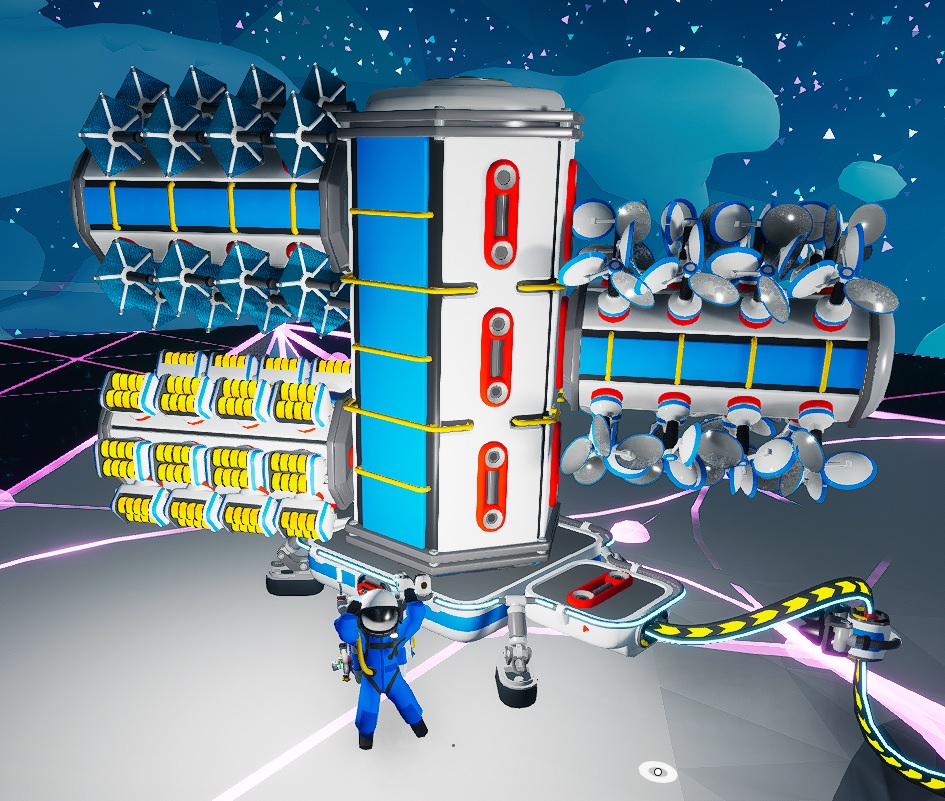 SMALL POWER SILOS
Advanced version Small Power Storage, use Storage Silos instead of Medium Storages to optimize more and more space using them.
Small Panels Silo Cost 24 Copper, 2 Titanium / Product 24 U/s
Made up of 24 Small Solar Panels, use it only if you are in the north or south pole to make them work 24/7 although very expensive, it produces the Power equivalent of 6 RTG, and you can get it pretty soon.
Small Turbines Silo Cost 24 Ceramic / Product 36 U/s
Very economical, made up of 24 Small Wind Turbines, it produces the equivalent of 9 RTG only when there is wind.
Build it as soon as possible and put it alongside other Battery Silos. Thanks to its crazy power production, it can be useful for unlocking Gateway Chambers.
Small Battery Silo Cost 24 Zinc/ Capacity: 768 U / Throughput Rate: 24 U/s
Despite the high cost, it can be easy to build if you find a Sphalerite underground vein on Sylva and It has a x1,5 Capacity and about x5 Throughput Rate than a Medium Battery. Create some as soon as possible to fix your Power problems early in the game. Later you can opt for Small Battery Silos, Medium Battery Storage/Silos if you have Lithium and Zinc for Medium Batteries, Titanium for Medium Silo and Steel for Large Silo. Great in combo with Small Wind Silos. Thanks to its great Throughput Rate, it can be useful for unlocking Gateway Chambers.
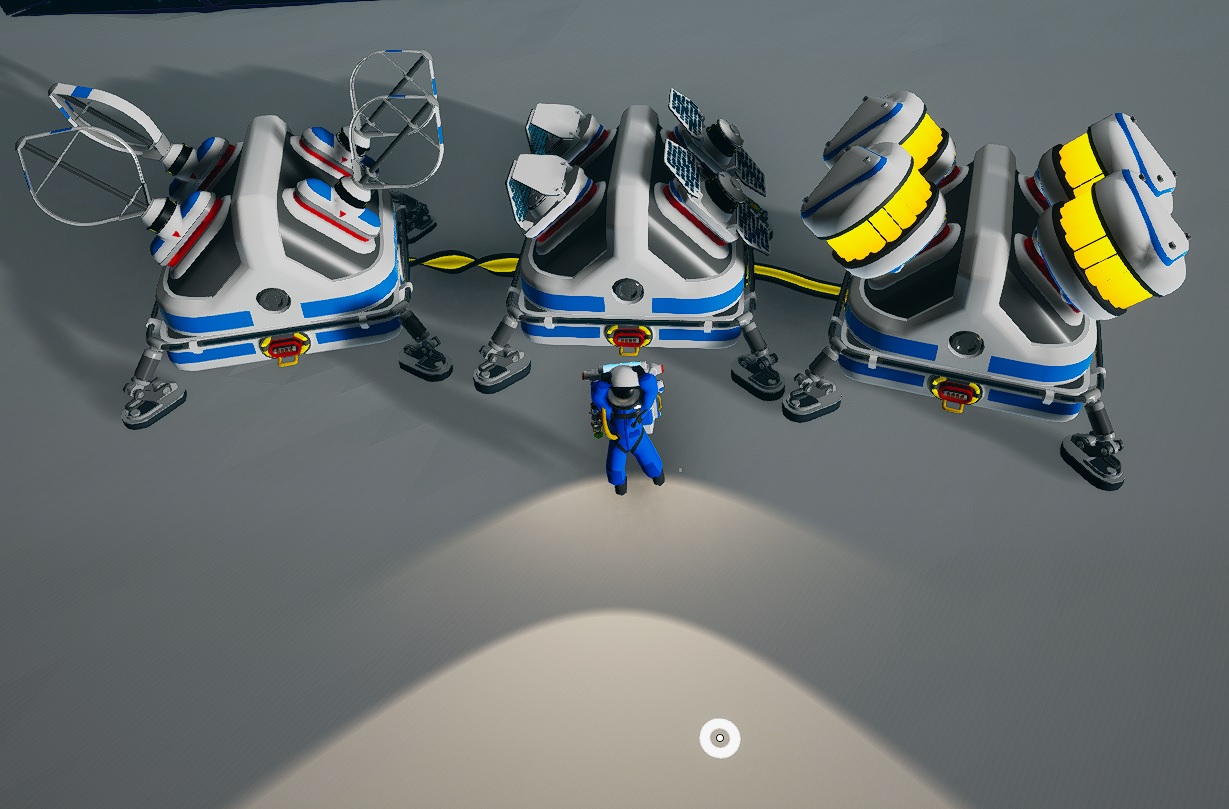 MEDIUM POWER STORAGE
Medium Solar Panels Storage Cost 4 Copper, 4 Glass,
3 Ceramic / Product 8 U/s
Made up of 4 Medium Solar Panels it has the advantage of being inexpensive compared to Small Solar Panels however only 50% of the Solar Panels will be active due to how the panels themselves are directed. Despite this, it produces an excellent amount of Power in proportion to its excellent price. Use this only at the North or South pole. Placed it on a Gateway Chamber.
Medium Turbines Storage Cost 4 Alluminium, 7 Ceramic
Product 20 U/s
Made up of 4 Medium Wind Turbines, if you don't feel like making a lot of Small Turbines, and you don't mind spend aluminum, this is for you. With the same space they produce twice as much as the Large Wind Turbine and more than one XL Wind Turbine, using common materials.
Medium Battery Storage Cost 4 Lithium, 4 Zinc, 3 Ceramic / Capacity: 1536U / Throughput Rate: 20U/s
Made up of 4 Medium Batteries, If you have access to Zinc and Lithium, this is a great investment. Later, you can move Medium Batteries and place them on Large Silos to save space for your base.
If you are looking for a way to store a lot of Power , this is for you!
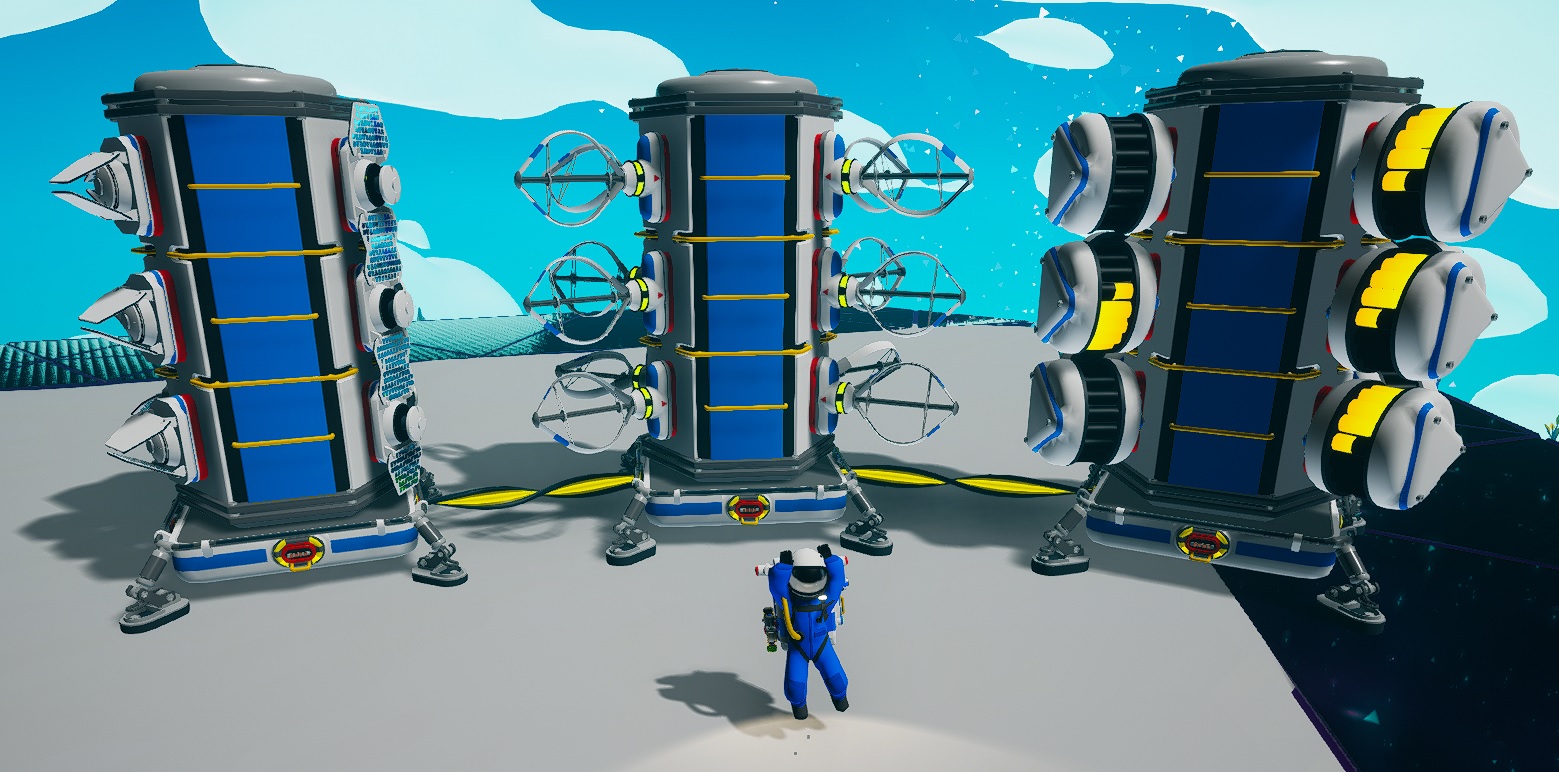 MEDIUM POWER SILOS
Advanced version Medium Power Storage, use Large Silos instead of Large Storages to optimize more and more space using them.
Medium Solar Silo Cost 12 Copper, 3 Steel
Product 24 U/s
Made up of 12 Medium Solar Panels, is the evolution of Medium Solar Storage. Use this only if you are in the North / South Pole, in order to have 50% of the Solar Panels always active. It has the advantage of taking up less space and it produces 3 times more compared to Large Storage and Large Solar Panel.
Medium Turbines Silo Cost 12 Alluminium, 12 Ceramic, 3 Steel
Product 60 U/s
Made up of 12 Medium Wind Turbines, is the evolution of Medium Wind Storage. If you have a lot of Aluminum, and you don't feel like building Small Wind Turbines, you might want to consider making it. With the same space it produces 6 times more than a Large Wind Turbine and 3.5 times more than a XL Wind Turbine.
Medium Battery Silo Cost 12 Lithium, 12 Zinc, 3 Steel / Capacity: 6144 U / Throughput Rate: 60 U/s
Made up of 12 Medium Batteries, is the evolution of Medium Battery Storage. It has the advantage of taking up less space and it store 3 times more compared to Large Storage. It's the top you can get.
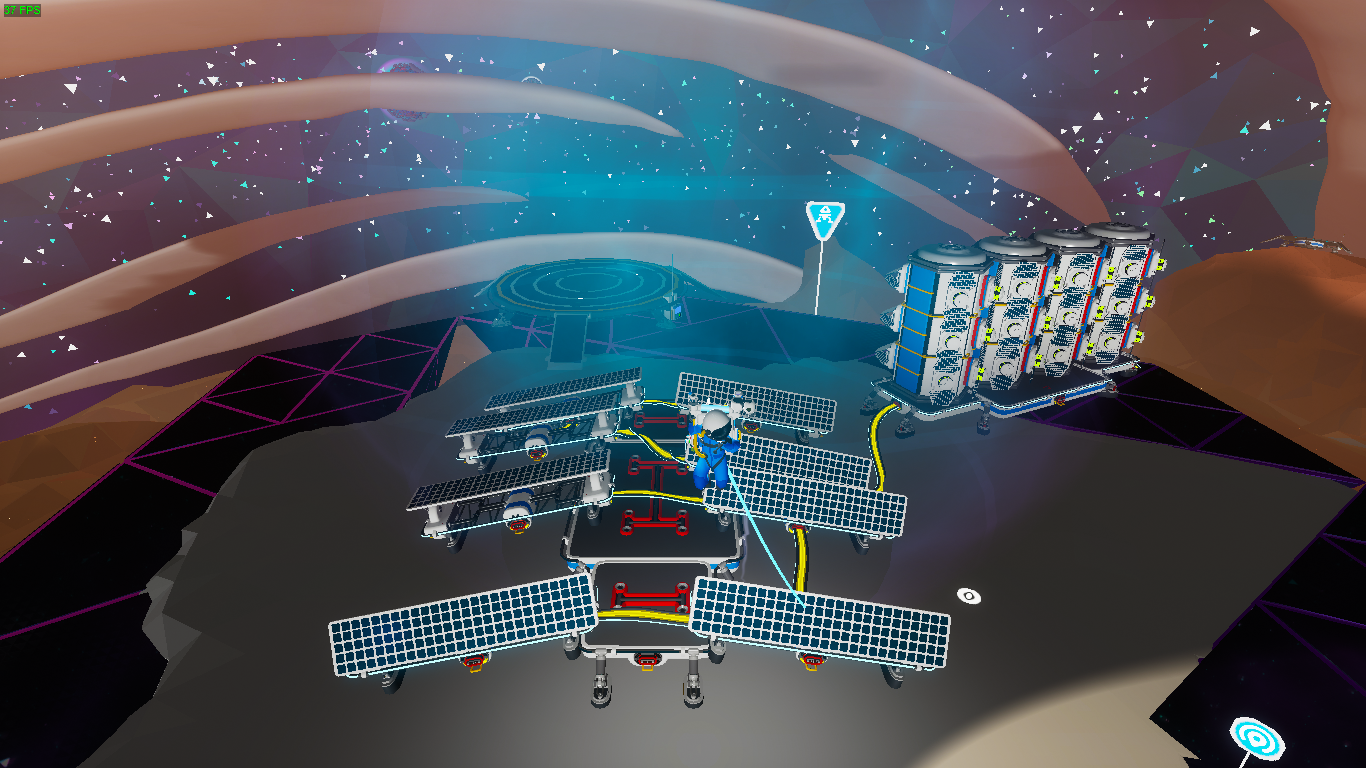 Poles Solar Array 50% efficiency
Formed by two or multiple Solar Arrays, use this only above a Gateway Chamber on one of the two Poles to take advantage of the 24h sun. The Large Platform has the function of tilting them in two opposite directions in order to have half of the Solar Arrays always active!
Recommended on Calidor! Solar Pannels 100% efficiency
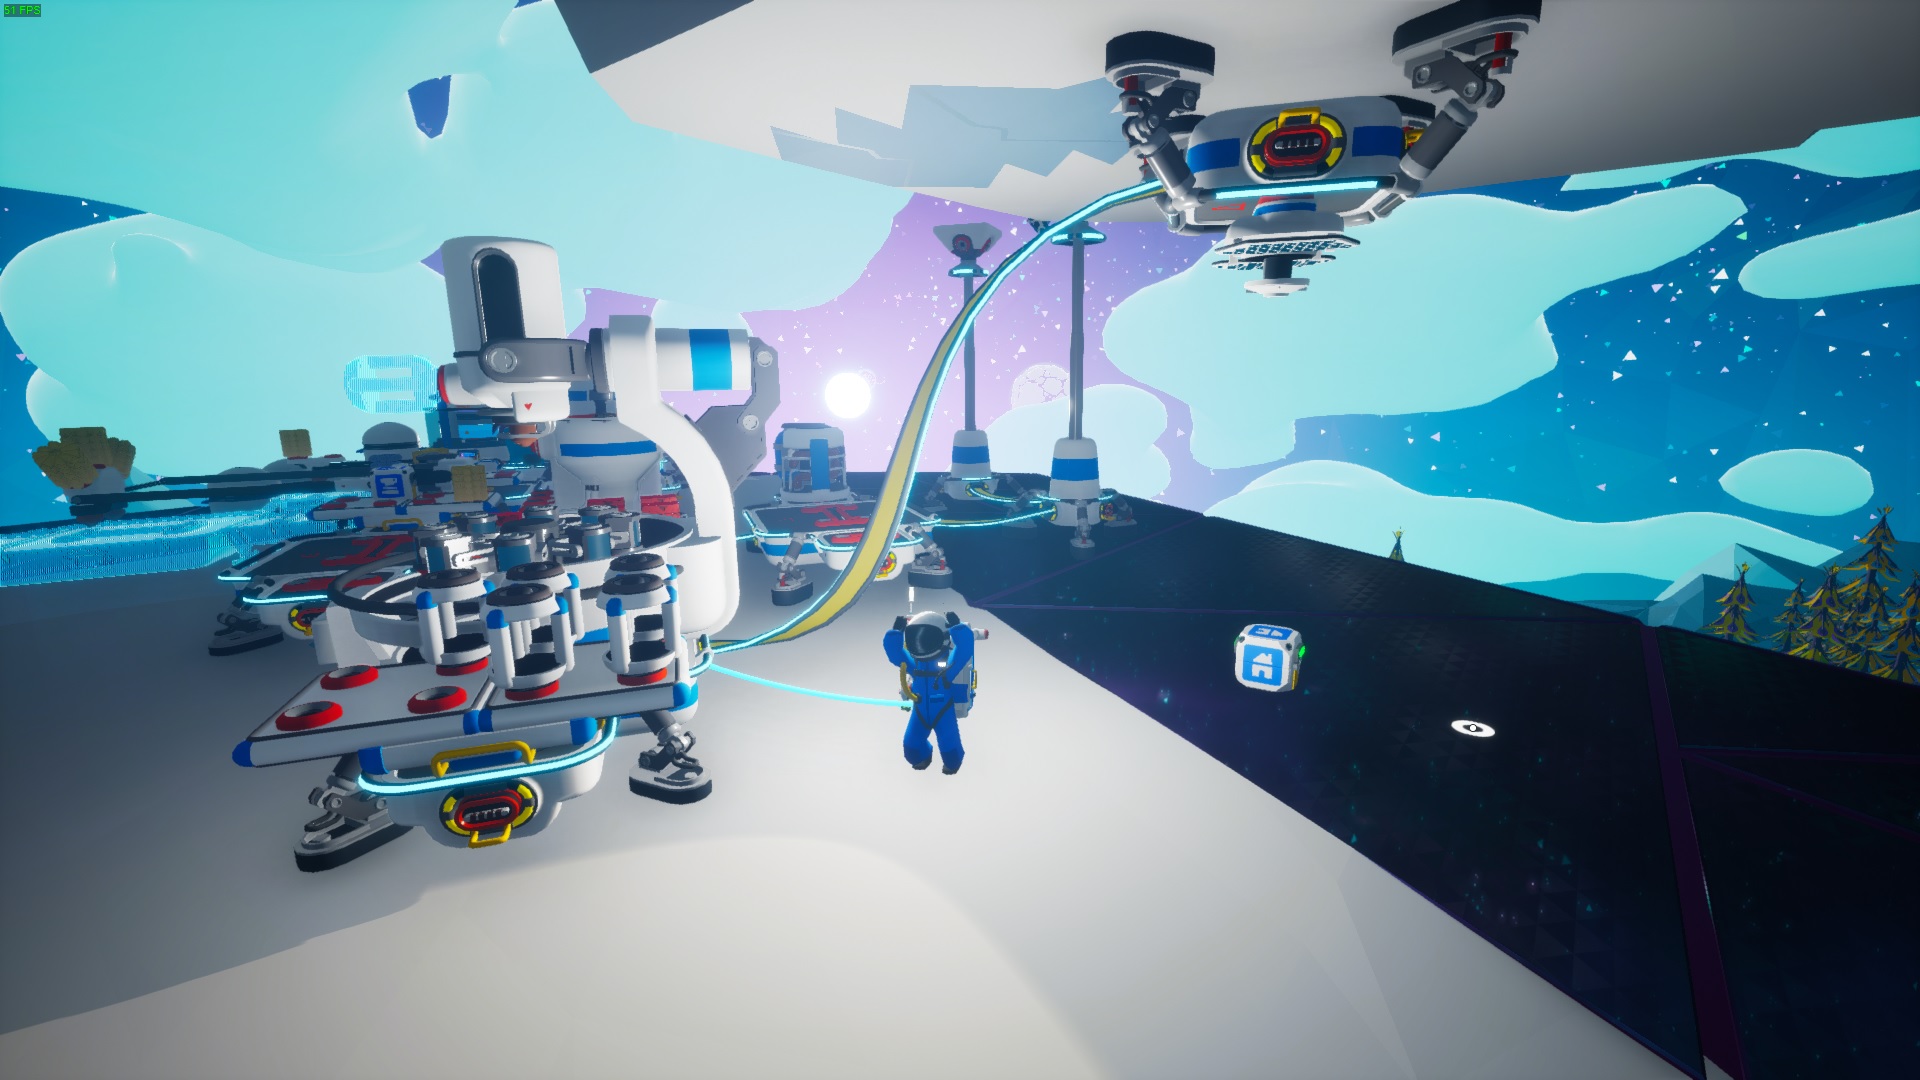 Above a north or south pole gateway chamber, use a Leveling Block to create a pillar. At the end of the pillar, create an adjacent one and remove the base with the Terrains Tool, in order to obtain a surface with a flat ceiling, where to attach Solar Arrays or Platforms on which to put Solar Panels upside down with respect to the ground.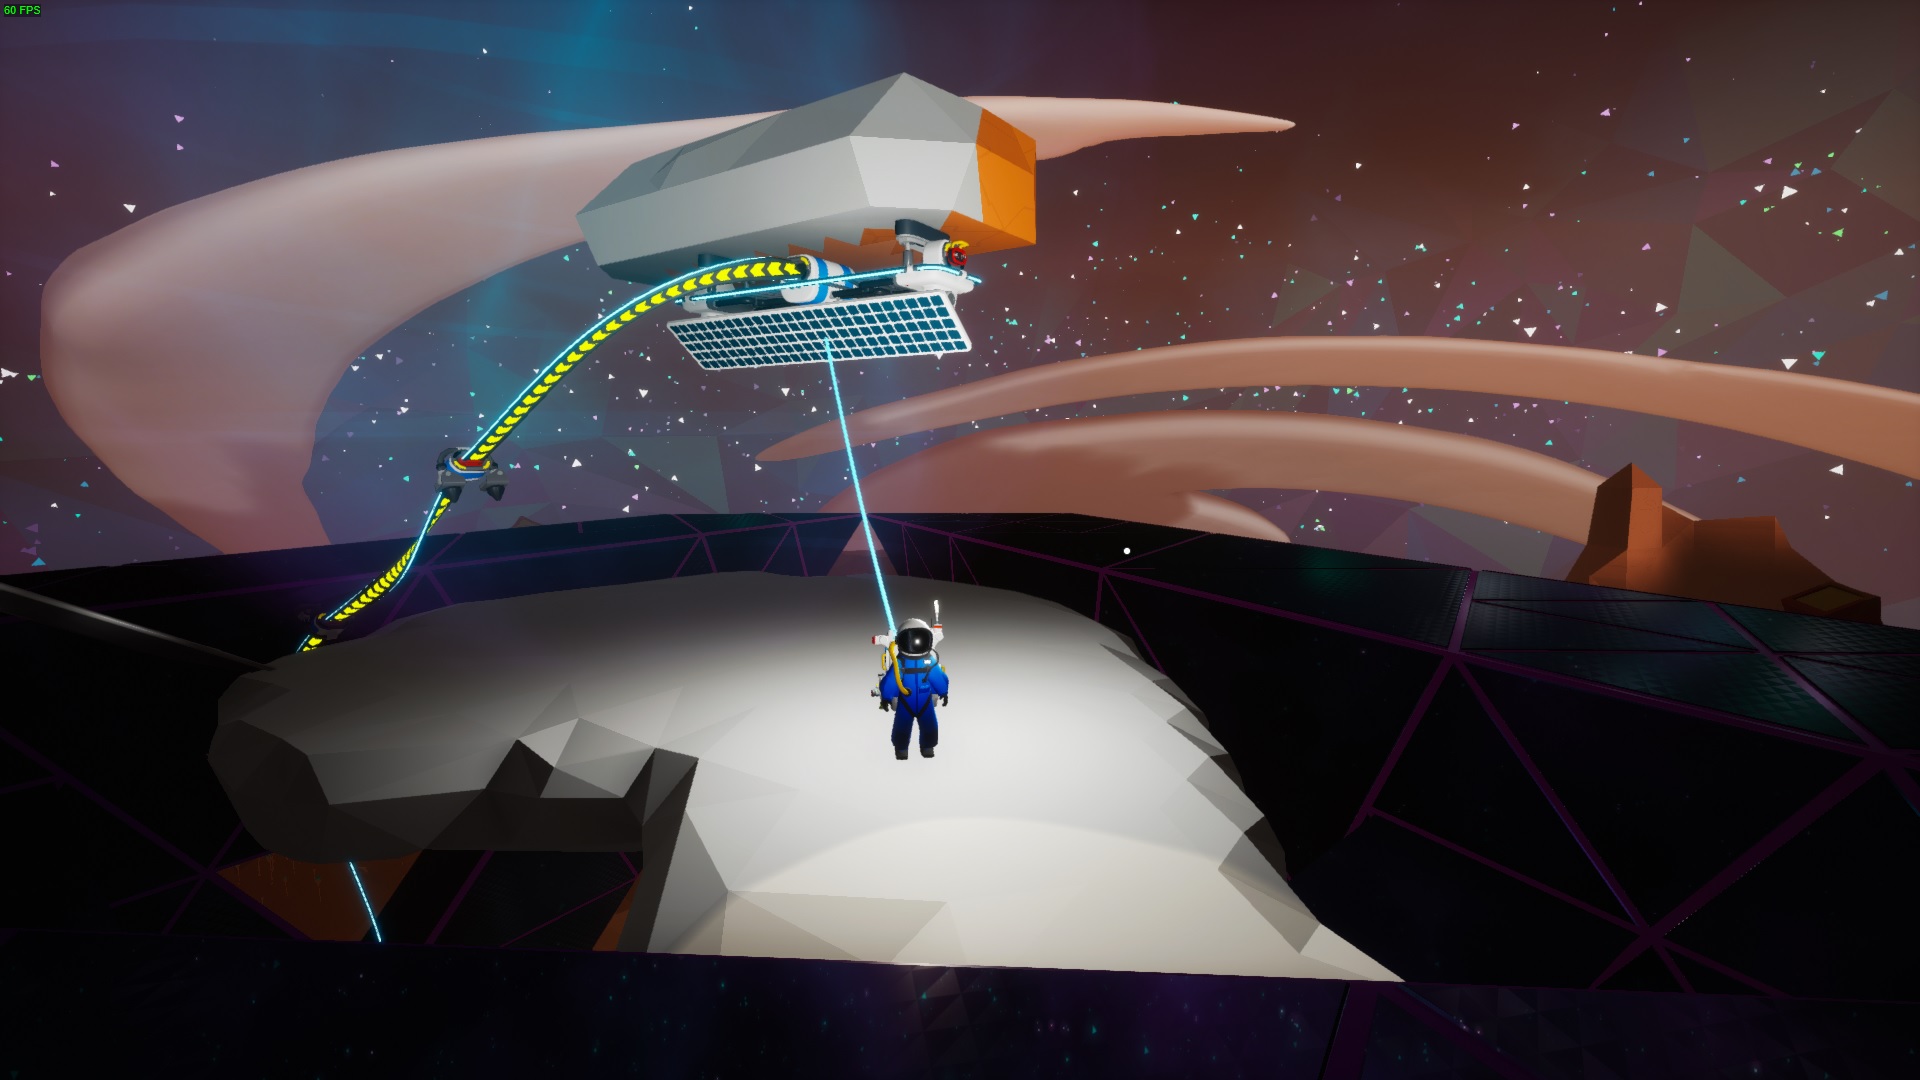
Vehicles Analysis
To learn more about Vehicles, I suggest you take a look at the game wiki https://astroneer.gamepedia.com/Vehicles
For now i will talk about land vehicles which are respectively Tractor, Trailer, Buggy, Medium Rover and the Large Rover
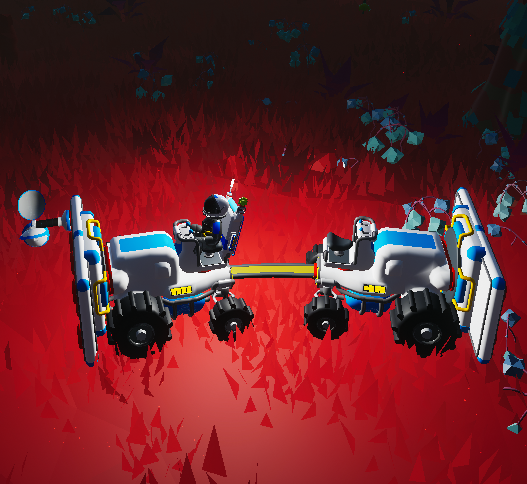 Tractor
It will be your first Vehicle, with which you will get freedom of oxygen and exploration, be careful not to get lost. Power it use a Medium Storage with a Small Wind Turbine to solve the Power, and add a small Battery or Small Generator if needed. You can also combine two tractors, it could have its usefulness. Remember to use packages to store Research and Medium sized items in your Medium Storages.
Trailers
It is the extension of the Tractor, useful for further increasing the stowage space, choose according to your needs how many Medium Storages to insert. Remember that a tractor can support up to 3 trailers.
Buggy
It's a good exploration vehicle, it is faster and more maneuverable than the Tractor.
I generally don't use this due to lack of space to store found Research Objects and Resources. If you really want to use it, a single Small Wind Turbine and a Small Battery is more than enough.
Medium Rover
It can be a good Vehicle, a real Movable Platform. I don't use it because it is completely supplanted by the Large Rover and I don't feel like spending bytes unnecessarily on it.
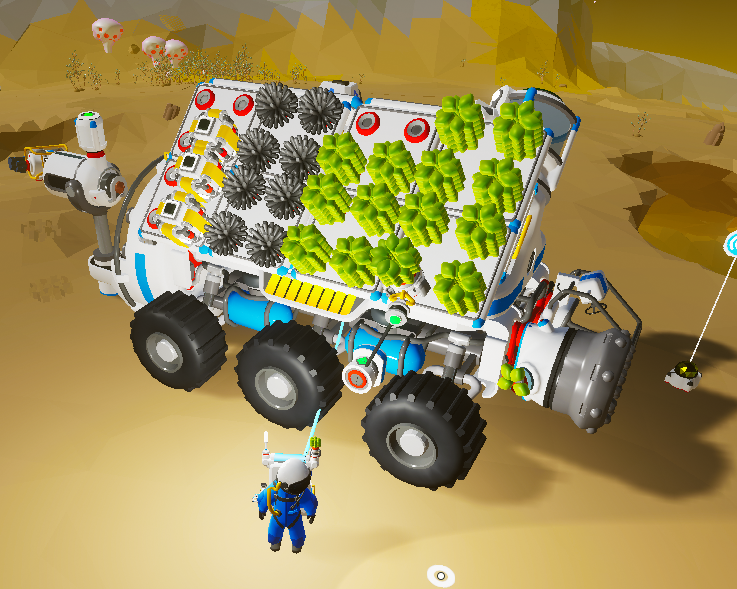 This is the best you can get. From the great maneuverability to the large storage space you can get thanks to Large Storages that you can put on it. Use a single Small Generator (or Qrtg) to feed it through organic which you can harvest through the use of a Drill, and remember to equip Medium Canister to collect Soil in large quantities. If you want, you can add a Soil Centrifuge behind it if you want to constantly stock up on Organic for Power, Quartz for Beacons, and Graphite for Packages during your exploration.
If you want, you can attach the Battery Sensor to one side of the Rover and connect its cable to the Small Generator so that it turns it on and off automatically.
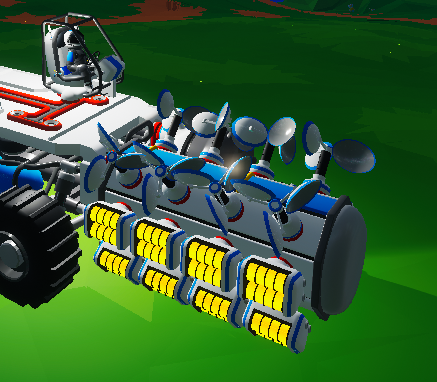 Later in the game, you can remove the Soil Centrifuge and insert in its place a Large Storage Silos. Add a paver beside the Drill as soon as possible and an additional Small Generator so you can literally dive Underground and drive into the Sky. If you can, add a Small Battery near the Generator to avoid continuous on and off of the sensor. Alternatively, you can use 1-2 Qrtg or 1 RTG so you don't need organic to feed it.
Large Rover Trains
I've used Large Rover Trains in the past, and created mobile bases, which was fun. However, I have noticed over time that they are simply not needed. A single Large Rover is much more maneuverable than a Large Rover Train, and the latter can often get stuck and waste your time. Better to make Single dedicated Large Rover than a long train all done. From my experience, the disadvantages outweigh the advantages, however feel free to experiment.
This guide may interest you:
https://steamcommunity.com/sharedfiles/filedetails/?id=2089523107
Rails
Rail Cars, Rail Engines, and C.O.L.E. allows players to create trains to ride along rail lines set down via Rail Post Bundles or Tall Rail Post Bundles.
The Rail Post is a railway item in Astroneer. It allows for the creation of rail lines, and can be used to recall Rail Engines to it. It can also be used as an “extended Extender”, being able to channel power and O2 between bases.
Placing a Rail Post within range of another will connect a rail line between them, deforming any terrain that might be in the way.
Rail Posts may be placed on any terrain, allowing for placement on walls and ceilings of caves.
The maximum placement distance for the post is shown as a coloured dial on the base of the post when placing.
White indicates valid placement, below the maximum rail length.
Blue indicates valid placement at optimal rail length.
Pink indicates invalid placement -- whether from being placed too far, too close, or from creating too sharp of a turn.
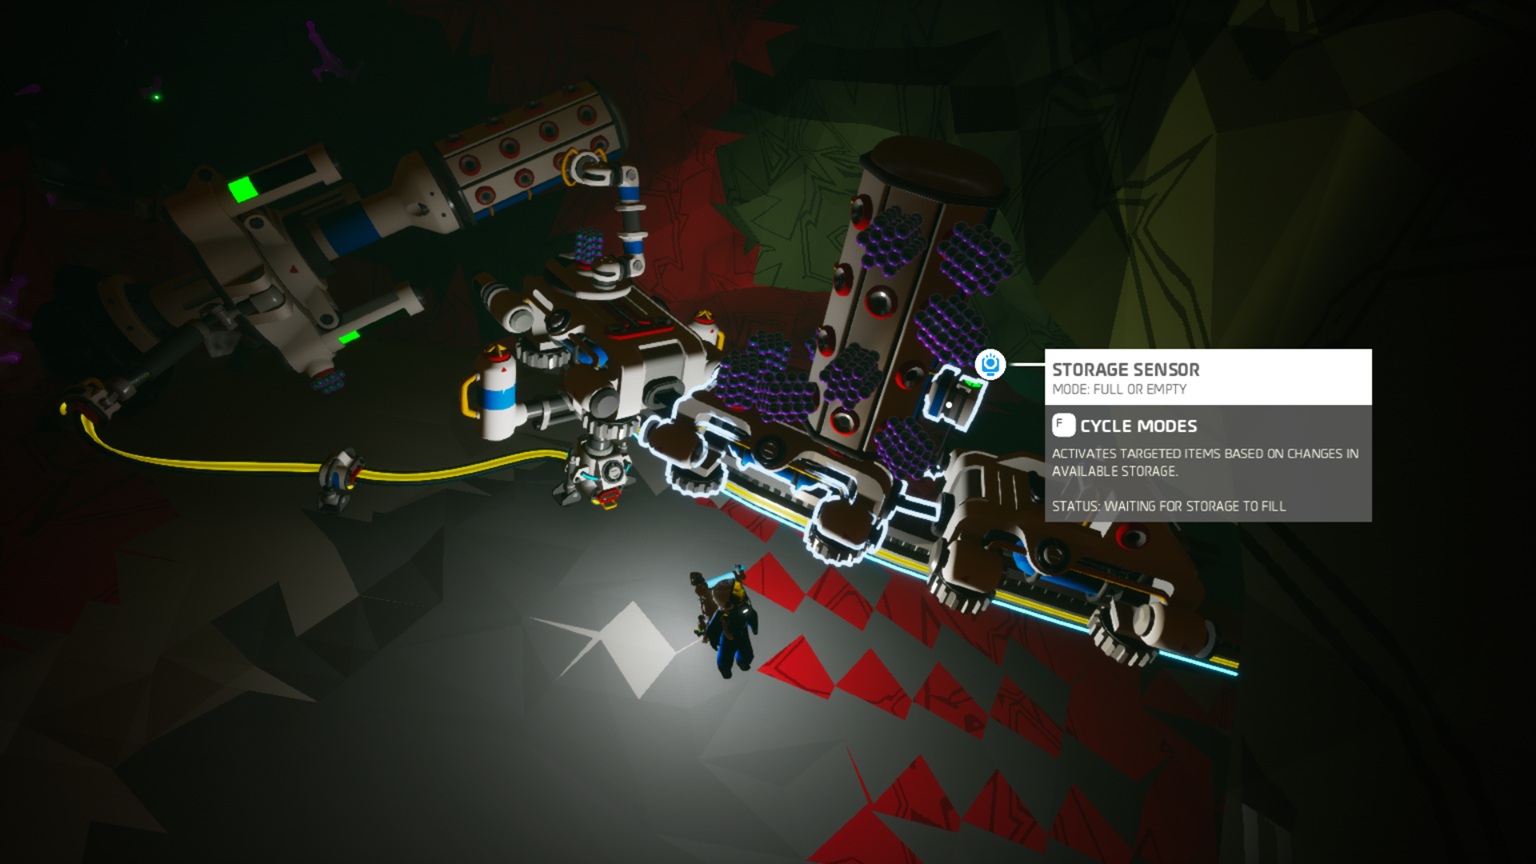 One of the best uses of rails is to automatically transport resources from the extractor car to your base, using a dedicated track. The train consists of two Rail Cars and a Rail Engine. An automatic arm collects the resources and places them in a Storage Silo, and the Storage Sensor (set to full or empty) starts the train as soon as the Silo is full. Conversely, when the silo is emptied, the train returns to the extraction point.
Page under construction
Base Layout
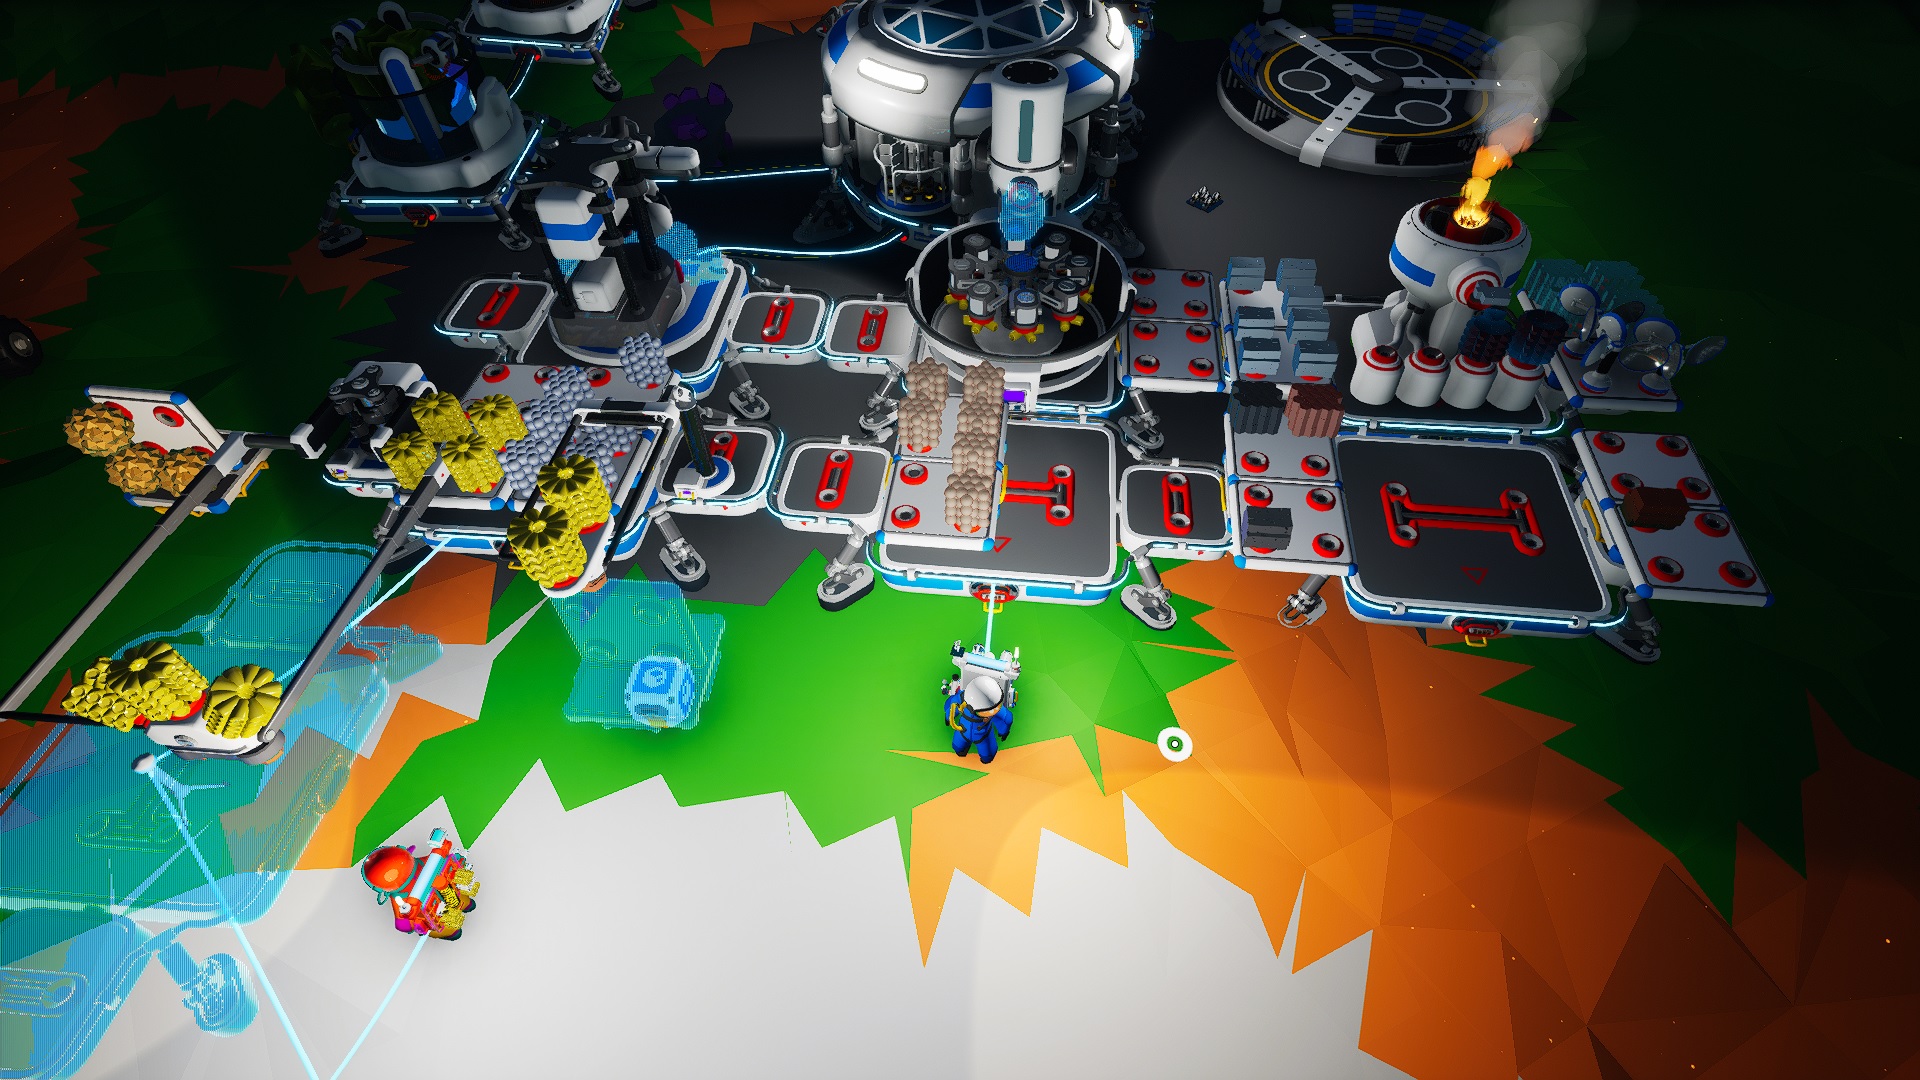 Basic Setup
This is the basic setup, it uses Large B platforms, with attached Medium Storages
Place other platforms in front for use as Storage.
Always remember to separate your Production Zone, with the Power Generation Zone and the Research Zone for a Greater Clear Layout.
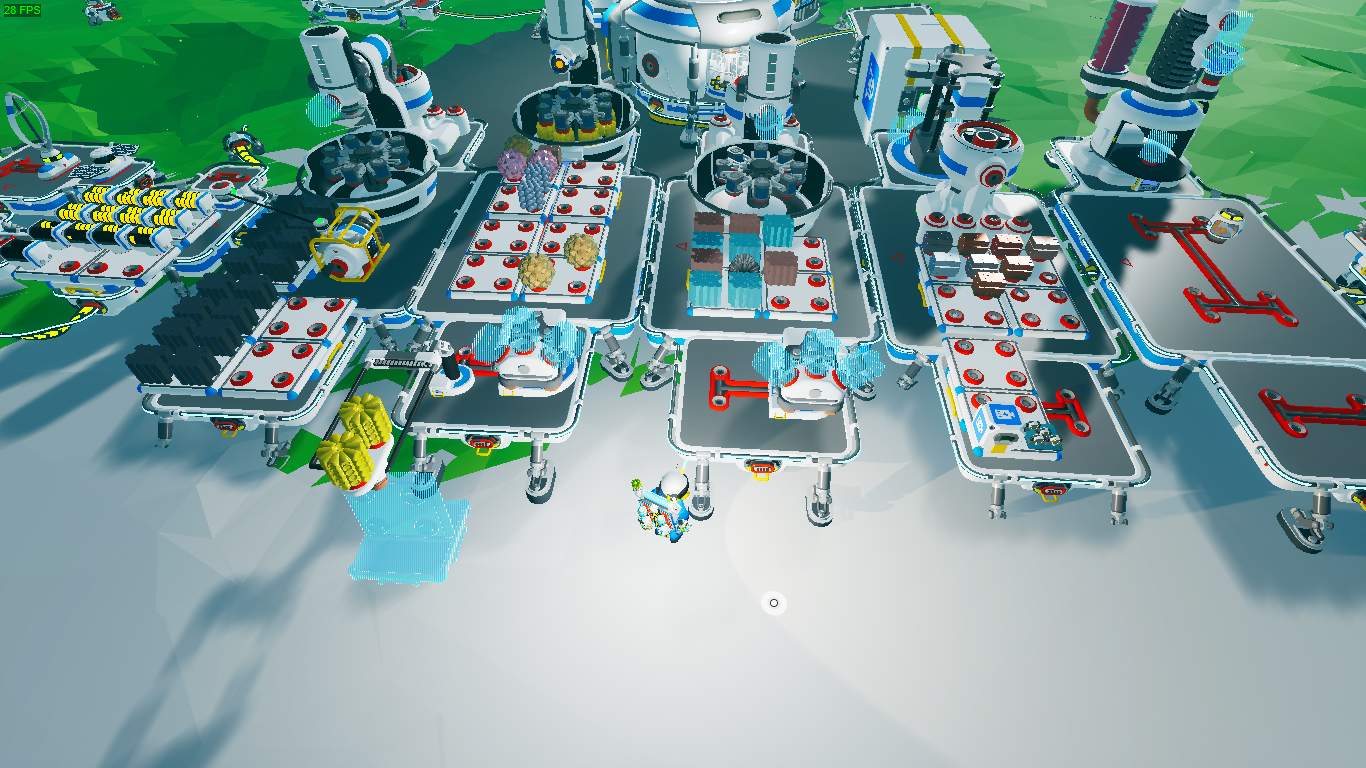 Advanced Setup
The image on the right is for illustrative purposes only. Create and customize your Extra Large Platforms C as you want, here are some examples!
Replace all Large Platforms B with Extra Large Platforms C. Insert Medium/Large Storage and Silos as desired, using Canisters to store resources is strongly discouraged, except in rare cases, you will understand with experience. Instead, use them to move assets from one platform to another.
A Large Storage or Large Storage Silo will be built into all Extra Large Platforms C
Initially you can use Smelting Furnace, however I recommend you replace them with Portable Furnaces to get more space and insert other modules as Chem Lab or Trade Platform where needed. Using Medium Silos is a highly recommended choice.
First I recommend configuring these 3 Extra Large Platforms C as follows:
Basic Resource Platform
- Produced Resources: compound, Resin, Organic, Quartz, Rubber, Silicone
Soil Centifuge + Chemistry Lab + Medium and Small Printer
Used for the production of raw materials without the need for cooking, useful for creating commonly used materials through printers. If you place a Chemistry Lab, you can produce Rubber, Silicone (need Methane)
Non-metal Smelting Platform
- Produced Resources: Ceramic, Glass, Carbon, Plastic, Tungsten Carbide (optional)
Soil Centrifuge + Portable Furnace + Chemistry Lab + Medium and Small Printer.
Use Soil Centrifuge to create Clay, Quartz and Organic to quickly get Ceramic, Glass and Carbon,
Use Chemistry Lab to get Plastic (get compound by Soil Centrifuge) and Tungsten Carbide
Generic Metals Platform
Portable Furnace + Chemistry Lab Large + Trade Platform + Medium and Small Printer.
- Produced Resources: Alluminium, Copper, Tungsten, Alluminium Alloy, Tungsten Carbide
Used for the Smelting some Minerals, it uses a Large Printer to build Extralarge Platforms C
Use Chemistry Lab to obtain various Types of Alloy, by entering the necessary resources needed.
Use Trade Platform to get the Minerals you need
SPECIFIC PRODUCER PLATFORMS
Carbon Power Plant
- Produced Resources: Carbon
Soil Centrifuge + Melting Furnace + Medium Generators
Produce all the Carbon here to feed Medium Generators to get Power from the Soil.
Steel mill Platform
- Produced Resources: Iron, Carbon, Steal
Smelting Furnace + Chemistry Lab (Steal) + Soil Centrifuge (Optional for Organic/Carbon)
Unload all the Hematite you collect on this Platform, if you can through a Medium Resource Canister to do faster.
Refueling Platform
Chemystry Lab (Hydrazine)+ Soil Centrifuge + Trade Platform
- Produced Resources: Ammonium, Hydrazine
Unload all the Ammonium you collect on this Platform, if you can through a Medium Resource Canister to do faster,. otherwise you can produce it from the Soil Centrifuge or Trade it at the Trade Platform for Scrap. Also make sure you Load hydrogen on this Platform. Use the Chem Lab to get Hydrazine. Alternatively you can use the Trade platform to trade astronium for hydrazine itself
Graphene Platform
- Produced Resources: Graphene
Chemistry Lab (Graphene) + Soil Centrifuge (Graphite) + Trade Platform
Unload all the Graphite you collect on this Platform, if you can through a Medium Resource Canister to do faster.
Titanium Alloy Platform
- Produced Resources: Titanium and Titanium Alloy
Portable Furnace (Titanium) + Chemistry Lab (Titanium Alloy) + Trade Platform + Small Printer
Unload all the Titanite you collect on this Platform, if you can through a Medium Resource Canister to do faster. Use the Small Printer to print quickly Storage Silos out of it. You can use Trade Platforms to trade Scraps for Titanite. Put Nitrogen and Graphene and use Chem Lab to get Titanium Alloy
Automation & Devices
Automation is a System that can simplify your life to make the Production and use of Resources more efficient over time. Often creating automation systems could take time and be expensive, however the benefits will not be long in coming over time.
 Smart on/off Storage
Attach a Battery Sensor to a Medium Storage or Medium Silo, and connect the pin to the Small Generator, and be sure to insert a Small Battery. This device has the ability to turn the Generator off and on based on Power needs. However, be sure to bring Organic with you. On a Rover, if you use a Drill and a Paver together, use 2 of these Devices.
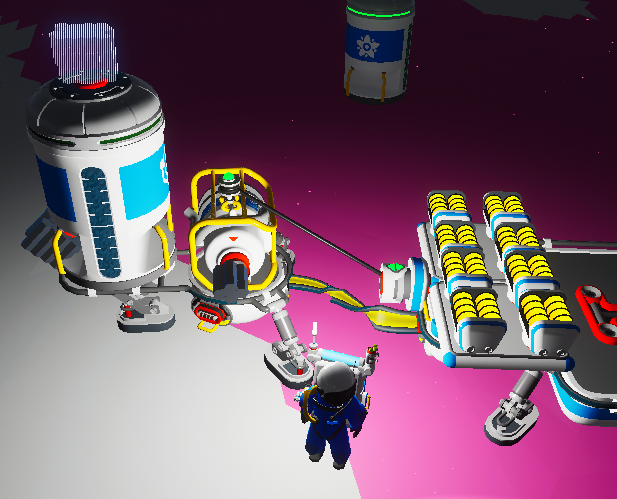 Smart Medium Generator
Sometimes it can be useful to have an emergency Medium Generator in cases of Power crisis.
Attach the Battery Sensor to a Small Battery Storage/Silo (Power Tips and Tricks) or Medium Battery, and connect the pin to the Medium Generator. When the battery power runs out, the generator will start running until they are recharged. However, remember the Carbon supply.
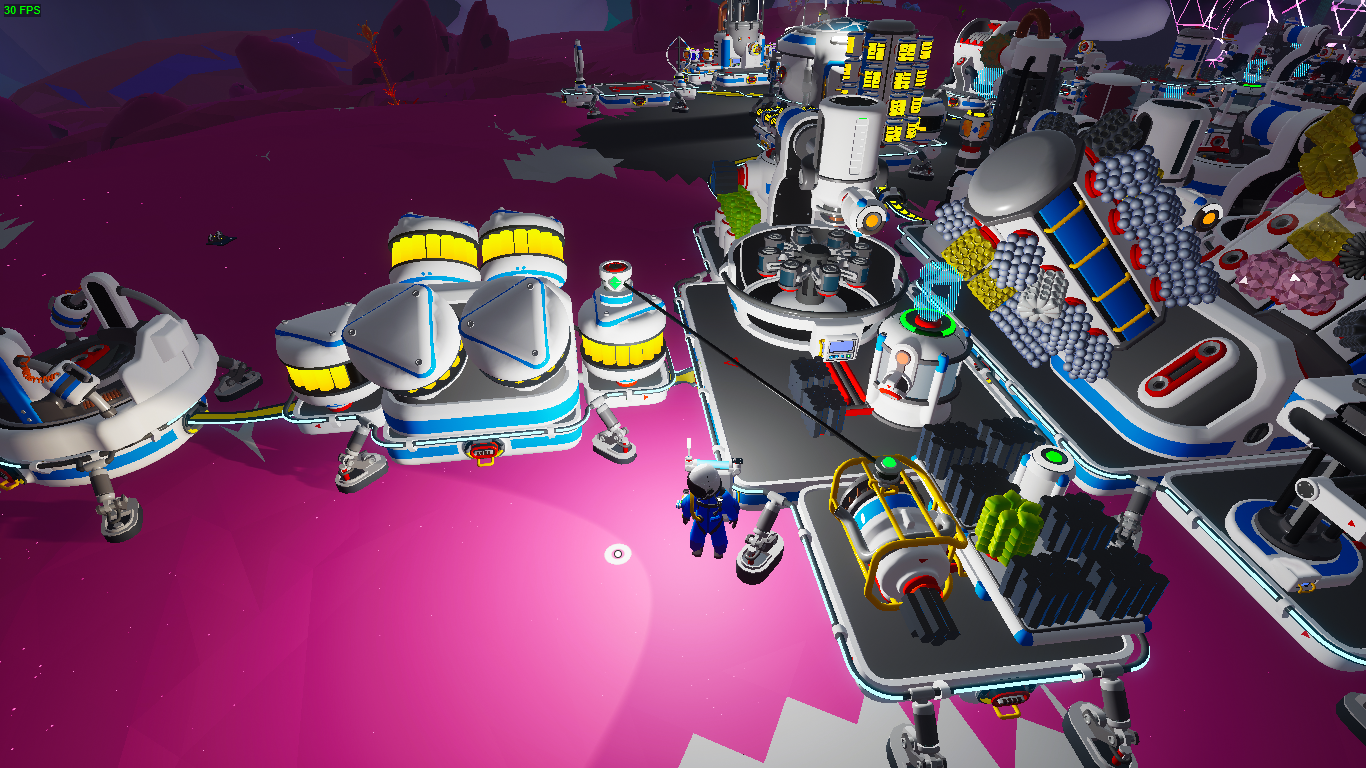 Automatic Carbon Generator
Insert a Medium Generator on Extra Large C platform for the production of Carbon only (Base Layout). Attach a Battery Sensor to a Medium Battery and connect the pin to the Generator. If you want to add other Generators, make sure the Battery Sensors are connected to other Batteries so they turn on when you actually need them.
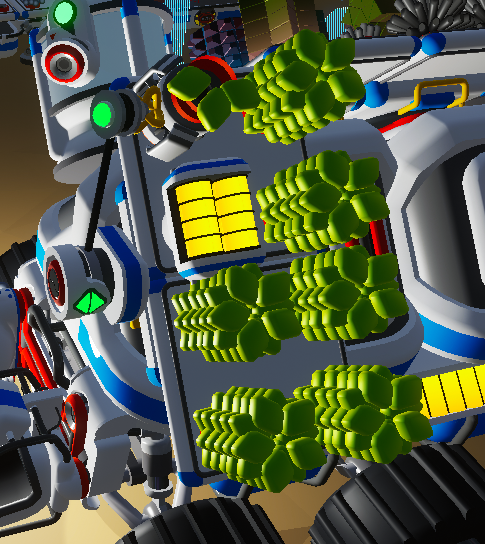
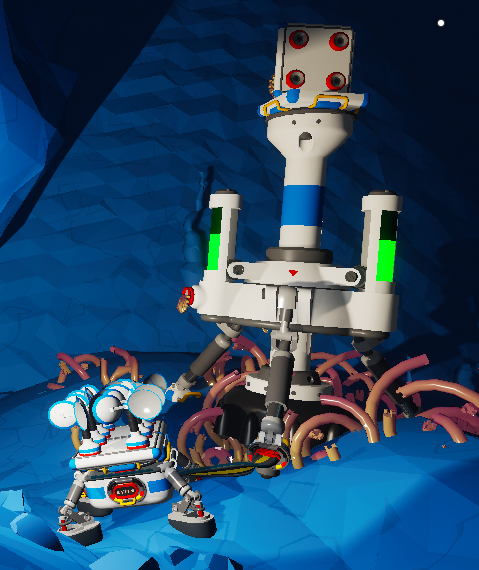 AUTO EXTRACTOR
Build it as soon as you have access to steel. It allows you to extract resources while doing something else and multiplies x15 the quantity extracted from a mineral field. Although it requires 8 powers to get maximum speed, you can power it with 6 Small Turbines placed in an Medium Storage. Later you can feed it continuously with 1 or 2 RTG. To store the Resources I recommend a Medium Canister, but a Medium Silo or Medium Storage could also be fine. Use AutoExtractor to mine key minerals such as, Hematite, Titanite, Ammonium. Others later you can mine Lithium, Copper, Aluminum, Sphalerite. If you want to increase harvesting speed even more, check Overclocking in the Tips and Tricks section
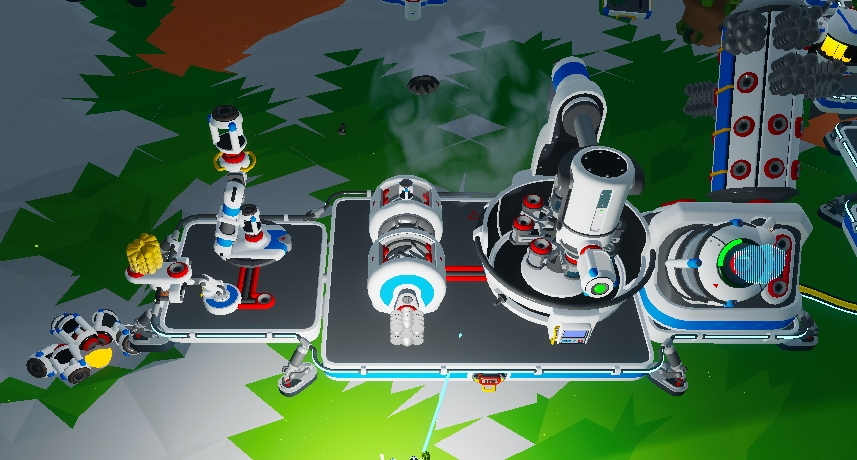 SOIL TO SCRAPS CONVERTER
Insert Medium Soil Canister and he will convert them to Scrap. The Centrifuge transforms the Soil into Resin, which is used by the Printer to create Small Canisters. These are taken from the Autoarm and shredded by the 2 Medium Shredders (or one Large).
This system allows you to convert your Sphalerite, Malachite and Wolframite into Scraps. The smelting furnace melts the minerals, the small printer will print, Repeater Buttons, Extenders or Floodlights, which will be taken from Autoarm to be shredded by Medium Shredders. Remember to put the printed object on the Autoarm to prevent it from dragging the Small Printer with it.
Use Canister to pour minerals into Storage Silos so that they the latter can be moved to other Scraps Converter Systems. You can also place Large Storage or Large Silo to be able to get more Scraps Storage Silos SCRAPS-HYDRAZINE CONVERTER
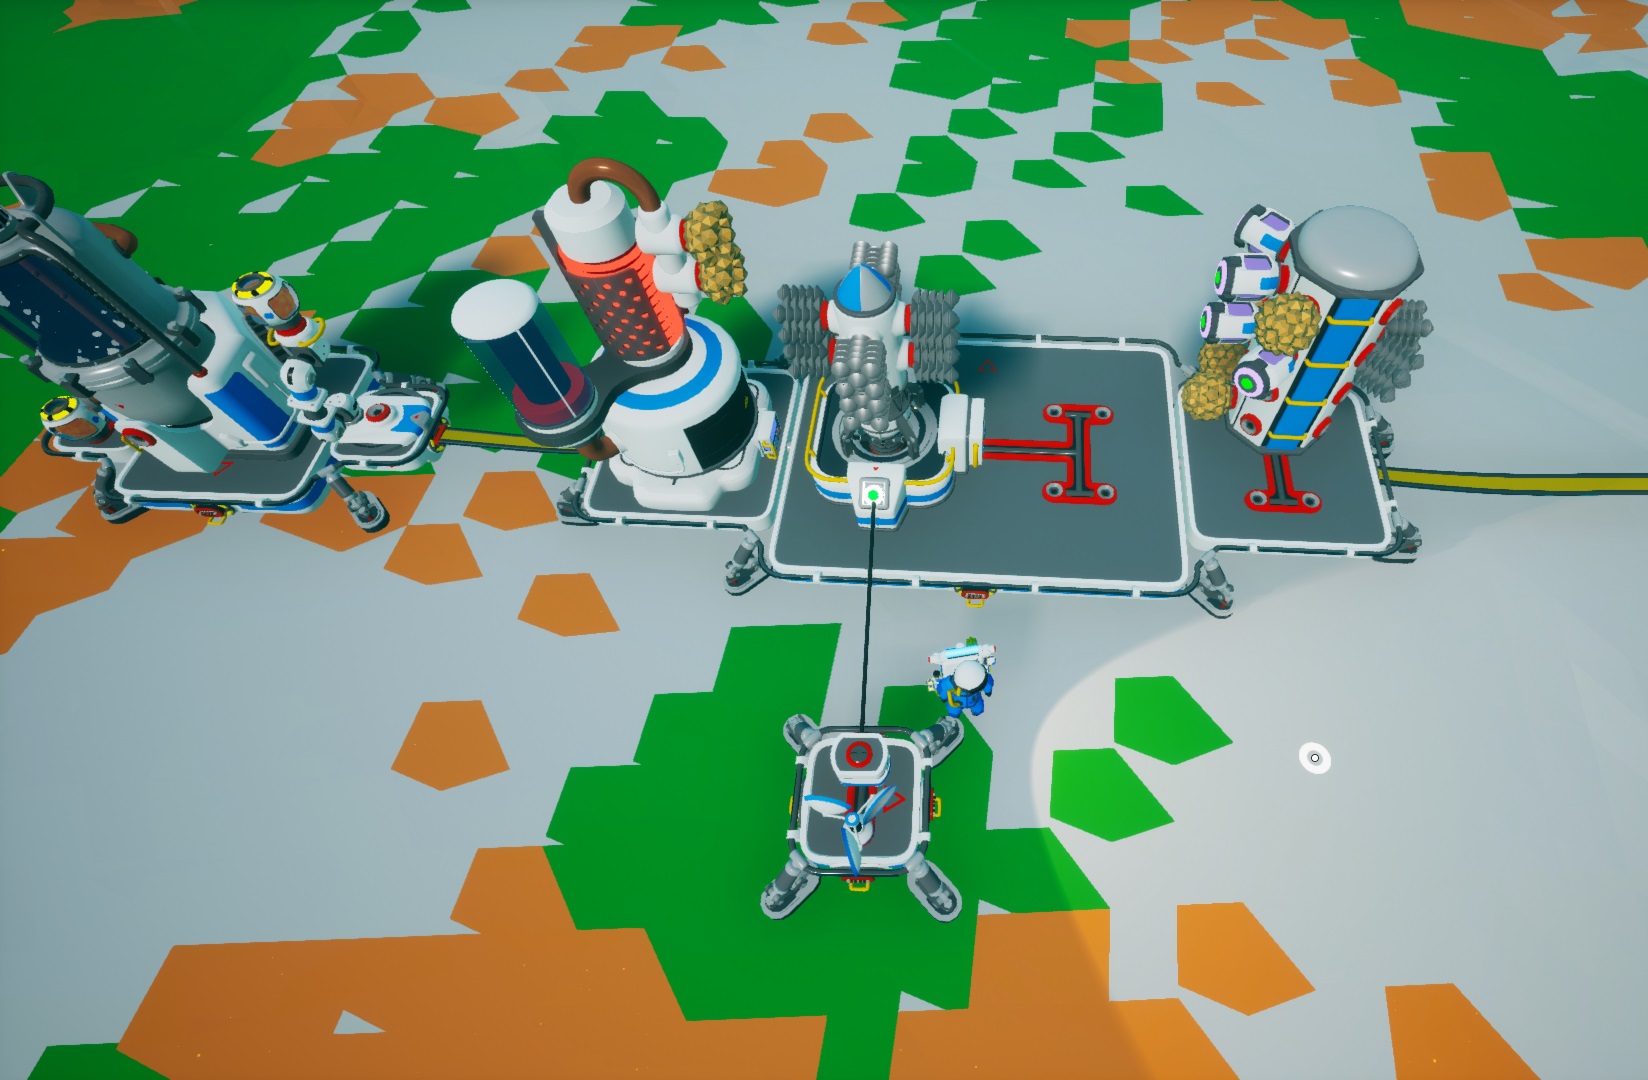 Formed by an Extralarge C platform with Chem lab and Trade Platform positioned, respectively set to produce hydrazine and exchange ammonium. Use feed sensor through a small turbine to automate the trading platform. The atmospheric condenser should be placed on a separate platform to avoid clogging of the mechanism due to hydrogen. Use an Autoarm to supply hydrogen to the Chem Lab.
 Remember to use Storage Silos to insert Scraps and never Resource Canisters, this prevents clogging of the mechanism.
Build more systems like this and change Resources to produce other types of it, like Graphene, Steel, Tungsten Carbide or Titanium alloy. In case of Minerals, add a Smelting Furnace to auto smelting these. However, you can use Canister to deposit Processed Resources and manually move them to other systems AUTO MASS TRADING PLATFORMS
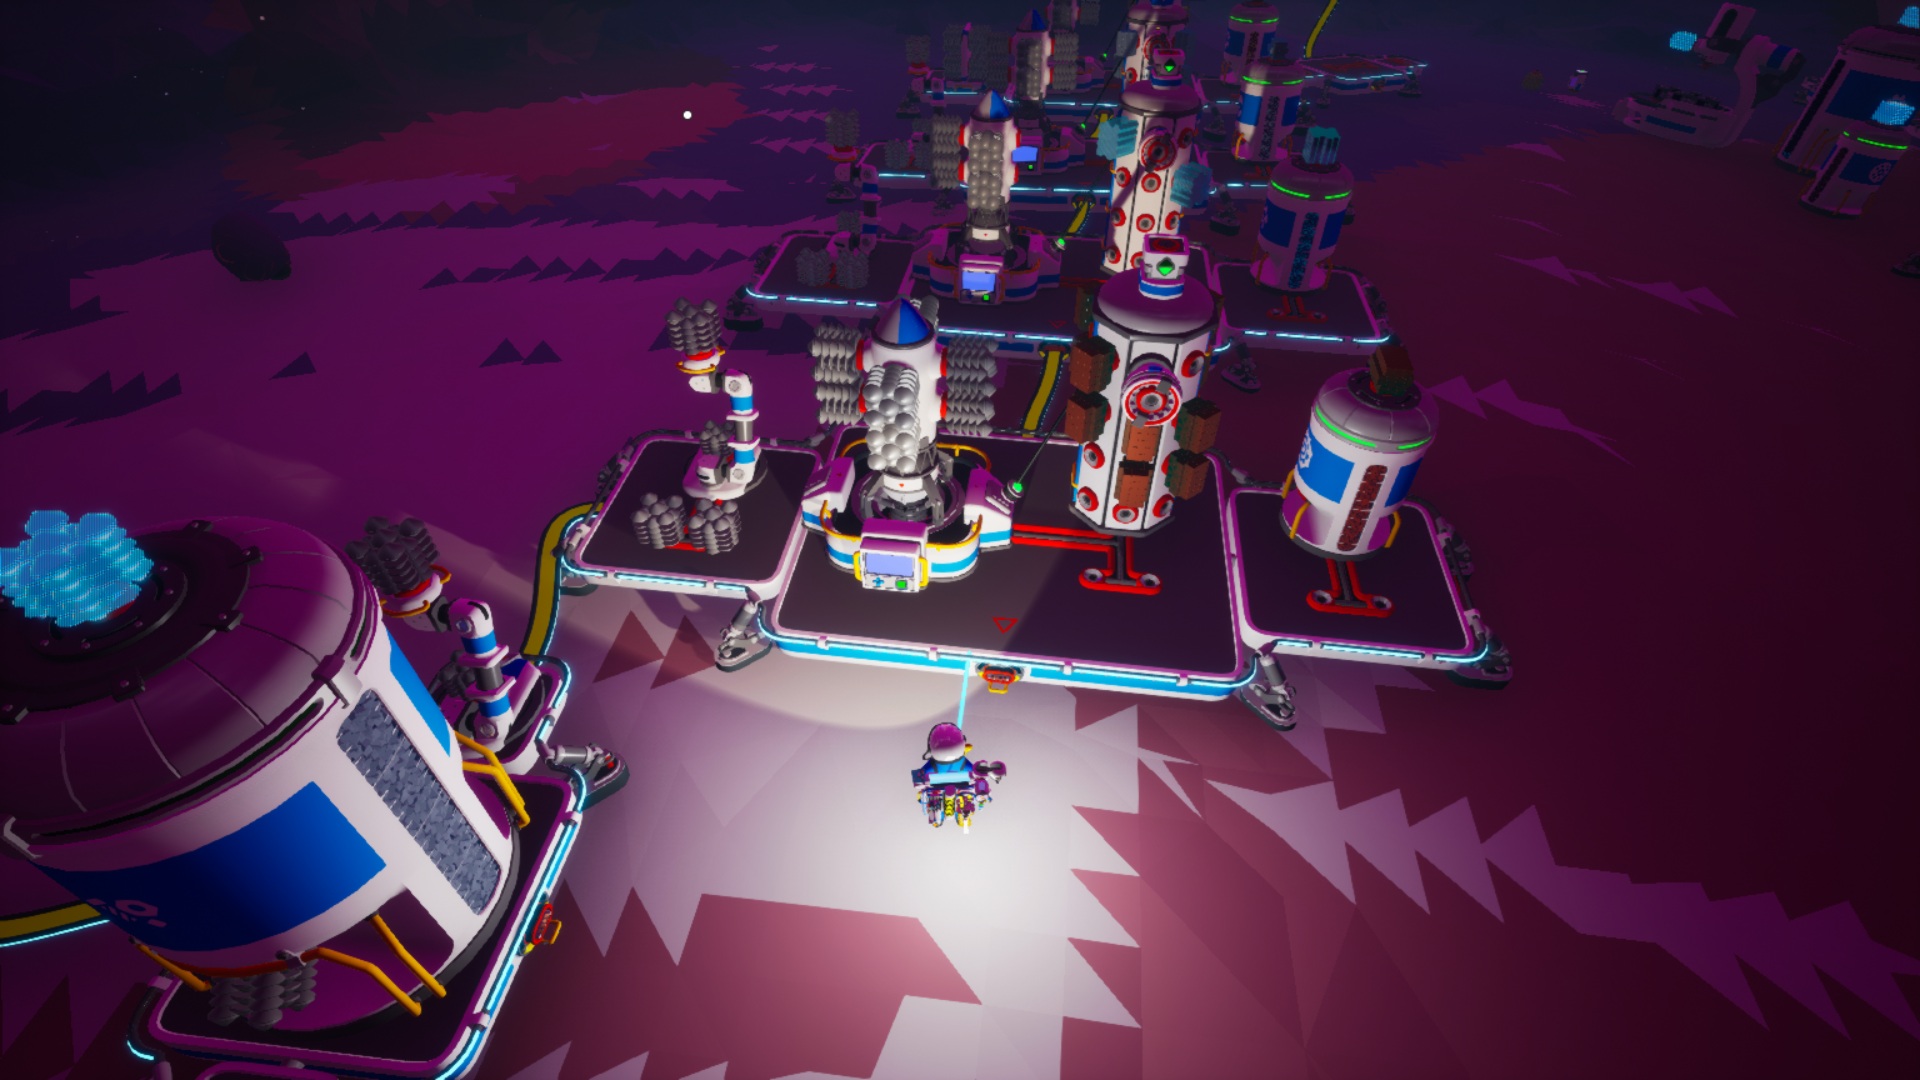 An autoarm continuously loads one side of the platform with scrap. When the storage silo becomes empty, a storage sensor (empty/not empty) triggers the trading platform to begin the exchange. Once completed, it unloads the melted material and loads the scrap, waiting for a new order from the sensor. It uses a medium or large container to feed the cycle. This device will only function if constantly supplied with scrap, and may need to be manually started if the scrap supply fails.
ADVANCED ASTRONIUM-CHIP-SCRAP CONVERTER
An autoarm continuously loads one side of the platform with scrap. When the storage silo becomes empty, a storage sensor (empty/not empty) triggers the trading platform to begin the exchange. Once completed, it unloads the melted material and loads the scrap, waiting for a new order from the sensor. It uses a medium or large container to feed the cycle. This device will only function if constantly supplied with scrap, and may need to be manually started if the scrap supply fails.
ADVANCED ASTRONIUM-CHIP-SCRAP CONVERTER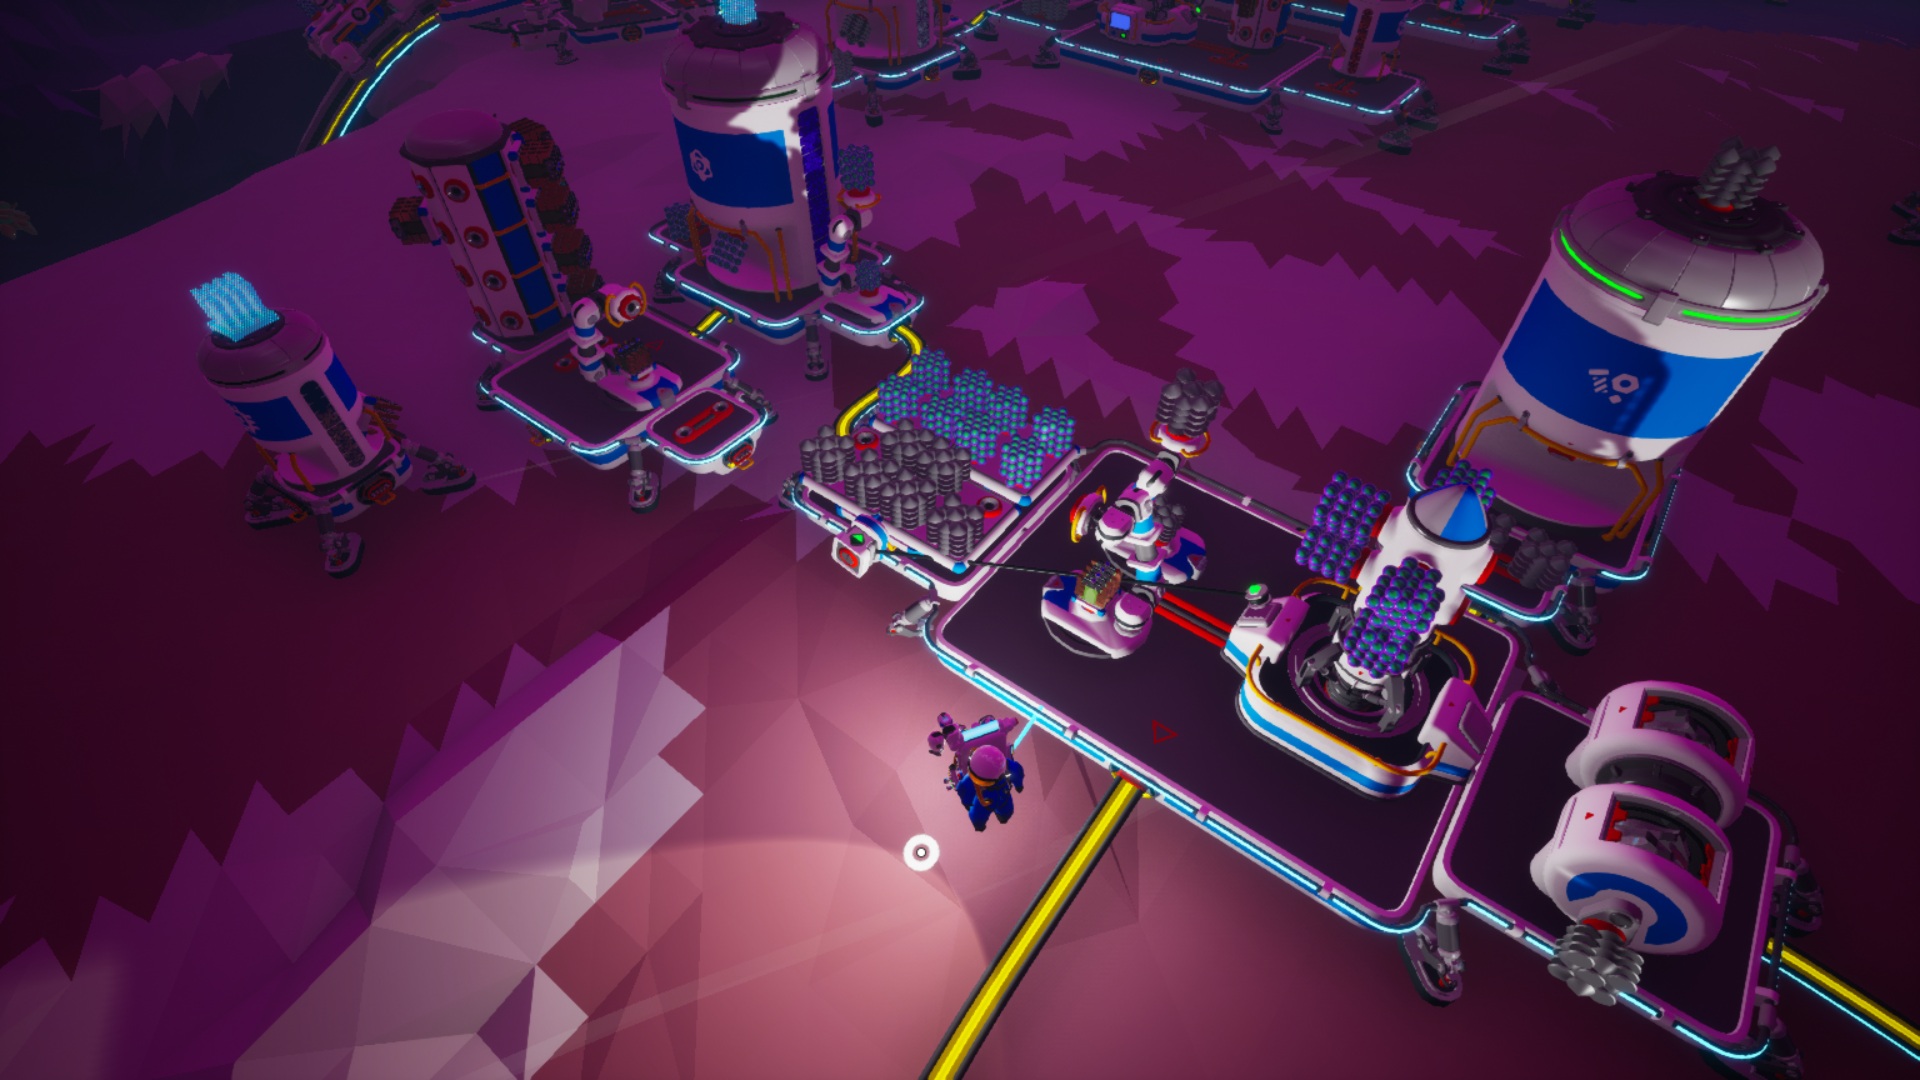 The astronium placed on the right medium storage will be collected by the trading platform, which is activated once the scrap on the left medium storage has been completely transferred by the right auto arm to the large scrap canister platform.
When the trading platform unloads chips onto the left storage, they are collected by the upper auto arm and moved to the chip storage silo
The astronium placed on the right medium storage will be collected by the trading platform, which is activated once the scrap on the left medium storage has been completely transferred by the right auto arm to the large scrap canister platform.
When the trading platform unloads chips onto the left storage, they are collected by the upper auto arm and moved to the chip storage silo 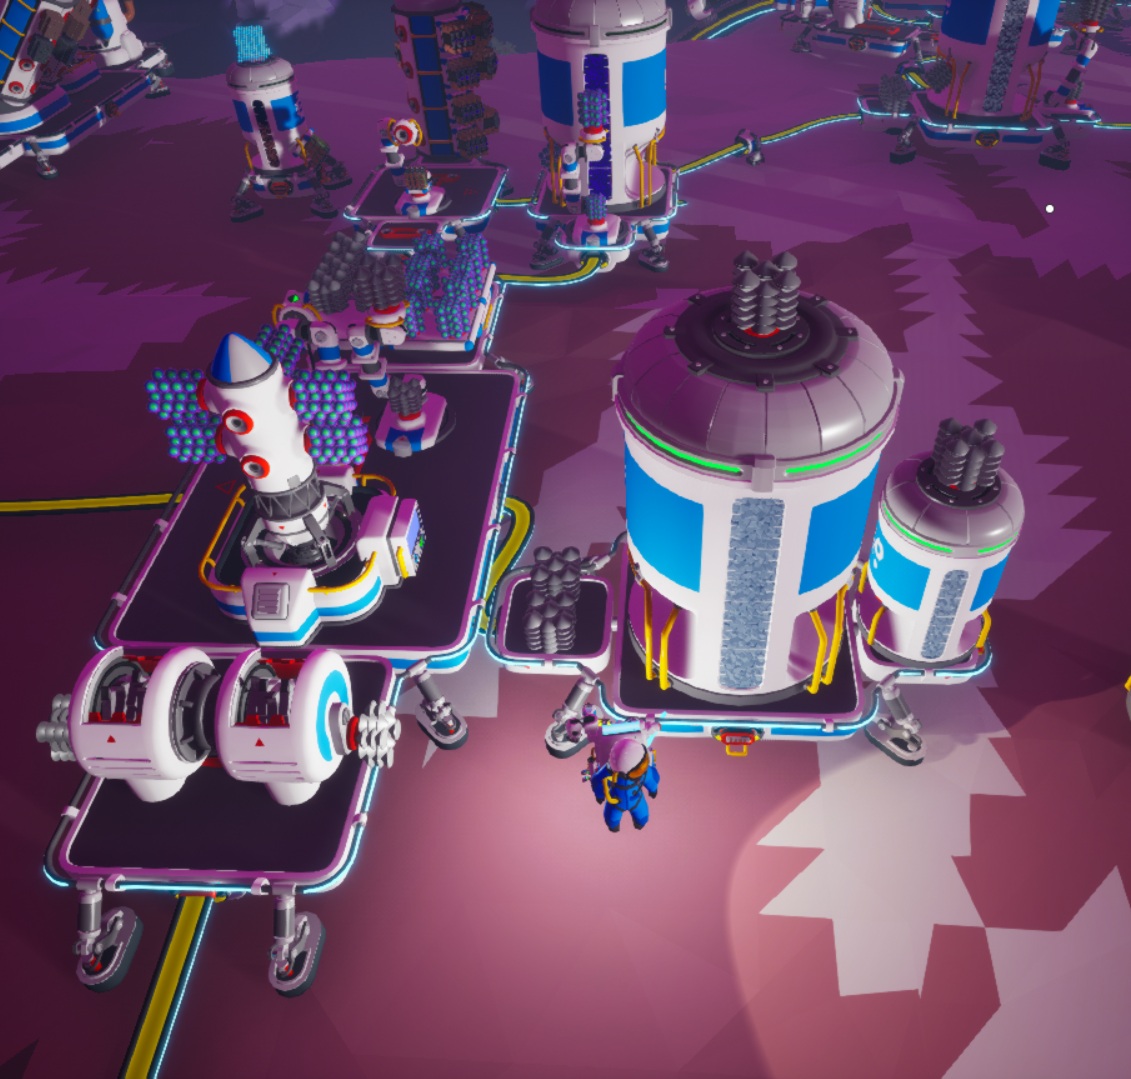 platform, while the other left chip auto arm inserts them into the medium shredders.
The medium shredders then release scrap onto the left storage, which is collected by the right auto arm, restarting the cycle until astronium is present or the large scrap container is full.
If the astronium runs out, replacing it with a large astronium canister may require manually reactivating the trading platform to restart the cycle.
Make sure to properly align the astronium auto arm so that it unloads only into the right astronium medium storage, and align the scrap platform with the right scrap auto arm so that scrap is deposited onto the left side of the large scrap canister platform.
It is important to note that the arrow on the extra-large platform must point to the left for this device to function correctly.
Achievement List
https://steamcommunity.com/sharedfiles/filedetails/?id=1900225454
Challenges for Veterans
Challenges are goals to be achieved through self-imposed limitations to make the game more challenging. You are free to choose which limitations you apply and which you don't, you can create your own challenges as well. Personally I faced some challenges and tried others and I am having a lot of fun:
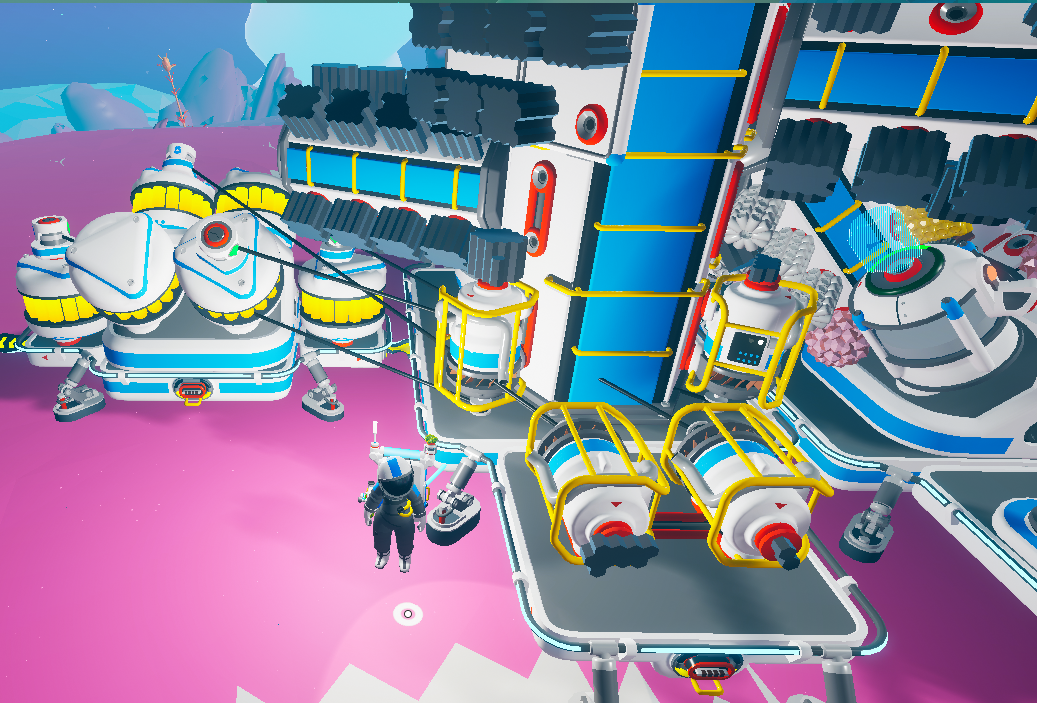 Power Drought
Collect all the Geometric Triptychs of the planets and unlock all Gateway Portals of Mysterious Satellite over the Sun
Rules:
- No Tethers use (you can use one to complete the mission but remove it immediately after and never use them again)
- No Unlock RTG, Solar Panels and Wind Turbines.
- No Sun 24/7 (north/south Pole Trick)
- Start oxygenator must be placed on the start Shelter and can never be moved again (place it on the small shuttle just to unlock the mission that requires it, then immediately reposition it in the starting shelter)
- No Unlock Oxygenator (Medium)
- No print Pumpkin Shelter
- No Oxygen Platform/Shuttle Move Trick:
* You can't use Shuttle oxygen trick. You cannot move Shuttle to get oxygen and move with it at the same time. You can use Shuttle to get oxygen, the important thing that you don't move it after landing, but you can use it to move between planets.
- You can't go to a planet if you haven't unlocked it first. You can unlock it by inserting the previous Triptych in the Mysterious Satellite above the Sun. Here is the following order:
Sylva ---> Desolo ---> Vesania ---> Novus ---> Calidor ---> Atrox --> Glacio.
An exception: to be able to go to Novus you just need to activate a single Vesania Gateway Chamber, but to go to Calidor you have to insert the Vesania Triptych on the Satellite above the Sun.
Suggestions:
-use Oxygen Filters to move and explore away from the Base
-use the Tractor to move to constantly get Oxygen
-use Extenders to replace Tethers and get Oxygen
Research Meanders
Unlocks all Cores of all Planets and place all Geometric Triptychs on the Satellite (???) above the sun.
Rules:
- No Tethers
- No Research Chamber
- No RTG
- No Sun 24/7 (north/south Pole Trick)
- No Oxygen Platform/Shuttle Move Trick
- No Vehicle (you can use only Shuttle to move between Planets)
- Only one Shelter or Field Shelter per Planet. No Pumpkin Shelter.
- You can get researches and unlock Gateway Chambers of the other Planets by first unlocking the Core of the previous planet: Sylva --> Desolo --> Calidor --> Vesania --> Novus --> Glacio --> Atrox
Unlock sylva to access research and desolo core, unlock the latter to access research and calidor core and so on.
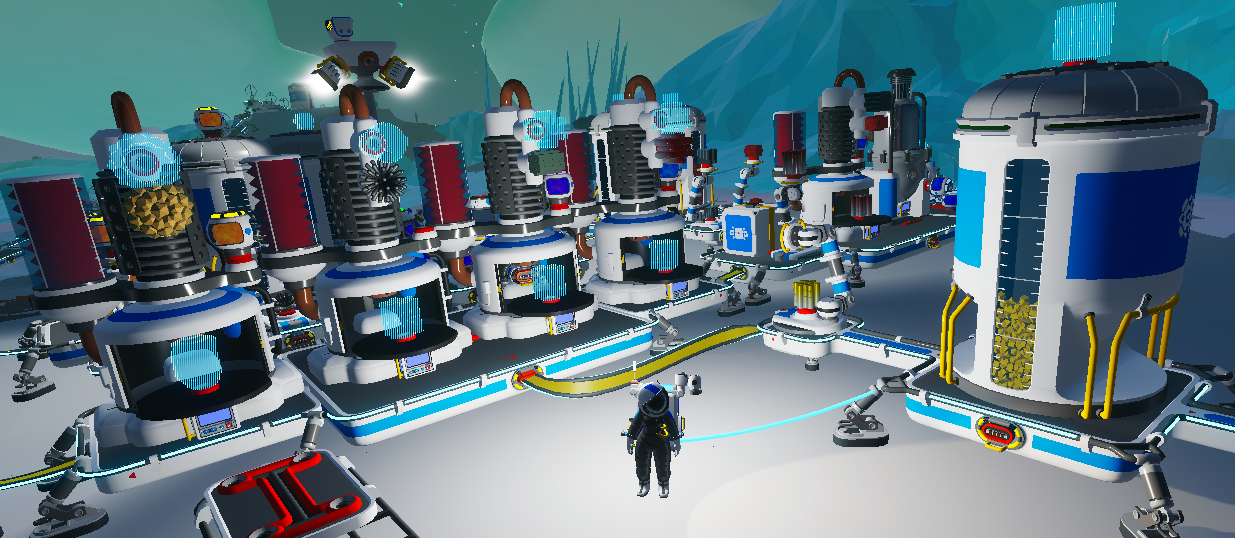 Mining Exhaustion
 Fill an entire Large container with Nanocarbon Alloy Rules:
- No Tethers
- No Soil Centrifuge
- No RTG
- No Sun 24/7 (north/south Pole Trick)
- No Oxygen Platform/Shuttle Move Trick
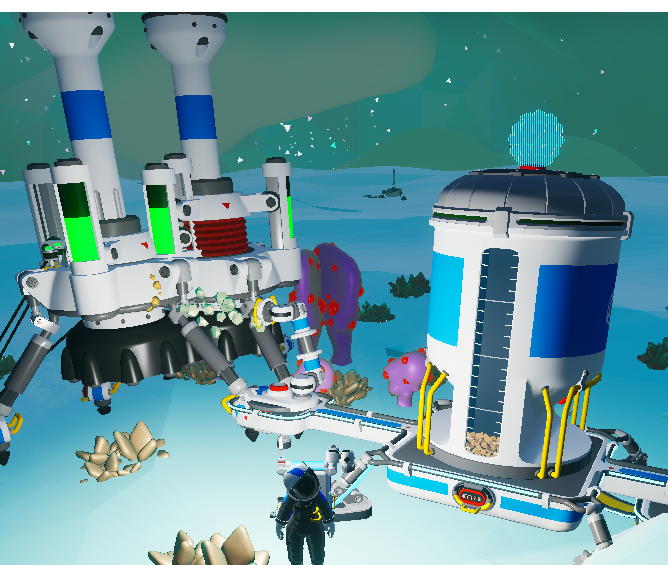 - Only one Shelter or Field Shelter per Planet. No Pumpkin Shelter.
- Research Chamber: you can insert inside it only Smelted Minerals and Scraps
- No Drill and Paver on Rovers (optional)
Other Optional Rules: choose one
- Auto Extractor: you can place it on Planets with Unlocked Core and Triptych placed on the Satellite
- Research Samples: you can use it to gain byte (you can't insert it on Research Camber) on planets only after you Unlocked Core and triptych placed on the Satellite of the planet where you find them.
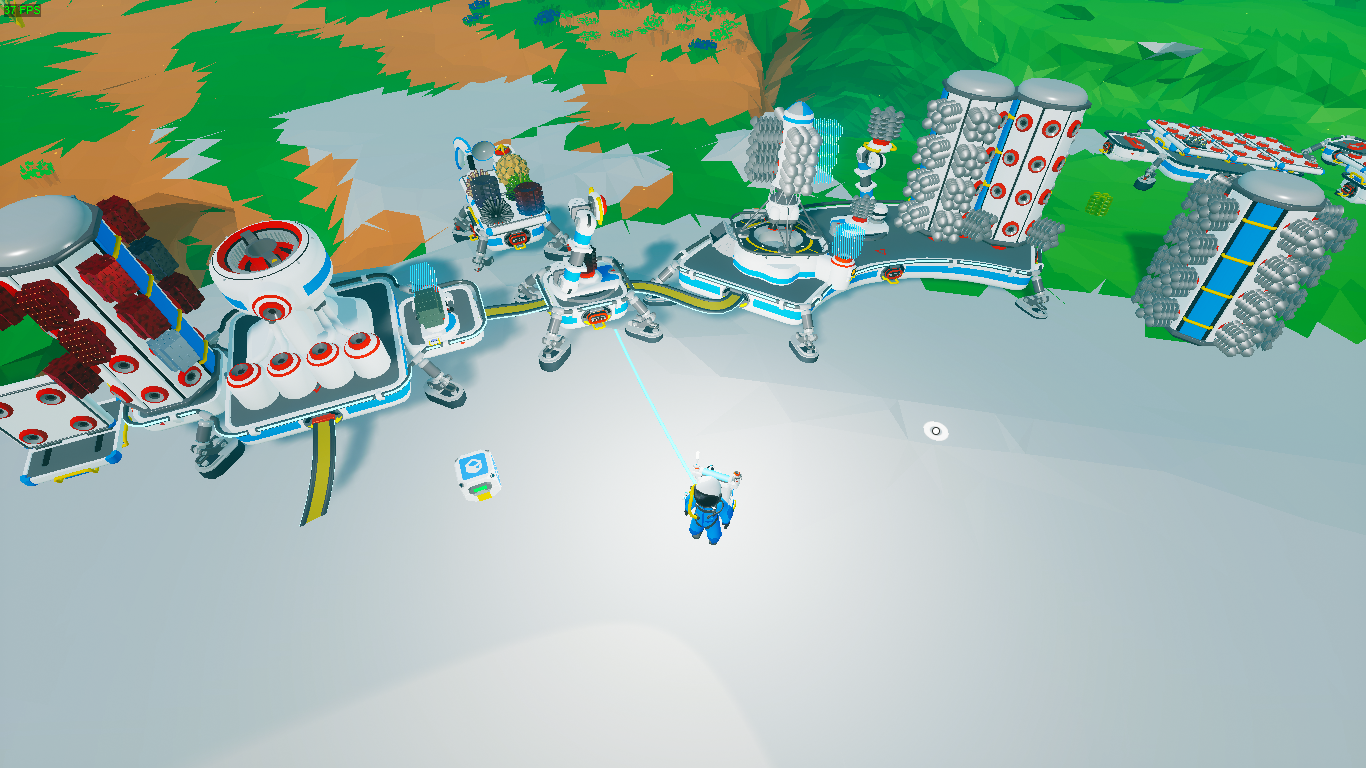 Alternative Sources
Get 100 Nanocarbon Alloys
Rules:
- No Tethers
- No RTG
- No Sun 24/7 (north/south Pole Trick)
- No Oxygen Platform/Shuttle Move Trick
- Debris and Scraps on all Planets can be collected
- Bytes: Only Sylva Research Item/Samples and Smelted Minerals/Scraps inside Research Chamber can be used. You can't use other Planet Research Item/Samples.
- Only 1 Wolframite and 1 Hematite can be collected on other Planets and nothing else (except gas).
- You can place Atmospheric Condeser and obtain the Gases in the various Planets by first unlocking their Cores and triptych positioned on the Satellite (???) above Sun.
Suggestions:
- Print a Trading Platform with Iron and Tungsten to get everything Resource you need.
- Use the Soil to get Scraps with Soil to Scrap Converter (Automation & Devices)
- Get Scraps with Tungsten, Copper, Zinc to autoscraps Converter
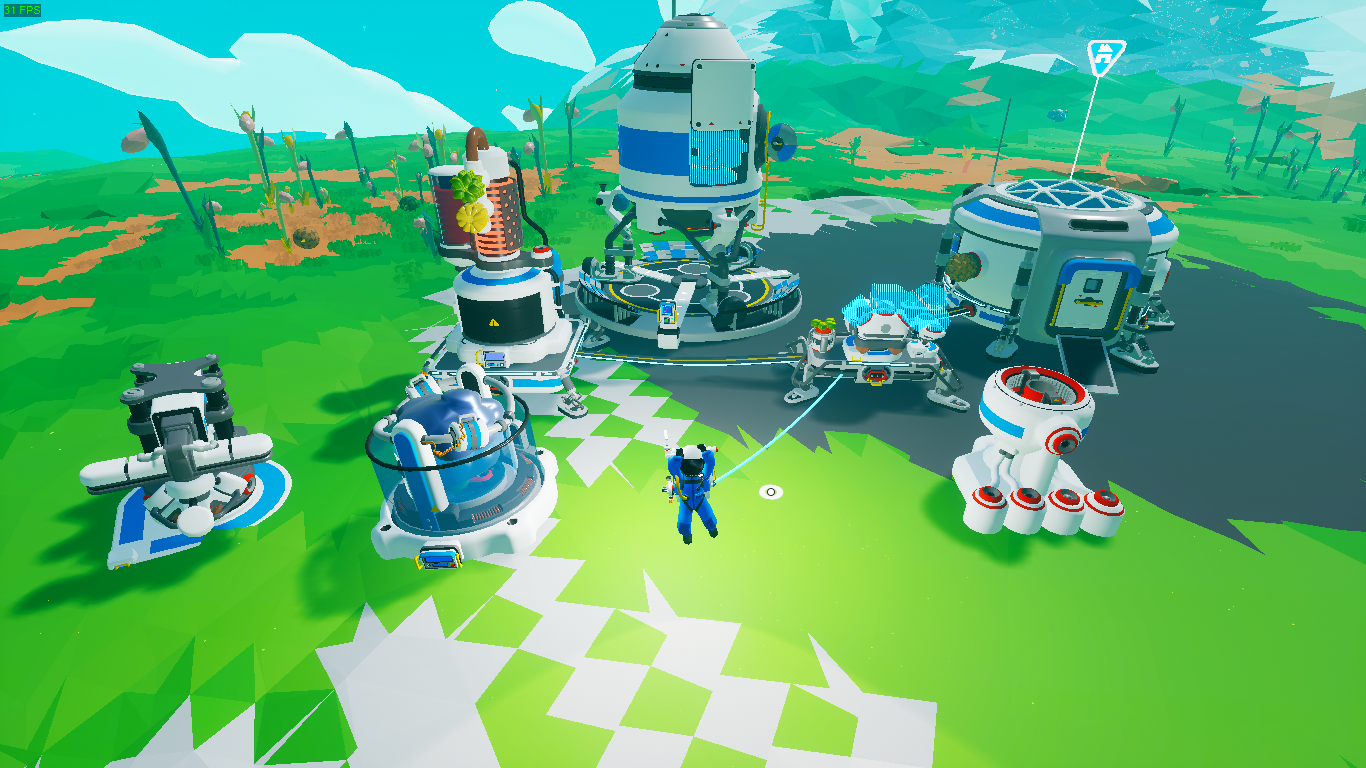 Get/unlock all Schematics
 from the Research Catalog. Rules
- No Tether
- No Autoextractor
- No Soil Centrifuge
- No Oxygen Platform/Shuttle Move Trick
- Only one Large platform A can be building and no other platform.
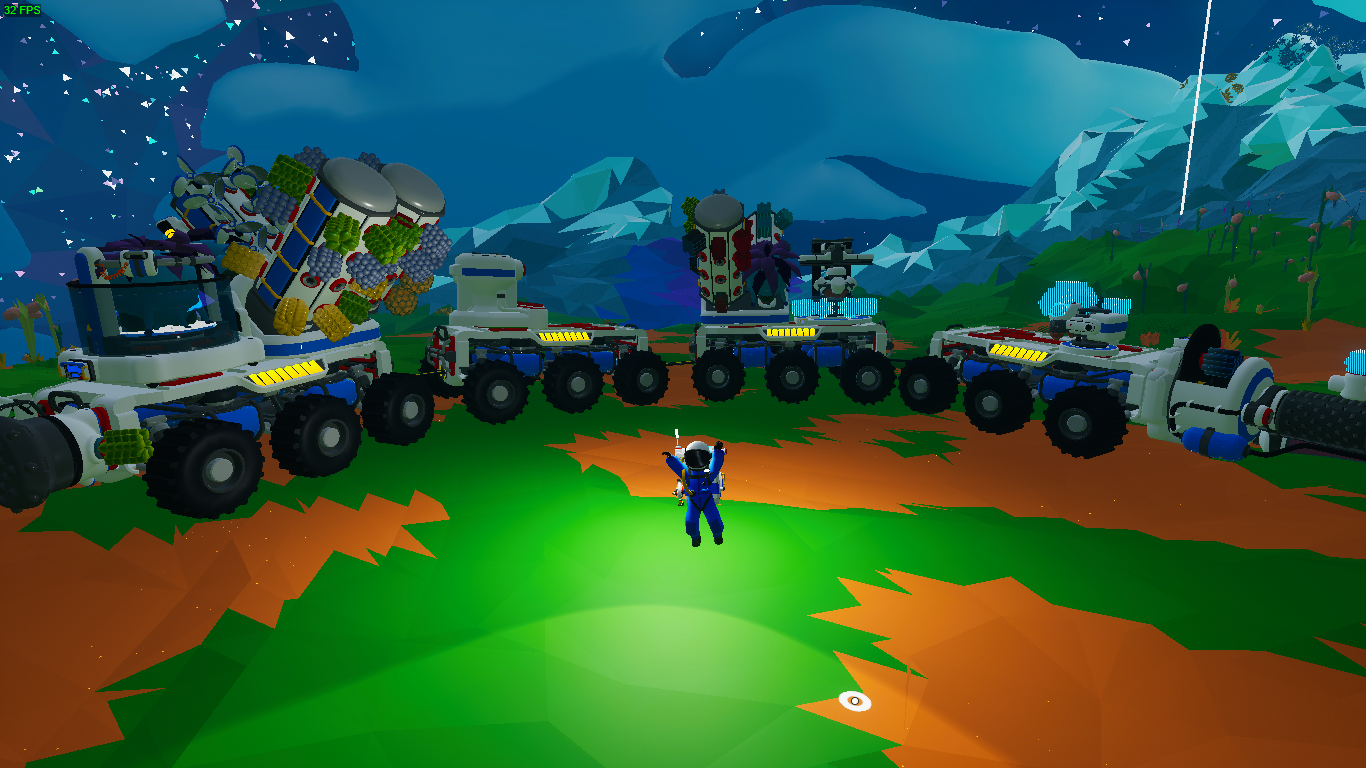 - You cannot collect resources and items you drop on the ground except modules
- You can get research simples/items and Unlock the Gateway Chamber of the other Planets by first unlocking the Core of the previous planet: Sylva --> Desolo --> Calidor --> Vesania --> Novus --> Glacio --> Atrox
Example: Unlock Sylva to get Desolo, unlock desolo to get Calidor, and so on
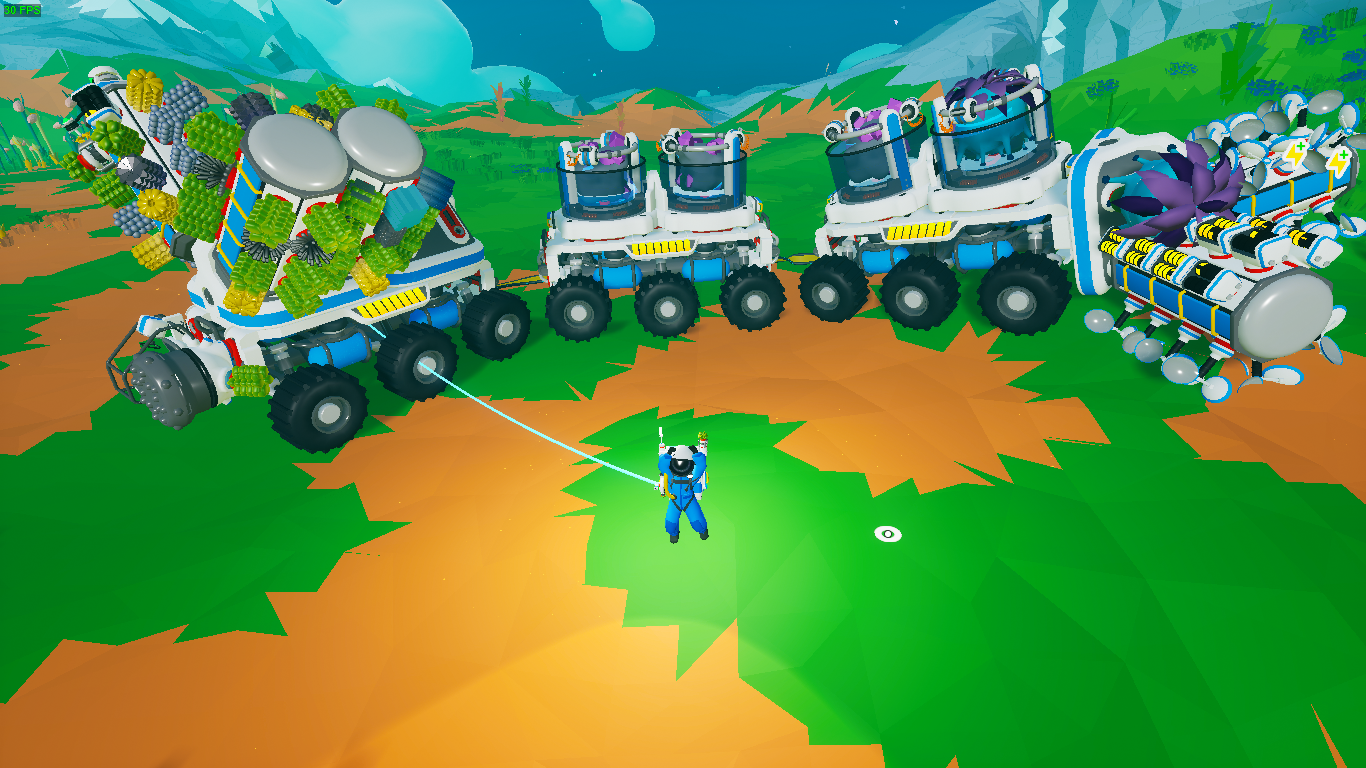 Suggestions:
 - Get vehicles as soon as possible.
- Items and resources can be stacked on vehicles.
- Use packs to collect research and deposit them on vehicle storage
- You can drop research item into research chamber
- Build rovers as soon as possible to get your mobile base
- You can go to other planets at any time to get the resources you want.
As they say in various multiplayer games, Good Luck Have Fun!
Astroneer PvP
Rules and Goals:
-Each player choose one side of the base and cannot interact the opponent build's items and resources. Don't steal or move resources, items and buildings from the other player (s)
-It is not possible to use the terrain tool or drill / paver rovers to damage opponent property
-Do not throw garbage and objects near the opponent's base
- Do not use explosives to damage the opponent's property (optional)
-The Mission Platform cannot be used by any player and no one can claim rewards from it
-Players can get power from the starting shellder and to avoid being stolen your own power by other players energy, they can use extenders.
- The use and production of bytes is in common, each player can produce and / or use the bytes as they prefer. So be careful when producing bytes, your opponent can use them to his advantage, and you can too.
-Players can trade resource or items with each other using steam chat or by speaking on discord
Before starting the game:
- Players set a goal to achieve such as building an item or accumulating a certain amount of resources, and when this condition is met by a player, the latter wins the challenge.
-Players can choose additional or other rules or restrictions, for example playing without tethers.
If you feel like playing this, add me to your steam friends and contact me as soon as possible
- Открываем узлы, активируем планеты.★ 5 (406)27k views704 ♥15 minRussianUpdated Jun 9, 2020
- Astroneer Guide★ 5 (376)24k views547 ♥1 minBulgarianUpdated Jul 16, 2023
- КАК ПОЛУЧИТЬ ХОВЕРБОРД и СВВП: НАГРАДЫ ЗА ВЫПОЛНЕНИЕ ЗАДАНИЙ!★ 4 (118)18k views260 ♥4 minRussianUpdated Sep 10, 2023
- 100% Достижения, Ксенобиологическая лаборатория★ 5 (328)18k views771 ♥11 minRussianUpdated Jul 1, 2024
- Planet Core Resource Guide★ 5 (173)15k views331 ♥1 min
- Список крафта, синтеза, обмена★ 5 (262)14k views564 ♥7 minRussianUpdated Jan 1





- Upgrading to PremiumTeam Fortress 2★ 5 (20k)1441k views11k ♥6 minUpdated May 11, 2022
- No More Room in Hell Official ManualNo More Room in Hell★ 5 (2.8k)569k views2.1k ♥29 minUpdated Apr 22, 2019
- NMRiH Community Hosting GuidesNo More Room in Hell★ 5 (526)351k views653 ♥1 minUpdated Aug 10, 2022
- ULTIMATE GUIDE FOR GAME DEV TYCOONGame Dev Tycoon★ 5 (5.8k)326k views10k ♥4 minUpdated 23 Jan, 2014
- How to 'Git Gud' Soon™MORDHAU★ 5 (2k)318k views3k ♥68 minUpdated Nov 16, 2024
- Лучшие кооперативные игры SteamPAYDAY 2★ 5 (1.5k)315k views2.1k ♥56 minRussianUpdated Apr 27, 2025






This guide was created by its original author on the Steam Community. Are you the author and want it removed? Request removal.