Anime Cel Shader Workflow
References
- Integrating photoshop with blender to paint in real time (QUICK TIPS | Update Handpainted Blender Textures I Near Real-time Using Photoshop).
- Adding a few nodes to make your texture cel shaded (Quick toon shader effects, NPR - Blender tutorial)
- Adding reflective streaks to your Shader (This Blender Shader is the Secret to Magical 3D Art)
- Adding lineart to your model to get outlines (10 Outline Techniques I Wish I Knew Sooner in Blender)
Texture Painting in Photoshop
We will use photoshop to texture paint, and link it to blender to see our changes to the texture in real time.
The reason to use photoshop instead of blender's texture painting tab is simple. Blender's texture painting is ahh 🥀💔😭💀✌️
Blender has really basic brushes, no LAYERS SYSTEM, no text tool, no shapes tool, look it's just not a painting software imho.
Photoshop offers a vast variety of brushes, tools and a freaking LAYERS SYSTEM. It's very powerful to paint in photoshop even if we don't possess the skill to paint that well.
Let's begin the texture painting process
Unwrap your model, go to the UV editing tab,
UV -> Export UV layout.
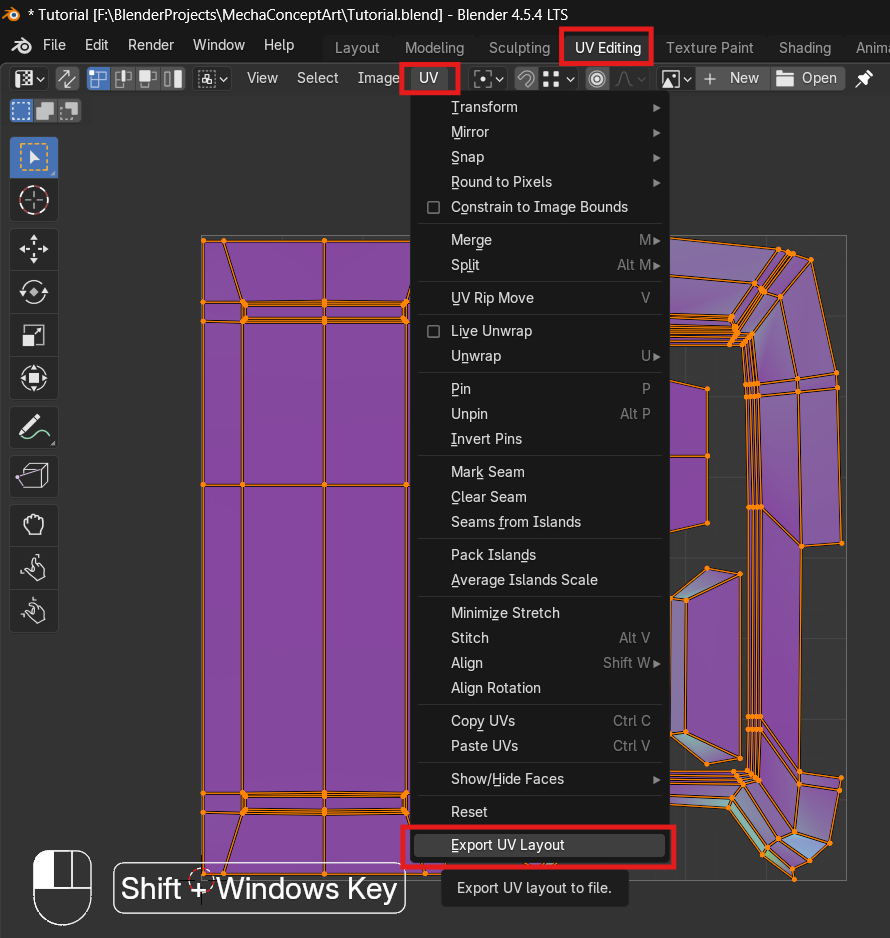
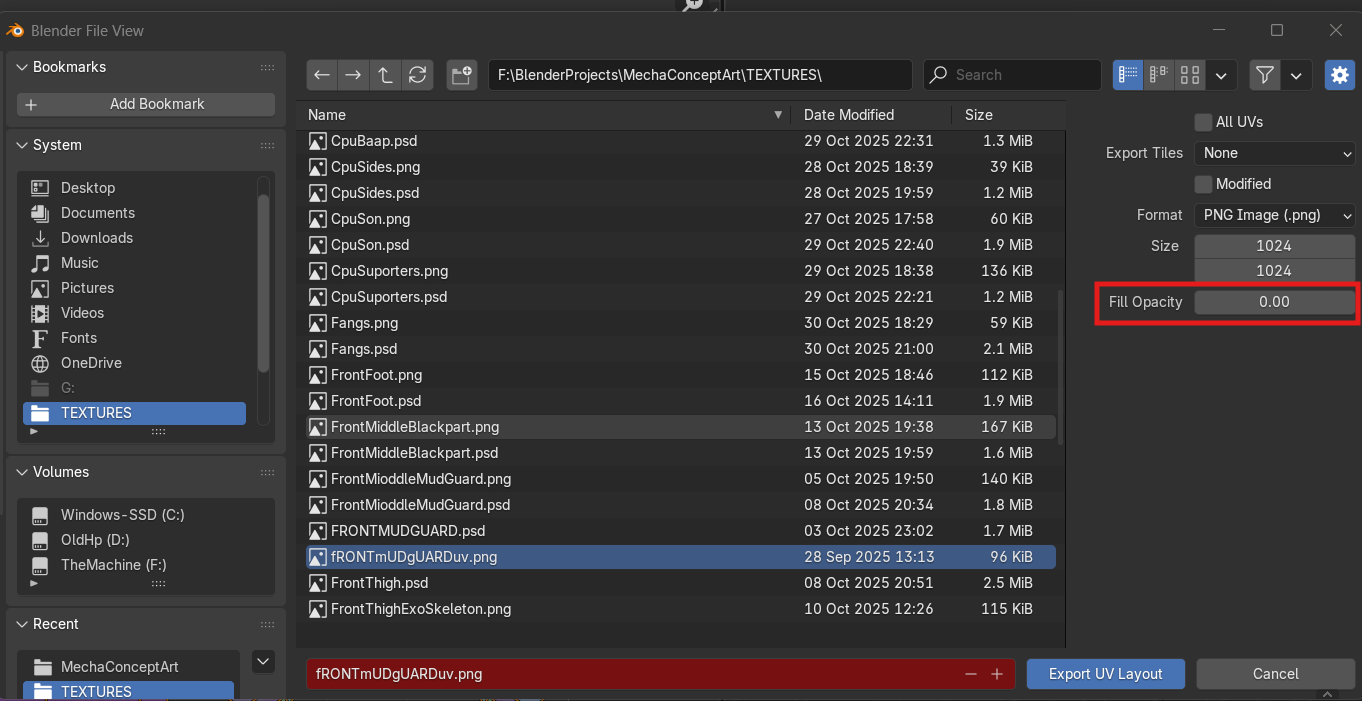
This allows you to save your UV map as a PNG.
While saving the PNG chose fill opacity as 0)
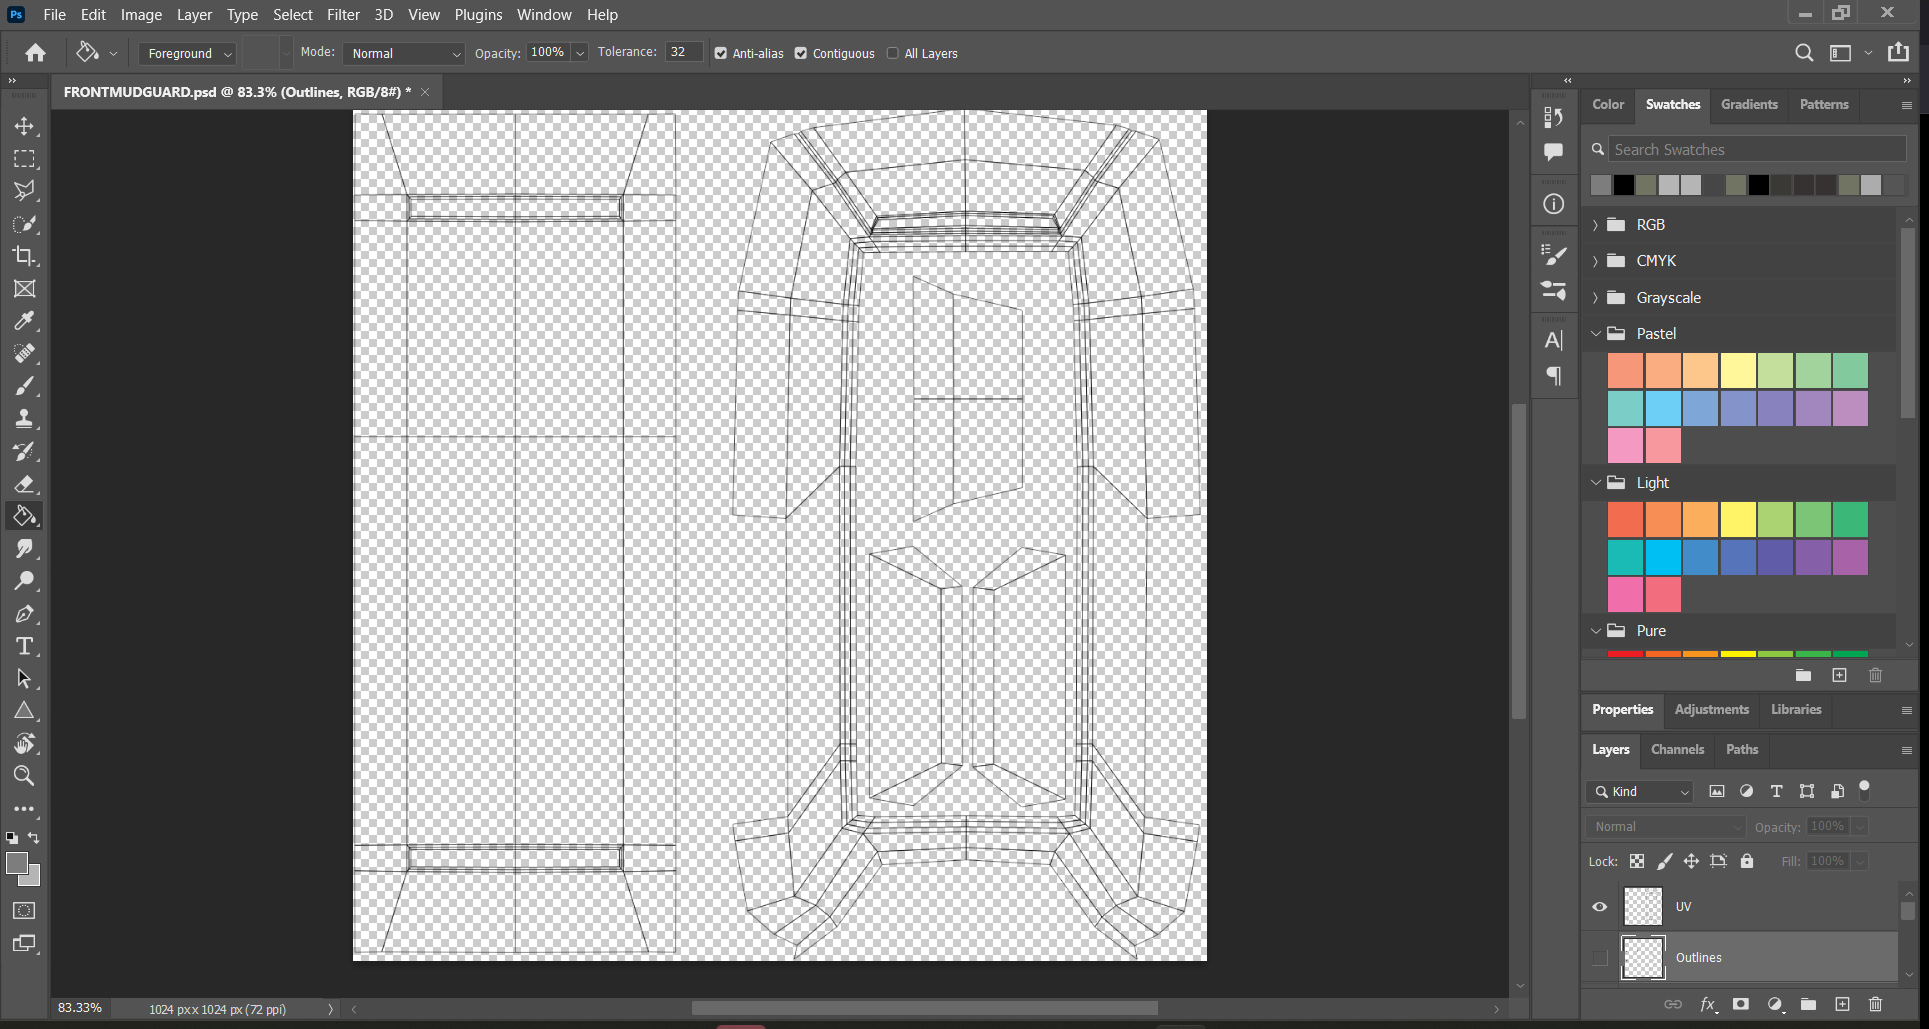
Open your exported UV map in photoshop.
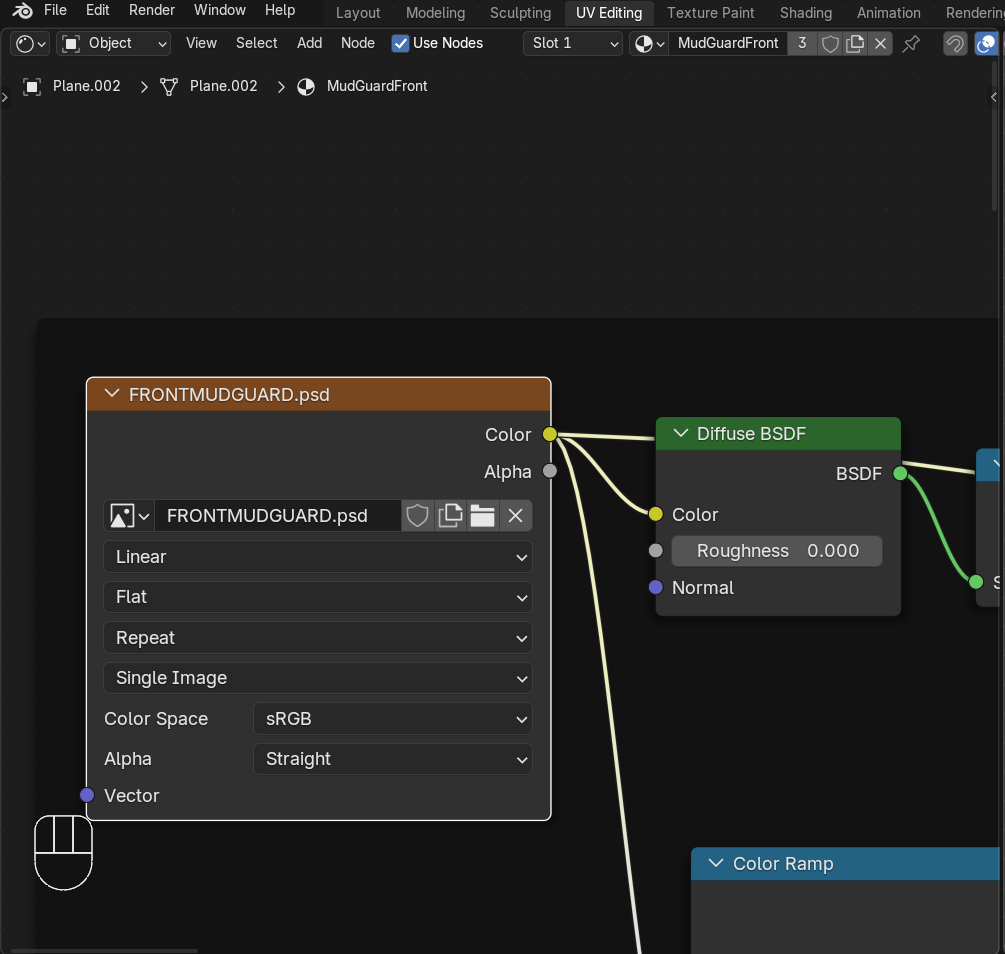
For now save this file as .psd file. We will use this PSD file as our image texture in Blender.
In blender add a new image texture node to your material and choose the psd file in open image option.
Now when you modify your PS file and save it, hit Alt+R in blender's image editor/UV editor.
This will reload the image. THIS is the ALMOST REAL-TIME texture painting technique.
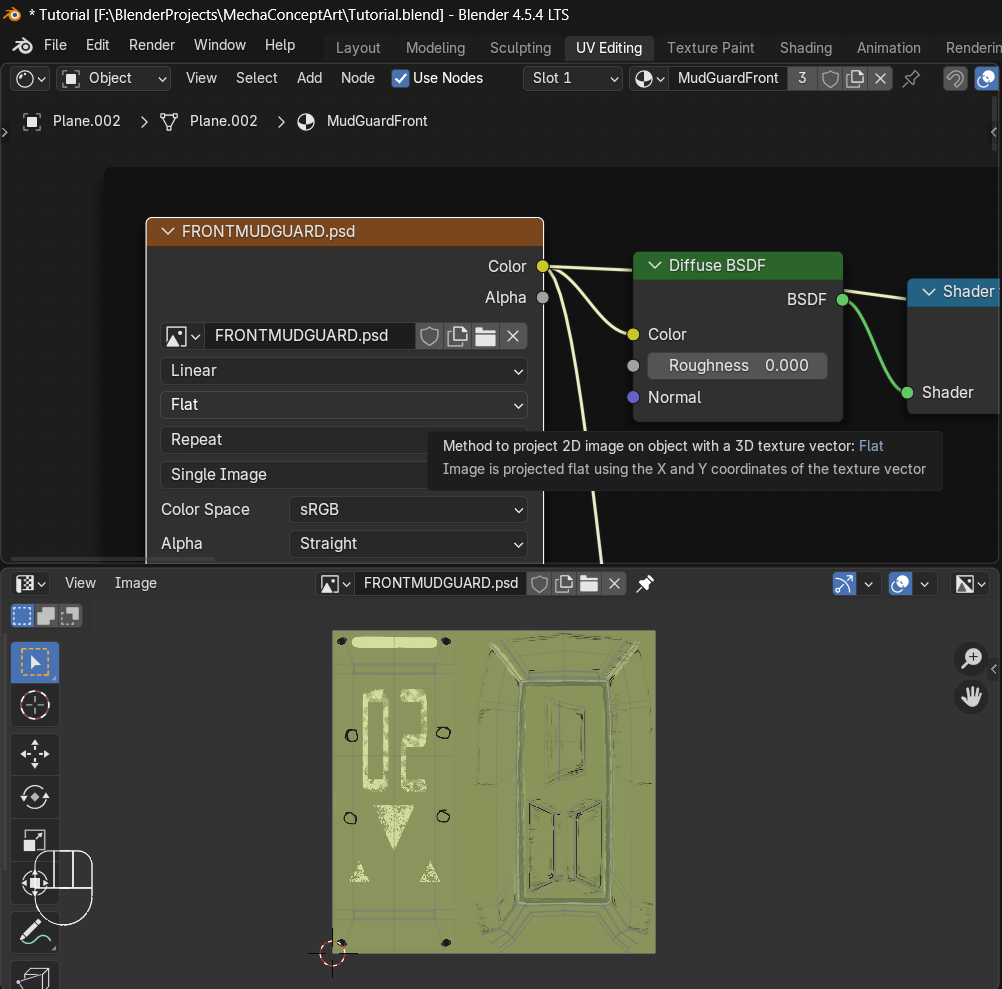
If you are like me and don't have much experience with texture painting, here's what you can follow to achieve a somewhat decent result.
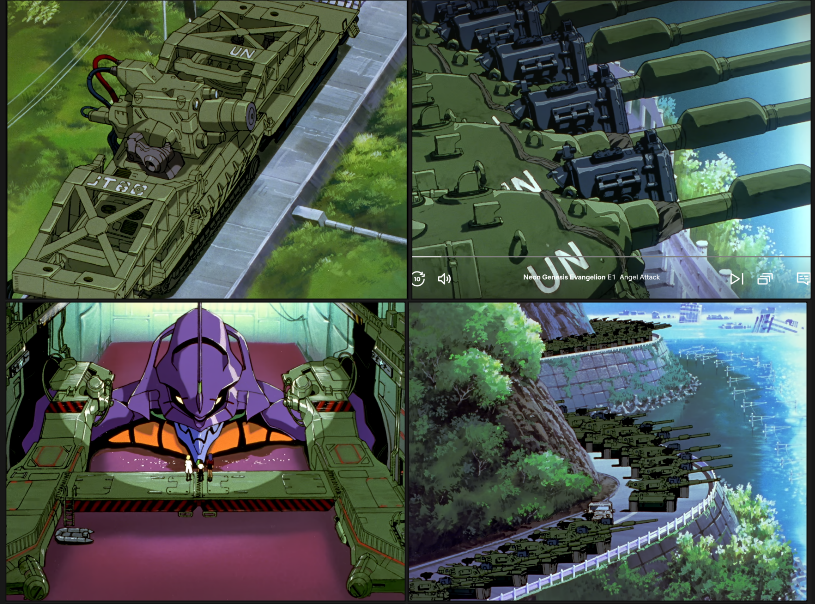
- Use reference images, in our case I wanted vintage anime + some urban cel shading look. So I used Borderlands 2 and Evangelion as references.
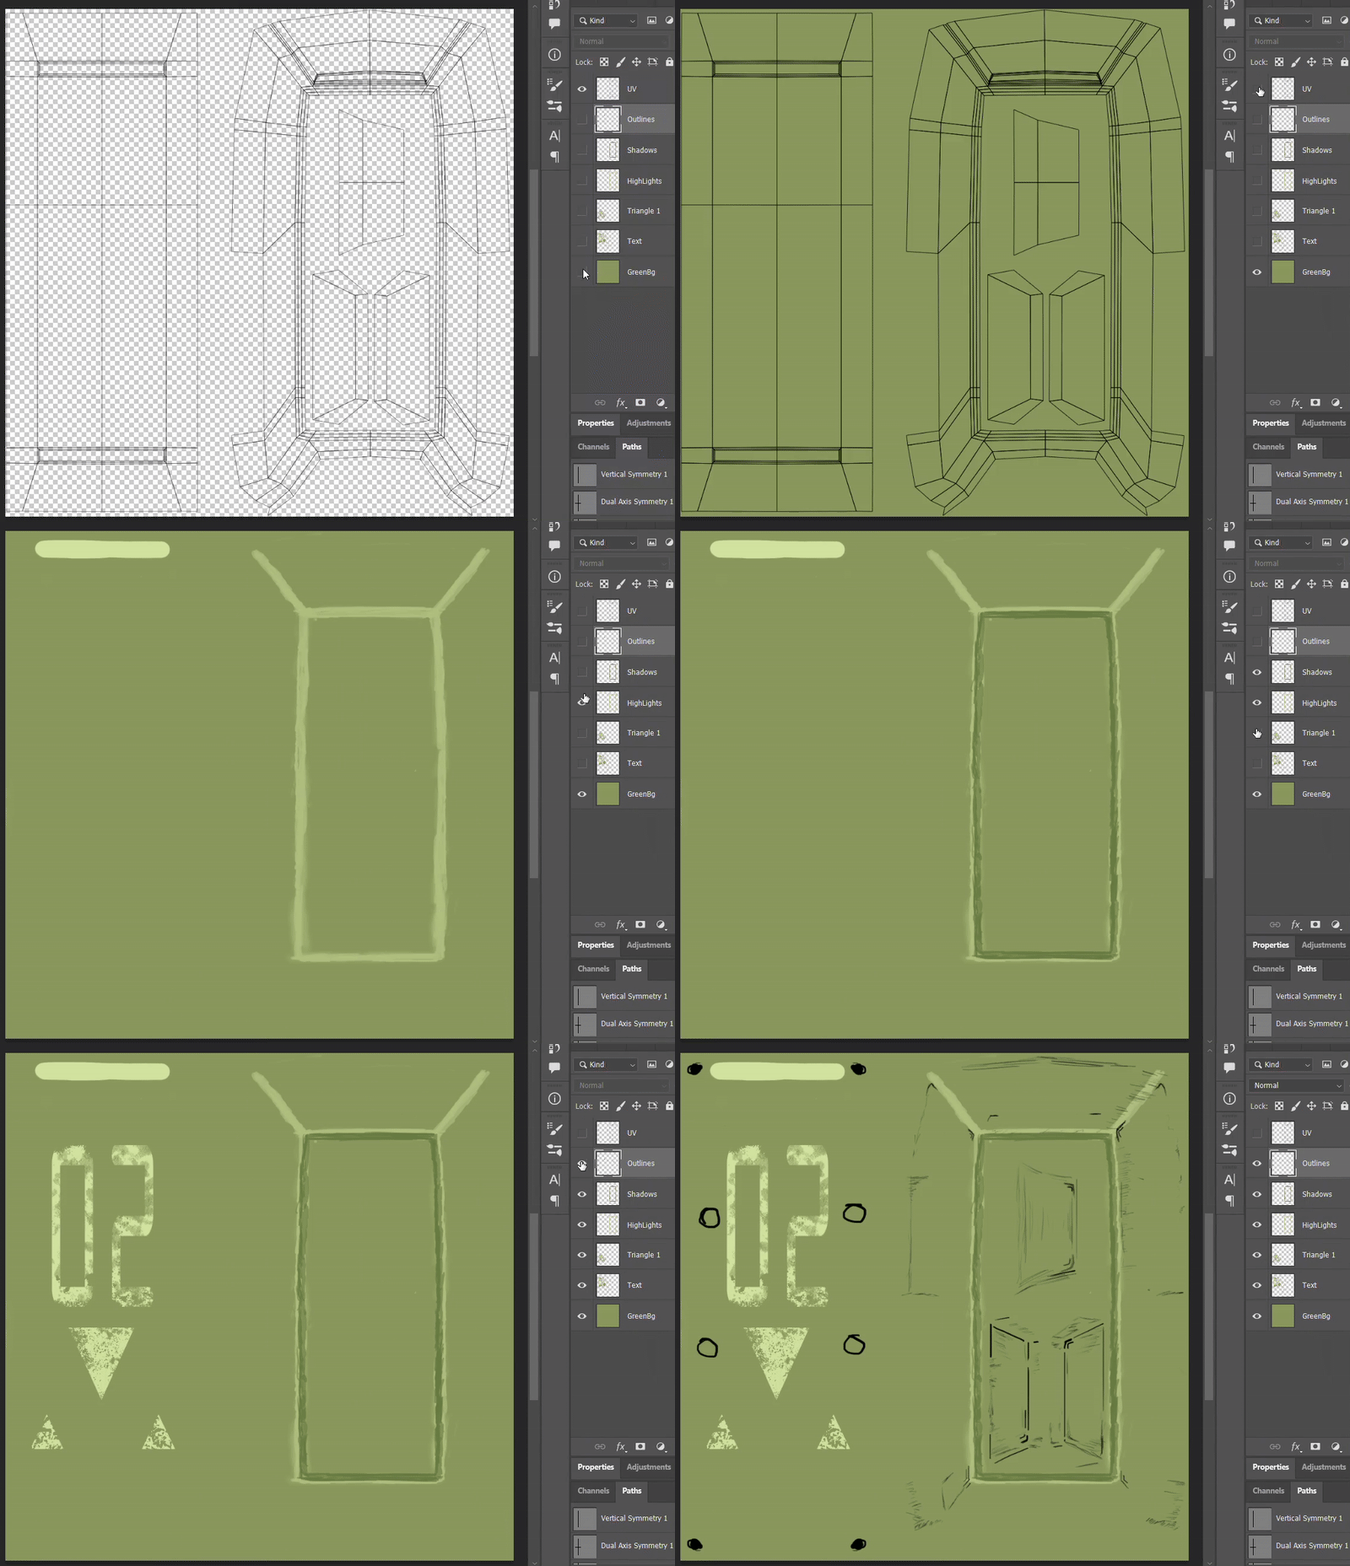
- In Photoshop use a layers system like this. Work on 1 layer at a time, first add your BG color, then highlights, then shadows, then outlines, then any decals/texts/shapes, then use a eraser to add imperfections. I always use Hard Brush to paint. This is very simple approach but produces great results.
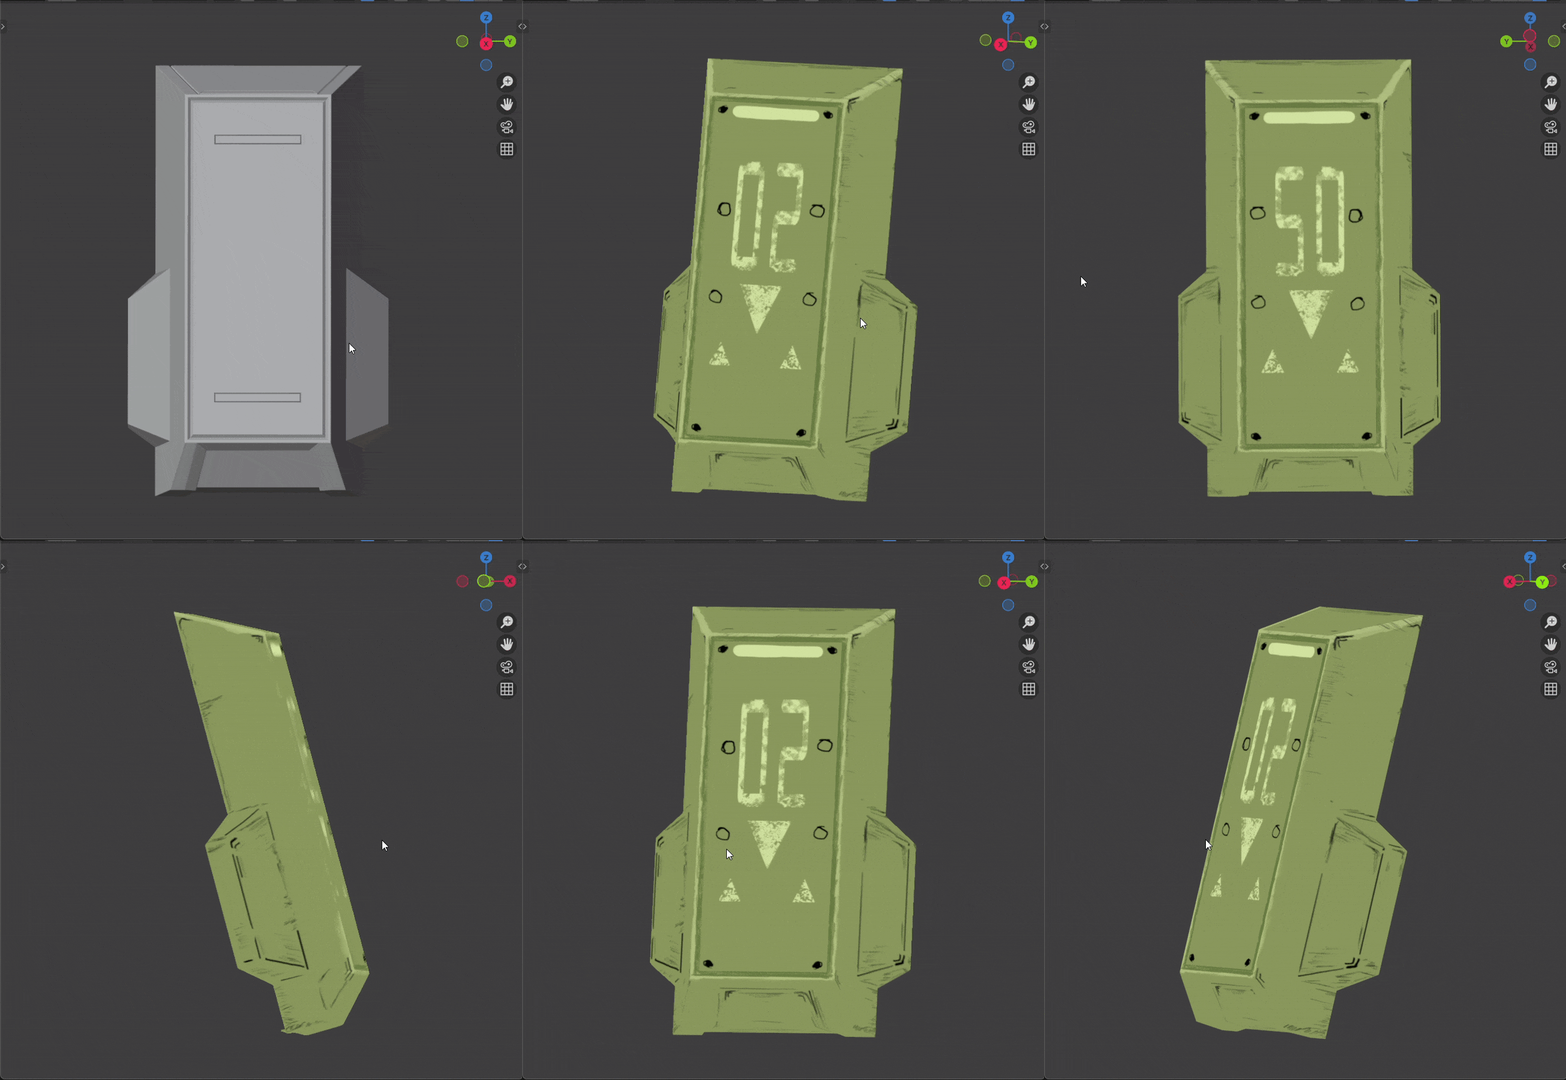
Cel Shader
Now that we have texture painted our model, let's setup a quick Cel Shader
For cel shading look, we need a diffuse BSDF, shader to RGB and a color ramp.
(PS - I'm using EEVEE )
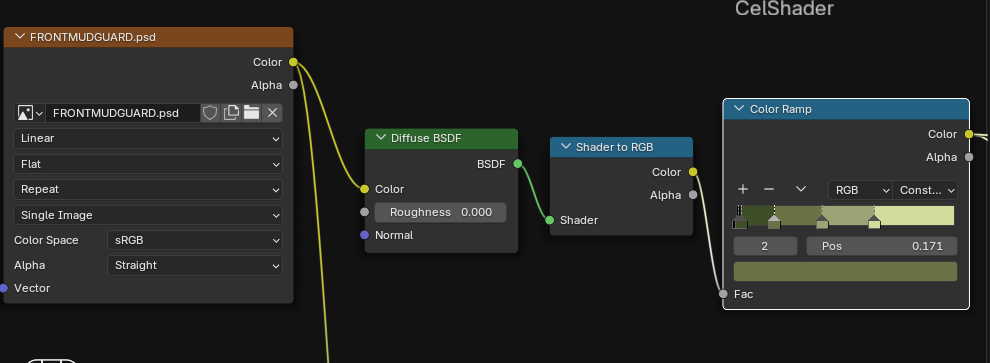 (These nodes can actually be used to convert any shader to a a toon shader in EEVEE)
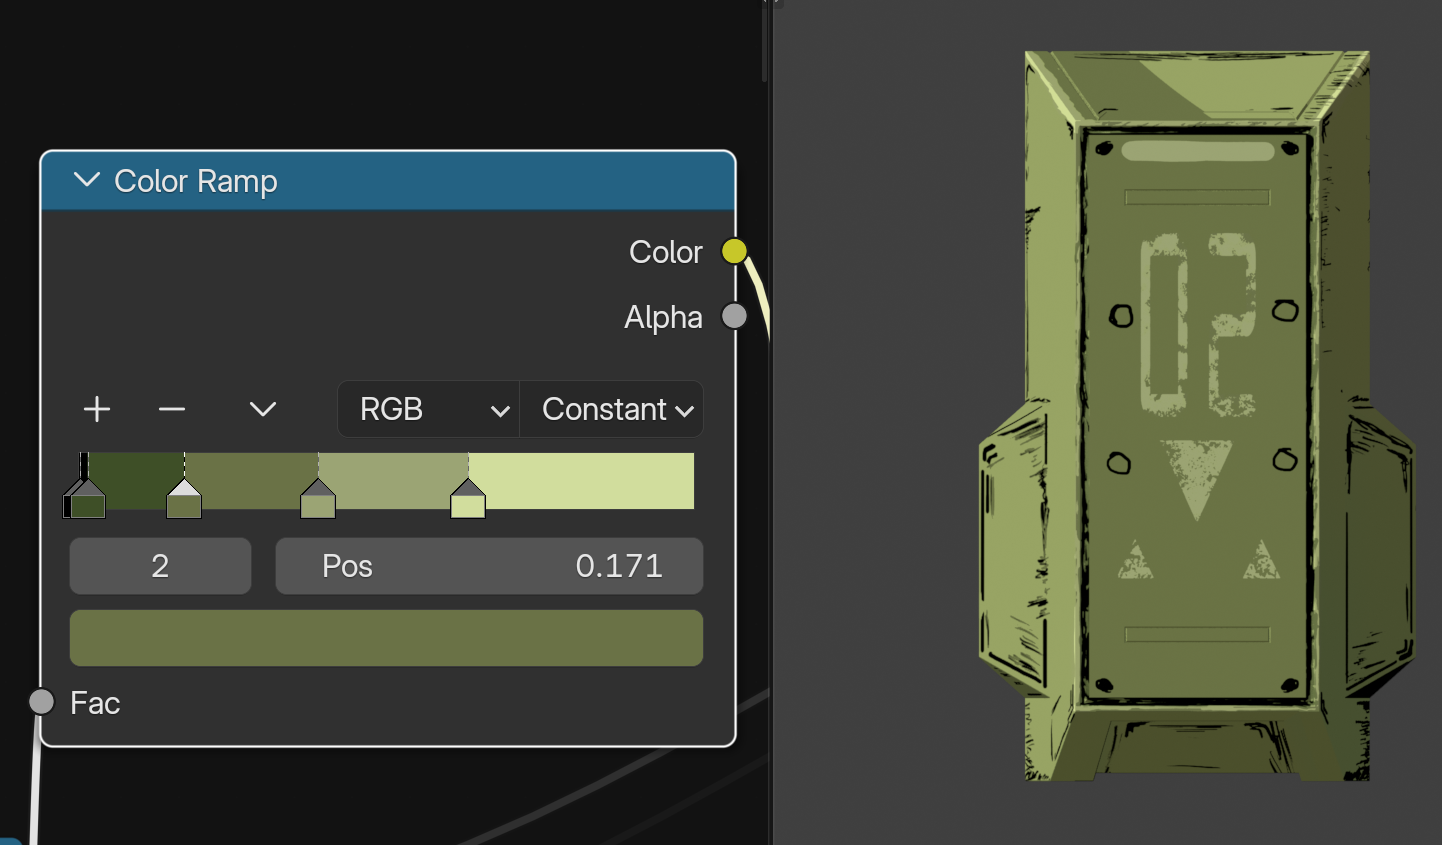
The color ramp's stops values determine the highlights and shadows' color in your cel shader.
I'm using a mid tone green, a darker one for shadows, a lighter one for highlights and a black one for my image texture's squiggles
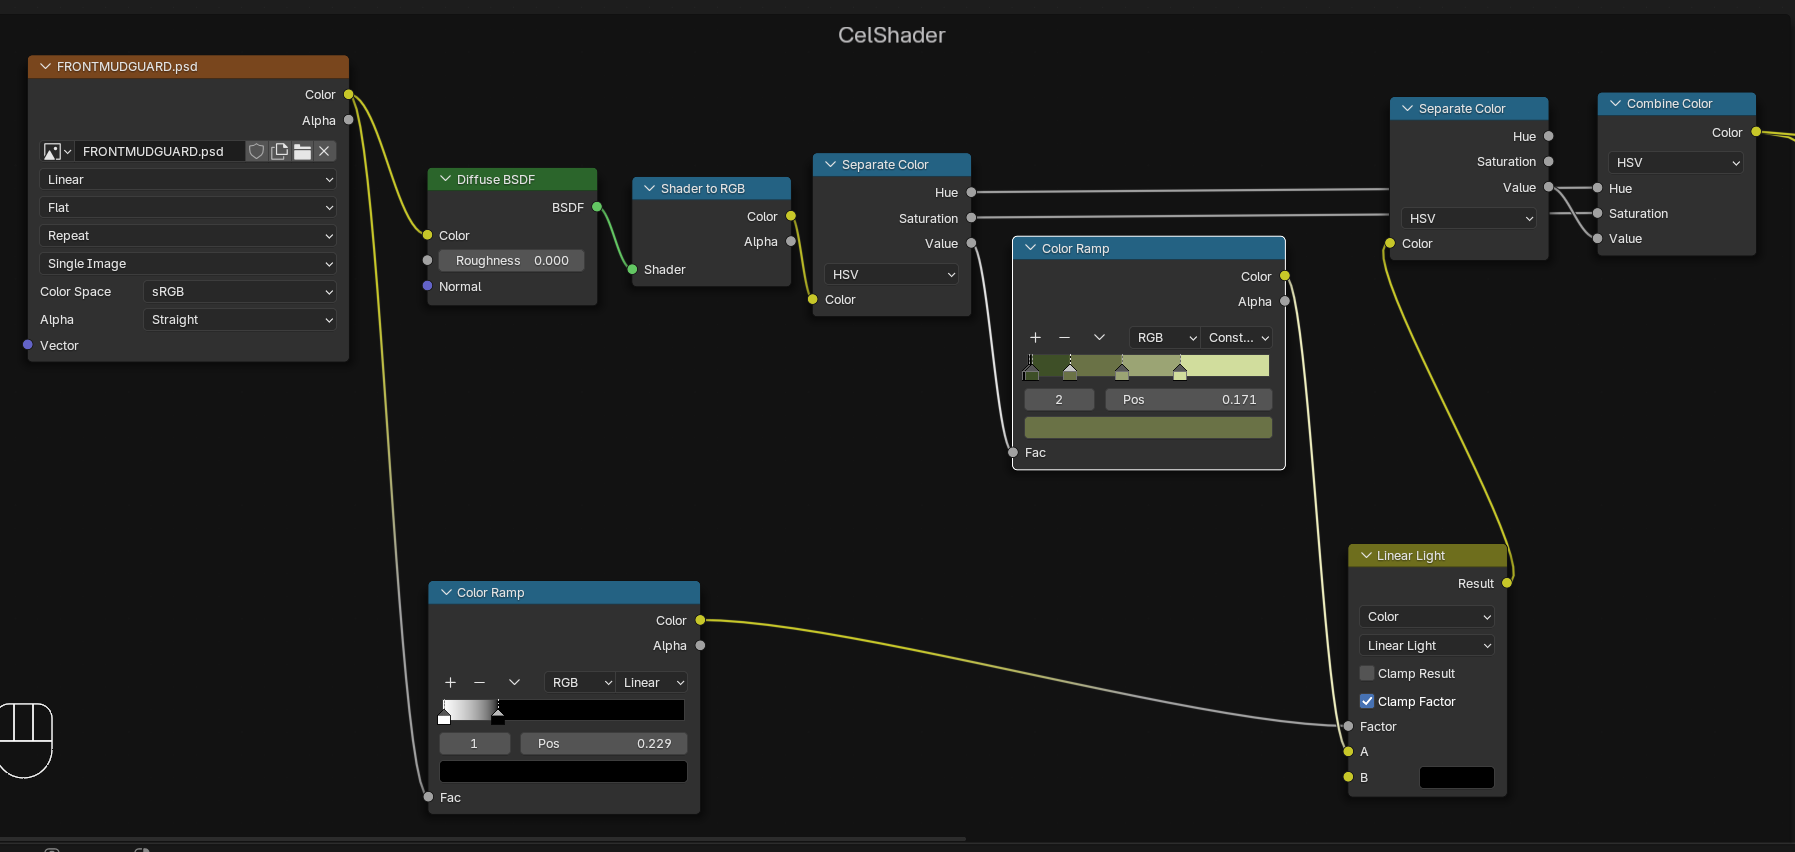
To retain the image texture's hue and saturation, use a seperate color and combine color node set to HSV in your cel shader like this
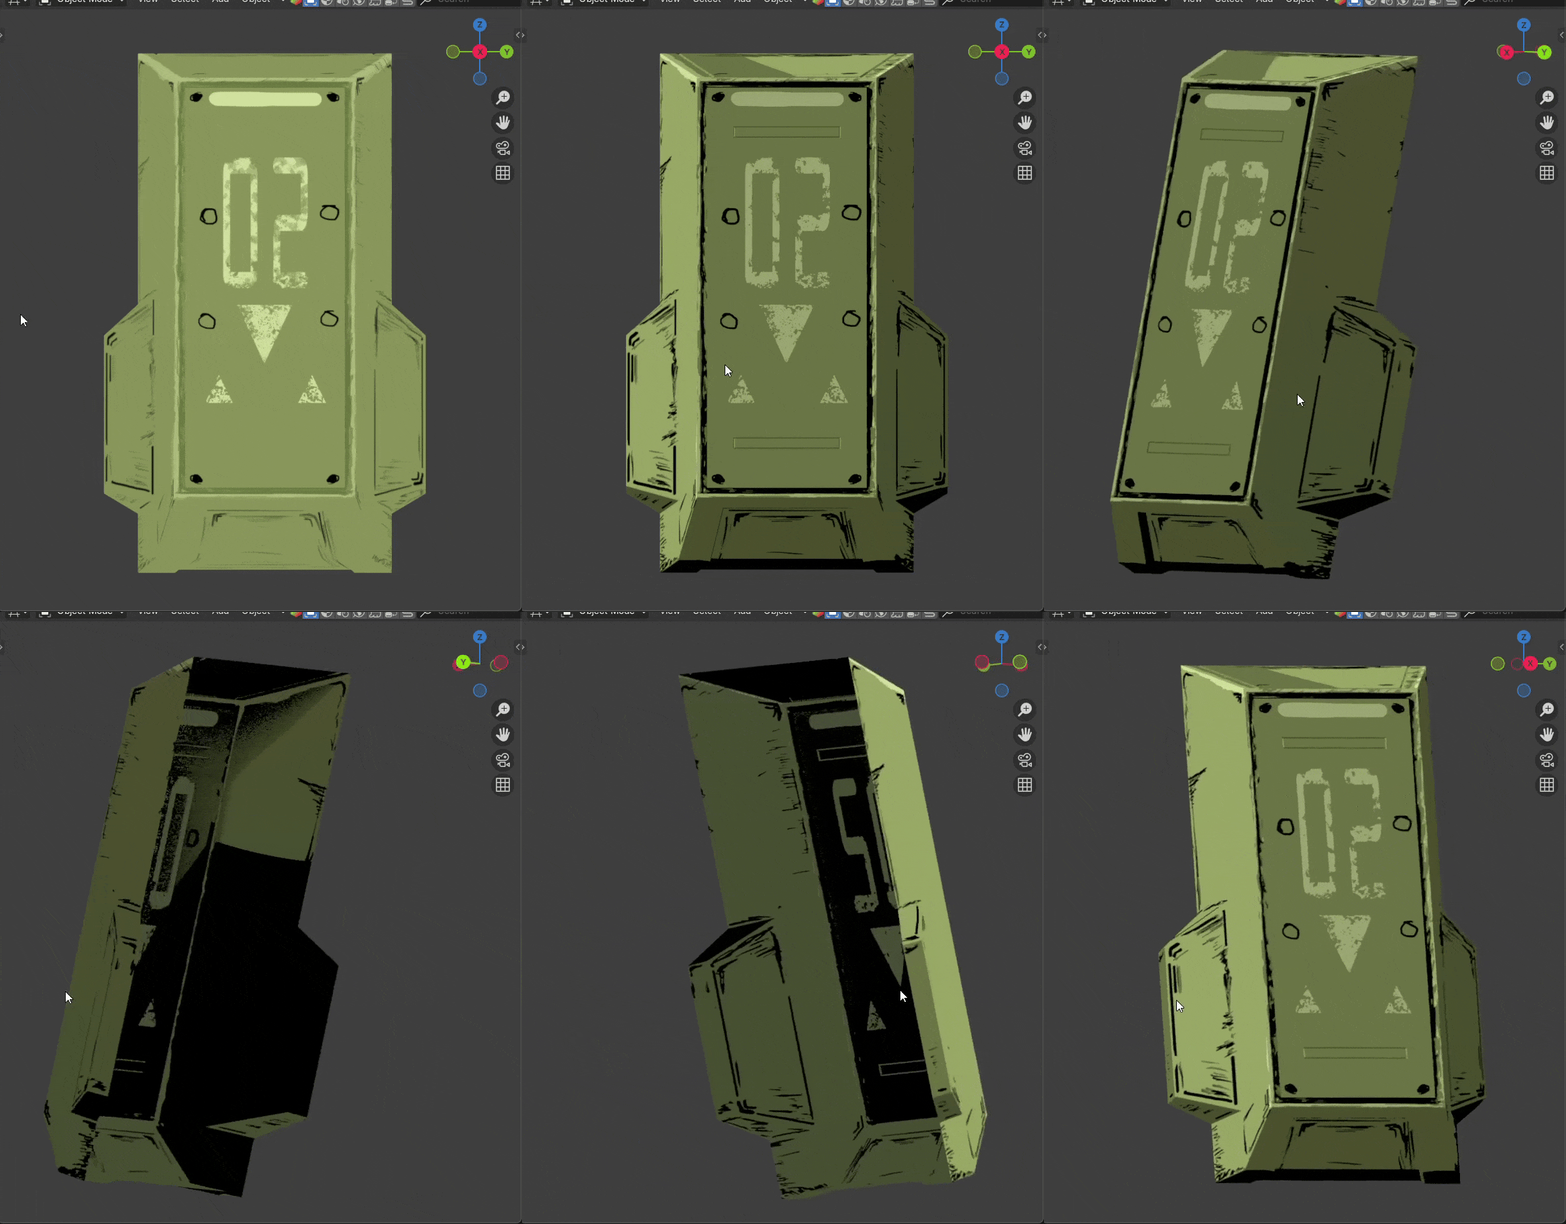
Reflections
Great now your 3D model is having the cel-shaded look, time to add some reflective streaks to really sell the look.
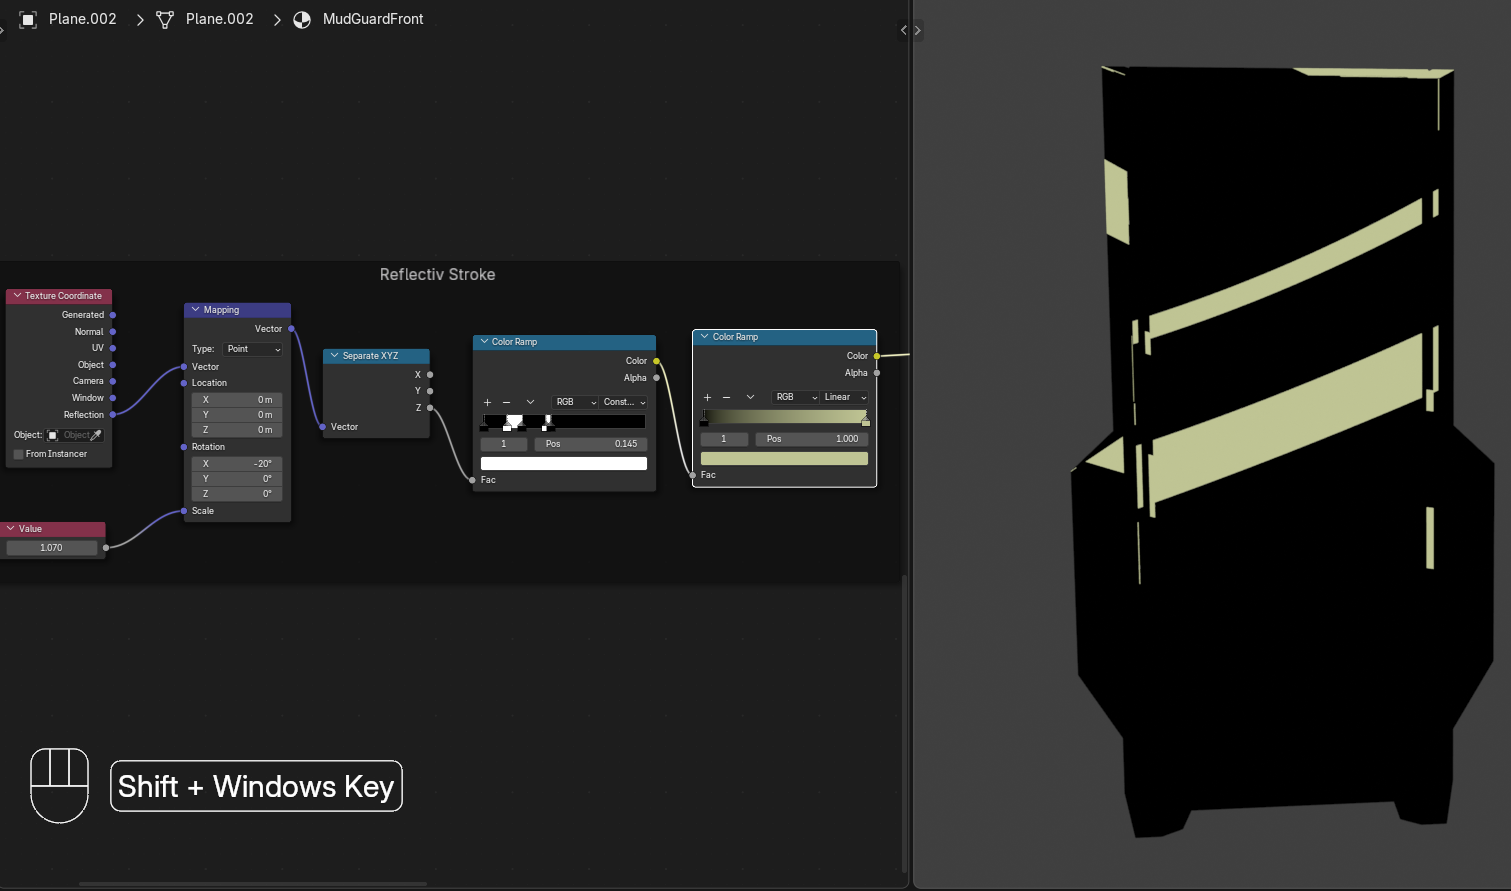
To add reflections we can make use of reflection output of texture co-ordinate node
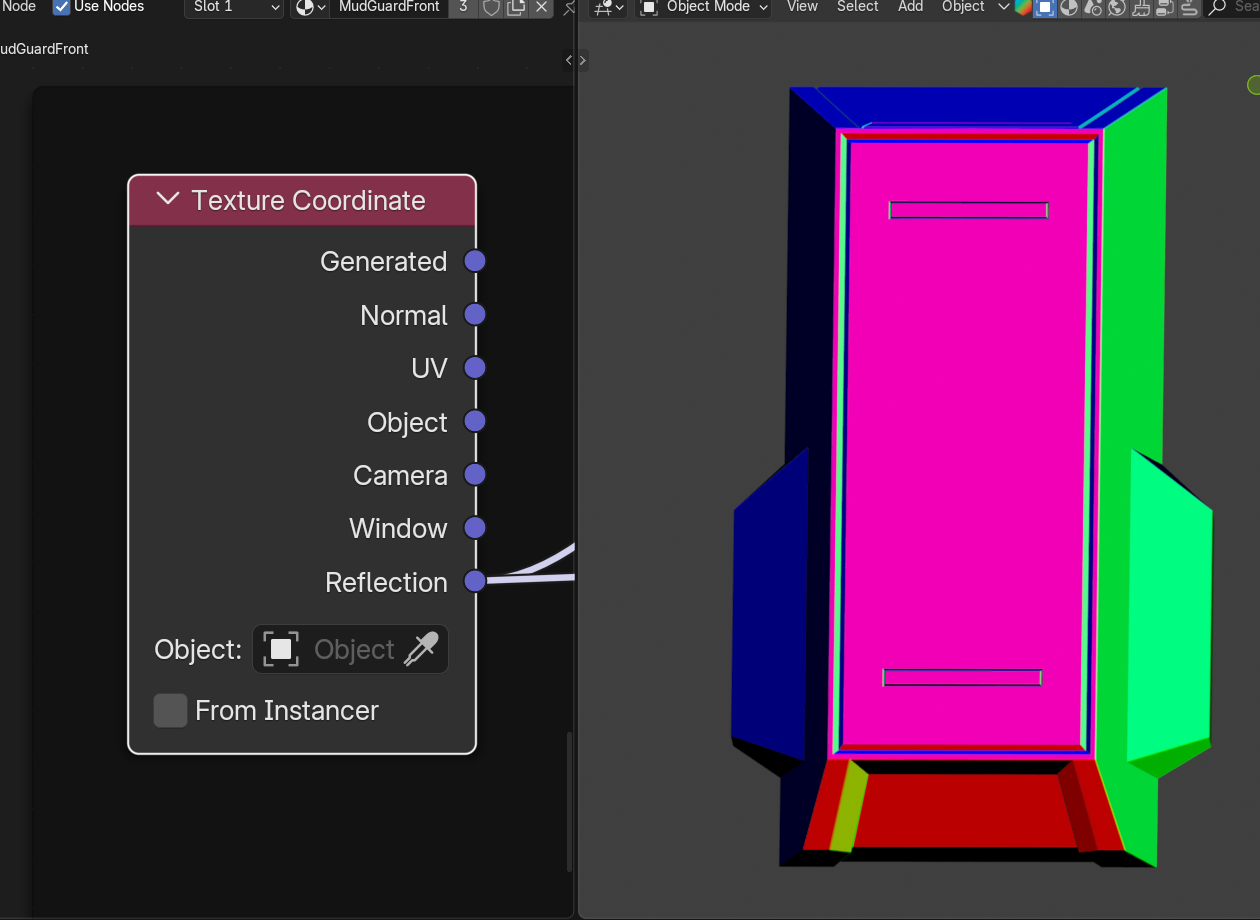
We only need our reflections to go in vertical (z) direction so let's seperate the vector to just z component using seperate XYZ node
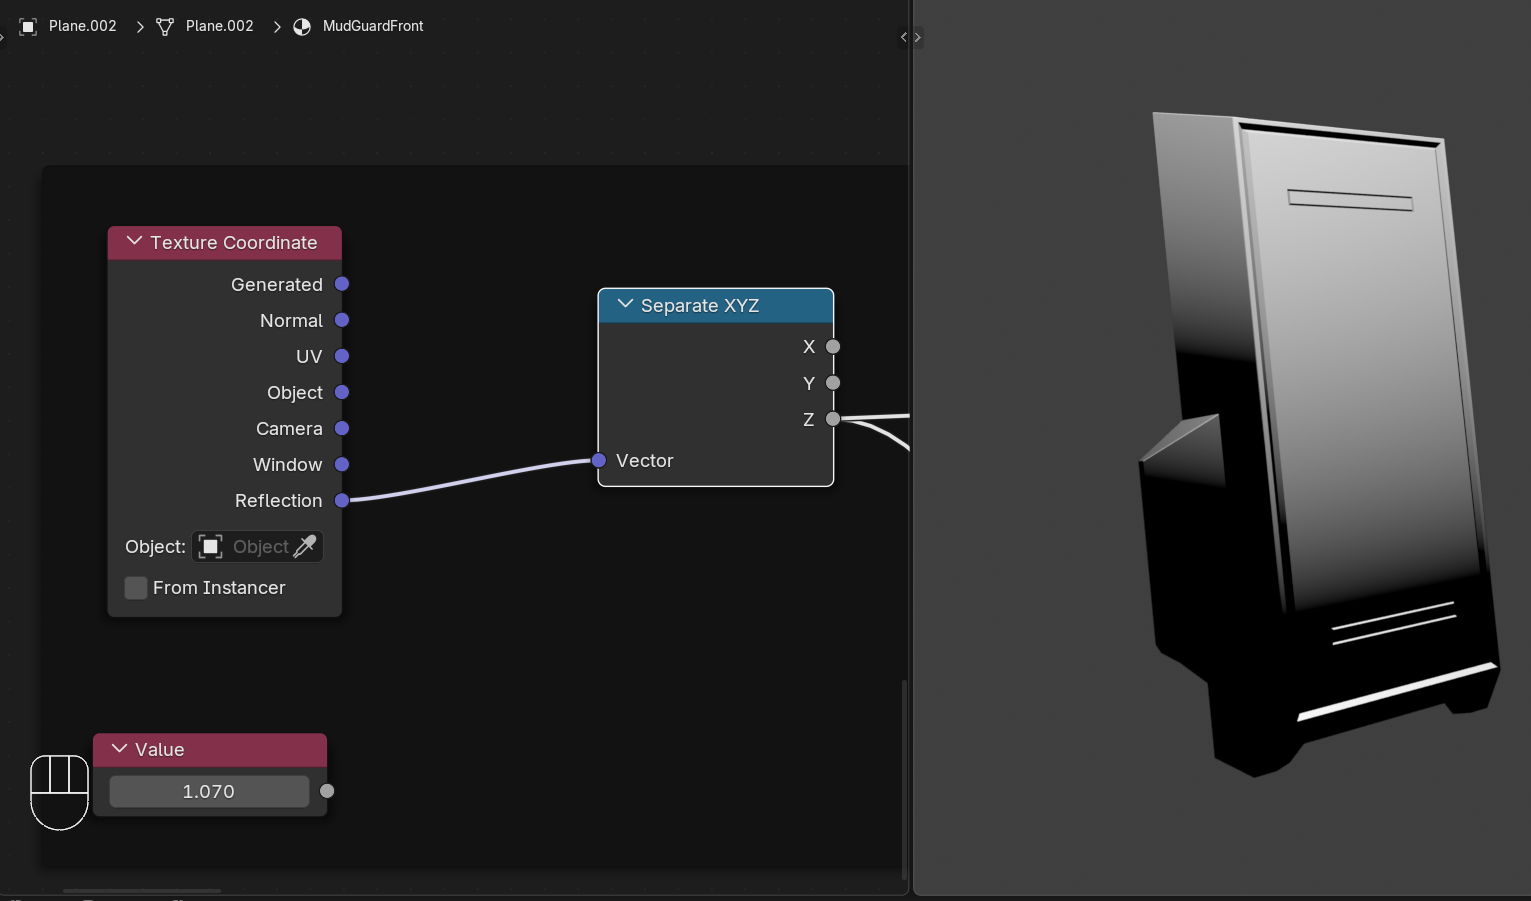
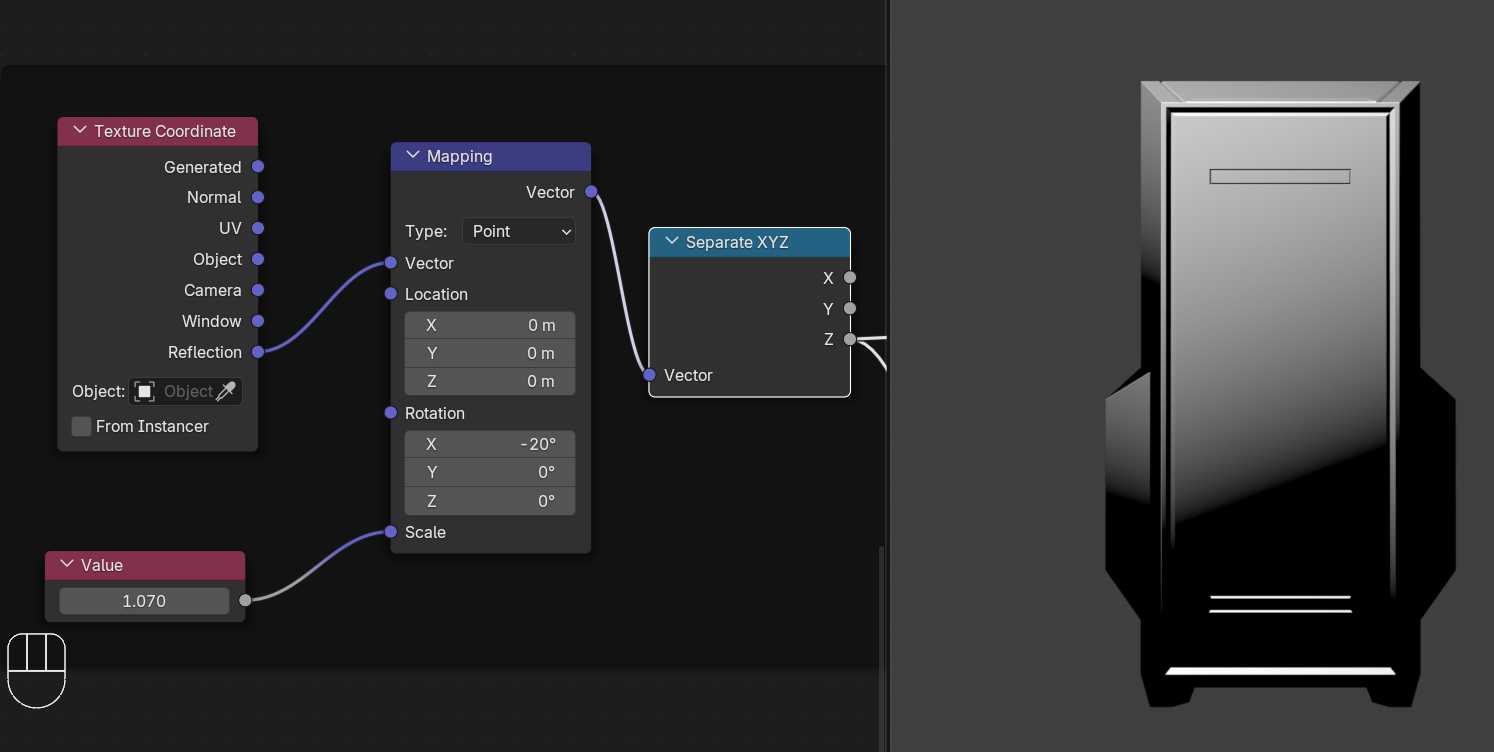
Now let's add slant to the reflections to make it look better
Add in a mapping node in between and change the rotation values.
Add a color ramp set to constant. Adjust the black and white stops to get the streaks of desired width.
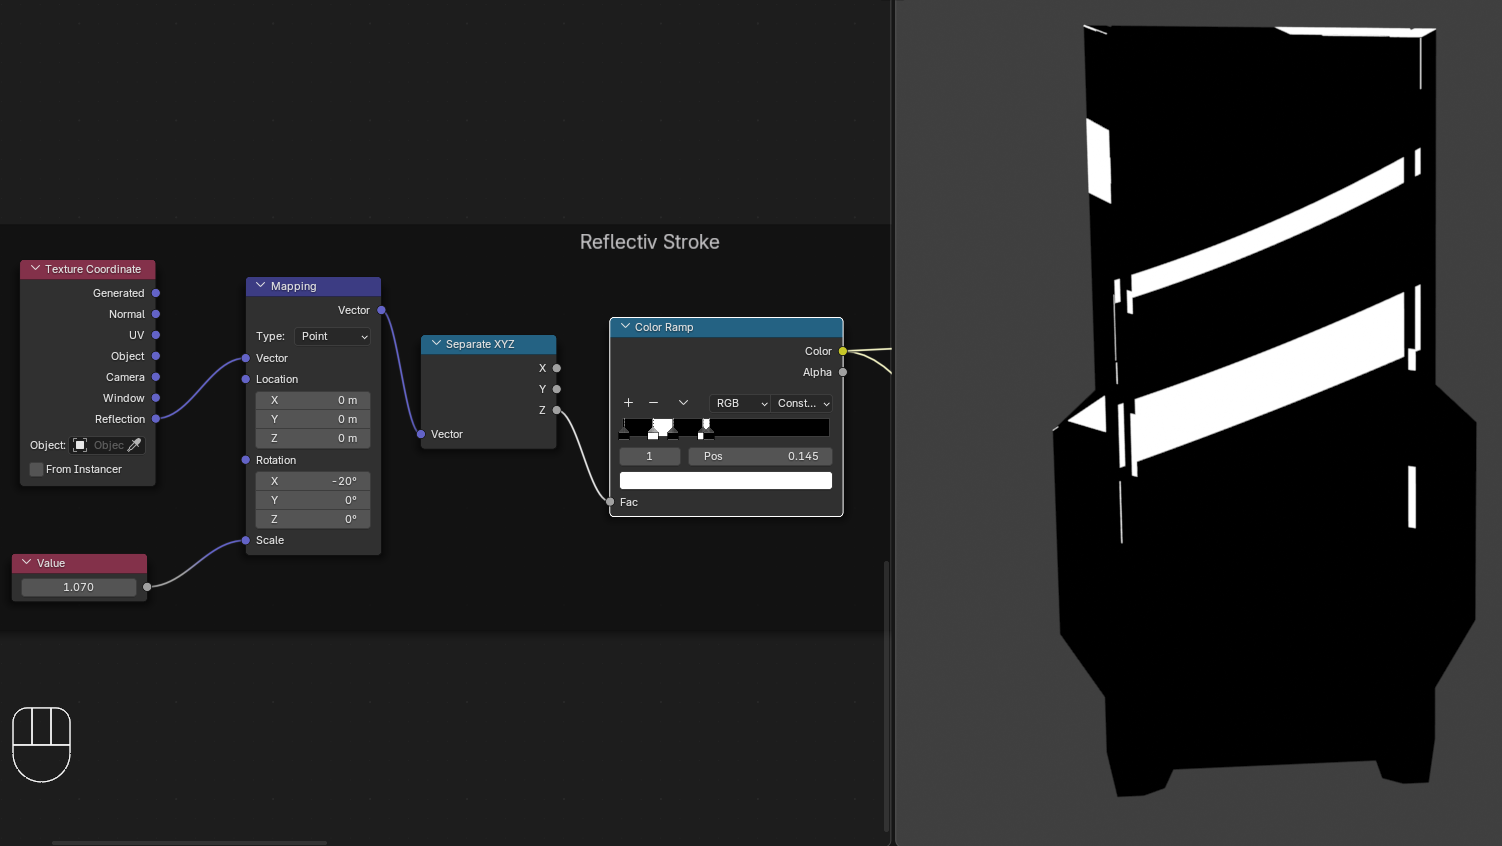
(1 set of B-W-B on your color ramp means 1 streak. If you repeat this set you can increase no.of streaks.)
Finally add a color ramp to determine the color of your streaks. Just change the white color.
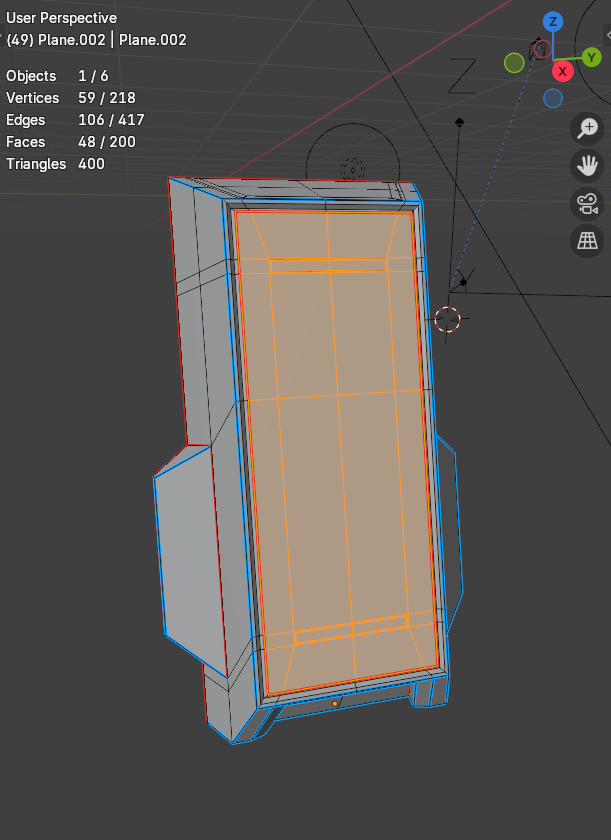
I just want the reflections to be on the front face.
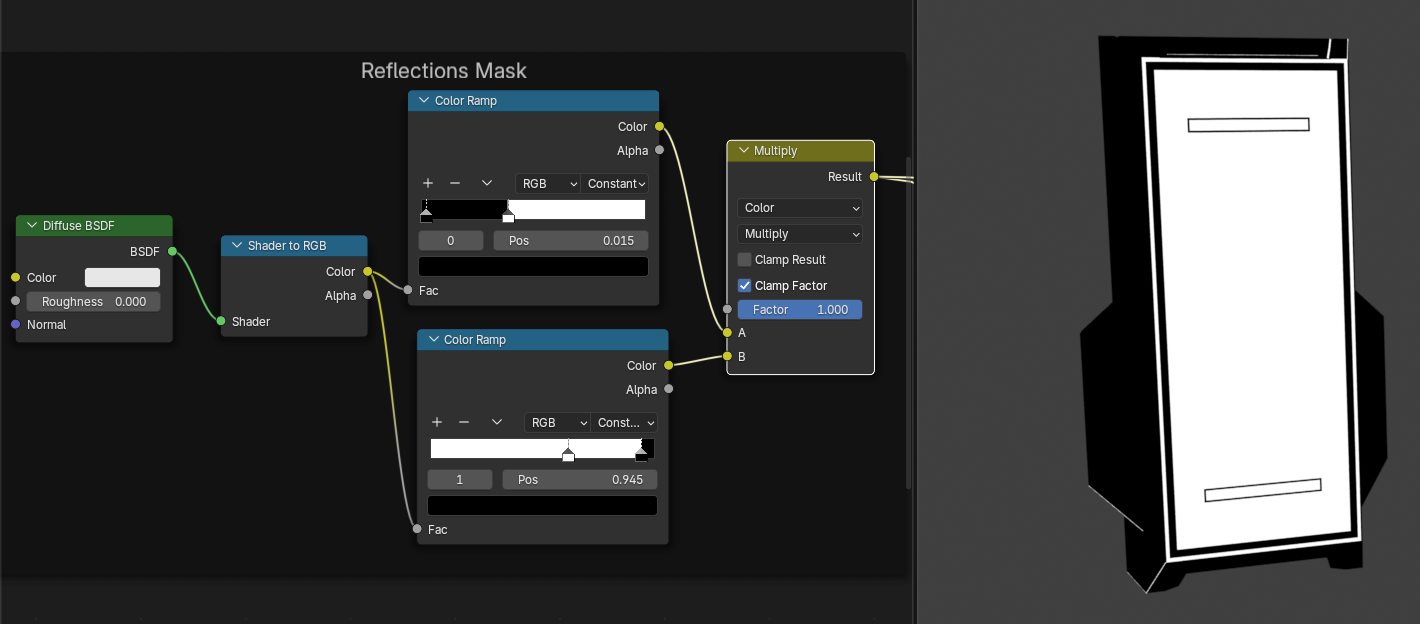
So let's create a mask using color ramps and some maths. Whatever is white will have the reflections, whatever is black no reflections.
Now add a mix color node with the mode set to screen.
Plug your mask in the factor.
Plug your reflections in the color B.
Make the color A black.
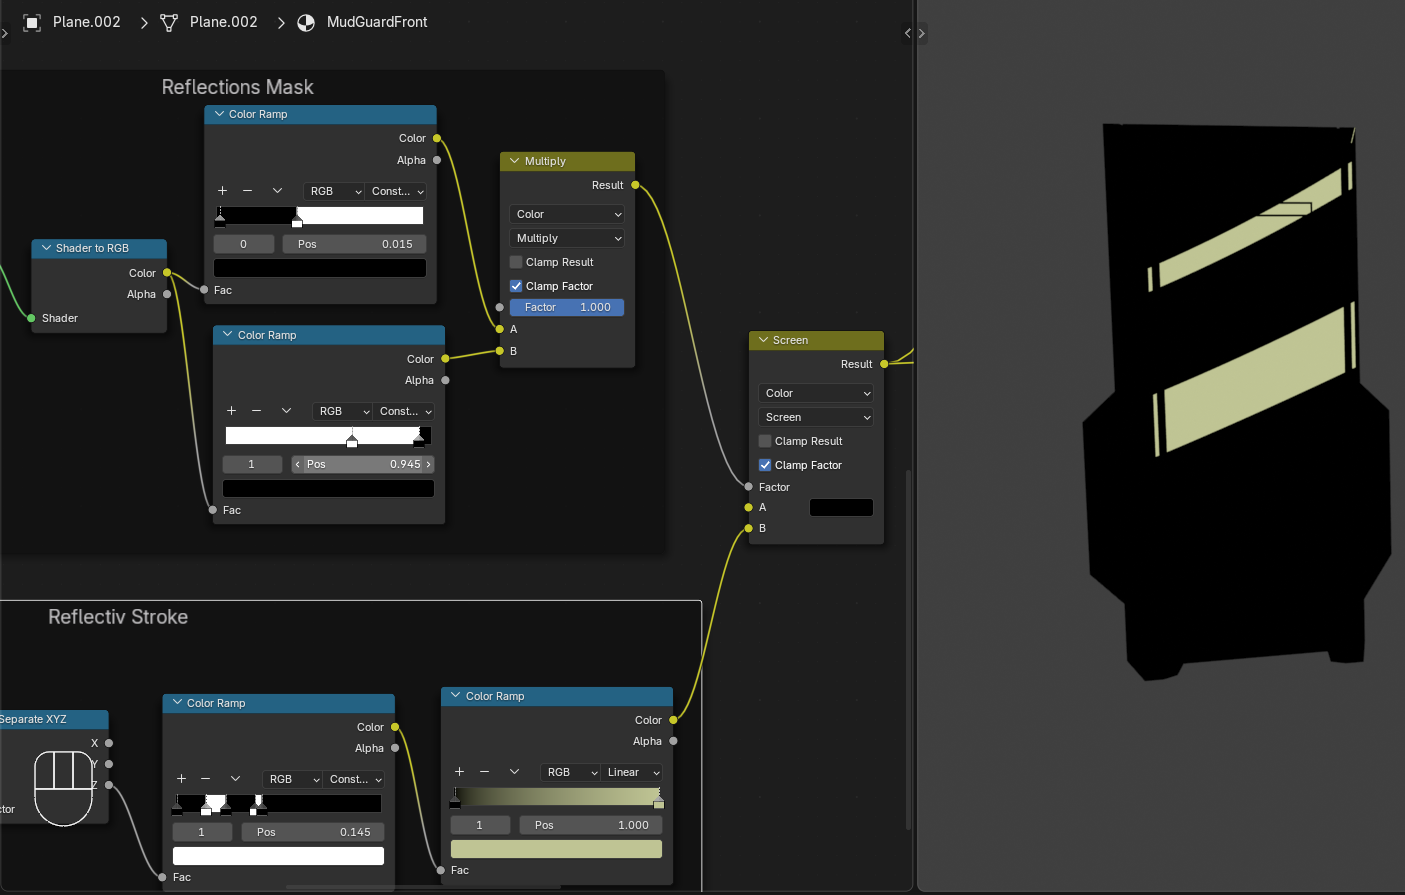
Finally add a mix color node set to lighten.
Plug cel shader into A.Plug previous mix's output to B
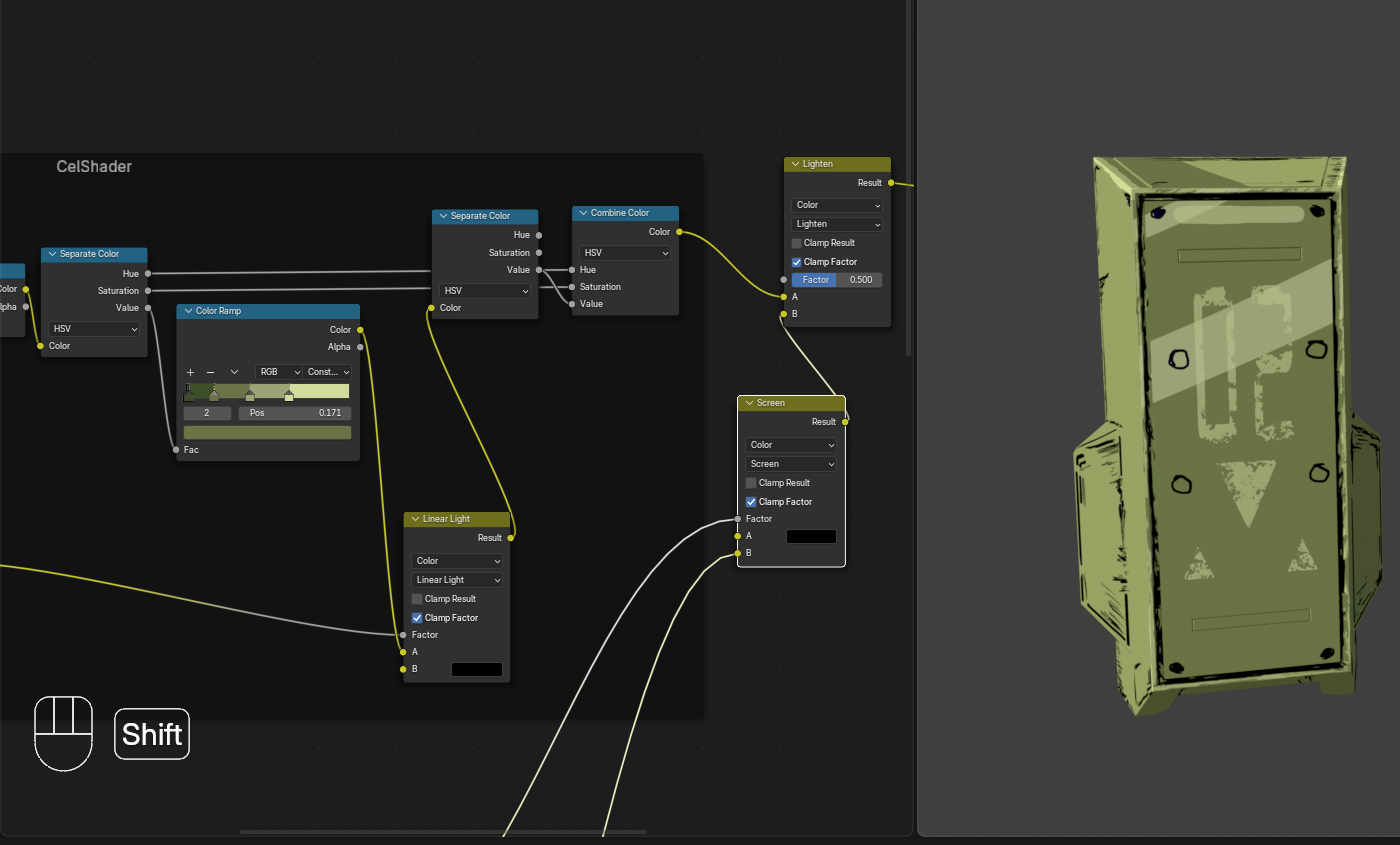
Congrats! now you have a hand painted, cel-shaded, reflection bearing texture.
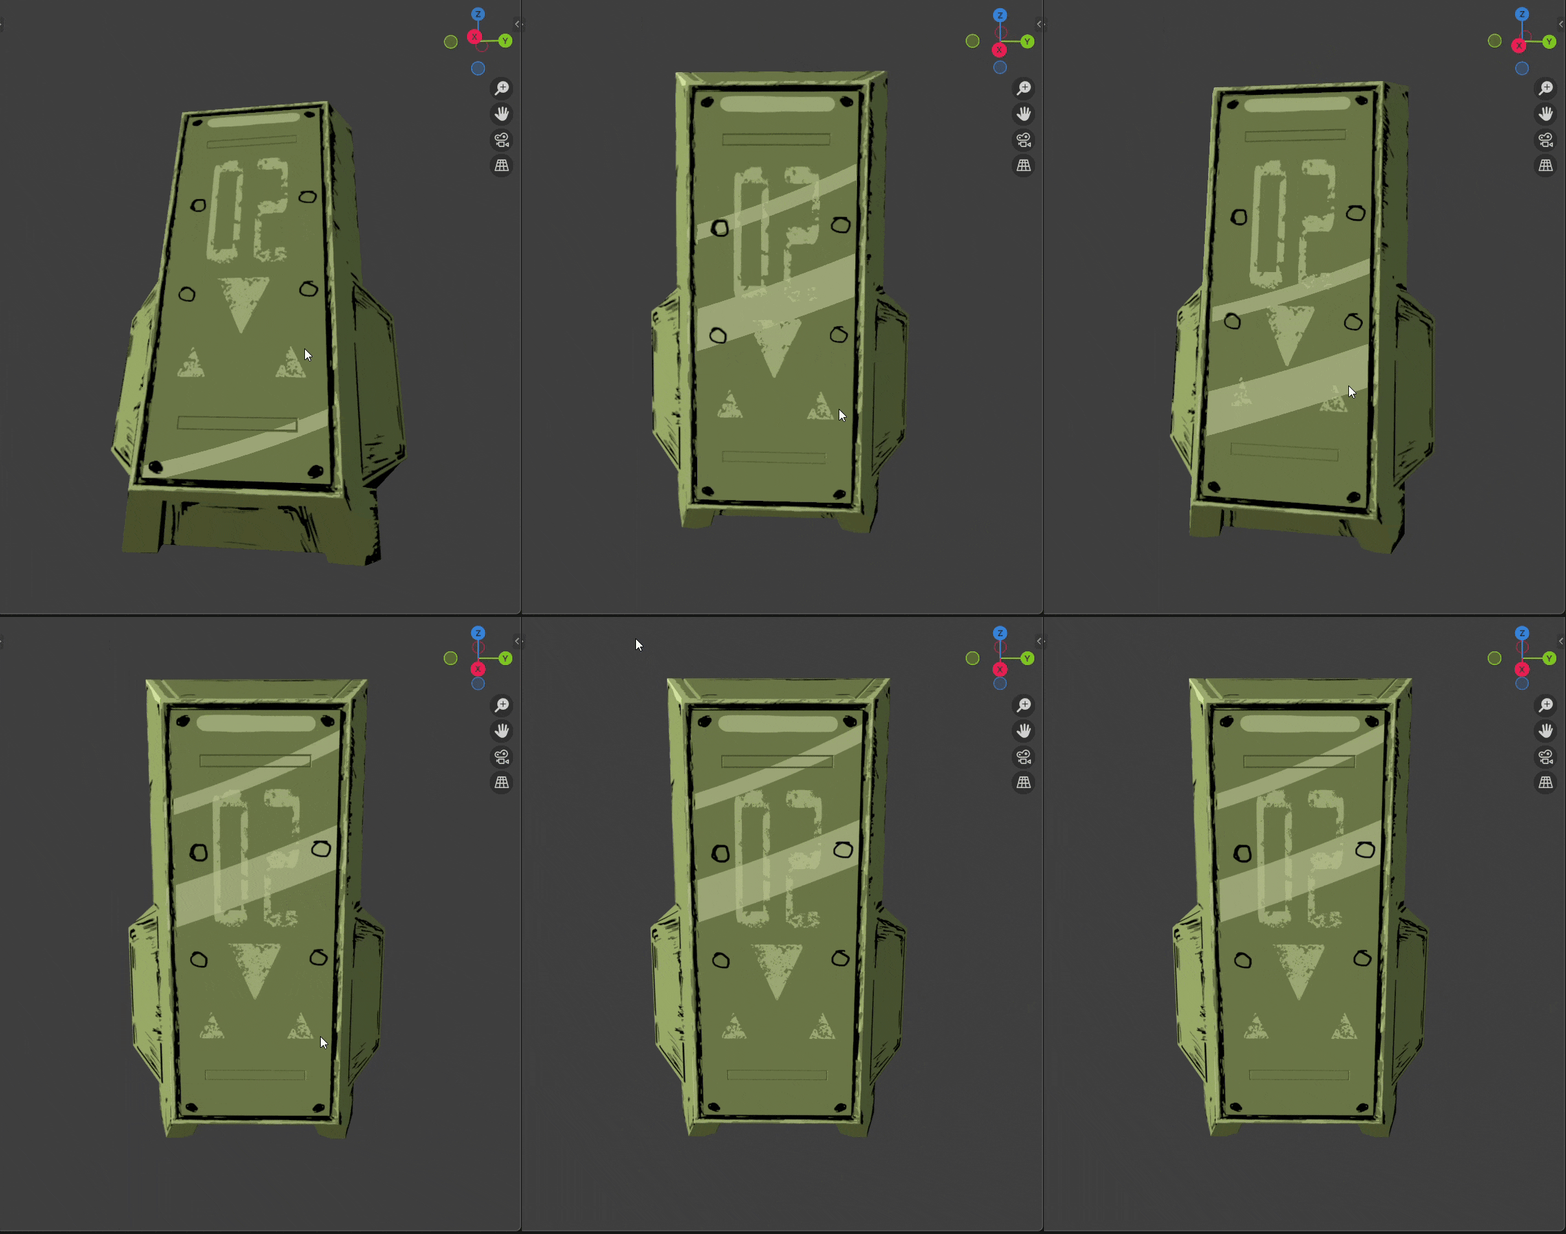
Outlines
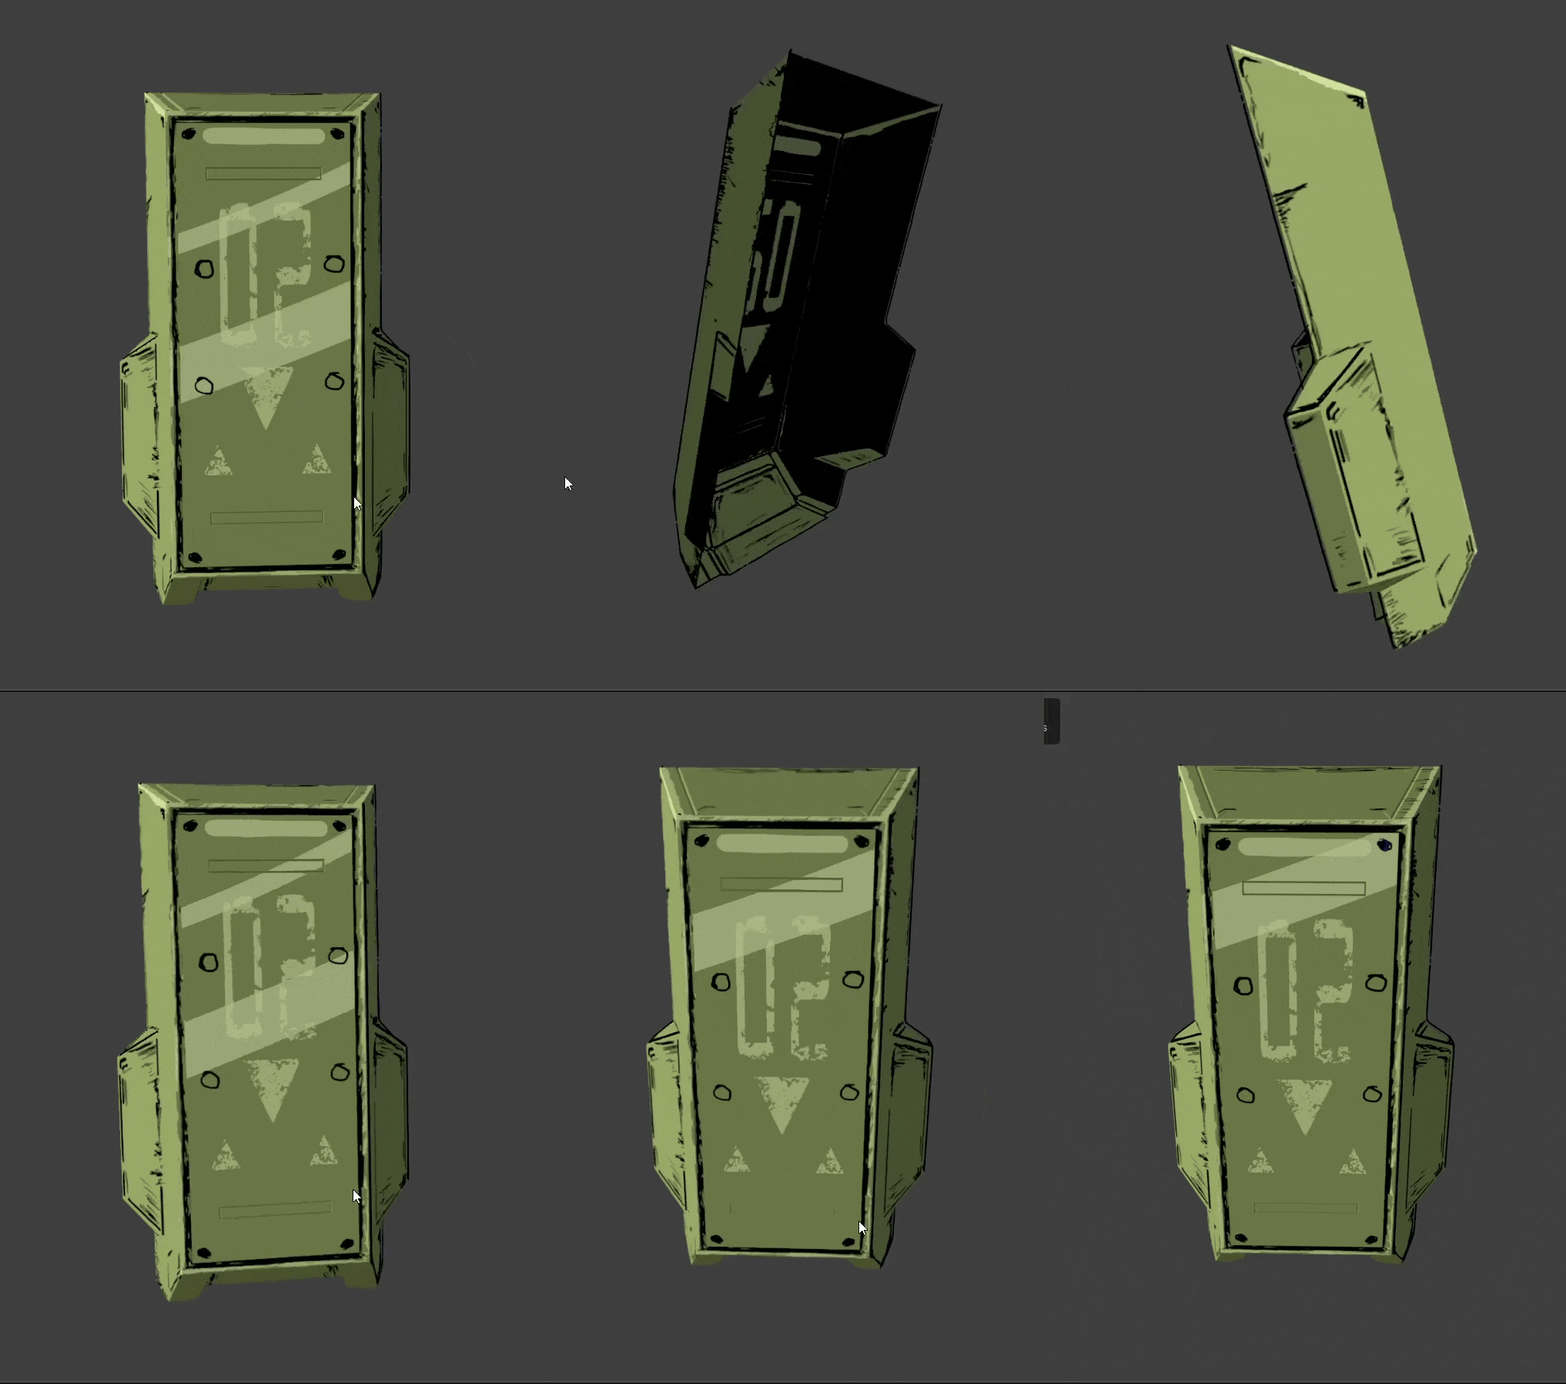
Great, texture painting done, cel shader made, reflections added. All we are left with is outlines.
While there are many ways to achieve outlines, like using layer weight node in shader editor or using the solidify modifier and making it's material as black, I found the line-art modifier of blender produces the best looking outlines.
Levi has created an amazing tutorial on outlines in blender. I went to 8:03 in the below video and straight up copied whatever he told. Works like a charm
If the embedded video below fails to play just click on this
Thanks
- Гайд для новичков (Модель)★ 5 (441)19k views1.1k ♥6 minRussianUpdated 22 Aug, 2022
- Game Asset Ripping★ 5 (450)18k views1.3k ♥2 minUpdated 21 Jun, 2021
- easier than you think blender tutorials for beginners★ 5 (774)17k views2.2k ♥4 minUpdated 26 Aug, 2022
- Как Делать круто и красиво ничего не умея в Blender.★ 4 (760)14k views131 ♥1 minRussian
- Нужные приколюхи для лохов как я★ 5 (717)14k views1.5k ♥2 minRussianUpdated 15 Jan, 2021
- Сборник видео руководств по Blender★ 5 (776)12k views2.1k ♥46 minRussianUpdated 17 Feb, 2022




- Upgrading to PremiumTeam Fortress 2★ 5 (20k)1441k views11k ♥6 minUpdated May 11, 2022
- No More Room in Hell Official ManualNo More Room in Hell★ 5 (2.8k)569k views2.1k ♥29 minUpdated Apr 22, 2019
- NMRiH Community Hosting GuidesNo More Room in Hell★ 5 (526)351k views653 ♥1 minUpdated Aug 10, 2022
- ULTIMATE GUIDE FOR GAME DEV TYCOONGame Dev Tycoon★ 5 (5.8k)326k views10k ♥4 minUpdated 23 Jan, 2014
- How to 'Git Gud' Soon™MORDHAU★ 5 (2k)318k views3k ♥68 minUpdated Nov 16, 2024
- Лучшие кооперативные игры SteamPAYDAY 2★ 5 (1.5k)315k views2.1k ♥56 minRussianUpdated Apr 27, 2025






This guide was created by its original author on the Steam Community. Are you the author and want it removed? Request removal.