Assassin's Creed II Glyph puzzles (from Gamesradar.com)
Puzzle 1: In the Beginning
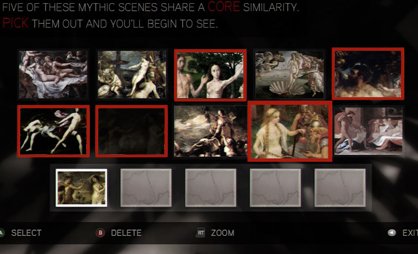
“Core?” “Pick?” That’s a dead giveaway right there. Just pick out all the paintings that contain apples. (And remember you can zoom in on them.) Or just pick these five and have done with it:
Puzzle 2: Sixty-Four Squares
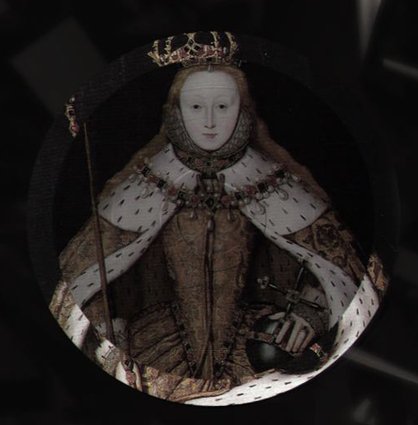
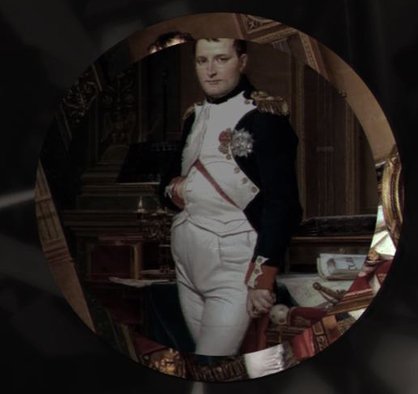
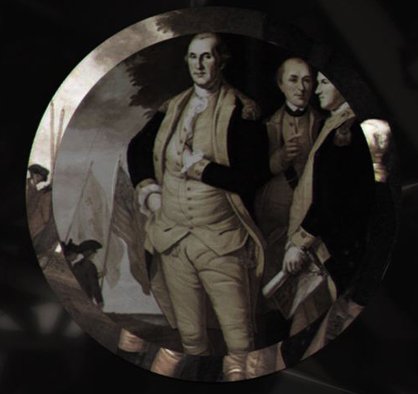
You don’t really need our help with this one, do you? Just rotate the rings until you complete each portrait. But if you’re curious, here’s what they’ll look like when they’re just a hair from being solved:
Puzzle 3: Descendants
Another simple one – just highlight the spot in each image where the Apple is hiding. You can click around at random and maybe find a couple of hidden messages, but if you’re in a hurry, here’s exactly where to look:
Puzzle 4: Infinite Knowledge
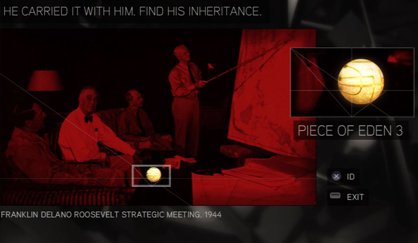
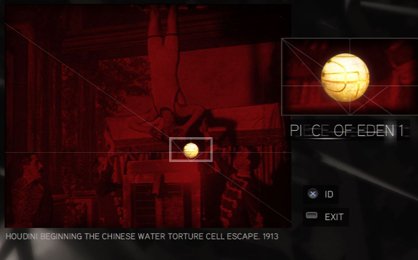
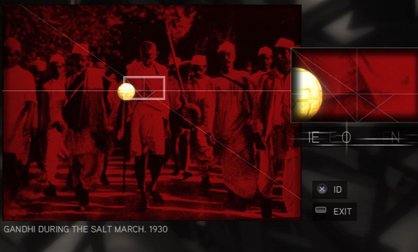
Another hidden-image puzzle; here’s where to find them:
Image 1: In the barrel of the bazooka.

Image 2: On the helmet of the soldier crouching in the background.
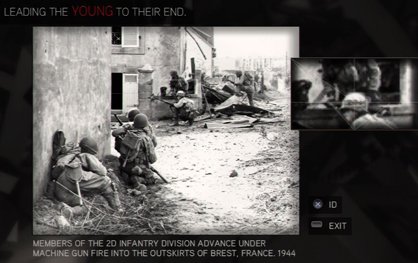
Image 3: On a rifle held up just to the left of the officers in the picture.
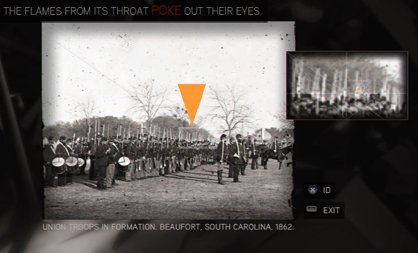
Image 4: In the hand of one of the monsters at the upper-right-hand corner.
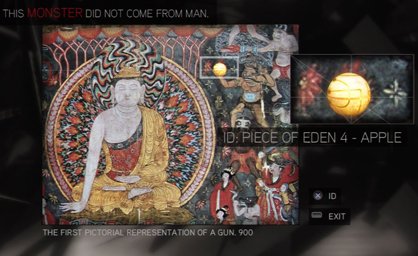
Image 1: In the barrel of the bazooka.
Image 2: On the helmet of the soldier crouching in the background.
Image 3: On a rifle held up just to the left of the officers in the picture.
Image 4: In the hand of one of the monsters at the upper-right-hand corner.
Puzzle 5: Instruments of Power
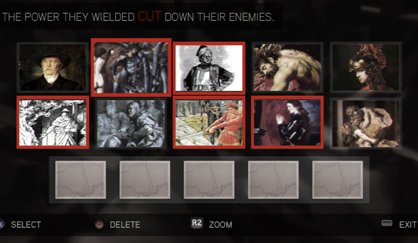
Set 1: The hint here is “cut,” so pick the five paintings that feature swords.
Set 2: What do the people in these paintings lean on? That’s right – pick out the images that feature staffs.
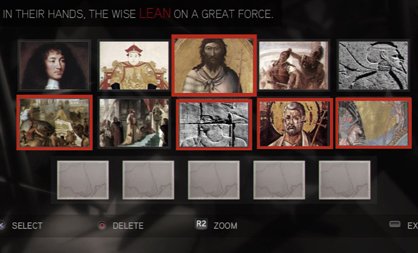
Set 2: What do the people in these paintings lean on? That’s right – pick out the images that feature staffs.
Puzzle 6: Brothers
This is where things start to get tricky; while the first batch of ring puzzles were simple, these link some of their rings together, so that you can’t move one without moving another. Here’s how to get through them in a hurry:
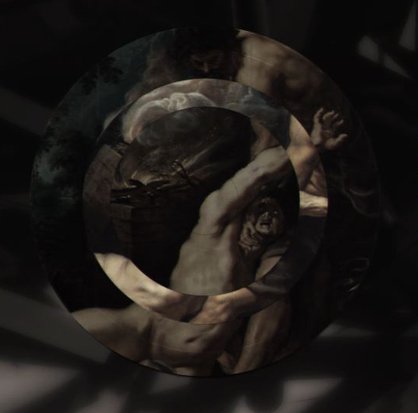
Puzzle wheel 1: The third, fourth and fifth rings are linked in this one. Turn the first ring right 10 times, the second one left three times, and the fourth right once (which will also move the third one with it). Then nudge the fifth ring (and the third along with it) right three times, and after that it’s just a matter of snapping the last ring into place.
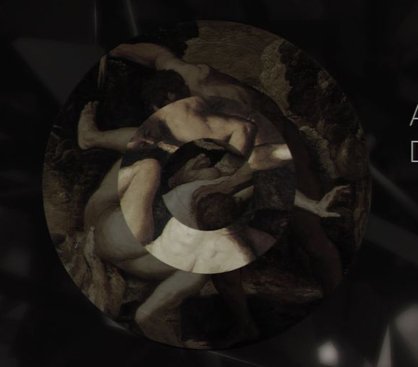
Puzzle wheel 2: The second and fourth rings are linked here. Turn the first ring left three times, the third ring left once, the fourth ring left four times, the fifth ring right once, and then snap the final ring into place.
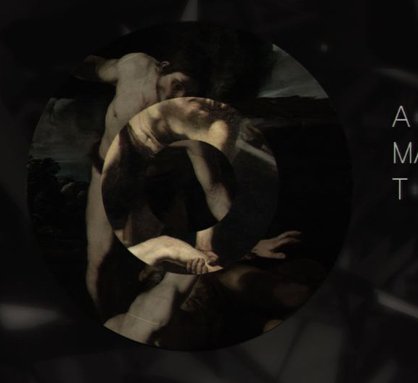
Puzzle wheel 3: The second and fourth rings are linked here. Turn the first ring left three times, the second one right twice and the third ring right once. Then rotate the fourth ring right seven times, turn the fifth ring left once and snap the second ring into place with three turns to the left.
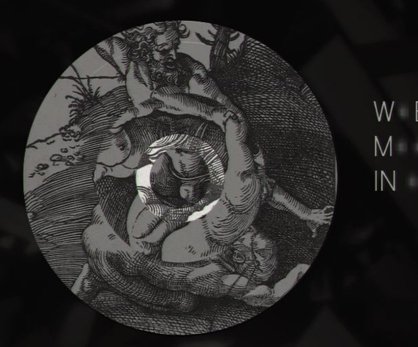
Puzzle wheel 4: The first and second rings are linked, as are the fourth and second. Start by turning the first ring right five times, then turn the second one right four times. Then turn the third ring right once, the fourth ring left twice, the fifth left twice and the second ring right twice. Then snap the first ring back into place.
Puzzle wheel 1: The third, fourth and fifth rings are linked in this one. Turn the first ring right 10 times, the second one left three times, and the fourth right once (which will also move the third one with it). Then nudge the fifth ring (and the third along with it) right three times, and after that it’s just a matter of snapping the last ring into place.
Puzzle wheel 2: The second and fourth rings are linked here. Turn the first ring left three times, the third ring left once, the fourth ring left four times, the fifth ring right once, and then snap the final ring into place.
Puzzle wheel 3: The second and fourth rings are linked here. Turn the first ring left three times, the second one right twice and the third ring right once. Then rotate the fourth ring right seven times, turn the fifth ring left once and snap the second ring into place with three turns to the left.
Puzzle wheel 4: The first and second rings are linked, as are the fourth and second. Start by turning the first ring right five times, then turn the second one right four times. Then turn the third ring right once, the fourth ring left twice, the fifth left twice and the second ring right twice. Then snap the first ring back into place.
Puzzle 7: Keep on Seeking, and You Shall Find
Image set: The key word here is “red,” so pick the images in which that color shines the brightest.
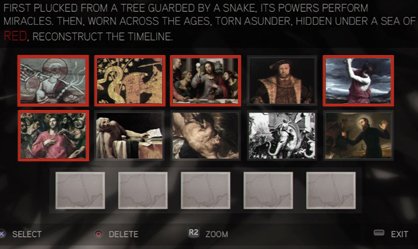
Image: Highlight the area to the right of Jesus’ hips to reveal a Piece of Eden.
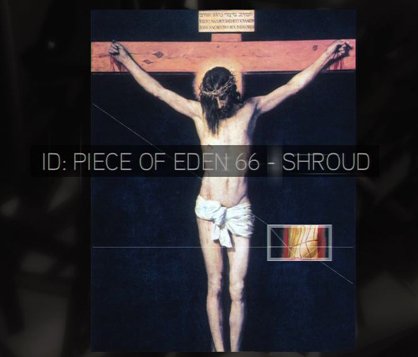
Image: Highlight the area to the right of Jesus’ hips to reveal a Piece of Eden.
Puzzle 8: Martyrs
Image 1: Highlight Czar Nicholas’ staff.
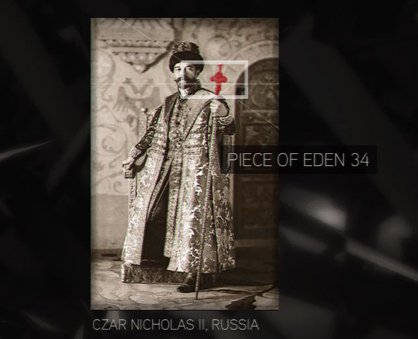
Image 2: Highlight Joan of Arc’s sword.
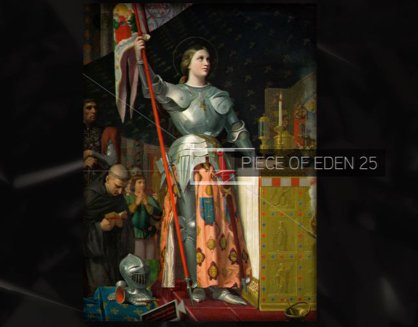
Image 3: Move the fireball to Joan of Arc’s portrait.
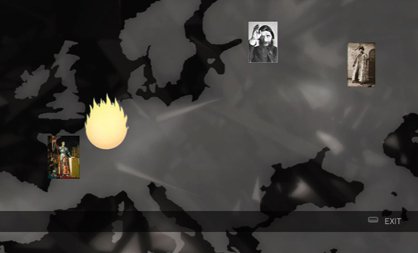
Image 4: Move the photo of Rasputin onto Czar Nicholas’ portrait.
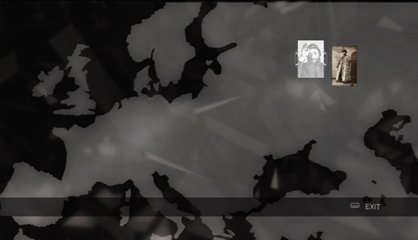
Image 2: Highlight Joan of Arc’s sword.
Image 3: Move the fireball to Joan of Arc’s portrait.
Image 4: Move the photo of Rasputin onto Czar Nicholas’ portrait.
Puzzle 9: Hat Trick
Image 1: Move the cursor onto Houdini’s torso.
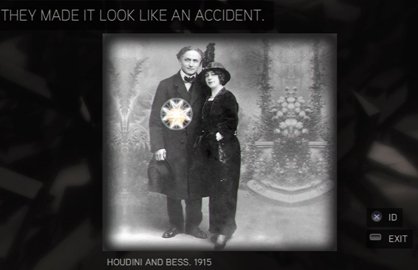
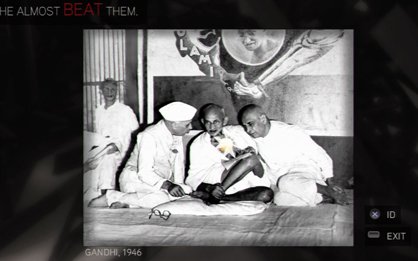
Image 2: Move the cursor over Gandhi’s heart.
Code wheel puzzle: Your hint here is pretty obvious; there’s a big, glaring “6=1” next to Oswald’s picture. So move the red wheel so that the 6 is over the gray 1, and plug in the corresponding numbers. Like so:
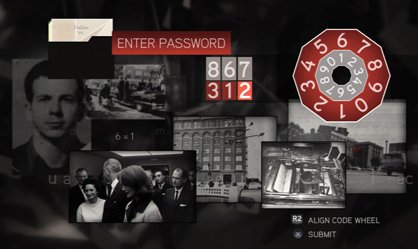
Image 2: Move the cursor over Gandhi’s heart.
Code wheel puzzle: Your hint here is pretty obvious; there’s a big, glaring “6=1” next to Oswald’s picture. So move the red wheel so that the 6 is over the gray 1, and plug in the corresponding numbers. Like so:
Puzzle 10: Apollo
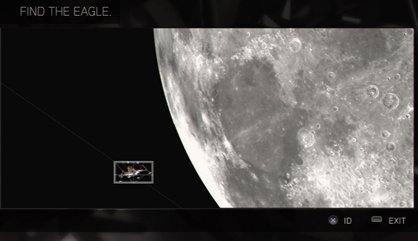
Image 1: Highlight the lunar lander just down and to the left of the moon.
Puzzle wheel: Another linked-ring rotation puzzle. Your job here is to align all the channels; do this by moving the fifth ring to the left six times, the second ring to the left four times, the fourth ring to the right three times and the third ring to the left five times. Then snap the first ring into place.
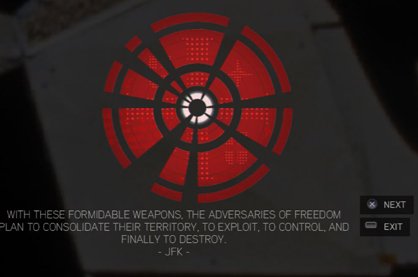
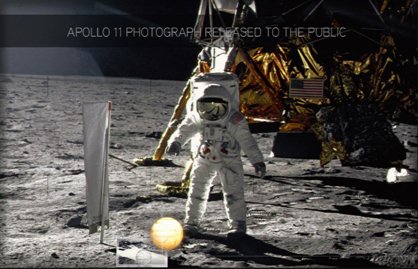
Image 2: Move the cursor down between the flag and the astronaut’s foot.
Puzzle wheel: Another linked-ring rotation puzzle. Your job here is to align all the channels; do this by moving the fifth ring to the left six times, the second ring to the left four times, the fourth ring to the right three times and the third ring to the left five times. Then snap the first ring into place.
Image 2: Move the cursor down between the flag and the astronaut’s foot.
Puzzle 11: The Inventor
Image 1: Just move the lightning bolt over the bulbs to bring them to life.
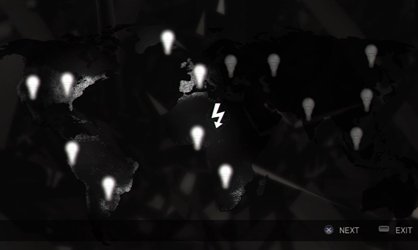
Image 2: Highlight the area just at the base of the tower, between the two windows, to find this hidden image.
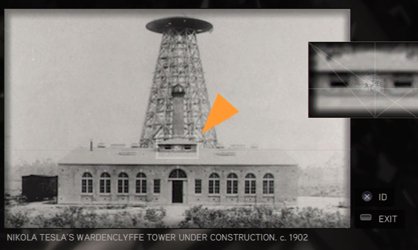
Image 3: Move the pointer onto Tesla’s lap.
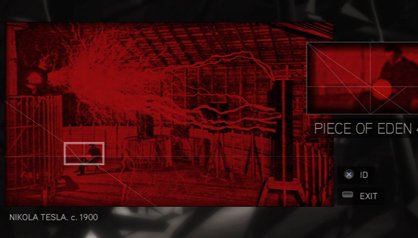
Image 2: Highlight the area just at the base of the tower, between the two windows, to find this hidden image.
Image 3: Move the pointer onto Tesla’s lap.
Puzzle 12: Titans of Industry
Code wheel puzzle 1: The key here is in the “4=1” on the blueprint at the left of the screen. Line up the red 4 over the gray 1 and input the following code:
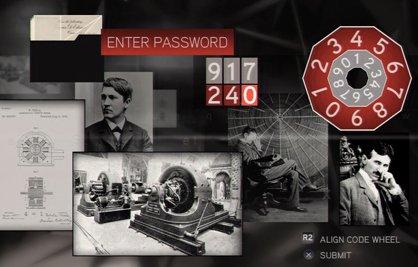
Image 1: This one’s the opposite of the light-bulb “puzzle” from before – just move the dollar sign over the bulbs to extinguish them.
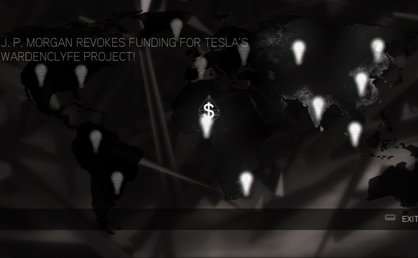
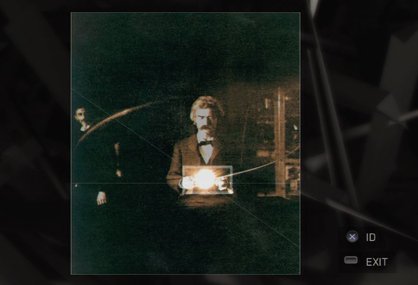
Image 2: Highlight the glowing ball at the center of the image.
Code wheel puzzle 2: Your hints here are the “2” on the old car, and the symbol just below the newspaper’s headline. From there, you need to figure out the numeric progression of the symbols to understand which ones are missing.
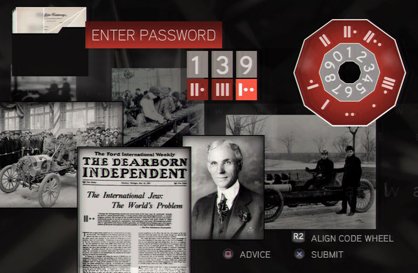
Image 1: This one’s the opposite of the light-bulb “puzzle” from before – just move the dollar sign over the bulbs to extinguish them.
Image 2: Highlight the glowing ball at the center of the image.
Code wheel puzzle 2: Your hints here are the “2” on the old car, and the symbol just below the newspaper’s headline. From there, you need to figure out the numeric progression of the symbols to understand which ones are missing.
Puzzle 13: ‘I Am Become Death, the Destroyer of Worlds’
Code wheel puzzle: This one’s even trickier than the last one; starting with the hint that 9 (next to the tower) equals “triangle” (up and to the left from the bomb), you need to figure out which symbols would fill in the blank spots on the wheel, going by the symbols next to them.
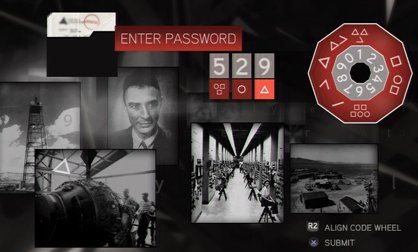
Image 1: Just hit the button. It’s not hard.
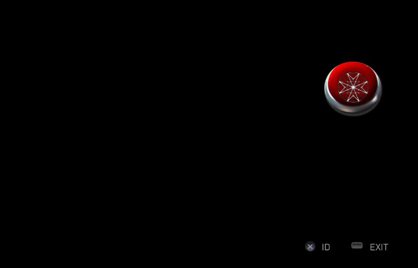
Image 2: Use the Geiger-counter clicks to guide you to the space shown below:
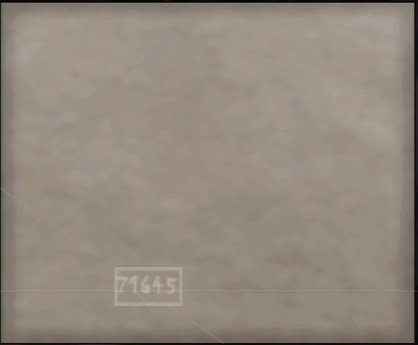
Image 1: Just hit the button. It’s not hard.
Image 2: Use the Geiger-counter clicks to guide you to the space shown below:
Puzzle 14: Bloodlines
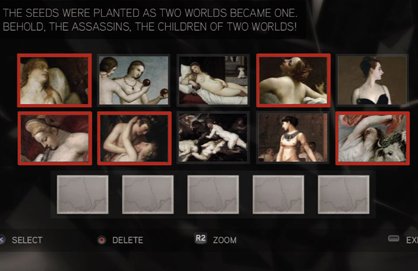
Highlight the images that depict women and gods in amorous entanglements (especially if those gods are disguised as animals).
Puzzle 15: Guardians
Puzzle wheel: Seemingly every other ring is linked here, so we’ll cut straight to the chase: Turn the third (and fourth) rings right twice, the fifth (and first) right four times, the fourth (and first) right five times, the fifth (and first) left five times and the second left five times. Finally, move the fifth (and second) rings right five times.
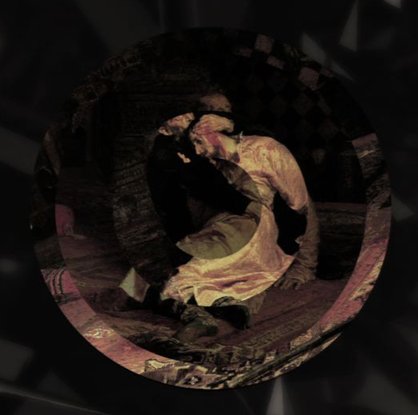
Image: Another gimme – just move the Assassin logo over the targets to complete the “puzzle.”
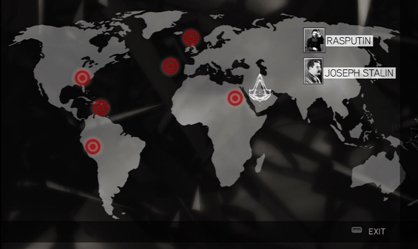
Image: Another gimme – just move the Assassin logo over the targets to complete the “puzzle.”
Puzzle 16: The Cavalry
Image 1: Just move the cursor to the word “Tunguska.”
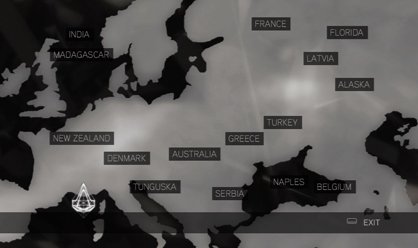
Image 2: Move the cursor onto the staff and drag it onto Tesla’s photo.
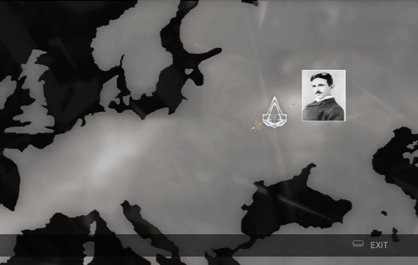
Image 2: Move the cursor onto the staff and drag it onto Tesla’s photo.
Puzzle 17: The Bunker
Code wheel puzzle: Here’s a tricky one; your clues are “<” and “2,” and the only advice you’ll get from your handlers is that maybe there’s “something we can count” on the strange symbols. In this case that “something” is the number of times each symbol bends sharply. Don’t expect consistency across the wheel on this one; just take a look at what symbols flank the blank spaces and pick a shape with the number of bends that would go between them.
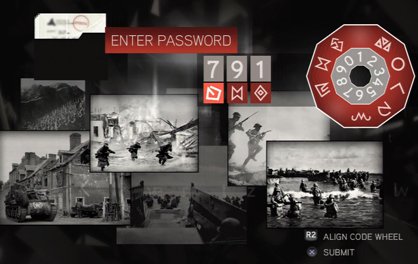
Image: Find the Assassin symbol at the upper-right of the bunker as shown here:
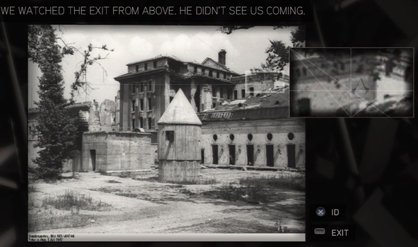
Image: Find the Assassin symbol at the upper-right of the bunker as shown here:
Puzzle 18: Synapses
Code wheel puzzle: This puzzle, for lack of better words, is a ♥♥♥♥♥ from hell. Your first clue is to line up 5 with a single tree-looking symbol, but from there it gets tricky. The key here is the weird-looking equation on the left, which offers a hint as to the progression of the symbols. Stare at this long enough to get some advice, and you’ll be told that the trees are Sumerian numerals that represent one, while the “<” symbols represent 10. Now, to make another cognitive leap, you’ll notice that the first few symbols on the code wheel follow a seemingly nonsensical progression: one, three, nine, 11, 12. Now, look at the equation again. Add up its numbers two at a time, and you’ll see that they follow that same progression: 1+2=3, 3+6=9, 9+2=11, 11+1=12, and so on. Once you know that, the rest is easy.
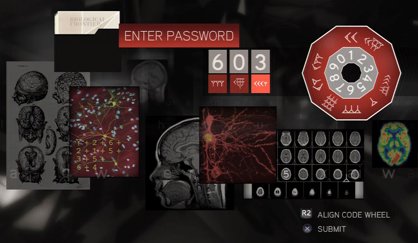
Image: In what’s sure to be a relief after the last puzzle, all you need to do here is move the cursor to light up the neurotransmitters.
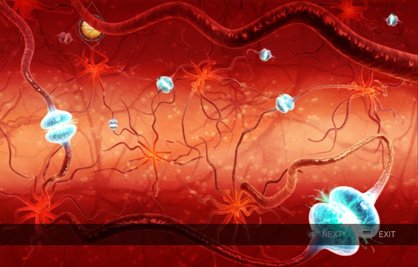
Image: In what’s sure to be a relief after the last puzzle, all you need to do here is move the cursor to light up the neurotransmitters.
Puzzle 19: The Fourth Day
Image set: What used to be worshipped by every primitive culture under the…? That’s right, the sun. Pick the five images that focus on it.
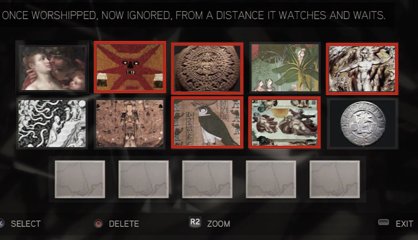
Image: Find the tiny image of Earth in the lower-left quadrant of the sun.
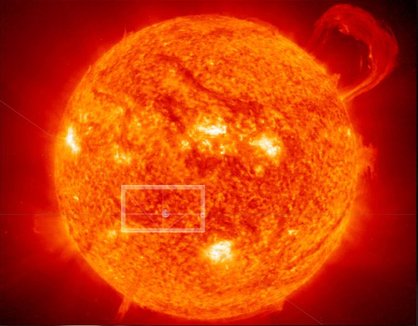
Image: Find the tiny image of Earth in the lower-left quadrant of the sun.
Puzzle 20: The Origin of the Species
Puzzle wheel: Oh hey, another ring puzzle. At least this one’s the last. Start by turning the fifth ring right ten times, then turn the fourth ring left twice. Then rotate the third (and first) rings right twice, the second ring right five times and the first ring left three times.
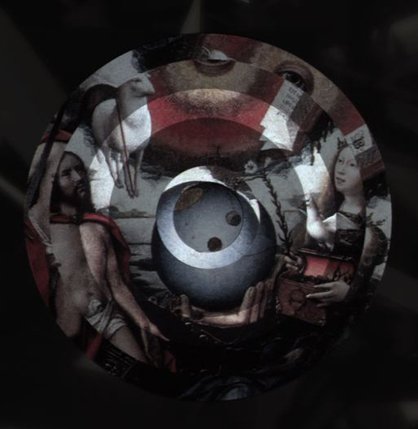
Image 1: It’s pretty smooth sailing from here. Highlight the eye at the top of the painting.
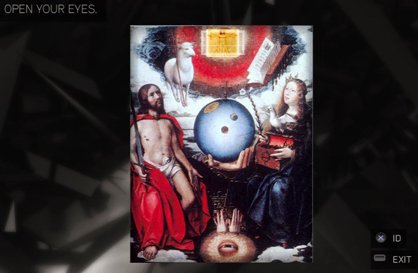
Code wheel puzzle: You can be forgiven for panicking at the sight of this one, but relax. Ignore the numbers and focus on the Assassin motto: “Nothing is true, everything is permitted.” With that in mind, pick any three glyphs and call this puzzle solved.
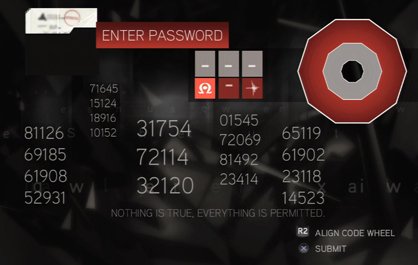
Image 2: Move the cursor over the bones to reshape the skeleton.
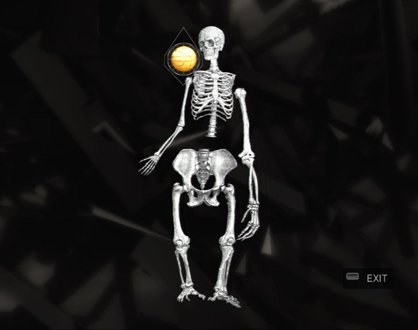
Image 1: It’s pretty smooth sailing from here. Highlight the eye at the top of the painting.
Code wheel puzzle: You can be forgiven for panicking at the sight of this one, but relax. Ignore the numbers and focus on the Assassin motto: “Nothing is true, everything is permitted.” With that in mind, pick any three glyphs and call this puzzle solved.
Image 2: Move the cursor over the bones to reshape the skeleton.
More Assassin's Creed II guides
- Xbox Controller Fix★ 5 (744)55k views785 ♥1 minUpdated Feb 25, 2014
- RU | Русификатор для Assassin's Creed II Текст/Звук 2025★ 5 (533)36k views1.2k ♥3 minRussianUpdated Nov 18, 2025
- All Glyph Locations and Solutions - Assassin's Creed II★ 5 (360)32k views845 ♥1 minUpdated Jul 9, 2018
- Русификатор Assassin's Creed II★ 5 (247)29k views543 ♥1 minRussianUpdated Apr 13, 2023
- Делаем оригинальную озвучку + рус.сабы.★ 5 (330)25k views609 ♥1 minRussianUpdated Dec 6, 2020
- All Feather Locations - Assassin's Creed II★ 5 (372)21k views836 ♥1 minUpdated Aug 22, 2023




This guide was created by its original author on the Steam Community. Are you the author and want it removed? Request removal.