Atomic Heart: Blood on Crystal 100% Achievement Guide
Introduction
8 out of the DLC's 13 achievements are missable. Due to the way the game can lock you into/out of areas, it can be easy to make a mistake. Remember, you can load previous saves if necessary, and be sure to utilize save rooms.
The achievements can be unlocked in a fairly straightforward chronological order, which is how I've ordered them. Be sure to follow along with the Missable and Collectible sections of the guide. I will try to avoid spoilers as much as possible while still providing helpful explanations.
Summary
Difficulty Achievements: No
Missable Achievements: Yes
Playthroughs: 1
The achievements can be unlocked in a fairly straightforward chronological order, which is how I've ordered them. Be sure to follow along with the Missable and Collectible sections of the guide. I will try to avoid spoilers as much as possible while still providing helpful explanations.
Summary
Difficulty Achievements: No
Missable Achievements: Yes
Playthroughs: 1
Unmissable
These achievements are part of the storyline and cannot be missed as long as you play through the whole DLC.
 Let's Shake on It!
Exterminate the RACCOON boss
 Clean in Two
Defeat the Second Twin
 For Chief's a Jolly Good Fellow
Save Sechenov
 Farewell, Old Friend
Beat CHAR-les
 This is the End
Complete the story DLC
Let's Shake on It!Exterminate the RACCOON boss
Clean in TwoDefeat the Second Twin
For Chief's a Jolly Good FellowSave Sechenov
Farewell, Old FriendBeat CHAR-les
This is the EndComplete the story DLC
Missable
Most of these are pretty straightforward and only require you to keep your eyes open for the right opportunity and explore. I was able to find all the secret rooms and collectibles simply by being thorough, and now I can make it easier for you :)
 Marco... Polo!
Fall in the water at Wave and get killed by Morays
After the opening sequence and cutscenes of the DLC, you will end up at the Wave complex surrounded by water. You can get this achievement at any point in this area, but you might as well get it right away to avoid losing progress. Jump into the water and swim down/away until you die.
 Final Burn-down
Destroy all of the infected plants on the submarine
This refers to the Mothers; the plants that spawn spores, which then attach to nearby corpses. Keep an eye on your scanner. You can't really miss the encounters where they are, but you can miss/forget to kill them while you're there. Backtracking should work if you do.
Note: There is a collectible in the submarine that doesn't seem to do anything and isn't tied to any achievements, but I stumbled upon it and figured you might be interested too. After collecting the handle to open one of the sub doors and fighting the enemies in the next room, climb through the hole in the wall and find the doll sitting on one of the chairs. Let me know if you discover it's purpose!
 Fluffy Easter Egg
Find the secret rooom with the fluffball
Far later in the DLC, after using the polymer key in the Residential Sector (allowing use of your weapons and abilities in the area), enter an "X" on the pattern lock attached to the outhouse. The code can also be found on the wall of the enclosed area, a ways to the left.
 Validol's Our Bro
Complete Validol's mission peacefully
Simply don't kill the patients after Validol asks you to talk to them. I'm not actually sure if any of the dialogue options can make you fail, but try to pick ones that match the character's mood.
I personally did Nastya, myself, and NORA for the 3 patients, respectively.
 Better Late Than Never
Find the dolphin figurine in the secret room
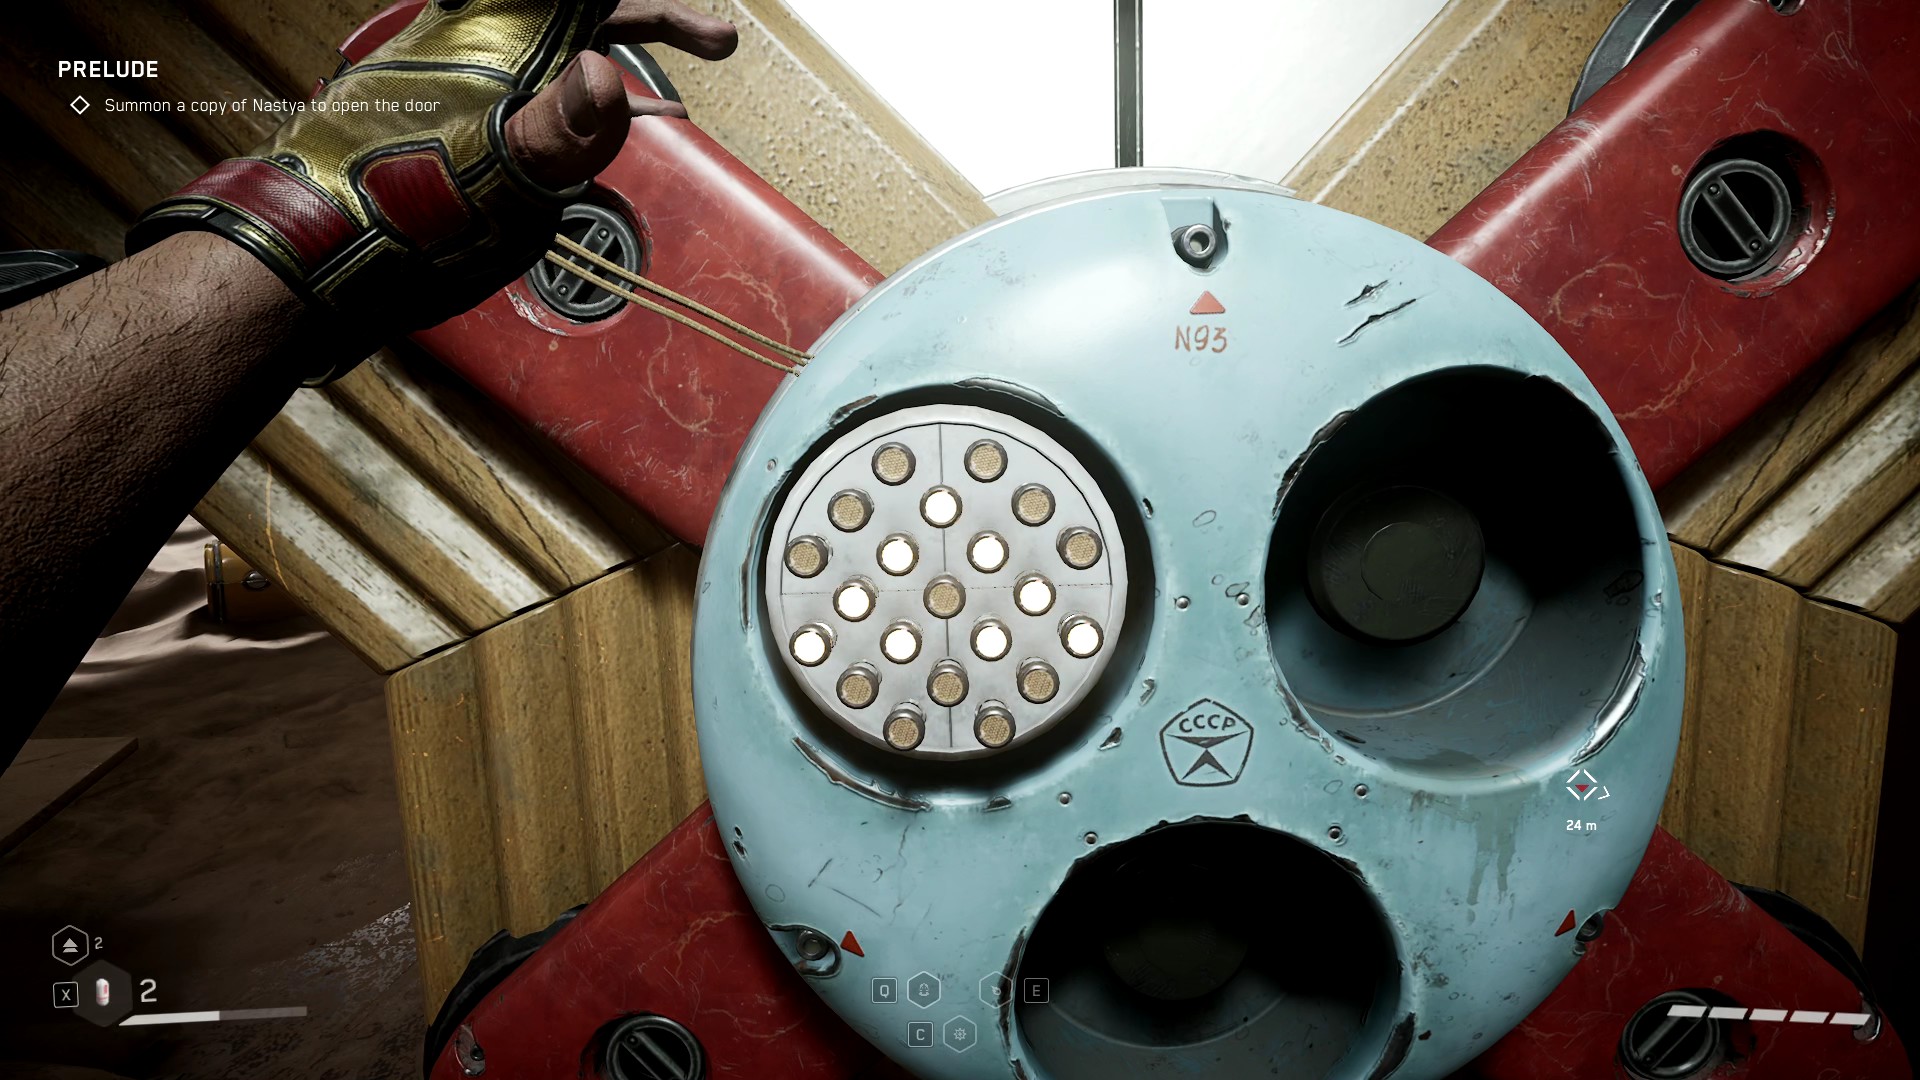
Some time after finishing up with Validol, you will come to a large open room where you will fight some enemies. After that, you will come to another one. Up the stairs in this second large room is a black mural on the wall. You will need to open the locked door in the room beside the mural.
I actually figured out the code by accident, but you can find clues on the PEAR terminals in this room and the one accessed with the polymer key. I've also included it below.
 Secret Meeting
Open the secret room with observers
Once you reach a save room that has been burnt out and damaged, you will see a PEAR terminal with a locked door beside it. Answer the questions on the terminal, then head back and get the key from the room that has now opened in the dorm hallway. You should be able to see the pink glow on your scanner to tell you which room it's in.
 Terminator's Death
Use an industrial press to destroy robots
When you reach the area with housing units and conveyor belts, you will have numerous opportunities to earn this achievement. Just be sure a robot has/is following you into the crush zone of the big presses. You should be able to get this easily at the first press you come to.
Marco... Polo!Fall in the water at Wave and get killed by Morays
After the opening sequence and cutscenes of the DLC, you will end up at the Wave complex surrounded by water. You can get this achievement at any point in this area, but you might as well get it right away to avoid losing progress. Jump into the water and swim down/away until you die.
Final Burn-downDestroy all of the infected plants on the submarine
This refers to the Mothers; the plants that spawn spores, which then attach to nearby corpses. Keep an eye on your scanner. You can't really miss the encounters where they are, but you can miss/forget to kill them while you're there. Backtracking should work if you do.
Note: There is a collectible in the submarine that doesn't seem to do anything and isn't tied to any achievements, but I stumbled upon it and figured you might be interested too. After collecting the handle to open one of the sub doors and fighting the enemies in the next room, climb through the hole in the wall and find the doll sitting on one of the chairs. Let me know if you discover it's purpose!
Fluffy Easter EggFind the secret rooom with the fluffball
Far later in the DLC, after using the polymer key in the Residential Sector (allowing use of your weapons and abilities in the area), enter an "X" on the pattern lock attached to the outhouse. The code can also be found on the wall of the enclosed area, a ways to the left.
Validol's Our BroComplete Validol's mission peacefully
Simply don't kill the patients after Validol asks you to talk to them. I'm not actually sure if any of the dialogue options can make you fail, but try to pick ones that match the character's mood.
I personally did Nastya, myself, and NORA for the 3 patients, respectively.
Better Late Than NeverFind the dolphin figurine in the secret room
Some time after finishing up with Validol, you will come to a large open room where you will fight some enemies. After that, you will come to another one. Up the stairs in this second large room is a black mural on the wall. You will need to open the locked door in the room beside the mural.
I actually figured out the code by accident, but you can find clues on the PEAR terminals in this room and the one accessed with the polymer key. I've also included it below.
Secret MeetingOpen the secret room with observers
Once you reach a save room that has been burnt out and damaged, you will see a PEAR terminal with a locked door beside it. Answer the questions on the terminal, then head back and get the key from the room that has now opened in the dorm hallway. You should be able to see the pink glow on your scanner to tell you which room it's in.
Terminator's DeathUse an industrial press to destroy robots
When you reach the area with housing units and conveyor belts, you will have numerous opportunities to earn this achievement. Just be sure a robot has/is following you into the crush zone of the big presses. You should be able to get this easily at the first press you come to.
Collectibles
The figurines begin to spawn once you reach Crystal, the Egyptian-themed area, and are spread throughout the rest of the DLC. They are visible as small blue objects on your scanner and often appear near chests, though not always. Keep your eyes open and refer to this section as often as necessary!
 Crystal Platinum
Collect all of the figurines hidden in the complex
Crystal PlatinumCollect all of the figurines hidden in the complex
- Once you reach Crystal (after getting out of the sarcophagus), the first figure will be unmissable, sitting on a sarcophagus in front of you.
- While making your way through the massive room with moving platforms, you will come to an area with a long, fast-moving track that leads to a platform with two chests, and this collectible
- After fighting your first group of Polymeric enemies in a room with glowing red generators, head to the back of the room and find this collectible sitting beside a chest.
- After speaking with the Polymorph stuck in the door, find this collectible in the corner to the left, hiding in the cushioned seat thing.
- After the fight with the Belyash, find this one in the washroom stall to the left after the breakroom.
- In the Residential Area, you will need to help a vacuum cleaner with a task. Check the upper floor of the house you need to go to as part of that task.
- In the second Residential Area, after talking to Validol, jump into the water by the end of the river and find this collectible beside a chest.
- After a cutscene and elevator ride, you'll find this one down the hallway, instead of going into the marked room.
- After progressing through the first few areas of the Factory, you will come to a very large open area, which will require you to move several circuit pieces into place to open a door farther on, up a ramp. This figure is found inside a shipping container to the right, just beyond those doors.
- When you come to an indoor beach, you will find this one in the sand at the far end, by a picnic table.
- After you're finished moving the reactor into place (P-3 will have dialogue about it), drop down onto a lower set of platforms and find your final collectible resting on the edge of a nearby truckbed.
Conclusion
That should be all! I really enjoyed stepping back into Atomic Heart for the final part of the story. I had lots of fun with it and am definitely looking forward to the sequel. I hope this guide has been helpful to you in your experience with Blood on Crystal. Let me know if I've forgotten anything or got anything wrong. Take care!
🏆
Beat Atomic Heart's 100% run?
Flex it — let your friends know you pulled it off.
More Atomic Heart guides
- Достижения Atomic Heart★ 5 (727)31k views1.9k ♥33 minRussianUpdated Jul 2
- 100% Achievement Guide [Atomic Heart]★ 5 (542)27k views1.4k ♥64 minUpdated Apr 23
- Ульи и как их отключить★ 4 (81)13k views109 ♥5 minRussianUpdated Mar 9, 2023
- Достижения Atomic Heart★ 4 (145)13k views354 ♥13 minRussianUpdated Dec 27, 2024
- Полигоны в Atomic Heart★ 4 (104)11k views262 ♥10 minRussianUpdated Apr 26, 2023
- Русская озвучка в Atomic Heart.★ 4 (97)9.6k views23 ♥1 minRussian






This guide was created by its original author on the Steam Community. Are you the author and want it removed? Request removal.