Changing the default "Desktop Shortcut" (Icon) that Steam creates
Introduction
This guide will show you how to change the default (original) and ugly "Desktop Shortcut" (Icon) that Steam creates for the game "The Walking Dead (Season 1)".
"The Walking Dead (Season 1)" original and ugly Desktop Icon ->
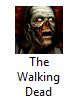
How to?
- Go to your Steam client and look for the "LIBRARY" tab, then select the "Games" tab; after that, create a "Desktop Shortcut" by right-clicking from the "The Walking Dead" game from your library (you can skip this step if Steam has already created one for you after the installation process of the game).
- Download this [s.go.ro] file to your PC (it's the original ".exe" of the game from the retail version). The password for the download link is 306005
- Extract the archive in another folder from where you have "The Walking Dead" game installed!
- Rename the extracted file to smth like "WalkingDead101 original".
- Paste the newly downloaded and renamed file ("WalkingDead101 original") to your "The Walking Dead" install directory - smth like (by default) - "C:\Program Files (x86)\Steam\steamapps\common\The Walking Dead".
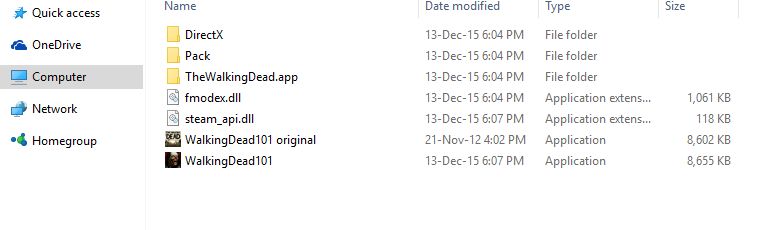
- Right-click on the "Desktop Shortcut" that Steam has created for you (Step 1), click on "Change Icon...", then "Browse..." and after that navigate your way to where you have your game installed - smth like (by default) - "C:\Program Files (x86)\Steam\steamapps\common\The Walking Dead"; double-click on "WalkingDead101 original", then click on - OK -> Apply -> OK and Voilà! your done!
- Enjoy your new "The Walking Dead (Season 1)" "Desktop Shortcut" (Icon) and don't forget to "Support the software developers. If you like this game, BUY IT!" :P
The Result
After you've correctly followed the above steps, your custom "The Walking Dead (Season 1)" "Desktop Shortcut" should look like this ->

More The Walking Dead guides
- Русификатор для The Walking Dead★ 5 (1.5k)75k views1.4k ♥2 minRussianUpdated Mar 8, 2023
- The Walking Dead Choices by Episode★ 5 (719)27k views727 ♥1 min
- Русификатор The Walking Dead(season one)★ 5 (359)27k views364 ♥1 minRussianUpdated Aug 22, 2023
- Русификатор | The Walking Dead Season One [RU]★ 5 (238)25k views421 ♥1 minRussianUpdated Jul 12, 2025
- Интересные детали и обзор последствий выбора★ 5 (1.3k)22k views736 ♥12 minUpdated May 20, 2018
- Anti's 100% Achievement Guide★ 4 (353)21k views281 ♥4 minCzechUpdated Nov 27, 2017





🔥 Popular guides
- Upgrading to PremiumTeam Fortress 2★ 5 (20k)1441k views11k ♥6 minUpdated May 11, 2022
- No More Room in Hell Official ManualNo More Room in Hell★ 5 (2.8k)569k views2.1k ♥29 minUpdated Apr 22, 2019
- NMRiH Community Hosting GuidesNo More Room in Hell★ 5 (526)351k views653 ♥1 minUpdated Aug 10, 2022
- ULTIMATE GUIDE FOR GAME DEV TYCOONGame Dev Tycoon★ 5 (5.8k)326k views10k ♥4 minUpdated 23 Jan, 2014
- How to 'Git Gud' Soon™MORDHAU★ 5 (2k)318k views3k ♥68 minUpdated Nov 16, 2024
- Лучшие кооперативные игры SteamPAYDAY 2★ 5 (1.5k)315k views2.1k ♥56 minRussianUpdated Apr 27, 2025






This guide was created by its original author on the Steam Community. Are you the author and want it removed? Request removal.