Dark Souls Remastered – Full Walkthrough, Optimized Build, All NPC Quests
Walkthrough Overview
- Step-by-step walkthrough of a complete Dark Souls Remastered playthrough
- All missable NPC questlines completed in a single run
- Efficient routing to become powerful early
- An optimized PvE and PvP-viable take on the infamous Giant Dad build
- Clear and efficient stat allocation
- Optimal soul farming routes at multiple stages of the game
- Suitable for both first-time players and experienced players
This guide shows how an experienced player routes Dark Souls Remastered to build a strong character early and avoid common mistakes. While player skill is important, proper stat allocation, gear choices, and routing dramatically reduce difficulty. Min-maxing is not required to enjoy Dark Souls, but having a solid foundation helps players focus on learning and having fun.
Join my Discord server (linked on my Steam profile) to ask questions, leave feedback, or view my other guides.
Leveling Strategy
- Use the Master Key to access late-game areas early
- Craft a Lightning weapon to bypass Strength and Dexterity scaling requirements
- Invest heavily in Vitality and Endurance for survivability
- Minimum stat milestones are highlighted throughout the walkthrough
- Some soul farming is required
- There is no respec system; all level-ups are permanent
How to Use This Guide
- It assumes basic familiarity with Dark Souls mechanics
- NPC questlines must be completed before killing area bosses
- Once a boss dies, all unfinished NPC quests in that area become locked
- The guide prioritizes becoming as strong as possible before boss fights
- Weaker bosses are generally tackled first
- Boss strategies are not explained in detail; external references are recommended
- Soloing bosses is encouraged, as boss HP increases by 100% per summoned ally
- If a step is unclear, refer to the linked video walkthrough
Quit-out definition:
- Quit to the main menu and reload the game
- Resets enemies and advances NPC quest states without resting at a bonfire
Stat Leveling Order
- Dexterity → 10
- Strength → 16
- Endurance → 24
- Vitality → 16
- Endurance → 30
- Vitality → 30
- Attunement → 10
- Endurance → 41
- Strength → 24
- Endurance → 50
- Vitality → 50
- Endurance → 84
Getting Started
Video Playthrough Parts One and Two:
Step 1 – Create Your Character
Step 1 – Create Your Character
- Choose the Bandit class for superior long-term stat distribution
- Select the Master Key as your starting gift to access late-game areas early
- Character appearance is cosmetic; smaller characters slightly reduce screen obstruction
Undead Assylum
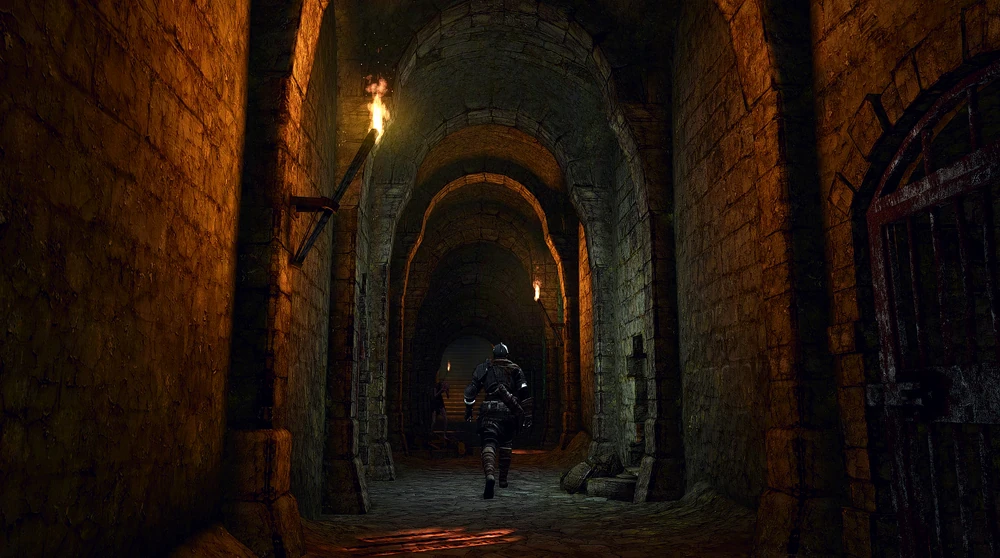 Step 2 – Escape Your Cell
- Leave your cell and light the bonfire
- Go through the double doors
- Run through the gate on the left to avoid the Asylum Demon
- Light the second bonfire
Step 3 – Equip a Weapon
- Pick up the Battle Axe and Spider Shield
- Replace your Straight Sword Hilt with the Battle Axe
- Two-hand the Battle Axe; it will one-shot hollows
- Do not equip a shield yet to avoid weight penalties
Step 4 – Reach Oscar of Astora
- Avoid the rolling boulder on the stairs
- Let the boulder break the wall
- Talk to Oscar of Astora
- Receive:
- Estus Flask
- Undead Asylum F2 East Key
- Estus Flask
Step 5 – Defeat the Asylum Demon
- Traverse the fog wall
- Perform a plunging attack from above
- Avoid locking on for easier camera control
- Defeat the Asylum Demon
- Loot the Soul of a Lost Undead near the crow’s nest before approaching it
- Approach the nest only after looting, or you will be transported and miss the soul
Firelink Shrine
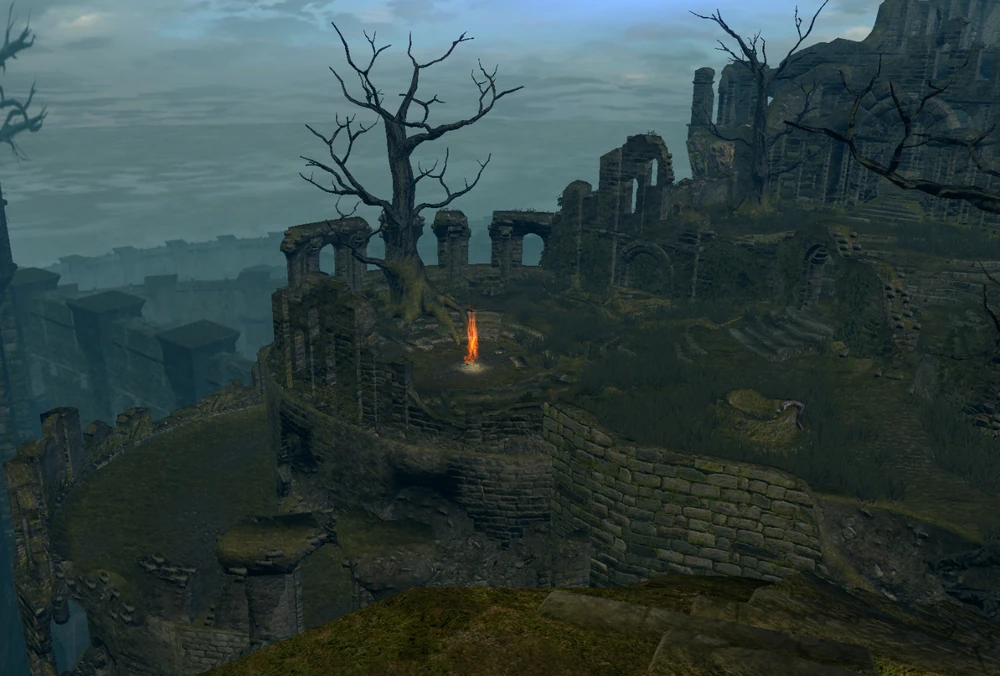 Step 6 – Level Early Stats
- Consume all collected souls
- At the bonfire, level:
- Dexterity → 10
- Strength → 16
- Dexterity → 10
Step 7 – Loot Firelink Shrine
- Talk to the Crestfallen Warrior
- Talk to Petrus of Thorolund, learn his gesture, and join the Way of White covenant
- Loot all items around Firelink Shrine
- Jump down the lift shaft behind Petrus
- Loot four chests containing the Morning Star and other items
- Equip Homeward Bones in your item slot after estus
Step 8 – Loot the Firelink Graveyard
- Enter the graveyard behind Firelink Shrine
- Loot:
- Zweihander
- Caduceus Round Shield
- Binoculars
- Zweihander
- Run past the skeletons; do not fight them
- Equip the shield in your offhand
Step 9 – Pass Through New Londo Ruins
- Take the lift below the bonfire down to the New Londo Ruins
- Talk to Rickert of Vinheim
- Use the Master Key to open the tower gate to the Valley of Drakes
- Loot the soul outside the gate
Step 10 – Rob the Undead Dragon
- Cross the wooden planks and rope bridge toward the Undead Dragon
- It will wake when you walk between its arms
- Loot the Soul of a Proud Knight near the dragon’s left claw
- Head back across the rope bridge
Step 11 – Loot the Crimson Armor
- Enter the cave leading to Blighttown
- Run past enemies; they are far above your level
- Descend the ladders to the lift area, ignore the lift, and cross the narrow tree roots
- Loot the Crimson Armor Set
- Equip:
- Crimson Helm
- Crimson Chest
- Crimson Gloves
- Crimson Helm
Step 12 – Retrieve the New Londo Fire Keeper Soul
- Return to New Londo Ruins and head past the hollows
- Loot two Transient Curses from a corpse in a pot
- Cross the wooden bridge over the flooded city
- Move quickly, as ghosts will pursue you
- Ignore the stairs and turn right immediately
- Enter the structure with a row of windows through the doorway on the right
- Cross the hidden walkway just below water level
- Loot the Fire Keeper Soul
- Use a Homeward Bone to escape the ghost ambush
Step 13 – Upgrade Estus and Increase Endurance
- Consume all collected souls
- Level Endurance → 20
- Equip the Crimson Waistcloth
- Give the Fire Keeper Soul to Anastacia of Astora to upgrade your Estus Flask → +1
- You are now significantly stronger than intended for the first main area
Undead Burg
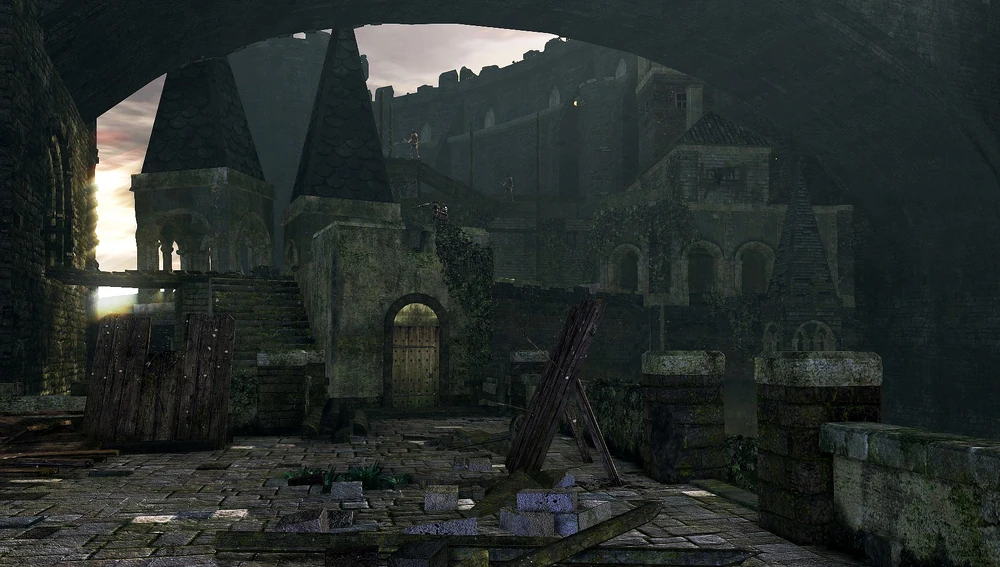 Step 14 – Enter the Undead Burg
- Take the cliffside path up from Firelink Shrine
- Kill enemies along the way; they are at your level
- Jump onto the stone bridge behind the hollow soldier to loot a Ring of Sacrifice
- Break barrels before the fog wall to find Rubbish
- Continue past the fog wall to the Undead Burg bonfire
Step 15 – Reach the Undead Merchant
- Go back down the stairs from the bonfire
- Kill the two hollow soldiers with spears
- Break the wooden boxes blocking the staircase
- Head down to meet the Undead Merchant
Step 16 – Loot a Light Crossbow
- Go past the Undead Merchant
- Climb the ladder to the rooftop
- Jump from the rooftop to the broken bridge
- Loot:
- Light Crossbow
- 16 Standard Bolts
- Light Crossbow
- Equip Standard Bolts in the first bolt slot on your equipment page
Step 17 – Clear the Undead Burg
- Continue forward past the bonfire
- Use the Master Key to open doors and loot everything
- Near the end of the area, kill the Black Knight in the alleyway using backstabs
- Loot and equip the Blue Tearstone Ring
- Near the boss fog wall, break barrels to reveal a Crystal Lizard
- Kill the Crystal Lizard
Step 18 – Increase Endurance
- Level Endurance → 24
- Re-equip your original Brigand Gauntlets
Step 19 – Defeat the Taurus Demon
- Traverse the fog wall in the tower
- Climb the ladder, kill the two archers, then run halfway across the bridge to trigger the boss
- Immediately climb back up the ladder
- Perform a plunging attack on the Taurus Demon, then finish the fight normally
- Loot the Large Soul of a Lost Undead hidden in a breakable wooden box near the exit
Step 20 – Meet Solaire of Astora
- Continue forward after the boss
- Talk to Solaire of Astora on the balcony
- Receive the White Sign Soapstone
Step 21 – Unlock the Hellkite Wyvern Shortcut
- Sprint across the bridge
- Hide in the alcove on the right halfway across to avoid dragon fire
- Descend the stairs, then kick down the ladder leading back to the Undead Burg bonfire
Step 22 – Buy Ammunition
- Buy at least 30 Standard Bolts from the Undead Merchant (30 souls each)
- Spend any excess souls leveling vitality → 16
Step 23 – Claim the Drake Sword
- Climb back up the ladder
- Go underneath the bridge
- Equip the Light Crossbow in your main hand slot, then two-hand it
- Shoot the Hellkite Wyvern’s tail until it breaks (about 30 bolts; easy to miss)
- Equip the Drake Sword in place of the crossbow
- Swap leggings back to Brigand Leggings to manage weight
Step 24 – Kill Havel the Rock
- Return to the tower where you fought the Taurus Demon
- Use the Master Key to open the locked door inside
- Descend to the bottom of the tower
- Kill Havel using parries and backstabs
- Loot Havel’s Ring
- Equip:
- Havel’s Ring
- Crimson Waistcloth
- Spider Shield (replace the Caduceus Round Shield)
- Havel’s Ring
Darkroot Garden
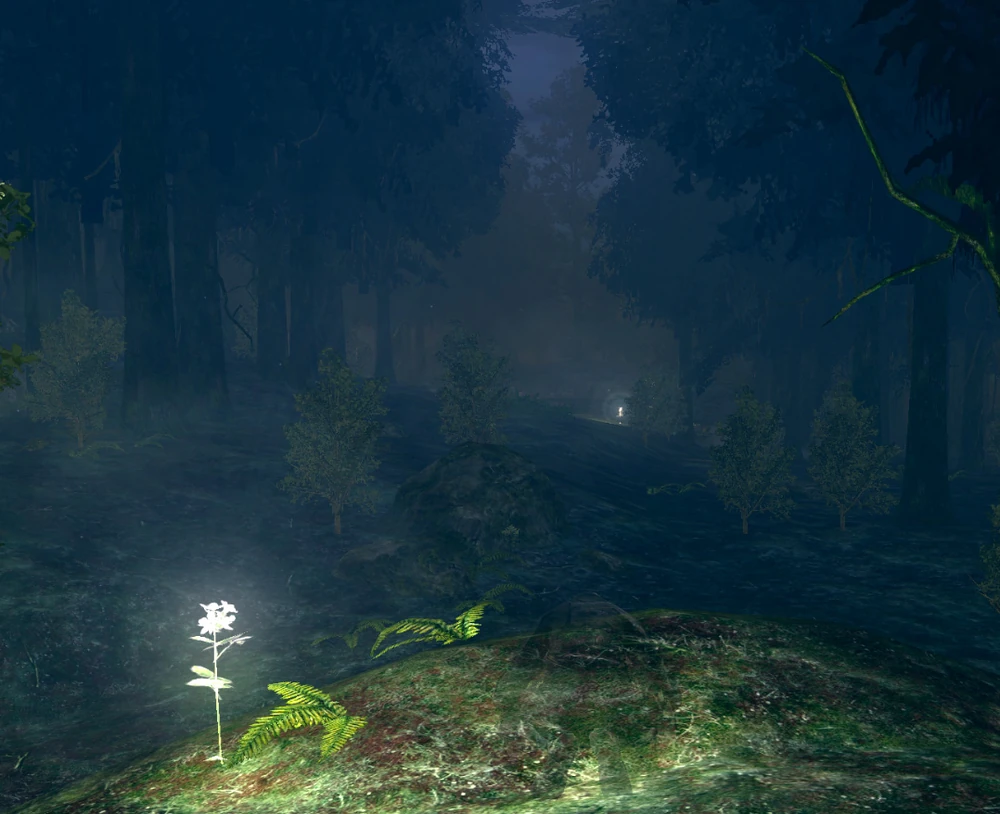 Step 25 – Enter Darkroot Basin
- Use the Master Key to open the door behind Havel
- Head into Darkroot Basin
- Use your shield to run past the crystal golems toward the Hydra
- Loot the Knight Armor Set
- Equip the Knight Gauntlets
- Immediately turn around and retreat; do not fight the Hydra yet
Step 26 – Obtain the Grass Crest Shield
- Stay to the left side of the basin
- Go down the hill away from the Hydra
- Kill the Black Knight
- Loot and equip the Grass Crest Shield
- A nearby cave contains a bonfire and a lift to the Valley of Drakes
- You may rest at this bonfire before killing the Black Knight, if needed
Step 27 – Increase Vitality
- Level Vitality → 16
Step 28 – Reach Blacksmith Andre
- From the basin, climb halfway up the hill and kill the Crystal Lizard
- Continue climbing to enter Darkroot Garden
- Turn left at the fork and run past the Titanite Demon
- Talk to Andre and learn his gesture
- Rest at the bonfire above Andre
Step 29 – Meet Siegmeyer of Catarina
- Exit through the doorway near the bonfire to reach Sen’s Fortress
- Talk to Siegmeyer
- Return to Andre’s bonfire
Step 30 – Unlock the Darkroot Garden Bonfire
- Go back past the Titanite Demon and stay left
- Stop at the sealed stone door
- Break the illusory wall just left of the door
- Light the Darkroot Garden bonfire
Step 31 – Loot the Wolf Ring
- Continue past the bonfire
- Kill the Possessed Tree enemy
- Loot the Elite Knight Armor Set to its left
- Head past the Possessed Tree
- Loot a Soul of a Proud Knight
- At the end of the tunnel, loot the Wolf Ring
- Jump down safely from the tunnel exit
- Equip:
- Wolf Ring (replace Blue Tearstone Ring)
- Elite Knight Gauntlets
- Wolf Ring (replace Blue Tearstone Ring)
Step 32 – Farm Moss Clumps
- Kill Ent enemies (demonic foliage) in Darkroot Garden
- Collect:
- 4 Purple Moss
- 1 Red Moss
- 1 Blooming Purple Moss
- 4 Purple Moss
- Extra Purple Moss is helpful later in Blighttown
Step 33 – Defeat the Titanite Demon
- Kill the Titanite Demon near Andre
- Stay behind its left leg during the fight; never stand in front of it
- Buy from Andre:
- Weapon Smithbox
- Armor Smithbox
- Repairbox
- Weapon Smithbox
- Total cost: 6,000 souls
Undead Parish
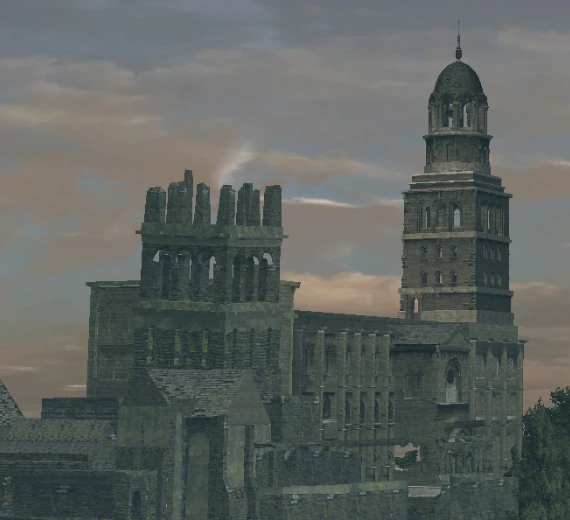 Step 34 – Enter the Undead Parish from the Rear
- Proceed from the bonfire into the church
- Kill the Berenike Knight (can be parried)
- Loot the Fire Keeper Soul it guards
- Take the lift down to Firelink Shrine
- Give the Fire Keeper Soul to Anastacia of Astora to upgrade your Estus Flask → +2
Step 35 – Rescue Lautrec of Carim
- Ride the lift back up
- Climb to the second floor of the church
- Kill the hollows one at a time
- Kill the Channeler
- Break the wooden barrier down the hall
- Free Lautrec of Carim
Step 36 – Retrieve the Basement Key
- Head back downstairs and exit through the front of the church
- Loot the Basement Key
- Open the gate
- Kill the Armored Boar using backstabs
Step 37 – Return to the Undead Burg
- Follow the road downward
- Climb the stairs on the left
- Kill the Black Knight in the tower using backstabs
- Descend the ladder beneath the tower
- Kill the rats before they poison you
- Pass the two hollow soldiers and descend the ladder to the Undead Burg bonfire
Step 38 – Stock Up at the Undead Merchant
- Buy the following items (4900 souls total):
- Bottomless Box
- Chain Chest Armor
- Dried Finger
- Orange Guidance Soapstone
- Residence Key
- Bottomless Box
Step 39 – Open the Parish Gate
- Go back up the ladder to the bridge
- Shoot an arrow at the Hellkite Wyvern to bait it into landing
- Once it lands, sprint past it immediately
- Pull the lever to open the gate to the Undead Parish
- Rest at the bonfire beyond the gate
- Optional:
- In online mode, help three players defeat a boss using the White Sign Soapstone
- Each successful assist lowers the Faith requirement to join the Warriors of Sunlight covenant by 5
- Bandits start with 10 Faith; the normal requirement is 25
- In online mode, help three players defeat a boss using the White Sign Soapstone
Step 40 – Finish the Undead Parish
- Head back toward the Undead Parish
- Enter the tunnel near where the Armored Boar was
- Loot the remaining items in the area
- Return to the bonfire near Blacksmith Andre
Step 41 – Increase Endurance
- Level Endurance → 26
- Equip the Elite Knight Helm
- Use 1 Humanity to become human
- Use another Humanity to kindle the bonfire
Step 42 – Defeat the Bell Gargoyles
- Return to the church
- Climb the ladder behind where the Channeler was and summon Solaire of Astora
- Two-hand your weapon and cut the first Gargoyle’s tail to obtain the Gargoyle’s Tail Axe
- Summoning increases boss HP, which helps prevent accidentally killing the first Gargoyle too quickly
- Kill both Bell Gargoyles
- Ring the First Bell of Awakening
- Talk to Oswald of Carim and learn the “Well! What is it?” gesture
- Buy the Book of the Guilty from him for 1000 souls
Darkroot Garden Farming
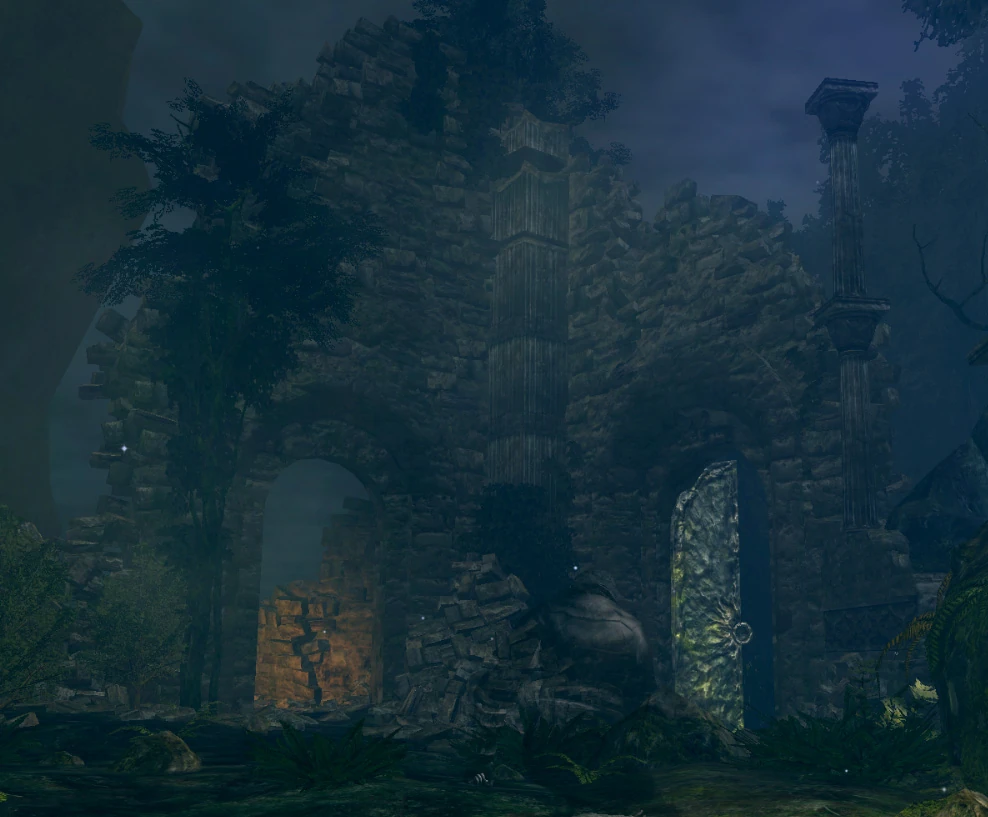 Step 43 – Defeat the Moonlight Butterfly
- Kindle the Darkroot Garden bonfire
- Enter the tower near where the Elite Knight Armor was found
- Summon Witch Beatrice
- Defeat the Moonlight Butterfly; Beatrice will kill it in a few hits
- Loot:
- Watchtower Basement Key
- Divine Ember
- Watchtower Basement Key
Step 44 – Purchase the Crest of Artorias
- Return to Andre of Astora
- Give him the Divine Ember
- Buy the Crest of Artorias for 20,000 souls
- This unlocks a lucrative soul-farming area and quickly pays for itself
Step 45 – Kill Pharris and Loot the Forest
- Return to the Darkroot Garden bonfire
- Use the Crest of Artorias to open the sealed stone door
- Run past the Forest Hunter NPCs and cross the bridge
- Do not speak to Alvina on the bridge yet, or farming access will be restricted
- Loot the Enchanted Ember from the chest guarded by two Mushroom Parents
- Loot nearby Souls of a Proud Knight
- Return across the bridge
- Kill Pharris, the Forest Hunter archer who drops 5,000 souls and doesn’t respawn
Step 46 – Farm an Egg Vermifuge
- Kill the 2 two-headed tree lizards near the Elite Knight Armor location
- Farm them until one drops an Egg Vermifuge
- Drop rate is approximately 10%
Step 47 – Forest Hunter Soul Farming
- Farm the first three Forest Hunter NPCs: Mage, Thief, and Cleric (2,000 souls each)
- This is great practice for new players
- Ignore the Bandit (only drops 1,000 souls)
- Farm approximately 175,000 souls total
- Spend souls frequently to avoid losing them on death
Step 48 – Upgrade Your Gear
- Buy 48 Titanite Shards from Blacksmith Andre for 38,400 souls total
- Upgrade:
- Zweihander → +5
- Grass Crest Shield → +5
- Elite Knight Armor Set → +3
- Chain Chest Armor → +3
- Zweihander → +5
Step 49 – Level Core Stats
- Level:
- Endurance → 30
- Vitality → 30
- Endurance → 30
- Approximate cost: 130,000 souls
Step 50 – Deliver the Enchanted Ember
- Travel to the New Londo Ruins
- Give the Enchanted Ember to Rickert of Vinheim
Step 51 – Defeat the Undead Dragon
- Enter the Valley of Drakes
- Defeat the Undead Dragon to loot a Dragon Scale
- Hug the cliffside to bait the toxic attack and stay between the dragon’s claws to avoid it
- Attack its left hand 2–3 times
- Roll backward immediately to avoid the claw swipe
Step 52 – Retrieve the Undead Asylum Key
- Take the lift from the Undead Parish to Firelink Shrine
- Drop onto the platform just before the bottom
- Jump onto the flying buttress
- Drop onto the roof near Petrus of Thorolund
- Loot the Undead Asylum F2 West Key
- Return to the buttress and climb the spiral staircase
- Curl up in the crow’s nest to return to the Undead Asylum
Undead Asylum Return Visit
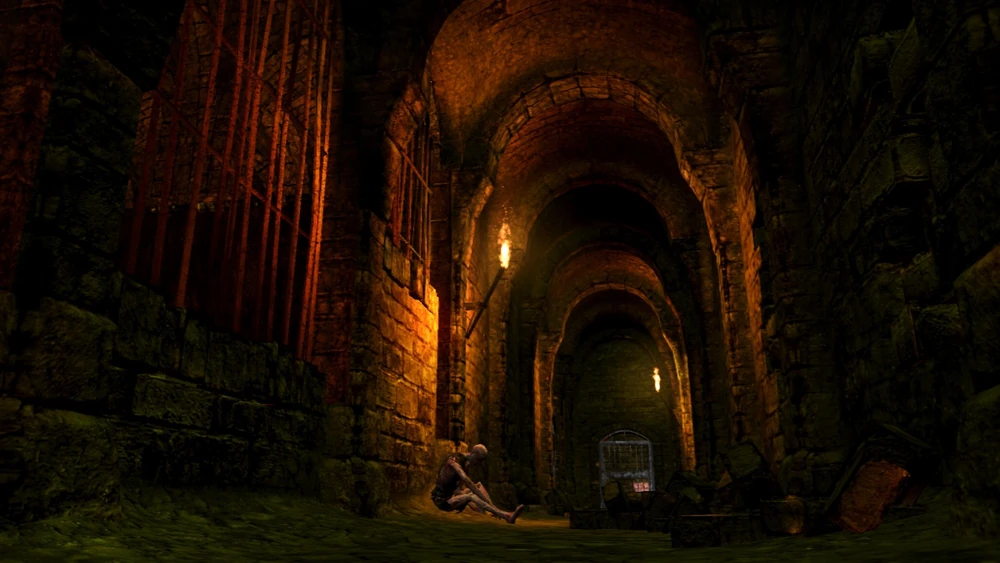 Step 53 – Trade With Snuggly the Crow
- Facing the asylum, Snuggly’s nest is on the left, before the torch-wielding hollows
- Kill the hollows; block with a shield, as they deal high damage
- Stand in Snuggly’s nest, drop an item, then quit out to trade it
- Trade the following items individually:
- Cracked Red Eye Orb
- Egg Vermifuge
- Rubbish
- Sunlight Medal
- One of each Moss
- Cracked Red Eye Orb
Step 54 – Loot the Undead Asylum
- Enter the Undead Asylum interior
- Avoid stepping on the center rectangle in the Asylum Demon boss room
- Kill the two Black Knights
- Loot the Peculiar Doll one guards
- Open the locked door near the original plunge area
- Loot the Rusted Iron Ring
Step 55 – Defeat the Stray Demon
- Use two Humanity to become human and kindle the courtyard bonfire
- Kill the two hollows in the boss room and equip the Spiked Mace in place of the drake sword
- One-hand the mace to reduce stamina consumption
- Step onto the diamond-shaped center tile to drop into the Stray Demon’s arena
- Heal immediately after landing; the fall removes roughly half your HP
- Bleed triggers after three hits (~10% HP); the meter decays quickly, so landing only two hits before dodging requires two more to proc again
- Watch the boss’ HP bar to confirm bleed procs
- Repeatedly proc bleed to kill the Stray Demon
Step 56 – Upgrade the Drake Sword
- Return to Andre
- Upgrade your Drake Sword → +1 (1 Dragon Scale and 10,000 souls)
Darkroot Basin
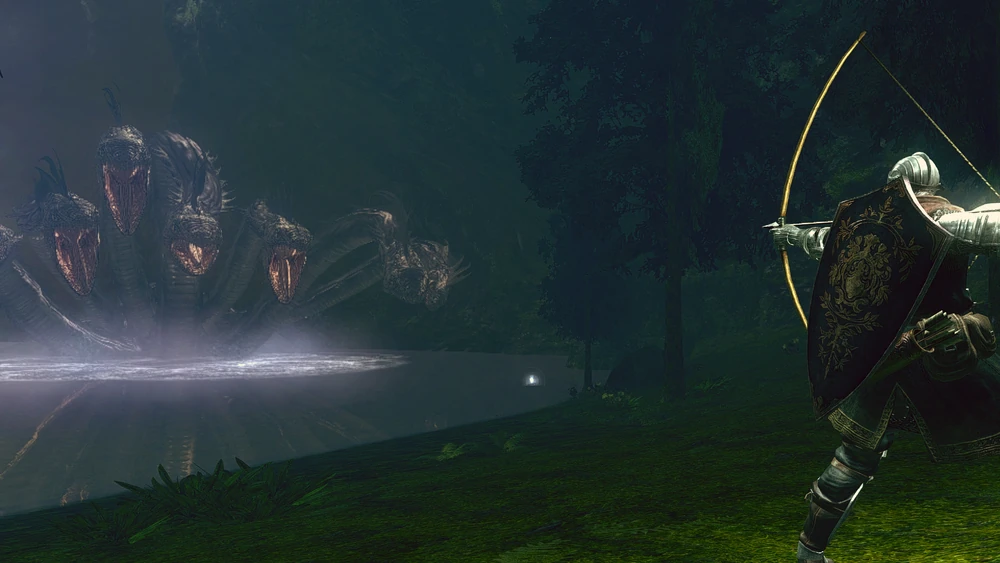 Step 57 – Slay the Hydra
- Travel to Darkroot Basin
- Equip the Rusted Iron Ring (replace Wolf Ring) to move freely in water
- Equip the Spider Shield (replace Grass Crest Shield)
- Dodge the Hydra’s ranged attacks and block its melee attacks
- Stand near the shoreline to bait melee attacks
- Lop off the Hydra’s heads to kill it
- Re-equip the Grass Crest Shield
Step 58 – Rescue Princess Dusk of Oolacile
- Quit out and reload the area
- Kill the Golden Crystal Golem on the far side of the lake
- Take care not to hit Princess Dusk, who spawns immediately
- Find her summon sign near the shore, then summon her and learn her gesture
- Loot Dusk’s armor set where the golem was
- Re-equip the Wolf Ring once out of the water
Step 59 – Upgrade the Drake Sword
- Rest at the Darkroot Basin bonfire
- Upgrade your Drake Sword → +2 (1 Dragon Scale and 10,000 souls)
Step 60 – Clear the Giant Cats
- Climb the ladder near the waterfall
- Cross the bridge
- Kill the three Giant Cats one at a time
- Use trees to block their movement
Step 61 – Defeat Great Grey Wolf Sif
- Continue past the Giant Cats
- Open the sealed door using the Crest of Artorias
- Defeat Great Grey Wolf Sif to get the Covenant of Artorias Ring
- Roll into attacks rather than away
- Stay underneath and focus attacks on the legs
- Pick up the Hornet Ring behind Artorias’ grave
Step 62 – Increase Attunement
- Level Attunement → 10
Lower Undead Burg
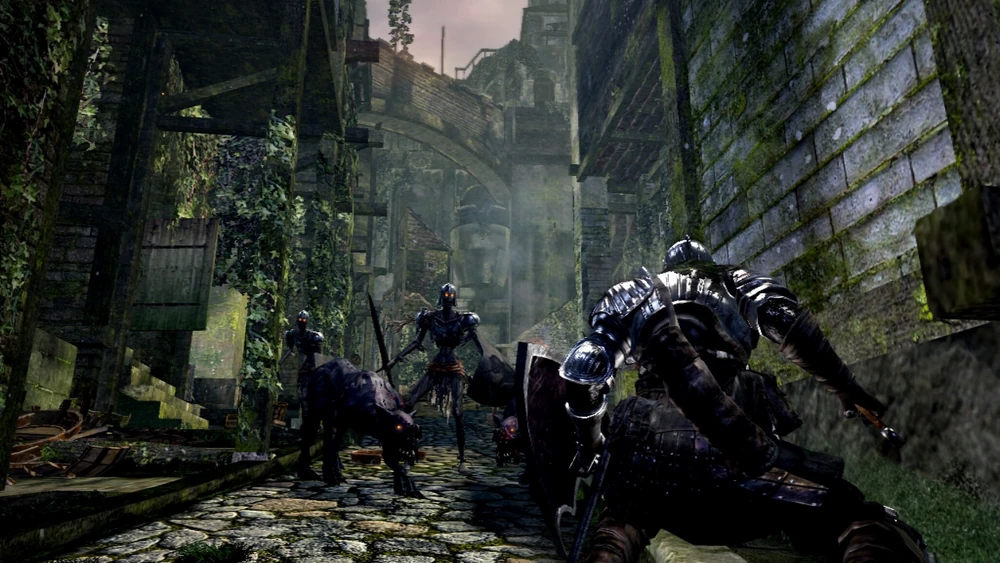 Step 63 – Unlock the Lower Undead Burg
- Return to where you met Solaire of Astora in the Undead Burg
- Use the Basement Key to open the locked door
- Descend into the Lower Undead Burg
Step 64 – Rescue Griggs of Vinheim
- Immediately go up the stairs on the right
- Open the door leading back to the Undead Burg, then return back down the stairs
- Use the Residence Key to open the locked house and free Griggs of Vinheim
- Break the nearby barrel and loot the Sorcerer Armor Set
- Ignore the fog wall for now
- Go down the stairs, then up another staircase
- Meet the Female Undead Merchant
- Open the nearby door leading back to Firelink Shrine and rest at the Firelink bonfire
Step 65 – Defeat the Capra Demon
- Return to the fog wall
- Defeat the Capra Demon
- Loot the Key to the Depths
- Use the key to unlock the final locked door leading onward
The Depths
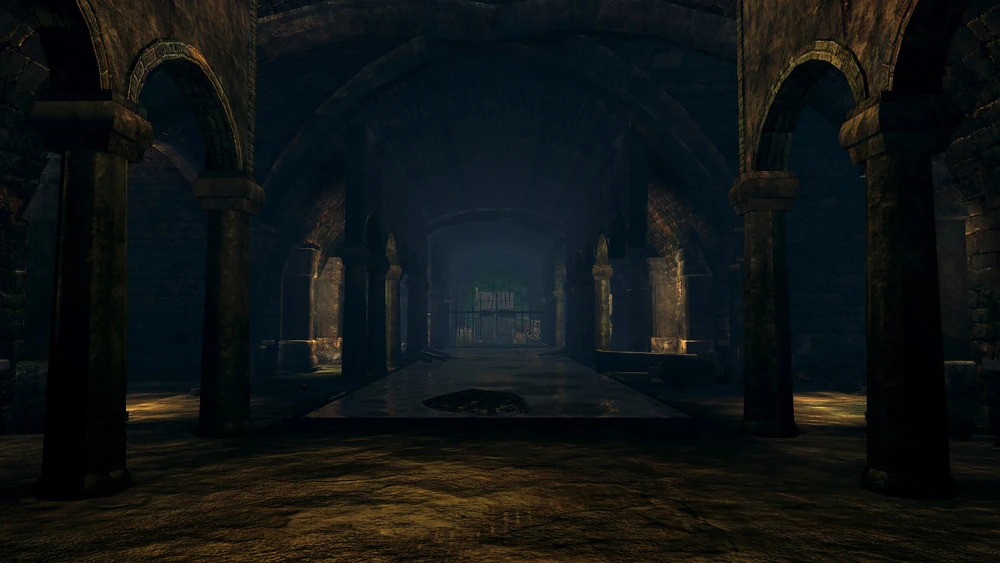 Step 66 – Rescue Laurentius of the Great Swamp
- Enter The Depths
- Kill both Butchers
- Rescue Laurentius from a barrel
- Loot the Large Ember from the chest guarded by a butcher
Step 67 – Unlock the Depths Bonfire Shortcut
- Make your way to the bottom of The Depths
- Talk to Domhnall of Zena
- Open the shortcut to the Depths bonfire
- Use 1 Humanity to become human
- Return to the rat-infested area near Domhnall
- Get invaded by Knight Kirk and kill him
- Loot the Large Titanite Shard near the Channeler in a nearby passage
Step 68 – Defeat the Gaping Dragon
- While still human, summon Solaire of Astora near the fog wall
- Let Solaire draw the boss’ attention
- Cut its tail to obtain the Dragon Greataxe
- Defeat the Gaping Dragon to receive the Blighttown Key
Step 69 – Talk to Firelink NPCs
- Return to Firelink Shrine
- Talk to:
- Griggs of Vinheim
- Petrus of Thorolund and companions
- Laurentius of the Great Swamp
- Griggs of Vinheim
- Receive a Pyromancy Flame from Laurentius
- Equip it in your second offhand slot, after your shield
Step 70 – Upgrade the Grass Crest Shield
- Visit Blacksmith Andre
- Give him the Large Ember
- Ascend the Grass Crest Shield +5 → +6 (1 large titanite shard and 200 souls)
Step 71 – Final Forest Hunter Farming
- Travel to the Darkroot Garden bonfire
- Farm Forest Hunters until you have 53,500 souls total
- You should already have ~25,000 from killing the Gaping Dragon
- Talk to Alvina to join the Forest Hunters covenant
- Talk to Shiva of the East after joining
- Note:
- You can no longer farm Forest Hunters after joining
- A much better soul farming location will be available later
- You can no longer farm Forest Hunters after joining
Step 72 – Upgrade Pyromancy Flame
- Return to Firelink Shrine
- Talk to Laurentius of the Great Swamp
- Upgrade your Pyromancy Flame → +10
- Buy the Combustion pyromancy for 500 souls
- Attune Combustion at the bonfire
Blighttown
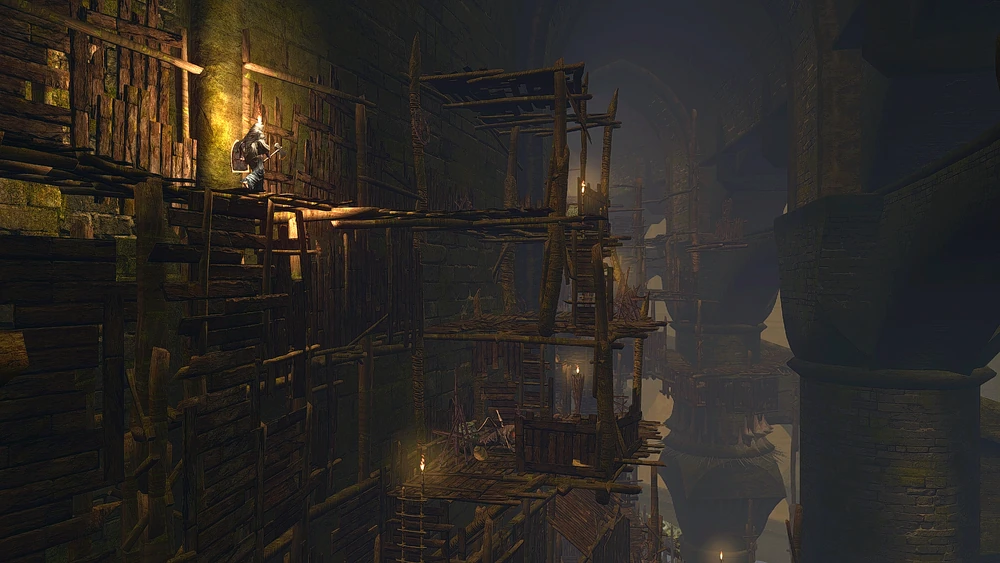 Step 73 – Enter Blighttown
- Return to The Depths
- Use the Blighttown Key near Domhnall of Zena
- Enter Blighttown through the sewer entrance
- At the end of the wooden walkway, jump to grab the Iaito katana
- Light the nearby bonfire
Step 74 – Descend to the Blighttown Swamp
- Continue descending the wooden structure
- When you encounter the Parasitic Wall Hugger, climb the ladder behind it
- Attack its exposed mouth, then loot the Power Within pyromancy it guards
- Equip the Rusted Iron Ring (replace Wolf Ring)
- Descend the rest of the way into Blighttown
- Rest at the swamp bonfire
Step 75 – Upgrade the Drake Sword
- Loot the Dragon Scale behind the swamp bonfire
- Rest at the bonfire
- Upgrade your Drake Sword → +3 (2 Dragon Scales and 10,000 souls)
Step 76 – Locate the Great Hollow
- From the swamp bonfire, go left onto a giant tree root
- Roll through the illusory wall and loot the chest behind it
- Behind the chest is a second illusory wall leading to the Great Hollow
- Do not enter yet
- Head in the opposite direction toward the lift area
Step 77 – Meet Quelana of Izalith
- Go to the lift near the Blighttown swamp
- Talk to Shiva of the East, who has relocated beneath the lift
- Talk to Quelana of Izalith sitting nearby
- Requires your Pyromancy Flame to be +10 for her to appear
- Buy Great Combustion from Quelana for 5000 souls
- Attune Great Combustion at the bonfire, replacing regular Combustion
Step 78 – Kill Maneater Mildred
- Loot the two Large Titanite Shards in Blighttown
- Use 1 Humanity at the bonfire to become human and enter the swamp
- Kill Maneater Mildred during her invasion
Step 79 – Retrieve the Blighttown Fire Keeper Soul
- Take the lift near Shiva upward
- Return to the area where you looted the Crimson Armor set earlier
- Climb the ladder to the blowdart sniper area
- Kill all Blowdart Snipers
- They do not respawn
- The Spider Shield blocks their poison attacks
- They do not respawn
- Loot the Soul of a Proud Knight and a Fire Keeper Soul
Step 80 – Defeat Chaos Witch Quelaag
- Return to the Blighttown swamp bonfire
- Run past Quelana to the cocoon containing Quelaag’s boss arena
- Use a Purple Moss Clump to cure poison
- Re-equip the Wolf Ring (replace Rusted Iron Ring)
- Defeat Quelaag
- Many attacks can be avoided by staying between her legs
- Ring the Second Bell of Awakening
Step 81 – Join the Chaos Servant Covenant
- Go down the stairs beyond the boss arena
- Roll through the illusory wall
- Tell Eingyi you want to become a servant to join the covenant
- Talk to the Daughter of Chaos and upgrade your Estus Flask → +3
- Buy the Servant Roster from Eingyi for 500 souls
Demon Ruins
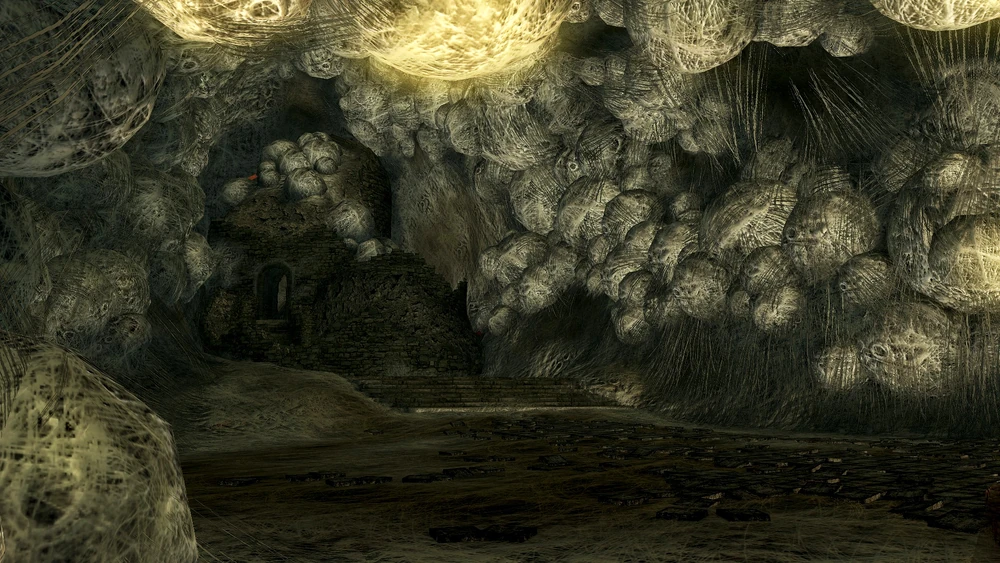 Step 82 – Egg Infection Setup
- Proceed forward from Quelaag’s domain into the Demon Ruins
- Allow an egg-burdened enemy to grab you
- Wait approximately five minutes
- Confirm infection by your character scratching their head
Step 83 – Defeat the Ceaseless Discharge
- Cross the large bridge and enter the fog wall
- Run to the far end of the area and loot the Gold-Hemmed Black Set
- Ceaseless will not attack until the armor is picked up
- Immediately run back toward the fog wall while avoiding his attacks
- He will leap across the chasm and grab the cliff edge
- Attack his arm six times to make him fall to his death
- The lava below will solidify, allowing you to progress
Step 84 – Clear the Lava Field
- Enter the solidified lava area
- Kill all Taurus Demons; they do not respawn
- Come back to loot this area once you can safely walk on lava
Step 85 – Cure Egg Infection
- Wait until the egg on your head has fully hatched
- Talk to Eingyi to receive an Egg Vermifuge
- Use the Egg Vermifuge immediately to cure the infection
- Eingyi will now sell you all of his pyromancies
Step 86 – Increase Endurance
- Level Endurance → 39
- Equip:
- Mask of the Sealer
- Elite Knight Chest Armor
- Mask of the Sealer
Step 87 – Advance Quelana’s Quest
- Return to Blighttown
- Talk to Quelana of Izalith
- Accept her request to kill the Bed of Chaos
Step 88 – Return to Firelink Shrine
- Return to Firelink Shrine
- Loot the Black Eye Orb where the Fire Keeper was
- The Firelink bonfire is now unusable
- Tell Laurentius about Quelana to conclude his questline
- Talk to Kingseeker Frampt and sell excess items for souls
- Exhaust the Crestfallen Warrior’s dialogue
Sen's Fortress
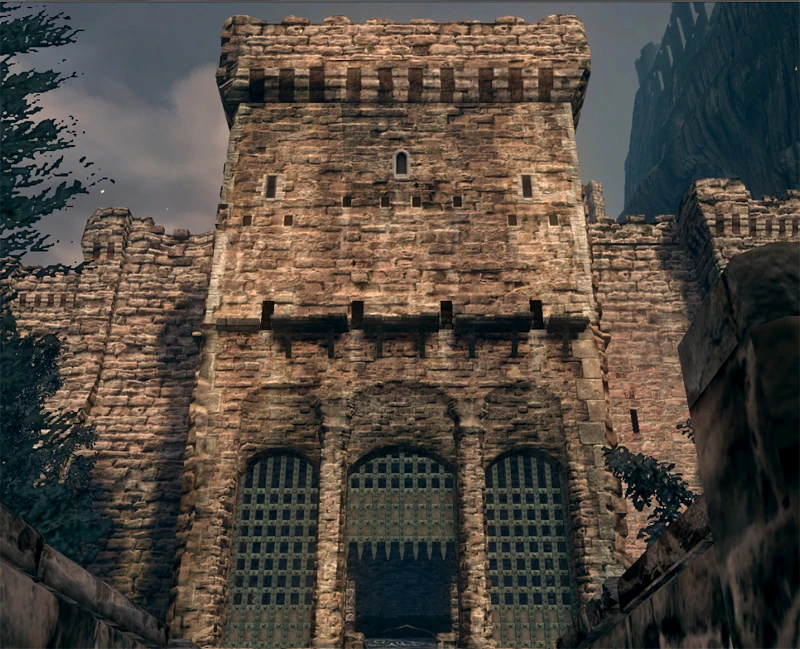 Step 89 – Enter Sen’s Fortress
- Return to Blacksmith Andre
- Ascend the Zweihander +5 → +6 (1 large titanite shard and 800 souls)
- Enter Sen’s Fortress
Step 90 – Loot the Ring of Steel Protection
- Progress through the fortress to the outdoor boulder ramp
- Talk to Siegmeyer of Catarina below
- Loot the Ring of Steel Protection from the chest at the top
- Equip the Ring of Steel Protection (replace Wolf Ring)
Step 91 – Go Bouldering
- Reach the giant stone turntable controlling the boulders and redirect them to open paths:
- Send a boulder down one path to break a wall
- Use the Master Key to rescue Big Hat Logan past the wall (he relocates to Firelink Shrine)
- Send several boulders down the other path to fill a pit and break a wall
- Loot the Covetous Gold Serpent Ring behind the wall
- Kill the nearby Mimic and loot the Lightning Spear
Step 92 – Reach the Sen’s Fortress Bonfire
- Climb to the roof, then drop through the gap in the wall to the Sen’s Fortress bonfire
- Climb up and kill the boulder-throwing giant
- Do not enter the fog gate yet; backtrack to kill the Berenike Knight on the side path
- Enter the far tower, kill Ricard, and loot the two chests
Step 93 – Reach the Crestfallen Merchant
- Jump the gap to the tower nearest to the bonfire
- Talk to the Crestfallen Merchant who sells Large Titanite Shards for 4000 souls each
- Go downstairs, kill the Serpent Man, and loot the Cage Key
- Unlock the cage lift near the fog gate to create a major shortcut
Step 94 – Slay the Titanite Demons
- Take the lift down and equip the Rusted Iron Ring (replace Ring of Steel Protection)
- Jump off the bridge near the entrance and perform a plunging attack on a Titanite Demon
- Kill all four Titanite Demons
- They are weak to fire; Great Combustion is very effective, and this may take multiple attempts
- Exit via the doorway, climb the ladder, pass through an illusory wall, and climb the second ladder
- Re-equip the Ring of Steel Protection, kill the giant at the top to loot a Titanite Chunk, then return to the bonfire via the cage lift
Step 95 – Increase Endurance
- Level Endurance → 41
Step 96 – Farm Large Titanite Shards
- Equip the Covetous Gold Serpent Ring and farm the Berenike Knight until you have 31 Large Titanite Shards total (~25% base drop rate)
- You should already have about 8; buy extras from the Crestfallen Merchant if needed, then re-equip the Ring of Steel Protection
Step 97 – Upgrade Equipment
- At the bonfire, upgrade:
- Zweihander → +10 (3200 souls, 8 Large Titanite Shards)
- Grass Crest Shield → +10 (800 souls, 8 Large Titanite Shards)
- Elite Knight Armor Set → +5 (600 souls, 3 Large Titanite Shards per armor piece)
- Chain Chest Armor → +5
- Equip the Chain Chest Armor, then equip Elite Knight Armor for the remaining slots
Step 98 – Defeat the Iron Golem
- Enter the fog wall and use the rock on the left to block the opening ranged attack
- Stay behind the boss and attack the legs
- He staggers around 75% and 25% HP
- If positioned correctly, he can fall off the bridge and die instantly
- Touch the glowing orb to travel to Anor Londo
Anor Londo
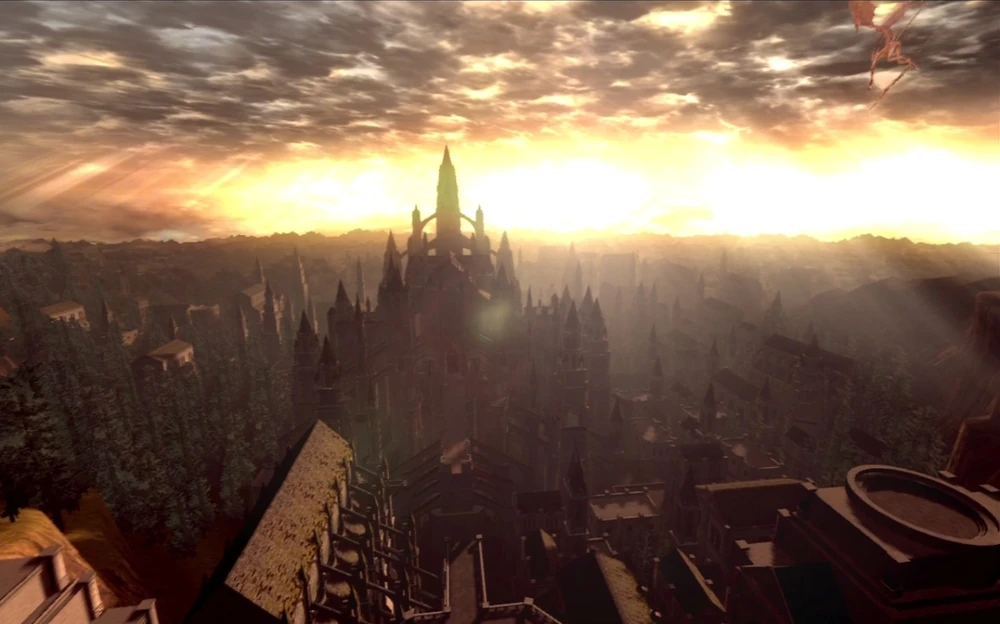 Step 99 – Arrive in Anor Londo
- After landing, look behind you to see the bat-winged demon that can return you to Sen’s Fortress
- Turn around and descend the stairs toward a doorway guarded by a Royal Sentinel
- Sentinels here have unusually low aggro range and can be bypassed
- Descend the stairs on the left to reach the Anor Londo bonfire
- Rest and talk to the Darkmoon Knightess
Step 100 – Loot the Sentinel’s Chests
- Return upstairs and head left
- Bait nearby Sentinels one at a time and kill them
- Loot the chests they guard
- The chest on the right is a Mimic
- Ignore the Sentinel guarding the blocked path for now
Step 101 – Enter the Chapel
- Take the lift near the bonfire down
- Kill the Gargoyle (cut its tail if you want a second Gargoyle Tail Axe)
- Jump down the left side of the lift tower to loot a chest
- Pass through the archway on the opposite side
- Climb the flying buttress and enter the chapel through the broken window
- Kill the Painting Guardians and climb the ladder to the rafters
Step 102 – Reach the Darkmoon Tomb Bonfire
- Cross the rafters carefully
- Cut the chandelier chain
- Jump to safety near the fog wall
- Optional: jump to the platform beneath Gwynevere and through the column gap to loot a chest
- Pass through the fog wall and pull the rotary lever twice to lower the staircase
- Descend and light the Darkmoon Tomb bonfire
Step 103 – Chapel Cleanup
- At the top of the staircase, enter the chapel and loot the Black Iron Armor
- Do not enter the painting yet
- Pull the rotary lever the opposite direction once
- Kill the attacking Gargoyle
- Continue to the main staircase of Anor Londo
Step 104 – Reach the Cathedral Bonfire
- At the top of the stairs, turn right and run past the enemies
- Ascend the flying buttress and kill the greatbow-wielding Silver Knights
- Enter the first door on the left and rest at the Cathedral bonfire
- Talk to Solaire
- The fireplace in one room is an illusory wall
- Behind it are a Mimic and four chests
- The second floor contains two Mimics, a Titanite Demon, and a door to the roof
Step 105 – Rescue Siegmeyer of Catarina
- On the roof, ignore the greatbow-wielding Silver Knight
- Go straight ahead and descend the spiral staircase
- Talk to Siegmeyer
- Kill the three Silver Knights blocking his path
- Return to receive the Tiny Being’s Ring
Step 106 – Craft a Maxed Weapon at the Giant Blacksmith
- Continue past the greatbow-wielding Silver Knight
- In the main hall, turn left, go upstairs, past the broken window, and through the narrow passage
- Reach the Giant Blacksmith and loot the chest behind him
- Ascend your Zweihander +10 → Lightning Zweihander and upgrade it to +5
- Cost: 8 Titanite Chunks, 1 Titanite Slab, 4800 souls
- Buy the Giant’s Armor Set (26,000 souls) and upgrade each piece to +2
- Cost: 8 Twinkling Titanite and 1600 souls total
- Too heavy to equip for now
- Cost: 8 Twinkling Titanite and 1600 souls total
- Equip the Lightning Zweihander +5 (two-handed), Mask of the Sealer, and Crimson Waistcloth
- You now have a max-level weapon halfway through the game
Step 107 – Invade Lautrec of Carim
- Open the door past the Giant Blacksmith to return to the main staircase
- Return to the main hall past the Royal Sentinels
- Use the rotary lever to open the giant front doors
- Use the Black Eye Orb to invade and kill Lautrec of Carim
- Equip the Ring of Favor and Protection he drops (replace Ring of Steel Protection)
- Removing it will permanently break it
- Re-equip the Chain Chest Armor and the rest of the Elite Knight Set
- Do not enter the boss room yet
Painted World of Ariamis
 Step 108 – Enter the Painted World
- Return to the chapel and enter the painting
- Requires the Peculiar Doll from the Undead Asylum
- You cannot exit the painting the way you entered
- The normal exit is easy to reach
Step 109 – Defeat the Undead Dragon
- Light the bonfire
- At the large bridge, run across to wake the Undead Dragon, then run back to avoid its charge
- Defeat the dragon using the same strategy as the Valley of Drakes Undead Dragon
- After killing it, cross the bridge
- Only the top half died; the lower half still blocks the path
- Perform a jumping attack to make it stand up and let you pass
- Only the top half died; the lower half still blocks the path
- You can exit the painting here, but there is much more to do first
Step 110 – Unlock the Courtyard Shortcut
- Enter the large circular tower
- Loot the Red Sign Soapstone at the top of the spiral stairs
- At the bottom of the tower, go through the fog wall into the courtyard
- Run straight back past the Phalanx enemies
- Open the double doors to create a shortcut to the bonfire
Step 111 – Kill Xanthous King Jeremiah
- Use 1 Humanity at the bonfire to reverse hollowing
- Return through the doors into the courtyard
- Turn right and walk to the cliffside
- Get invaded by Xanthous King Jeremiah
- Kill him
Step 112 – Obtain the Annex Key
- Descend the ladder into the well in the courtyard
- Spend all your souls beforehand, as this area contains dangerous Wheel Skeletons
- Loot the Annex Key behind an illusory wall
- Behind another illusory wall, turn the crank mechanism
- Unlocks the intended exit route from the Painted World
- Use the Annex Key to open the locked door in the courtyard
- Loot the Dark Ember past the door
Step 113 – Farm the Phalanx
- If available, equip:
- Symbol of Avarice
- Crimson Waistcloth
- Symbol of Avarice
- Farm the Phalanx enemies
- Level stats to:
- Strength → 24
- Endurance → 50
- Strength → 24
- Total cost: 385,000 souls (17 levels)
- Equivalent to killing all 13 Phalanx enemies ~42 times
- You should already have a large number of souls
- Equivalent to killing all 13 Phalanx enemies ~42 times
- Farm an additional 50,000 souls for future crafting materials
- When finished, equip the full Elite Knight Armor Set (all 4 pieces)
- With 24 Strength, you can now one-hand the Zweihander
- It still deals more damage when two-handed
- One-handing is mainly useful for ripostes
- It still deals more damage when two-handed
Step 114 – Leave the Painted World
- Cross the bridge to reach the boss arena
- Talk to Crossbreed Priscilla
- Cutting her tail yields a powerful unique dagger
- Killing her is optional; recommended to do later
- Cutting her tail yields a powerful unique dagger
- Loot the Xanthous Armor Set before leaving
- Only appears if you killed Xanthous King Jeremiah
- Exit the Painted World
Step 115 – Upgrade your Armor
- Rest at the Anor Londo bonfire
- Buy 12 Large Titanite Shards from the Giant Blacksmith (3,800 souls each)
- Upgrade the Elite Knight Armor Set → +6
Step 116 – Defeat Ornstein and Smough
- Enter the large fog wall in the main hall
- Kill Dragonslayer Ornstein first
- Kill Executioner Smough second
- The surviving boss becomes much stronger
- Super Ornstein is capable of one-shot attacks
- Though your build should be tanky enough to survive them
- The surviving boss becomes much stronger
- You receive the soul of the boss killed last
- NG+ is required to obtain both
- Super Ornstein also drops the Leo Ring
- NG+ is required to obtain both
Step 117 – Obtain the Lordvessel
- Take the lift to the Chamber of the Princess bonfire
- Loot Armor of Favor from Lautrec’s corpse if you killed him earlier
- Open the bedchamber doors and talk to Gwynevere to receive the Lordvessel
- You can now warp between select bonfires
- You can warp from nearly all bonfires
- You can only warp to some
- You cannot warp from the Painted World of Ariamis or Duke’s Archives Cell bonfires
- You can warp from nearly all bonfires
- Talk to Gwynevere again to join the Princess Guard covenant
- Killing her locks you out of multiple covenants — do not attack her
Step 118 – Progress Siegmeyer’s Quest
- Warp to Firelink Shrine and talk to Siegmeyer of Catarina
- Do not talk to Kingseaker Frampt or you will be locked out of a covenant
- Use the Fire Keeper’s Soul to retrieved from Lautrec to resurrect Anastasia of Astora
- Warp to the Daughter of Chaos bonfire
- Go to the Blighttown swamp
- Talk to Siegmeyer and give him 3 Purple Moss Clumps
- Warp back to Firelink Shrine
New Londo Ruins
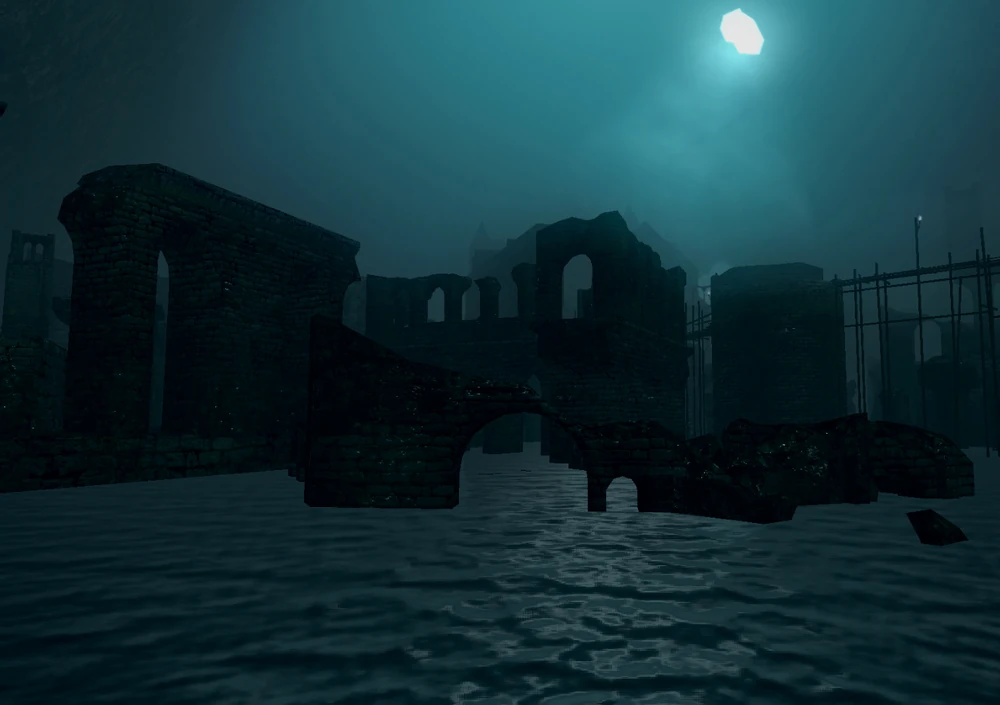 Step 119 – Enter the New Londo Ruins
- Take the elevator down to New Londo
- Kill the Crestfallen Warrior, now hollow
- Equip Transient Curses in an item slot; you need them to be able to kill ghosts
- Curse duration is approximately five minutes; reapply before it expires
- Enter the ruins and activate a Transient Curse
- Proceed slowly and kill the Ghosts; they can attack through walls
- Buy Transient Curses from the female Undead Merchant if needed
Step 120 – Get Ingward’s Seal
- Continue deeper into New Londo Ruins
- Climb the ladder inside the large central building
- Talk to Ingward the Sealer to receive the Key to the Seal
- Use the lever to drain the water
- Take the lift down to the lower ruins
- Up the nearby stairs is a chest containing the Very Large Ember
- At the end of the area you’ll find the boss’ fog wall
Step 121 – Defeat the Four Kings
- Equip the Covenant of Artorias ring (replace Havel’s ring)
- Required to survive the Abyss
- Enter the fog wall and fall into the Abyss
- Defeat the Four Kings
- After killing a King, keep attacking briefly — its hitbox lingers after the model disappears
- A new King spawns every ~45 seconds, so stay aggressive to avoid fighting multiple at once
- Re-equip Havel’s Ring after the fight
Step 122 – Meet Darkstalker Kaathe
- Talk to Darkstalker Kaathe
- Join the Darkwraith Covenant and receive the Dark Hand
- Have him take you to the Kiln of the First Flame and place the Lordvessel
Step 123 – Upgrade the Grass Crest Shield
- Warp to Undead Parish
- Give Andre:
- Very Large Ember
- Dark Ember
- Very Large Ember
- Ascend the Grass Crest Shield → +11
- Upgrade further as materials allow
The Catacombs
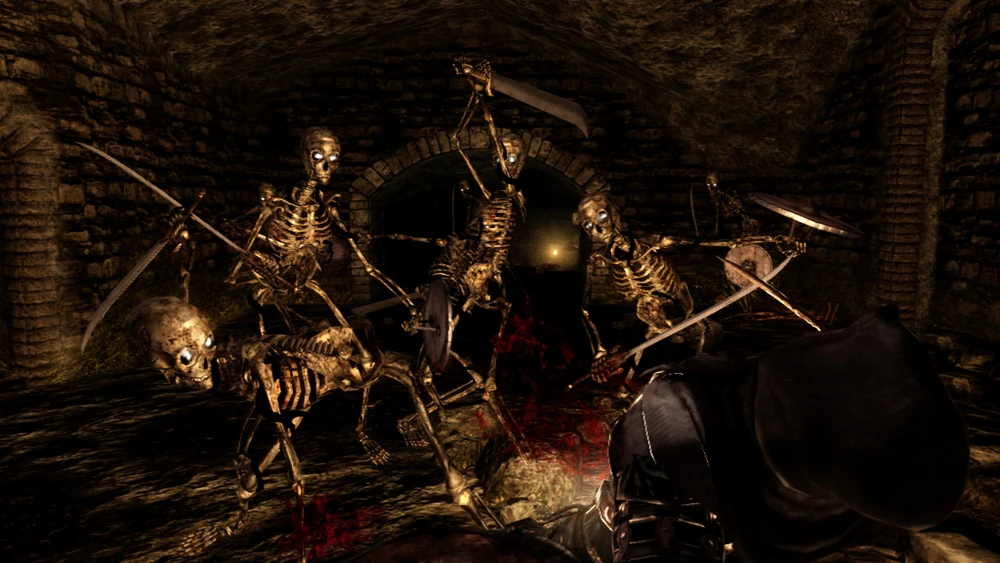 Step 124 – Enter the Catacombs
- Enter the Catacombs via the graveyard behind Firelink Shrine
- On the left, enter the narrow passage containing a bonfire and an Undead Mage
- Kill the Undead Mage and rest at the bonfire
- Use the nearby lever to open the way forward outside the bonfire room
Step 125 – Reach Blacksmith Vamos
- Proceed to the room with the spiral staircase
- Jump down to the lowest stair to land on a platform
- Drop to the next platform, then fall into the lower chamber
- Light the bonfire and talk to Blacksmith Vamos
- Warp back to Firelink Shrine, then return to continue exploring the Catacombs
Step 126 – Join the Gravelord Servants
- Kill every Undead Mage you encounter
- At least one will drop a Skull Lantern
- In the crypt just before the Titanite Demon, climb into the coffin
- Wait inside the coffin to be transported to the Gravelord tomb
- Join the Gravelord Servant covenant
- Enter the coffin again to return to the Catacombs
Step 127 – Defeat Pinwheel
- Continue to the bottom of the Catacombs past the Bonewheel Skeletons near Vamos
- Enter the boss room and defeat Pinwheel
- Two heavy attacks with a Lightning Zweihander +5 will kill him
- He drops the Rite of Kindling, letting you kindle bonfires until they grant 20 Estus charges
- Two heavy attacks with a Lightning Zweihander +5 will kill him
- Equip the Skull Lantern in place of the Grass Crest Shield
- Proceed into the Tomb of the Giants
Tomb of Giants
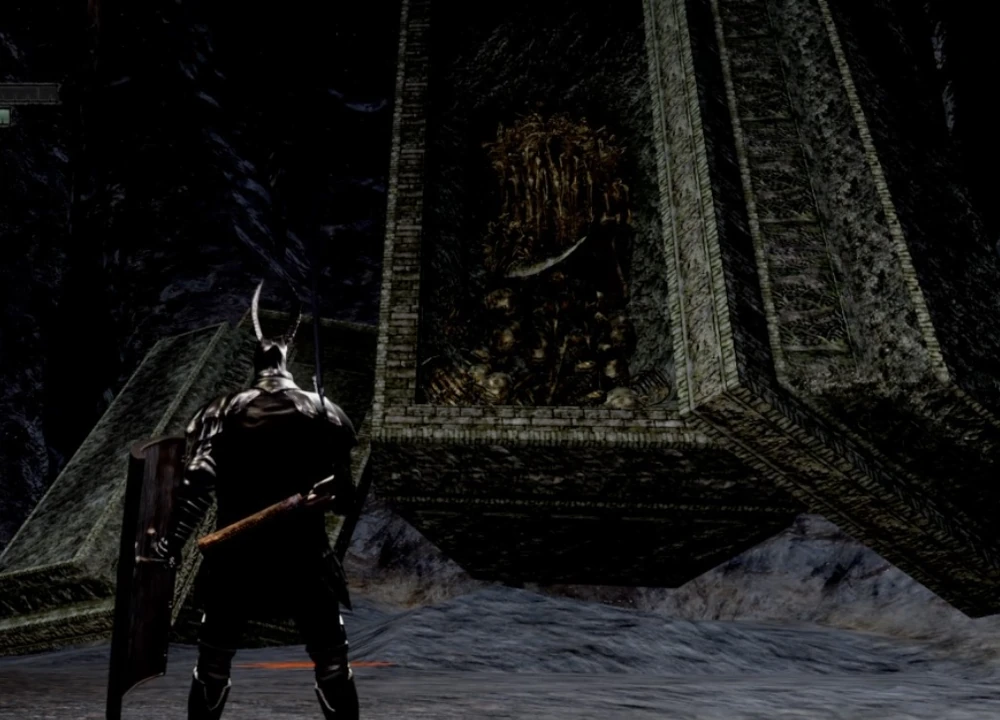 Step 128 – Enter the Tomb of the Giants
- One-hand your weapon and use the Skull Lantern to light the area
- Move slowly and look carefully before dropping down ledges
Step 129 – Rescue Rhea of Thorolund
- Allow Patches the Hyena to trick you into falling into the pit
- Kill Vince and Nico to rescue Rhea of Thorolund
- Rhea will later move to the Undead Parish church and sell miracles
- Return to Patches and do not forgive him to receive a free Humanity
Step 130 – Loot the Covetous Silver Serpent Ring
- Pass through the nearby fog wall into the large chamber
- Locate the corpse holding an item near the cliff edge
- Stand on the corpse and jump off the cliff onto a platform
- Loot the Covetous Silver Serpent Ring
Step 131 – Kill Paladin Leeroy
- Reverse hollowing at a bonfire
- Summon and kill Paladin Leeroy near the end of the Tomb
- Do not fight Gravelord Nito yet
- Killing Nito removes you from the Gravelord Servant covenant
- Warp to the Anor Londo bonfire
The Duke's Archives
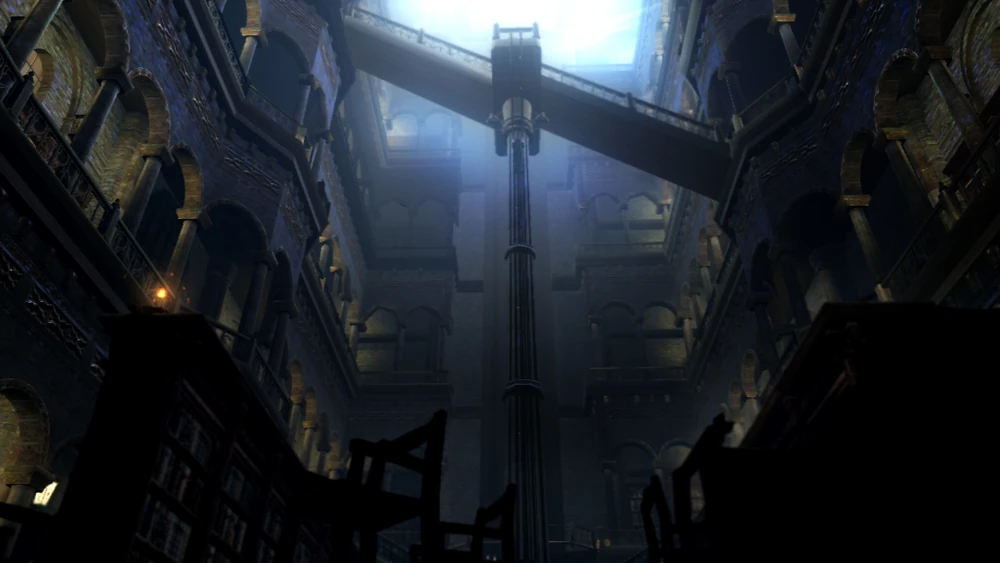 Step 132 – Enter the Duke’s Archives
- Head left past the Giant Sentinels to the Duke’s Archives entrance
- Kill the Crystal Golem to obtain the Broken Pendant
- Take the lift up to Seath the Scaleless
- Allow Seath to kill you (required to progress)
- Optional: equip a Ring of Sacrifice to keep your souls
Step 133 – Escape the Prison
- Kill the Serpent Man outside your cell
- Loot the Archive Tower Cell Key and unlock the cell
- Fight down the stairs, disable the alarm, and loot the Archive Tower Giant Door Key
- Head back up and climb the ladder to reach the upper half of the Archives
Step 134 – Open the Archive Bonfire Shortcut
- Use the rotating staircases to reach the room with a ladder
- Descend the ladder and pull the lever to reveal the Duke’s Archives bonfire
- Loot nearby chests; one contains the Archive Tower Giant Cell Key
- Return to the prison area
- Rescue Big Hat Logan and loot the Fire Keeper Soul
Step 135 – Upgrade Your Estus Flask
- Warp to any Fire Keeper
- Upgrade your Estus Flask → +4
- Return to the Duke’s Archives
Step 136 – Rescue Sieglinde of Catarina
- In the chest room, pull the lever to reveal stairs downward
- Enter the small forested area
- Kill the Golden Crystal Golem
- Avoid hitting Sieglinde of Catarina as she emerges
- Talk to Sieglinde, then proceed into the Crystal Cave
Crystal Cave
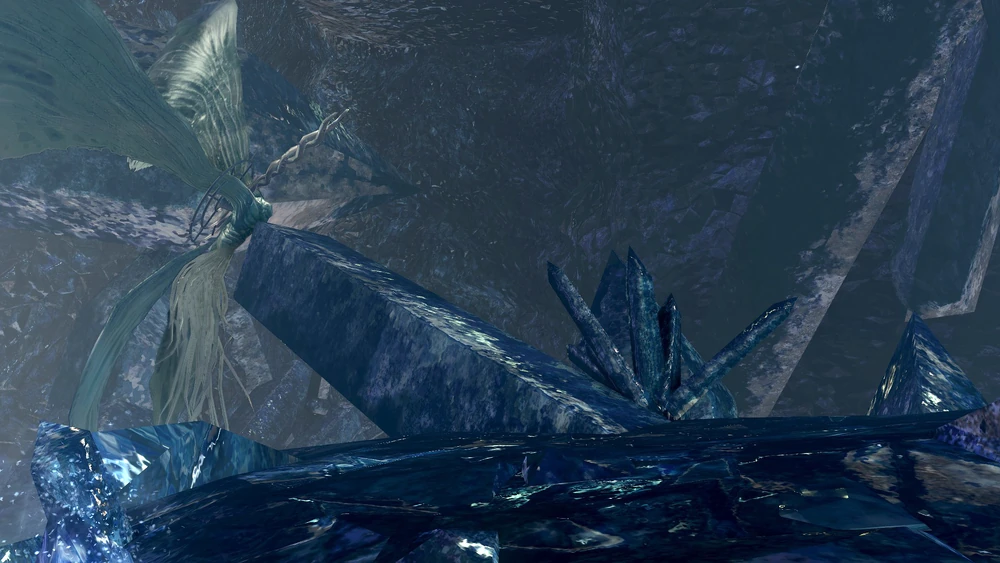 Step 137 – Navigate the Crystal Cave
- Proceed carefully through the cave
- Some walkways are invisible
- Falling snowflakes reveal safe paths
- Prism Stones can be used to mark walkable ground
- Falling snowflakes reveal safe paths
- Move slowly to avoid fatal falls
Step 138 – Defeat Seath the Scaleless
- Reach Seath at the end of the cave
- First, destroy the Primordial Crystal behind him to negate his immortality
- Defeat Seath the Scaleless
- Optional: cut his tail to obtain the Moonlight Greatsword
- Much easier with a co-op partner drawing his attention
Step 139 – Complete Big Hat Logan’s Quest
- Return to the room where you found Logan’s cell key
- Find Logan sitting there
- Purchase all of his sorceries for 183,000 souls total
- Talk to him and quit/reload repeatedly until he disappears
- Warp to the Anor Londo bonfire
- Return to the Duke’s Archives and enter the room where Seath killed you earlier
- Kill Logan and loot the Large Magic Ember
- Warp to Firelink Shrine
- Descend to the New Londo Ruins and give the Large Magic Ember to Rickert of Vinheim
- Warp to the Daughter of Chaos bonfire
Demon Ruins (Second Descent)
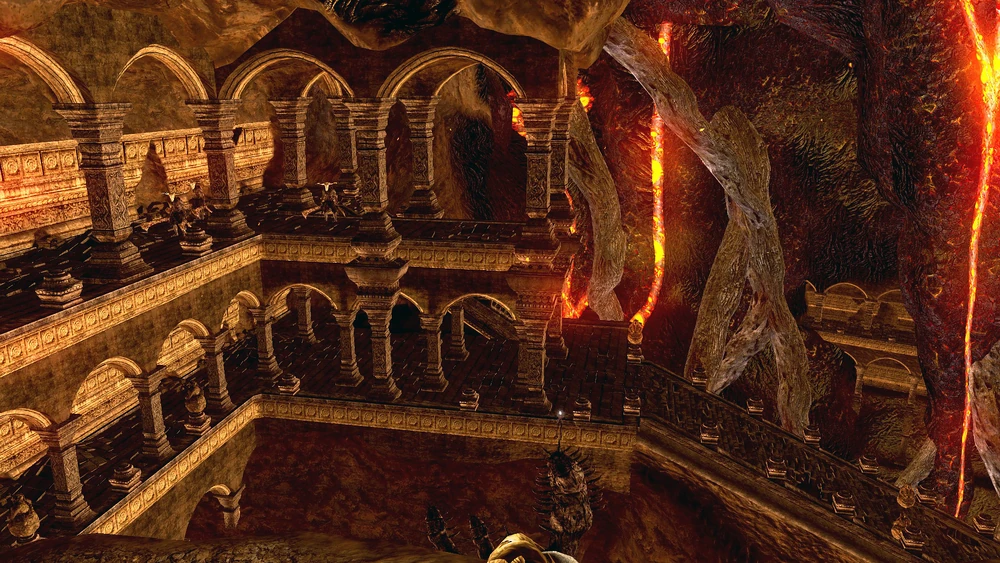 Step 140 – Kill Knight Kirk
- Reverse hollowing and head down past the Capra Demon area
- Get invaded by Knight Kirk and kill him
- Take the left path to loot the Large Flame Ember (for Blacksmith Vamos)
- Continue straight to the fog wall
Step 141 – Defeat the Demon Firesage
- Defeat the Demon Firesage
- Past the boss:
- Above the stairs is a lift back to the Daughter of Chaos bonfire
- Below the stairs is a bonfire
- Above the stairs is a lift back to the Daughter of Chaos bonfire
Step 142 – Chaos Servant Shortcut (Solaire Quest)
- Give 30 Humanity to the Daughter of Chaos to reach the rank of Chaos Servant +2
- Take the right path just before the Firesage’s fog wall
- Go down the tree roots and open the shortcut door
- Kill all nine Sunlight Maggots and loot the Sunlight Maggot helm
- Do not proceed until all maggots are dead
Step 143 – Defeat the Centipede Demon
- Return to the bonfire below the Demon Firesage’s arena
- Summon Solaire of Astora
- Enter the fog wall and defeat the Centipede Demon to get the Orange Charred Ring
- Cutting the tail grants the ring mid-fight
- Equip the Orange Charred Ring (replace Havel’s Ring)
- Talk to Solaire at the bonfire just before Lost Izalith
Lost Izalith
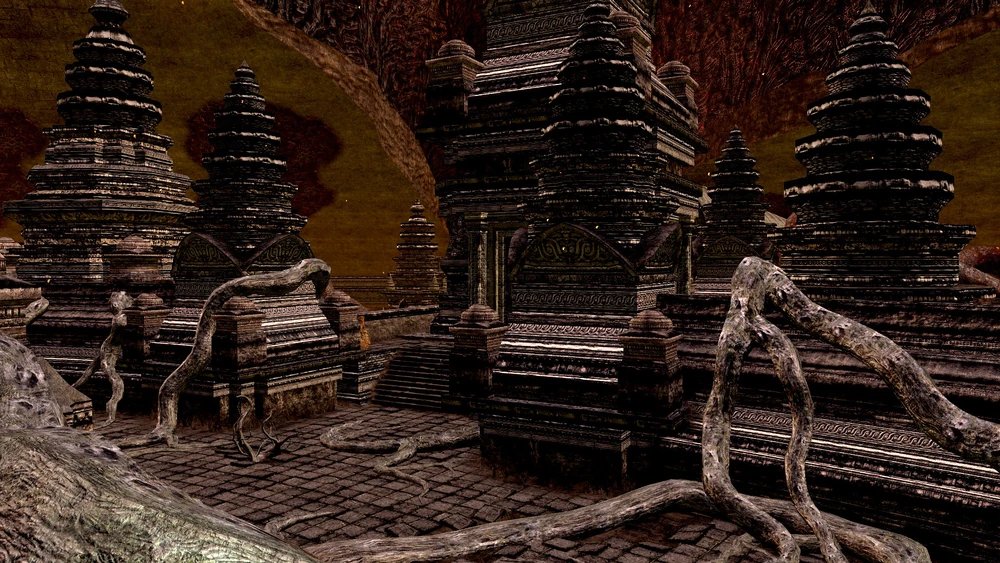 Step 144 – Enter Lost Izalith
- Enter Lost Izalith
- Find the bonfire behind an illusory wall in the farthest large square pillar
- Bounding Demons nearby are dangerous but do not respawn and can damage each other
Step 145 – Final Knight Kirk Invasion
- From the bonfire, reverse hollowing and enter the partially collapsed tunnel
- Re-equip Havel’s Ring (replace Orange Charred Ring)
- Climb the stairs
- Get invaded by Knight Kirk and kill him
- Kill the hostile Daughter of Chaos guarding the area
Step 146 – Team up with Siegmeyer of Catarina
- Go down the tree root and left into the dim alcove
- Walk across the floor tiles to drop below
- Talk to Siegmeyer of Catarina
- Drop down with him and kill all Chaos Eaters
- Ensure Siegmeyer survives with over 50% health
- Talk to him again and return to the boss fog wall
Step 147 – Defeat the Bed of Chaos
- Enter the fog wall and slide down
- Defeat the Bed of Chaos
- Progress persists between deaths
- Destroy both side branches (sword or well-aimed firebombs)
- Enter the tunnel beneath and kill the insect to finish the fight
- Progress persists between deaths
- Light the revealed bonfire
Step 148 – Complete Solaire’s Quest
- Return to the Sunlight Maggot shortcut area
- Find Solaire of Astora
- His questline is complete
- You may kill him to obtain his gear
Step 149 – Max Your Pyromancy Flame
- Warp to Firelink Shrine and talk to Sieglinde of Catarina
- Warp to the Daughter of Chaos bonfire
- Enter Blighttown and talk to Quelana of Izalith
- Receive the Fire Tempest pyromancy
- Upgrade your Pyromancy Flame → +15, then ascend it and upgrade → +5
- Total cost: 287,000 souls
- Attune Fire Tempest
- Climb the giant tree root to enter the Great Hollow
The Great Hollow
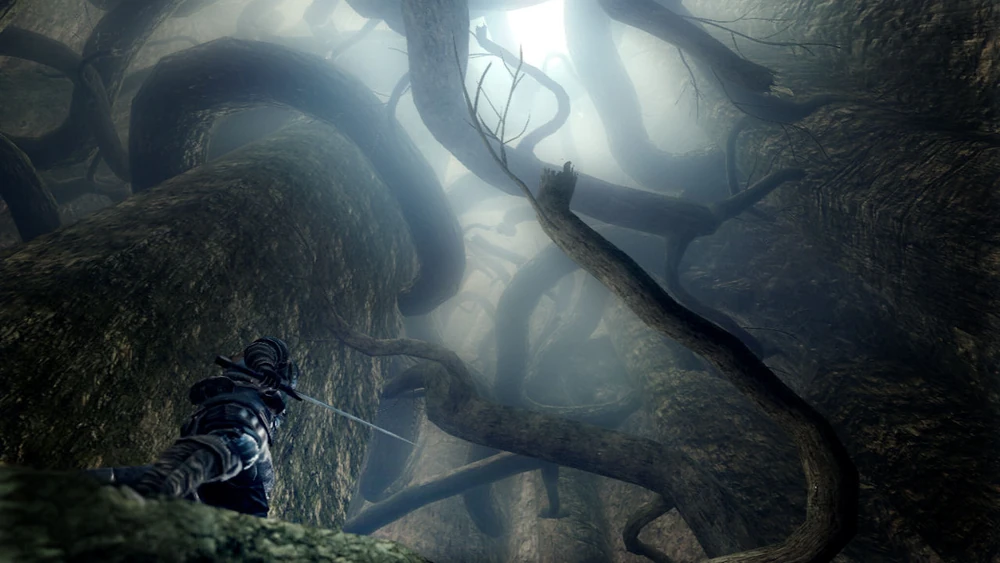 Step 150 – Descend the Great Hollow
- Carefully drop down the series of branches toward the bottom
- Kill and loot Crystal Lizards along the way
- They drop valuable Twinkling Titanite
- A Basilisk spawns outside the map and falls into the killbox when the area loads
- Grants 400 souls each time you enter
- Reach the bottom of the Hollow to enter Ash Lake
Ash Lake
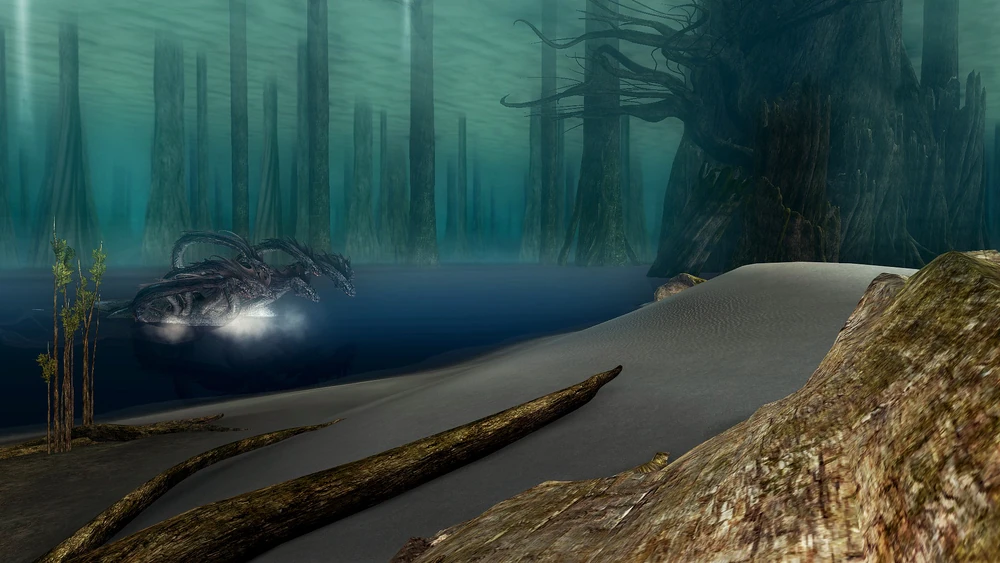 Step 151 – Slay the Black Hydra
- Talk to Sieglinde of Catarina to receive a Titanite Slab
- Defeat the Black Hydra
- A stronger version of the Hydra fought in Darkroot Garden
Step 152 – Join the Path of the Dragon Covenant
- Continue past the Hydra to the far end of Ash Lake
- Talk to the Everlasting Dragon and join the Path of the Dragon covenant
- Optional: cut off its tail to obtain the Dragon Greatsword
- The dragon does not become hostile
- Warp to the Princess’ Bedchamber bonfire
Step 153 – Max the Giant’s Armor Set
- Talk to the Giant Blacksmith
- Buy Twinkling Titanite until you have 40 total (8,000 souls each)
- Upgrade every piece of the Giant’s Armor Set → +5
Step 154 – Final Stat Milestones
- Use Fire Tempest to efficiently farm the Phalanx in the Painted World of Ariamis
- Level stats to:
- Vitality → 50
- Endurance → 84
- Vitality → 50
- Equip the full Giant’s Armor Set
Step 155 – Unlock the DLC Area
- Warp to the Undead Parish
- Return to Darkroot Garden, to the location where you defeated the Golden Crystal Golem and rescued Dusk of Oolacile
- With the Broken Pendant obtained in the Duke’s Archives, a portal will now appear
- Enter the portal to access the DLC area
The Royal Wood
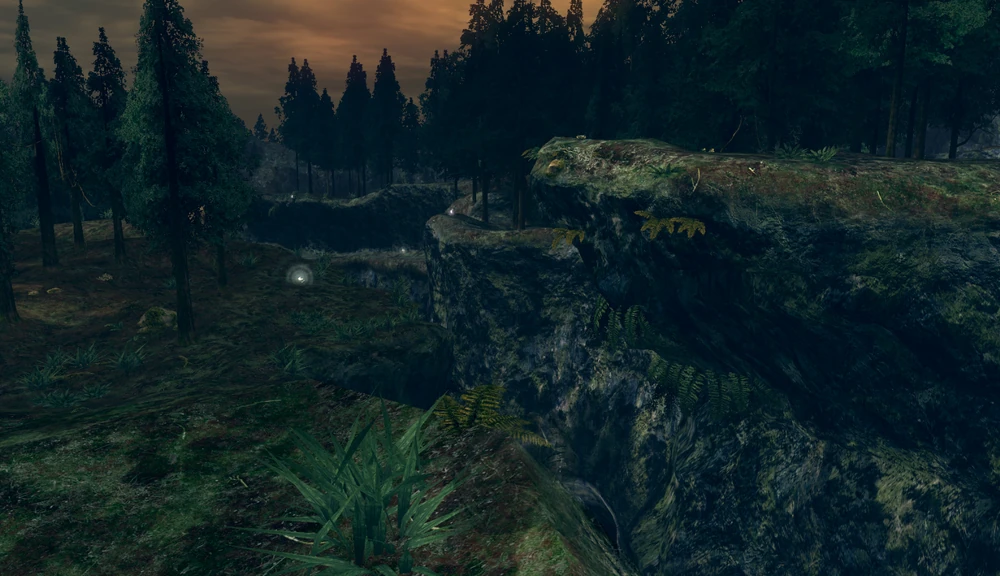 Step 156 – Defeat the Sanctuary Guardian
- Enter the Royal Wood and defeat the Sanctuary Guardian
- Optional: cut its tail to obtain a whip
- Talk to Elizabeth
- Cross the bridge to enter the Royal Wood proper
Step 157 – Reach Artorias’ Arena
- Proceed through the Royal Wood
- Near the far end, locate the lift leading to a fog wall
- Talk to Marvelous Chester nearby
Step 158 – Defeat Knight Artorias
- Enter the fog wall and defeat Knight Artorias
- Many attacks require sideways rolls to dodge
- When he performs repeated backflips, he is preparing to buff himself
- Deal enough damage during the buff to interrupt it
- A running attack followed by a heavy attack with the Zweihander works well
Step 159 – Meet the Lord’s Blade Ciaran
- After the fight, quit and reload
- Talk to Lord's Blade Ciaran
- Giving her Artorias’ soul grants her weapons
- Killing her instead yields her weapons and armor while keeping the soul
- Giving her Artorias’ soul grants her weapons
- Proceed past her to light the Oolacile Township bonfire
Oolacile Township
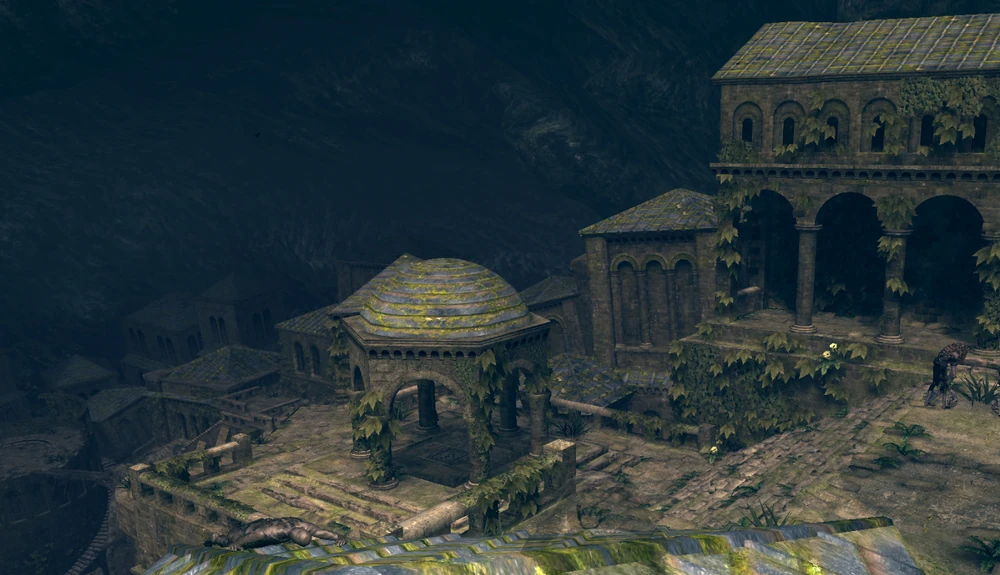 Step 160 – Obtain the Silver Pendant
- Just past an Oolacile Sorceress, look for a hidden path on the right
- Equip a light source (Sunlight Maggot or Skull Lantern)
- Behind the scaffolded building, reveal a light-activated illusory wall
- Loot the Silver Pendant from the chest
Step 161 – Loot the Crest Key
- Proceed down the long narrow path and kill the Mimic you encounter
- Enter the large building and go upstairs
- Use your light source to reveal another illusory wall hiding a chest
- Return and leap off the wooden scaffold into a room with a lit fireplace
- Kill the Mimic to obtain the Crest Key
- Descend the ladder and cut the rope to drop the dark fog spell
- Exit the room and activate the lift on the right
- This unlocks a shortcut to the Township bonfire
- Continue on to light the Oolacile Township Dungeon bonfire
Step 162 – Kalameet Setup
- Warp back to the Oolacile Township bonfire
- Go upstairs in the building where you fought Artorias
- Use the Crest Key to open the locked door
- Talk to Hawkeye Gough
- Return to the Royal Wood and head downhill past the waterfall
- Aggro Black Dragon Kalameet, then retreat
- Return to Gough and tell him you will persevere to the very end
- Gough will shoot Kalameet down, enabling the boss fight
Step 163 – Defeat the Black Dragon Kalameet
- Slay Kalameet
- Optional: cut his tail to obtain the Obsidian Greatsword
- Much easier with a summoned companion
- Loot the Titanite Slab from the chest behind the nearby waterfall
- Return to Gough
- You may kill him to obtain his armor
- Warp to the Oolacile Township Dungeon bonfire
Chasm of the Abyss
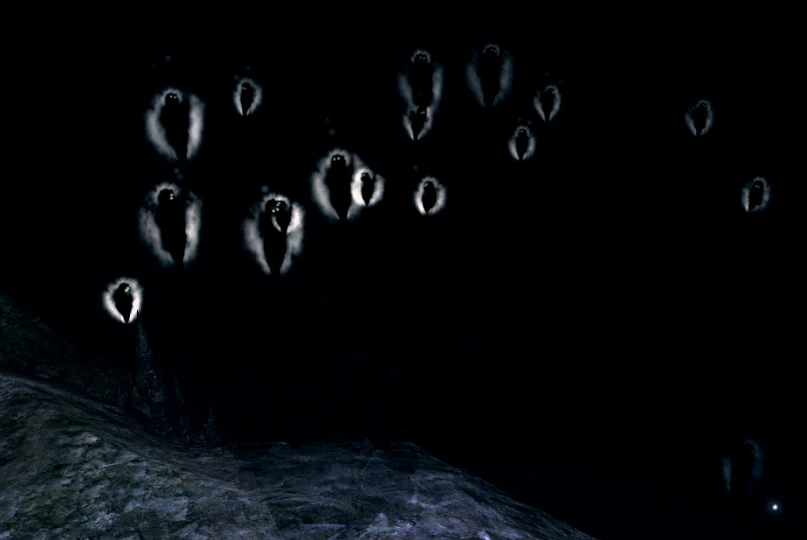 Step 164 – Rescue Young Sif
- Enter the Chasm of the Abyss
- Descend until you see a fog-covered platform on the left
- Jump onto it and follow Alvina to an illusory wall
- Open the illusory wall to reveal a cave
- Kill the Humanity Phantoms inside to rescue Great Grey Wolf Sif
- Loot Artorias’ Cleansing Greatshield
- Use the nearby lift to unlock a shortcut back to the Royal Wood
Step 165 – Reach Manus
- Proceed deeper into the Abyss
- Loot the Black Flame pyromancy and attune it at a bonfire
- Cross the collapsed stone column acting as a bridge
- Enter the large fog wall
Step 166 – Defeat Manus, Father of the Abyss
- Defeat Manus
- Great Grey Wolf Sif can be summoned to assist
- Summoning Sif does not increase Manus’ health
- Use the Silver Pendant to negate Manus’ magic attacks
- Great Grey Wolf Sif can be summoned to assist
- After the fight, talk to Dusk of Oolacile
- Warp to Oolacile Sanctuary and talk to Elizabeth
This is the optimal point to complete any PvP activities. Progressing toward the end of the game locks out multiple covenants and PvP modes
Preparation for New Game Plus
Step 167 – Final Fire Keeper Souls
Step 168 – Expose Gwyndolin’s Illusion
Step 169 – Kill the Darkmoon Knightess
Step 170 – Defeat Dark Sun Gwyndolin
Step 171 – Defeat Crossbreed Priscilla
Step 172 – Defeat Gravelord Nito
Step 173 – Final NPC Cleanup (Optional)
Step 174 – Place the Lord Souls
- Warp to the Daughter of Chaos bonfire
- Kill the Daughter of Chaos to obtain her Fire Keeper Soul
- Warp to Firelink Shrine
- Talk to Anastacia of Astora and upgrade your Estus Flask → +5
Step 168 – Expose Gwyndolin’s Illusion
- Warp to the Princess’ Bedchamber
- Attack Gwynevere to dispel the illusion
Step 169 – Kill the Darkmoon Knightess
- Warp to the Darkmoon Tomb bonfire
- Kill the now-hostile Darkmoon Knightess outside for her Fire Keeper Soul
- Warp to Firelink Shrine and upgrade your Estus Flask → +6
Step 170 – Defeat Dark Sun Gwyndolin
- Return to the bonfire and enter the fog wall
- Defeat Gwyndolin
Step 171 – Defeat Crossbreed Priscilla
- Warp to the Painted World of Ariamis
- Defeat Crossbreed Priscilla
- Optional: cut her tail to obtain a powerful dagger
- When she turns invisible, her footprints in the snow reveal her position
- Optional: cut her tail to obtain a powerful dagger
Step 172 – Defeat Gravelord Nito
- Warp to the Tomb of the Giants
- Defeat Gravelord Nito
- This fight is a DPS check; dragging it out causes additional skeletons to spawn
Step 173 – Final NPC Cleanup (Optional)
- Warp to Firelink Shrine
- Talk to Patches the Hyena, who has relocated there
- After purchasing everything you want from all merchants:
- Kill any remaining NPCs to loot their gear
- Not required if you already obtained their gear in a previous playthrough
- Kill any remaining NPCs to loot their gear
Step 174 – Place the Lord Souls
- Warp to the Abyss and talk to Darkstalker Kaathe to travel to the Kiln of the First Flame
- Place all four Lord Souls in the Lordvessel
- The Kiln is the only location where Black Knights respawn, making it the best place to farm their gear
Kiln of the First Flame
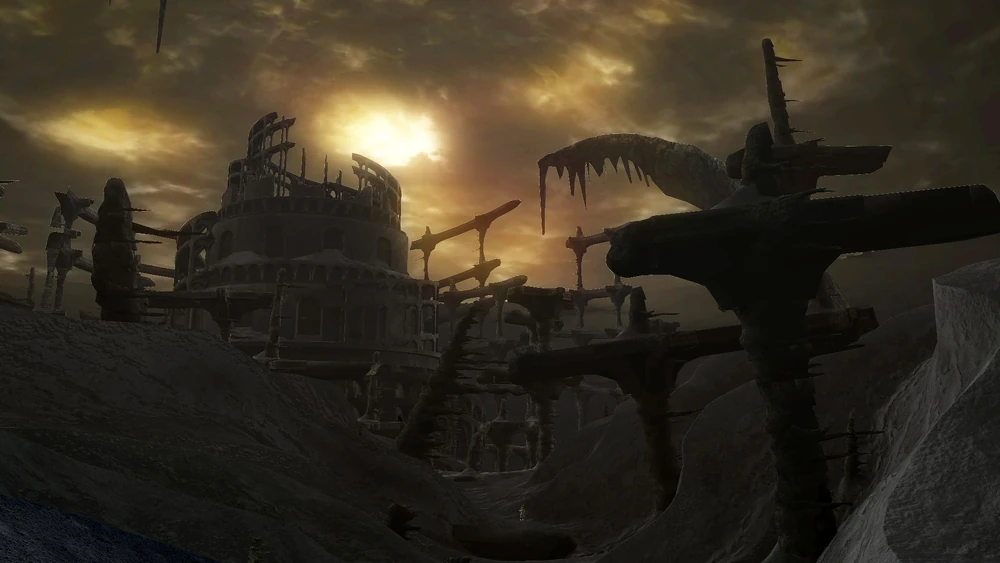 Step 175 – Defeat Gwyn, Lord of Cinder
- Enter the final fog wall
- Defeat Gwyn, Lord of Cinder
- Many of his attacks are parryable
- After the fight, leave the Kiln without linking the fire
- This triggers the Dark Lord ending
- You may choose the other ending in future playthroughs
- You retain the Dark Hand even if you are no longer a Darkwraith
- This triggers the Dark Lord ending
Soul Farming Guide
Soul farming becomes increasingly efficient as the game progresses. While NG+ enemies drop roughly double the souls, the best farming spots become available by the midgame and remain effective even in later playthroughs.
Soul Gain Bonuses
Overkill Mechanics
Gear Swap Timing
Symbol of Avarice Tradeoffs
Soul Gain Bonuses
- Equip all available soul-boosting gear when farming
- Covetous Silver Serpent Ring increases souls gained
- Symbol of Avarice increases souls gained and item discovery
- Soul-boosting effects stack multiplicatively
Overkill Mechanics
- Dealing at least 150% of an enemy’s HP in a single hit triggers overkill
- Overkill grants 20% additional souls
- High-damage attacks and Fire Tempest frequently trigger overkill
Gear Swap Timing
- There is a short delay between killing an enemy and receiving souls
- You can swap into soul-boosting gear immediately after a kill to receive its bonuses
- This also works after boss kills
Symbol of Avarice Tradeoffs
- Drains 5 HP per second
- Vision obstruction is often more dangerous than the HP drain
- Does not stack with the Covetous Gold Serpent Ring
- Item discovery scales with soft Humanity up to 10
Early Game Soul Farming – Undead Burg Wyvern Bridge
- Available after killing the Taurus Demon
- Start at the Undead Burg bonfire
- Climb the ladder and aggro the Hellkite Wyvern
- Retreat under the bridge
- Allow the Wyvern to kill the hollow soldiers
- Rest at the bonfire after the bridge is cleared to reset enemies
Notes
- Yields 555 souls per reset
- Safe and beginner-friendly
- Best used before Darkroot Garden access
Mid Game Soul Farming – Forest Hunter NPCs
- Available after purchasing the Crest of Artorias
- Must be done before joining the Forest Hunter covenant
- Start at the hidden Darkroot Garden bonfire
- Open the sealed door
- Kill the following NPCs:
- Mage
- Thief
- Cleric
- Mage
- Ignore the bandit for efficiency (drops half the souls)
- Reset at the bonfire
Notes
- Each NPC drops 2,000 souls
- Fast midgame farming method
- Backstabs, parries, and heavy weapons are most effective
- Great practice for new players
- Warning: attacking Forest Hunter NPCs after joining the covenant causes permanent expulsion
Best Soul Farming in the Game – Painted World Phalanx
- Available after entering the Painted World of Ariamis
- Start at the Painted World bonfire
- Open the courtyard double doors
- Kill all of the Phalanx enemies
- Reset at the bonfire
Recommended Methods
- Fire Tempest with an Ascended Pyromancy Flame +5
- Lightning Zweihander +5
Why This Spot Is the Best
- Enemies are slow, tightly packed, and weak to fire
- Fire Tempest reliably overkills with a maxed pyromancy flame
- Fire Tempest can wipe most enemies in a single cast
- Fastest and safest soul farm in the game
- While NG+ enemies drop more souls, earlier farming methods yield fewer souls per minute in NG+ than the Painted World Phalanx farm does in NG.
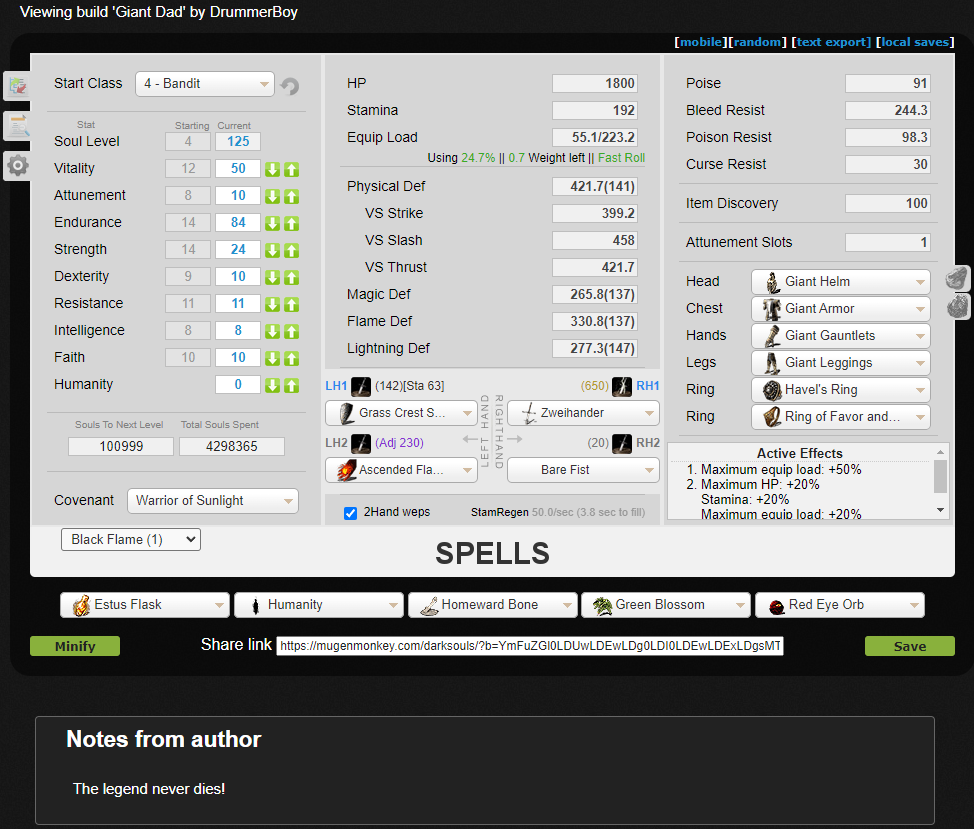
Build Guide – Stat Progression (SL 125)
Recommended Starting Class — Bandit
Recommended Leveling Order:
PvP Matchmaking:
- Best starting stats with no wasted levels
Recommended Leveling Order:
- Dexterity → 10
- Strength → 16
- Endurance → 24
- Vitality → 16
- Endurance → 30
- Vitality → 30
- Attunement → 10
- Endurance → 41
- Strength → 24
- Endurance → 50
- Vitality → 50
- Endurance → 84
- Resistance is never worth leveling
- Damage primarily comes from weapon upgrades rather than stat scaling
- Lightning weapons ignore Strength and Dexterity scaling
- Lightning damage bypasses most enemy resistances
- Two-hand the Zweihander for higher damage
- 24 Strength enables reliable one-handed ripostes after parries
- High Endurance allows fast rolling while wearing full Giant armor
- This version invests an additional 17 Endurance to wear the Giant Helm instead of Mask of the Father while maintaining fast roll
PvP Matchmaking:
- SL 125 is optimal for multiplayer activity
- Leveling beyond SL 125 significantly reduces matchmaking
Rings – Mandatory Setup
- Havel’s Ring
- Ring of Favor and Protection
Ring Effects (Equip Load Scaling)
- Havel’s Ring increases maximum equip load by 50%
- Ring of Favor and Protection increases HP, stamina, and equip load by 20%
- These effects stack multiplicatively, resulting in roughly an 80% total increase to equip load
Warning: removing the Ring of Favor and Protection permanently destroys it.
Armor Setup – Maximum Defense with Fast Roll
- Giant Helm +5
- Giant Armor +5
- Giant Gauntlets +5
- Giant Leggings +5
Armor and Poise Mechanics
- Fully upgraded Giant armor has the highest defense values in the game
- Provides 91 poise, enough to poise through Great Fireball
- Some attacks will stagger regardless of poise
Mobility and Stamina Management
- With Havel’s Ring, Ring of Favor and Protection, and at least 83 Endurance, you remain under 25% equip load and can fast roll
- Fast rolling boosts your run speed and provides 13 i-frames compared to 11 for medium rolls, a significant PvP advantage
- Heavy armor applies stamina regeneration penalties in Dark Souls Remastered
- Chest armor reduces stamina regen by 2 per second
- Other armor pieces reduce stamina regen by 1 per second each
- These penalties are more than offset by the Grass Crest Shield’s +10 stamina regen per second
Weapon Loadout
- Lightning Zweihander +5
- Grass Crest Shield +15
- Ascended Pyromancy Flame +5
Weapon Notes and Damage Types
- Lightning weapons do not scale with stats and are extremely powerful in Dark Souls Remastered
- Very few enemies resist lightning damage
- Chaos weapons only have slightly higher attack rating at 8-10 soft Humanity
- Lightning provides more consistent damage with no reliance on Humanity
- Unlike in Dark Souls III, the Grass Crest Shield in Dark Souls Remastered is effective for blocking and parrying.
Why the Zweihander Works
- Widely considered the strongest weapon in Dark Souls Remastered
- Longest weapon in the fastest class capable of reliably staggering enemies
- Active poise in Dark Souls Remastered means ultra greatswords dominate
- 51 poise is required to resist one-handed attacks
- 76 poise is required to resist two-handed attacks
- Most players do not meet these thresholds
- Zweihander hits typically stun-lock opponents until stamina runs out
Pyromancy Overview
- Pyromancy does not scale with Intelligence or Faith
- Pyromancies are viable on any build
- Quelana only appears once you have at least a +10 Pyromancy Flame
- Ascend the Pyromancy Flame after upgrading it to +15, then upgrade it to +5
Recommended Pyromancies
- Fire Tempest – Best soul farming spell
- Black Flame – PvP pressure and guard breaking
Common PvP Combo
- Black Flame → Zweihander punish
- Black Flame deals physical damage and drains enormous stamina when blocked
- Extremely effective at opening opponents for follow-up attacks
Manners
- Perform the “Well, what is it?” gesture after defeating opponents
- Gesture is obtained from Oswald of Carim after killing the Bell Gargoyles
- If you receive hate mail, reply only with “The legend never dies!”
Tools and References
- OnlyAfro for popularizing the original Giant Dad build
- Mugenmonkey for their weapon AR calculator and build planner
- Fextralife Wiki — used for stats, testing data, and item placement verification
- Image credit for all screenshots: Dark Souls Fandom Wiki — Licensed under Creative Commons BY-NC-SA 3.0
🏆
Beat DARK SOULS™: REMASTERED's completion?
Flex it — let your friends know you pulled it off.
More DARK SOULS™: REMASTERED guides
- DARK SOULS: REMASTERED 100% Achievement Guide★ 5 (2k)53k views4.5k ♥95 minUpdated 12 Dec, 2020
- 100% Achievement Guide: Dark Souls - Remastered★ 5 (2k)53k views5.5k ♥183 minUpdated 8 May
- Прохождение Dark Souls★ 5 (1k)40k views2.6k ♥66 minRussianUpdated 16 Jan, 2022
- Dark Souls NPC Questlines in Order★ 5 (864)31k views2.2k ♥11 minUpdated 18 Sep, 2023
- Пошаговое получение 100% достижений в DARK SOULS™: REMASTERED★ 5 (1.3k)26k views3k ♥19 minRussianUpdated 26 Nov, 2023
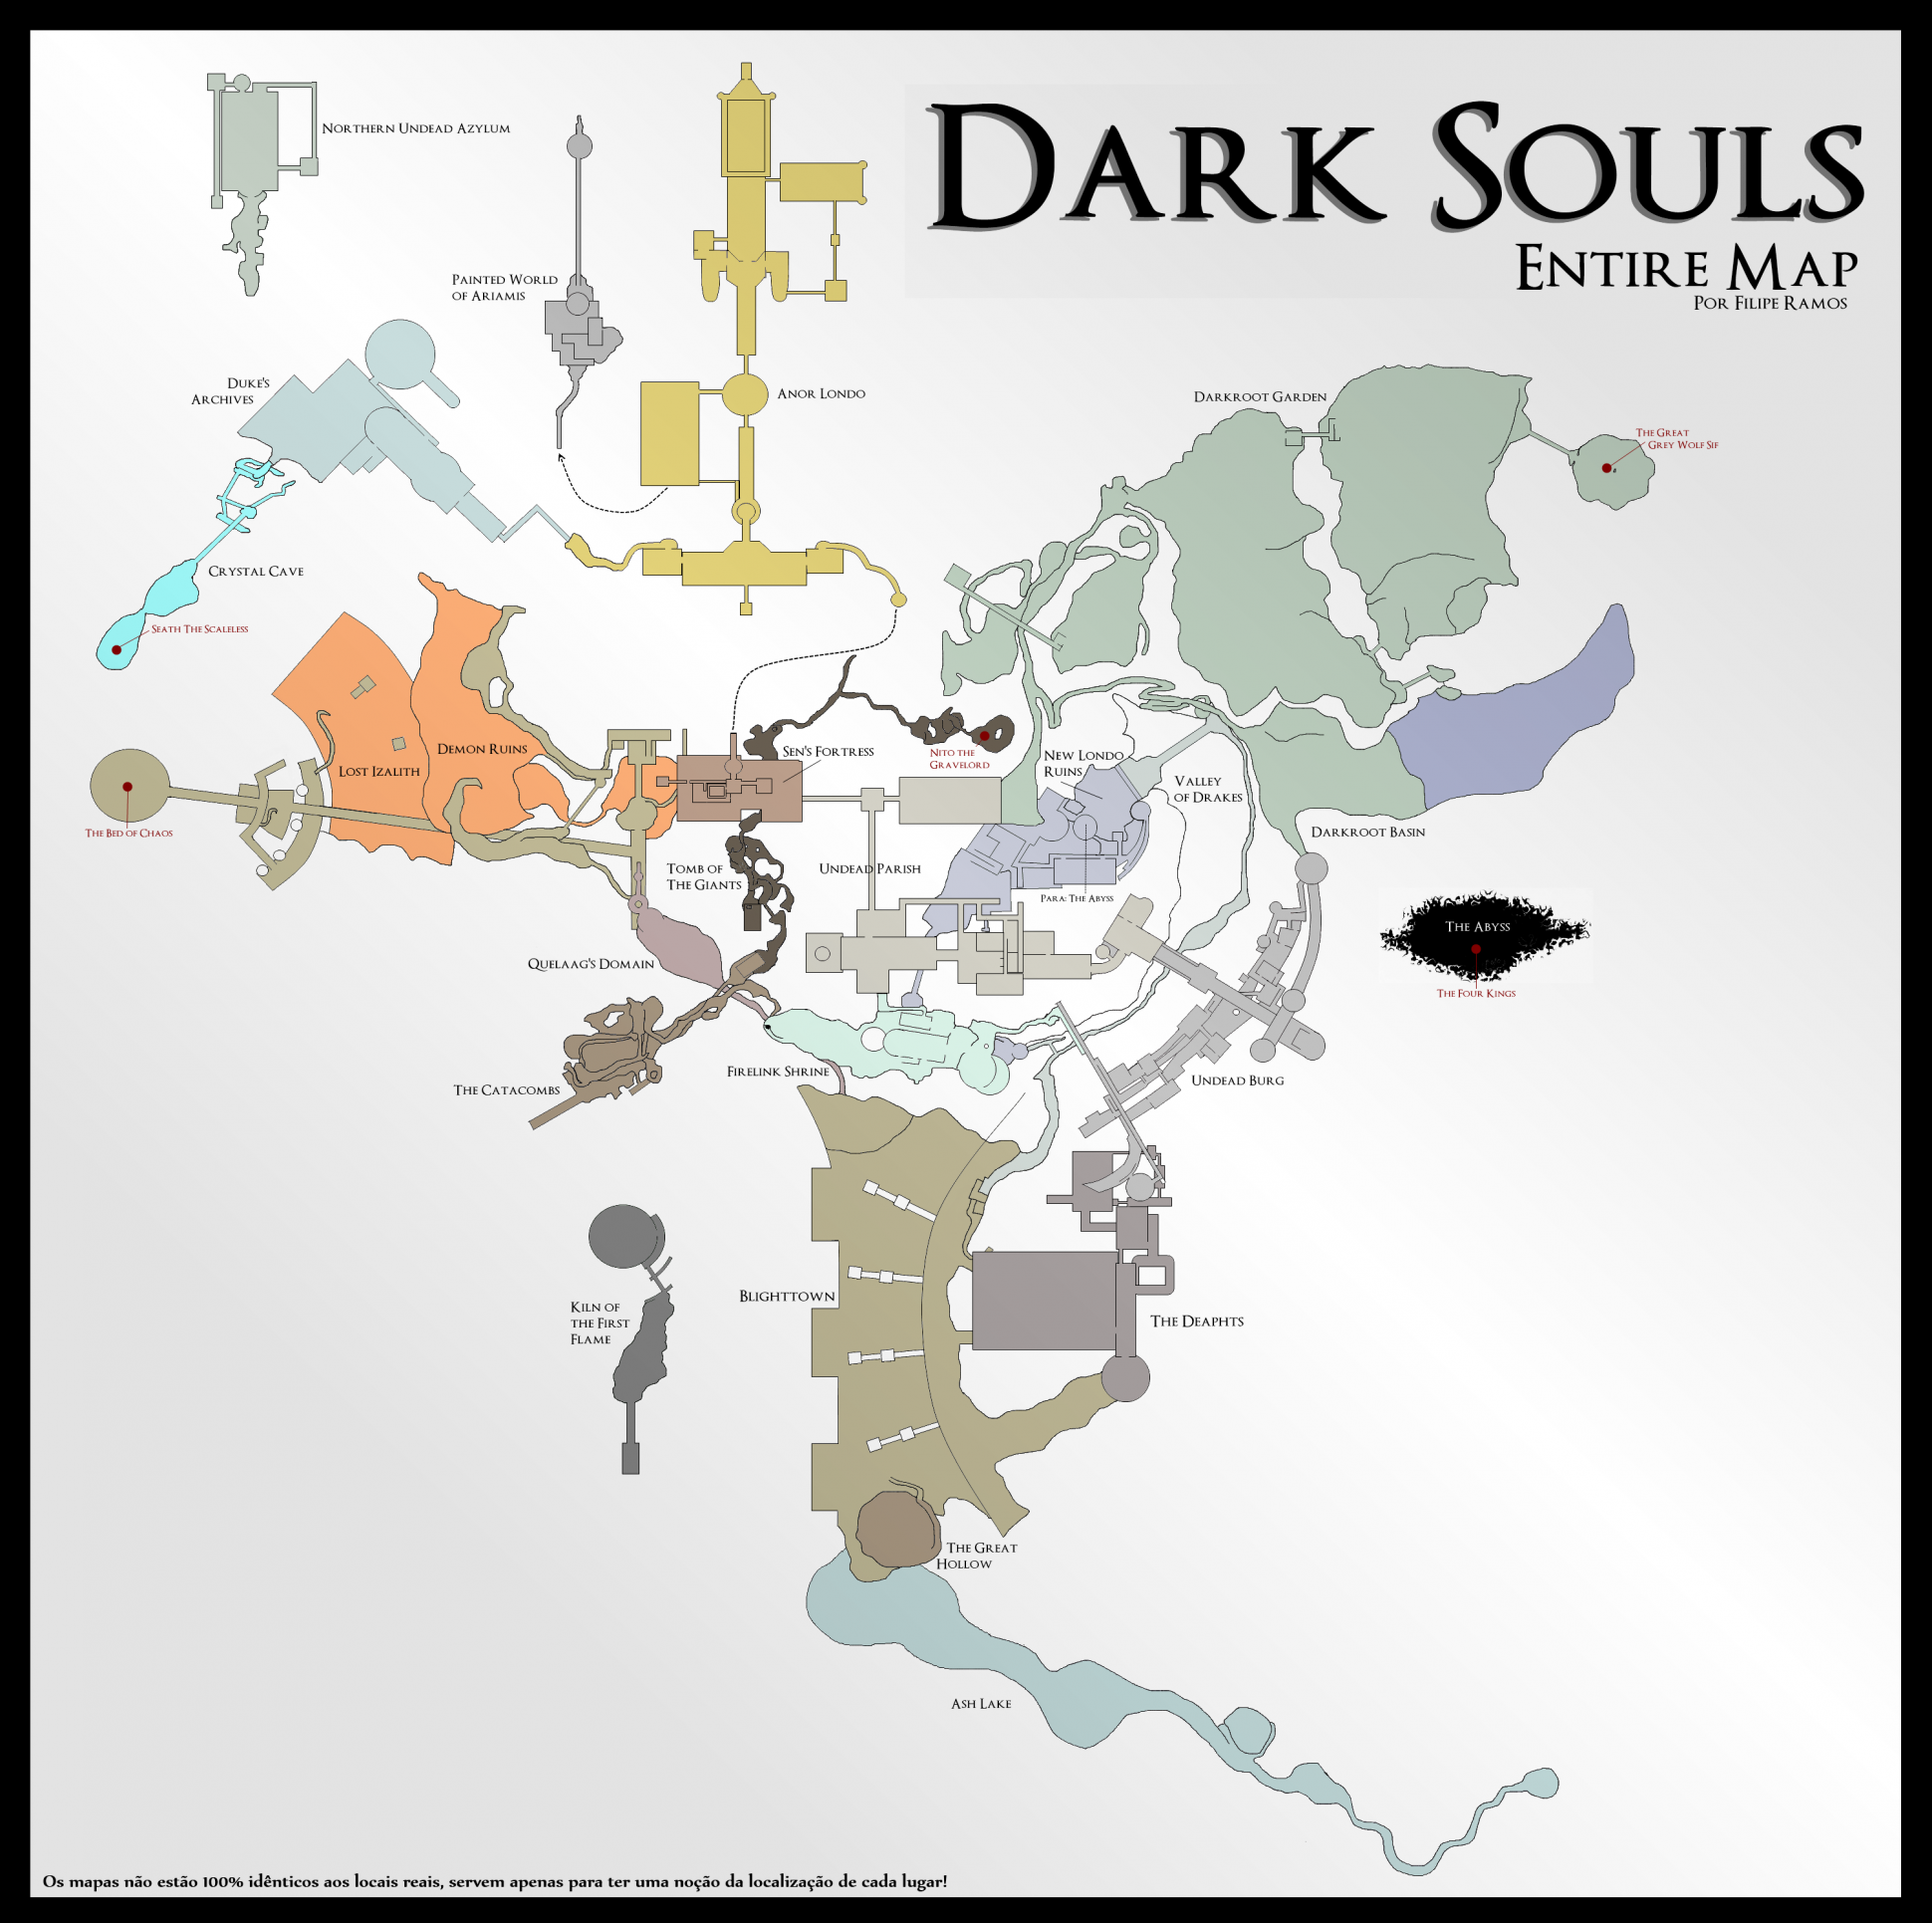
- DARK SOULS™: maps★ 5 (206)25k views539 ♥1 min




🔥 Popular guides
- Upgrading to PremiumTeam Fortress 2★ 5 (20k)1441k views11k ♥6 minUpdated May 11, 2022
- No More Room in Hell Official ManualNo More Room in Hell★ 5 (2.8k)569k views2.1k ♥29 minUpdated Apr 22, 2019
- NMRiH Community Hosting GuidesNo More Room in Hell★ 5 (526)351k views653 ♥1 minUpdated Aug 10, 2022
- Лучшие кооперативные игры SteamPAYDAY 2★ 5 (1.5k)315k views2.1k ♥56 minRussianUpdated Apr 27, 2025
- Desert Eagle Heat Treated | Blue GemCounter-Strike 2★ 5 (1.6k)292k views1.5k ♥2 minUpdated Jan 16
- Treasure Hunt Puzzle SolutionsTotal War: WARHAMMER II★ 5 (6.9k)281k views15k ♥3 minUpdated Aug 19, 2021






This guide was created by its original author on the Steam Community. Are you the author and want it removed? Request removal.