Deponia 2 walkthrough with missable achievements
Introduction
<RANT> So for example, when it turned out that my problem was an item i'd missed, i then had to go digging around in other parts of the guide to figure out where that item came from. Worse, there were occasionally two actions that needed to be performed, but the first was described in a completely separate part of the guide and not mentioned anywhere in the vicinity of the hurdle that blocked my path, leaving me totally baffled as to why the second action didn't work. Not to mention that in at least 3 instances (across several different guides, to be fair), i found information that was flat-out wrong. </RANT>
Therefore, i tried to organize this guide in such a way that you can search it for the obstacle you're trying to pass -- like acquiring the Tournament Hand, for example -- and find all the information you need collected right there without having to do very much additional rummaging around. Please note that this method does not always provide the fastest way through the game, if that's what you're looking for.
I've also made an effort to provide hints to tip you over the edge of figuring out a problem yourself before being handed the answer. However, extensive hints are difficult to work into a walkthrough without making it REALLY long and requiring readers to mouse over a LOT of spoiler text -- which is unsearchable, making the guide MUCH harder to use -- so perhaps a separate "cluethrough" is in order to do that up right. All rights reserved on that word i just made up.*
* (in 2017)
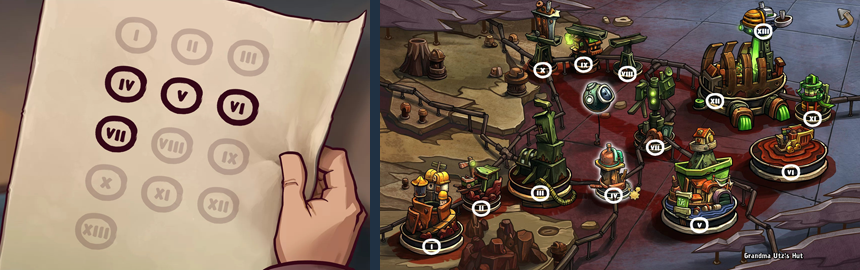
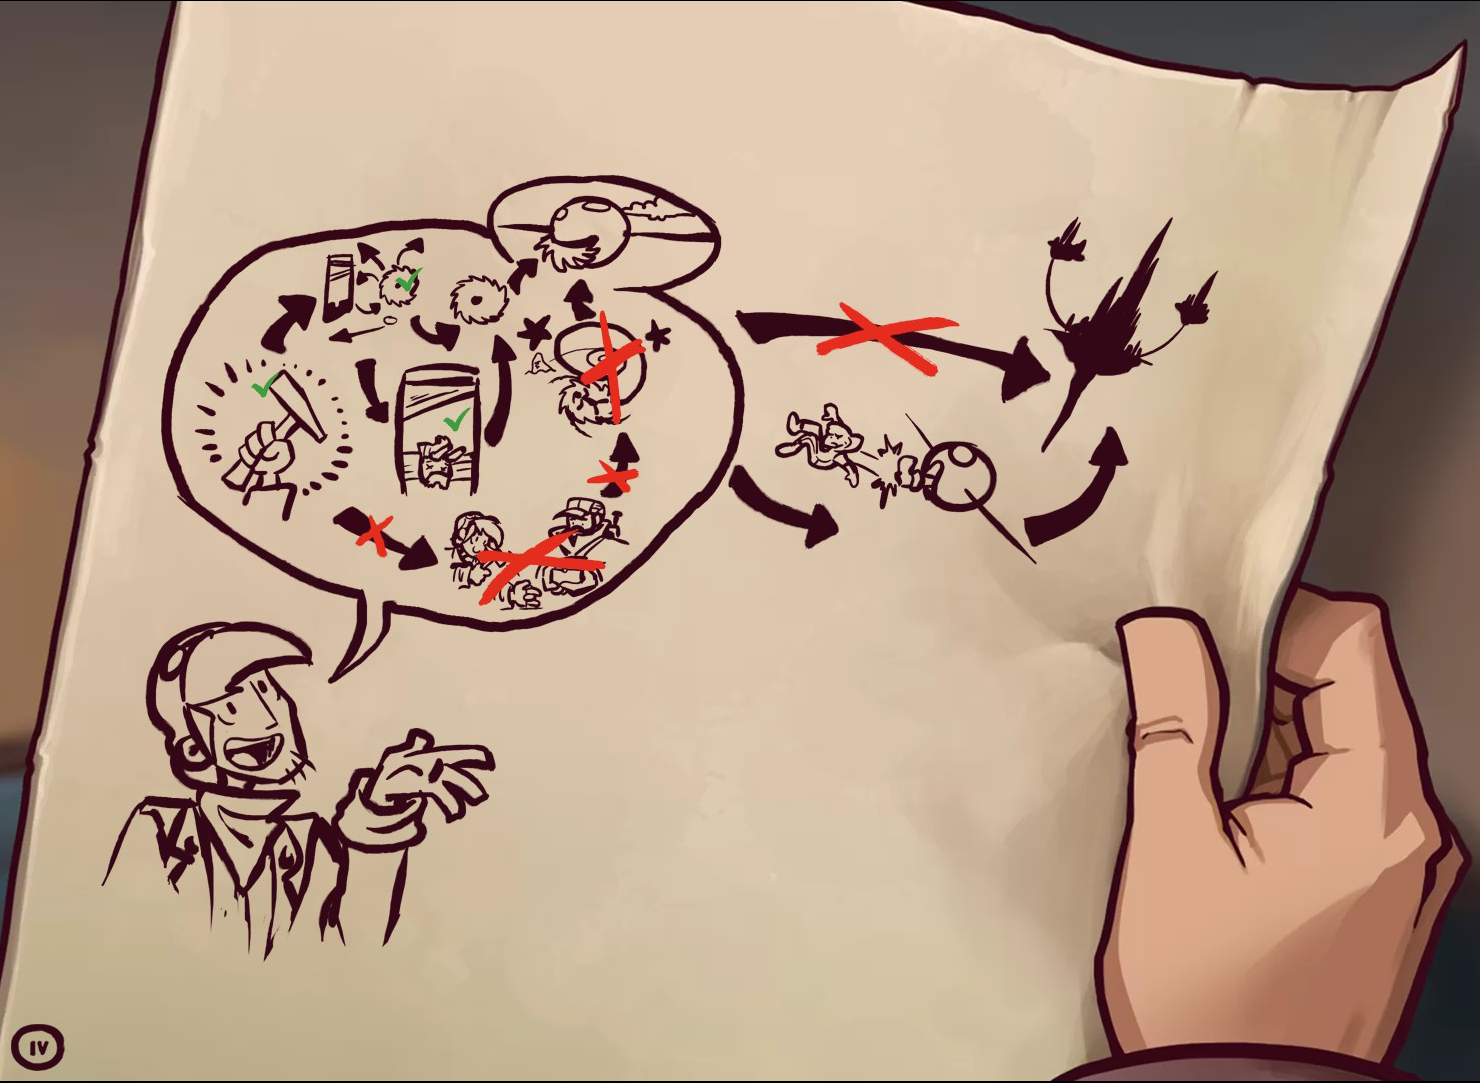
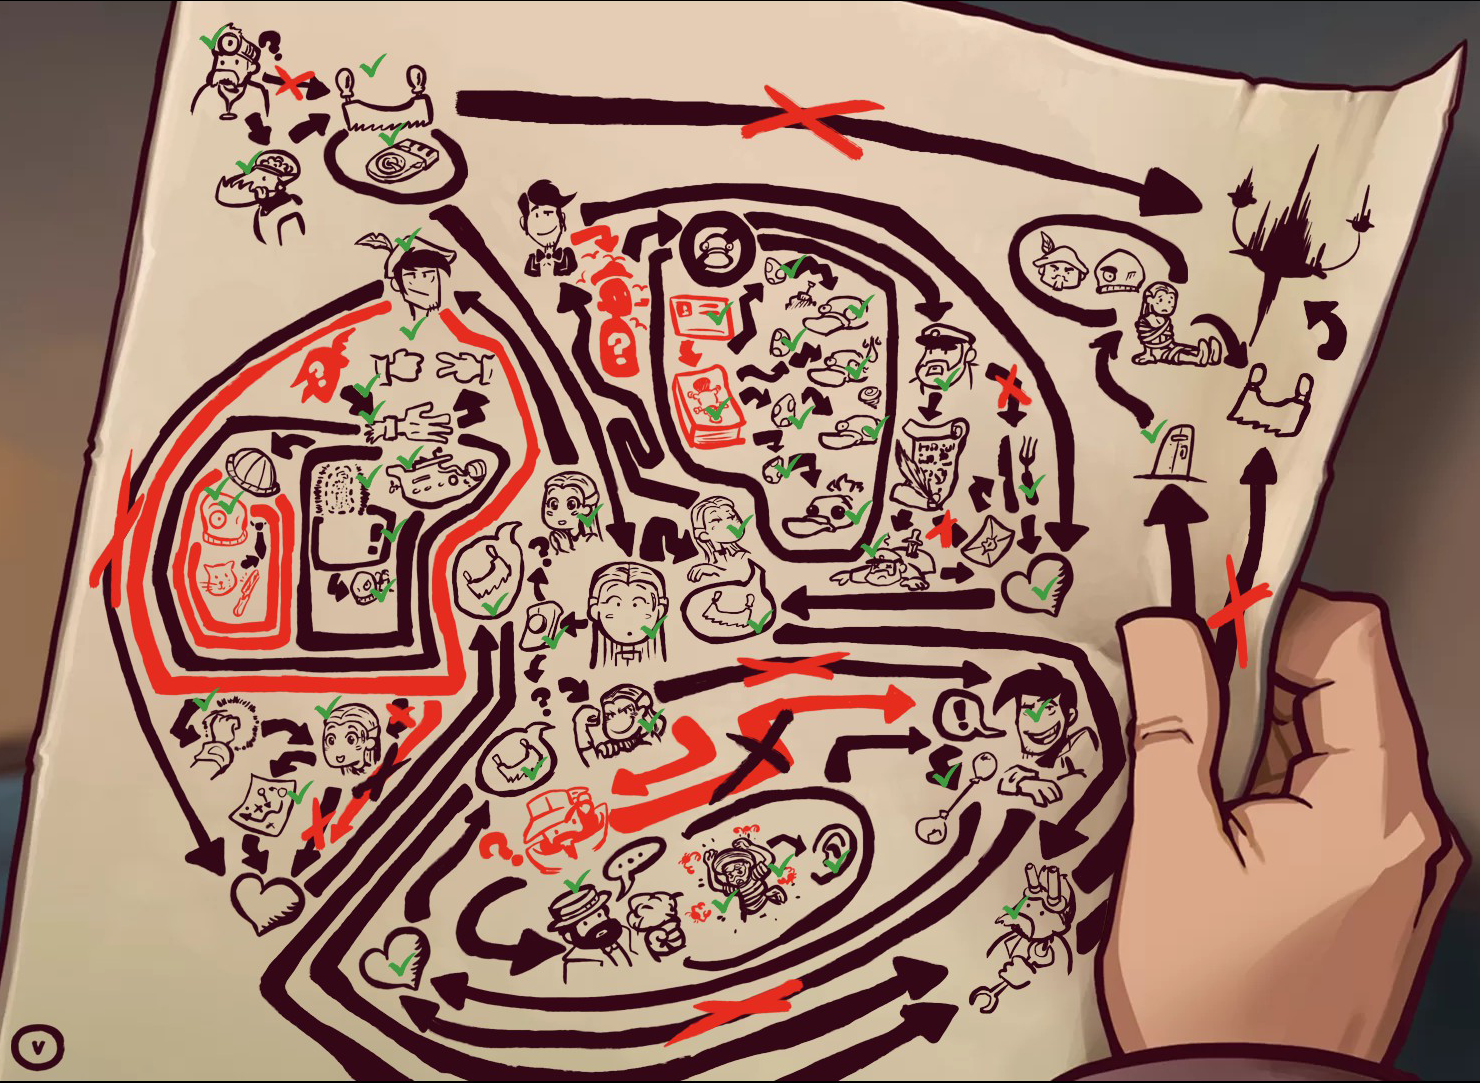
Your current chapter number is displayed in the lower left corner of Rufus' Plan.
text styling conventions
- In this walkthrough, quest items are always shown capitalized and in bold text.
When the name of an item is underlined, it indicates that that is the point at which it first enters your inventory. Note the style difference between these two sample instructions:
- pick up Rusty Chainsaw
- use Rusty Chainsaw on Rufus
- pick up Rusty Chainsaw
- Italicized paragraphs like the one directly above this one contain hints, notes, or other "extra" information.
- To make it easier for you to skip past the fluff to reach the next instruction, larger hint chunks and notes are often placed inside boxes:
Text contents of this box are for box-demonstrating purposes only and are not typical.hinterlude"Hinterlude," short for "hint interlude," is a word i made up circa 2021 for use in these guides. I mention this in case someday there's money and/or accolades in store for the inventors of super niche portmanteaux so nerdy they require two French words to classify them.
"CONTINUE" BUG! WARNING!!!
Do NOT rely on the "Continue" button for picking up where you left off after quitting the game! Always save your game, and then load the save file!
Sometimes after using the Continue button from the Main Menu, you may find yourself with no cursor, unable to click anything -- the only way that i know of to fix this is to quit the game, restart, and go back to an older save file. Other times, you may lose some progress (like everything you did between entering the location you were last in and quitting the game).

keyboard shortcuts
- Press "I" to open the Inventory. (that's a capital "i," in case you were wondering)
- Press the "Space" bar to show all hotspots and to pause a cutscene.
- Press "Esc" to go back to the main menu and to skip dialogue lines as well as cutscenes.
- With the keys "+" and "-" you can decrease and increase the sound volume.
- Press "M" to mute and unmute the game sound.
- "F5" takes you directly to the Load/Save menu.
- "F8" opens the Settings menu.
- "F9" saves a quicksave, overwriting any existing one.
- "F10" loads a quicksave, if one exists.
- By pressing "F11" you can take a screenshot.
general tips for surviving on your own
- Consult Rufus' Plan often!Any time you hear a "ding" and/or the sound of a pencil scratching on paper, and see a light bulb or an exclamation point appear on the upper right side of the screen, that means there's new information for you on the Plan; if you see a little green checkmark icon, that means you've completed one of the tasks on the Plan.
To view the Plan, you can either click on one of those icons, or open your inventory and click the light bulb in the upper left of that screen. You will find LOTS of good hints there. Mouse over any drawing without a green checkmark on it to see what you should be working on.
- Talk to everyone about everything!!!Sometimes a character will give Rufus information that unlocks the next segment of his Plan; other times you'll be given subtle hints on how to solve a problem. If you're stuck and have a lot of patience, talk to everyone again: you could discover that some character has a new hint for you, or you may see that a question you already asked is still on a dialogue menu, underscoring the importance of the information it leads to.
- Highlight hotspots!Hold down the spacebar on your keyboard or the scroll wheel button on your mouse to display a mark over each interactable object on the screen.
- Examine (right-click) everything!Do it to objects in the environment and to NPCs. Do it to items before you pick them up, and do it again after they're in your inventory (because Rufus' commentary sometimes differs depending on where an item is). Even if you don't get a helpful hint or a ray of inspiration, there's a pretty good chance you will at least get entertained.
- Pick up everything!You're guaranteed to need every item you encounter, and you're not going to run out of space in your inventory like some games.
- Experiment with inventory items!Try using them on each other and on objects in the environment; you just might stumble on a combination that makes you say "I never would have thought of that."
- Pay attention to what Rufus says!When something you try doesn't work, his reaction isn't always helpful, but sometimes it really is.
- Keep in mind you're in a cartoon universe.Logic and physics here are based more on misconceptions and comedy than reality. Answers may come to you more easily if you approach puzzles with your Tex Avery hat on.
- Try and try again...and again...and possibly again. ...Or not.One running source of frustration for me over the course of this trilogy was the fact that some actions must be repeated in order to get results, and the first attempt offered little to no feedback that would lead me to expect it to work if tried again (and sometimes again). So if you're stuck and you really prefer to do without assistance, you can sometimes get through just by clicking on everything a second or third time.
Though TBH if it comes down to this, you're probably better off just giving in and looking it up.

Leopard Mode
Maybe you've caught a fleeting glimpse of this "tip" as you loaded up a save game:

Here's what the manual has to say about that:
There is no Leopard Mode.
There never will be.
Especially not in Chaos on Deponia.
Don't even try clicking a certain scrapheap on Deponia three times during a cutscene.And don't be a moron, changing your resolution to 546/750, spin around ten times and drink a glass of warm goat's milk afterward.
That's stupid and wouldn't do any good, anyway.
And don't, don't ever click Rufus' Coat 45 times.That's absolutely not how you could watch Rufus wearing a leopard thong.
Just don't try that.
It's utter nonsense.
I set out to try the two more doable-sounding parts of that (clicking the scrapheap and the coat), but gave up very quickly because i didn't think it was gonna work, plus it was really boring. Besides, it's not like all that effort is necessary just to see Rufus in a leopard thong; all you gotta do is scroll down!
MISSABLE ACHIEVEMENTS
This installment of the trilogy has 3 missables that require multiple actions at different points in the game: Supercool, Animal Lover, and Pin-Up Goal (the latter 2 of which actually span chapters). These are all covered in detail in the sections that follow this one.missable achievement alertsEach alert is positioned at the "last chance" point for earning one or more missable achievements, and each contains spoiler-hidden instructions for earning it (or them).The alerts are placed at the "last chance" point (rather than "first opportunity") both to avoid spoiling achievements before you're ready for them to be spoiled, and also to help you figure out whether one of your save files is viable for an achievement you had to go back for.
There are 34 achievements total in the second installment of The Complete Journey, which you can identify on the global stats page by their blue icons. The achievements that you can't avoid earning are not mentioned in this walkthrough; i've only covered the ones that you must do something special in order to receive.
Here are the 24 that are known or believed to be missable, along with the official description of each, since sometimes that's the only clue you need to figure out how to get it:

Omnomnom! Nomnomnomnomnomnom!

Catch 'em all!
thru
4.7

No animals were harmed in the making of this game!
4.5, 7.2

An alternative ending to another game

Rake up another achievement!

Actually, that would have been Toni's job...

I see what you did there...

Collecting agent
thru
4.4

The Droggeljug search for the supersinger

No egg on your face

These foreign models are junk.

Hunt for the Red October

Prove your street cred

Is it Easter already?

I didn't do anything?!

Thank you, sir, may I have another?

I only read it for the articles
thru
7.5

Back to the future

Make a fool of yourself
4.8

I'll be back!

I thought you couldn't die here?

Survive the interview

Expert in platypus poetry
5.1b

Did you see that?
The "section" column indicates the portion(s) of this walkthrough in which the achievement is mentioned, so you can get an idea on what point in the timeline you should be focusing if you want to try for it without my help. For the marathon tasks (Supercool, Animal Lover, Pin-up Goal, Collecting Agent), i just tried to put down whatever seemed like the most helpful numbers. I didn't try very hard. Just FYI.
The "don't skip the minigame" achievements are:
All Mine, Egg Race, Flipper Out, Garden Work, What Women Want.
The following achievements are ones which i'm not convinced are missable, at least not in the "Complete Journey" version. I've included them in this guide anyway because i've seen claims that they are missable, and i'd rather be safe than sorry:

Force your luck

Training is for losers!

Was that our 15 minutes of fame?
🧩 Pin-Up Goal / Cheater (introduction)
On the Main Menu, you'll see a button marked "Bonus;" if you click that, you'll find a button marked "Puzzle." If you click that button, you'll see an image which is most likely to be an incomplete version of this jigsaw puzzle:
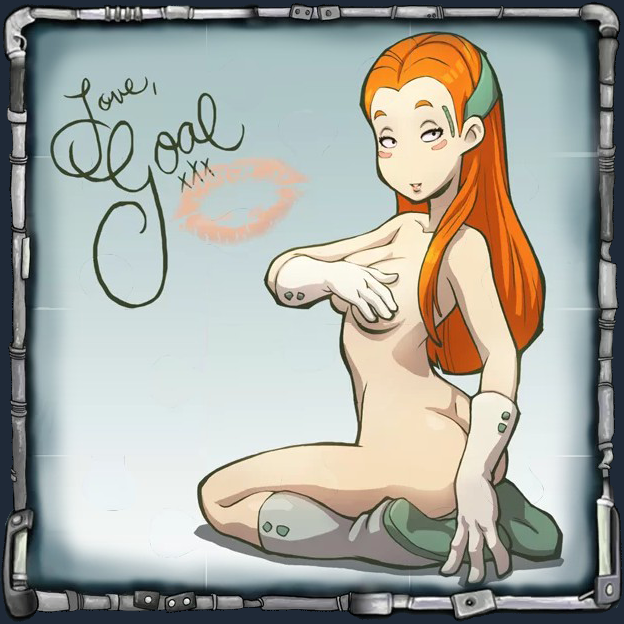
This Bonus Puzzle is connected to two achievements: Pin-Up Goal and Cheater. The central idea is that on your travels, you'll collect the pieces needed to complete this alluring portrait of Rufus' secondary obsession (after himself, of course).
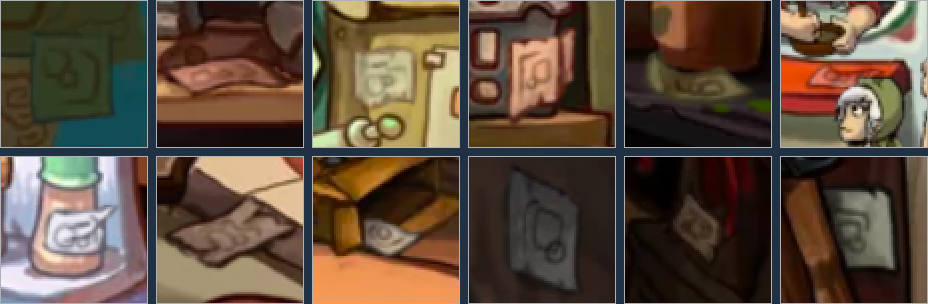
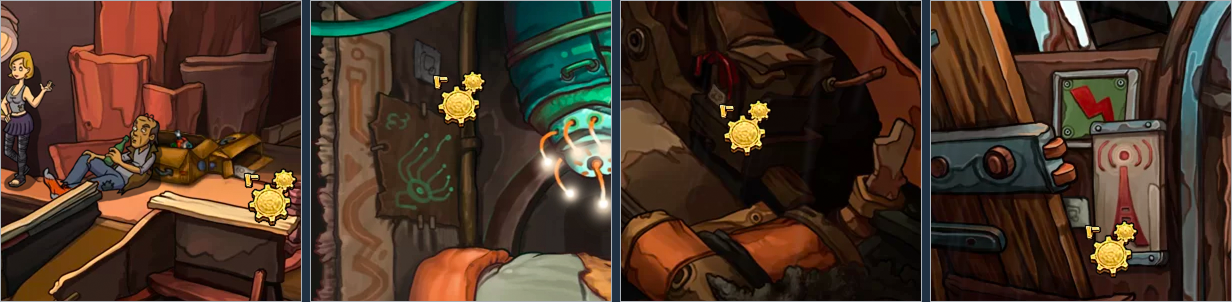
The twelve small, innocuous items you need to hunt down are scattered throughout Chapters V and VI, hidden in the scenery. Notes about the pieces:- they are NOT highlighted by pressing the spacebar
- they do NOT look like puzzle pieces in-game (they're more like rectangular scraps of paper)
- they do NOT appear in your inventory when you click them
The difference between Pin-Up Goal and Cheater lies in the way the pieces are collected. The two methods conflict with each other, so it's not possible to earn both achievements on a single playthrough. After completing one, you must start a new game to reset your Bonus Puzzle progress before beginning work on the other.
The two sections marked with a 🧩 below go into more detail about each achievement. Cover your eyes as you scroll down there if you're not ready to see screenshots of the puzzle piece locations, cuz i'm about to drop 'em.
By the way, if you don't see the Bonus button on the Main Menu, or if the button is there but clicking it doesn't reveal the Puzzle button, it's because you don't have an "installment 2" game in progress. You just need to get yourself into the game between Chapters IV and VII, then press the Esc key to return to the Main Menu, and voilà!
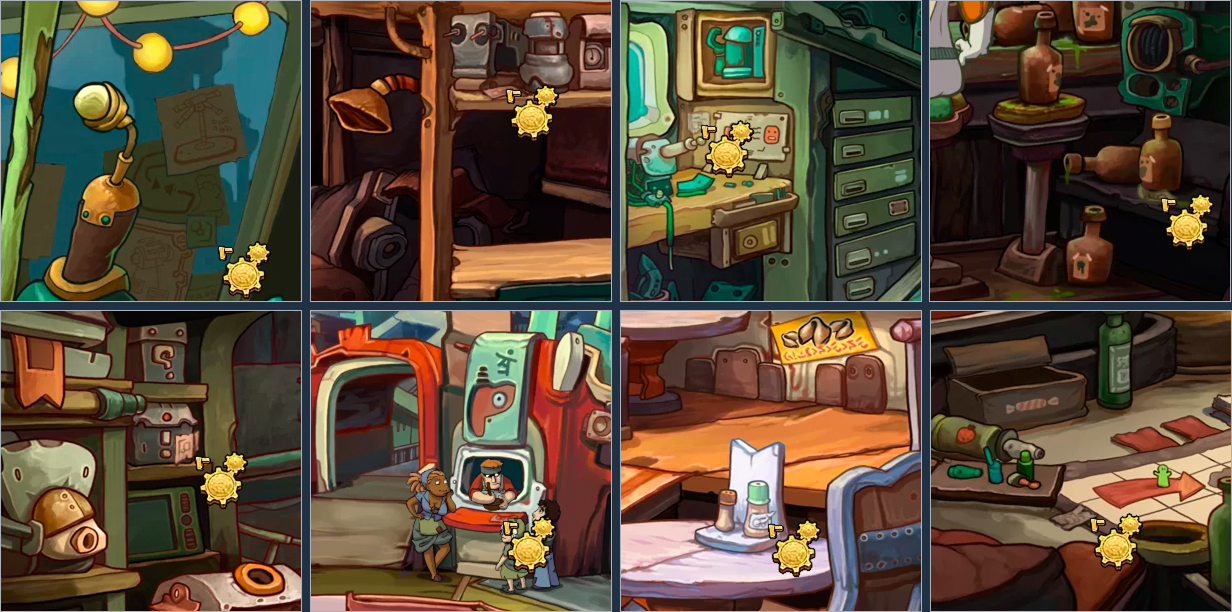
- Bozo's Cutter: stuck to window on right side (cannot be collected in Chapter VI)
- Doc's Replacement Parts Store: on shelf near Lamp
- Doc's Office: by square window under entrance
- Tavern: on shelf by bottle closest to bathroom
- Gadget Shop: on "!" box on left side (cannot be collected in Chapter VI)
- Marketplace: on orange counter between Bellevue and Dark Alley
- Old Town: condiment label on table*
- Rebel Hideout: by game pieces on lower left
* if you're having trouble accessing the piece in Old Town, there's a note titled "if Lady is your LAST Goal..." under section 4.8 that might help. Chapter VI
- Porta Fisco, Quay: box in trash where the Power Inverter was found
- Porta Fisco, Seer's Tent: on rug hanging by entrance
- Isla Watchit, 1st area: right side, near a thing that looks like an upside-down red "U"
- Isla Watchit, 2nd area: left side, near poster of Radio Tower
🧩 Pin-Up Goal
I'm describing Pin-Up Goal first because it more closely embodies the main objective of collecting the puzzle pieces. However, you should know that its requirements are very strict and very touchy, so if you've played any part of Chapter V at all, there's a chance you've already disqualified yourself from receiving it on this playthrough. In that case, you may want to start with the easier one: Cheater (described in the next section).
To earn this achievement, you must:- Begin your playthrough at or before Chapter IV.Even though there are no puzzle pieces in Chapter IV, it's still somehow necessary to this achievement.
- Collect 12 puzzle pieces.Eight of them are found in Chapter V, the rest in Chapter VI. Their exact locations are given above, at the end of the section titled "🧩 Pin-Up Goal / Cheater (introduction)."
If you want to see how many pieces you have so far, check your Bonus Puzzle screen (Main Menu > Bonus > Puzzle). The Puzzle is completed in random order, so unfortunately, you cannot use it to determine which specific pieces you're missing.
- Never click any piece more than once.Be careful not to double-click!
- Don't create "overlaps" with your save files.
If you load a save file that causes any puzzle piece to reappear, you're already doomed and need to start over.
So once you begin collecting pieces, don't engage in ANY time-traveling with your save files AT ALL. Don't go backwards to a time that precedes even one of your puzzle piece clicks. Don't go forwards to a more advanced file from an earlier playthrough to try to take a shortcut. Don't change Chapters in either direction. Just play through in a straight line and don't try any funny stuff.
The most obvious way to avoid overlap slip-ups is to always save your game immediately after collecting pieces. I recommend either saving a new file each time (rather than overwriting a previous one) or checking the Bonus Puzzle screen before saving (to make sure you haven't already failed). ...The first way is so much easier, do that one.
Another thing you might want to try is collecting all (or most of) the pieces in each chapter all at once, rather than clicking them one at a time as you encounter them. Two of the pieces in Chapter V are located in areas that require a little extra work to access, so if you're gonna try this "clumping" method and you're hoping to find them on your own without looking at my screenies, you may want to wait until you're almost done with all the quests before hunting the puzzle pieces down. Don't wait too long, though, as winning over your third Goal initiates the chapter finale and removes access to most locations. If you seem to be short a piece, note that one of them is revealed by nearing the end of the quest to win over Baby Goal.
If you're doing well in your pursuit of this achievement, you'll hear a musical sound each time you collect a piece. On the other hand...
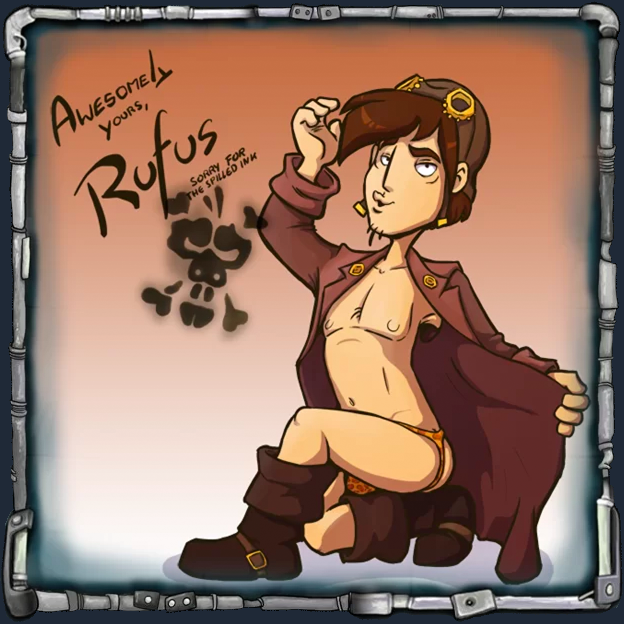
After failing Pin-Up Goal, consider putting the work you've done so far towards Cheater, which is described in the next section.
But if you want to have another go at Pin-Up Goal, here's what you need to do:- step 1: Start a new game to reset your Bonus Puzzle progress.Choose "New Game" from the Main Menu, and select Chapter IV on the chapter select world map.
- step 2, option 1: Play.This is the more labor-intensive of your two options, but my "sprint-through" speed guide can help you glide through it like a cloud in a dream!
https://steamcommunity.com/sharedfiles/filedetails/?id=885617589 - step 2, option 2: Load a save file.After starting a New Game as described above, use Esc to skip the dialogue at the beginning of the tutorial, then Esc again to return to the Main Menu.
Next, hit the "Load/Save" button and choose a file, making sure it represents a playthrough that began at or before Chapter IV. If you saved your game after making some progress on the achievement but before committing your fatal error, so much the better. If you don't have a viable file of your own, Commenter J-Bear suggests downloading "savegame41 (radio obtained)" from Daedalic's website [www.daedalicsupport.com]
Before continuing, be sure to check your Bonus Puzzle screen! If you see Rufus there, it's either because you didn't properly reset your Puzzle progress (step 1), or there's some issue with your save file. If you can't fix it by adjusting those factors, you'll need to abandon option 2 and go with option 1 (Play).
If you fail Pin-Up Goal and are NOT playing "The Complete Journey," you may need to refer to a guide specifically written for the standalone "Chaos on Deponia" about these achievements; apparently there's some kind of bug in that game that makes failure permanent or some crazy thing.
🧩 Cheater
Basically, Cheater requires you to break the primary rules of Pin-Up Goal. You still need to click 12 puzzle pieces, but you also need to intentionally create at least one file overlap, and should repeat-click at least one piece.
Suggested steps to earning this achievement:- Check your Bonus Puzzle screen (Main Menu > Bonus > Puzzle); if it displays a completed portrait of Goal, you need to reset your Bonus Puzzle progress:
- Start a New Game from the Main Menu.
- On the world map, choose any Chapter between IV and VII. I recommend Chapter IV if you plan to load a save file (because you only have to press "Esc" once to get past its opening dialogue), or Chapter VI if you plan to start from scratch.
- Start a New Game from the Main Menu.
- Load a save file from Chapter V or Chapter VI.
If this method doesn't work for you for whatever reason -- like because you don't have any save files, or you do but were unable to earn the achievement while using them -- you can also just start a New Game and play that. It might be easiest to start at Chapter VI, because it has less story to slog through before you're free to wander around.
Or you could download "savegame41 (radio obtained)" from Daedalic's website [www.daedalicsupport.com] as recommended by Commenter J-Bear.
- Position Rufus near an uncollected puzzle piece. The locations of the pieces are given above, in the section titled "🧩 Pin-Up Goal / Cheater (introduction)."
- Save your game.
- Click the puzzle piece.
- Load the file you saved in step 4.
- Click the same puzzle piece again.
- After this point, you just need to keep clicking pieces until you've reached 12 clicks total. You could keep reloading and tapping that one piece over and over, or you could walk around gathering several more pieces before reloading, or whatever. Some players like to position Rufus next to a pair of pieces that are close together -- like the ones in Doc's Workshop, Porta Fisco, or Isla Watchit -- and just keep walking between and clicking on those two (and then reloading, of course) until the achievement appears.
Supercool & Animal Lover
Each of these two achievements requires multiple actions in multiple locations; some are part of the storyline, some are not. The ones that are not (and are therefore missable) are marked within the body of this guide with "missable achievement alerts." You know, so you don't miss them.
To earn Supercool, you must:- Fetch the Stick for Clever-Byte 3 times (section 2.1):
This task entails first using Stick on Clever-Byte (which makes Rufus throw it), then clicking Stick as it lies on the ground (which makes Rufus fetch it). Now do both those steps two more times.
- Sing the Dumb Bum song for Spunky Goal (section 2.2):
To do this, you need to go through all of the following dialogue with Spunky Goal at the Tavern:
- "You have to come with me to see Doc."
- "You must come with me! Something went wrong with the surgery."
- "What do i have to do to make you come along?"
According to some accounts, it may also be necessary to use all of the pick-up lines under "Hey Baby..." when talking to all three Goals.
- "You have to come with me to see Doc."
- Recite a line of poetry* to Crane the Poet (section 4.8):
My personal experience implied this part is not missable, but that may not be the case (see next paragraph). After fetching the stick 3 times and singing the song -- as well as going through all of all three Goals' pick-up lines, because i'm just compulsive that way -- i got Supercool by choosing only the first line of those available when talking to Crane about poetry. It may be important to note, however, that when i recited the line & got the achievement, it's possible i didn't yet have "Platy-poo" on my poetry menu...
* Commenter Pengukeks reports that the "Platy-poo" poem not only doesn't trigger the achievement, it effectively prevents it by removing the ability to use any more poetry on Crane. Therefore, you should choose a different poem to recite, and hold off using "Platy-poo" until after you see the achievement pop up.
Other guides claim you must recite ALL of the poems on Crane's menu (and possibly all the ones on Seagull's menu). I don't put any stock in this theory, but present it anyway just to be thorough.
To earn Animal Lover, you must:- Kill the canary (section 1.1). This is part of the storyline & can't be missed.
If you're going back for Animal Lover and intend to start a new game rather than loading up an old save file to do it, you'll need to start that new game at Chapter IV (where the canarycide happens). Thank you to commenter DeltaStrata for pointing this out!
- Talk to Baby Goal about bugs (section 2.2):
To do this, you need to go through the following dialogue with Baby Goal at the Tavern:
- "Hey, Baby!"
- "What's a nice girl like you doing in a place like this?"
- "Hey, Baby!"
- Let the reanimated Zebrafish die (section 4.5).
Pretty much all you need to do here is walk around Floating Black Market with Zebrafish with Egg in your inventory; when the fish is on the verge of death, Rufus will ask "What's that twitching?" Then just go through any door and the Zebrafish will die.
- Make cat food (section 7.2). This is part of the storyline & can't be missed.
Collecting Agent (introduction)
To earn this achievement, you must accumulate 26 items in your inventory during Chapter V. Section 4.4 below provides a bit more information, including a list of all the items.
Sections 2.1 through 4.3 of this guide include "Collecting Agent notes" regarding actions you should or shouldn't complete if you hope to get this achievement. Additionally, each section begins with a list of the Collecting Agent items you'll gather while playing through that segment.
for more (better) help...Although i've put a lot of effort into making this guide Collecting-Agent-compatible, i think you'll find that the method i was obliged to use here is less than ideal. Therefore, i've also written a very terse walkthrough guide for experienced players who only want to earn Collecting Agent and a handful of other achievements. It's kind of more like a "sprint-through." All rights reserved on that word i made up.In pursuit of Collecting Agent, i highly recommend using that other guide instead, even if all you want is the list of items:
http://steamcommunity.com/sharedfiles/filedetails/?id=885617589
CHAPTER IV: GRANDMA UTZ'S HUT
0.0: Tutorial (missable achievement)
You must complete the tutorial without skipping it to earn Huzzah -- once more from the top.
The achievement isn't awarded until after Chapter IV has officially started (following two cutscenes, the Huzzah song, and a conversation between Doc & Grandma Utz).
1.1: terrorize Grandma Utz
- open red Toolbox
- grab Hammer (...Rufus throws it at John Thomas, the canary, for some reason)
- pull Hammer out of post (...Rufus drops it and it lands under striped Tablecloth)
- click Hammer again (...instead of picking that up, Rufus takes Tablecloth, knocking over lantern and setting table on fire)
The only hint i'm giving you in this section is that examining Tablecloth in your inventory will give you an idea what needs to be done next...
- open Bathroom Door to reveal John Thomas, who is being intermittently electrocuted
- click Box in which canary is lodged (...he falls head-first into toilet)
- take Power Inverter out of Toolbox
- use Power Inverter on Box in Bathroom
- pull Flush Handle hanging from chain in Bathroom (...John Thomas gets sucked up into tank over toilet ...cuz the Inverter made the flush go backwards, get it?)
- press Flush Button on sink (...the dazed canary drains into Sink along with some brown water)
- use Tablecloth on Sink to wet it (...it gets stuck)
- push Button next to Sink to start garbage disposal. If you don't see Button, Rufus may be standing in front of it.
Luckily they don't make us look at the implied mangled corpse of the canary, nor the tears of abject grief shed by Grandma Utz over his horrific torture and death. Hopefully she won't even notice anything is wrong before Rufus knocks her entire house into the sea at the end of the next scene.
- take Soaked Tablecloth from disposal and use it on Fire -- Rufus FINALLY picks up the *#@$^%*#@$&% Hammer! (...Sadly, he does NOT bash his own face in with it)
1.2: destroy Goal's Escape Pod
Rufus is tied to a giant saw blade, telling Doc about his new escape plan, noticeably NOT using the Hammer that he murdered an elderly woman's pet canary to acquire.
You can't open the inventory menu here nor aboard the escape pod, and if you want to look at Rufus' Plan, you can only do so by quickly clicking the little light bulb icons that sometimes appear on the right side of the screen. Just FYI.
- click green Bellows near Rufus' foot -- Doc is knocked unconscious by the ricocheting cork.
Don't worry about Rufus saying you "have to hurry" if you're poking around looking at stuff after this step. There's no rush!
- click Panhandle near Rufus' foot to knock Knife into Rufus' hand and onto your cursor
- use Knife on Fireworks above Rufus' head -- black powder falls out of Fireworks down into pan, and Knife disappears
- click Panhandle again to flip black powder into Bellows
- click Bellows to puff black powder into Bunsen Burner.
The gas tank explodes, knocking Doc out of the way of the guillotine and starting a cutscene that ends aboard the escape pod.Pressing Eject-button aboard the escape pod prevents you from earning Blow Job, which requires you to blow dust off of Badge (by clicking it) 5 times.
- click Eject-button (with any diagram showing on Badge, doesn't matter)
CHAPTER V: FLOATING BLACK MARKET
MAP
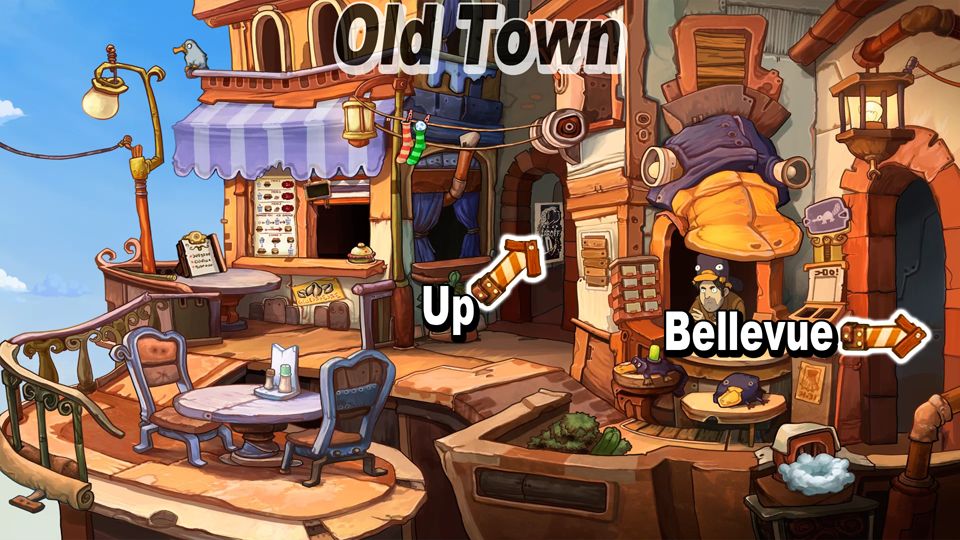
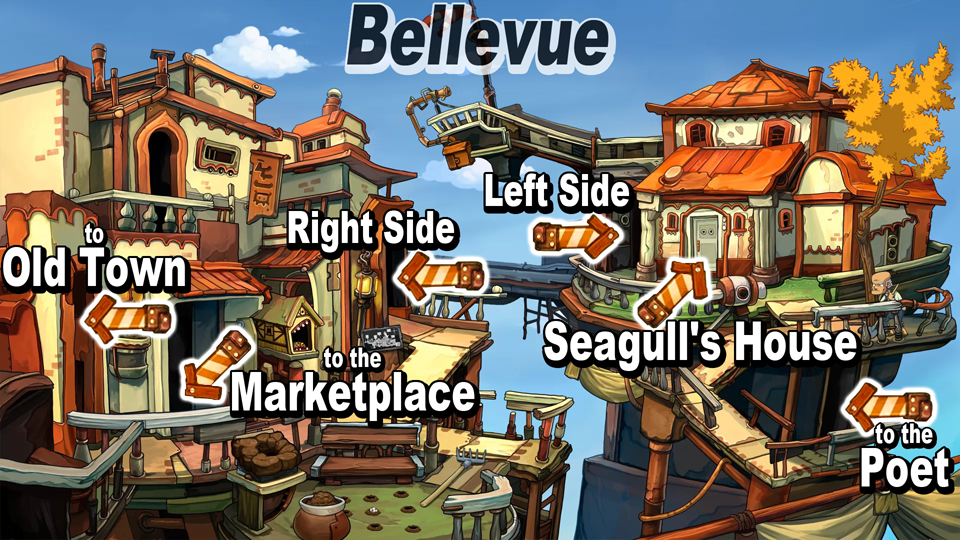
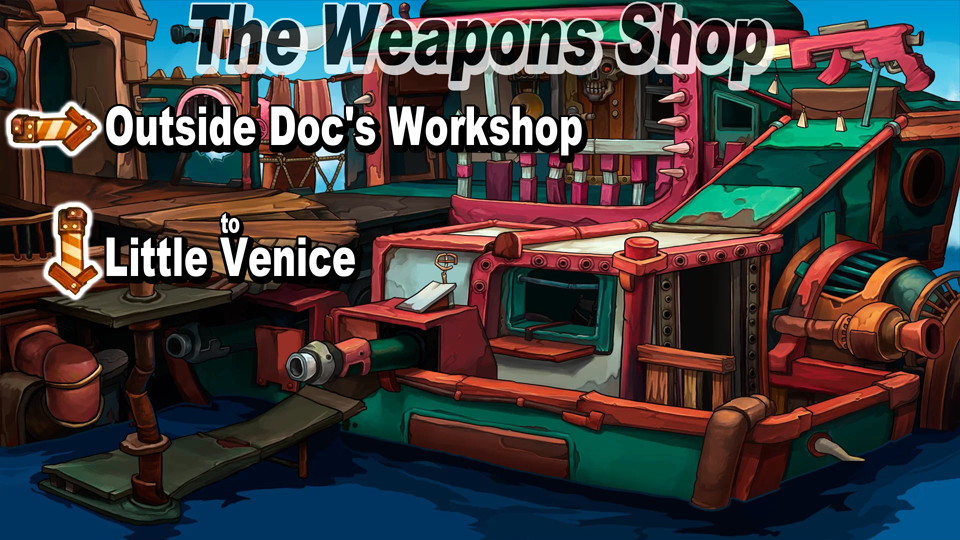
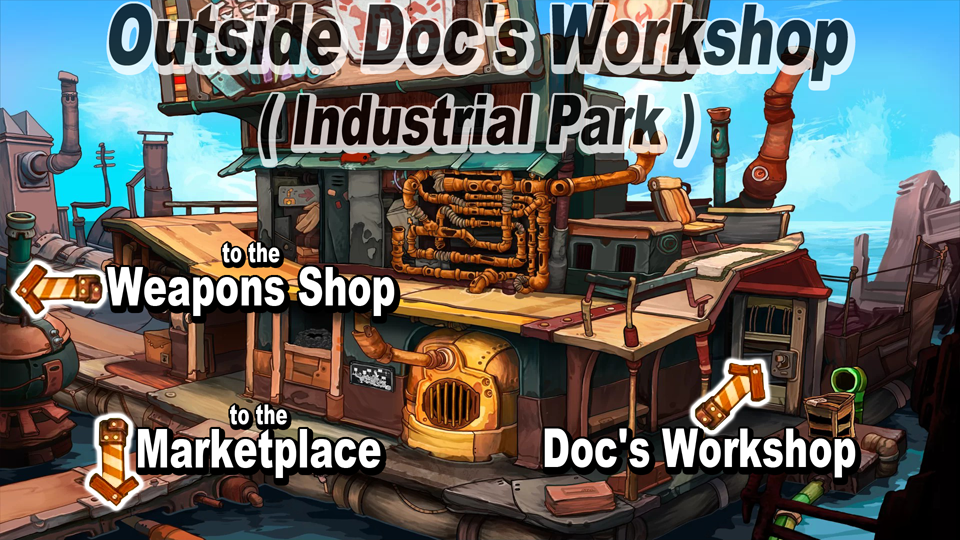
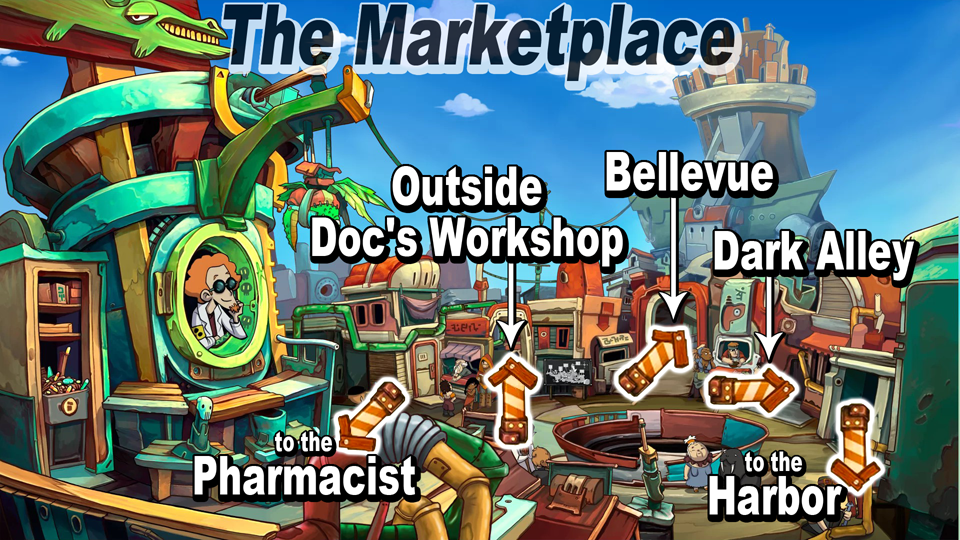
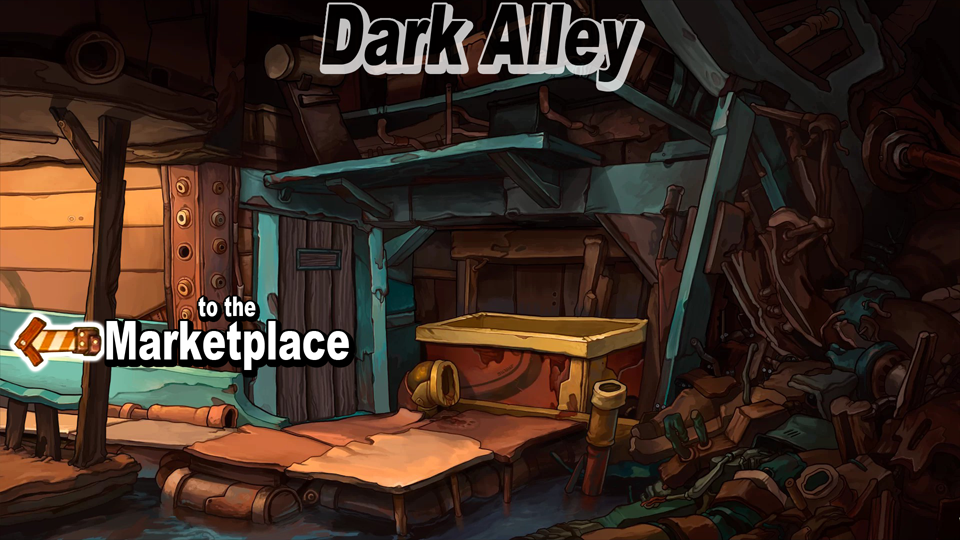
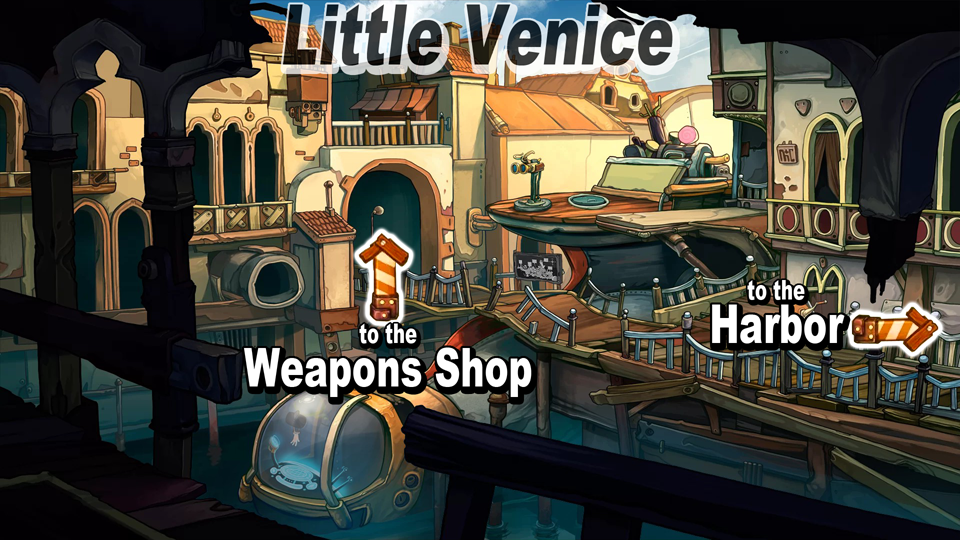
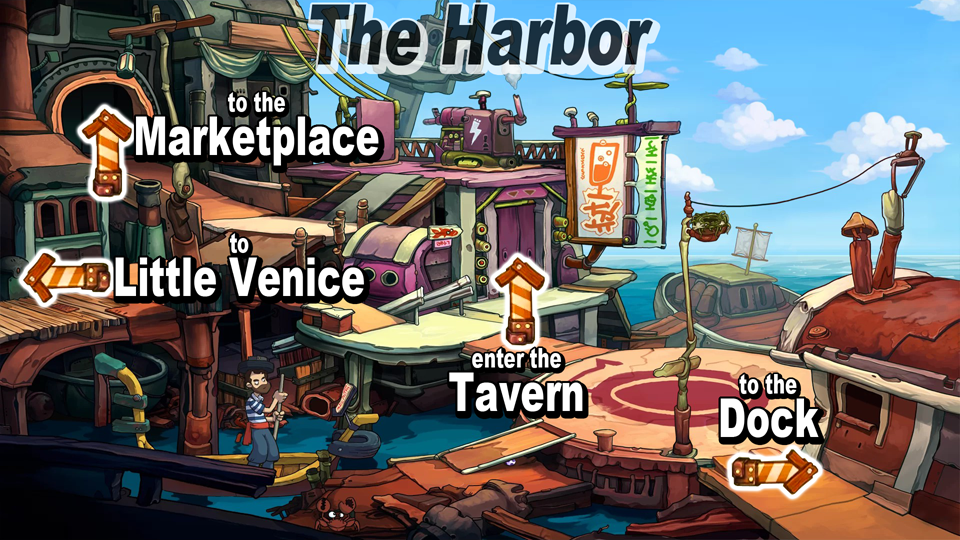
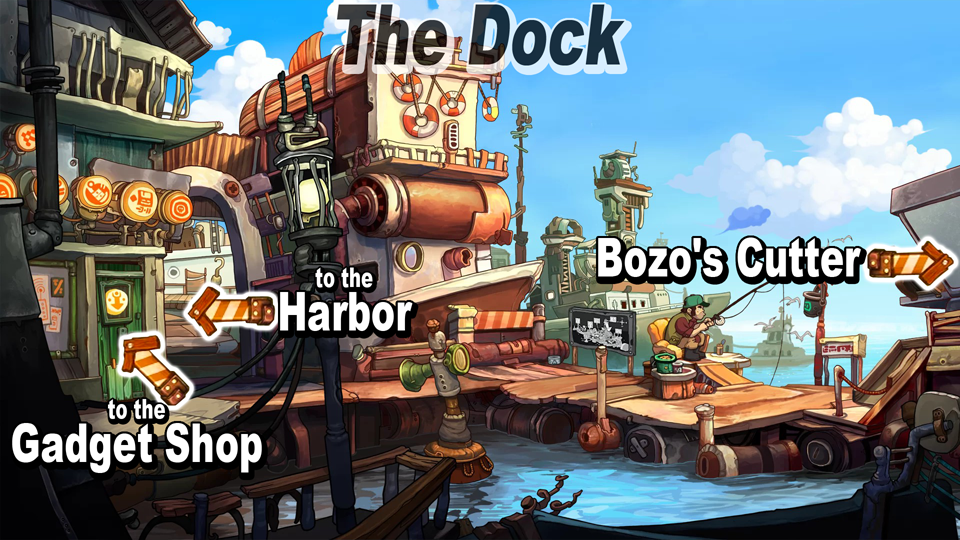
When you arrive at The Dock from The Harbor or the Town Map, it looks like there's no entrance to Bozo's Cutter on the right side... you need to walk over to where the Fisherman is, and the screen will scroll so that you're able to see the door.
Inside the Cutter, the exit is mislabeled "To the Harbor" -- it actually leads right back to The Dock as you would expect.
Each of the first three rows of the above table contains 1 blank cell by design. FYI.
Wondering why some of the arrows on the maps point in different directions than they do in-game? No? Then skip this paragraph. Making all these maps line up the way you might expect them to would have required flipping some of them sideways or backwards (which i didn't do), and stacking others up (which i couldn't do). In an attempt to make things a bit more clear, i rotated a few of the orange door arrows so that they point towards the maps to which they lead.
- Outside Doc's Workshop (Industrial Park)
- Bellevue
- The Marketplace
- Little Venice
- The Dock

- the hatch atop the Submersible in Little Venice will lead to Donna's hideout (section 3.2)
- the wood door in Dark Alley will lead to the Rebel Hideout (section 3.4)
- the small tan door next to the Pharmacist in The Marketplace will lead to the Platypus Bataka arena (section 5.2)
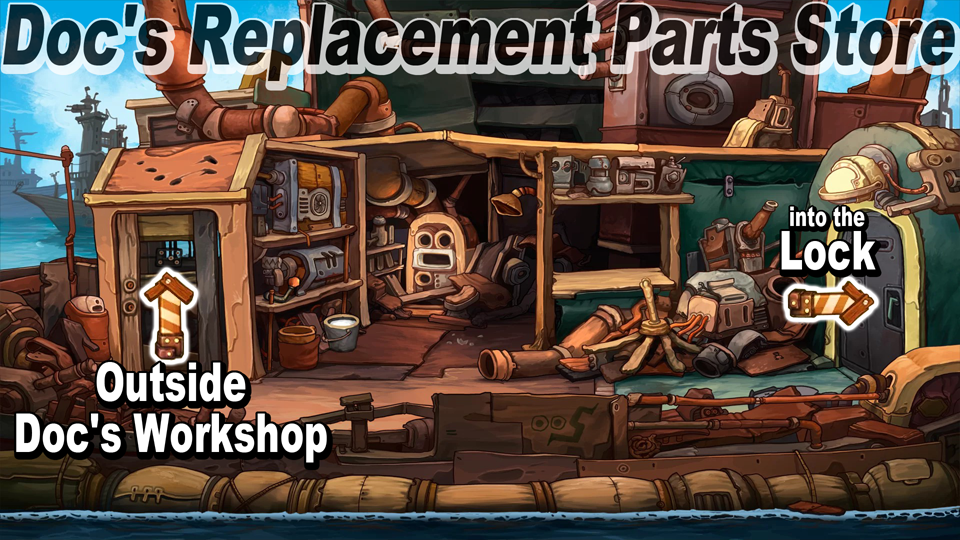
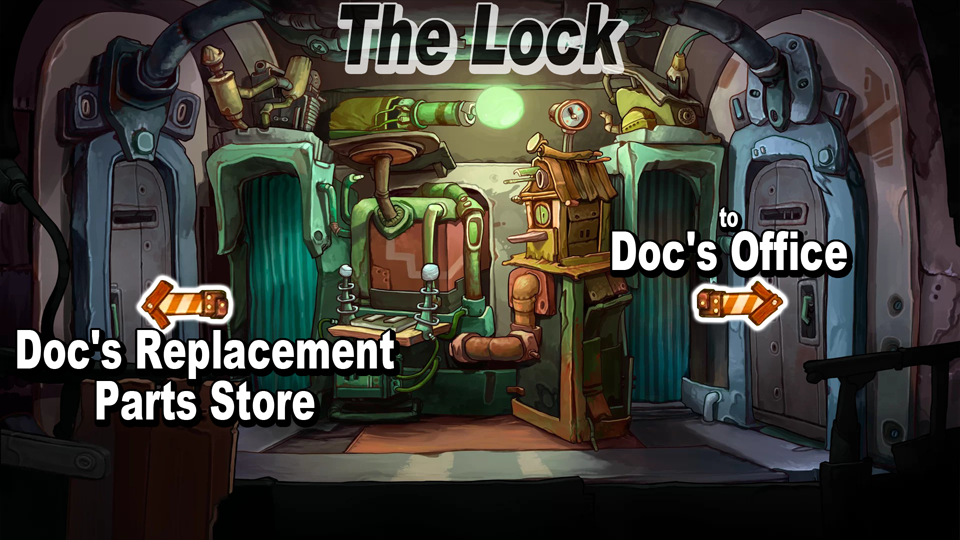
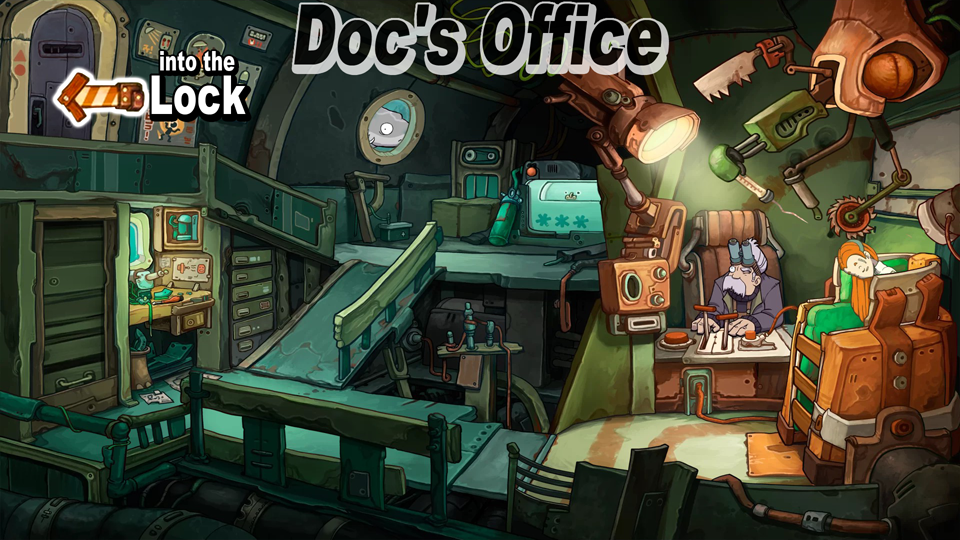
2.1: find Doc's workshop
- Stick, Electrical Tape / Insulated and Highly Charged Stick
- Cartridges, Remote
After destroying Goal's escape pod and falling from the sky, Rufus finds himself aboard Bozo's Cutter.
- exit via door marked "To the harbor," which takes you to an area called "The Dock" (of course).
After the conversation with Fisherman, you'll be looking at the Town Map. You only have one choice here, so...
- click "Industrial Park," which takes you to the area called "Outside Doc's Workshop" (of course)
- go through door marked "???" on right side to enter Doc's Workshop.
Doc's Workshop consists of three rooms, the first of which -- the one you're now standing in -- is called "Doc's Replacement Parts Store."
- bypass Clever-Byte:
- pick up Stick, then use it on Clever-Byte -- Rufus throws it, but the dog won't chase it
- click Stick to have Rufus fetch it -- this makes Clever-Byte laugh, and Lamp (roughly center screen) flickers onmissable achievement alert
- break Lamp with Stick -- Stick falls to floor, buzzing with an electrical charge that prevents Rufus from picking it up
- grab Electrical Tape off shelf
- use Electrical Tape on Stick to create Insulated and Highly Charged Stick
- use Insulated and Highly Charged Stick on Clever-Byte -- Rufus shocks himself with it, making the dog laugh so hard its brain explodes
- pick up Stick, then use it on Clever-Byte -- Rufus throws it, but the dog won't chase it
- enter door behind Clever-Byte to reach an area called "The Lock"
- use door on right side of Lock to enter Doc's Office.
An automatic conversation with Doc starts as soon as you enter his Office. From it, you learn:
- Doc wants Rufus to bring him a bunch of empty brain implant Cartridges (good ones);
- the Cartridges can be found at the Gadget Shop, which is "right by the Harbor, outside the city gate;" and
- "Bozo said something about a tavern..."
- Doc wants Rufus to bring him a bunch of empty brain implant Cartridges (good ones);
- go all the way back Outside Doc's Workshop for a brief scene with some masked guys (Liebold and Garlef) talking about the Organon
- go to The Dock.
To get to The Dock from Outside Doc's Workshop, you can either use the Town Map (that black and white billboard thing that brought you here in step 2), or you can take the scenic route to start learning your way around:
- use lower left exit to go to Marketplace
- use archway on the far right of Marketplace to enter Harbor
- use the exit on lower right side of Harbor to enter The Dock
When you arrive, Wink & Nod beat up Rufus (yay) in a cutscene, during which we learn that they believe Rufus has the ascension codes, and that they report to someone named Donna. - use lower left exit to go to Marketplace
- enter Gilligan's Gadget Shop (green door on far left side of The Dock) and talk to Shop-O-Mat. Pick any of the dialogue choices you like as they all end up the same way.
Be sure to talk to Doc again after this. One thing he says is potentially very helpful but can't be repeated, so i jotted it down for you:
"Nice office" > "What's that funny apparatus in the lock next door?"
"Don't you mess with that, kid! It is part of an experiment designed to revive dead brain tissue by means of well-aimed electrical impulses. But there are a few obnoxious side effects that so far I haven't been able to remedy. ...The electrical field is so strong that space will fold around the generator. And the resulting creases are really hard to iron out."
2.2: find the Tavern
- Remote including Cartridges
- Peanut Bowl
- Bathroom Key
- #1: Remote including Cartridges
- go to Harbor and click purple door (roughly center screen) to enter Tavern
- click the arrow marked "Down" to go to the lower level
- talk to Goal. Choose any facial expression and opening line you like as they all end up the same way.
- combine Cartridges and Remote (section 2.1) to create Remote including Cartridges.
The Remote including Cartridges is used to cause Goal to switch between her three personalities: Baby, Lady, and Spunky. To use it, click it in your inventory, then click on Goal; this makes two cartridges appear over her head, each leading to one of her two other selves.
The first time you use the Remote on Goal, both cartridges are marked with a "?". The green cartridge on the left leads to Spunky Goal, the blue one on the right leads to Baby Goal. The Goal you encountered before using the Remote was Lady, whose cartridge is red.
- talk to everybody in Tavern about everything they have to say.
Tavern conversation notesThe characters can be chatted up in any order, but because some conversations unlock others, i've listed them below in the most efficient order.
- Lady Goal -- the following line leads to receipt of Peanut Bowl:
- "You have to come with me to see Doc"
- Baby Goal -- all three of the following lines are necessary before you can get Bathroom Key from Garlef:
- "You have to come with me to see Doc"
- "Can't you remember anything?"
- "Janosch, Janosch. What's up with that Janosch?"
- Spunky Goal -- the following line unlocks a crucial conversation with Bozo:
- "You have to come with me to see Doc"
- Gulliver, the bartender -- his conversation doesn't unlock anything, but he does say some helpful things pertaining to all 3 Goals that aren't added to Rufus' Plan and can't be repeated:
By the way, each Goal reacts differently to some of the repeatable parts of your conversation with Gulliver. It's not necessary to switch her around and talk to him over and over, but it is sort of entertaining.
- Rufus: "I, um, need to use the bathroom."
Gulliver: "Then you should sign this waiver first."
Rufus: "Who would sign this nonsense?"
Gulliver: "Well.. the owner of the drugstore, for one."- Rufus: "It's pretty dark in here."
Gulliver: "If you think this is dark, just wait until the generator breaks down again."
Rufus: "Does that happen often?"
Gulliver: "Unfortunately, yeah. It's the salty air. Almost the same effect as sugar in the tank."- Rufus: "Can't the jukebox play a different song for a change?"
Gulliver: "My favorite is the 'Mating Song of the Junk Crabs.' But only when the door's closed. I have enough complaints about crab bites as it is."- Bozo -- he has dialogue pertaining to all 3 Goals, but in particular you must deliver the following lines to proceed in Spunky Goal's quest:
Bozo keeps saying the Weapons Shop is in Little Venice, but if we're going by the labels on the world's various doorways, "Weapons Shop" and "Little Venice" are two separate areas. See section titled "MAP" above if you need help sorting this out.
- "What were you going to say earlier? Something about a very special 'boarding maneuver?'" (after the first time you select this, it becomes "Let's talk about women again")
- "I do believe Spunky Goal likes me."
- "Tell me more about your Bambina."
- WARNING! This next line makes Bozo leave Tavern, so if you want to hear all his hints about winning over the Goals, save it for last:
"I think you should pay a visit to your Bambina."- Garlef, the guy sitting upstairs -- the following lines lead to receipt of Bathroom Key:
Garlef also has at least one bit of dialogue that's helpful but isn't added to the Plan and can't be repeated:
- "You're part of a resistance movement, or so i've heard?""
- "May I join you?"
- "Please, let me join you! I want to impress a woman!"
- Rufus: "You're a professional Rock-Paper-Scissors player?"
Garlef: "Yes. ... Scissors is my forte. I've been training it for years, and I can do it in my sleep."- Nod, the guy in the ski mask -- all the following lines are required for Baby Goal's quest:
- "I think an apology would be in order."
- "Unorganized Crime...what is that, exactly?"
- "May I join you?"
- (pick any of the first 4 options on the next menu, the ones in which Rufus is describing what he has to offer; this adds the next option):
- "How can I prove to you that I'm reckless enough?"
3.0: BABY GOAL QUEST
The following elements of Rufus' Plan* are covered in sections 3.1 through 3.4 of this walkthrough:
- Get an insight
- Obtain the Golden Dragon of Invisibility
- Sneak past Wink
- Get on board of the submarine
- Shave the ♥♥♥♥♥ (Shave Kitty)
- Survive the job interview
- Become a member of the Organized Crime
- Get inside the cockpit
- Get an official tournament hand
- Beat Garlef in rock-paper-scissors
- Become a member of the resistance
- Follow Goal to the Rebel Hideout
- Use the secret knock
- Trump Janosch's battle plan
- Impress Baby Goal by becoming a rebel
- Convince second Goal of another surgery
* If you don't know what i mean by "Rufus' Plan," please see the section near the beginning of this guide titled "general tips for surviving on your own."
If you didn't talk to those people and don't know those things, go to section 2.2.
Perhaps you noticed that there's a Tournament Hand hanging inside the Submersible in Little Venice; i recommend going there and clicking around for clues on how to get at it. When you try to open hatch, Wink says something very helpful: "The way you stomp around, I would notice you even if you were hidden using The Golden Dragon of Invisibility from Gilligan's Gadget Shop." And observe the Periscope as it blinks at Rufus, noting that there's only one eye (his left) (...i mean "his left eye," not "his eye left").
3.1: loot the Gadget Shop
- Indestructable Sunglasses of Eternal Darkness
- Shred of Toilet Paper
- Cucumber of Revelation
- The Golden Dragon of Invisibility
- Left Frame, Sunglasses Lens, Right Frame
- #2: The Golden Dragon of Invisibility
- #3: Left Frame
- #4: Sunglasses Lens
- #5: Right Frame
The order of the instructions below was not chosen for its efficiency, but rather for its (hopeful) resemblance to the order in which players have taken steps to try to solve this puzzle on their own. If you're feeling salty, you can do step 3 before step 2.
- go to The Dock and enter Gadget Shop
- try to get Indestructable [sic] Sunglasses of Eternal Darkness:
- click Anti-Gravity Socks to try them on -- Rufus flies up to the ceiling
- take Indestructable Sunglasses of Eternal Darkness, then go "Back down from ceiling."
Maybe these Sunglasses can help you get away with shoplifting? Use them on Shop-O-Mat to see what happens. ...Wellp, that didn't work, but Rufus' response was a good hint what to try next...
- use Indestructable Sunglasses of Eternal Darkness on Shredder to break them.
Try using broken Sunglasses on Shop-O-Mat again. ...Still no luck, but Rufus' repeated remark "A clue would be just the ticket" is slightly more helpful than it might seem. Of course, it would've been much more helpful (possibly too much so) if he'd said "a Revelation would be just the ticket."
Before reading on, see if you can put together that spoiler, a conversation you've had with one of the NPCs around town (Pharmacist in Marketplace), and an object in this room.
- click Anti-Gravity Socks to try them on -- Rufus flies up to the ceiling
- get an insight:
- go to Harbor, enter Tavern
- use Bathroom Key (section 2.2) on Bathroom Door (far right). When Rufus emerges, Shred of Toilet Paper is added to your inventory.
- go to Marketplace
- give Pharmacist Shred of Toilet Paper to receive Cucumber of Revelation
- return to Gadget Shop
- use Cucumber of Revelation on Juicer Hat.
- go to Harbor, enter Tavern
- get The Golden Dragon of Invisibility and broken Sunglasses:
- take Indestructable Sunglasses of Eternal Darkness off counter, then hand them to Shop-O-Mat -- he puts them on to prove they're not broken
- take The Golden Dragon of Invisibility -- in an effort to prove Sunglasses are working, Shop-O-Mat pretends not to see this happening.
If you touch The Golden Dragon of Invisibility anywhere outside the shop, it is removed from your inventory. To retrieve it, just go back to the Gadget Shop, and you'll automatically get it back as soon as you enter.
- right-click The Golden Dragon of Invisibility in your inventory to use it
- while invisible, click Indestructable Sunglasses of Eternal Darkness -- this places Left Frame, Sunglasses Lens, and Right Frame in your inventory
- take Indestructable Sunglasses of Eternal Darkness off counter, then hand them to Shop-O-Mat -- he puts them on to prove they're not broken
3.2: get Tournament Hand
- Repaired Sunglasses [Left Lens]
- Slides
- Sugar Dispenser
- Razorfish
- Tournament Hand
- #6: Sugar Dispenser
- #7: Razorfish
missable achievement alert
- repair broken Sunglasses:
- combine Left Frame and Sunglasses Lens to create Left Frame with Lens
- combine Left Frame with Lens and Right Frame to create Repaired Sunglasses [Left Lens]
If you have Repaired Sunglasses [Right Lens] instead of Repaired Sunglasses [Left Lens], use Screwdriver (from Doc's Office) on it to dismantle it, then try again.
missable achievement alert - combine Left Frame and Sunglasses Lens to create Left Frame with Lens
- go to Little Venice, use Repaired Sunglasses [Left Lens] on Periscope
- click hatch to enter Submersible
- open Door to Radio Room, which is right next to where Rufus is standing when he enters -- after some dialogue with Cletus, you'll have Slides in your inventory.
On Cletus' dialogue menu, only the first option ("Where are you anyway?") is unique; the other three all lead to the same conversation, which ends with Cletus hanging up.
- there's a red Button on lower left of Radio Station -- click it to open pink door and reveal Kitty.
Could that be Donna's cat, the one Nod told you (not) to shave? We've only seen one item that seems remotely plausible for use in shaving anything, and that "plausibility" is based almost entirely on what it's called...
- get Razorfish:
- go to Tavern.
For some clues on what to do next, click Razorfish ("It seems to have some sort of motion sensor") and talk to bartender (and/or refer to "Tavern conversation notes" in section 2.2, specifically Gulliver's 2nd bullet point).
- grab Sugar Dispenser
- exit to Harbor, use Sugar Dispenser on Generator to make it break down
- enter darkened Tavern and click Razorfish. With the lights out, the motion sensor isn't triggered, so you're able to take it.
- go to Tavern.
- return to Little Venice and enter Submersible. You might wanna save your game here.
- use Razorfish on Kitty. If Rufus won't shave Kitty, it means you missed some key conversation with Nod in the Tavern (see section 2.2 for help).missable achievement alert
- talk Donna out of feeding Rufus to the sharks on your first try.
- talk Donna out of feeding Rufus to the sharks without skipping the minigame (yeah, it turns out this is a minigame, apparently). For more information on skipping this thing and how to avoid doing that, see the instructions below.
minigame: (don't) feed the sharksThis "minigame" involves simply talking to Donna, trying to figure out what lines to feed her to avoid becoming feed yourself.If Rufus ends up on the Dock, you'll know you "failed" (sadly we don't get to witness him being torn to shreds). You'll then need to return to Submersible to try again; when you arrive, a popup will ask "are you sure you want to skip this minigame?" If that second missable achievement theory above is correct, clicking the green checkmark (to say "yes, skip it") would be the thing that prevents you from earning the achievement. So click the red X (to say "no, don't skip it") instead.
Either way, you should probably save your game before shaving Kitty. Oh yeah, and don't forget you can teleport to Little Venice from the Dock via the Town Map.
The correct answers are as follows:
(1) "What did she say?" (2) "That I'll be made into shark food?" (3) "Go ahead".That first dialogue option (""What did she say?") seems to change randomly after the first time you choose it. If you return to that menu after a failed attempt, it may alternatively be "Will you please tell me now what that winking means?" or "What are your plans for me?"
- talk Donna out of feeding Rufus to the sharks on your first try.
- enter Bridge via the door just left of where Donna is sitting. You now see an exterior shot of Little Venice, with Rufus down inside the cockpit.
- take Tournament Hand, then exit Bridge by clicking door right behind Rufus
3.3: minigame: Rock-Paper-Scissors
Once you have Tournament Hand (section 3.2), go to Tavern, talk to Garlef, say: "I want to play!" (if you don't see that on his dialogue menu, you can make it appear by selecting "Why are you sitting here on your lonesome?" ...yes, it says "on your lonesome")
I got a little carried away with the hints and history here... you might wanna scroll past it to "solution." It's there, i swear; just keep scrolling...
Just in case there are one or two people out there who've never played Rock-Paper-Scissors (a.k.a. Roshambo), it goes like this: at the count of three, two players each present one of the following hand signals:A winner is then determined using the following rules:
- a fist (Rock)
- two fingers extended (Scissors)
- a flat hand (Paper)
- Rock crushes Scissors
- Scissors cut Paper
- Paper covers Rock
In this minigame version, you add and subtract fingers to create your "weapons:"
- 4 fingers = Paper
- 2 fingers = Scissors
- 0 Fingers = Rock
Note that it is not possible to win the first round, so don't give up hope when you lose. Also note that there's no penalty for clicking the little "X" to skip this minigame. Just sayin'.
If you ask Garlef "What's the stake?" before beginning the game, he tells you that the "first person who has no fingers left to surrender after a lost round loses the game." This might cause concern that the game will end if you lose all your fingers, but it won't, so don't worry.
Here's why it won't: after the round in which your last two fingers are surrendered, you have another round to play; if you were to lose that round, the game would be over (because you wouldn't have any fingers to surrender). But you CAN'T lose that round, because Garlef ALWAYS plays Scissors, and zero fingers (Rock) ALWAYS beats Scissors.
Of course Scissors vs. Scissors is a tie; the two of you could sit there Scissoring each other all day, or you could find a way to cause one or the other of you to lose... There aren't that many things to try here, so maybe you should just try them all before i tell you the answer in the next paragraph.
To break the Scissors-Scissors tie, you need to "load" your Tournament Hand by pressing the razorfish button on the left side. Because you "cheated," you'll lose the round and your last 2 fingers; but with zero fingers remaining, you can finally play Rock, which beats Scissors.
Now that you're winning fingers back and they're no longer attached to your Hand -- because Garlef cut them all off -- you're able to choose how many to display; but since Garlef always plays Scissors, just keep playing Rock until you've taken all his fingers away from him.
When all his fingers are gone, Garlef can only play Rock; so add 4 fingers to your Hand to beat him with Paper.
3.4: follow Goal to Rebel Hideout
missable achievement alert
- after beating Garlef at Rock-Paper-Scissors (section 3.3), talk to Baby goal and tell her "It is done. We are resistance fighters!" -- she leaves to go to Rebel Hideout
- go to Dark Alley off right side of Marketplace
- enter Rebel Hideout:
- click Door to try out the secret knock.
Does Rufus say he's getting mixed up because of the "snappy groove they play in the marketplace," or that he "just can't get the marketplace rhythm out of [his] head"? Go to "Settings" and turn the music all the way down, then knock again.
After you knock, three bars over the little window start to fall down, one by one; this is a timer telling you how long you have to complete the next step...
- click Crate to hide in it. If you make it into Crate before all 3 bars have disappeared, Liebold comes out looking for Rufus, then has to use the old knock to get back inside.
- now Rufus knows the old knock, so click Door again. You're in!
missable achievement alertIf you've already won over Lady and Spunky Goal, step 4 will put you on a straight track out of Chapter V; therefore this would be your last chance to earn/work on the following achievements:
With love from Porta Fisco requires you to read all the Greeting Cards next to Platypus Trapper in Old Town (keep right-clicking until the achievement pops up). - click Door to try out the secret knock.
- win over Baby Goal:
- use Slides on Slide Projector to start a slide show. If there's a woman who can't be wooed with a slide show, i haven't met her.
If at any point your presentation seems to have stopped, and you see Janosch's "snacks and armchair" plan projected on the Screen, just use Slides on Projector again to start over.
- choose a description for the "smeared fingerpaint" blob; this one is pretty easy, since there's only one good answer available: "A symbol."
I recommend intentionally picking the "bad" answers first, though, as the reactions Rufus gets may give you an idea how to handle the slides that follow the first one.
...What you should learn by doing this is that everybody gets mad at and refuses to listen to Rufus when he laughs at Janosch's speech impediment. Incidentally, Janosch is going to repeat Rufus' entire presentation word for word.
So... you need to choose descriptions that won't make Rufus laugh when Janosch repeats them...
- for the remainder of the slides, choose descriptions that don't contain the letter "s" or the digraph "th."
"Sigh. Just tell me the answers already." Okay, fine, here they are:
- "An Organon bombing fort"
- "Our enemy will try to eradicate Deponia"
- "Our team will dare to attack"
- "I obtained topographical data locating one particular Organon fort"
- "...detonate a bomb here and put an end to all life, marine and on land"
- "Goal and her brain implant might mean an important trump in our hand"
- "An Organon bombing fort"
- use Slides on Slide Projector to start a slide show. If there's a woman who can't be wooed with a slide show, i haven't met her.
4.0: LADY GOAL QUEST
- Get Seagull's advice
- Learn how to treat a lady
- Become a member of the Platypus Club
- Consult the Platypus Field Guide
- Earth-platypus:
find and hatch the nest-guardian egg - Water-platypus:
find and hatch the nest-guardian egg - Flying-platypus:
find and hatch the nest-guardian egg
- Fire-platypus:
find and hatch the nest-guardian egg - Remove the platypus meals from the menu
- Return to Seagull
- Solve the poem-problem
- Obtain an official invitation by Seagull
- Invite Goal to dinner
- Find Seagull
- Impress Lady Goal by being a gentleman
- Convince Lady Goal of the surgery
* If you don't know what i mean by "Rufus' Plan," please see the section near the beginning of this guide titled "general tips for surviving on your own."
4.1: get Seagull's advice & Crane's stuff
- Bread Memo / Bread
- Candle Memo / Candle
- Coal Memo / Coal
- Water Memo / Water
- Thread Memo / Thread
- Urn
- #8: Bread
- #9: Candle
- #10: Coal
- #11: Water
- #12: Thread
- #13: Urn
- go to Bellevue (it's the door next to Town Map in Marketplace).
The trick to getting past the Fine Nose sensor is an item that you probably already have in your inventory. I add this note here to give you a moment to reflect on what that item might be... or to just start trying everything you've got until you find something that works.
- use Peanut Bowl (section 2.2) on Fine Nose to disable it with influenza
- double-click door of house on right side to enter Seagull's House. It's also possible to get there by single-clicking the arrow marked "Right Side" (roughly center screen) and then the one on the door... it's just slower that way.
- get five Memos:
- examine Goldfish Bowl to get Bread Memo
- examine Books to get Candle Memo
- examine Window to get Coal Memo
- examine Flowers to get Water Memo
- collect all four of those Memos (in any order) to receive Thread Memo
- examine Goldfish Bowl to get Bread Memo
- exit to Bellevue, then enter door on lower right (below Hoedown the Gardener) to go see Crane the Poet
- hand all 5 Memos to Crane. Each authorizes you to take the item it describes, so now you can...
- collect Bread, Candle, Coal, Water, Thread (in any order).
After you give Crane the 5th Memo, he tells you to "take everything you can find," which makes it possible to...
- grab the Urn containing Crane's mother's ashes
4.2: get Platypus Field Guide
- Fortune Cookie / ID Card / Field Guide
- #14: Field Guide
According to Captain Seagull, you need to get platypus off the menu at Chez Schlumpi... but you don't really know how to do that, and in fact aren't even able to pick up the Eggs you've seen lying around. Maybe it's time to find someone who knows stuff about platypuses...
- go to Bellevue, enter door on far left to reach Old Town
- talk to Platypus Trapper
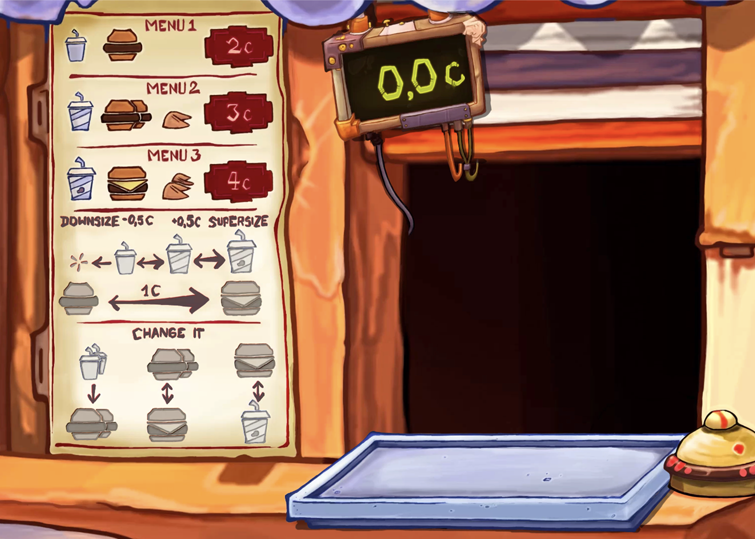
- get a Fortune Cookie:You must complete the minigame without skipping it to earn All mine!minigame: take-out menuThe idea in this puzzle is to get something for nothing (a Fortune Cookie for 0.0c) by taking advantage of the specials.
To enter the puzzle, right-click Take-Out Menu on the left side of Old Town.
how to playAt the top of the chart on the left, there is a list of meal combos marked "Menu 1," "Menu 2," and "Menu 3;" click one of those to put some food on your tray. These can also be used like reset buttons if your puzzle-solving efforts aren't going well and you want to start over.Below the menu of Menus are illustrations of the kinds of exchanges you can make. The first section shows the ways in which your bill will be adjusted when you downsize or supersize an item: for each downsize, your bill will be reduced by 0.5c, and for each supersize, it will be increased by 0.5c. The bottom part of the chart (marked "CHANGE IT") shows the ways in which some items can be traded for others without impacting your total.
Click a food item on the tray, then click an image on the chart to indicate which downsize, supersize, or trade you want to make.
If you have 2 burgers or drinks and want to trade them both in on the CHANGE IT menu, you need to click the item in the back. When you mouse over the rear one, both items will be highlighted to indicate that they both will be selected if you click there.
The one hint that got me through this whole thing was: you only need ONE cookie. And here's a bonus hint for you, just in case: it's not ever necessary to increase your bill by supersizing.
how to win (spoiler alert!)Choose Menu 2, which gives you 1 medium drink, 2 small burgers, 1 fortune cookie. Then:- trade both small burgers ➞ large burger
- trade large burger ➞ large drink
- downsize large drink ➞ medium drink
- downsize both medium drinks ➞ 2 small drinks
- trade 2 small drinks ➞ 2 small burgers
- trade 2 small burgers ➞ large burger
- trade large burger ➞ large drink
- downsize large drink all the way to nothing (the asterisk-like symbol on the left end of the scale)
- trade both small burgers ➞ large burger
- right-click Fortune Cookie in inventory to open it and see if you won a trial membership. You didn't.
To get another Cookie and try again, just right-click the Take-Out Menu (don't worry, you don't have to play the minigame again).
Optional: keep opening Fortune Cookies until one of them tells you in a direct and amusing way what you need to do next.
- go to The Dock, give Fortune Cookie to Fisherman -- he finds an ID Card inside and gives it to you
- return to Old Town, give ID Card to Platypus Trapper to receive Field Guide
- examine Field Guide in inventory. This may look like a suggestion, but it must be done before you can collect any Platypus eggs!
Right-click each illustration in Field Guide for some indispensable clues. This one IS just a suggestion... but it's a good one.
4.3: Earth Platypus
- Earth Platypus Egg
- Bucket / Bucket with Soil / Bucket with Soil and Egg
- Spade
- Earth Platypus
- #15: Earth Platypus Egg
- #16: Bucket or Bucket with Soil
- #17: Spade
helpful Field Guide quotes"It says here that earth platypuses hide their eggs in the soil."
"Earth platypuses hatch in frozen soil with the first ground frost."
- go to Bellevue.
Locate the Egg sitting in the small dirt-themed alcove in the foreground; you can't access it because Rufus is unable to get past the Rake blocking the entrance. If only you could somehow inspire that Gardener over there to remove it for you...Step 2 prevents you from earning Bloody nose, which requires you to step on the Rake in Bellevue 10 times.
- click Tree on right side of screen to knock its leaves off.
Hoedown the Gardener becomes enraged and punches Rufus so hard he lands in Marketplace. Fun fact: from now on, Rufus will exit to Marketplace this same way any time you click Hoedown or the Tree. It's faster than walking from Seagull's House AND Rufus gets hurt! :D
- return to Bellevue -- Hoedown has removed Rake to clean up the leaves, so Rufus is free to enter area containing Egg
- click Egg to start minigame. If Rufus won't touch it, examine Field Guide (section 4.2) by right-clicking it in inventory, then try again.You must complete the minigame without skipping it to earn Garden work.minigame: meerkat moundsHere you see the Egg sitting on a 4x4 grid of Mounds of Soil; if you click it, a Meerkat moves it to a different spot. Your task is to trap the Meerkat, freeing you to take the Egg. ...Or maybe it's actually the Egg that you're trapping? I dunno, whatever.how to playFirst i'll number the mounds so they're easier to talk about:12345678910111213141516
After stealing your Egg, the Meerkat moves like the knight in chess: one space straight, then one space diagonally (e.g. from 1 to 7 or from 1 to 10). Unlike the knight, the Meerkat is also able to move from any corner into the opposing one (e.g. from 1 to 16 and vice versa).If you're unfamiliar with the rules of chess, keep in mind that the angle created by your diagonal must be obtuse, and it's therefore NOT possible to move from square 1 to squares 2 or 5. If you're unfamiliar with the word "obtuse," please look it up, then have a good laugh. ...Make sure you get both definitions, though, otherwise you'll just be more confused than before.
There are three tools to the right of the grid: two Rocks and a Meerkat Trap. Each tool can be placed on any mound to foil the Meerkat's escape with your Egg; the Rocks block him from moving the Egg onto the mounds on which they sit, and i don't think i need to tell you what a "Meerkat Trap" does... it traps the Egg. Yeah.
how to win (spoiler alert!)The trick is to click the Egg until it's sitting on a mound with no more than 3 possible exits (i.e. no more than 3 places the Meerkat can move it to based on his pattern). Block those 3 exits with the Meerkat Trap and 2 Rocks, then click the Egg again to drive it into your Trap.Every mound around the edge has exactly 3 exits; the only positions you can't use as starting points are 6, 7, 10, and 11.
meerkat position:tool positions:meerkat position:tool positions:17, 10, 1692, 7, 1528, 9, 11123, 6, 1435, 10, 12134, 6, 1146, 11, 13145, 7, 1253, 11, 14156, 8, 982, 10, 15161, 7, 10if your mounds are Meerkatless...I hear tell there's a bug in this puzzle that leaves some players without an Egg or a Meerkat, and also possibly without the ability to place the tools on the mounds. If that's happening to you, this discussion in the forum recommends trying the following:- Use Esc to return to the Main Menu, then Continue; or...
- Repeatedly exit and reenter the puzzle; or...
- Change your monitor's refresh rate to 60 Hz. You're gonna have to look up how to do that yourself, i can't do everything for you.
- If all else fails: Replay Chapter V :(
When you're done with the puzzle, you'll have Earth Platypus Egg in your inventory. - Use Esc to return to the Main Menu, then Continue; or...
- go to The Dock, take Bucket from pole near Fisherman, return to Old Town
- use Bucket on Tub full of Dirt to create Bucket with Soil
- Kate Spade. ...oops, i meant to say: "Take Spade."If you're working on Collecting Agent, DO NOT continue to step 8! Go straight to section 4.4 for the wrap-up (yes, you're almost done).
- hatch Earth Platypus:
- go to Doc's Office
- combine Earth Platypus Egg and Bucket with Soil to create Bucket with Soil and Egg
- use Bucket with Soil and Egg on Freezer. The freshly-hatched Earth Platypus is too aggressive to be picked up, so...
- press red Switch (Rufus might be standing in front of it) to defrost Freezer
- press Switch again to seal the critter in a block of ice
- use Spade on Frozen Earth Platypus to collect Earth Platypus
missable achievement alertThere seems to be a bug that causes some players to not get this achievement even after they've... done the thing under the spoiler tags above. I can't find any good information about it; all i know for sure is that it doesn't affect everyone. One post on the forums suggests -- but doesn't really confirm -- that it might be corrected by playing through again (and doing "the thing" again). Beyond that, check the comments section of this guide to see if anything there helps you.
- go to Doc's Office
- go to Bellevue and place Earth Platypus on its Nest
4.4: COLLECTING AGENT (finale)
missable achievement alert
If you've just freshly arrived here looking for help with this achievement, allow me to recommend my dedicated "Collecting Agent" guide. Even its list of items is better! ...Well, it's the same list, really, just formatted better.
http://steamcommunity.com/sharedfiles/filedetails/?id=885617589
So far in this guide (the one you're reading now), 17 Collecting Agent items have been listed; the remaining 9 items aren't used until later on, so they haven't been mentioned yet. That means that if you've been following this walkthrough in pursuit of this achievement, you may have a li'l more work to do.
So here's the part where i need to balance the needs of people who have been following the guide up to this point with the needs of people who have not. For the latter group, i've rearranged the list as it exists so far so that the items are grouped by their area of origin. The numbers in parentheses tell you which section(s) of this guide to consult if you need help acquiring those items.
#6: Sugar Dispenser
#7: Razorfish
#3: Left Frame
#4: Sunglasses Lens
#5: Right Frame
#9: Candle (or Lit Candle)
#10: Coal
#11: Water
#12: Thread
#13: Urn (or Lint)
#17: Spade
- #18: Hand-Held Vacuum Cleaner (Seagull's House; see section 4.6, step 2)
- #19: Expired Pills (Dumpster next to Pharmacist in Marketplace)
- #20: Crank (Doc's Replacement Parts Store) or Flying Platypus Egg (Old Town)
- #21: Screwdriver (Doc's Office)
- #22: Water Platypus Egg (Harbor, underneath ramp near Gondolier)
- #23: any sheet music (Tavern; see section 5.1b, step 3)
- #24: Antenna (Little Venice)
- #25: Hook (in Jar of Hooks at The Dock)
- #26: Bait (in Trash Can aboard Bozo's Cutter)
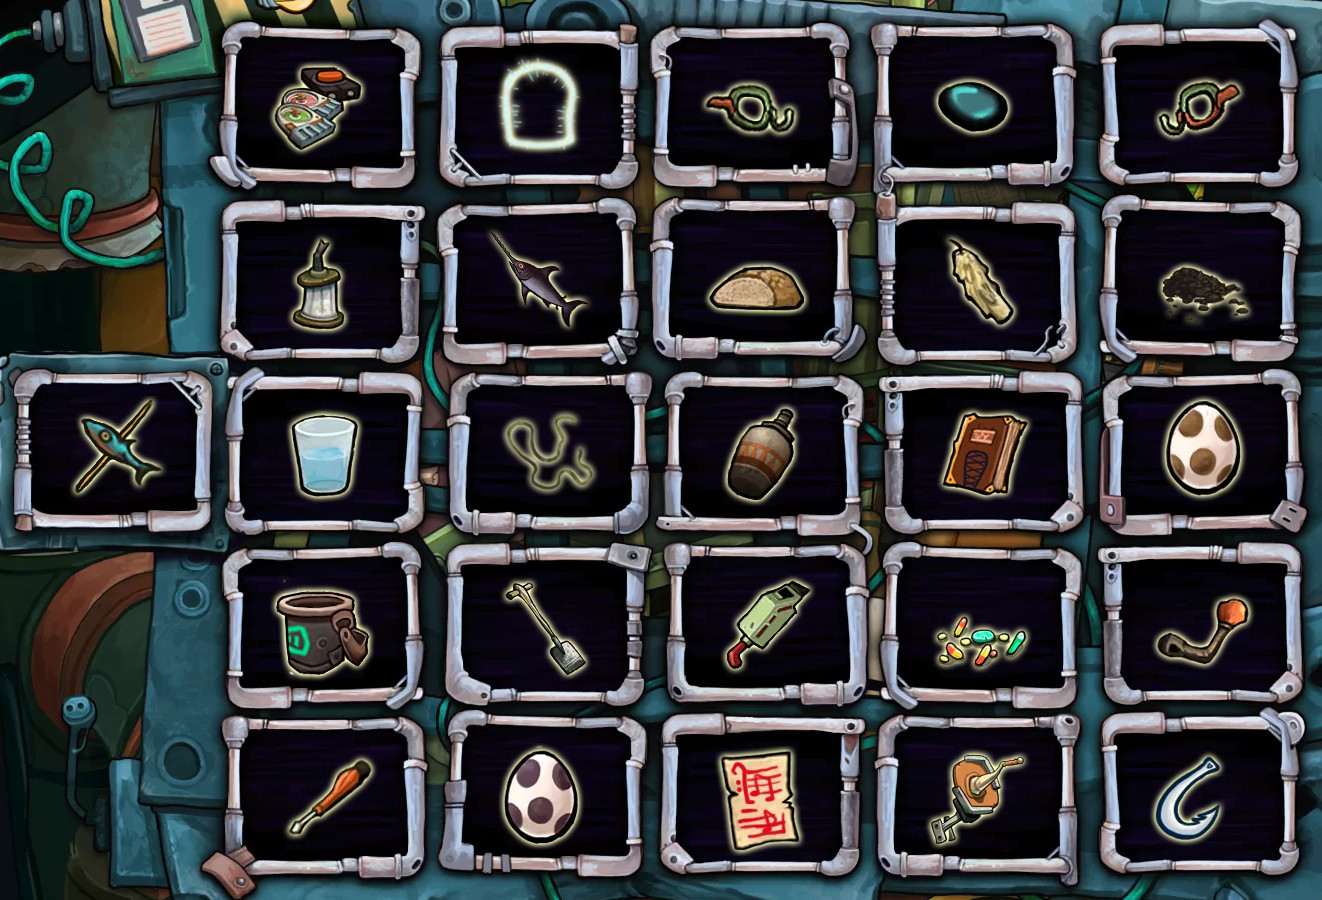
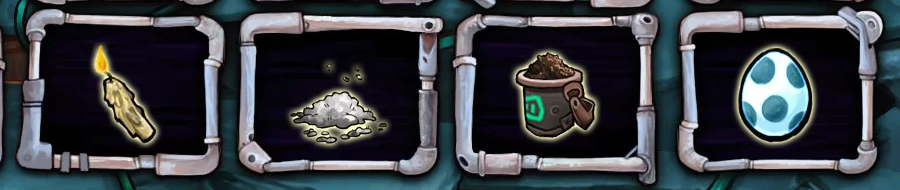
- Lit Candle instead of Candle (#9)
- Lint instead of Urn (#13)
- Bucket with Soil instead of Bucket (#16)
- Flying Platypus Egg instead of Crank (#20)
- the Sunglasses method:
- combine Sunglasses Lens with Left or Right Frame
- pick up 26th item
- use Screwdriver to dismantle Frame with Lens back into 2 pieces, thereby forcing one piece into the 26th slot
- combine Sunglasses Lens with Left or Right Frame
- the Golden Dragon method:
- remove Golden Dragon of Invisibility from inventory by clicking or right-clicking it
- pick up 26th item
- enter Gadget Shop -- Golden Dragon is automatically recovered, forcing it into 26th inventory slot
- remove Golden Dragon of Invisibility from inventory by clicking or right-clicking it
4.5: Water Platypus
- Water Platypus Egg
- Bait
- Expired Pills
- Tigerfish / Zebrafish / Frankenfish with Egg / Zebrafish with Egg
- Water Platypus
helpful Field Guide quotes"It says here that water platypuses... hatch in the mouths of living zebrafish."
"It also says here that zebrafish are freshwater fish."
- go to Harbor, pick up Water Platypus Egg from underneath ramp near Gondolier. If Rufus won't touch it, examine Field Guide (section 4.2) by right-clicking it in inventory, then try again.
Next, you need a fish for hatching the Egg, and who better to go to for one of those than the Fisherman sitting at The Dock? If you've tried pestering that guy, you may recall that Rufus has promised to prove that he too is a fisherman... that's the route you're gonna take here.
- get Zebrafish:
- go to The Dock, show Razorfish (section 3.2) to Fisherman
- when he asks what your secret is, answer "I use a special kind of bait." He says if you bring him your special bait, he'll give you a Tigerfish.
- enter Bozo's Cutter, take anchovy Bait out of Trash Can, return to The Dock
- show Bait to Fisherman.
He's convinced that Rufus' story is true, so baits his line and pulls a fish out of the water; unfortunately, it falls right back in before Rufus can pick it up.
To figure out how to prevent the fish from falling back in the water, you'll need to put the following two things together in your head: (1) an observation that the Fisherman used his own Bait, not Rufus', and (2) the fact that you've (hopefully) been carrying around a certain inventory item for a while now, waiting to find a use for it. Just in case you don't already have the item i mean...
- go up To the Pharmacist at Marketplace, collect Expired Pills from Dumpster, return to The Dock
- use Expired Pills on Bucket with Bait
- show Rufus' Bait to Fisherman again -- when the fish is pulled out of the water this time, it's too sleepy to escape, so Rufus is able to grab Tigerfish (for which he gives up his Bait in exchange).
So now you've got a dead Tigerfish, but according to the Field Guide, you need a live Zebrafish; look at the illustration in the Guide to see if it gives you an idea what to try next... hint: one difference between the species is the color of their stripes...
- go to Doc's Replacement Parts Store
- put Tigerfish in Paint Bucket to create Zebrafish.
- go to The Dock, show Razorfish (section 3.2) to Fisherman
- hatch Water Platypus:
- enter Lock (the middle room of Doc's Workshop)
- place Water Platypus Egg into Zebrafish's mouth, creating Frankenfish with Egg
- use Frankenfish with Egg on Electrodes to revive it, creating Zebrafish with Egg.
Now all you need is some fresh water... Where have you seen fresh water in this town (i mean besides in your inventory)? Think "indoors"
- go Outside Doc's Workshop -- Rufus says "What's that twitching?" and tells you that the fish needs to get into some water
- use Water (section 4.1) on Zebrafish with Egg to keep it alive a little longer.
If you leave the area without doing this, the fish will die and you'll need to go back to the third bullet point under this step. En route to your Zebrafish depository, this "twitching" thing will happen at least once more; just keep using Water on it until you reach your destination.
- go to Bellevue, enter Seagull's Housemissable achievement alert
There seems to be a bug that causes some players to not get Animal Husbandry even after they've... done the thing under the spoiler tags above. I can't find any good information about it; all i know for sure is that it doesn't affect everyone. One post on the forums suggests -- but doesn't really confirm -- that it might be corrected by playing through again (and doing "the thing" again). Beyond that, check the comments section of this guide to see if anything there helps you.
- place Zebrafish with Egg in Goldfish Bowl to hatch Water Platypus
- click Goldfish Bowl to collect Water Platypus
- enter Lock (the middle room of Doc's Workshop)
- go to Harbor and place Water Platypus on its Nest
4.6: Flying Platypus
- Crank / Flying Platypus Egg
- Hook / Hook on a Thread
- Hand-Held Vacuum Cleaner
- Lint
- Windsock, Antenna / Landing Net
- Flying Platypus
helpful Field Guide quotes"It says here that flying platypuses hide their eggs in high places."
"Flying platypuses hatch in free fall from the highest point of their habitat."
- get Flying Platypus Egg:
- retrieve Crank from Doc's Replacement Parts Store
- go to Old Town, enter passage marked "Up" (next to Take-Out window)
- use Crank on Crank Handle to install it
- turn Crank to reel in Flying Platypus Egg. If Rufus won't touch it, examine Field Guide (section 4.2) by right-clicking it in inventory, then try again.
- retrieve Crank from Doc's Replacement Parts Store
- go to highest point of Floating Black Market:
- go to Bellevue, enter Seagull's House
- click or right-click Books. This creates a new hotspot on upper right of bookcase labeled "Pull here for secret door."
- click "Pull here for secret door" to open bookcase and reveal a ladder
- climb ladder To the Crow's Nest.
- go to Bellevue, enter Seagull's House
- launch Flying Platypus Egg:
- use Urn (section 4.1) on Pipe to bring Windsock to half-mast so Rufus can reach it
- go to The Dock, take Hook from Jar of Hooks, return to Crow's Nest
- combine Hook with Thread (section 4.1) to create Hook on a Thread
- use Hook on a Thread on "Windsock, half-mast." After Rufus attaches it, it stays on your cursor so you can...
- fasten the other end to Grommet on lower left
- put Flying Platypus Egg into "Attached, Yet Insufficiently Taut Windsock."
Sounds like you need to make Windsock more taut, huh? If you don't have any ideas how to do that, try this hinty spoiler: you need to return Windsock to full mast, i.e. to undo what you did in the first bullet point under this step.
- return to Seagull's House and open Lint Trap (if you don't see it, open Hatch).
Examining Lint inside Lint Trap reveals that this is the "heap of ashes ... that [you] dumped into the Flag-O-Mat." ...which is the action you performed in the first bullet point ... which is the action you need to "undo" in order to make the Windsock more taut. Rufus won't touch Lint with his bare hands, so...
- pick up Hand-Held Vacuum Cleaner and use it to collect Lint -- this returns Windsock to full-mast.
Lint can be used on Pipe the same way Urn was in the first bullet point (like if you needed to bring Windsock back down to half-mast because you got curious and used the Vacuum before attaching Hook on a Thread).
- return to Crow's Nest
- use Razorfish (section 3.2) on "Heavily Taut Windsock with Egg" to cut thread and launch egg into freefall.
- use Urn (section 4.1) on Pipe to bring Windsock to half-mast so Rufus can reach it
- grab Hanging Windsock and go to Bellevue
From here, you can see Flying Platypus circling up near Crow's Nest. Before you can catch it, you need to lure it down to where you can reach it... Imagine this thing is a bird, then think about how you might entice a bird to come closer using a combination of item(s) in your inventory and object(s) in the environment...
- catch Flying Platypus:
- put Bread (section 4.1) into Birdhouse near Bellevue entrance.
The Platypus comes closer, but you can't grab it with your bare hands. Perhaps the Field Guide has some tips...
The Guide's illustration of a Landing Net resembles the Windsock you took from Crow's Nest, but with a handle attached to it. If you don't have anything in your inventory that might be used as that handle...
- retrieve Antenna from Little Venice, return to Bellevue
- combine Windsock with Antenna to create Landing Net
- use Landing Net on Flying Platypus to capture it
Animal Husbandry requires you to have all 4 hatched platypuses in your inventory at the same time; therefore, if you want this achievement, do not put any platypus on its nest (as in step 6) until after you've hatched all 4 of them.There seems to be a bug that causes some players to not get this achievement even after they've... done the thing under the spoiler tags above. I can't find any good information about it; all i know for sure is that it doesn't affect everyone. One post on the forums suggests -- but doesn't really confirm -- that it might be corrected by playing through again (and doing "the thing" again). Beyond that, check the comments section of this guide to see if anything there helps you.
- put Bread (section 4.1) into Birdhouse near Bellevue entrance.
- go to Old Town, place Flying Platypus on its Nest
4.7: Fire Platypus
- Lit Candle
- Fire Platypus
Go Outside Doc's Workshop and look carefully at the green pipe that extends into the sky over the door to his Workshop: there's something in there marked "Egg in the Funnel".helpful Field Guide quotes"It says here fire platypuses hide their eggs in hot geysers."
"Fire platypuses hatch in blazing fire."
Trying to pick it up just makes Rufus utter a mild curse, so maybe you need a way to force it out of there... Hey, how about that Furnace? Try using Candle (section 4.1) on that if you need some ideas...
- extract Fire Platypus Egg from funnel:
- go to Tavern and use your Candle (section 4.1) on their Candle to create Lit Candle
- Outside Doc's Workshop, put Coal (section 4.1) into Furnace
- use Lit Candle on Furnace -- Egg is forced out of funnel and sits atop it
- click "Egg in the Funnel." If Rufus won't touch it, examine Field Guide (section 4.2) by right-clicking it in inventory, then try again. When Rufus does touch Egg, he drops it into another pipe, triggering a minigame.
You must complete the minigame without skipping it to earn Egg race.minigame: pipe mazehow to playThe egg is traveling counterclockwise around a maze of pipes; your goal is to make it exit the bottom of the maze (via the pipe with red arrows on it) by switching the connectors around to alter its path. The connectors are numbered 1 through 8, and each has two possible positions: one with a blue stripe, one with a pink stripe.how to winThe steps below describe my thought process in solving this puzzle; the hope is that at some point you'll be tipped over the edge of solving it yourself (or maybe just satisfy some curiosity about how it was done).Beneath those steps are screenshots of the complete solution.
I started with the end of the path. The egg is traveling the wrong direction to get out that pipe at the bottom of the maze, and i couldn't see how connector #8 could do any good in its default pink position, so i switched it to blue.Then i followed the pipe leading into #8 and found that the other end wasn't attached to anything, so i switched connector #5 from pink to blue.To reach connector #5, the egg would have to come from either #4 or #3. Connector #4 didn't look promising, since the egg would need to be traveling clockwise to get there from connector #7; so i assumed the next stop was #3, and switched that from pink to blue.The other end of the pipe leading out of connector #3 wasn't attached to anything, so i switched #7 from blue to pink.But now that whole part leading to connector #8 was effectively a closed system. So i thought… #7 needs to be pink, because it's useless in the blue position (the egg is traveling the wrong direction to ever get there). Therefore the next connector i need to switch is #4 (from pink to blue).
Now to get the egg to connector #4, all i need to do is switch #2 from blue to pink.
Solution summary:If every connector is in its default position (shown on the left below), just switch them all.
#1 and #6 have no impact on the solution, but why not do 'em anyway.Before:AFTER: - go to Tavern and use your Candle (section 4.1) on their Candle to create Lit Candle
- when you're done with the minigame, collect Fire Platypus from FurnaceAnimal Husbandry requires you to have all 4 hatched platypuses in your inventory at the same time; therefore, if you want this achievement, do not put any platypus on its nest (as in step 3) until after you've hatched all 4 of them.
There seems to be a bug that causes some players to not get this achievement even after they've... done the thing under the spoiler tags above. I can't find any good information about it; all i know for sure is that it doesn't affect everyone. One post on the forums suggests -- but doesn't really confirm -- that it might be corrected by playing through again (and doing "the thing" again). Beyond that, check the comments section of this guide to see if anything there helps you.
- place Fire Platypus on its Nest (the coal pile next to Town Map)
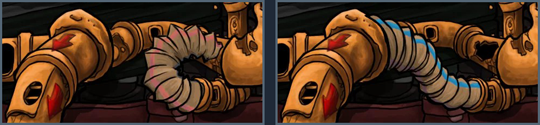
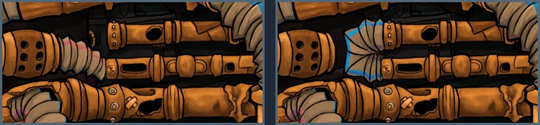
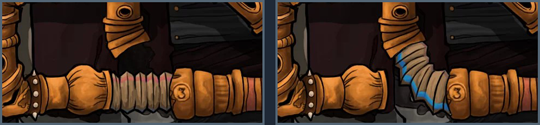
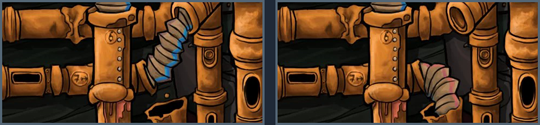
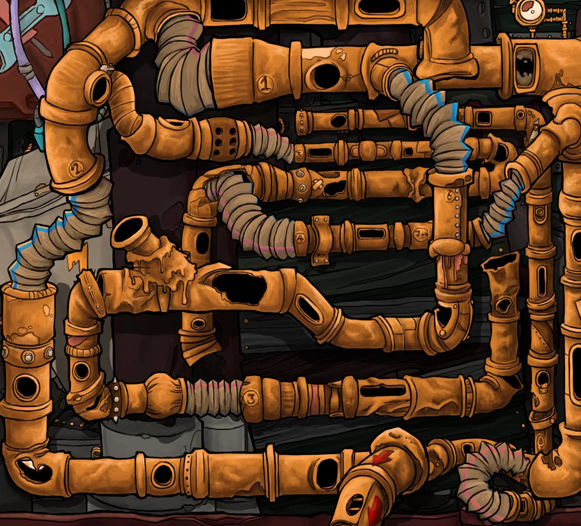
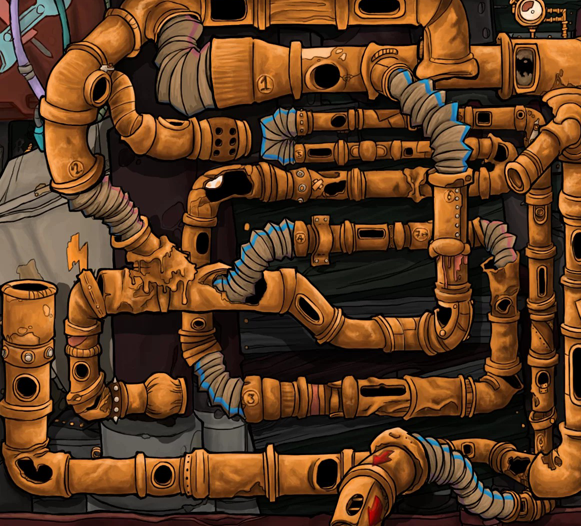
4.8: invite Goal to dinner
- Invitation for Lady Goal
- Radio Equpiment Memo / Radio Equipment
- once you've placed all 4 Platypuses on their Nests (sections 4.3 and 4.5-4.7), go talk to Seagull and tell him "I did it."
Turns out Seagull has changed the conditions of the deal: now you need a good romantic poem before he'll make the dinner reservation. He won't accept any of the ones Rufus comes up with, so...
missable achievement alert...When talking to Crane, reciting the poem "Platy-poo" (unlocked in the second bullet point under step 2) may interfere with the achievement. Therefore, you should NOT start with that one.
If you've fulfilled the first two requirements of Supercool, you should receive the achievement immediately after choosing one of the other poems to try on Crane. For more information, refer to the special section on Supercool near the beginning of this guide. - get help with poem:
- go talk to Crane the Poet. Say, "You know quite a bit about Poetry, don't you?" and then recite some for him.
If none of the poems in your repertoire inspires Crane to overcome his desire to not help you, try to think who else in this town writes poetry...
- go talk to Platypus Trapper in Old Town, and say, "So, when you've got the time." Now you have a new poem in your arsenal: the epically bad "Platy-poo."
- return to Crane and recite "Platy-poo" -- its terribleness is more than he can bear, so he finally agrees to help.
- go talk to Crane the Poet. Say, "You know quite a bit about Poetry, don't you?" and then recite some for him.
- go talk to Seagull and say, "I know which words I'll use to impress Goal," then "I may not be good at waxing eloquent. But I've got this." After Rufus tells him about the prompter, Seagull gives you Invitation for Lady Goal, and you're transported to Harbor.
...and if you're working on Pin-Up Goal, there's an issue you may want to know about before proceeding to step 4.
Warning: the location of a Pin-Up piece is disclosed below; i didn't hide the text because i wanted players stymied by this issue to have a chance of finding help with it. If Lady is NOT your LAST Goal, you don't need to read on.
If Lady is your LAST Goal, and you want to do this achievement with a minimum amount of help from me and my screenies, you should probably hunt down all eight of the Chapter V puzzle pieces before handing over the dinner Invitation in step 4. The explanation for this (including non-hidden spoilers) is in the next paragraph.
After you invite Lady Goal to dinner, she and Seagull will be in Old Town, and his arm will be blocking the Pin-Up item that's there; as soon as you get rid of Seagull, the next chapter starts (in a different set of locations), so you can't grab the piece after he's gone.
Although the item is very hard to see with Seagull sitting at the table, it's still there and you can still collect it; just click the tiny white triangle protruding from behind his forearm. - enter Tavern, give Invitation for Lady Goal to Lady Goal, and watch the scene that ends with Rufus standing alone in Seagull's House
- take Radio Equpiment [sic] Memo from Seagull's desk
- give Radio Equpiment Memo to Crane -- Rufus automatically takes Radio Equipment
- go to Old Town and watch the scene with Seagull and Goal. (...it's too soon to call them "SeaGoal," although that does have a better ring to it than "Goafus" or "Rufoal"...)
missable achievement alertIf you've already won over Baby and Spunky Goal, step 8 will put you on a straight track out of Chapter V; therefore this would be your last chance to earn/work on the following:
- give Radio Equipment to Platypus Trapper so that Seagull is being fed his awful poetry.
5.0: SPUNKY GOAL QUEST
- Unleash the crabs upon the gondolier
- Eavesdrop on Bozo and Bambina
- Learn Bozo's pick-up line
- Use the perfect pick-up line
- Beat Goal in Bataka
- Impress Spunky Goal with the right words
- Convince third Goal of another surgery
* If you don't know what i mean by "Rufus' Plan," please see the section near the beginning of this guide titled "general tips for surviving on your own."
5.1a: Bozo's pick-up line: HINTS
This is a really tough puzzle with a lot of walking around, and nobody would blame you for skipping straight to the solution in section 5.1b. Either way, this seems like a good time to make sure you know that you can double-click on a passage to a new area to pop there automatically instead of walking slowly over.
- if you haven't talked to/messed with Gondolier at the Harbor, do so
- be sure you've checked out the interactable objects at Weapons Shop
- when Bozo enters the Shop, watch the whole scene between him & Bambina without esc'ing through it; you'll see something near the end that you may find helpful: the Gondolier's song travels through the pipes
- check the hidden hint that appears on Rufus' Plan after Bozo talks to Bambina the first time
- after Bozo's first attempt with Bambina fails, talk to him and say "You just don't know the right moves;" his response is helpful, but not repeatable, so i wrote it down for you:
"It was that gondolier. ... May the junk crabs get him. ... Junk crabs - those pesky parasites that hang out in flotsam. Those critters are a real plague. Rumor has it they came to the Floating Black Market stowed away in some transport crates." - look over section 2.2 to see if anything Gulliver said helps you
- Here i've prepared a set of visual clues for you (NOT spoiler-hidden, so scroll carefully)... each screenie-bit below depicts a thing you should locate and investigate.
If you don't feel like figuring out where these things are or what's learned by checking them out, it's all laid out in the list that follows the images (also NOT spoiler-hidden).
- Weapons Shop, Pipe Valve: "That can be used to close the pipe."
Pipe Opening: left-click to learn that sound travels through the pipe to other locations ... yes, i said "locations" with an "s"...you can change where the sound goes by messing with Pipe Diverter in Marketplace - Outside Doc's Workshop, Airbag Crate: "According to the delivery note, the crate contains a replacement airbag for the canal gondolas."
- Dark Alley, Eyes in the Trash: "It seems to be a colony of junk crabs."
- Marketplace, Pipe Diverter: "The red pipe leads towards Little Venice. The green into the heart of the industrial park. And the yellow into that dark alley."
Two small clarifications: (1) the red pipe leads to The Weapons Shop, NOT to the area with the Submersible in it; and (2) you may know "the heart of the industrial park" better as "Outside Doc's Workshop."
- Tavern, Jukebox: "I hope there's also something useful in there."
Jukebox Flap: "The flap is screwed down." - Harbor, Generator: "This generator provides the tavern with electricity. It's pretty careless, setting it up out here... where any random, well-meaning citizen can kick it, stick bananas in the exhaust, or pour sugar in the tank."
5.1b: Bozo's pick-up line: SOLUTION
IF YOU WANT HINTS BEFORE GETTING THE ANSWERS, go up to section 5.1a before you even glance below this paragraph! Sorry, i couldn't fit both parts into one section -- i exceeded the character limit :P
- Screwdriver
- Sugar Dispenser
- "The Mating Song of the Junk Crabs"
Your goal in this section is to somehow lure the Junk Crabs into the pipe in Dark Alley, then divert them to someplace they can wreak havoc on the Gondolier...
- if Bozo is still sitting in the Tavern, send him out (see "Tavern conversation notes" under section 2.2 for help with that)
- go to The Weapons Shop and talk to Bozo. Reassure him that "It's going to be great."
Bozo talks to Bambina, but just as he's about to deliver "the line," the Gondolier from the Harbor shows up and wrecks the mood. Time to open up a can of Junk Crabs on that guy...
- get sheet music:
- go to Tavern. If you can't see inside Jukebox, you'll need a tool to open it up...
- retrieve Screwdriver from Doc's Office, then come back to Tavern and use it on Jukebox Flap to reveal a guy named Alex sitting inside there, playing a keyboard
- click Jukebox and select the song "The Mating Song of the Junk Crabs" (top button) -- this puts the sheet music we want to steal onto Alex's music stand
- take Sugar Dispenser off table
- exit to Harbor and use Sugar Dispenser on Generator to knock out lights inside Tavern
- reenter Tavern. With the lights off, Alex has fallen asleep.
- take "The Mating Song of the Junk Crabs" sheet music from inside Jukebox
- go to Tavern. If you can't see inside Jukebox, you'll need a tool to open it up...
- exit Tavern and give "The Mating Song of the Junk Crabs" to Gondolier at Harbor
if you've messed with Pipe Diverter in Marketplace at any point, go there to make sure it joins red pipe (Weapons Shop) to yellow pipe (Dark Alley). If you haven't touched Pipe Diverter, it's already set correctly, so you don't need to do anything to it at this point.
- return to Weapons Shop and ask Bozo, "You're not going to give up just like that are you?" so that he'll try talking to Bambina again.
This time, when Gondolier plays, Junk Crabs in Dark Alley hear their favorite song and scuttle up into the pipe after it.
- turn Pipe Valve to trap Crabs at Weapons Shop
- go to up To the Pharmacist at Marketplace and set Pipe Diverter so it joins red pipe (Weapons Shop) to green pipe (Outside Doc's Workshop):missable achievement alert-o-rama!
Note that if you've already done steps 6-8, you'll need to "undo" those before you can do the achievement: switch Pipe Diverter so it connects red to yellow (as shown in step 5), then open Pipe Valve; Junk Crabs will then return to Dark Alley as soon as you leave Weapons Shop.
With love from Porta Fisco requires you to read all the Greeting Cards next to Platypus Trapper in Old Town (keep right-clicking until the achievement pops up). - return to Weapons Shop and open Pipe Valve -- Crabs crawl out of green pipe into box marked "Airbag Crate" Outside Doc's Workshop
- go to Harbor and kick the Gondolier's Bumper to set off his airbag -- he swims off to get a replacement... that's filled with Junk Crabs
- go to Weapons Shop and have Bozo try the line one last time, then sit back and watch the Gondolier's longest, yet also most enjoyable performance to date (trust me)
- go to Tavern, save your game, and use the magic line on Spunky Goal
5.2: minigame: Platypus Bataka
possible missable achievement alertIf you're reading this before starting Platypus Bataka, just save your game now. Then if you do get the achievement, you won't have to bother reading through the rest of this long alert. According to commenter Natrea, it should appear during the cutscene after defeating Goal.
Below are some theories, listed in order from most plausible to least plausible. The first three are my own, if that makes any difference to you.
theory 1: it's not missable in "Complete Journey"I've only marked Shut up, Simon as "possibly missable" because other guides claim that it is; however, they also specify requirements that i know are inaccurate because i didn't meet them before earning the achievement myself. I'll tell you what those other guides said further along on the plausibility parade.theory 2: don't skip either of the minigamesYes, there are technically 2 of them here: Platypus Bataka and the Training Dummy game. This theory landed higher on the list than the next one primarily because "don't skip the minigame" is a common M.O. in this trilogy.theory 3: enter at least 1 fight without training all the way upThis is a guess cobbled together from the description of the achievement ("Training is for losers!"), (mis)information found on other guides, and my own personal experience (described below, at the bottom of this box).theories 4 & 5 from other guides (both disproven):It is NOT POSSIBLE for these theories to be true; these CANNOT be the criteria for the achievement in "The Complete Journey" version of this game. I know this because i broke both those rules before earning it myself. Here's a complete account of what i was doing when i got Shut Up, Simon:
- win Platypus Bataka without using the Training Dummy at all
- win Platypus Bataka without training all the way up
- i lost the first battle (possibly also a second one)
- i went through one training session with the Dummy
- i fought and lost at least once more
- i trained all the way up with the Dummy
- i fought until i won
- i got the achievement
Continue until somebody loses. Probably you.
Rufus loses the game after being hit three times. Goal, on the other hand, takes 5 hits, then enters "Rrrrrrrage-MODE!!!!" which allows her to attack you 5 times in a row (even if you block every attack). If Rufus is still standing at the end of those 5 turns, you win!
(This is a doodle i made on the back of a grocery list in 2021. It was still making me laugh 4 years later, so i finally decided to share it. Its irrelevance and poor quality will hold me back no longer!)
If you're having trouble with the "fighting" part, training with the Dummy will make those battle timers a little longer, giving you a little more time to prepare your blocks and attacks. Once you've trained to the maximum, the "about 2 seconds, maybe less" you started with becomes "about 3 or 4 seconds," giving you a better chance of escaping this little corner of heck.
Click Training Dummy to start the game. Each round of training goes like this:- After a brief warning countdown, Simon displays a random sequence in which several of his body parts are highlighted one at a time.
- You repeat the sequence by clicking the same body parts in the same order.
- If you succeed, Simon plays the sequence again with 1 step added to the end of it.
- You repeat the +1 sequence.
- If you succeed, Simon adds another step to the sequence.
- You repeat the +2 sequence. If you succeed this time, you win the round!
You may have noticed that there's an "X" button on the Training Dummy screen, and wondered if you'd still get credit for training if you were to click that to skip the Simon minigame. The answer is yes, BUT i don't know for 100% sure that it won't impact the achievement; so if you want to try it, you should save your game first.*
There are three ways to tell whether you've completed all 5 training rounds, thereby reaching the "maximum:"- Rufus says "There. That should definitely be enough now. I'm in top shape now."
- Training Dummy is no longer clickable.
- Training indicator underneath Rufus' health meter on battlefield shows 5 colored-in biceps instead of grayscale ones:
When you're ready to try fighting Goal again, click the door marked "To the fight."
 * If you want to save your game -- like if you need to log off and meditate or drink for a bit before continuing -- you must first exit to the Marketplace via the door on the left end of the training area. To reenter the arena, use the door that has become available in the Marketplace between the arrow leading to Pharmacist and the one leading to Outside Doc's Workshop. ➞
When you finally win Platypus Bataka, you'll find yourself back in the Tavern. You won Spunky Goal! If she was your third and final Goal, you'll be automatically whisked to section 6.0.
6.0: Chapter V finale
After winning over your third Goal, you'll find yourself at Doc's Replacement Parts Store watching some dialogue with the Resistance. They plan to "shnatch ze cartrishesh" with the ascension codes -- "sacrifishe"ing Goal in the process -- to prevent them falling into the hands of Unorganized Crime, who are currently holding Doc and Goal hostage in Doc's Office. "Ash shoon ash ze clock shtrikesh ze vull hour," Janosch plans to send Garlef in to deal with them in some unspecified manner. ...or to "die vor ze good caushe," one of those two things. Rufus asks them to give him a little time to think of a better plan...
- click Door behind Janosch. After a brief conversation with an unidentified yet familiar-sounding person behind that Door, you get temporary custody of Liebold's Remote.
- use Liebold's Remote on Liebold
- enter the Mysterious Anomaly that opens
- talk to Future Rufus. It doesn't matter what you say to him -- i.e. there's no point at which "you must say X in order for Y to happen" -- so just enjoy the show.
The conversation ends with Rufus (your Rufus, the Present one) going through the portal on the right and landing in Doc's Office; he asks Nod and Wink to wait before shooting their way out through the "weird extremists."
With Doc unable to voice his objection (because he's gagged), Rufus is now able to open that Drawer by the ramp, so on your way by...
- open Drawer, then click Remotes inside to collect Donna's Remote and Liebold's Remote (yes, again)
- talk to Goal (currently "Lady") and mention the Remote you found to learn that she's unwilling to go along with any plan that involves the removal of her Cartridge.
In order to unlock the dialogue required in step 7, it's necessary to say to Goal either "I found this remote" or "Doc mentioned that Donna has an implant." The bit about the remote appears on her menu after you do step 5; the one about the implant only appears there if you first talk to Doc and say "This element on Donna's temple - is that also an implant?"
- distract Lady Goal by telling her "Doc keeps a bottle of champagne in his office" -- Rufus automatically takes her Cartridge
- combine Lady Goal's Cartridge with Donna's Remote (the blue one)
- use Donna's Remote on Donna to put Lady Goal's brain inside Donna's body. After a brief scene in which Donna-Goal "takes care of" Wink and Nod (by shooting them in their backs), Rufus gives Donna's Remote to her
- click crowbar lying on floor next to Nod's body (or gun next to Wink's) to collect Crowbar and WeaponStep 11 prevents you from earning Pre-paradox, which requires you to exit Doc's office via the Mysterious Anomaly.
- go Into the Lock -- Rufus talks to Past Rufus through the door and gives him Liebold's Remote
- use Crowbar on Electrodes to open the portals
- when Past Rufus asks "what am I thinking of right now," you need to give the nonsensical response that Future Rufus gave when you had this conversation the first time (it's the last menu option, "Zeeblezooble")...
... that is, unless you want to see Rufus dissolving painfully in a "time paradox." Don't worry, you can dissolve him (did i mention painfully?) as many times as you like until you get it right.
If you have anywhere to be IRL within the next 15 minutes or so, you might want to save your game here and come back later, because there's a huge amount of dialogue coming up, with no breaks.
- click on Clock to make it strike the hour, cueing the Resistance to enter. After some hijinks with them, Rufus is talking to Donna-Goal through the door.
Now prepare yourself for well over 100 lines of exposition and backstory in a segment i like to call: "OH MY GOD, THEY'RE STILL TALKING." At least we get an idea why Rufus seems to prefer Lady Goal to the others: she's even more of a selfish monster than he is...
CHAPTER VI: RED RUST SEA
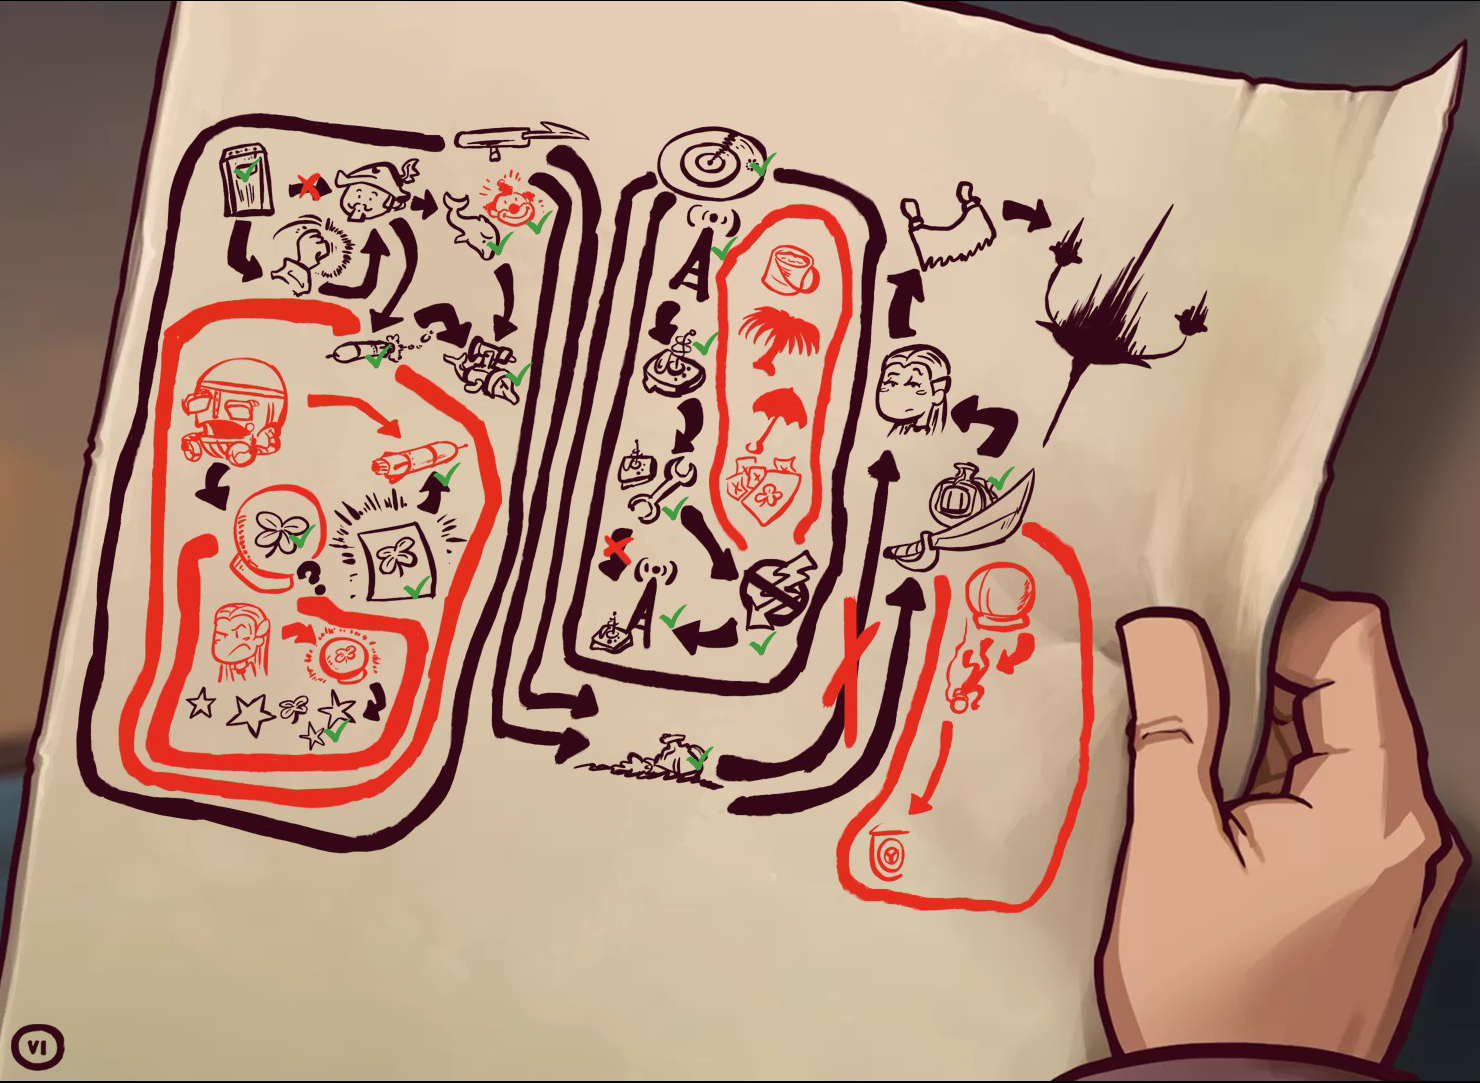
The Chapter is labeled "Red Rust Sea" on the New Game > World Map, but when mentioned in the dialogue, the body of water is referred to as "Rust Red Sea."
I'll be using that first version ("Red Rust") in the guide, but wanted to mention the other version ("Rust Red") just to make sure all my search engine bases are covered. All two of them.
I tried for some time to fill that empty space in the lower right corner of this chapter's Plan, but couldn't find the trigger. I've a hunch whatever's supposed to be there would have made that whole segment aboard the Cutter (section 7.6) a lot less... feeling like something important got left out. But i guess we'll never know.
7.1: find the rebels' hideout
- Secret Knock Note
There's some disagreement among the crew over where you should go first, but the Radar map seems to side with Goal and Bozo that Porta Fisco is the place to be (because it's the only location other than the one where you started that's marked with a name)...
- while looking at Radar map, click topmost location to go to Porta Fisco
- go through green pipe on lower right to reach an area known only as "Entrance"
- click the door marked "???" to start the...minigame: secret knockThe secret knock for this door consists of four sets of 1 to 5 knocks. Each of the first three sets you knock is followed by a response. Your mission is to figure out what the responses mean, using Secret Knock Note as your guide.
Now, the Secret Knock Note may look sort of like a robot face emoticon, but it's actually showing you the math symbols plus, minus, plus. So in this puzzle you've got numbers, and you've got math symbols... if only there were a way to make those two concepts work together...
how to playClick Door to knock on it. After completing your set, use the checkmark button at the top of the door to submit it. If you mess up and want to start a set over -- like if you meant to knock 2 times but accidentally did 3 -- use the big "X" button.To solve this puzzle on your own, it may be necessary to first go to Main Menu > Settings and enable subtitles, so that during the responses, you can see the text "*knock*" flashing over the blue window once for each knock. I swear there used to be some audio there, but when i retried this puzzle in 2026, the responses were silent. According to my notes, even if you do get sound, it will be very quiet, and the pace remains very fast either way, so subtitles are the way to go.
on with the spoilers!Basically, you're going to build yourself a series of little equations by putting together your knocks, the symbols from Secret Knock Note, and the responses:- your first knock PLUS the first response = your second knock
- your second knock MINUS the second response = your third knock
- your third knock PLUS the third response = your fourth knock
If you play around with this you'll find that the responses are always the same:
first response = 1; second response = 3; third response = 4.You'll also find that sometimes doing the math leaves you with numbers you can't knock, i.e. less than 1 or more than 5. So you'll need to find a starting number that allows you to stay within the limits while doing all your equations.
solutionThe only number that will work as your first knock is 3:- knock 3 times (the response is 1 ... 3 + 1 = 4)
- knock 4 times (the response is 3 ... 4 - 3 = 1)
- knock 1 time (the response is 4 ... 1 + 4 = 5)
- knock 5 times
- your first knock PLUS the first response = your second knock
- enter Rebel Camp.
If you go through all the dialogue here, you'll eventually be presented with the choices "Restore," "New Game," or "Quit." The last two buttons actually work, i.e. they really do what they say they're gonna do. Click "Restore" to dismiss the popup without doing yourself any damage.
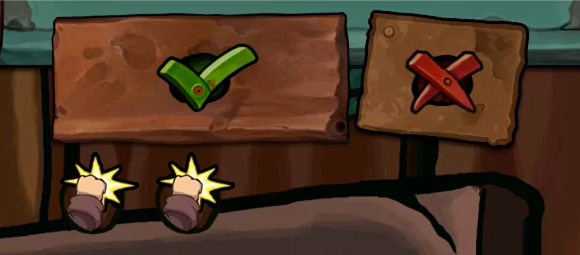
7.2: get access to the Gadget Shop
- Ice
- Torch / Burning Torch
- Tire
- Bait Fish
- Can of Tuna
One of the few hints i have for you in this section is that your quest begins with some things Rufus described as "boring" when you examined them, followed by an idea how they could be made less boring. (The things to which i refer are found somewhere in Porta Fisco...)
- get Torch:
- aboard Cutter, right-click Radar (that green grid thing behind Bozo) to bring up Radar map
- click the location that's up against the eastern edge -- this takes you to North Pole.
Look around, then go back Into the Cutter... there's something different here: a cup of Tea on the table that wasn't there before... Go on, click it.
- out On Deck, click Snow Pile to collect Ice, then go back Into the Cutter
- use Ice on kidney Tea to cool it down, then click it to make Rufus drink -- he runs outside to relieve himself, melting a hole in the ice
- take Torch
- aboard Cutter, right-click Radar (that green grid thing behind Bozo) to bring up Radar map
- get Tire:
- go to Porta Fisco
- use Torch on Burning Barrel to create Burning Torch
- enter Street Canyon (the large archway top center of Porta Fisco's Quay)
- use Burning Torch on Mountain of Tires
- click the Burning Tire that fell out to collect Tire
- go to Porta Fisco
- make cat food:
- go to Rebel Camp
- use Tire on Service Hatch (far right side) to hang it up there.
Rufus wants the Baby Dolphins to jump through the burning hoop, but "they still need a little incentive..." Try using items from your inventory on Tire as it hangs on Service Hatch; if nothing helps...
- board Cutter, go to Floating Black Market
- click bucket next to Fisherman to collect Bait Fish, then return to Rebel Camp
- use Bait Fish on Tire
- ...take Can of Tuna from Service Hatch, and never speak of this again.
- go to Rebel Camp
- go to Floating Black Market
- put Can of Tuna into Bowl in front of Gadget Shop to make Cat reveal the cat flap that Rufus couldn't see without murdering something first, apparently. Let's hope he didn't put ground glass in the "tuna" while we weren't looking.
- Rufus is too "muscular" to fit through Cat Door, so ask Goal if she can squeeze through; Baby won't, but Spunky can and does, unlocking the door on her way out
7.3: obtain torpedo gear
- Prize / Torpedo Equipment
To get those lottery numbers, you need to make Spunky Goal talk to the Seer, but she won't go into the tent willingly... Maybe you could "smuggle" her in there somehow?
- go to Porta Fisco's Quay and ask Baby Goal to go with you "to the fortune teller."
If you ask her and she won't go, it means you were talking to Spunky instead of Baby; use Remote on her and try again.
If you can't ask her (because the option isn't on her dialogue menu), it means one of two things:
- either you haven't yet talked to anyone about couples counseling (and therefore Rufus doesn't know it exists), in which case you need to go talk to either Seer or Goon (the bum standing outside Rebel Camp) until "couples counseling" is mentioned...
- ...or you've already taken Goal to the Seer and unlocked the next part of your quest, and so are ready to skip directly to step 3; if it's this one, you'll see "Find the lottery numbers in the stars" on Rufus' plan.
- find a way to win the lottery:
- with Baby Goal present, run through all of the following dialogue with Seer:
- "How do I prevent Goal from marrying Cletus?"
- "What does our future together look like?"
- "This is all humbug. You're holding the ball upside down."
- "How do I prevent Goal from marrying Cletus?"
- use Remote to switch to Spunky Goal.
To discover Spunky's role here, start asking questions, and observe her reactions.
When you ask a question as it first appears on the menu, Seer doesn't answer (he just says "I don't understand what that has to do with your relationship").
When you ask the question again (rephrased for couples counseling), Seer answers it. The first time Spunky hears this response, she comments, "This is humbug! Let's get out of here."
The second time Spunky hears that same response (because you asked the same question again), she says, "This guy is starting to drive me crazy. May I slap him?"
The third time Spunky hears that same response, she loses her temper and attacks Seer, making him change his answer.
- ask Seer about money (keywords "lottery" or "wealth") 3 times. After the third time, Goal attacks him and he provides a lead on the winning numbers: "they are written in the stars."
- with Baby Goal present, run through all of the following dialogue with Seer:
- board Cutter and go to North Pole
- examine Pole Star (the brightest one of the bunch) to get winning lottery numbers.
You don't need to write them down or anything -- Rufus will remember them. In case you're just curious, though, they're 4, 8, 15, 16, 23, and 42 (commenter Exo-rain points out these are the mysterious recurring numbers from the 2004 American T.V. series "Lost").
- go to Floating Black Market, enter Gadget Shop (if you can't get in, see section 7.2)
- click Lott-O-Mat to get Prize
- use Prize on Shop-O-Mat to collect Torpedo Equipment
possible missable achievement alertNormally i put these alerts directly before the action that takes an achievement off the table, but this time i've made an exception for the following reasons: (1) i don't think it's actually missable, plus (2) its unwieldy longness was interfering with the legibility of my primary instructions. Just in case i'm wrong about reason #1, i moved the alert down here instead of deleting it. Everybody wins. ...Probably.I say "possible" and "vague" because i didn't do anything special to earn this achievement, and because the instructions i read about it after completing the game are phrased cryptically and seem to indicate requirements that i didn't meet. Both guides i found were written for the standalone "Chaos on Deponia," so maybe different rules apply to players of that game than to those of "The Complete Journey."
Both of the other guides stated that you must witness "all the angry scenes of Goal" at the Seer. I would interpret this to mean that you need to get Spunky Goal to force Seer to change his answer to all 5 questions (by repeating each of them until she attacks him). I'm 99.9% sure i did not do this (that's a 0.1% allowance for the fact that nobody's perfect).
So i guess if you get through this part without earning the achievement, try loading an old save file and doing that thing i described in the previous paragraph. Be sure to ask about lottery/wealth last, because that ends the conversation.
Since each question comes in 3 different forms, here's a list to help you keep track:
- "What was that about our future together again?"
The first question is only shown in its final form while Spunky is present, because you had to use the other two forms on Baby before you could switch her over; you'll need to just ask this one 3 times.- "Will we find Donna-Goal in time?" >
"Will Goal and I ever really get together?" / "What was that about our getting together?"- "Are we going to survive all this?" >
"What does the future hold for our health?" / "What was that about our health again?"- "What will happen to Deponia?" >
"Where will we grow old together?" / "What was that about our sunset years?"- "What are this week's lottery numbers?"
"Will we be rich? Lottery winner rich?" / "What was that about our wealth?"
7.4: fix Radio Tower
- Broken Transmitter / Transmitter
- Shoe / Broken Umbrella
- Bananas
- Canister, Hose / Diesel
- Power Inverter
- Air Freshener Trees
- Wading Pool
- go to Isla Watchit (2nd location from top on Radar map)
- go through passage on right to reach Radio Tower
- pick up Broken Transmitter and take it to Doc aboard the Cutter -- he fixes it and gives back Transmitter
- return to Radio Tower (the area) and use Transmitter on Radio Tower (the structure) -- Rufus is struck by lightning and is therefore unable to make the repair...hinterlude*...However, he did get some new info on his Plan, and Goal got some new options on her dialogue menu(s) -- be sure to talk to both of her personalities. When you're done doing that, examine everything, and you'll have a lot of helpful information about what's going to happen next: you need to use Goal as a human lightning rod so Rufus can climb the tower without being struck. If you're not sure how to do that, tell Baby Goal "I keep getting hit by lightning," then ask her about the thunderstorm rules.
At the end of that conversation (the one mentioned in that last spoiler), Rufus rattles off a list of elements of the upcoming task: "Water, tree, umbrella, lottery." I'm guessing one of the things that brings people to this walkthrough for help is "lottery" (which is covered in sections 7.2 and 7.3), and another big one is "tree."
Below are three tree hints for you. Viewing all of them is almost the equivalent of reading the answer, so use caution where applicable; i recommend starting out with EITHER both of the first two OR just the third one.
The first two hints come from Janosh; they're essentially non-repeatable, so here they are, translated into English for your convenience:
- Rufus: <examining Canister as it sits on the floor> There's no more diesel.
Janosh: ...we need it to run the turbine in the sewers. Lucky for us, the winds out there are offshore right now. As soon as the wind turns, the stink in here becomes unbearable. - Rufus: Isn't it a little risky to operate directly under the nose of the Organon? Speaking of which... you've got a booger there.
Janosh: A booger? Icky icky icky. But that is exactly the point. You can't see right under your nose. And down here in the sewers, nobody wants to smell either. We are even almost out of air fresheners.
Your third hint comes from Mike D of the Beastie Boys (bet you didn't see that coming), who once said: "I got the trees on my mirror so my car won't smell..."In summary: steps 7 and 8 below will be guiding you to make it stinky inside Rebel Camp using the Old Power Turbine in Entrance area so they'll break out the tree-shaped air fresheners.
* "hinterlude" = "hint" + "interlude." May history remember that i was the one to coin that.
Let's start by getting the Umbrella Rufus mentioned, since we know where to find one: Goon of Porta Fisco said he would trade his for something to eat. And what do bums eat? According to Rufus, it's shoes. Perhaps you've had a conversation with Fisherman about catching boots... close enough, right? - Rufus: <examining Canister as it sits on the floor> There's no more diesel.
- go to Floating Black Market and say the following things to Fisherman:
- "Get off it. You're afraid of the Organon too."
- "If you're not afraid then why did you stop fishing?"
- "Could you please catch a boot for me?"
- "I won't go away until you catch me a boot."
- "Get off it. You're afraid of the Organon too."
- go to Porta Fisco and trade Shoe to Goon for Broken Umbrella
- get Diesel:
- enter Rebel Camp and take Canister off floor
- go to Seer's tent and steal his Bananas by clicking them a total of three times
- board Cutter, go to North Pole, grab Hose from the Deck
- go to Isla Watchit and use Bananas on Exhaust to "put [Diesel Generator] out of commission"
- use Hose and then Canister on Diesel Generator to collect Diesel
- enter Rebel Camp and take Canister off floor
- get Air Freshener Trees:
- go to Porta Fisco and pick up Power Inverter from trash pile near archway
- enter Entrance (the area that leads into Rebel Camp)
- use Diesel on Tank to fuel Old Power Turbine
- use Power Inverter on Hatch to reverse the airflow
- press blue Button (over by the door) to start Turbine. Rufus may or may not do this step automatically when you install the Inverter.
- enter Rebel Camp and collect Air Freshener Trees
- go to Porta Fisco and pick up Power Inverter from trash pile near archway
- while at Rebel Camp, pick up Wading Pool. If it has Baby Dolphins in it, go to section 7.2.
- go to Isla Watchit's Radio Tower (the second area)
- evade the lightning:
The first three actions can all be accomplished by simply handing Wading Pool to Baby Goal; i list them separately here for the benefit of anyone who's already completed one or more of them and needs help finishing up.- place Wading Pool on Plateau
- click Pump to fill it with water
- ask Baby Goal to stand in Pool
- give Baby Goal Prize (section 7.3), Broken Umbrella, and Air Freshener Trees. You can combine Broken Umbrella and Air Freshener Trees in inventory before handing them to Goal if you want to skip a few lines of chatter from her.
Step 12 prevents you from earning Woooghieee, which requires you to use the repaired Transmitter on Radar aboard Cutter. - place Wading Pool on Plateau
- use Transmitter on Radio Tower
7.5: prepare & deploy dolphins
- Straight Bananas
Your first task in this section will be to cheer up the depressed dolphins; the instructions for that are below, but i thought some of you might like to have some hints first...Go to Rebel Camp at Porta Fisco, then click "Back" to reach the area where an inattentive sewer worker is carrying crates back and forth past a manhole. If you click Drain to open it, the worker just goes around... but Rufus said it was funny, so you're on the right track.
Try various items from your inventory on Drain to see if you can improve its comedy potential; if nothing works, make sure you've stolen Bananas from Seer's tent (section 7.4). If you place one of those near the hole, the worker steps on it and slips off in the wrong direction. ...the WRONG DIRECTION... (that's a hint)
- cheer up Dolphins:
- go to Floating Black Market, enter Gadget Shop
- use Bananas (section 7.4) on Banana Straightener to create Straight Bananas
- return to Rebel Camp and use Straight Bananas on Drain
- go to Floating Black Market, enter Gadget Shop
- click Lock (green lever on pipe) to release Dolphins and send them out to Entrance
missable achievement alert(s)Step 3 prevents you from traveling around via the Radar map, and step 4 starts the minigame, completion of which takes you out of Red Rust Sea forever. Therefore, this is your last chance to earn all of the following:
Freestyler, which requires you to say "We could practice a little freestyling" to Goon, the bum standing outside Entrance in Porta Fisco.WARNING: the "New Game" and "Quit" buttons on the resulting popup actually work! Click "Restore" to dismiss it and move on.
Flipper out, which requires you to complete the minigame without skipping it. - go to Entrance, use Torpedo Equipment (section 7.3) on Dolphins
- board Cutter and right-click Radar to launch the...
minigame: dolphin puzzleOn the green grid, you see three dolphins and a Submarine; the goal is to move one of your dolphins into the same square as the fleeing Sub.how to play
- On each turn, you can move each dolphin one time: use the red arrow buttons on the lower right to either send it forward one square or rotate it 90°. After you select a move for one dolphin, the next will be highlighted. When you've moved all three, the Sub makes its move, and a new turn begins.
- The arrows on the buttons are relative to the dolphin's orientation, which means if you click the up arrow on a dolphin that's facing down, it will move down.
- If you don't like the way things are going, use the Reset button on the left side to start over. This does NOT count as "skipping" the minigame, so Reset to your heart's content.
It's not possible to map out an answer to this puzzle, because the Sub doesn't take the same route every time. All i can give you are these...tips
- The Sub is actually avoiding the squares in front of the dolphins' noses rather than the dolphins themselves.
- The Sub can move diagonally, so you'll need all 3 dolphins (plus 2 walls) to catch it.
- The best spots to corner the Sub are the upper right and lower left corners, because once your prey gets its back up against the wall there, it has much less "wiggle room:"
The Sub seems to prefer the northern half of the map, so you may find it easiest to corral it into the upper right corner; however, i feel the lower left corner makes the better trap. Don't be shy about using that Reset button to make things go your way.- Get a piece of paper and draw a north-facing dolphin with its flippers labeled "LEFT" and "RIGHT;" then when you're trying to figure out which arrow to click, turn the paper so that your drawing is facing the same way as the dolphin you're working on.
Use of crayon & green paper optional.
Below are screenies of a successful trap. Since the Sub avoids the squares in front of the dolphins' noses, i've marked them with a purple tint to make them more visual; i'll be referring to these in the next paragraph as "danger squares."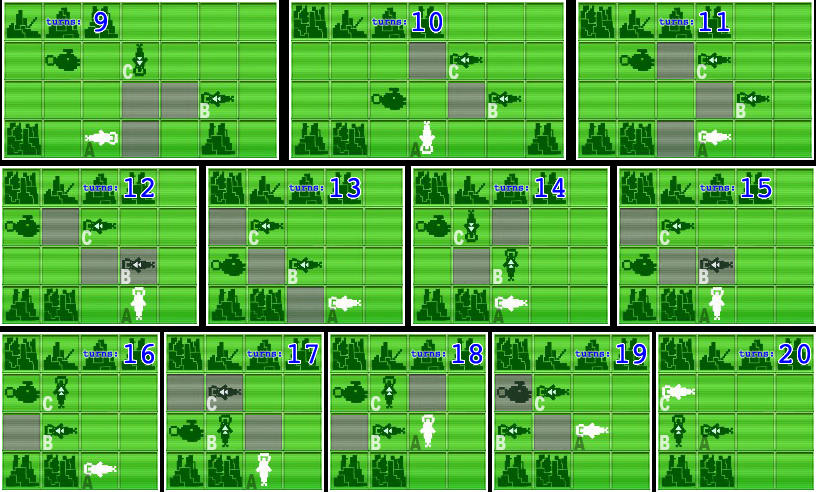
Notice that on its 19th turn, the Sub didn't move, even though there was an open square nearby. The reason is that the only square available to it -- the one to the southeast -- was a "danger square," and it will not move into a "danger square" no matter what, not even to escape one in which it's already sitting!
The "turns" number written on each screenshot indicates how many turns had been taken when that image was captured; the first one is zero because it represents the state of the playfield before any moves have been made. To make it a little easier to tell what's going on while still keeping the images cropped to a manageable size, that number is marked on the same grid square in every screenie.
7.6: board the submarine
After the dolphins catch up with Donna-Goal, Rufus and the crew are out at sea aboard the Cutter, with a vague set of tasks before them as unclear as the water they're floating on...
- click Hatch on right side, then tell Bozo "The hatch won't open." This puts a hidden hint on Rufus' Plan that suggests we'll be looking underwater for another entrance.
- look for a "back door:"
- open Locker and take Diving Suit from inside
- place Diving Suit on Hook
- click Diving Suit to climb into it and be lowered into water
- once below, all you can do is press a Button that does nothing, and collect 2 Hoses.
After you've taken them both, the weaponized dolphins swim past in the background with evil red eyes and a dramatic music sting.
- return to surface via the arrow in upper left corner of screen.
The most helpful clue about what to do next comes from dialogue that doesn't happen until after you've already started doing it, so i'm going to "cheat" and present it to you now: "The dolphins absolutely want a target." ...you were probably hoping it was more helpful than that. Sorry.
- open Locker and take Diving Suit from inside
- create a Rufus decoy, part one (the body):
- combine 2 Hoses in inventory to create Long Hose
- use Long Hose on Water Faucet
- click Hose lying on the deck to get it on your cursor, then click Diving Suit to attach it there
- turn on Water Faucet to fill Diving Suit with water.
- combine 2 Hoses in inventory to create Long Hose
- create a Rufus decoy, part two (the face):
- enter Cutter and use Remote to switch to Spunky Goal
- go back out On Deck and ring Bell three times. The third time, Spunky smashes the door into Rufus' face, leaving a clear, face-shaped Dent ...so clear, in fact, you could probably use it as a mold...
- open Lamp and take Candle from inside
- inside Cutter, put Candle in Pot to melt it
- click Pot to collect Pot with Wax
- out On Deck, use Pot with Wax on Dent in door to create Impression
- use Impression on Diving Helmet to complete decoy
- enter Cutter and use Remote to switch to Spunky Goal
- talk to Bozo and ask him to help lower the dummy.
After a brief conversation with Bozo and an explosion underwater, Ray Coolsen (the decoy) emerges in a knot. Rufus clears out the Suit to make it available for his own use.
- click Diving Suit to go back underwater and discover that a Hatch has appeared
- click Hatch
CHAPTER VII: BLAST TOWER
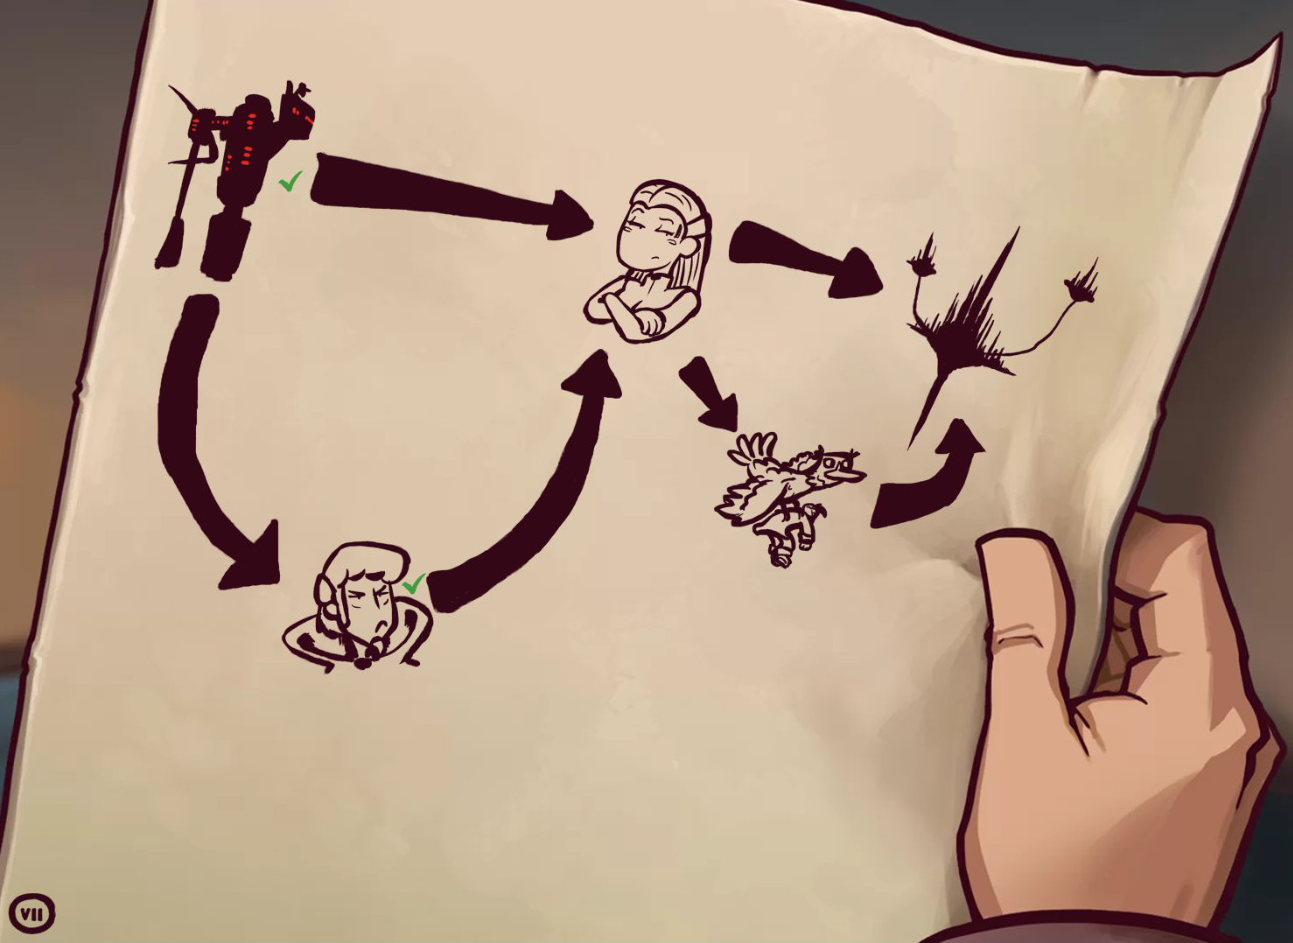
8.1: teleporters
Rufus and Doc are now in the teleporter area, and Doc is spinning a yarn about how everybody aboard the cutter was kidnapped by Donna-Goal, but she only took Goal-Goal with her, so i dunno how that works. Anyway, the Goals and Cletus are planning to go to Porta Fisco aboard Argus' cruiser, and Rufus needs to navigate the teleporter maze to catch up with them.
The solution is at the end of this section.
There are two areas here; since they don't really have names, i'll be calling them "Area 1" and "Area 2." The one with Doc sitting in it is "Area 1," and the one with the Resistance fighting in it is "Area 2."
Each of the three teleporters you see in Area 1 leads to a teleporter in Area 2, as shown on the map below. The cabinet in Area 1 that i've labeled "1A" on the map leads to the cabinet in Area 2 that i've labeled "2A," and so on.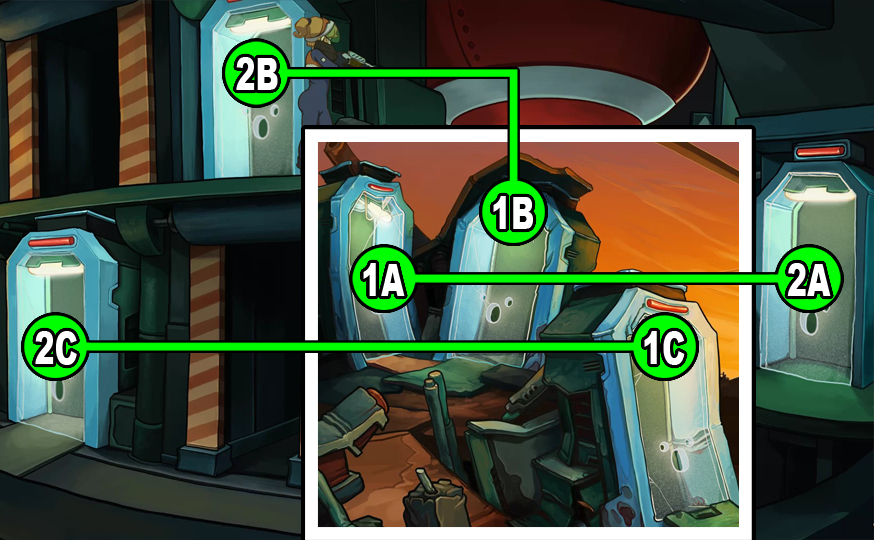
Your goal in this section is simply to get Rufus to teleporter 2A. ...Yes, of course there's a catch.
Each of the teleporters in Area 1 is occupied: 1A has a platypus in it, 1B has a frog in it, and 1C has a fly in it. If movies have taught us anything, it's that getting into a teleporter with another organism makes crazy stuff happen. ...as long as that organism is bigger than, like, bacteria or eyelash mites, i guess. And these organisms are definitely that.
The basic rules of the teleporters are as follows:- When Rufus enters a teleporter with an animal in it, he comes out the other end merged with that animal:
- When merged-Rufus goes through a teleporter, he comes out the other end separated back into himself and the animal:
- When Rufus enters an empty teleporter that has an animal sitting in the other end of it, he and the animal switch places:
- When merged-Rufus enters an empty teleporter that has an animal sitting in the other end of it, he and the animal switch places, AND he becomes unmerged:
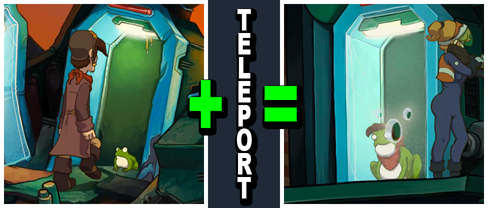
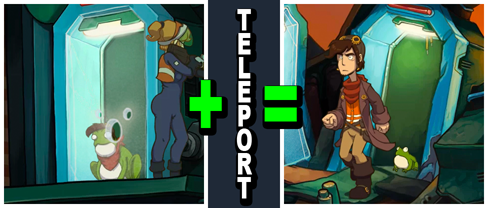
Victory happens when Rufus arrives at teleporter 2A as himself (not merged).
The basic rules of movement are as follows:- In Area 1, non-merged Rufus can walk between any of the three teleporters.
- In Area 2, non-merged Rufus can only walk between 2B and 2C.
- Fly-Rufus can move freely between all teleporters in both areas, but can't enter an occupied cabinet.
- Platypus-Rufus and Frog-Rufus cannot leave their boxes; pretty much all they can do is turn around and go back where they came from.
...And the big secret is: it's possible to make Frog-Rufus eat the fly through the holes in the transporter doors.
- enter 1C with fly (exit 2C as Fly-Rufus)
- enter 2A as Fly-Rufus (exit 1A as Rufus) ➞ fly is now at 1A, platypus is at 2A
- enter 1C (exit 2C)
- enter 2B (exit 1B) ➞ frog is now at 2B
- enter 1C (exit 2C)
- enter 2B with frog (exit 1B as Frog-Rufus)
- as Frog-Rufus (in 1B), click the fly (in 1A) to eat it
- go back through 1B as Frog-Rufus (exit 2B as Rufus) ➞ frog is now at 2B
- enter 2C (exit 1C)
- enter 1A (exit 2A) ➞ platypus is now at 1A; Rufus is himself at the end of the puzzle
Climbing the ladder next to teleporter 2A prevents you from earning Behind the mirror, which requires you to enter teleporter 2A as non-merged Rufus
8.2: (not) the end
- once through the teleporters (section 8.1), climb the ladder next to the last one
- after the scene with Cletus, Goal, and Argus, go through door to Bomb Control Room
- click Bag to collect Cartridge and Donna's blue Remote
- use Cartridge on Donna to put Baby Goal's brain into her body.
After a brief conversation, Baby Donna Goal walks through the door and Rufus follows, arriving to find that Lady Goal has won over Baby, instead of the other way 'round. Rufus and Baby Donna Goal go back out through the door.
- use blue Remote on Donna to put Spunky's brain into her.
After a brief conversation, Spunky Donna Goal walks through the door and Rufus follows; this time, the conversation with Lady takes a better direction.
When Rufus returns to Bomb Control Room, Cletus is gone and the door leading to Controls is open.
- click Controls -- Cletus appears and locks Rufus inside control room
- click Controls again to restart bomb timer -- Cletus comes in to stop it, leaving door open
- click anywhere outside control room to have Rufus walk out and close door behind him.
A free-for-all breaks out; Cletus attacks Rufus, and Spunky Donna Goal attacks Lady Goal. Cletus gets hold of Donna's Remote and switches her to Baby Donna Goal, giving Lady Goal the advantage. Donna's Remote lands on the floor, and you regain control of Rufus.
- press Donna's blue Remote to put Spunky's brain back into Donna's body and turn the tide in that scrap.
If you can't press Remote, it's because Cletus is on top; click him to switch places.
If at any point you find that Cletus has switched Spunky Donna Goal back to Baby Donna Goal, just push the Remote again. Punching Cletus (clicking him while Rufus is on top) seems to reduce/eliminate his interference with the button.
- click Spunky Donna Goal to talk to her four times (if you can't talk to her, click Cletus to put Rufus on top, then try again):
- "Spunky Goal!" ("What?")
- "Lady Goal still has her remote!" ("So what?")
- "Grab the remote!" ("Got it! Now what?")missable achievement alert
- "Press it! Press the Remote!"
- "Spunky Goal!" ("What?")
- grab red Remote.
Cletus throws Rufus off the balcony, but won't kick him over the edge because he still has the red Remote with Lady Goal's brain on it.
This is your last chance to create a save file before the next installment of the trilogy starts, and before the final (potentially) missable achievement.
- get red Remote out of your inventory and use it on Goal Donna to switch her to Lady Goal.
You may miss seeing it because it happens so fast: Rufus drops the red Remote off the tower; Cletus freaks because he doesn't know Rufus switched it to contain Donna's brain. Then Lady Goal, having misunderstood the conversation she overheard, knocks Cletus out because she thinks he was the one who started the bomb countdown. Before she'll help Rufus up off the ledge, she needs to take him on a little guilt trip...
- Lady Goal asks if Cletus was lying about the bomb; eventually, in order to continue, you have to tell her he wasn't.
That's it, that's all i can help you with in this installment, except for this one last...
missable achievement alert...ishThe reason i believe this is that as far as i know, earning it requires you to let all the credits roll at the end of the second installment... but when you're playing The Complete Journey, this isn't the end, so the credits don't roll here -- you won't see them until the end of the third installment.
What i can tell you for sure about the trilogy version of this achievement is that (1) i got it without having to go back for it, and (2) it popped up after the third installment started.
LINKS
Steam's "Complete Journey" Global Gameplay Stats
This is where you can see a list of all 105 achievements across all three installments, as well as the percentage of Deponia players that have earned them. Game 2 icons are blue, game 3 icons are green, and game 1 icons are whatever that other color is... pinkish? brownish? ...mauve?
Deponia manual from the standalone version's Steam Store page (pdf)
It's just a game manual (remember those?), but it's pretty entertaining, especially as game manuals go.
Daedalic Entertainment's Complete Journey support center[www.daedalicsupport.com]
Their site offers -- amongst other things -- an array of "savegames," which i hear tell may assist players who were deprived of achievements by bugs in the software. It is unknown whether these files might also compensate for laziness. I'm guessing "yes," but i'm too lazy to look into it.
http://steamcommunity.com/sharedfiles/filedetails/?id=875459798
http://steamcommunity.com/sharedfiles/filedetails/?id=891545311
Beat Deponia: The Complete Journey's achievements?
Flex it — let your friends know you pulled it off.
- Deponia 1 walkthrough with missable achievements★ 5 (857)26k views1.3k ♥104 minUpdated 2 Mar
- Deponia Walkthrough: Game 1 (Deponia)★ 4 (127)19k views240 ♥24 minUpdated 4 Oct, 2016
- Deponia: The Complete Journey Достижение Король свалки.★ 5 (382)17k views365 ♥1 minRussianUpdated 18 Aug, 2014
- Achievement guides for all parts of Deponia (English&German)★ 5 (261)15k views411 ♥3 minUpdated 14 Aug, 2016
- Гайд по достижениям Deponia: The Complete Journey ✔ (105 / 105)★ 5 (691)15k views981 ♥18 minRussianUpdated 23 Sep, 2019
- Deponia 3 walkthrough with missable achievements★ 5 (467)12k views770 ♥115 minUpdated 26 Mar


- Upgrading to PremiumTeam Fortress 2★ 5 (20k)1441k views11k ♥6 minUpdated May 11, 2022
- No More Room in Hell Official ManualNo More Room in Hell★ 5 (2.8k)569k views2.1k ♥29 minUpdated Apr 22, 2019
- NMRiH Community Hosting GuidesNo More Room in Hell★ 5 (526)351k views653 ♥1 minUpdated Aug 10, 2022
- ULTIMATE GUIDE FOR GAME DEV TYCOONGame Dev Tycoon★ 5 (5.8k)326k views10k ♥4 minUpdated 23 Jan, 2014
- How to 'Git Gud' Soon™MORDHAU★ 5 (2k)318k views3k ♥68 minUpdated Nov 16, 2024
- Лучшие кооперативные игры SteamPAYDAY 2★ 5 (1.5k)315k views2.1k ♥56 minRussianUpdated Apr 27, 2025






This guide was created by its original author on the Steam Community. Are you the author and want it removed? Request removal.