Deponia 3 walkthrough with missable achievements
Introduction
I created these Deponia: The Complete Journey guides (links to the rest of them at the end of this document) based on my dissatisfaction with the way other walkthroughs are organized. When referring to other guides, i found information to be grouped in a way that catered to readers who were following them to the letter start to finish, whereas i was only checking here and there to get past specific frustrations. I'm guessing i'm not the only one who does it that second way.
Therefore, i tried to organize this guide in such a way that you can search it for the obstacle you're trying to pass -- like stealing Bozo's Towel, for example -- and find all the information you need collected right there without having to do very much additional rummaging around. Please note that this method does not always provide the fastest way through the game, if that's what you're looking for.
I've also made a feeble effort to provide hints to tip you over the edge of figuring out the problem yourself before being handed the answer. However, hints are difficult to work into a walkthrough without making it REALLY long and requiring readers to mouse over a LOT of spoiler text -- which is unsearchable, making the guide MUCH harder to use -- so perhaps a separate "cluethrough" is in order to do that up right. All rights reserved on that word i just made up.*
* (in 2017)
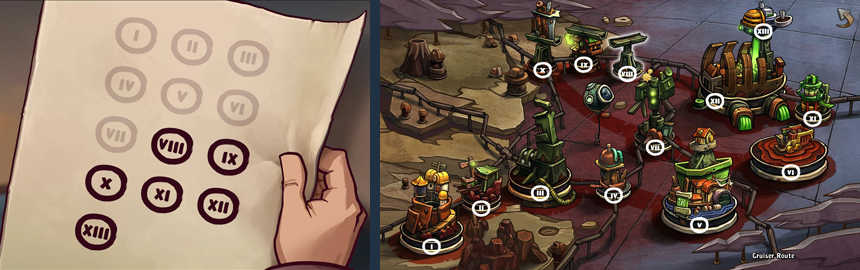
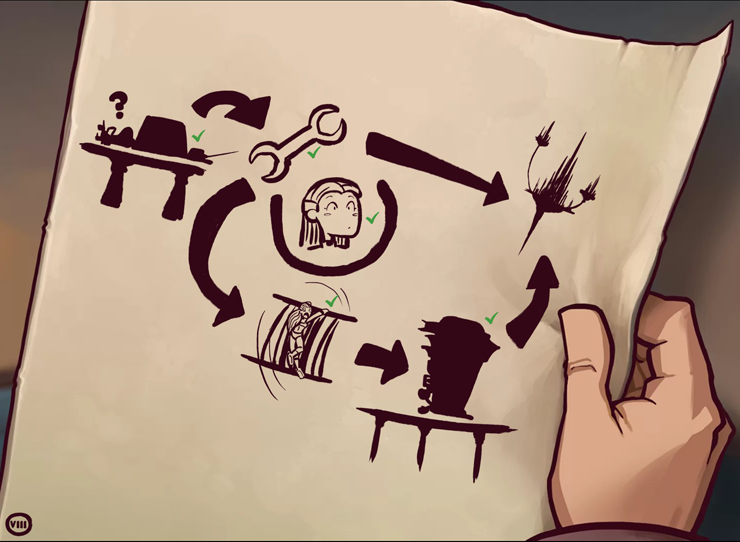
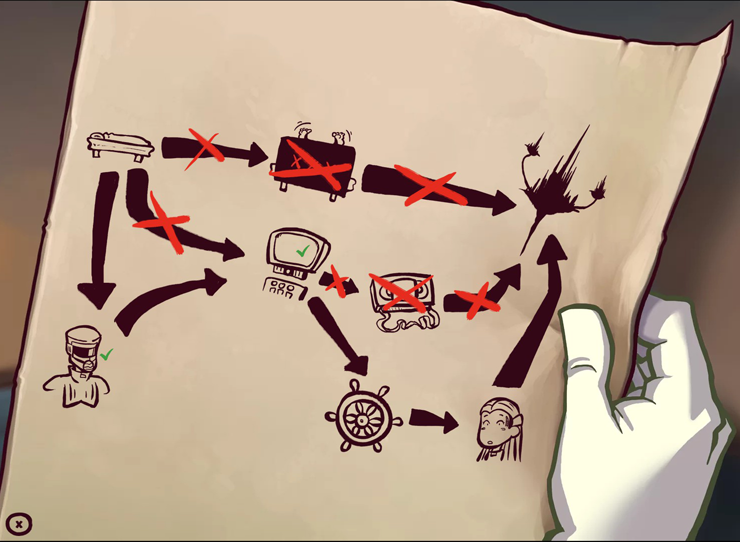
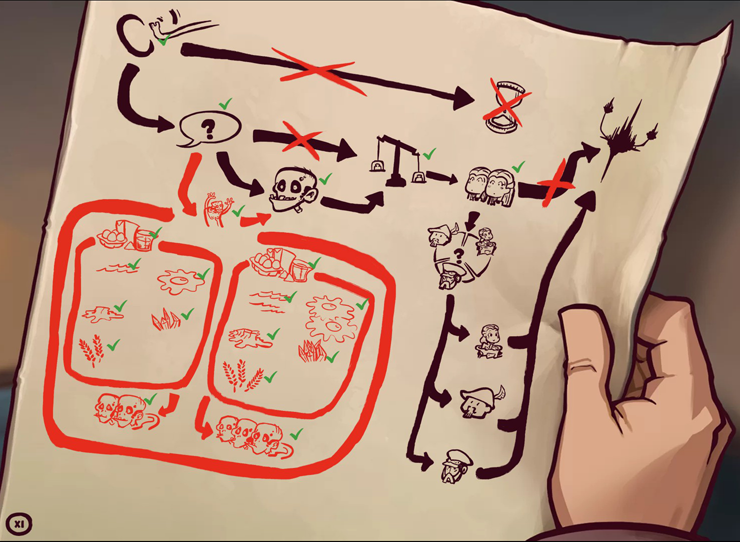
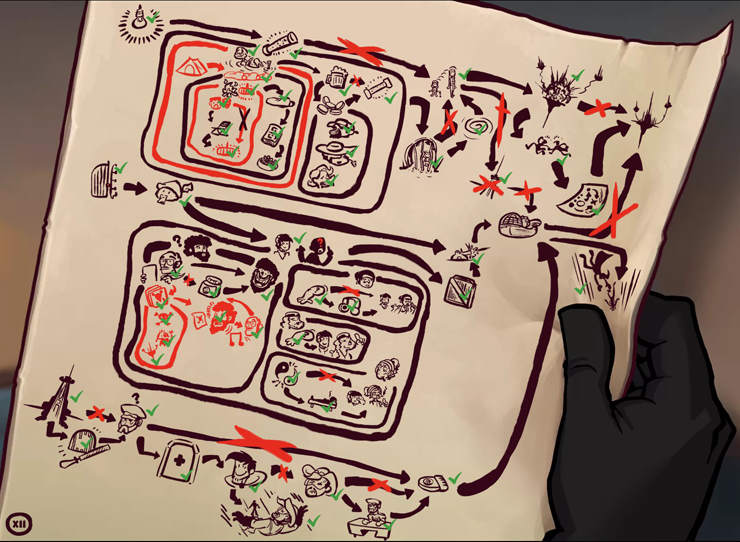
Your current chapter number is displayed in the lower left corner of Rufus' Plan.
text styling conventions
- In this walkthrough, quest items are always shown capitalized and in bold text.
When the name of an item is underlined, it indicates that that is the point at which it first enters your inventory. Note the style difference between these two sample instructions:
- pick up Eye-Gouging Pointy Stick
- use Eye-Gouging Pointy Stick on Rufus
- pick up Eye-Gouging Pointy Stick
- Italicized paragraphs like the one directly above this one contain hints, notes, or other "extra" information.
- To make it easier for you to skip past the fluff to reach the next instruction, larger hint chunks and notes are often placed inside boxes:
Text contents of this box are for box-demonstrating purposes only and are not typical.hinterlude"Hinterlude," short for "hint interlude," is a word i made up circa 2021 for use in these guides. I mention this in case someday there's money and/or accolades in store for the inventors of super niche portmanteaux so nerdy they require two French words to classify them.
"CONTINUE" BUG! WARNING!!!
Do NOT rely on the "Continue" button for picking up where you left off after quitting the game! Always save your game, and then load the save file!
Sometimes after using the Continue button from the Main Menu, you may find yourself with no cursor, unable to click anything. Other times, you may lose some progress (like everything you did between entering the location you were last in and quitting the game).

keyboard shortcuts
- Press "I" to open the Inventory. (that's a capital "i," in case you were wondering)
- Press the "Space" bar to show all hotspots and to pause a cutscene.
- Press "Esc" to go back to the main menu and to skip dialogue lines as well as cutscenes.
- With the keys "+" and "-" you can decrease and increase the sound volume.
- Press "M" to mute and unmute the game sound.
- "F5" takes you directly to the Load/Save menu.
- "F8" opens the Settings menu.
- "F9" saves a quicksave, overwriting any existing one.
- "F10" loads a quicksave, if one exists.
- By pressing "F11" you can take a screenshot.
general tips for surviving on your own
- Consult Rufus' Plan often!Any time you hear a "ding" and/or the sound of a pencil scratching on paper, and see a light bulb or an exclamation point appear on the upper right side of the screen, that means there's new information for you on the Plan; if you see a little green checkmark icon, that means you've completed one of the tasks on the Plan.
To view the Plan, you can either click on one of those icons, or open your inventory and click the light bulb in the upper left of that screen. You will find LOTS of good hints there. Mouse over any drawing without a green checkmark on it to see what you should be working on.
- Talk to everyone about everything!!!Sometimes a character will give Rufus information that unlocks the next segment of his Plan; other times you'll be given subtle hints on how to solve a problem. If you're stuck and have a lot of patience, talk to everyone again: you could discover that some character has a new hint for you, or you may see that a question you already asked is still on a dialogue menu, underscoring the importance of the information it leads to.
- Highlight hotspots!Hold down the spacebar on your keyboard or the scroll wheel button on your mouse to display a mark over each interactable object on the screen.
- Examine (right-click) everything!Do it to objects in the environment and to NPCs. Do it to items before you pick them up, and do it again after they're in your inventory (because Rufus' commentary sometimes differs depending on where an item is). Even if you don't get a helpful hint or a ray of inspiration, there's a pretty good chance you will at least get entertained.
- Pick up everything!You're guaranteed to need every item you encounter, and you're not going to run out of space in your inventory like some games.
- Experiment with inventory items!Try using them on each other and on objects in the environment; you just might stumble on a combination that makes you say "I never would have thought of that."
- Pay attention to what Rufus says!When something you try doesn't work, his reaction isn't always helpful, but sometimes it really is.
- Keep in mind you're in a cartoon universe.Logic and physics here are based more on misconceptions and comedy than reality. Answers may come to you more easily if you approach puzzles with your Tex Avery hat on.
- Try and try again...and again...and possibly again. ...Or not.One running source of frustration for me over the course of this trilogy was the fact that some actions must be repeated in order to get results, and the first attempt offered little to no feedback that would lead me to expect it to work if tried again (and sometimes again). So if you're stuck and you really prefer to do without assistance, you can sometimes get through just by clicking on everything a second or third time.
Though TBH if it comes down to this, you're probably better off just giving in and looking it up.

Leopard Mode
It is my sad duty to inform you that as far as i can tell, neither Leopard Mode nor the sex scene exist. Poki has toyed with your emotions. ...or your... whatever.
MISSABLE ACHIEVEMENTS
There are 52 achievements total in the third installment of The Complete Journey, which you can identify on the global stats page by their green icons. The achievements that you can't avoid earning are not mentioned in this walkthrough; i've only covered the ones that you must do something special in order to receive.missable achievement alertsEach alert is positioned at the "last chance" point for earning one or more missable achievements, and each contains spoiler-hidden instructions for earning it (or them).The alerts are placed at the "last chance" point (rather than "first opportunity") both to avoid spoiling achievements before you're ready for them to be spoiled, and also to help you figure out whether one of your save files is viable for an achievement you had to go back for.
Here are the 33 that are known or believed to be missable, along with the official description of each, since sometimes that's the only clue you need to figure out how to get it:

What has been seen cannot be unseen.

High fashion - low fashion - high fashion - low fashion.

I didn't mean to wind her up.

Cut my life into pieces.

Mirror mirror on the wall...

Where's the fume extractor hood?

Aka. How to die a thousand Deaths

At least I got the lyrics right.

Doors – useful AND sexy.

He'll get around somehow.

Don't turn around! The Kommissar is out!

Knock-knock. Who's there? Rufus. Rufus who? Rufus on fire!

So that's why you don't wash your dirty laundry in public?

Not that I actually need it.

Little pieces of heaven down in the gutter.

The darkest Room Escape Game ever.

Never pay more than 20 bucks for a computer game.

He's just no fun person to hang out with.

You can’t make an omelette without breaking some eggs.
thru
XII
thru
6.4

Throw me something, Mister!

Tell it to the marines!

You jump, I jump … not!

Picking at fresh wounds.

Disco ain't dead!

1st RULE: You do not talk about FIGHT CLUB.

Once upon a time...

Which place do I stick it in... ?

15 minutes of fame.

Admit it: That was dumb luck!

Didn't feel a thing.

Vampire me, Vampire you. Platy-poo.

So what? It's the only peep-show in town.

They seemed a bit bitey.
The "section" column indicates the portion(s) of this walkthrough in which the achievement is mentioned, so you can get an idea on what point in the timeline you should be focusing if you want to try for it without my help.
The "don't skip the minigame" achievements are:
Doppelganger, Groundhog Day, Hand over Heart, Hide and Seek, Laundry Day, Mission Impossible, Saturday Night Fever, Surgeon Simulator.
possibly missable (probably not)
The following achievements are ones which i'm not convinced are missable, at least not in the "Complete Journey" version. I've included them in this guide anyway because i've seen claims that they are missable, and i'd rather be safe than sorry:

I knew it: I'm surrounded by ♥♥♥♥♥♥♥♥.

Does this smell like chloroform?
There has been quite a spirited discussion in the comments over whether Quality Assurance is missable, what action is required to earn it, and how long after earning it it appears. Since this seems to be a popular topic, i've hand-crafted this lovely table to display a summary of the answers i've seen to 2 of those questions:
Based on this input, my official statement is that the achievement is not missable in The Complete Journey, and that you won't see it pop up until the game is over (unless you do the thing under the spoiler tags, which will make it appear sooner). ...Probably.
Two commenters in the "yes/immediately" camp said this achievement is missable. The reason i'm not accepting their input as proof is that neither of them said "I missed it and had to go back for it*." TBH even if they had, i might wait until i heard that a few more times before being convinced, since most of the votes so far indicate otherwise. Also, that "after the end credits" thing is bound to cause at least some confusion.
* (The first one said "It's missable, it's not 'supposed to' appear after the credits because that's not where the action happens, UPDATE THE GUIDE RIGHT NOW" and the other said "I didn't miss it but I think it can be missed." Both quotes paraphrased.)
Ornithorhynchologist
There are 15 platypus eggs scattered around in Chapters IX (Hotel Menetekel) through XII (Porta Fisco). Finding any of them puts a platypus Field Guide into the Bonus section of the Main Menu so you can see the ones you've found so far.
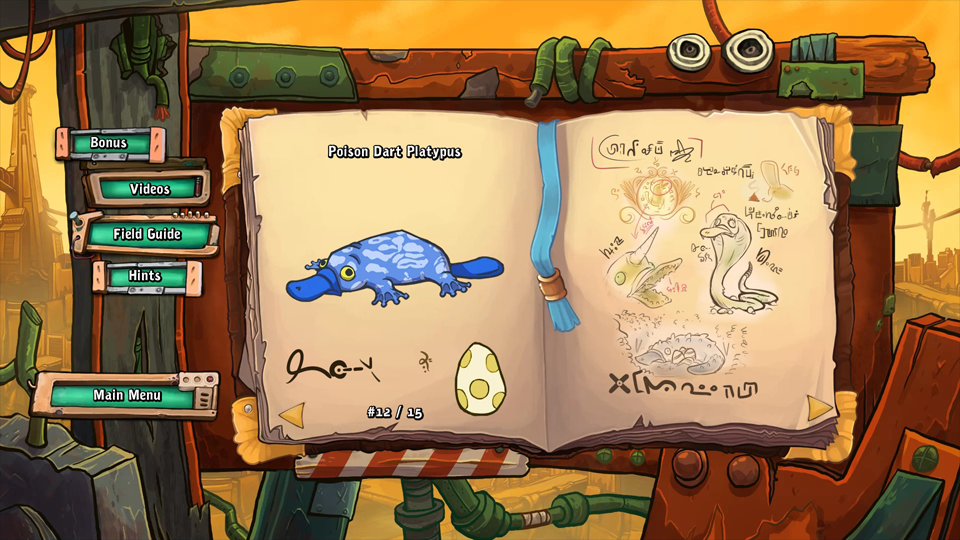
Unlike similar quests in previous installments (Junkyard King, Pin-Up Goal, and Cheater from games 1 and 2), this achievement seems to have no restrictions on save files or timelines or anything. Seriously, none at all! Skip around between unrelated playthroughs in your save files, start new games, travel forwards and backwards through time, click every egg three times to satisfy your OCD compulsions... do whatever you want, as long as you tap all 15 eggs at least once each.
Within the body of this walkthrough, most of the eggs will not be mentioned in such a way as to spoil finding them on your own. Instead, when you're about to do something that will remove you from an area where eggs are found, there'll be a "missable achievement alert" giving you a heads-up to either find them or save your game so you can come back for them. If you need to know how many and where, just scroll back up here.
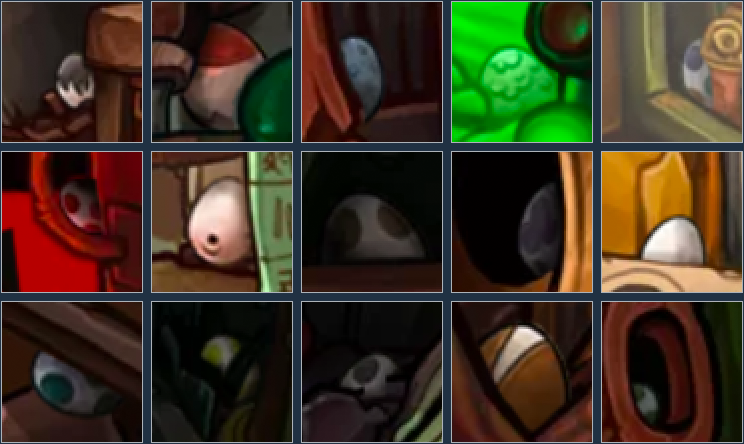
Chapter IX, Hotel Menetekel
- outside: left of door that leads to rooms (#8, Long-Hair Platypus)
- Restaurant: above Coffee Maker (#9, Dwarf Platypus)
- Trash Bin: left of dumpster (#11, Snow Platypus)
- Laundry: just left of center, among machines (#7, Wooly Platypus)
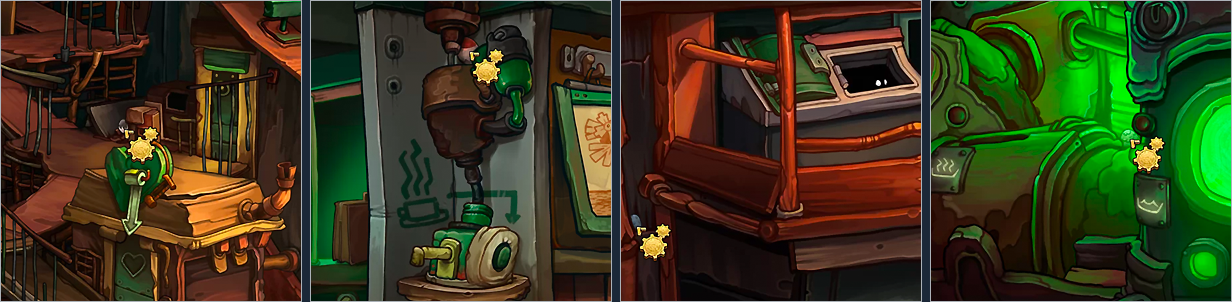 Chapter X, Organon Cruiser
- room immediately following Central Core: left of Oppenbot in box (#14, Clown Platypus)
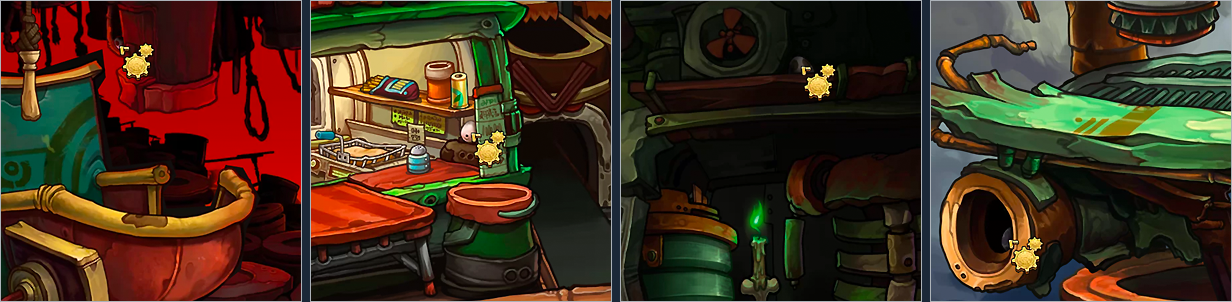
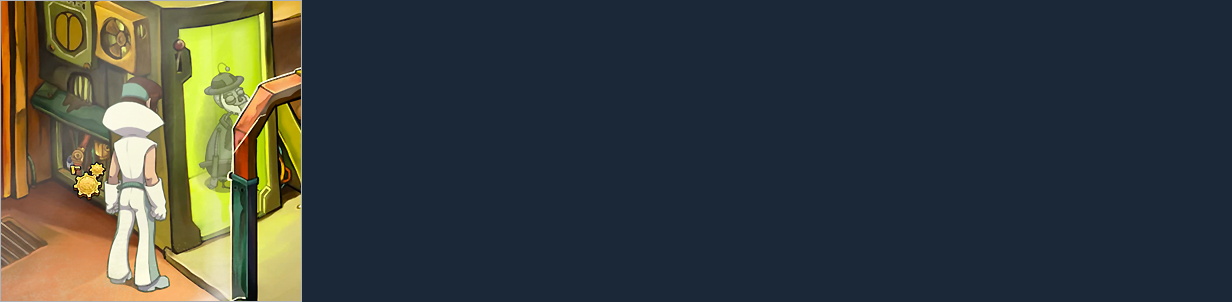 Chapter XI, Clone Lab
- Hell: upper left (#4, Fire Platypus)
- Patio: right side of food stand (#13, Pot-Bellied Platypus)
- Residence: near fan up top (#1, Earth Platypus)
- Clone Lab: pipe opening on lower left (#6, Vampire Platypus)
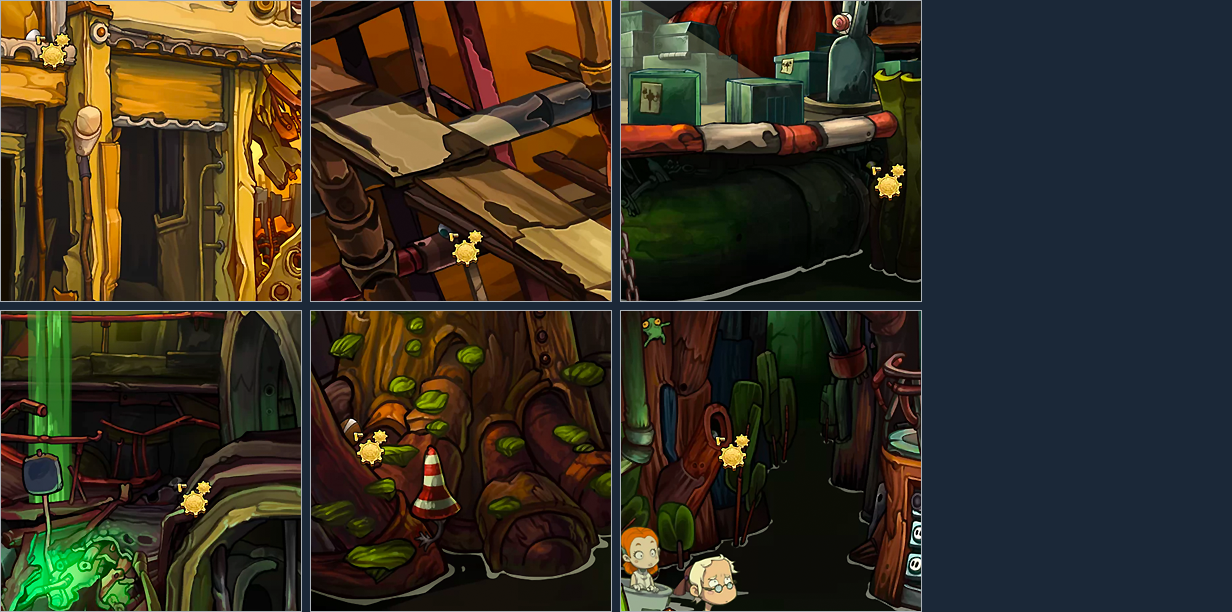
 Chapter XII, Porta Fisco
- Middle Rufus > District Center: left of door leading up to Bozo's house (#10, Naked)
- Middle Rufus > scaffolding where Baby Bozo is crawling around: lower left (#2, Flying)
- Right Rufus > loading dock: under platform on right side (#12, Poison Dart)
- Left Rufus > Lantern: left of large barred pipe opening on right side (#3, Water)
- Left Rufus > Pipe Forest: between archway to leper colony & pipe tree (#15, Mimicri)
- Left Rufus > Campsite: hole near entrance (#5, Swamp)
CHAPTER VIII: CRUISER ROUTE
1.0: dislodge cutter from Cruiser
- after the conversation with Goal and Doc about breakfast and Cruiser Routes, go On Deck, then go To the Prow (lower left)
- after cutscene, enter door To the Sternmissable achievement alertThe next two steps impact these conflicting missable achievements:
Tough Guy, which requires you to get hit by the rail Signal 10 times. - click arrow marked "To the side wall" -- Rufus is now clinging to the side of Bozo's Cutter
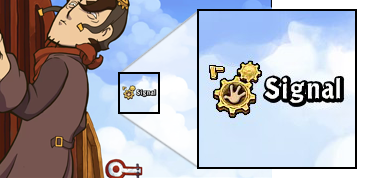
- position your cursor in the sky near Rufus' head, then click when it shows a hand and says "Signal."
This brings Rufus to the back of the Cutter, where Goal is trying to free the cable that snagged the Organon Cruiser. - tighten the screws:
- click Crane Fitting (the thing Goal is sitting on)
- click Middle Screw to make it tight
- click either one of the others (Left or Right) to make the third one fall out
- click Middle Screw 3 times in a row so that all the screws are gone
- click Crane Fitting (the thing Goal is sitting on)
- click "Hold on to Goal" to go to the next scene (warning: underpants)
- once aboard Organon Cruiser, choose a method of overpowering the guard from Barry's dialogue menu. If you want to see all the reactions to the "wrong" choices, be sure to pick the correct answer last: "I'll confuse him with my blackout tactics."missable achievement alert
- Did you hear about the time I saved Goal from the claws of the Organon?
- Do you know how I uncovered the Organon's conspiracy?
- Do you realize it was me who started the rebellion against the Organon?
- Have you also heard that I prevented the depopulation of the Rust Red Sea?
- Did you hear about the time I saved Goal from the claws of the Organon?
- exit the conversation with Barry by saying "We should use the time for an interview," then "How about a little photo session?"
- mess with the controls:
- click big red Button on right side
- click the Lever that was revealed -- the camera moves to a spot behind Lever so that you can see it and the speed gauge up close
- click Speed Up (which is found both on the right side of the speed gauge and the right side of the Lever)
- click Lever two more times.
- click big red Button on right side
- take Fire Axe off of fire protection kitmissable achievement alert
- pick up Hose that was hiding behind Fire Axe in fire protection kit, then click on Cannon to attach Hose there
- click Cannon again to fire it
- grab Hose, which is now wrapping around axle -- Rufus gets wrapped onto axle with Goal
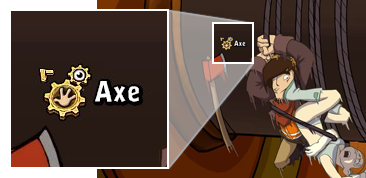
- to get out of this, you first need to get Fire Axe on your cursor. If it's in your inventory, just click it and go back to the scene; otherwise, hold your mouse over left side of axle, and click when cursor shows a hand and says "Axe."
- once Fire Axe is on your cursor, use it on Hose.
CHAPTER IX: HOTEL MENETEKEL
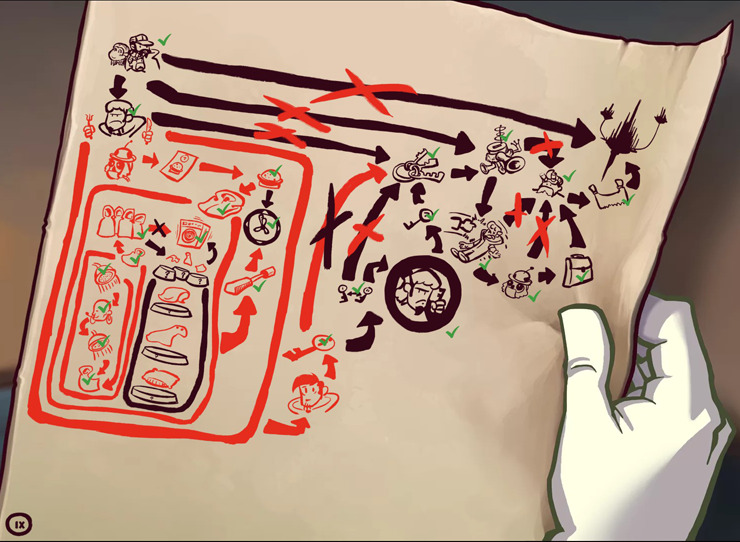 In this chapter, you have a lot of freedom to perform tasks in just about any order you choose, but there's one in particular that unlocks almost everything on Rufus' Plan. Here are screenies of what you will see there if you have already completed that action: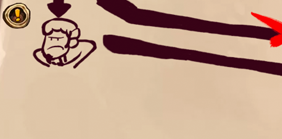
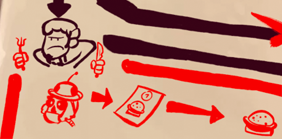
If you don't see any of that, and if you've already discovered Cletus in Reception (as in step 2 of section 2.1), next you need to call the front desk and ask about food: "Room 1" > "I would like to dine now" - or - "Room 5" > "I'd like to eat something" (as in step 4 of section 2.1).
MAP
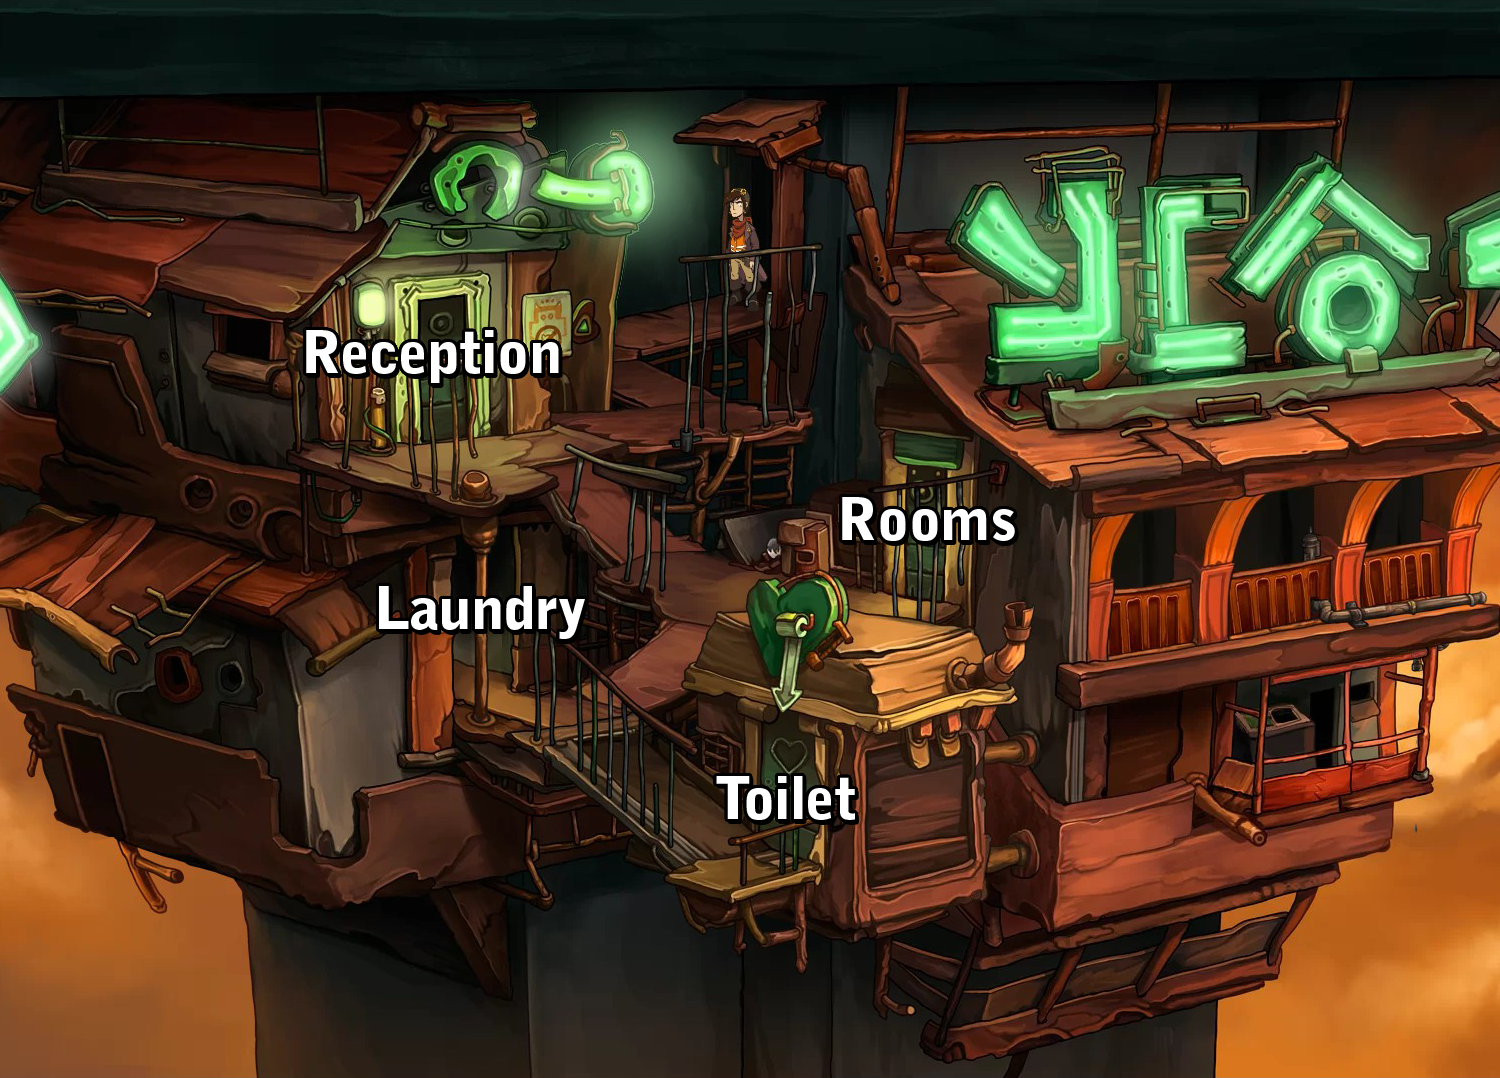
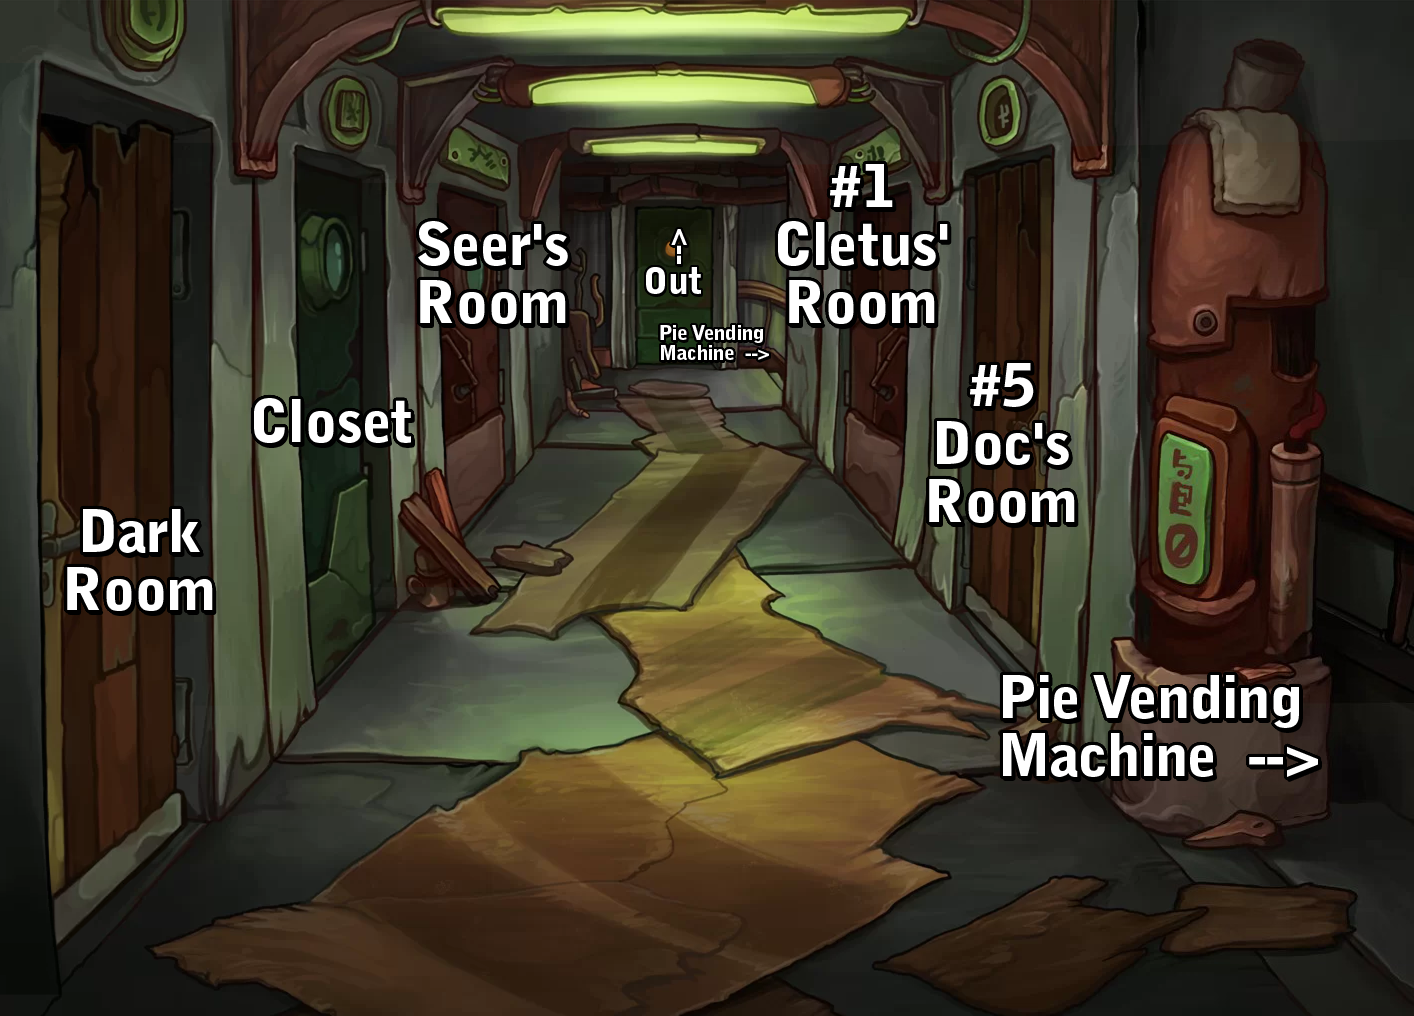
(If you're looking for "Restaurant," the entrance is inside Reception)
2.1: sign Cletus up for lunch
- Room Key #5
- according to Rufus' Plan, the first thing you need to do upon arrival at Hotel Menetekel is "Find the others:"
- to get down off Cruiser Route, find the down-arrow marked "???" about center screen, and go there. This takes you to the outside area of Hotel Menetekel.
- enter top left door to reach Reception
- ring Bell
- tell Receptionist "I was just looking for my friends" to collect Room Key #5
- go back outside and enter the first door on the right (your right) to go To the Rooms
- use Room Key #5 to unlock the door that's on the right side in the foreground
- enter Room 5.
Inside, there's a conversation with Doc and Bozo in which Rufus is sent on a wild goose chase to retrieve a Plasma Exchange Whoop-de-doo Mammoth Fur Relay. ...Or would that be a "wild mammoth chase?"
At one point, the conversation pauses, waiting for Rufus to speak; it doesn't matter which option you choose.
- to get down off Cruiser Route, find the down-arrow marked "???" about center screen, and go there. This takes you to the outside area of Hotel Menetekel.
- go back to Reception to learn three and a half important things:
- Cletus has just arrived;
- Oppenbot has a Plasma Exchange Whoop-de-doo Mammoth Fur Relay in his Bag;
- Oppenbot's Bag containing the Plasma...etc thing is in Cletus' room; and
- Cletus' clothes are in the Laundry.
- Cletus has just arrived;
- return to Doc's Room
- get a menu:
- click Intercom (left side of Doc's Room, near door)
- tell Receptionist you're calling from Room 1 (Cletus' Room)
- say "I would like to dine now."
From this conversation (and a similar one you've maybe had when trying to order food for Room 5), we understand that you must have a menu before you can place an order. Cletus already has his menu, so you can't get one by pretending to be him. Rufus can still pick up Room 5's menu, but can't enter Reception with Oppenbot standing there...
- ask to speak to your assistant -- Receptionist says he'll send him down
- exit Doc's room.
If you try to go Out the door at the far end of the hall, you'll run into Oppenbot; no matter whose clothes Rufus is wearing at the time, the effort will be marked a failure -- which Rufus indicates by saying, unhelpfully enough, "Perfect. The coast is clear" -- and you'll have to call Receptionist back & ask him to send Oppenbot again. What you need is a good hiding place... you'll know you found the right one when Rufus sneaks outside during the conversation between Oppenbot & Cletus that's triggered by hiding in it.
- to avoid Oppenbot, enter one of the passages on the right side of the hall (the ones marked "Pie Vending Machine" that flank Rooms 1 & 5) -- after some dialogue, Rufus automatically sneaks outside
- enter Reception and talk to Receptionist about menu. You must be dressed as Rufus for this to work.
As soon as that conversation is over, Oppenbot returns, and Rufus automatically flees to Restaurant. You will NOT have an item called "menu" in your inventory -- all you needed was the conversation about it.
- click Intercom (left side of Doc's Room, near door)
- go back to Doc's Room and call front desk on Intercom
- tell Receptionist you're in Room 1, and say "I would like to dine now."
This time, because he has a menu, Rufus is able to order Fish Brain Stew for Room 1, to be served in Restaurant at 12 on the dot. ...or maybe more like 4...that Receptionist seems a little flaky.
2.2: get the Seer's robe
- Bozo's Bag / Shampoo
- Salt Shaker, Corkscrew
- Cletus' Bag / Paper Money
- Bozo's Suit, Coathanger
- Fish Knife
- Fish / Scales
- Mister Toffee in a Jar / Cork, Empty Jar
- Coin
- Pillowcase
- Seer's Coat (a.k.a. seer's robe)
hints to get you startedFrom looking at the Plan, you may know that you must convince Seer he needs a shower so he'll disrobe; and from poking around Seer's Room, you may also know that Rufus wants to put something in Seer's Hood -- it's just a question of figuring out what. Perhaps you found what you believed to be the perfect thing, then had your hopes dashed when Rufus wouldn't use it: Pillowcase (with head lice) is no good because the Seer "is missing an important prerequisite," by which Rufus means "hair" -- he won't use lice-infested Pillowcase because Seer is bald. ...Which raises the question, what might a bald person find in his Hood that would convince him he needs a shower? The surprising answer is fish Scales. To emulate scaly skin flakes, i suppose. ...Yeah, i didn't get that either.
- gather some stuff you'll need to do the other stuff:
- go to Doc's Room, take Bozo's Bag
- examine Bag in inventory to get Shampoo.
If you already swapped Bozo's Bag (as described three bullet points down) without first getting Shampoo out of it, you can just swap the Bags back again.
- go to Reception, enter Restaurant
- collect Salt Shaker and Corkscrew
- steal Cletus' Bag (sitting on counter next to Coffee Maker) by using Bozo's Bag on it to swap them
- examine Cletus' Bag in inventory to find Paper Money
- go to Laundry
- take Bozo's Suit and the Coathanger it was hanging on
- go to Doc's Room, take Bozo's Bag
- from hotel hallway, go to Pie Vending Machine, then enter door on left side of that area to go To the Trash Bin.
Here you see a "dumpster for fish guts" with an ornery Pelican sitting inside it. For some clues that i didn't find helpful but maybe you will, click and right-click both objects at least twice each. One comment Rufus makes while doing this is kinda sorta helpful but not repeated; if you missed (or forgot) it, it's: "Just you wait... I'll stuff your big mouth." Here's the clue that i failed to glean: you need to get Pelican out of your way by making it eat the fish in the dumpster; to do this, you must make the fish taste better (despite Rufus saying the Pelican is "not hungry" ...and also despite the counterintuitiveness of obtaining a Fish by enticing a seabird to eat it <eye roll>).
- get Fish:
- use Salt Shaker on Trash Bin -- after a small feeding frenzy, Pelican flies out and sits under dripping pipe on lower right.
The bird didn't leave any Fish for you in the dumpster, but fortunately, there's still some in its mouth. If only you could reach in there without it biting you...
- use Coathanger on Pelican to wedge its mouth open
- take Fish from Pelican
- use Salt Shaker on Trash Bin -- after a small feeding frenzy, Pelican flies out and sits under dripping pipe on lower right.
- get fish Scales:
- from hotel hallway, enter Dark Room (windowless door on far left)
- talk to Ghost, making sure to close with "I am room service"
- click Dishes on floor near Rufus' foot to collect Fish Knife.
After you do this, you can talk to Ghost again to enjoy some new dialogue that's appeared on his menu; there are some vague clues involved, but it's mostly entertainment.
- use Fish Knife on Fish to get Scales
- from hotel hallway, enter Dark Room (windowless door on far left)
- get the Seer to take a shower:
- go to Seer's Room and put Scales into Seer's Hood
- talk to Seer and say, "What are you doing?" then, "I think you look just fine" -- this makes him put his Hood up and dump Scales all over himself
- give Bozo's Shampoo to Seer -- he kicks Rufus out so he can take a shower.
Unfortunately, Seer locked the door, so you can't go back in to steal the robe yet. According to the hidden hint that appeared on Rufus' Plan after that last step, the next thing you need to do is figure out how to get Seer back out of the shower... sigh.
...and the answer is: flush the Toilet.
If you've already tried doing that, then you already know there's "a leak somewhere in the pipes" that must be repaired. You may have seen it (the obstacle mentioned under those spoiler tags) earlier when you were at Trash Bin, but it was up one level...
Maybe there's another way to get there? Like maybe even a NEW way that wasn't available as recently as one bullet point ago...? And no, you're not crazy: the new route does seem like it's on the wrong side of the building. - go to Seer's Room and put Scales into Seer's Hood
- fix the leak:
- enter Dark Room -- Ghost is peeping on Seer in shower, leaving you free to...
- climb out through window on left side -- this puts you on the balcony where Leak is
- click arrow marked "To the Seer's Room" to look in through his window
- grab Tarantula Jar to collect Mister Toffee in a Jar, then click arrow marked "Out of here" to return to balcony
- use Corkscrew on Mister Toffee in a Jar to produce Cork and Empty Jar
- use Cork on Leak
- enter Dark Room -- Ghost is peeping on Seer in shower, leaving you free to...
- make your way outside, then use Paper Money on Toilet door -- the time traveler that's inside there gives you Coin and clears out of your way
- pull Flush handle to flush the Toilet.
Now that you got Seer out of the shower, you need to ... make him get back in the shower. SIGH. One feeble advance hint: go look at Seer and see if you notice anything different about him that might have an impact on Rufus' method of getting him into the shower (what i'm hoping you'll realize here is that thanks to Bozo's Shampoo, he now has hair ... making him susceptible to head lice)
- get the Seer to shower yet again:
- open Closet (green door with round window next to Seer's Room) and take Pillowcase
- enter Seer's room, use Pillowcase on Hood to infest it with lice
- make Seer put his Hood up by saying "What are you doing again?" then "I think you look just fine" -- he kicks Rufus out again, but doesn't lock the door this time
- open Closet (green door with round window next to Seer's Room) and take Pillowcase
- go back in Seer's Room, click Habit on bed to collect Seer's Coat.
If you return to Laundry now, you'll get some helpful new clues on Rufus' Plan.
2.3: get Bozo's Towel
- Toothpaste
- Urinal Cake, Toilet Paper
- Dust, Pepper Shaker
- Abraded coin
- Pie
- Bozo's Towel
Bozo's first excuse not to get dressed is that his clothes are in the Laundry, so try handing him Bozo's Suit. If for some reason you don't have that item yet, you can find it in the Toilet...ha ha, just kidding, it's at the Laundry like he said.
...Okay, that didn't work, but you did get some good hints. One thing Bozo says is that he's warm enough, so let's "fix" that...
- turn off the heat:
Turning off the heat (step 1) or feeding Pie to Bozo (last bullet under step 4) prevents you from earning Basic Instinct, which requires you to make Bozo uncross and recross his legs. There are 1.5 ways to do this:
Step one is to say either "Now, don't you think we should get dressed?" or "Come on... please get dressed. Relieve me of the sight."
If that doesn't get you the achievement, it's time to go to step one-and-a-half, which is to say "Your nakedness is throttling my sense of esthetics."
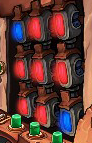
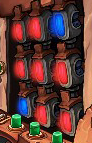
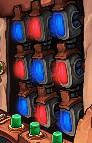
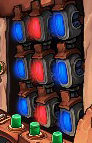
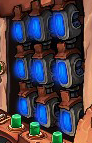
Step two is to just end that conversation branch (by saying "Oh, do whatever you want.")minigame: heater puzzleNext to the Pie Vending Machine is a grid of 9 heaters; you need to use the Buttons and Lever to switch all 9 elements to blue, which turns off the heat.Warning! This minigame is NOT SKIPPABLE! This means if you can't solve it, you can't play on! It's recommended that you save your game before trying anything, since it's easiest to guide you to the solution from the default settings.
the controlsEach Button toggles all 3 elements in its row, column, or diagonal line between red and blue. For example, from the starting layout, which looks like this:...pressing "Button on the Diagonal" creates this:
In the three cells affected by the Diagonal button, both the reds have changed to blue, and the blue cell has changed to red."Button on the Side" toggles the center row ( ↔ ); Left, Middle, and Right Buttons toggle their corresponding columns ( ↕ ).
The Lever on the left side flips the whole board horizontally, which would change the previous example to this:the solutionThe first two steps were just given to you above (click Button on the Diagonal, then Lever); the rest are as follows:step 3
Button on the Diagonal:step 4
Button on the Side:step 5
Middle Button:
If you've already messed with the buttons and levers, and therefore are not starting from the default settings, i've written a guide to help with that:
http://steamcommunity.com/sharedfiles/filedetails/?id=891515676 - talk to Bozo again.
Even though he has icicles in his hair, he still won't get dressed. There are some themes in his conversation with Rufus that should help you figure out what to do next...
You need to convince Bozo he got sick from sitting around nekkid. First, consider the symptoms of Whooping Pox: blue tongue, cough, sniffles, and fever. Then consider what you've seen when examining various items in your inventory ...items such as the ones i'm about to specify.
- assemble ingredients that simulate the symptoms of Whooping Pox:
- go to Seer's room and take his Toothpaste to produce a fever
- go outside and take Urinal Cake from Toilet Bowl to turn Bozo's tongue blue
- while you're there, pick up that Toilet Paper even though it has no symptoms associated with it
- go to Reception, enter Restaurant
- collect Pepper Shaker to bring on sniffles
- click Coffee Maker to get Dust for a cough
missable achievement alert - go to Seer's room and take his Toothpaste to produce a fever
- convince Bozo he has Whooping Pox:
- when Bozo said he was hungry, he mentioned the Pie Vending Machine, so go there
- use Toilet Paper on Coin to sand it down, creating Abraded Coin
- put Abraded Coin into Pie Vending Machine
- take Pie
- combine Pie with Toothpaste, Urinal Cake, Dust, and Pepper Shaker
- feed poisoned Pie to Bozo to finally convince him to put his clothes on
- when Bozo said he was hungry, he mentioned the Pie Vending Machine, so go there
- hand Bozo's Suit to Bozo and receive Bozo's Towel
2.4: minigame: laundry puzzle
- Seer's Coat (section 2.2)
- Pillowcase (section 2.2)
- Fitted Sheet -- can be found in Dark Room after flushing Toilet (section 2.2)
- Bozo's Towel (section 2.3)
You must complete this puzzle without skipping it to earn Laundry Day.
Cletus' Clothes are in the wash, and the only way to retrieve them is to force them out the end of the line by placing more items into the Machine. After you throw Pillowcase, Fitted Sheet, and Bozo's Towel into Washing Machine, the Sect will throw Rufus in as well. It is at this point that the in-game instructions and the "skip" button become available.
When items come out of the Machines, they hang up by the door. Your goal is to put items into the wash in such a way that both Cletus' Clothes and Rufus are hanging up by the door at the same time.
I'm not going to explain the care symbols (referred to by the Sect as "the insignia six") because i didn't find them the least bit useful in solving this puzzle.
If you want to work on this yourself before proceeding to the spoilers, i recommend just writing down what you put into the Machine and what happened as a result, then looking over your notes after a few passes. That's what i did.
There are only a handful of possible combinations of items that can be hanging by the door, no matter what you've already tried. When you first start the puzzle, after the Sect throws Rufus into the Machine, the items hanging there will be Cletus' Clothes and item #1.
SPOILERS!leads either to victory or "Cletus' Clothes and item #1" (see above)
This is less a "baffling number of combinations" than a "fairly linear progression." Even if i've missed a combination, you would probably only need to add one or two things to the Machine before you reached one of those shown.
Once Rufus and the Clothes are both hanging by the door, you will automatically end up outside with Cletus' Clothes in your inventory.
2.5: break into Cletus' room
- 1/3 Screwdriver
- Room Key #9, Room Key #1
- Oppenbot's Bag (the one containing Plasma Exchange Whoop-de-doo Mammoth Fur Relay)
- Carpet Cleaner, Mothballs
- Chloroform Paste
- take care that it is lunch time:
- right-click Cletus' Clothes (section 2.4) in inventory to put them on
- enter Room 5 -- Doc and Bozo hide from "Cletus," leaving you free to take 1/3 Screwdriver
- go to Reception, enter Restaurant
- click Picture to take it down and reveal a Nut
- use 1/3 Screwdriver on Nut to change clock at Reception desk so that the number 4 is at the top (should be 2 clicks). Receptionist starts babbling, Cletus arrives and turns in his key before entering Restaurant, and Rufus automatically exits to Reception. If Receptionist doesn't start talking when top of clock shows a 4, go to section 2.1; the chatter will begin as soon as you've done all that stuff.
missable achievement alertAcquiring Cletus's room key (last bullet point under step 2) causes some areas to become inaccessible, making this your last chance to earn/work on these two achievements:
Knock knock, which requires you to ring Bell on Reception desk 10 times. - right-click Cletus' Clothes (section 2.4) in inventory to put them on
- get Room Key #1:
- dressed as Cletus, talk to Receptionist to collect Room Key #9
- that's the wrong key, so give Room Key #9 back to Receptionist. Cletus shows up before you can get the correct key, and Rufus ends up back in Restaurant.
- use 1/3 Screwdriver on Nut until the number 8 is at top of clock and Cletus demands his key (should be 2 clicks).
Cletus took the wrong key, too, so now you need to fix the clock so Rufus can get the right one; if you're not sure what's required to "fix" it, remember that Cletus' meal was to be served at 12:00...
- use 1/3 Screwdriver on Nut until 12 is at top of clock (should be 2 clicks)
- give Receptionist Room Key #5 to receive Room Key #1 -- Cletus shows back up, and Rufus ducks outside. If you already gave Room Key #5 to Receptionist before fixing the clock, just go talk to him again now.
- dressed as Cletus, talk to Receptionist to collect Room Key #9
- use Room Key #1 on the door to Cletus' room and go inside
- grab Oppenbot's Bag
- click inside closet (the dark corner near door) to hide from Cletus
- collect Carpet Cleaner and Mothballs. ...Hey, haven't you heard "Carpet Cleaner" mentioned somewhere before...?
- set a trap for Cletus:
- click Mirror to look at the back of it close-up
- use 1/3 Screwdriver on Nut
- the Toothpaste in your inventory specifies it should never be combined with Carpet Cleaner, so you should, of course, totally do that; as promised by that warning label, you have now created Chloroform Paste.possible missable achievement alert
I don't believe this one is missable, but due to some stirrings in the comments, i'm including it anyway to be safe; just know that if you don't perform the action under the spoiler tags, you'll have to wait until the end credits to see the achievement appear. If you'd like more information and/or are interested in taking sides in this weirdly lengthy debate, please see the section near the beginning of this guide marked "possibly missable (probably not)."
- use Chloroform Paste on Toothpaste sitting on the shelf to swap them, then move your mouse to right side of screen and click "Back."
- click Mirror to look at the back of it close-up
- use Mothballs on Pipe.
One Mothball travels through the AC pipe and falls into Cletus' bowl of truffles. He pops it in his mouth, then runs to brush his teeth...but it turns out Rufus messed up the switch, so Cletus is not incapacitated.
- click Mirror, and once you're looking at the back of it, click it again to start a super-mini minigame:You must play through this puzzle without skipping it to earn Doppelganger.
Via an unlikely event unrelated to toothpaste, Cletus ends up unconscious in the tub, then Oppenbot shows up wanting the money Bag (which is a little odd, since as far as he knew, he had it with him at the front desk, but whatever)....minigame: mirror puzzleThrough the Mirror, you see Cletus brushing his teeth; in the foreground is a toothbrush Rufus is holding. All you need to do is mimic Cletus' movements. The gauge on the lower right shows you how well you're doing; when you max out the gauge, you win! - give Oppenbot a Bag from your inventory. No matter which you give him, it's the wrong one.
- go to Reception. During the scene that follows, Rufus swaps the Bags and goes outside.missable achievement alert
- enter Doc's Room. After a short scene, you'll be trapped in a minigame in the hallway.
2.6: minigame: door puzzle
Rufus, Cletus, Argus, Goal, and Donna are all chasing each other around the Hotel, going in and out of doors like a certain bunch of stoned cartoon teenagers. Your goal is to get Cletus and Donna to meet each other.You must complete this puzzle without skipping it to earn Hide and Seek.
Each door you enter will cause the other characters to rearrange themselves in complicated and baffling ways. The instructions imply that you're supposed to figure out how your movements influence those of the others, but of course what every character does depends on where s/he was when you clicked the door, as well as on where all the other characters were. Even if you could keep all that straight, you'd have to also remember where all the characters end up, since you can't see them once they're there; and this would be extremely difficult to do since they run around quite quickly and often go in and out of multiple doors before settling down.
I spent well over an hour trying to identify a pattern, but there were way too many variables. I did, however, find a simple solution that i believe will work no matter what you've done on your own before consulting this guide. I sure hope this is right, because i'm sick to death of playing this puzzle.
- Click Seer's Room until you see Goal emerge from Seer's Room or Donna emerge from Closet.
- Go in and out of Closet until you win. If you haven't won after 6 or so Closet visits, try both steps again.
CHAPTER X: ORGANON CRUISER
3.1: trick the guard
- Cletus' Shoes
- Letter Opener
- Slatted Frame
- near Goal, there are two buttons: push the bottom one, marked "Bed Button"
- click Bed to "Go to bed."
Rufus gets in and removes his disguise, then puts it back on & hops out when he learns from Goal that there is now security camera footage of him with his disguise off. It's only a jumpsuit, but hey, the glasses worked for Superman, right?
- press Door Button and talk to Guard.
Most of what he says is exposition, but you should be most interested in the dialogue choice that's different, i.e. the one that makes Guard do something besides just talk, and remains on his menu even after you've tried it. Specifically, the choice i mean is "Are you going to search our cabin," and what you should take away from it is that next, you need to convince Guard there's an intruder in the room.
- push Drawer Button (above Bed Button) and take Cletus' Shoes from Drawer that opens on right side.
It's possible to mutilate Shoes by using Coffee and/or Letter Opener on them, but it's not required. Seems like the original intent might have been to make them look more like the shoes of a Deponian (brown & full of holes), but i'm just guessing.
- open Closet and put Cletus' Shoes inside. Leave Closet door open.
If you push Door Button and talk to Guard now, he says "How would they have got in here anyway?" So apparently, you need to make it look like there's an alternate way into the room...like maybe that Air Duct.
- take Letter Opener from Goal's desk. Examine it to hear Rufus recite an excellent poem.
- use Letter Opener on Air Duct to remove grate.
You'd think that would be enough, but it isn't. The problem is that apparently the duct is too high off the ground for an intruder to have entered that way (even though Rufus gets in & out of there with no trouble); so you need to put something underneath it upon which someone could have climbed down...
- click mattress to move it off the bed
- pick up Slatted Frame and use it on Open Air Duct to prop it up there like a ladder.
Small clue: note that if Drawer is open when you do this, Rufus closes it first.
- press Door Button again, and ask Guard to search your room. Guard climbs up Slatted Frame to check Open Air Duct, and stands there with his butt stuck out until you figure out how to make the trap "snap shut."
- push Drawer Button to knock Guard down, trapping him under Slatted Frame
- push Bed Button to fold Guard up inside wall
The tyrant Argus for to seek,
Stern Rufus with his poniard crept.
The watchful guard upon him swept...
Grim Argus yelled at him: "Some cheek!"
"What wouldst thou with thy poniard? Speak!"
"Rip open all the tyrant's mail!"
"Bad Rufus, thou wilst rot in jail."
3.2: infiltrate Central Core
- Coffee
- open small door marked "Lid" (behind mattress in Rufus & Goal's Cabin) to reveal Coffee Dispenser
- take Coffee from Coffee Dispenser
- exit Cabin and take note of the only landmark that helps you find your way back to it: the Doormat.
If you wander around and poke at things for a bit, you'll learn that the halls are an impossible maze, and also that right now, there are pretty much only two things you're able to do. One of them -- examining Doormat -- provides sort of a clue to the other one, which is...
- pour Coffee onto Doormat outside Cabin.
When Tidybot arrives to clean up the mess, examine it for a clue.
- use Coffee on Tidybot to make use of its drink holder.
...Okay, so Tidybot is just sitting there, and nothing is happening. ...If you want me to just tell you what to do next, scroll past the box to step 6. Otherwise, please enjoy these..."clue-through" instructions:All clues, all the way through! ...mostly.
- maybe Tidybot needs another mess to clean up
- have you seen anything else you could pour Coffee onto?
- ...like another Doormat, maybe?
- really, there's another Doormat. See if you can find it.
- enter Cabin and grab another Coffee from Coffee Dispenser
- enter Open Air Duct
- use Coffee on Doormat in Central Core -- Tidybot goes there to clean it up
- if only there were a way to make Tidybot leave a trail from your Cabin to Central Core...
- go back outside Cabin and use Coffee on Doormat to bring Tidybot back
- use Letter Opener on Tidybot to perforate its cup and make it leave a trail of coffee as it goes
- go pour some more Coffee on Doormat in Central Core to see what happens
- exit Cabin and follow the trail
- unfortunately, Tidybot is already on its way back, cleaning up the trail as it goes, so you can't follow it to the end...
- ...so if you can't follow a trail that ends in Central Core, maybe you need...
- ...
- ...a trail that starts in Central Core....
- go through Open Air Duct and mess up Central Core Doormat with some more Coffee
- ima save us both some time and point out that Tidybot's cup is empty right now, so if you want it to leave a trail, you need to pour more Coffee onto it
- return to Cabin, exit to hallway, and spill Coffee on Doormat outside Cabin
- when Tidybot returns, follow trail it left to Central Core
- maybe Tidybot needs another mess to clean up
- spoiler-style instructions:
- use Letter Opener on Tidybot to perforate its cup, allowing the coffee to spill out
- enter Cabin and grab another Coffee from Coffee Dispenser
- climb through Open Air Duct
- use Coffee on Central Core's Doormat -- this causes Tidybot to travel there from your Cabin, leaving a trail behind it
- refill Tidybot's cup by using Coffee on it as it sits in Central Core
- return to hallway
- follow coffee trail to Central Core. On the way there, you'll run into Tidybot, leaving a new trail of coffee behind it as it cleans up the first one.
- use Letter Opener on Tidybot to perforate its cup, allowing the coffee to spill out
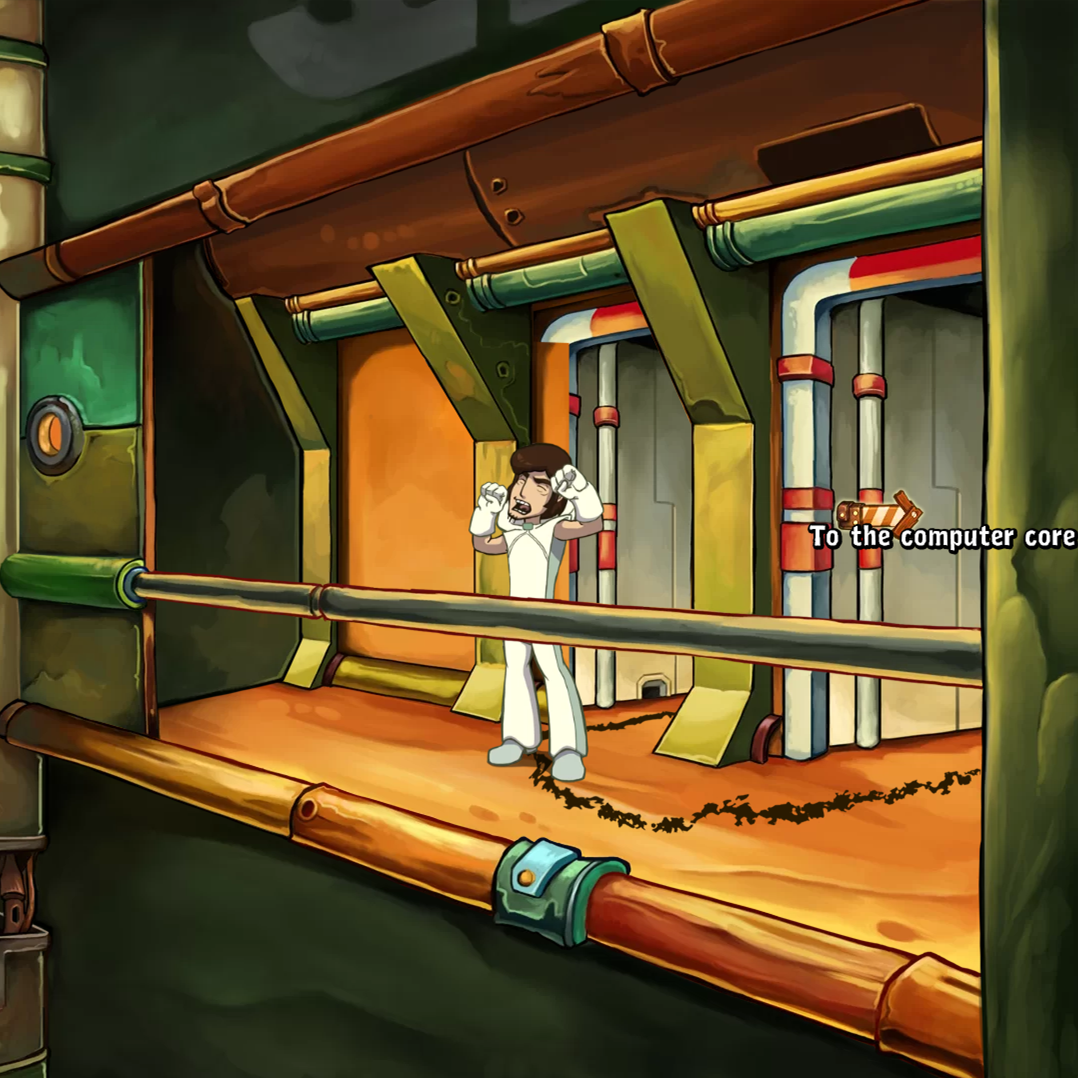
3.3: minigame: Central Core disco
You must complete this puzzle without skipping it to earn Saturday Night Fever. This puzzle is IMMEDIATELY followed by two missable achievements, described in section 3.4.
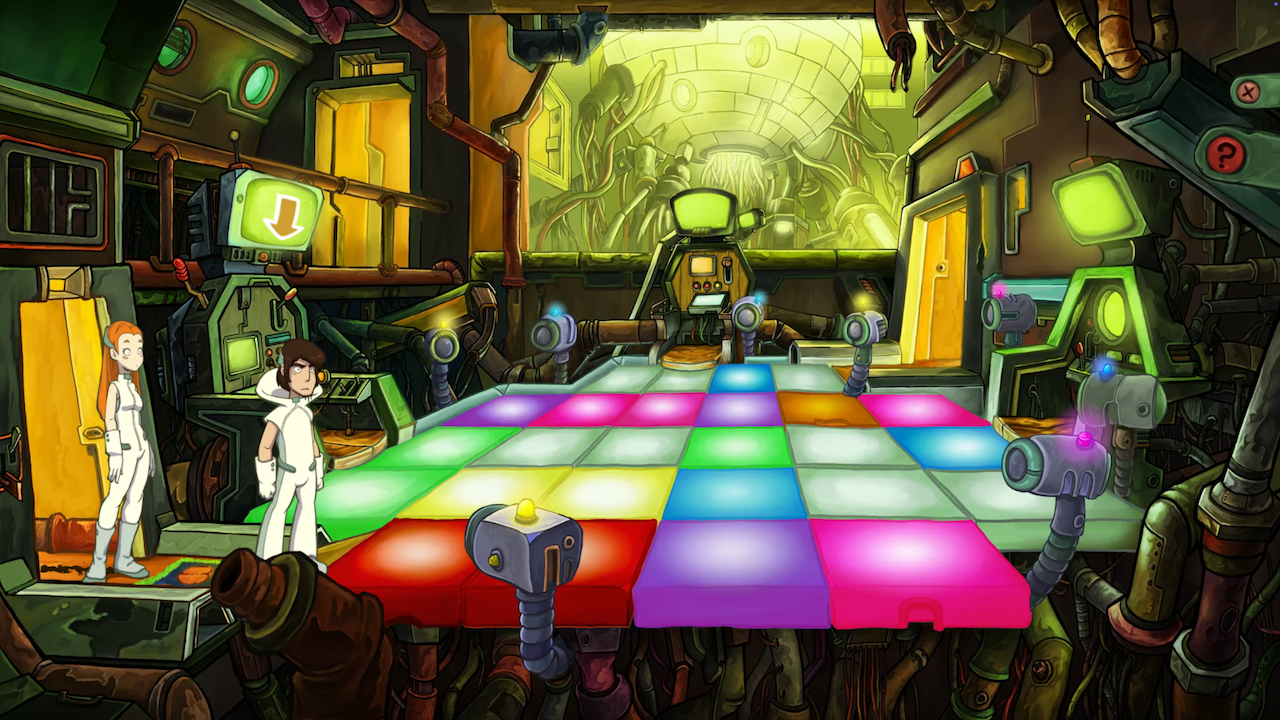
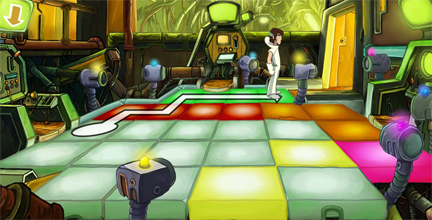
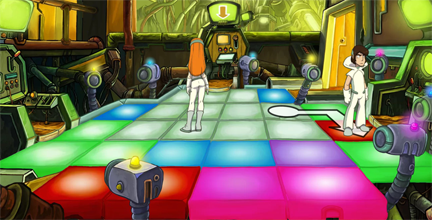
So now Goal needs to reach each of the three computer terminals to delete the security video, but of course there are cameras here, too; Rufus needs to "distract" them to allow her passage. To do this, you will walk around the grid, leading the cameras to change direction so that they're looking away from where Goal needs to be.
Now look at the grid of colored squares on the floor. The brightest colors are projected there by the cameras to let you know which ones are blocking Goal's path (the colors of the cameras are, of course, indicated by the lights atop them). If there's more than one camera shining on the same square, their colors combine; so, for example, when you first enter Central Core, the squares in front of the left-hand terminal are green, meaning you need to adjust at least one yellow camera and at least one blue camera to get there.
Even though the cameras can see Goal from across the room, they can only see Rufus if he is standing on the squares directly adjacent to them. So for example, the yellow camera in the foreground is only impacted by the first three squares in the front row (the red, red, and violet squares in the screenshot above).
To adjust a camera, step directly in front of it, then step onto one of the other squares in its view. When you first enter Central Core (as shown in the screenshot above), the yellow camera in the foreground is pointing at the first square just inside the entrance, so stepping onto the dance floor gets the yellow camera's attention. If Rufus then walks to the right, the yellow camera follows him to the right.
Rufus will only move 1 straight square at a time, so if he just says "Nope" when you click, it's because you asked him to move diagonally or move more than one square.
When the coast is clear and you're ready for Goal to start walking towards her destination, click on her to call her. If she runs into a colored square, she'll complain and quickly turn back; however, you can "trap" her on the floor by moving a camera to block her retreat path. She will then stand there until you talk to her again (or until you point a camera at her, but then she'll just move over one square). This method of corralling her is not necessary to reach the first two terminals, but it is for the third one.
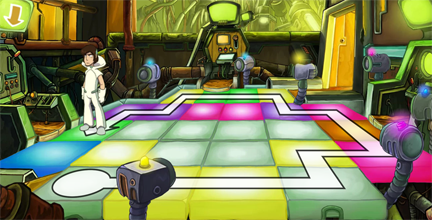
- Start by walking counterclockwise all the way around the edge until you reach the terminal on the left; this points the first 5 cameras you pass the correct way, and places you in a position to fix the last three:
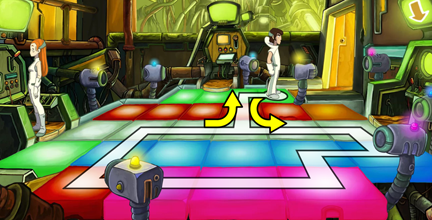
- Go back the way you came, but only pass by 3 cameras:
- Call Goal (by clicking on her) to send her to the first terminal.
- The path shown in the next diagram clears the way from terminal 1 (the one on the left) to terminal 2 (the one on the right). Rufus is shown standing where you will both start and complete this step; travel clockwise around the loop and go back to the corner:
- Send Goal to the second terminal.
- Getting Goal from terminal 2 to terminal 3 (the middle one) is a bit trickier, since you have to get her started walking before you've cleared the path, then trap her to prevent her going back to terminal 2.
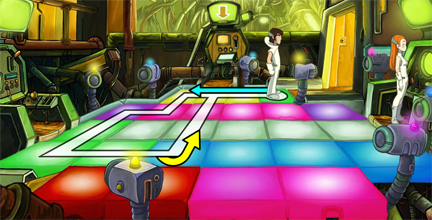
First point the cameras that are in the back left corner away from the 3rd terminal by walking counterclockwise around the path shown below. Here again Rufus is shown standing where you will both start and complete this step:
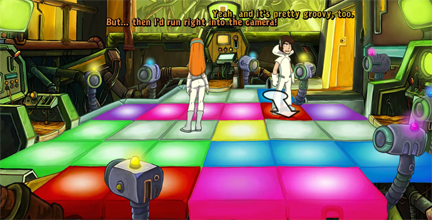
- Now comes the tricky part. Call Goal, and when she takes her first step into the column that terminal 3 is in, quickly move forward 1 square to trap her there with the yellow camera before she can turn around and go back.
You can see by the screenshot that i had Rufus step forward before Goal could finish complaining. - Now just take a few more steps around the corner to move the pink camera that's blocking her path:
- Call Goal again.
If you quit the application during the minigame......you may run into some problems. When you "Continue" from the Main Menu, you might see this: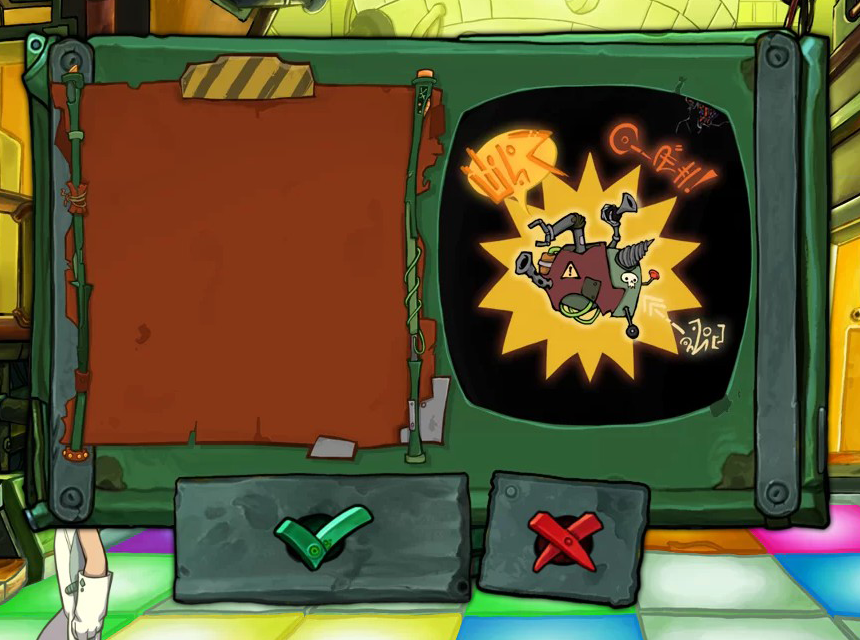
Rufus is walking in place in the background. You don't have a cursor, so you can't click the mysterious buttons. You can press "esc" to dismiss the weird popup, but Rufus just keeps doing his impression of a mime on a long stroll...
Whereas it's still possible to complete the minigame (as long as you're willing to work twice as hard to do it), the "walk cycle" problem will persist, and you'll be unable to progress through the scene that immediately follows.
I'm sorry to report that at this point, you don't really have a choice but to load a save file :(
3.4: find a way to the bridge
- for Rufus' last request, ask for "A last cup of coffee."
Tidybot shows up to clean the mess, knocking Guard over the side and leaving Rufus free to escape.
missable achievement alert - click door in back right corner to follow Goal and Argus.
After Argus exits, Cletus and Donna mysteriously show up; luckily, they haven't seen Rufus yet. What you need is a Good Hiding Place...
- click "Good Hiding Place" (close to center of screen).
After a scene in which we learn that Argus is technically on our side -- and supposedly also resembles Rufus and Cletus, but i don't see it...must be the tan -- there's a break in the dialogue, and you'll see Rufus facing some buttons.
- push any buttons until Rufus stabs Goal in the heart with an overdose of sodium amytal.
CHAPTER XI: CLONE LAB
4.1: minigame: conveyor belt
You must complete this minigame without skipping it to earn Groundhog Day. Completing the minigame takes you out of this area forever, removing the opportunity to earn/work on the following:
Darwin Award, which requires you to repeatedly fail the conveyor belt puzzle (five times, according to the comments).
Ornithorhynchologist. For more information on this achievement, see the special section at the beginning of this guide.
Rufus is in Hell, which features a control box with an Indentation and a Button. The Button only works when something is plugged into Indentation; pick up the small black Yin off the floor and plug it into the Indentation to see what it makes the Button do. ...As satisfying as that was, crushing Rufus into a sticky paste over and over won't move you through the game. So here's what you need to do to get started:
- pick Yin up off the floor
- step on the small orange plate on right side of round platform -- lights come on, revealing Console on far right
- place Yin on Odd Floor Panel (the small orange plate) to hold it down and keep lights on
- grab Power Inverter from underneath Console
- put Power Inverter into Indentation
- press Button
- jump in the hole To the Conveyor Belt
- baseball bat
- flamethrower
- saw
- freeze ray
- laser (looks sorta like an eyedropper)

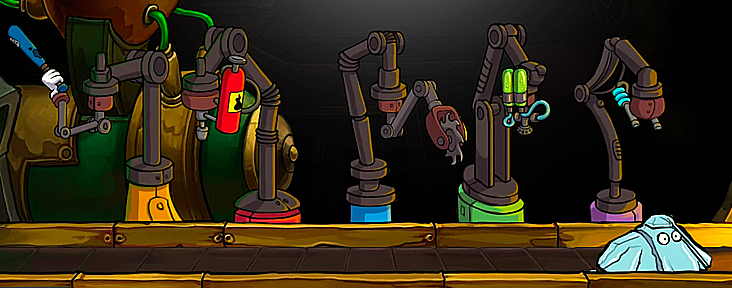
I like that the flamethrower looks like an extinguisher.
You can change the order in which the weapons hit Rufus on the Conveyor by rearranging the Fuses on the Console: click a Fuse to pick it up, then click where you want to put it. If there was already a Fuse sitting in your target spot, it will jump onto your cursor, and you'll need to find a new place for that one. When you're done ordering the Fuses, click "Back" to leave the Console. To try out your configuration, press Button, then jump in the hole.
Before continuing on to the spoilers, make sure you've checked out the in-game Instructions (the ones you view by clicking the "( ? )" button shown near the laser Fuse in the screenie above) -- that's where i found the one hint that led me to solve this puzzle.
The trick to figuring this out is realizing that some weapons reverse the damage caused by others -- the only sort of obvious pair is the freeze ray and the flamethrower. I'll start by explaining what each weapon is meant to do, ordered from least "spoily" to most (so scroll carefully):- saw: slices stuff up
- freeze ray: turns Rufus into a solid block of ice
- flamethrower: melts ice created by freeze ray
- baseball bat: knocks off the brown crust left behind when flamethrower melts frozen Rufus
- laser: repairs cuts made by the saw... under certain circumstances




4.2: explore Clone Lab
- Junkball Bat
- grab Junkball Bat, then go into the Light
- go through door on upper left, which leads to Patio. You arrive just in time to see a gray-skinned fellow exiting to the left.
- go through lower archway (the door Rufus is standing in front of when he's done yelling at the stranger) to reach Residence
- use Junkball Bat to break through Door
- go Out through that door to reach upper level of Patio
- exit on left to reach Clone Lab
- talk to Hermes to learn Rufus's dark origins. If the conversation seems to have stalled, he may be waiting for you to pop his eyeball back in.
- when at long last you're done talking to Hermes, Junkball Bat will be on your cursor -- use it to knock out all four Steel Beams
- exit To The Patio and watch Hermes kill himself. There's now a very helpful hidden hint on Rufus' Plan.
Now take what you learned from doing that, combine it with Rufus' Plan, and see if you can figure out how to complete your next task, which is...
4.3: bring back Hermes
- Sack of Beans, Oil Bottle, Water
- Time Card / Stamped Time Card
- Olives / Olive Oil
- Bag of Fries, Fryer Grease, Swill-o-Fizz, Iodized Salt
- Garlic
- Platypus Eggs
- go to Residence and collect Sack of Beans, Oil Bottle, and Water.
learn to use the clonerThis section was originally step 2, because it follows the natural progression of the game, and allows players a chance to figure out the next part on their own. But of course by the time people come to me for help, a good portion are just looking for answers...
So if you're using this guide as an answer sheet and want to cut to the chase, skip down past the box. If you only want a push in the right direction, stay here in the box with me. I'll make cocoa.
make two Hermes clones:- go Down to lower level of Patio, then go to Factory Floor (far right door, next to Time Clock)
- place Sack of Beans, Oil Bottle, and Water into Funnel.
You can see by the fact that there are now two green smiley faces next to the gauges in the background that the machine has enough material to make two clones.
- go to Clone Lab, click Console
- the round Switch on the left side sets the number of clones to be produced: click until it's set to 2, which is the most you can make at this point
- hold your mouse over the green display -- text appears on your cursor indicating which clone model is set to be produced (the default is Rufus)
- push purple Button top center until Hermes is selected
- pull Lever on right, then follow the two Hermeses to Patio.
- go Down to lower level of Patio, then go to Factory Floor (far right door, next to Time Clock)
- get into Food Truck:
Before we get started, here's a small hint about getting past the barricade that blocks you from reaching the Food Truck: it's controlled by Time Clock on right side of Patio.
- take Time Card from Time Clock.
What Rufus says when you examine it -- "The shift started so long ago that the holes have closed up" -- is a hint that next you need to punch new holes in Time Card.
- go all the way up to Clone Lab and enter passage marked "Pipe" on lower left side
- use Time Card on Vampire Platypus to create Stamped Time Card
- return to lower level of Patio and use Stamped Time Card on Time Clock -- the barricade drops.
Darnit, Food Truck Door is rusted shut... Maybe a little oil would loosen it up, but Rufus won't use Oil Bottle and there isn't any more about. You'd almost have to... i dunno... make some yourself or something...
- go to Residence, pick up Olives
- put Olives into Oil Mill
- click Vial to collect Olive Oil
- return to Patio, use Olive Oil on Food Truck Door, open Door
- take Time Card from Time Clock.
- collect Bag of Fries, Fryer Grease, Swill-o-Fizz, and Iodized Salt from Food Truck
- get some protein for the triple clones:
- go to Clone Lab, enter Pipe.
Oddly enough, the Vampire Platypus inside won't let you take Eggs, so you need to get her (or him) out of the way. If you don't have any vampire repellent on you...
- go to Patio, click Gratuity on Time Clock to receive Garlic, then return to Pipe at Clone Lab (if you don't see "Gratuity" on Time Clock, go to step 2)missable achievement alert
- use Garlic on Vampire Platypus
- take Platypus Eggs
- go to Clone Lab, enter Pipe.
- go to Factory Floor and place all your ingredients into Funnel:
- Sack of Beans
- Oil Bottle
- Water
- Bag of Fries
- Fryer Grease
- Swill-o-Fizz
- Iodized Salt
- Platypus Eggs
- Sack of Beans
- return to Clone Lab
- make three Hermes clones:
- make sure cloner is set to "Hermes"
- set Switch on Console to 3
- pull Lever.
- make sure cloner is set to "Hermes"
- follow the three Hermeses to Patio composters and watch them jump in. This time, there's one survivor.
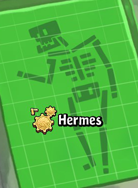
4.4: clone Goal
- Goal's Brain Scan
- talk to Hermes the Third (sitting in 3rd composter at Patio) to get Goal's Brain Scan.
If you don't have a living Hermes clone, go to section 4.3.
missable achievement alert - return to Clone Lab, click Console -- Rufus pops cartridge in, and Goal is added to green display
- set Switch to 1
- pull Lever.
Lots of stuff happens. When the dialogue between Rufus and Hermes pauses for your input, it doesn't matter which option you choose.
Now there are three Rufuses at the Clone Lab, and you are once again faced with dialogue options that don't matter; just wade through them until they go away.
Next you need to figure out which of the 3 Rufuses has the Nucleic Acid. Check your inventory: nope, not there...
- examine Left or Right Rufus -- a switching interface appears at bottom of screen:
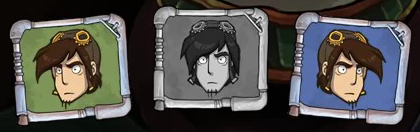
The middle icon is grayed out because you're currently "driving" Middle Rufus. - you already know Middle Rufus doesn't have Nucleic Acid, so use the switching interface to hop into the other Rufuses and check their inventories
- when you find Acid (in Right Rufus' inventory), talk to either one of the other clones to start a tug-of-war
- click green icon to switch to Left Rufus
- click Nucleic Acid to knock them all into the sewers
CHAPTER XII: PORTA FISCO
MAPS
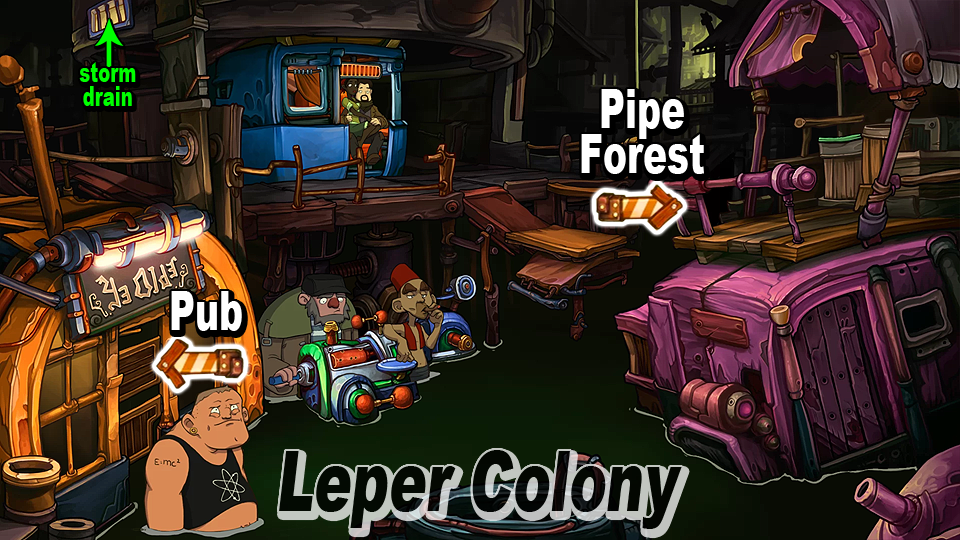
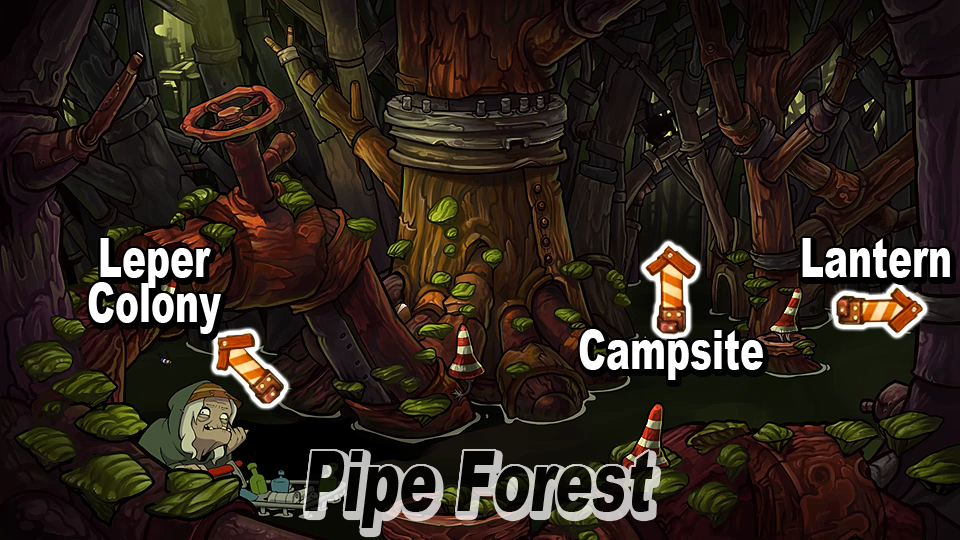
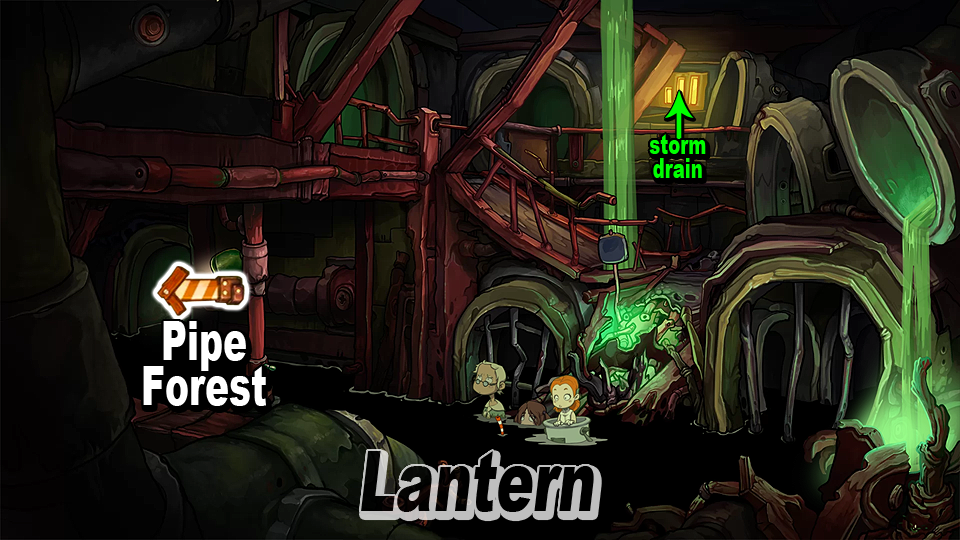
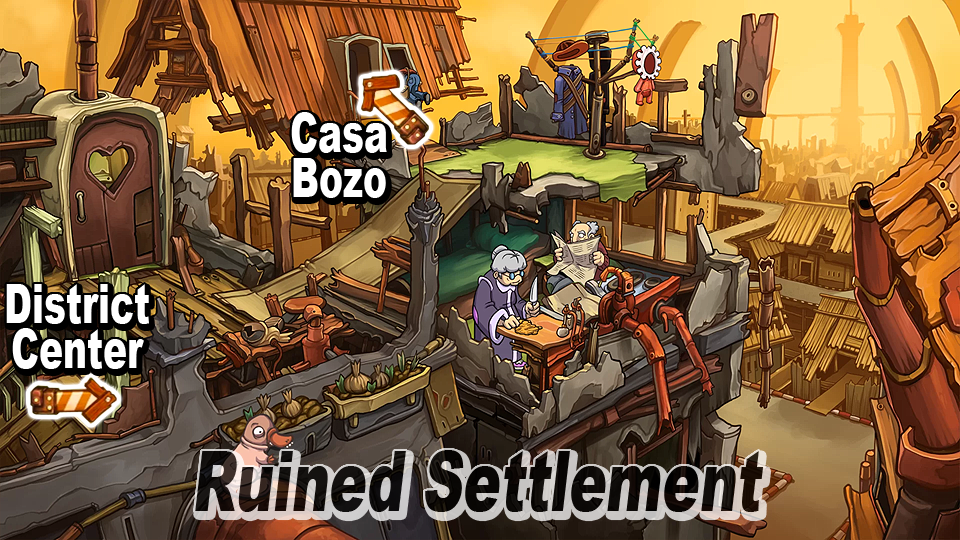
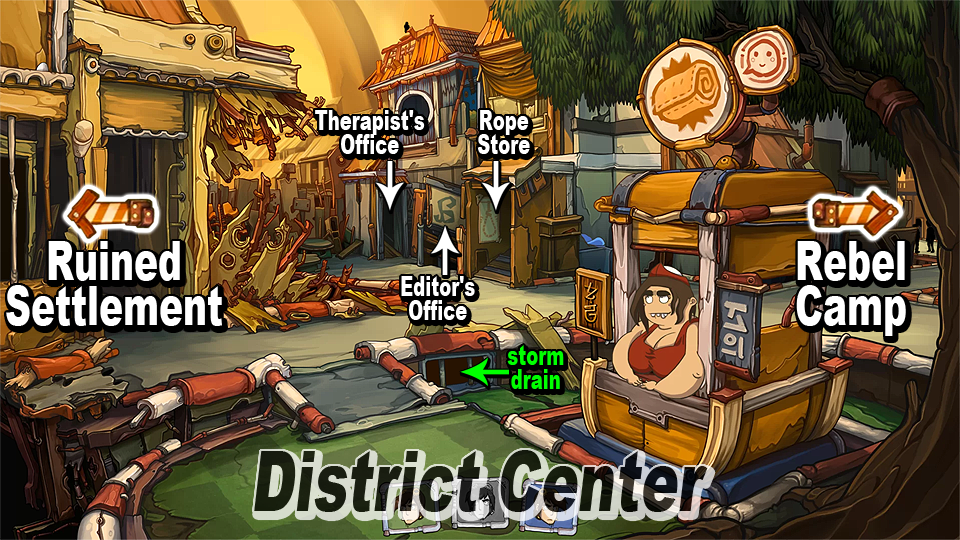
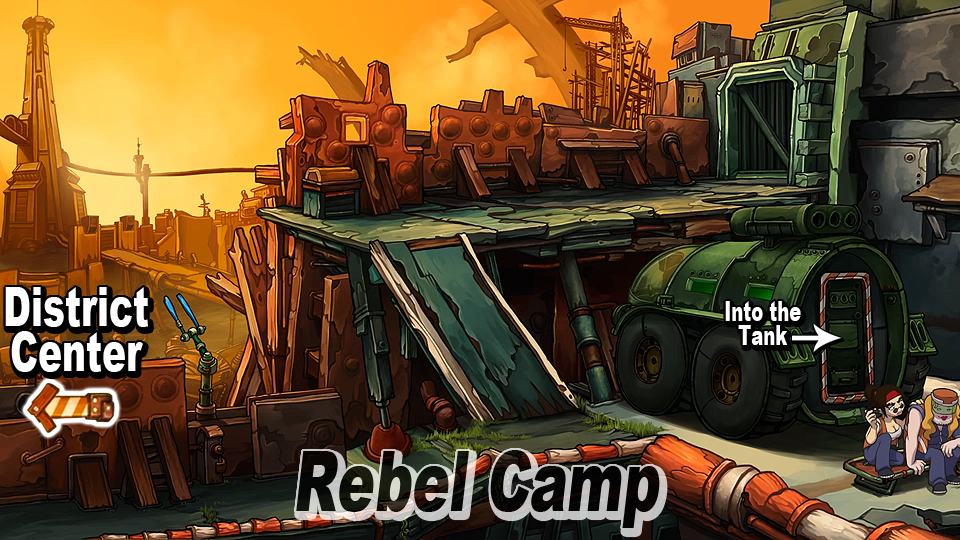
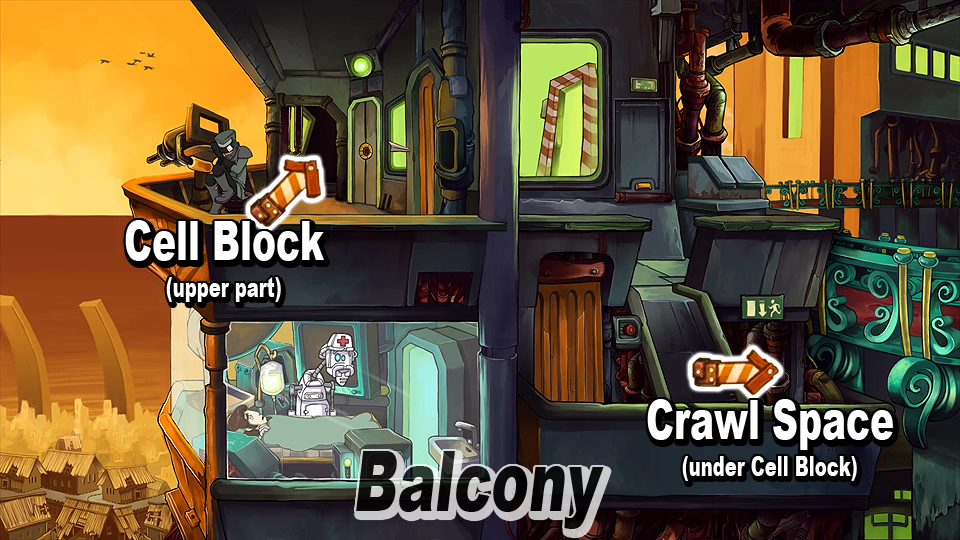
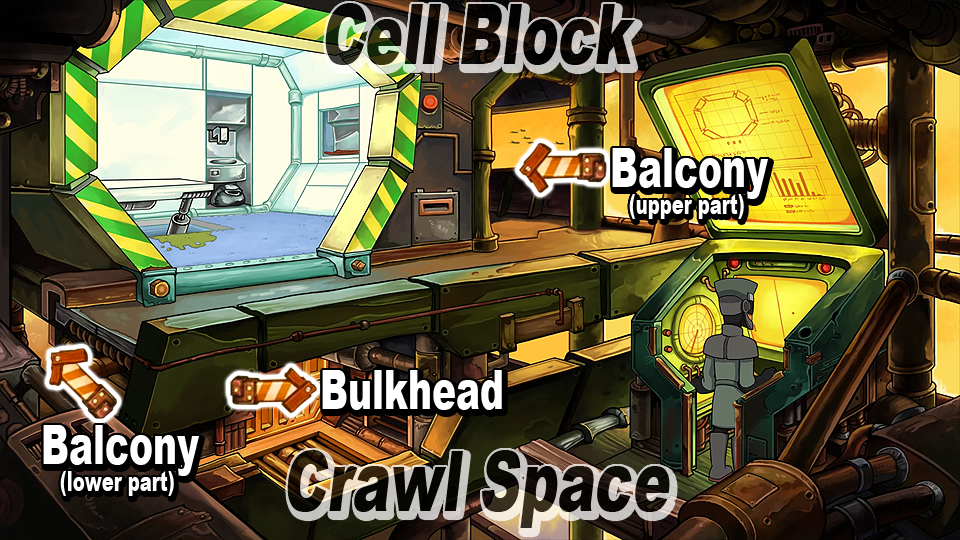
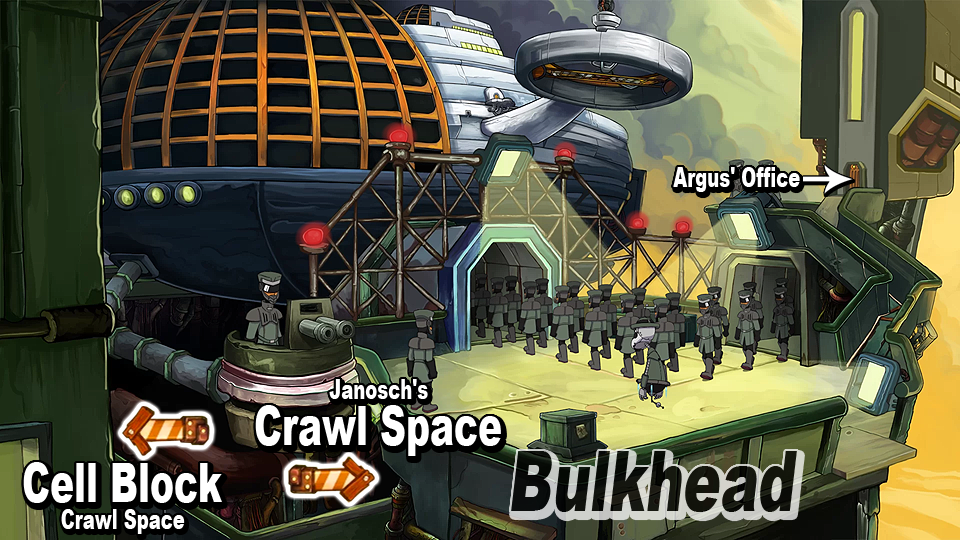
Mapping Organon HQ and talking about its locations can be a little tricky in part because the phrase "crawl space" is found on three different doors that lead to three different areas. When labeling the maps, i tried to find a balance between what the doors are tagged and what is helpful (those two don't always overlap here).
- Cell Block (middle map) is where Rufus enters this part of the HQ, inside the holding cell.
- Balcony (left map) is where Rufus ends up after leaving the upper level of Cell Block.
- Cell Block Crawl Space (middle map) is first reached via the door marked "Into the crawl space" on lower right of Balcony; as its name suggests (and the screenshot shows), it's the lower level of "Cell Block."
- Bulkhead (right map) is the area reached by entering the door directly underneath the holding cell. ...Yes, i'm aware that just because the door is marked "Through the bulkhead" doesn't mean that after entering it, Rufus is standing inside the bulkhead (which is a kind of wall). I just called it that because it matches the label on the door.
- Janosch's Crawl Space (not shown), which is entered via Bulkhead, is where the Rebels are holed up.
sending items between characters
In Porta Fisco, you will often be instructed to "send <item> to <character>." Rather than try to figure out every possible way in which people might encounter this instruction without knowing how to do it, and then explaining it in every single one of those spots, i'll take care of it all here and hope for the best.
First you need to get the characters to talk to each other through a Storm Drain (marked with bright green text on the MAPS above). Left Rufus can connect with Middle and Right Rufus, but Middle and Right Rufus cannot trade directly.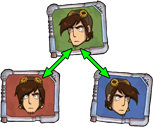
Left and Middle Rufus hook up very early in Chapter XII -- section 5.1 explains how to do it. Once you've gotten two characters to "connect" like this, you can send almost any item between them by clicking it in your inventory, then clicking it onto the other character's icon.
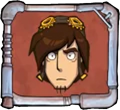
A pair of curved arrows on a Rufus icon means that trading has been enabled with that clone. For example, at the end of section 5.1, as soon as Left Rufus is done talking to Middle Rufus, the middle icon changes to this: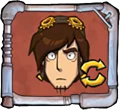
Left Rufus won't be able to talk to Right Rufus until near the end of the Chapter. Instructions on where to leave Left Rufus are at the end of section 6.4, but Right Rufus won't meet him there until section 7.3.
5.0 MIDDLE RUFUS QUEST
- Find the rebel camp
- look around at Bozo's therapist
- Obtain your own therapy cards: Cute animal
- Obtain your own therapy cards: Hero image
- Find a proper-squad emblem
- Break Toni's cool resolve
- Get Toni out of therapy
- Arrange for some light
- Break out
Middle Rufus can't complete his quest until after Left Rufus has completed his; therefore, the end of Middle Rufus' quest is described under the Left Rufus quest header (in section 6.4).
5.1: hook up Left & Middle Rufus
- Lollipop
- Pacifier, Brush, Branch
missable achievement alert
- you start this Chapter as Left Rufus, sitting with "Goal" in the dark. You can't do anything here yet, so click the red icon in the middle to...
switch to Middle Rufus (red icon | streets)The location you're currently in is called Ruined Settlement. The door top center leads to Casa Bozo (which contains a sitcom, apparently), and the ramp lower left leads to District Center. If you go down there, you'll be able to see District Center, but not access it, because the gate is locked.
If you go back up ramp and enter Casa Bozo, you can ask Mama Bozo about the gate; she'll reply that it's "just there so Baby Bozo won't toddle off. ...It's not locked. All it's got is a child safety catch. But that doesn't help. Baby Bozo is just too clever."
Here's one more clue about the gate before the spoilers: have you played with the Rotary Clothes Dryer behind where the Mooks are sitting?
- open the gate:
- click Rotary Clothes Dryer twice, so that Romper is in front
- click Romper to make Rufus stick his face through it -- Mrs. Mook mistakes him for Baby Bozo and gives him a caffeine Lollipop
- enter Casa Bozo and give Lollipop to Baby Bozo
- Baby Bozo spits out Pacifier & wanders off, opening gate to District Center on his way out
- click Rotary Clothes Dryer twice, so that Romper is in front
- exit to District Center.
Pro tip: if you're really paying attention upon arrival here, you may catch a glimpse of Baby Bozo just as he's leaving the screen.
- park Rufus next to Storm Drain (near Bread Wrap Woman)
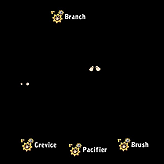
- switch to Left Rufus (green icon | sewer)Left Rufus begins his adventure sitting in the dark with "Goal". There are four hotspots here marked "???:" one is above and about halfway between the two sets of eyes, and the other three are below them, forming almost a line between the two characters. First thing Left Rufus needs to do is...
- get out of the dark:
- click each "???" to change its text to something more helpful: Branch, Crevice, Pacifier, and Brush
- to keep Goal from crying every time you touch something, pick up Pacifier and give it to her (her eyes are the ones that are larger and up higher, to the right ...because "bigger" and "taller" is what babies are all about... right?)
- collect Brush and Branch
- put Brush into Crevice, then use Branch on it to start a fire...
- ew.
- click each "???" to change its text to something more helpful: Branch, Crevice, Pacifier, and Brush
- switch to Right Rufus (blue icon | Organon HQ)
- enter Pipe on far right. The other end comes out up on the platform, between the video screens.
- press Button. This not only turns on the light for Left Rufus, it also distracts Organon Surveillance for Right Rufus by putting on a Cowboy Dodo video.
- enter Pipe on far right. The other end comes out up on the platform, between the video screens.
- switch to Left Rufus (green icon | sewer)
- click Turnstile to shine light into Darkness.
This results in Right Rufus getting busted by the Organon, and in Left Rufus taking on three more crumbsnatchers.
- go through passage on far left to enter Pipe Forest
- after automatic conversation with Bottle Witch, enter passage behind her to go to Leper Colony
- click Rung next to Monkey to reach upper level.
When you're ready to climb back down, click Rung again. By the way, Rufus will automatically initiate a conversation with Goon as you try to walk past him in the next step.
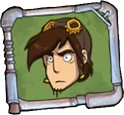
- examine Storm Drain Grate on upper left to make contact with Middle Rufus.
5.2: begin your Middle mission
- Doctor's Referral
- Paper, Printer's Ink / Blackened Paper / Imprint
- switch to Middle Rufus (red icon | streets)
- from District Center, go through passage on far right to enter Rebel Camp
- click "Gate to the Rebel Camp" on upper level to talk to Liebold
- go back down and talk to Sgt. Bambi and Pvt. Lotti (the conversation with Liebold adds choices to their dialogue, so be sure to talk to them after him).
The Plan now says that you need to find someone to vouch for Rufus at the gate. Bambi? Lotti? How about Bozo? The old pirate's not feeling well, so before you can get him on board, you must...
- figure out how to help Bozo:
- go back to Ruined Settlement, enter Casa Bozo, click up-arrow marked "???" to go upstairs to Bozo's Bed
- click Note to take Bozo's Doctor's Referral
- go to District Center
- there are three passages marked "???" between gate to Ruined Settlement and Bread Wrap Woman -- click leftmost "???" to enter Therapist's Office
- give Doctor's Referral to Therapist to start a session
- say, "I'm not here just to chat with you" to start the Rorschach test. There are no right or wrong answers, but you will sort of need to remember your answer to the second card later on.
- go back to Ruined Settlement, enter Casa Bozo, click up-arrow marked "???" to go upstairs to Bozo's Bed
- switch to Left Rufus (green icon | sewer)
- get "Cute Animal" card:
- go to Leper Colony. If you don't see Creep leering out of van on right side, click Rung to climb to upper level, then climb back down by clicking Rung again.
- talk to Creep -- Rufus goes inside van to see the "petting zoo"
- find hotspot marked "Cute Furry Animal?" and click it.
After Creep throws him out, Rufus tells the kids that next time he'll "make a print" to prove he's not fibbing about the petting zoo. Left Rufus hasn't encountered anything that could be used to make a print, but one of the others has...
- switch to Middle Rufus (red icon | streets)
- collect Paper and Printer's Ink from Editor's Office (below Therapist's Office, down by where Barry is sitting). If you've left that office complex and need to return via District Center, the middle door with the backwards "a" sign on it leads directly to Editor's Office.
- send Paper and Printer's Ink to Left Rufus
- switch to Left Rufus (green icon | sewer)
- use Printer's Ink on Paper to create Blackened Paper
- click Rear Door to get back into van
- use Blackened Paper on "Cute Furry Animal?" to get Imprint.
If you still have Blackened Paper and not Imprint, it means you didn't complete step 5.
- when Rusty asks, "What is that supposed to be," use the answer you gave to the second card at Therapist's Office (it will be the 2nd to last choice on the list of options ...you can also just guess until you get it right)
- go to Leper Colony. If you don't see Creep leering out of van on right side, click Rung to climb to upper level, then climb back down by clicking Rung again.
- send Imprint to Middle Rufus, because that's the "Cute Animal" therapy card he needs
5.3: mess with the Major
- Baby Phone
- Flyer / Weighted Flyer
- Metal Type "Yrk"
- Pepper, Coffee, Bagel
- Urinal Cake, Toothpaste
- Dust
- switch to Middle Rufus (red icon | streets)
- go to Rebel Camp and show Imprint (section 5.2) to Sgt. Bambi so she can use it as their new "proper-squad emblem," as it's called on Rufus' Plan
- when Rufus wakes up, enter Tank via the entrance that has appeared behind the spot where Sgt. Bambi and Pvt. Lotti were sitting before he passed out.
A conversation with Sgt. Bambi starts automatically. When that's over, if you click her to talk to her again, she doesn't say anything new, but a new element is added to Rufus' Plan.
- enter Cockpit and talk to Major Toni.
One of the things you learn is that you now want to "Break Toni's cool resolve." Another thing is that the only topic that seems like it might ruffle her feathers is the possibility of multiple Rufuses.
This would be a good time to examine various objects, paying special attention to unusual words their descriptions have in common... words like "frequency"...
If there's nothing in your inventory that has that word in its description, you need to: - go to Casa Bozo, take Baby Phone, come back to Cockpit
- break Toni's cool resolve:
- use Baby Phone on CB Radio to set it to Toni's frequency
- send Baby Phone to Left Rufus
- switch to Left Rufus and right-click Baby Phone to call Toni -- at the sight of the extra Rufus, she gets upset and runs off (obviously, Middle Rufus must be sitting in Cockpit for this step to work).
- use Baby Phone on CB Radio to set it to Toni's frequency
- switch back to Middle Rufus and go to Rope Store (it's the door with the noose sign on it in District Center)navigating Rope Store/Therapist's Office/Editor's Office complexWhen trying to get from one room to another, you may have noticed you can't just click the floor to walk there. You could exit to District Center and then come back in the correct door, but the easiest way is to interact with something in the room where you want to go (grab it, examine it, or talk to it. ...er, him). Rufus will then do all the exiting and reentering for you.
- make and throw a paper airplane:
- take Flyer off Rope Store counter -- Rufus makes it into a paper airplane
- try to throw Flyer at Toni -- it lands downstairs in Editor's Office instead
- click Flyer to go get it back.
Psst! You're now standing very near the item needed to correct Flyer's trajectory...
- click Lettercase to collect Metal Type "Yrk"
- combine Flyer with Metal Type "Yrk" to create Weighted Flyer
- return to Rope Storemissable achievement alert
If you have an aversion to spoilers and would prefer deducing this on your own, you may find it more fun to search the guide for the name of this achievement and preview what those four actions are, perhaps gaining inspiration in the process.
Story Time requires you to read an item -- Flyer, Weighted Flyer, Prescription, or Letter -- to the children in the sewer while they are seated on the monster's teeth (by clicking it in inventory, then using it on a kid).
- throw Weighted Flyer at Toni. This time it flies up to a Balcony with a Sleeping Organon. In order to get your airplane back, you need to get Right Rufus onto that Balcony...
- take Flyer off Rope Store counter -- Rufus makes it into a paper airplane
- switch to Right Rufus (blue icon | Organon HQ)Your big hint for step 10 is that it involves throwbacks to puzzles you solved earlier in this installment; so when you see something that looks familiar but you're not sure what to do with it, just think back to what you did the last time you encountered that something.
- break out of jail:
- click Blanket to find Cletus underneath it
- talk to Cell Guard and run through at least the first two dialogue choices ("I'm hungry!" and "I need the bathroom!") to reveal the objects you're about to collect
- click Breakfast on right side of cell to collect Pepper, Coffee, and Bagel
- take Urinal Cake and Toothpaste from bathroom
- spill Coffee on Rug to summon Tidybot
- when Tidybot appears, click its Dust Bag to obtain Dust
- combine Bagel with Pepper, Urinal Cake, Toothpaste, and Dustmissable achievement alert
- give Bagel to "Obviously Rufus" (actually Cletus) to make him barf on Rug
- talk to Cell Guard -- he sends Cletus to Med Bay and opens the cell to air it out
- click Blanket to find Cletus underneath it
- enter passageway on right. You're now on Balcony where Flyer is sticking out of wall.
- click Flyer -- Right Rufus takes Metal Type "Yrk", then throws Flyer back, hitting Therapist in the eye.
Therapist, apparently embittered or driven mad by the experience, abruptly decides to recommend Toni kill herself, and gives her a Prescription for a Rope.
5.4: get "Hero Image" card
- Finger Focus
- Prescription / Rope
- Baby Bozo, Hero Photo
- switch to Middle Rufus (red icon | streets)
- go to Editor's Office (door between Therapist's Office and Rope store off District Center)
- click Barry in lower right corner to talk to him -- this gives you a thing called Finger Focus:
To use Finger Focus, click it in your inventory. You'll then see Rufus holding up his fingers to frame a part of the screen. Find a subject, make sure its mouseover text is showing, and click.
Right-click to put Finger Focus away.
The idea is to use this tool to select a good subject for a heroic photograph. If Rufus' reaction to something you focused on makes you think you might have found such a thing, check your inventory: if Finger Focus is no longer there, that means you found your hero scene and need to go talk to Barry.
If the fingers resist following your mouse, and/or jump around too erratically to be focused on a target, try quitting and relaunching the game to see if that helps.
...Hm, i wonder if this thing might help you get a better look at something you were unable to see well earlier; something Rufus described as a blurry blob...hard for normal eyes to tell what it is... - go to Rebel Camp and use Finger Focus on the hotspot in the sky just to the left of "Gate to the Rebel Camp" -- it's Baby Bozo, crawling around on some scaffolding
- return to Editor's Office and talk to Barry to be magically transported to where Baby Bozo is.
It seems you can't reach Baby Bozo by clicking on him (because he crawls away), or by clicking the beam (because Rufus just spins it around unhelpfully)... If only there were a way to secure the beam... or ...lasso the baby... or something.
If you don't have the item you need in your inventory and need to return to solid ground, click "Elevator" to be spirited back to Editor's Office.
- get a Rope:
- enter Cockpit of Tank at Rebel Camp (if you can't get in, go to section 5.3)
- take Toni's Prescription (if it isn't there, go to section 5.3)
- go to Rope Storemissable achievement alert
If you have an aversion to spoilers and would prefer deducing this on your own, you may find it more fun to search the guide for the name of this achievement and preview what those four actions are, perhaps gaining inspiration in the process.
Story Time requires you to read an item -- Flyer, Weighted Flyer, Prescription, or Letter -- to the children in the sewer while they are seated on the monster's teeth (by clicking it in inventory, then using it on a kid). - hand Prescription to Rope Seller to receive Rope
- talk to Barry to return to the scaffolding
- enter Cockpit of Tank at Rebel Camp (if you can't get in, go to section 5.3)
- get Hero Photo:
- use Rope on Hook to set a Trap
- click Baby Bozo to chase him into Trap
- while Baby Bozo is on Trap, click "Climb on the support" -- the beam spins around and hangs Rufus by his neckmissable achievement alertThe next bullet closes off this scaffolding area, preventing you from earning/working on the following:
Hung out to dry, which requires you to switch to another Rufus while Middle Rufus is hanging from the scaffolding.
Ornithorhynchologist. If you need help finding the egg, check the special section at the beginning of this guide. - click Rope End and watch Rufus cheat death yet again. After the brief scene, you'll have Baby Bozo and Hero Photo in your inventory.
- use Rope on Hook to set a Trap
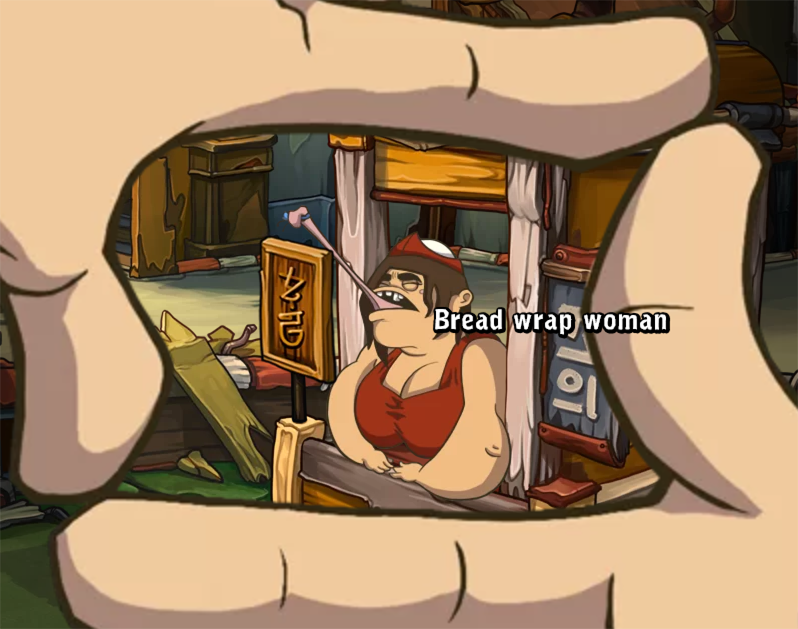
6.0 LEFT RUFUS QUEST
- Find a camp
- Find something to counter the cold and darkness
- Help Goon and June
- Lure Goon and June outside
- Get rewarded with their radiator
- Obtain the radiator from Goon and June
- Tuck 'em in
- Lull 'em
- Feed 'em
- Put the kids to sleep
- Get rid of the kids
- Go to the pub
- Earn your tip
- Serve on the plumber
- Serve on the delivery man
- Serve on the fruit merchant
- Get back the nucleic acid
- Find a way to Goaly
- Go after Goaly!
- Tear Bambina out of her eavesdropping job
- Obtain therapy card: Elysium
- Check Bozo's reaction to the Rorschach test
- Go through therapy using Bozo's answers
- Obtain psychotropic drugs for Bozo
- Cure Bozo's depression
- Find someone to vouch for you
- Open the gate
- Gain entry to the rebel camp
Okay, yeah: there's a pretty big chunk of Middle Rufus quest at the end there (pretty much all of section 6.4, really). I think you'll be okay, though. You're a smart cookie.
6.1: counter the cold & darkness
- Crowbar, Bananas, Crank
- Deck Chair, Space Heater (a.k.a. radiator)
- Antenna Fork, Fuse
- switch to Left Rufus (green icon | sewer)
- at Leper Colony, try to enter door marked "???" behind Bouncer.
The resulting conversation with Bouncer adds info to Rufus' Plan: you need to get rid of the kids before you can enter the Pub, and step one of that crusade is "find a camp"...
- return to Pipe Forest (the exit's about center, behind the purple van), and enter passage marked "???" next to the big tree-looking thing in the middle -- this leads to an area called Campsite.
Examine "ideal spot for a campsite" (the monster's tongue) to flesh out the Plan even more... One of the elements added here should be "obtain the radiator from Goon and June;" but please note that there is no item called "radiator" -- the thing you're looking for is actually labeled "Space Heater." So you know from Rufus' Plan that you need to help Goon and June; what you maybe don't know is that when cranked, the Jack next to Monkey at Leper Colony will raise Goon and June out of the sewer, which is the first step towards that goal. To do that, you need to get Crank from Organ Grinder. Maybe there's something in that Banana Crate on the right side of Leper Colony that will help?
- get crank:
- at Leper Colony, click Rung next to Monkey to reach upper level
- click on any of the kids to make them move over and form a line
- click one of them again to walk over their heads to Banana Crate on top of Creep's van
- switch to Middle Rufus (red icon | streets)
- go to Rebel Camp
- pick up Crowbar next to where Lotti is lounging on top of Tank. If she's not up there, go to section 5.3.
- send Crowbar to Left Rufus
- switch to Left Rufus (green icon | sewer)
- use Crowbar on Banana Crate
- take Bananas
- click Down arrow to get back in the water
- offer Bananas to Monkey -- Organ Grinder takes them and runs off
- take Crank off left end of organ
- at Leper Colony, click Rung next to Monkey to reach upper level
- get Space Heater (a.k.a. "radiator"):
- attach Crank to Jack (behind Monkey)
- turn Crank to send Goon and June to surface
- switch to Middle Rufus (red icon | streets)
- go to District Center.
For clues what to do next, talk to Goon and June, making sure to say "Why don't you come out into the sun?" -- this should add a helpful little drawing to the Plan (if not, try clicking Space Heater mounted at the top of the cabin).
- if you didn't pick up Deck Chair while you were at Rebel Camp, go get it now
- give Deck Chair to Goon to lure him out of his cabin
- take Space Heater and send it to Left Rufus
- attach Crank to Jack (behind Monkey)
- switch to Left Rufus (green icon | sewer)
- turn on Space Heater:
- go to Campsite, place Space Heater on "Ideal spot for a campsite"
- grab the Heater's Plug (sticking up out of water between fuse box and ladder).
Click Top Outlet to plug it in there, since that's the only one with a Fuse. Oops, the cable isn't long enough to reach that one, so...
- plug Plug into Bottom Outlet.
You need to move Fuse to the correct (bottom) Socket, but if you click it, you'll find it's stuck, and learn that "the way these things are built, they will only fly from their sockets during an electrical spike." Maybe you could cause one of those by sticking something metal into Outlet... haven't you seen a metal thing that looked like it would fit really nicely into an Outlet?
- switch to Middle Rufus, send Antenna Fork (found near entrance at Rebel Camp) to Left Rufus, then switch back to Left Rufus
missable achievement alert
- give Antenna Fork to Rusty -- he holds it in the Outlet while Rufus climbs ladder
- click Lever to pop Fuse out (and electrocute Rusty)
- take Fuse and put it in Socket -- Space Heater comes on
- go to Campsite, place Space Heater on "Ideal spot for a campsite"
- talk to any of the kids to get them to sit down on the monster's teeth
6.2: get rid of the kids
- Fez, 5 Zlottis
- Sign, Four XXL Bread Wraps
- Letter
- Gravy / Leftover Soup
If Goon and June are sitting together inside the blue cabin -- at either Leper Colony or District Center -- you've arrived here prematurely, so go to section 6.1.
- switch to Left Rufus (green icon | sewer)
- go to Leper Colony and click Crank to lower cabin back into sewer
- press Crank Release Button to retrieve Crank, then give it to Monkey
- get 5 Zlottis:
- talk to Monkey again to discover he's looking for a new partner
- pick up Fez to learn Monkey will pay you a finder's fee if you bring him someone that will dance while he cranks.
The Fez you just took acts like the physical embodiment of a job offer; to find a replacement monkey, hand Fez to an NPC. There's, like, four people down here, so this'll be grueling to find the right one...
- ...and the job Fez goes to: Sad June (weeping in cabin behind Monkey). She accepts, and Rufus volunteers to go find her a paying audience.
- go to Pipe Forest and tell Bottle Witch that the organ grinder has a new monkey
- return to Leper Colony
- after the dialogue, take 5 Zlottis and send them to Middle Rufus
- talk to Monkey again to discover he's looking for a new partner
- switch to Middle Rufus (red icon | streets)You know that "physical embodiment of a job offer" you had with Fez in step 4 above? There's another one in District Center that will allow you to find Bread Wrap Woman a new assistant so she'll sell you some burritos... or burrito wraps... or Bread Wraps... or whatever it is she's got in there.
- buy Bread Wraps:
- take "help wanted" Sign next to Bread Wrap Woman in District Center
- hand Sign to Sad Goon. He doesn't so much take the job as the job takes him.
- give 5 Zlottis to Bread Wrap Goon in exchange for Four XXL Bread Wraps
- send Four XXL Bread Wraps to Left Rufus
- take "help wanted" Sign next to Bread Wrap Woman in District Center
- switch to Left Rufus (green icon | sewer)
- tuck 'em in:
- at Campsite, click Four XXL Bread Wraps in inventory, then
- click each kid so that all four are bundled up.
- at Campsite, click Four XXL Bread Wraps in inventory, then
- lull 'em:
- click Television to turn it on, and listen to what Rufus says about it
- click Antenna to see if that helps the reception
- click Television again.
Where do we get food for the kids now that Bread Wrap Stand has been cleaned out? You may recall a bit very early in this chapter about Grandpa Bozo making dinner "if Bozo ever brings home a girlfriend." You may also recall that Bozo has a girlfriend -- Sgt. Bambi. So now you just need to figure out a way to get Bambina to go to Casa Bozo. One last clue before i tell you: the trick is handing her an inventory item that Middle Rufus should have picked up when he first arrived in Porta Fisco...
- click Television to turn it on, and listen to what Rufus says about it
- feed 'em:
- switch to Middle Rufus (red icon | streets)
- go to Ruined Settlement
- open Mailman's Bag
- take Letter from inside
- go to Rebel Camp, enter Tank
missable achievement alert
Now for the aforementioned two reasons, in case you were wondering what they were: the first bullet following this alert removes Letter from your inventory (which really only interferes with the achievement if you've already used up the other three readable items). Feeding the kids in the last bullet puts them to sleep, eliminating the ability to read to them. And the need, but that's beside the point.
Because i've seen several guides incorrectly present the name of this achievement as one word, i shall now include the misspelling to facilitate people finding this alert whether they search for "Story Time" or "Storytime." P.S. My guide was among those that had it wrong. For a realllllly long time.
- give Letter to Sgt. Bambi -- she thinks Bozo's been injured at the front, so runs off to see him
- go to Casa Bozo, click Pot on far left to collect Gravy
- send Gravy to Left Rufus.
Just for kicks, click the ladies on the couch multiple times to hear multiple tidbits about Bozo's childhood.
- switch to Left Rufus (green icon | sewer)
- click Gravy in inventory, then click each kid so that all four fall asleep. When this step is done, you'll have Leftover Soup left over.
6.3: get "Elysium" card
- Tankard x3 / Swill x3
- Advertisement / Mushroom
- Mother's Milk
- Lunchbox / Hormones
- Mushroom Swill, Hormone Swill, Hair Growth Swill
- Picture of Elysium
- switch to Left Rufus (green icon | sewer)
- go to Leper Colony and click passage marked "???" to enter Pub. If you can't get in, see sections 6.1 - 6.2.
- talk to all three customers, and take each of their Tankards
- click all three Tankards onto the Swill nozzle (left of Barkeeper) so that you have three Swills in your inventory.
For some clues, try handing one Swill to each customer; each reaction will tell you what you must serve in order to earn your tip from that person (although you may be able to guess just by recognizing who the characters were modeled after). When you're done doing this, be sure to pour yourself three new Swills. What you learn from the above exercise is that each customer yearns for a flavor of "yummy Swill they used to have" at the Pub: Hair Growth Swill, Hormone Swill, and "Mushroom Slops." This is the information you'll use to determine what ingredient needs to be added to each of their drinks in order to earn your tips. If you need more clues, try clicking the three colorful taps next to Barkeeper (warning: the helpful part of the resulting dialogue is not repeatable).
- get the first ingredient:
- click Advertising Board to collect Advertisement. You can't find the ingredient unless you have this in inventory.
- go to Pipe Forest and hand Advertisement to Bottle Witch -OR- talk to her and choose the new option that's appeared on her dialogue menu: "As a witch, you must know a lot about mushrooms, right?"
She gives you three guesses which Mushroom is the right one. You can either click 3 of the ones growing in the environment, or you can fast-forward to the part where it turns out that it's none of those, and you need to...
- talk to Bottle Witch again -- the Mushroom you need is growing on her foot.
She will not reveal this unless you talk to her before making your third guess; if it's too late and you've already made three, you can ask her for three more.
- when she lifts her foot out of the water, click Toe Fungus to collect Mushroom
- click Advertising Board to collect Advertisement. You can't find the ingredient unless you have this in inventory.
- switch to Middle Rufus (red icon | streets)
- get the other two ingredients:
- go to Casa Bozo, take Mother's Milk from counter next to Grandpa
- go to Rebel Camp, enter Tank, open Locker Door.
Just for fun, examine Lotti's Lunchbox before picking it up (because you get a different reaction from Rufus depending on where it is when you examine it).
- grab Lunchbox
- examine Lunchbox in inventory to get Hormones
- send Mother's Milk and Hormones to Left Rufus
- go to Casa Bozo, take Mother's Milk from counter next to Grandpa
- switch to Left Rufus (green icon | sewer)
- combine one Swill with each special ingredient to create three custom drinks:
- ...with Mother's Milk to create Hair Growth Swill
- ...with Hormones to create Hormone Swill
- ...with Mushroom to create Mushroom Swill
If you're still not sure who gets which drink, you can just start handing them out; a customer receiving the wrong drink will refuse it and tell you who the correct recipient is. You'll also get a little bonus story about why he doesn't like that flavor, so you actually might want to get the orders wrong on purpose.
When you're ready, here's how to...
- ...with Mother's Milk to create Hair Growth Swill
- match the right wacky drink with the right wacky customer:
- give Hair Growth Swill to Delivery Man
- give Hormone Swill to Fruit Seller
- give Mushroom Swill to Plumber
- give Hair Growth Swill to Delivery Man
- reenter Pub and click Picture (now lying on the bar) to collect Picture of Elysium
- send Picture of Elysium to Middle Rufus, because that's the "Elysium" therapy card he needs
6.4: cure Bozo's depression
- Antidepressants, Emetic
- Piggy Bank
- Nucleic Acid
- switch to Middle Rufus (red icon | streets)
- obtain psychotropic drugs for Bozo:
- go to Casa Bozo and up to Bozo's Bed
- to get the answers you need for the retake of the Rorschach test, show Bozo all three therapy cards:
- Picture of Elysium (section 6.3)
- Imprint (section 5.2)
- Hero Photo (section 5.4)
- Picture of Elysium (section 6.3)
- go to District Center, enter Therapist's Office
- talk to Therapist and ask to "play that card game again"
- for each card, give Bozo's answer -- it'll be the second to last choice on each list:
- "Elysium crashing into Deponia."
- "That is terrible. Why would you show me something like that?"
- "It's the devil."
- "Elysium crashing into Deponia."
- after passing test, open Medicine Cabinet
- grab Antidepressants and Emetic. An emetic, by the way, is a substance used to induce vomiting -- knowledge that will come in handy very soon...
- go to Casa Bozo and up to Bozo's Bed
- cure Bozo:
- go to Bozo's Bed.
Try to give Antidepressants to Bozo; pay attention to what Rufus says when it fails (if that doesn't give you any ideas, try using Emetic on Bozo and listen to Rufus' response to that).
- have Left Rufus send Leftover Soup to Middle Rufus, then switch back to Middle Rufus
- combine Antidepressants with Leftover Soup.
When you try to get the Soup out of your inventory, you find that Baby Bozo has eaten it. Now you gotta make him barf it up, so...
- use Emetic on Baby Bozo -- his face turns greenmissable achievement alertThe next bullet ends Middle Rufus' ability to move freely about the neighborhood, making this your last chance to earn/work on the following achievements:
Porta Fisco Carnival, which requires you to try on all three outfits hanging on the Rotary Clothes Dryer at Ruined Settlement.
Ornithorhynchologist. For more information on this achievement, see the special section at the beginning of this guide. - use green-faced Baby Bozo on Bozo. He's cured! ...just not the way Rufus expected.
- go to Bozo's Bed.
- while Bozo is struggling to get his coat on, take Piggy Bank.
Both guys then automatically appear outside "Gate to the Rebel Camp;" Bozo vouches for Rufus, and Liebold opens the Gate.
- send Piggy Bank to Left Rufus
- enter Gate
missable achievement alertThe last few steps in this section end Left Rufus' ability to move freely about the sewer, making this your last chance to earn/work on the following achievements:
Magic Mushroom Picker, which requires you to click all 4 mushrooms in Pipe Forest.
Ornithorhynchologist. For more information on this achievement, see the special section at the beginning of this guide. - switch to Left Rufus (green icon | sewer)
- at Pub, give Piggy Bank to Barkeeper to receive Nucleic Acid
- go to Campsite.
After a scene in which you learn that at least one of the children has probably been eaten by the slime monster, Rufus follows Goal into the tunnel on the right. The pipes are a hopeless maze that you can't escape yet, so just...
- park Left Rufus under Storm Drain (marked "Window") and leave him there for future use (the future = section 7.3)
7.0 RIGHT RUFUS QUEST
- Gain access to med bay
- Get the other Rufus out of the med bay
- Subdue Cowboy Dodo
- Outvote Cowboy Dodo
- Set up a distraction
- Find another way into Argus' Office
- Steal the ascension codes
7.1: outvote Cowboy Dodo
- Screwdriver
- Pneumatic Mail Cartridge, Application Form
- Organon Outfit
- Tapeworm
 Right Rufus (blue icon | Organon HQ):
- enter passage on lower right (behind the ramp) marked "Into the crawl space" to enter Crawl Space under Cell Block
- directly underneath the cell from which Rufus recently escaped, you'll see a door marked "???" -- enter that to reach Bulkhead
- after the dialogue, click the pipe-filled passageway just right of Rufus to enter another Crawl Space, henceforth referred to as "Janosch's Crawl Space."
Rufus, Janosch, and Cowboy Dodo discuss who's going to get lowered down into Argus' office; the men vote for Rufus, but the starstruck women vote for Cowboy Dodo. Rufus wants to go get Cletus to break the tie. I'll save you the trip back to Balcony by telling you that the Med Bay Door Sensor "only opens for the Organon," and we're not ready to deal with that just yet. For now, try to get some clues out of that Pneumatic Mail Tube on the left.
- talk to Janosch, ask to borrow his Screwdriver
- use Screwdriver on Pneumatic Mail Tube to get clobbered by a Pneumatic Mail Cartridge (and break Janosch's Screwdriver, of course)
- leave Janosch's Crawl Space. Cowboy Dodo stops Rufus at Bulkhead for an argument, then remains there blocking the door.
- go to Balcony
- submit application form "Yrk-75 (Sanitary Service):"
- open Cover at top of ramp to reveal Terminal
- open Crate to reveal Application Forms; click them to take an Application Form.
When you do this (and/or when you right-click Application Form in inventory), Rufus reads off the ways in which the Form can be used. The option that seems most closely related to Rufus' need to get into Med Bay is "Yrk-75 (Sanitary Service)," but if you try to apply for that, you find the "Yrk" isn't working...
- use Metal Type "Yrk" (section 5.3) on Terminal to fix it
- use Application Form on Terminal, then choose "Yrk-75 (Sanitary Service)" from menu
- place completed Application Form into Pneumatic Mail Cartridge
The item is called just "Application Form" whether it's completed or not, but Rufus will only put it into the capsule if it's been filled out.
- put Pneumatic Mail Cartridge into Pneumatic Mail Chute.
- open Cover at top of ramp to reveal Terminal
- go to Bulkhead -- nobody there. Continue to Janosch's Crawl Space to see Cowboy Dodo has subdued medic.
- gain access to the Med Bay:
- click Captured Organon Medic to steal Organon Outfit from him
- go back to Balcony and right-click Organon Outfit in inventory to put it on
- click Door Sensor to open door, then enter Med Bay to start minigame:
You must complete the minigame without skipping it to earn Surgeon Simulator.minigame: remove tapewormAs you gaze upon Cletus' guts, you see a Tapeworm wrapped around one of his organs; if you click that organ to remove it, the Tapeworm hides behind another. Keep chasing that little bugger around, removing organs as you go, until there's nowhere left to hide and you can finally take Tapeworm as a souvenir.Now you need to put the organs back. Grab one out of the tray, rotate it by clicking the right mouse button, and cram it in there. If Rufus refuses to put any organ back, it may be because the one you're holding needs to go behind another that you've already replaced (for example, Intestine needs to go in before Stomach, so that it's in the back).
You may notice when you place an organ, Cletus either cries out in pain or does nothing; although these reactions might seem like helpful feedback, i believe they're actually random.
When everything's in its place, Rufus starts talking, and the puzzle exits.
Spoilers!The middle row is quite forgiving. For one thing, the organ on the left needs to be just "Some random organ" -- it doesn't matter which one. For another, the heart can be either right-side-up or upside-down. This creates 4 possible correct solutions, but i will only be illustrating 2 of them with my screenies. Sorry.By the way, you should expect to have "Some random organ" left over: either the green-brown bag or the purply sac of bumps.
- click Captured Organon Medic to steal Organon Outfit from him
- get a new Screwdriver:
- grab another Application Form from Crate
- use Application Form on Terminal and choose "Holla-55 (Screwdriver)" from menu
- place completed Application Form into Pneumatic Mail Cartridge
- put Pneumatic Mail Cartridge into Pneumatic Mail Chute to receive Screwdriver
- grab another Application Form from Crate
- take Cletus back to Janosch's Crawl Space. Rufus is still not chosen for the job he wanted.
- give Screwdriver to Cletus -- he uses it to hold open Pneumatic Tube so that the next capsule to come through there will hit Cowboy Dodo
- return to Balcony and send another screwdriver application through Mail Chute
- go back to Janosch's Crawl Space. Cletus has won the honors by saving Cowboy Dodo's life, thereby gaining the women's admiration (and their votes).
"All ve are shtill mishing now ish a rope..."missable achievement alert
- give Tapeworm to Janosh to start the next minigame
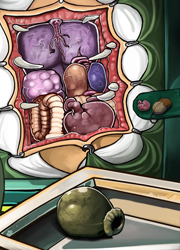
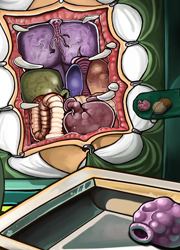
7.2: minigame: Cletus crane
You must complete this minigame without skipping it to earn Mission Impossible.
This entire section is for...
Right Rufus (blue icon | Organon HQ):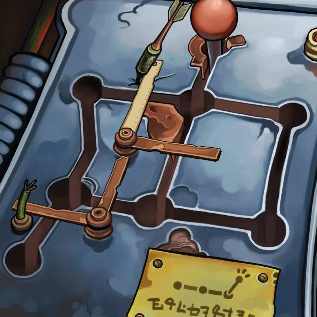
You can move the brackets by pushing the lever into them, but only if they can rotate without hitting anything (like the dart on the upper left, or the protruding wire on the lower left).
To move the lever, click one of the positions next to its current position. For example, when the minigame begins, the lever is in "Starting position" at the top (see screen shot above); click the round junction underneath it -- marked "Upper middle" -- to shift the lever there. Note that the lever will only move one position at a time, so from "Starting position," "Upper middle" is the only place you can go.
- When the puzzle starts, there's only one move you can make: shift the lever straight down two notches. The console will then look like the image on the right:beforeafter
This leaves you with only three available moves. The most obvious one (shift the lever up) only reverses the move you just made, so prob'ly don't do that one. That leaves two options; one of them is "bad" and the other "good," but fortunately, the "bad" one is very easy to fix:If you were to make that bad move (right, up, left, down), you'd end up with the brackets forming a backwards "C" blocking the goal, as shown here. To fix that, position the lever over the top of the "C" and shift down. This not only sets the brackets back the way they were at the end of step 1, it puts you in the perfect position to perform the final shift of the "good" move, described in step 2.
And the "good" move is... - Make a big counterclockwise circle around the board (shift right, up, left, left, down) to reach the other side of that vertical obstacle, and then shift right -- putting the lever back where it started -- to push both brackets from the left side:beforeafter
If you were to shift to the left now, both brackets would be back where they were at the very beginning, so that's out. There's only one other move you can make besides that... - Go around to the top center position (shift right, up, left) and shift down to push the half-white bracket out of your way:beforeafter
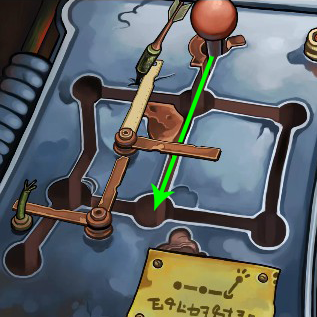
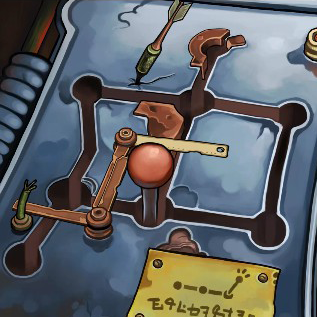
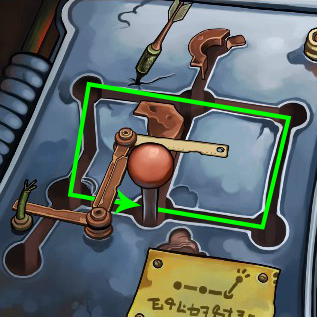
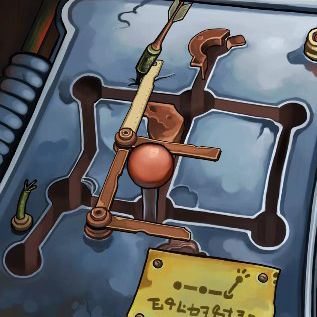
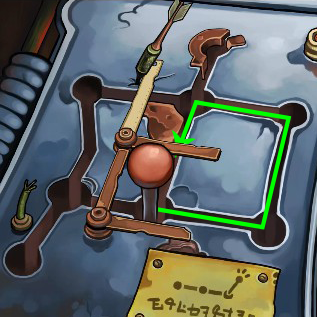
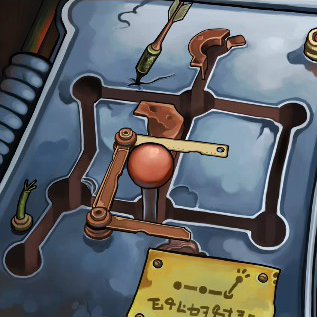
Now you have a clear path to the goal. Here's an unnecessary picture of the lever in the goal:
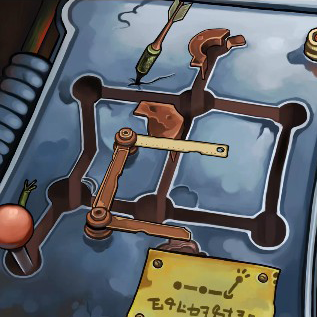
7.3: set up a distraction
Right Rufus (blue icon | Organon HQ)- go to Balcony.
Argus is here yelling at his soldiers about the Rebels. He sends Oppenbot off to lug crates as punishment for contradicting him, then resumes his efforts to determine who's responsible for the security breach...
- put on Organon Outfit and talk to Argus.
Rufus claims responsibility in hopes he'll be sent to lug crates as well; instead, they're going to throw him off the tower, and they start to sing a ceremonial hymn to see him off to his death.
- if you haven't moved Middle Rufus through the Gate at Rebel Camp to where Garlef is sitting, do it now (for help with that, see section 6.4)
missable achievement alert
If you click Garlef (inside "Gate at the Rebel Camp") to talk to him, he describes one of the parts he would've preferred to have played in this installment. If you click him again, he'll describe another part. After several clicks, it may seem like he only had three ideas and is now just repeating them; however, if you click him enough times, he'll mention a fourth part, and you'll earn the achievement.
Here are the opening lines of all four speeches:- I... could be the obsessed colonel
- I could be the dying messenger with the news that changes the course of the war
- I could be the inscrutable rogue who ultimately proves to be a friend
- With the right wig, I could even play the female lead
- I... could be the obsessed colonel
- click "Fire the cannon" behind Argus. If they just keep singing and nothing happens, it means you missed step 3.
Heads up!For the remainder of this section, there will be a lot of involuntary quick-changing between all three Rufuses.
After step 4, you're automatically switched to Middle Rufus (as if you had clicked the Middle Rufus icon), and you see Garlef and Liebold take up arms against the Organon attack.
- as Middle Rufus (whom you've automatically become), go through Door and enter Rebel Headquarters.
Watch a scene in which you learn that the General is Rufus' evil foster father, Seagull, and he plans to blow up Elysium. When it's done, you're automatically switched to Right Rufus.
- as Right Rufus (whom you automatically became after the previous step), you'll see a new passage leading to "Goods Transporter" to the right of Pneumatic Mail Chute on Balcony -- go through it to reach that loading dock area from the beginning of Chapter XII
- stow away:
- go down through Pipe and examine Storm Drain to contact Left Rufus and open up trading between the two clones. If you need help getting Left Rufus into position, go to section 6.4.
- switch to Middle Rufus and send Picture of Elysium (section 6.3) to Left Rufus
- switch to Left Rufus and send Picture of Elysium to Right Rufus
- switch to Right Rufus and go through Pipe so that you're back up on the loading dock
- put Picture of Elysium on Barrel
- click Barrel to climb in
- click Oppenbot to get his attention. There may be a bug in the standalone "Goodbye Deponia" that can cause a crash if you click anywhere else, so be careful!
- go down through Pipe and examine Storm Drain to contact Left Rufus and open up trading between the two clones. If you need help getting Left Rufus into position, go to section 6.4.
- as Left Rufus (whom you automatically became after the previous step), enter either the leftmost Pipe or the one closest to Window to reach the new whirlpool in lower right corner
- jump into that new whirlpool.
He'll be falling down a sewer pipe for a while, so you're automatically switched back to Right Rufus, whose chauffeured Barrel has just arrived at Ascension Customs...
7.4: steal ascension codes
- Dictaphone
- Mini Cartridge
- Cartridge
This entire section is for...
Right Rufus (blue icon | Organon HQ)- there's a tiny door on the upper right -- go there to enter Argus' Office (don't ask how it can be both up there AND directly beneath Janosch's Crawl Space)
- get combination to Safe:
- go down ramp and take Argus' Dictaphone off desk.
Rufus listens to it and gets part of the Safe combination, but Argus shows up and interrupts him before he can get the whole thing.
- in front of Rufus, there's an arrow marked "???" -- click it to hide Under the Desk
- right-click Dictaphone in inventory to enter "Dictaphone view"
- press Eject button
- remove Mini Cartridge, then click "Back" to exit view of Dictaphone
- put empty Dictaphone on Desk.
Argus tries to listen to it, but there's no Cartridge. When he starts yelling "Talk to me" ... do that.
- click Argus to talk to him, then give him the wrong combination to the safe. You can just guess until stuff starts happening, but the answer the game is waiting for is "4437."
- while alarm is sounding, take Dictaphone back
- use Mini Cartridge on Dictaphone -- this automatically puts you in Dictaphone view
- press Play button. You can't listen to it with Oppenbot standing close, so...
- click arrow marked "???" (on pipe opening) to go To the Window
- open Window, then click arrow marked "Out" to step onto the ledge
- right-click Dictaphone
- press Play button to get combination. You don't have to remember it, because oddly enough, Rufus will.
- go down ramp and take Argus' Dictaphone off desk.
- steal the ascension codes:
- in Dictaphone view, press Record button to record a new message: "The cartridge is not in the safe. It fell behind the desk."
- click arrow marked "In" to leave the ledge, then go back Behind the Desk
- put Dictaphone on Desk
- press "Alarm Off" button. Argus squats down behind desk to look for Cartridge, and Rufus goes through pipe to avoid detection.
- go Out window. Cletus shows up and sits in the chair.
- look for the other Window at the far end of the ledge, back closer to Safe -- open that, then click arrow marked "In Argus' Office" to climb through
- click Safe.
Alarm goes off, Rufus disguises himself as a lamp, Cletus slips behind Desk, Oppenbot comes in, etc.
- click Safe again
- grab Cartridge from inside
- in Dictaphone view, press Record button to record a new message: "The cartridge is not in the safe. It fell behind the desk."
- exit Argus' Office via the door you came in (next to Safe)
Rufus is chased right back in by some Organon, and he hides behind the Screen; Argus spies Cletus and thinks that's the intruder. While he's distracted...
- exit Argus' Office
8.0: chapter XII finale
The remainder of this chapter is more storytelling than gameplay. You are no longer the one choosing which character is active, so i'll just tell you which one is "on" at the beginning of each step, where applicable.
Following section 7.4, the first thing that happens is Left Rufus and Goaly pop out of the pipe at Rebel Headquarters, joining Middle Rufus.- as Left Rufus, use Nucleic Acid on Goaly to discover it wasn't Goal at all.
That corpse back at the Lab was a failed clone of Donna, whose hair must have been orange before she reached puberty (the age at which every clone's hair changes color)...
...i guess "puberty" means something different on Deponia...(or in Germany) - as Right Rufus, walk over to the door to the high boat, click Button to open it, and put Cartridge into Code Entry slot
- as Left Rufus:
- Seagull demands an apology. Say, "Fine, so we wait."
Seagull pulls out a gun.
- say, "All right, all right, I apologize."
Middle Rufus starts listing off all the bad things for which Left Rufus was responsible (...including his mother's death, in case you missed that...)
- while Middle Rufus is talking, click Plug near Doc. Then click it two more times.
Seagull shoots Left Rufus; both Rufuses jump through the open hatch and climb out through the cannon.
- Seagull demands an apology. Say, "Fine, so we wait."
- as Right Rufus, watch Oppenbot throw Goal off the tower, then click down arrow marked "???"
From this point on, it's all...Middle RufusMiddle and Left Rufus are back outside Rebel Camp... but so is Seagull, apparently not done with his oddly-timed Jerk-A-Thon...
- say, "Rufus Number Three didn't screw it up!"
This is the cue for Right Rufus ("Number Three") to fall from the sky, landing on Seagull and killing them both. ...At least "Daddy Dearest" never got a chance to say "I told you so."
- enter Tank. The two surviving Rufuses are now sitting in Cockpit, both holding Gas Lever.
- poke Left Rufus' wound to get his hand off the leverThe next step prevents you from earning Sadist, which requires you to poke Rufus' gunshot wound 10 times.
- click Gas Lever.
Lots of stuff happens, including Left Rufus' death. Now everybody's in Headquarters, waiting for Rufus to...
- come up with a plan:
- take Pen from the drawing board (labeled "Plan") next to Toni
- use Pen on Plan. Rufus can't think of anything to draw.
- talk to Doc
- use Pen on Plan again
- take Pen from the drawing board (labeled "Plan") next to Toni
- eventually you'll be looking at Rufus and Goal in the Tank's Cockpit. Click Ignition to find it doesn't work.
- click Door Button and talk to The Deponians crammed in the back. They fix the problem.
- click Ignition again.
CHAPTER XIII: HIGH BOAT
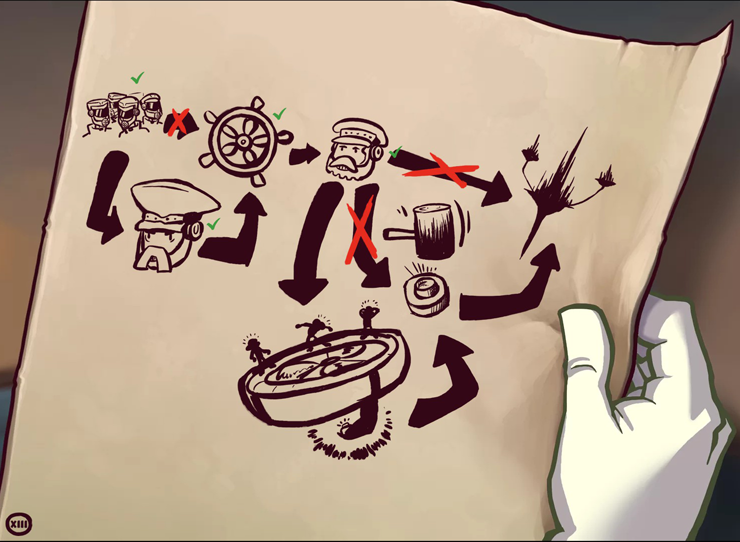
9.0: redemption
- click on Organon and say "ATTEN-TIOON!" then "DIVISION HALT!" to clear the way
- exit to the right -- Rufus enters an elevator with more Organon
- navigate the elevator:
- on the control lever just inside the door, click either "Up" or "Down," doesn't matter which
- click "Stop"
- when asked if you're sure this is the right floor, say, "Of course" to make Organon exit elevator.
Gasp! Argus was standing behind them, and he wants to fistfight; if you punch him, you'll find he hits pretty hard. Maybe you need to find something else to hit him with...
- click Pedal on floor to open hatch
- remove Throttle Valve that was revealed when hatch opened. This makes elevator go faster.
- step on Pedal again to open hatchThe next bullet prevents you from earning Smack him, which requires you to hit Argus with the hatch door (by stepping on Pedal) 5 times.
- before hatch closes, click "Down" on lever -- both guys fly up to ceiling
- click "Stop" on lever -- Argus falls through hatch
- exit to right
- on the control lever just inside the door, click either "Up" or "Down," doesn't matter which
- now you have to give a speech to the Organon; for the purposes of normal gameplay, your choices in the speech don't matter, but...possible missable achievement alert
- when the speech is over, the hymn minigame begins...You must complete this puzzle without skipping it to earn Hand over heart.minigame: Organon hymnRufus has just finished his rousing speech, the Organon are singing their catchy theme song, and our hero is singing along off-key. Your goal is to help him get the tune right. The musical score you see on the upper left shows the notes Rufus is singing. By clicking the score above or below each note, you can move it up or down the scale to try to match the one the Organon are singing on that syllable. You can try to match it by ear, or you can use this excellent method submitted by a helpful commenter:
There's also a "hot-cold" indicator you can use to determine how close your chosen note is to the correct one. The icons above the crowd's heads will be a stormcloud if you're way off, a set of ellipsis ("...") if you're close but not correct, and a heart if you've selected the right note. It will update in real-time, as well, so if you change a note on the same beat it's being sung, you can see the crowd's reaction change to match.
Here you see the same note (indicated by the red ball above it) depicted three times, along with the crowd's different reactions to it when it is quite wrong, close, and correct, in that order:If all else fails, there's always the...
solution (spoiler alert!)Bug warningAfter you complete this minigame, DO NOT quit or save while still standing on the speech platform. If you try to resume your game from such a save file, you'll be trapped on the platform, doomed to stand there listening to the hymn forever!!!...or... i guess you could go back to an older save file. Whatever.
- exit the speech platform for a long expositional scene with Ulysses. When it's over, Rufus, Argus, and Cletus are outside, on their way to destroy the Transmitter.
- grab an Antenna
- use Antenna on Cable to cross over tightrope-style. The other clones follow.
- when Cletus and Argus are done talking, throw Antenna at Transmitter to knock it down into the Rotor
- talk to Cletus (on the left), then talk to Argus.
Argus counts to two; nobody jumps, and they all accuse each other of planning to cheat. If you talk to Argus to start the count again, the same thing happens. Over and over. What madness is this?!? If scratching your head isn't helping, here's something else you can try...
missable achievement alert - jump down onto catwalk:
- talk to Argus to initiate the countdown
- quickly position your cursor over the gap in front of Rufus.
When Argus says "two," the cursor changes for about 1 second to a down-arrow marked "Jump!"
- quickly click "Jump!" arrow.
- talk to Argus to initiate the countdown
- get Transmitter:
- there are 4 Screws holding catwalk in place, 2 at each end: remove one Screw (doesn't matter which, just pick the one you like best)
- put that Screw into Hole in the middle, at the bottom of that green fork thing
- remove the remaining three Screws. The catwalk is now a seesaw.
- walk over to left end of seesaw and grab Transmitter.
missable achievement alert - there are 4 Screws holding catwalk in place, 2 at each end: remove one Screw (doesn't matter which, just pick the one you like best)
- still standing down on the left, use Heap of Screws on Hole (down by where the Transmitter was) to secure catwalk, transforming it from seesaw to ladder
- use Transmitter on Rotor.
After some conversation, all three guys are wedged in the Rotor, and Goal shows up. The conversation with her goes in circles; in order to escape and finish the game, you must...
- persistently deny being the real Rufus
- grab some tissues and click "Let go"


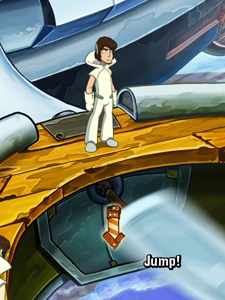
LINKS
Steam's "Complete Journey" Global Gameplay Stats
This is where you can see a list of all 105 achievements across all three installments, as well as the percentage of Deponia players that have earned them. Game 2 icons are blue, game 3 icons are green, and game 1 icons are whatever that other color is... pinkish? brownish? ...mauve?
Daedalic Entertainment's Complete Journey support center[www.daedalicsupport.com]
Their site offers -- amongst other things -- an array of "savegames," which i hear tell may assist players who were deprived of achievements by bugs in the software. It is unknown whether these files might also compensate for laziness. I'm guessing "yes," but i'm too lazy to look into it.
http://steamcommunity.com/sharedfiles/filedetails/?id=885617589
http://steamcommunity.com/sharedfiles/filedetails/?id=875459798
Beat Deponia: The Complete Journey's achievements?
Flex it — let your friends know you pulled it off.
- Deponia 1 walkthrough with missable achievements★ 5 (857)26k views1.3k ♥104 minUpdated 2 Mar
- Deponia Walkthrough: Game 1 (Deponia)★ 4 (127)19k views240 ♥24 minUpdated 4 Oct, 2016
- Deponia: The Complete Journey Достижение Король свалки.★ 5 (382)17k views365 ♥1 minRussianUpdated 18 Aug, 2014
- Achievement guides for all parts of Deponia (English&German)★ 5 (261)15k views411 ♥3 minUpdated 14 Aug, 2016
- Deponia 2 walkthrough with missable achievements★ 5 (581)15k views858 ♥129 minUpdated 17 Mar
- Гайд по достижениям Deponia: The Complete Journey ✔ (105 / 105)★ 5 (691)15k views981 ♥18 minRussianUpdated 23 Sep, 2019


- Upgrading to PremiumTeam Fortress 2★ 5 (20k)1441k views11k ♥6 minUpdated May 11, 2022
- No More Room in Hell Official ManualNo More Room in Hell★ 5 (2.8k)569k views2.1k ♥29 minUpdated Apr 22, 2019
- NMRiH Community Hosting GuidesNo More Room in Hell★ 5 (526)351k views653 ♥1 minUpdated Aug 10, 2022
- ULTIMATE GUIDE FOR GAME DEV TYCOONGame Dev Tycoon★ 5 (5.8k)326k views10k ♥4 minUpdated 23 Jan, 2014
- How to 'Git Gud' Soon™MORDHAU★ 5 (2k)318k views3k ♥68 minUpdated Nov 16, 2024
- Лучшие кооперативные игры SteamPAYDAY 2★ 5 (1.5k)315k views2.1k ♥56 minRussianUpdated Apr 27, 2025






This guide was created by its original author on the Steam Community. Are you the author and want it removed? Request removal.