[ENG] Easy Way to Add WarPaint on Weapon
Little Note
Texture Search and Download
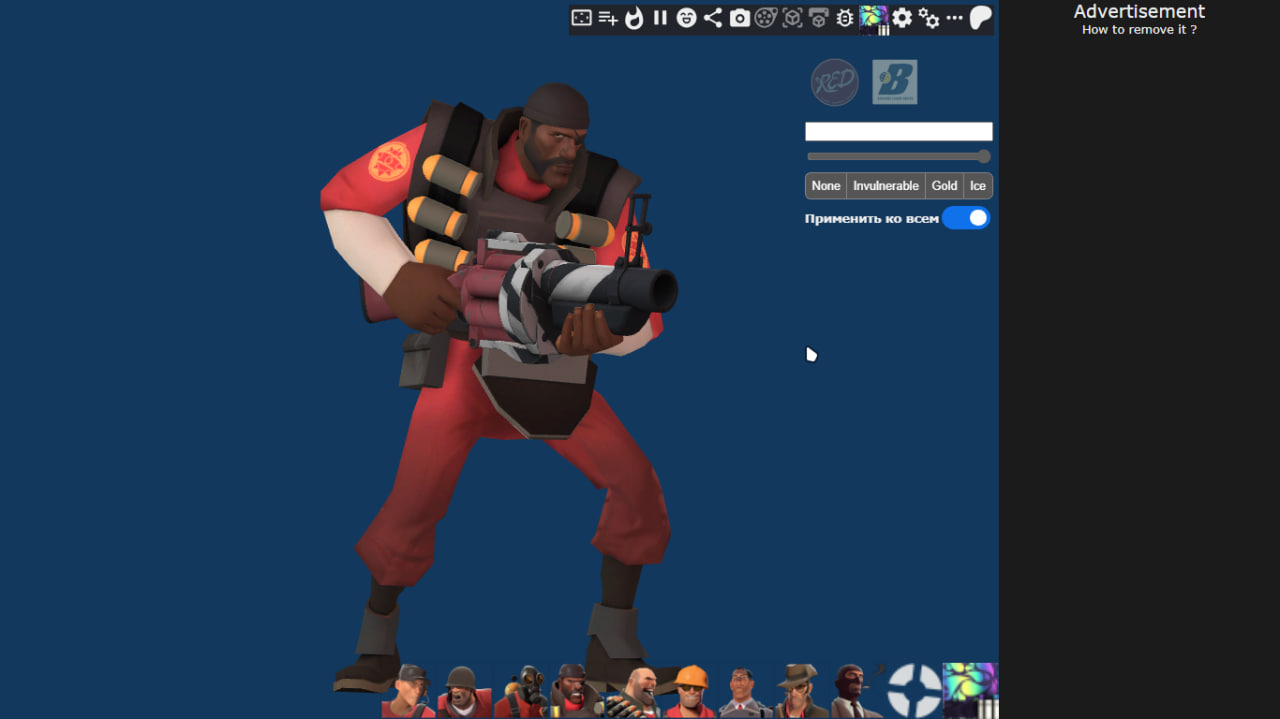
We go to the website loadout.tf, then select the weapon and skin we are interested in. (The advantage of this method is that we can choose the pattern and quality of the combat paint we want)
Next, after we have chosen a skin, we need to open the WarPaint editing menu. To do this, IN THE ENGLISH LAYOUT, press the Shift + W button combination.
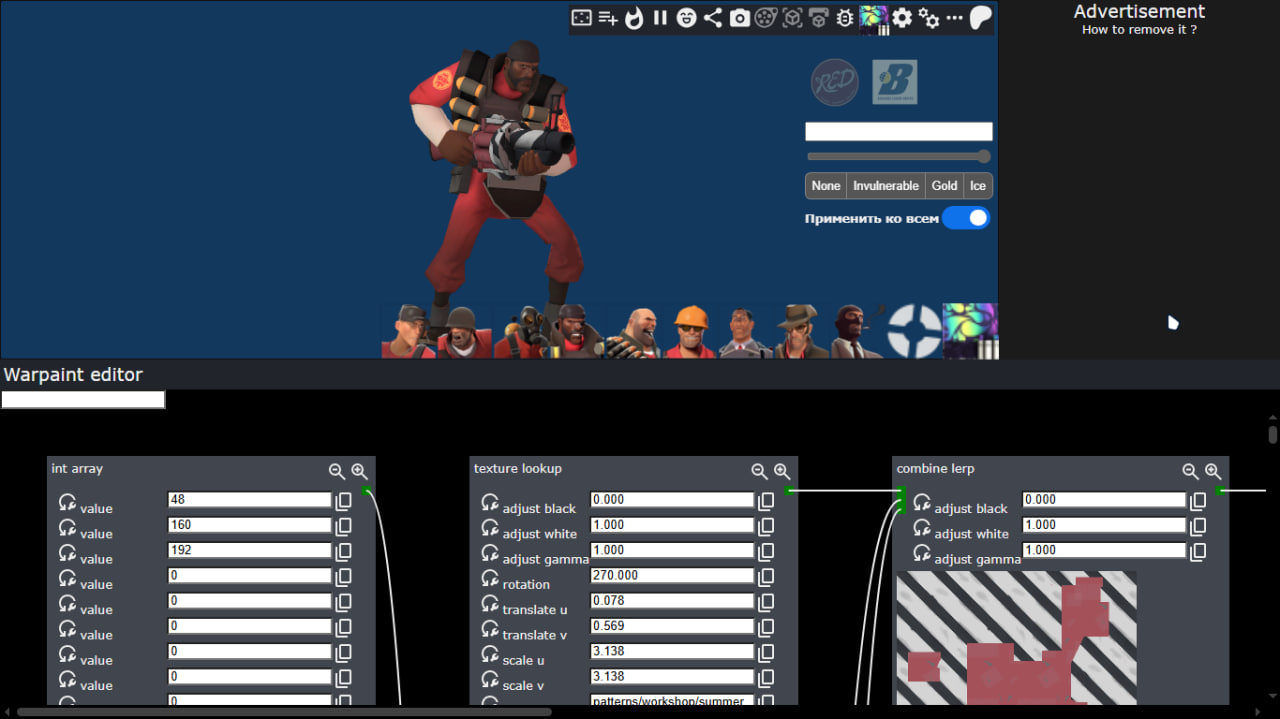
After the menu appears, we scroll the menu to the right until we find the texture we want, and click the Save VTF button to download our texture.
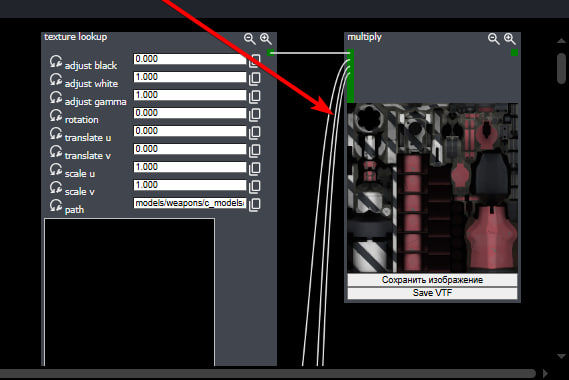
Next, name the resulting file as you like. After that, we need to go to the SFM files in the path SourceFilmmaker\game\usermod\materials where we create a folder with any name where we will store our texture, in my case it will be warpaint\helllo
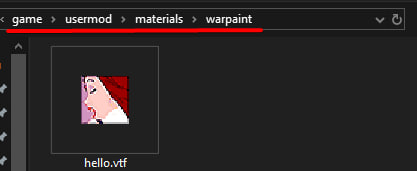
IMPORTANT NOTE
Replacing Weapon Texture with Skin
After we have successfully downloaded and saved our skin, we go to SFM and add our weapon to which we have downloaded the skin to the session.
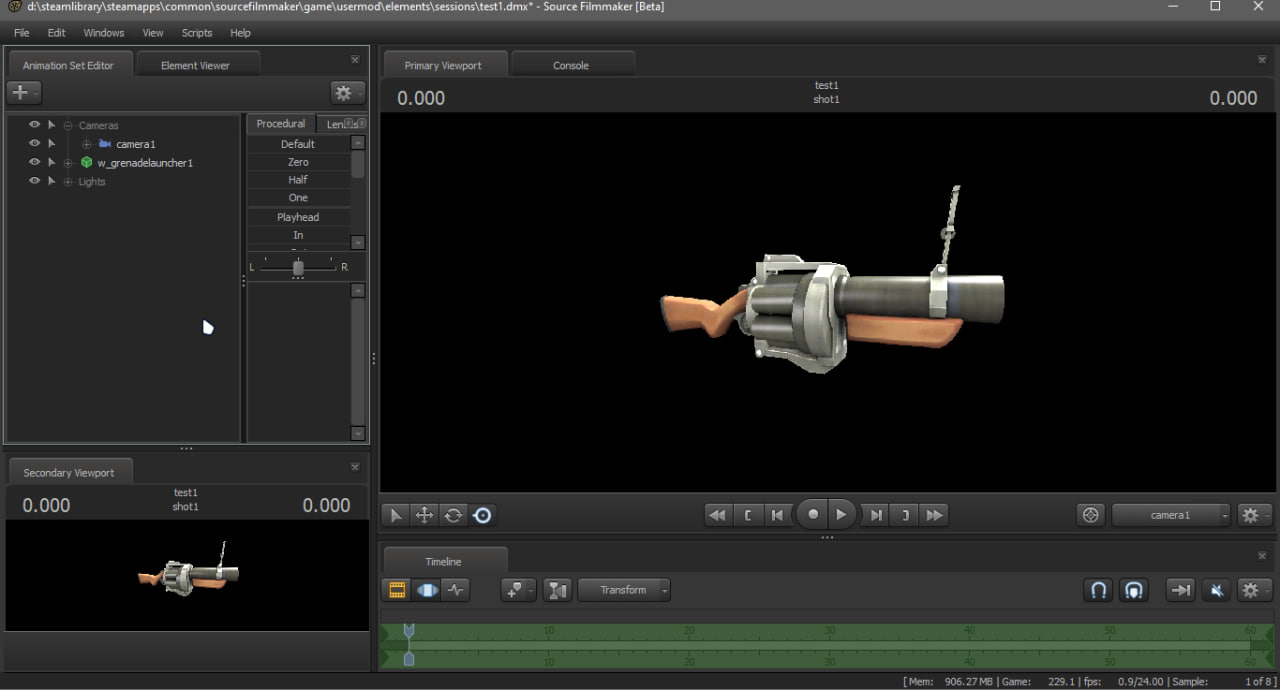
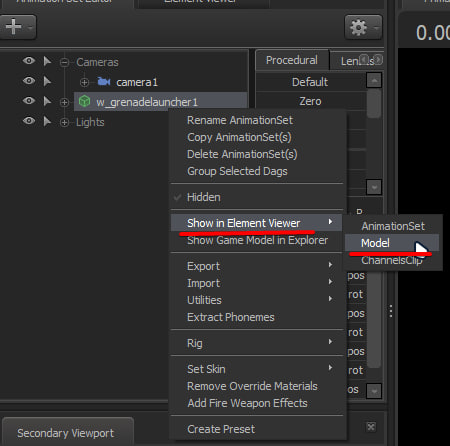
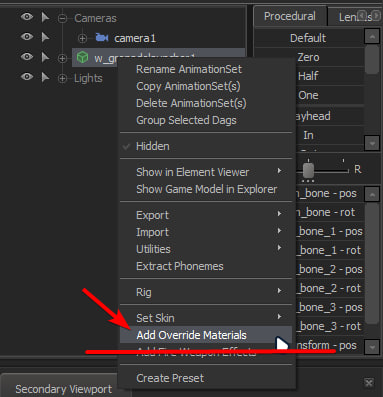
Next, we need to add materials. To do this, click RMB on our model and select Add Override Materials. Then, click RMB on the model again and select Show in Element Viever and Model.
Next, in the opened menu scroll to the very bottom before the inscription materials click on the plus sign we are interested in c_(name of your weapon).
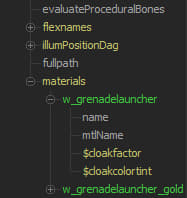
Now we need to click RMB on c_(weapon) then select Add Attribute and then select string.
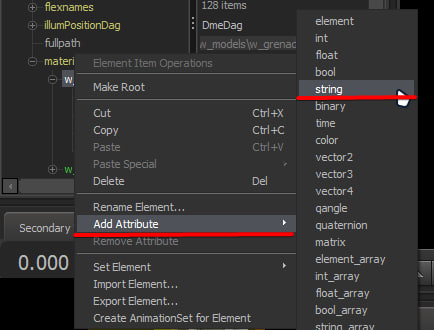
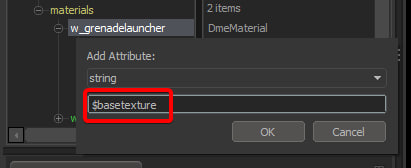
Next, in the window that appears, enter $basetexture and click Ok.
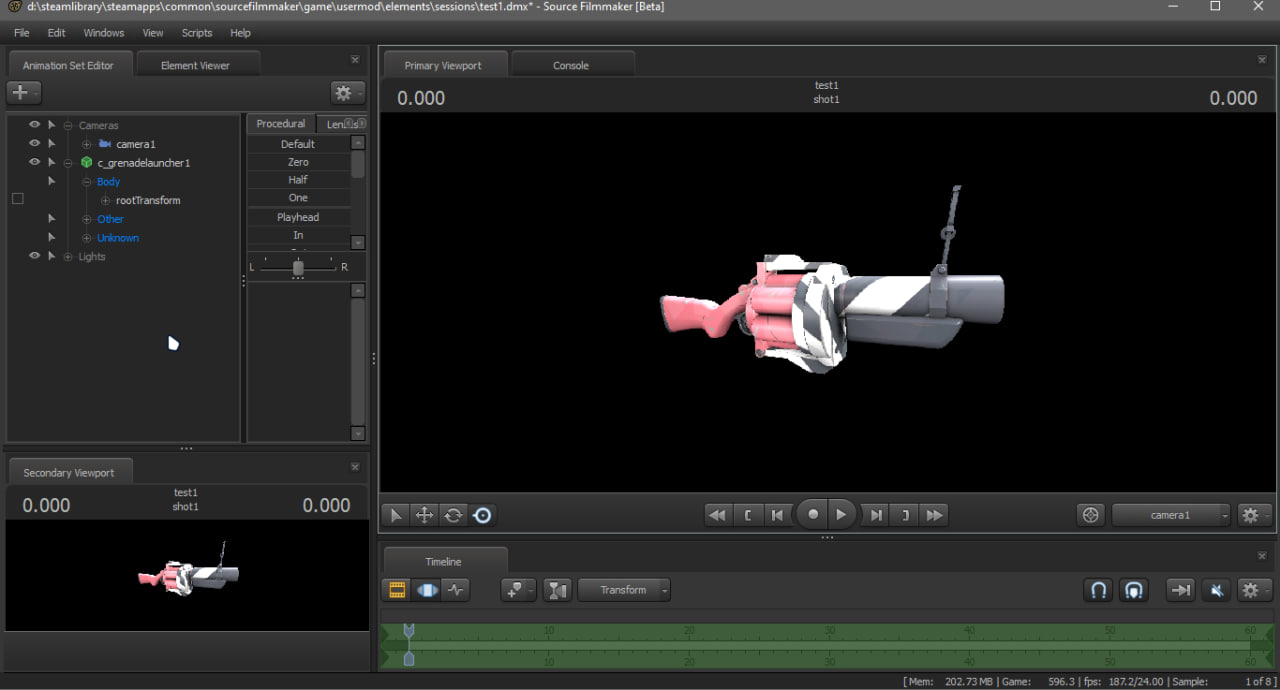
Next, we open c_(Weapon) and look for a panel with the name $basetexture and in the empty field opposite we specify the path to our file I have usermod\materials\warpaint\hello, but I will write simply warpaint\hello.
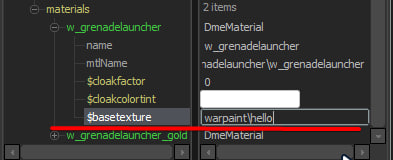
RESULT
P.s.
If this guide was helpful to you, please give it a like.

Данное Руководство на Русском Языке.
https://steamcommunity.com/sharedfiles/filedetails/?id=3764572030
- Changing Textures Using Material Overrides★ 5 (1.4k)41k views2.7k ♥5 minUpdated Jul 26, 2014
- Manually Updating TF2 Content★ 5 (1.3k)35k views1.9k ♥2 minUpdated Nov 26, 2025
- The Fundamentals of SFM: For Beginners★ 5 (1.3k)25k views3.3k ♥55 minUpdated Apr 29
- Ваш первый постер★ 5 (1.1k)22k views2k ♥5 minRussianUpdated Oct 22, 2024
- Getting Gmod Workshop stuff too SFM★ 5 (510)15k views1.3k ♥1 minBulgarianUpdated Aug 4, 2015
- Animation Guide★ 5 (704)14k views1.9k ♥6 minUpdated Apr 9, 2023




- Upgrading to PremiumTeam Fortress 2★ 5 (20k)1441k views11k ♥6 minUpdated May 11, 2022
- No More Room in Hell Official ManualNo More Room in Hell★ 5 (2.8k)569k views2.1k ♥29 minUpdated Apr 22, 2019
- NMRiH Community Hosting GuidesNo More Room in Hell★ 5 (526)351k views653 ♥1 minUpdated Aug 10, 2022
- ULTIMATE GUIDE FOR GAME DEV TYCOONGame Dev Tycoon★ 5 (5.8k)326k views10k ♥4 minUpdated 23 Jan, 2014
- How to 'Git Gud' Soon™MORDHAU★ 5 (2k)318k views3k ♥68 minUpdated Nov 16, 2024
- Лучшие кооперативные игры SteamPAYDAY 2★ 5 (1.5k)315k views2.1k ♥56 minRussianUpdated Apr 27, 2025






This guide was created by its original author on the Steam Community. Are you the author and want it removed? Request removal.