Expectamus Puzzle ARG Guide
ㅤ
❗The puzzle saves your progress, so you can come back and finish it later!
Complete the puzzle to earn a Unique Animation, 5.000 Klei Points and unlock a new in-game item - B.U.D.D.Y.!
Attention!

If you're playing this puzzle game SOLELY FOR THE REWARDS, you can skip the beginning and start your playthrough from the “Reagents in flasks” section. (This is the image numbered “16”)❗To switch between Day and Night in the image, click on the sun.
However, if you want to complete the game 100% by finishing all the tasks and collecting all the collectible stamps, continue playing in order.
Start
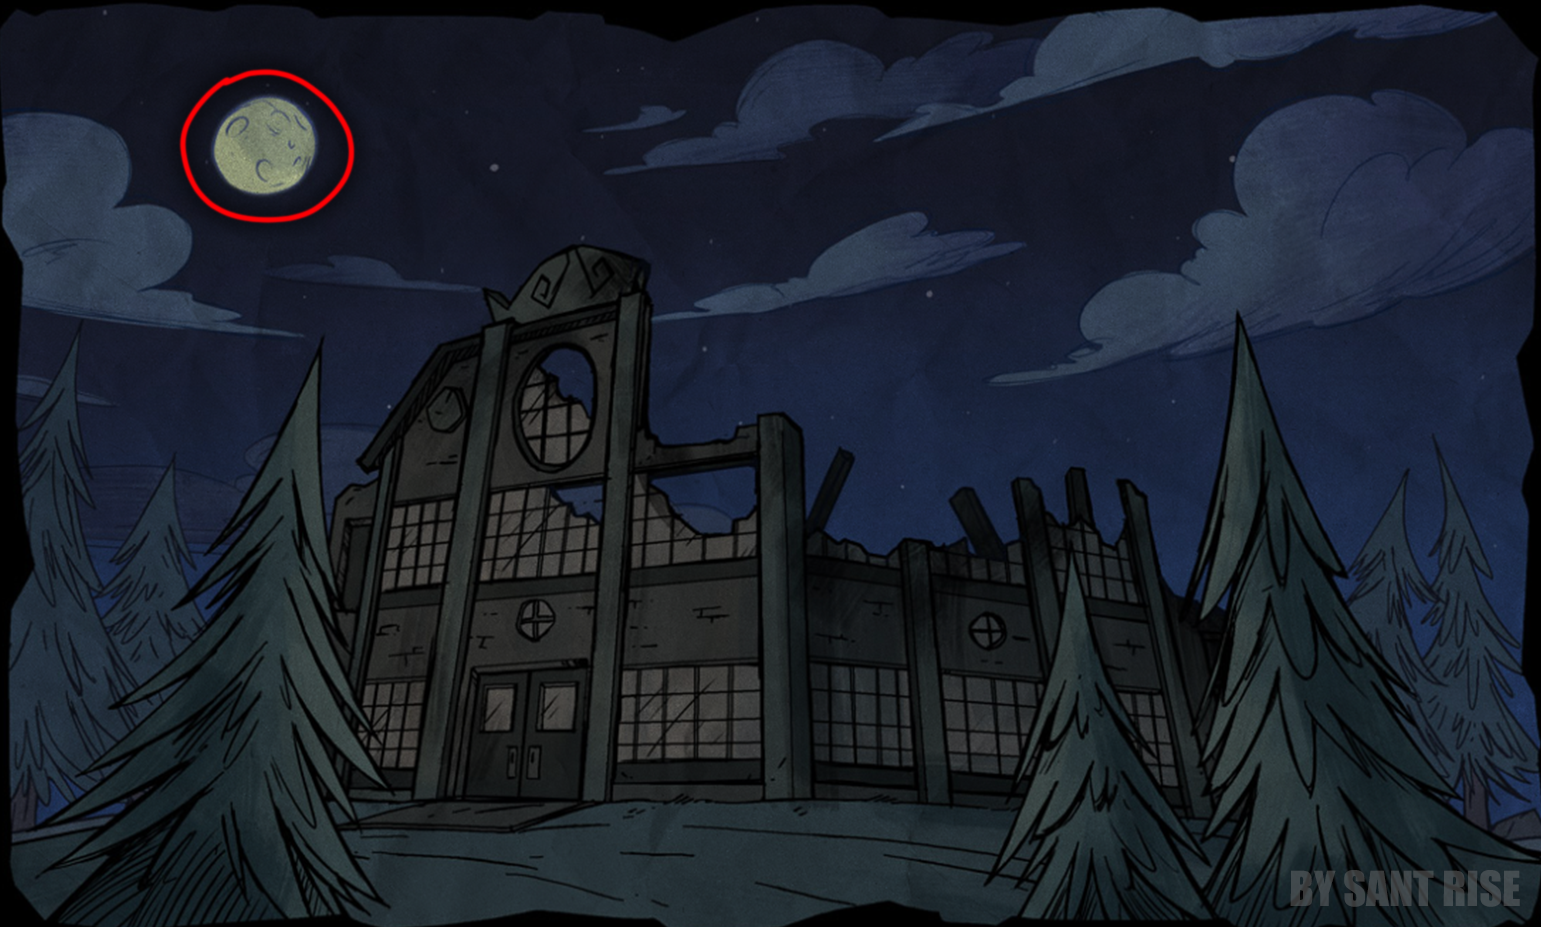 Click on the MOON.
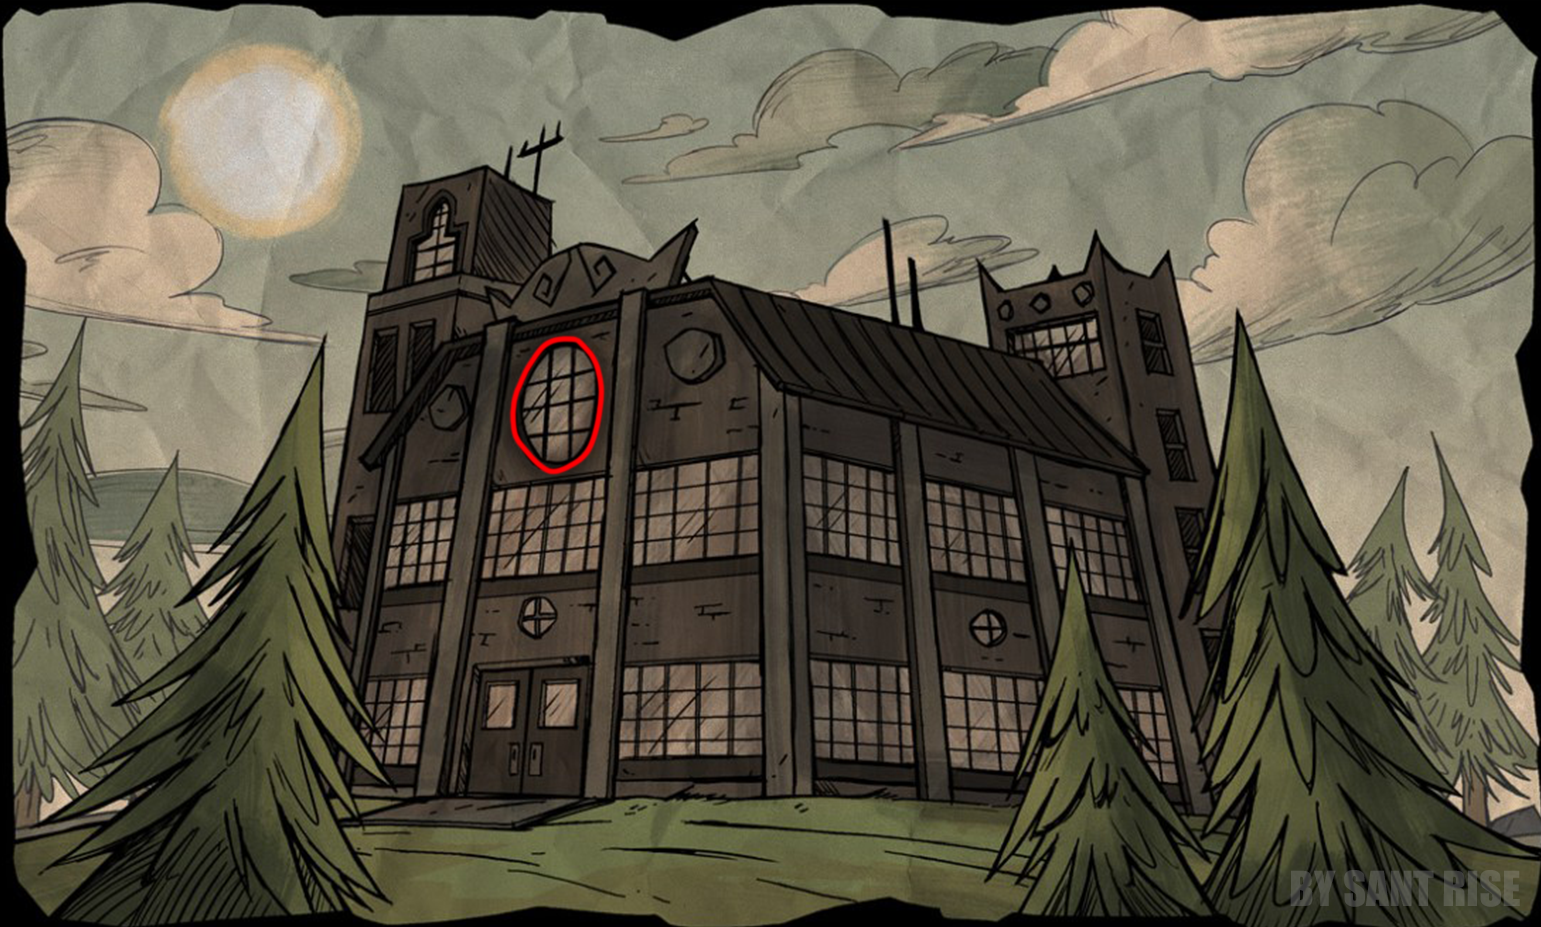 Click on the ROUND WINDOW.
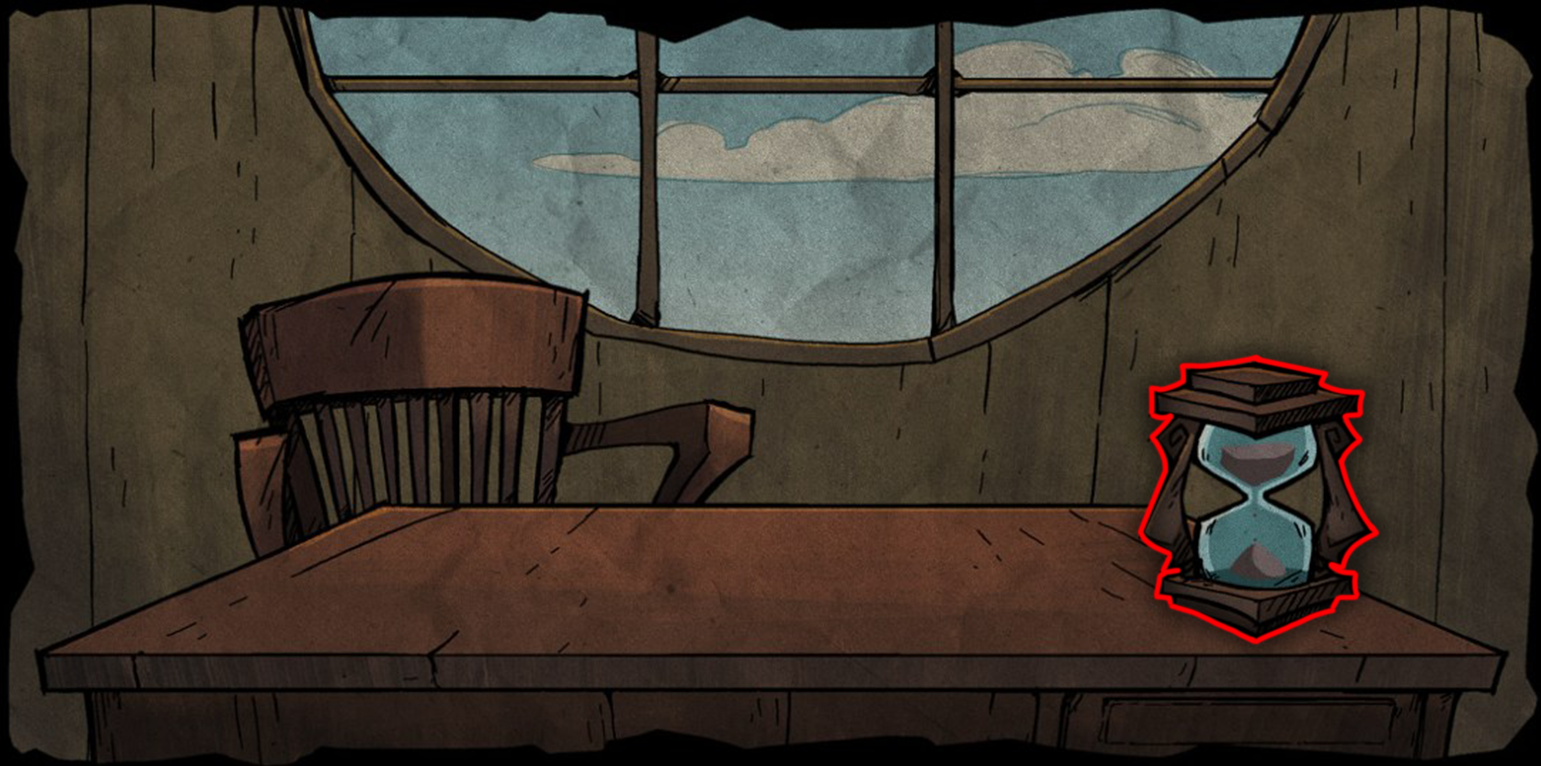
Click on the HOURGLASS.
❗If you don't have an hourglass, try skipping this step and starting with the next one.
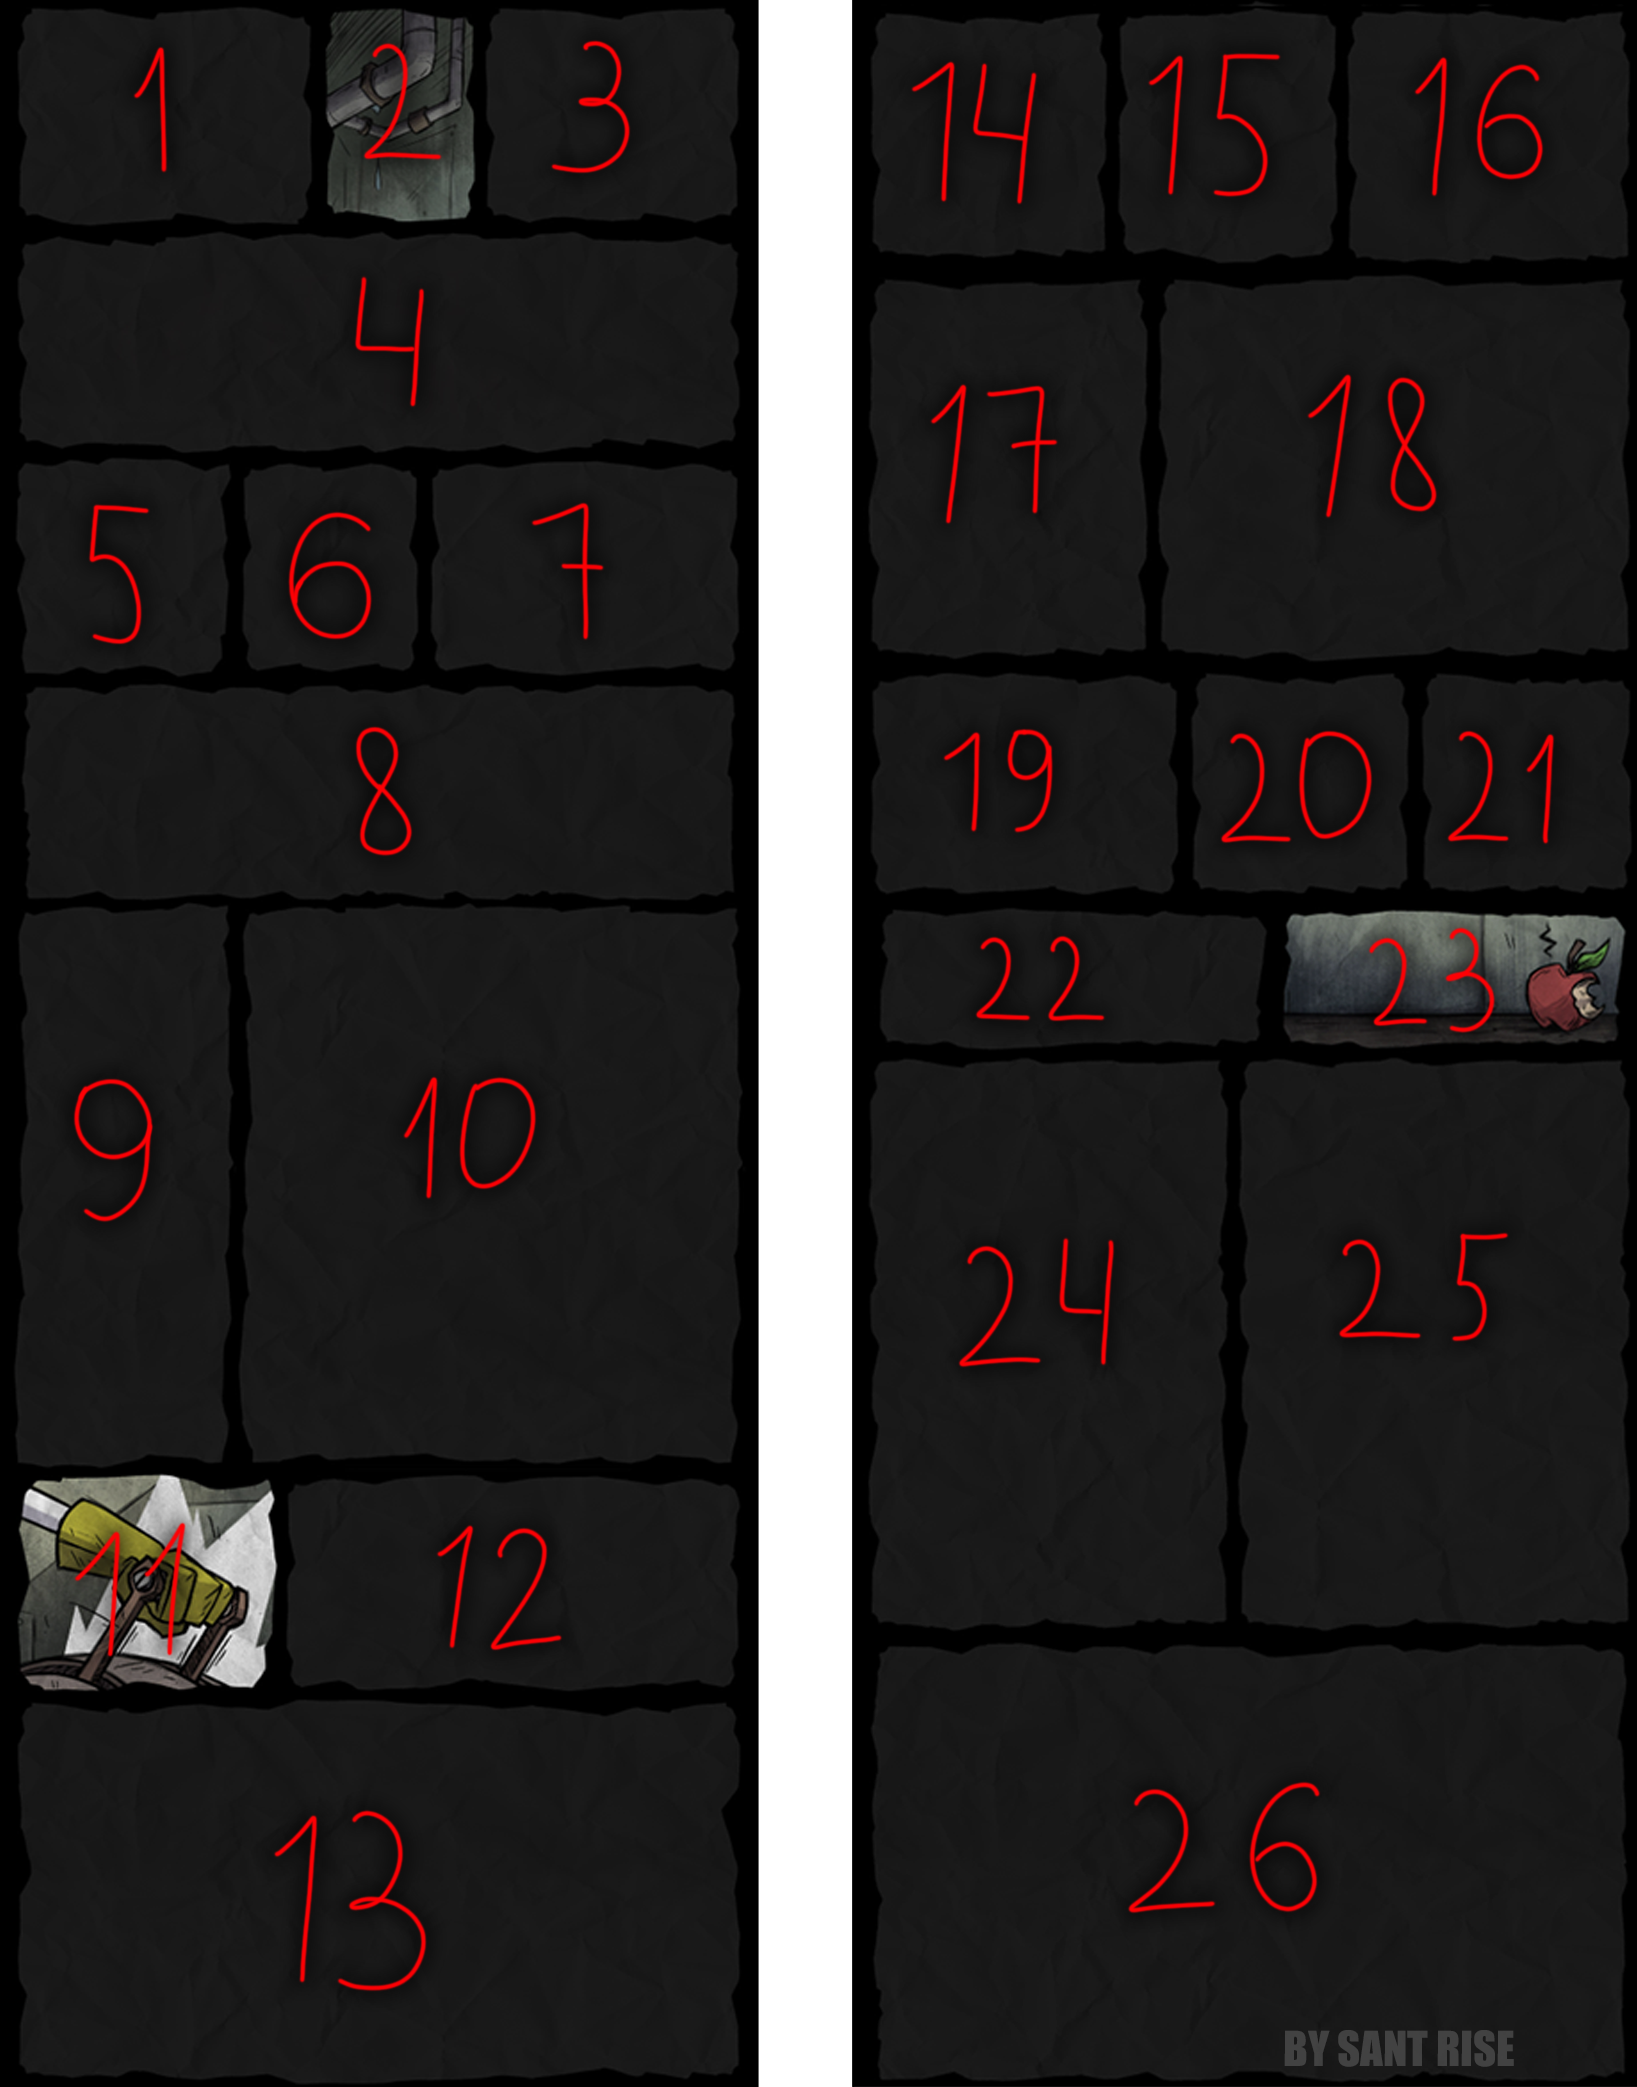 [4] You need to CLICK ON THE IMAGES in a specific order.
 Specifically, in this order:
Continue clicking on the images:
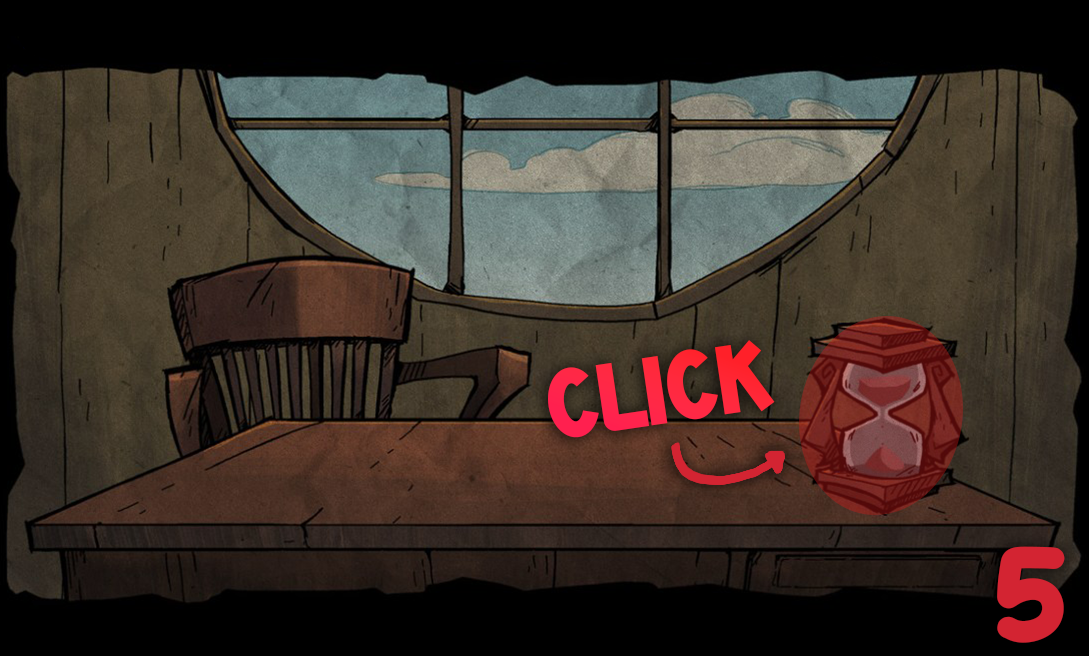 [5] Click on the HOURGLASS.
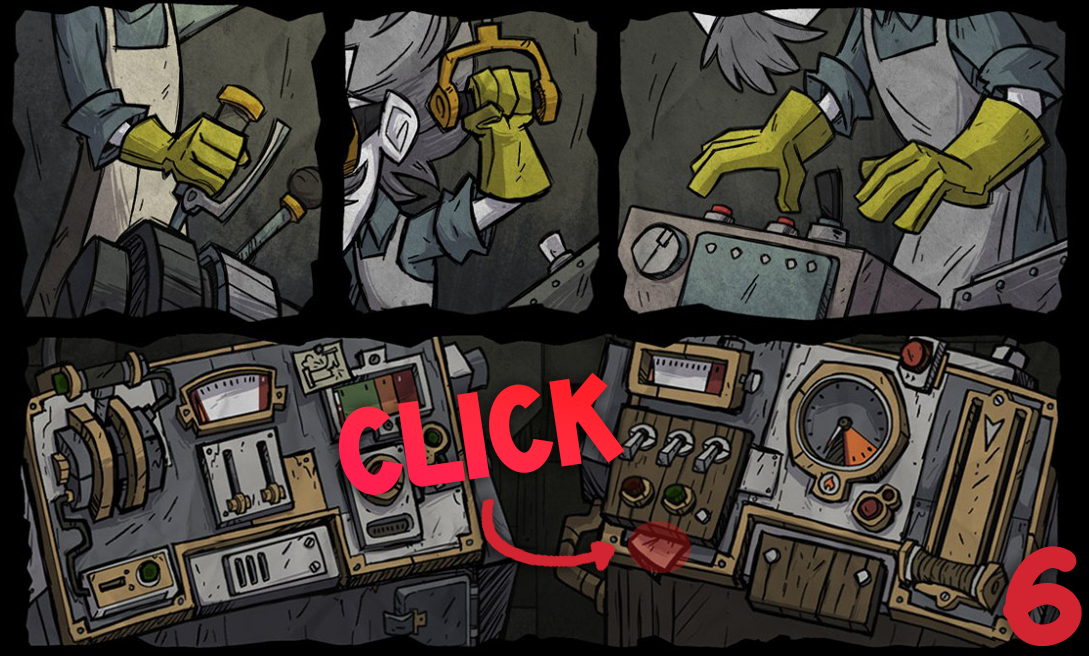 [6] Find the CONTROL PANEL in the images and click on the PIECE OF PAPER sticking out.
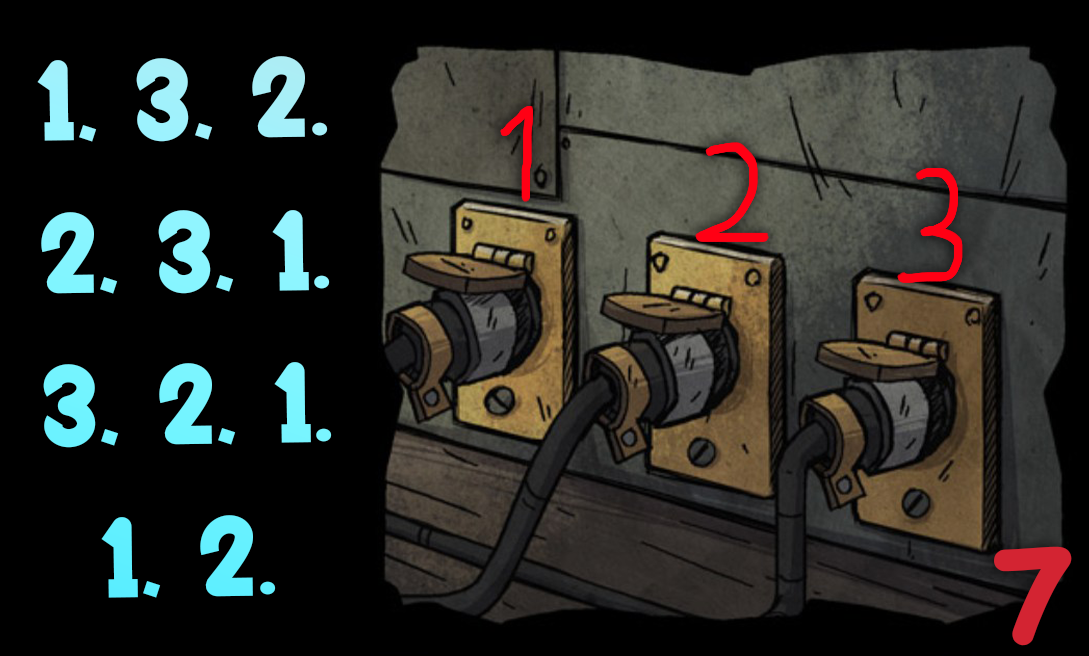 [7] Below the image of the table is a diagram showing three outlets that you need to turn on and off in sequence (the diagram is shown in the screenshot above).
Turn them off in the following order: 1, 3, 2. Then turn them on: 2, 3, 1. Turn them off: 3, 2, 1. Turn them on: 1, 2. If you did everything correctly, the outlets will no longer respond to your presses.
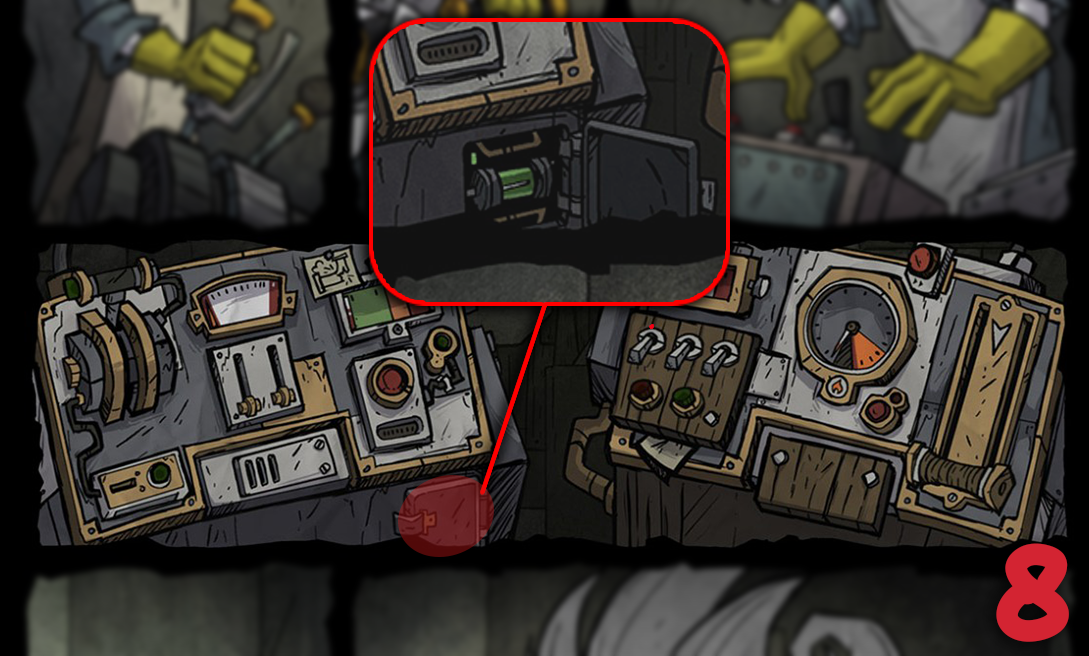 [8] Find the control panel (just below the image showing the outlets). Next, follow all the step-by-step instructions shown in the video below; if the video is moving too fast for you, simply slow down the playback speed.
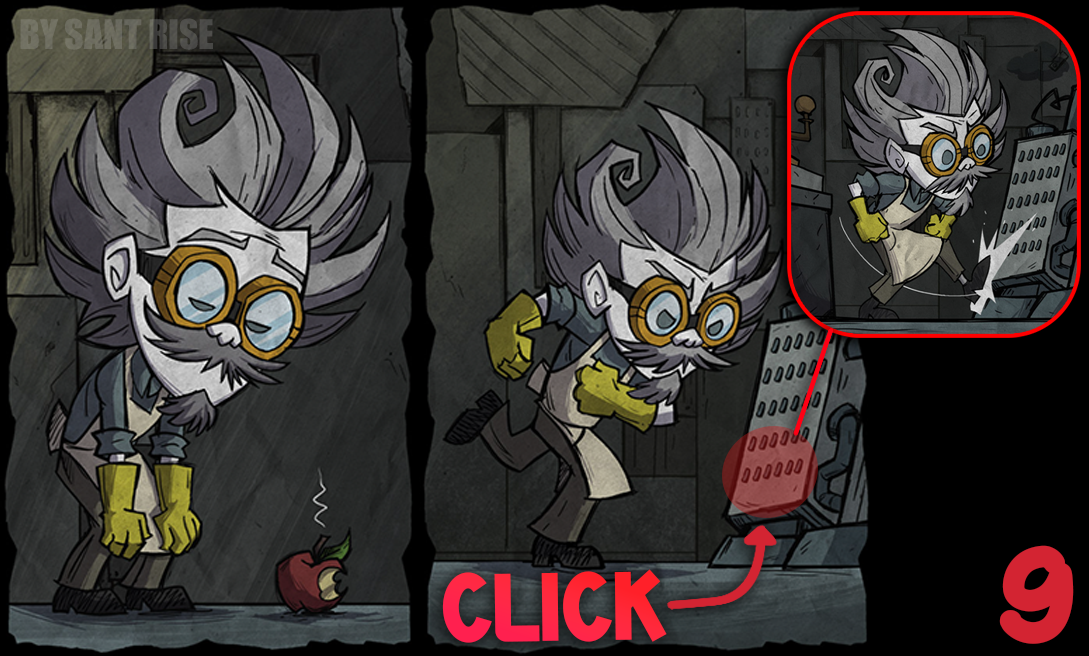 [9] Next, find the image where Wagstaff is swinging his leg at the metal box. Click on the bottom of the box until new images appear below.
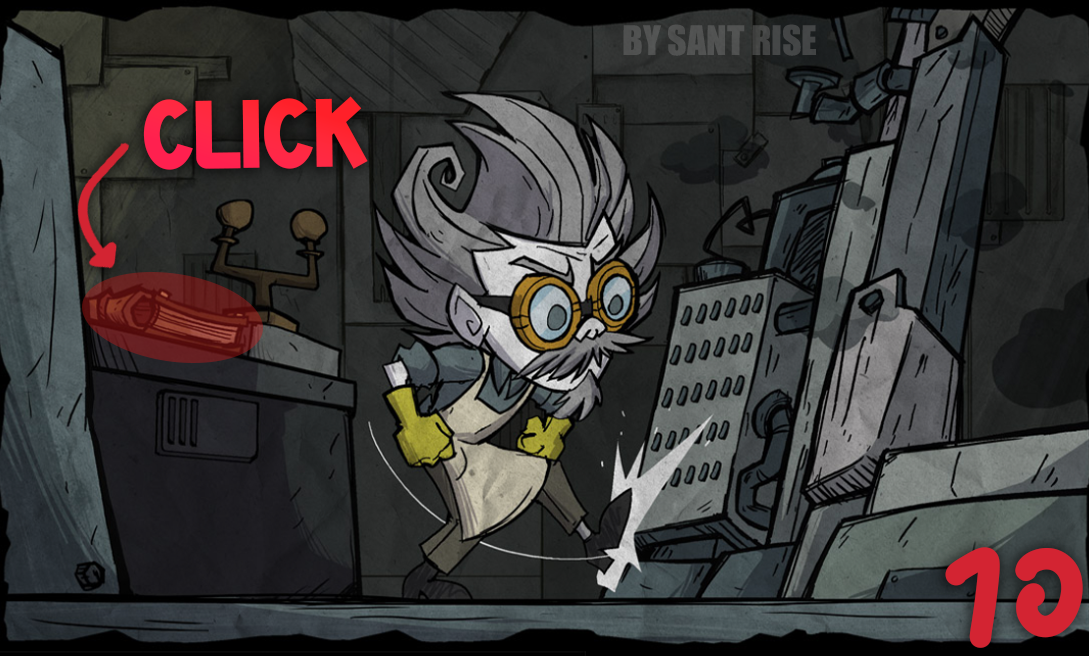 [10] Scroll down and find the image where you need to tap the book, it should then disappear.
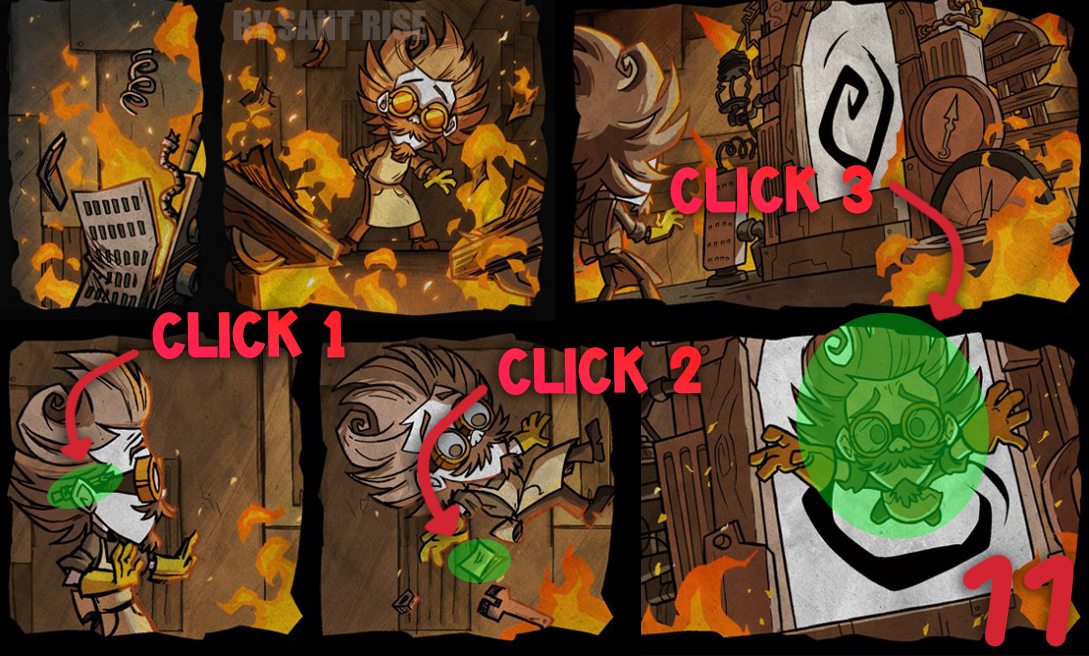 [11] Next, scroll all the way to the bottom and tap the following items in order:
1. The pencil behind Wagstaff’s ear.
- The piece of paper that fell out of Wagstaff’s pocket.
- Tap Wagstaff himself.
(❗Not all images will be available at first, just tap them one by one.)
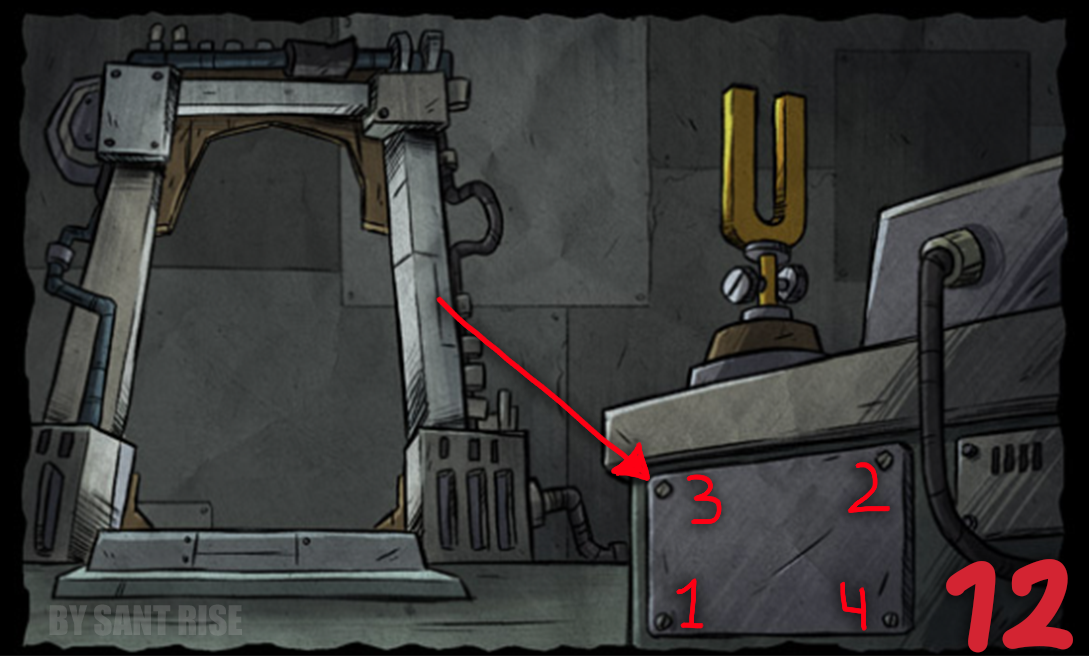 [12] Next, scroll down further and click on the bolts in the order shown in the image.
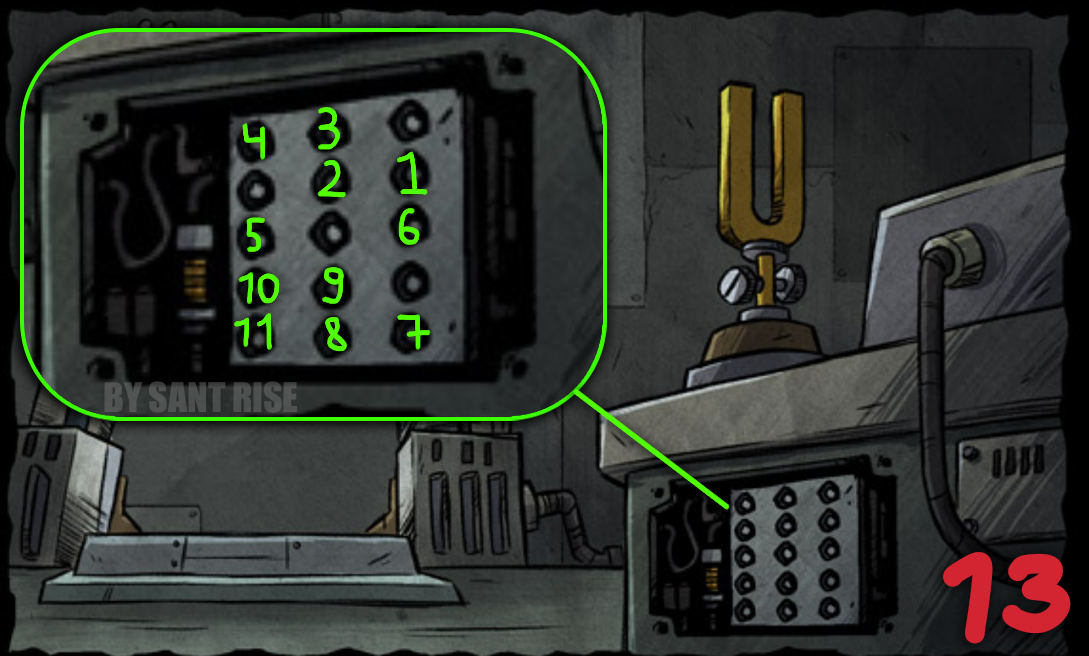 [13] After completing the previous steps, a panel will appear where you need to press the buttons in the correct order. The order is shown in the image.
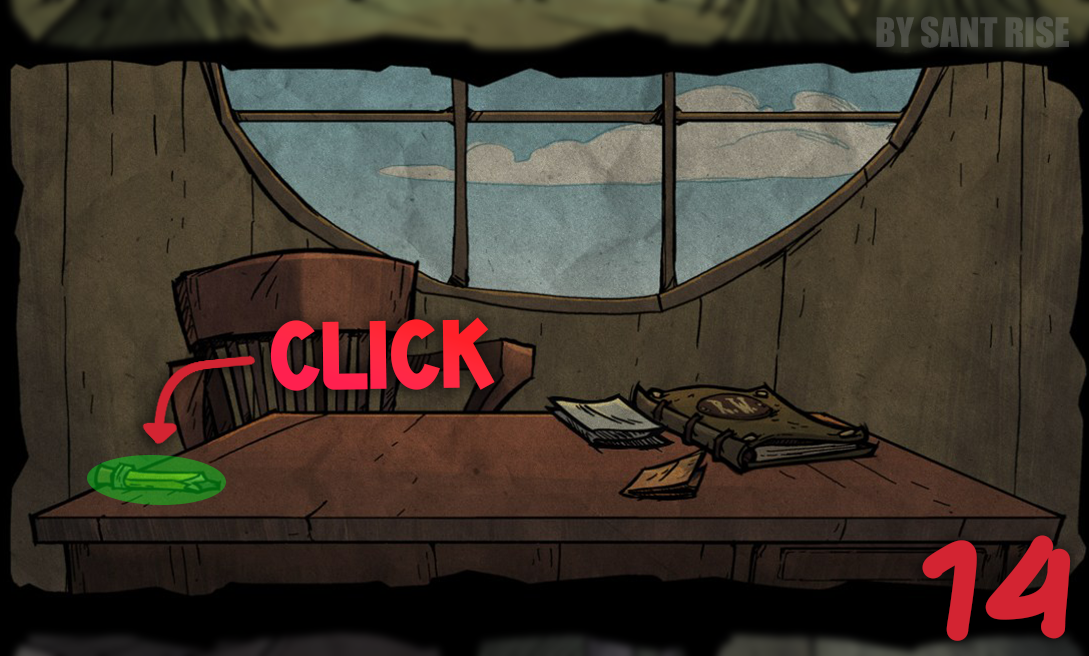 [14] Go back to the table and click on the PENCIL.
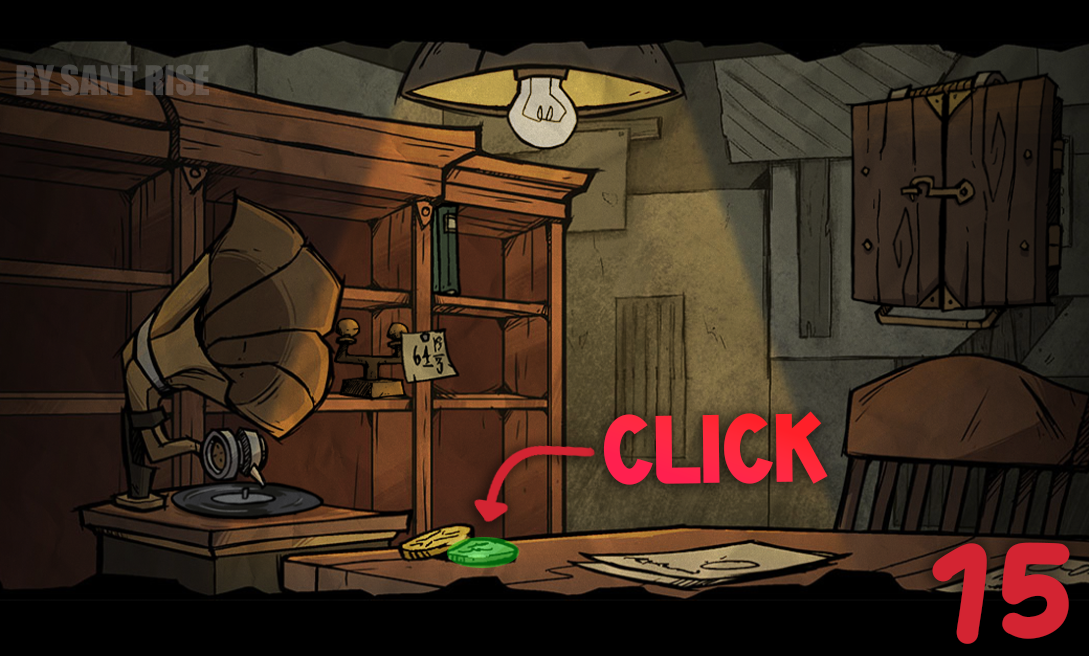 [15] Click on the SILVER COIN.
(❗The silver coin will take you to the night version of the image, and the gold coin to the daytime version).
Reagents in flasks
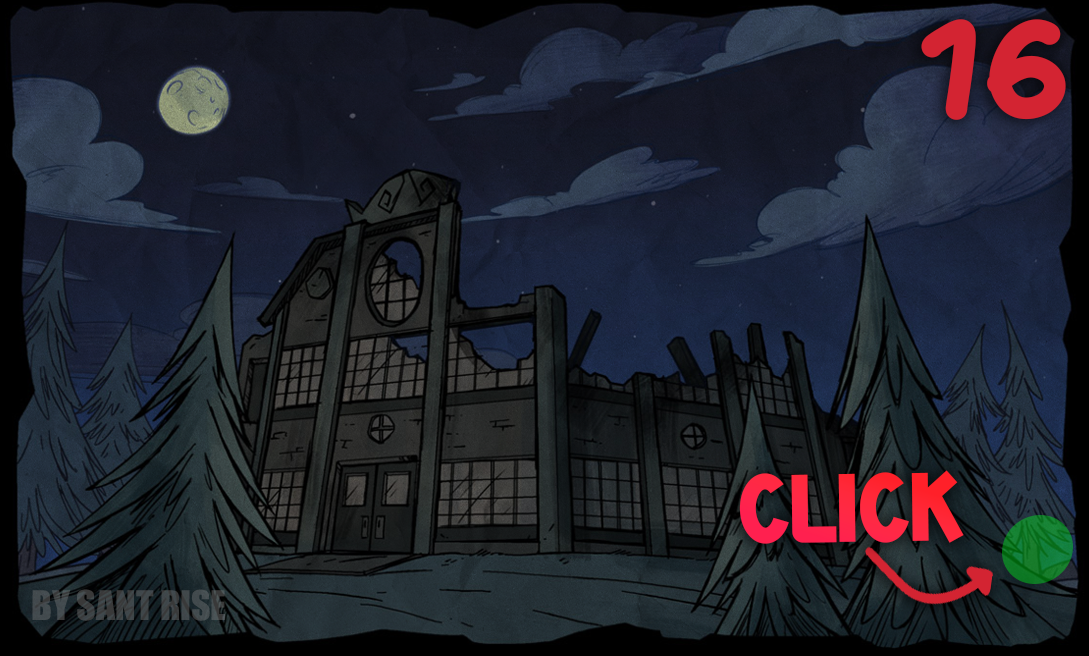 [16] Click on the indicated area until a new image appears at the bottom.
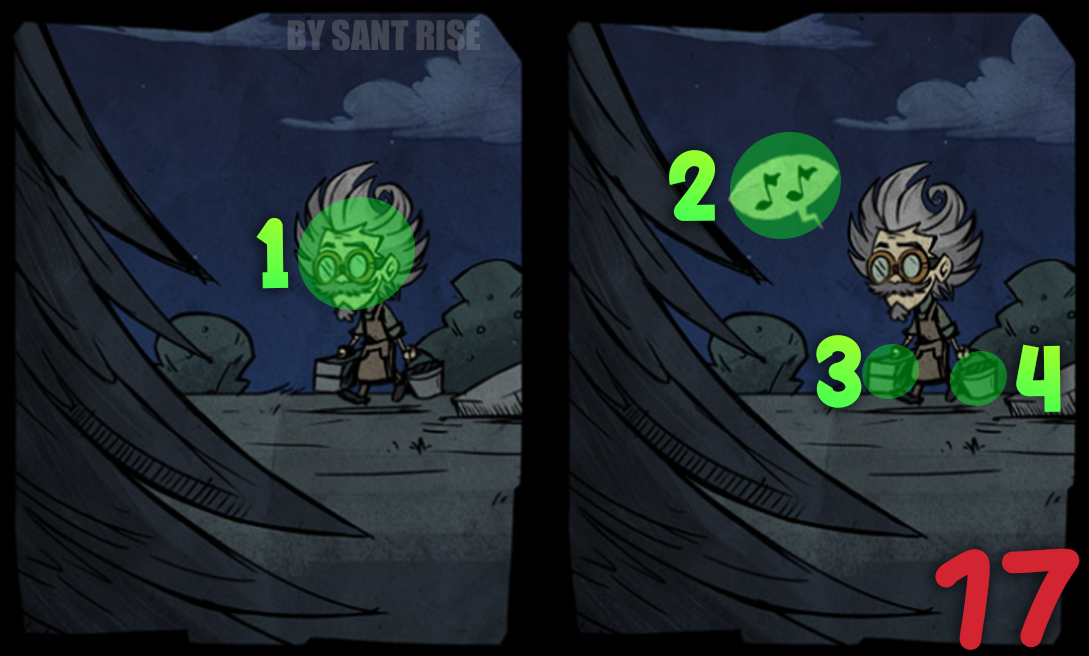 [17] In the image that appears, click on the following items:
- Wagstaff.
- The speech bubble with musical notes.
- The bucket on the left.
- The bucket on the right.
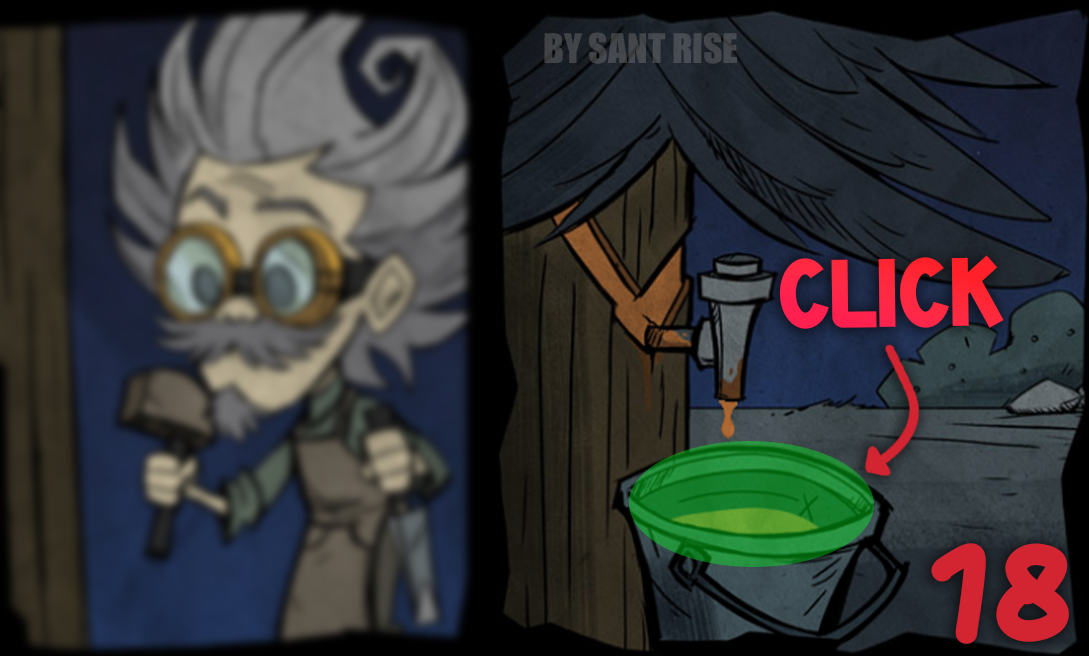 [18] In the new image, click on the BUCKET.
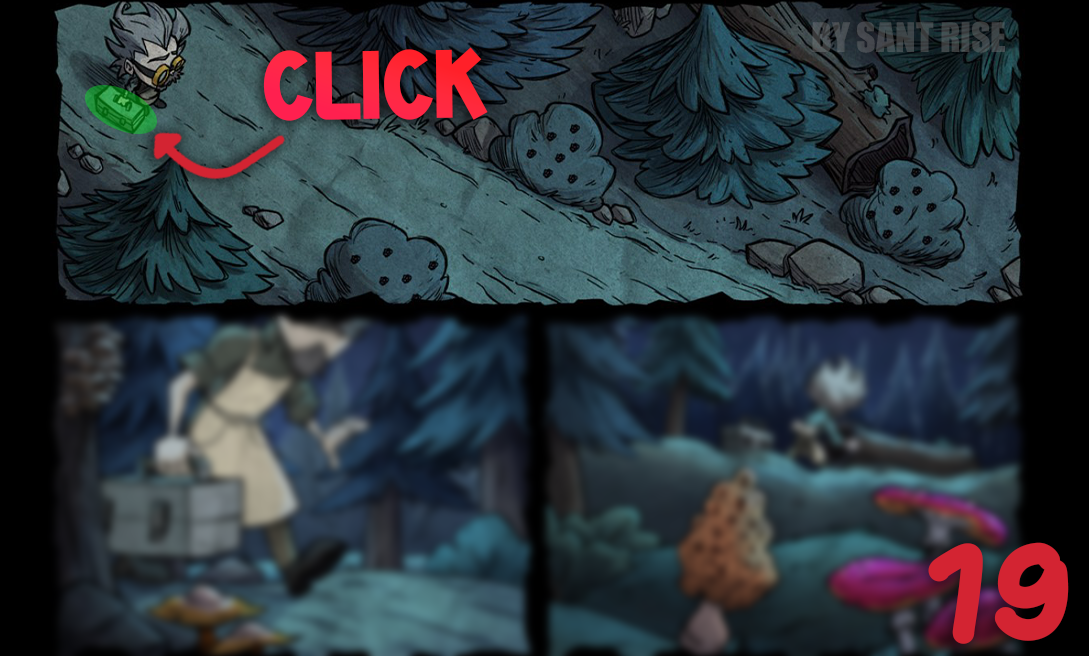 [19] Scroll through the list and click on the Wagstaff suitcase.
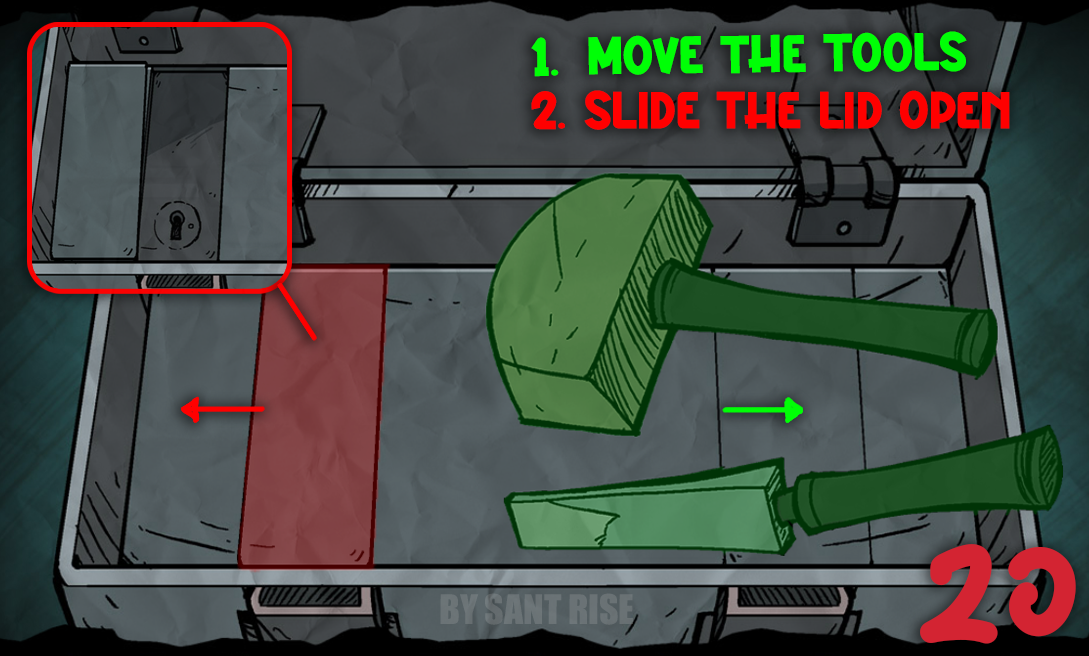 [20] When the compartment opens, you need to:
- Slide the tools to the right to reveal the hidden flap at the bottom of the suitcase.
- Slide the hidden flap to reveal the keyhole.
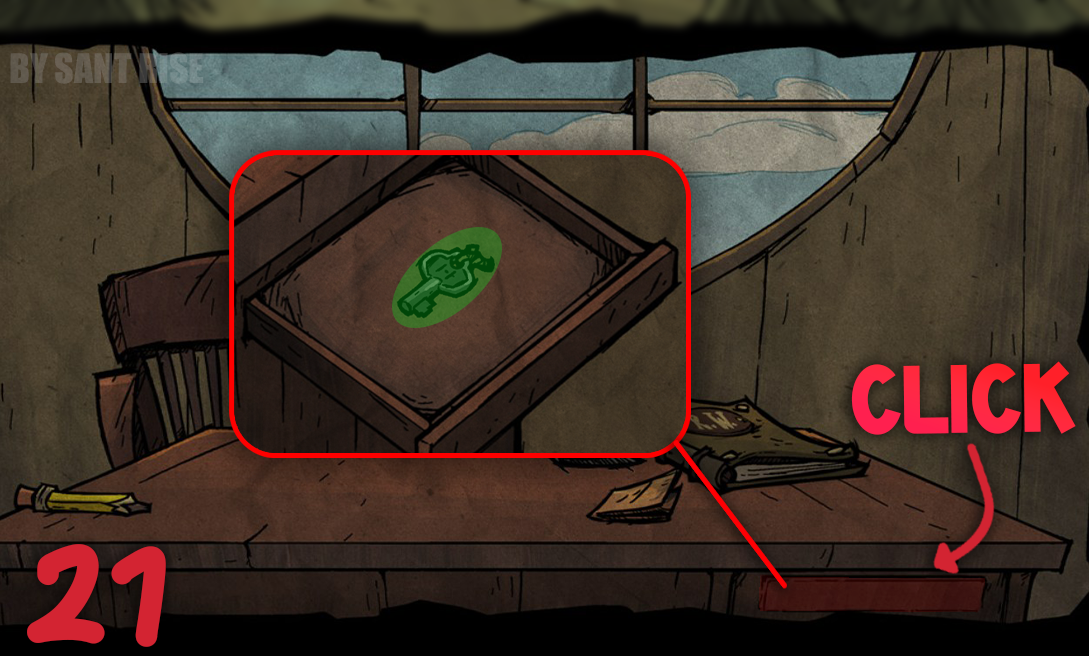 [21] Now we need to find the key.
- Scroll all the way to the top and tap the moon again to switch from night to day.
- In the familiar spot, scroll down a little to where the table is shown. In the lower right corner of the table, there will be a secret drawer that you need to tap to get the key.
- Then tap the sun and return to our picture.
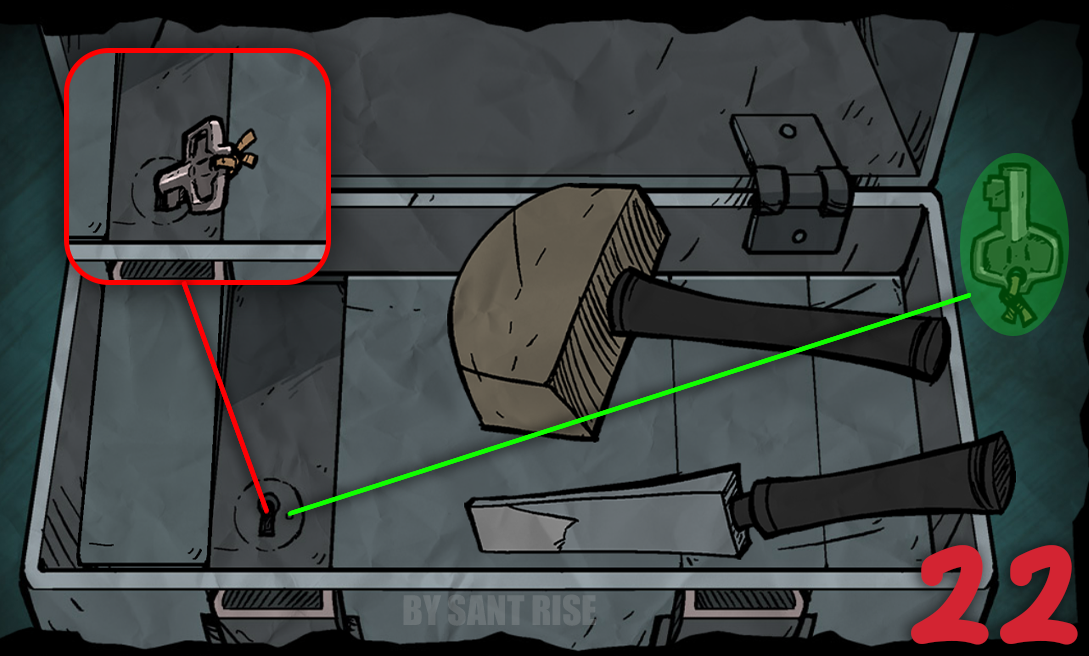 [22] Now a key will appear to the right of the suitcase, you need to pick it up and drag it into the keyhole to open the secret compartment.
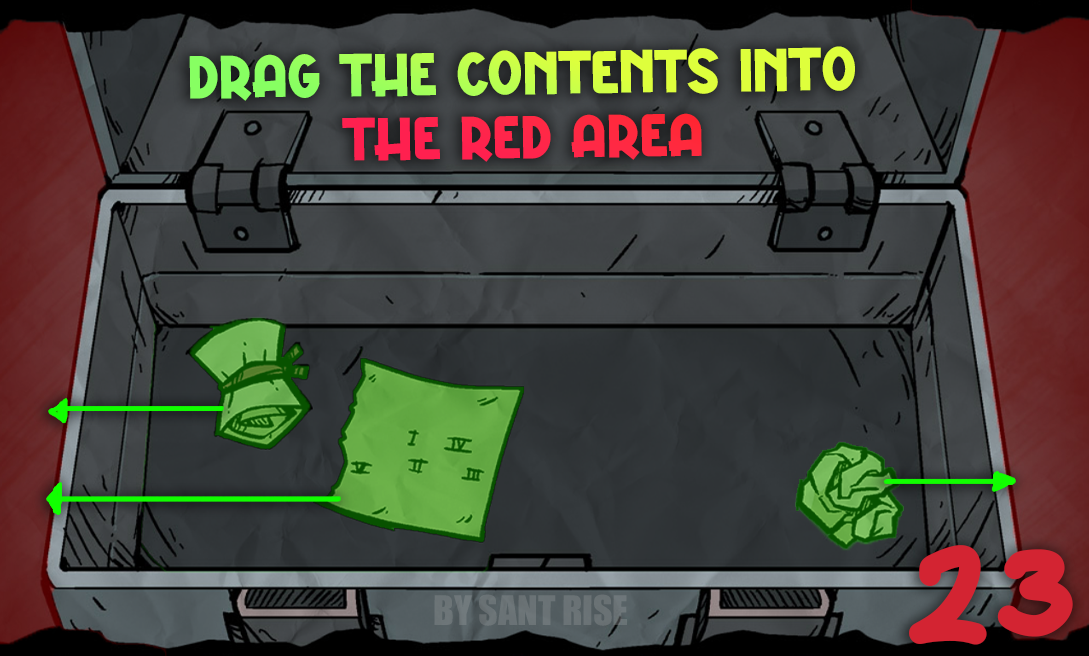 [23] Drag all the items out of the suitcase.
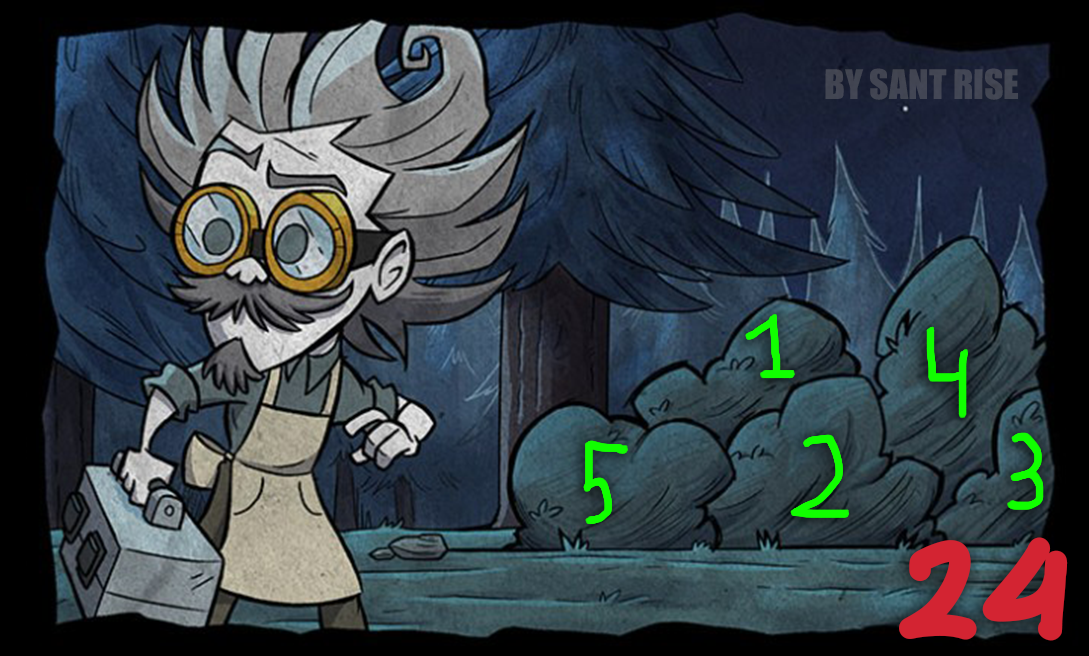 [24] Scroll down and click on the bushes in the order shown.
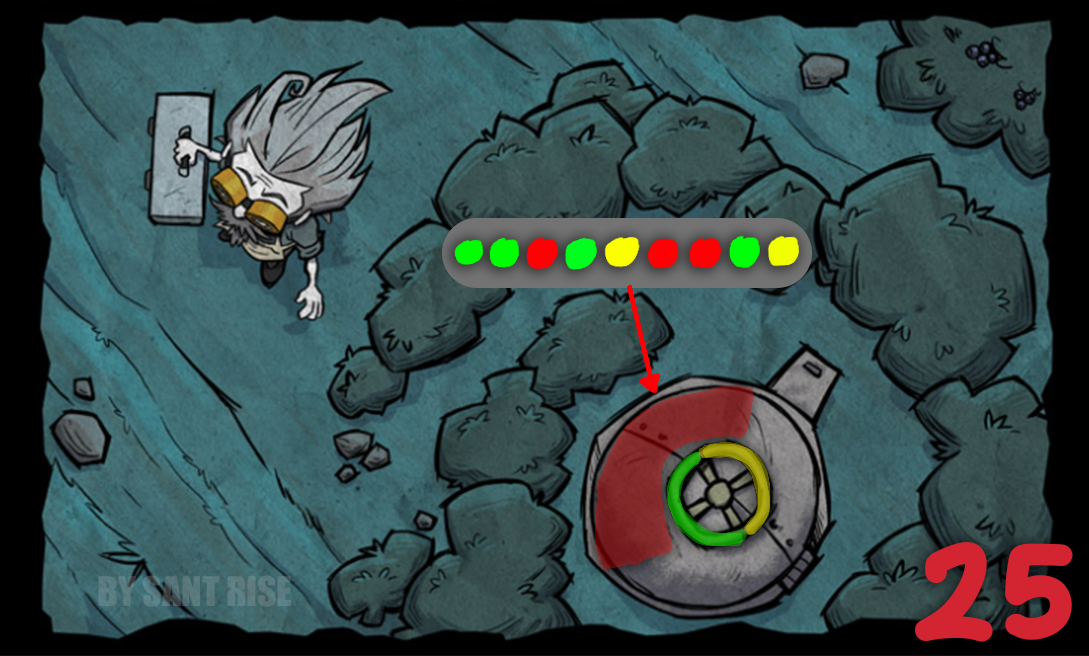 [25] Next, we need to click on the hatch components in the correct order.
- Green – the left side of the hatch.
- Yellow – the right side of the hatch.
- Red – the gray hatch cover.
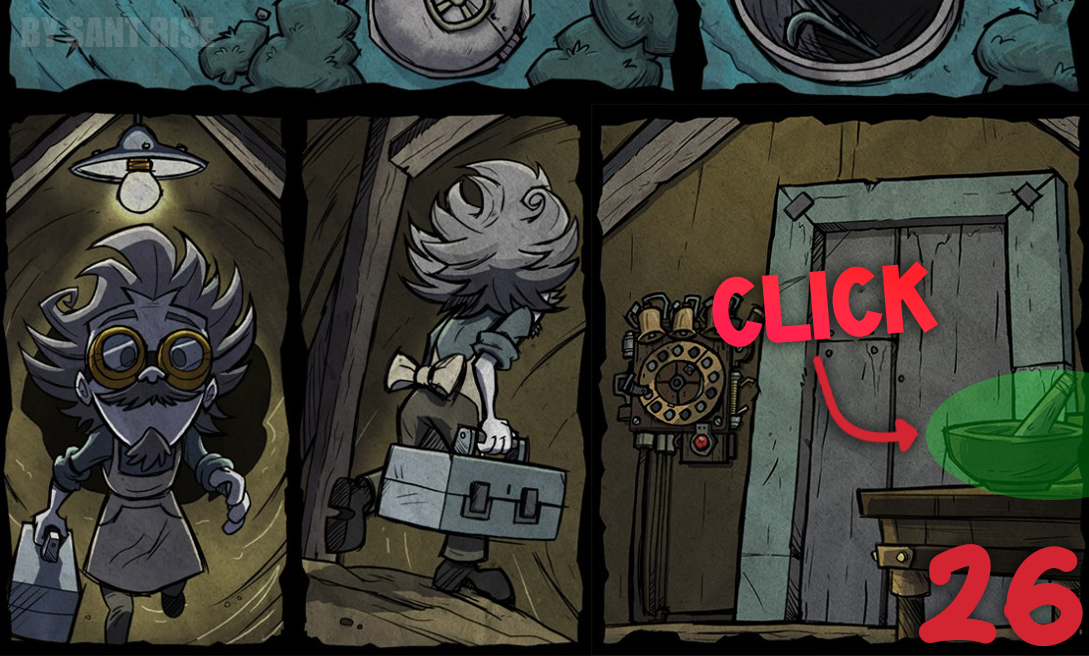 [26] Scroll down and click on the bowl.
If you are playing this puzzle SOLELY FOR THE REWARDS, you will need to scroll down to the section ‘Piano Clock (NEW!)’ and continue from there. However, if you want to complete the puzzle game 100% by finishing everything and collecting all the collectible stamps, continue playing in order.
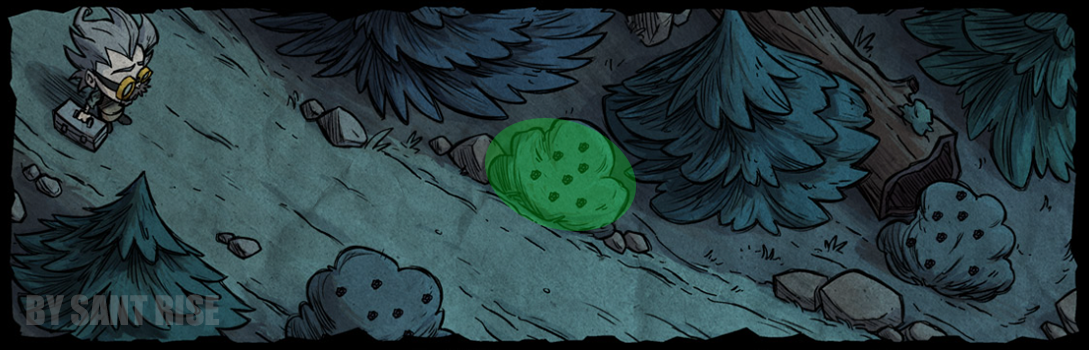 [27] Now we need to collect all the ingredients shown in the previous images.
1. In the image above, click on the bush.
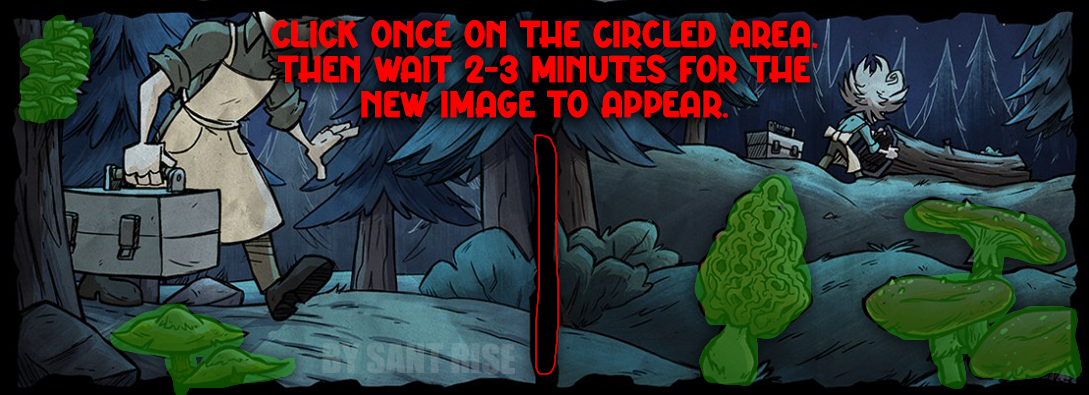 2. In the image above, click on all the mushrooms marked in green.
3. Move your cursor between the two images, CLICK ONCE, and simply wait 2–3 minutes WITHOUT TOUCHING THE MOUSE!
2. In the image above, click on all the mushrooms marked in green.
3. Move your cursor between the two images, CLICK ONCE, and simply wait 2–3 minutes WITHOUT TOUCHING THE MOUSE!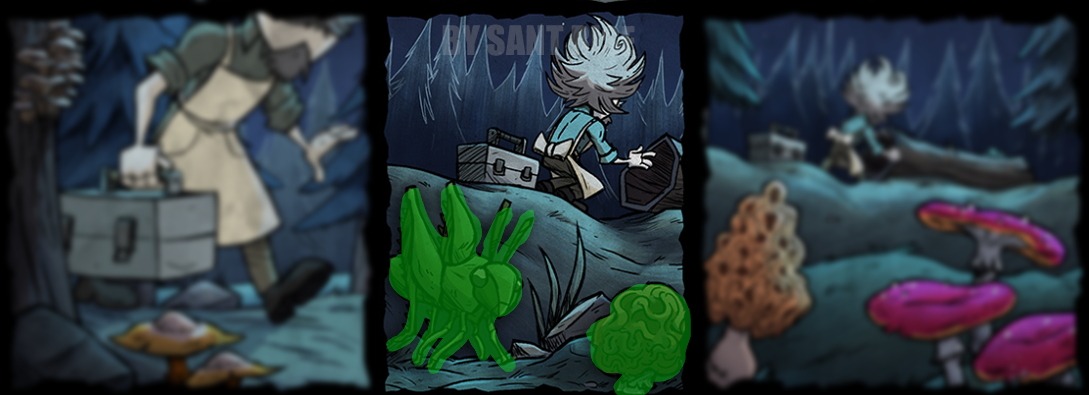 4. Once the new image appears, click on the cricket and the mushroom marked in green.
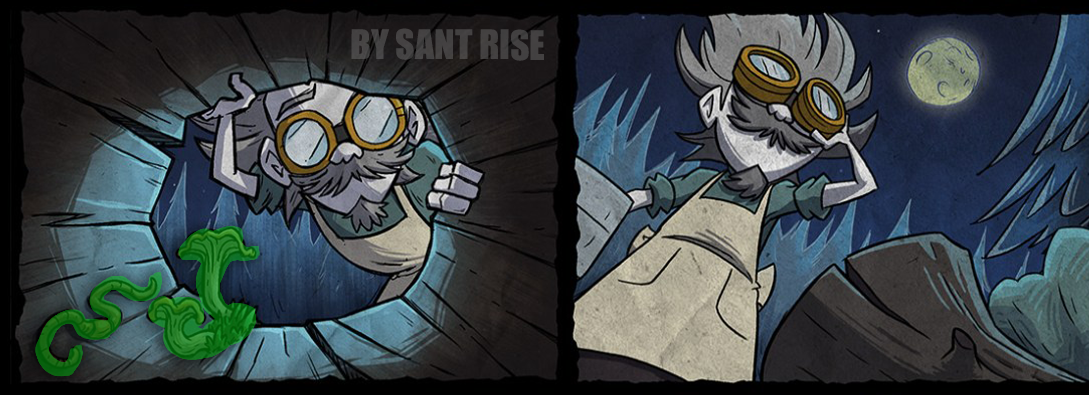 5. Click on the mushroom and the worm.
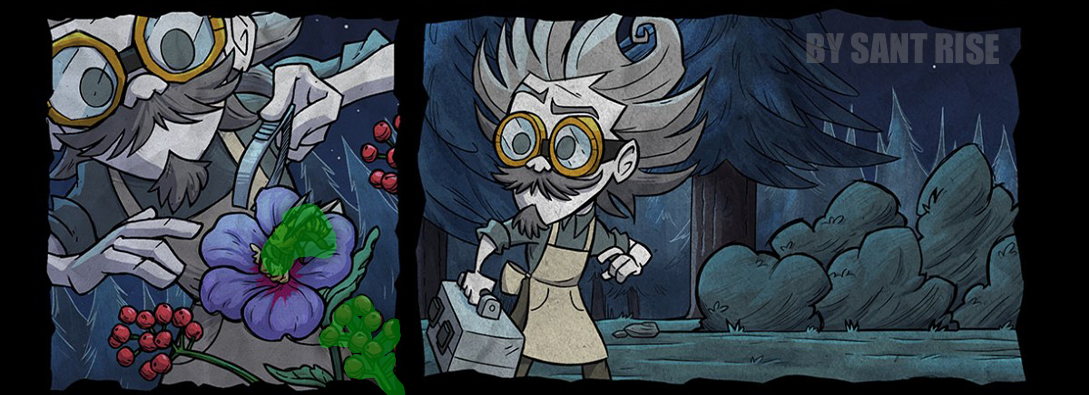 6. Click on the bee and the red berry.
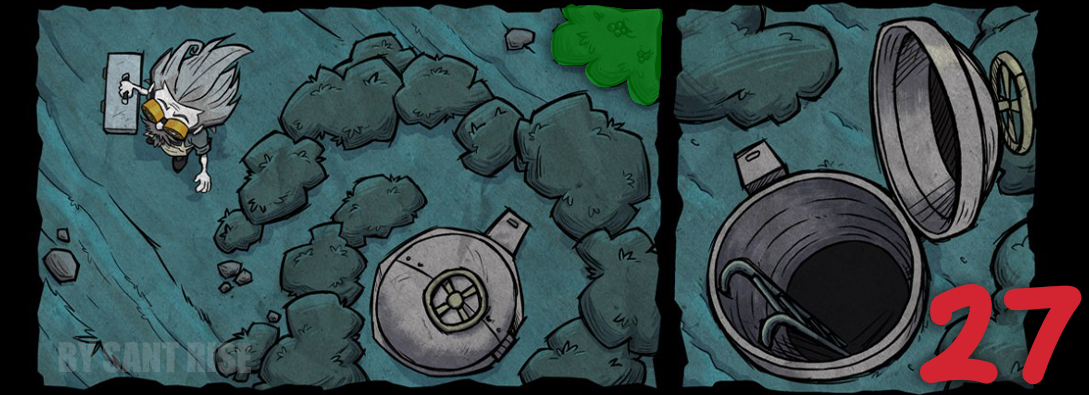 7. Click on the bush marked in green in the picture.
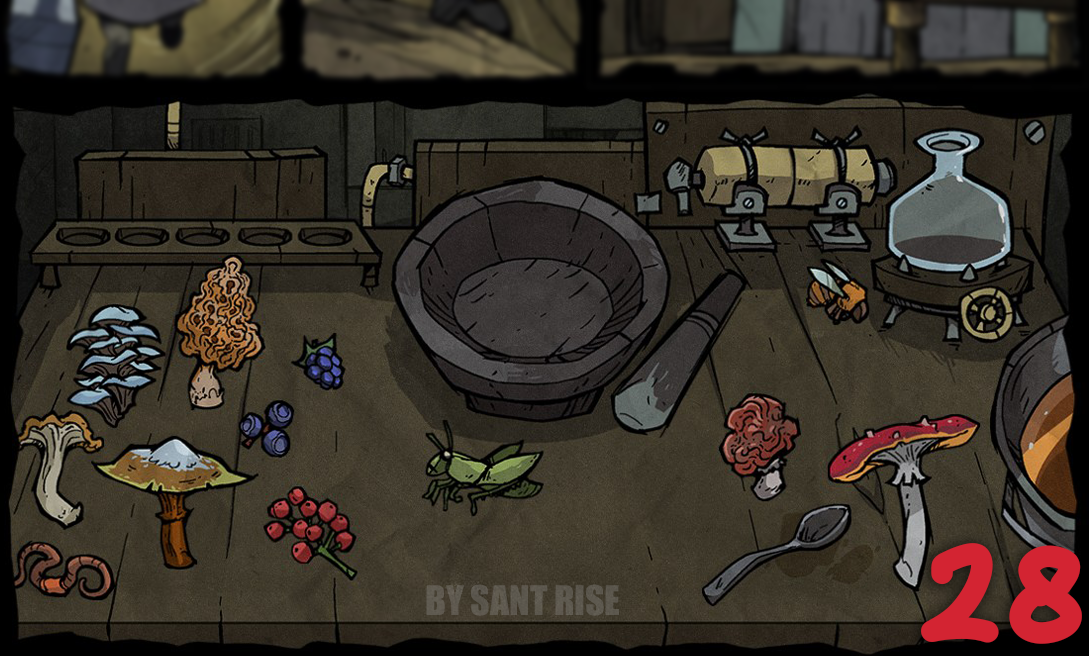 [28] You should end up with a set like this.
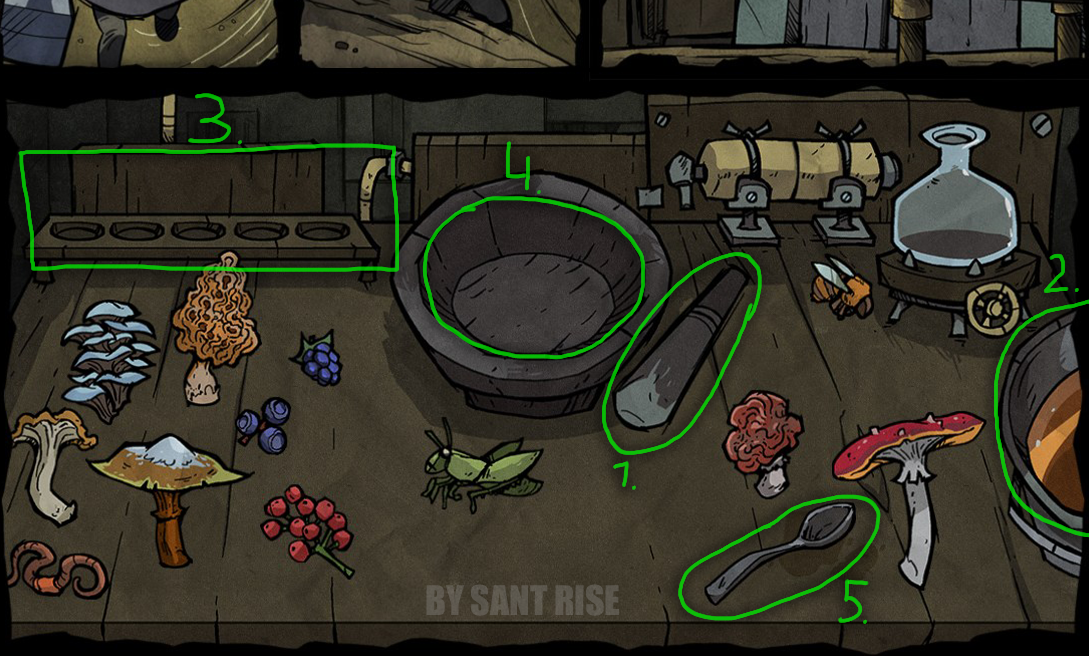 [29] Now we need to prepare 5 different mixtures in test tubes. First, let’s go over the basics.
- The mortar is the tool you’ll use to mix the mixture after you’ve added all the ingredients.
- The liquid you’ll need to scoop up with a spoon (5.) and transfer to the grinding container (4.). It’s best to do this right away!
- The place where the test tube will appear if you mix all the ingredients correctly.
- The container where you need to put the ingredients.
- The spoon used to scoop up the liquid (2.) and transfer it to the container (4.).
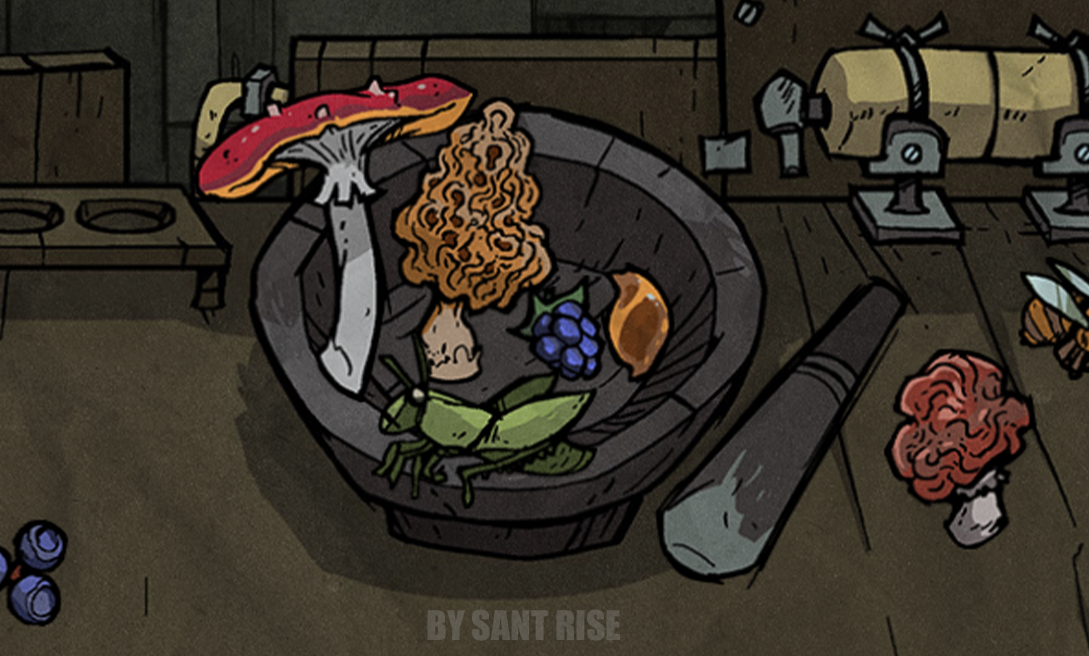 For the first test tube, mix these ingredients. Also, don’t forget the liquid that you need to scoop up with a spoon and add to the container (as described above). You only need to add this liquid once, and it will stay there permanently.
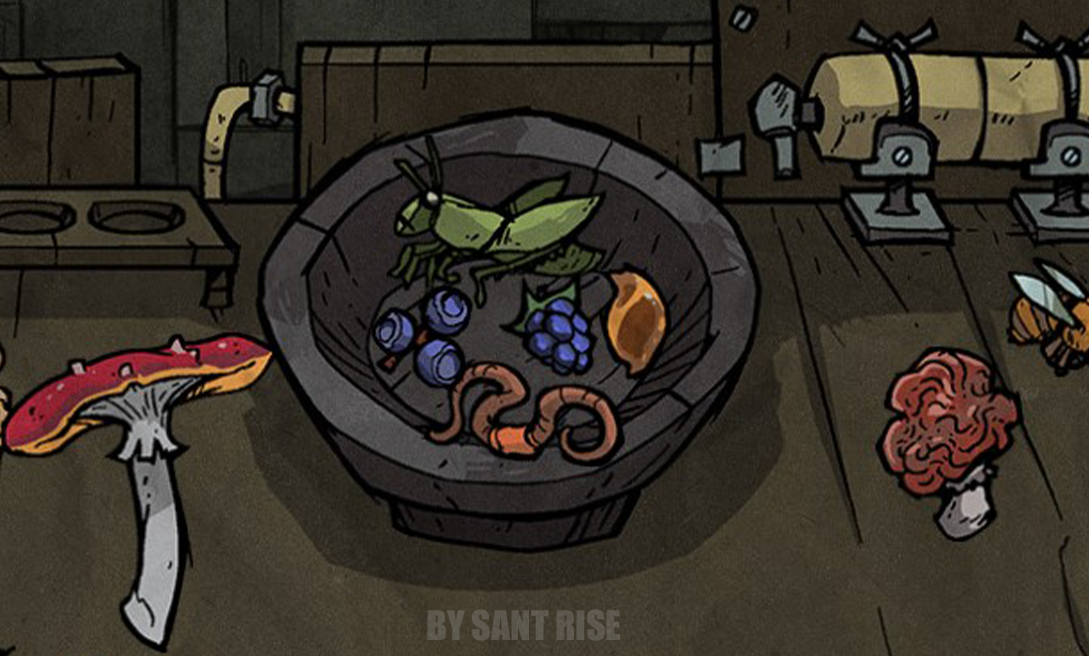 Ingredients for the second test tube.
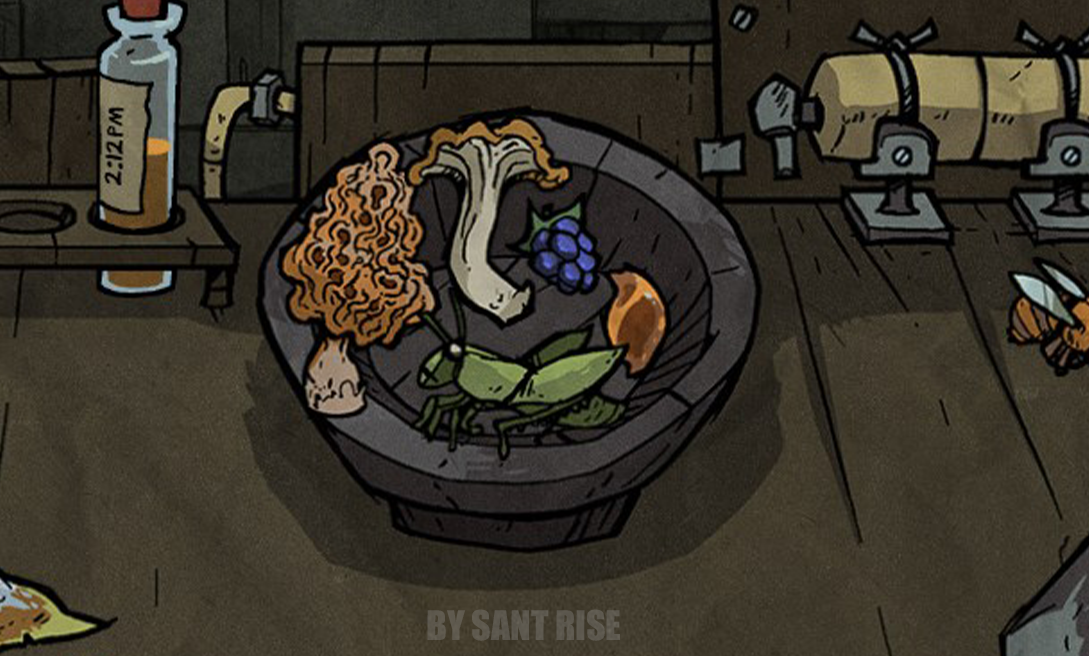 Ingredients for the third test tube.
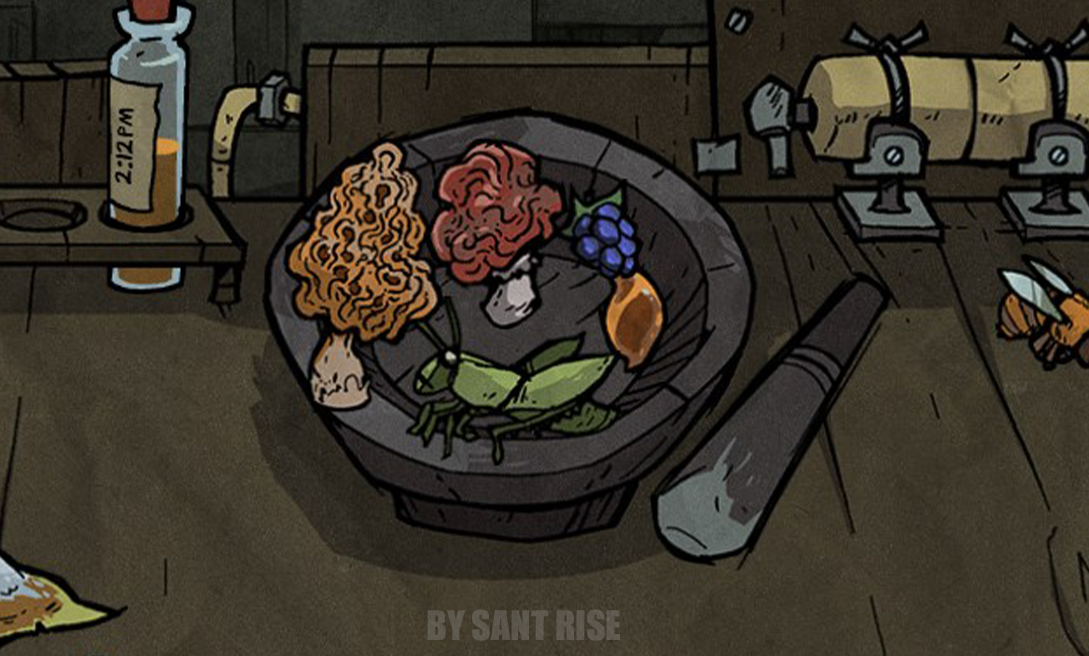 Ingredients for the fourth test tube.
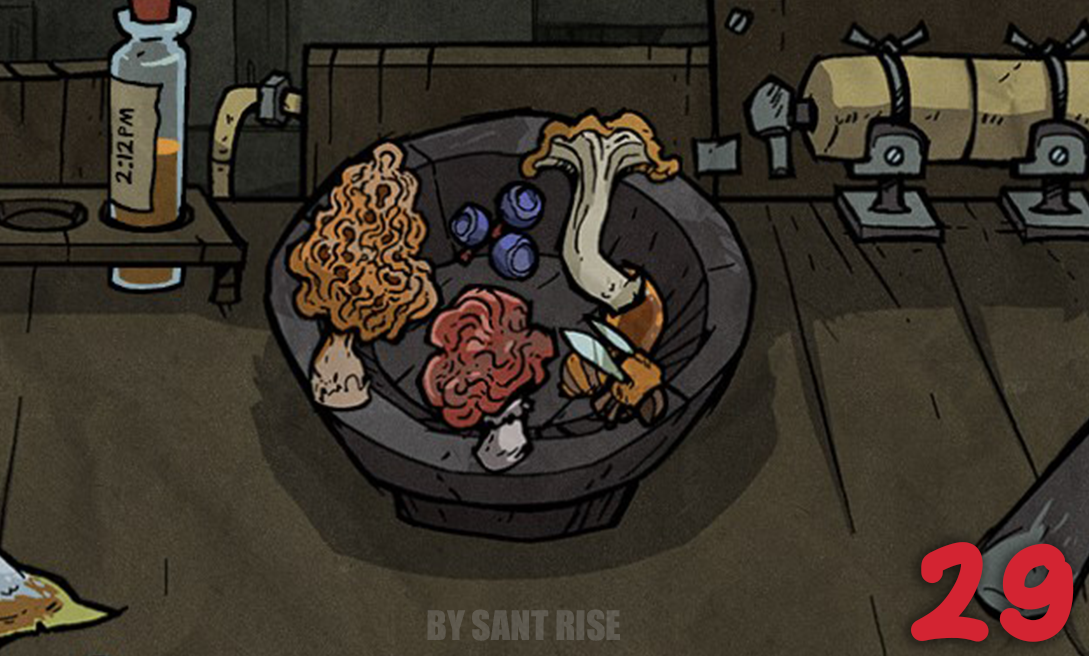 Ingredients for the fifth test tube.
❗When you're done, you should have 5 test tubes.
Intercom
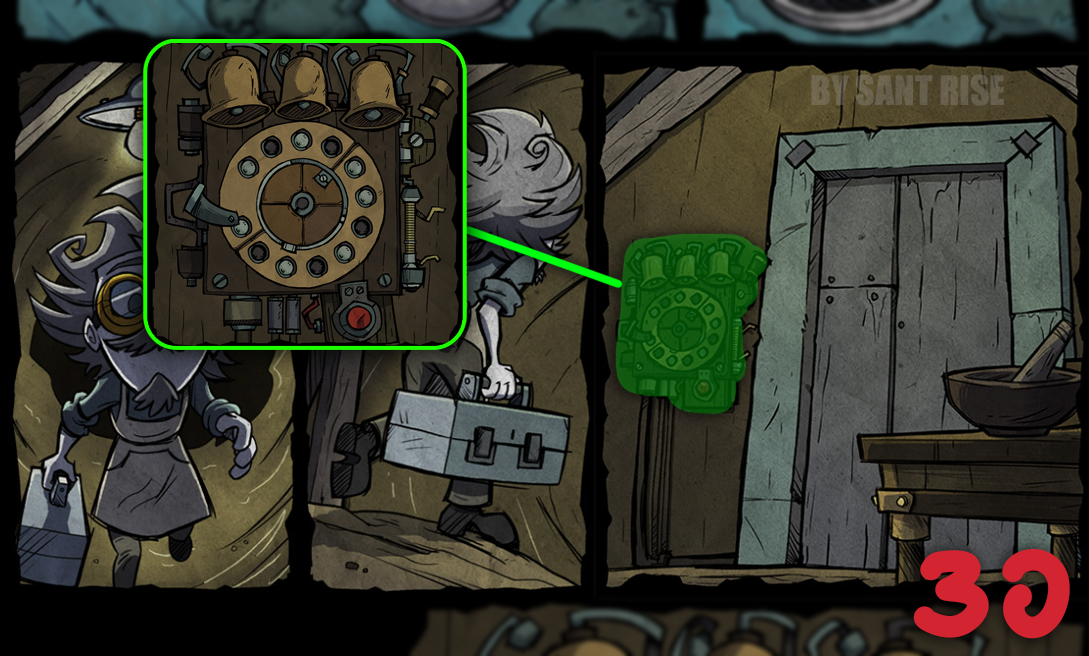 [30] Scroll up a bit and tap the intercom.
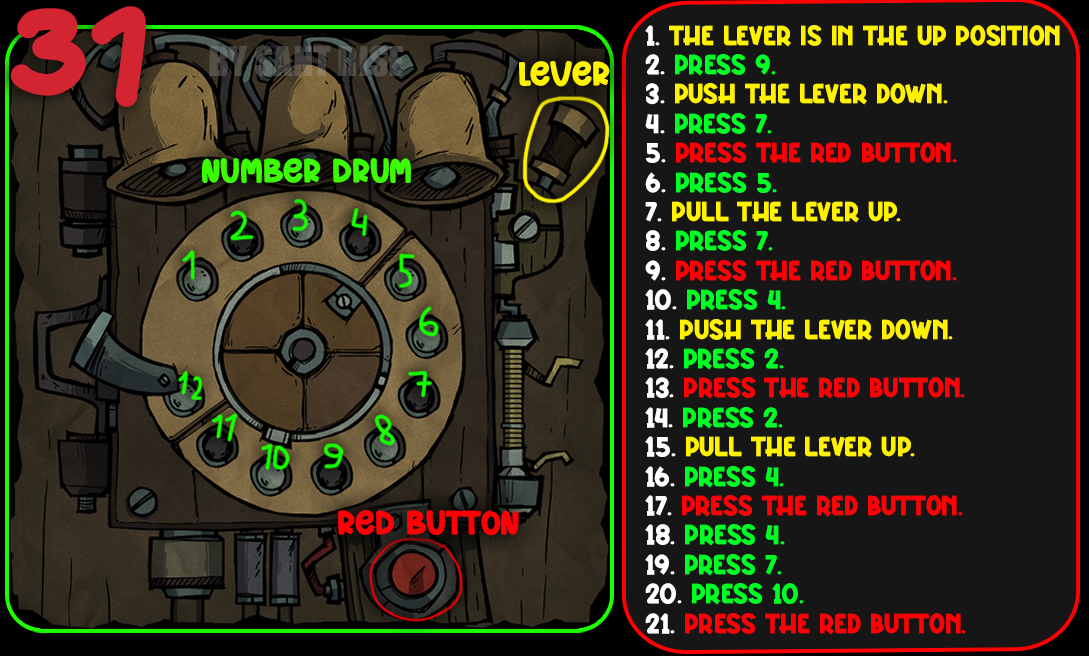 [31] Now you need to repeat all the steps shown in the picture.
❗If you make a mistake, don't forget to press the top and bottom tabs to set the silver ring to the 5th position from the bottom (this is the default position)
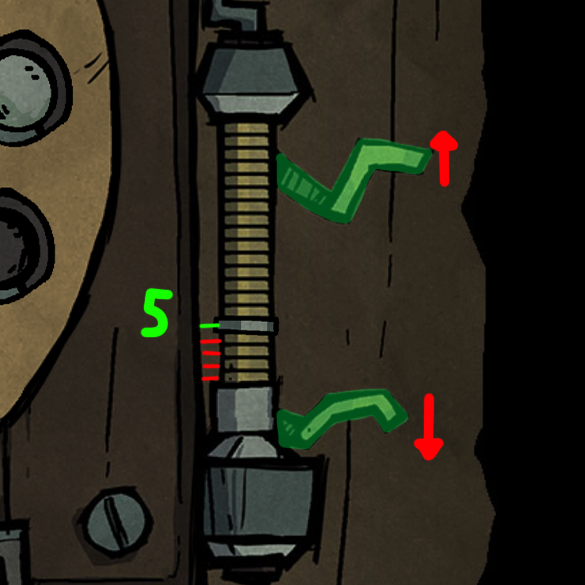
If you've done everything correctly, you'll hear music, and three bells will ring at the top.
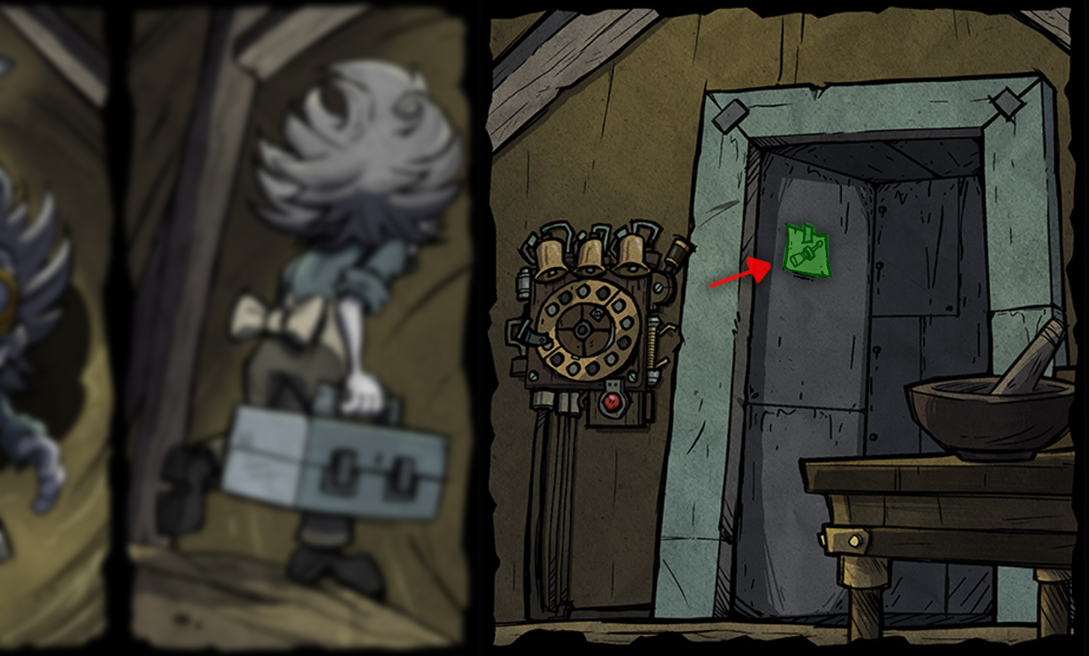 A door will open above the intercom image, and you'll need to retrieve the note inside!
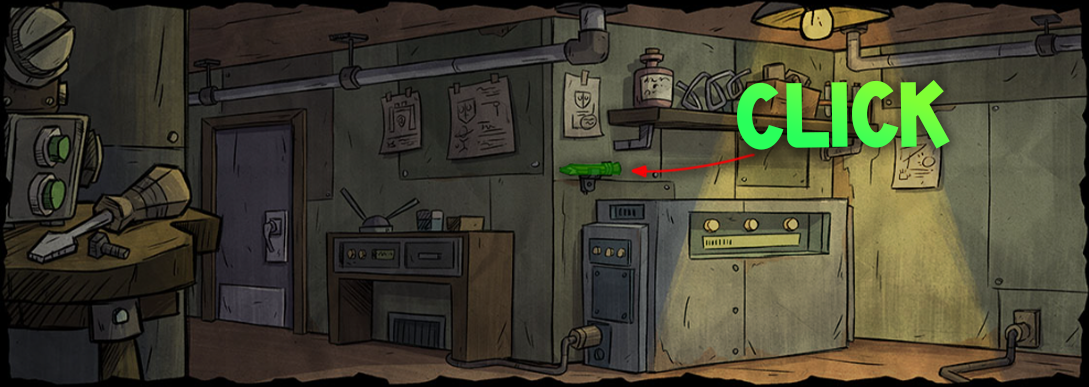 Click on the pencil on the wall.
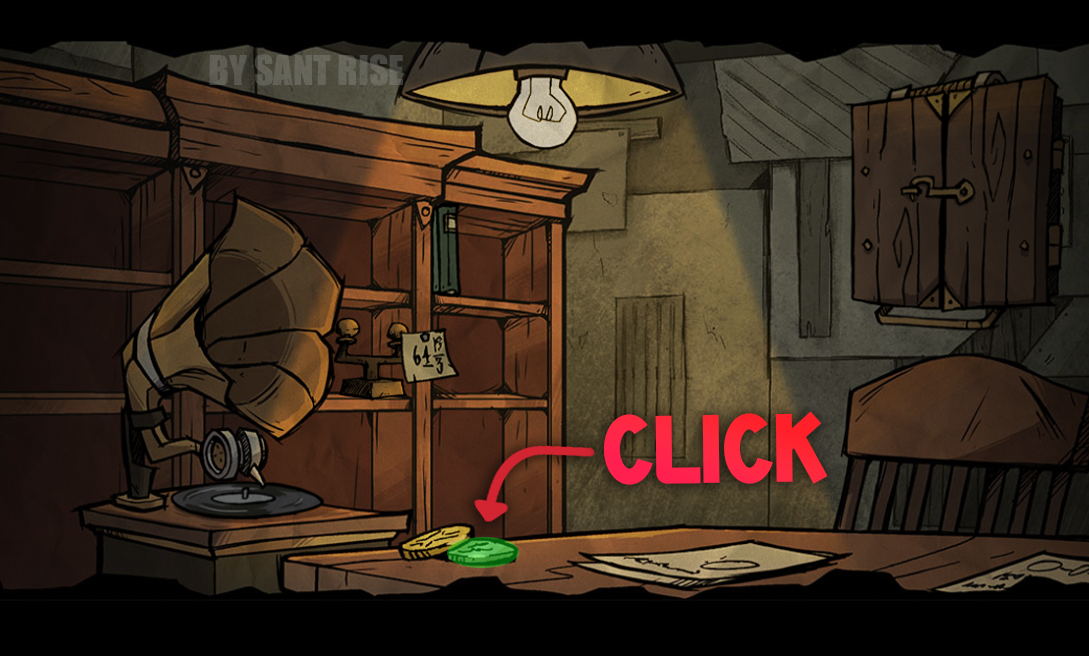 Click on the silver coin
Windows/Glasses
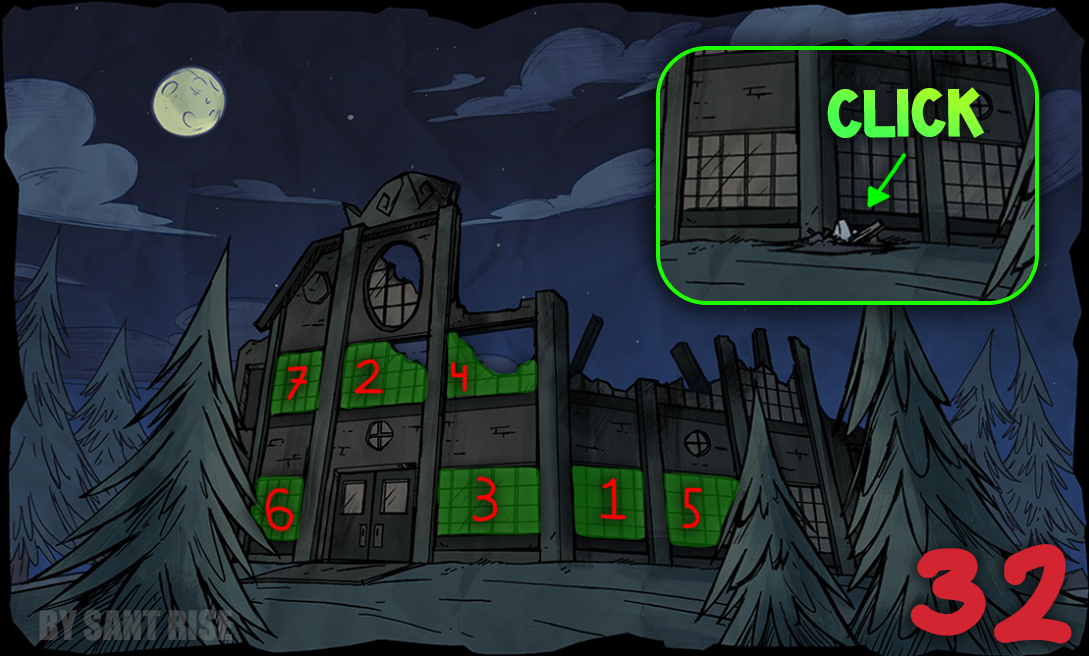 [32] Now you need to scroll to the top of the page and click on the windows in the order shown in the image. If you did everything correctly, the image will refresh, and a pile of trash will appear next to the building.
YOU NEED TO CLICK ON THIS PILE OF TRASH
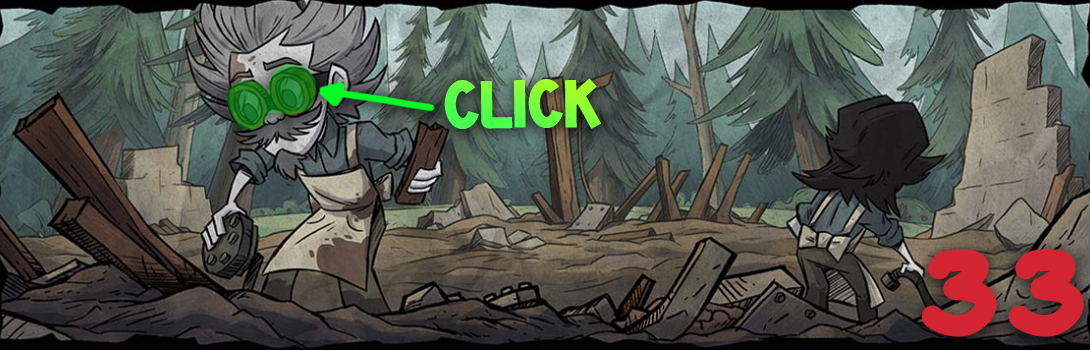 [33] In this image, click on the Wagstaff glasses.
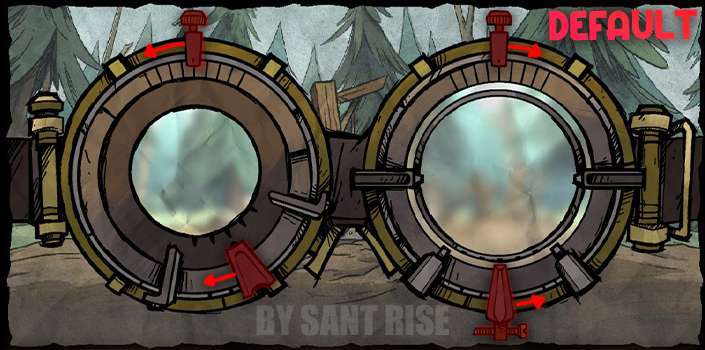
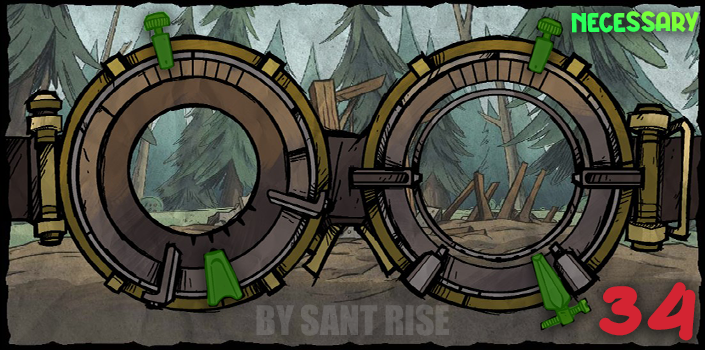 [34] You need to adjust your glasses as shown in the second illustration, once you do, the image in the picture below will be clear.
Excavations/Radio
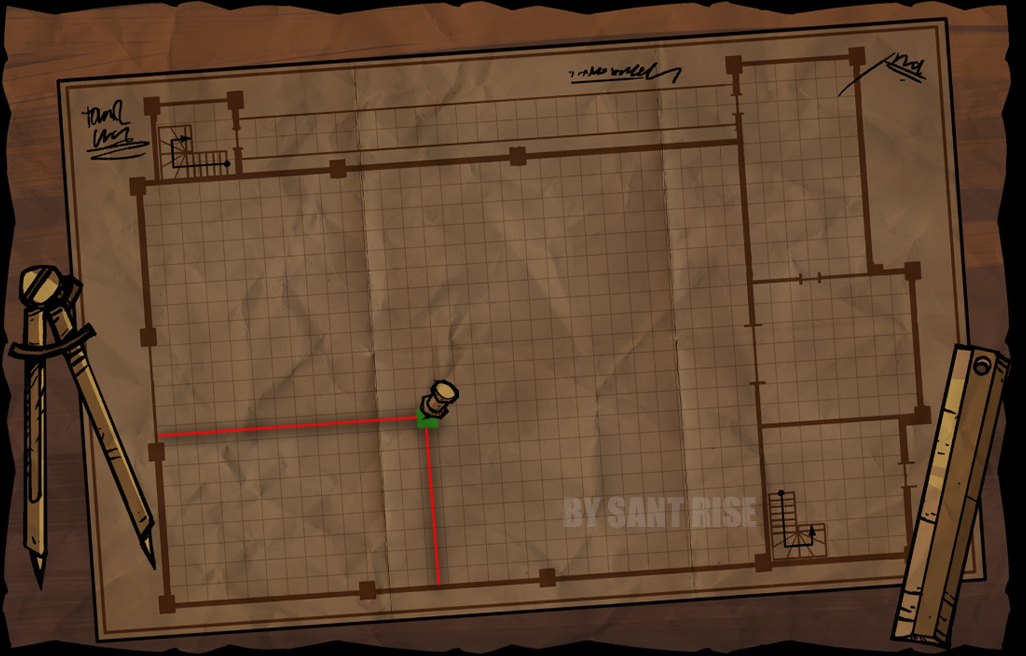
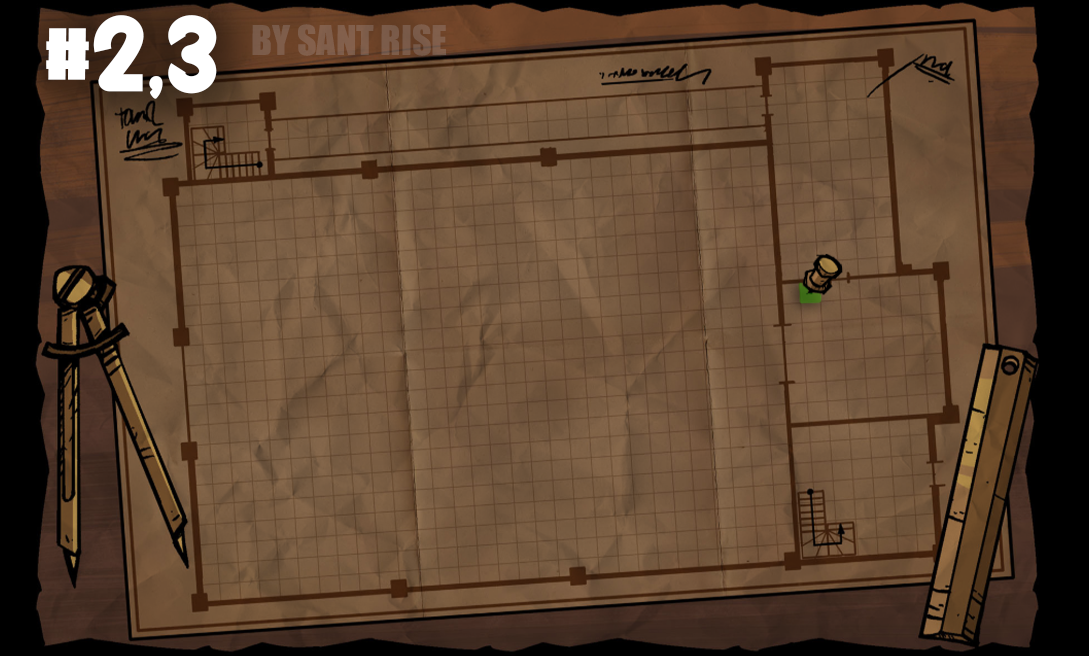
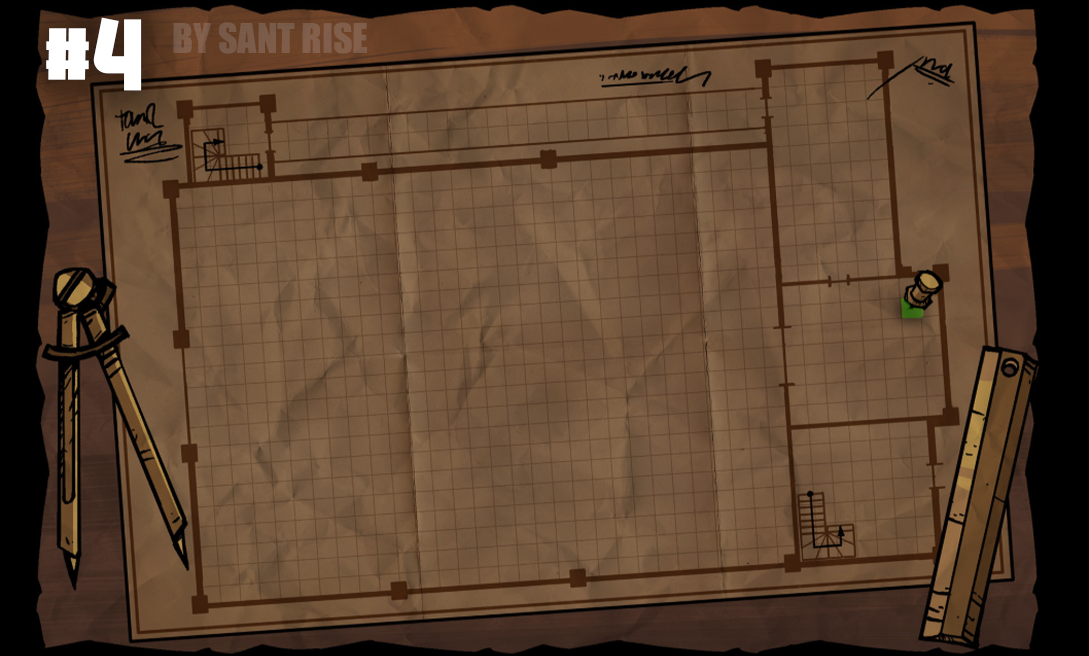
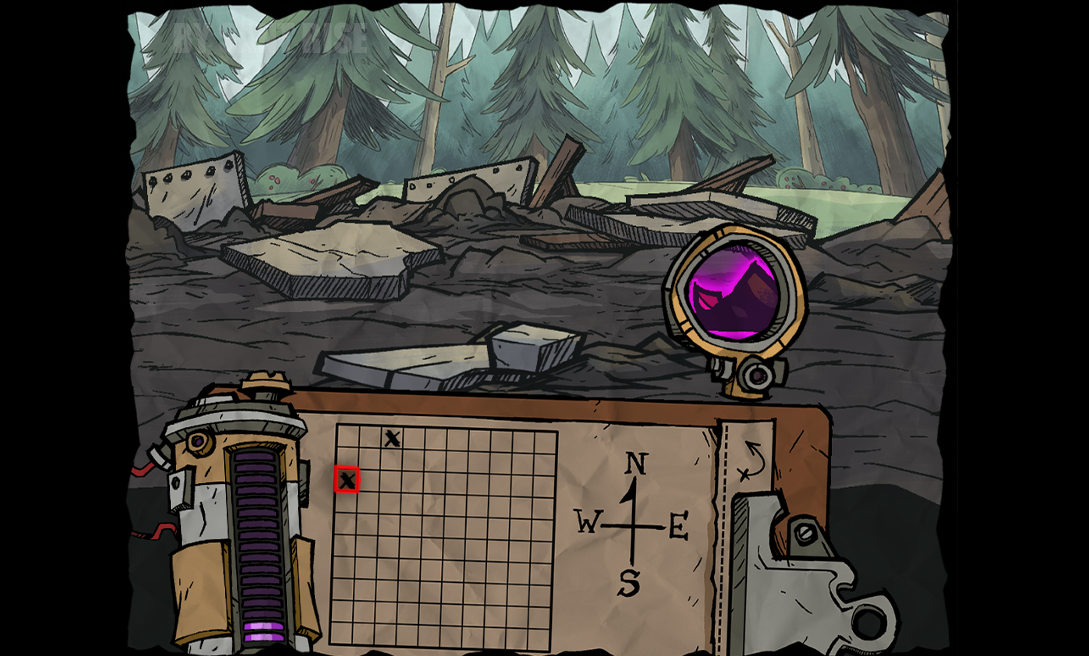
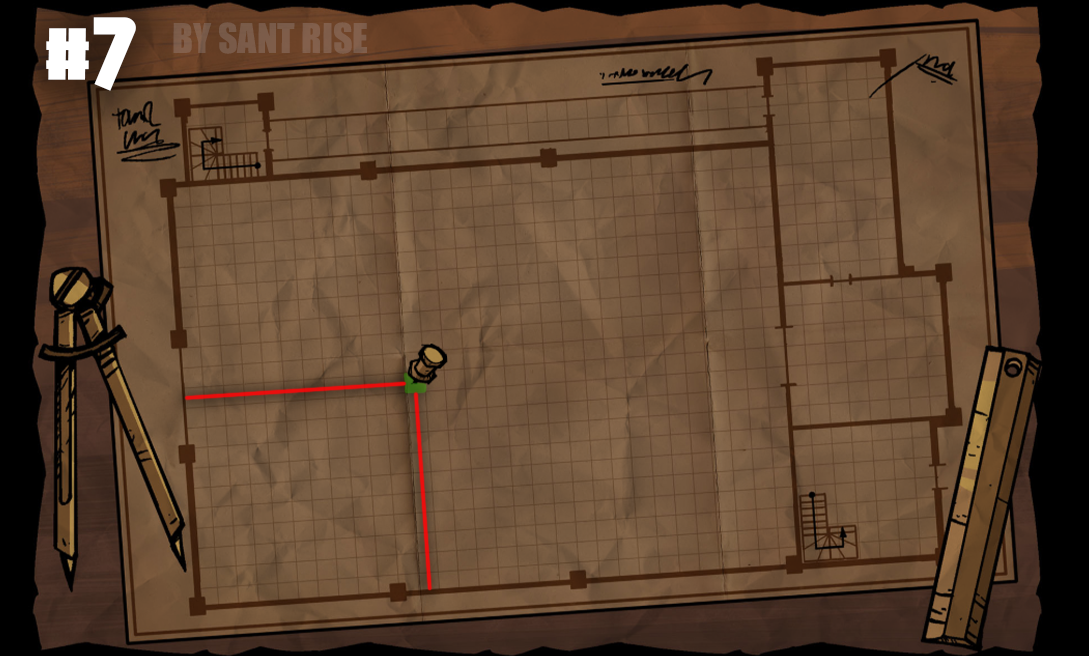
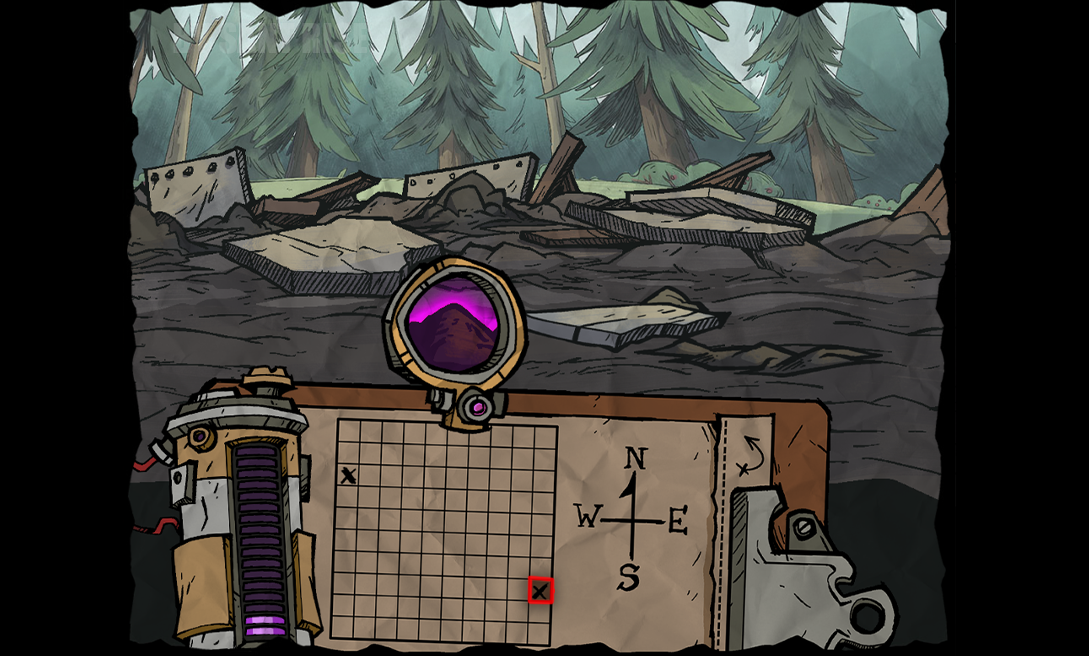
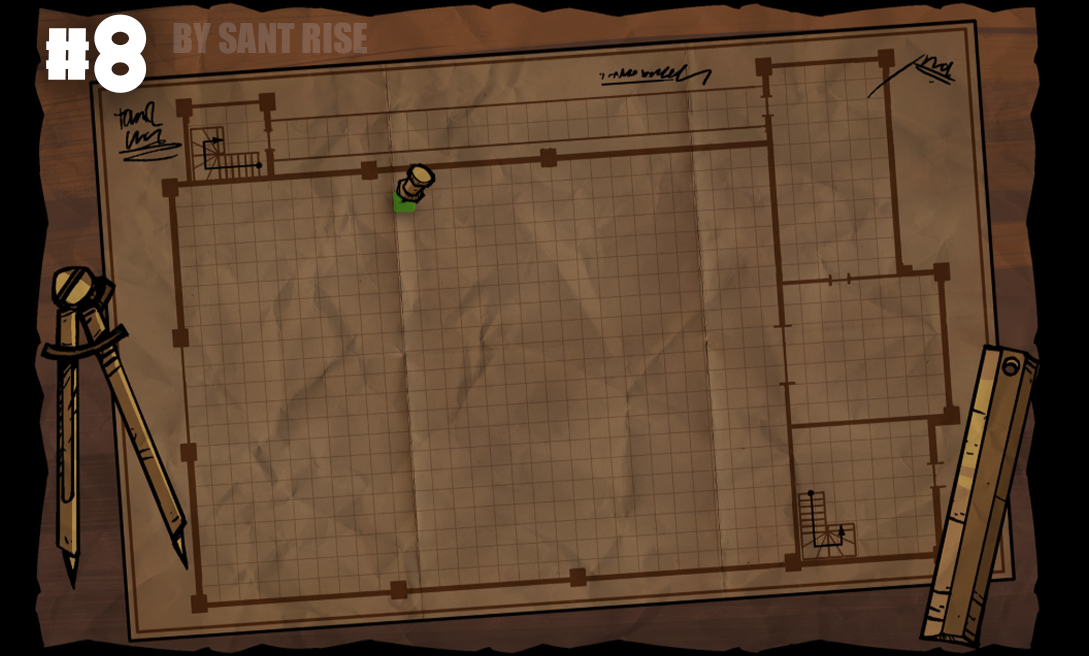
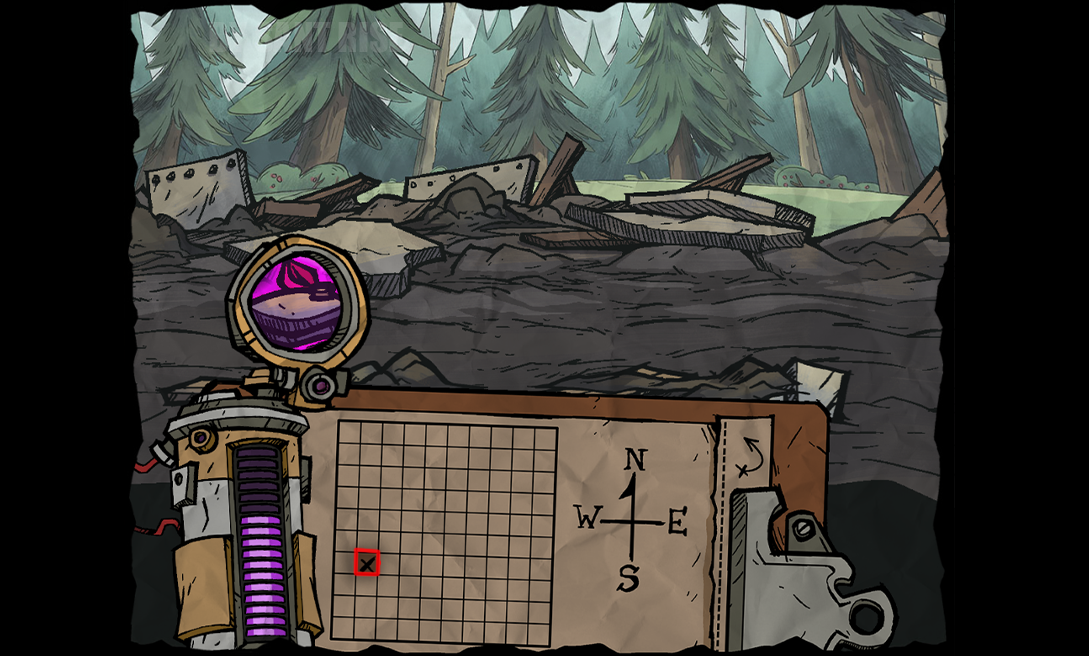
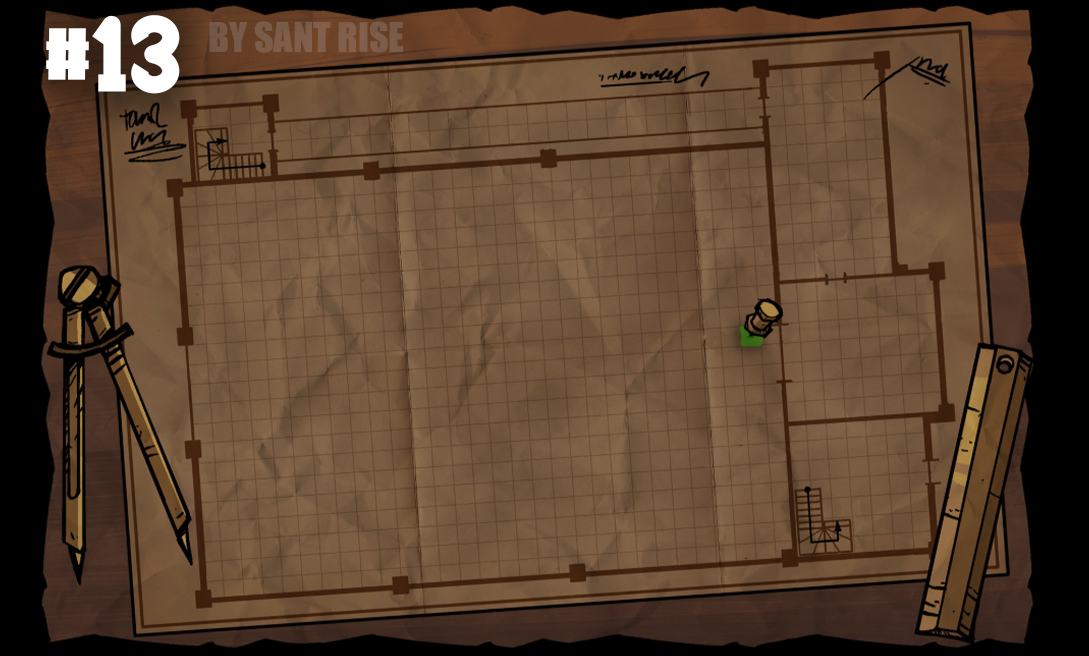
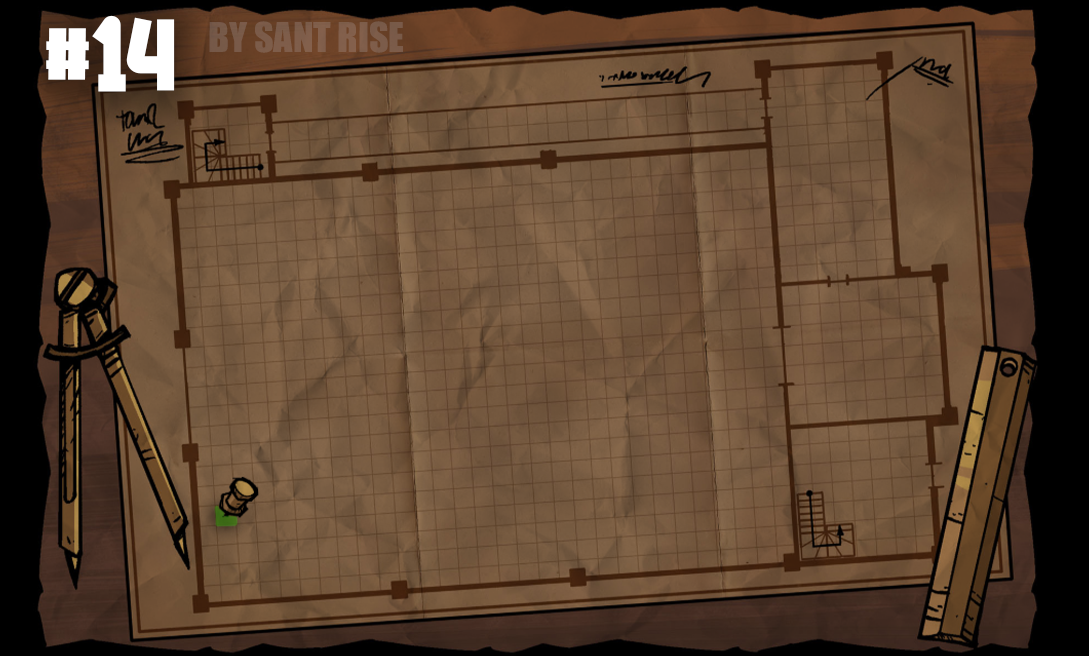
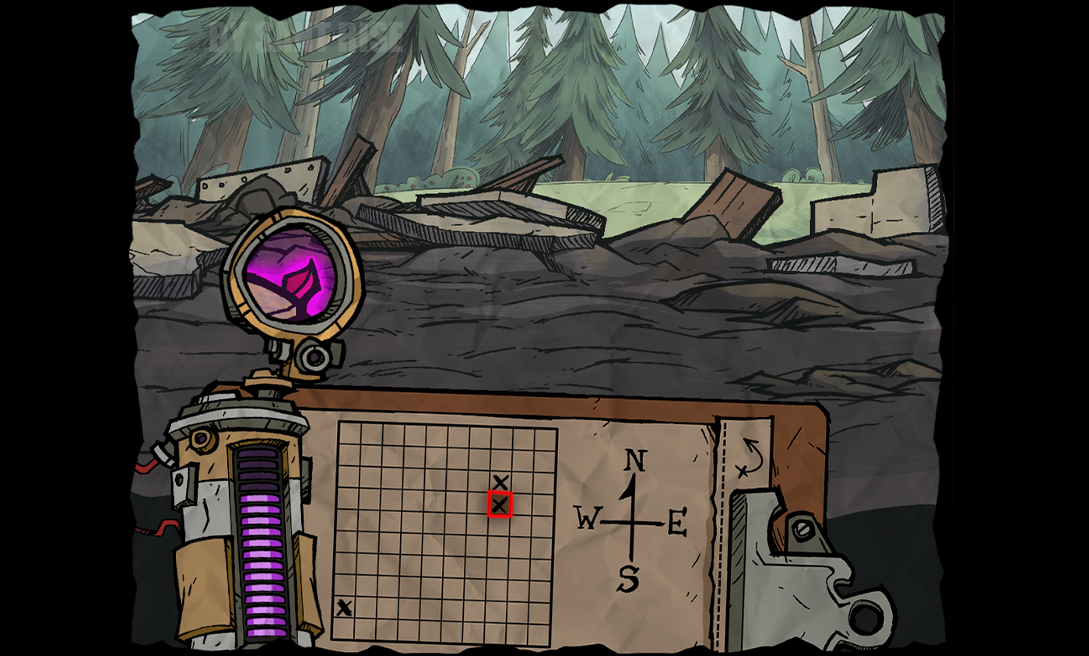
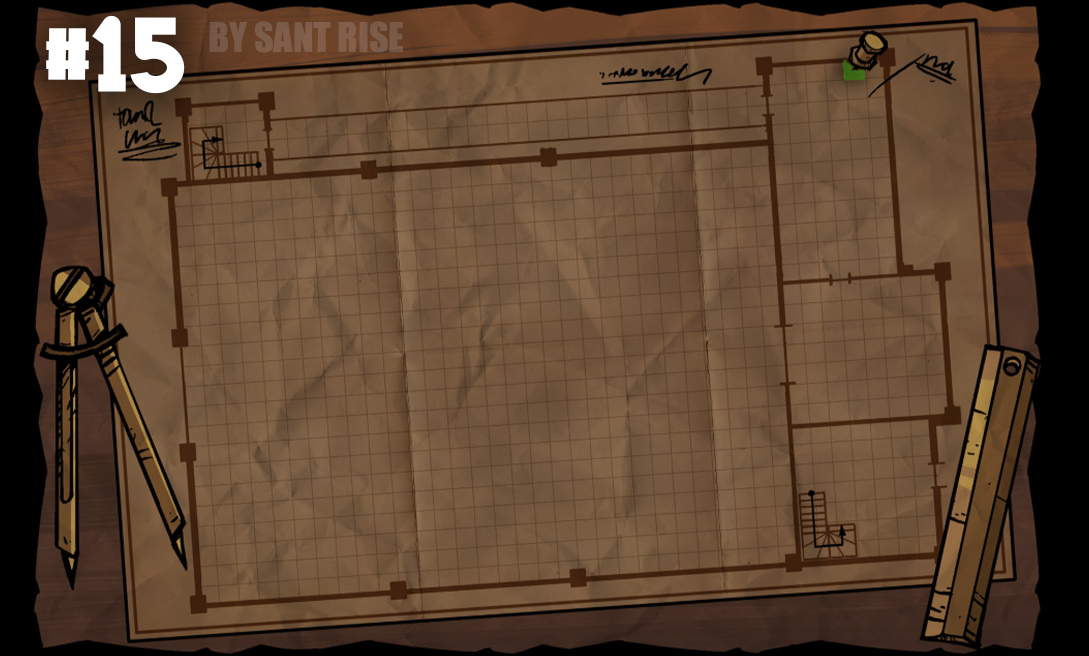
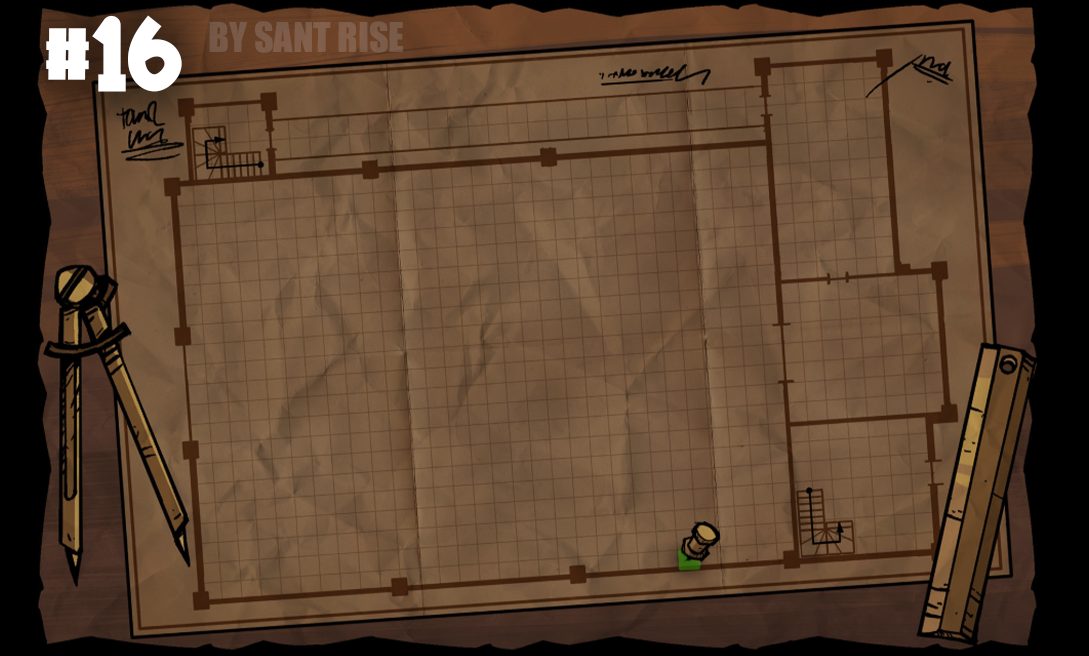
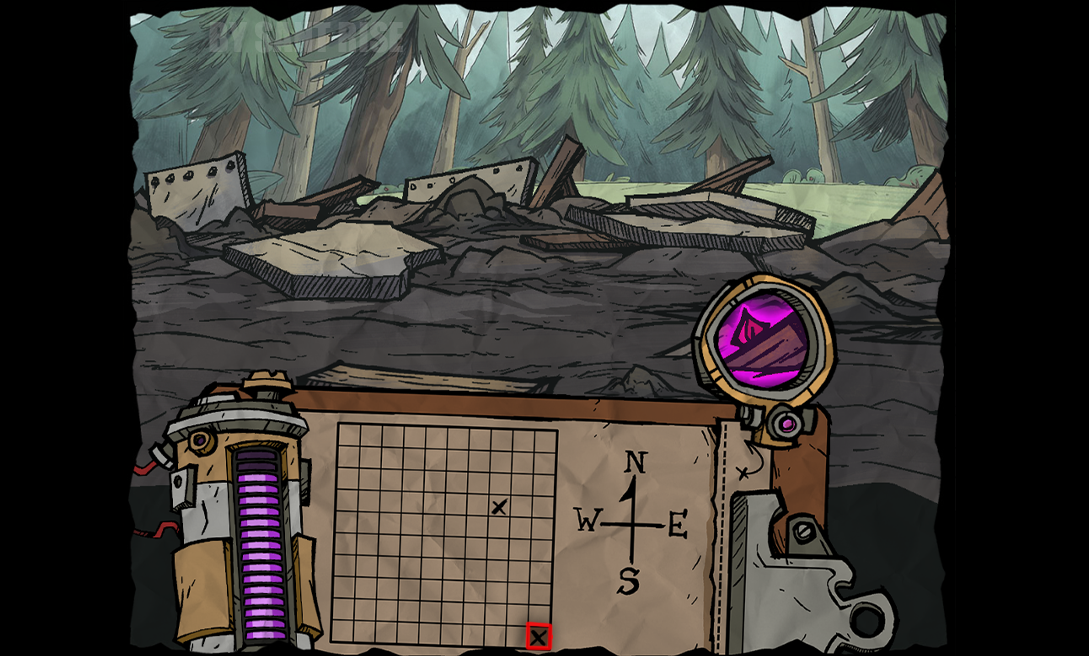
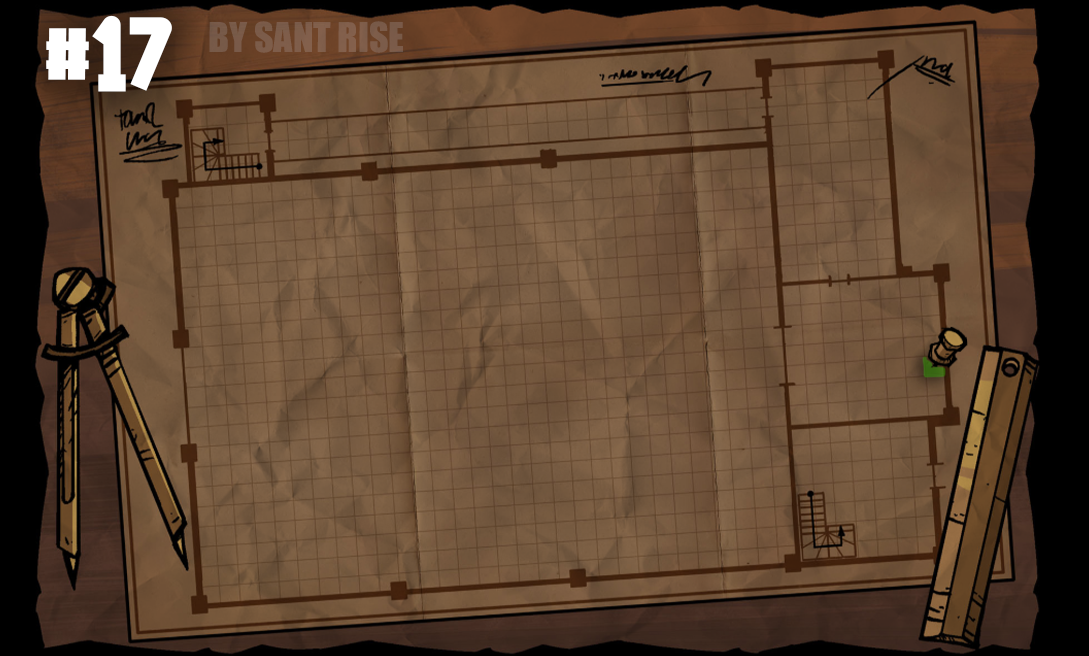
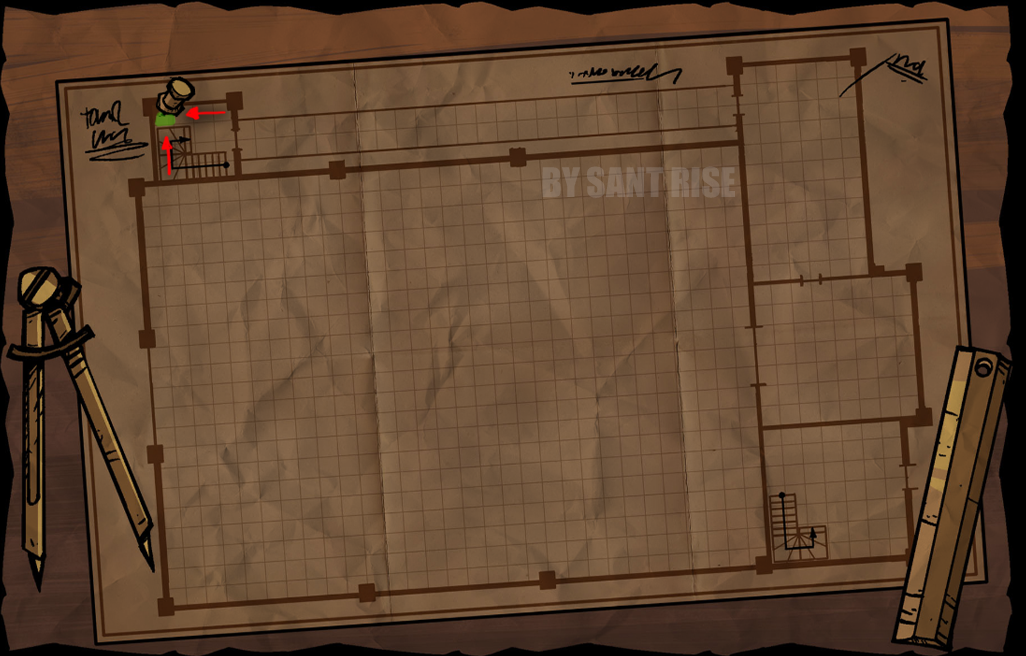 [35] Place a pin at the indicated location on the map.
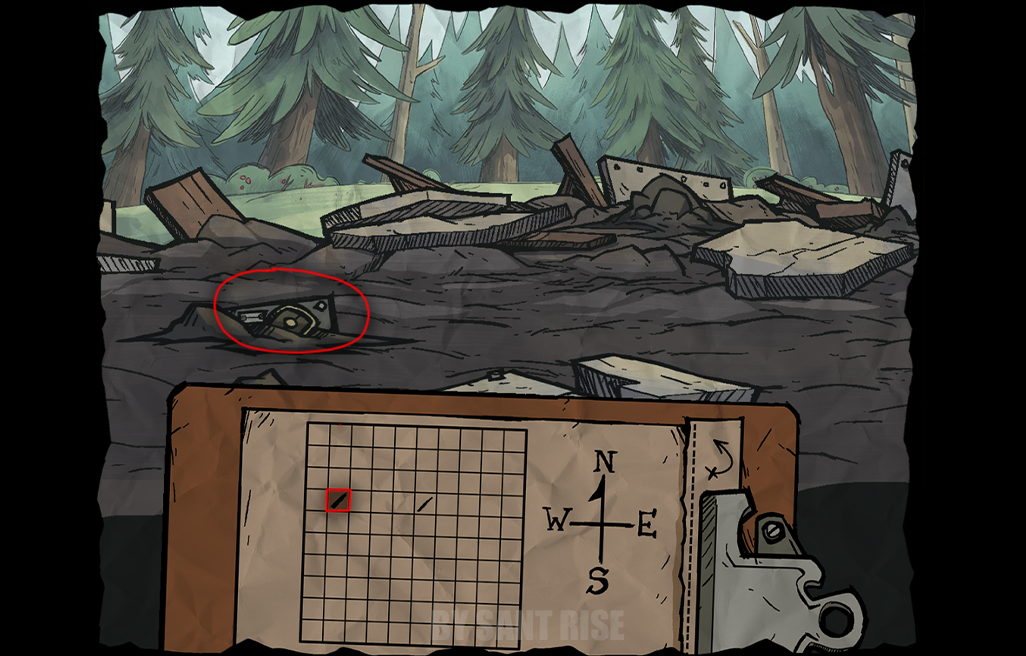
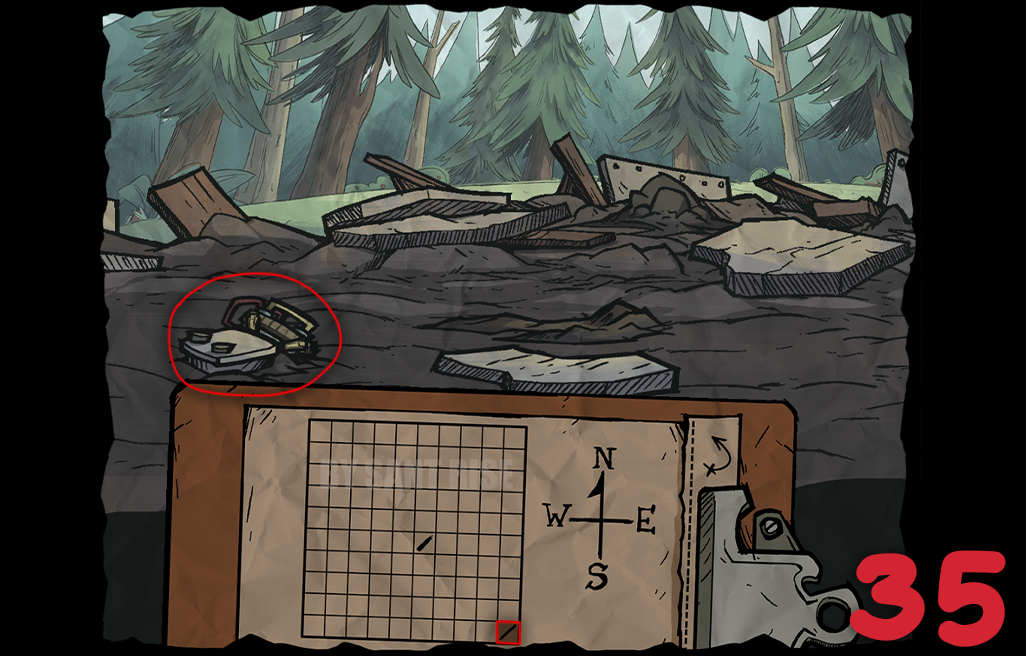
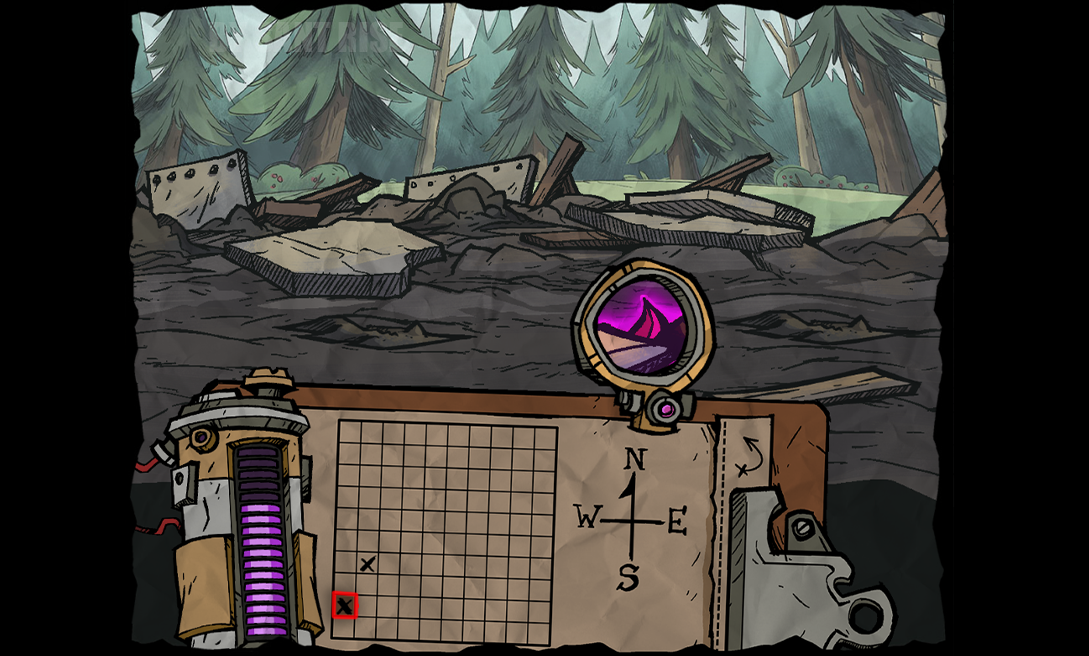
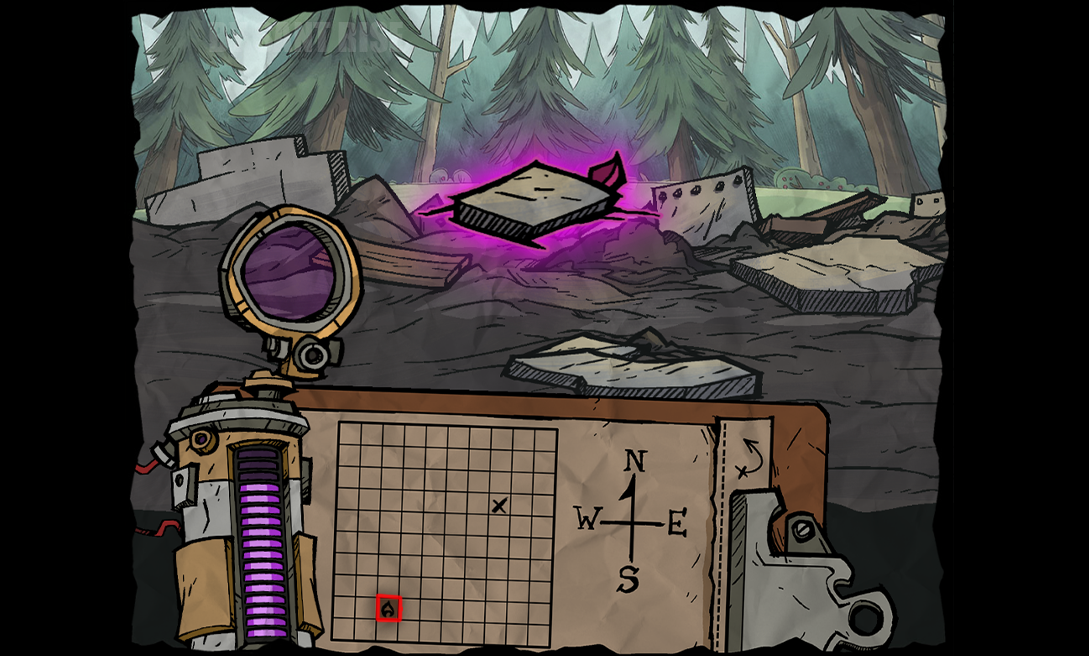
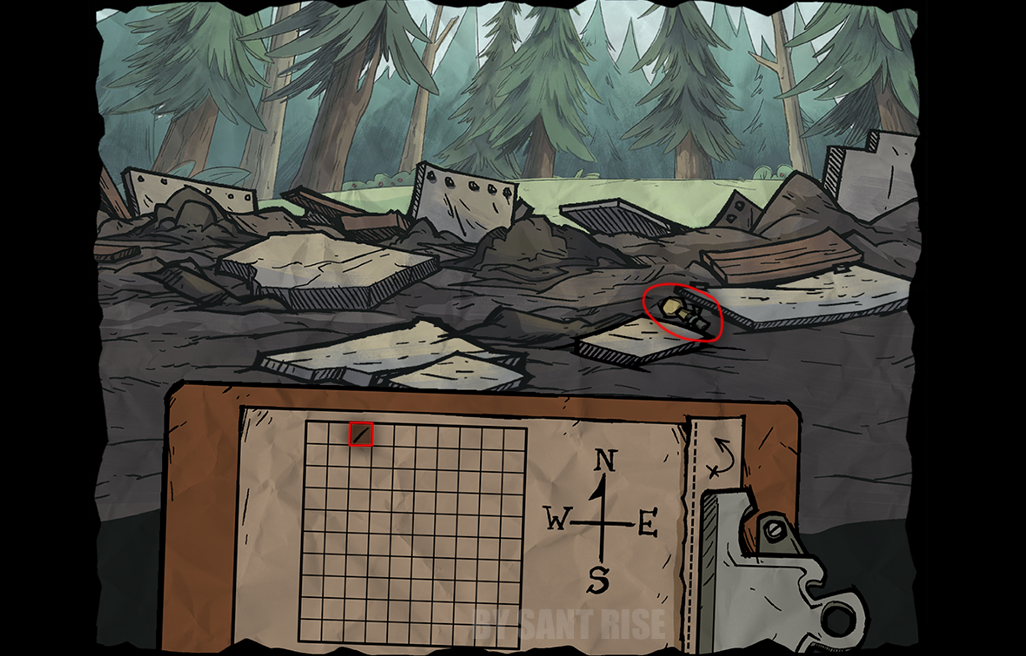 Next, as shown in the image below, click on the square in the notebook, then click on the shard hidden in the pile of trash (it’s circled in red).
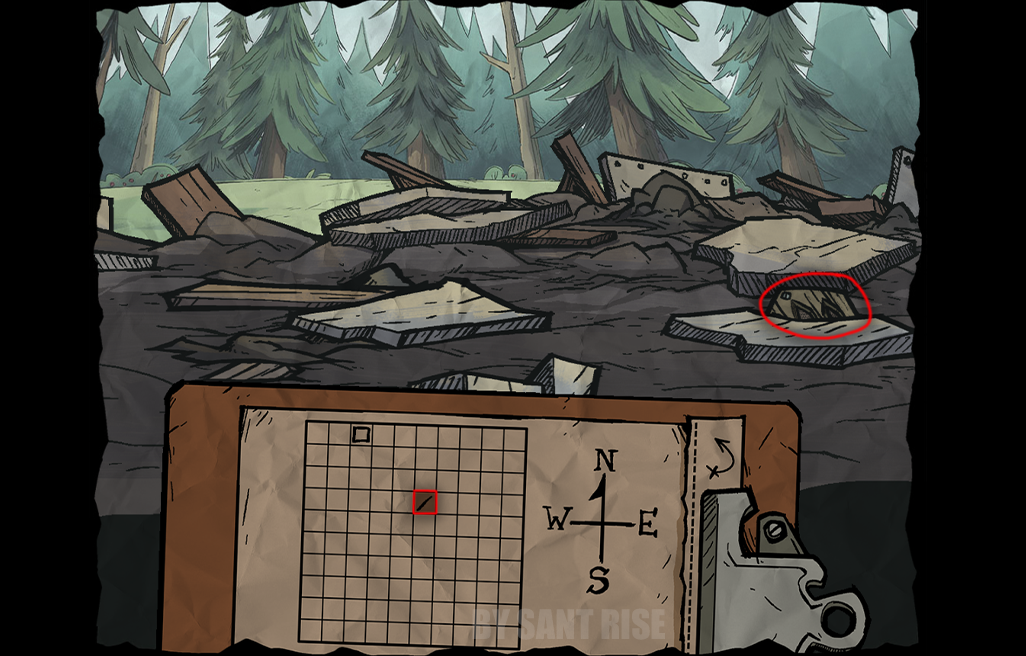 Then change the label in the notebook and take the second fragment.
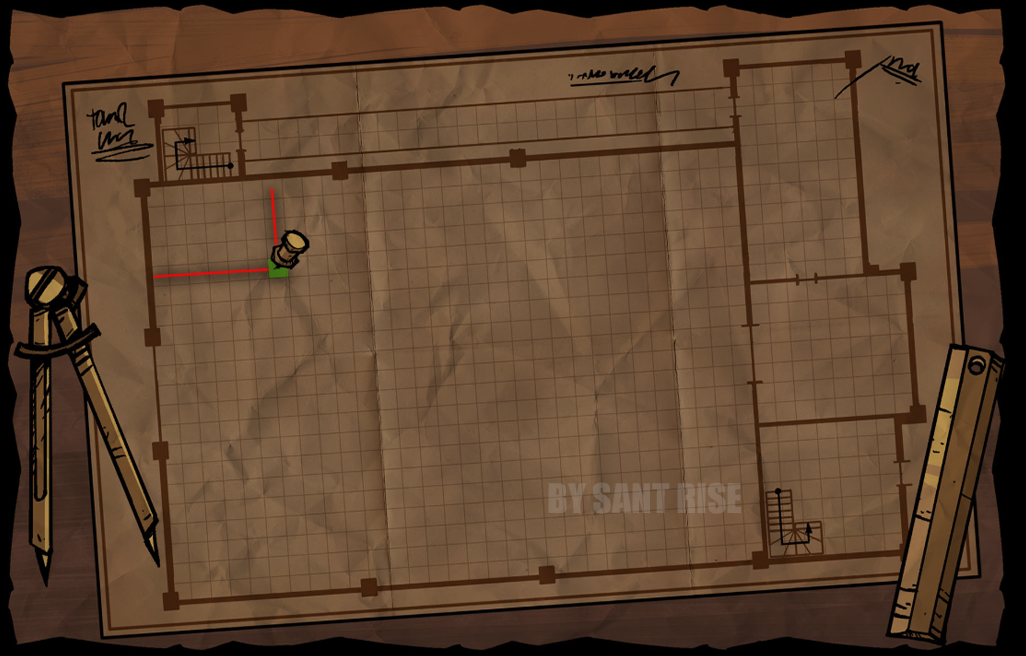
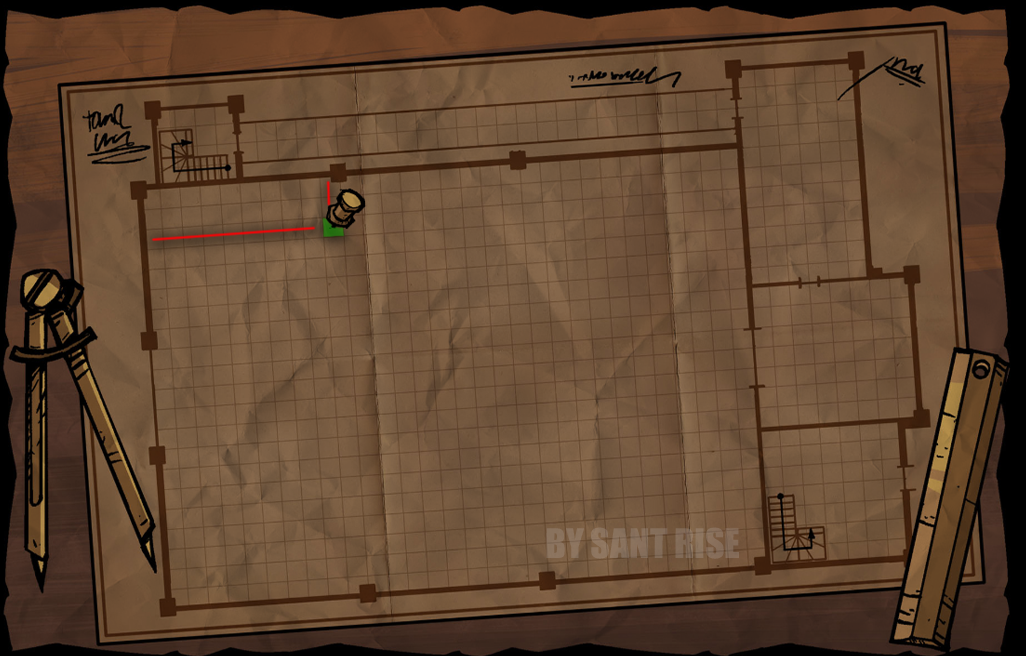 Let’s go back to the beginning and select the desired square again.
 Mark the correct square in the notebook again and take the part.
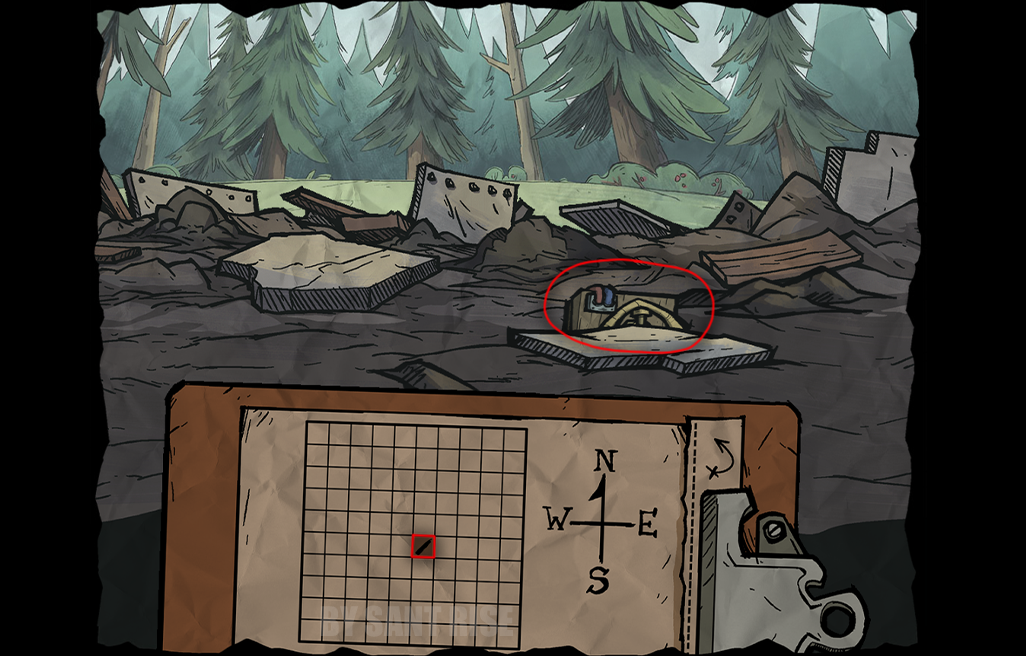
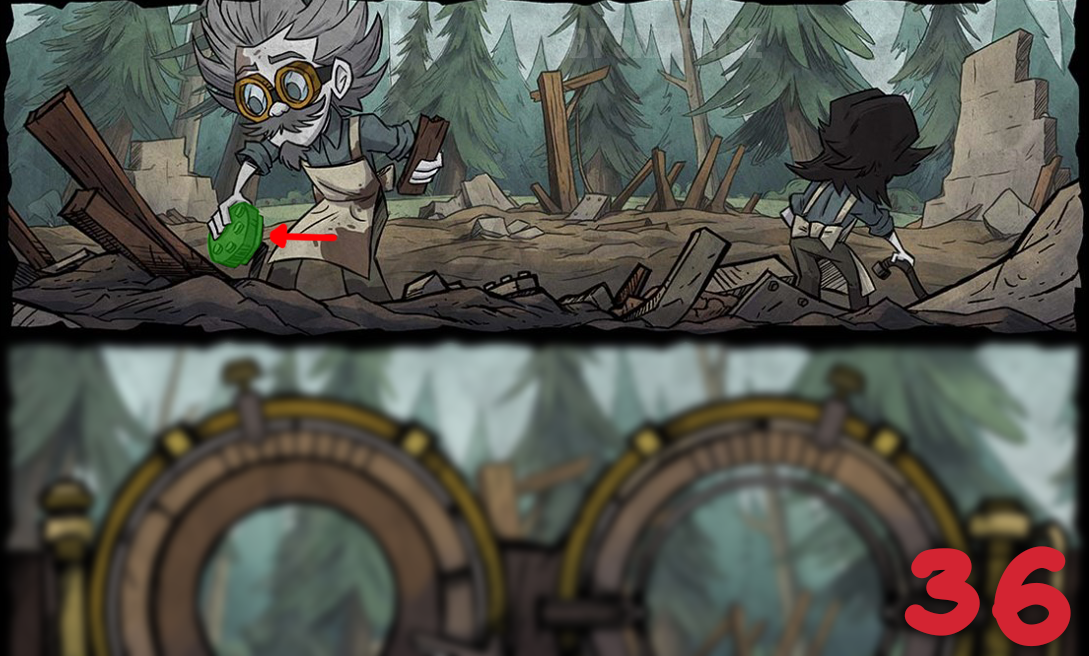 [36] After collecting the debris, you need to go back a little and click on the scrap metal in Wagstaff's hands.
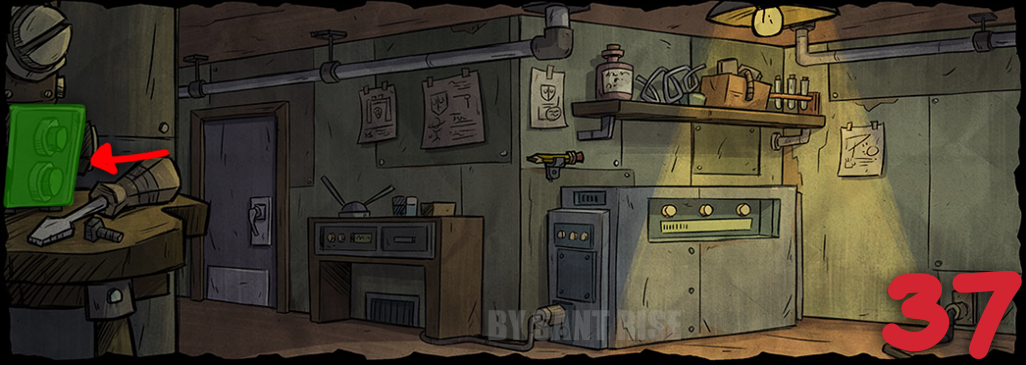 [37] Press the two-button remote control located on the left.
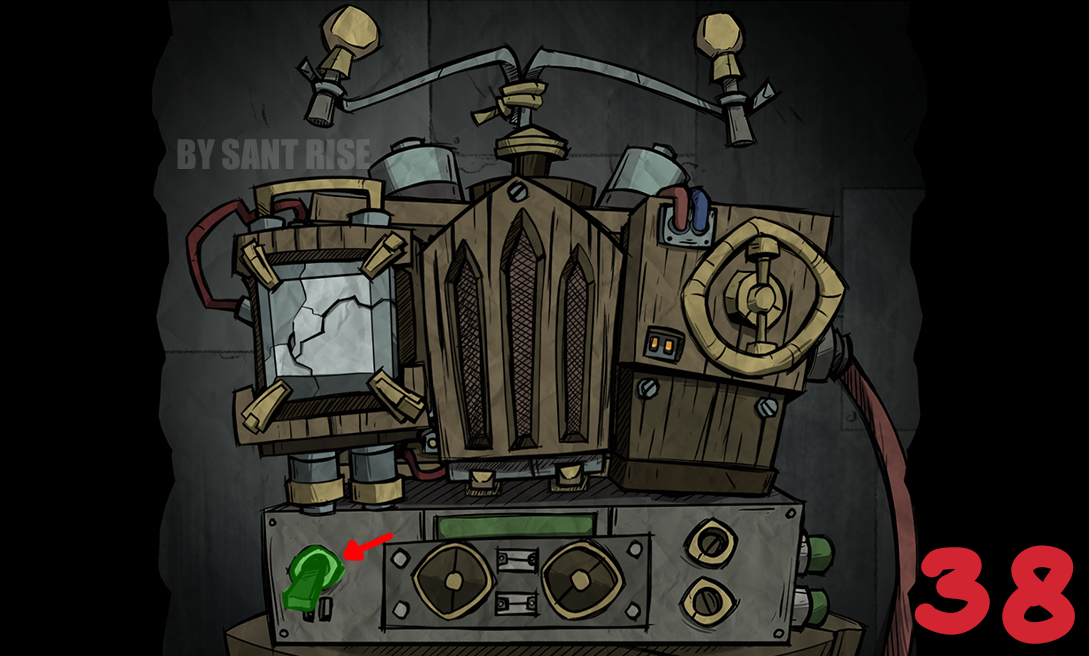 Press the switch at the bottom left of the radio.
 Unlock the new in-game item—B.U.D.D.Y.!
You can check if you've received your reward here: CLICK HERE![accounts.klei.com]
Lenses
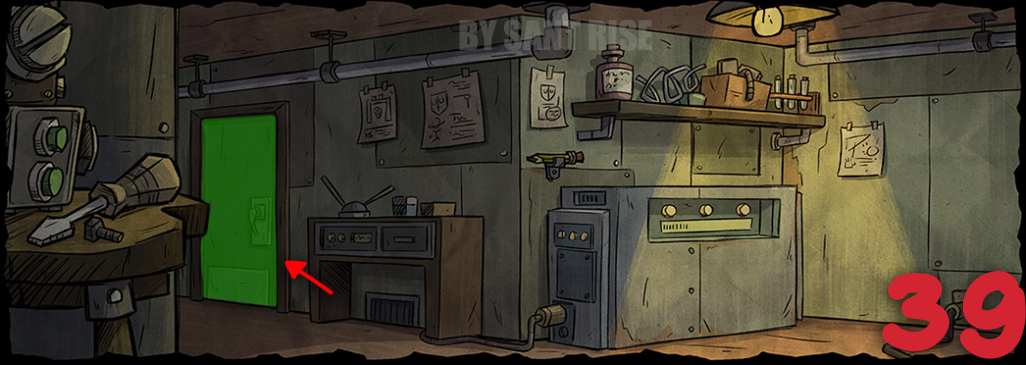 [39] Scroll up and tap the door.
❗if you’re doing this after some time has passed, make sure the receiver is turned on.
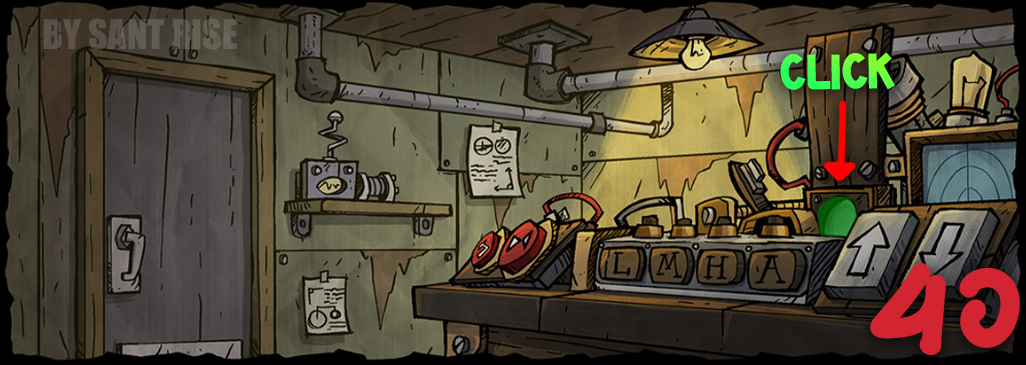 [40] Click on the lens.
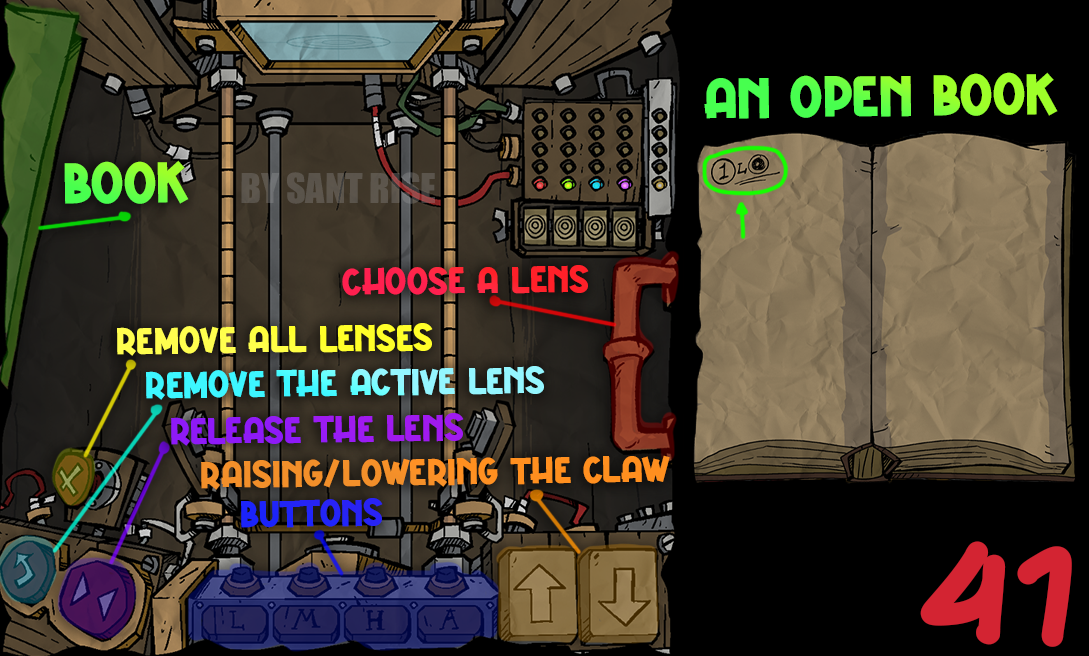 [41] This is an interactive puzzle where you need to position lenses and shoot a laser through them. It looks complicated, but it’s actually pretty easy!
First, let’s take a look at all the elements we need:
[41] This is an interactive puzzle where you need to position lenses and shoot a laser through them. It looks complicated, but it’s actually pretty easy!
First, let’s take a look at all the elements we need: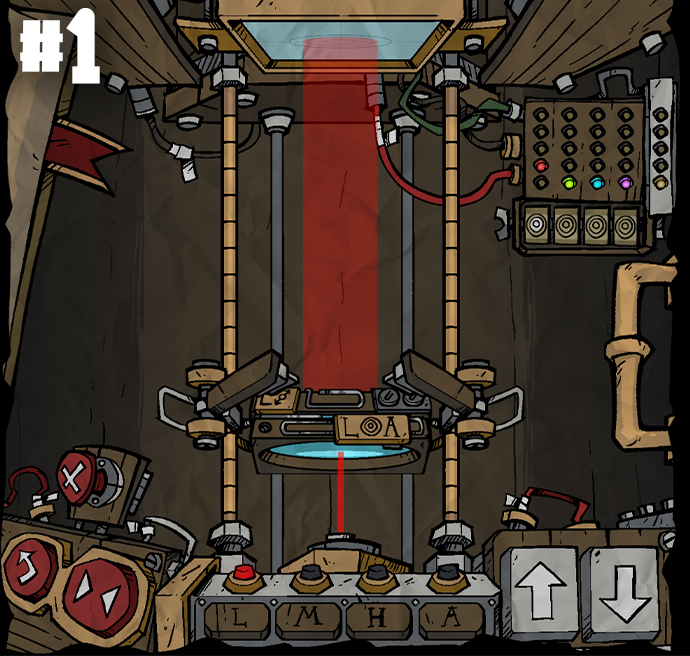 To complete the first assignment, follow the instructions below. I’ll explain each step the first time, but after that, you’ll just need to copy what’s shown in the image.
❗There are 17 tasks in total, so you’ll need to copy 17 images.
❗If you’ve done everything correctly, a bookmark and a new entry will appear in the book.
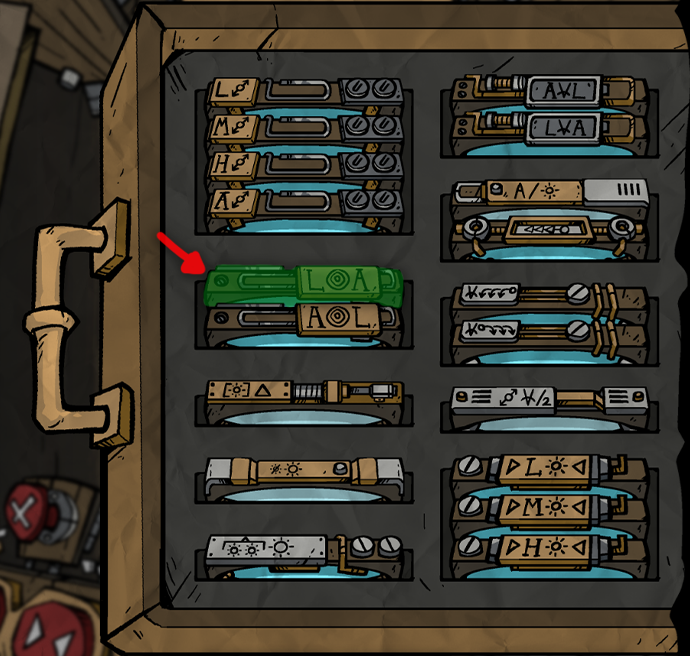
- Open the lens compartment and select the lens you need.
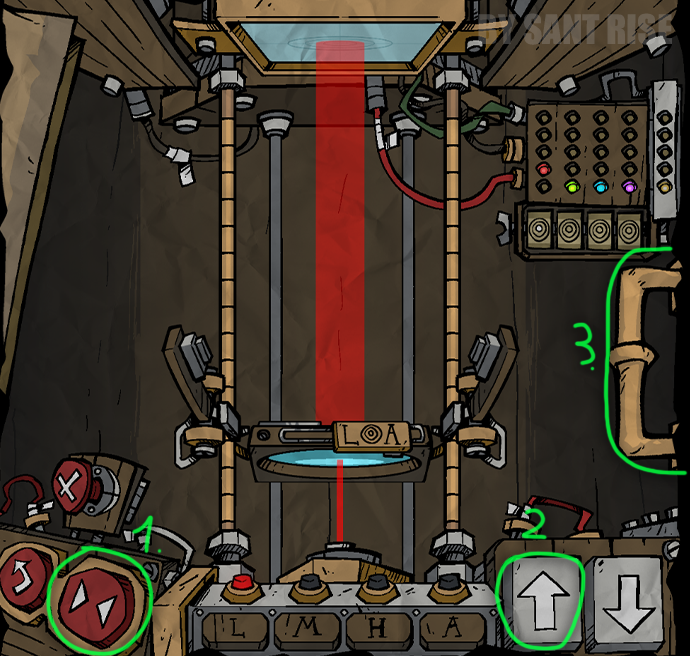
- Press the red button with two triangles to release the lens from the clamp.
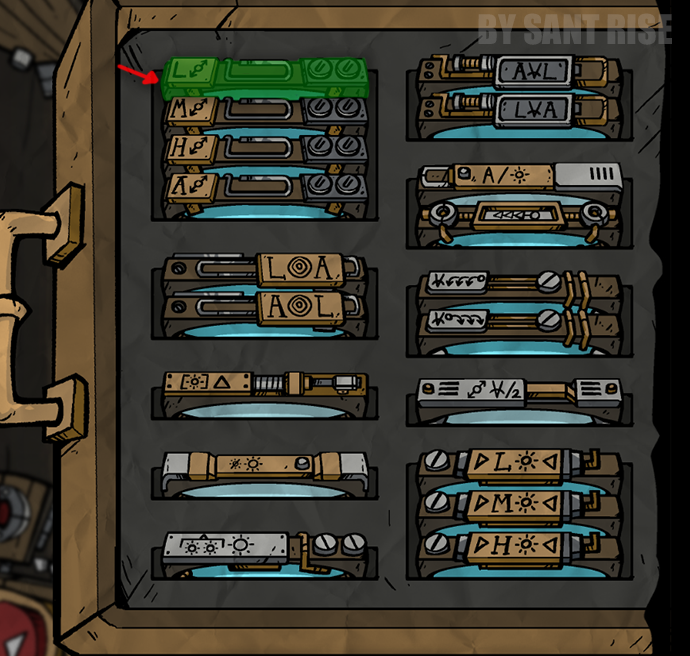 5. Select the next lens you need.
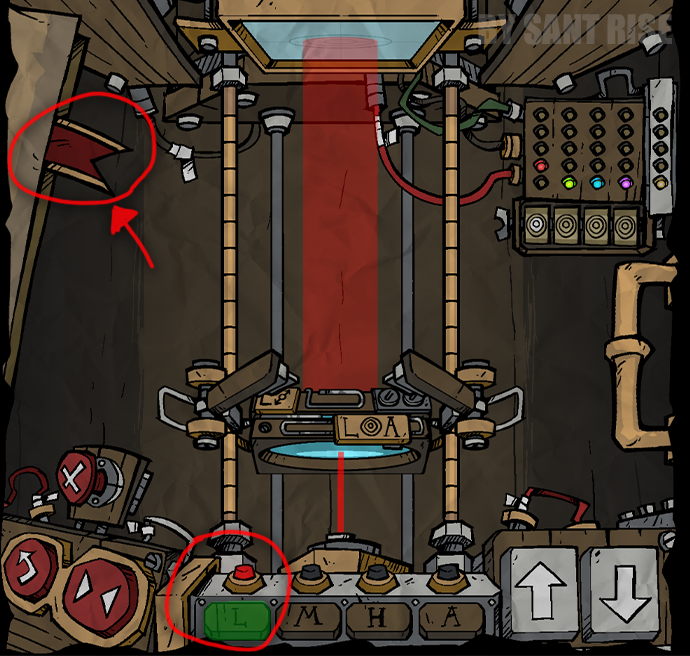 6. Press the appropriate buttons at the bottom; in our case, the button labeled “L” should light up.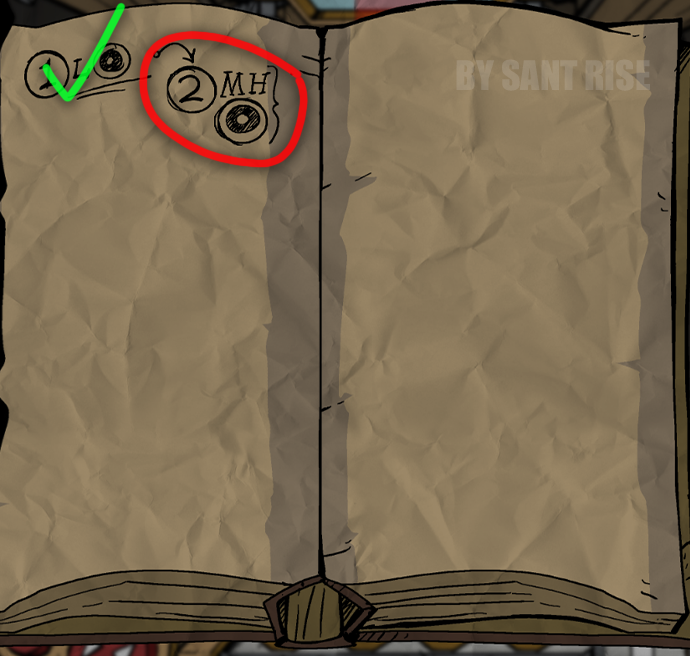
- If everything is done correctly, a red bookmark will appear in the book.
You begin reviewing the first lens when your notebook shows the number (1).
If the last entry in your notebook is (15), then you need to review the 15th lens. ⚠️ Be careful - many people make mistakes at this stage!
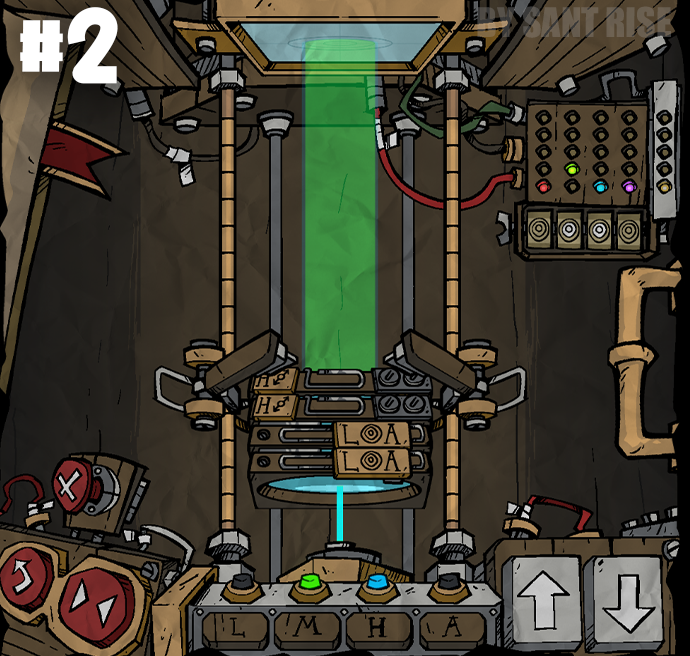 ❗If you're having trouble determining the height of the first lens, pay attention to the length of the laser beam emerging from the lenses.
❗Also, don't forget to press the buttons at the bottom.
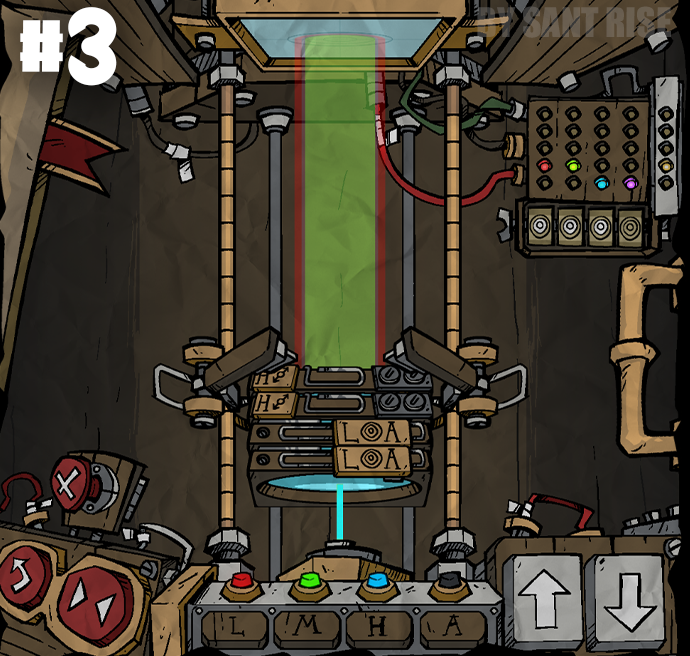
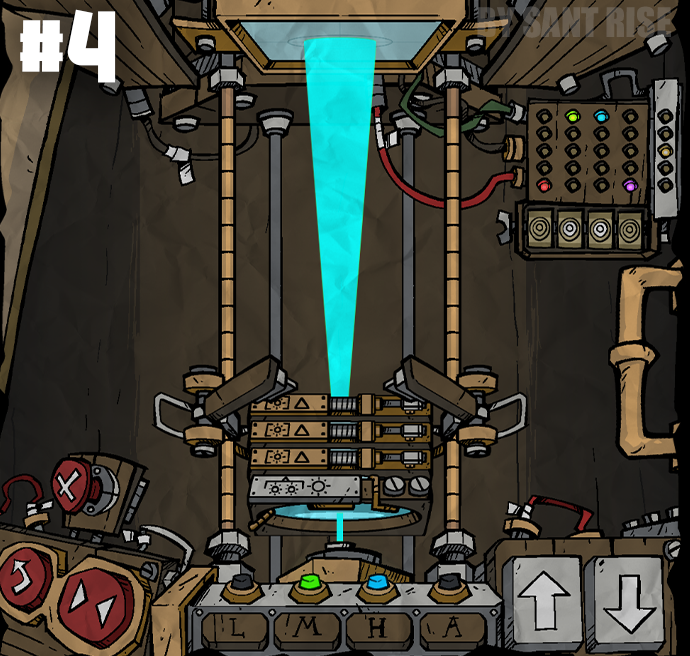
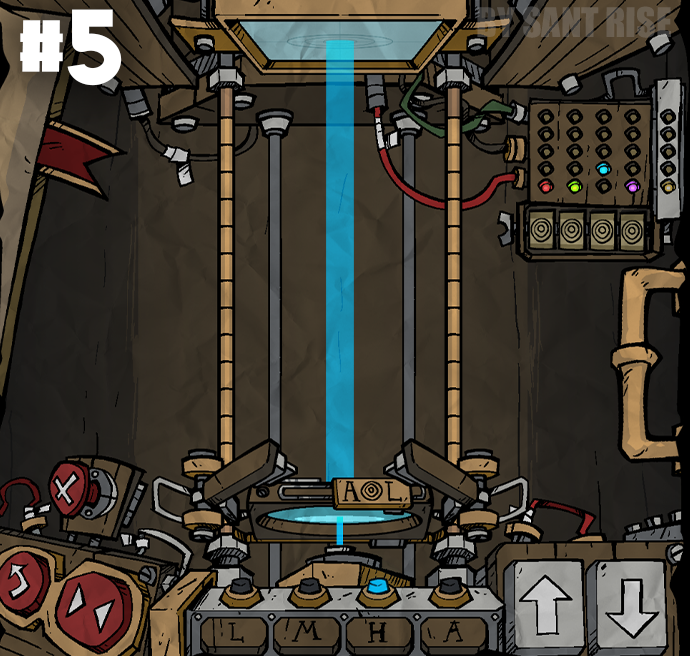
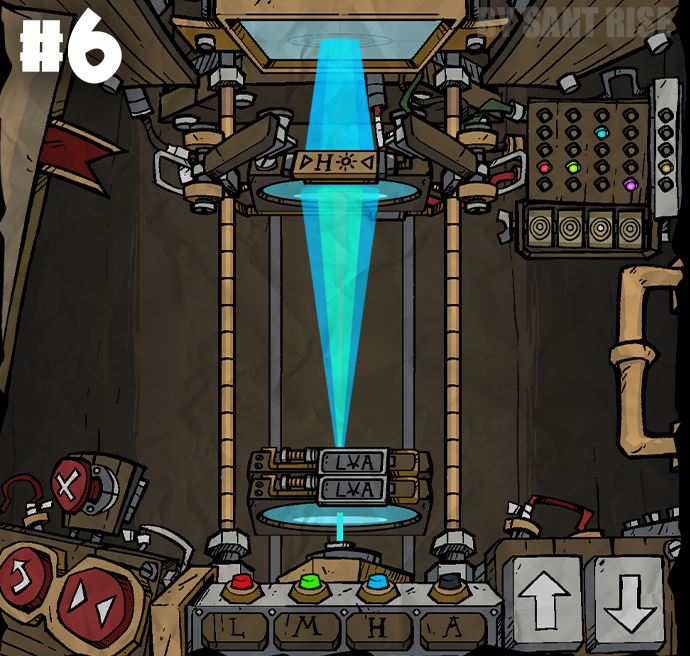 ❗Don’t miss the third lens located at the top.
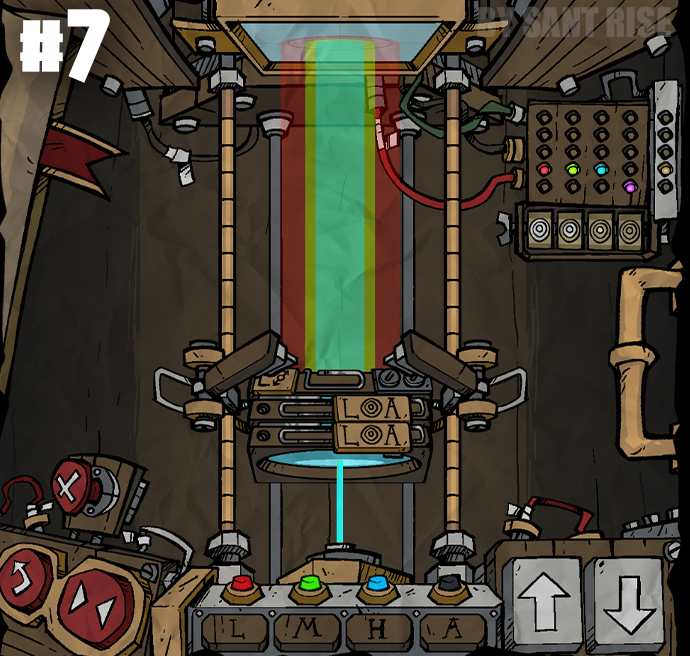
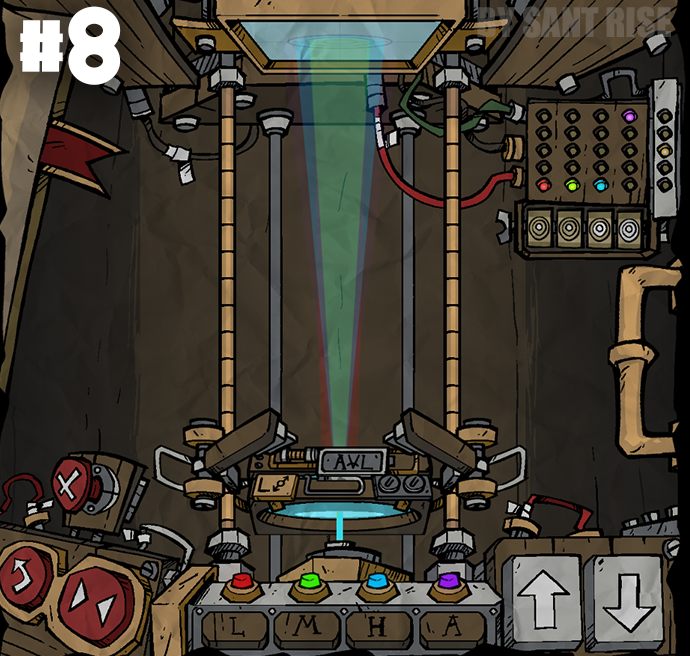
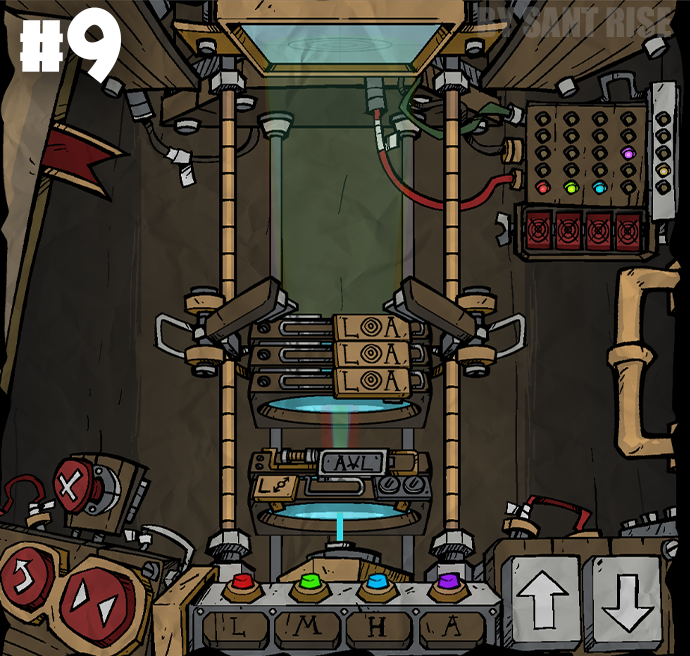
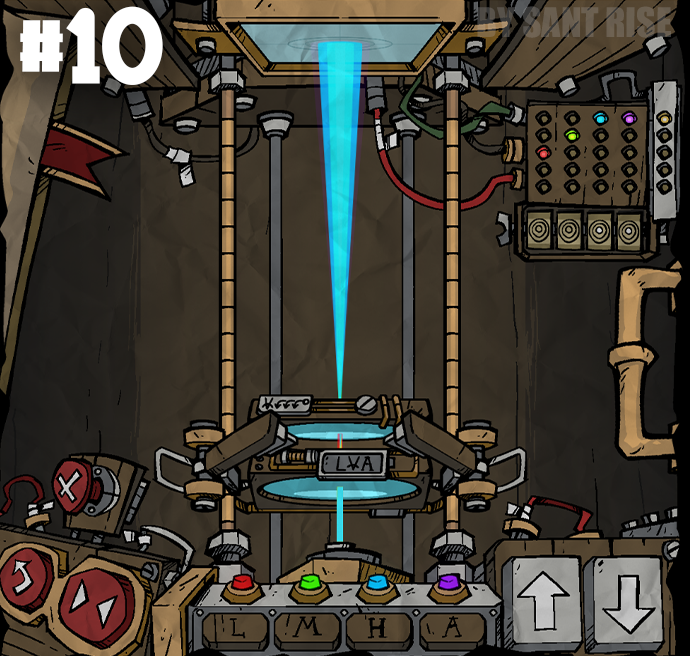
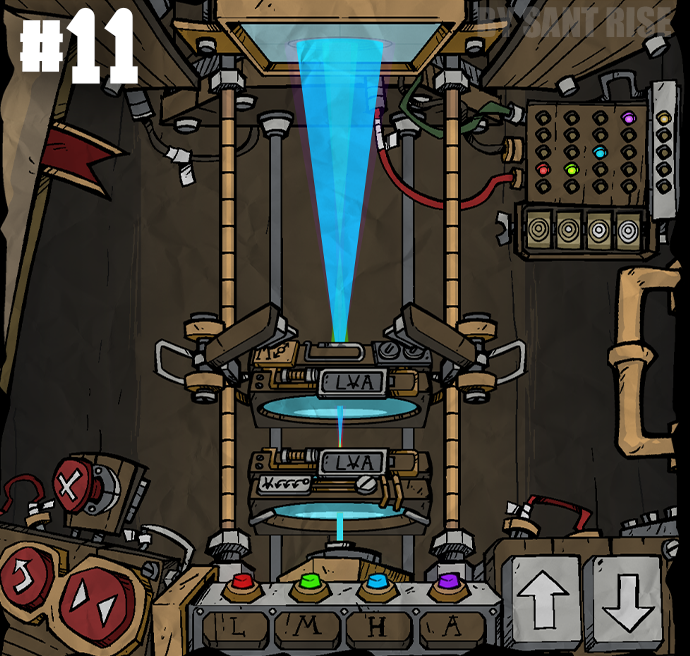 ❗The upper lenses should be marked with the letter "M".
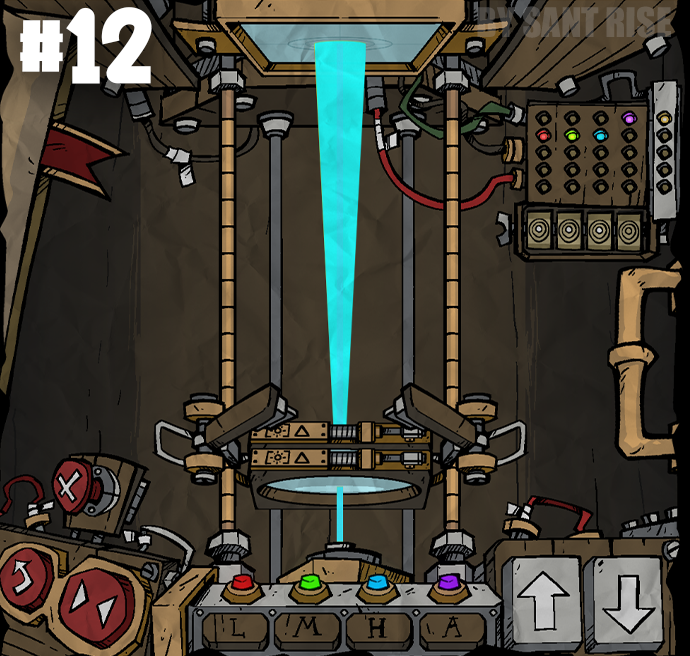
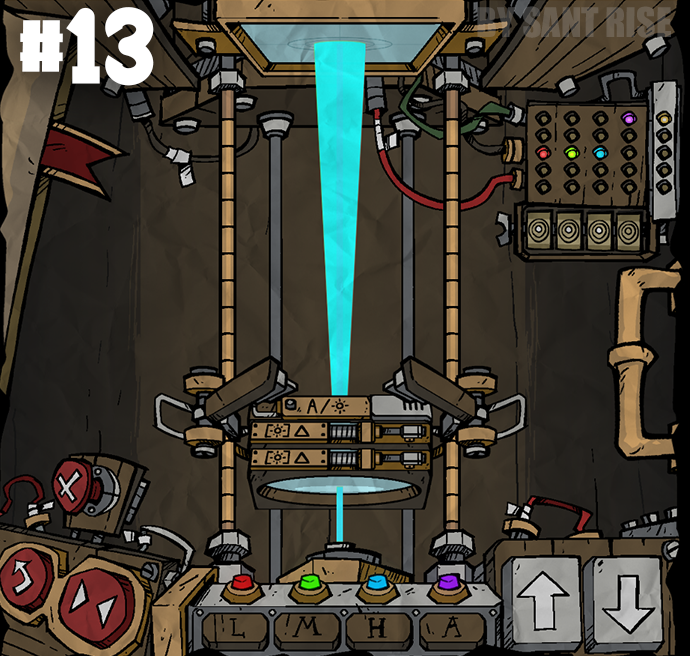
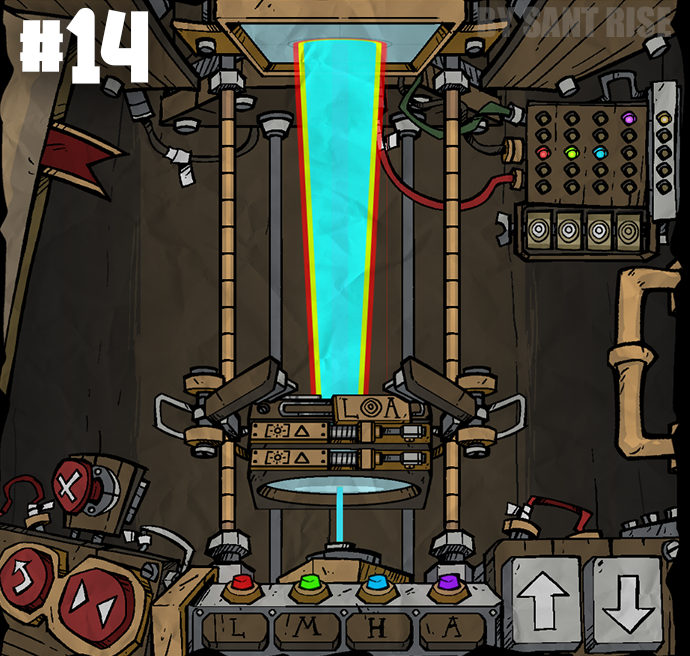
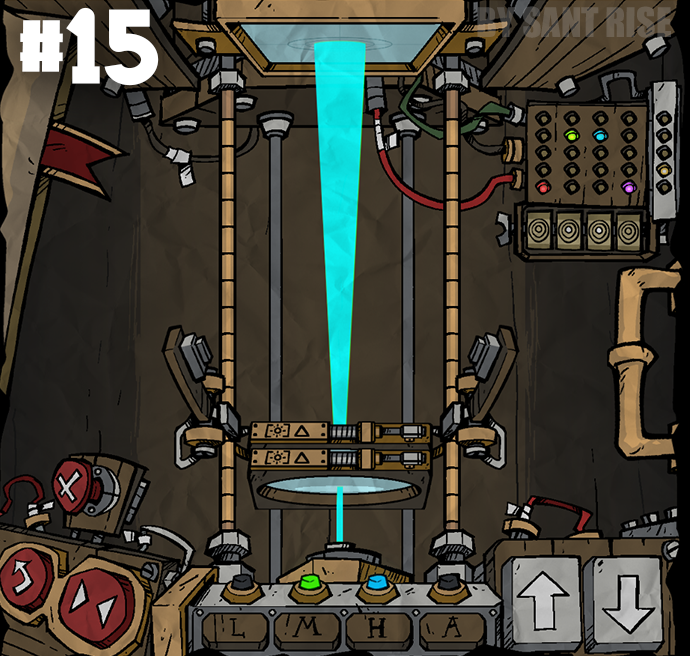
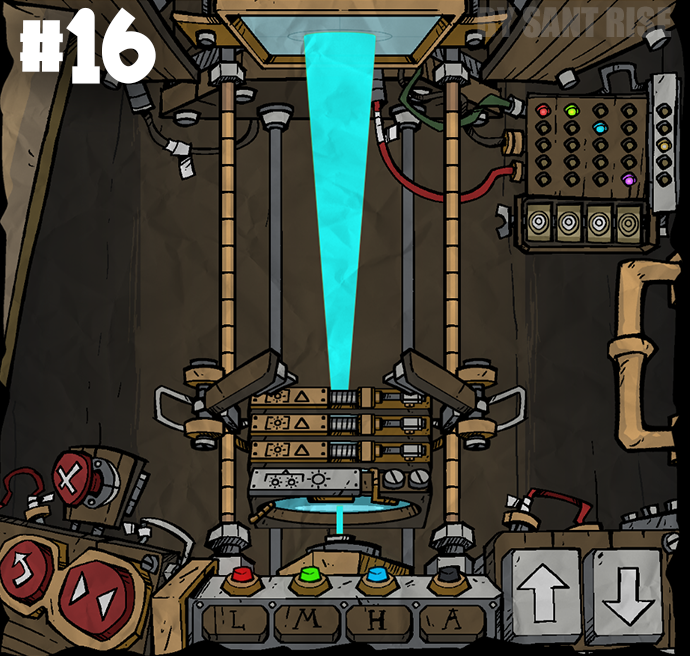
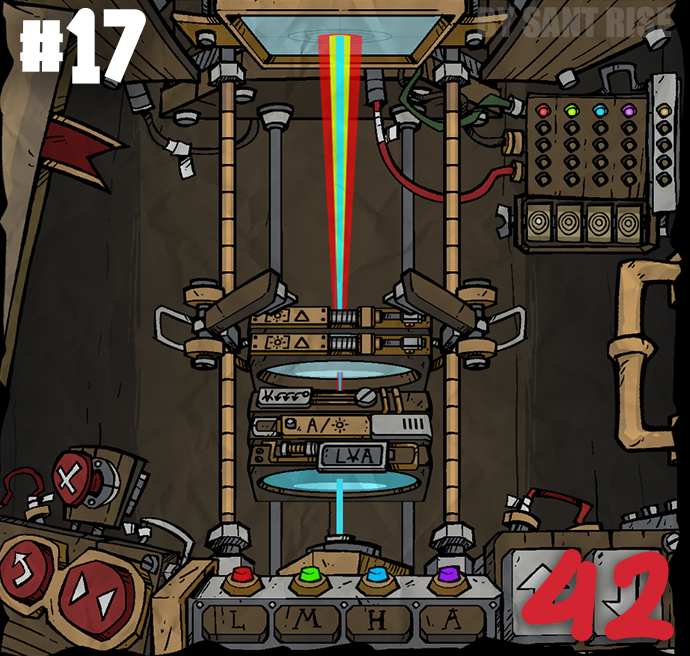
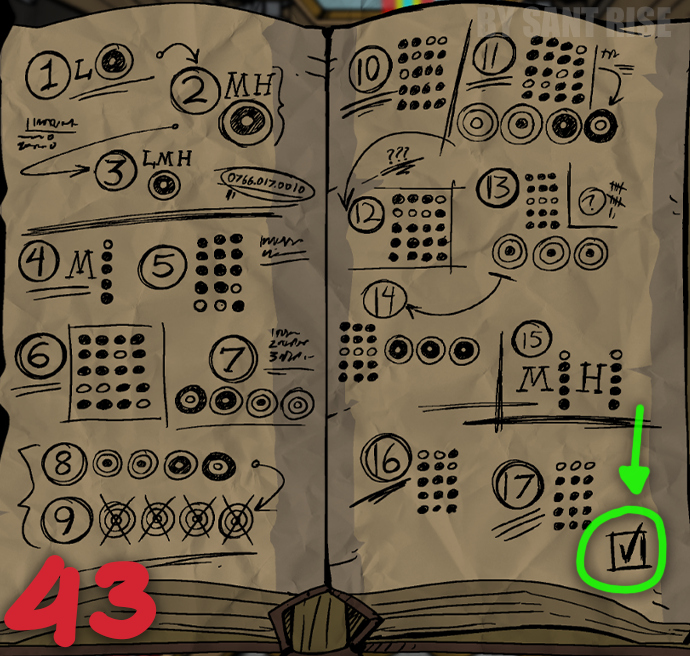 [43] Once you've finished everything, you can open the book and check that there's a checkmark in the bottom right corner - this means the task has been completed!
Petals
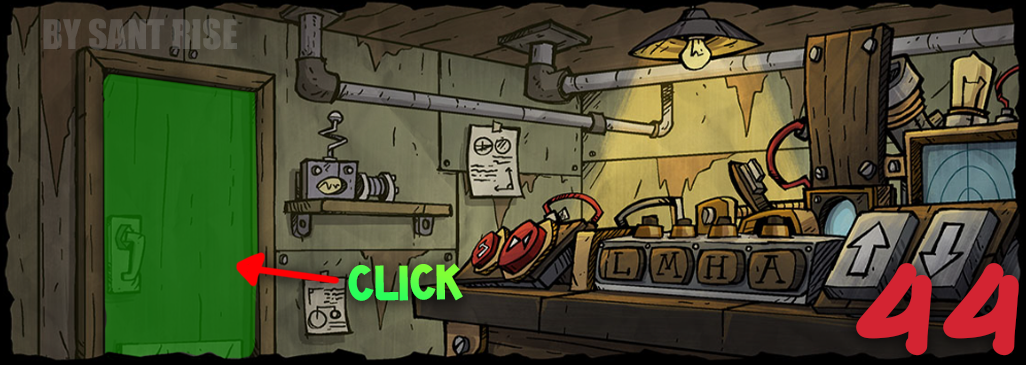 [44] Scroll up and tap the door.
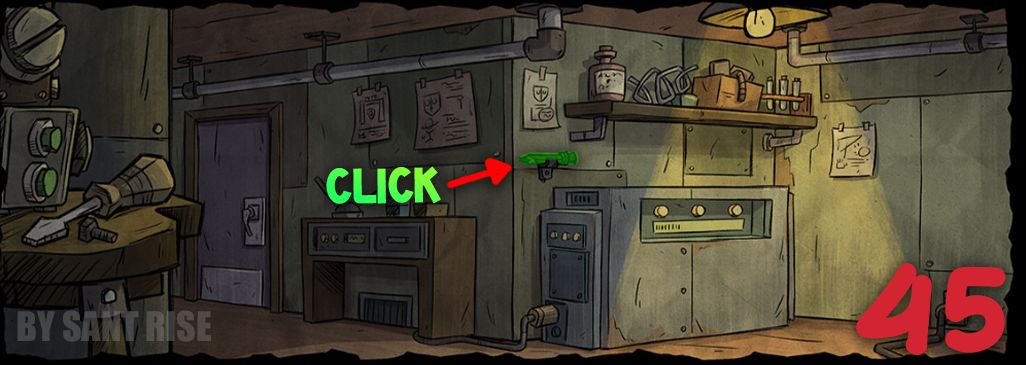 [45] Click on the pencil on the wall.
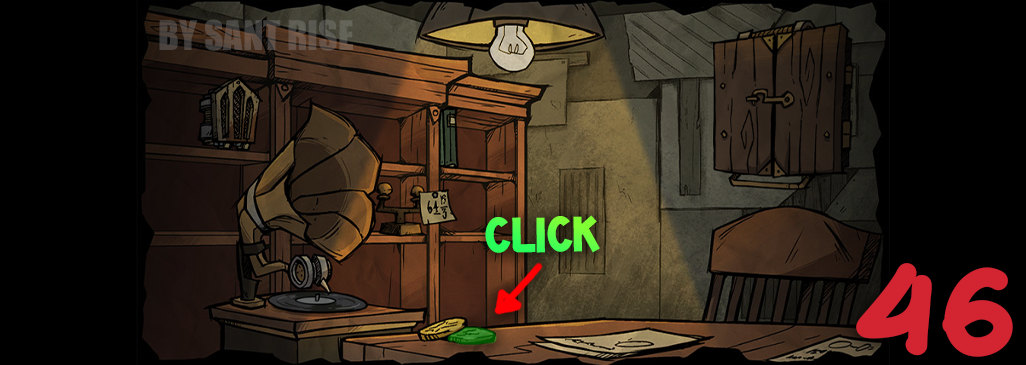 [46] Click on the silver coin.
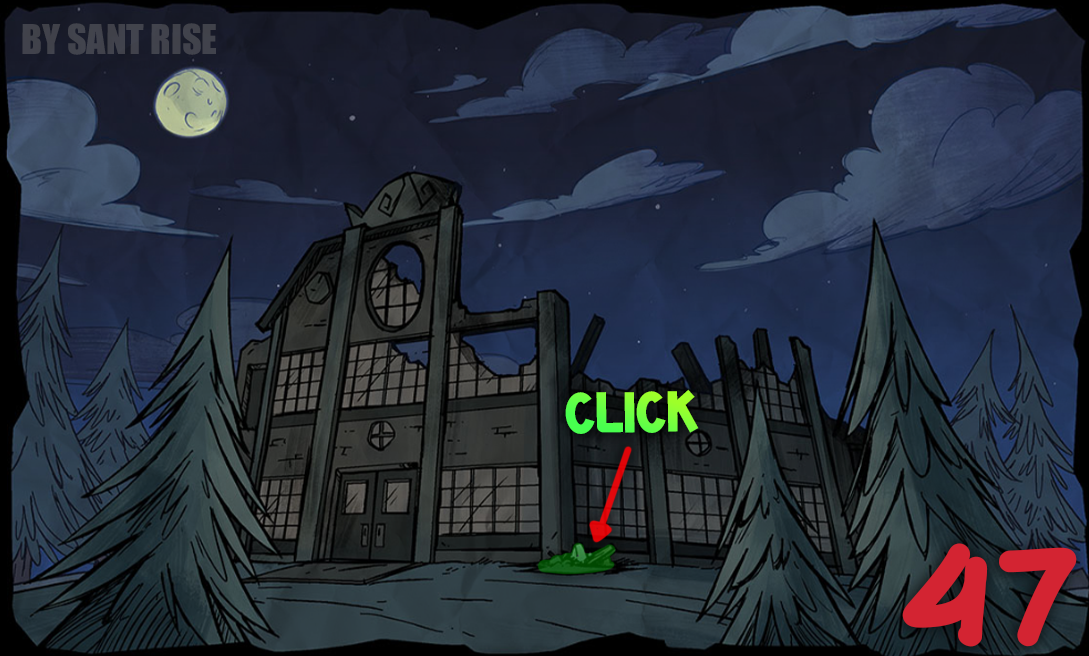 [47] Click on the pile of trash.
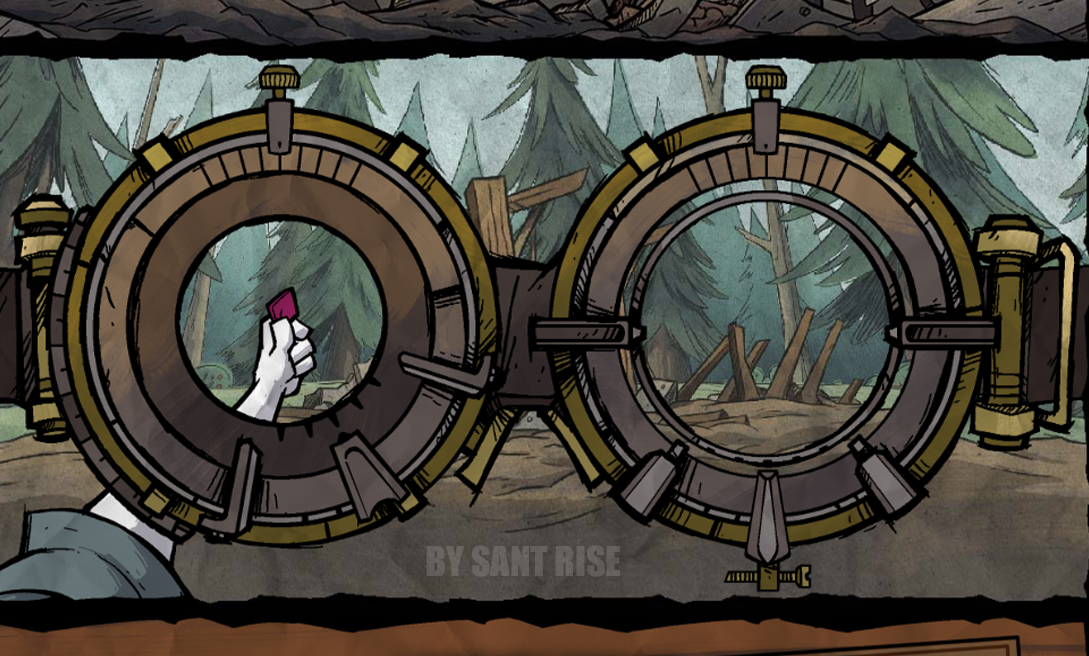 [48] We've returned to our settings, but they've become out of sync, so you'll need to refresh them. To do this, simply move any slider and then return it to its original position.
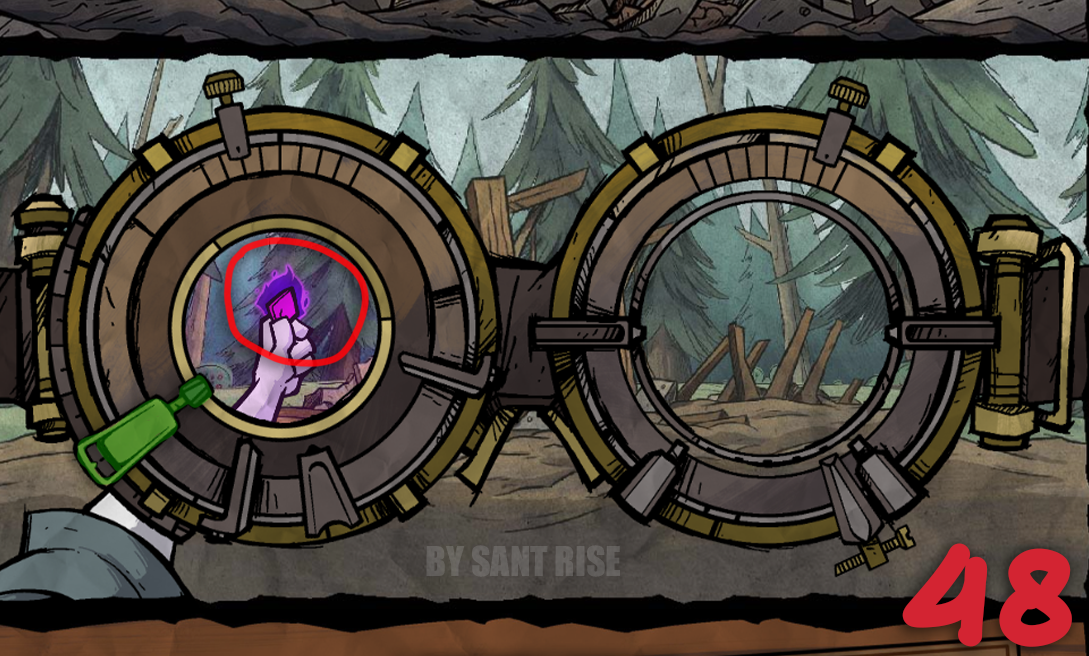 After the update, you'll notice that a new glasses setting has appeared. Adjust it like I did so that the petal in the center of the lens glows with a purple flame.
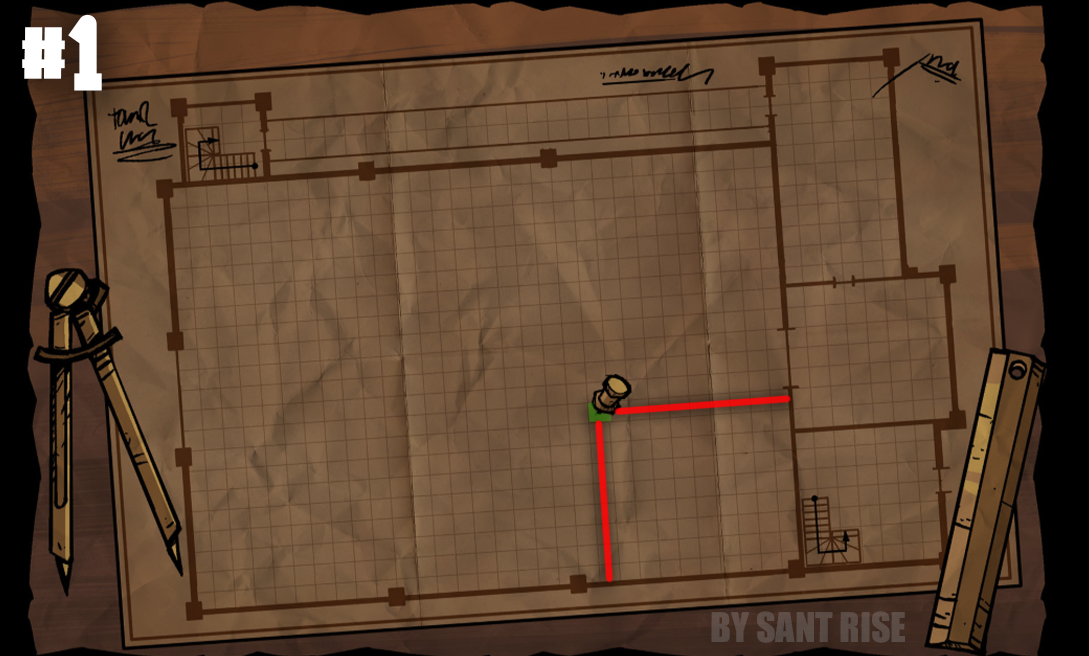 [49] Now we need to look for petals just as we looked for the debris, except we need to find many more petals (17), and we need to use a special magnifying glass to find them.
 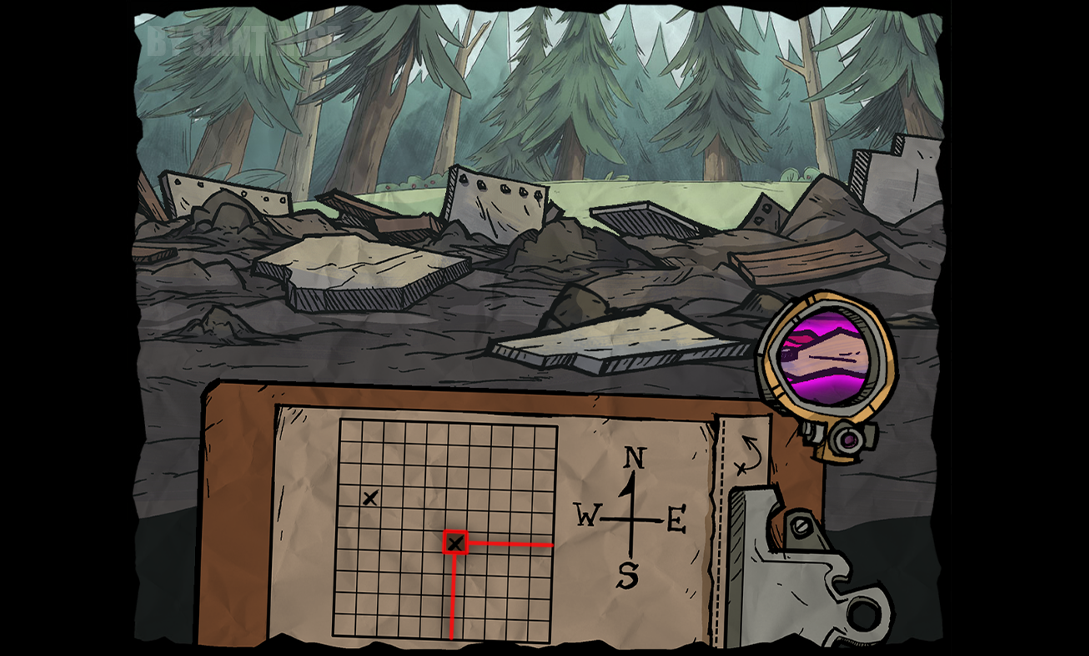 To find the petal, pick up the magnifying glass to the right of the notebook and point it at the right spot. Then, don’t forget to click on the petal to pick it up.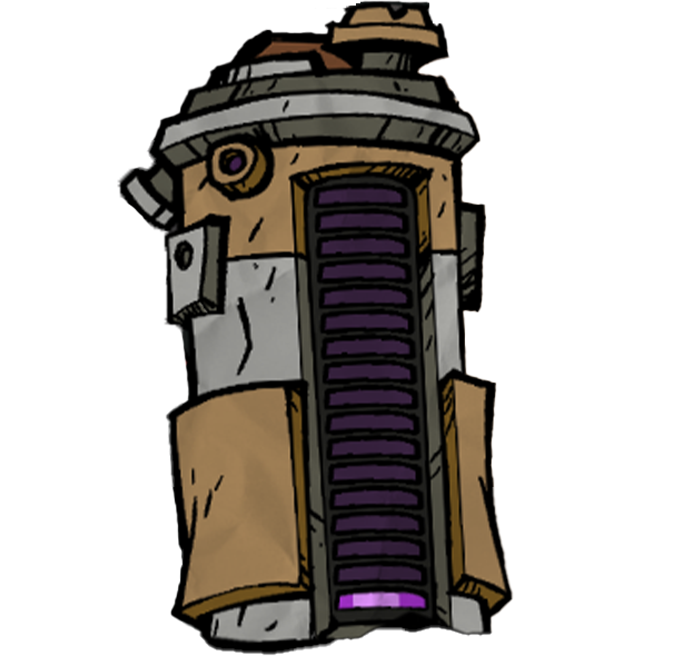
As soon as you pick up the first petal, a flask will appear to the left of the notebook, which you must fill completely.
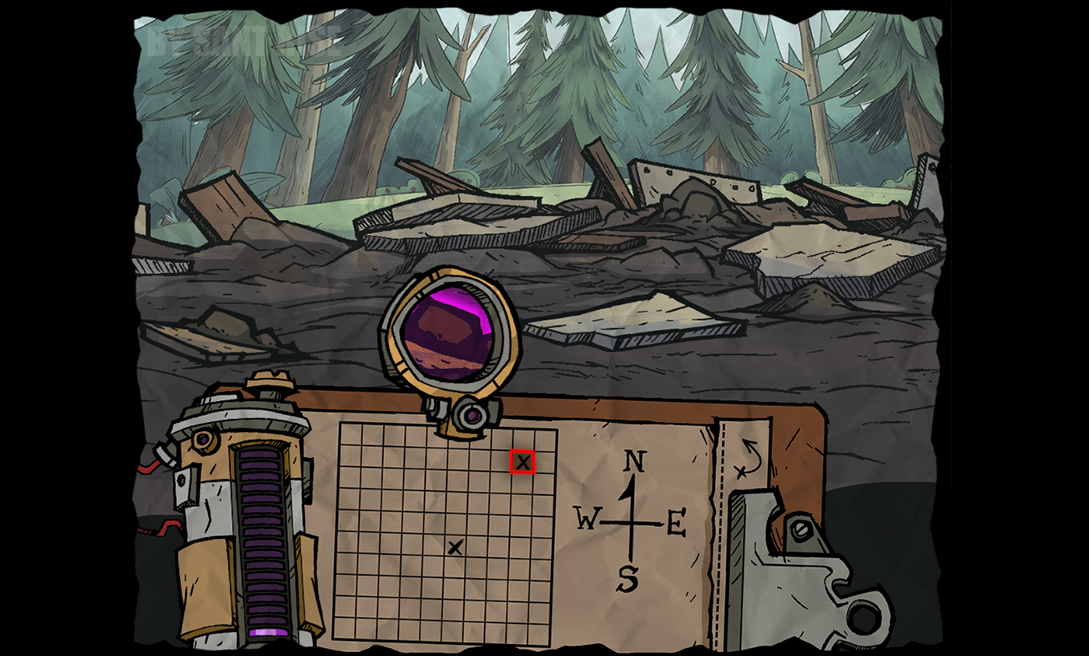
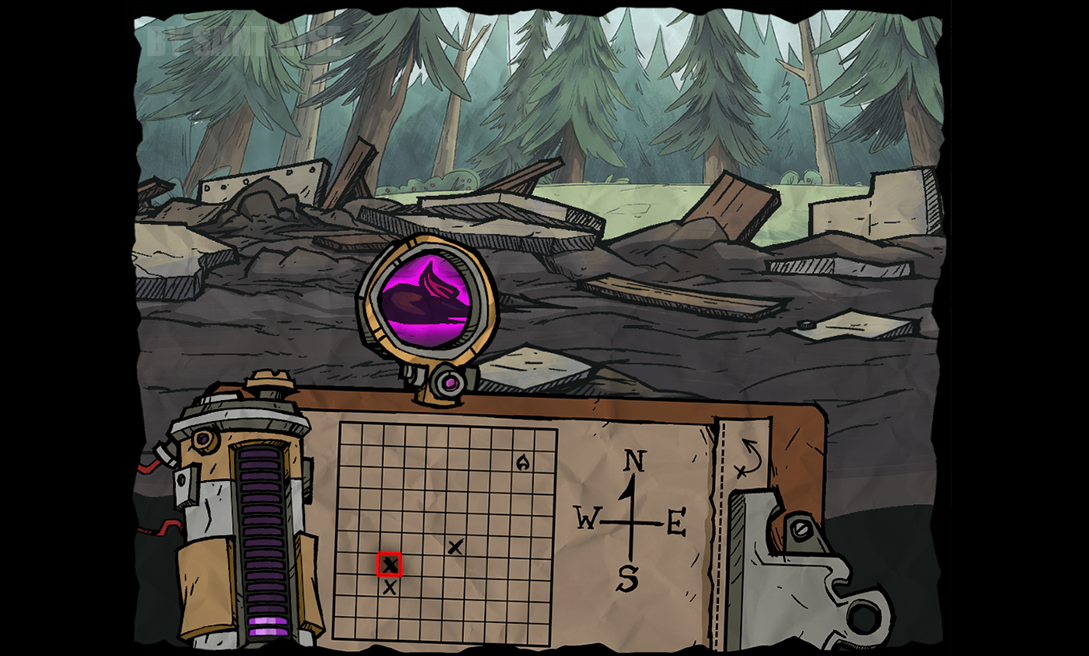
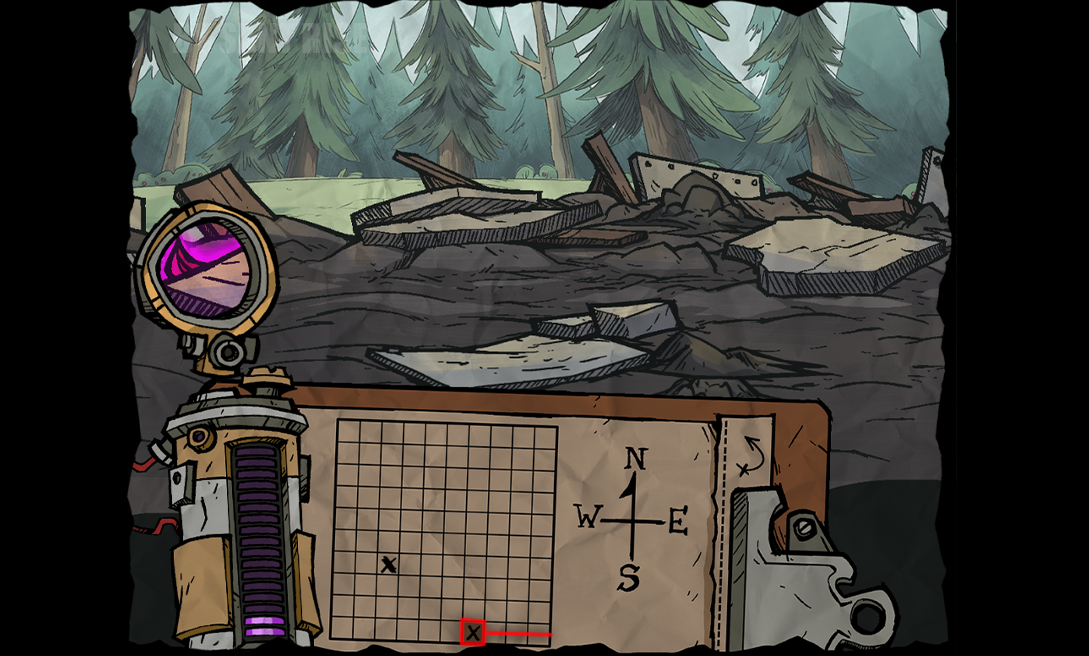
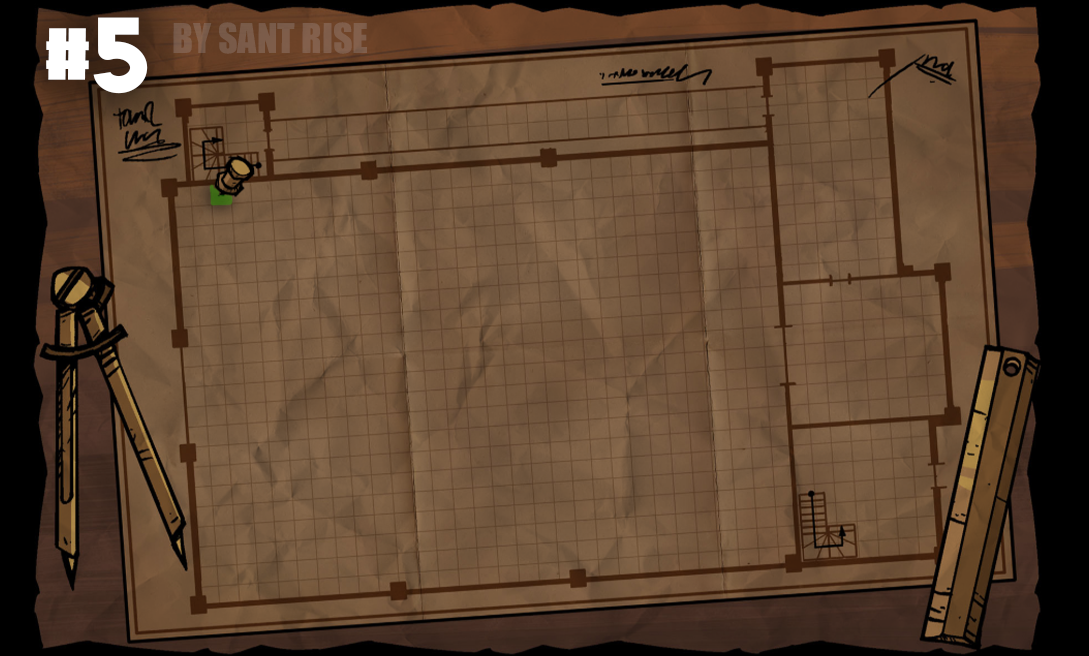
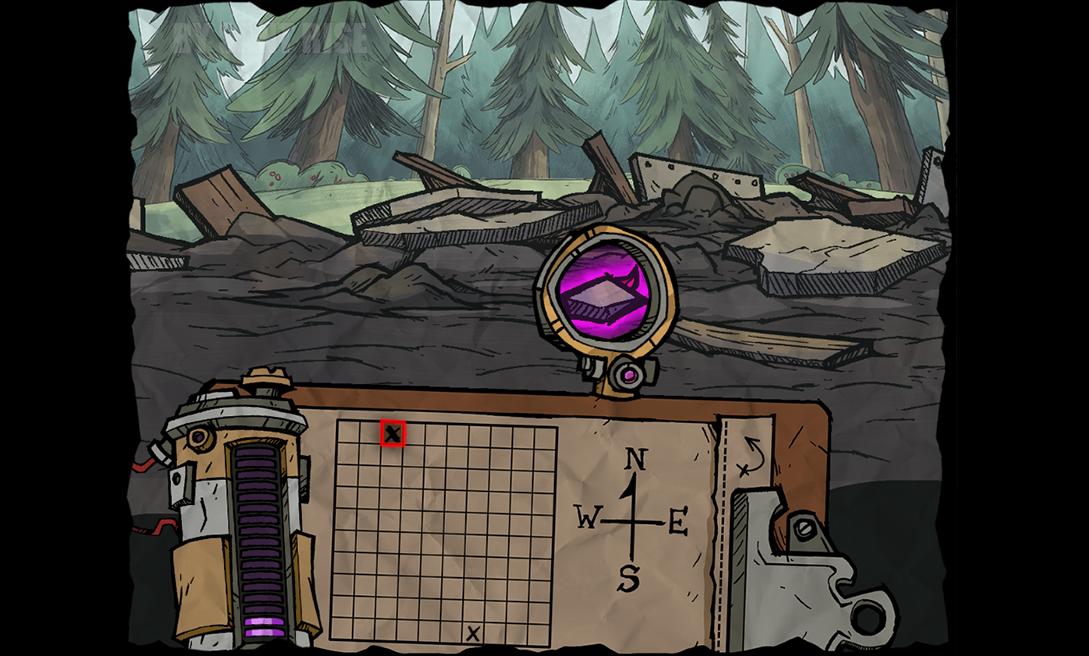
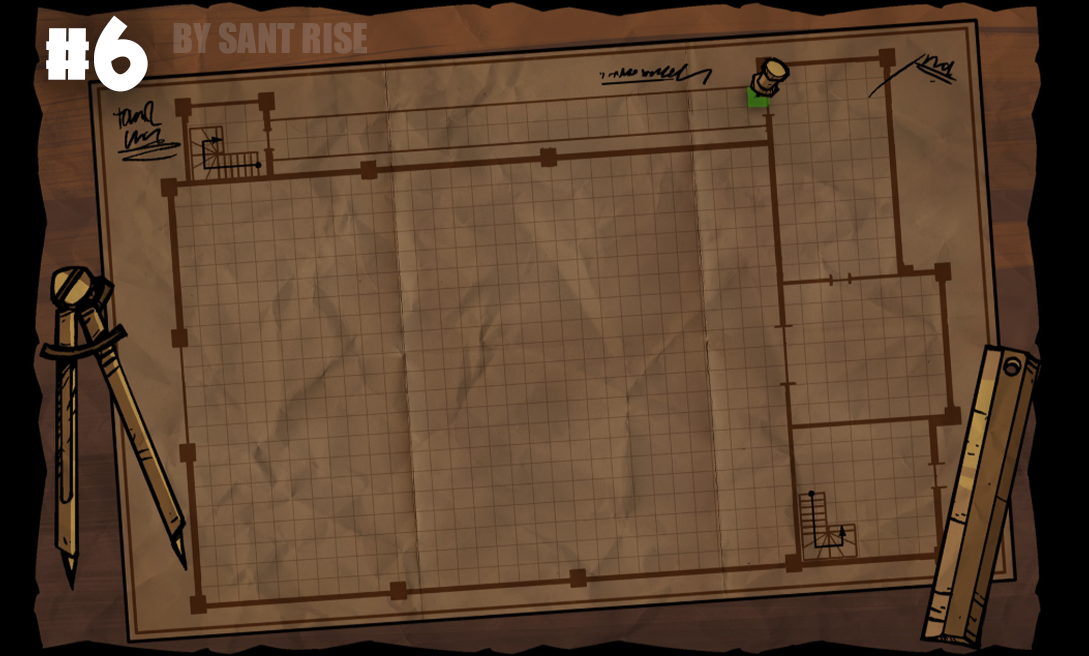
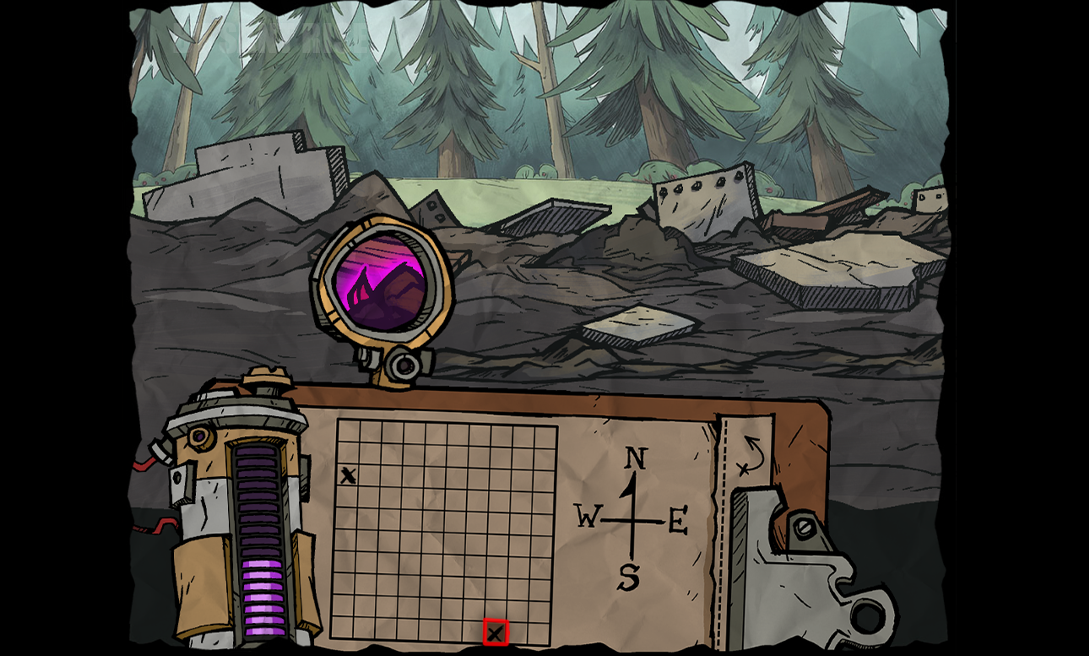
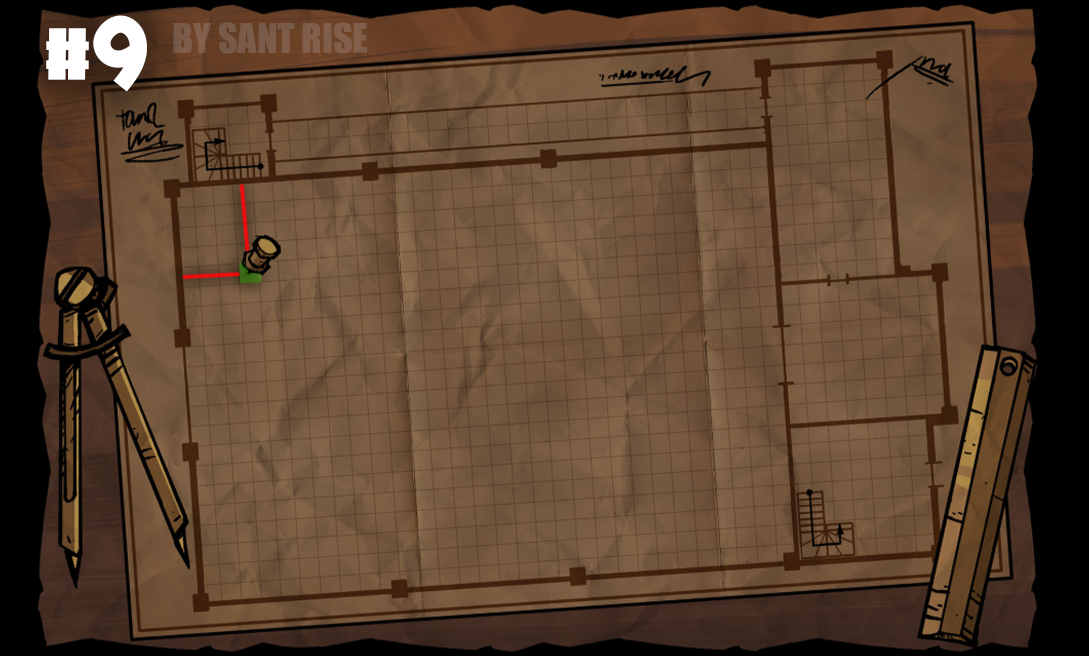
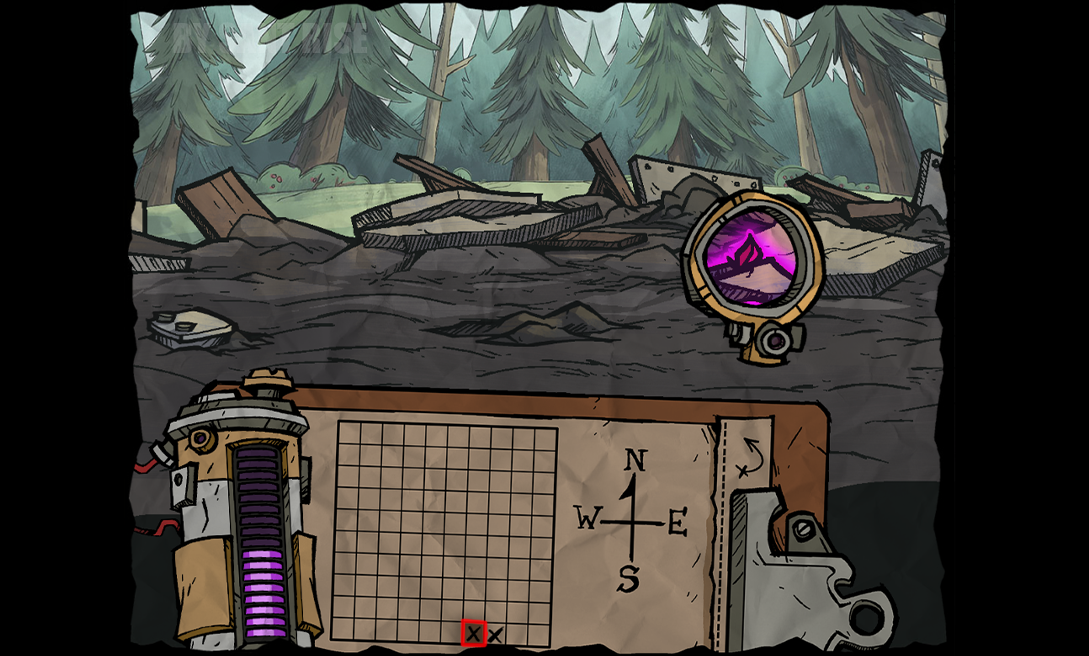
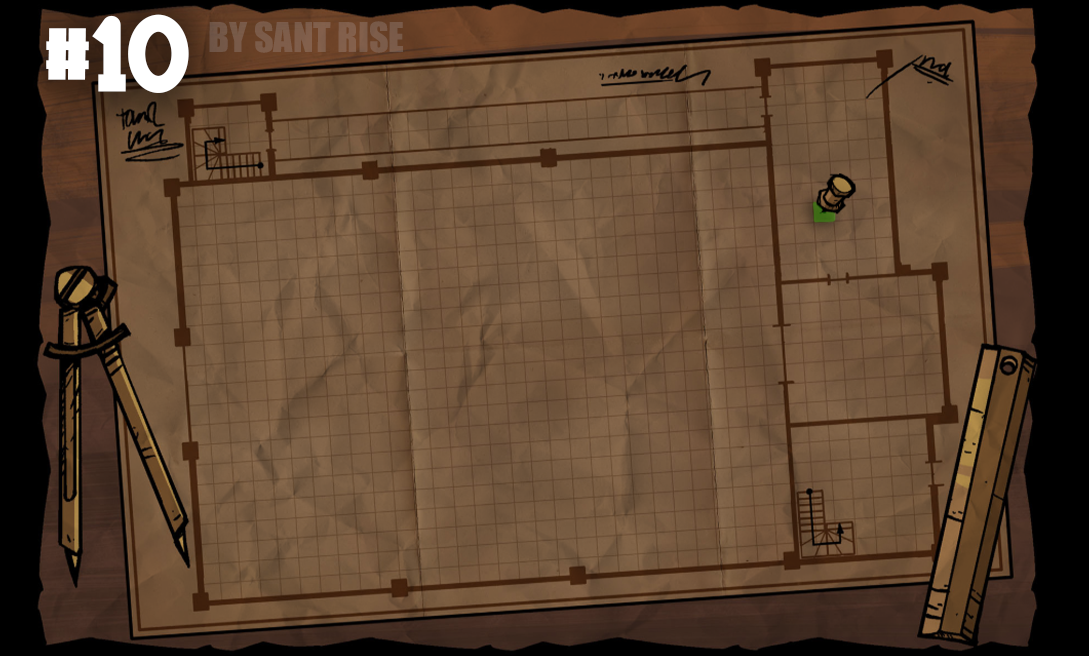
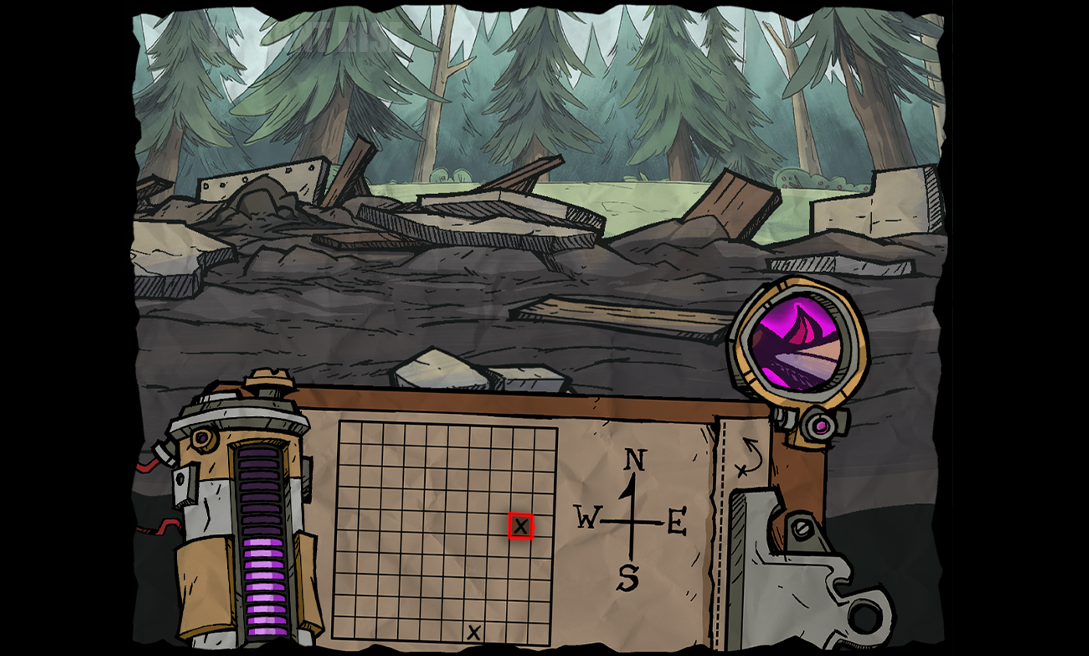
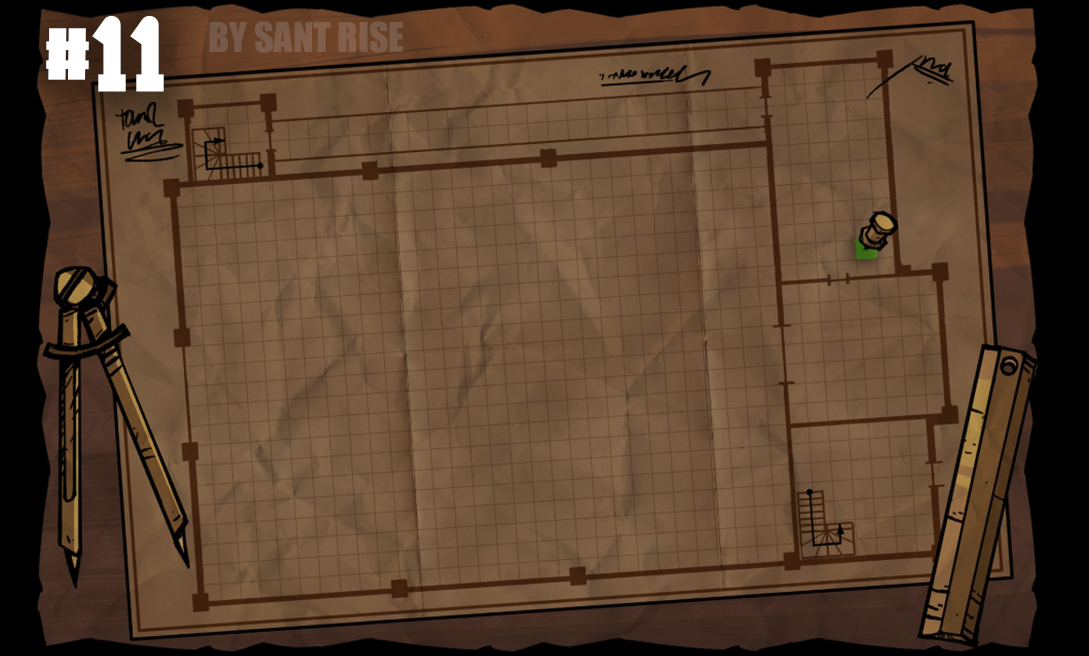
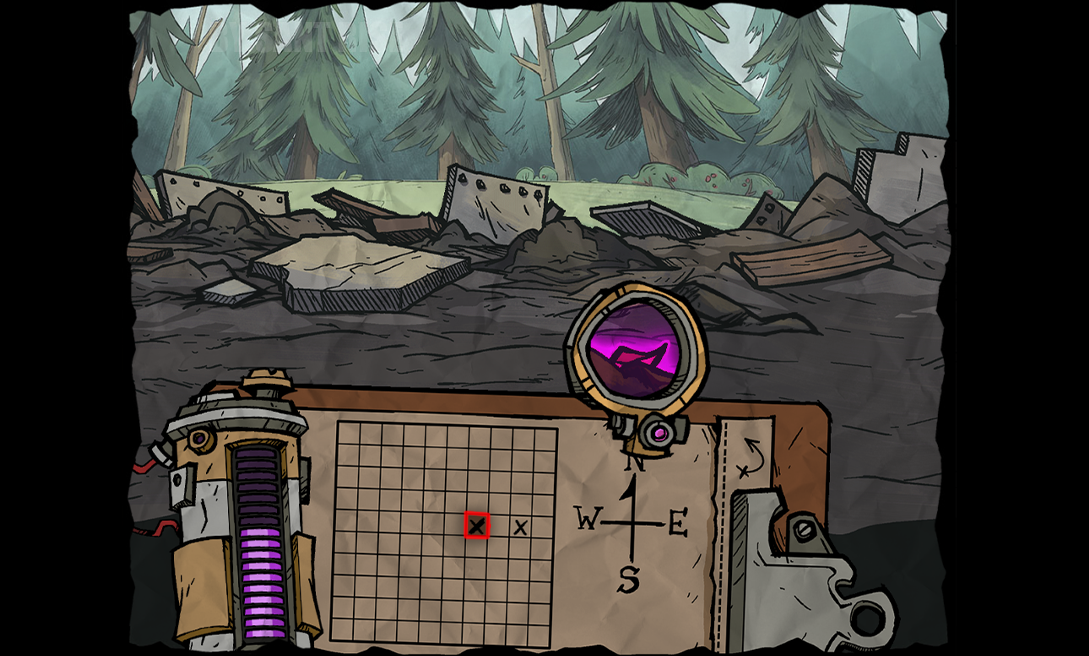
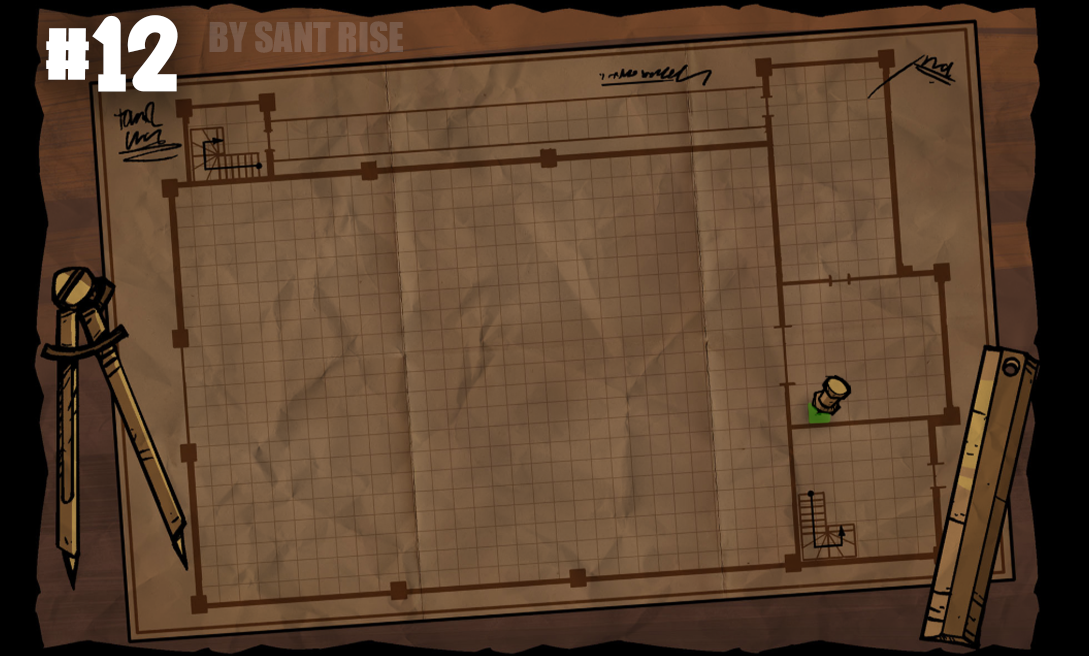
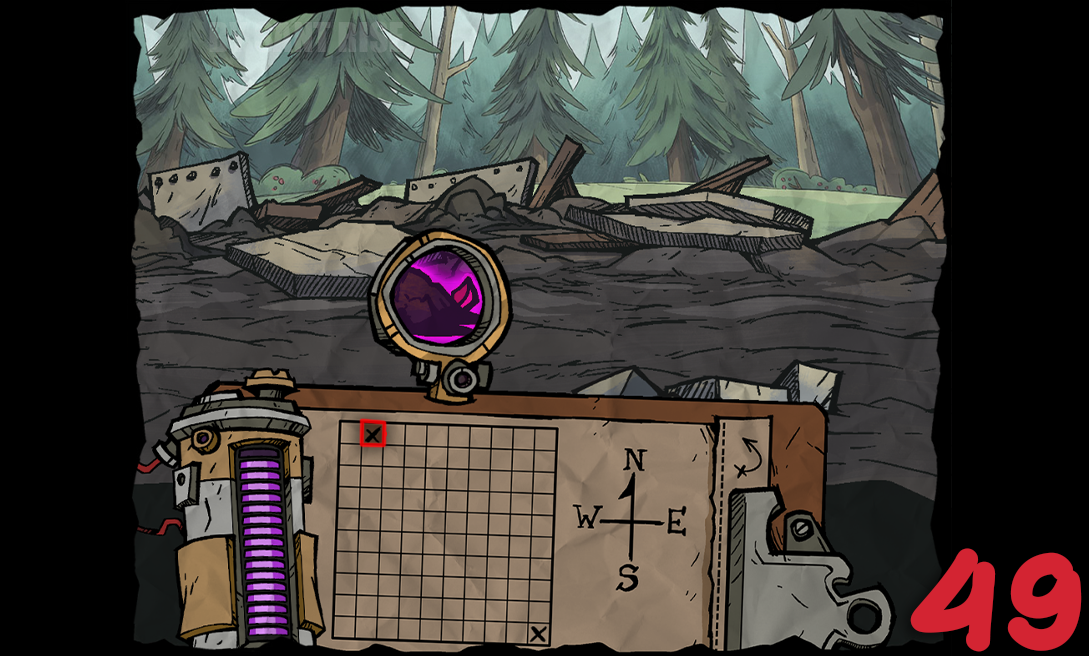 ❗Make sure the entire capsule is filled (you can tell by the indicator).
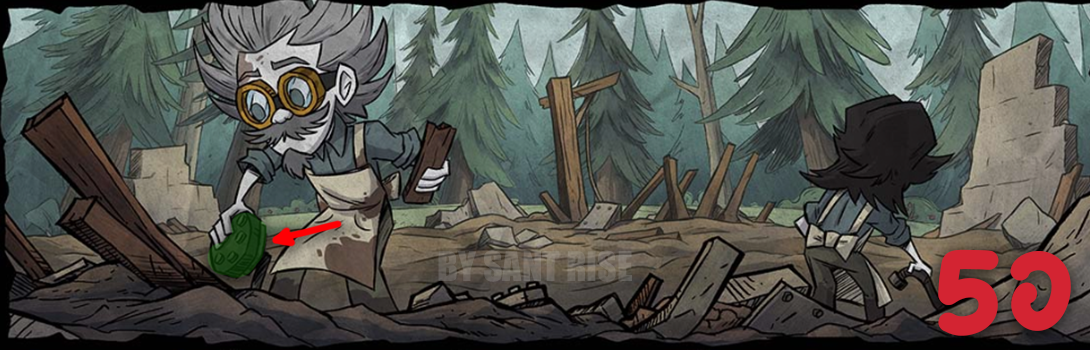 [50] Scroll up and tap the indicated spot.
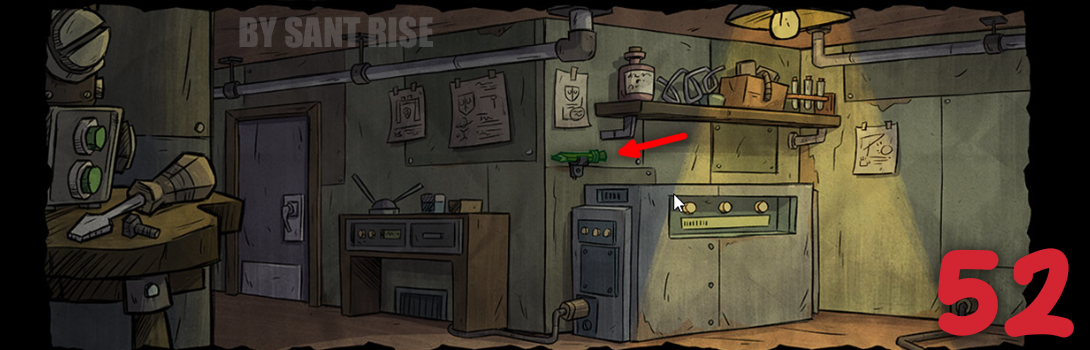 [52] Scroll up and tap the pencil on the wall.
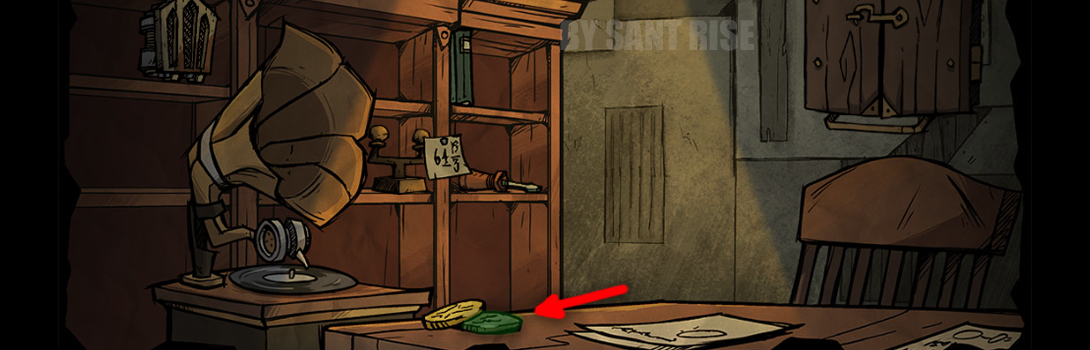 Click on the silver coin.
Piano Clock (NEW!)
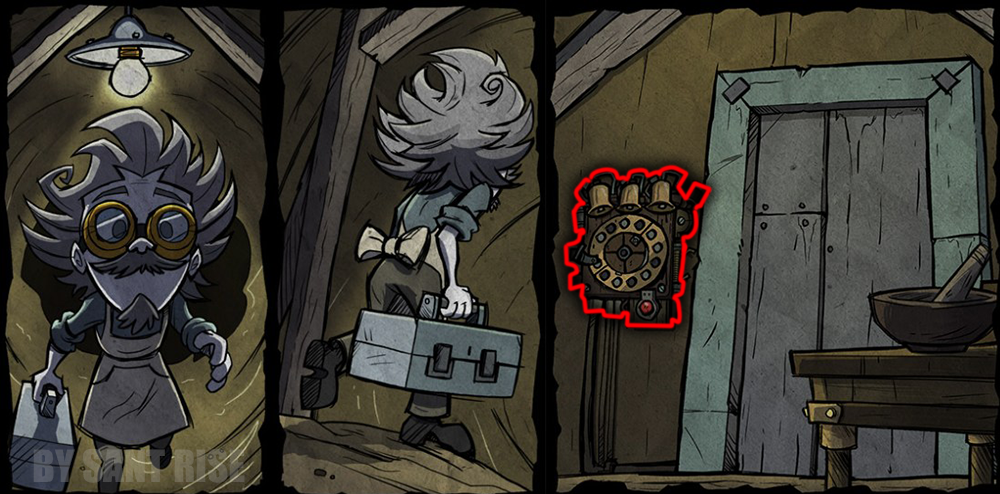 Click on Piano Clock.
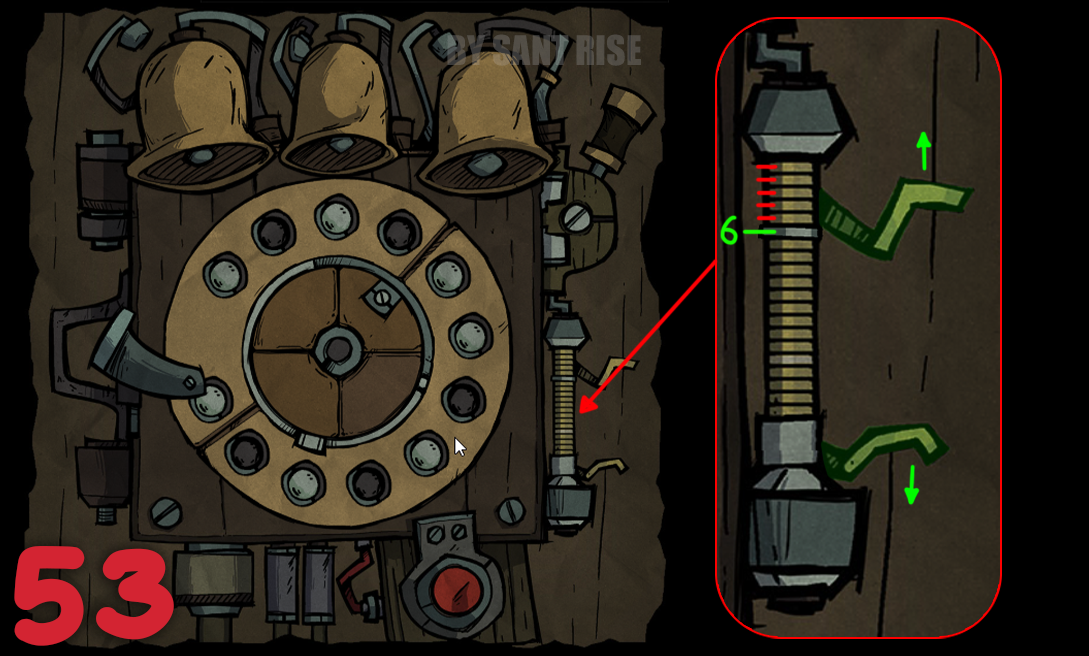 [53] Scroll down to the musical phone.
❗The silver ring must be set to position 15. The brown ring (which moves when the red button is pressed) should be placed directly below the silver ring with each new attempt.
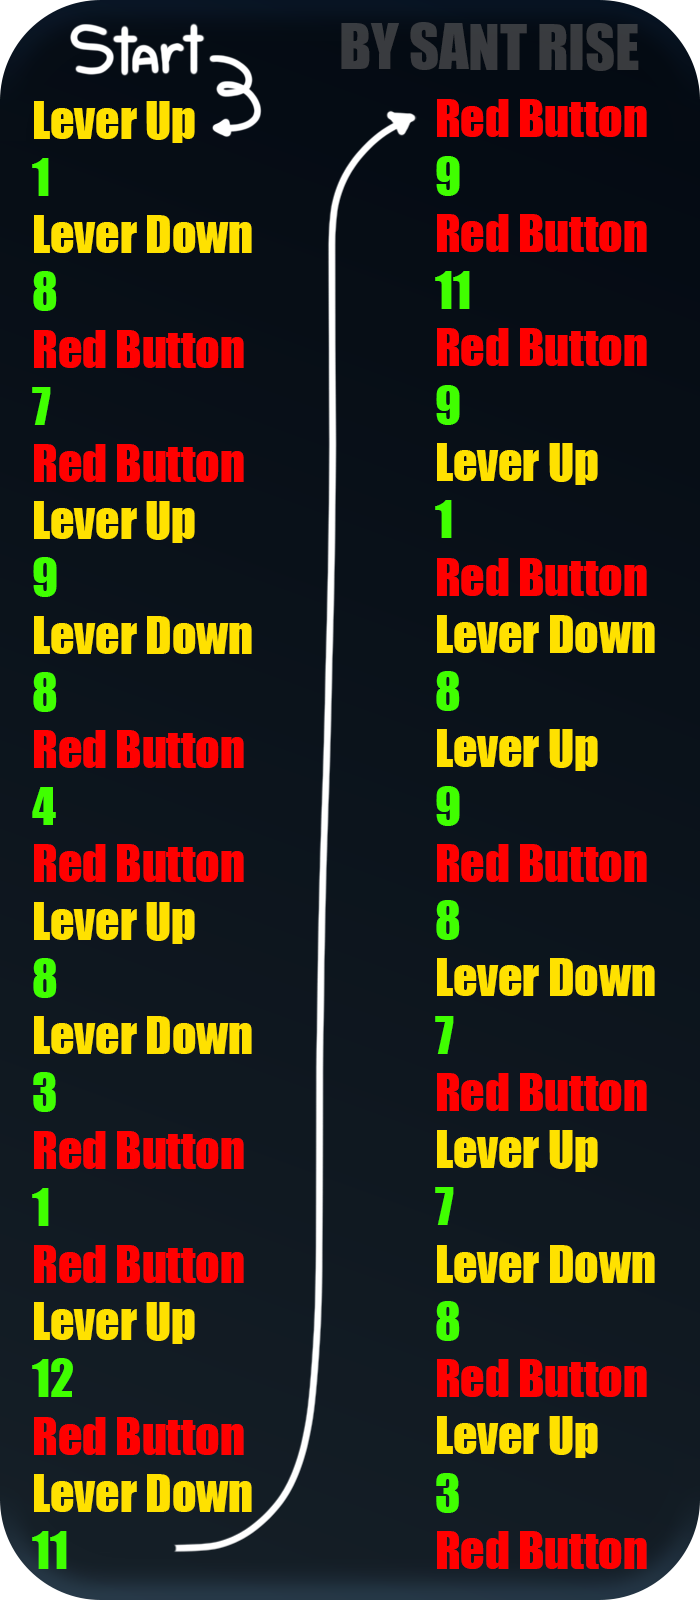
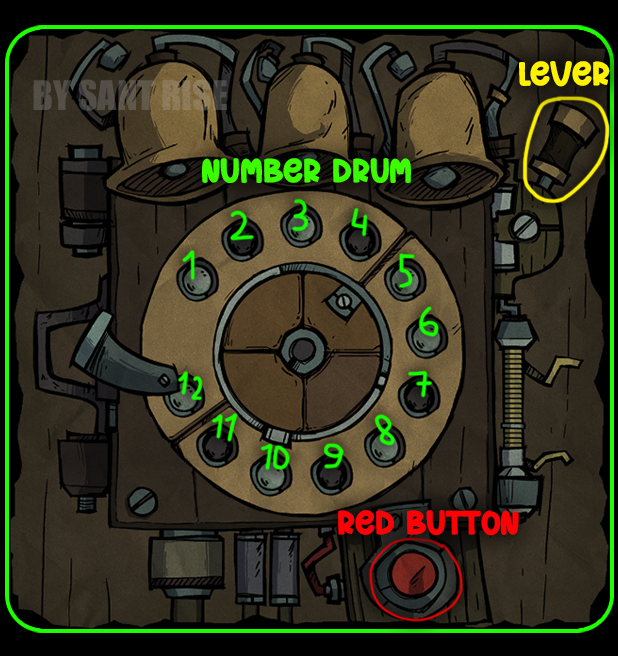
Just like last time, you need to enter the code on your music phone (First column - start; Second column - continue).
❗If you have any trouble, remember that the brown ring should be positioned under the silver one as you begin entering the code.
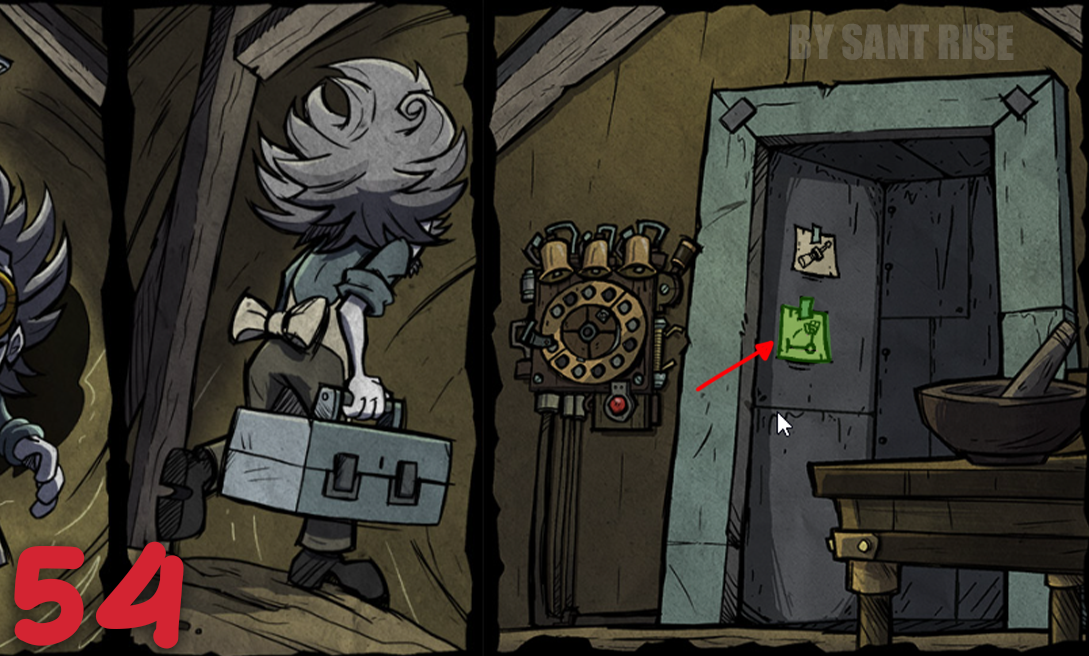 [54] If you did everything correctly, a new piece of paper will appear at the top of the elevator after the melody plays.
Click on it!
Laboratory (NEW!)
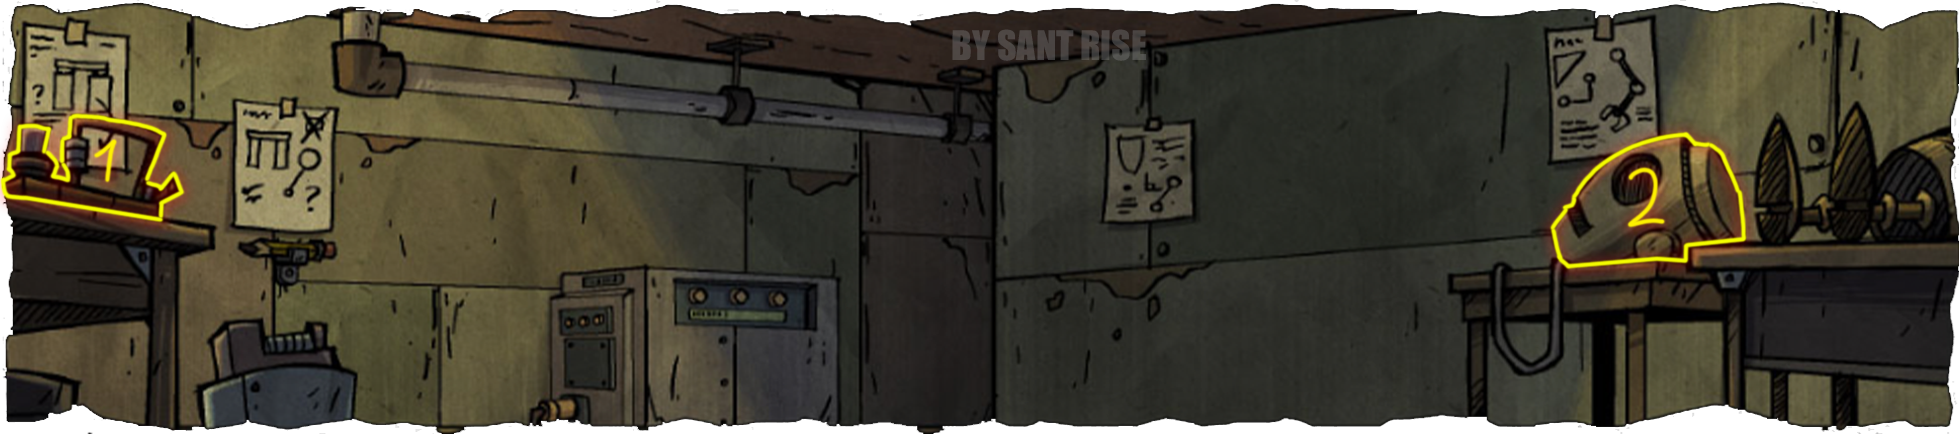 1.The device on the table to the left.
- Head of the robot.
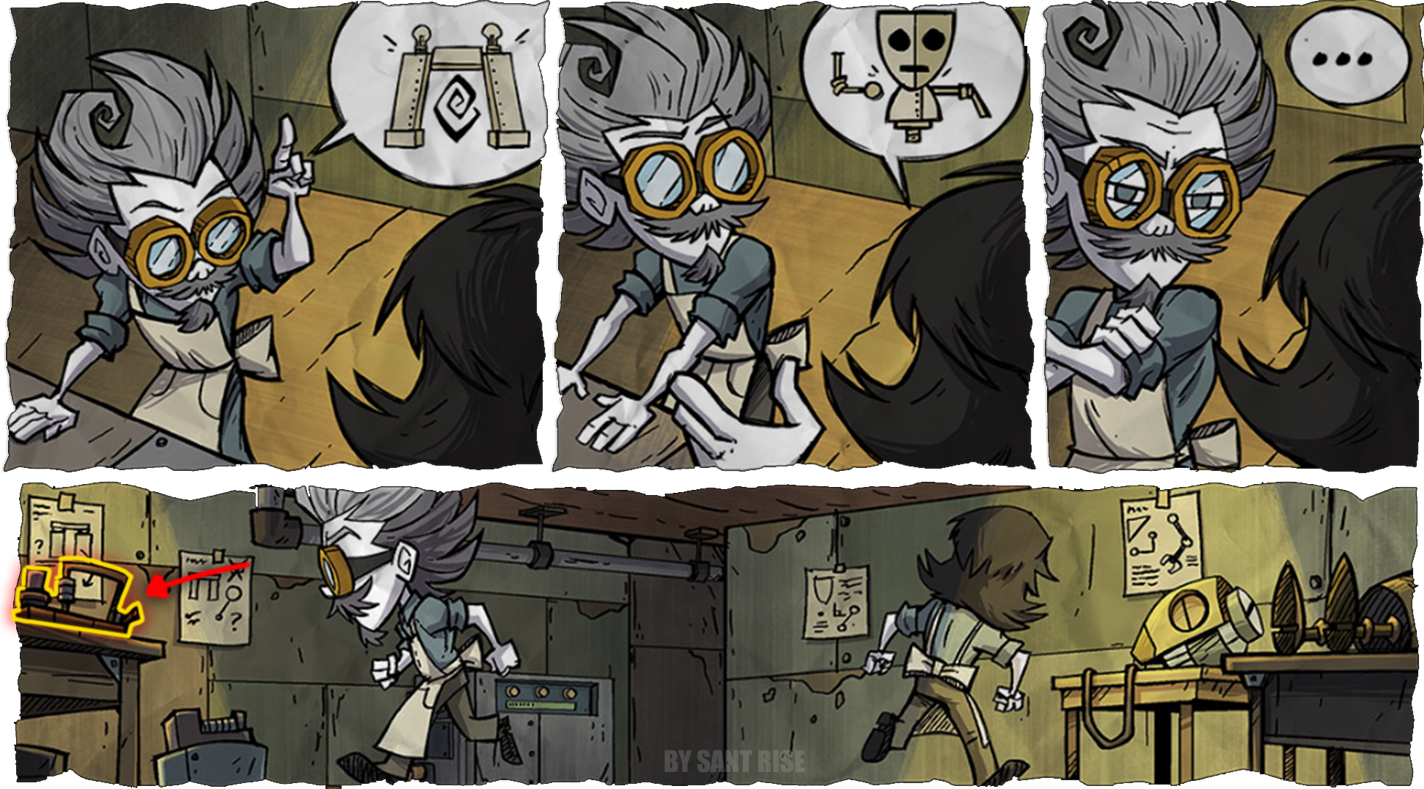 1.The device on the table to the left.
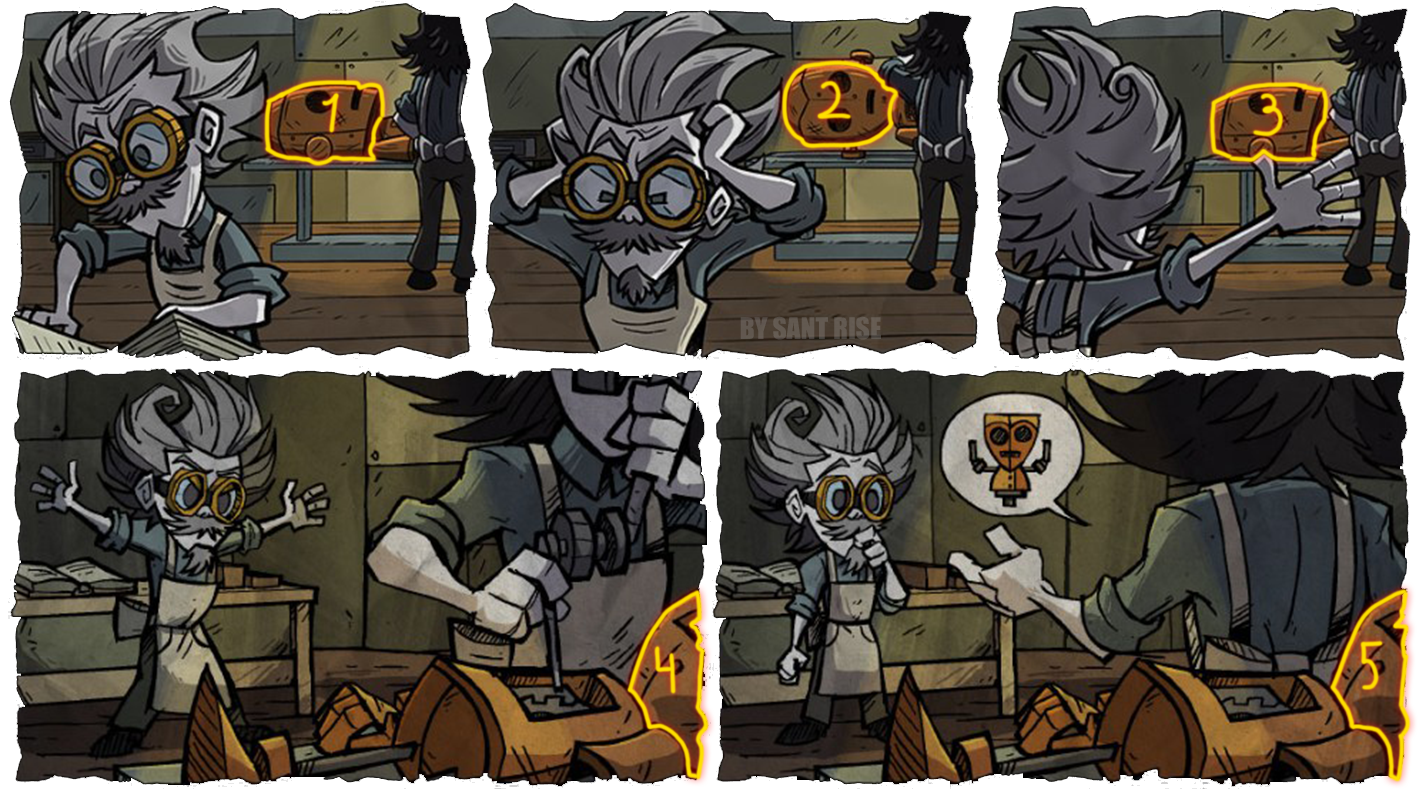 Click on the 5 robot heads in sequence
 1.Device on the table.
- WX head.
 1.WX hair.
- Robot's face.
- Hand.
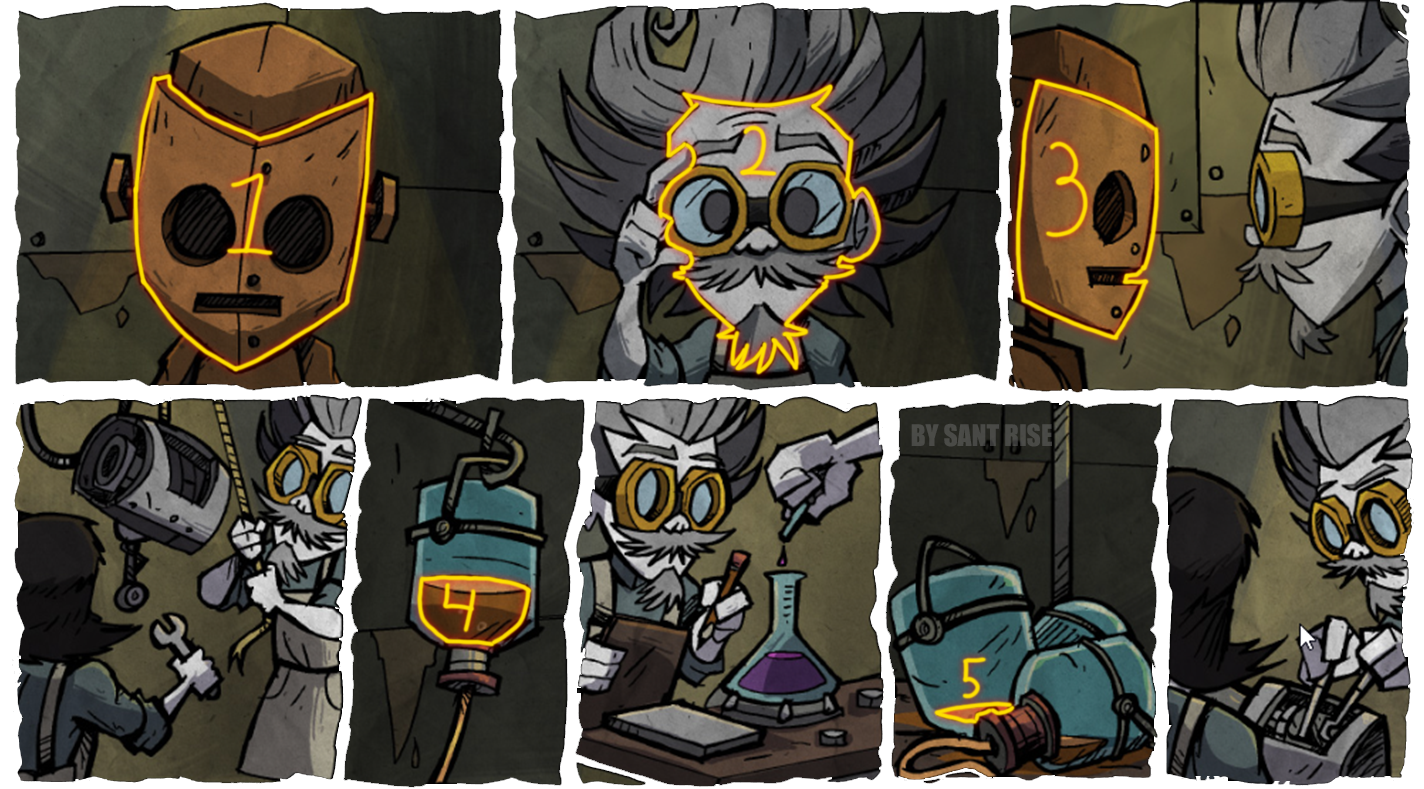 1.Robot's face.
- Wakstaff.
- Robot's face.
- Liquid in a jar.
- Liquid at the bottom of the jar.
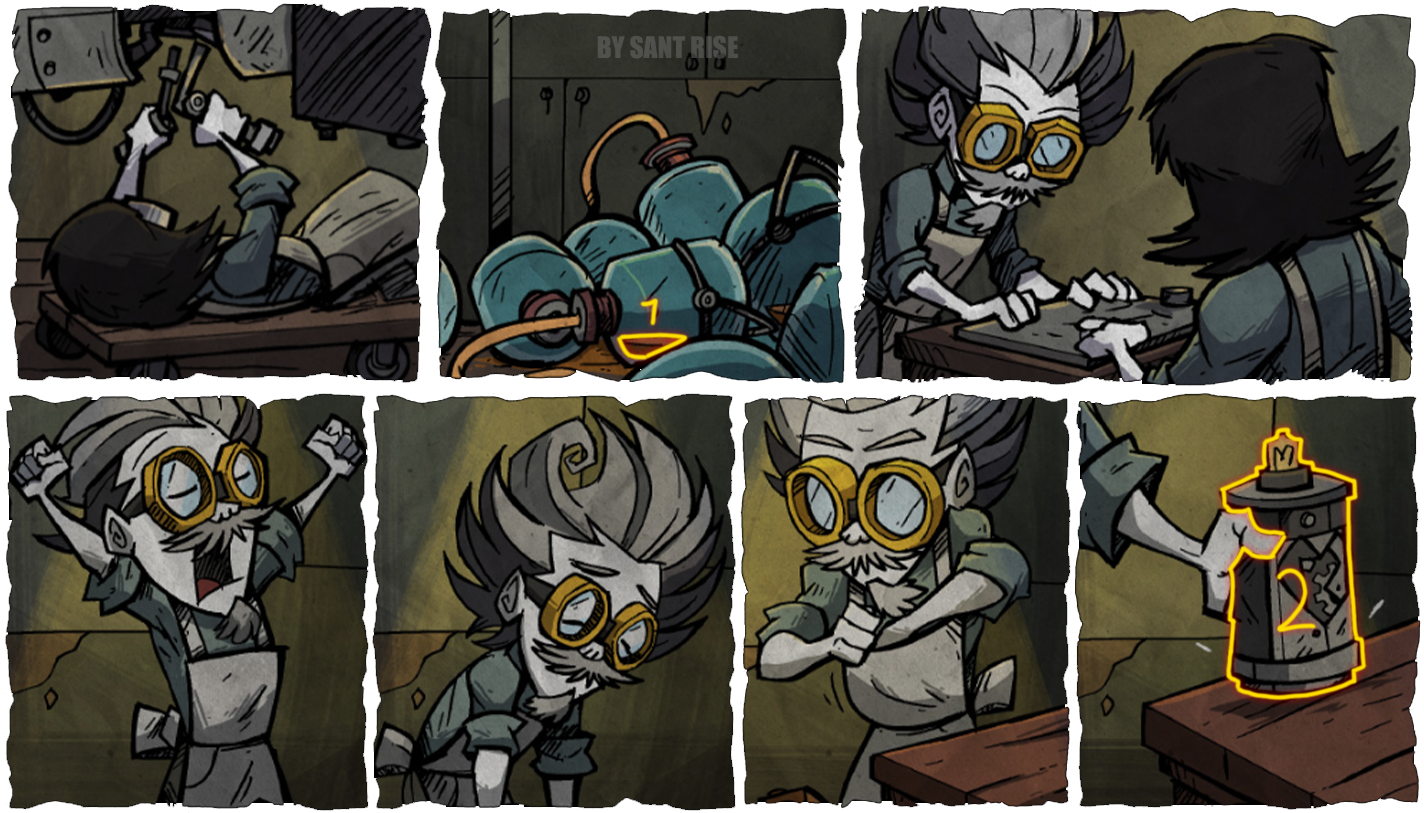 1.Liquid at the bottom of the jar.
- Device.
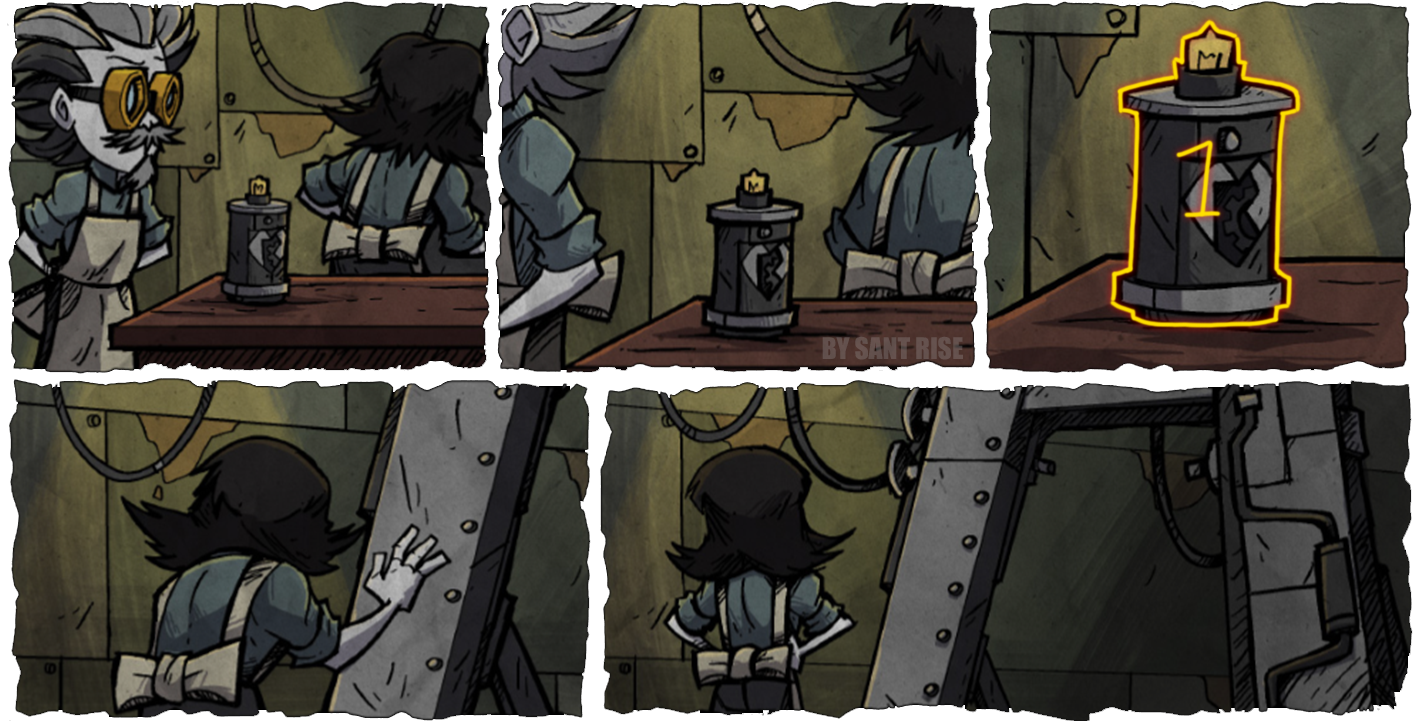 1.Device.
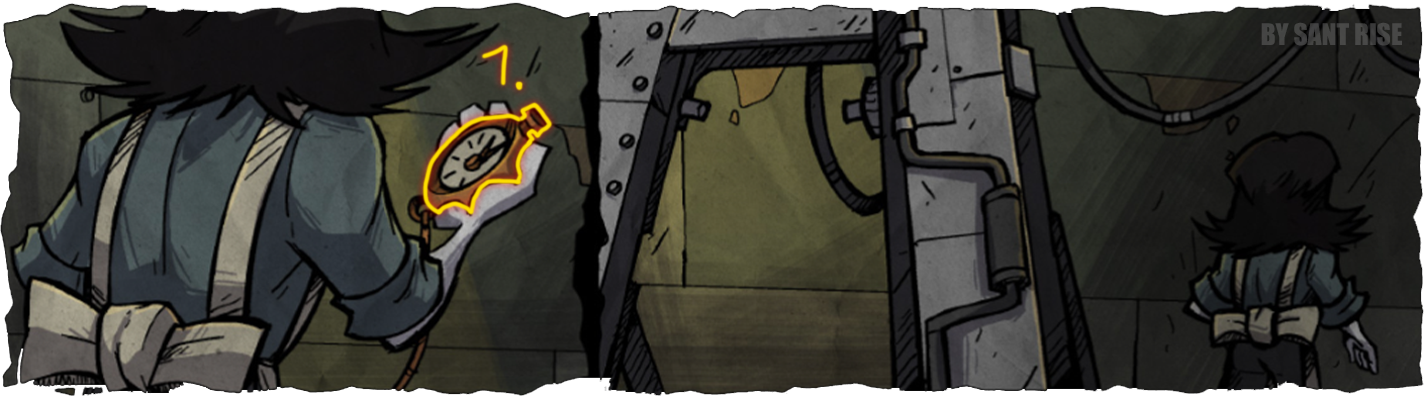 1.Clock.
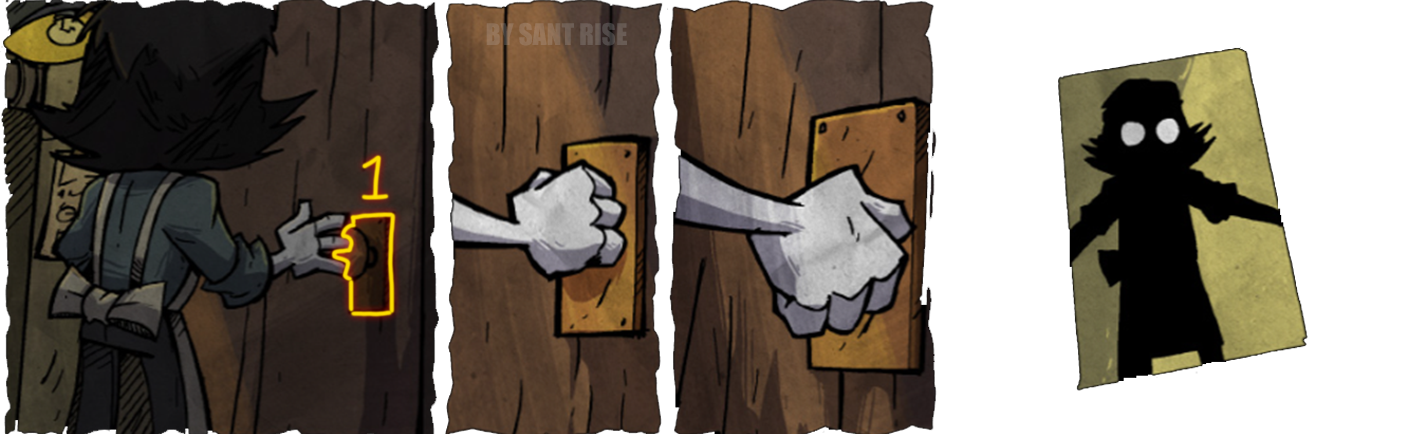 1.Door handle
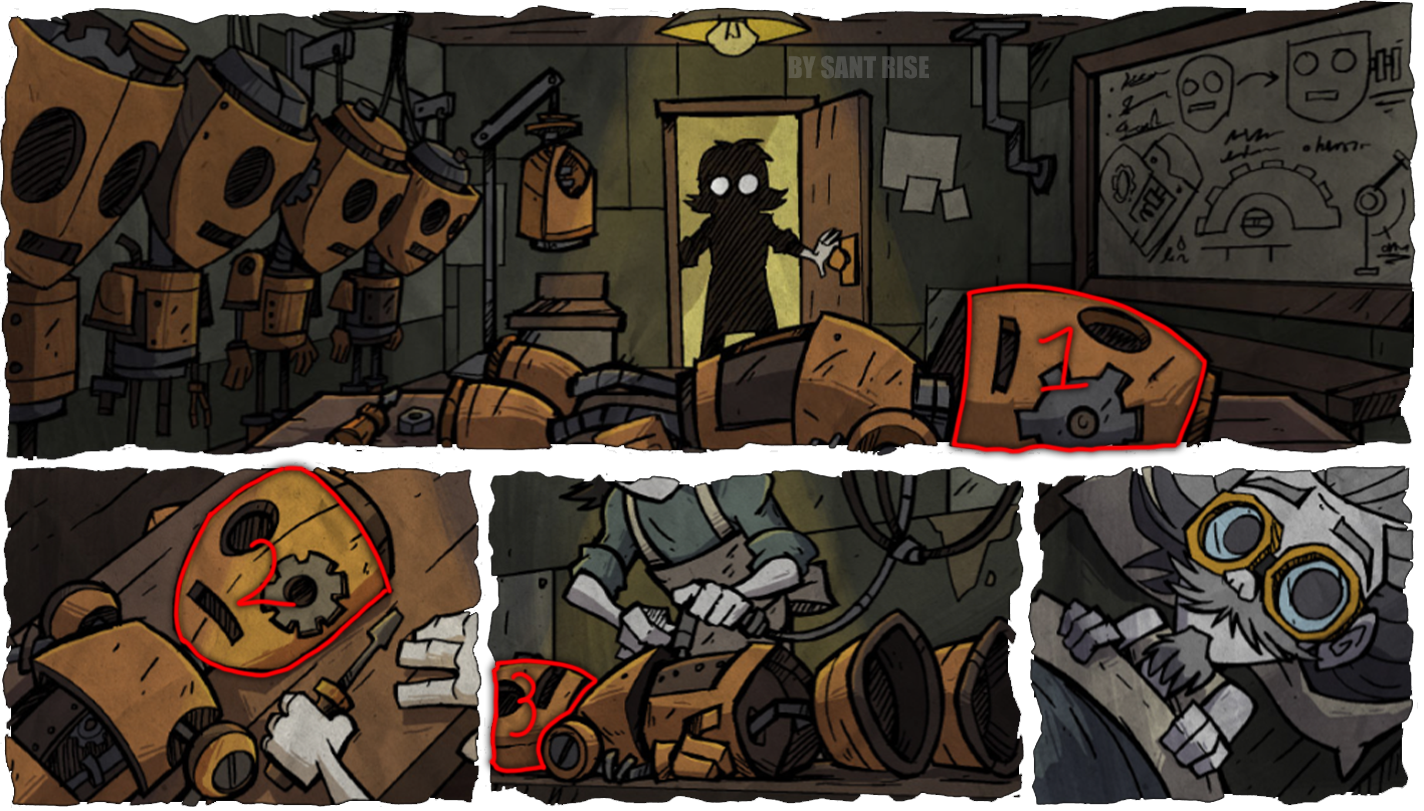 Click on the 3 robot heads in sequence
Robot Assembly (NEW!)
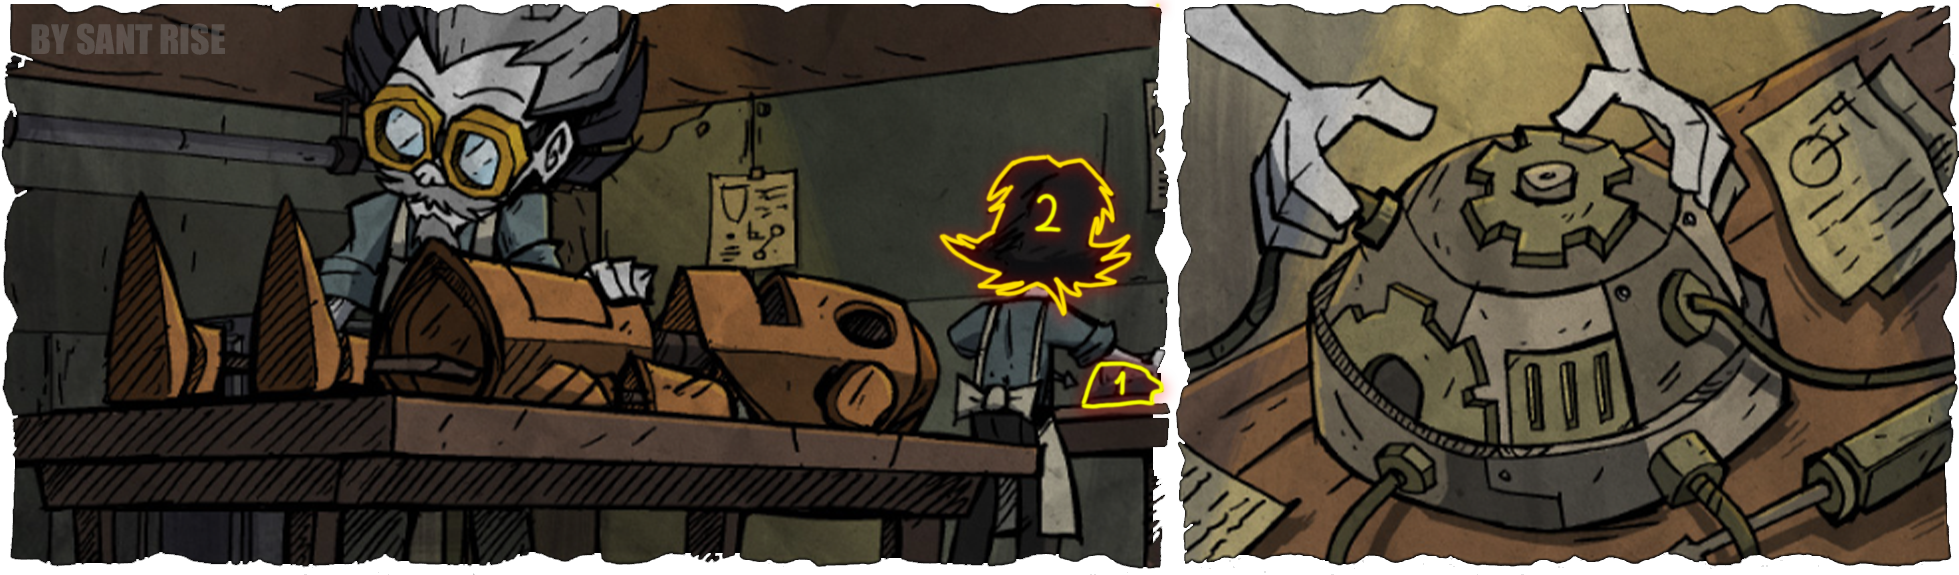
 Now you need to assemble the robot, but to do that, you have to find all the hidden parts.
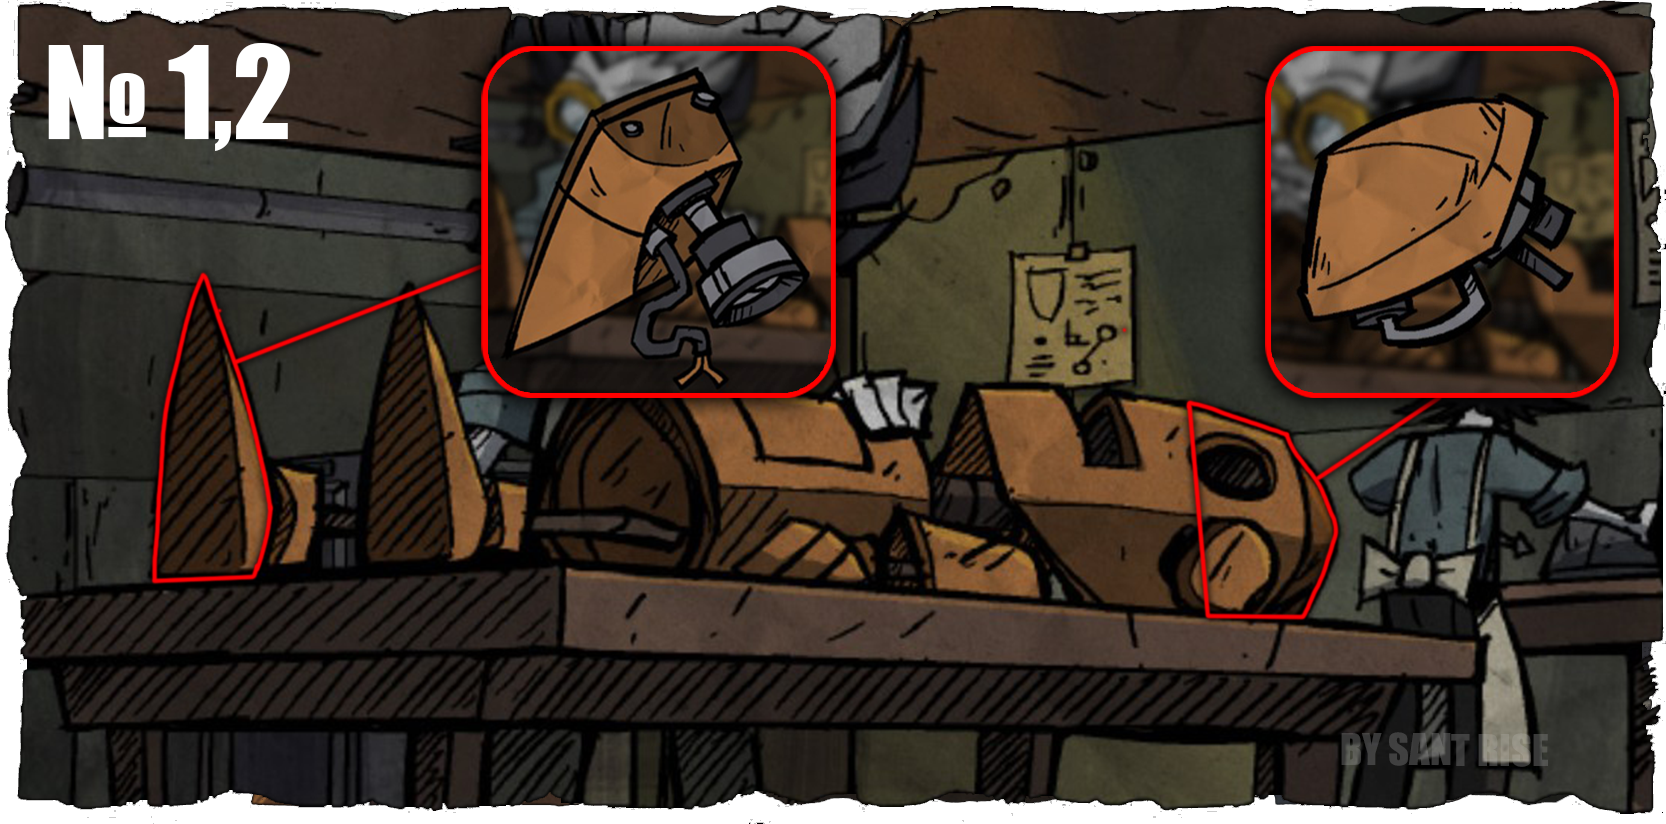
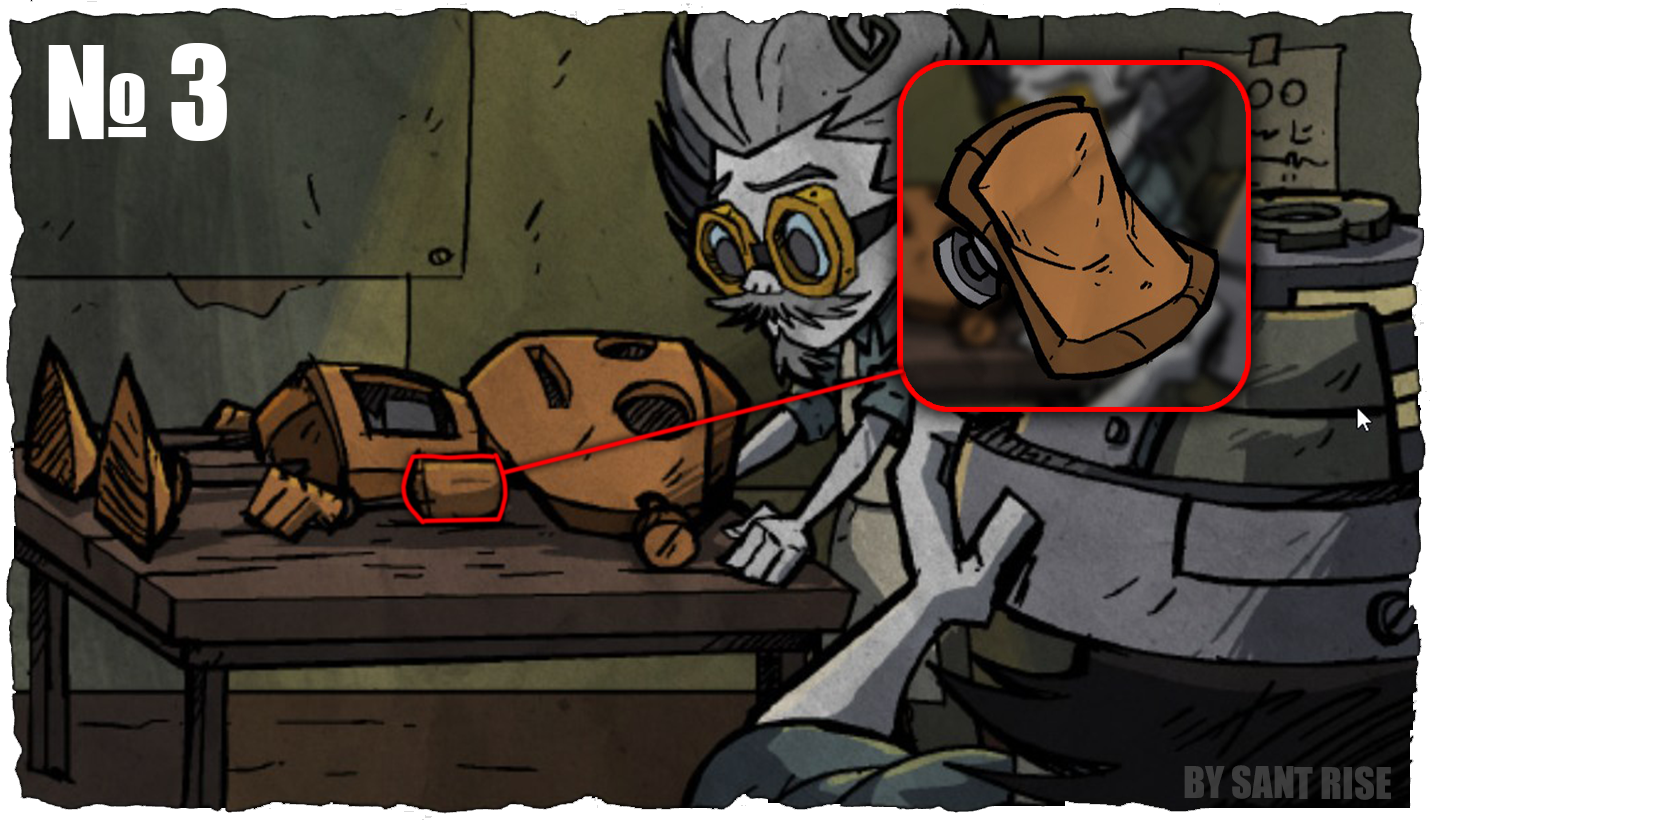
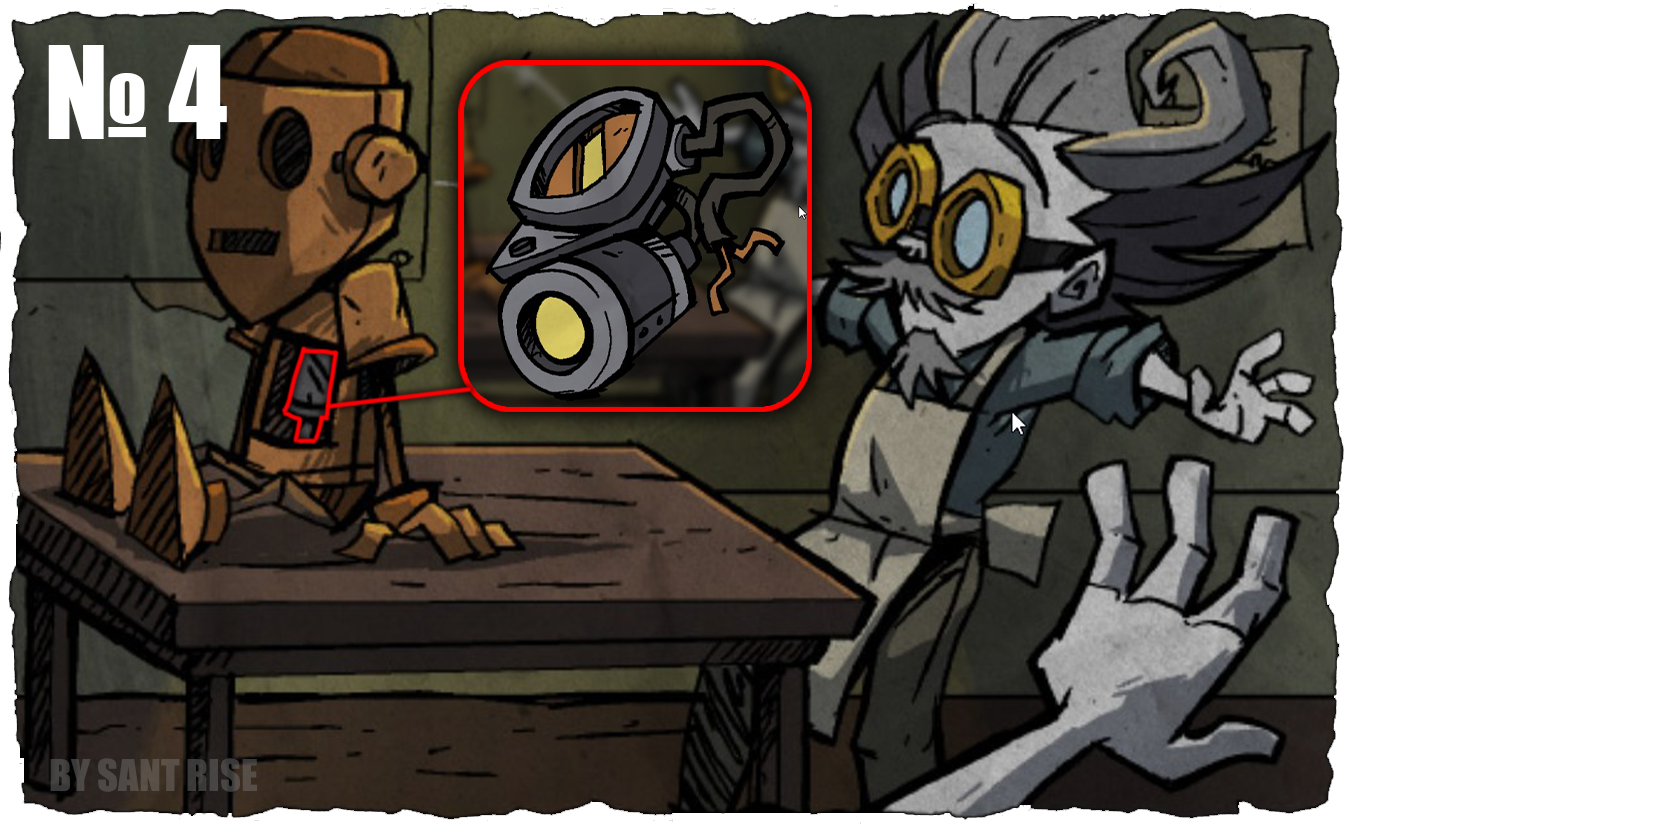
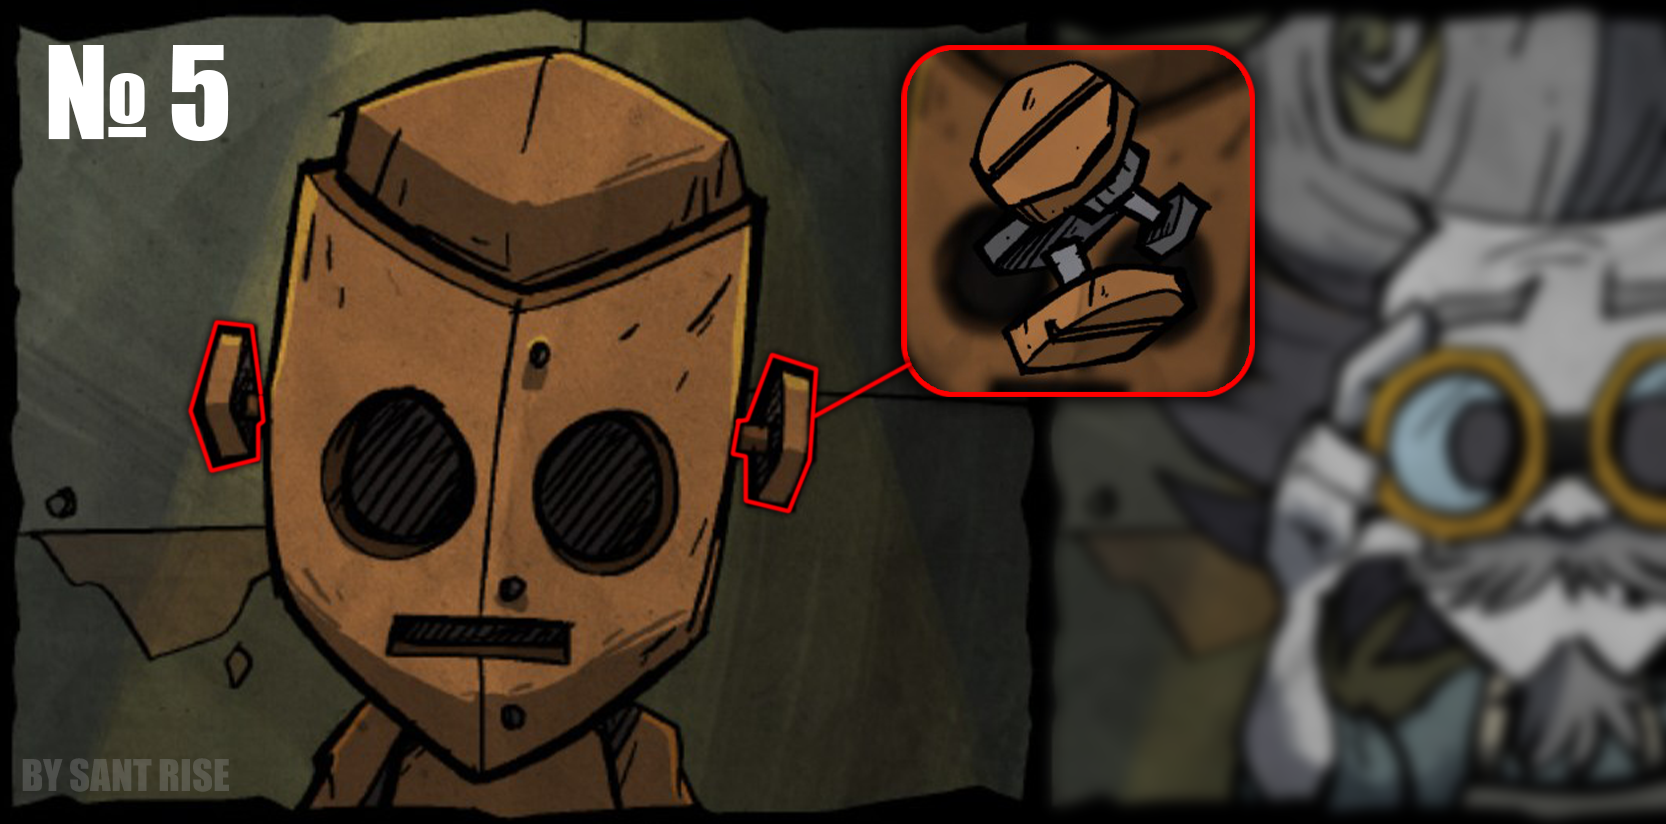
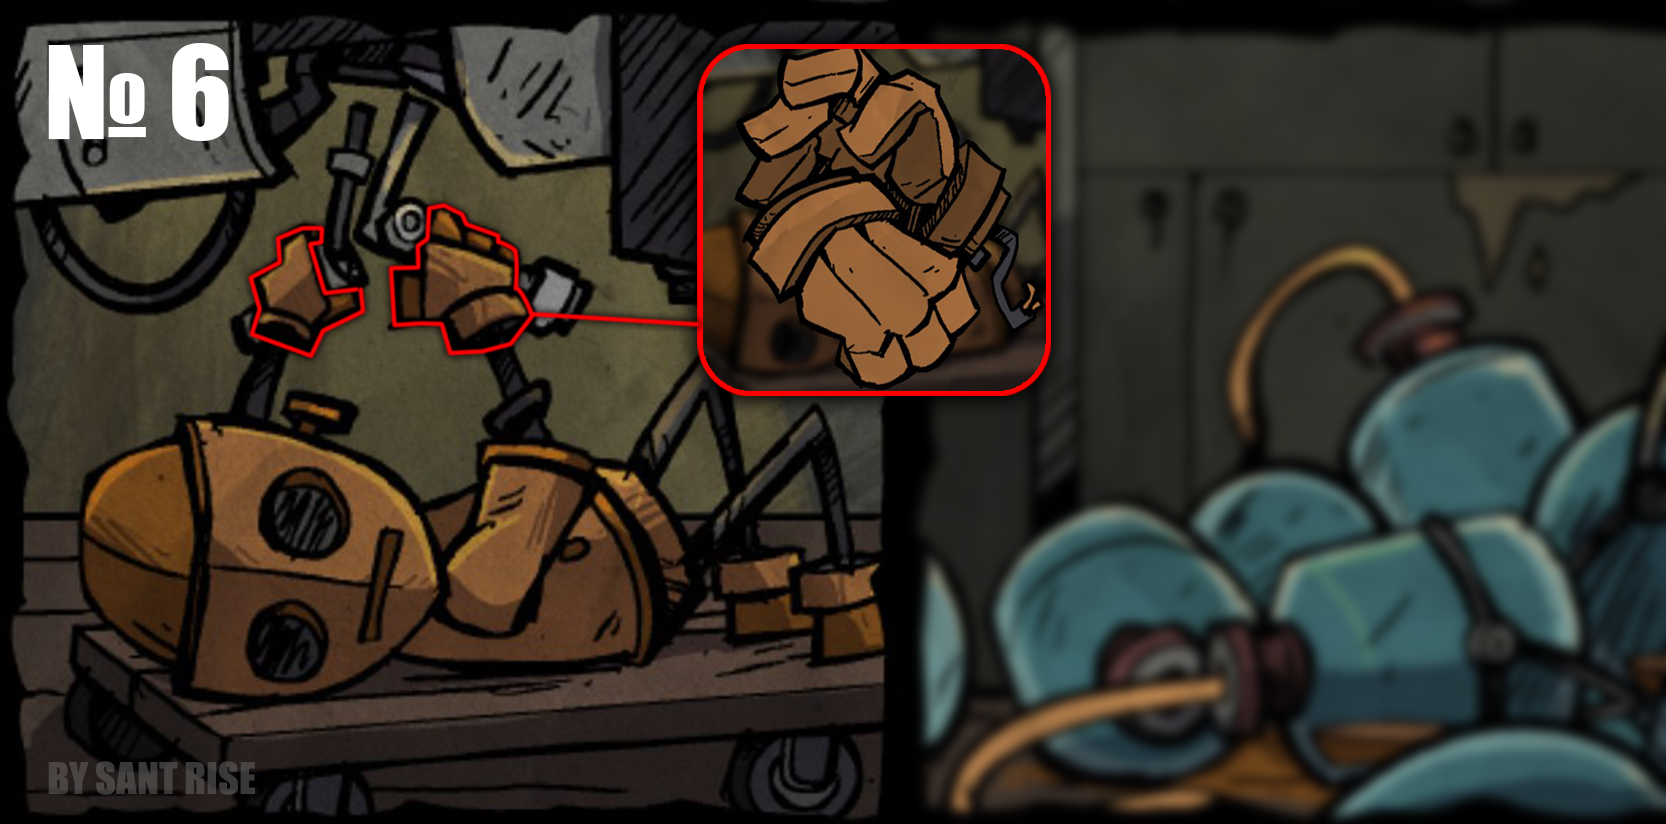
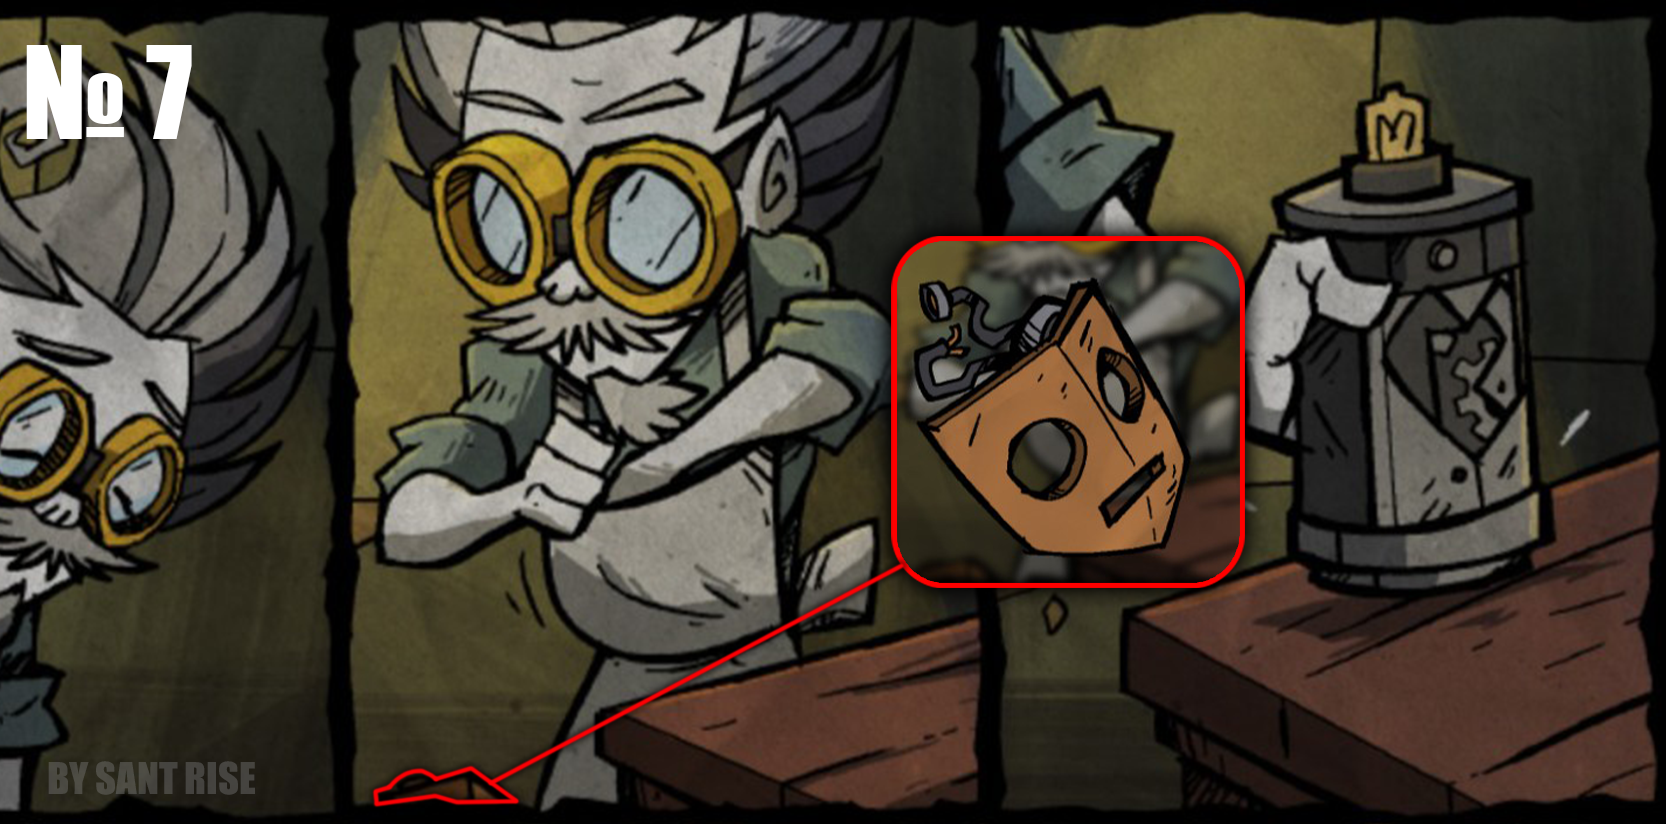
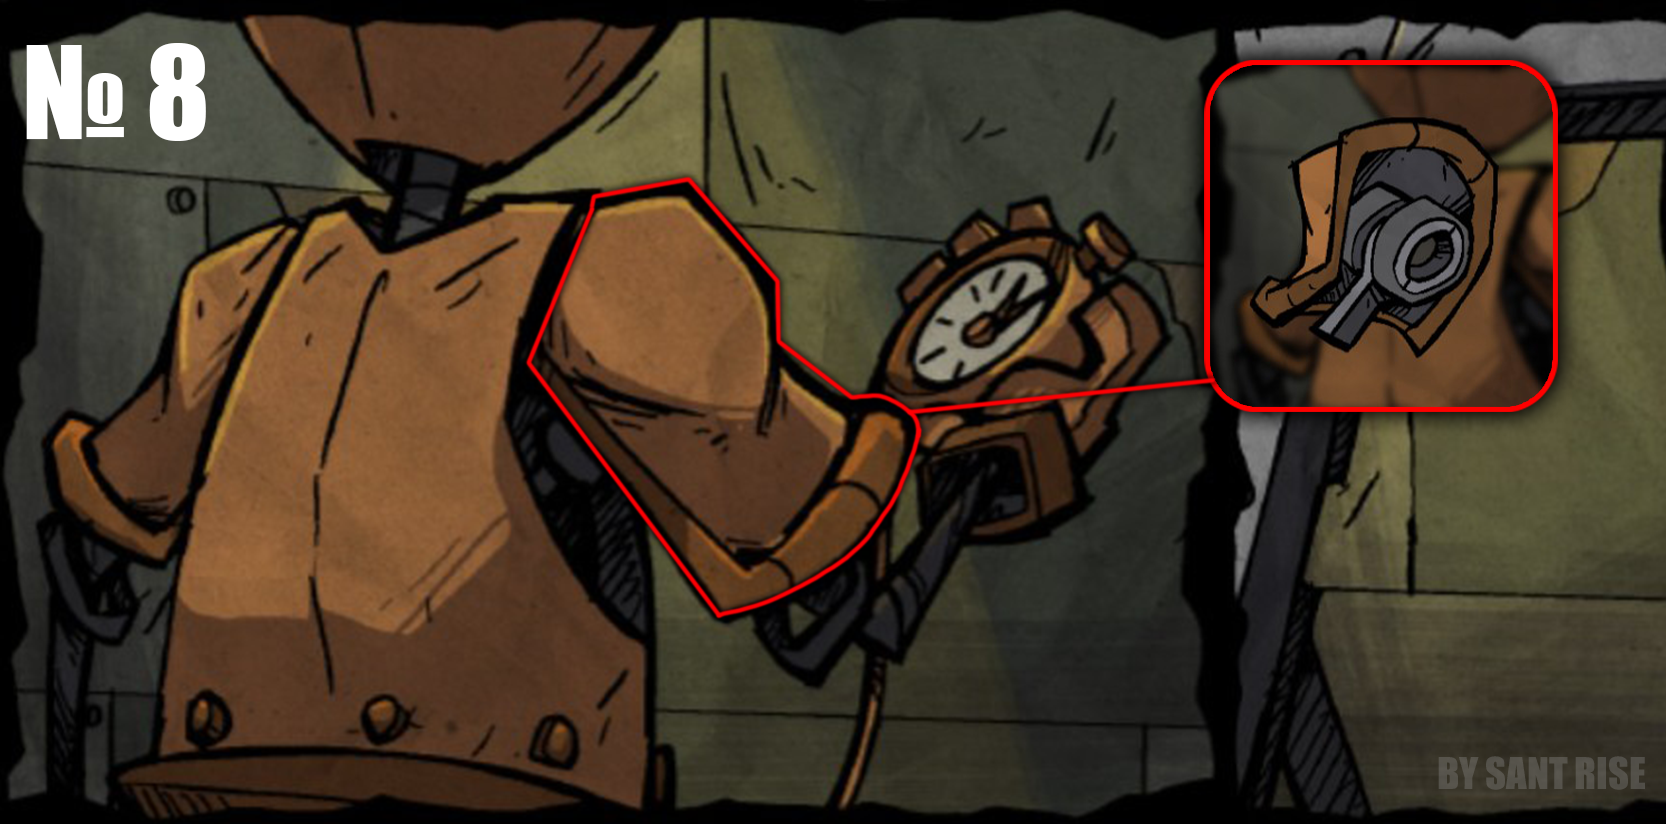
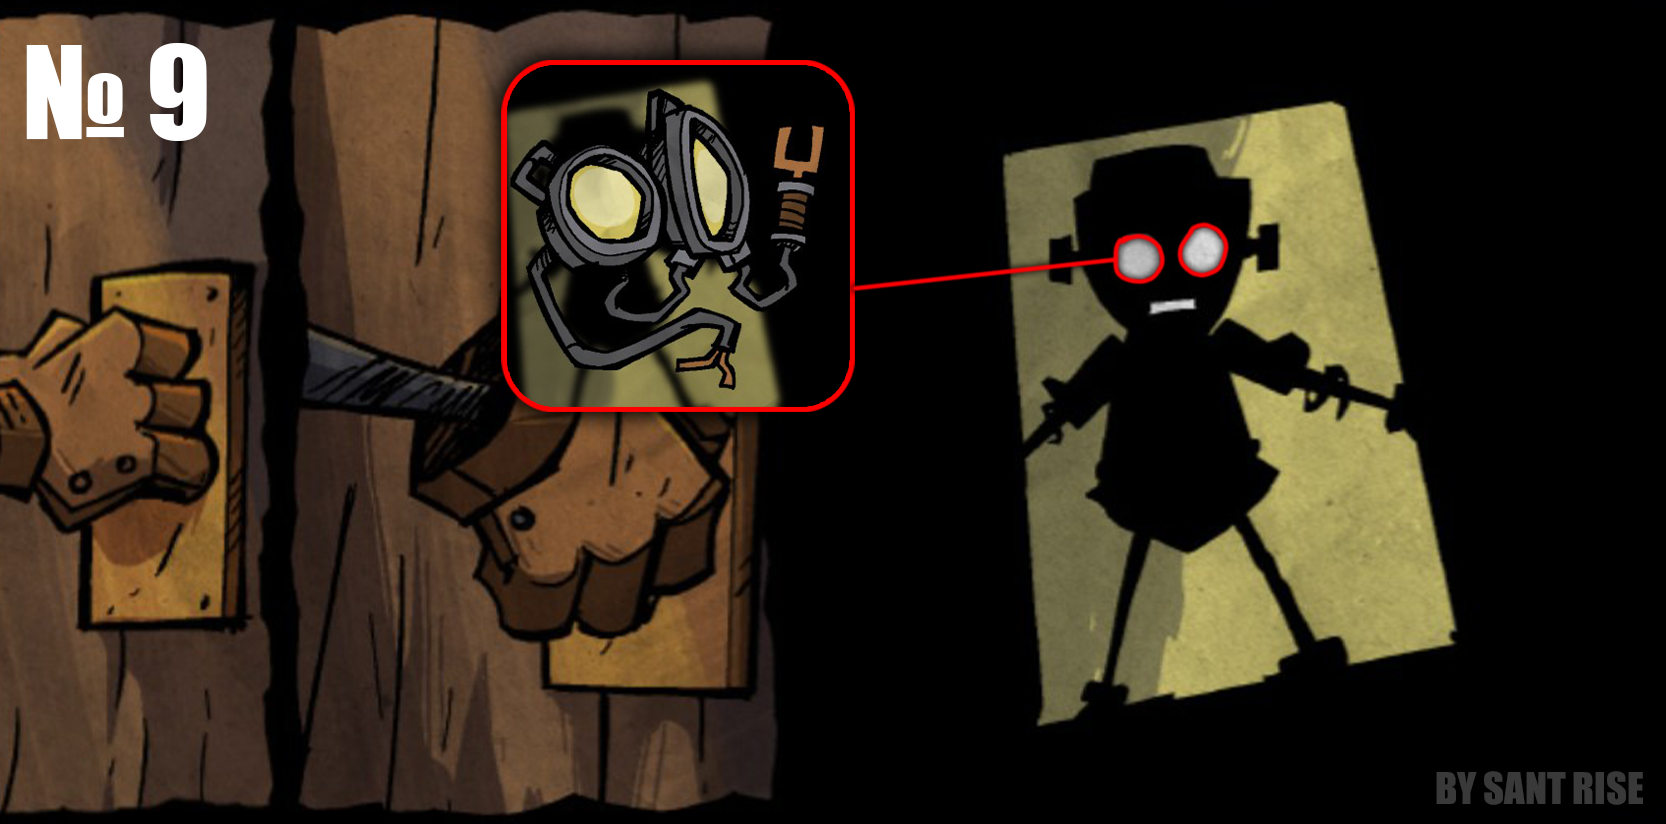
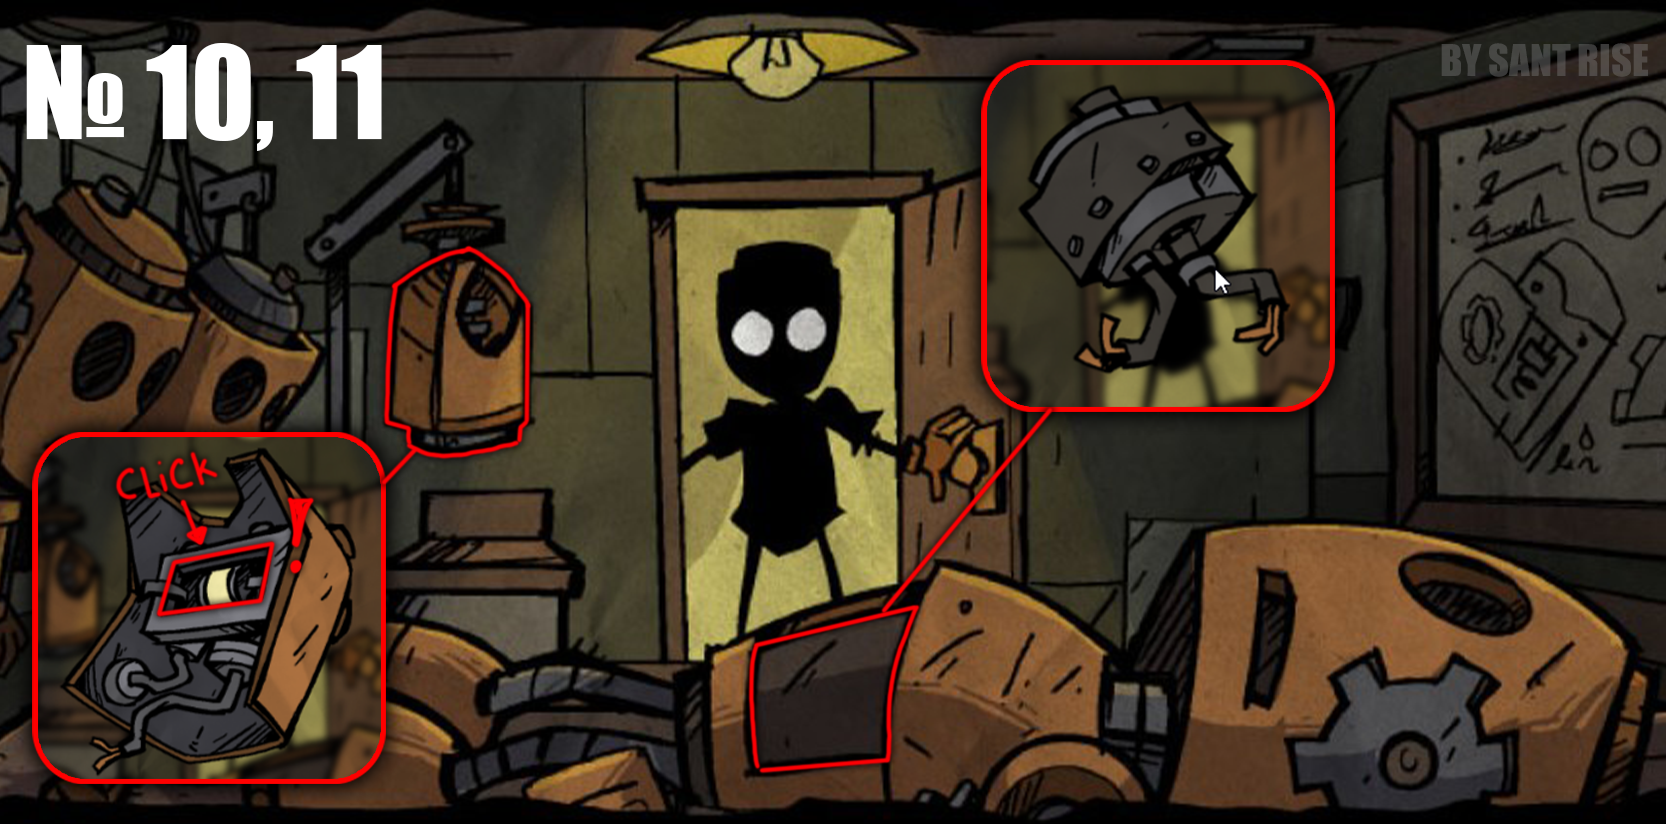
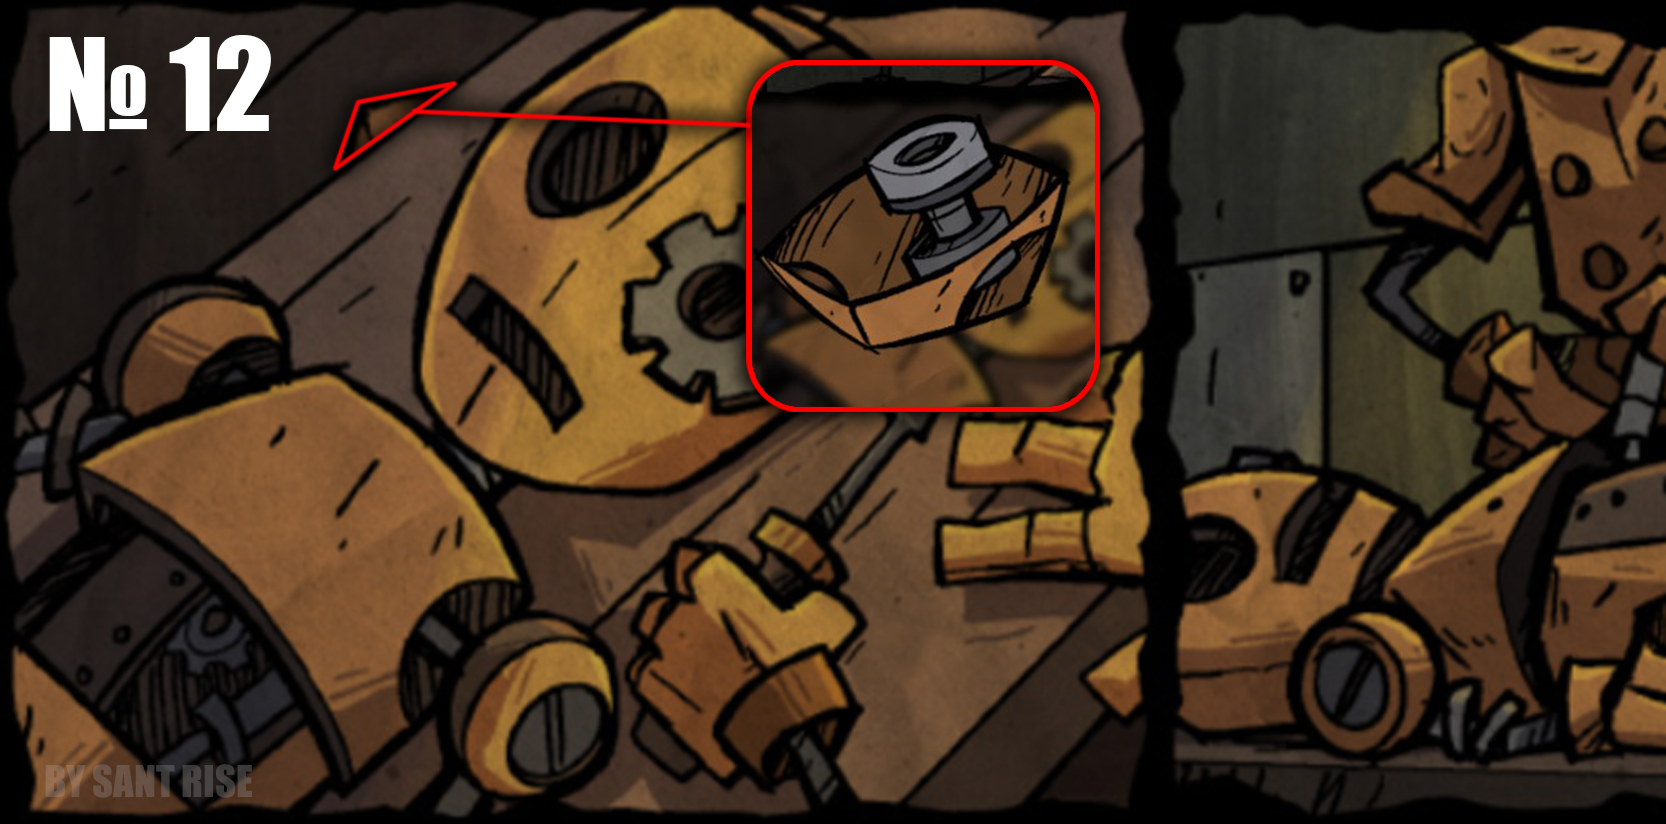
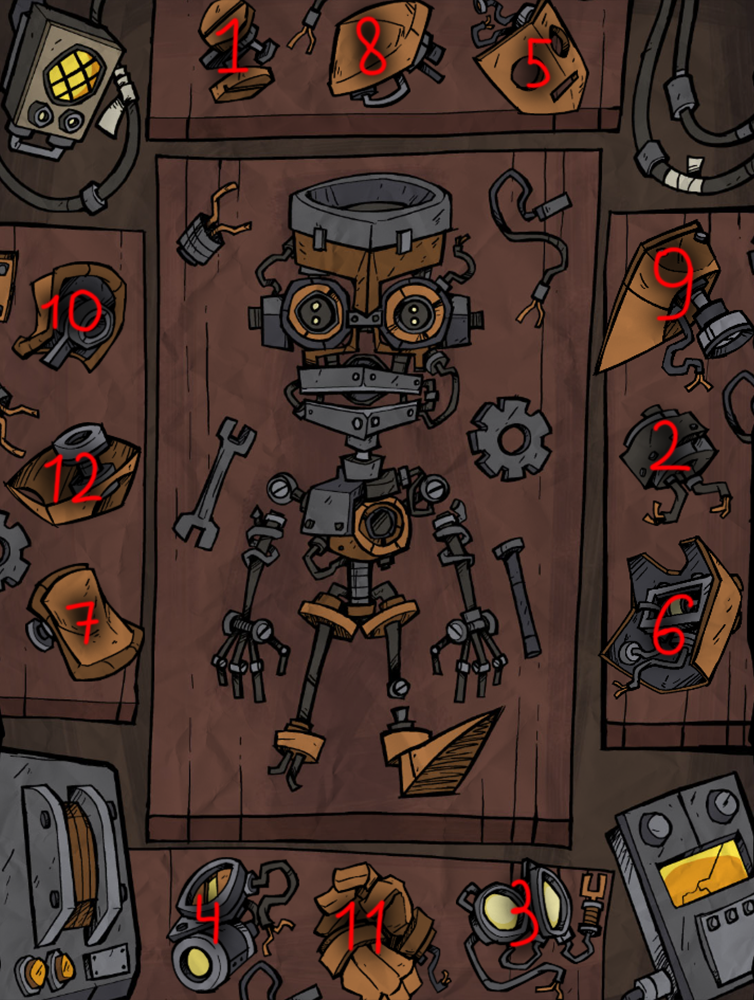 ❗If you've made a mistake and need to take the robot apart, just assemble it all the way through, and if something is wrong, it will take itself apart
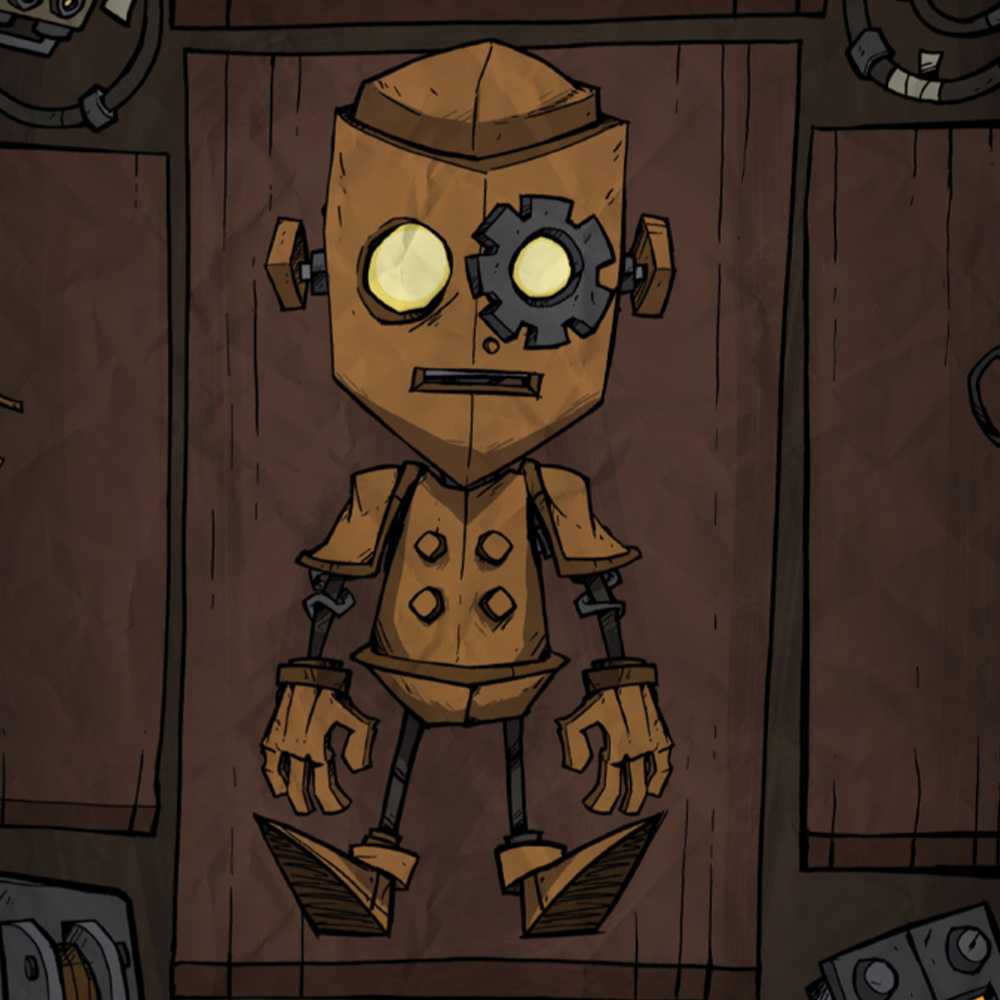
If you've done everything correctly, you'll see an image like this
Laboratory 2 (NEW!)
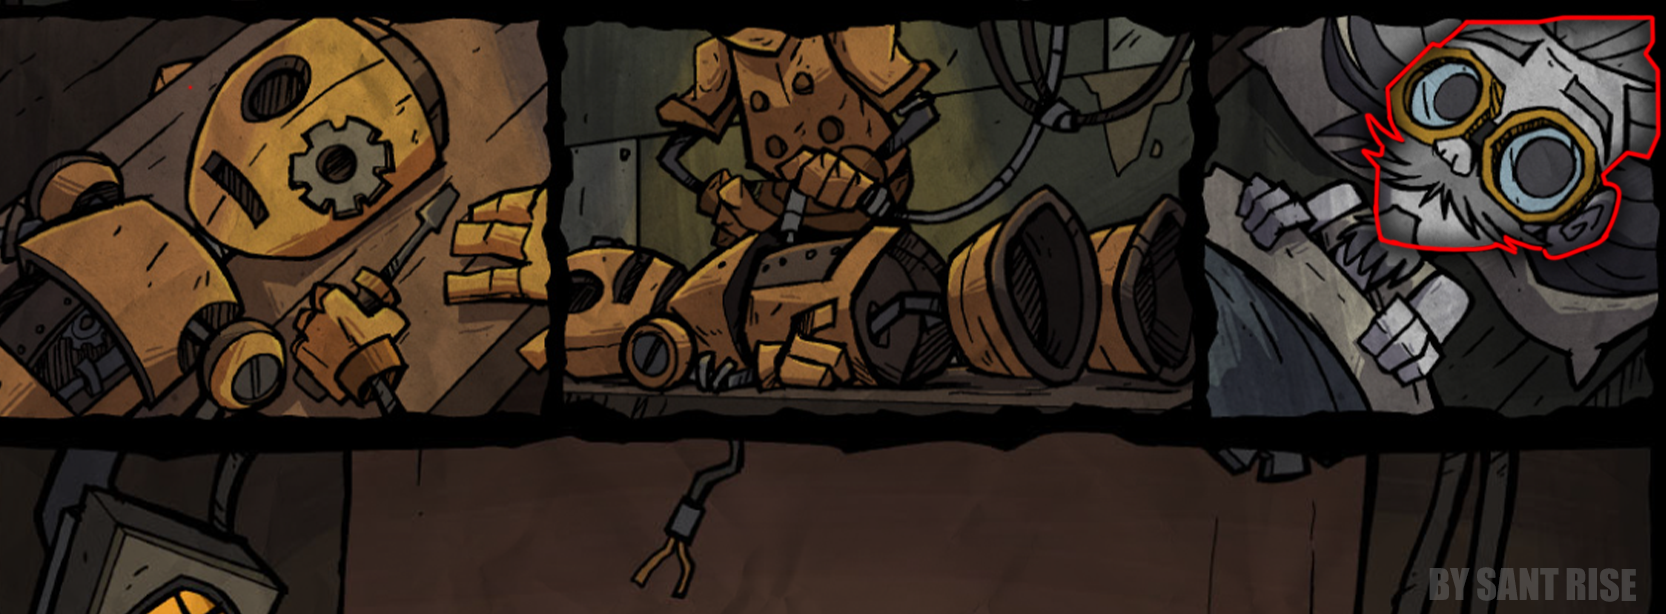 Just above the picture of the robot, click on Wakstaff lying in bed
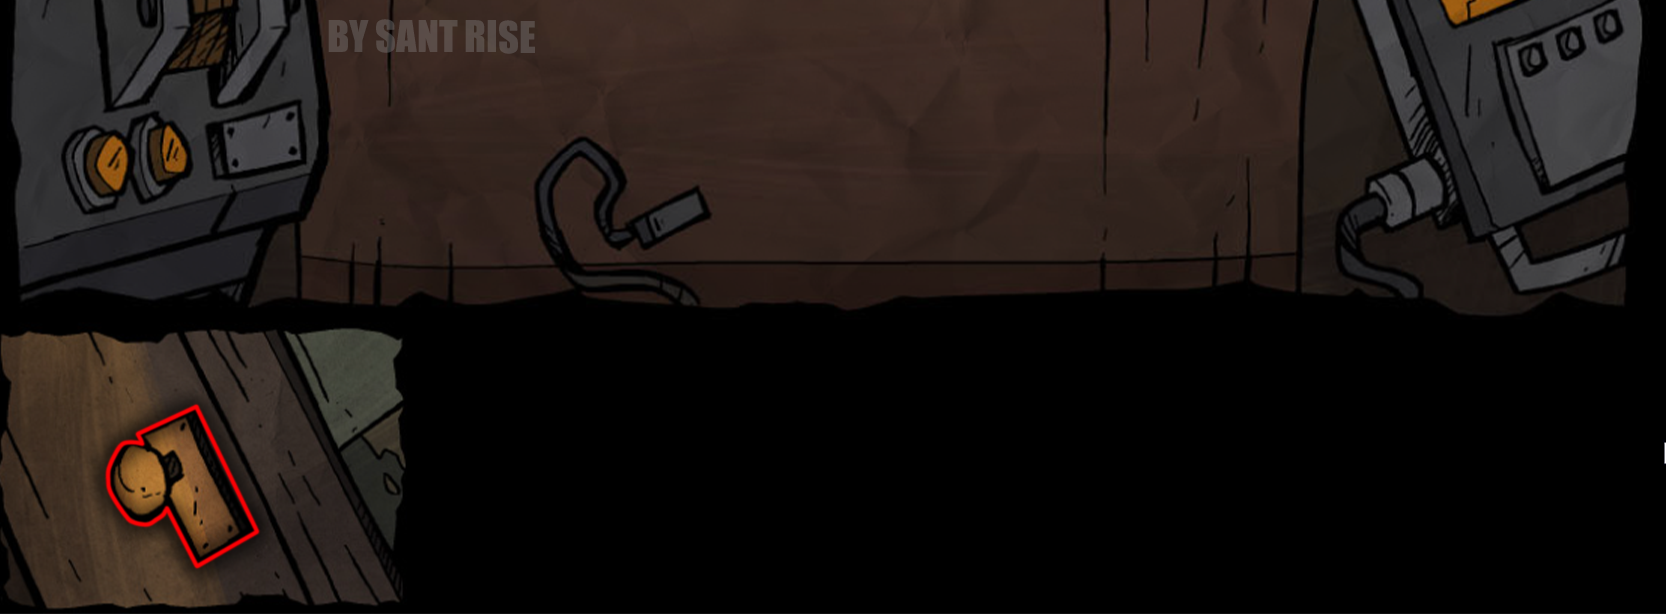 Click on the doorknob below the image of the robot
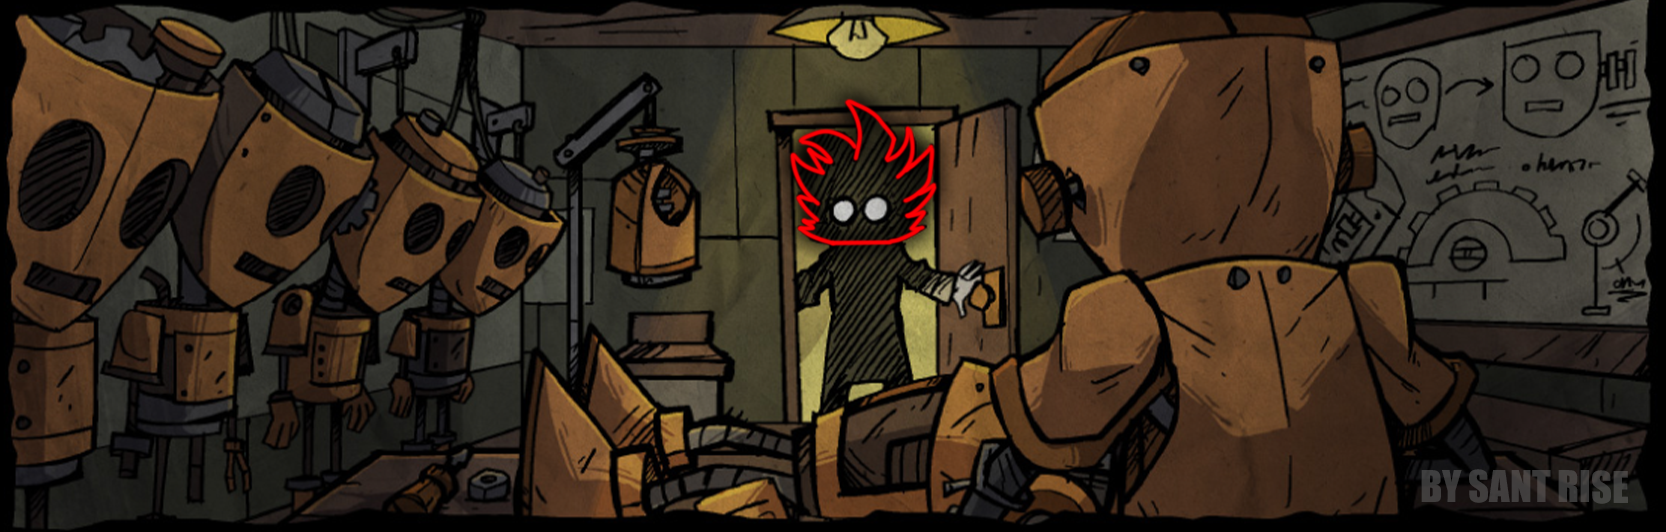 Click on the silhouette's head in the doorway
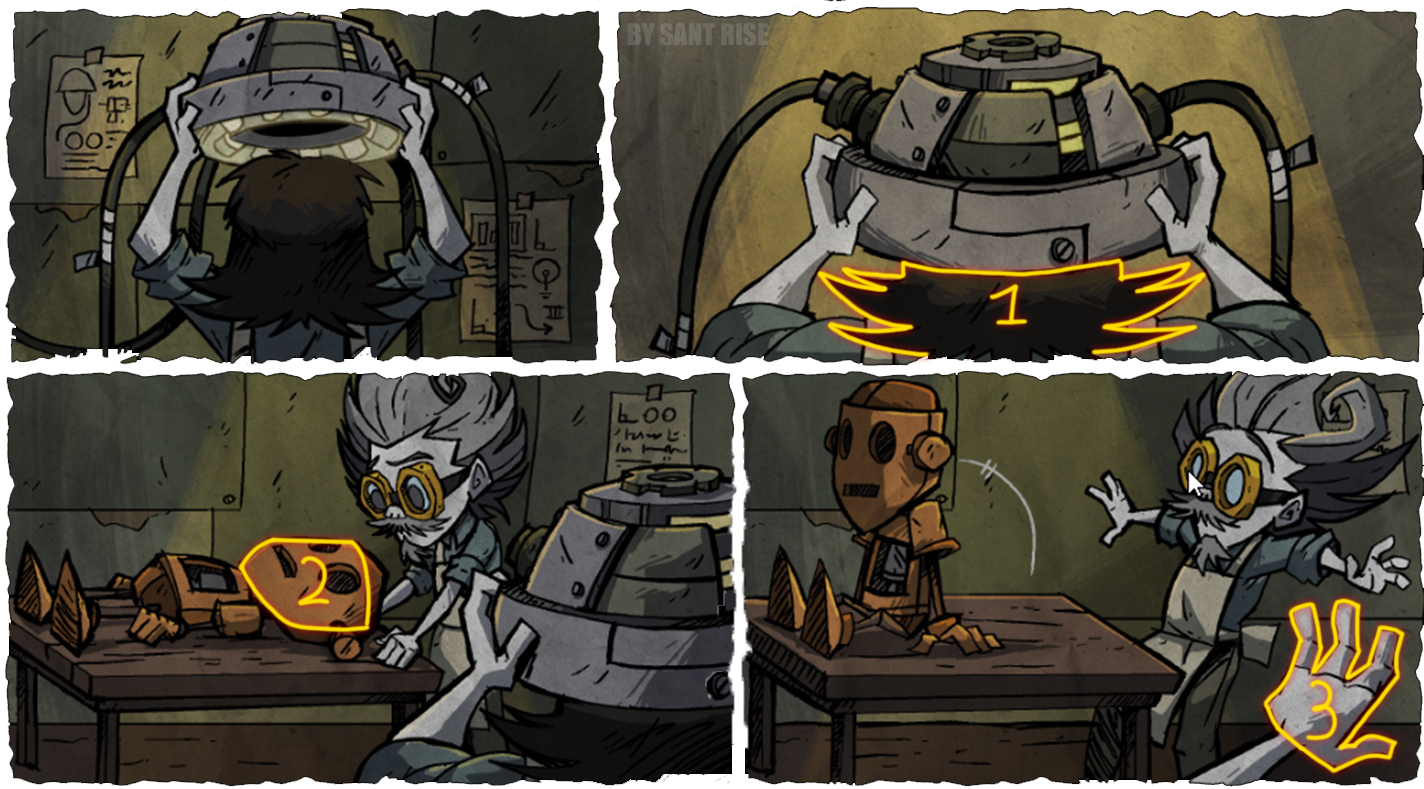
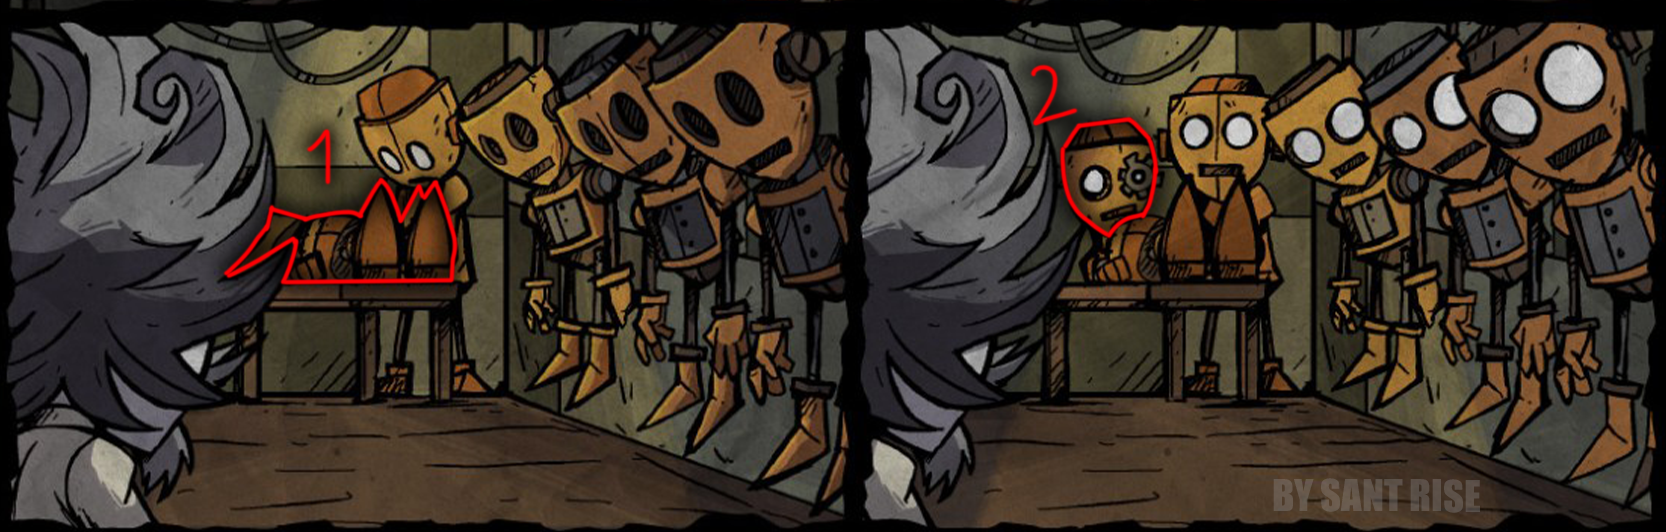 1. Click on the robot's body
- Click on the robot's head
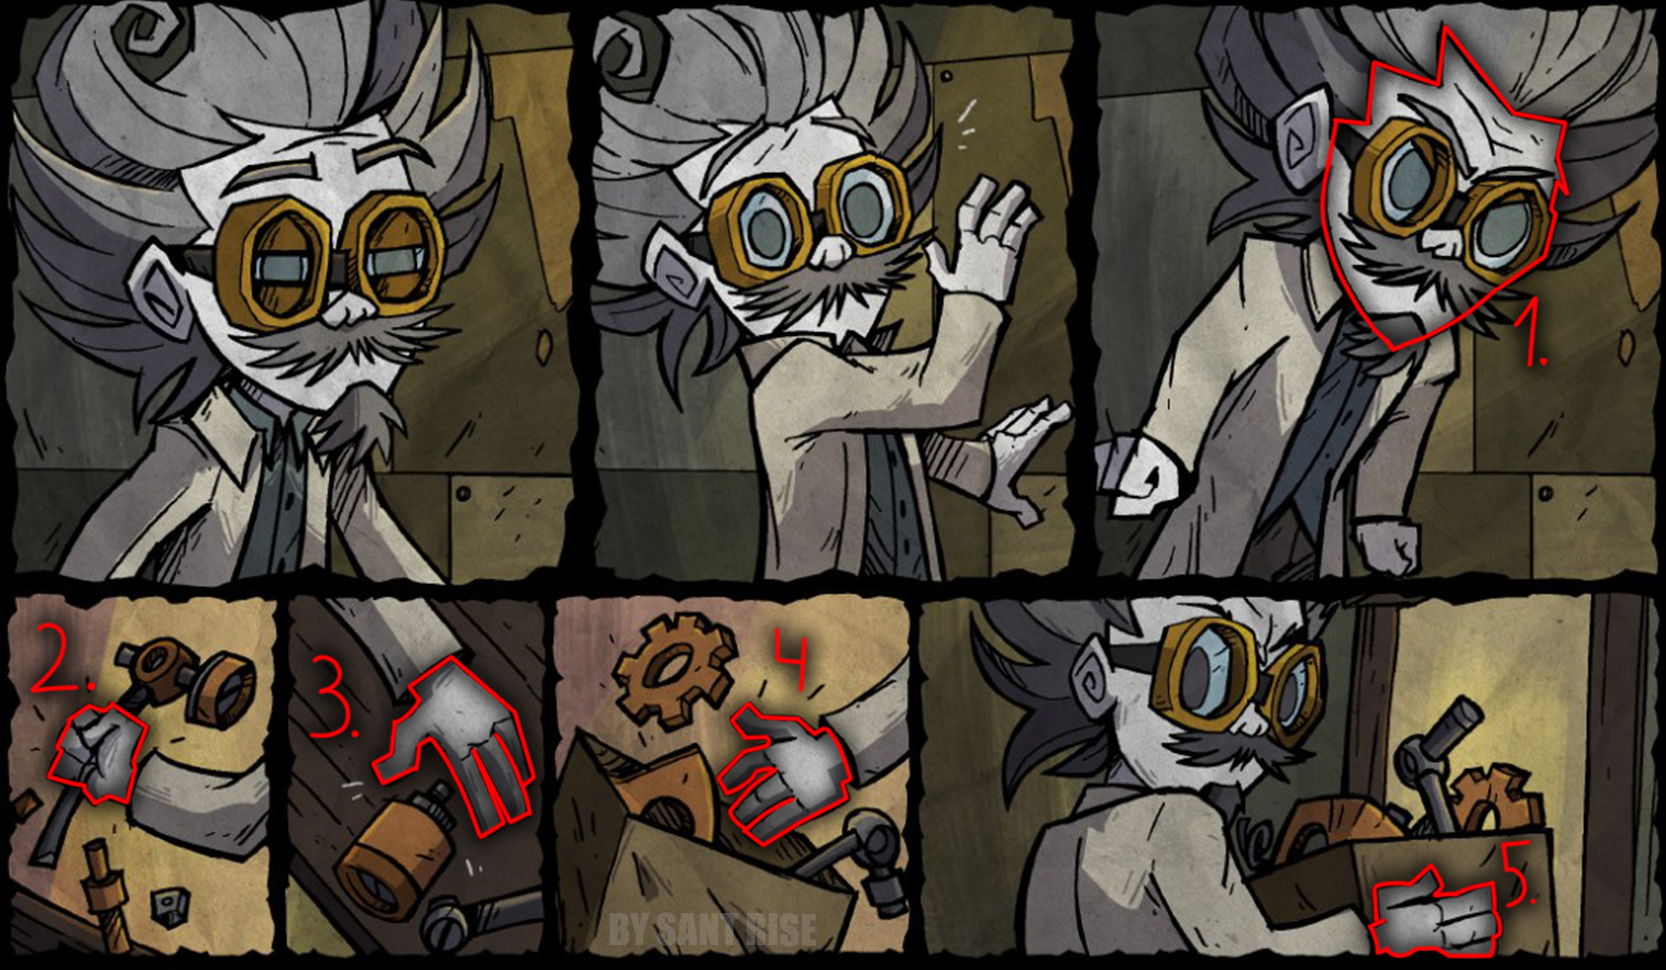 Click first on the evil Wackstaff's head, and then on his four arms
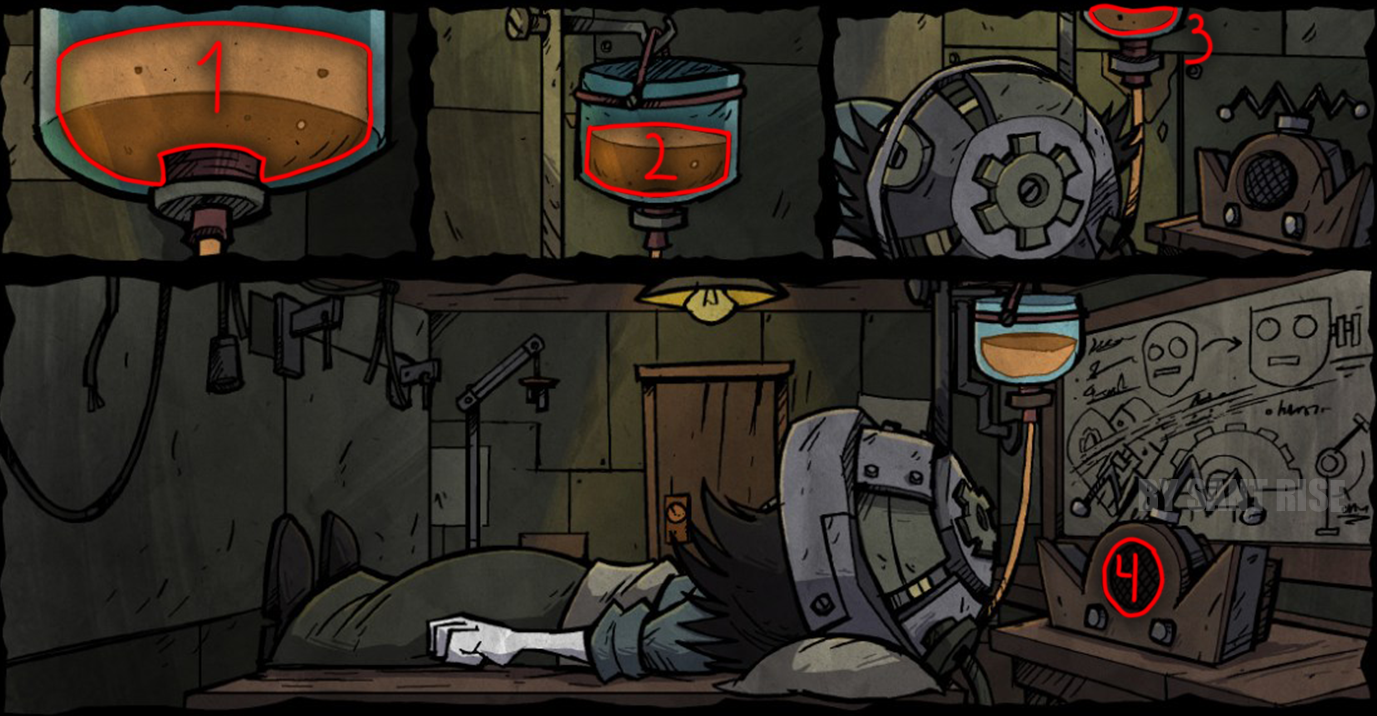 Click sequentially on the liquids in the flasks and on the round mesh in the radio
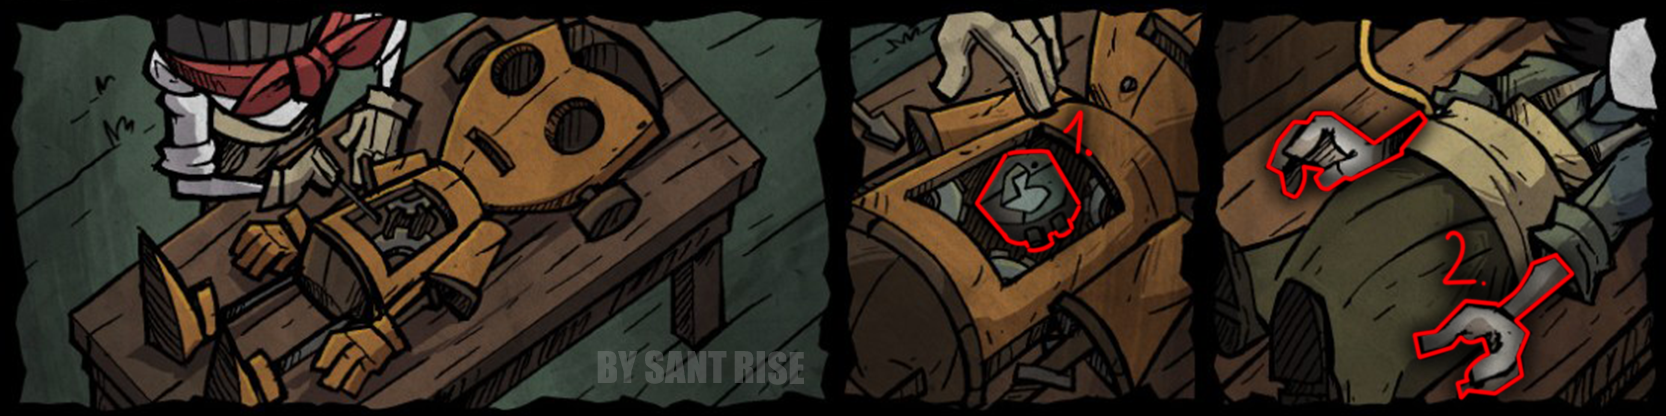 Click on the robot's heart, then on hand
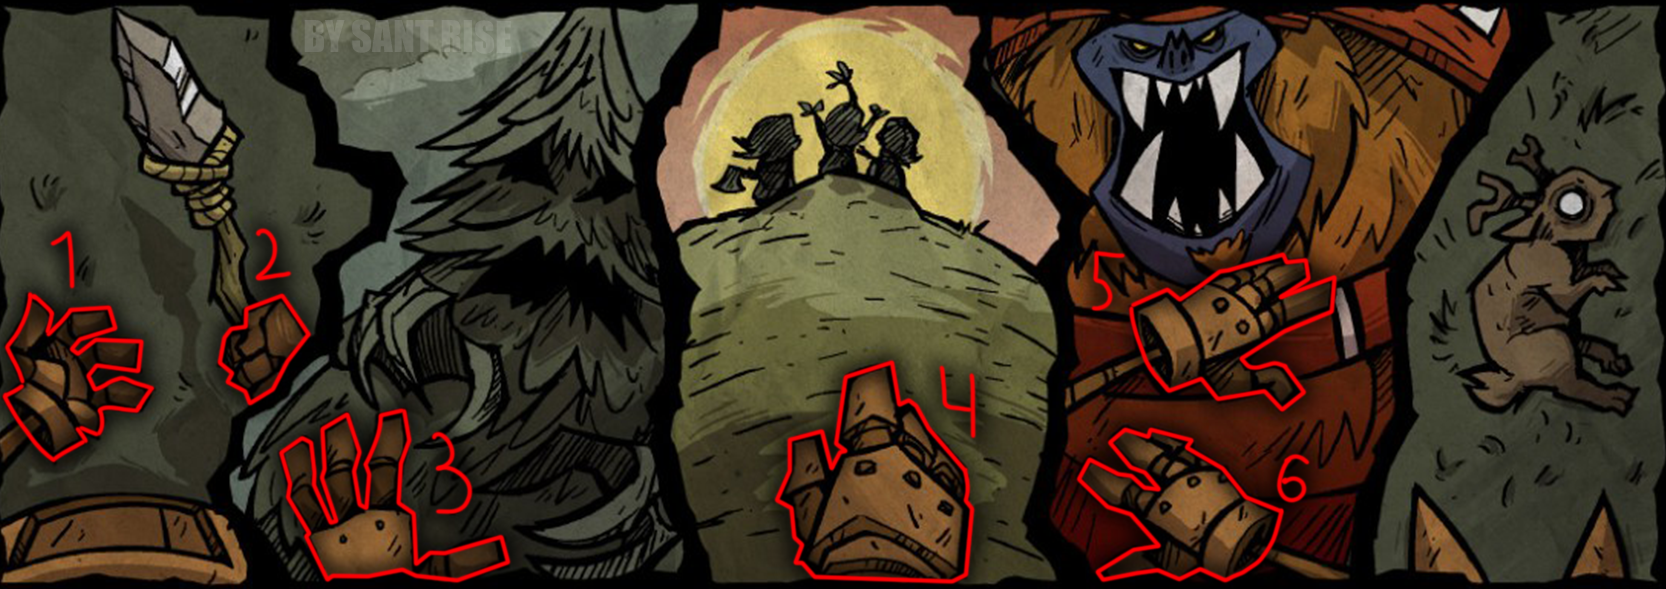 Click on all the hands in the picture
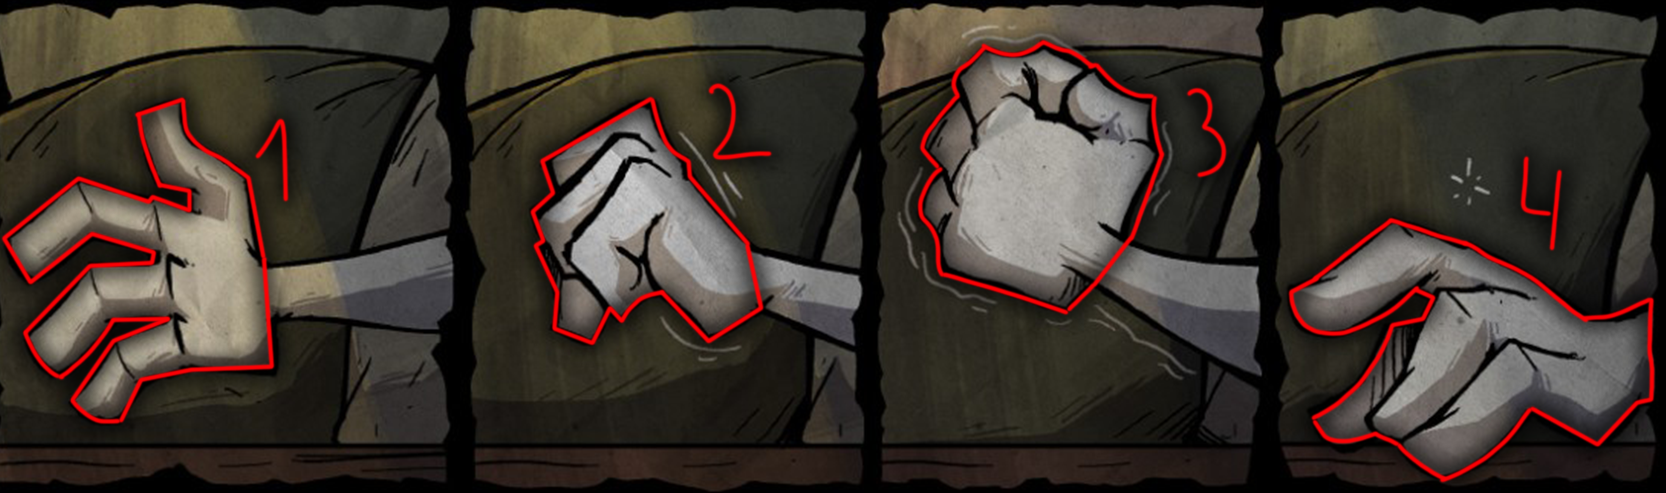 Press your hands one after the other
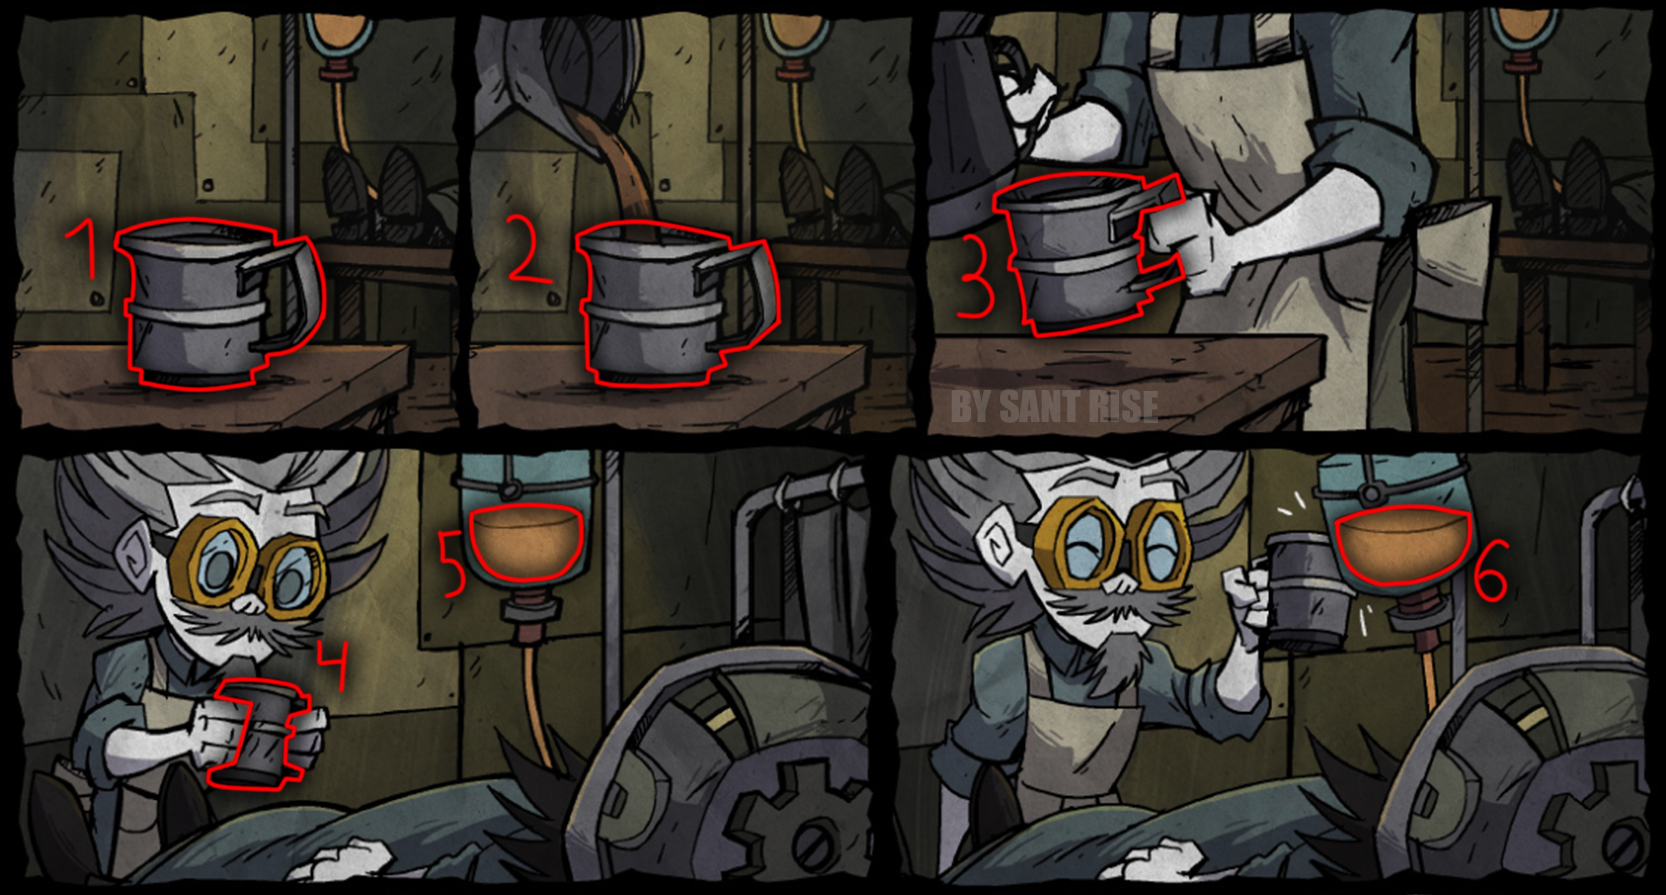 Click on all the items in the picture, one by one
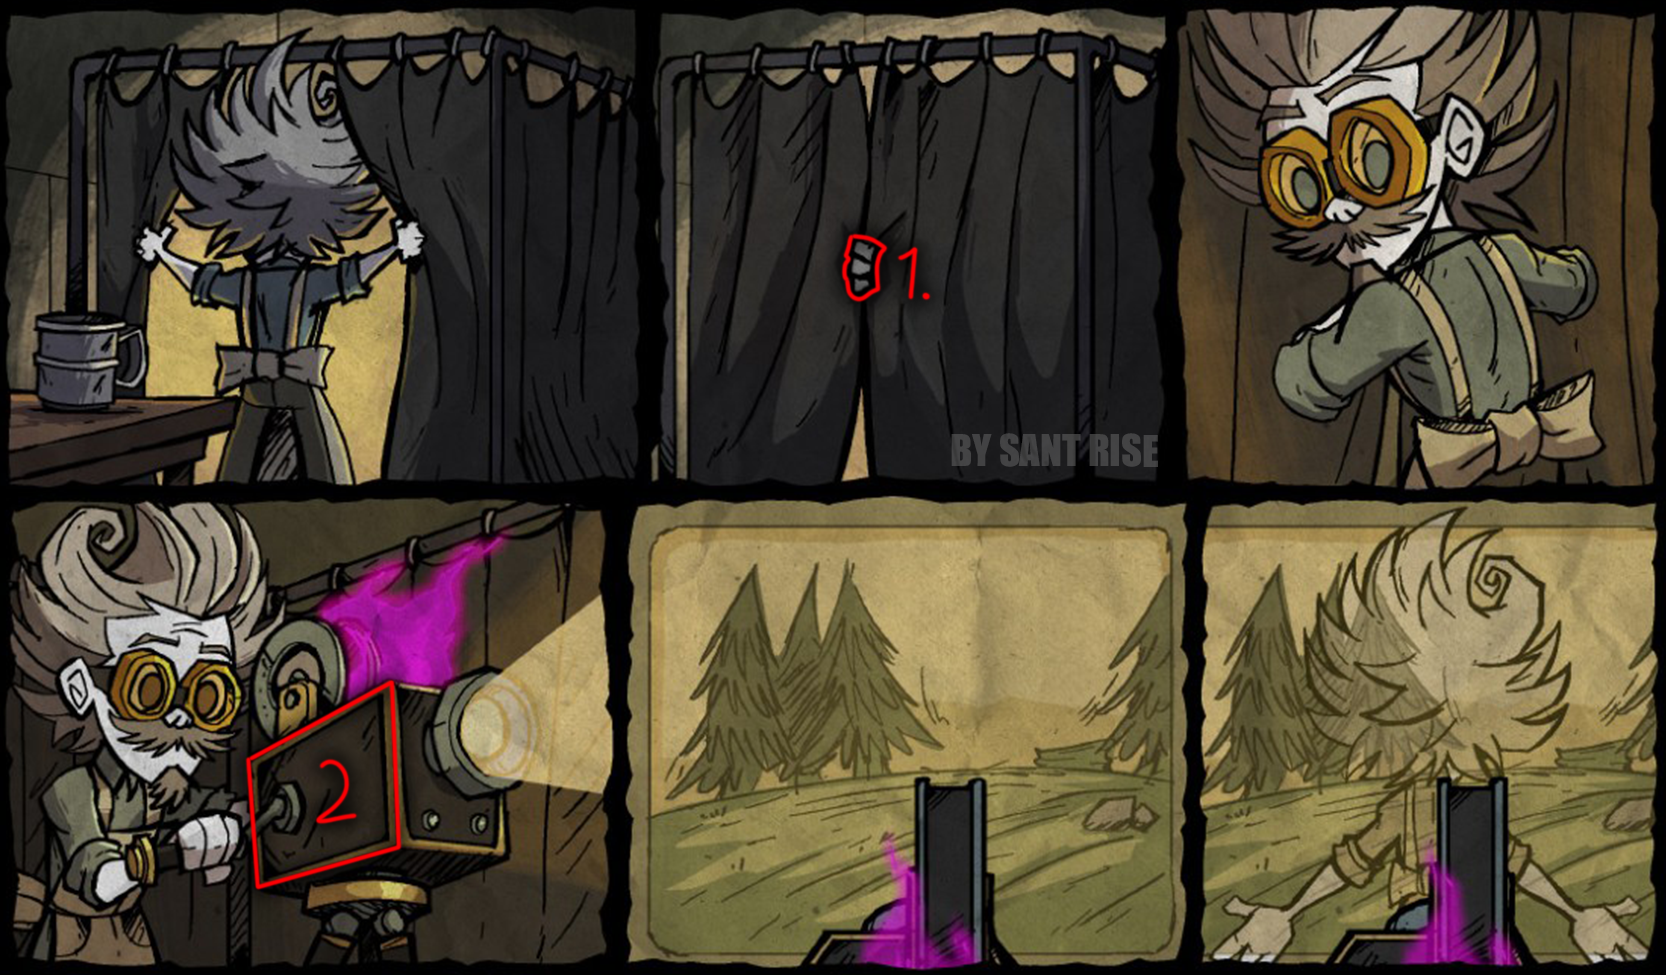 Tap the protruding fingers of Wackstaff, then tap the projector
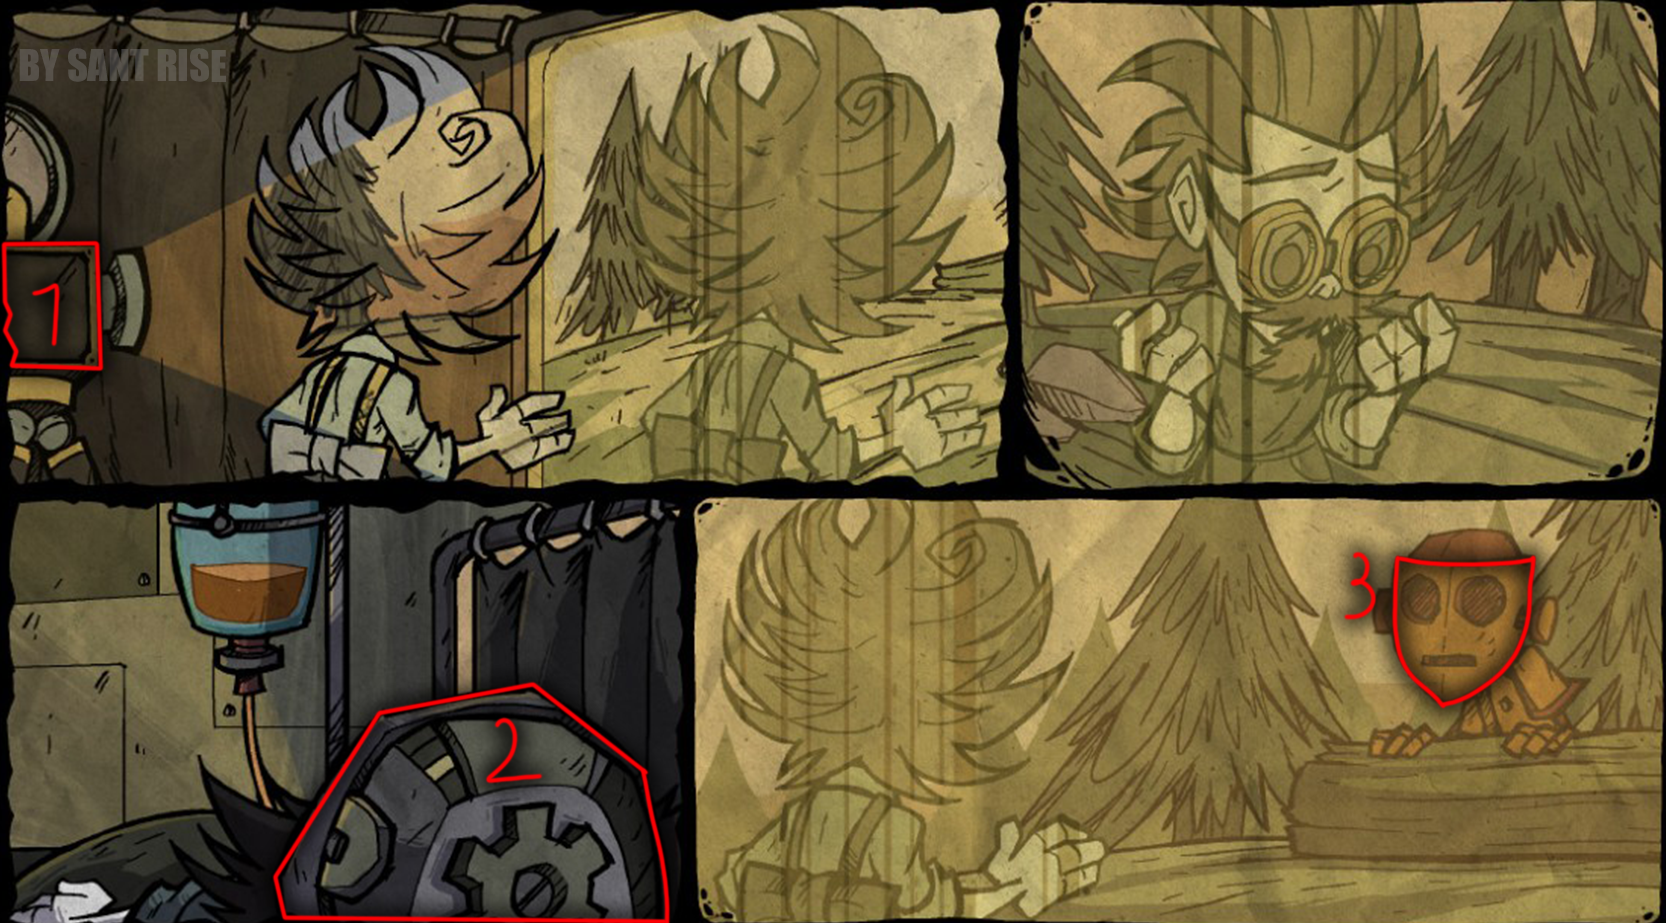 Click on the projector, then on the WX helmet and the robot's head
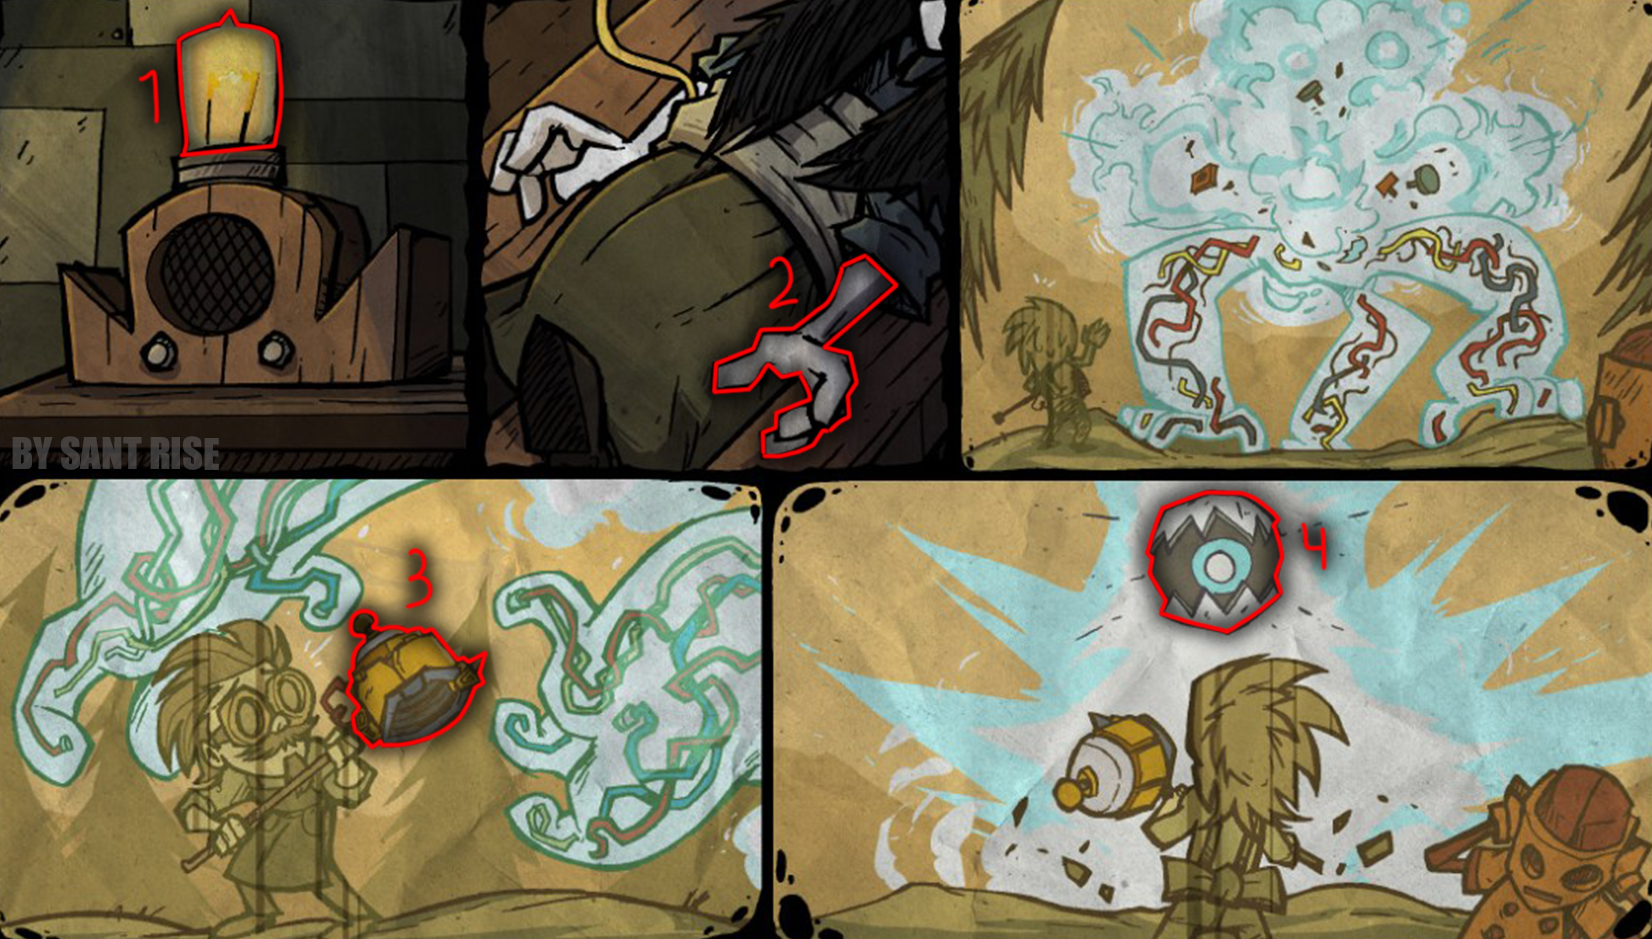 Click on all the items as shown in the picture
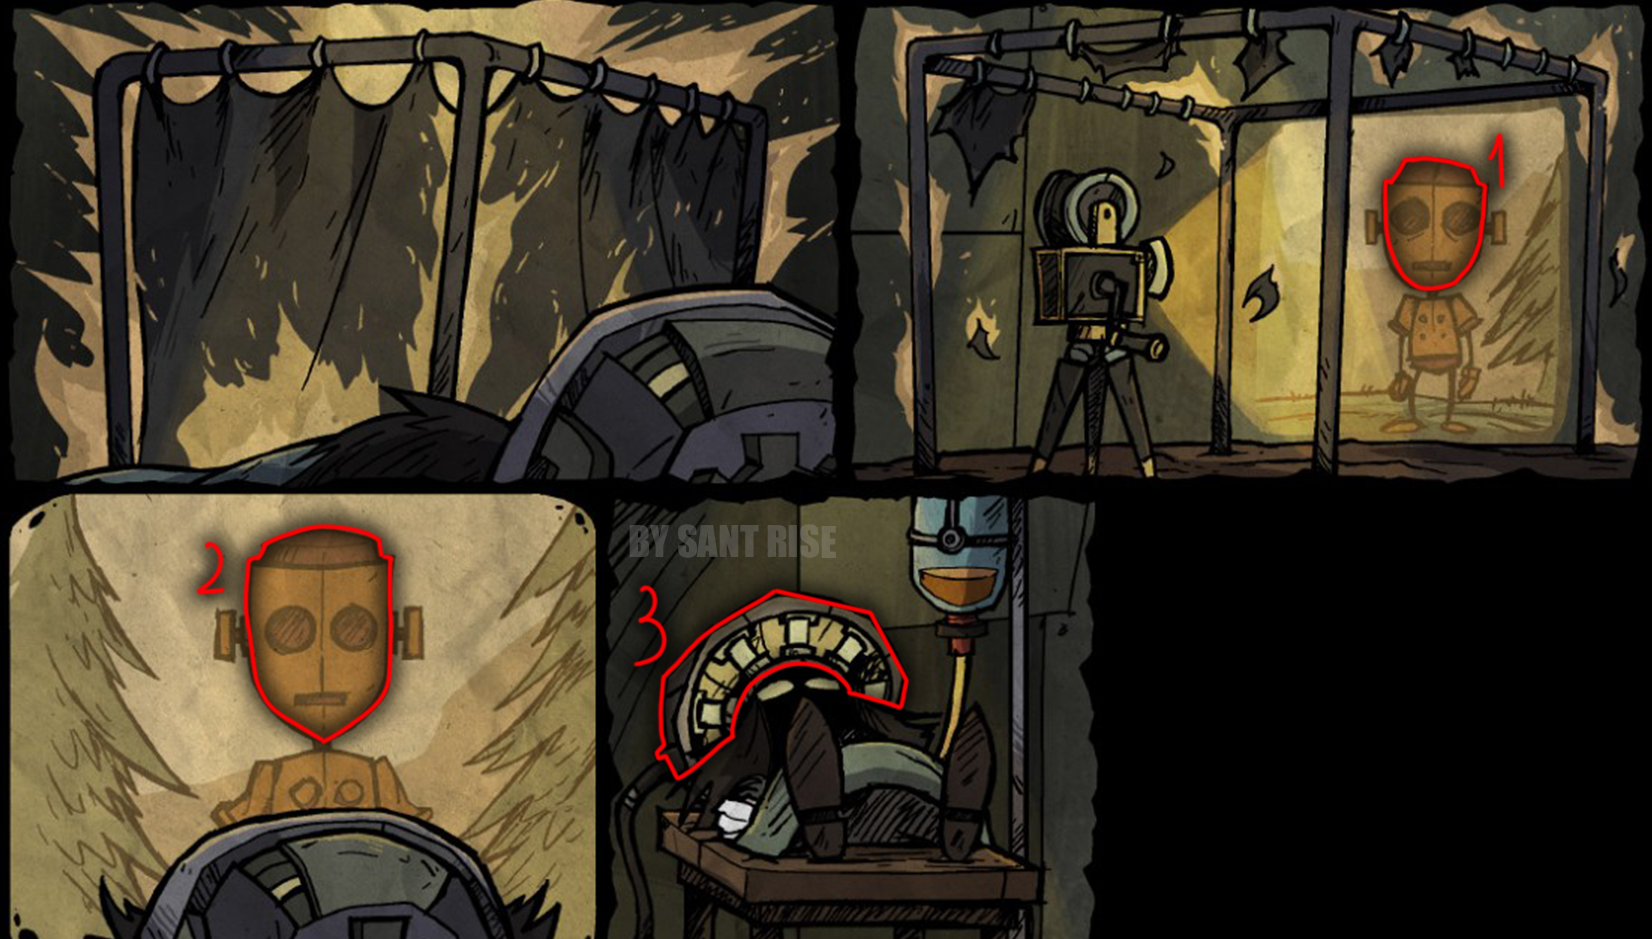 Click on the WX heads and the helmet
Helmet from Memories (NEW!)
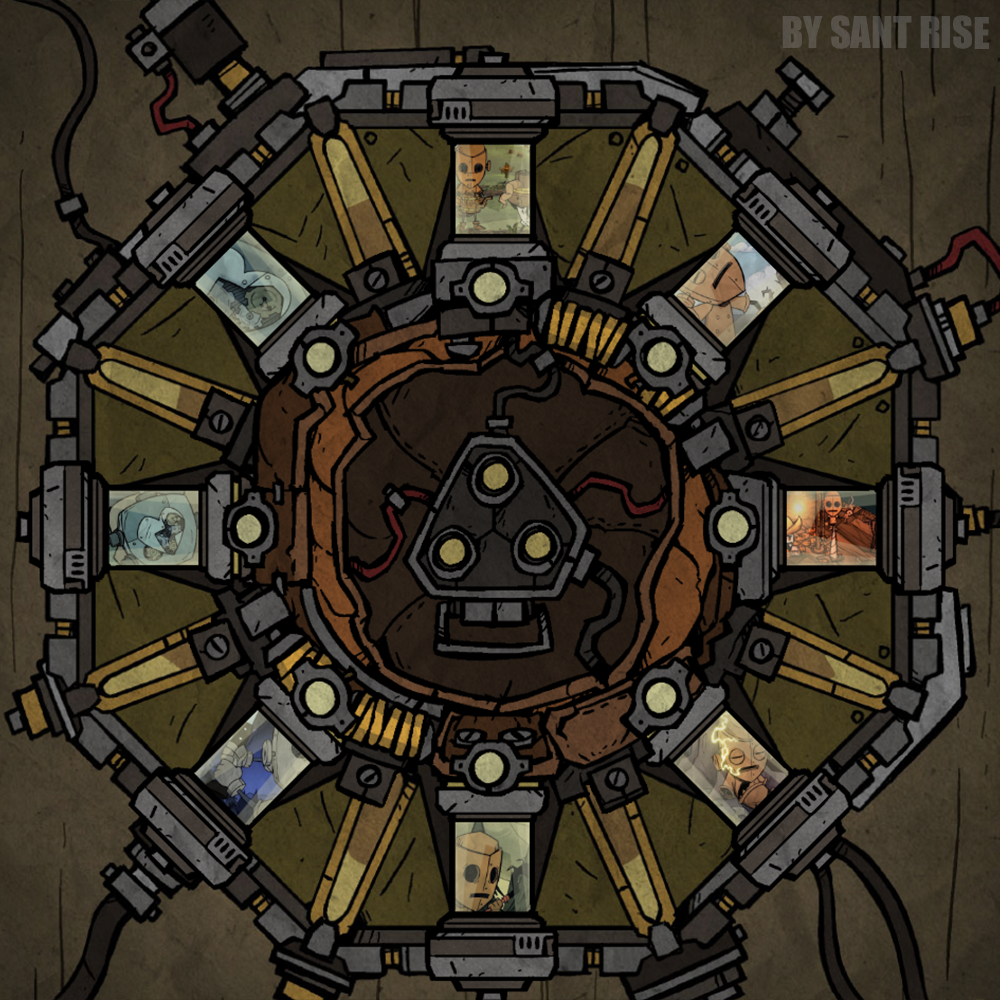 Now you’re facing a rather tricky puzzle. In front of you is a helmet surrounded by vials containing various memories (they’re always arranged in random order).
You need to press the buttons beneath each vial in the correct order from the earliest memory to the latest.
https://docs.google.com/spreadsheets/d/e/2PACX-1vSk2cEb5TlqnBKZddMu4oVlcb65BJuGh7y4qHzO94TlcwuVbw_TvDJizlFVSabG2R8Z7Z6Vmov3d4Xf/pubhtml#gid=0
❗It's important to click on the memories not only vertically, but also horizontally
So, you’ll need to tap the memories in the correct order, after each round, one memory bubble will pop until they’re all gone. It’s important to understand that if you make even one mistake, you’ll have to start over.❗You can also tap the flask itself to see a slightly larger version of the selected memory (and to close it, just tap the flask again)
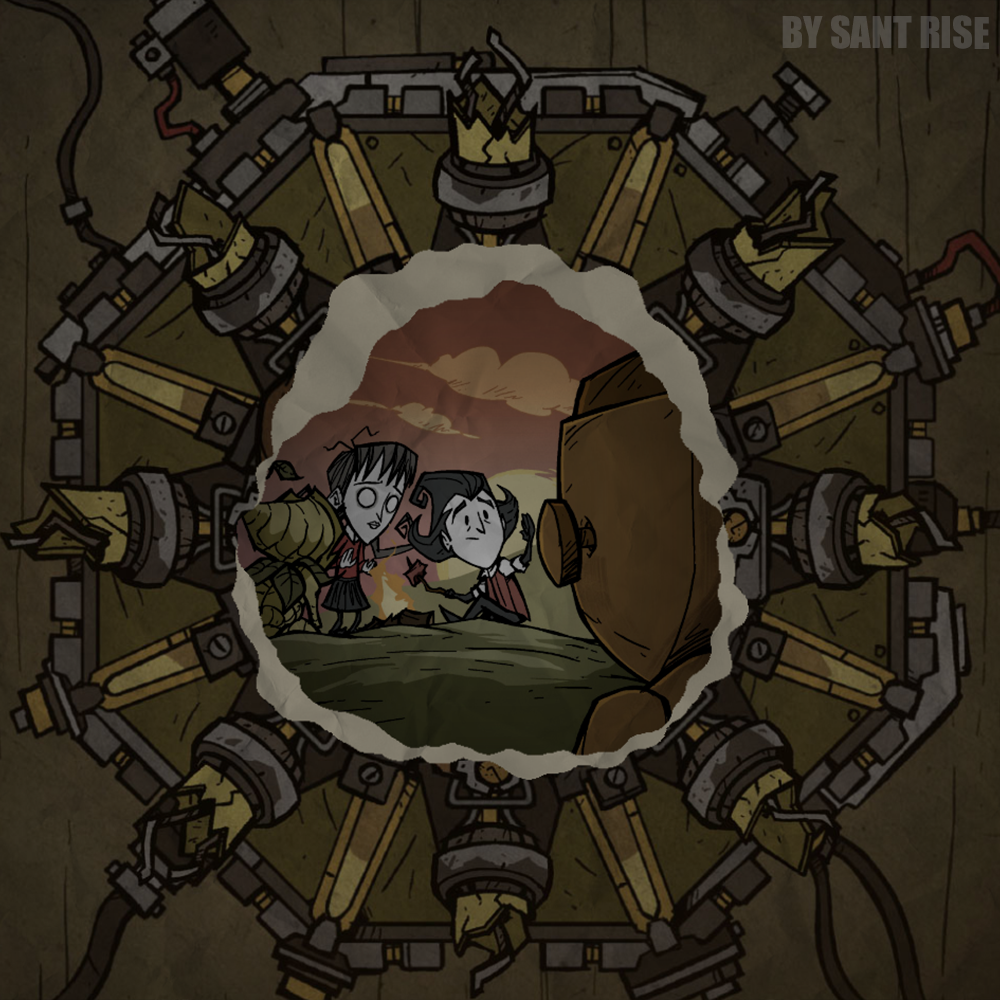
If you've done everything right, all the memory vials will burst, and a memory like this will appear in the center
The Final (NEW!)
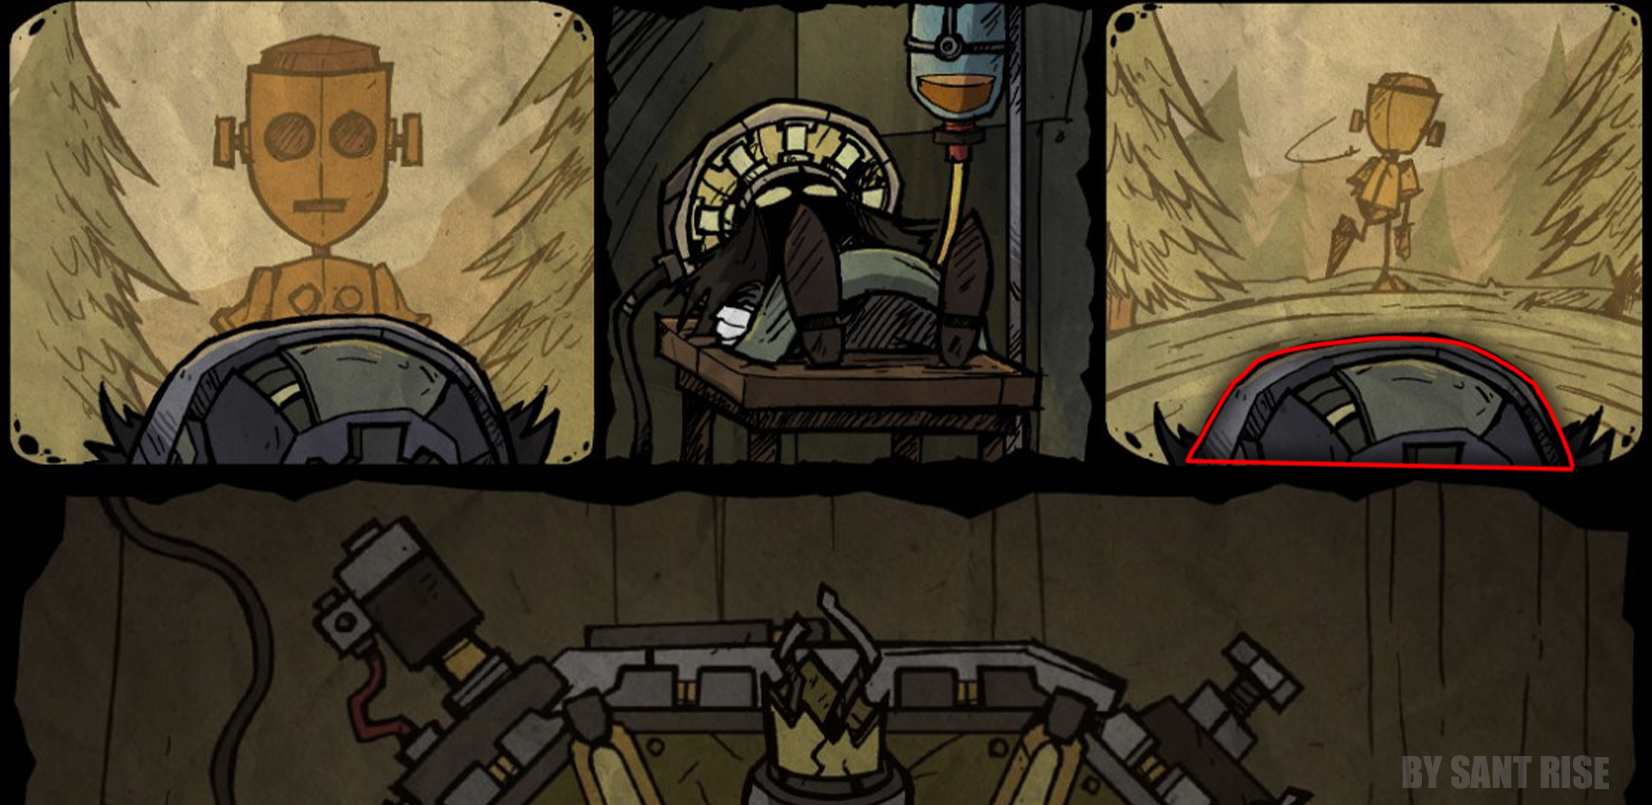 Above the helmet puzzle, there is an image where you need to click on the helmet
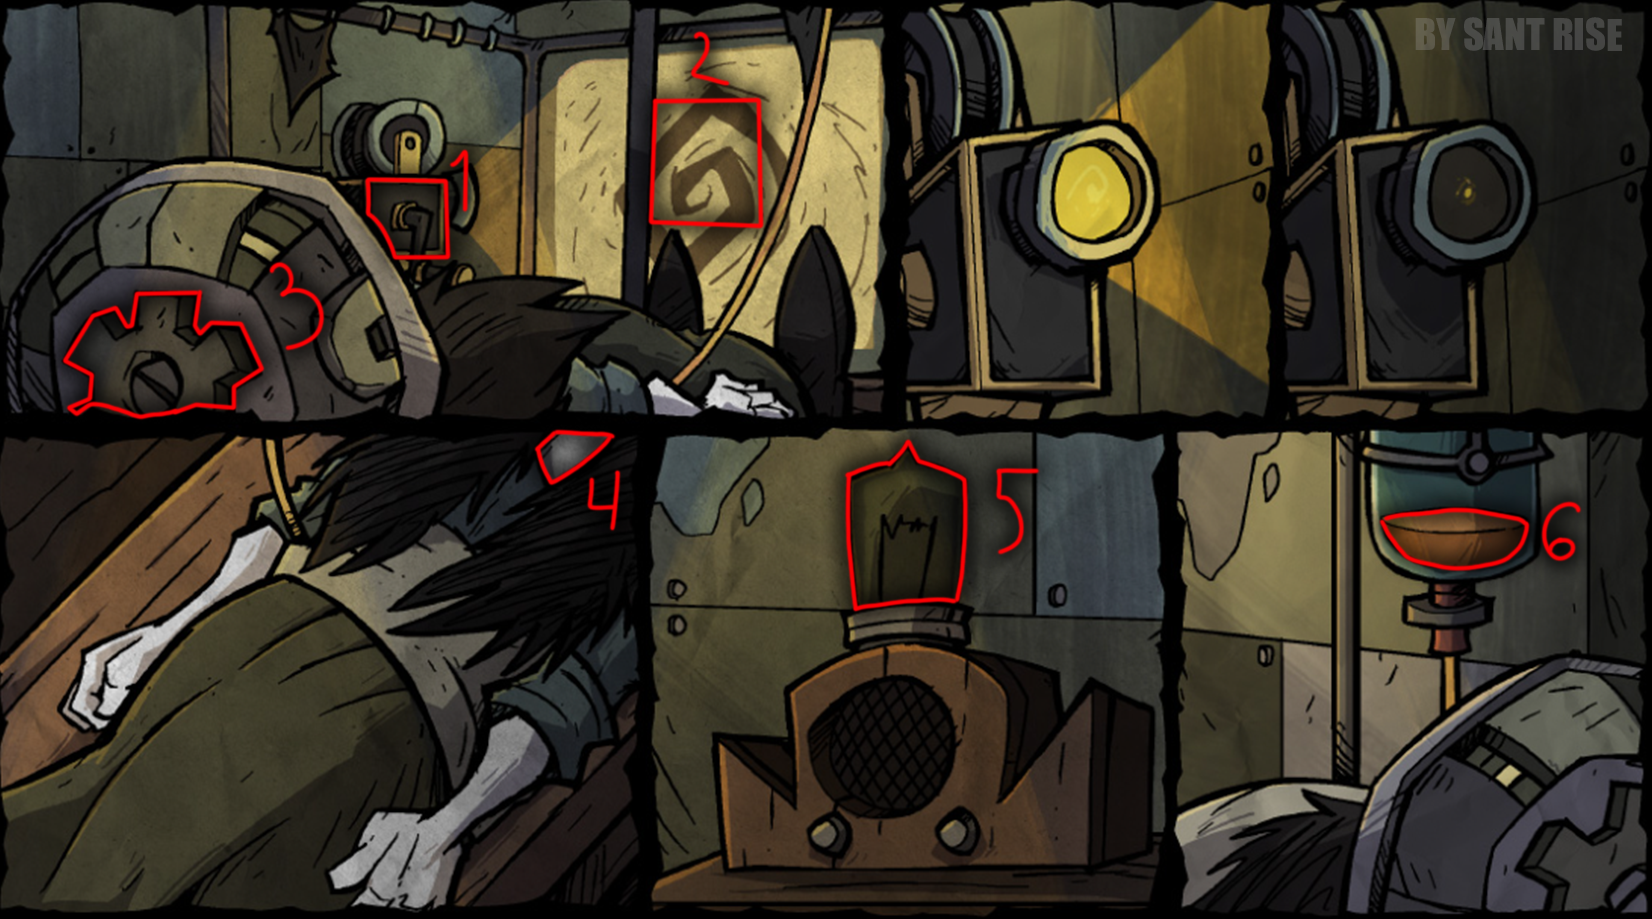 Click on the following in order:
- Projector.
- Portal Center.
- Gear on the helmet.
- WX face piece.
- Lightbulb.
- Liquid in the jar.
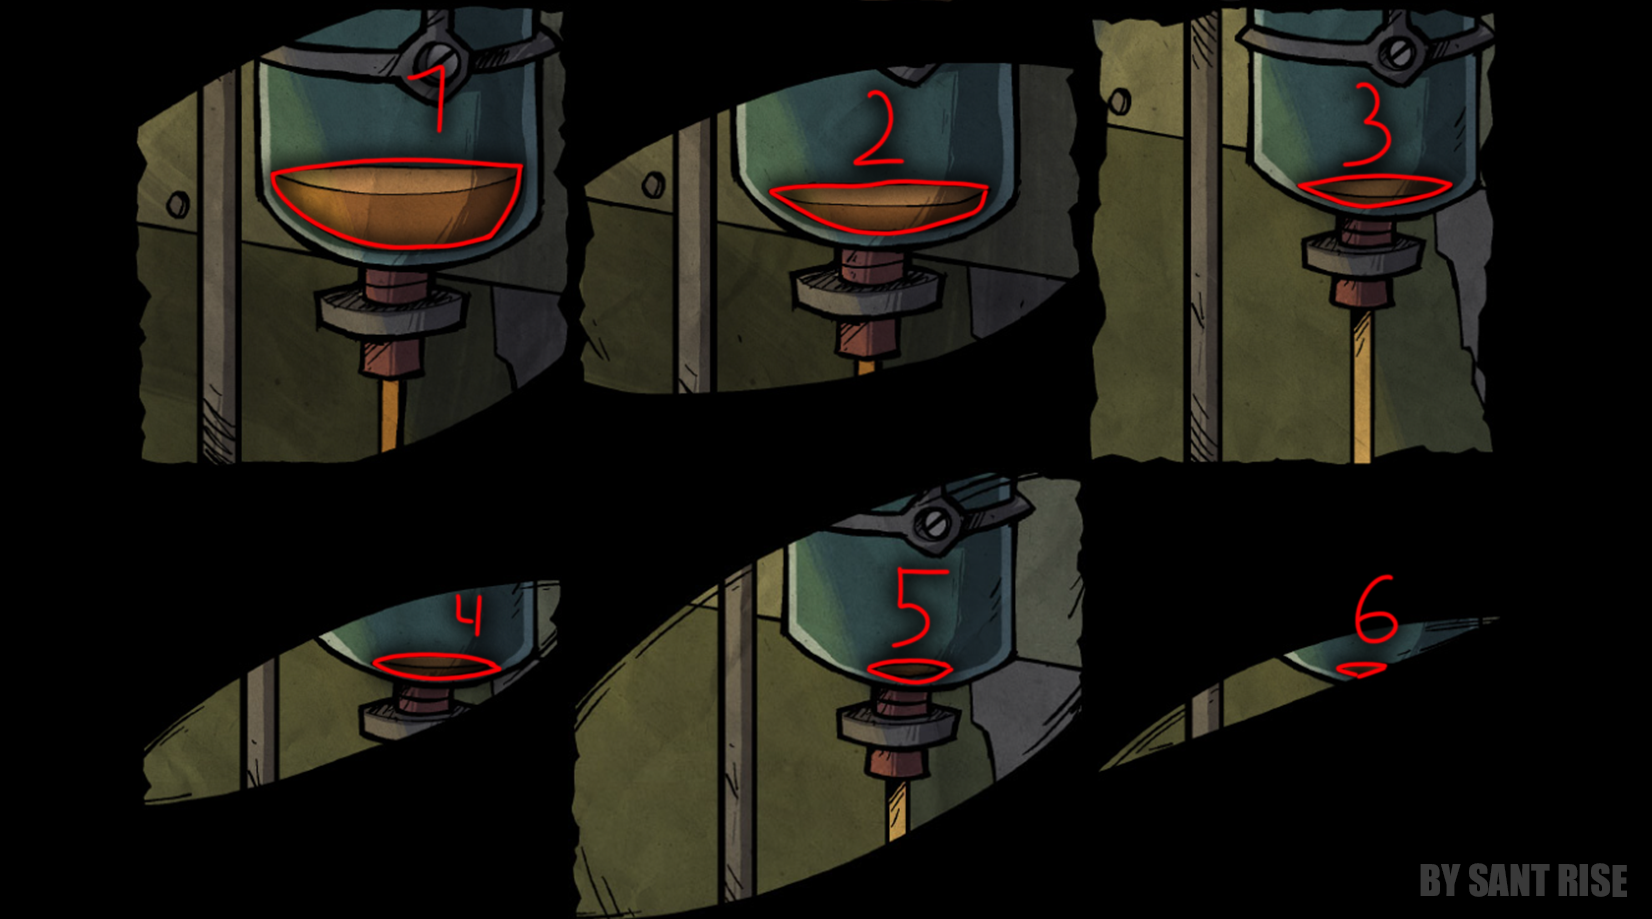 Press down on the liquid in the jar.
You've earned 5,000 Klei Points and an animation!
Press down on the liquid in the jar.
You've earned 5,000 Klei Points and an animation!You can check if you've received your reward here: CLICK HERE![accounts.klei.com]
⭣STAMP COLLECTING PUZZLES⭣
Below you'll find puzzles that don't earn you any rewards, they're only there so you can complete the stamp collection in the book located in Wagstaff's room!
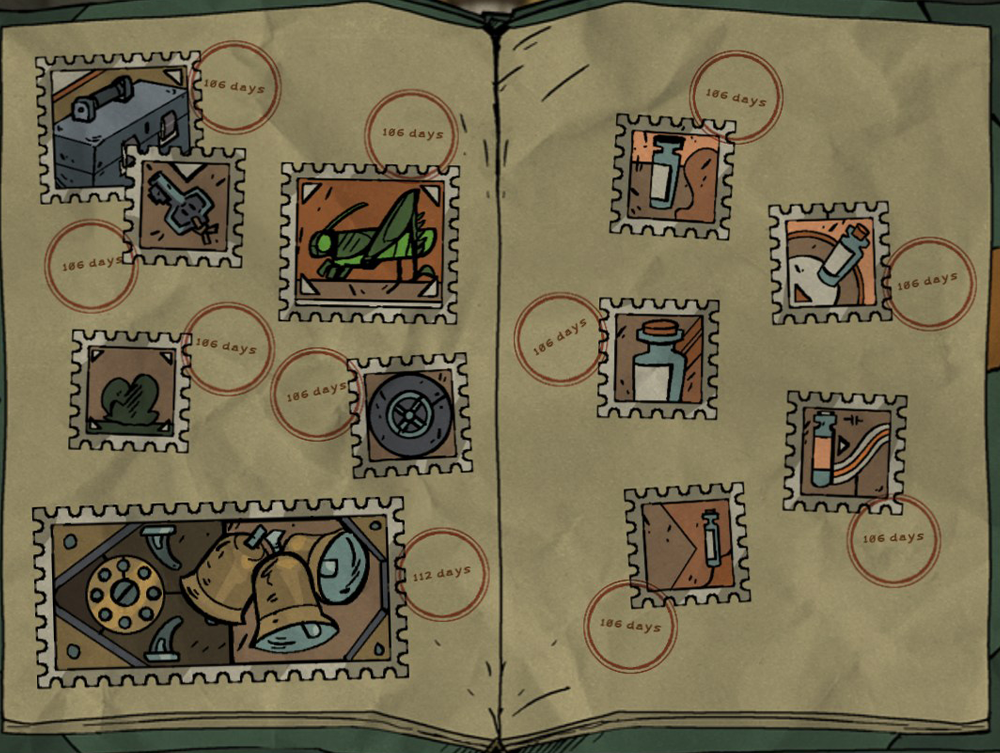
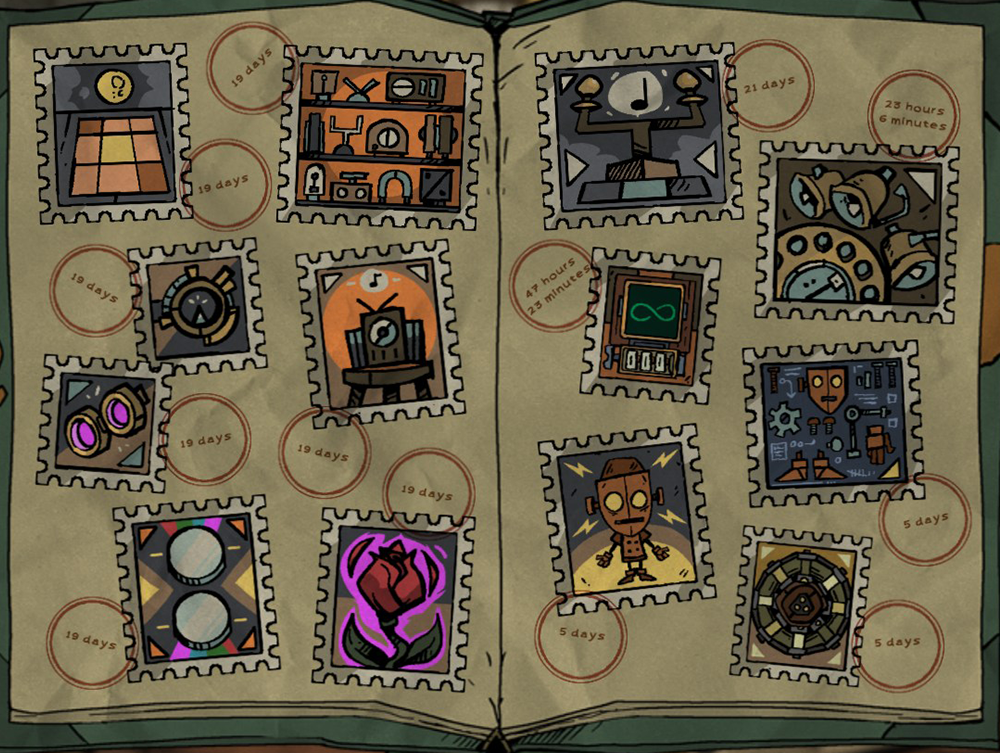
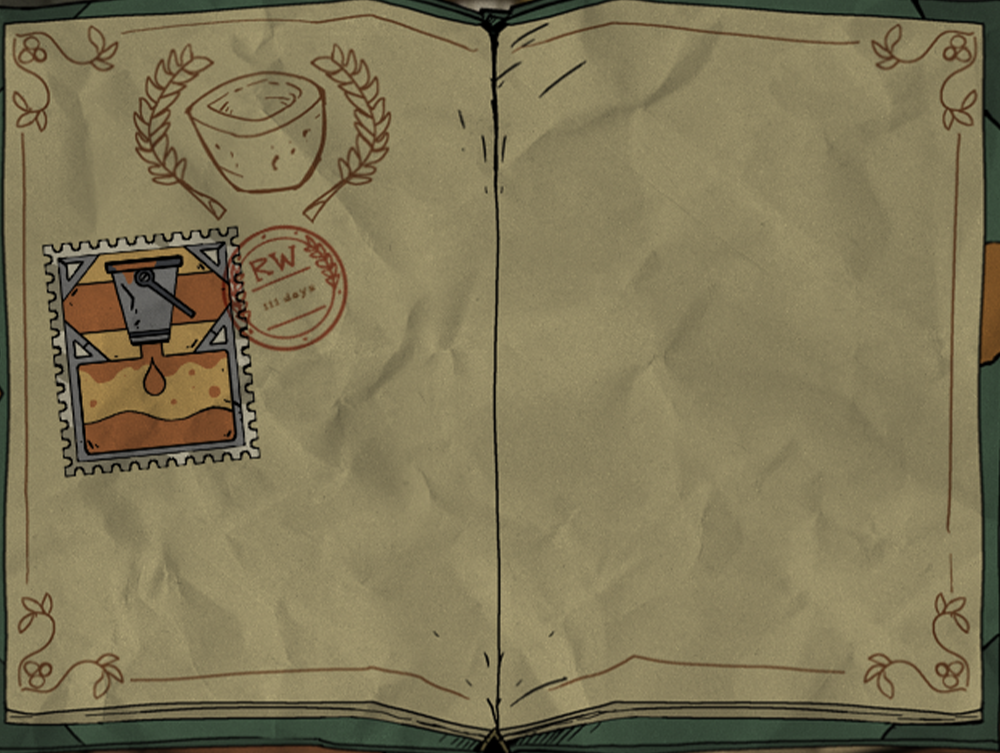
Kammerton
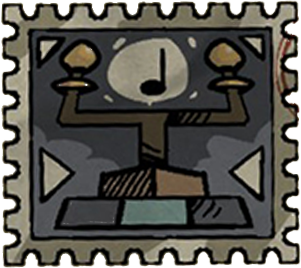
To obtain this stamp, you need to return to the daytime version of the puzzle and find the image (shown below).
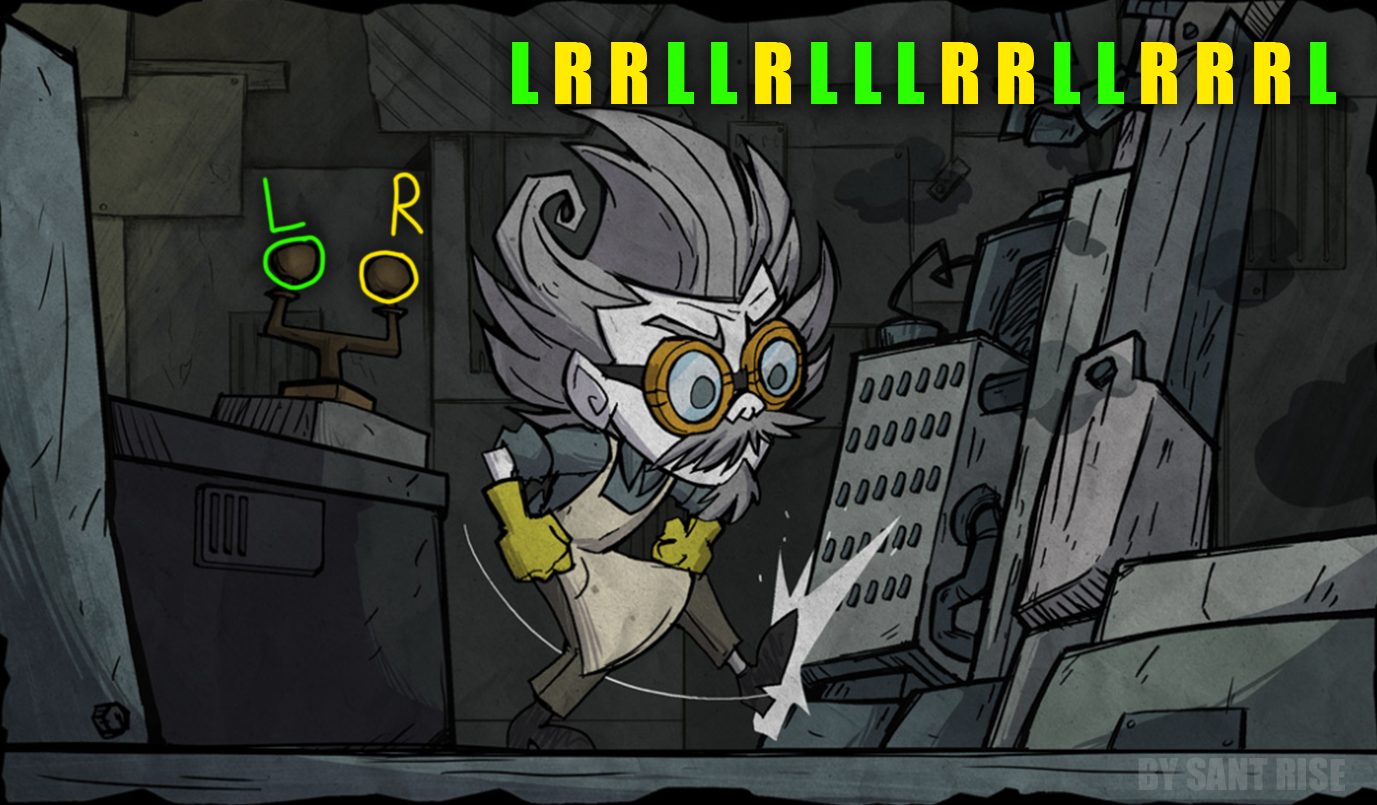 Then, you must click on the right and left Kammerton's balls in the following order: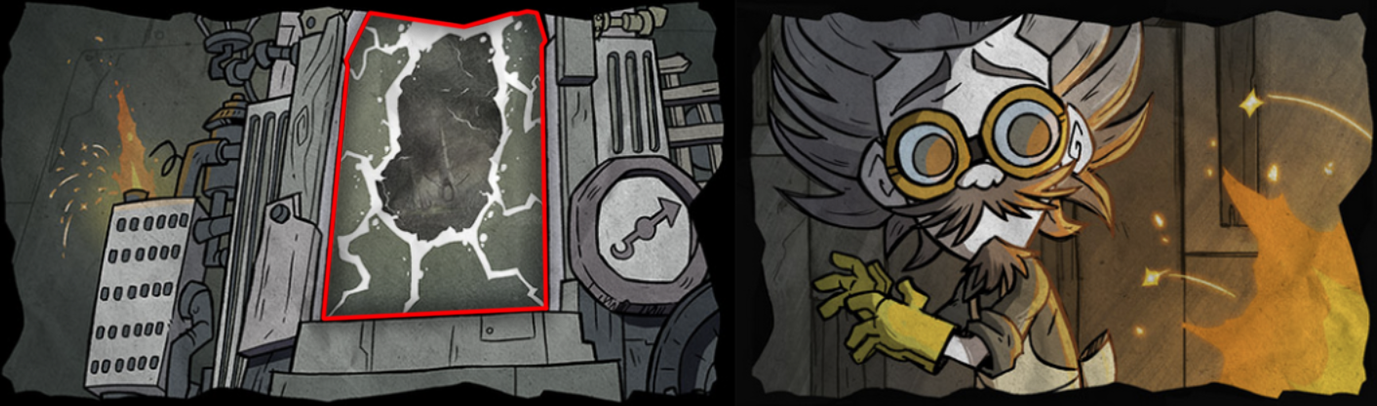
Oscilloscope (NEW!)
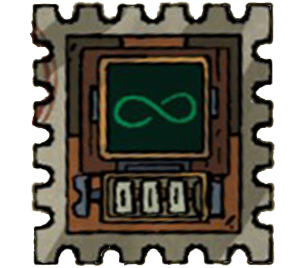
To get this stamp, you need to go back to the Lab and click on the piece of paper.
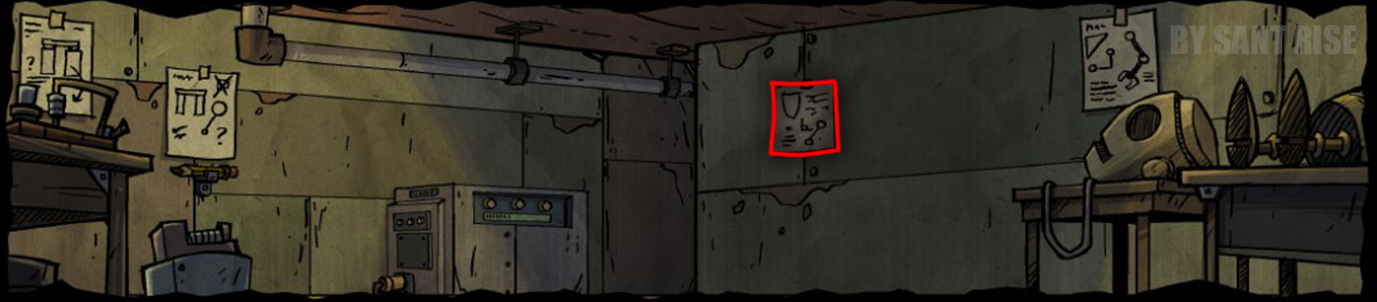
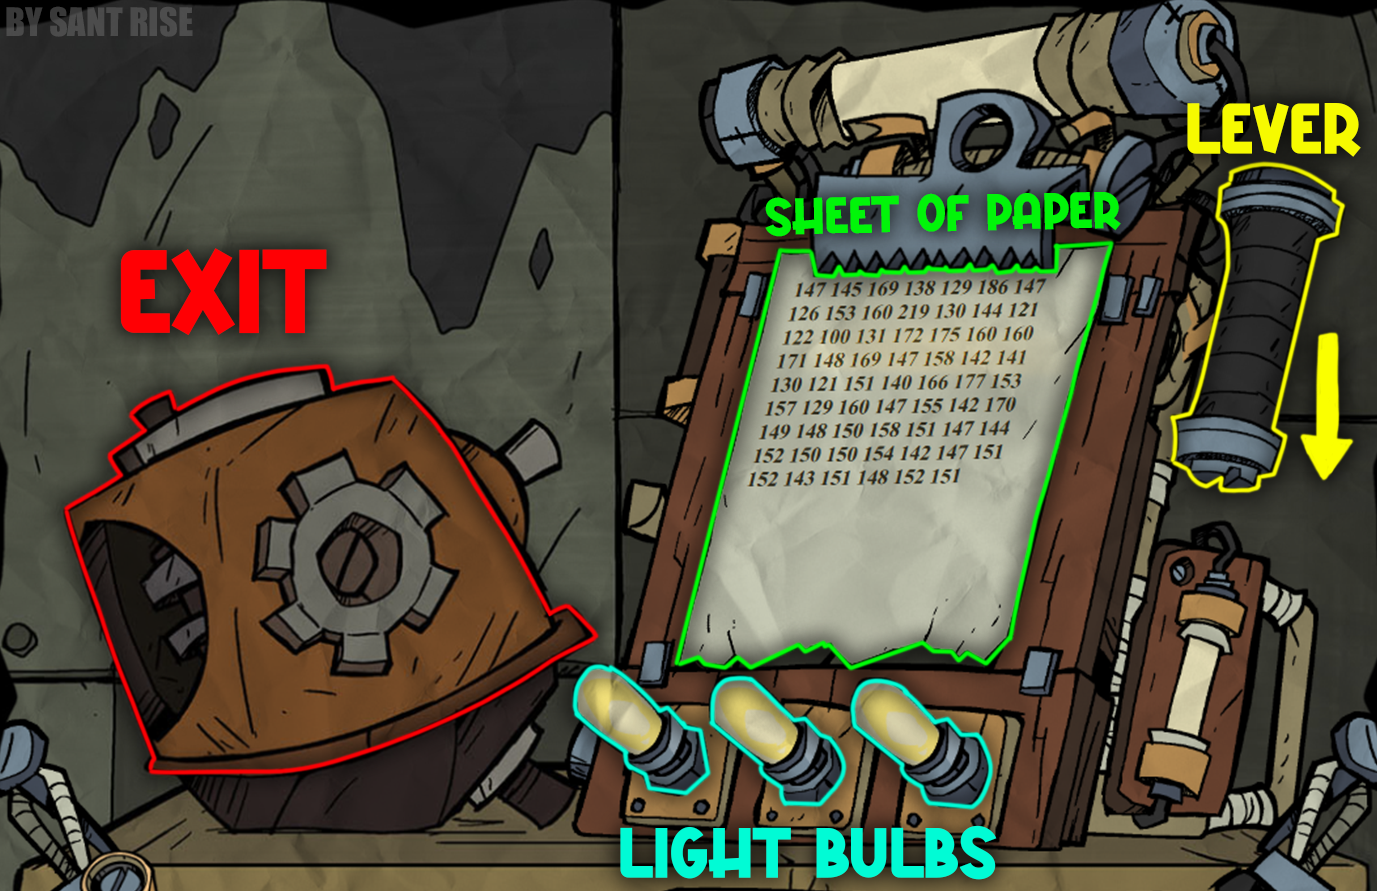 You'll be transported to this room. Here, you don't need to touch anything except the piece of paper and the lever.
1. Click on the piece of paper and enter this code:
2. Move the lever down until 3 lights come on.
- That's it! To exit, click on the gear icon on the left.
Bucket Of Resin
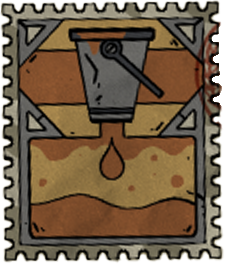
To get this stamp, go back to the night version of the puzzle and find this image at the top.
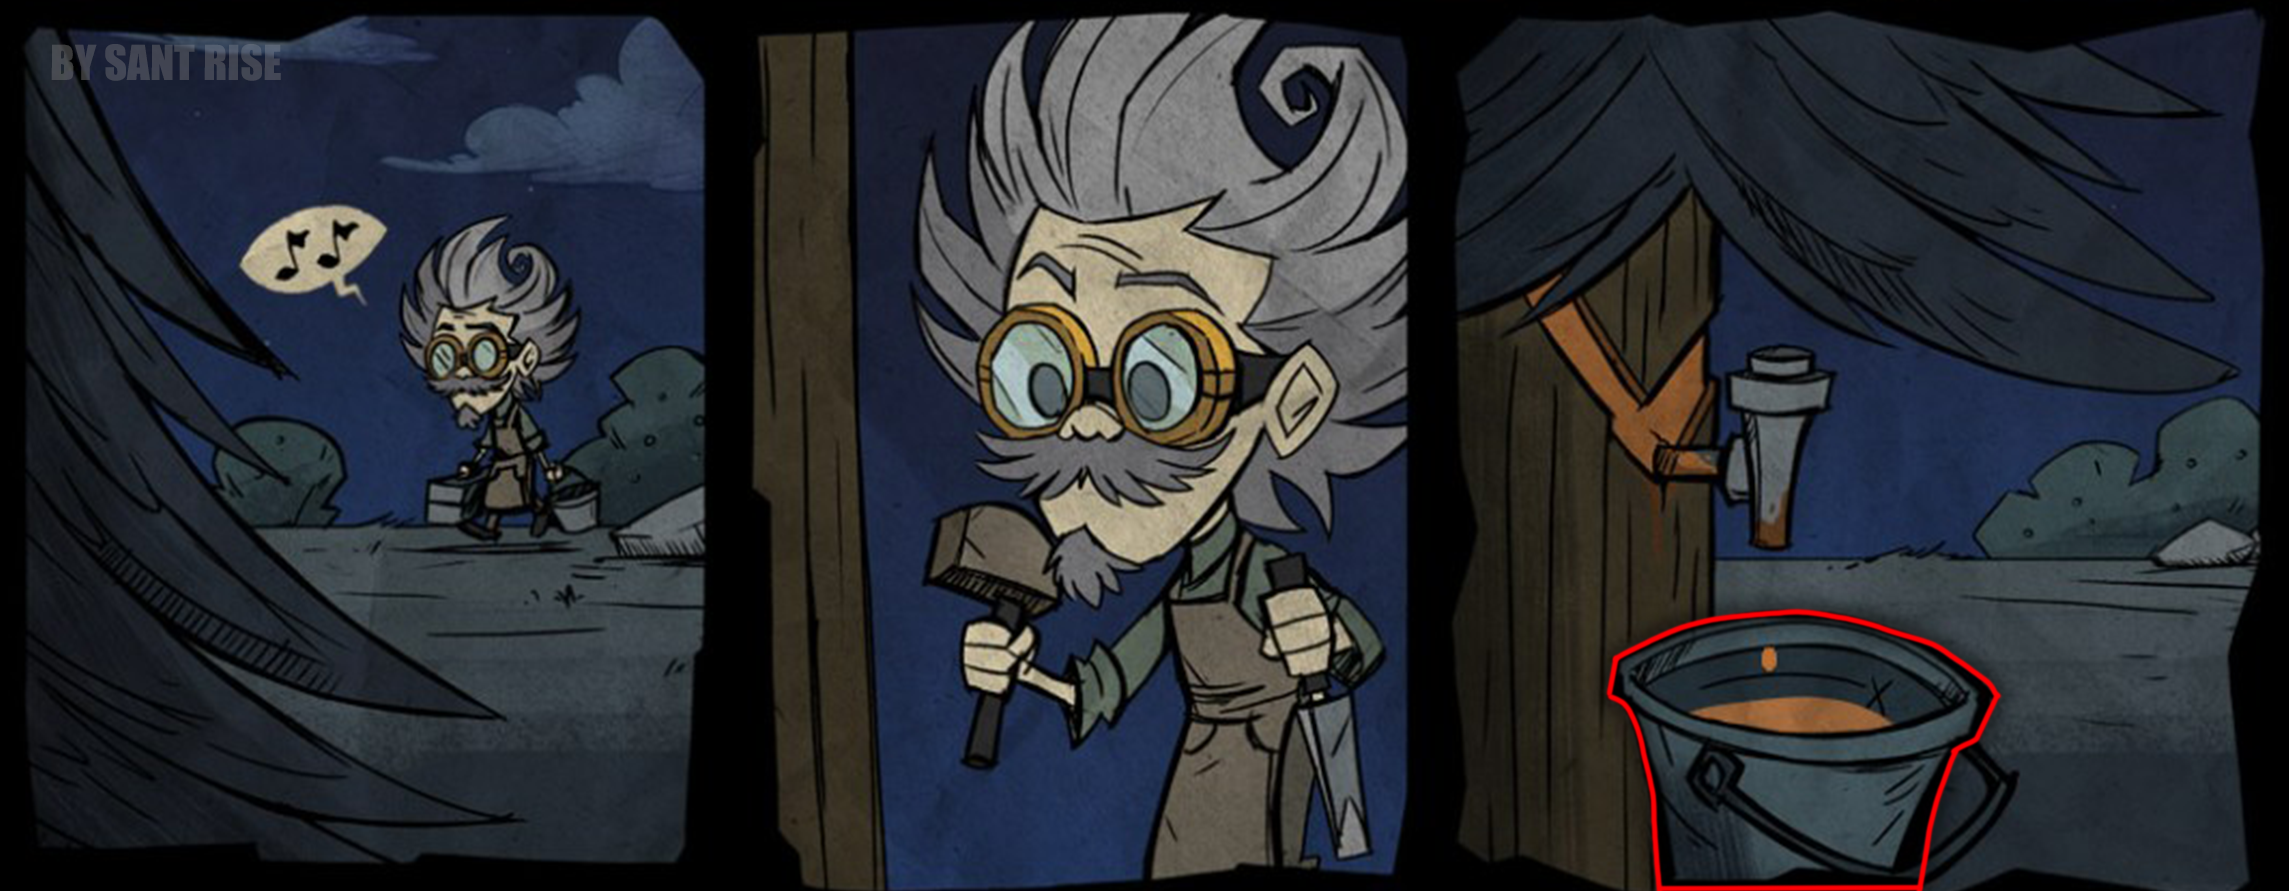 Then, tap the bucket of resin repeatedly (about 40 times). After that, an image of a room full of resin supplies will appear at the bottom - this means you’ve done everything right, and the stamp is now in your book!
Radio Parts
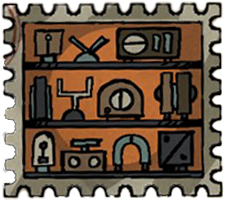
To earn this stamp, you need to find all 40 parts of the radio.
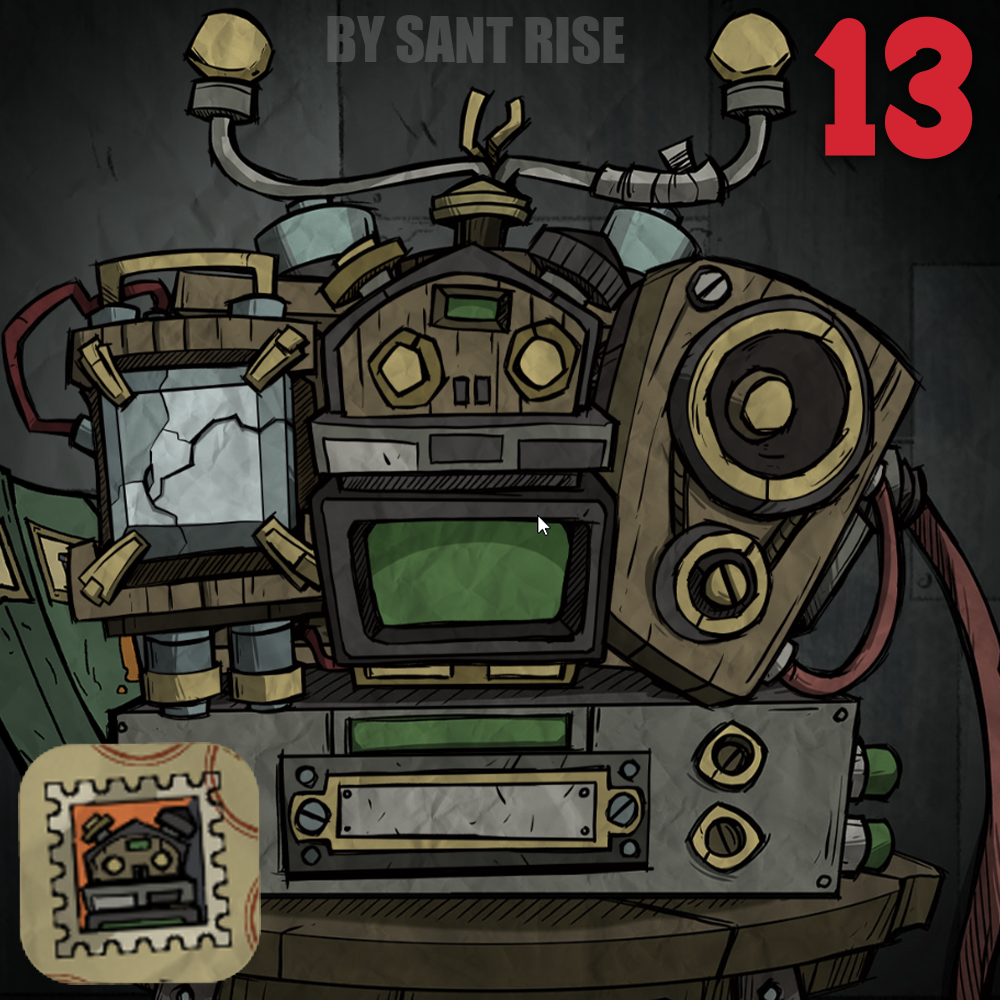
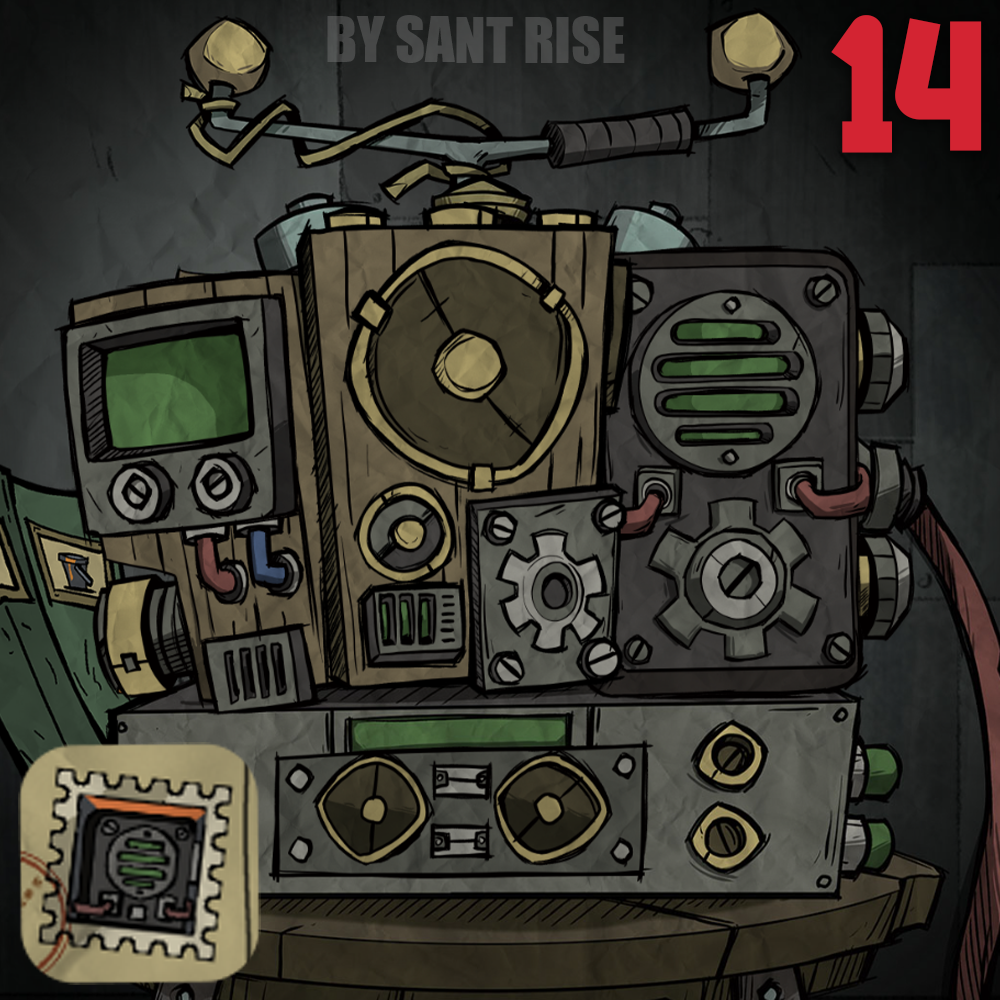
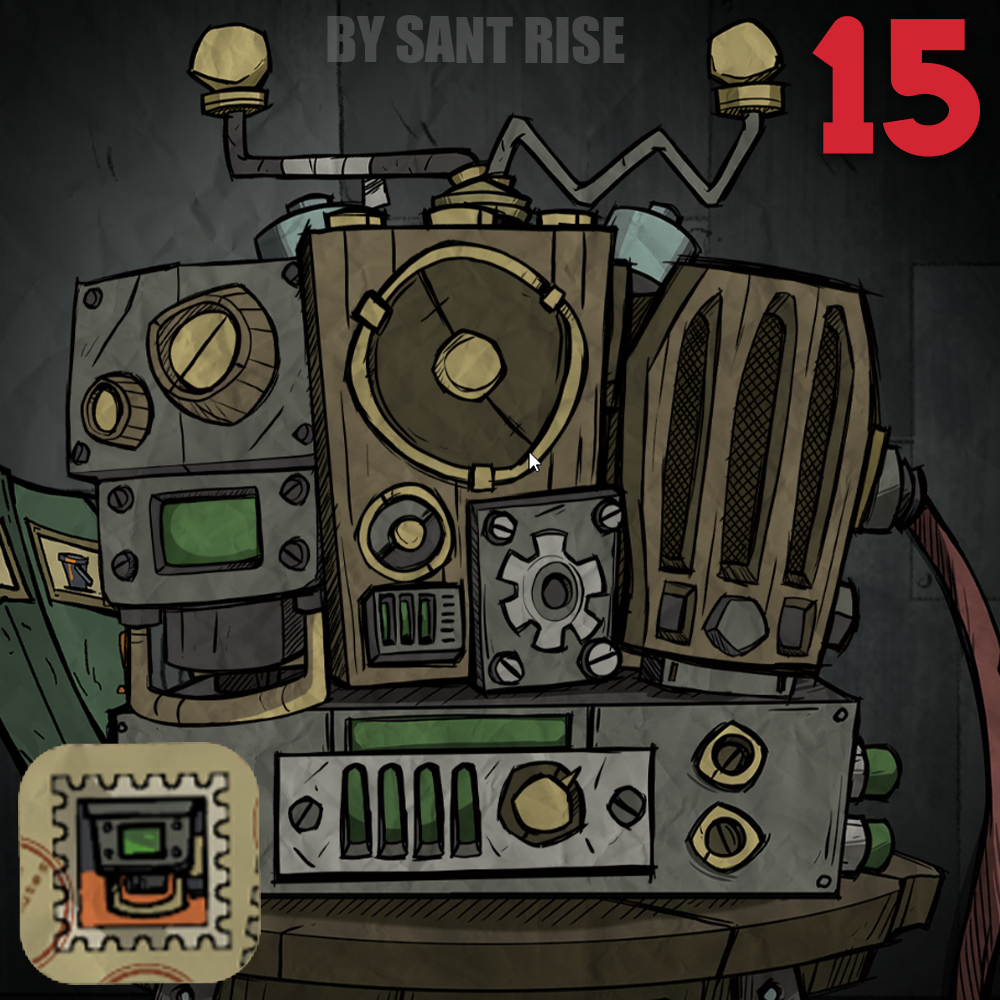
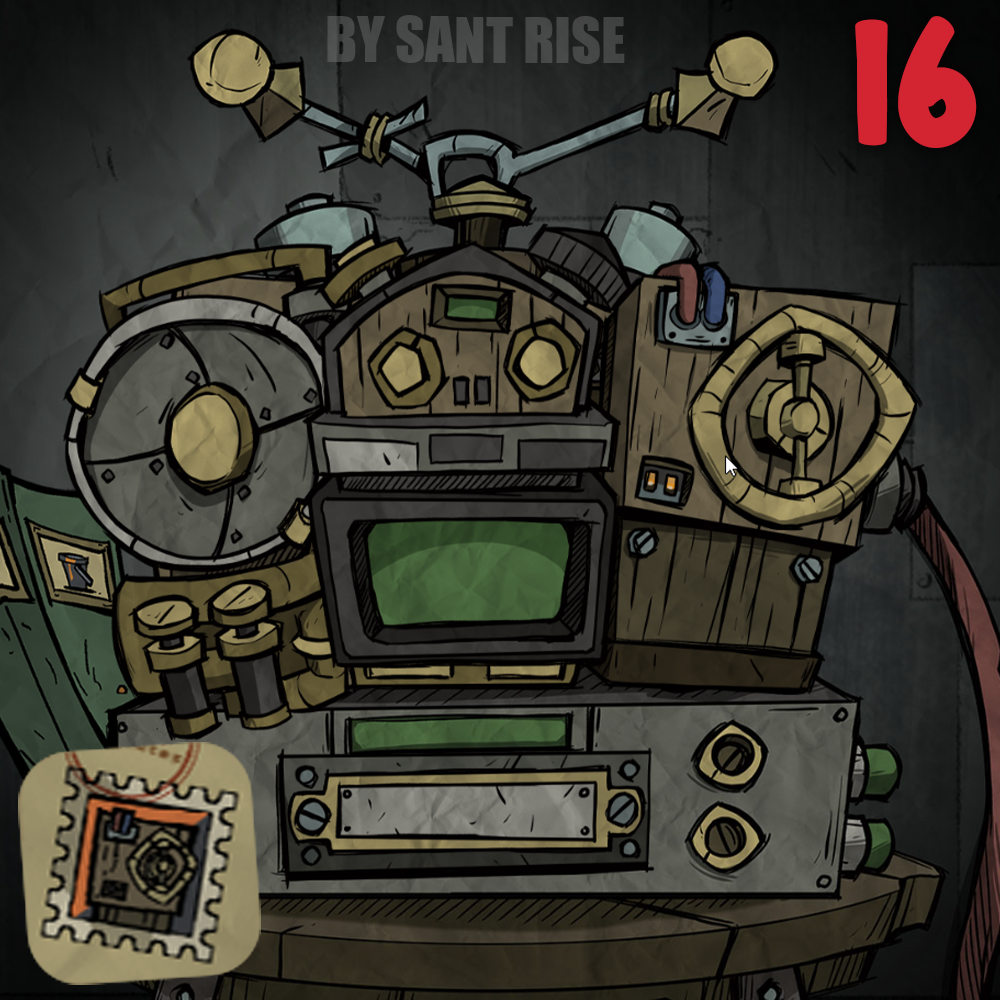
Radio Combos (NEW!)
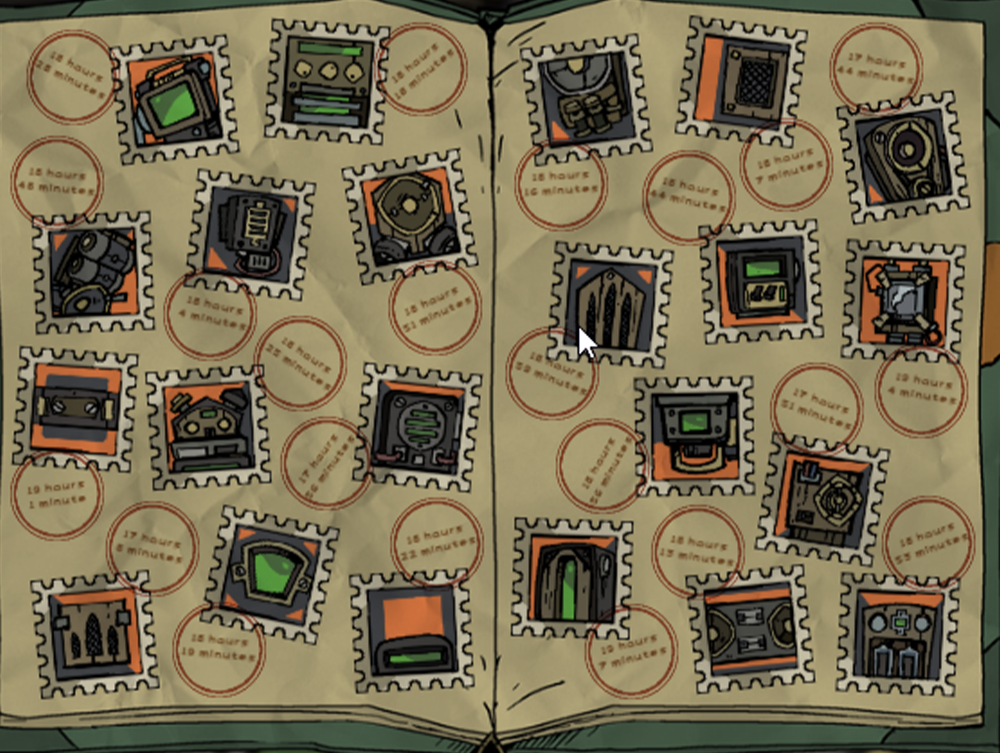
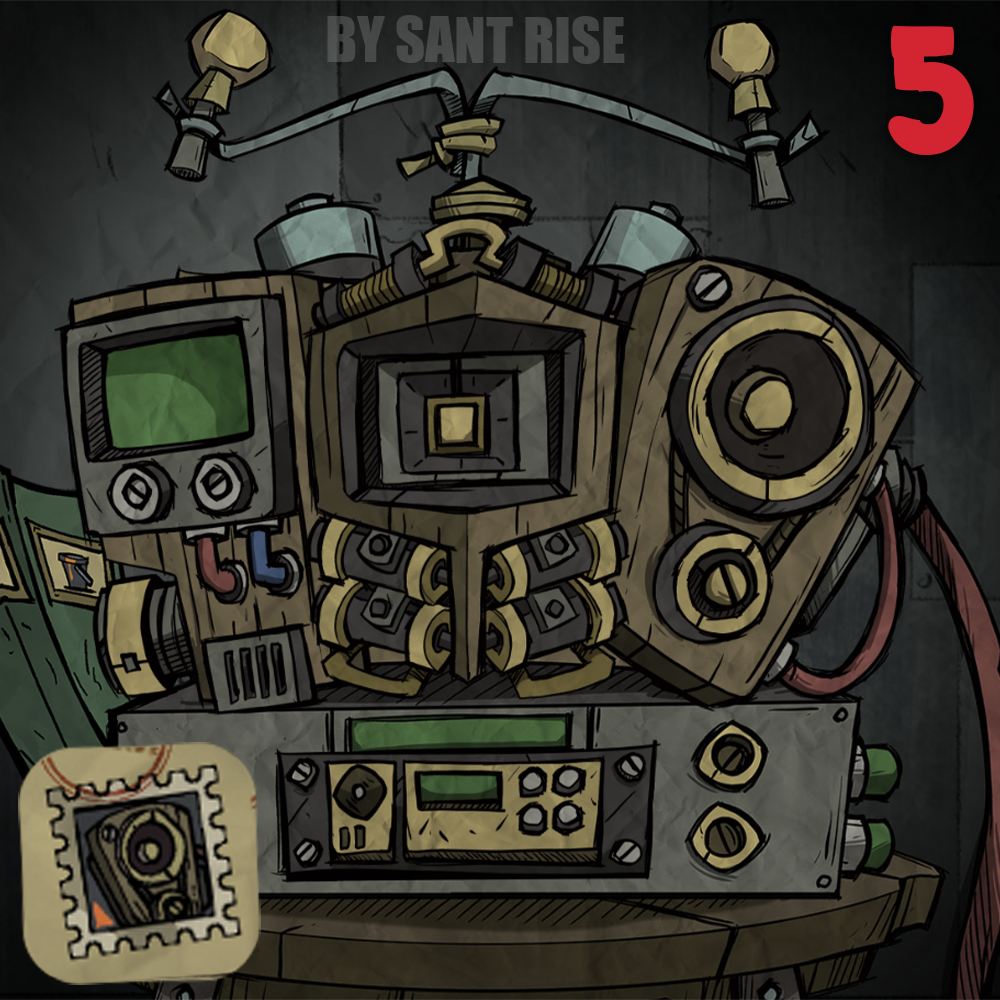
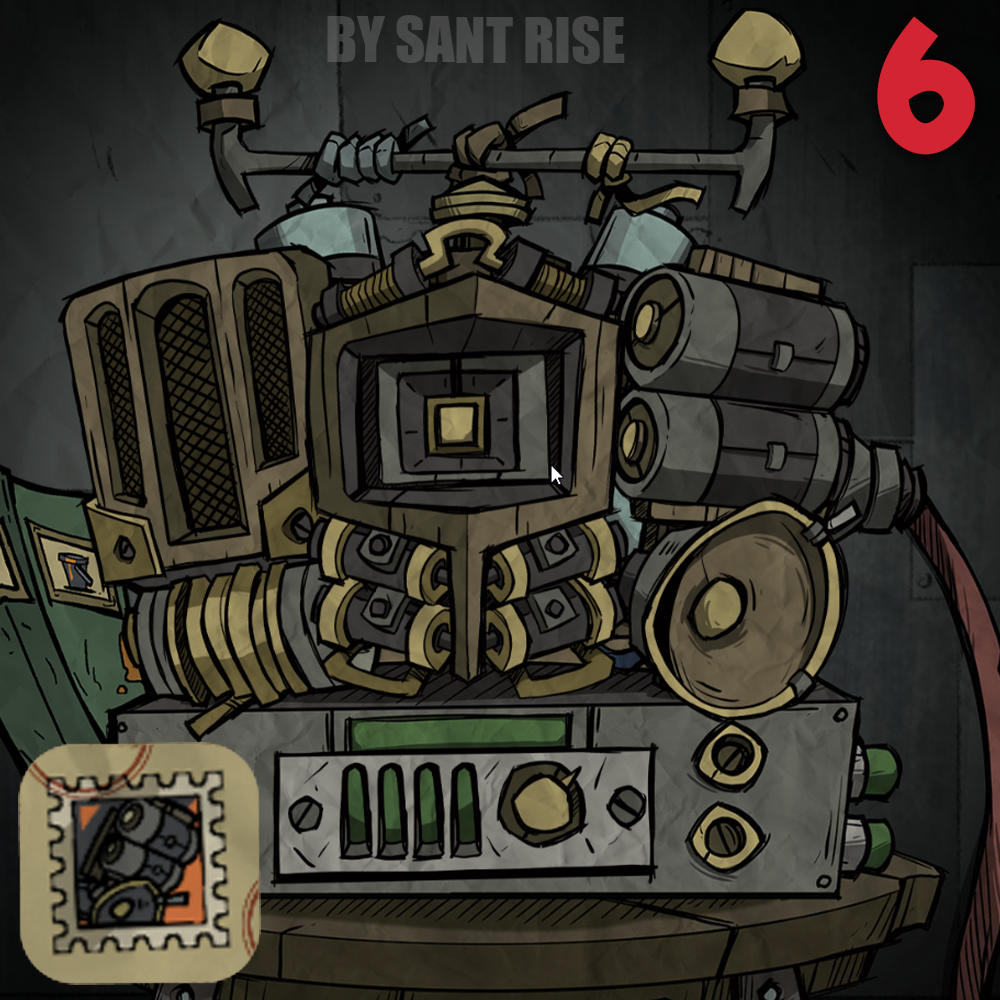
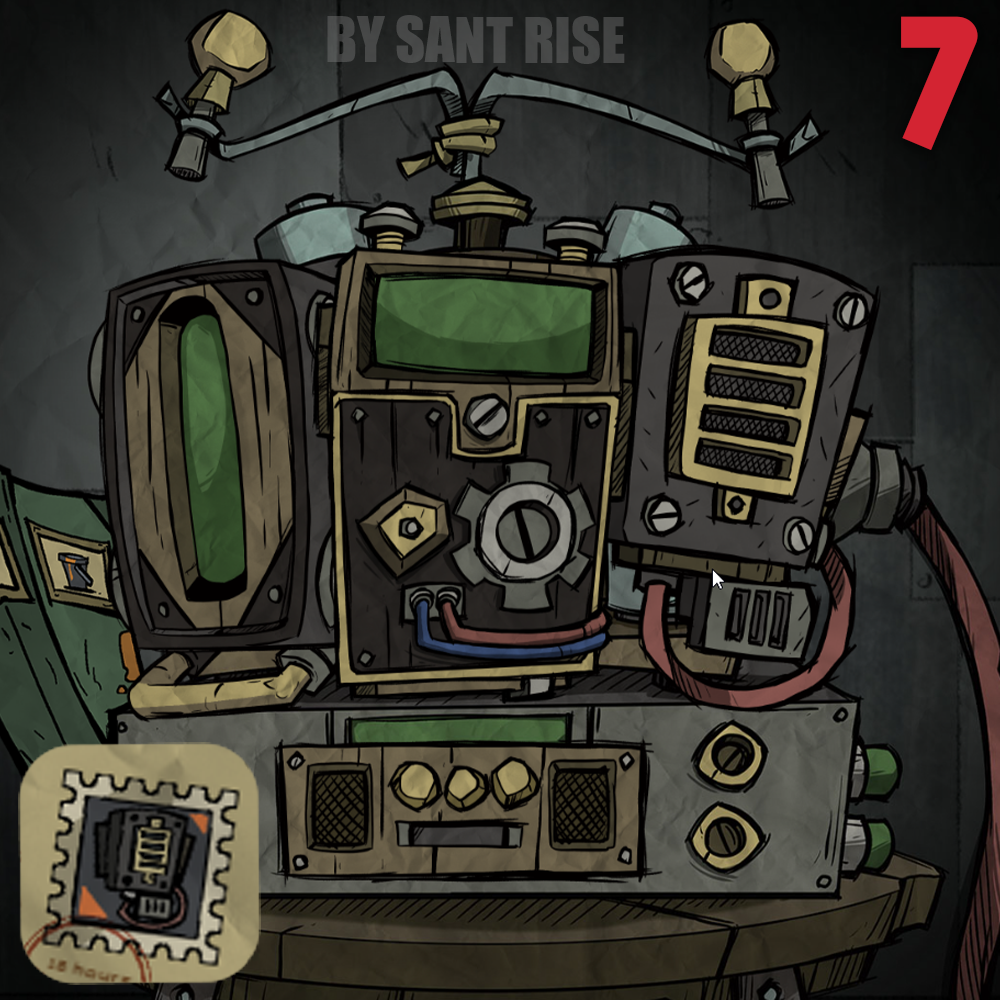
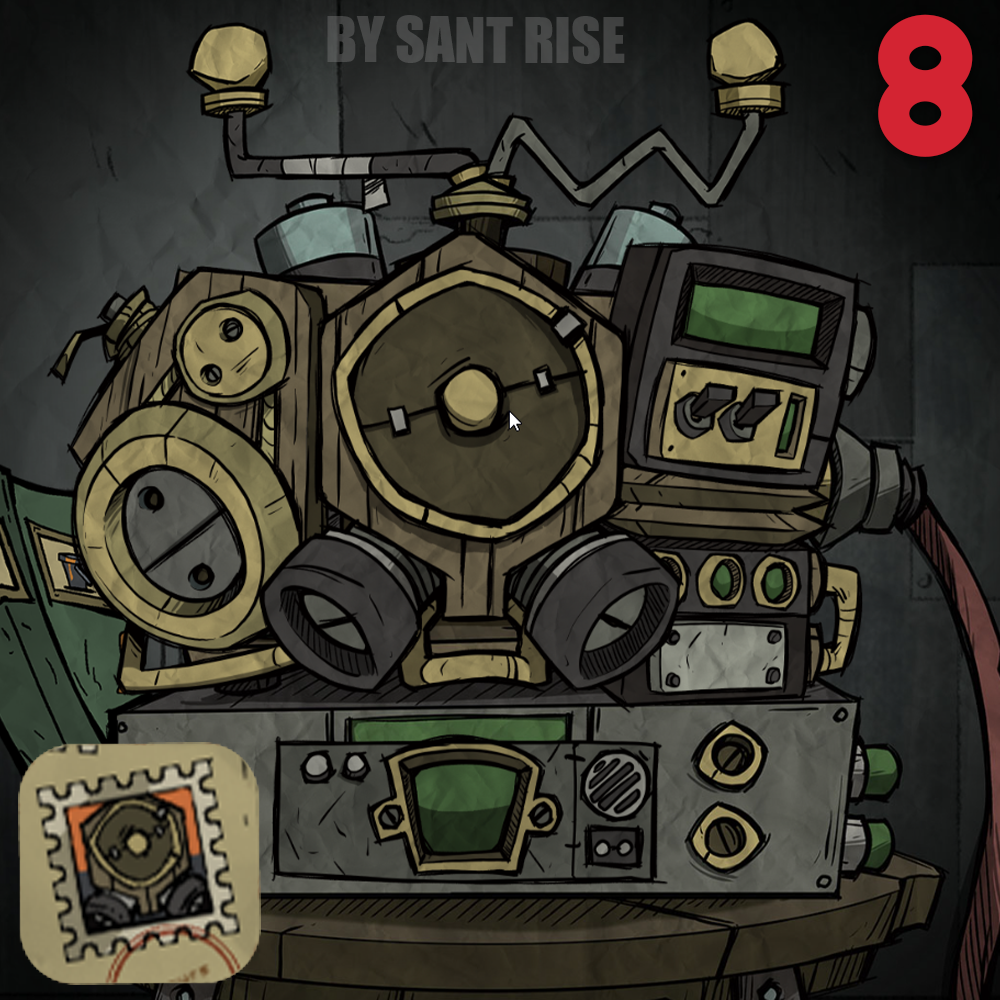
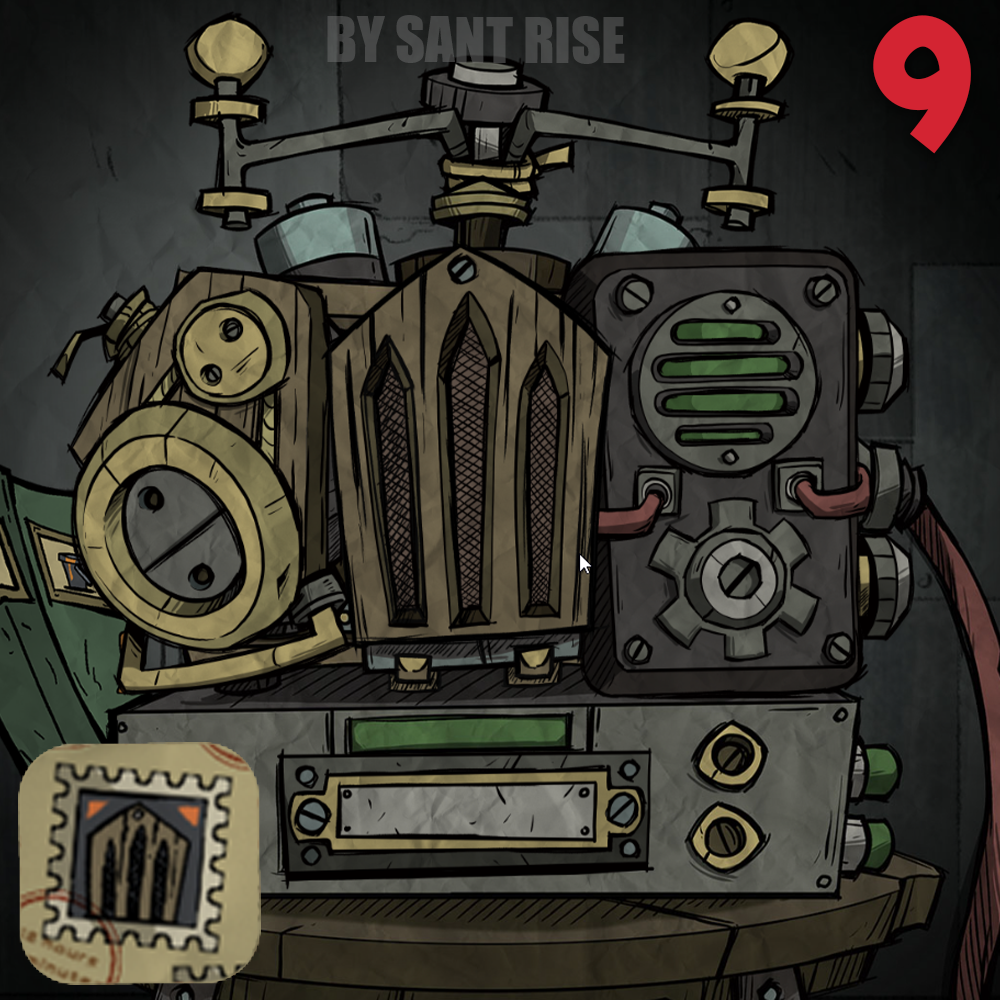
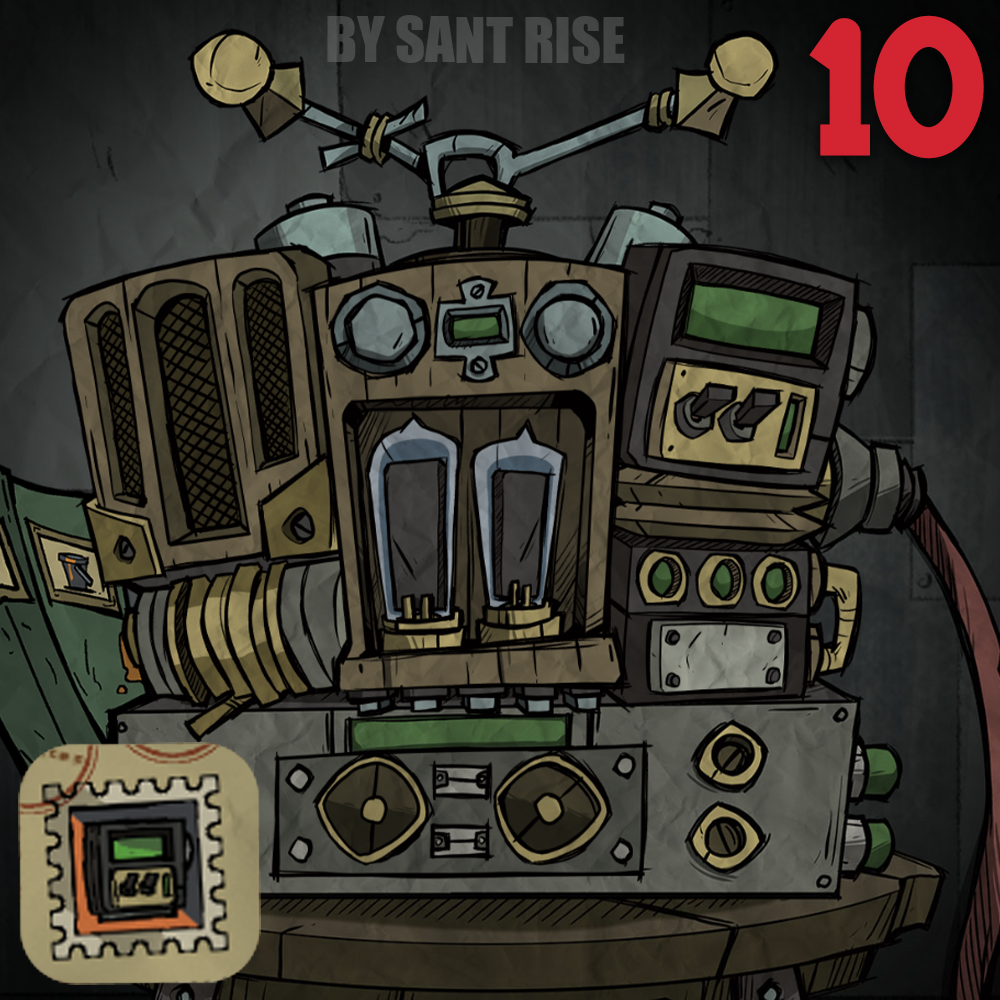
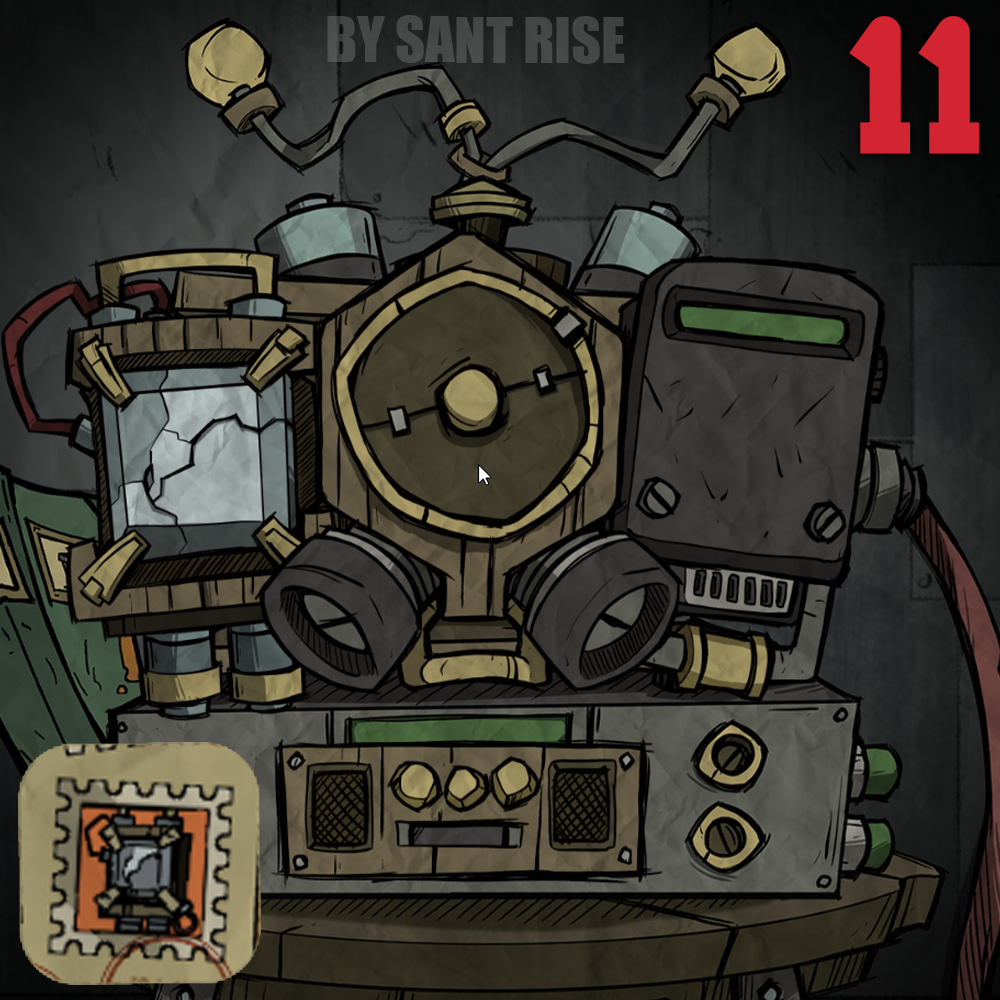
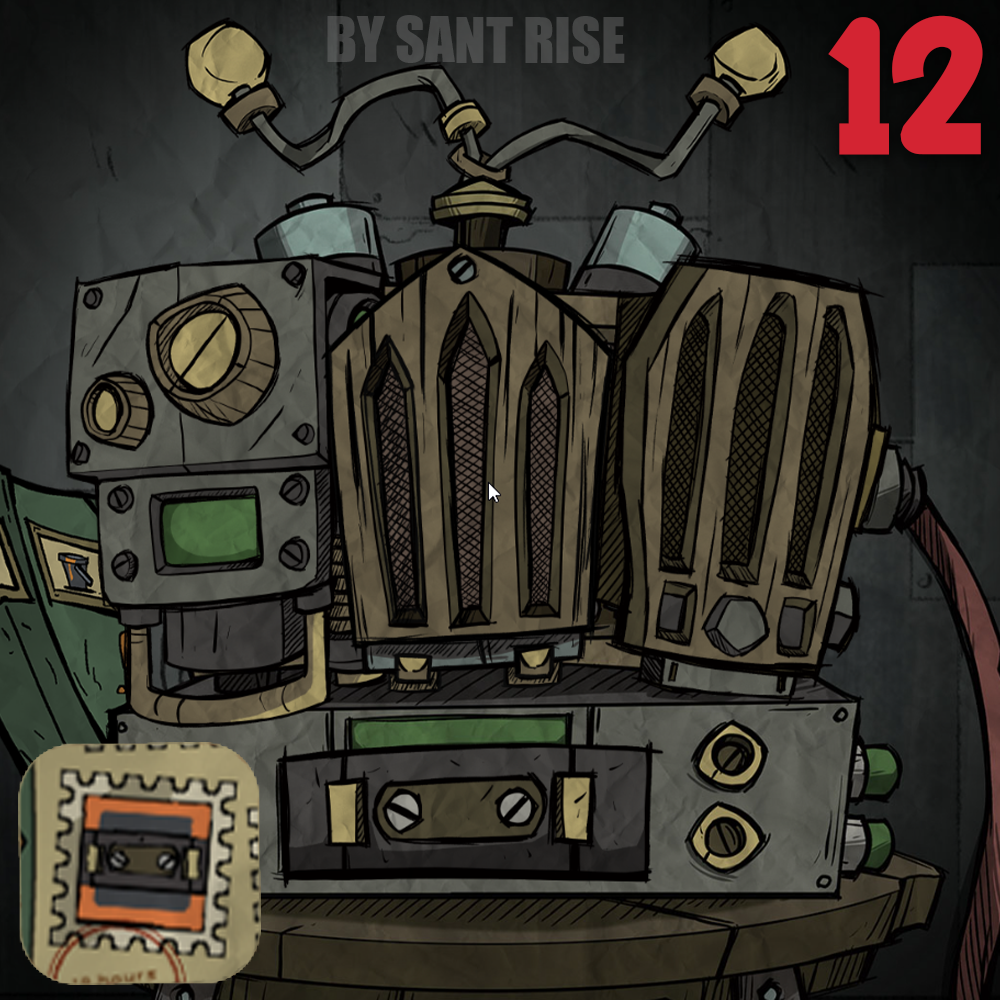
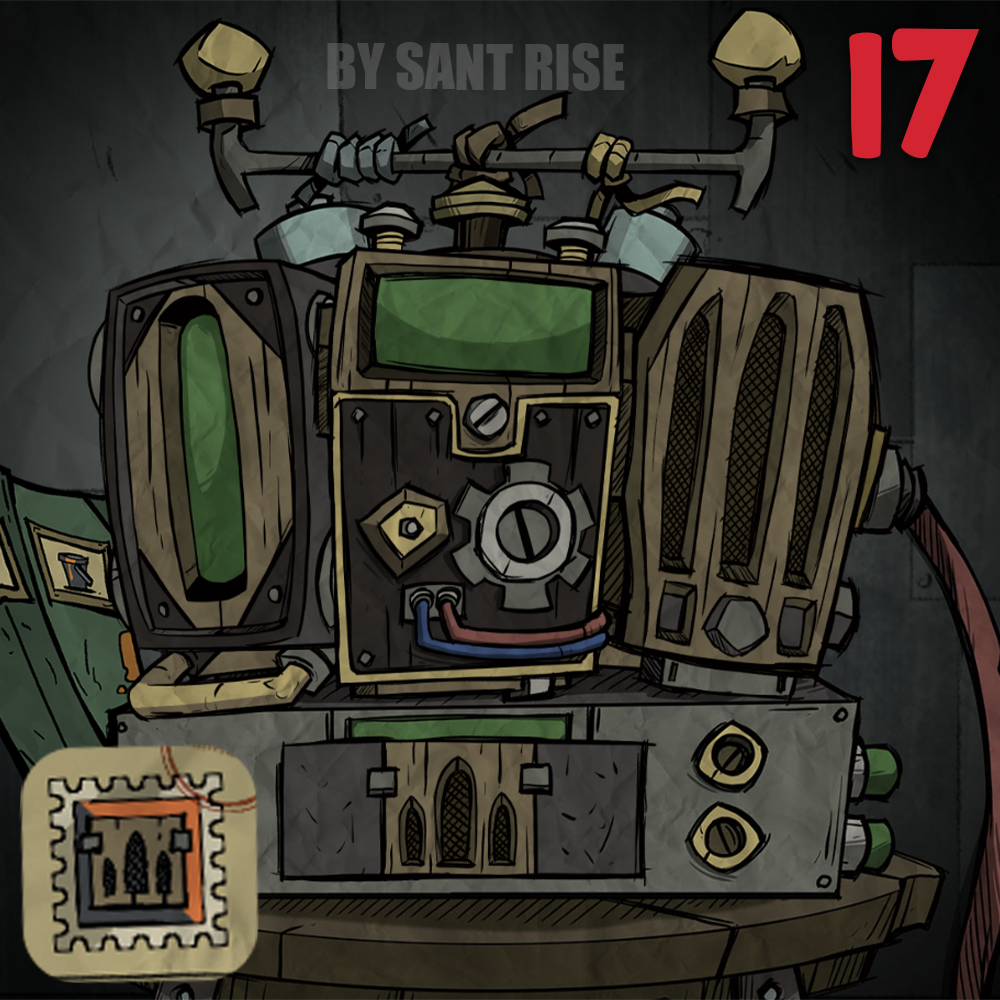
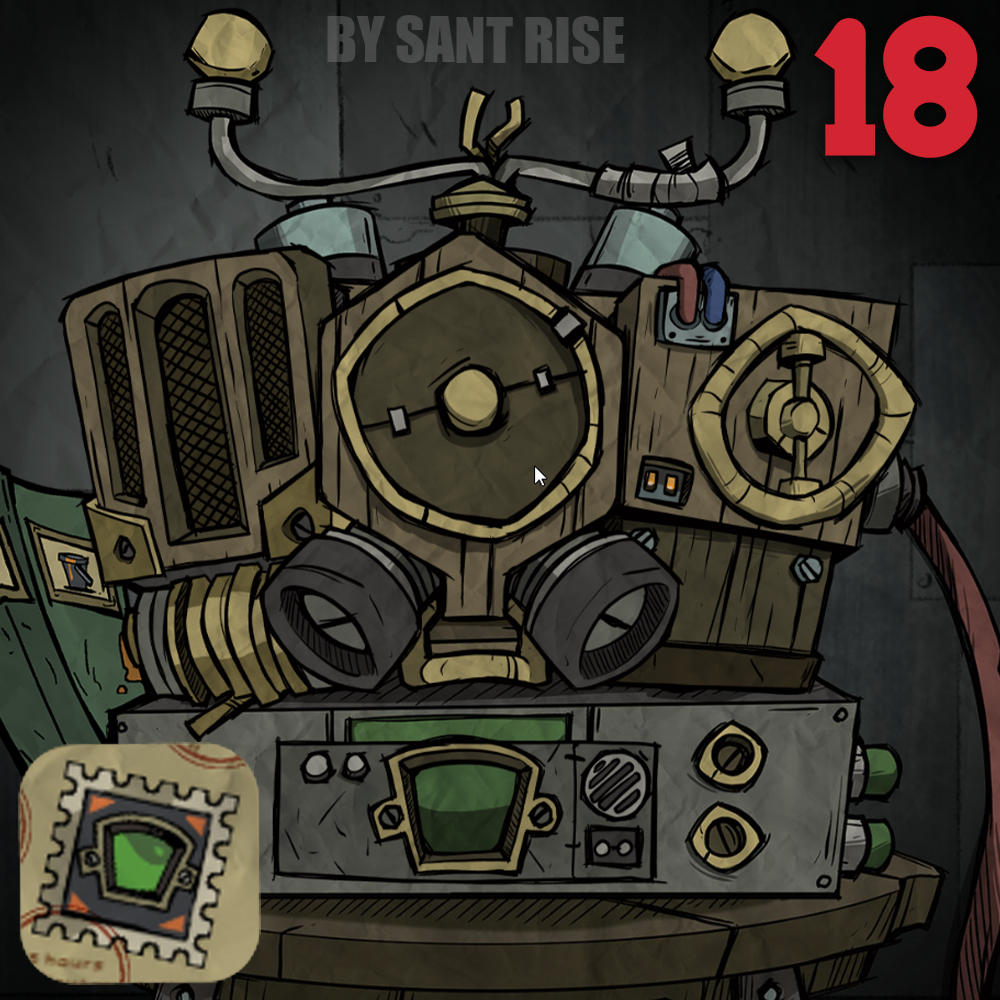
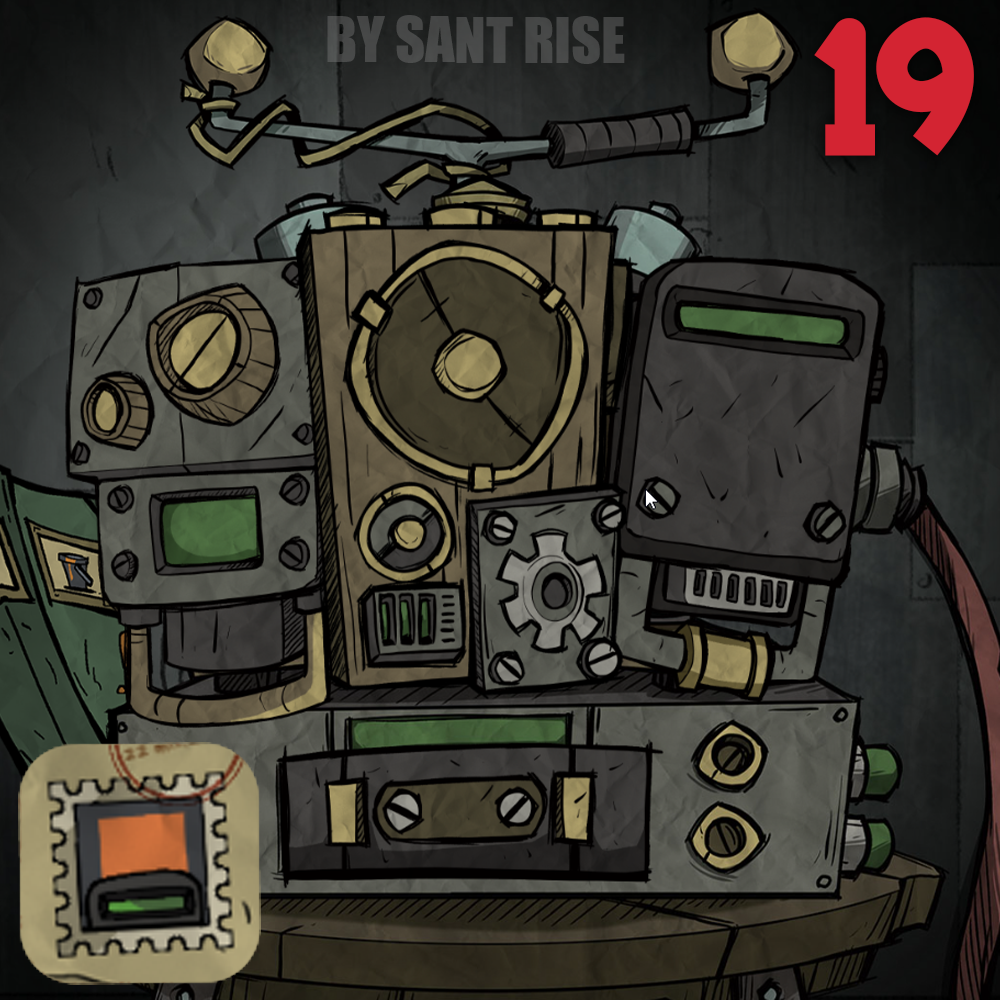
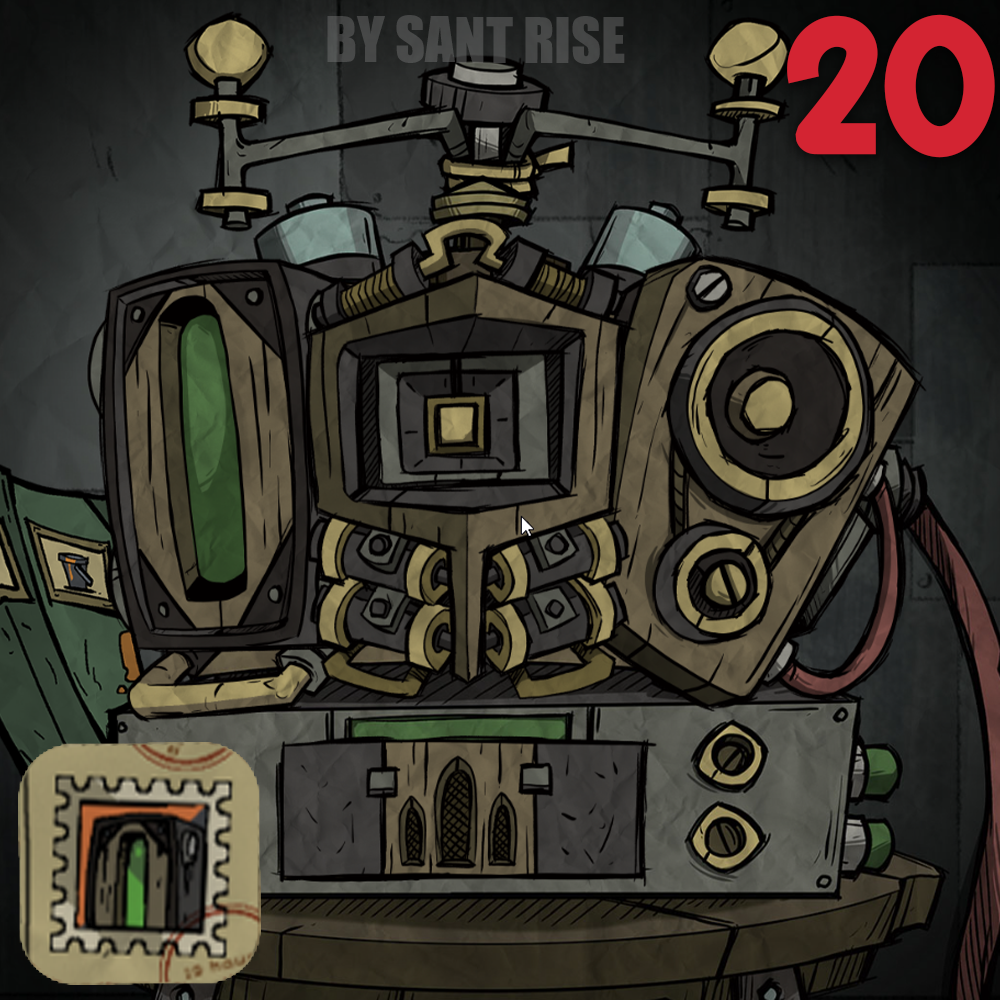
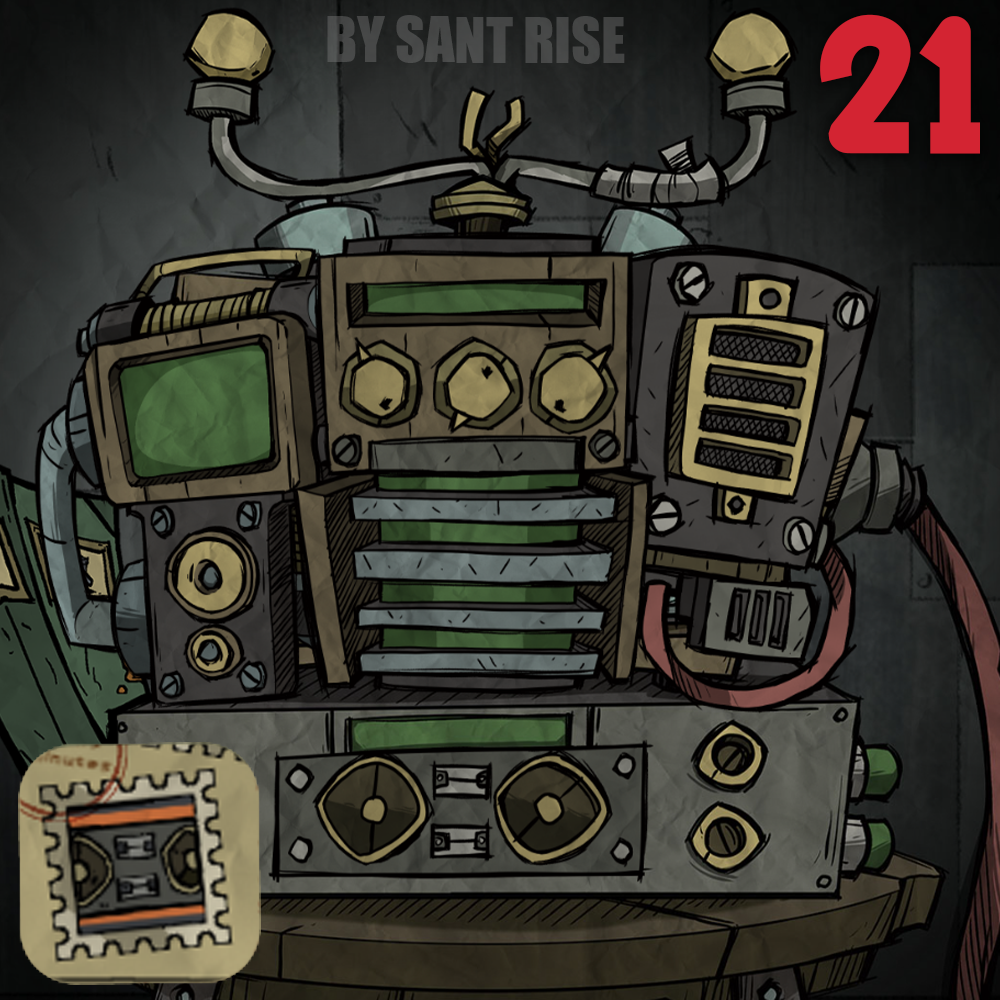
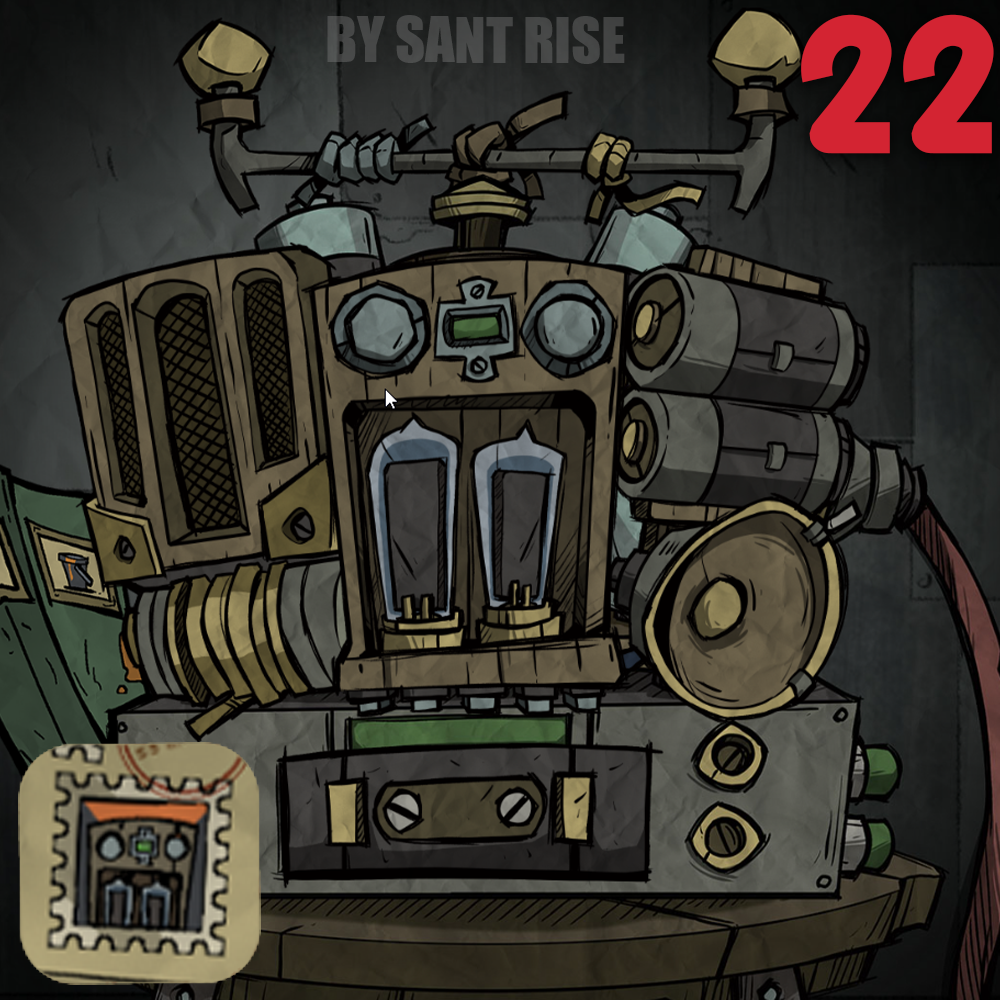
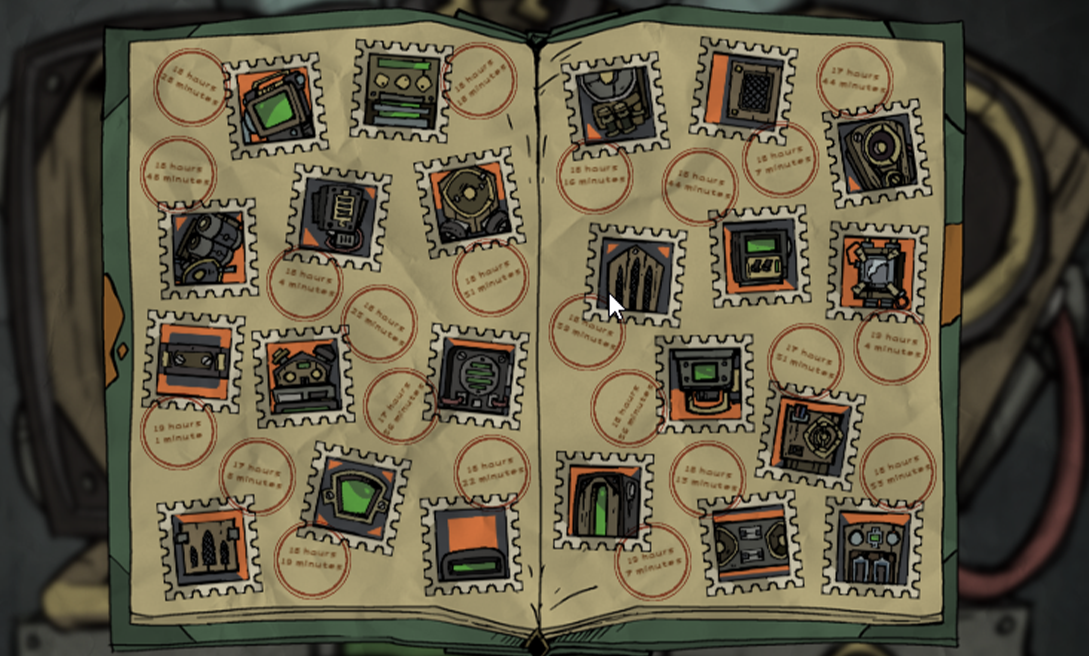 To collect all these stamps, you need to assemble 22 specific combinations of the radio.
❗To complete this puzzle, it’s important to find all 40 pieces of the radio.
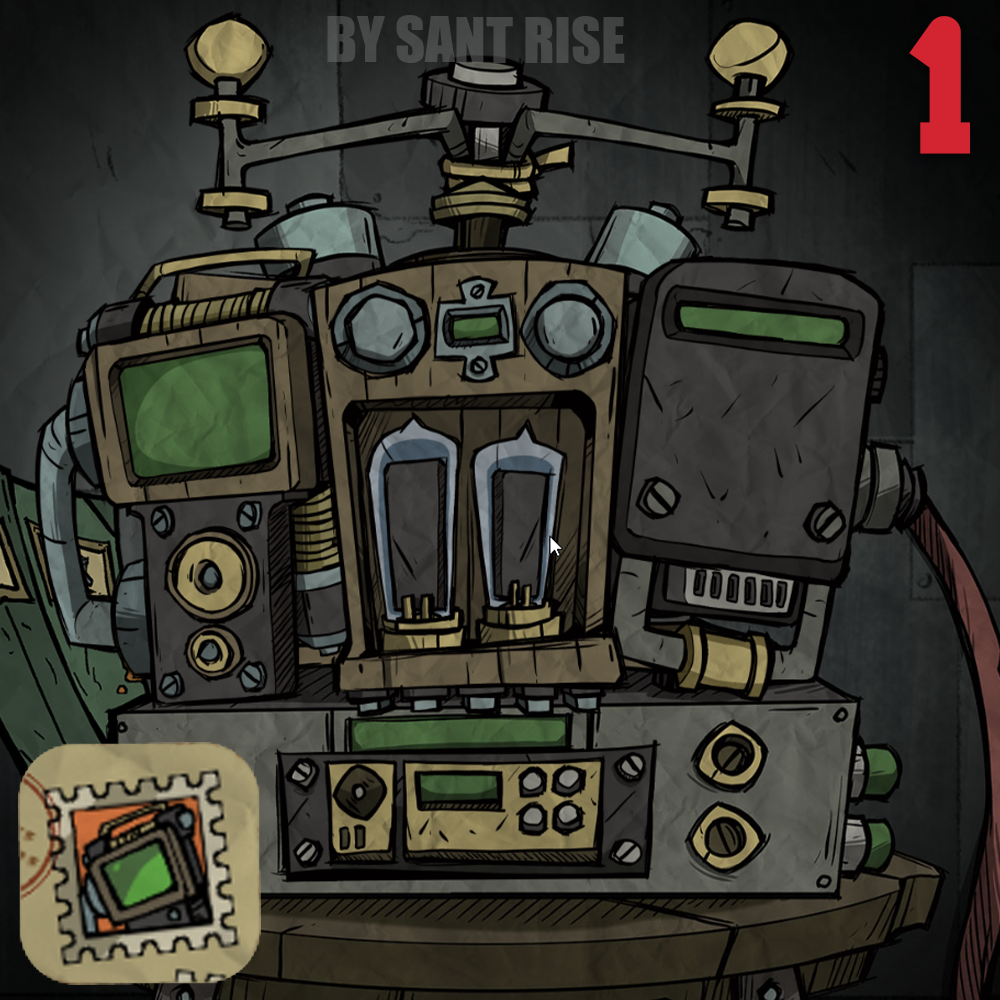
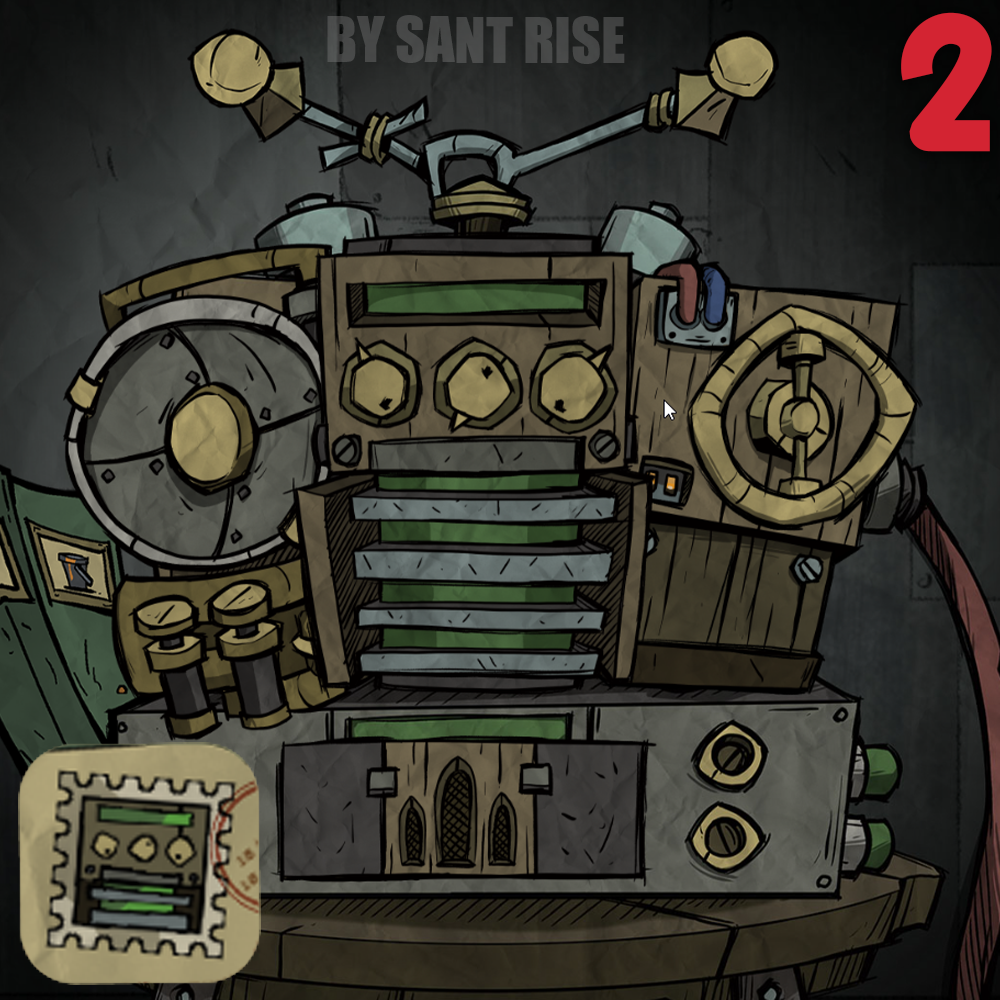
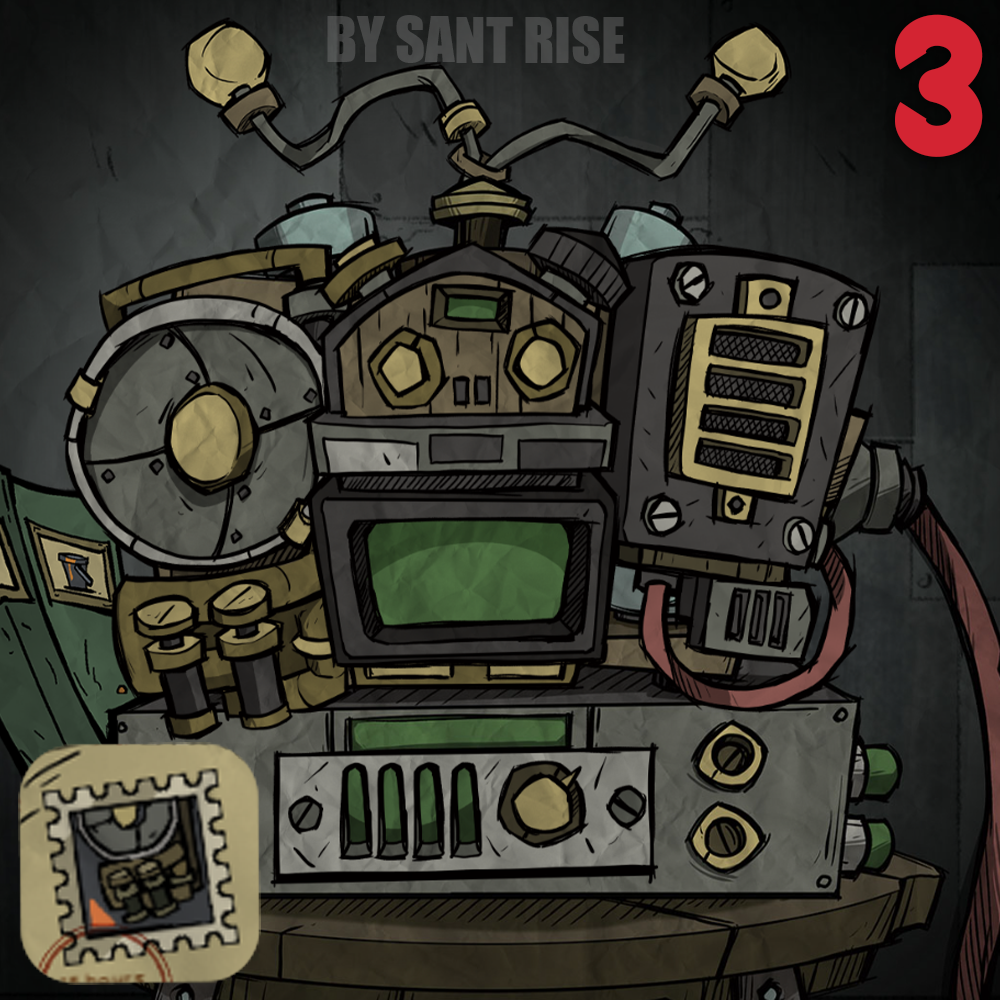
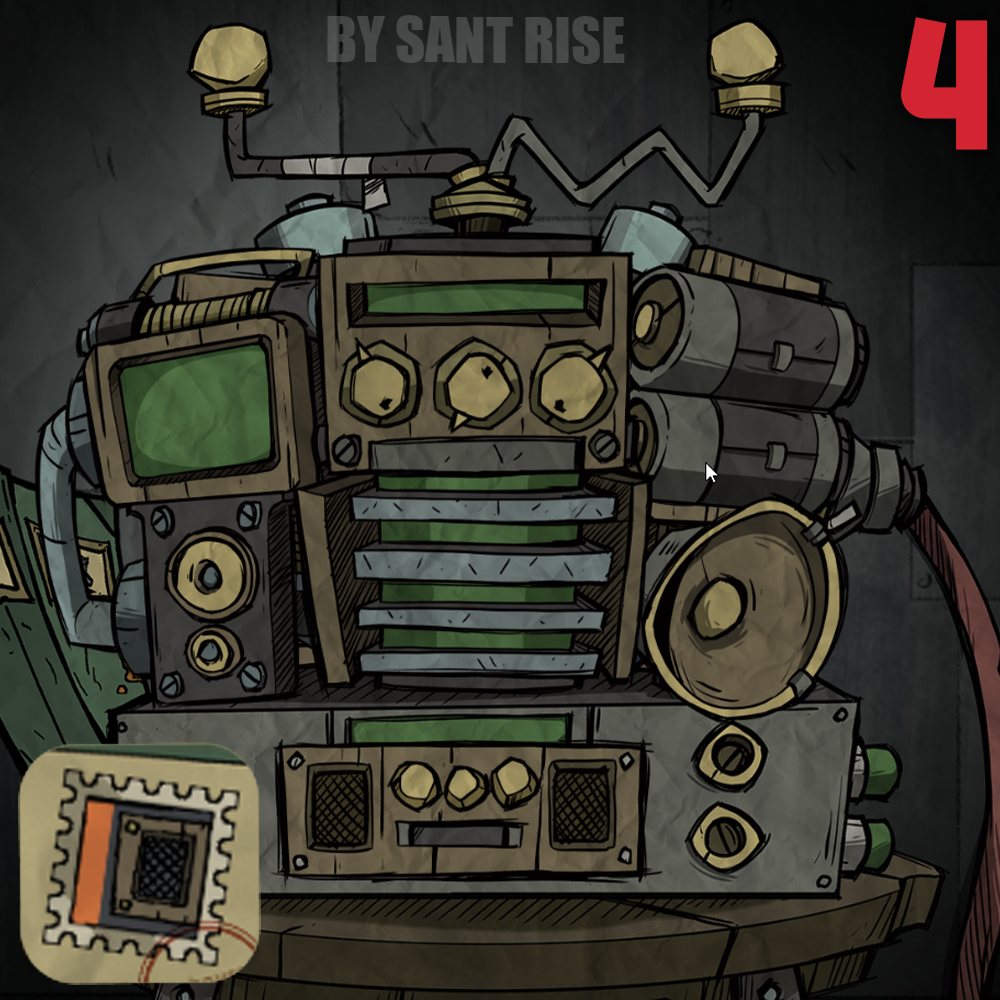
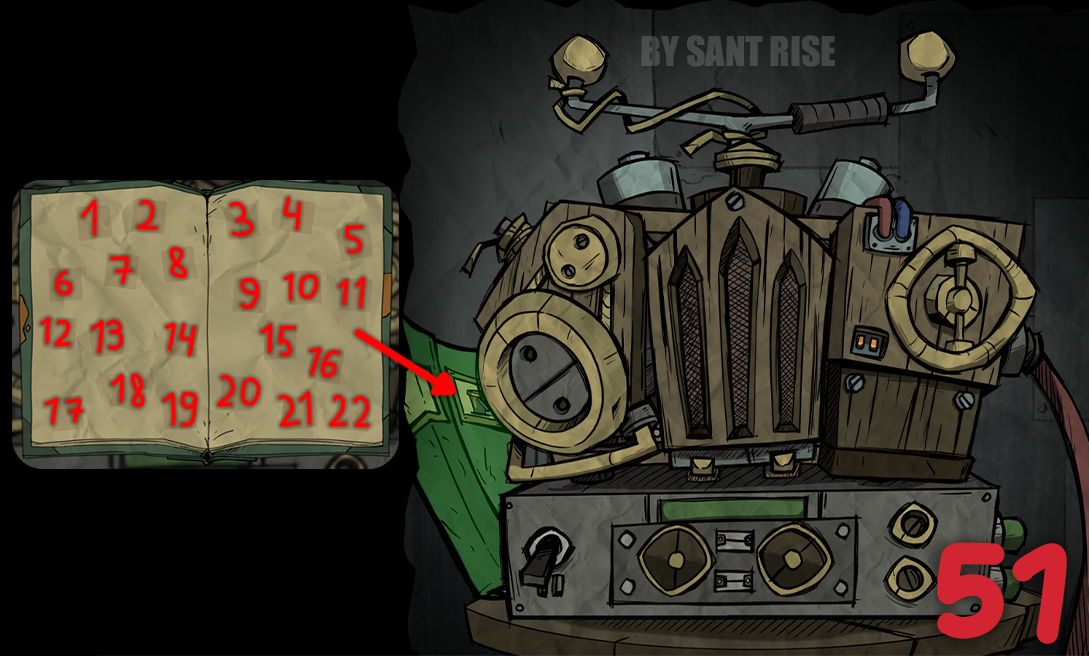 Let’s go back to the radio. Now you need to assemble all (22) of its combinations. You can check the combinations using the book shown in the image above. If you miss any of the badges, just look it up by number and try again.
⠀

- Free Spools, Klei Points, Twitch Drops (22nd-July-2026)★ 5 (8.7k)283k views12k ♥5 minUpdated 22 Jul
- Modding Don't Starve and Don't Starve Together★ 5 (1.8k)263k views2.3k ♥4 minUpdated 11 Oct, 2024
- ⭐ All links for Free Spools, Klei Points & Twitch Drops★ 5 (4.8k)139k views5.2k ♥1 minBulgarianUpdated 21 Jul
- Don't Starve Together Ultimate Guide★ 5 (2.5k)86k views4.6k ♥222 minUpdated 17 Nov, 2023
- Полезные моды для Don't Starve Together★ 5 (503)58k views955 ♥4 minRussianUpdated 11 Nov, 2024
- ВСЕ Кулинарные РЕЦЕПТЫ и способы их приготовления★ 5 (1.8k)44k views2.5k ♥6 minRussianUpdated 15 Dec, 2022


- Upgrading to PremiumTeam Fortress 2★ 5 (20k)1441k views11k ♥6 minUpdated May 11, 2022
- No More Room in Hell Official ManualNo More Room in Hell★ 5 (2.8k)569k views2.1k ♥29 minUpdated Apr 22, 2019
- NMRiH Community Hosting GuidesNo More Room in Hell★ 5 (526)351k views653 ♥1 minUpdated Aug 10, 2022
- ULTIMATE GUIDE FOR GAME DEV TYCOONGame Dev Tycoon★ 5 (5.8k)326k views10k ♥4 minUpdated 23 Jan, 2014
- How to 'Git Gud' Soon™MORDHAU★ 5 (2k)318k views3k ♥68 minUpdated Nov 16, 2024
- Лучшие кооперативные игры SteamPAYDAY 2★ 5 (1.5k)315k views2.1k ♥56 minRussianUpdated Apr 27, 2025






This guide was created by its original author on the Steam Community. Are you the author and want it removed? Request removal.