Fwatch - Useful Features
Installation
FWATCH IS ONLY FOR THE LEGACY VERSION OF THE GAME. NOT FOR THE REMASTER.
Go to https://ofp-faguss.com/fwatch/download and download installer. Unpack archive using password "fwatch". Make sure your game was run at least once since installing it on Steam and then start the installer.
Installer will create a shortcut on the desktop. Use it to play the game.
If your antivirus / firewall is giving you trouble then add fwatch.dll / fwatch.exe to the exception list.
Go to https://ofp-faguss.com/fwatch/download and download installer. Unpack archive using password "fwatch". Make sure your game was run at least once since installing it on Steam and then start the installer.
Installer will create a shortcut on the desktop. Use it to play the game.
If your antivirus / firewall is giving you trouble then add fwatch.dll / fwatch.exe to the exception list.
Changing Mods
Fwatch (along with OFP Aspect Ratio pack which was in the installer) adds a mod selector to the game main screen.
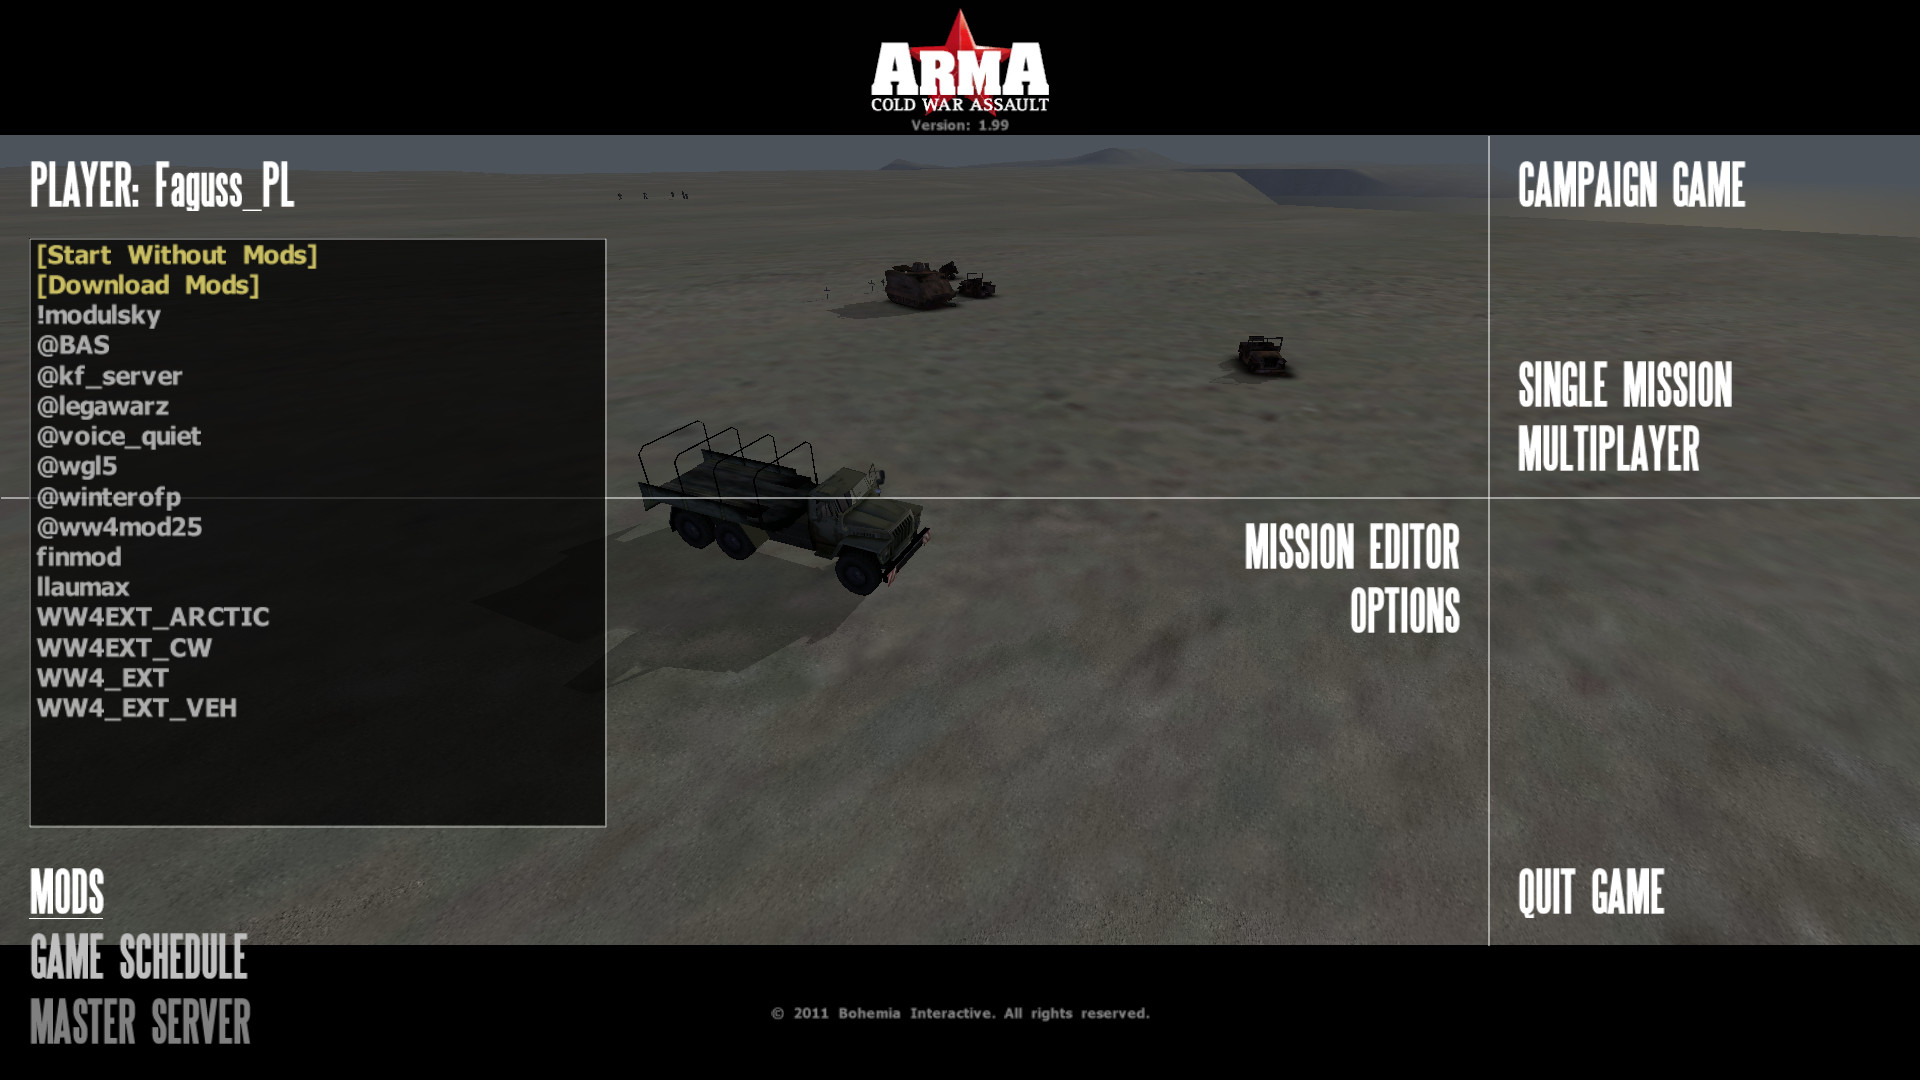
In the main menu click on the Mods button (in the lower left corner). Double-click on a name from the list to restart the game with that mod.
To load more than one modfolder hold SHIFT while double-clicking. Release SHIFT before the last item.
Mod selected with SHIFT will appear in red. Click again to remove it.
Currently loaded mods are marked pink on the list.
If there's a combination of mods you're using often then use option [Add Shortcut] to create a quick launch button.
In the main menu click on the Mods button (in the lower left corner). Double-click on a name from the list to restart the game with that mod.
To load more than one modfolder hold SHIFT while double-clicking. Release SHIFT before the last item.
Mod selected with SHIFT will appear in red. Click again to remove it.
Currently loaded mods are marked pink on the list.
If there's a combination of mods you're using often then use option [Add Shortcut] to create a quick launch button.
Downloading Mods
There's a bunch of mods that you can install automatically.
In the game main menu select Mods, then double-click on the [Downloads Mods]. A list will appear. Click on any name to display more information.
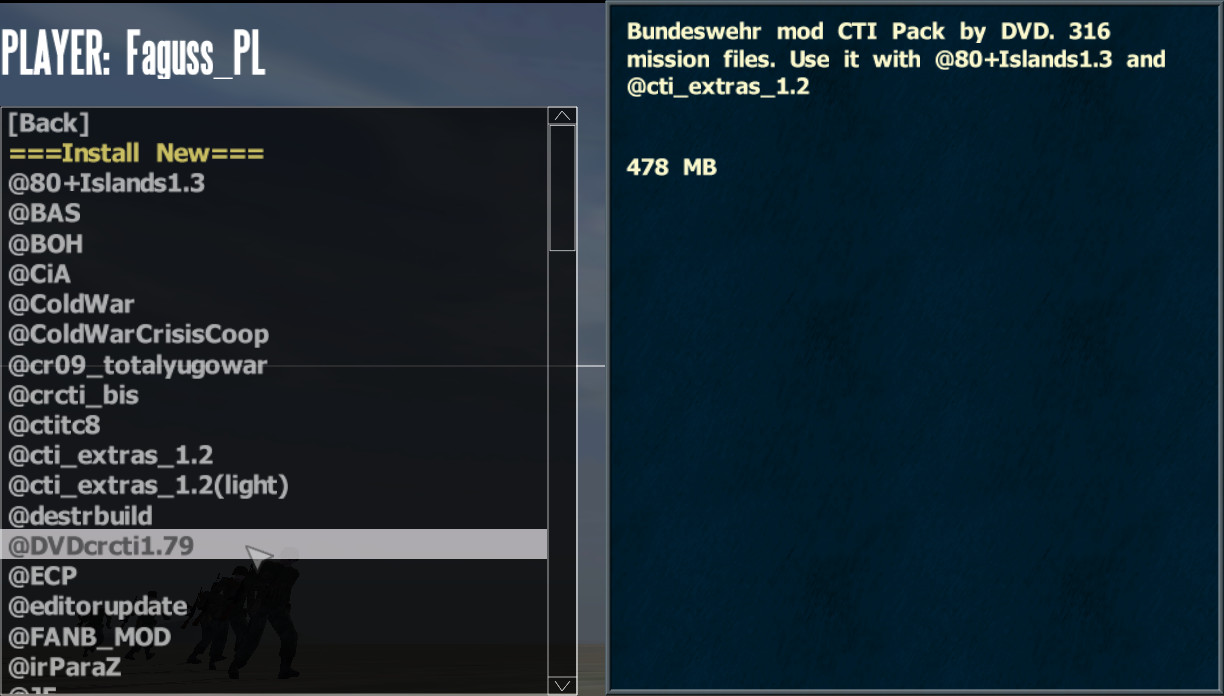
Double-click on a name to start the installation.
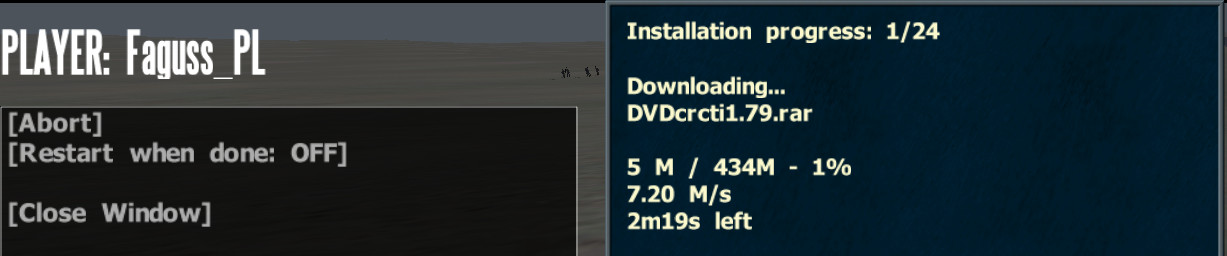
While waiting you can safely play the game or quit it.
Complete list of downloadable mods you'll find here: https://ofp-faguss.com/schedule/allmods
Installer replaced file "dta\anims.pbo" with a new one that will make the game automatically check for mod updates on launch.

To disable this feature navigate to the "fwatch\mdb" folder. Open file "fwatch_version.db" in a text editor and change value "onlinecheck" to 0.
In the game main menu select Mods, then double-click on the [Downloads Mods]. A list will appear. Click on any name to display more information.
Double-click on a name to start the installation.
While waiting you can safely play the game or quit it.
Complete list of downloadable mods you'll find here: https://ofp-faguss.com/schedule/allmods
Installer replaced file "dta\anims.pbo" with a new one that will make the game automatically check for mod updates on launch.
To disable this feature navigate to the "fwatch\mdb" folder. Open file "fwatch_version.db" in a text editor and change value "onlinecheck" to 0.
Modfolder Missions
To avoid the mess with having lots of missions in a single MPMissions folder you can now store them in the modfolders instead. Fwatch will automatically transfer files when the mods are loaded.
Side note: mods you downloaded from the list already have their own mission folders.
For example: create Missions and MPMissions directories inside a modfolder.
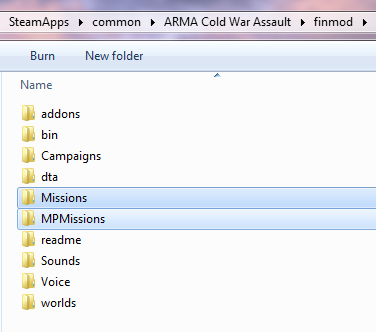
Then copy files there
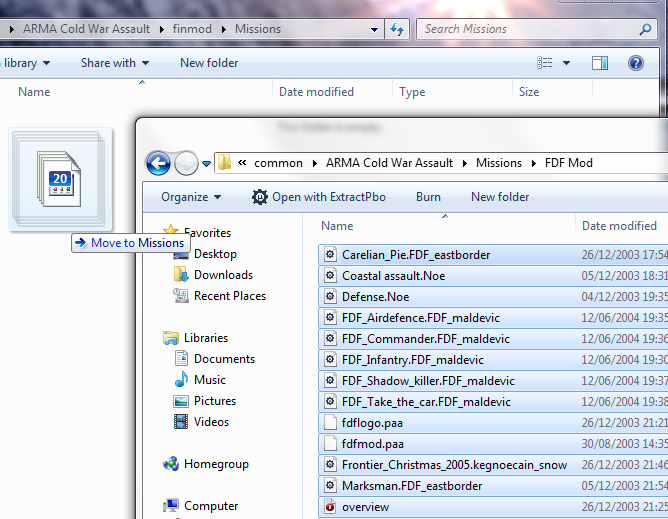
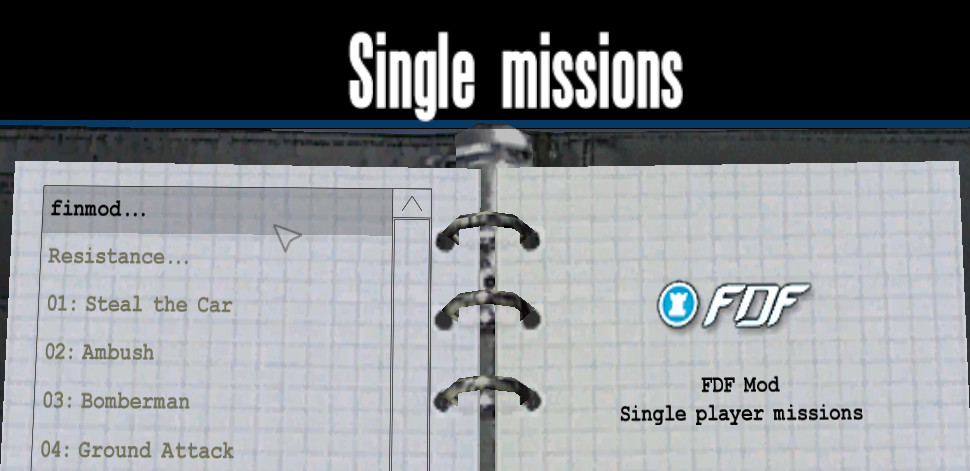
Now the start the game with this mod. In Single Player menu a sub-directory with a modfolder name will appear.
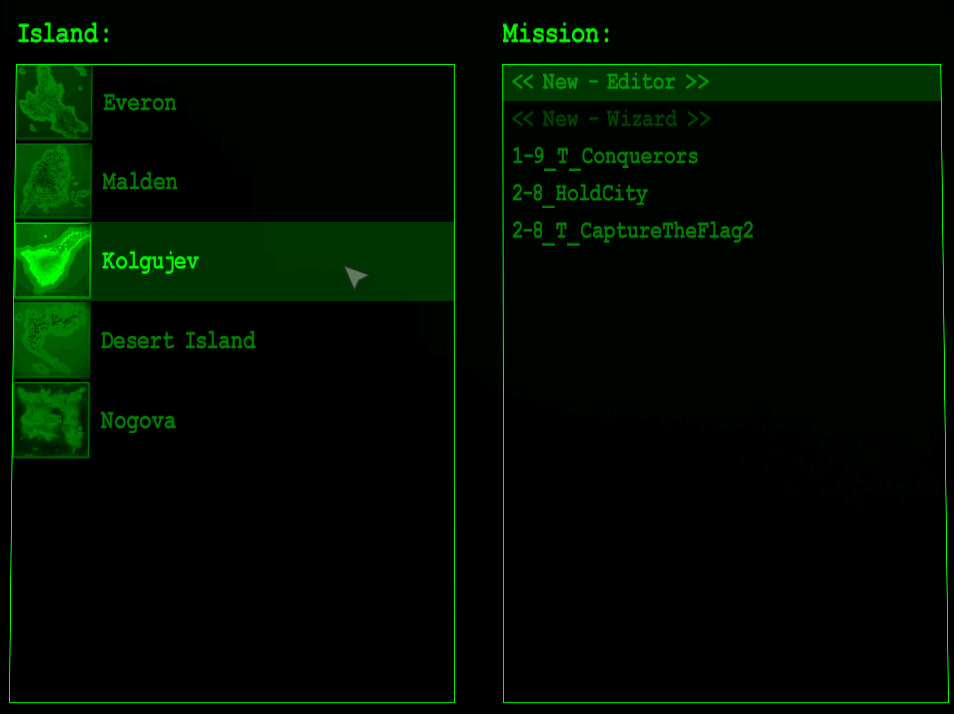
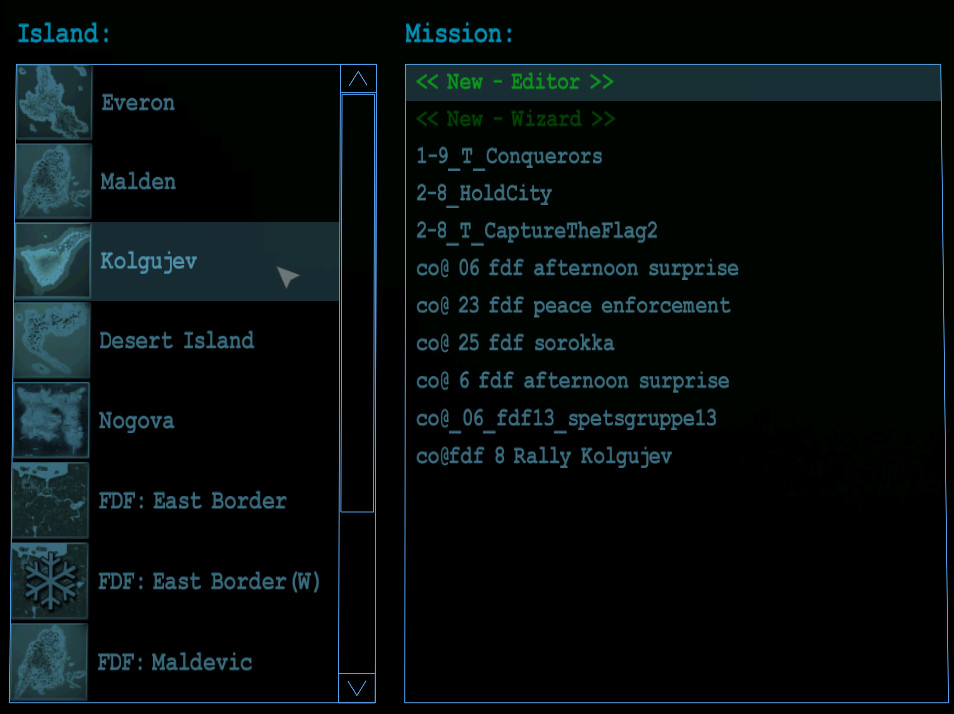
In multiplayer selection screen missions for this mod will appear only when it's loaded.
Here's a list showing how Fwatch transfer files:
Side note: mods you downloaded from the list already have their own mission folders.
For example: create Missions and MPMissions directories inside a modfolder.
Then copy files there
Now the start the game with this mod. In Single Player menu a sub-directory with a modfolder name will appear.
In multiplayer selection screen missions for this mod will appear only when it's loaded.
Here's a list showing how Fwatch transfer files:
From:
To:
<mod>\Missions
Missions
<mod>\MPMissions
MPMissions
<mod>\MissionsUsers
Users\<player>\Missions
<mod>\MPMissionsUsers
Users\<player>\MPMissions
<mod>\IslandCutscenes
Addons
<mod>\IslandCutscenes\_Res
Res\Addons
<mod>\Templates
Templates
<mod>\SPTemplates
SPTemplates
Server Browser
Multiplayer server browser stopped working when GameSpy was shutdown (July 2014). Game is locked to the master.gamespy .com but Fwatch automatically replaces that address with the one pointing to the community master server.
If you ever need to change this address then go to the game main menu, click on Mods, select Master Server and then double-click on the [Add New].
If you ever need to change this address then go to the game main menu, click on Mods, select Master Server and then double-click on the [Add New].
Reporting Listen Server
By default, the game does not report multiplayer sessions created in the game to the master server. Fwatch can do that instead.
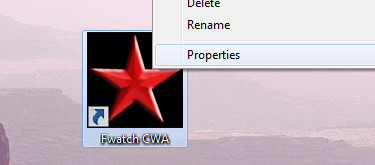
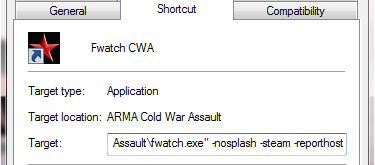
Right-click on Fwatch shortcut, select "Properties" and then add add parameter -reporthost to the "Target" field.
Start CWA and select Multiplayer -> New. Your game will be visible in the server browser within a short while.
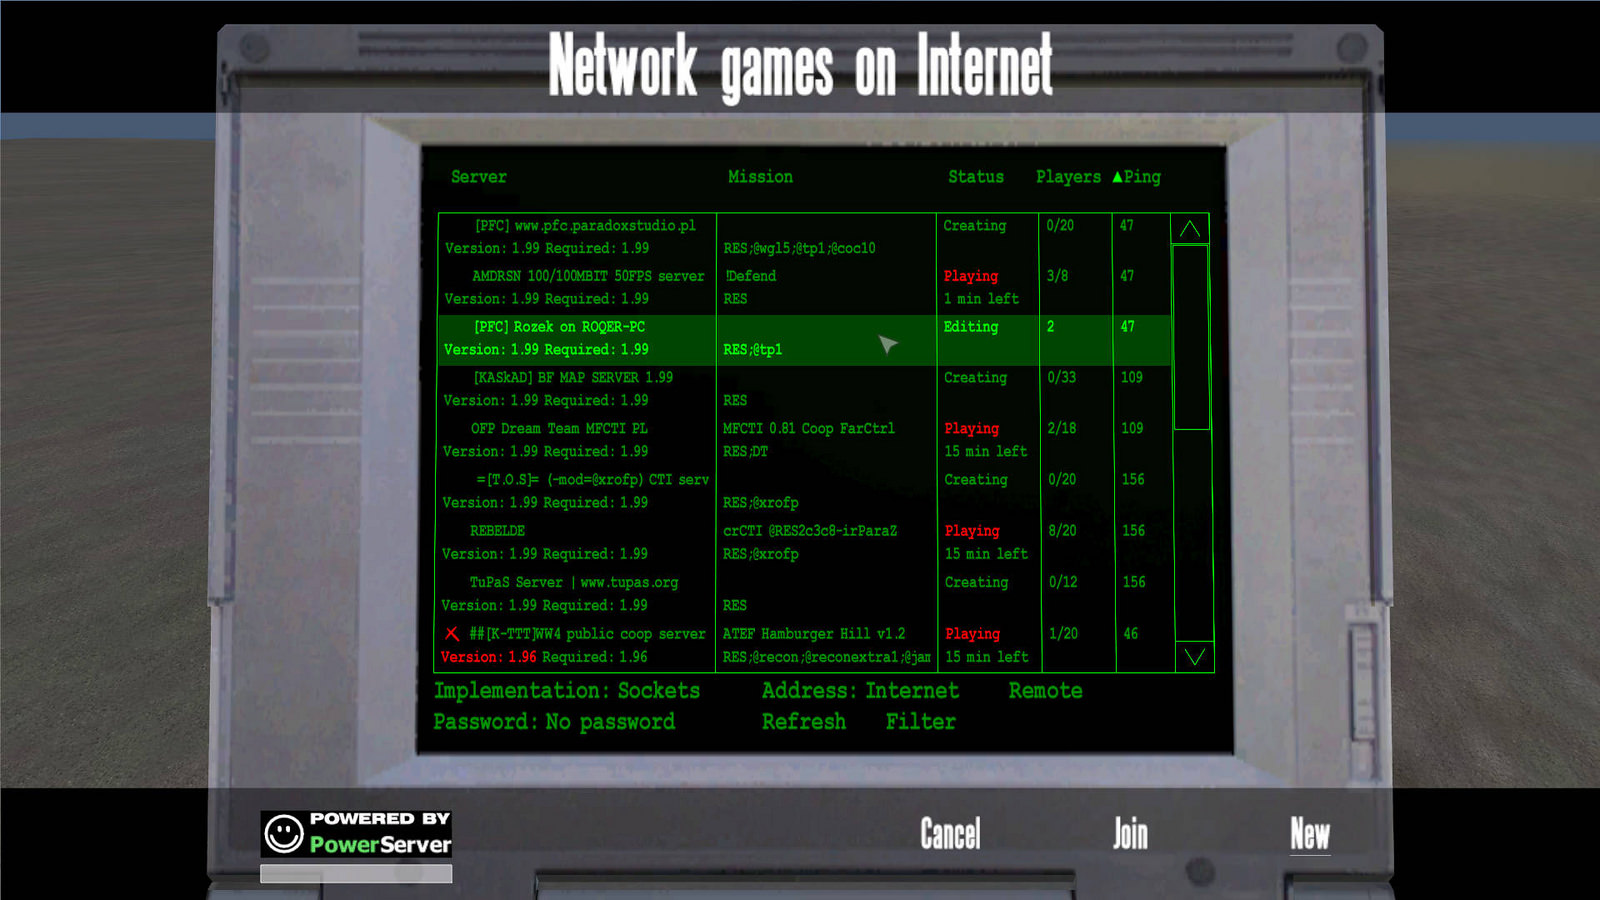
To secure your game click on Password: No password and type in password. Then select New.
If you want your server to use a different port then go to Steam library, right-click on the game, select "Properties" and in "Launch options" type -port=<number> parameter (default is 2302).
To skip main menu screen and immediately start hosting add -host to the "Launch options"
Right-click on Fwatch shortcut, select "Properties" and then add add parameter -reporthost to the "Target" field.
Start CWA and select Multiplayer -> New. Your game will be visible in the server browser within a short while.
To secure your game click on Password: No password and type in password. Then select New.
If you want your server to use a different port then go to Steam library, right-click on the game, select "Properties" and in "Launch options" type -port=<number> parameter (default is 2302).
To skip main menu screen and immediately start hosting add -host to the "Launch options"
Game Schedule
When you organize a multiplayer session register it on the OFP Game Schedule[ofp-faguss.com] website (you can do it from Steam overlay using web browser). Players will be able to automatically download required mods and connect to your server.
Click on the Login button in the upper right corner and then select Sign in with Steam.

Next add a new server.
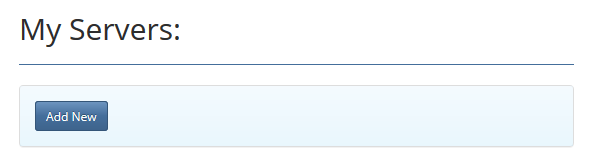
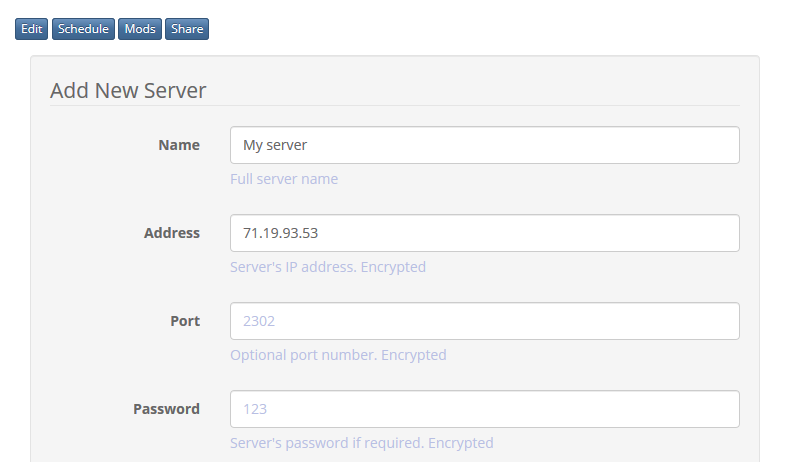
Write name and IP of the server. Optionally other information.
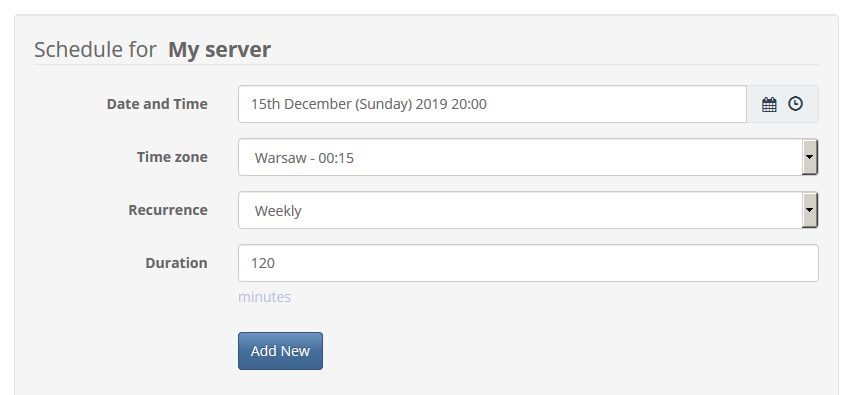
Click on the "Schedule" button on the top to move to the section where you set up game times and add a new one.
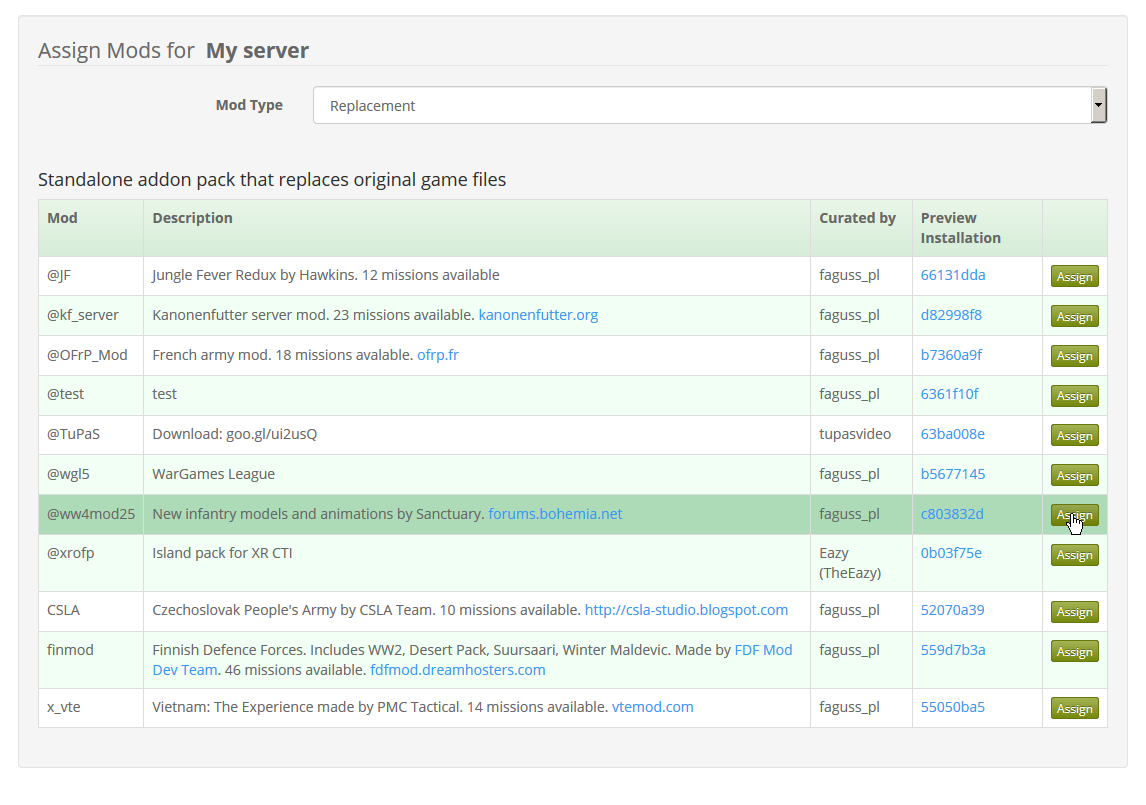
If your server has mods then go to the "Mods" section and select the ones being used. If you have your own mods then you can add a new mod to the website from the main page.
Start the game with Fwatch. Click on the Mods --> Game Schedule. Select your server from the list.
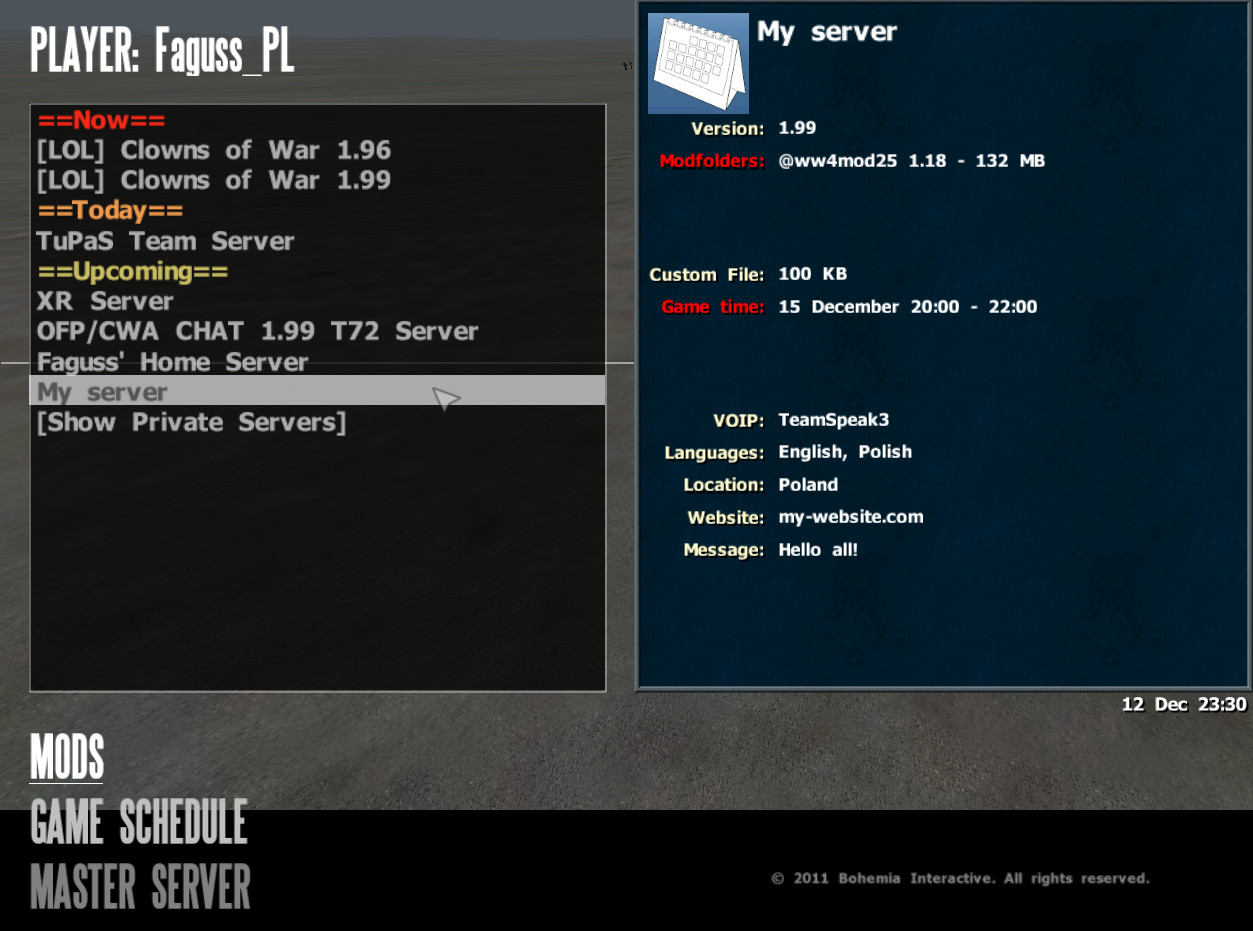
Double-click to open options. If you don't have required mods then [Download] button will appear. Otherwise it will be [Connect].
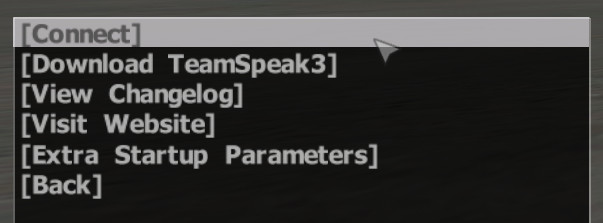
Double-click on it to restart the game with required mods and connect to the server.
Click on the Login button in the upper right corner and then select Sign in with Steam.
Next add a new server.
Write name and IP of the server. Optionally other information.
Click on the "Schedule" button on the top to move to the section where you set up game times and add a new one.
If your server has mods then go to the "Mods" section and select the ones being used. If you have your own mods then you can add a new mod to the website from the main page.
Start the game with Fwatch. Click on the Mods --> Game Schedule. Select your server from the list.
Double-click to open options. If you don't have required mods then [Download] button will appear. Otherwise it will be [Connect].
Double-click on it to restart the game with required mods and connect to the server.
Customizable HUD
Not all of the HUD elements can be changed through standard modding but it's possible to tweak them with Fwatch. Installer automatically adds configuration that gives you enlarged chat and action menu.
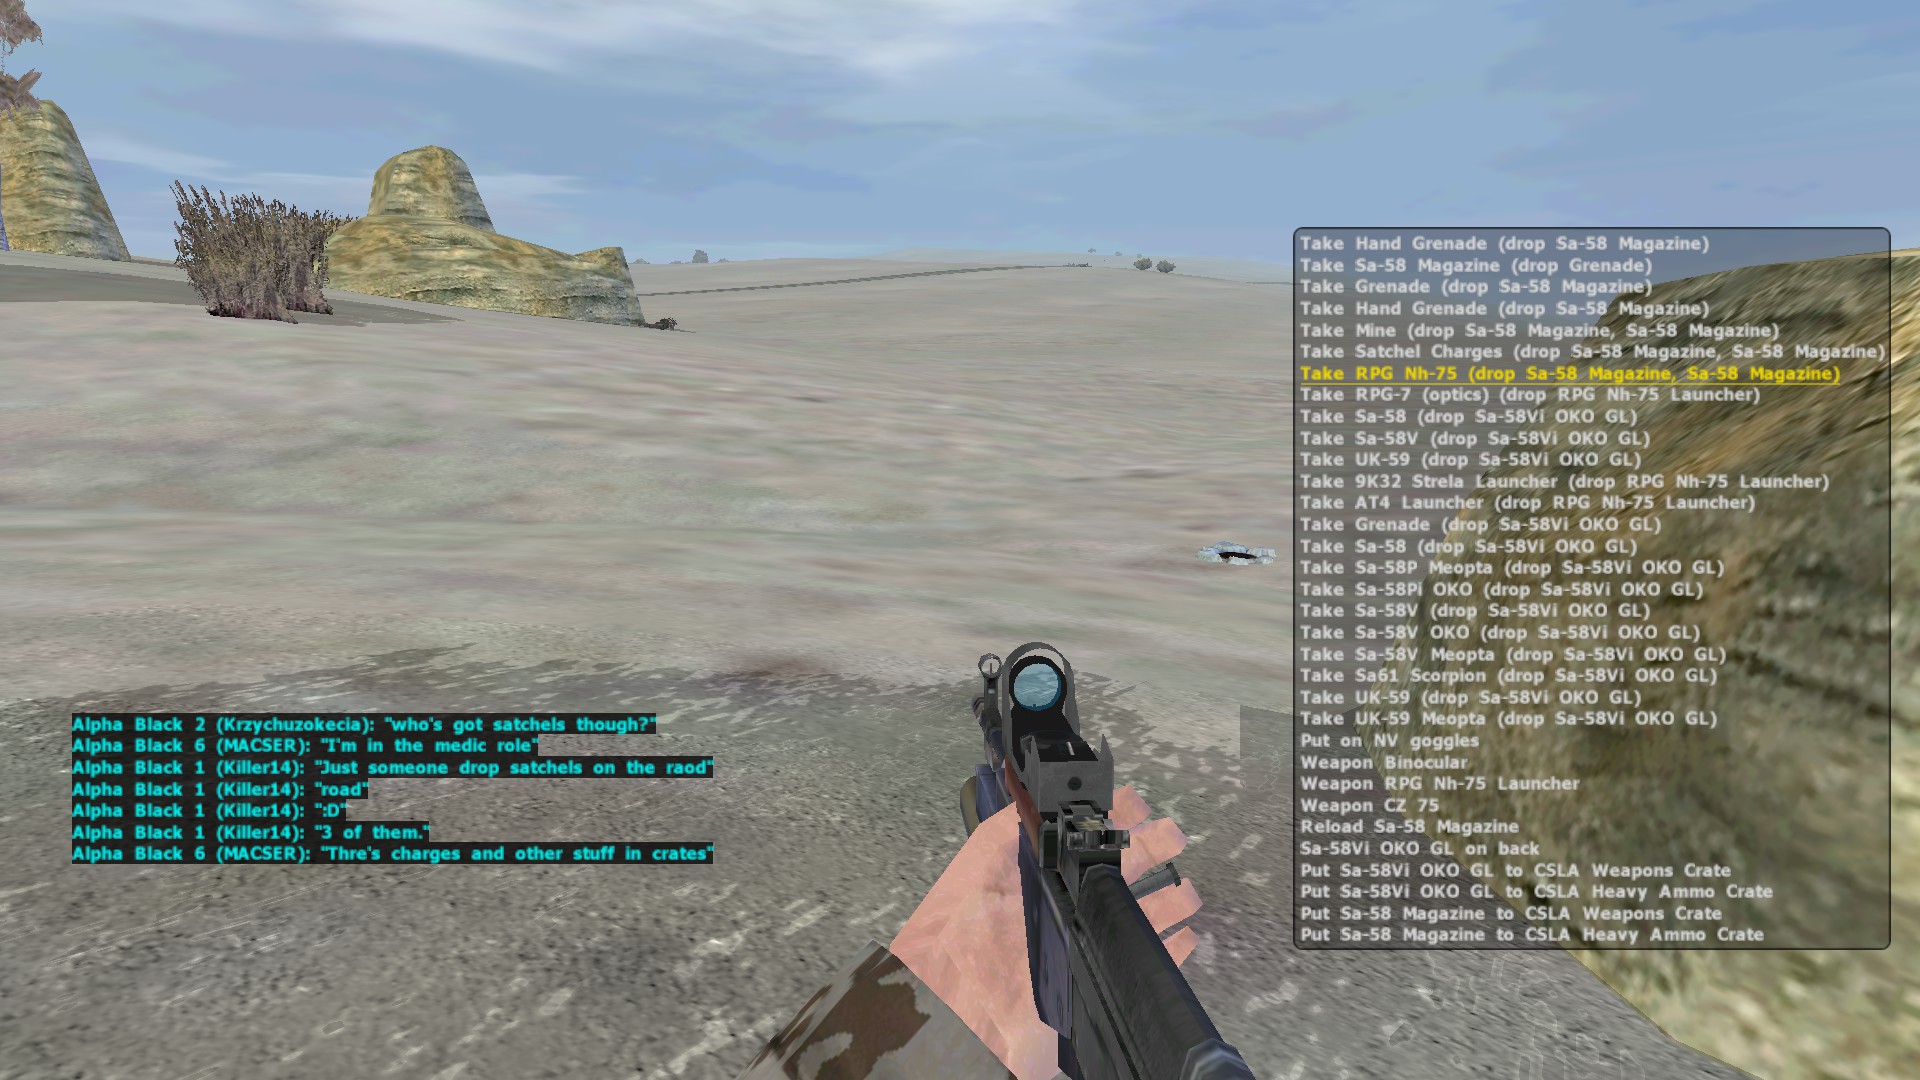
If you want to change these settings then go to the "bin" folder and open "config_fwatch_hud.cfg" in text editor.
Each mod can have its own settings if you place the file in <mod>\bin folder. Some of the mods available for automatic download already come with their own settings.
Here's a list of items that can be modified:
To change color write four numbers (red, green, blue, opacity) ranging from 0 to 1 separated by commas. For example:
Fwatch shifts items to the side for widescreen. To disable it you can add noar. For example:
If you want to change these settings then go to the "bin" folder and open "config_fwatch_hud.cfg" in text editor.
Each mod can have its own settings if you place the file in <mod>\bin folder. Some of the mods available for automatic download already come with their own settings.
Here's a list of items that can be modified:
Name
Value Type
Description
action_x
Float
action menu horizontal position
action_y
Float
action menu vertical position
action_w
Float
action menu width
action_h
Float
action menu height
action_rows
Integer
action menu maximum number of rows
action_colorback
Array
action menu background colour
action_colortext
Array
action menu text colour
action_colorsel
Array
action menu highlight colour
action_size
Float
action menu single row size
radiomenu_x
Float
radio menu horizontal position
radiomenu_y
Float
radio menu vertical position
radiomenu_w
Float
radio menu width
radiomenu_h
Float
radio menu height
tank_x
Float
tank silhoutte horizontal position
tank_y
Float
tank silhoutte vertical position
tank_w
Float
tank silhouette width
tank_h
Float
tank silhouette height
radar_x
Float
radar display horizontal position
radar_y
Float
radar display vertical position
radar_w
Float
radar display width
radar_h
Float
radar display height
compass_x
Float
compass display horizontal position
compass_y
Float
compass display vertical position
compass_w
Float
compass display width
compass_h
Float
compass display height
leader_x
Float
leader bar horizontal position
leader_y
Float
leader bar vertical position
leader_w
Float
leader bar width
leader_h
Float
leader bar height
groupdir_x
Float
group compass horizontal position
groupdir_y
Float
group compass vertical position
groupdir_w
Float
group compass width
groupdir_h
Float
group compass height
chat_x
Float
chat horizontal position
chat_y
Float
chat vertical position
chat_w
Float
chat width
chat_h
Float
chat height
chat_rows
Integer
chat maximum number of rows
chat_colorglobal
Array
global chat colour
chat_colorside
Array
side chat colour
chat_colorteam
Array
group chat colour
chat_colorvehicle
Array
vehicle chat colour
chat_colordirect
Array
direct chat colour
chat_colorback
Array
chat background colour
chat_size
Integer
chat single row size
chat_enable
Integer
chat displayed
To change color write four numbers (red, green, blue, opacity) ranging from 0 to 1 separated by commas. For example:
action_colorsel=[0,0.75,0,1]
Fwatch shifts items to the side for widescreen. To disable it you can add noar. For example:
action_x=noar; chat_x=0.5,noar;
More Arma: Cold War Assault Remastered guides
- [RU] Полная русификация ARMA: CWA Legacy★ 5 (333)10k views437 ♥3 minRussianUpdated Jul 20
- Installing addon Red Hammer★ 5 (215)9.2k views196 ♥1 minUpdated May 21, 2014
- Руководство к выживанию в ArmA:Cold War Assault // ArmA:Cold War Assault Survival Guide★ 5 (325)6.5k views166 ♥6 minUpdated Jul 13, 2018
- Arma: Cold War Assault Русификатор★ 4 (166)6.1k views165 ♥1 minRussianUpdated Jun 21, 2016
- Полезное барахло для OFP★ 4 (100)4.7k views189 ♥1 minRussianUpdated Jan 8, 2023
- How use Hot Patch 1.99 to1.96 (Downgading Patch)★ 4 (57)4.7k views58 ♥1 minUpdated Nov 26, 2025




This guide was created by its original author on the Steam Community. Are you the author and want it removed? Request removal.