Golden Moa - Weekly Locations
Basic Info / FAQ
External Links
Spreadsheet - https://docs.google.com/spreadsheets/d/17ihZzNo0esadiMDv4O3jce-kcms_GLx5ZqSgcEuuOn4/edit?usp=sharing
What's the point of collecting these?
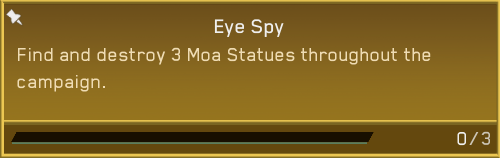 Each week there is a PvE Challenge for destroying three Golden Moa's (Statues), "Eye Spy", which awards one Spartan Point and 100,000 XP. The missions & locations change each week, check the Challenge Hub for more info.
What if the Covenant destroy the Golden Moa's, will they still count?
Yes, those will count. As will scripted explosions, because the game doesn't appear to track how the Golden Moa was destroyed, just if its been destroyed. Although I haven't tested this in co-op.
Each week, how many Golden Moa's are there in each mission?
Most missions will have three Golden Moa's. There are exceptions mostly due to there not being enough spawn locations in some missions. The following list notes all missions known to be an exception:Reach
⠀➟ Winter Contingency⠀(only two locations some weeks)
⠀➟ Lone Wolf⠀(limited to two locations)
Combat Evolved
⠀➟ Halo⠀(two to four locations some weeks)
⠀➟ 343 Guilty Spark⠀(only two locations most weeks)
Halo 2
⠀➟ Metropolis⠀(two to four locations some weeks)
⠀➟ High Charity⠀(only two locations some weeks)
Halo 3
⠀➟ Cortana⠀(only two locations most weeks)
ODST
⠀➟ Kizingo Boulevard⠀(limited to two locations)
⠀➟ ONI Alpha Site⠀(limited to one location)
⠀➟ NMPD HQ⠀(limited to one location)
⠀➟ Kikowani Station⠀(limited to two locations)
⠀➟ Mombasa Streets⠀(only two locations most weeks)
Halo 4
⠀➟ Composer⠀(four locations some weeks)
What do the Grey, Gold & Red icons in the screenshots mean?
They indicate the Rally Points in each mission, reading left to right, and whether or not you'll be able to collect the Golden Moa from the corresponding rally point.
 Grey: A rally point where the Golden Moa isn't in this part of the mission, or that you can not backtrack from this rally point.
 Gold: A rally point where the Golden Moa first appears in the mission, or that you can backtrack from this rally point.
 Red: A rally point where the Golden Moa first appears, but it's impossible, or to difficult to collect.
Do you check every possible location each week, or just the predicted locations?
Just the predicted locations, as the sequence hasn't change in quite awhile. In the past I would check all possible locations, but I've opted to stop the exhaustive search due to a lack of motivation.
None of the Golden Moa's are showing up in-game, What should I do?
Sometimes this can occur, and I assume it's due to a bad sync with the servers.- Some possible solutions are:
- Restart Halo: MCC
- Restart your computer
Reach: 23ʳᵈ July 2026 Weekly Set
Tip of the Spear
Rally Point: Alpha
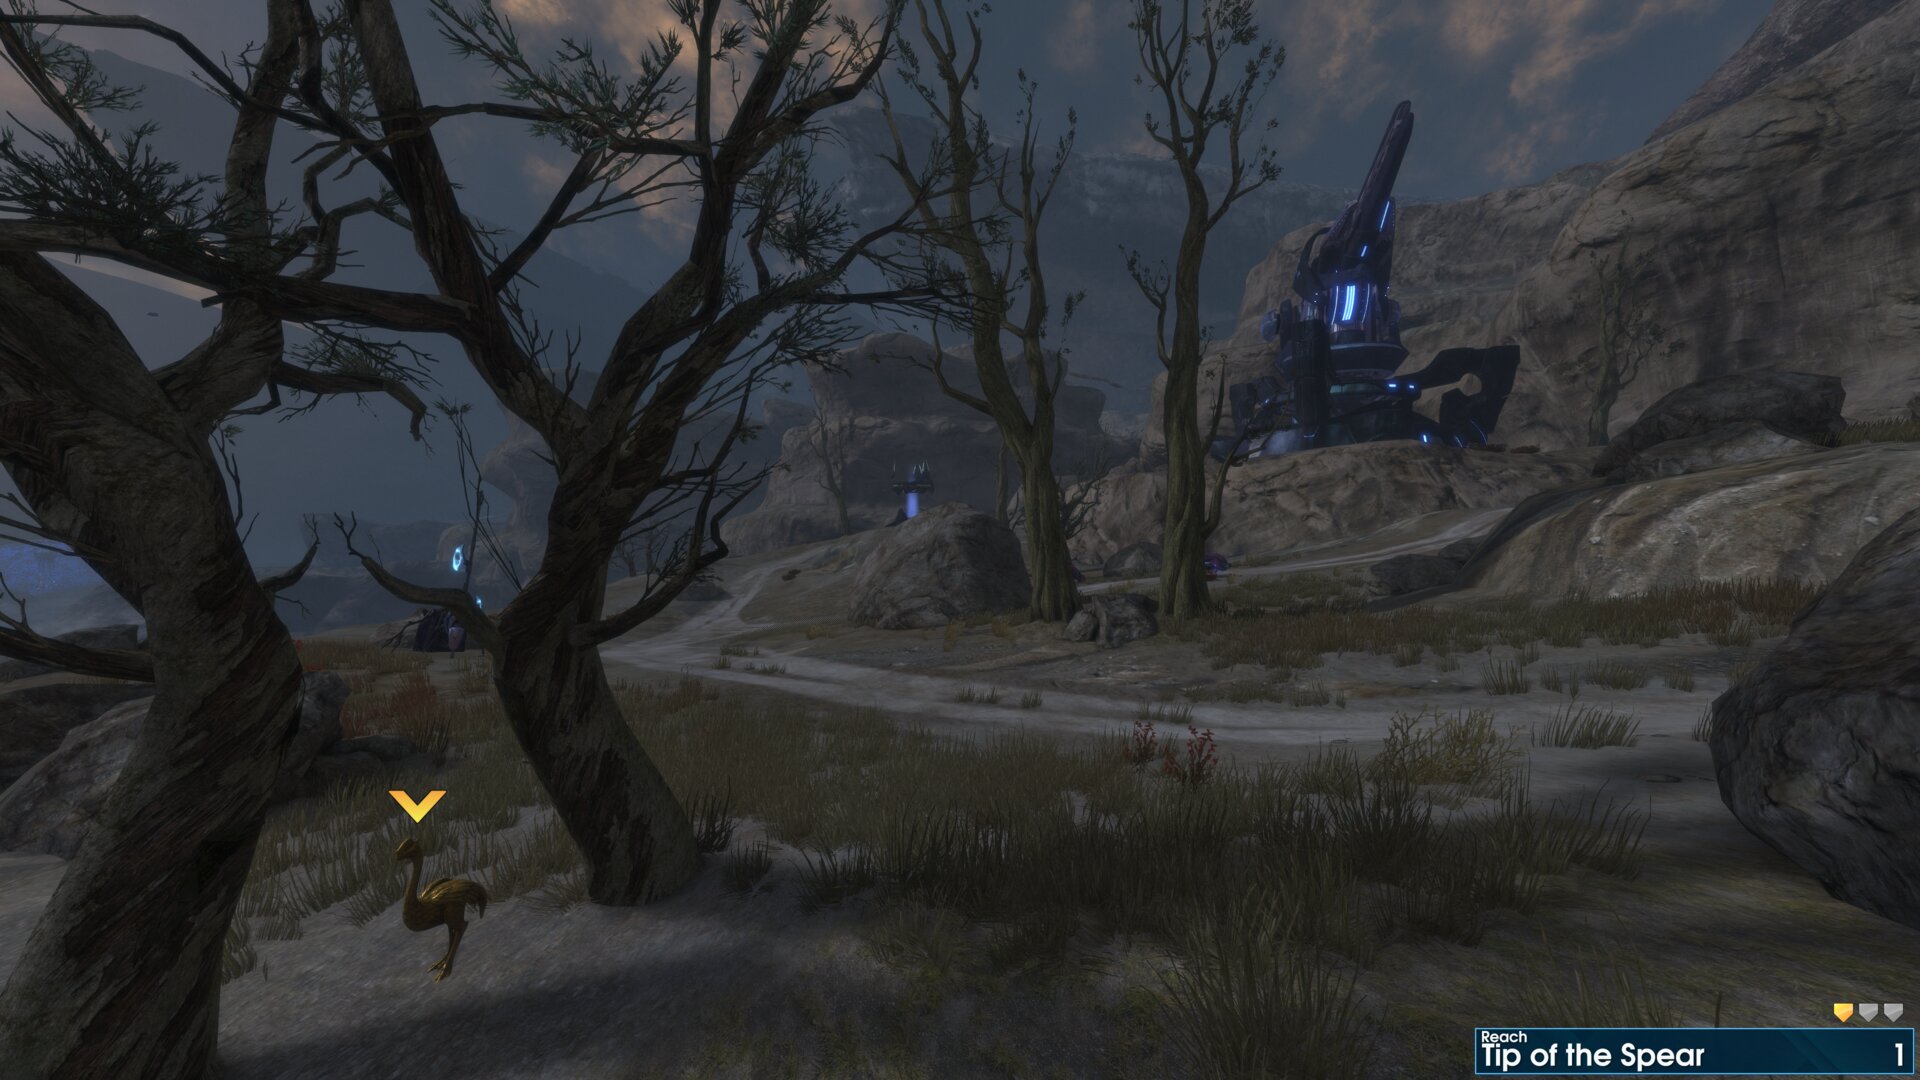
Golden Moa 1 — The Golden Moa is between two trees on the cliff edge, south east of the first Covenant Anti-Aircraft Cannon.
 ⠀
⠀
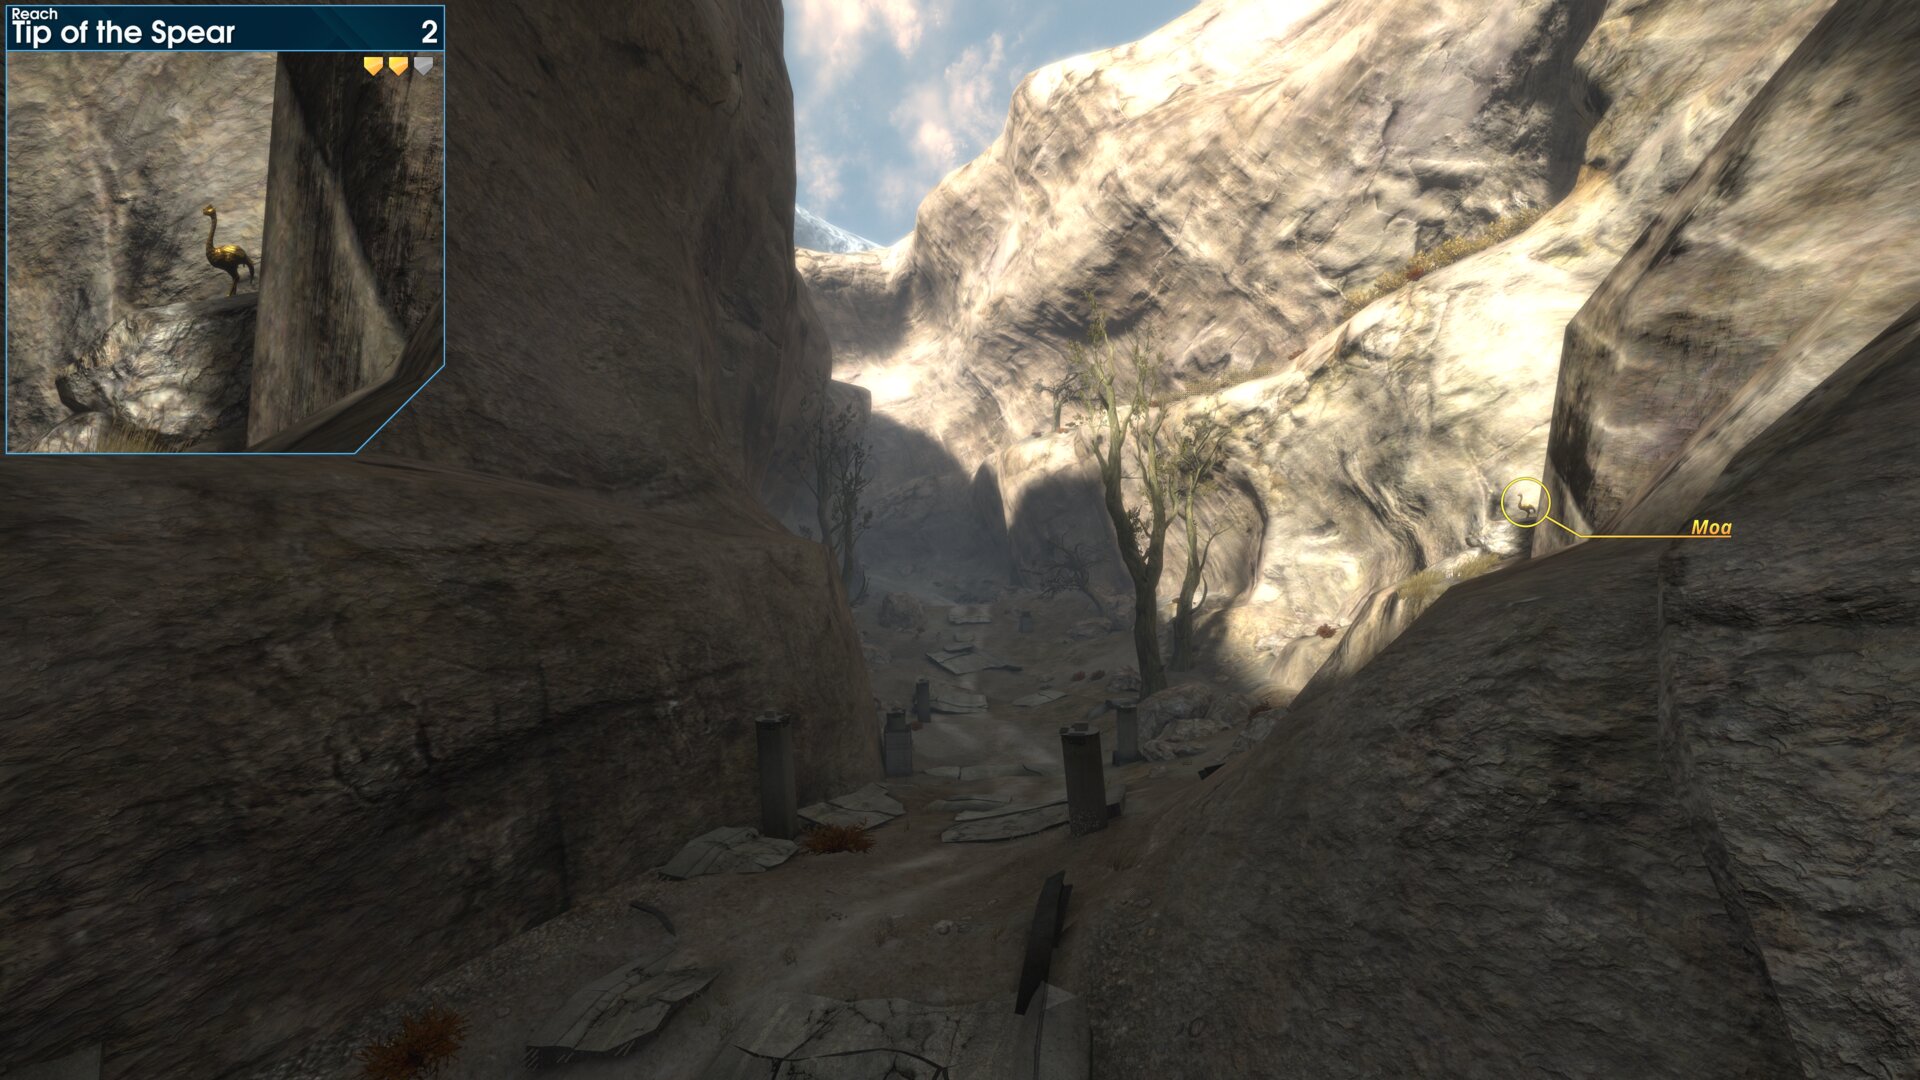
Golden Moa 2 — After destroying the first Anti-Aircraft Cannon and crossing the bridge, the Golden Moa will be on a rock, in the north face of the canyon walls. This is just after rounding the corner, at the start of the broken road.
 ⠀
⠀
Rally Point: Bravo
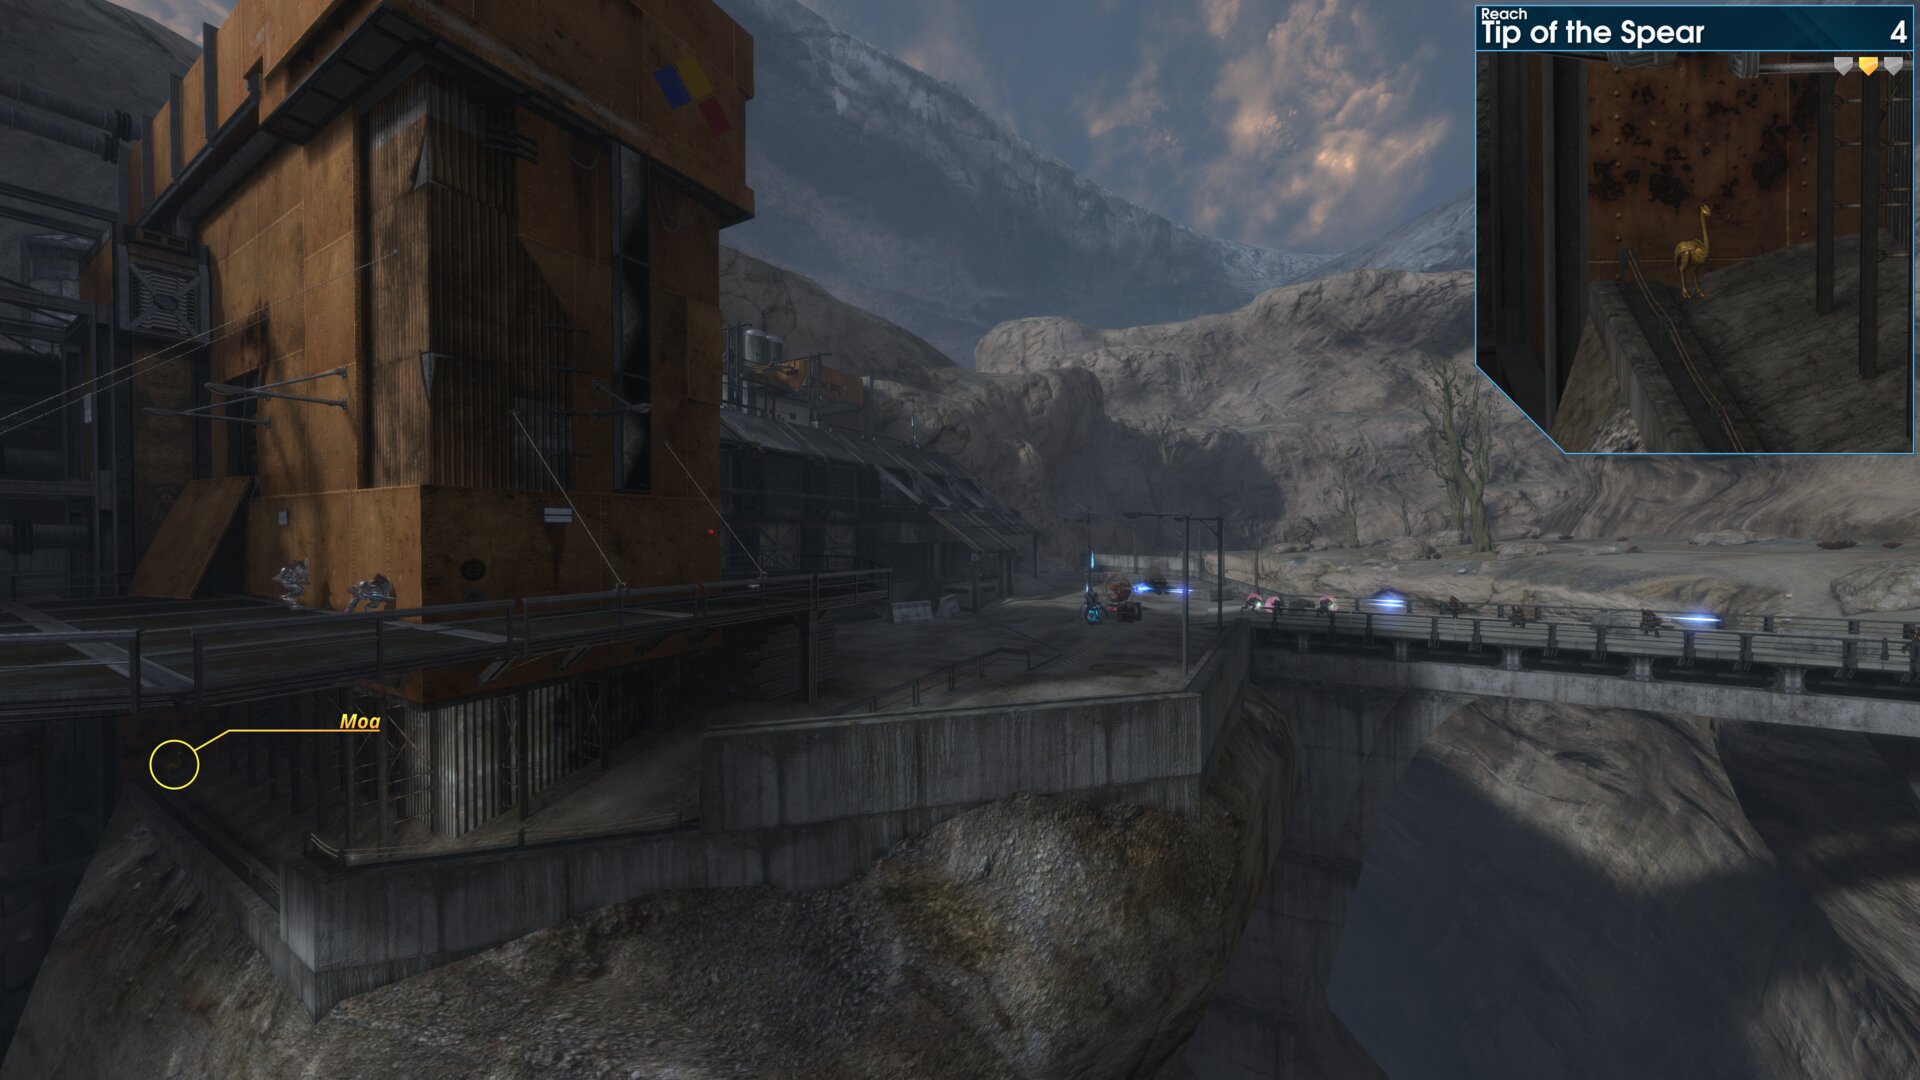
Golden Moa 4 — Beneath the walkway that leads up into the BXR Mining Facility, the Golden Moa is by the south east wall overlooking the dam.
 ⠀
⠀
 Long Night of Solace
Rally Point: Alpha
Golden Moa 1 — Beside a group of jagged rocks, at the waters edge, as you reach the path up to the Sabre Launch Facility.
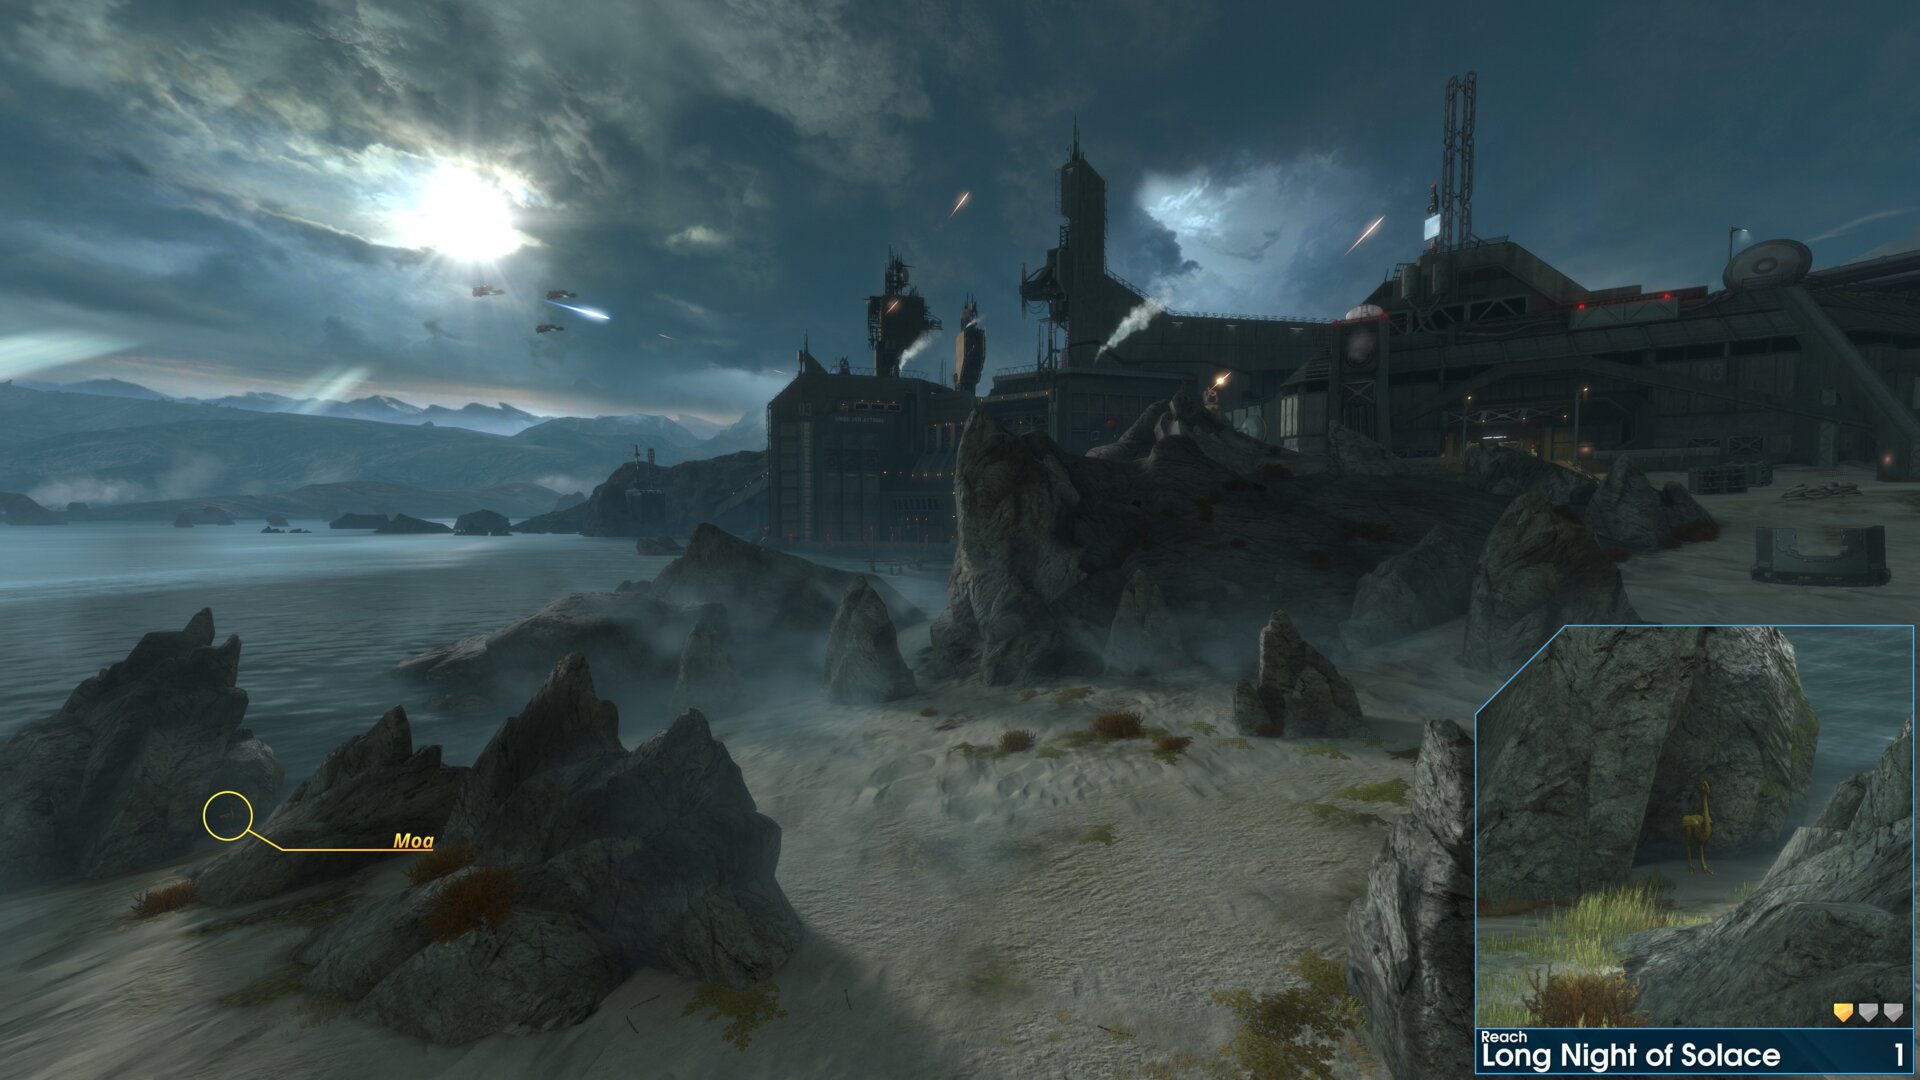 ⠀
⠀
Golden Moa 2 — On top of the outer building, that overlooks the dock. This is just below the hole in the Sabre Launch Facility.
 On rare occasions this Golden Moa could be knocked over or even destroyed
by debris from the Seraph fighter crashing into the Launch Facility.
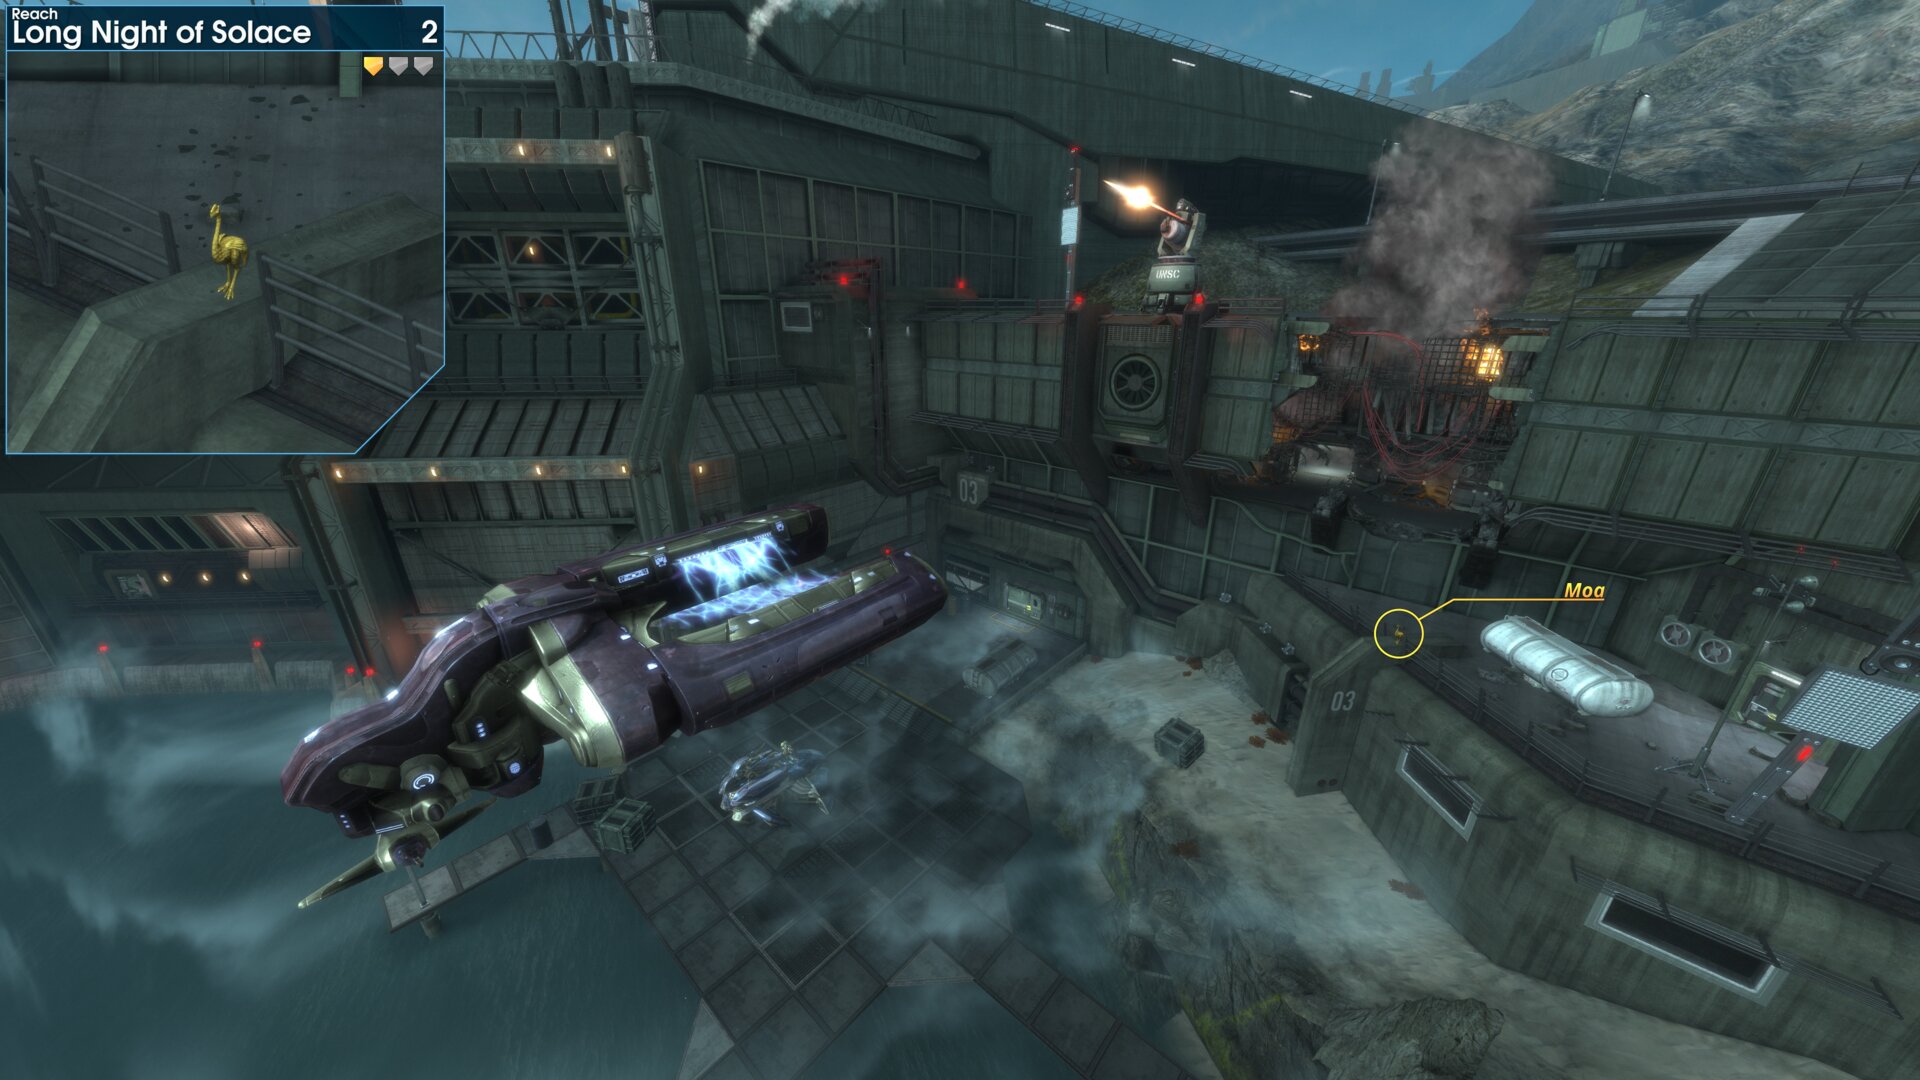 ⠀
⠀
Golden Moa 3 — On top the the western structure by the Sabre, the Golden Moa is beside the light tower on it’s roof.
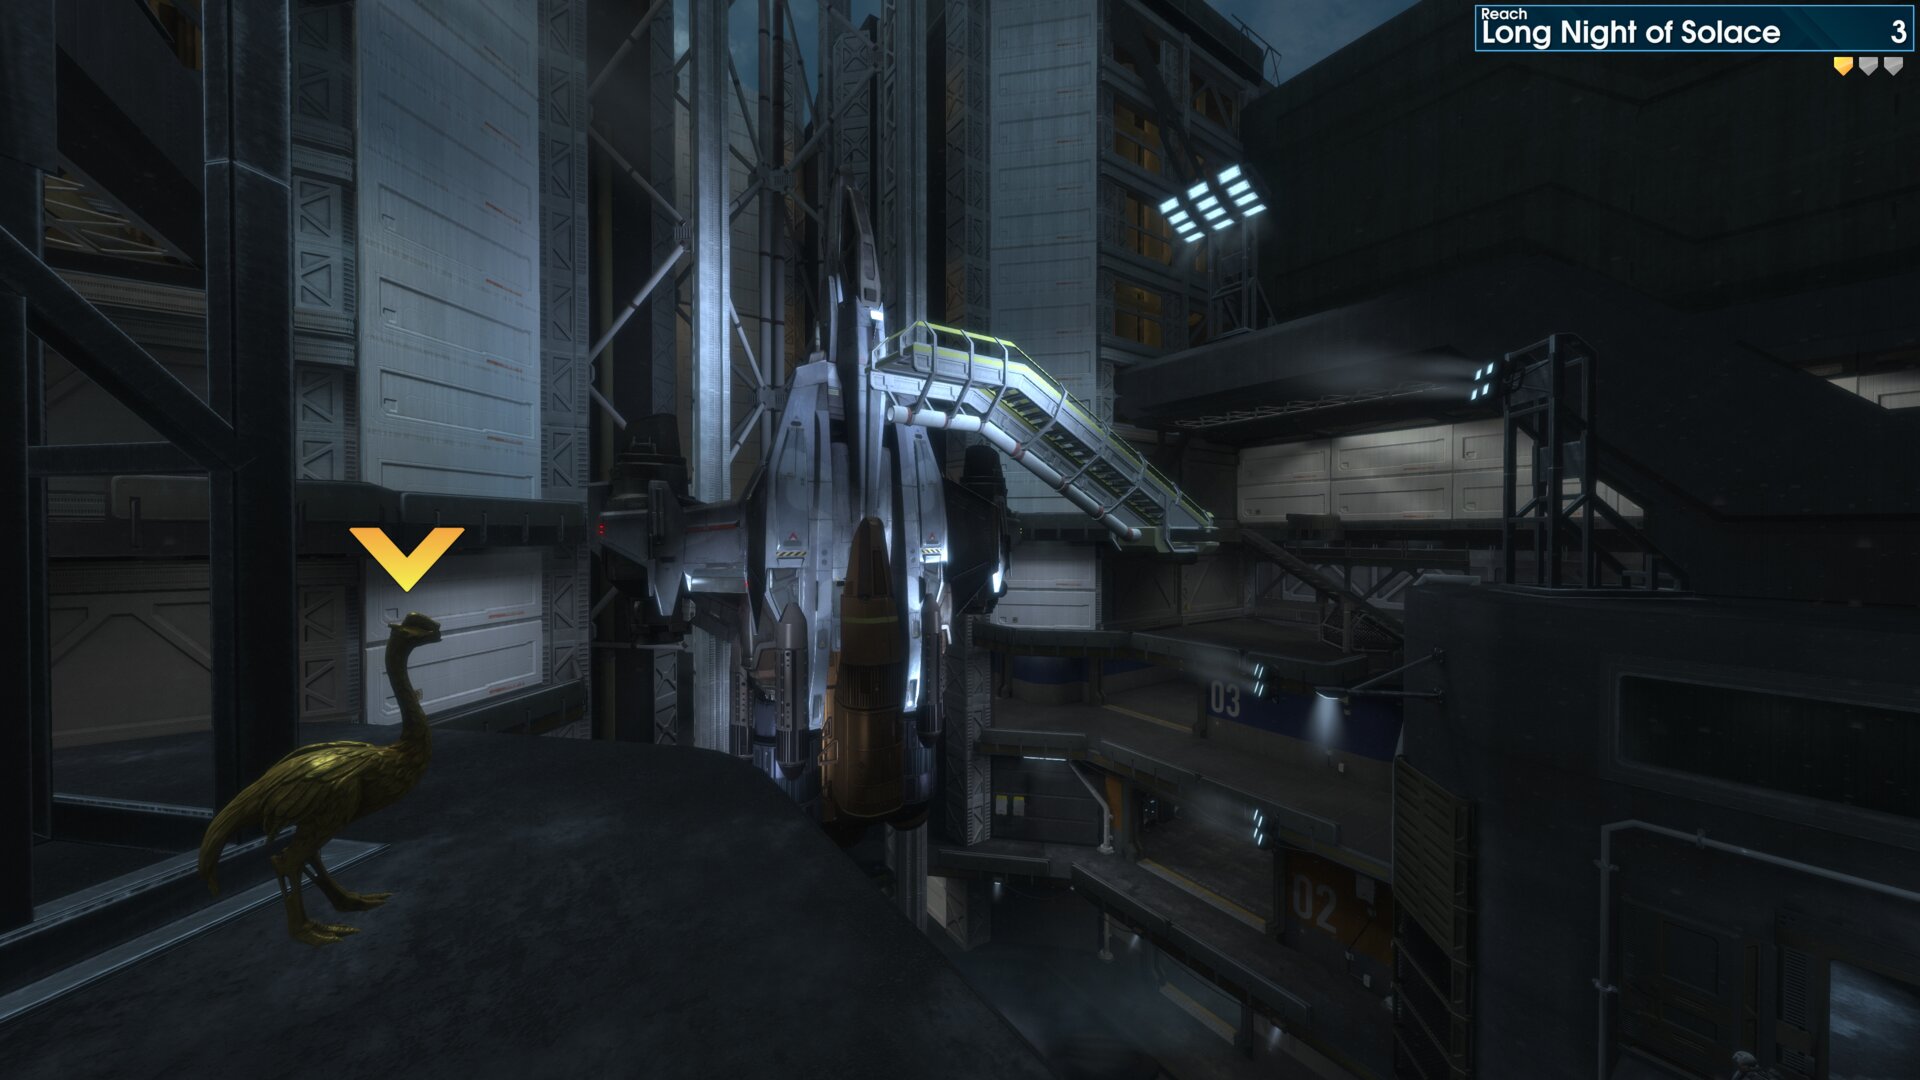 ⠀
⠀
Exodus
Rally Point: Alpha
Golden Moa 1 — After passing through the automatic doors, into the Civic Center, the Golden Moa is in the garden bed on the north side of the stairs.
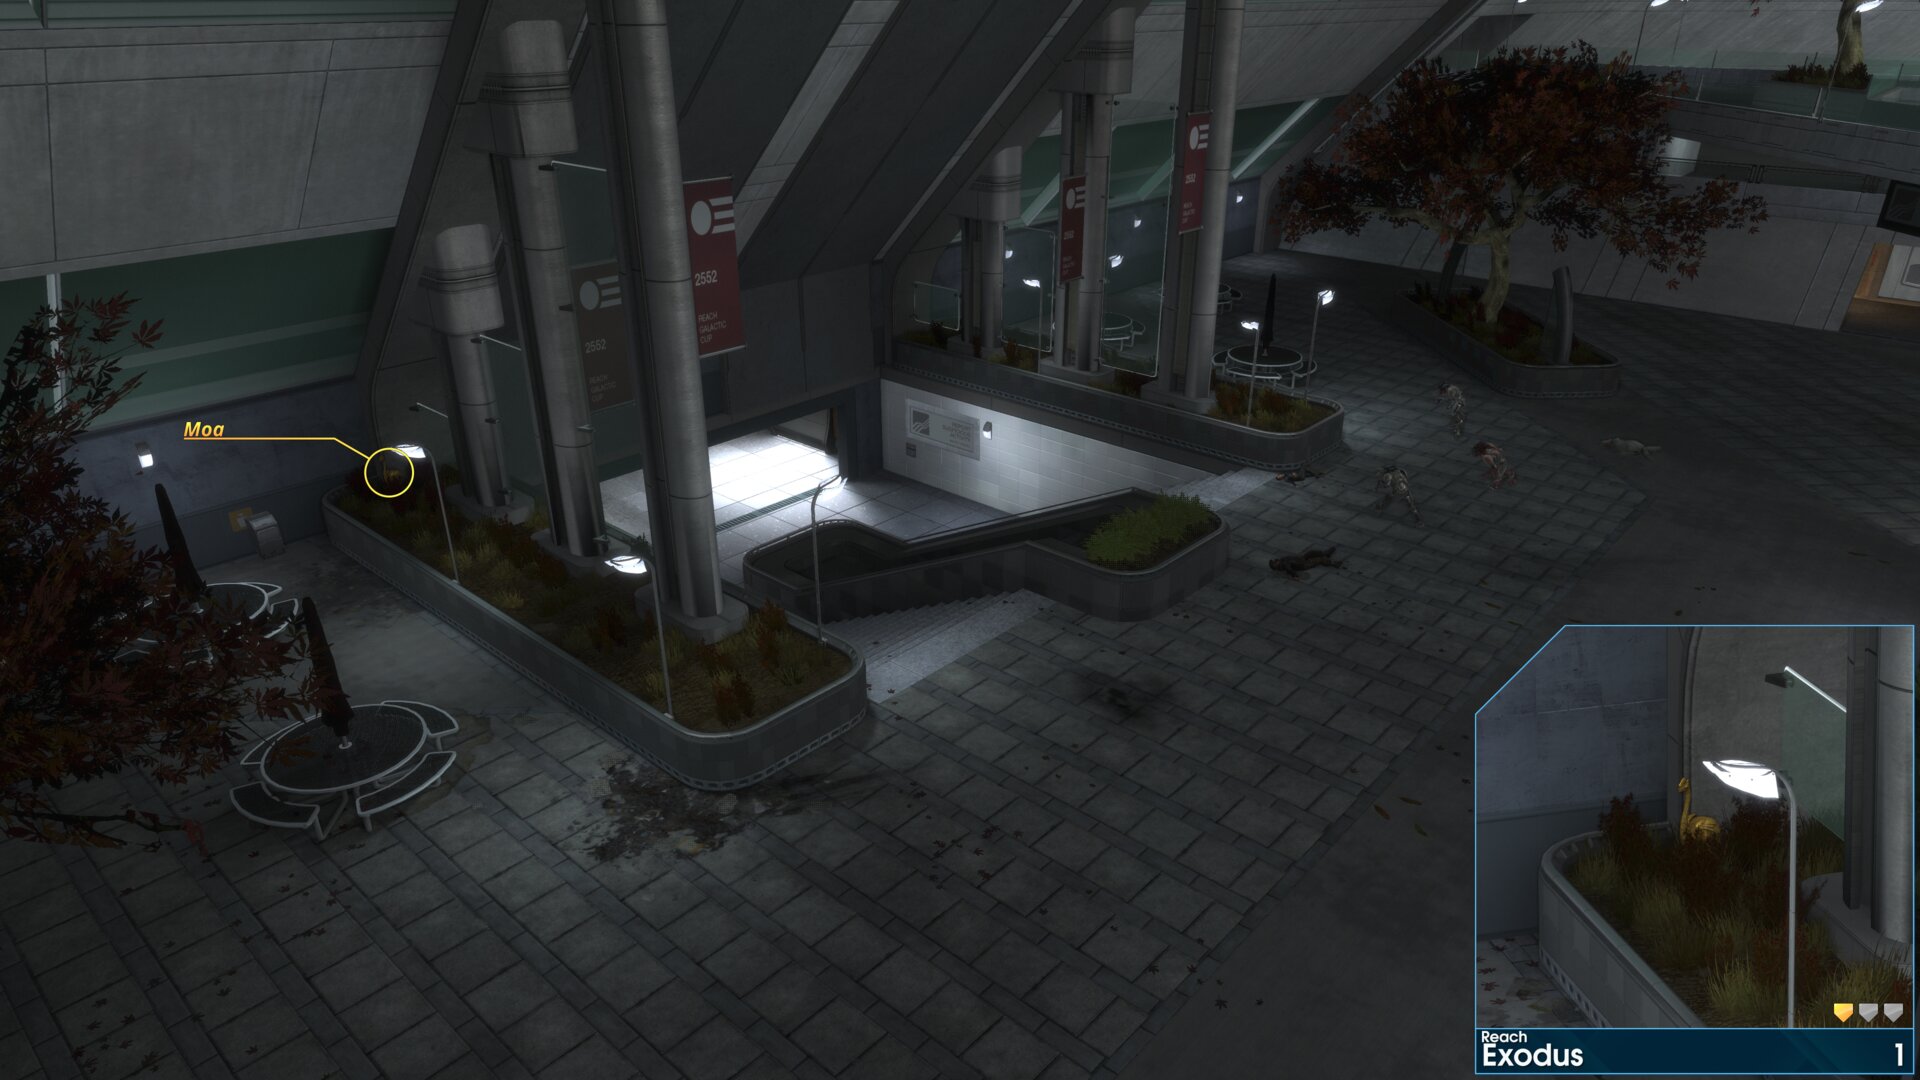 ⠀
⠀
Golden Moa 2 — The Golden Moa is beside the elevators in the Housing building lobby, just before the suicide Grunts.
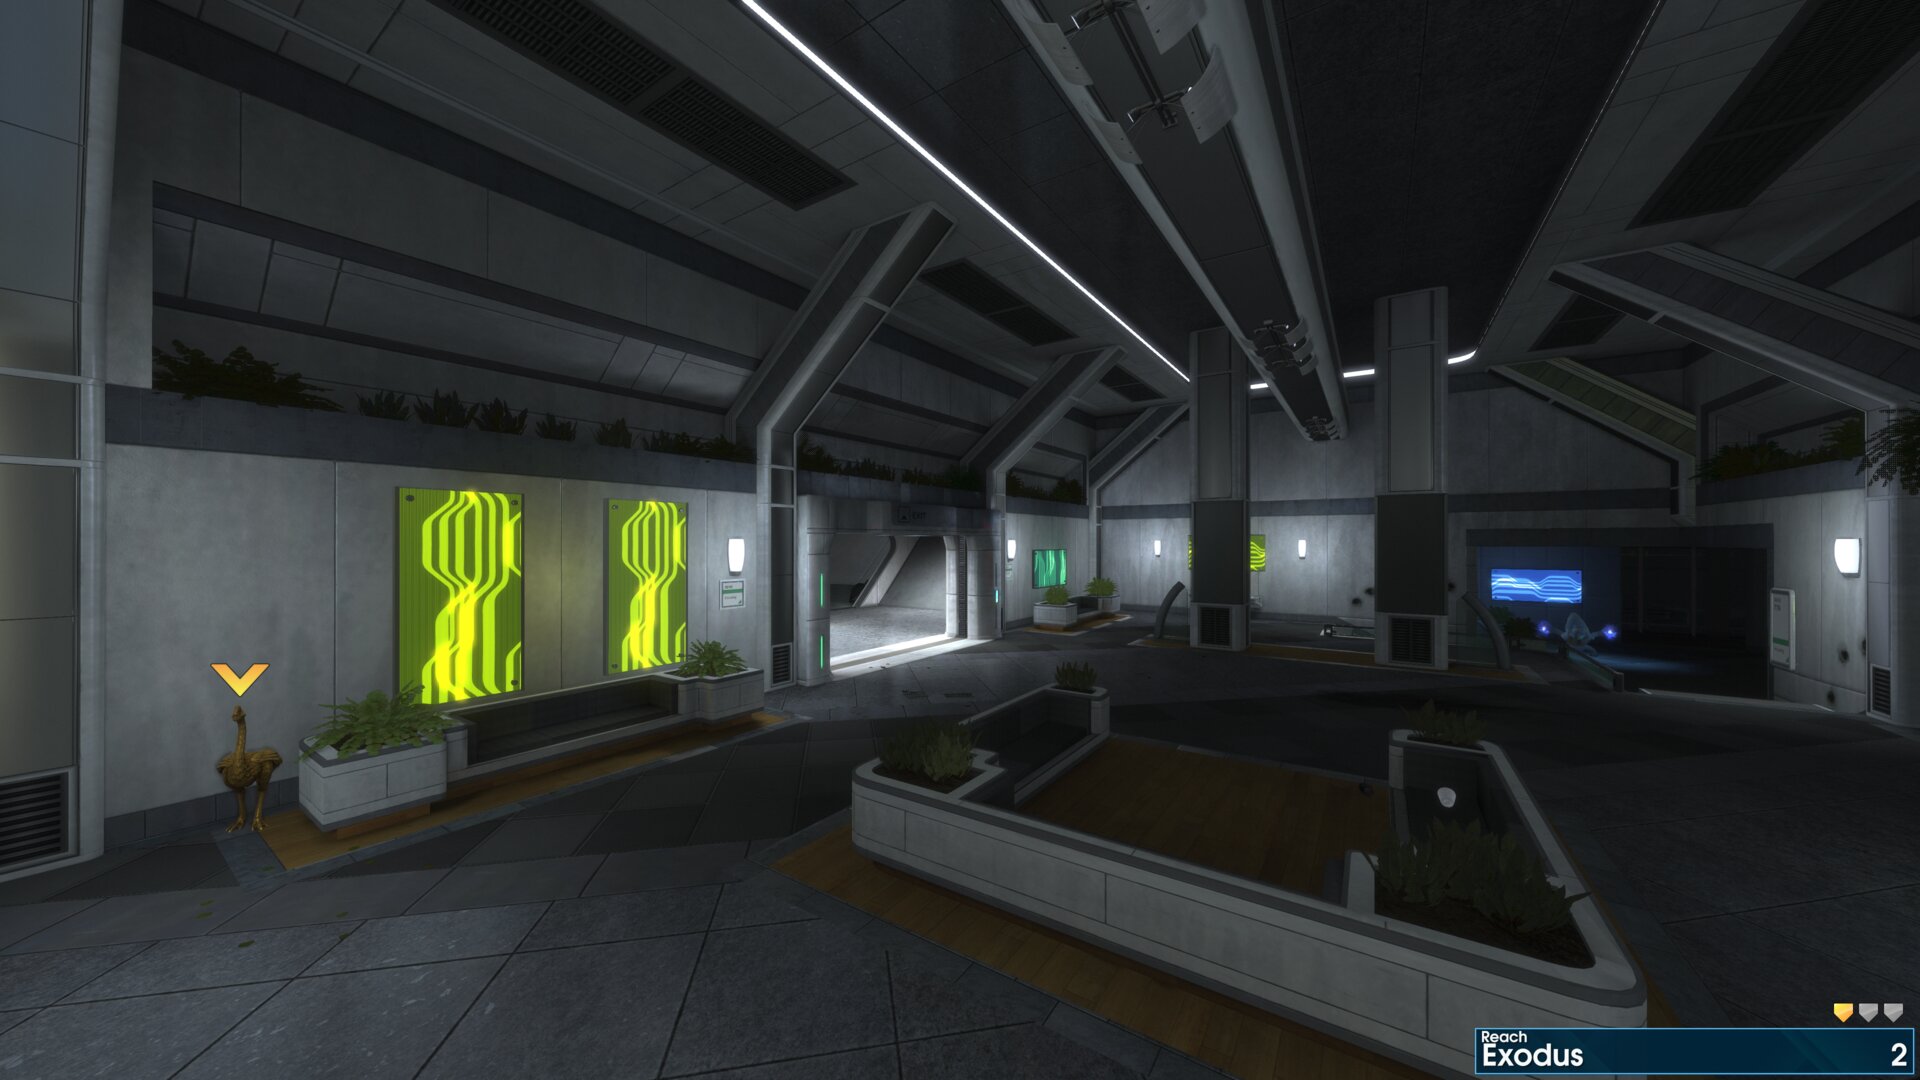 ⠀
⠀
Golden Moa 3 — Inside the first maintenance storage room that is below the lobby.
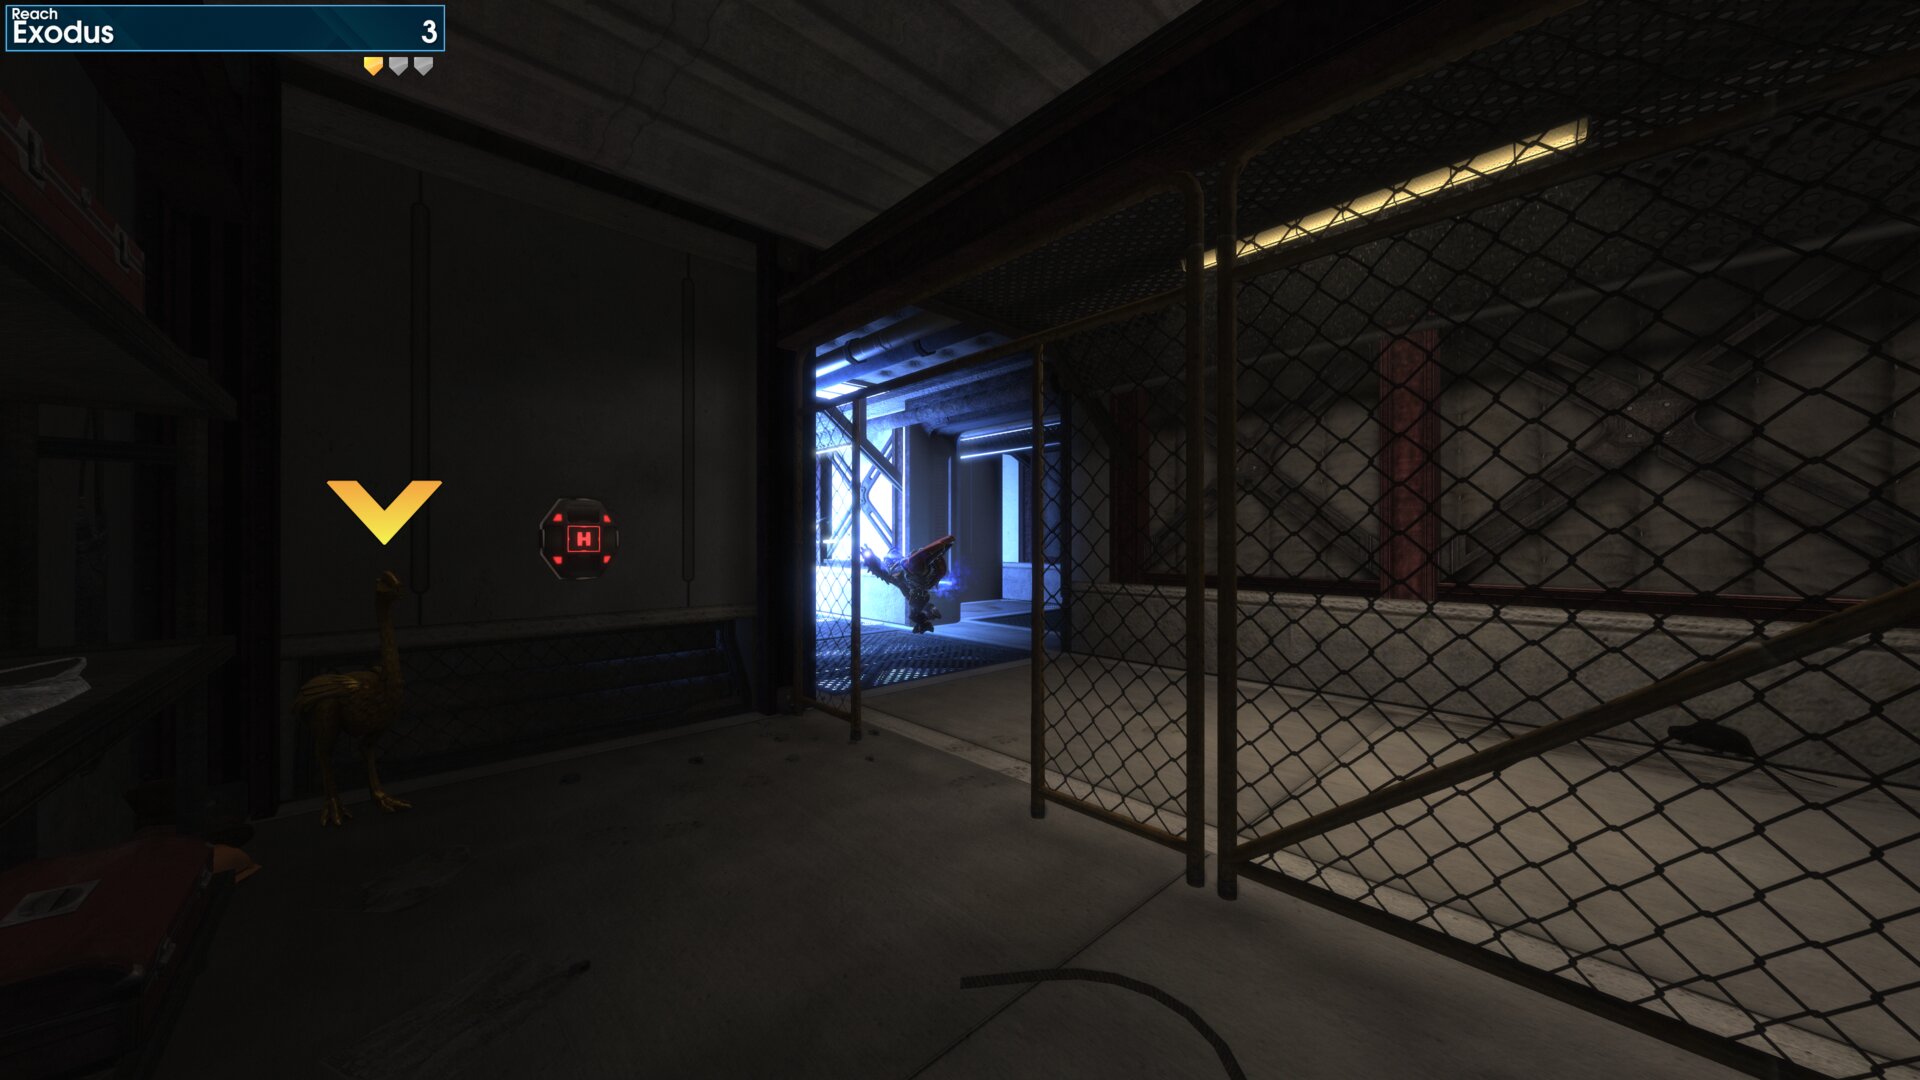 ⠀
⠀
Rally Point: Alpha
Golden Moa 1 — The Golden Moa is between two trees on the cliff edge, south east of the first Covenant Anti-Aircraft Cannon.
⠀Golden Moa 2 — After destroying the first Anti-Aircraft Cannon and crossing the bridge, the Golden Moa will be on a rock, in the north face of the canyon walls. This is just after rounding the corner, at the start of the broken road.
⠀Rally Point: Bravo
Golden Moa 4 — Beneath the walkway that leads up into the BXR Mining Facility, the Golden Moa is by the south east wall overlooking the dam.
⠀Long Night of SolaceRally Point: Alpha
Golden Moa 1 — Beside a group of jagged rocks, at the waters edge, as you reach the path up to the Sabre Launch Facility.
⠀Golden Moa 2 — On top of the outer building, that overlooks the dock. This is just below the hole in the Sabre Launch Facility.
On rare occasions this Golden Moa could be knocked over or even destroyedby debris from the Seraph fighter crashing into the Launch Facility.
⠀Golden Moa 3 — On top the the western structure by the Sabre, the Golden Moa is beside the light tower on it’s roof.
⠀ExodusRally Point: Alpha
Golden Moa 1 — After passing through the automatic doors, into the Civic Center, the Golden Moa is in the garden bed on the north side of the stairs.
⠀Golden Moa 2 — The Golden Moa is beside the elevators in the Housing building lobby, just before the suicide Grunts.
⠀Golden Moa 3 — Inside the first maintenance storage room that is below the lobby.
⠀Combat Evolved: 23ʳᵈ July 2026 Weekly Set
Golden Moas in Combat Evolved require switching to, or play with, original graphics.The Silent Cartographer
Golden Moa 2 — After acquiring the Warthog from Foehammer, continue round the island anti-clockwise to the next area. The Golden Moa can be found on a ledge in the exposed structure, where part of the cliff has collapsed.
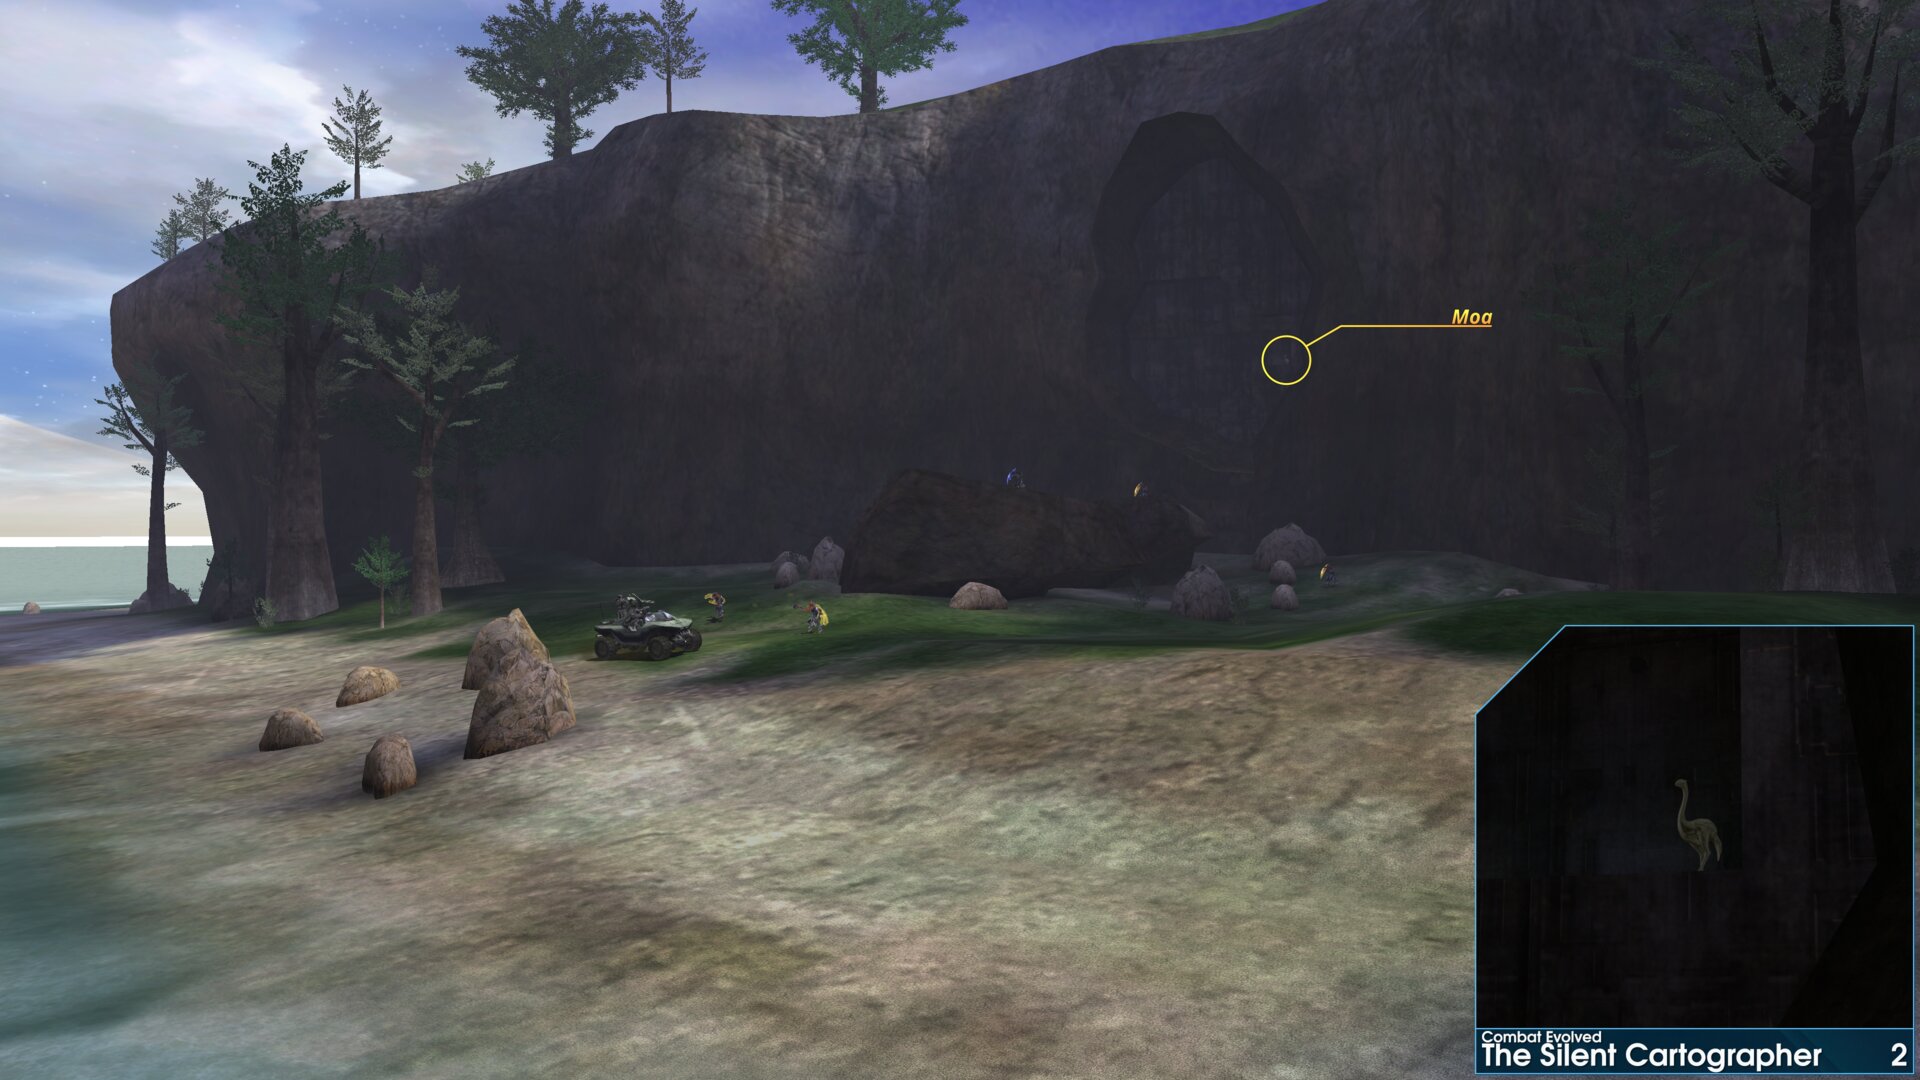 ⠀
⠀Golden Moa 4 — The Golden Moa is beneath the main facilities entrance.
”There, in the cliff wall; I'll bet the Silent Cartographer is somewhere inside that facility” Cortana.
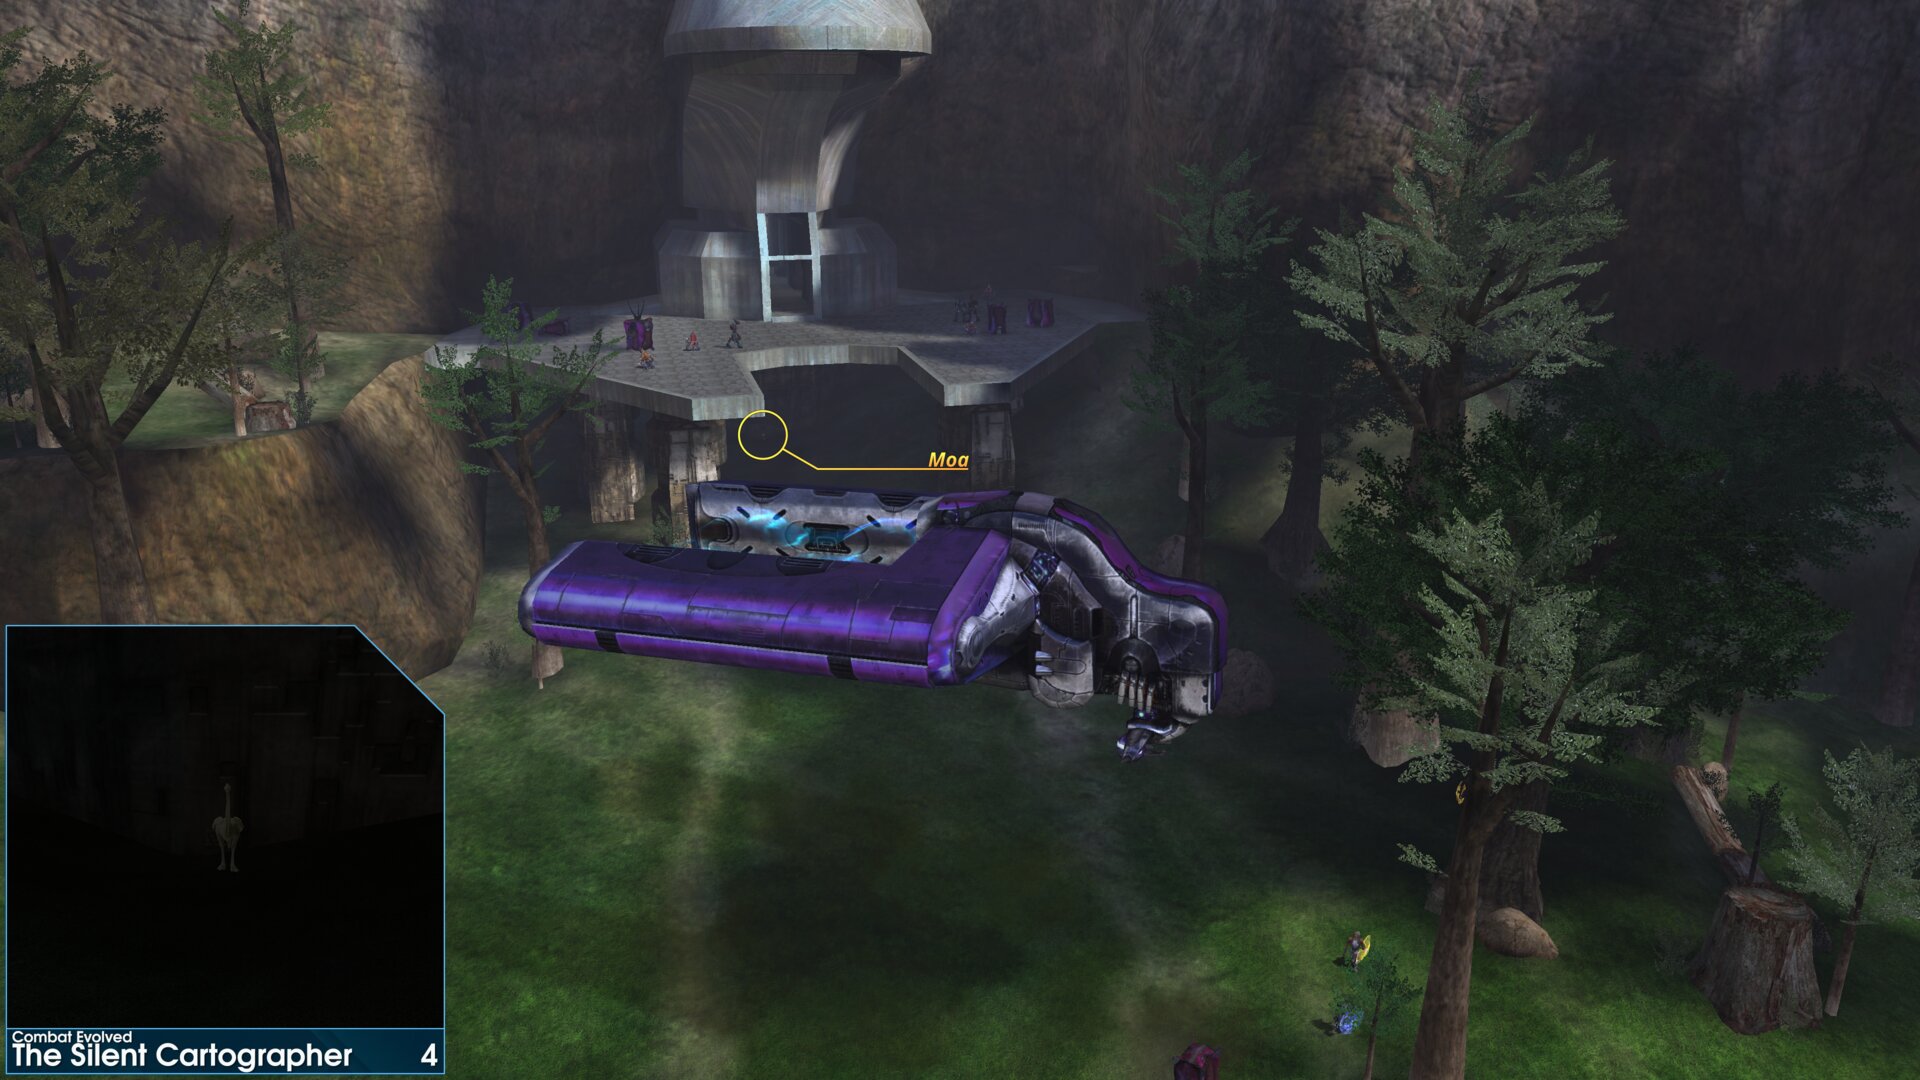 ⠀
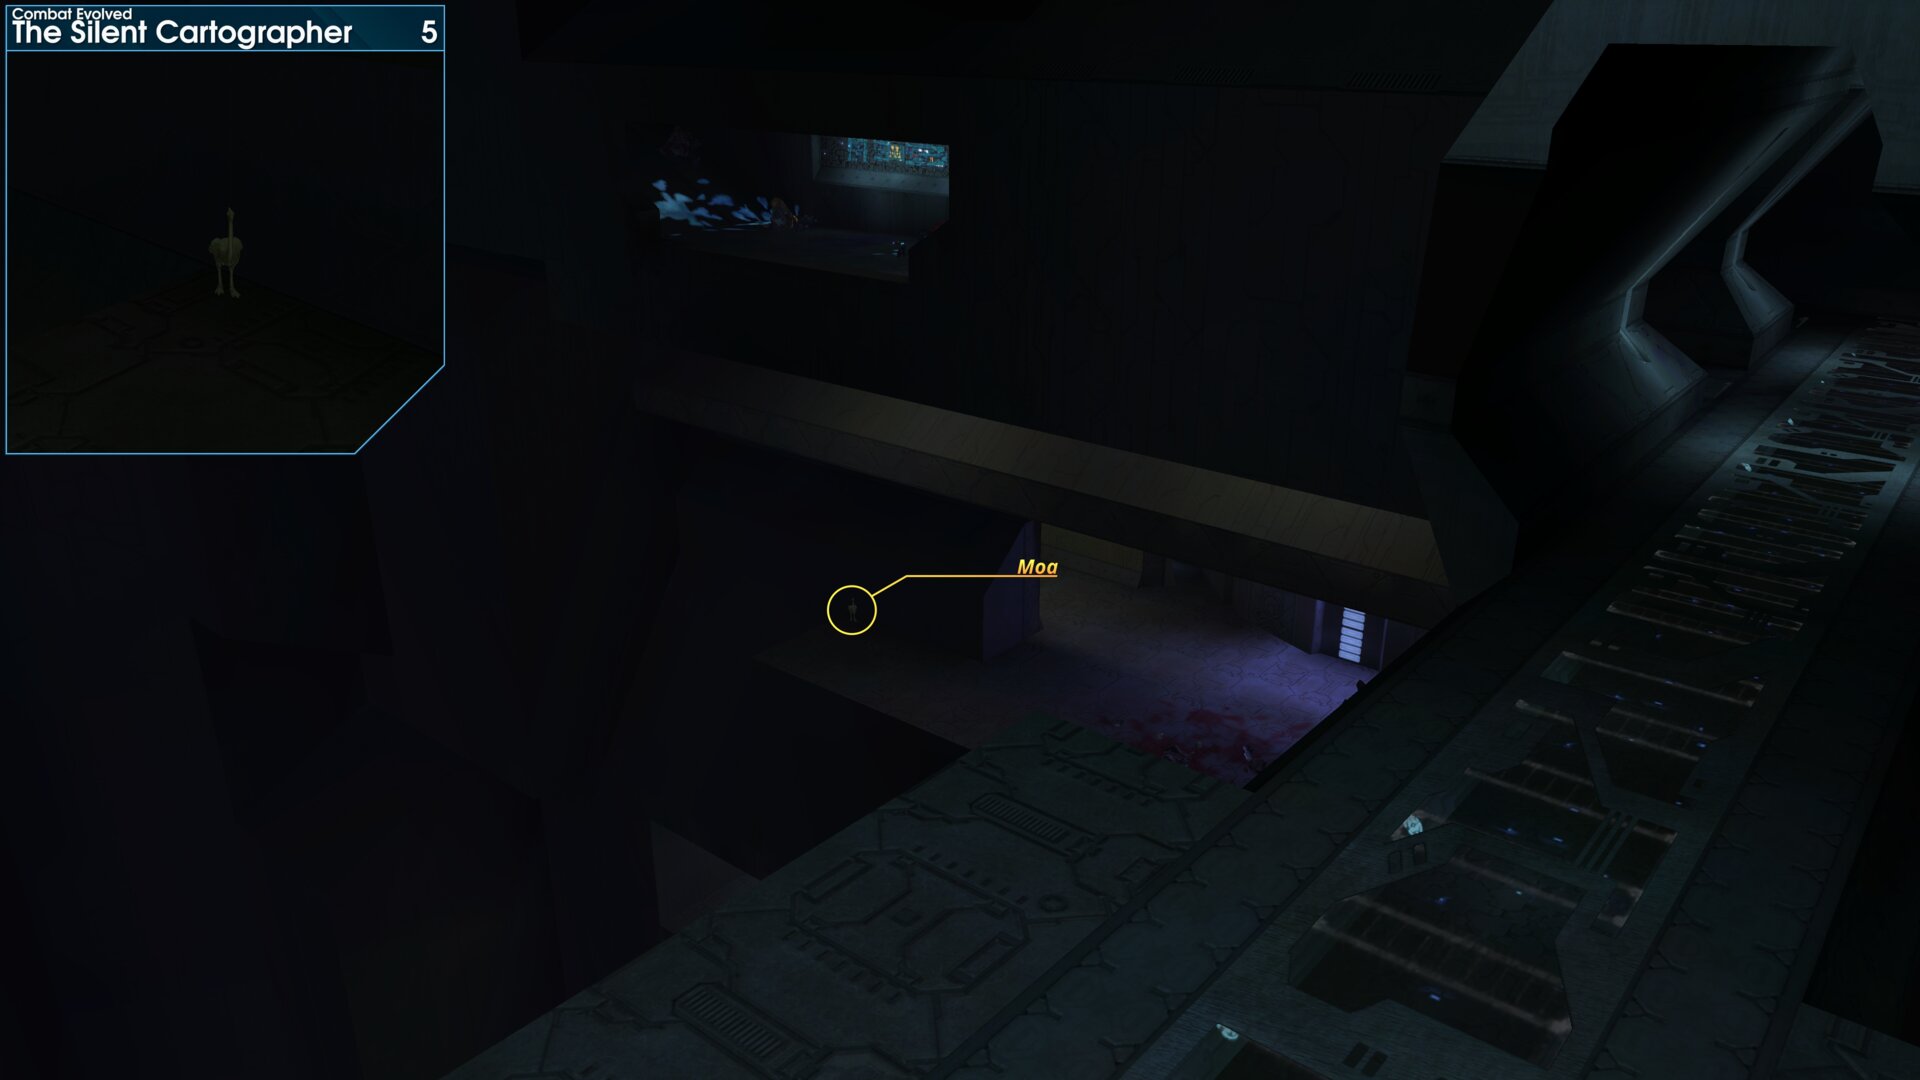
⠀Golden Moa 5 — After entering the main facility (past the locked door), continue down one level, as you reach this level the Golden Moa is on the other side of the wall to your right.
Alternatively after passing through the locked door, head for the Shafted cutscene, from here you can see and shoot the Golden Moa.
 ⠀Assault on the Control Room
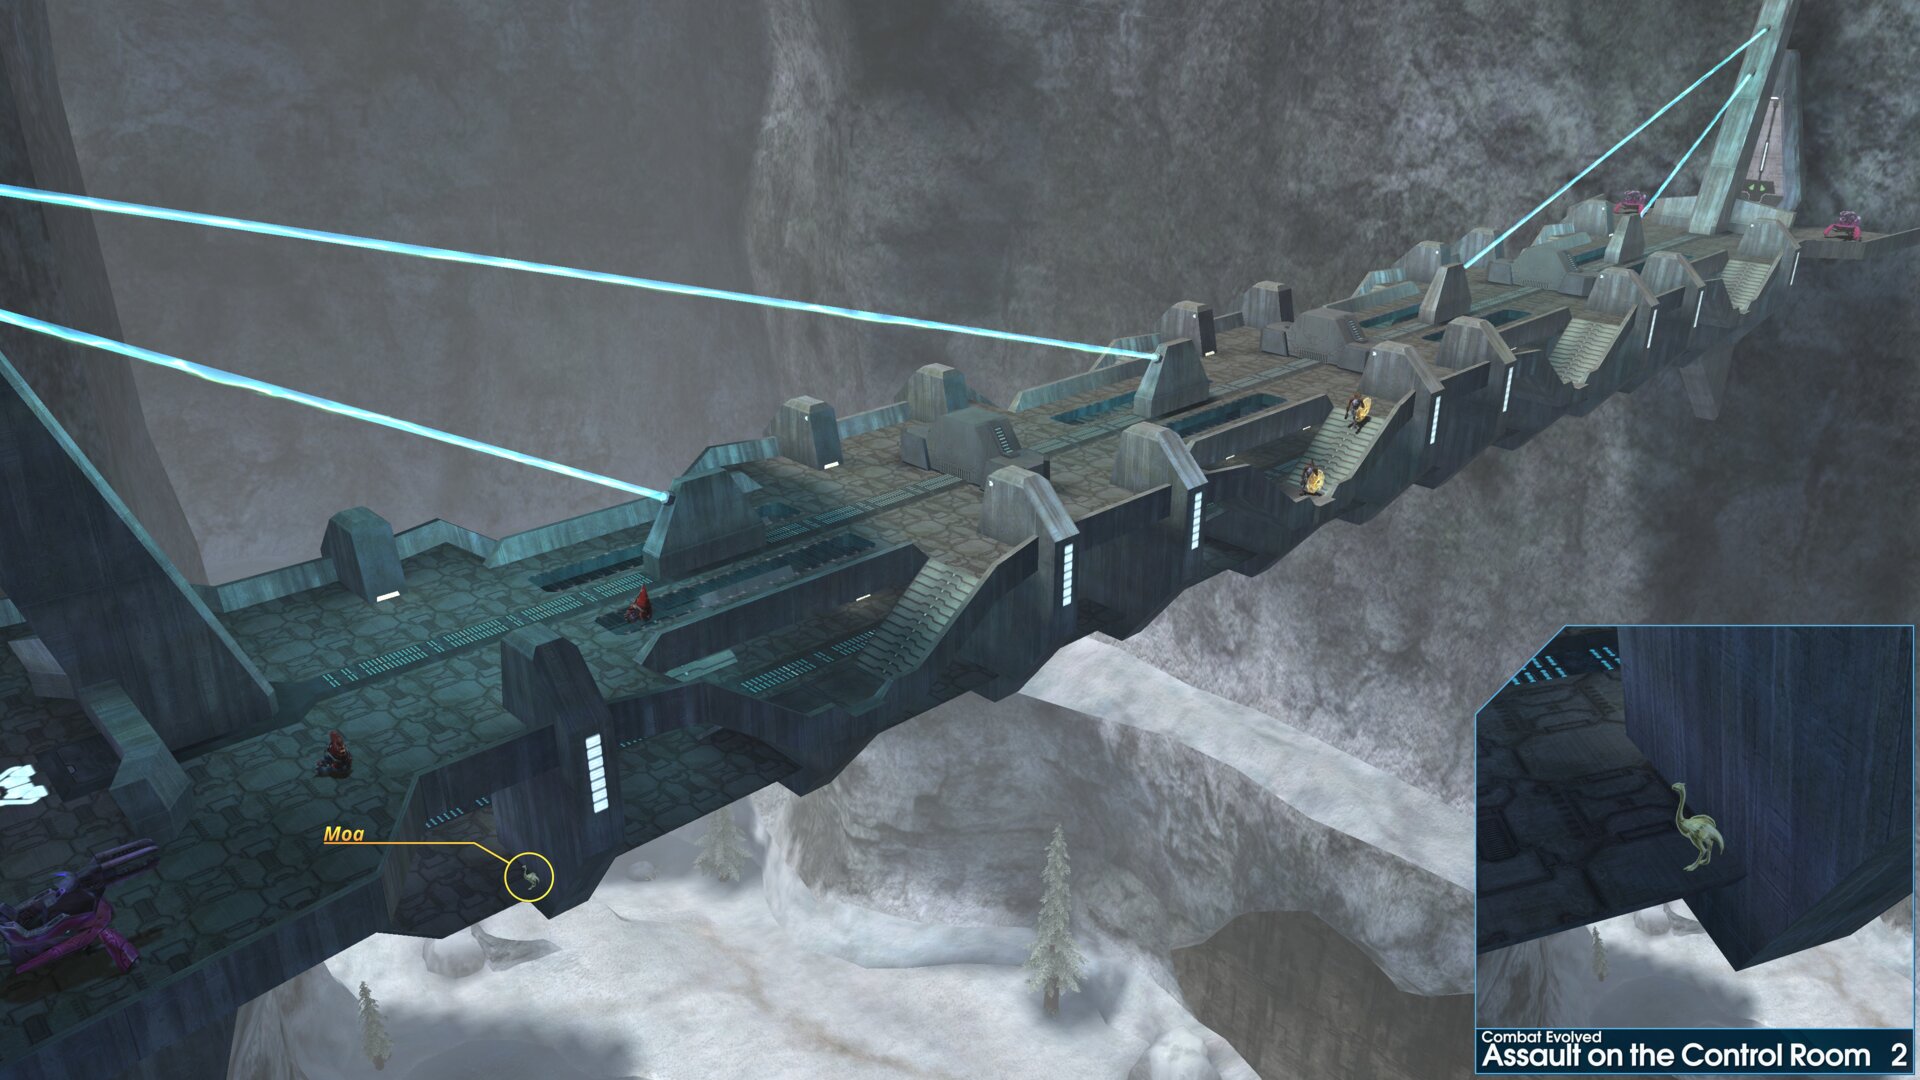
Golden Moa 2 — On the very first bridge, the Golden Moa is behind a support structure at the start of the lower level.
 ⠀
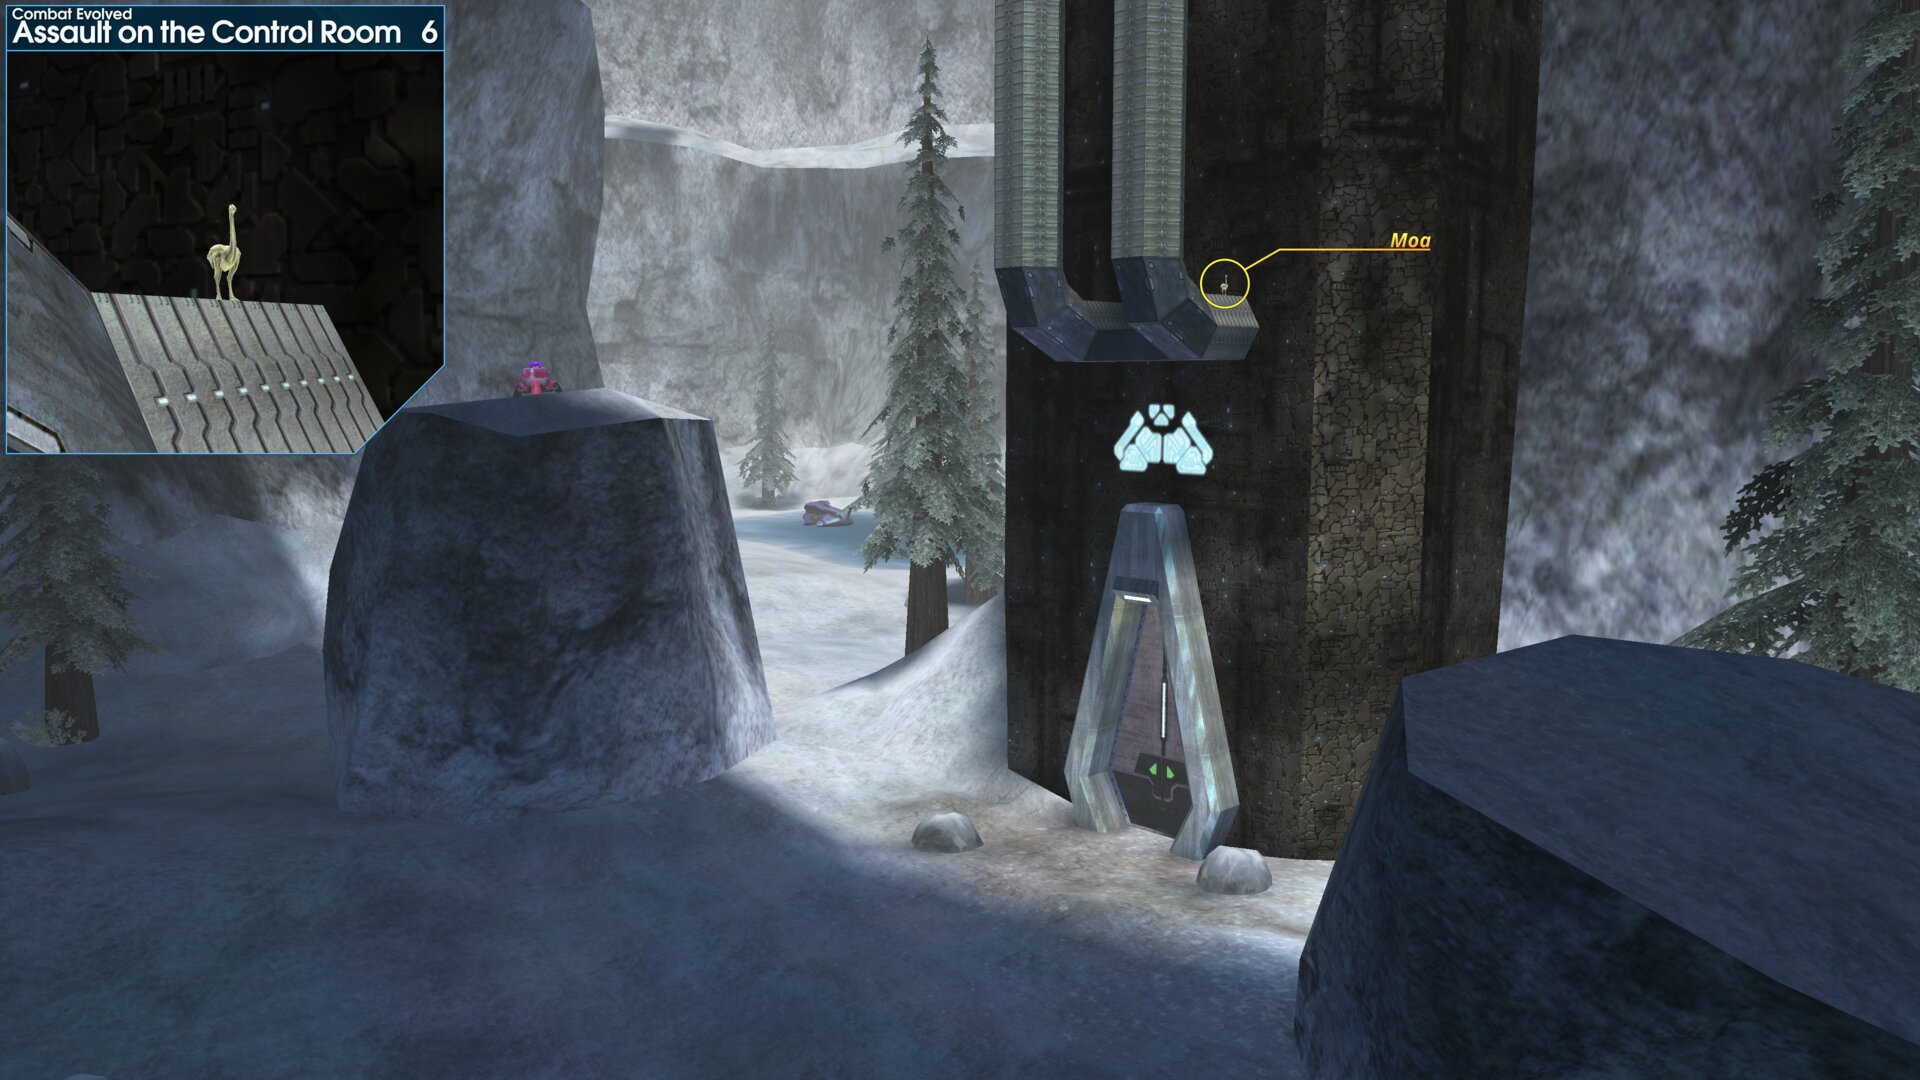
⠀Golden Moa 6 — Rolling Thunder.
After leaving the tunnels/cave take the left path round the central structure/cliff formation, towards the side with a couple of large pipes up the side of it. The Golden Moa at the bottom of the closest pipe, next to where it attaches to the central structure.
 ⠀
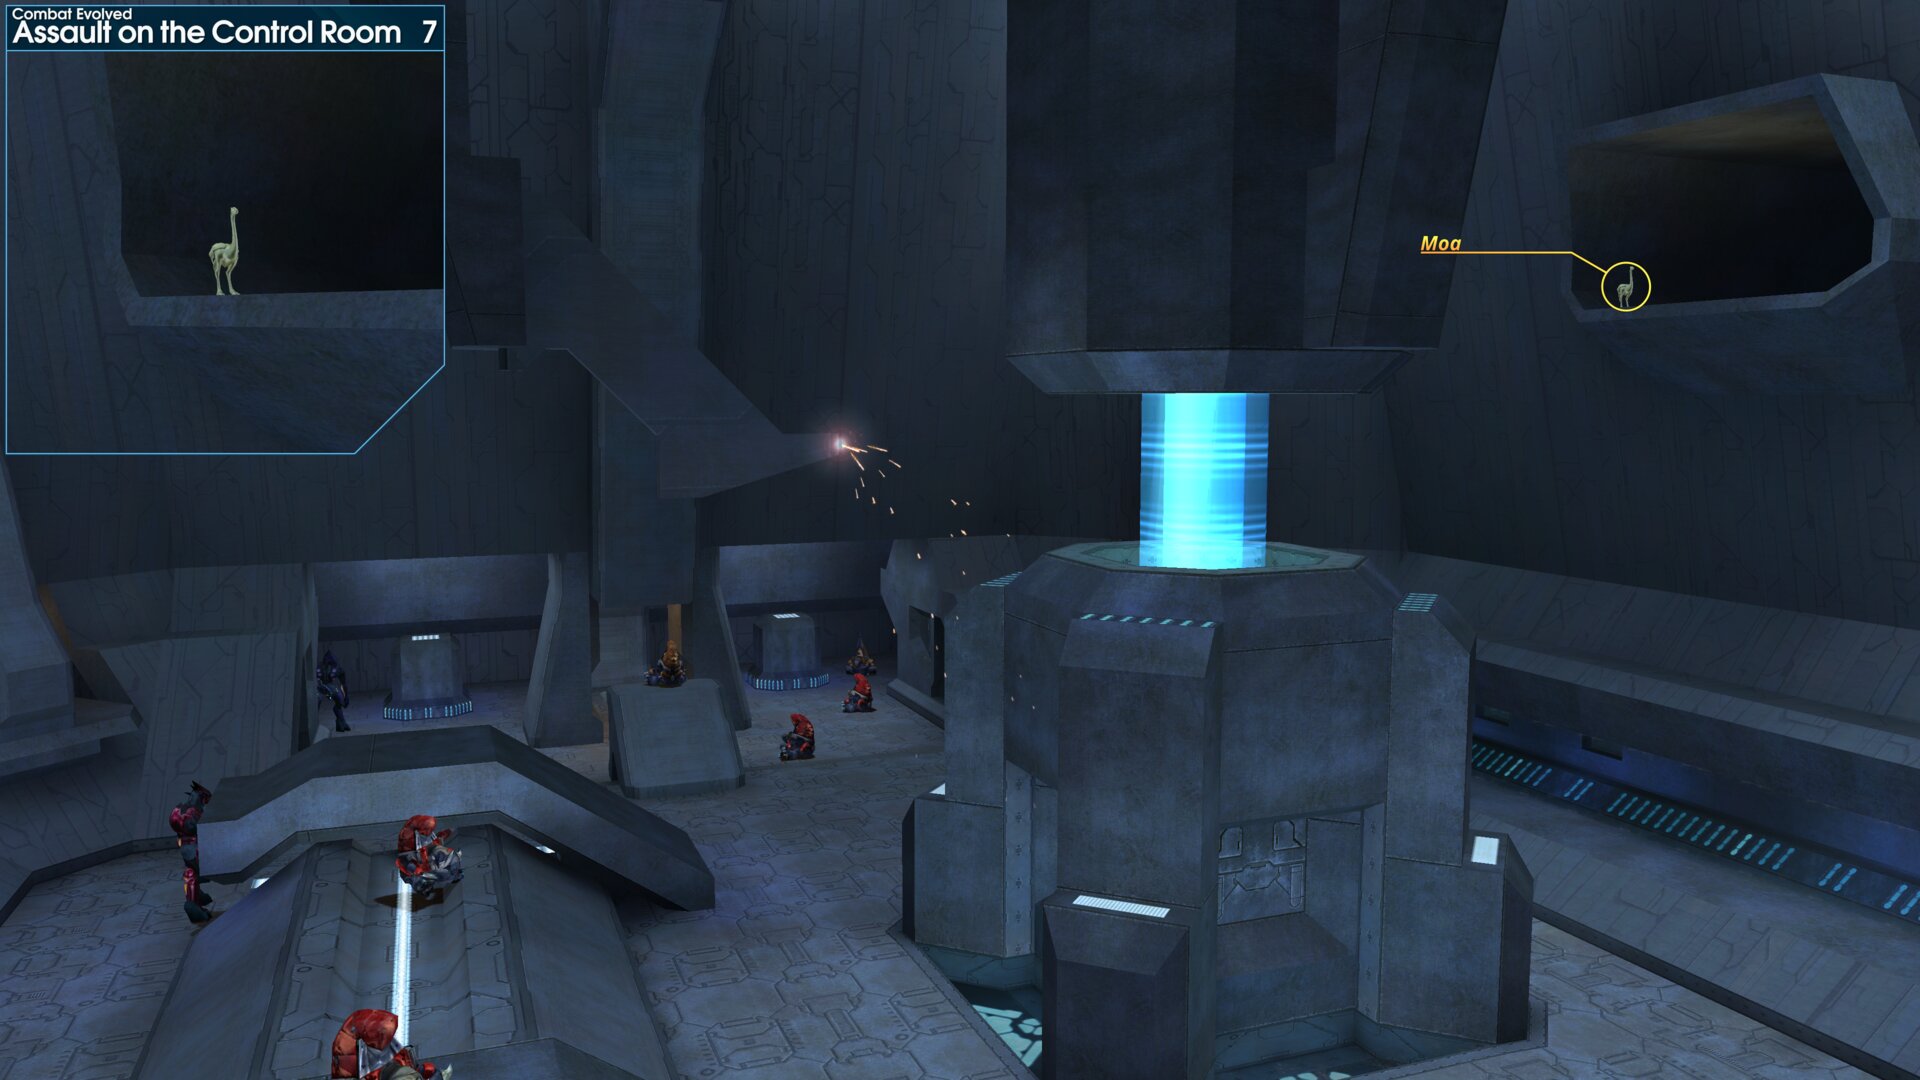
⠀Golden Moa 7 — In the octagonal room after leaving the second chasm, the Golden Moa is in a large tube by the strange blue beam thing. (This is the room before you go up the lift to the two bridges that cross the second chasm)
 ⠀343 Guilty Spark
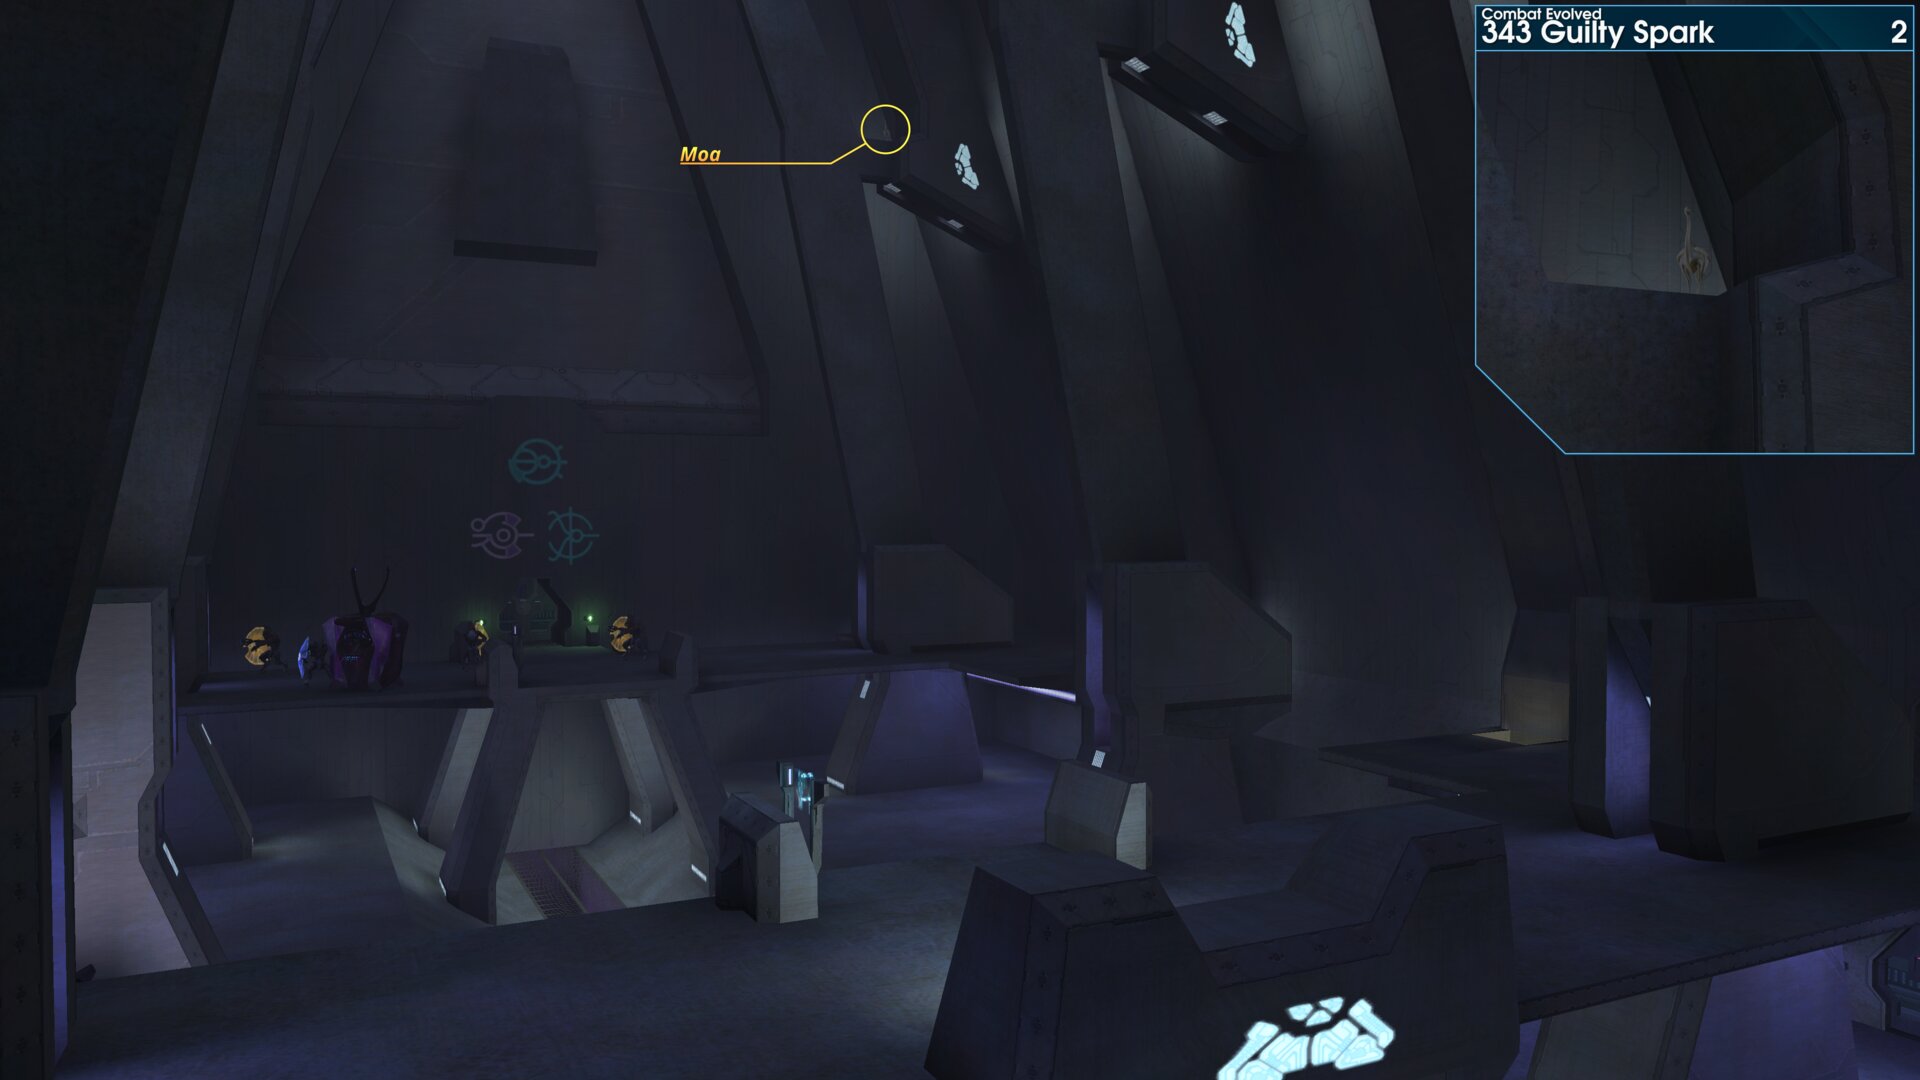
Golden Moa 2 — After going down the first elevator you will reach a large room, the Golden Moa is up high on a ledge on the left side of the room. (The screenshot has been taken from the far end of the room, looking back towards the elevator doorway)
 ⠀
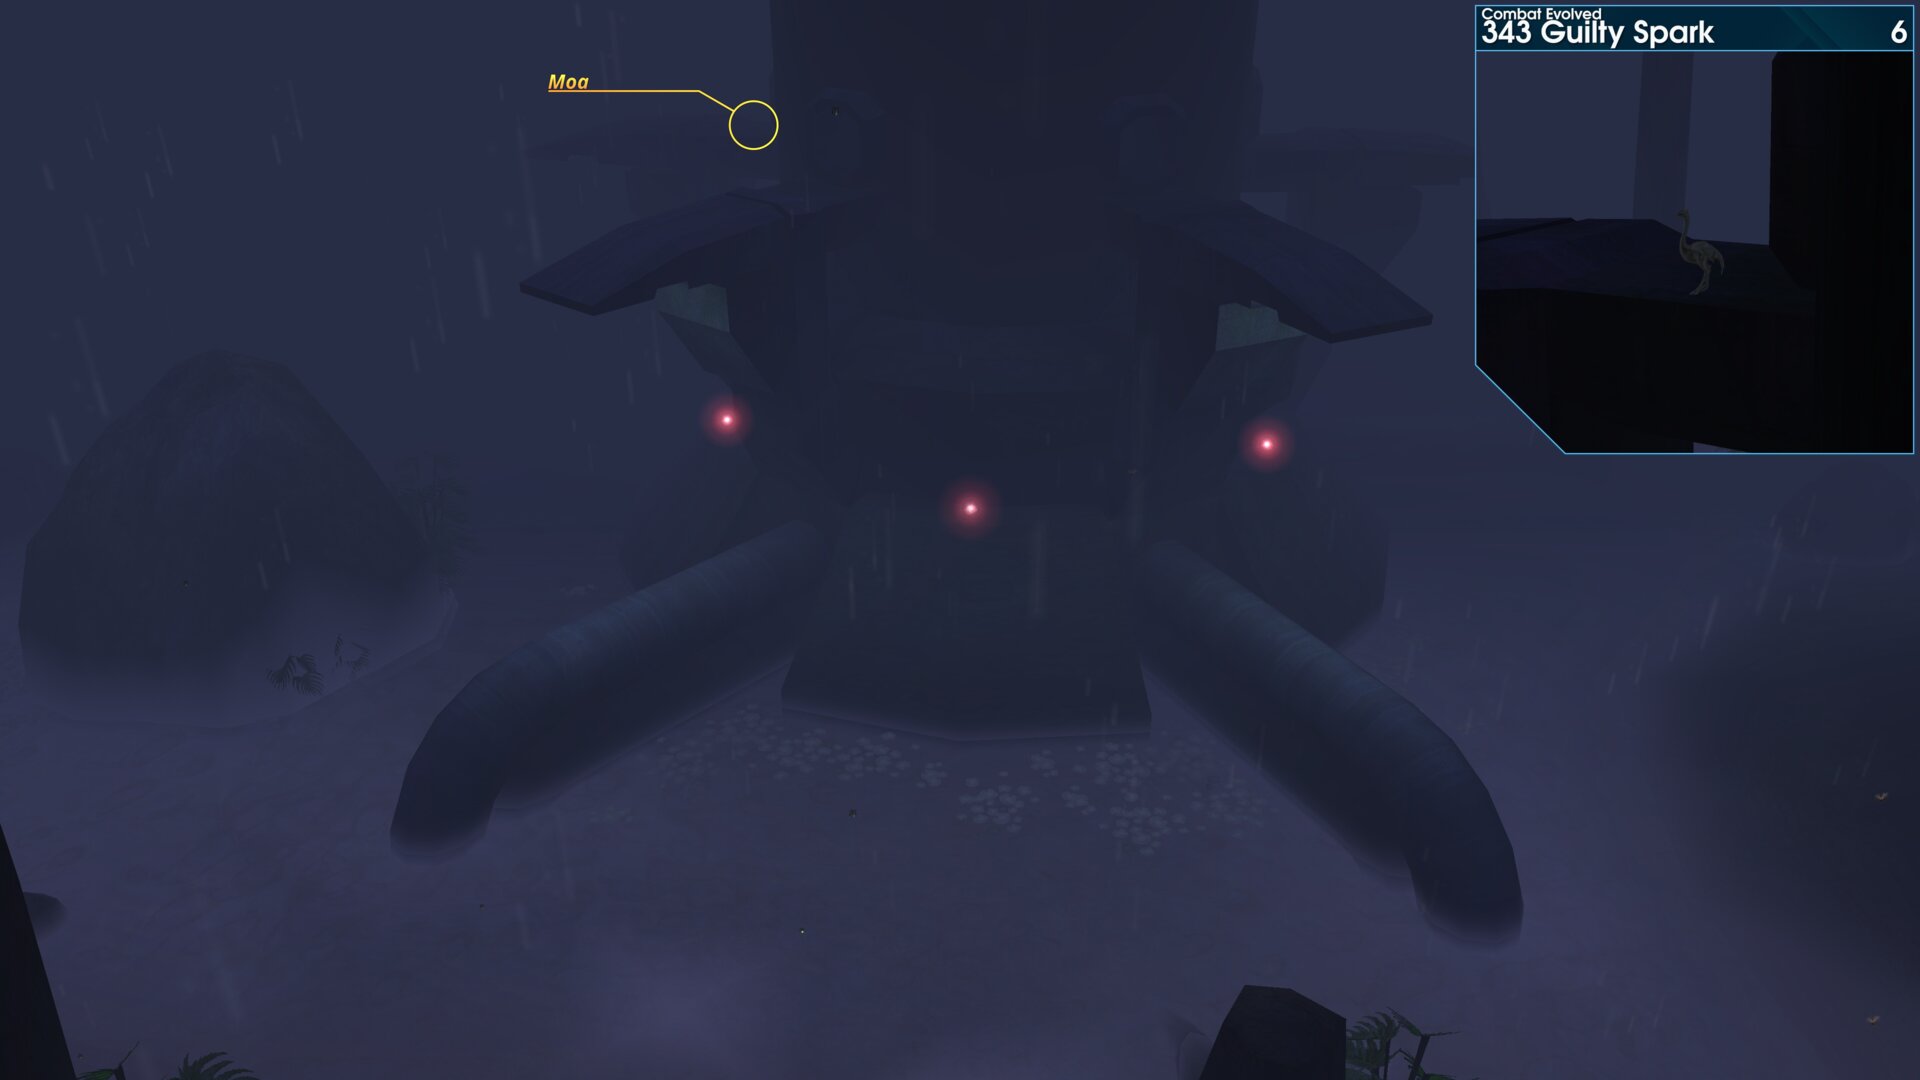
⠀Golden Moa 6 — As you enter the final area with a strange structure in the middle, the Golden Moa is on top of the far left light platform protruding from the structure.
 ⠀
⠀Halo 2: 23ʳᵈ July 2026 Weekly Set
Golden Moas in Halo 2 require switching to, or play with, original graphics.The Oracle
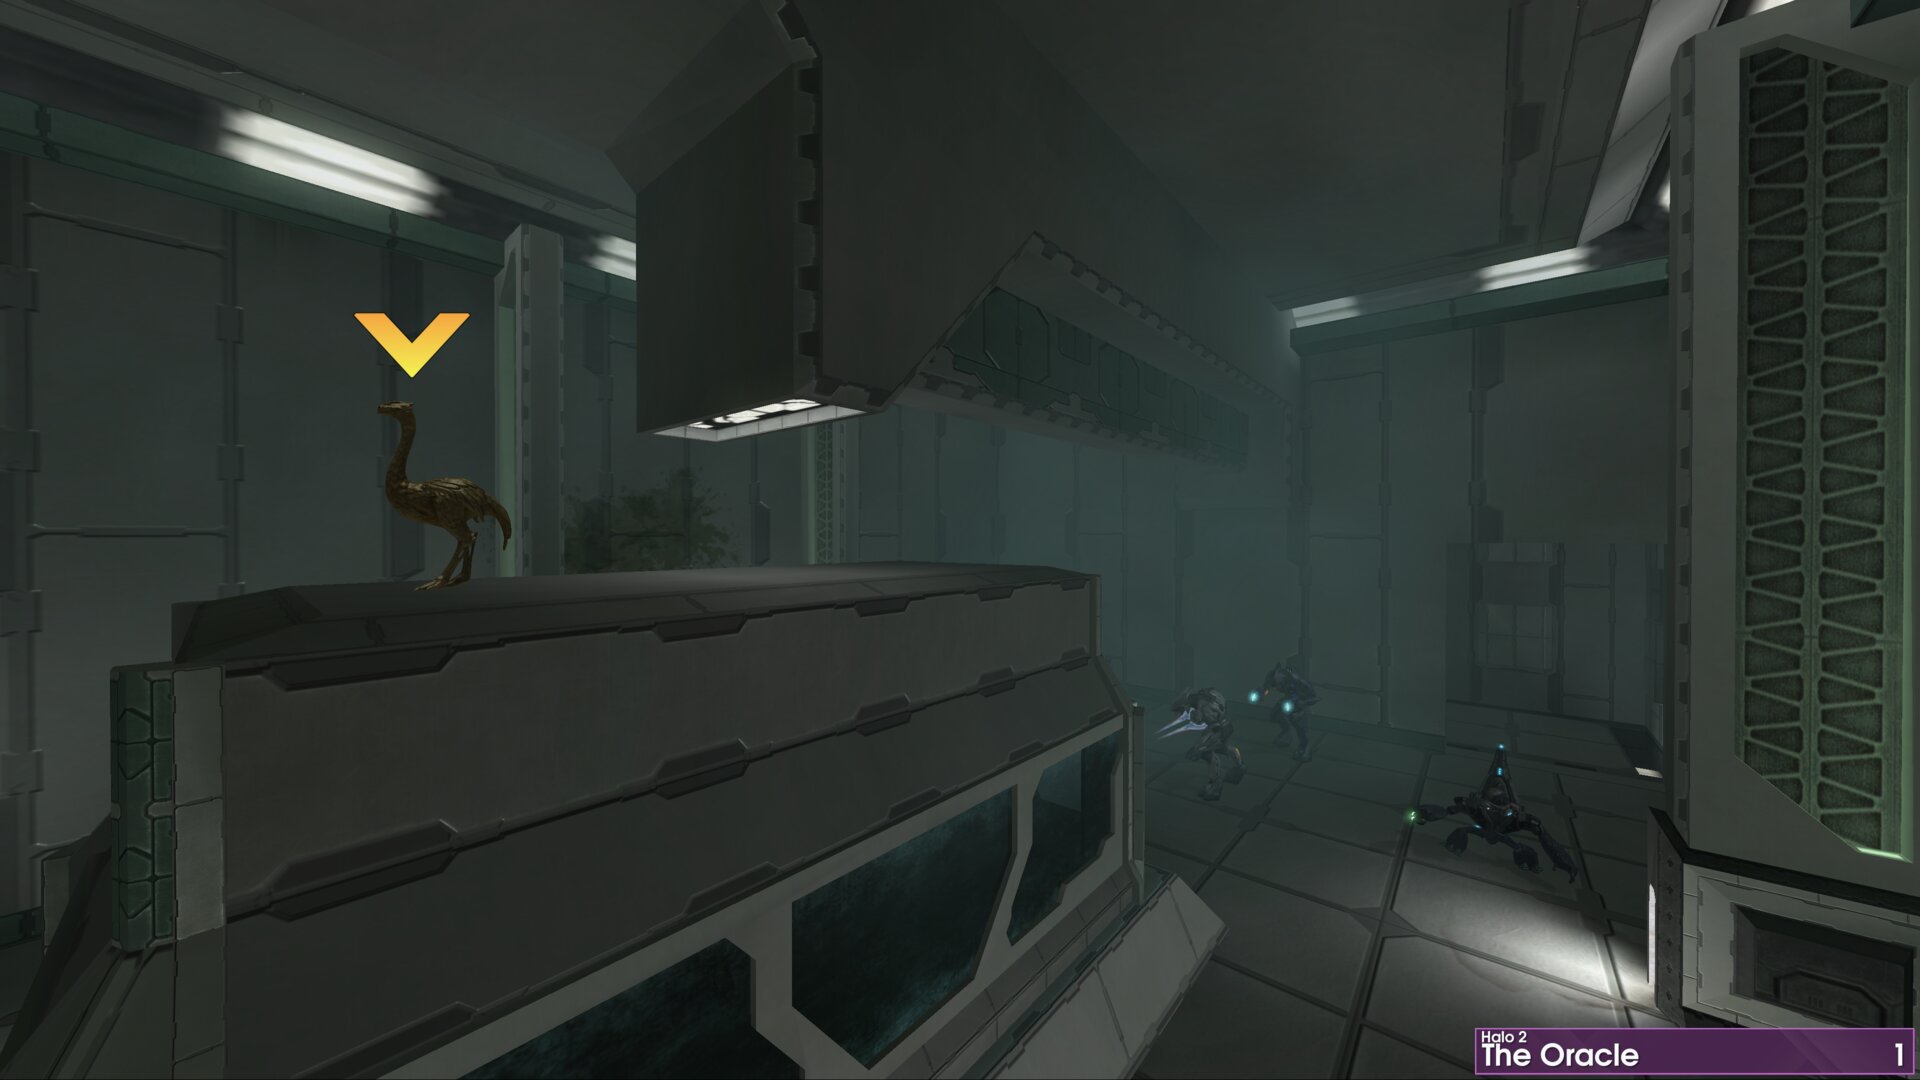
Golden Moa 1 — At the start of the mission, this Golden Moa is on top of the large tank holding small, floating, fleshy lifeforms.
 ⠀
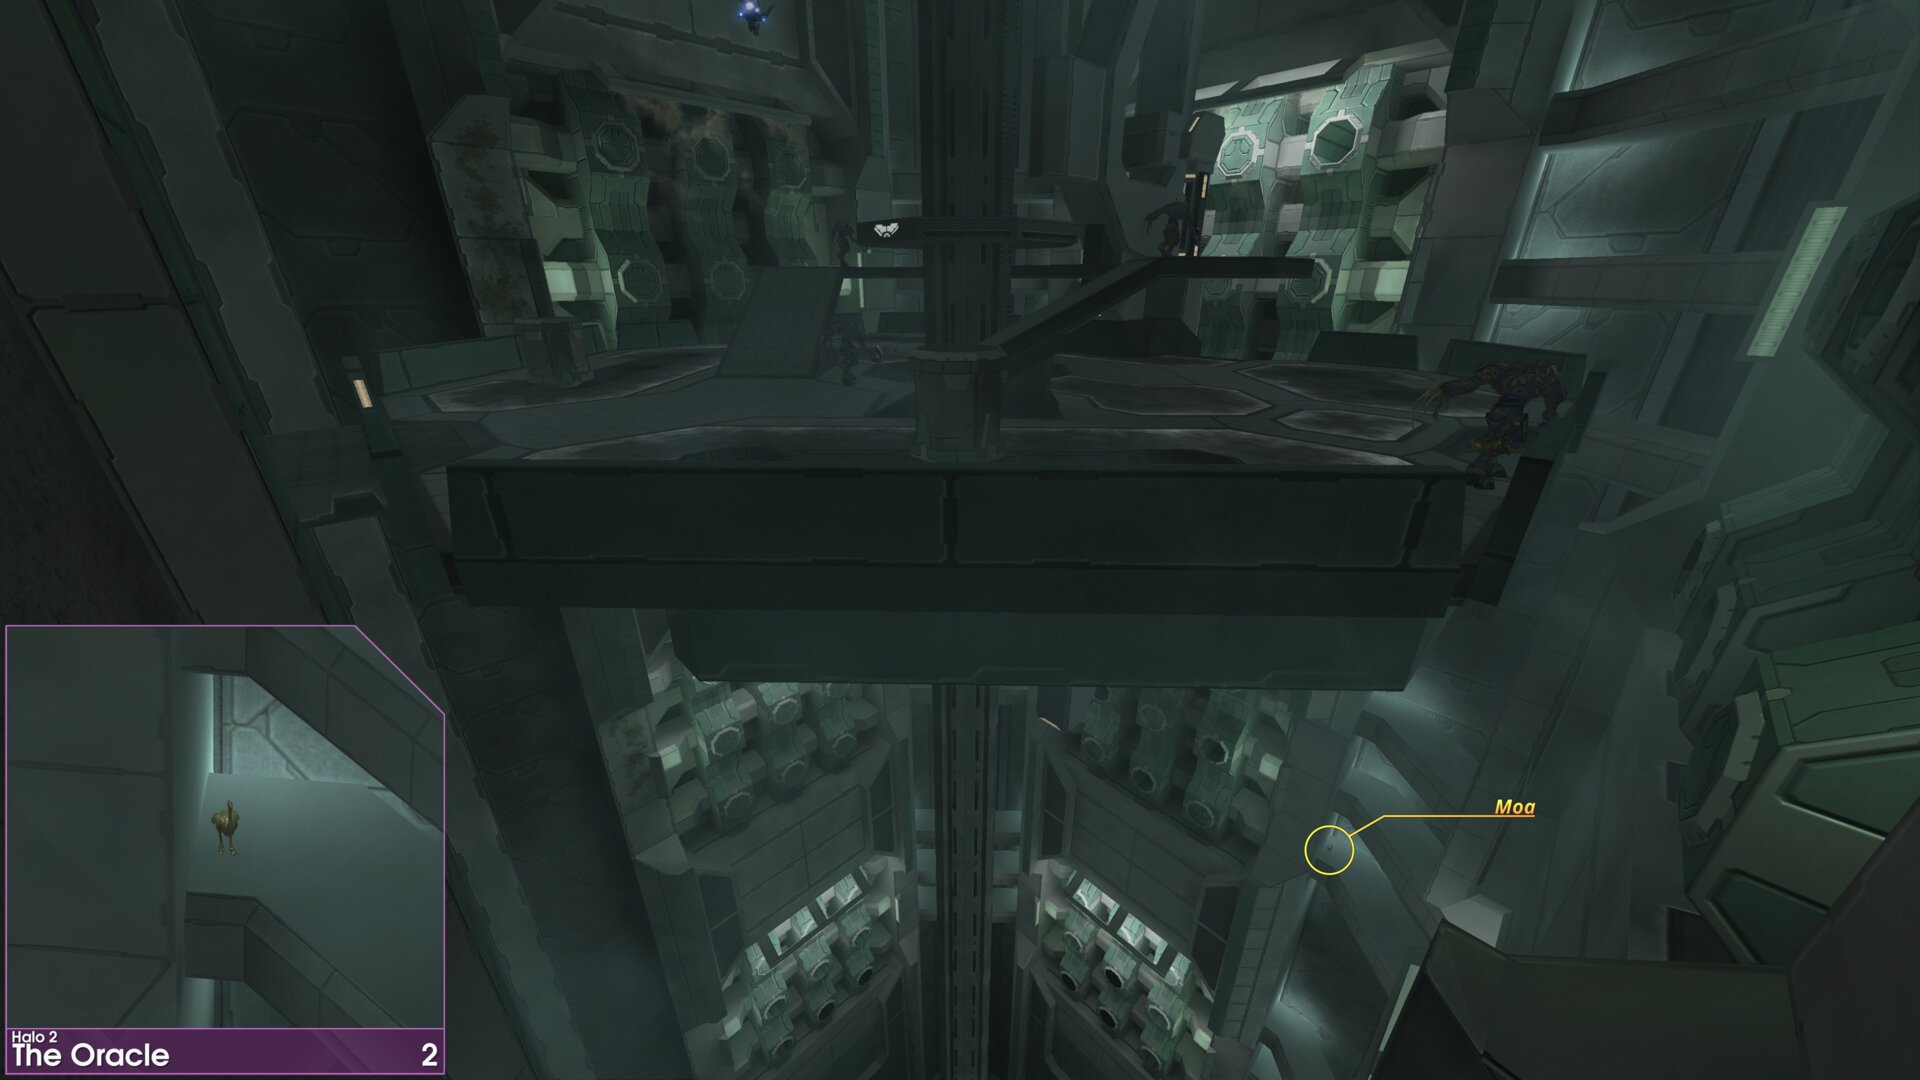
⠀Golden Moa 2 — Once on the elevator platform, peer over the right side. The Golden Moa is on a ledge at back of the room, about halfway down.
 ⠀
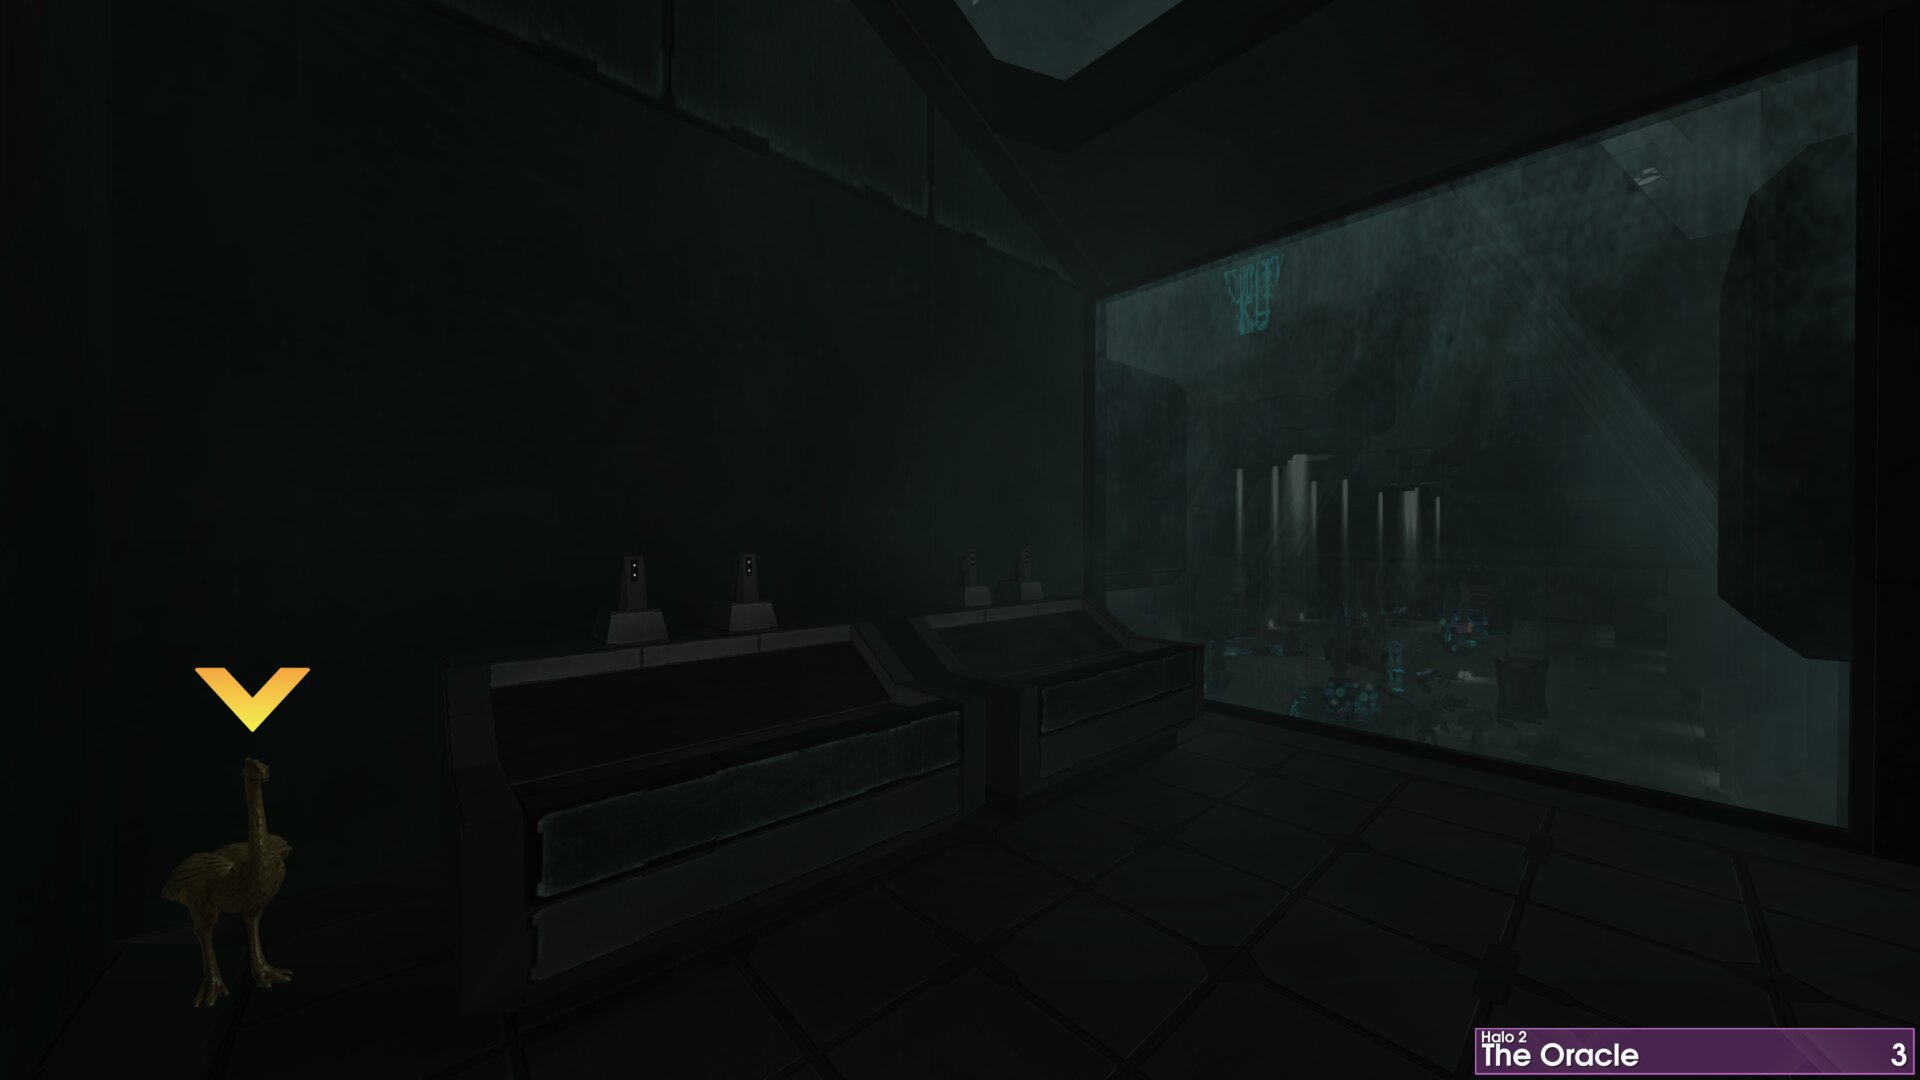
⠀Golden Moa 3 — As you enter the second lab, before dropping down, go towards the left locked door. The Golden Moa is in the corner next to the locked door, beside a set of wash stations.
 ⠀Delta Halo
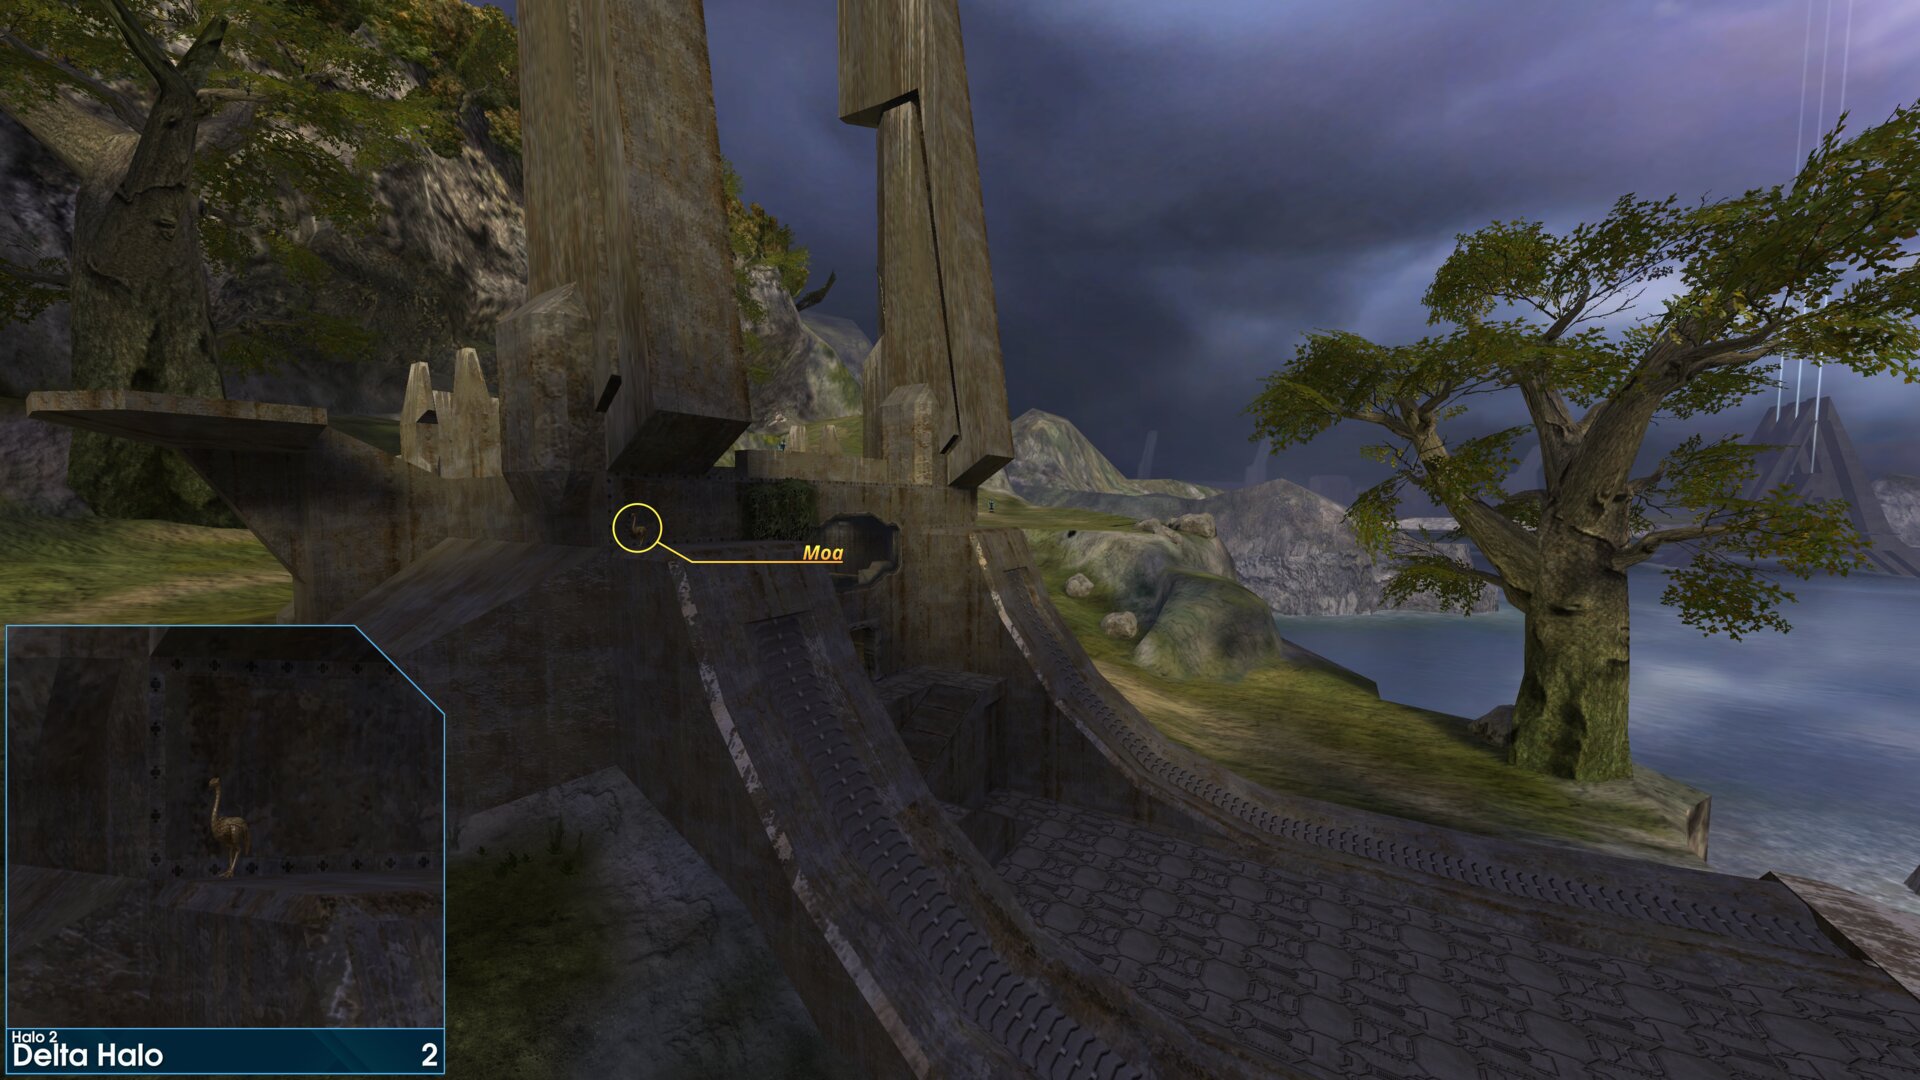
Golden Moa 2 — Make your way to the far side of the structure that controls the bridge, the Golden Moa is on top of the lower guide track for the bridge.
 ⠀
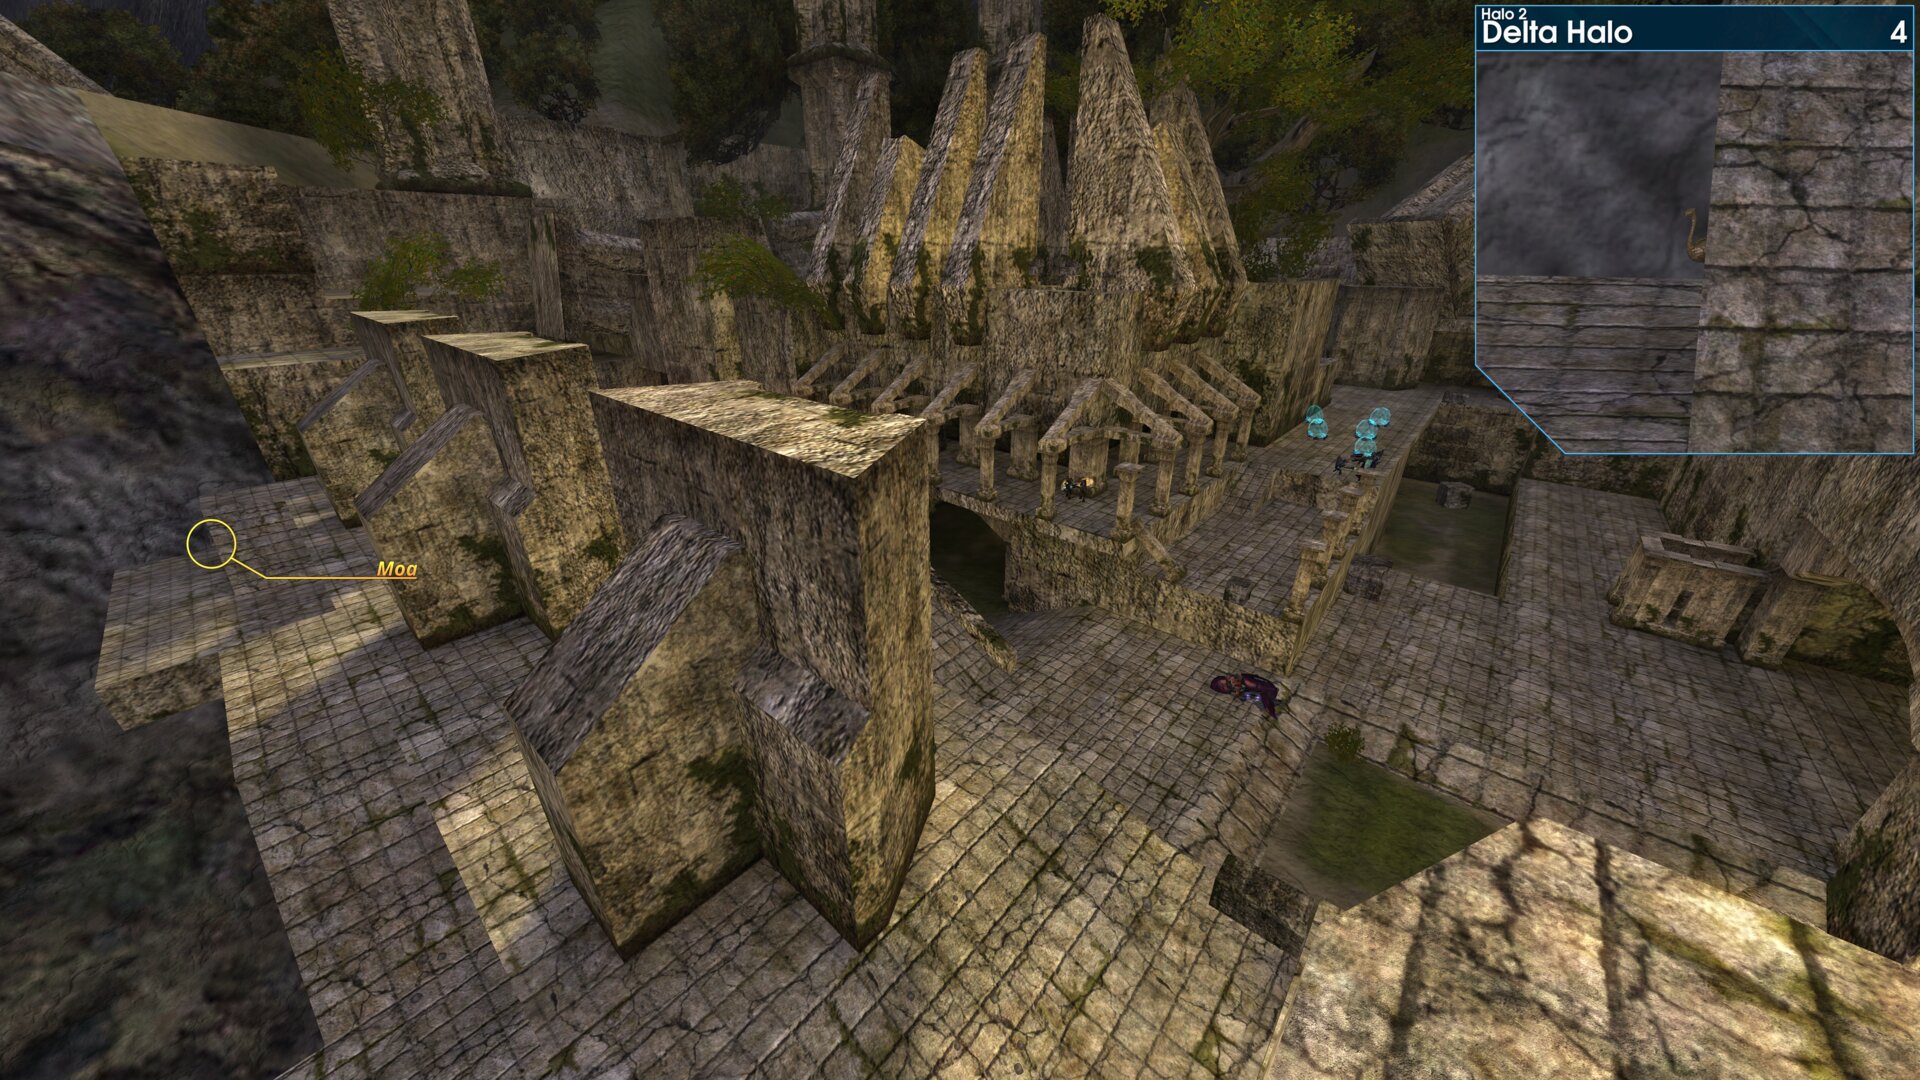
⠀Golden Moa 4 — As you come to the end of the winding ruins, you’ll reach an open are with a central structure that the Covenant are pouring out of. Take the left path, up a ramp, towards the lake. The Golden Moa will be on the furthest platform, over hanging the lake.
“Careful. We're coming up to another structure.” Cortana or Marine
 ⠀
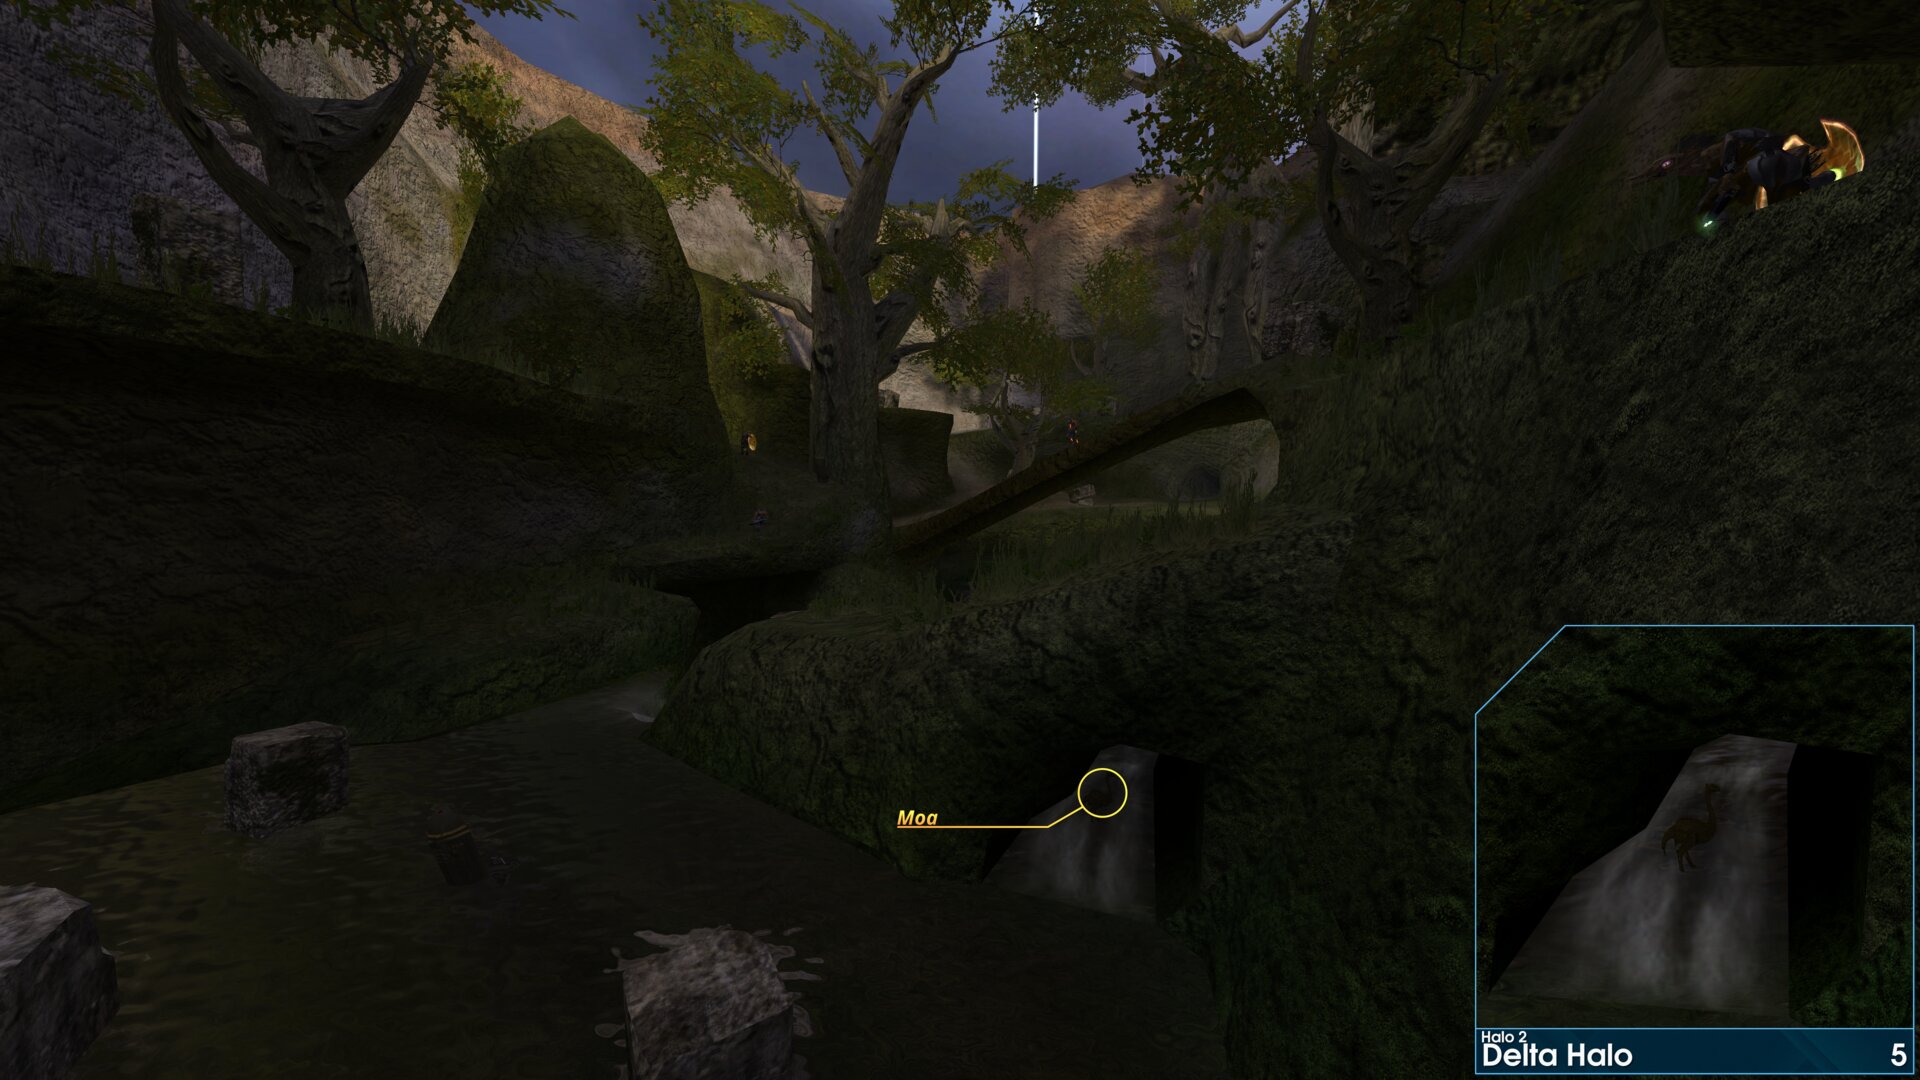
⠀Golden Moa 5 — Off the Rock, Through the Bush, Nothing But Jackal.
Once you reach the top of the waterfall, drop down into the water below, the Golden Moa is in a small cave to the right as you follow the creek.
 ⠀Regret
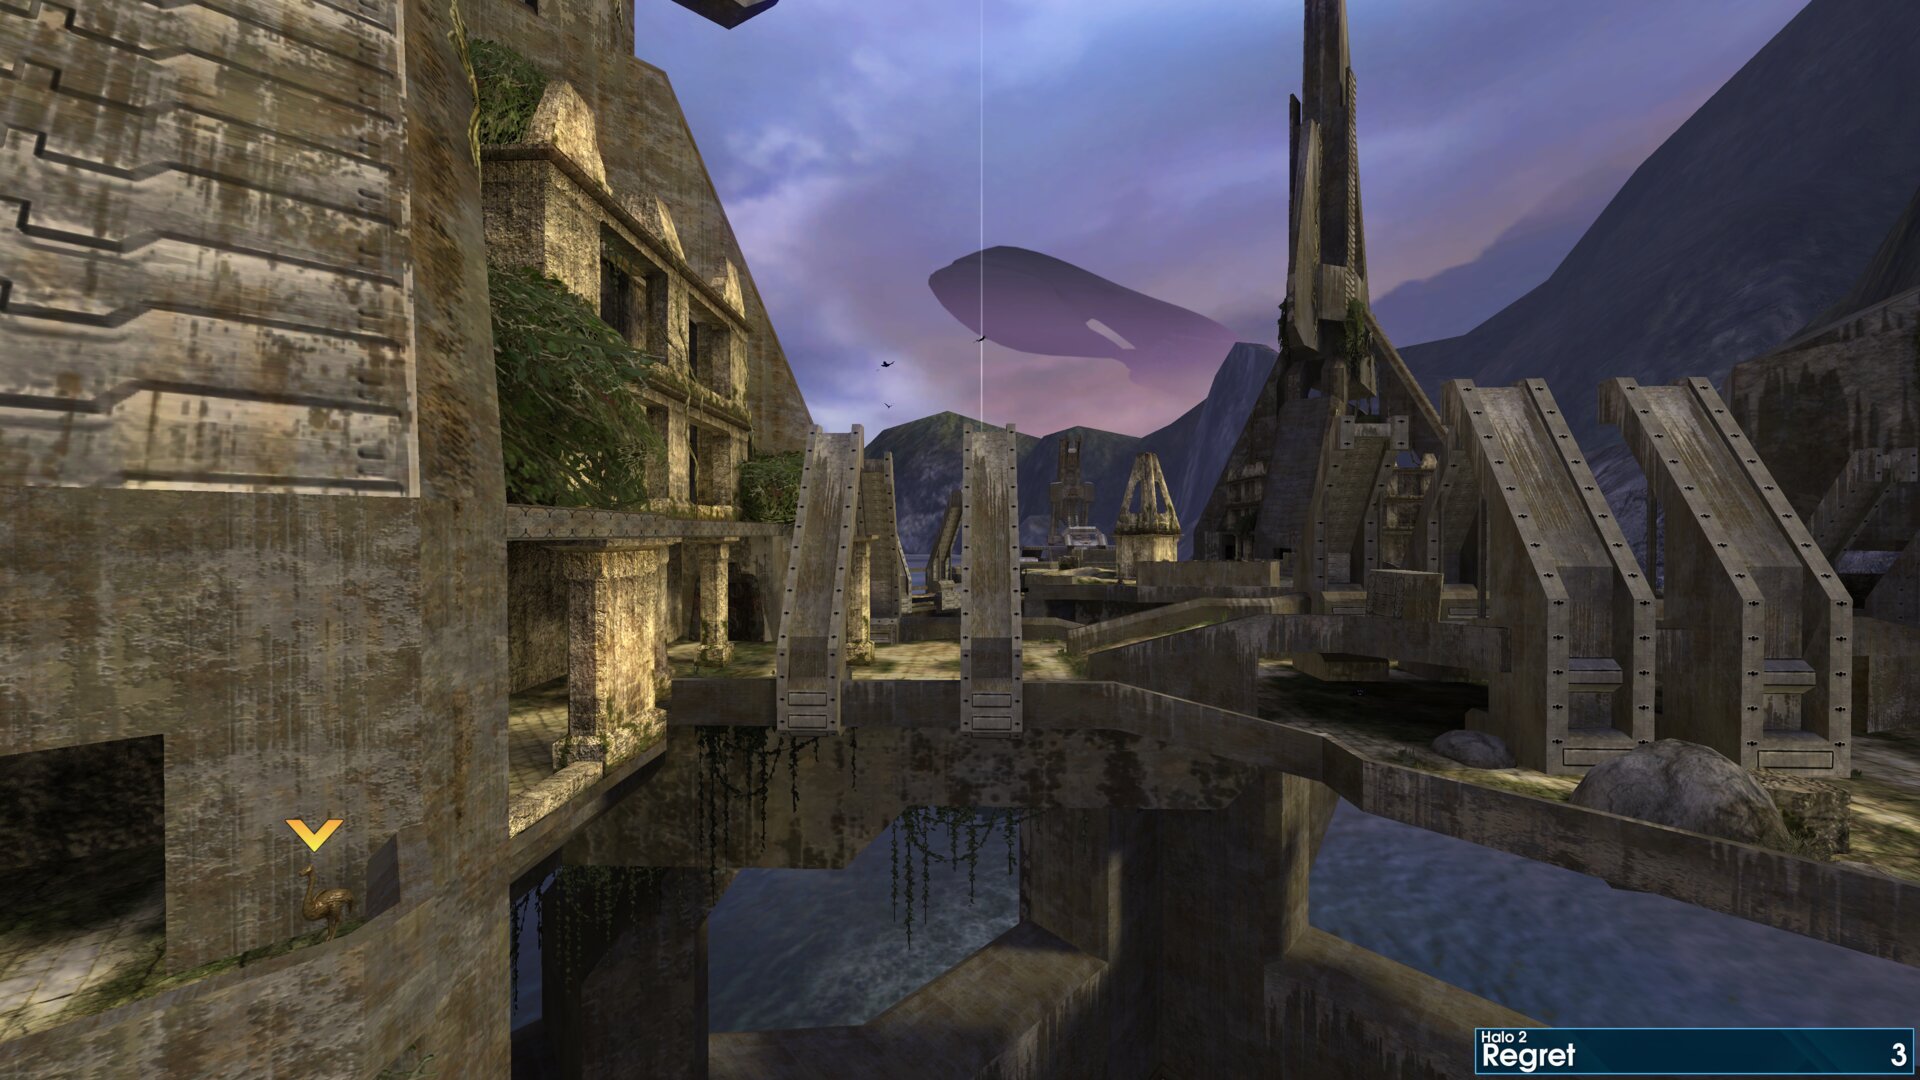
Golden Moa 3 — At the start of the mission, after crossing the bridge to the first connected structure, you’ll find the Golden Moa on a balcony to the left.
 ⠀
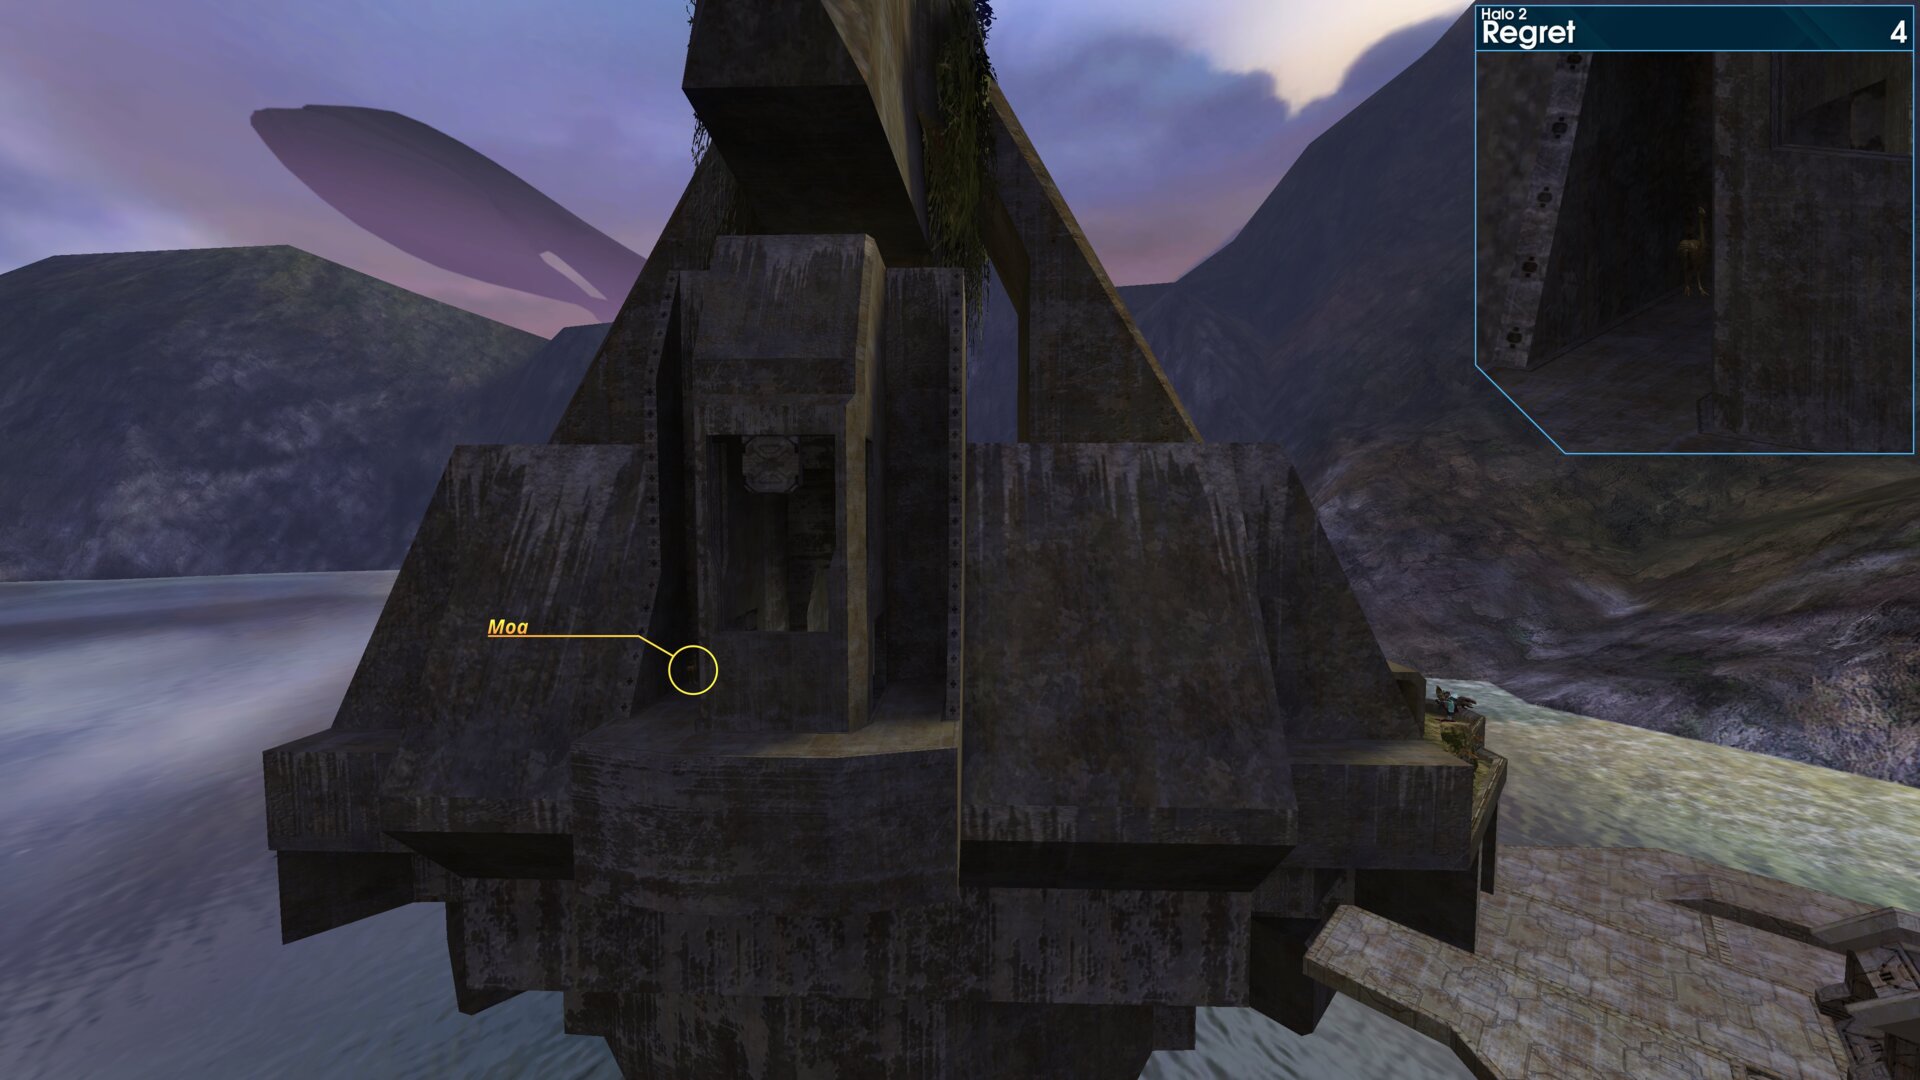
⠀Golden Moa 4 — Once inside the first tower, follow the ramps up to the balcony above the elevator shaft. The Golden Moa will be to you right as you head outside.
 ⠀
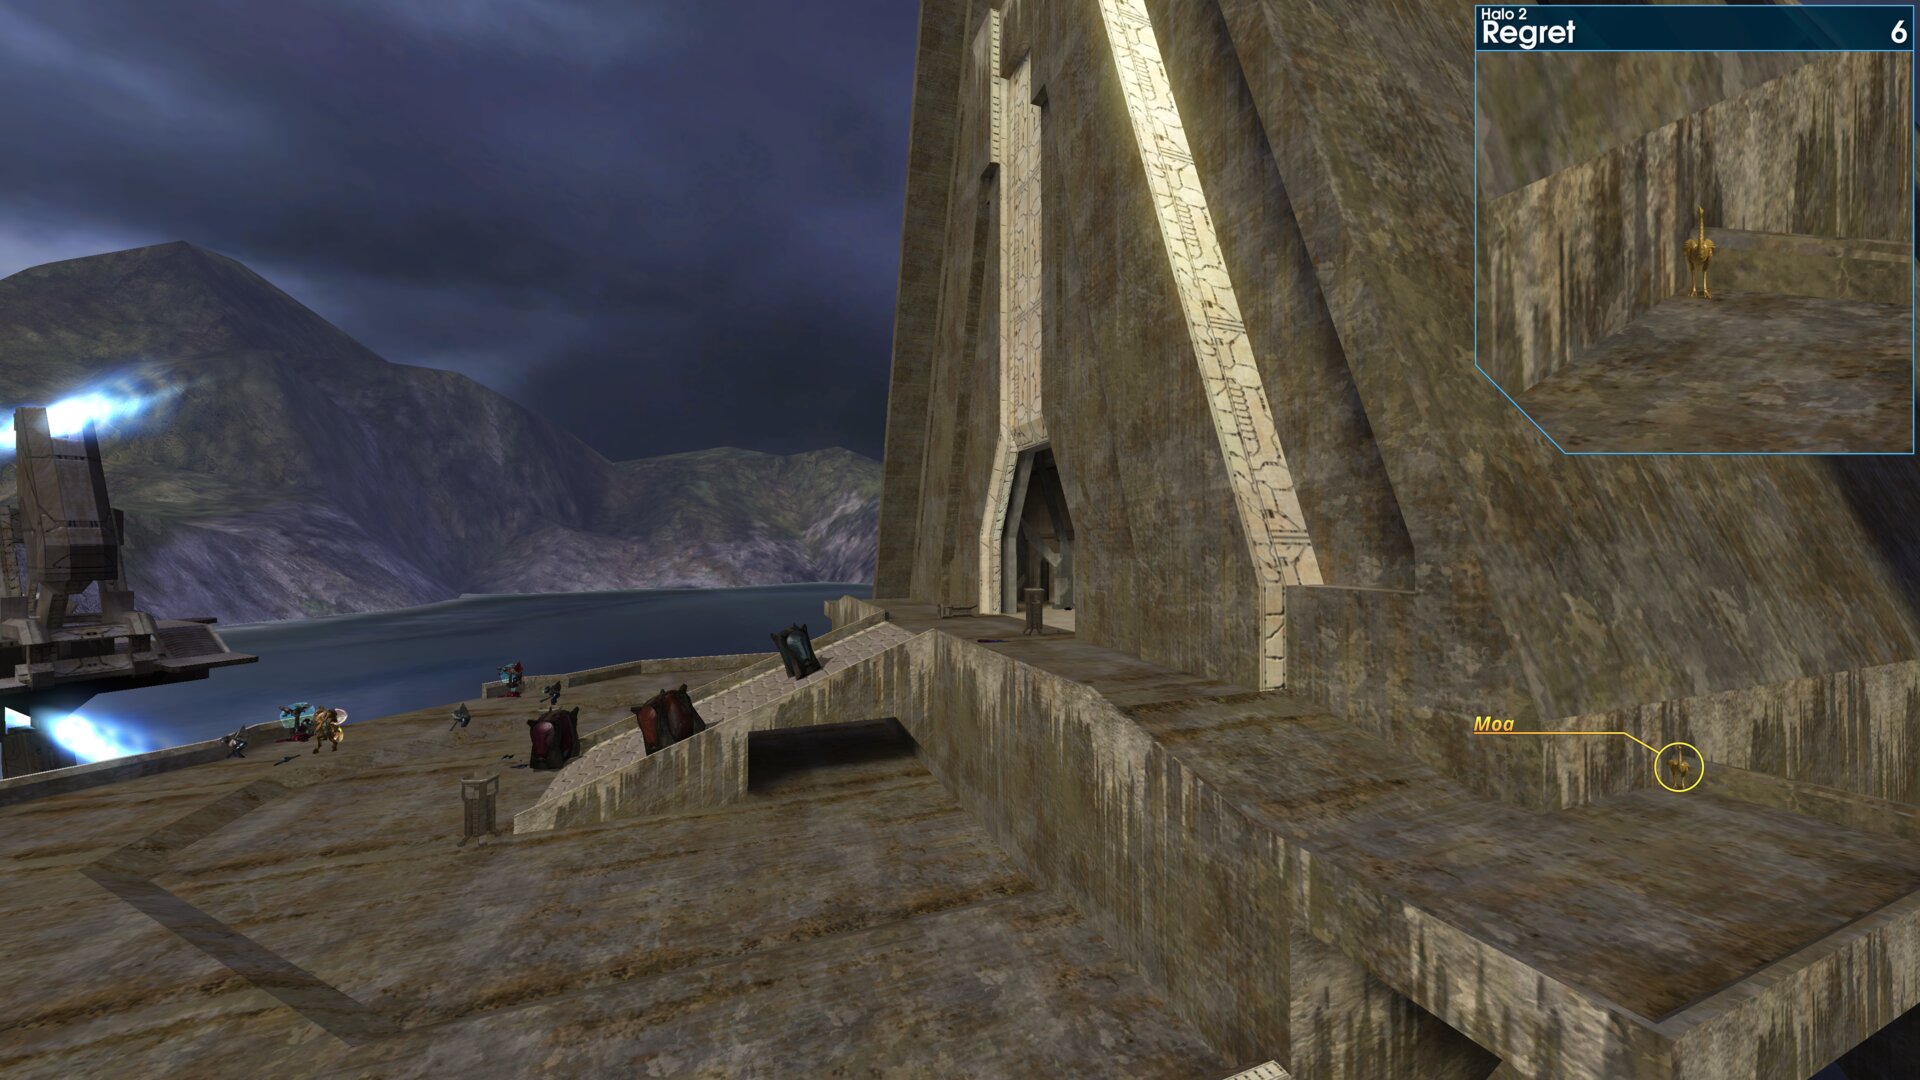
⠀Golden Moa 6 — Once you reach the main temple, head up the ramp to the entry, but don’t go inside just yet. Follow the balcony round to the right, the Golden Moa is just around the corner of the building.
 ⠀Sacred Icon
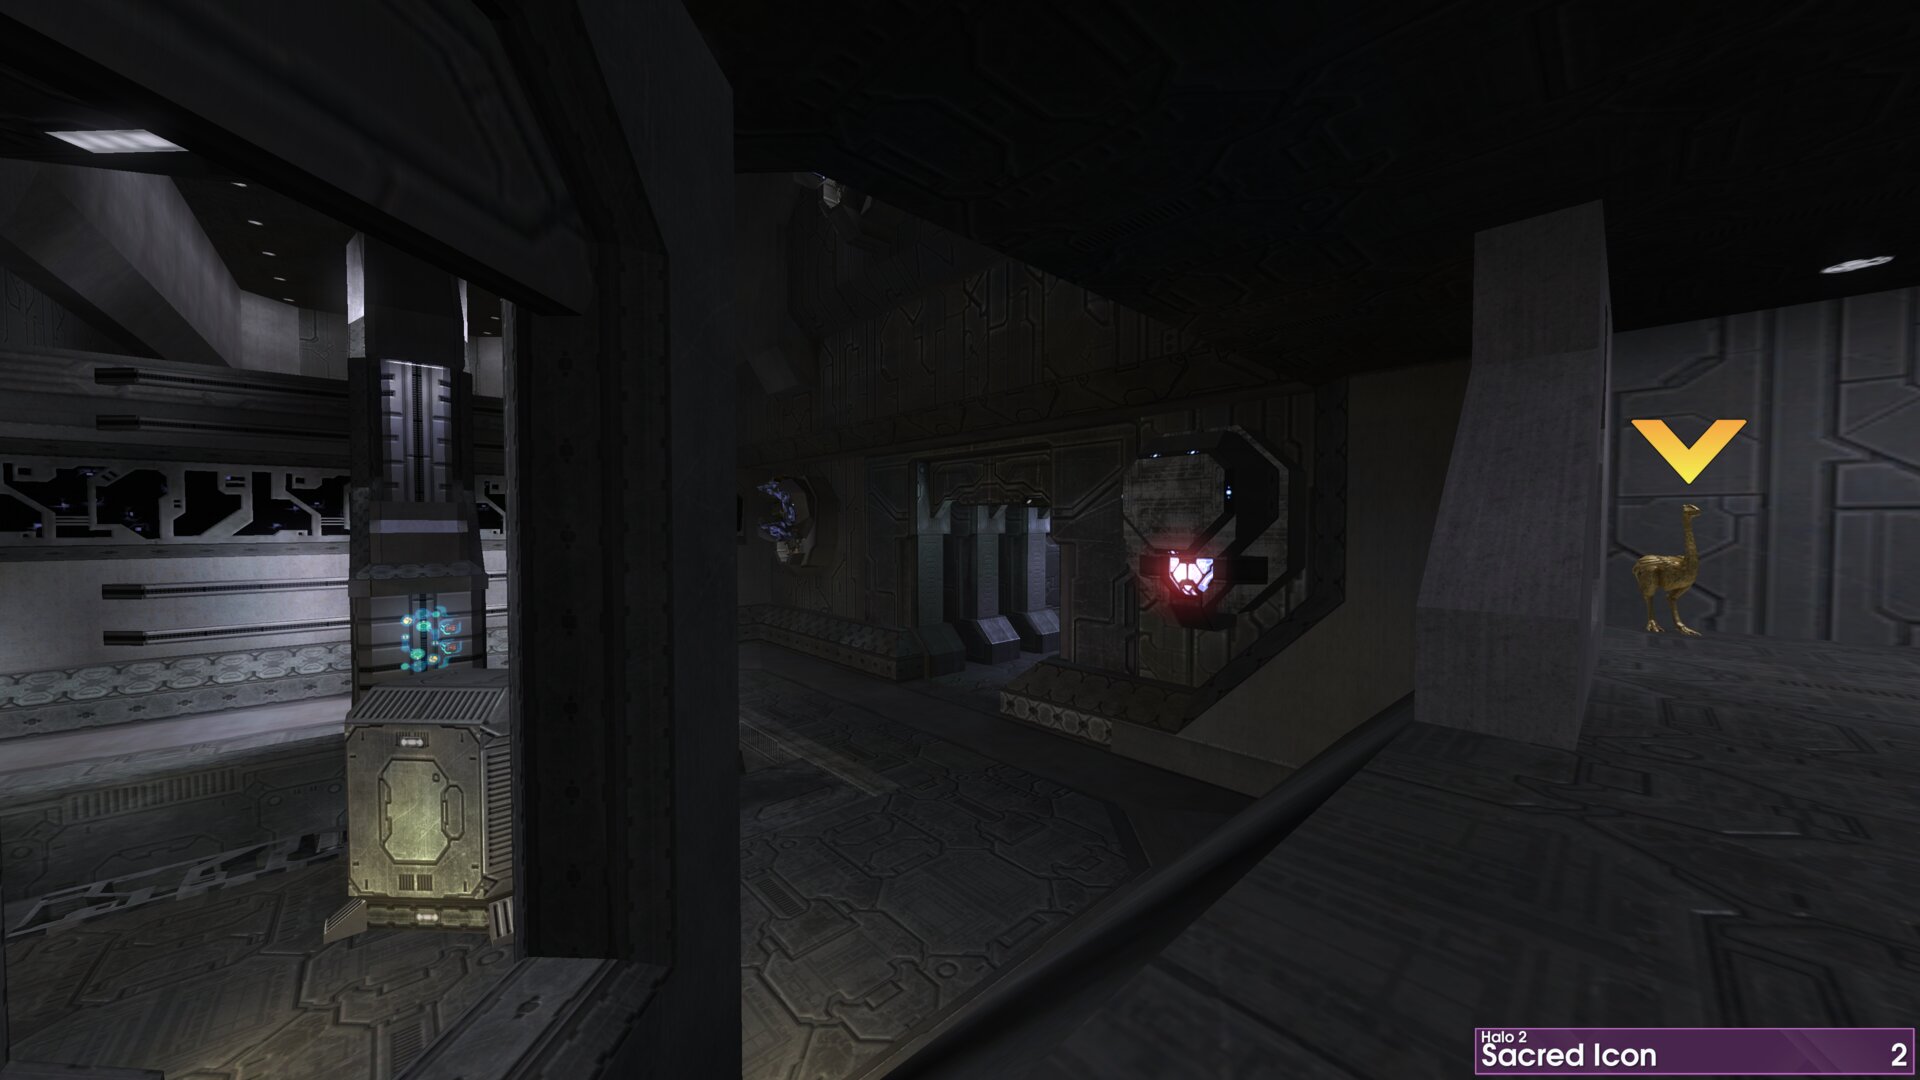
Golden Moa 2 — After going down the first two chutes, you’ll reach a passageway. As you enter said passageway, turn left and jump up onto the nearby raised floor. Turn left once more, so that your now face back towards the entry, to find the Golden Moa.
 ⠀
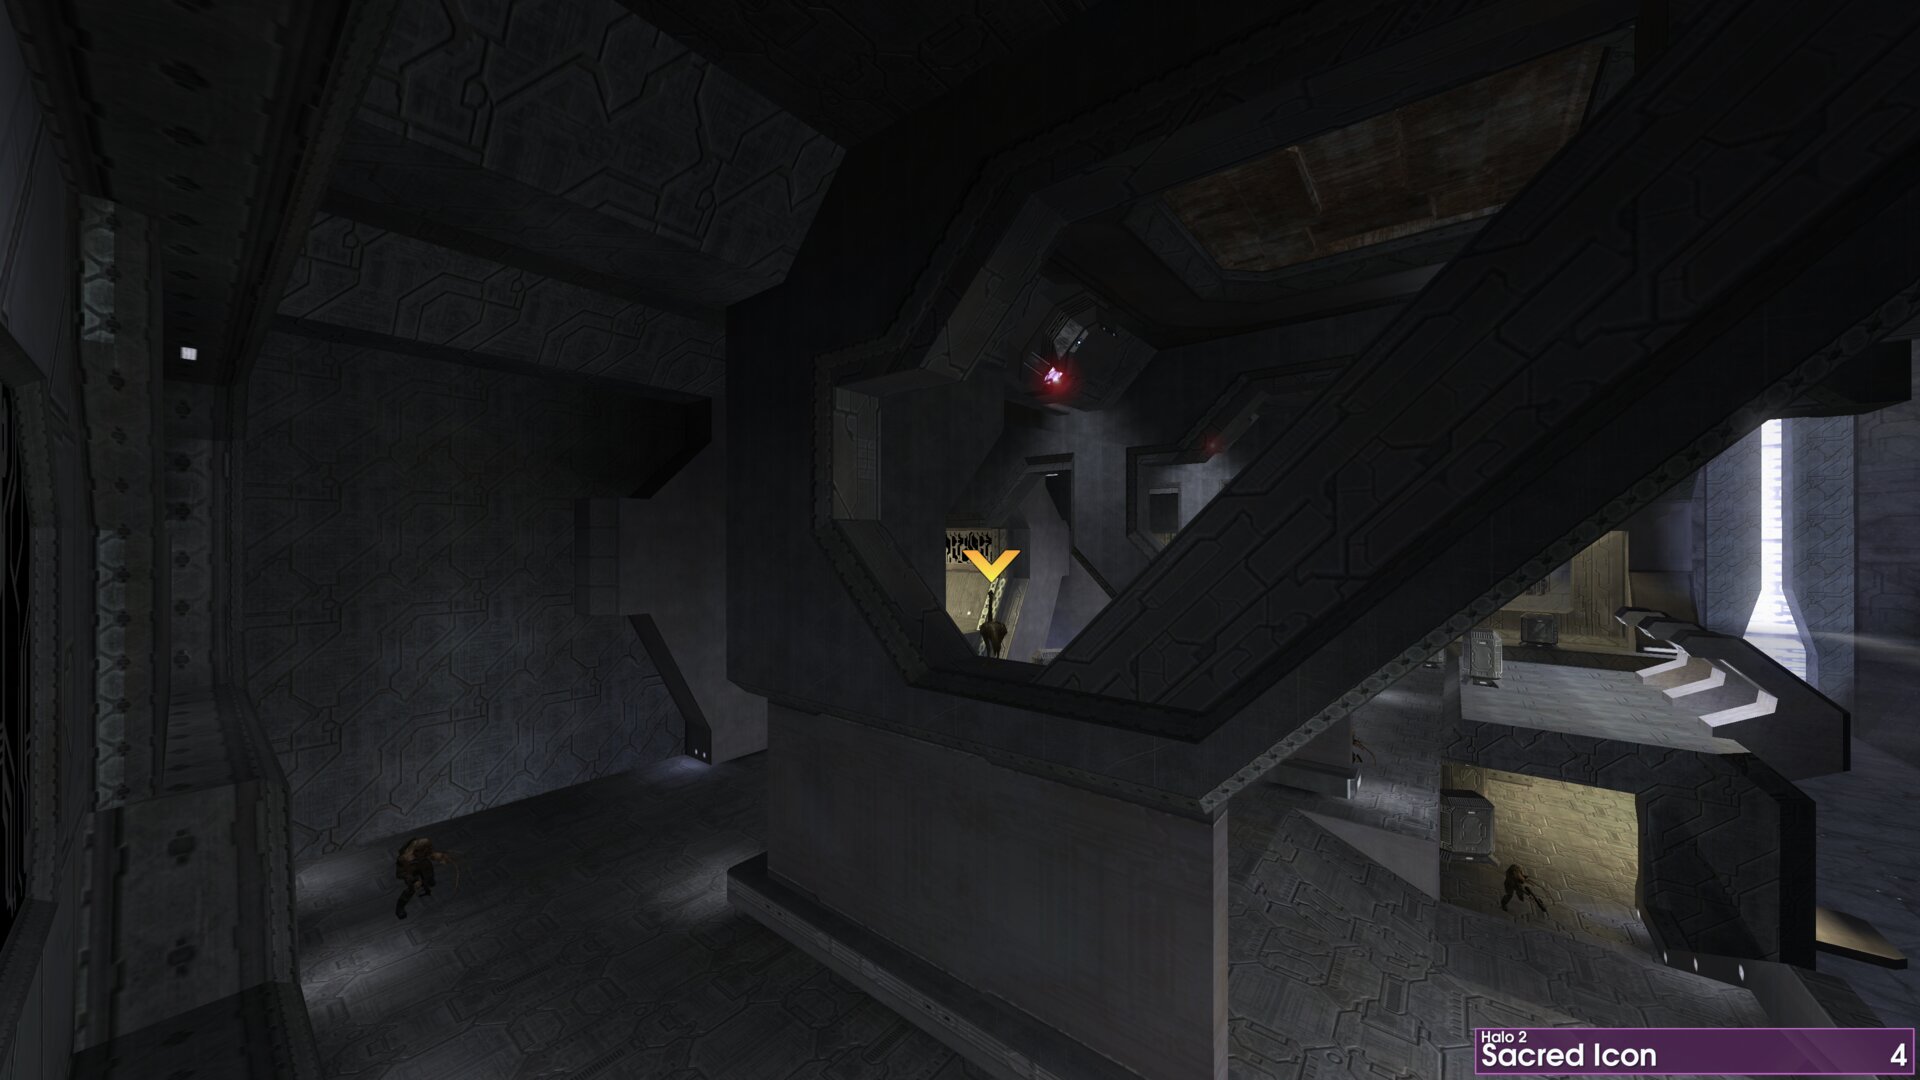
⠀Golden Moa 4 — Once you reach the balcony that looks out over the void in the wall, which you previously crossed on the power source (gondola). You’ll find the Golden Moa atop a ledge, on the right most column.
 ⠀
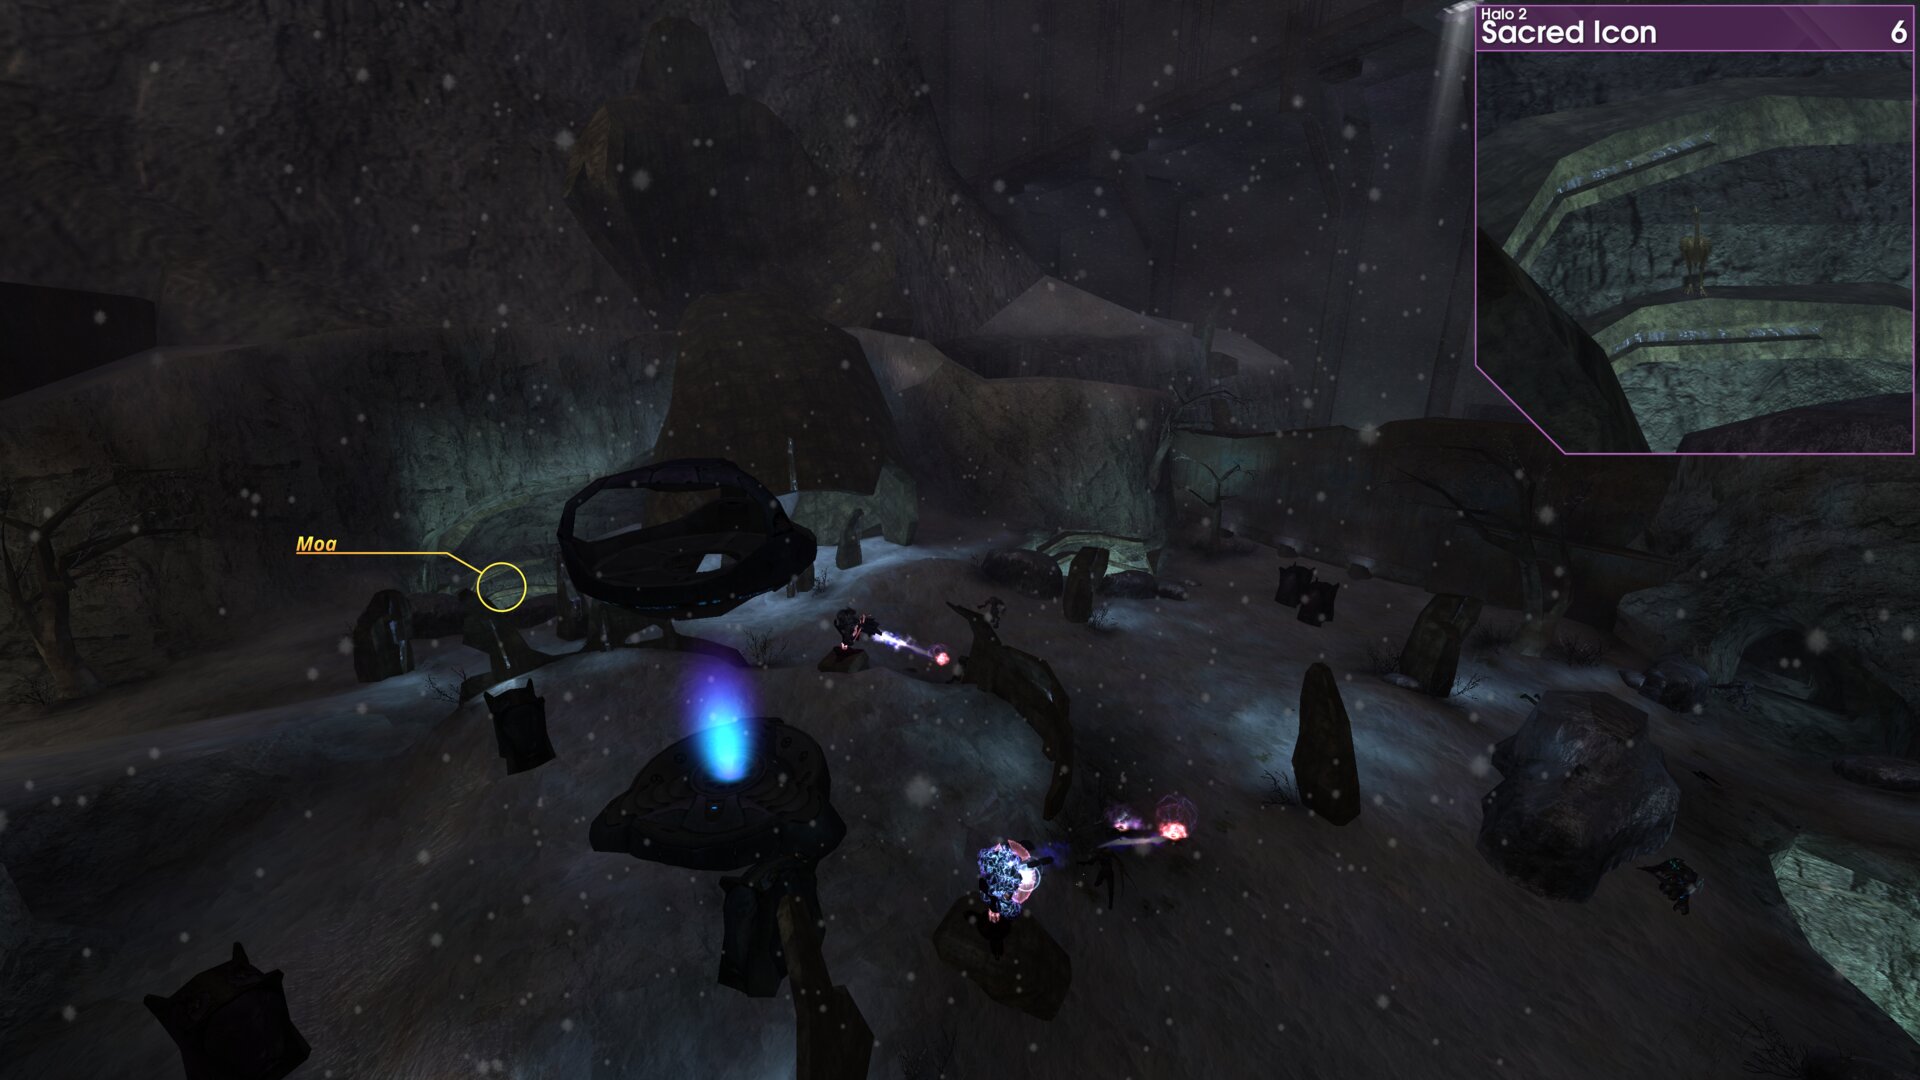
⠀Golden Moa 6 — Once you reach the final area, looking towards the Library, the Golden Moa is on a ledge at the back of the far right pit.
 ⠀Quarantine Zone
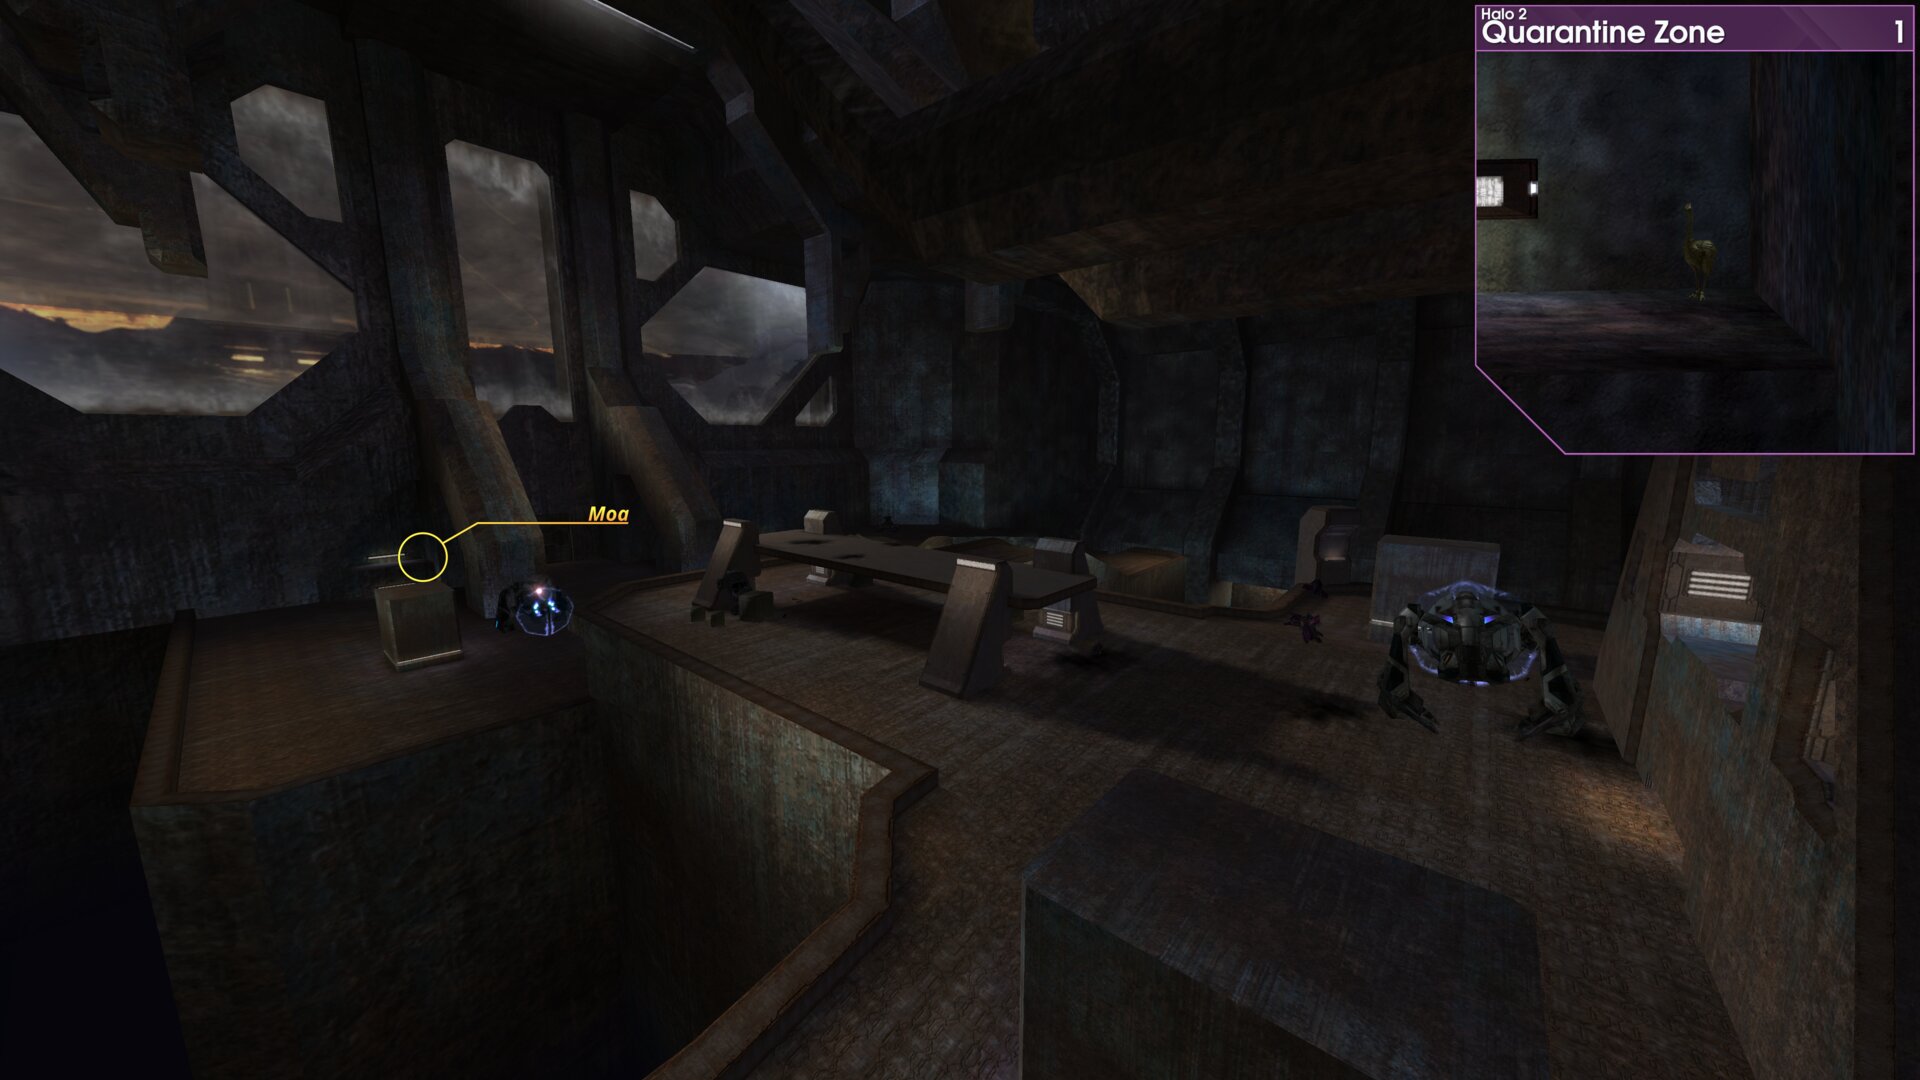
Golden Moa 1 — At the back of the large chamber, beneath the windows. Look for the Golden Moa on a lit ledge, left side of the exit.
 ⠀
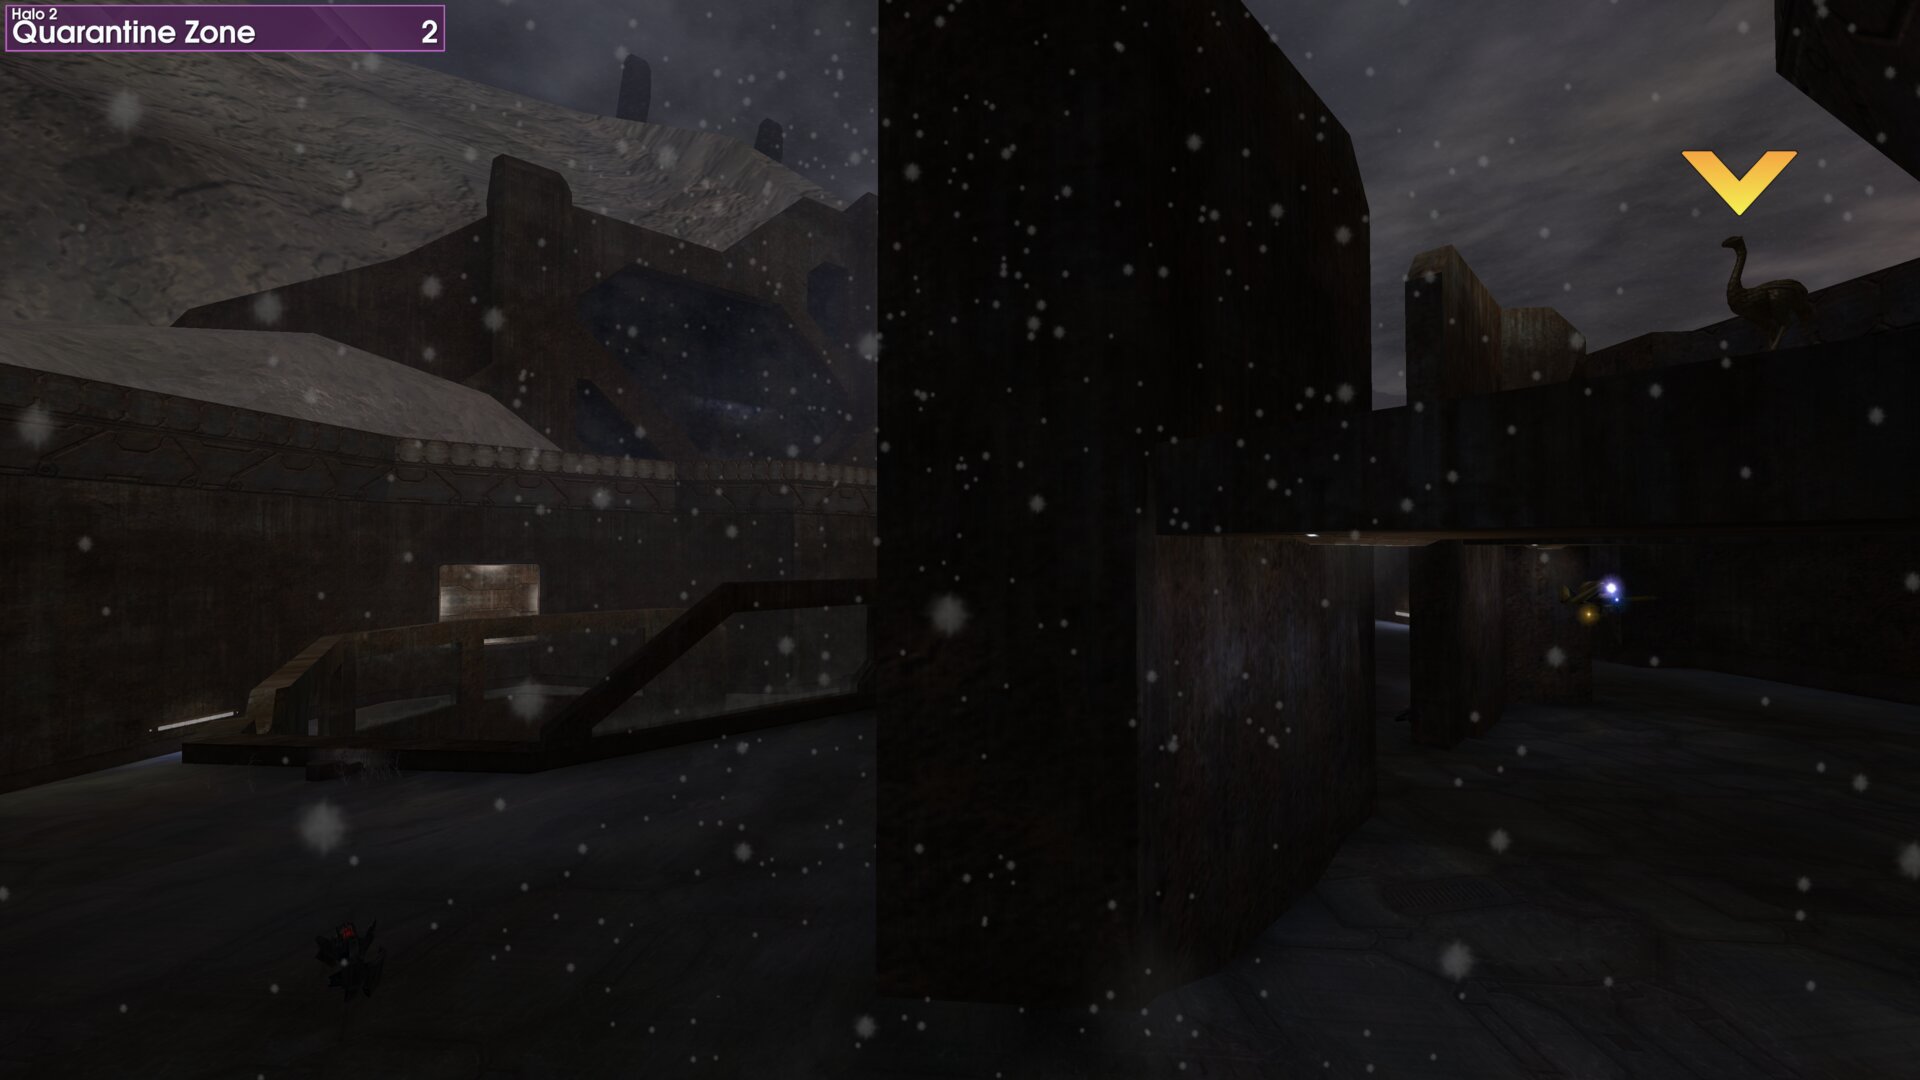
⠀Golden Moa 2 — As you make your way around the upper level of the courtyard, the Golden Moa is atop the second roof structure, just before the ramp down.
 ⠀
⠀Golden Moa 3 — As you reach the clearing in the middle of the crashed Sentinel manufacturing facility, the Golden Moa is next to a fire atop the soil formation, that’s left of the smoldering spikes.
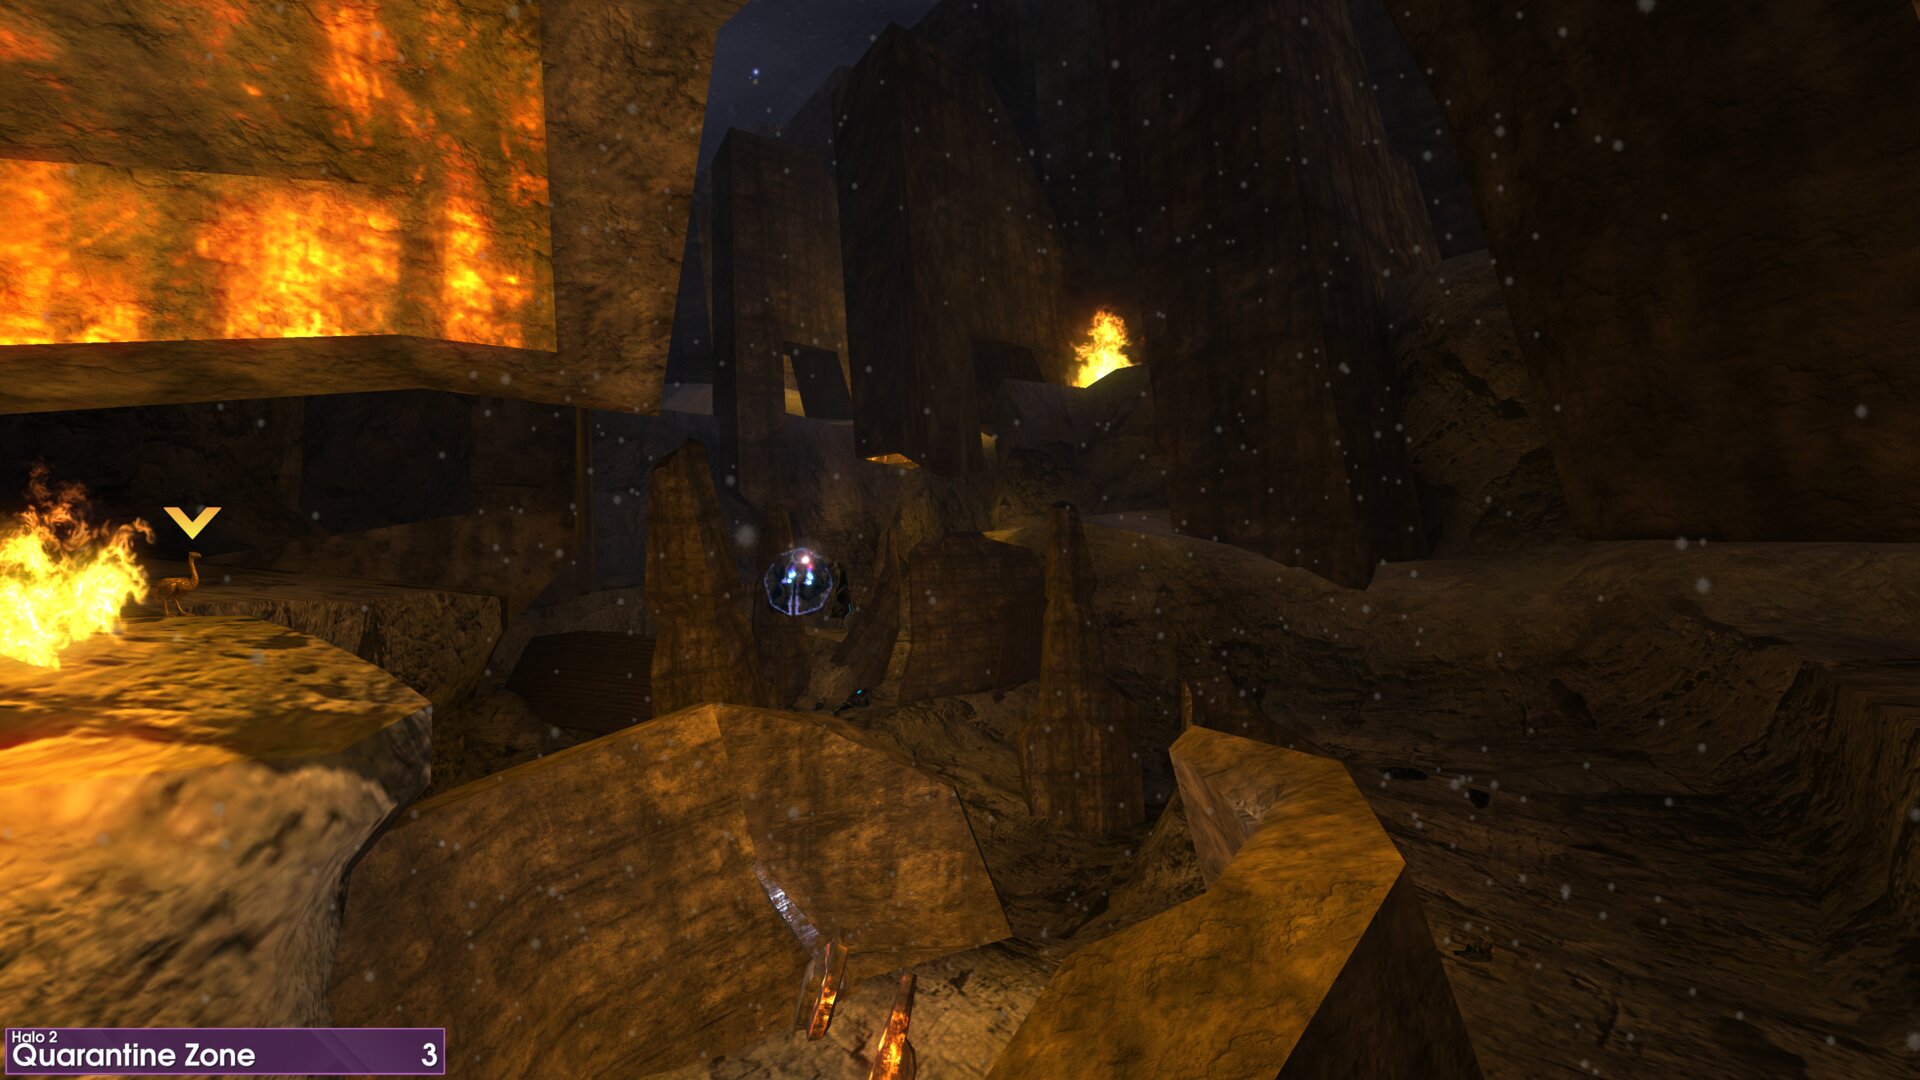 ⠀
⠀Halo 3: 23ʳᵈ July 2026 Weekly Set
The Storm
Rally Point: Alpha
Golden Moa 2 — At the start of the level, on the broken road next to the tunnel exit.
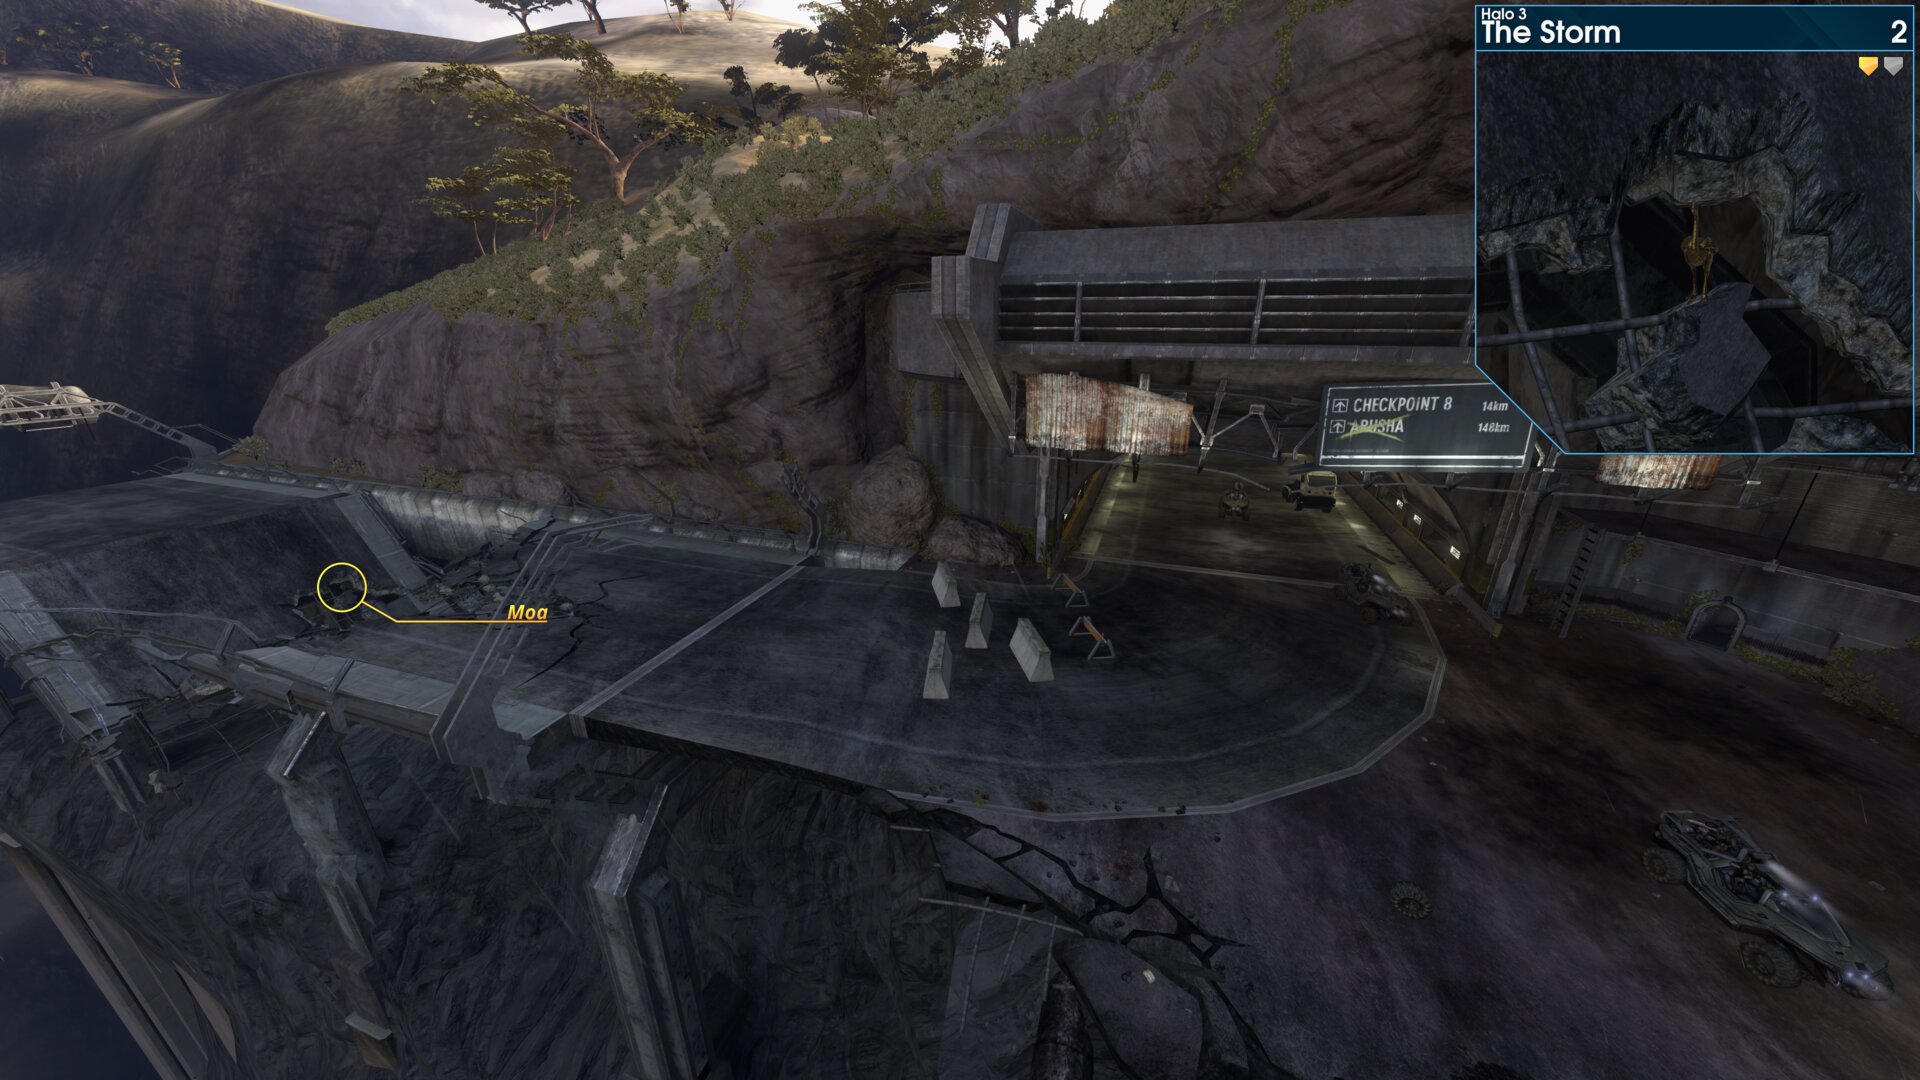 ⠀
⠀
Golden Moa 7 — In the end of the drain, next to the first AA-Wraith. (in the first lake bed)
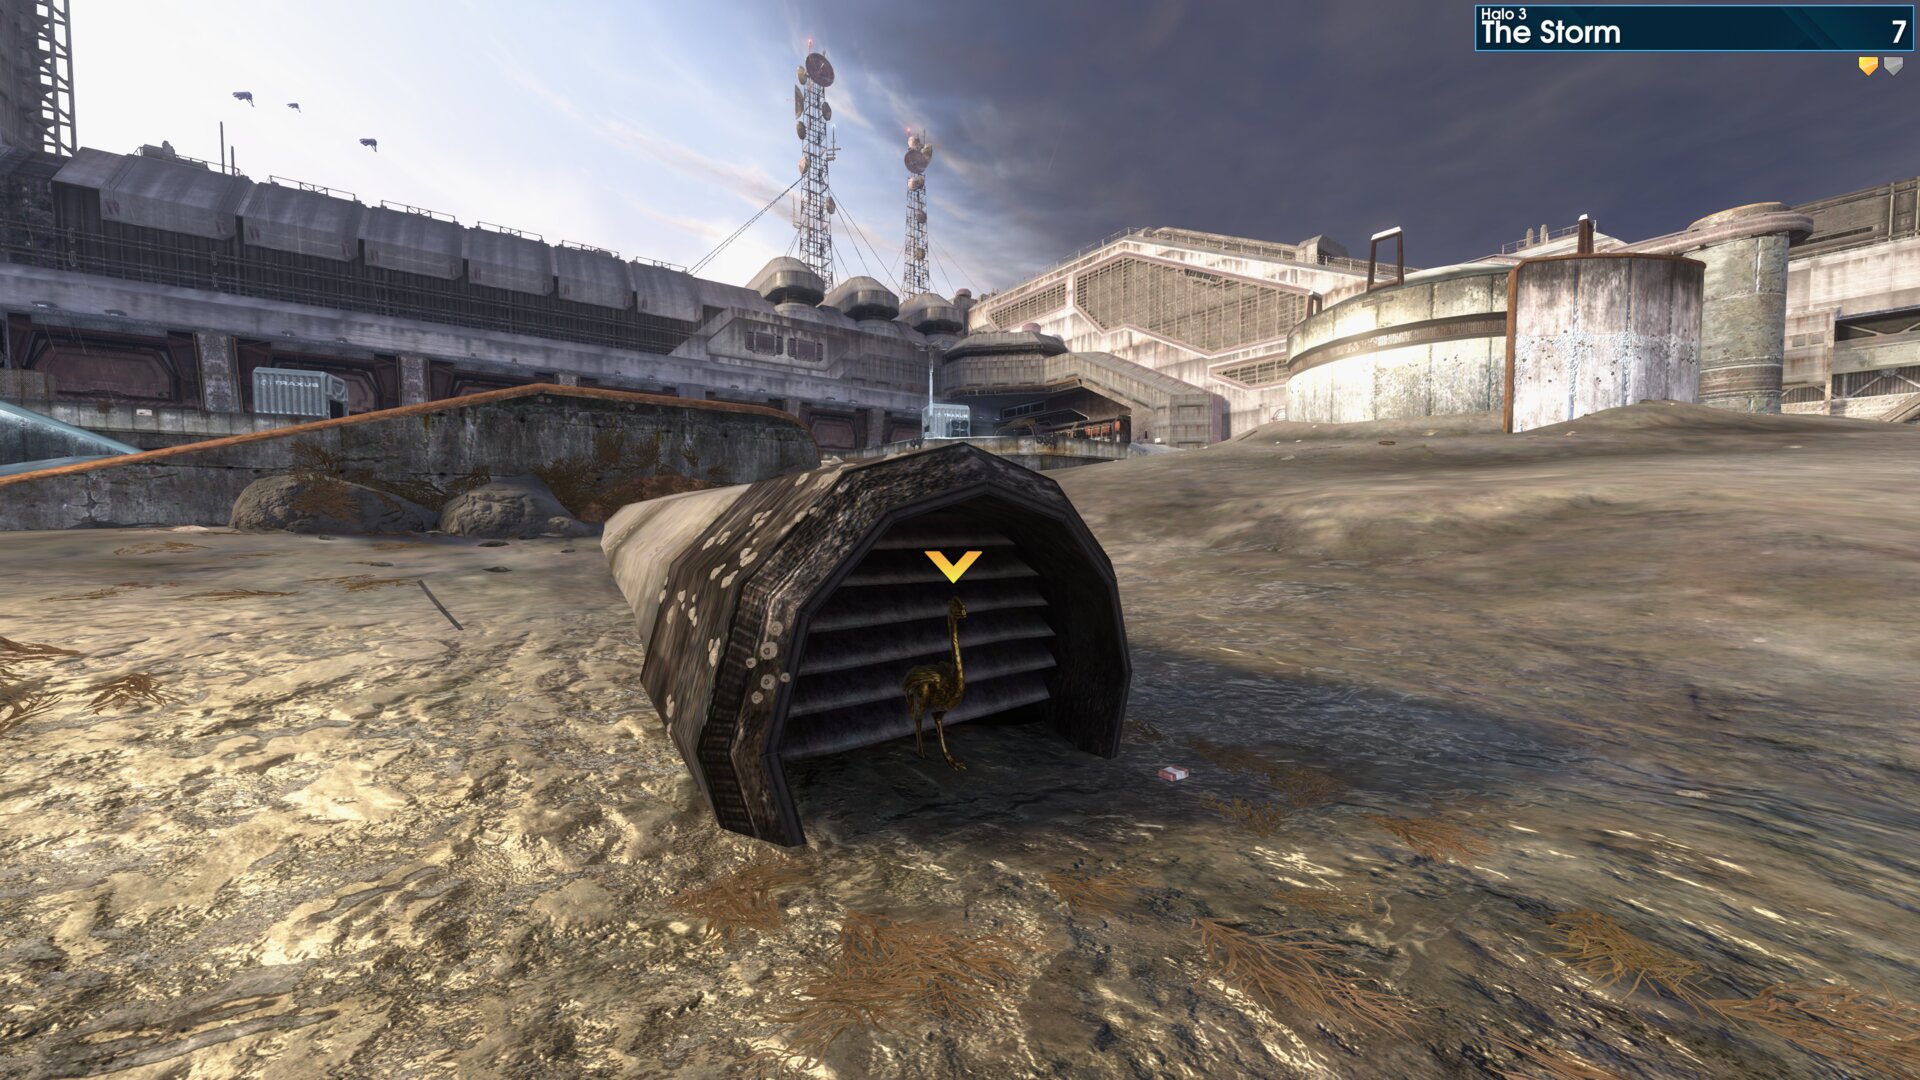 ⠀
⠀
Rally Point: Bravo
Golden Moa 16 — After the Hunters, head towards the far gate, the Moa is in a nook to the left.
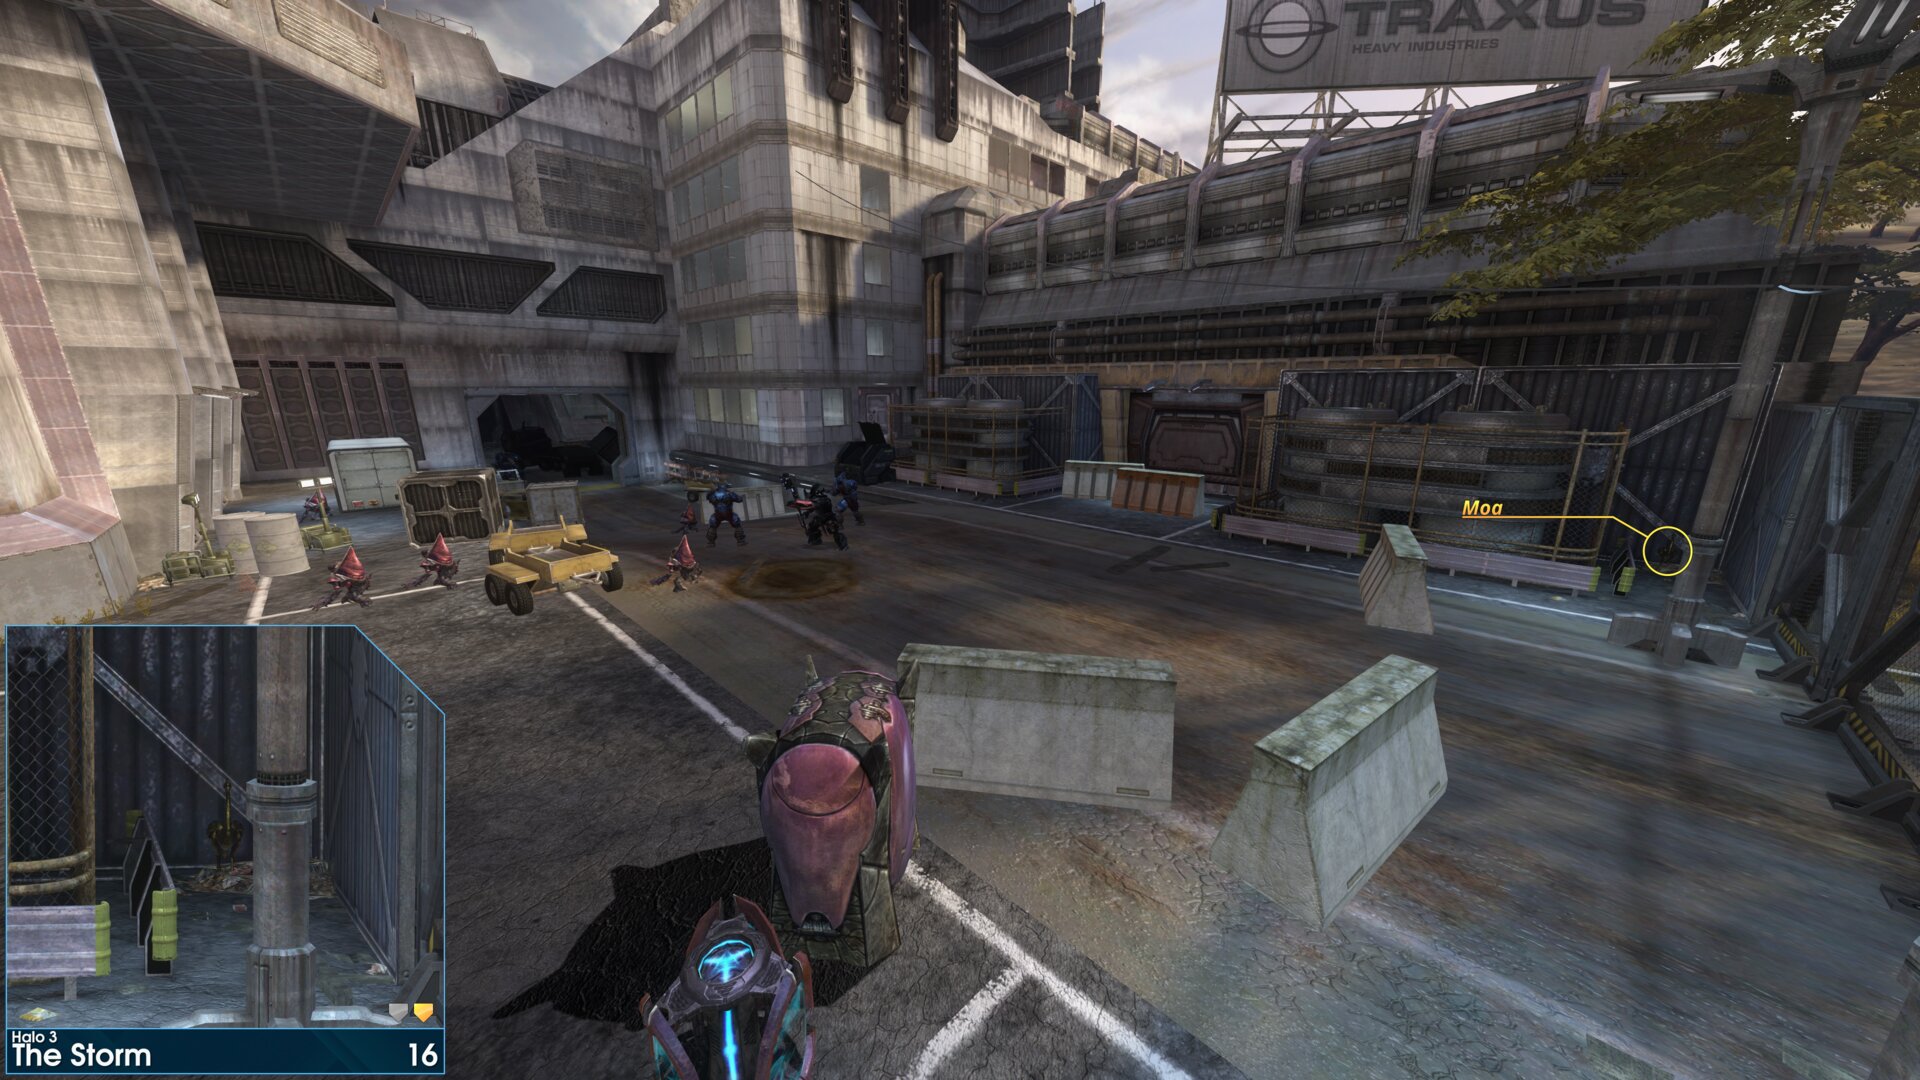 ⠀
⠀
Floodgate
Rally Point: Bravo
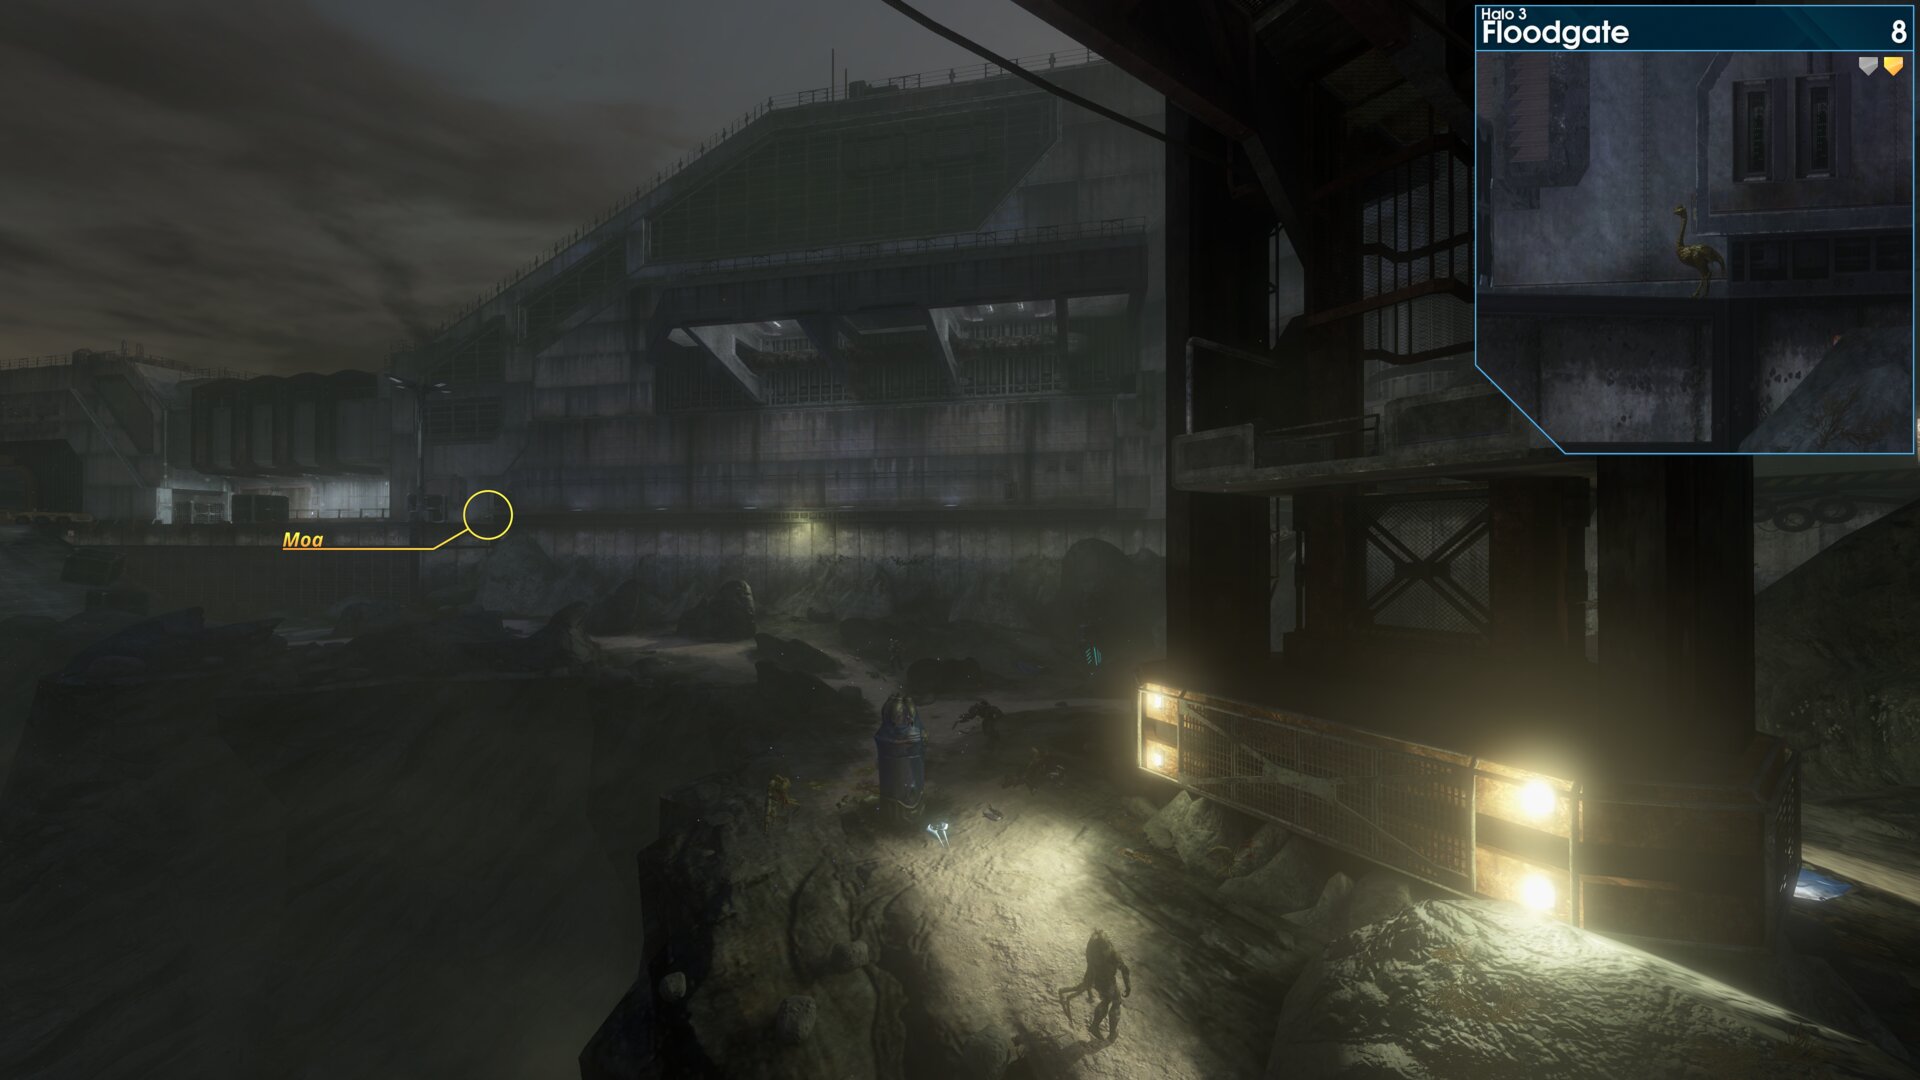
Golden Moa 8 — Just after the Elites, it's against the wall on the concrete ledge, near the ramp that leads into the next area.
 ⠀
⠀
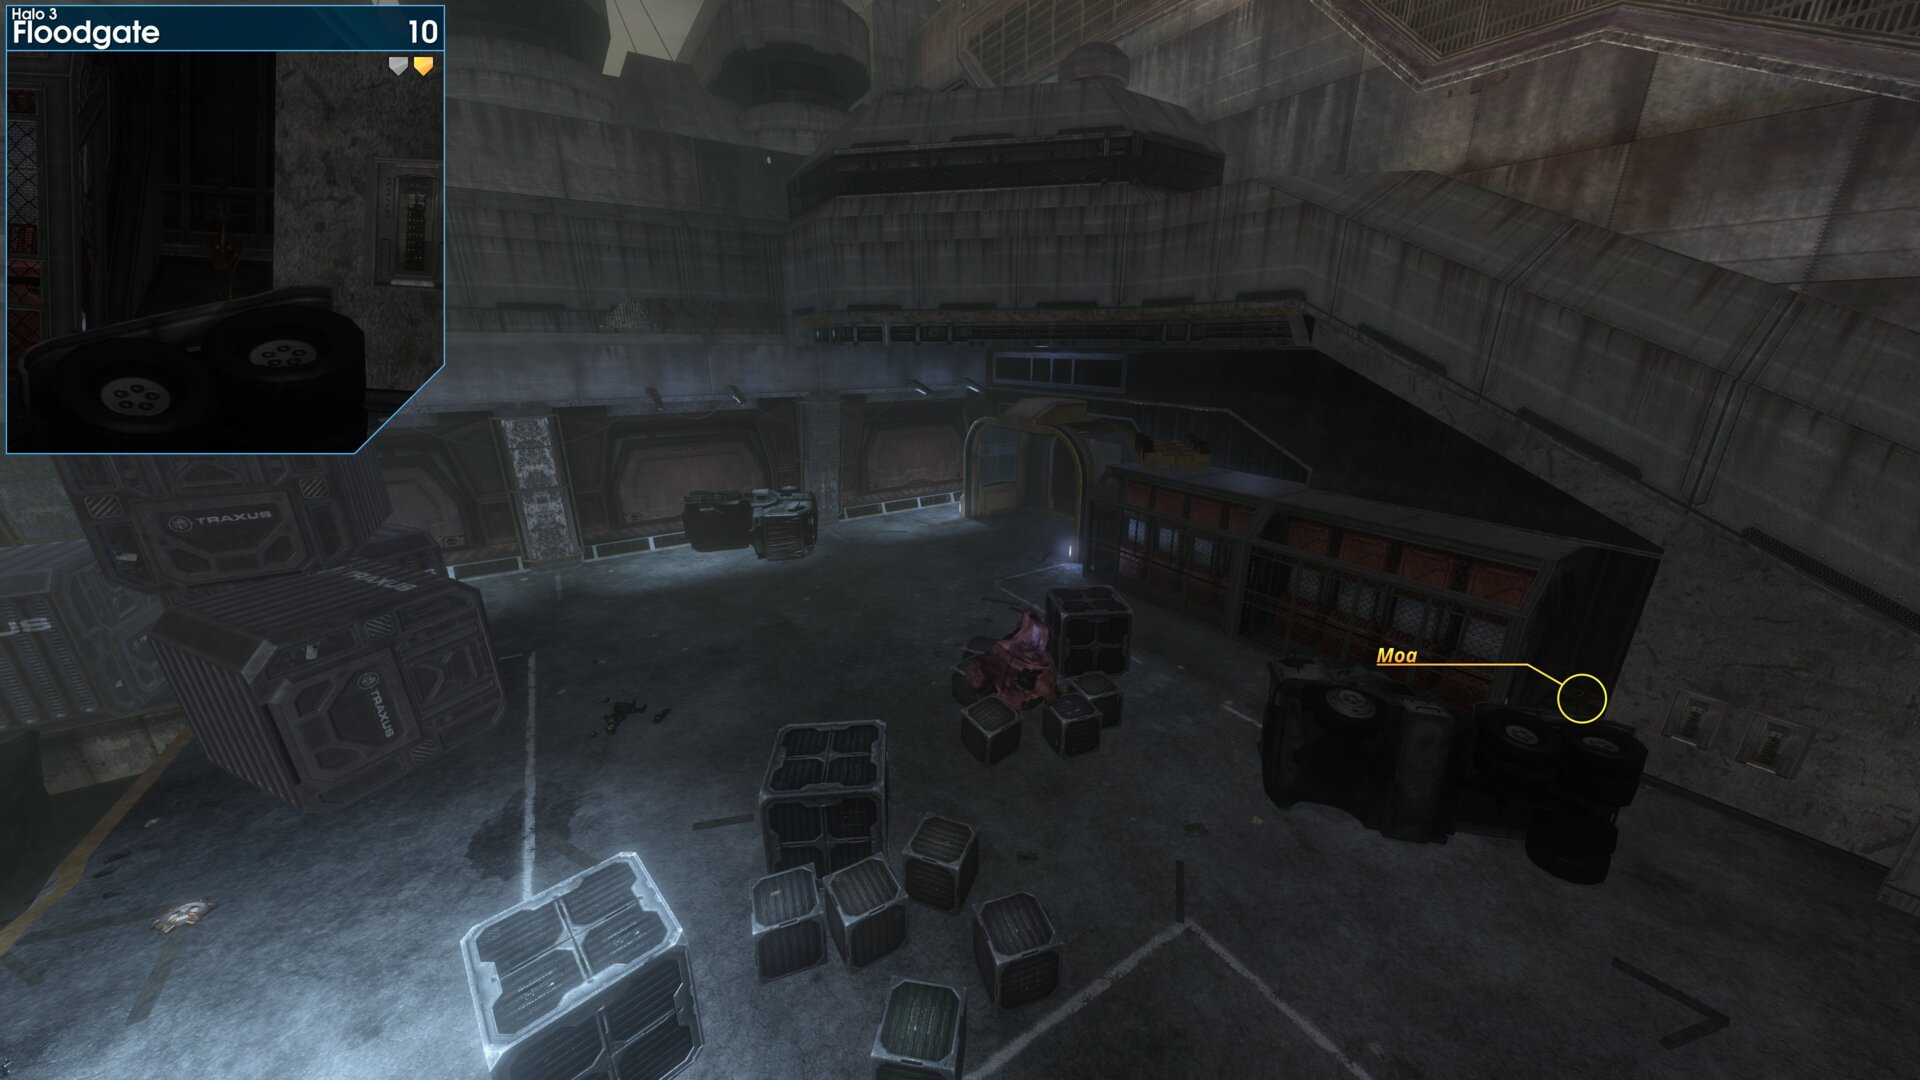
Golden Moa 10 — When you go outside for the last fight (first encounter with Pure Flood forms), look for a nook to your left, next to the cliff edge.
 ⠀
⠀
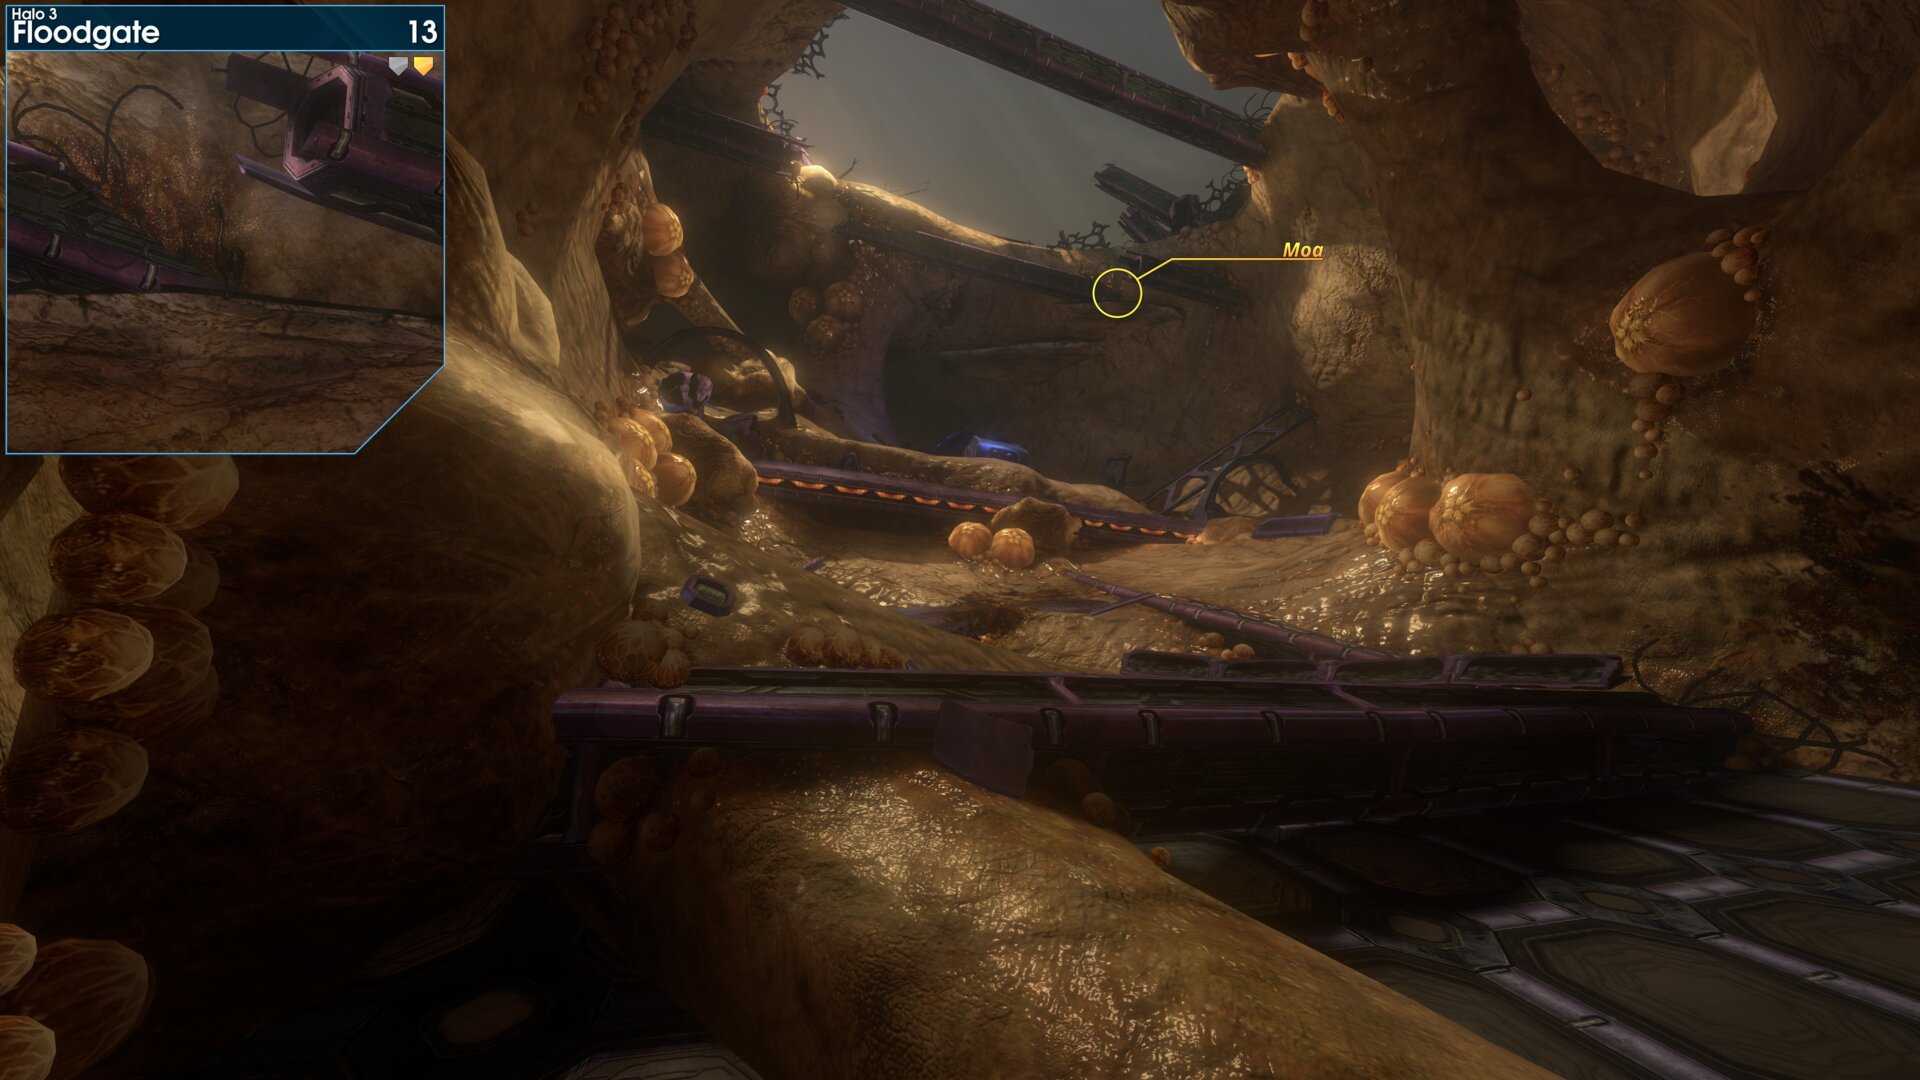
Golden Moa 13 — Just before collecting Cortana's recording, look up to the right, the Golden Moa is on a fungus ledge.
 ⠀
⠀
The Ark
Rally Point: Alpha
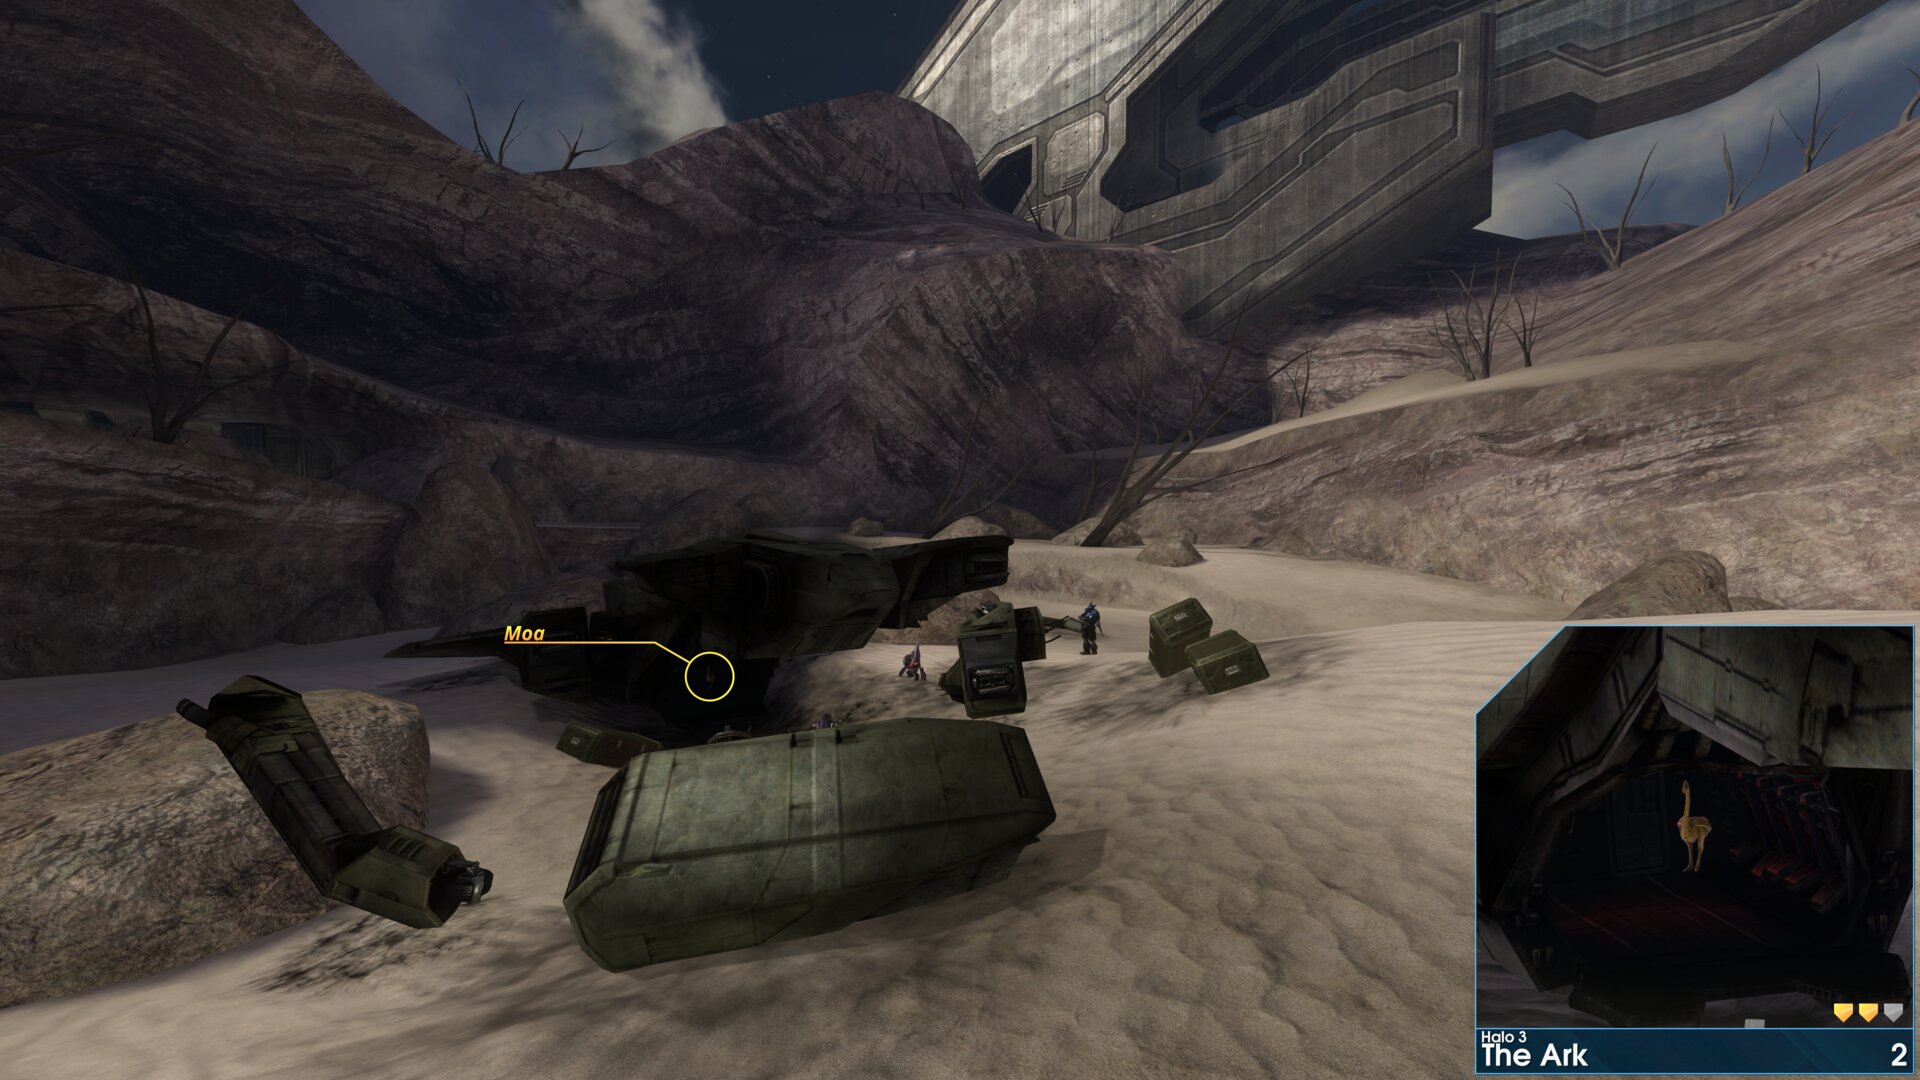
Golden Moa 2 — Inside the crashed Pelican.
 ⠀
⠀
Rally Point: Bravo
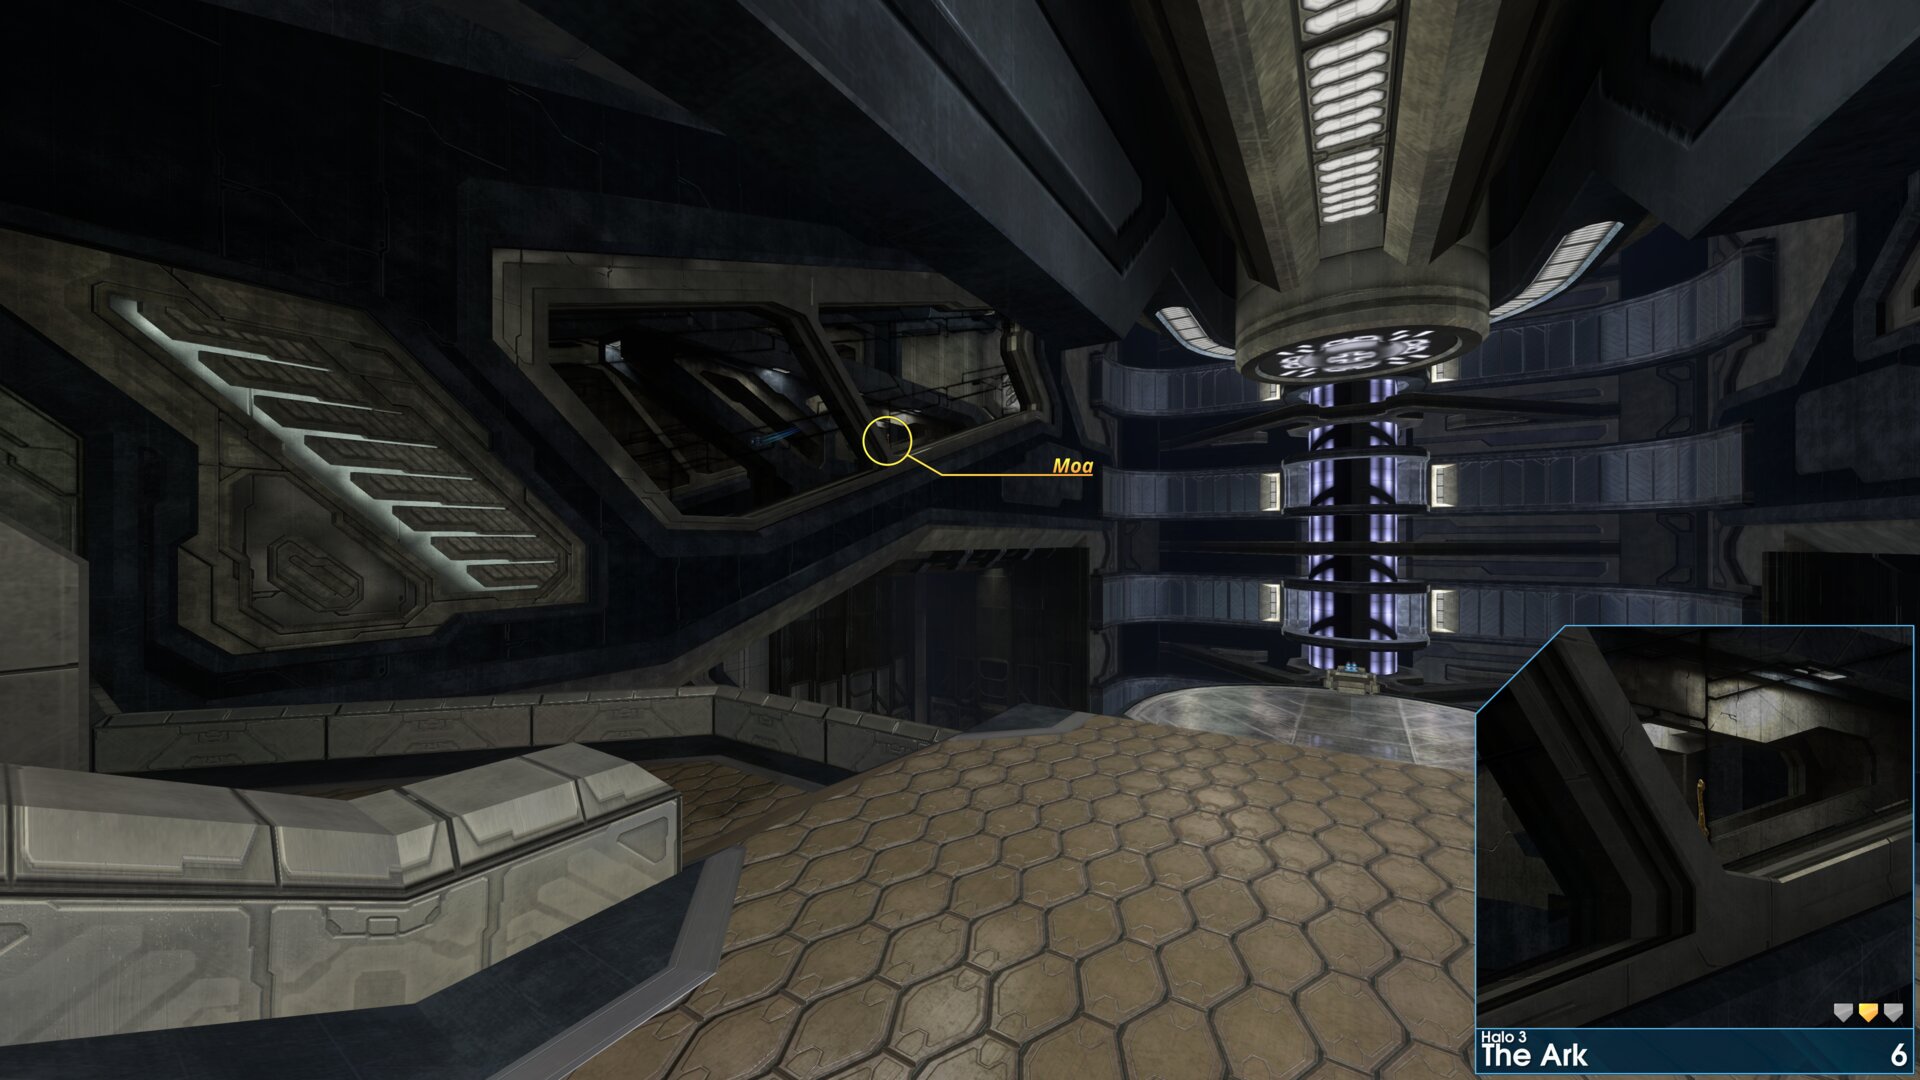
Golden Moa 6 — Where you activate the light bridge, it's on the closest point of the ledge, between the far left windows. "Say What?" Sgt. Johnson
 ⠀
⠀
Rally Point: Charlie
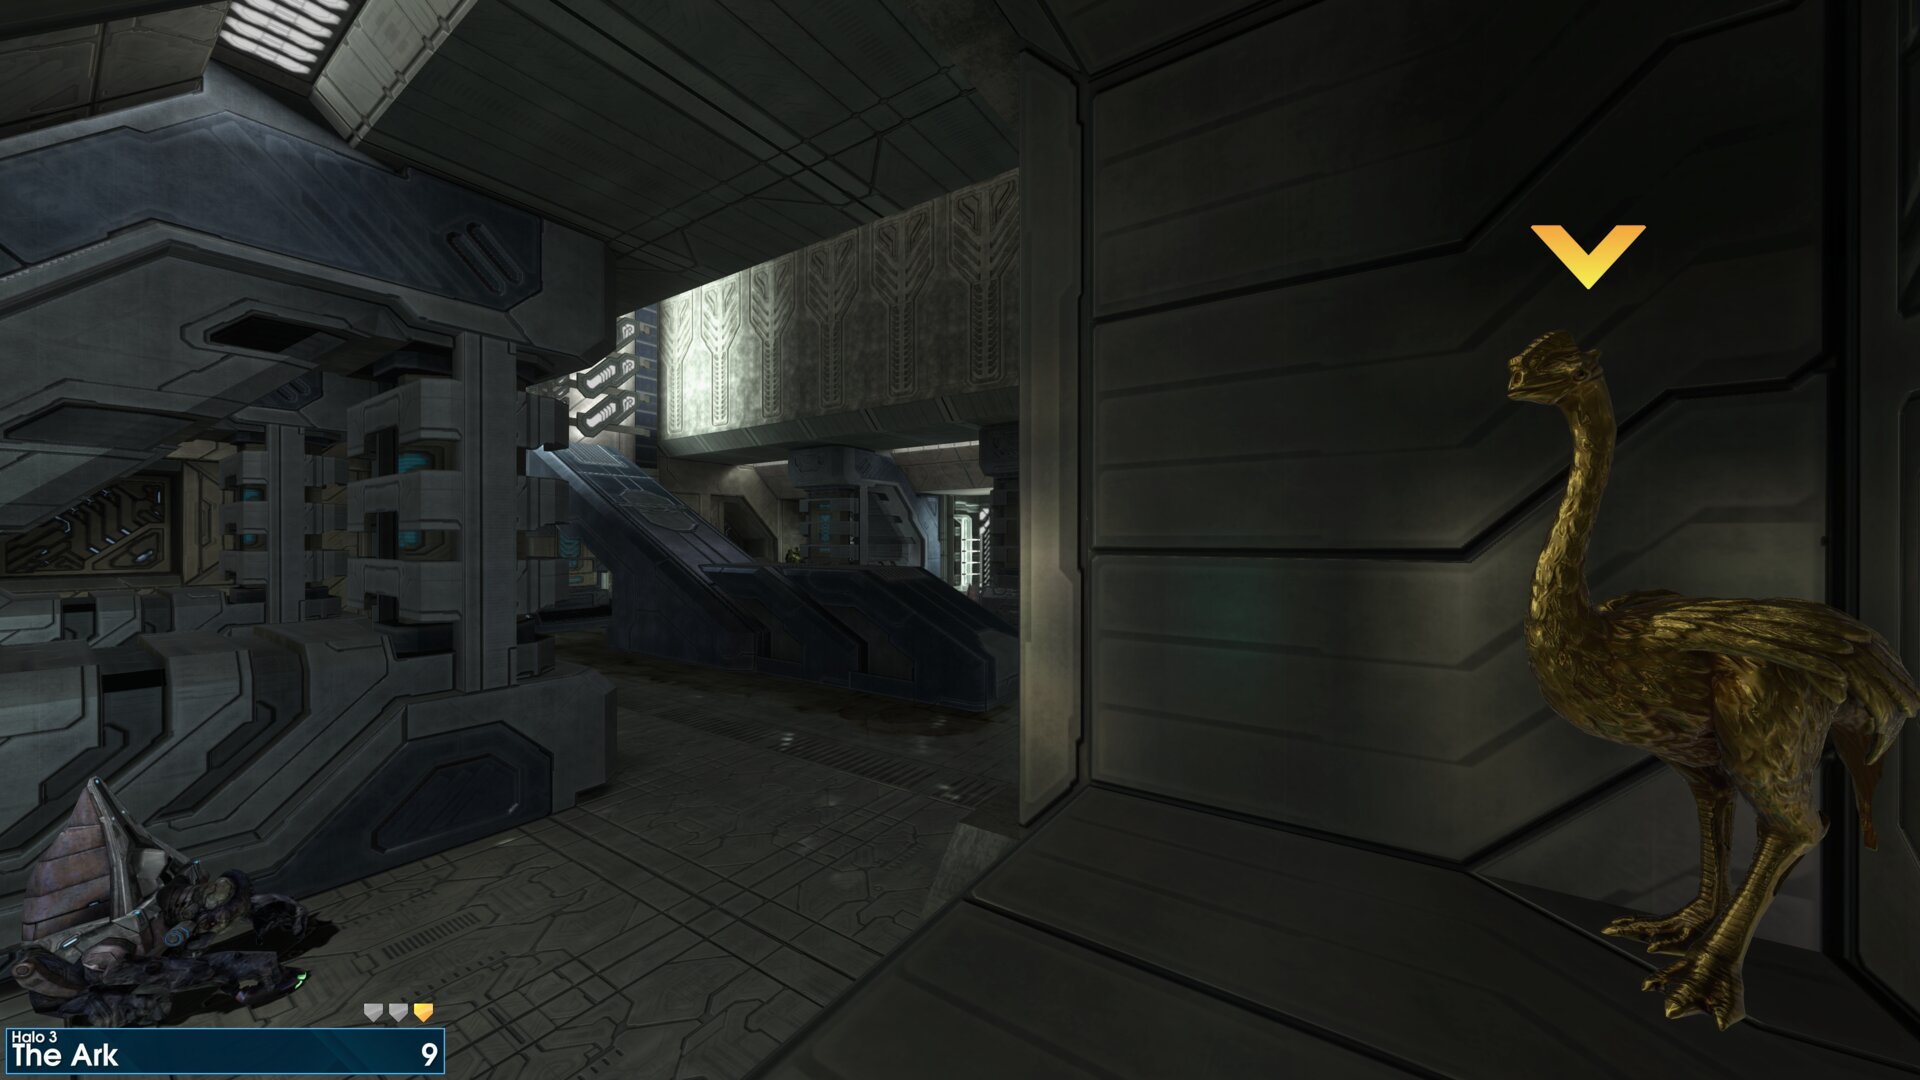
Golden Moa 9 — In the wall on your left, when you enter the first room with sleeping grunts.
 ⠀
⠀
Rally Point: Alpha
Golden Moa 2 — At the start of the level, on the broken road next to the tunnel exit.
⠀Golden Moa 7 — In the end of the drain, next to the first AA-Wraith. (in the first lake bed)
⠀Rally Point: Bravo
Golden Moa 16 — After the Hunters, head towards the far gate, the Moa is in a nook to the left.
⠀FloodgateRally Point: Bravo
Golden Moa 8 — Just after the Elites, it's against the wall on the concrete ledge, near the ramp that leads into the next area.
⠀Golden Moa 10 — When you go outside for the last fight (first encounter with Pure Flood forms), look for a nook to your left, next to the cliff edge.
⠀Golden Moa 13 — Just before collecting Cortana's recording, look up to the right, the Golden Moa is on a fungus ledge.
⠀The ArkRally Point: Alpha
Golden Moa 2 — Inside the crashed Pelican.
⠀Rally Point: Bravo
Golden Moa 6 — Where you activate the light bridge, it's on the closest point of the ledge, between the far left windows. "Say What?" Sgt. Johnson
⠀Rally Point: Charlie
Golden Moa 9 — In the wall on your left, when you enter the first room with sleeping grunts.
⠀ODST: 23ʳᵈ July 2026 Weekly Set
ONI Alpha Site
Rally Point: Alpha
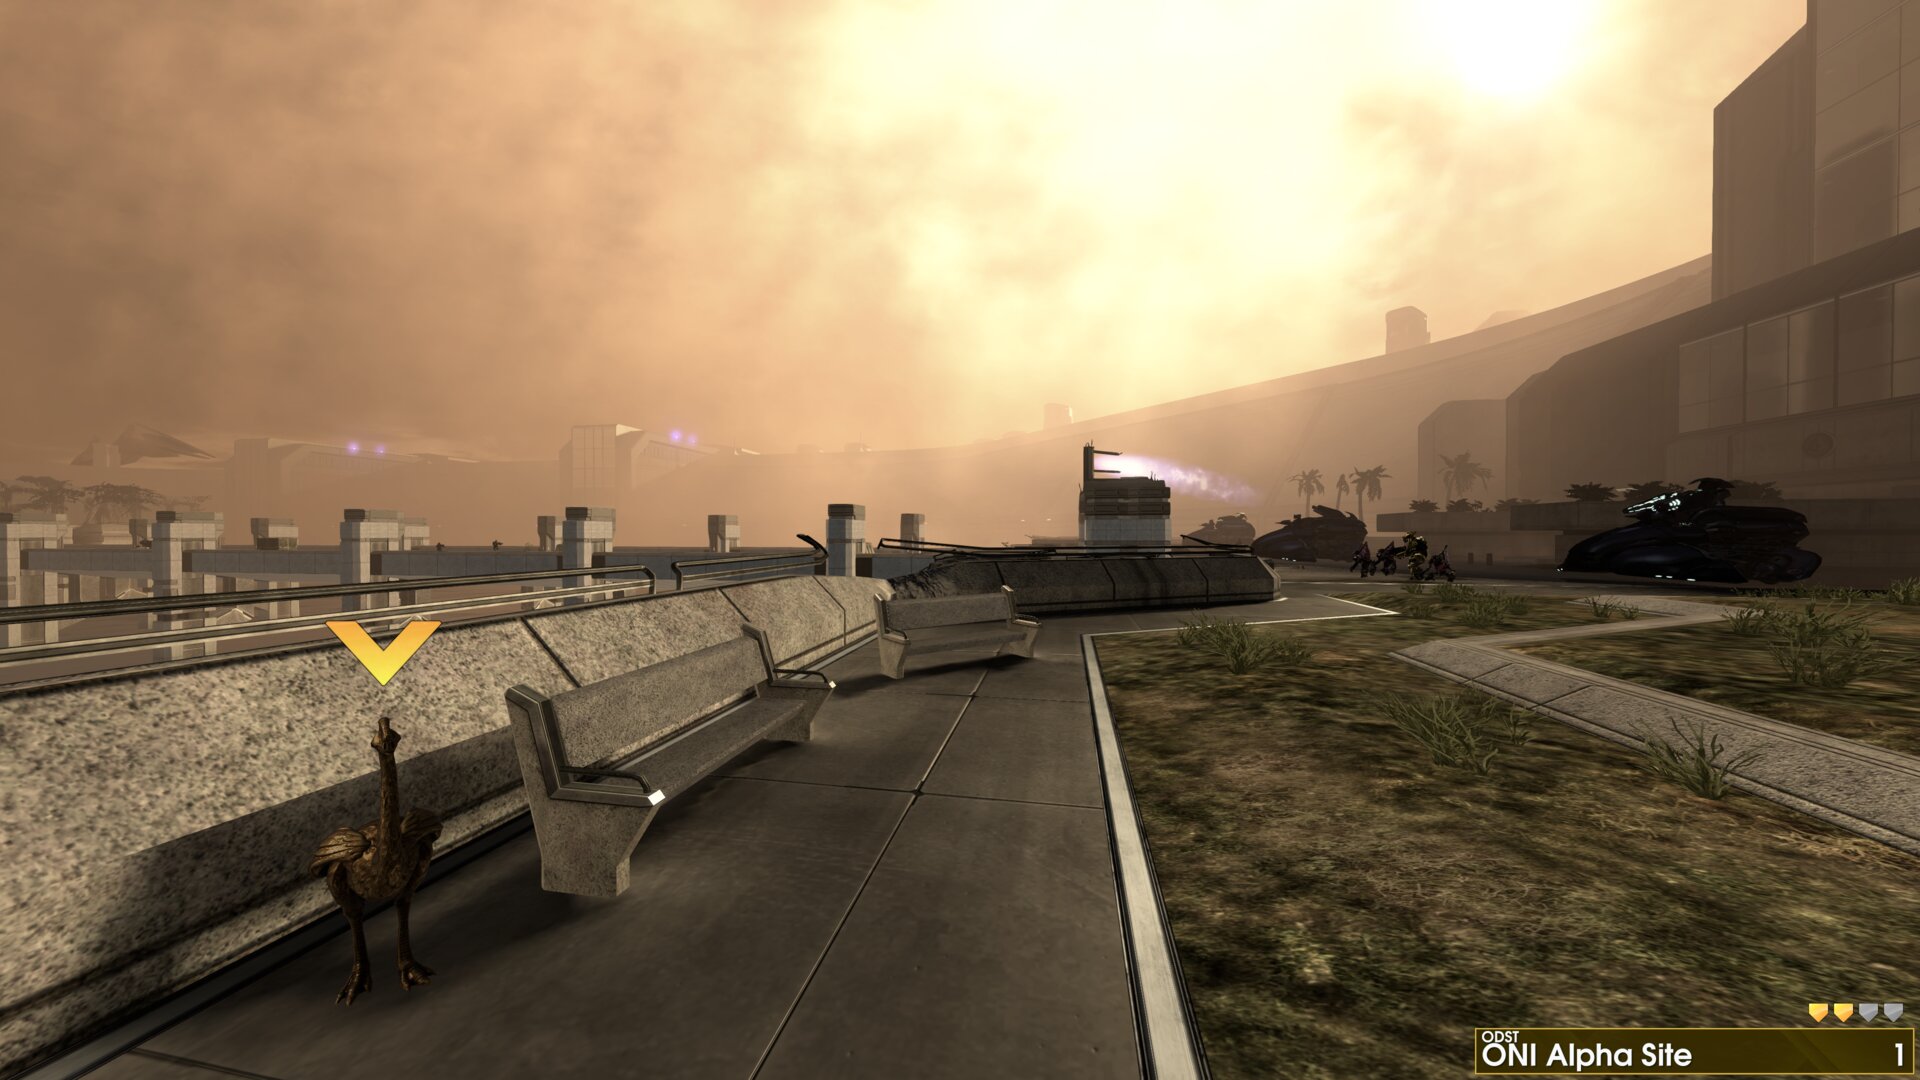
Golden Moa 1 — The Golden Moa is by the seats at the northern end of the bridge to ONI Alpha Site.
 ⠀
⠀
NMPD HQ
Rally Point: Delta
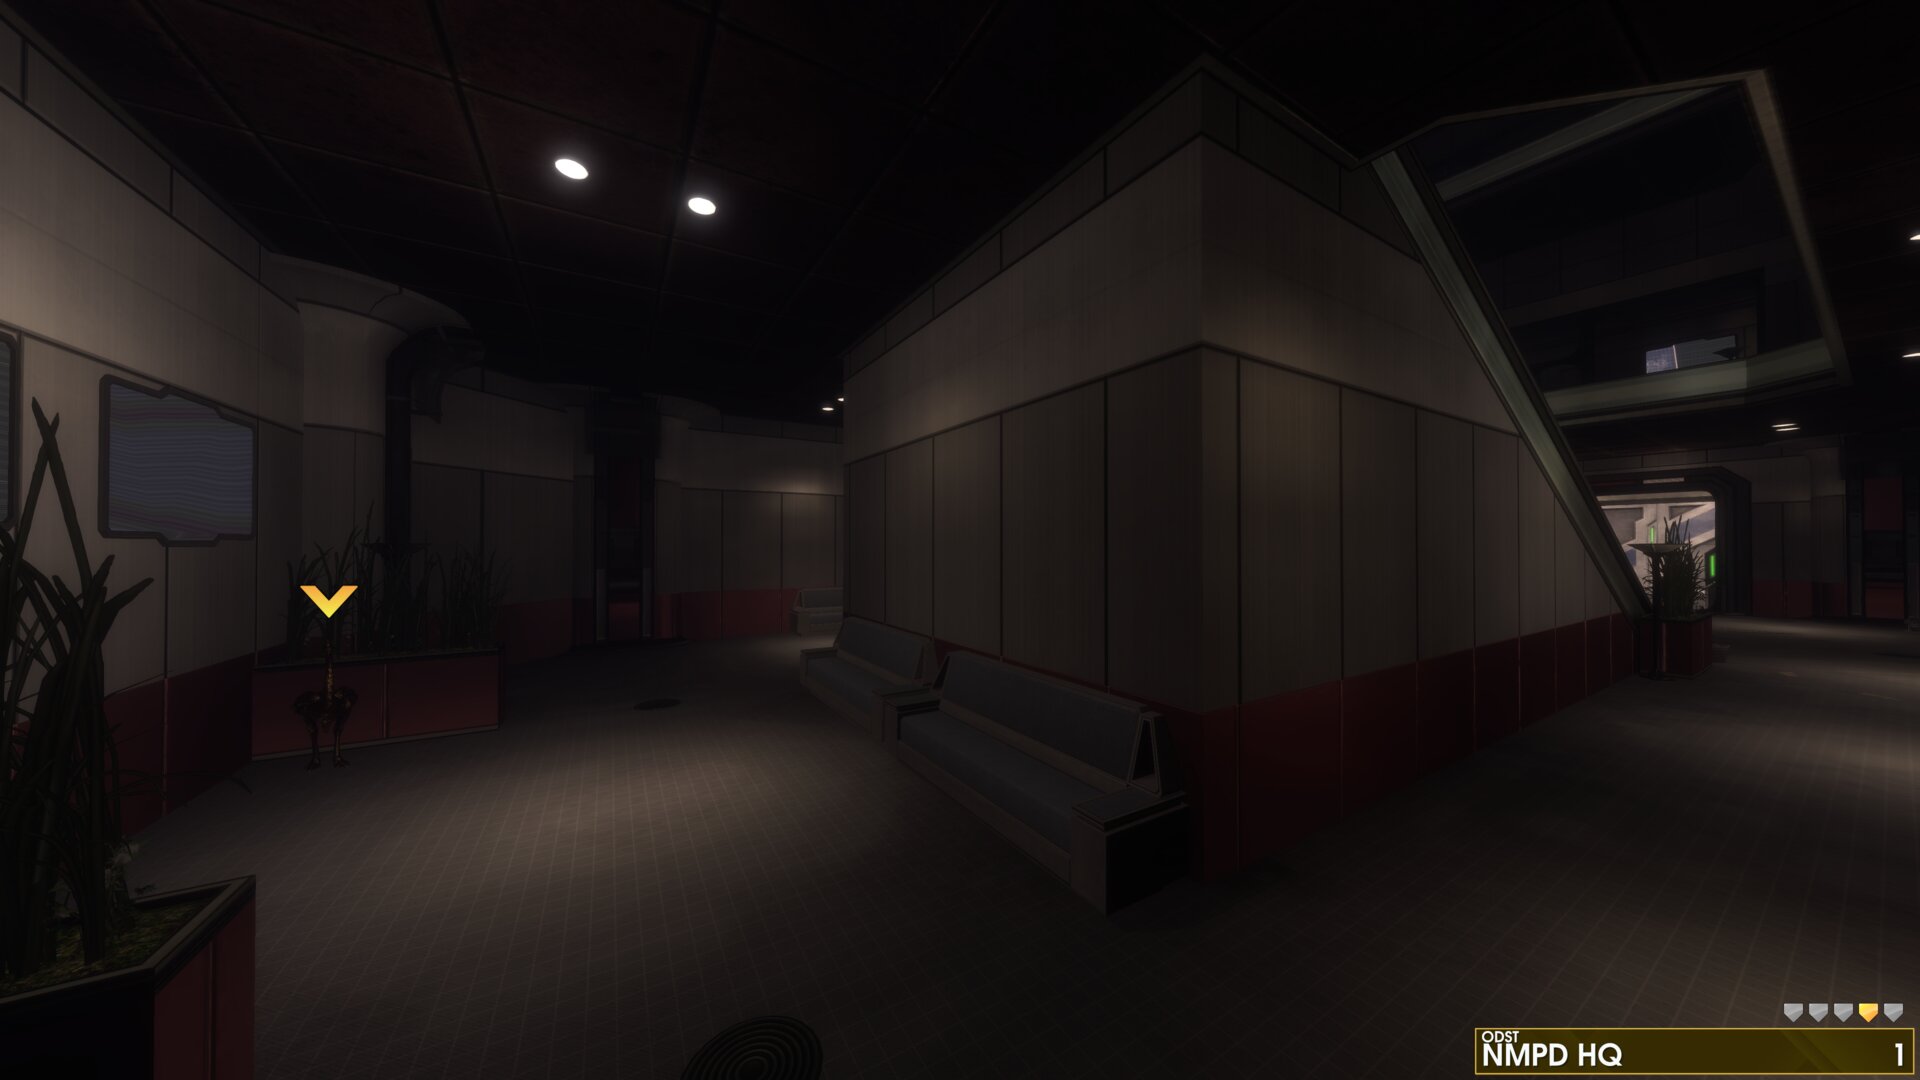
Golden Moa 1 — Behind the last set of stairs, just before you reach the makeshift bridge.
 ⠀
⠀
Kikowani Station
Rally Point: Alpha
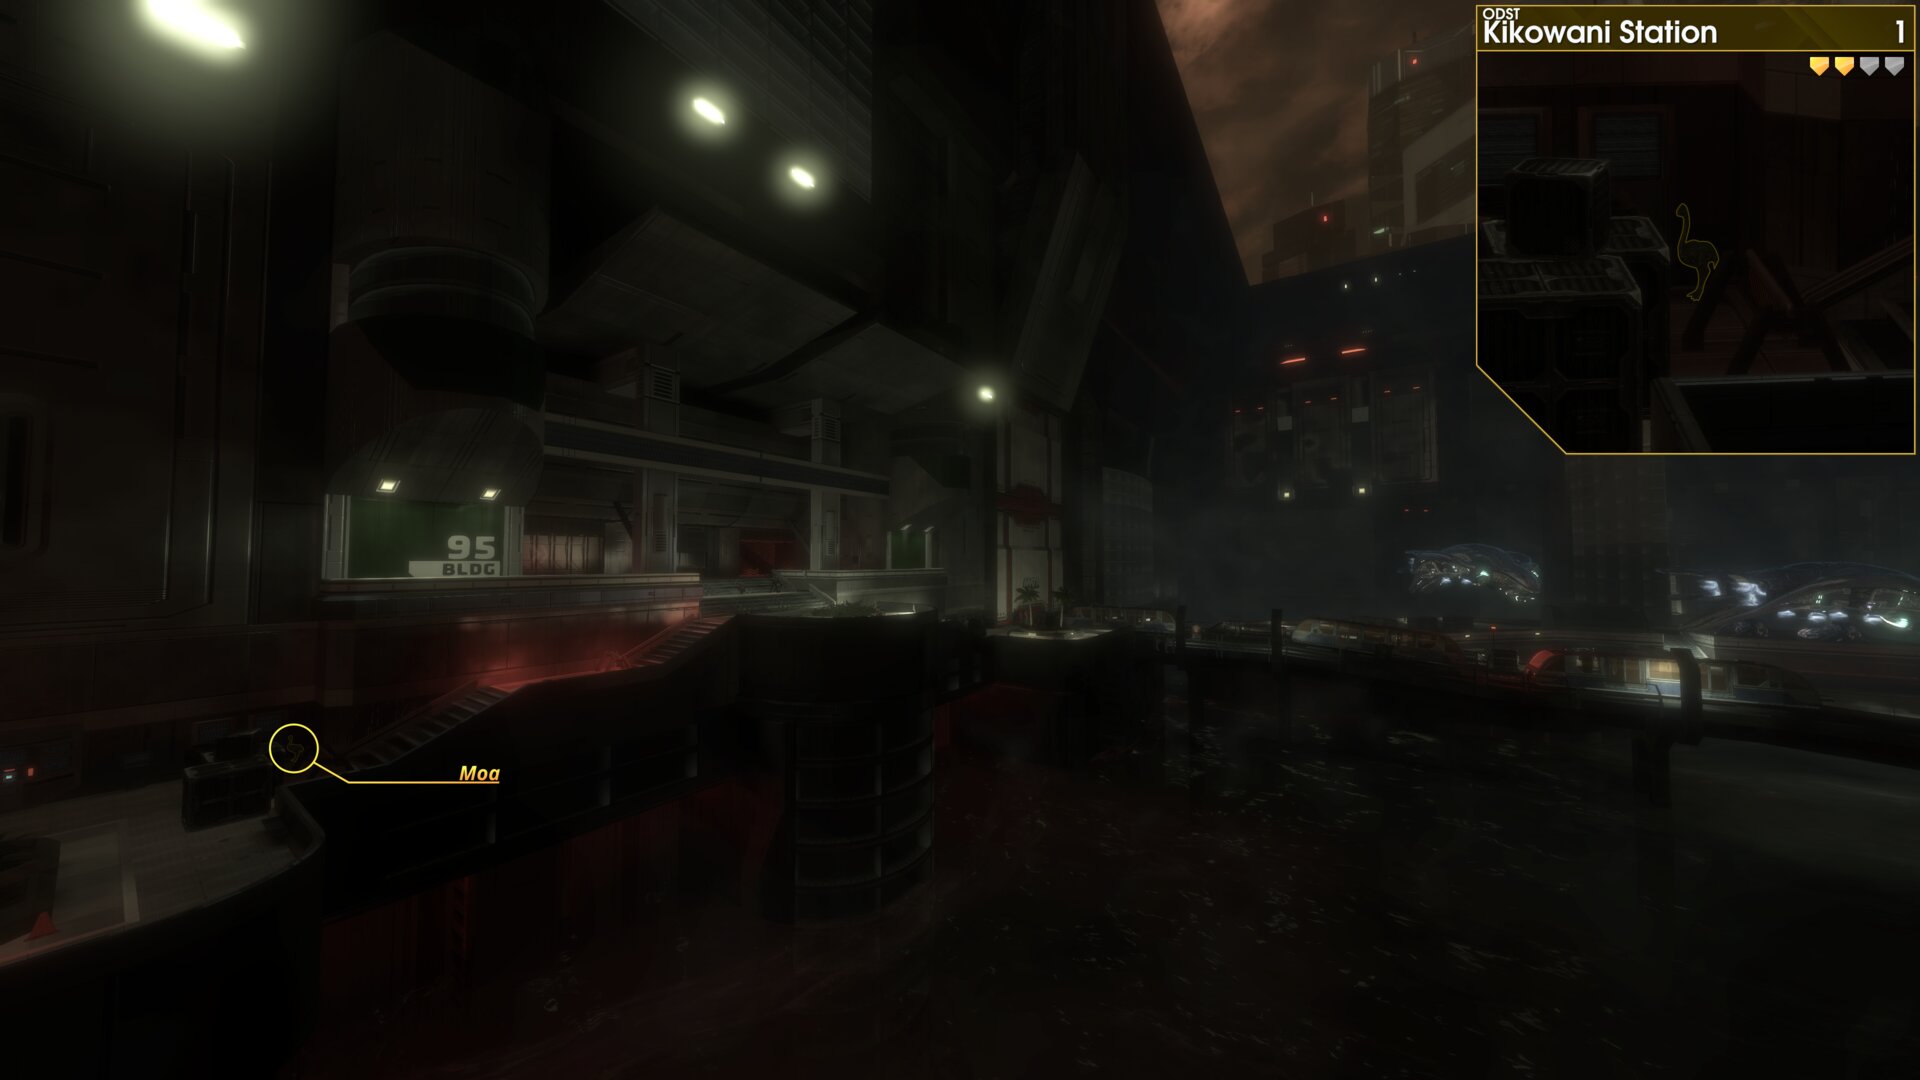
Golden Moa 1 — At the start of the mission, the Golden Moa is by the bottom of the stairs to the north east.
 ⠀
⠀
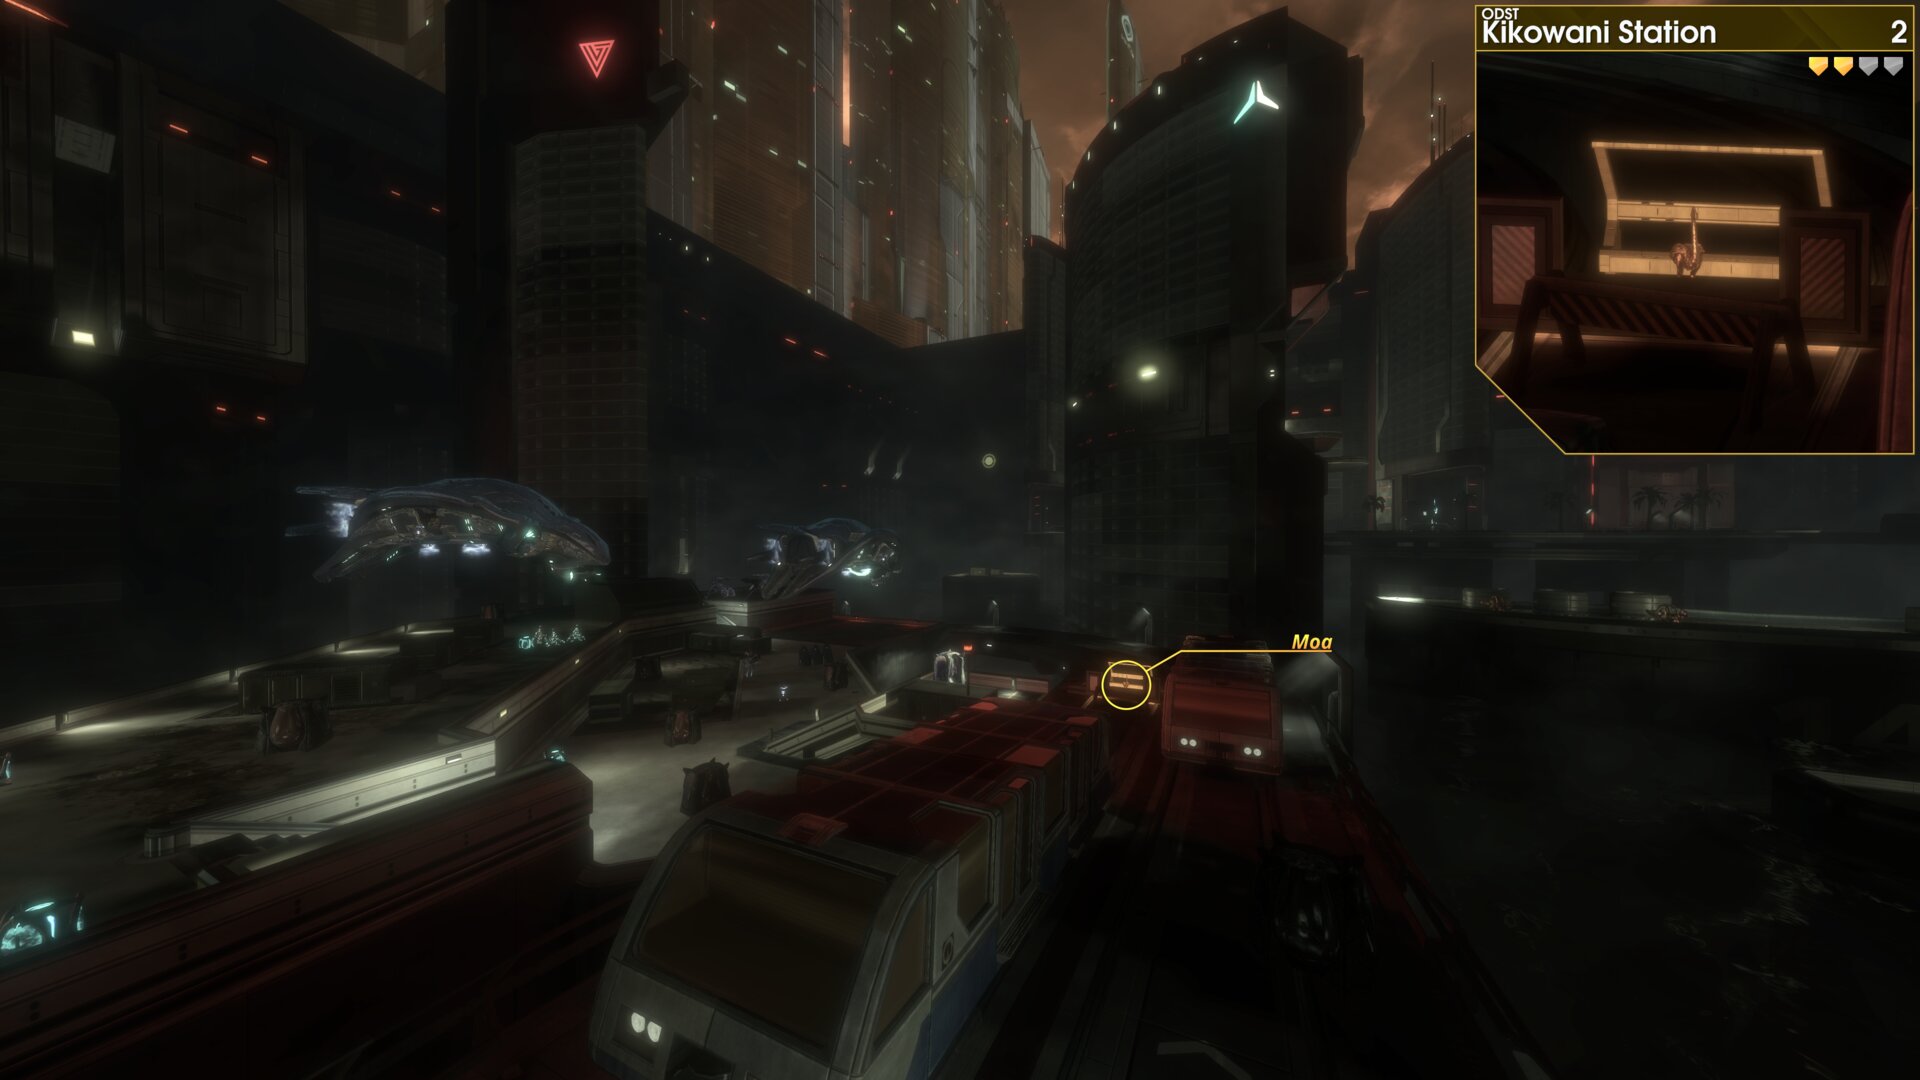
Golden Moa 2 — Along the south west most railroad track at the start of the mission, the Golden Moa is by of the lit stopblock (aka: buffer stop, bumper block, etc).
 ⠀
⠀
Rally Point: Alpha
Golden Moa 1 — The Golden Moa is by the seats at the northern end of the bridge to ONI Alpha Site.
⠀NMPD HQRally Point: Delta
Golden Moa 1 — Behind the last set of stairs, just before you reach the makeshift bridge.
⠀Kikowani StationRally Point: Alpha
Golden Moa 1 — At the start of the mission, the Golden Moa is by the bottom of the stairs to the north east.
⠀Golden Moa 2 — Along the south west most railroad track at the start of the mission, the Golden Moa is by of the lit stopblock (aka: buffer stop, bumper block, etc).
⠀Halo 4: 23ʳᵈ July 2026 Weekly Set
Infinity
Rally Point: Alpha
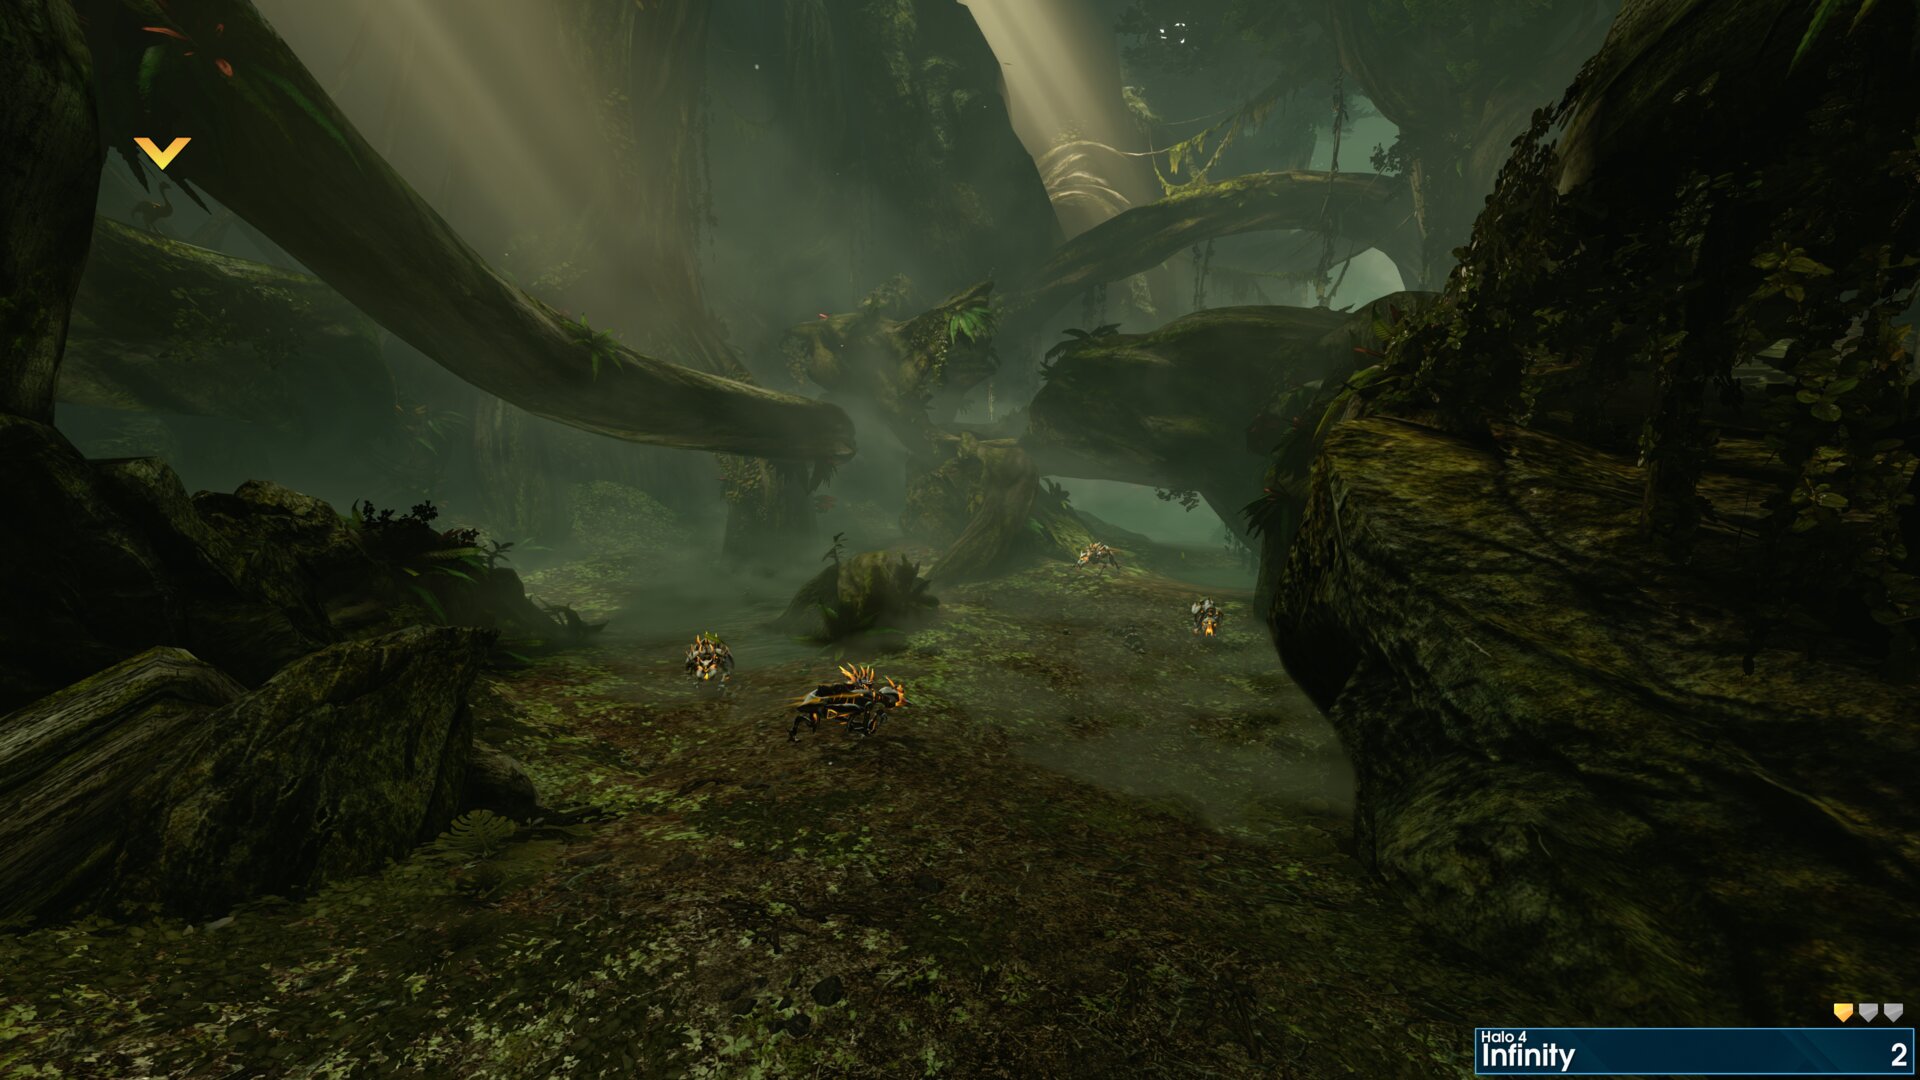
Golden Moa 2 — As you make your way down the hill from the first IFF tag, look to the left side, the Golden Moa is up on top of a large tree root.
 ⠀
⠀
Rally Point: Bravo
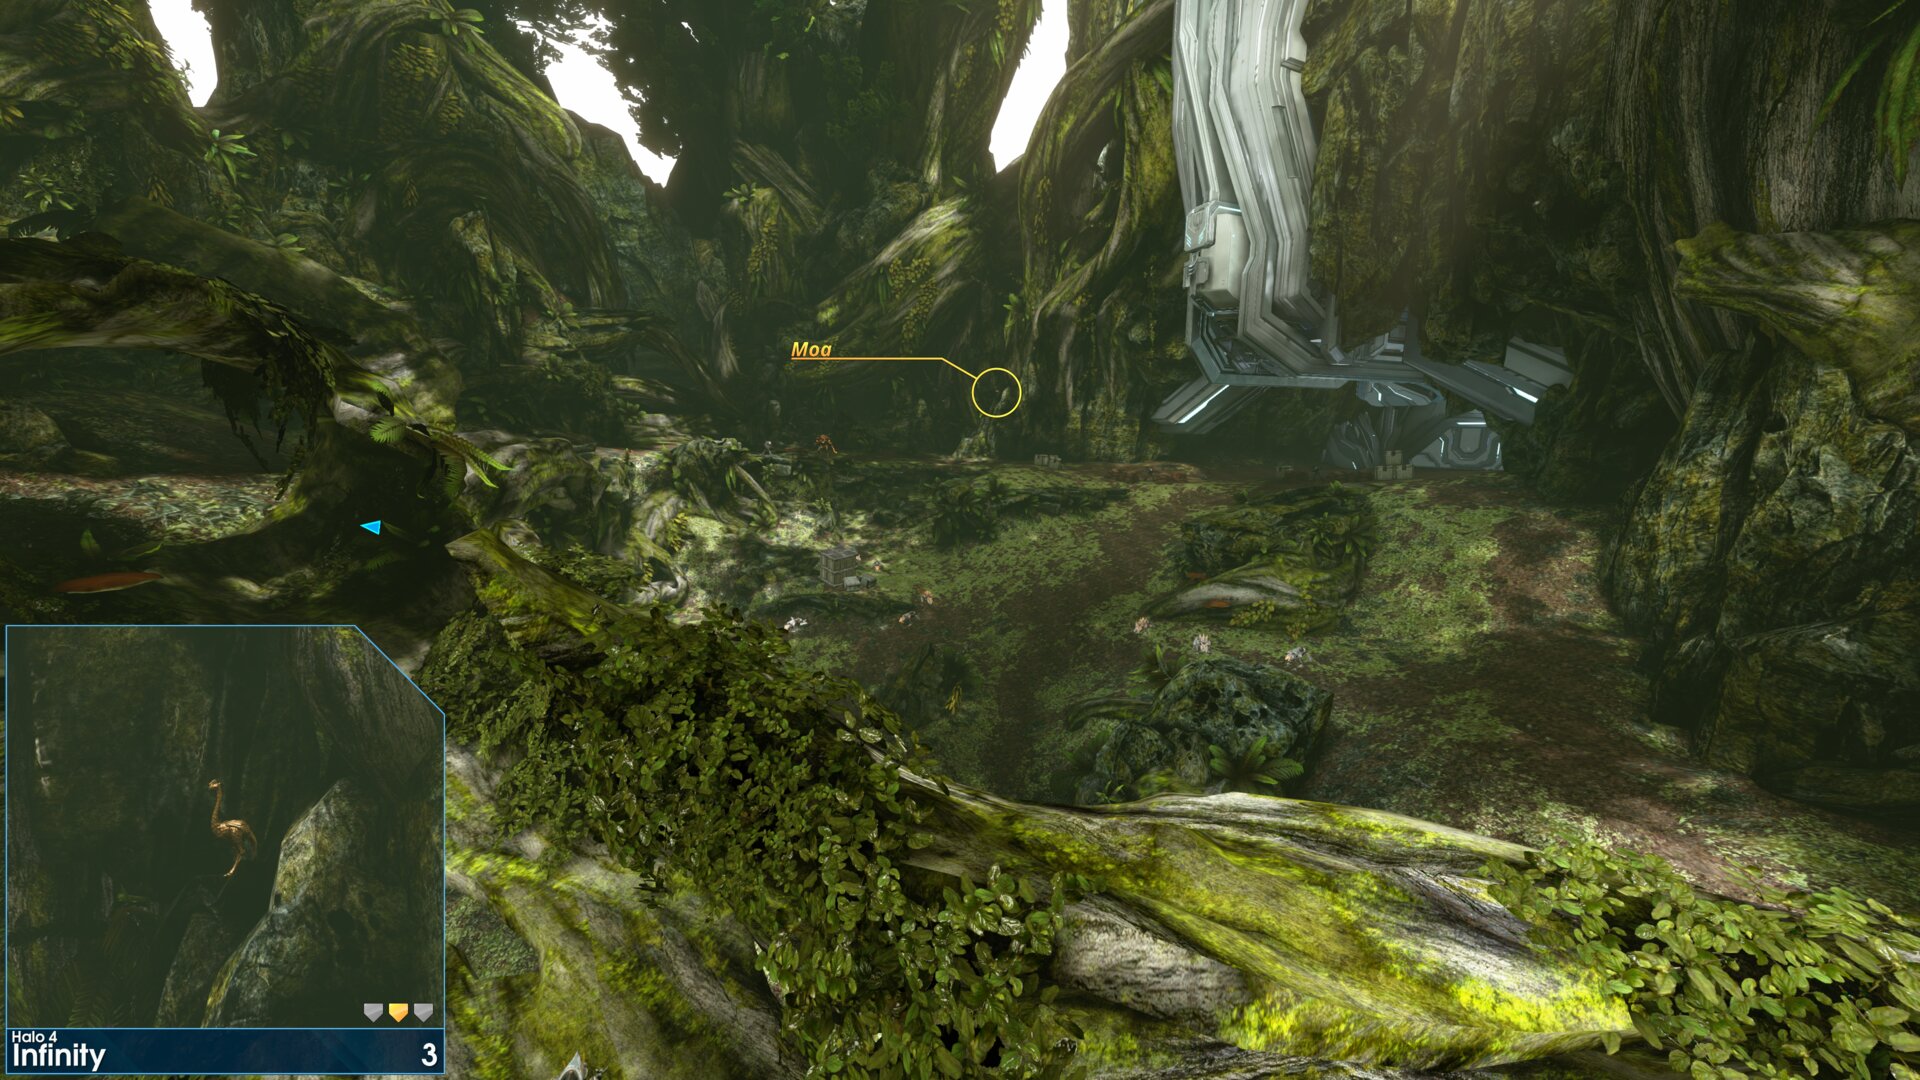
Golden Moa 3 — After rescuing a group of Marines head up to hill to a sealed door, the Golden Moa is on a rock to the left of the door.
“The Marines got trapped trying to get through these doors. Look for an interface.” Cortana
 ⠀
⠀
Rally Point: Charlie
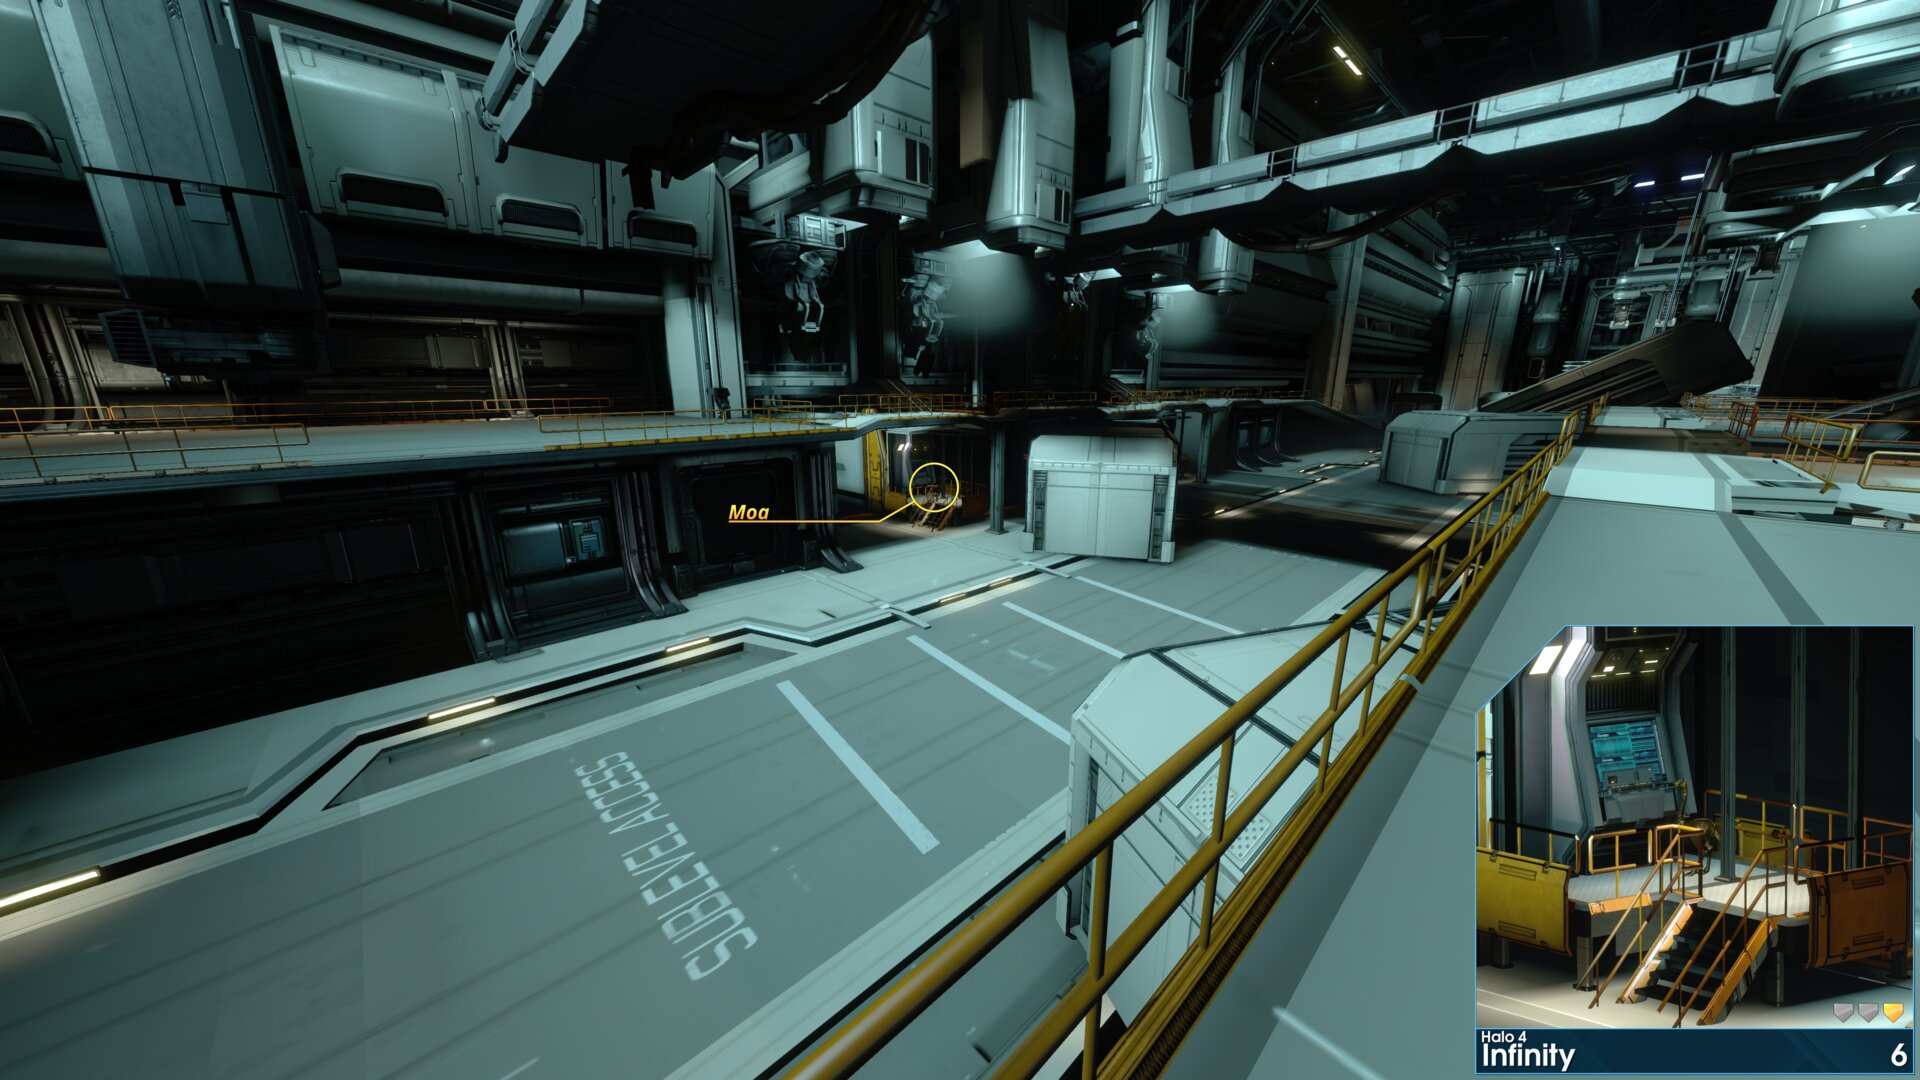
Golden Moa 6 — As you near the end of the maintenance causeway, you’ll pass multiple shipping containers. Behind the last container on the right, you’ll find the Golden Moa next to a maintenance console.
 ⠀
⠀
Reclaimer
Rally Point: Alpha
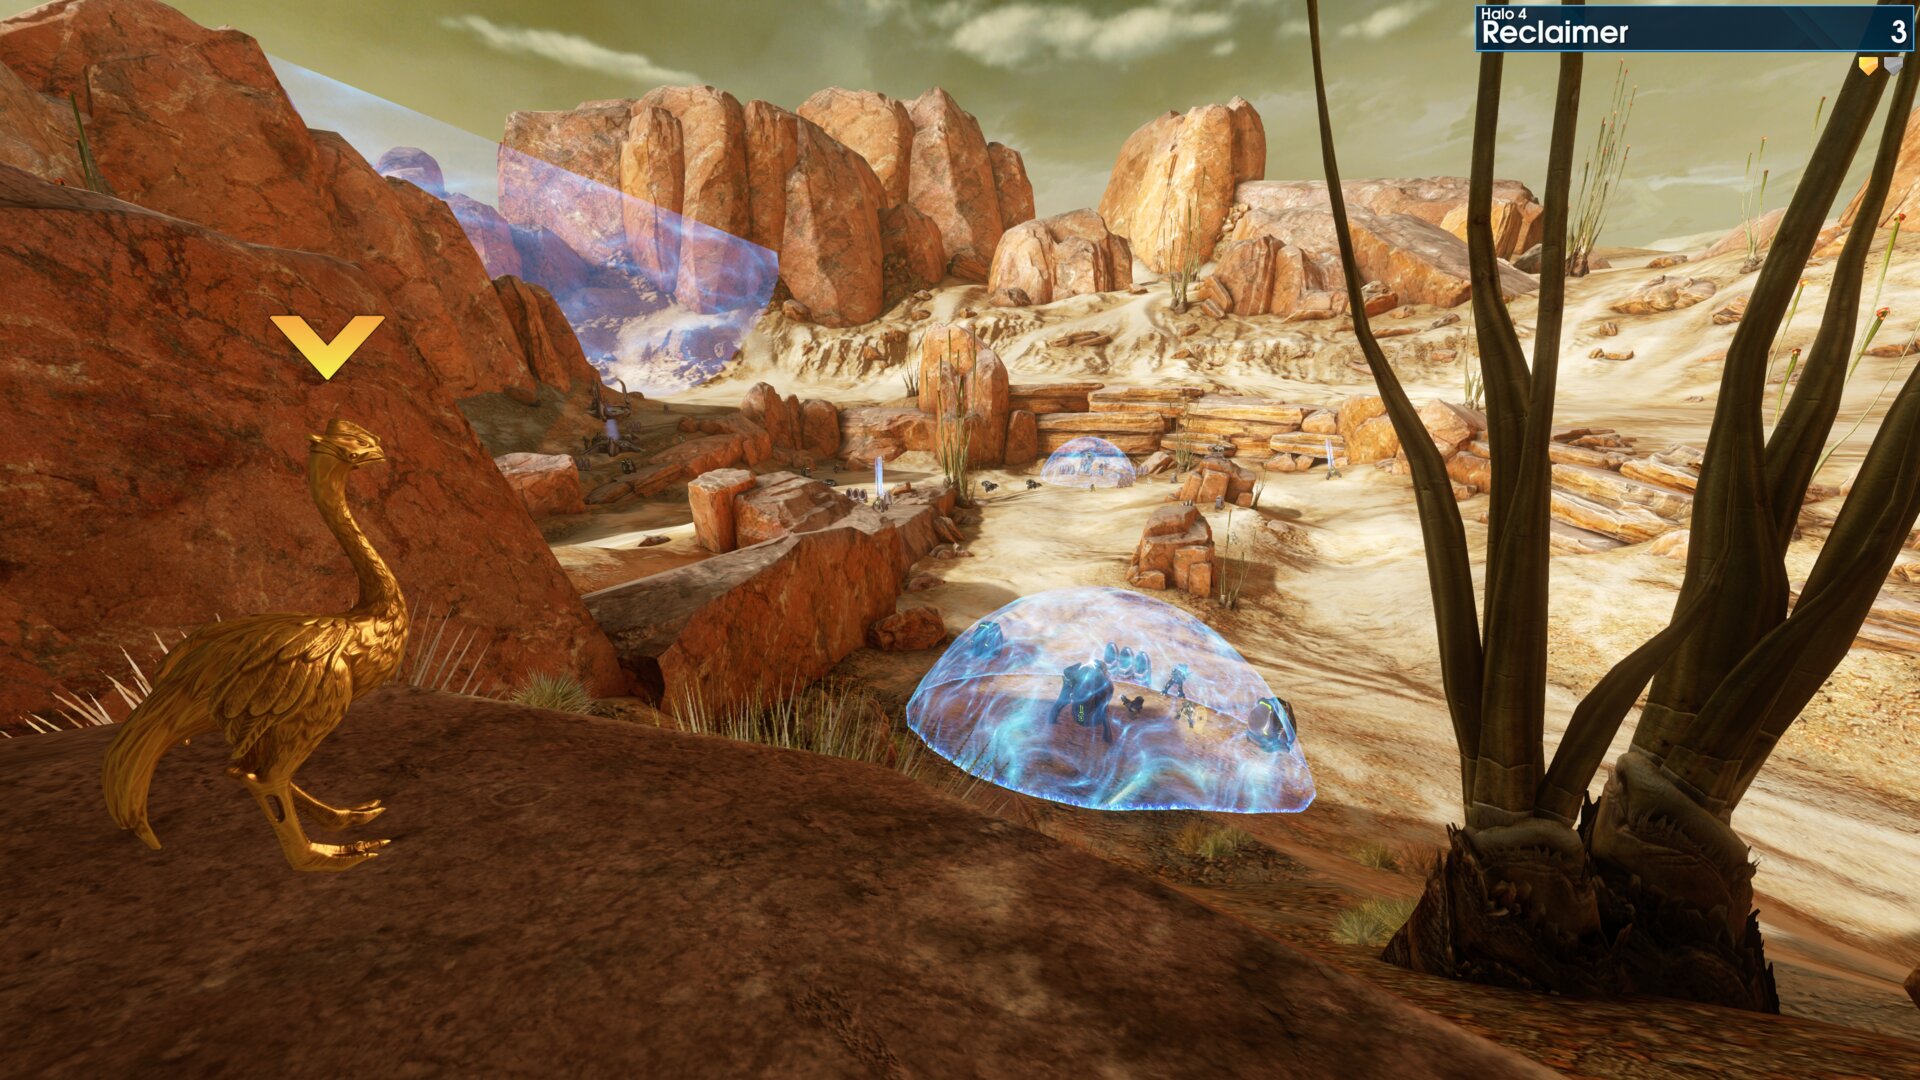
Golden Moa 3 — In the canyon with the three power sources generating a force field. The Golden Moa is on a rock near the closest power source.
 ⠀
⠀
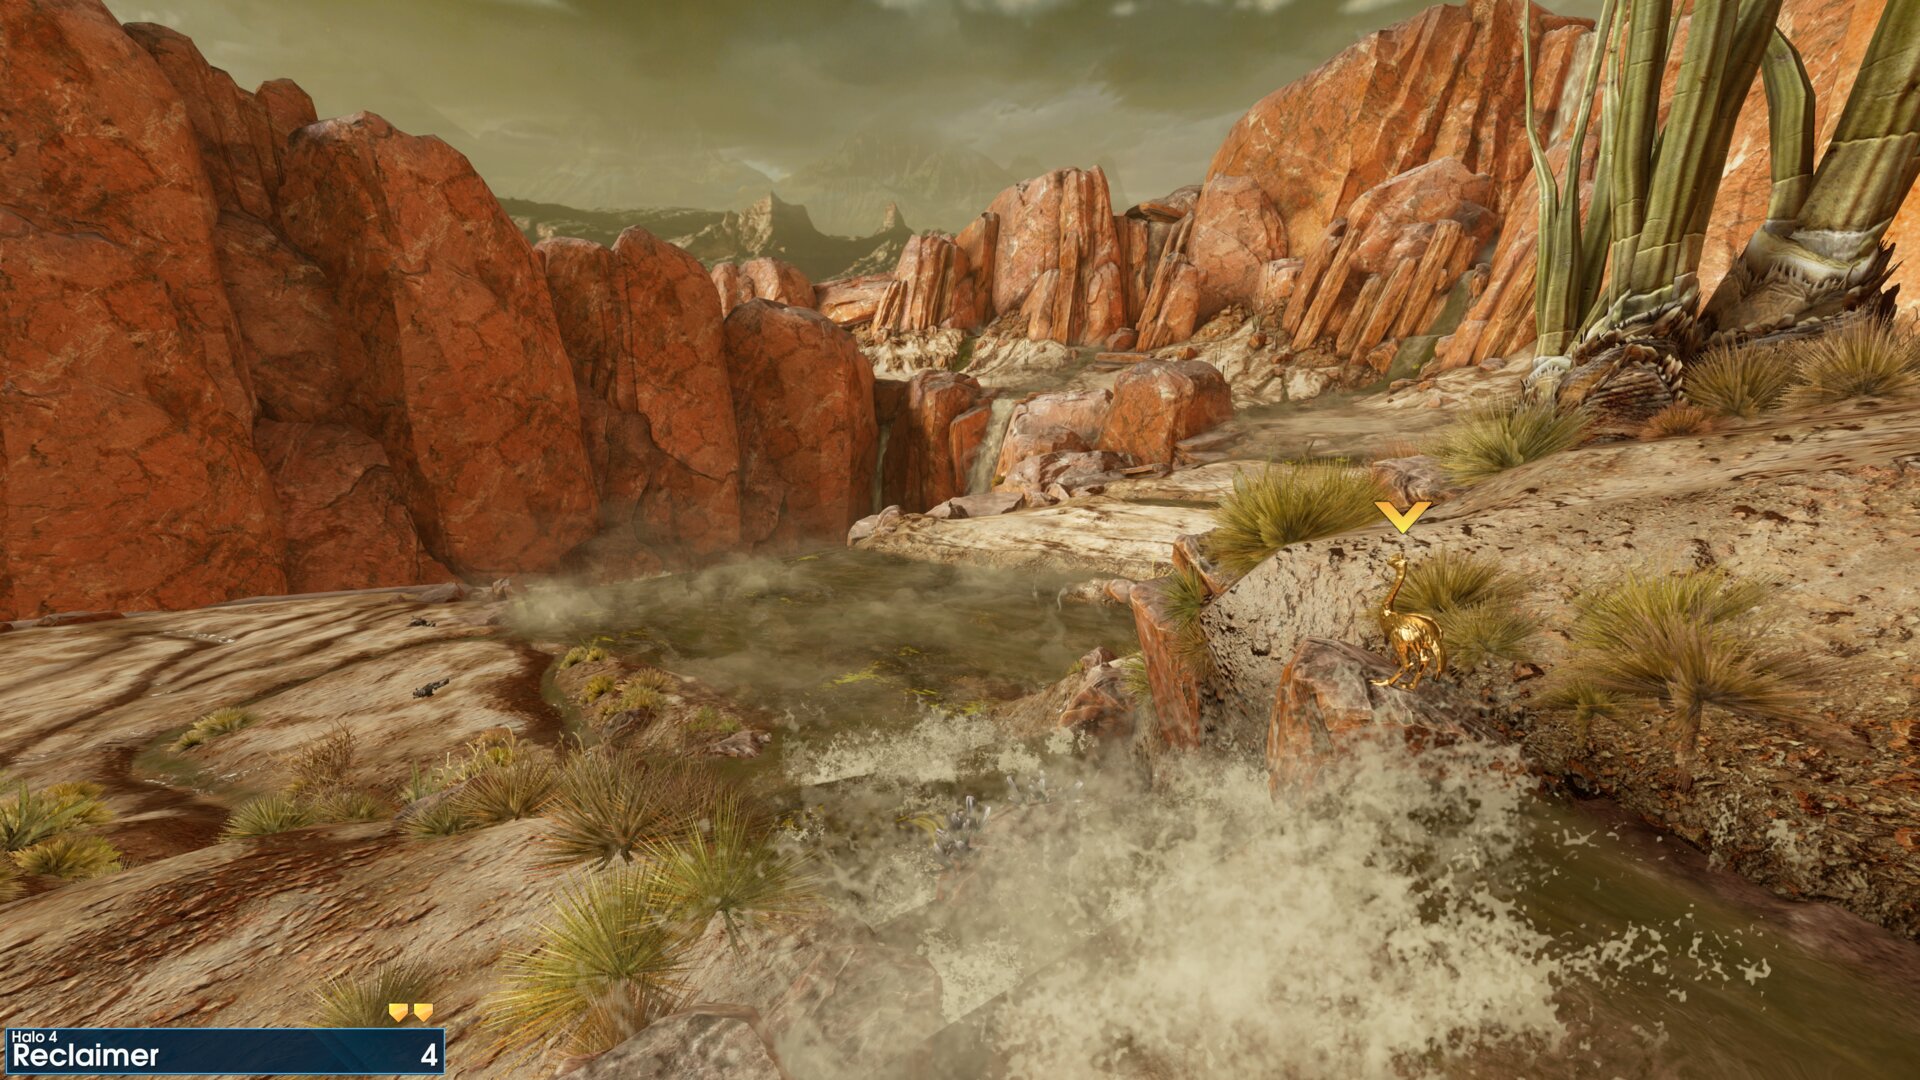
Golden Moa 4 — After destroying the Lich, the Golden Moa is on a rock at the head of the first tributary (aka a stream).
“OK folks, terrain's too rough around these tributaries.” Commander Lasky
 ⠀
⠀
Rally Point: Bravo
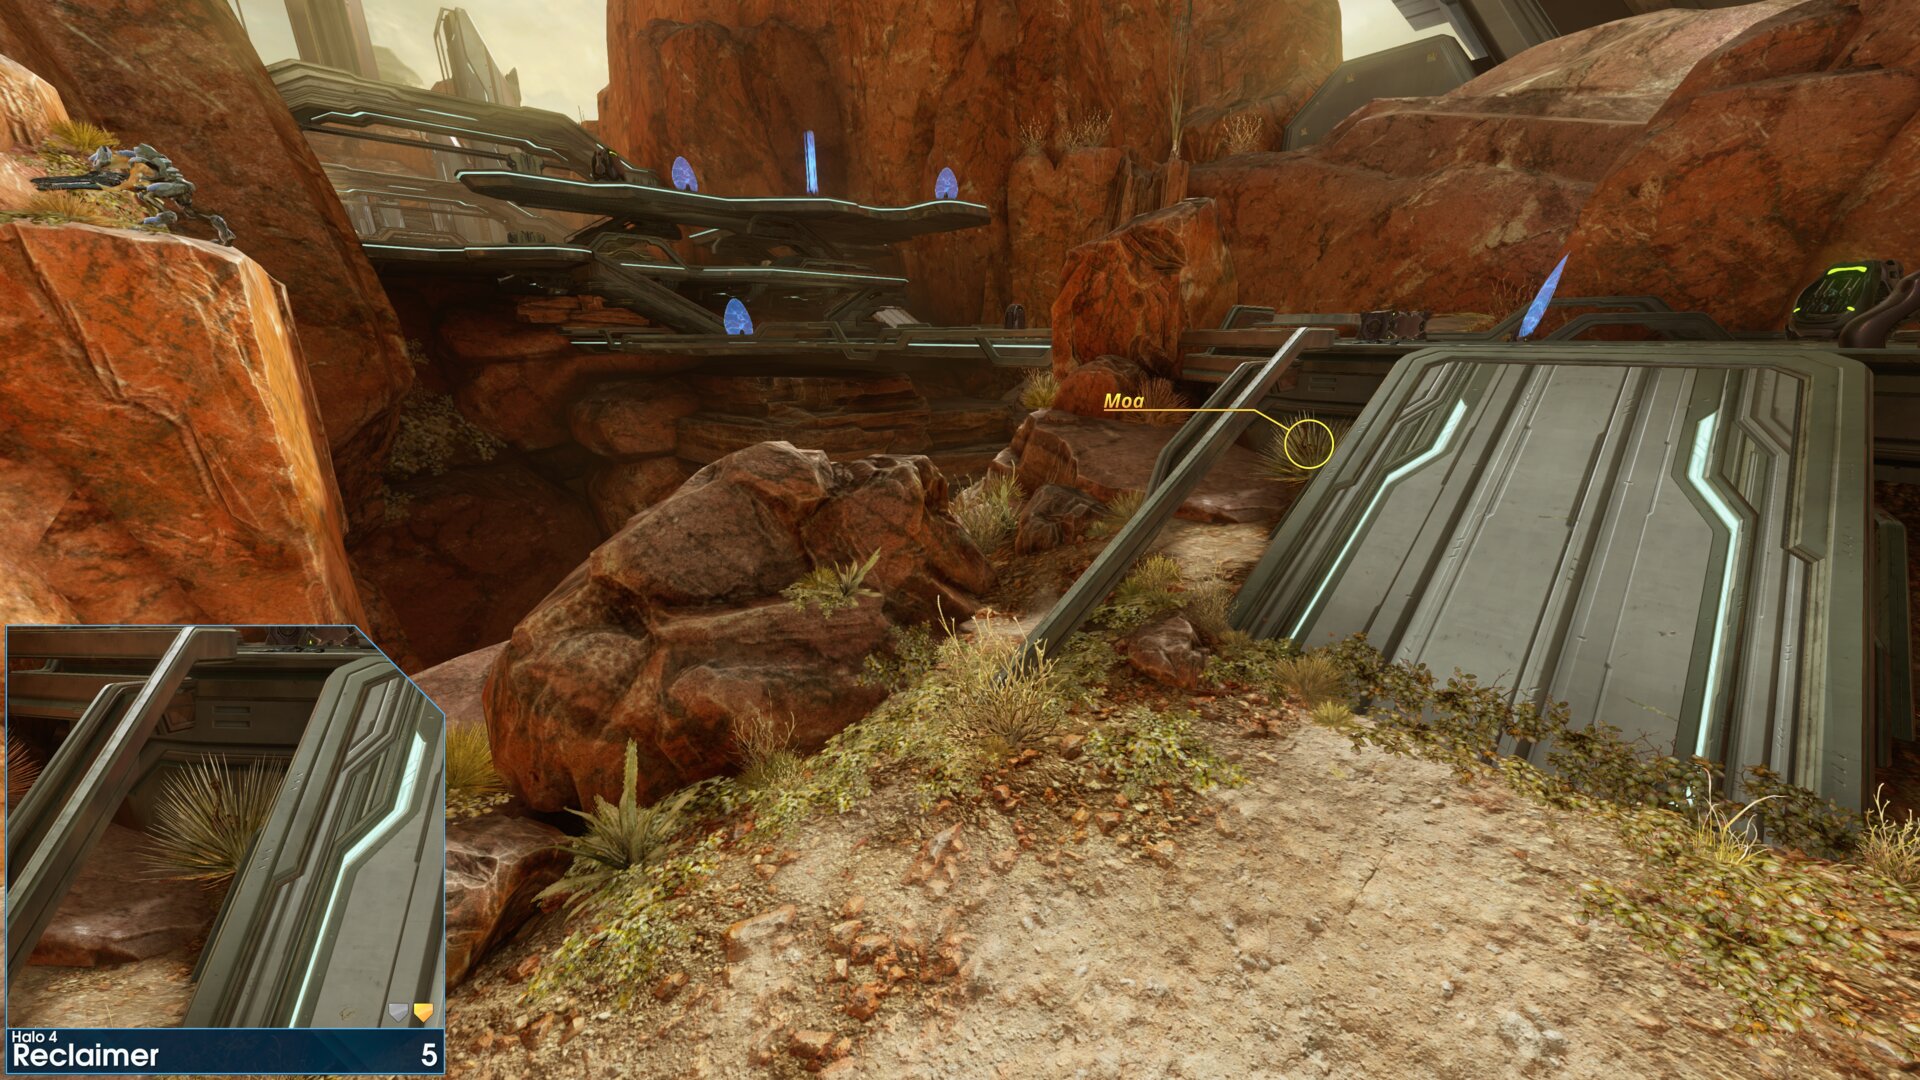
Golden Moa 5 — At the first ramp to the Command Post, the Golden Moa is hidden in a shrub on the left side.
 ⠀
⠀
Shutdown
Rally Point: Alpha
Golden Moa 1 — This Golden Moa is in the main control room of the Motor Pool, beside the weapons rack.
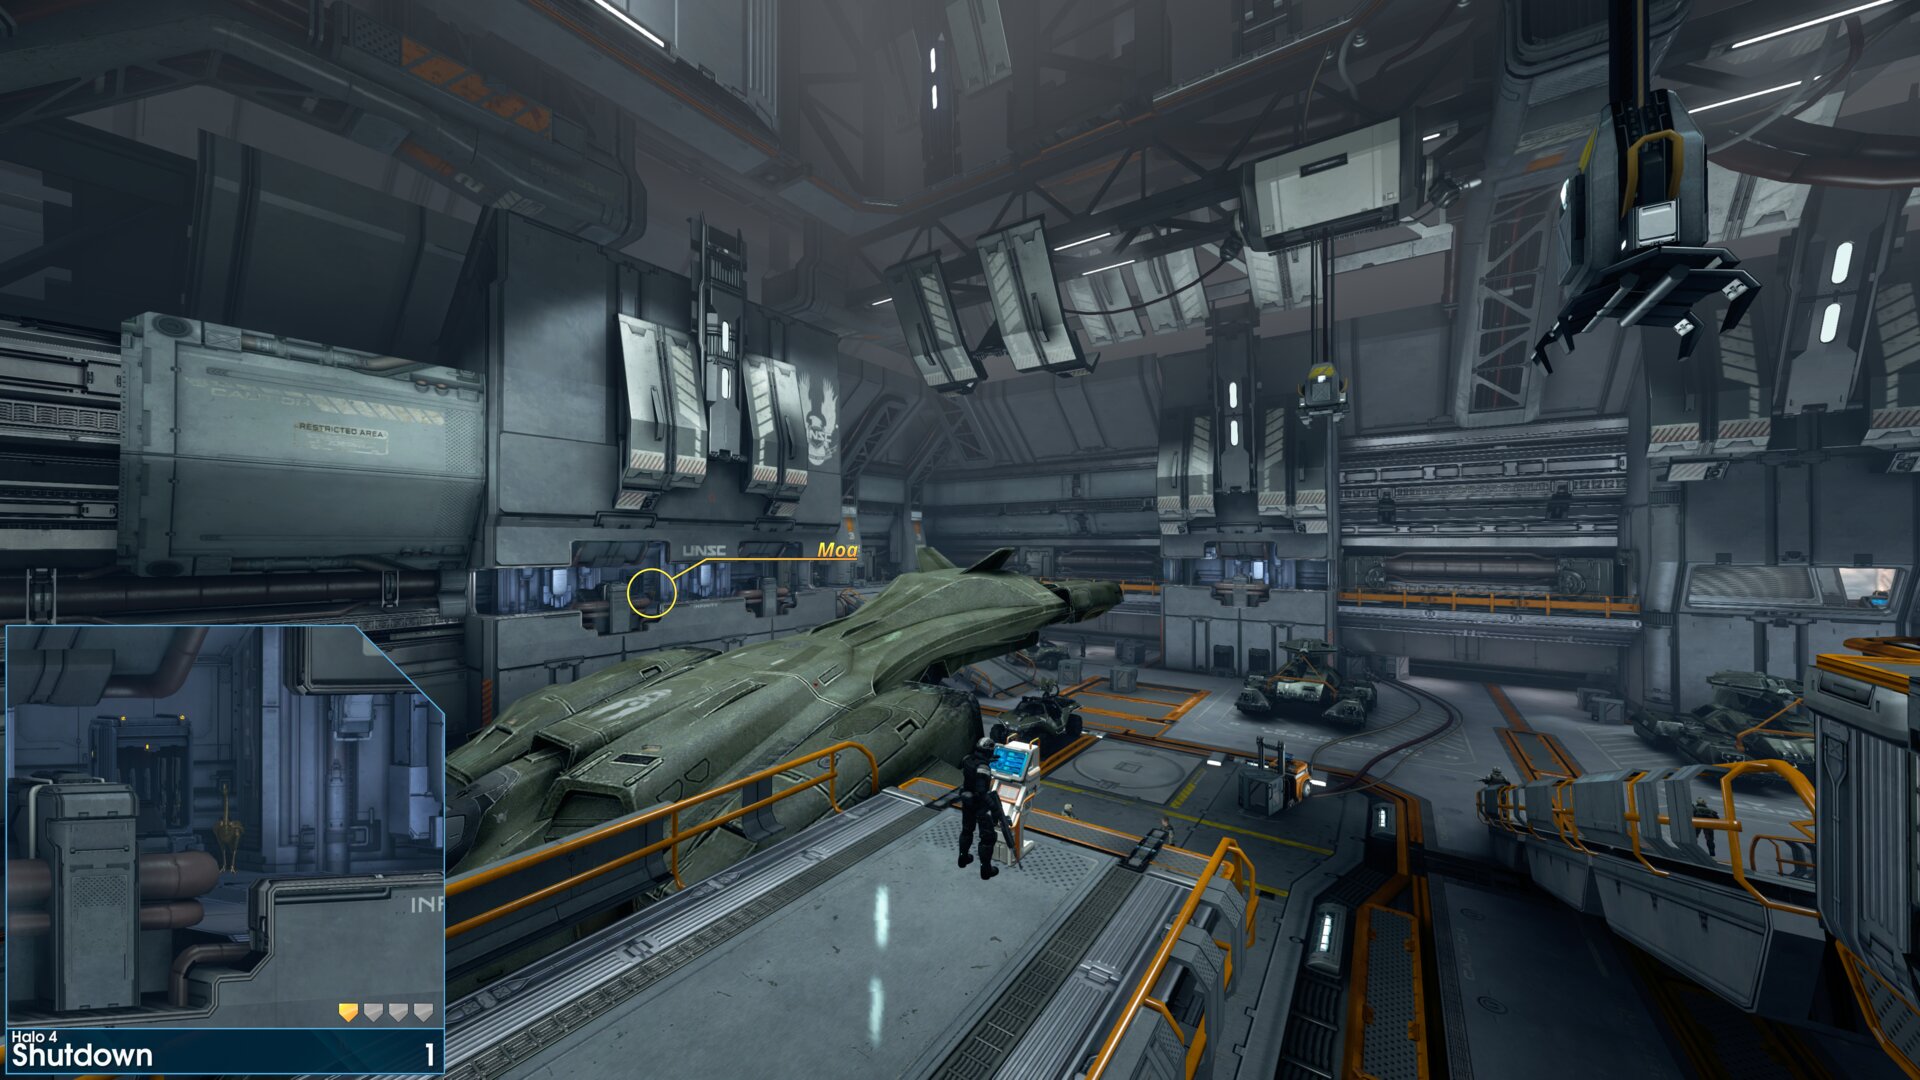 ⠀
⠀
Rally Point: Bravo
Golden Moa 3 — On the far side of the second gondola override station, the Golden Moa is on one of the lowest platforms behind a pillar.
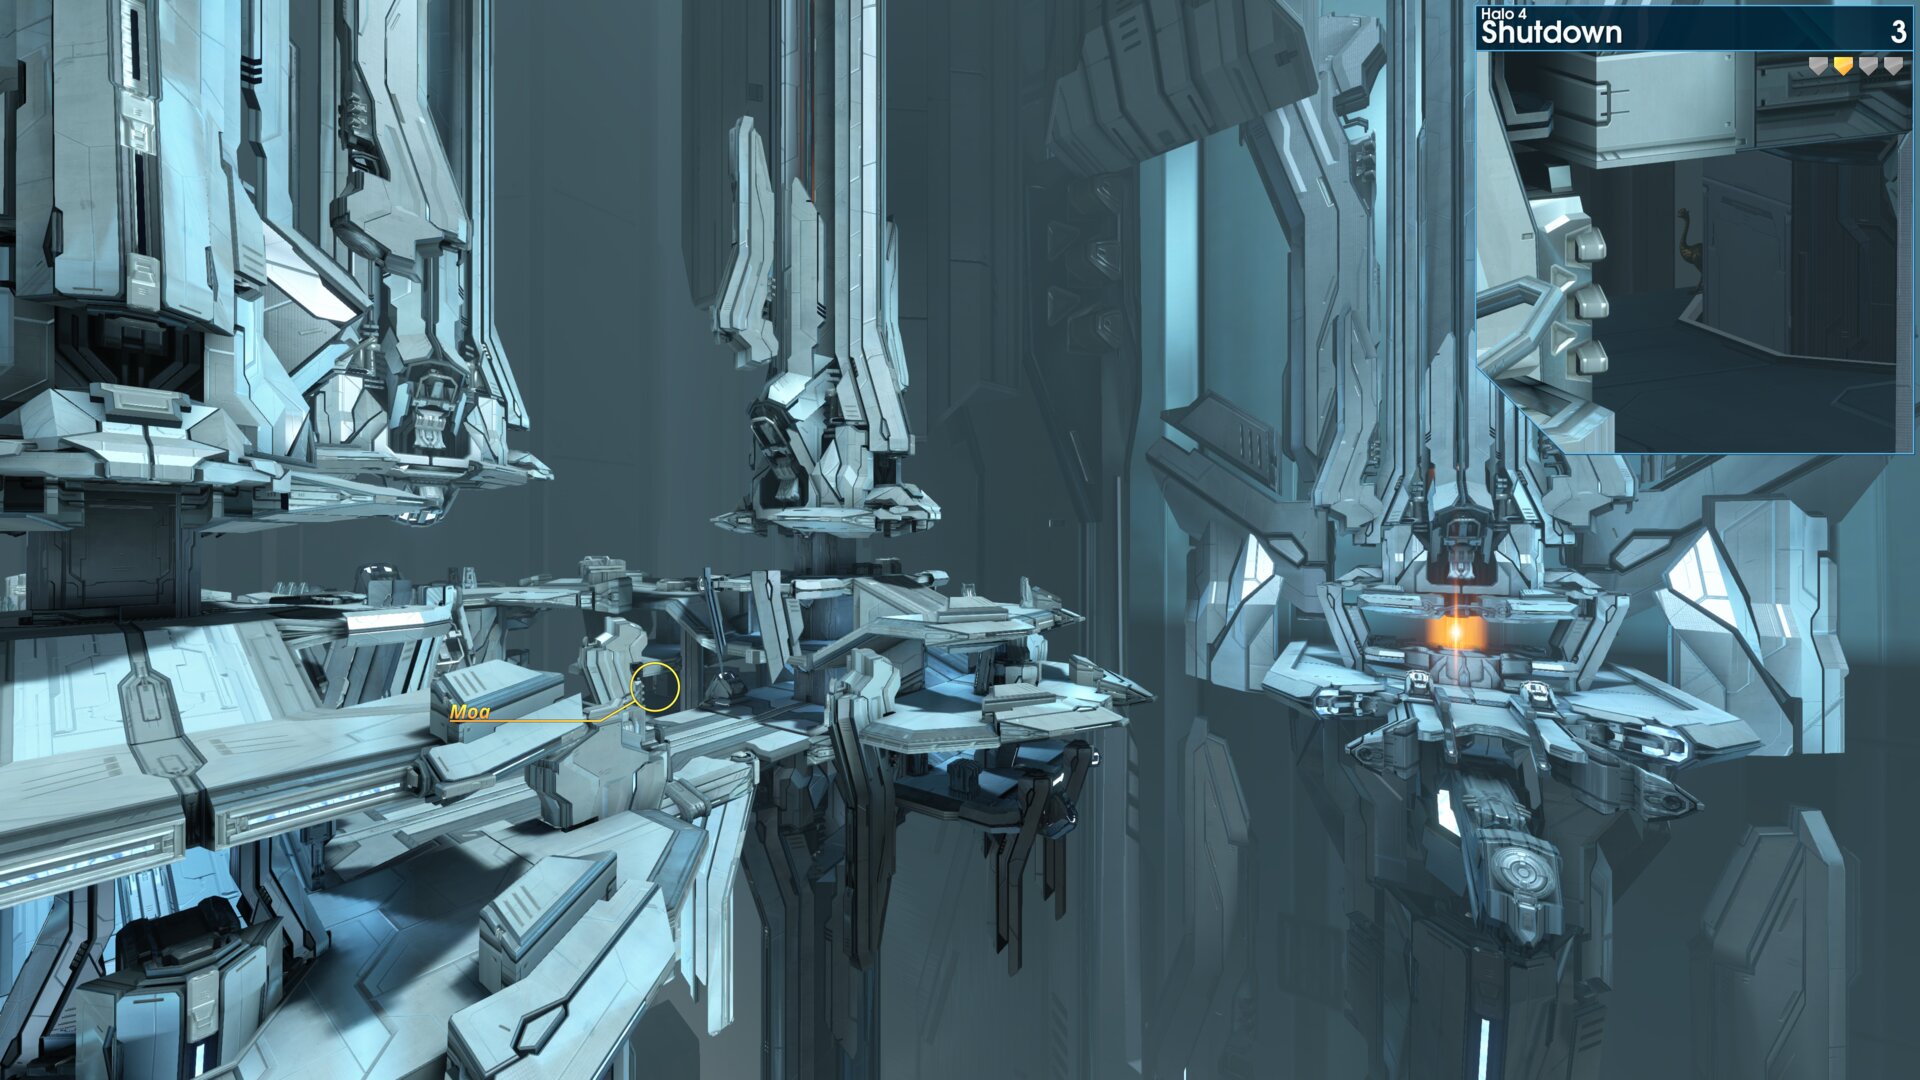 ⠀
⠀
Rally Point: Charlie
Golden Moa 4 — In the Data Attenuator Tower, this Golden Moa is behind a weapons rack in the far left corner.
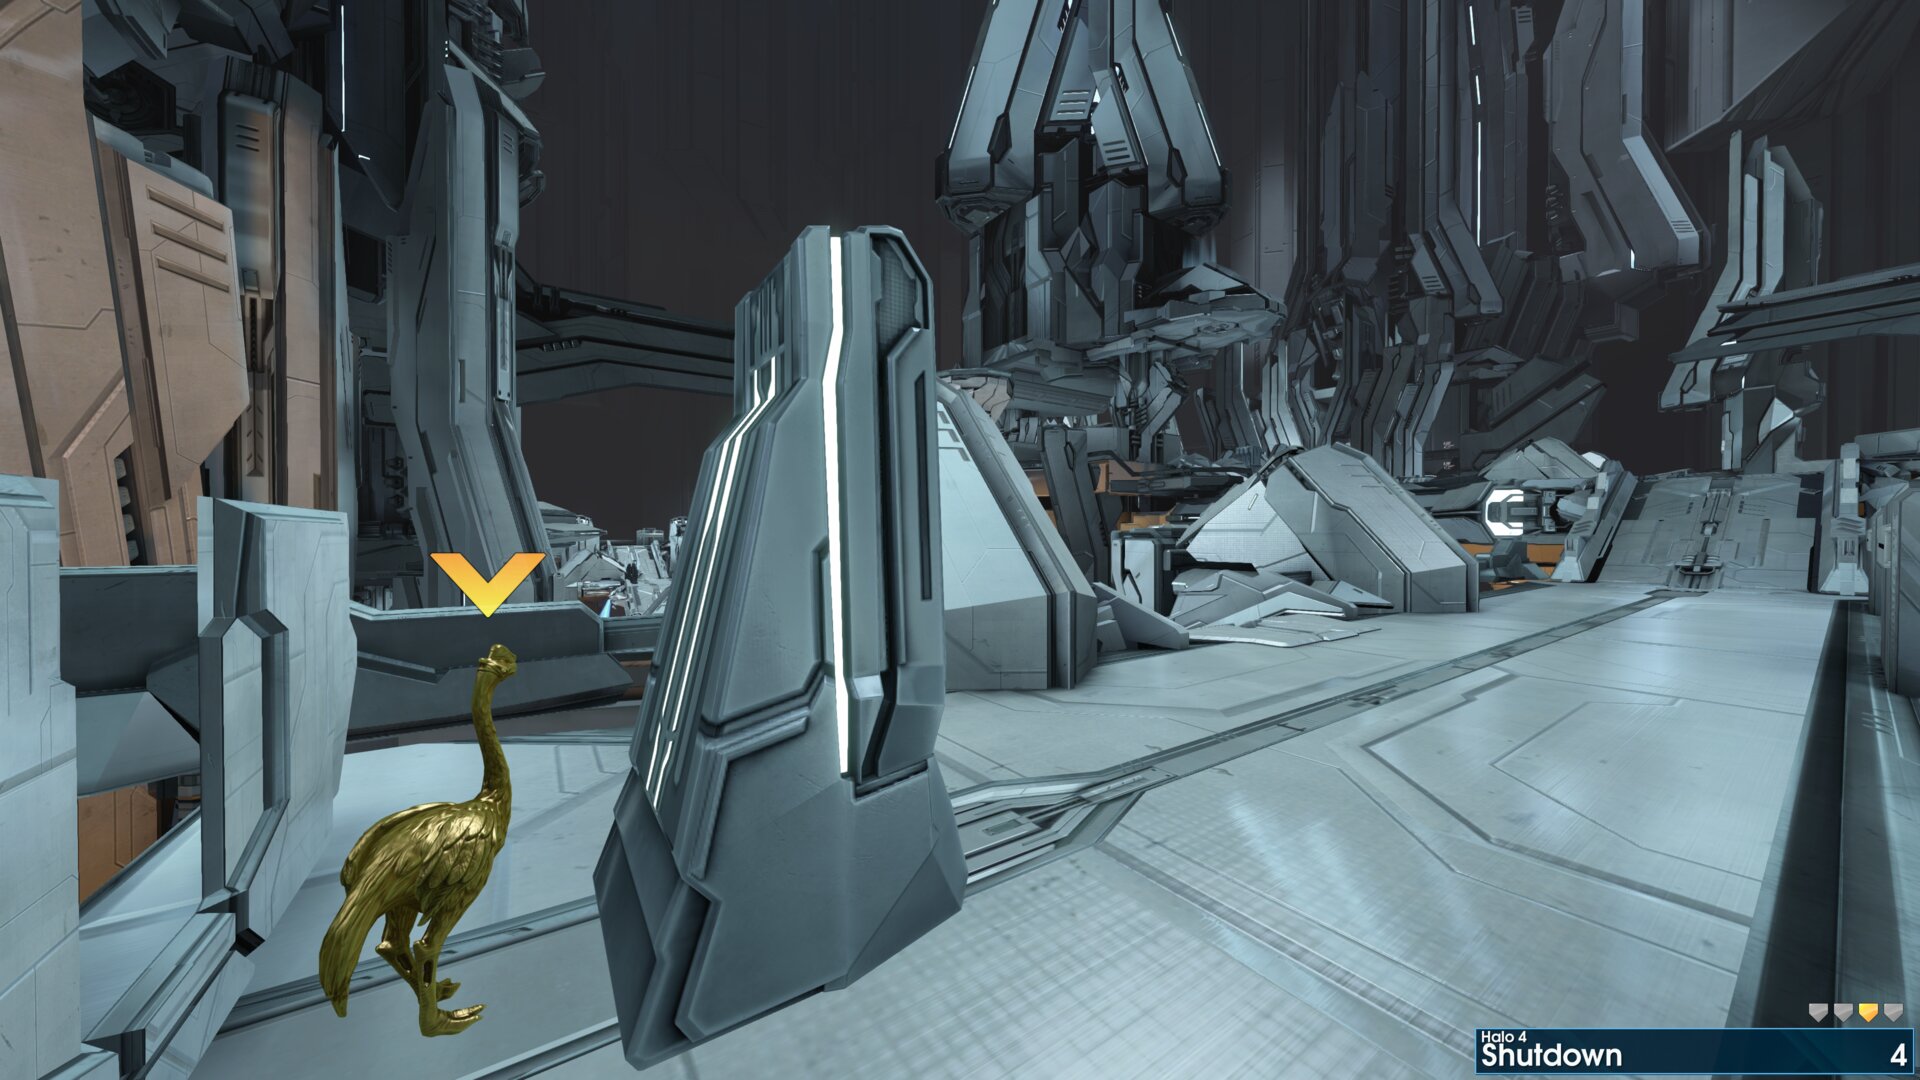 ⠀
⠀
Rally Point: Alpha
Golden Moa 2 — As you make your way down the hill from the first IFF tag, look to the left side, the Golden Moa is up on top of a large tree root.
⠀Rally Point: Bravo
Golden Moa 3 — After rescuing a group of Marines head up to hill to a sealed door, the Golden Moa is on a rock to the left of the door.
“The Marines got trapped trying to get through these doors. Look for an interface.” Cortana
⠀Rally Point: Charlie
Golden Moa 6 — As you near the end of the maintenance causeway, you’ll pass multiple shipping containers. Behind the last container on the right, you’ll find the Golden Moa next to a maintenance console.
⠀ReclaimerRally Point: Alpha
Golden Moa 3 — In the canyon with the three power sources generating a force field. The Golden Moa is on a rock near the closest power source.
⠀Golden Moa 4 — After destroying the Lich, the Golden Moa is on a rock at the head of the first tributary (aka a stream).
“OK folks, terrain's too rough around these tributaries.” Commander Lasky
⠀Rally Point: Bravo
Golden Moa 5 — At the first ramp to the Command Post, the Golden Moa is hidden in a shrub on the left side.
⠀ShutdownRally Point: Alpha
Golden Moa 1 — This Golden Moa is in the main control room of the Motor Pool, beside the weapons rack.
⠀Rally Point: Bravo
Golden Moa 3 — On the far side of the second gondola override station, the Golden Moa is on one of the lowest platforms behind a pillar.
⠀Rally Point: Charlie
Golden Moa 4 — In the Data Attenuator Tower, this Golden Moa is behind a weapons rack in the far left corner.
⠀Future Predictions - Part 1
The following is a list of all predicted locations for the next 18 weeks. After which, the pattern repeats for most games except Reach which repeats after just 6 weeks.
⠀
30ᵗʰ July 2026
⠀
⠀
6ᵗʰ August 2026
⠀
⠀
13ᵗʰ August 2026
⠀
⠀
20ᵗʰ August 2026
⠀
⠀
27ᵗʰ August 2026
⠀
⠀
3ʳᵈ September 2026
⠀
⠀
10ᵗʰ September 2026
⠀
⠀
17ᵗʰ September 2026
⠀
⠀
24ᵗʰ September 2026
⠀
30ᵗʰ July 2026
⠀⠀⠀⠀⠀⠀Game⠀
⠀Locations⠀⠀⠀⠀⠀⠀⠀⠀⠀⠀⠀⠀⠀⠀⠀⠀⠀
⠀⠀⠀⠀⠀⠀⠀⠀Game⠀
⠀Locations⠀⠀⠀⠀⠀⠀⠀⠀⠀⠀⠀⠀⠀⠀⠀⠀
⠀⠀⠀⠀⠀⠀Reach
New Alexandria: 1, 2, 3
The Package: 1, 2, 3
The Pillar of Autumn: 1, 2, 3
Lone Wolf: 1, 2
⠀The Package: 1, 2, 3
The Pillar of Autumn: 1, 2, 3
Lone Wolf: 1, 2
⠀⠀⠀⠀⠀⠀Halo 3
The Covenant: 5, 9, 17
Cortana: 4, 6, 8
Halo: 1, 3, 7
Cortana: 4, 6, 8
Halo: 1, 3, 7
Combat Evolved
The Library: 2, 3, 5
Two Betrayals: 3, 5, 10
Keyes: 2, 6, 7
⠀Two Betrayals: 3, 5, 10
Keyes: 2, 6, 7
⠀⠀⠀⠀⠀⠀ODST
Data Hive: 1, 2, 3
Coastal Highway: 1, 3, 4
Mombasa Streets: 5, 8
Coastal Highway: 1, 3, 4
Mombasa Streets: 5, 8
⠀⠀⠀⠀⠀⠀Halo 2
Gravemind: 2, 4, 6
Uprising: 1, 3, 4
High Charity: 1, 2, 3
The Great Journey: 2, 4, 5
⠀Uprising: 1, 3, 4
High Charity: 1, 2, 3
The Great Journey: 2, 4, 5
⠀⠀⠀⠀⠀⠀Halo 4
Composer: 2, 4, 7, 8
Midnight: 4, 5, 7
Midnight: 4, 5, 7
⠀
6ᵗʰ August 2026
⠀⠀⠀⠀⠀⠀Game⠀
⠀Locations⠀⠀⠀⠀⠀⠀⠀⠀⠀⠀⠀⠀⠀⠀⠀⠀⠀
⠀⠀⠀⠀⠀⠀⠀⠀Game⠀
⠀Locations⠀⠀⠀⠀⠀⠀⠀⠀⠀⠀⠀⠀⠀⠀⠀⠀
⠀⠀⠀⠀⠀⠀Reach
Winter Contingency: 2, 3, 4
ONI: Sword Base: 1, 2, 4
Nightfall: 1, 2, 4
⠀ONI: Sword Base: 1, 2, 4
Nightfall: 1, 2, 4
⠀⠀⠀⠀⠀⠀Halo 3
Sierra 117: 3, 6, 8
Crow’s Nest: 3, 9, 14
Tsavo Highway: 6, 7, 9
Crow’s Nest: 3, 9, 14
Tsavo Highway: 6, 7, 9
Combat Evolved
The Pillar of Autumn: 1, 3, 5
Halo: 1, 4
The Truth and Reconciliation: 1, 4, 8
⠀Halo: 1, 4
The Truth and Reconciliation: 1, 4, 8
⠀⠀⠀⠀⠀⠀ODST
Tayari Plaza: 2, 4, 5
Uplift Reserve: 2, 4, 8
Kizingo Boulevard: 1, 2
Uplift Reserve: 2, 4, 8
Kizingo Boulevard: 1, 2
⠀⠀⠀⠀⠀⠀Halo 2
Cairo Station: 1, 2, 3
Outskirts: 1, 2, 3
Metropolis: 1, 2, 3, 5
The Arbiter: 1, 2, 3
⠀Outskirts: 1, 2, 3
Metropolis: 1, 2, 3, 5
The Arbiter: 1, 2, 3
⠀⠀⠀⠀⠀⠀Halo 4
Dawn: 1, 4, 6
Requiem: 1, 3, 5
Forerunner: 2, 4, 6
Requiem: 1, 3, 5
Forerunner: 2, 4, 6
⠀
13ᵗʰ August 2026
⠀⠀⠀⠀⠀⠀Game⠀
⠀Locations⠀⠀⠀⠀⠀⠀⠀⠀⠀⠀⠀⠀⠀⠀⠀⠀⠀
⠀⠀⠀⠀⠀⠀⠀⠀Game⠀
⠀Locations⠀⠀⠀⠀⠀⠀⠀⠀⠀⠀⠀⠀⠀⠀⠀⠀
⠀⠀⠀⠀⠀⠀Reach
Tip of the Spear: 3, 4, 5
Long Night of Solace: 1, 2, 3
Exodus: 1, 4, 5
⠀Long Night of Solace: 1, 2, 3
Exodus: 1, 4, 5
⠀⠀⠀⠀⠀⠀Halo 3
The Storm: 1, 10, 14
Floodgate: 1, 5, 12
The Ark: 4, 5, 10
Floodgate: 1, 5, 12
The Ark: 4, 5, 10
Combat Evolved
The Silent Cartographer: 2, 4, 5
Assault on the Control Room: 4, 7, 8
343 Guilty Spark: 4, 6
⠀Assault on the Control Room: 4, 7, 8
343 Guilty Spark: 4, 6
⠀⠀⠀⠀⠀⠀ODST
ONI Alpha Site: 1
NMPD HQ: 1
Kikowani Station: 1, 2
NMPD HQ: 1
Kikowani Station: 1, 2
⠀⠀⠀⠀⠀⠀Halo 2
The Oracle: 1, 3, 4
Delta Halo: 1, 2, 3
Regret: 1, 2, 3
Sacred Icon: 1, 2, 3
Quarantine Zone: 2, 3, 4
⠀Delta Halo: 1, 2, 3
Regret: 1, 2, 3
Sacred Icon: 1, 2, 3
Quarantine Zone: 2, 3, 4
⠀⠀⠀⠀⠀⠀Halo 4
Infinity: 1, 3, 5
Reclaimer: 1, 5, 6
Shutdown: 2, 5, 6
Reclaimer: 1, 5, 6
Shutdown: 2, 5, 6
⠀
20ᵗʰ August 2026
⠀⠀⠀⠀⠀⠀Game⠀
⠀Locations⠀⠀⠀⠀⠀⠀⠀⠀⠀⠀⠀⠀⠀⠀⠀⠀⠀
⠀⠀⠀⠀⠀⠀⠀⠀Game⠀
⠀Locations⠀⠀⠀⠀⠀⠀⠀⠀⠀⠀⠀⠀⠀⠀⠀⠀
⠀⠀⠀⠀⠀⠀Reach
New Alexandria: 1, 3, 4
The Package: 2, 3, 4
The Pillar of Autumn: 2, 3, 4
Lone Wolf: 1, 2
⠀The Package: 2, 3, 4
The Pillar of Autumn: 2, 3, 4
Lone Wolf: 1, 2
⠀⠀⠀⠀⠀⠀Halo 3
The Covenant: 3, 6, 10
Cortana: 5, 7
Halo: 2, 5, 6
Cortana: 5, 7
Halo: 2, 5, 6
Combat Evolved
The Library: 1, 2, 6
Two Betrayals: 3, 4, 8
Keyes: 3, 6, 7
⠀Two Betrayals: 3, 4, 8
Keyes: 3, 6, 7
⠀⠀⠀⠀⠀⠀ODST
Data Hive: 1, 2, 3
Coastal Highway: 2, 4, 5
Mombasa Streets: 3, 7
Coastal Highway: 2, 4, 5
Mombasa Streets: 3, 7
⠀⠀⠀⠀⠀⠀Halo 2
Gravemind: 1, 2, 3
Uprising: 1, 2, 4
High Charity: 2, 3
The Great Journey: 1, 2, 3
⠀Uprising: 1, 2, 4
High Charity: 2, 3
The Great Journey: 1, 2, 3
⠀⠀⠀⠀⠀⠀Halo 4
Composer: 1, 4, 8
Midnight: 1, 2, 4
Midnight: 1, 2, 4
⠀
27ᵗʰ August 2026
⠀⠀⠀⠀⠀⠀Game⠀
⠀Locations⠀⠀⠀⠀⠀⠀⠀⠀⠀⠀⠀⠀⠀⠀⠀⠀⠀
⠀⠀⠀⠀⠀⠀⠀⠀Game⠀
⠀Locations⠀⠀⠀⠀⠀⠀⠀⠀⠀⠀⠀⠀⠀⠀⠀⠀
⠀⠀⠀⠀⠀⠀Reach
Winter Contingency: 1, 2
ONI: Sword Base: 2, 3, 4
Nightfall: 1, 2, 3
⠀ONI: Sword Base: 2, 3, 4
Nightfall: 1, 2, 3
⠀⠀⠀⠀⠀⠀Halo 3
Sierra 117: 7, 12, 16
Crow’s Nest: 5, 12, 13
Tsavo Highway: 2, 5, 10
Crow’s Nest: 5, 12, 13
Tsavo Highway: 2, 5, 10
Combat Evolved
The Pillar of Autumn: 2, 4, 6
Halo: 2, 6, 7, 8
The Truth and Reconciliation: 2, 3, 9
⠀Halo: 2, 6, 7, 8
The Truth and Reconciliation: 2, 3, 9
⠀⠀⠀⠀⠀⠀ODST
Tayari Plaza: 1, 3, 6
Uplift Reserve: 1, 3, 5
Kizingo Boulevard: 1, 2
Uplift Reserve: 1, 3, 5
Kizingo Boulevard: 1, 2
⠀⠀⠀⠀⠀⠀Halo 2
Cairo Station: 2, 3, 4
Outskirts: 3, 4, 5
Metropolis: 2, 3, 4, 5
The Arbiter: 2, 3, 4
⠀Outskirts: 3, 4, 5
Metropolis: 2, 3, 4, 5
The Arbiter: 2, 3, 4
⠀⠀⠀⠀⠀⠀Halo 4
Dawn: 2, 3, 5
Requiem: 2, 4, 6
Forerunner: 1, 3, 5
Requiem: 2, 4, 6
Forerunner: 1, 3, 5
⠀
3ʳᵈ September 2026
⠀⠀⠀⠀⠀⠀Game⠀
⠀Locations⠀⠀⠀⠀⠀⠀⠀⠀⠀⠀⠀⠀⠀⠀⠀⠀⠀
⠀⠀⠀⠀⠀⠀⠀⠀Game⠀
⠀Locations⠀⠀⠀⠀⠀⠀⠀⠀⠀⠀⠀⠀⠀⠀⠀⠀
⠀⠀⠀⠀⠀⠀Reach
Tip of the Spear: 1, 2, 4
Long Night of Solace: 1, 2, 3
Exodus: 1, 2, 3
⠀Long Night of Solace: 1, 2, 3
Exodus: 1, 2, 3
⠀⠀⠀⠀⠀⠀Halo 3
The Storm: 4, 15, 17
Floodgate: 4, 8, 11
The Ark: 3, 7, 11
Floodgate: 4, 8, 11
The Ark: 3, 7, 11
Combat Evolved
The Silent Cartographer: 1, 3, 6
Assault on the Control Room: 2, 3, 6
343 Guilty Spark: 2, 3, 5
⠀Assault on the Control Room: 2, 3, 6
343 Guilty Spark: 2, 3, 5
⠀⠀⠀⠀⠀⠀ODST
ONI Alpha Site: 1
NMPD HQ: 1
Kikowani Station: 1, 2
NMPD HQ: 1
Kikowani Station: 1, 2
⠀⠀⠀⠀⠀⠀Halo 2
The Oracle: 2, 3, 4
Delta Halo: 2, 3, 4
Regret: 2, 4, 5
Sacred Icon: 3, 4, 5
Quarantine Zone: 1, 2, 4
⠀Delta Halo: 2, 3, 4
Regret: 2, 4, 5
Sacred Icon: 3, 4, 5
Quarantine Zone: 1, 2, 4
⠀⠀⠀⠀⠀⠀Halo 4
Infinity: 2, 6, 7
Reclaimer: 2, 3, 4
Shutdown: 1, 3, 4
Reclaimer: 2, 3, 4
Shutdown: 1, 3, 4
⠀
10ᵗʰ September 2026
⠀⠀⠀⠀⠀⠀Game⠀
⠀Locations⠀⠀⠀⠀⠀⠀⠀⠀⠀⠀⠀⠀⠀⠀⠀⠀⠀
⠀⠀⠀⠀⠀⠀⠀⠀Game⠀
⠀Locations⠀⠀⠀⠀⠀⠀⠀⠀⠀⠀⠀⠀⠀⠀⠀⠀
⠀⠀⠀⠀⠀⠀Reach
New Alexandria: 1, 2, 3
The Package: 1, 2, 3
The Pillar of Autumn: 1, 2, 3
Lone Wolf: 1, 2
⠀The Package: 1, 2, 3
The Pillar of Autumn: 1, 2, 3
Lone Wolf: 1, 2
⠀⠀⠀⠀⠀⠀Halo 3
The Covenant: 1, 7, 9
Cortana: 4, 6, 8
Halo: 3, 4, 7
Cortana: 4, 6, 8
Halo: 3, 4, 7
Combat Evolved
The Library: 3, 4, 5
Two Betrayals: 1, 2, 10
Keyes: 1, 2, 5
⠀Two Betrayals: 1, 2, 10
Keyes: 1, 2, 5
⠀⠀⠀⠀⠀⠀ODST
Data Hive: 1, 2, 3
Coastal Highway: 1, 3, 4
Mombasa Streets: 2, 6, 9
Coastal Highway: 1, 3, 4
Mombasa Streets: 2, 6, 9
⠀⠀⠀⠀⠀⠀Halo 2
Gravemind: 3, 4, 5
Uprising: 1, 2, 3
High Charity: 1, 2
The Great Journey: 2, 3, 4
⠀Uprising: 1, 2, 3
High Charity: 1, 2
The Great Journey: 2, 3, 4
⠀⠀⠀⠀⠀⠀Halo 4
Composer: 2, 6, 7
Midnight: 3, 5, 7
Midnight: 3, 5, 7
⠀
17ᵗʰ September 2026
⠀⠀⠀⠀⠀⠀Game⠀
⠀Locations⠀⠀⠀⠀⠀⠀⠀⠀⠀⠀⠀⠀⠀⠀⠀⠀⠀
⠀⠀⠀⠀⠀⠀⠀⠀Game⠀
⠀Locations⠀⠀⠀⠀⠀⠀⠀⠀⠀⠀⠀⠀⠀⠀⠀⠀
⠀⠀⠀⠀⠀⠀Reach
Winter Contingency: 2, 3, 4
ONI: Sword Base: 1, 2, 4
Nightfall: 1, 2, 4
⠀ONI: Sword Base: 1, 2, 4
Nightfall: 1, 2, 4
⠀⠀⠀⠀⠀⠀Halo 3
Sierra 117: 2, 4, 10
Crow’s Nest: 2, 3, 6
Tsavo Highway: 1, 3, 8
Crow’s Nest: 2, 3, 6
Tsavo Highway: 1, 3, 8
Combat Evolved
The Pillar of Autumn: 1, 4, 5
Halo: 3, 4, 5
The Truth and Reconciliation: 4, 6, 7
⠀Halo: 3, 4, 5
The Truth and Reconciliation: 4, 6, 7
⠀⠀⠀⠀⠀⠀ODST
Tayari Plaza: 2, 4, 5
Uplift Reserve: 4, 6, 8
Kizingo Boulevard: 1, 2
Uplift Reserve: 4, 6, 8
Kizingo Boulevard: 1, 2
⠀⠀⠀⠀⠀⠀Halo 2
Cairo Station: 1, 2, 4
Outskirts: 1, 2, 6
Metropolis: 1, 2, 4, 5
The Arbiter: 1, 2, 4
⠀Outskirts: 1, 2, 6
Metropolis: 1, 2, 4, 5
The Arbiter: 1, 2, 4
⠀⠀⠀⠀⠀⠀Halo 4
Dawn: 1, 2, 6
Requiem: 1, 2, 6
Forerunner: 2, 3, 5
Requiem: 1, 2, 6
Forerunner: 2, 3, 5
⠀
24ᵗʰ September 2026
⠀⠀⠀⠀⠀⠀Game⠀
⠀Locations⠀⠀⠀⠀⠀⠀⠀⠀⠀⠀⠀⠀⠀⠀⠀⠀⠀
⠀⠀⠀⠀⠀⠀⠀⠀Game⠀
⠀Locations⠀⠀⠀⠀⠀⠀⠀⠀⠀⠀⠀⠀⠀⠀⠀⠀
⠀⠀⠀⠀⠀⠀Reach
Tip of the Spear: 3, 4, 5
Long Night of Solace: 1, 2, 3
Exodus: 1, 4, 5
⠀Long Night of Solace: 1, 2, 3
Exodus: 1, 4, 5
⠀⠀⠀⠀⠀⠀Halo 3
The Storm: 3, 8, 11
Floodgate: 2, 5, 12
The Ark: 4, 6, 9
Floodgate: 2, 5, 12
The Ark: 4, 6, 9
Combat Evolved
The Silent Cartographer: 3, 4, 6
Assault on the Control Room: 1, 5, 8
343 Guilty Spark: 4, 6
⠀Assault on the Control Room: 1, 5, 8
343 Guilty Spark: 4, 6
⠀⠀⠀⠀⠀⠀ODST
ONI Alpha Site: 1
NMPD HQ: 1
Kikowani Station: 1, 2
NMPD HQ: 1
Kikowani Station: 1, 2
⠀⠀⠀⠀⠀⠀Halo 2
The Oracle: 1, 2, 3
Delta Halo: 1, 2, 5
Regret: 1, 3, 6
Sacred Icon: 1, 2, 6
Quarantine Zone: 1, 2, 3
⠀Delta Halo: 1, 2, 5
Regret: 1, 3, 6
Sacred Icon: 1, 2, 6
Quarantine Zone: 1, 2, 3
⠀⠀⠀⠀⠀⠀Halo 4
Infinity: 1, 4, 5
Reclaimer: 1, 2, 6
Shutdown: 2, 5, 6
Reclaimer: 1, 2, 6
Shutdown: 2, 5, 6
Future Predictions - Part 2
1ˢᵗ October 2026
⠀
⠀
8ᵗʰ October 2026
⠀
⠀
15ᵗʰ October 2026
⠀
⠀
22ⁿᵈ October 2026
⠀
⠀
29ᵗʰ October 2026
⠀
⠀
5ᵗʰ November 2026
⠀
⠀
12ᵗʰ November 2026
⠀
⠀
19ᵗʰ November 2026
⠀
⠀
26ᵗʰ November 2026
⠀⠀⠀⠀⠀⠀Game⠀
⠀Locations⠀⠀⠀⠀⠀⠀⠀⠀⠀⠀⠀⠀⠀⠀⠀⠀⠀
⠀⠀⠀⠀⠀⠀⠀⠀Game⠀
⠀Locations⠀⠀⠀⠀⠀⠀⠀⠀⠀⠀⠀⠀⠀⠀⠀⠀
⠀⠀⠀⠀⠀⠀Reach
New Alexandria: 1, 3, 4
The Package: 2, 3, 4
The Pillar of Autumn: 2, 3, 4
Lone Wolf: 1, 2
⠀The Package: 2, 3, 4
The Pillar of Autumn: 2, 3, 4
Lone Wolf: 1, 2
⠀⠀⠀⠀⠀⠀Halo 3
The Covenant: 2, 4, 8
Cortana: 5, 7
Halo: 1, 2, 4
Cortana: 5, 7
Halo: 1, 2, 4
Combat Evolved
The Library: 1, 4, 6
Two Betrayals: 6, 9, 11
Keyes: 2, 3, 4
⠀Two Betrayals: 6, 9, 11
Keyes: 2, 3, 4
⠀⠀⠀⠀⠀⠀ODST
Data Hive: 1, 2, 3
Coastal Highway: 1, 3, 4
Mombasa Streets: 1, 4
Coastal Highway: 1, 3, 4
Mombasa Streets: 1, 4
⠀⠀⠀⠀⠀⠀Halo 2
Gravemind: 1, 2, 6
Uprising: 1, 3, 4
High Charity: 1, 2, 3
The Great Journey: 1, 2, 4
⠀Uprising: 1, 3, 4
High Charity: 1, 2, 3
The Great Journey: 1, 2, 4
⠀⠀⠀⠀⠀⠀Halo 4
Composer: 1, 3, 5, 8
Midnight: 1, 2, 6
Midnight: 1, 2, 6
⠀
8ᵗʰ October 2026
⠀⠀⠀⠀⠀⠀Game⠀
⠀Locations⠀⠀⠀⠀⠀⠀⠀⠀⠀⠀⠀⠀⠀⠀⠀⠀⠀
⠀⠀⠀⠀⠀⠀⠀⠀Game⠀
⠀Locations⠀⠀⠀⠀⠀⠀⠀⠀⠀⠀⠀⠀⠀⠀⠀⠀
⠀⠀⠀⠀⠀⠀Reach
Winter Contingency: 1, 2
ONI: Sword Base: 2, 3, 4
Nightfall: 1, 2, 3
⠀ONI: Sword Base: 2, 3, 4
Nightfall: 1, 2, 3
⠀⠀⠀⠀⠀⠀Halo 3
Sierra 117: 1, 5, 9
Crow’s Nest: 4, 6, 11
Tsavo Highway: 3, 8, 10
Crow’s Nest: 4, 6, 11
Tsavo Highway: 3, 8, 10
Combat Evolved
The Pillar of Autumn: 2, 3, 6
Halo: 1, 7, 8
The Truth and Reconciliation: 1, 2, 8
⠀Halo: 1, 7, 8
The Truth and Reconciliation: 1, 2, 8
⠀⠀⠀⠀⠀⠀ODST
Tayari Plaza: 3, 6, 7
Uplift Reserve: 1, 5, 7
Kizingo Boulevard: 1, 2
Uplift Reserve: 1, 5, 7
Kizingo Boulevard: 1, 2
⠀⠀⠀⠀⠀⠀Halo 2
Cairo Station: 3, 4, 5
Outskirts: 4, 5, 6
Metropolis: 3, 4
The Arbiter: 3, 4, 5
⠀Outskirts: 4, 5, 6
Metropolis: 3, 4
The Arbiter: 3, 4, 5
⠀⠀⠀⠀⠀⠀Halo 4
Dawn: 3, 4, 5
Requiem: 3, 4, 5
Forerunner: 1, 4, 6
Requiem: 3, 4, 5
Forerunner: 1, 4, 6
⠀
15ᵗʰ October 2026
⠀⠀⠀⠀⠀⠀Game⠀
⠀Locations⠀⠀⠀⠀⠀⠀⠀⠀⠀⠀⠀⠀⠀⠀⠀⠀⠀
⠀⠀⠀⠀⠀⠀⠀⠀Game⠀
⠀Locations⠀⠀⠀⠀⠀⠀⠀⠀⠀⠀⠀⠀⠀⠀⠀⠀
⠀⠀⠀⠀⠀⠀Reach
Tip of the Spear: 1, 2, 4
Long Night of Solace: 1, 2, 3
Exodus: 1, 2, 3
⠀Long Night of Solace: 1, 2, 3
Exodus: 1, 2, 3
⠀⠀⠀⠀⠀⠀Halo 3
The Storm: 2, 7, 16
Floodgate: 8, 10, 13
The Ark: 2, 6, 9
Floodgate: 8, 10, 13
The Ark: 2, 6, 9
Combat Evolved
The Silent Cartographer: 2, 4, 5
Assault on the Control Room: 2, 6, 7
343 Guilty Spark: 2, 6
⠀Assault on the Control Room: 2, 6, 7
343 Guilty Spark: 2, 6
⠀⠀⠀⠀⠀⠀ODST
ONI Alpha Site: 1
NMPD HQ: 1
Kikowani Station: 1, 2
NMPD HQ: 1
Kikowani Station: 1, 2
⠀⠀⠀⠀⠀⠀Halo 2
The Oracle: 1, 3, 4
Delta Halo: 3, 4, 5
Regret: 4, 5, 6
Sacred Icon: 4, 5, 6
Quarantine Zone: 2, 3, 4
⠀Delta Halo: 3, 4, 5
Regret: 4, 5, 6
Sacred Icon: 4, 5, 6
Quarantine Zone: 2, 3, 4
⠀⠀⠀⠀⠀⠀Halo 4
Infinity: 2, 3, 6
Reclaimer: 3, 4, 5
Shutdown: 1, 3, 4
Reclaimer: 3, 4, 5
Shutdown: 1, 3, 4
⠀
22ⁿᵈ October 2026
⠀⠀⠀⠀⠀⠀Game⠀
⠀Locations⠀⠀⠀⠀⠀⠀⠀⠀⠀⠀⠀⠀⠀⠀⠀⠀⠀
⠀⠀⠀⠀⠀⠀⠀⠀Game⠀
⠀Locations⠀⠀⠀⠀⠀⠀⠀⠀⠀⠀⠀⠀⠀⠀⠀⠀
⠀⠀⠀⠀⠀⠀Reach
New Alexandria: 1, 2, 3
The Package: 1, 2, 3
The Pillar of Autumn: 1, 2, 3
Lone Wolf: 1, 2
⠀The Package: 1, 2, 3
The Pillar of Autumn: 1, 2, 3
Lone Wolf: 1, 2
⠀⠀⠀⠀⠀⠀Halo 3
The Covenant: 5, 9, 17
Cortana: 4, 6, 8
Halo: 1, 3, 7
Cortana: 4, 6, 8
Halo: 1, 3, 7
Combat Evolved
The Library: 2, 3, 5
Two Betrayals: 3, 5, 10
Keyes: 2, 6, 7
⠀Two Betrayals: 3, 5, 10
Keyes: 2, 6, 7
⠀⠀⠀⠀⠀⠀ODST
Data Hive: 1, 2, 3
Coastal Highway: 1, 3, 4
Mombasa Streets: 5, 8
Coastal Highway: 1, 3, 4
Mombasa Streets: 5, 8
⠀⠀⠀⠀⠀⠀Halo 2
Gravemind: 4, 5, 6
Uprising: 1, 2, 4
High Charity: 2, 3
The Great Journey: 3, 4, 5
⠀Uprising: 1, 2, 4
High Charity: 2, 3
The Great Journey: 3, 4, 5
⠀⠀⠀⠀⠀⠀Halo 4
Composer: 2, 4, 7, 8
Midnight: 4, 5, 7
Midnight: 4, 5, 7
⠀
29ᵗʰ October 2026
⠀⠀⠀⠀⠀⠀Game⠀
⠀Locations⠀⠀⠀⠀⠀⠀⠀⠀⠀⠀⠀⠀⠀⠀⠀⠀⠀
⠀⠀⠀⠀⠀⠀⠀⠀Game⠀
⠀Locations⠀⠀⠀⠀⠀⠀⠀⠀⠀⠀⠀⠀⠀⠀⠀⠀
⠀⠀⠀⠀⠀⠀Reach
Winter Contingency: 2, 3, 4
ONI: Sword Base: 1, 2, 4
Nightfall: 1, 2, 4
⠀ONI: Sword Base: 1, 2, 4
Nightfall: 1, 2, 4
⠀⠀⠀⠀⠀⠀Halo 3
Sierra 117: 3, 6, 8
Crow’s Nest: 3, 9, 14
Tsavo Highway: 6, 7, 9
Crow’s Nest: 3, 9, 14
Tsavo Highway: 6, 7, 9
Combat Evolved
The Pillar of Autumn: 2, 4, 6
Halo: 2, 6, 7, 8
The Truth and Reconciliation: 2, 3, 9
⠀Halo: 2, 6, 7, 8
The Truth and Reconciliation: 2, 3, 9
⠀⠀⠀⠀⠀⠀ODST
Tayari Plaza: 2, 4, 5
Uplift Reserve: 2, 4, 8
Kizingo Boulevard: 1, 2
Uplift Reserve: 2, 4, 8
Kizingo Boulevard: 1, 2
⠀⠀⠀⠀⠀⠀Halo 2
Cairo Station: 1, 3, 5
Outskirts: 1, 3, 5
Metropolis: 1, 3
The Arbiter: 1, 3, 5
⠀Outskirts: 1, 3, 5
Metropolis: 1, 3
The Arbiter: 1, 3, 5
⠀⠀⠀⠀⠀⠀Halo 4
Dawn: 2, 3, 5
Requiem: 2, 4, 6
Forerunner: 1, 3, 5
Requiem: 2, 4, 6
Forerunner: 1, 3, 5
⠀
5ᵗʰ November 2026
⠀⠀⠀⠀⠀⠀Game⠀
⠀Locations⠀⠀⠀⠀⠀⠀⠀⠀⠀⠀⠀⠀⠀⠀⠀⠀⠀
⠀⠀⠀⠀⠀⠀⠀⠀Game⠀
⠀Locations⠀⠀⠀⠀⠀⠀⠀⠀⠀⠀⠀⠀⠀⠀⠀⠀
⠀⠀⠀⠀⠀⠀Reach
Tip of the Spear: 3, 4, 5
Long Night of Solace: 1, 2, 3
Exodus: 1, 4, 5
⠀Long Night of Solace: 1, 2, 3
Exodus: 1, 4, 5
⠀⠀⠀⠀⠀⠀Halo 3
The Storm: 1, 10, 14
Floodgate: 1, 5, 12
The Ark: 4, 5, 10
Floodgate: 1, 5, 12
The Ark: 4, 5, 10
Combat Evolved
The Silent Cartographer: 3, 4, 6
Assault on the Control Room: 1, 5, 8
343 Guilty Spark: 4, 6
⠀Assault on the Control Room: 1, 5, 8
343 Guilty Spark: 4, 6
⠀⠀⠀⠀⠀⠀ODST
ONI Alpha Site: 1
NMPD HQ: 1
Kikowani Station: 1, 2
NMPD HQ: 1
Kikowani Station: 1, 2
⠀⠀⠀⠀⠀⠀Halo 2
The Oracle: 1, 2, 4
Delta Halo: 1, 3, 5
Regret: 1, 2, 5
Sacred Icon: 1, 3, 5
Quarantine Zone: 1, 3, 4
⠀Delta Halo: 1, 3, 5
Regret: 1, 2, 5
Sacred Icon: 1, 3, 5
Quarantine Zone: 1, 3, 4
⠀⠀⠀⠀⠀⠀Halo 4
Infinity: 1, 4, 5
Reclaimer: 1, 2, 6
Shutdown: 2, 5, 6
Reclaimer: 1, 2, 6
Shutdown: 2, 5, 6
⠀
12ᵗʰ November 2026
⠀⠀⠀⠀⠀⠀Game⠀
⠀Locations⠀⠀⠀⠀⠀⠀⠀⠀⠀⠀⠀⠀⠀⠀⠀⠀⠀
⠀⠀⠀⠀⠀⠀⠀⠀Game⠀
⠀Locations⠀⠀⠀⠀⠀⠀⠀⠀⠀⠀⠀⠀⠀⠀⠀⠀
⠀⠀⠀⠀⠀⠀Reach
New Alexandria: 1, 3, 4
The Package: 2, 3, 4
The Pillar of Autumn: 2, 3, 4
Lone Wolf: 1, 2
⠀The Package: 2, 3, 4
The Pillar of Autumn: 2, 3, 4
Lone Wolf: 1, 2
⠀⠀⠀⠀⠀⠀Halo 3
The Covenant: 3, 6, 10
Cortana: 5, 7
Halo: 2, 5, 6
Cortana: 5, 7
Halo: 2, 5, 6
Combat Evolved
The Library: 1, 4, 6
Two Betrayals: 6, 9, 11
Keyes: 2, 3, 4
⠀Two Betrayals: 6, 9, 11
Keyes: 2, 3, 4
⠀⠀⠀⠀⠀⠀ODST
Data Hive: 1, 2, 3
Coastal Highway: 2, 4, 5
Mombasa Streets: 3, 7
Coastal Highway: 2, 4, 5
Mombasa Streets: 3, 7
⠀⠀⠀⠀⠀⠀Halo 2
Gravemind: 1, 3, 5
Uprising: 1, 2, 4
High Charity: 1, 3
The Great Journey: 1, 3, 5
⠀Uprising: 1, 2, 4
High Charity: 1, 3
The Great Journey: 1, 3, 5
⠀⠀⠀⠀⠀⠀Halo 4
Composer: 1, 3, 5, 8
Midnight: 1, 2, 6
Midnight: 1, 2, 6
⠀
19ᵗʰ November 2026
⠀⠀⠀⠀⠀⠀Game⠀
⠀Locations⠀⠀⠀⠀⠀⠀⠀⠀⠀⠀⠀⠀⠀⠀⠀⠀⠀
⠀⠀⠀⠀⠀⠀⠀⠀Game⠀
⠀Locations⠀⠀⠀⠀⠀⠀⠀⠀⠀⠀⠀⠀⠀⠀⠀⠀
⠀⠀⠀⠀⠀⠀Reach
Winter Contingency: 1, 2
ONI: Sword Base: 2, 3, 4
Nightfall: 1, 2, 3
⠀ONI: Sword Base: 2, 3, 4
Nightfall: 1, 2, 3
⠀⠀⠀⠀⠀⠀Halo 3
Sierra 117: 1, 5, 9
Crow’s Nest: 4, 6, 11
Tsavo Highway: 3, 8, 10
Crow’s Nest: 4, 6, 11
Tsavo Highway: 3, 8, 10
Combat Evolved
The Pillar of Autumn: 1, 4, 5
Halo: 3, 4, 5
The Truth and Reconciliation: 4, 6, 7
⠀Halo: 3, 4, 5
The Truth and Reconciliation: 4, 6, 7
⠀⠀⠀⠀⠀⠀ODST
Tayari Plaza: 3, 6, 7
Uplift Reserve: 1, 5, 7
Kizingo Boulevard: 1, 2
Uplift Reserve: 1, 5, 7
Kizingo Boulevard: 1, 2
⠀⠀⠀⠀⠀⠀Halo 2
Cairo Station: 2, 4, 5
Outskirts: 2, 4, 6
Metropolis: 2, 4, 5
The Arbiter: 2, 4, 5
⠀Outskirts: 2, 4, 6
Metropolis: 2, 4, 5
The Arbiter: 2, 4, 5
⠀⠀⠀⠀⠀⠀Halo 4
Dawn: 1, 2, 6
Requiem: 1, 2, 6
Forerunner: 2, 3, 5
Requiem: 1, 2, 6
Forerunner: 2, 3, 5
⠀
26ᵗʰ November 2026
⠀⠀⠀⠀⠀⠀Game⠀
⠀Locations⠀⠀⠀⠀⠀⠀⠀⠀⠀⠀⠀⠀⠀⠀⠀⠀⠀
⠀⠀⠀⠀⠀⠀⠀⠀Game⠀
⠀Locations⠀⠀⠀⠀⠀⠀⠀⠀⠀⠀⠀⠀⠀⠀⠀⠀
⠀⠀⠀⠀⠀⠀Reach
Tip of the Spear: 1, 2, 4
Long Night of Solace: 1, 2, 3
Exodus: 1, 2, 3
⠀Long Night of Solace: 1, 2, 3
Exodus: 1, 2, 3
⠀⠀⠀⠀⠀⠀Halo 3
The Storm: 2, 7, 16
Floodgate: 8, 10, 13
The Ark: 2, 6, 9
Floodgate: 8, 10, 13
The Ark: 2, 6, 9
Combat Evolved
The Silent Cartographer: 2, 4, 5
Assault on the Control Room: 2, 6, 7
343 Guilty Spark: 2, 6
⠀Assault on the Control Room: 2, 6, 7
343 Guilty Spark: 2, 6
⠀⠀⠀⠀⠀⠀ODST
ONI Alpha Site: 1
NMPD HQ: 1
Kikowani Station: 1, 2
NMPD HQ: 1
Kikowani Station: 1, 2
⠀⠀⠀⠀⠀⠀Halo 2
The Oracle: 1, 2, 3
Delta Halo: 2, 4, 5
Regret: 3, 4, 6
Sacred Icon: 2, 4, 6
Quarantine Zone: 1, 2, 3
⠀Delta Halo: 2, 4, 5
Regret: 3, 4, 6
Sacred Icon: 2, 4, 6
Quarantine Zone: 1, 2, 3
⠀⠀⠀⠀⠀⠀Halo 4
Infinity: 2, 3, 6
Reclaimer: 3, 4, 5
Shutdown: 1, 3, 4
Reclaimer: 3, 4, 5
Shutdown: 1, 3, 4
Halo: Reach
➟ Winter Contingency
Rally Point: Alpha
Rally Point: Bravo
Golden Moa 1
Inside the fireplace of the house on the cliff.
“Noble Six move into the house. Go in quiet, I’m right behind you.” Carter
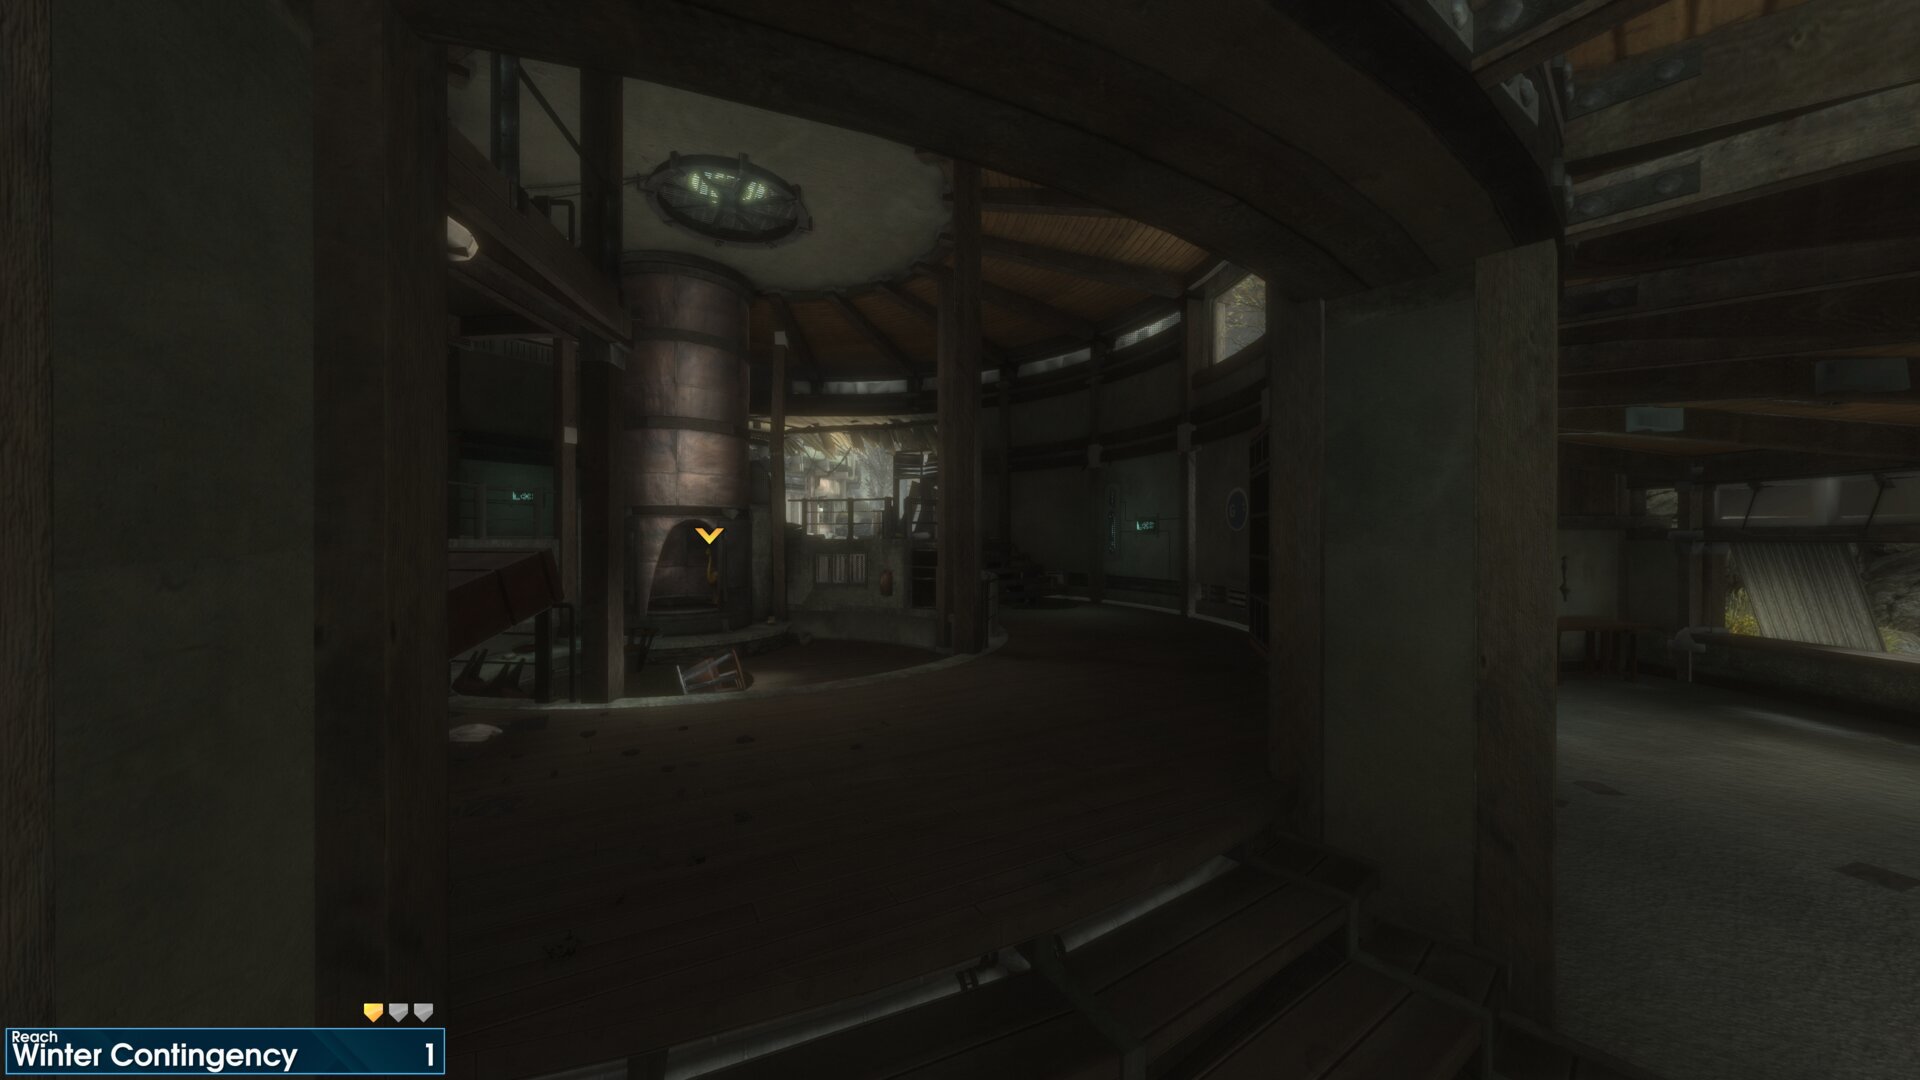
Inside the fireplace of the house on the cliff.
“Noble Six move into the house. Go in quiet, I’m right behind you.” Carter
Golden Moa 2
Under the stairs to the basement, just after Jun says “Boss, I see movement! Outside your structure!”.
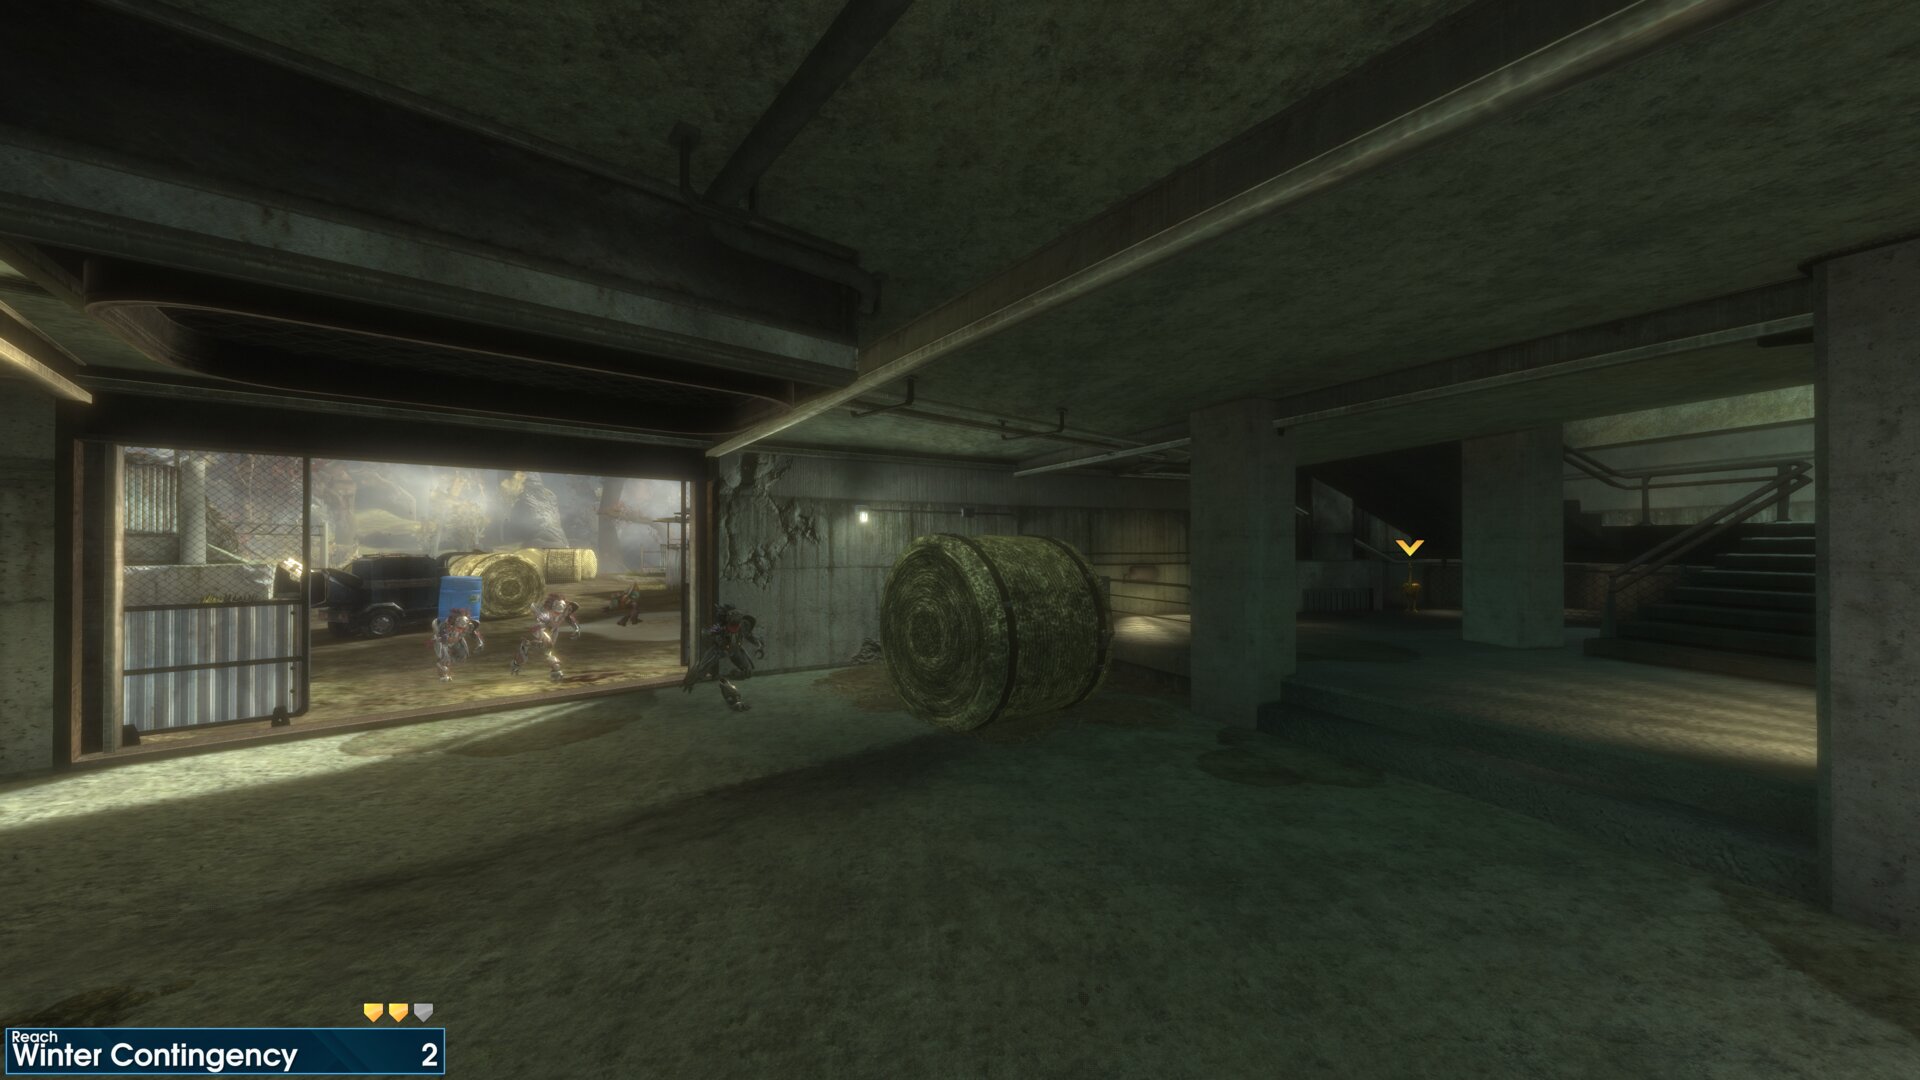
Under the stairs to the basement, just after Jun says “Boss, I see movement! Outside your structure!”.
Golden Moa 3
Inside the Hay Shed, just beyond the first waterfall, where Kat & Emile get an airlift to the relay outpost.
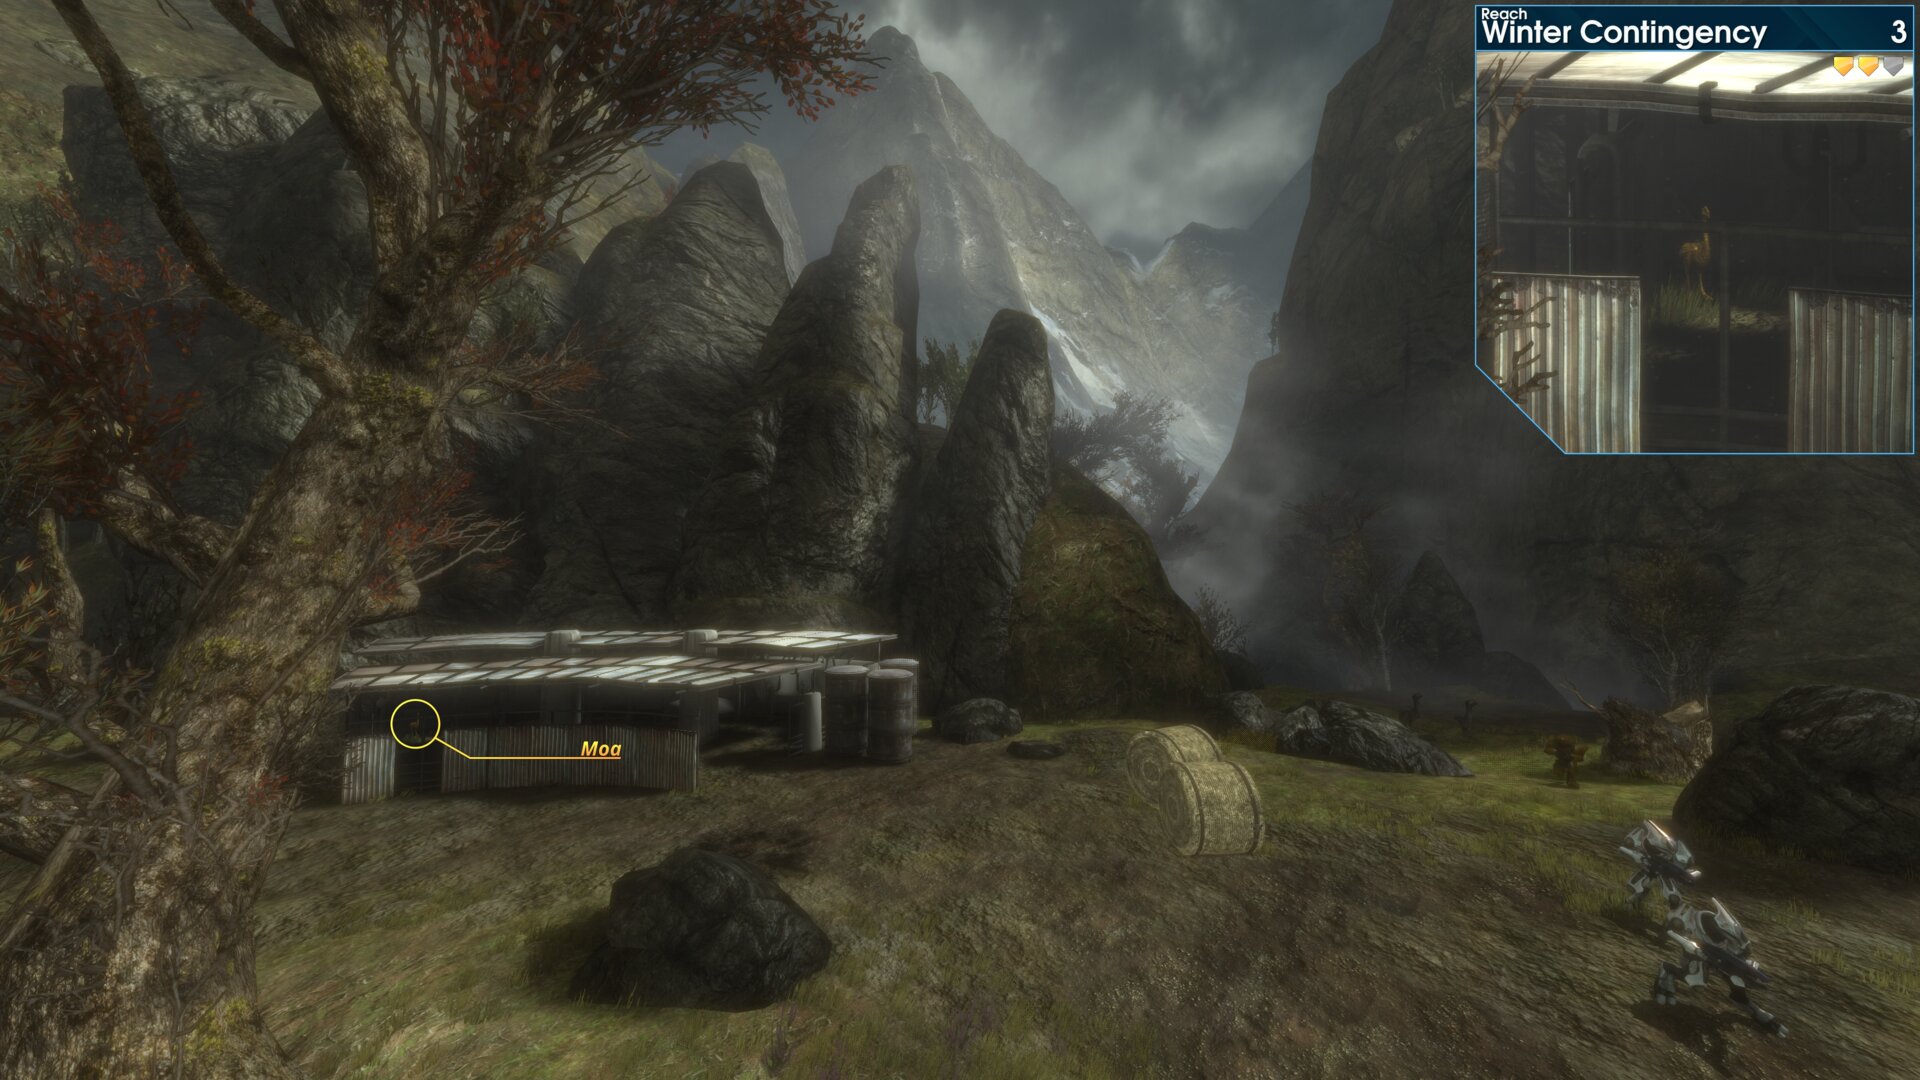
Inside the Hay Shed, just beyond the first waterfall, where Kat & Emile get an airlift to the relay outpost.
Rally Point: Bravo
Golden Moa 4
After crossing the second river, head south east to the
broken bridge. The Golden Moa is on top of the second
silo beside the bridge.
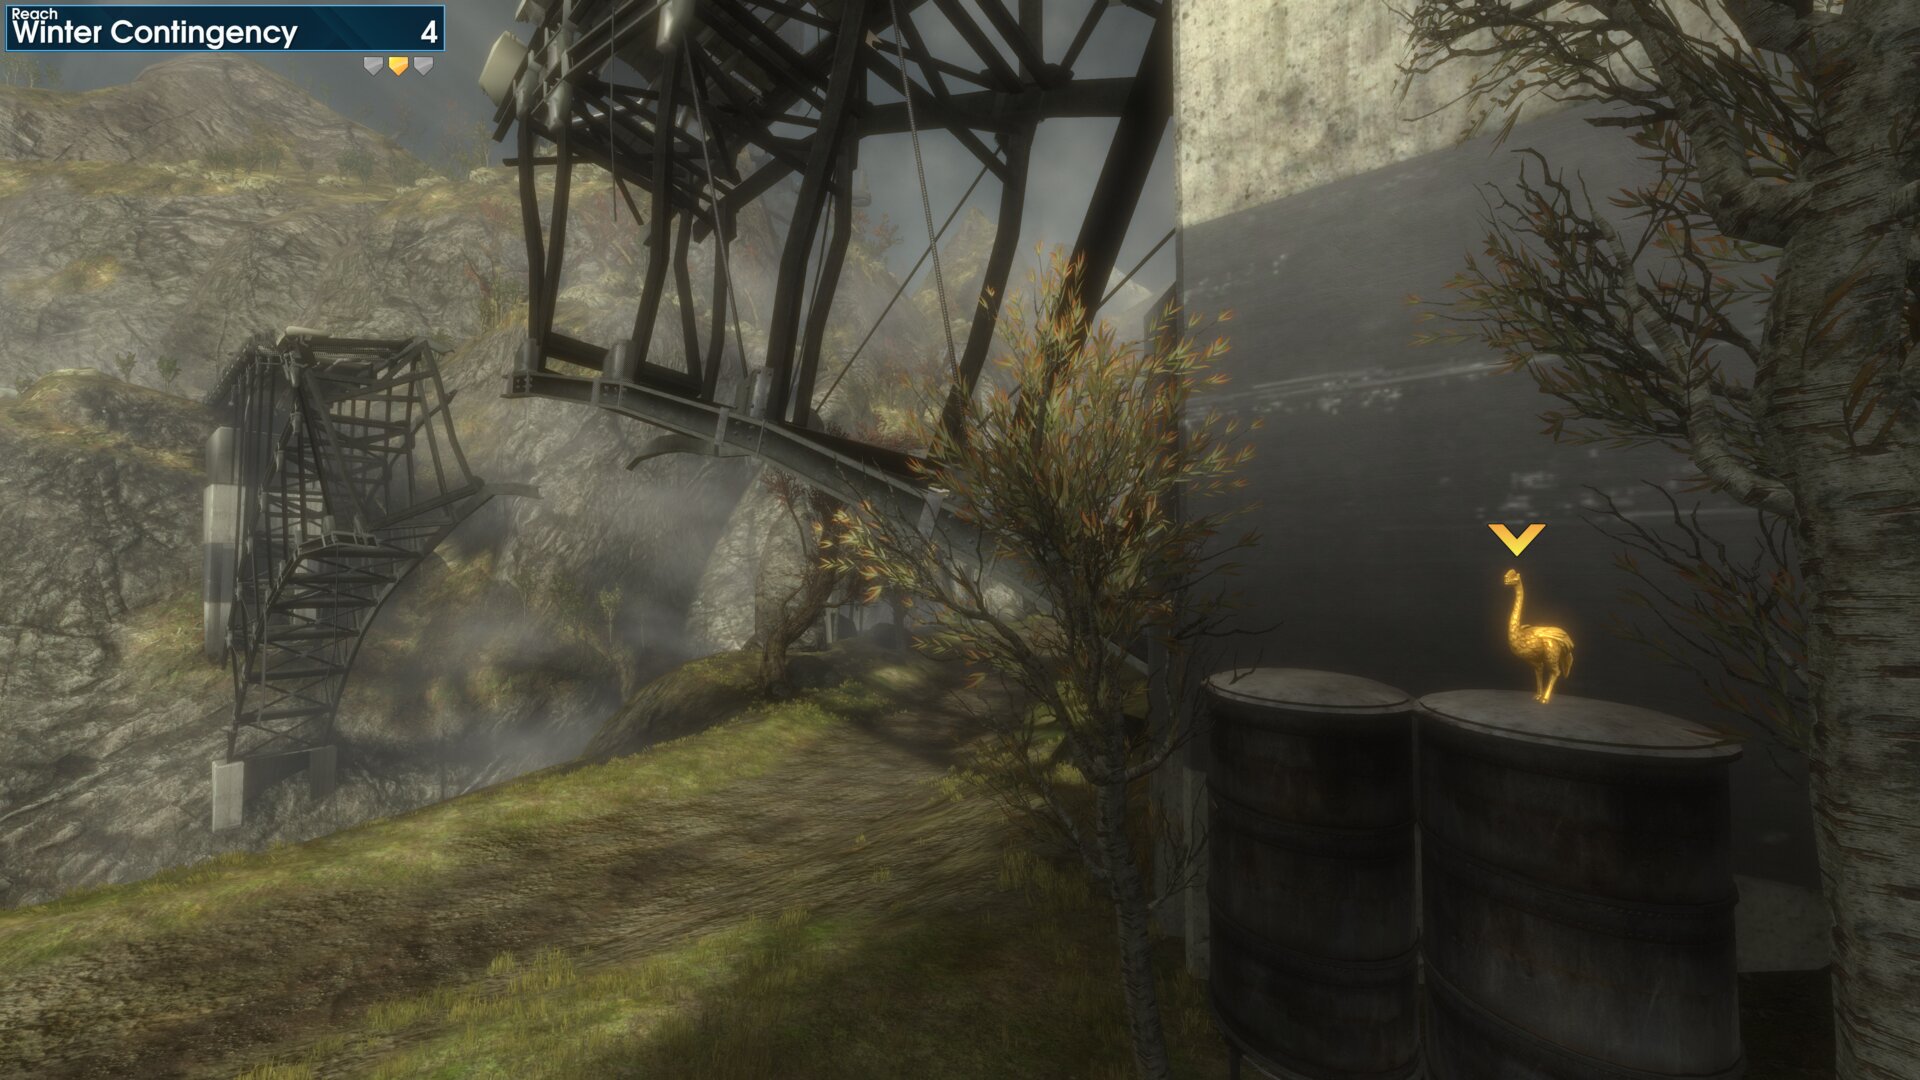
After crossing the second river, head south east to the
broken bridge. The Golden Moa is on top of the second
silo beside the bridge.
➟ ONI: Sword Base
Note: All Moa’s can be reached from rally point Charlie.
Rally Point: AlphaGolden Moa 1
At the south east end of the upper walkway, in Sword
Base’s courtyard.
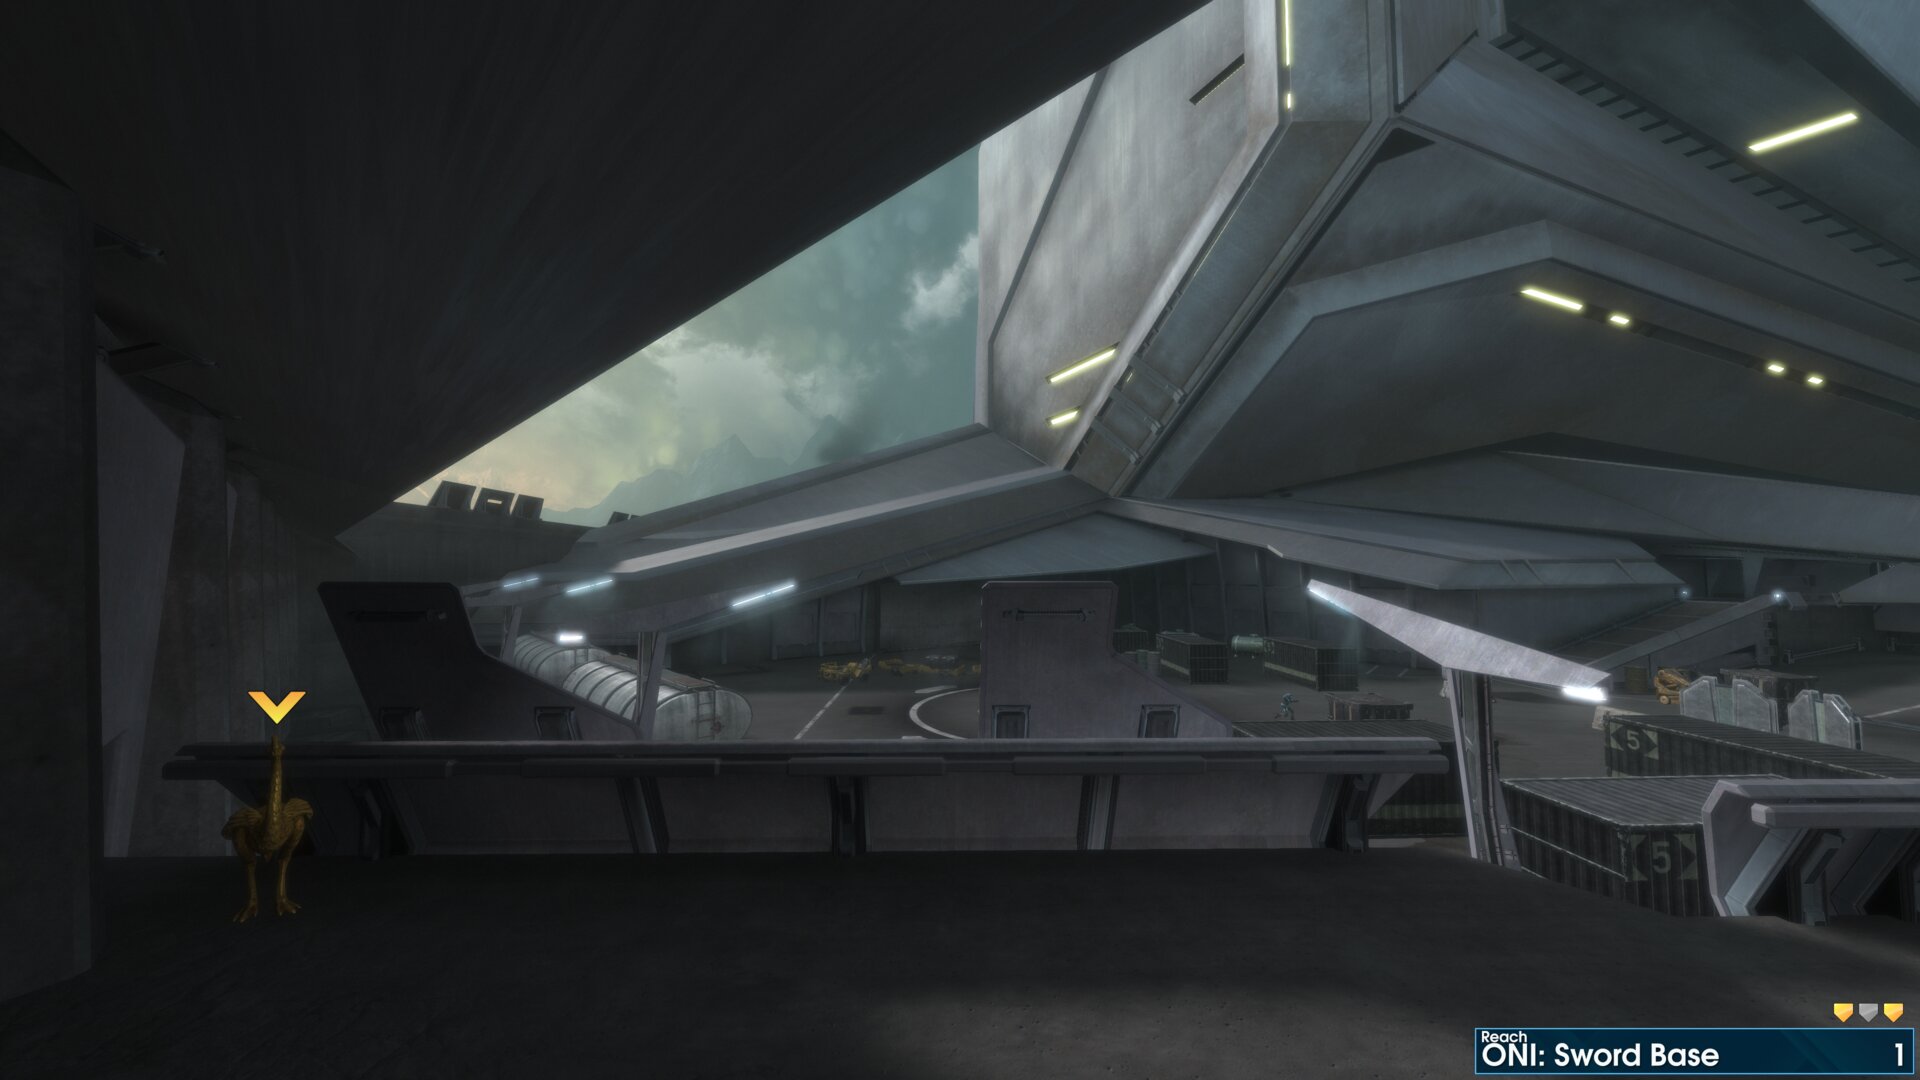
At the south east end of the upper walkway, in Sword
Base’s courtyard.
Rally Point: Bravo
Golden Moa 2
On the way to Airview Base, Anti-Air battery. The Golden Moa is on a rock next to the dirt road, as it reaches the cliff edge.
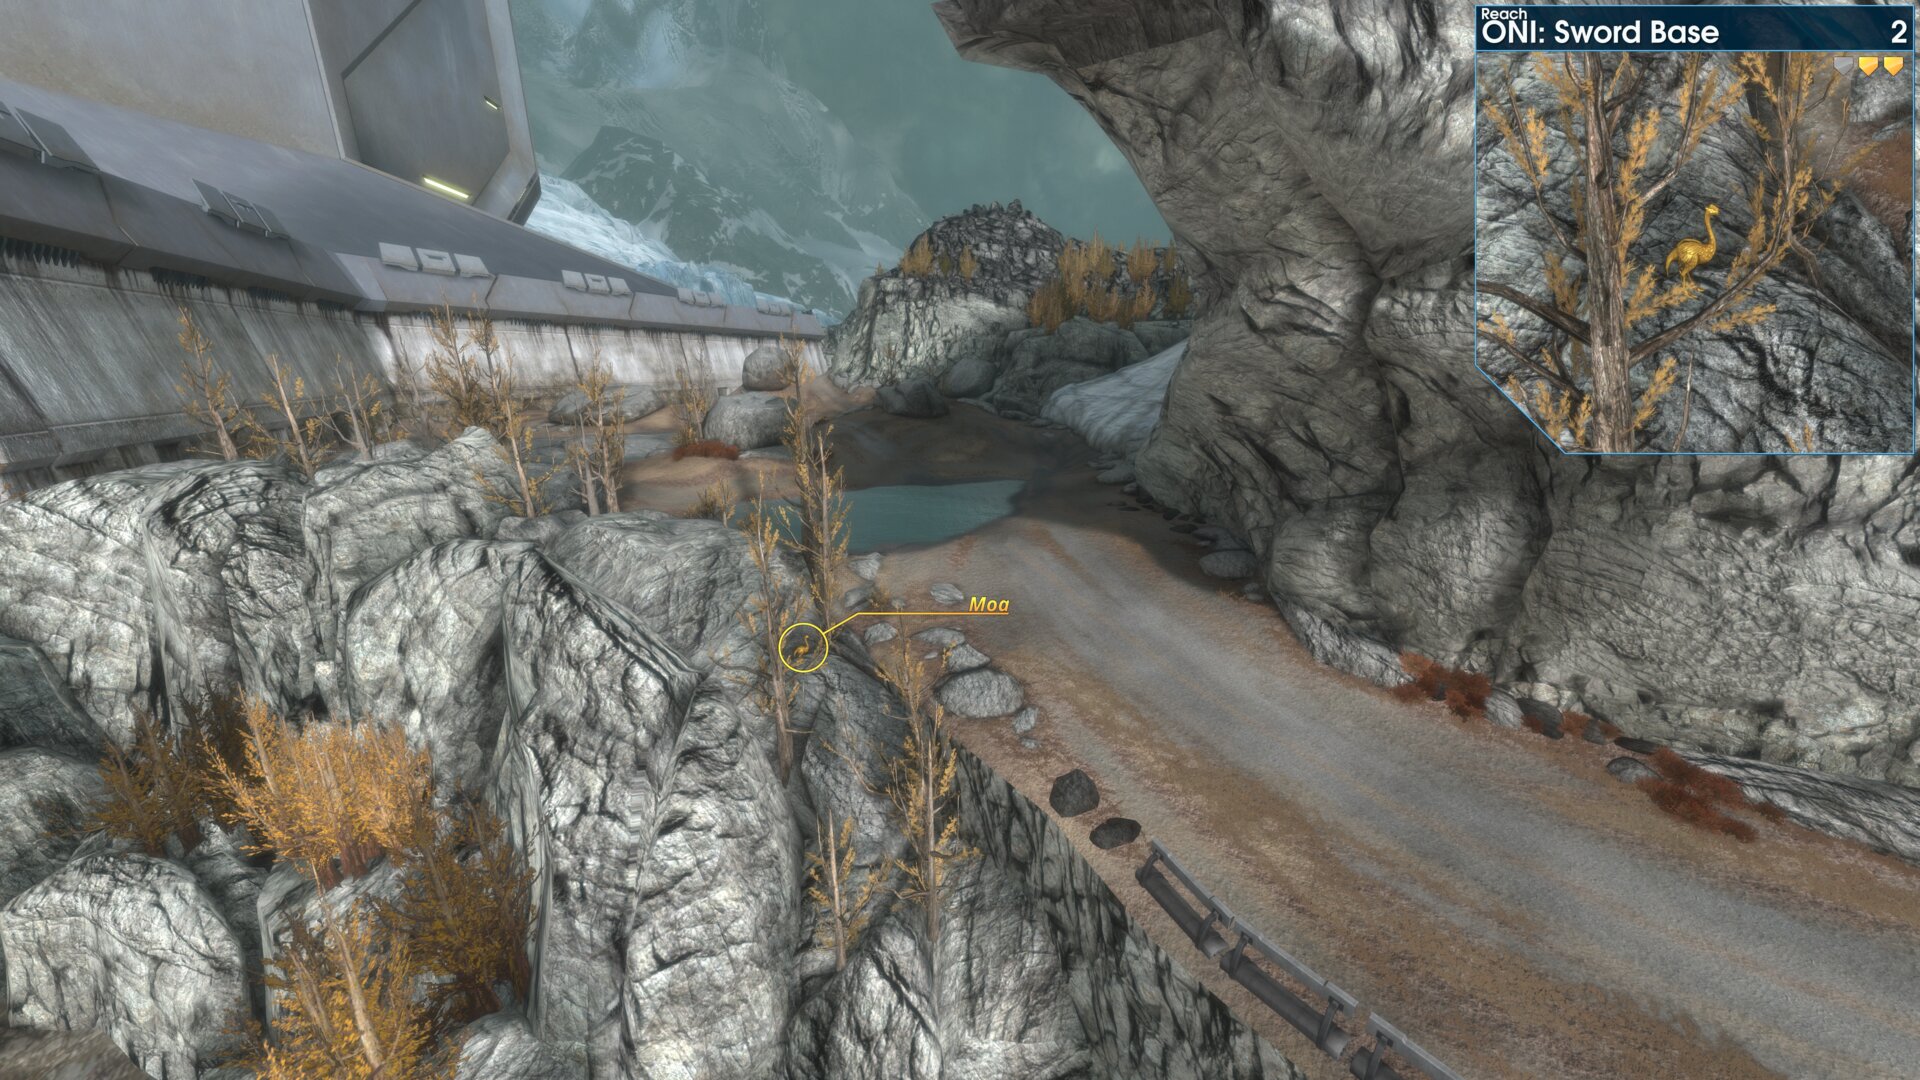
On the way to Airview Base, Anti-Air battery. The Golden Moa is on a rock next to the dirt road, as it reaches the cliff edge.
Golden Moa 3
On the way to Farragut Station, Comms array. On the side of the cliff to the west, as you reach the sea.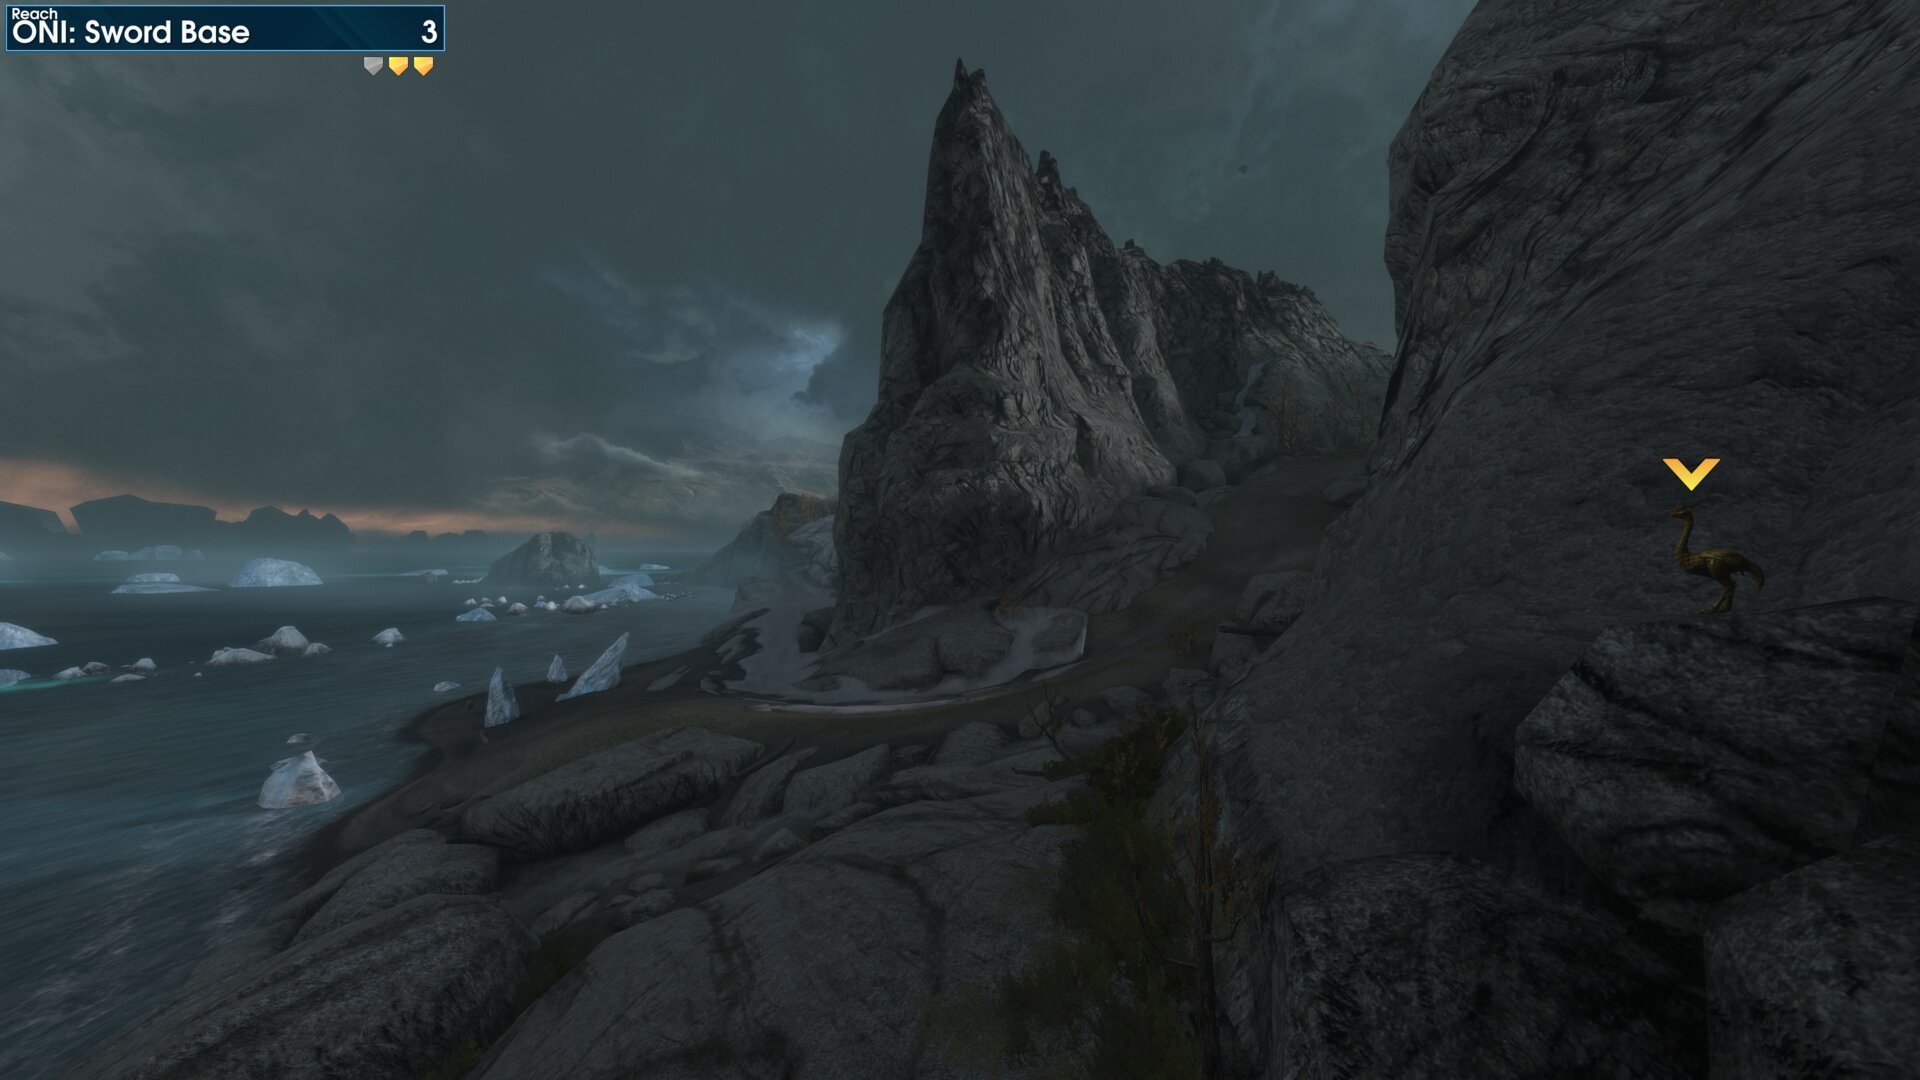
On the way to Farragut Station, Comms array. On the side of the cliff to the west, as you reach the sea.
Rally Point: Charlie
Golden Moa 4
On the first floor, in the Operations room, north side of
Sword Base’s Atrium.
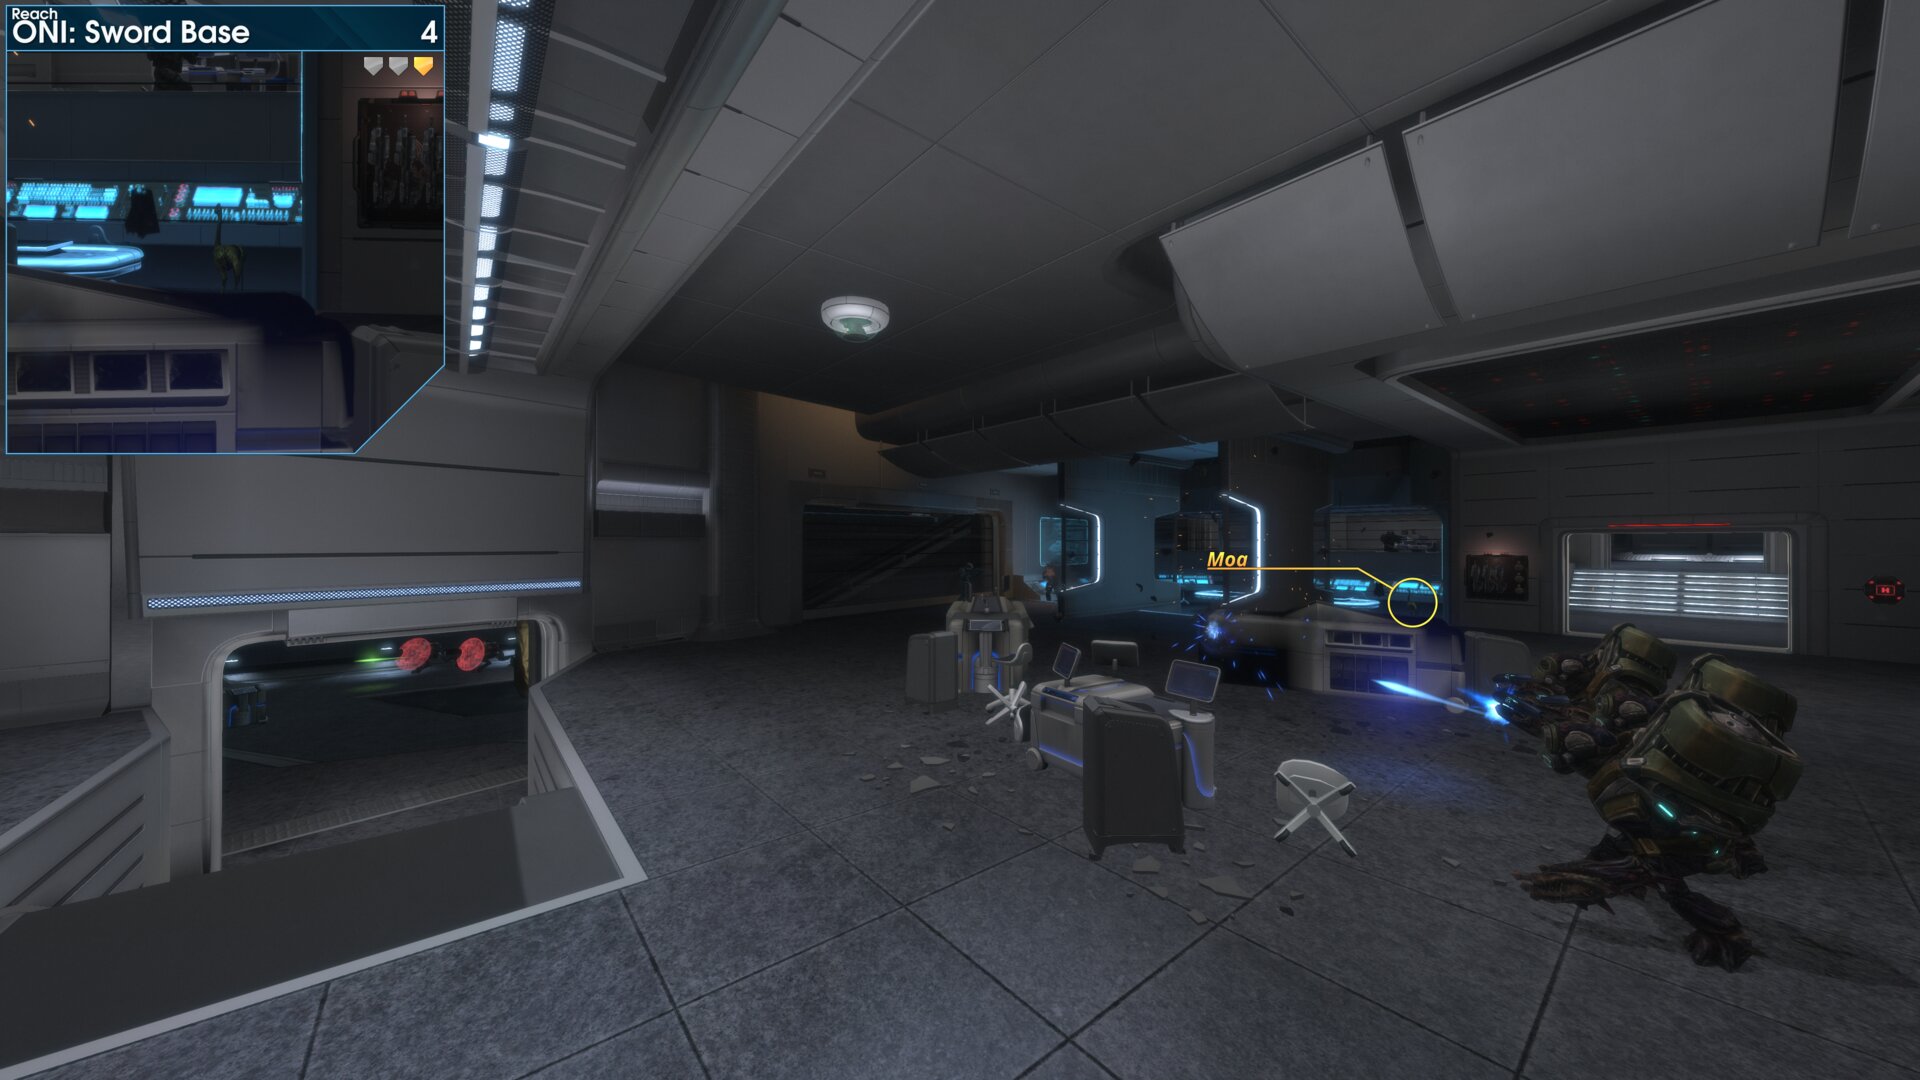
On the first floor, in the Operations room, north side of
Sword Base’s Atrium.
➟ Nightfall
Note: All Golden Moa’s can be reached from rally point Charlie, although this requires a lot of
⠀⠀ ⠀backtracking.
Rally Point: Alpha
Rally Point: Bravo
Rally Point: Charlie
⠀⠀ ⠀backtracking.
Rally Point: Alpha
Golden Moa 1
Take the high ground at the first group of Covenant, the
Golden Moa is behind the tree that is south west of the
Camouflage pick-up.
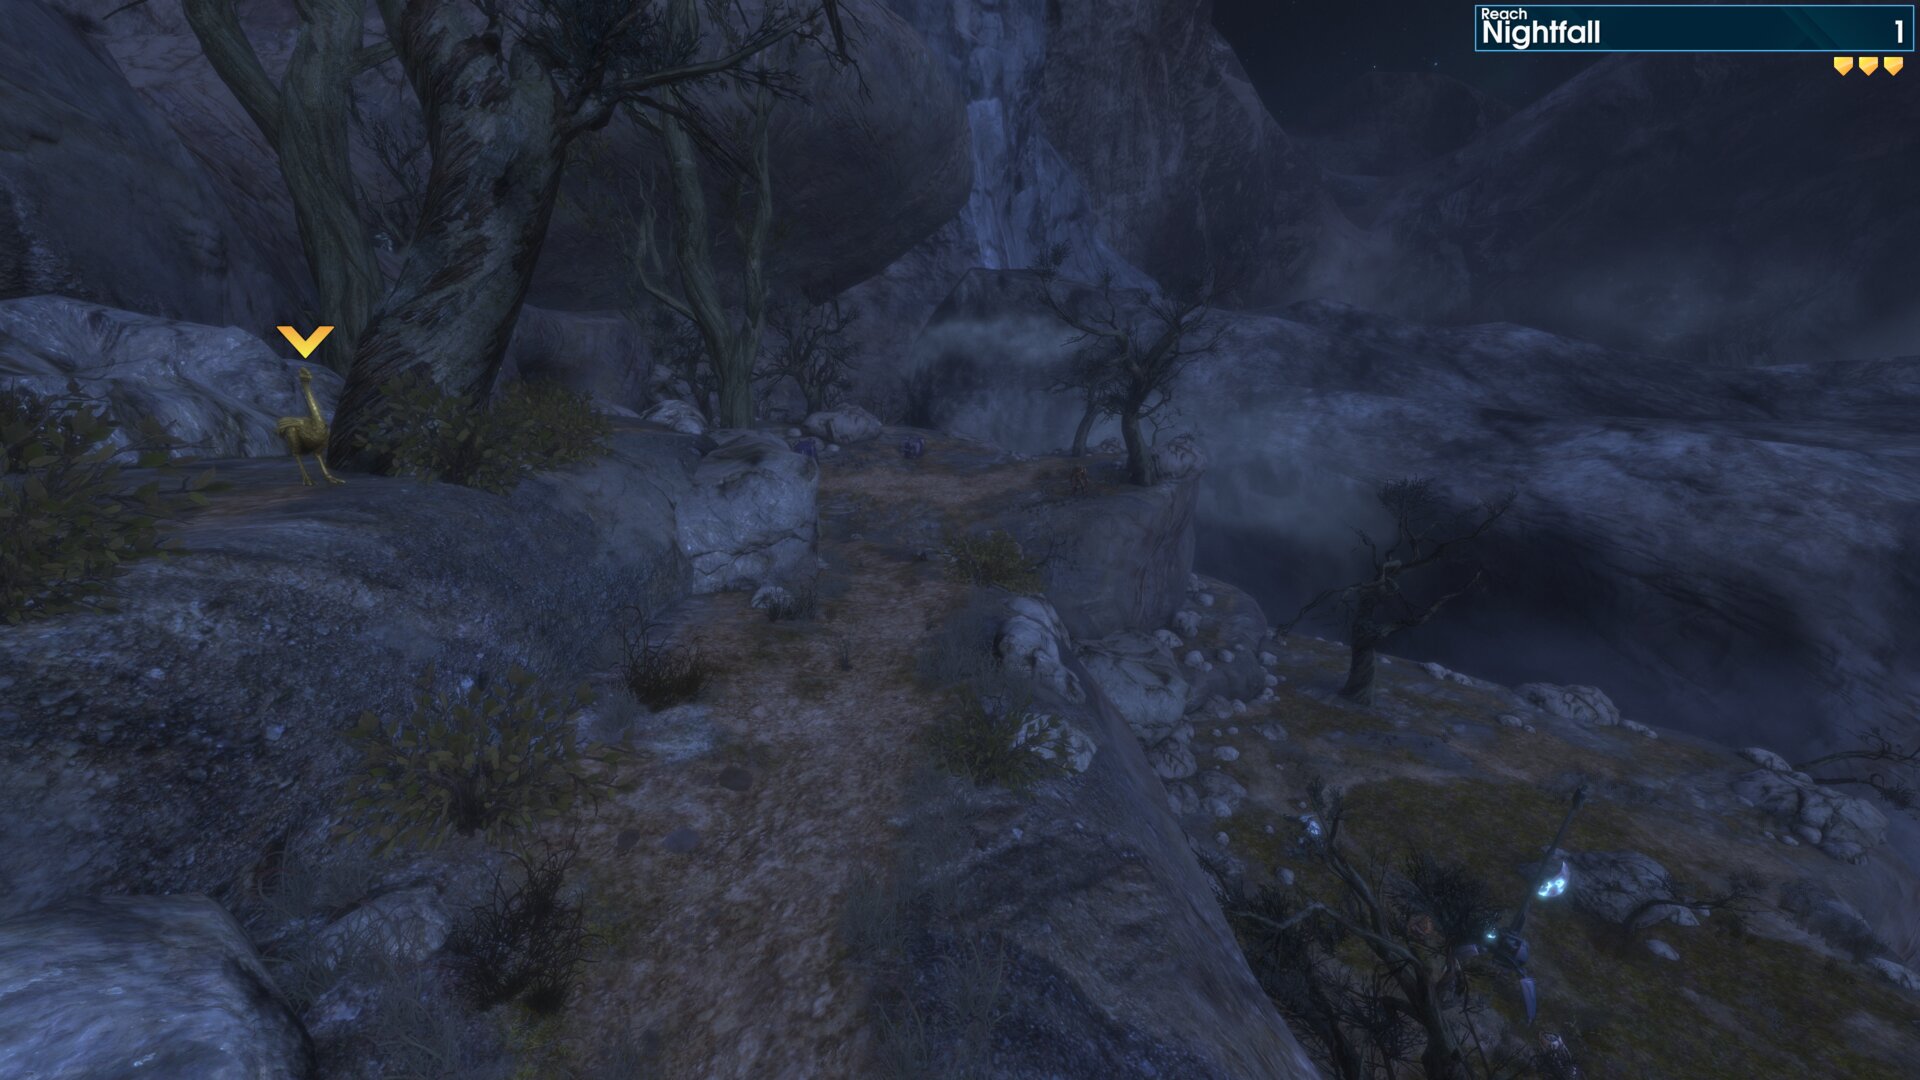
Take the high ground at the first group of Covenant, the
Golden Moa is behind the tree that is south west of the
Camouflage pick-up.
Rally Point: Bravo
Golden Moa 2
On top of a rock by the cliff walls, at the western end of the area with the 2 Guta.
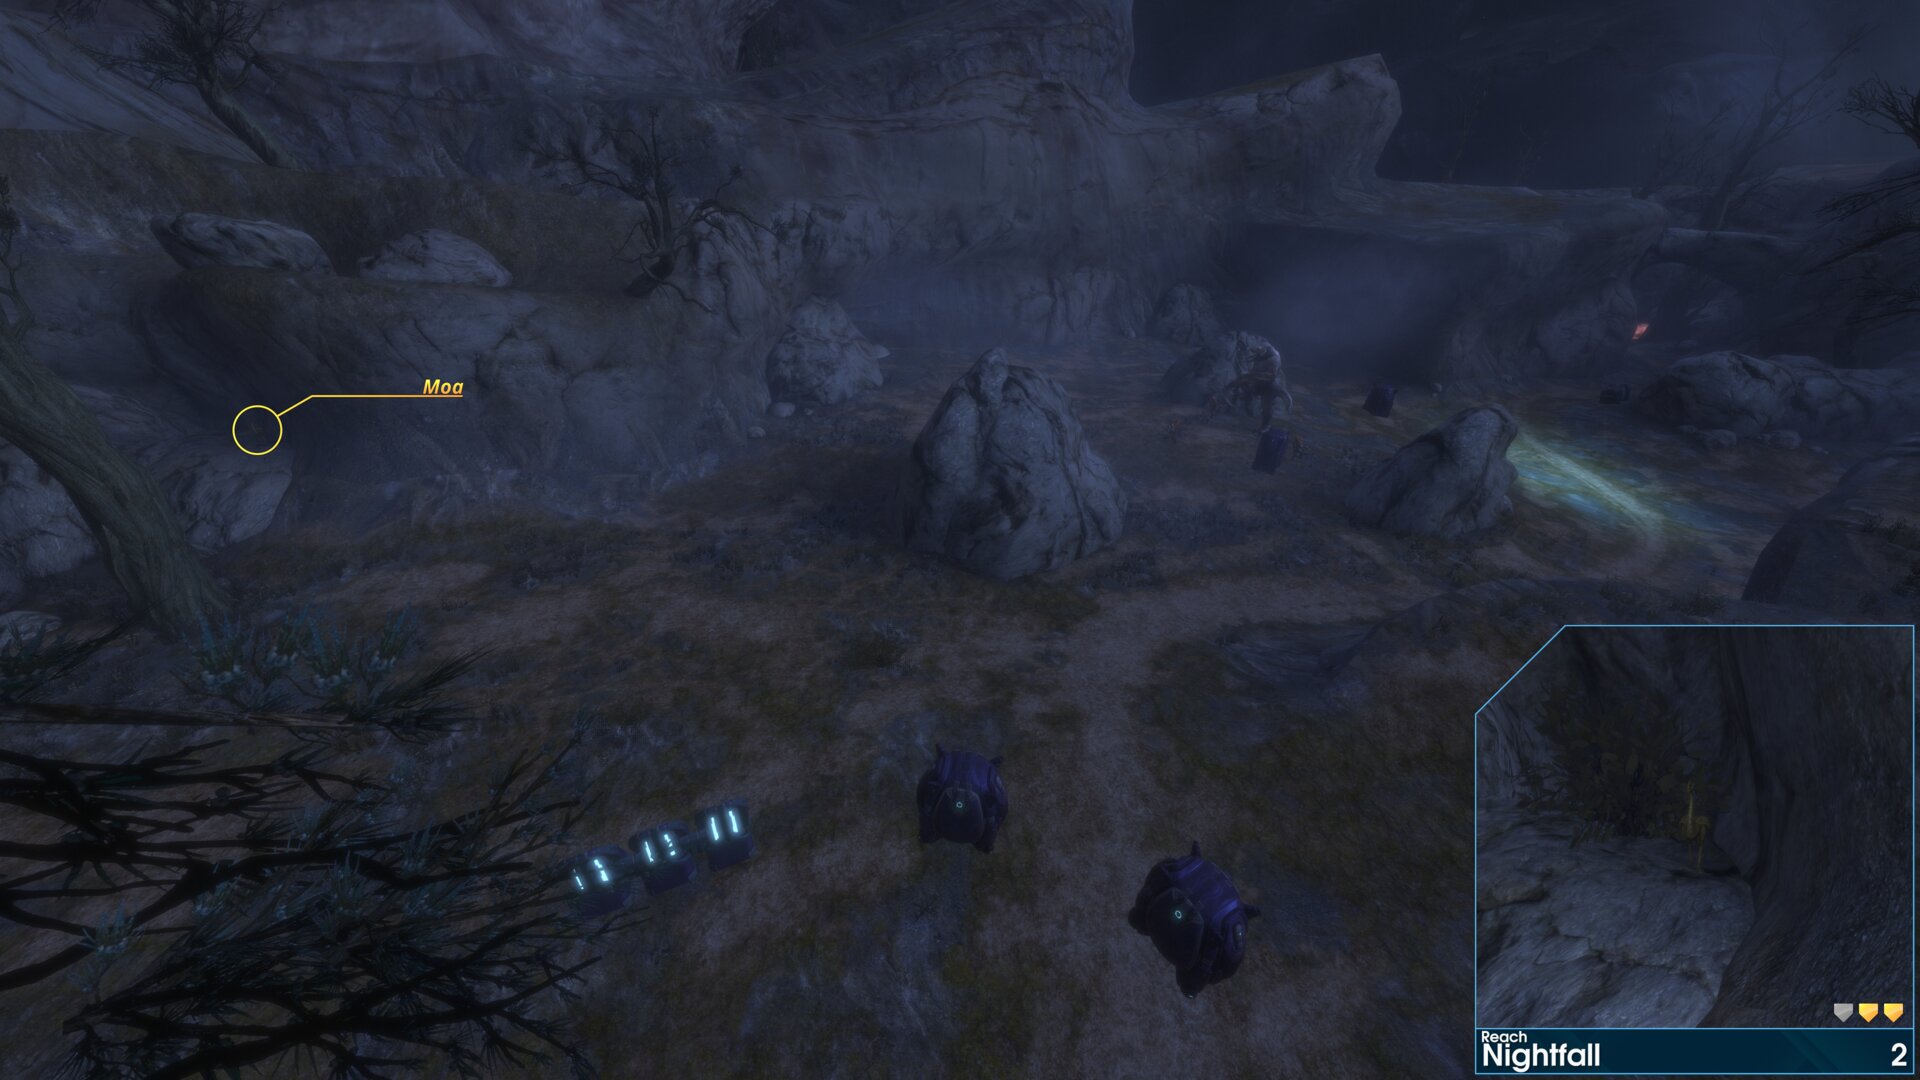
On top of a rock by the cliff walls, at the western end of the area with the 2 Guta.
Golden Moa 3
On top of the buoy, that’s just beyond the middle pump, at the Waterfront Pump Station.
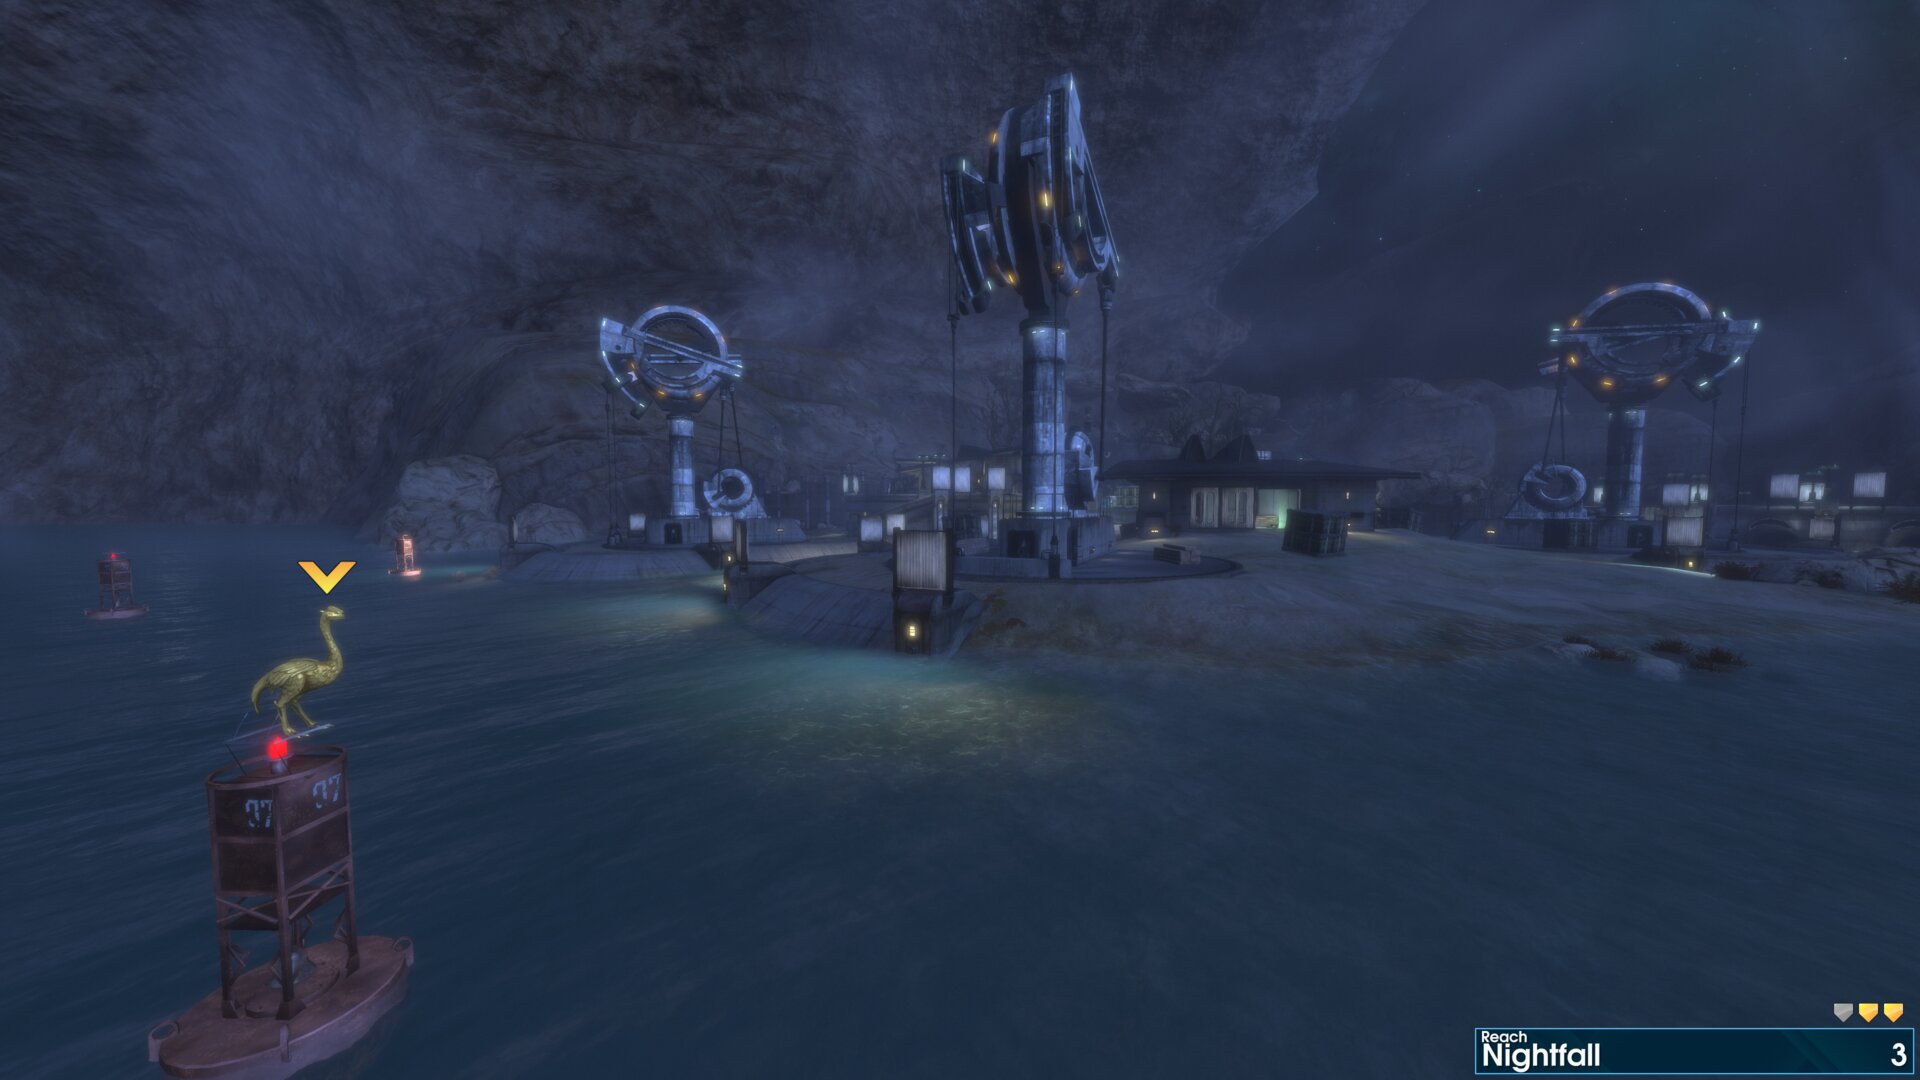
On top of the buoy, that’s just beyond the middle pump, at the Waterfront Pump Station.
Rally Point: Charlie
Golden Moa 4
In the shower just past the lockers, west side of the
spillway, at the Hydroelectric Plant.
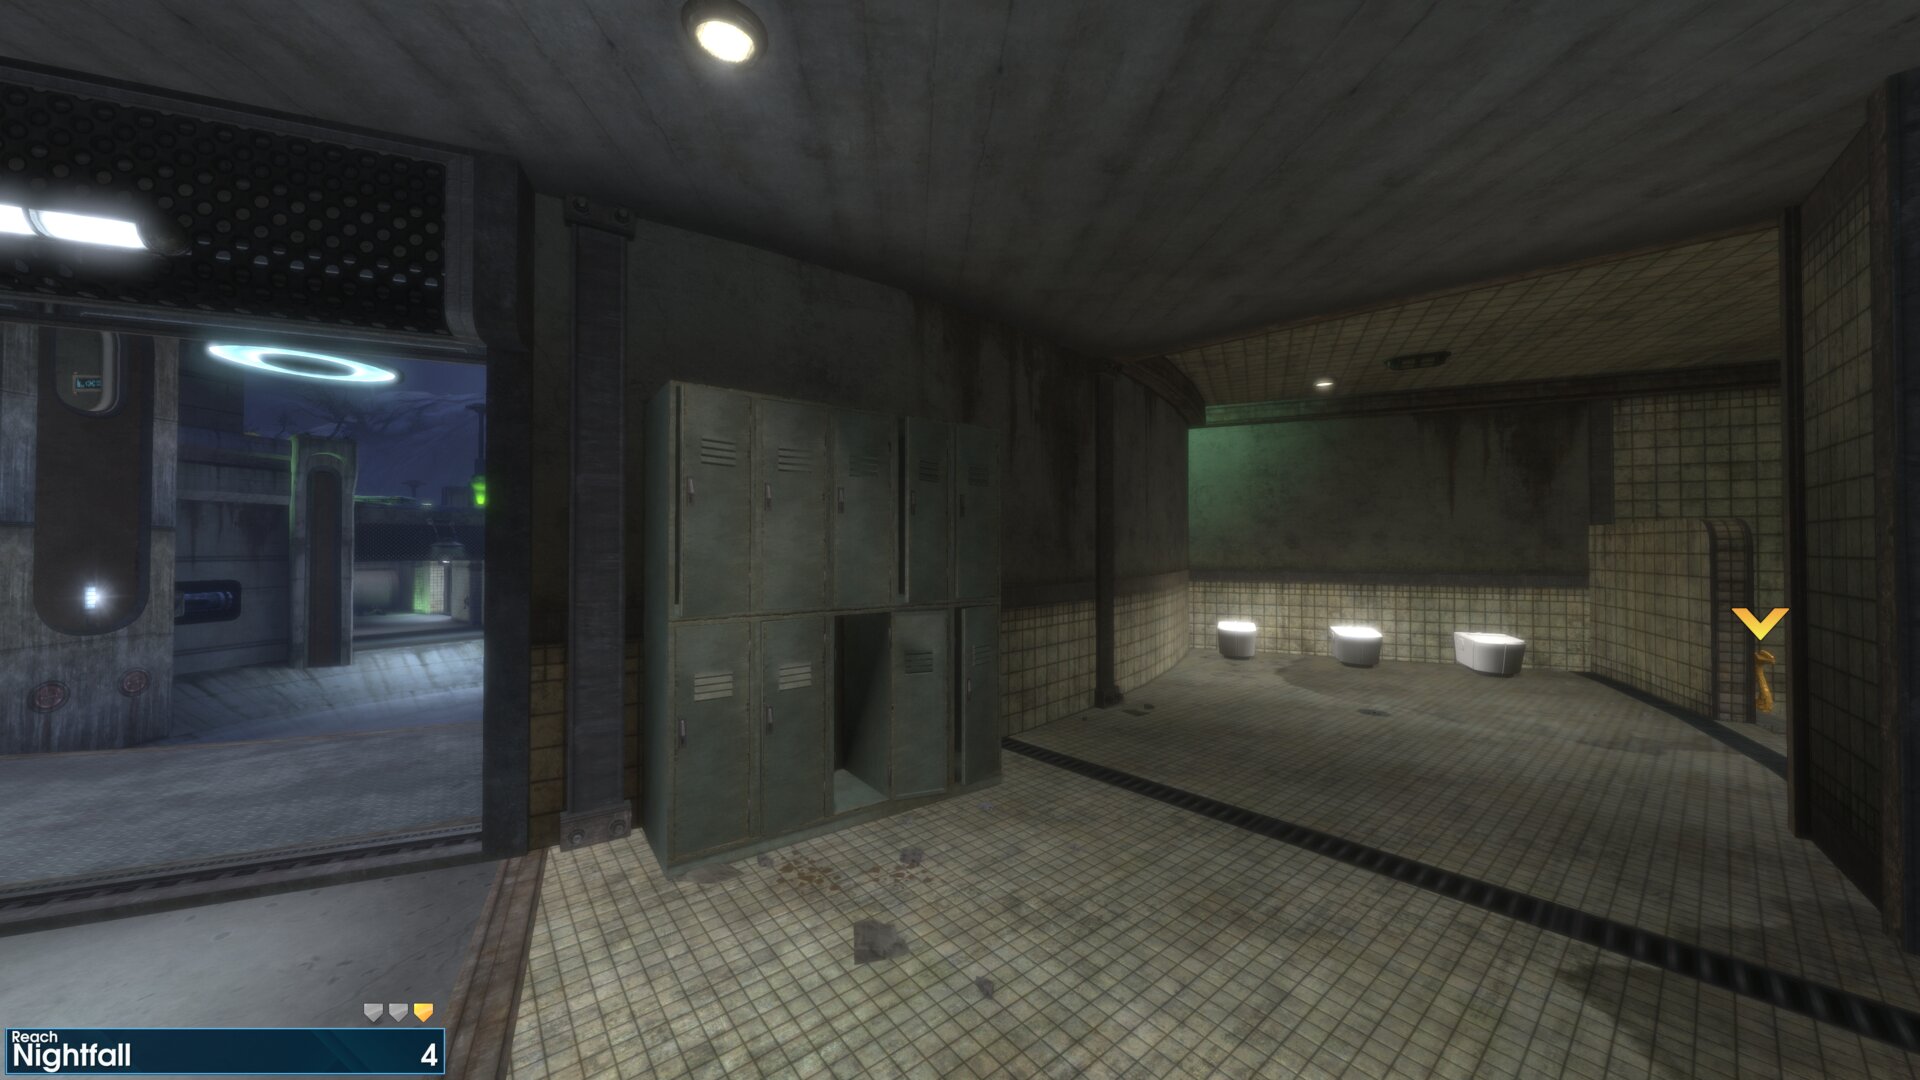
In the shower just past the lockers, west side of the
spillway, at the Hydroelectric Plant.
➟ Tip of the Spear
Rally Point: Alpha
Rally Point: Bravo
Golden Moa 1
The Golden Moa is between 2 trees on the cliff edge, south east of the 1st Covenant Anti-Aircraft Cannon.
The Golden Moa is between 2 trees on the cliff edge, south east of the 1st Covenant Anti-Aircraft Cannon.
Golden Moa 2
After destroying the 1st Anti-Aircraft Cannon and crossing the bridge, the Golden Moa will be on a rock, in the north face of the canyon walls. This is just after rounding the corner, at the start of the broken road.
After destroying the 1st Anti-Aircraft Cannon and crossing the bridge, the Golden Moa will be on a rock, in the north face of the canyon walls. This is just after rounding the corner, at the start of the broken road.
Rally Point: Bravo
Golden Moa 3
On the BXR Mining Facilities 1st building, the Golden Moa is on top of the awning, above the facilities door (not to be confused with the facilities hole on the 2nd building).
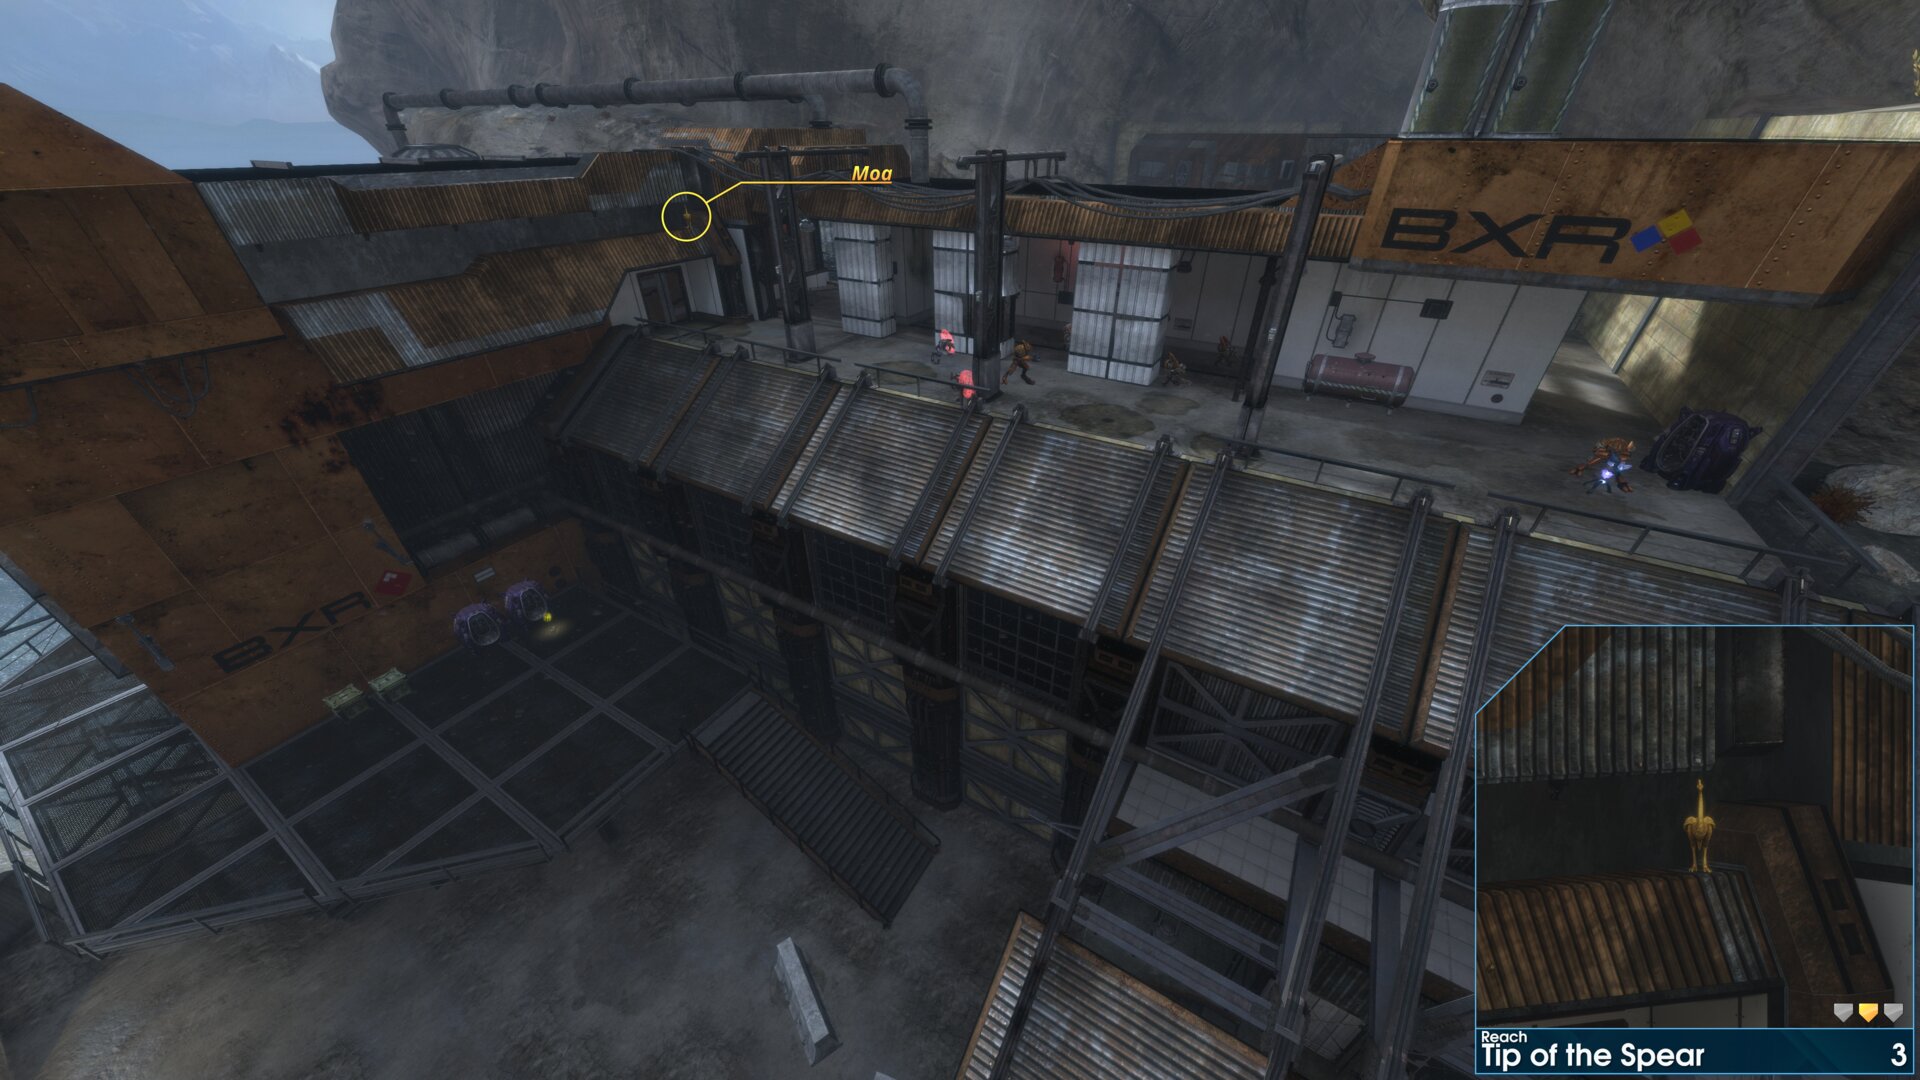
On the BXR Mining Facilities 1st building, the Golden Moa is on top of the awning, above the facilities door (not to be confused with the facilities hole on the 2nd building).
Golden Moa 4
Beneath the walkway that leads up into the BXR Mining Facility, the Golden Moa is by the south east wall overlooking the dam.
Beneath the walkway that leads up into the BXR Mining Facility, the Golden Moa is by the south east wall overlooking the dam.
Golden Moa 5
South of the 2nd Anti-Aircraft Cannon, the Golden Moa is on top of the concrete footing at the north east end of the broken bridge.
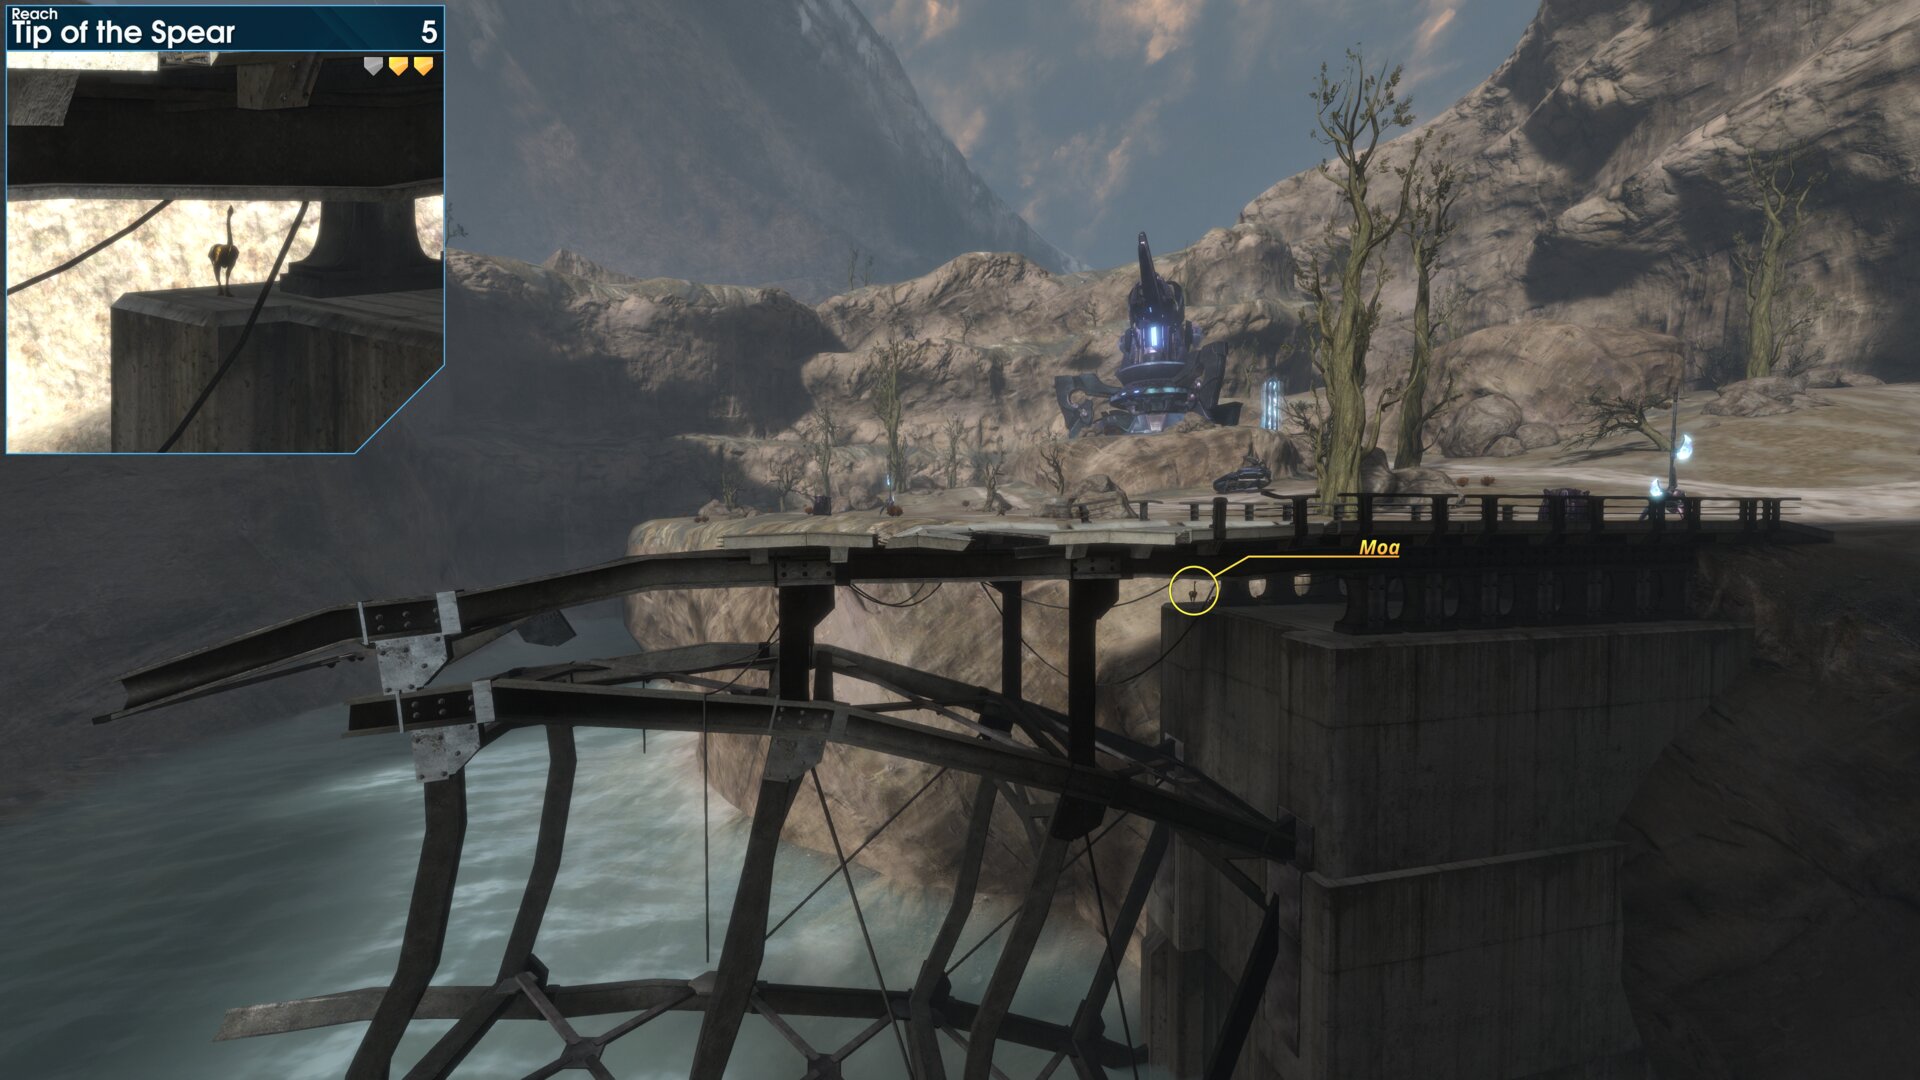
South of the 2nd Anti-Aircraft Cannon, the Golden Moa is on top of the concrete footing at the north east end of the broken bridge.
➟ Long Night of Solace
Rally Point: Alpha
Golden Moa 1
Beside a group of jagged rocks, at the waters edge, as you reach the path up to the Sabre Launch Facility.
Beside a group of jagged rocks, at the waters edge, as you reach the path up to the Sabre Launch Facility.
Golden Moa 2
On top of the outer building, that overlooks the dock. This is just below the hole in the Sabre Launch Facility.
On rare occasions this Golden Moa could be
knocked over or even destroyed by debris from the
Seraph fighter crashing into the Launch Facility.
On top of the outer building, that overlooks the dock. This is just below the hole in the Sabre Launch Facility.
On rare occasions this Golden Moa could beknocked over or even destroyed by debris from the
Seraph fighter crashing into the Launch Facility.
Golden Moa 3
On top the the western structure by the Sabre, the Golden Moa is beside the light tower on it’s roof.
On top the the western structure by the Sabre, the Golden Moa is beside the light tower on it’s roof.
➟ Exodus
Rally Point: Alpha
Rally Point: Bravo
Golden Moa 1
After passing though the automatic doors, into the Civic Center, the Golden Moa is in the garden bed on the north side of the stairs.
After passing though the automatic doors, into the Civic Center, the Golden Moa is in the garden bed on the north side of the stairs.
Golden Moa 2
The Golden Moa is beside the elevators in the Housing building lobby, just before the suicide Grunts.
The Golden Moa is beside the elevators in the Housing building lobby, just before the suicide Grunts.
Golden Moa 3
Inside the first maintenance storage room that is below the lobby.
Inside the first maintenance storage room that is below the lobby.
Golden Moa 4
After passing through the Housing building/maintenance, the Golden Moa is in the garden bed above the stairs to the eastern World Cuisine stall.
(Just before you reach the 1st Brute attacking civilians)
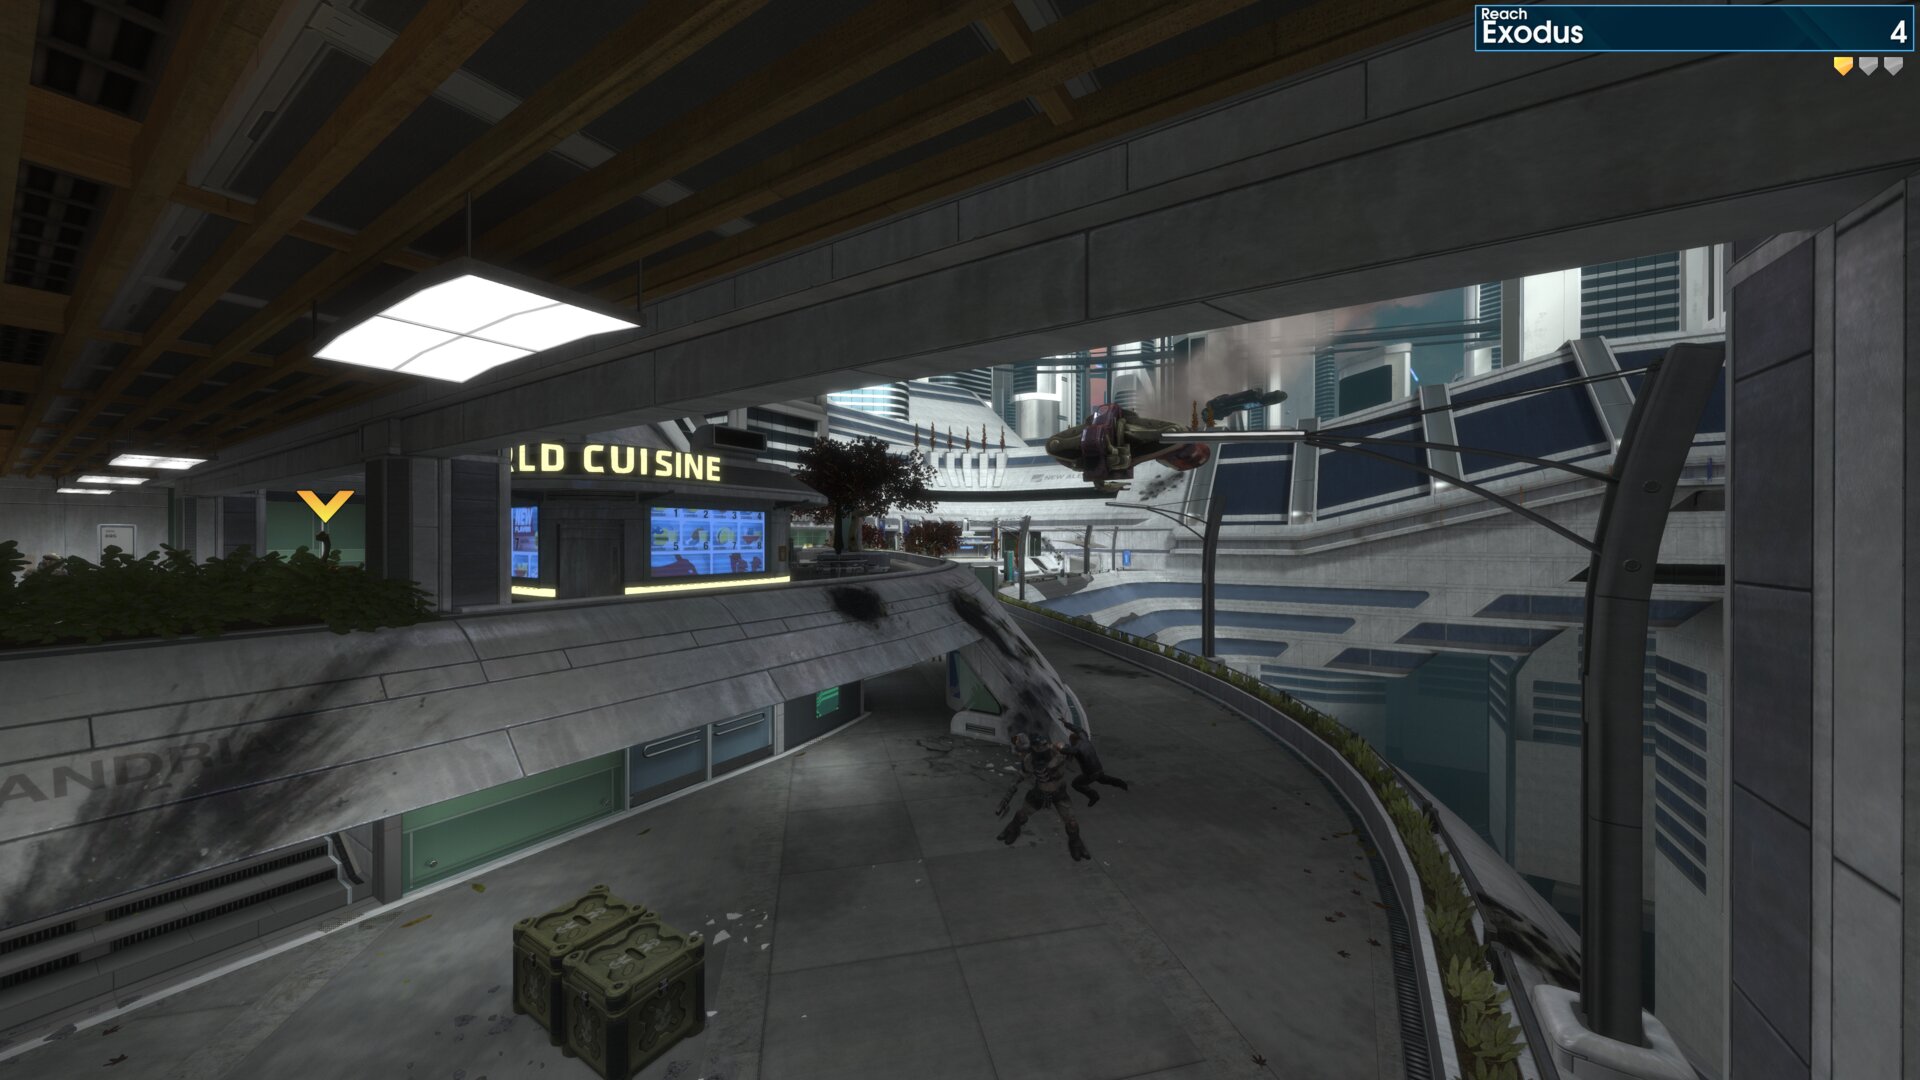
After passing through the Housing building/maintenance, the Golden Moa is in the garden bed above the stairs to the eastern World Cuisine stall.
(Just before you reach the 1st Brute attacking civilians)
Rally Point: Bravo
Golden Moa 5
The Golden Moa is beside the elevator, after taking it
down to the Cargo Port, Traxus Tower.
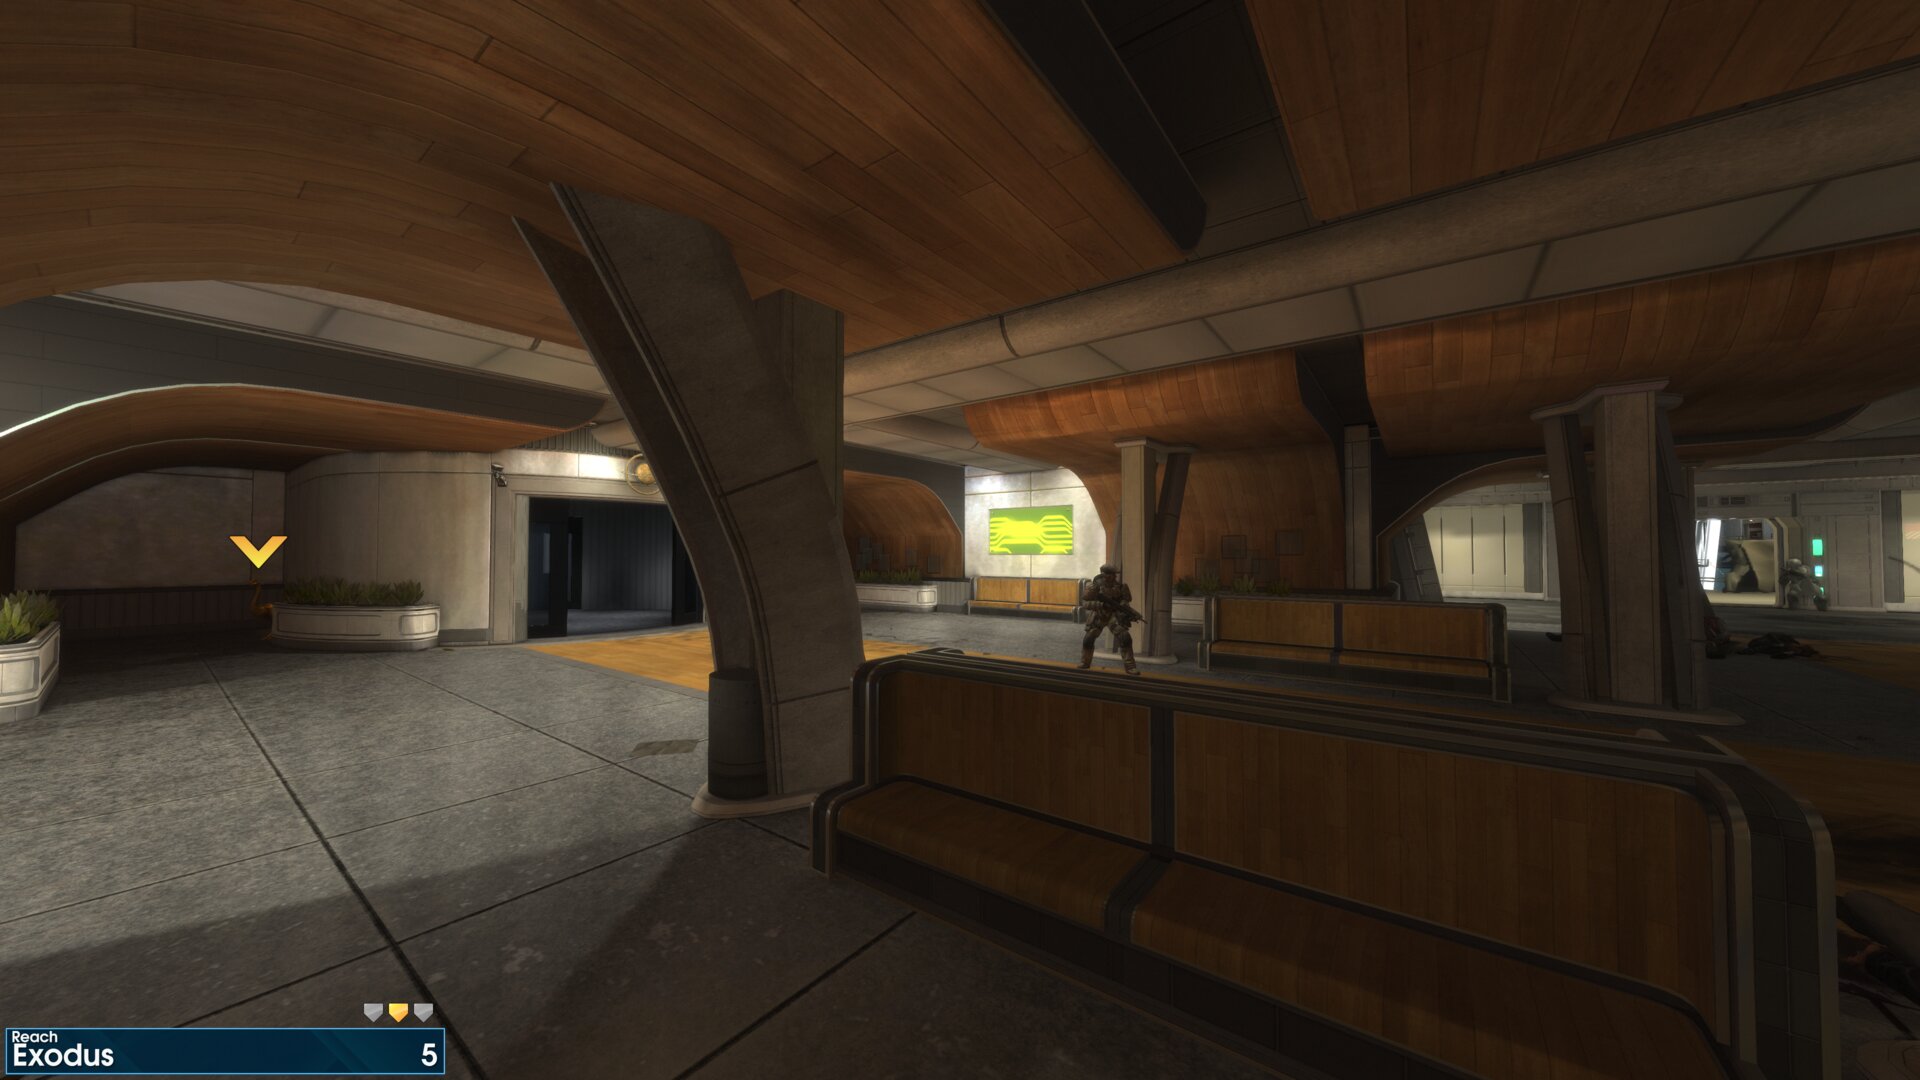
The Golden Moa is beside the elevator, after taking it
down to the Cargo Port, Traxus Tower.
➟ New Alexandria
Golden Moa 1
On top of a steel beam, that’s located beneath the stairs to the elevators, at SinoViet Industries/Center.
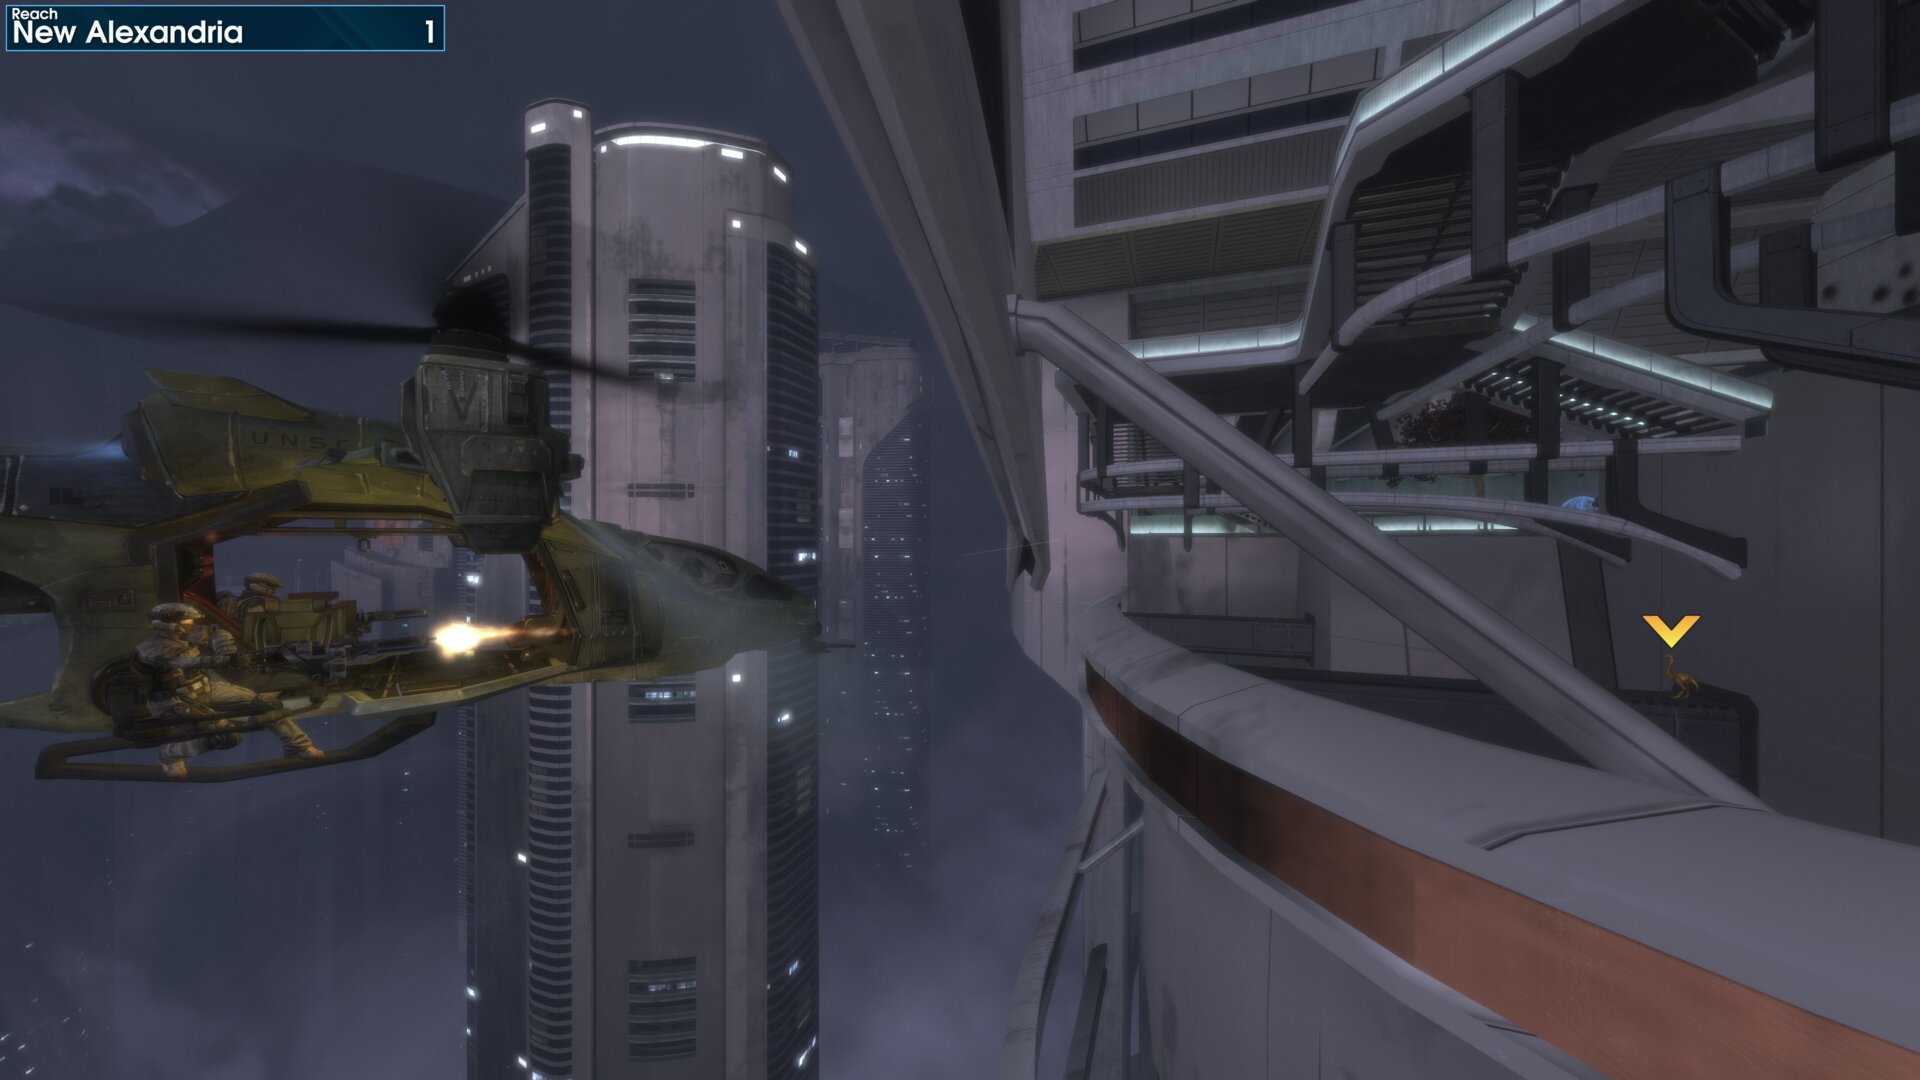
On top of a steel beam, that’s located beneath the stairs to the elevators, at SinoViet Industries/Center.
Golden Moa 2
On the balcony of the Hospital’s small tower, above where the Skybridge extends from.
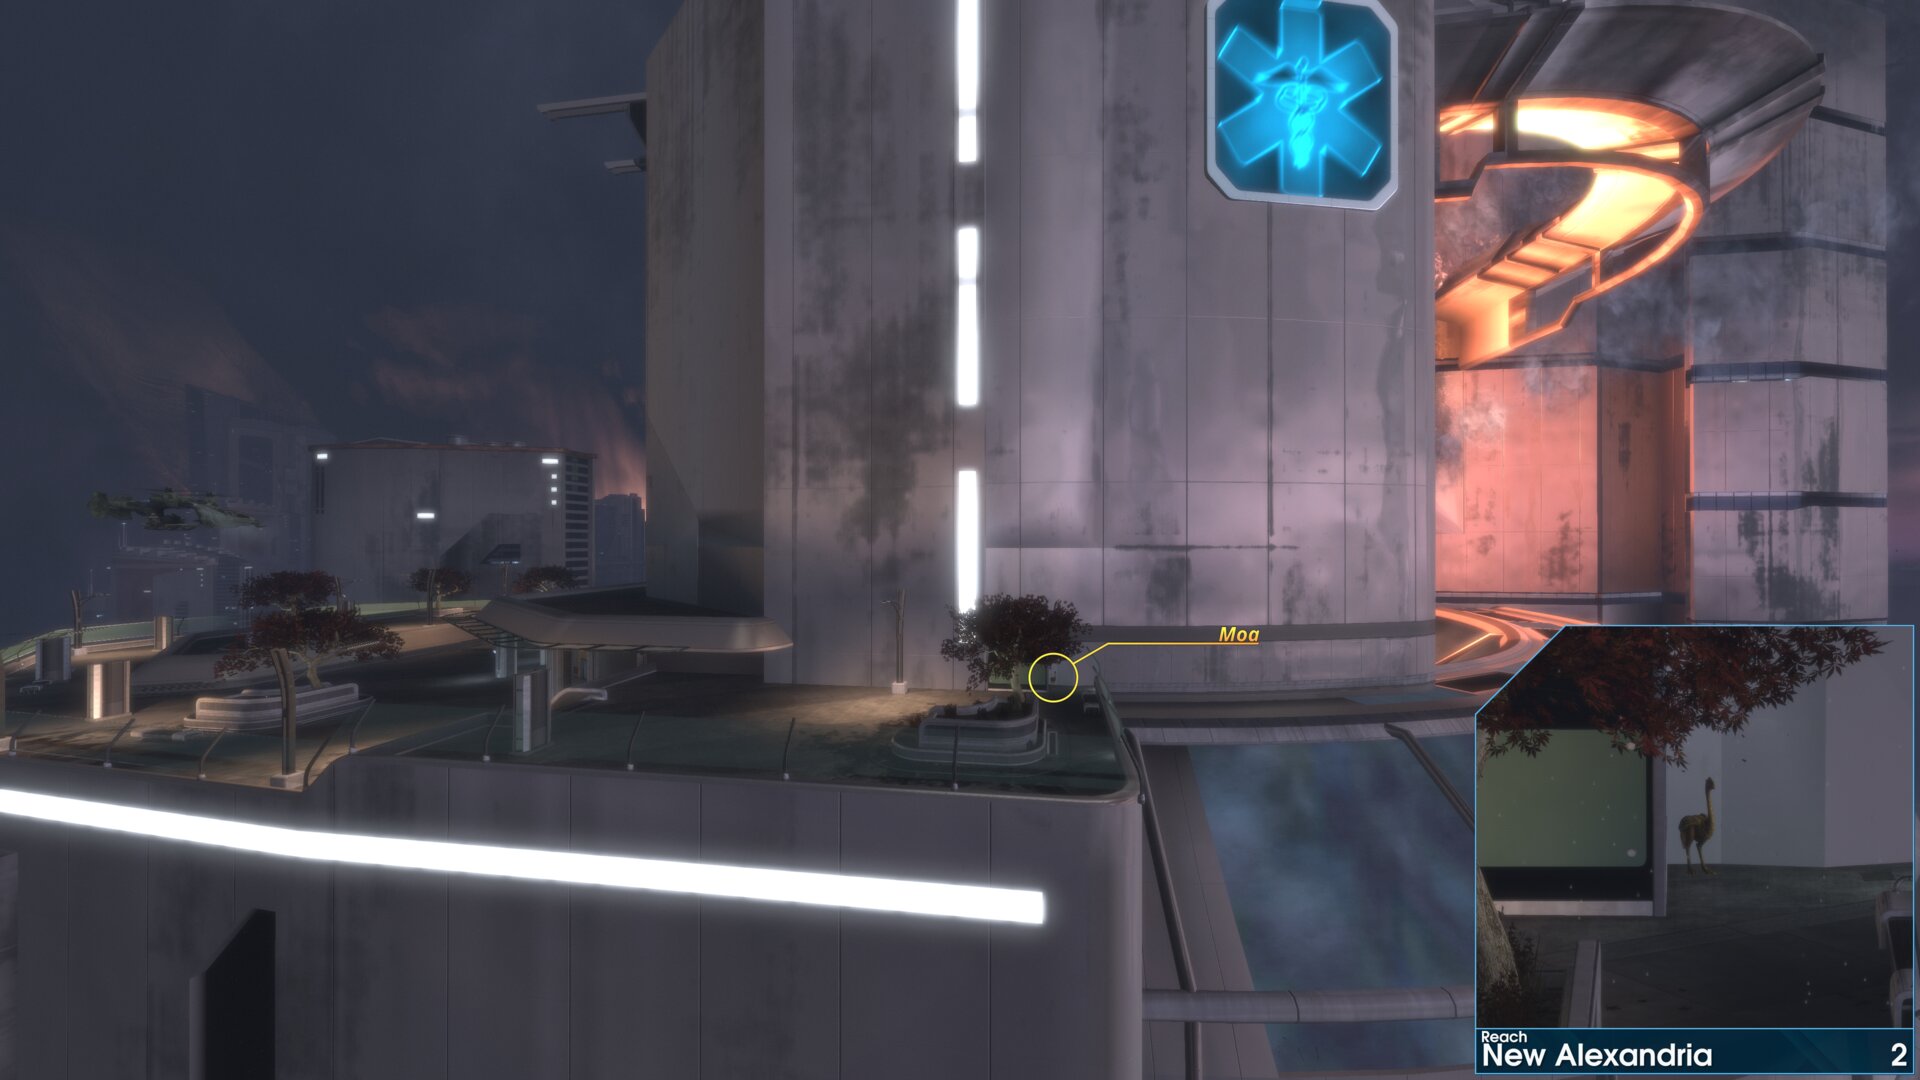
On the balcony of the Hospital’s small tower, above where the Skybridge extends from.
Golden Moa 3
Inside the Hospital, at the far end of the Skybridge (where the jammer is located). The Golden Moa is in the planter box that’s attached to the wall of the Hospital’s tallest tower.
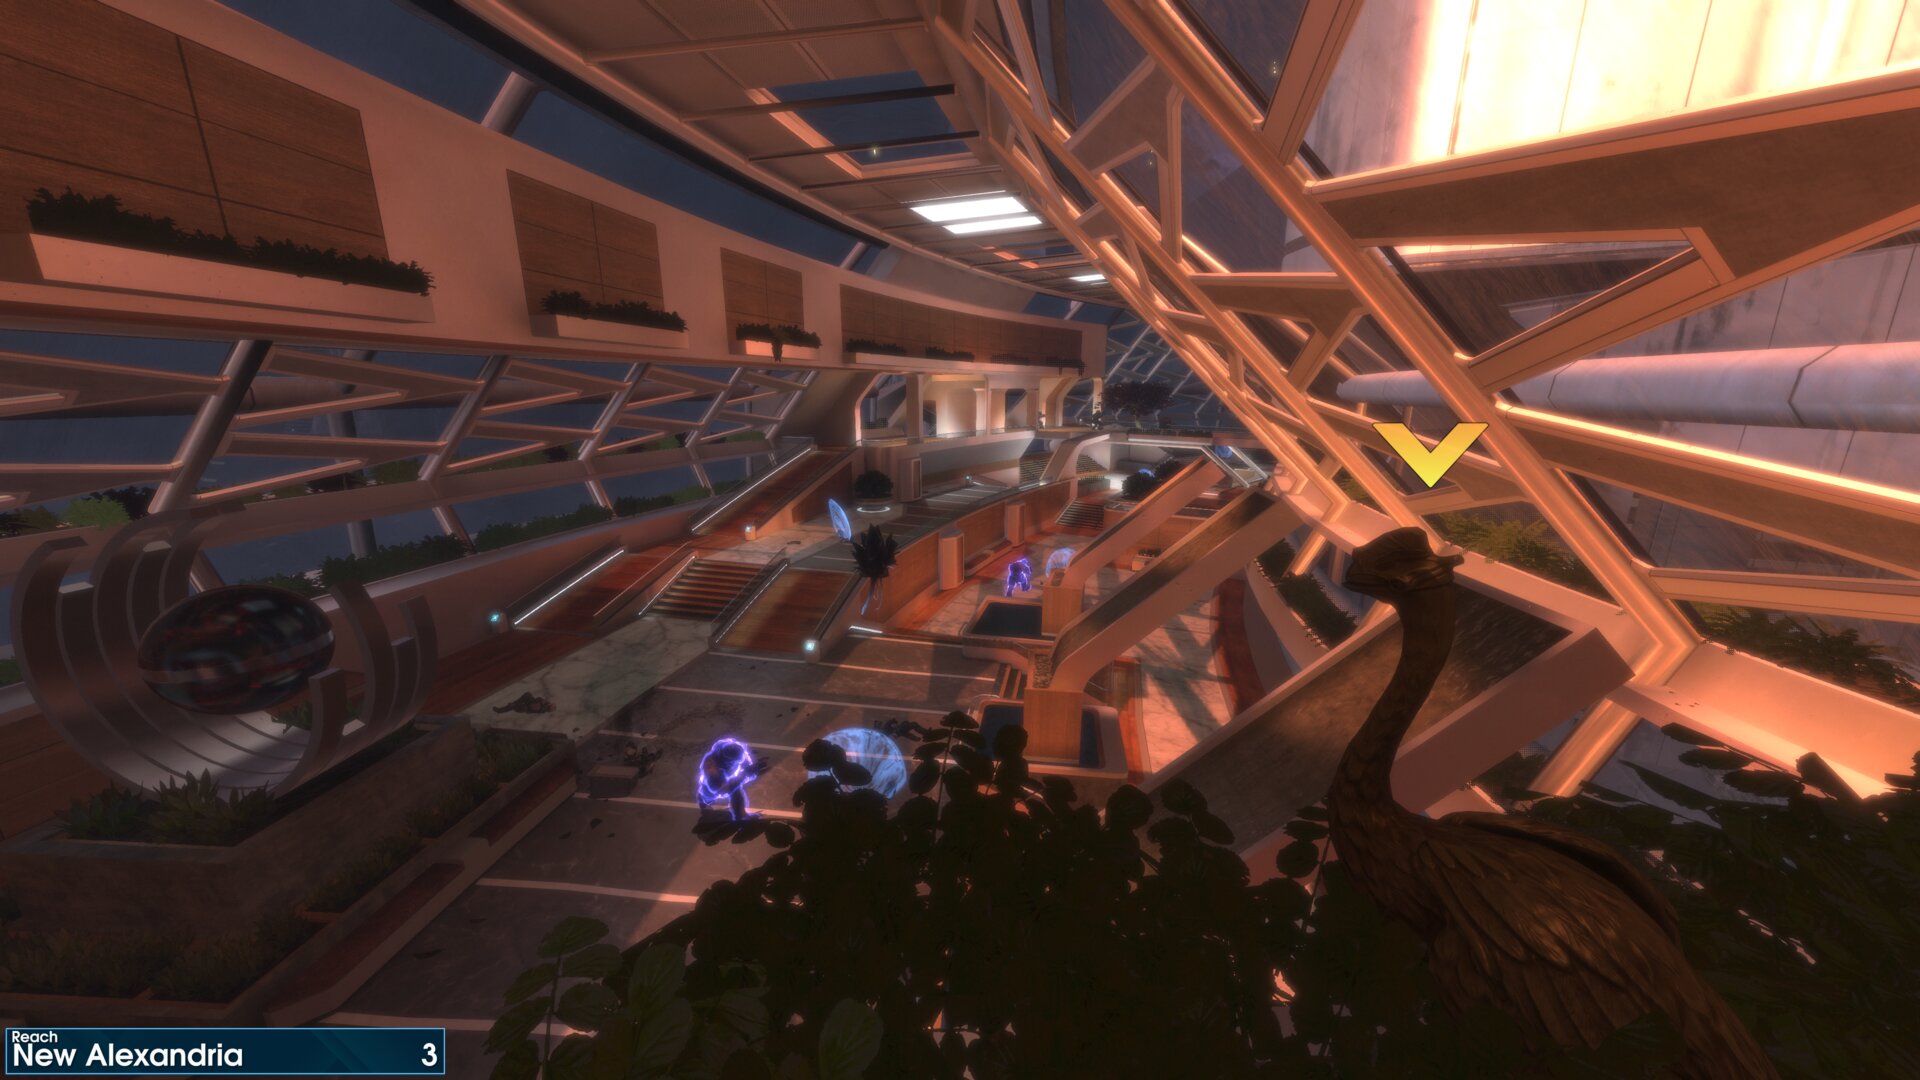
Inside the Hospital, at the far end of the Skybridge (where the jammer is located). The Golden Moa is in the planter box that’s attached to the wall of the Hospital’s tallest tower.
Golden Moa 4
At the back of the lounge, that’s beneath the Club Errera DJ/Entrance, Vyrant Telecom Tower.
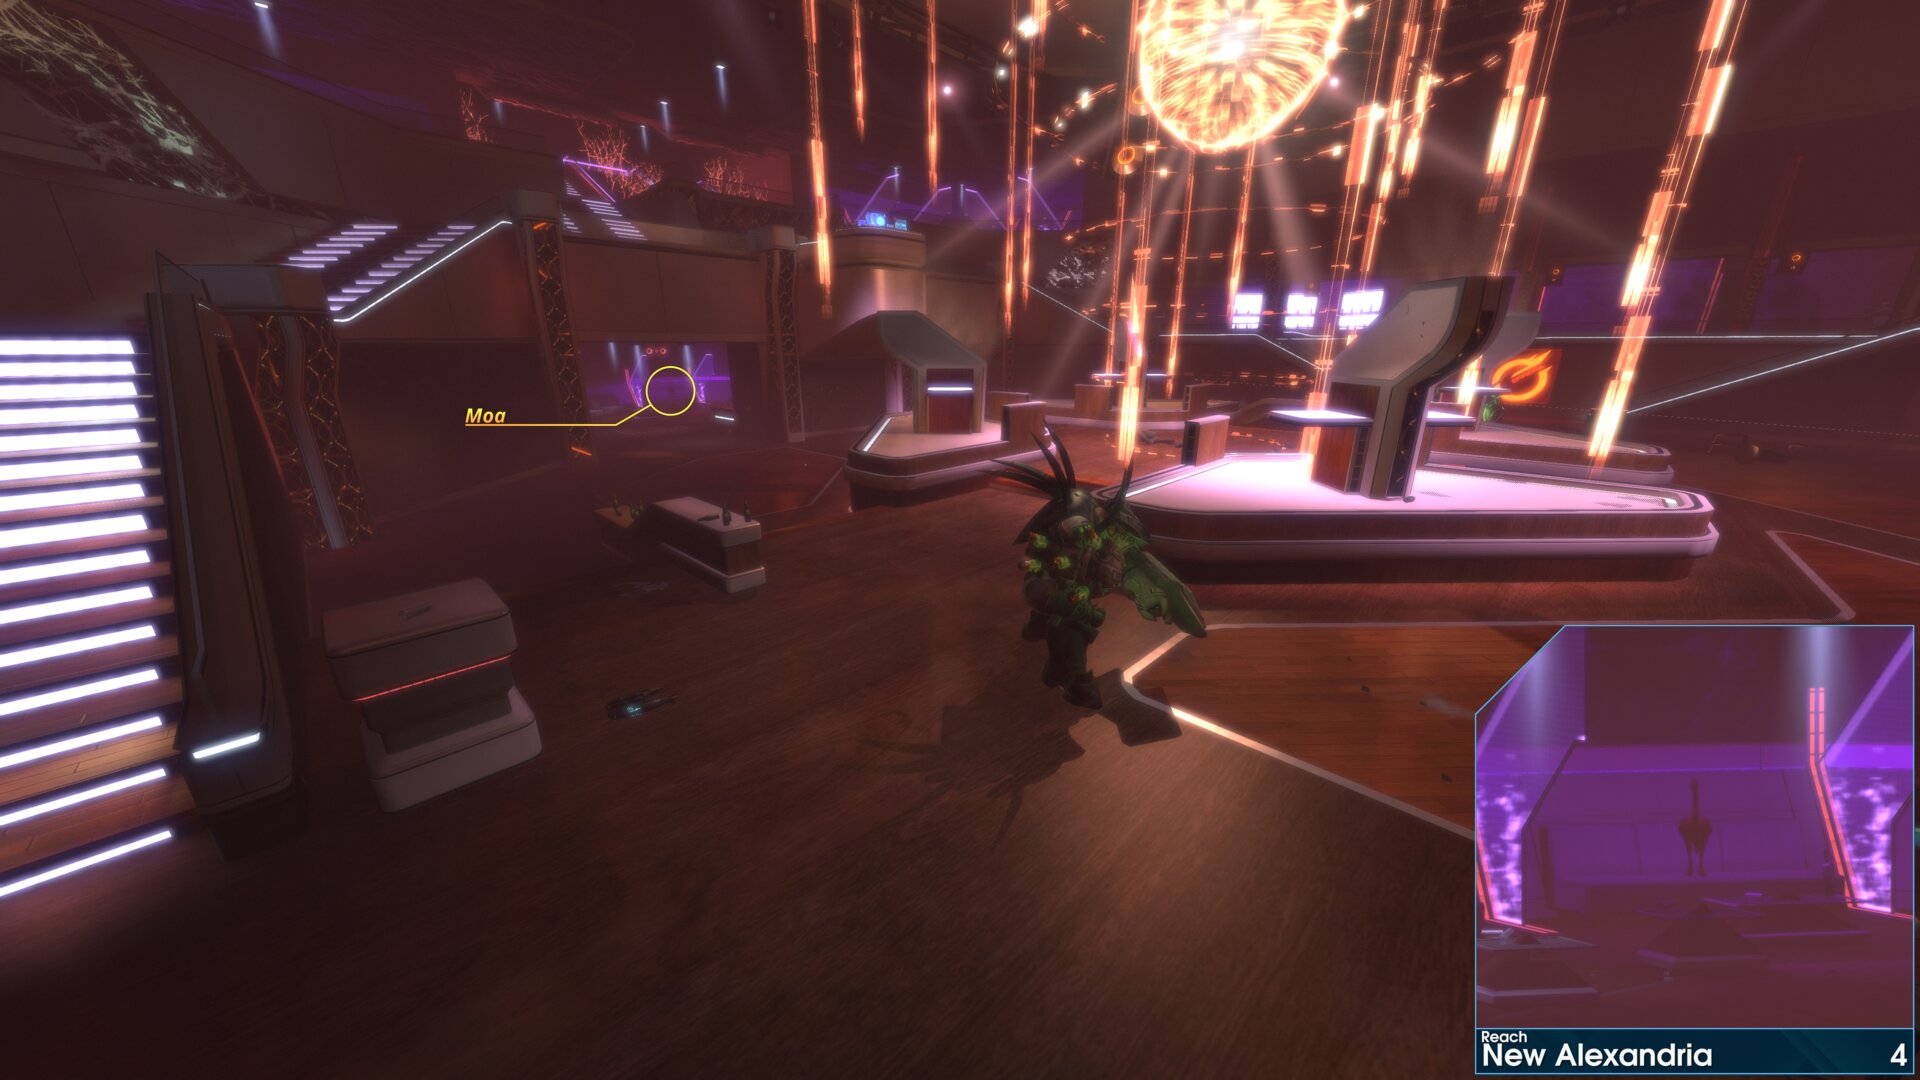
At the back of the lounge, that’s beneath the Club Errera DJ/Entrance, Vyrant Telecom Tower.
➟ The Package
Rally Point: Alpha
Rally Point: Bravo
Golden Moa 1
Inside the now flooded Farragut Station, Comms array building (closest building to spawn). On top of a timber beam that supports the 2nd floor.
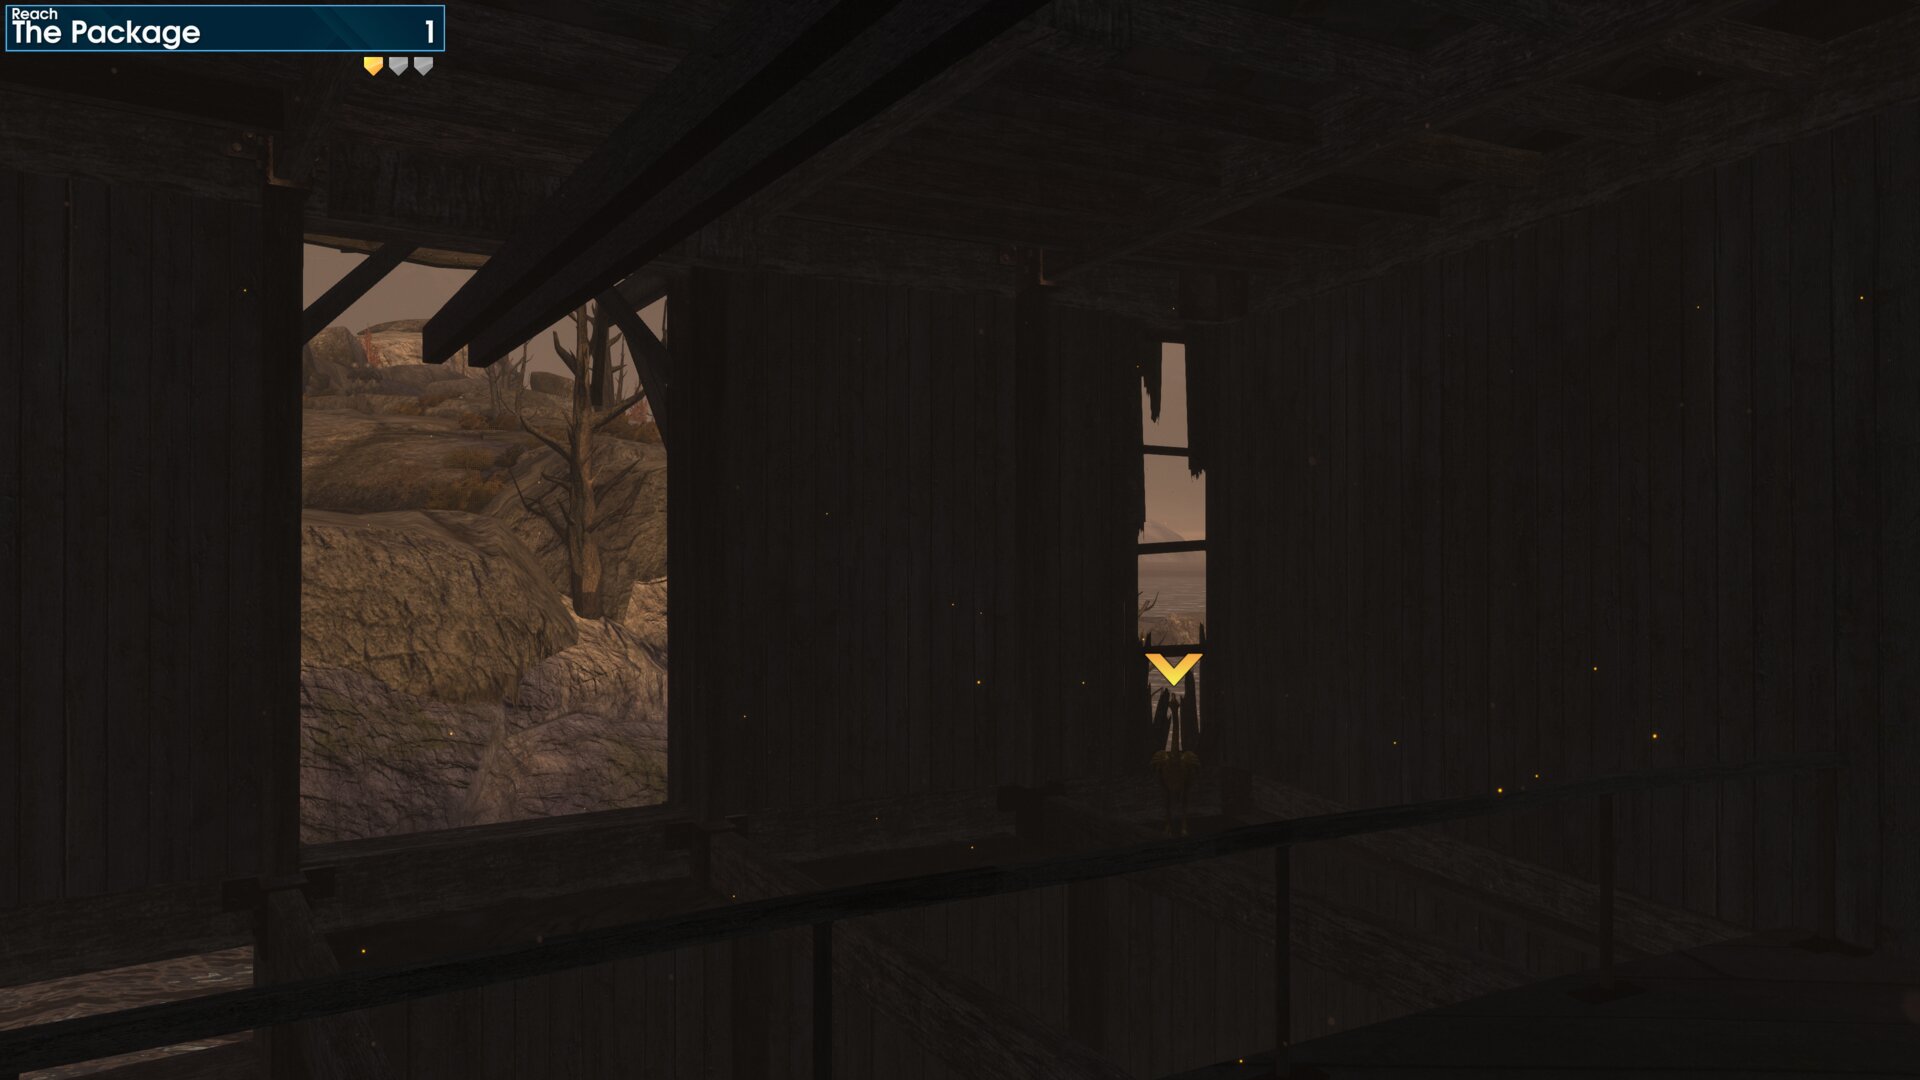
Inside the now flooded Farragut Station, Comms array building (closest building to spawn). On top of a timber beam that supports the 2nd floor.
Golden Moa 2
In the back of Airview Base, between the 2 Covenant Anti-Aircraft Cannons. The Golden Moa is beside the weapon racks.
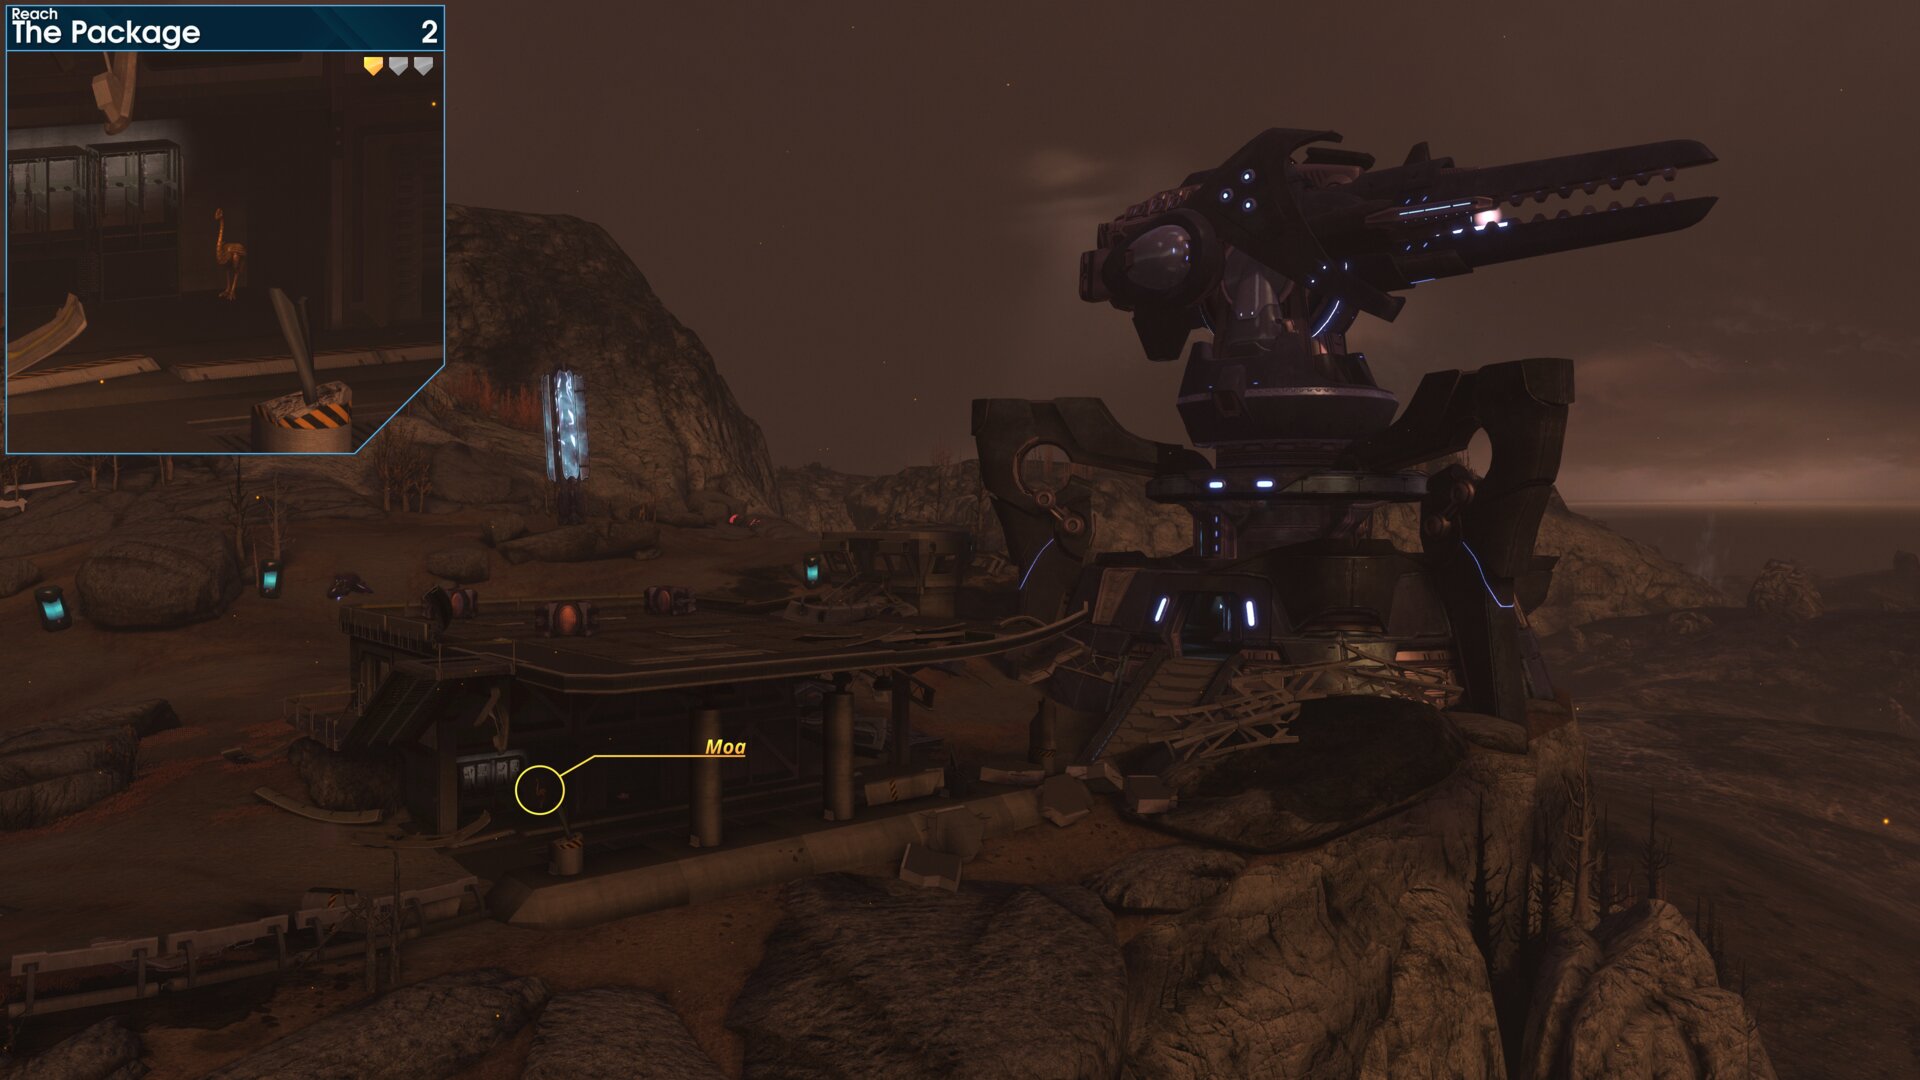
In the back of Airview Base, between the 2 Covenant Anti-Aircraft Cannons. The Golden Moa is beside the weapon racks.
Rally Point: Bravo
Golden Moa 3
On the ground floor of Maintenance, the Golden Moa is beneath the ramp to the 1st floor.
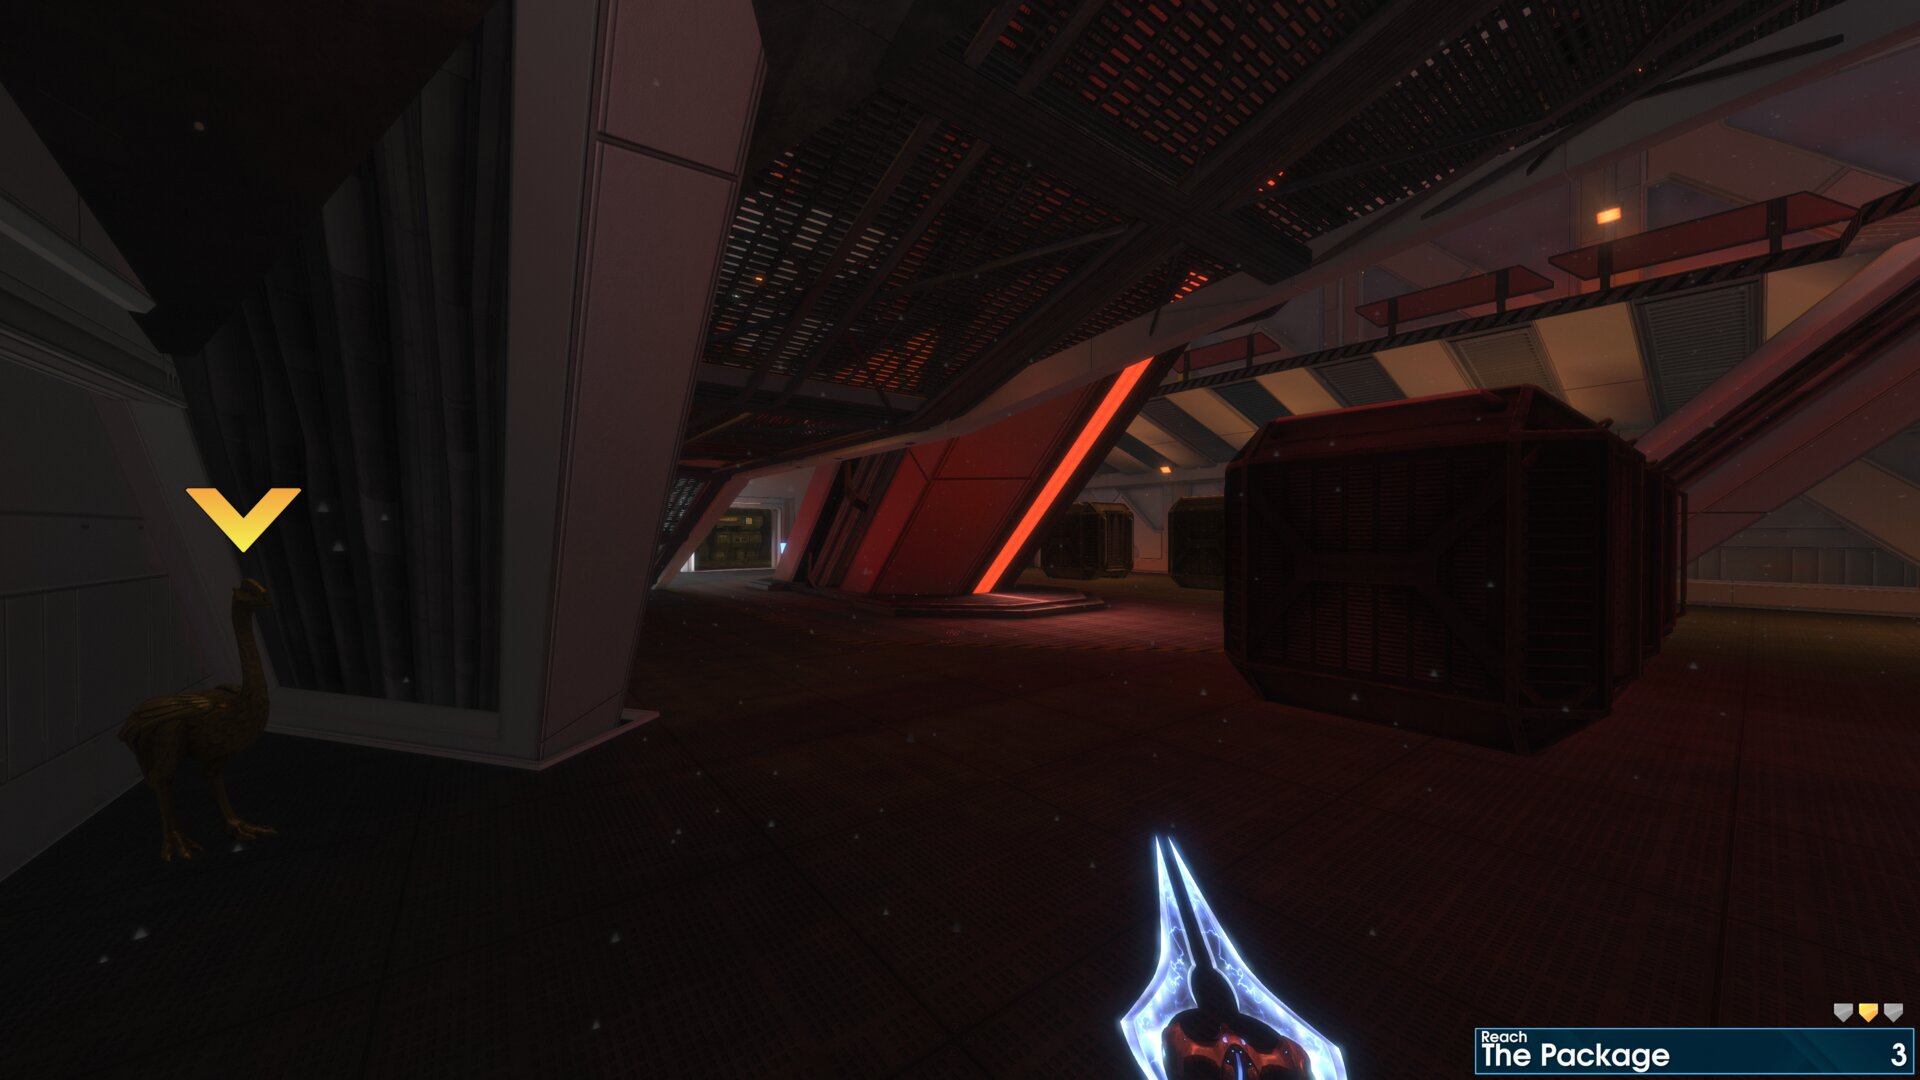
On the ground floor of Maintenance, the Golden Moa is beneath the ramp to the 1st floor.
Golden Moa 4
After going through Maintenance, you’ll reach Security. The Golden Moa is in the window at the south end of the room, beside the fire.
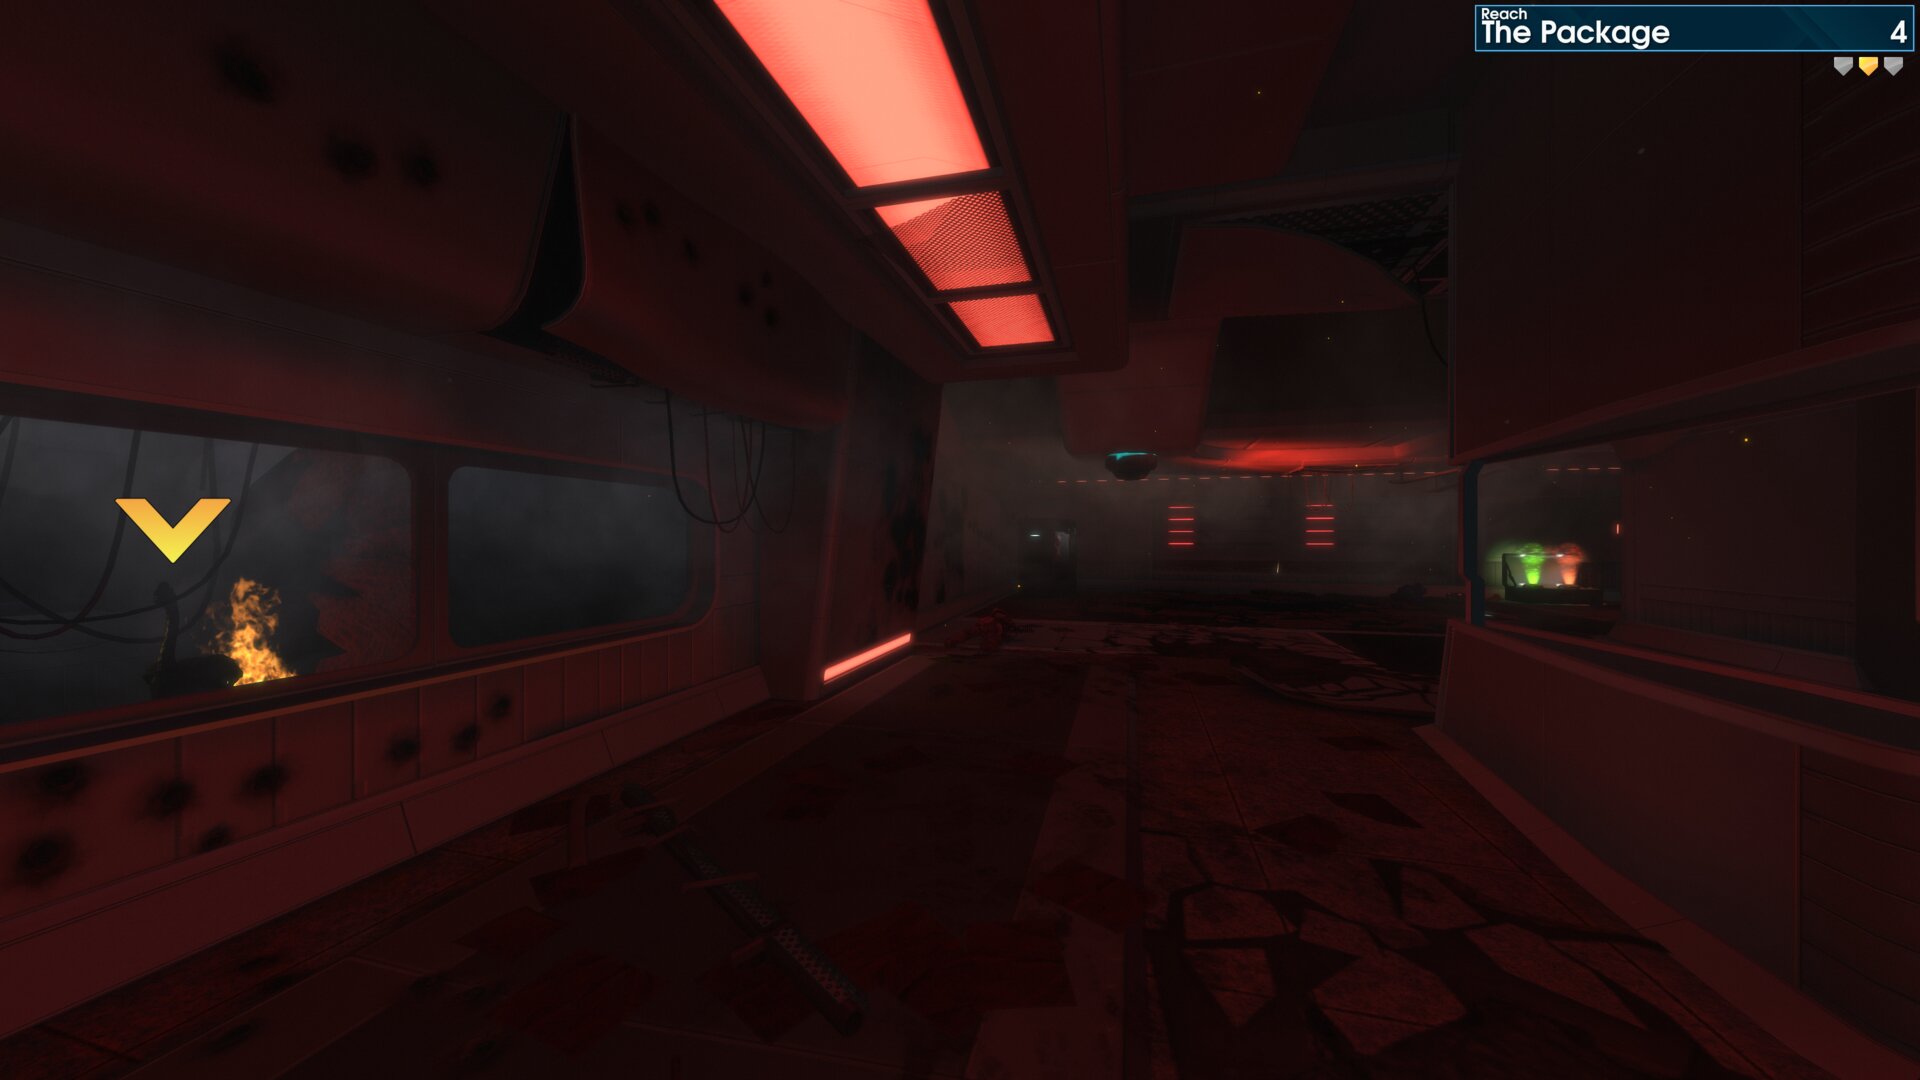
After going through Maintenance, you’ll reach Security. The Golden Moa is in the window at the south end of the room, beside the fire.
➟ The Pillar of Autumn
Rally Point: Alpha
Rally Point: Bravo
Rally Point: Charlie
Golden Moa 1
The Golden Moa is beside the communication antenna & fence, by building 04, just before you grab the Mongoose.
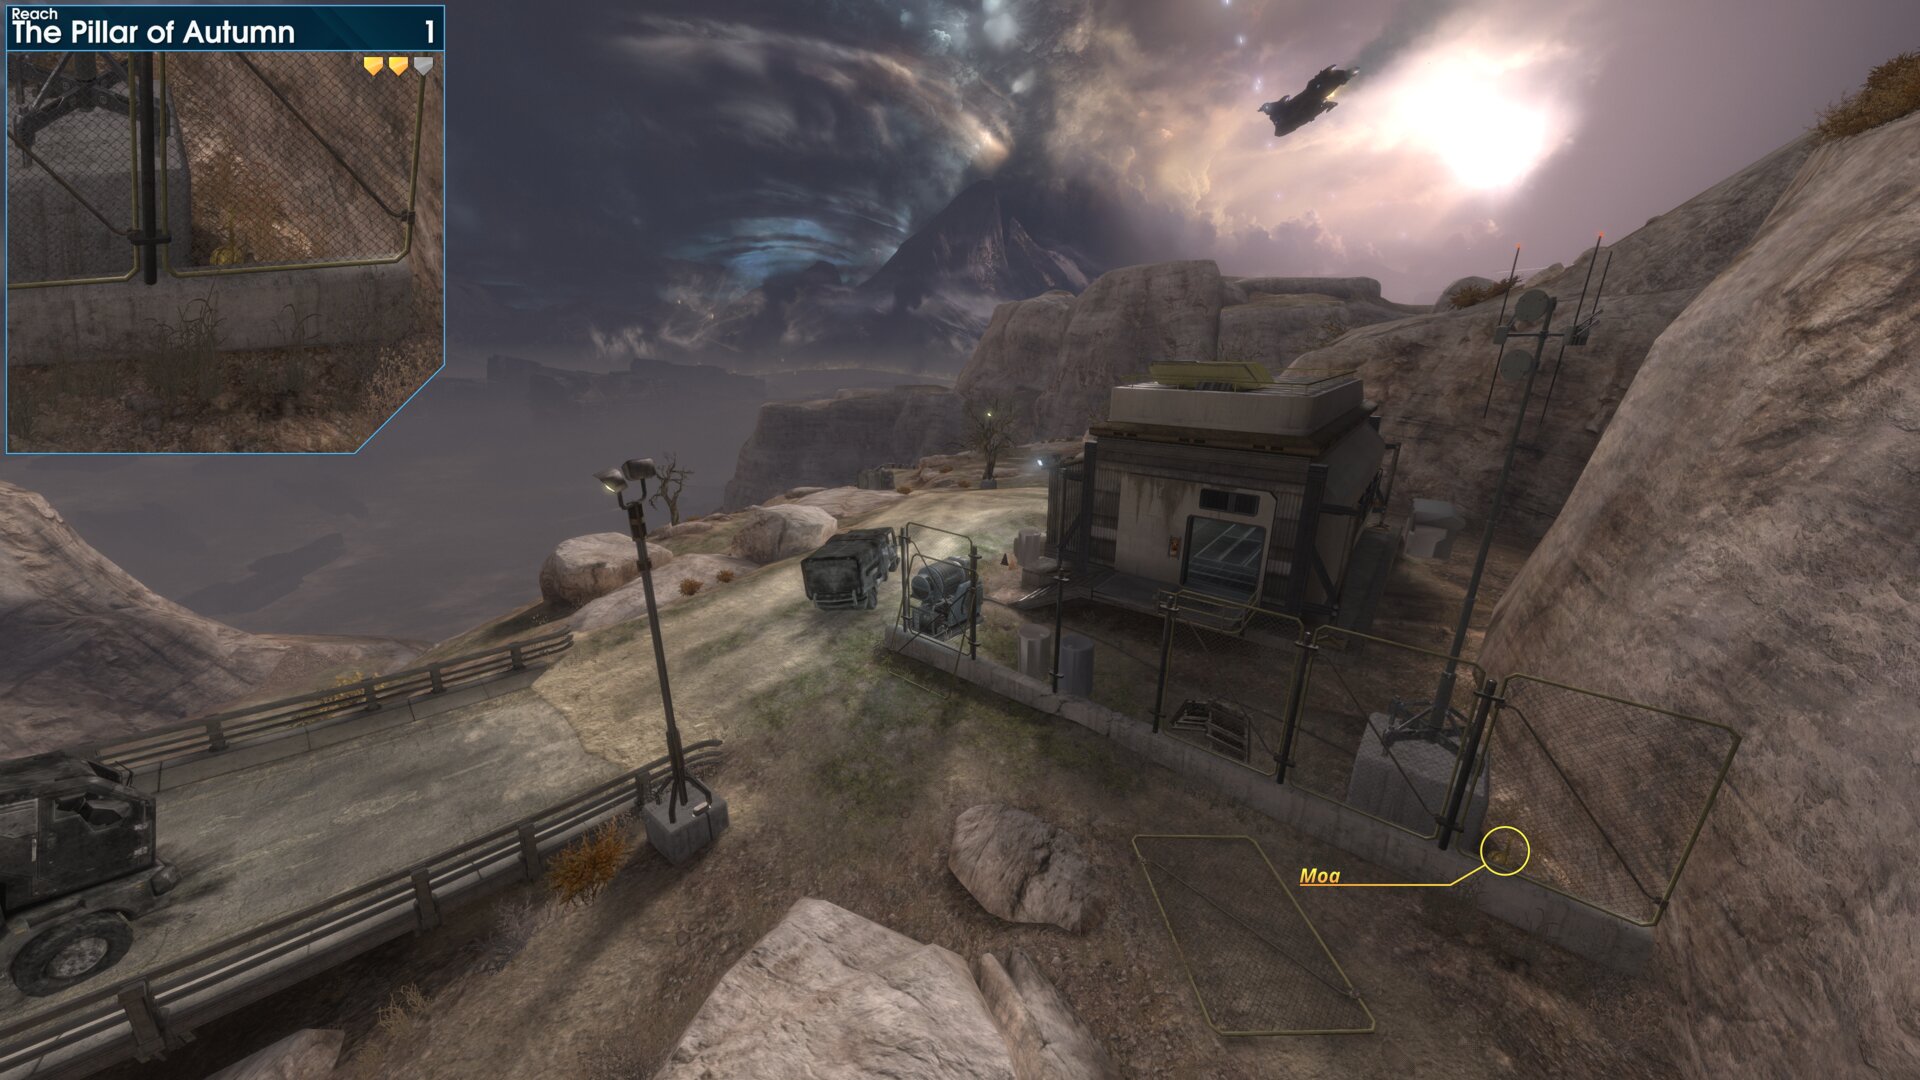
The Golden Moa is beside the communication antenna & fence, by building 04, just before you grab the Mongoose.
Golden Moa 2
After passing the 2 Scarabs, the Golden Moa is behind the rock just past the overturned Mongoose.
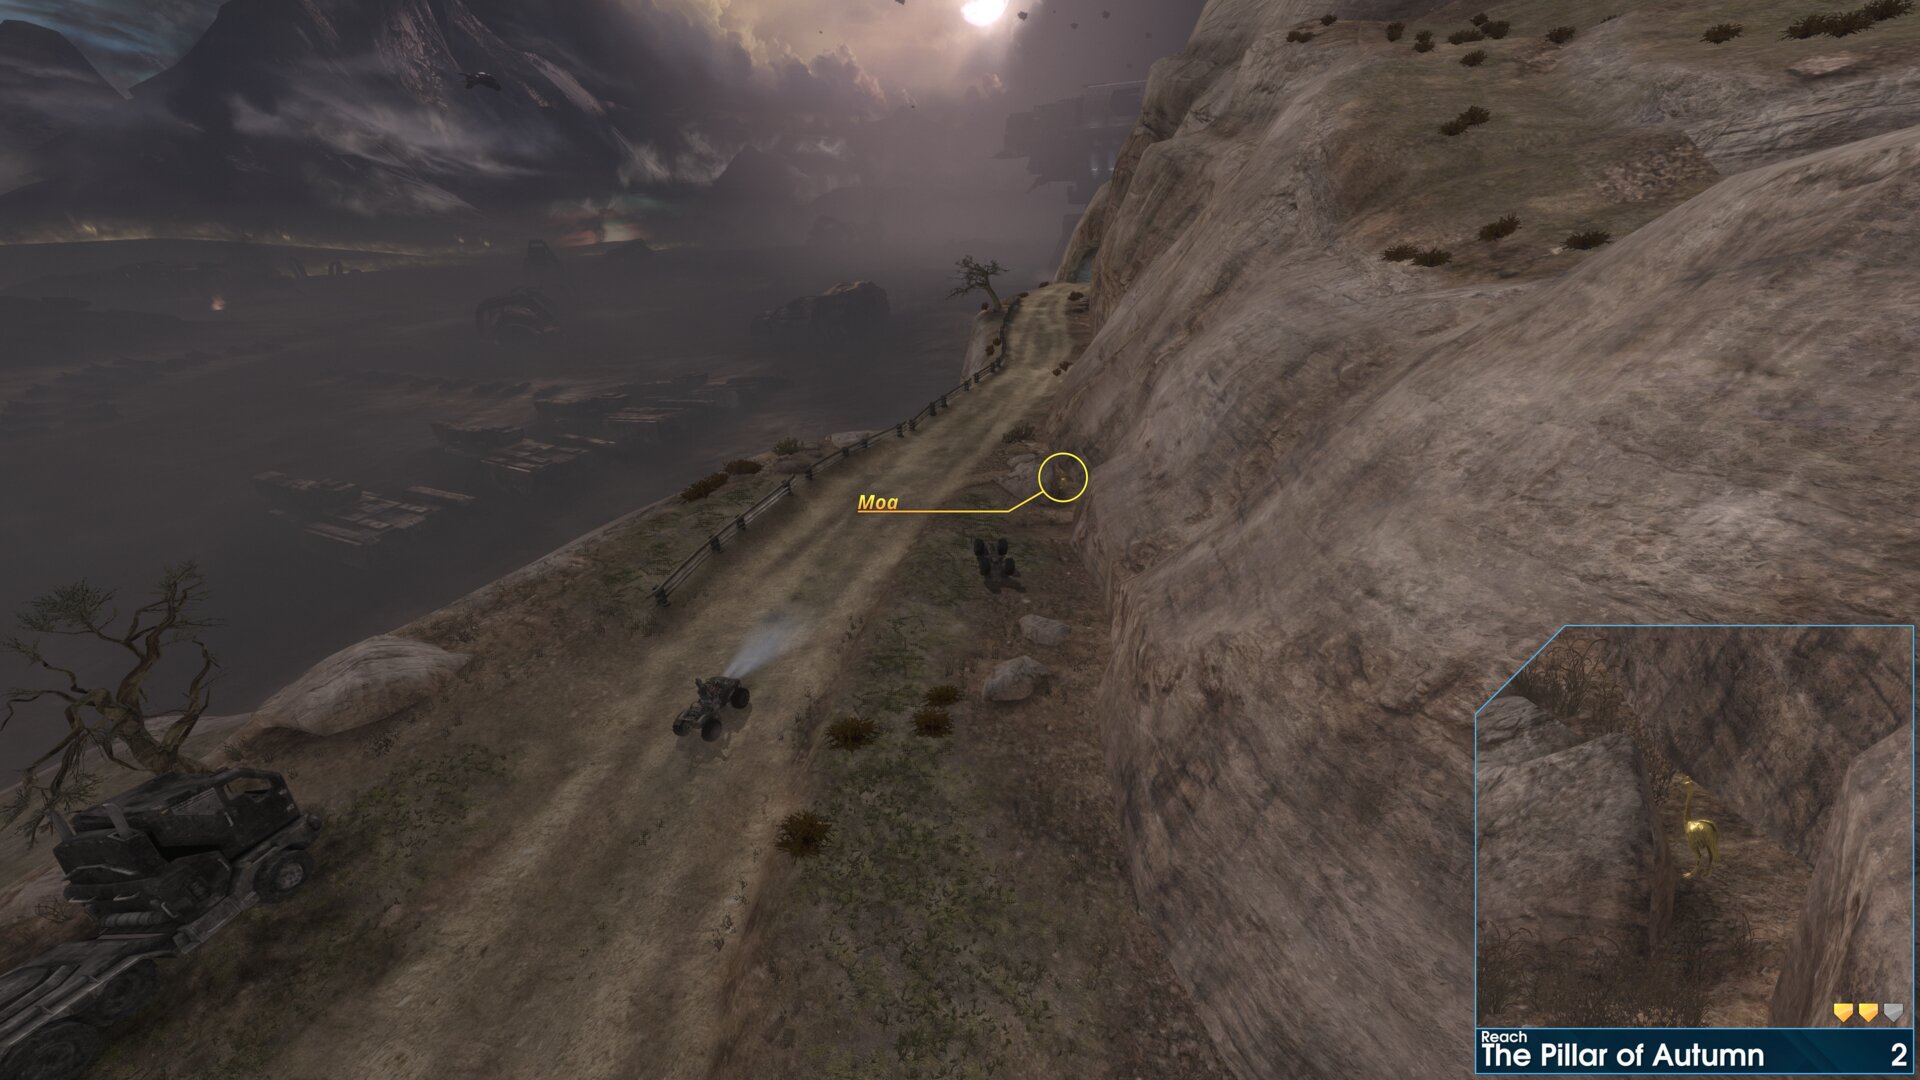
After passing the 2 Scarabs, the Golden Moa is behind the rock just past the overturned Mongoose.
Rally Point: Bravo
Golden Moa 3
The Golden Moa is in the fenced off area with the
pipes, beside Loading Bay 37b, Aszod ship breaking
yard (the SinoViet building, just after you pass
through the ship UNSC Commonwealth).
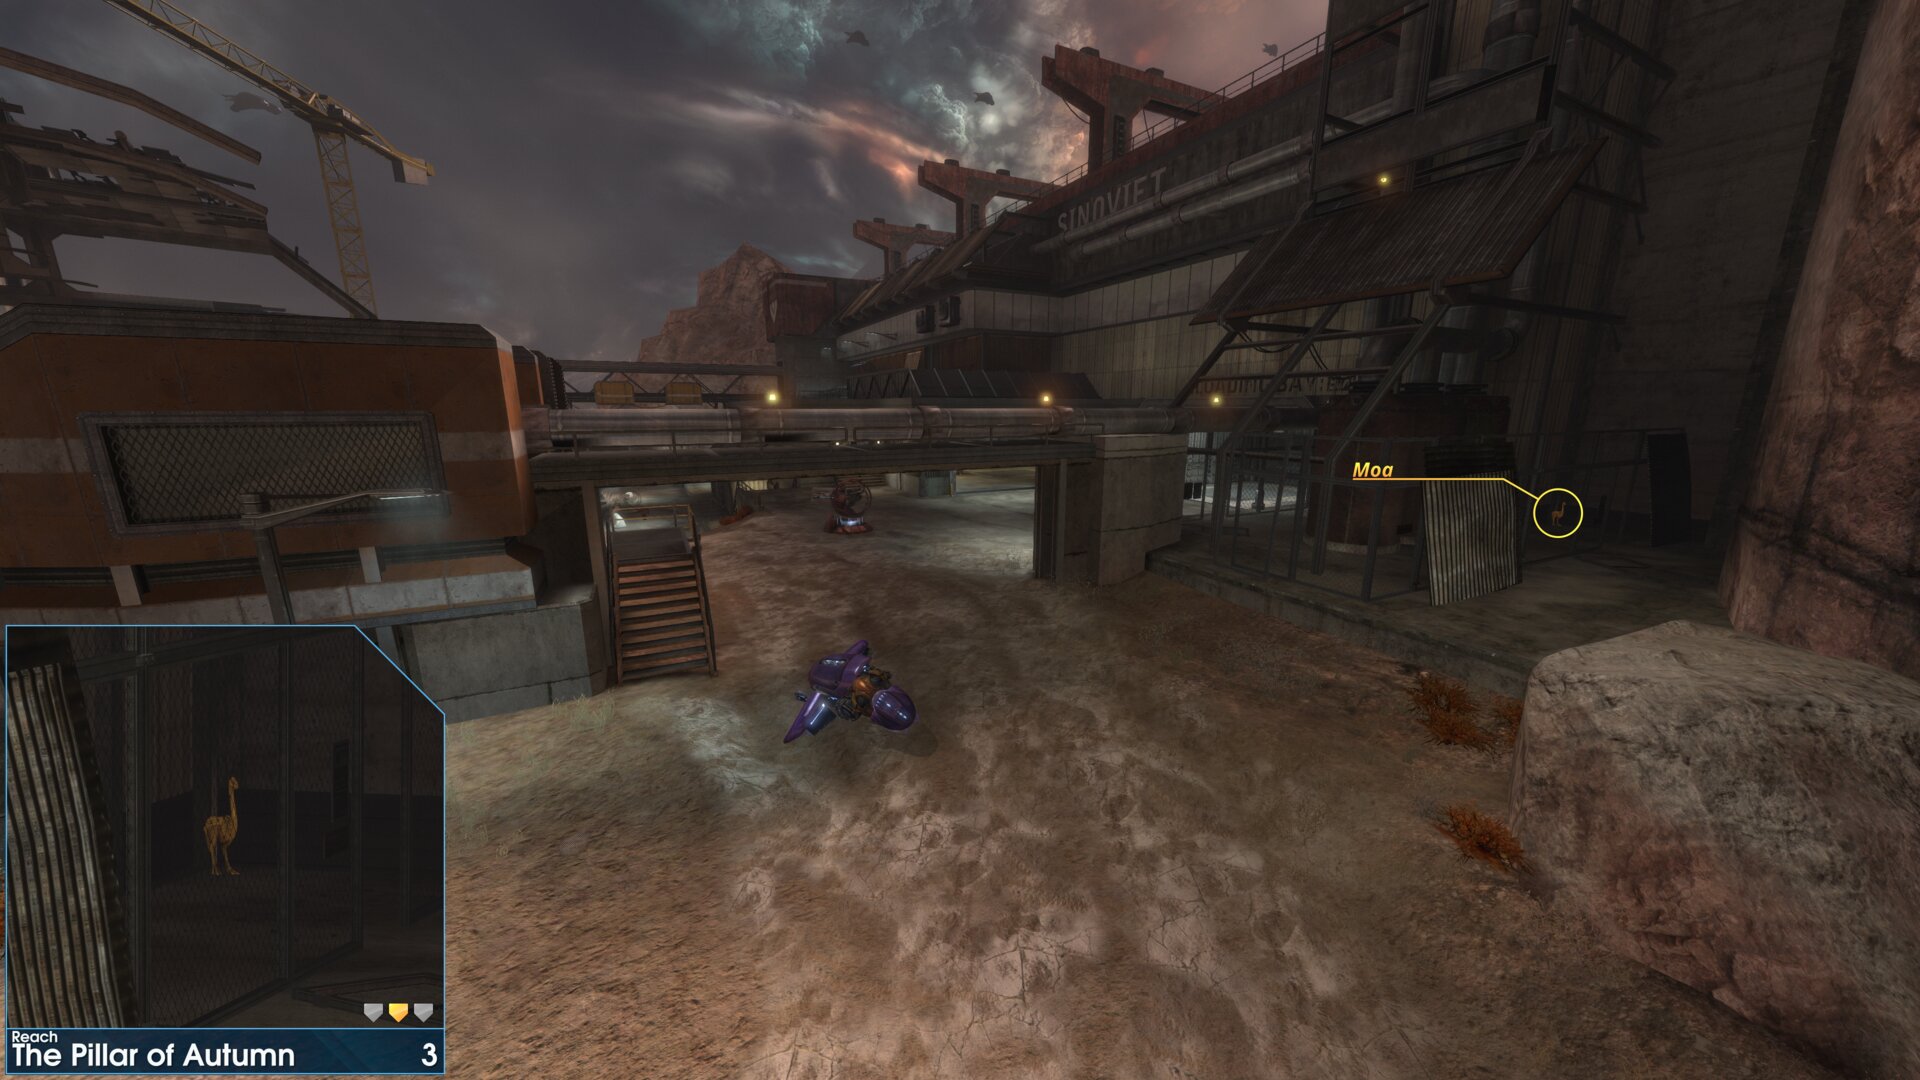
The Golden Moa is in the fenced off area with the
pipes, beside Loading Bay 37b, Aszod ship breaking
yard (the SinoViet building, just after you pass
through the ship UNSC Commonwealth).
Rally Point: Charlie
Golden Moa 4
The Golden Moa is under the external walkway linking
the factory buildings, near the stairs that lead down to
landing platform D.
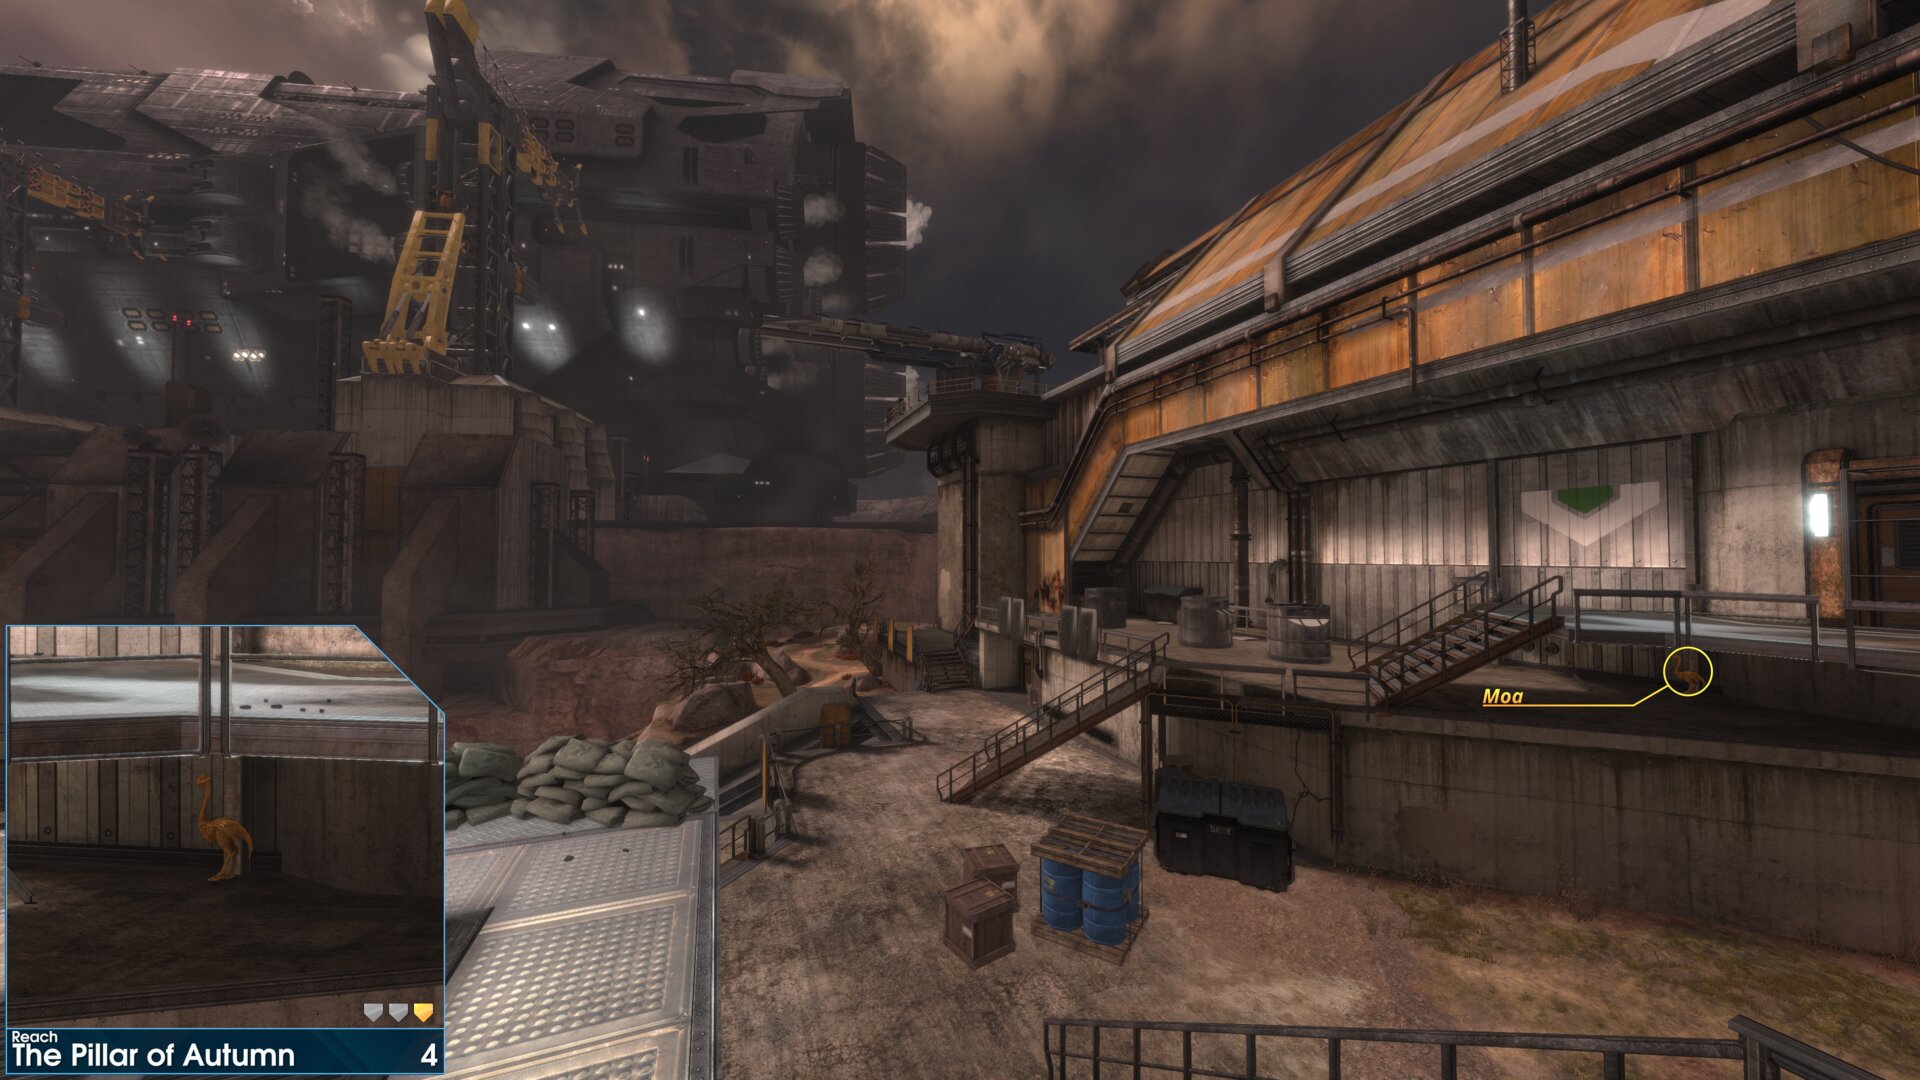
The Golden Moa is under the external walkway linking
the factory buildings, near the stairs that lead down to
landing platform D.
➟ Lone Wolf
Rally Point: Omega
Golden Moa 1
From spawn head north to building B, the Golden Moa is outside the building, next to its north west wall.
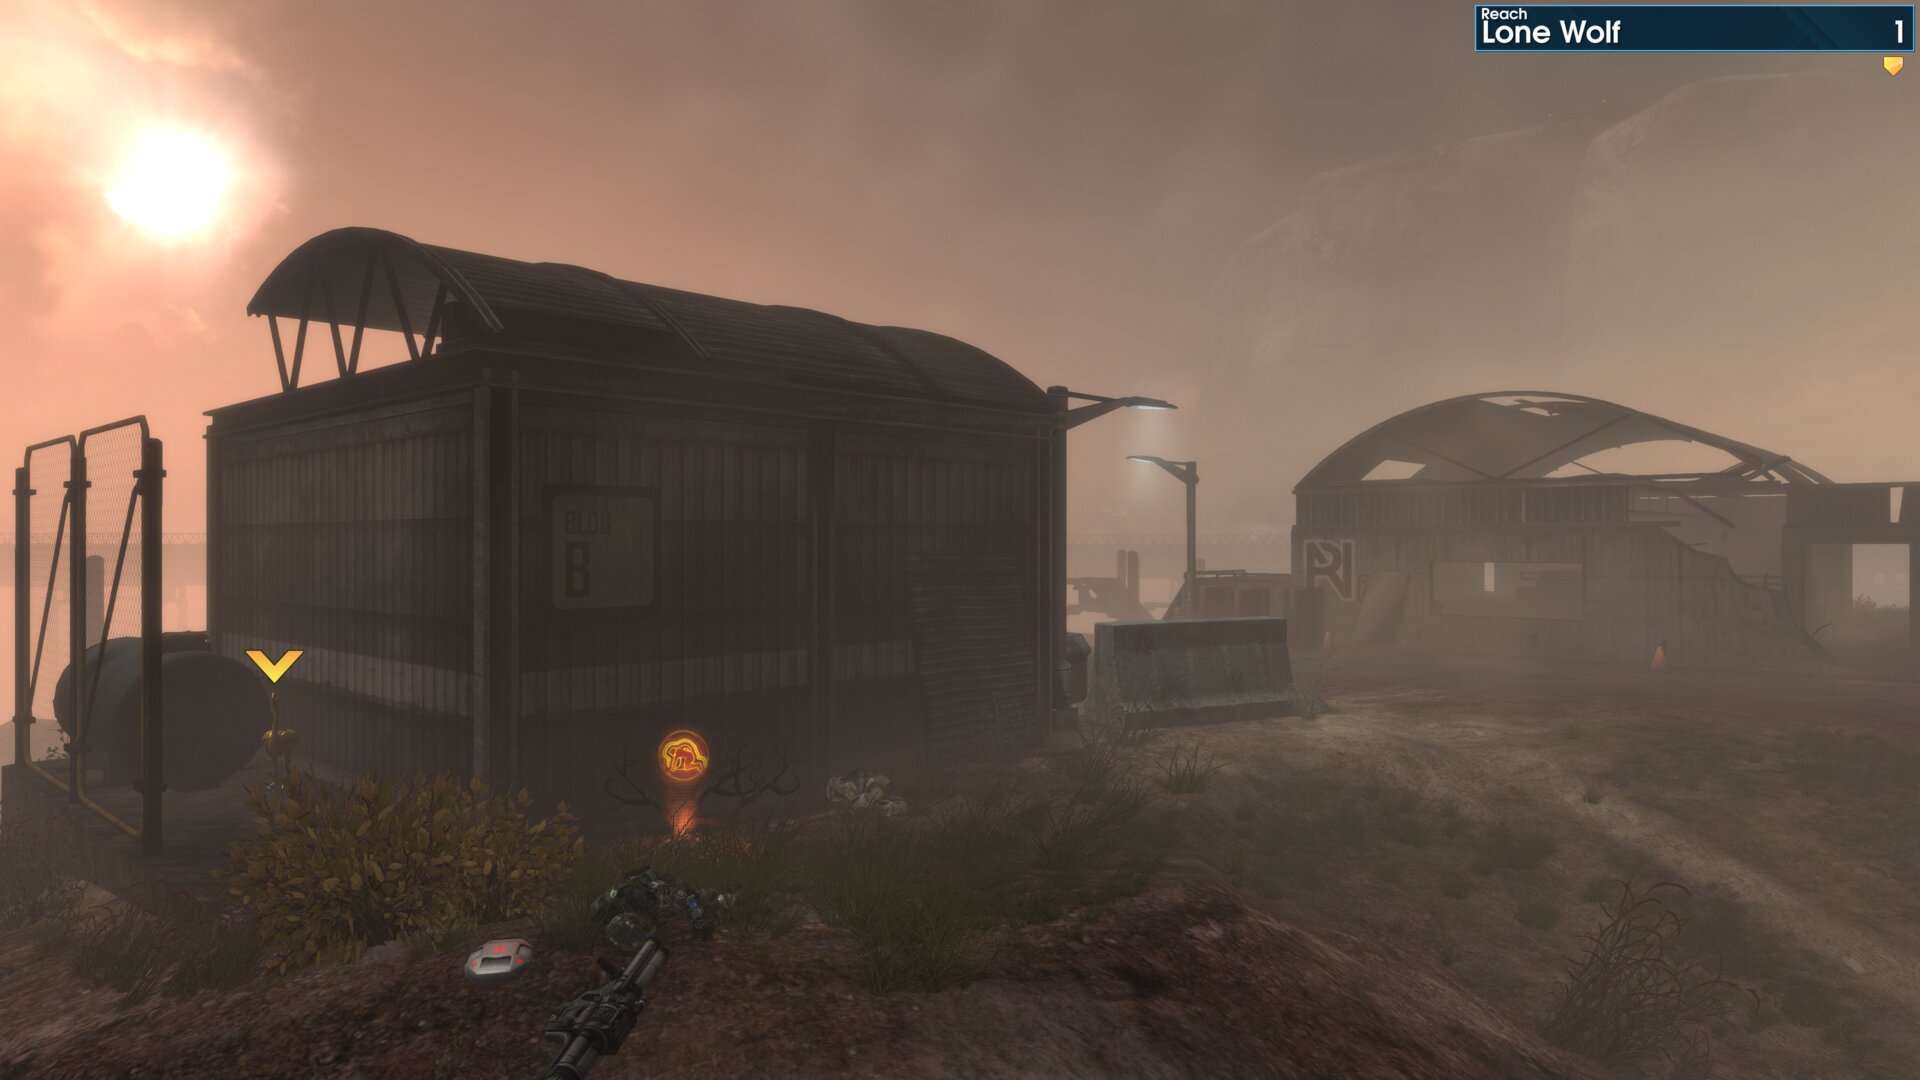
From spawn head north to building B, the Golden Moa is outside the building, next to its north west wall.
Golden Moa 2
From spawn head east to the stack of large pipes, the Golden Moa is in the end of the closest pipe.
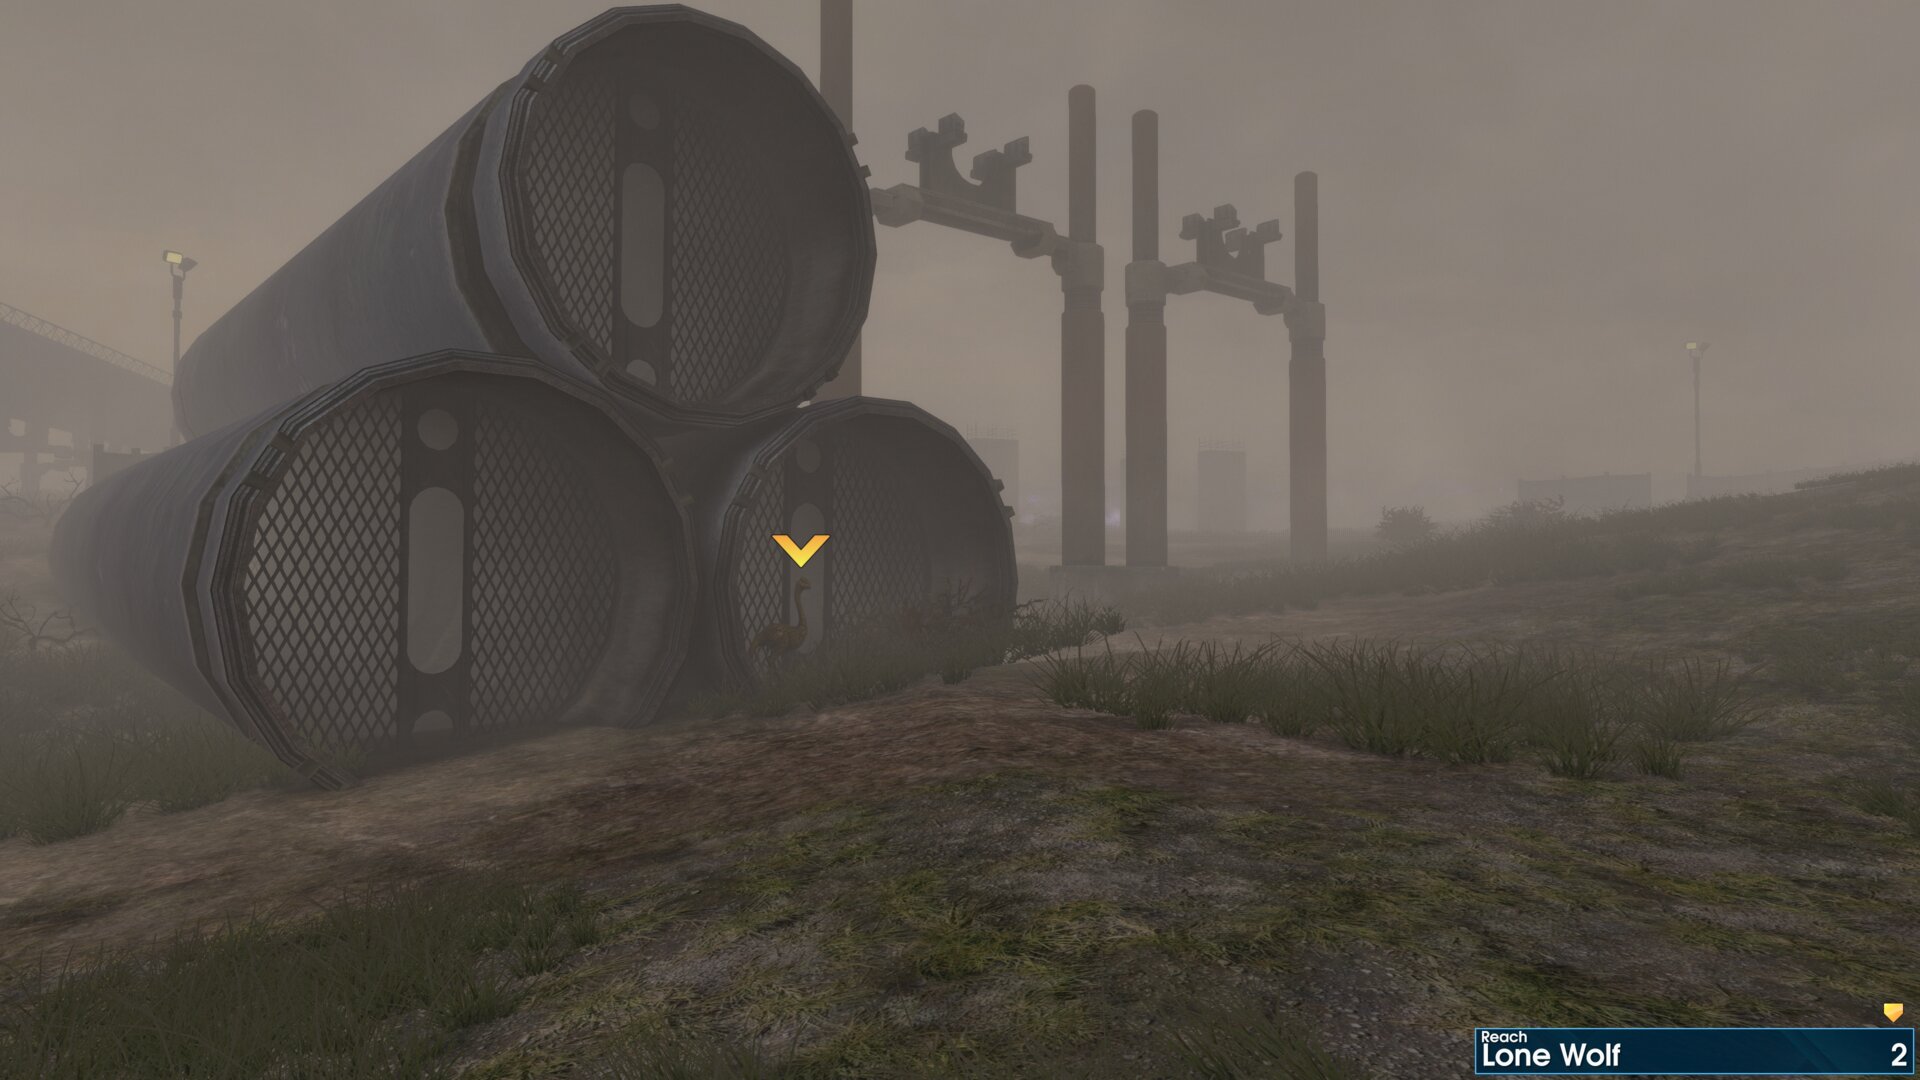
From spawn head east to the stack of large pipes, the Golden Moa is in the end of the closest pipe.
Halo: Combat Evolved
Golden Moas in Combat Evolved require switching to, or play with, original graphics.
➟ The Pillar of Autumn
Golden Moa 1
Turn right as you enter the cafeteria, the Golden Moa is in a nook between the vending machines.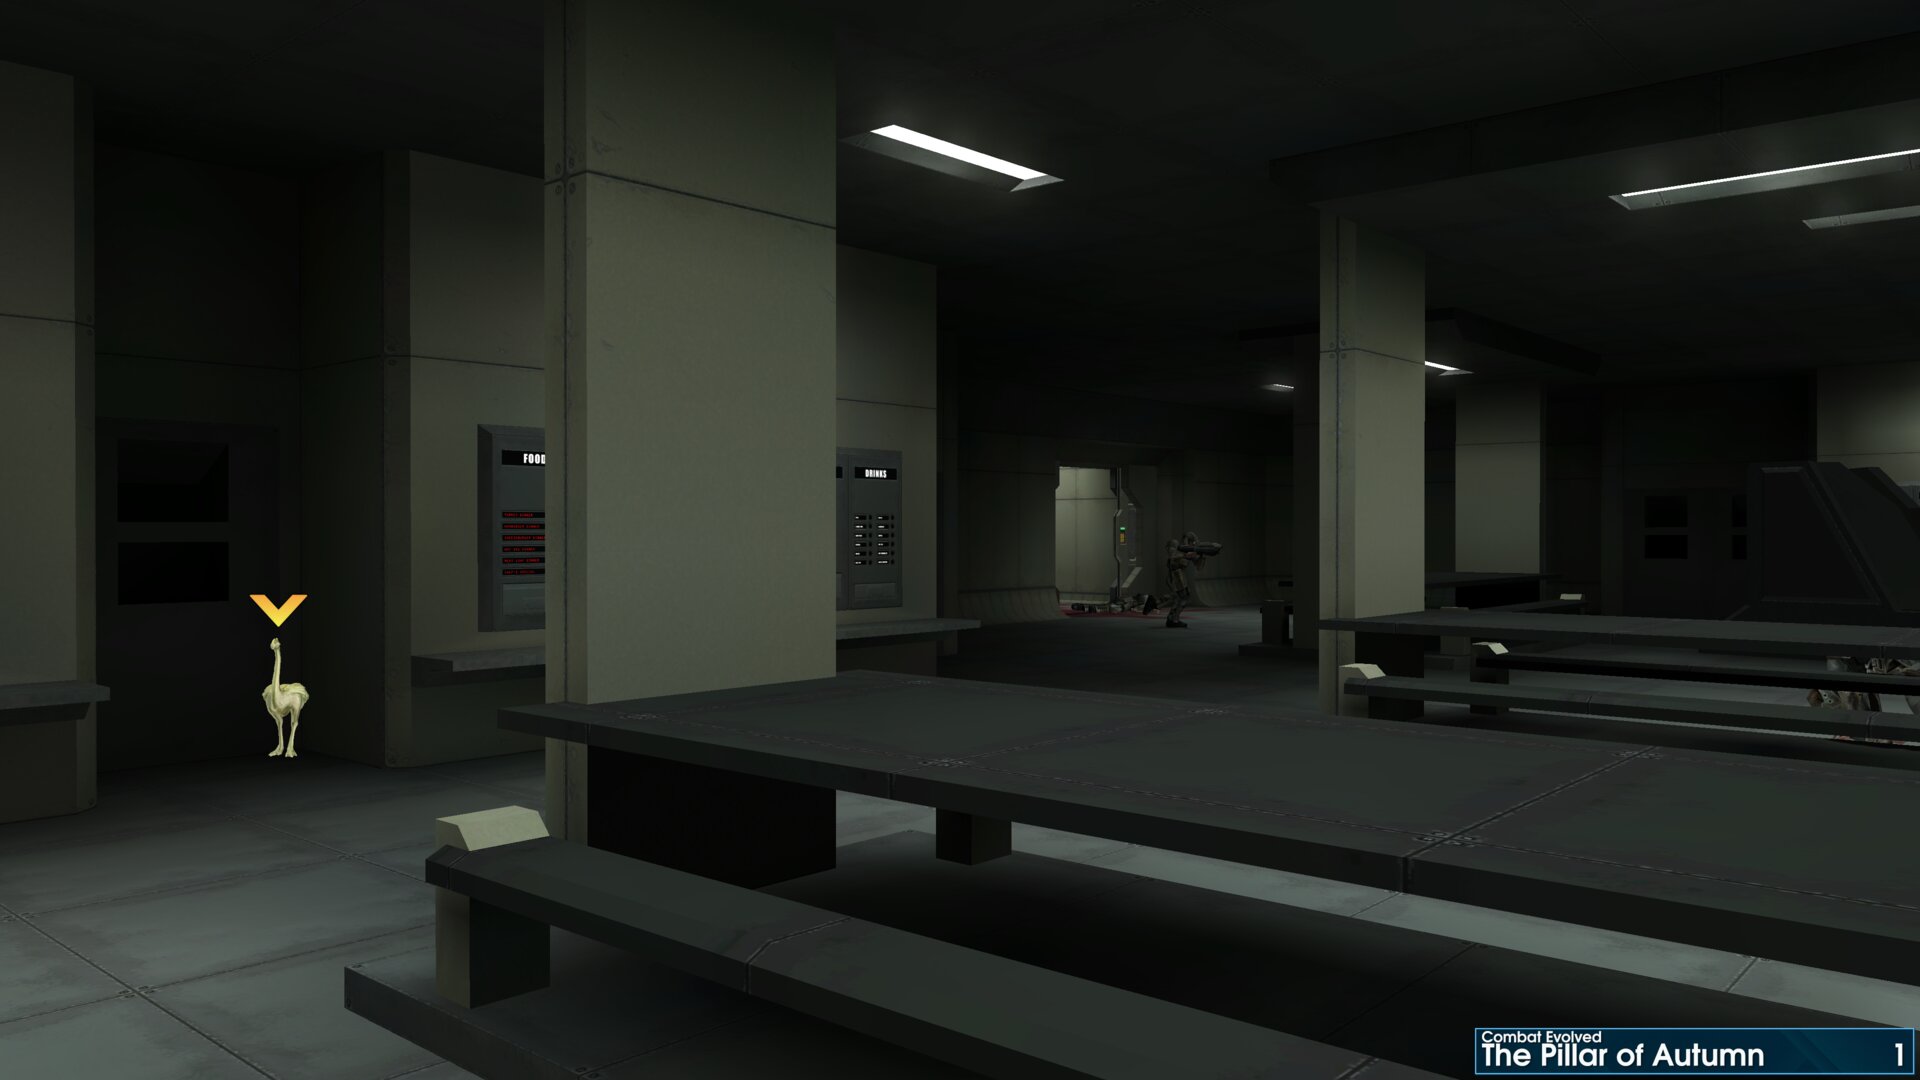
Turn right as you enter the cafeteria, the Golden Moa is in a nook between the vending machines.
Golden Moa 2
As you make your way to the 2nd Airlock, aka Airlock 32, you will reach a group of Marines fight off the Covenant from behind cover. The Golden Moa is hidden behind a structural column, past the Covenant.
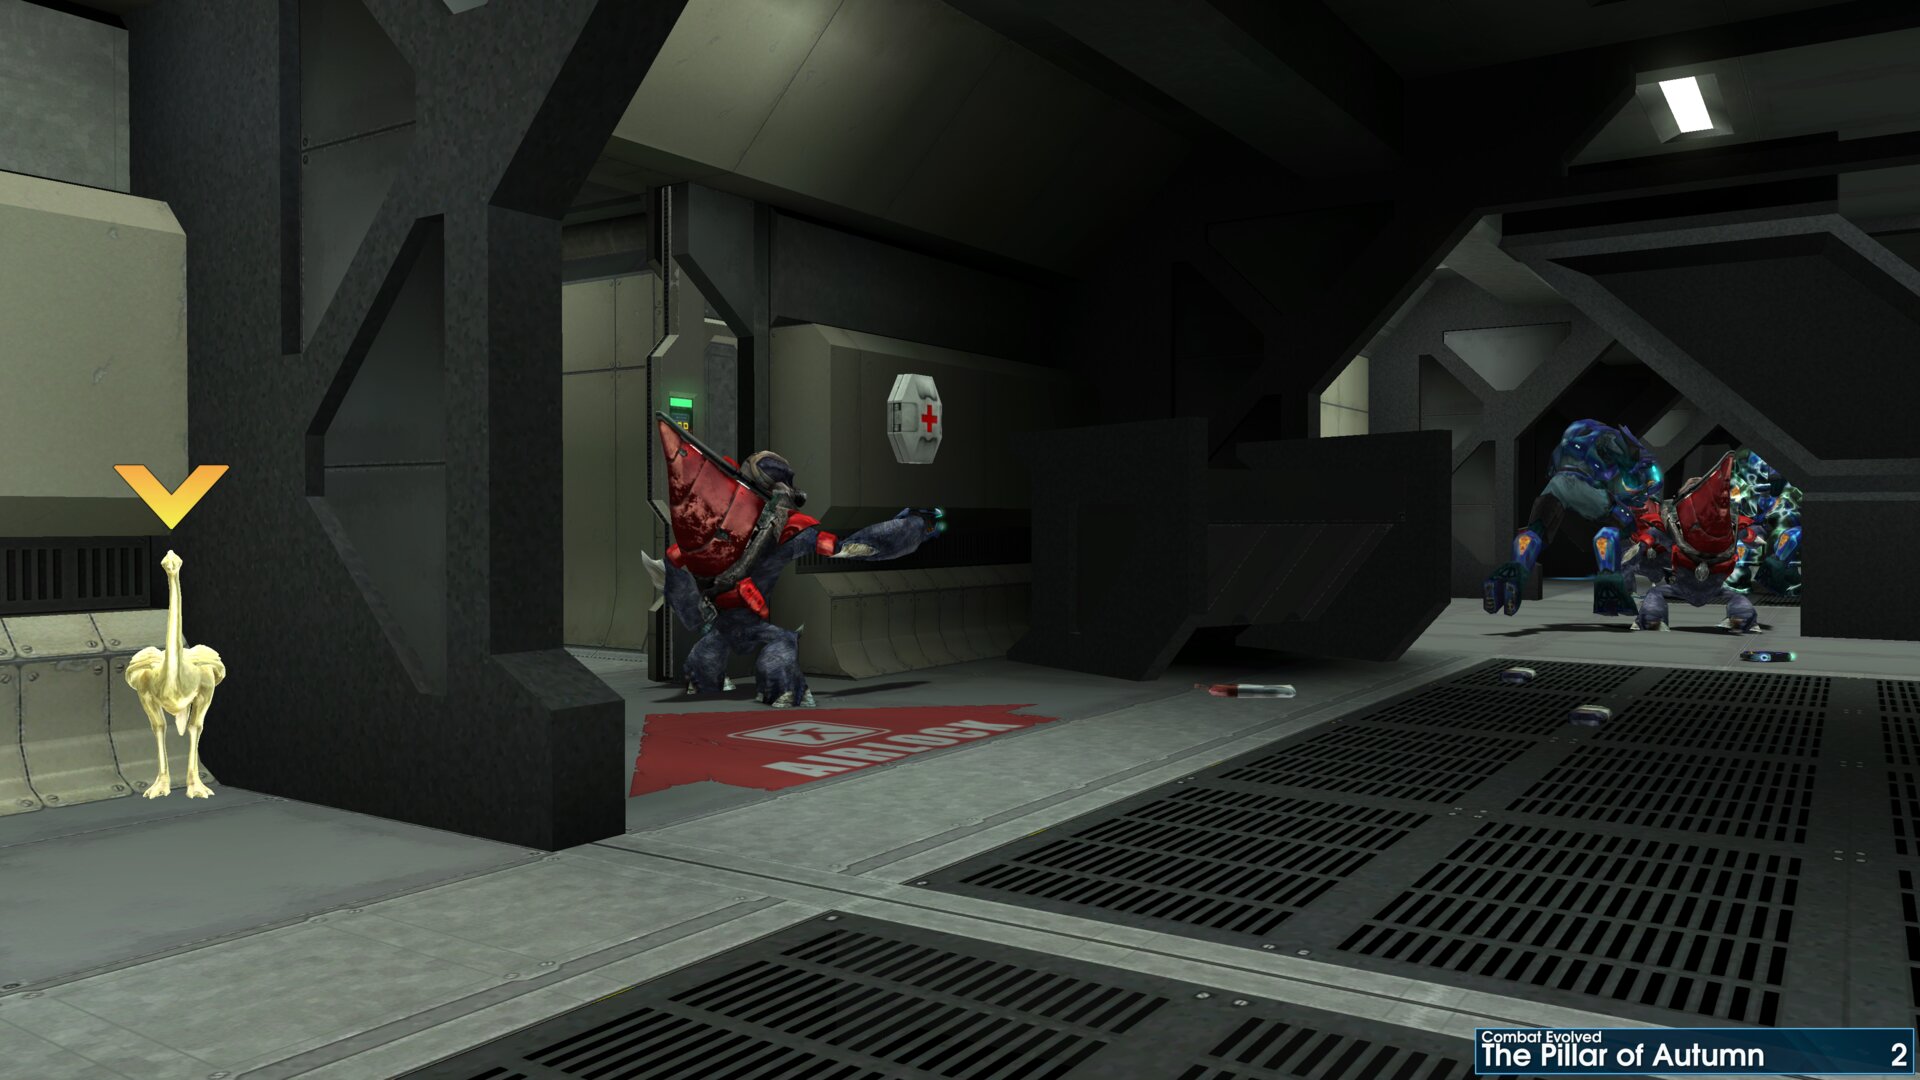
As you make your way to the 2nd Airlock, aka Airlock 32, you will reach a group of Marines fight off the Covenant from behind cover. The Golden Moa is hidden behind a structural column, past the Covenant.
Golden Moa 3
This Golden Moa is inside the Covenant boarding craft, at the 2nd Airlock, aka Airlock 32.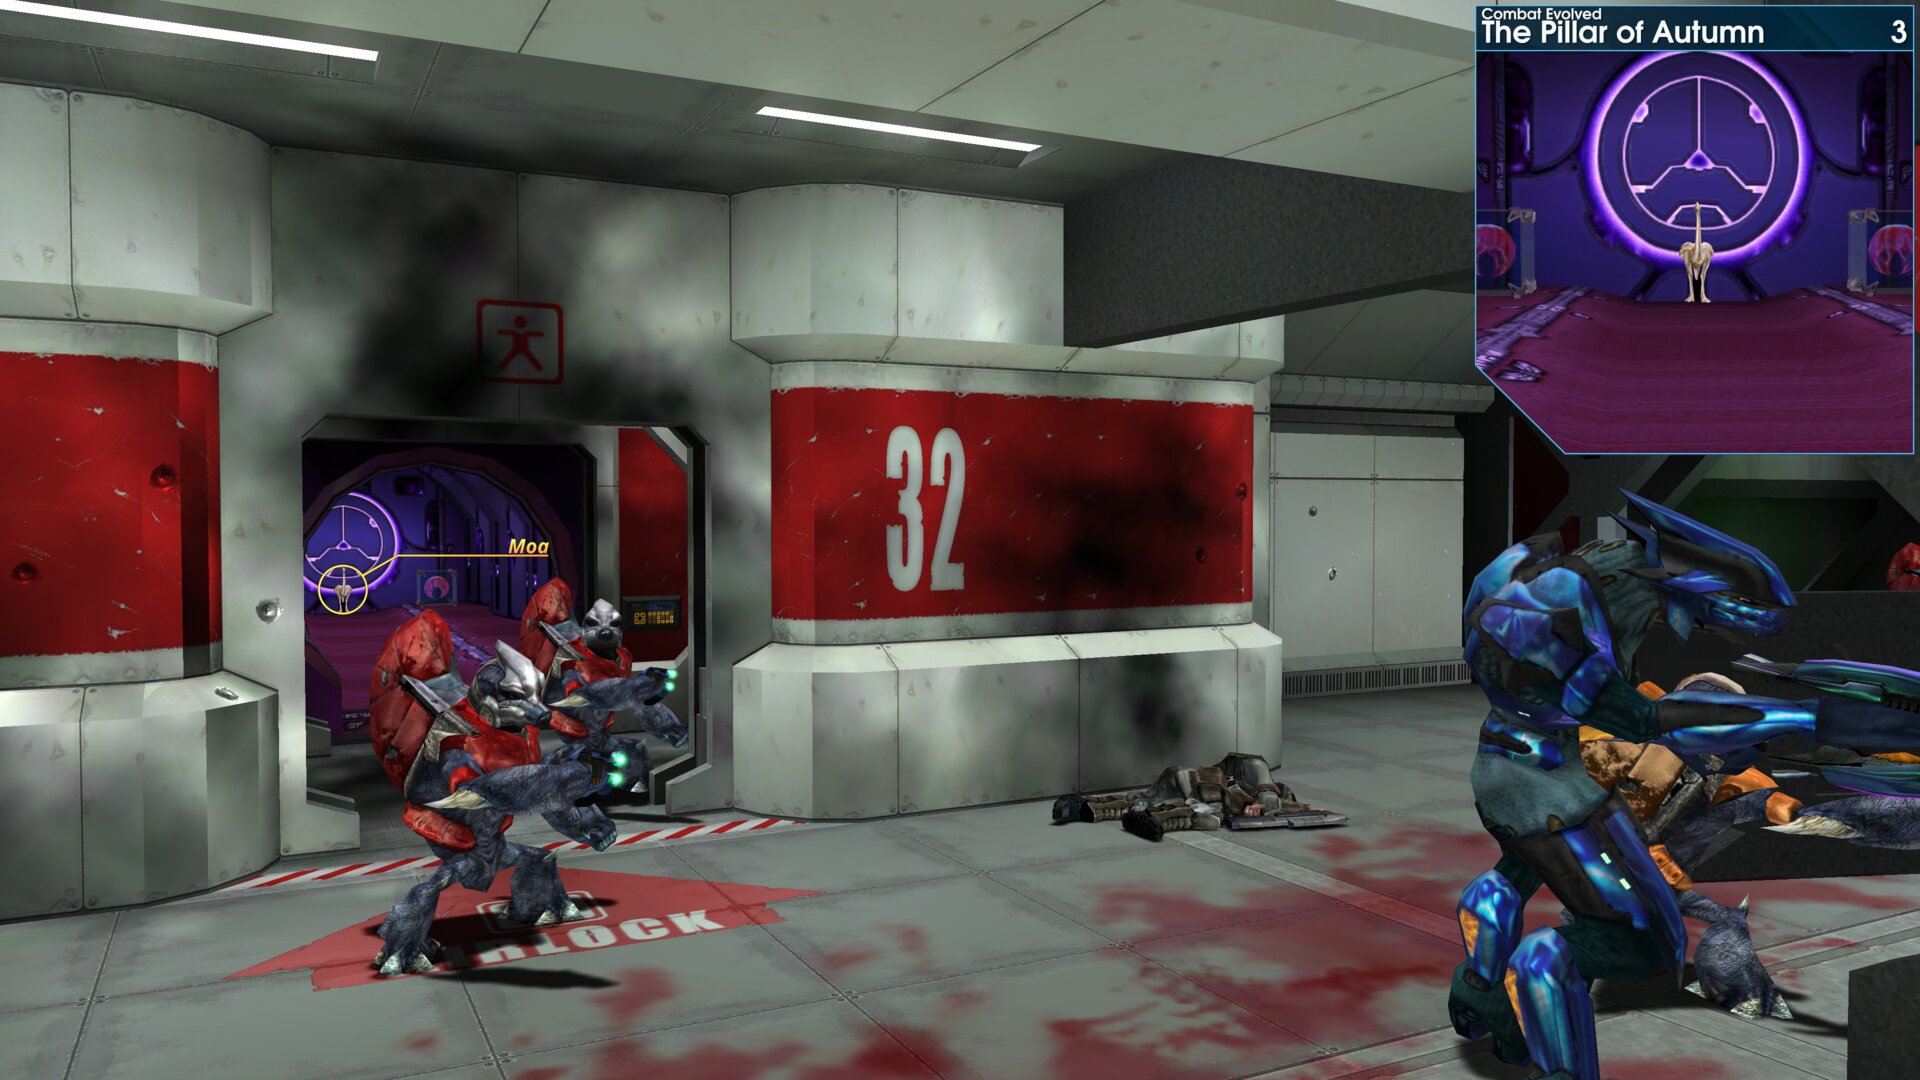
This Golden Moa is inside the Covenant boarding craft, at the 2nd Airlock, aka Airlock 32.
Golden Moa 4
After making your way up to level 2, you will reach a unlit area just beyond a group of Covenant. The Golden Moa will be to your left is you enter the darkness.
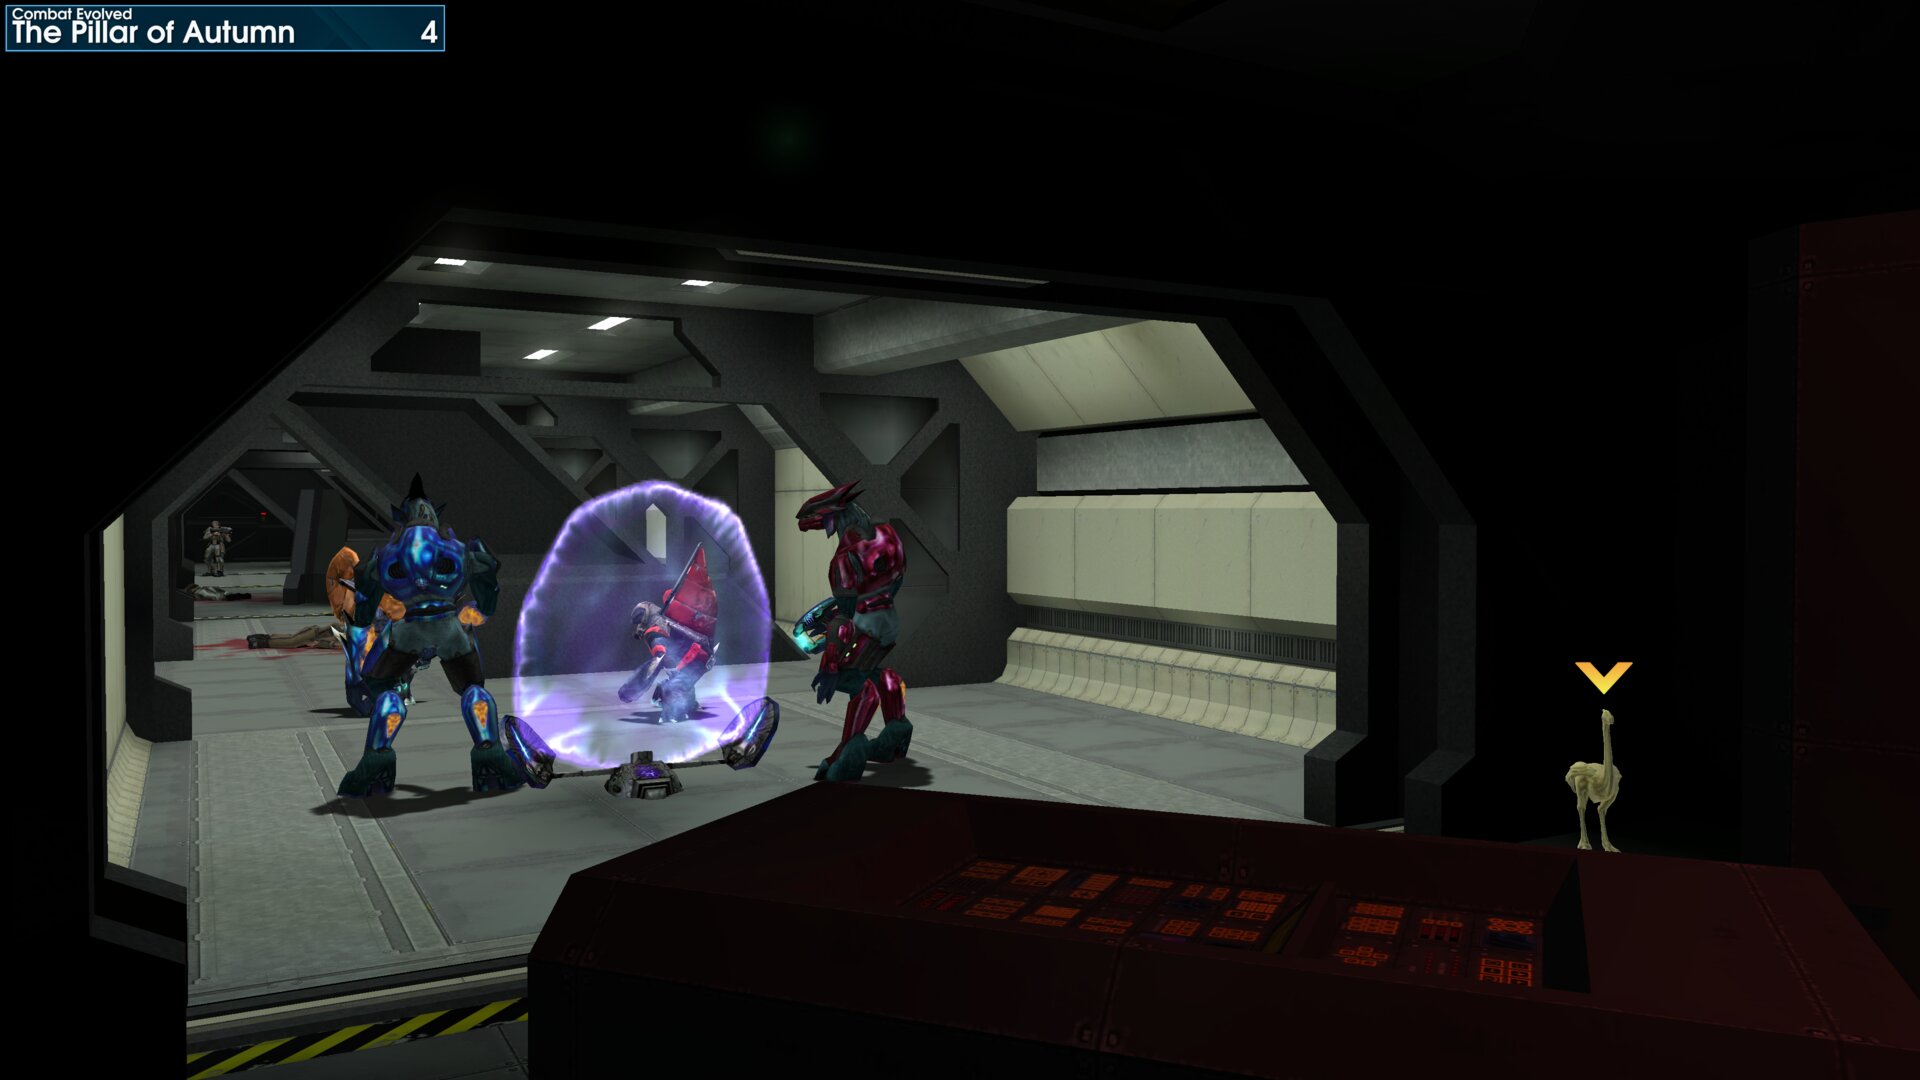
After making your way up to level 2, you will reach a unlit area just beyond a group of Covenant. The Golden Moa will be to your left is you enter the darkness.
Golden Moa 5
After passing through the Cryobay Control Room, you’ll will reach a heavily damage section of the Pillar of Autumn. The Golden Moa is on top of a barrel to your left as you enter this area.
Get this one quick, since a scripted explosion
will destroy it.
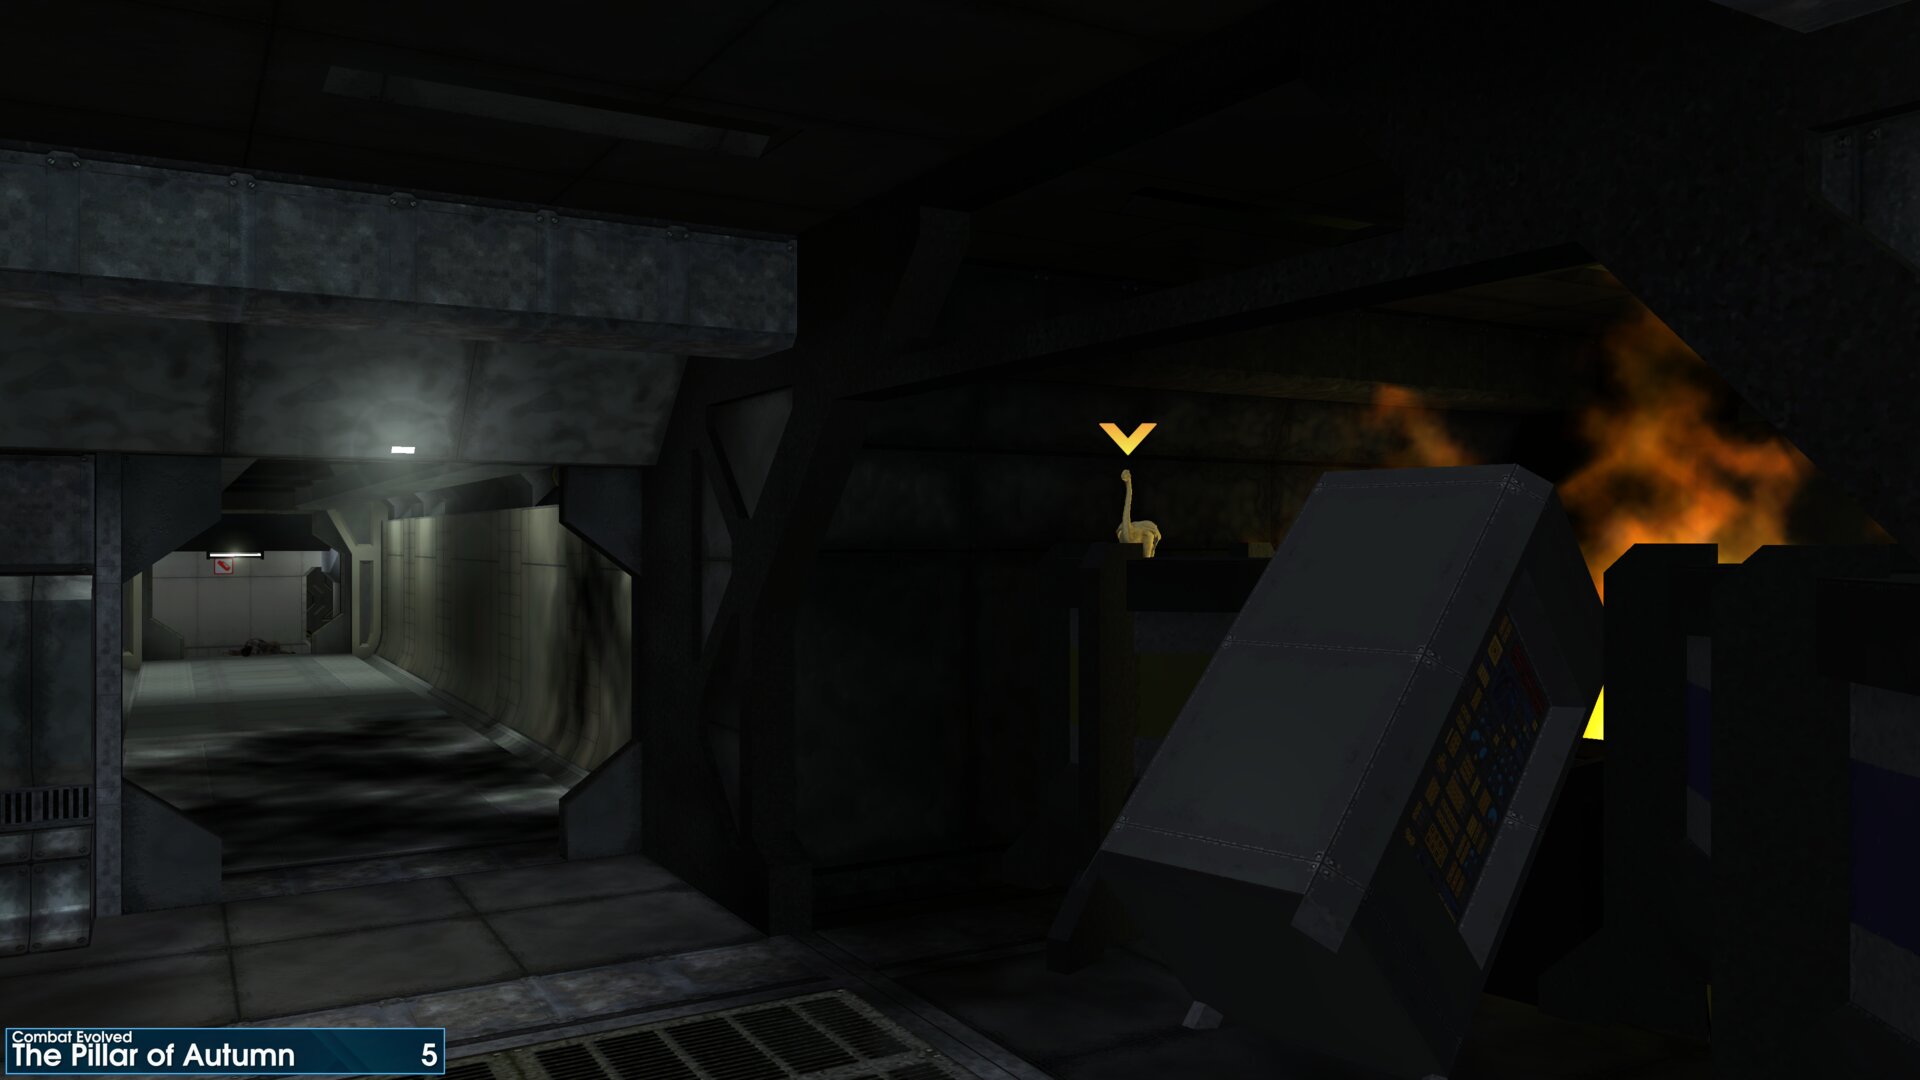
After passing through the Cryobay Control Room, you’ll will reach a heavily damage section of the Pillar of Autumn. The Golden Moa is on top of a barrel to your left as you enter this area.
Get this one quick, since a scripted explosionwill destroy it.
Golden Moa 6
This Golden Moa is past Airlocks 61 & 62 (the end of the mission), in a seated area with Drinks vending machines. You may want to use the ships maintenance accessways to get there.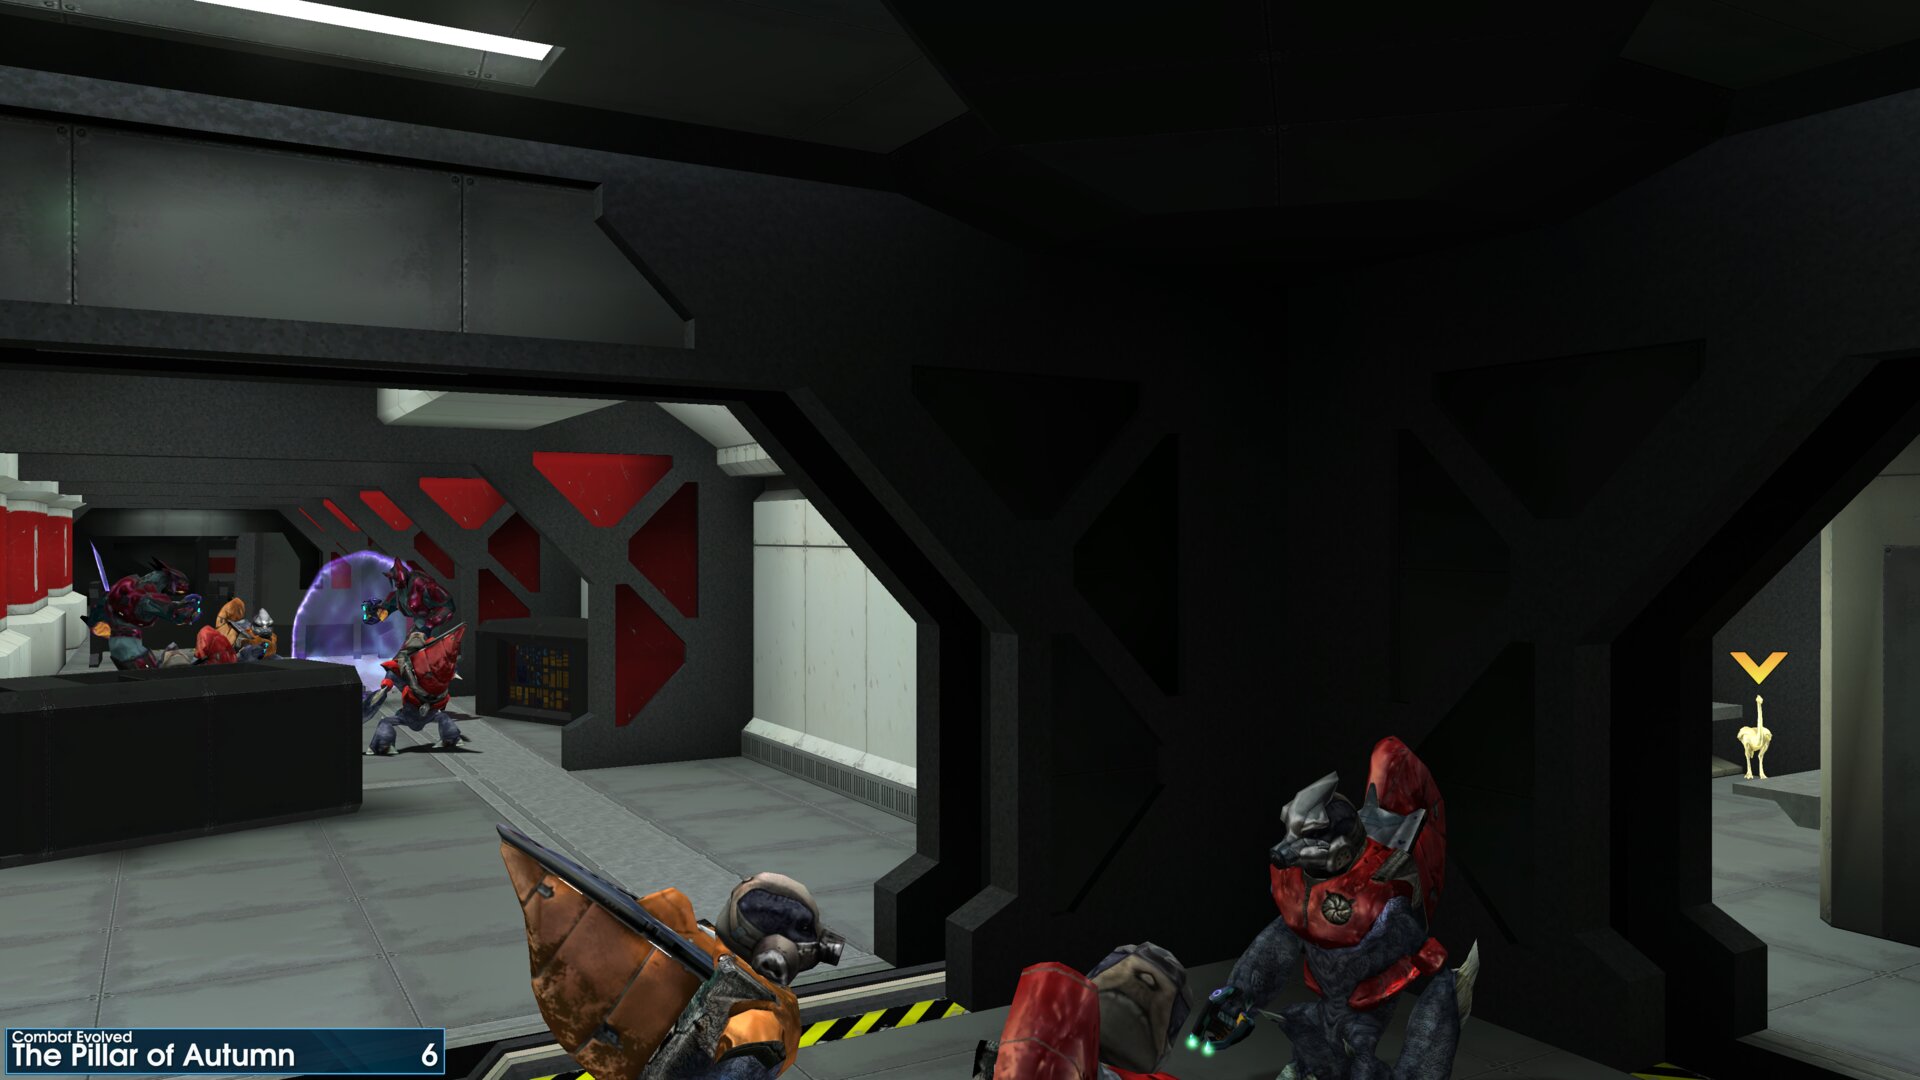
This Golden Moa is past Airlocks 61 & 62 (the end of the mission), in a seated area with Drinks vending machines. You may want to use the ships maintenance accessways to get there.
➟ Halo
Golden Moa 1
After exiting the lifeboat, turn right and walk up the hill between the nearby tree and boulder. The Golden Moa is just beyond, next to the cliff edge.
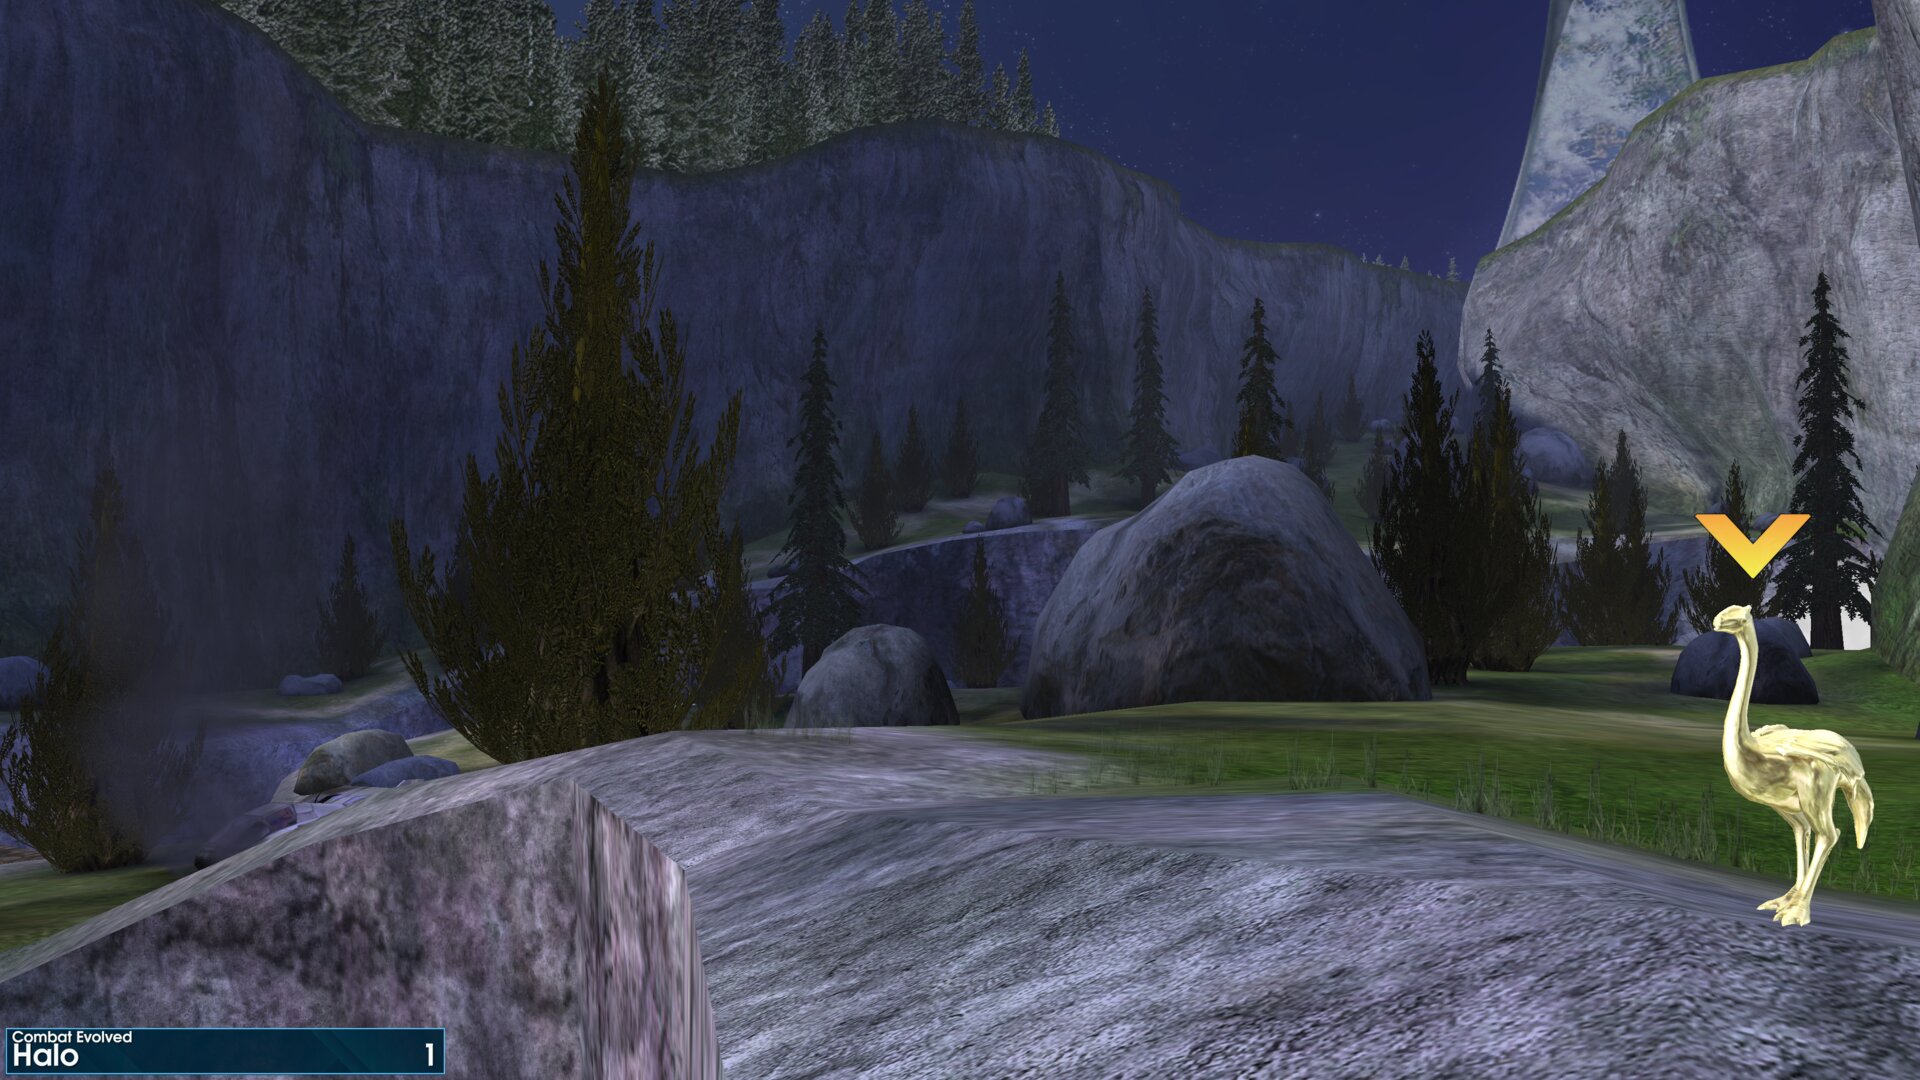
After exiting the lifeboat, turn right and walk up the hill between the nearby tree and boulder. The Golden Moa is just beyond, next to the cliff edge.
Golden Moa 2
This Golden Moa is at the end of the lower narrow bridge, nearest the lifeboat.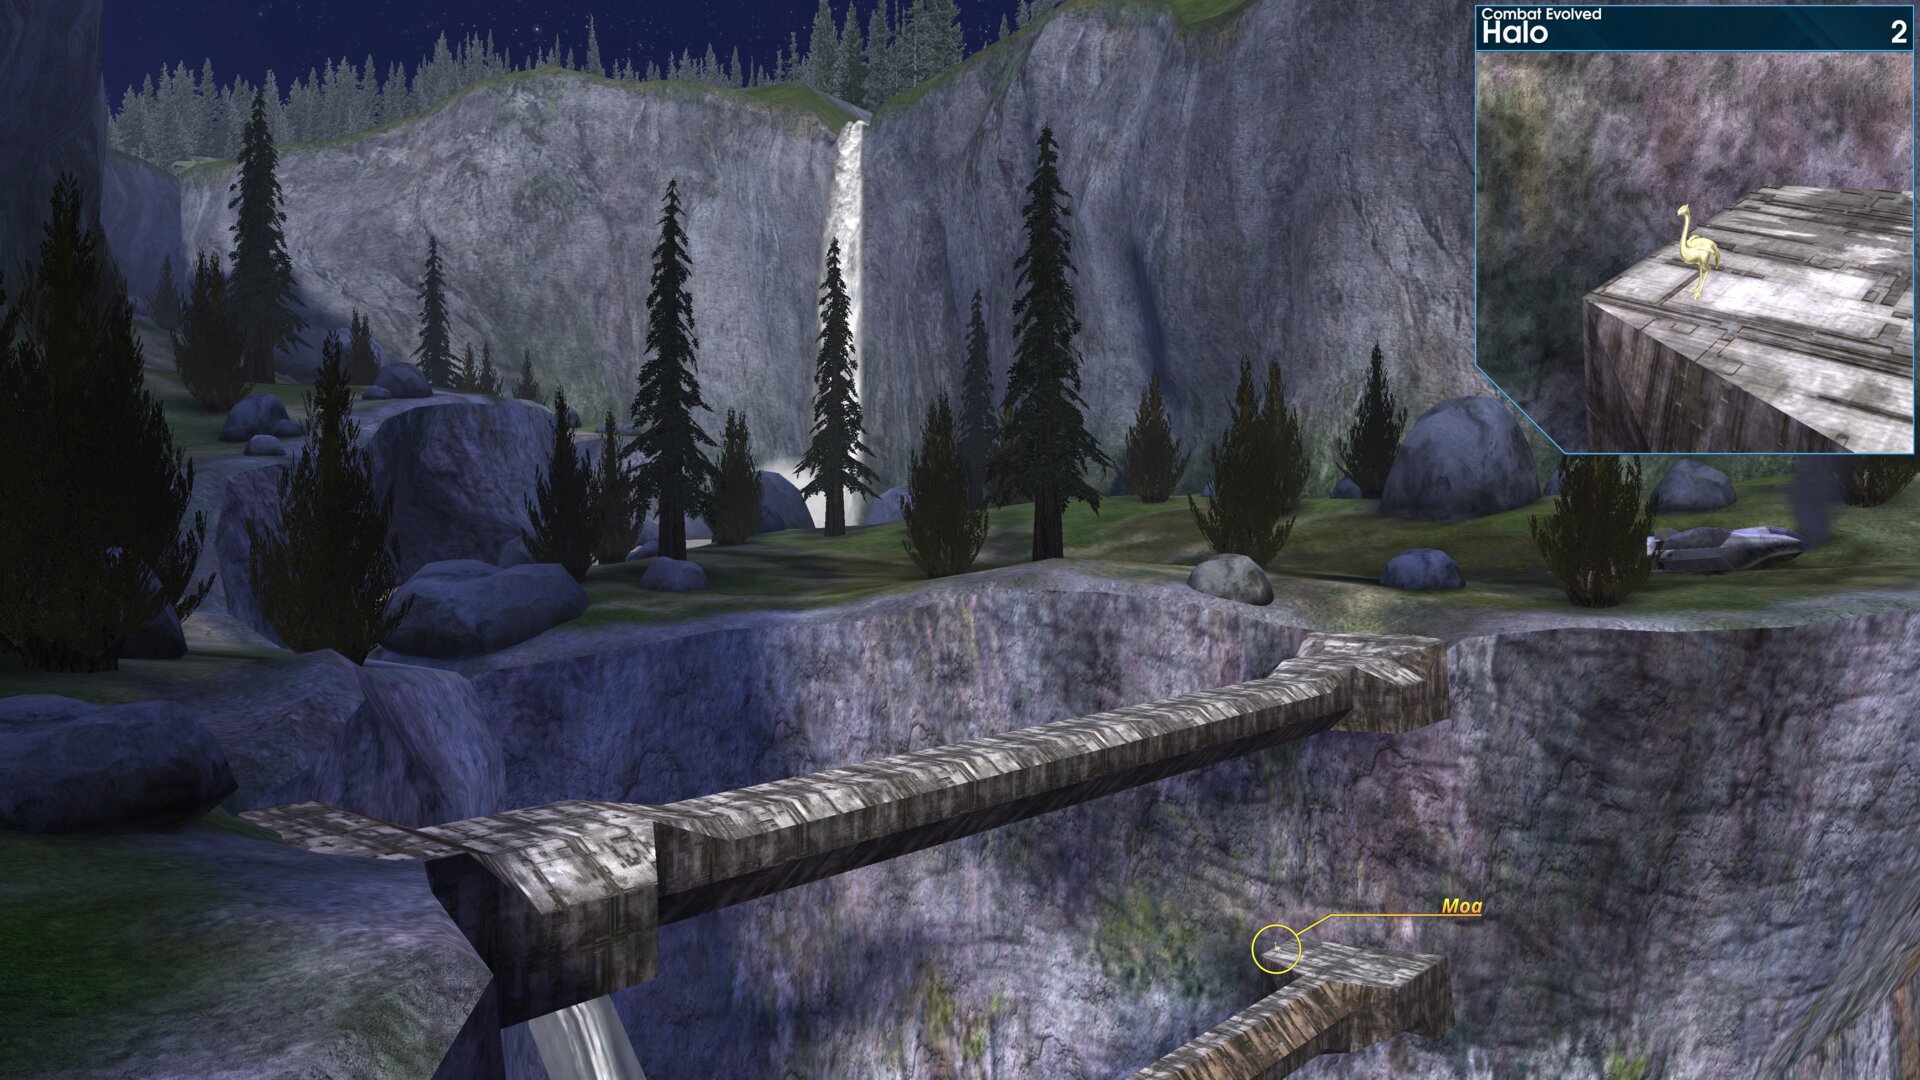
This Golden Moa is at the end of the lower narrow bridge, nearest the lifeboat.
Golden Moa 3
This Golden Moa is located in the middle of the first Beam Tower, on one of the ledges above the beams source.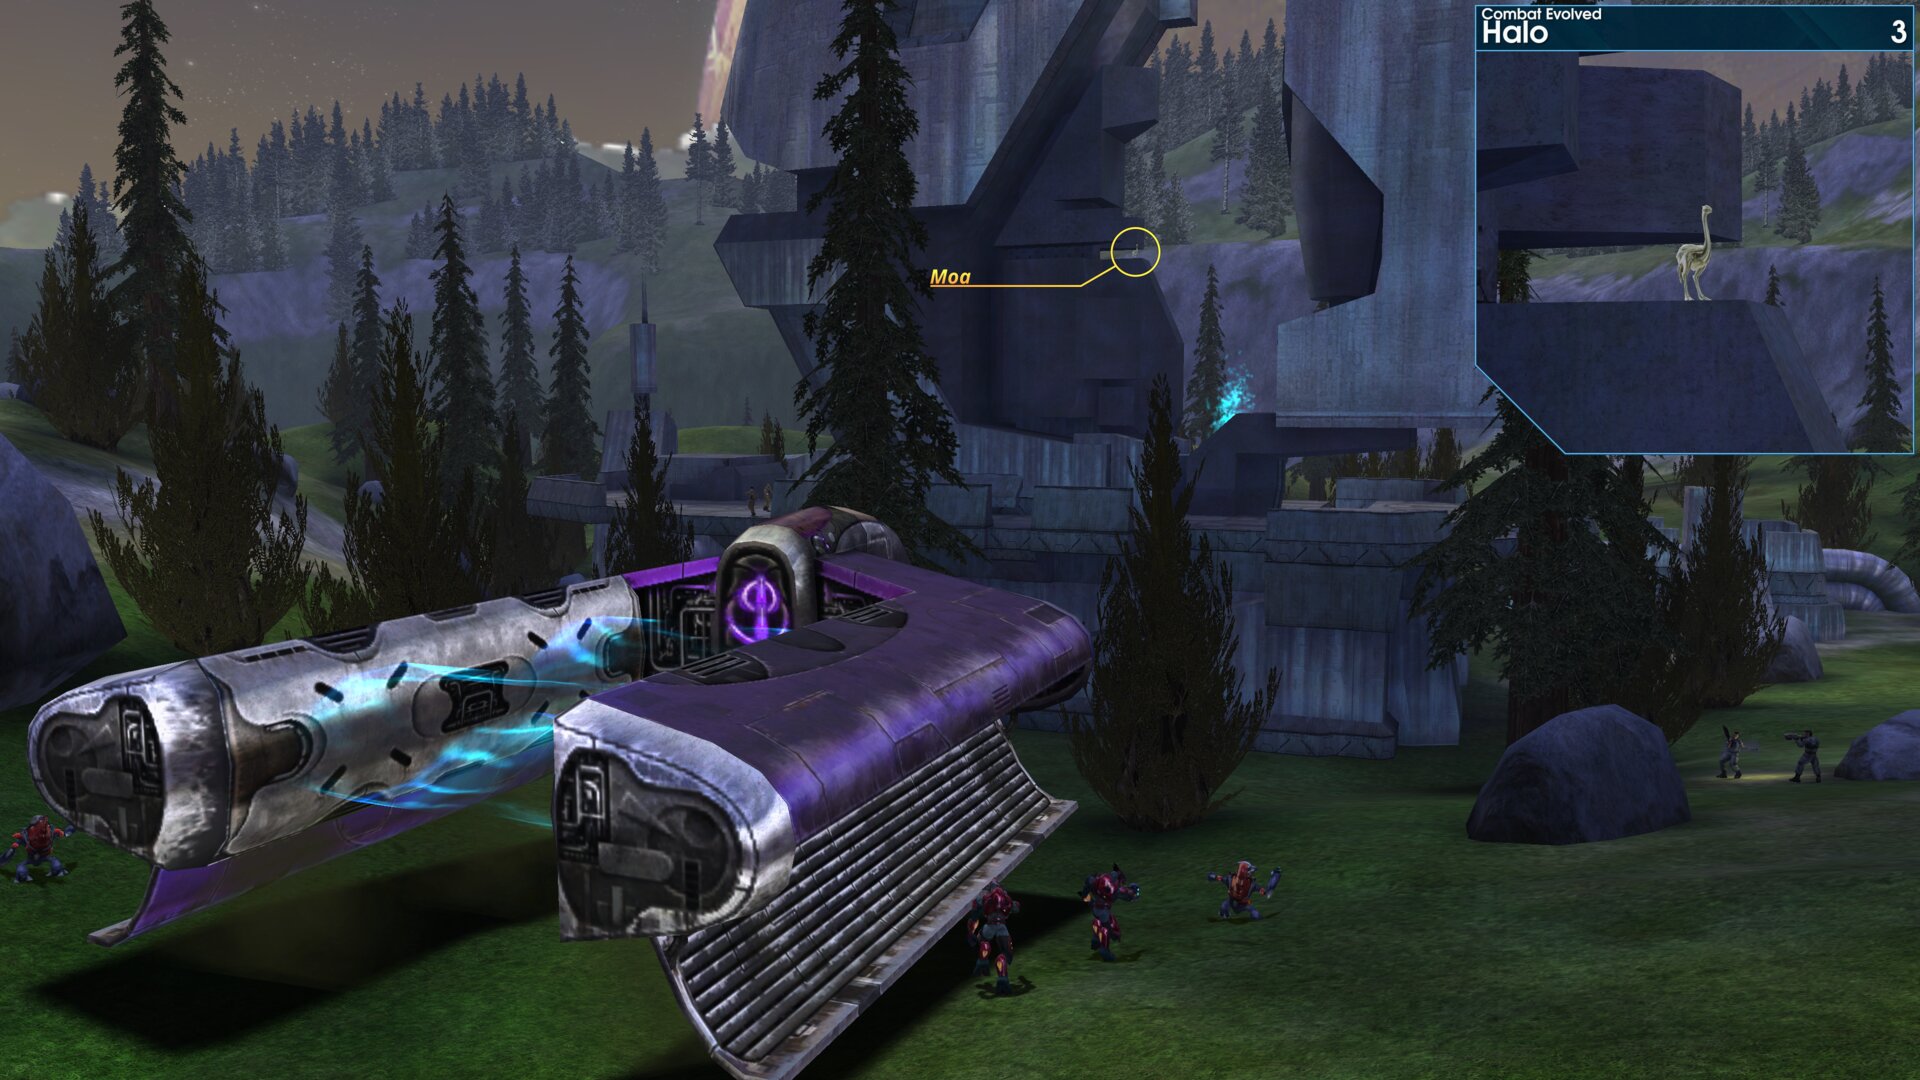
This Golden Moa is located in the middle of the first Beam Tower, on one of the ledges above the beams source.
Golden Moa 4
As you make your way through the tunnel, you’ll reach a loop with a eventual gap you’ll need to cross. Before doing so, look to the end of the passage beside the final ramp, the Golden Moa will be in the corner. (This area also contains a terminal, hidden in a seperate nook)
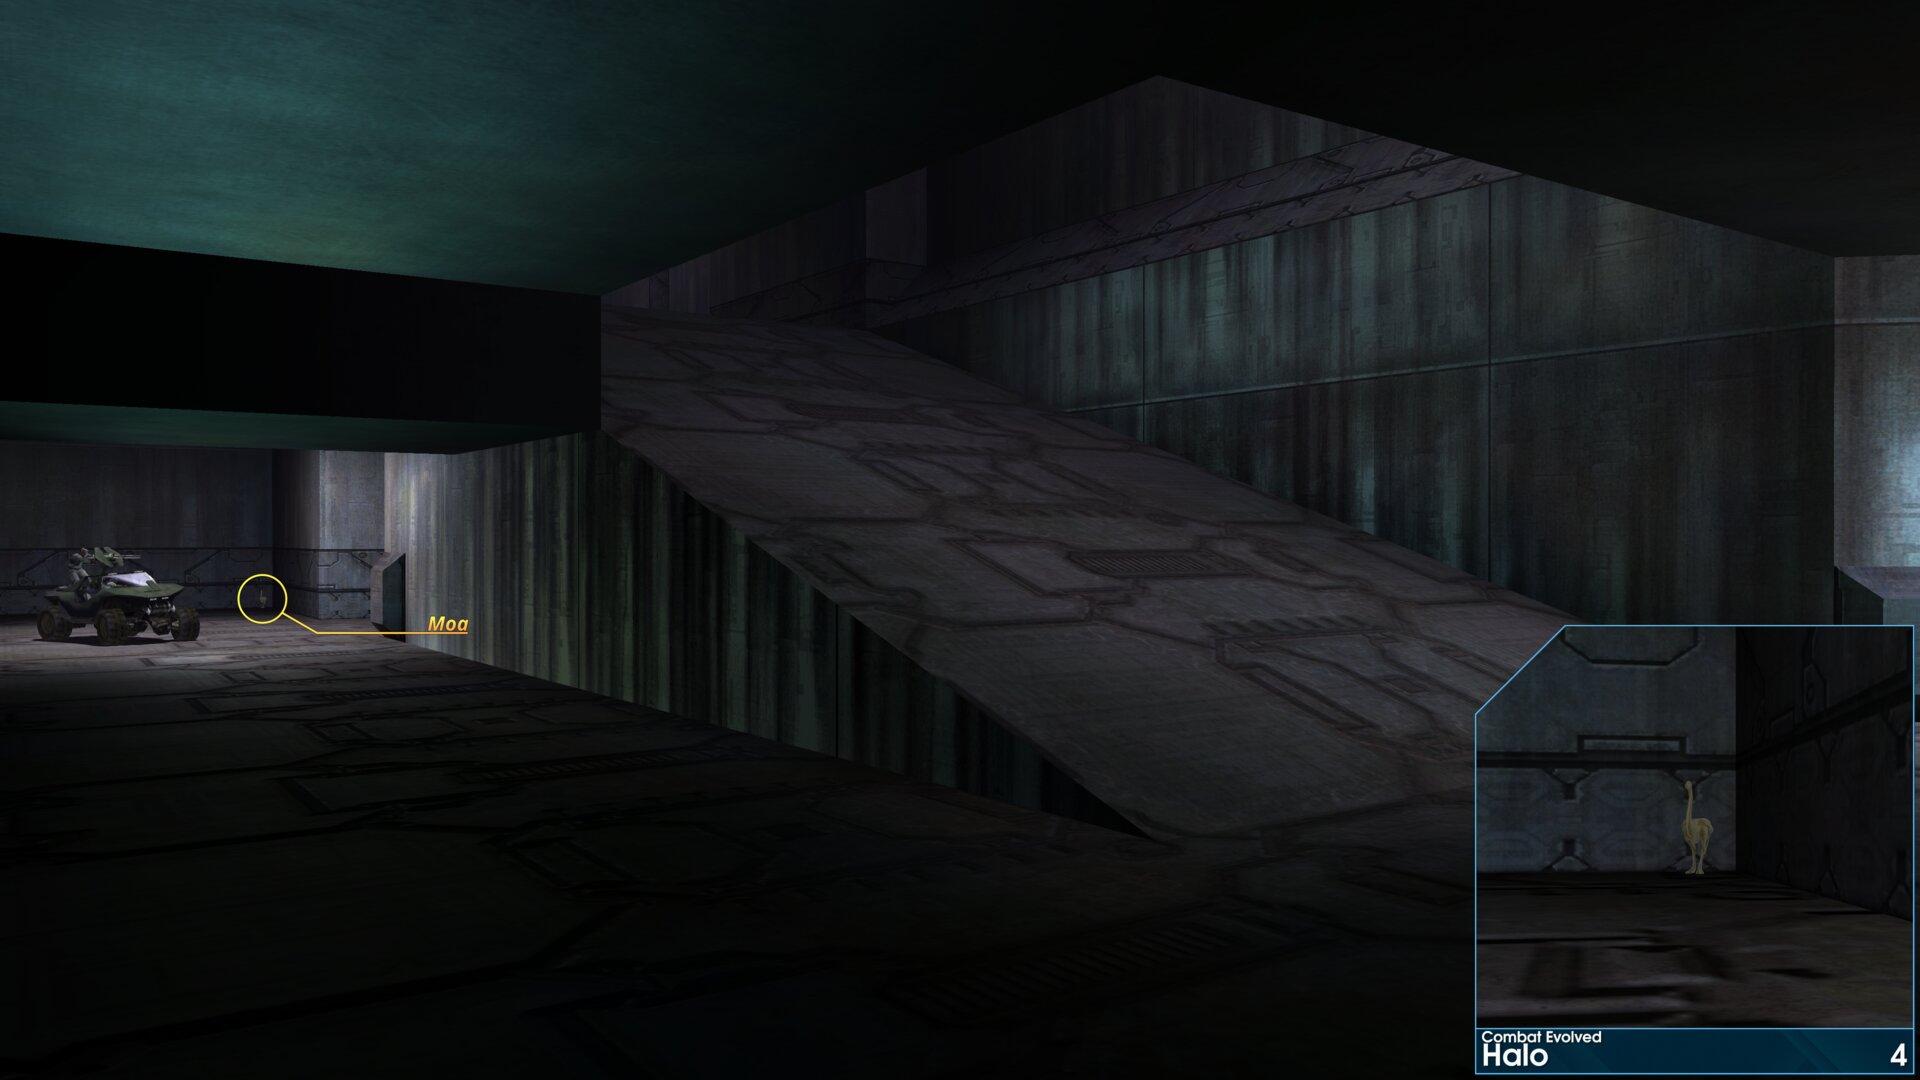
As you make your way through the tunnel, you’ll reach a loop with a eventual gap you’ll need to cross. Before doing so, look to the end of the passage beside the final ramp, the Golden Moa will be in the corner. (This area also contains a terminal, hidden in a seperate nook)
Golden Moa 5
This Golden Moa is hiding beside the light bridge, next to one of the lights near the chasm. You’ll have a great vantage point from the light bridge controls.
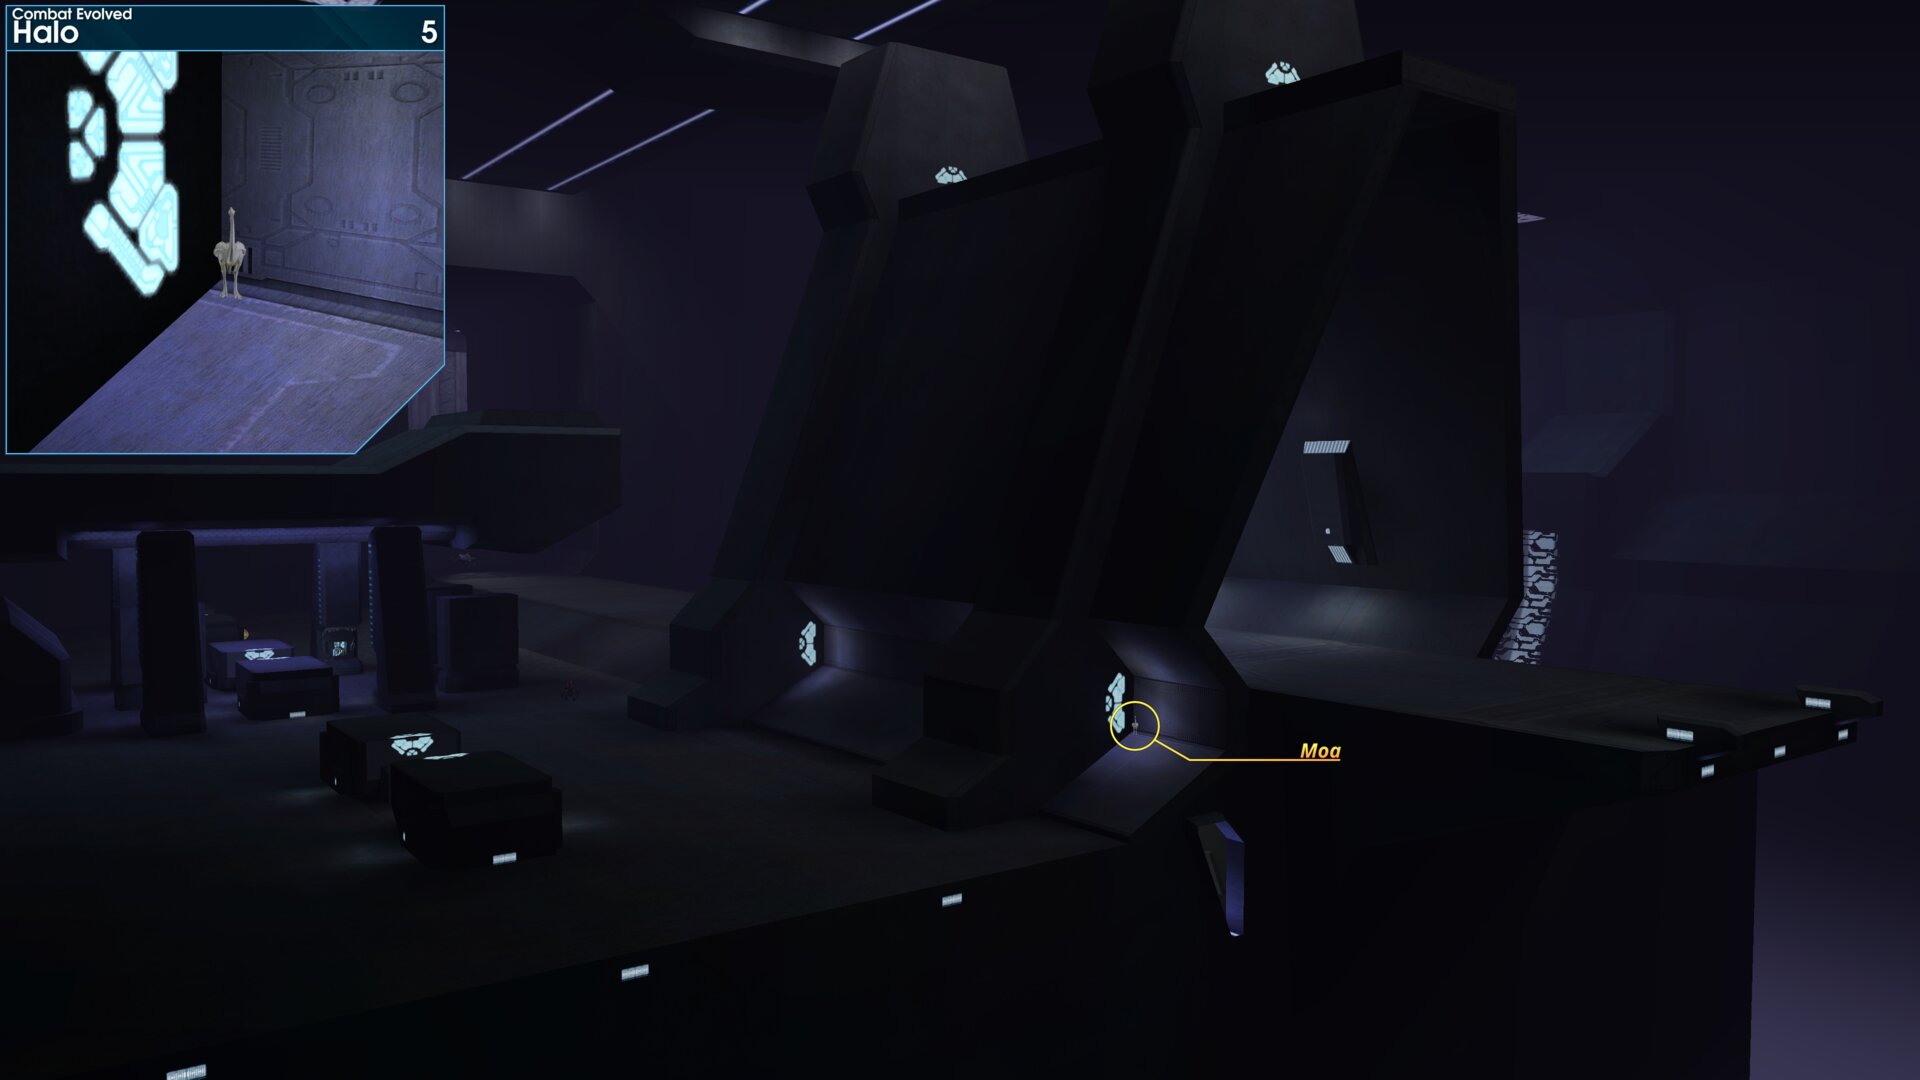
This Golden Moa is hiding beside the light bridge, next to one of the lights near the chasm. You’ll have a great vantage point from the light bridge controls.
Golden Moa 6
Reunion Tour.
You’ll find this Golden Moa to the left as you exit the tunnel.
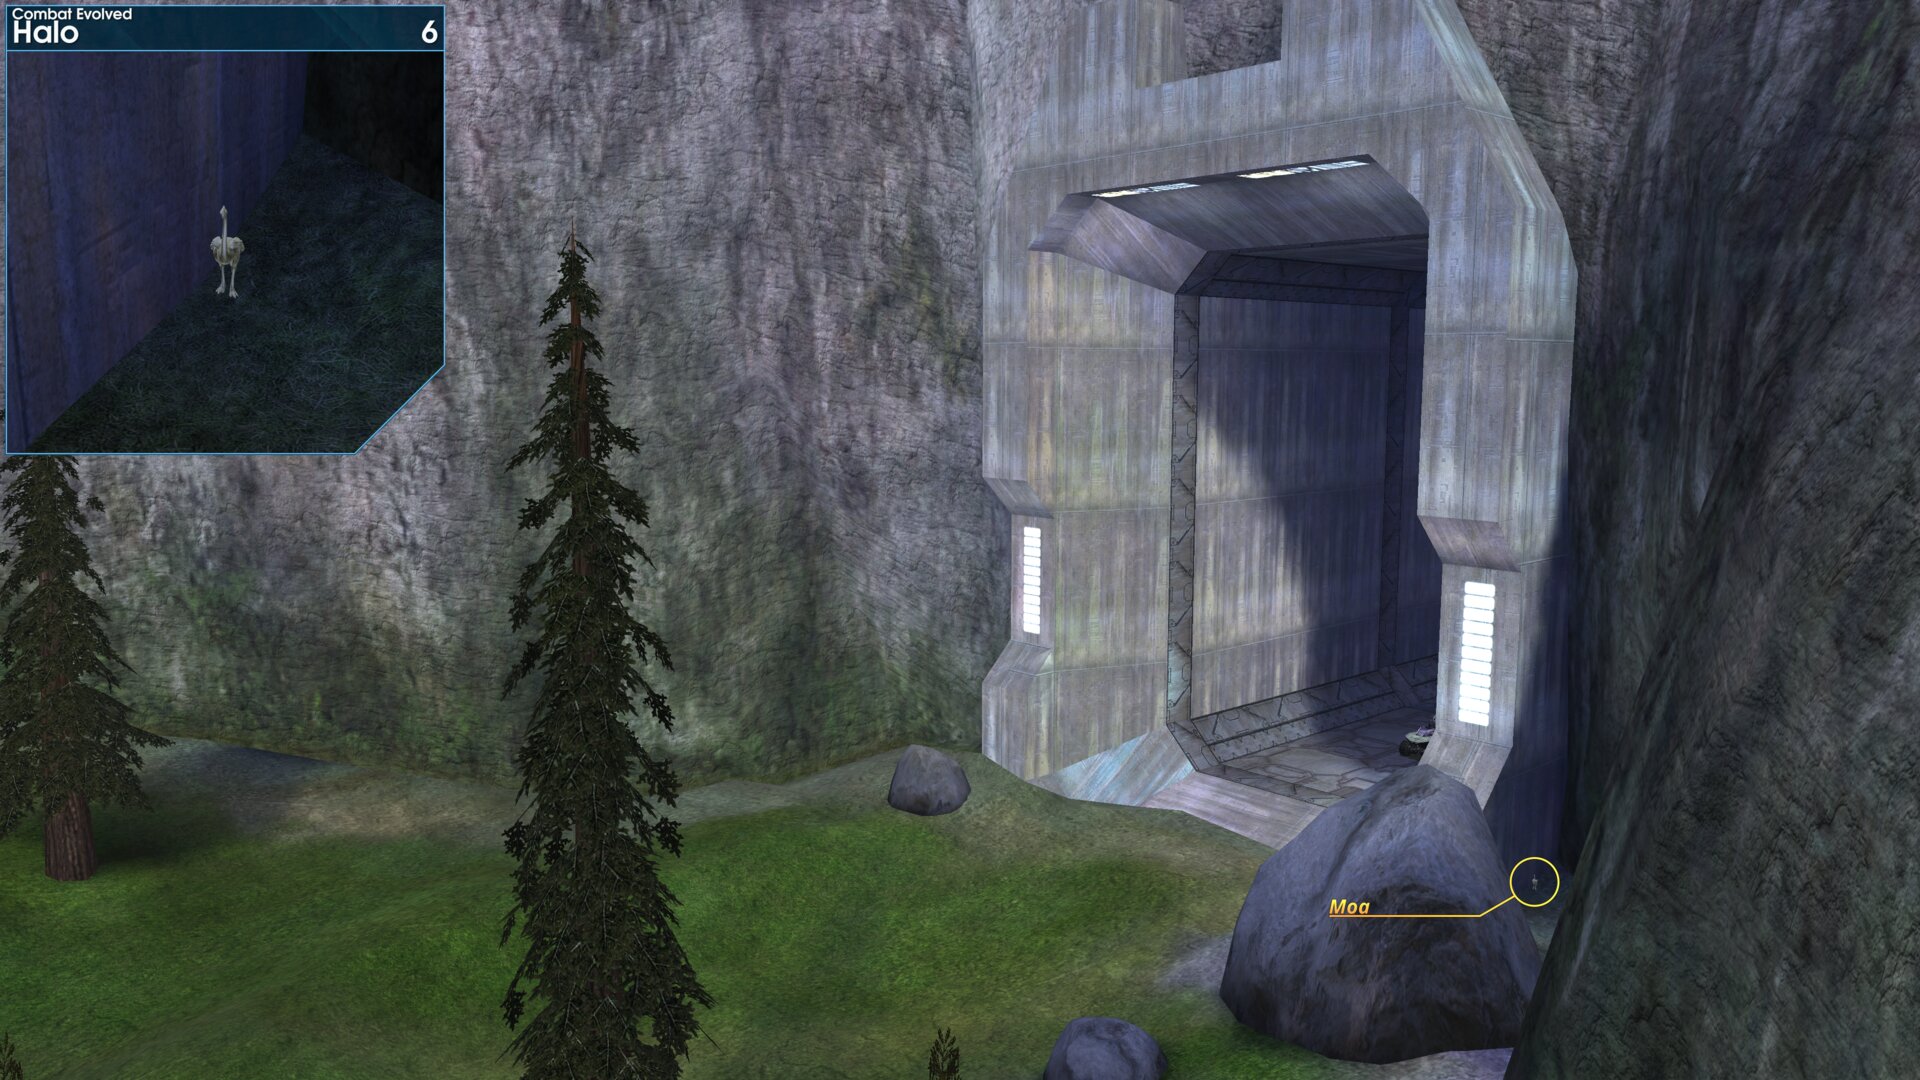
Reunion Tour.
You’ll find this Golden Moa to the left as you exit the tunnel.
Golden Moa 7
In the rock slide area, ”...Marines are concealed in those rocks” Cortana, the Golden Moa is hidden behind the large boulder near the lifeboat.
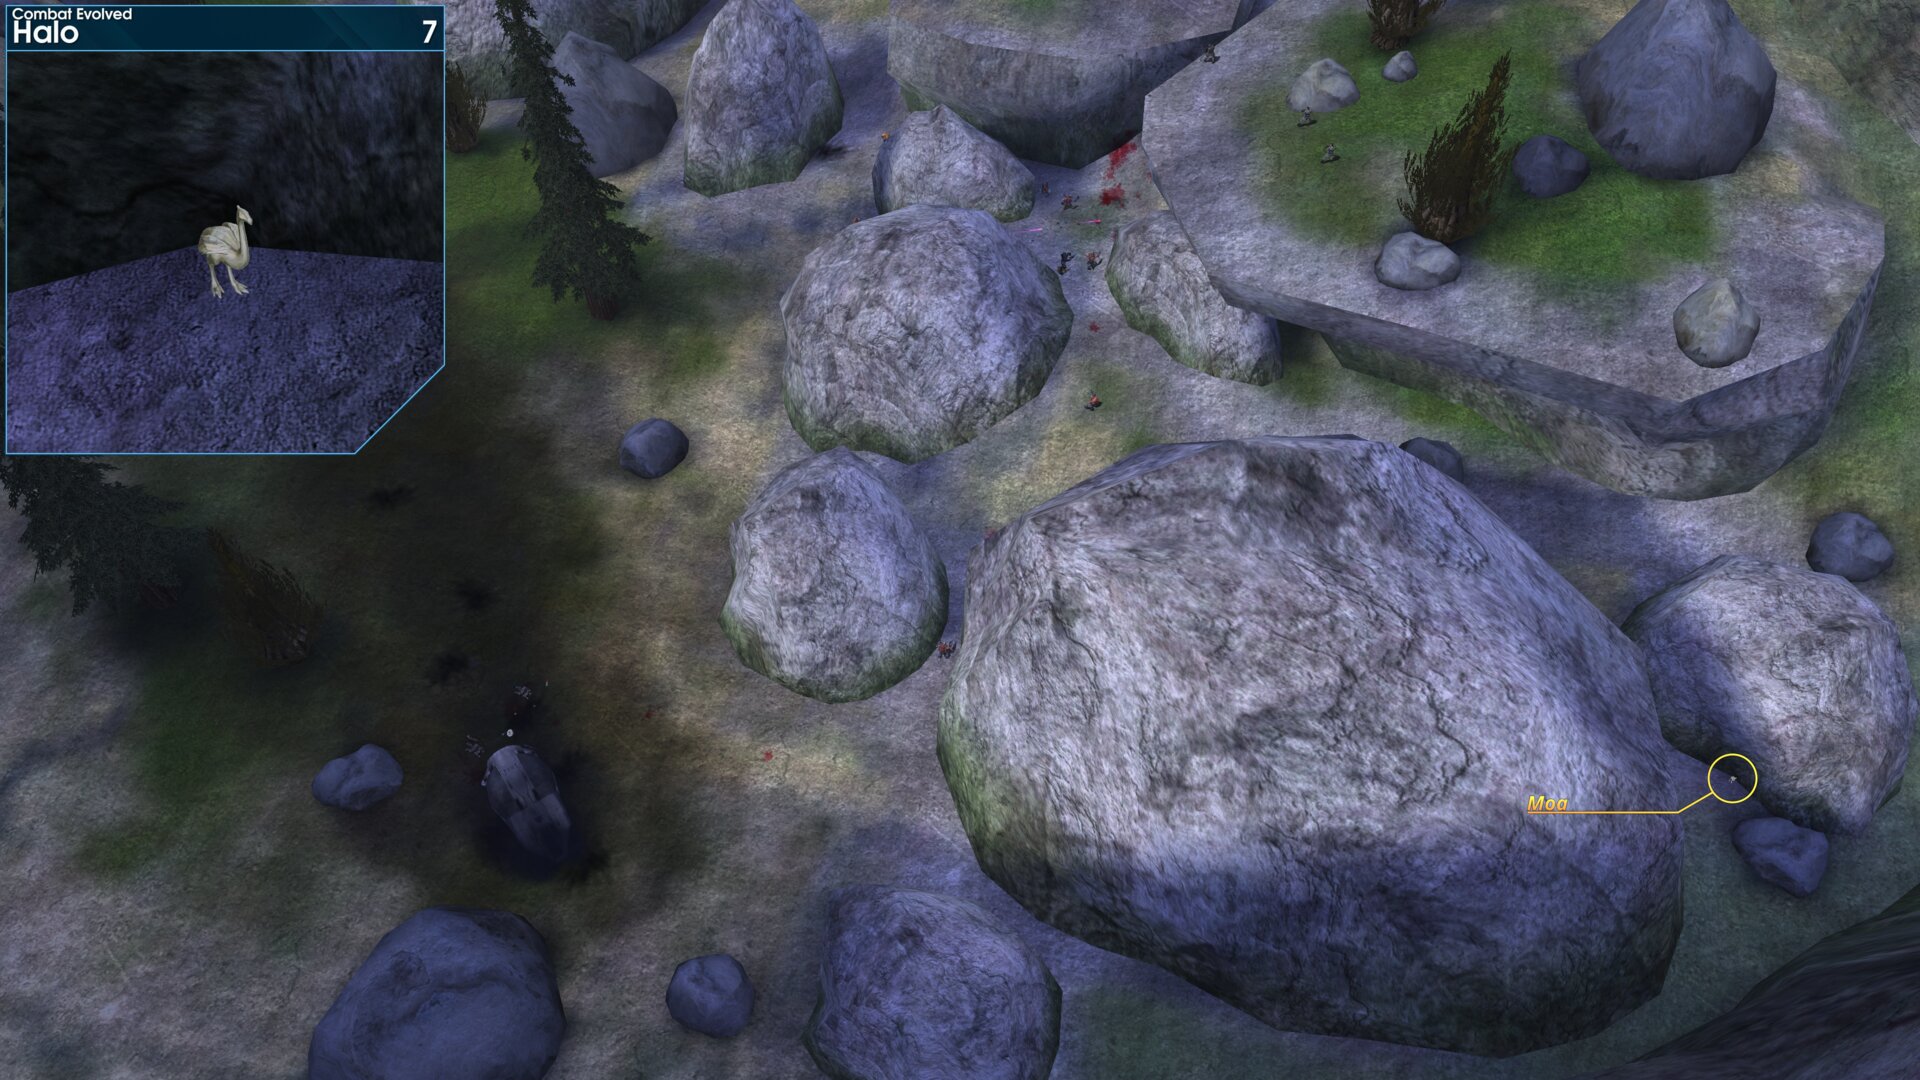
In the rock slide area, ”...Marines are concealed in those rocks” Cortana, the Golden Moa is hidden behind the large boulder near the lifeboat.
Golden Moa 8
At the head of the river, the Golden Moa is in the water next to the waterfall.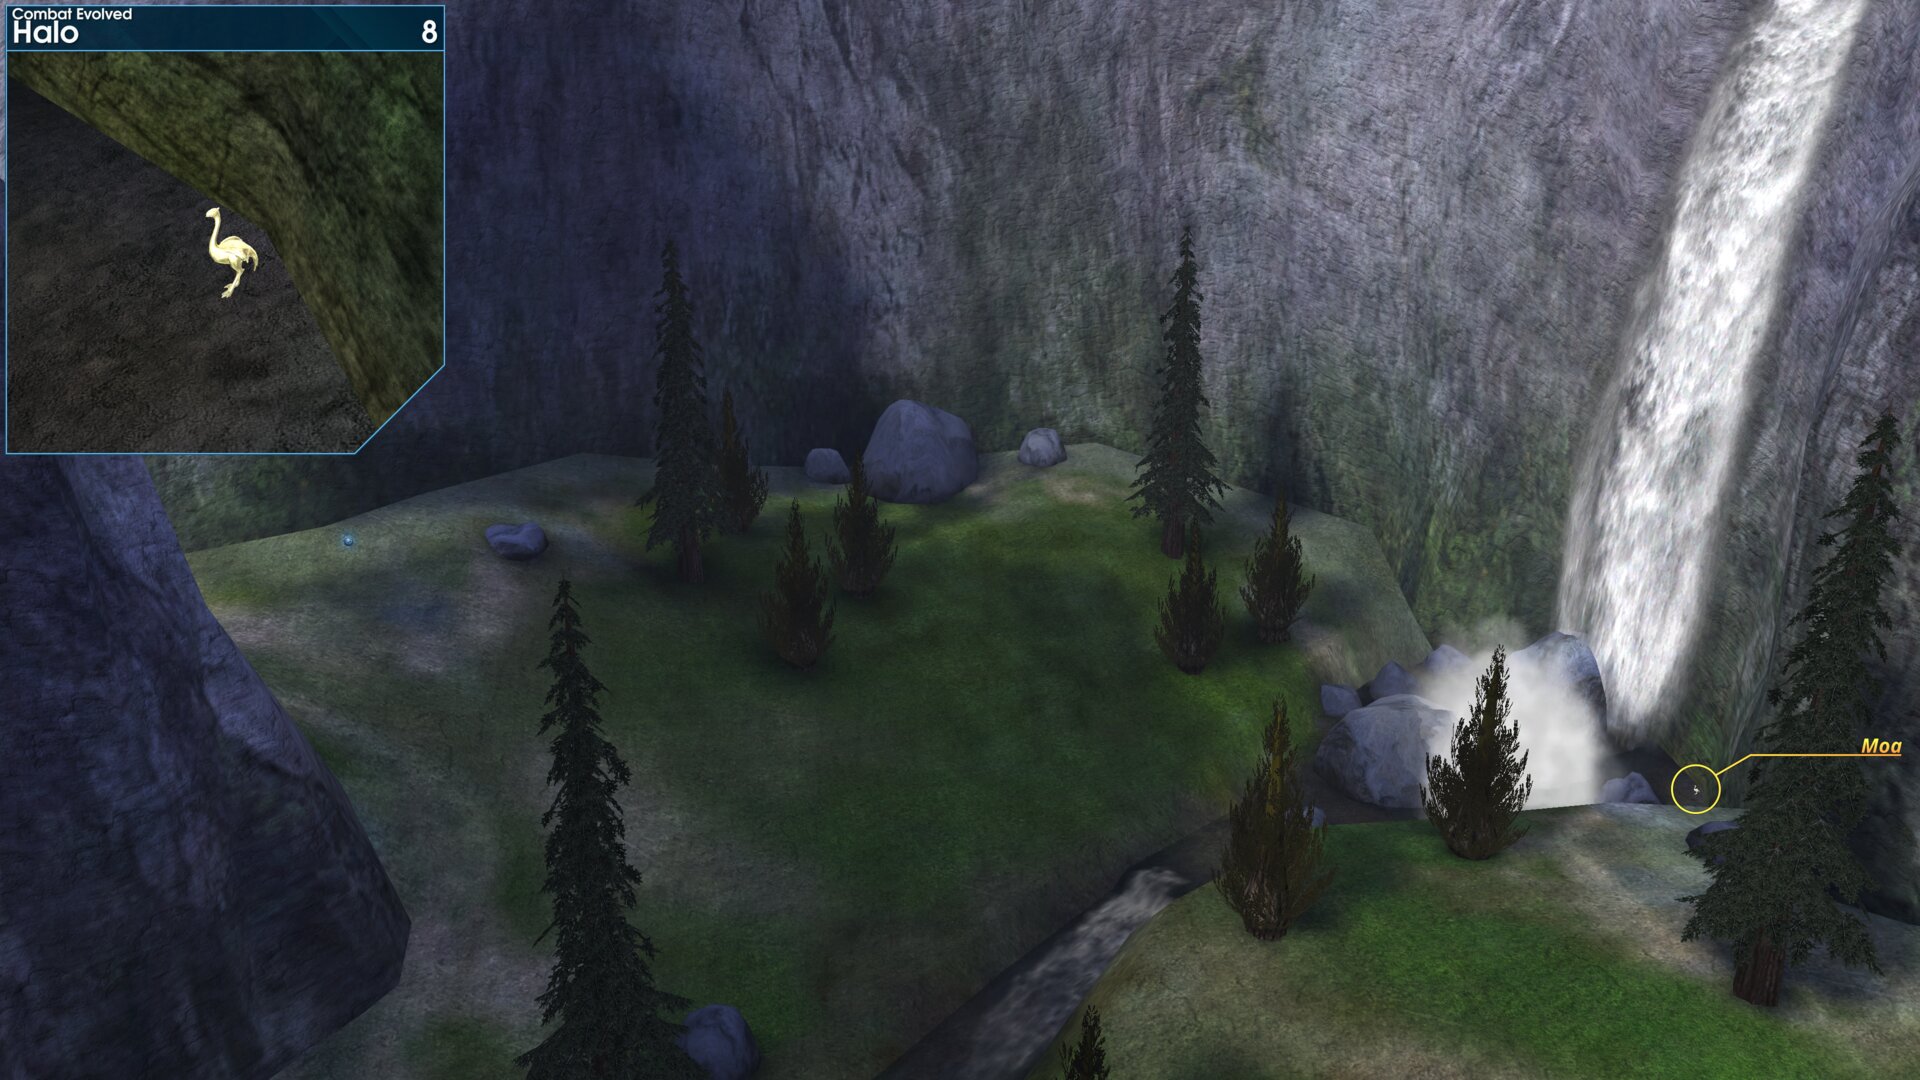
At the head of the river, the Golden Moa is in the water next to the waterfall.
➟ The Truth and Reconciliation
Golden Moa 1
As you reach the 2nd Covenant encounter, you’ll find a Golden Moa around the corner to the right.
"Stop. Motion tracker shows movement around the next bend" Cortana.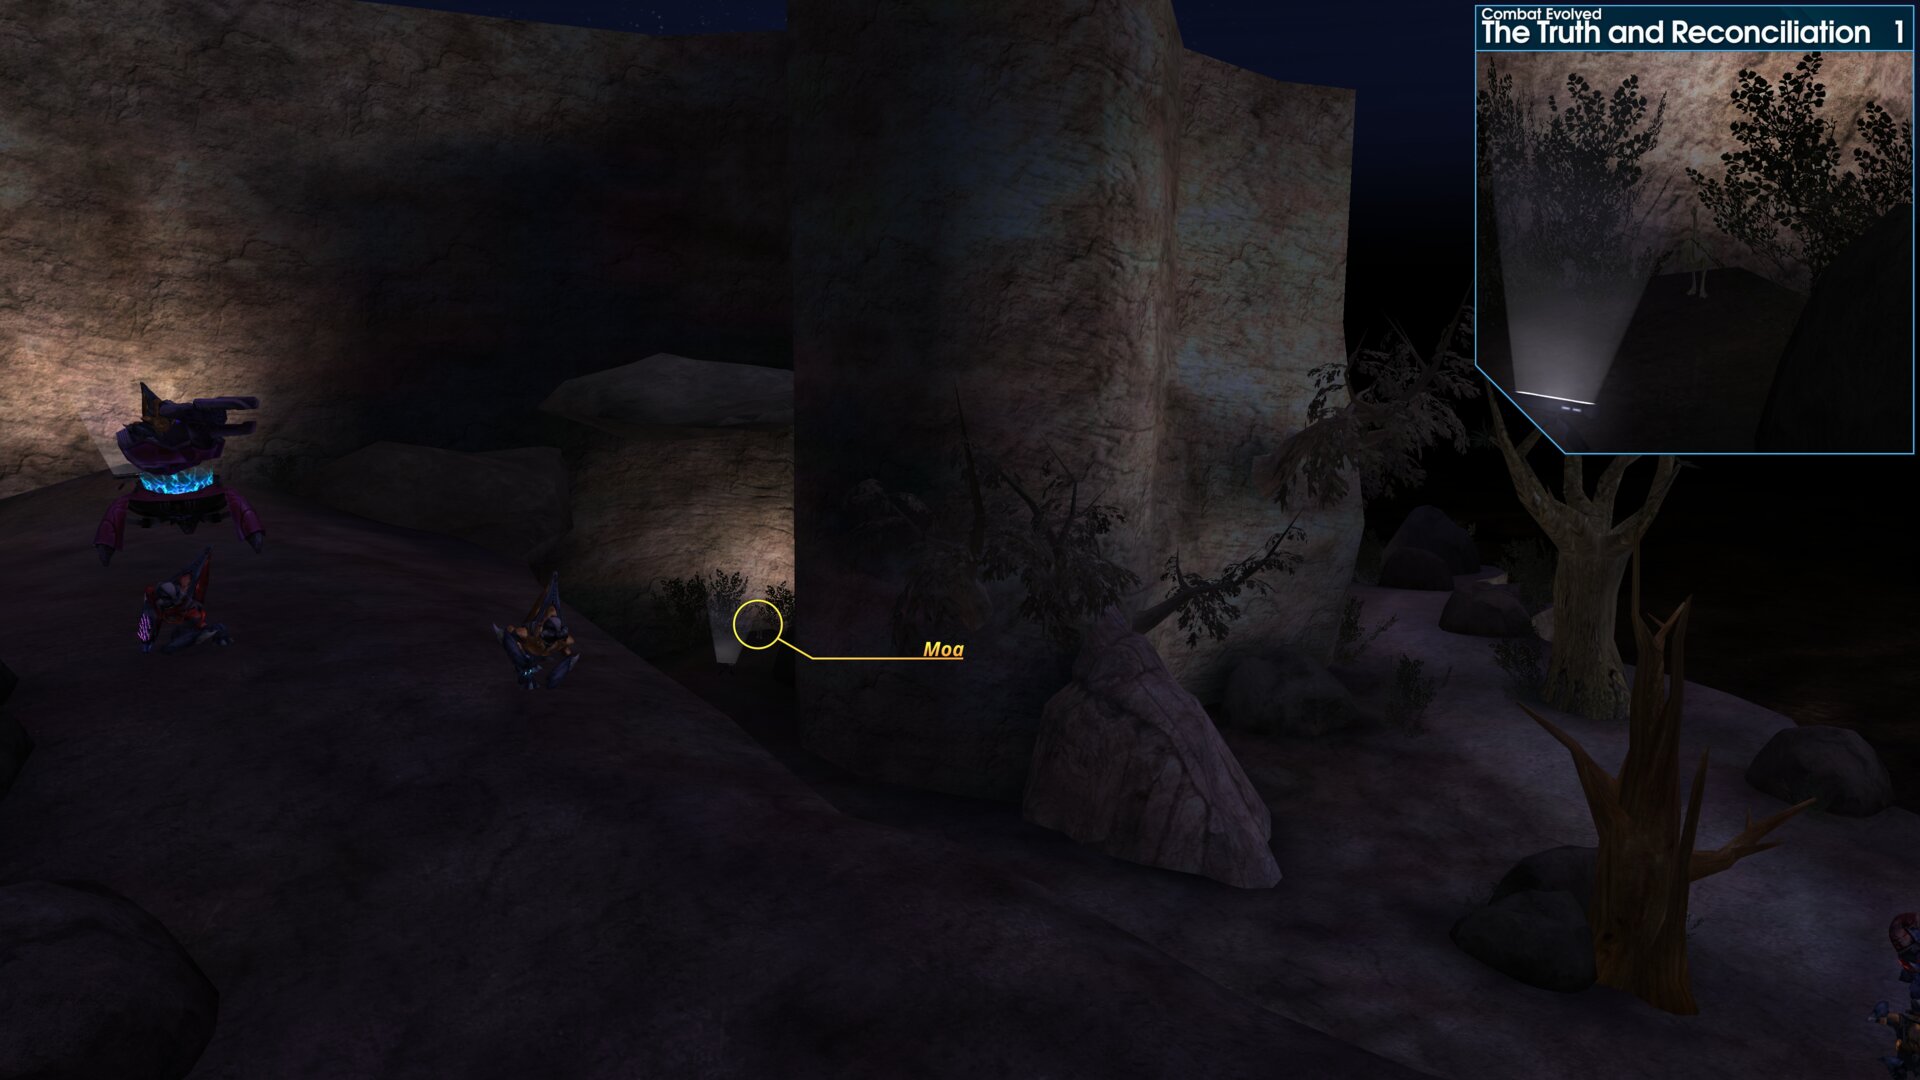
As you reach the 2nd Covenant encounter, you’ll find a Golden Moa around the corner to the right.
"Stop. Motion tracker shows movement around the next bend" Cortana.
Golden Moa 2
At the 3rd Covenant encounter, take the suggested left path. The Golden Moa is behind a couple of boulders at the end of the path, near one of the Covenants stationary guns (aka Shade turret).
"Covenant forces detected up ahead. The path up on the left should let us sneak up around" Cortana.
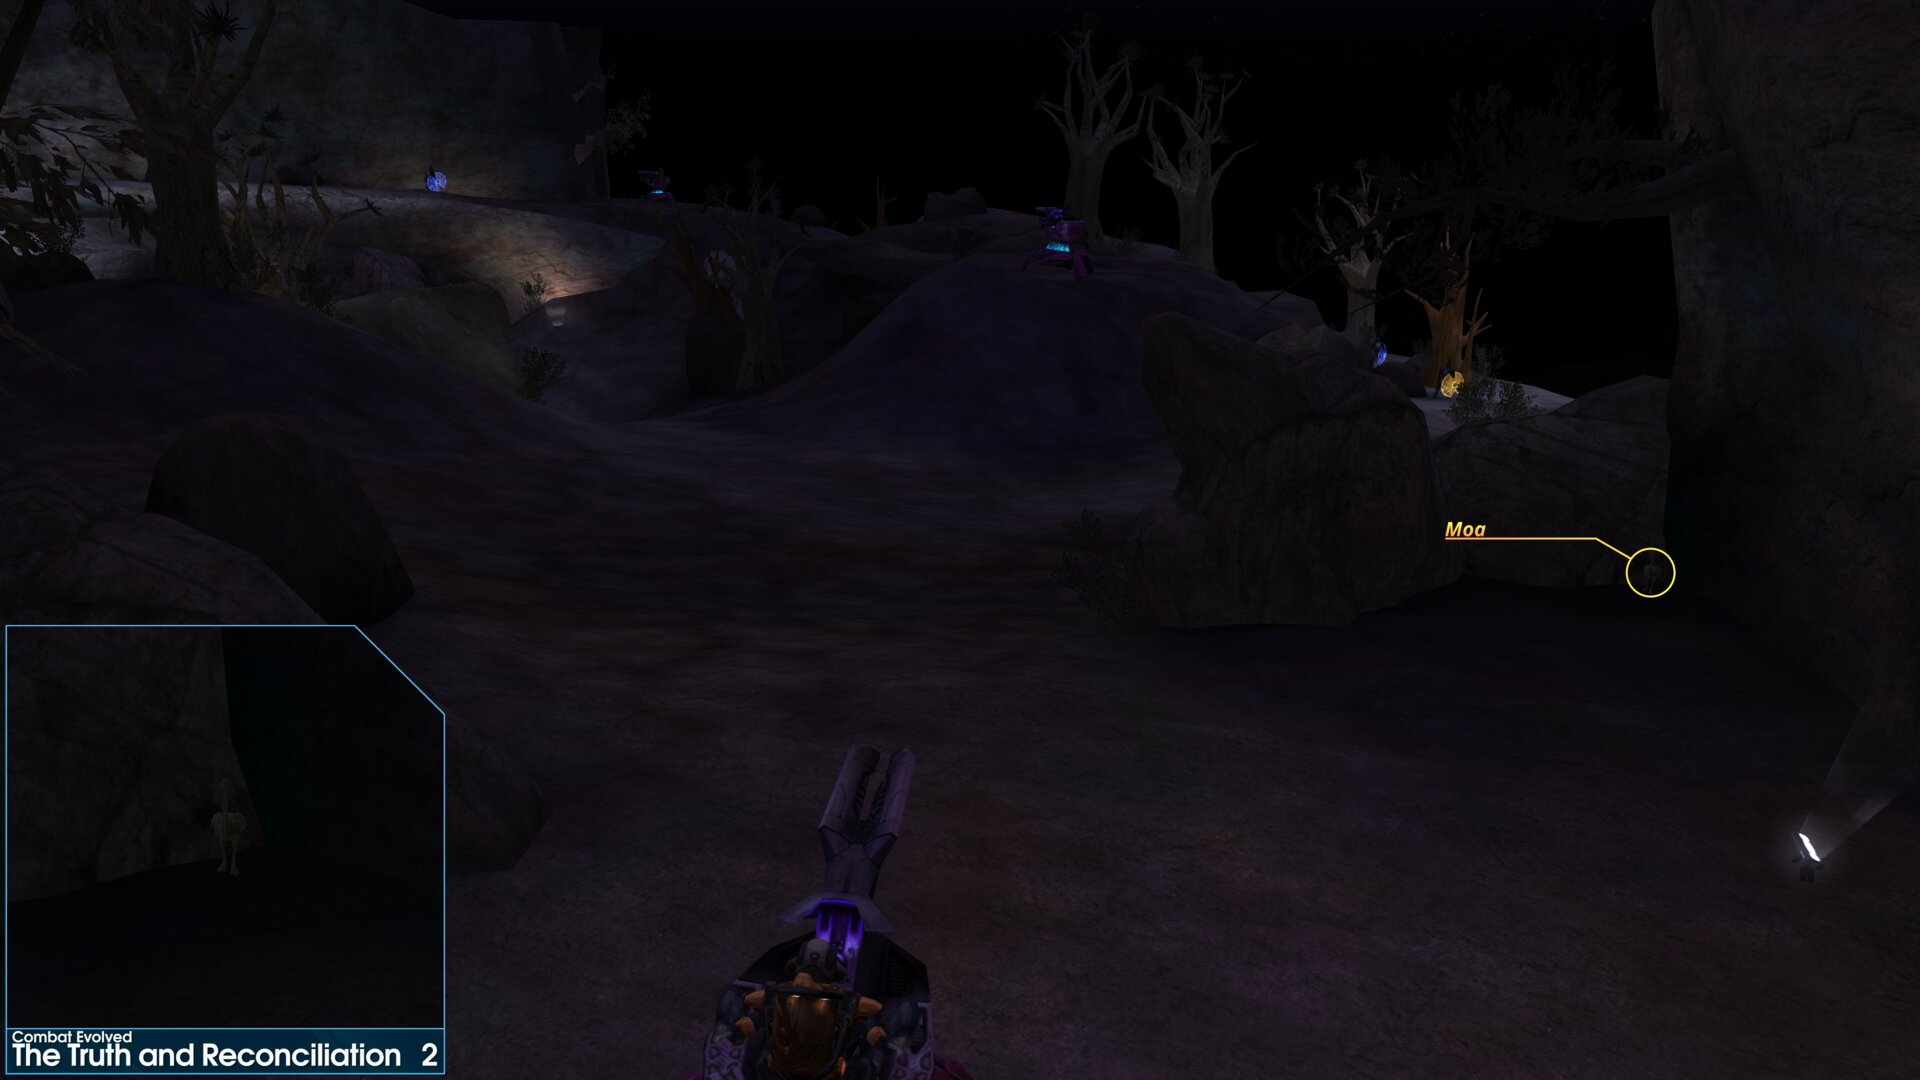
At the 3rd Covenant encounter, take the suggested left path. The Golden Moa is behind a couple of boulders at the end of the path, near one of the Covenants stationary guns (aka Shade turret).
"Covenant forces detected up ahead. The path up on the left should let us sneak up around" Cortana.
Golden Moa 3
This Golden Moa is past the grav lift, hidden behind the furthest rock spike.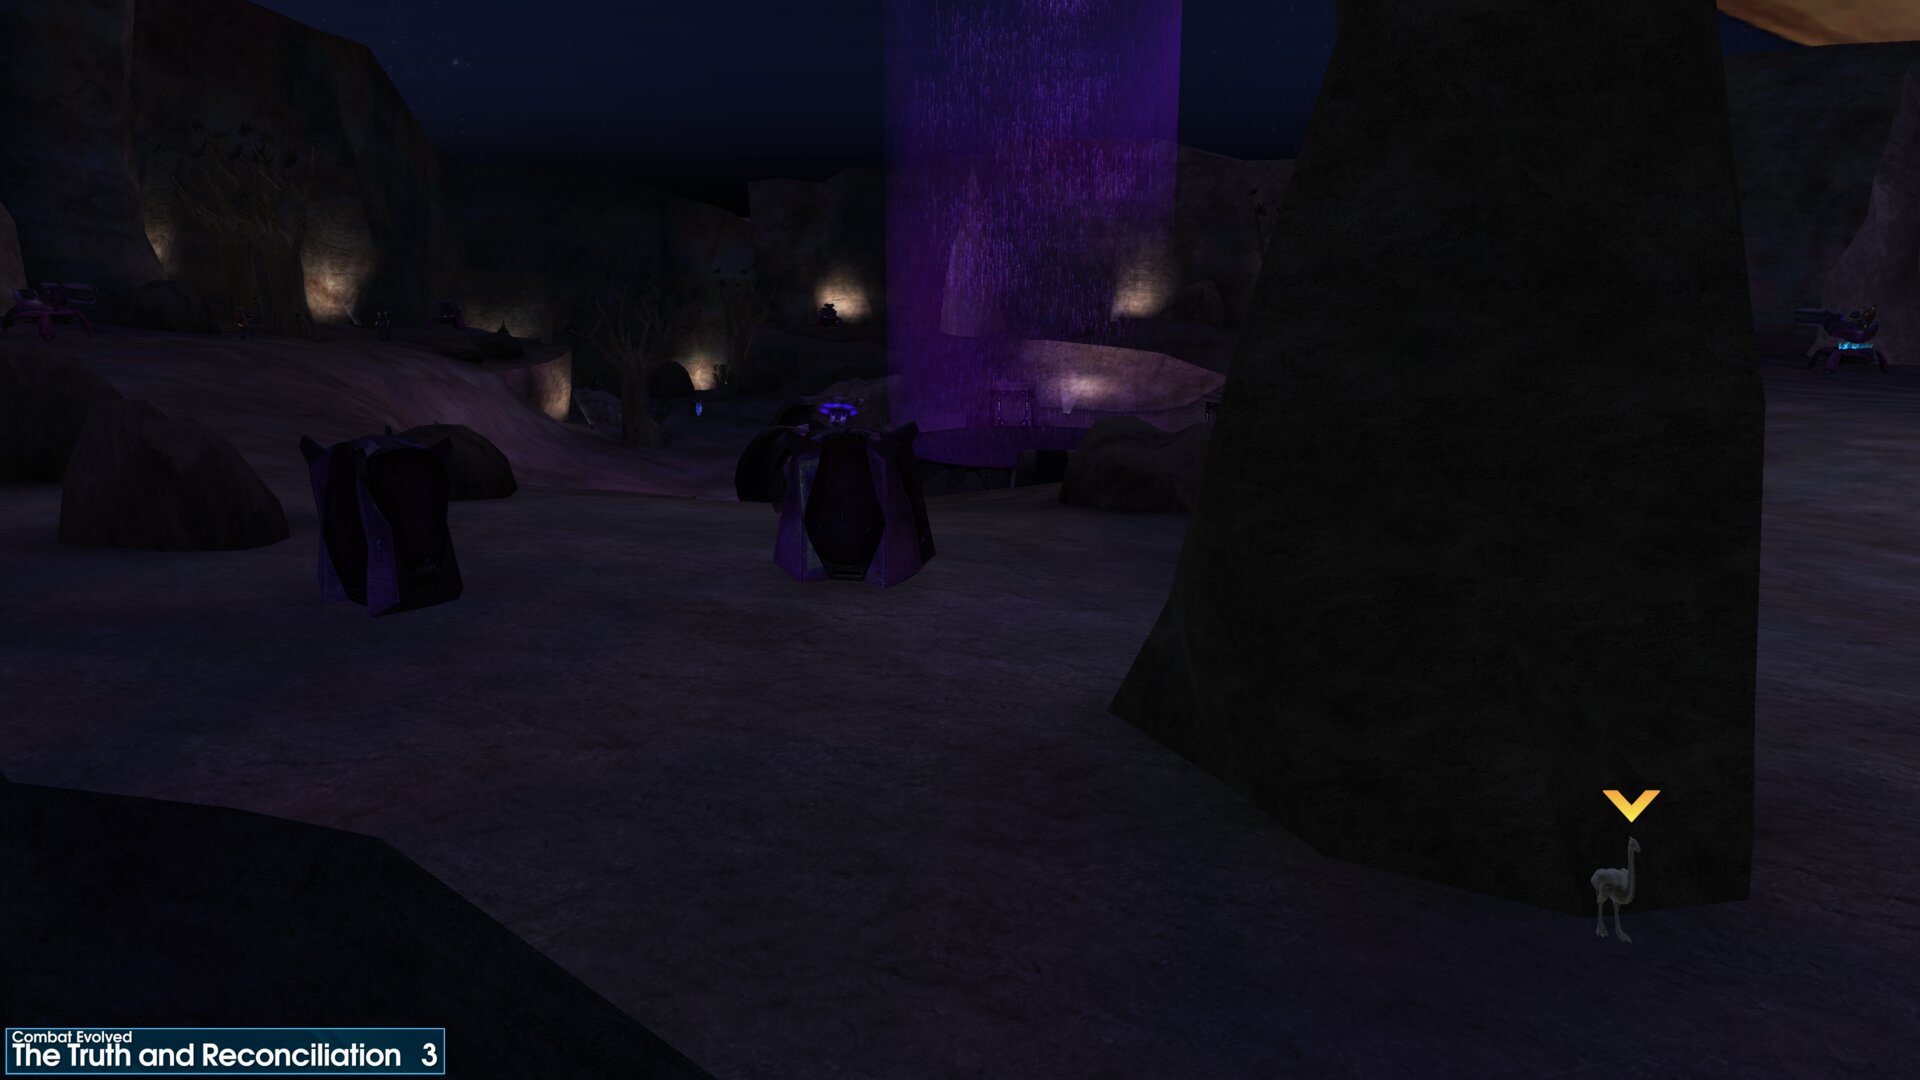
This Golden Moa is past the grav lift, hidden behind the furthest rock spike.
Golden Moa 4
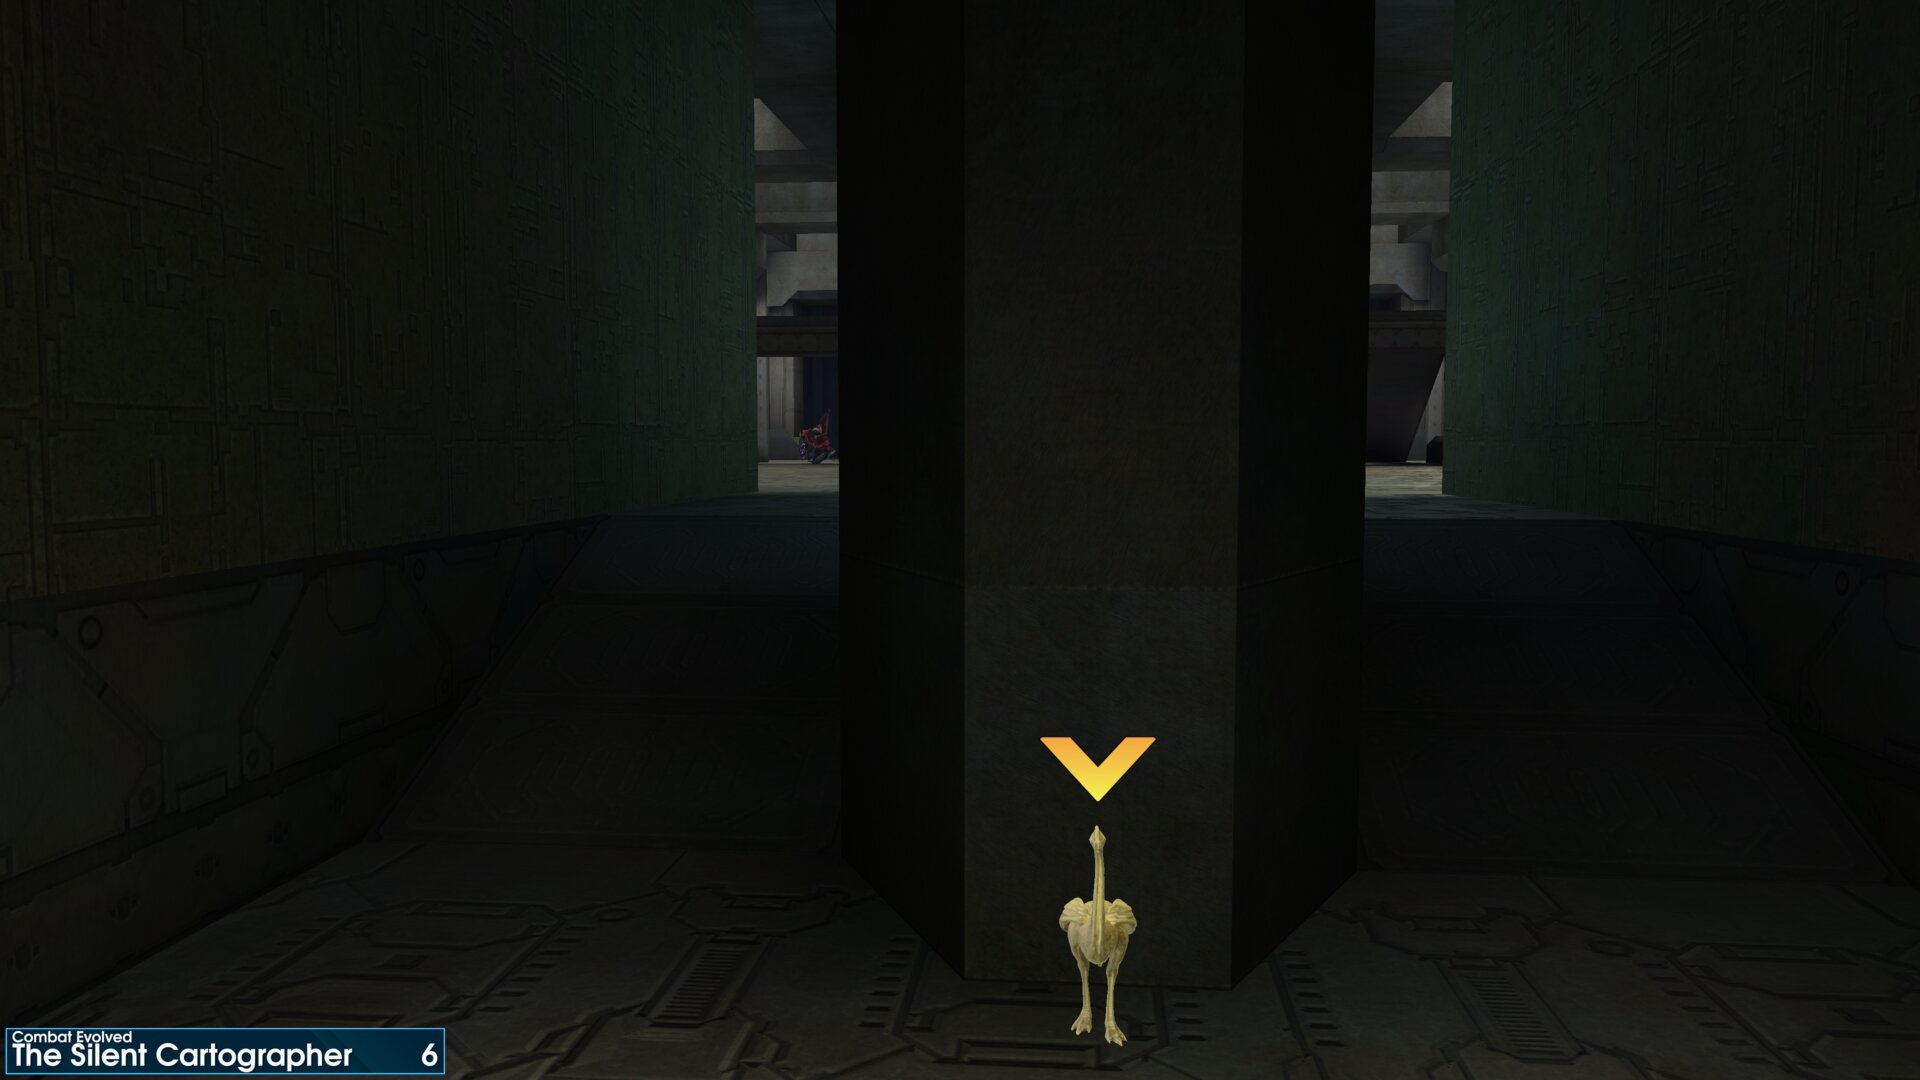
After completing belly fight, and leaving the Marines waiting for you to unlock a door. Follow the side passage, turning left just before you reach a dark grey pillar. The Golden Moa is next to the locked door, down the left passage.
The Picture-in-Picture shows the side passage, up to the dark grey pillar.
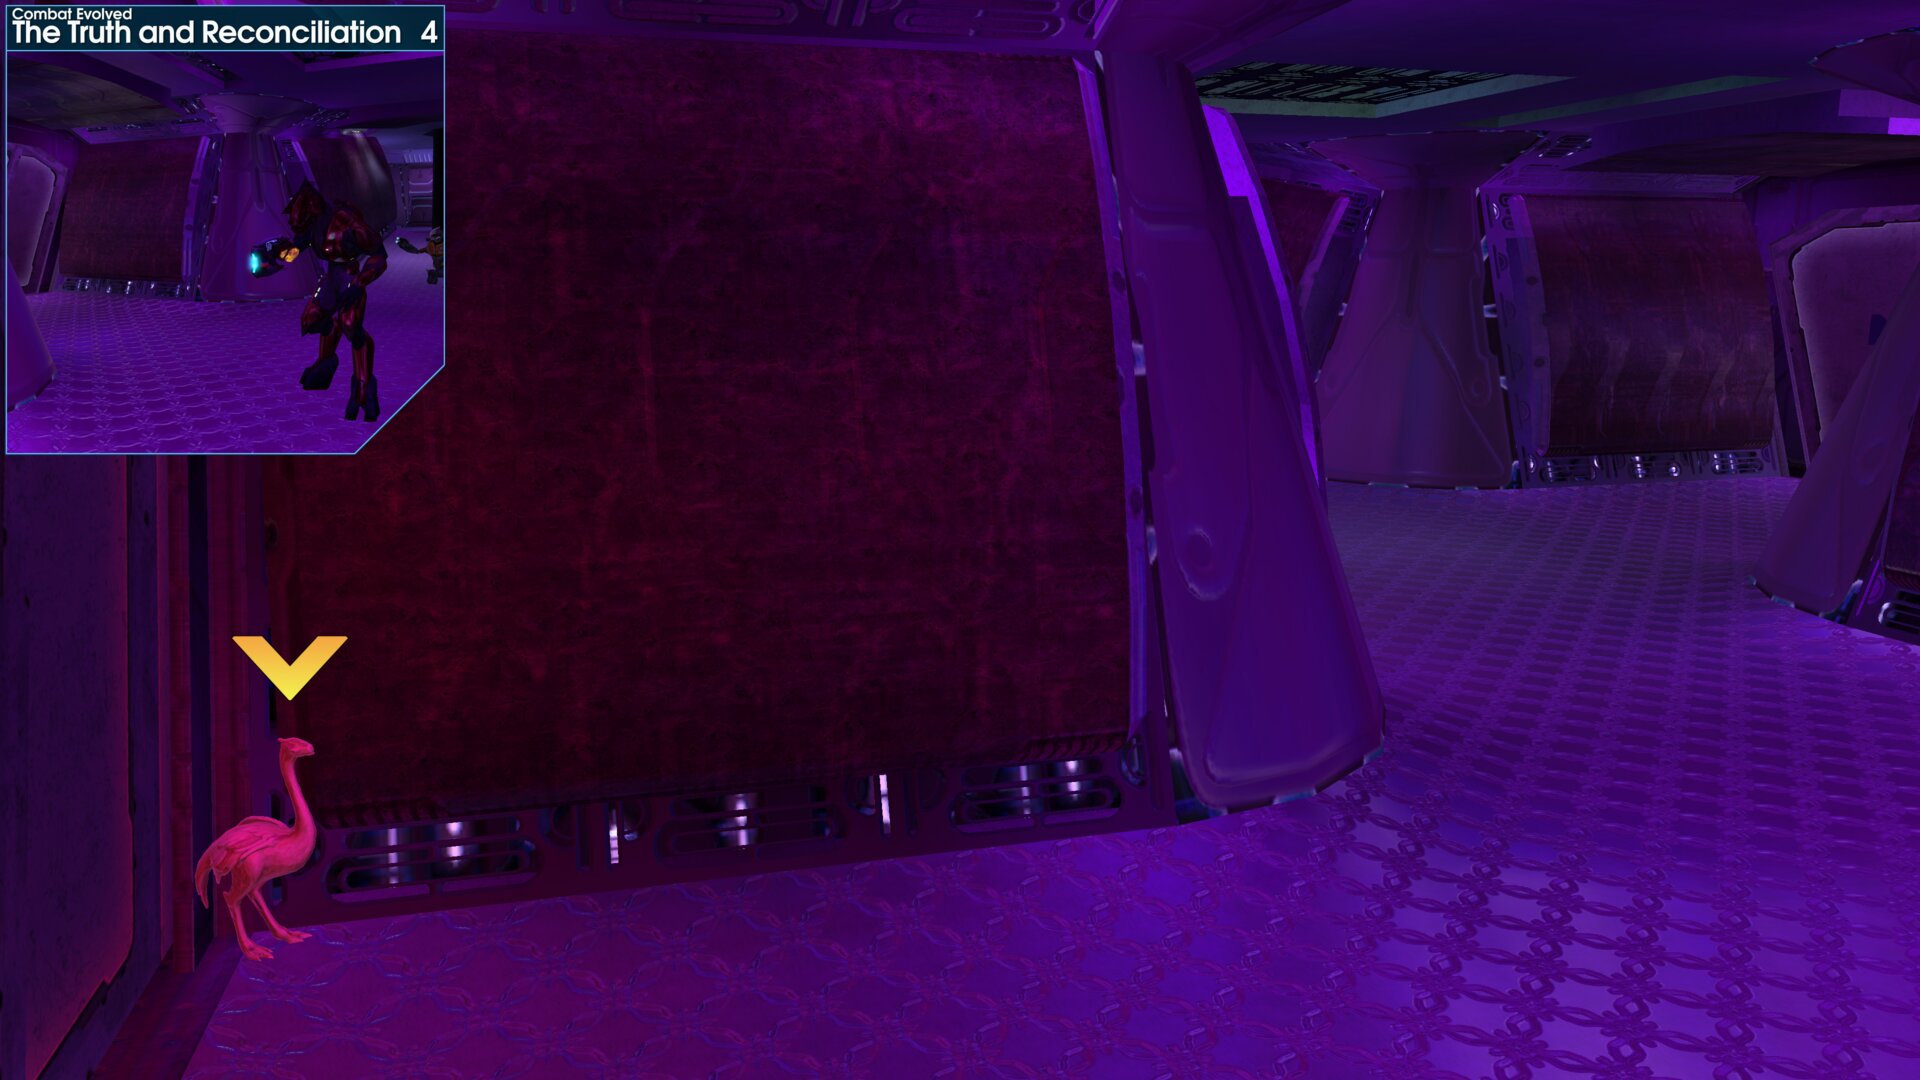
After completing belly fight, and leaving the Marines waiting for you to unlock a door. Follow the side passage, turning left just before you reach a dark grey pillar. The Golden Moa is next to the locked door, down the left passage.
The Picture-in-Picture shows the side passage, up to the dark grey pillar.
Golden Moa 5
On the balcony of the cargo bay, you’ll find a Golden Moa hidden in the far corner under a crate.
”Wait. That's the locked door down there…" Cortana.
You will probably need to use a Grenade /
Plasma Grenade to destroy this one.
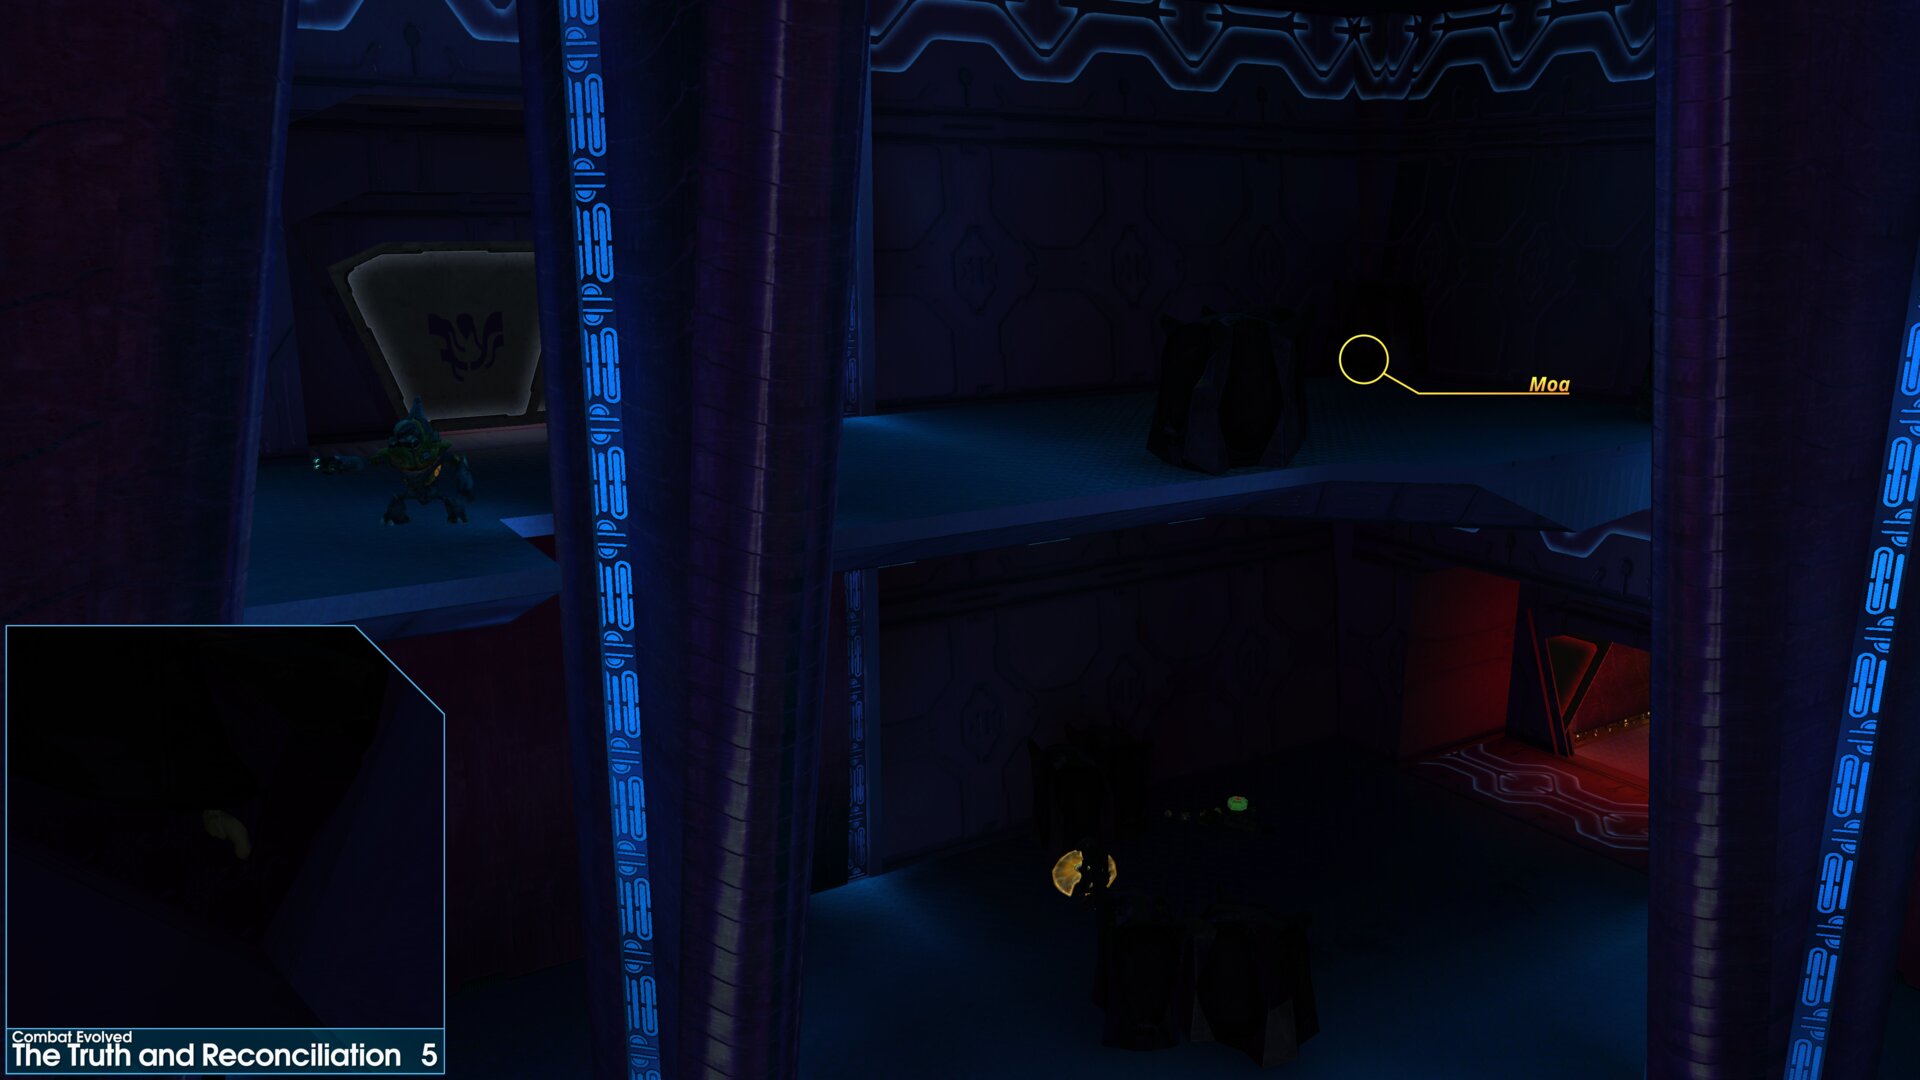
On the balcony of the cargo bay, you’ll find a Golden Moa hidden in the far corner under a crate.
”Wait. That's the locked door down there…" Cortana.
You will probably need to use a Grenade /Plasma Grenade to destroy this one.
Golden Moa 6
As you enter the hanger bay filled with crates, follow the wall to the right. The Golden Moa is behind a group of crates against the wall.
The Picture-in-Picture shows the view looking in from above.
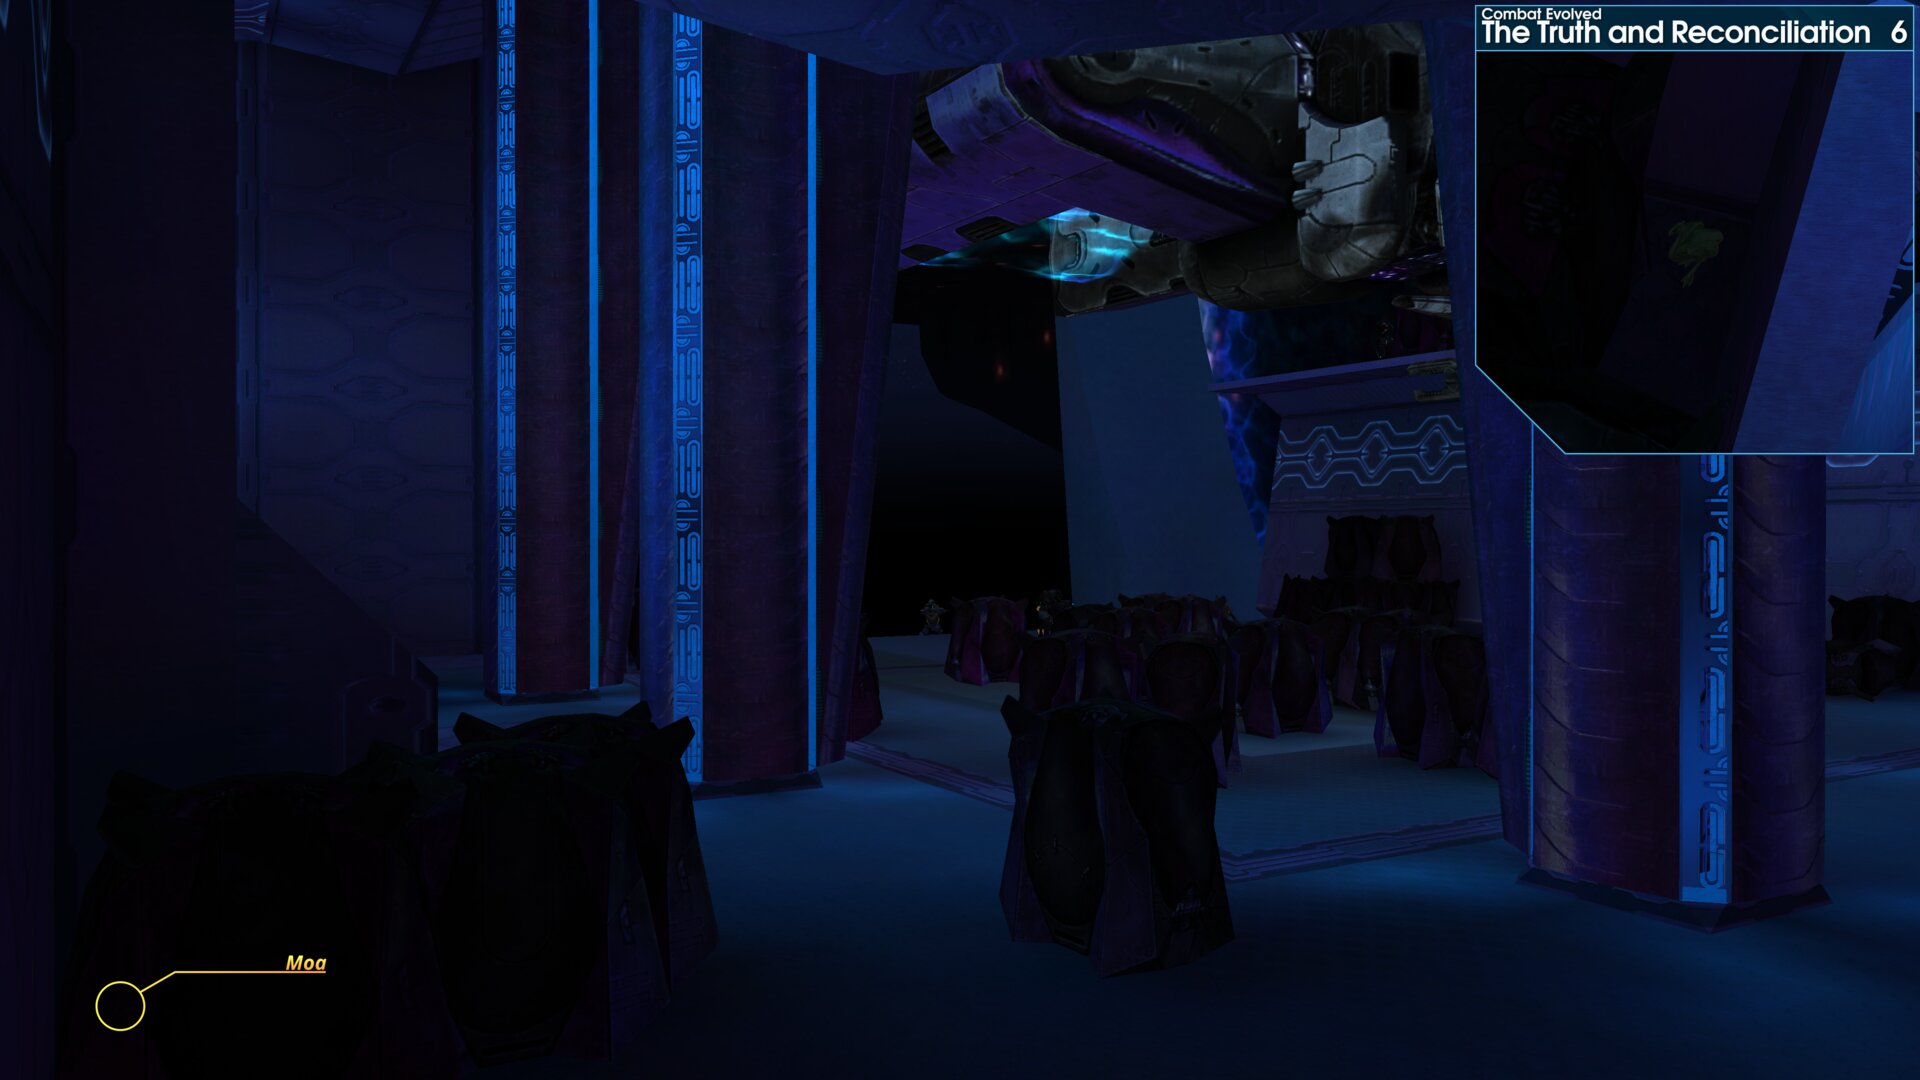
As you enter the hanger bay filled with crates, follow the wall to the right. The Golden Moa is behind a group of crates against the wall.
The Picture-in-Picture shows the view looking in from above.
Golden Moa 7
When you reach the 3rd level of the hanger bay, turn left, you will find the Golden Moa in a nearby nook.
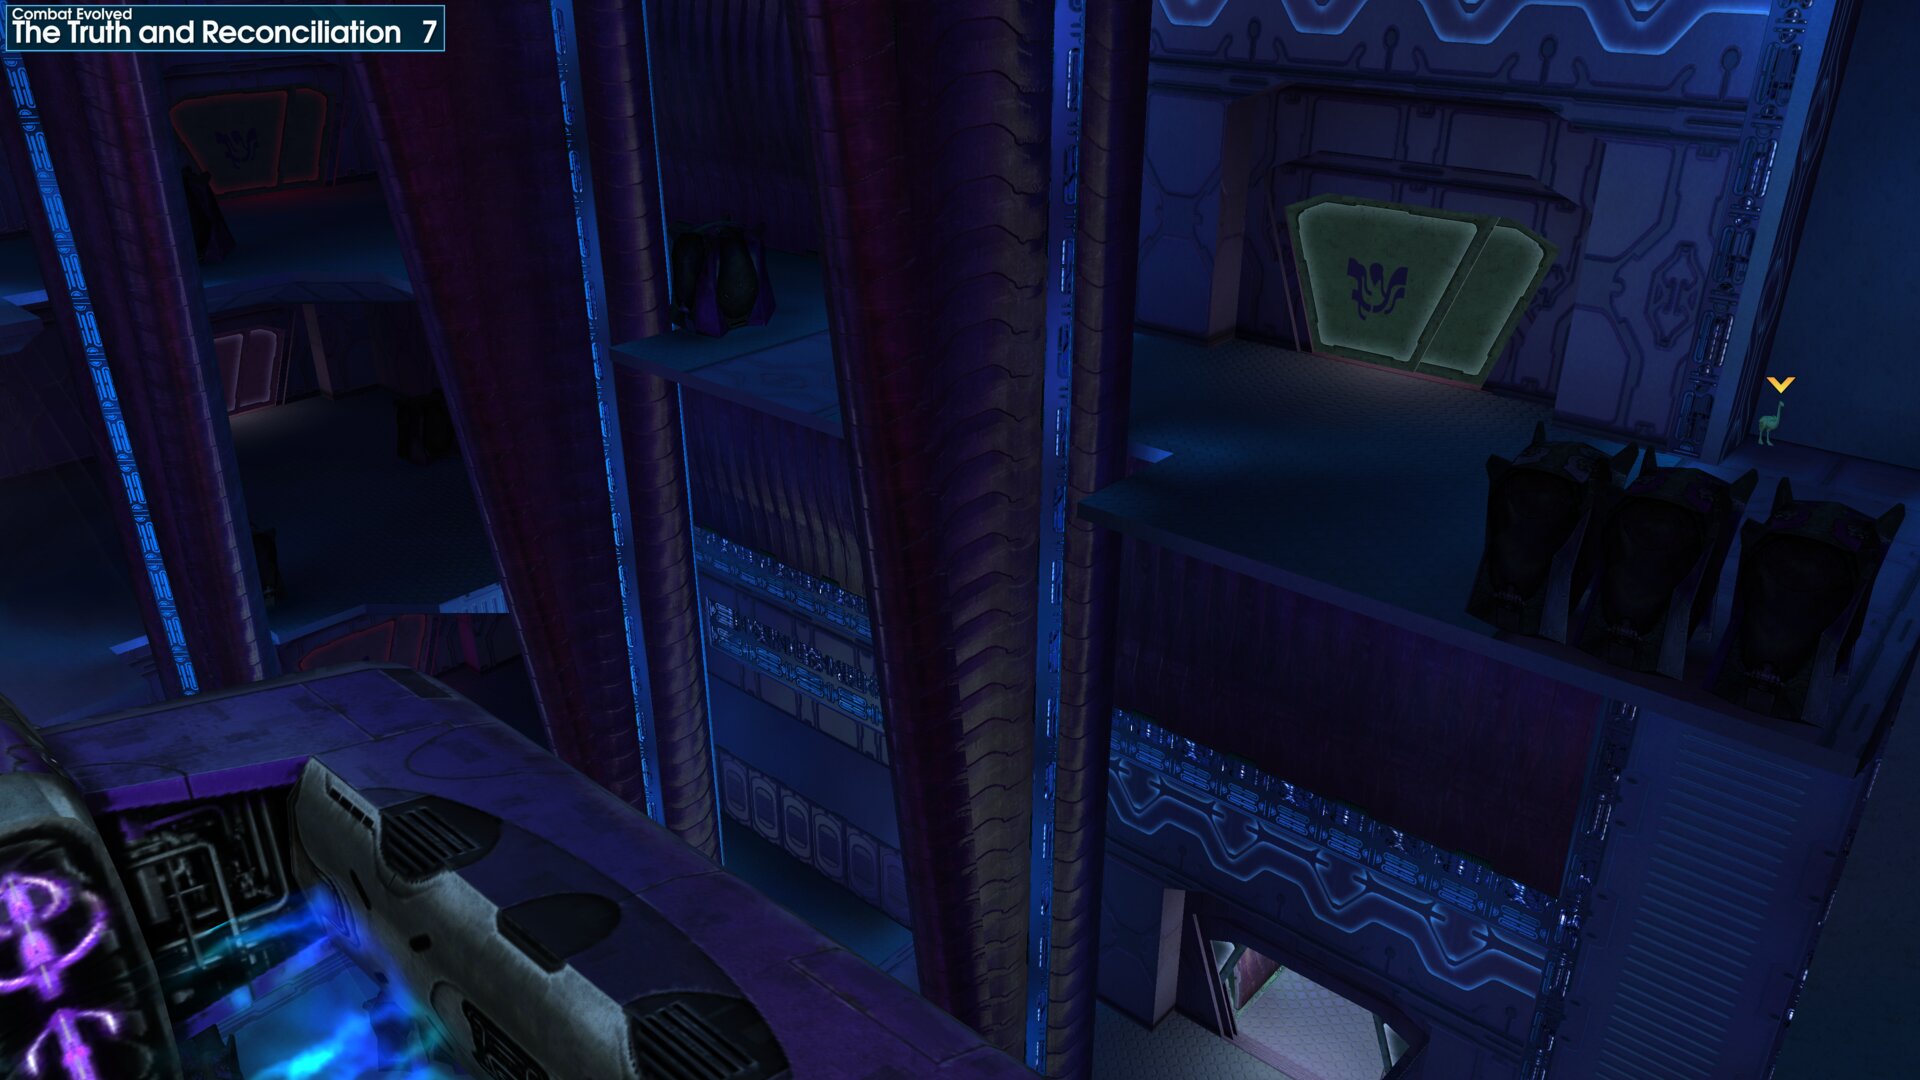
When you reach the 3rd level of the hanger bay, turn left, you will find the Golden Moa in a nearby nook.
Golden Moa 8
This Golden Moa is in a nook, in the back left corner of the ship’s Command Center.
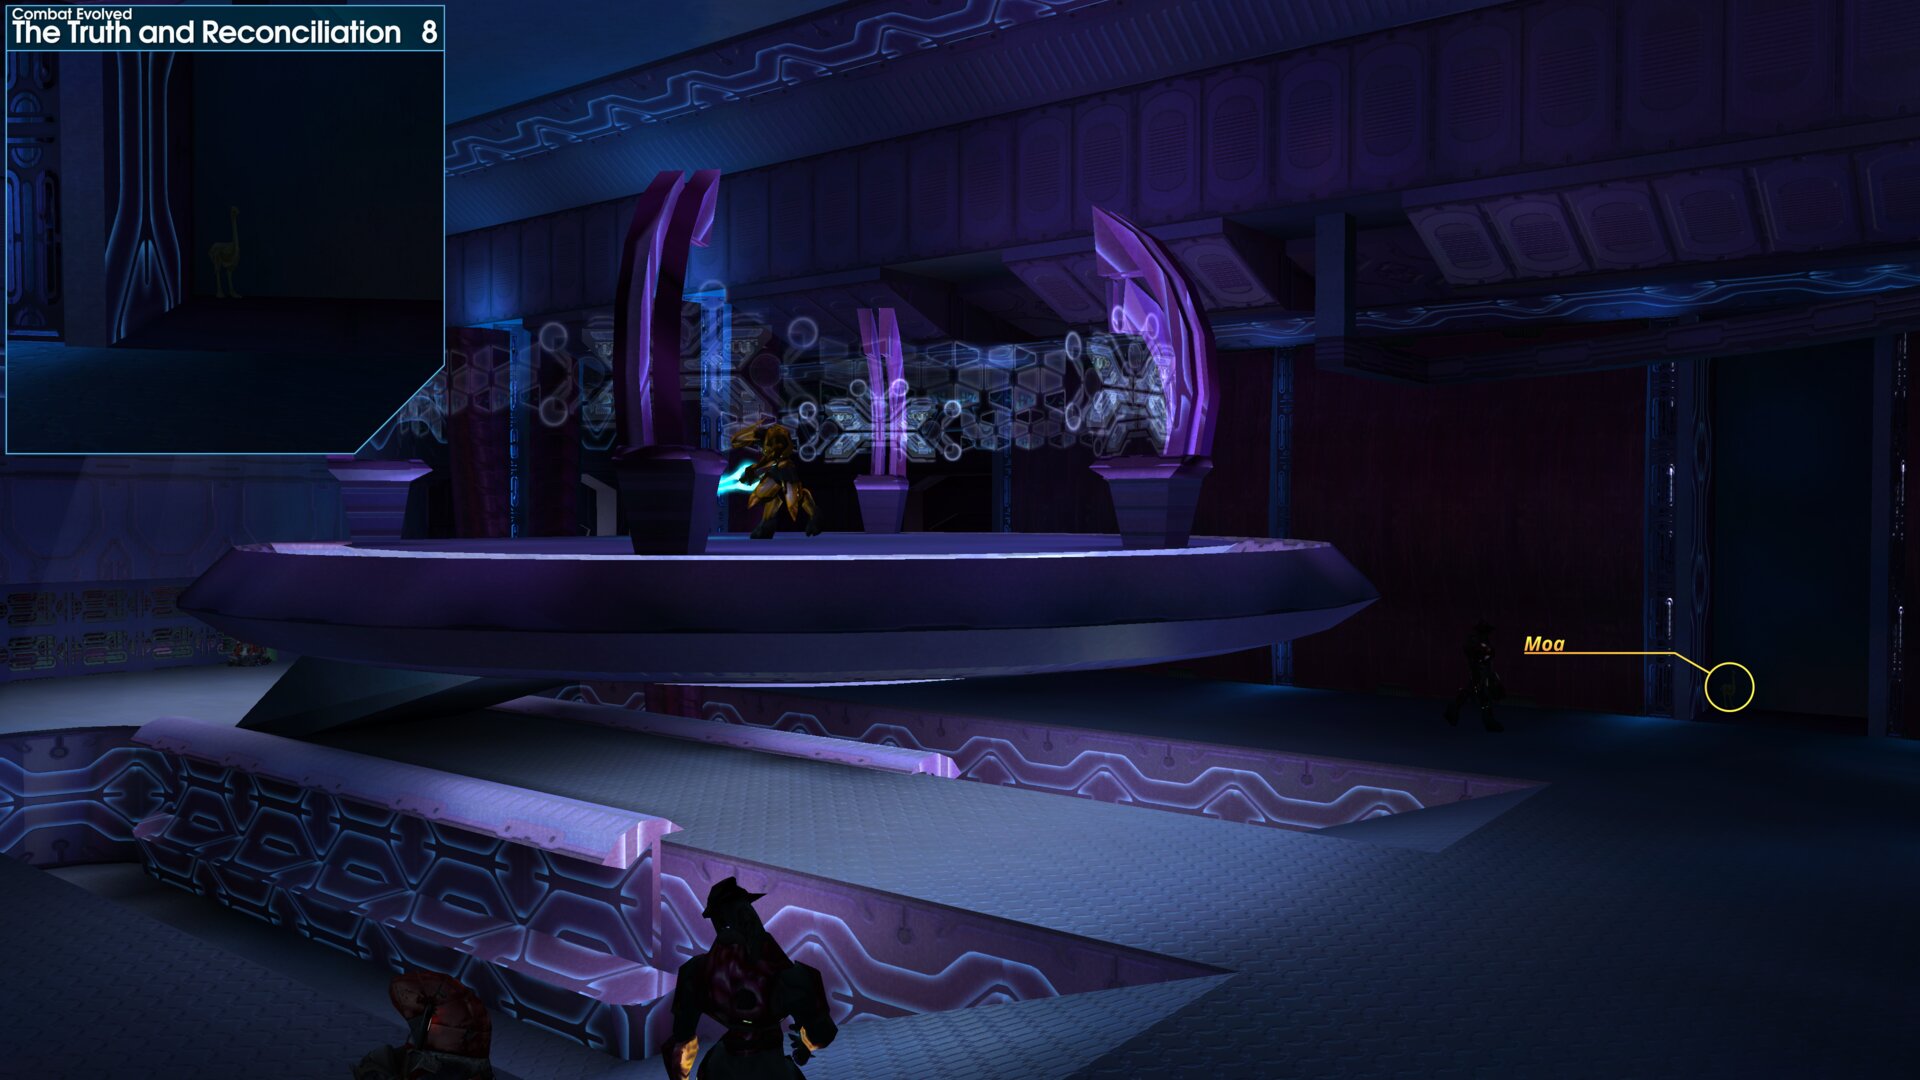
This Golden Moa is in a nook, in the back left corner of the ship’s Command Center.
Golden Moa 9
In the brig, where you rescue Captain Keyes, the Golden Moa is in the 2nd last cell on the right.
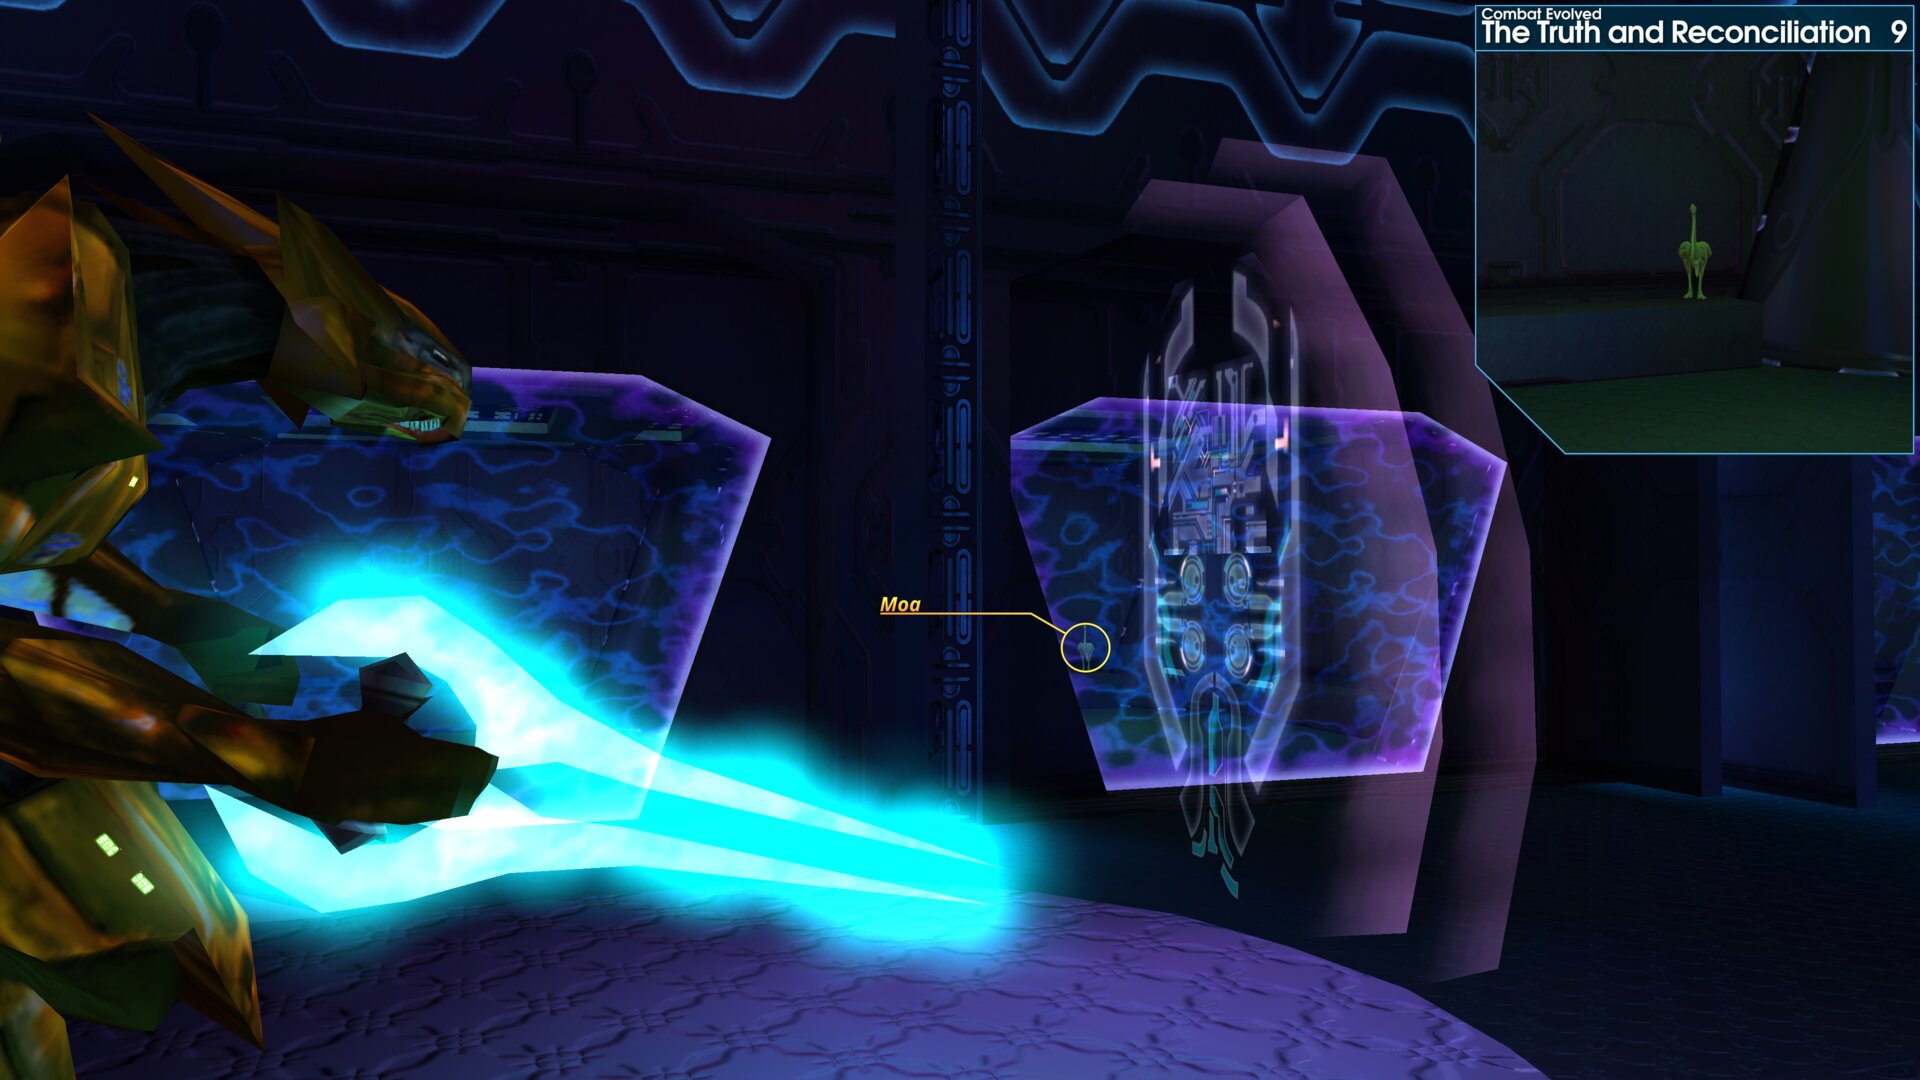
In the brig, where you rescue Captain Keyes, the Golden Moa is in the 2nd last cell on the right.
➟ The Silent Cartographer
Golden Moa 1
After exiting the Pelican make your way towards the nearby structure. On the far side of the outer pillar, you’ll find this Golden Moa on top of a ledge about half way up.
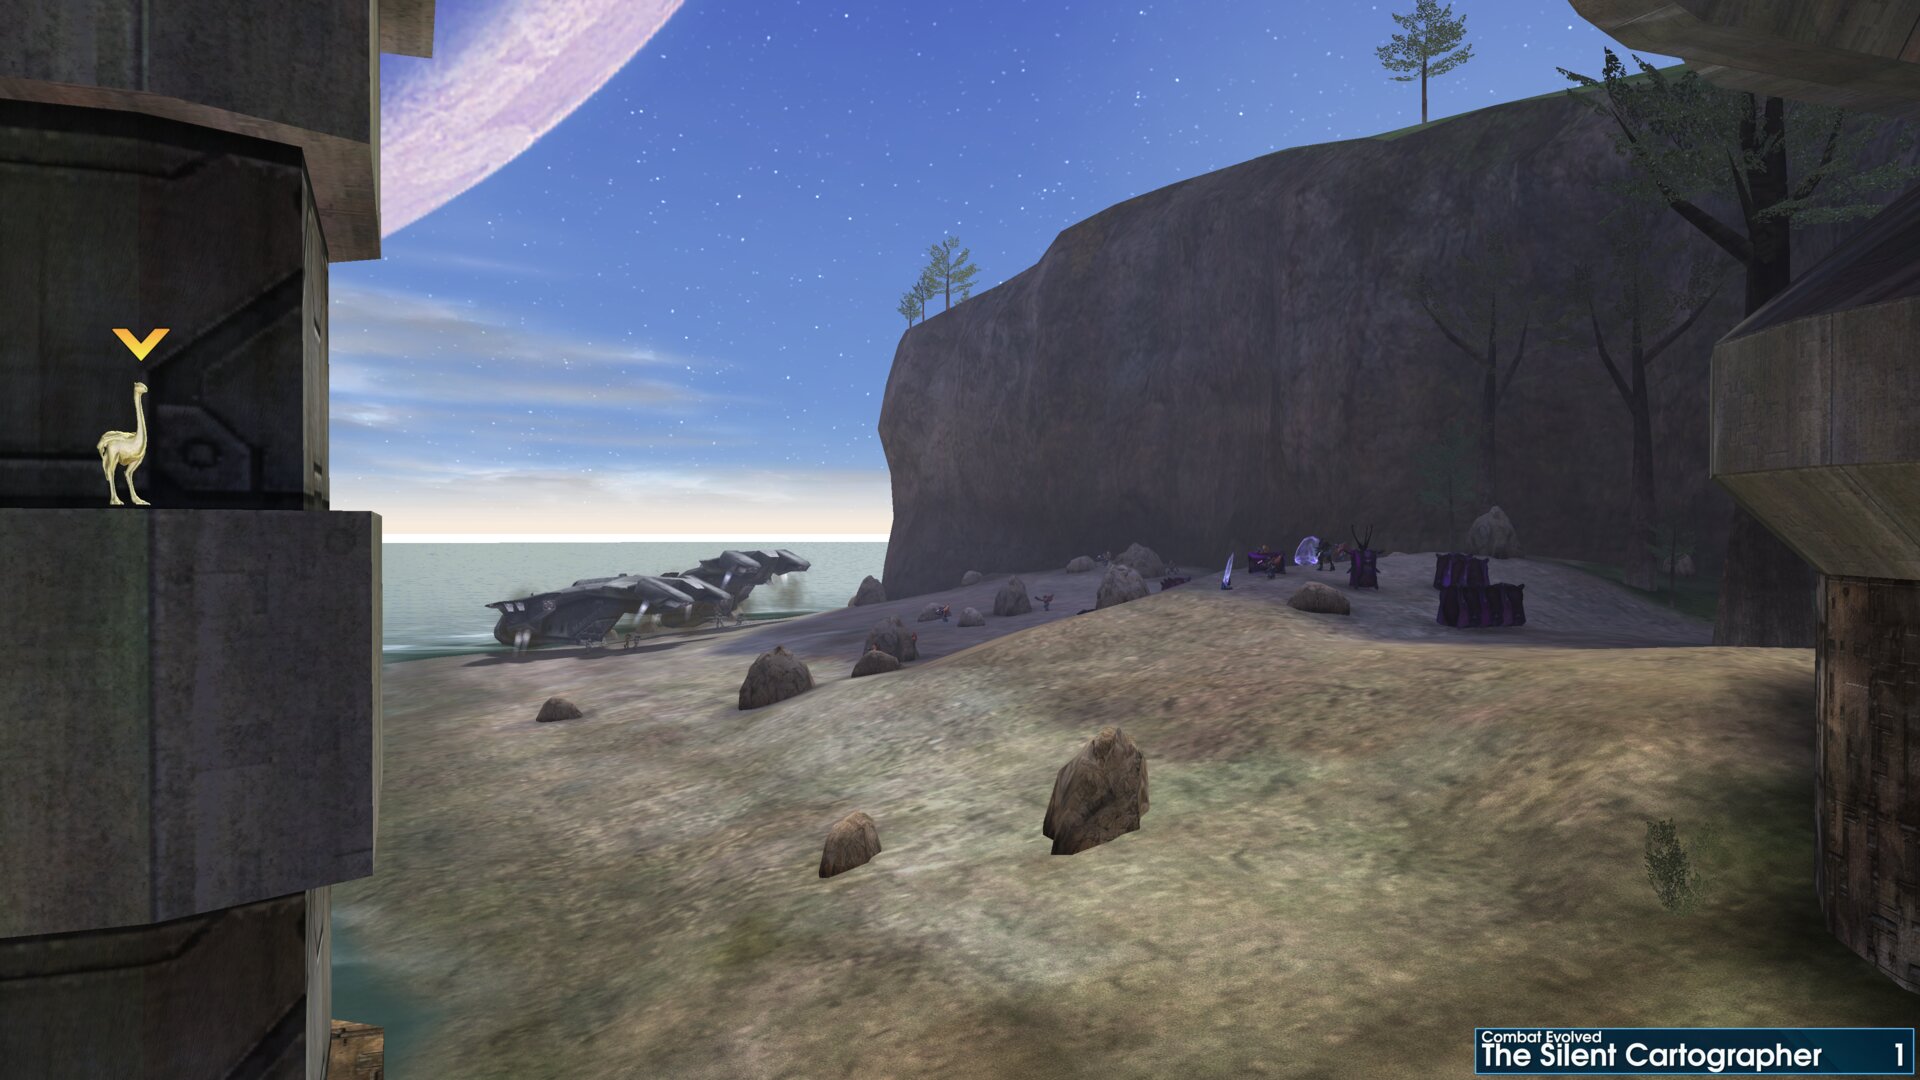
After exiting the Pelican make your way towards the nearby structure. On the far side of the outer pillar, you’ll find this Golden Moa on top of a ledge about half way up.
Golden Moa 2
After acquiring the Warthog from Foehammer, continue round the island anti-clockwise to the next area. The Golden Moa can be found on a ledge in the exposed structure, where part of the cliff has collapsed.
After acquiring the Warthog from Foehammer, continue round the island anti-clockwise to the next area. The Golden Moa can be found on a ledge in the exposed structure, where part of the cliff has collapsed.
Golden Moa 3
After acquiring the Warthog from Foehammer, follow the shoreline round the island anti-clockwise to the next area. Where the water meets the cliffs, the Golden Moa will be in the shallows beside some rocks.
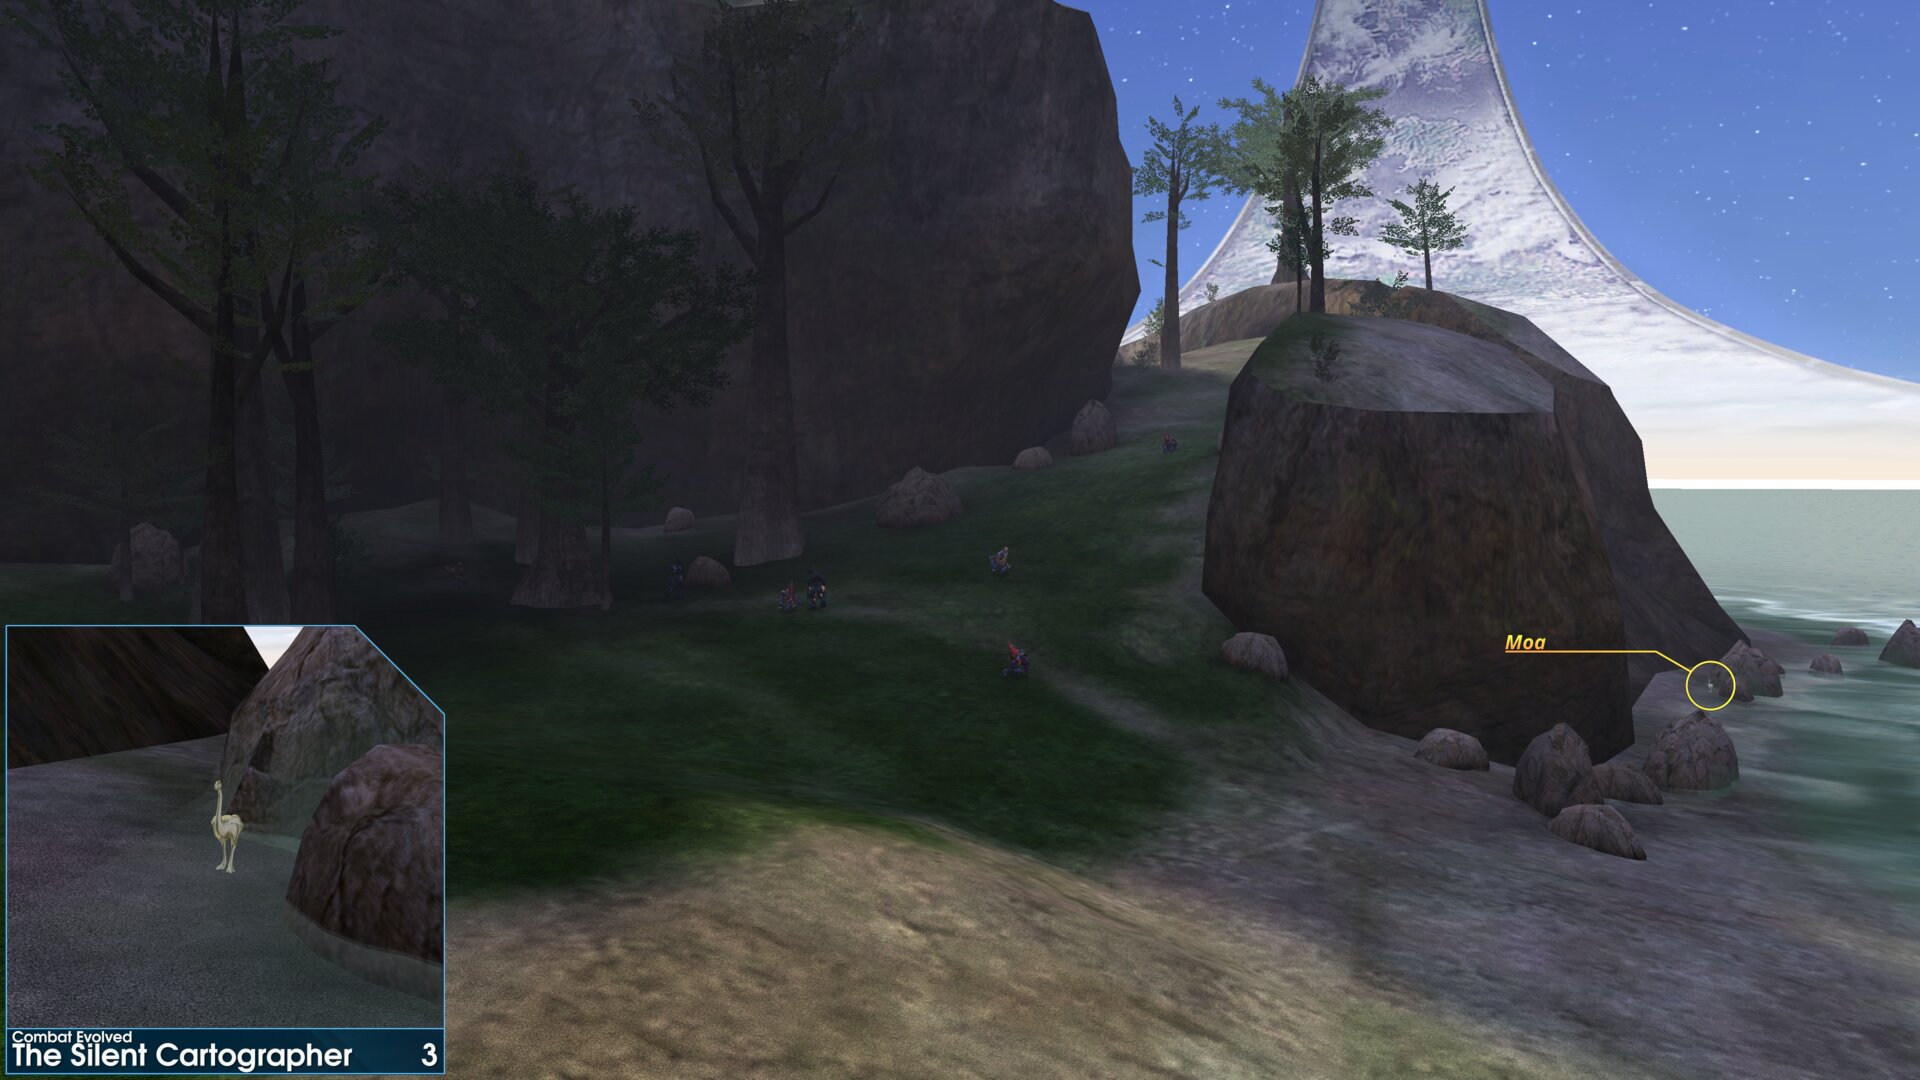
After acquiring the Warthog from Foehammer, follow the shoreline round the island anti-clockwise to the next area. Where the water meets the cliffs, the Golden Moa will be in the shallows beside some rocks.
Golden Moa 4
The Golden Moa is beneath the main facilities entrance.
”There, in the cliff wall; I'll bet the Silent Cartographer is somewhere inside that facility” Cortana.
The Golden Moa is beneath the main facilities entrance.
”There, in the cliff wall; I'll bet the Silent Cartographer is somewhere inside that facility” Cortana.
Golden Moa 5
After entering the main facility (past the locked door), continue down 1 level, as you reach this level the Golden Moa is on the other side of the wall to your right.
Alternatively after passing through the locked door, head for the Shafted cutscene, from here you can see and shoot the Golden Moa.
After entering the main facility (past the locked door), continue down 1 level, as you reach this level the Golden Moa is on the other side of the wall to your right.
Alternatively after passing through the locked door, head for the Shafted cutscene, from here you can see and shoot the Golden Moa.
Golden Moa 6
This Golden Moa is at the back of the room, on the lowest level of the main facility. Playing through the main facility as the developers intended, you’ll be able to shoot this Golden Moa by looking down a shaft just past the Hunters.
This Golden Moa is at the back of the room, on the lowest level of the main facility. Playing through the main facility as the developers intended, you’ll be able to shoot this Golden Moa by looking down a shaft just past the Hunters.
➟ Assault on the Control Room
Golden Moa 1
In the 1st octagonal room, the Golden Moa is in the closest tube in the middle of the room.
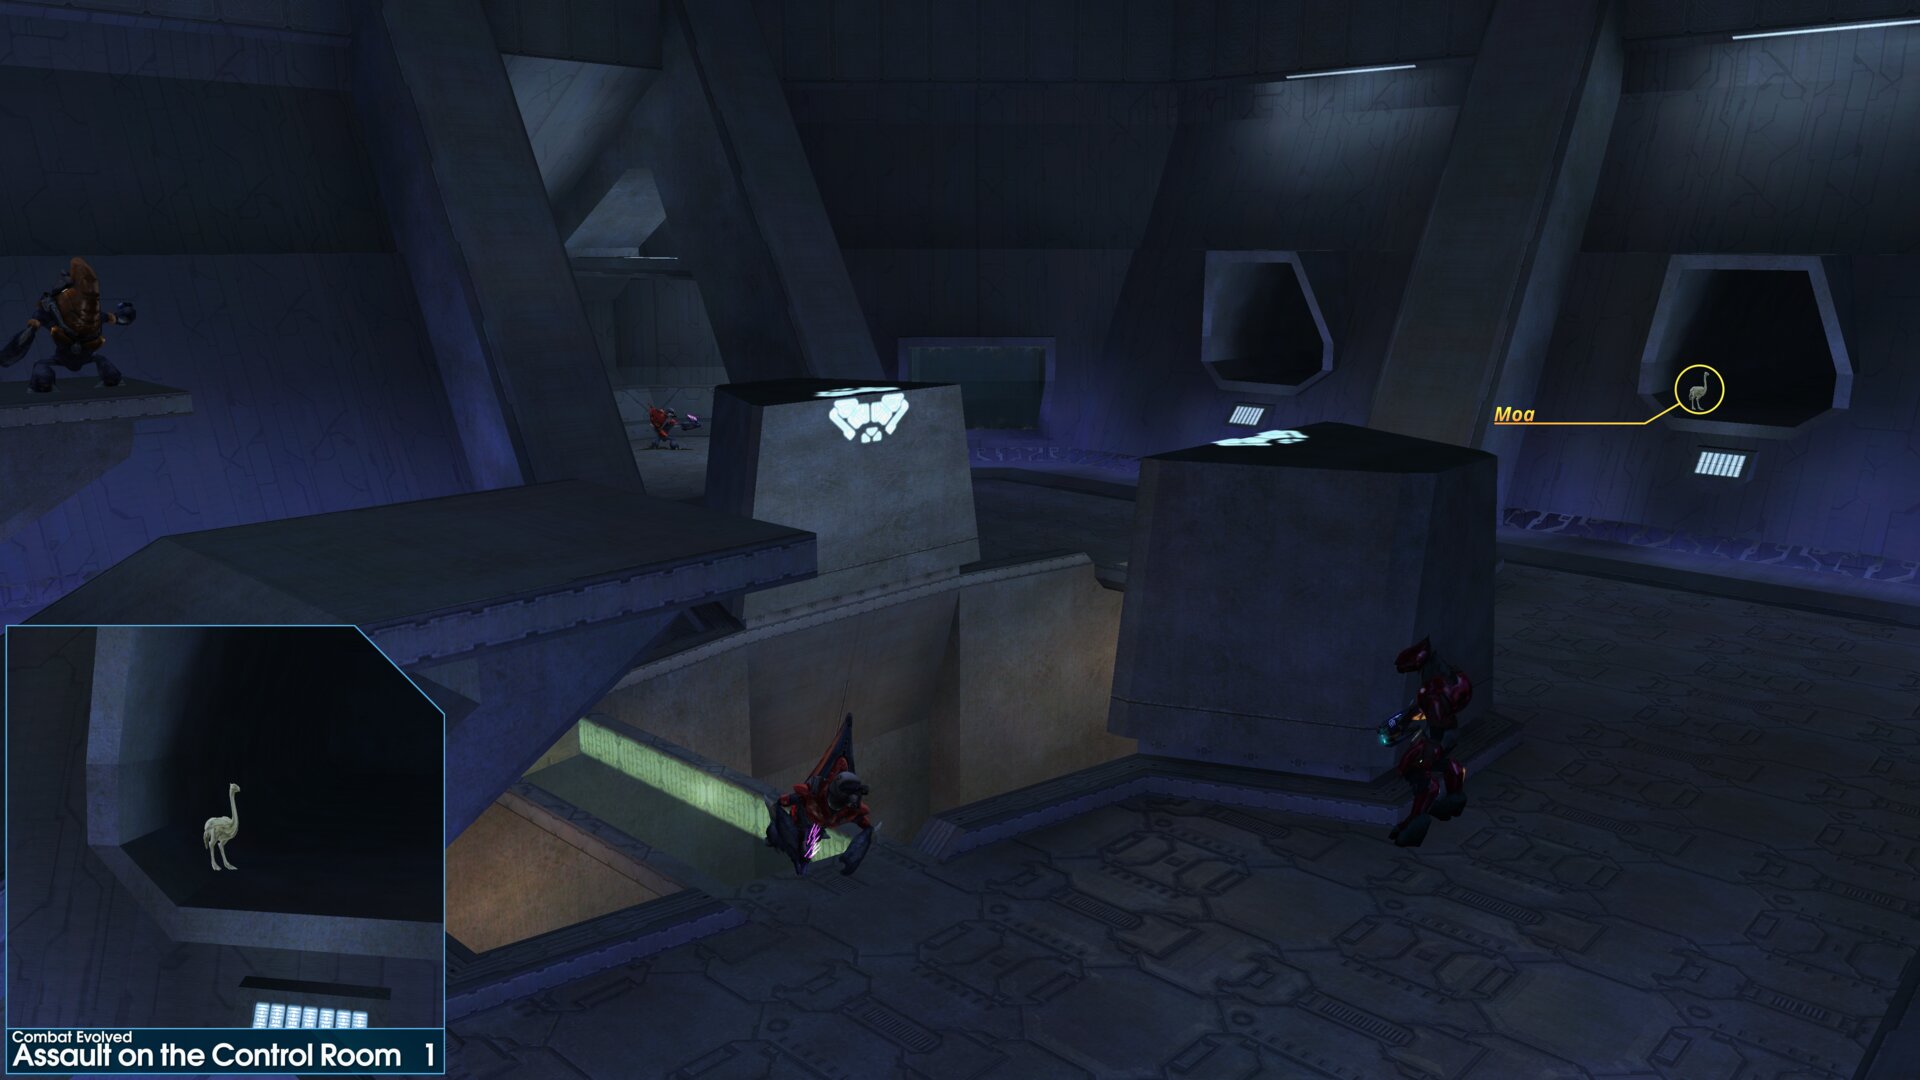
In the 1st octagonal room, the Golden Moa is in the closest tube in the middle of the room.
Golden Moa 2
On the very 1st bridge, the Golden Moa is behind a support structure at the start of the lower level.
On the very 1st bridge, the Golden Moa is behind a support structure at the start of the lower level.
Golden Moa 3
After going down the 1st lift you will reach the 3rd octagonal room, take the path to the right (anti-clockwise) and then the 1st overhead ramp into the middle of the room. The Golden Moa in is a large tube on the left side.
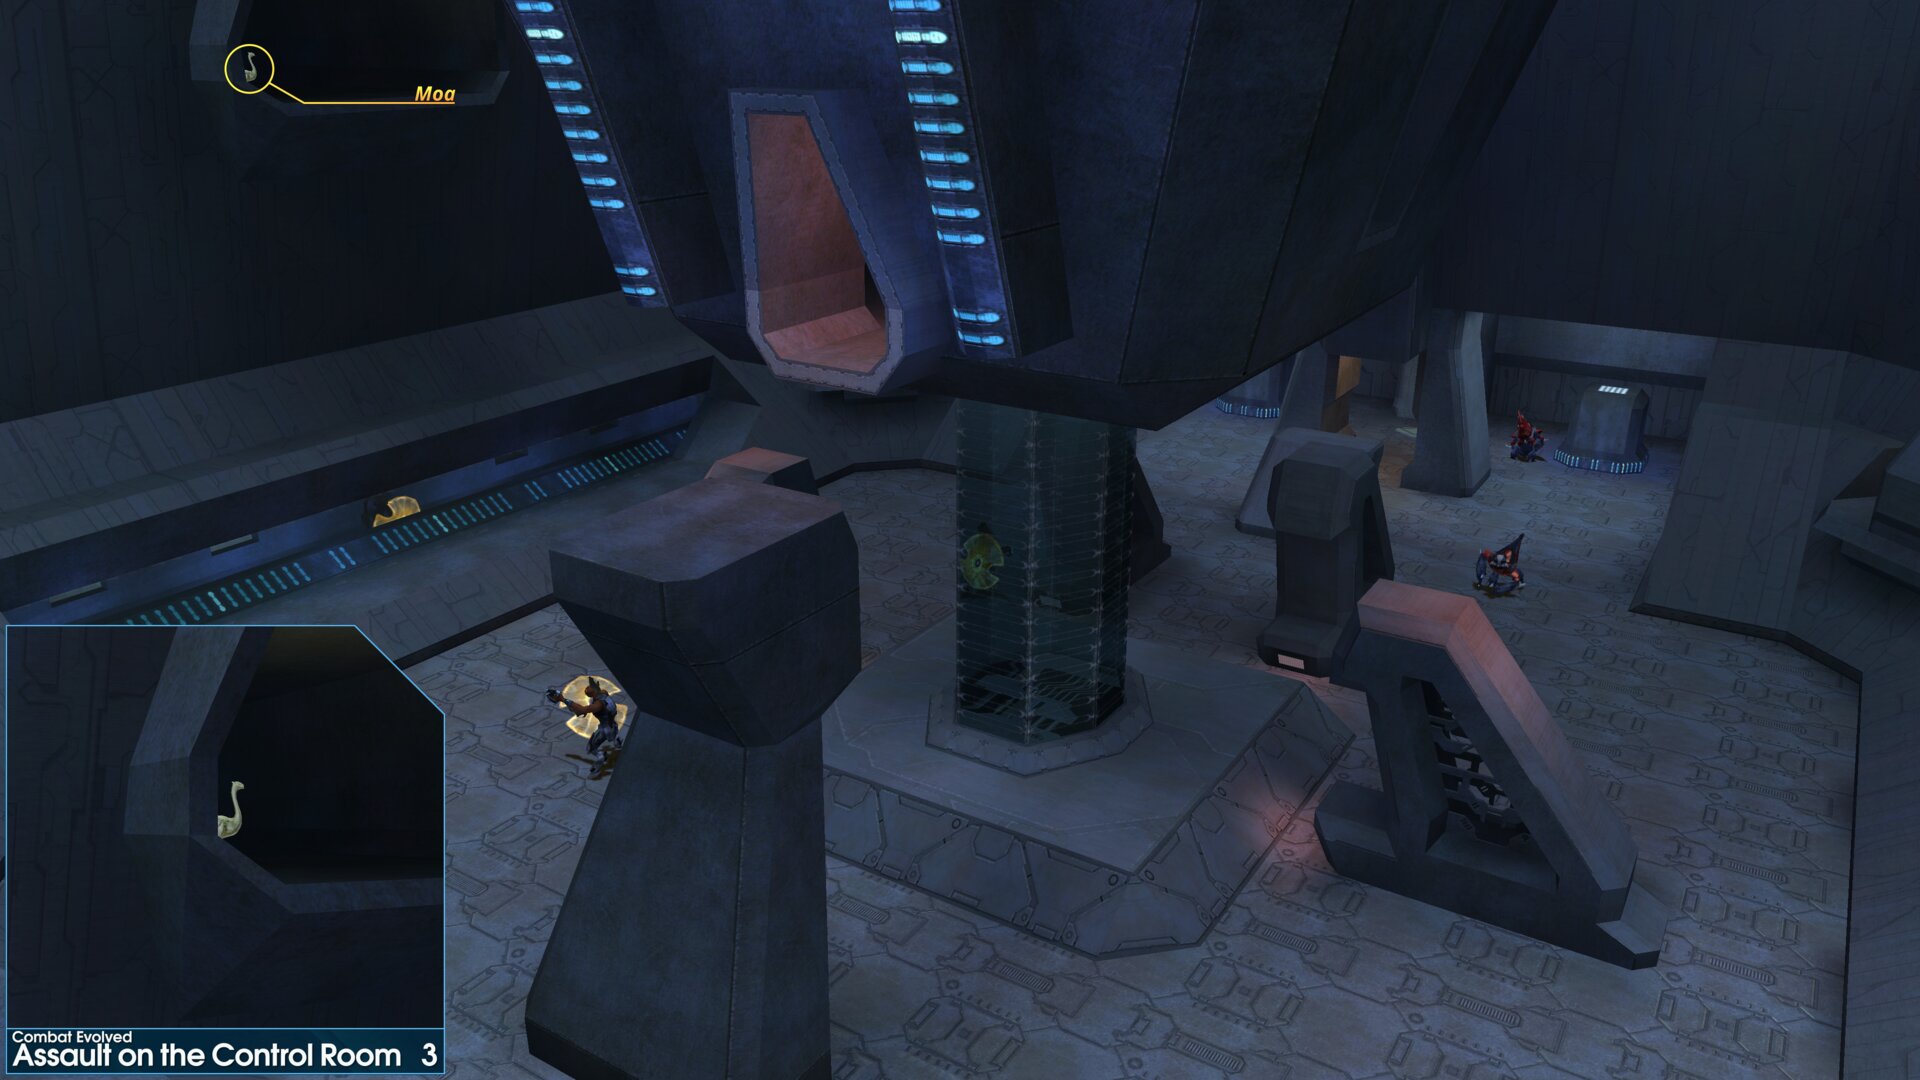
After going down the 1st lift you will reach the 3rd octagonal room, take the path to the right (anti-clockwise) and then the 1st overhead ramp into the middle of the room. The Golden Moa in is a large tube on the left side.
Golden Moa 4
This Golden Moa is hidden beside the cockpit of the crashed Pelican.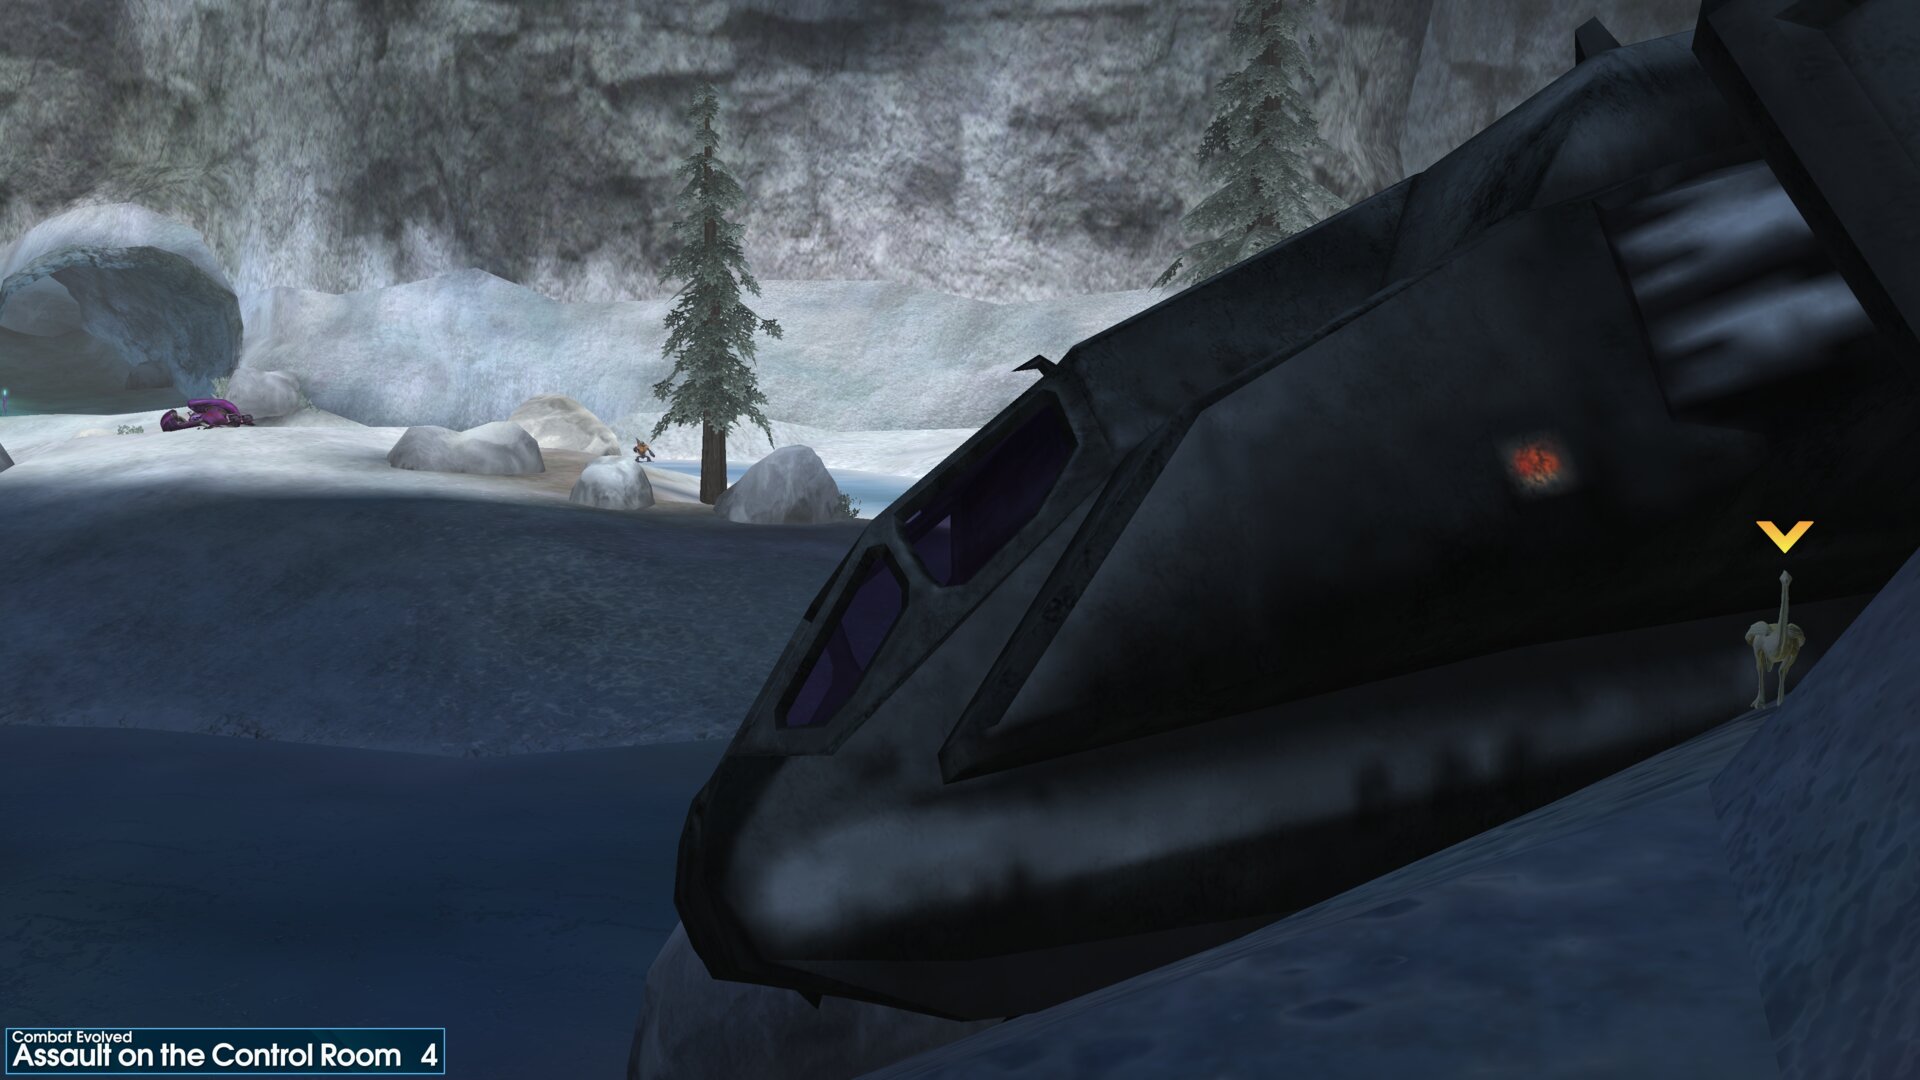
This Golden Moa is hidden beside the cockpit of the crashed Pelican.
Golden Moa 5
Before you cross the bridge in the cavern, the Golden Moa is by the cavern wall past left Shade turret.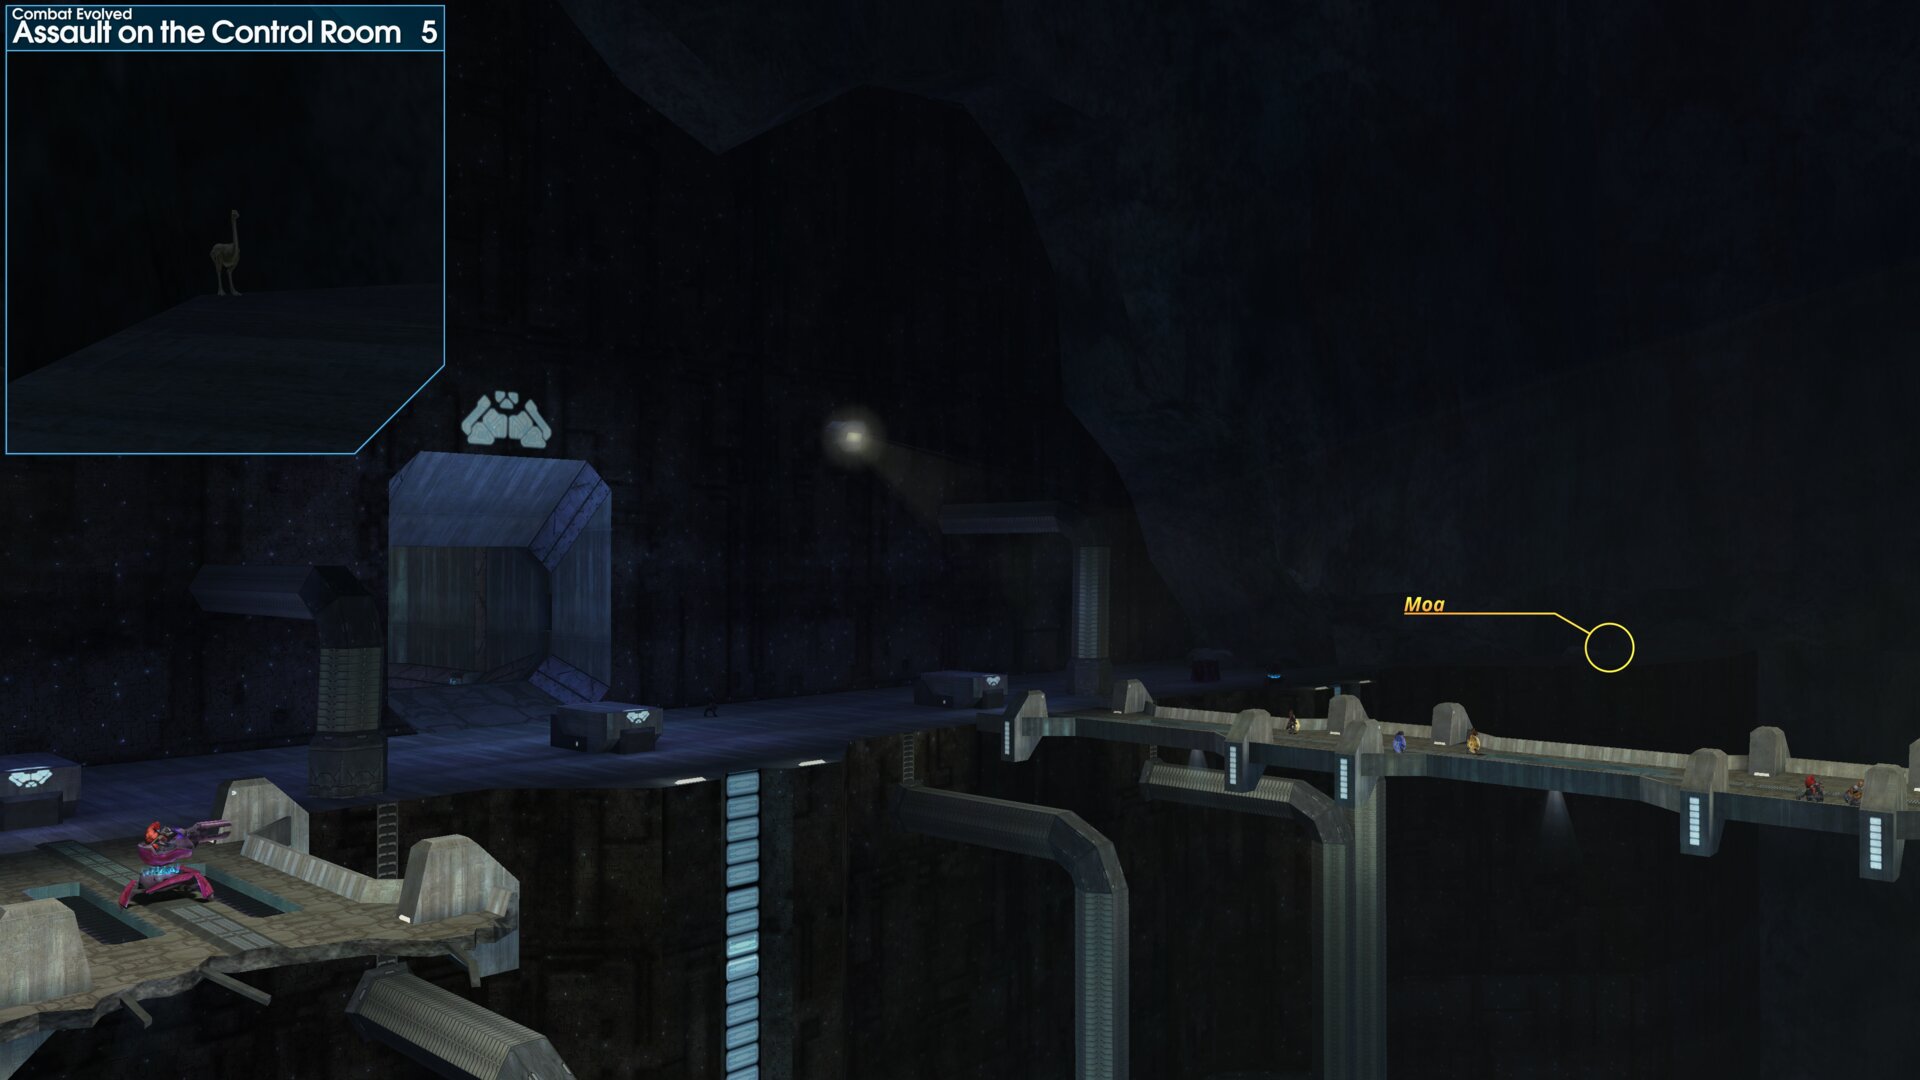
Before you cross the bridge in the cavern, the Golden Moa is by the cavern wall past left Shade turret.
Golden Moa 6
Rolling Thunder.
After leaving the tunnels/cave take the left path round the central structure/cliff formation, towards the side with a couple of large pipes up the side of it. The Golden Moa at the bottom of the closest pipe, next to where it attaches to the central structure.
Rolling Thunder.
After leaving the tunnels/cave take the left path round the central structure/cliff formation, towards the side with a couple of large pipes up the side of it. The Golden Moa at the bottom of the closest pipe, next to where it attaches to the central structure.
Golden Moa 7
In the octagonal room after leaving the 2nd chasm, the Golden Moa is in a large tube by the strange blue beam thing. (This is the room before you go up the lift to the 2 bridges that cross the 2nd chasm)
In the octagonal room after leaving the 2nd chasm, the Golden Moa is in a large tube by the strange blue beam thing. (This is the room before you go up the lift to the 2 bridges that cross the 2nd chasm)
Golden Moa 8
In the final chasm, the Golden Moa is on top of a rock at the bottom of the frozen waterfall (opposite the Control Room).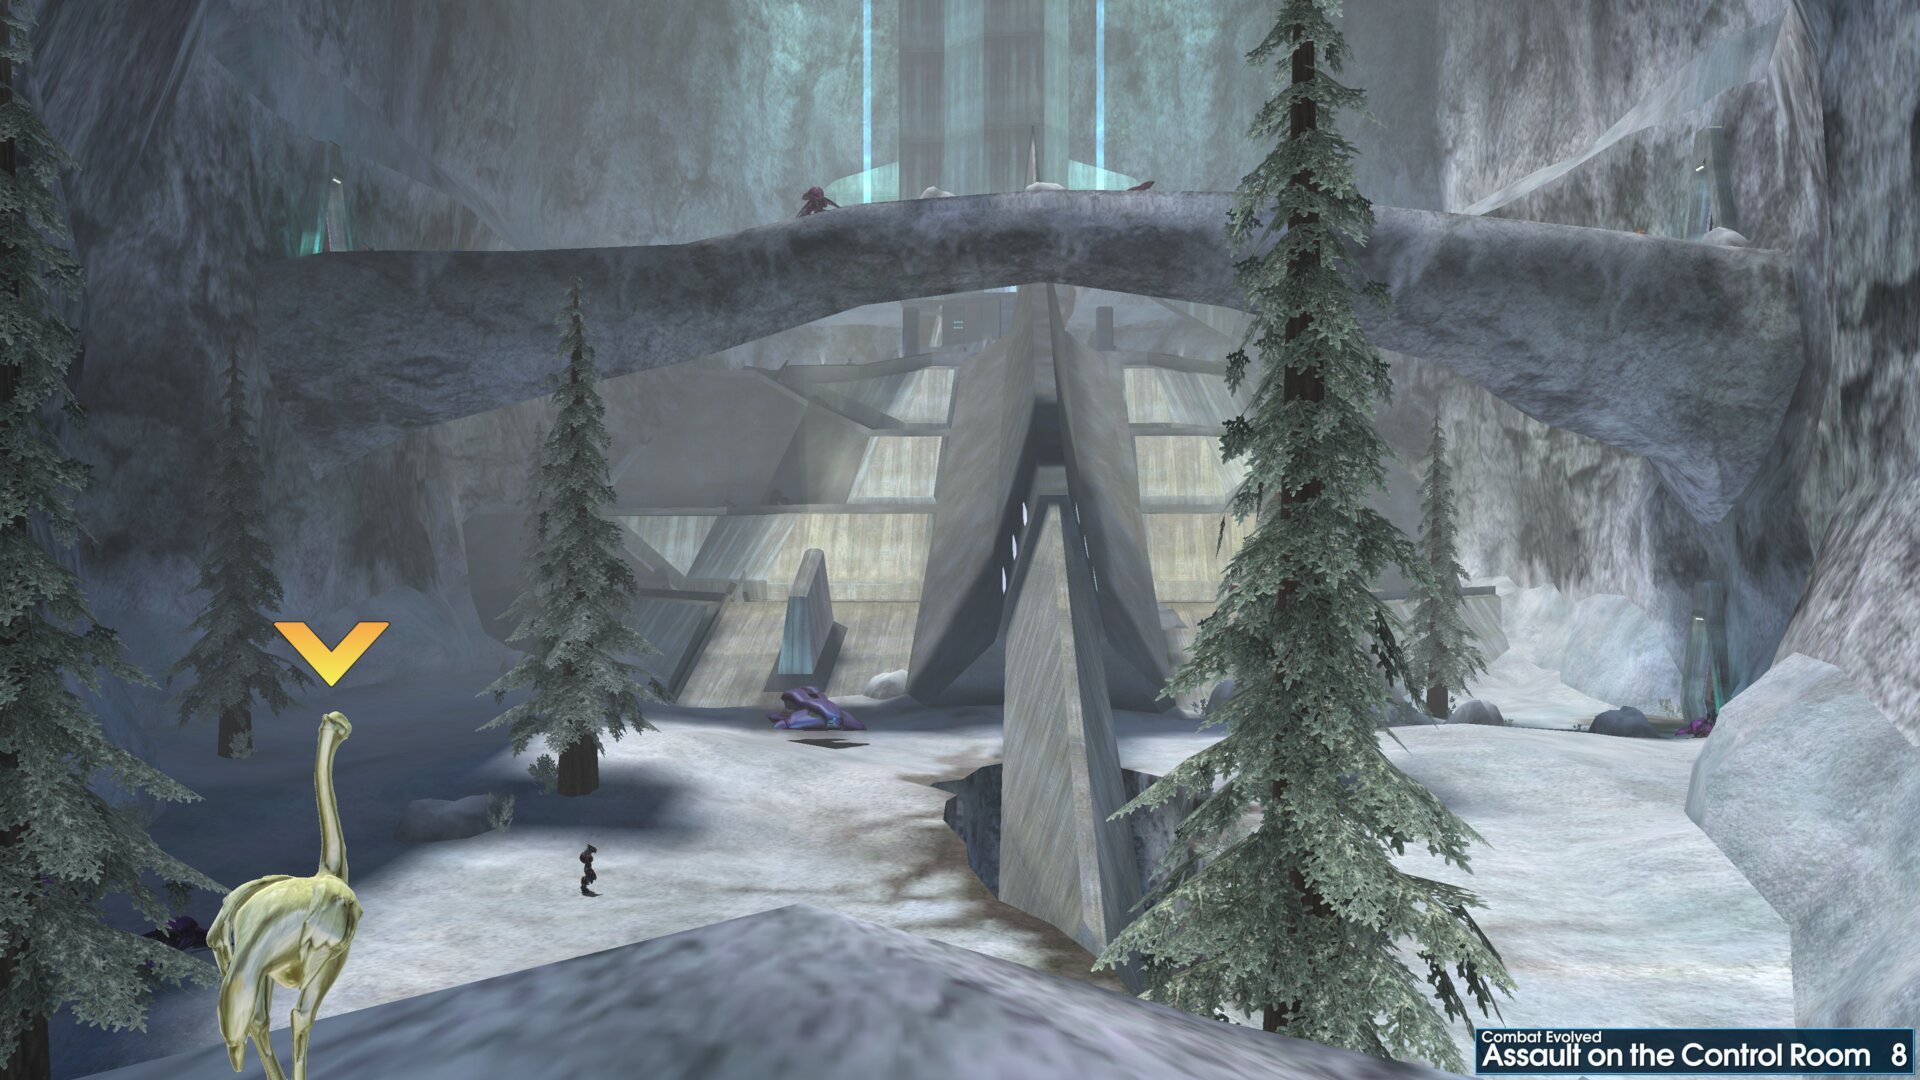
In the final chasm, the Golden Moa is on top of a rock at the bottom of the frozen waterfall (opposite the Control Room).
➟ 343 Guilty Spark
Golden Moa 1
Once you enter the containment facility, the Golden Moa is on top of the ledge above the entrance to the elevator room.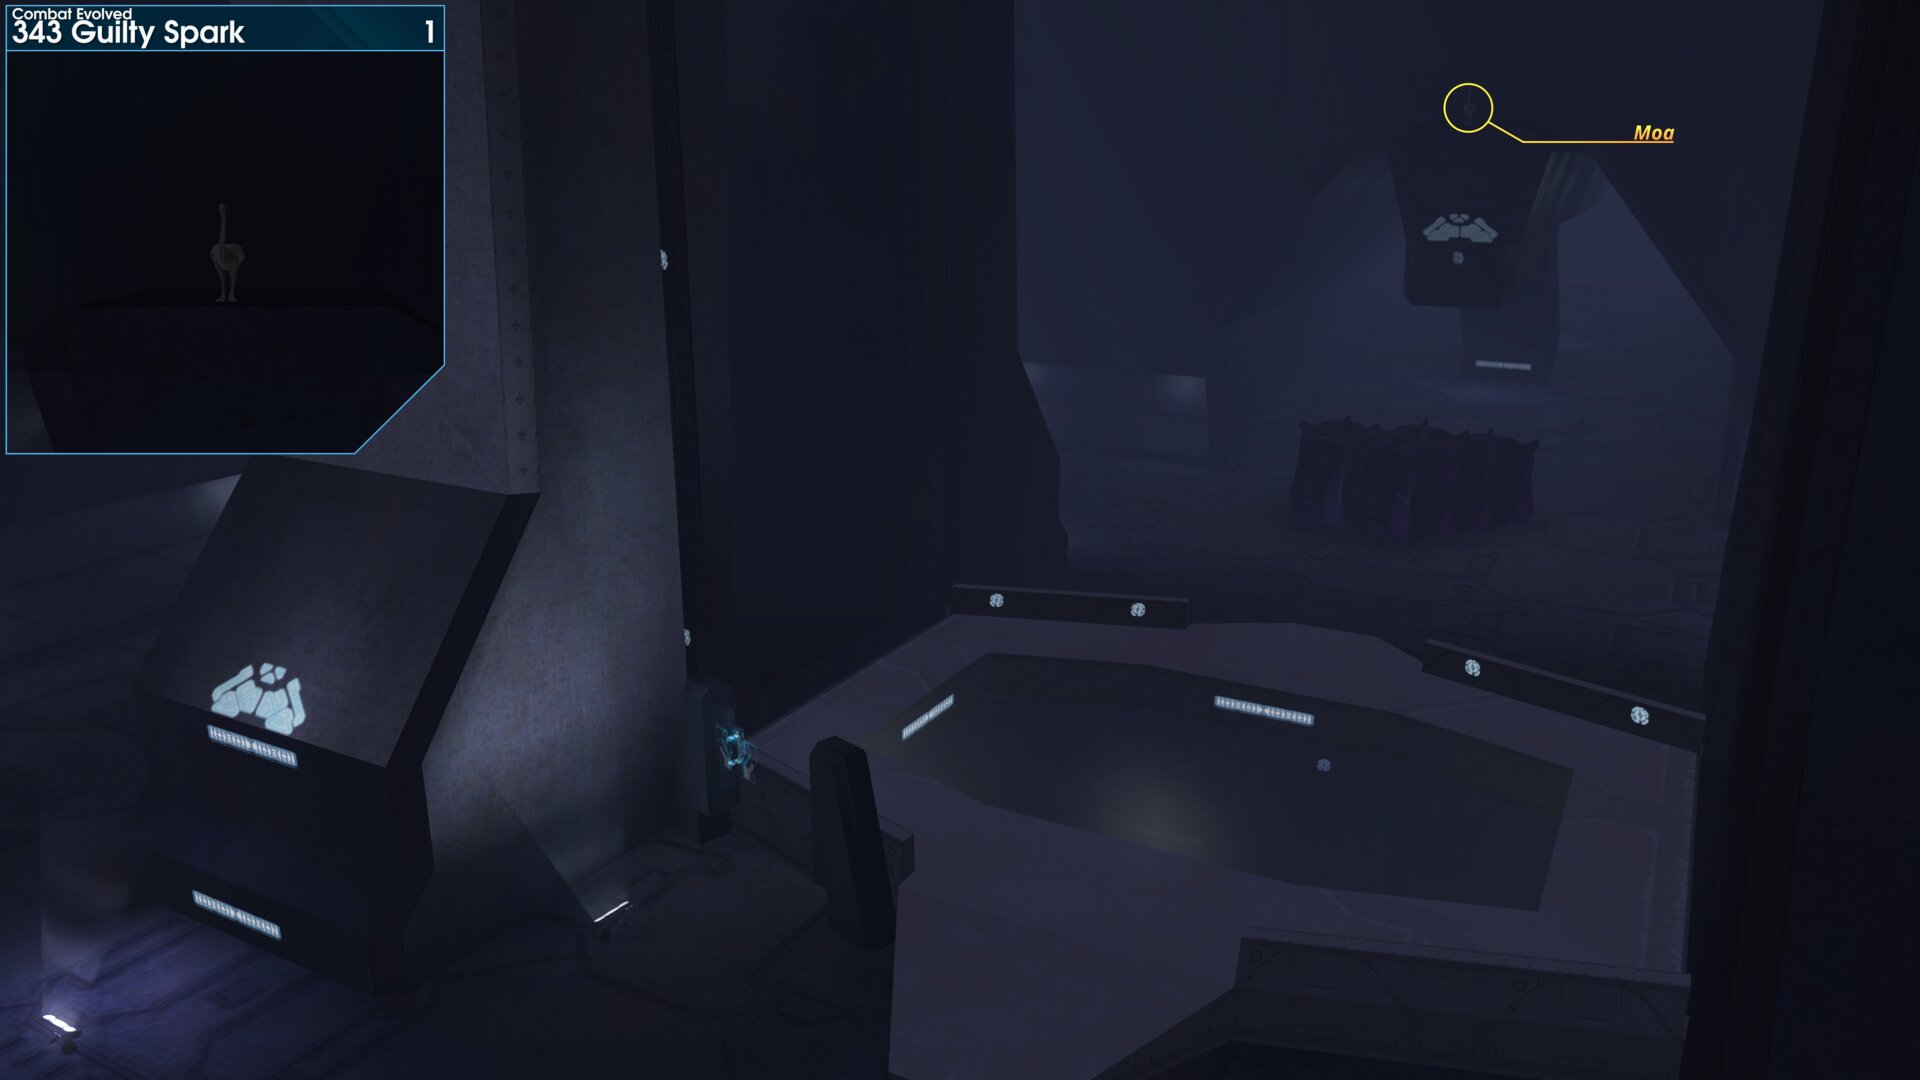
Once you enter the containment facility, the Golden Moa is on top of the ledge above the entrance to the elevator room.
Golden Moa 2
After going down the 1st elevator you will reach a large room, the Golden Moa is up high on a ledge on the left side of the room. (The screenshot has been taken from the far end of the room, looking back towards the elevator doorway)
After going down the 1st elevator you will reach a large room, the Golden Moa is up high on a ledge on the left side of the room. (The screenshot has been taken from the far end of the room, looking back towards the elevator doorway)
Golden Moa 3
The Flood.
In the Flood reveal room, this Golden Moa is on a ledge directly above the 2nd raised platform in the middle of the room.
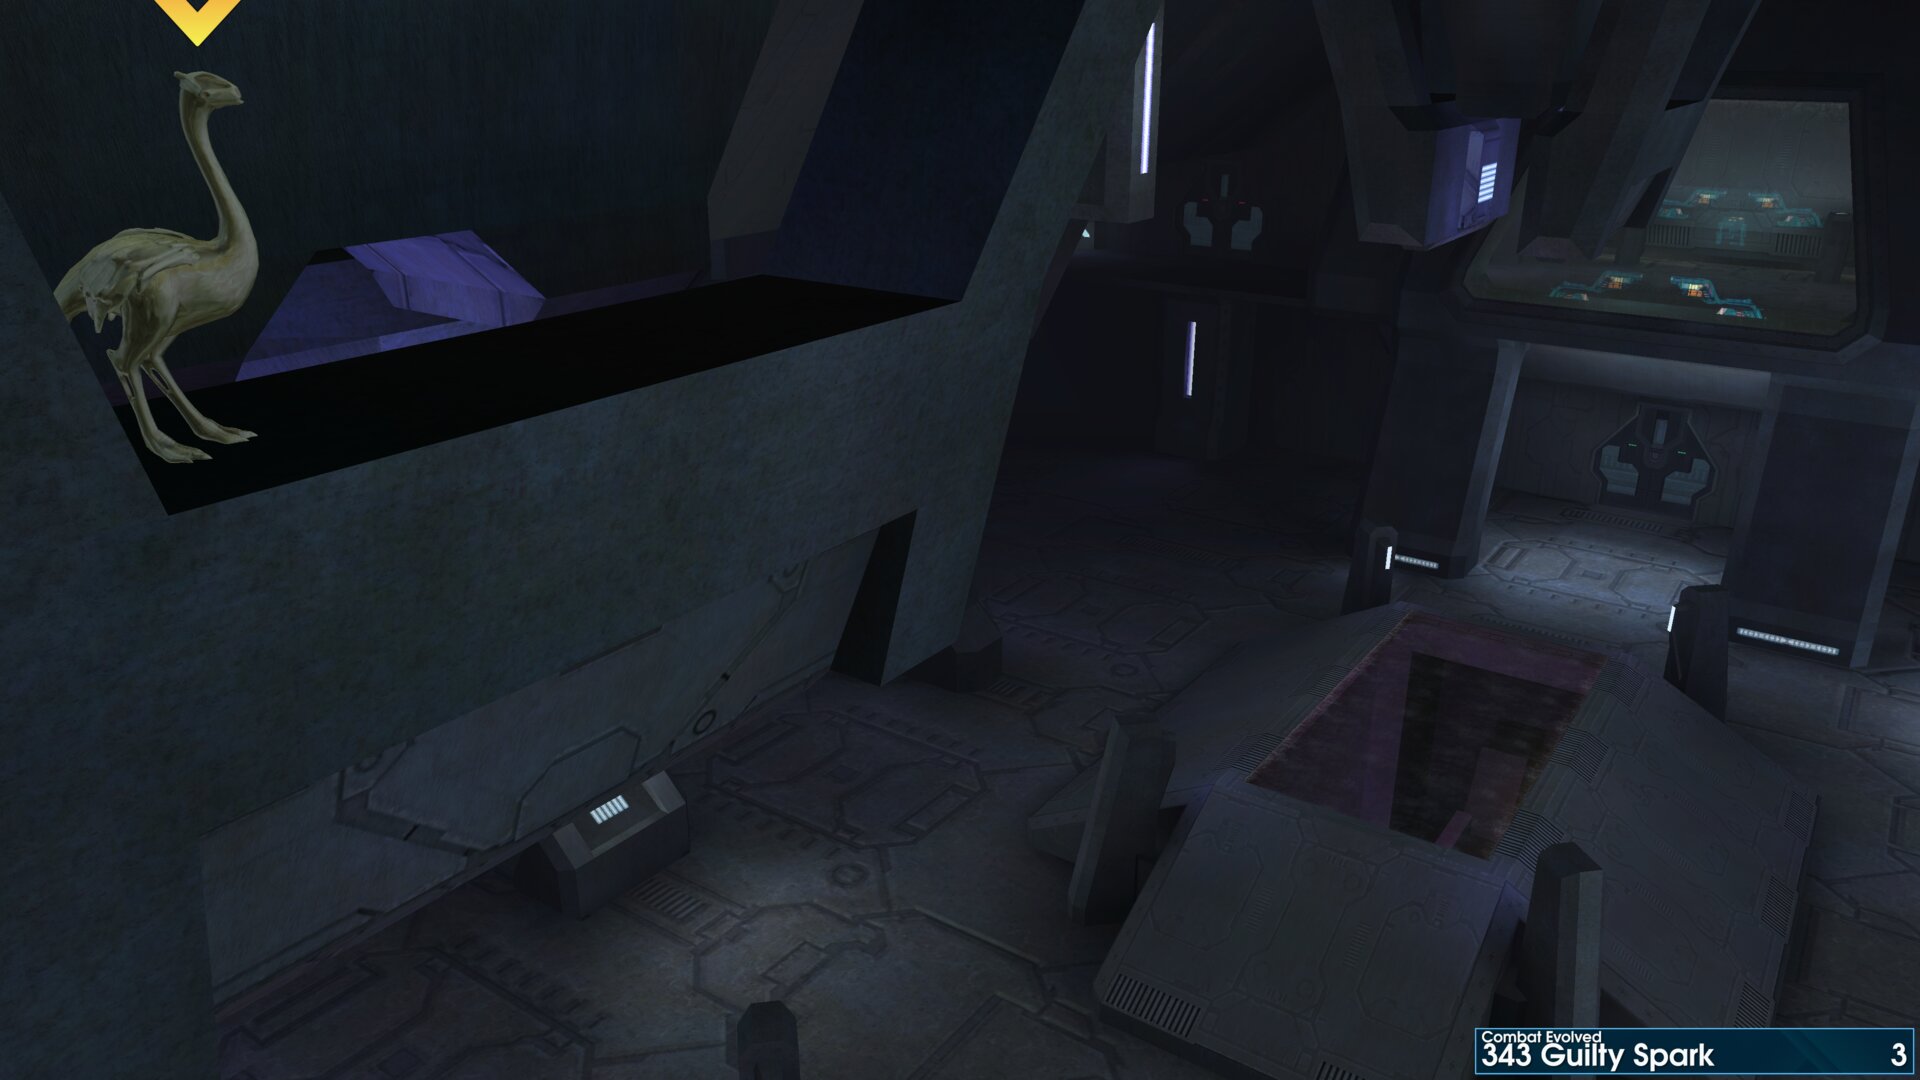
The Flood.
In the Flood reveal room, this Golden Moa is on a ledge directly above the 2nd raised platform in the middle of the room.
Golden Moa 4
At the bottom of the 2nd elevator, the Golden Moa is on top of a ledge at the back for the room.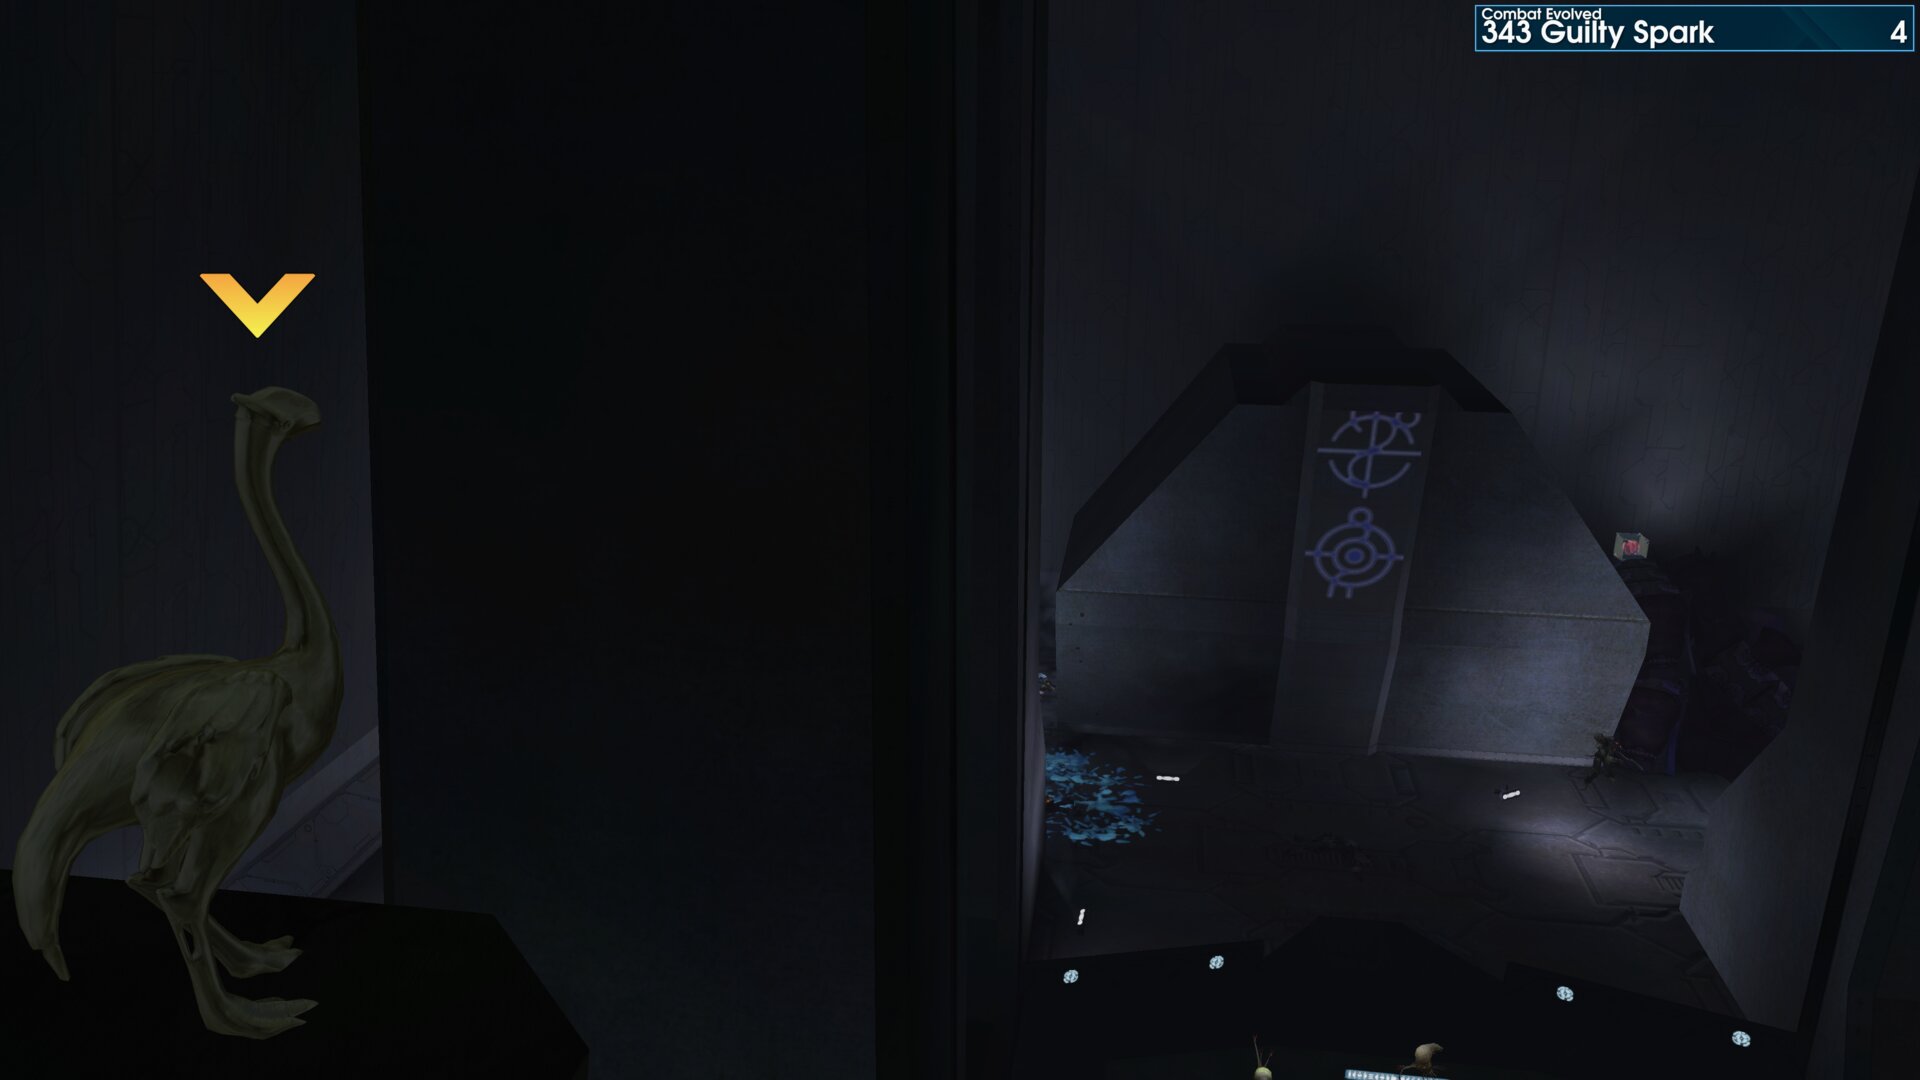
At the bottom of the 2nd elevator, the Golden Moa is on top of a ledge at the back for the room.
Golden Moa 5
In the final room before the 3rd elevator, where you activate a light bridge, the Golden Moa is up high on a ledge in the far left corner of the room.
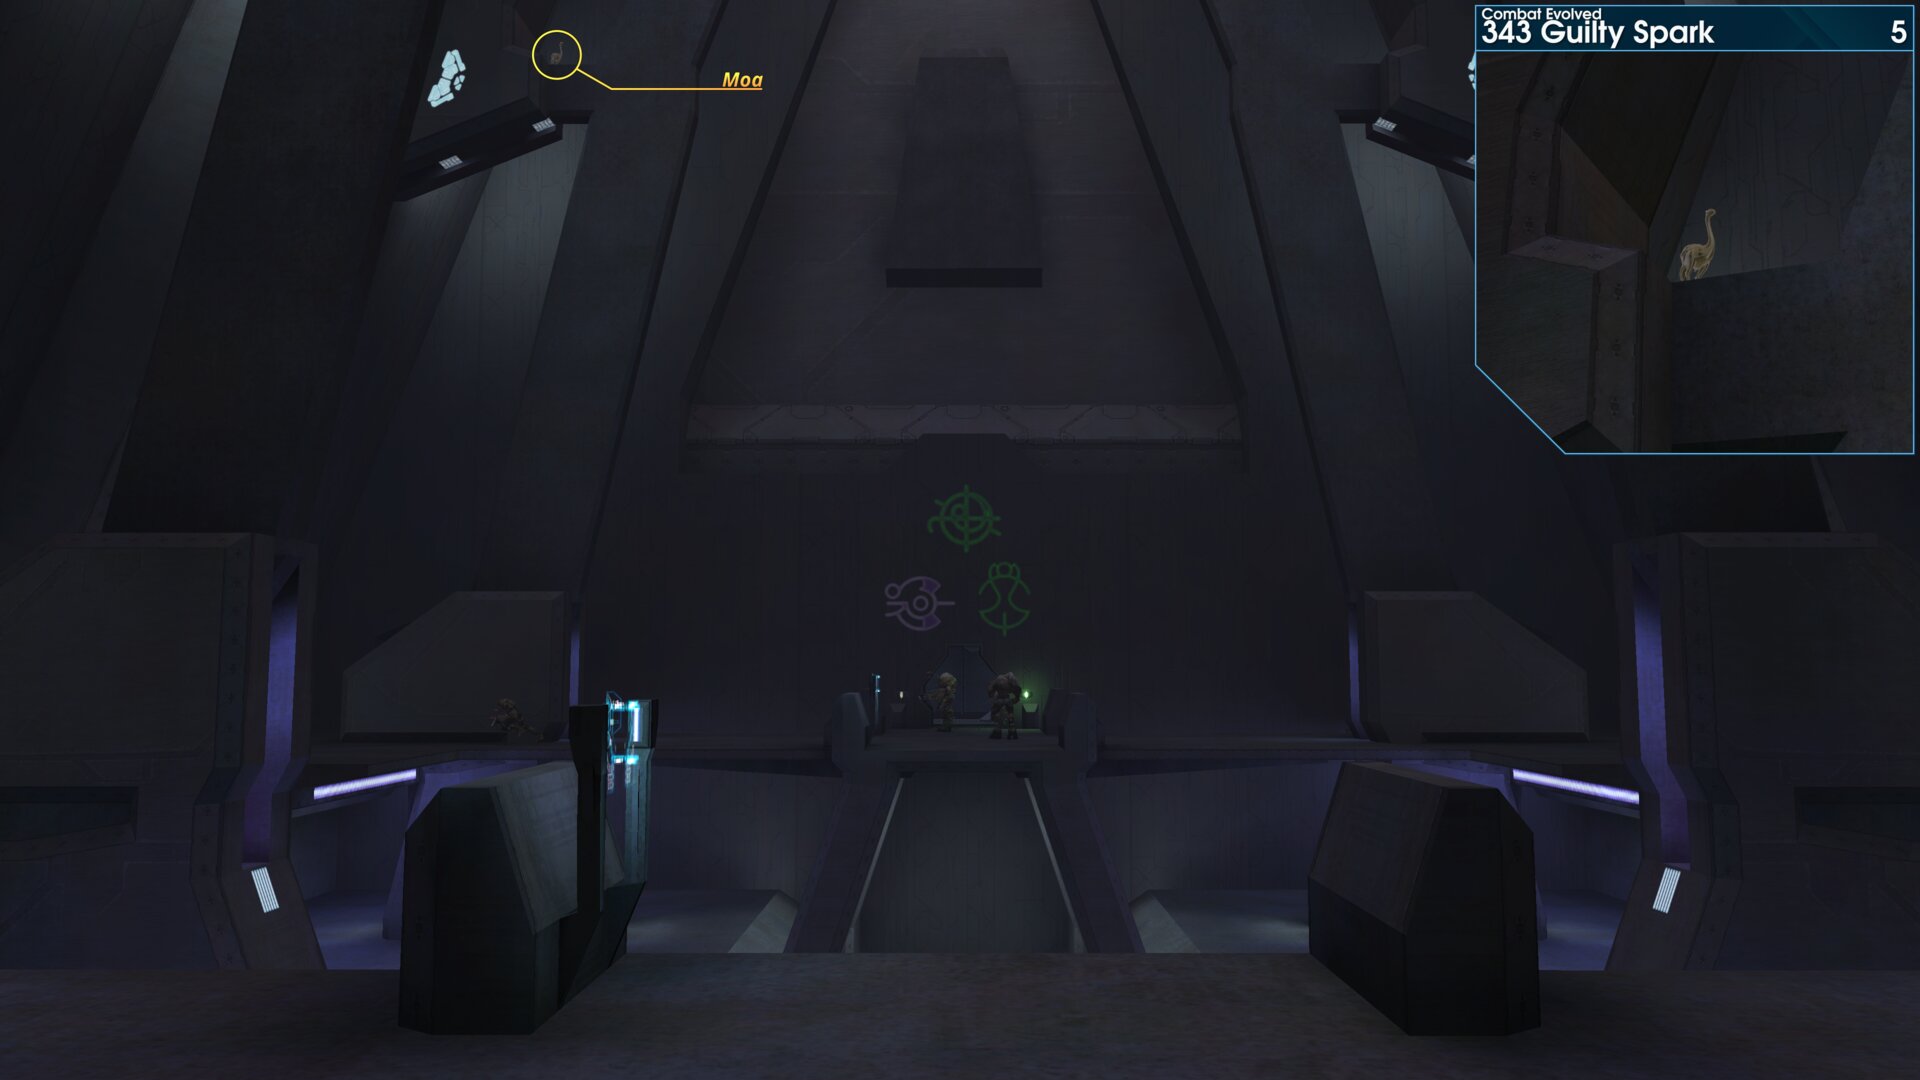
In the final room before the 3rd elevator, where you activate a light bridge, the Golden Moa is up high on a ledge in the far left corner of the room.
Golden Moa 6
As you enter the final area with a strange structure in the middle, the Golden Moa is on top of the far left light platform protruding from the structure.
As you enter the final area with a strange structure in the middle, the Golden Moa is on top of the far left light platform protruding from the structure.
➟ The Library
Golden Moa 1
[1st Floor] At the start of the mission just beyond the first set of ventilation shafts, the Golden Moa is on top of a light above the very 1st Flood Carrier Form.
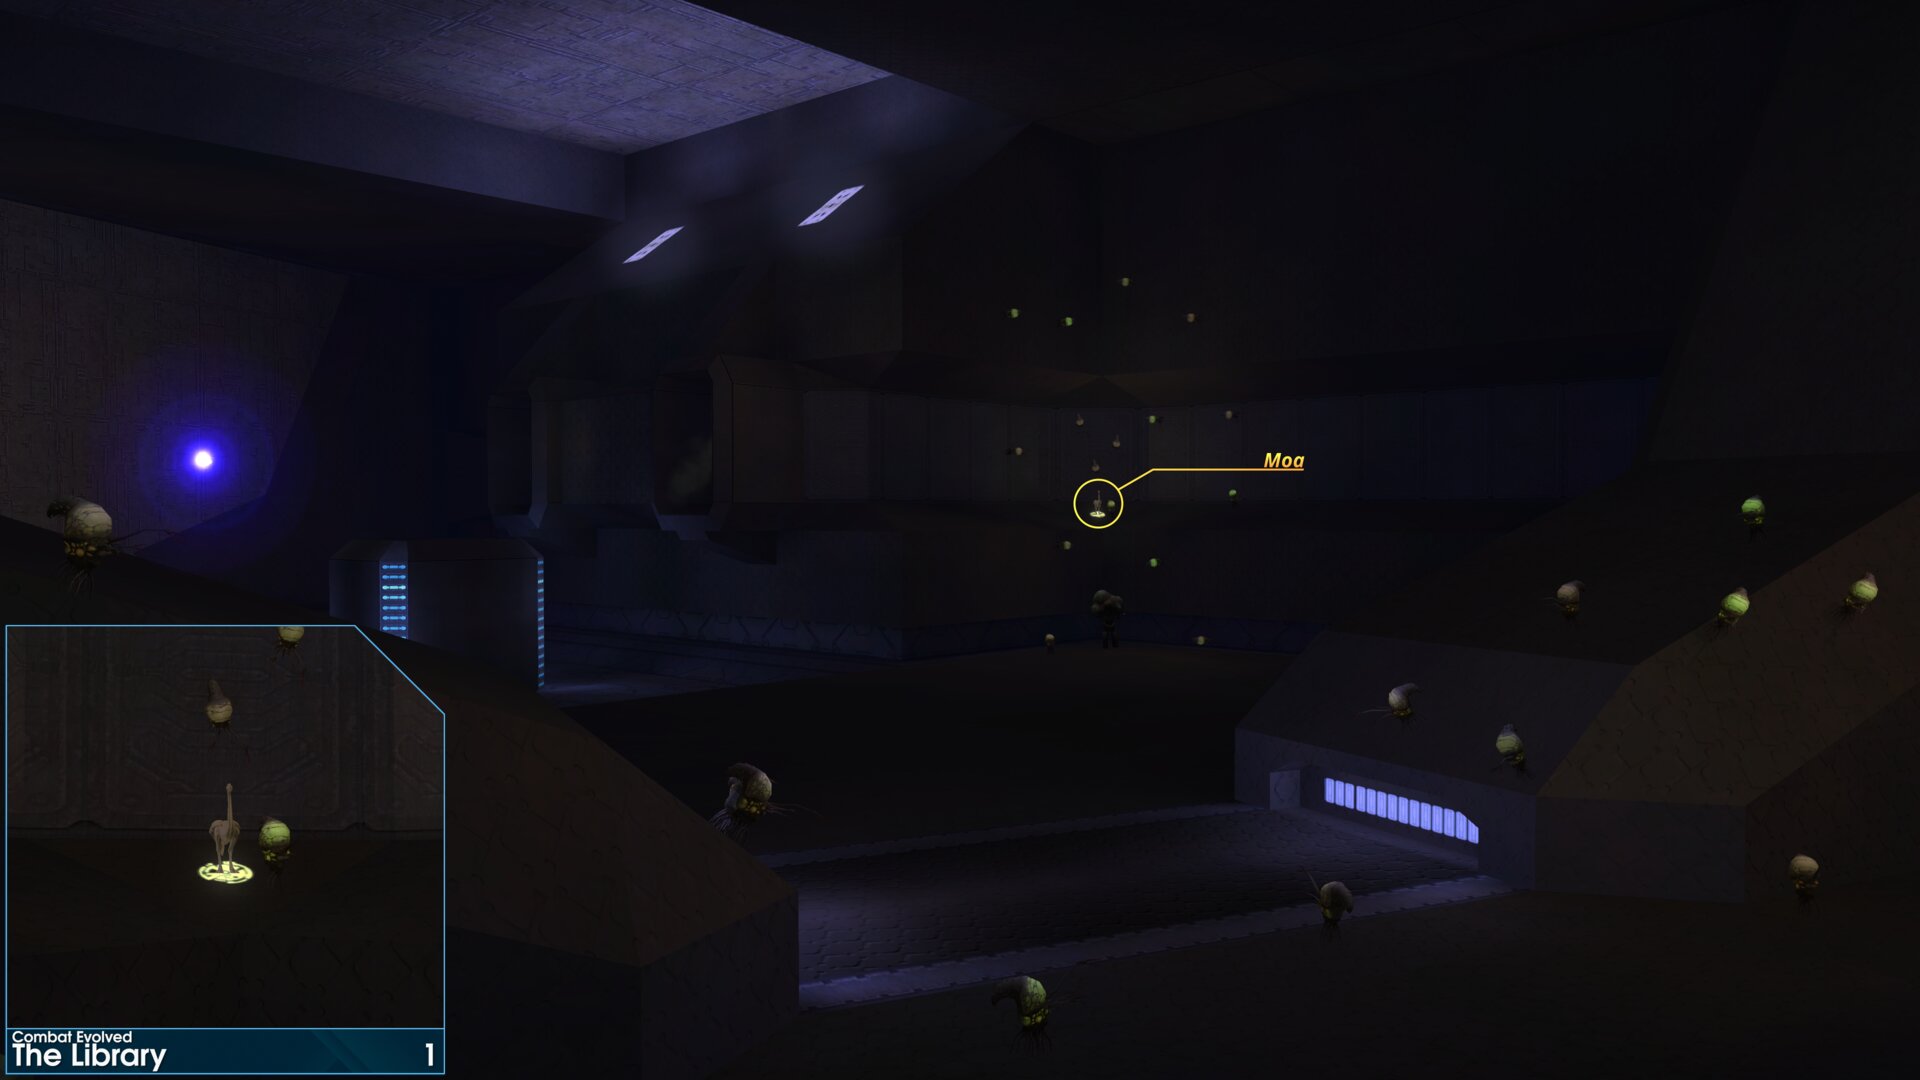
[1st Floor] At the start of the mission just beyond the first set of ventilation shafts, the Golden Moa is on top of a light above the very 1st Flood Carrier Form.
Golden Moa 2
[1st Floor] As you enter the Libraries Index Chamber (the inner circle), the Golden Moa is over the far side just out of sight.
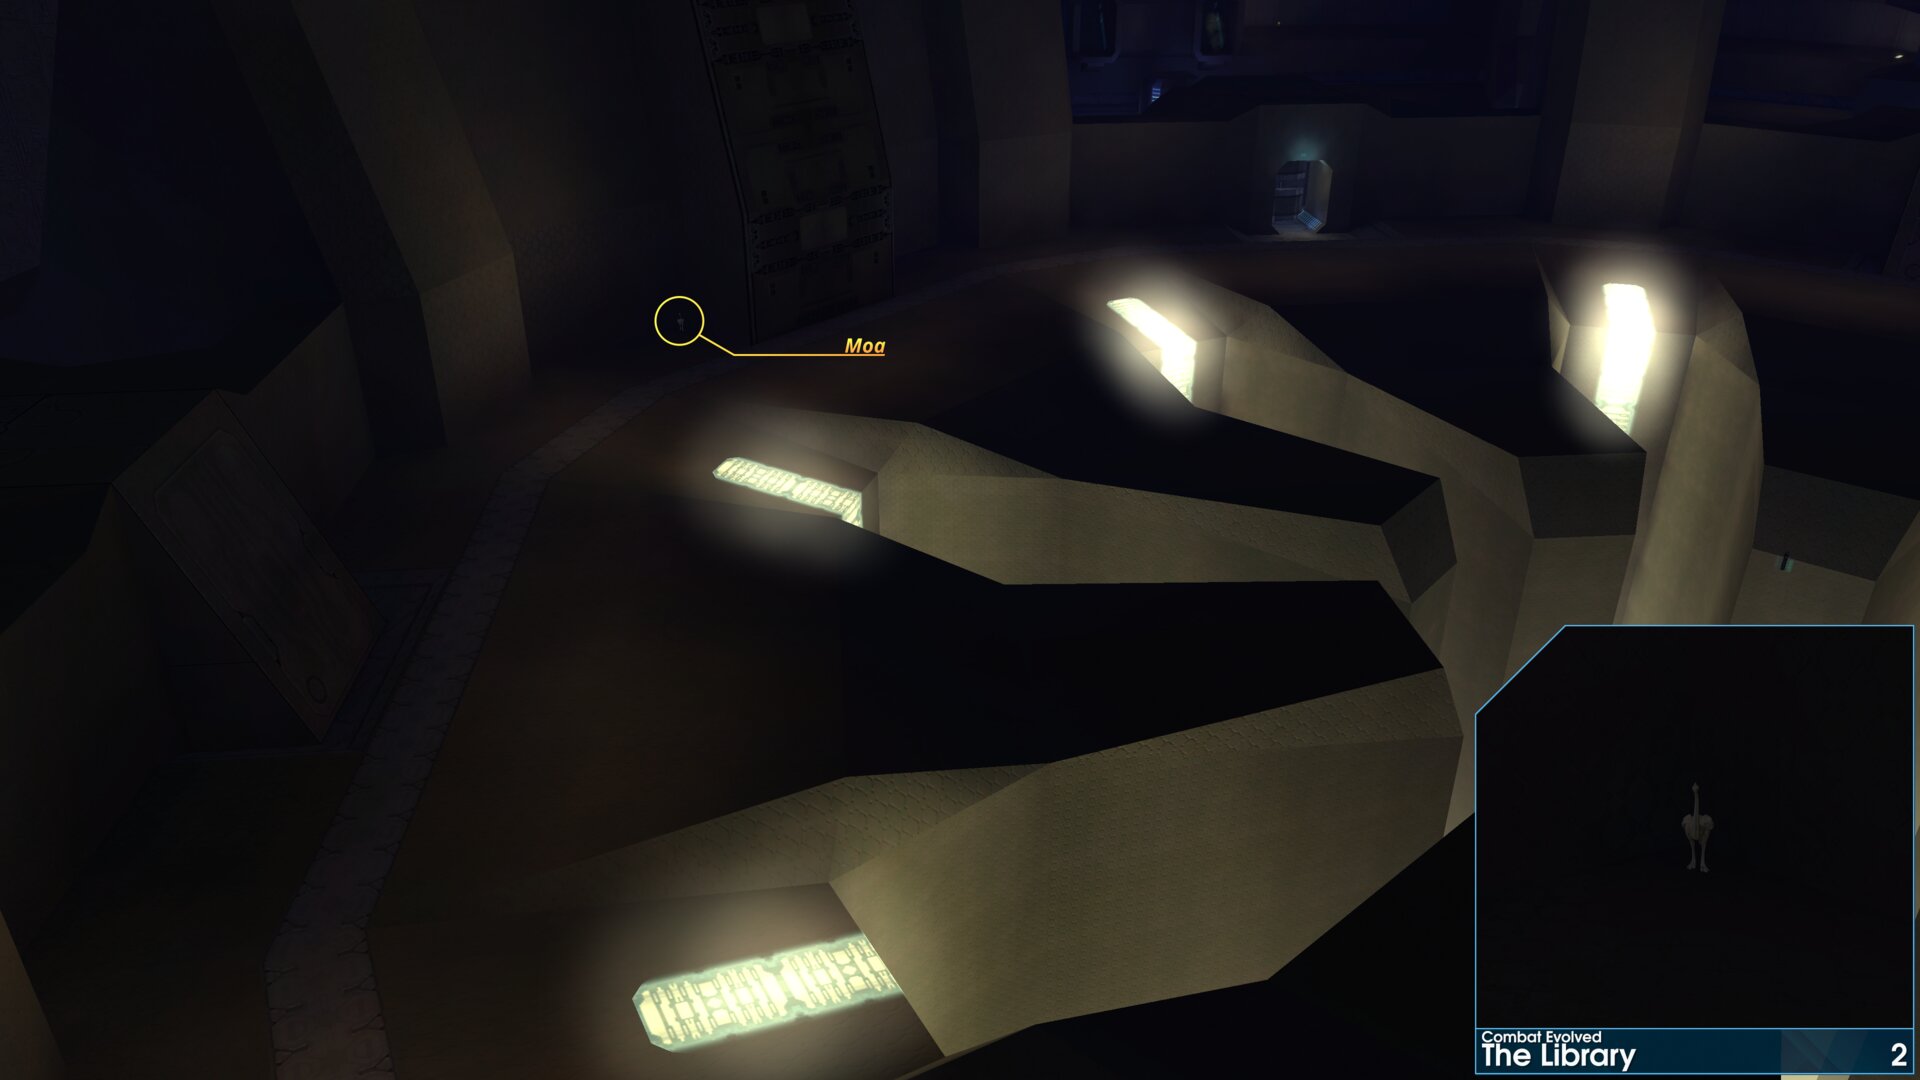
[1st Floor] As you enter the Libraries Index Chamber (the inner circle), the Golden Moa is over the far side just out of sight.
Golden Moa 3
[1st Floor] As you reach the end of the first floor, the Golden Moa is in the side hallway before the lift.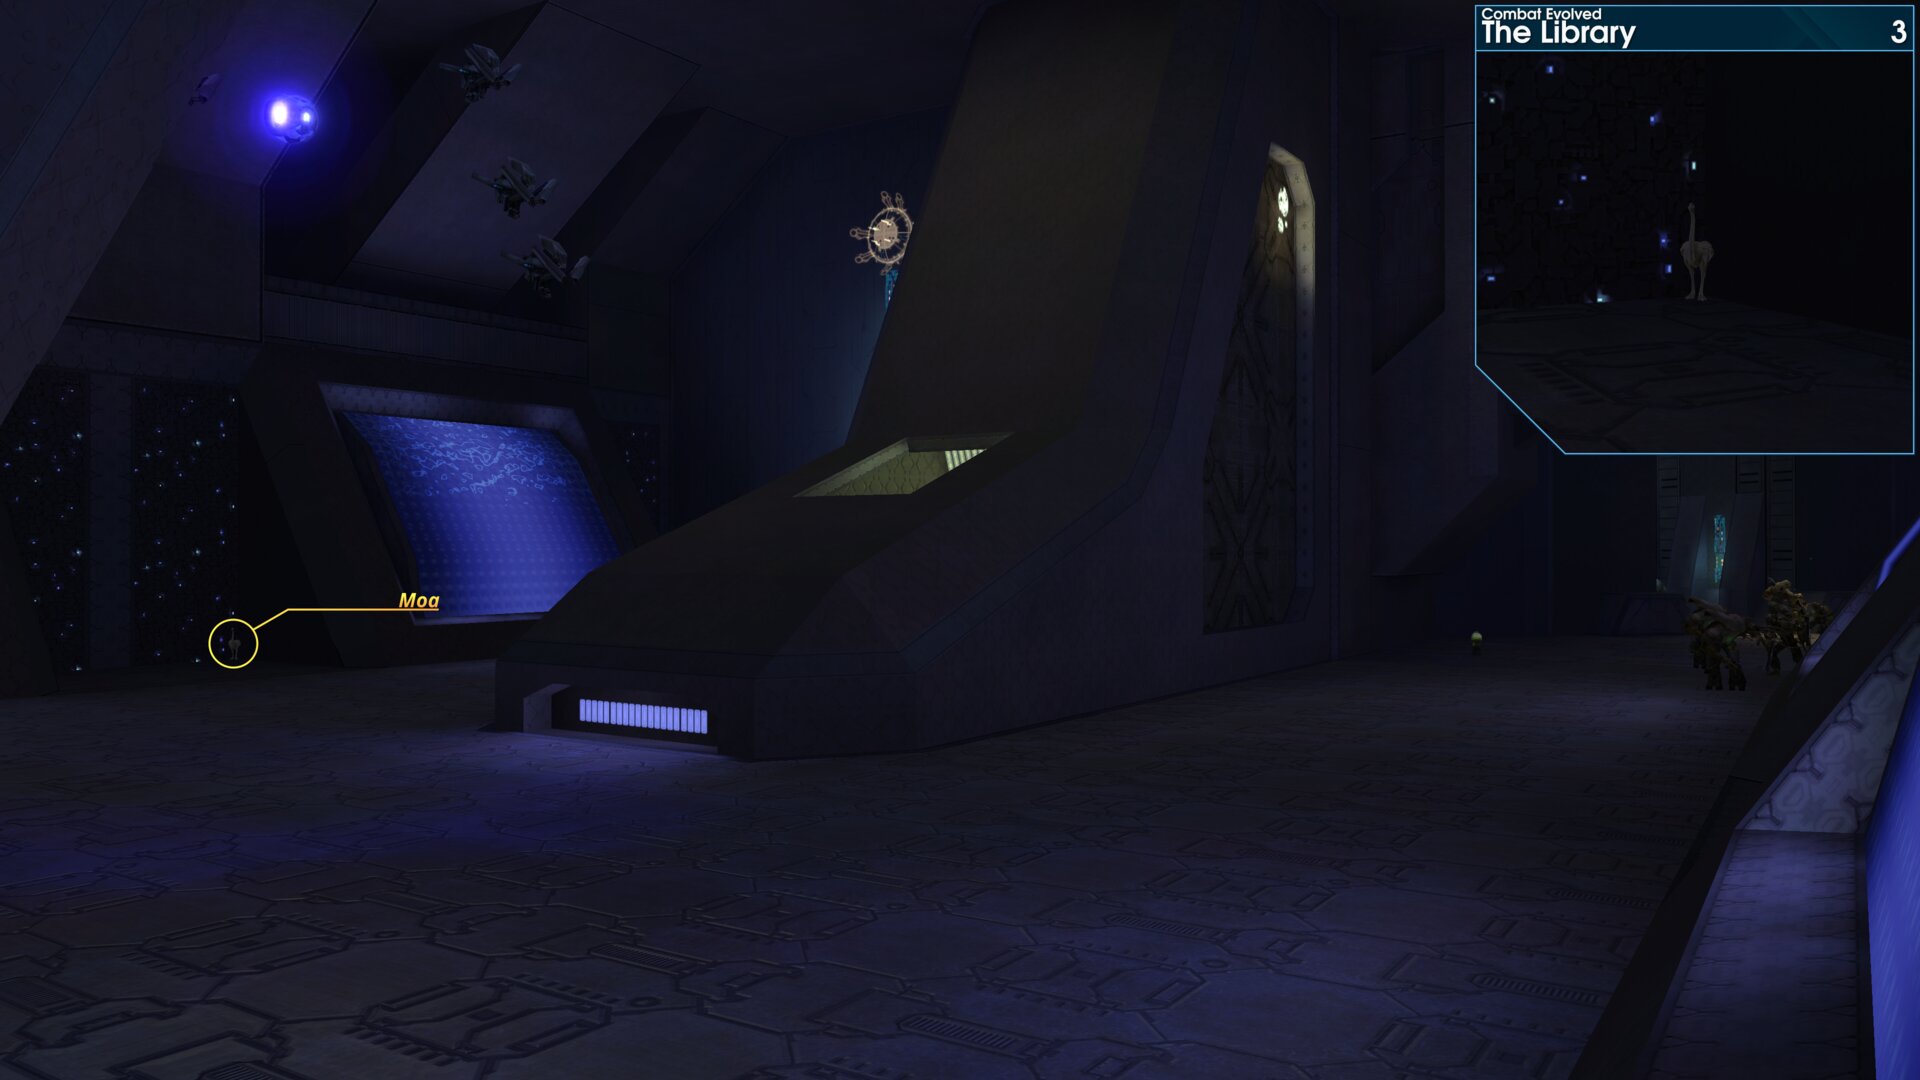
[1st Floor] As you reach the end of the first floor, the Golden Moa is in the side hallway before the lift.
Golden Moa 4
[2nd Floor] After waiting for the Monitor at the 1st door on the 2nd floor, you’ll enter the outer circle, continue round the corner. The Golden Moa is up on the wall to your right.
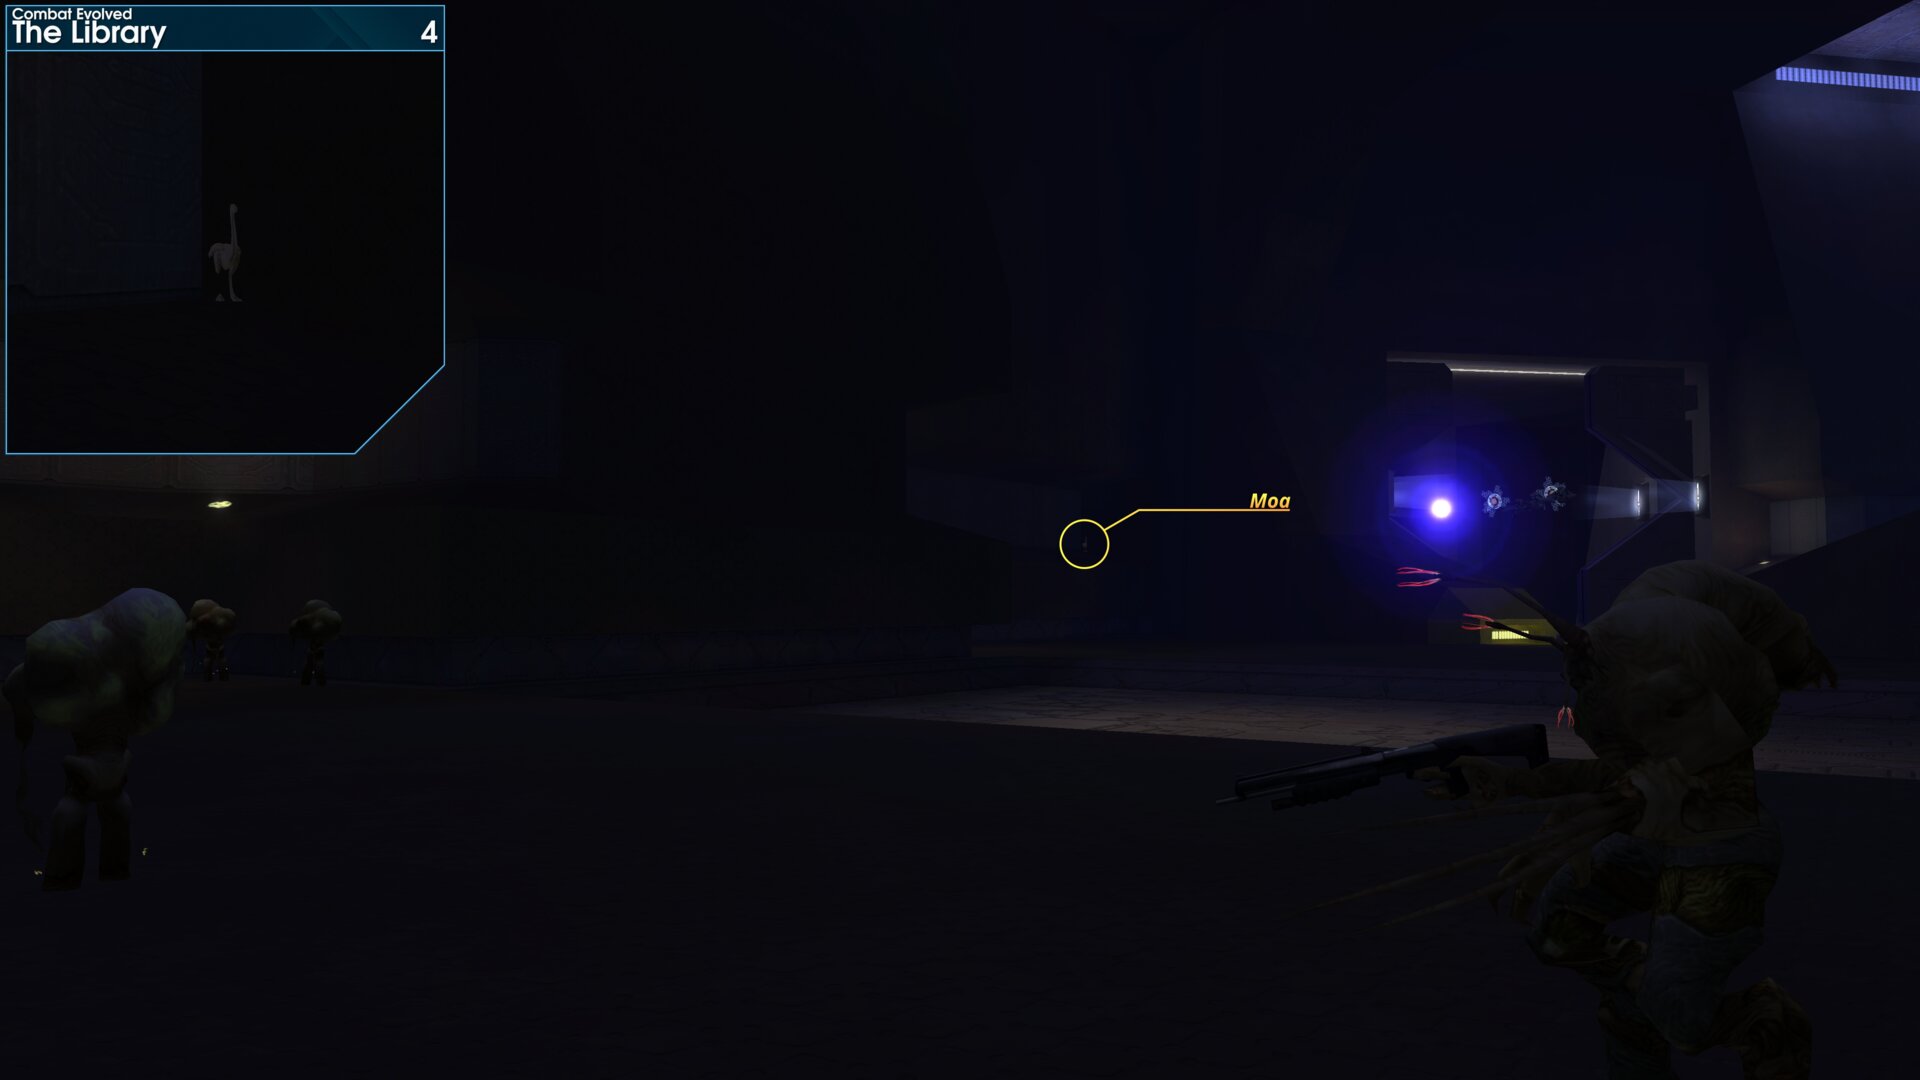
[2nd Floor] After waiting for the Monitor at the 1st door on the 2nd floor, you’ll enter the outer circle, continue round the corner. The Golden Moa is up on the wall to your right.
Golden Moa 5
[4th Floor] As you enter the outer/inner circle for the final time, go to the left past the far boxes, the Golden Moa is up on the wall (on top of a light) to your left.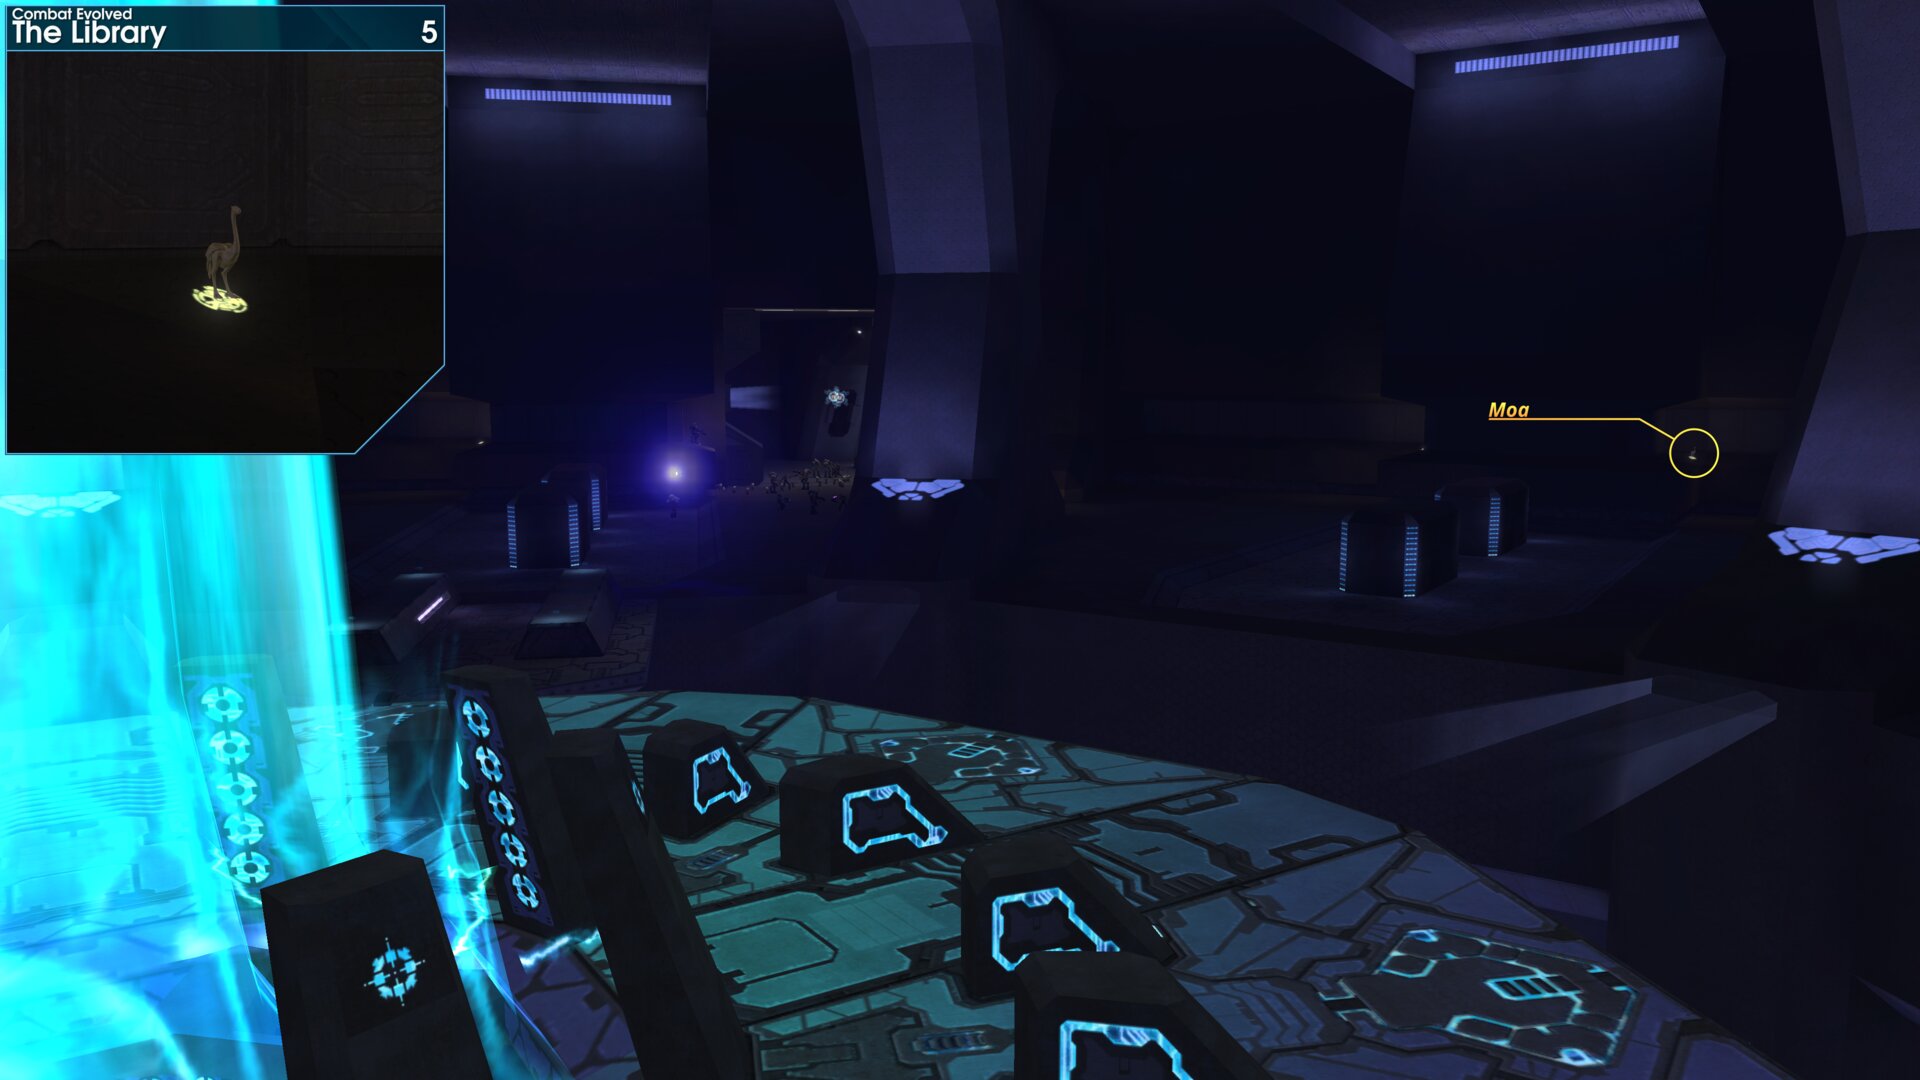
[4th Floor] As you enter the outer/inner circle for the final time, go to the left past the far boxes, the Golden Moa is up on the wall (on top of a light) to your left.
Golden Moa 6
[4th Floor] As you enter the outer/inner circle for the final time, the Golden Moa is beside a jut out in the inner circle, towards the far side of the room. (the shortest path is anti-clockwise)
Be sure to avoid the central platform when going
for this Golden Moa, otherwise you will end the
mission.
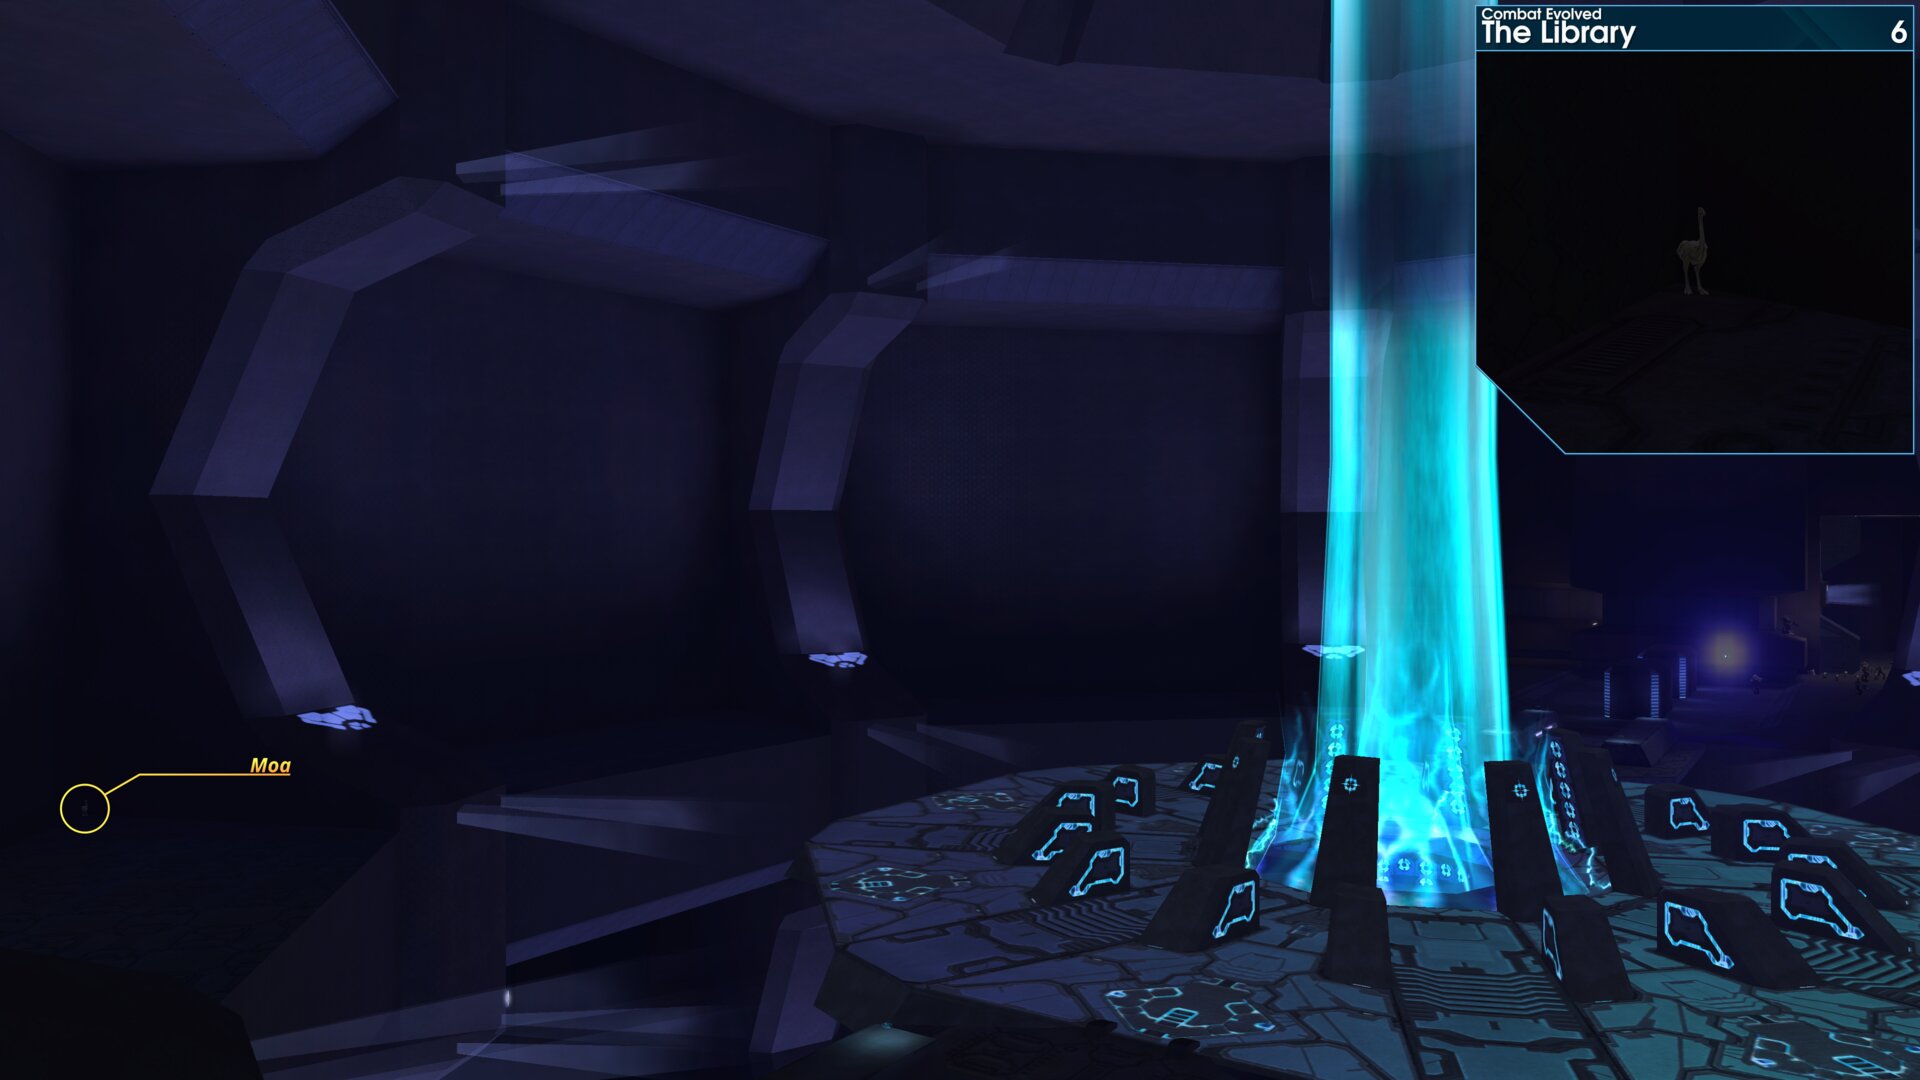
[4th Floor] As you enter the outer/inner circle for the final time, the Golden Moa is beside a jut out in the inner circle, towards the far side of the room. (the shortest path is anti-clockwise)
Be sure to avoid the central platform when goingfor this Golden Moa, otherwise you will end the
mission.
➟ Two Betrayals
Golden Moa 1
Once you reach the chasm floor outside Control Room, the Golden Moa is under the protruding section of the Control Room structure.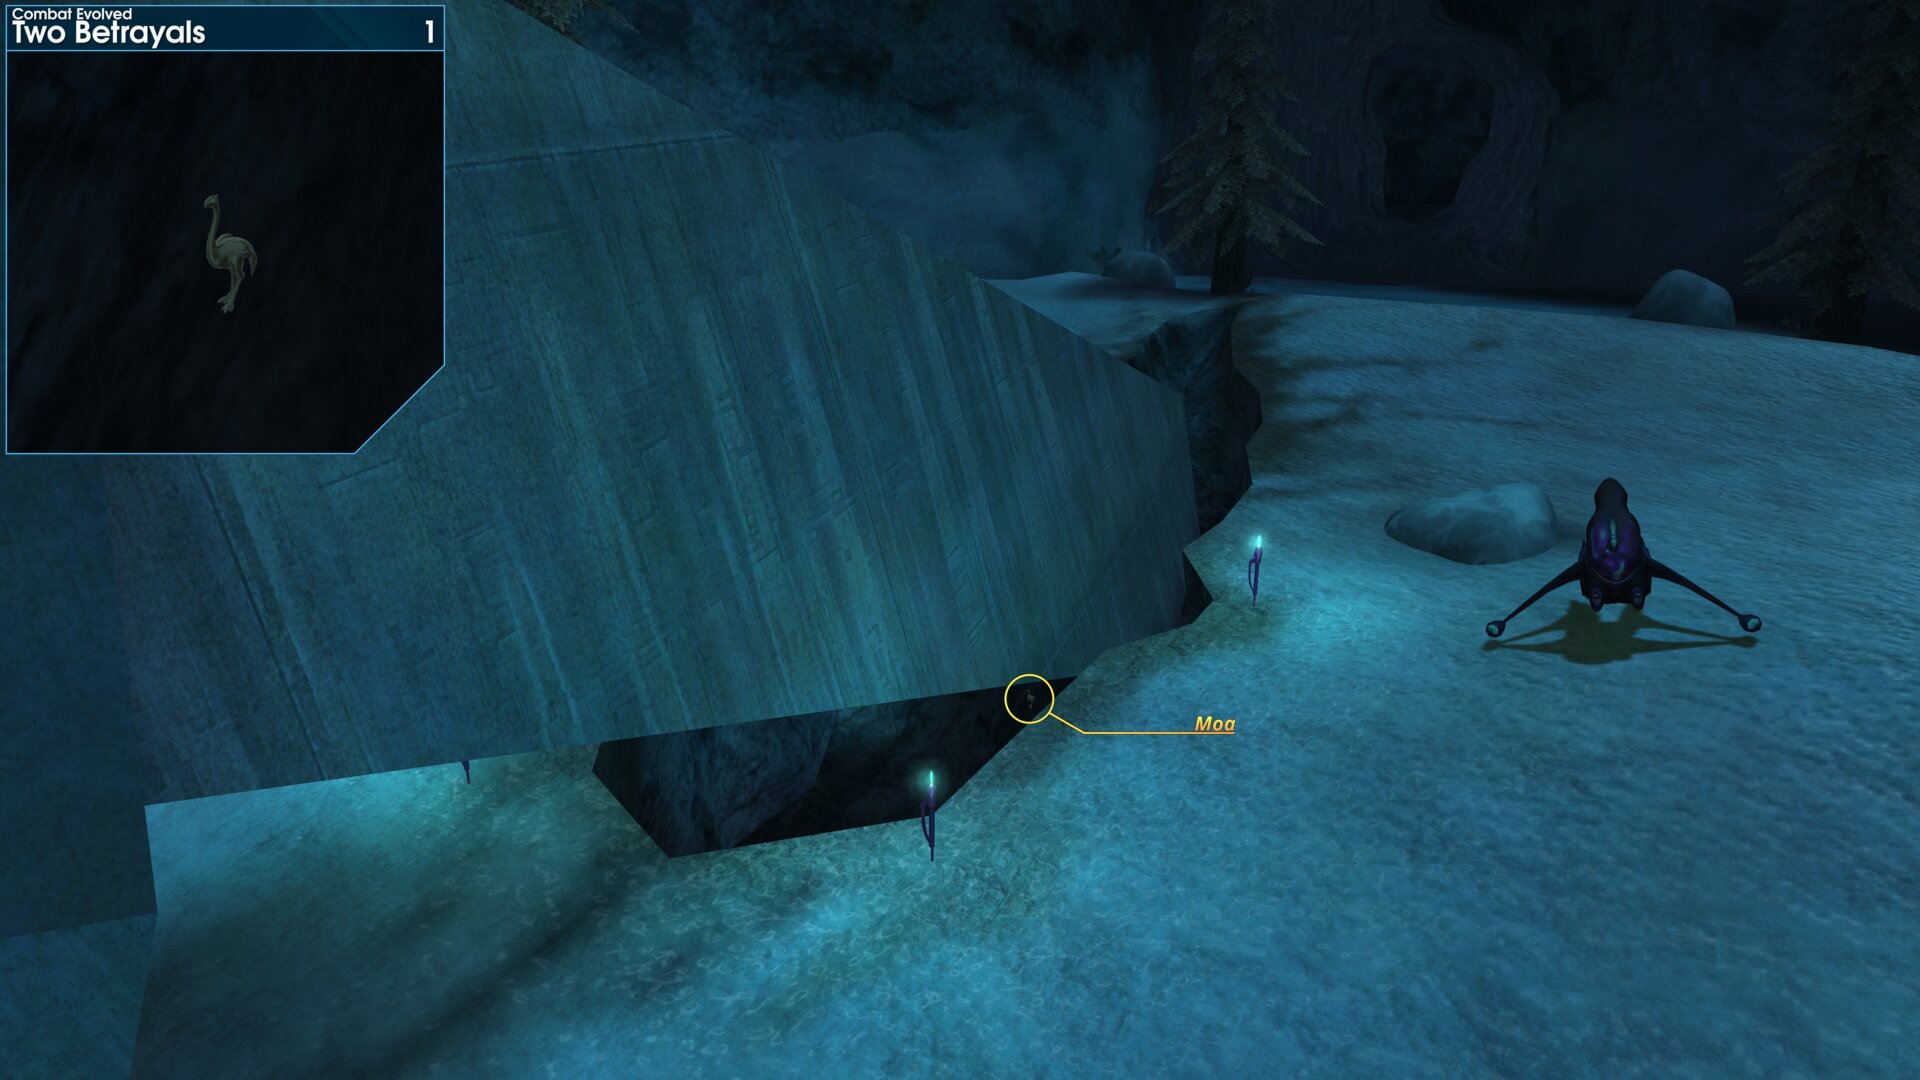
Once you reach the chasm floor outside Control Room, the Golden Moa is under the protruding section of the Control Room structure.
Golden Moa 2
After crossing the 1st bridge in the 2nd chasm, the next octagonal room will contain the Golden Moa (this room contains a large raised structure in the middle). As you enter the room follow the outer perimeter anti-clockwise (go left), the Golden Moa is on top of a platform that extends into the center of the room.
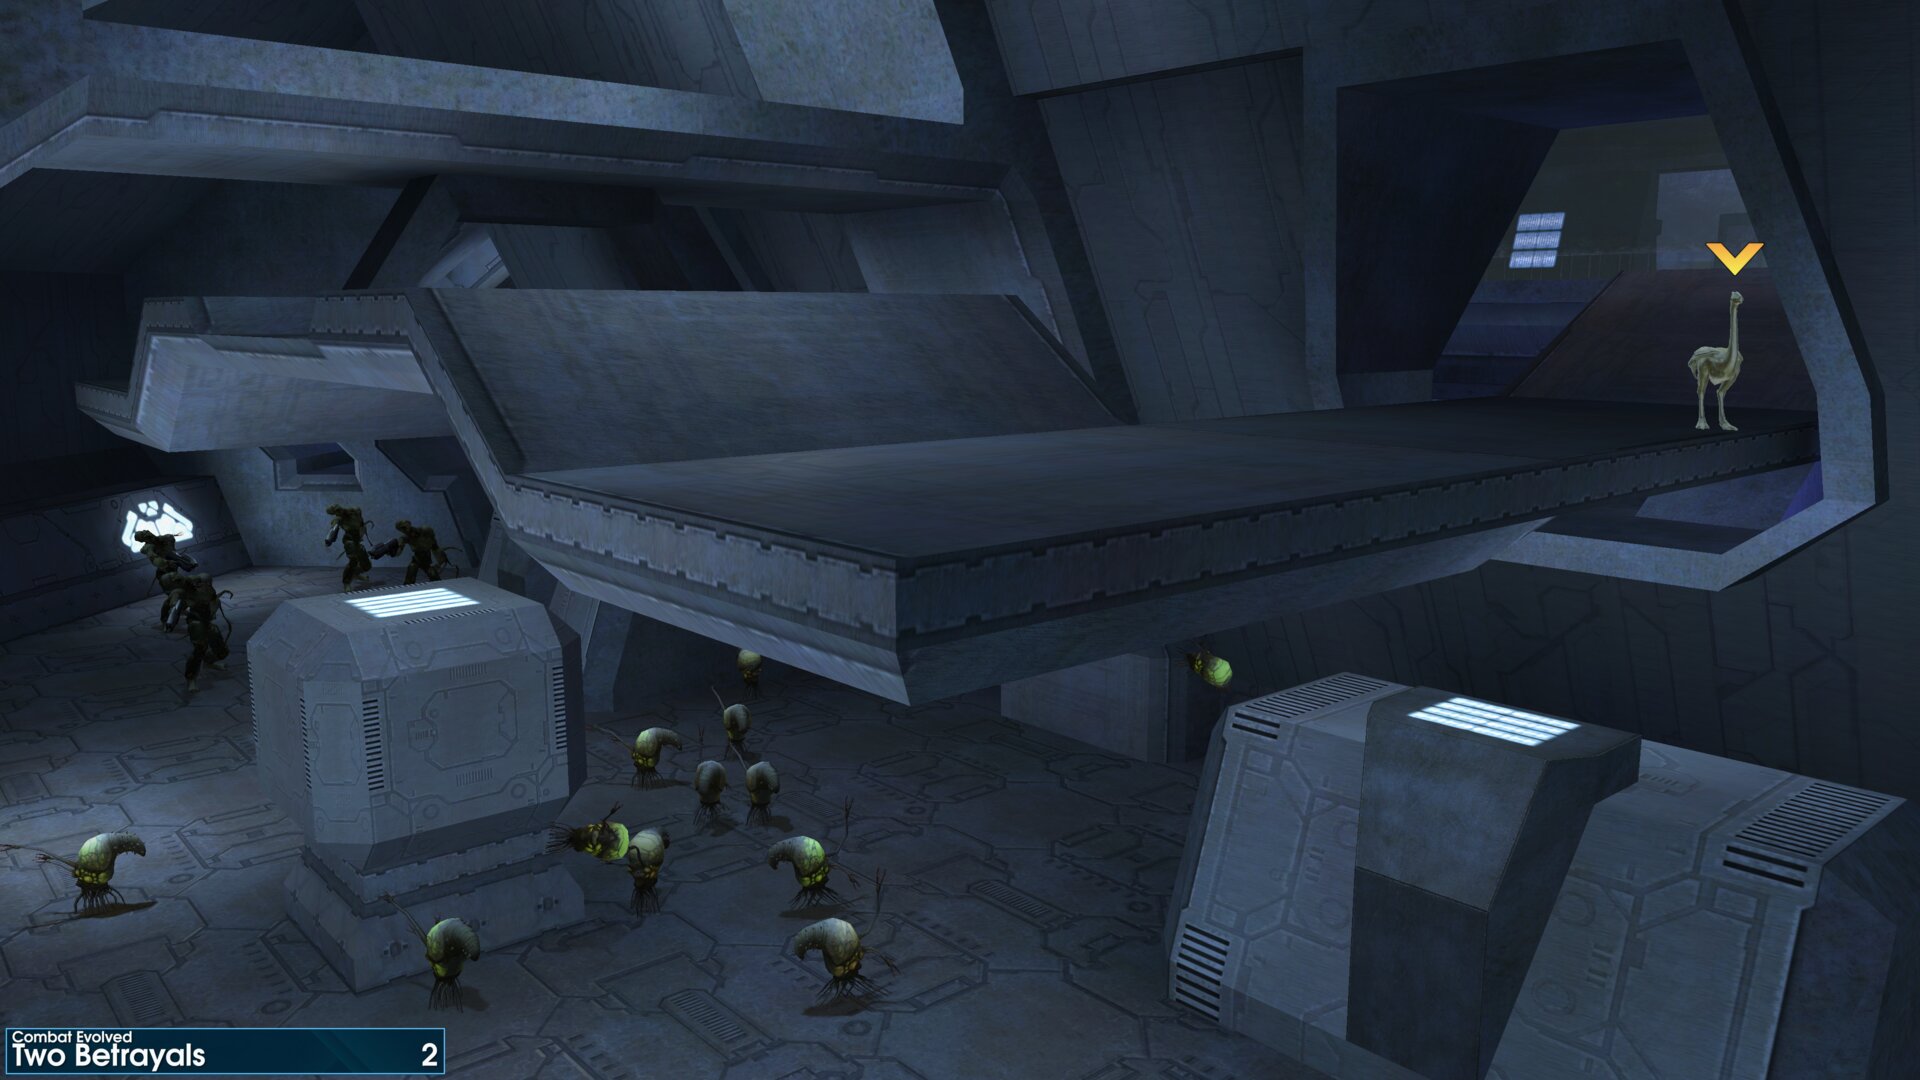
After crossing the 1st bridge in the 2nd chasm, the next octagonal room will contain the Golden Moa (this room contains a large raised structure in the middle). As you enter the room follow the outer perimeter anti-clockwise (go left), the Golden Moa is on top of a platform that extends into the center of the room.
Golden Moa 3
After the elevator, you’ll reach another octagonal room. As you enter the room follow the outer perimeter anti-clockwise (go left), the Golden Moa is in the corner beside a protruding box like structure.
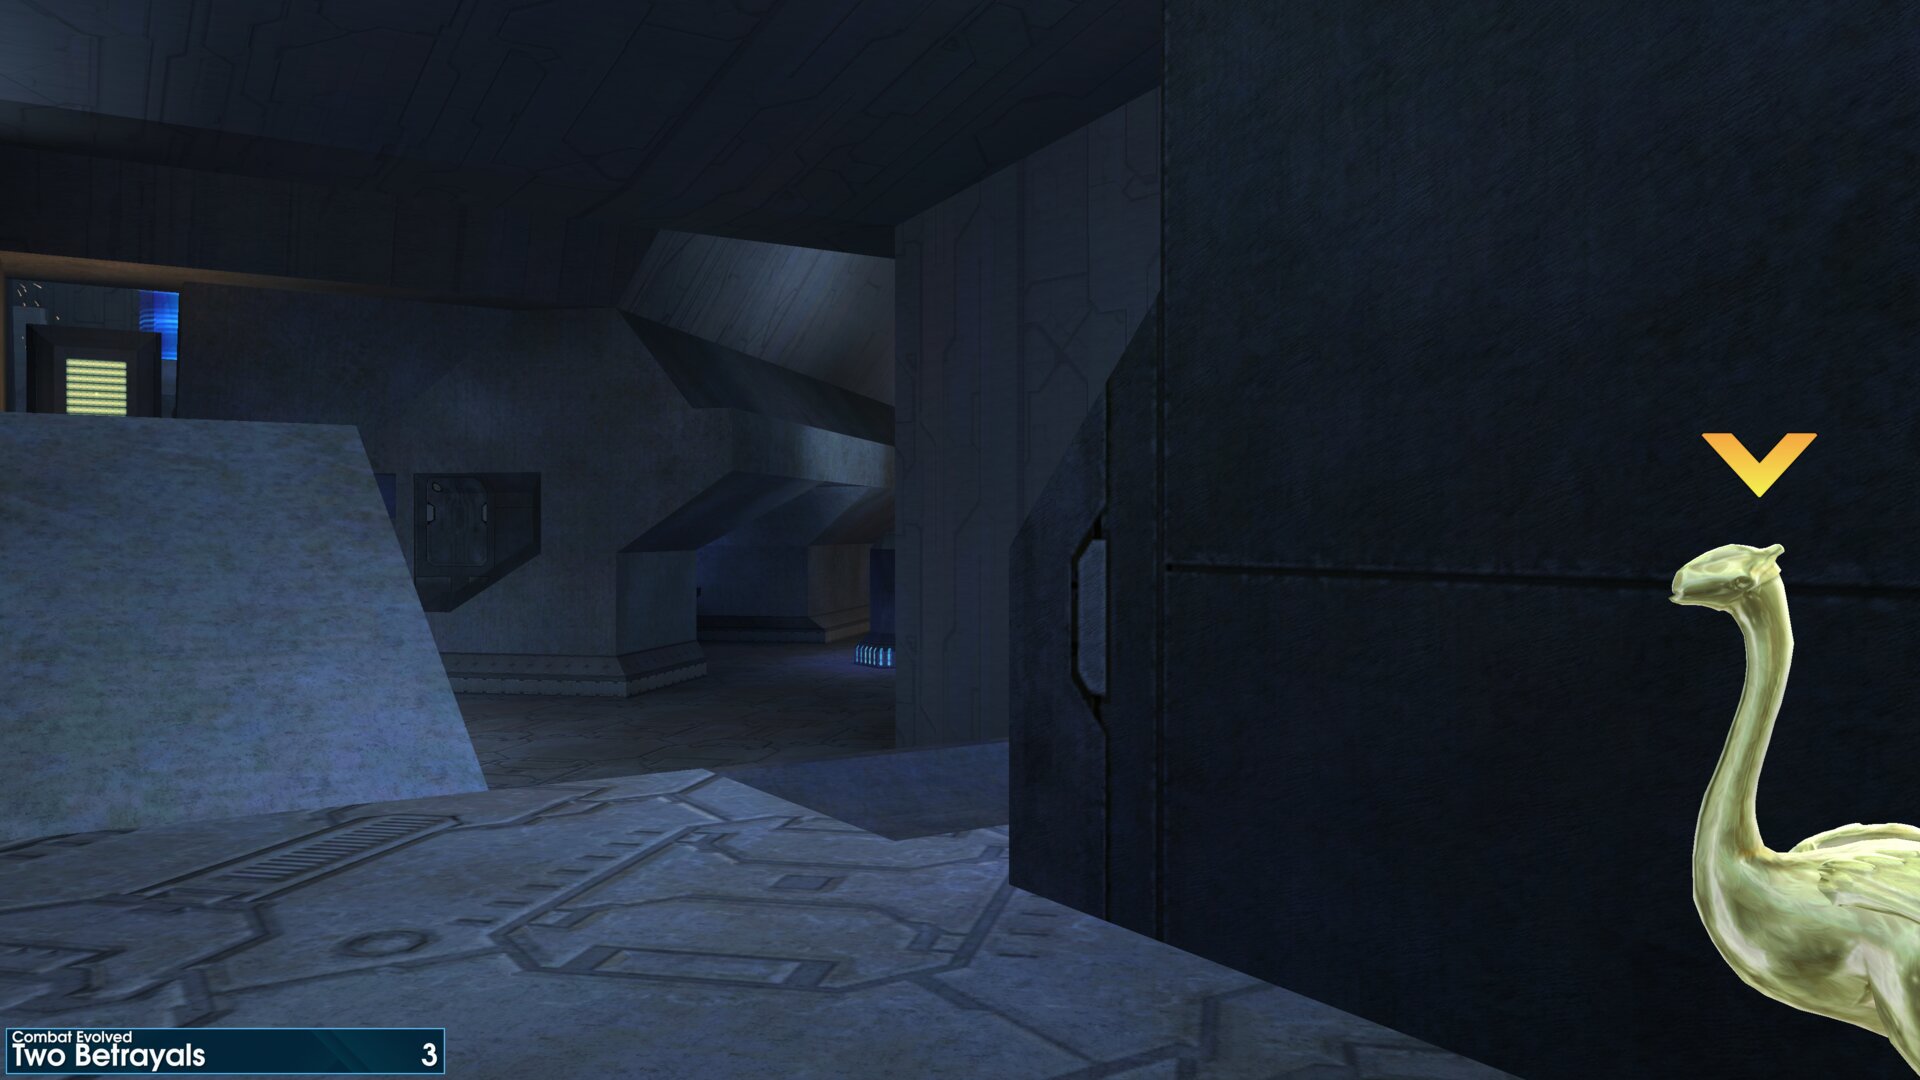
After the elevator, you’ll reach another octagonal room. As you enter the room follow the outer perimeter anti-clockwise (go left), the Golden Moa is in the corner beside a protruding box like structure.
Golden Moa 4
In the 2nd chasm, this Golden Moa can be found on top of the far wall between the large pipes.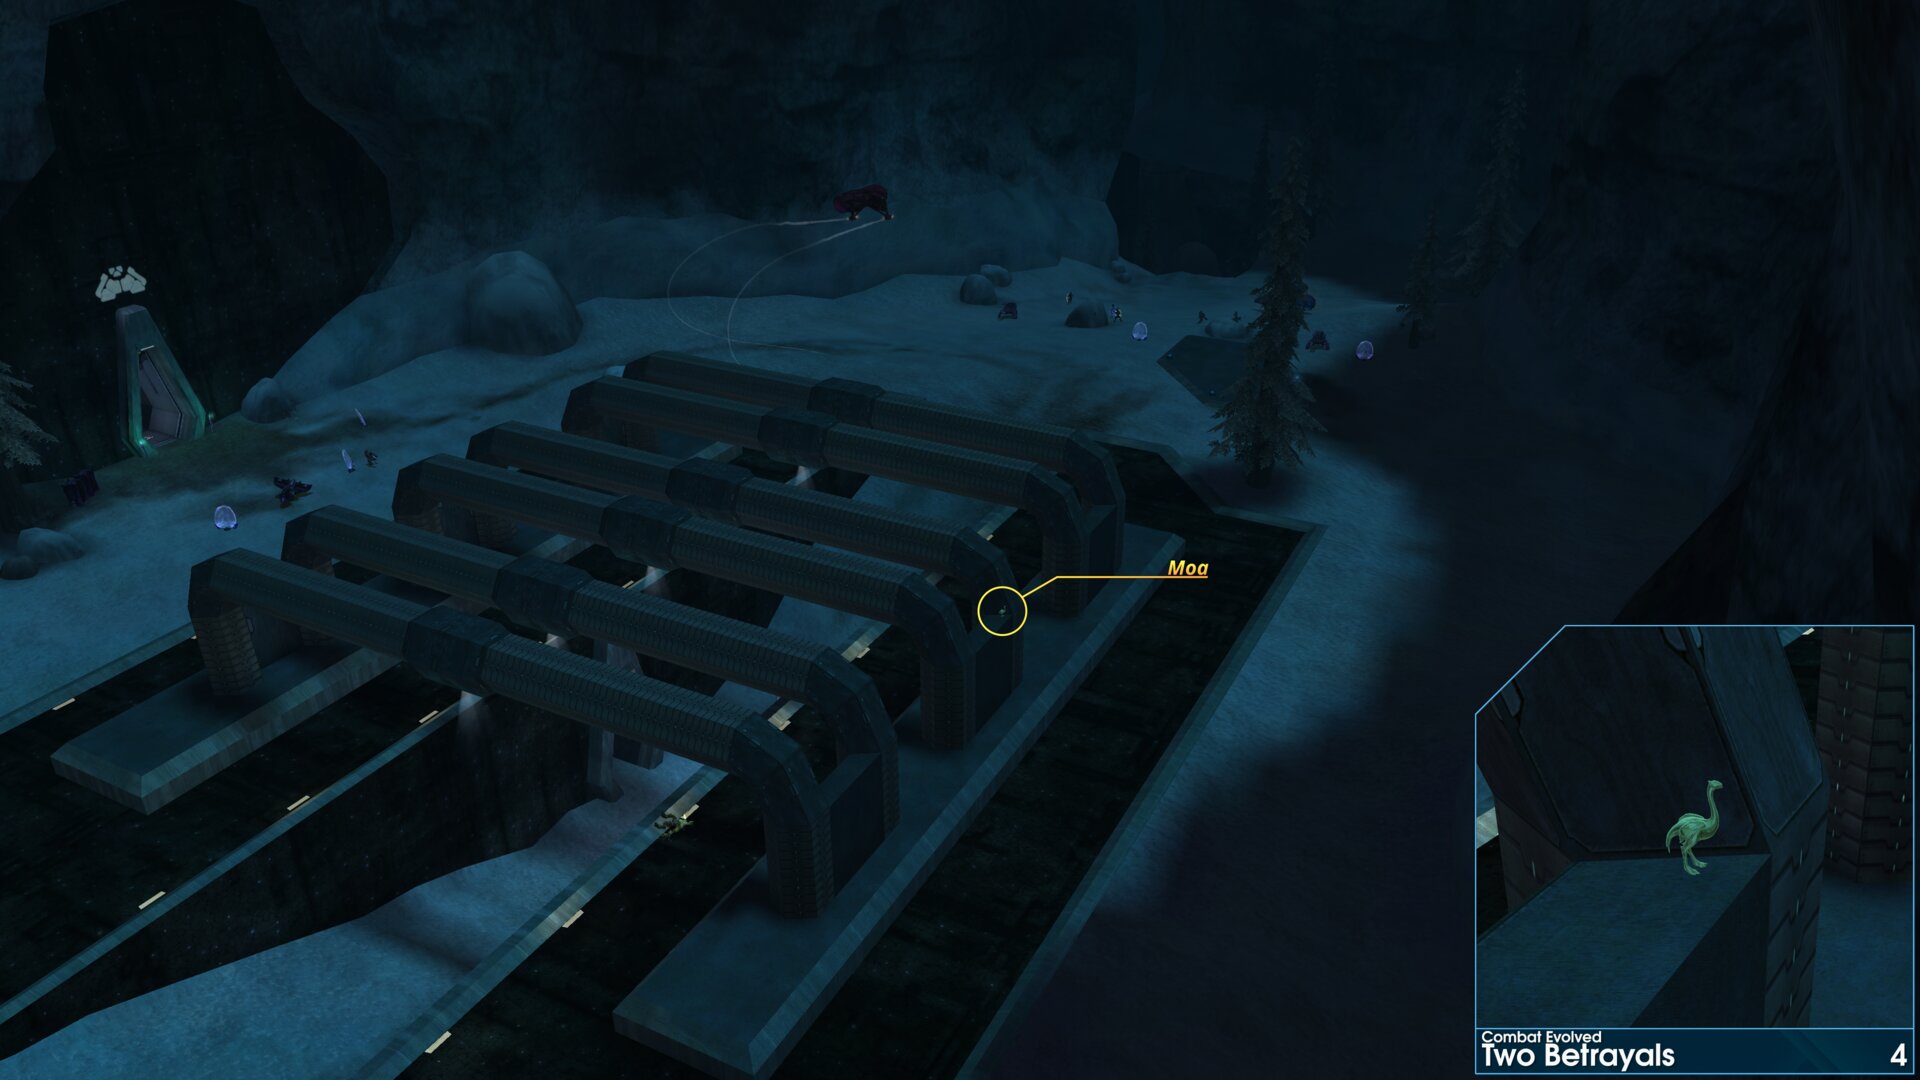
In the 2nd chasm, this Golden Moa can be found on top of the far wall between the large pipes.
Golden Moa 5
In the 2nd chasm beneath the large pipes are two passages, the Golden Moa is at the end of the far passage.
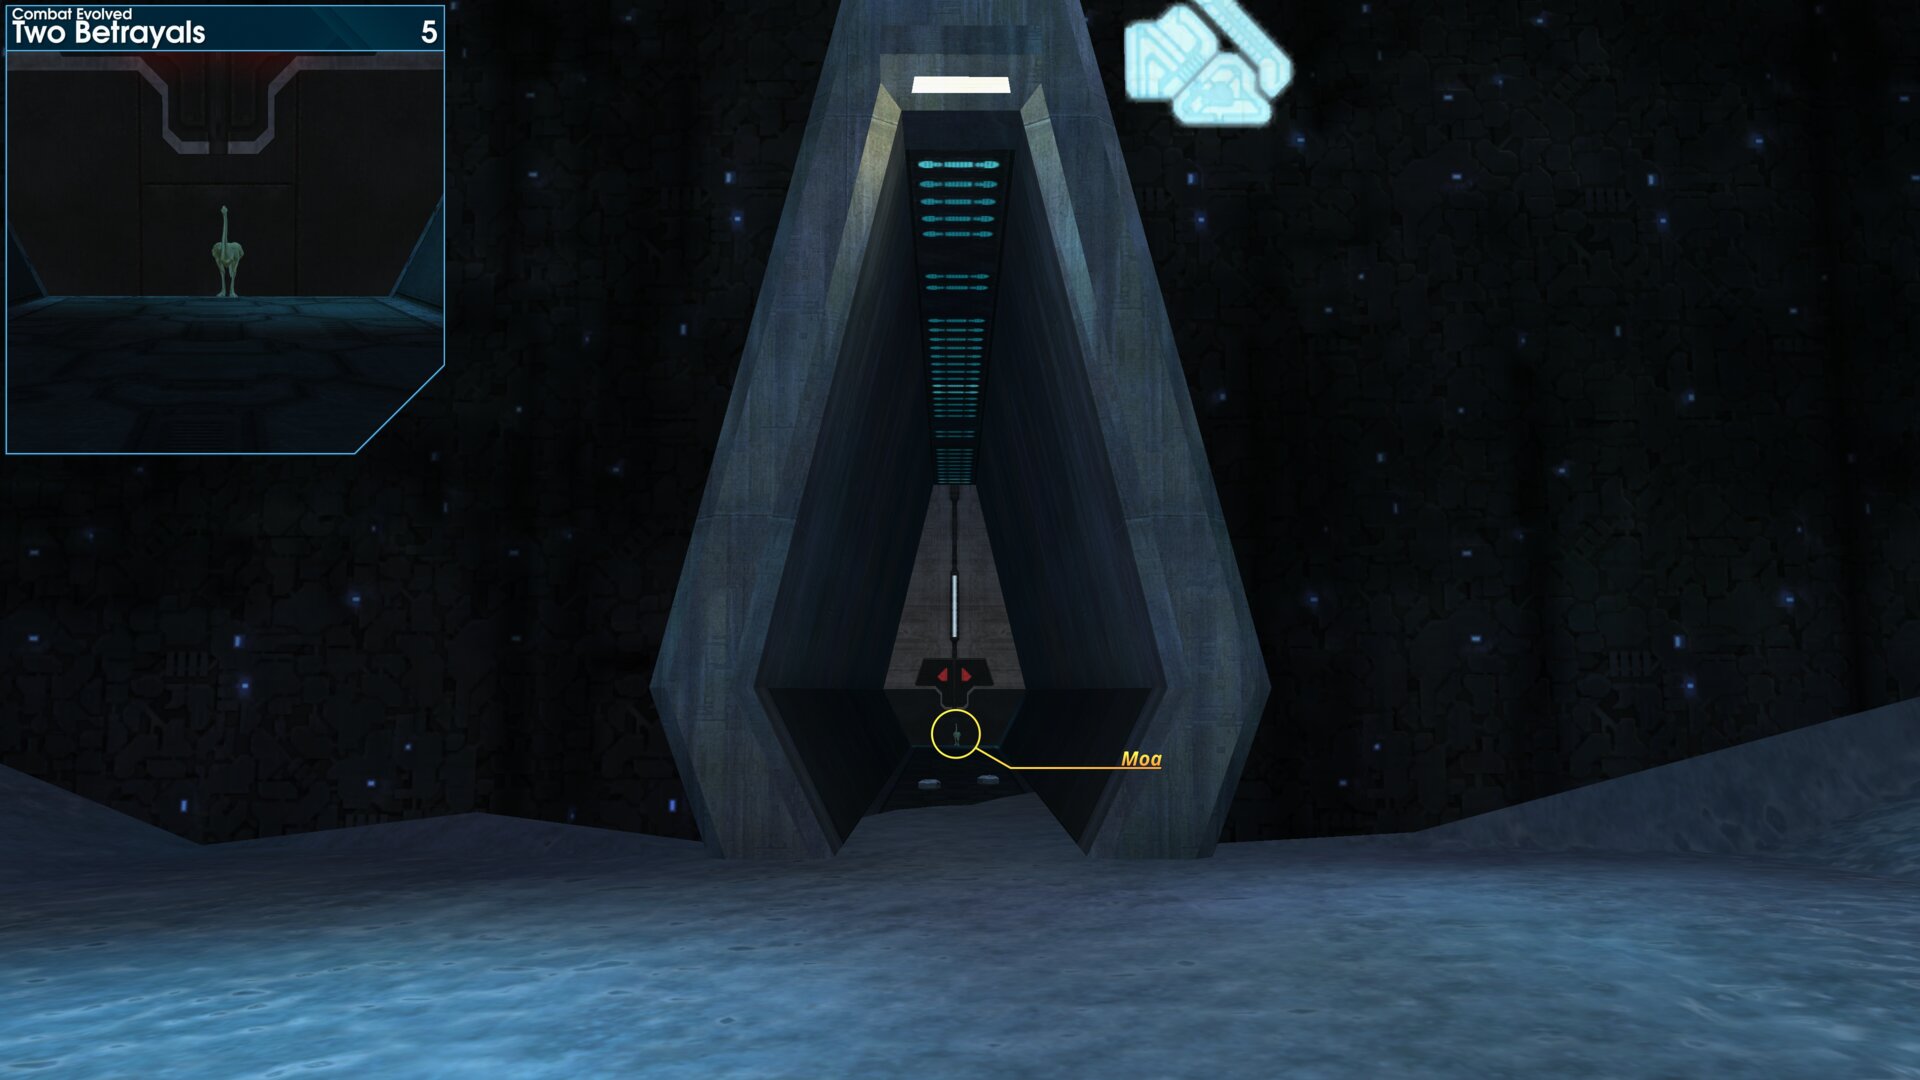
In the 2nd chasm beneath the large pipes are two passages, the Golden Moa is at the end of the far passage.
Golden Moa 6
In the octagonal room containing the 2nd phase pulse generator, the Golden Moa is the nearest tube to the right of the pulse generator.
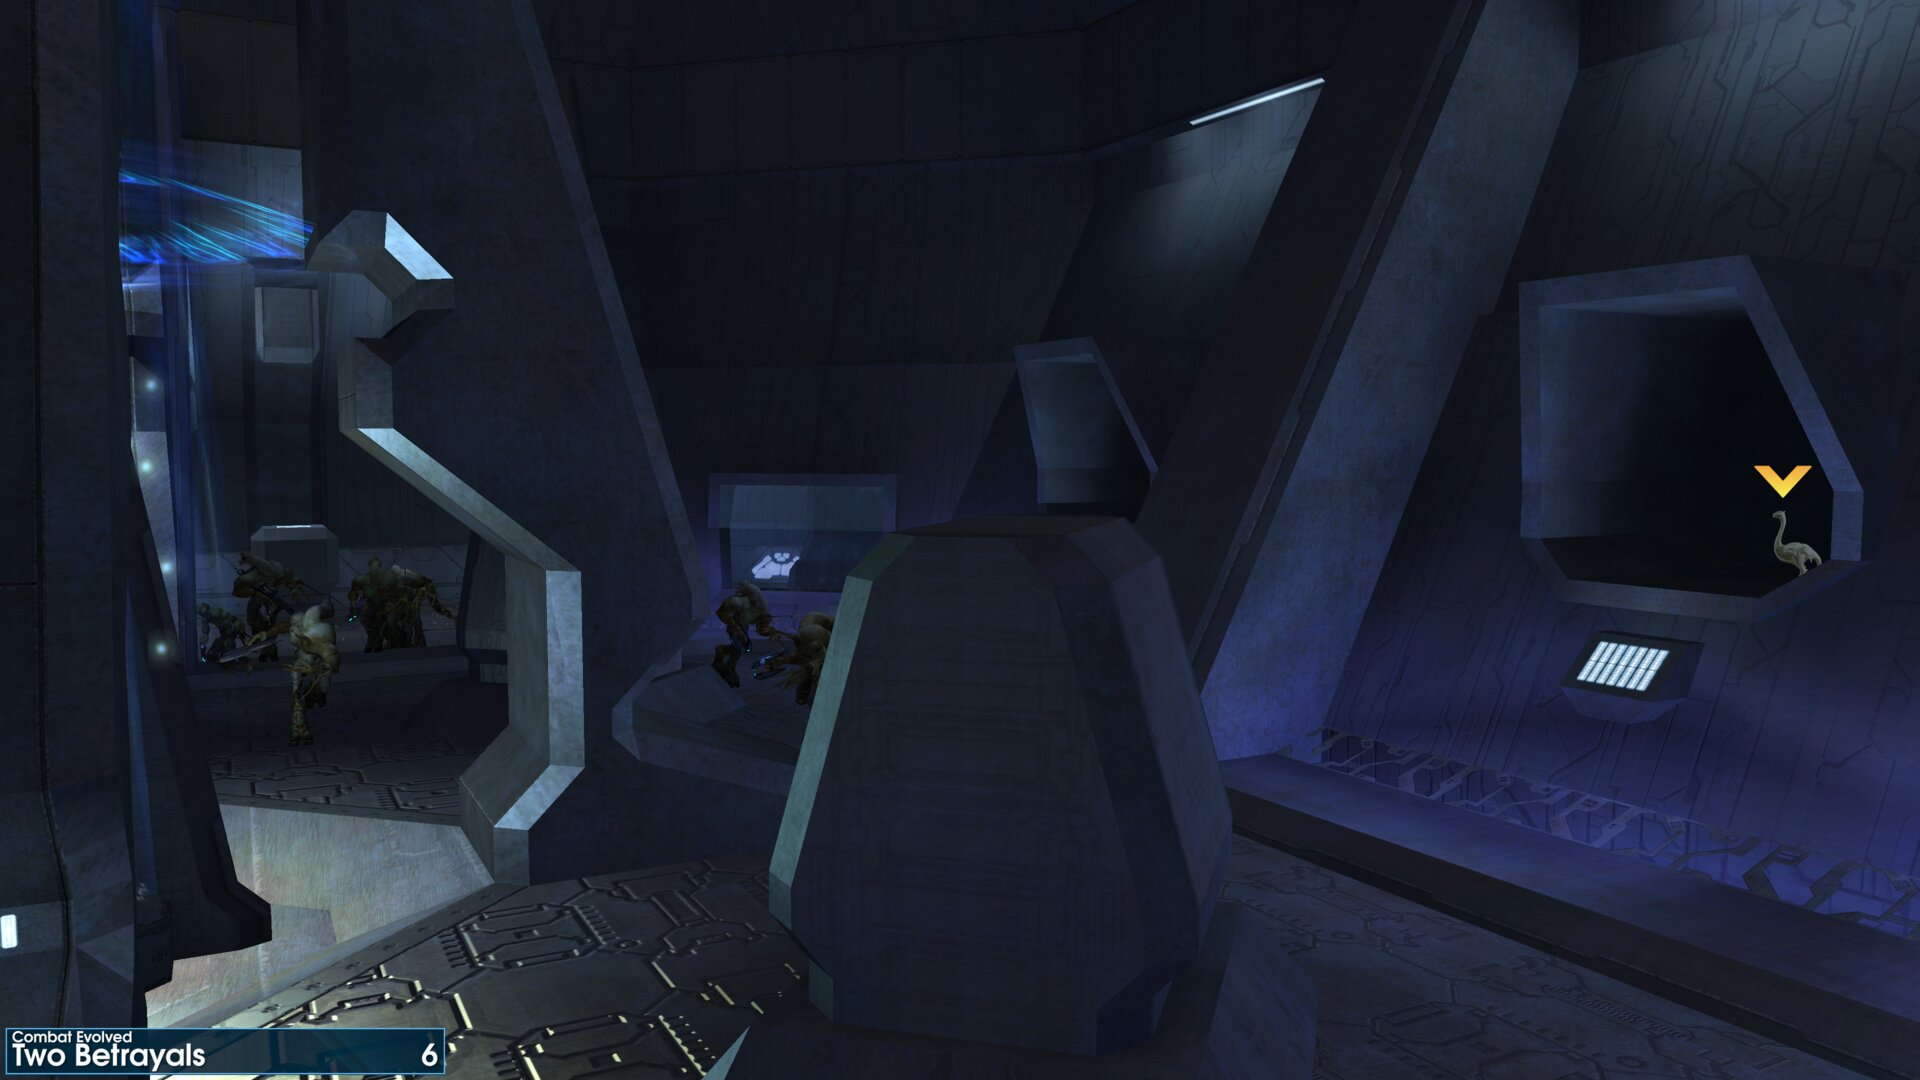
In the octagonal room containing the 2nd phase pulse generator, the Golden Moa is the nearest tube to the right of the pulse generator.
Golden Moa 7
In the octagonal room containing the unused phase pulse generator (in the same chasm as the 2nd phase pulse generator), the Golden Moa is in the far right tube.
 To reach this area, you will need to be able to
glitch through a locked door. I'll add a guide for
this soon, No ETA. For now just search ‘Halo CE
Banshee teleport tutorials’ if you’re keen to get to
this Golden Moa.
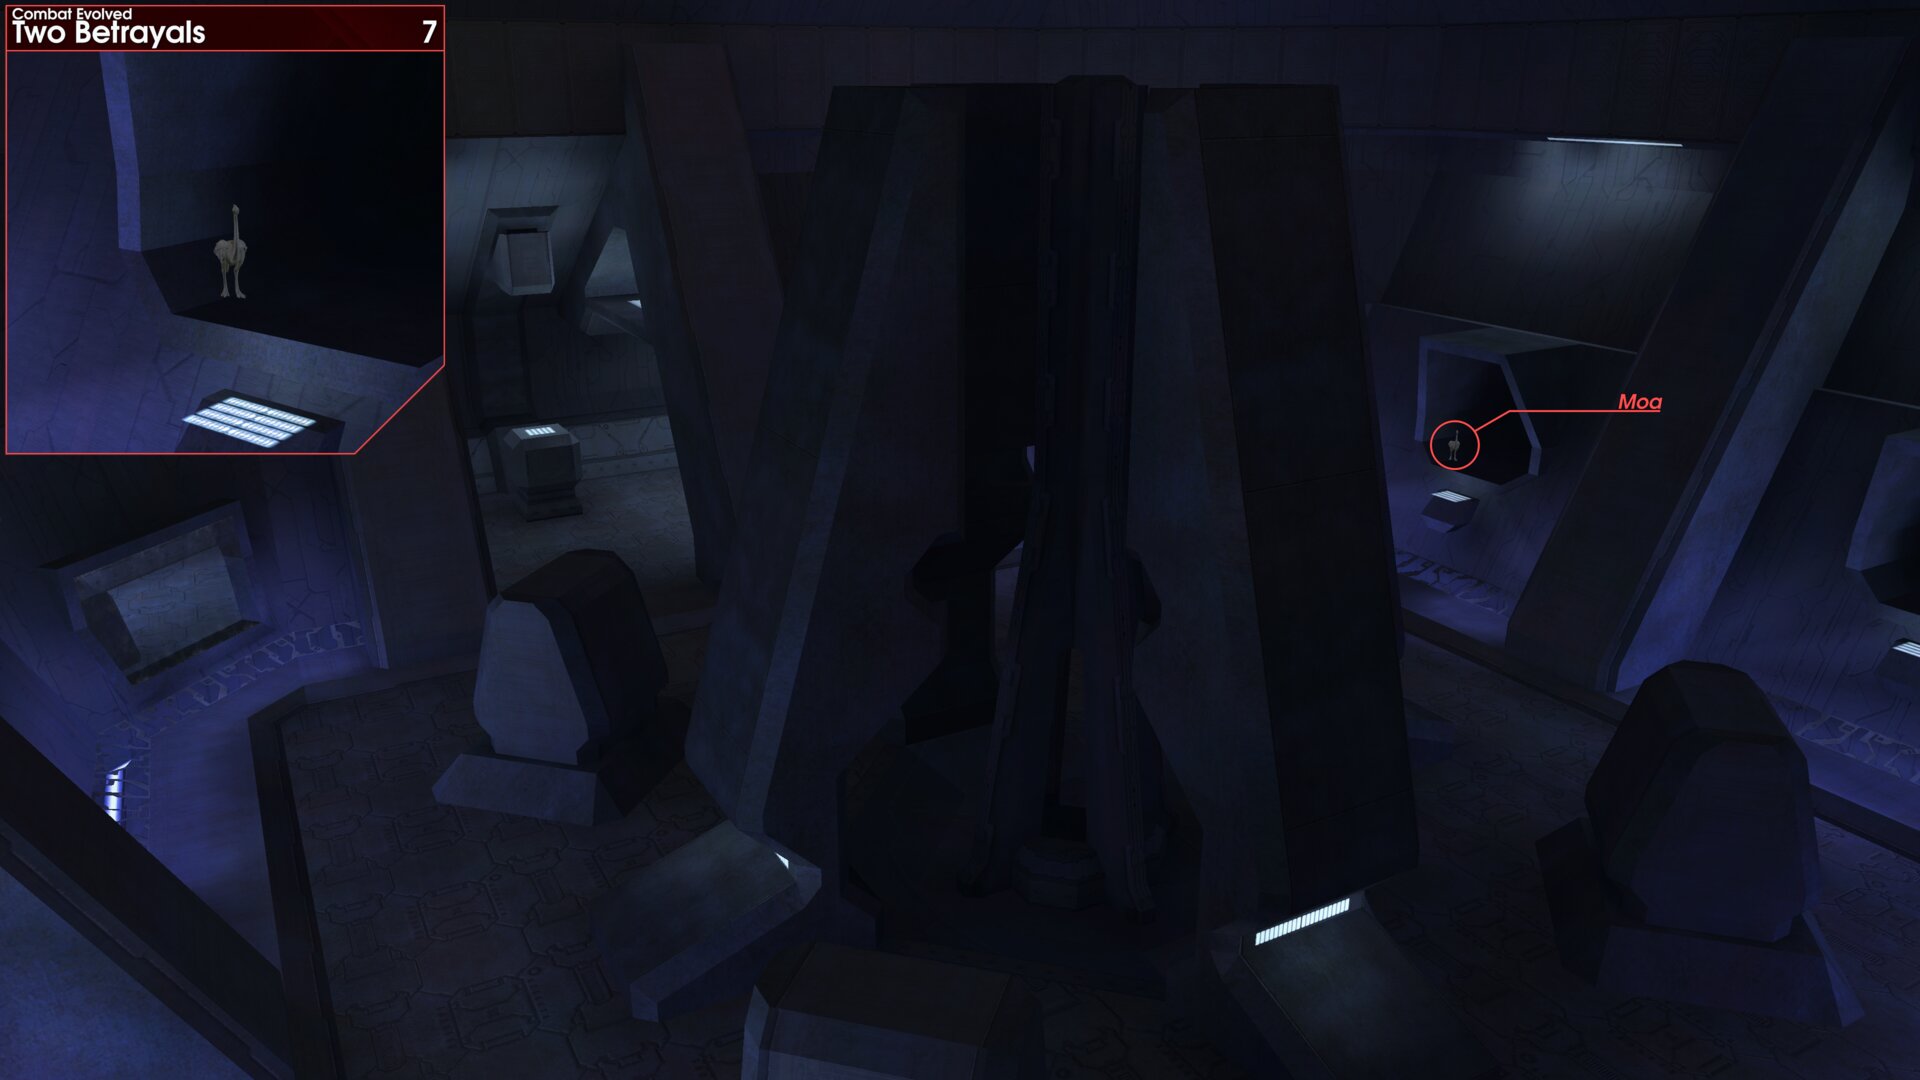
In the octagonal room containing the unused phase pulse generator (in the same chasm as the 2nd phase pulse generator), the Golden Moa is in the far right tube.
To reach this area, you will need to be able toglitch through a locked door. I'll add a guide for
this soon, No ETA. For now just search ‘Halo CE
Banshee teleport tutorials’ if you’re keen to get to
this Golden Moa.
Golden Moa 8
In the cavern, the Golden Moa is on top of the nearest pipe next to the far right side of the bridge.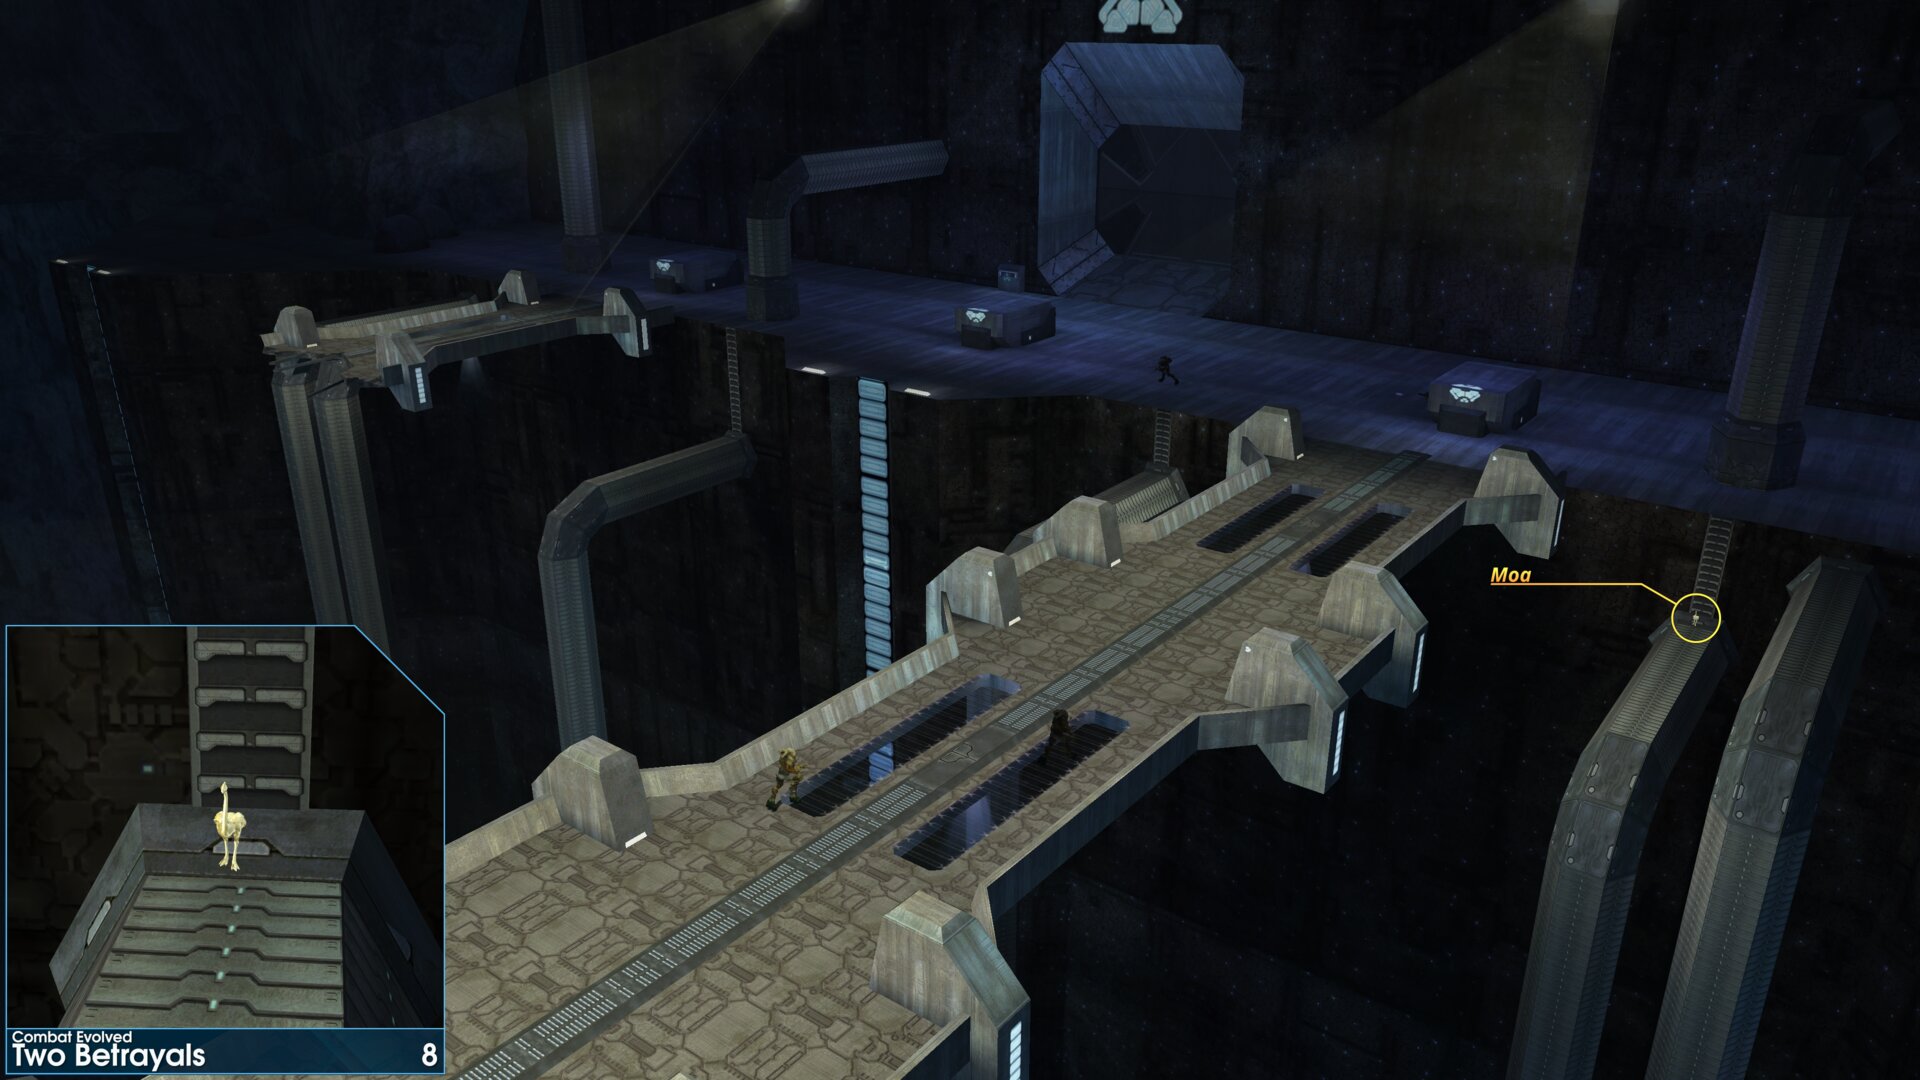
In the cavern, the Golden Moa is on top of the nearest pipe next to the far right side of the bridge.
Golden Moa 9
Final Run.
As you reach the top of the ramp, leading into the final chasm, turnaround. The Golden Moa is beside a rock and the cliff face, on the left side of the tunnel entrance.
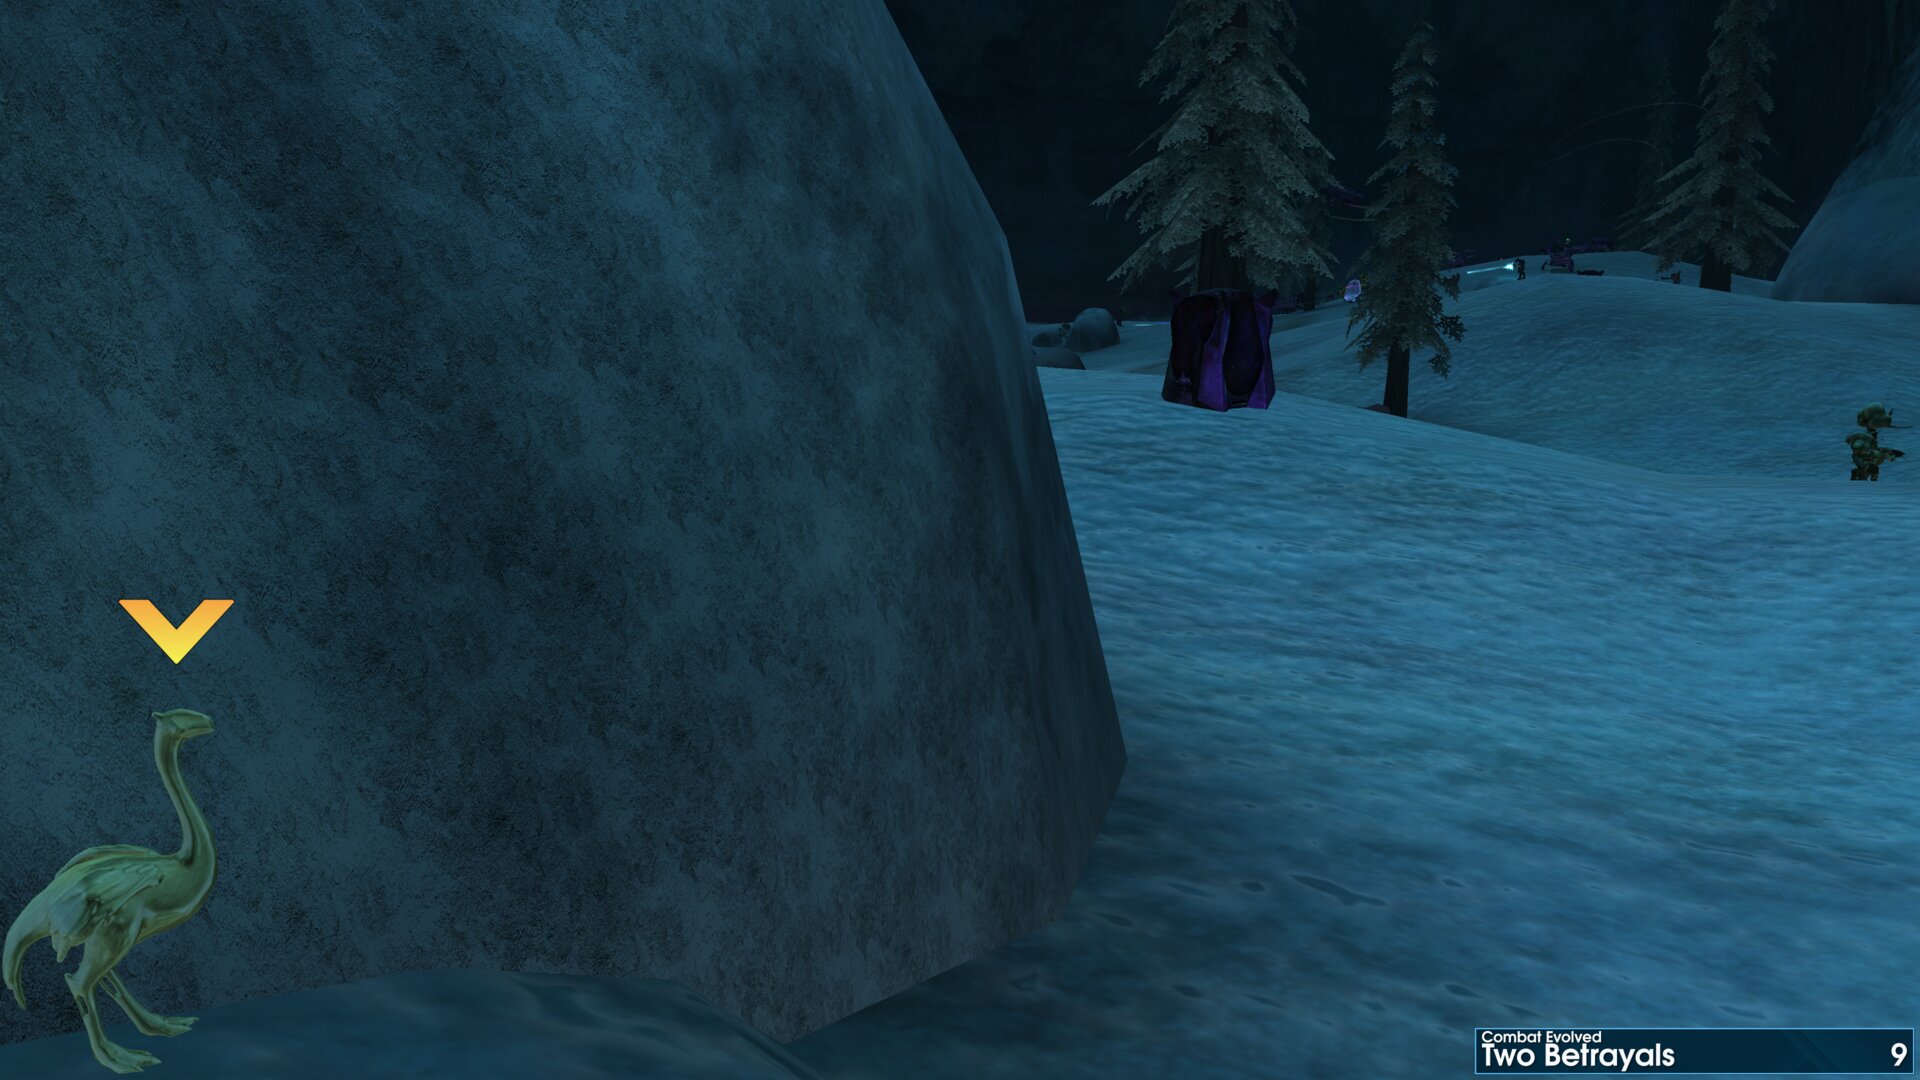
Final Run.
As you reach the top of the ramp, leading into the final chasm, turnaround. The Golden Moa is beside a rock and the cliff face, on the left side of the tunnel entrance.
Golden Moa 10
In the final section of the last chasm, the Golden Moa is beside a tree on the left side.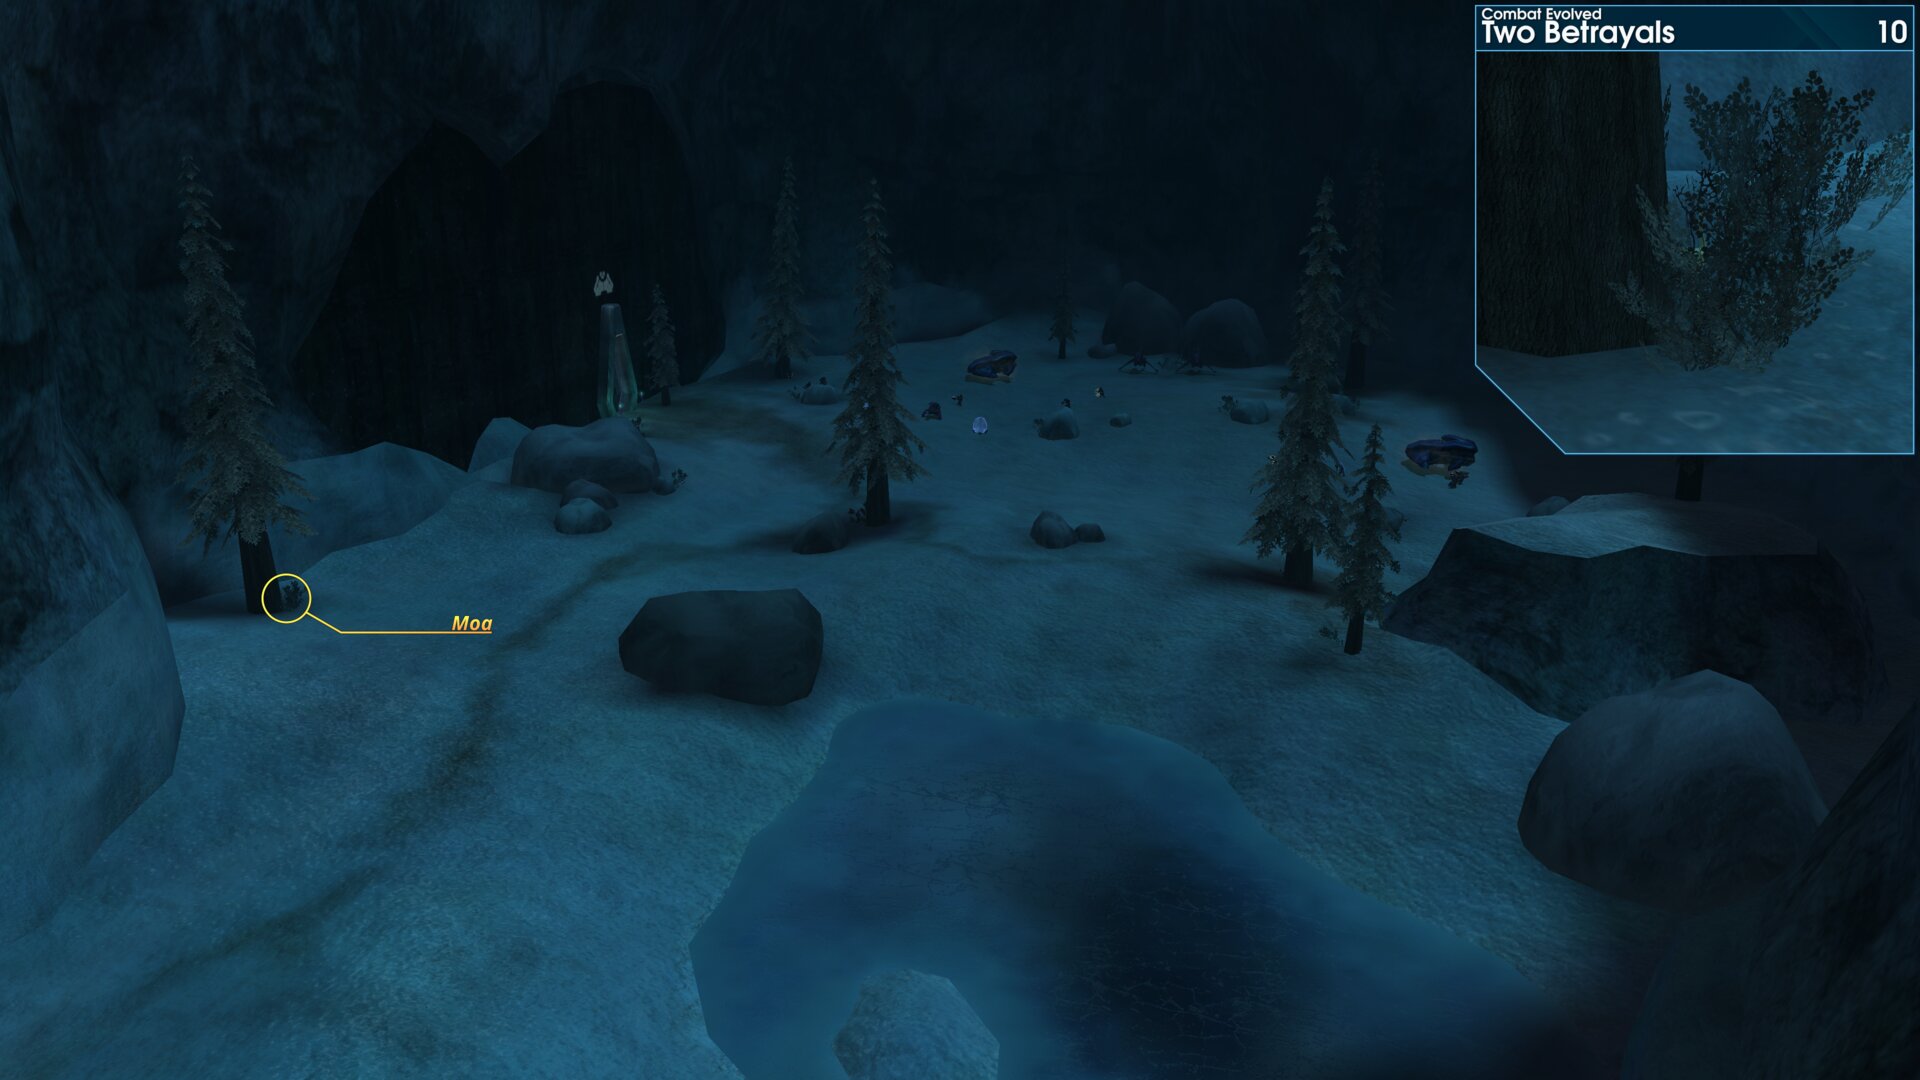
In the final section of the last chasm, the Golden Moa is beside a tree on the left side.
Golden Moa 11
In the room with the final phase pulse generator. As you enter the room follow the outer perimeter anti-clockwise (go left), the Golden Moa is on top of a the 1st large pipe overhead.
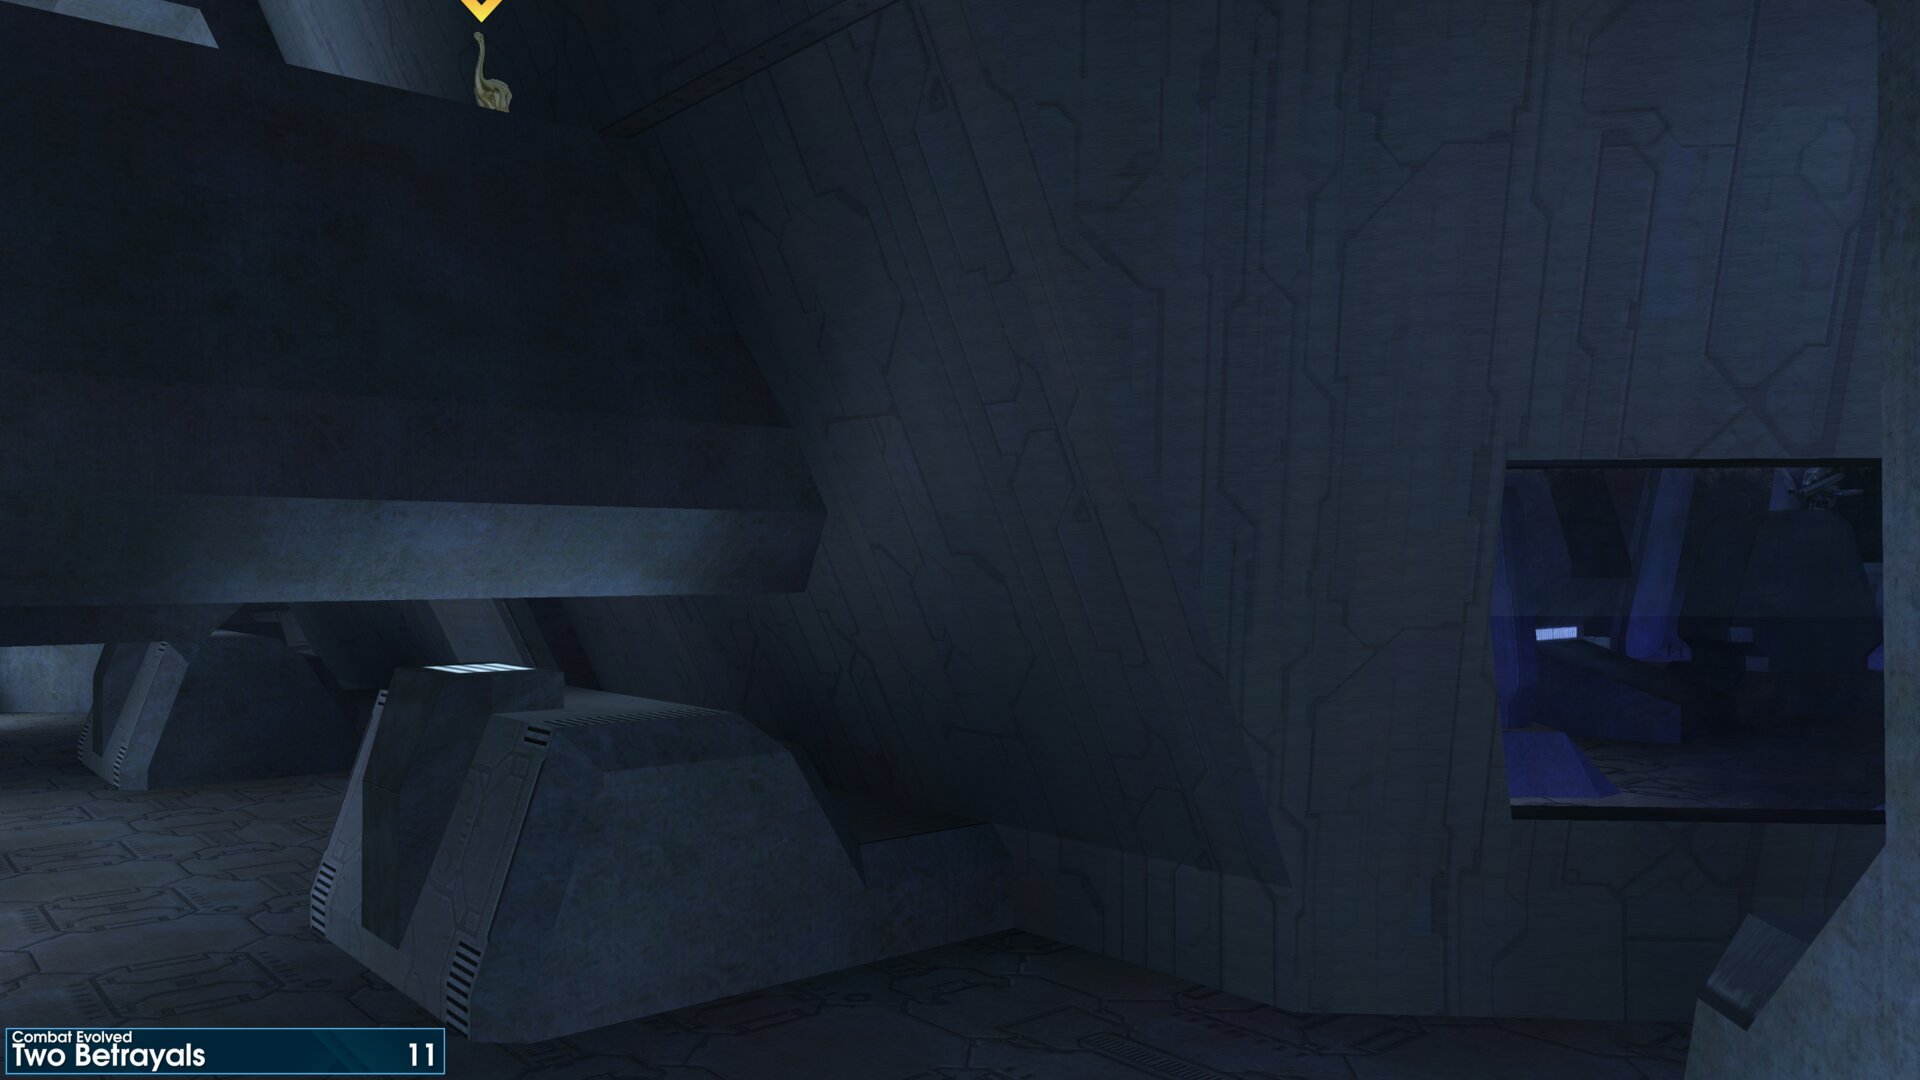
In the room with the final phase pulse generator. As you enter the room follow the outer perimeter anti-clockwise (go left), the Golden Moa is on top of a the 1st large pipe overhead.
➟ Keyes
Golden Moa 1
At the start of the mission turn around, the Golden Moa is on top of a crate behind the damaged wall.
(You can get this one later on is the mission)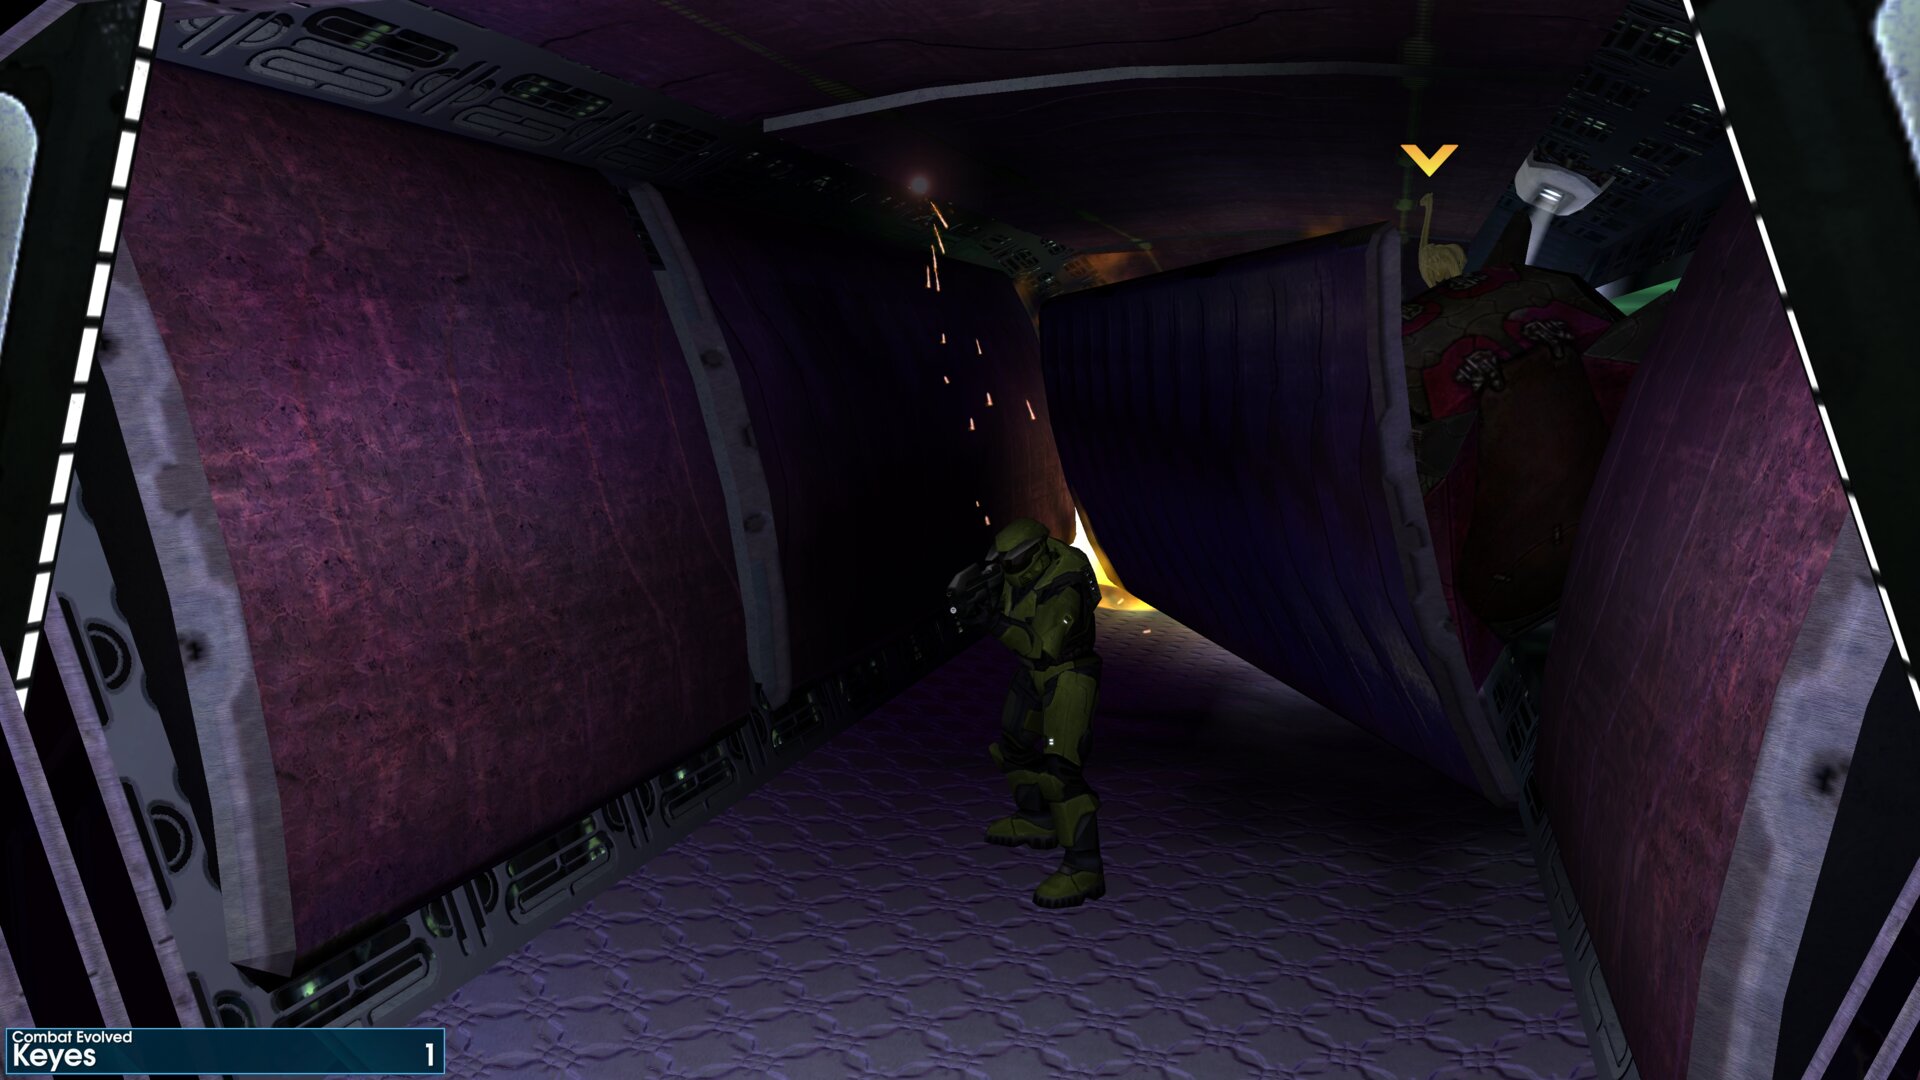
At the start of the mission turn around, the Golden Moa is on top of a crate behind the damaged wall.
(You can get this one later on is the mission)
Golden Moa 2
After dropping down into the pool of coolant, make your way through the fighting to a much smaller pool of coolant. The Golden Moa is hidden in the stream of coolant.
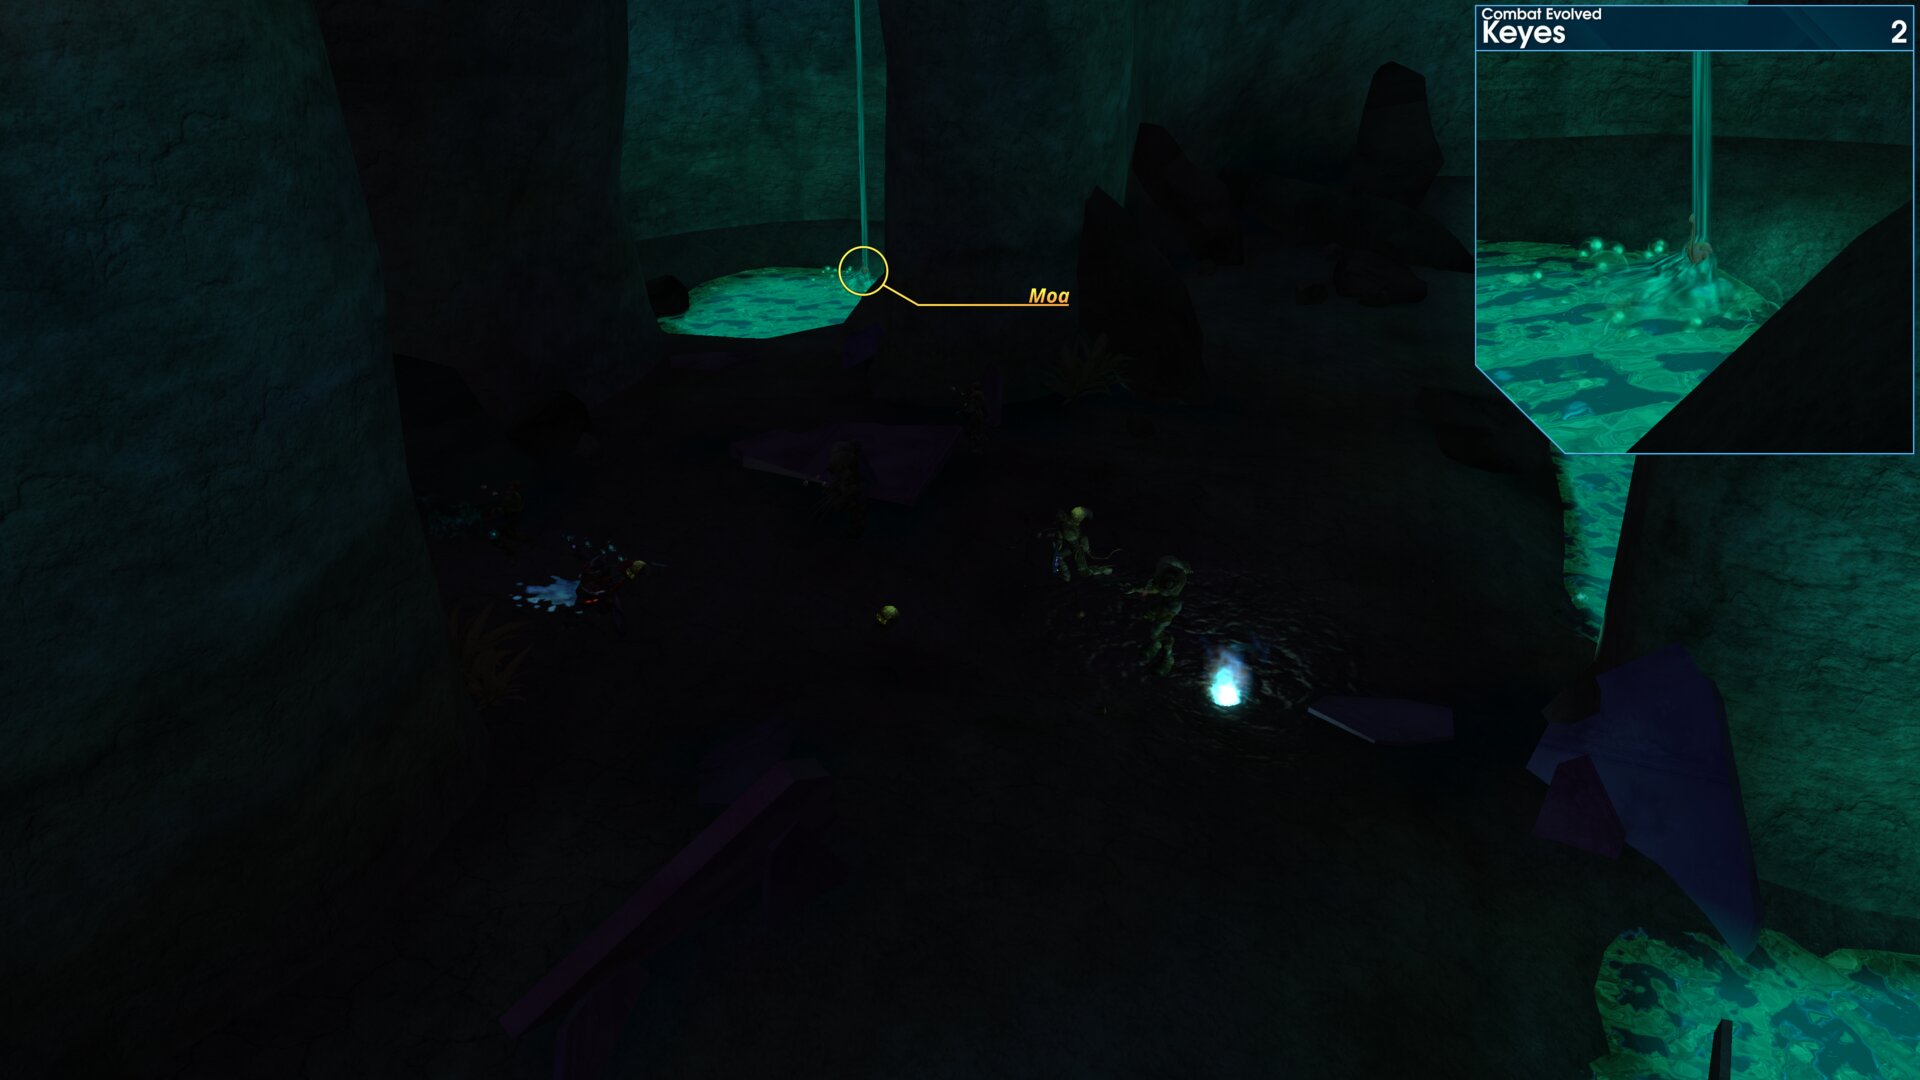
After dropping down into the pool of coolant, make your way through the fighting to a much smaller pool of coolant. The Golden Moa is hidden in the stream of coolant.
Golden Moa 3
This Golden Moa is on a ledge above you as you make your way through the narrow pass with the falling Flood Carrier Forms. (If you reach the Sniper Rifle/Hunters, then you’ve gone to far)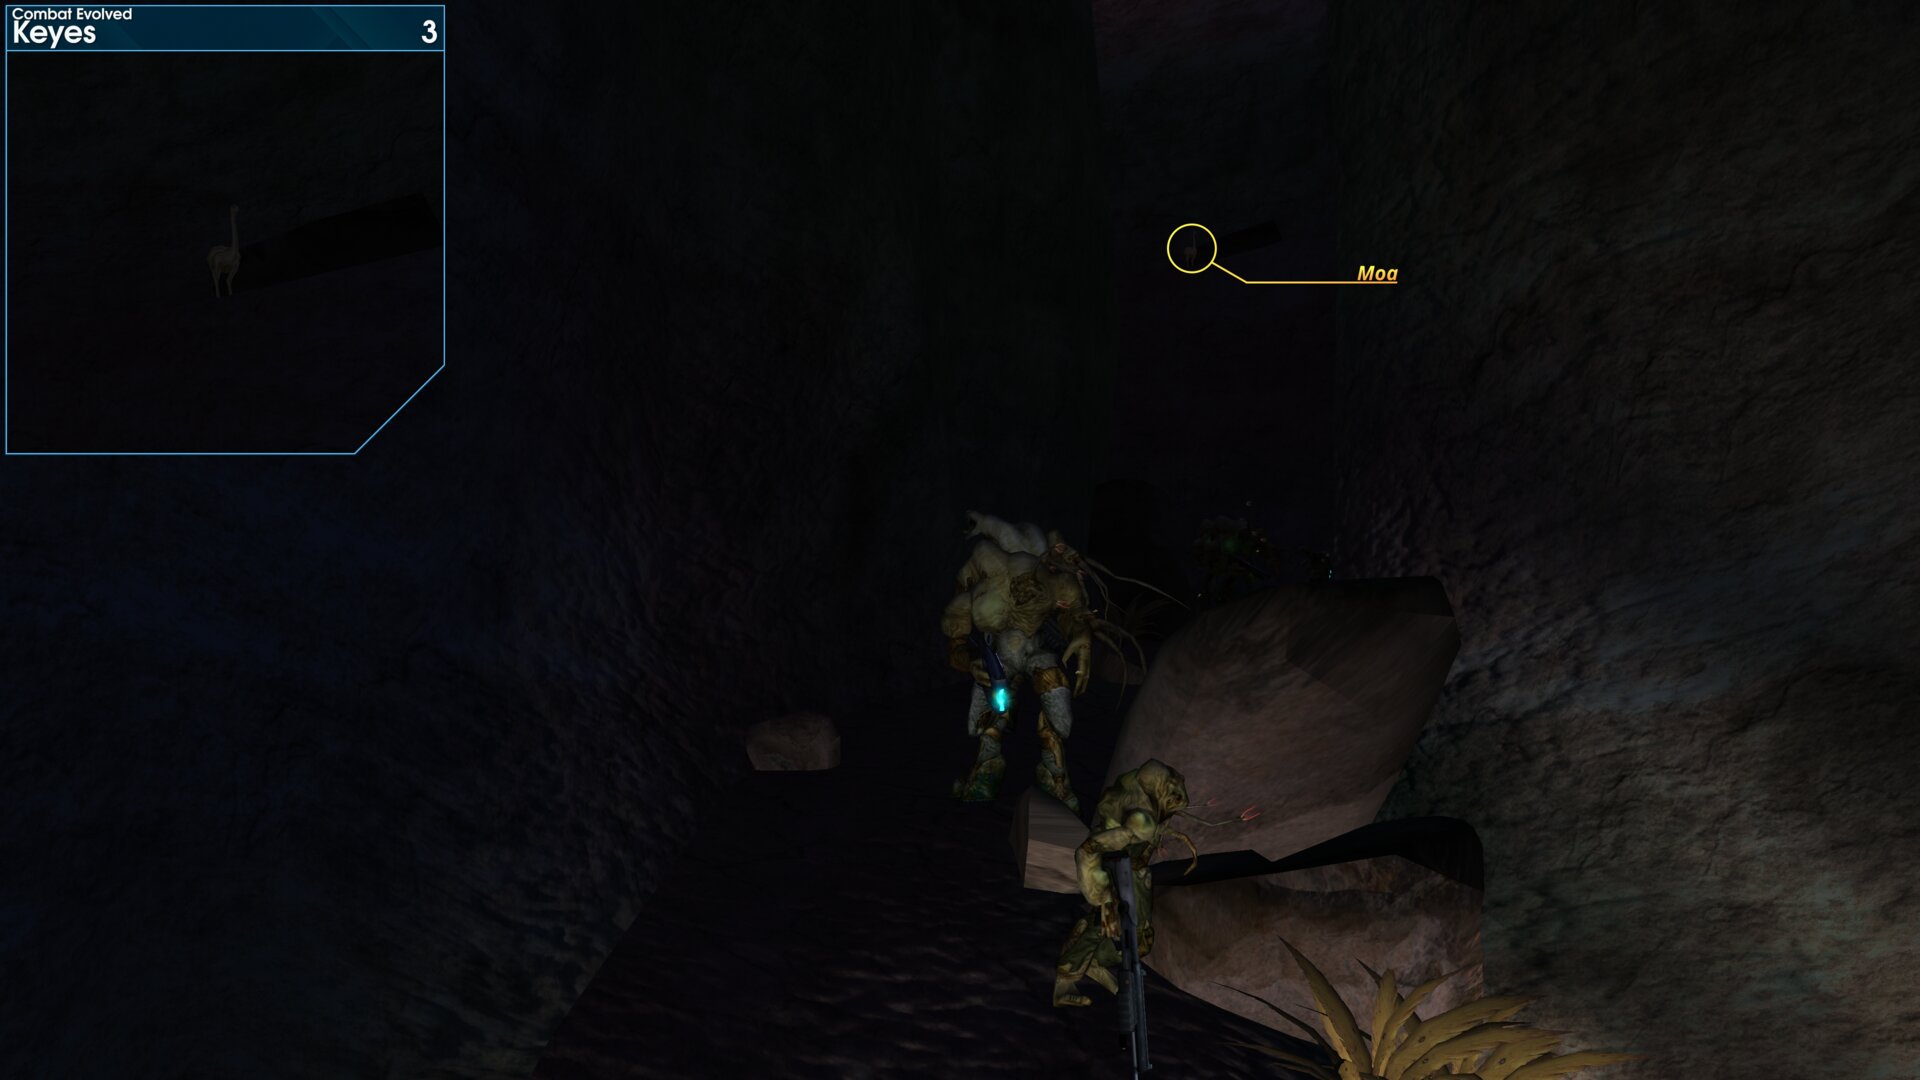
This Golden Moa is on a ledge above you as you make your way through the narrow pass with the falling Flood Carrier Forms. (If you reach the Sniper Rifle/Hunters, then you’ve gone to far)
Golden Moa 4
After passing through the cargo bay, you’ll enter a passage way with Flood guarding a hole in the floor. The Golden Moa is to the left of the hole, shoot it before dropping down!
”Look, in the corners. The Flood are gathering bodies here.” Cortana
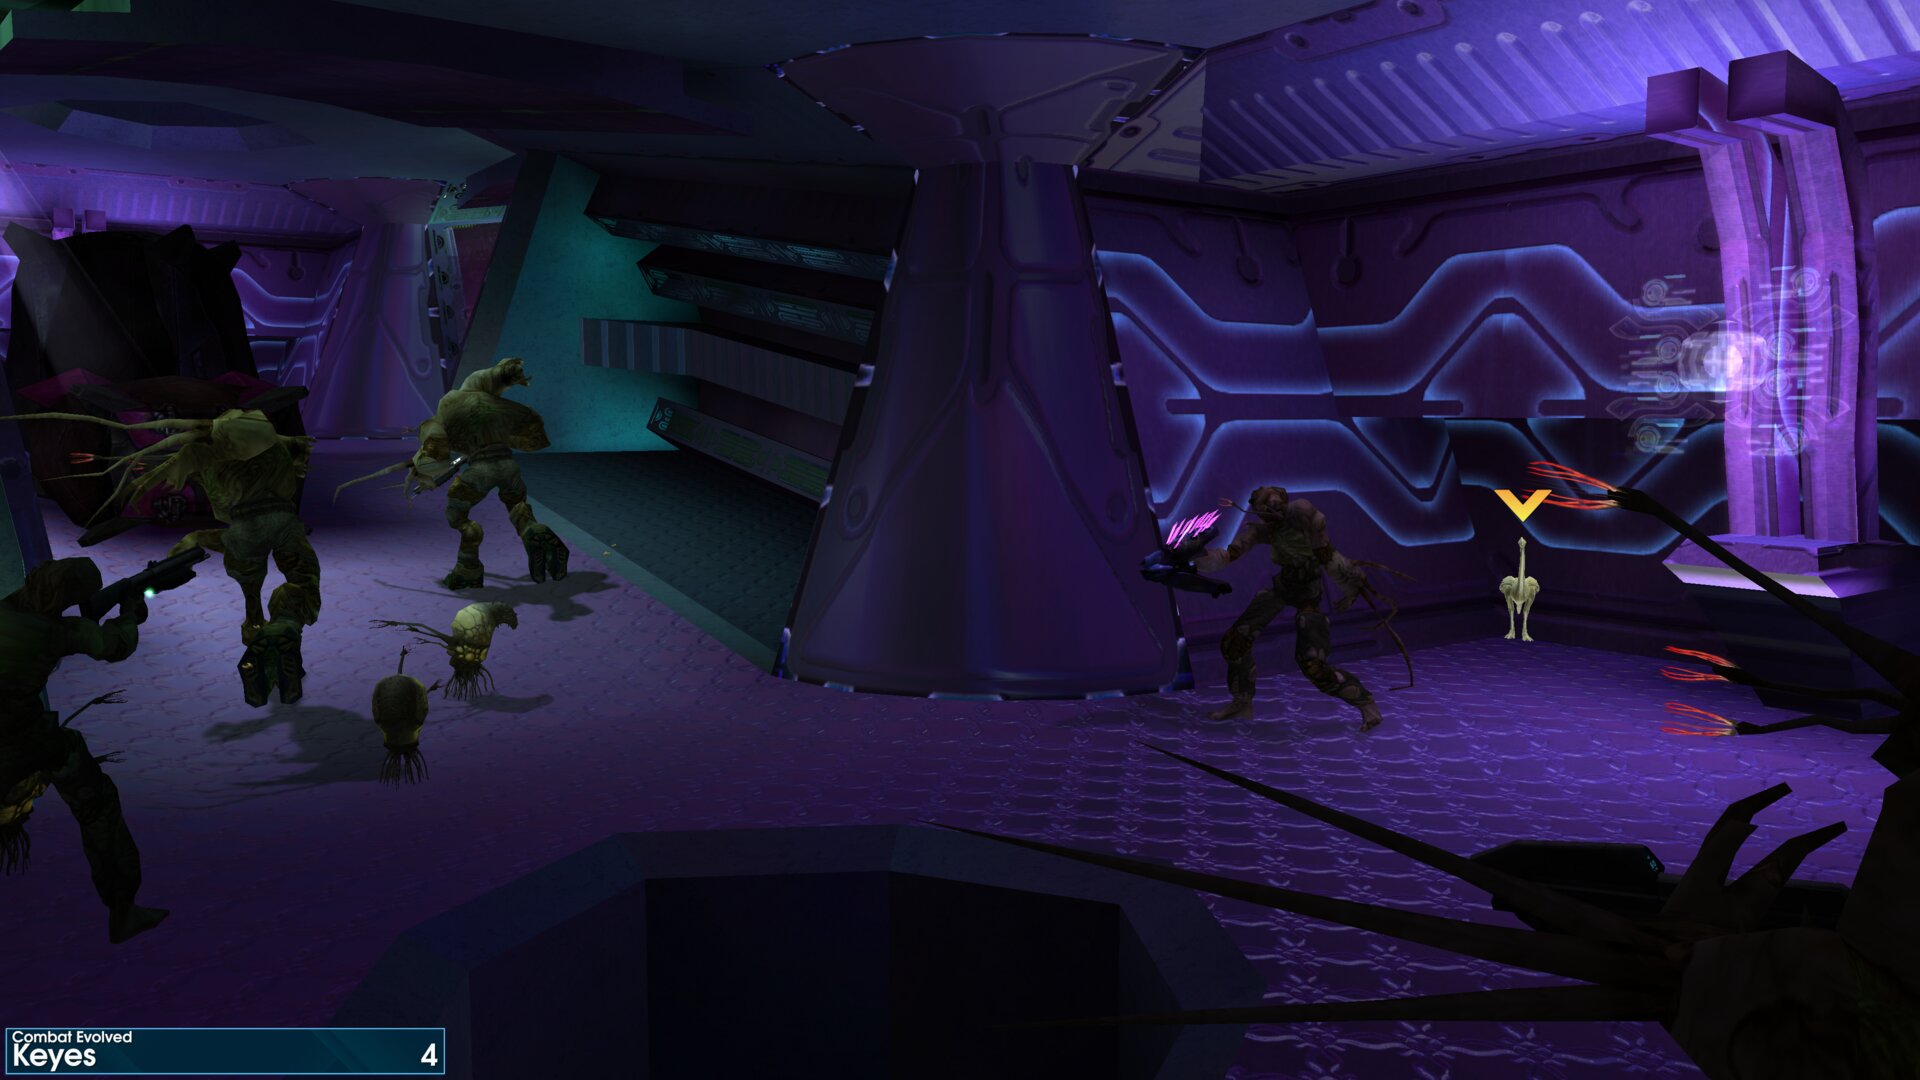
After passing through the cargo bay, you’ll enter a passage way with Flood guarding a hole in the floor. The Golden Moa is to the left of the hole, shoot it before dropping down!
”Look, in the corners. The Flood are gathering bodies here.” Cortana
Golden Moa 5
On the 2nd level of the shuttle bay (aka hanger bay), the Golden Moa is in a nook near center platform.
(When you first enter the hanger bay you will already be on the 2nd floor)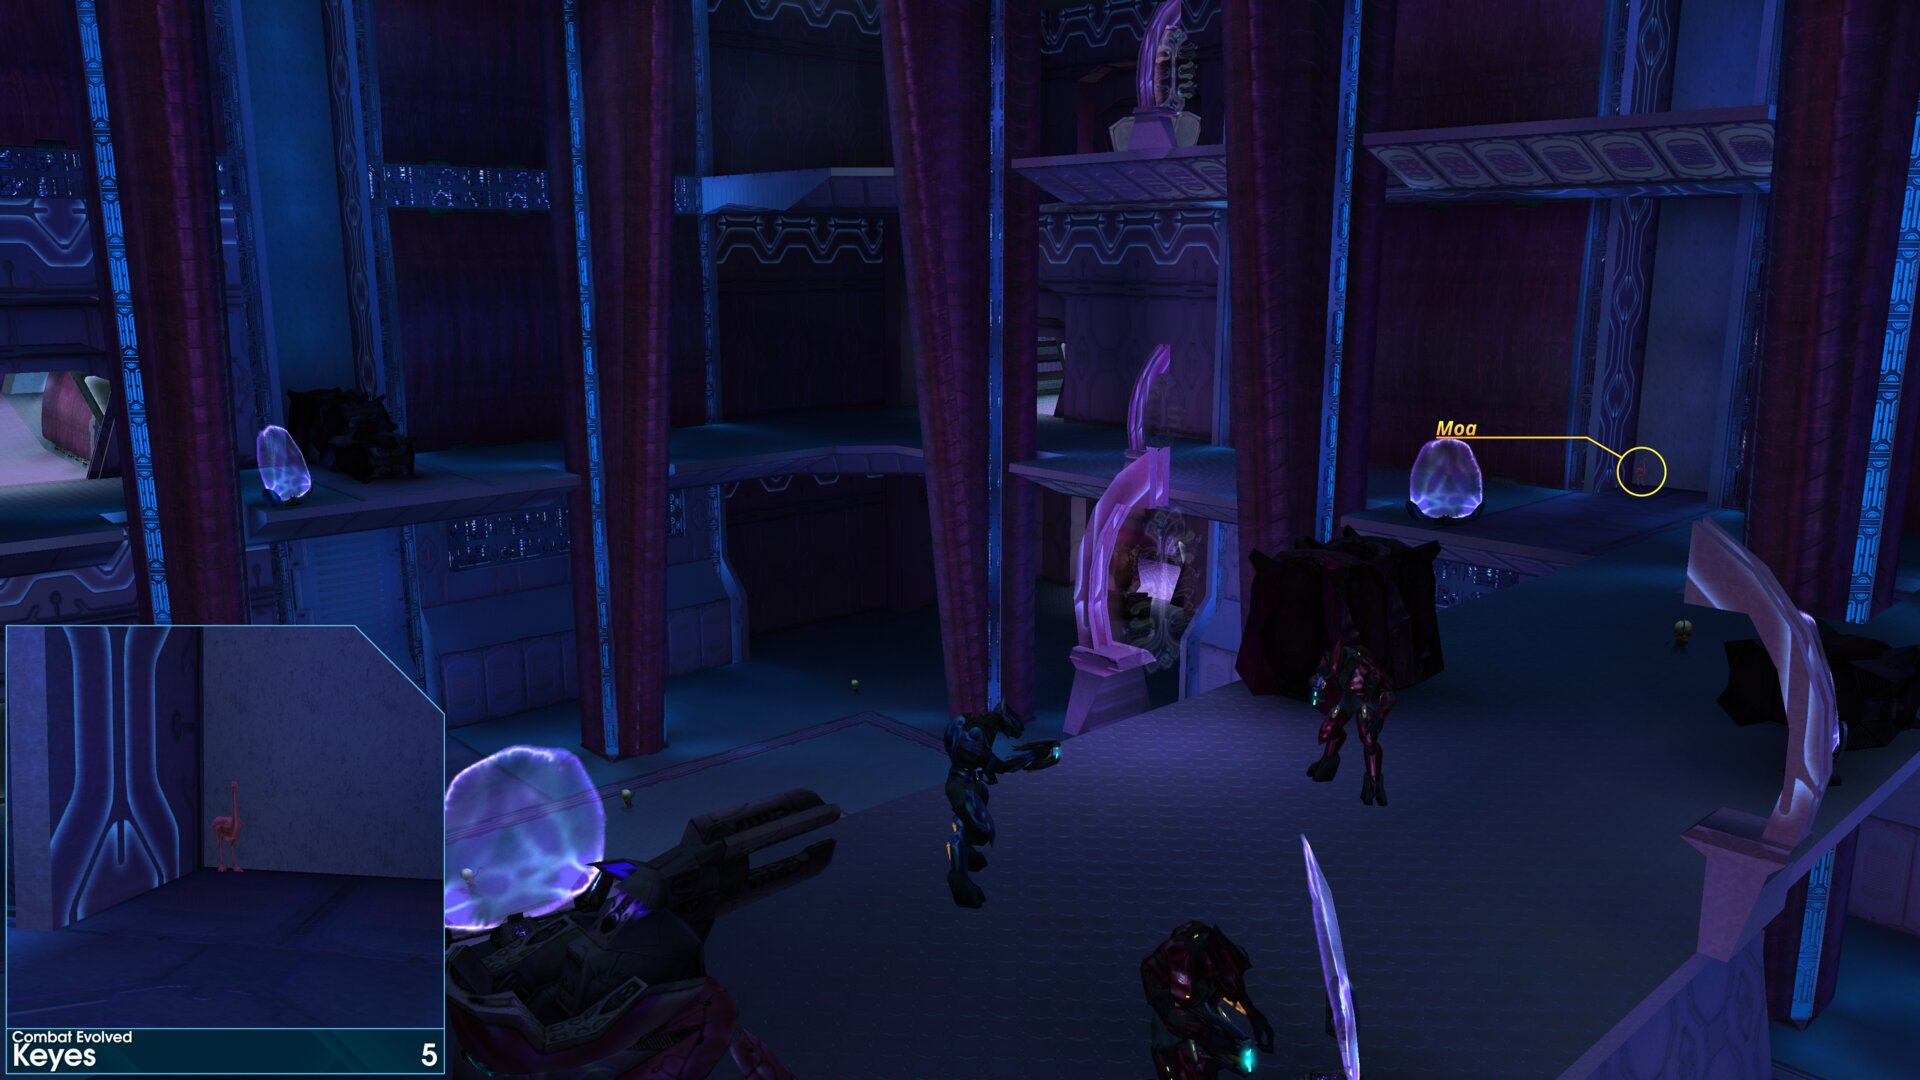
On the 2nd level of the shuttle bay (aka hanger bay), the Golden Moa is in a nook near center platform.
(When you first enter the hanger bay you will already be on the 2nd floor)
Golden Moa 6
After crossing the shuttle bay (aka hanger bay), enter the passage up to the 3rd level. The Golden Moa is beside the locked door to the left of the Flood, just past the 1st group of Grunts.
(Be careful that you don’t accidentally cause a Flood Carrier Form to explode near this one)
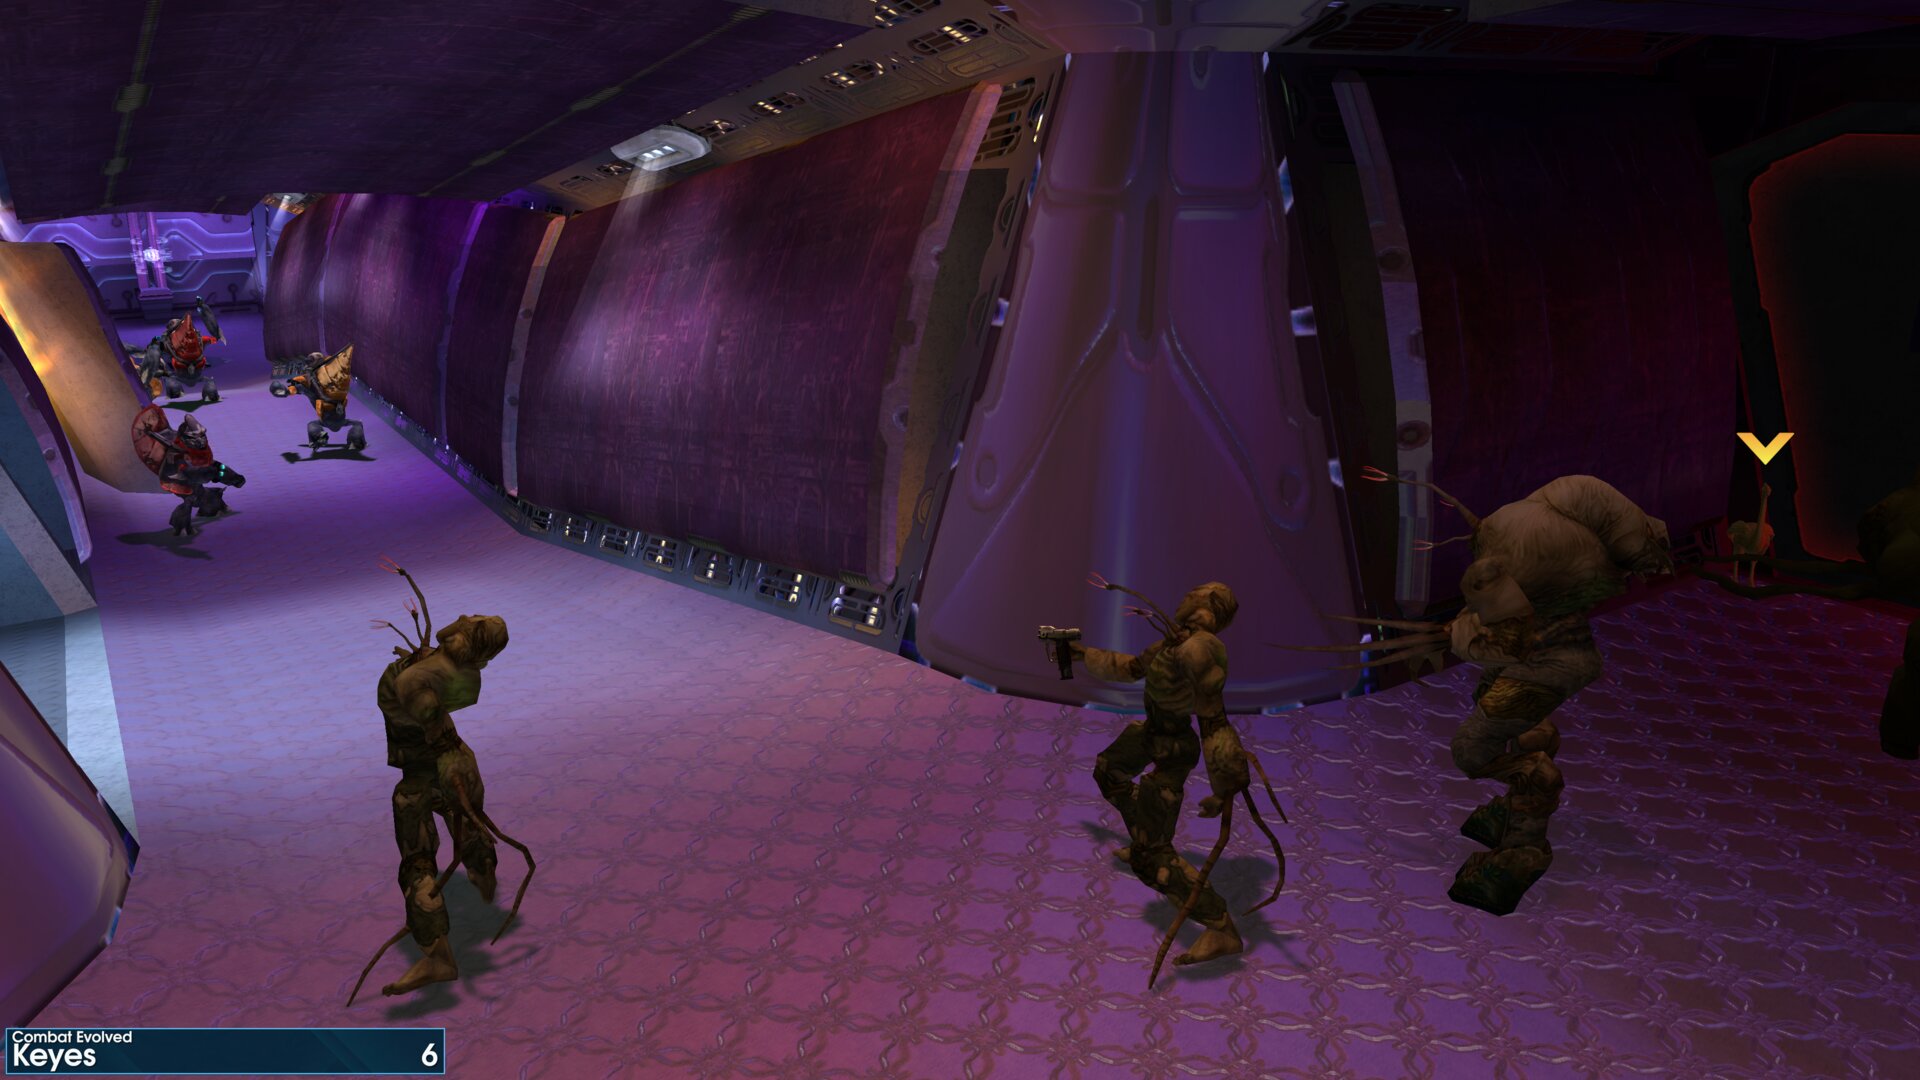
After crossing the shuttle bay (aka hanger bay), enter the passage up to the 3rd level. The Golden Moa is beside the locked door to the left of the Flood, just past the 1st group of Grunts.
(Be careful that you don’t accidentally cause a Flood Carrier Form to explode near this one)
Golden Moa 7
At the back of the ships Control Room (aka Command Center), the Golden Moa is behind the left pillar.
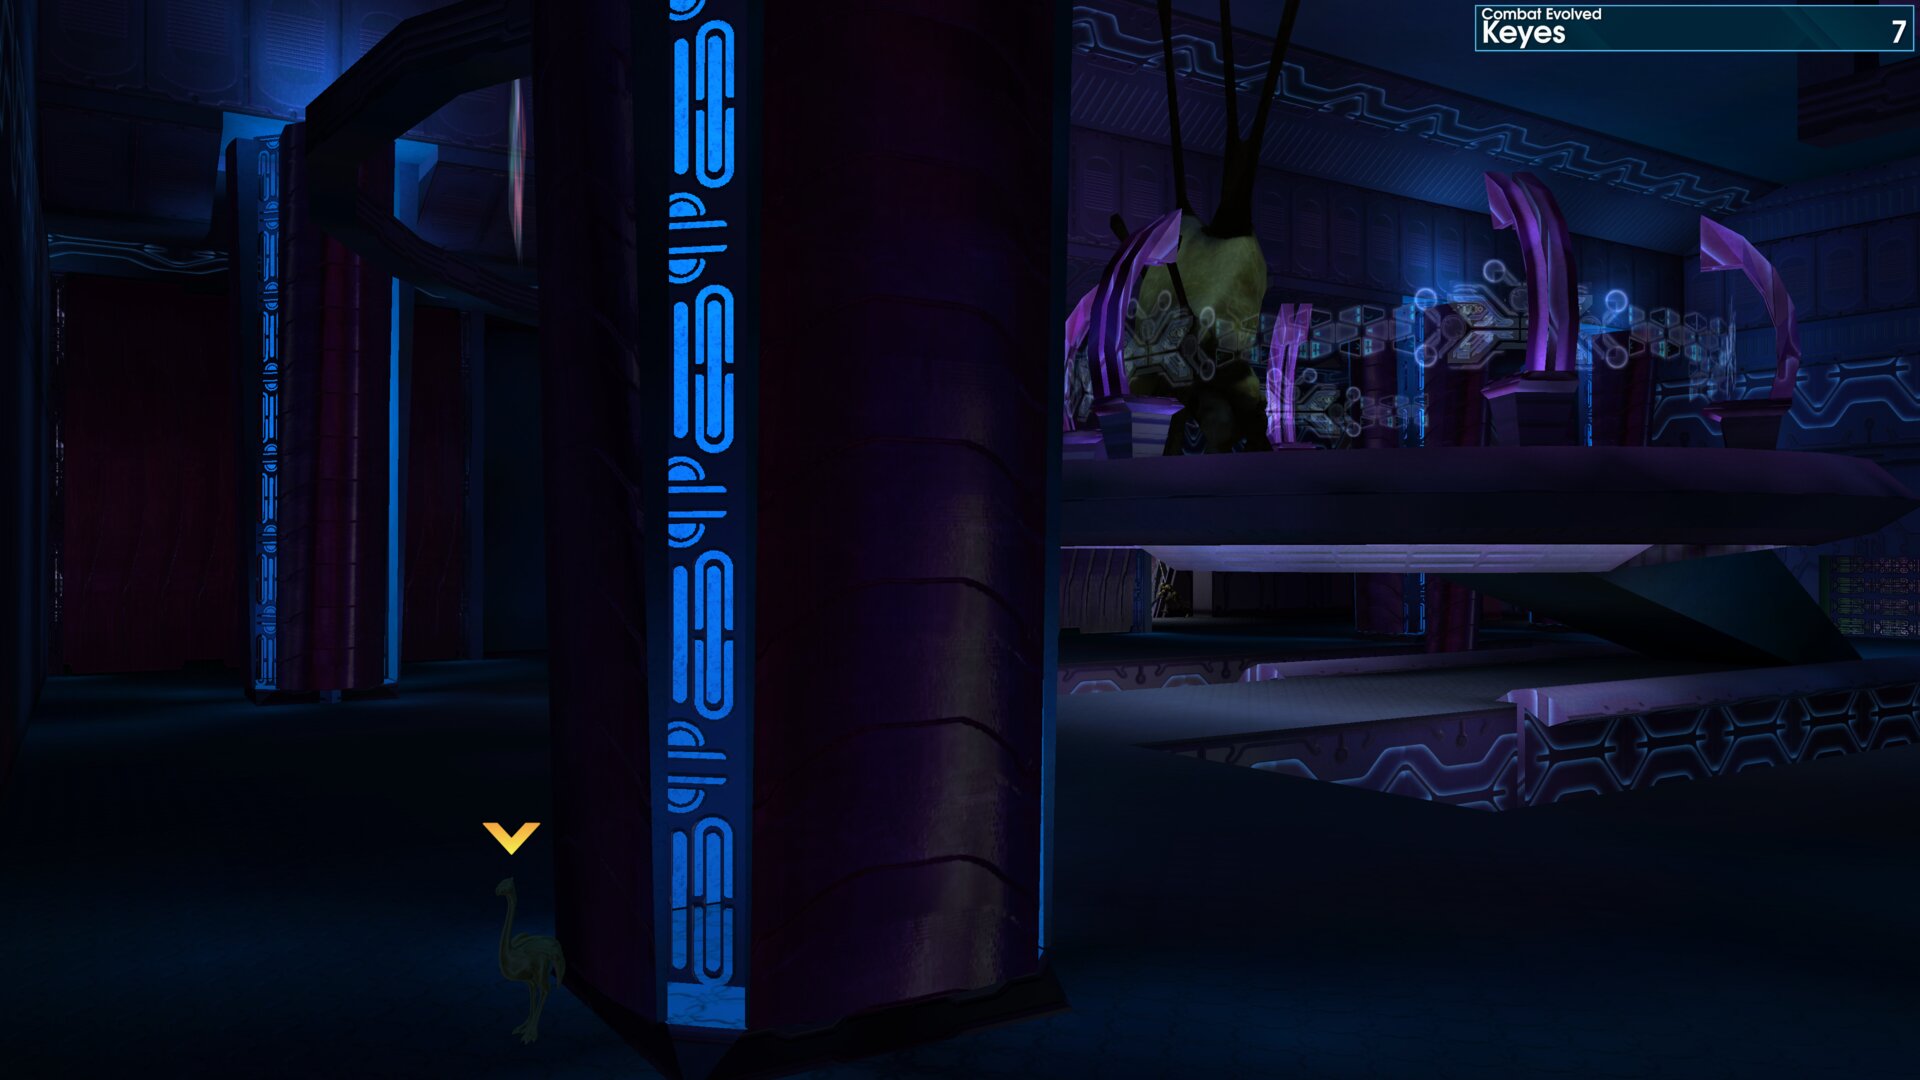
At the back of the ships Control Room (aka Command Center), the Golden Moa is behind the left pillar.
➟ The Maw
Golden Moa 1
As you enter the Pillar of Autumn, the Golden Moa is at the end of the hallway behind the combat barrier.
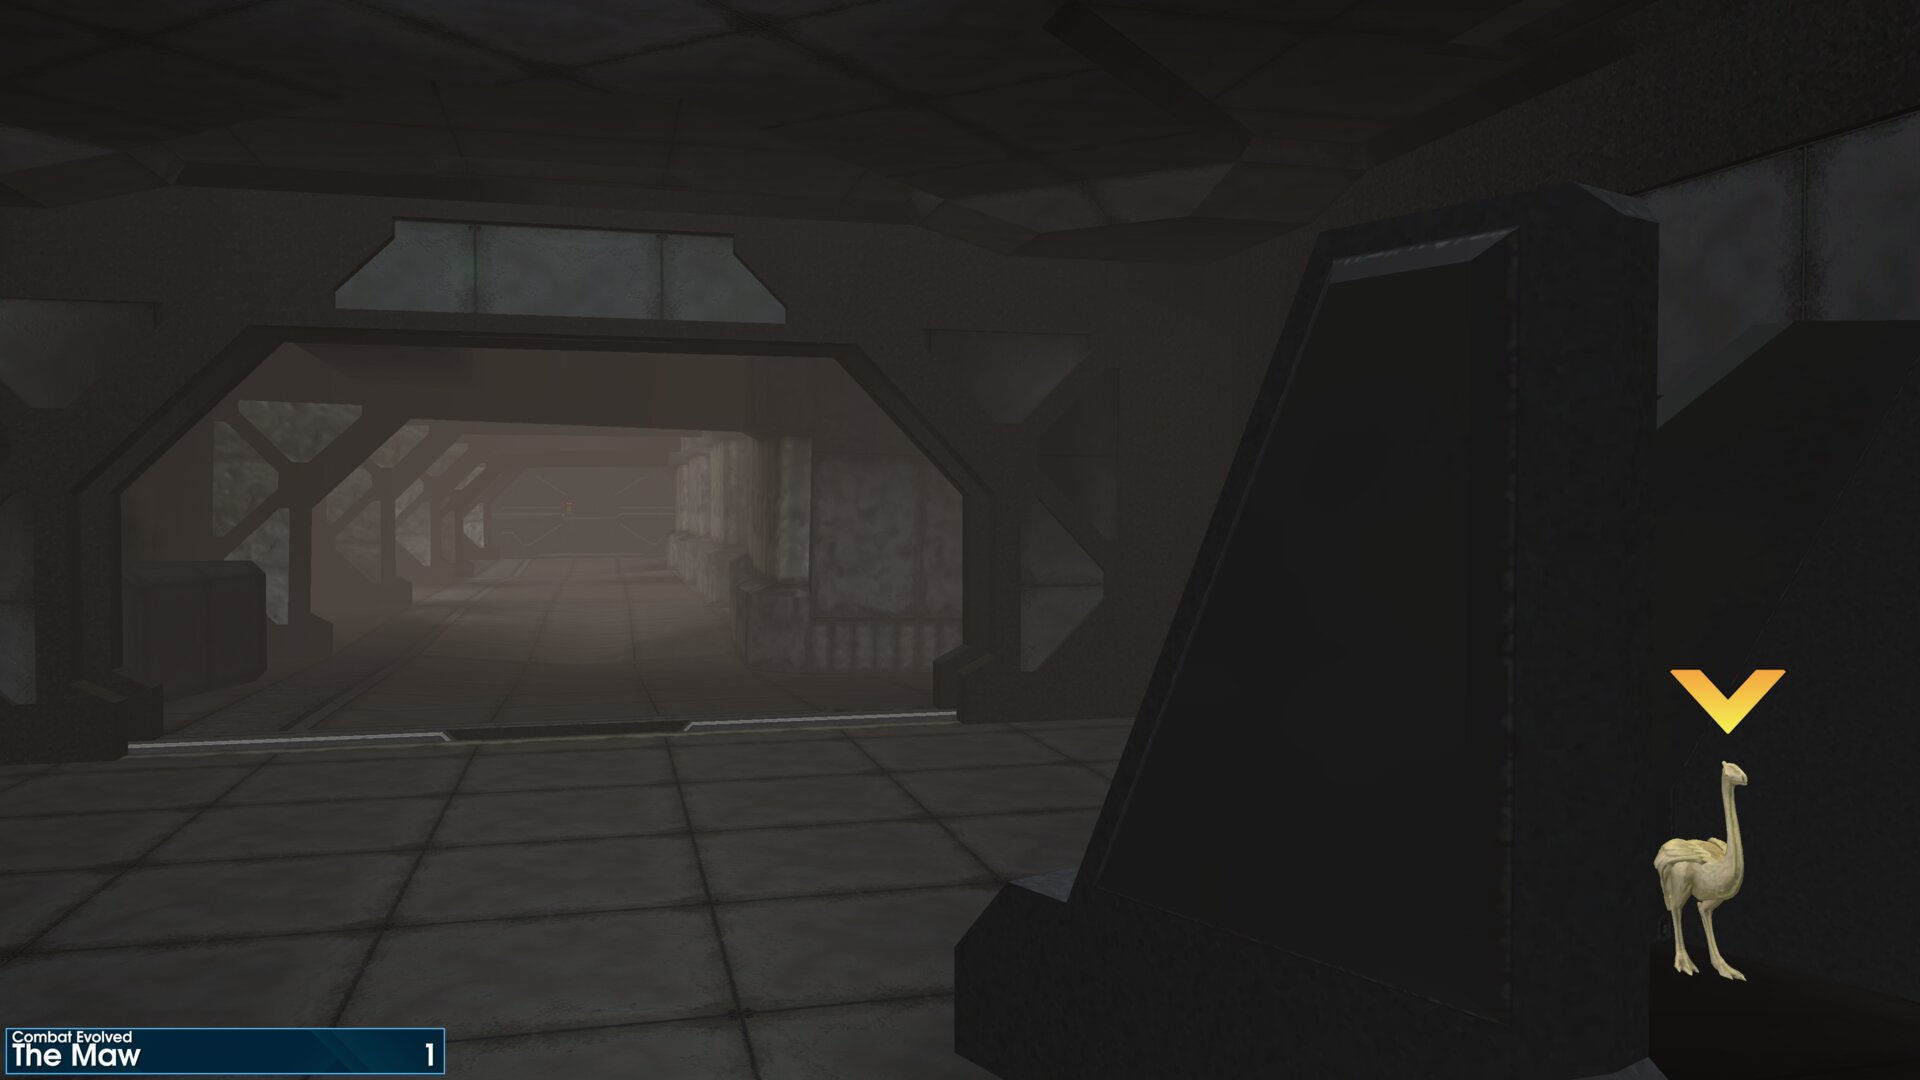
As you enter the Pillar of Autumn, the Golden Moa is at the end of the hallway behind the combat barrier.
Golden Moa 2
After dropping down the ladder to the lower level, the Golden Moa is in the next/final airlock.
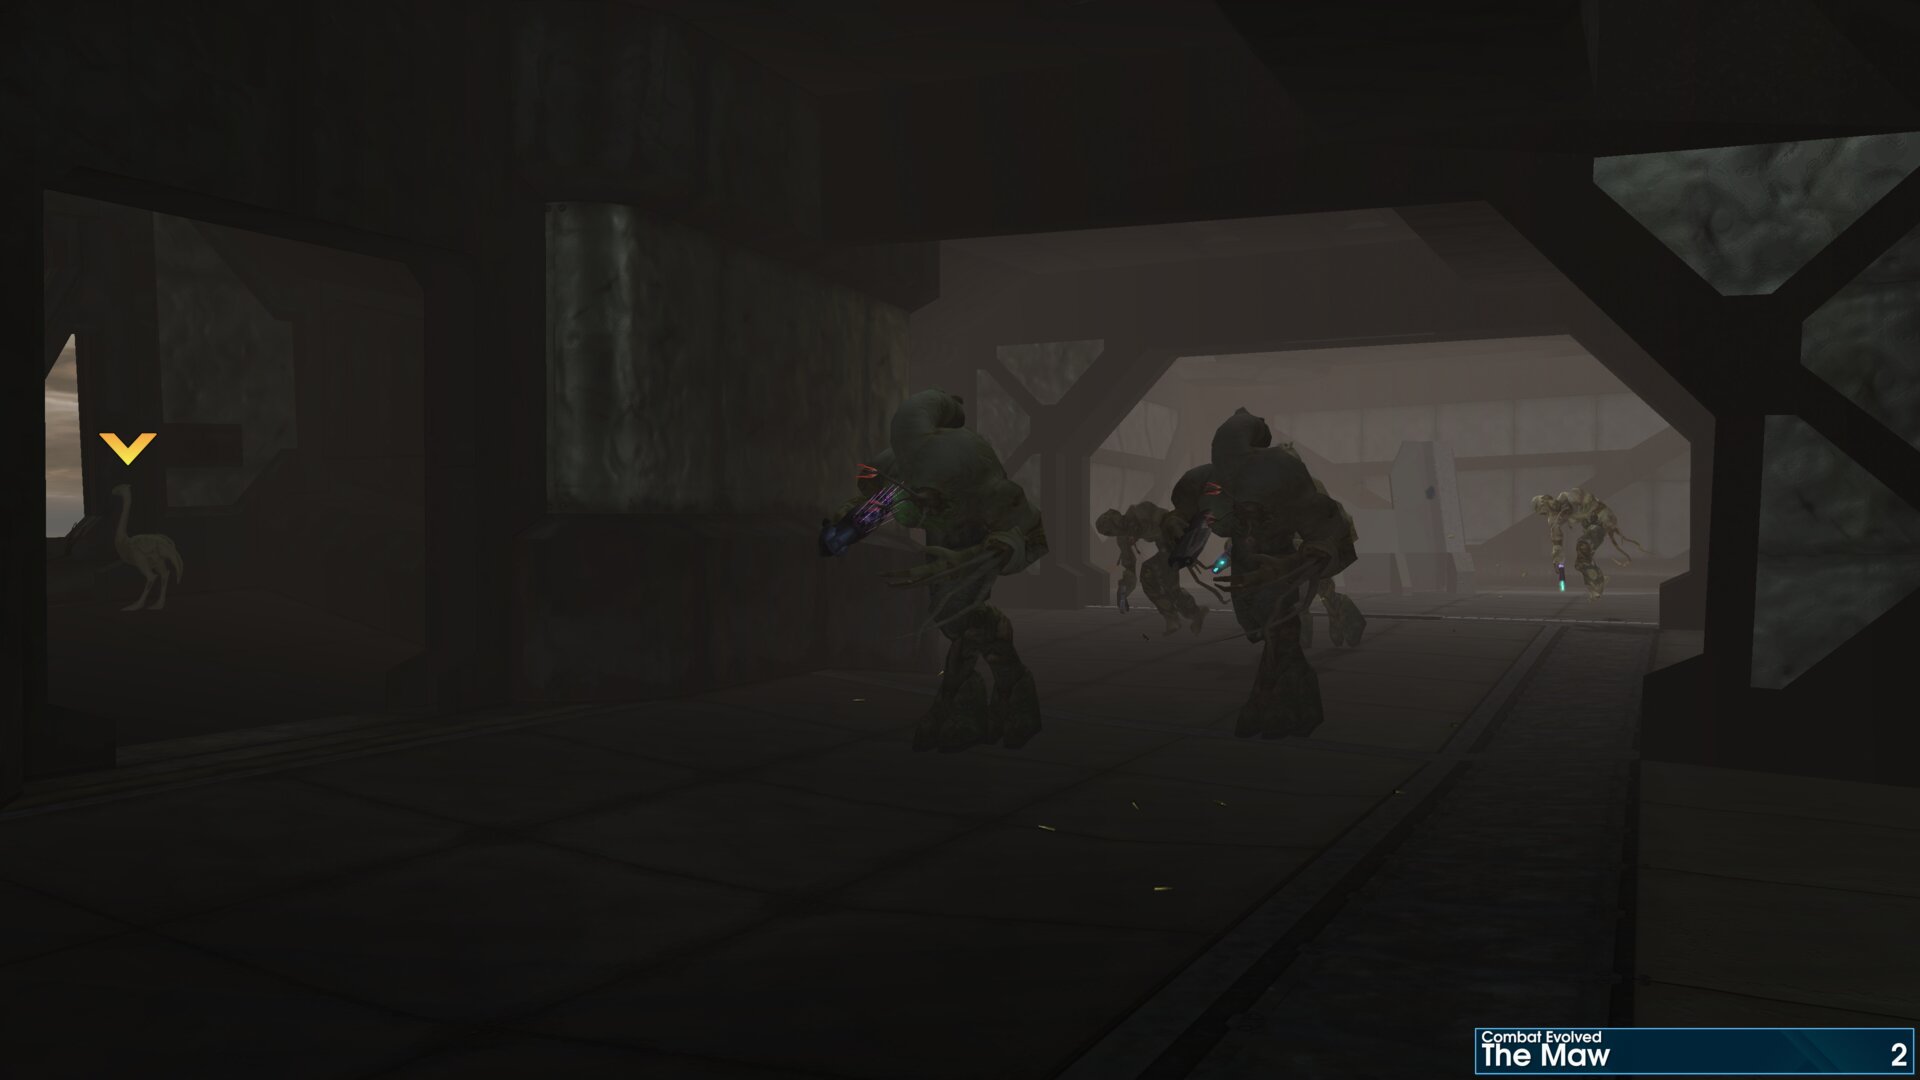
After dropping down the ladder to the lower level, the Golden Moa is in the next/final airlock.
Golden Moa 3
As you enter the cafeteria, the Golden Moa is along the left wall next to the vending machines.
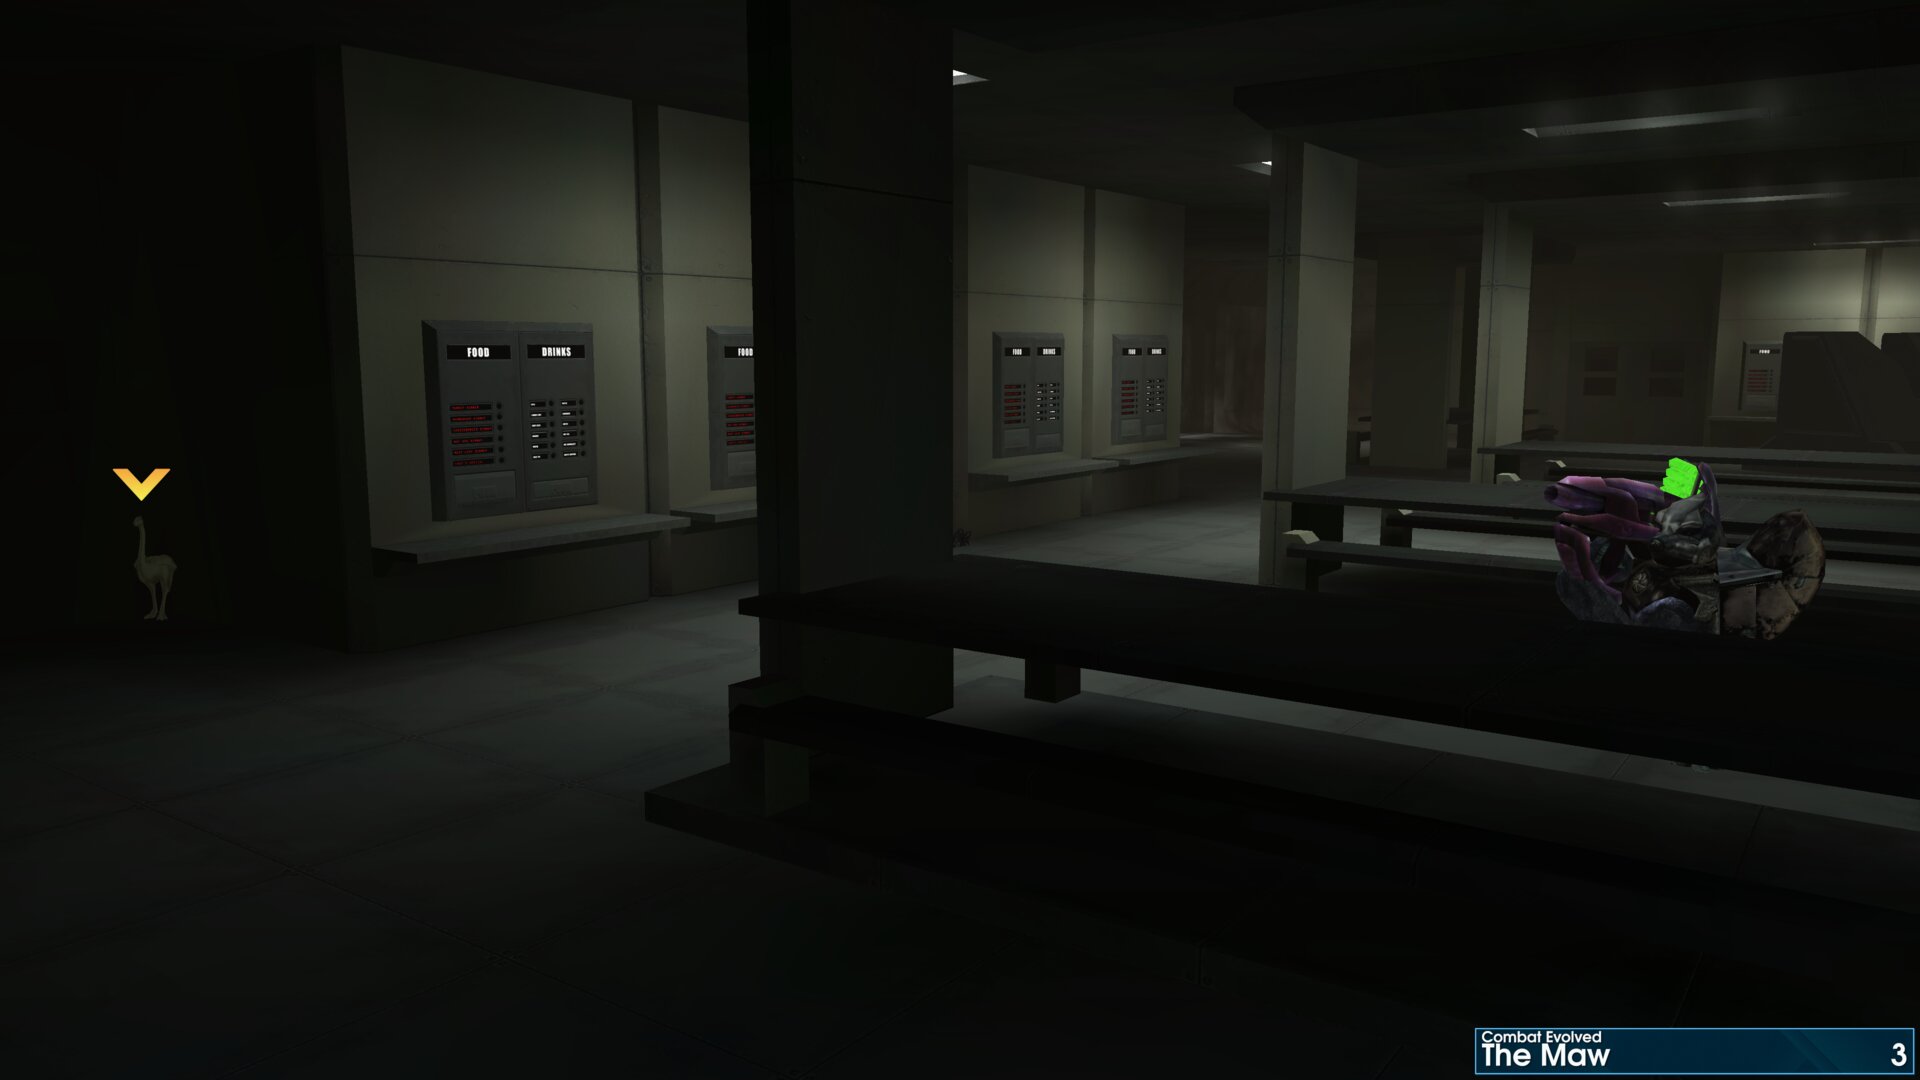
As you enter the cafeteria, the Golden Moa is along the left wall next to the vending machines.
Golden Moa 4
In the bridge, the Golden Moa is behind the now damaged main screen.
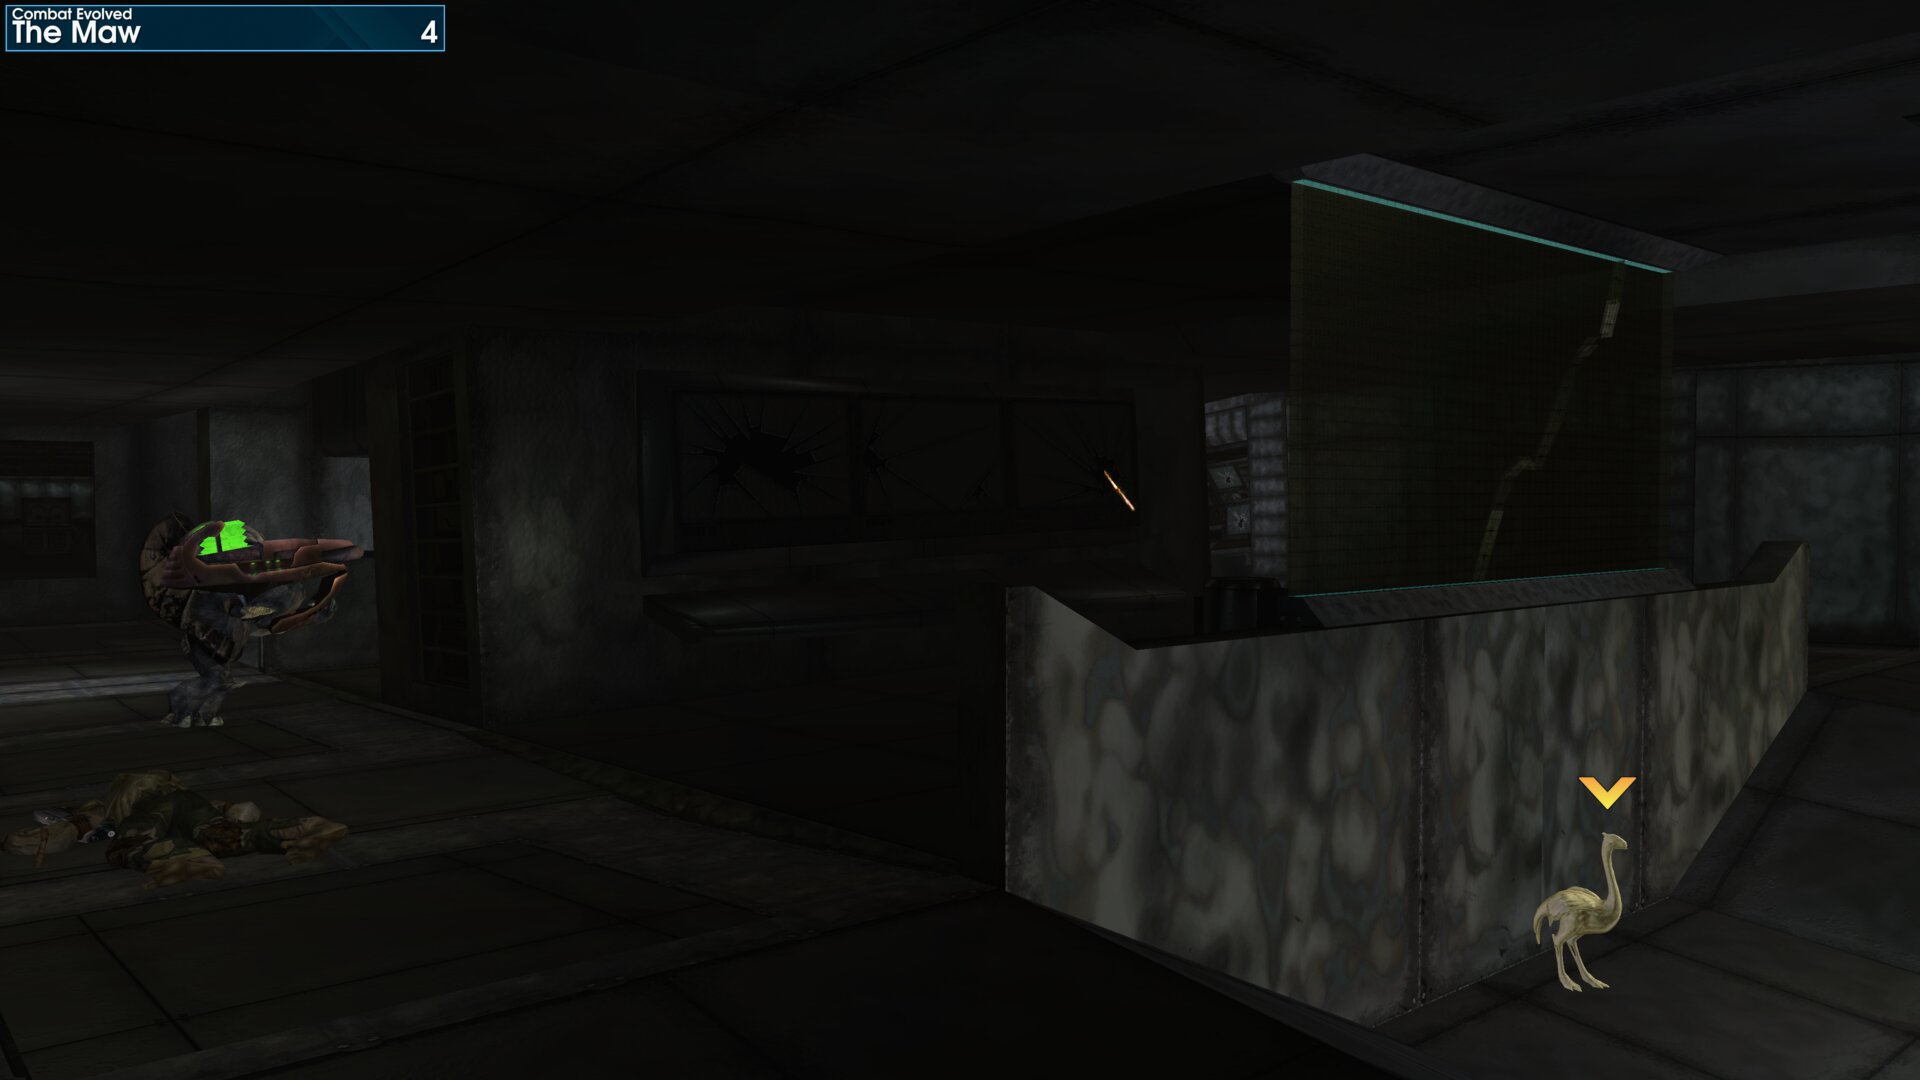
In the bridge, the Golden Moa is behind the now damaged main screen.
Golden Moa 5
In the armory, the Golden Moa is beside the 1st set of weapons racks along the left wall.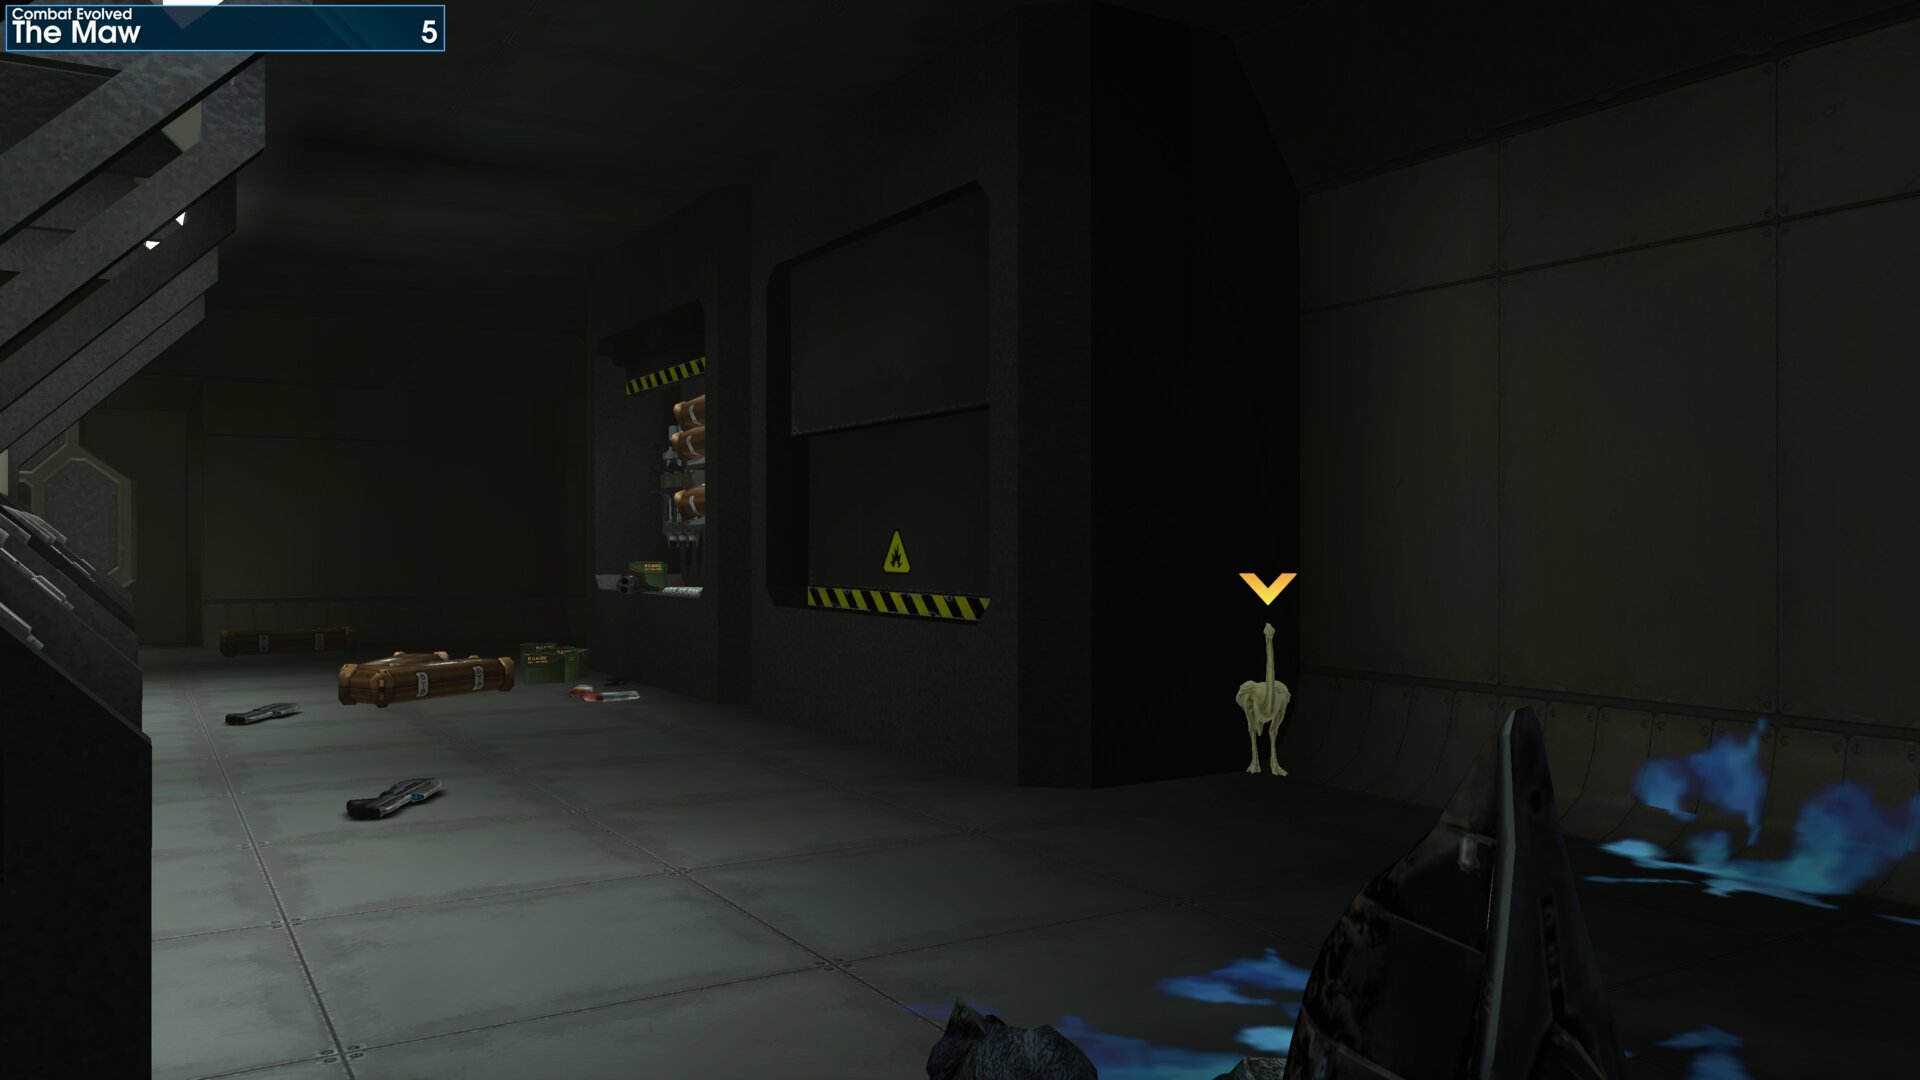
In the armory, the Golden Moa is beside the 1st set of weapons racks along the left wall.
Golden Moa 6
As you enter the Engine Room (Engineering), head up the ramp on the right side of the room. The Golden Moa is between the supports 1 & 2 for the above exhaust couplings.
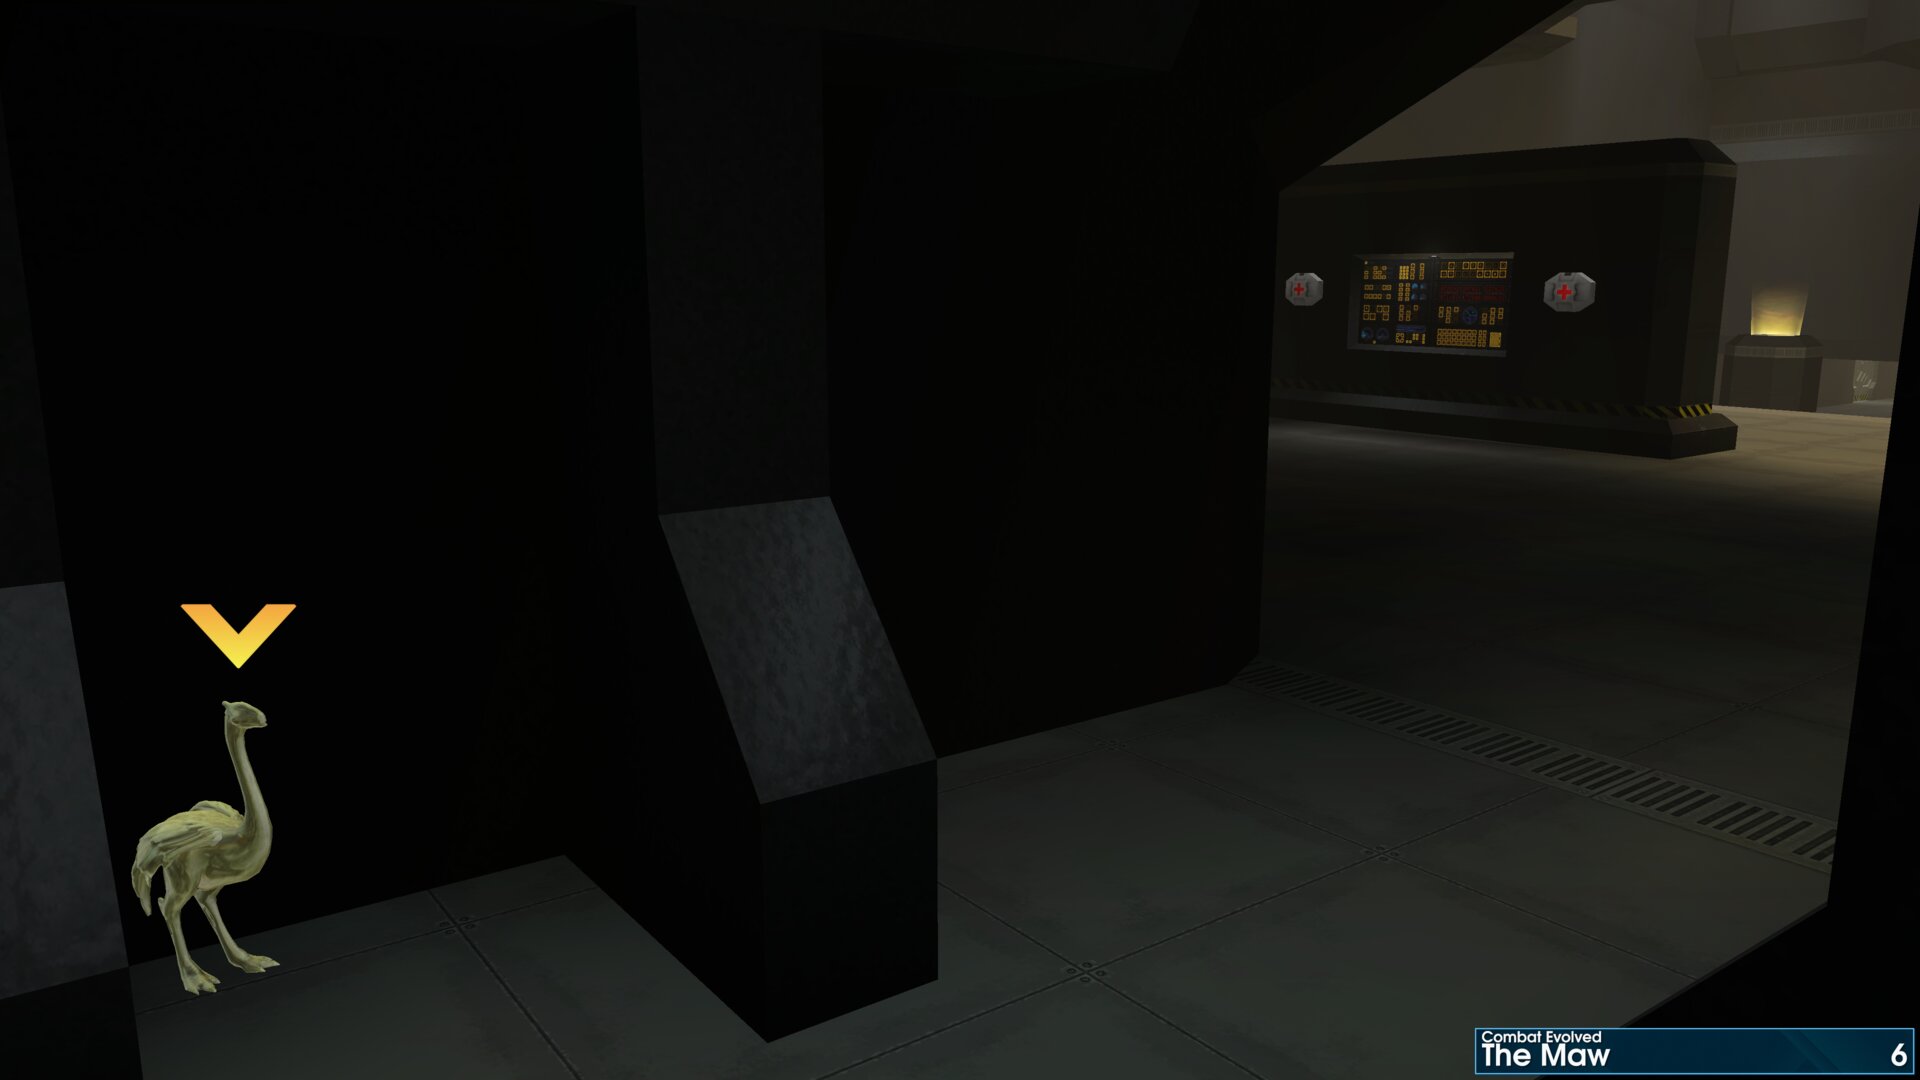
As you enter the Engine Room (Engineering), head up the ramp on the right side of the room. The Golden Moa is between the supports 1 & 2 for the above exhaust couplings.
Golden Moa 7
As you enter the Engine Room (Engineering), head to the stairwell to level 2 on the right side of the room. The Golden Moa is in the corner, beneath the first ramp.
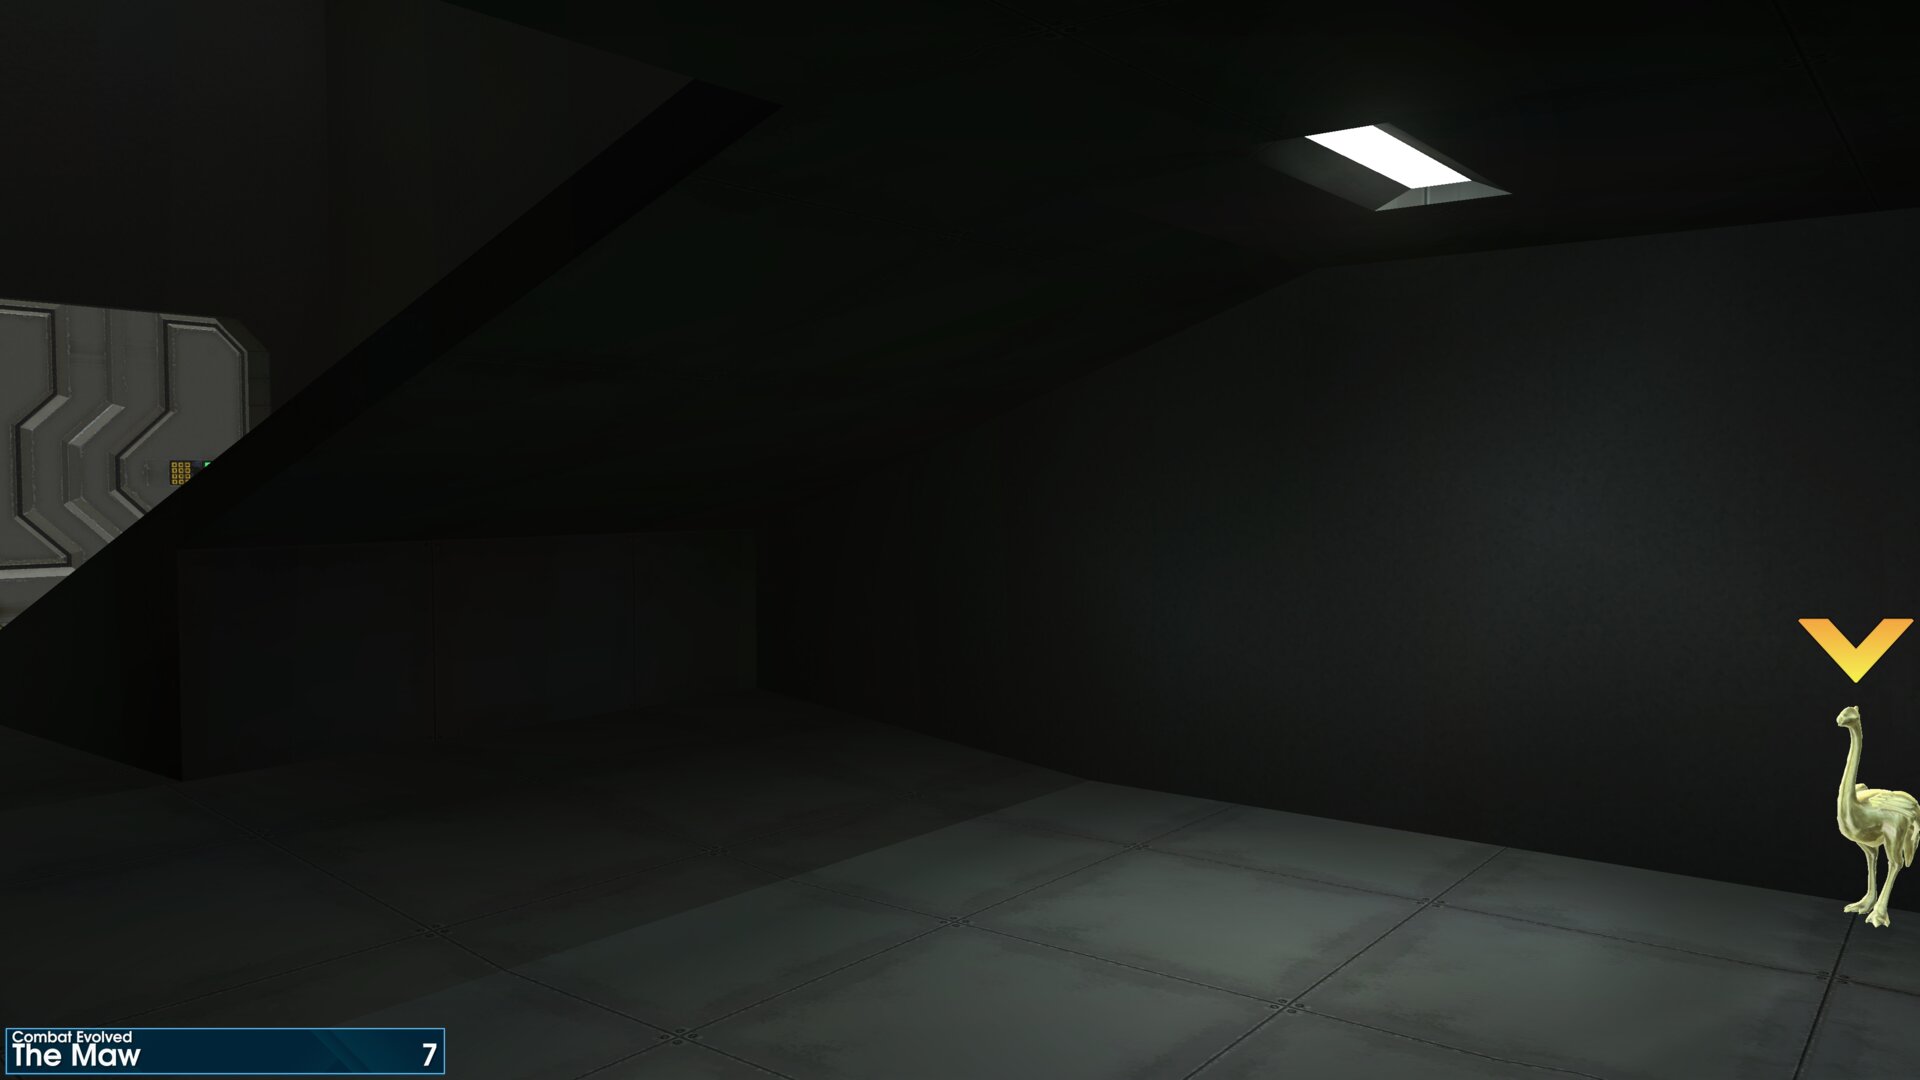
As you enter the Engine Room (Engineering), head to the stairwell to level 2 on the right side of the room. The Golden Moa is in the corner, beneath the first ramp.
Golden Moa 8
After going up the service lift you’ll reach a Warthog station, the Golden Moa is in the corner to the right as you enter.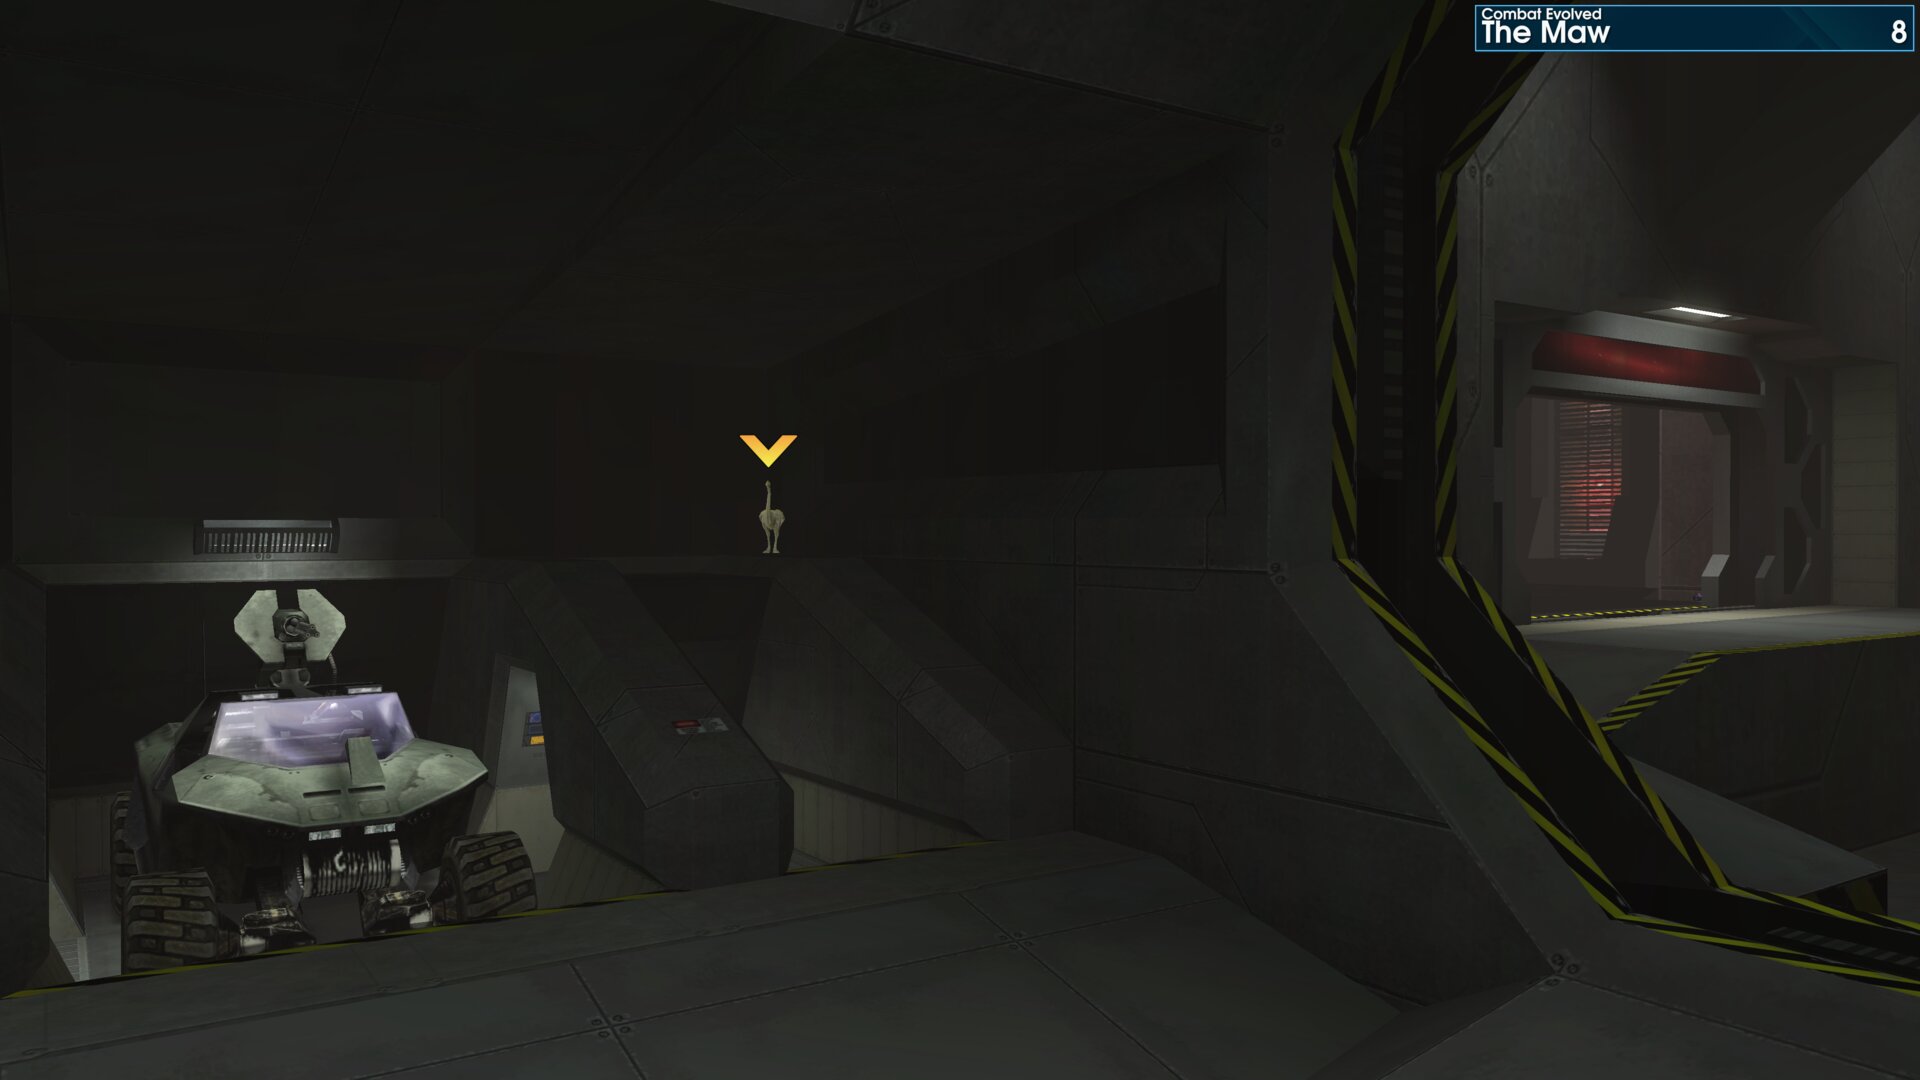
After going up the service lift you’ll reach a Warthog station, the Golden Moa is in the corner to the right as you enter.
Golden Moa 9
As you make your way along the class-7 service corridor, you’ll will eventually reach the 1st S-bend corridor. At this point take the shortcut in the wall, the Golden Moa is beside the left sealed door (halfway through the shortcut).
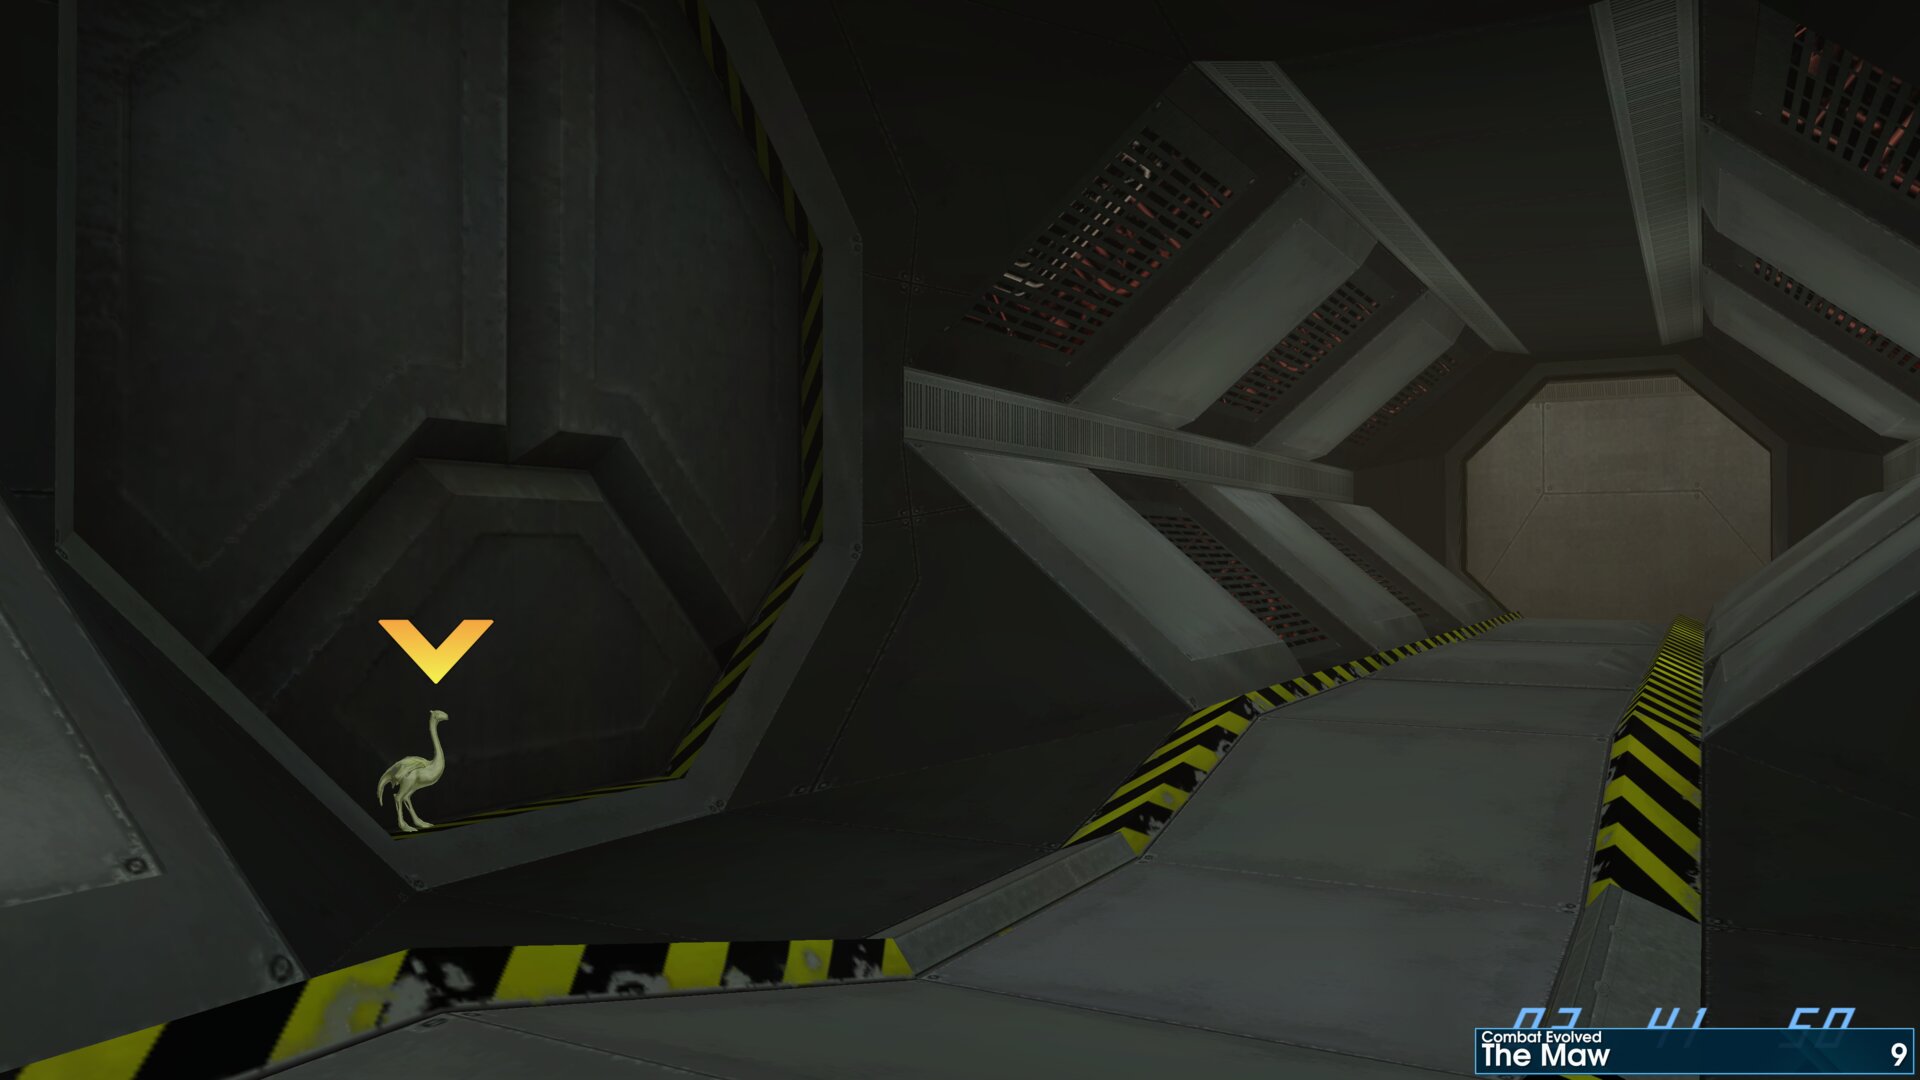
As you make your way along the class-7 service corridor, you’ll will eventually reach the 1st S-bend corridor. At this point take the shortcut in the wall, the Golden Moa is beside the left sealed door (halfway through the shortcut).
Golden Moa 10
As you come to external access Junction 4C, the Golden Moa is in the corner to the left as you drop down to the lower level.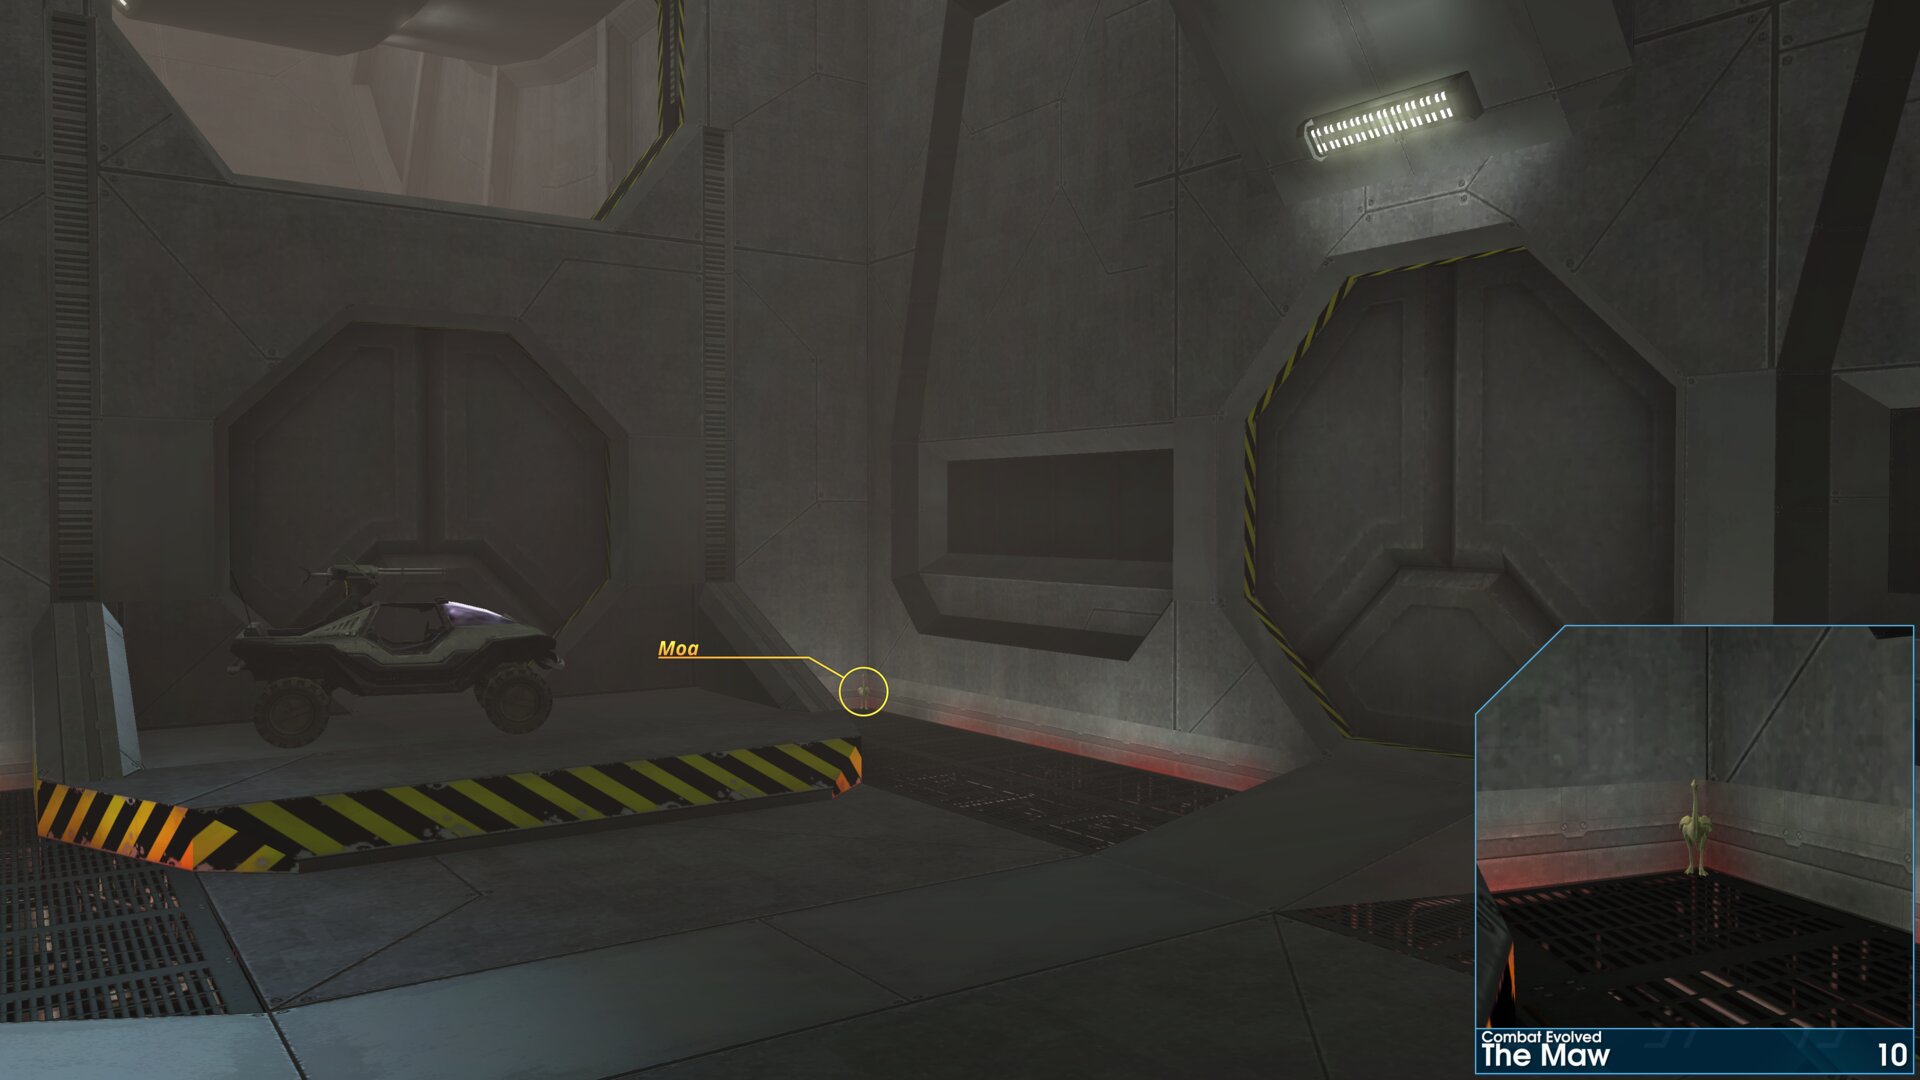
As you come to external access Junction 4C, the Golden Moa is in the corner to the left as you drop down to the lower level.
Halo 2
Golden Moas in Halo 2 require switching to, or play with, original graphics.
➟ Cairo Station
Golden Moa 1
This Golden Moa is at the start of the mission between the Communications booths, hidden behind the trash can.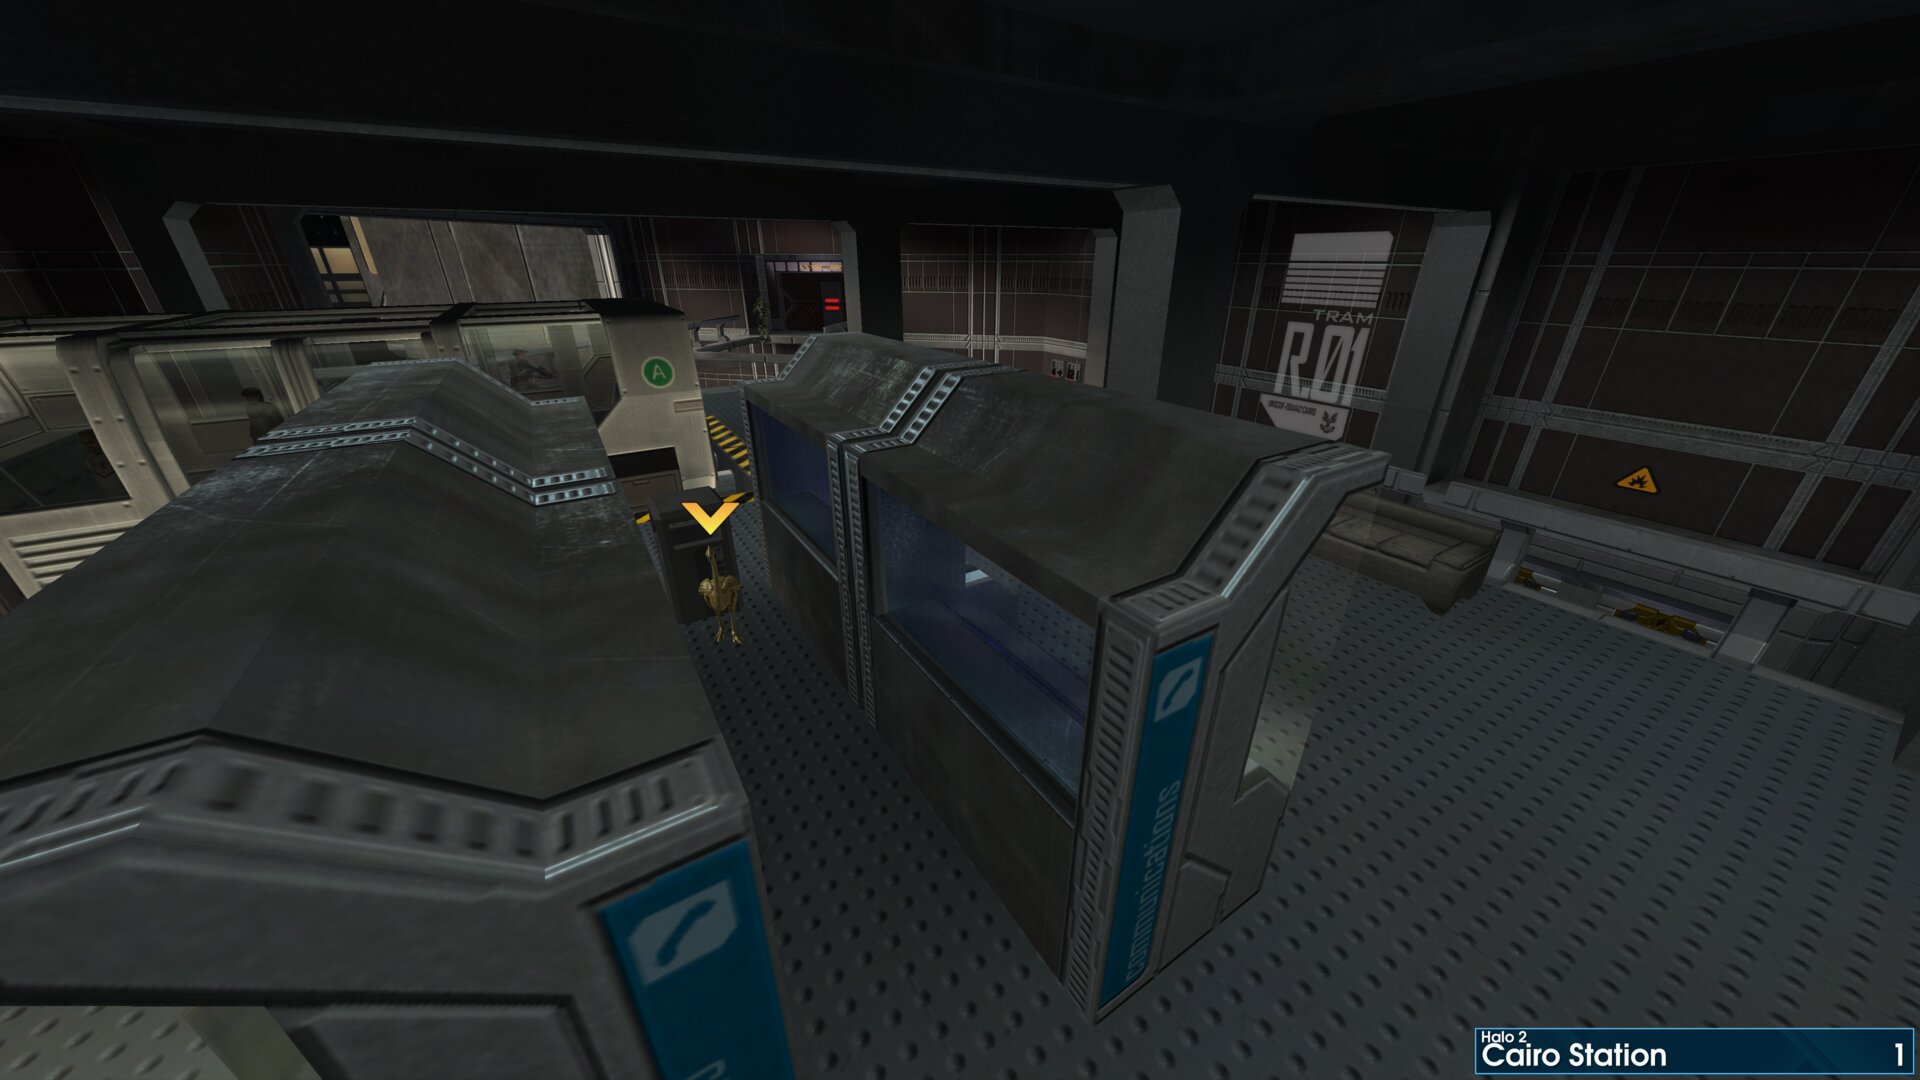
This Golden Moa is at the start of the mission between the Communications booths, hidden behind the trash can.
Golden Moa 2
In the corridor after clearing the first Covenant assault (in Recreation R.01), take a left towards the locked door. The Golden Moa is in the corner beside the small fire.
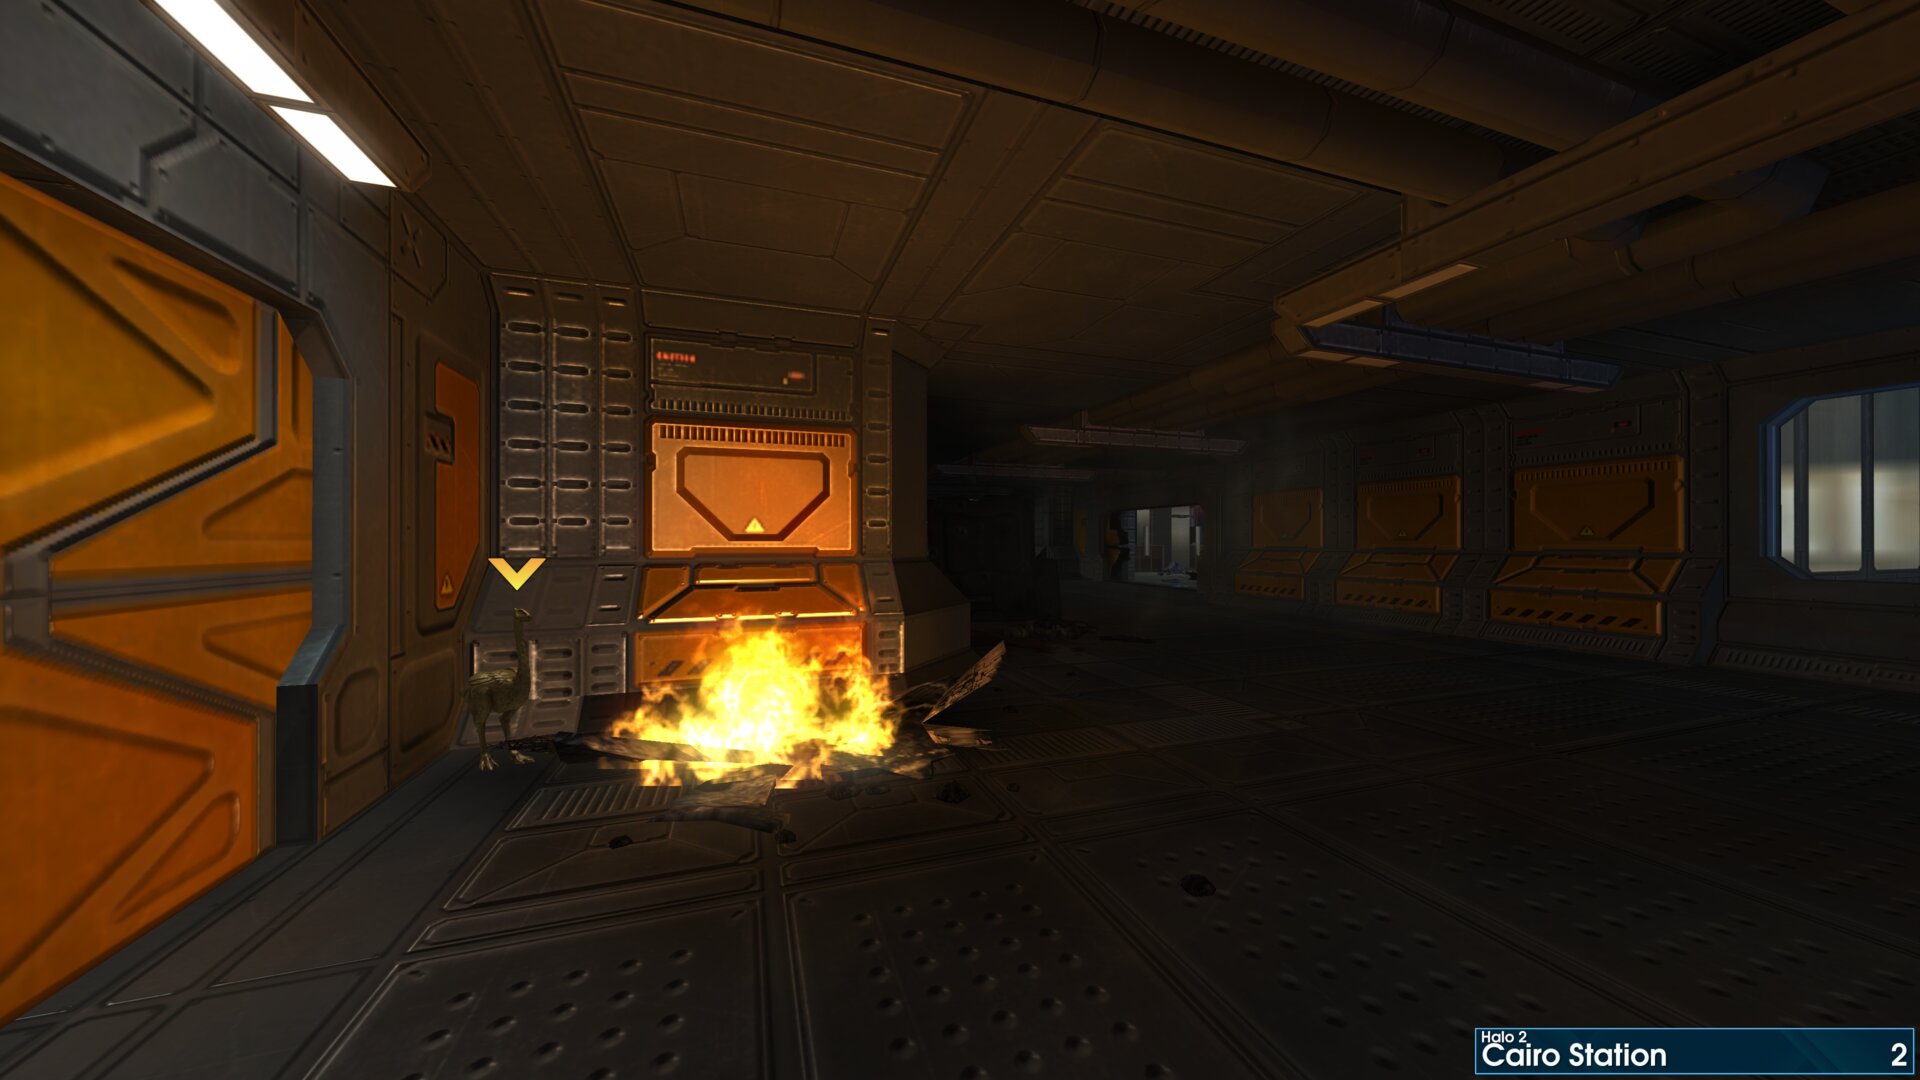
In the corridor after clearing the first Covenant assault (in Recreation R.01), take a left towards the locked door. The Golden Moa is in the corner beside the small fire.
Golden Moa 3
As you enter the MAC Storage room, via the right door from Hanger Bay A-02. The Golden Moa is on top of the central storage shelf.
“Then they sure as hell brought one here.
Chief, find it.” Lord Hood
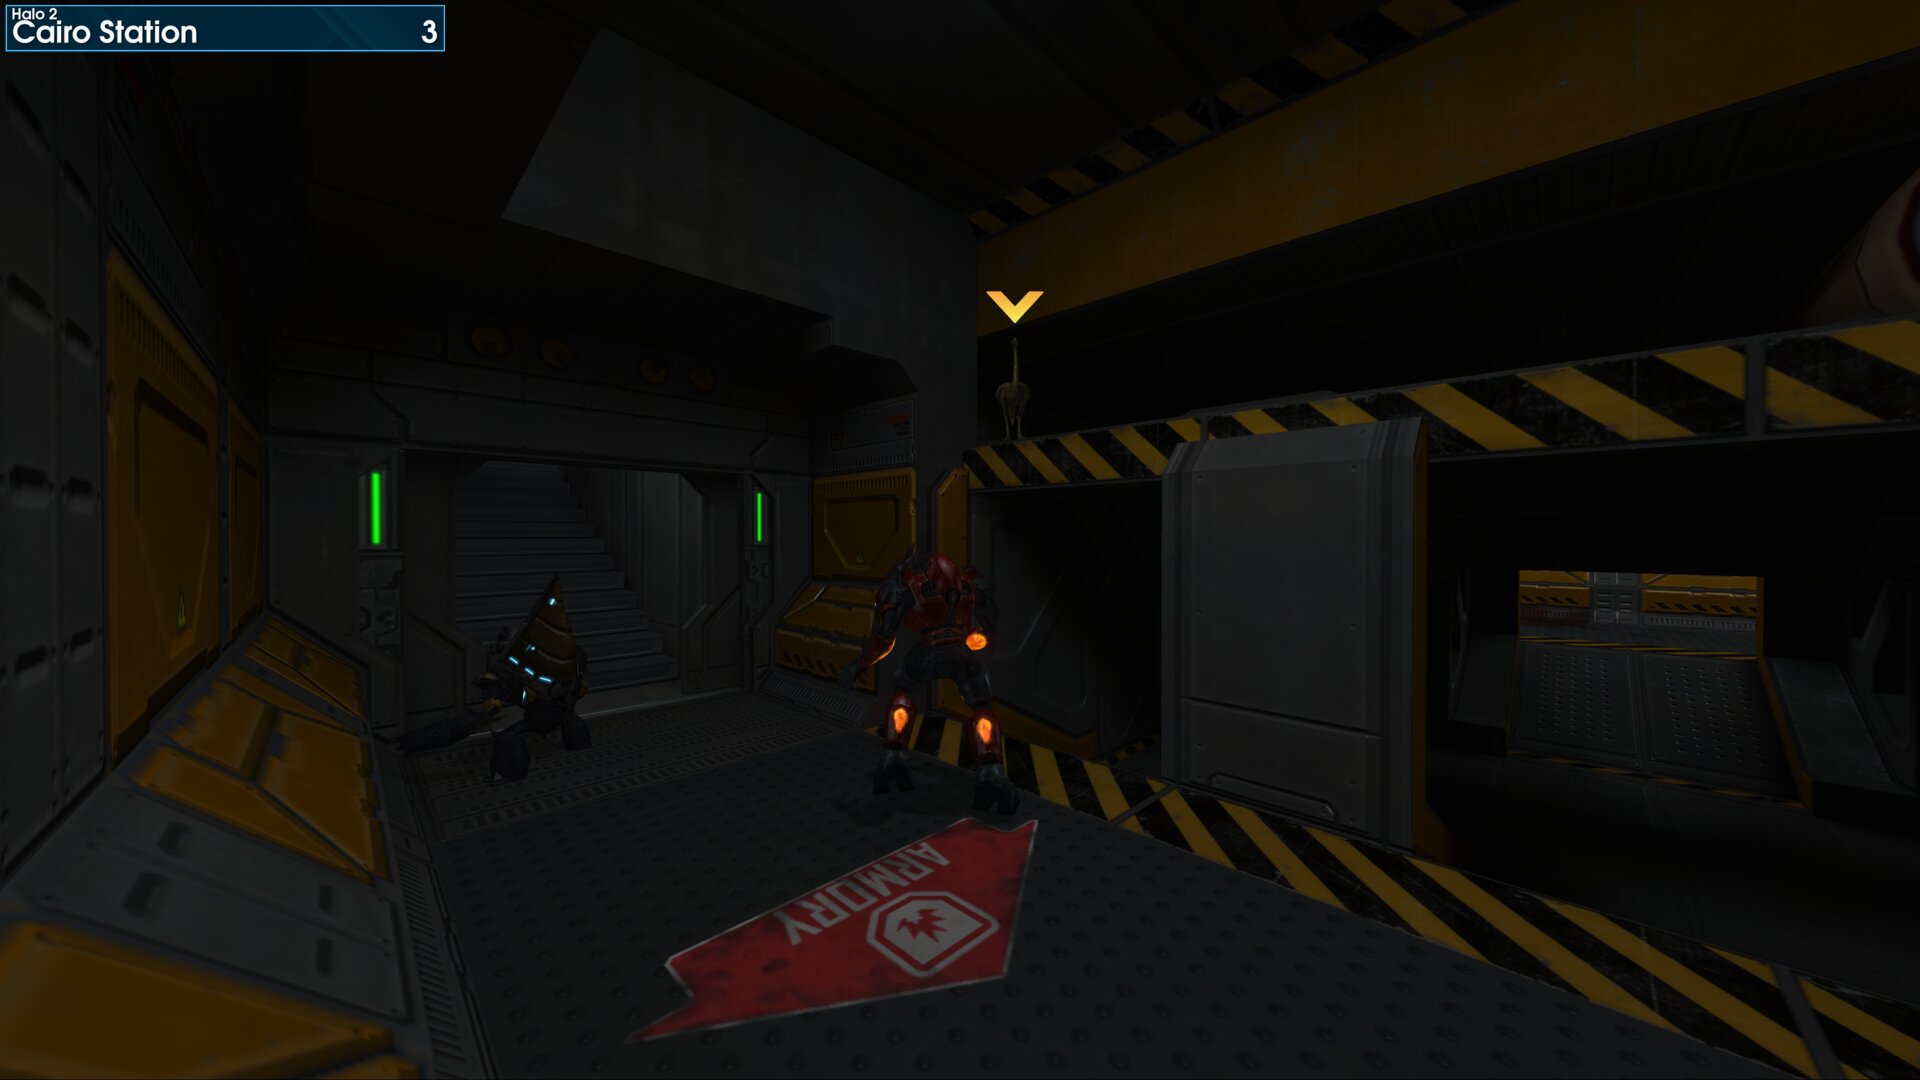
As you enter the MAC Storage room, via the right door from Hanger Bay A-02. The Golden Moa is on top of the central storage shelf.
“Then they sure as hell brought one here.
Chief, find it.” Lord Hood
Golden Moa 4
This Golden Moa is on top of the Container Crane in Portside Shipping.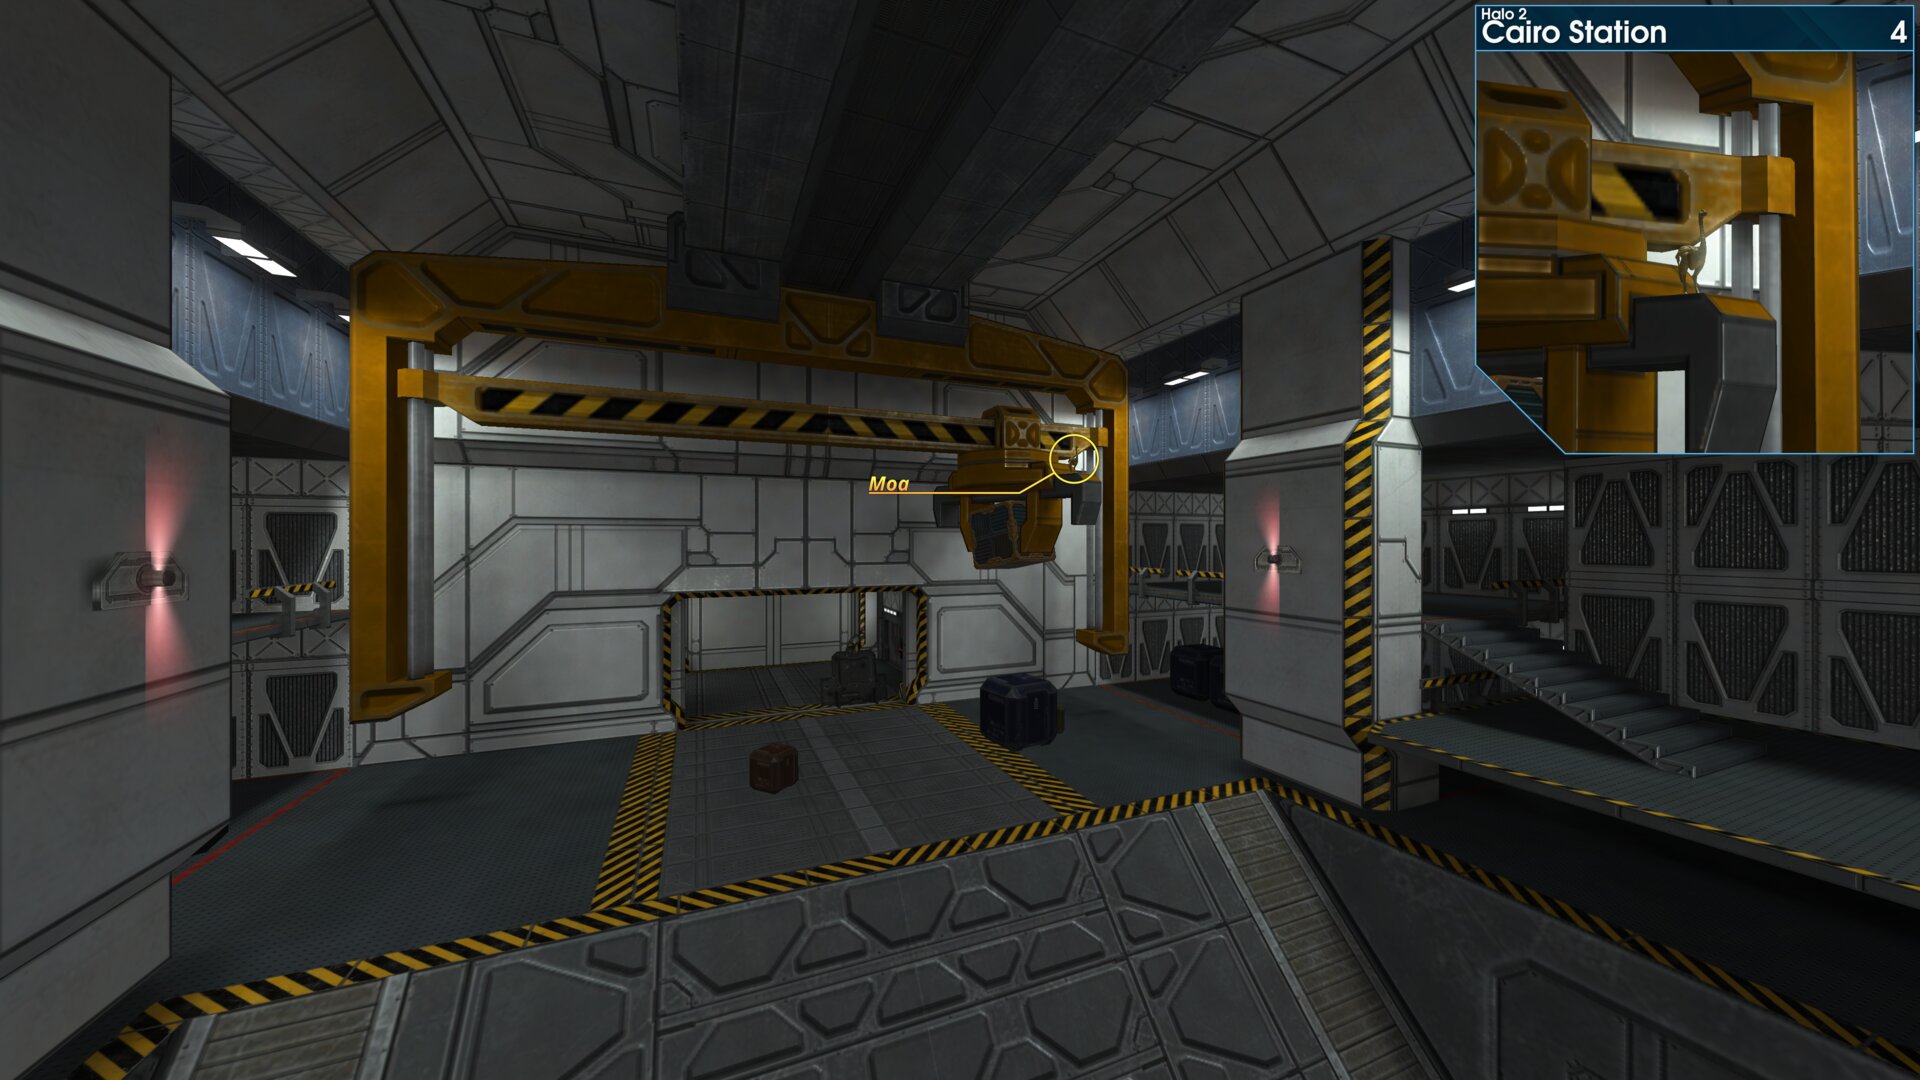
This Golden Moa is on top of the Container Crane in Portside Shipping.
Golden Moa 5
As you make your way through the second space walk, the Golden Moa is on a ledge to the right just beyond the moving platform (MAC’s recoil arm).
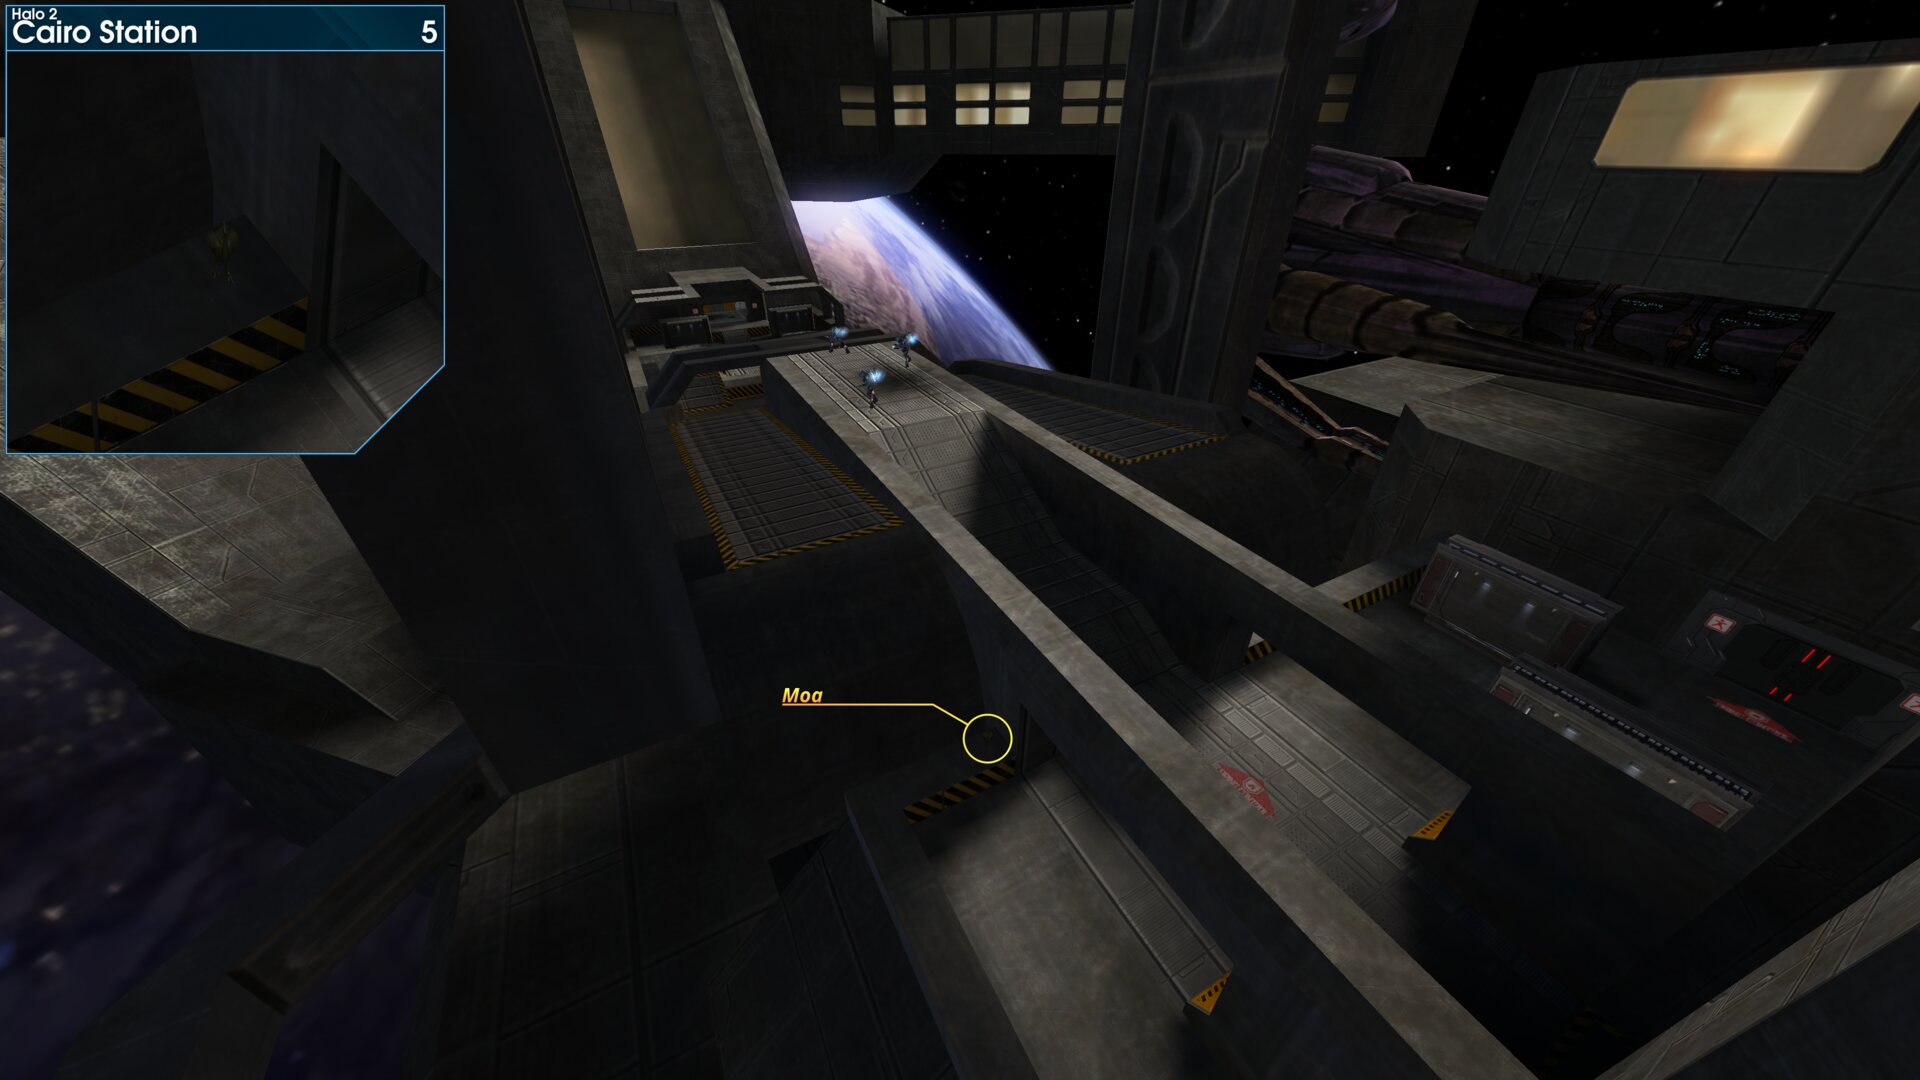
As you make your way through the second space walk, the Golden Moa is on a ledge to the right just beyond the moving platform (MAC’s recoil arm).
➟ Outskirts
Golden Moa 1
After entering the courtyard, follow the street past the red Truck. The Golden Moa is by the proceeding intersection.
“More on the street, left side!” Sgt. Johnson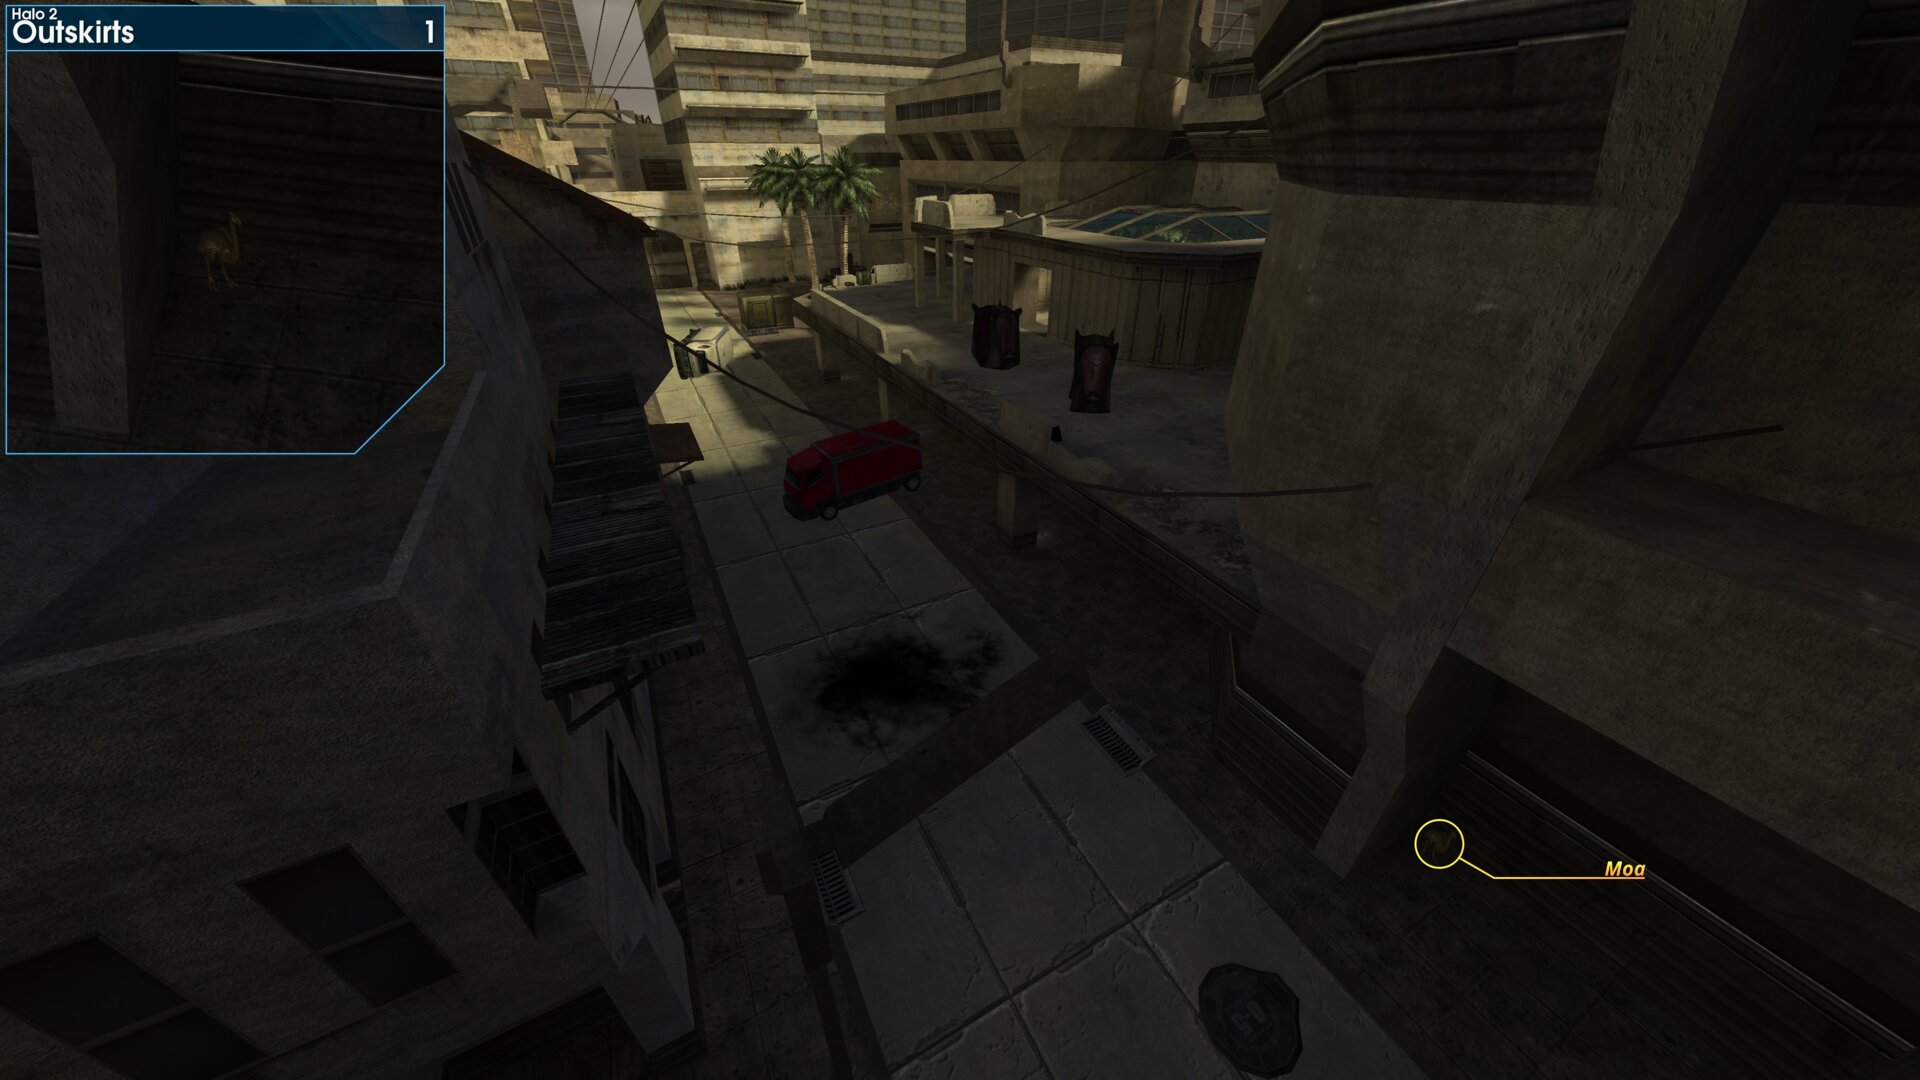
After entering the courtyard, follow the street past the red Truck. The Golden Moa is by the proceeding intersection.
“More on the street, left side!” Sgt. Johnson
Golden Moa 2
At the far end of Sniper Alley, the Golden Moa is around the corner on top of an awning.
Not yet sure which triggers must be hit to get this
one to spawn, but playing through the mission as
the Dev's intended usually works.
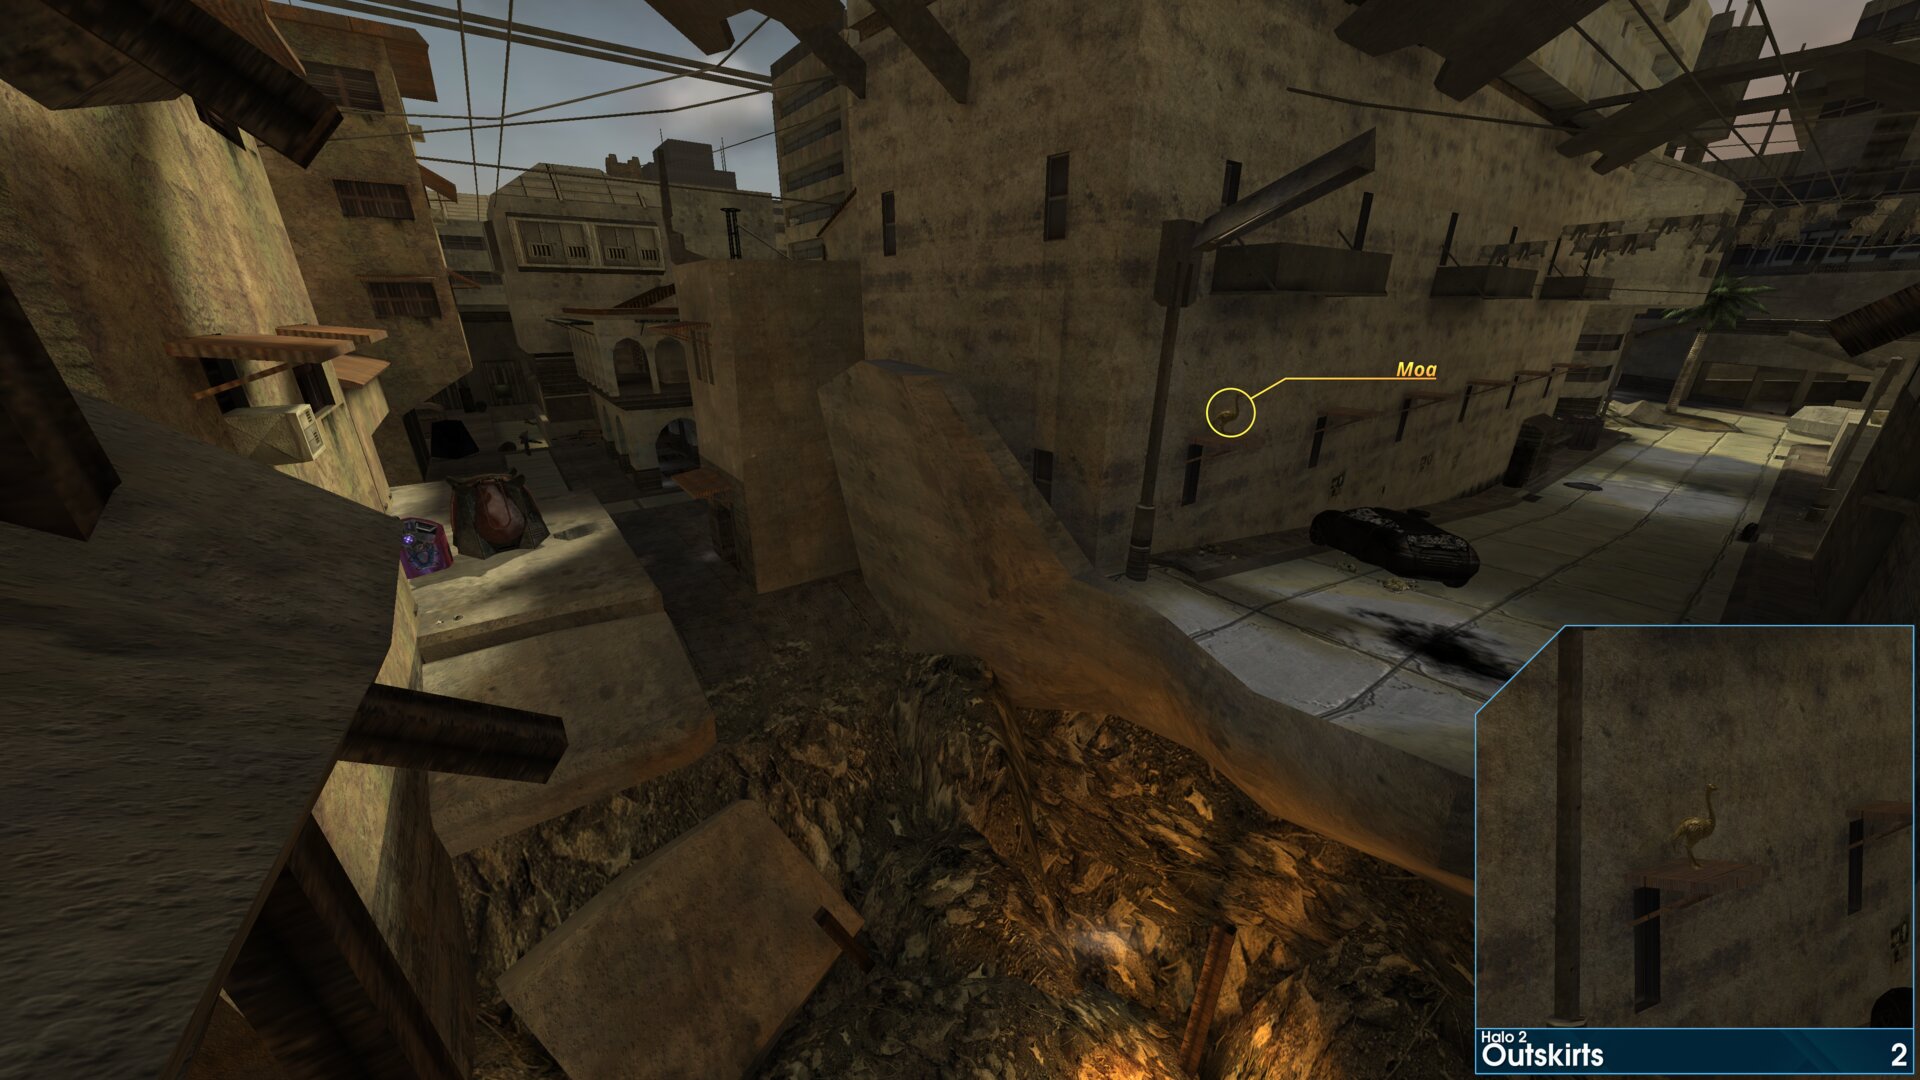
At the far end of Sniper Alley, the Golden Moa is around the corner on top of an awning.
Not yet sure which triggers must be hit to get thisone to spawn, but playing through the mission as
the Dev's intended usually works.
Golden Moa 3
After going through Hotel Zanzibar, take a right and follow the road all the way to the end. The Golden Moa is behind the dumpster, by the locked gates.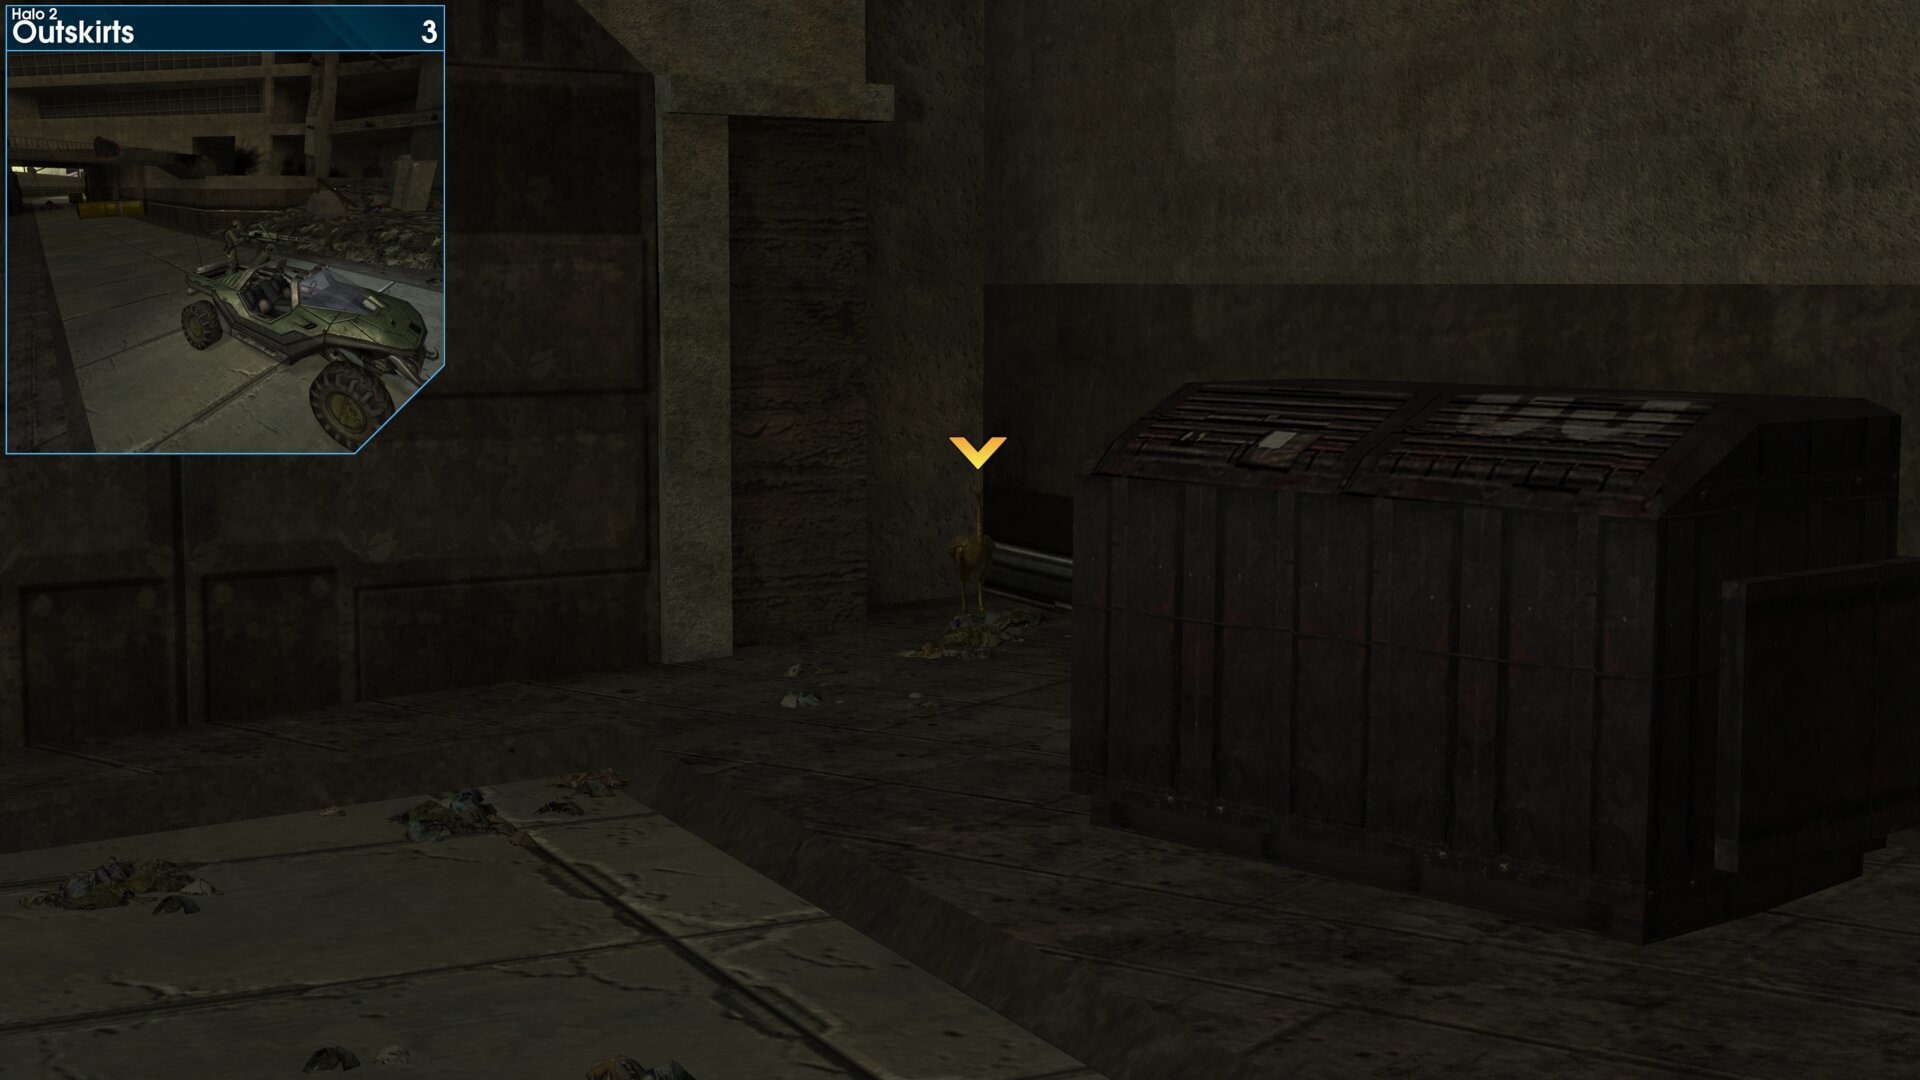
After going through Hotel Zanzibar, take a right and follow the road all the way to the end. The Golden Moa is behind the dumpster, by the locked gates.
Golden Moa 4
Follow the beach until you reach the first deployed Covenant artillery (Type-48 Artillery Platform, aka “Weevil”). The Golden Moa is past the Covenant Artillery, between two large pipes.
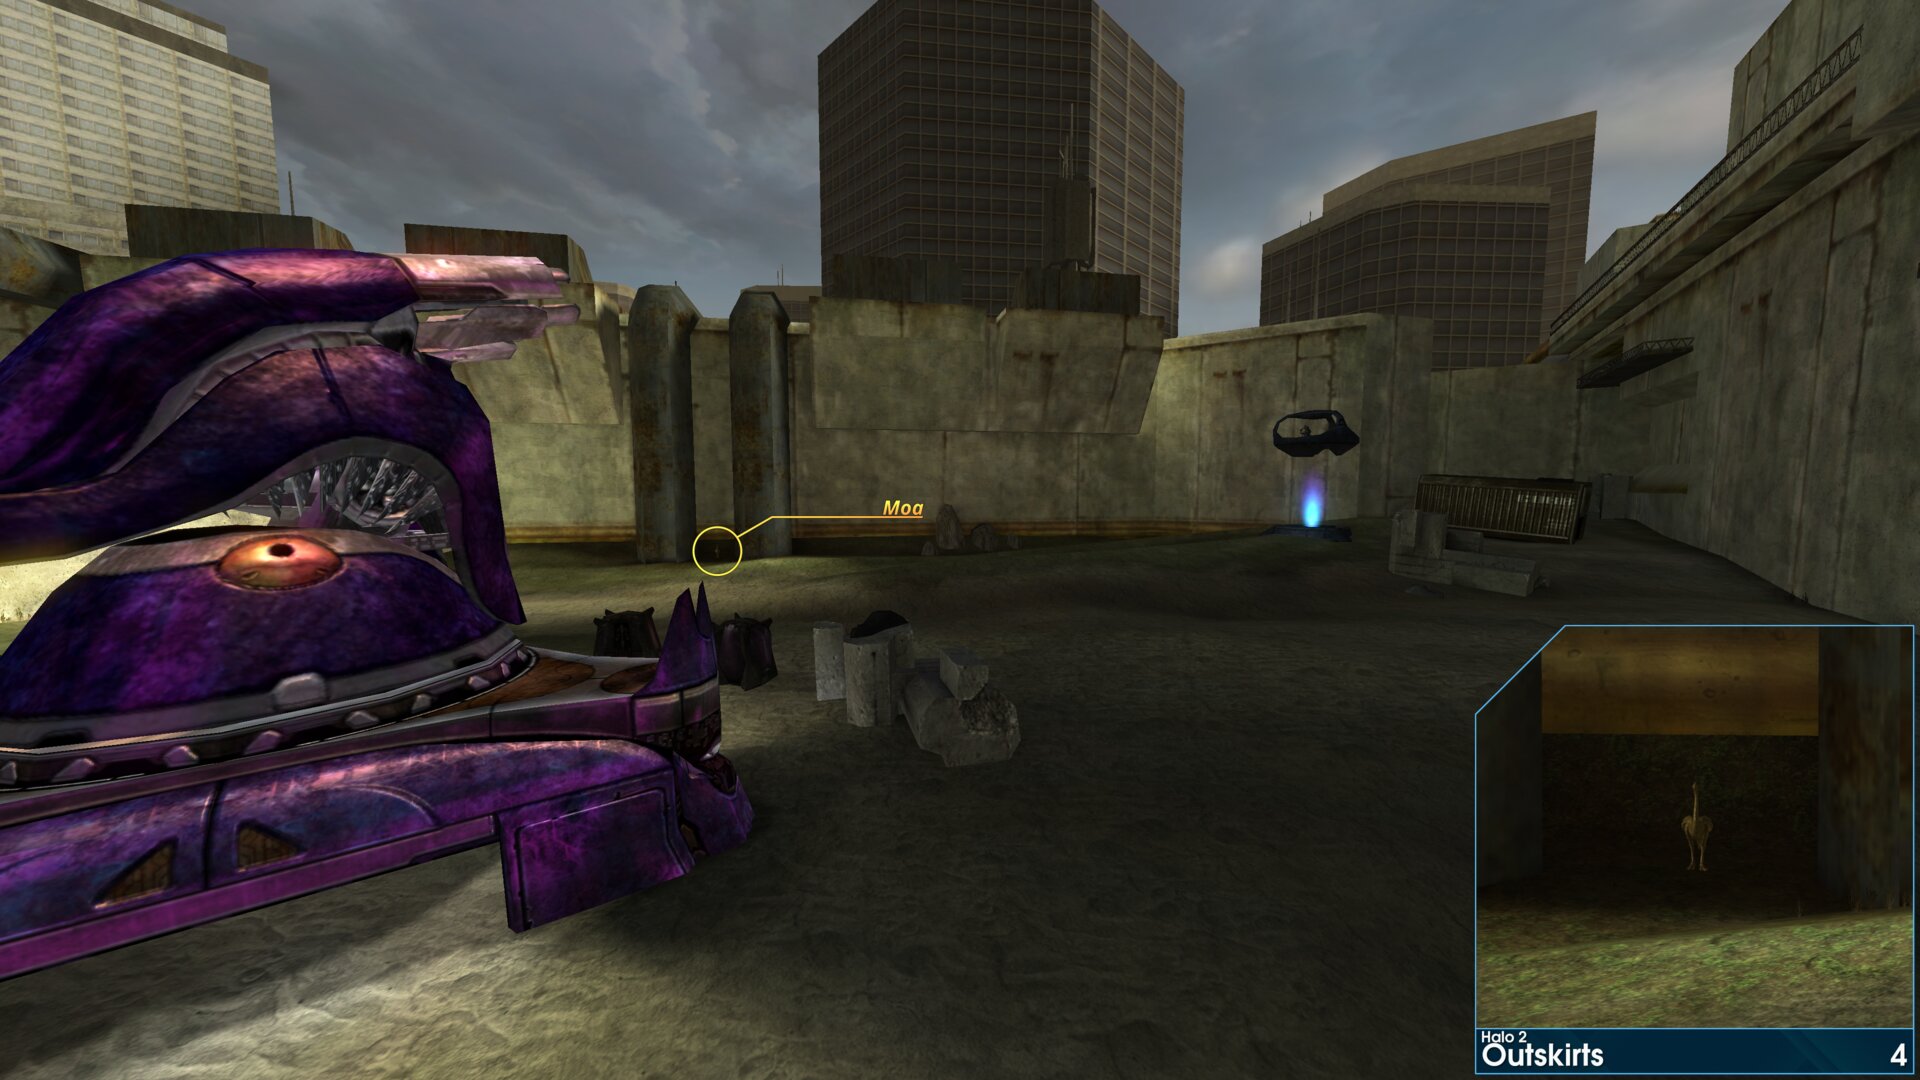
Follow the beach until you reach the first deployed Covenant artillery (Type-48 Artillery Platform, aka “Weevil”). The Golden Moa is past the Covenant Artillery, between two large pipes.
Golden Moa 5
In the final beach area before the tunnel, the Golden Moa is behind some rocks in the gap between the city wall and a large structure.
“Chief, the carrier just launched a wave of pods. They're inbound on your position!” Commander Miranda Keyes
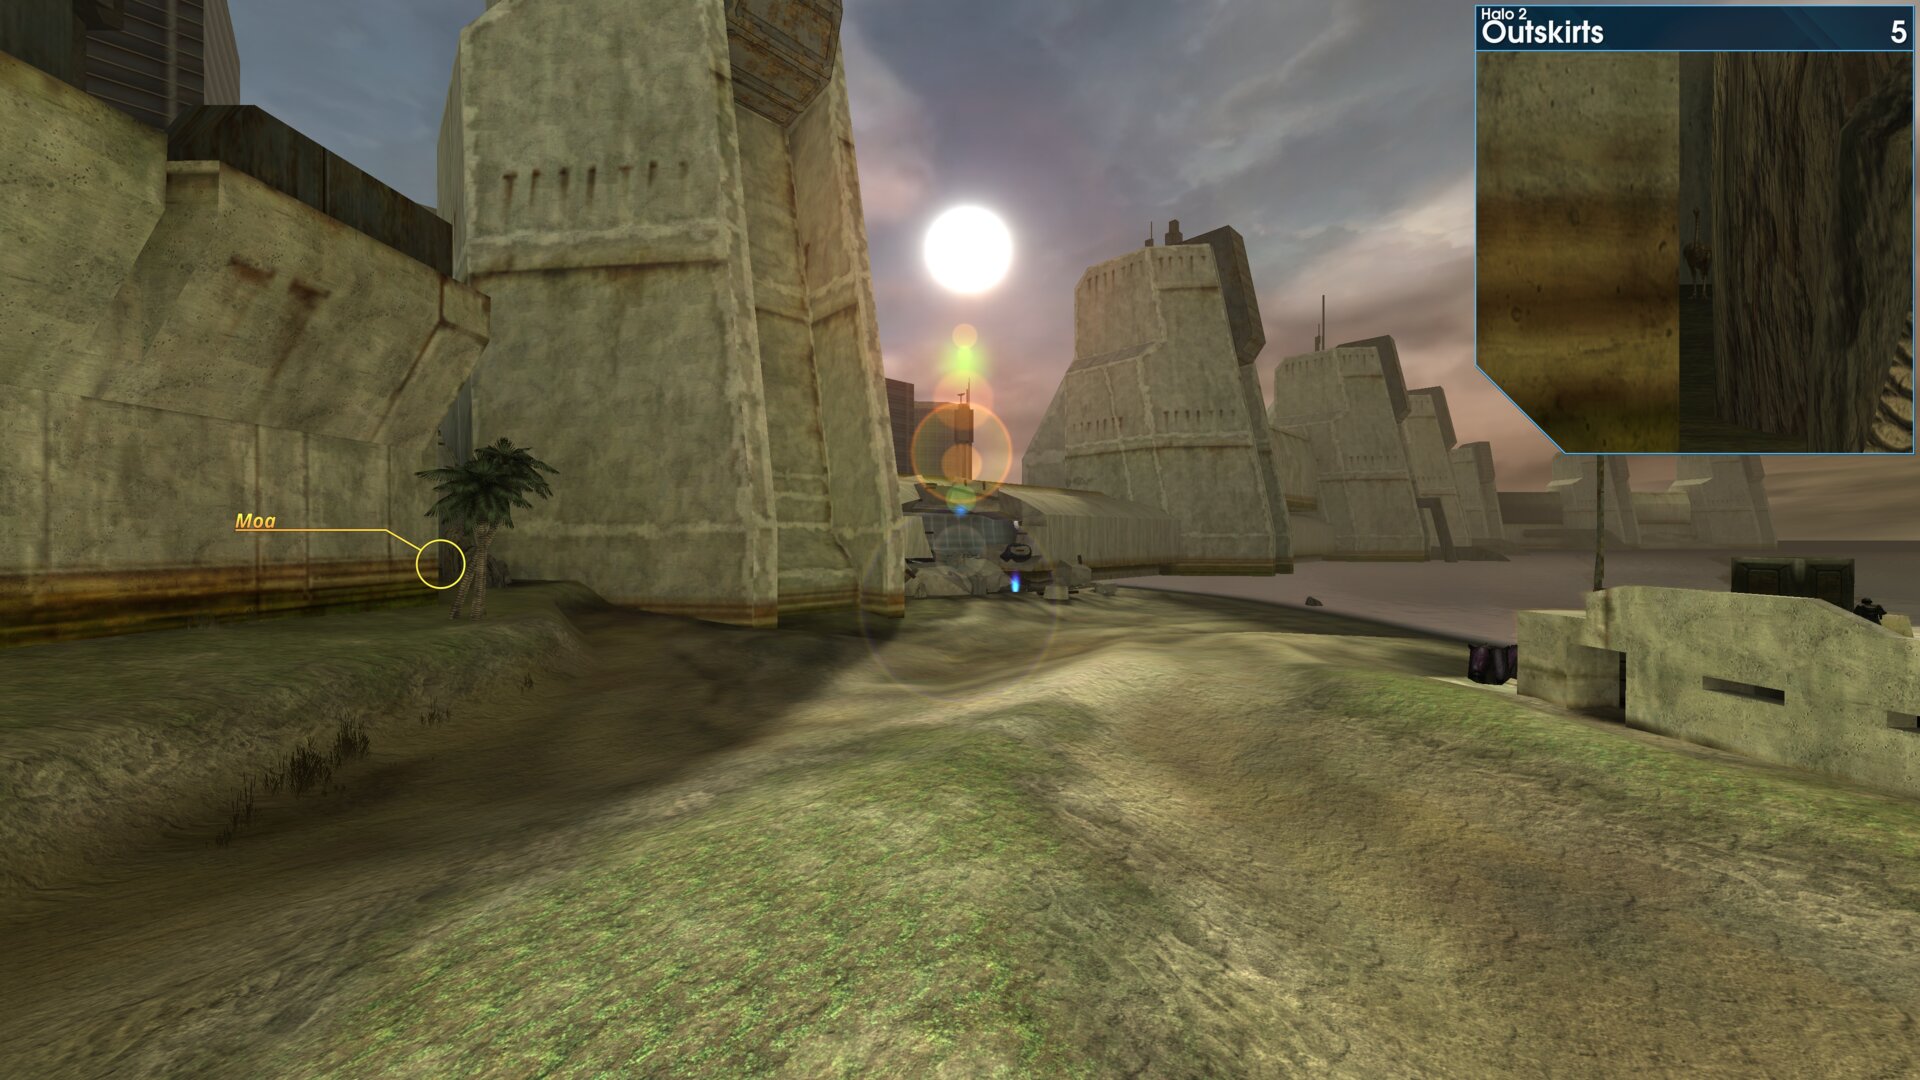
In the final beach area before the tunnel, the Golden Moa is behind some rocks in the gap between the city wall and a large structure.
“Chief, the carrier just launched a wave of pods. They're inbound on your position!” Commander Miranda Keyes
Golden Moa 6
As you reach the final Covenant blockade in the tunnel, sector C4. The Golden Moa is on the left side of the tunnel, on the walkway beside the locked gate.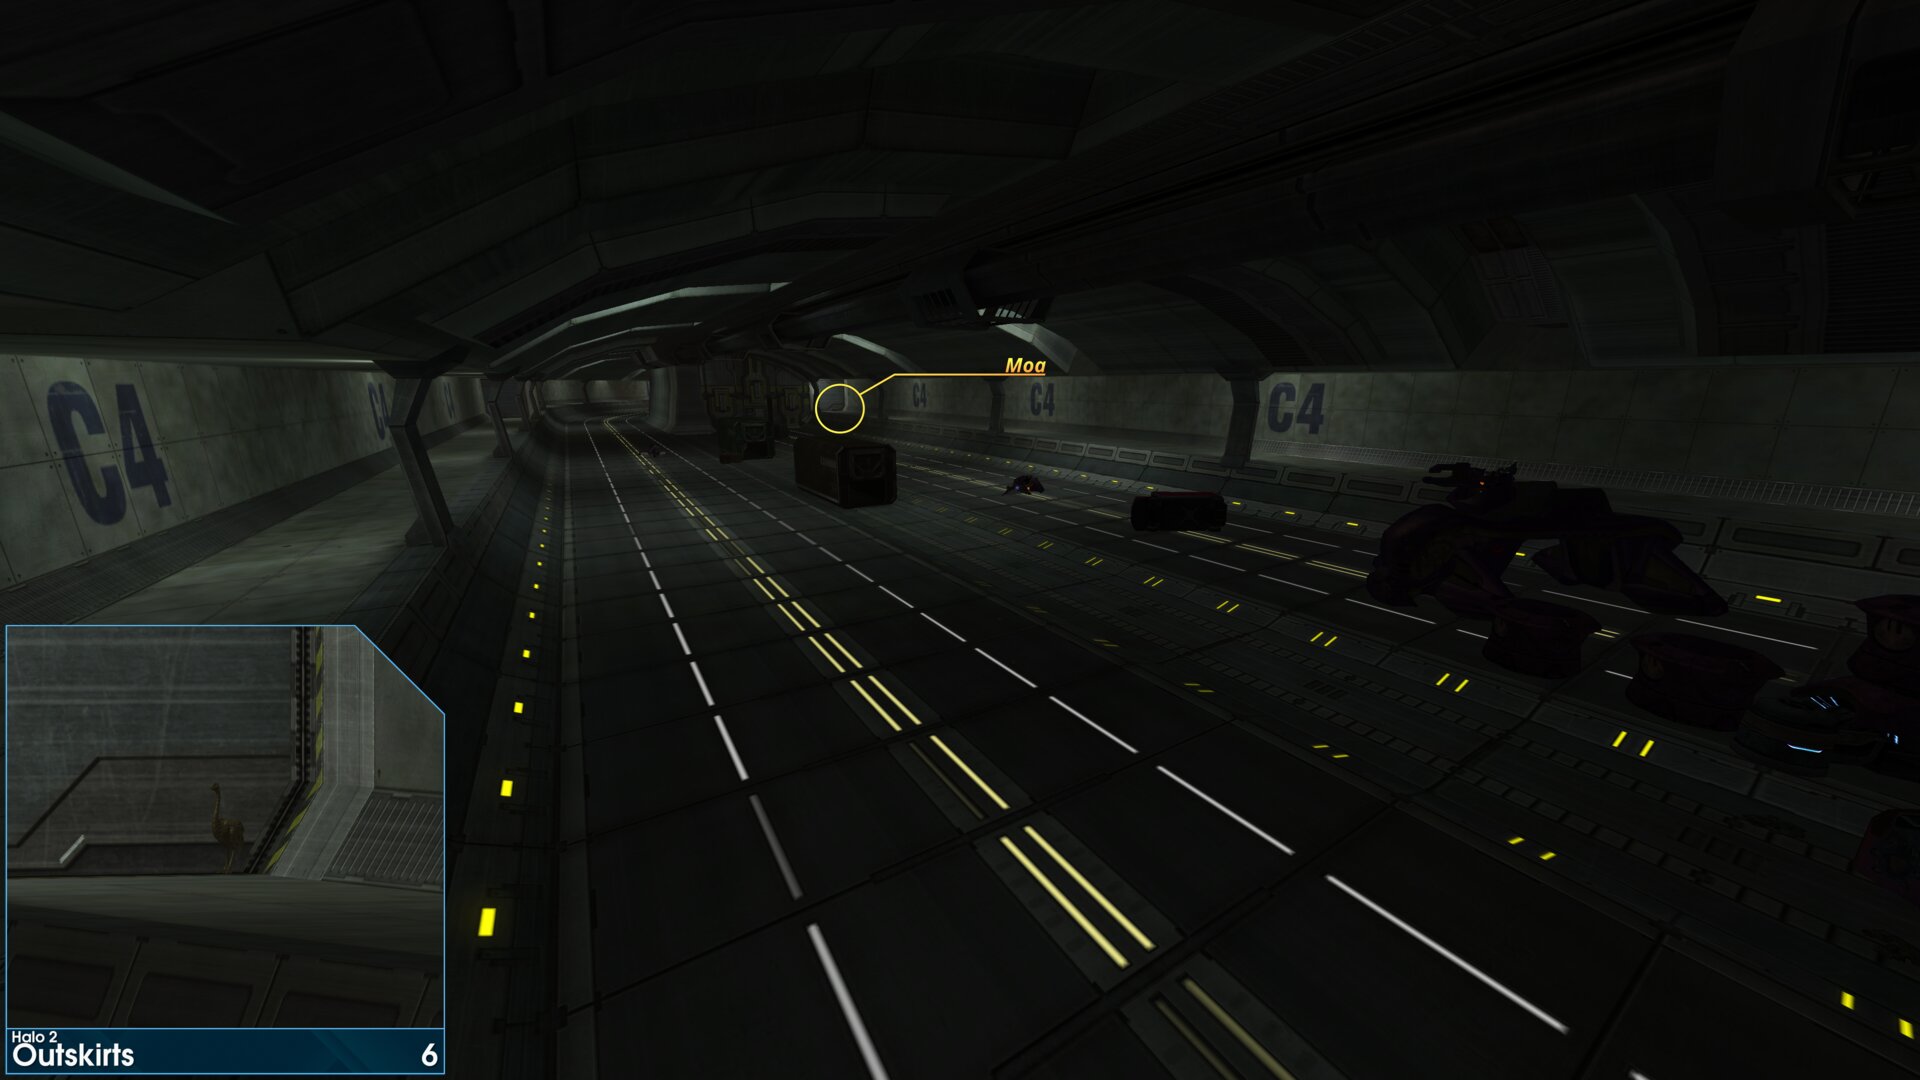
As you reach the final Covenant blockade in the tunnel, sector C4. The Golden Moa is on the left side of the tunnel, on the walkway beside the locked gate.
➟ Metropolis
Golden Moa 1
As you pass the hole in the bridge, you’ll find the Golden Moa just beyond the right cable.
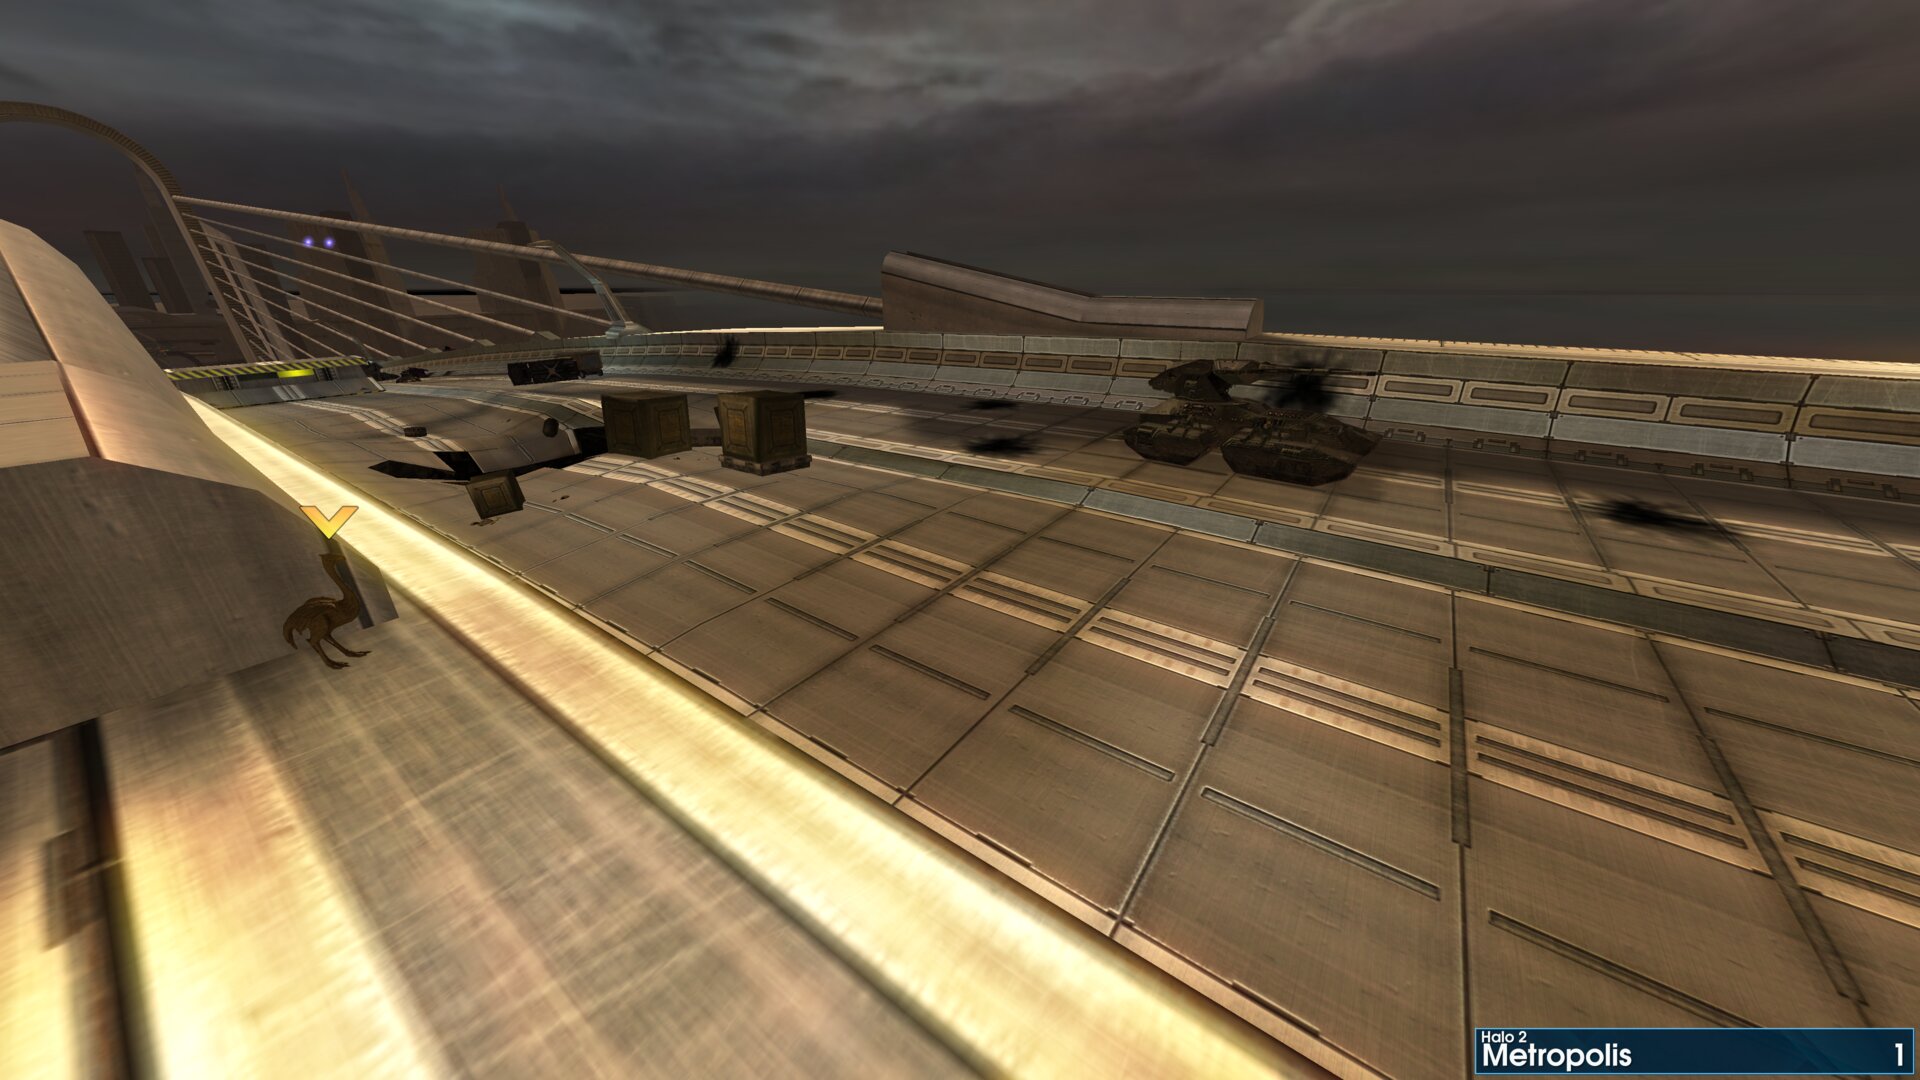
As you pass the hole in the bridge, you’ll find the Golden Moa just beyond the right cable.
Golden Moa 2
After passing the toll booths on the far side of the bridge, this Golden Moa will be up the left ramp by a roller door.
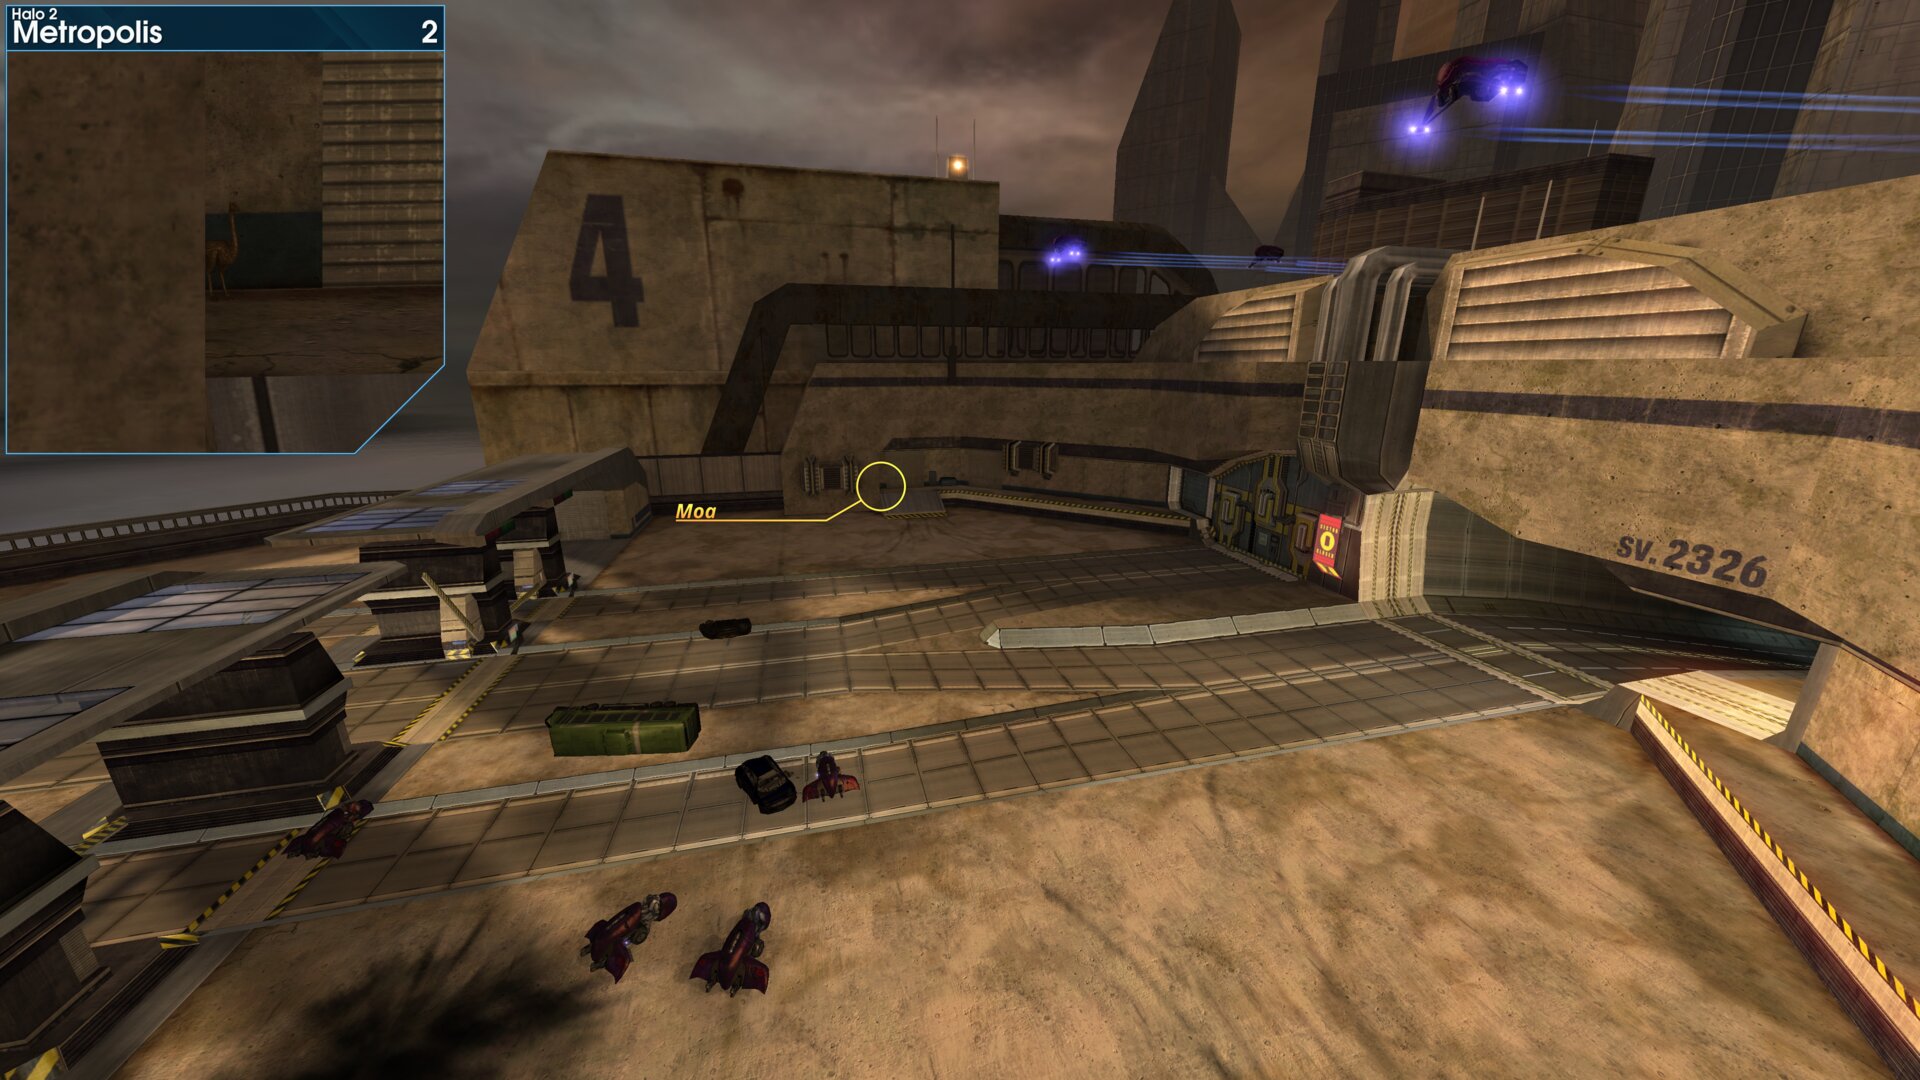
After passing the toll booths on the far side of the bridge, this Golden Moa will be up the left ramp by a roller door.
Golden Moa 3
As you make your way through the tunnel, a Warthog will appear from a side road. Head up the side road, the Golden Moa is in the corner by the roller door.
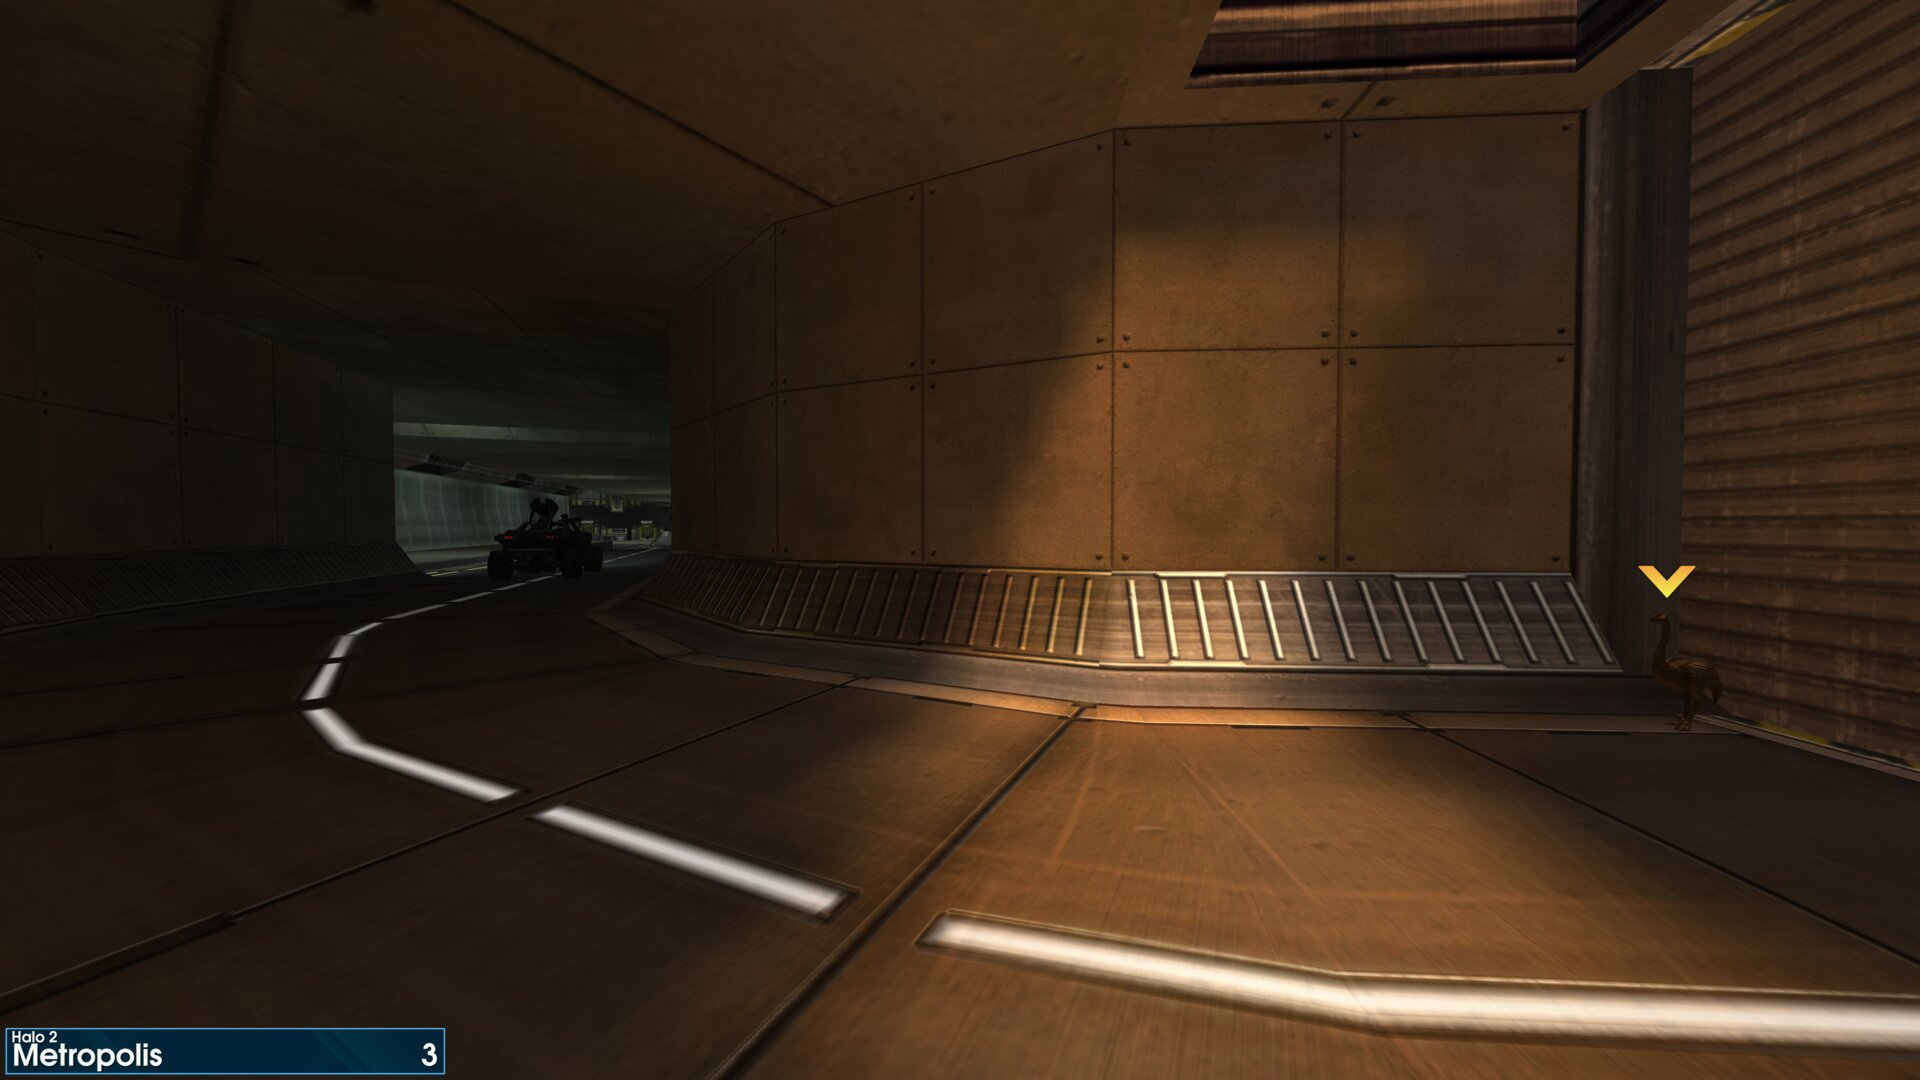
As you make your way through the tunnel, a Warthog will appear from a side road. Head up the side road, the Golden Moa is in the corner by the roller door.
Golden Moa 4
As you make your way through the park, you’ll reach an area with a Wraith. The Golden Moa will be in the pool of water, by the right drain.
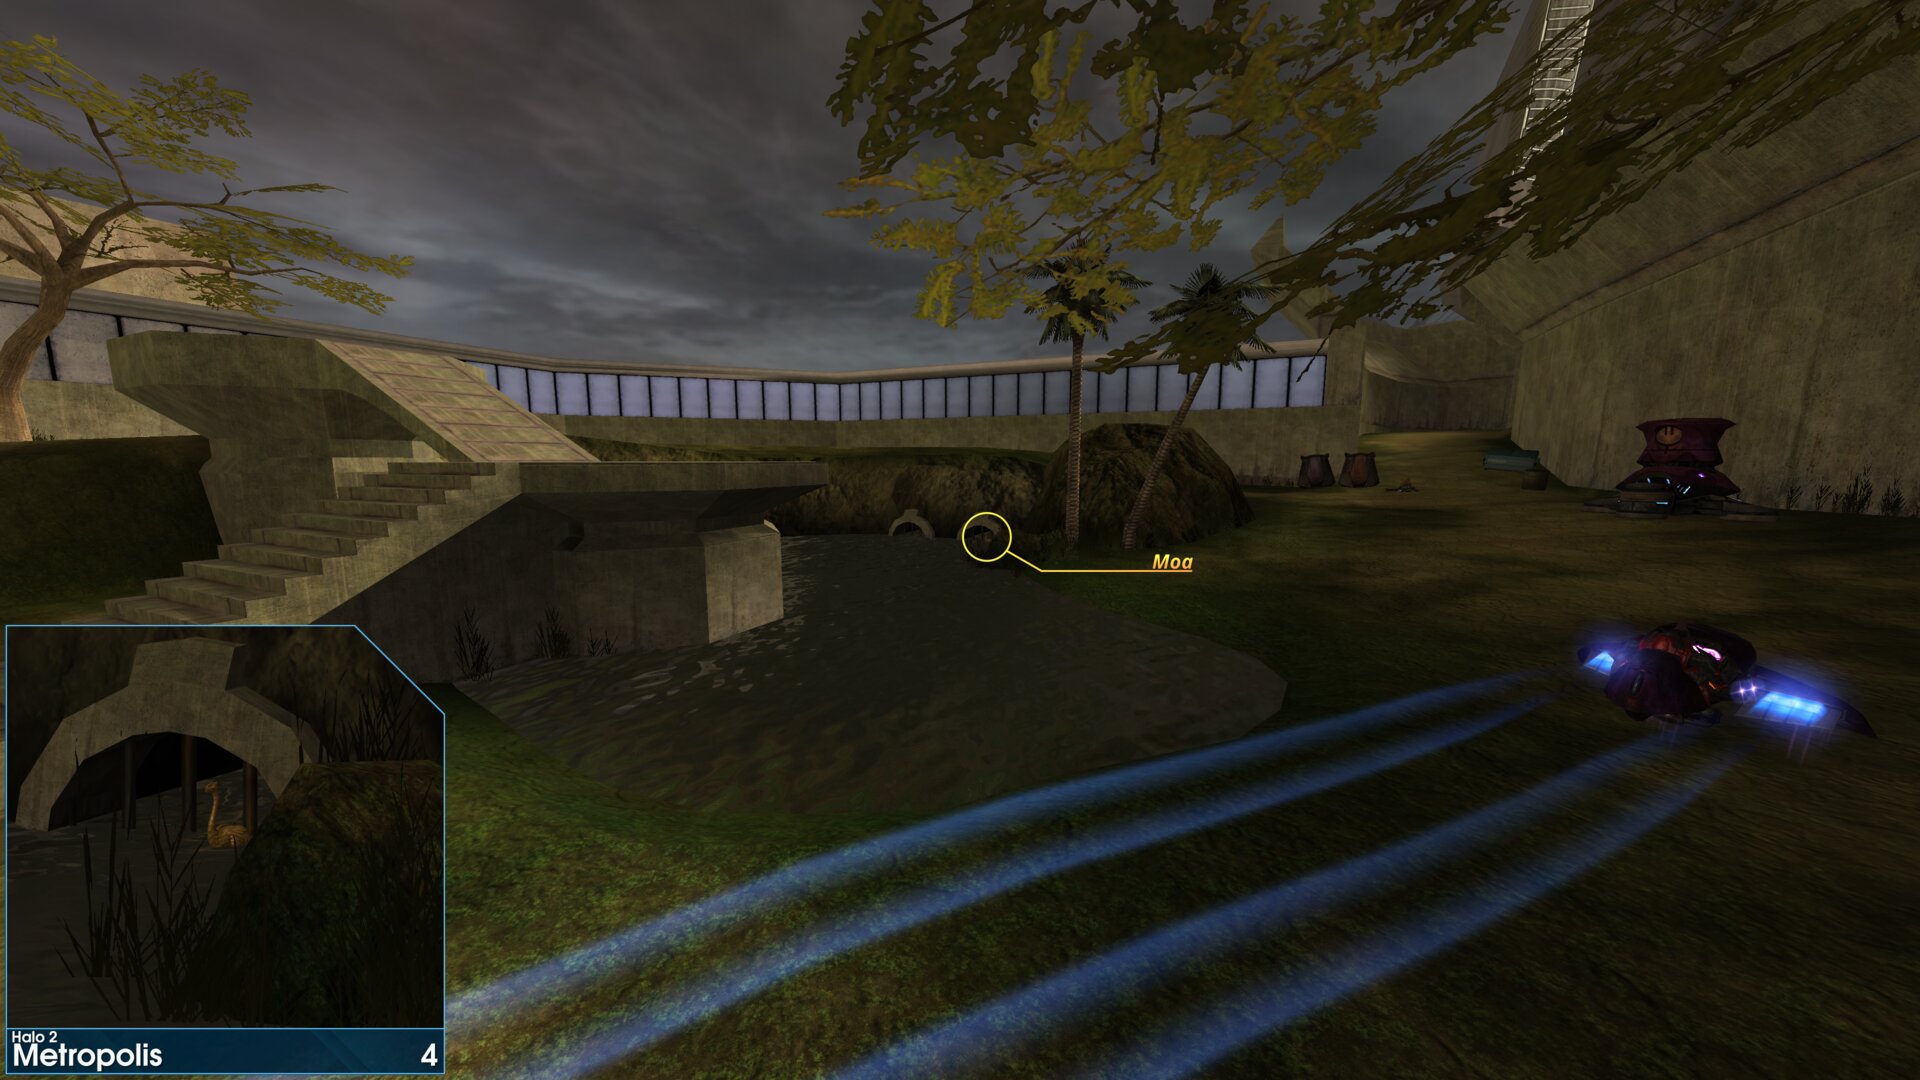
As you make your way through the park, you’ll reach an area with a Wraith. The Golden Moa will be in the pool of water, by the right drain.
Golden Moa 5
At the Marine Command Post, take the road to the left, the Golden Moa is just above the entrance of the far building (Hannibal building according to the remaster).
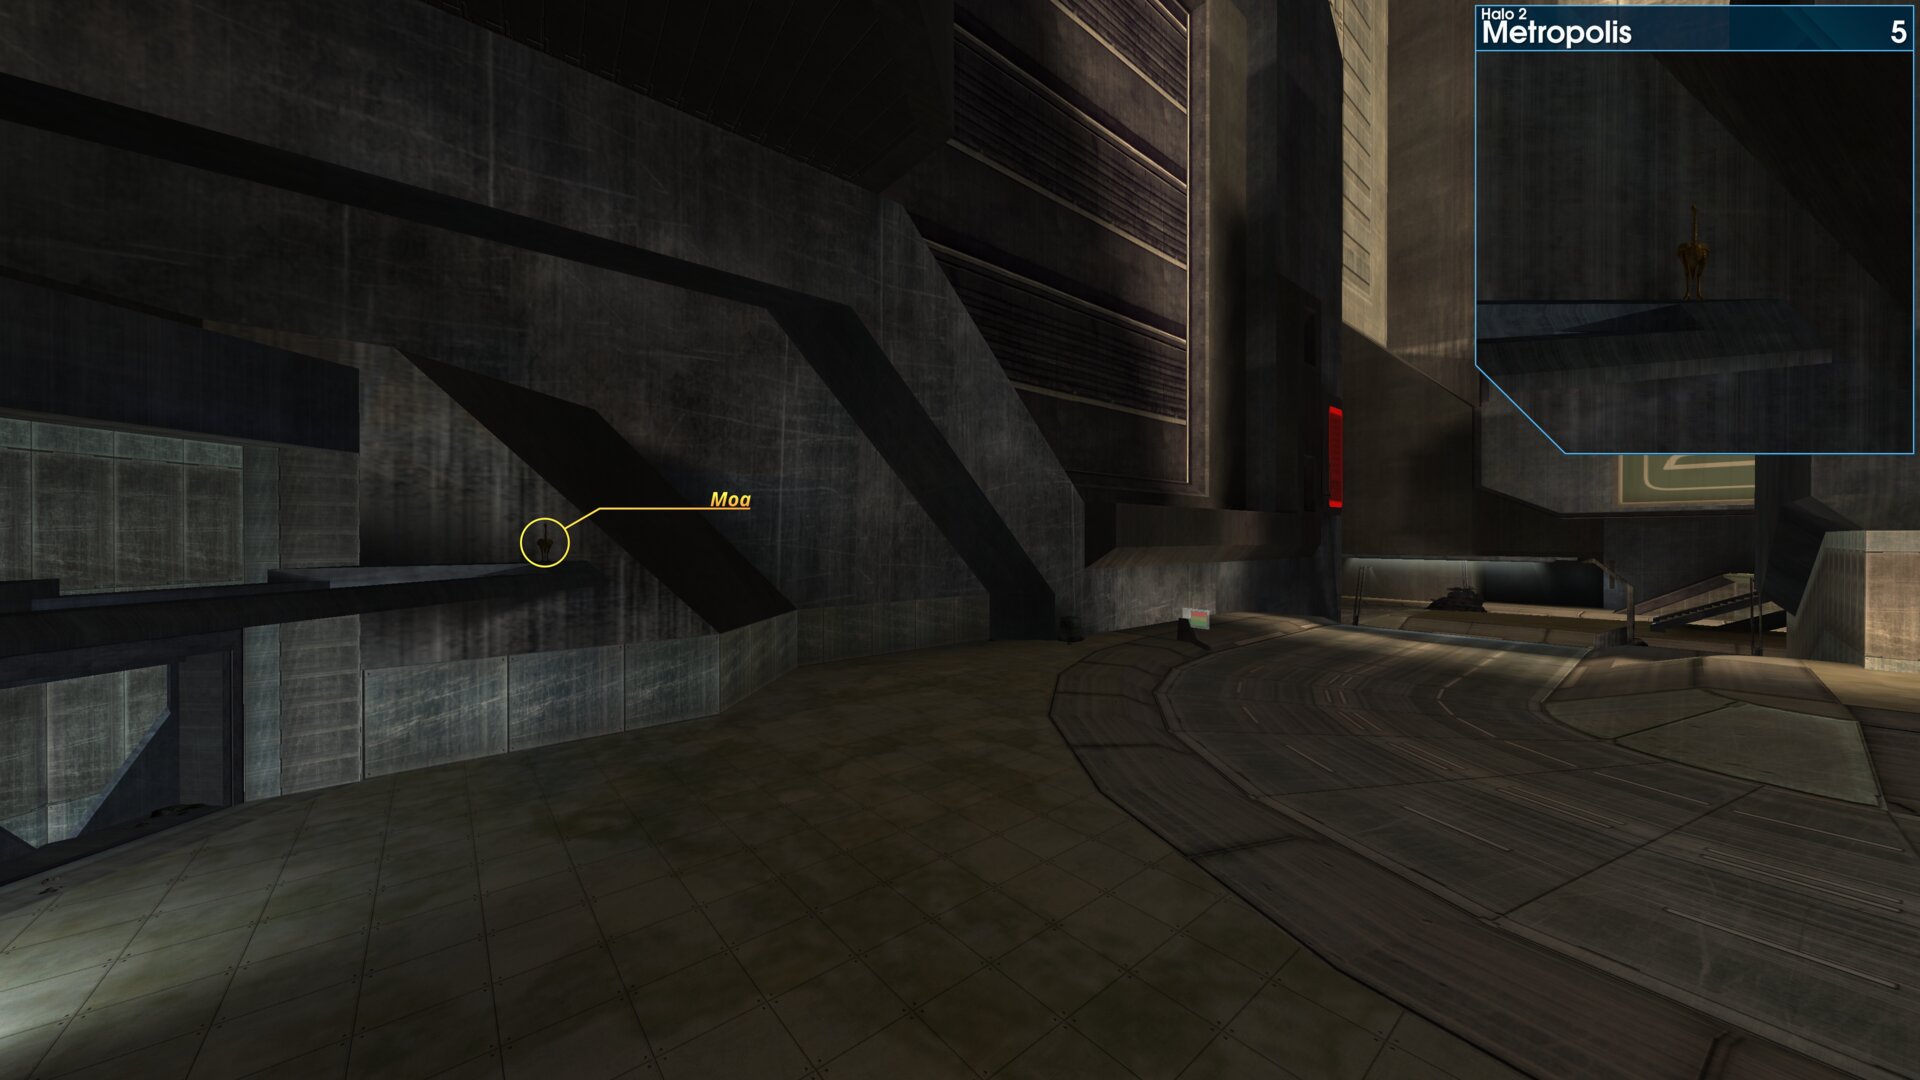
At the Marine Command Post, take the road to the left, the Golden Moa is just above the entrance of the far building (Hannibal building according to the remaster).
➟ The Arbiter
Golden Moa 1
After entering the Forerunner facility through the airlock, look to the left, the Golden Moa is on a ledge above a nearby light.
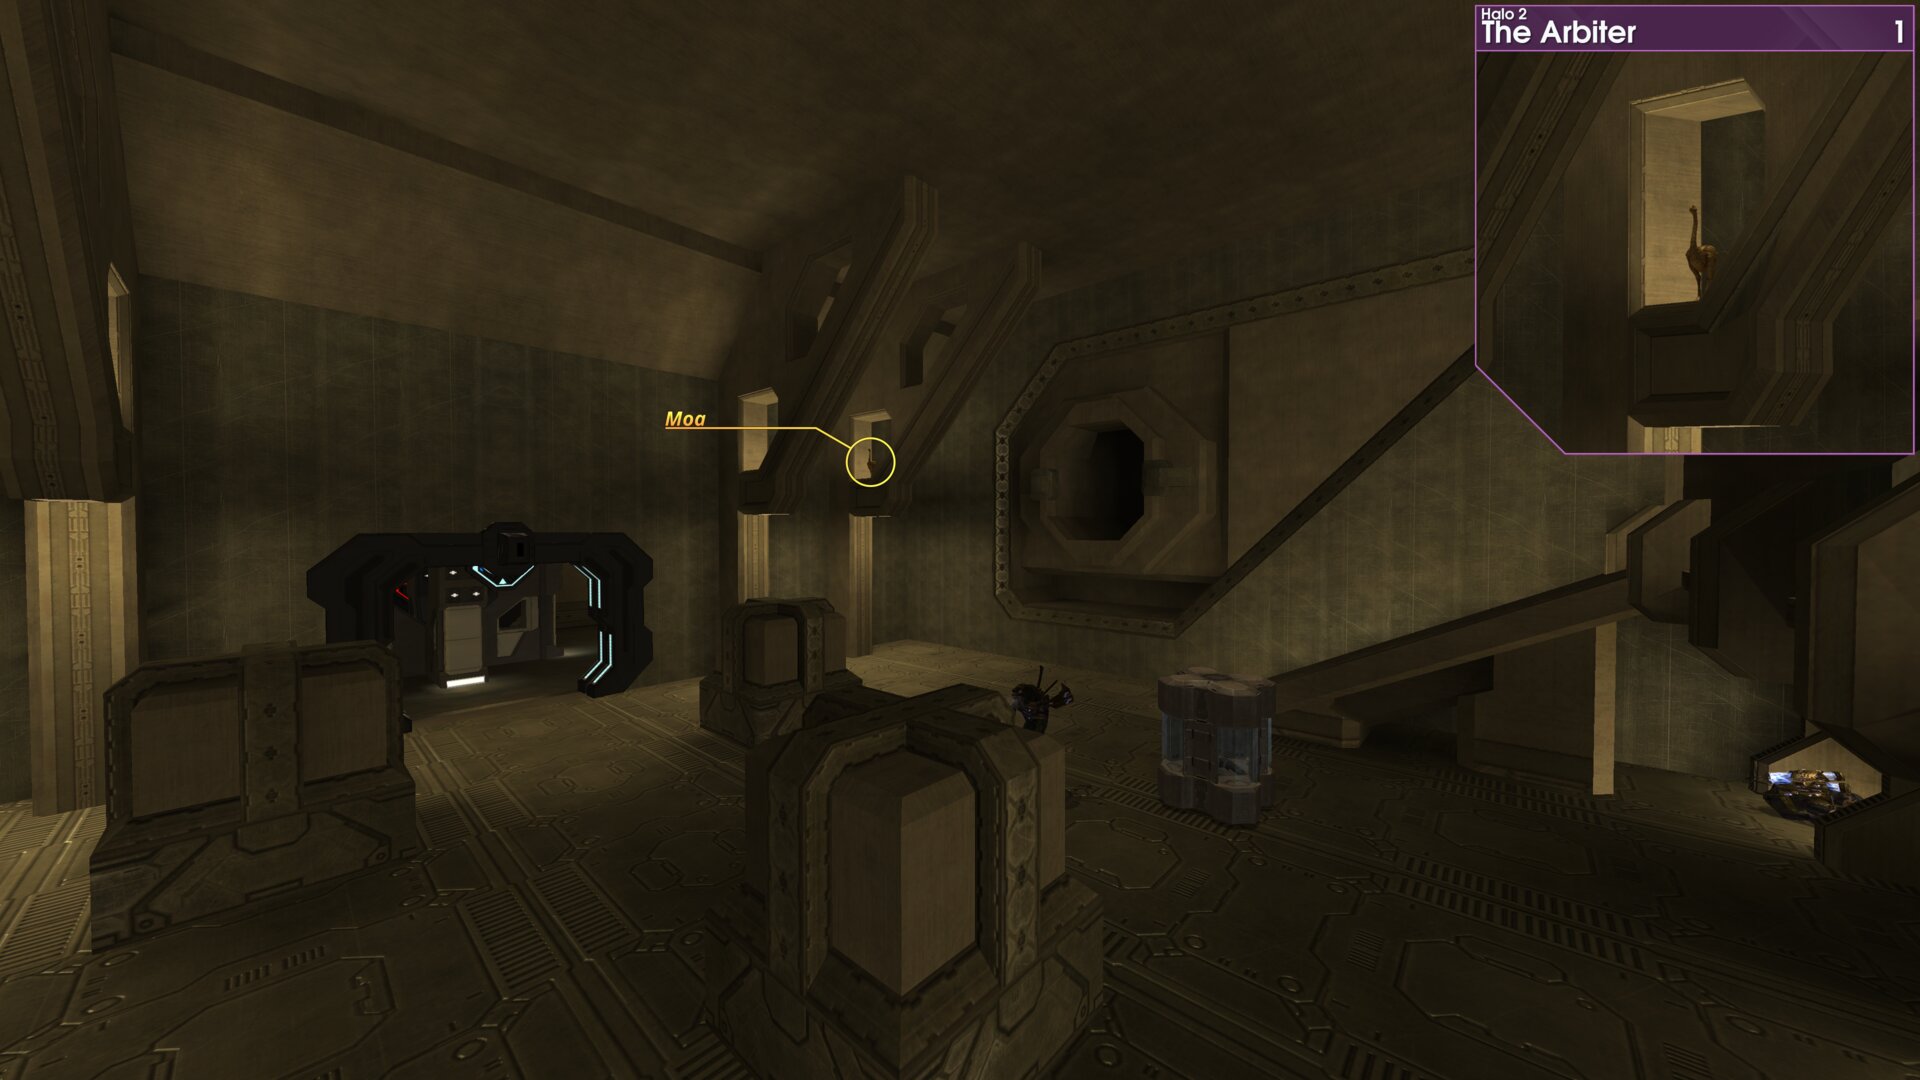
After entering the Forerunner facility through the airlock, look to the left, the Golden Moa is on a ledge above a nearby light.
Golden Moa 2
As you descend into the hangar, the Golden Moa will be up on a ledge next to the elevator (right side of the elevator, when facing the hangar door).
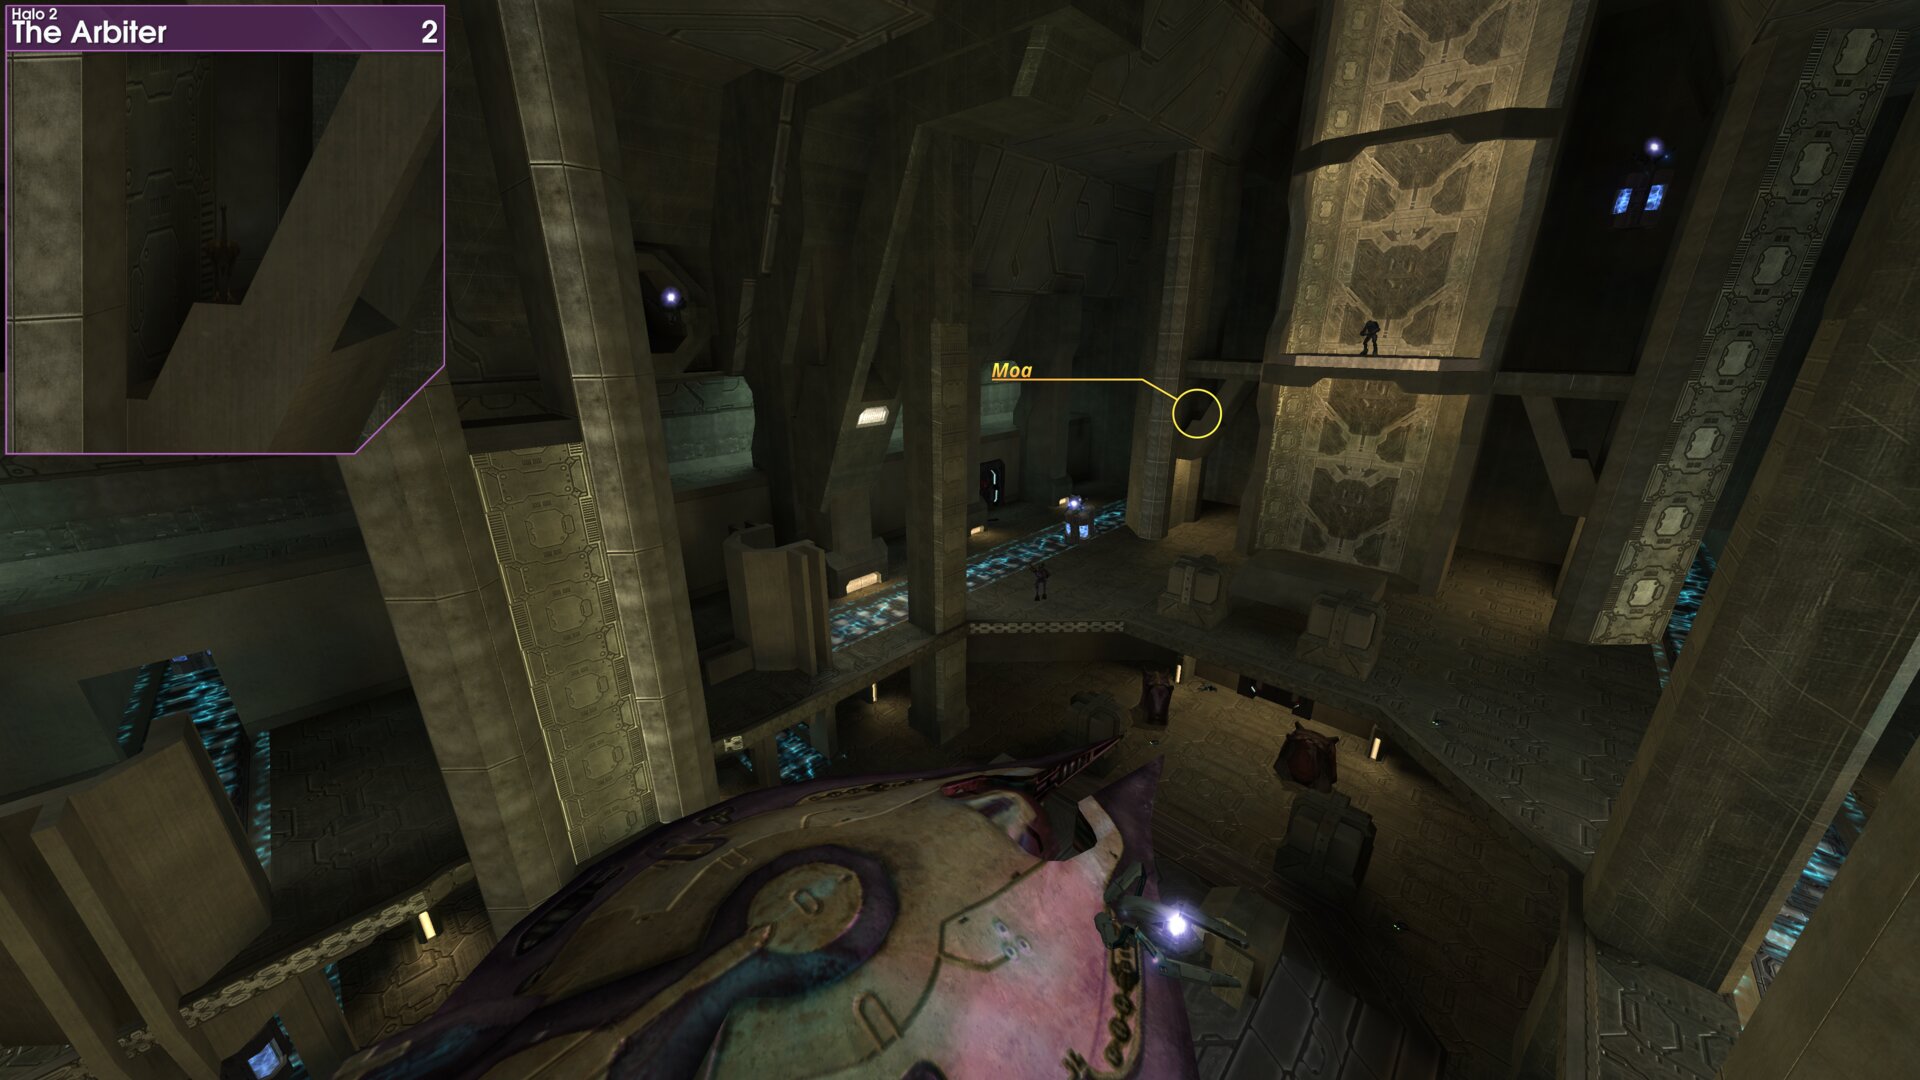
As you descend into the hangar, the Golden Moa will be up on a ledge next to the elevator (right side of the elevator, when facing the hangar door).
Golden Moa 3
After leaving the hangar, follow the passageway down to the next room. Pass by the ramp ahead, the Golden Moa will be beneath the second ramp to your left. (this is before you cross the blue conveyor belts)
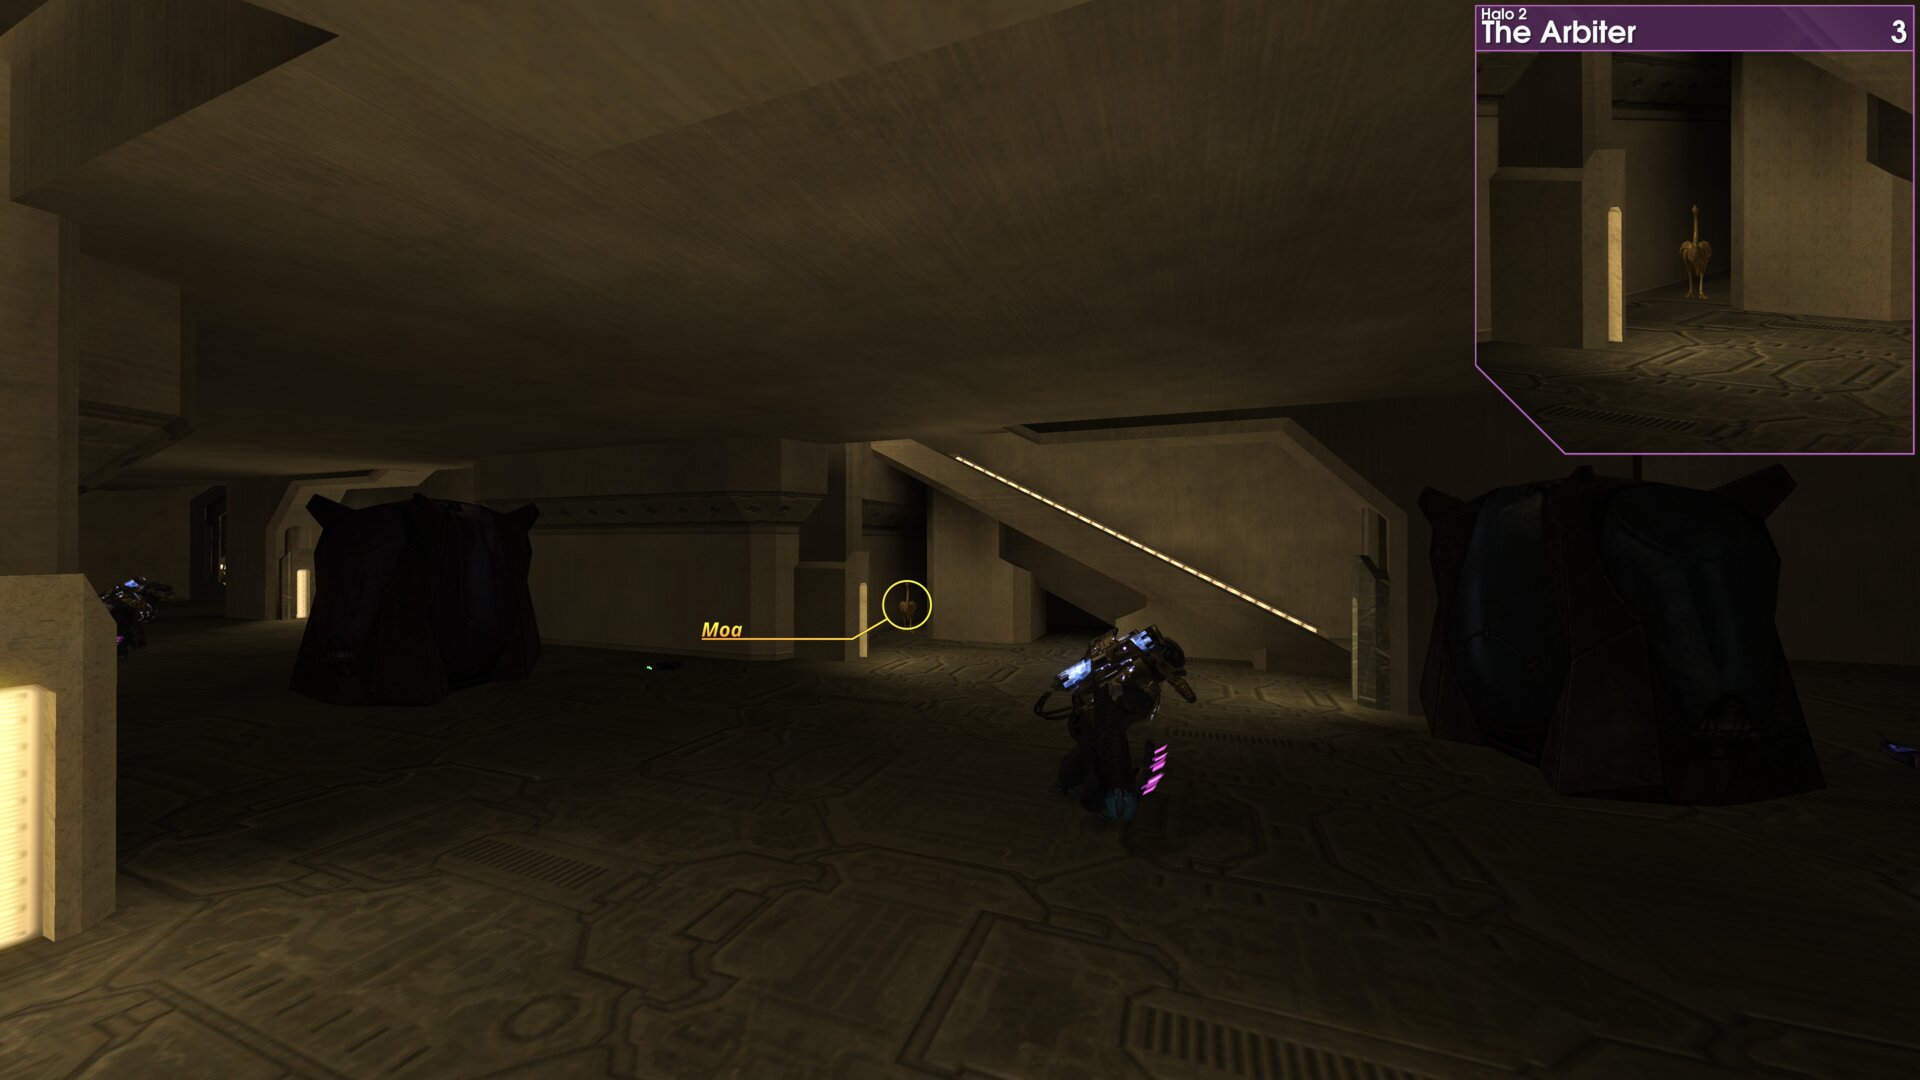
After leaving the hangar, follow the passageway down to the next room. Pass by the ramp ahead, the Golden Moa will be beneath the second ramp to your left. (this is before you cross the blue conveyor belts)
Golden Moa 4
This Golden Moa just inside the curved room, it will be on up on a ledge to the right as you enter.
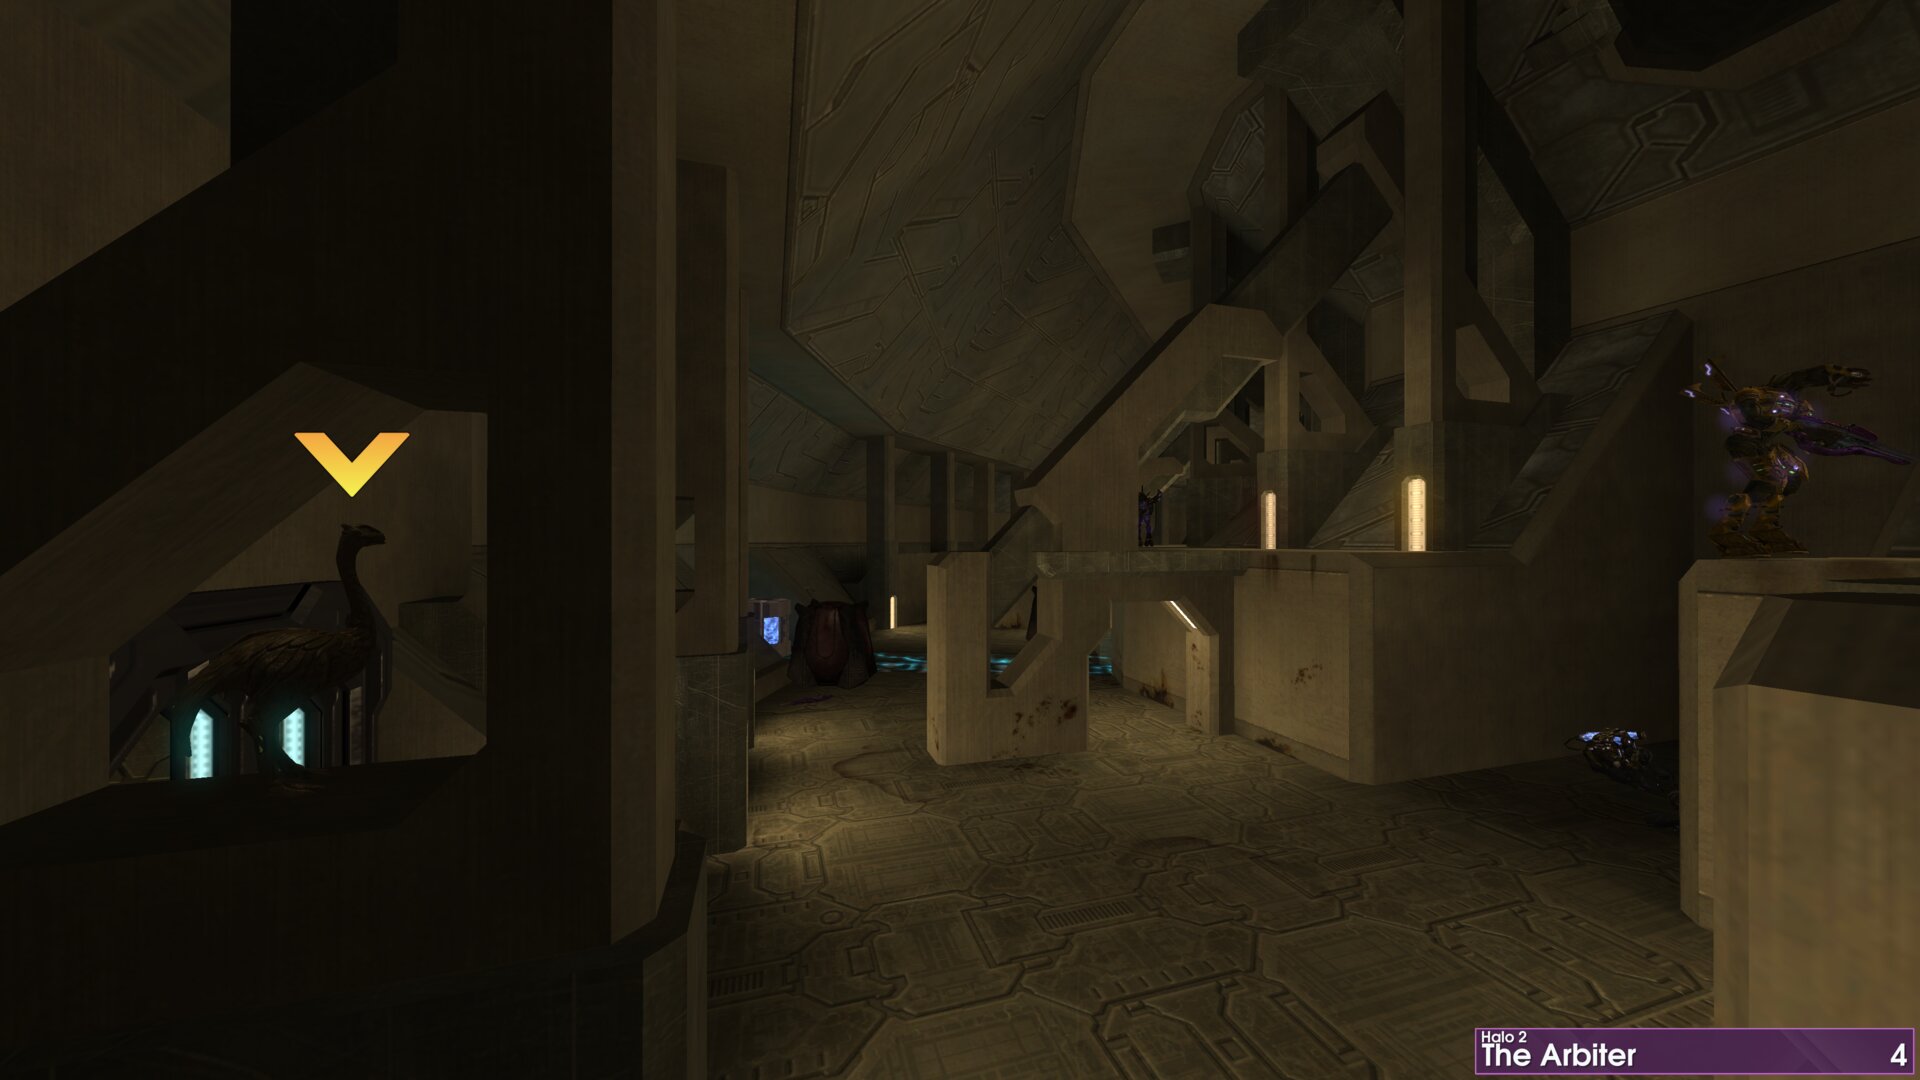
This Golden Moa just inside the curved room, it will be on up on a ledge to the right as you enter.
Golden Moa 5
To the Hunt.
Once you head outside to the Banshees, the Golden Moa will be on a pillar left of the window.
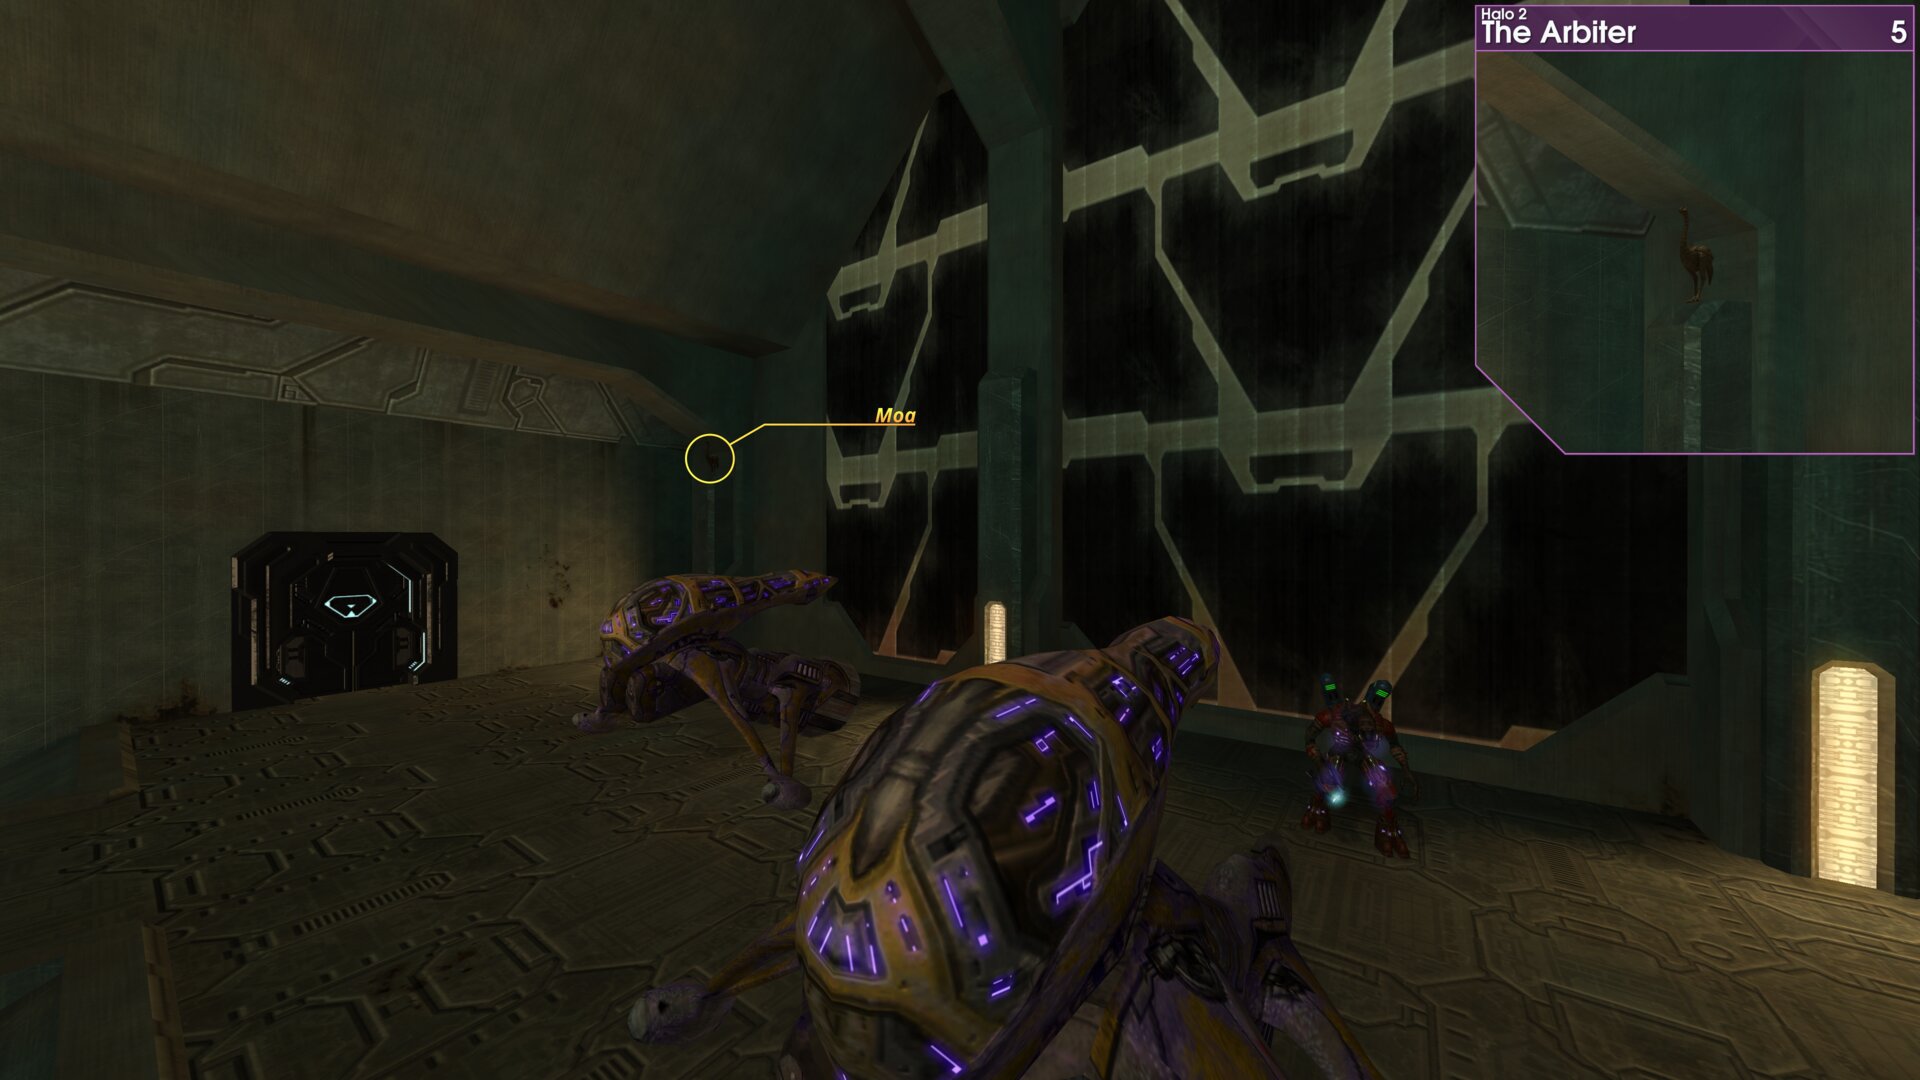
To the Hunt.
Once you head outside to the Banshees, the Golden Moa will be on a pillar left of the window.
➟ The Oracle
Golden Moa 1
At the start of the mission, this Golden Moa is on top of the large tank holding small, floating, fleshy lifeforms.
At the start of the mission, this Golden Moa is on top of the large tank holding small, floating, fleshy lifeforms.
Golden Moa 2
Once on the elevator platform, peer over the right side. The Golden Moa is on a ledge at back of the room, about halfway down.
Once on the elevator platform, peer over the right side. The Golden Moa is on a ledge at back of the room, about halfway down.
Golden Moa 3
As you enter the second lab, before dropping down, go towards the left locked door. The Golden Moa is in the corner next to the locked door, beside a set of wash stations.
As you enter the second lab, before dropping down, go towards the left locked door. The Golden Moa is in the corner next to the locked door, beside a set of wash stations.
Golden Moa 4
As you enter the second lab, before dropping down, go towards the right locked door. The Golden Moa is beside the final pillar, next to the locked door.
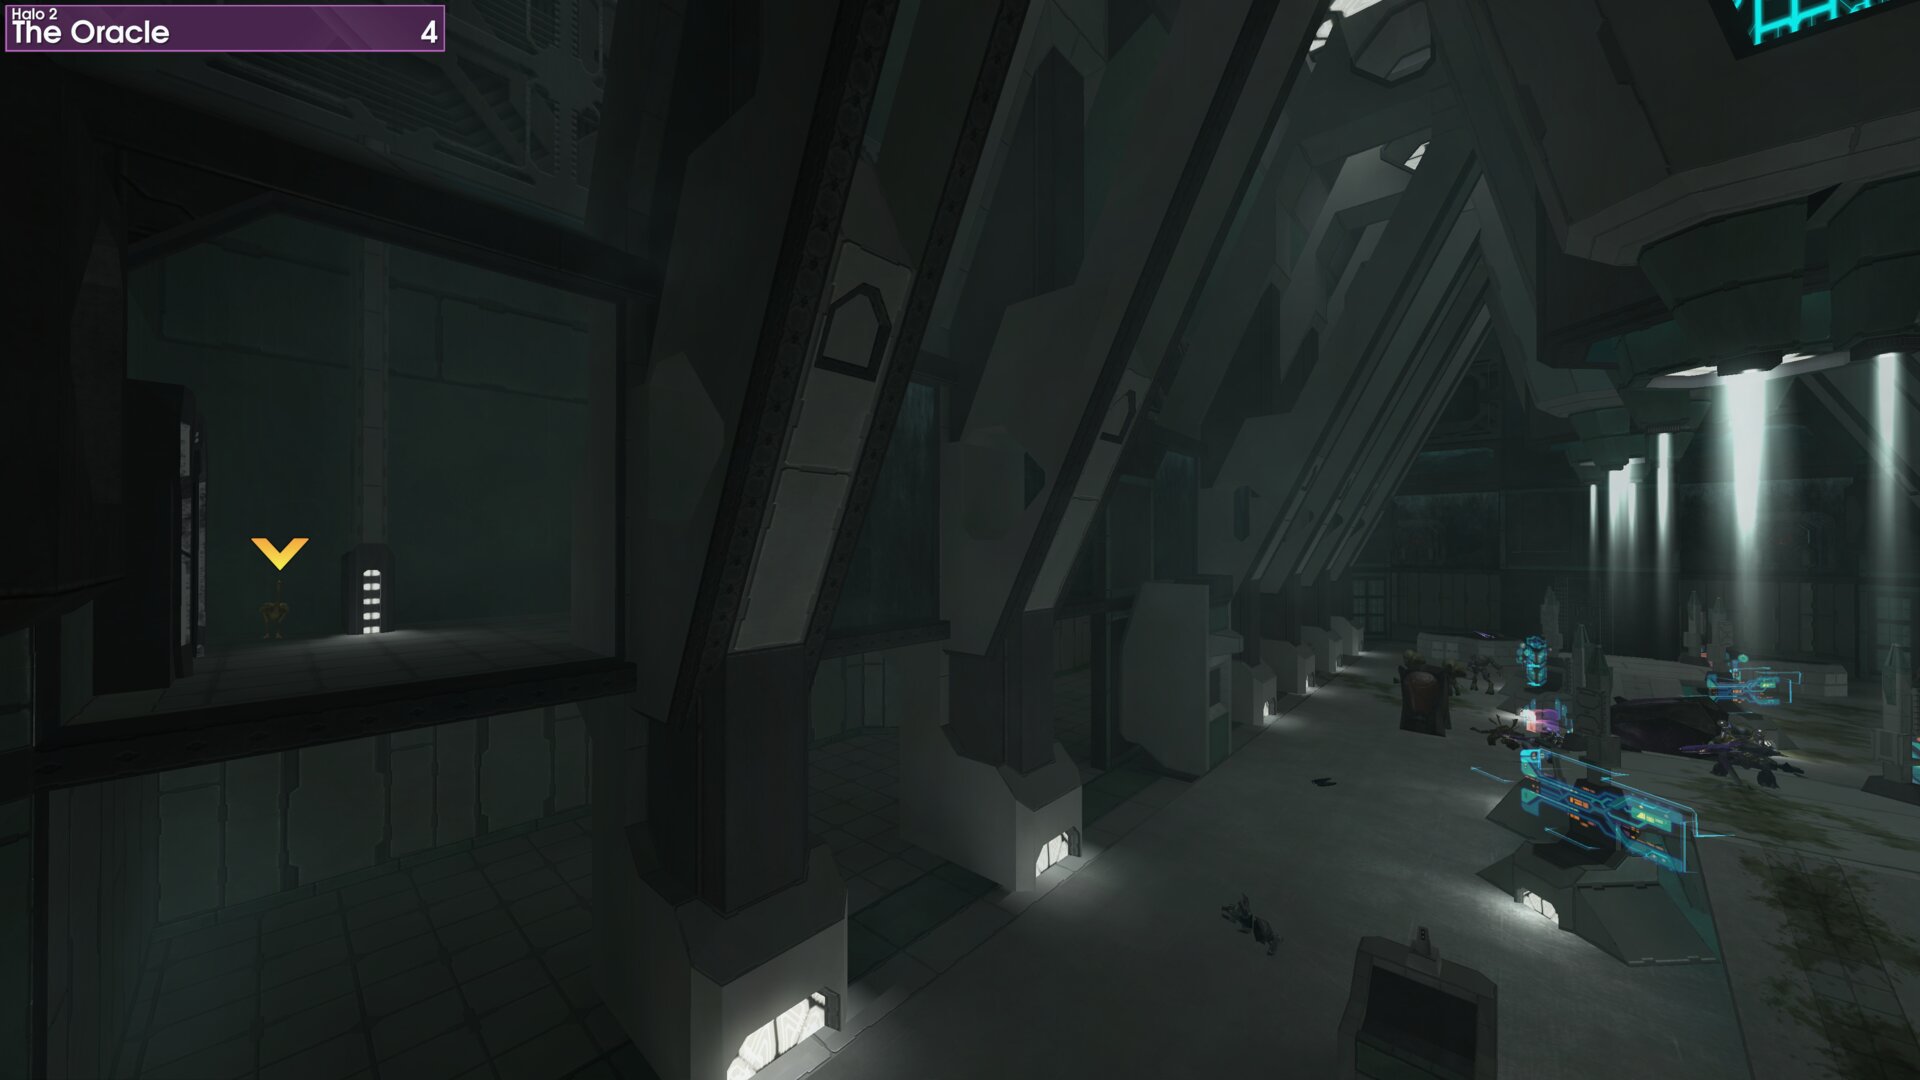
As you enter the second lab, before dropping down, go towards the right locked door. The Golden Moa is beside the final pillar, next to the locked door.
➟ Delta Halo
Golden Moa 1
In front of the main ruined structure at the start of the mission, the Golden Moa is up on a ledge at the back of the small structure to the left.
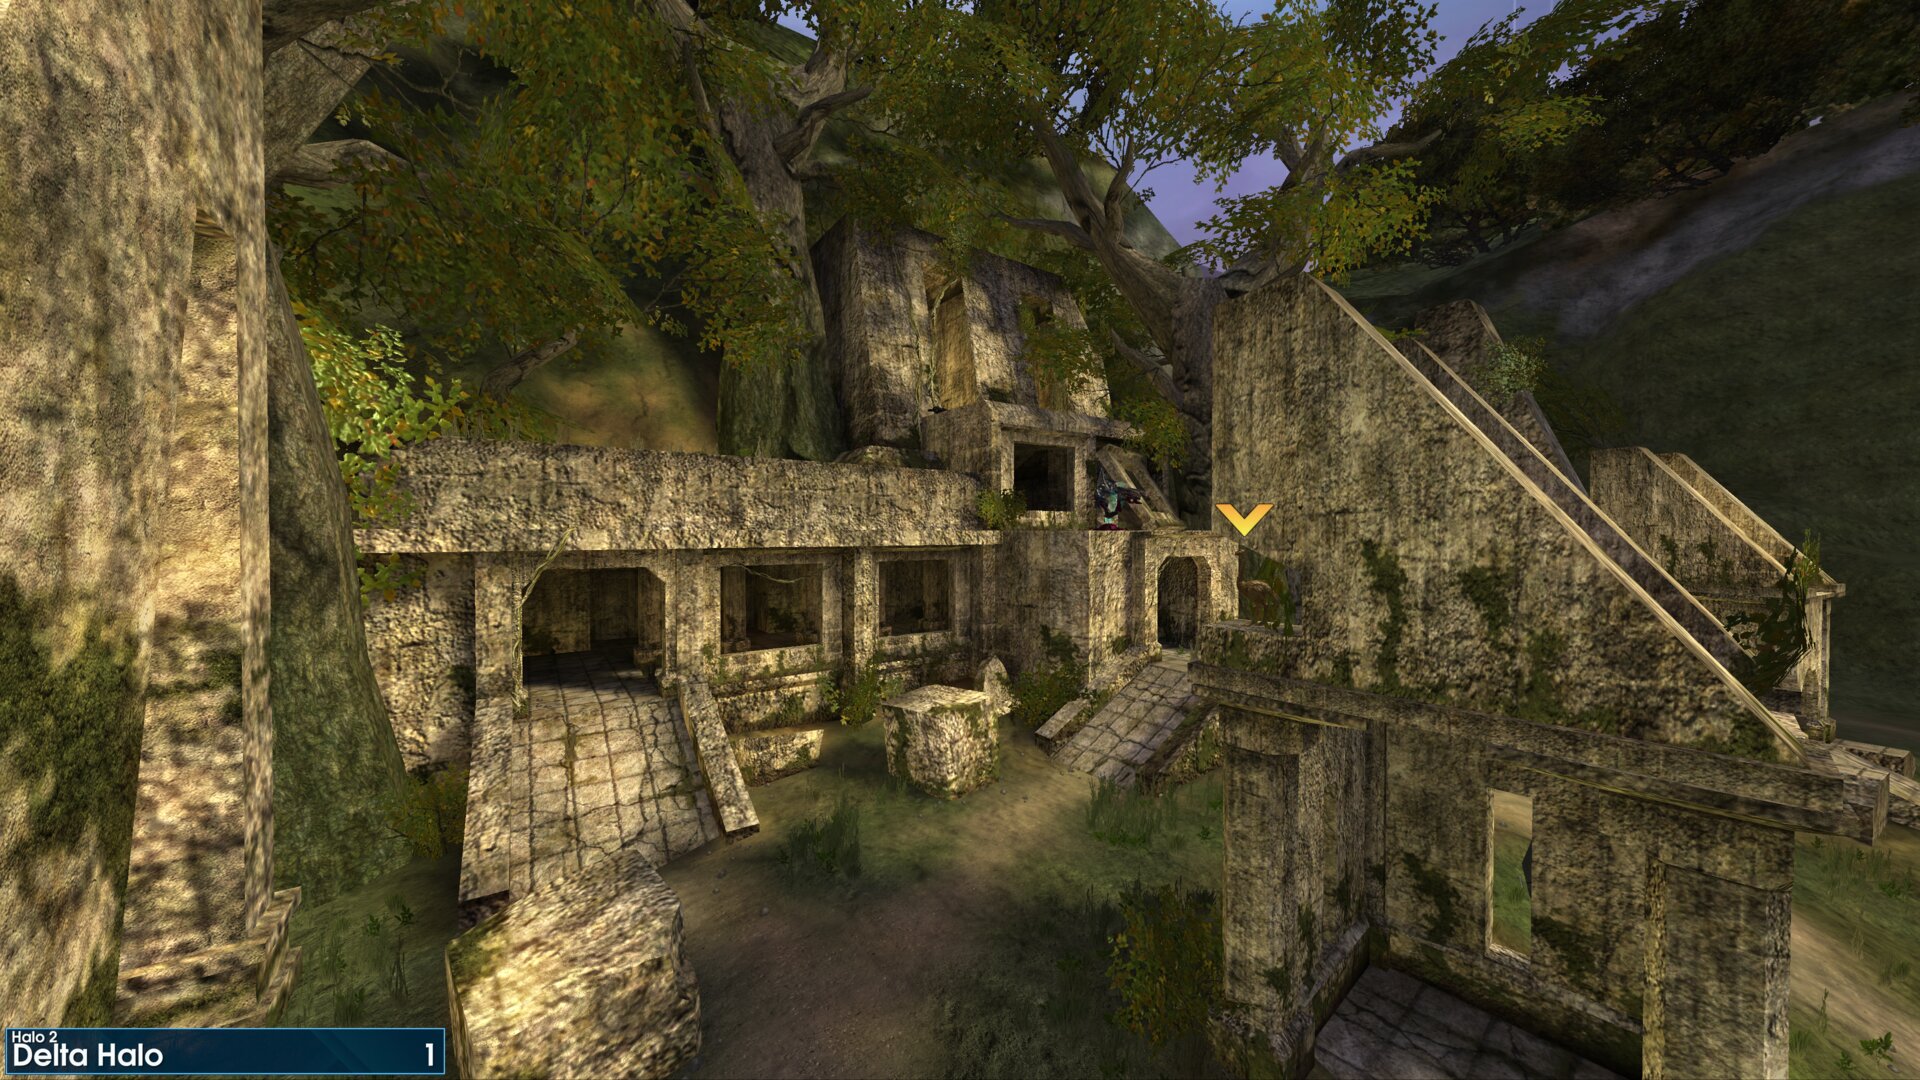
In front of the main ruined structure at the start of the mission, the Golden Moa is up on a ledge at the back of the small structure to the left.
Golden Moa 2
Make your way to the far side of the structure that controls the bridge, the Golden Moa is on top of the lower guide track for the bridge.
Make your way to the far side of the structure that controls the bridge, the Golden Moa is on top of the lower guide track for the bridge.
Golden Moa 3
After crossing the bridge, you will enter a tunnel with a split path, take the lower path towards the waterfall. The Golden Moa will be in the alcove to your left, where you can also find a Ghost.
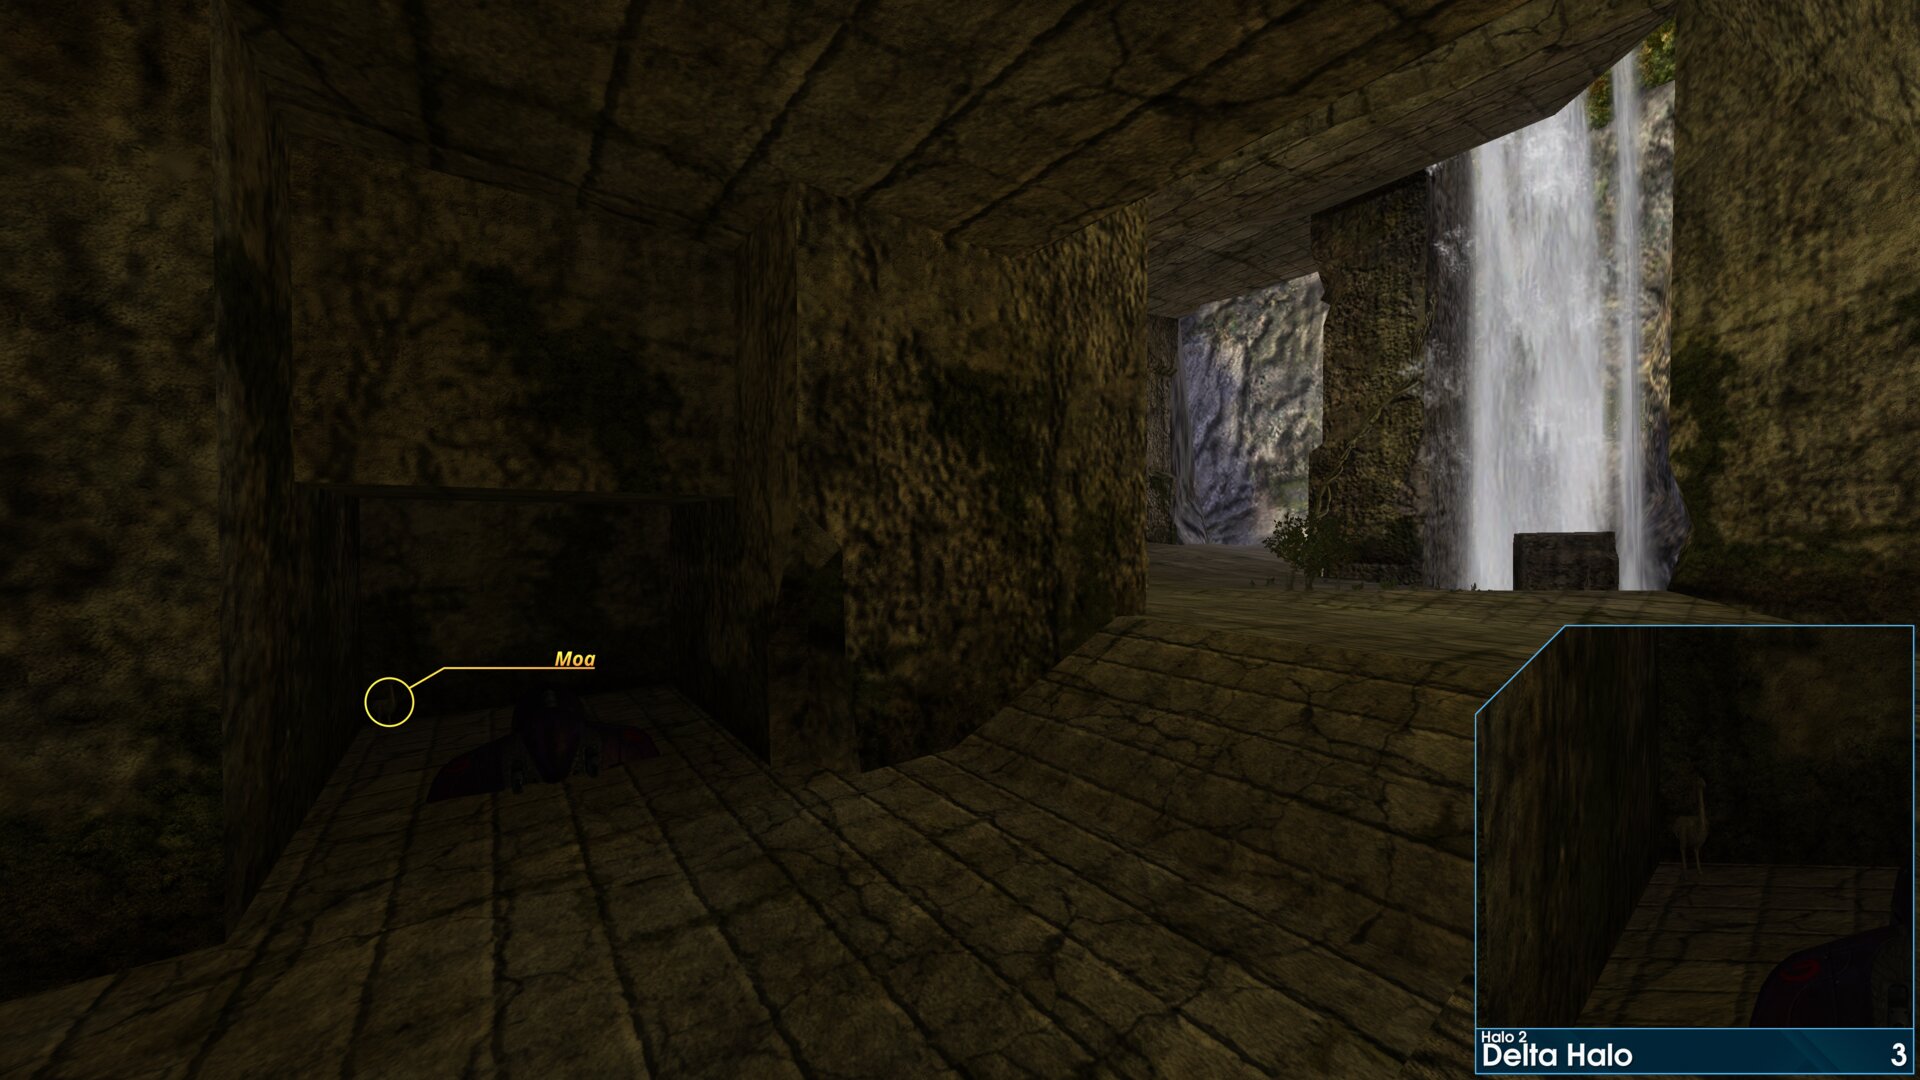
After crossing the bridge, you will enter a tunnel with a split path, take the lower path towards the waterfall. The Golden Moa will be in the alcove to your left, where you can also find a Ghost.
Golden Moa 4
As you come to the end of the winding ruins, you’ll reach an open are with a central structure that the Covenant are pouring out of. Take the left path, up a ramp, towards the lake. The Golden Moa will be on the furthest platform, over hanging the lake.
“Careful. We're coming up to another structure.” Cortana or Marine
As you come to the end of the winding ruins, you’ll reach an open are with a central structure that the Covenant are pouring out of. Take the left path, up a ramp, towards the lake. The Golden Moa will be on the furthest platform, over hanging the lake.
“Careful. We're coming up to another structure.” Cortana or Marine
Golden Moa 5
Off the Rock, Through the Bush, Nothing But Jackal.
Once you reach the top of the waterfall, drop down into the water below, the Golden Moa is in a small cave to the right as you follow the creek.
Off the Rock, Through the Bush, Nothing But Jackal.
Once you reach the top of the waterfall, drop down into the water below, the Golden Moa is in a small cave to the right as you follow the creek.
➟ Regret
Golden Moa 1
At the start of the mission, the Golden Moa is atop the wall behind you. You’ll want to head up the ramp to the upper level to be able to see this one.
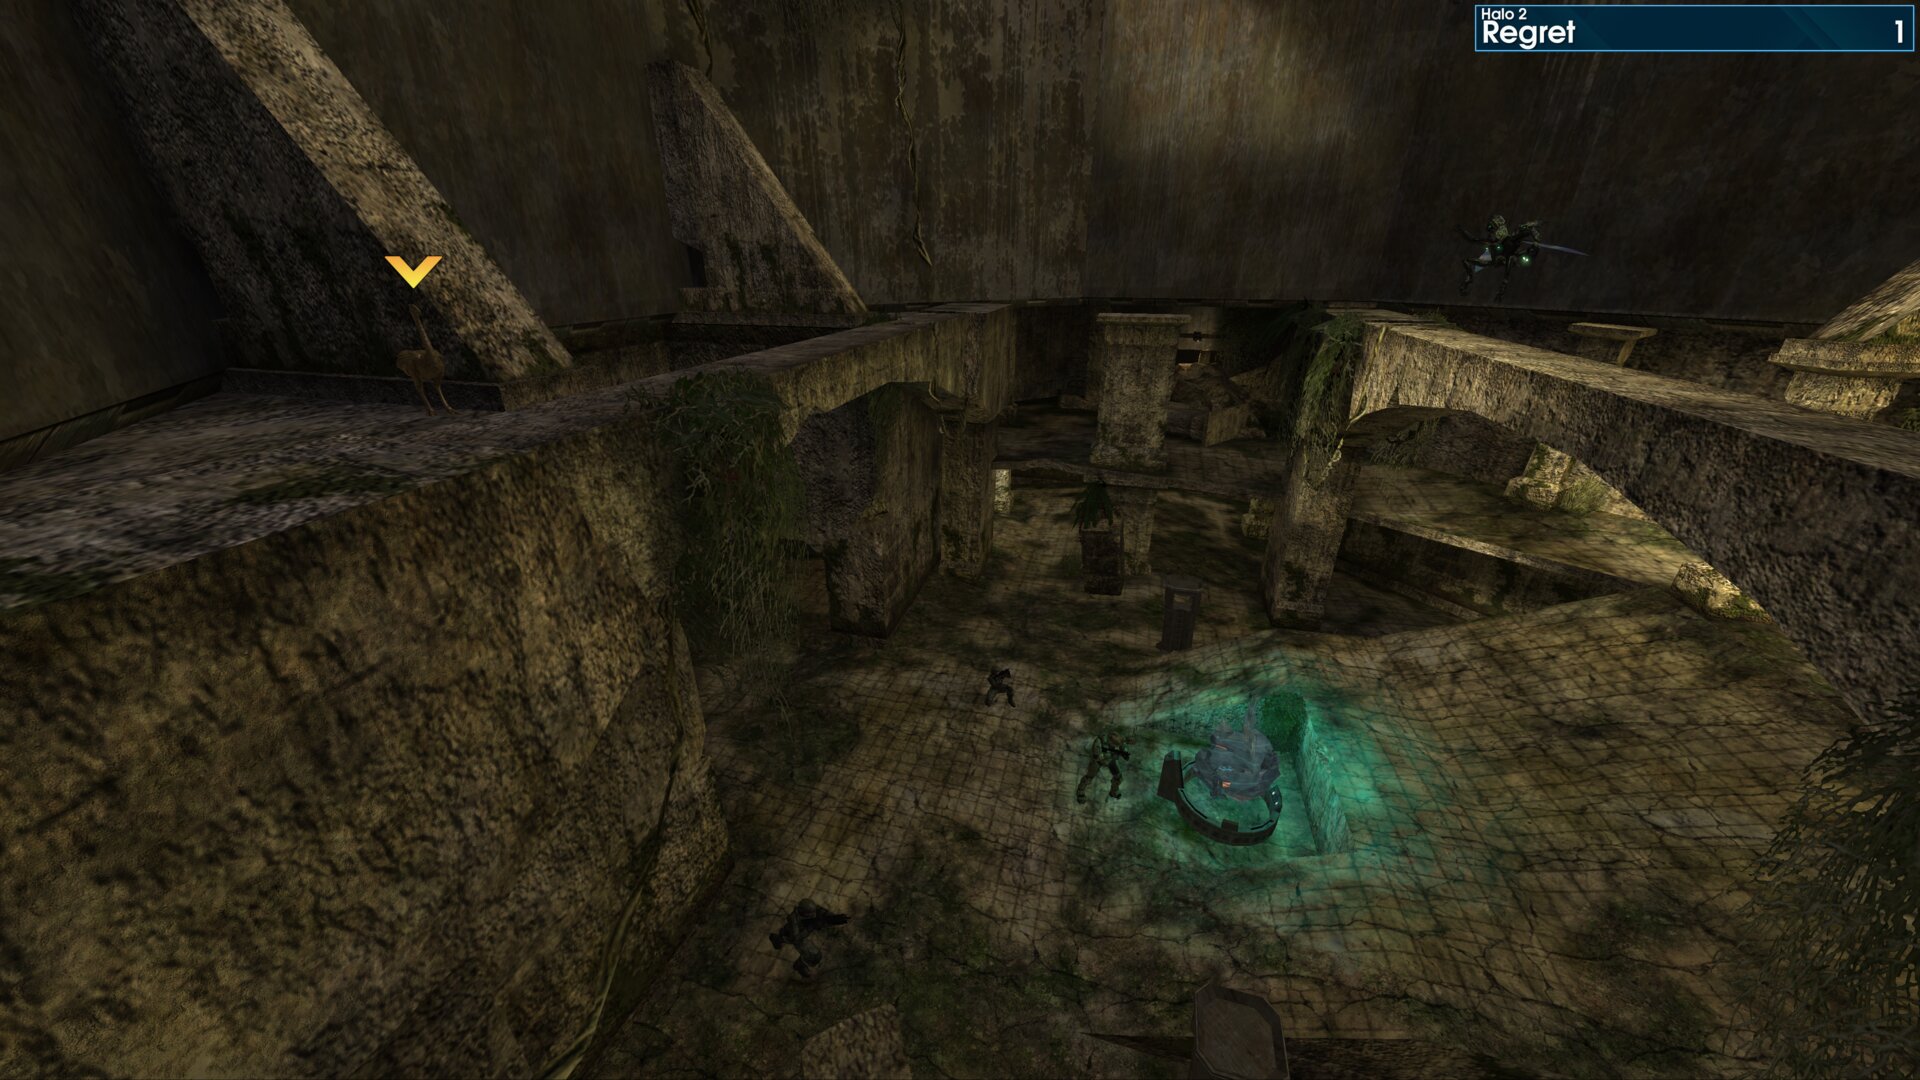
At the start of the mission, the Golden Moa is atop the wall behind you. You’ll want to head up the ramp to the upper level to be able to see this one.
Golden Moa 2
After making your way outside the temple, follow the path around towards the next connected structure. The Golden Moa is on the bridge, beneath the raised path.
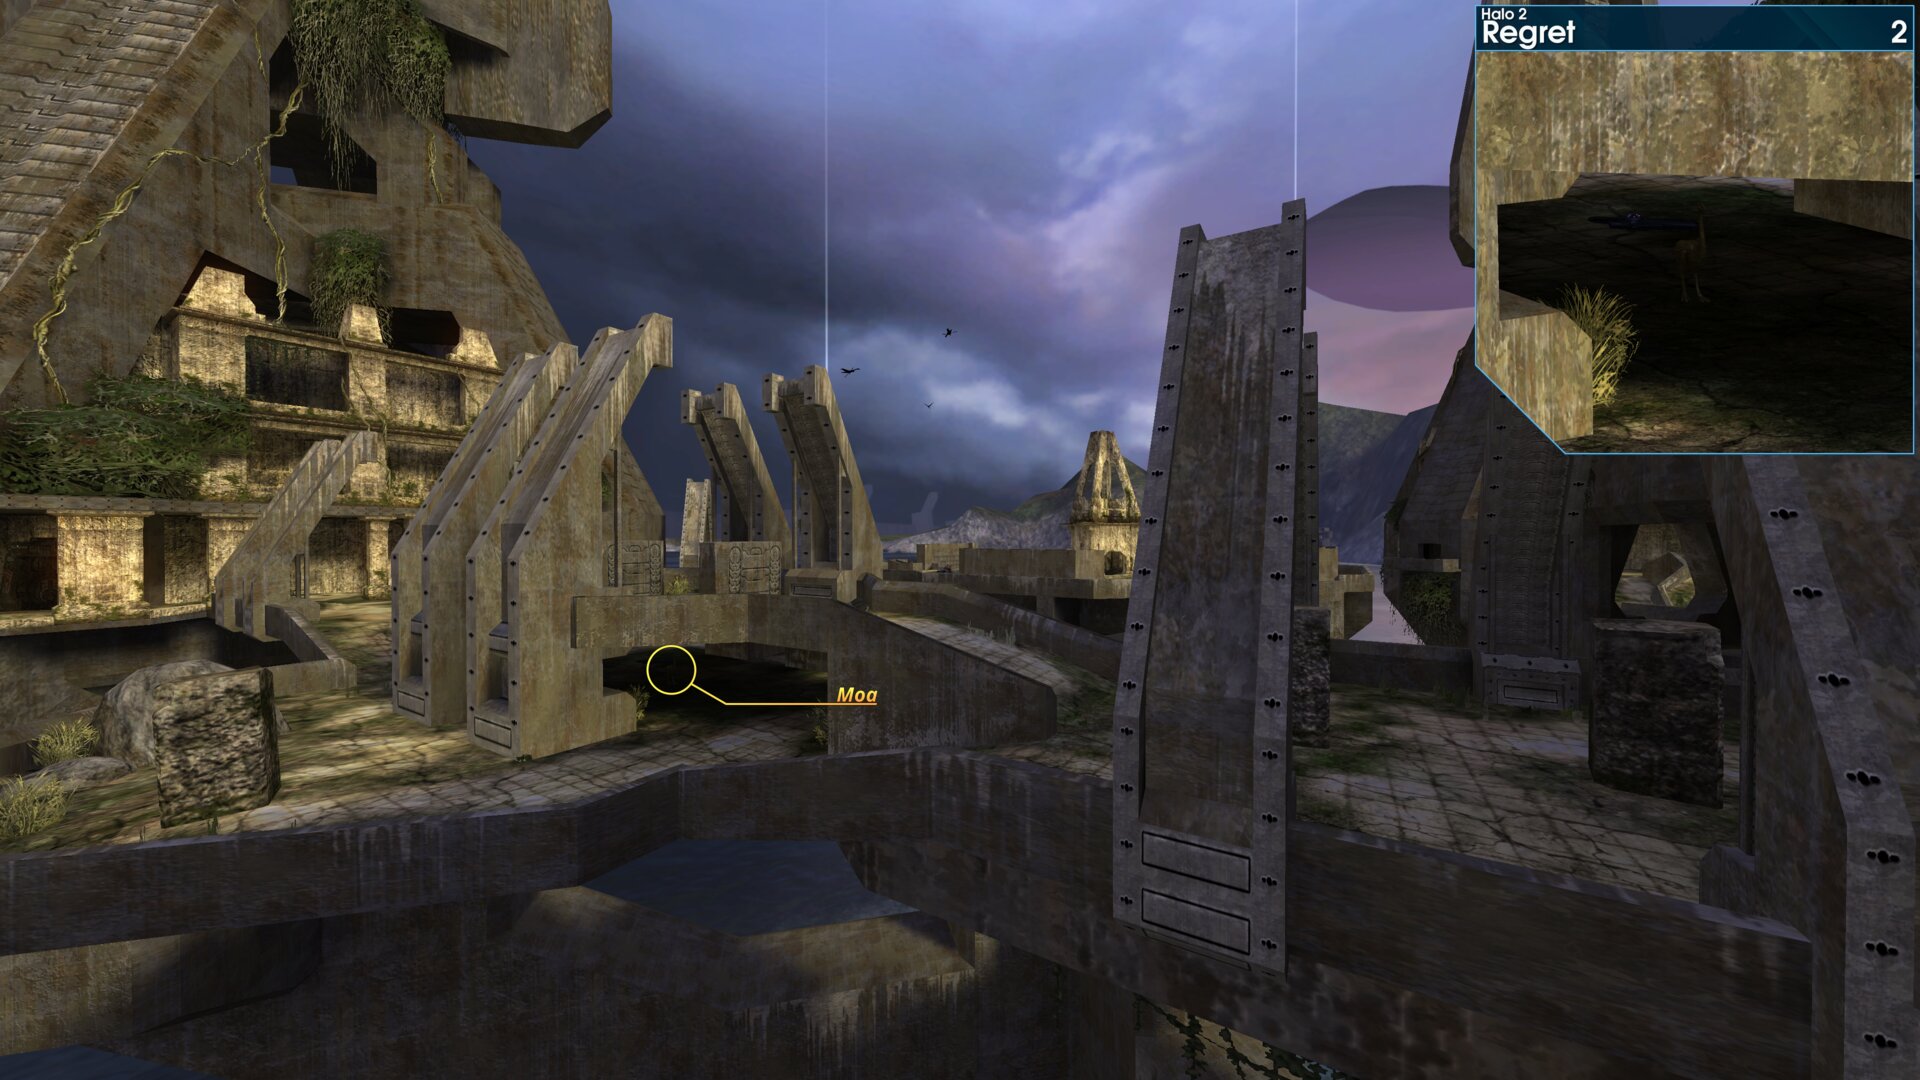
After making your way outside the temple, follow the path around towards the next connected structure. The Golden Moa is on the bridge, beneath the raised path.
Golden Moa 3
At the start of the mission, after crossing the bridge to the first connected structure, you’ll find the Golden Moa on a balcony to the left.
At the start of the mission, after crossing the bridge to the first connected structure, you’ll find the Golden Moa on a balcony to the left.
Golden Moa 4
Once inside the first tower, follow the ramps up to the balcony above the elevator shaft. The Golden Moa will be to you right as you head outside.
Once inside the first tower, follow the ramps up to the balcony above the elevator shaft. The Golden Moa will be to you right as you head outside.
Golden Moa 5
At the start of the submerged section, you’ll enter a corridor patrolled by Grunts (not to be confused with the flooded corridor patrolled by cloaked Covenant). The Golden Moa is at the far end of the corridor, beneath the ramp.
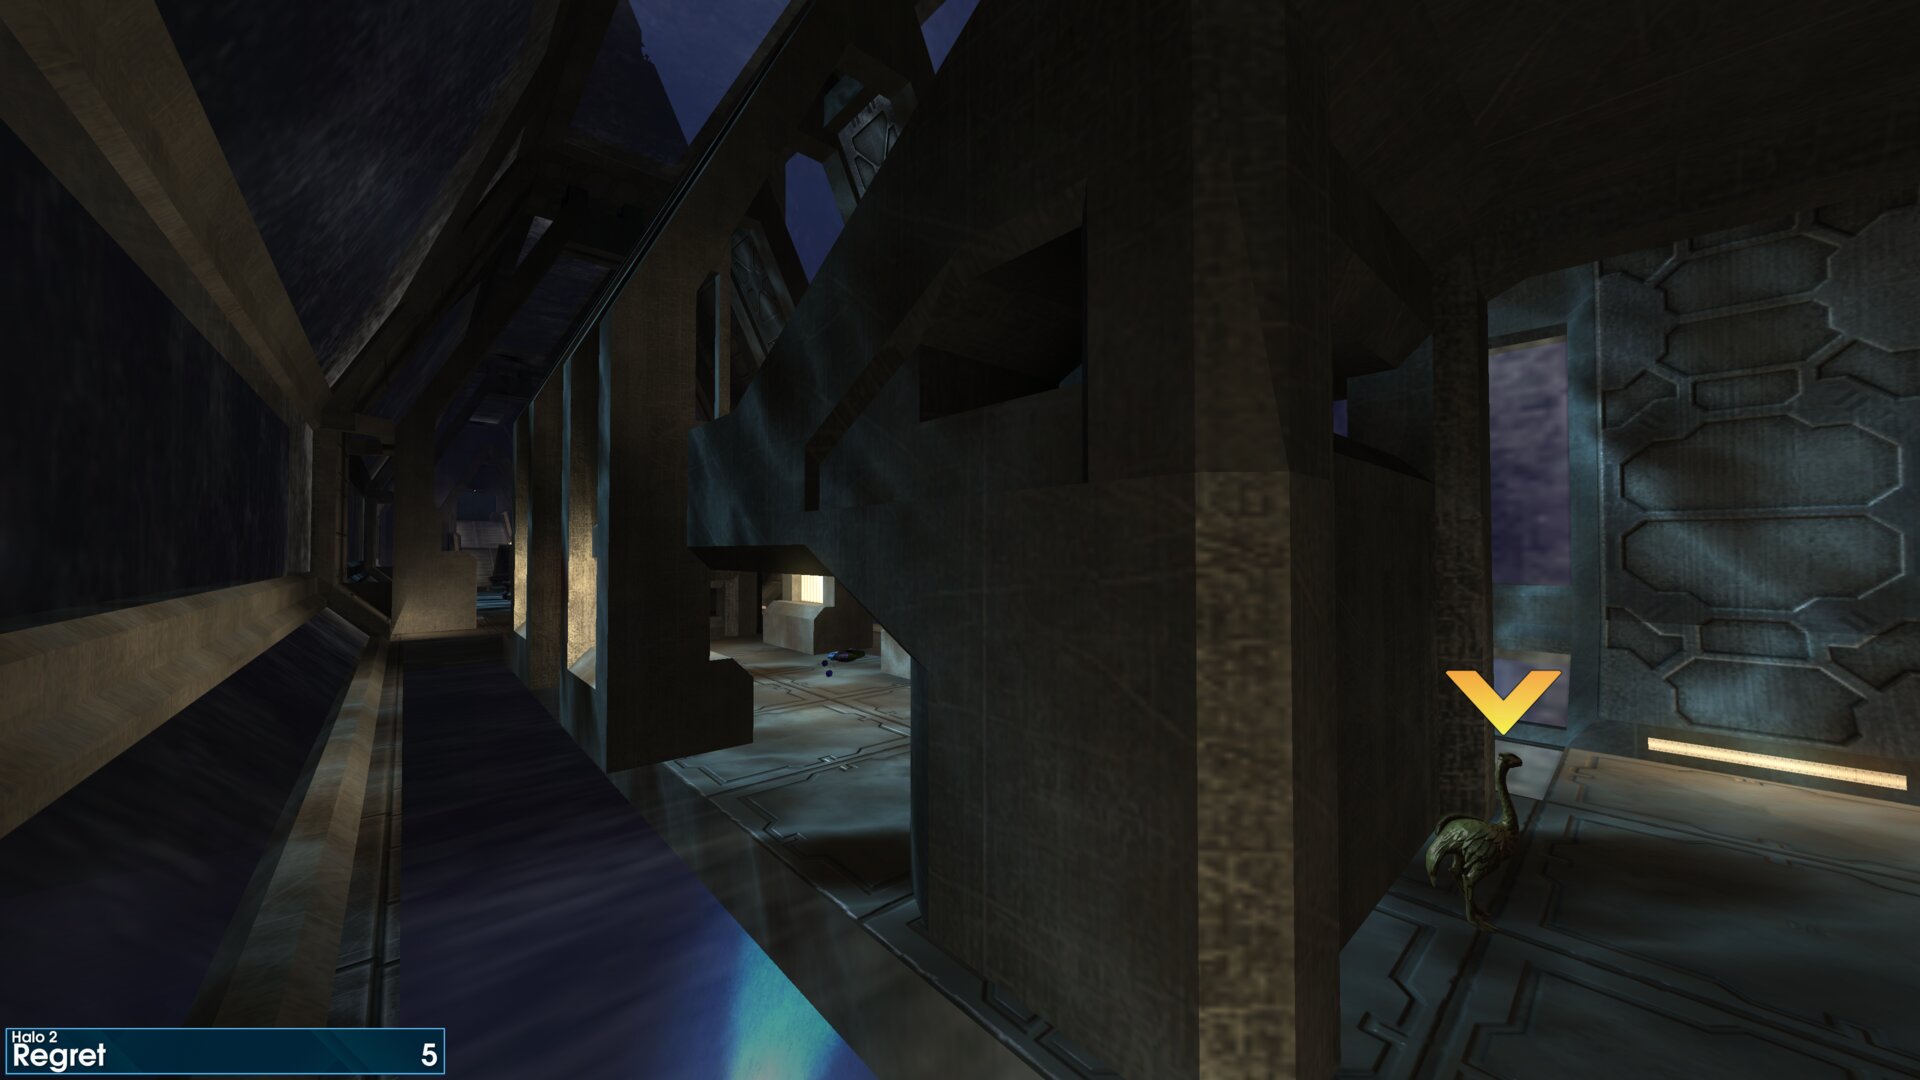
At the start of the submerged section, you’ll enter a corridor patrolled by Grunts (not to be confused with the flooded corridor patrolled by cloaked Covenant). The Golden Moa is at the far end of the corridor, beneath the ramp.
Golden Moa 6
Once you reach the main temple, head up the ramp to the entry, but don’t go inside just yet. Follow the balcony round to the right, the Golden Moa is just around the corner of the building.
Once you reach the main temple, head up the ramp to the entry, but don’t go inside just yet. Follow the balcony round to the right, the Golden Moa is just around the corner of the building.
➟ Sacred Icon
Golden Moa 1
From the start of the mission, head towards the first chute. As you come to the raised floor, you’ll find the Golden Moa is atop a ledge to the left of the opening.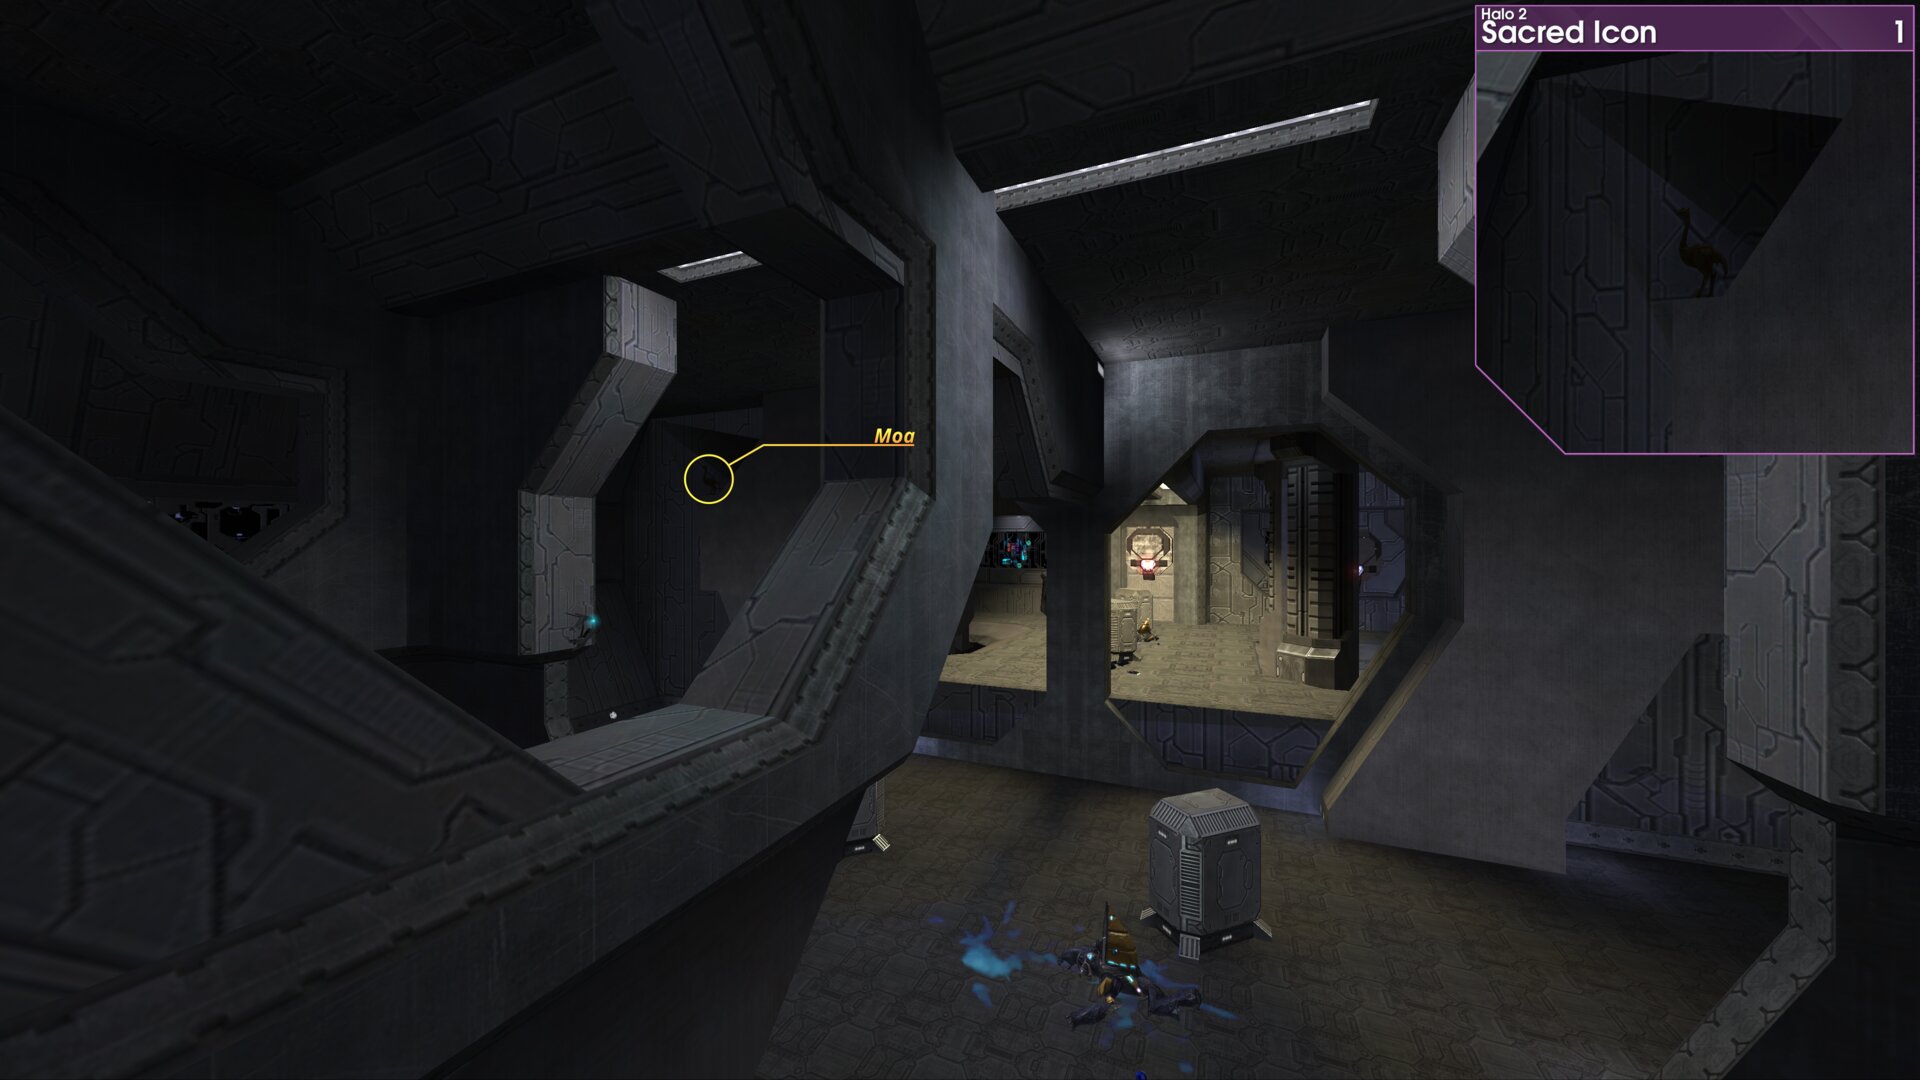
From the start of the mission, head towards the first chute. As you come to the raised floor, you’ll find the Golden Moa is atop a ledge to the left of the opening.
Golden Moa 2
After going down the first two chutes, you’ll reach a passageway. As you enter said passageway, turn left and jump up onto the nearby raised floor. Turn left once more, so that your now face back towards the entry, to find the Golden Moa.
After going down the first two chutes, you’ll reach a passageway. As you enter said passageway, turn left and jump up onto the nearby raised floor. Turn left once more, so that your now face back towards the entry, to find the Golden Moa.
Golden Moa 3
After a few chutes, you’ll reach a passageway much like where the second Golden Moa was located. Go to the far end of the passageway, before jumping up onto the raised floor to your right. Look to the left, same direction as the exit, to find the Golden Moa.
”Big, scary thing! Run away!” Grunt
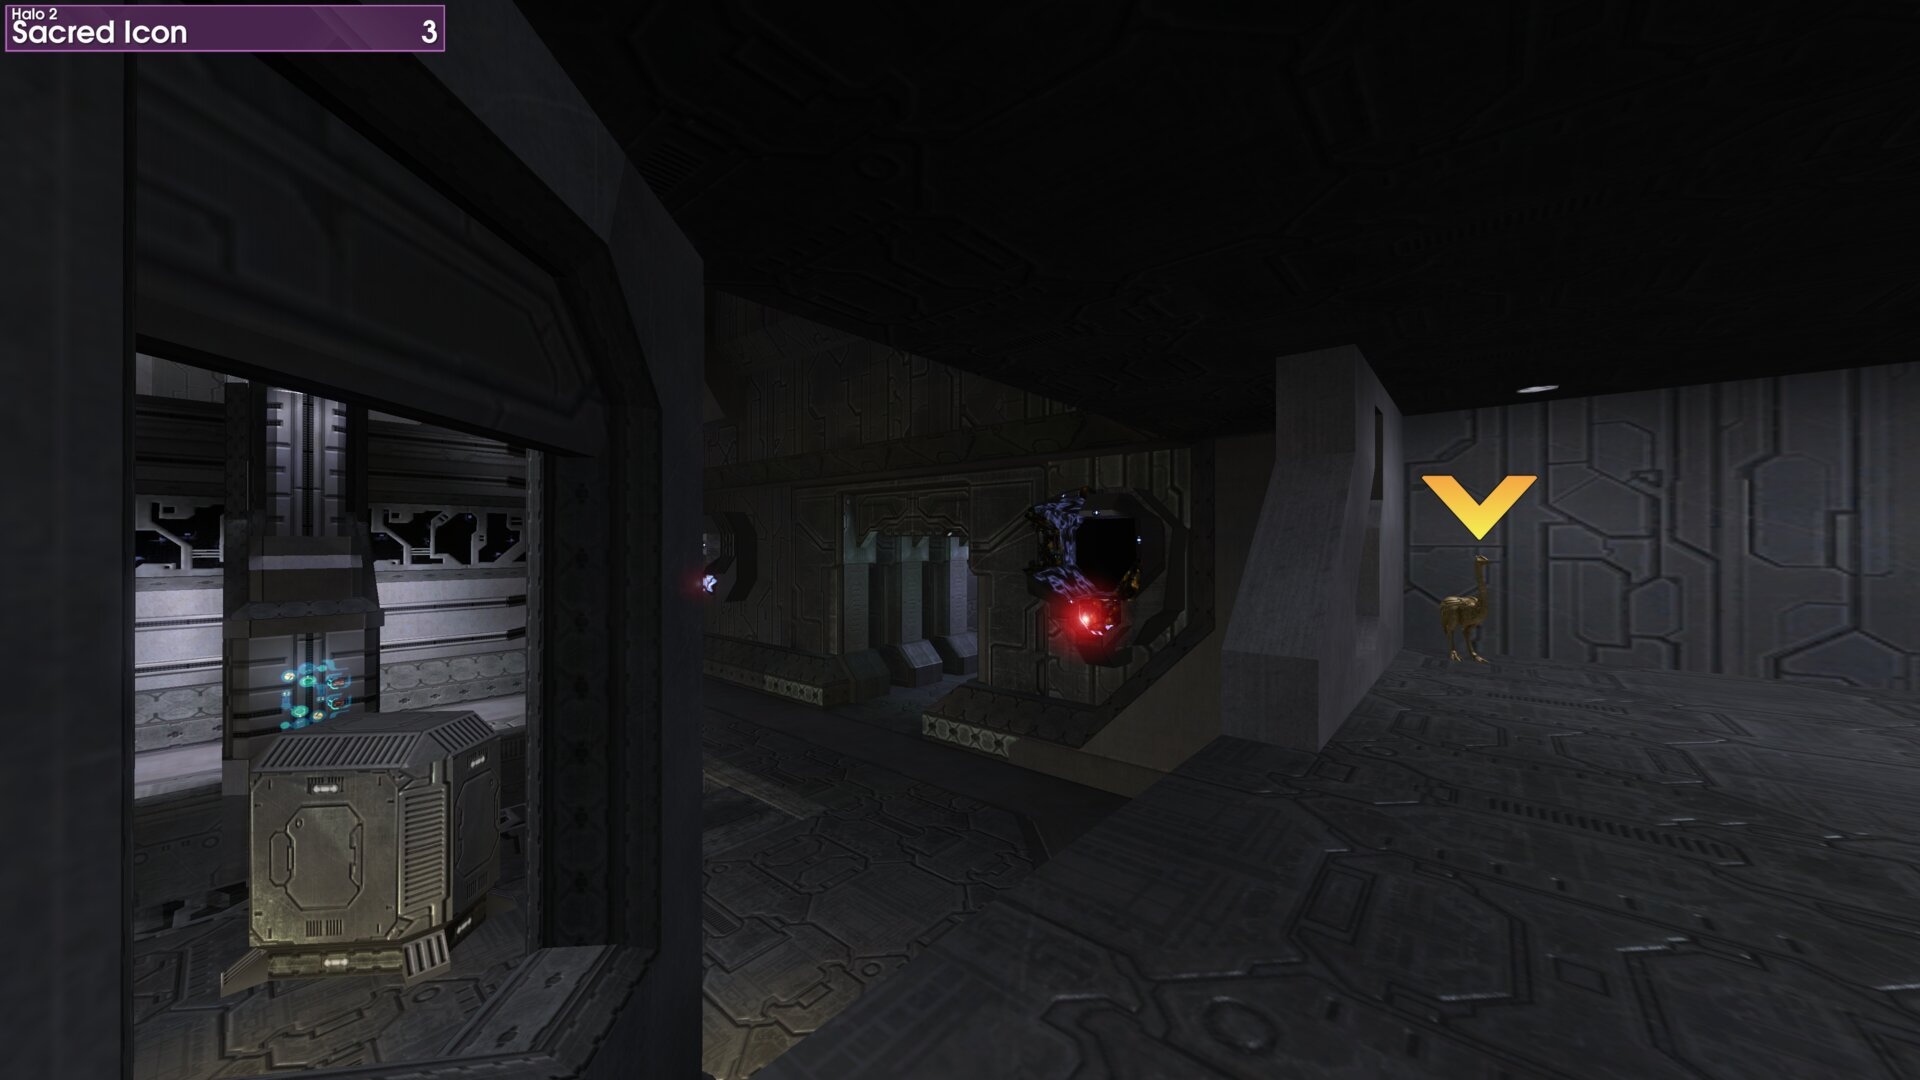
After a few chutes, you’ll reach a passageway much like where the second Golden Moa was located. Go to the far end of the passageway, before jumping up onto the raised floor to your right. Look to the left, same direction as the exit, to find the Golden Moa.
”Big, scary thing! Run away!” Grunt
Golden Moa 4
Once you reach the balcony that looks out over the void in the wall, which you previously crossed on the power source (gondola). You’ll find the Golden Moa atop a ledge, on the right most column.
Once you reach the balcony that looks out over the void in the wall, which you previously crossed on the power source (gondola). You’ll find the Golden Moa atop a ledge, on the right most column.
Golden Moa 5
Making your way through the wall, you’ll reach a balcony with a view of the Library (it’s the first one, it’s also free of enemies). As you drop down from the raised floor, turn left, the Golden Moa will be just out of sight along the wall.
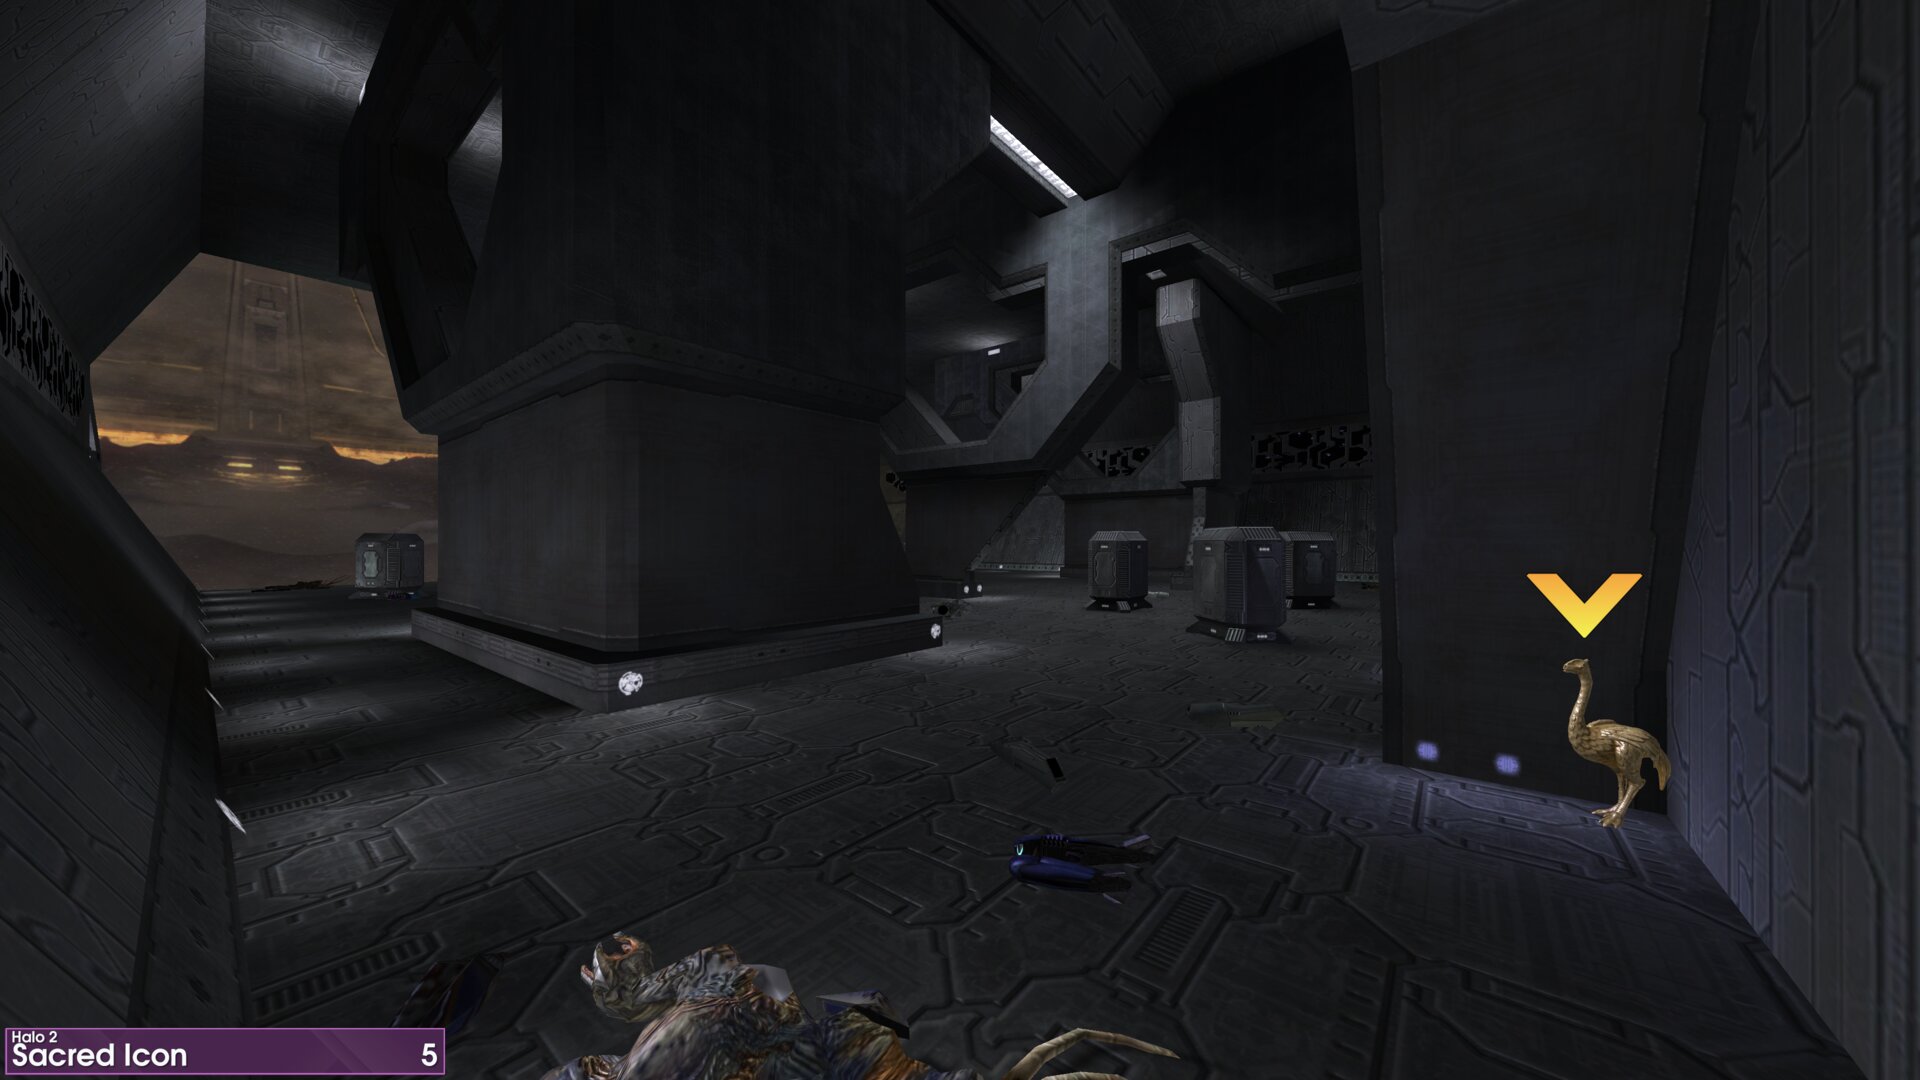
Making your way through the wall, you’ll reach a balcony with a view of the Library (it’s the first one, it’s also free of enemies). As you drop down from the raised floor, turn left, the Golden Moa will be just out of sight along the wall.
Golden Moa 6
Once you reach the final area, looking towards the Library, the Golden Moa is on a ledge at the back of the far right pit.
Once you reach the final area, looking towards the Library, the Golden Moa is on a ledge at the back of the far right pit.
➟ Quarantine Zone
Golden Moa 1
At the back of the large chamber, beneath the windows. Look for the Golden Moa on a lit ledge, left side of the exit.
At the back of the large chamber, beneath the windows. Look for the Golden Moa on a lit ledge, left side of the exit.
Golden Moa 2
As you make your way around the upper level of the courtyard, the Golden Moa is atop the second roof structure, just before the ramp down.
As you make your way around the upper level of the courtyard, the Golden Moa is atop the second roof structure, just before the ramp down.
Golden Moa 3
As you reach the clearing in the middle of the crashed Sentinel manufacturing facility, the Golden Moa is next to a fire atop the soil formation, that’s left of the smoldering spikes.
As you reach the clearing in the middle of the crashed Sentinel manufacturing facility, the Golden Moa is next to a fire atop the soil formation, that’s left of the smoldering spikes.
Golden Moa 4
In the valley, shortly after leaving the crashed Sentinel manufacturing facility. The Golden Moa is on a ledge on the far side of the chasm, just before the second bridge (a large pipe).
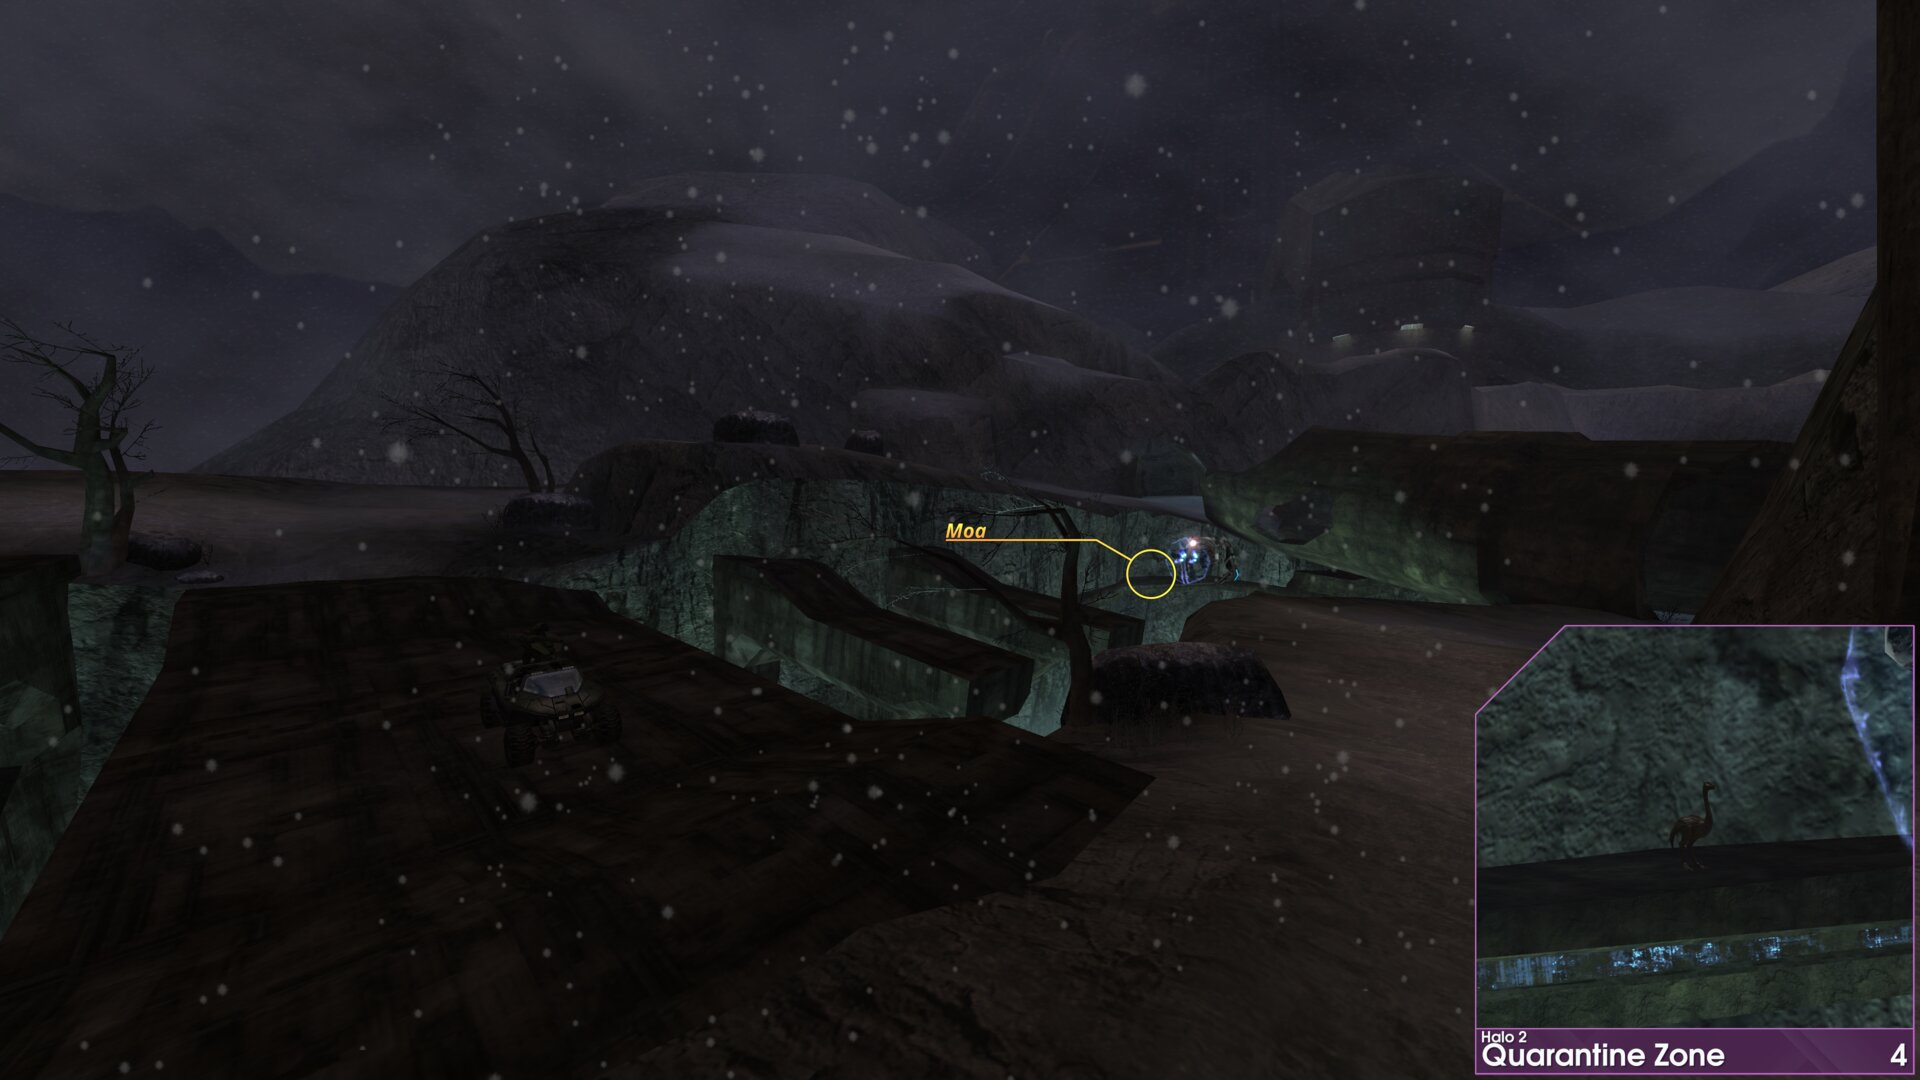
In the valley, shortly after leaving the crashed Sentinel manufacturing facility. The Golden Moa is on a ledge on the far side of the chasm, just before the second bridge (a large pipe).
➟ Gravemind
Golden Moa 1
In the Council Chamber, as you make your way to the door. The Golden Moa is along the wall, beside the last passage door to your left.
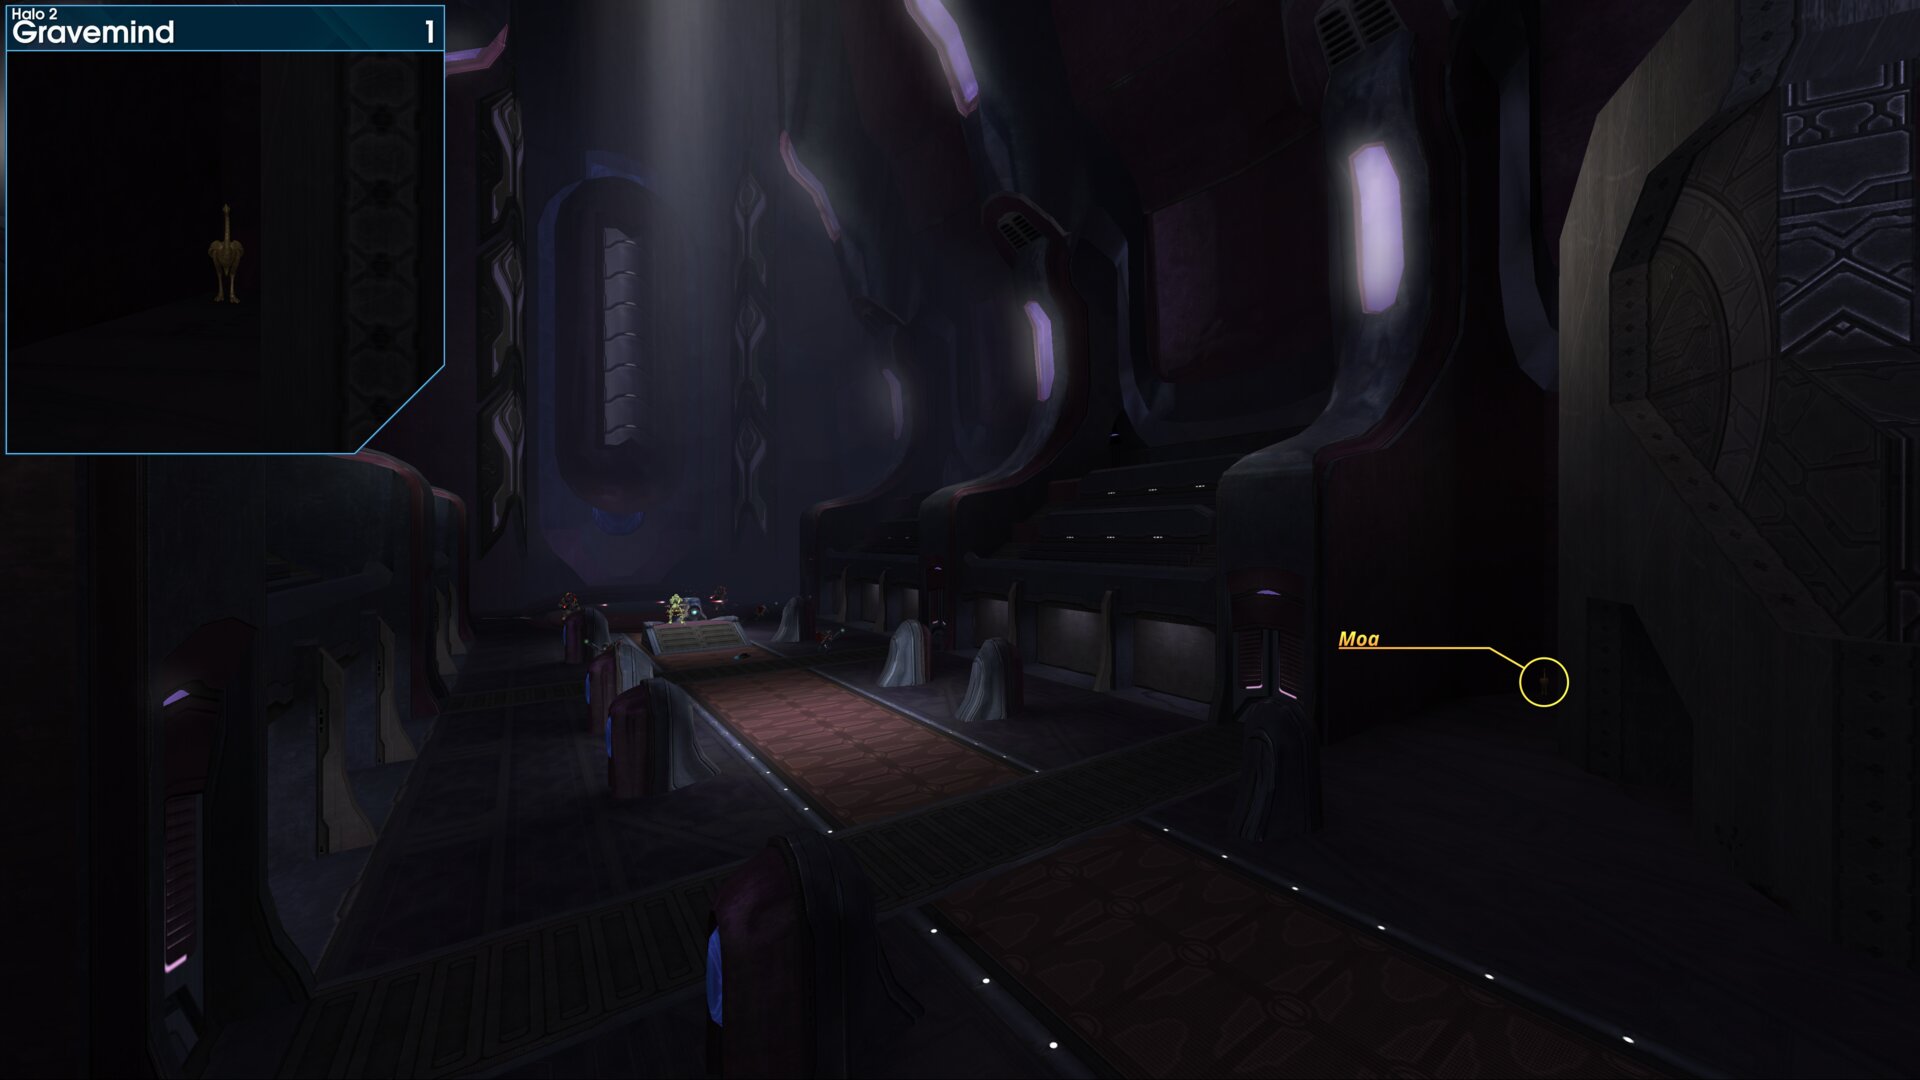
In the Council Chamber, as you make your way to the door. The Golden Moa is along the wall, beside the last passage door to your left.
Golden Moa 2
Once you reach the first outside area, where you’re greeted by one or two Brute Honor Guards. The Golden Moa is along the wall to your right, near the alien plant.
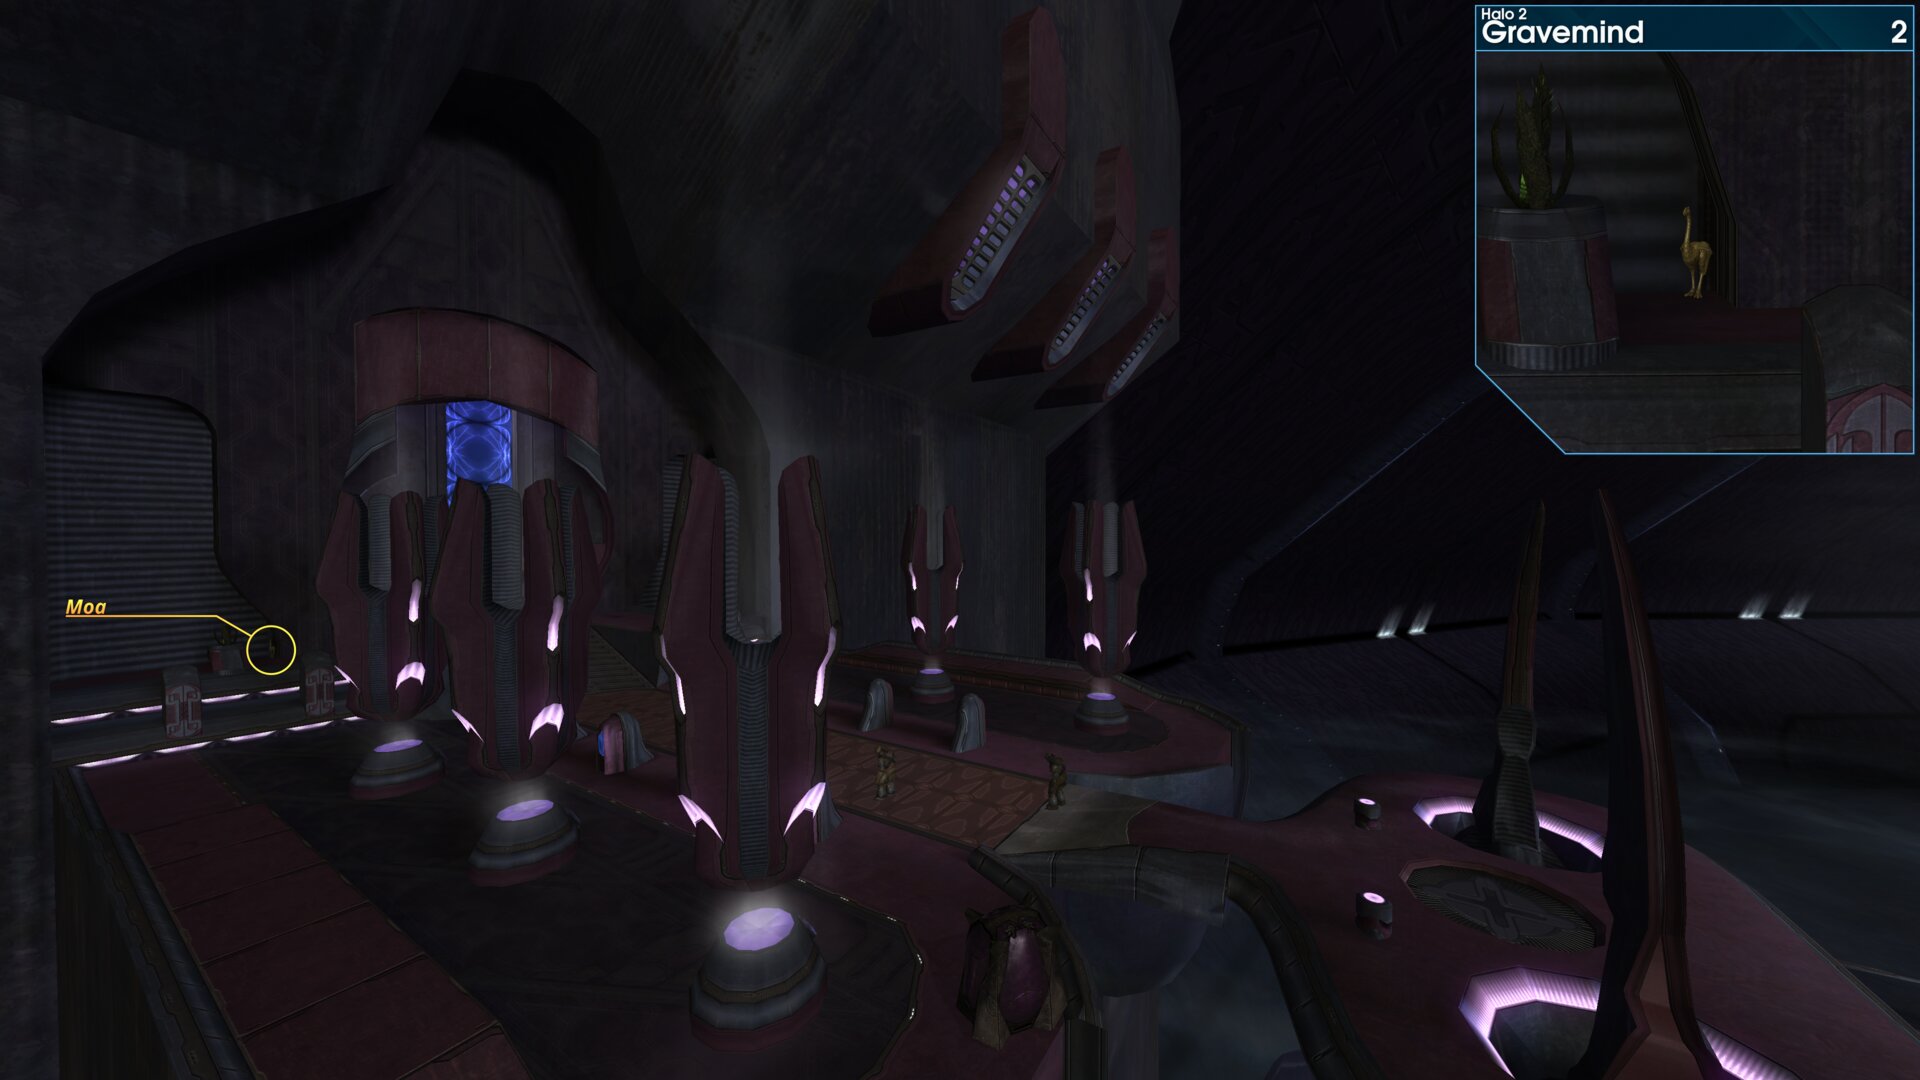
Once you reach the first outside area, where you’re greeted by one or two Brute Honor Guards. The Golden Moa is along the wall to your right, near the alien plant.
Golden Moa 3
Inside the brig on the middle level of the detention block, the Golden Moa is in the second cell to the right.
“Chief, come to the middle level…” Cortana
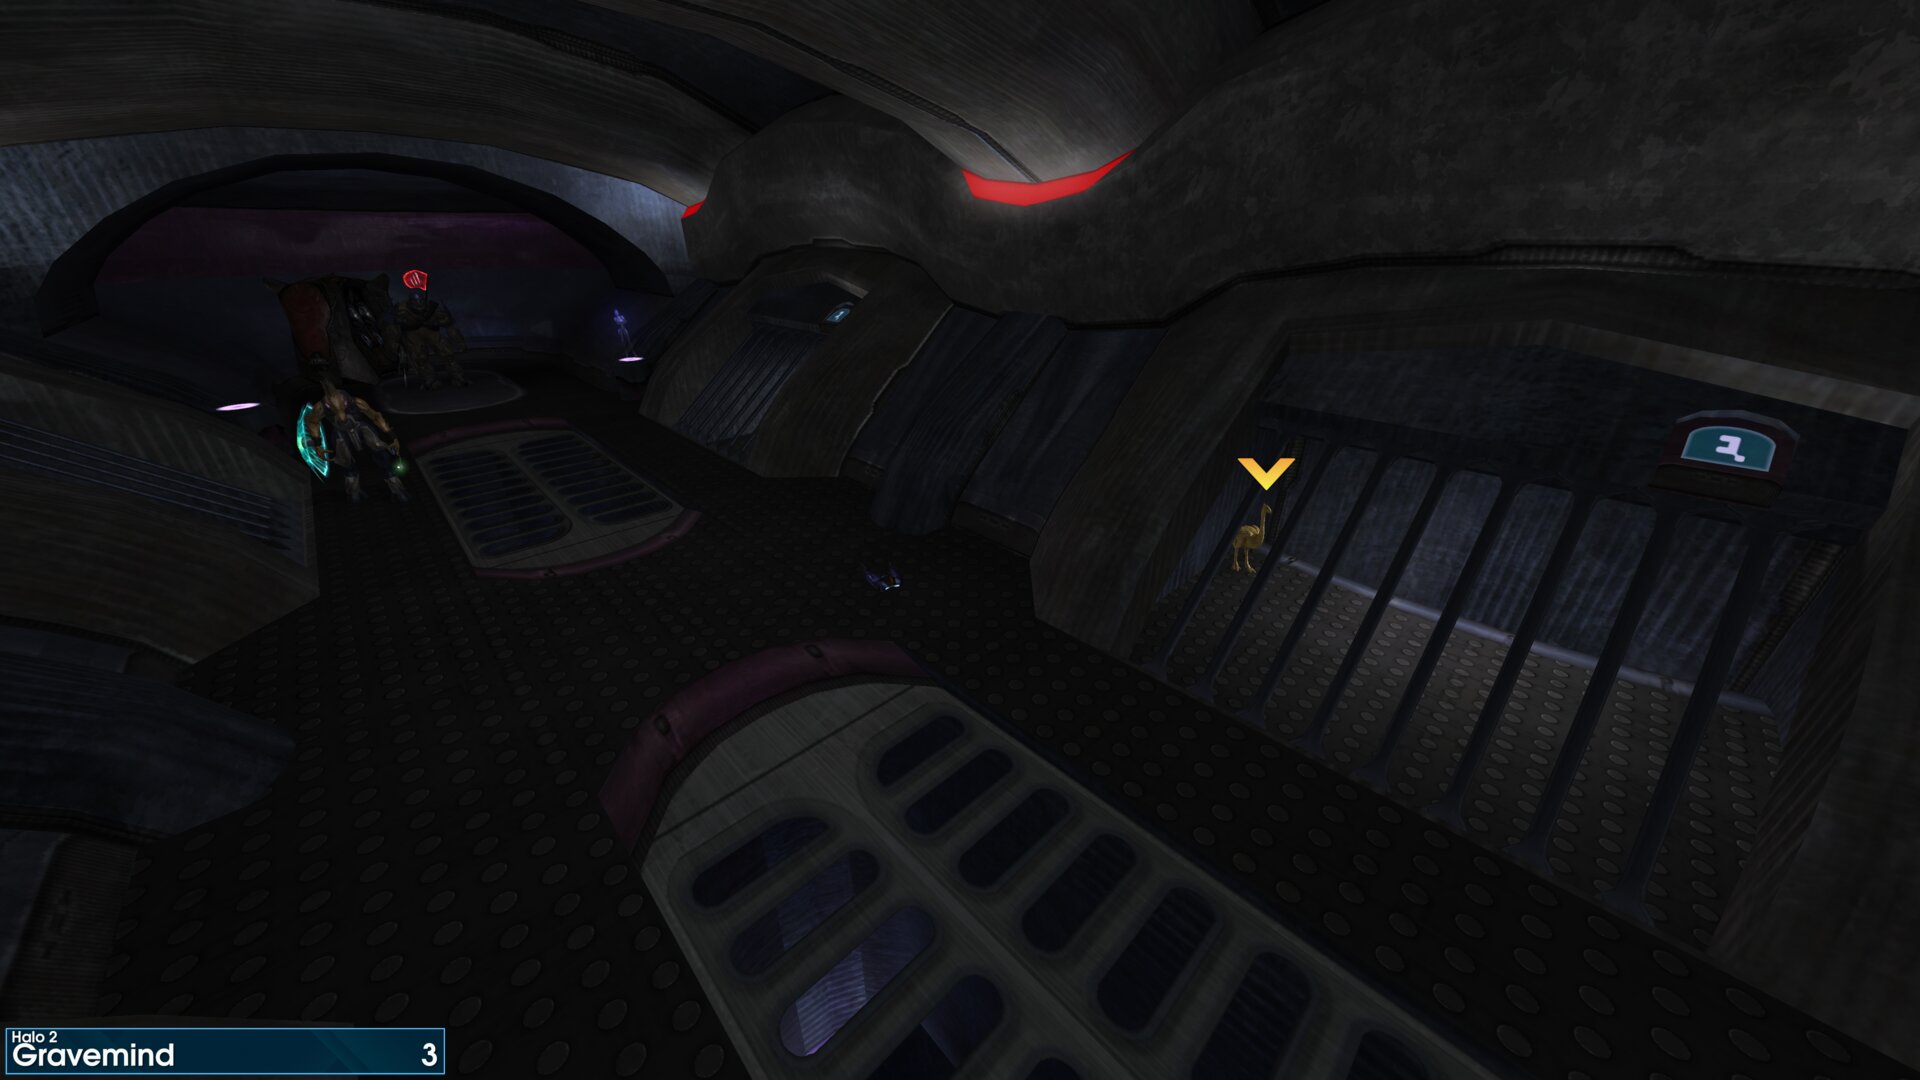
Inside the brig on the middle level of the detention block, the Golden Moa is in the second cell to the right.
“Chief, come to the middle level…” Cortana
Golden Moa 4
Before crossing the first gravity bridge. Look to the left of the door you just came through, this Golden Moa is hiding just around the corner.
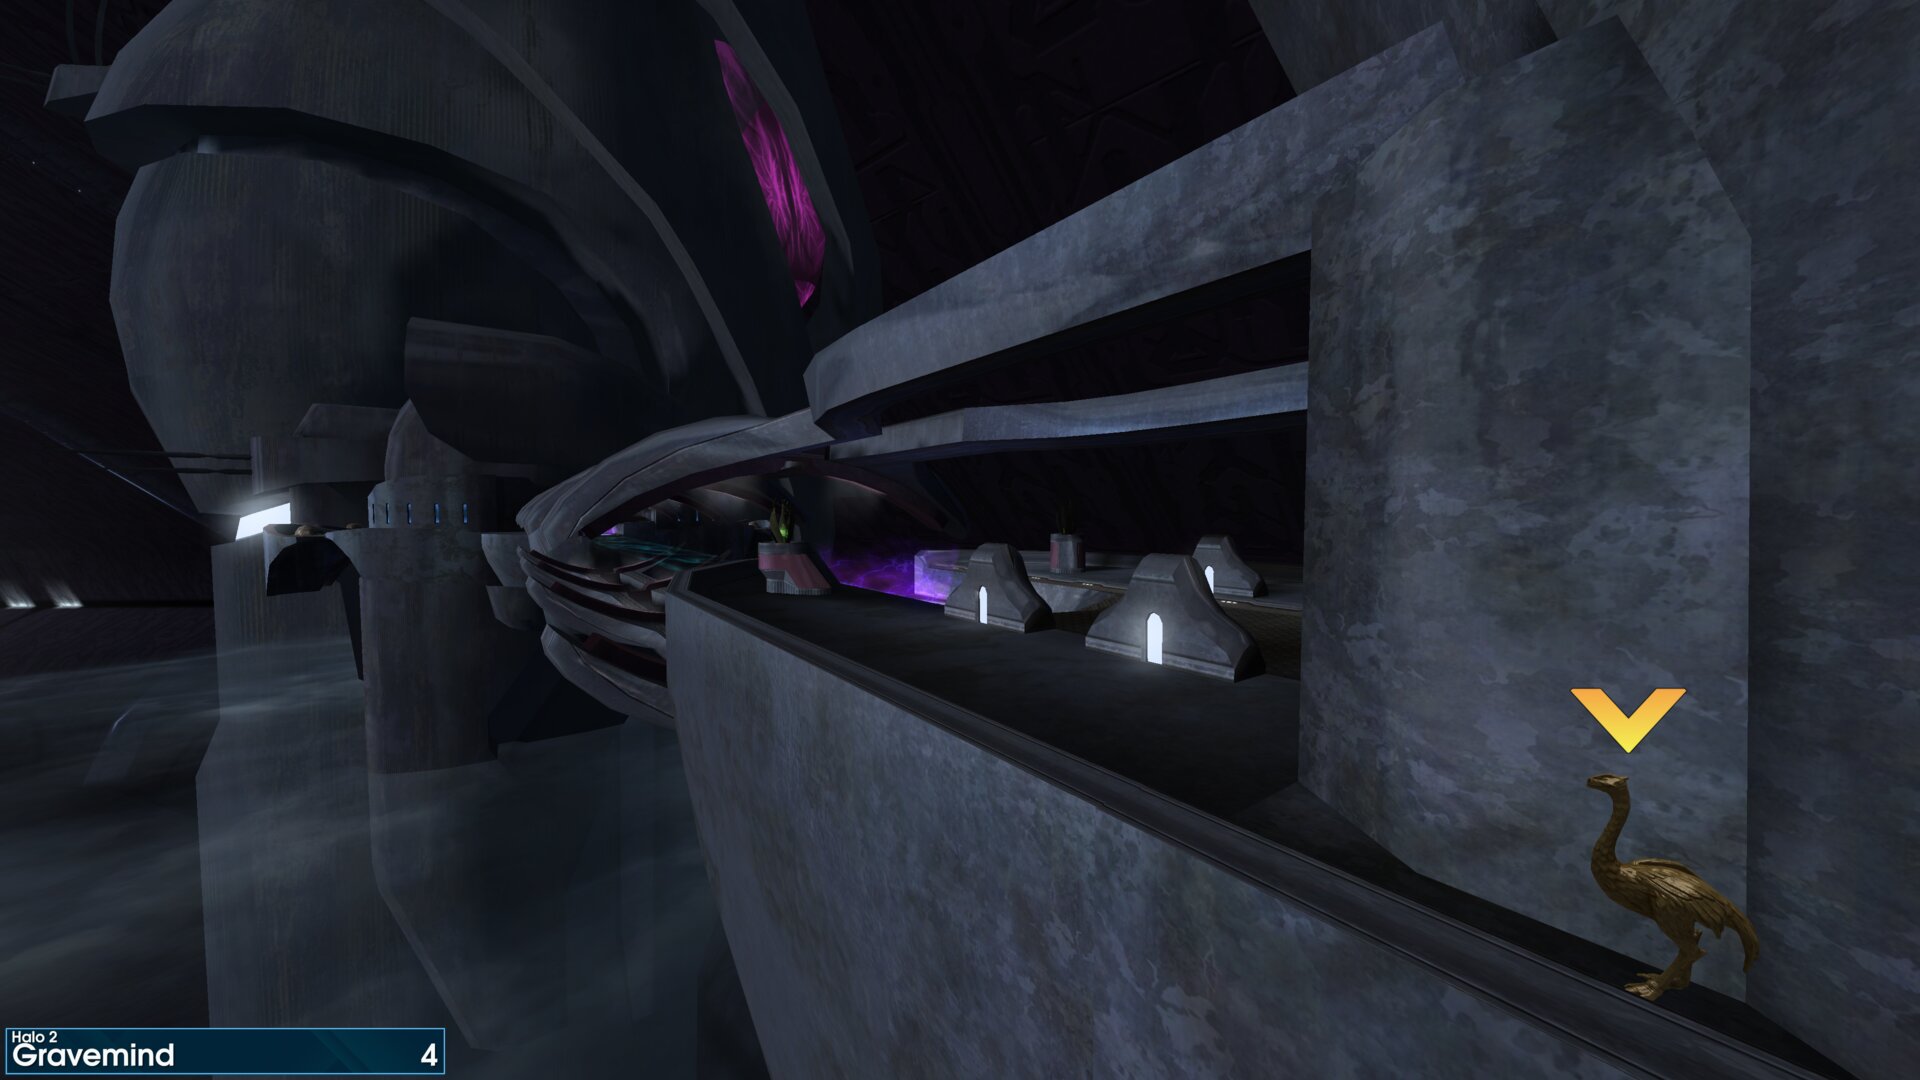
Before crossing the first gravity bridge. Look to the left of the door you just came through, this Golden Moa is hiding just around the corner.
Golden Moa 5
In the second set of hanging gardens, between gravity bridges three and four, the Golden Moa is behind a rock in the far left garden.
”I have listened to the Oracle, and it confirmed our deepest hope. The Great Journey begins with Halo.” Prophet of Truth
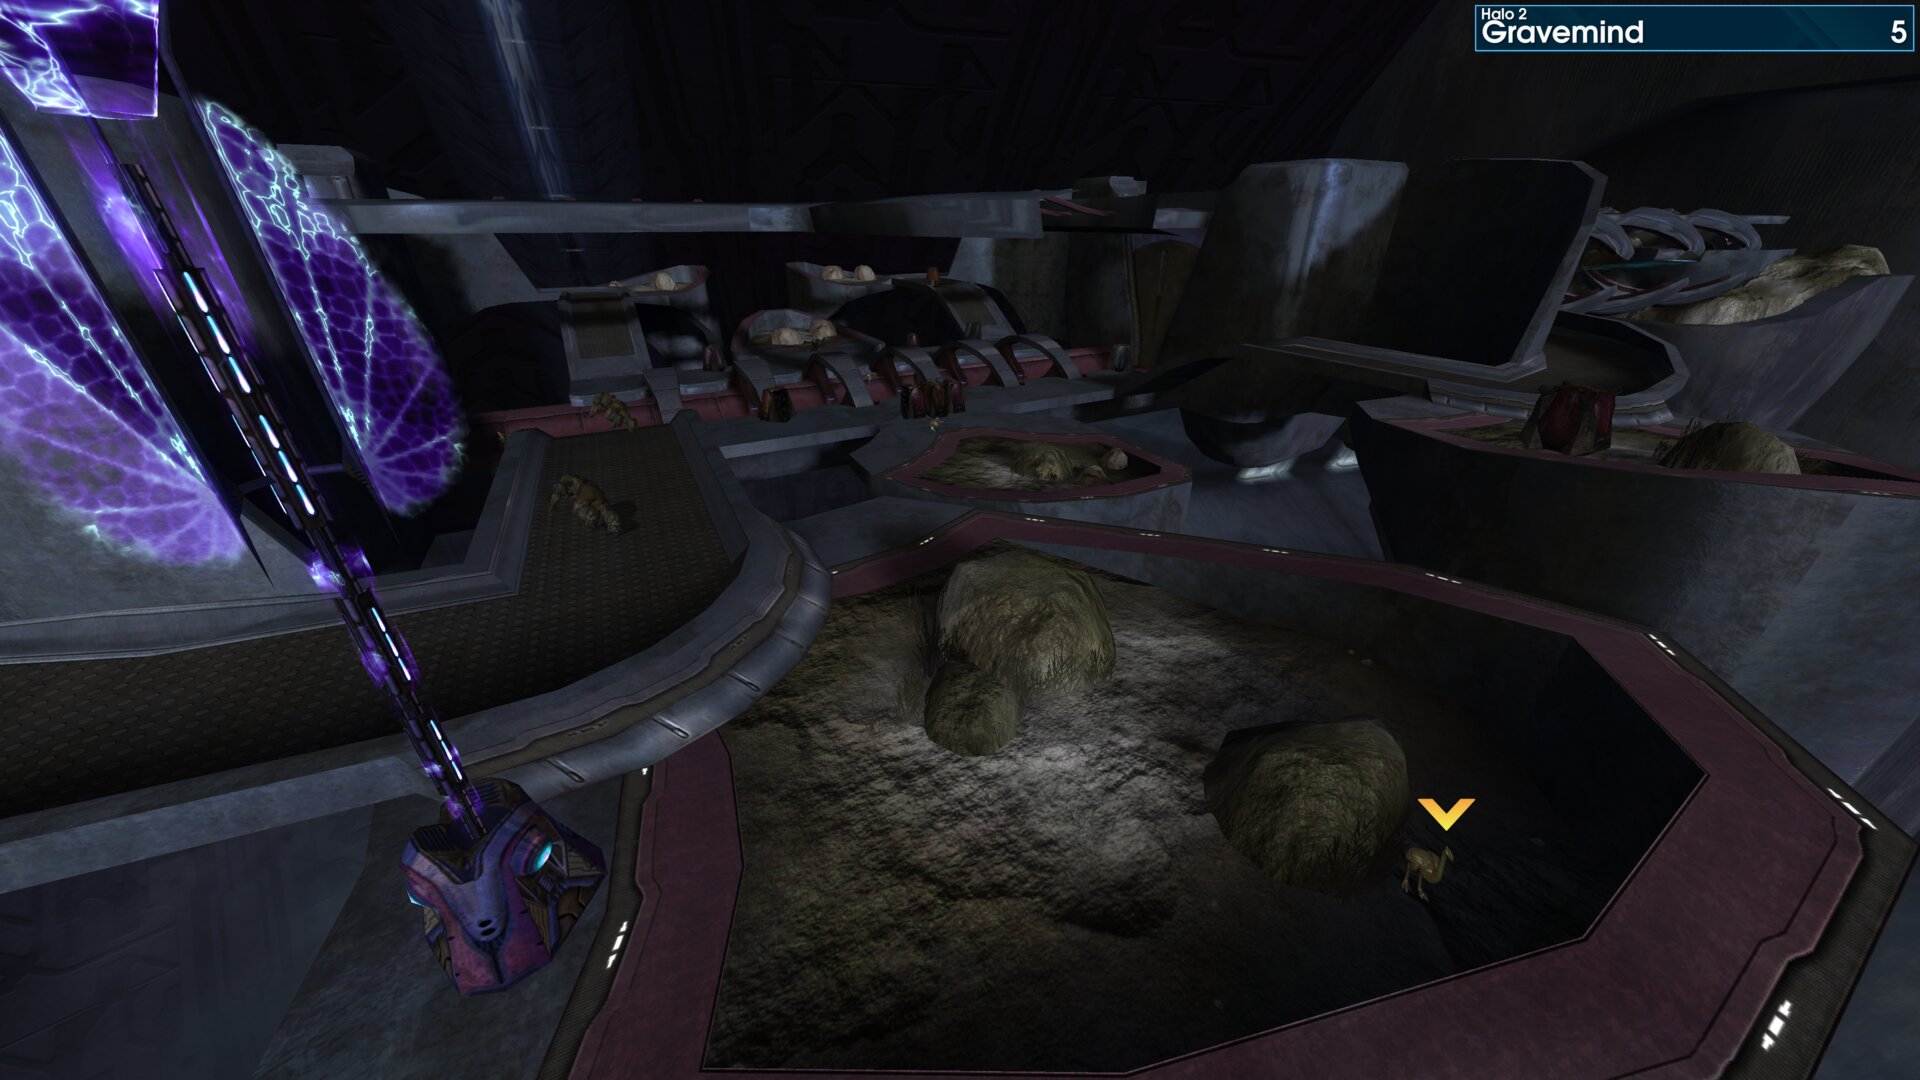
In the second set of hanging gardens, between gravity bridges three and four, the Golden Moa is behind a rock in the far left garden.
”I have listened to the Oracle, and it confirmed our deepest hope. The Great Journey begins with Halo.” Prophet of Truth
Golden Moa 6
Once you reach the bridge to the Mausoleum, turn around and face the door you just came through, the Golden Moa is up on a ledge to the right of the door.
”If we're going to catch Truth, we'll need to take a shortcut…” Cortana
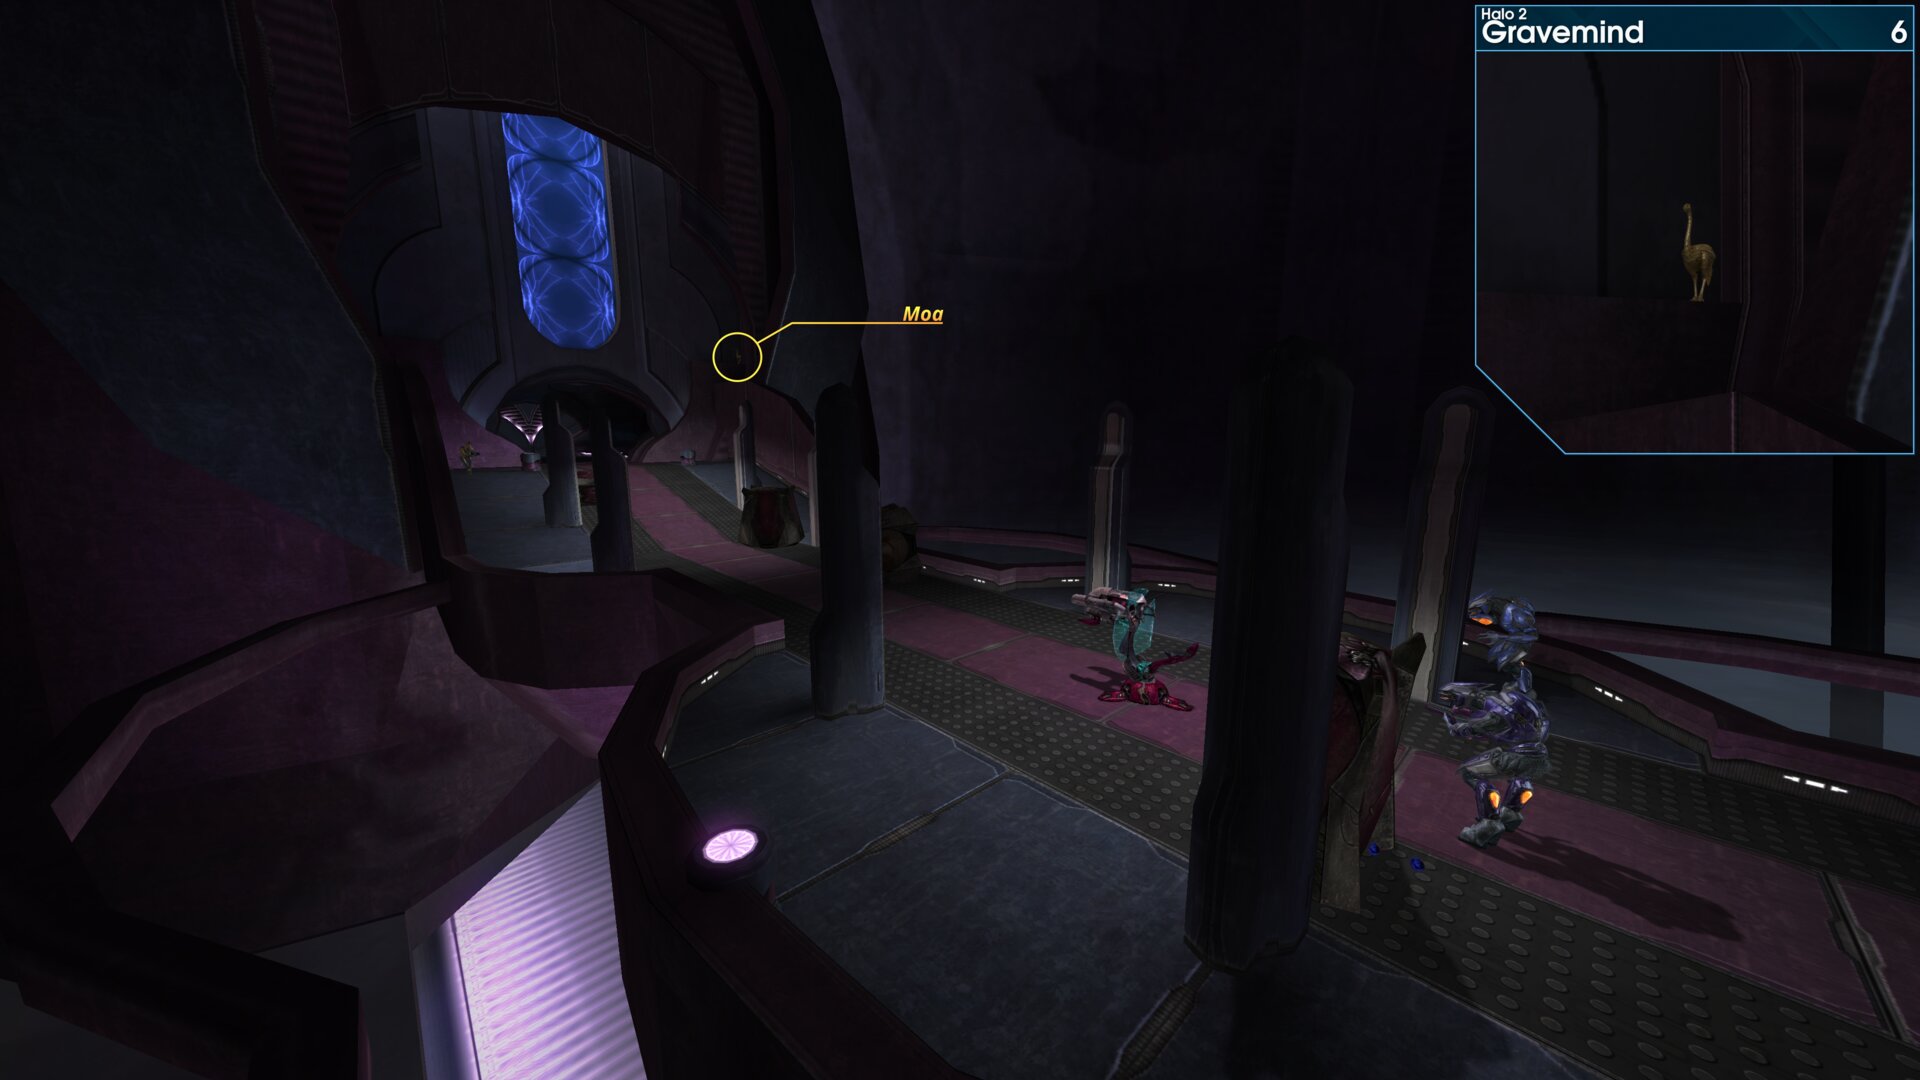
Once you reach the bridge to the Mausoleum, turn around and face the door you just came through, the Golden Moa is up on a ledge to the right of the door.
”If we're going to catch Truth, we'll need to take a shortcut…” Cortana
➟ Uprising
Golden Moa 1
In the large cave, look for the far pillar, on the outer edge of the second circular platform. The Golden Moa is atop a light on the back of the pillar.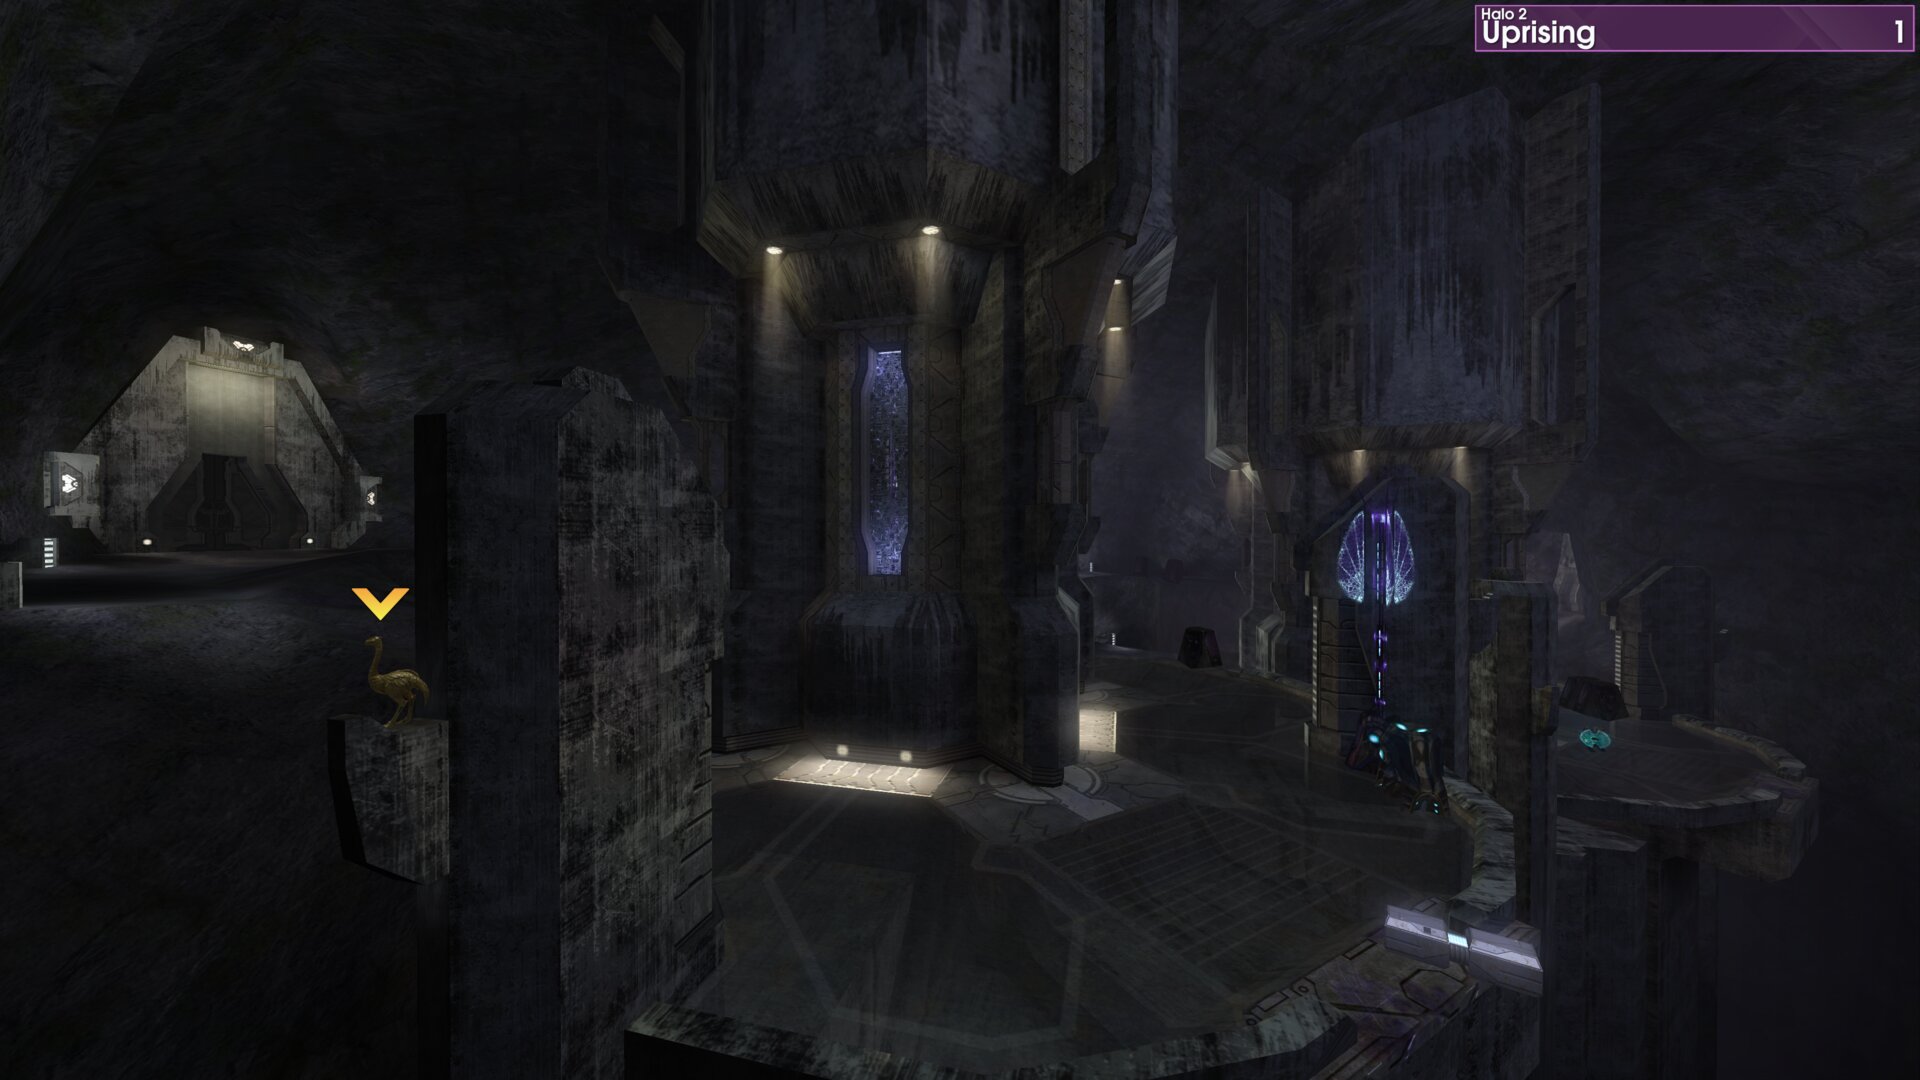
In the large cave, look for the far pillar, on the outer edge of the second circular platform. The Golden Moa is atop a light on the back of the pillar.
Golden Moa 2
After passing though a passage with Elite corpses you’ll reach a two-level room with a Brute manning a Shade Turret, the Golden Moa is on the ledge above the door you entered through.
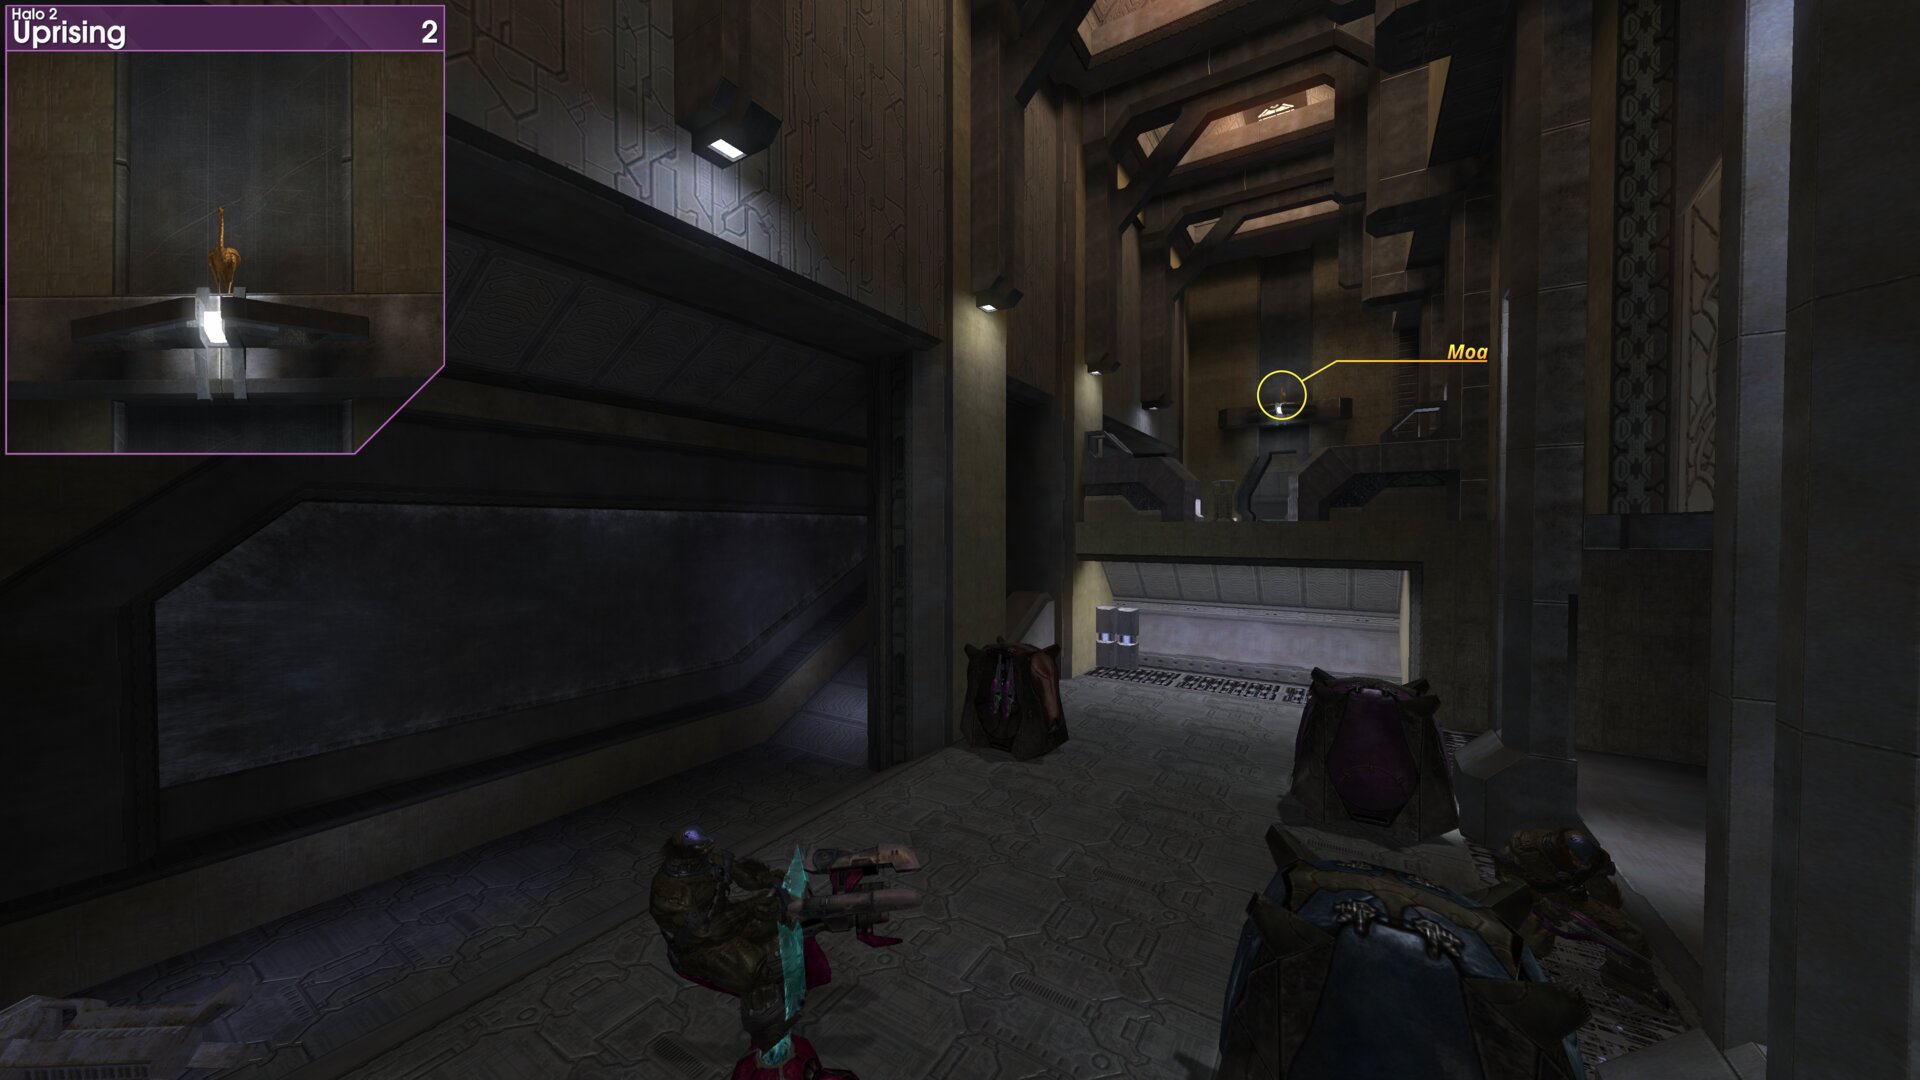
After passing though a passage with Elite corpses you’ll reach a two-level room with a Brute manning a Shade Turret, the Golden Moa is on the ledge above the door you entered through.
Golden Moa 3
Once you reach the pool of water at the head of the stream, the Golden Moa is in the pool beside the log.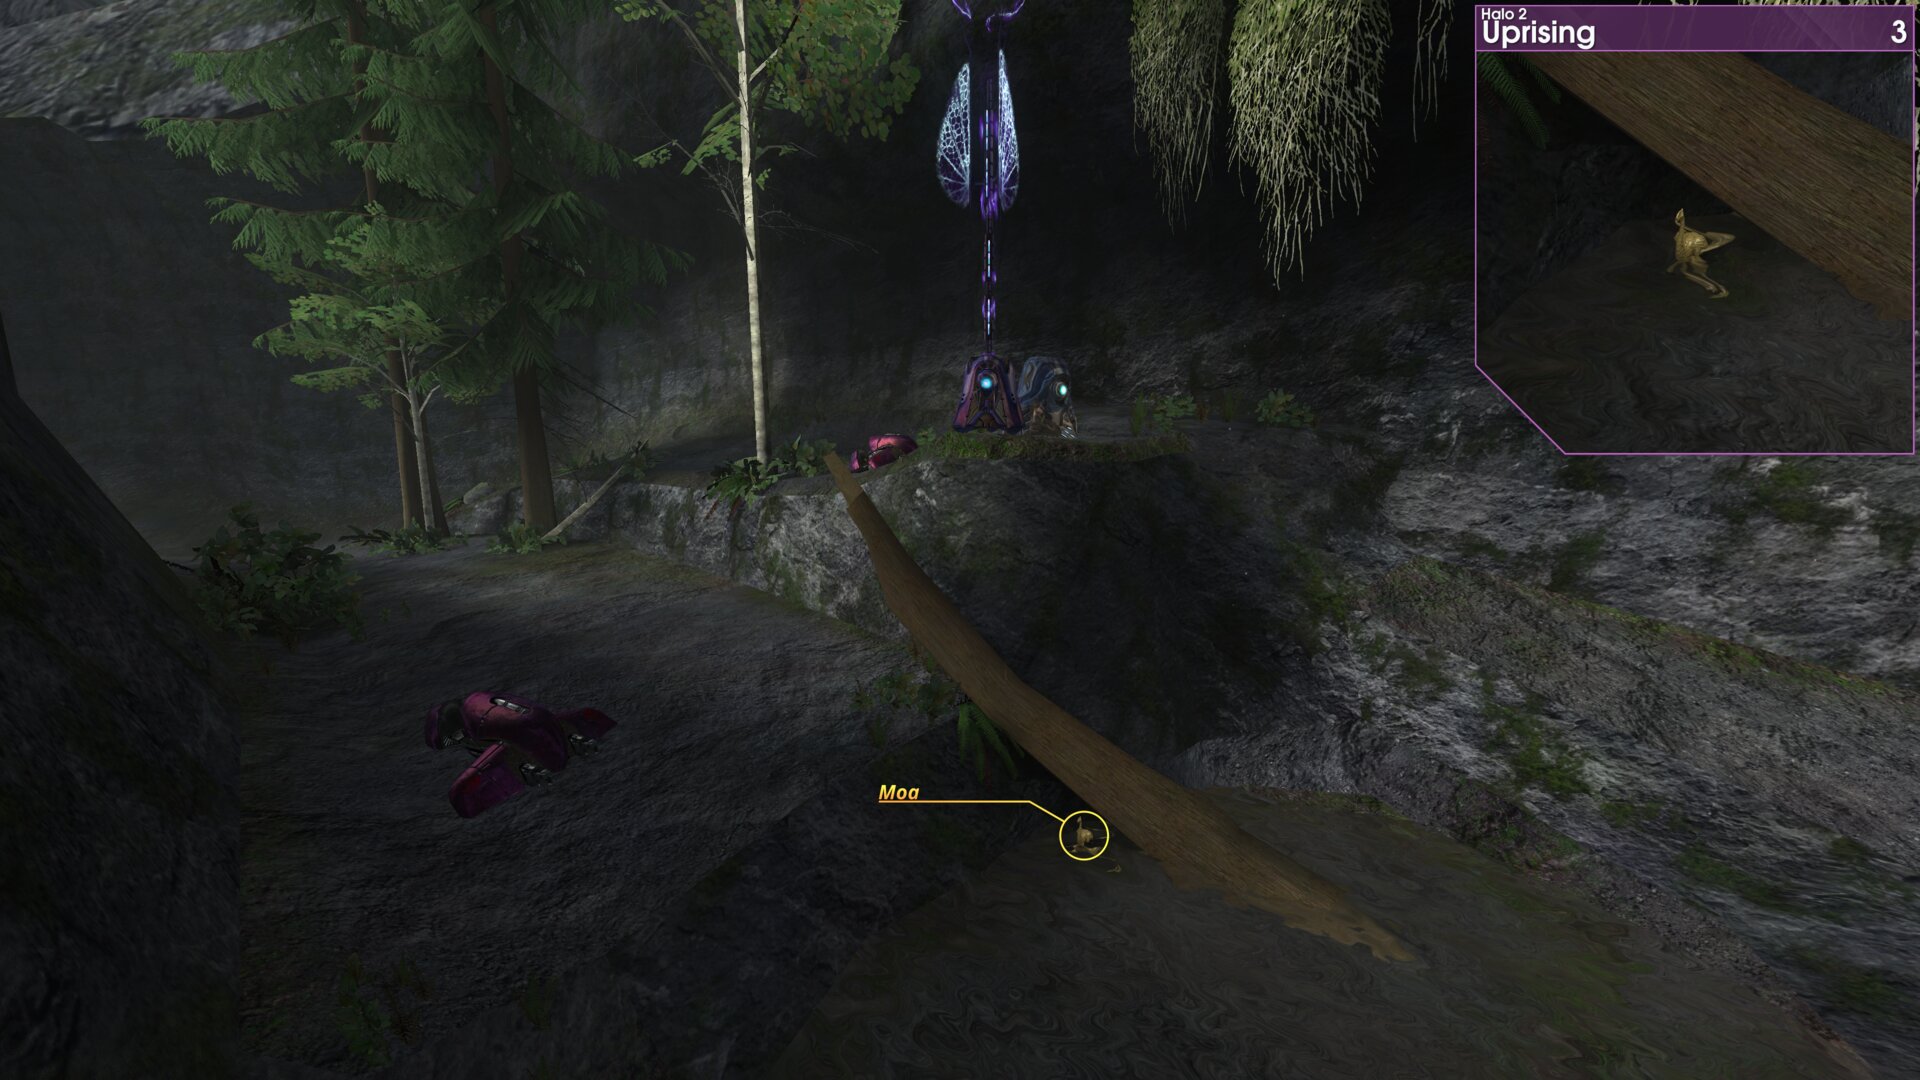
Once you reach the pool of water at the head of the stream, the Golden Moa is in the pool beside the log.
Golden Moa 4
Fight Club.
In the basin at the end of the stream, take the ramp up to the circular structure, the Golden Moa is behind the first pillar.
The Picture-in-Picture is looking from the ramp, towards the middle of the basin.
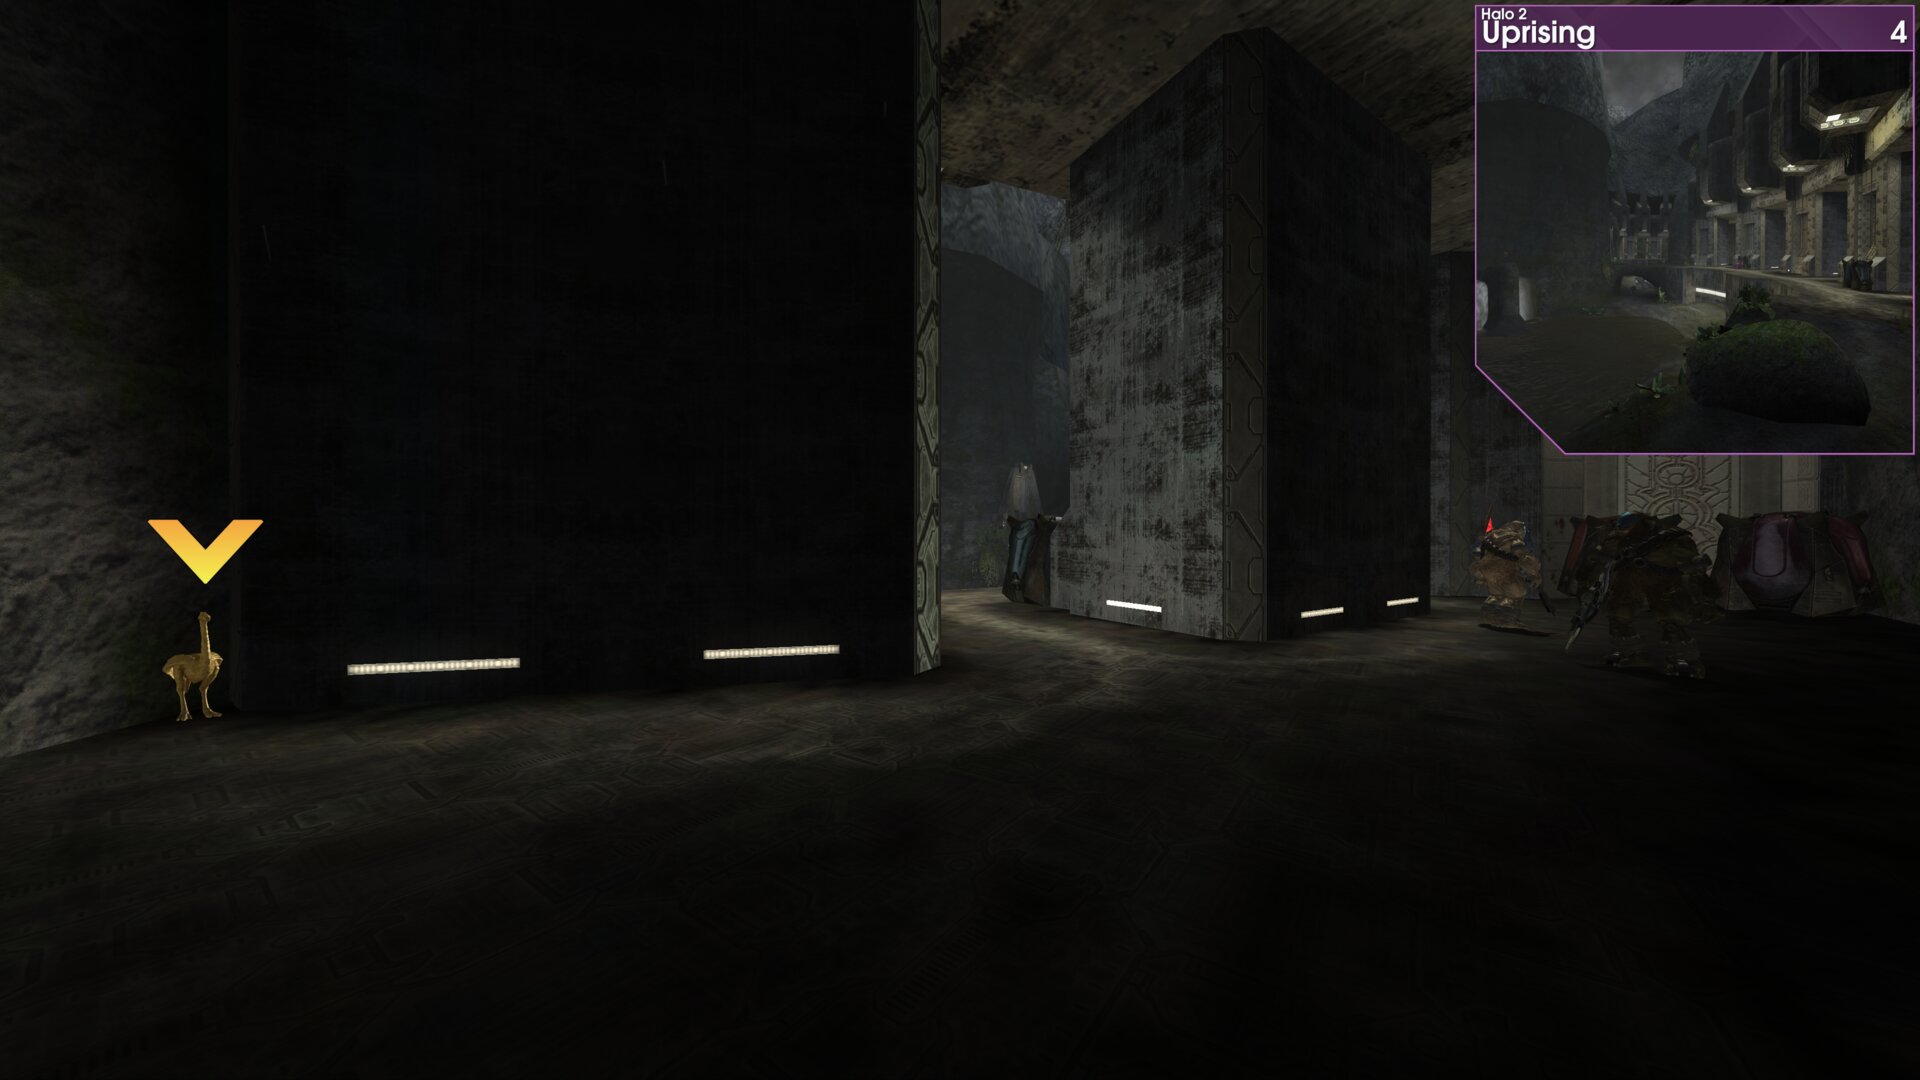
Fight Club.
In the basin at the end of the stream, take the ramp up to the circular structure, the Golden Moa is behind the first pillar.
The Picture-in-Picture is looking from the ramp, towards the middle of the basin.
➟ High Charity
Golden Moa 1
Please, Make Yourself at Home.
After making your way across the large chamber, head down the passage into a dark straight corridor. Once inside turn right, the Golden Moa is in the corner on the raised path.
Please, Make Yourself at Home.
After making your way across the large chamber, head down the passage into a dark straight corridor. Once inside turn right, the Golden Moa is in the corner on the raised path.
Golden Moa 2
In the first garden room, head up to the large window, the Golden Moa is behind a rock at the right end of the window.
”The parasite did not defeat the Forerunners...and it shall not defeat us.” Prophet of Truth
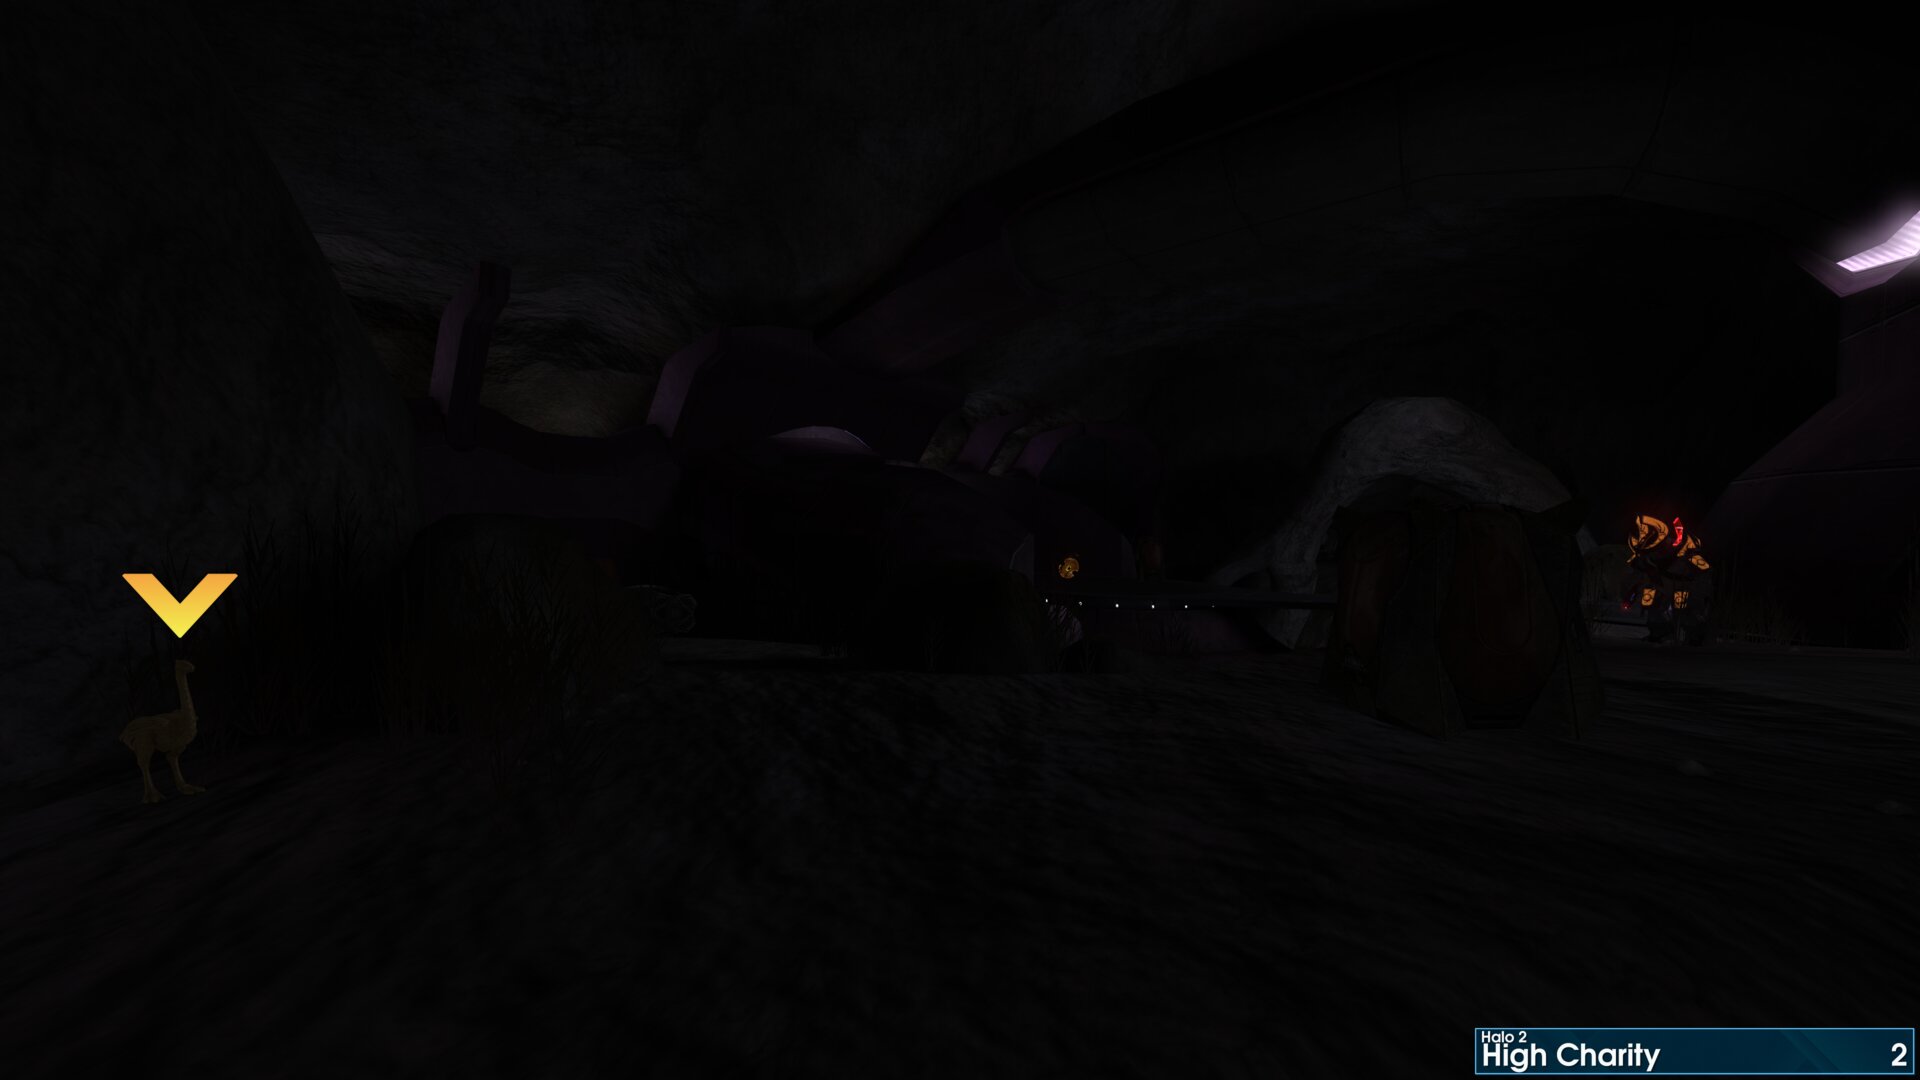
In the first garden room, head up to the large window, the Golden Moa is behind a rock at the right end of the window.
”The parasite did not defeat the Forerunners...and it shall not defeat us.” Prophet of Truth
Golden Moa 3
In the second garden room, head up to the broken window, the Golden Moa is in the far left corner by the window.
”The security systems in this part of the tower are particularly robust.” Cortana
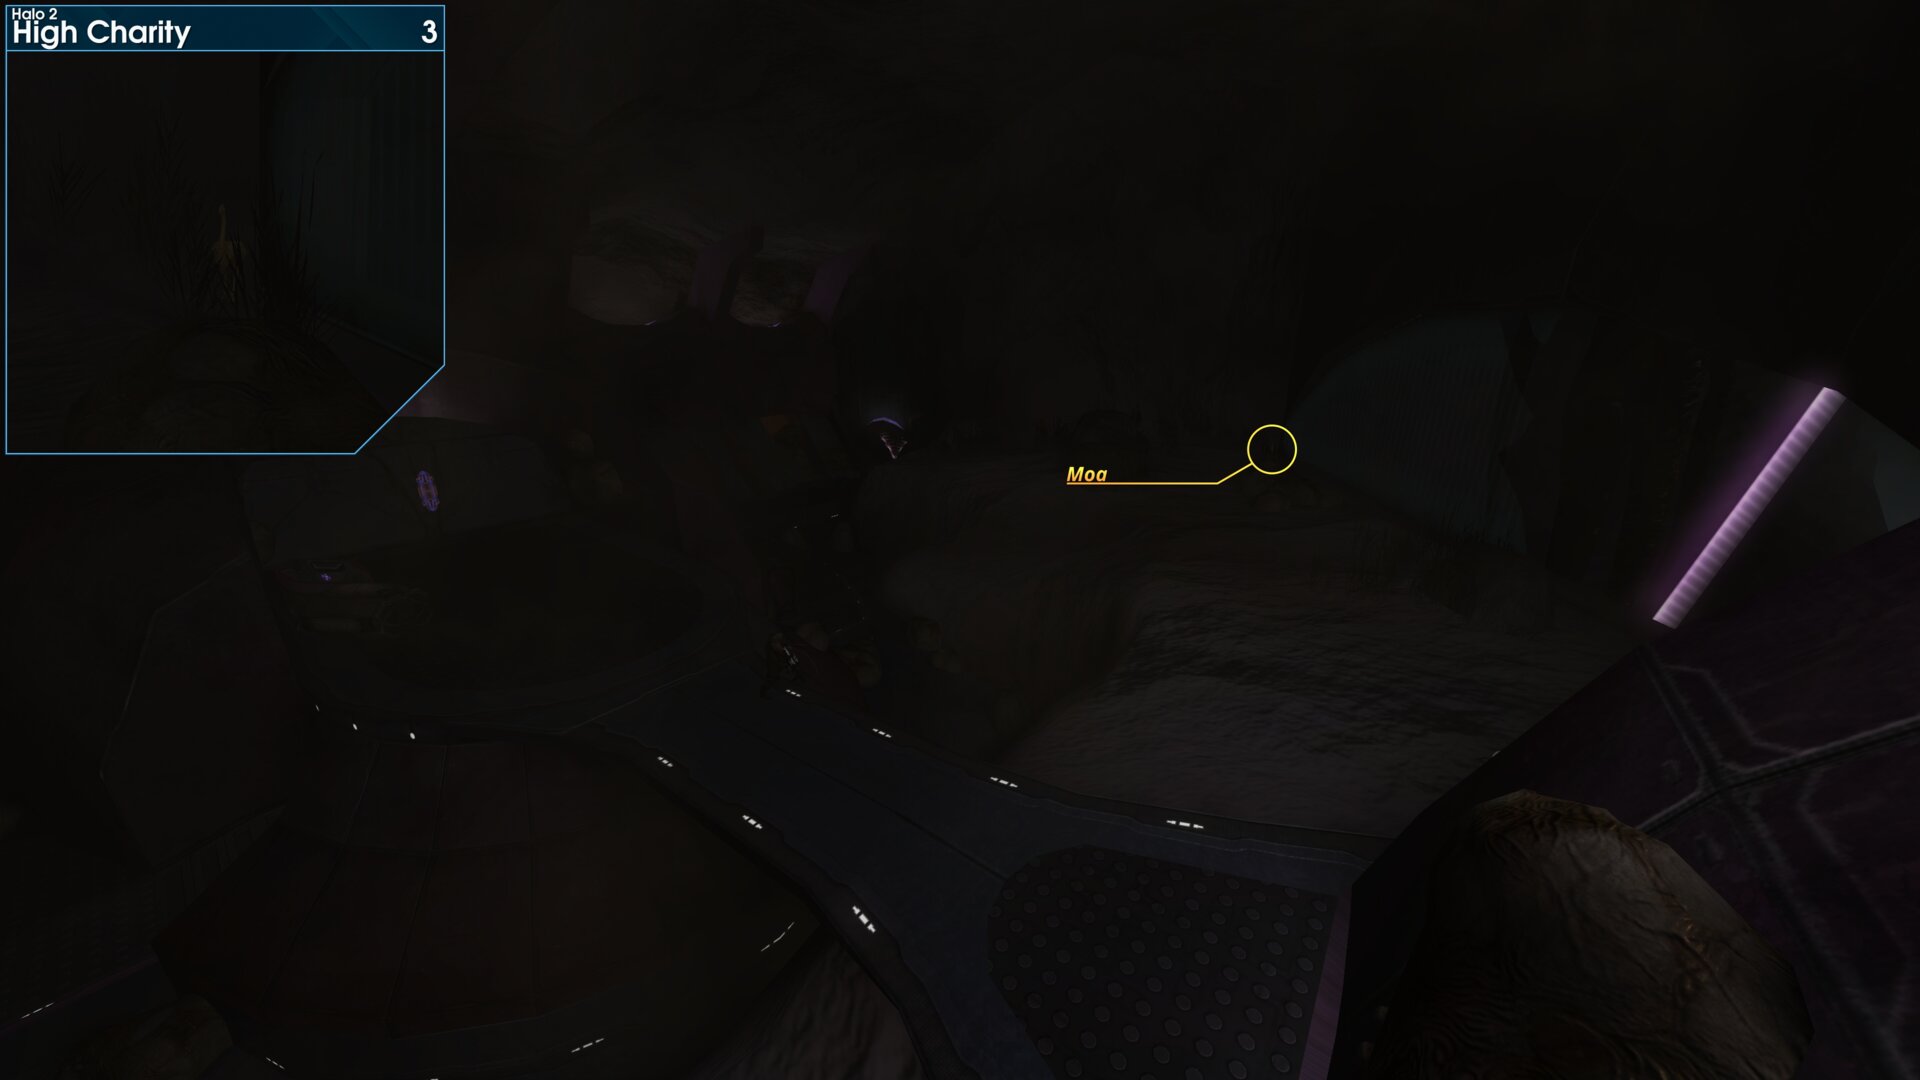
In the second garden room, head up to the broken window, the Golden Moa is in the far left corner by the window.
”The security systems in this part of the tower are particularly robust.” Cortana
Golden Moa 4
Impossible? This Golden Moa is in a separate area of the Prophet Hierarch's private quarters, this area is not used during gameplay.
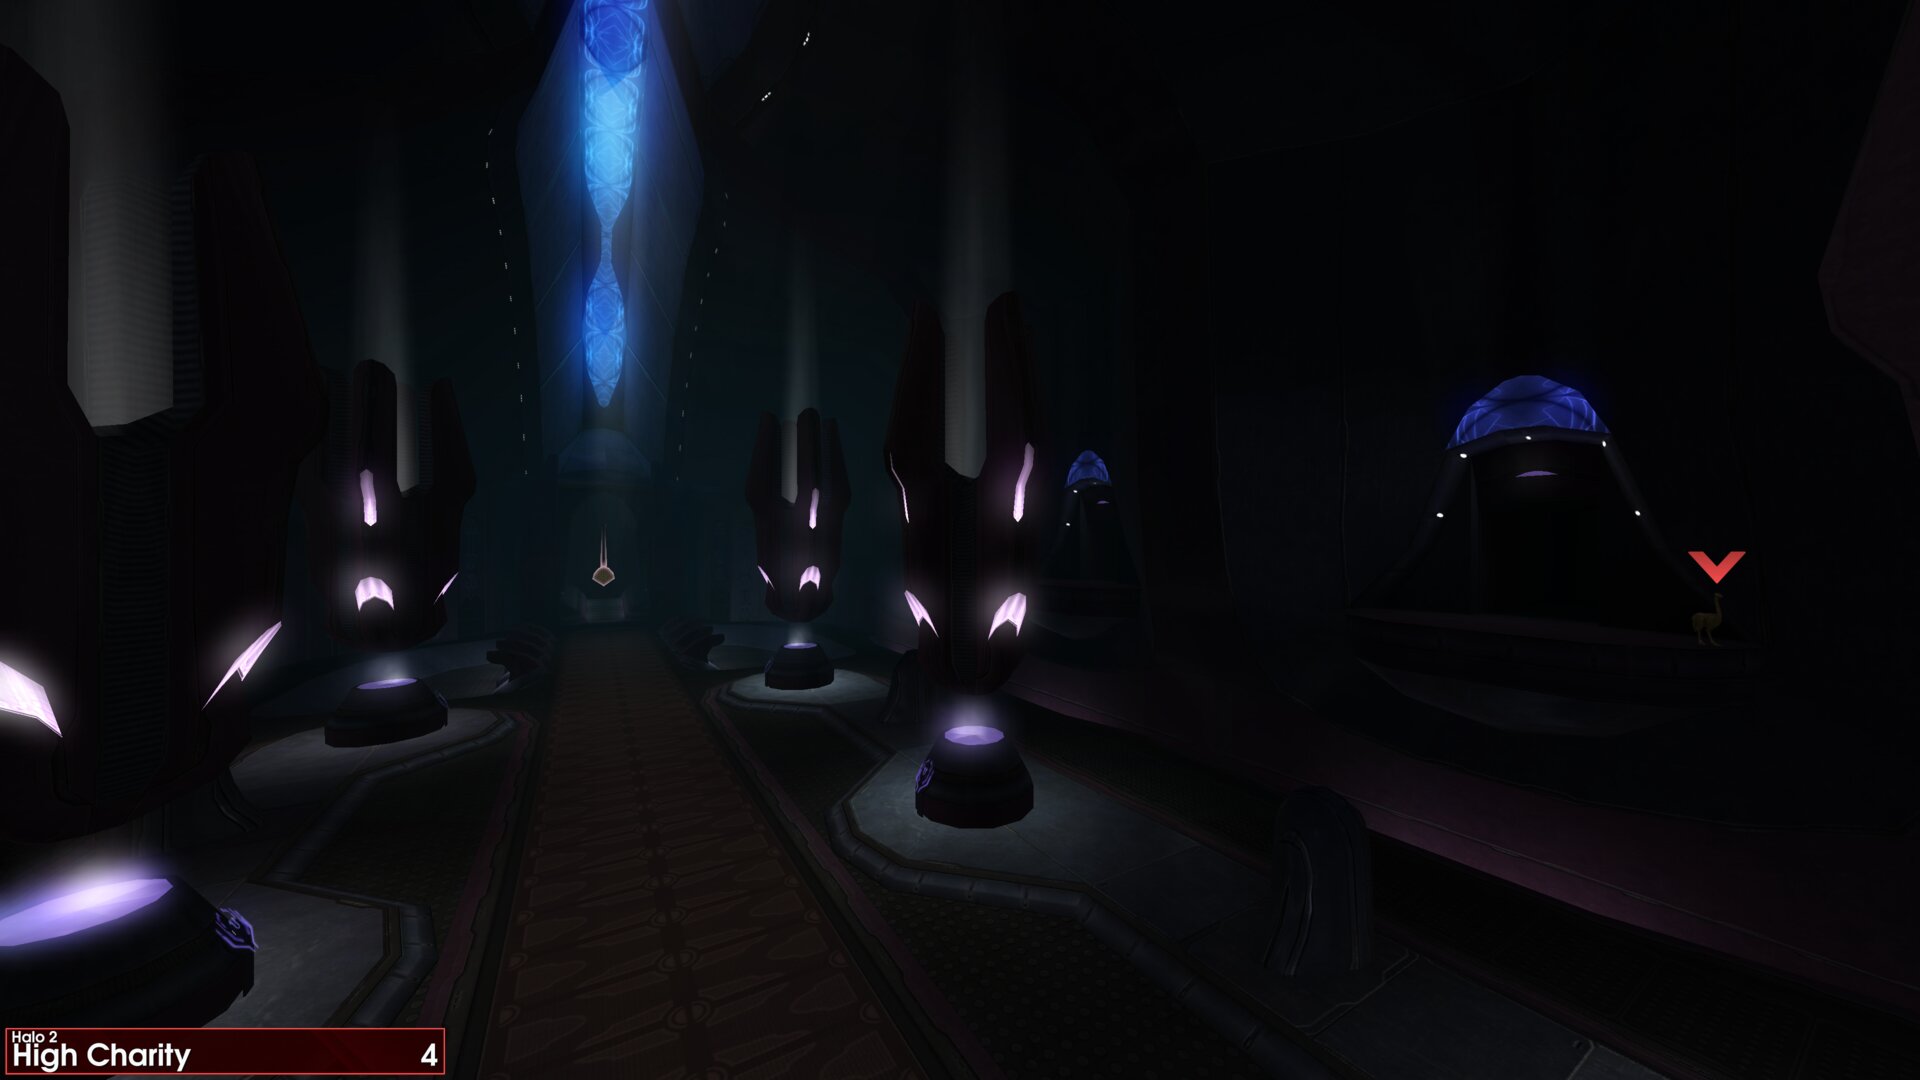
Impossible? This Golden Moa is in a separate area of the Prophet Hierarch's private quarters, this area is not used during gameplay.➟ The Great Journey
Golden Moa 1
Make your way to the base of the structure that the Scarab is stationed at. The Golden Moa is atop the ledge, on the second support structure, counting left the right.
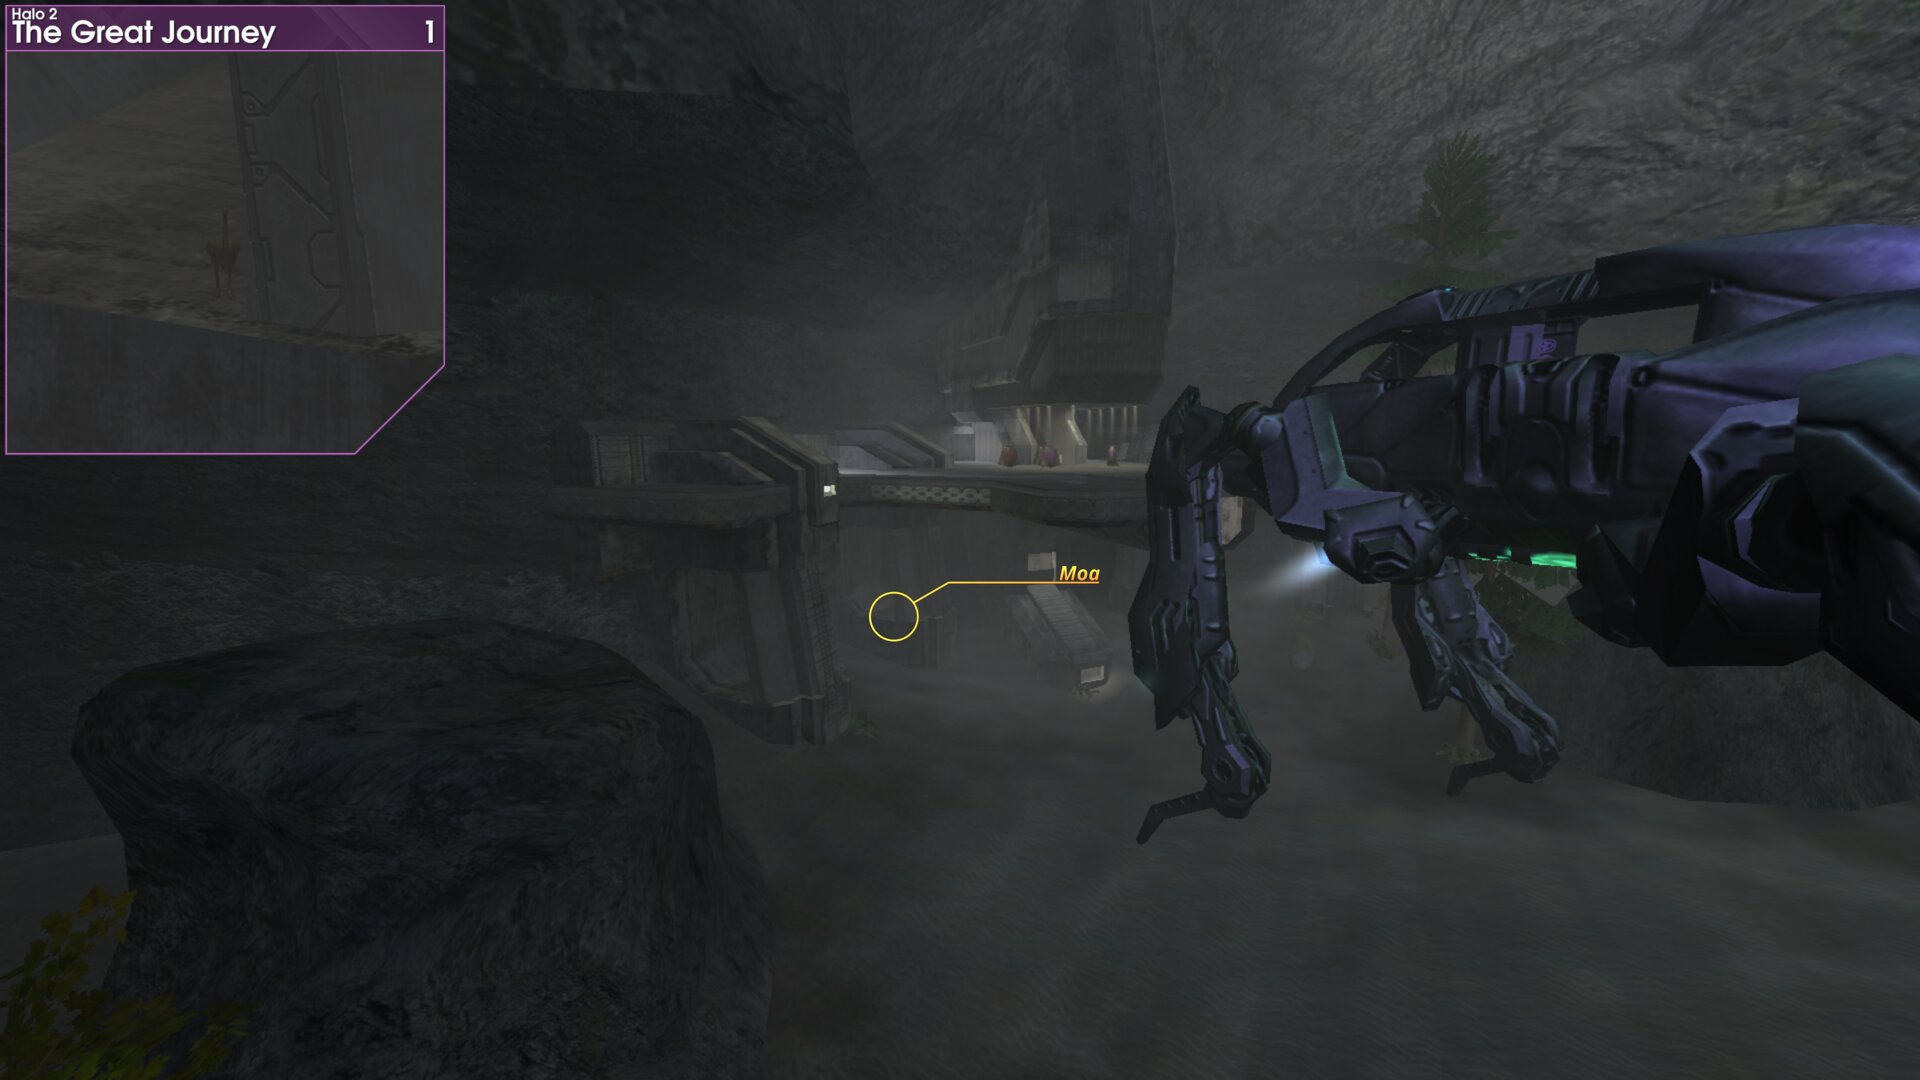
Make your way to the base of the structure that the Scarab is stationed at. The Golden Moa is atop the ledge, on the second support structure, counting left the right.
Golden Moa 2
In the two-level room with the first Shade Turret for the mission, where a group of Brutes await your arrival. You’ll find the Golden Moa is atop the ledge, above the door you entered through.
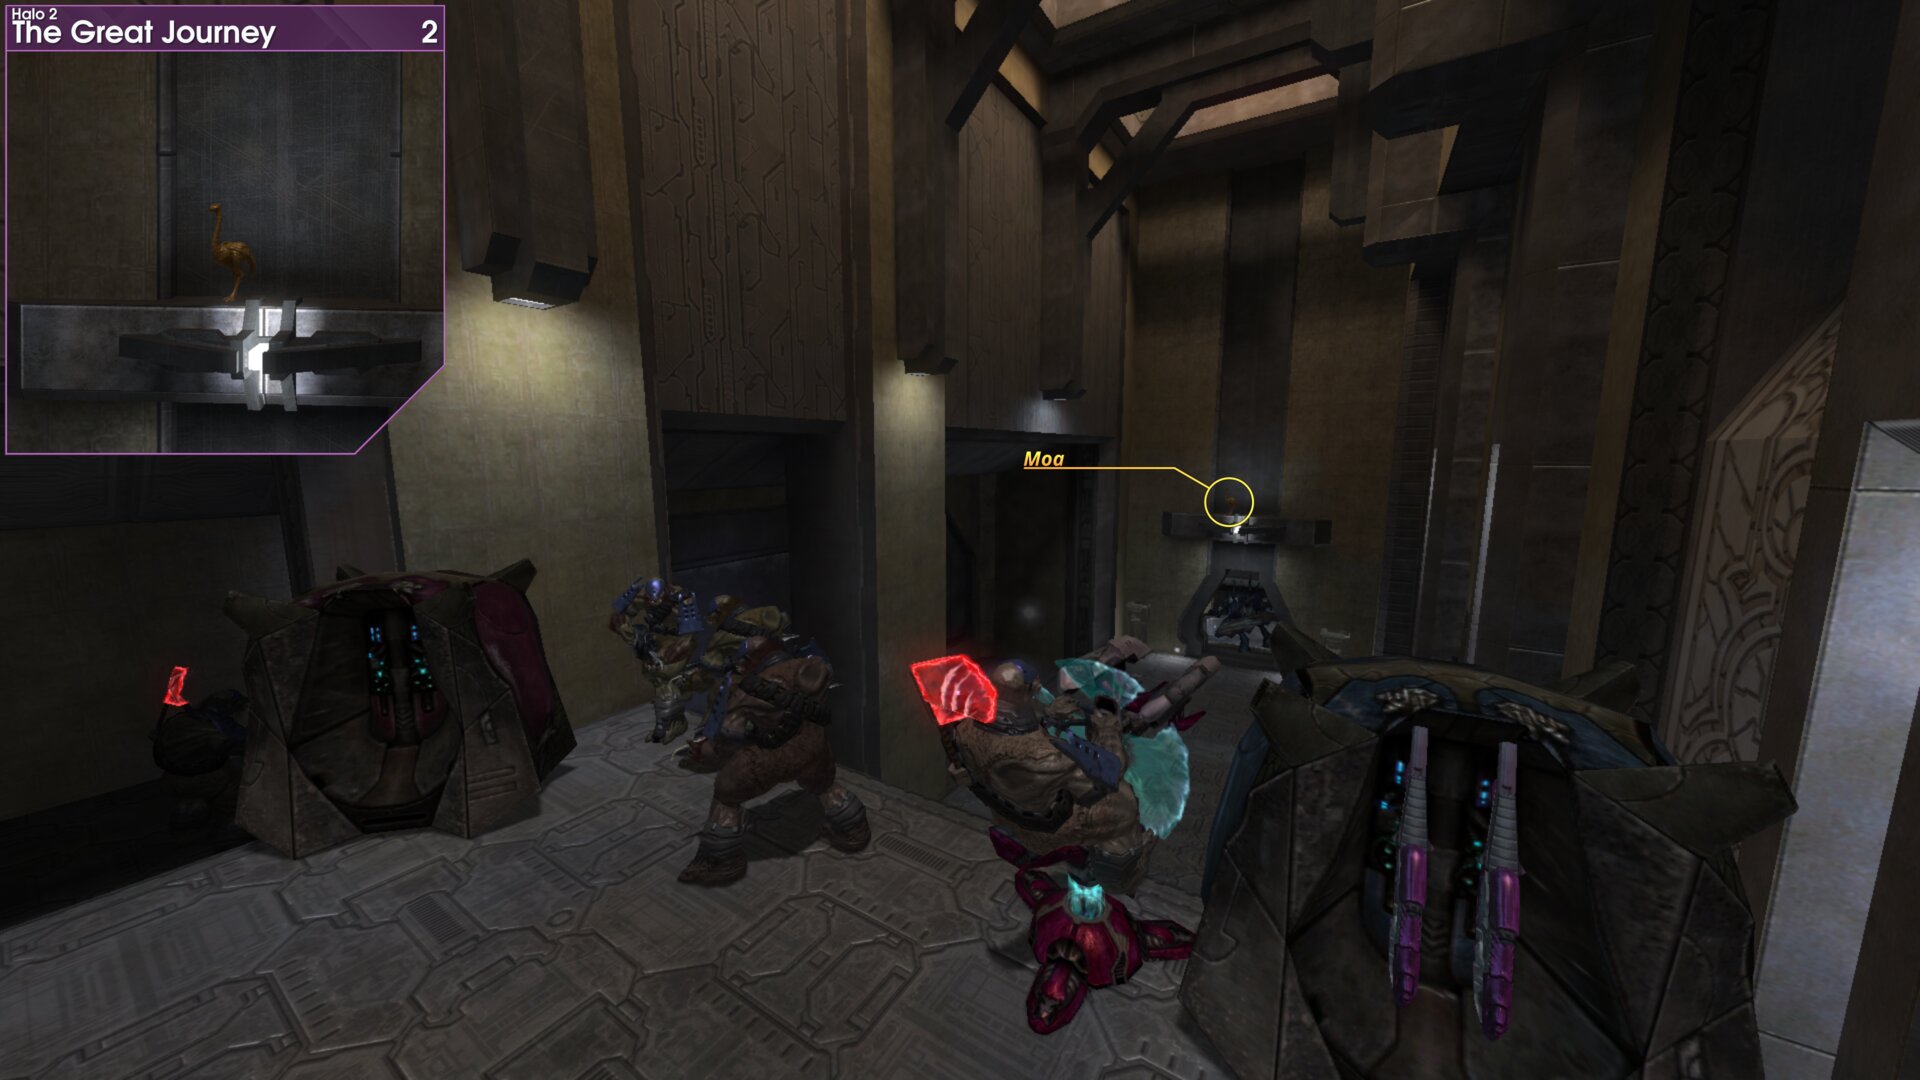
In the two-level room with the first Shade Turret for the mission, where a group of Brutes await your arrival. You’ll find the Golden Moa is atop the ledge, above the door you entered through.
Golden Moa 3
On the bridge defended by Jackals & Drones. Look to the right of the door you enter through, the Golden Moa is on top of the lower ledge, on the nearest pillar.
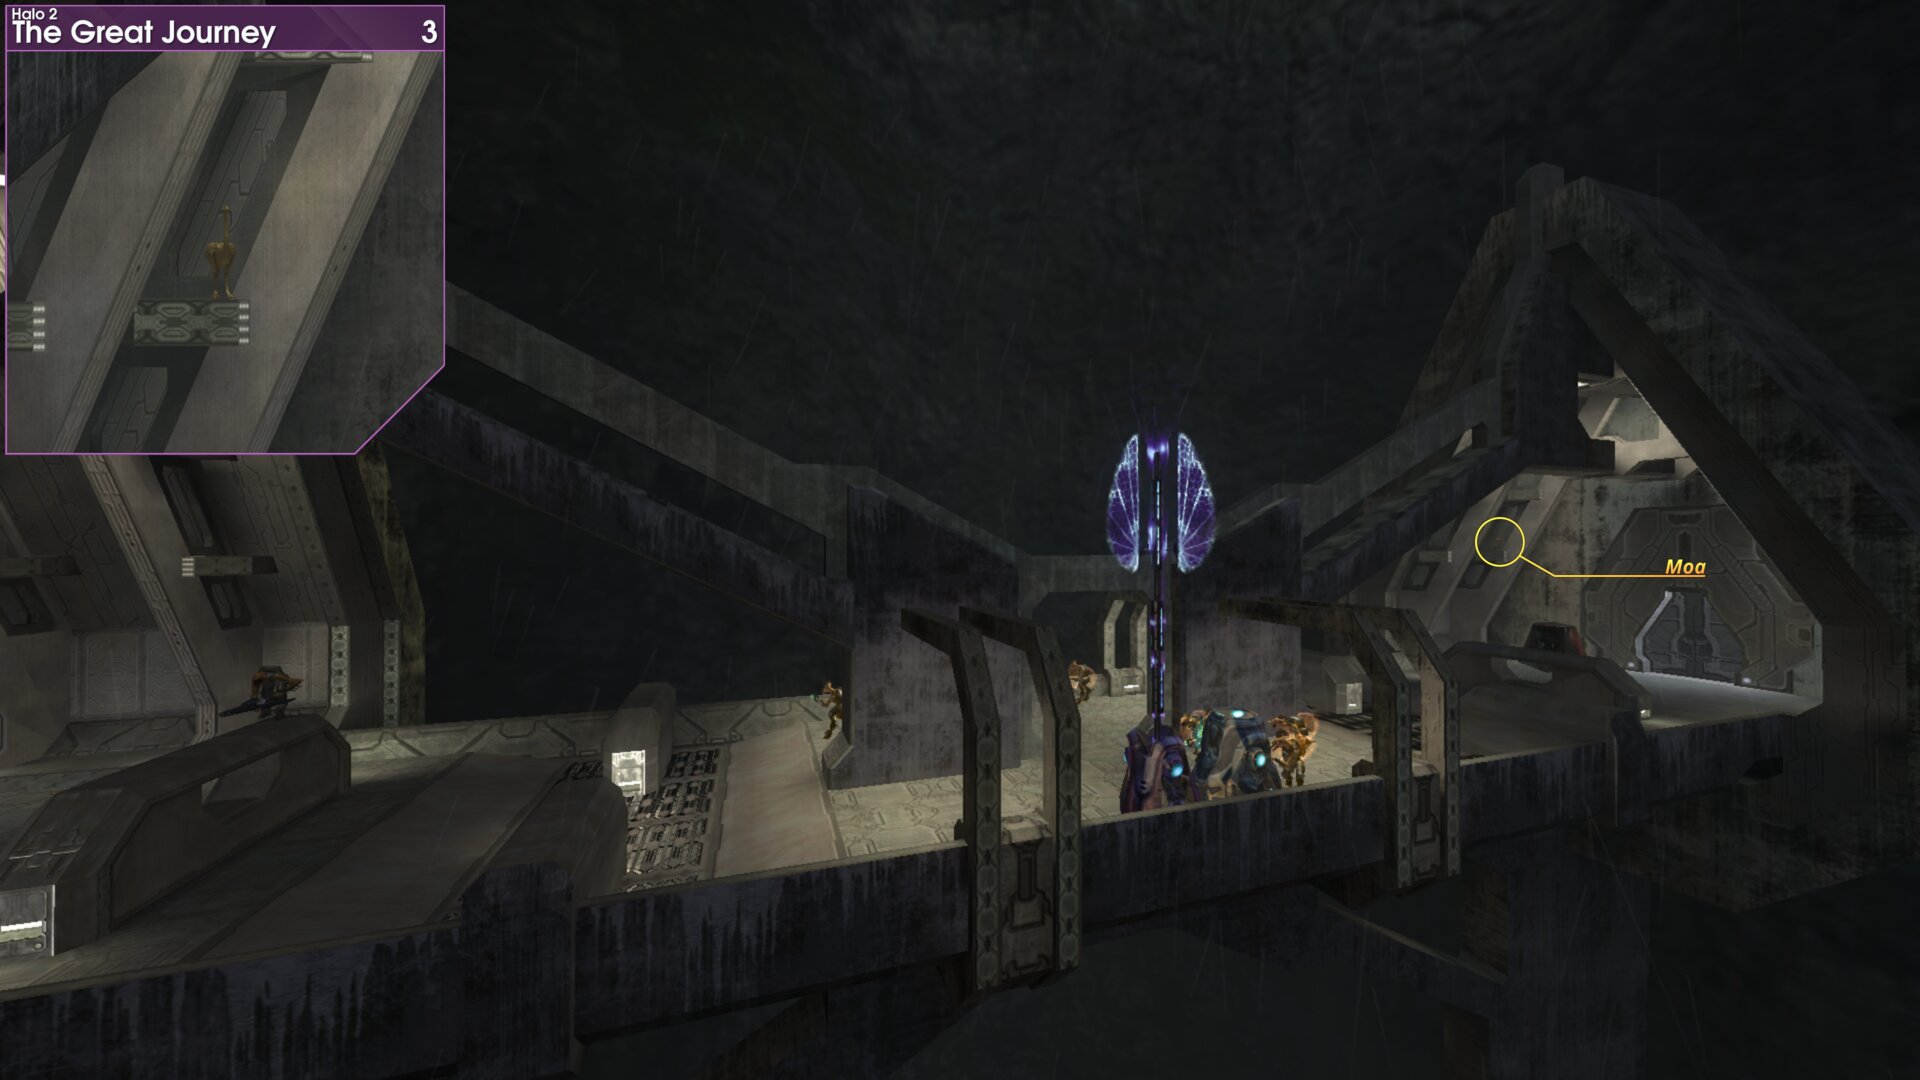
On the bridge defended by Jackals & Drones. Look to the right of the door you enter through, the Golden Moa is on top of the lower ledge, on the nearest pillar.
Golden Moa 4
Once you reach the outer platform, by the Scarab, where the Brutes are about to kill some Marines. The Golden Moa is on the ledge above the door you just came through.
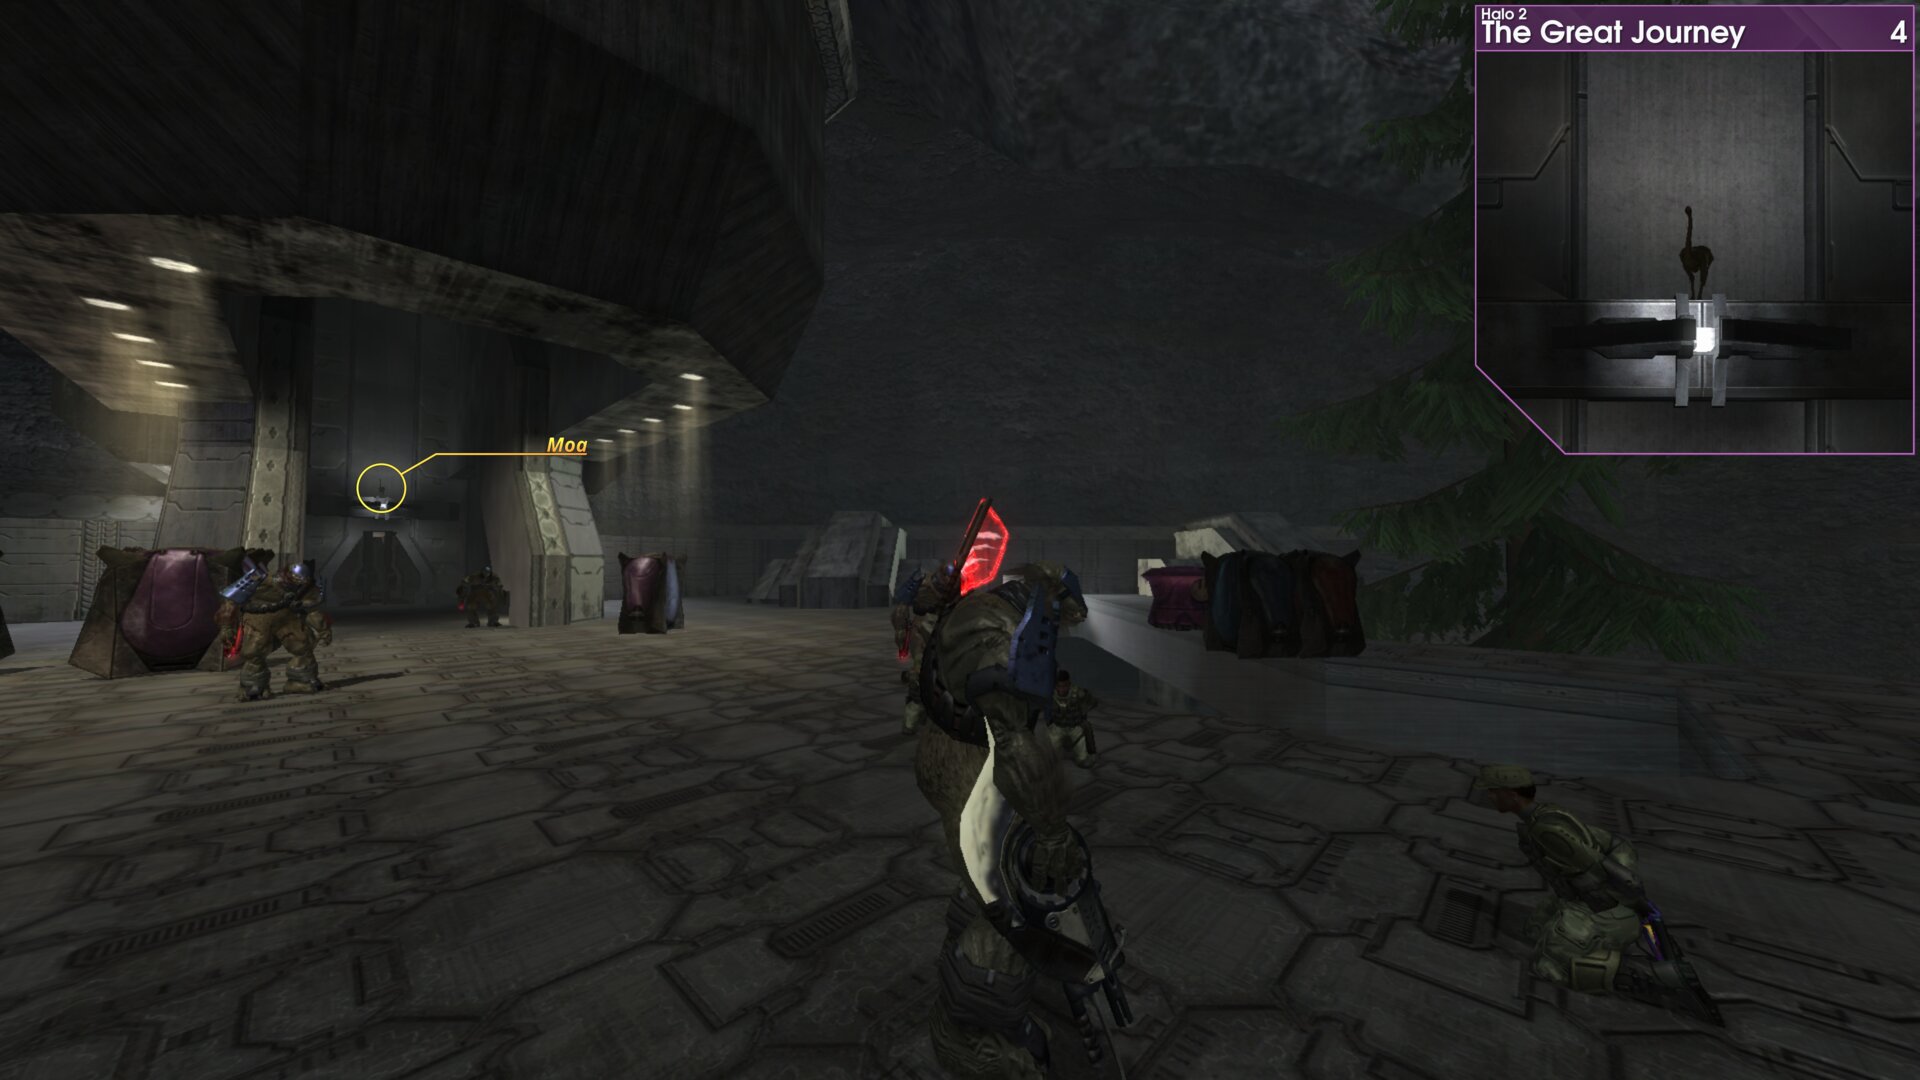
Once you reach the outer platform, by the Scarab, where the Brutes are about to kill some Marines. The Golden Moa is on the ledge above the door you just came through.
Golden Moa 5
Delusions and Grandeur.
As you make your way through the charred entry to the Control Room, you’ll reach the door to the next room. The Golden Moa is to the right of the door, beneath some rubble.
Delusions and Grandeur.
As you make your way through the charred entry to the Control Room, you’ll reach the door to the next room. The Golden Moa is to the right of the door, beneath some rubble.
Halo 3
➟ Sierra 117
Rally Point: Alpha
Rally Point: Bravo
Rally Point: Charlie
Golden Moa 1
At the very start of the level, turn around.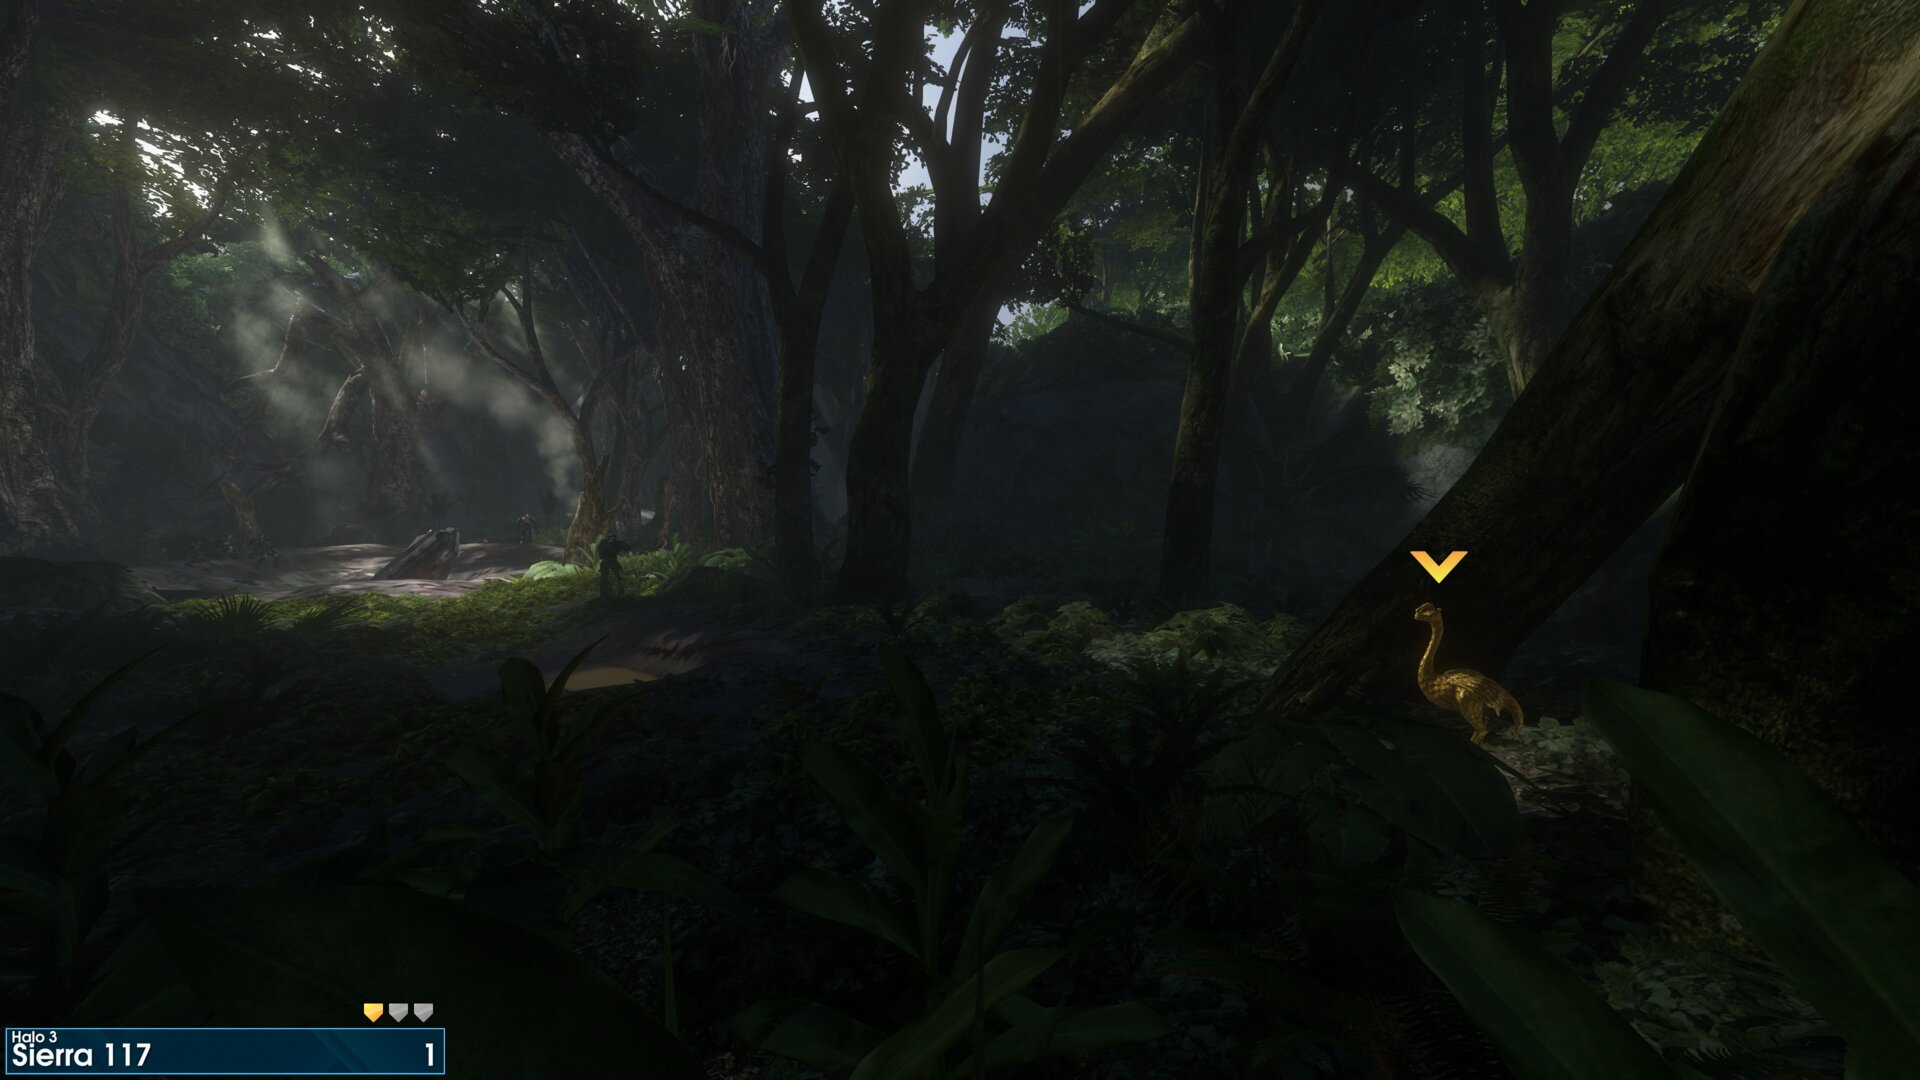
At the very start of the level, turn around.
Golden Moa 2
Beside the log that's to your left, as you reach the jump tutorial.
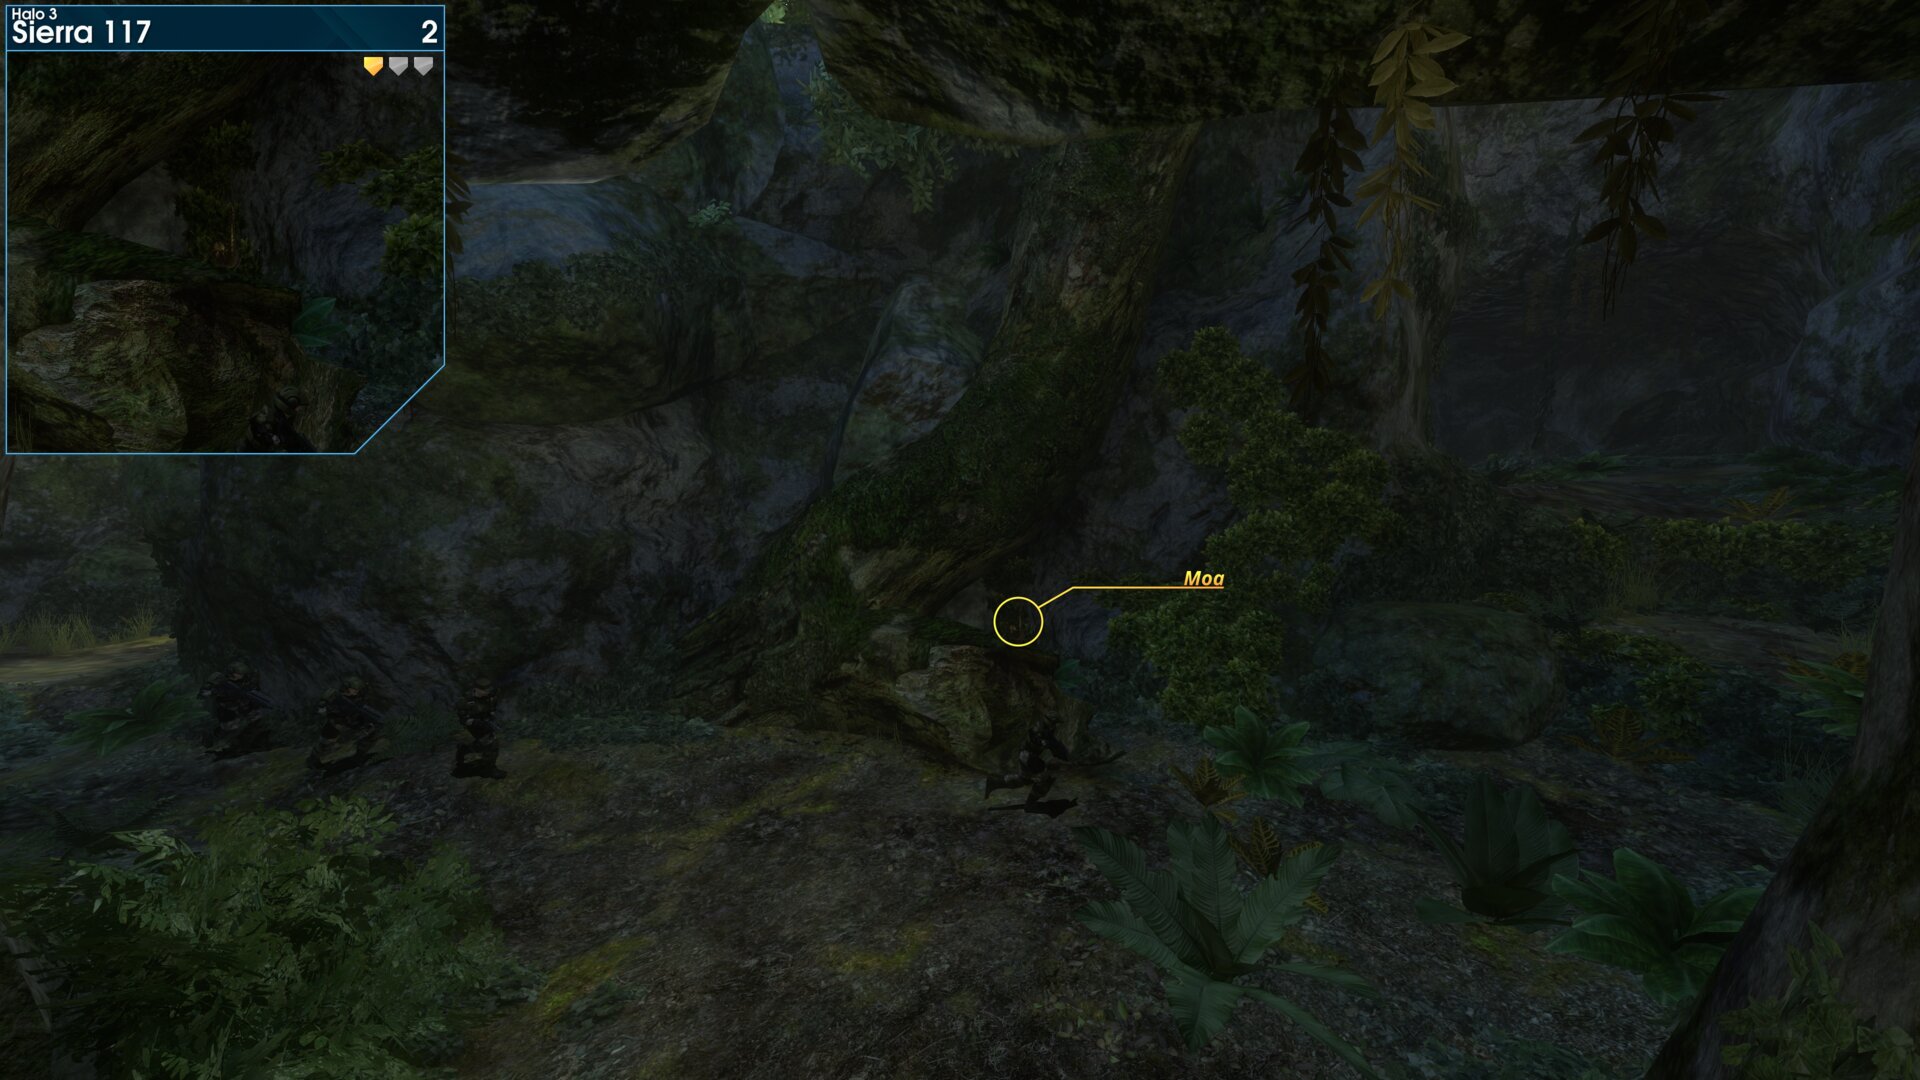
Beside the log that's to your left, as you reach the jump tutorial.
Golden Moa 3
In a pool of water just after learning to jump.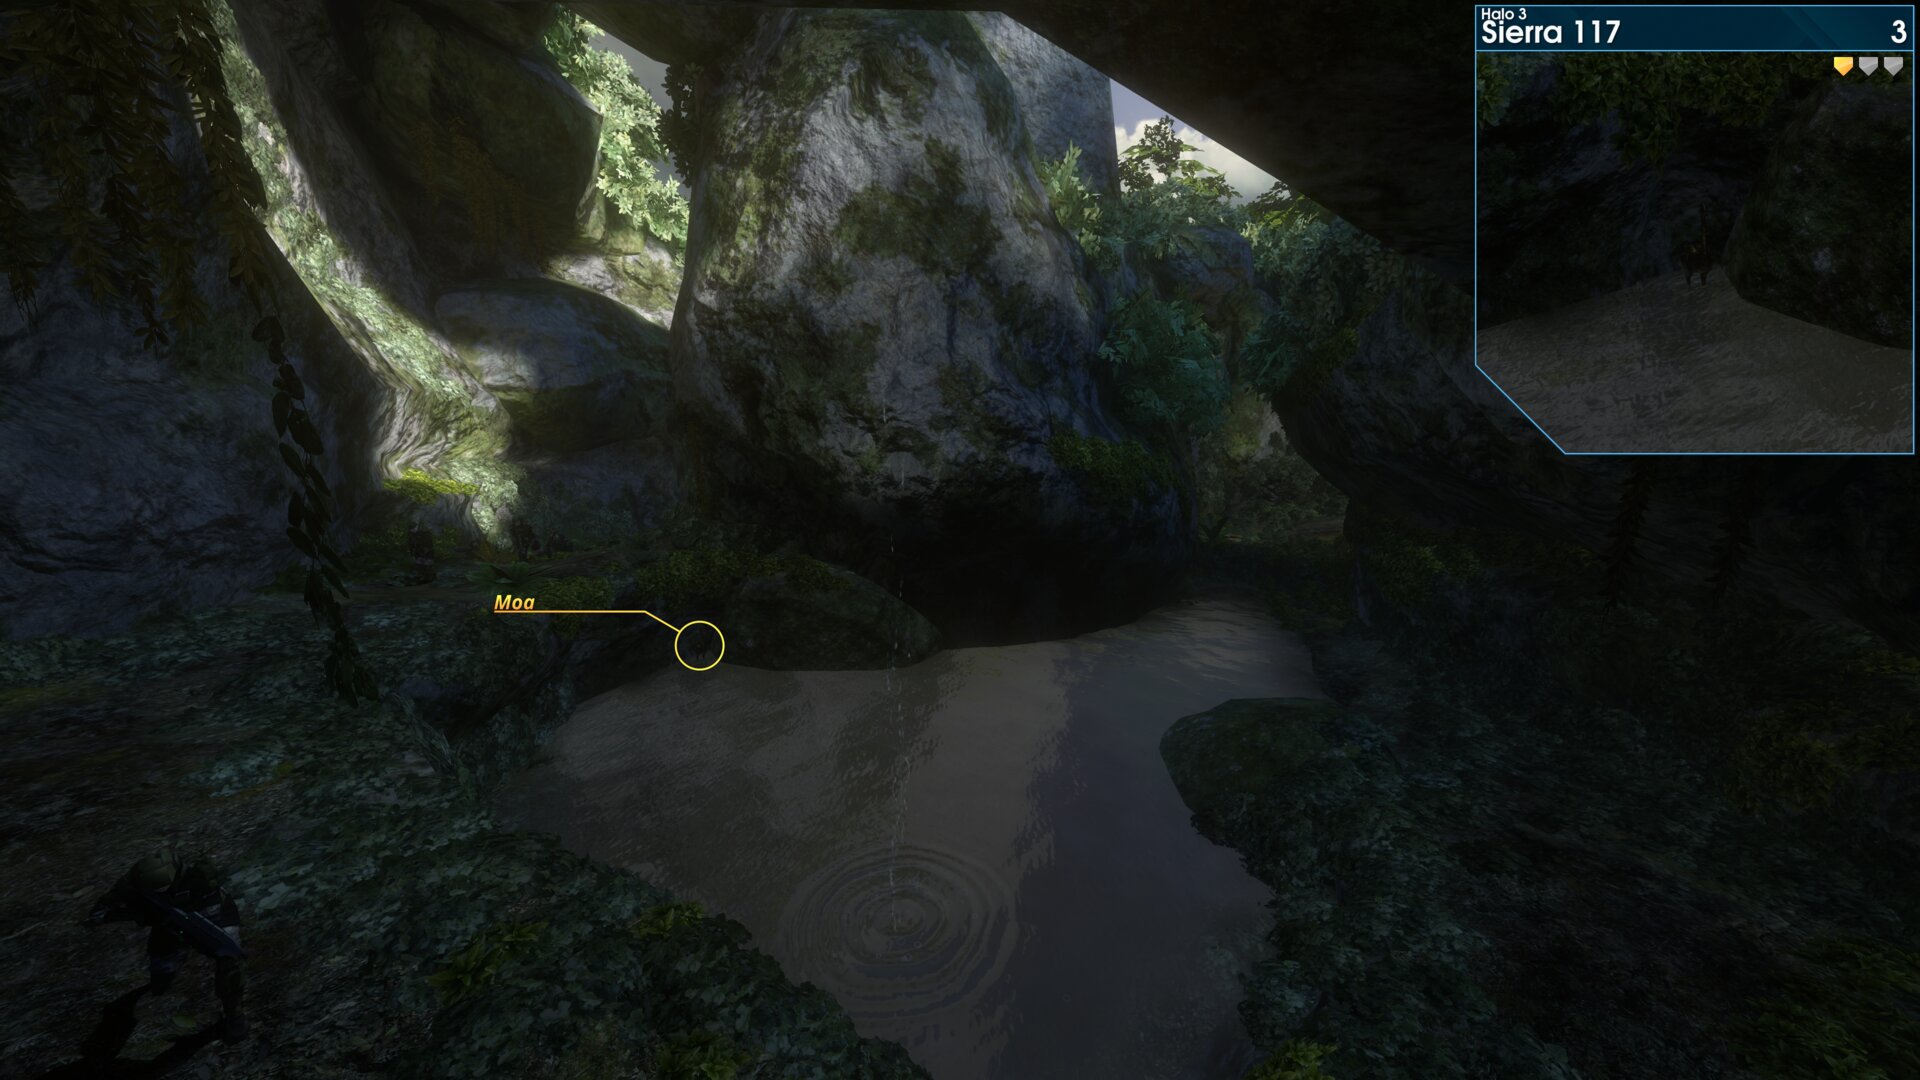
In a pool of water just after learning to jump.
Golden Moa 4
On top of the rock wall, Sgt. Johnson and some Marines climb. (next to the first waterfall you'll see)
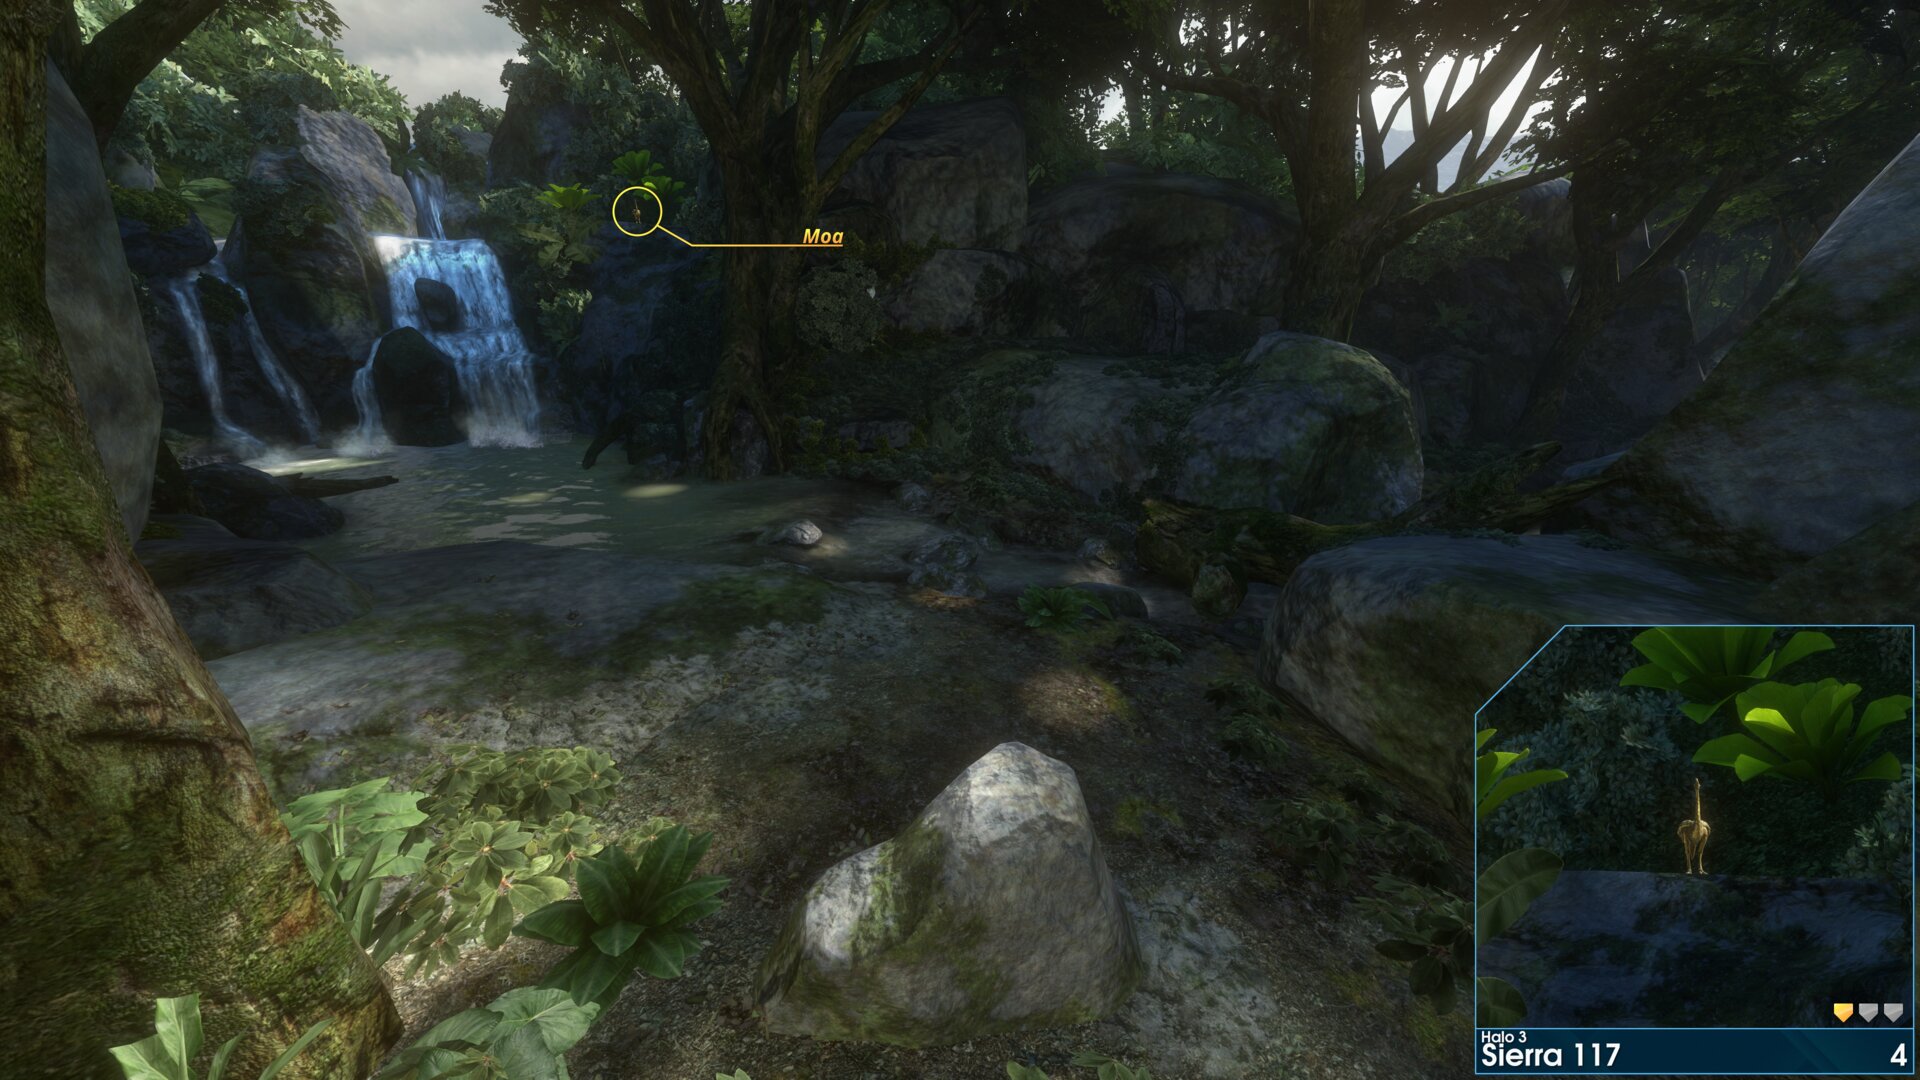
On top of the rock wall, Sgt. Johnson and some Marines climb. (next to the first waterfall you'll see)
Golden Moa 5
In the structure to the right of the first group of enemies you encounter.
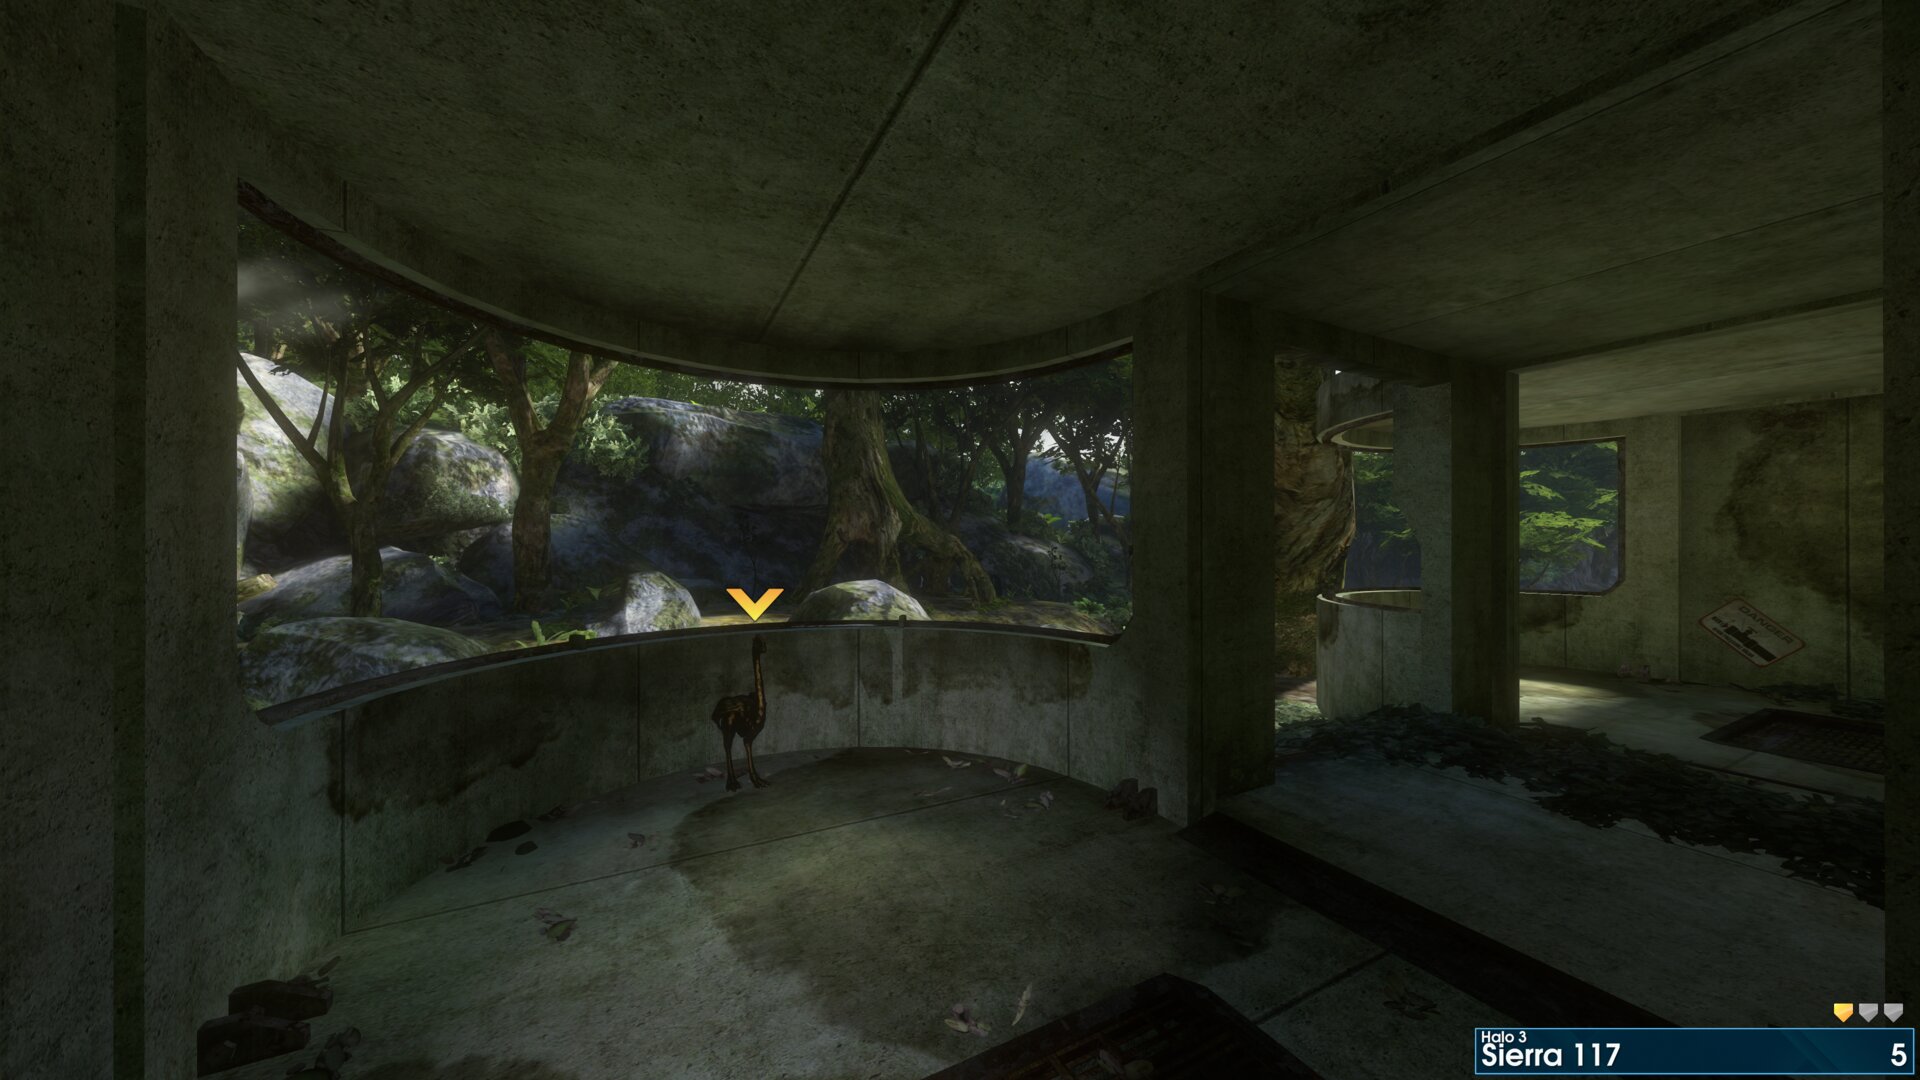
In the structure to the right of the first group of enemies you encounter.
Golden Moa 6
At the bottom of the waterfall, at the first Phantom drop off.
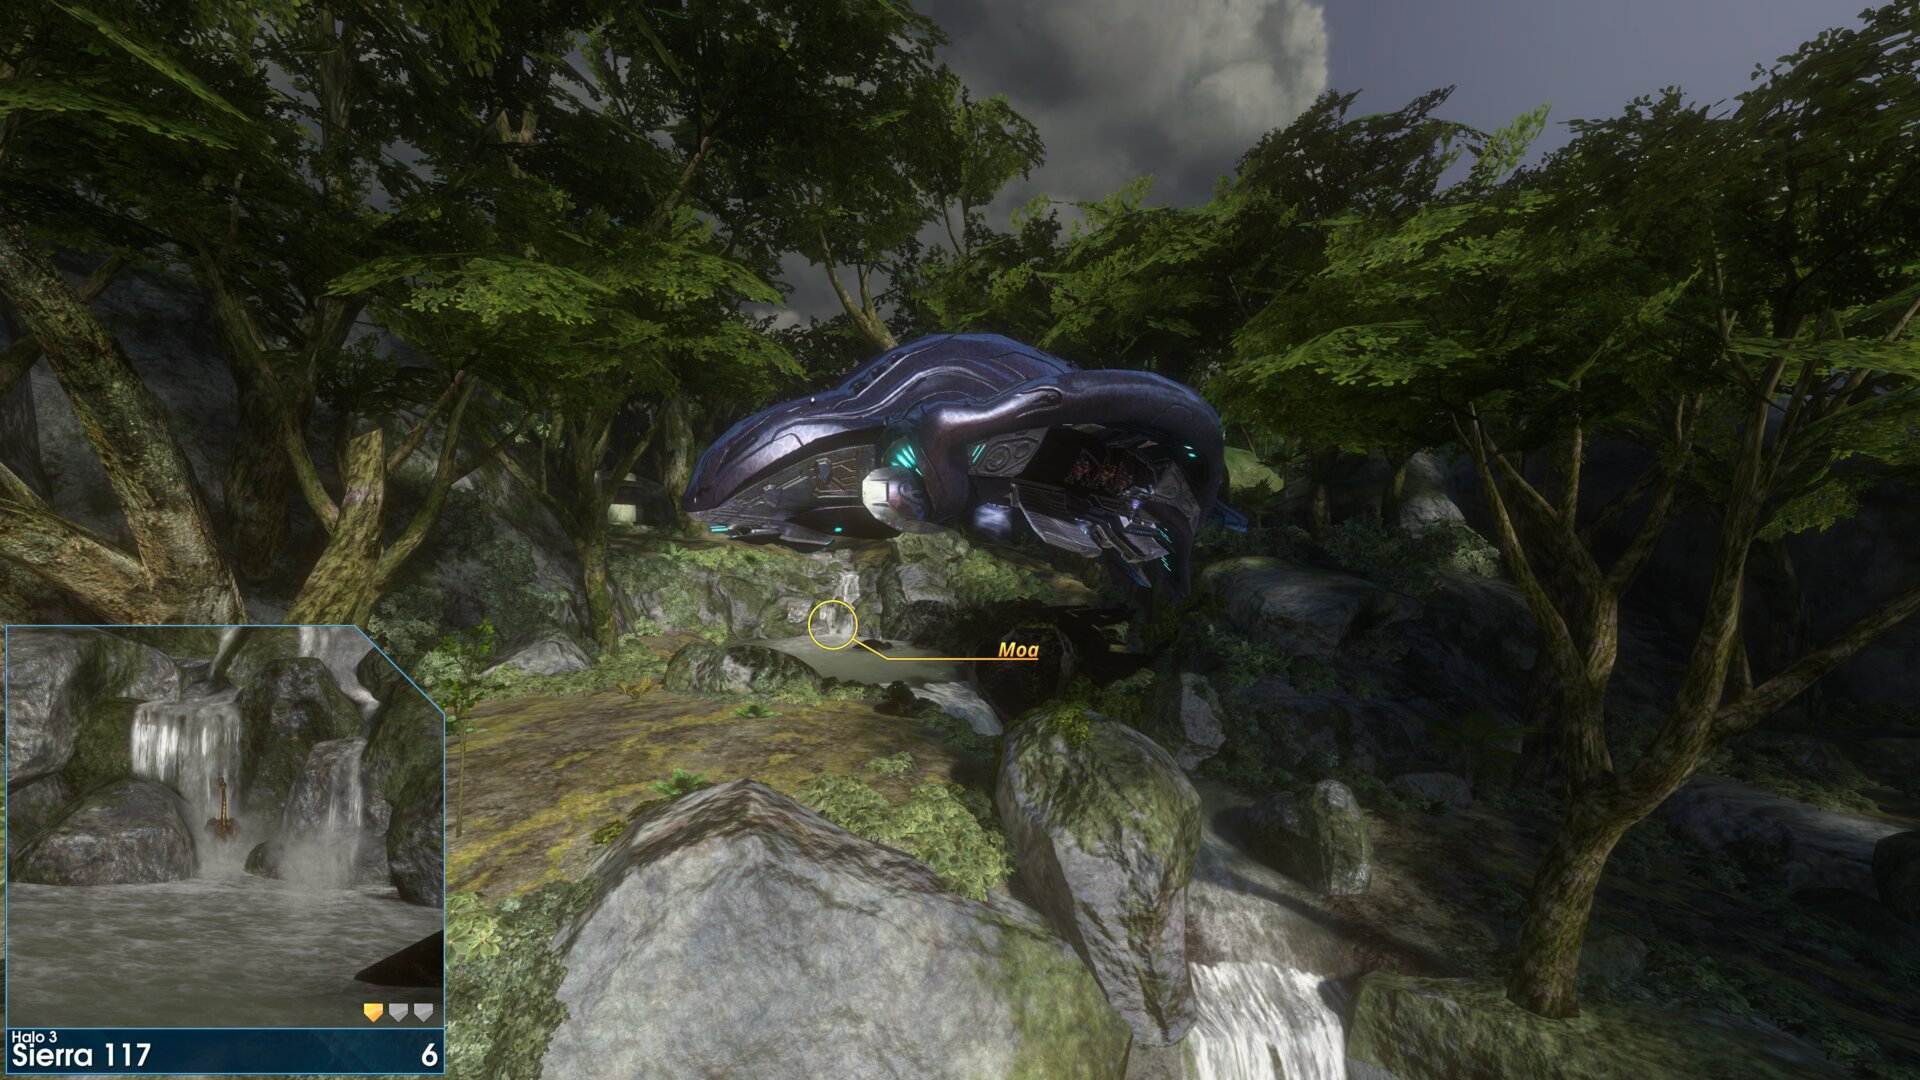
At the bottom of the waterfall, at the first Phantom drop off.
Golden Moa 7
Between the first 2 enemy encounters, turn around after dropping down. (this is NOT near the first Cortana moment)
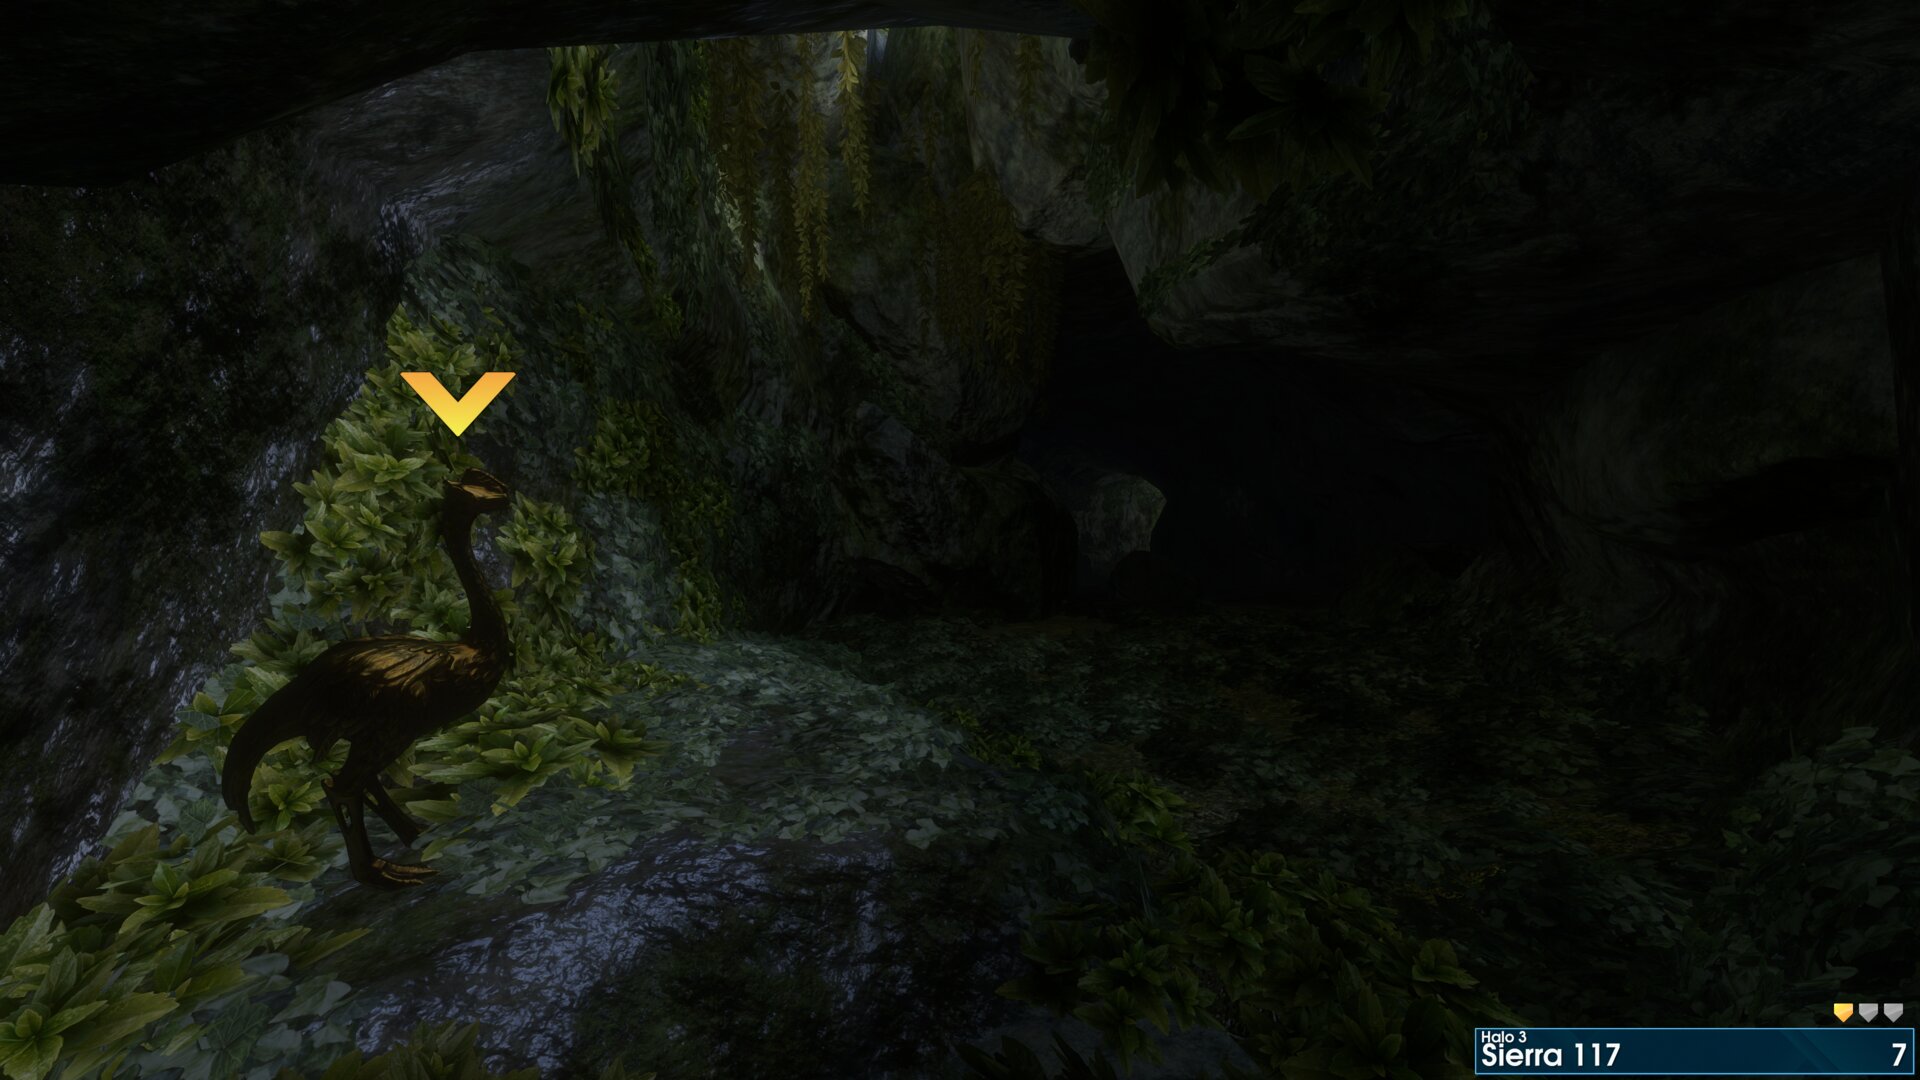
Between the first 2 enemy encounters, turn around after dropping down. (this is NOT near the first Cortana moment)
Golden Moa 8
In the area where you encounter the first sleeping Grunts, look in a tree to the far right. It's beside the path you'll take to the next area.
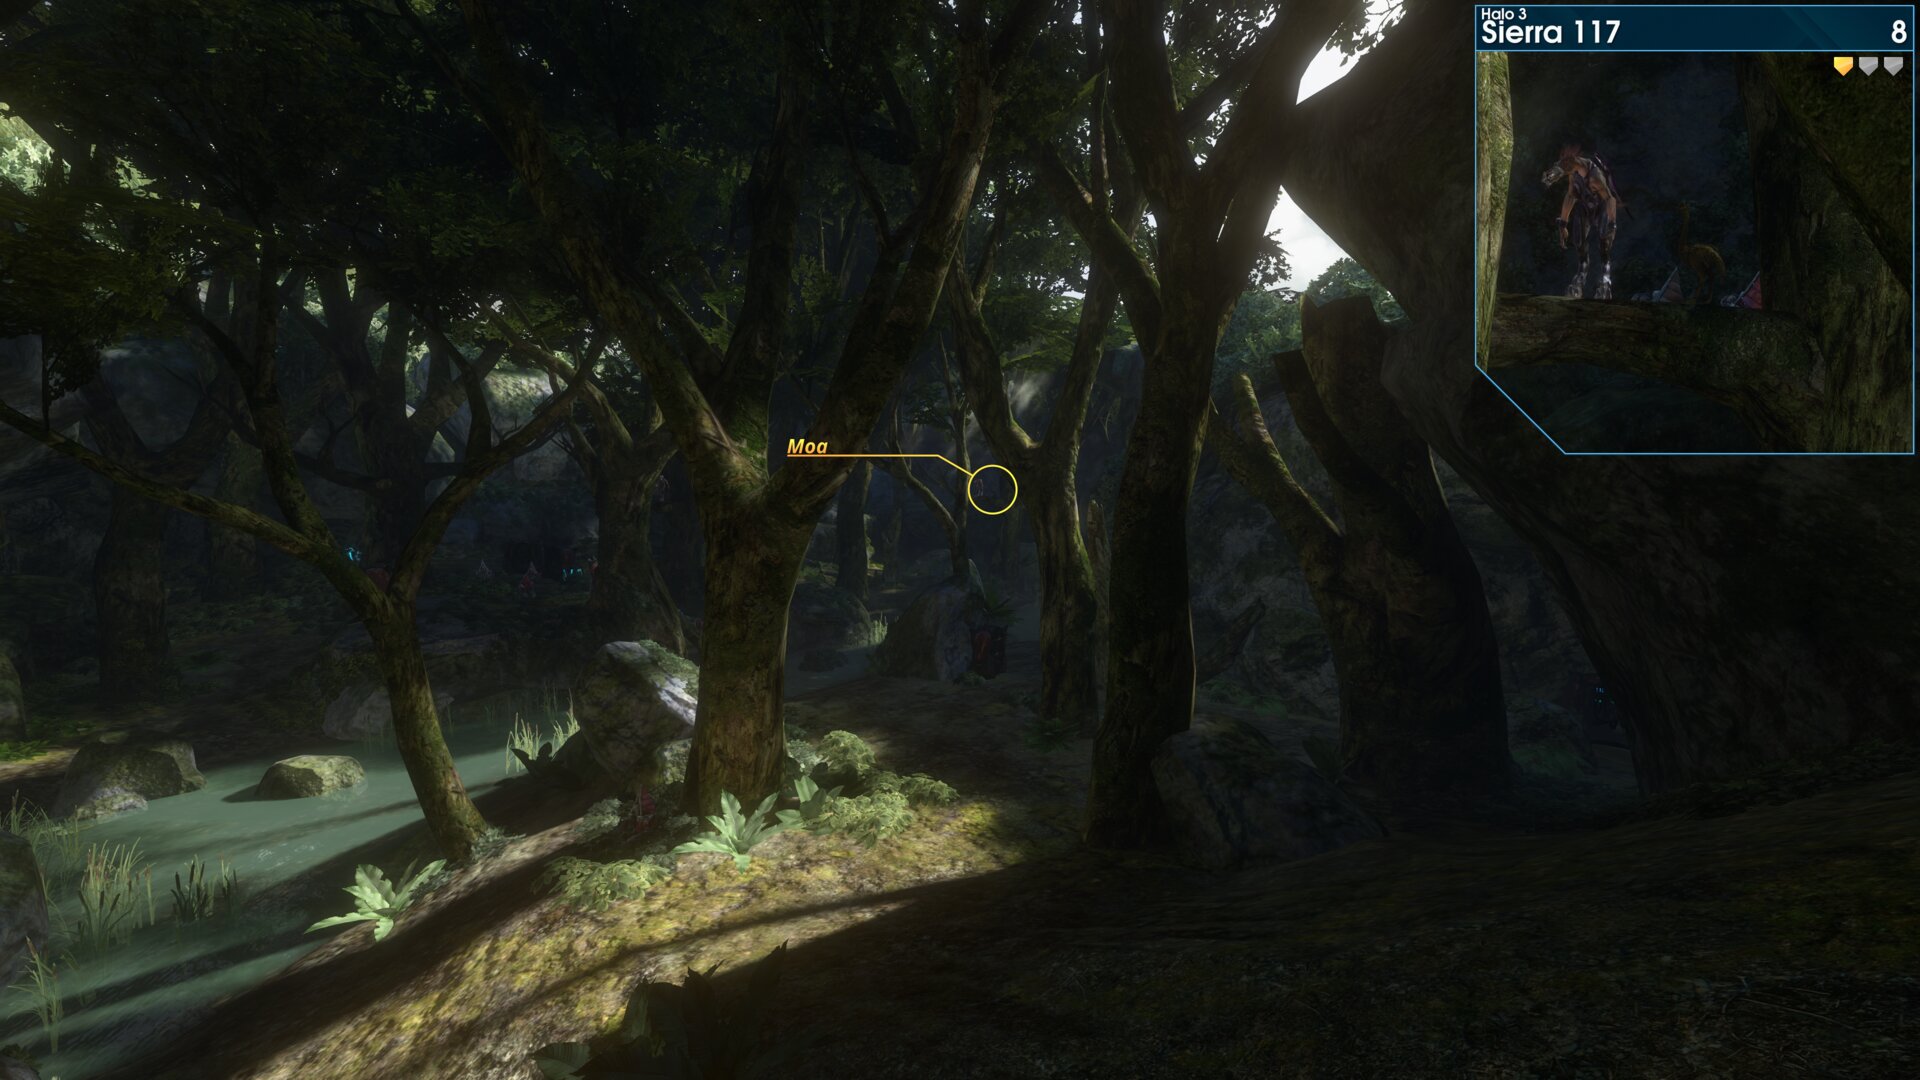
In the area where you encounter the first sleeping Grunts, look in a tree to the far right. It's beside the path you'll take to the next area.
Golden Moa 9
After the Brute interrogating a Marine on a log, go across the log, and into the cave to the left.
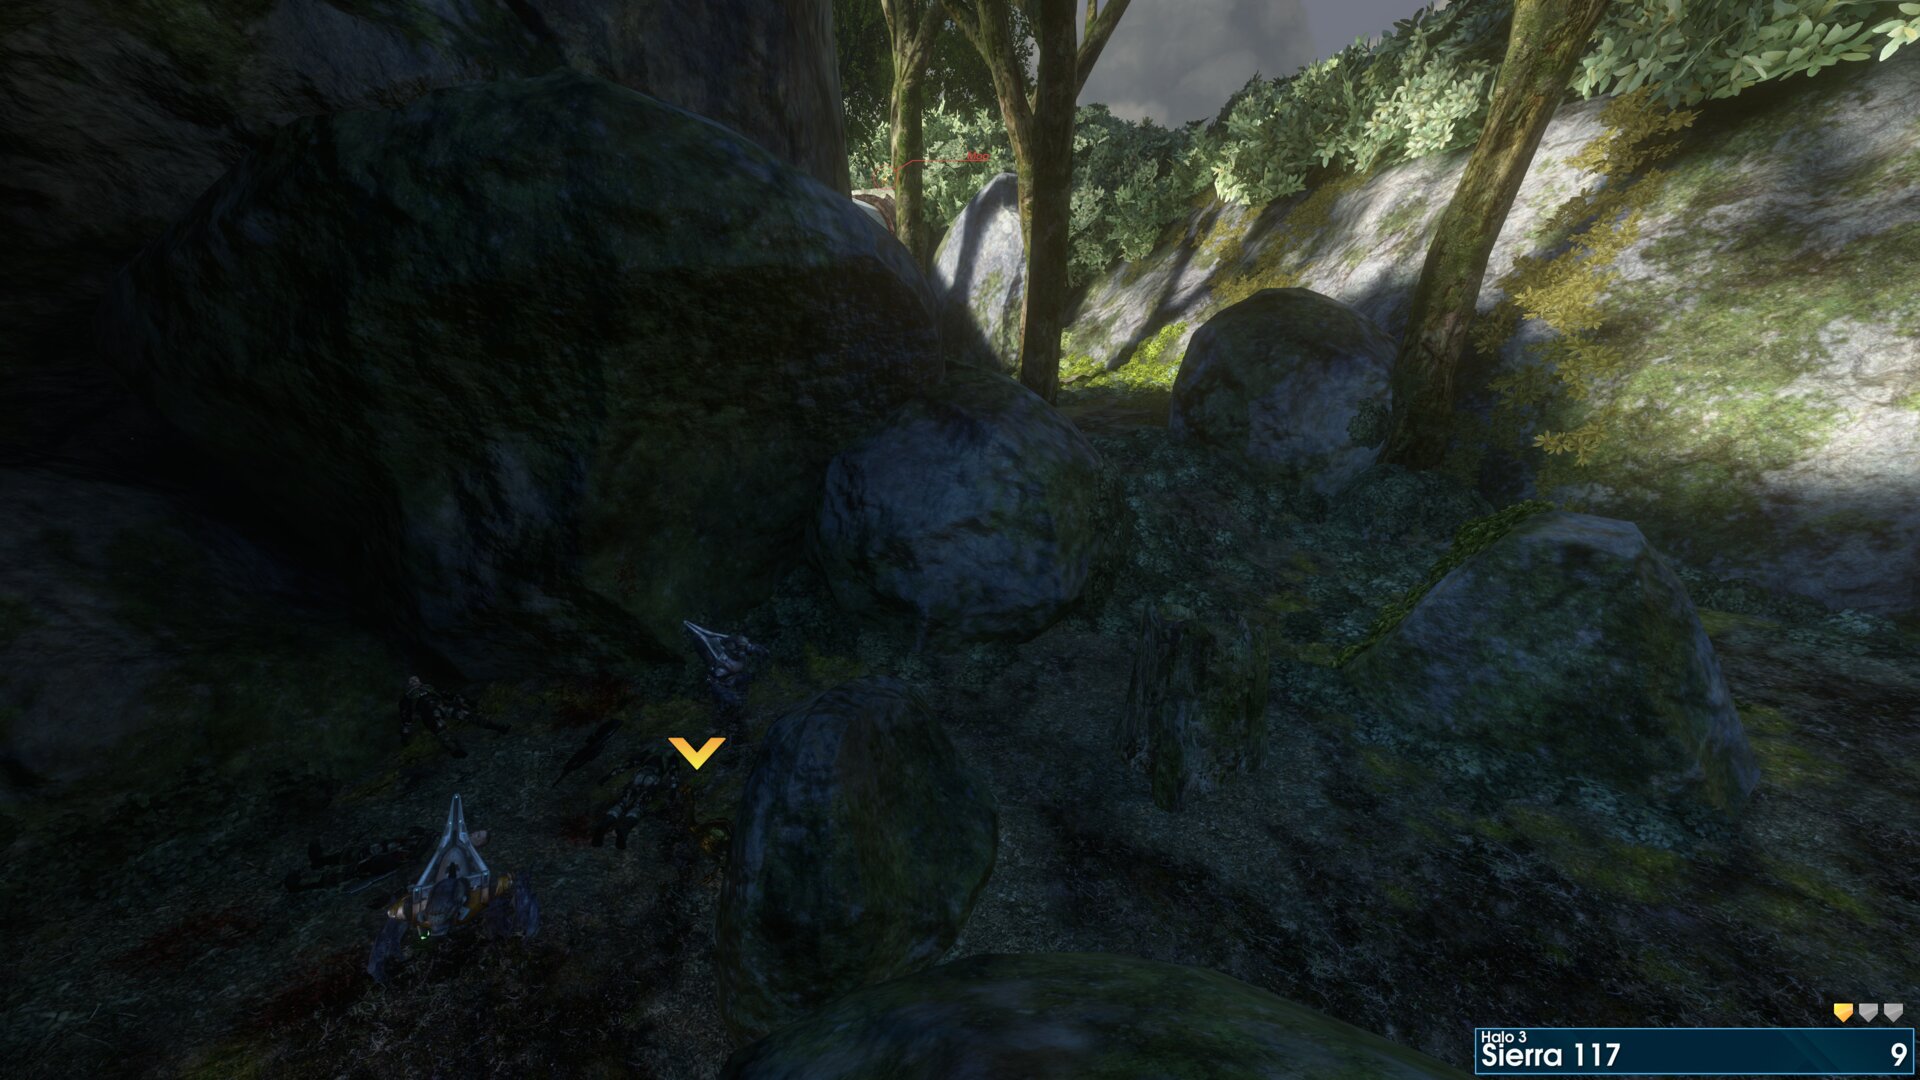
After the Brute interrogating a Marine on a log, go across the log, and into the cave to the left.
Golden Moa 10
On top of the pipe that's just after the Brute interrogating a Marine.
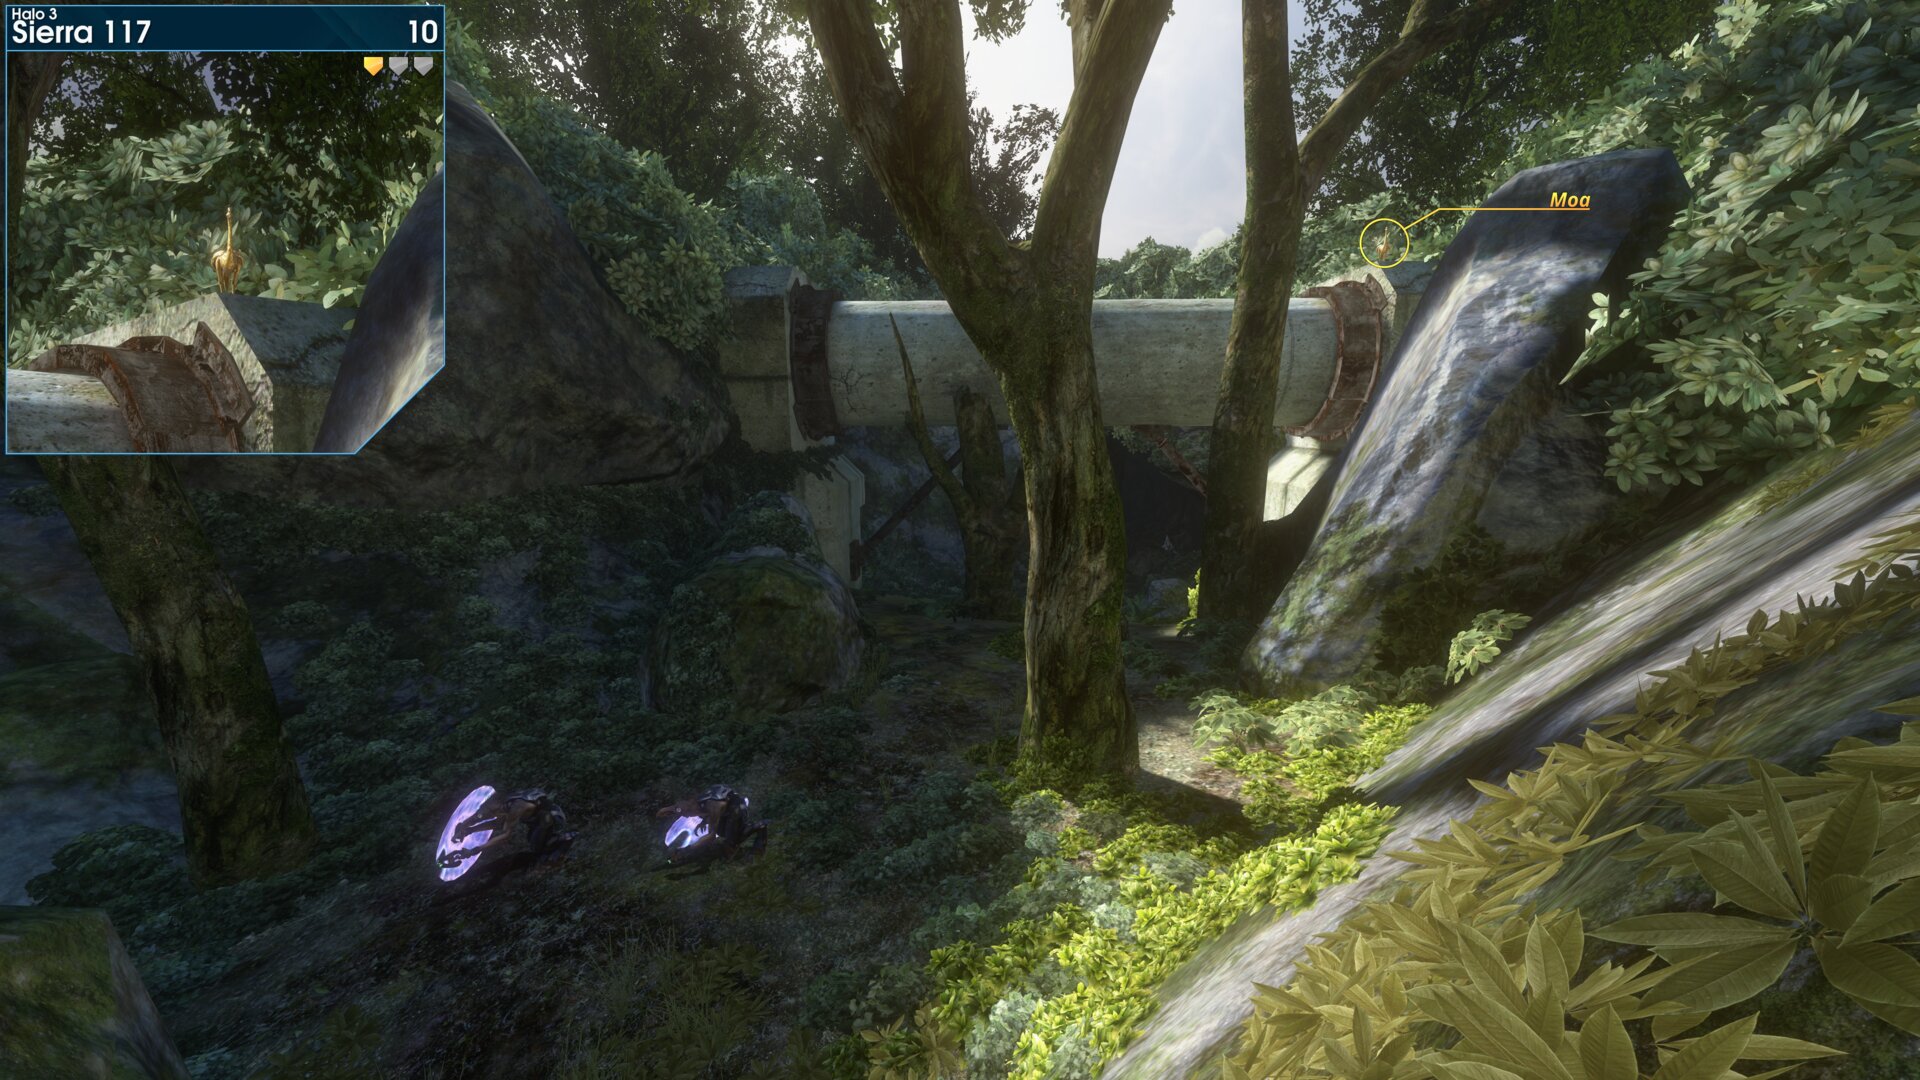
On top of the pipe that's just after the Brute interrogating a Marine.
Rally Point: Bravo
Golden Moa 11
Under the ramp of the first pump house, where the Banshees shoot down the EVAC Pelicans.
Bugged, does NOT count most weeks.
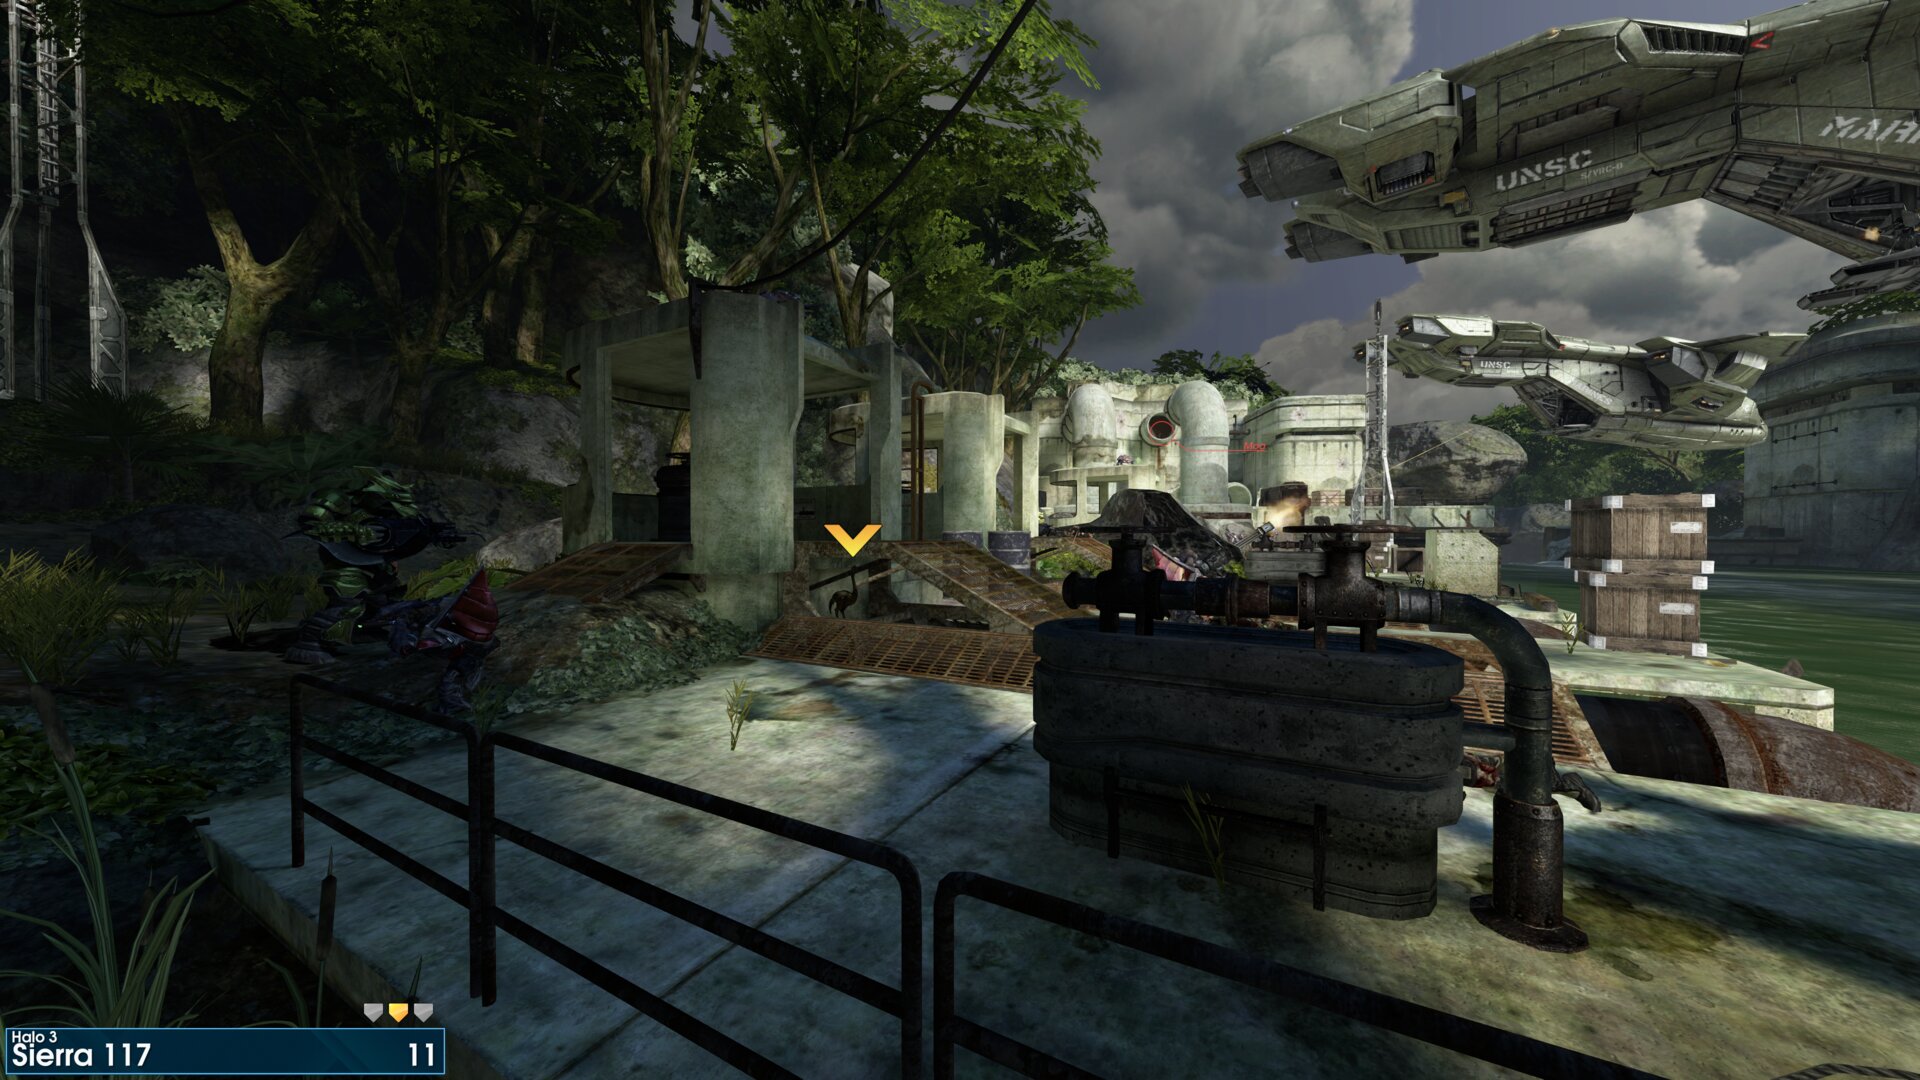
Under the ramp of the first pump house, where the Banshees shoot down the EVAC Pelicans.
Bugged, does NOT count most weeks.Golden Moa 12
In a large pipe, on the side of the large pump station.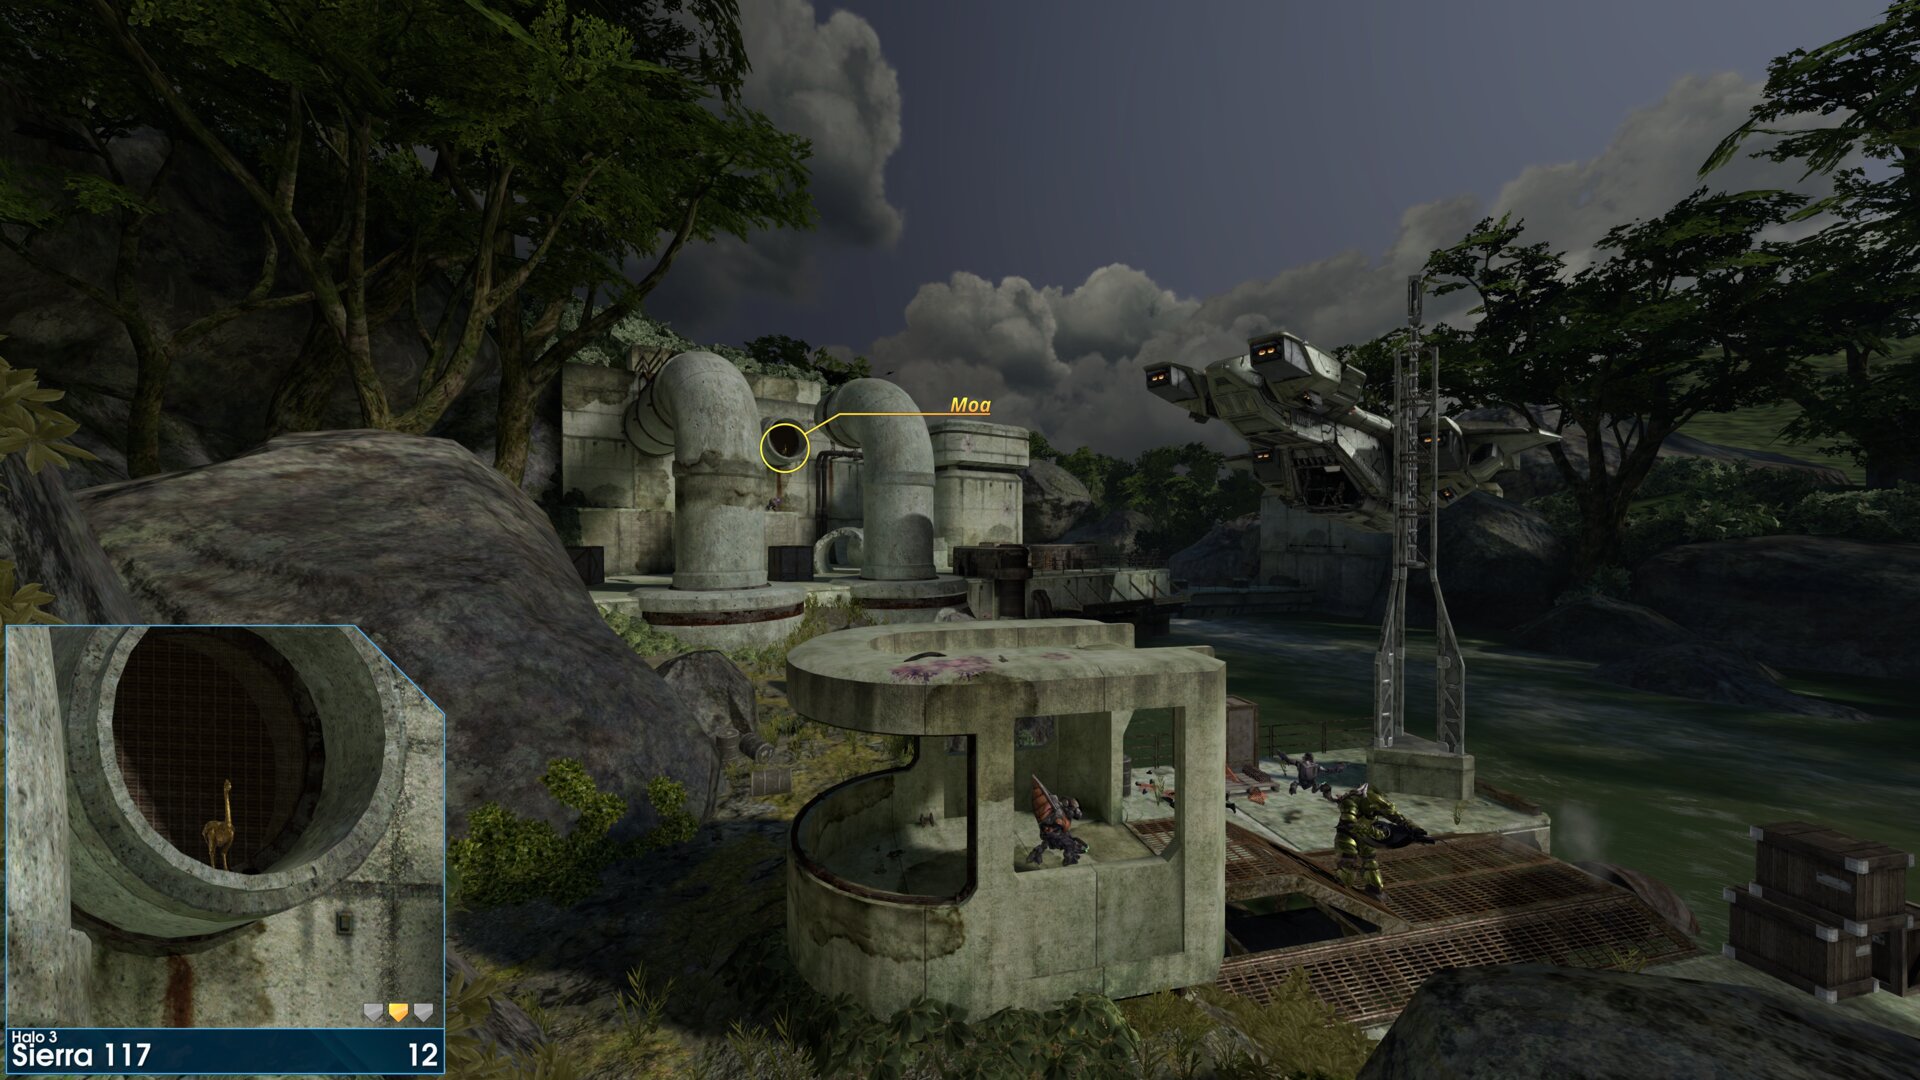
In a large pipe, on the side of the large pump station.
Rally Point: Charlie
Golden Moa 13
On top of the cliff/rock to your left as you reach the area where Sgt. Johnson's Pelican went down.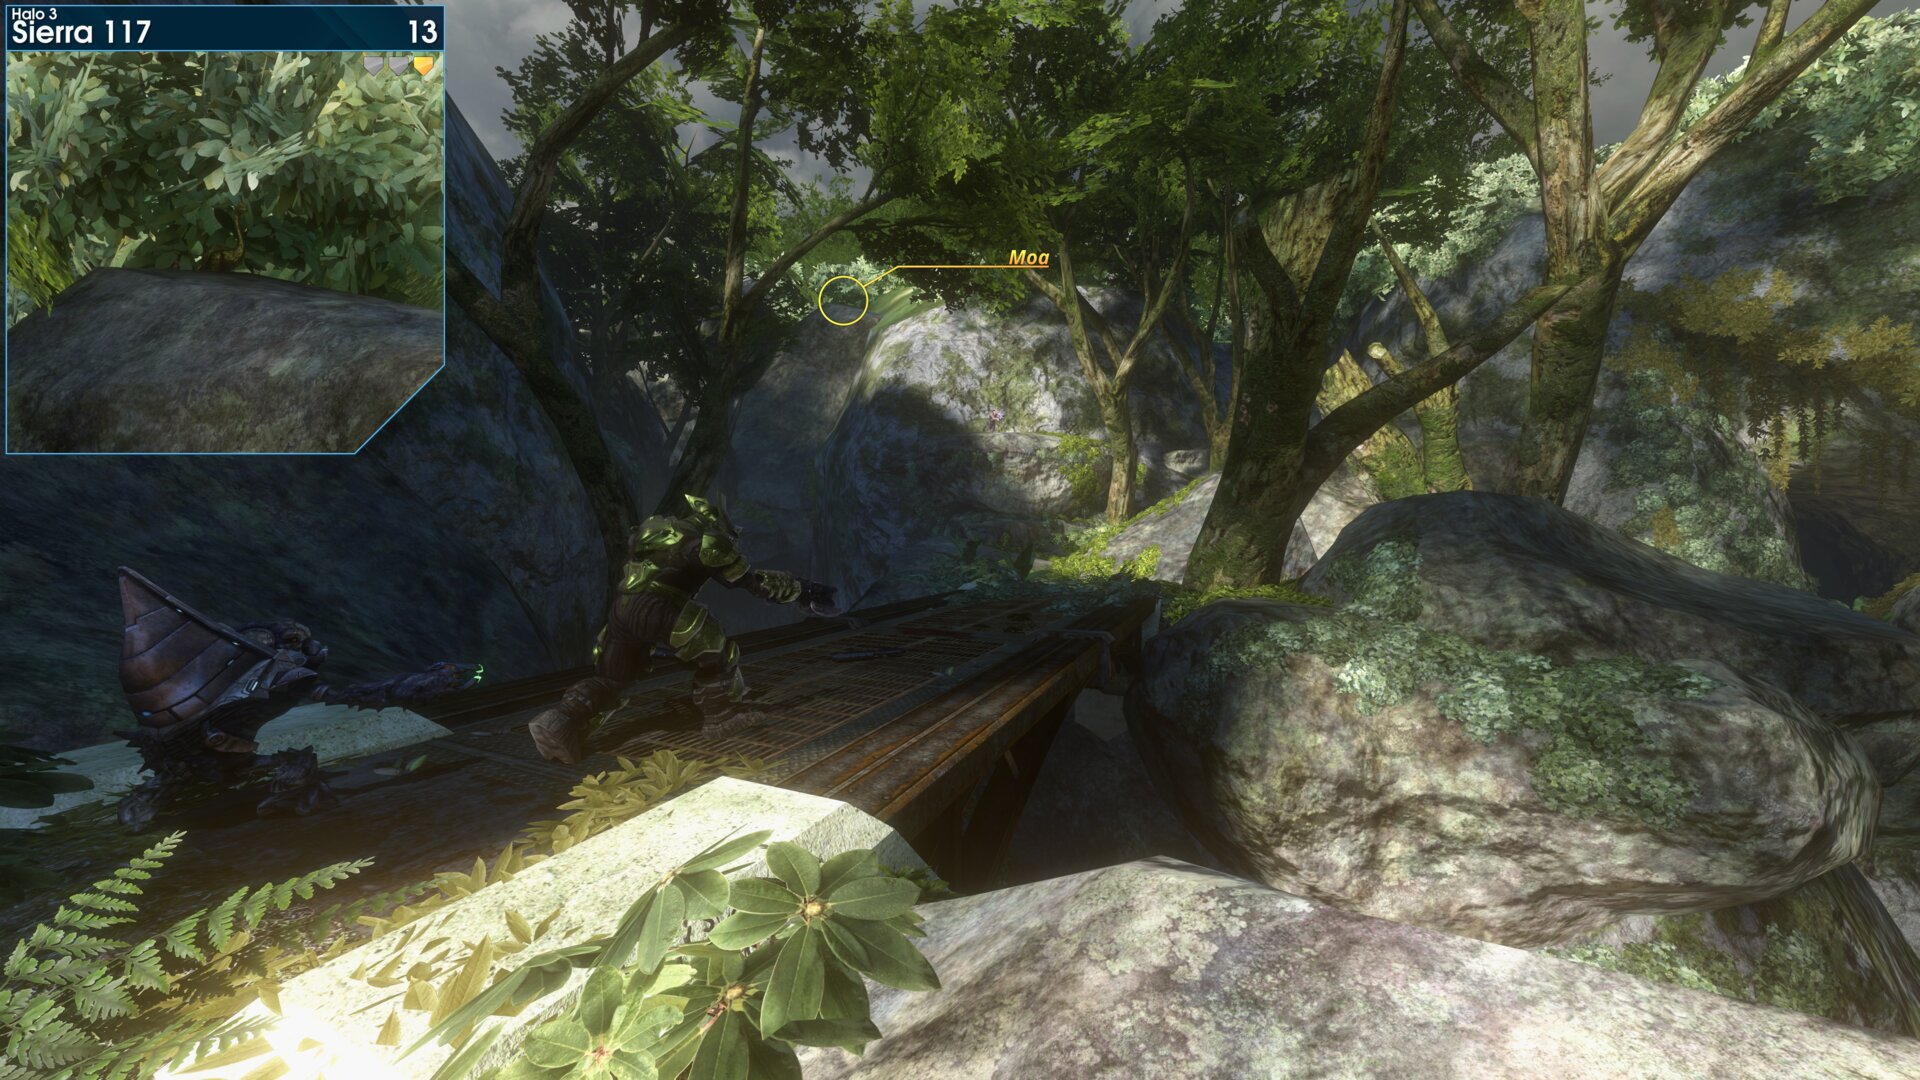
On top of the cliff/rock to your left as you reach the area where Sgt. Johnson's Pelican went down.
Golden Moa 14
In the river, well out of sight. To line this one up, grab a Sniper Rifle (UNSC), and stand on the crashed Pelican. Position yourself against the landing gear by the cargo door.
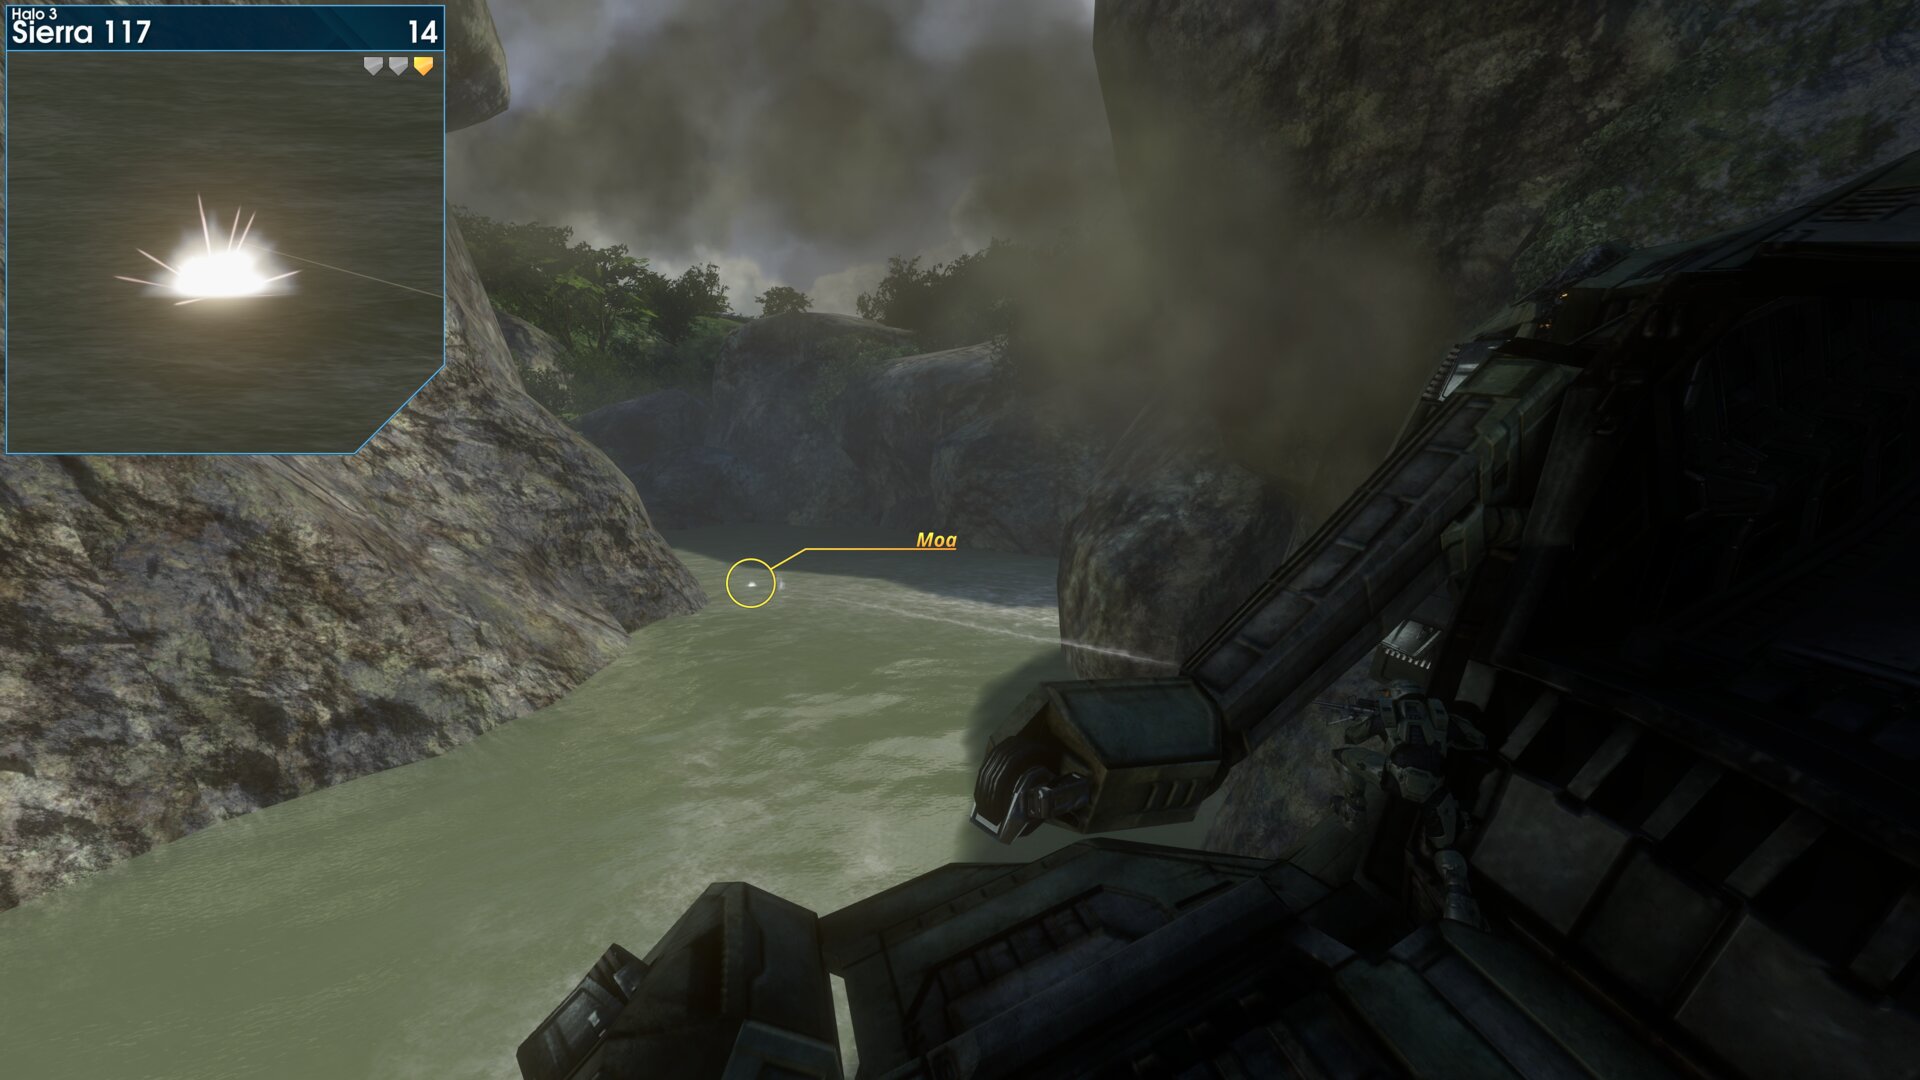
Aim at the lower portion of the scratches in front of you, and zoom in.
Locate the wonky X (reference point), and position your crosshair on the end of the right most point of the X. Raise your aim until the X's right most point is between the 3ᴿᴰ and 5ᵀᴴ Compensation Points. Then crouch and shoot.
In the river, well out of sight. To line this one up, grab a Sniper Rifle (UNSC), and stand on the crashed Pelican. Position yourself against the landing gear by the cargo door.
Aim at the lower portion of the scratches in front of you, and zoom in.
Locate the wonky X (reference point), and position your crosshair on the end of the right most point of the X. Raise your aim until the X's right most point is between the 3ᴿᴰ and 5ᵀᴴ Compensation Points. Then crouch and shoot.
Golden Moa 15
On top of the cliff, behind the bushes, in the area where Sgt. Johnson's Pelican went down. Best vantage point is between the large concrete pipe and cliff, located up the hill from the crashed Pelican.
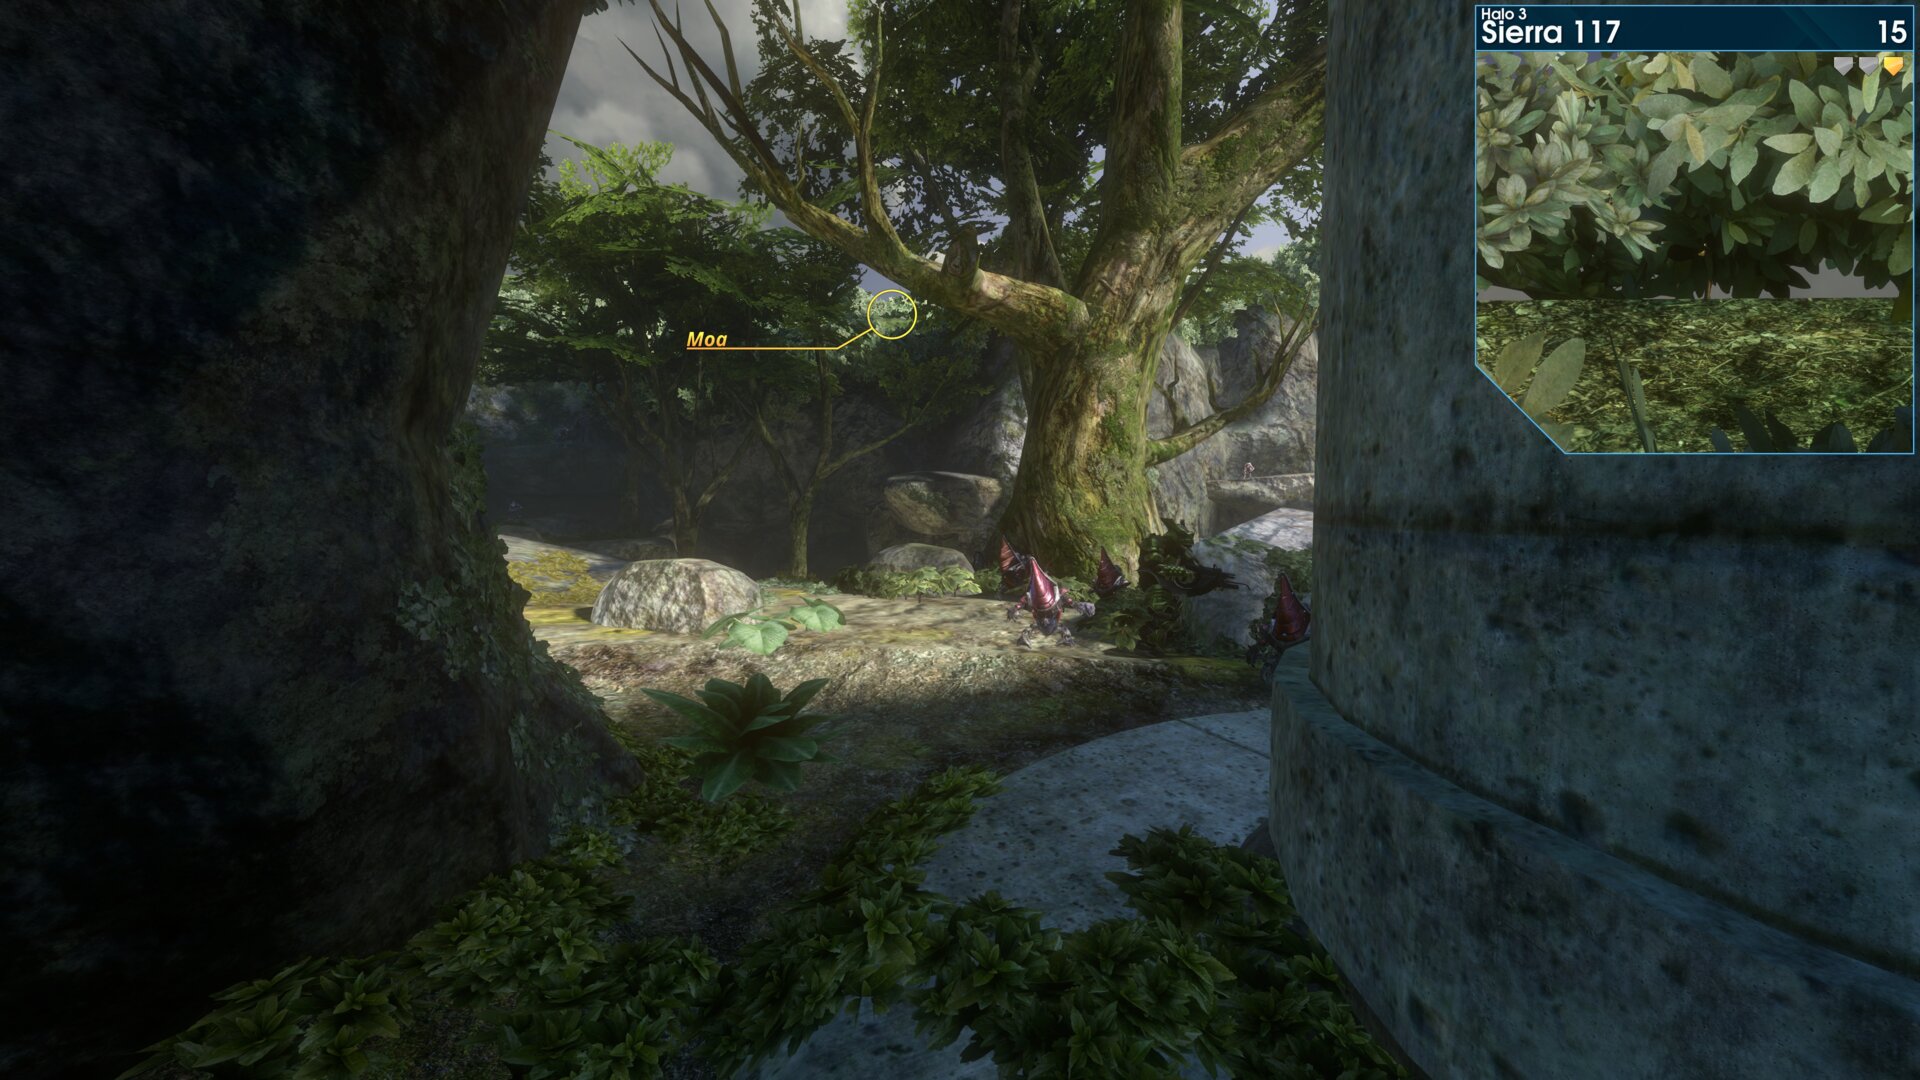
On top of the cliff, behind the bushes, in the area where Sgt. Johnson's Pelican went down. Best vantage point is between the large concrete pipe and cliff, located up the hill from the crashed Pelican.
Golden Moa 16
On a pipe just above the far side of the river, next to the dam wall.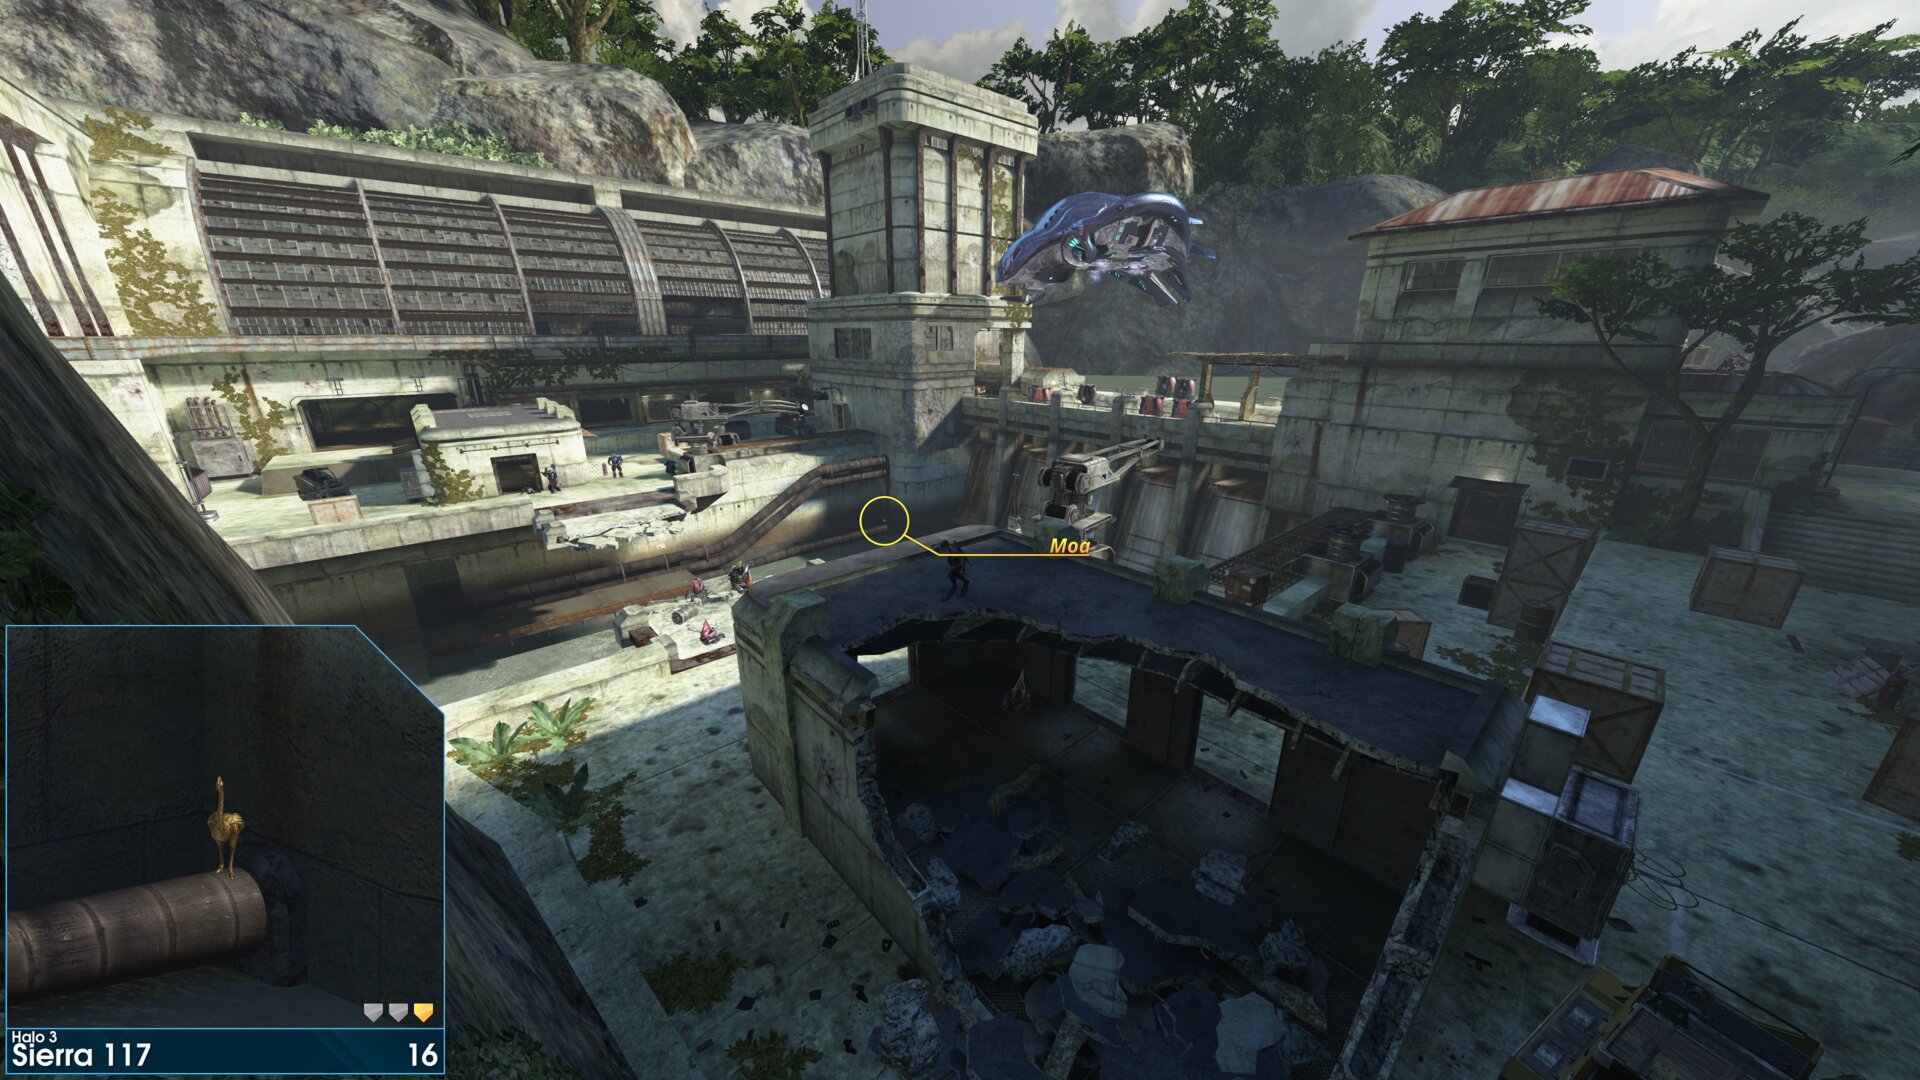
On a pipe just above the far side of the river, next to the dam wall.
Golden Moa 17
Above the cave you entered the final area through. You can see it through the leaves, when standing next to the No Fishing\No Swimming sign on the Dam Wall.
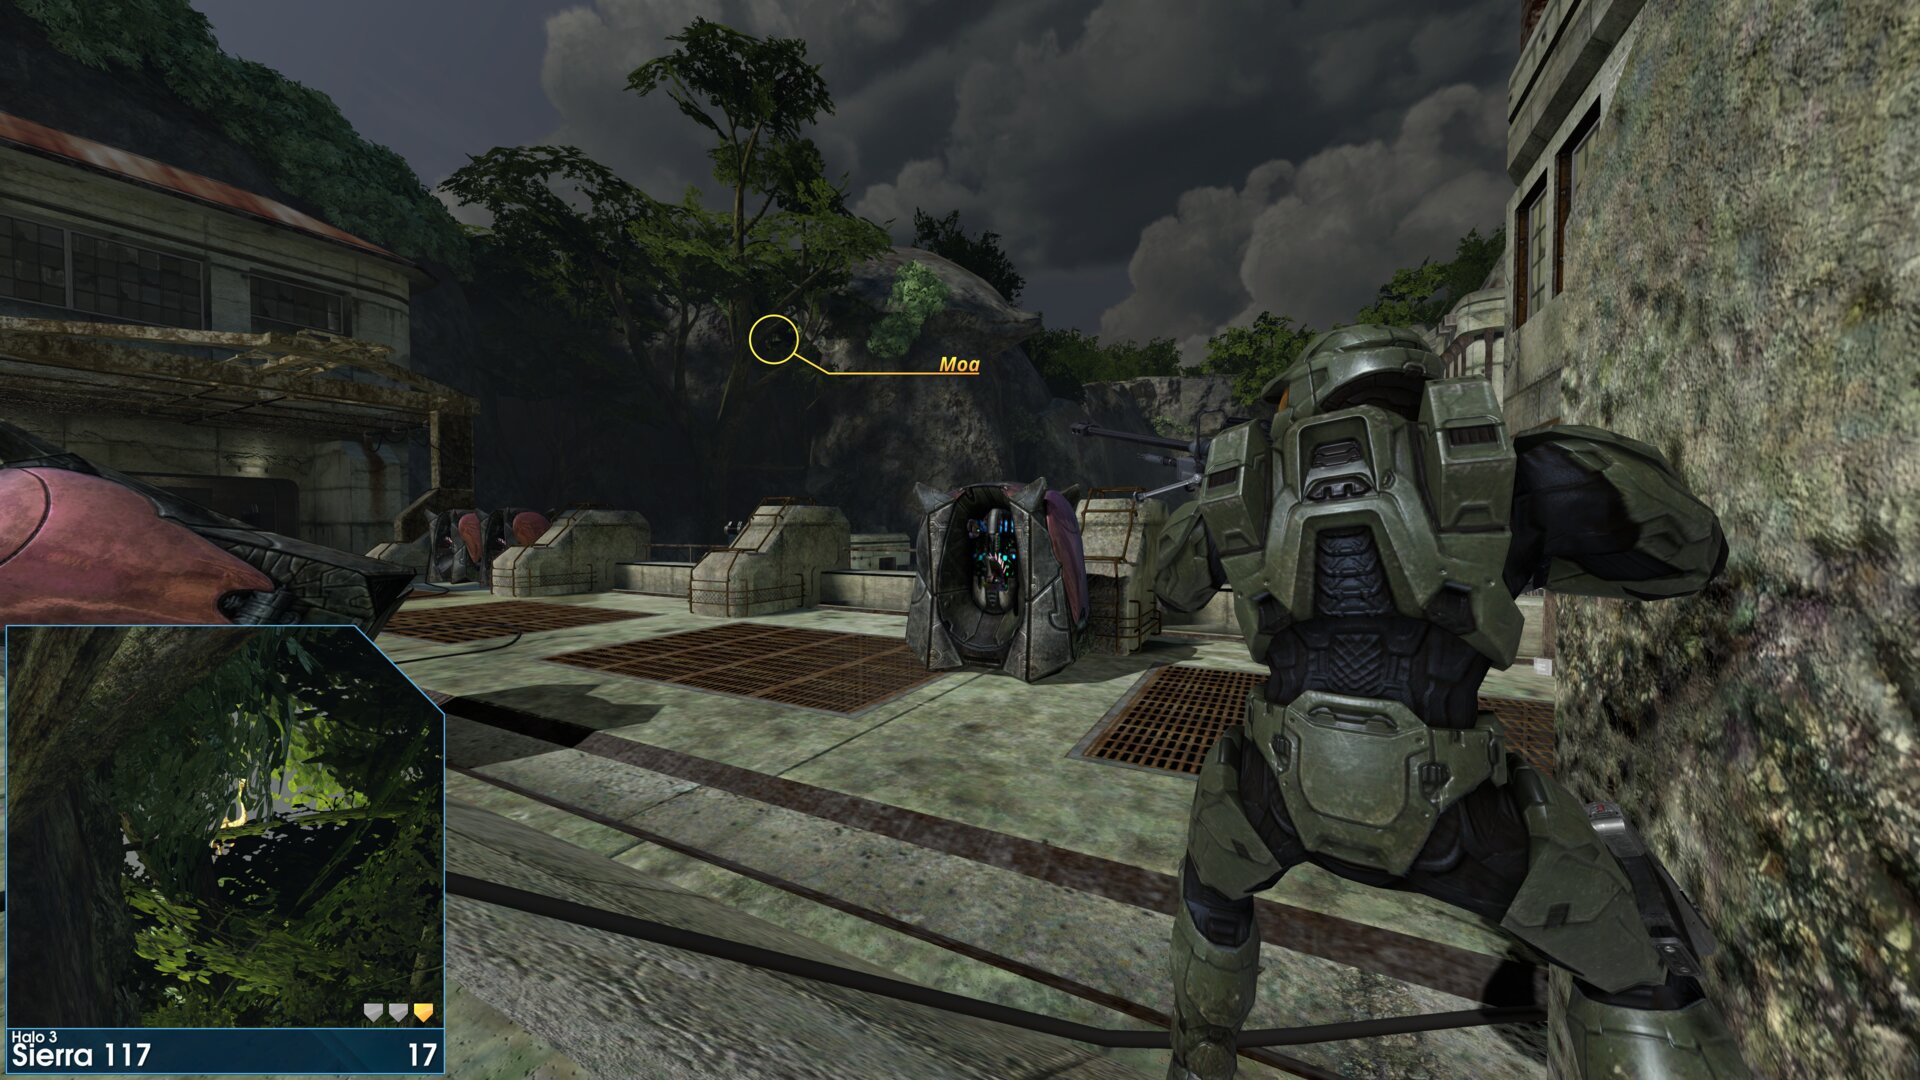
Above the cave you entered the final area through. You can see it through the leaves, when standing next to the No Fishing\No Swimming sign on the Dam Wall.
➟ Crow's Nest
Rally Point: Alpha
Note: Moa 1 can be reached from rally point Bravo & Charlie.
⠀⠀ ⠀While Moa's 2, 3, 4, 5, 6 & 7 can be reached from rally point Charlie.
Rally Point: Bravo
Note: Moa 8 can be reached from rally point Charlie.
Rally Point: Charlie
Note: Moa 1 can be reached from rally point Bravo & Charlie.
⠀⠀ ⠀While Moa's 2, 3, 4, 5, 6 & 7 can be reached from rally point Charlie.
Golden Moa 1
By the windows in the Command Center.
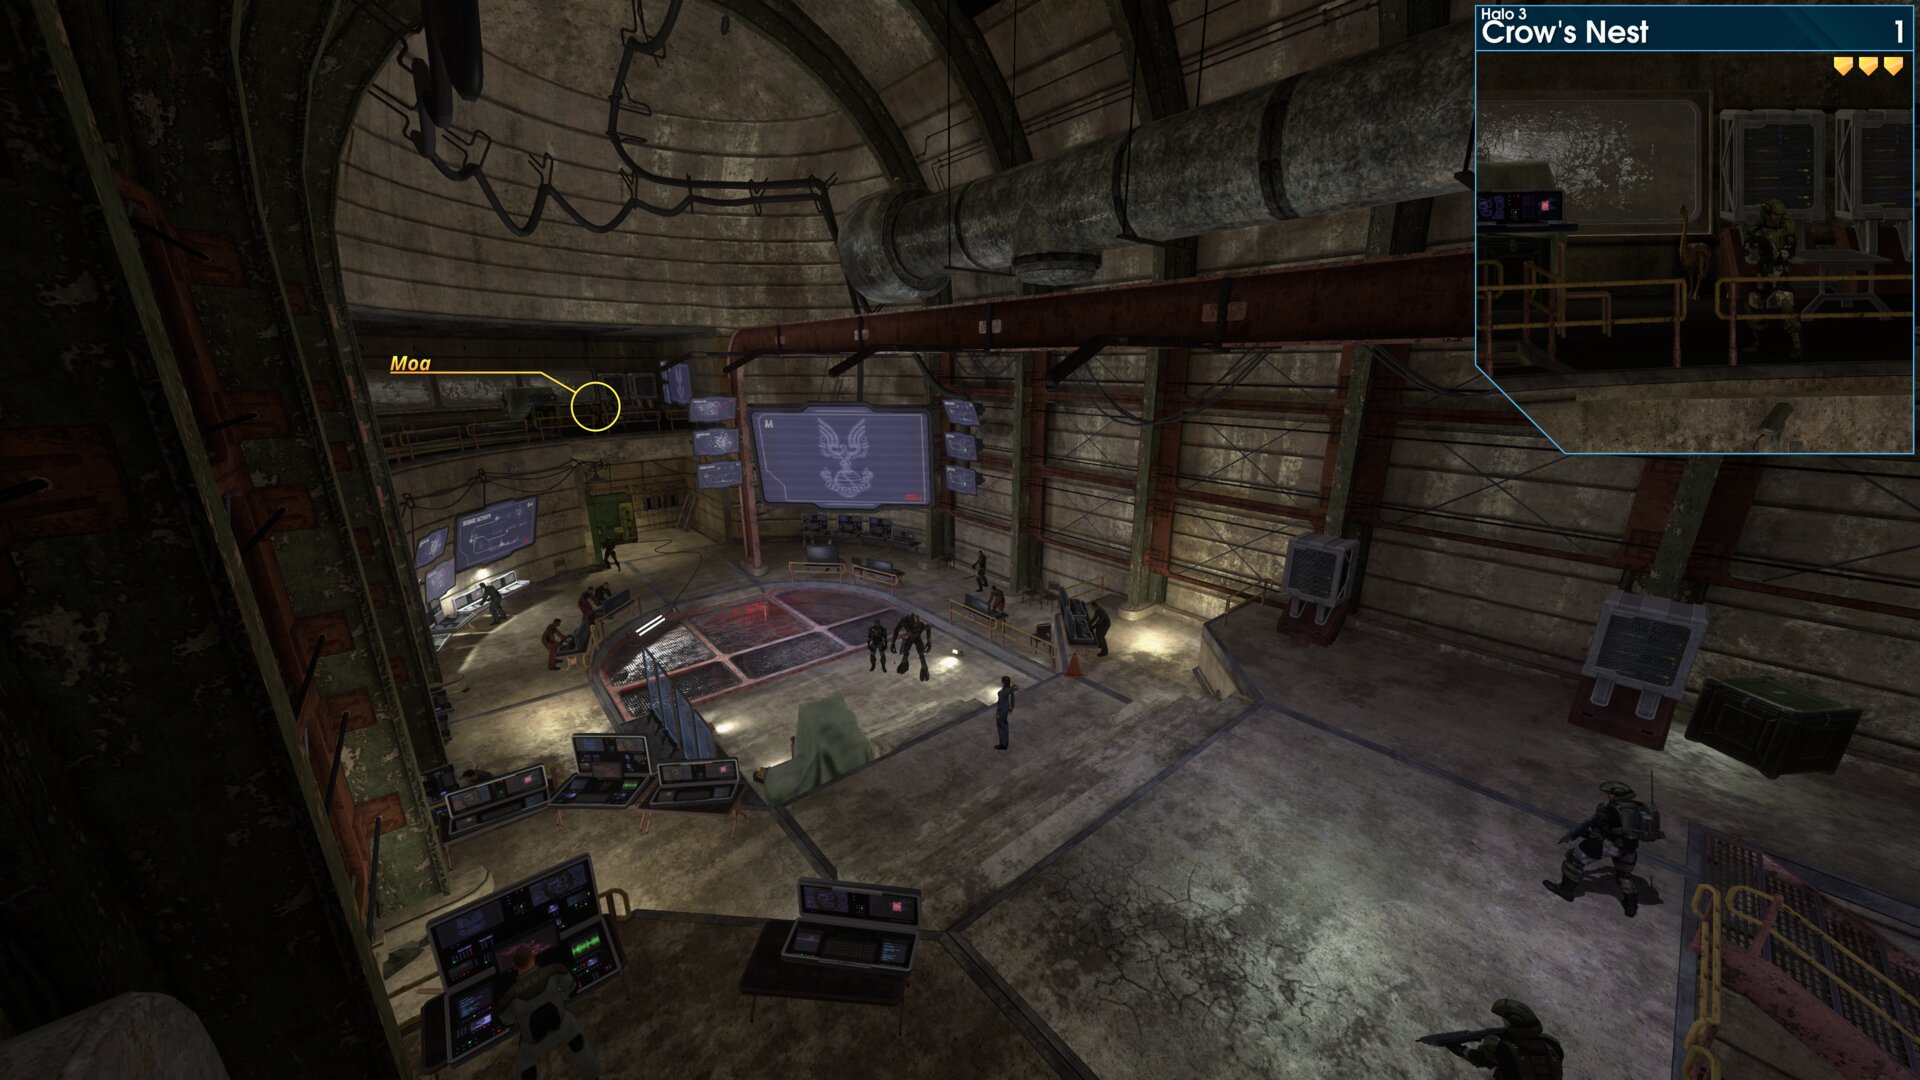
By the windows in the Command Center.
Golden Moa 2
In a weapon rack on the right side of the cavern.
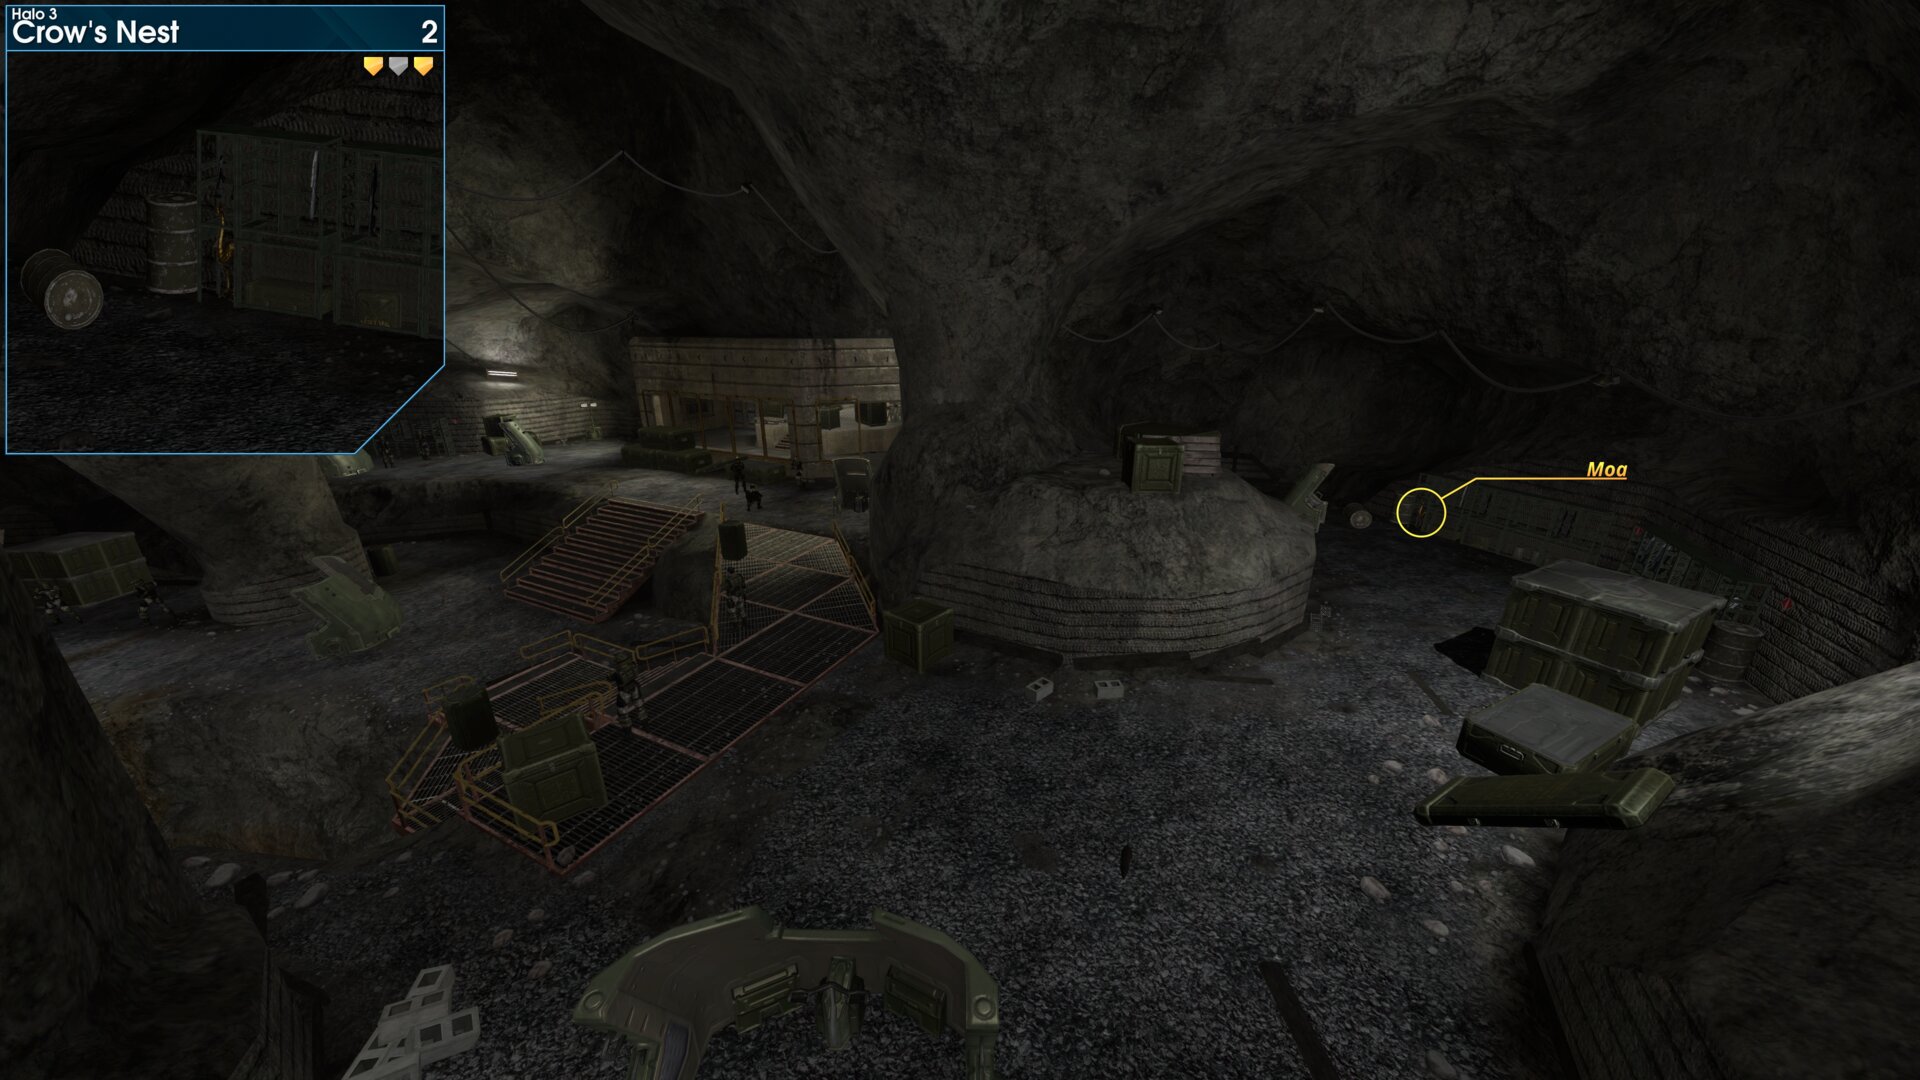
In a weapon rack on the right side of the cavern.
Golden Moa 3
In the first road section, turn right, it's behind the crates next to the large closed door.
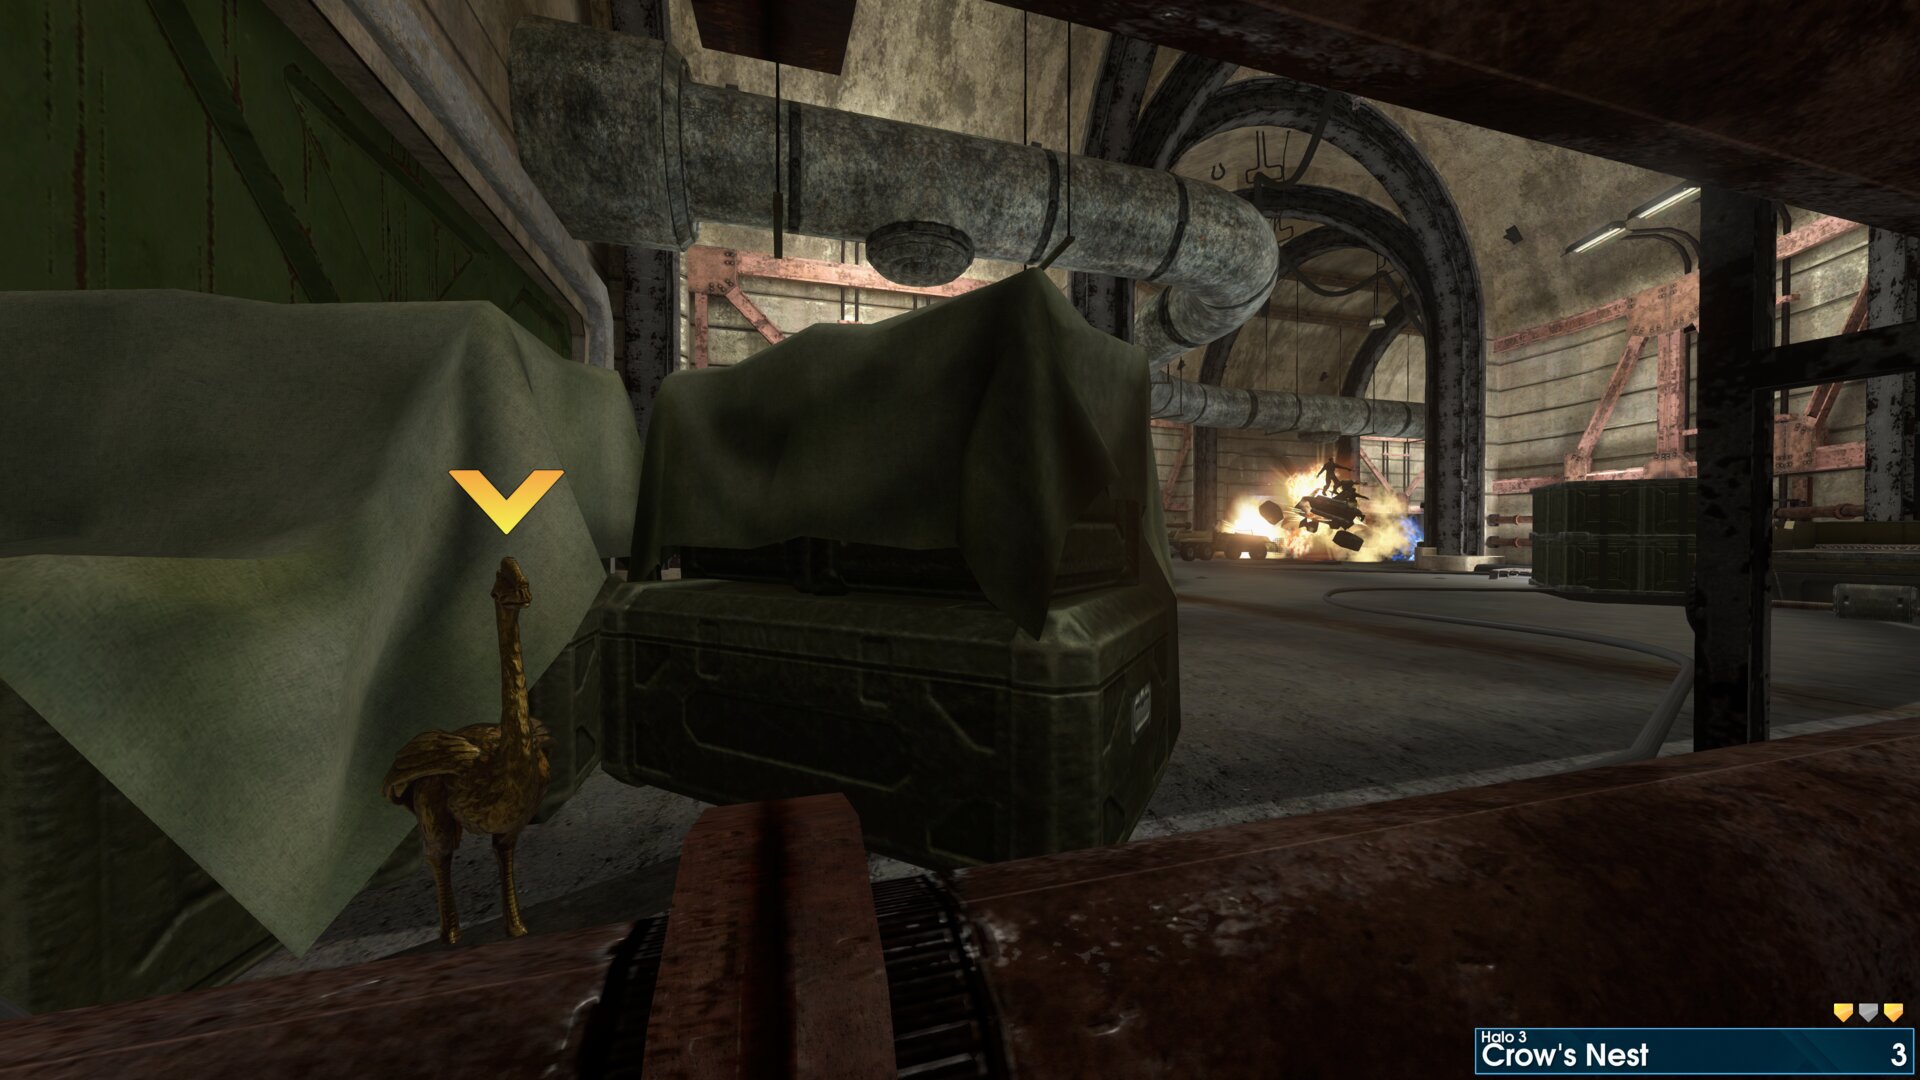
In the first road section, turn right, it's behind the crates next to the large closed door.
Golden Moa 4
In the first road section, go to the far end. (password not required)
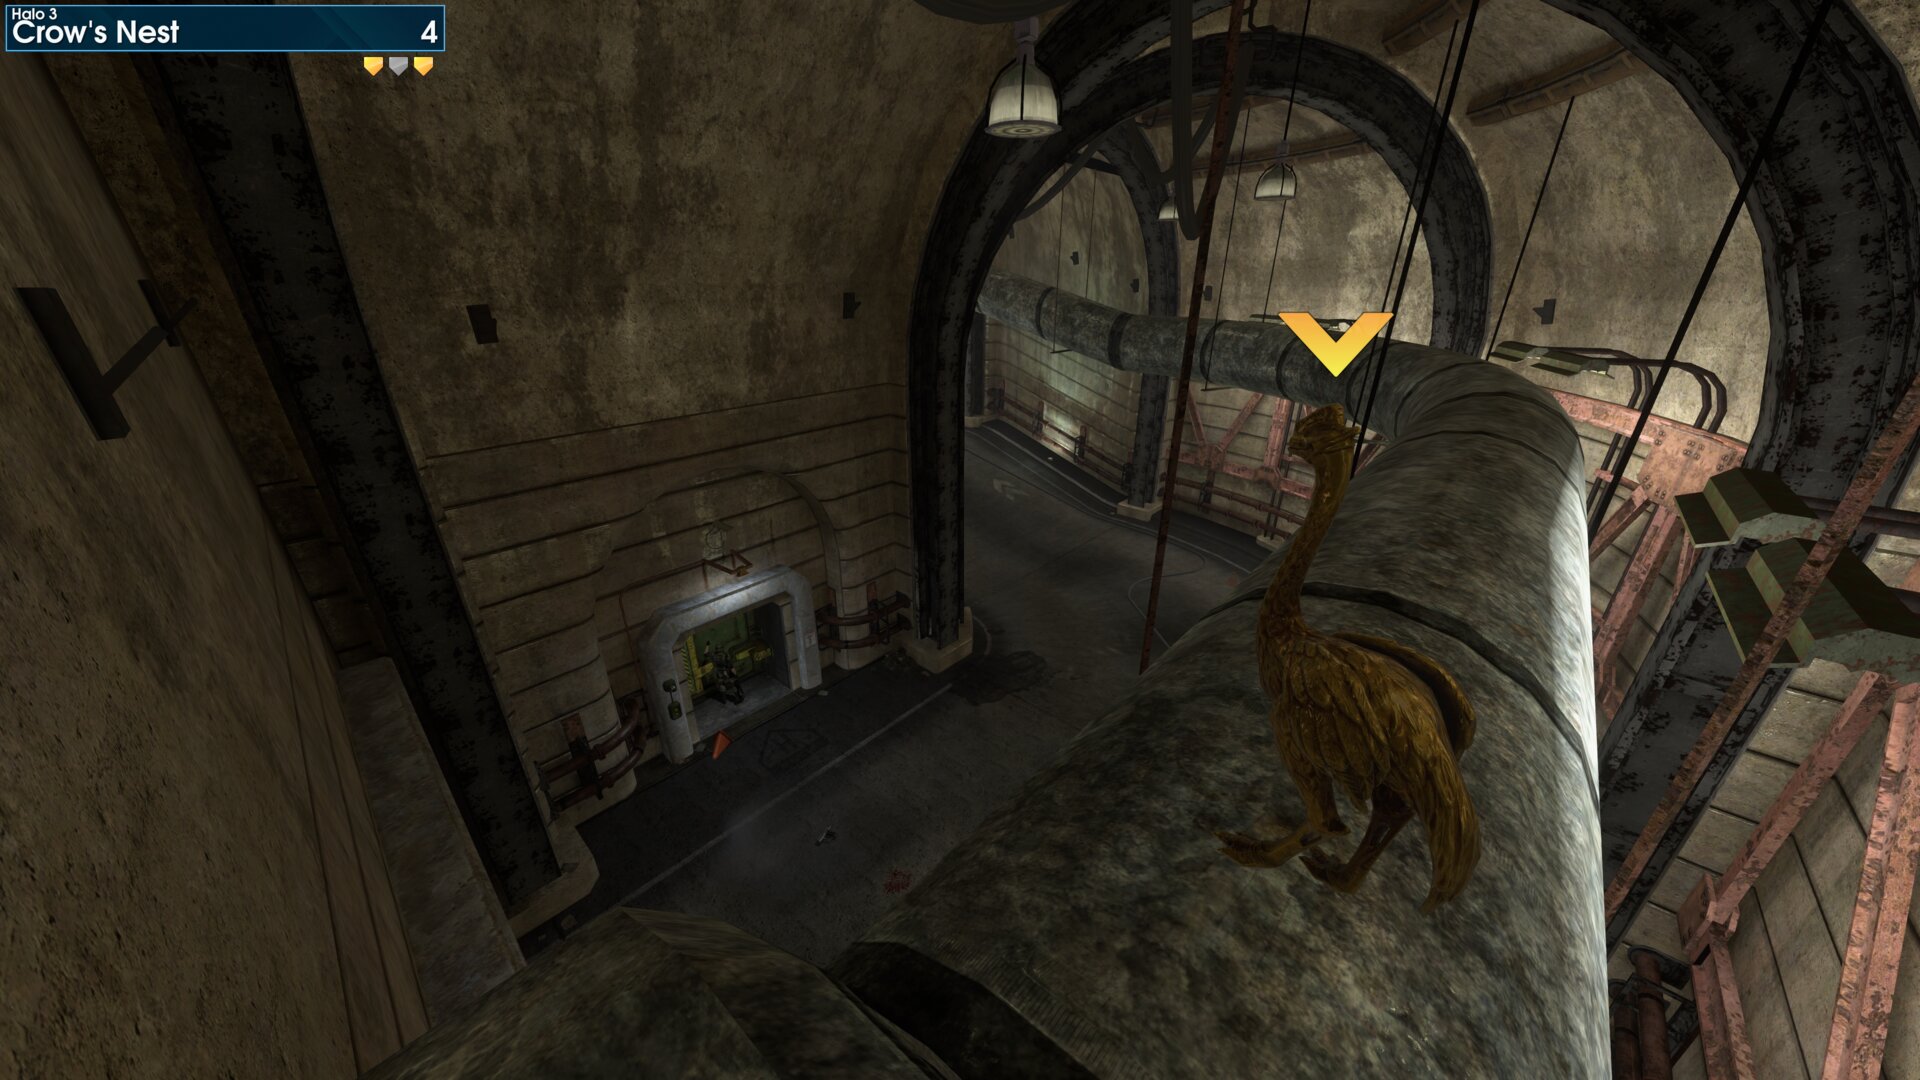
In the first road section, go to the far end. (password not required)
Golden Moa 5
In the Hanger, on top of the 4ᵀᴴ steel column that's along the right wall.
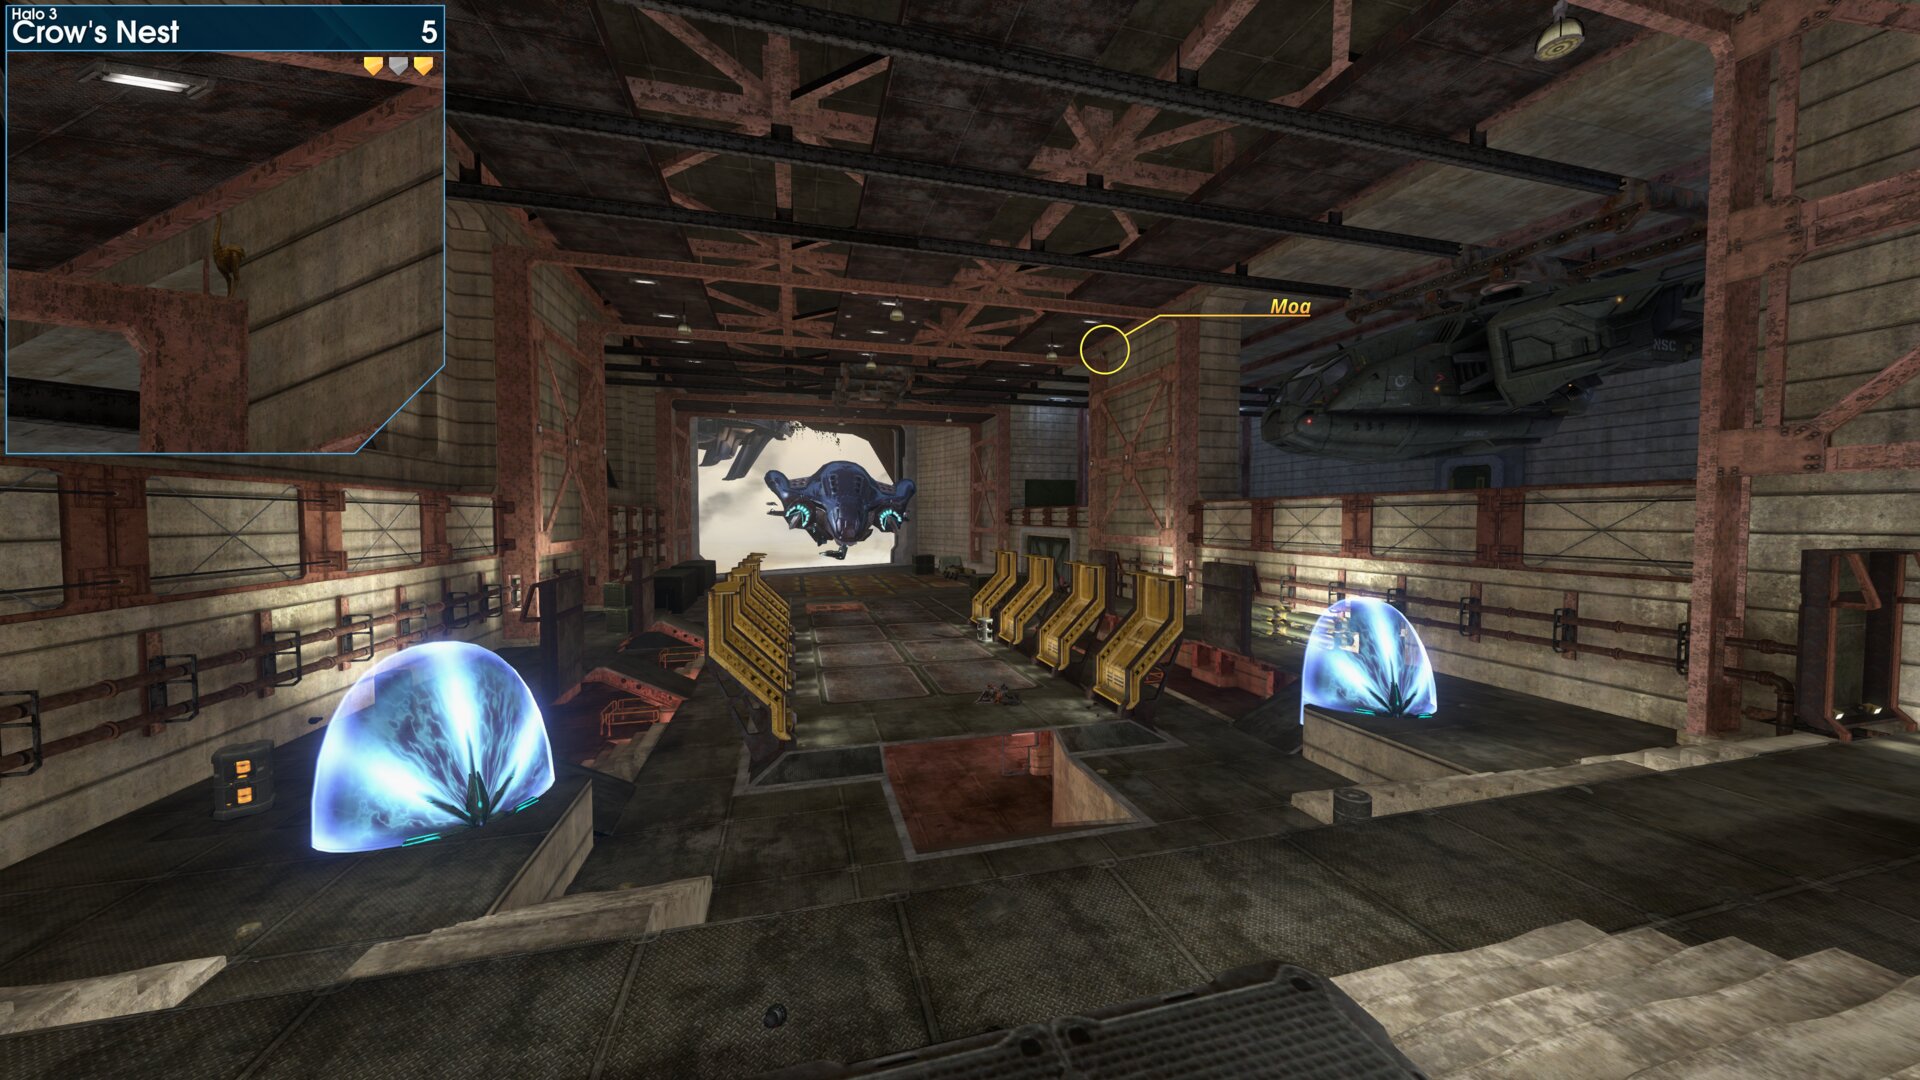
In the Hanger, on top of the 4ᵀᴴ steel column that's along the right wall.
Golden Moa 6
At the back of the munitions area, under the hanger floor.
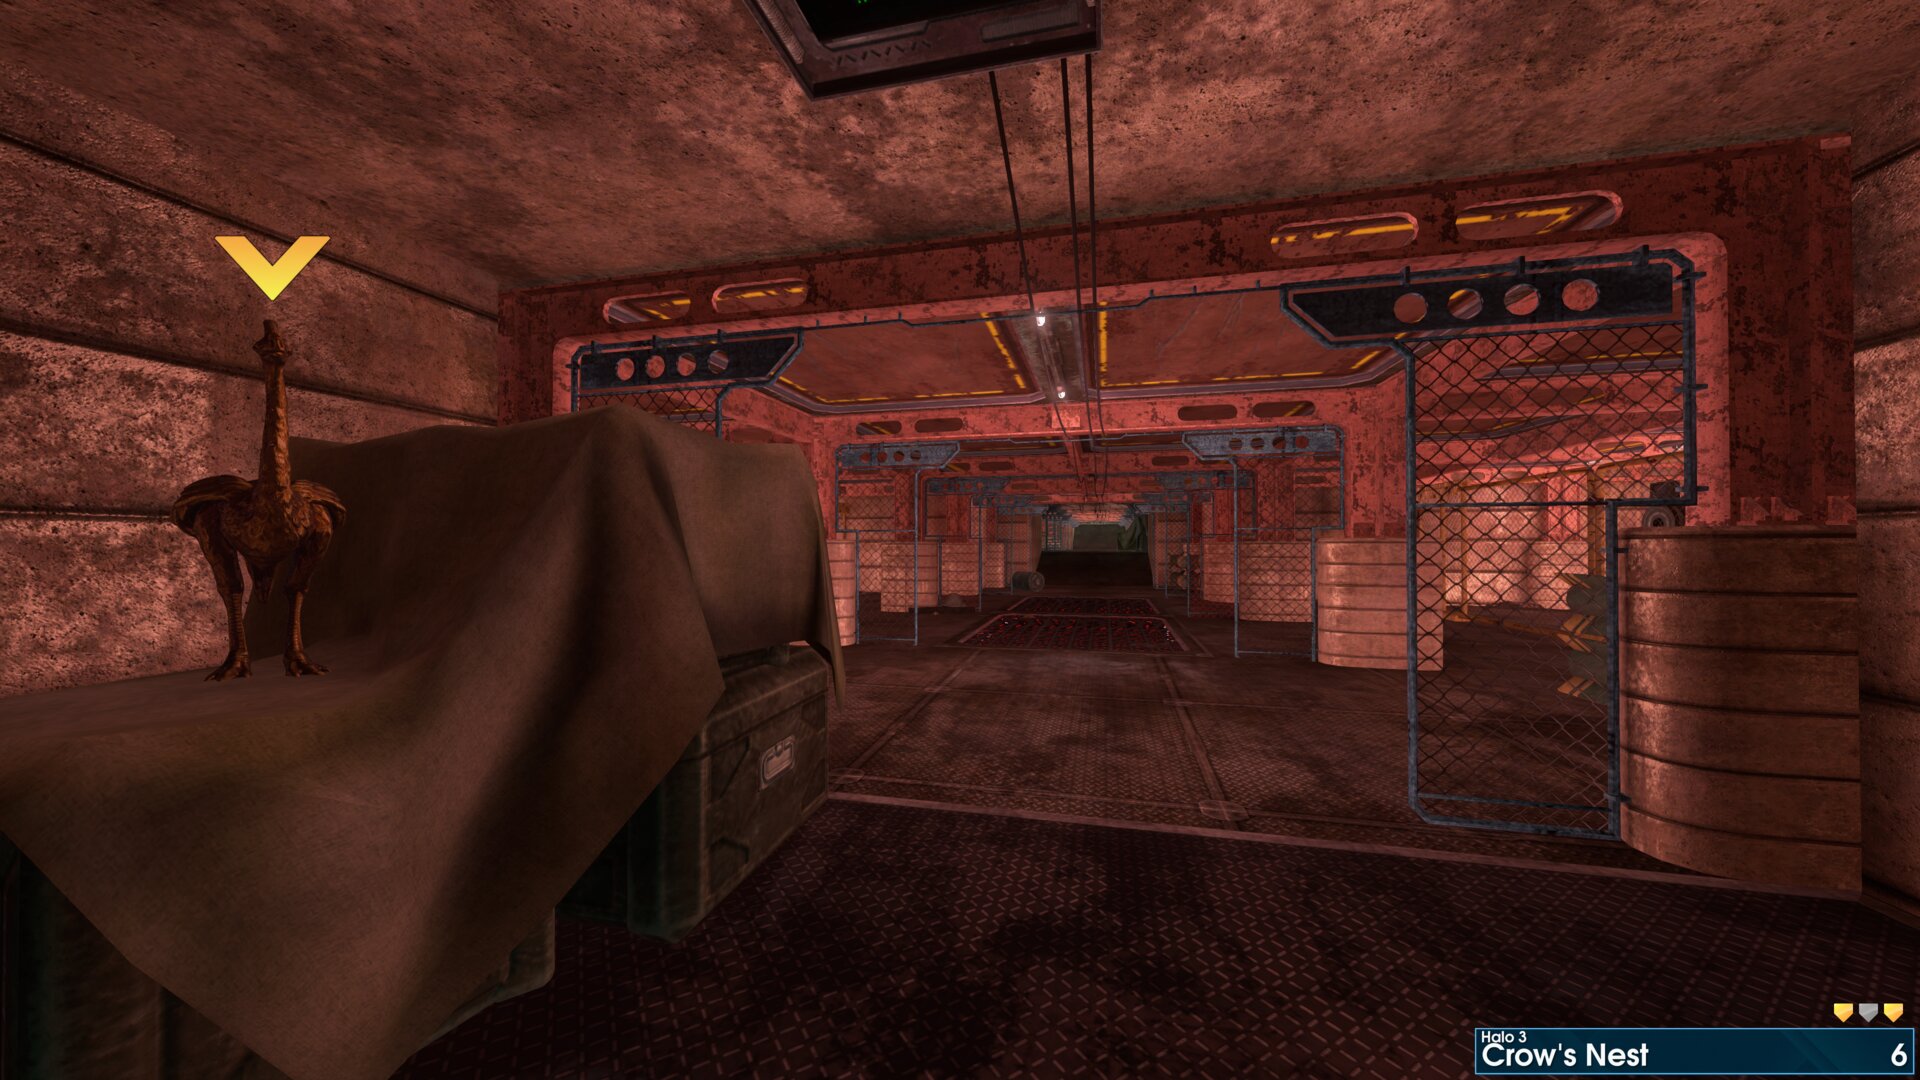
At the back of the munitions area, under the hanger floor.
Golden Moa 7
On the cliff, beneath the Hanger door (exterior). You will need to stand right on the edge, near the left side, and look straight down.
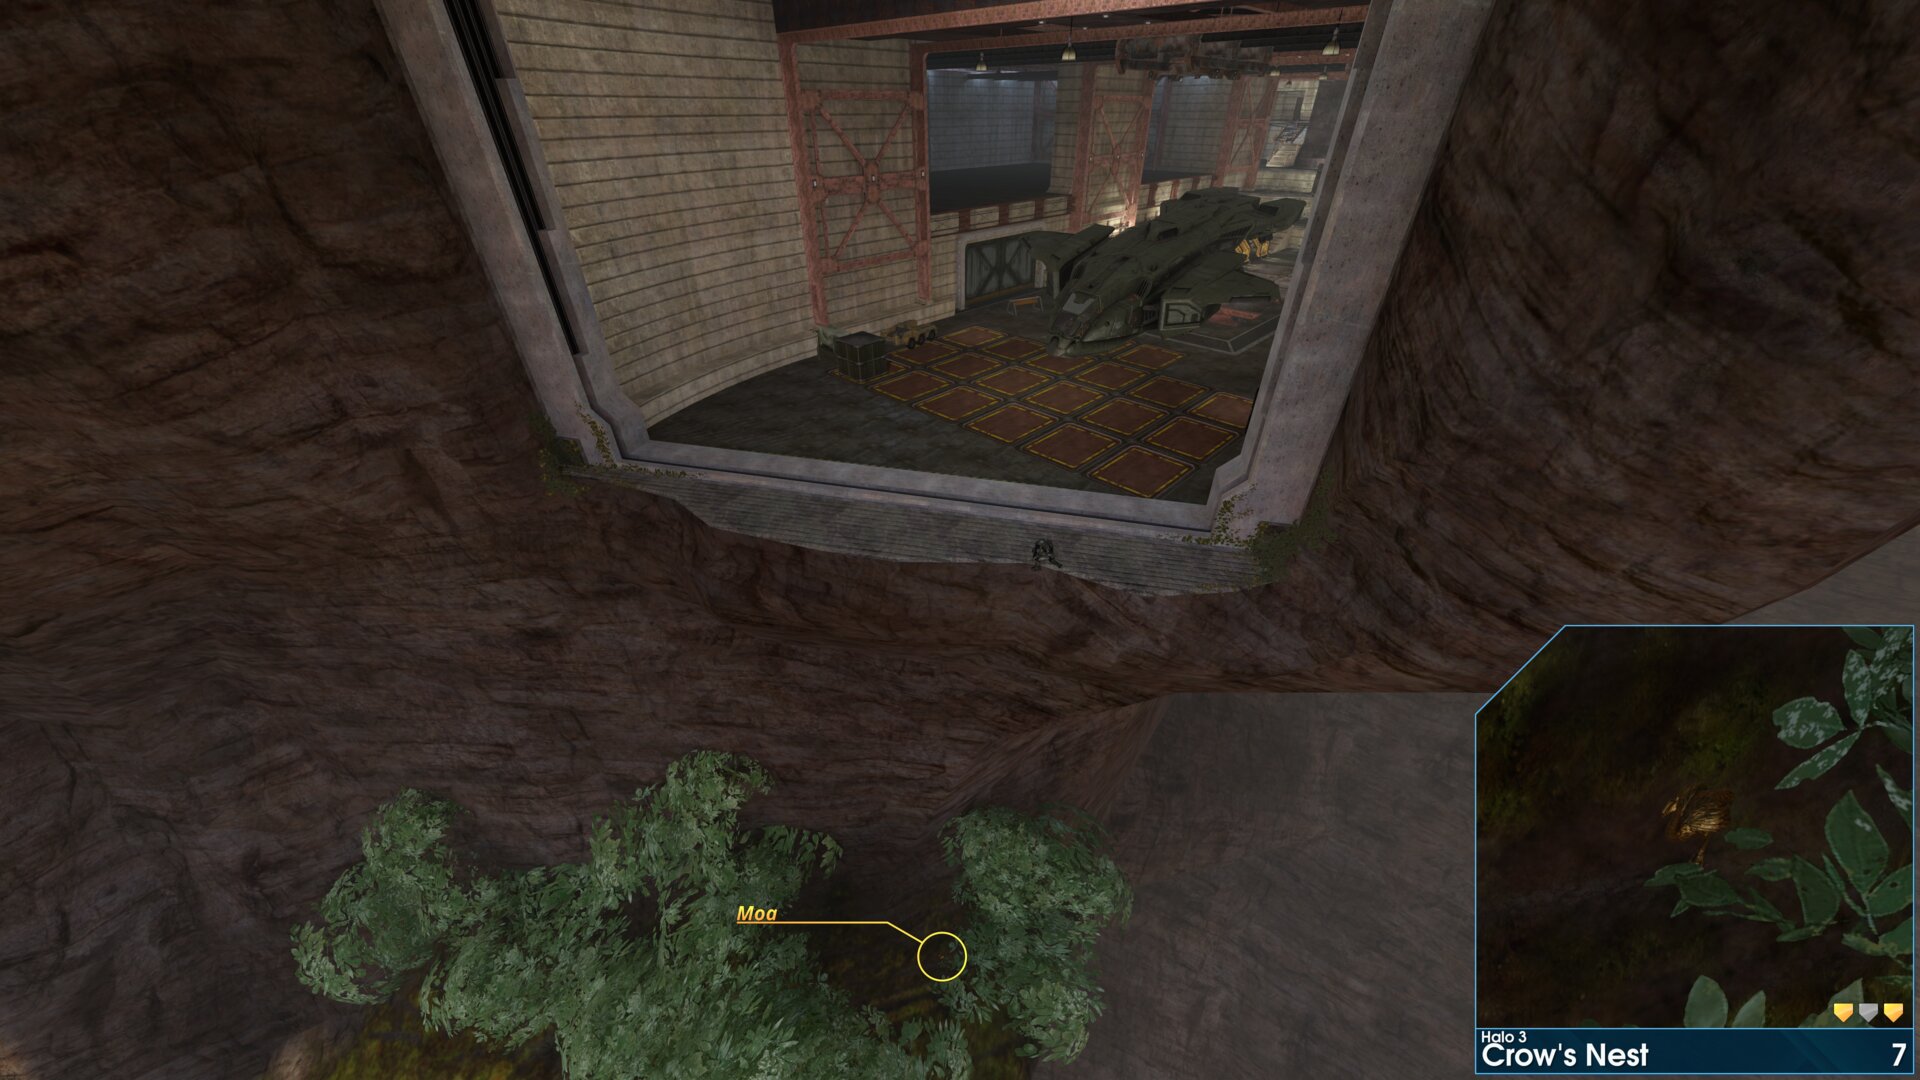
On the cliff, beneath the Hanger door (exterior). You will need to stand right on the edge, near the left side, and look straight down.
Rally Point: Bravo
Note: Moa 8 can be reached from rally point Charlie.
Golden Moa 8
In the first bay on the right, as you enter the Motor Pool.
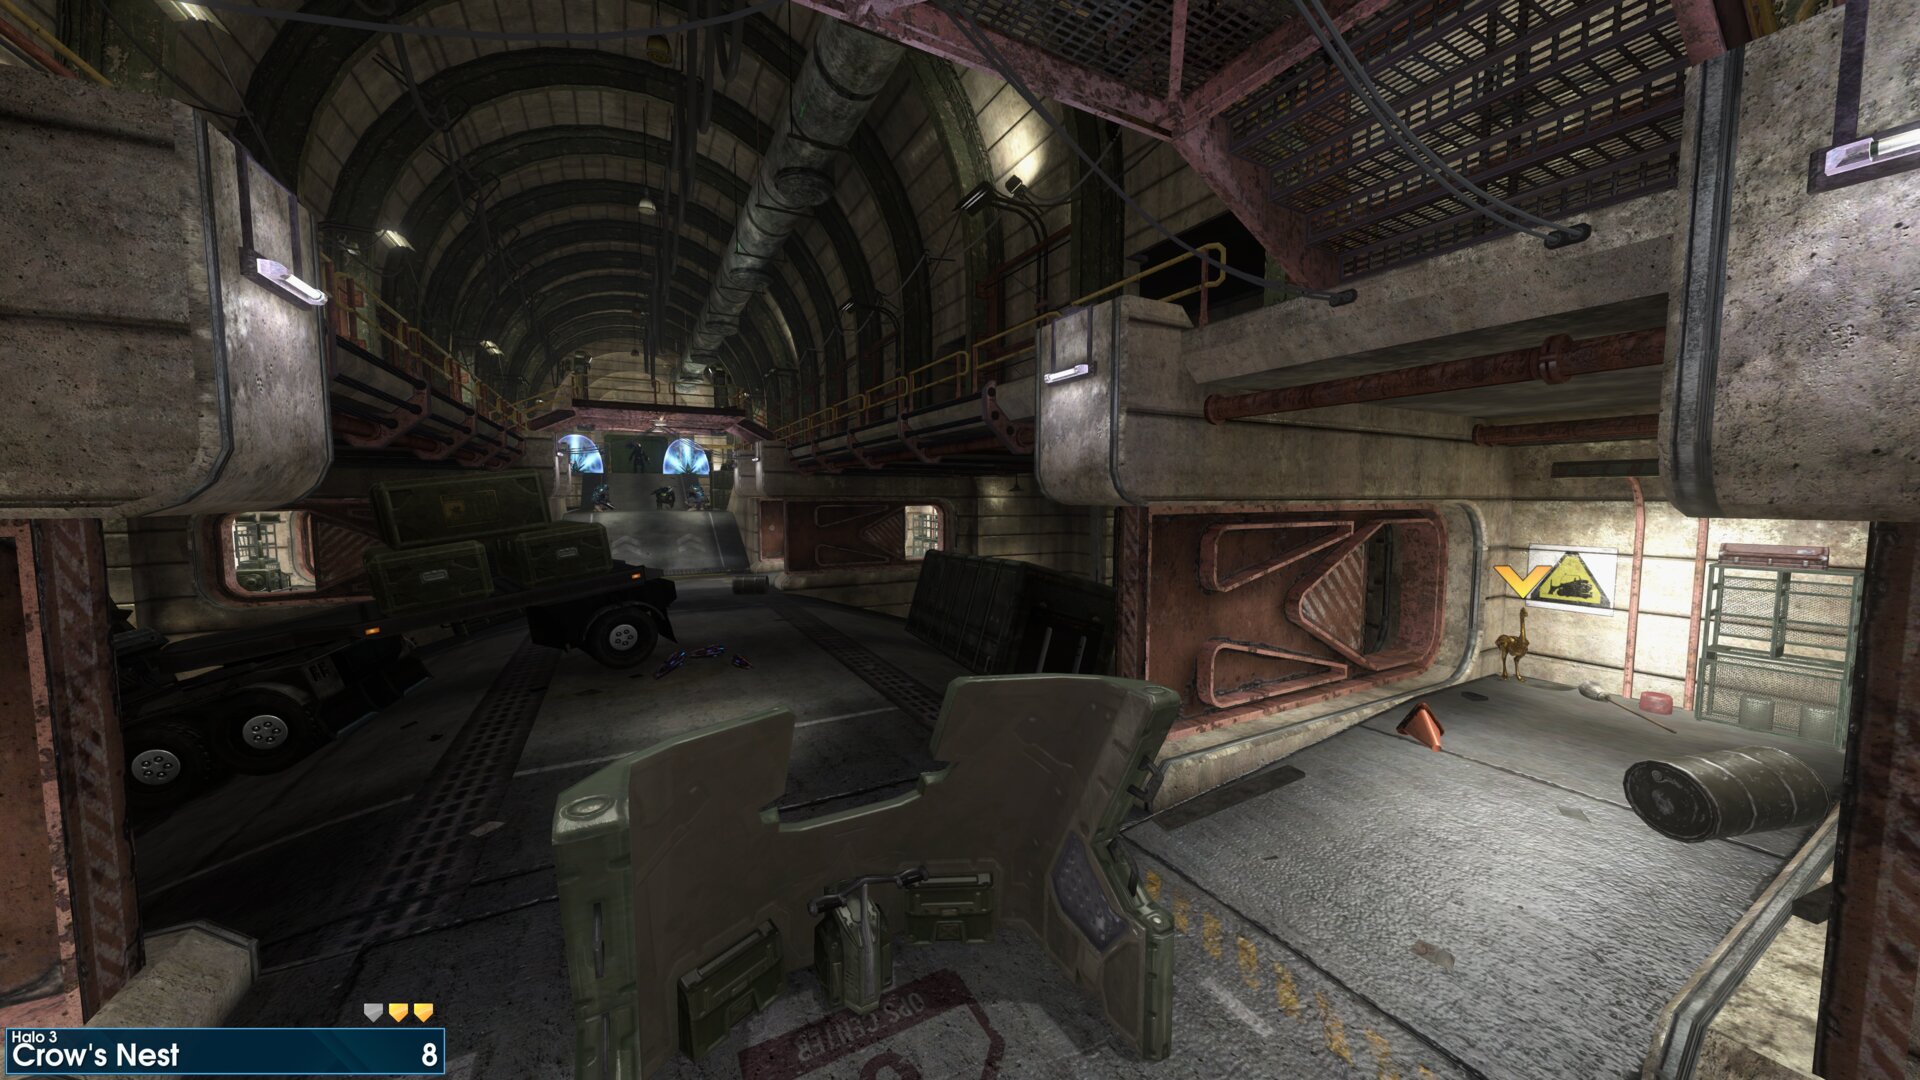
In the first bay on the right, as you enter the Motor Pool.
Golden Moa 9
Just after the Gravity Hammer wielding Brute, in the corridor go left, next to a locked door.
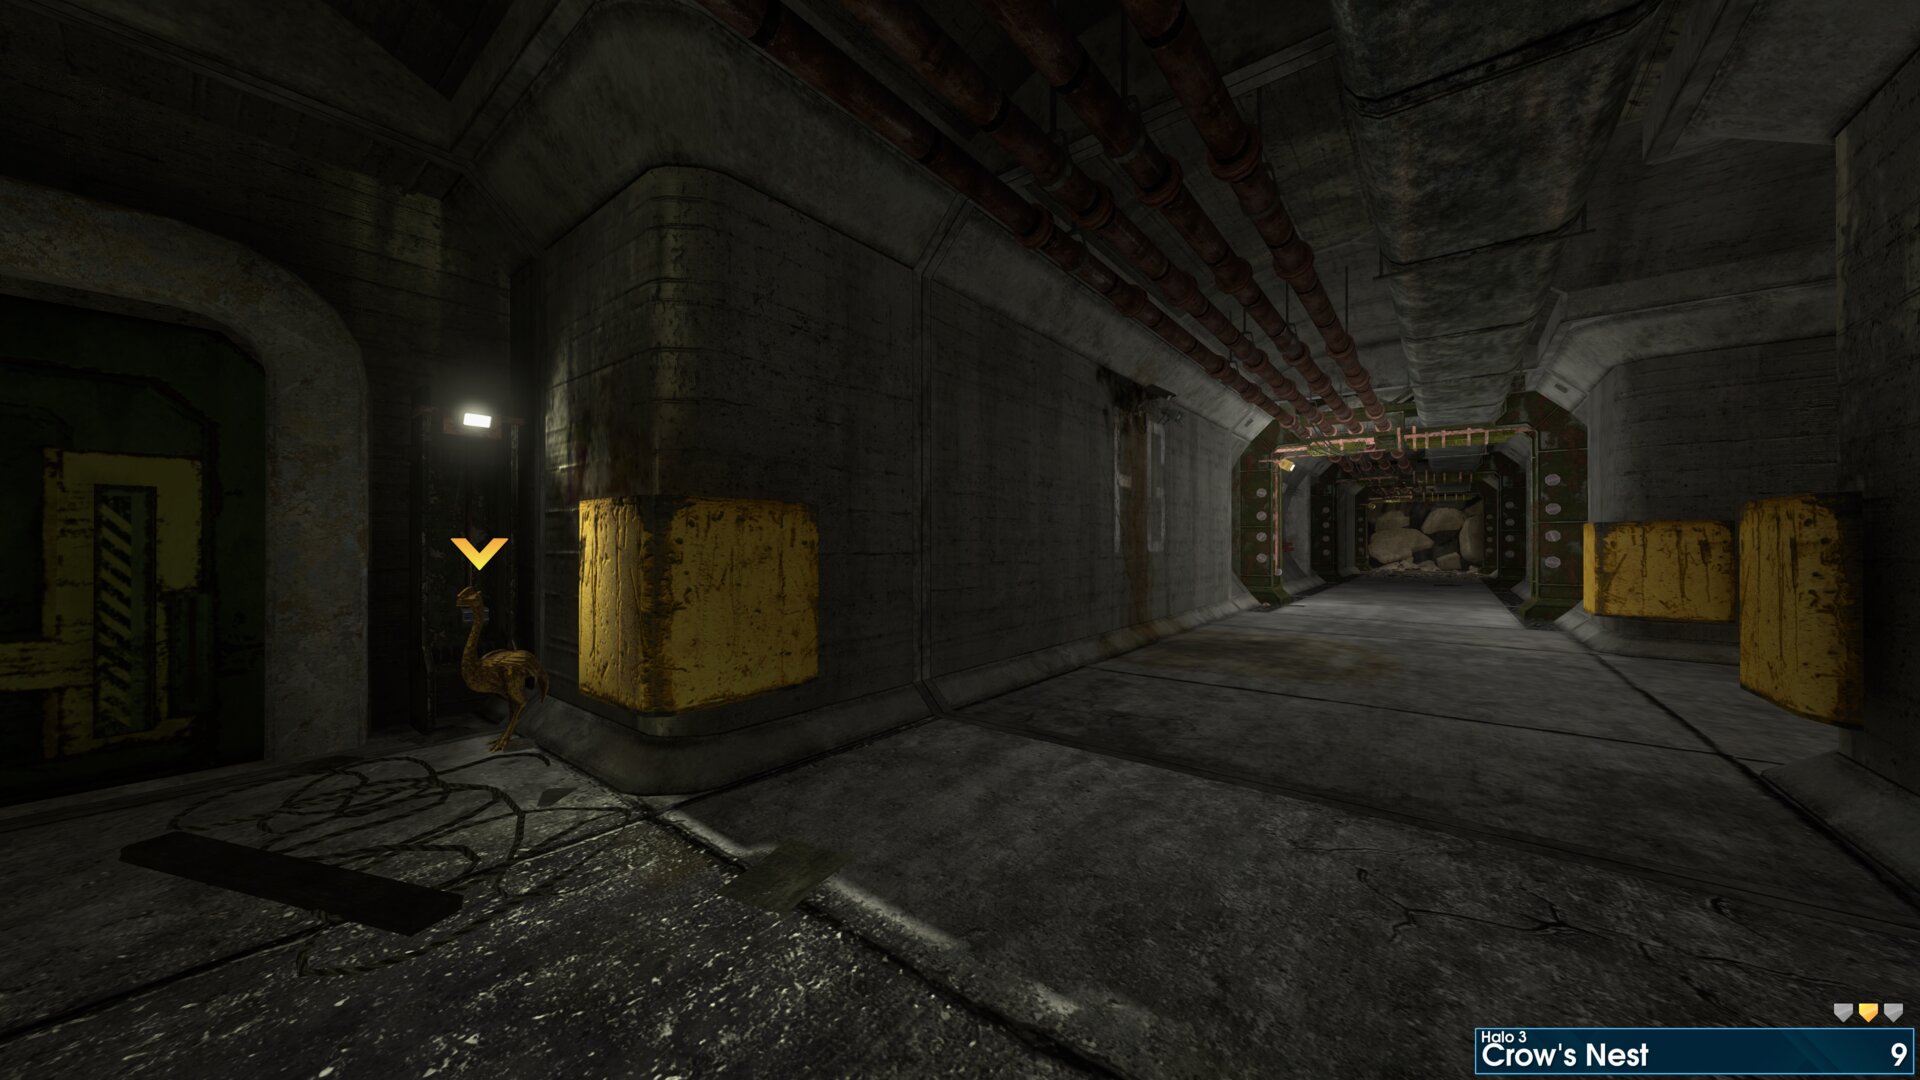
Just after the Gravity Hammer wielding Brute, in the corridor go left, next to a locked door.
Golden Moa 10
In the second pipe to your left, in the ventilation system.
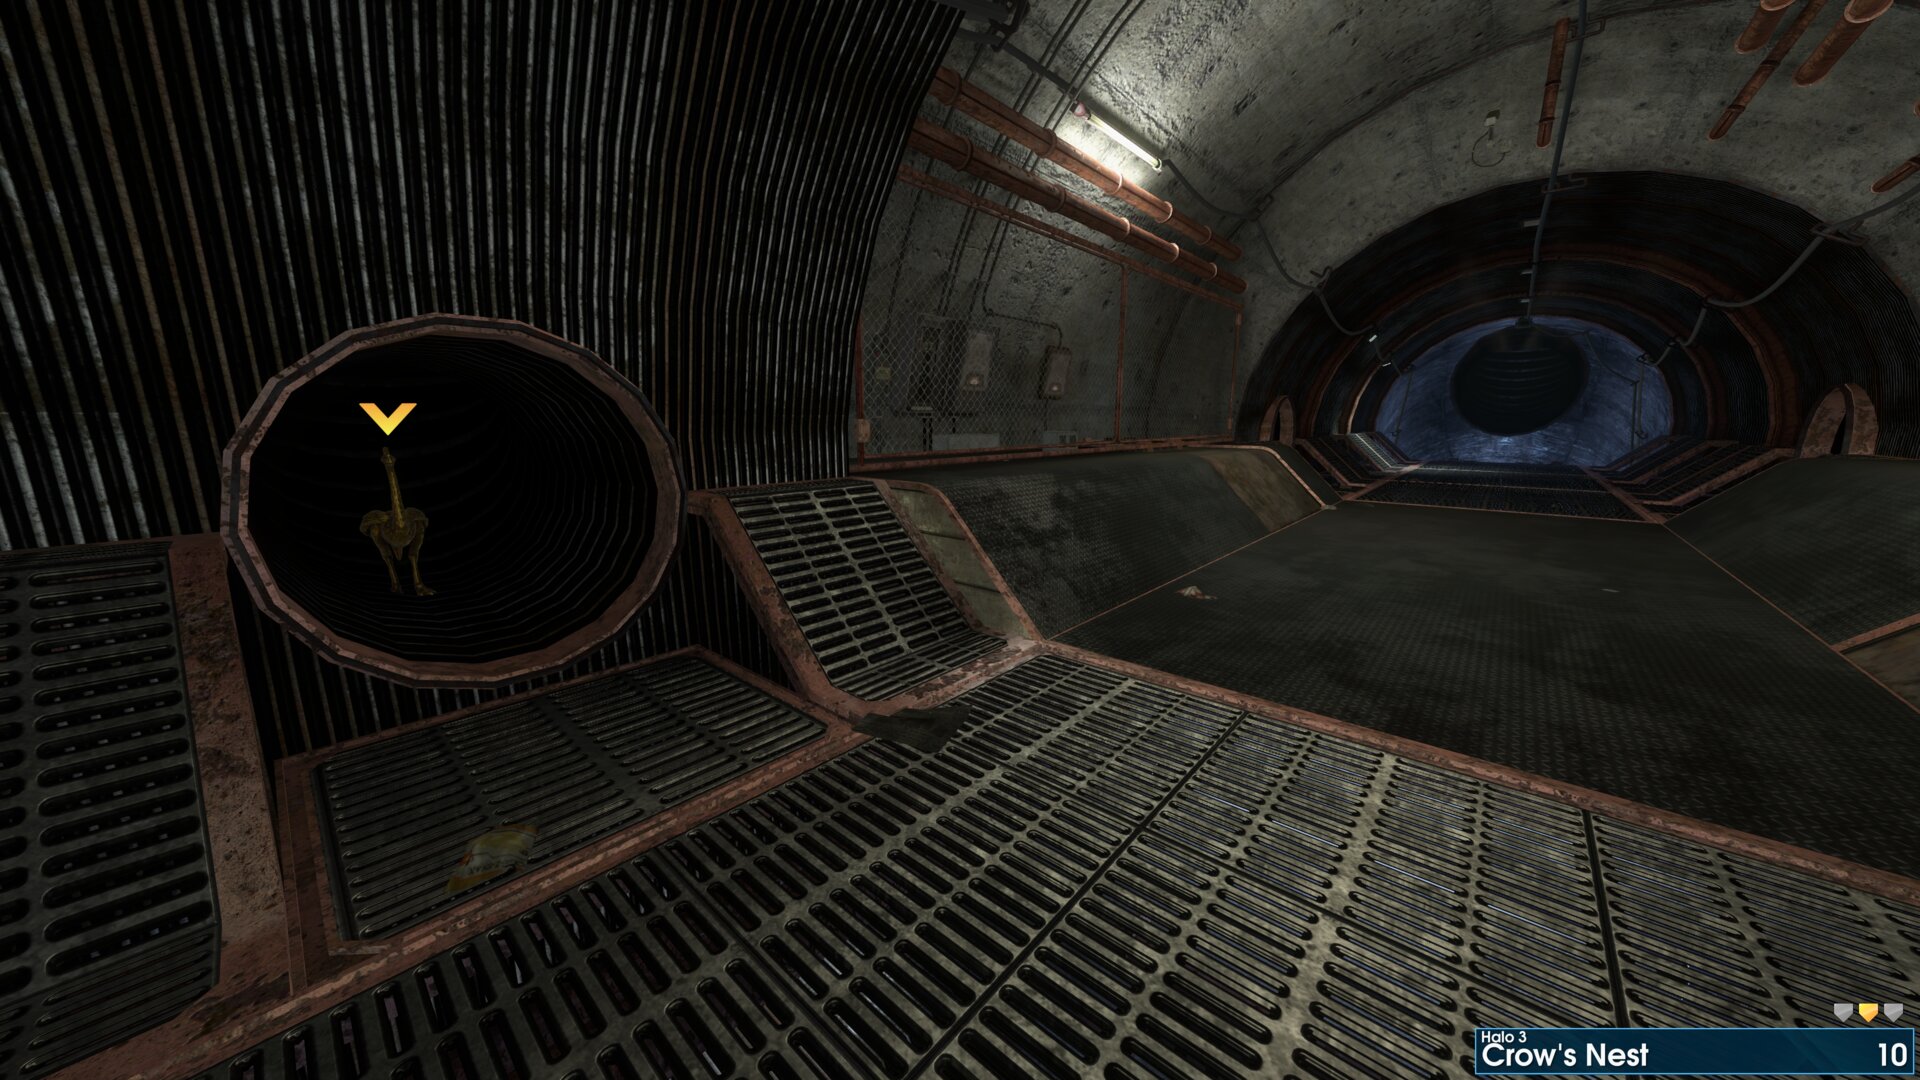
In the second pipe to your left, in the ventilation system.
Golden Moa 11
After going up the cargo elevator, beneath the landing pad.
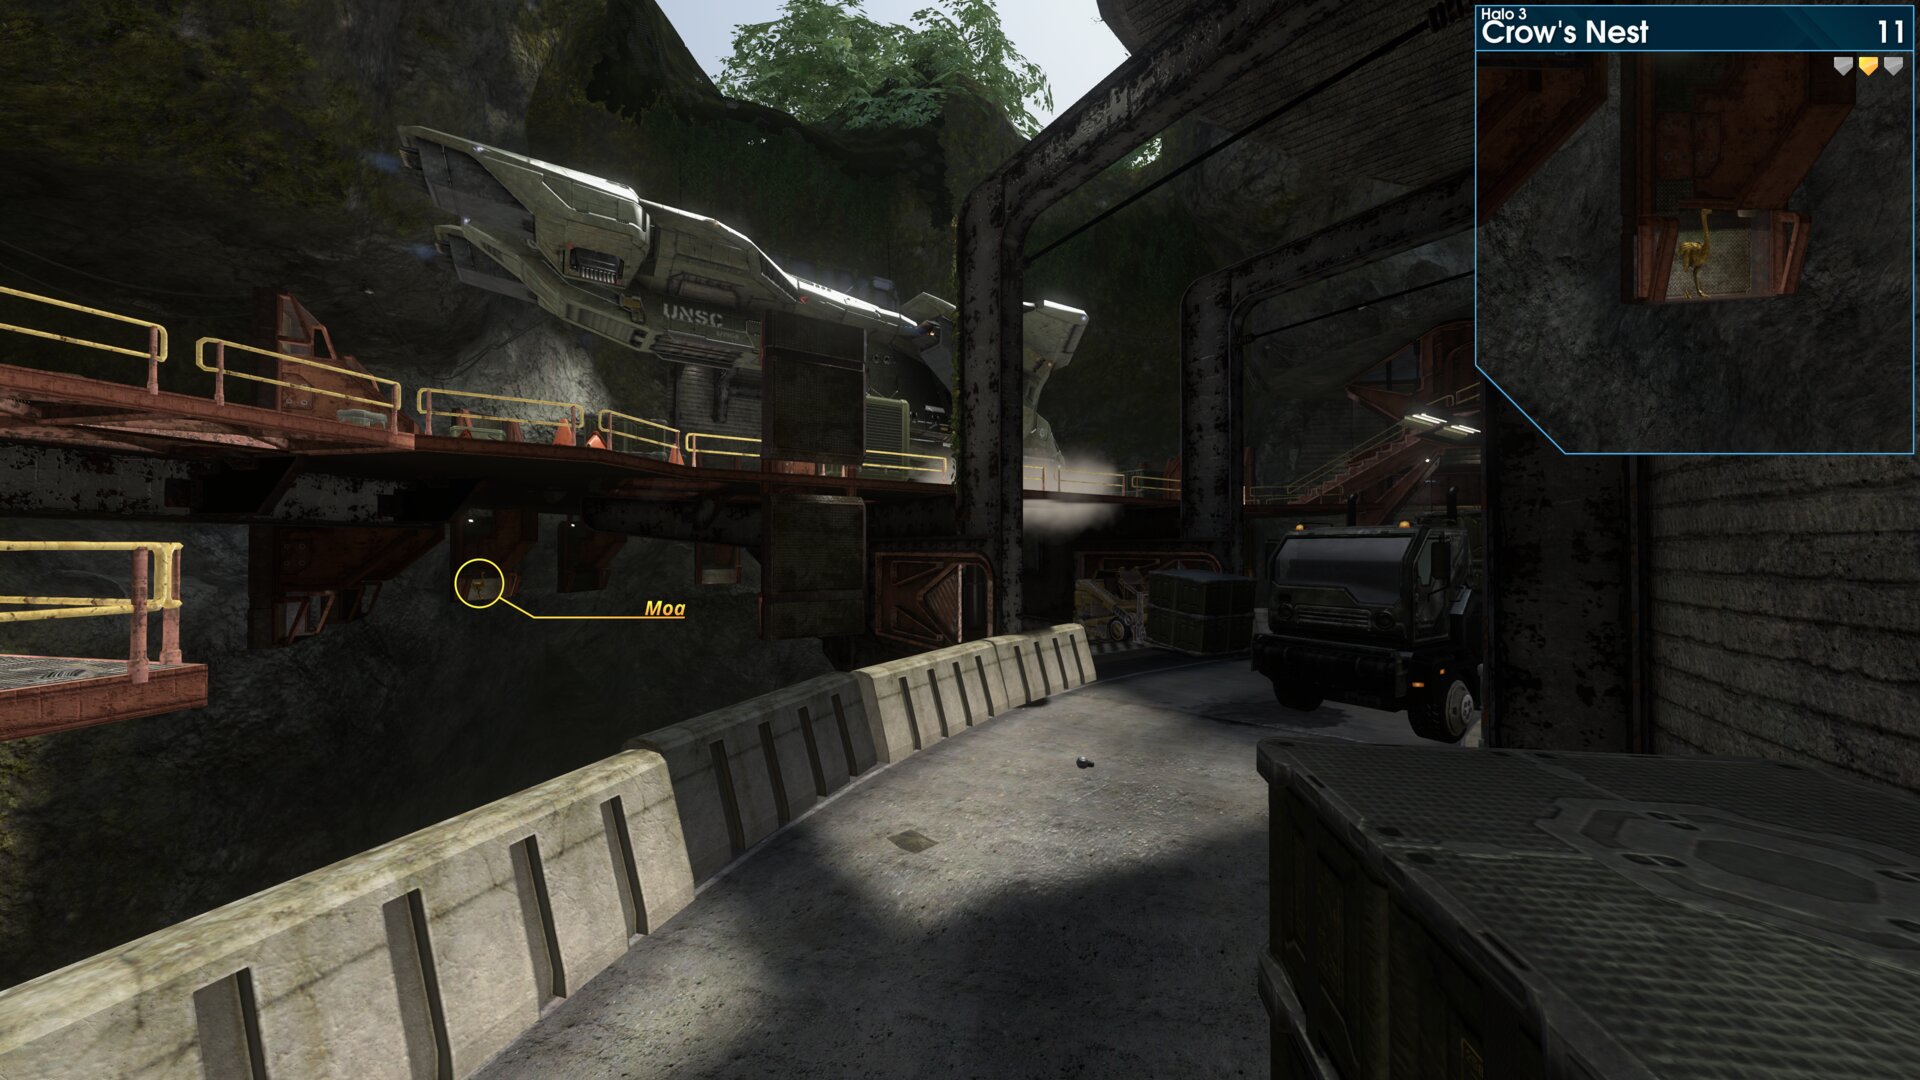
After going up the cargo elevator, beneath the landing pad.
Golden Moa 12
In the observation post above the landing pad.
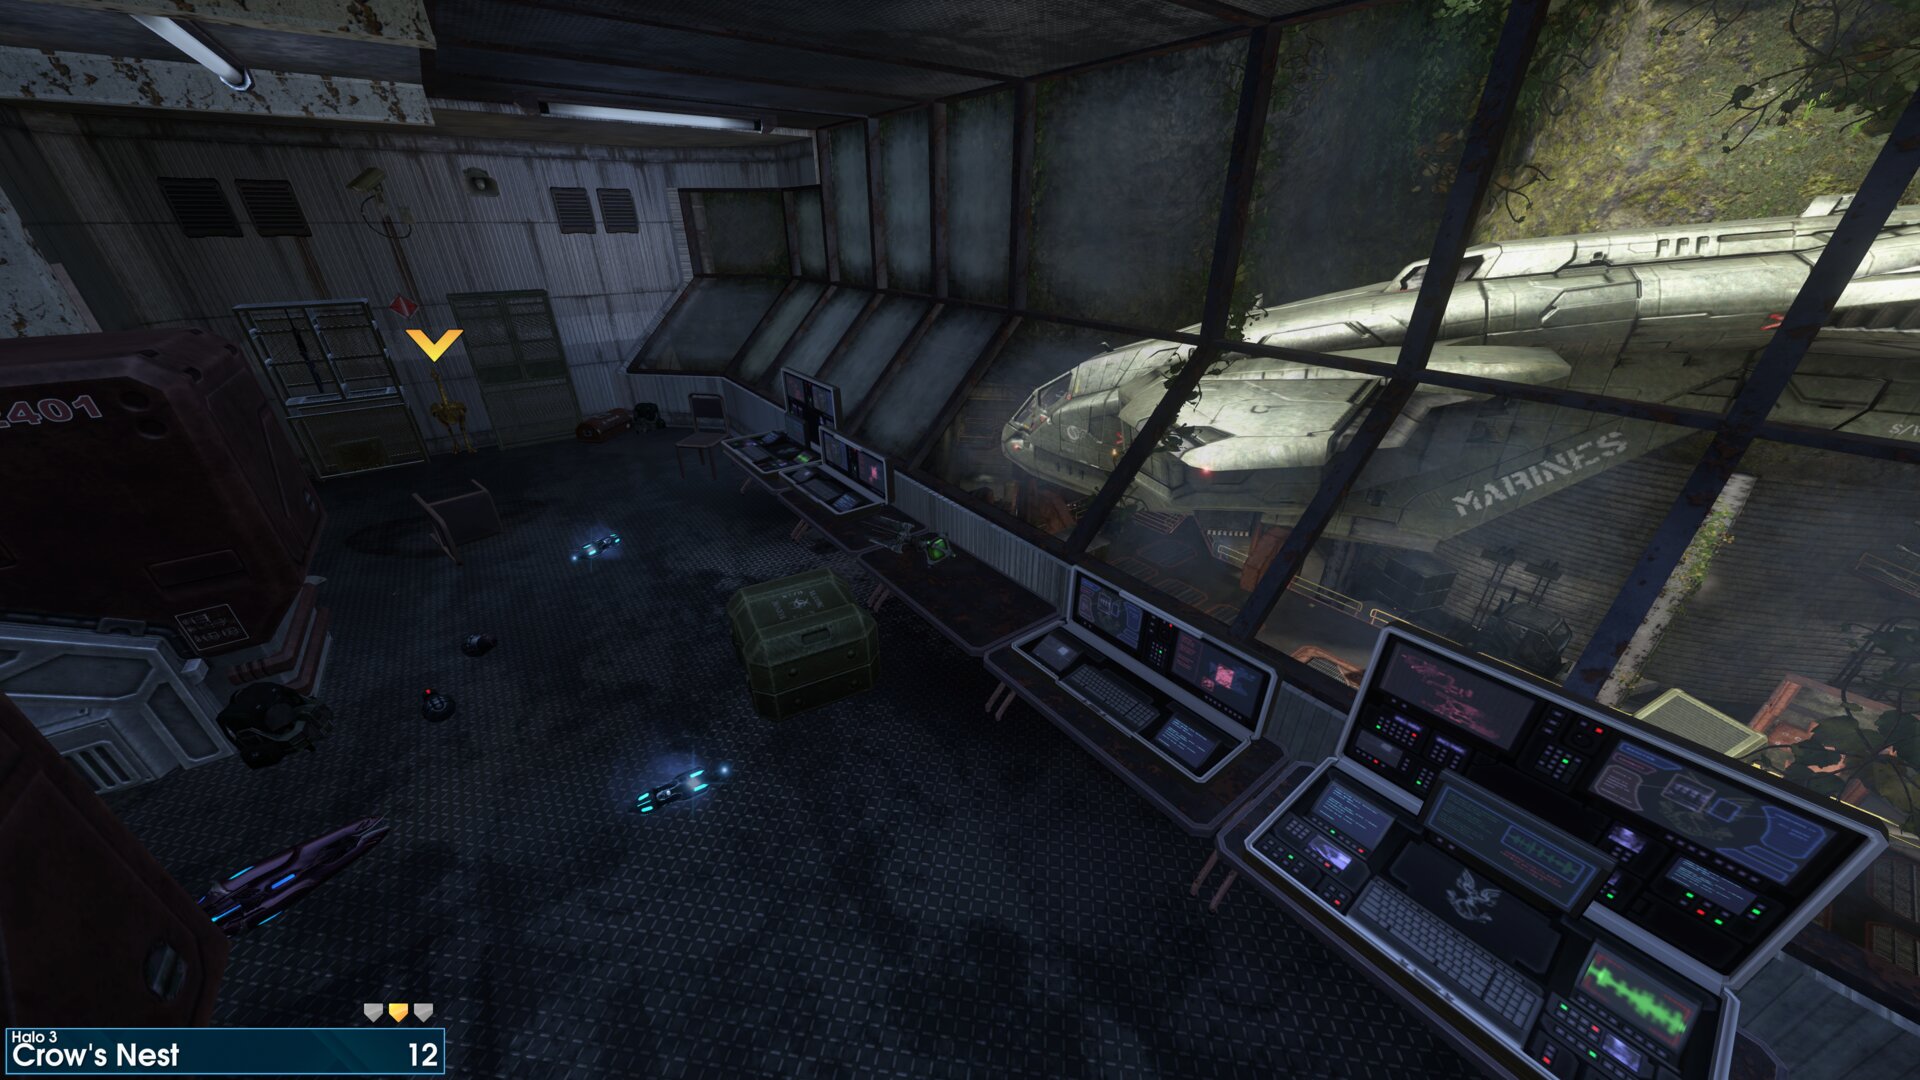
In the observation post above the landing pad.
Rally Point: Charlie
Golden Moa 13
Beside the door near the first Grunt on a turret.
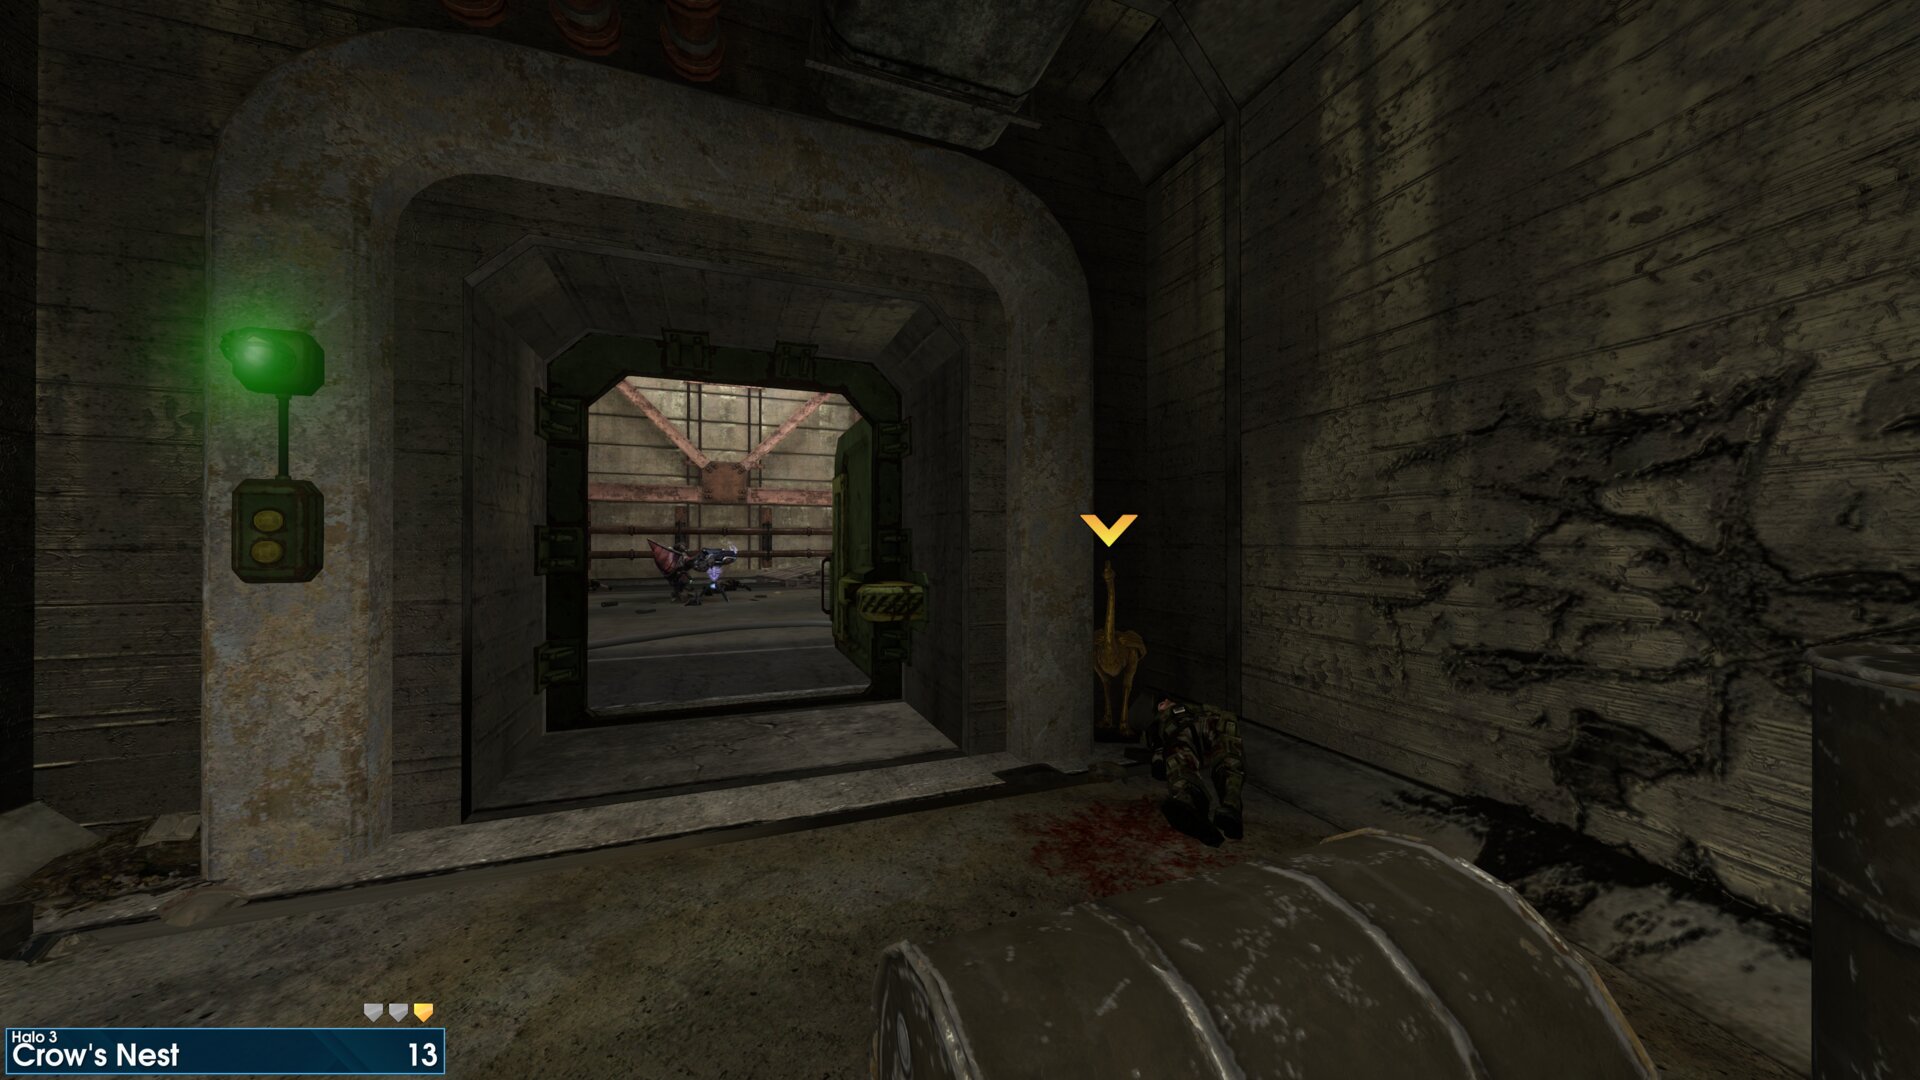
Beside the door near the first Grunt on a turret.
Golden Moa 14
Above the two Grunts on turrets. (the final fight before returning to the Command Center)
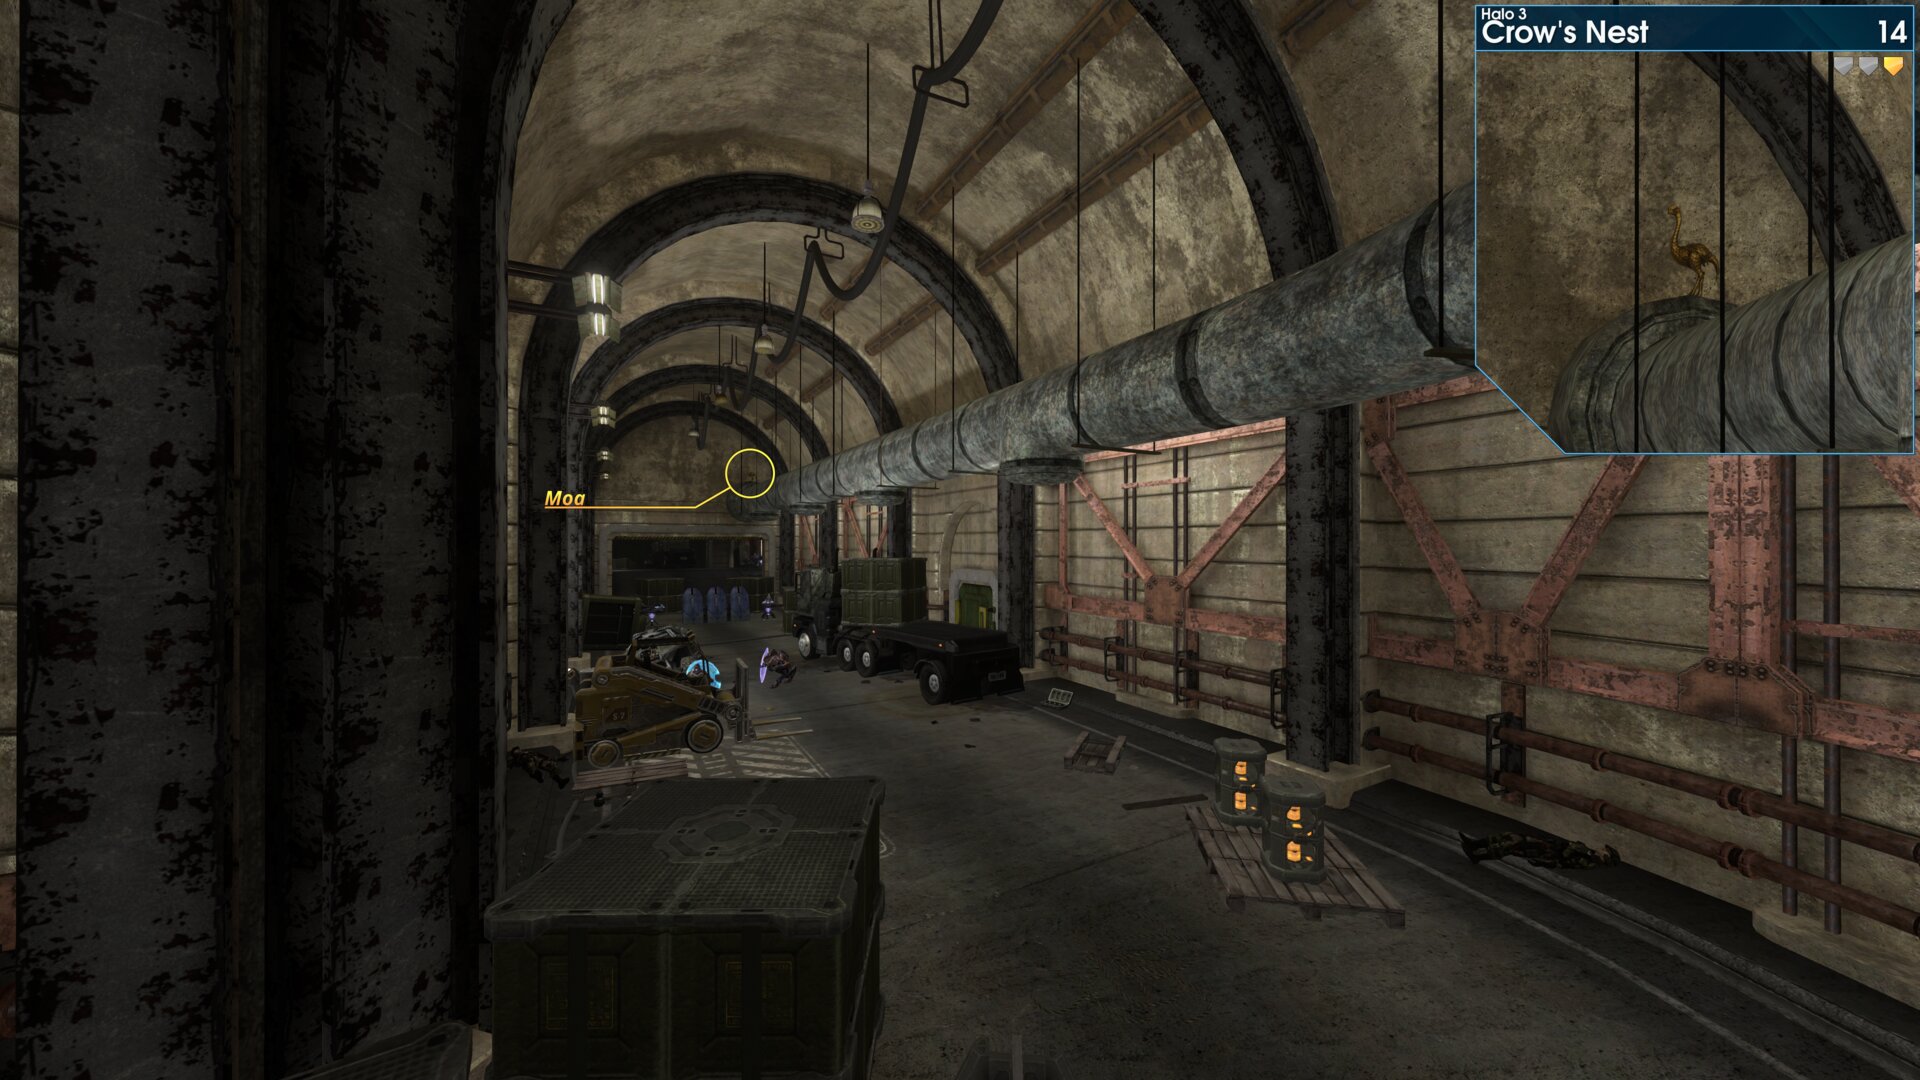
Above the two Grunts on turrets. (the final fight before returning to the Command Center)
➟ Tsavo Highway
Rally Point: Alpha
Note: Moa's 4, 5, 6, 7 & 8 can be reached from rally point Bravo, although this requires a lot of
⠀⠀ ⠀backtracking.
Rally Point: Bravo
Note: Moa's 4, 5, 6, 7 & 8 can be reached from rally point Bravo, although this requires a lot of
⠀⠀ ⠀backtracking.
Golden Moa 1
Beside the Troop Transport Warthog.
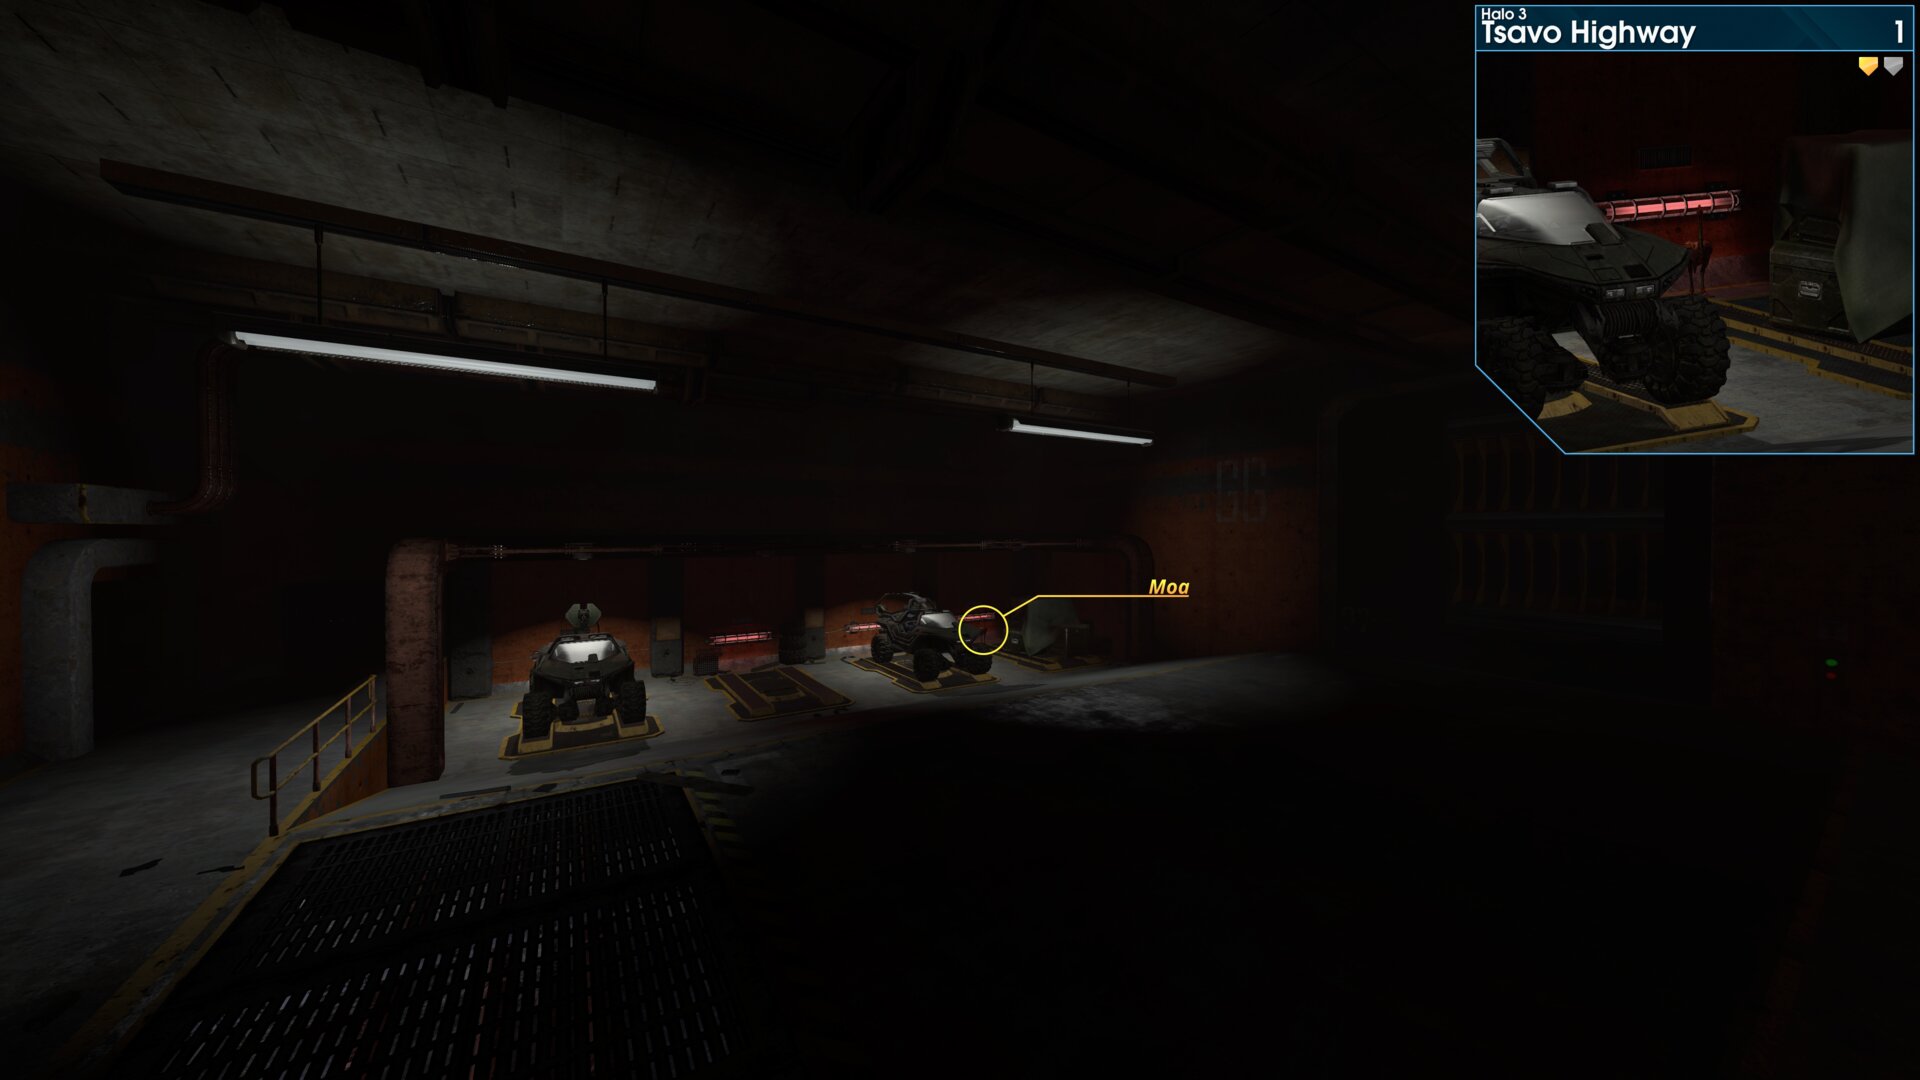
Beside the Troop Transport Warthog.
Golden Moa 2
Just outside the first large door.
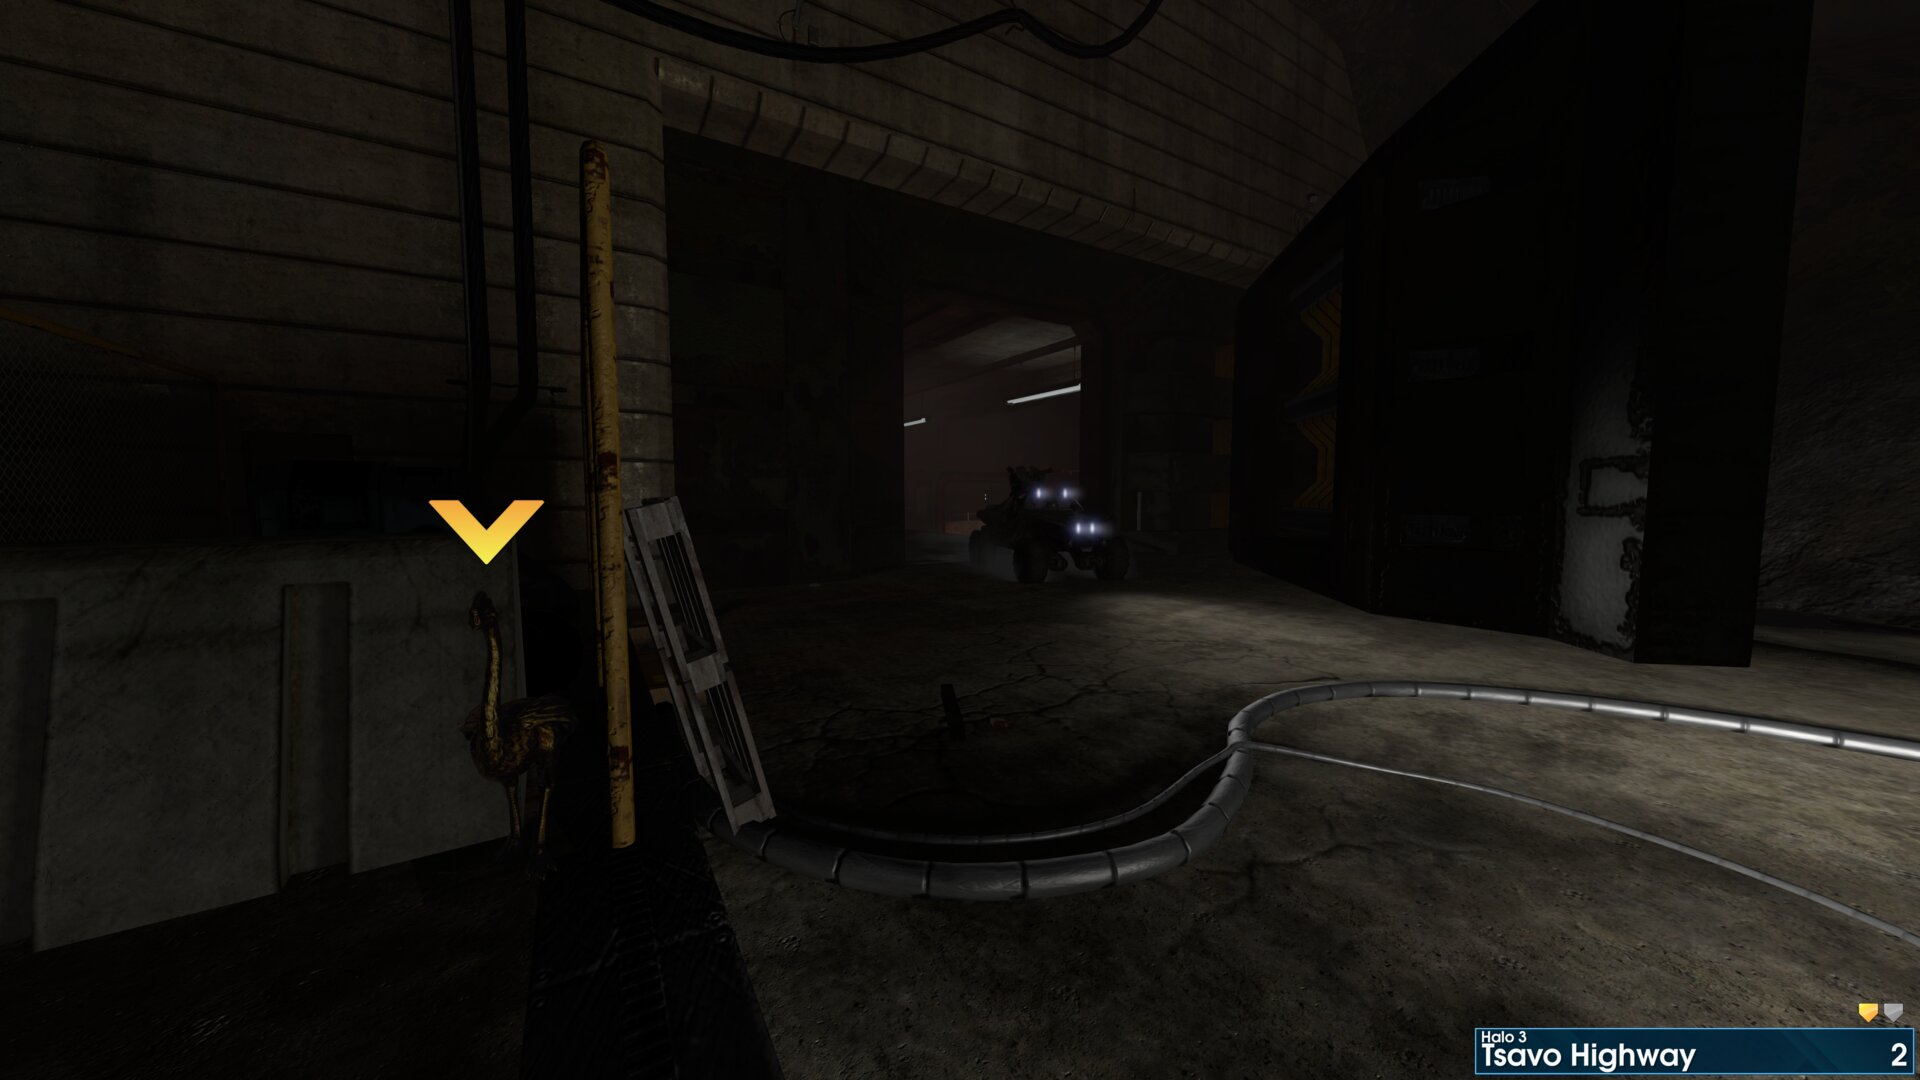
Just outside the first large door.
Golden Moa 3
Above the booth, at the cave exit. (just above the surveillance camera)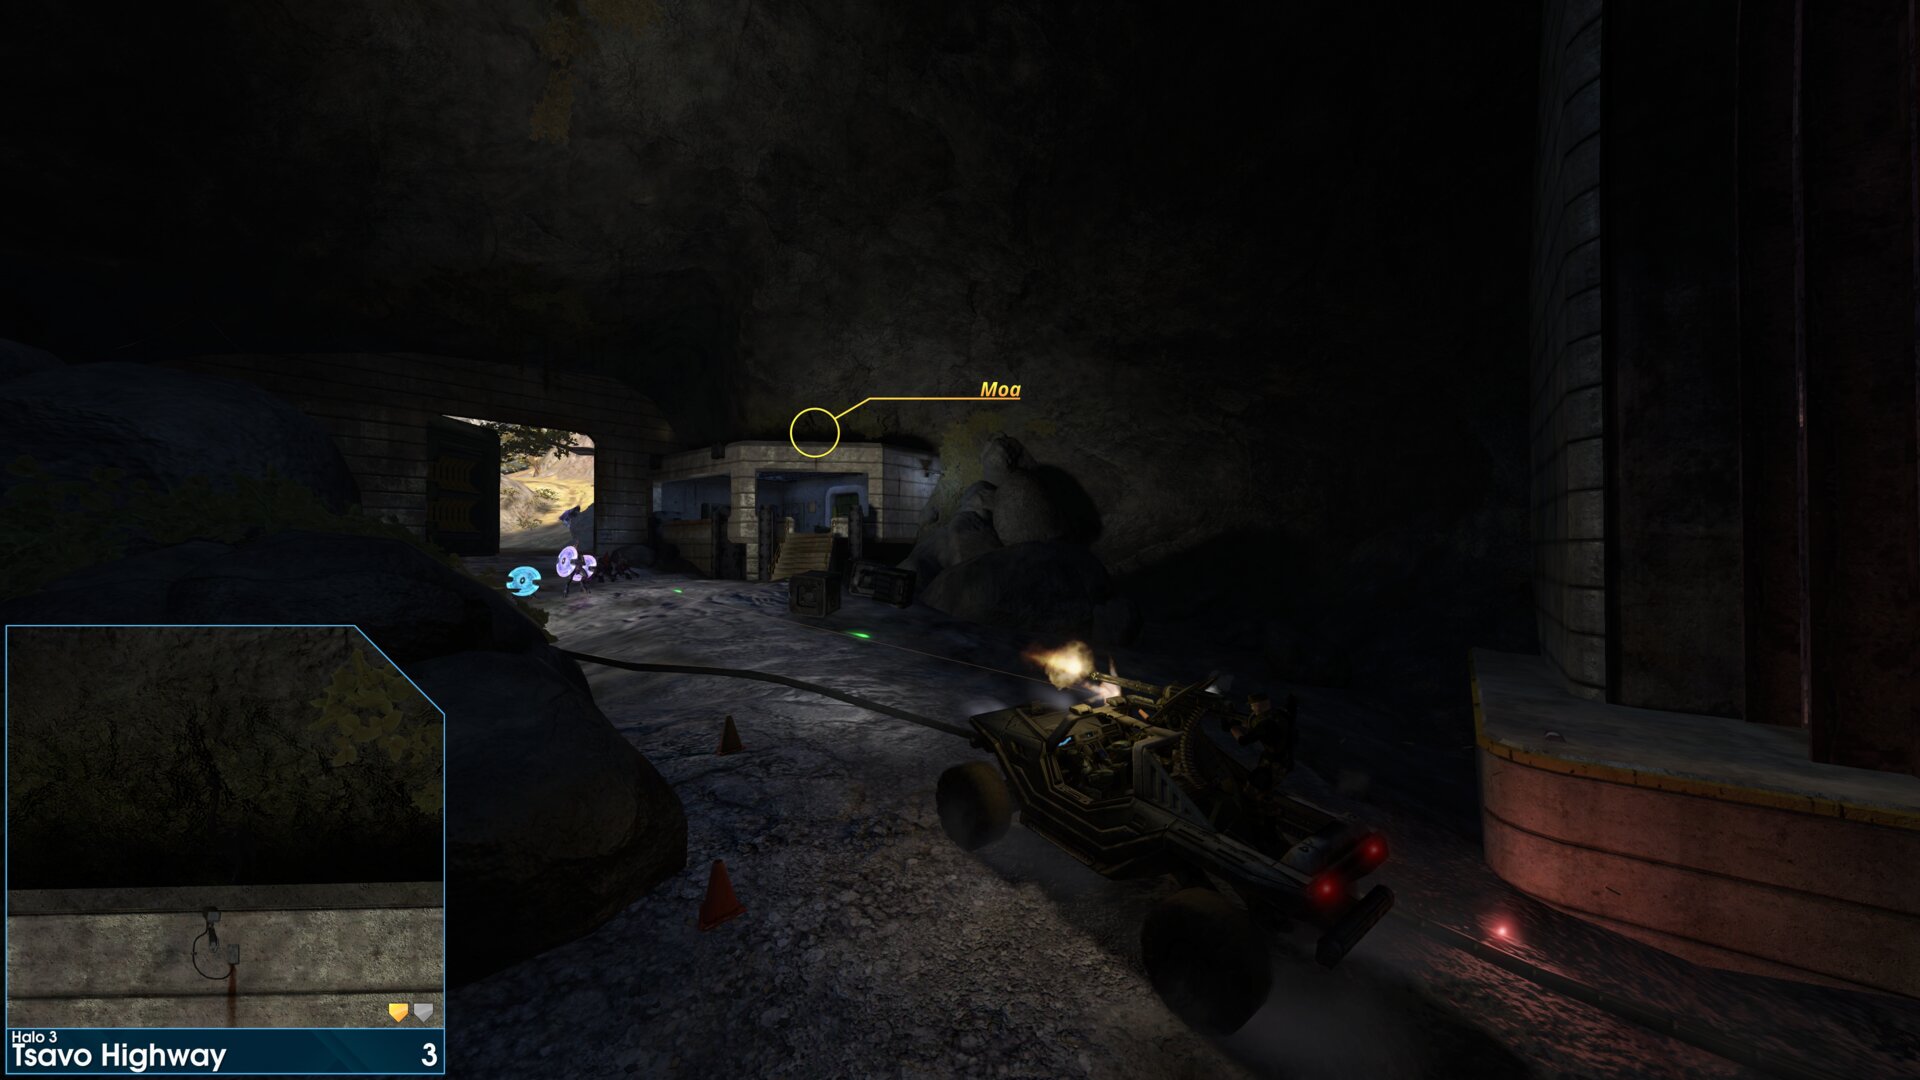
Above the booth, at the cave exit. (just above the surveillance camera)
Golden Moa 4
After exiting the cave head up the hill and into the next area. Borrow a Beam Rifle from one of the Jackals, and then back-track a little. The Moa is on top of one of the debris from the Space Elevator. Aim for the head.
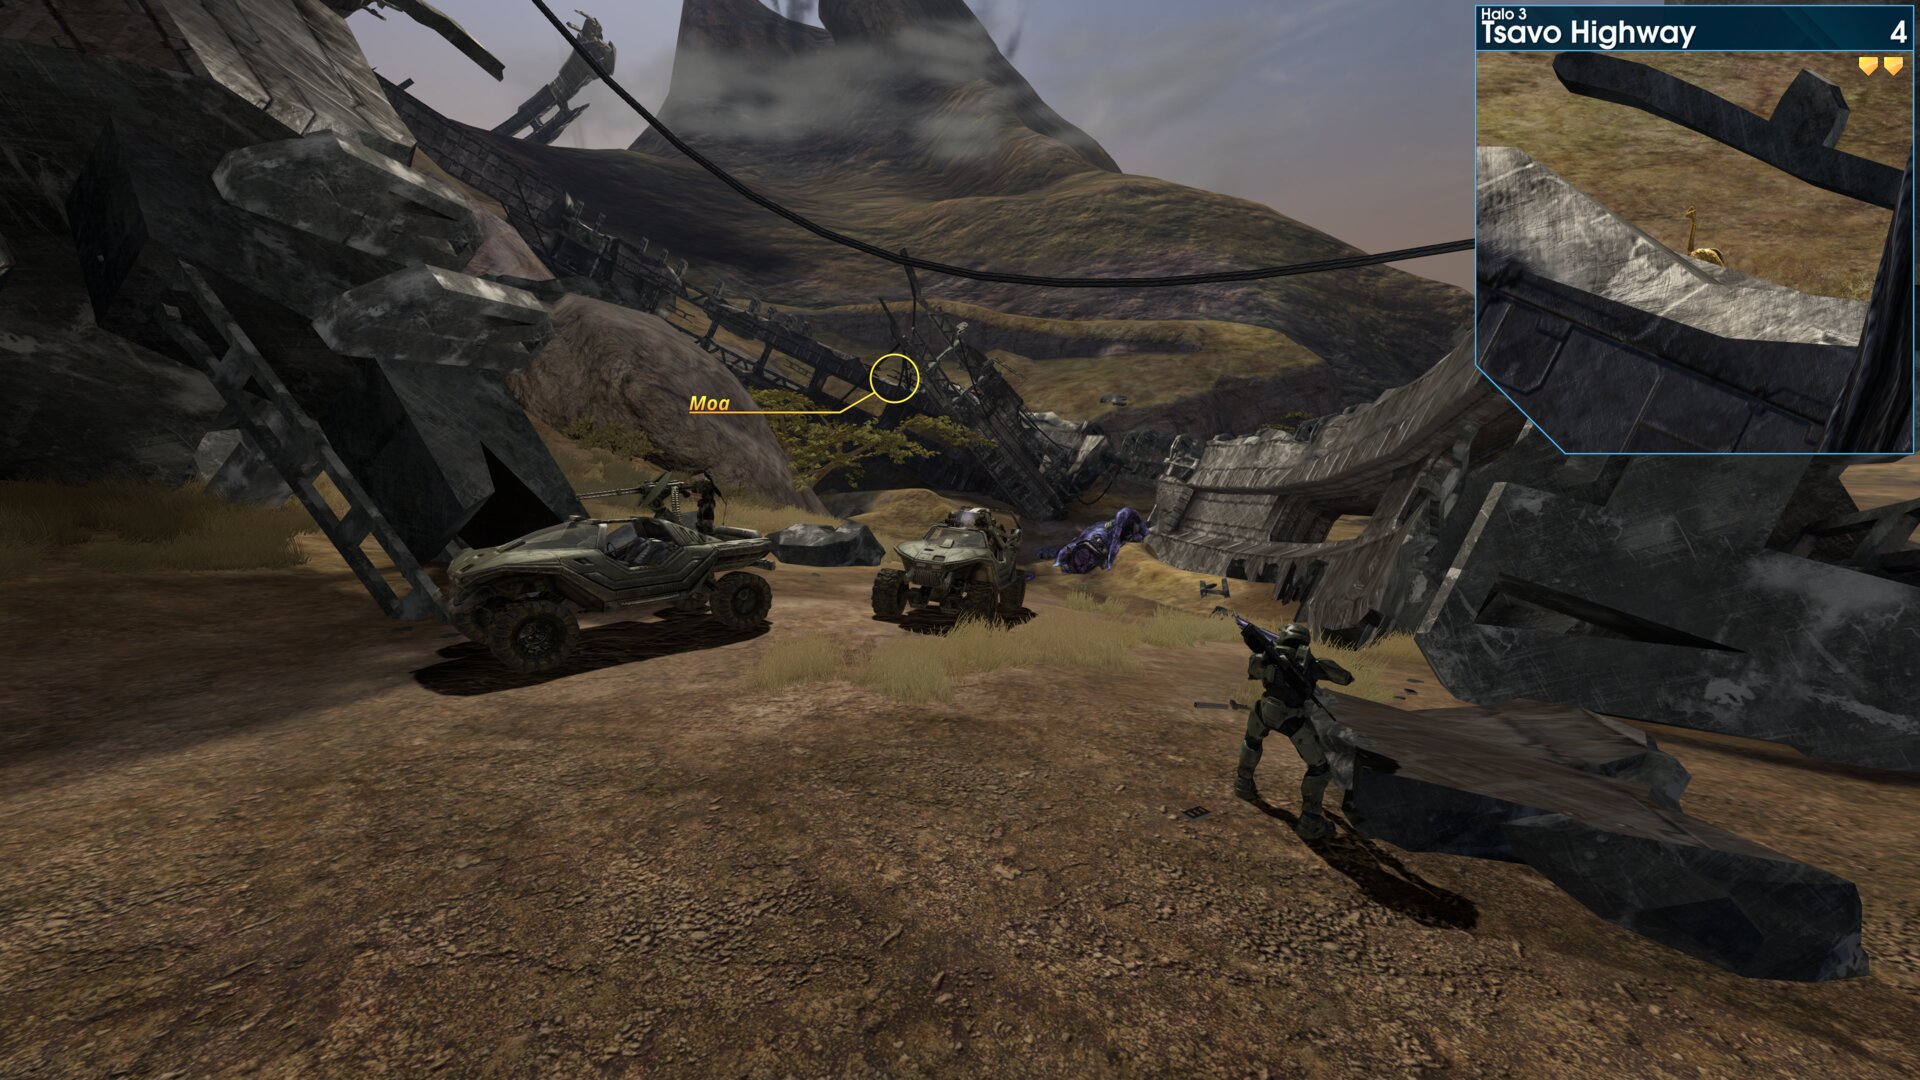
After exiting the cave head up the hill and into the next area. Borrow a Beam Rifle from one of the Jackals, and then back-track a little. The Moa is on top of one of the debris from the Space Elevator. Aim for the head.
Golden Moa 5
On the back of the dam wall.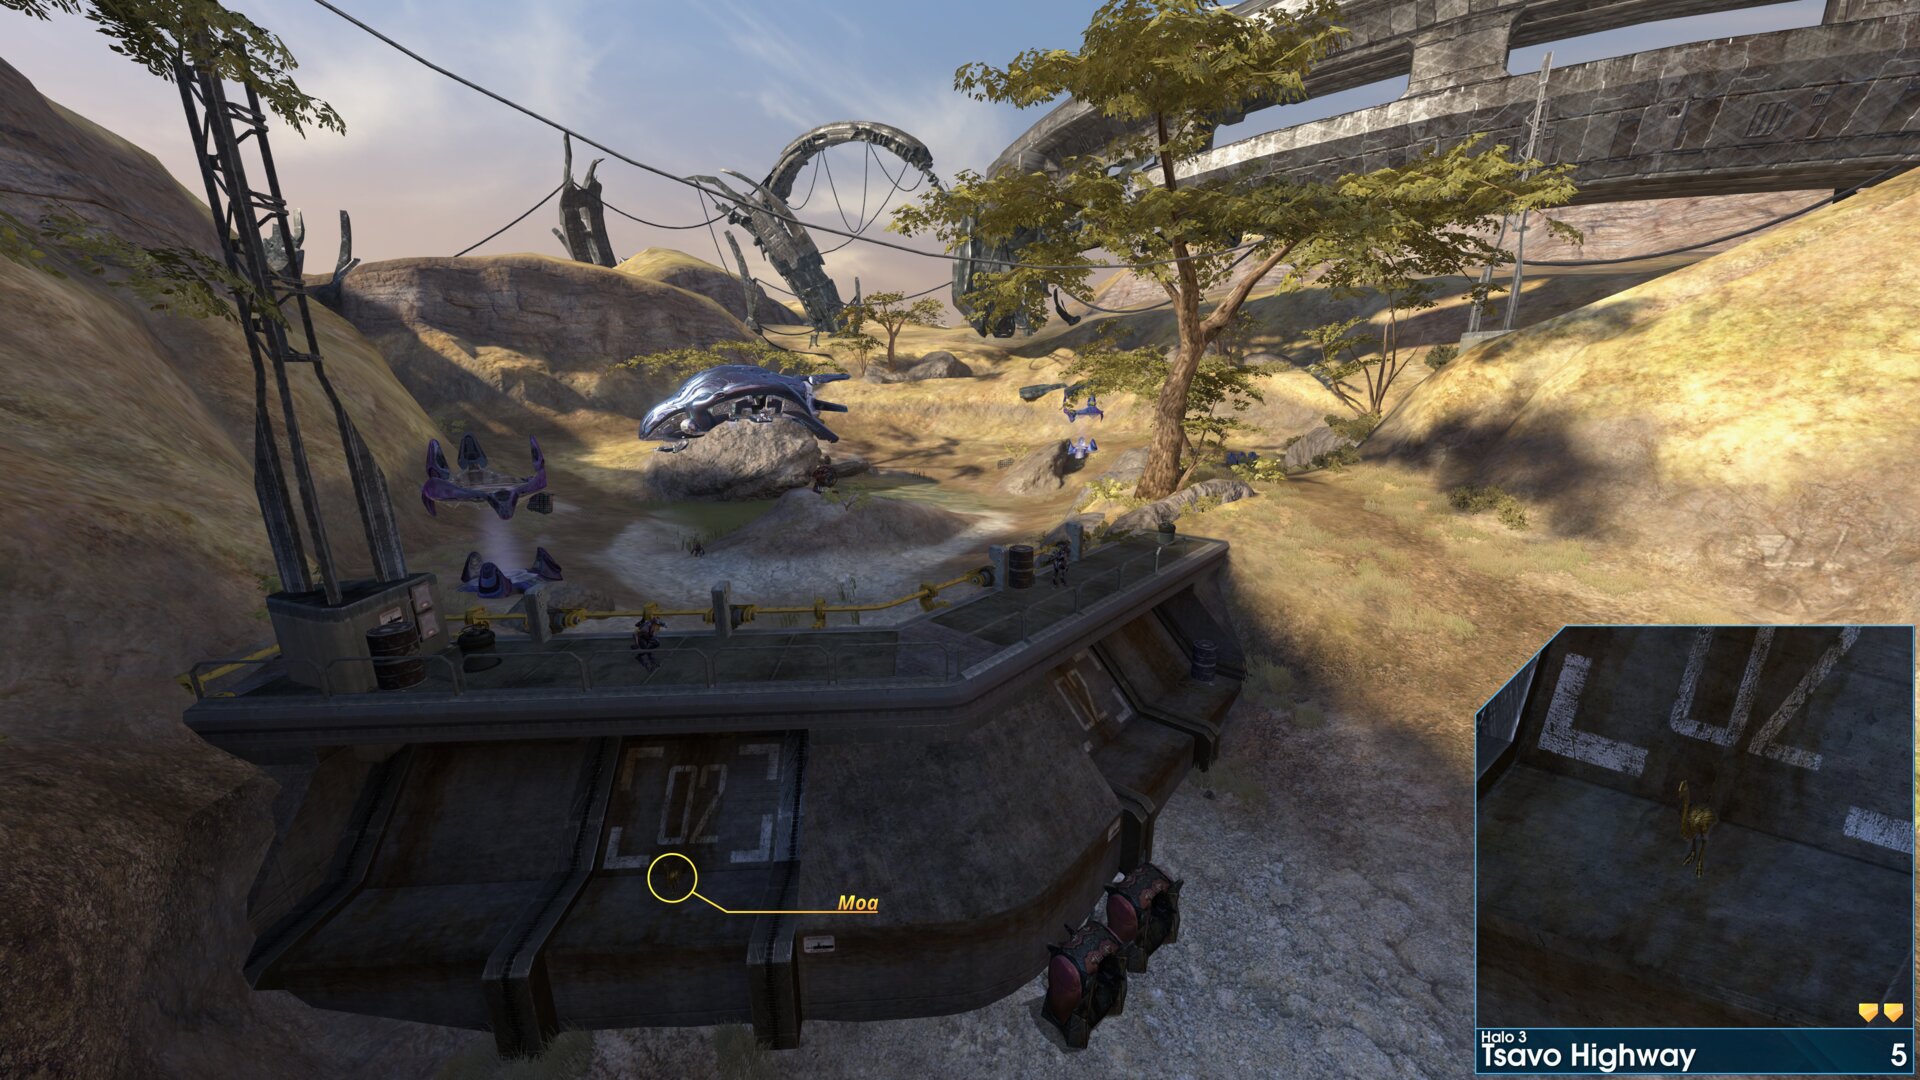
On the back of the dam wall.
Golden Moa 6
Look for the first power pole, after passing the dam wall, it's on the concrete slab.
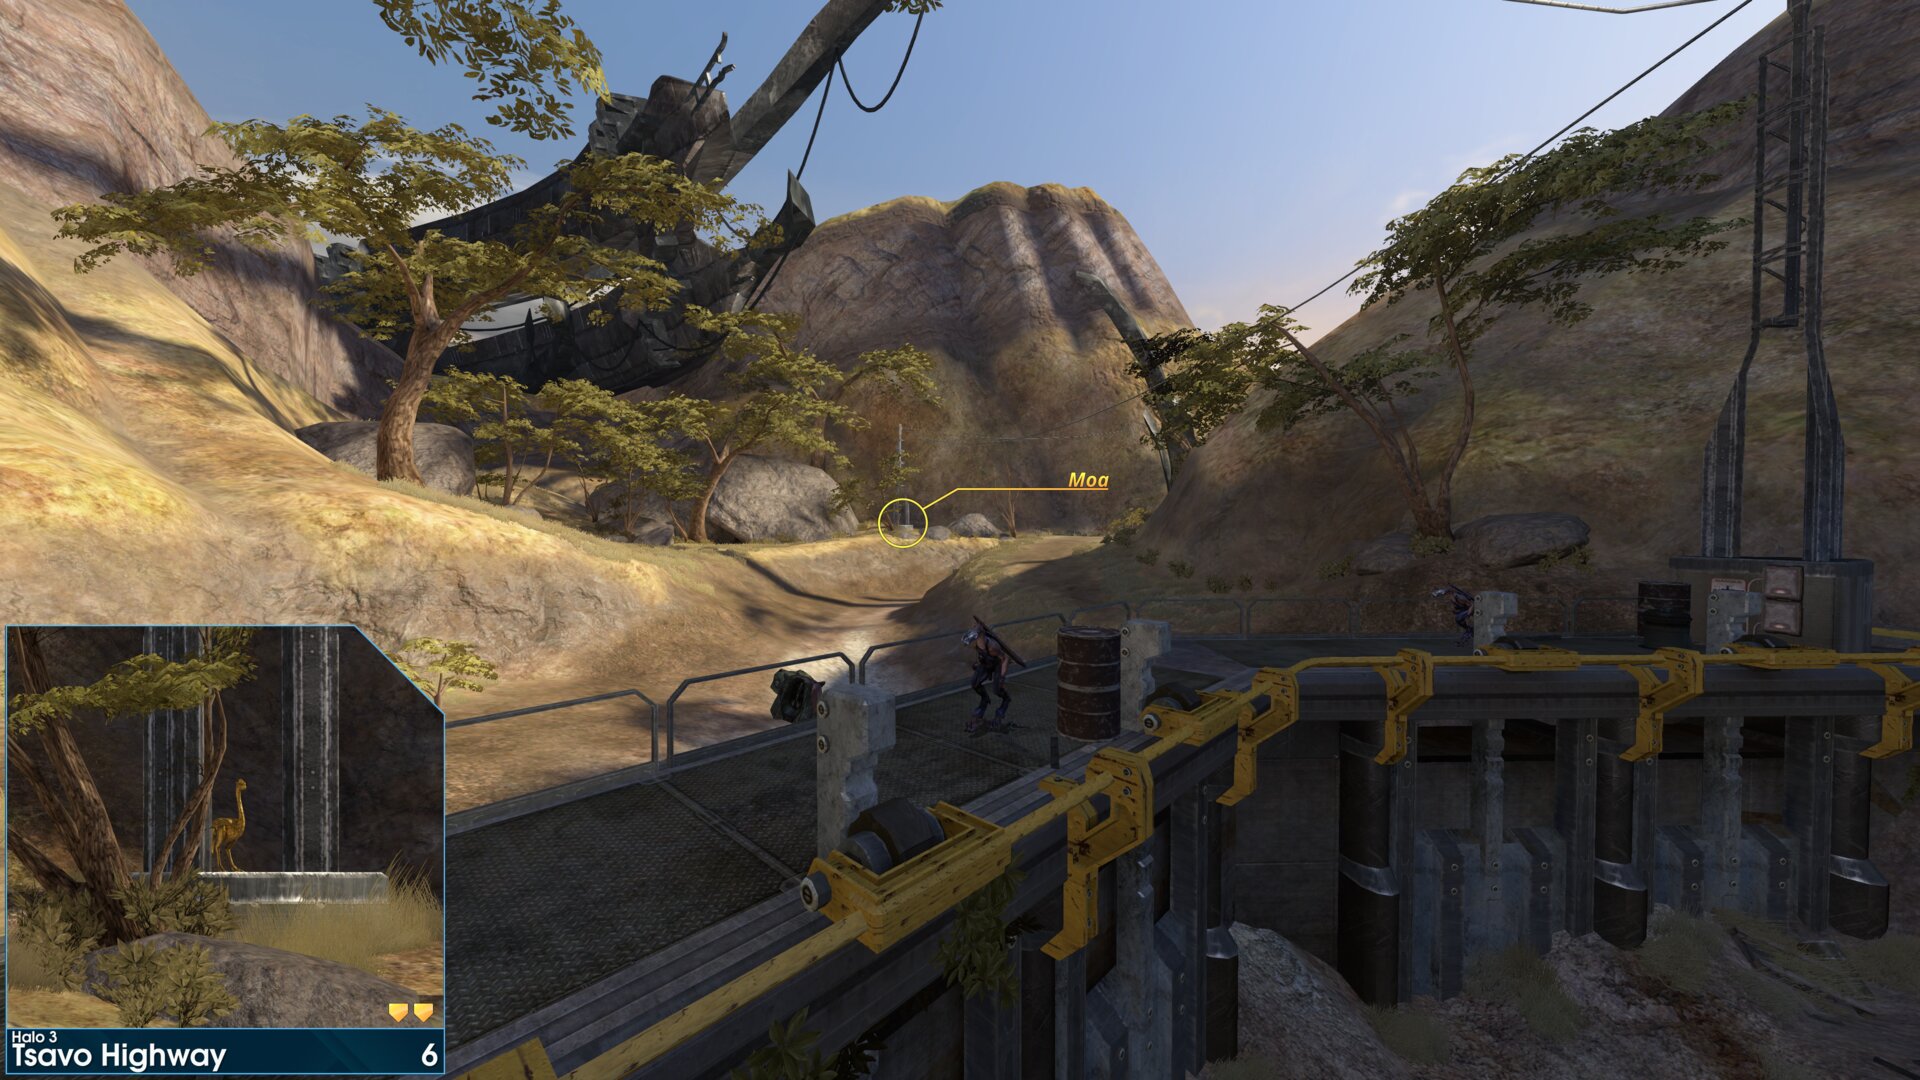
Look for the first power pole, after passing the dam wall, it's on the concrete slab.
Golden Moa 7
In the area with the first energy wall, look inside building 3. (building 3 faces toward the energy wall, marking on the back)
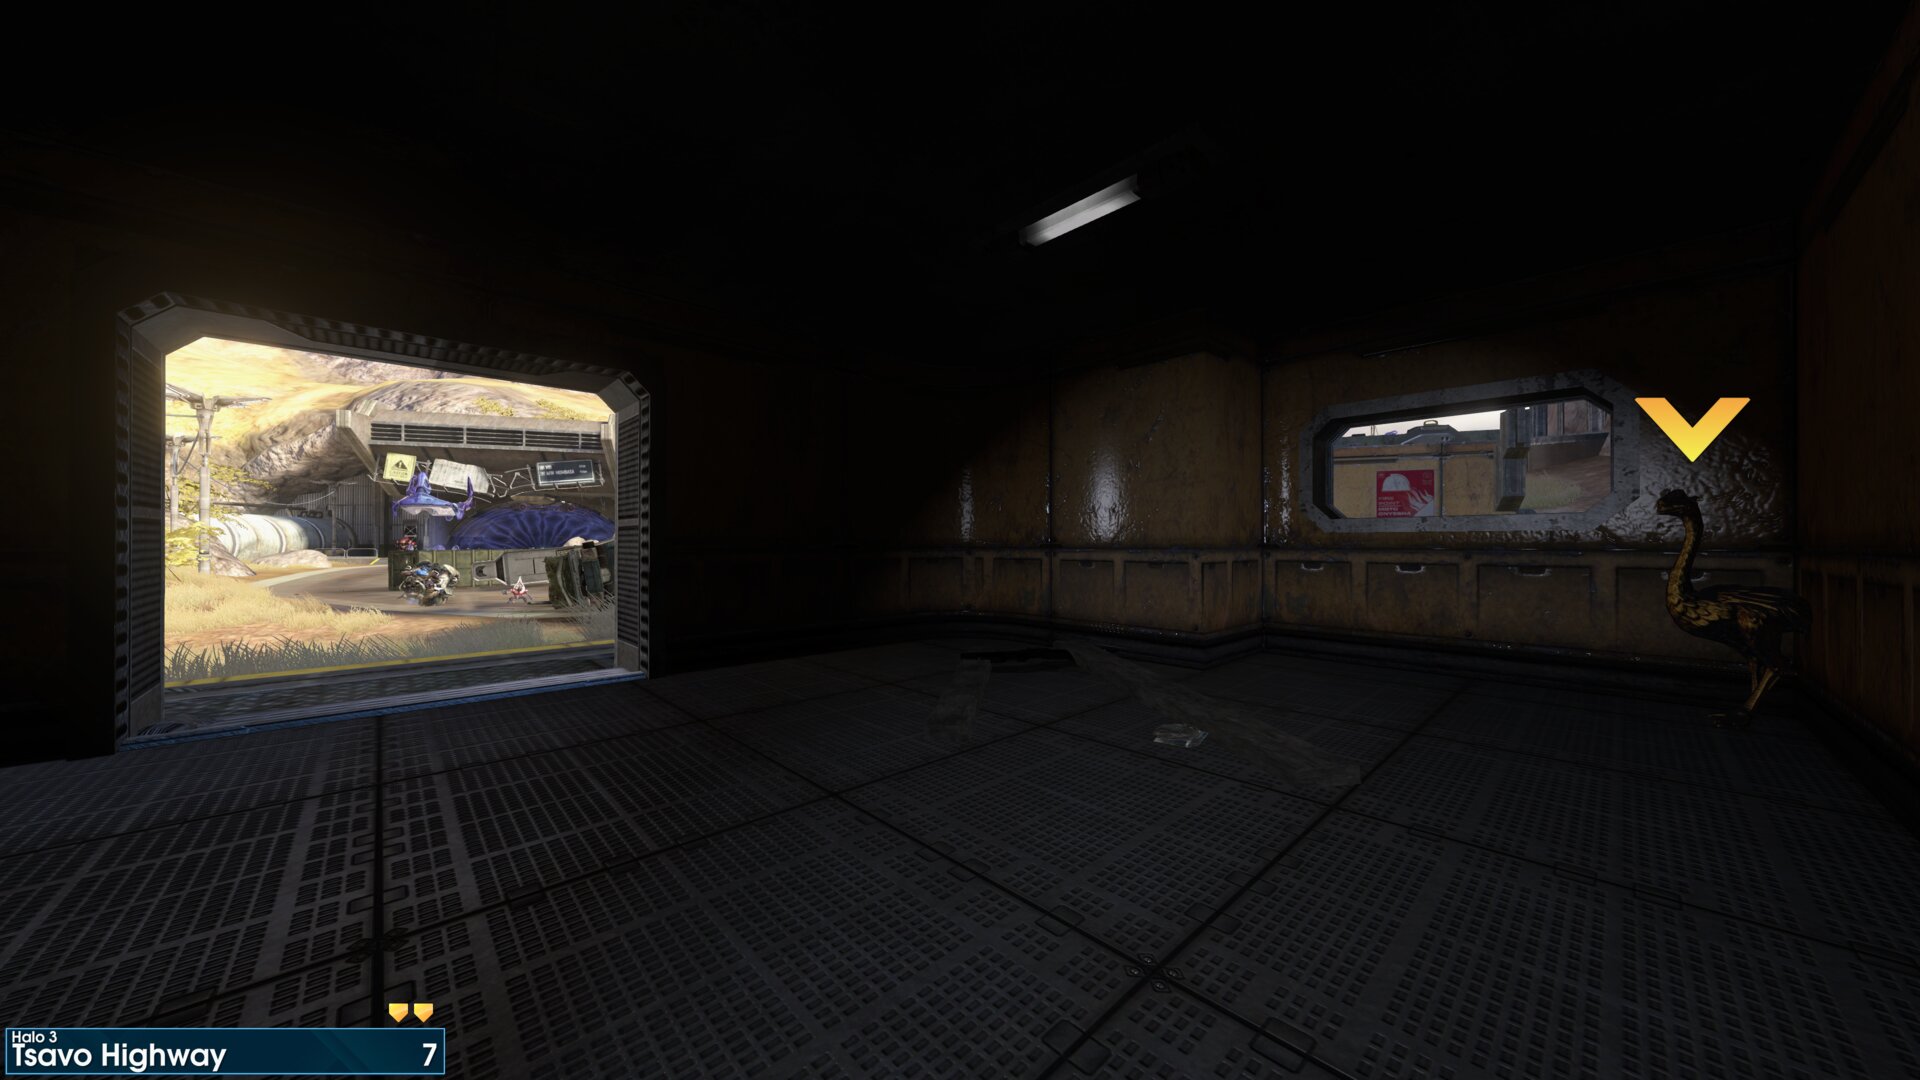
In the area with the first energy wall, look inside building 3. (building 3 faces toward the energy wall, marking on the back)
Golden Moa 8
In the area with the first energy wall, head right (away from the wall) to the broken section of highway. It's on the first support, to the left.
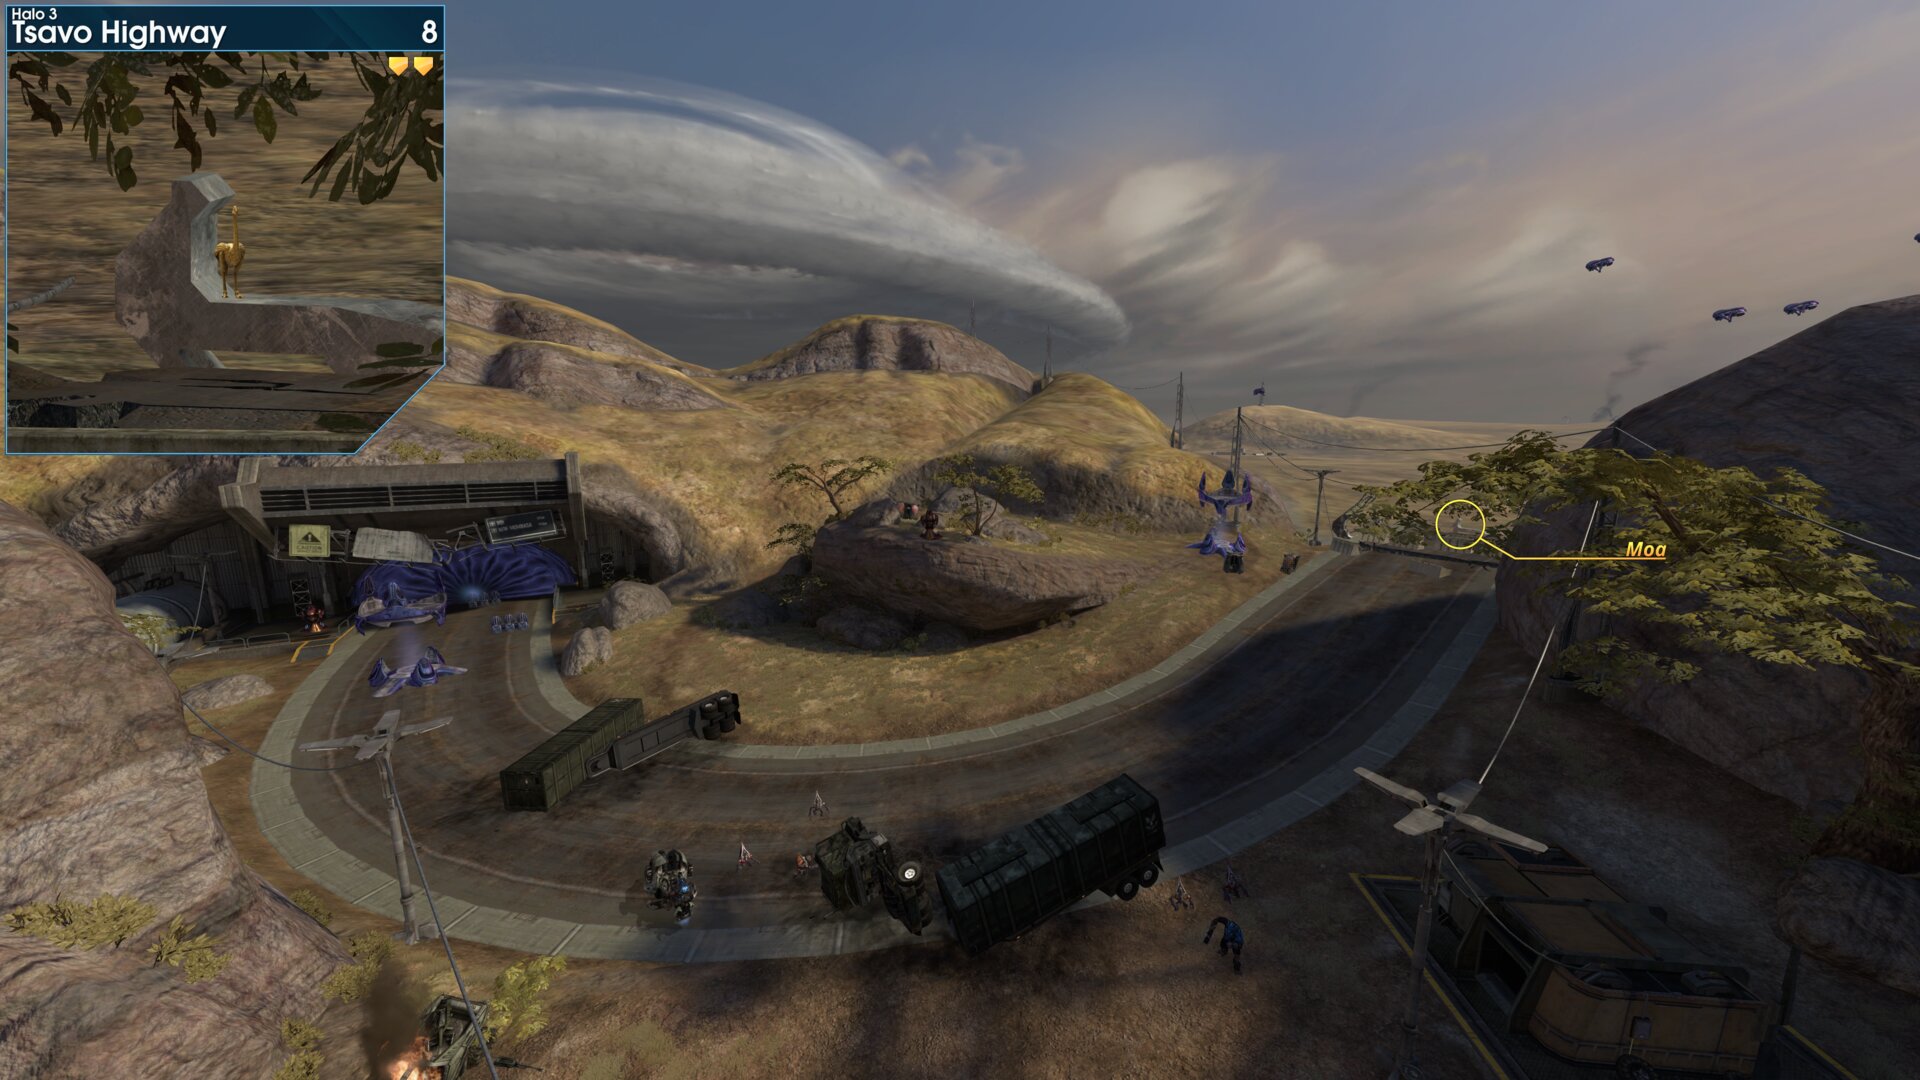
In the area with the first energy wall, head right (away from the wall) to the broken section of highway. It's on the first support, to the left.
Rally Point: Bravo
Golden Moa 9
As you pass through the highway gate, look for the Moa on a ledge to the left.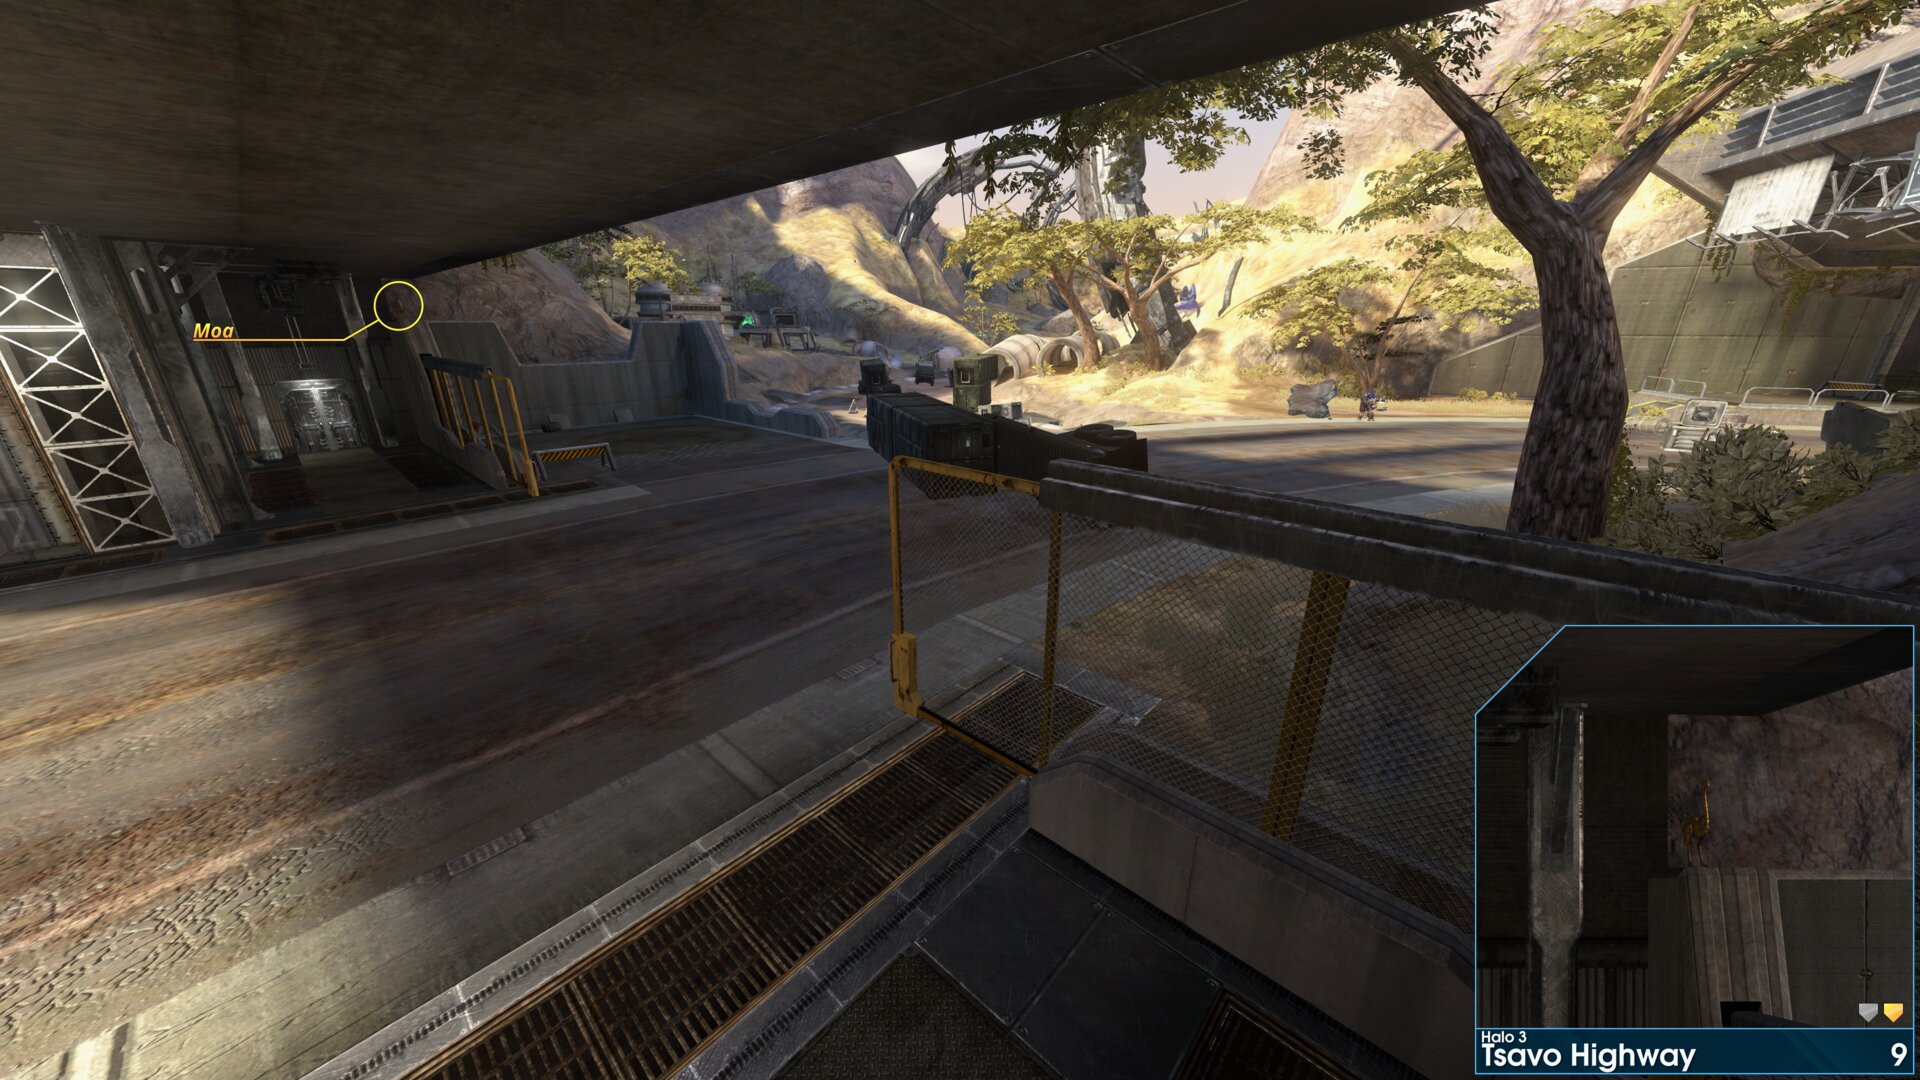
As you pass through the highway gate, look for the Moa on a ledge to the left.
Golden Moa 10
Where you protect the marines, after crossing the small gap in the highway. Look for the power pole, it's on the concrete slab.
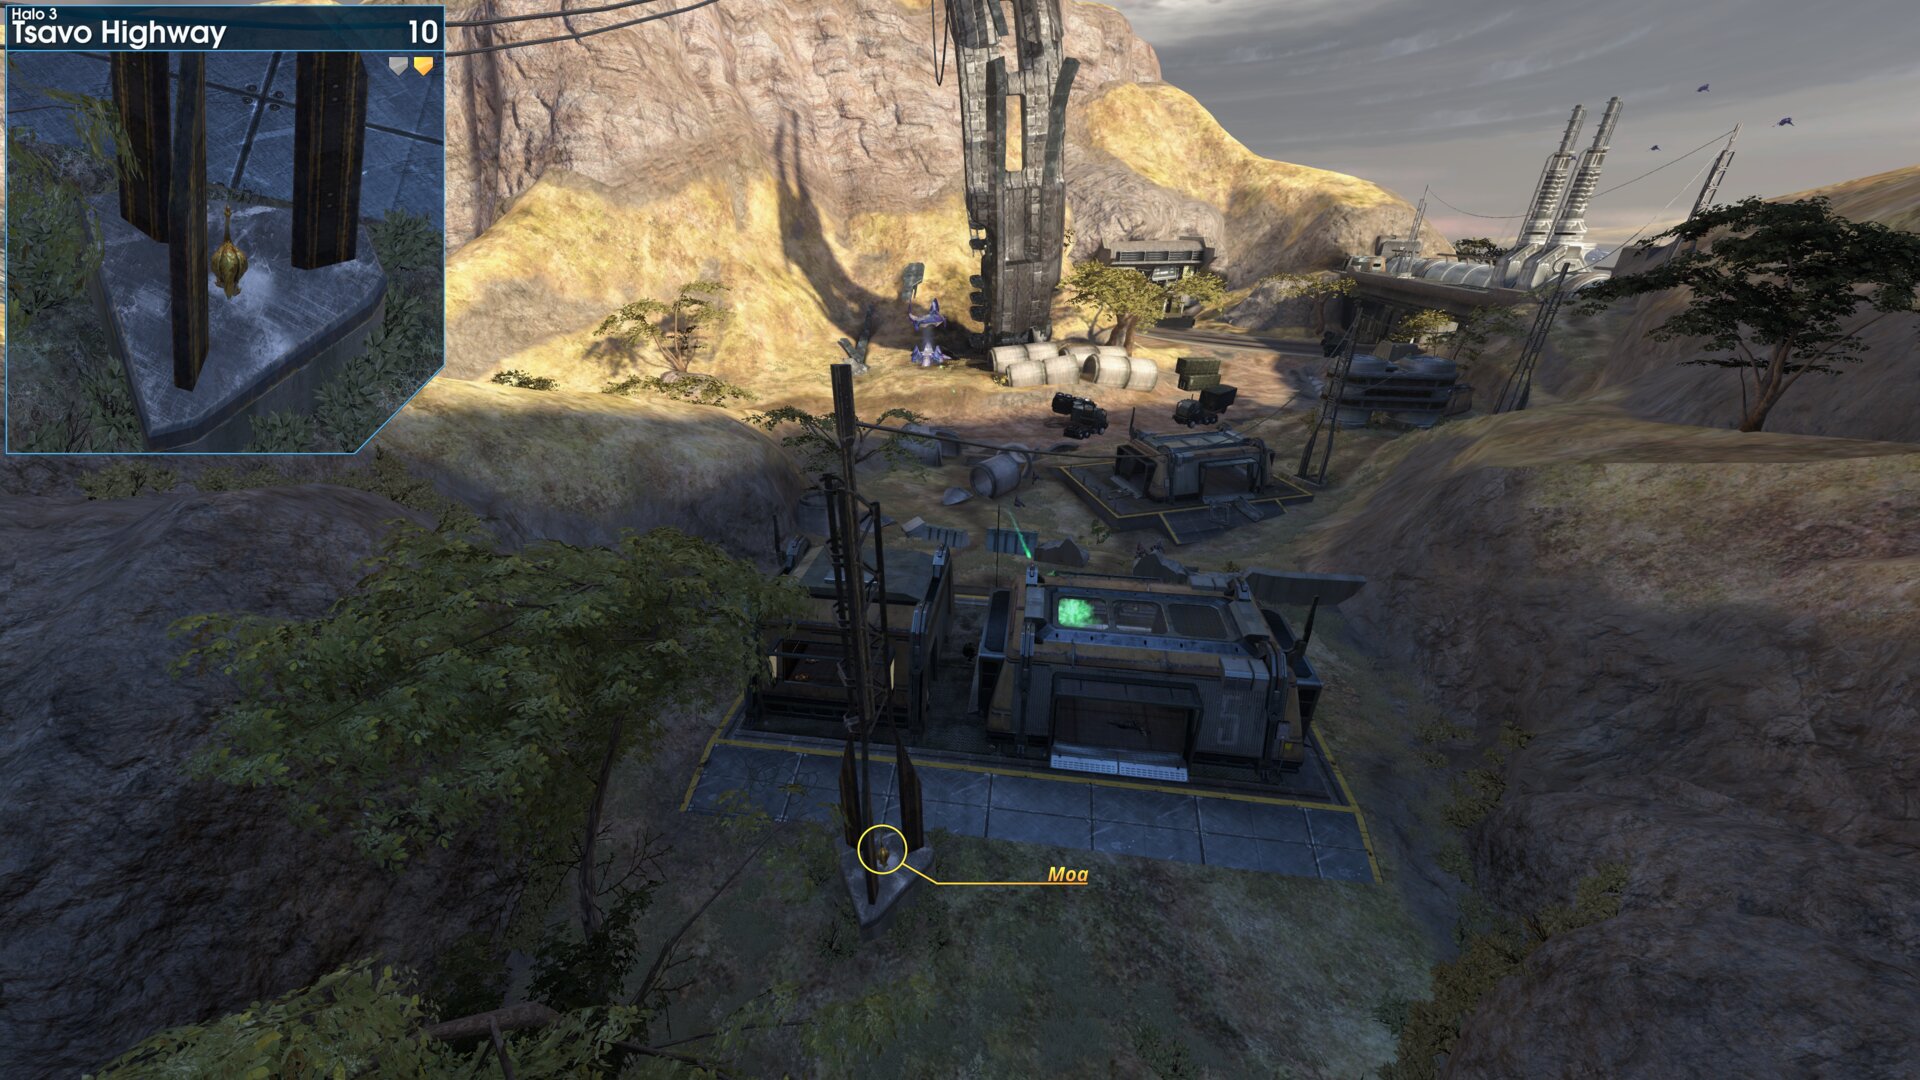
Where you protect the marines, after crossing the small gap in the highway. Look for the power pole, it's on the concrete slab.
➟ The Storm
Rally Point: Alpha
Note: Moa's 10 & 11 can be reached from rally point Bravo.
Rally Point: Bravo
Note: Moa's 10 & 11 can be reached from rally point Bravo.
Golden Moa 1
At the start of the level, next to the tunnel exit.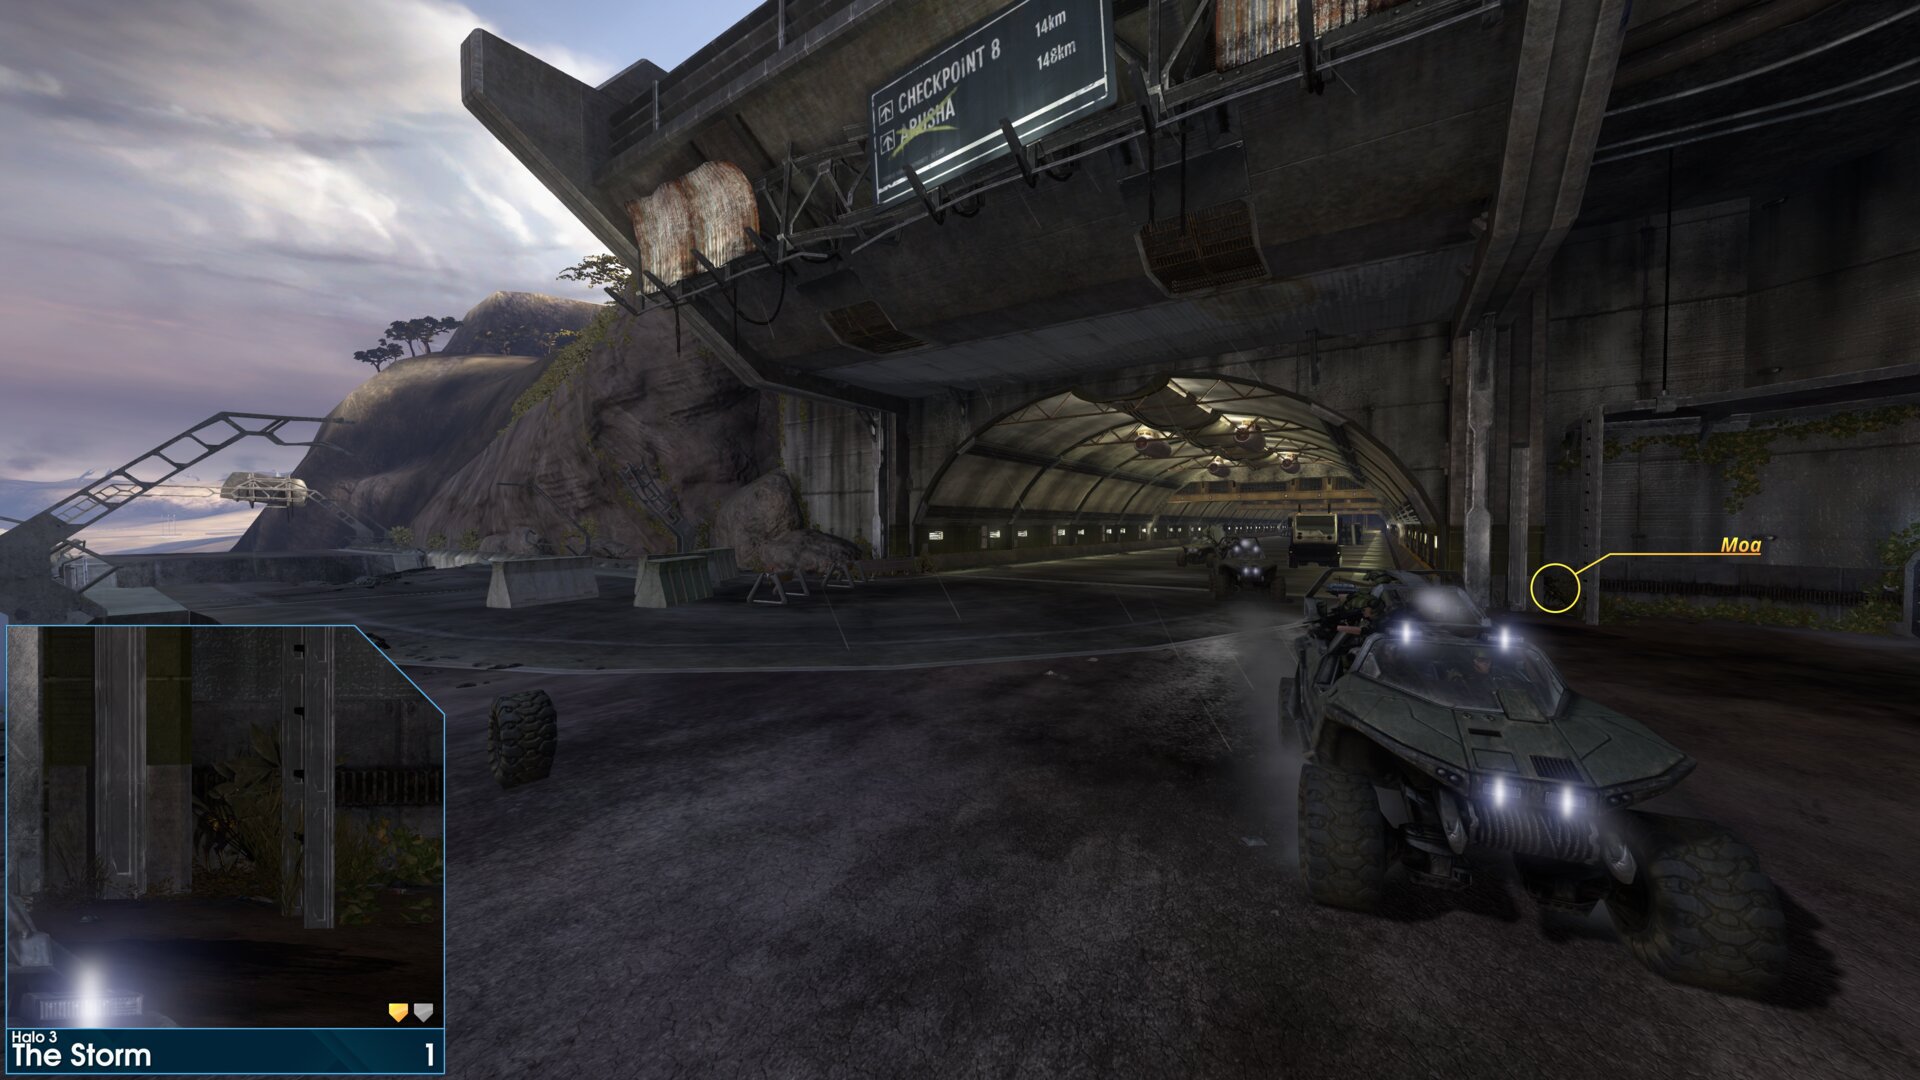
At the start of the level, next to the tunnel exit.
Golden Moa 2
At the start of the level, on the broken road next to the tunnel exit.
At the start of the level, on the broken road next to the tunnel exit.
Golden Moa 3
At the start of the level, on a pipe out over the edge, it's just beyond the 'Traxus: Heavy Industries' sign.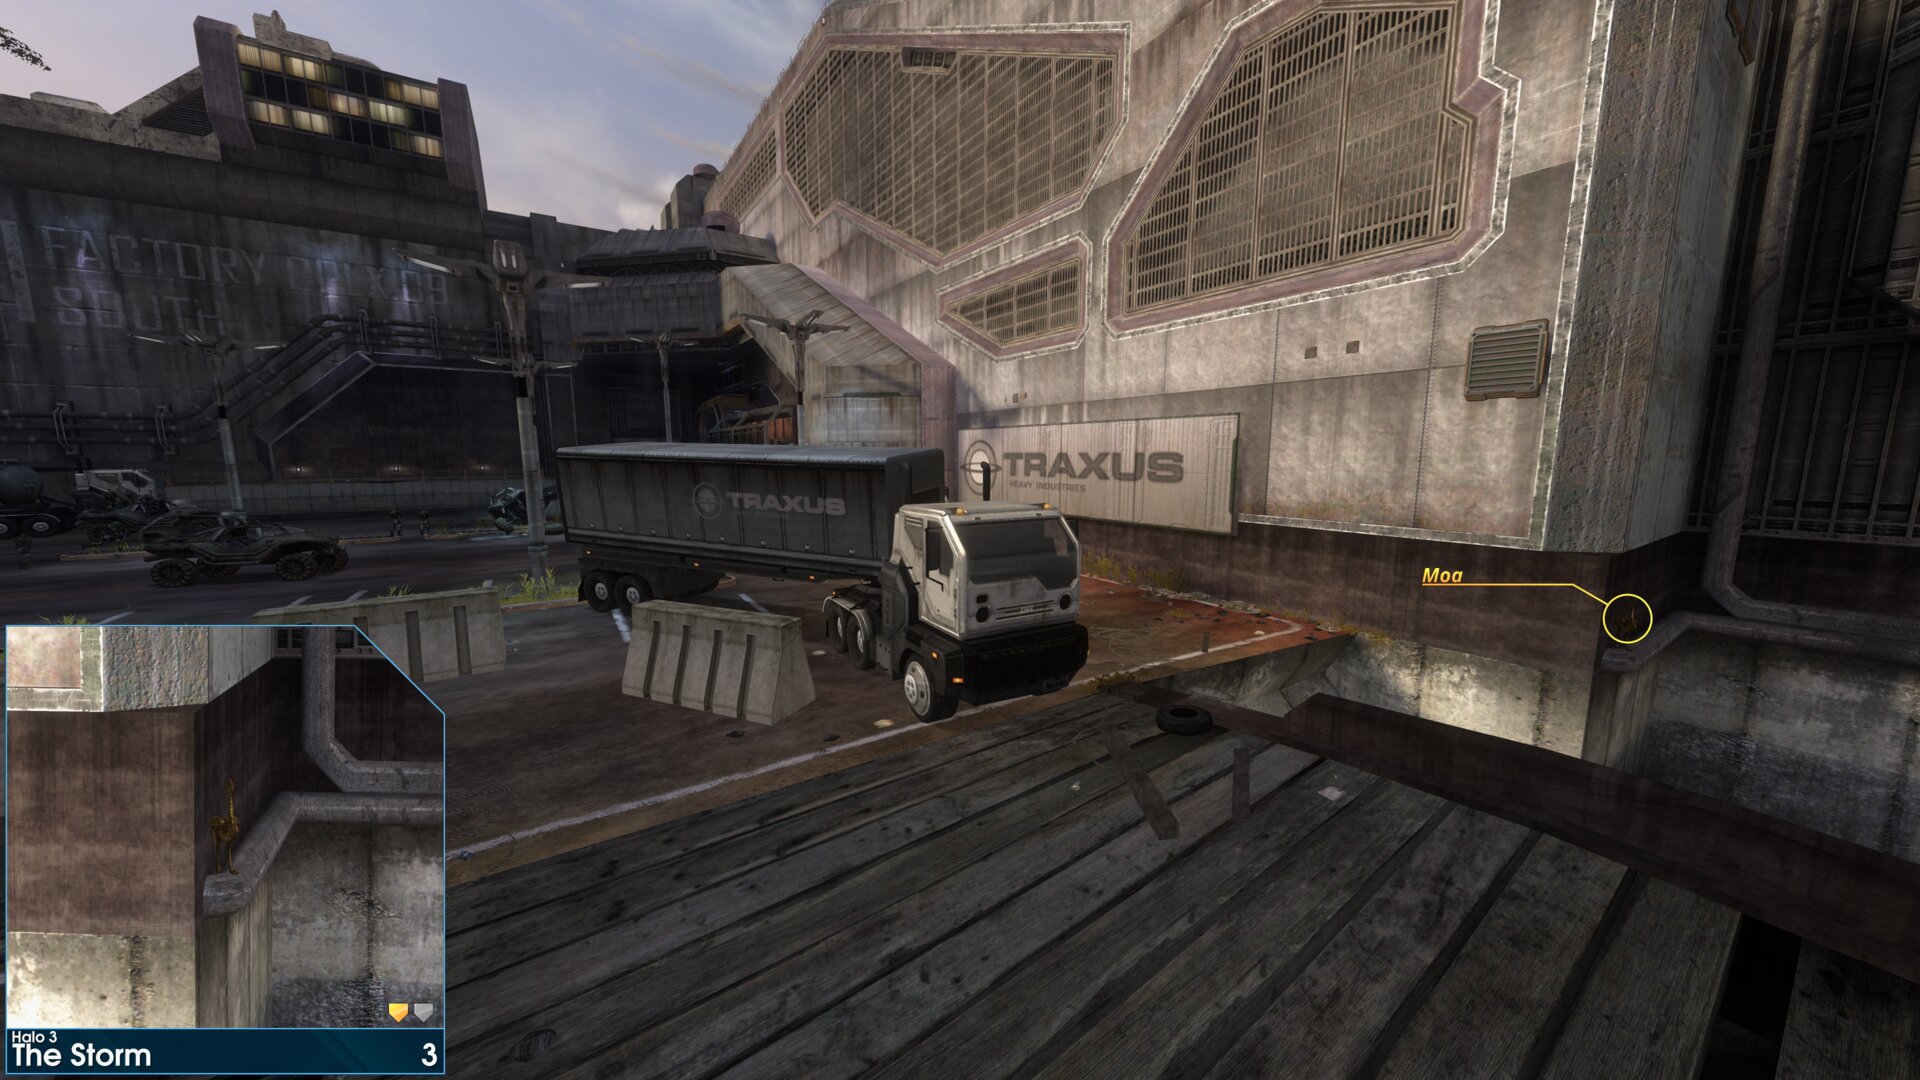
At the start of the level, on a pipe out over the edge, it's just beyond the 'Traxus: Heavy Industries' sign.
Golden Moa 4
After opening the first gate, go straight in and up the stairs. Then turn right, you'll find the Moa on some hazardous pipes.
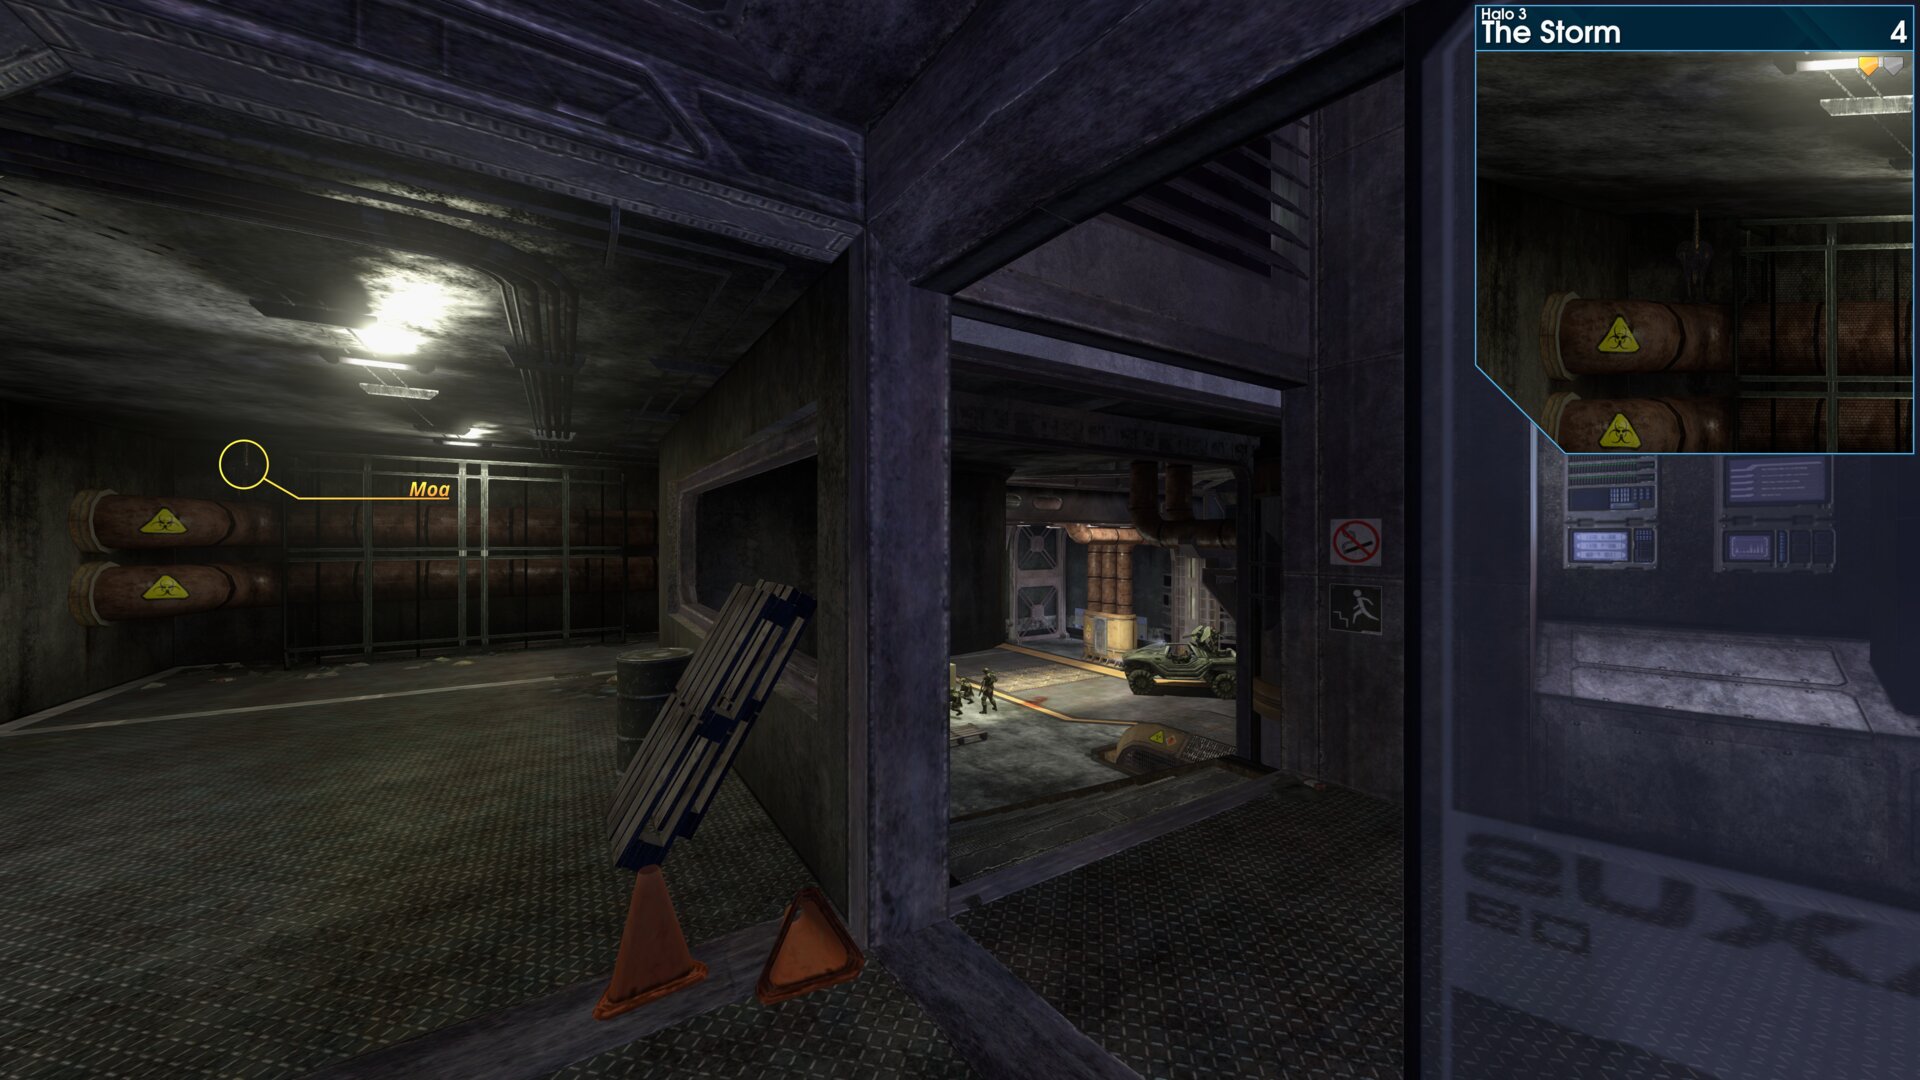
After opening the first gate, go straight in and up the stairs. Then turn right, you'll find the Moa on some hazardous pipes.
Golden Moa 5
Under the second stair/grate, after the third door you open.
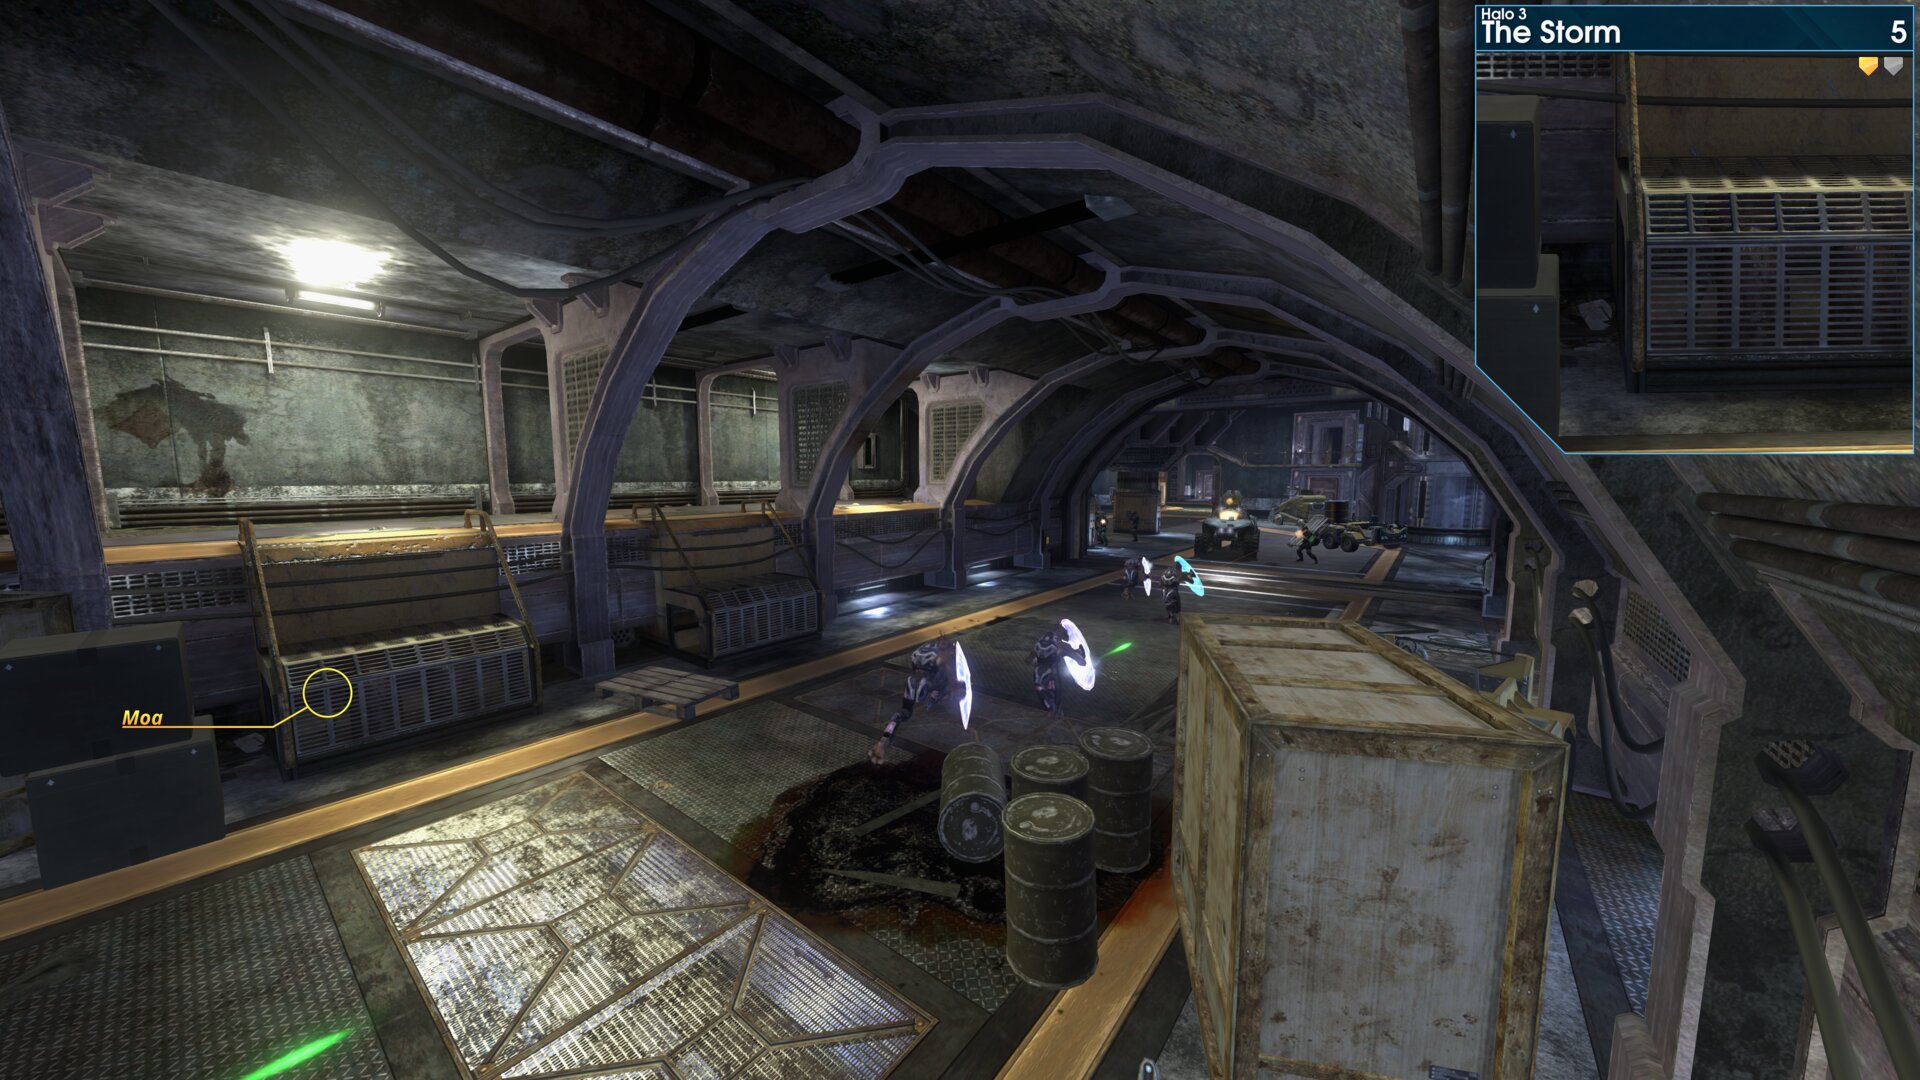
Under the second stair/grate, after the third door you open.
Golden Moa 6
Round the back of the central structure that's in the first lake bed.
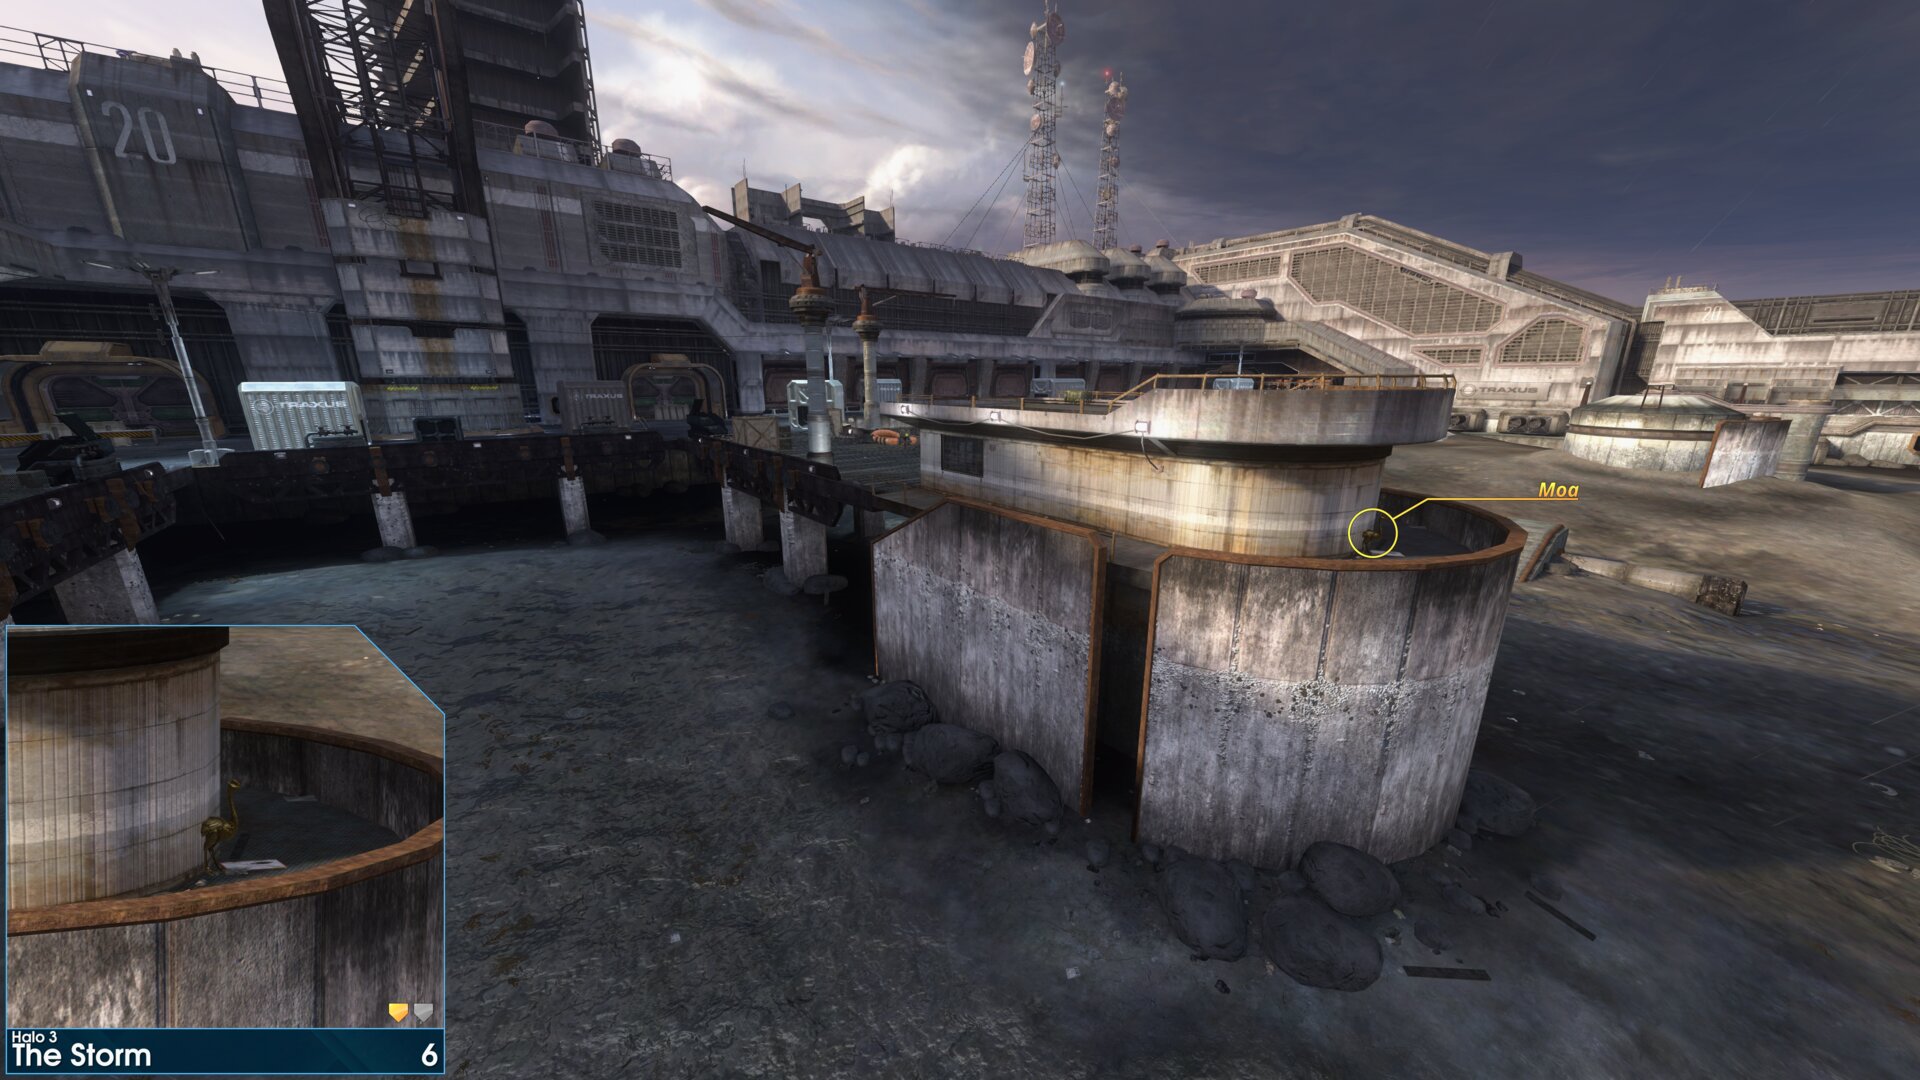
Round the back of the central structure that's in the first lake bed.
Golden Moa 7
In the end of the drain, next to the first AA-Wraith. (in the first lake bed)
In the end of the drain, next to the first AA-Wraith. (in the first lake bed)
Golden Moa 8
Once you go back inside (after the first lake bed), go straight ahead and look under the stairs.
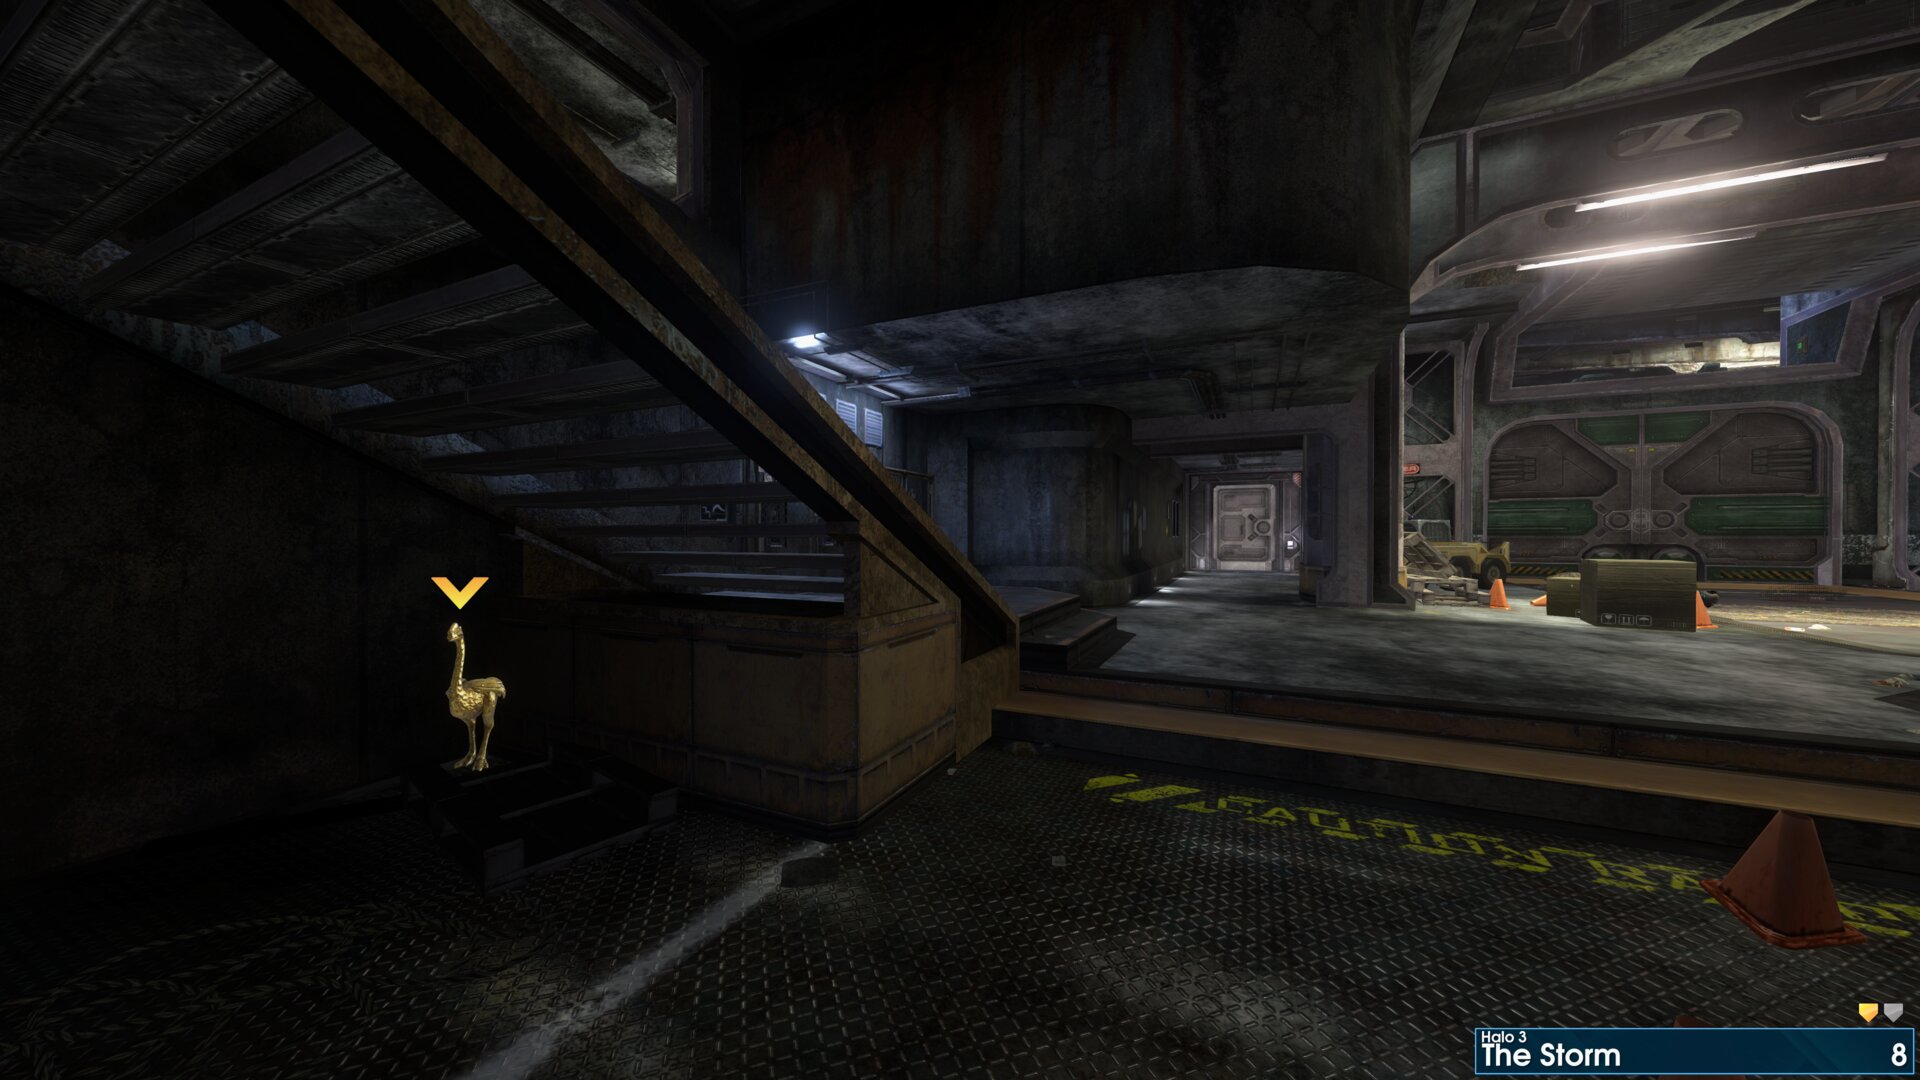
Once you go back inside (after the first lake bed), go straight ahead and look under the stairs.
Golden Moa 9
In a ventilation pipe above the door that leads to the Marines with Rocket Launchers and Mongooses. (Watch out for the swarm of Drones)
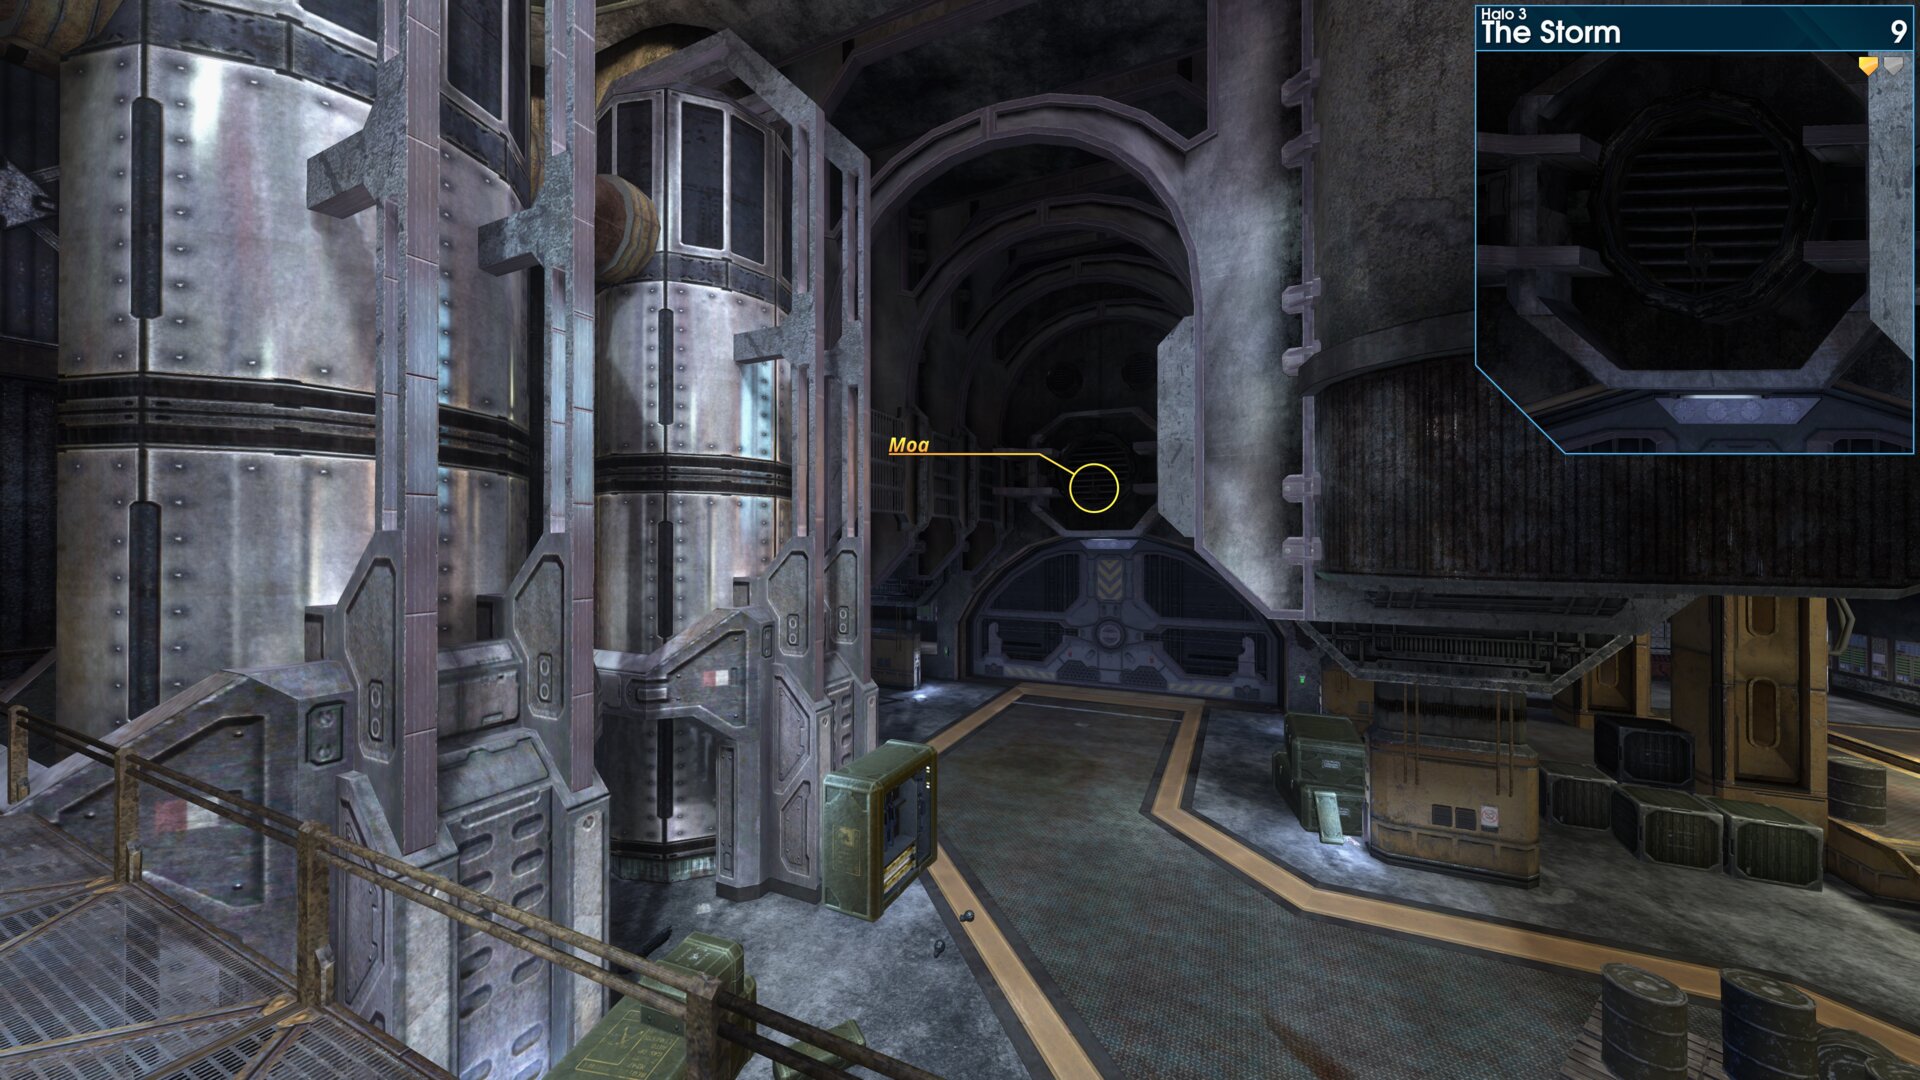
In a ventilation pipe above the door that leads to the Marines with Rocket Launchers and Mongooses. (Watch out for the swarm of Drones)
Golden Moa 10
As you enter the area with to 2 AA-Wraiths (second lake bed / Scarab fight). It's at the bottom of the ramp, around the corner to the left.
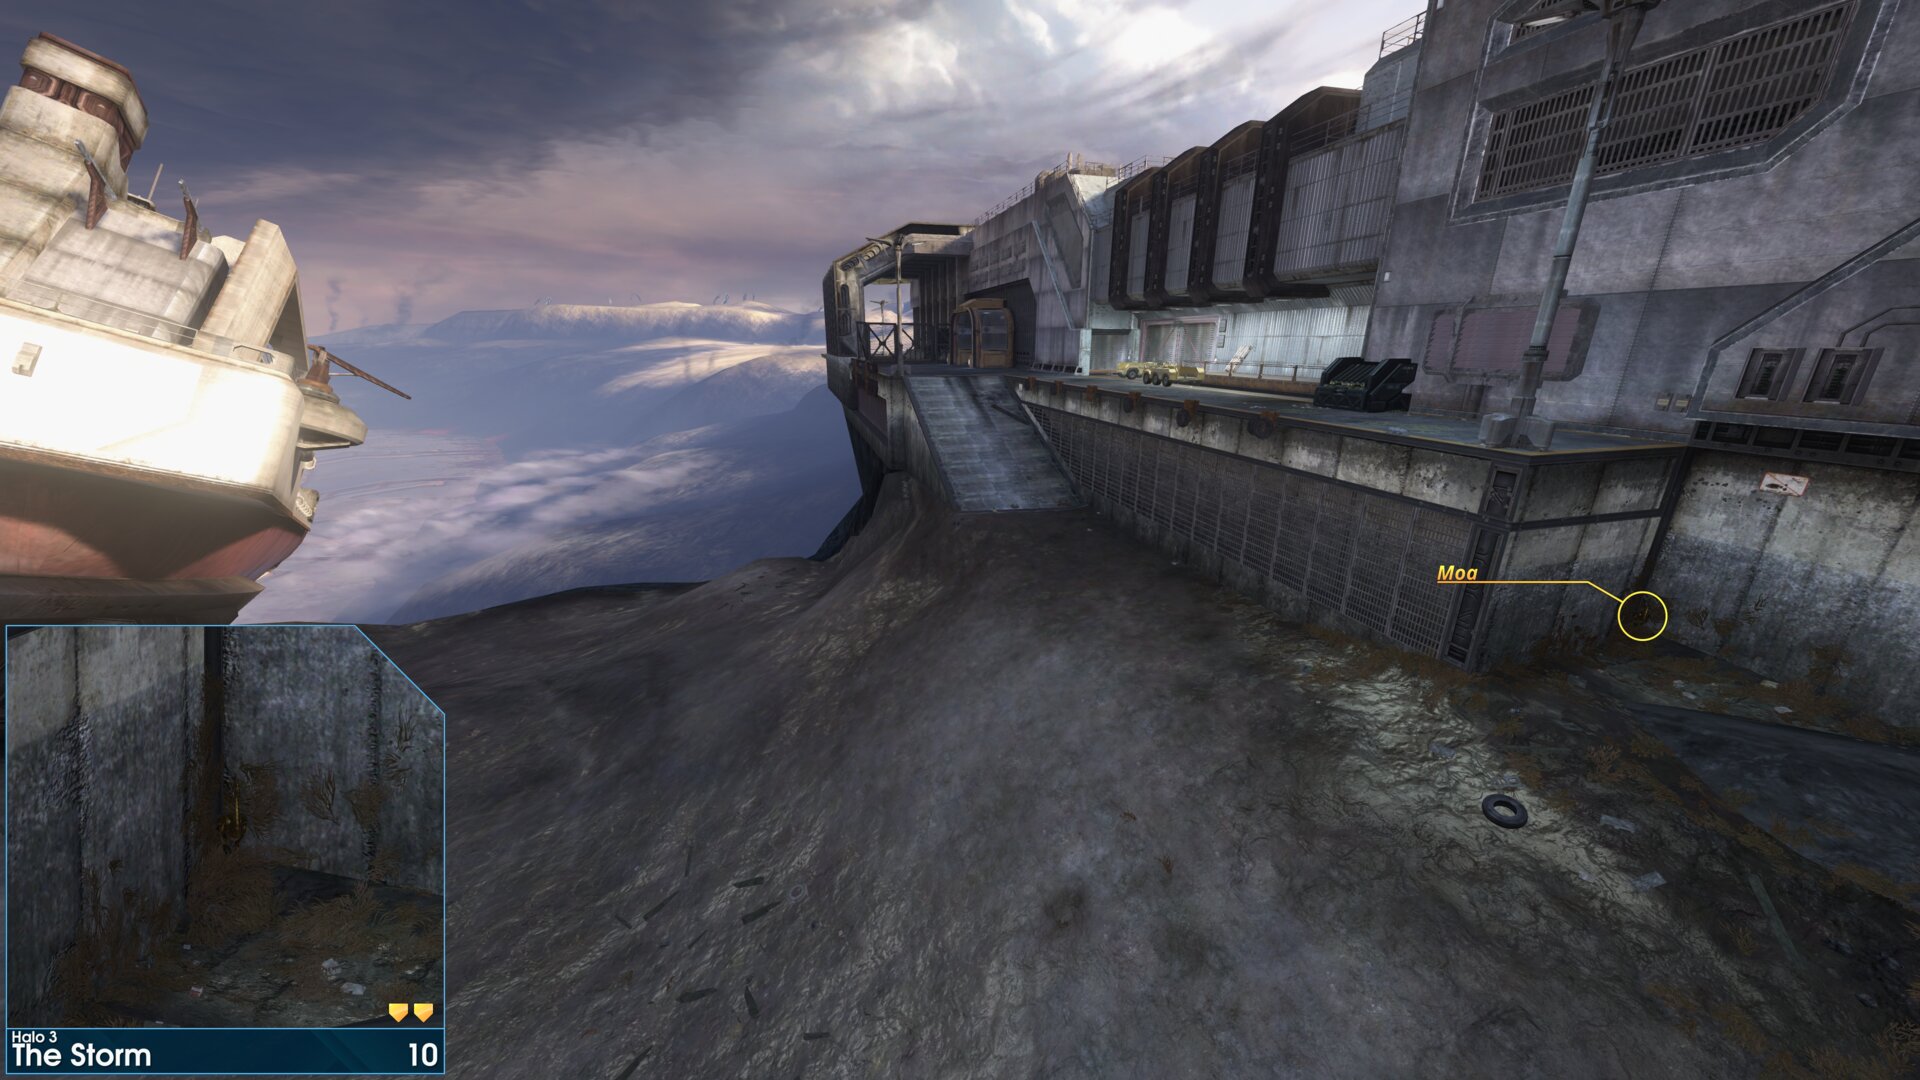
As you enter the area with to 2 AA-Wraiths (second lake bed / Scarab fight). It's at the bottom of the ramp, around the corner to the left.
Golden Moa 11
In the end of the drain closest to the beached ship. (in the second lake bed / Scarab fight)
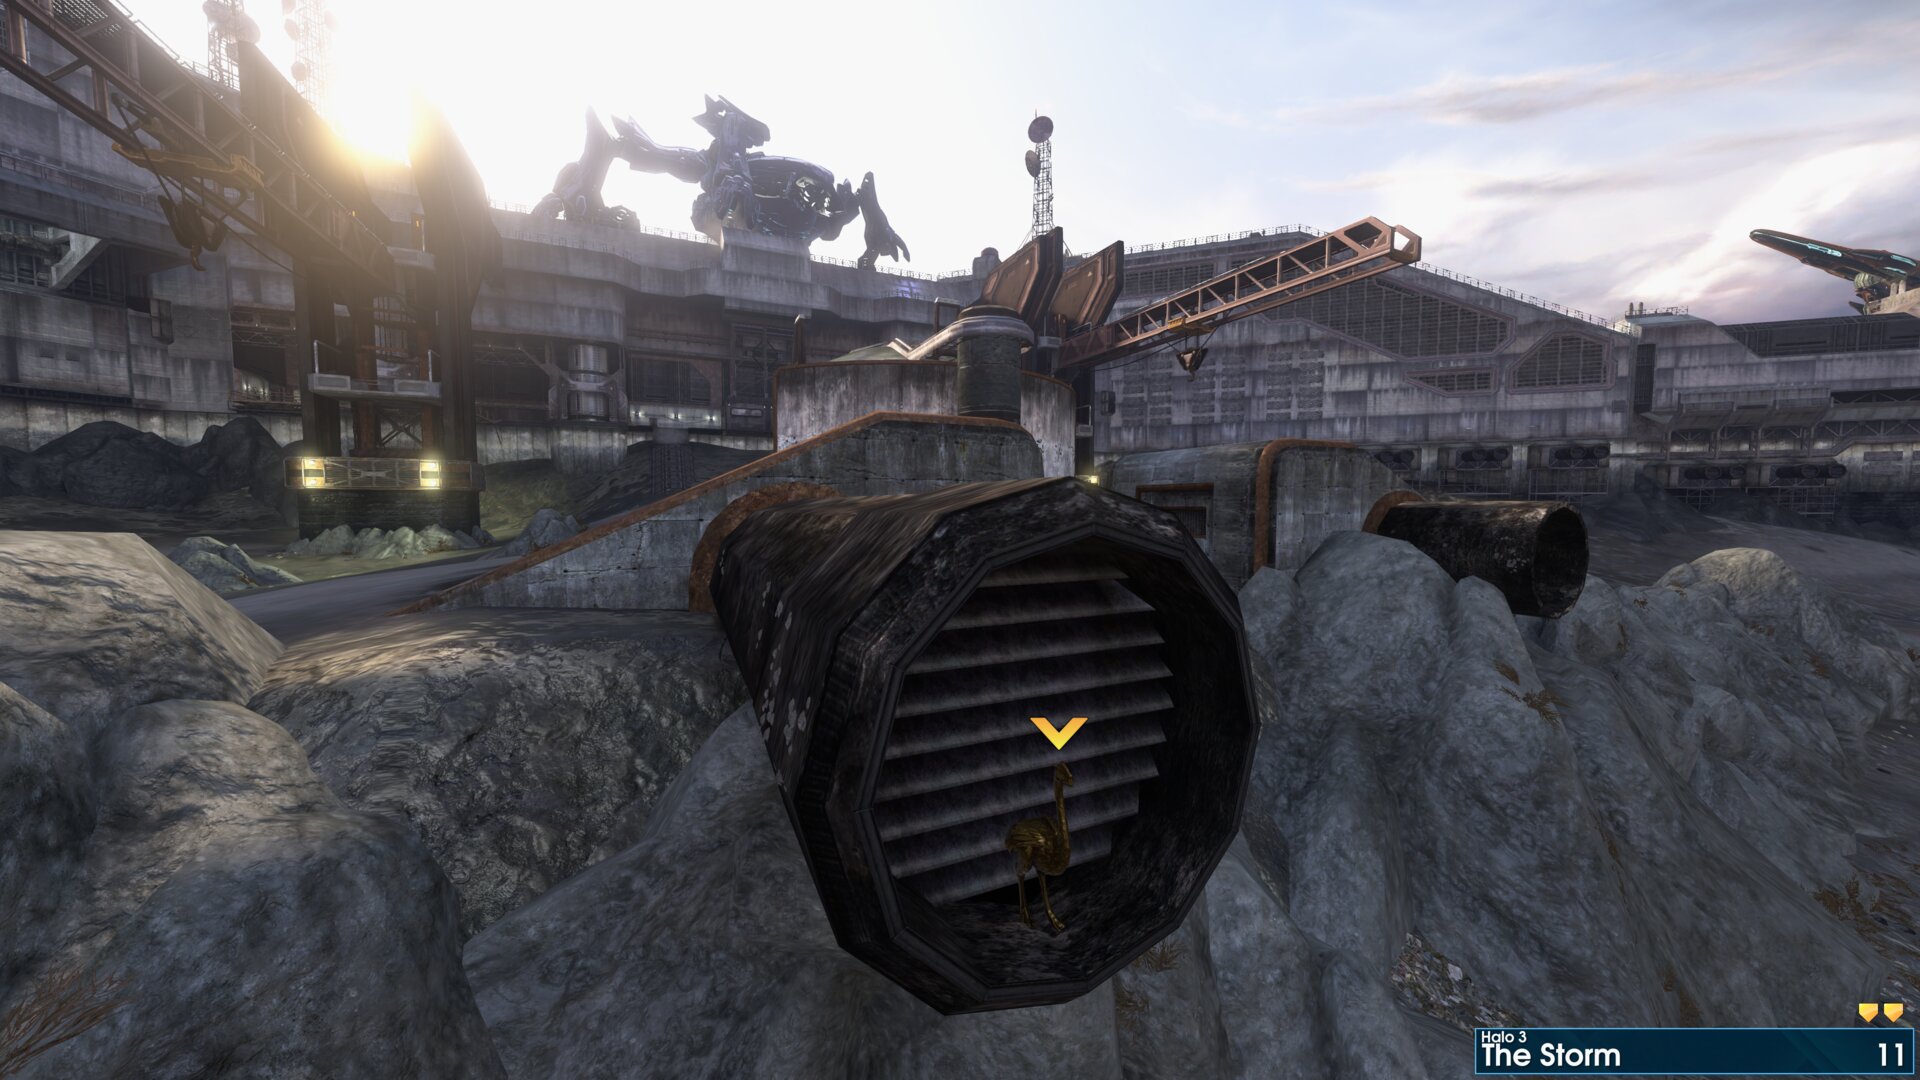
In the end of the drain closest to the beached ship. (in the second lake bed / Scarab fight)
Rally Point: Bravo
Golden Moa 12
Above the door as you exit out of the room with the wounded Dock Workers and Marines. "I am your shield, I am your sword" Cortana
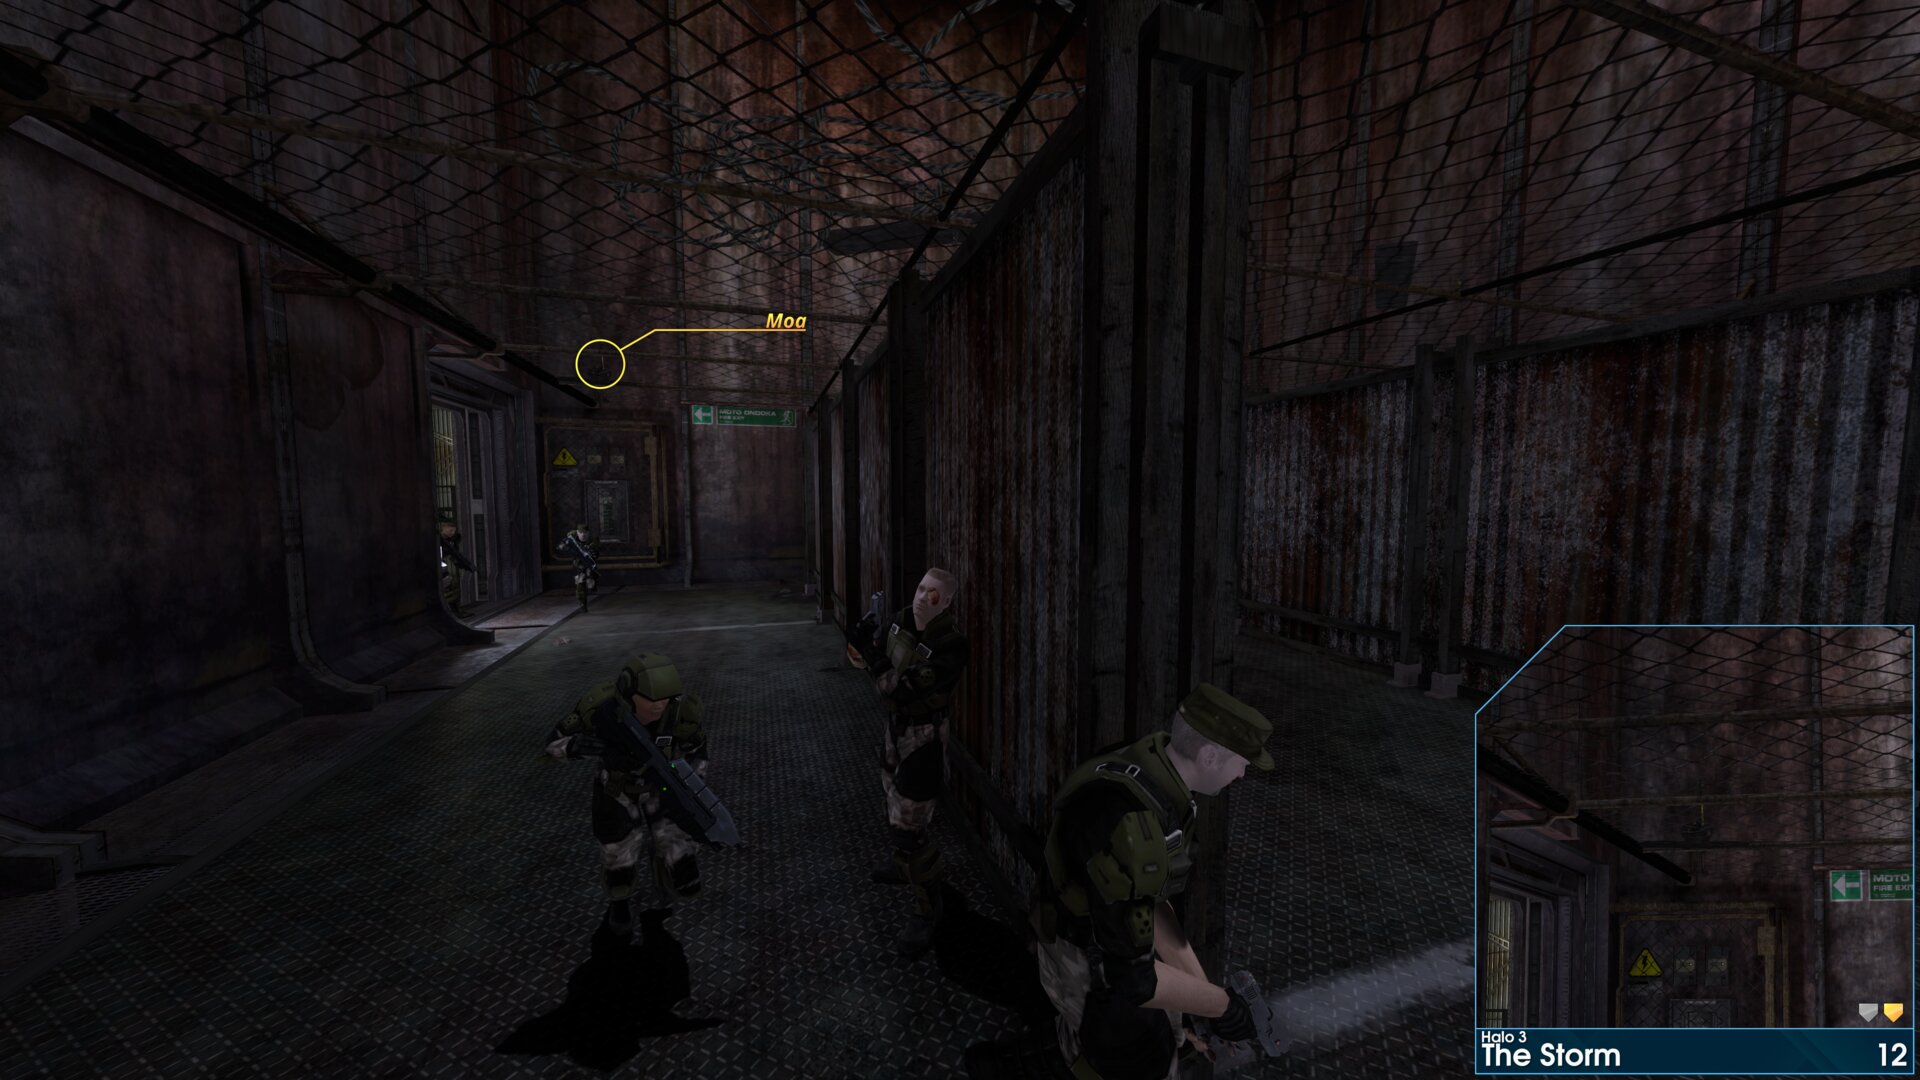
Above the door as you exit out of the room with the wounded Dock Workers and Marines. "I am your shield, I am your sword" Cortana
Golden Moa 13
At the first large gate, section K434 (label on the wall to the left of the gate), turn around. The Moa in the container hanging from a crane to your right.
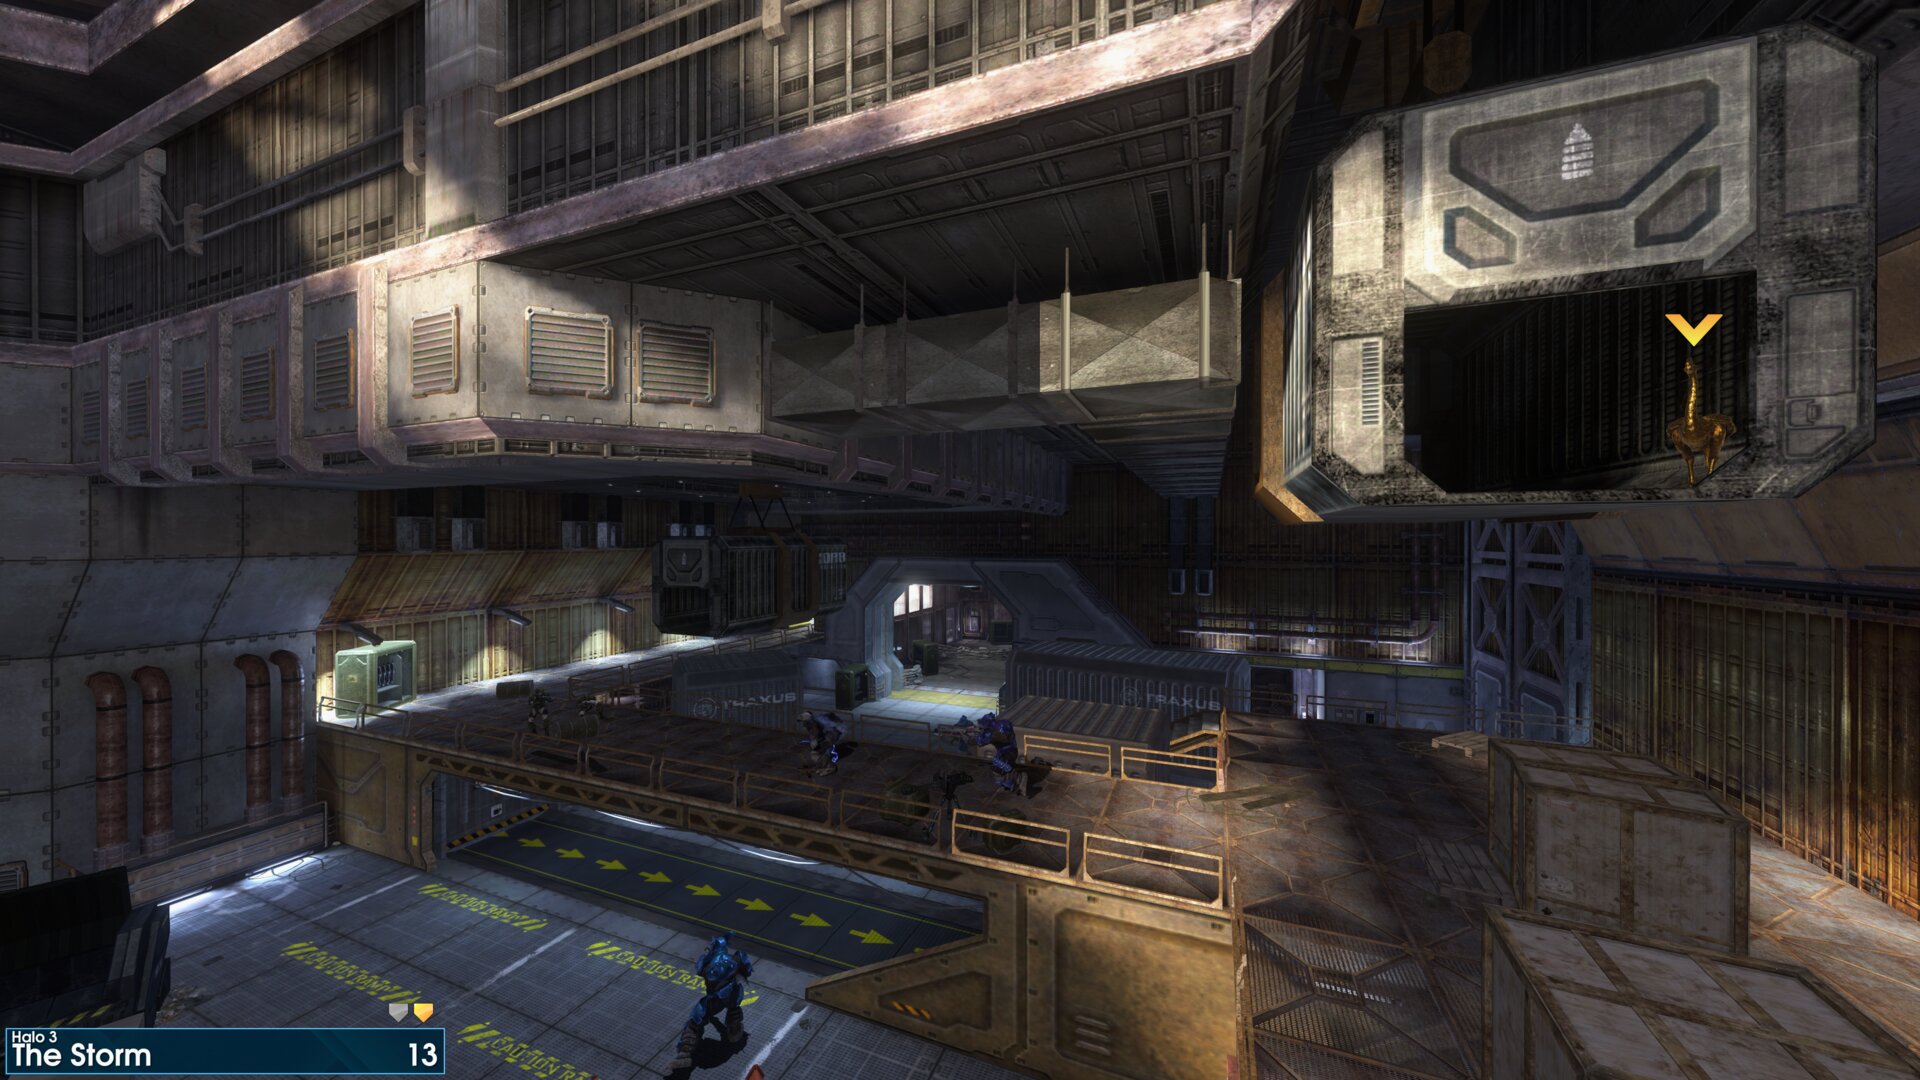
At the first large gate, section K434 (label on the wall to the left of the gate), turn around. The Moa in the container hanging from a crane to your right.
Golden Moa 14
To the right of the door, where you encounter the Hunters.
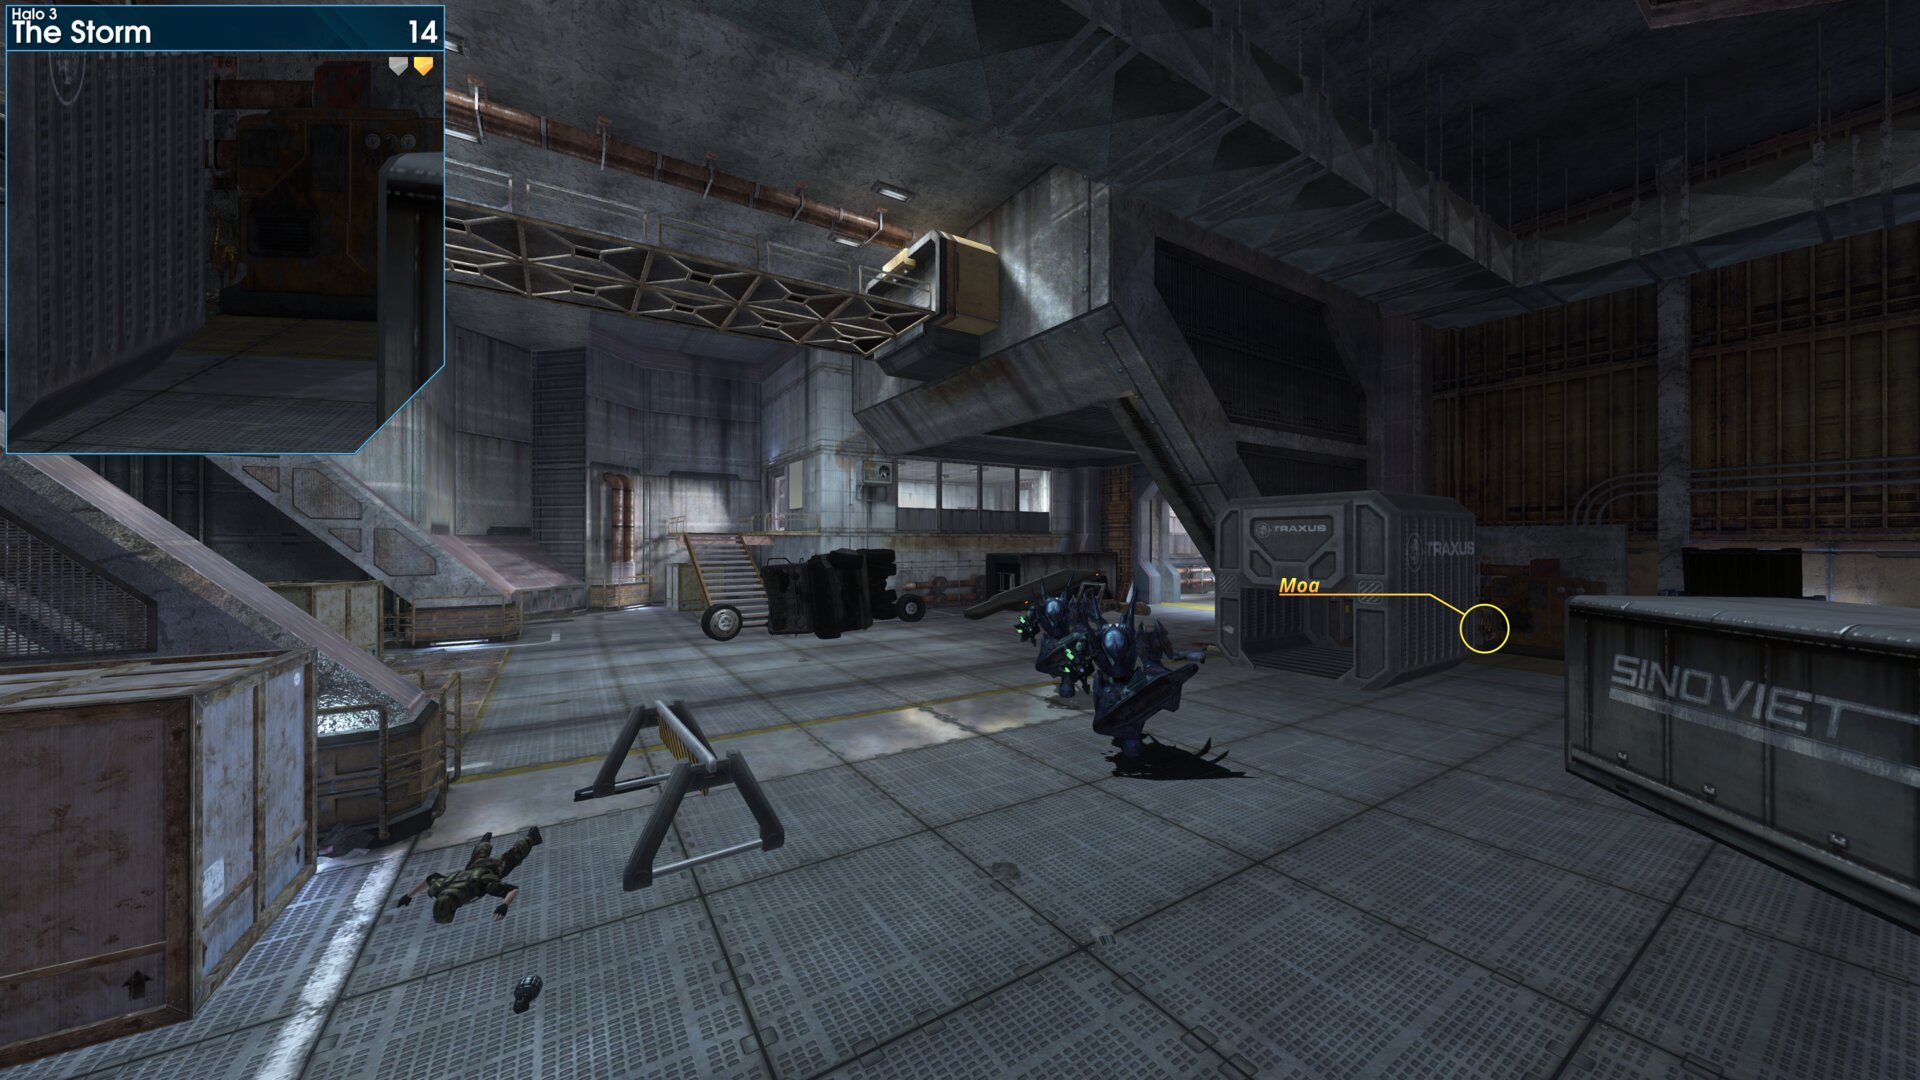
To the right of the door, where you encounter the Hunters.
Golden Moa 15
Under the stairs, left of the door where you encounter the Hunters.
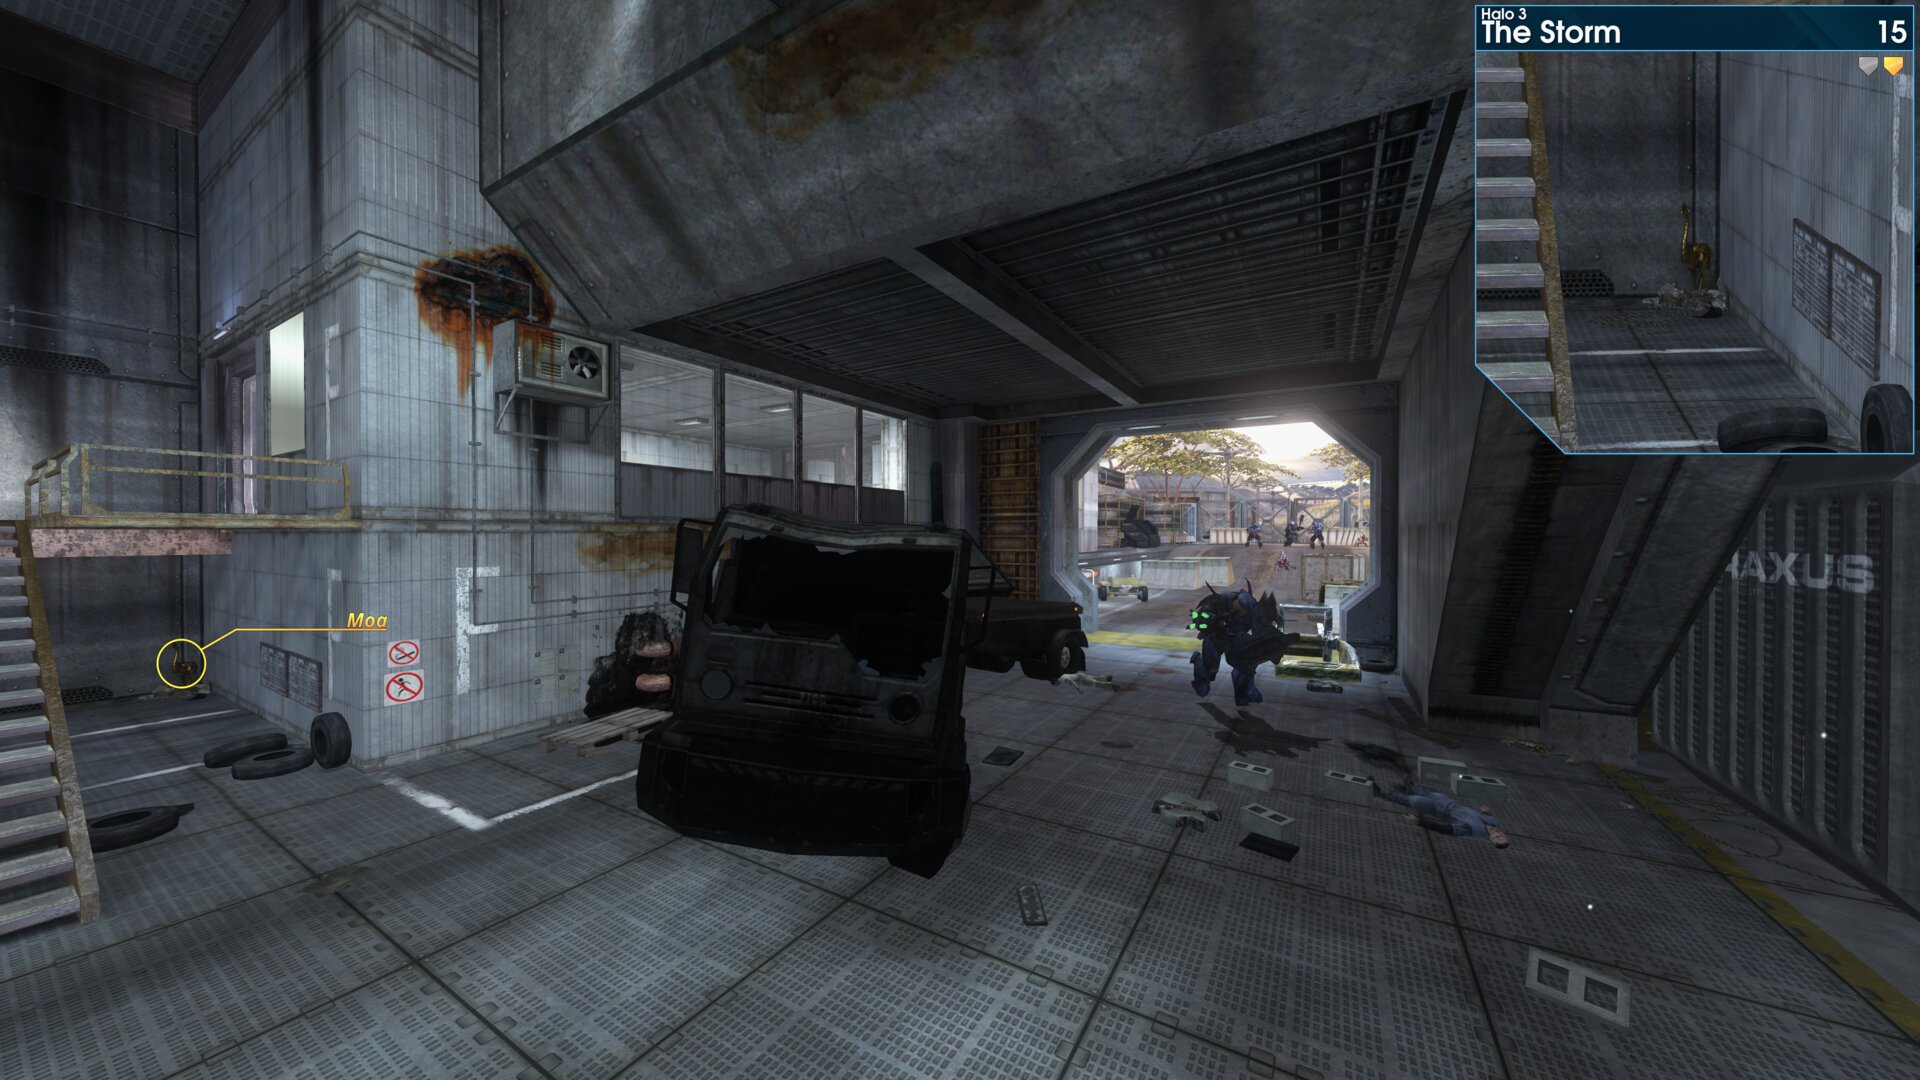
Under the stairs, left of the door where you encounter the Hunters.
Golden Moa 16
After the Hunters, head towards the far gate, the Moa is in a nook to the left.
After the Hunters, head towards the far gate, the Moa is in a nook to the left.
Golden Moa 17
Under the crumbling concrete, where the UNSC setup a small missile launcher.
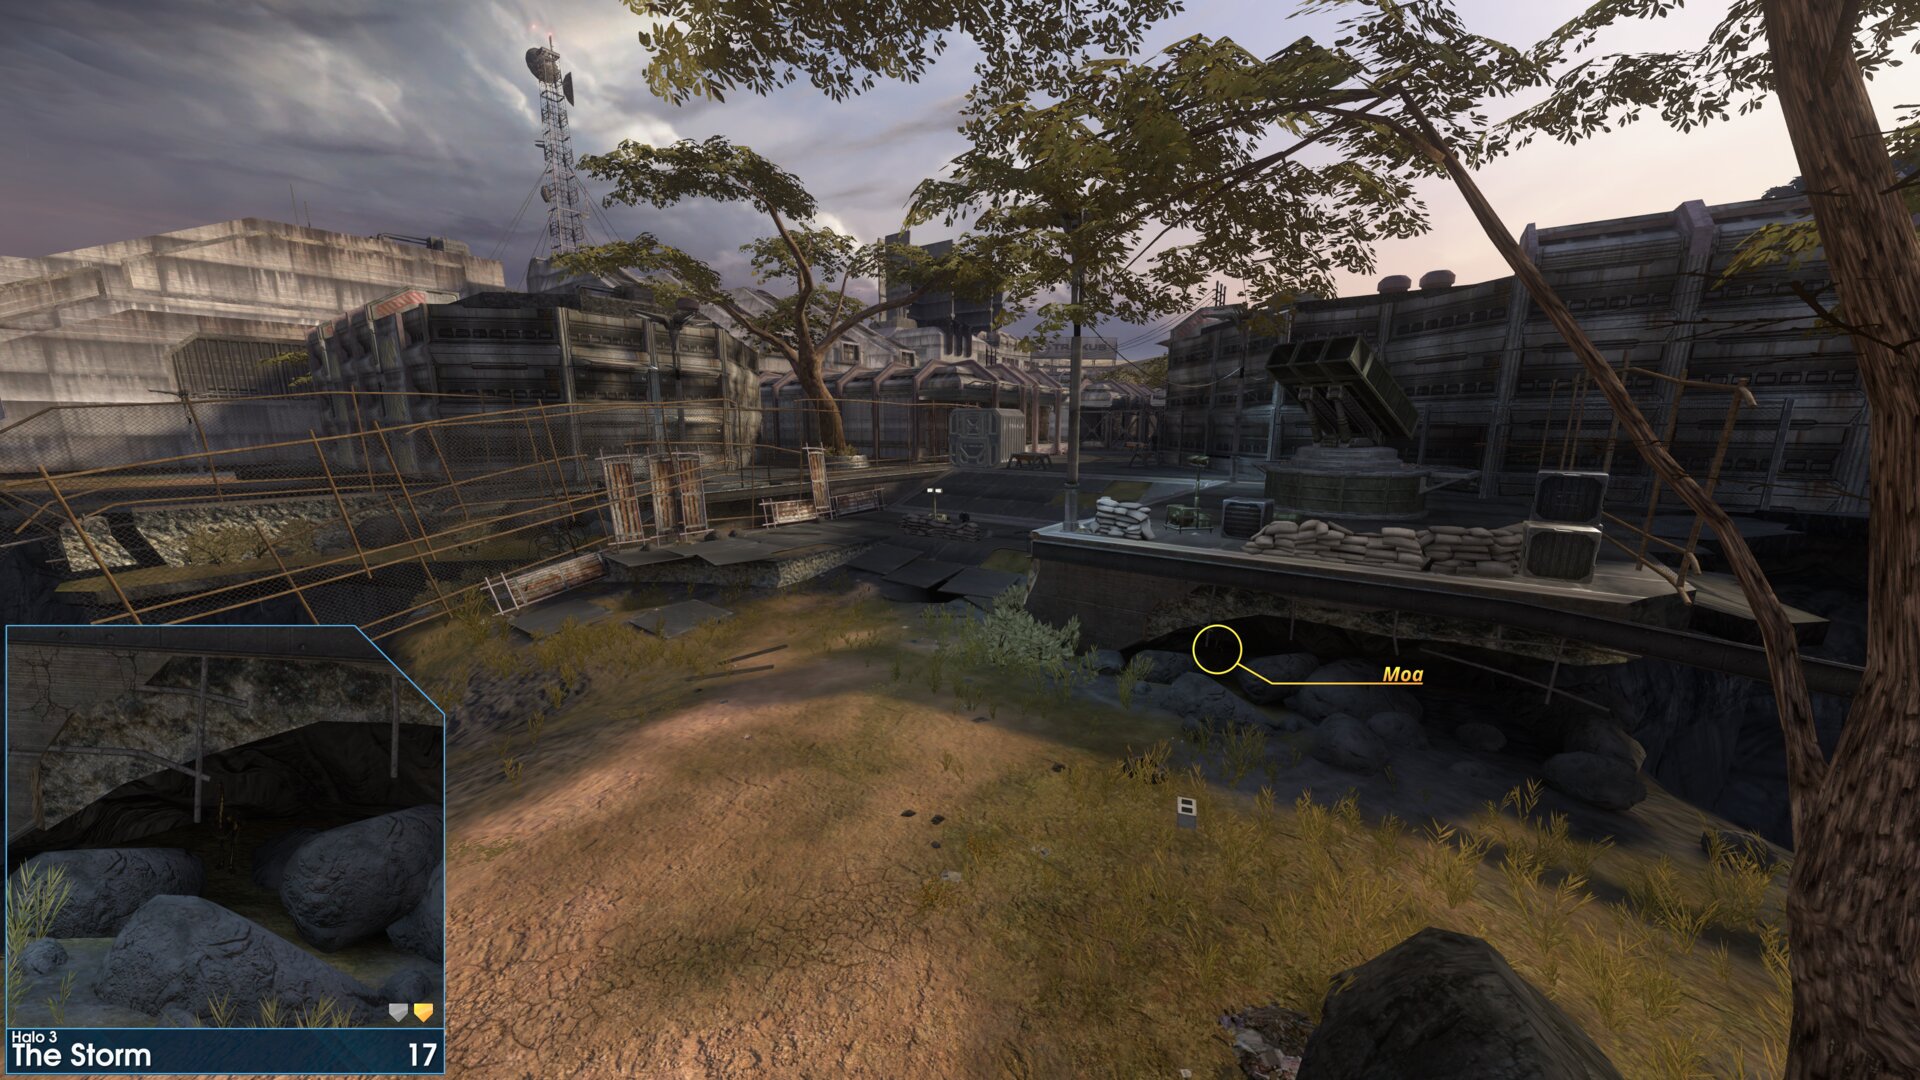
Under the crumbling concrete, where the UNSC setup a small missile launcher.
➟ Floodgate
Rally Point: Alpha
Note: Only Moa 6 can be reached from rally point Bravo.
Rally Point: Bravo
Note: Only Moa 6 can be reached from rally point Bravo.
Golden Moa 1
As you reach the buildings, look in the first alcove on your left.
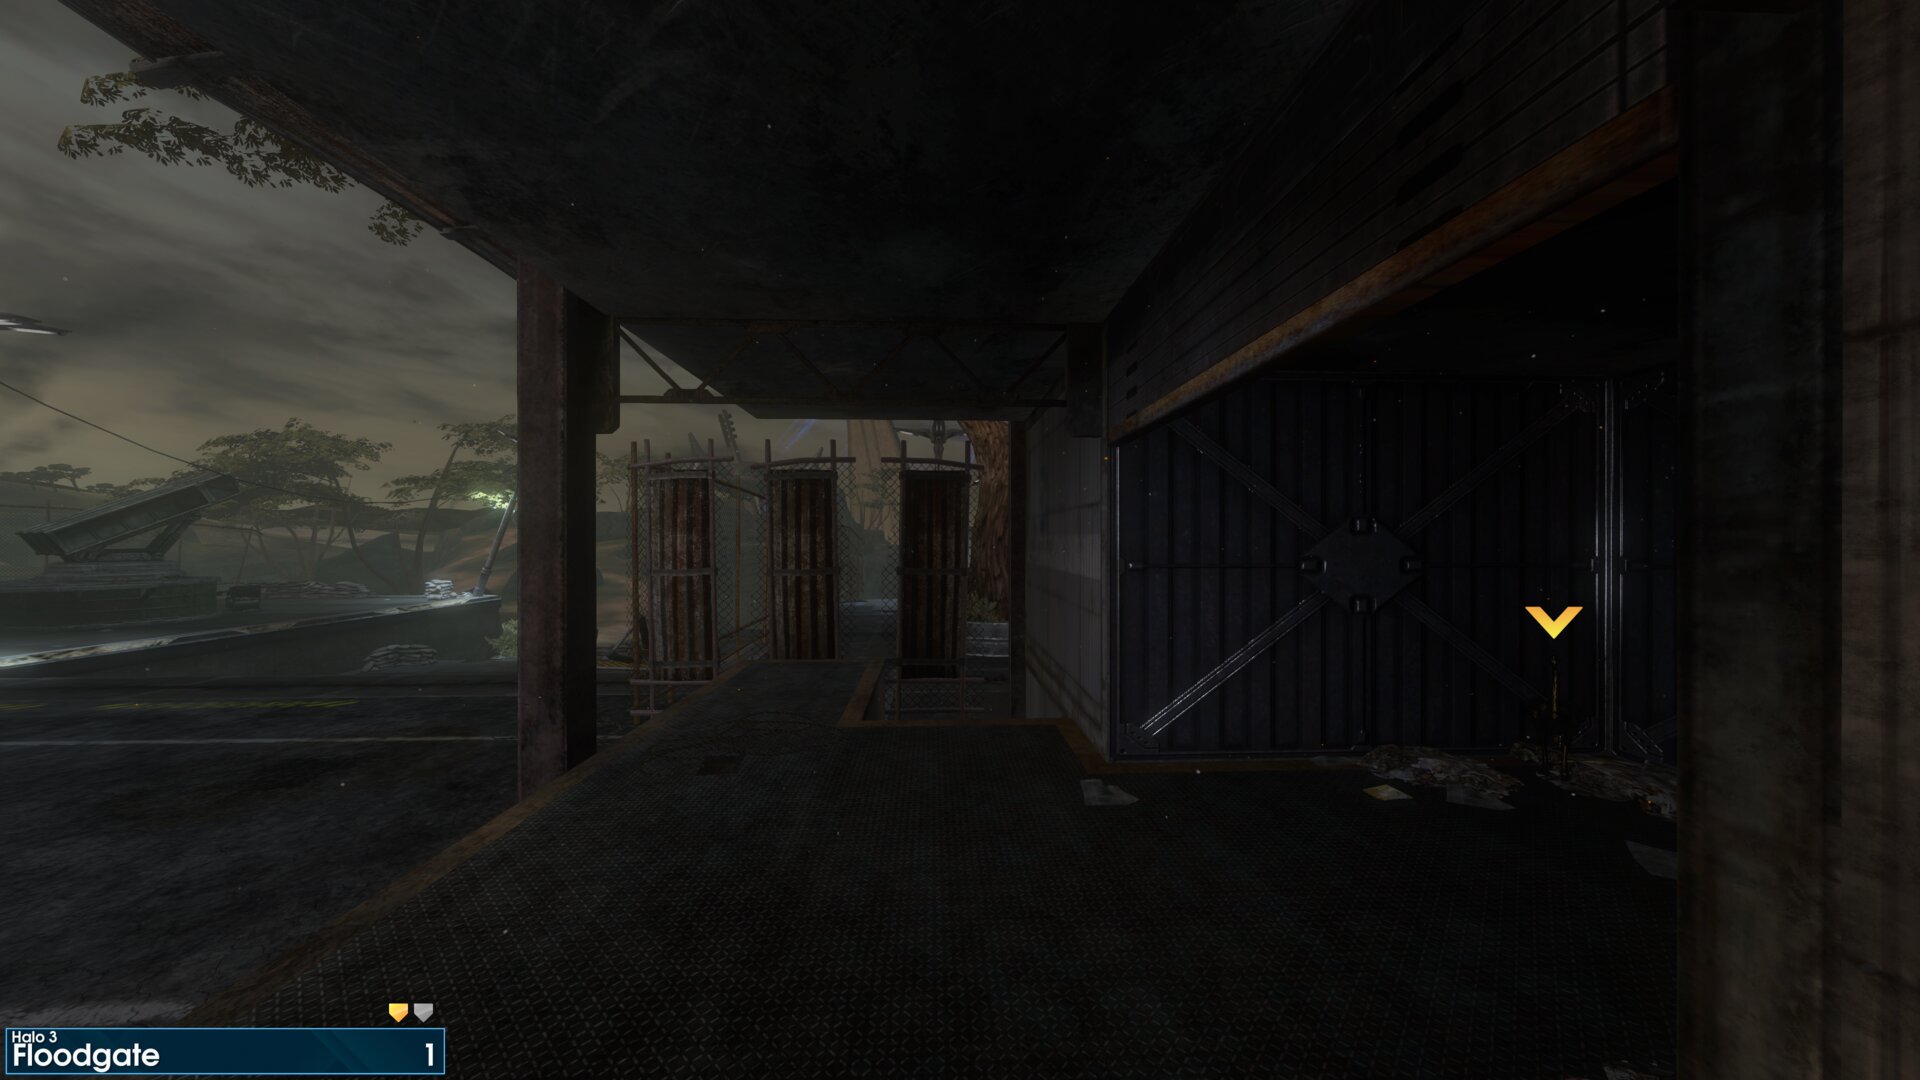
As you reach the buildings, look in the first alcove on your left.
Golden Moa 2
To the right of the first group of Marines taking cover behind sandbags.
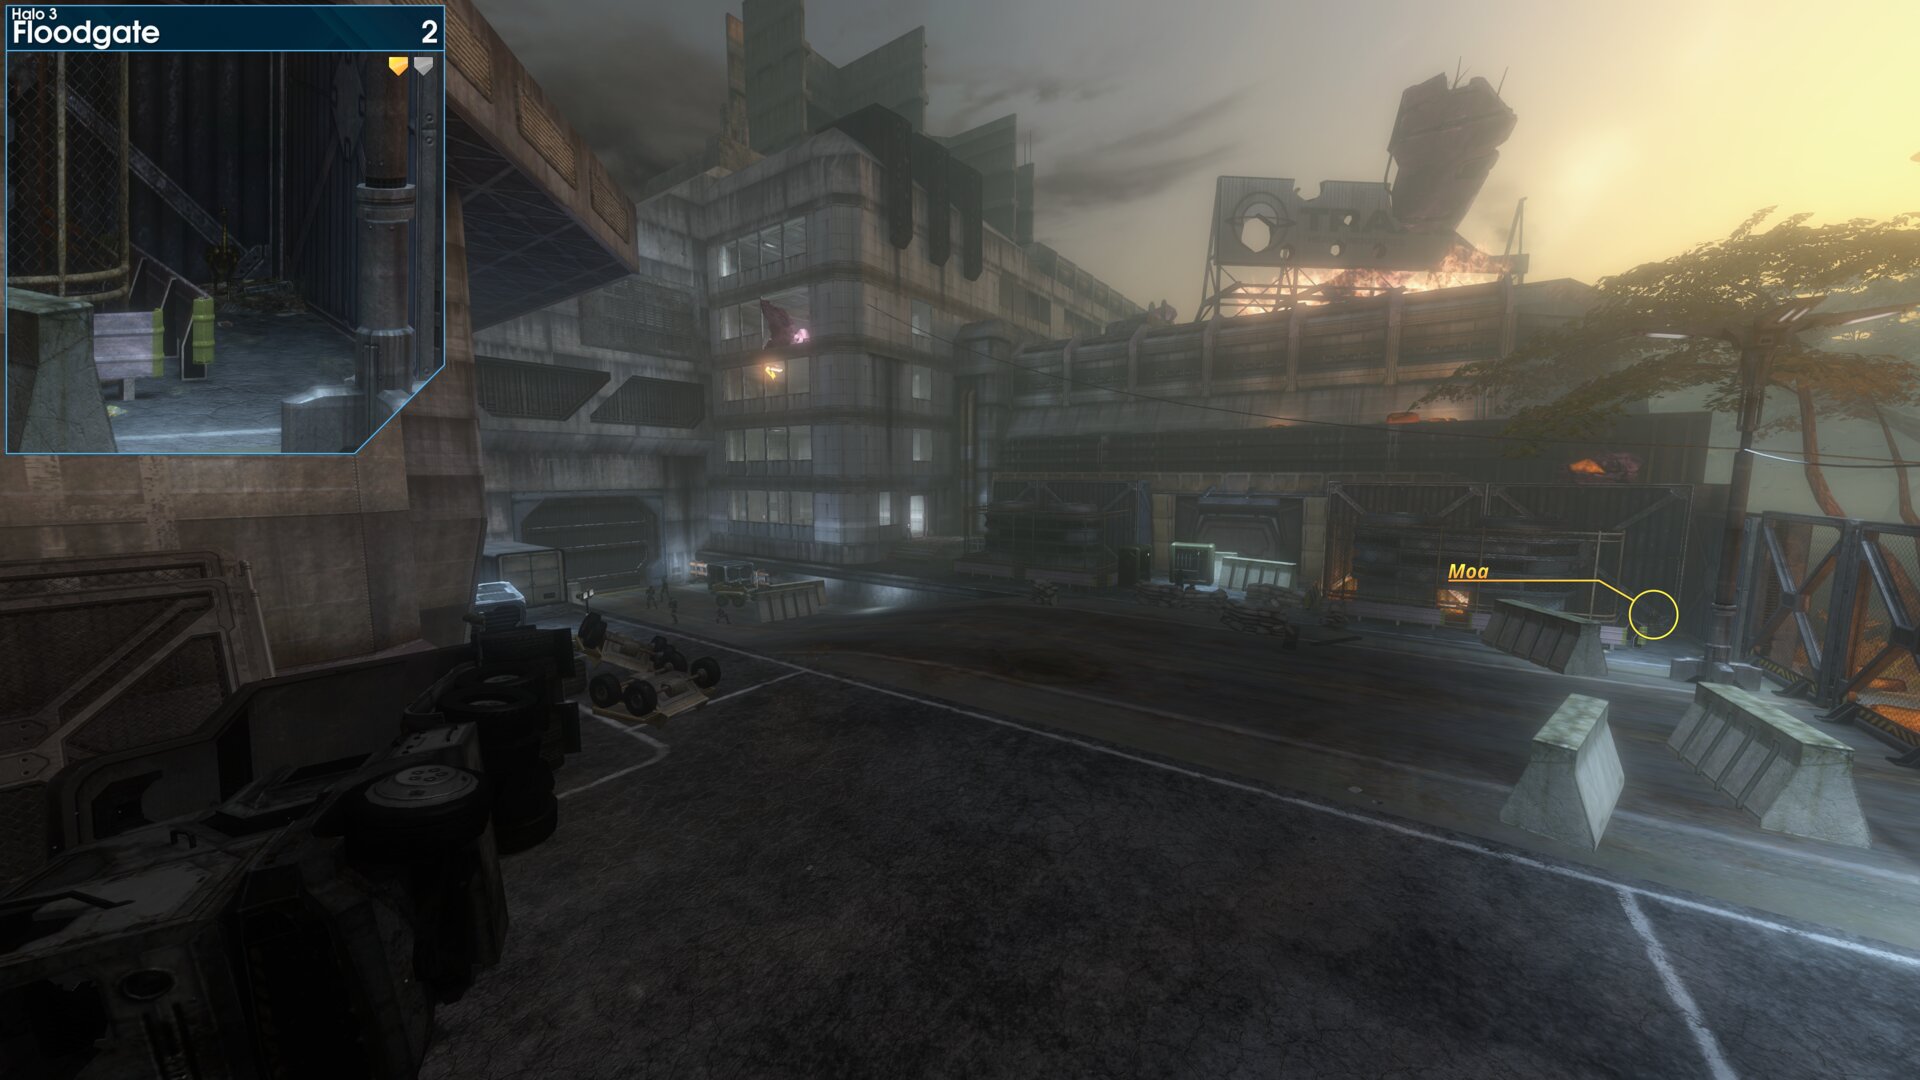
To the right of the first group of Marines taking cover behind sandbags.
Golden Moa 3
On top of a large pump, just to the right of the first large gate you walk through.
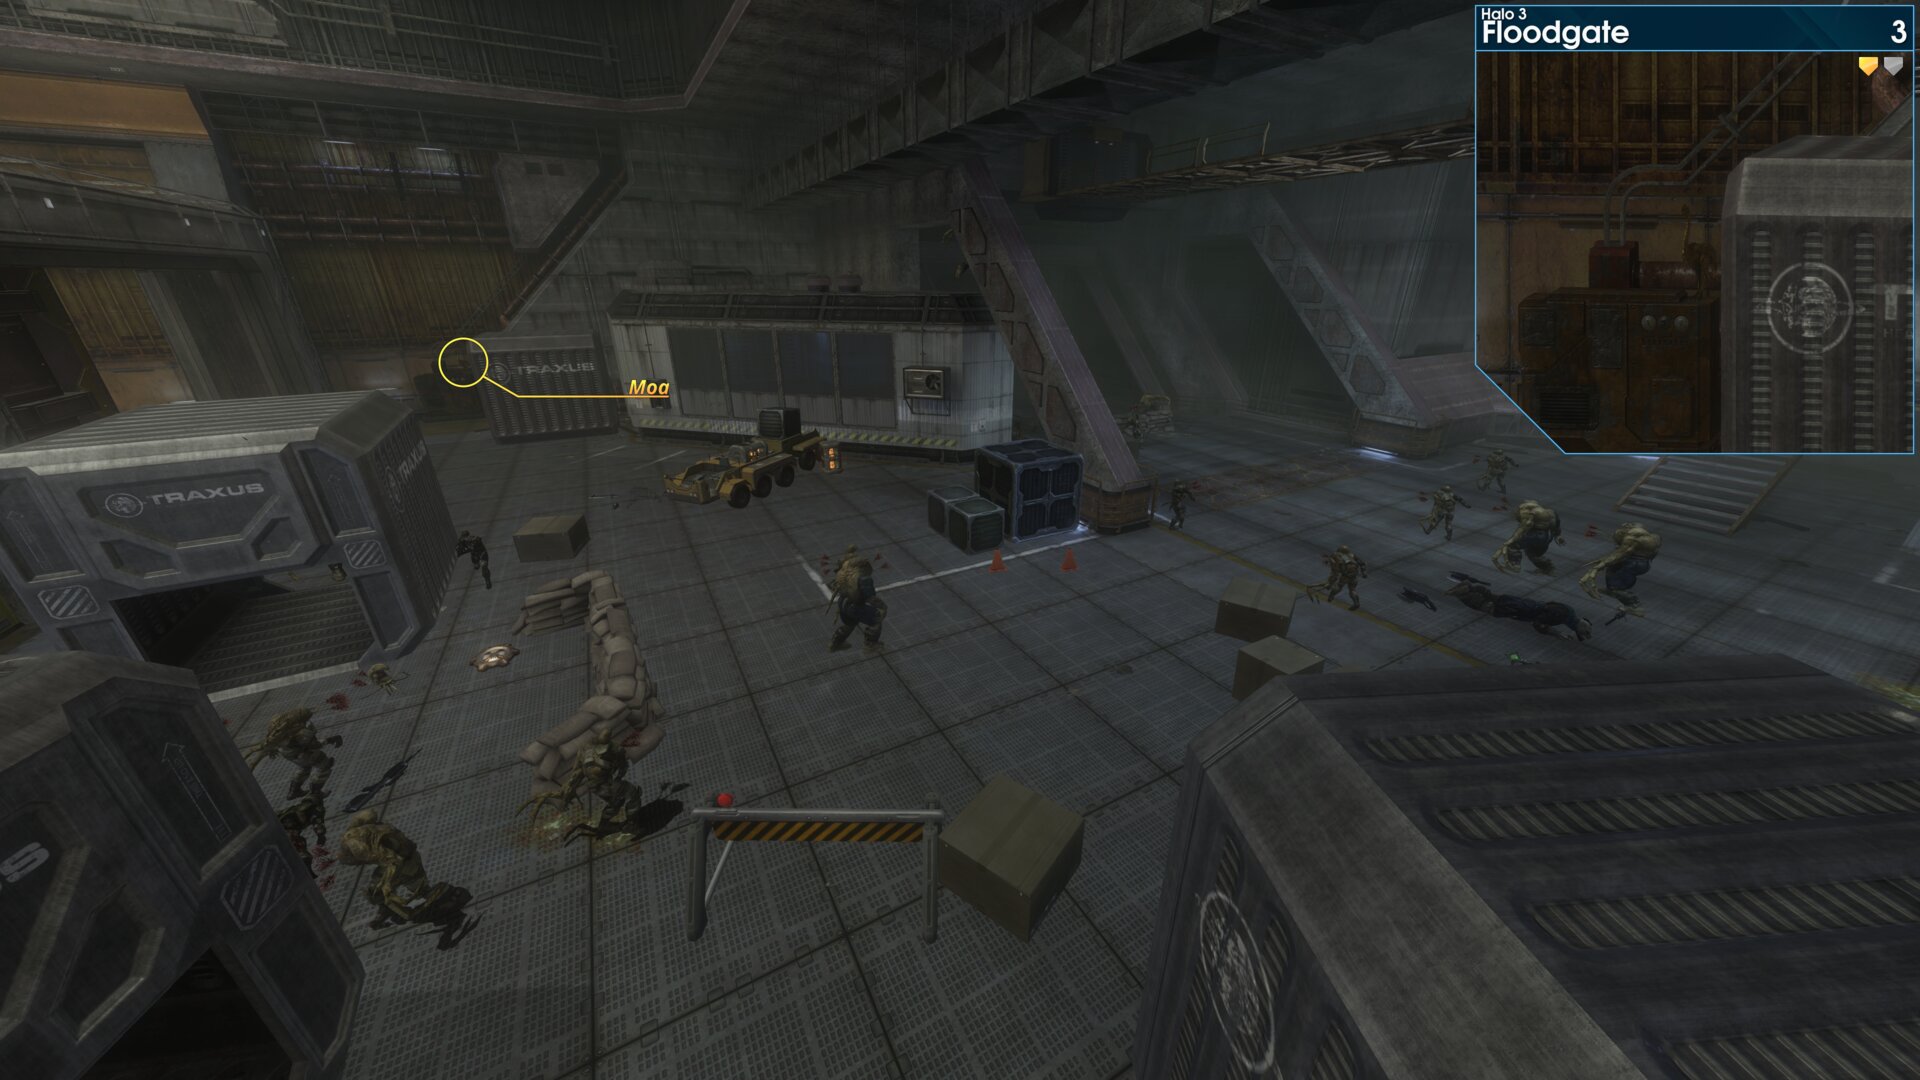
On top of a large pump, just to the right of the first large gate you walk through.
Golden Moa 4
In a shipping container suspended from a crane, just after passing through the second large gate.
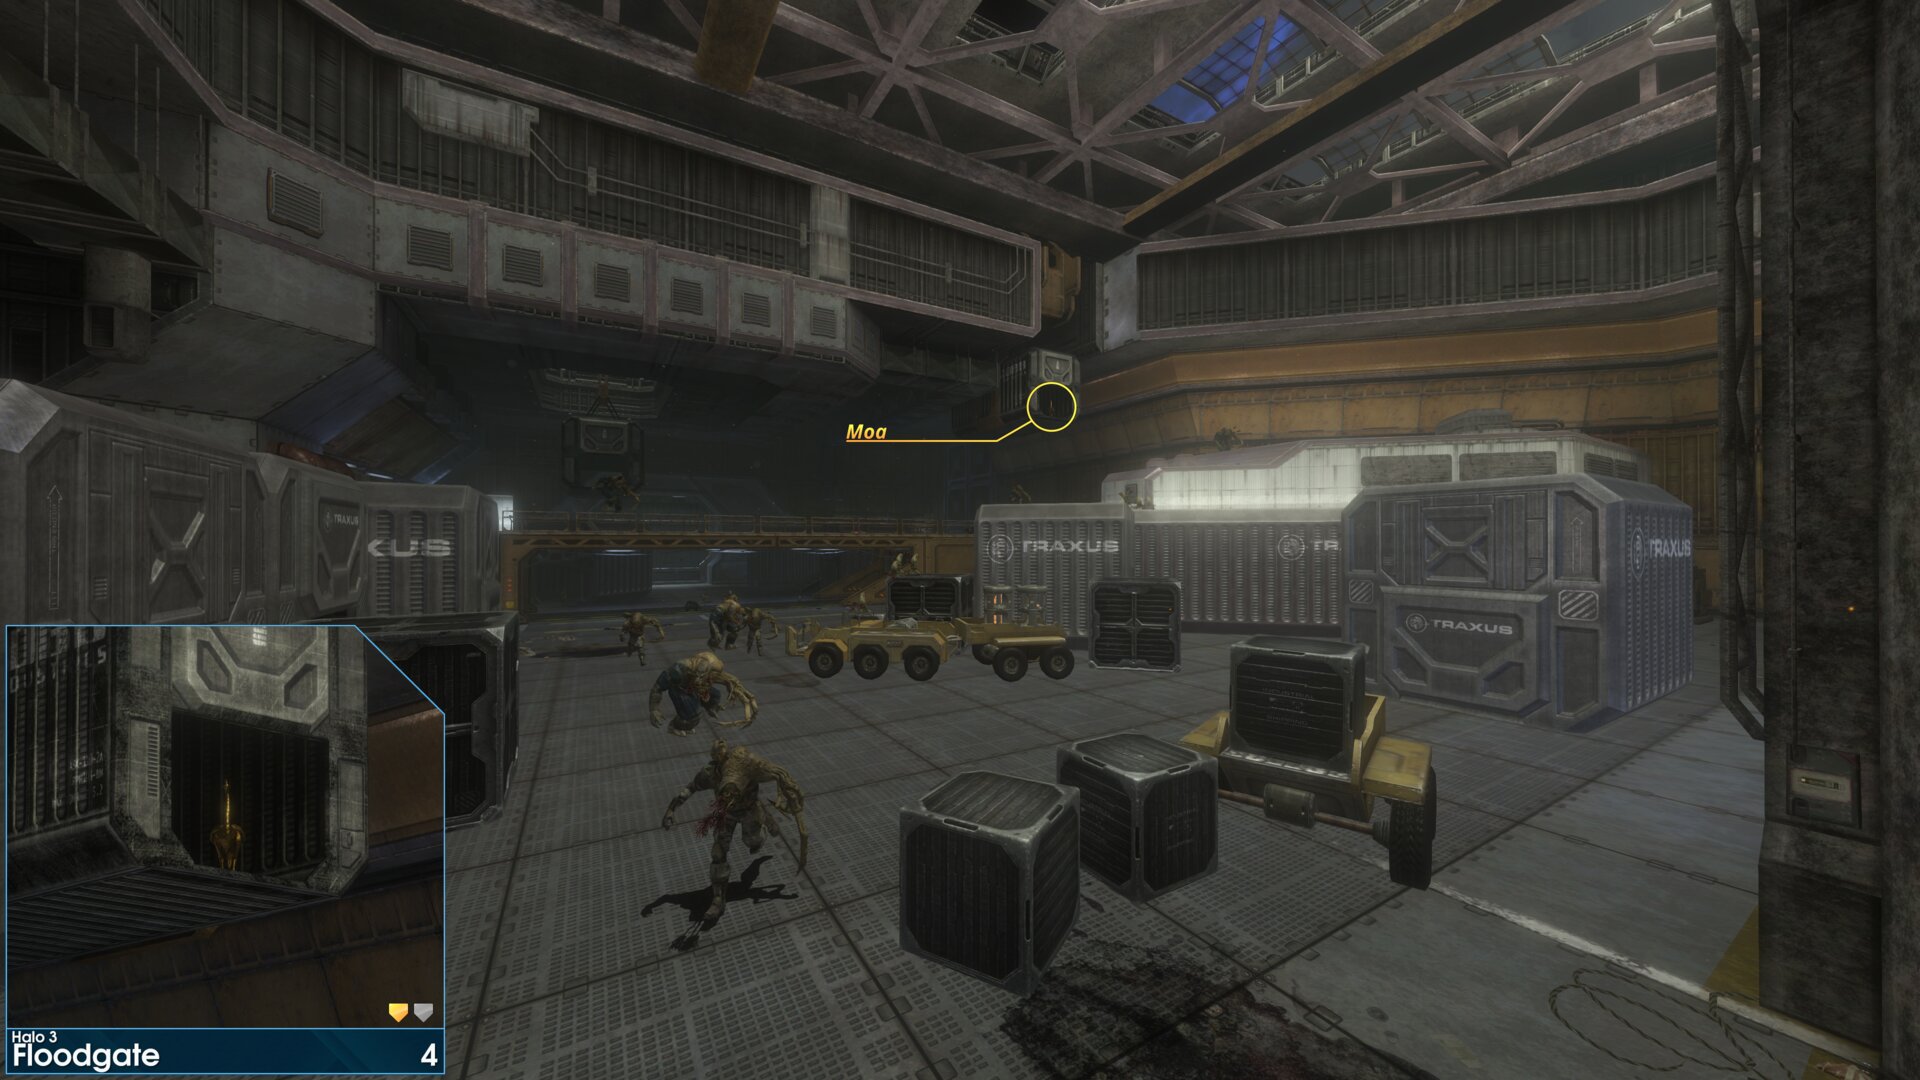
In a shipping container suspended from a crane, just after passing through the second large gate.
Golden Moa 5
To the right of the large closed gate. (previously open during 'The Storm')
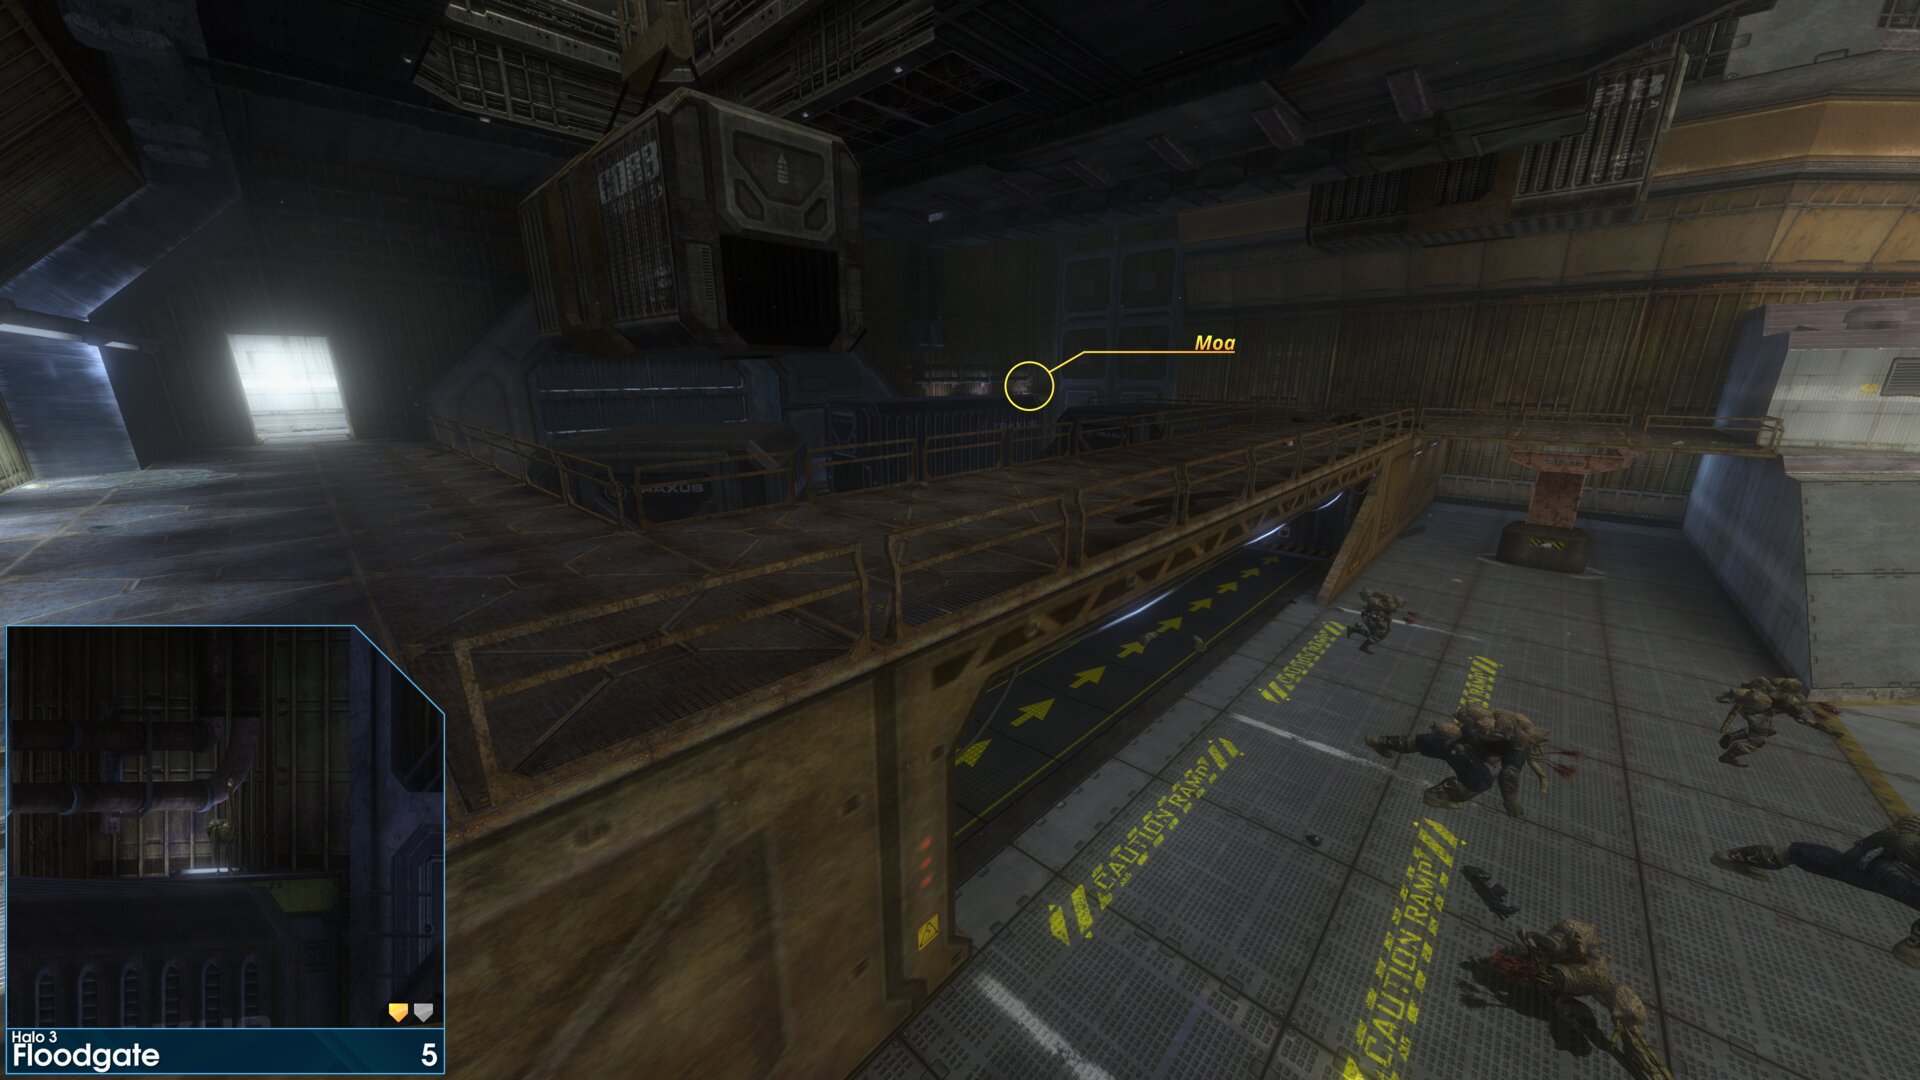
To the right of the large closed gate. (previously open during 'The Storm')
Golden Moa 6
Next to the disturbed marine. (The one talking about Flood infecting those around him)
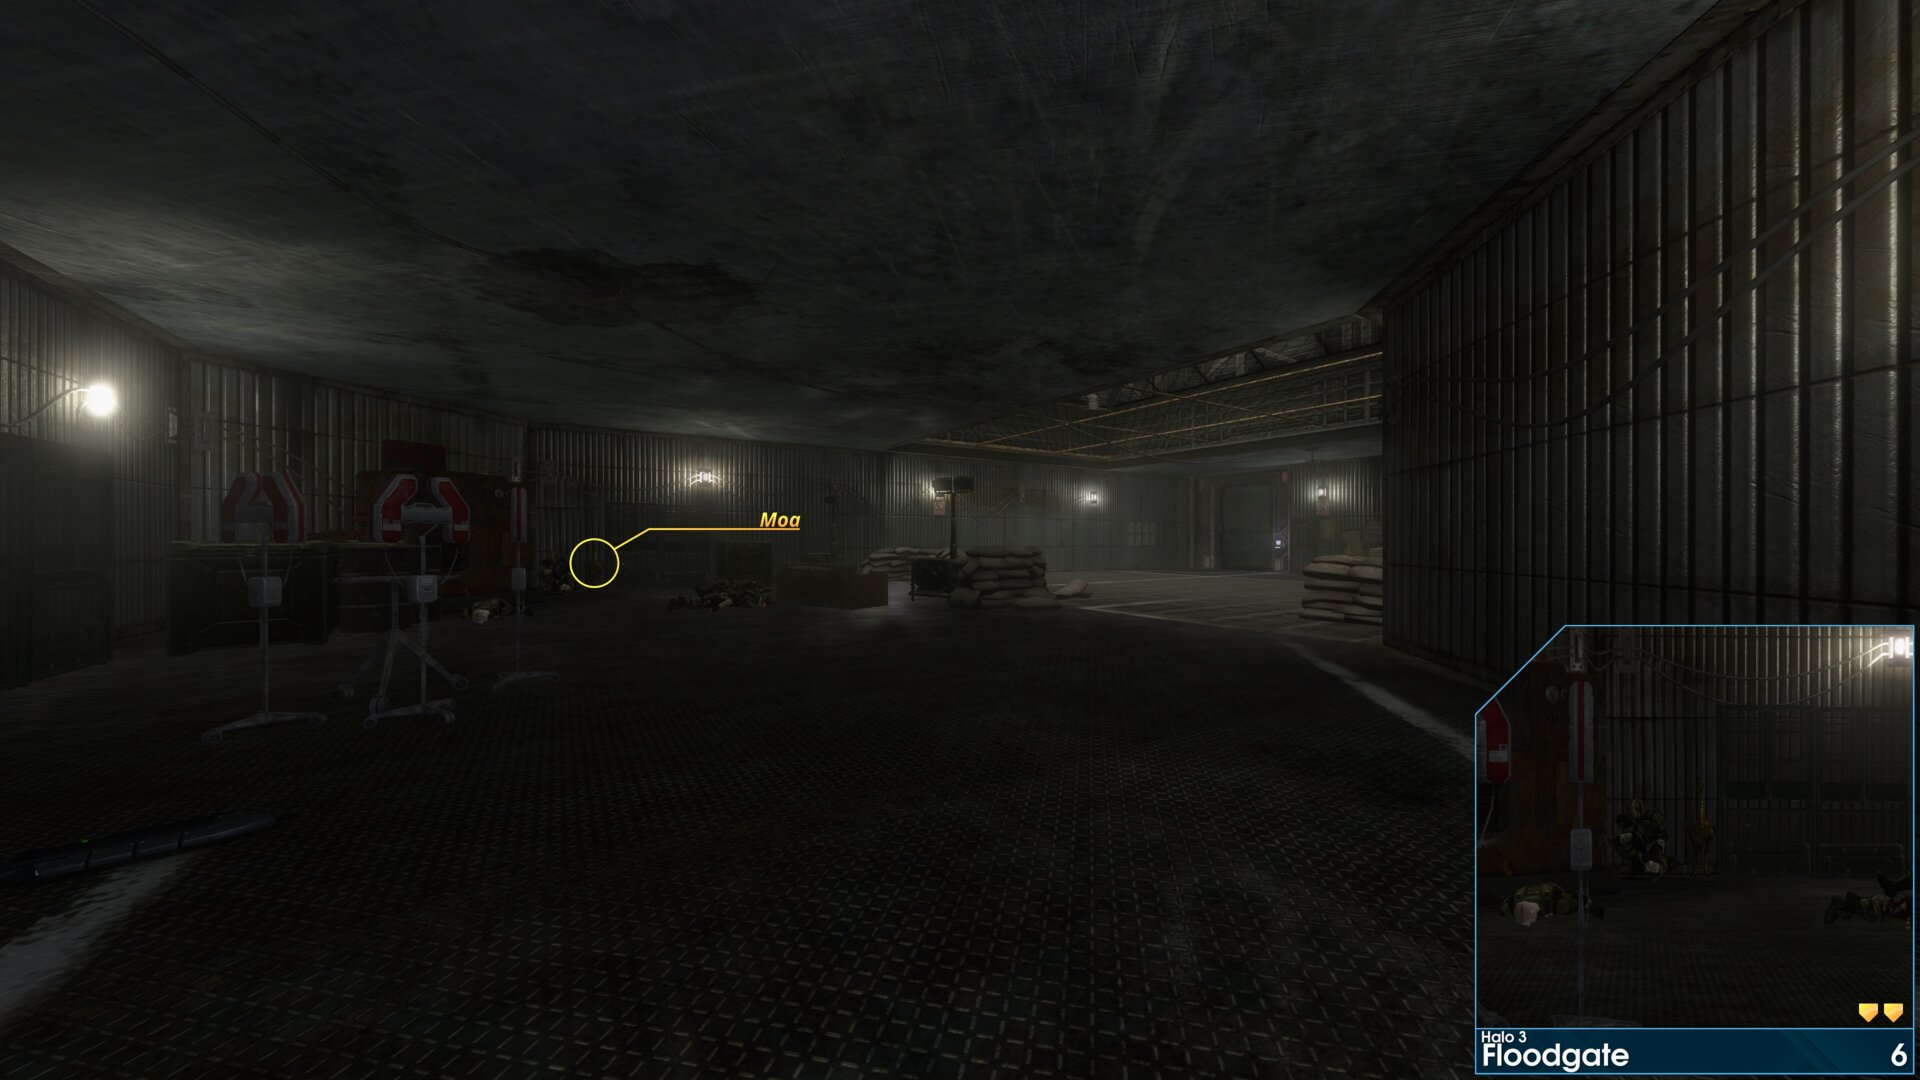
Next to the disturbed marine. (The one talking about Flood infecting those around him)
Rally Point: Bravo
Golden Moa 7
After triggering the 'Shadow of Intent' cutscene, turn around, the Moa is on the closest concrete ledge.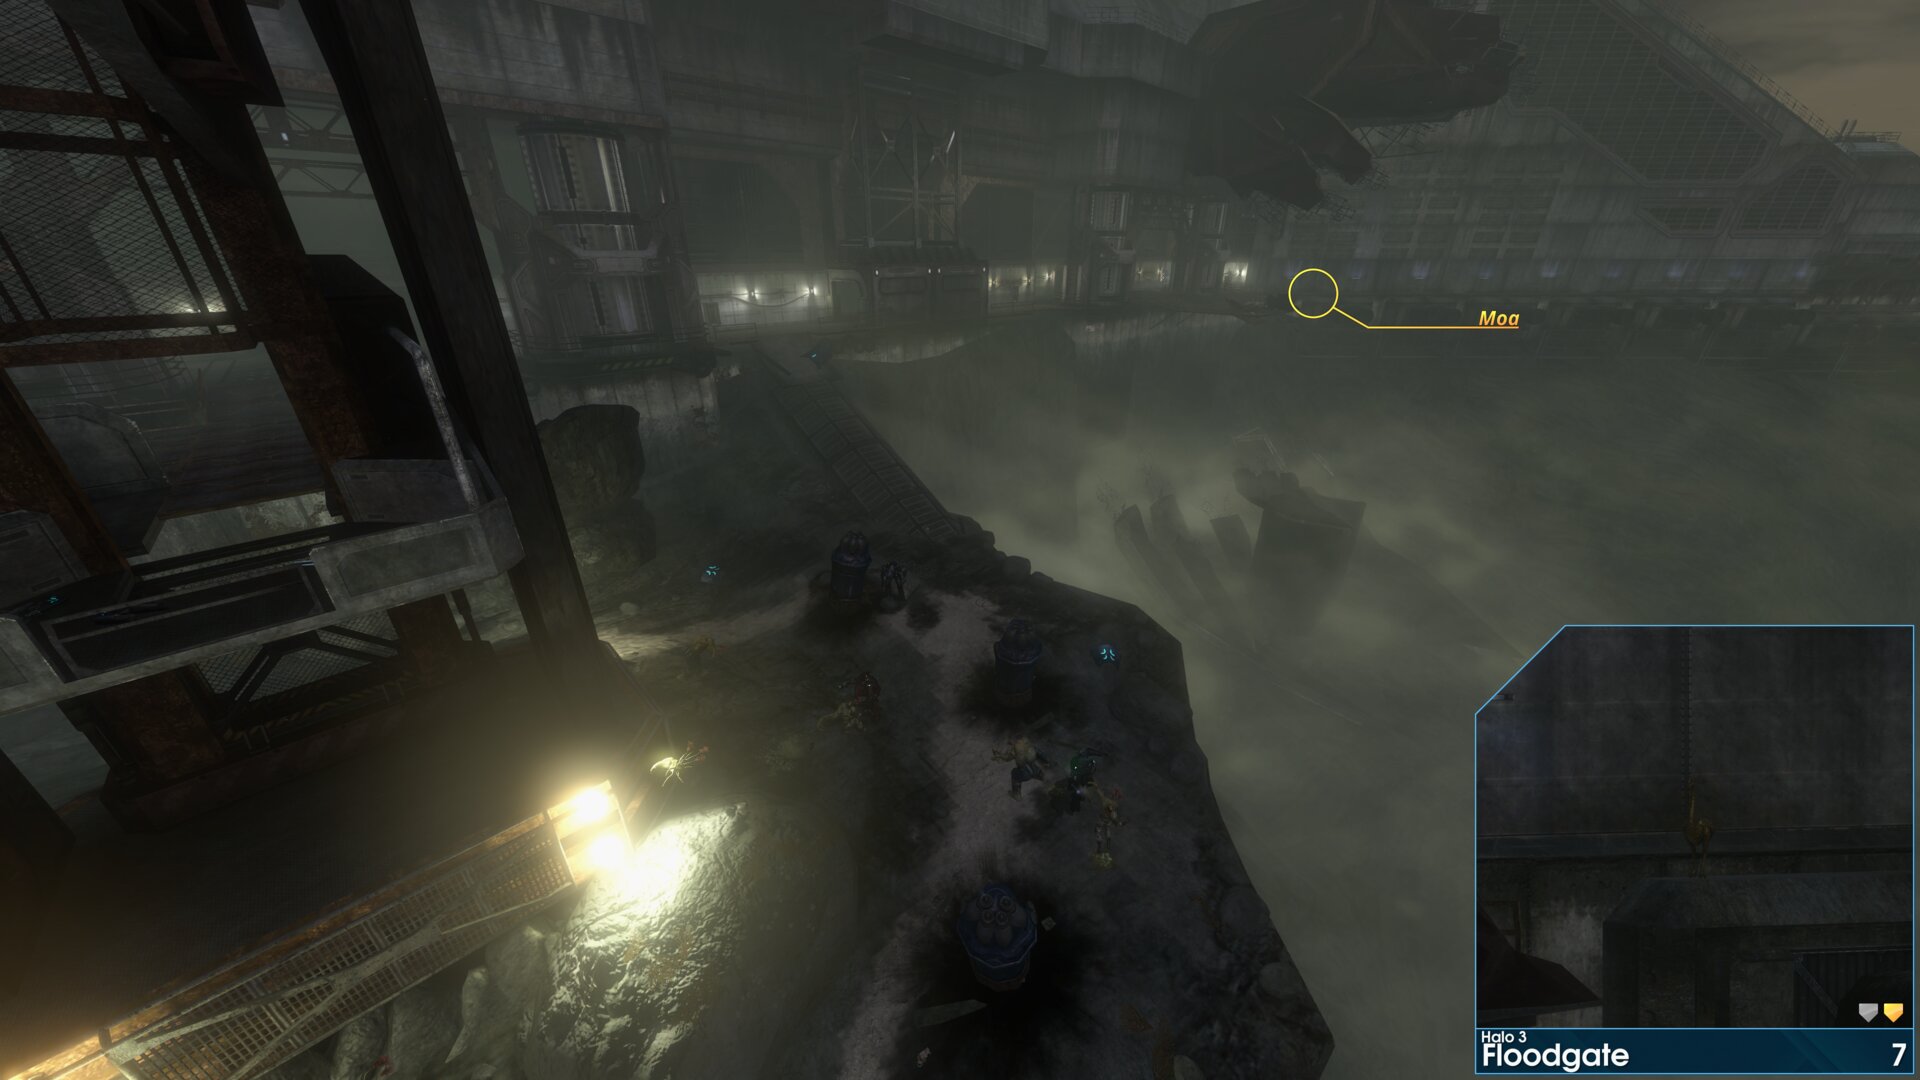
After triggering the 'Shadow of Intent' cutscene, turn around, the Moa is on the closest concrete ledge.
Golden Moa 8
Just after the Elites, it's against the wall on the concrete ledge, near the ramp that leads into the next area.
Just after the Elites, it's against the wall on the concrete ledge, near the ramp that leads into the next area.
Golden Moa 9
In the room before going outside to the last fight, it's on top of the pipes that are attached to the central column. (specifically the pipe furthest from the exterior door)
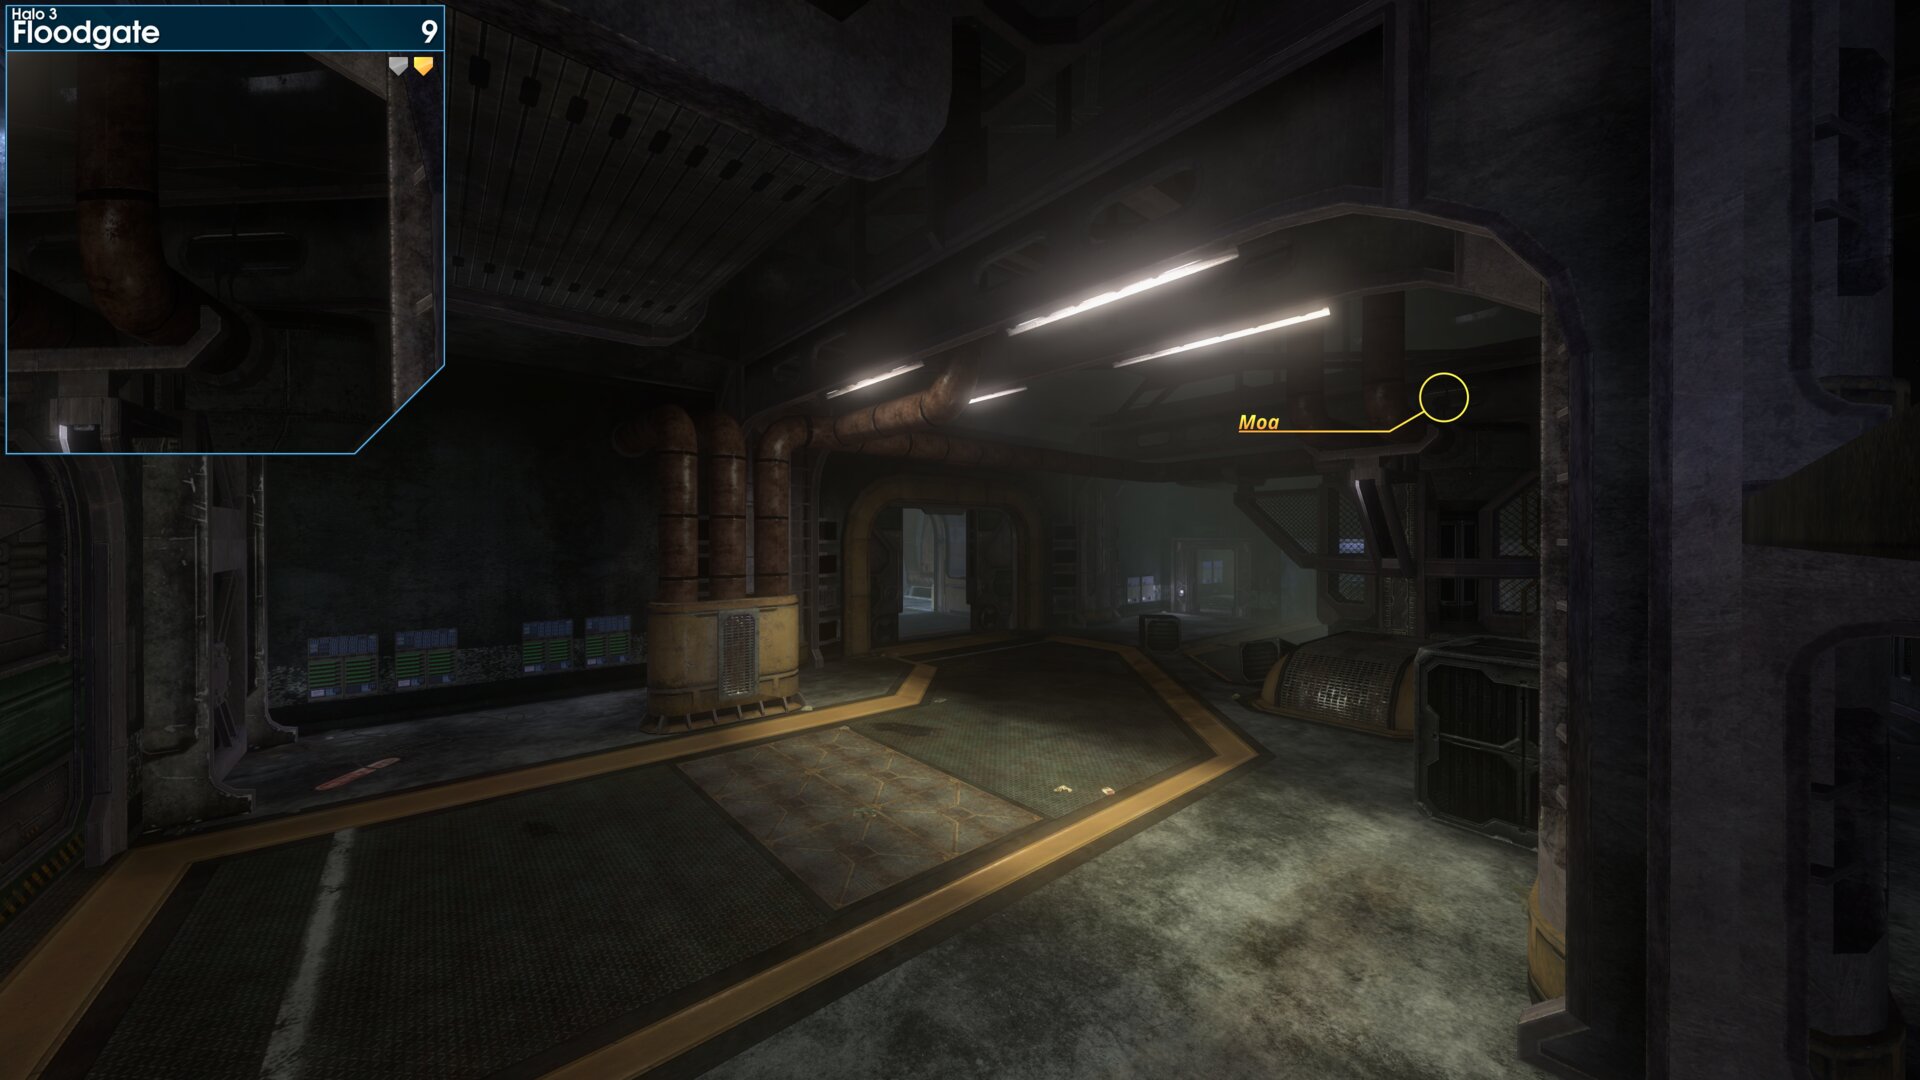
In the room before going outside to the last fight, it's on top of the pipes that are attached to the central column. (specifically the pipe furthest from the exterior door)
Golden Moa 10
When you go outside for the last fight (first encounter with Pure Flood forms), look for a nook to your left, next to the cliff edge.
When you go outside for the last fight (first encounter with Pure Flood forms), look for a nook to your left, next to the cliff edge.
Golden Moa 11
Near the top of a large broken off section from the Flood ship.
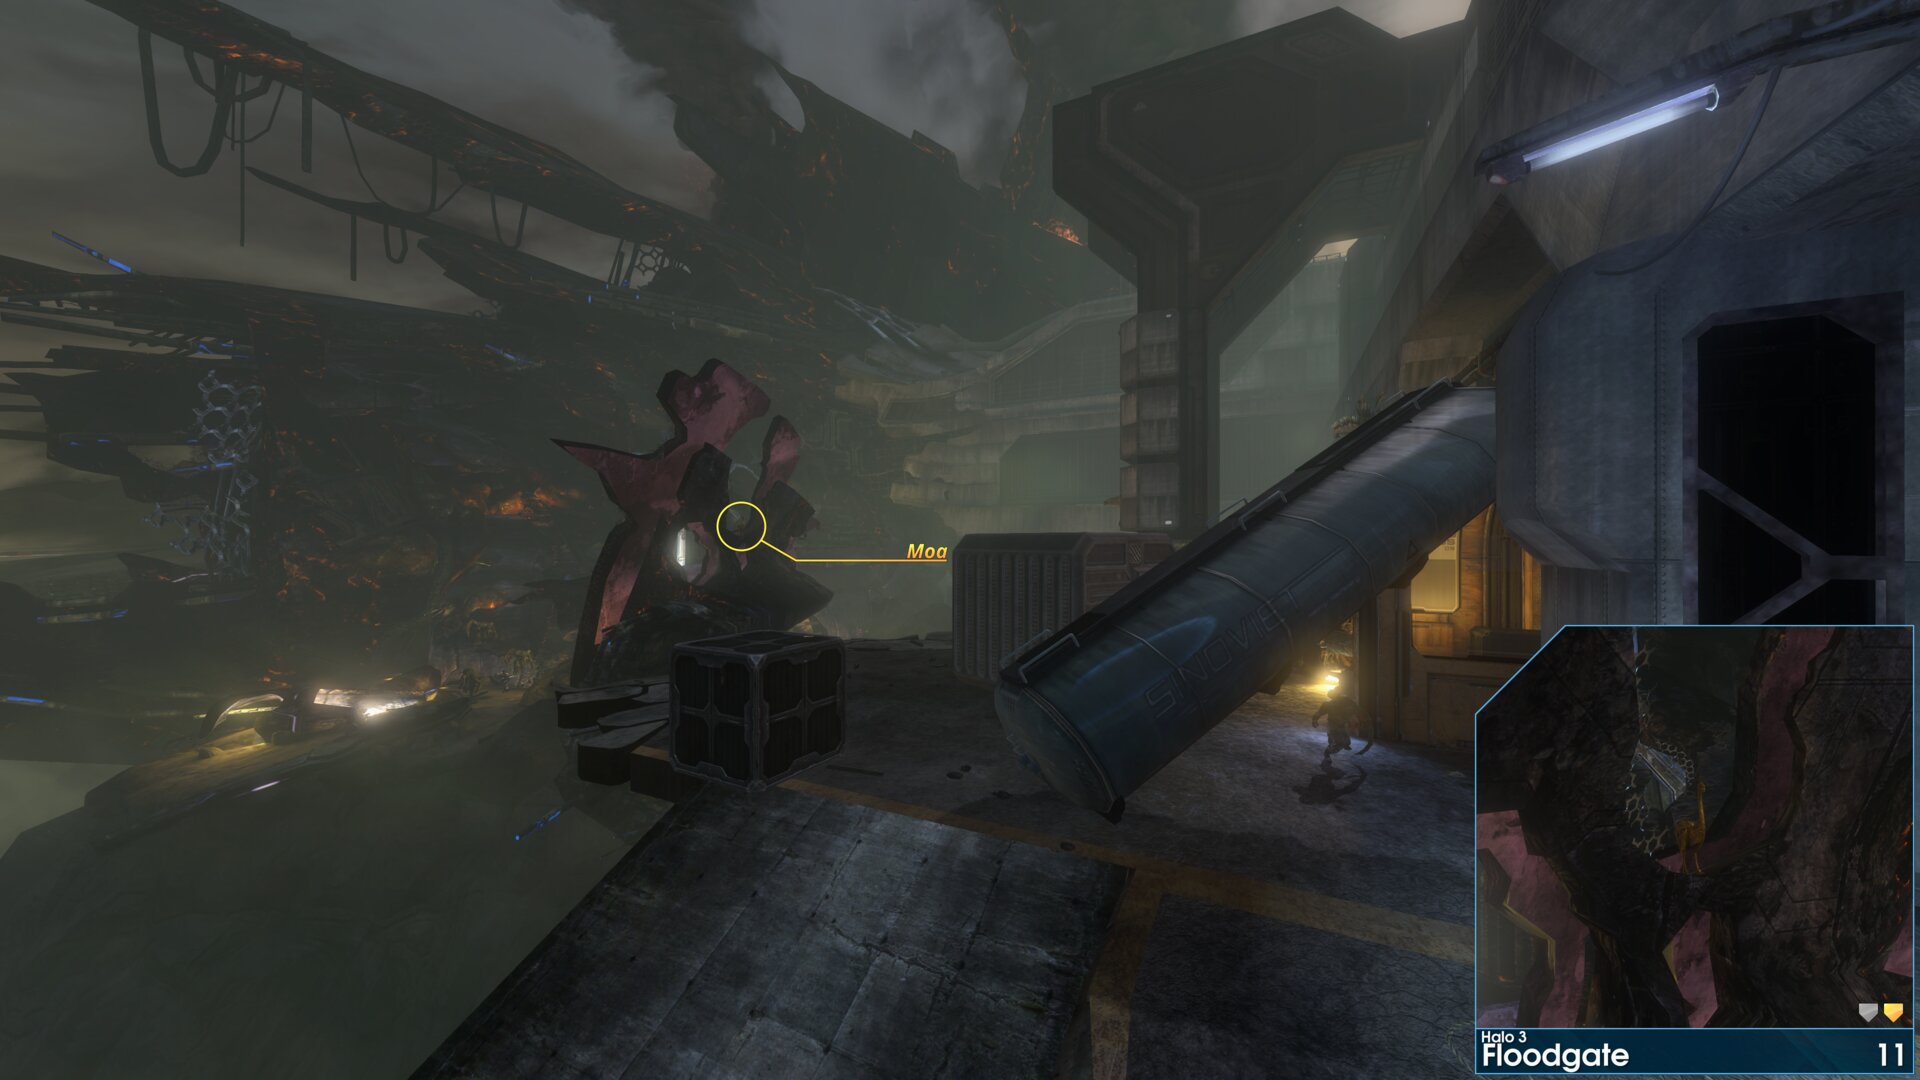
Near the top of a large broken off section from the Flood ship.
Golden Moa 12
Look to the left, as you reach the final room where you collect Cortana's recording.
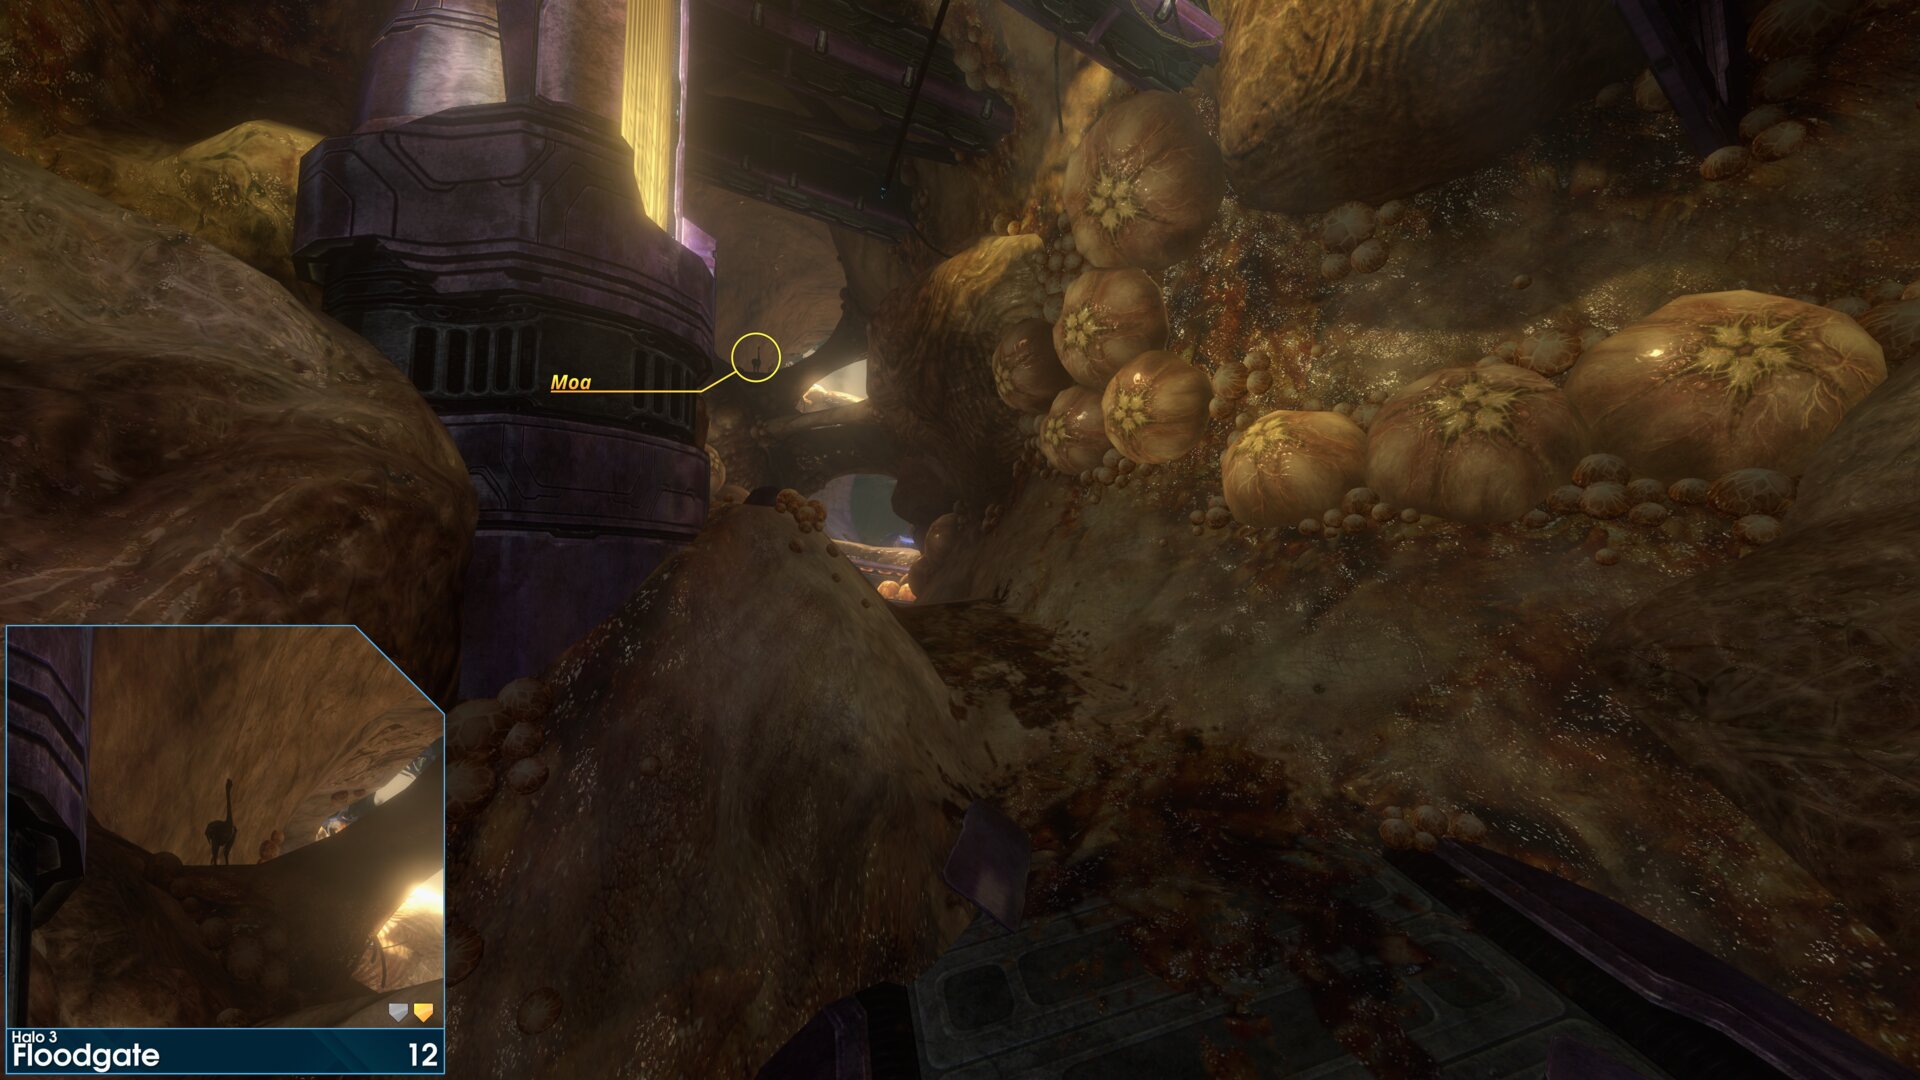
Look to the left, as you reach the final room where you collect Cortana's recording.
Golden Moa 13
Just before collecting Cortana's recording, look up to the right, the Golden Moa is on a fungus ledge.
Just before collecting Cortana's recording, look up to the right, the Golden Moa is on a fungus ledge.
➟ The Ark
Rally Point: Alpha
Note: Moa's 2, 3, 4 & 5 can be reached from rally point Bravo.
Rally Point: Bravo
Rally Point: Charlie
Note: Moa's 2, 3, 4 & 5 can be reached from rally point Bravo.
Golden Moa 1
On top of the rock arch that you're dropped off at. (only the head and neck will be visible, unless you step back a bit)
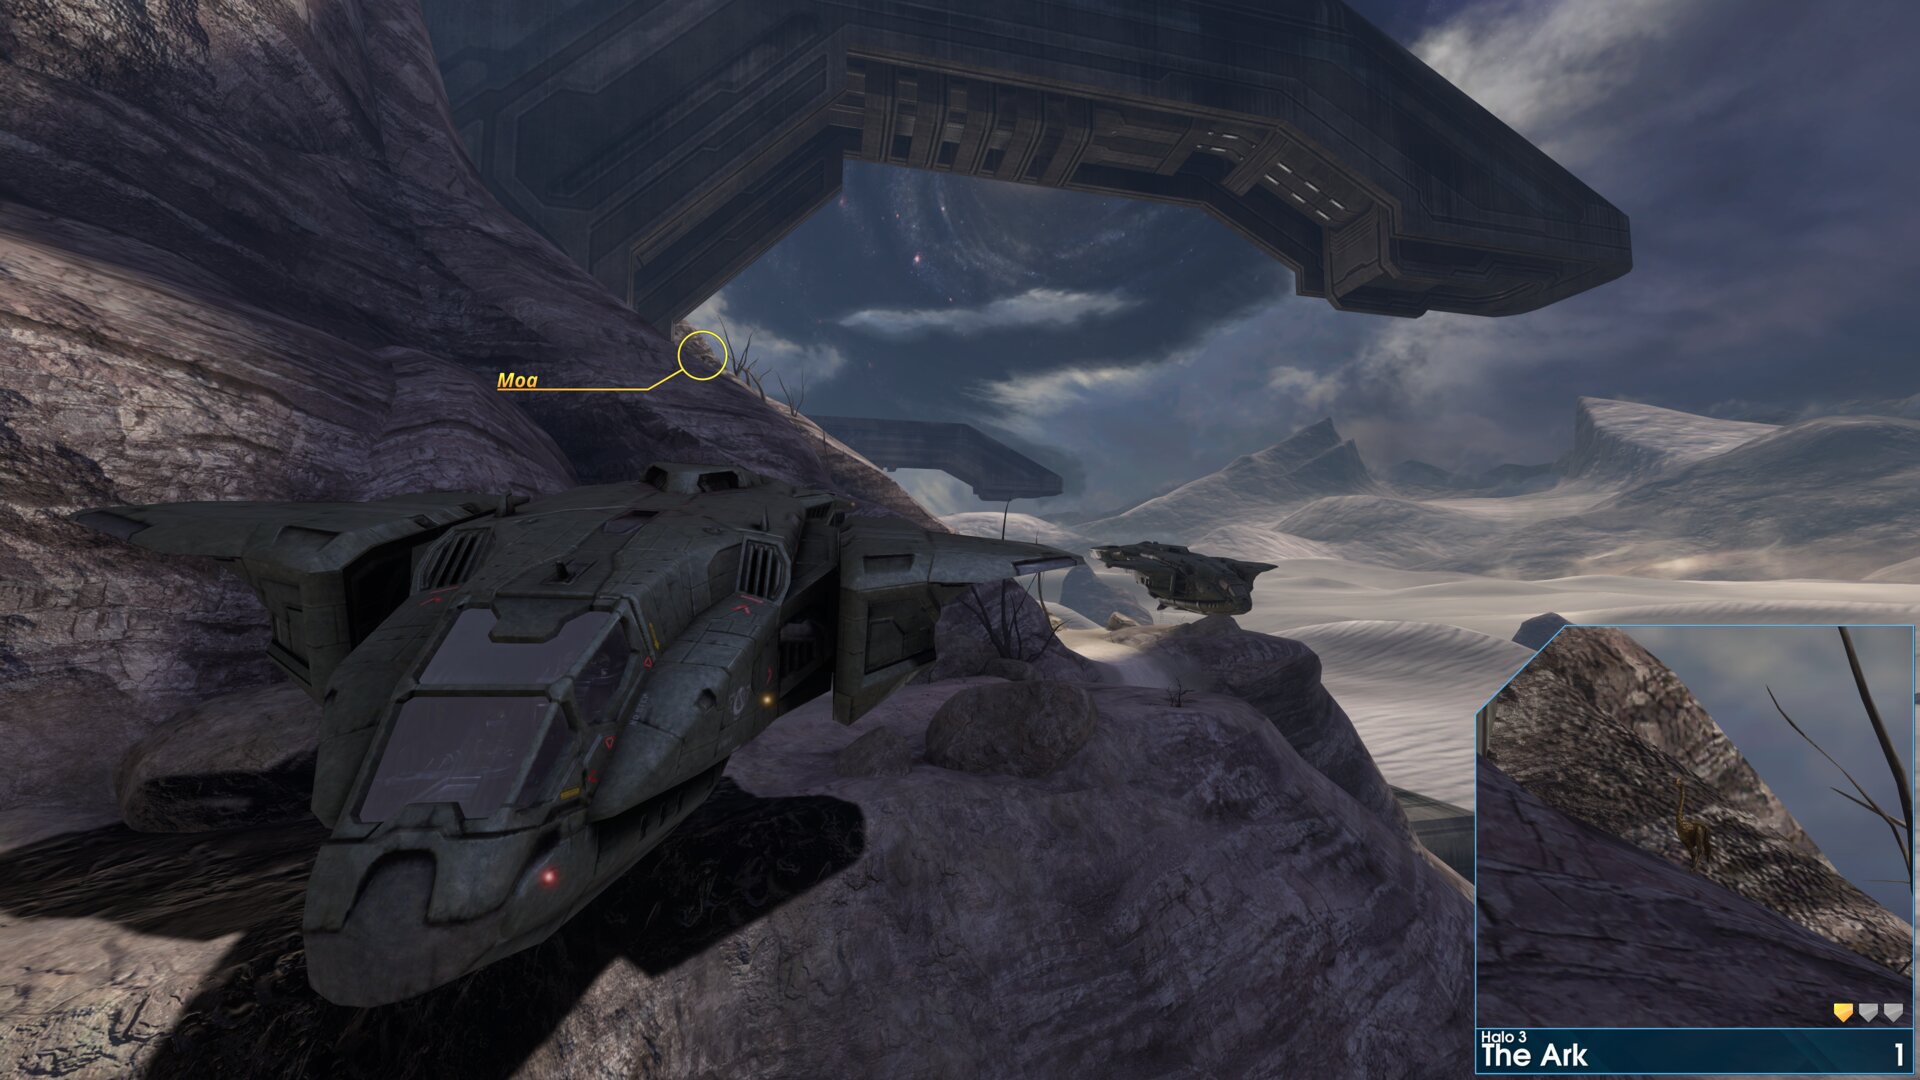
On top of the rock arch that you're dropped off at. (only the head and neck will be visible, unless you step back a bit)
Golden Moa 2
Inside the crashed Pelican.
Inside the crashed Pelican.
Golden Moa 3
In the exposed wall to the left of the crashed Longsword.
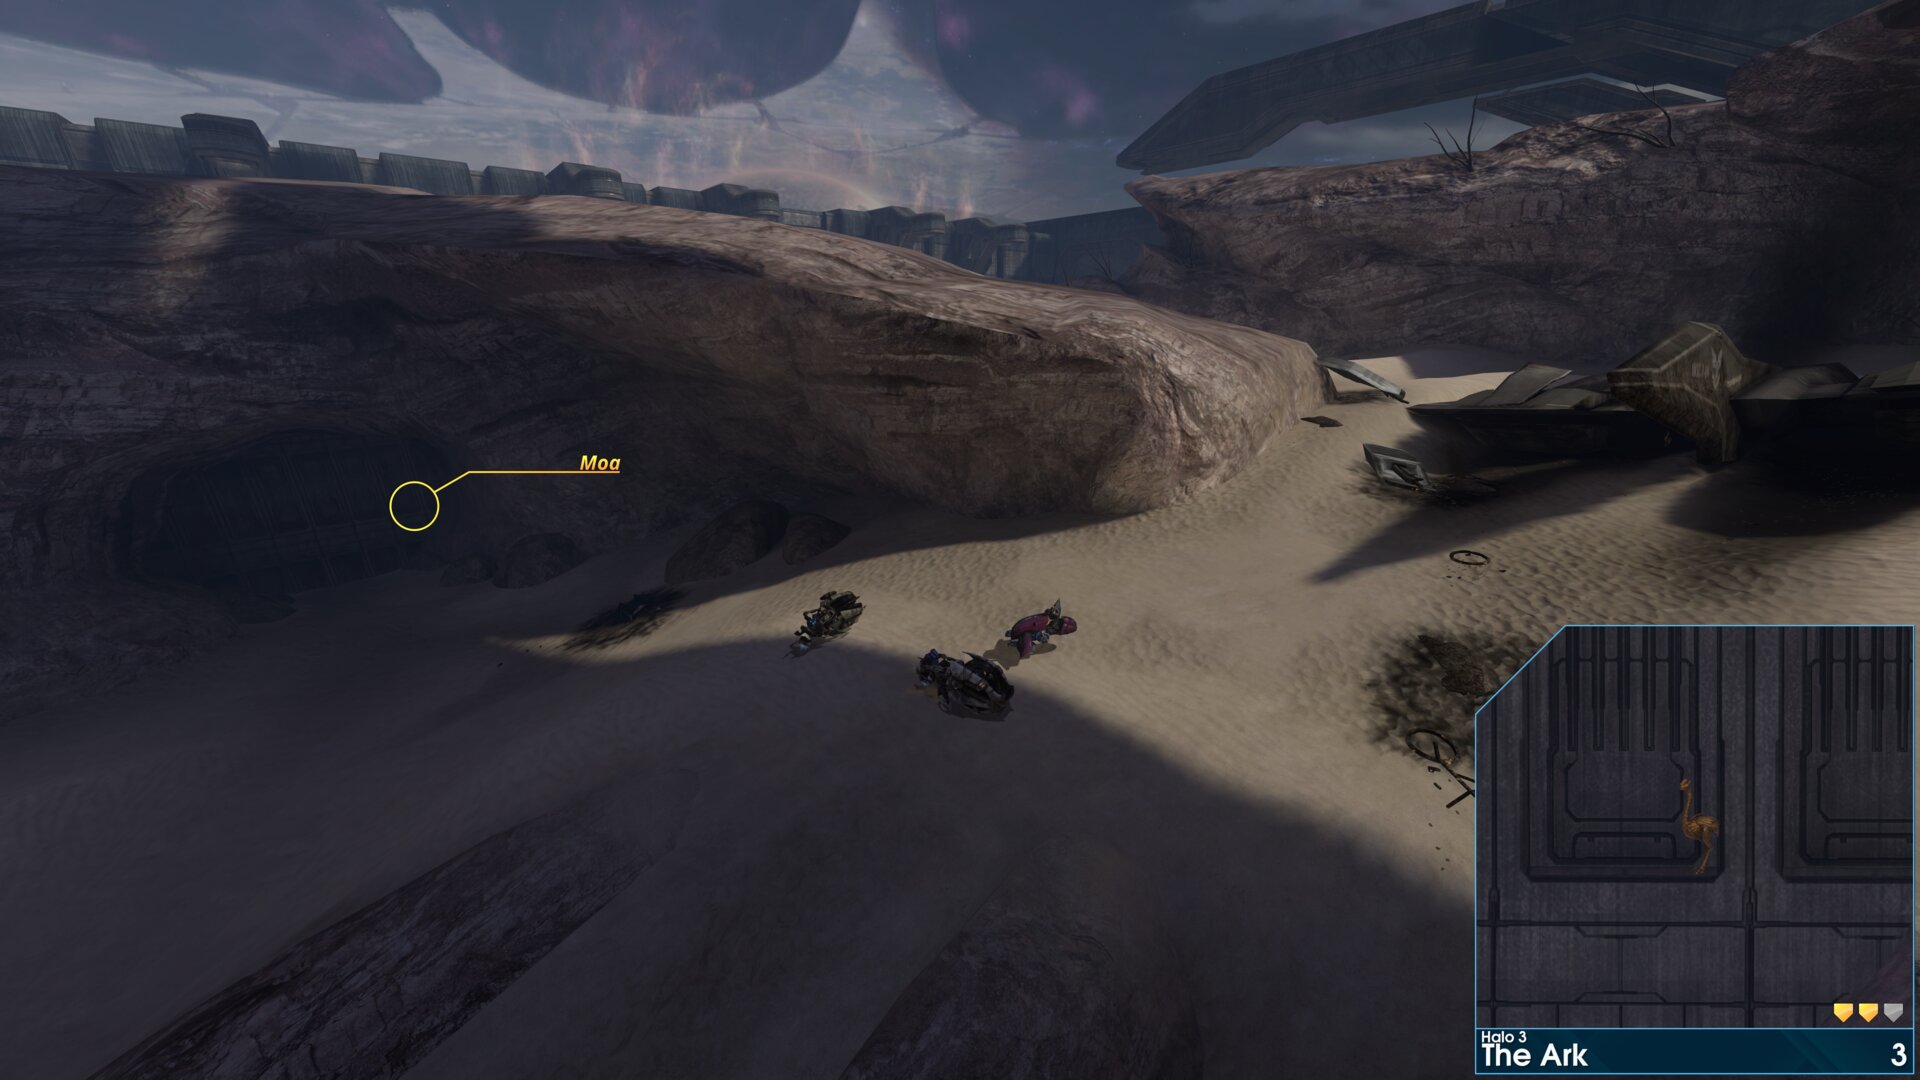
In the exposed wall to the left of the crashed Longsword.
Golden Moa 4
Under the crashed Longsword, between the fuselage and the left engine.
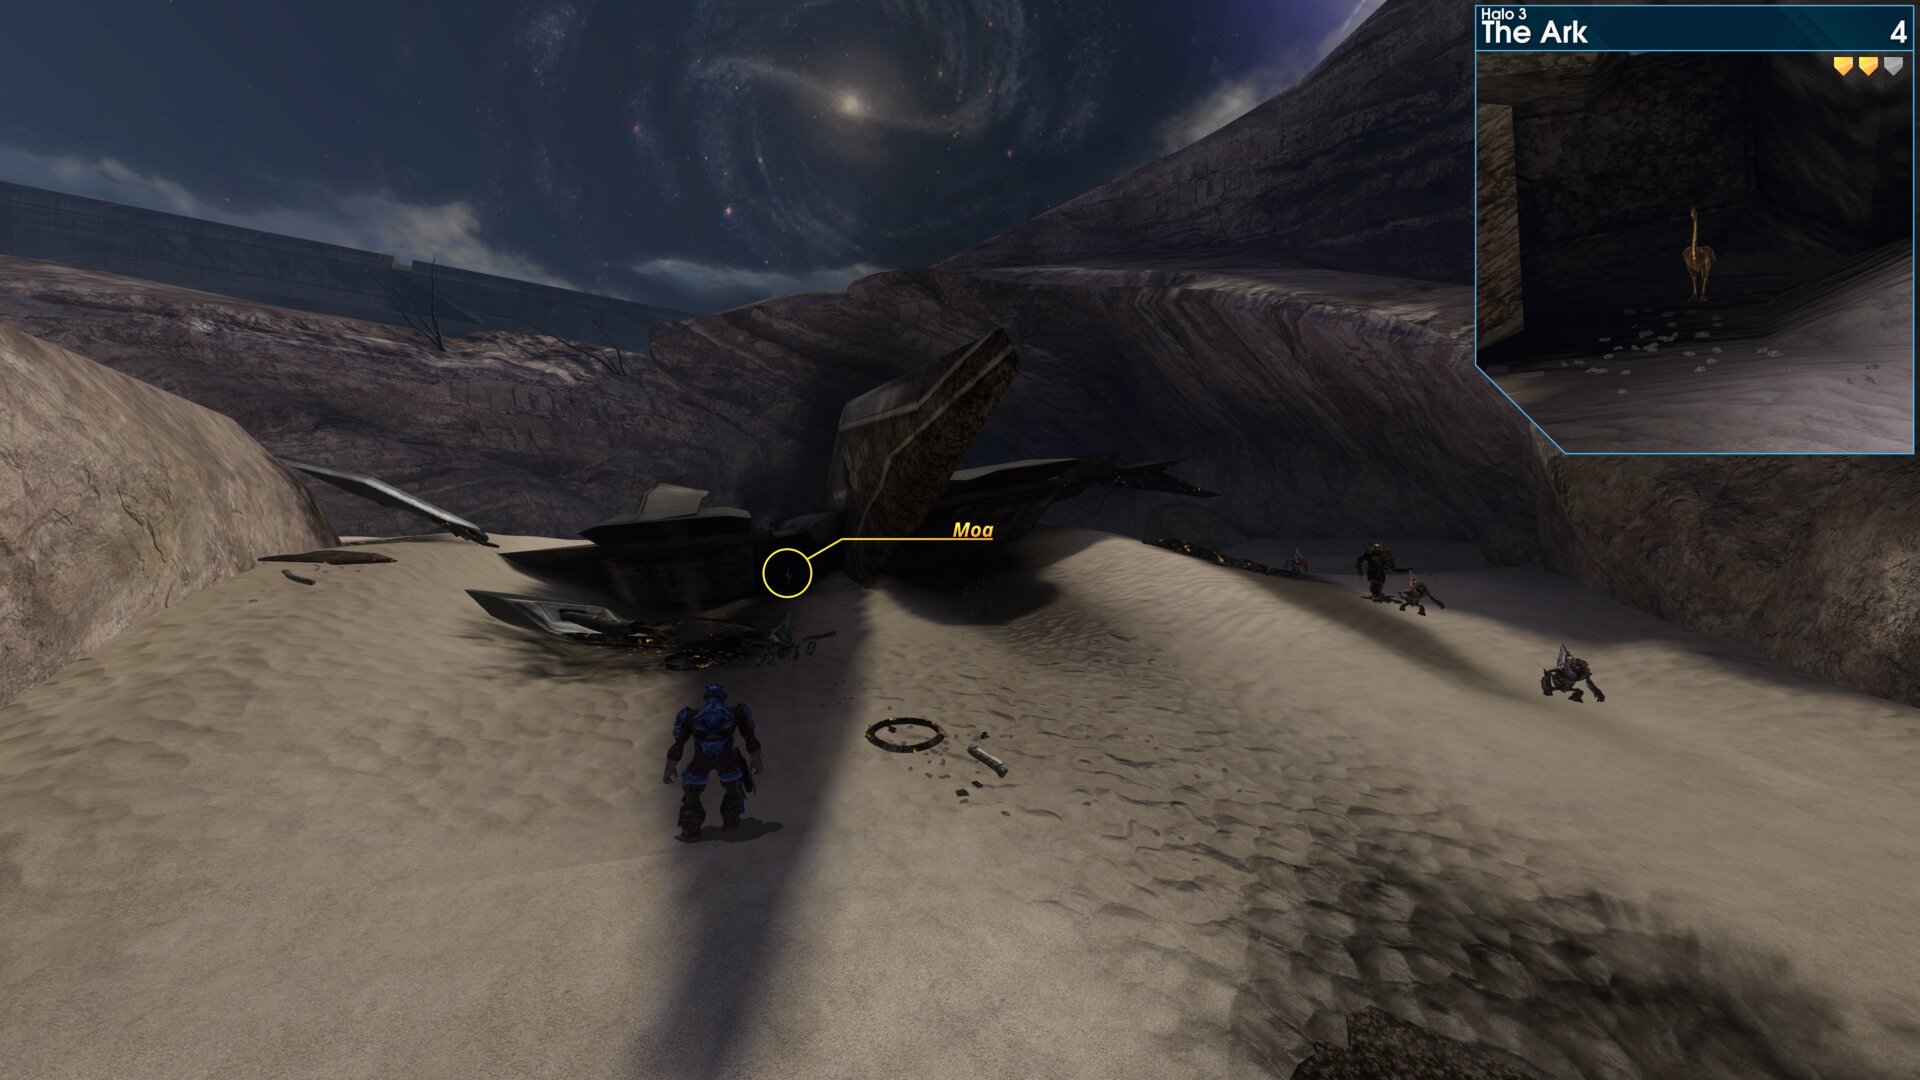
Under the crashed Longsword, between the fuselage and the left engine.
Golden Moa 5
In the area where Keyes lands, as you enter turn right, look for this Moa on a rock next to the area walls (Cliffs).
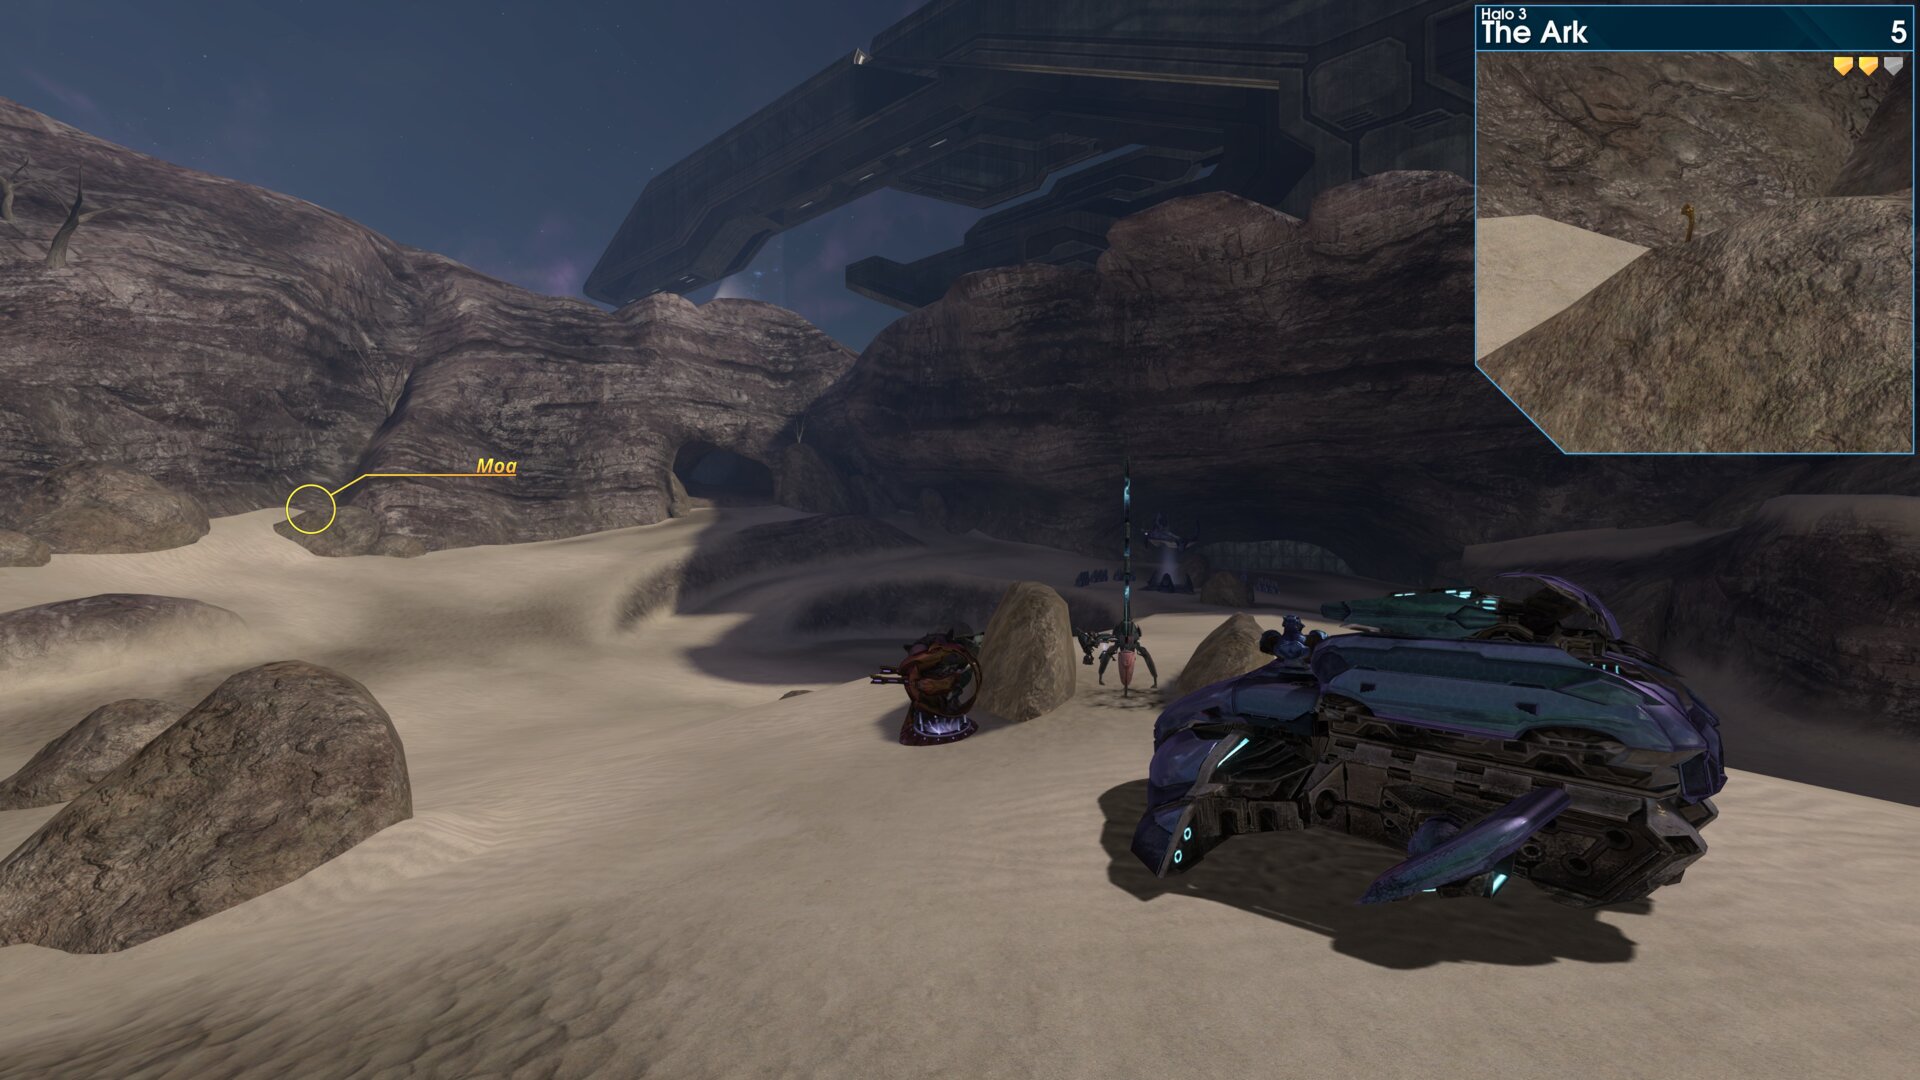
In the area where Keyes lands, as you enter turn right, look for this Moa on a rock next to the area walls (Cliffs).
Rally Point: Bravo
Golden Moa 6
Where you activate the light bridge, it's on the closest point of the ledge, between the far left windows.
"Say What?" Sgt. Johnson
Where you activate the light bridge, it's on the closest point of the ledge, between the far left windows.
"Say What?" Sgt. Johnson
Golden Moa 7
In the wall, above the final ramp that leads to the indoor area.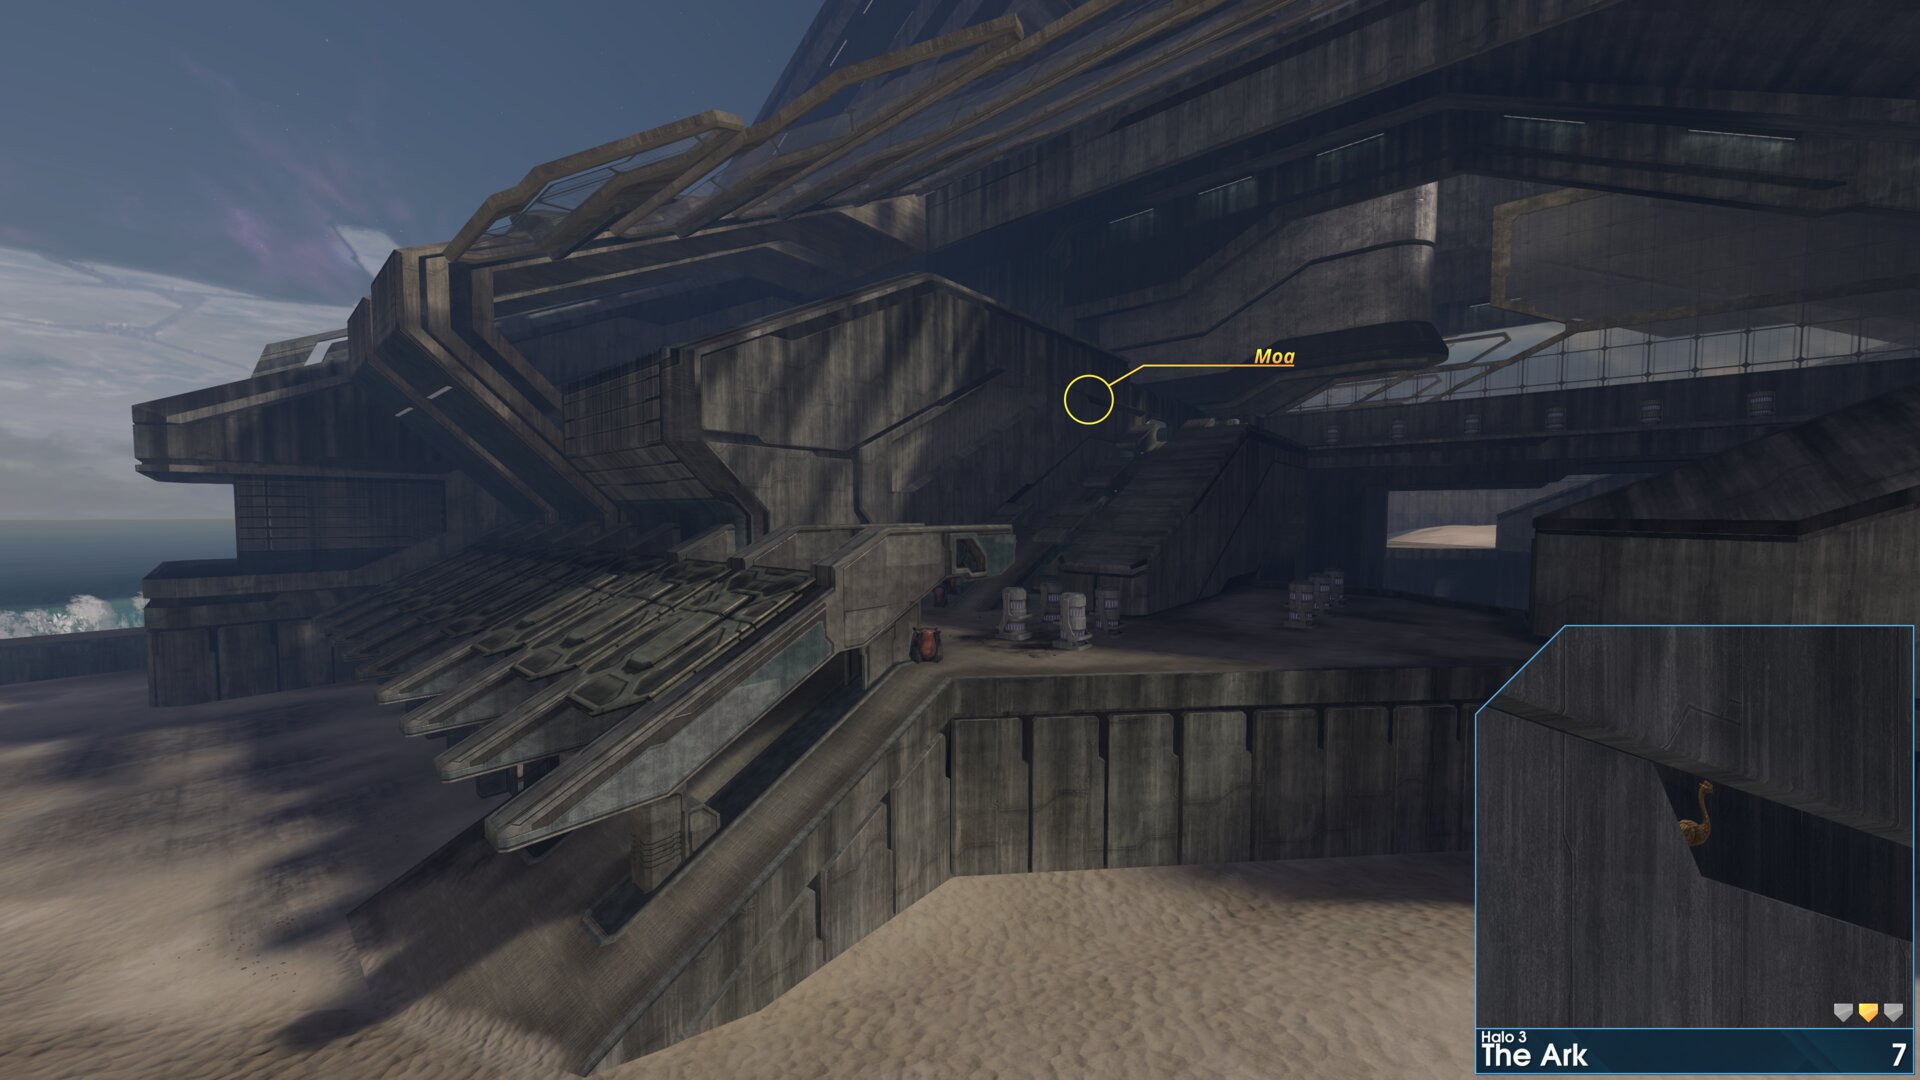
In the wall, above the final ramp that leads to the indoor area.
Golden Moa 8
In the last nook, on the main structure. (right next to where the Scarab drops in)
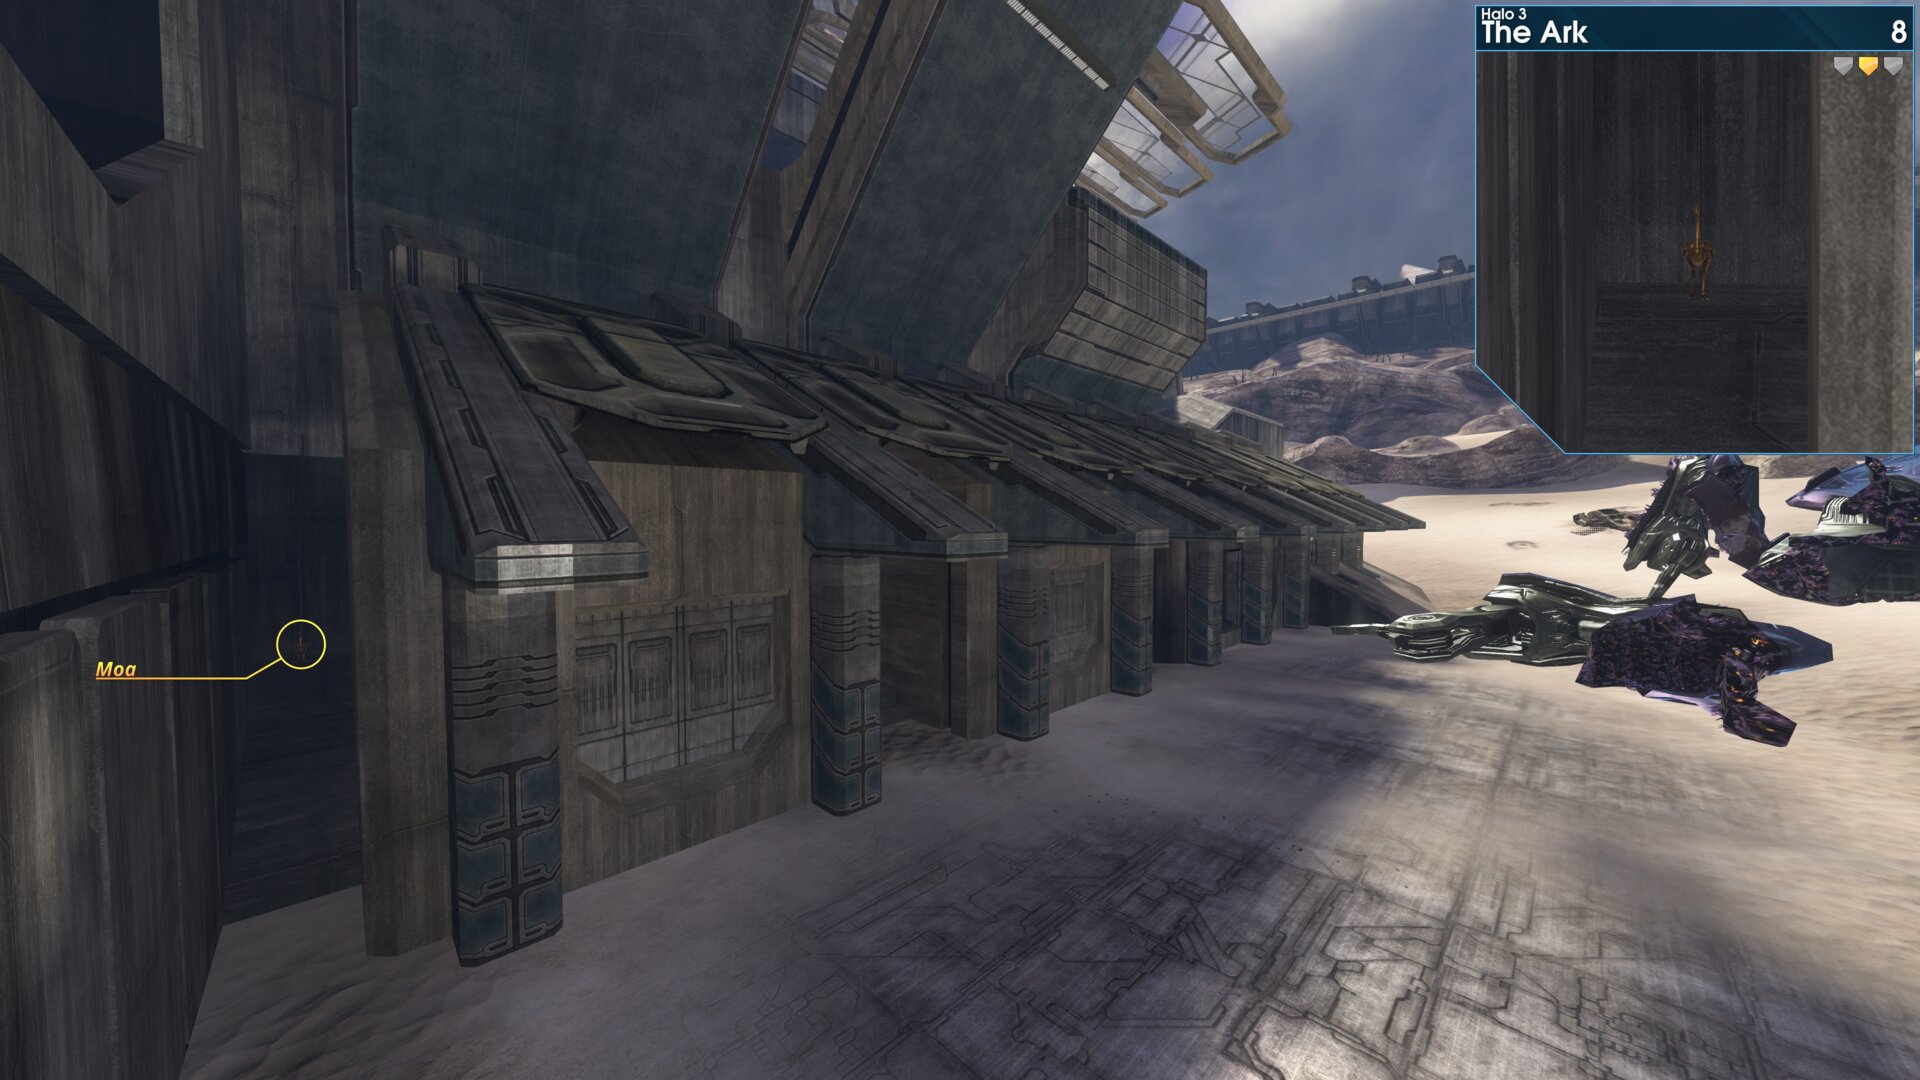
In the last nook, on the main structure. (right next to where the Scarab drops in)
Rally Point: Charlie
Golden Moa 9
In the wall on your left, when you enter the first room with sleeping grunts.
In the wall on your left, when you enter the first room with sleeping grunts.
Golden Moa 10
After a couple of empty corridors, you'll reach a room with a lone patrolling Grunt (more enemies are in the next room). This Moa is on a ledge, which is part of a pillar in the wall (the one with purple lights).
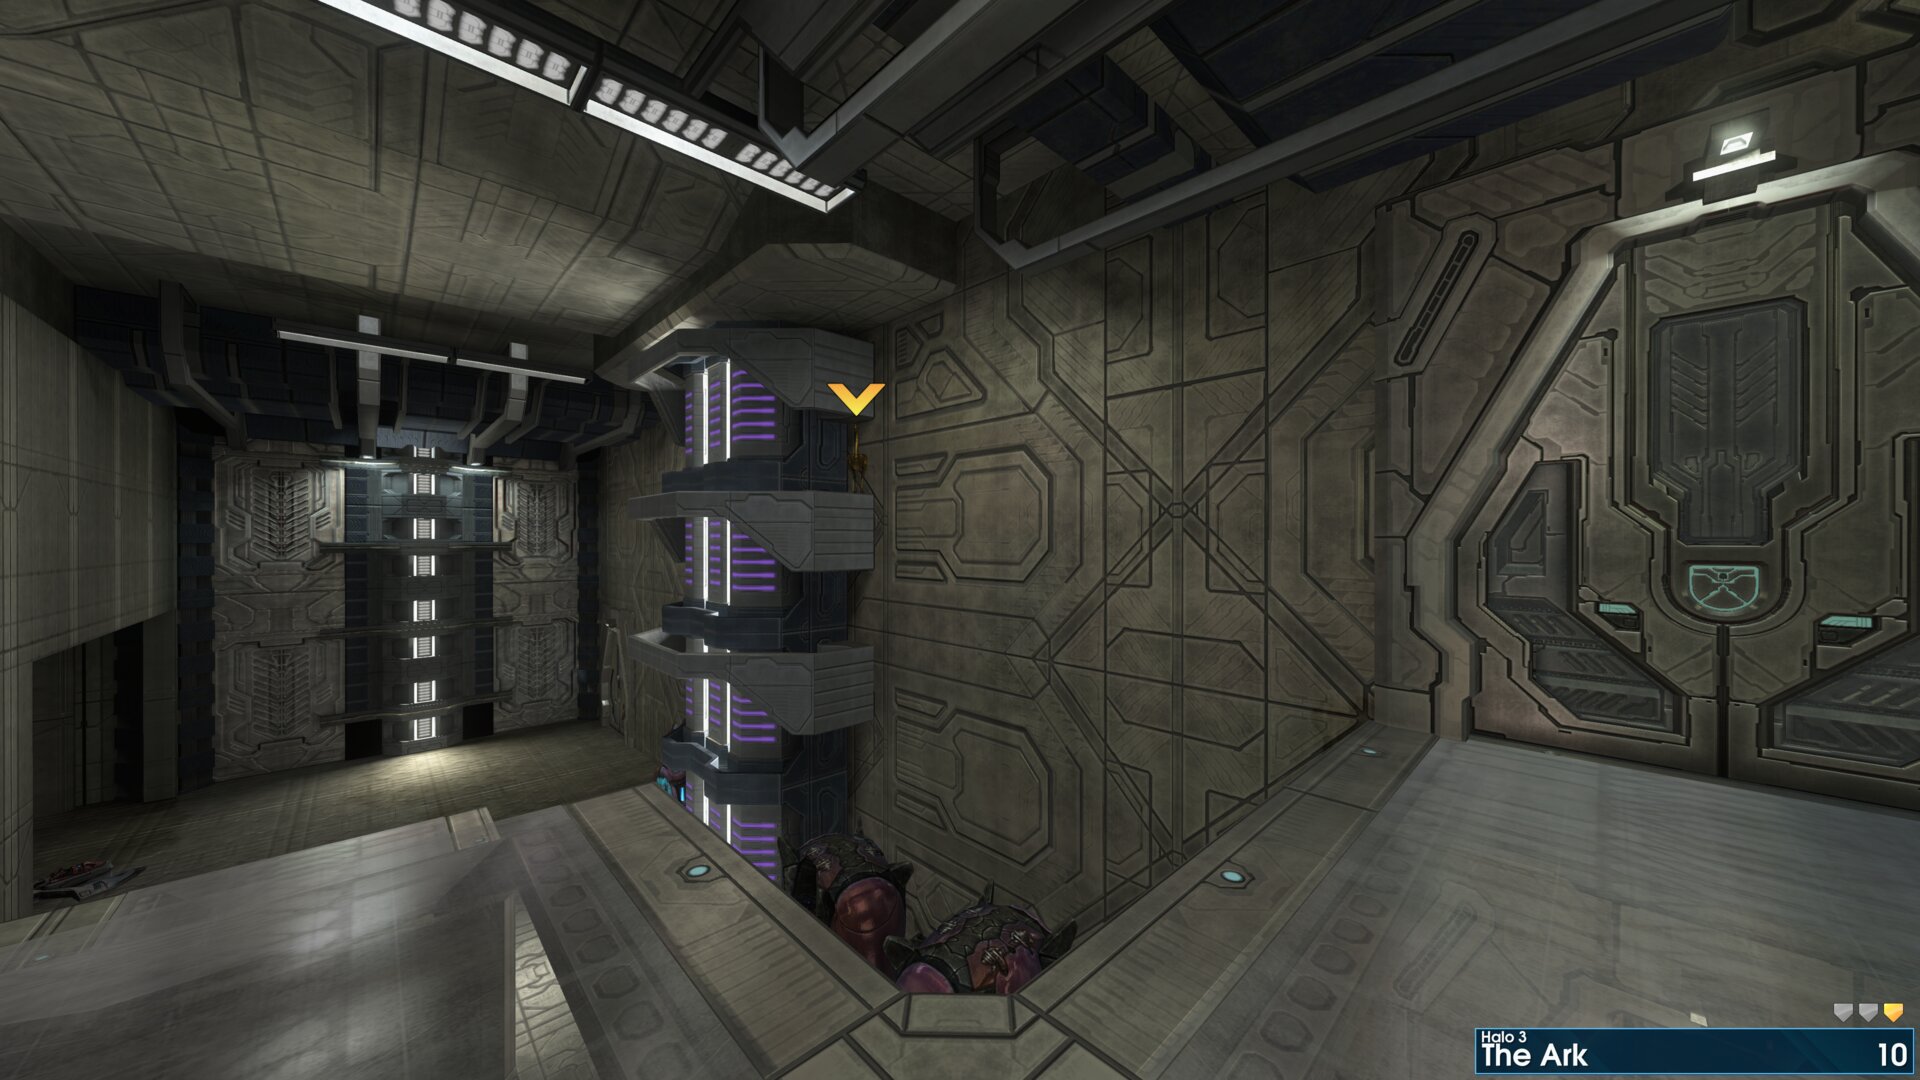
After a couple of empty corridors, you'll reach a room with a lone patrolling Grunt (more enemies are in the next room). This Moa is on a ledge, which is part of a pillar in the wall (the one with purple lights).
Golden Moa 11
In the central pillar, it's the room with a Brute guarding the door. (you will pass through this room again after activating the Cartographer)
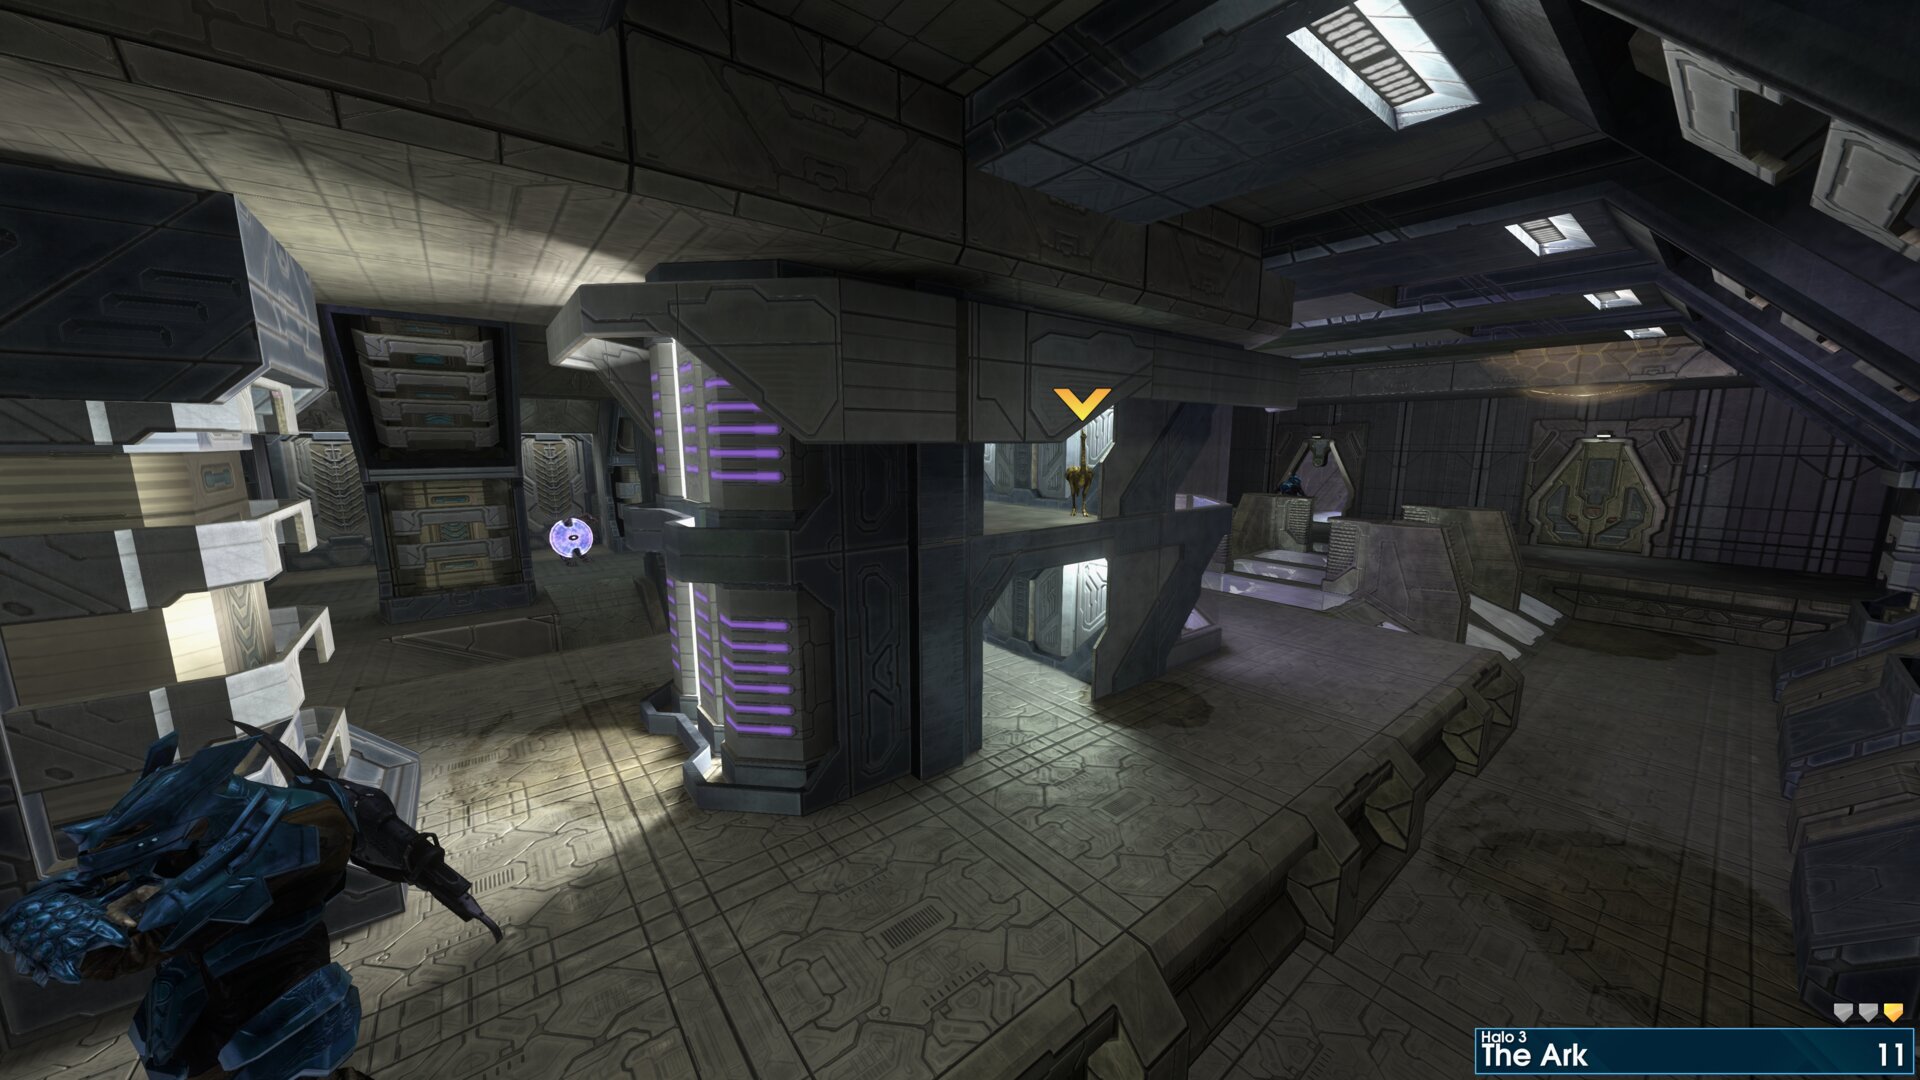
In the central pillar, it's the room with a Brute guarding the door. (you will pass through this room again after activating the Cartographer)
Golden Moa 12
When you reach the Cartographer, turn right, look for the Moa on a ledge towards the back of the room.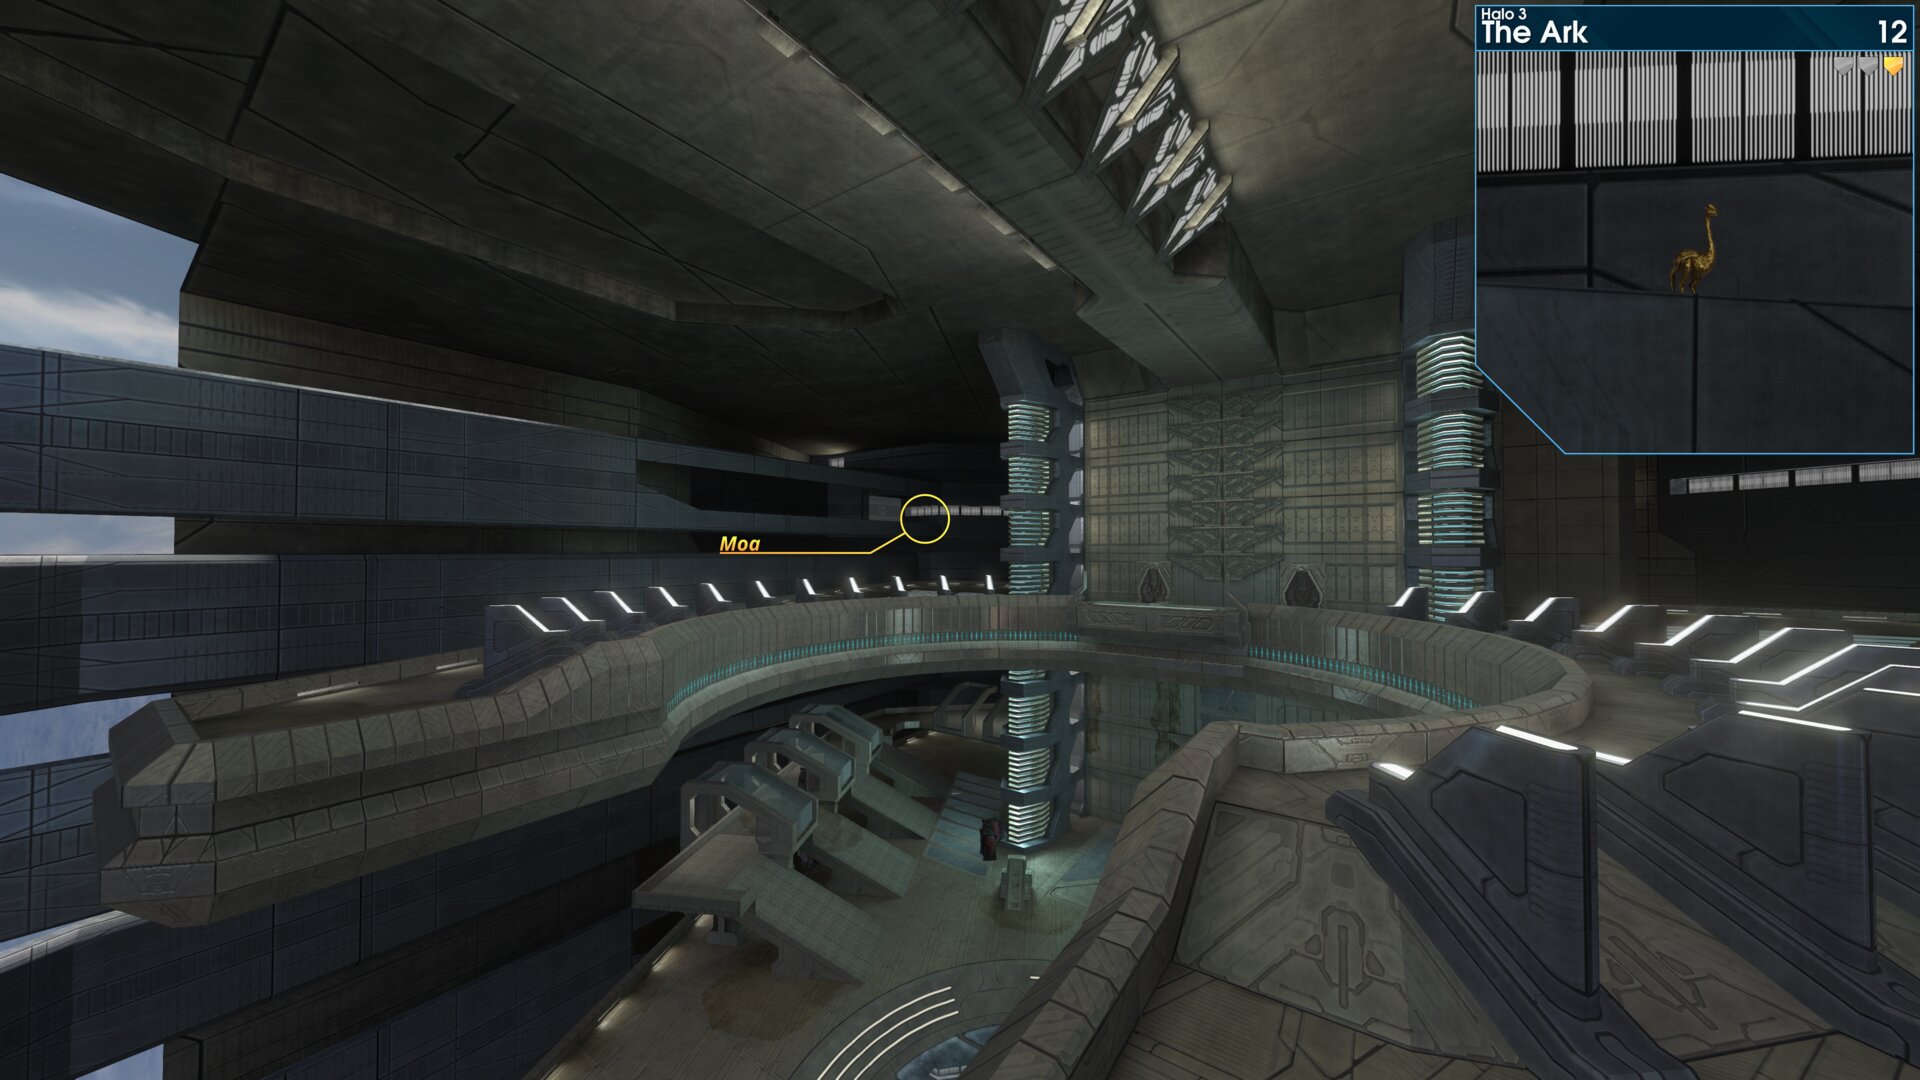
When you reach the Cartographer, turn right, look for the Moa on a ledge towards the back of the room.
Golden Moa 13
In the second stairwell (it's a spiral ramp that leads to a lower level), the Moa is on a ledge just above where it turns left.
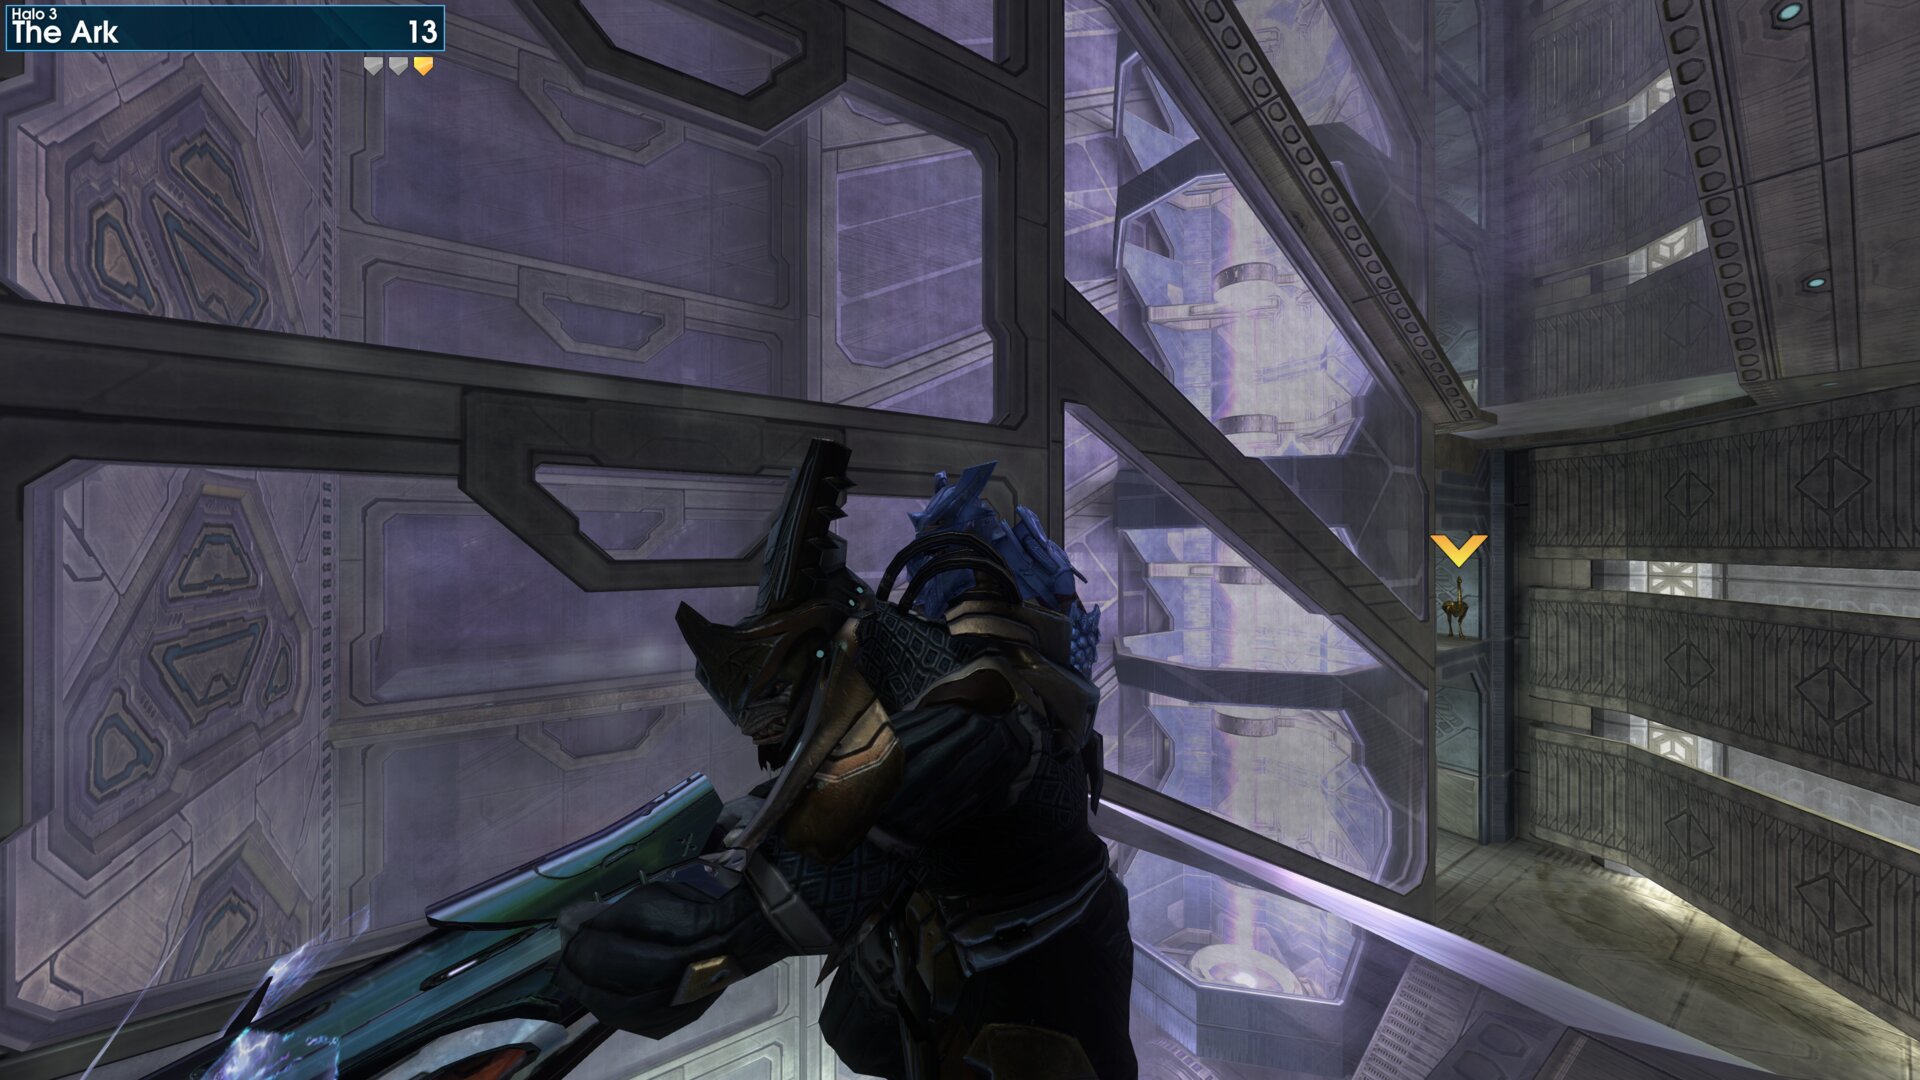
In the second stairwell (it's a spiral ramp that leads to a lower level), the Moa is on a ledge just above where it turns left.
Golden Moa 14
In the central pillar again, on the top-most ledge, in the room with the invisible Brutes.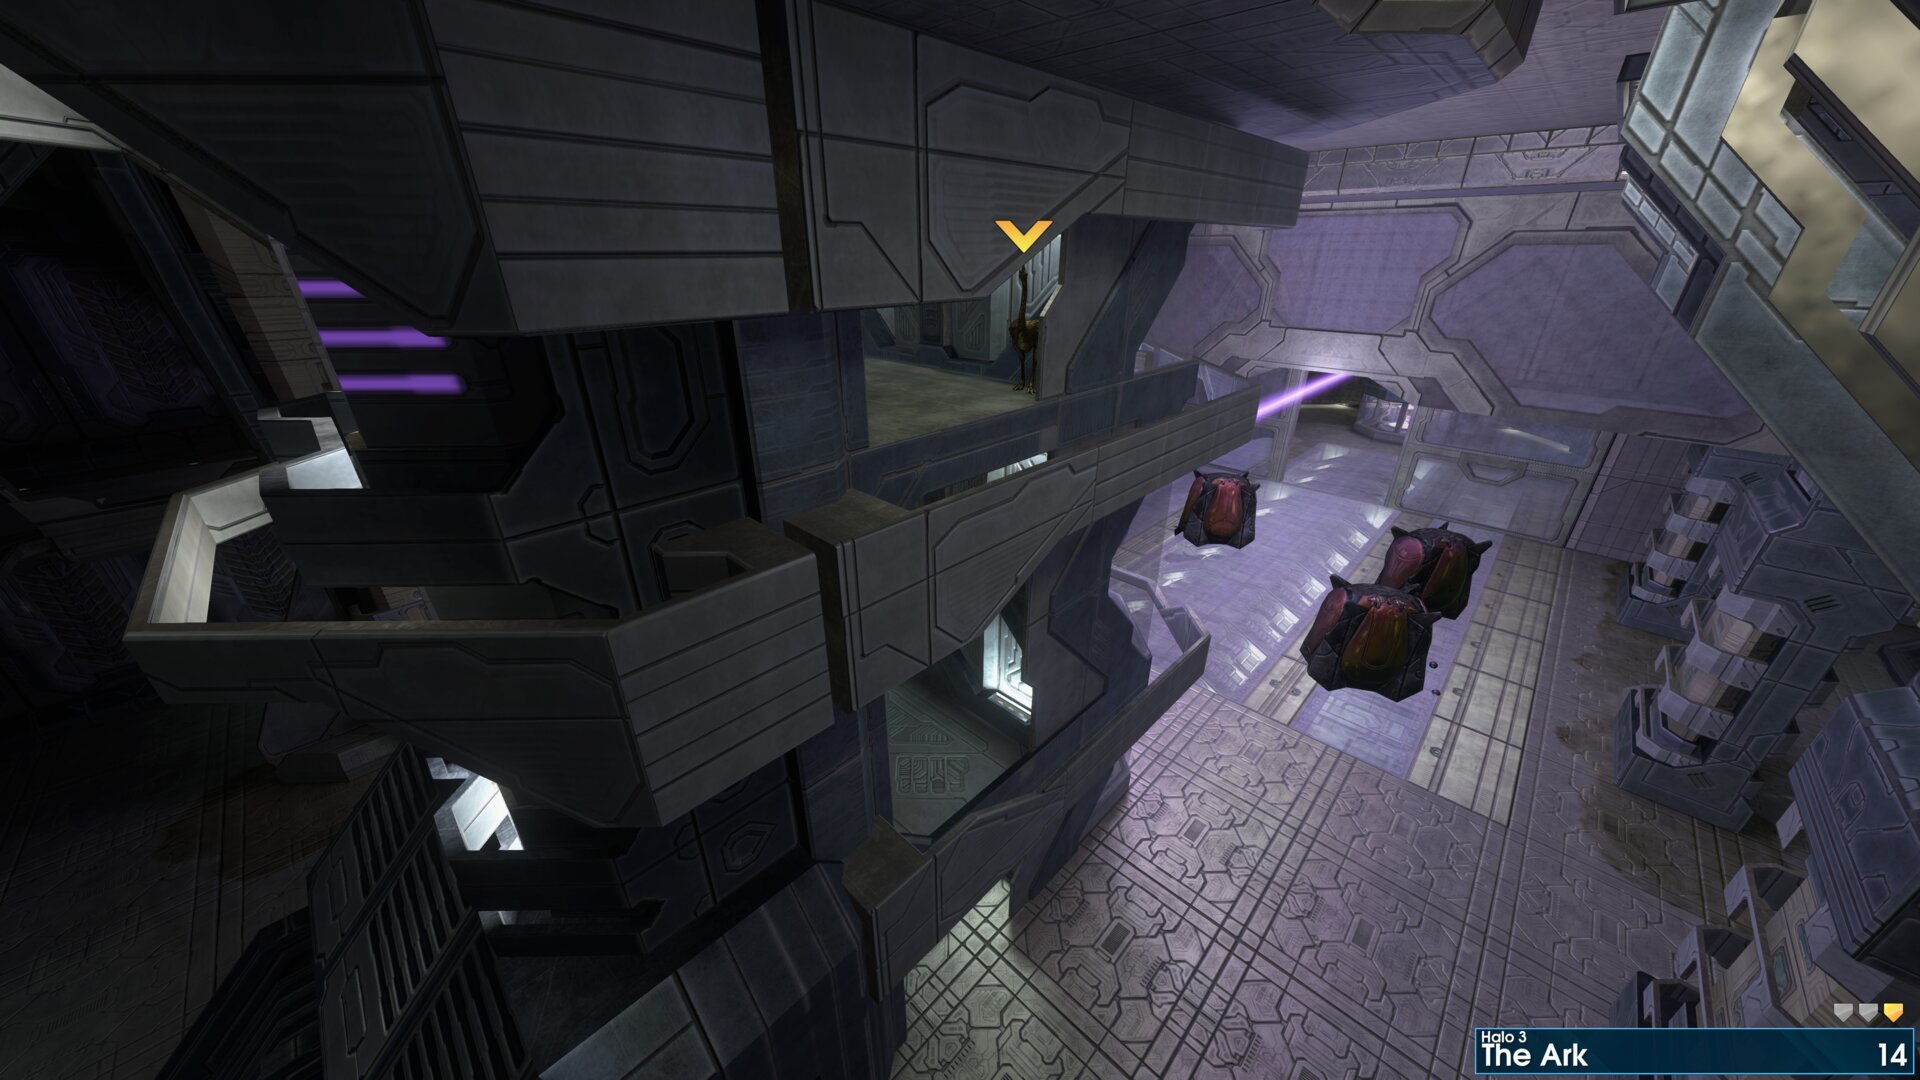
In the central pillar again, on the top-most ledge, in the room with the invisible Brutes.
➟ The Covenant
Rally Point: Alpha
Note: Moa's 1 through 8 can be reached from rally point Bravo. Just don't get in a Hornet!
⠀⠀ ⠀Although this requires a lot of backtracking.
Rally Point: Bravo
Note: Moa 10 can be reached from rally point Charlie.
Rally Point: Charlie
Note: Moa's 1 through 8 can be reached from rally point Bravo. Just don't get in a Hornet!
⠀⠀ ⠀Although this requires a lot of backtracking.
Golden Moa 1
Half way up the waterfall at the start of the mission.
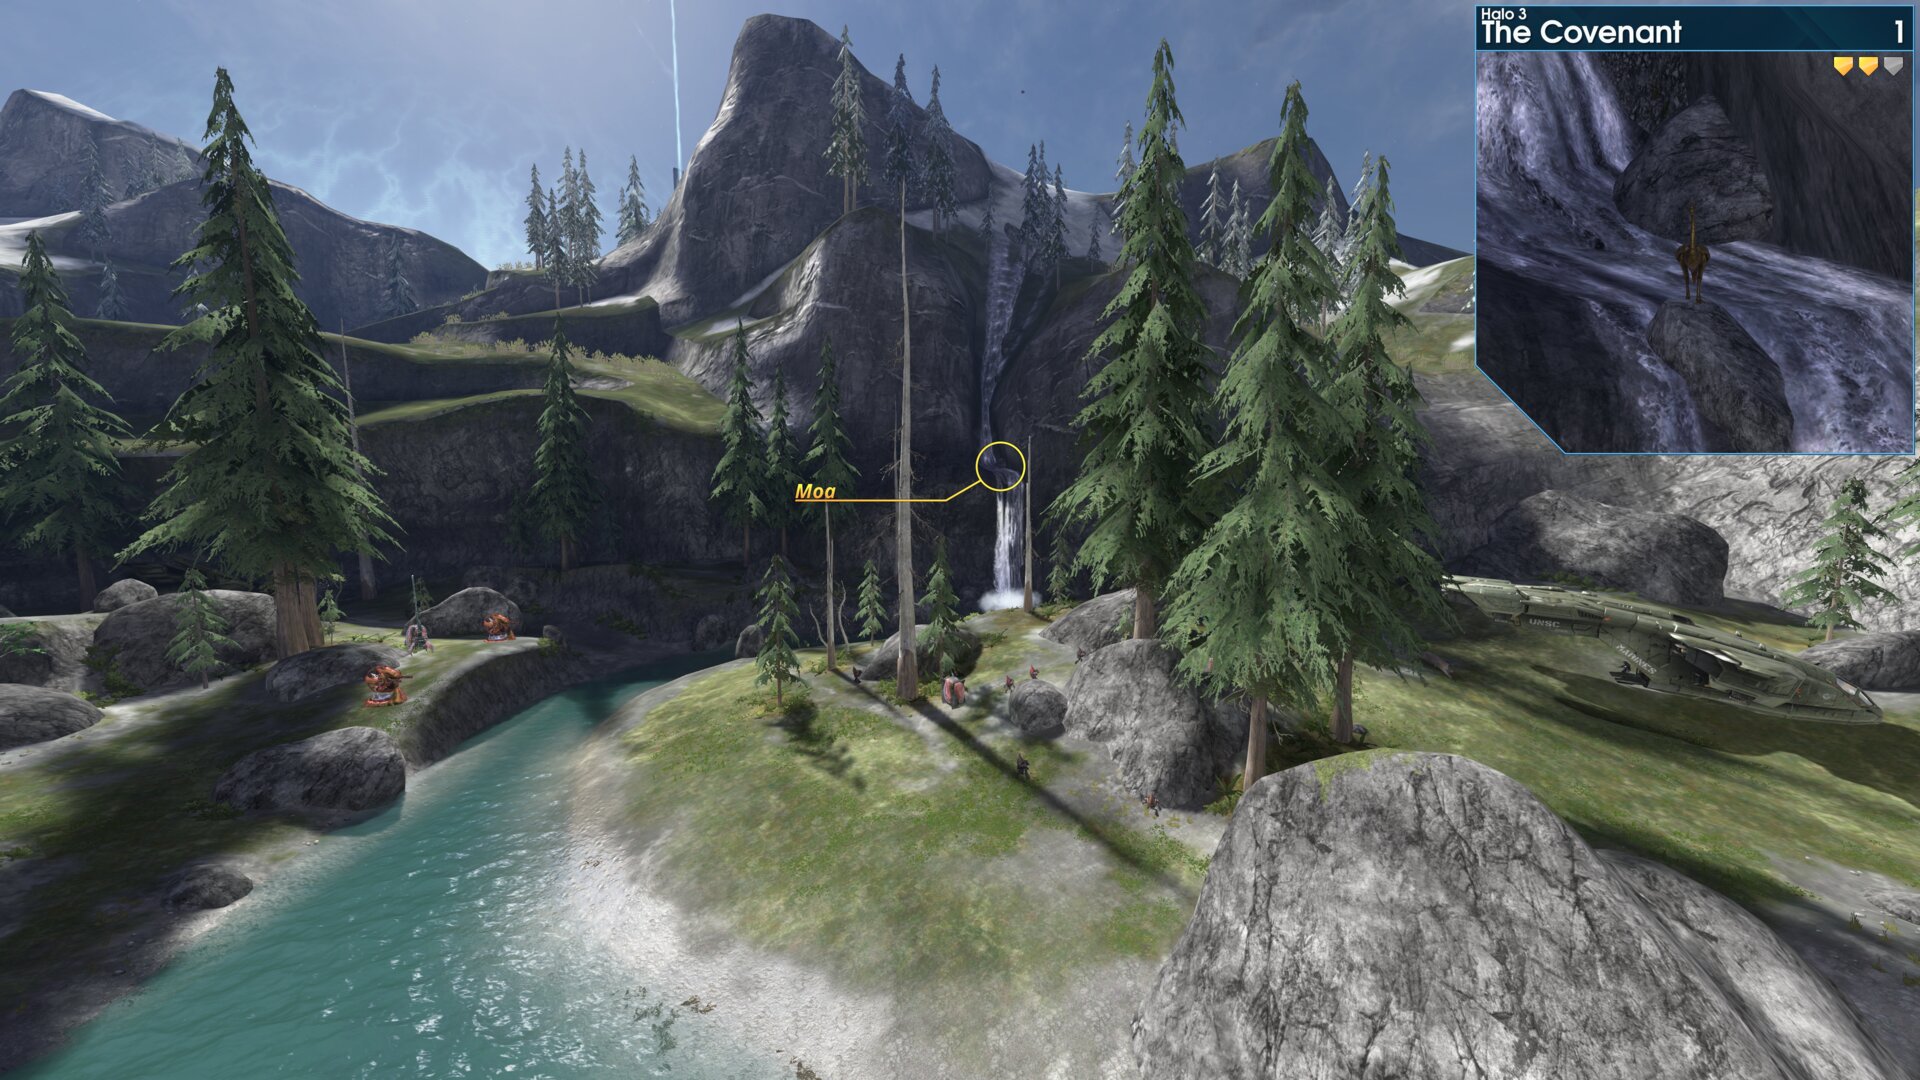
Half way up the waterfall at the start of the mission.
Golden Moa 2
Inside the crashed Pelican.
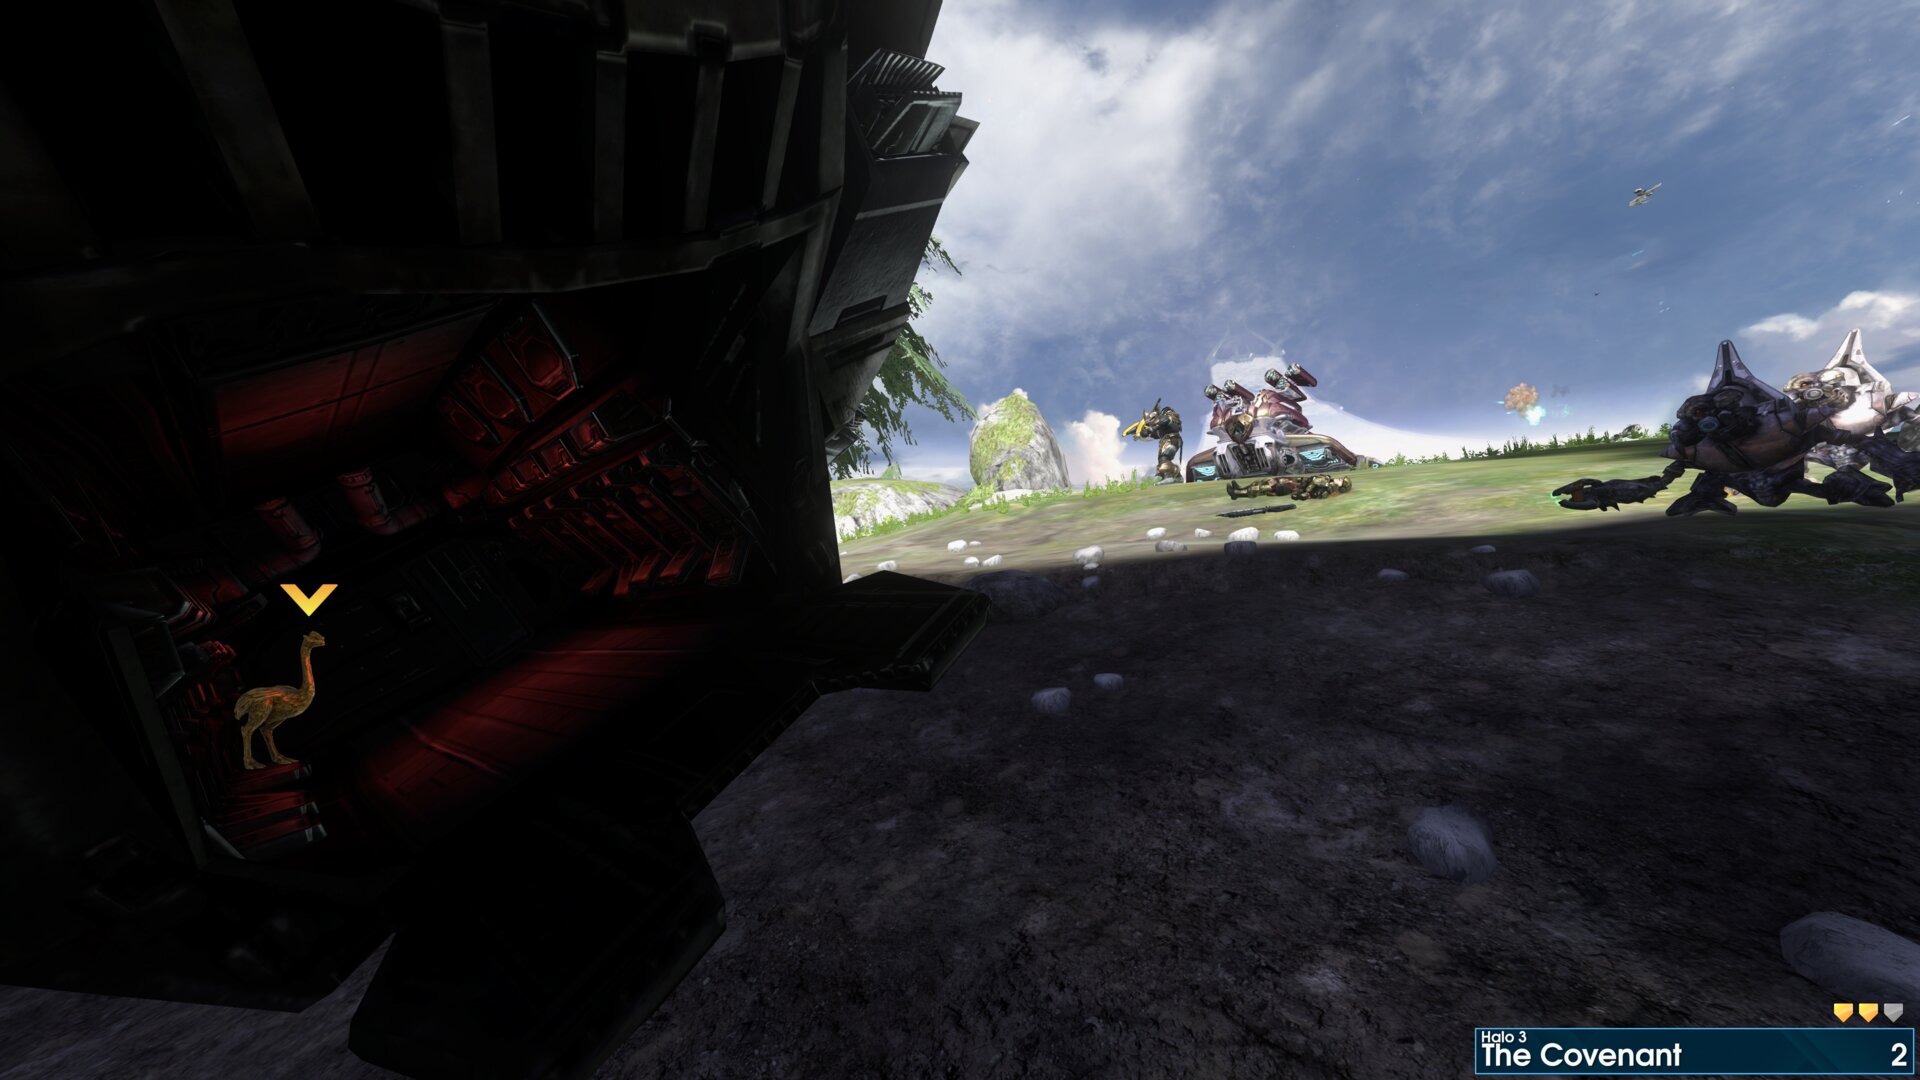
Inside the crashed Pelican.
Golden Moa 3
Next to the shade turret, as you progress up the hill to the first tower.
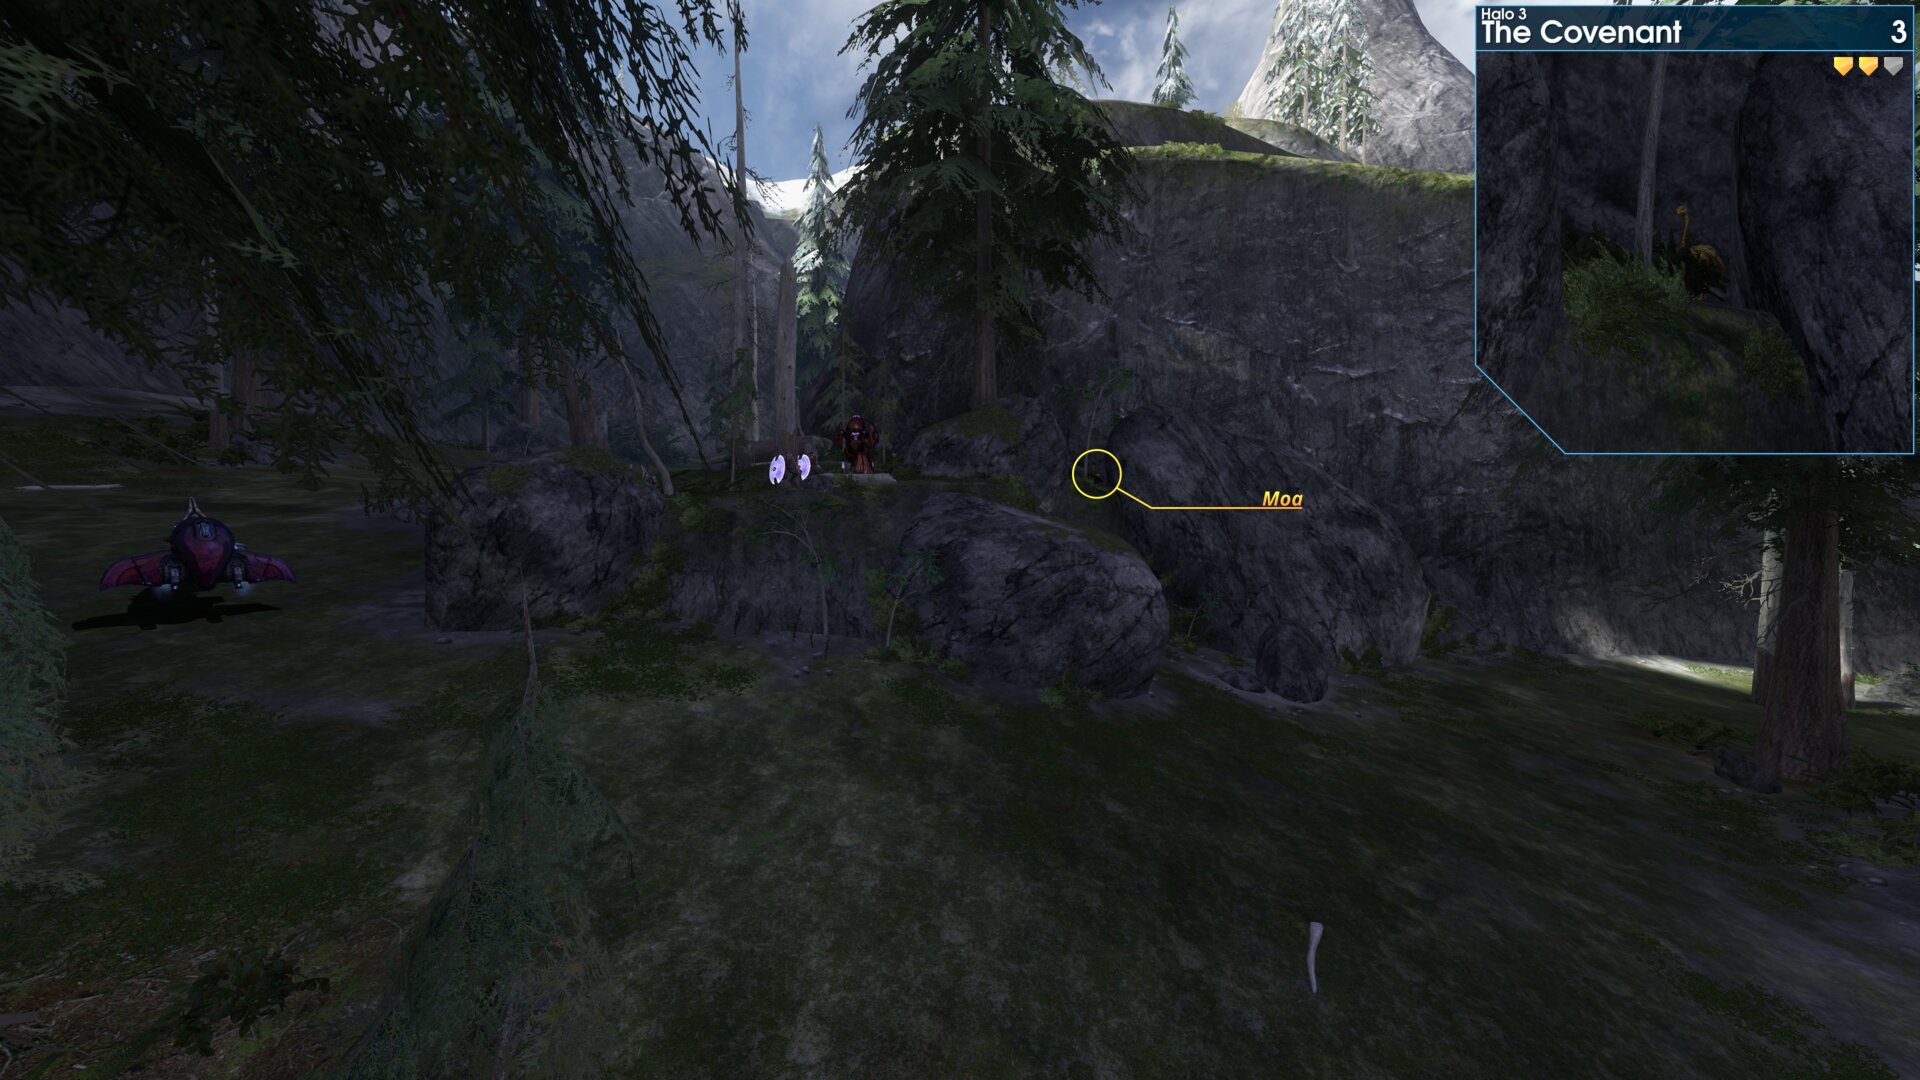
Next to the shade turret, as you progress up the hill to the first tower.
Golden Moa 4
On a rock sticking out of the upper half of the waterfall, at the first tower.
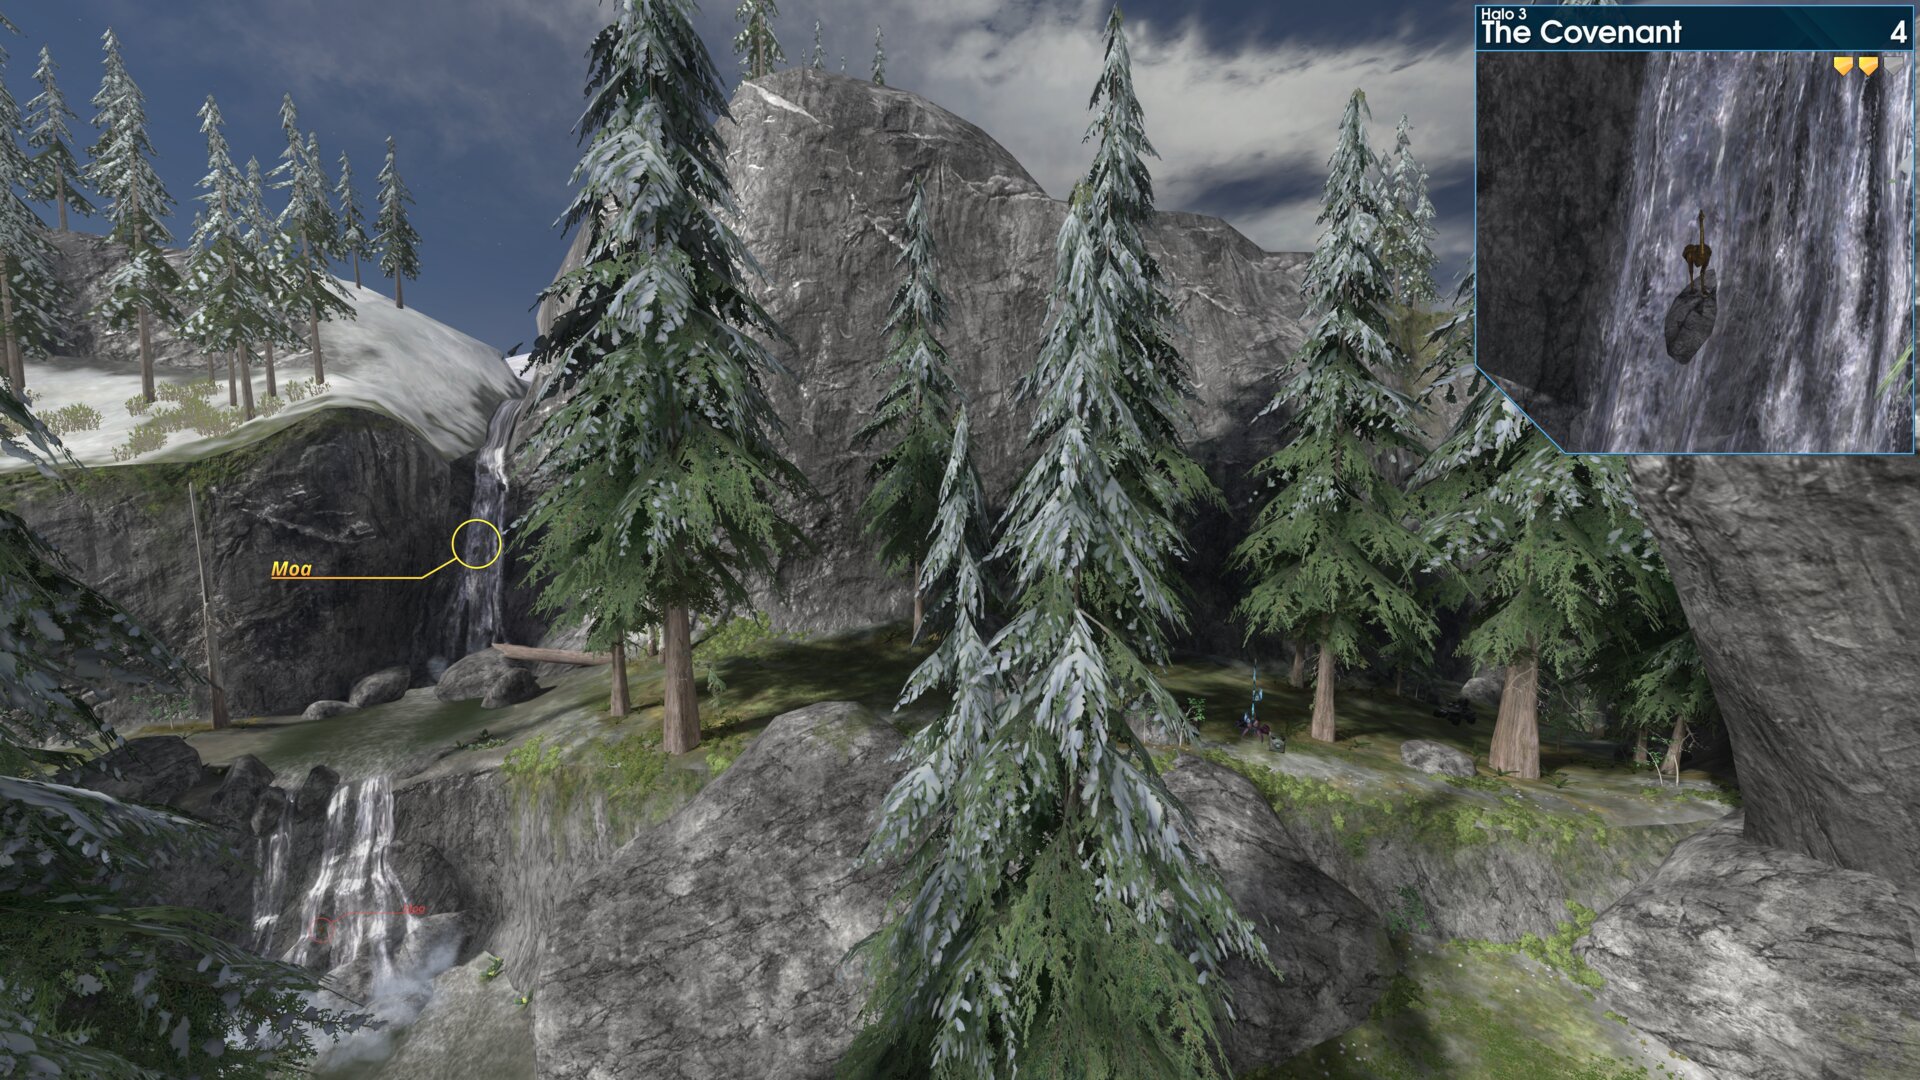
On a rock sticking out of the upper half of the waterfall, at the first tower.
Golden Moa 5
In the lower half of the waterfall, at the first tower, slightly obscured by the water.
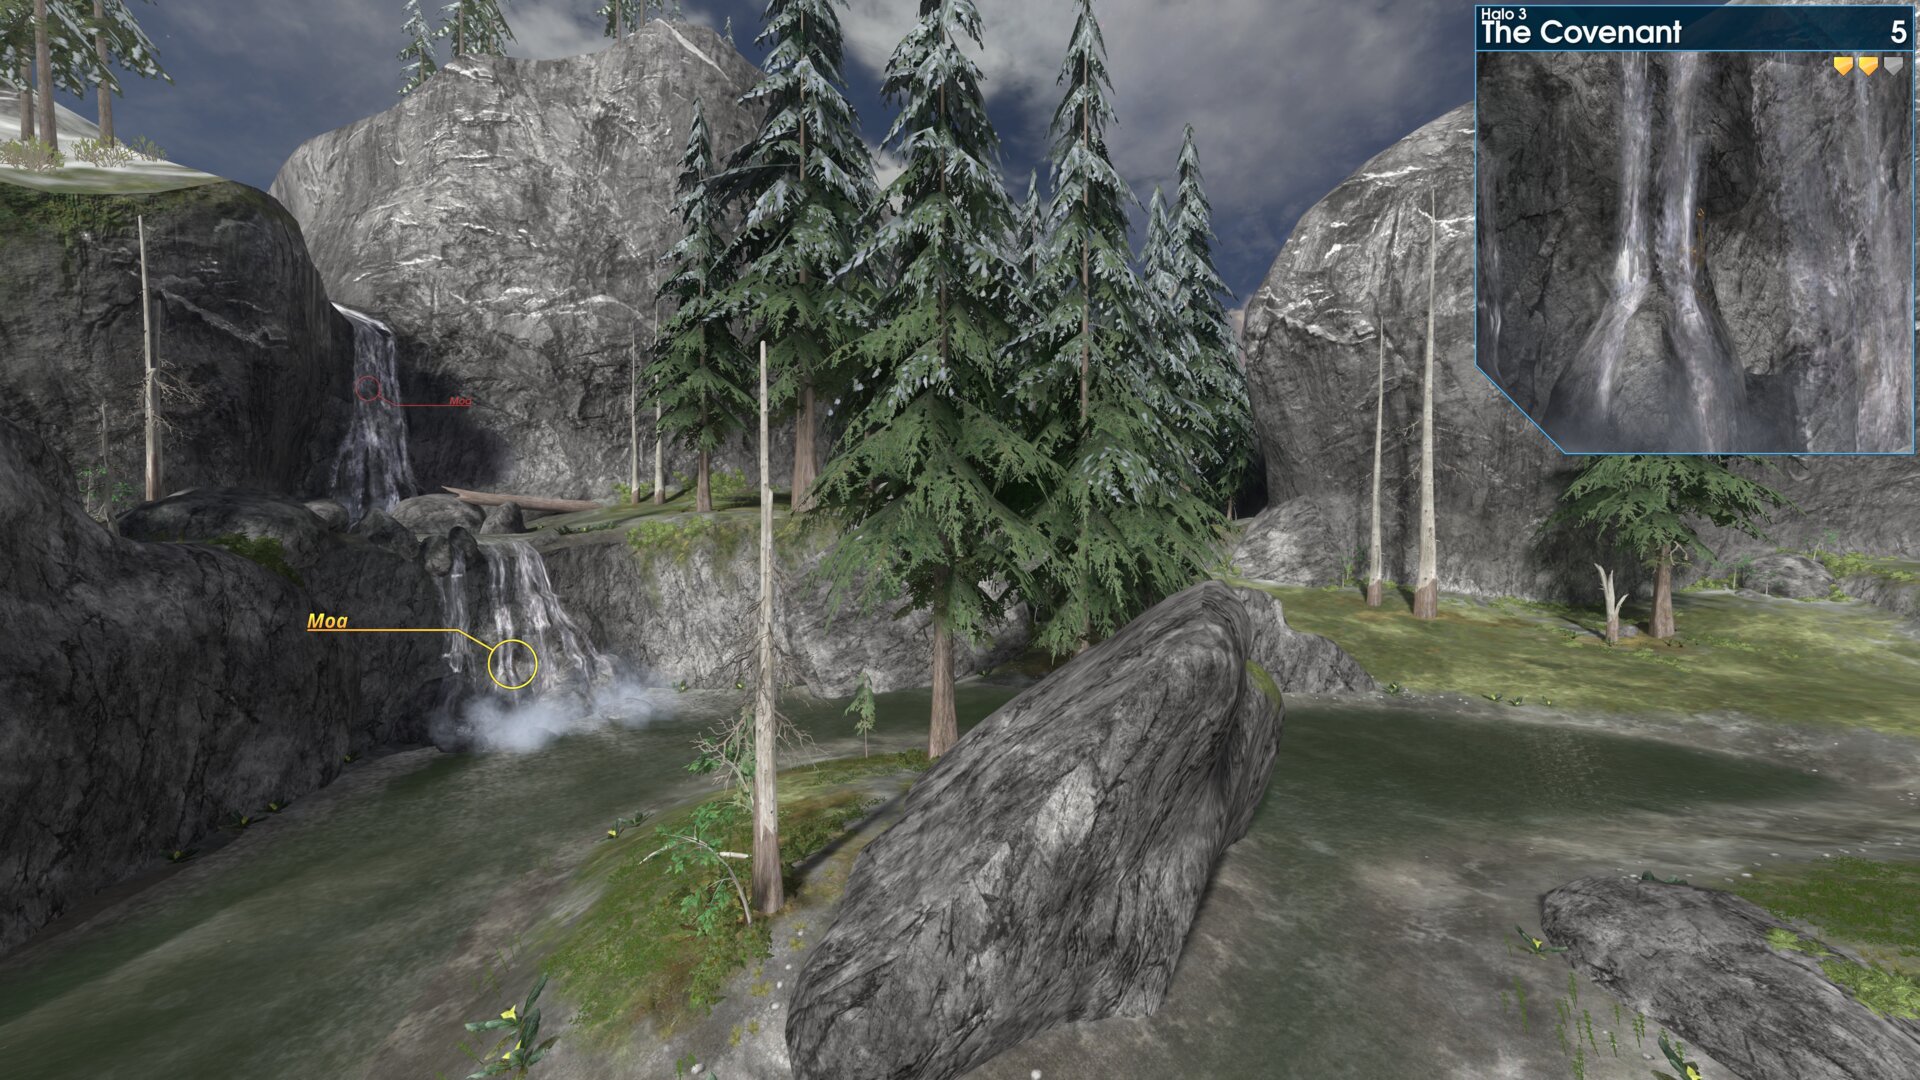
In the lower half of the waterfall, at the first tower, slightly obscured by the water.
Golden Moa 6
Above the entrance to the first tower.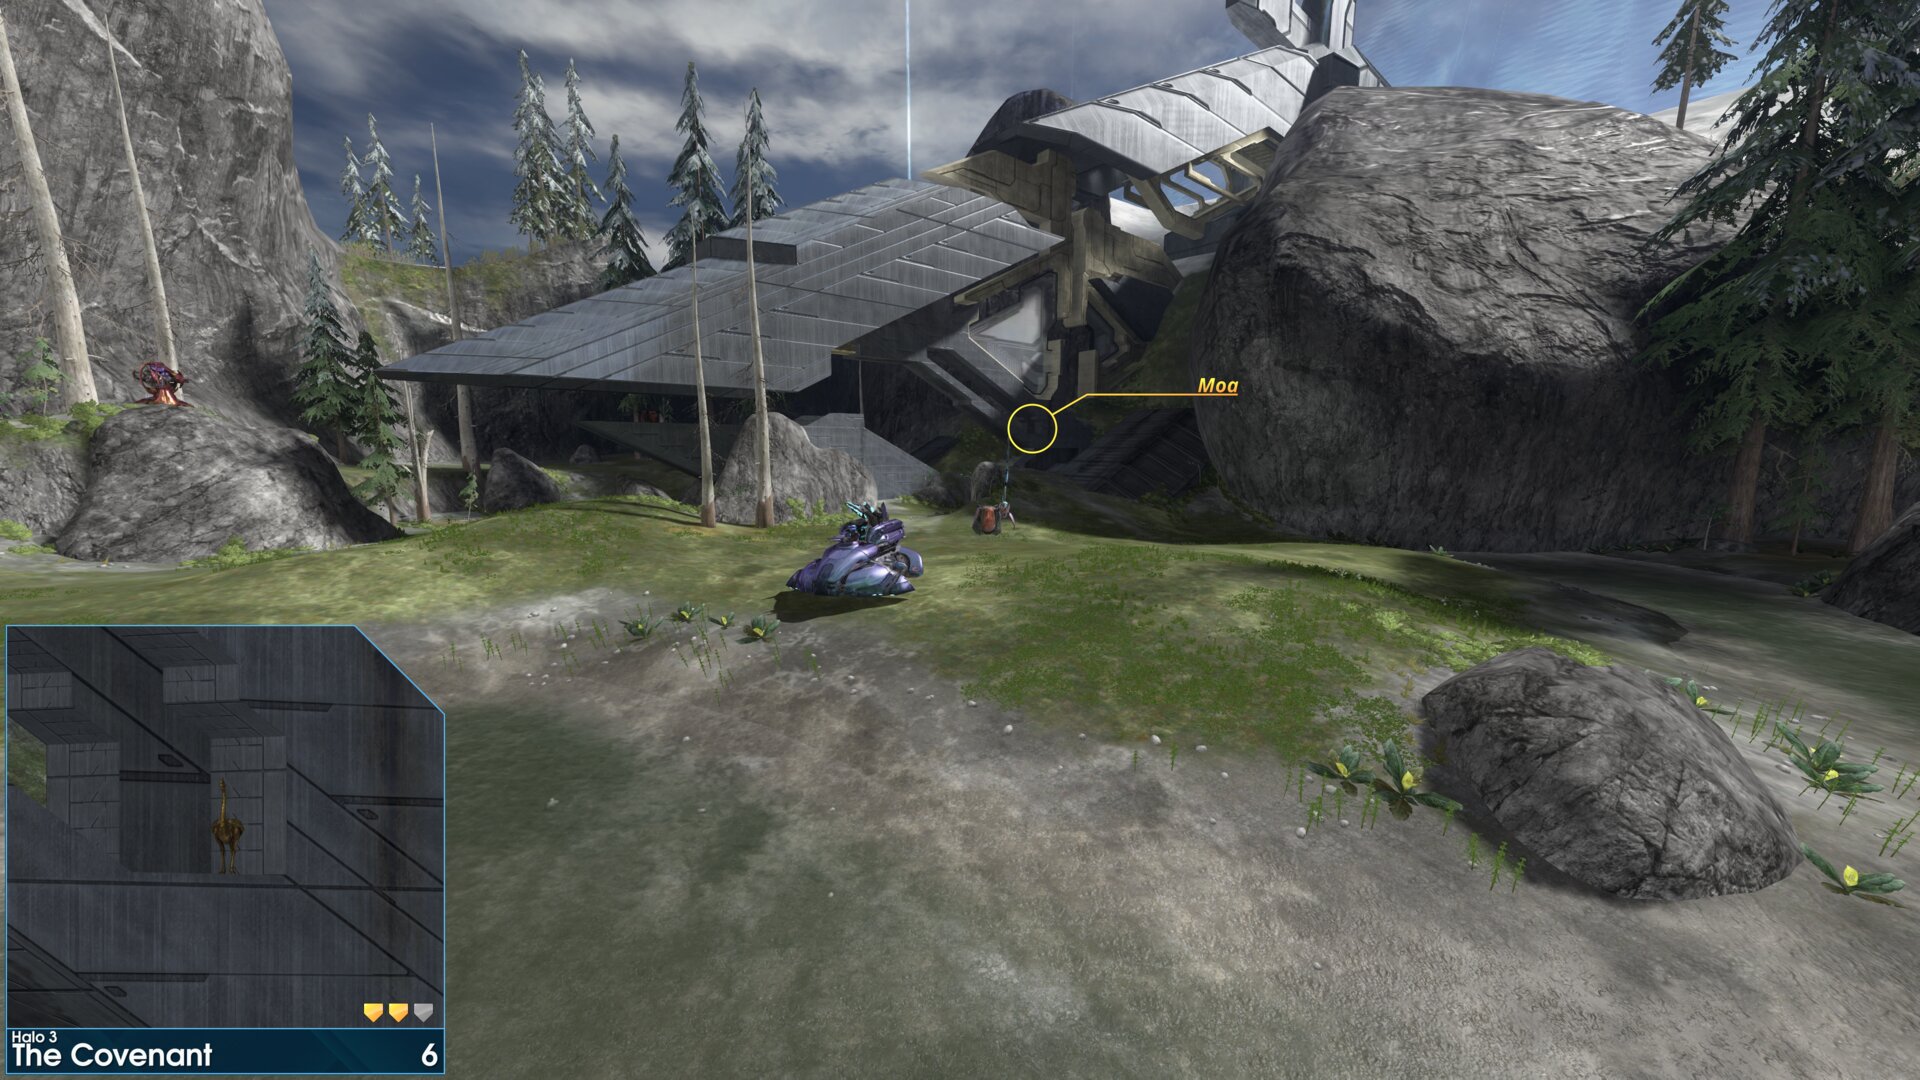
Above the entrance to the first tower.
Golden Moa 7
On a pillar in the lift room of tower one, as you enter, turn right and follow the outer path (anti-clockwise). The Moa is on the third pillar to your left.
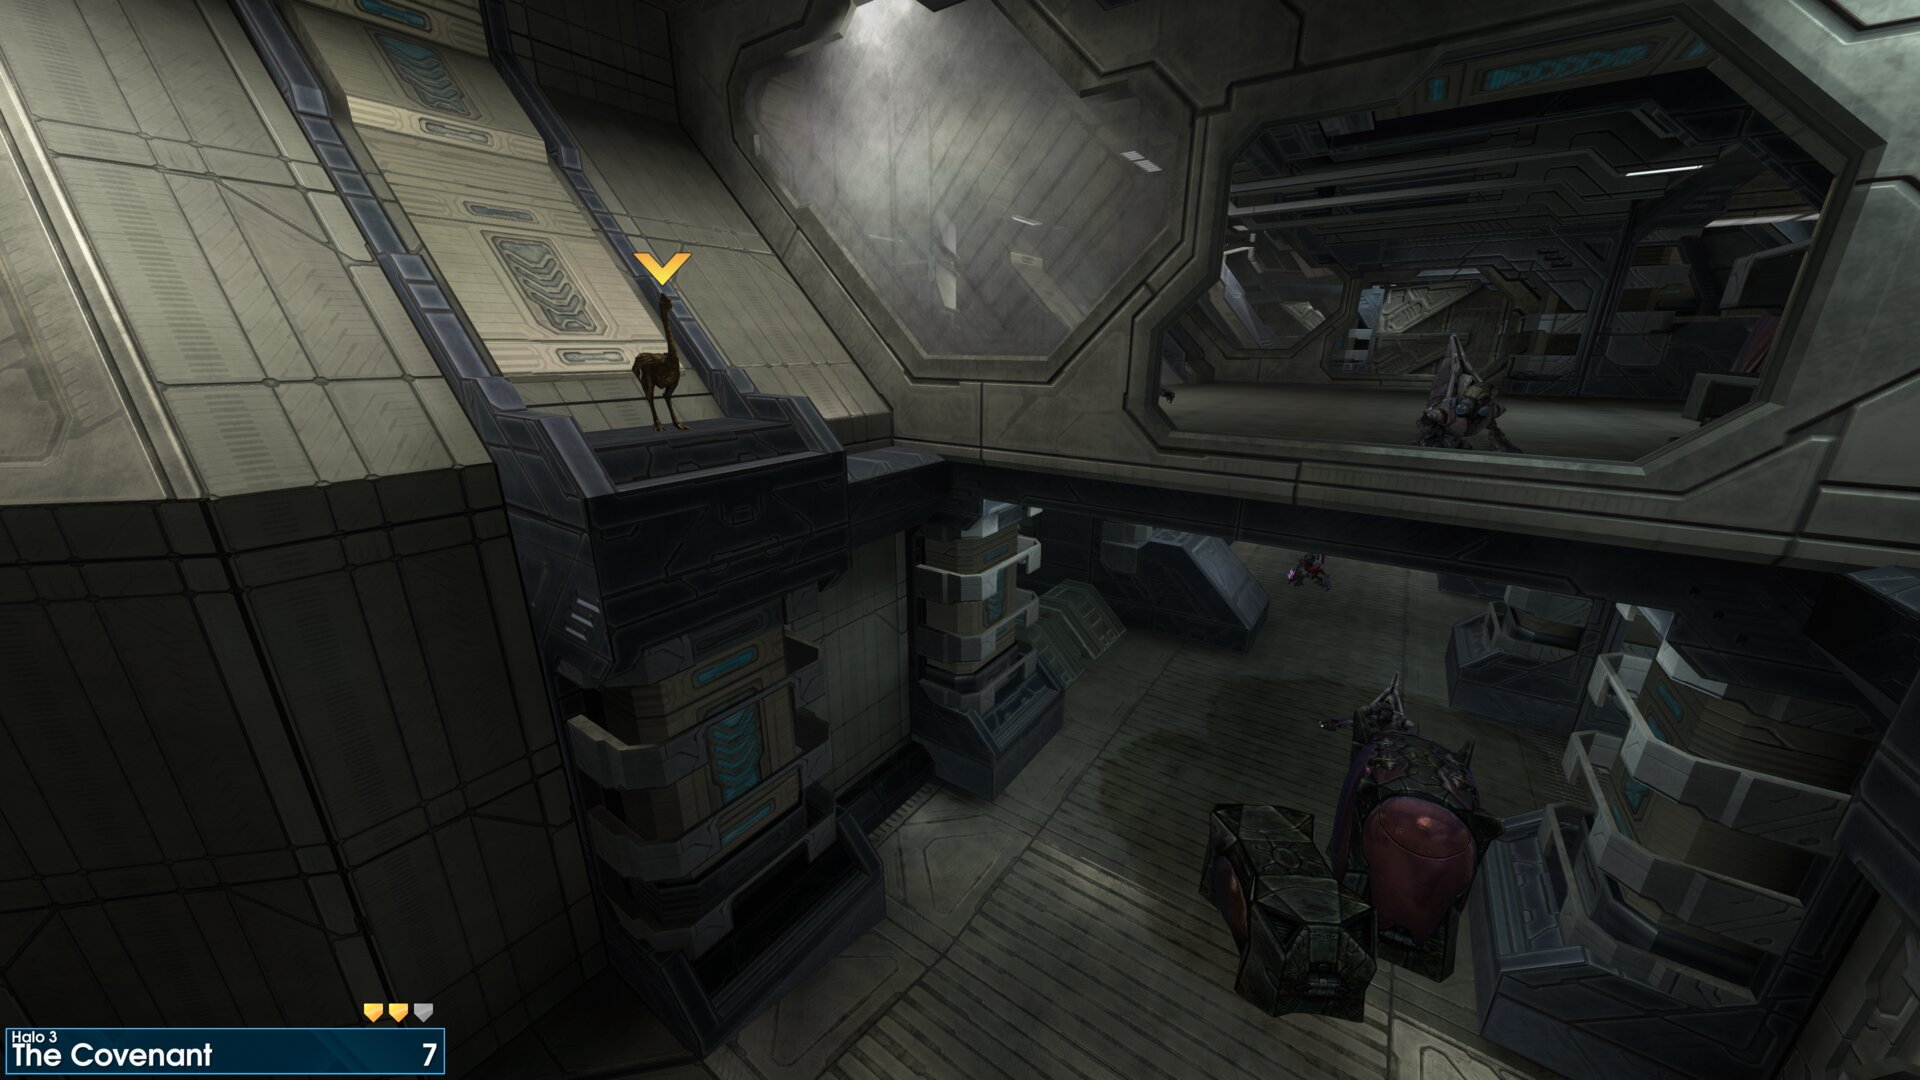
On a pillar in the lift room of tower one, as you enter, turn right and follow the outer path (anti-clockwise). The Moa is on the third pillar to your left.
Golden Moa 8
On a ledge in the shield control room of tower one, right side of the room, above the Brutes.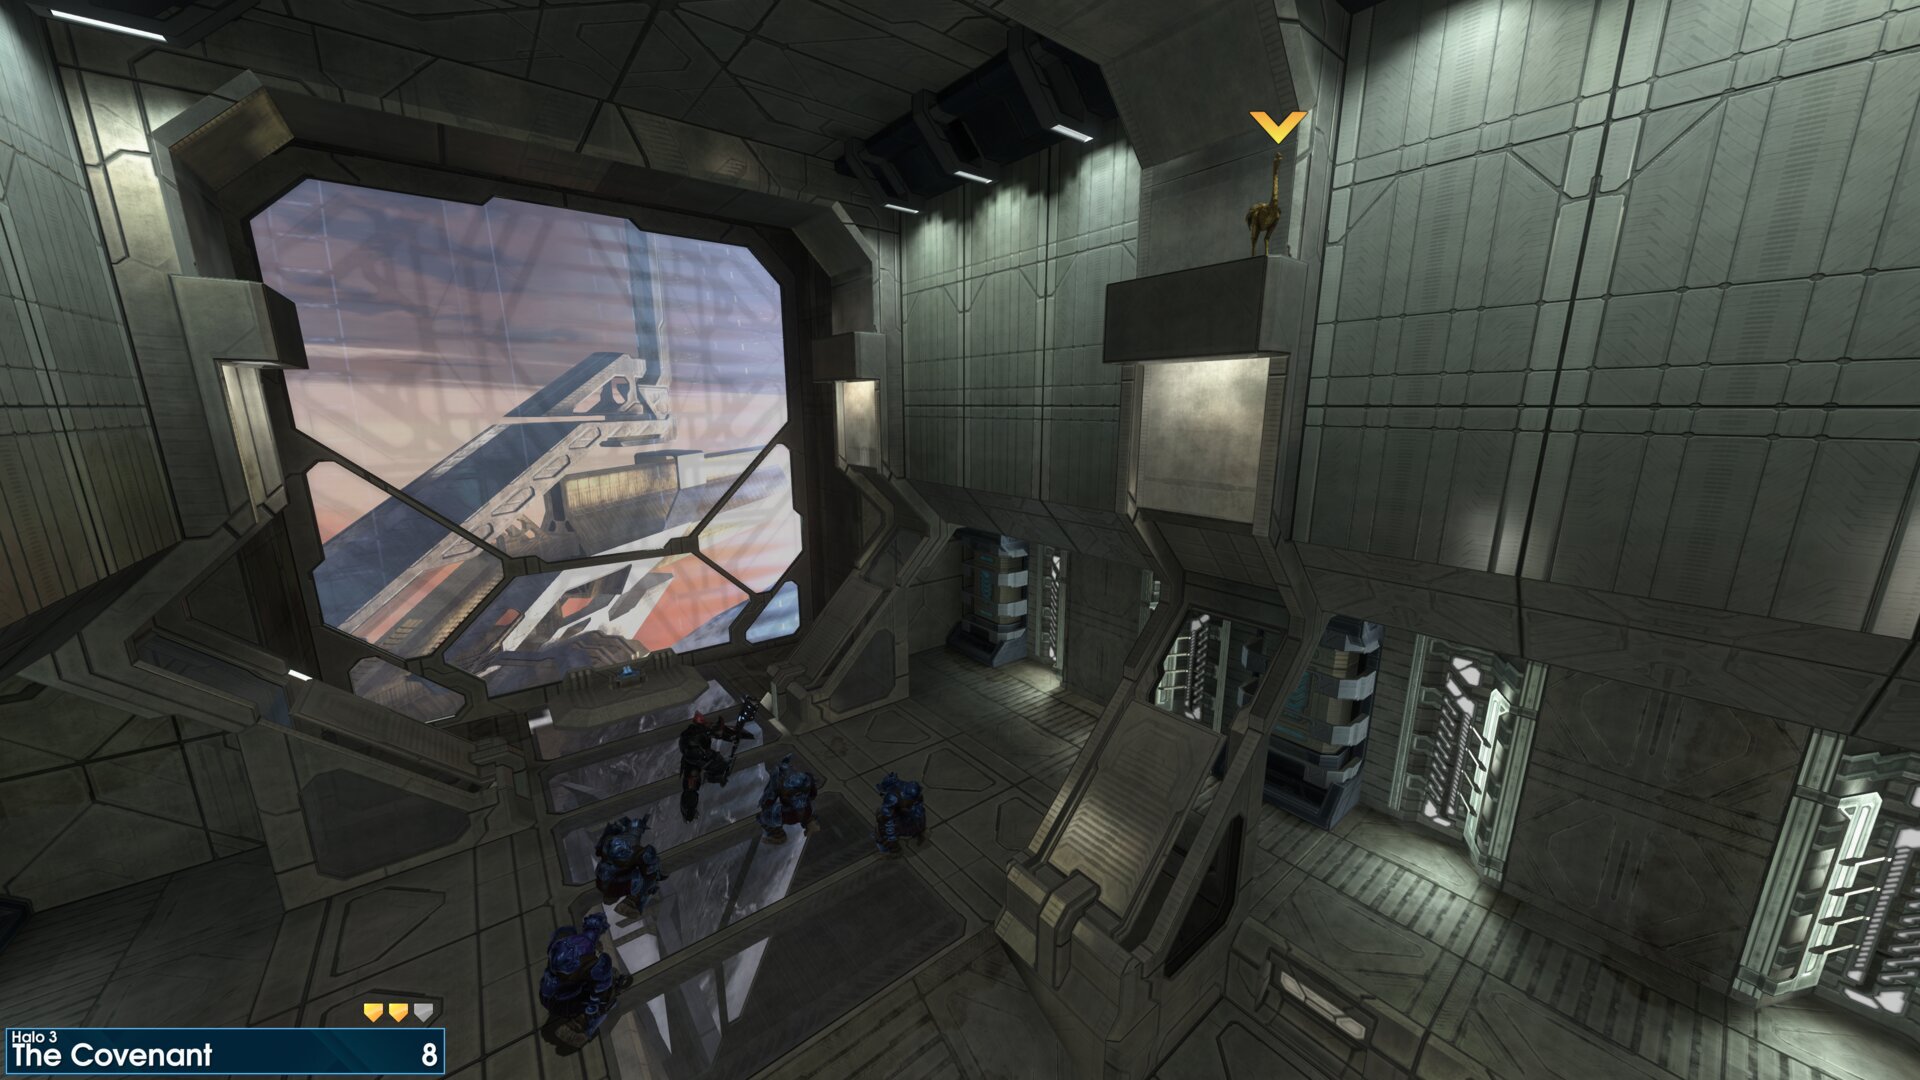
On a ledge in the shield control room of tower one, right side of the room, above the Brutes.
Rally Point: Bravo
Note: Moa 10 can be reached from rally point Charlie.
Golden Moa 9
On the second tower, the one the Elites visit.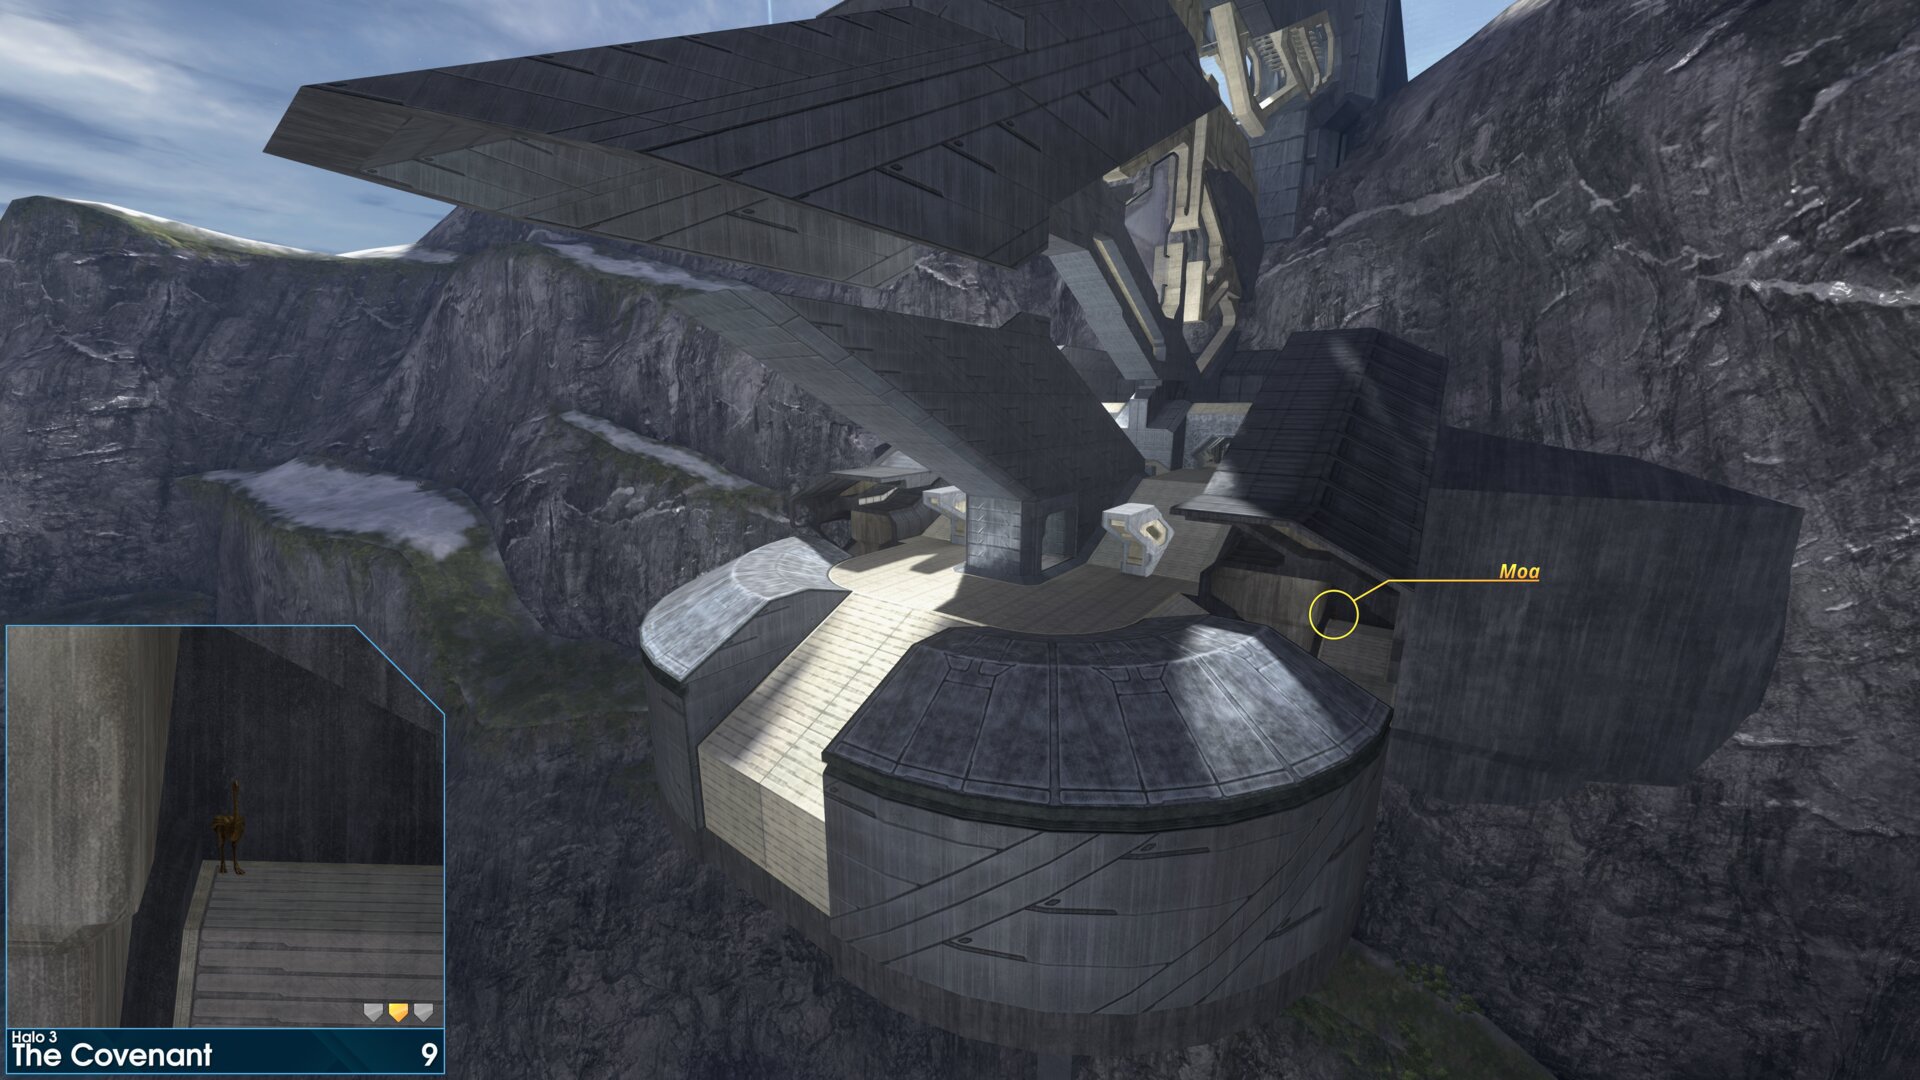
On the second tower, the one the Elites visit.
Golden Moa 10
In a tree stump next to the right AA-Wraith, at the third tower.
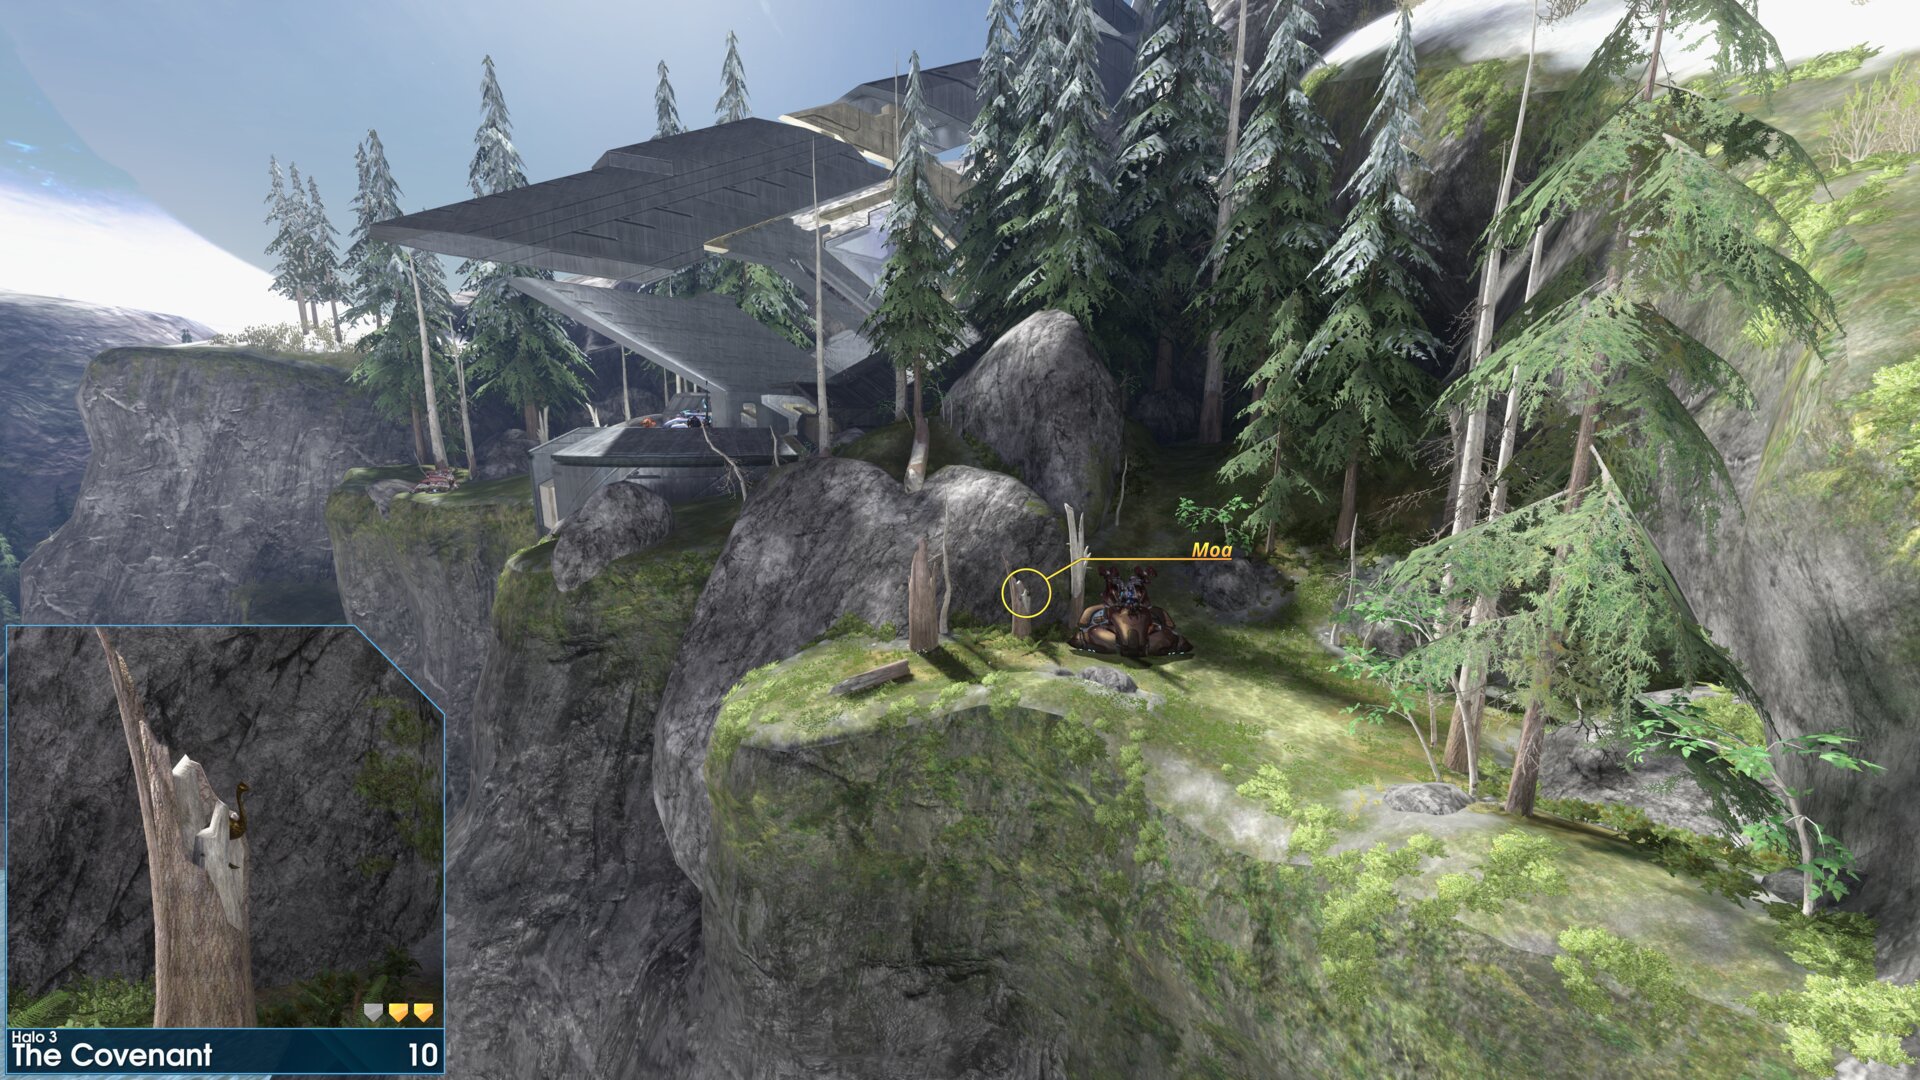
In a tree stump next to the right AA-Wraith, at the third tower.
Golden Moa 11
On a pillar in the lift room of tower three, past the Hunters, on the left pillar. (near the door at the back of the room)
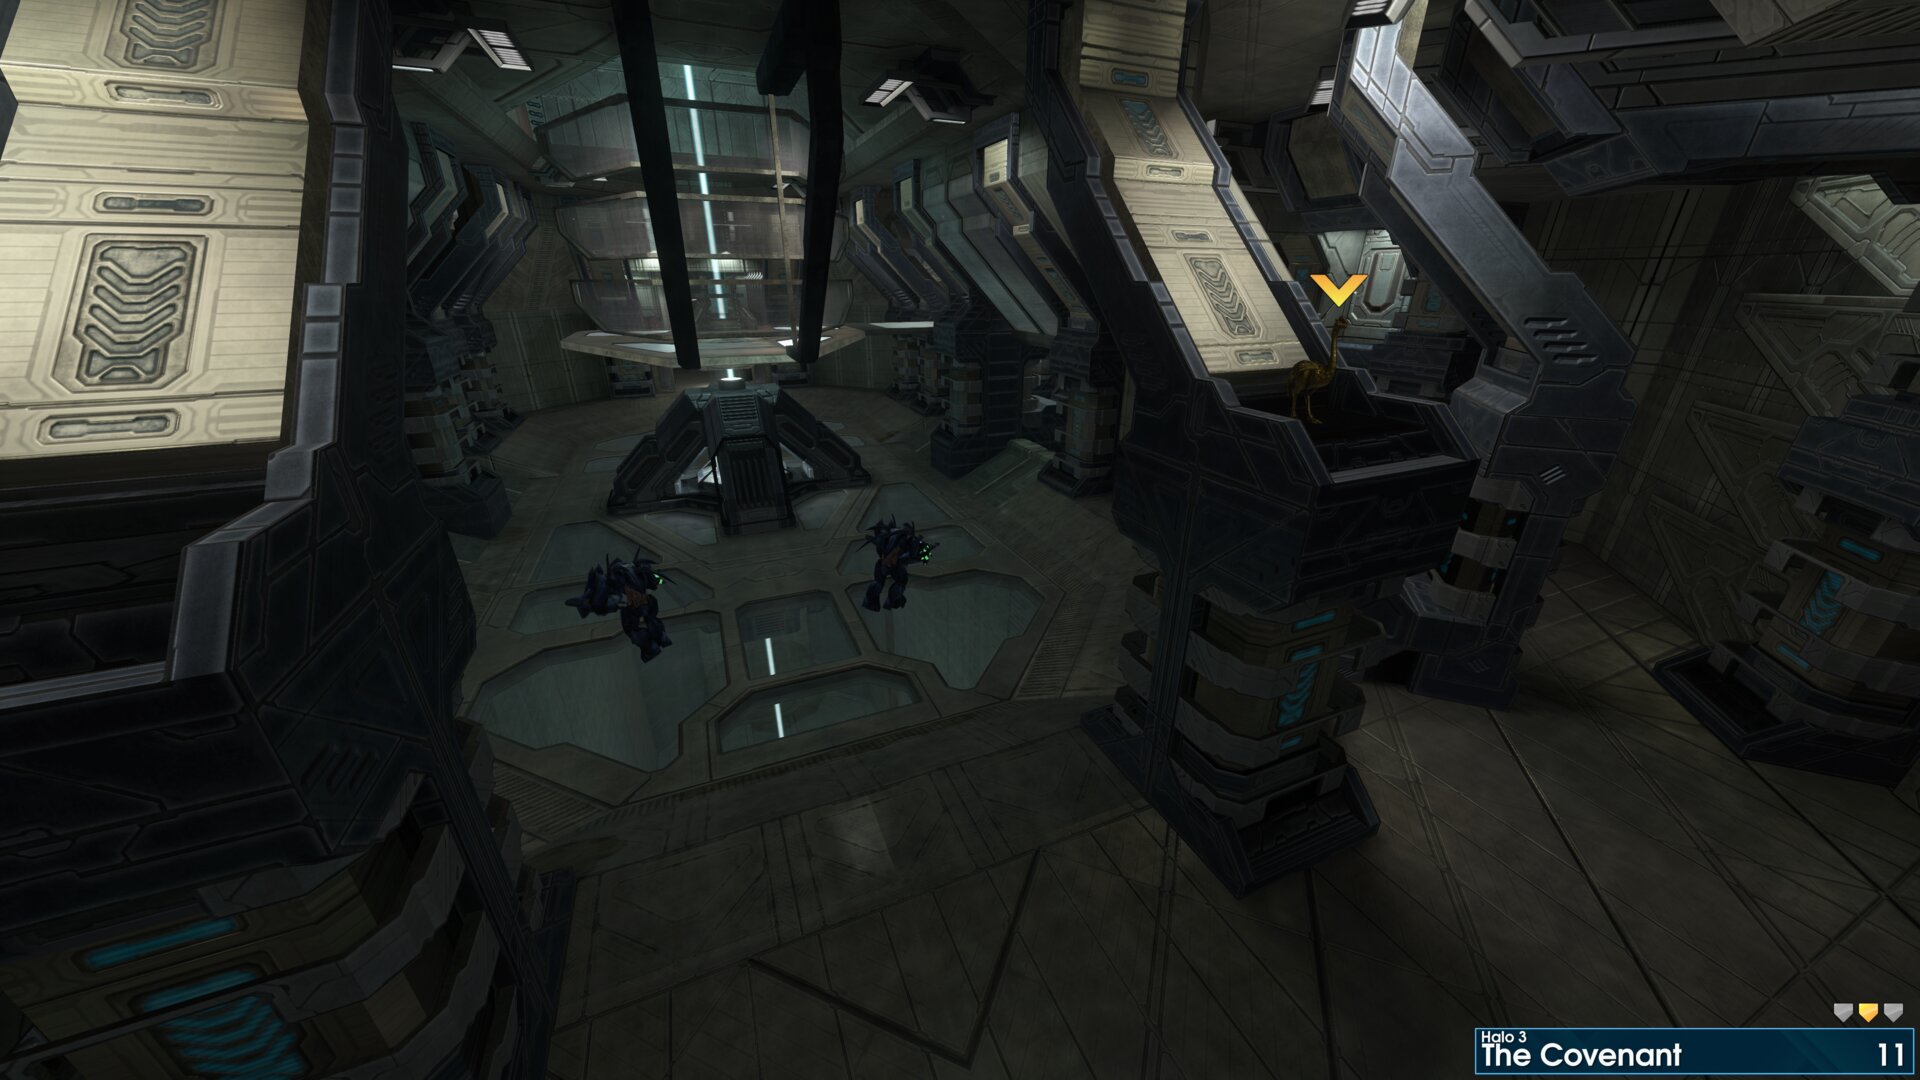
On a pillar in the lift room of tower three, past the Hunters, on the left pillar. (near the door at the back of the room)
Golden Moa 12
On a ledge in the shield control room of tower three, left side of the room, above the lift.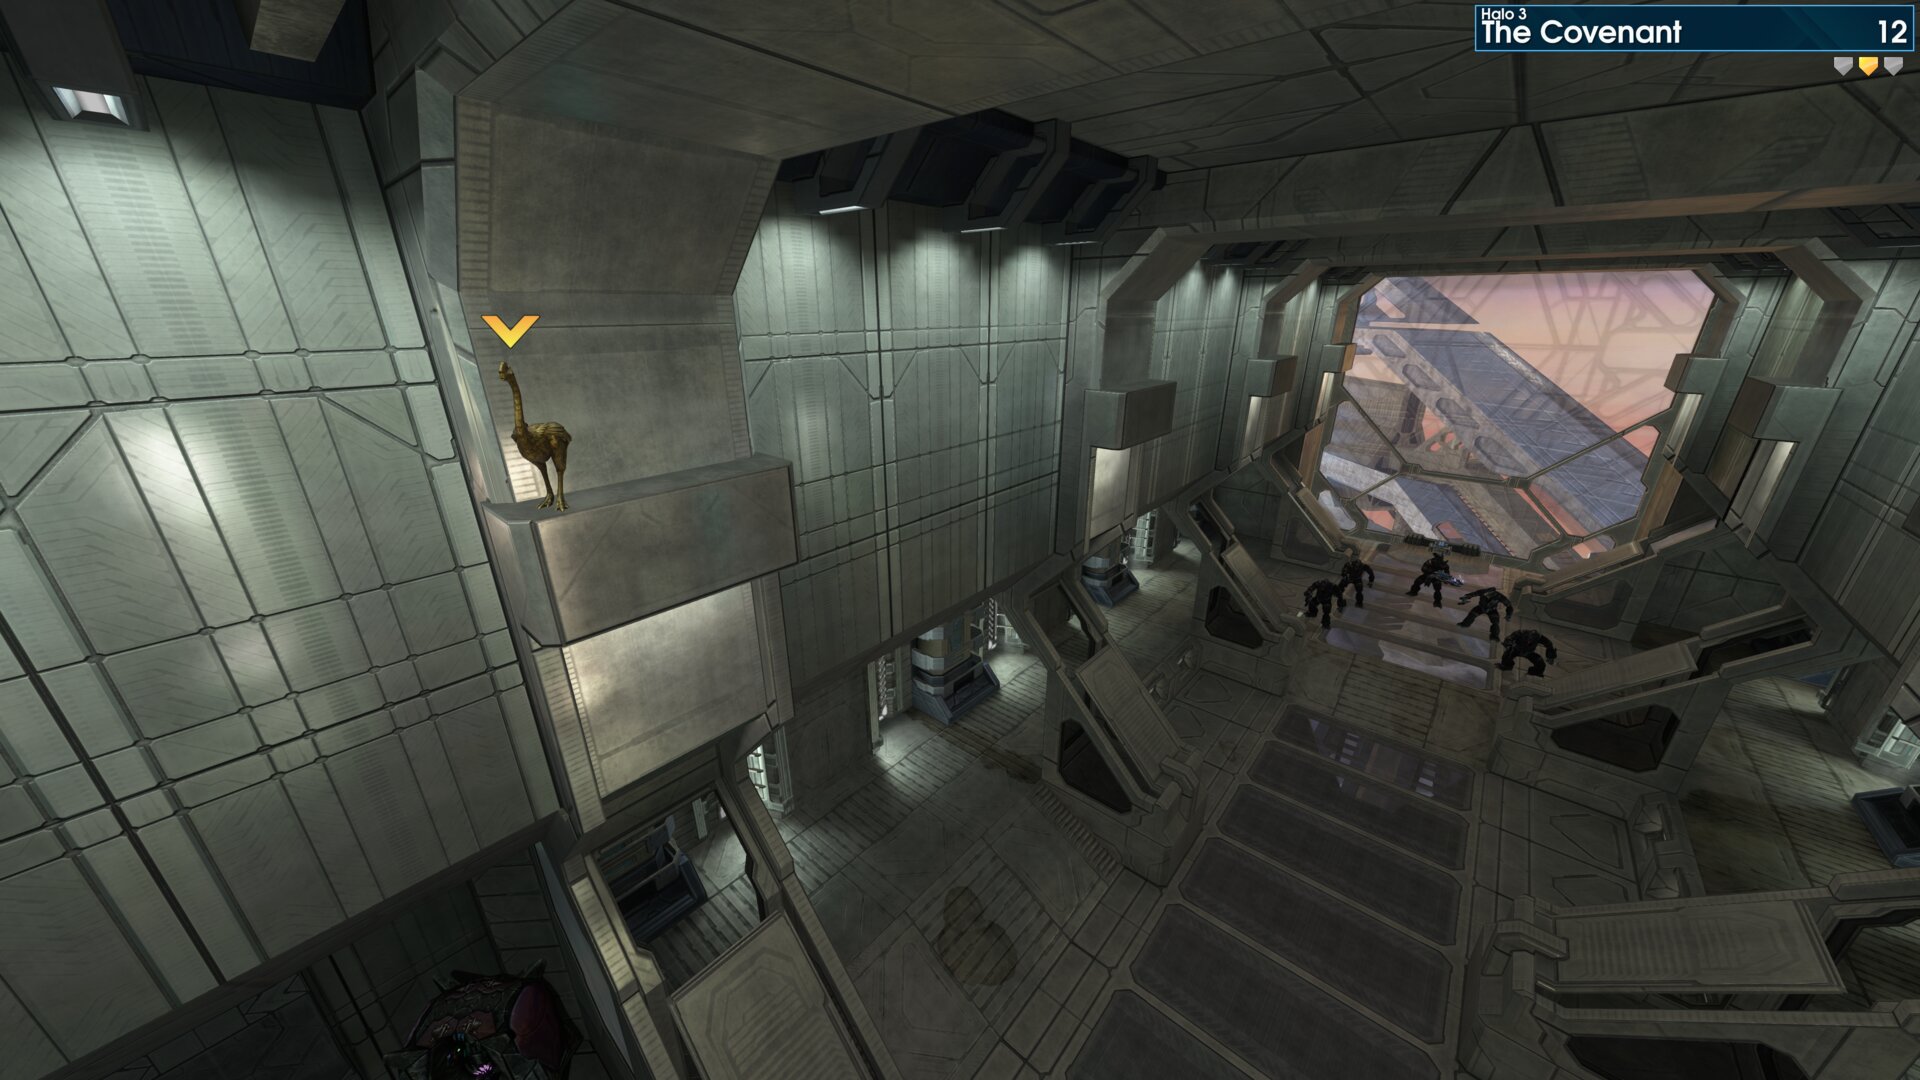
On a ledge in the shield control room of tower three, left side of the room, above the lift.
Rally Point: Charlie
Golden Moa 13
On the snow capped cliff to your right, just beyond the Deployable Lookout Tower base, as you progress inland from the third tower.
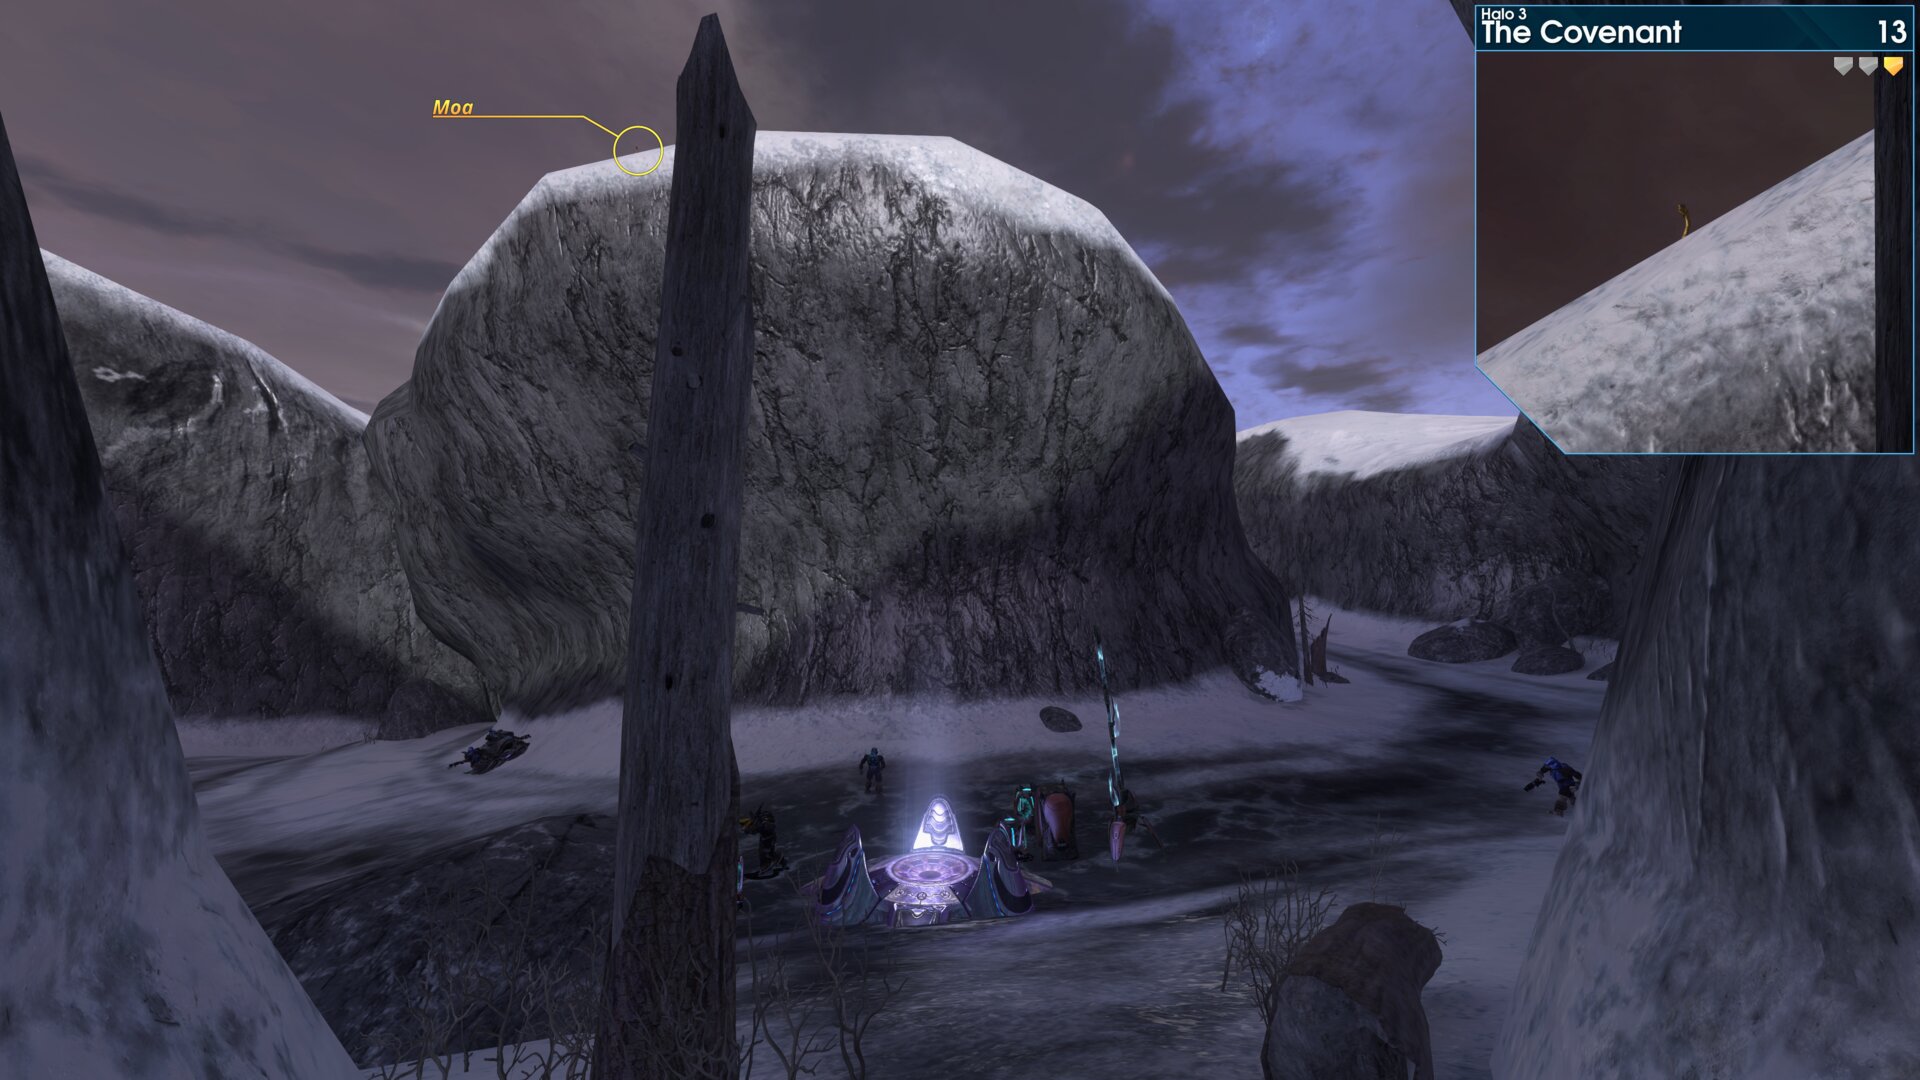
On the snow capped cliff to your right, just beyond the Deployable Lookout Tower base, as you progress inland from the third tower.
Golden Moa 14
On the lower structure of the third tower, the part that points to the Citadel, near the point.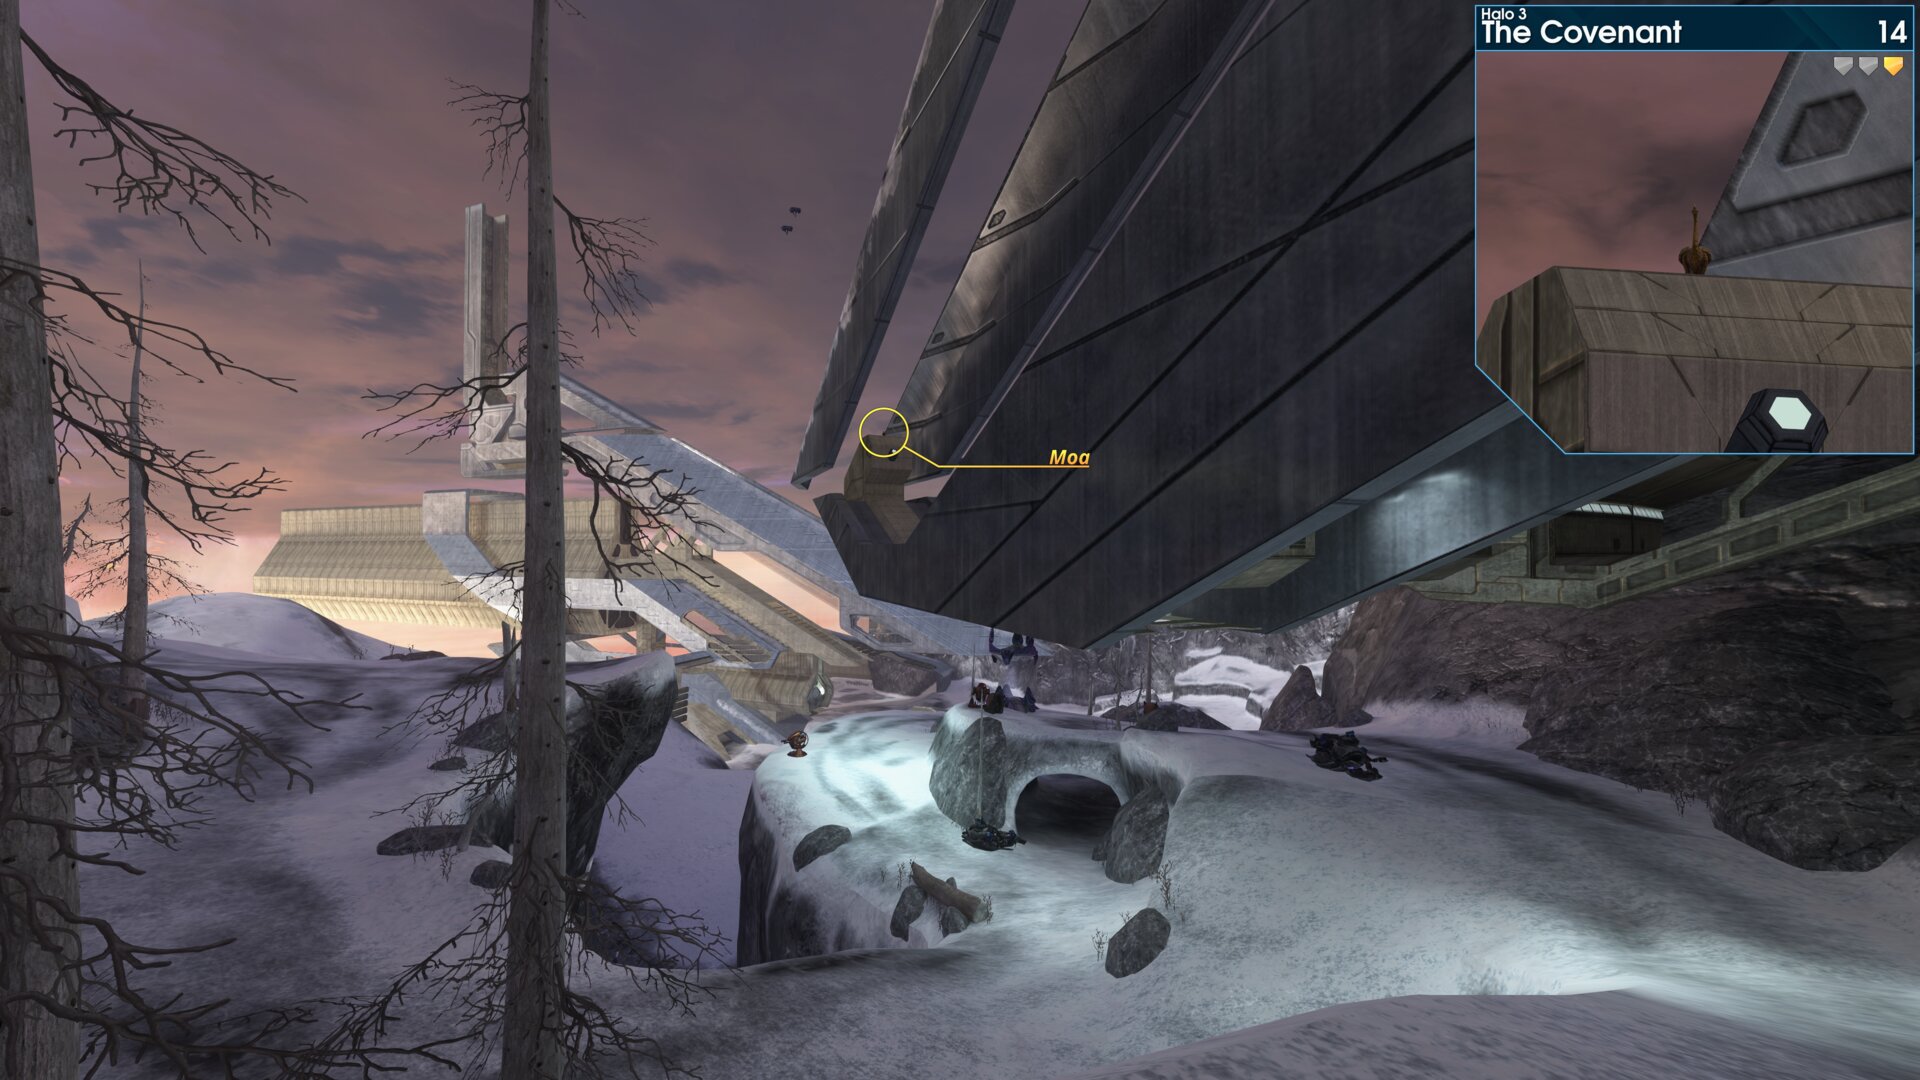
On the lower structure of the third tower, the part that points to the Citadel, near the point.
Golden Moa 15
As you enter the Citadel, the Moa is on the ledge to your right, near the far door. Be sure to shoot it before you trigger the cutscene.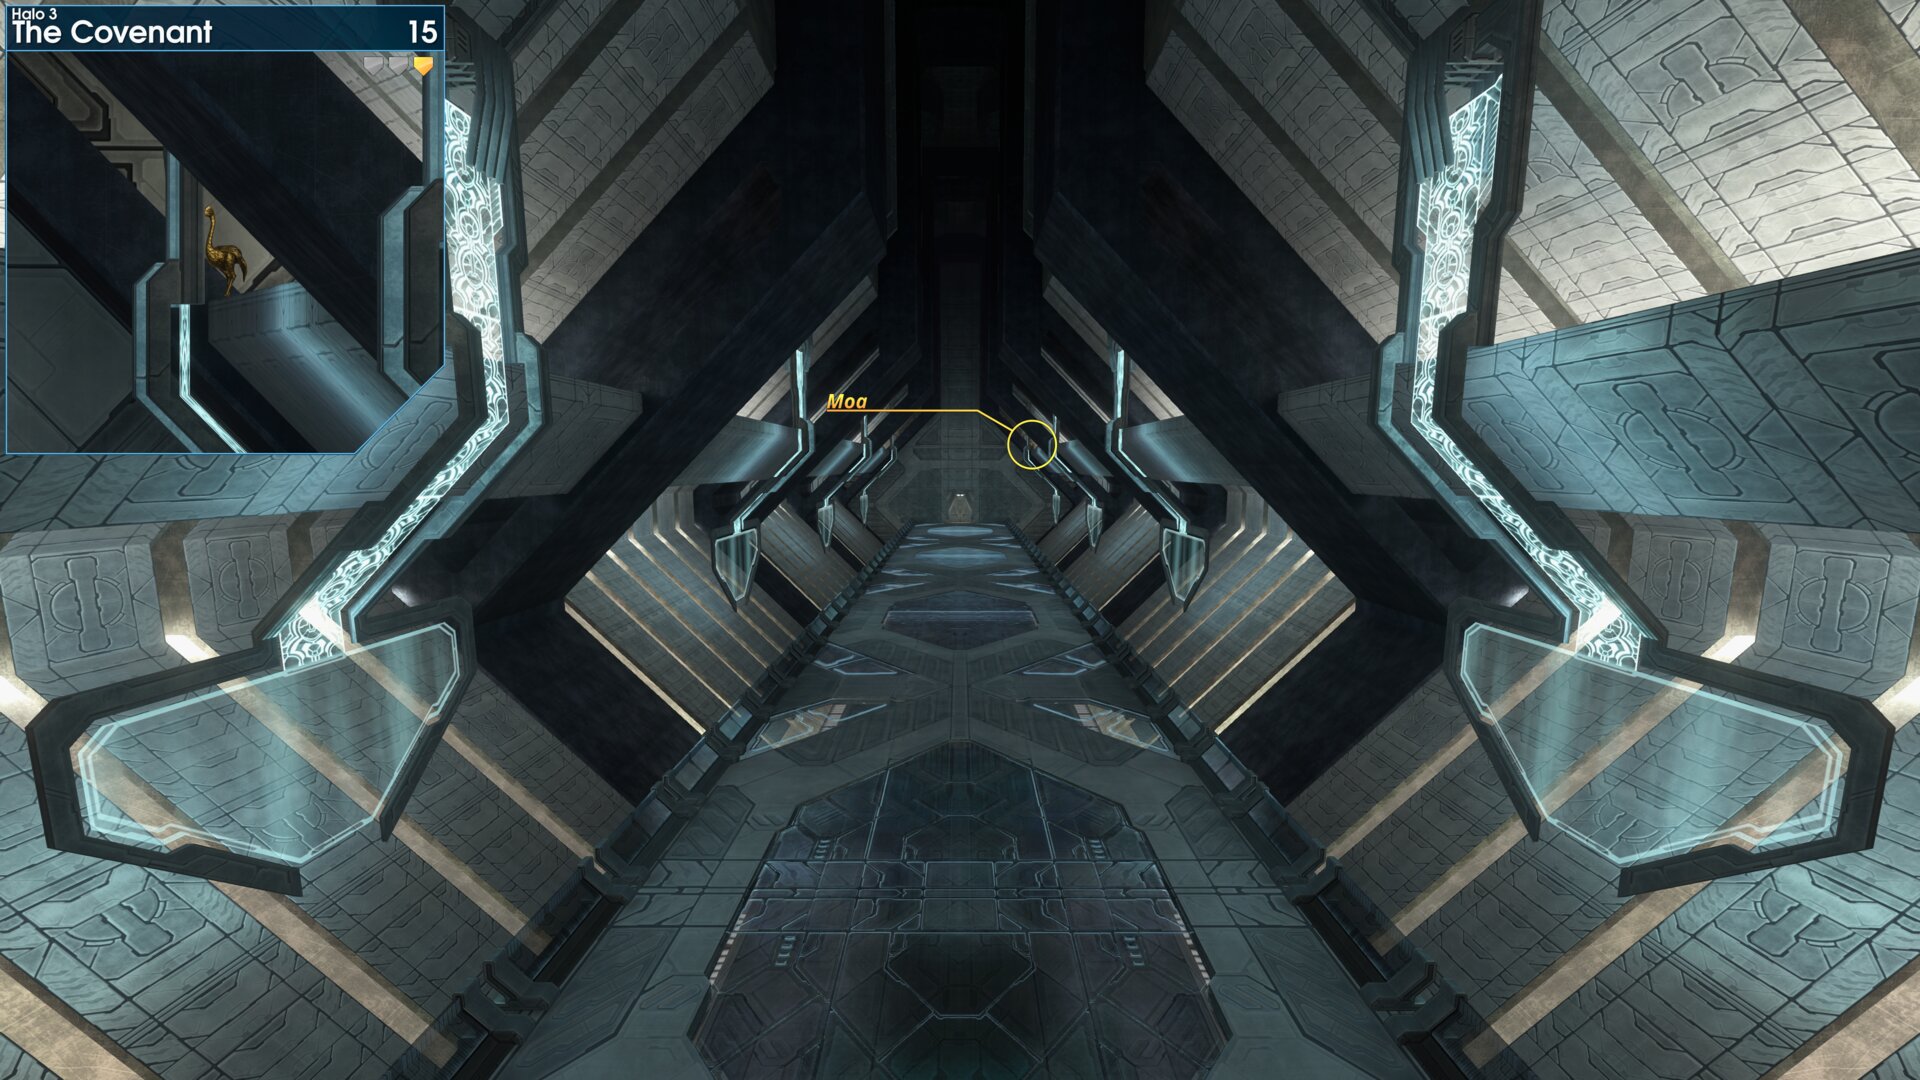
As you enter the Citadel, the Moa is on the ledge to your right, near the far door. Be sure to shoot it before you trigger the cutscene.
Golden Moa 16
Impossible? In the elevator room that's below where Master Chief & Arbiter ally with the Flood. Maybe a Frag Grenade or Fuel Rod would be able to get this Golden Moa
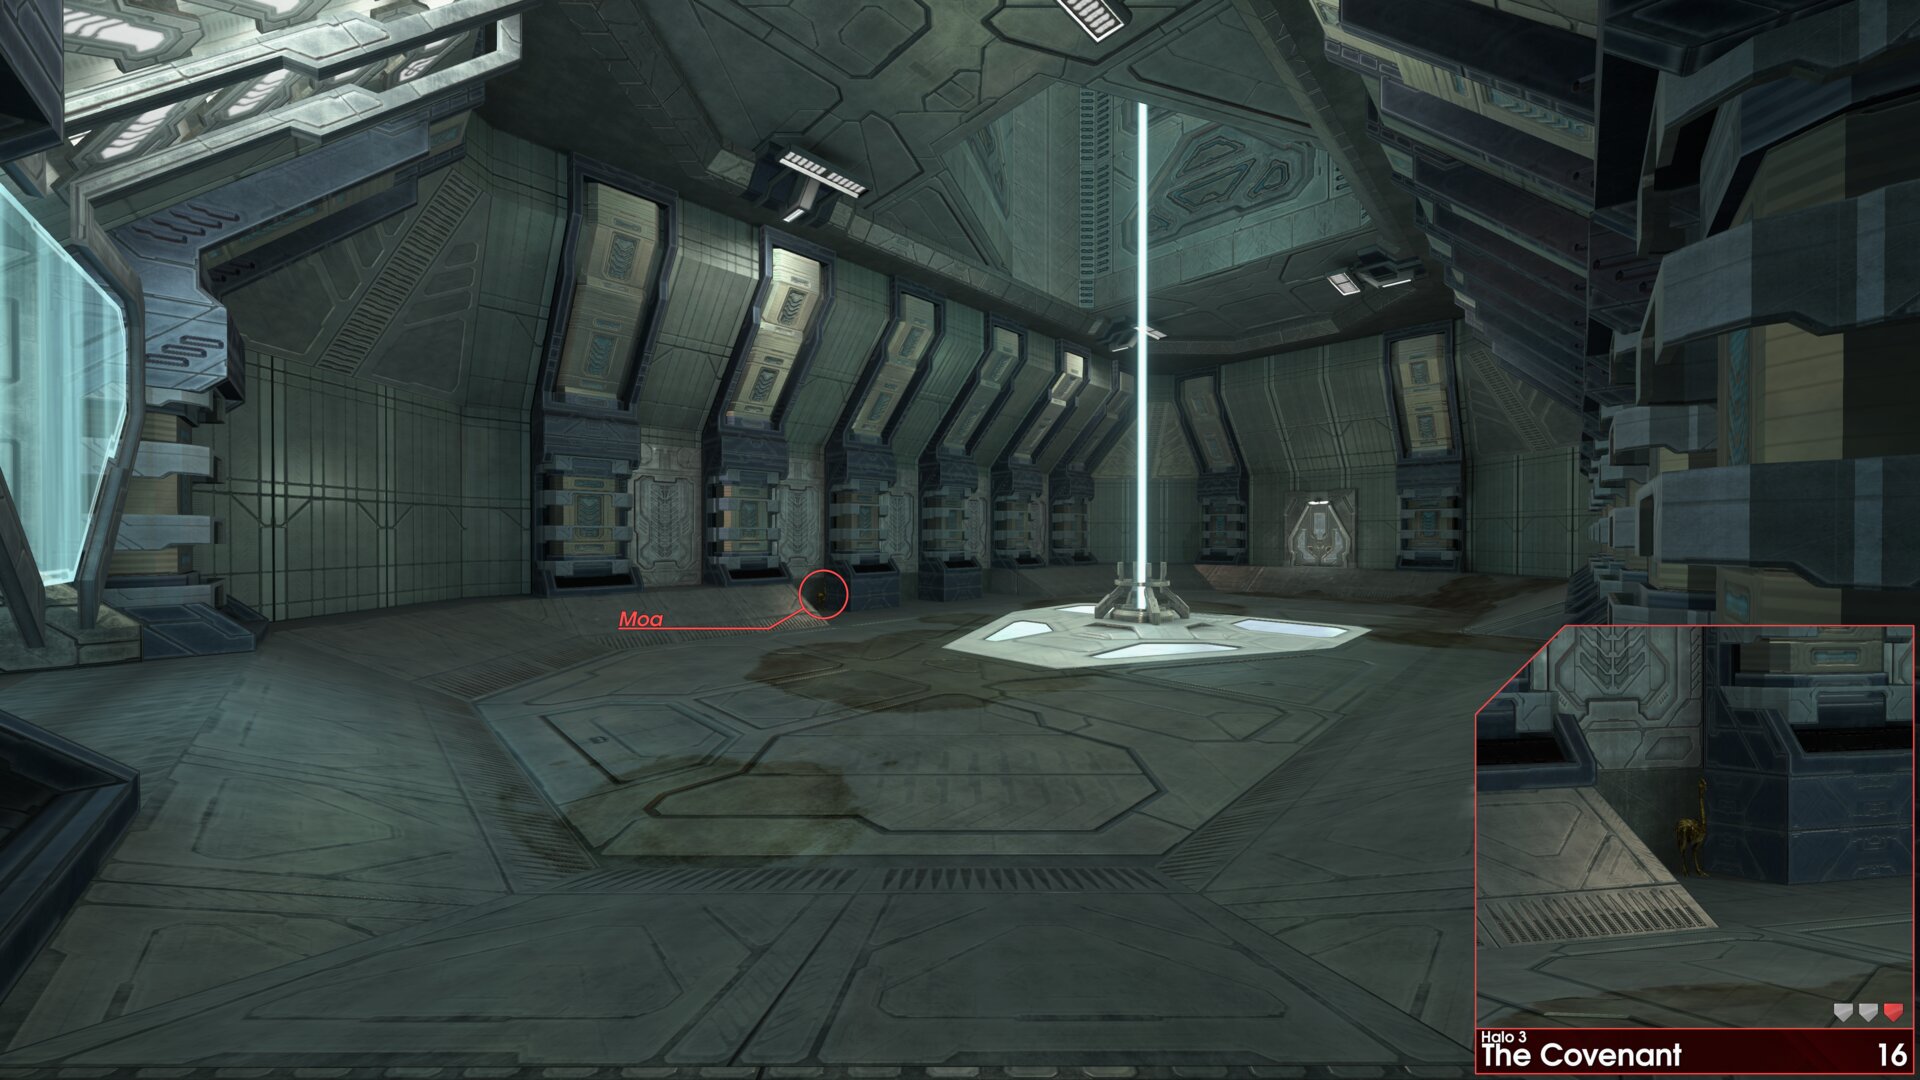
Impossible? In the elevator room that's below where Master Chief & Arbiter ally with the Flood. Maybe a Frag Grenade or Fuel Rod would be able to get this Golden Moa Golden Moa 17
On a ledge to the left, as you reach the last Gravity Hammer wielding Brute in Halo 3.
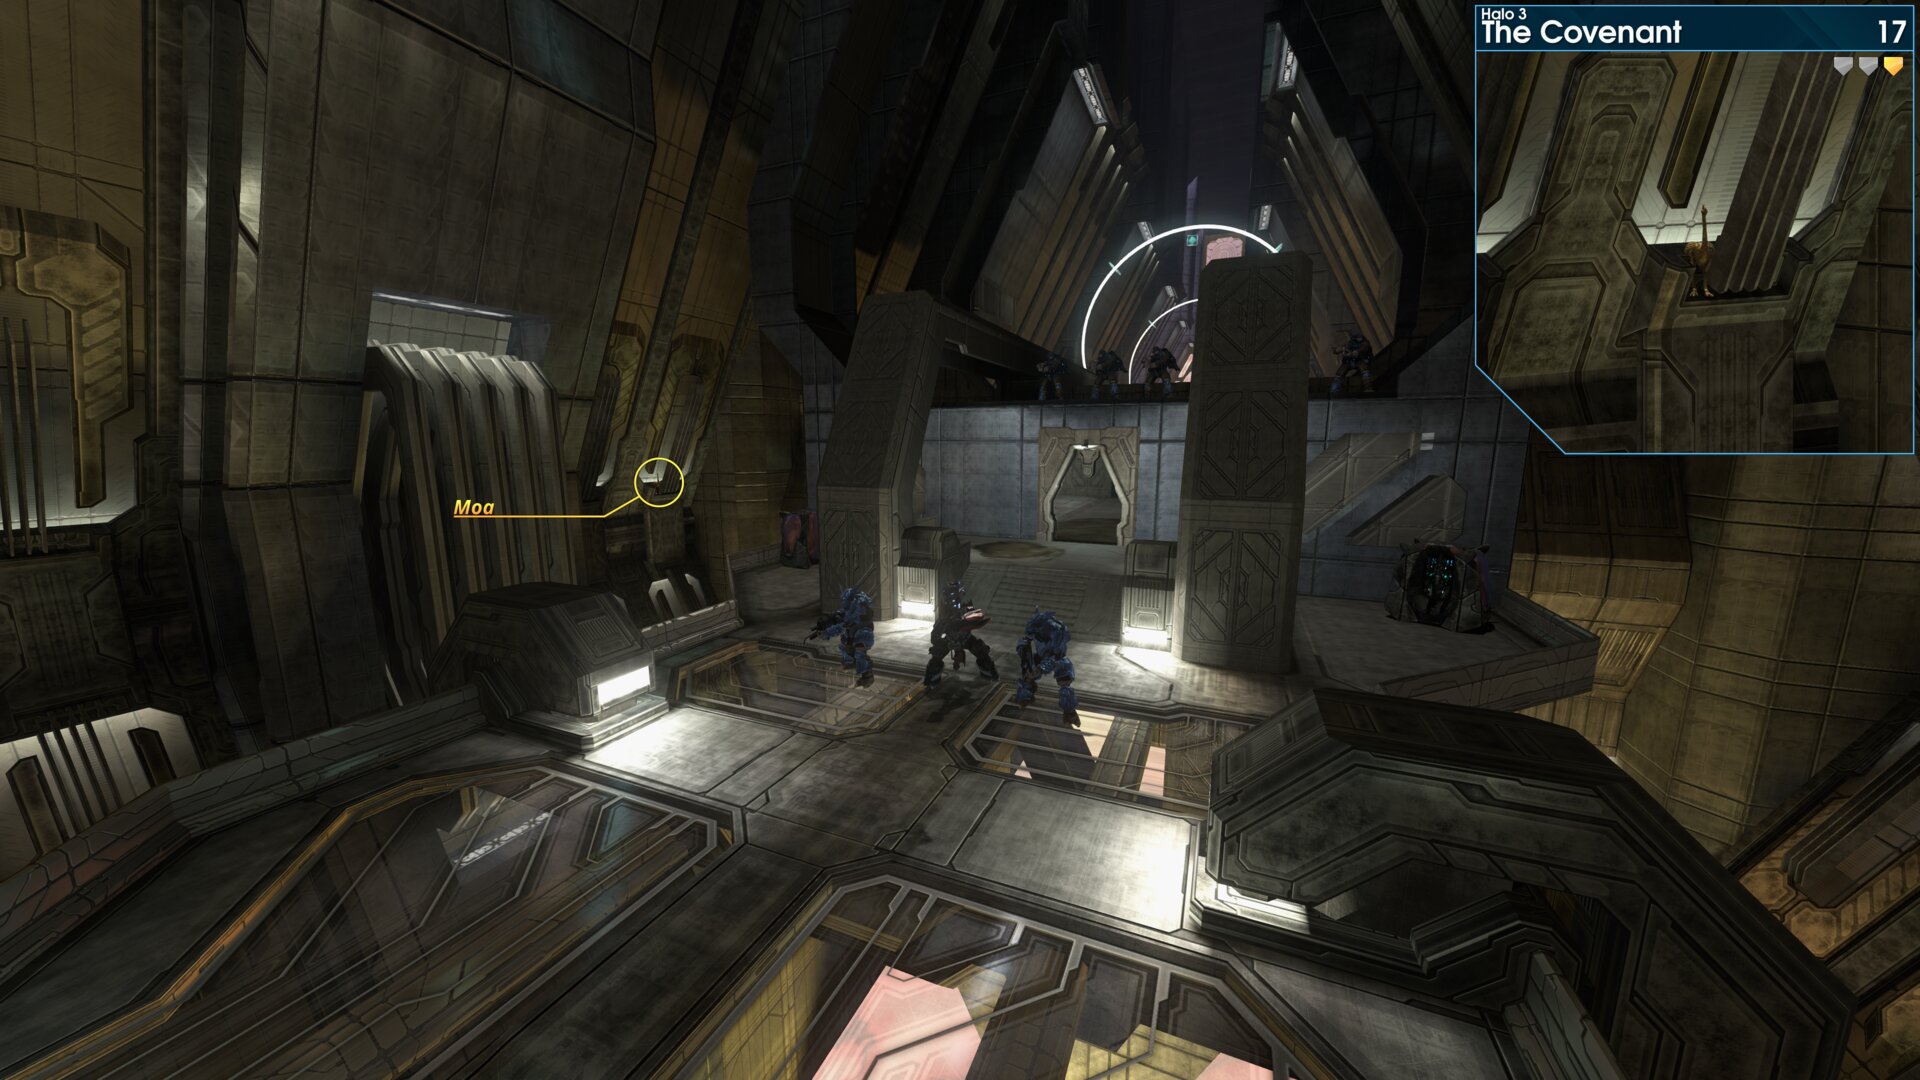
On a ledge to the left, as you reach the last Gravity Hammer wielding Brute in Halo 3.
Golden Moa 18
On top of last room with holograms of Truth, just before the Control Center.
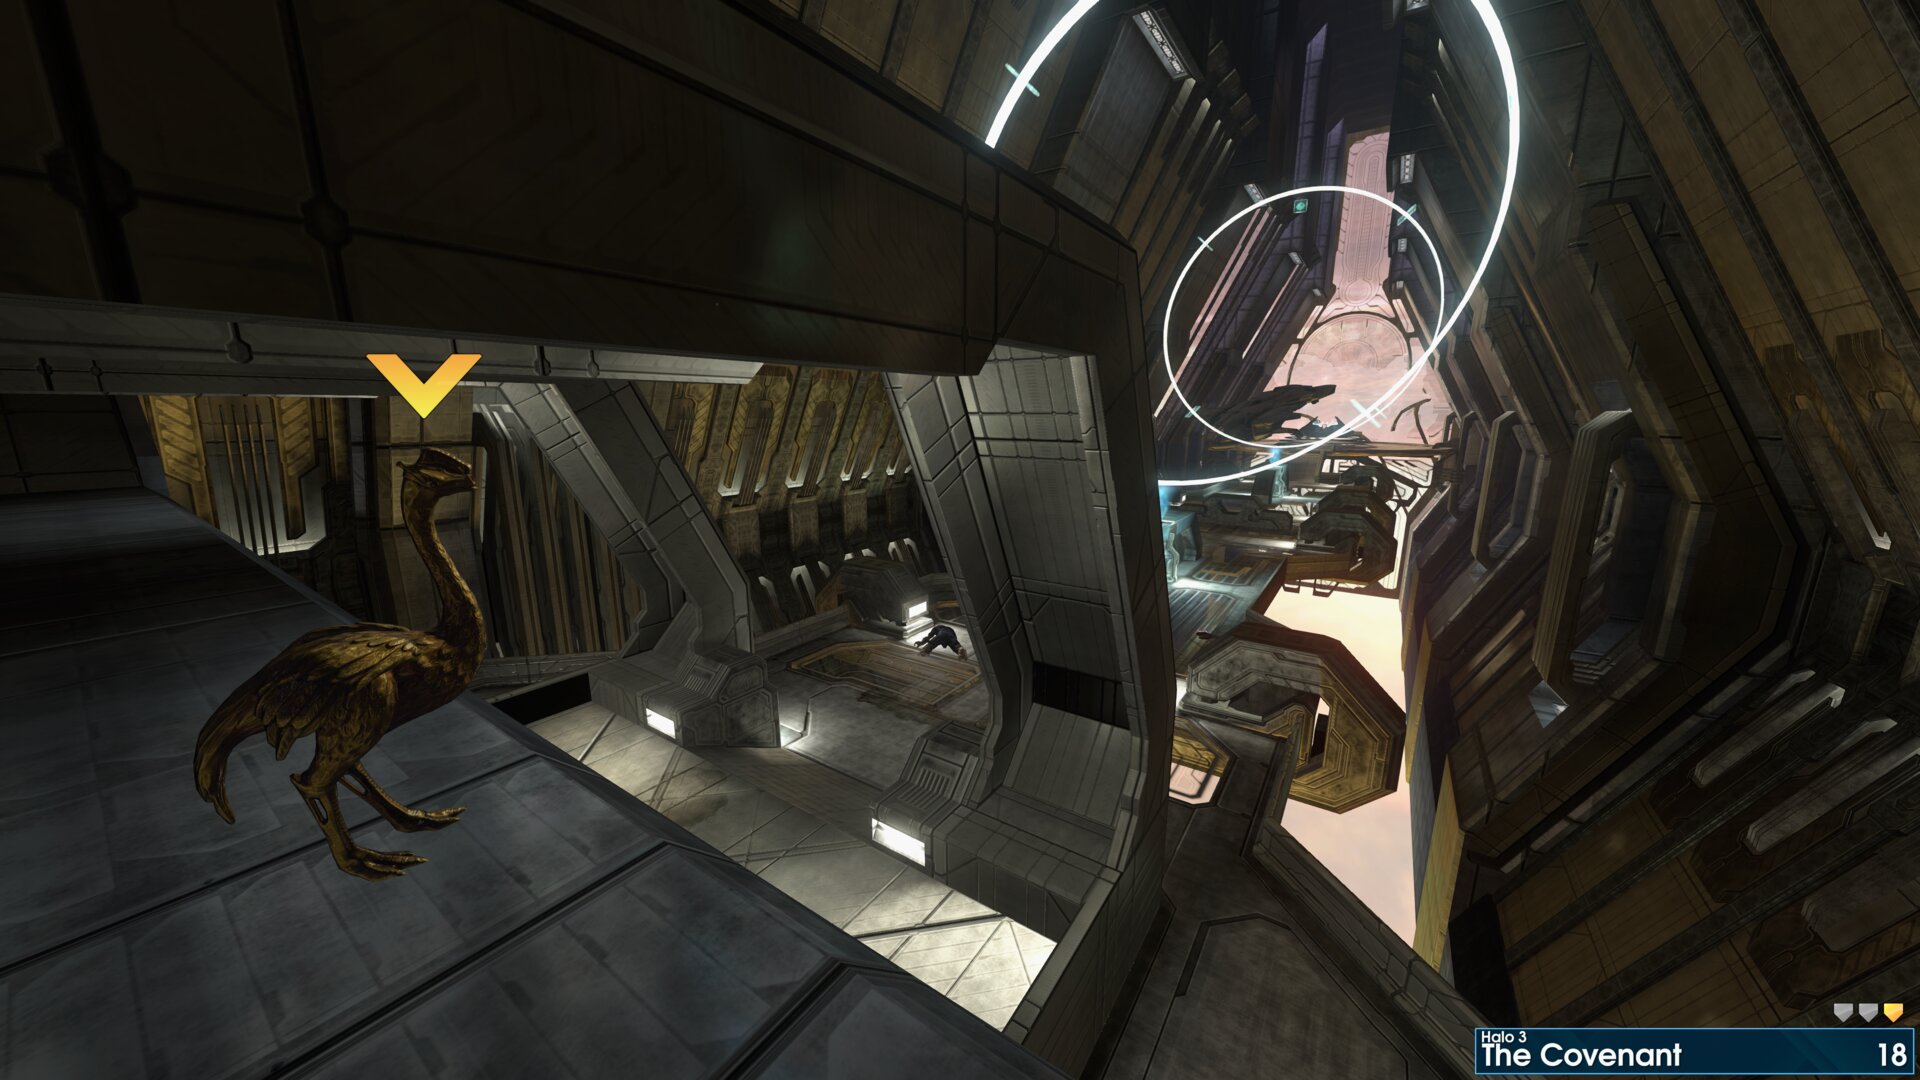
On top of last room with holograms of Truth, just before the Control Center.
Golden Moa 19
Impossible? Where Master Chief follows the Cortana projection (final cutscene). Maybe if we could teleport down to the corridor, unlikely.
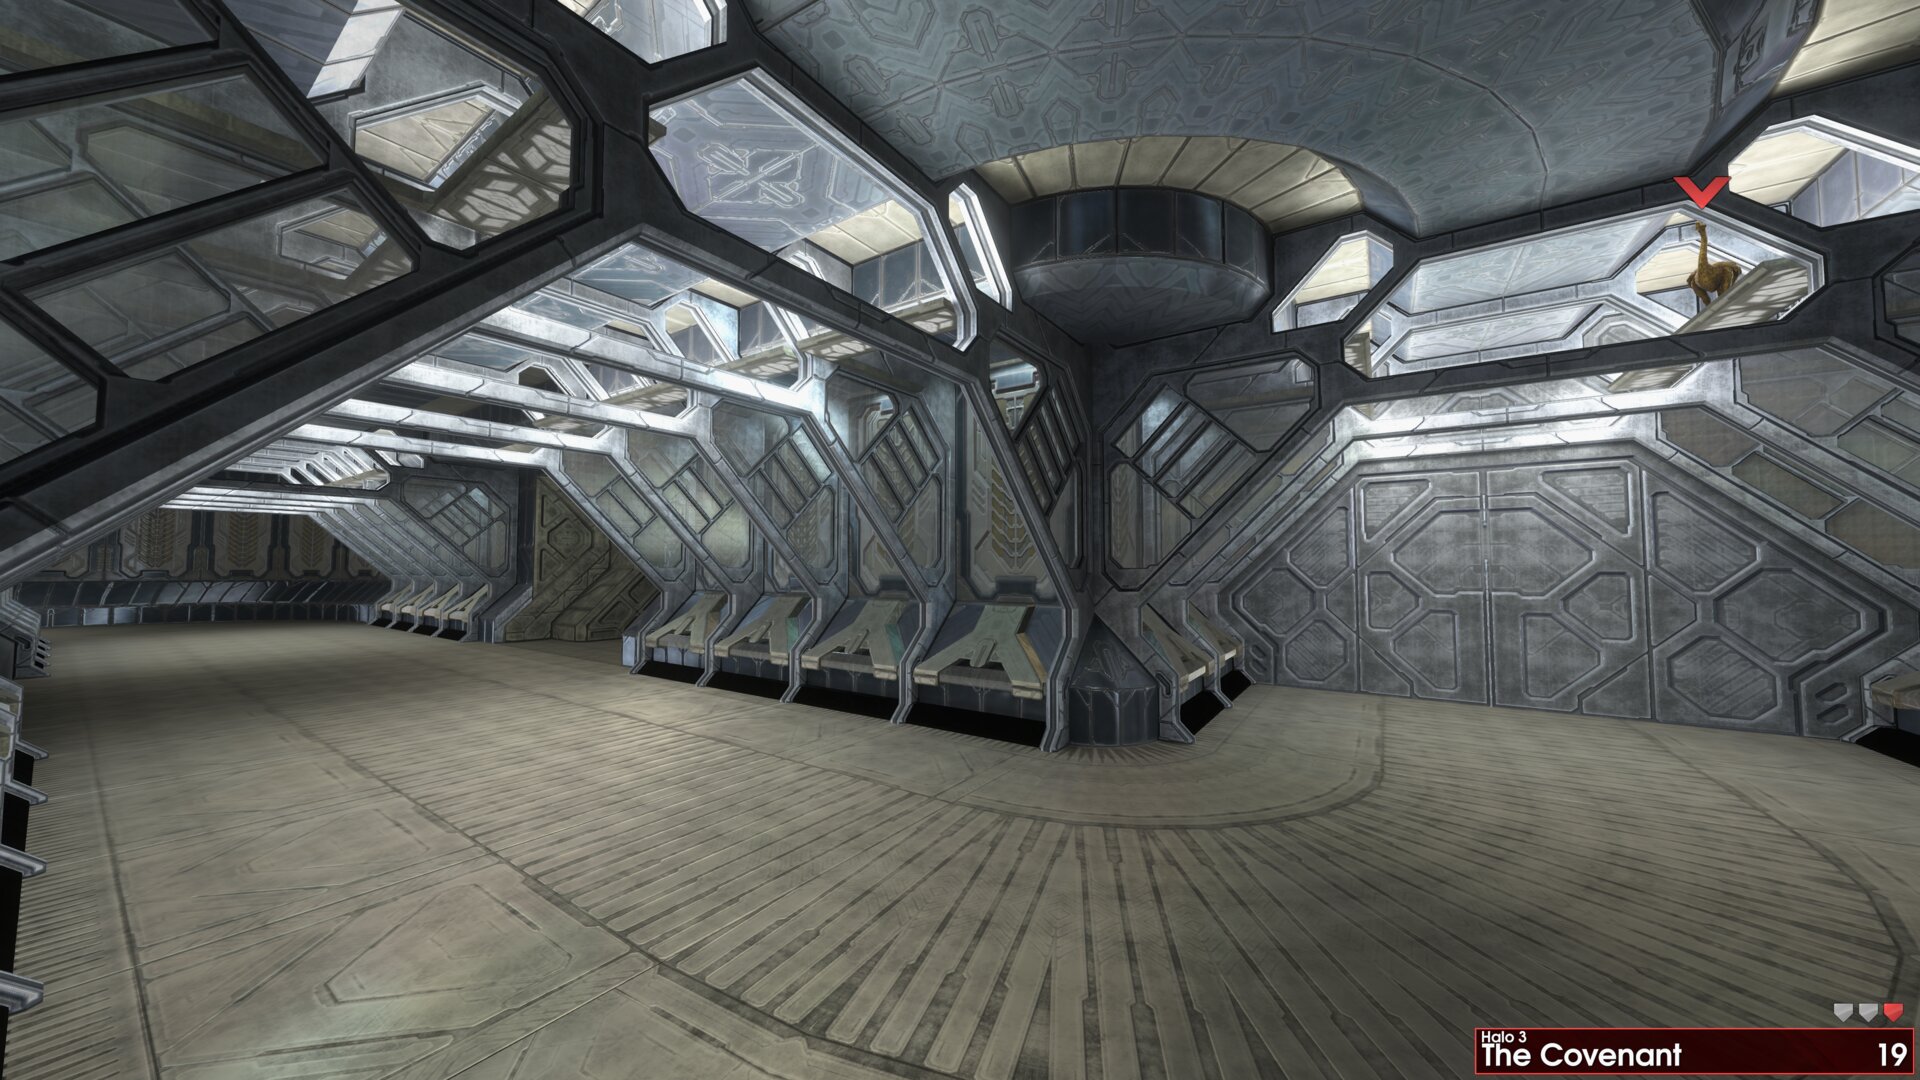
Impossible? Where Master Chief follows the Cortana projection (final cutscene). Maybe if we could teleport down to the corridor, unlikely.➟ Cortana
Rally Point: Alpha
Note: Moa's 1 & 2 are the only ones that can NOT be reached from rally point Bravo.
Note: Moa's 1 & 2 are the only ones that can NOT be reached from rally point Bravo.
Golden Moa 1
Impossible! Intro cutscene, located a long way from the start of the mission. No chance of getting this one, invisible barriers, maximum bullet range and zone unloading make this Moa impossible.
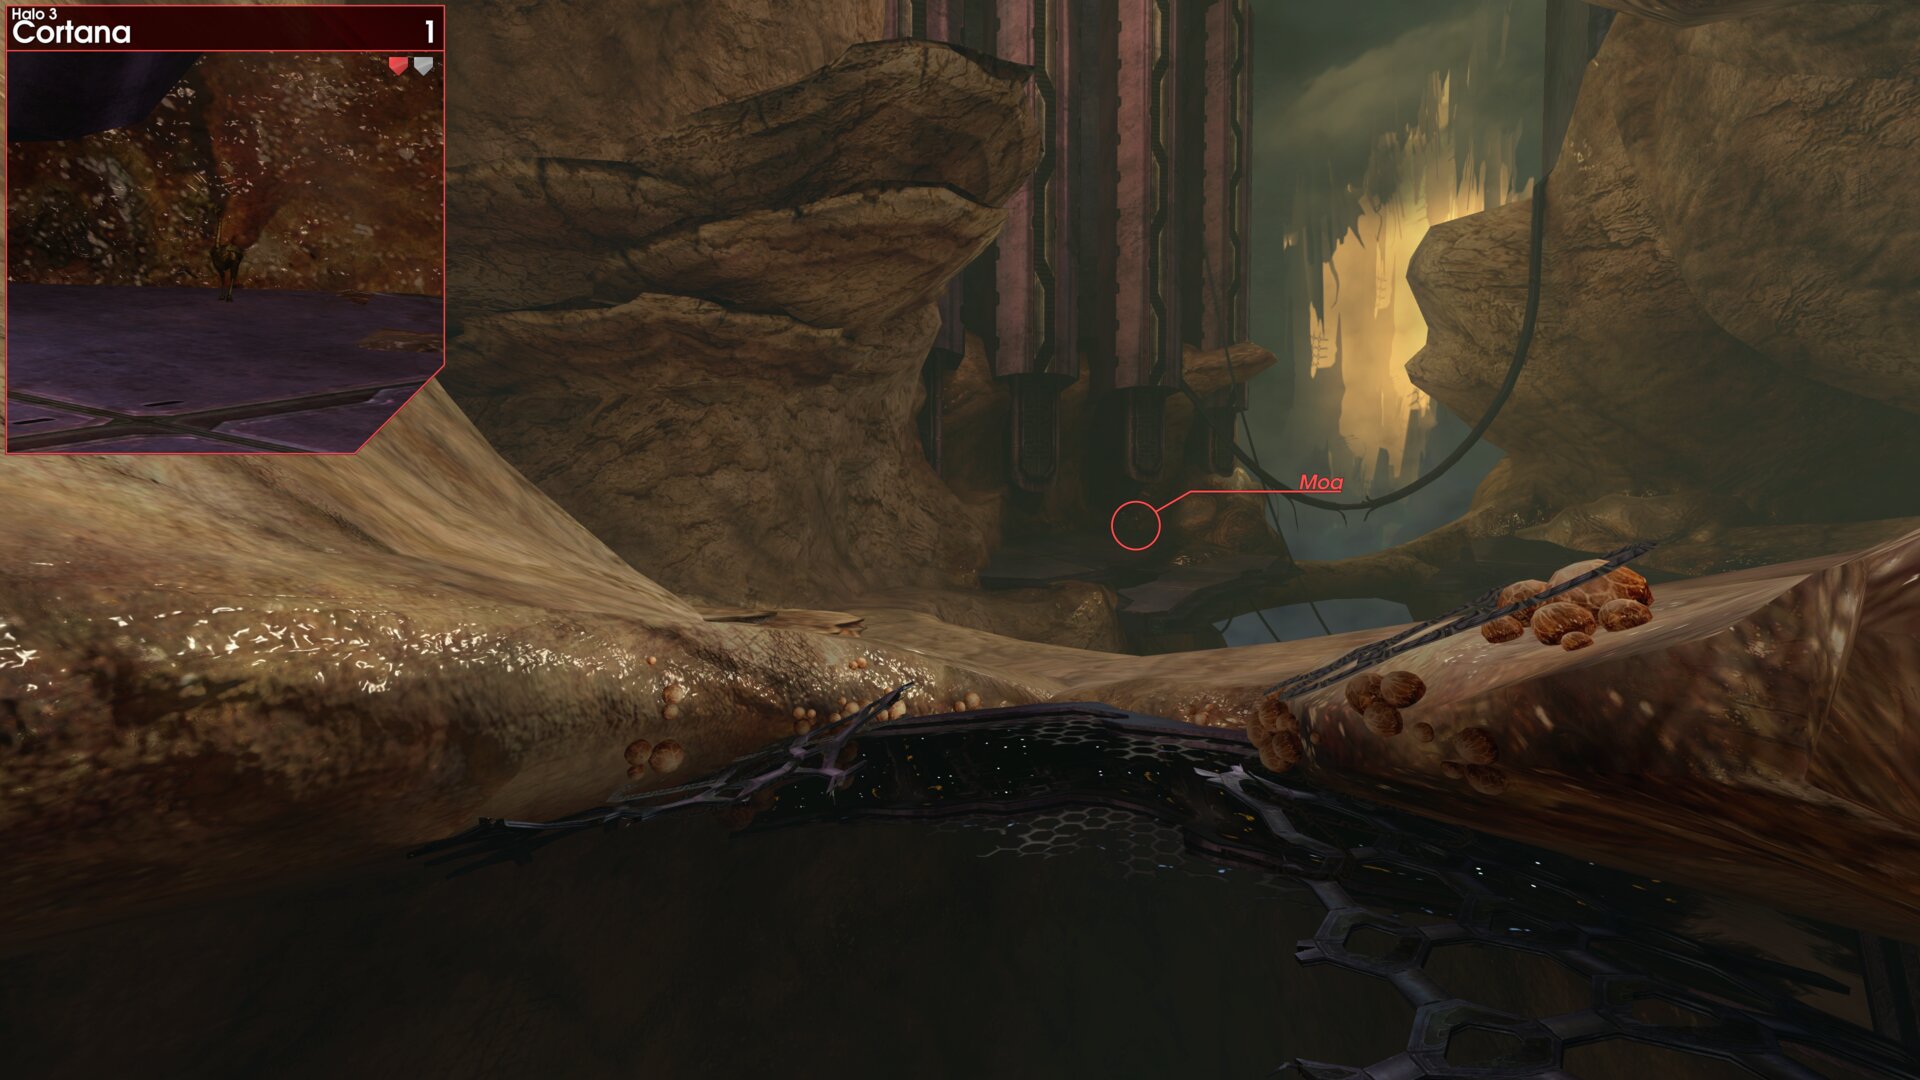
Impossible! Intro cutscene, located a long way from the start of the mission. No chance of getting this one, invisible barriers, maximum bullet range and zone unloading make this Moa impossible.
Golden Moa 2
Head through the first cave to your right as you progress, it has a single blister above it. When you reach the upper level, turn left, and continue up to the exposed wall (pre-Flood infestation). The Moa is on a panel laying next to this wall.(this all before you use the first 'porta', door)
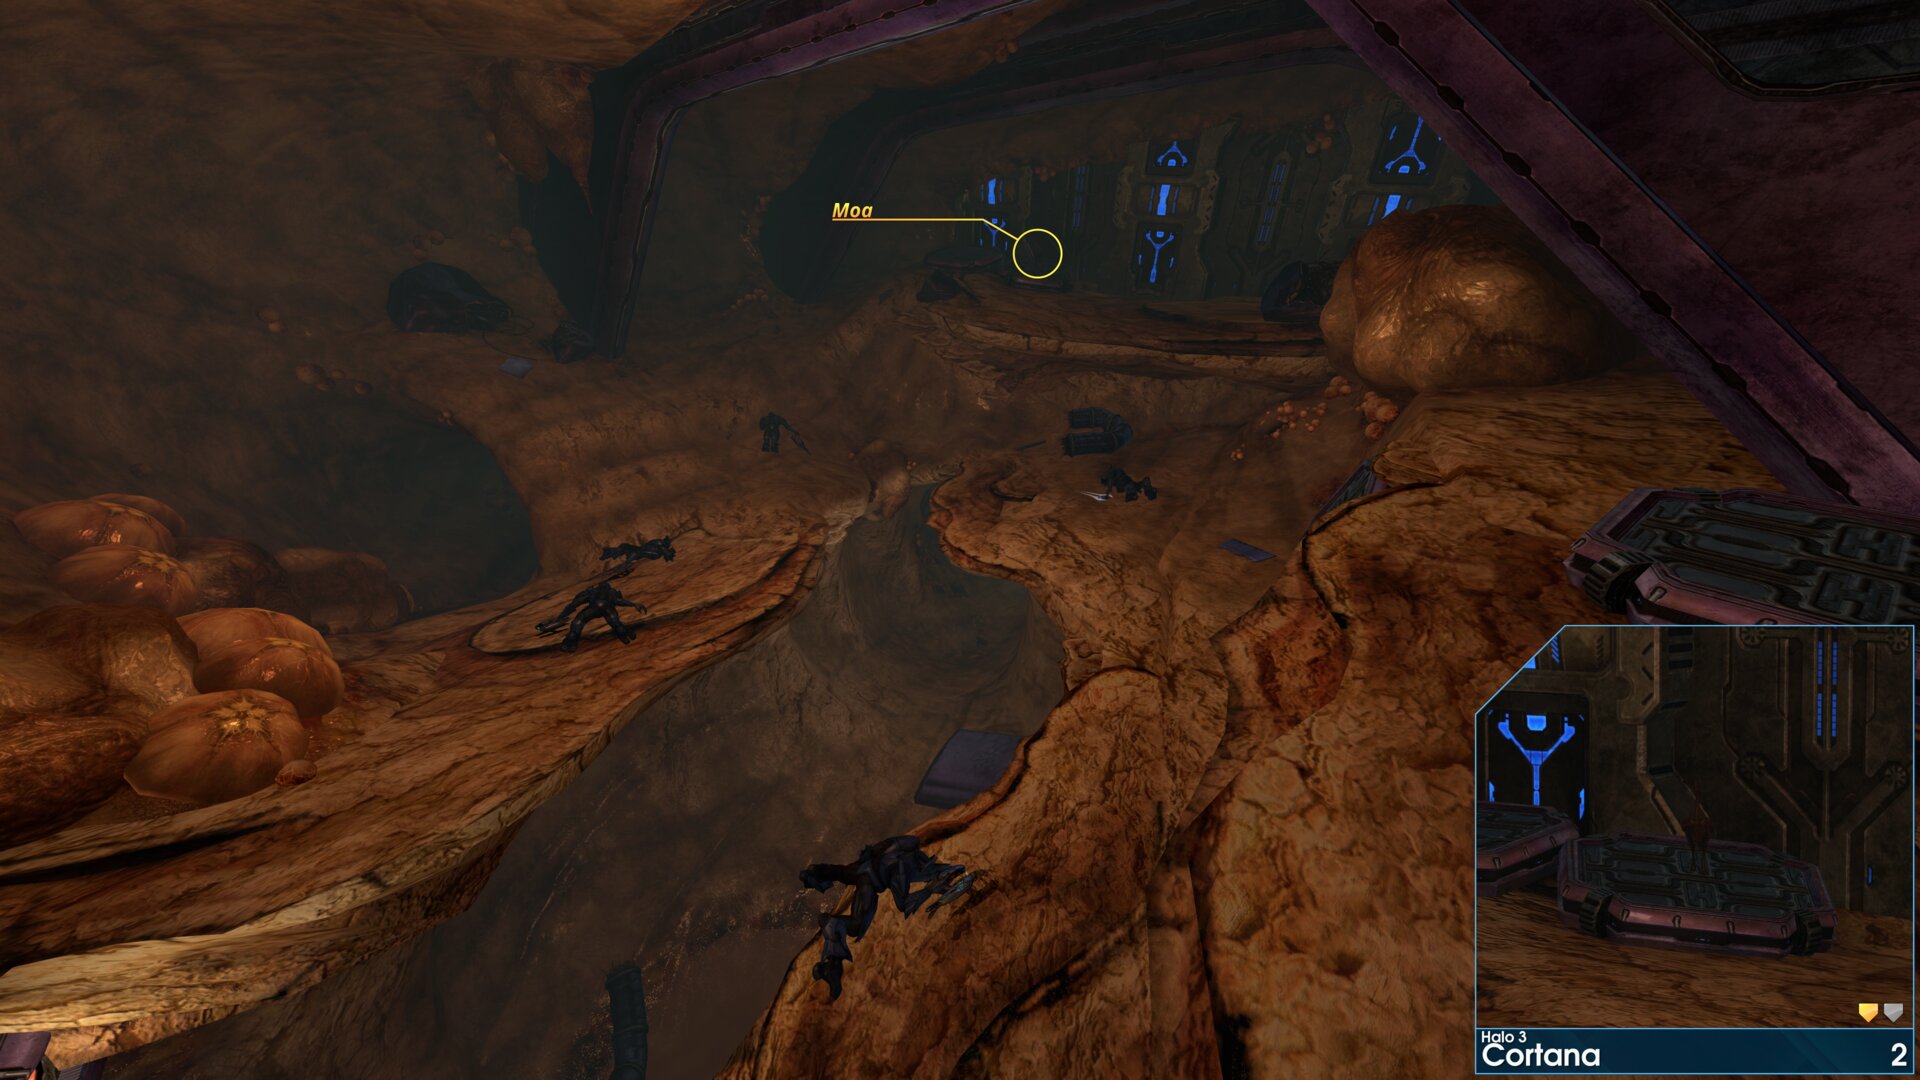
Head through the first cave to your right as you progress, it has a single blister above it. When you reach the upper level, turn left, and continue up to the exposed wall (pre-Flood infestation). The Moa is on a panel laying next to this wall.(this all before you use the first 'porta', door)
Golden Moa 3
Inside the abandoned Pelican, this is in the large room where you trigger the first Cortana moment.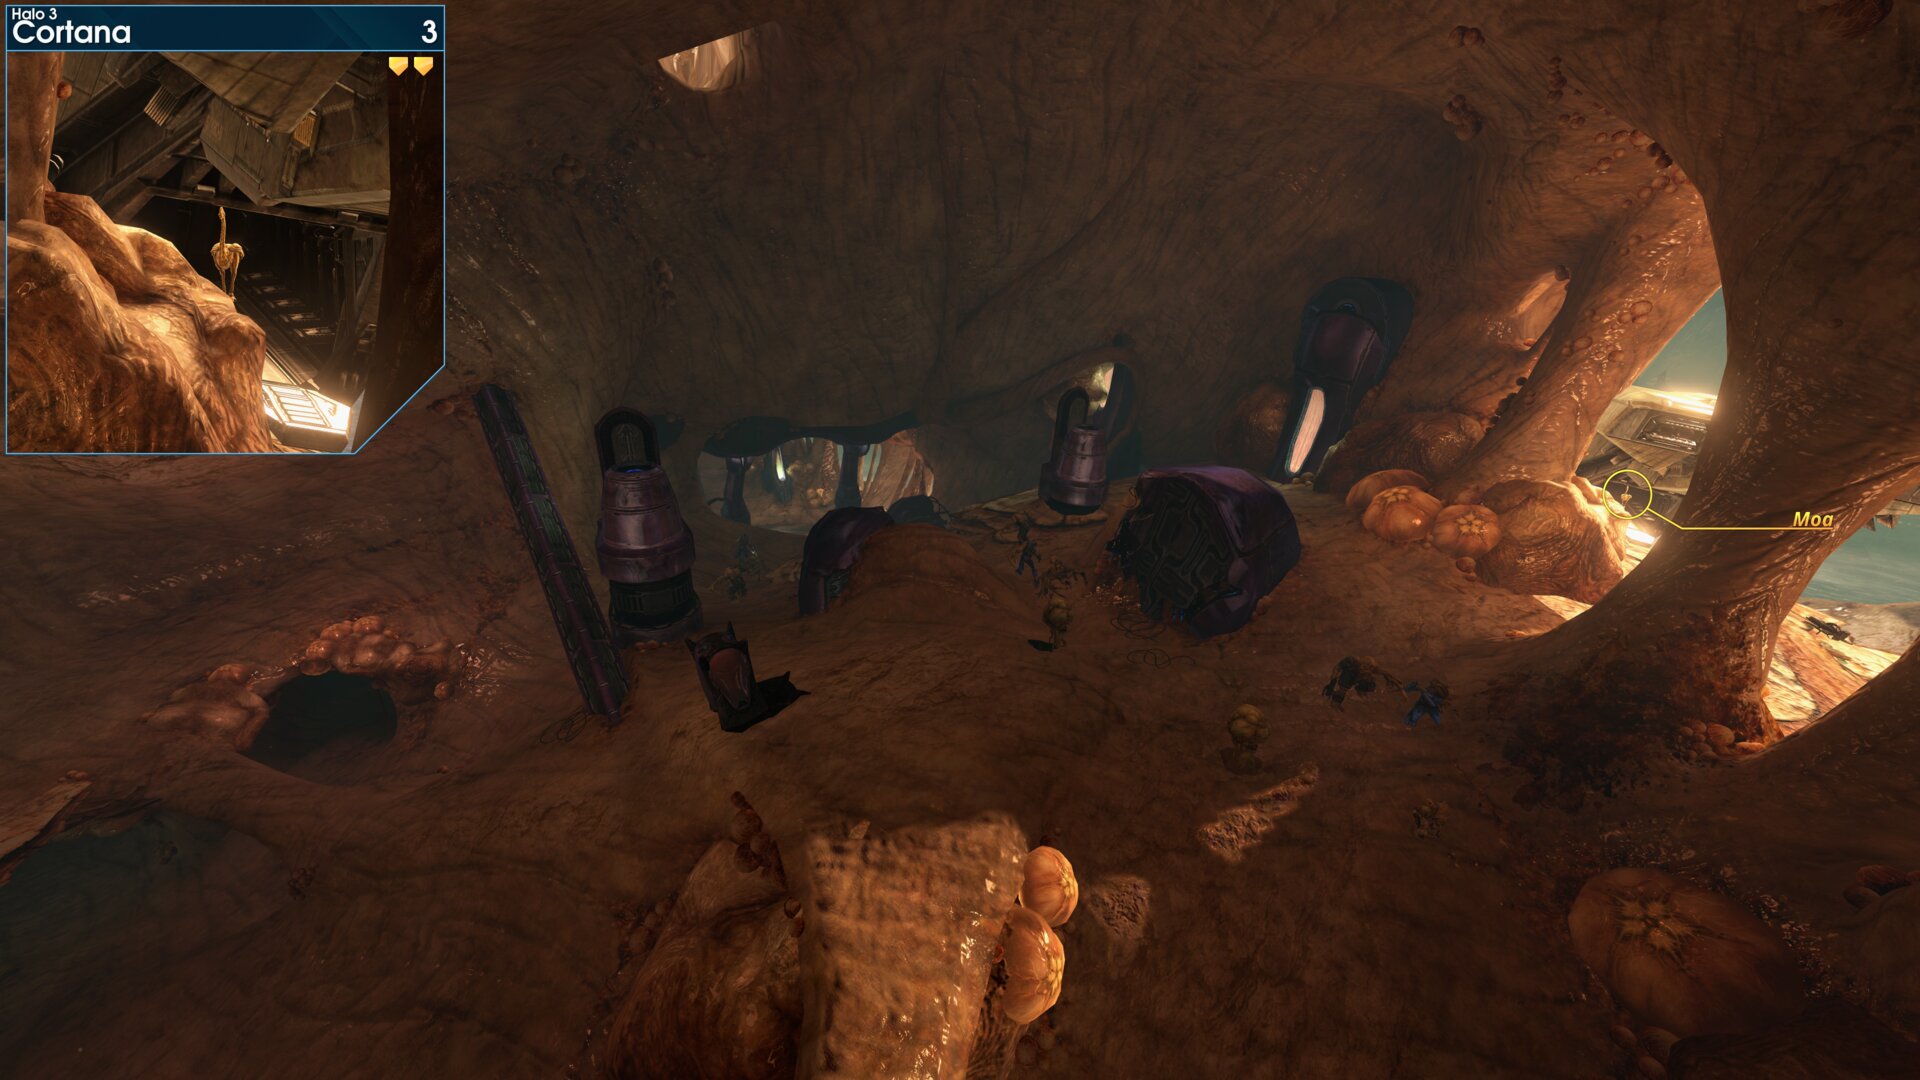
Inside the abandoned Pelican, this is in the large room where you trigger the first Cortana moment.
Golden Moa 4
When Cortana says "A collection of lies, that's all I am, stolen thoughts and memories", look through the gaps in the wall, just before the next door.
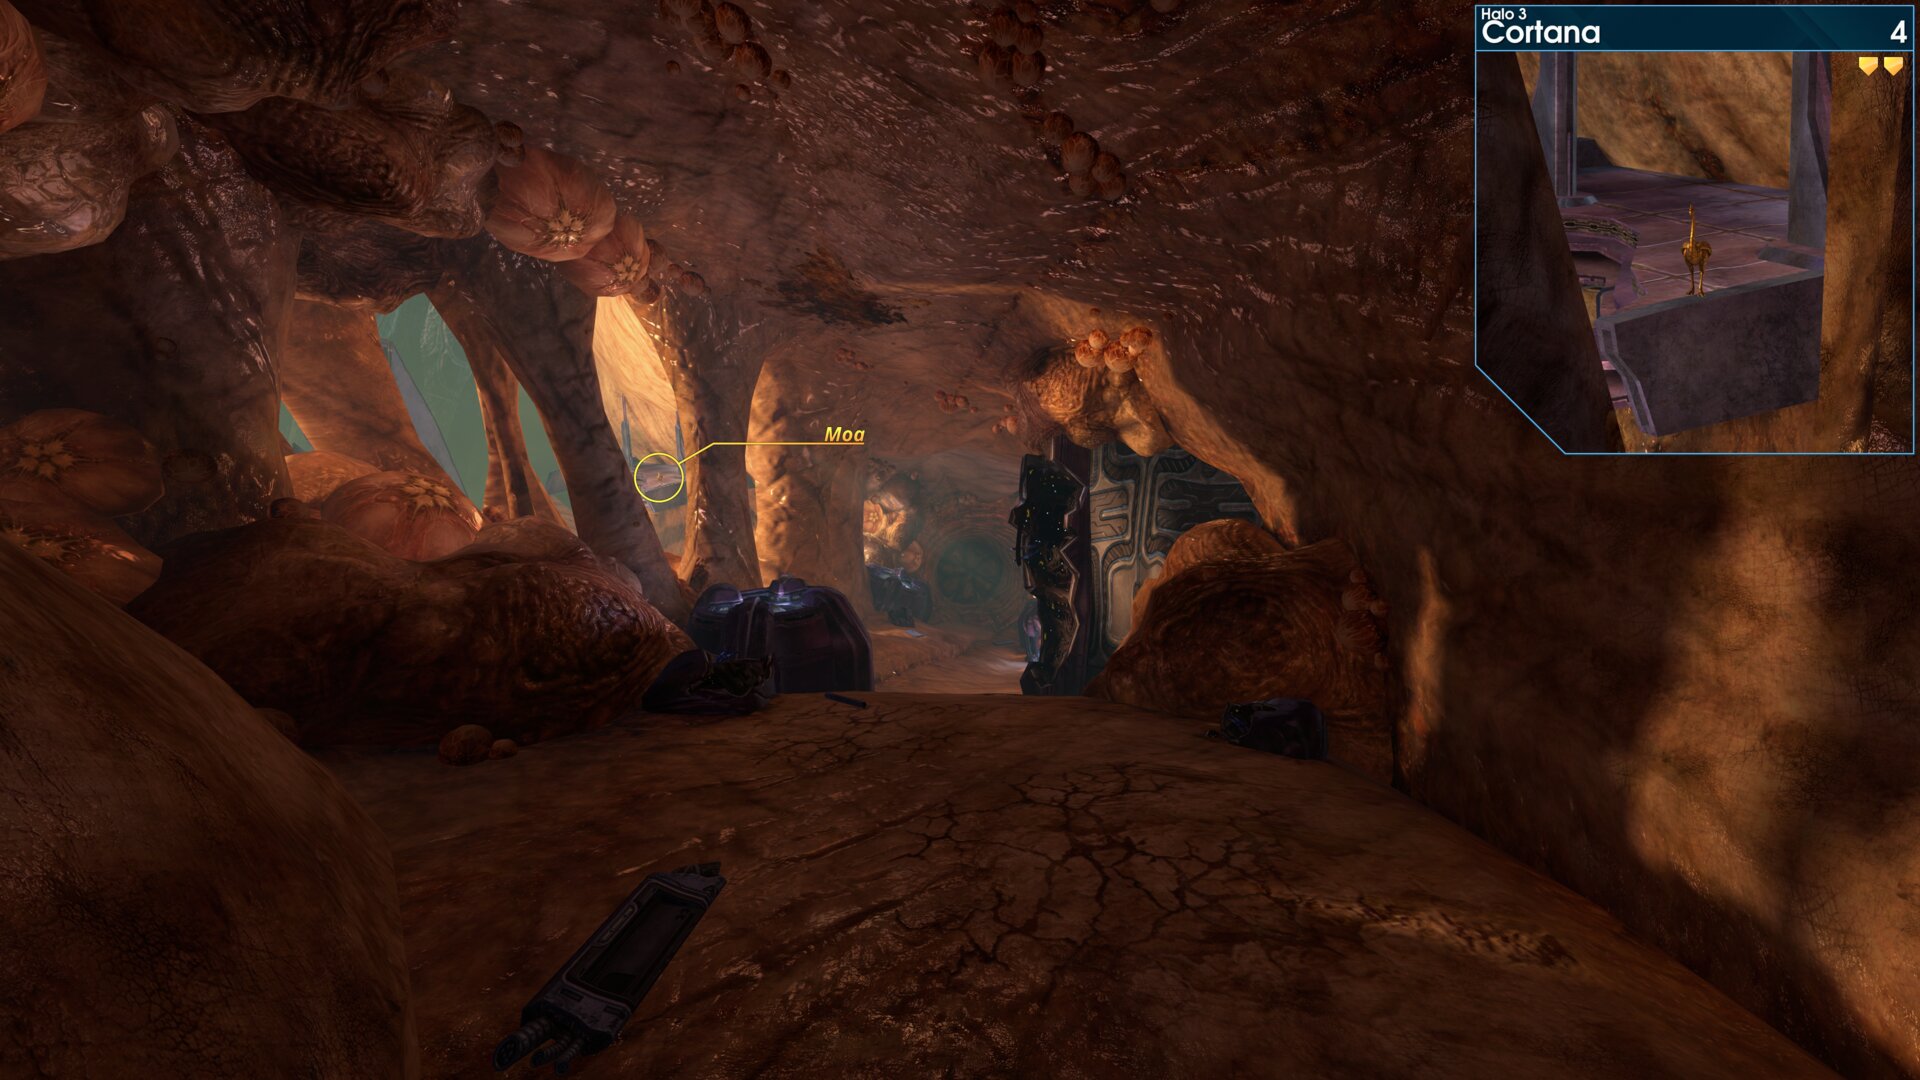
When Cortana says "A collection of lies, that's all I am, stolen thoughts and memories", look through the gaps in the wall, just before the next door.
Golden Moa 5
In the Bridge (the room with a hidden terminal/Cortana moment and the Tilt skull), up high on a fungus ledge to the left.
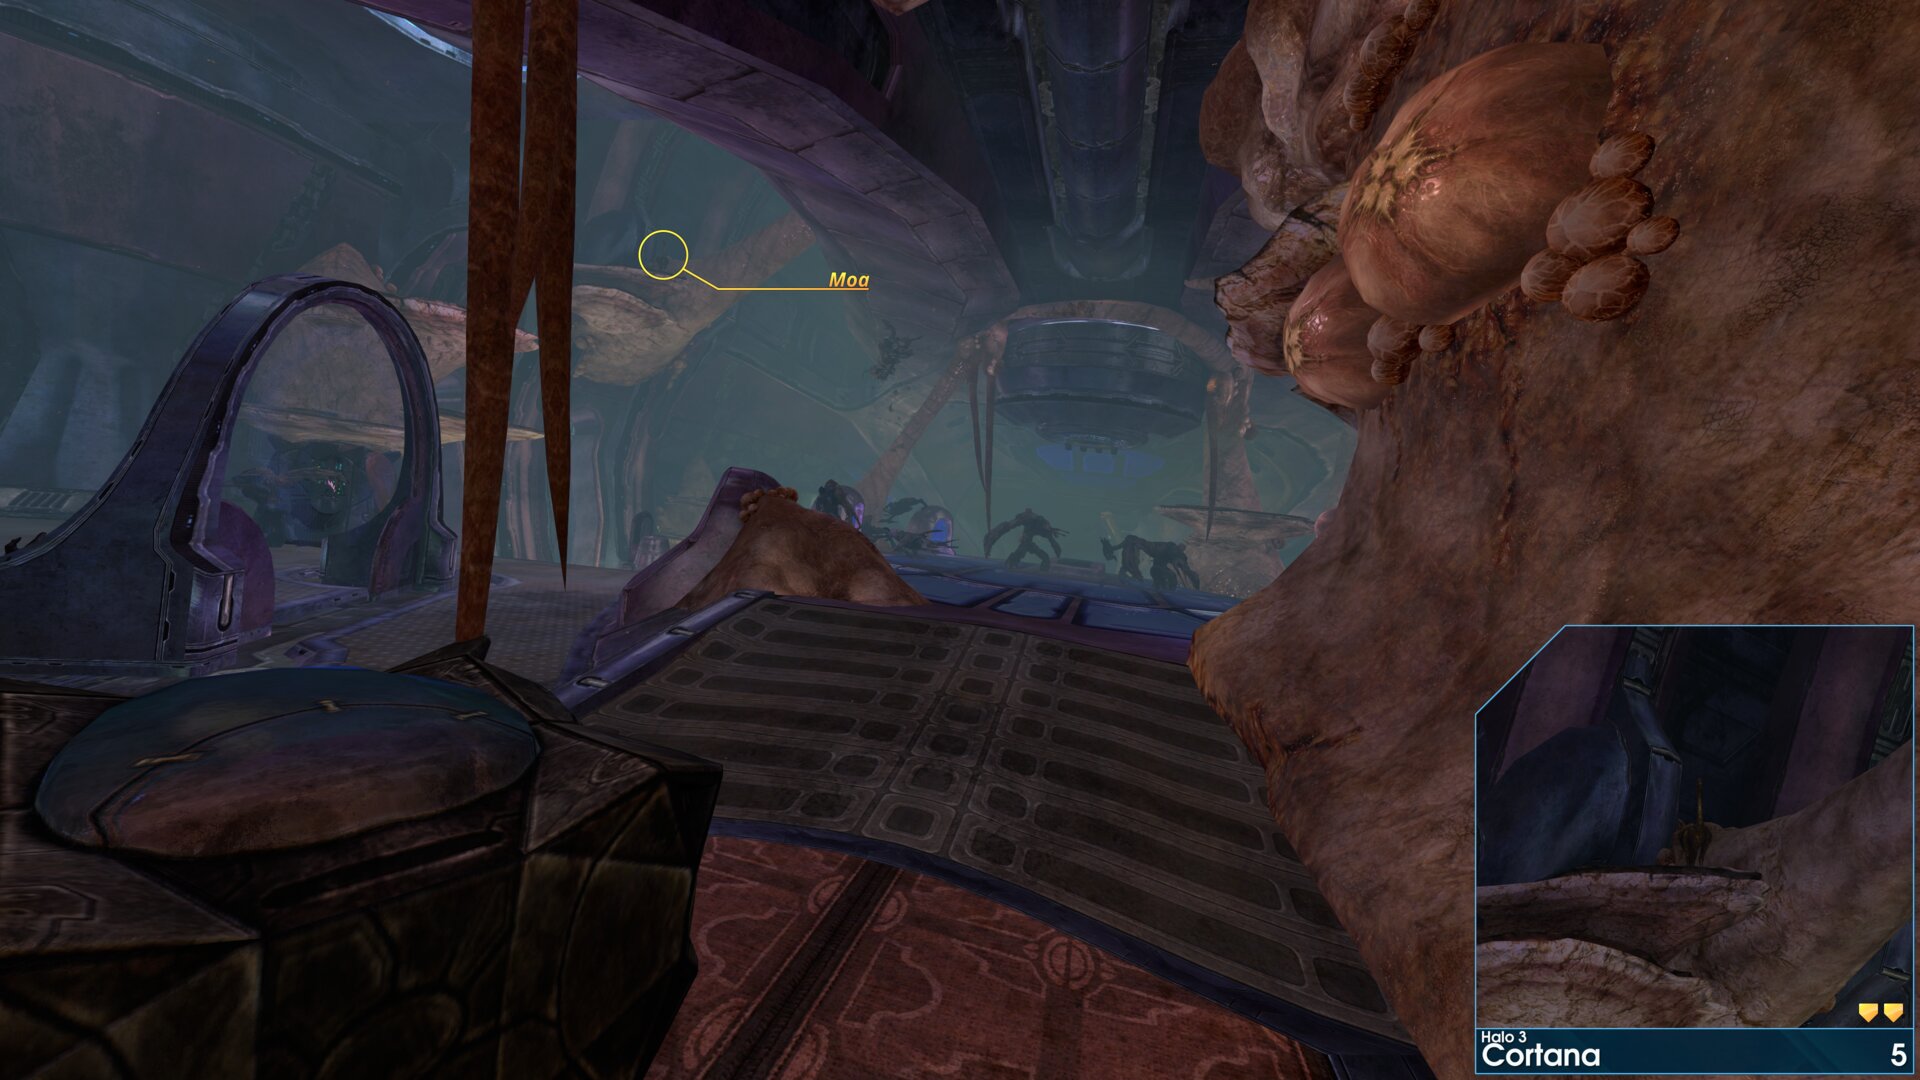
In the Bridge (the room with a hidden terminal/Cortana moment and the Tilt skull), up high on a fungus ledge to the left.
Golden Moa 6
As you leave the Bridge (the room with a hidden terminal/Cortana moment and the Tilt skull), look to your left.
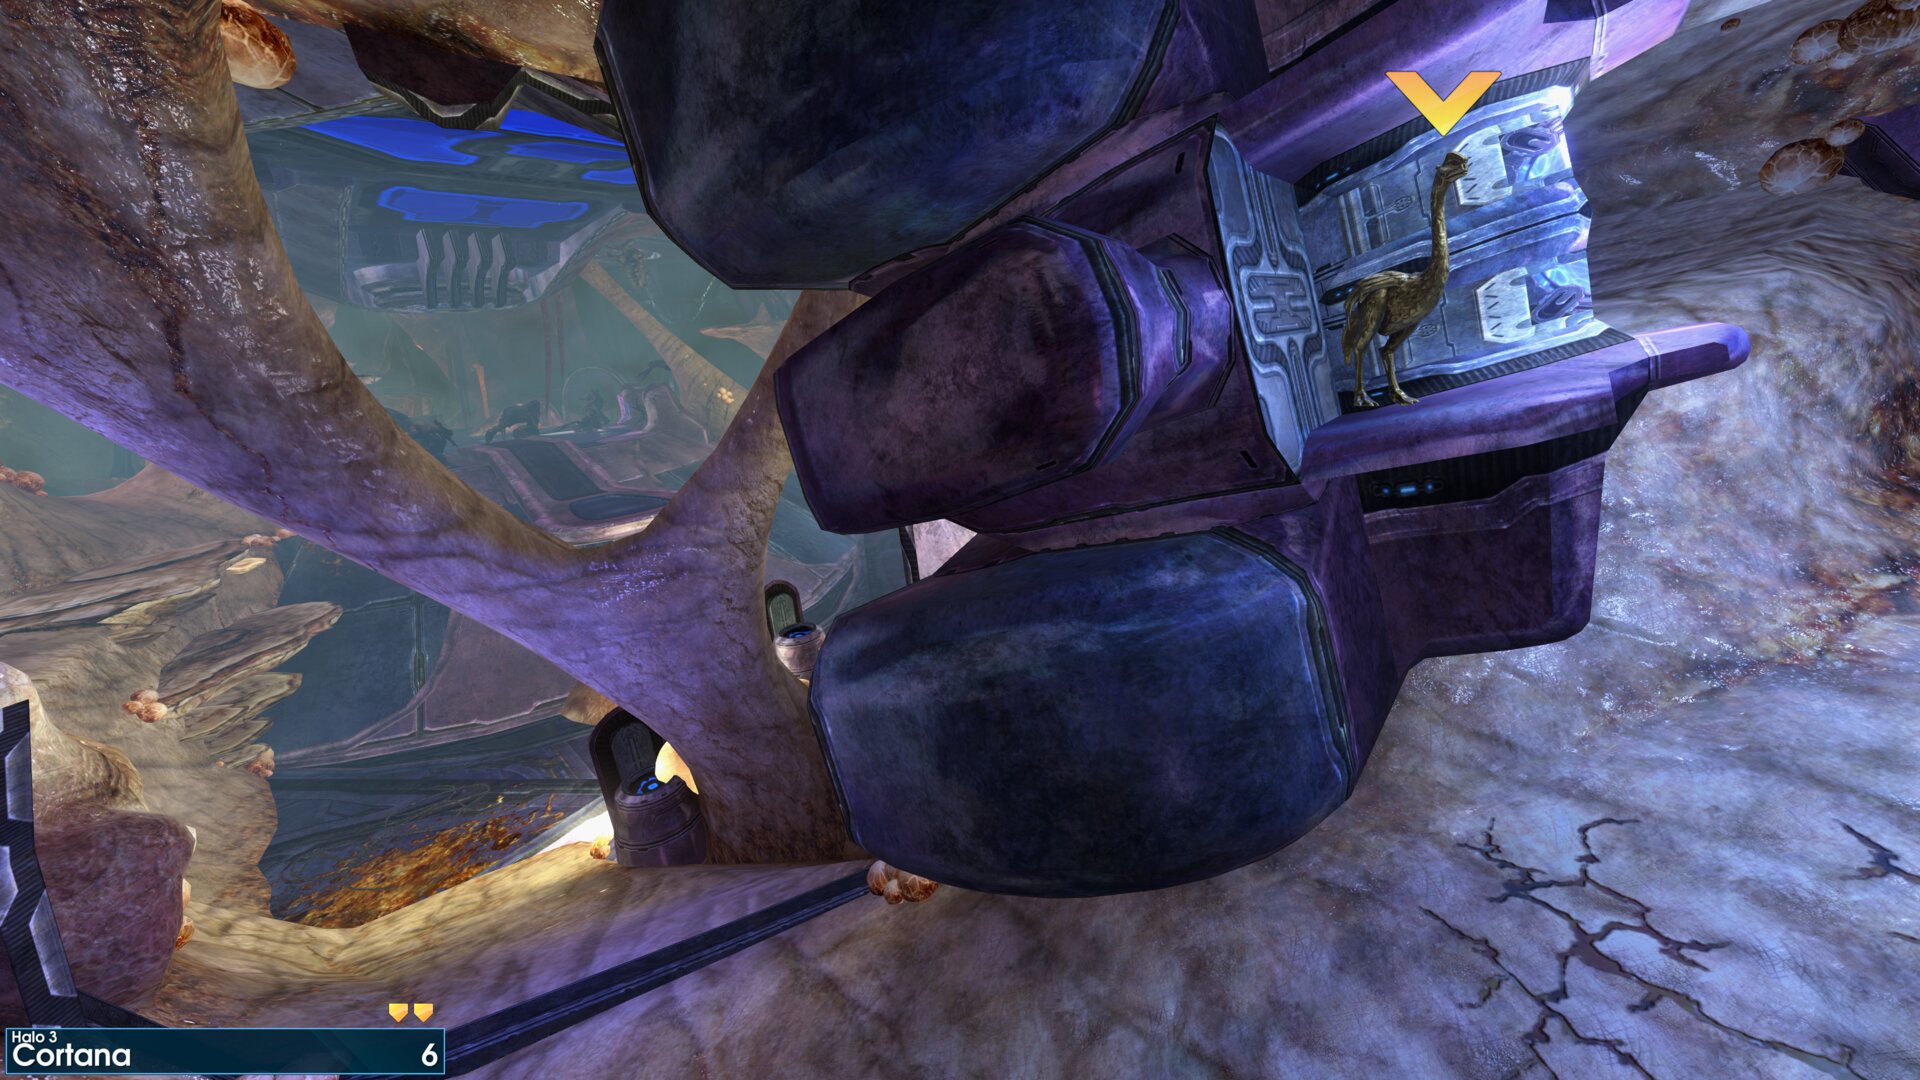
As you leave the Bridge (the room with a hidden terminal/Cortana moment and the Tilt skull), look to your left.
Golden Moa 7
In a hole in the wall, as you go up a long narrow corridor. Look for the 2 purple pillars, the hole is in the opposite wall of the far pillar.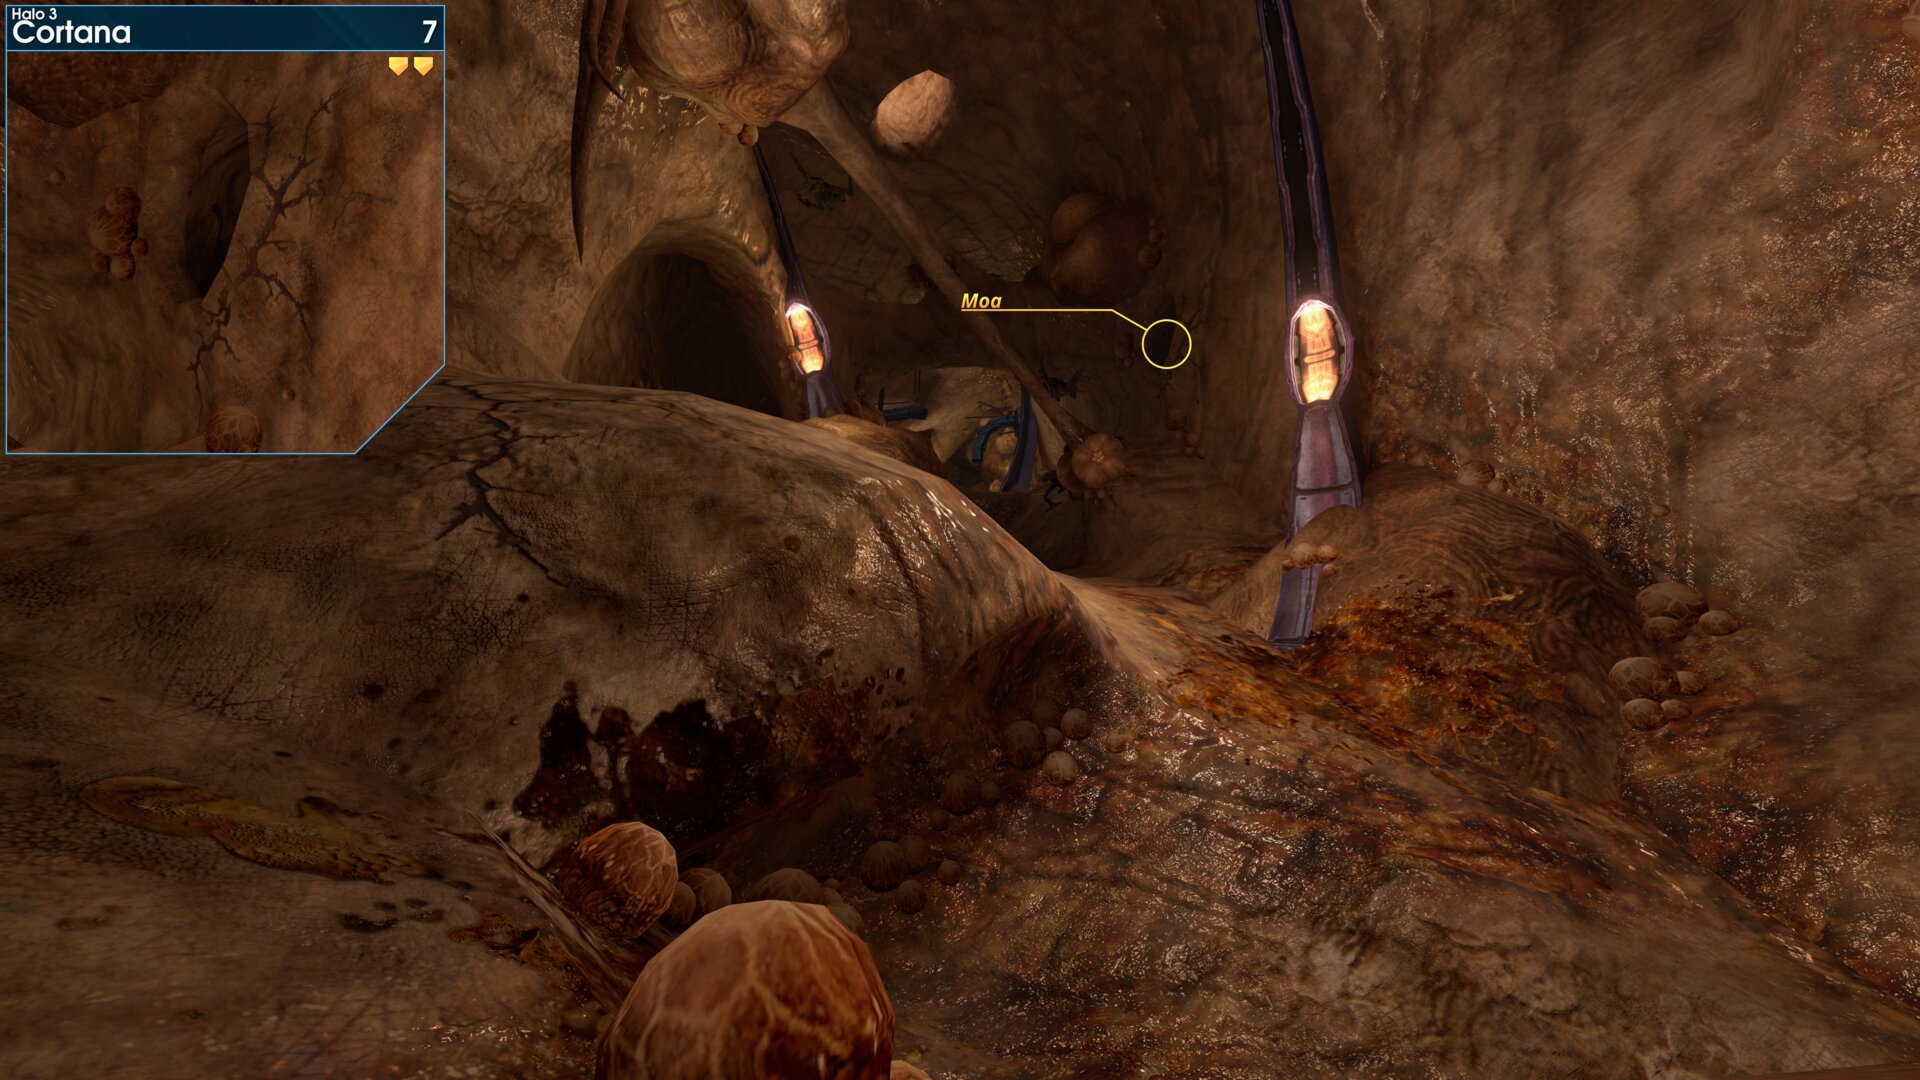
In a hole in the wall, as you go up a long narrow corridor. Look for the 2 purple pillars, the hole is in the opposite wall of the far pillar.
Golden Moa 8
In the last combat room before the reactor room, where the intended path has you spiral up counter-clockwise to the next door. Go up the first ramp, you find the Moa on a pedestal in the tunnel ahead.
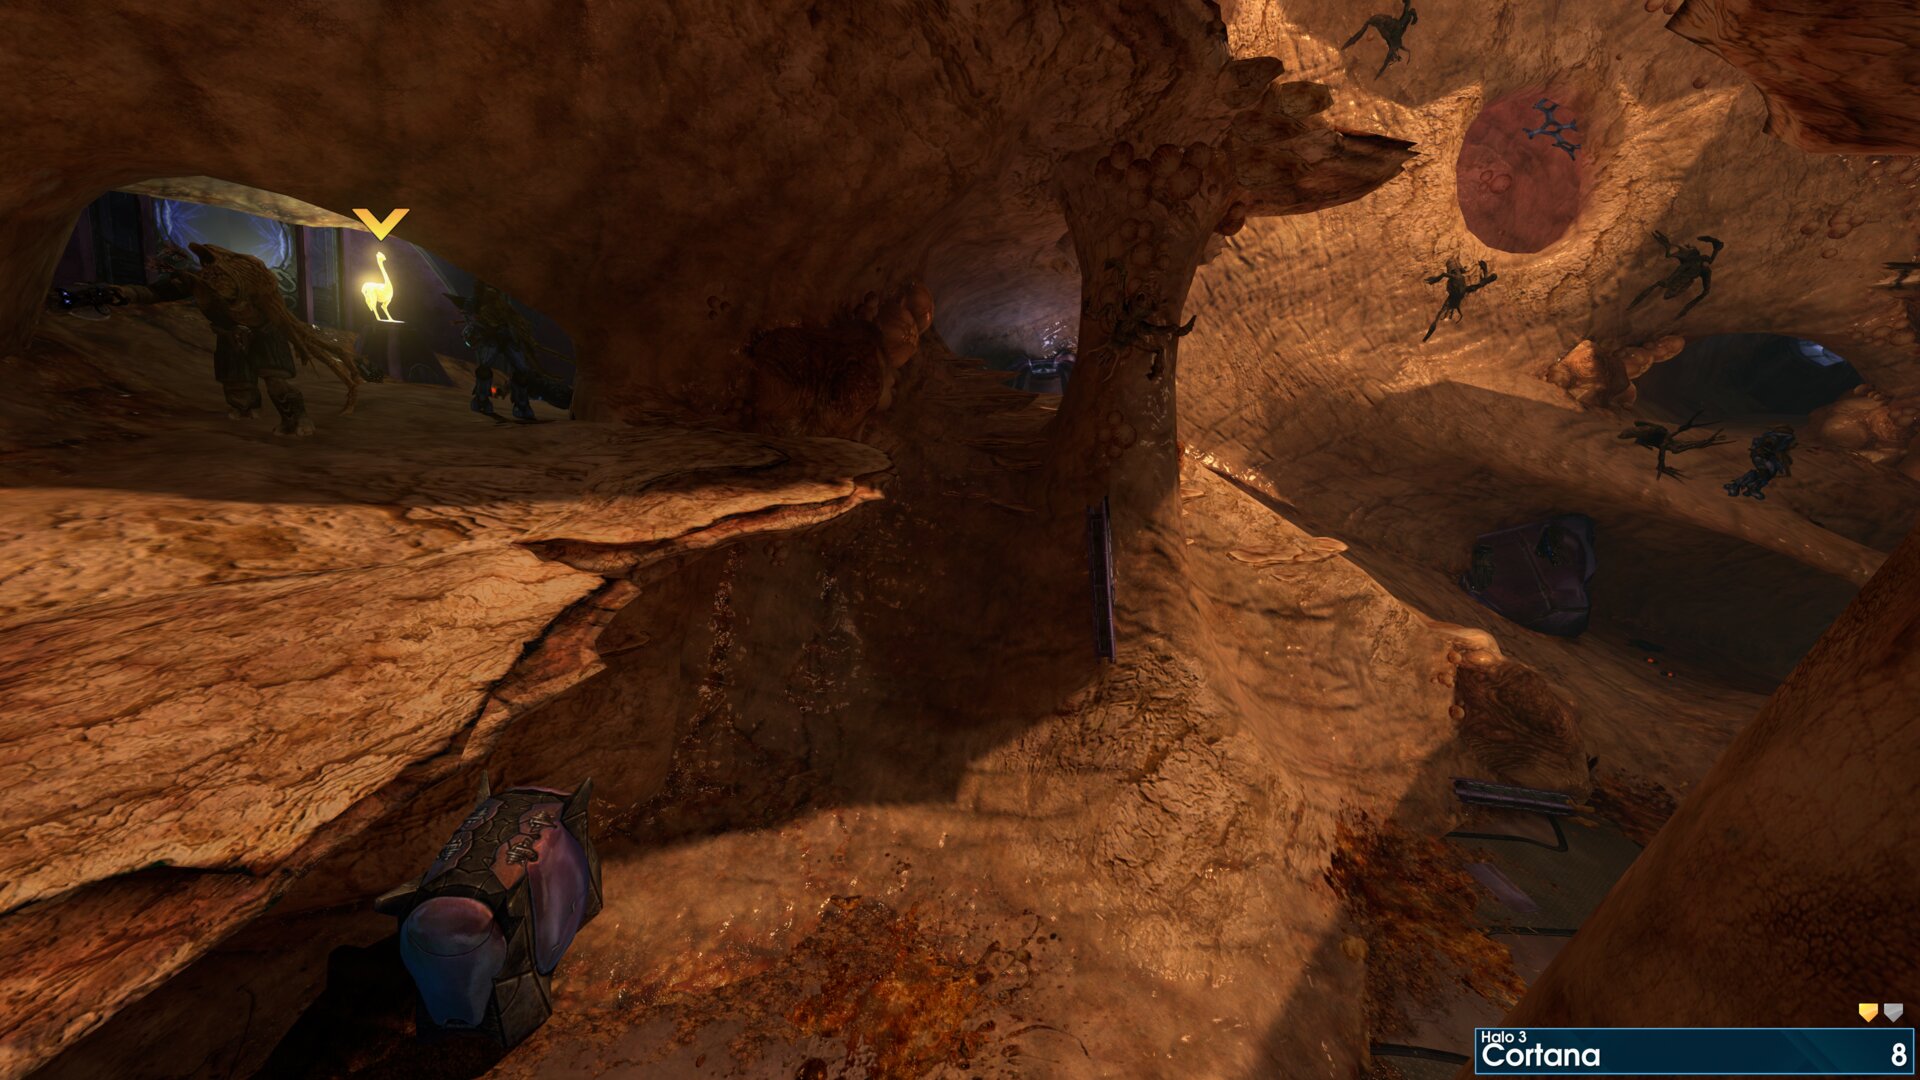
In the last combat room before the reactor room, where the intended path has you spiral up counter-clockwise to the next door. Go up the first ramp, you find the Moa on a pedestal in the tunnel ahead.
Golden Moa 9
In the Reactor room, on the reactor that explodes as you enter the room.
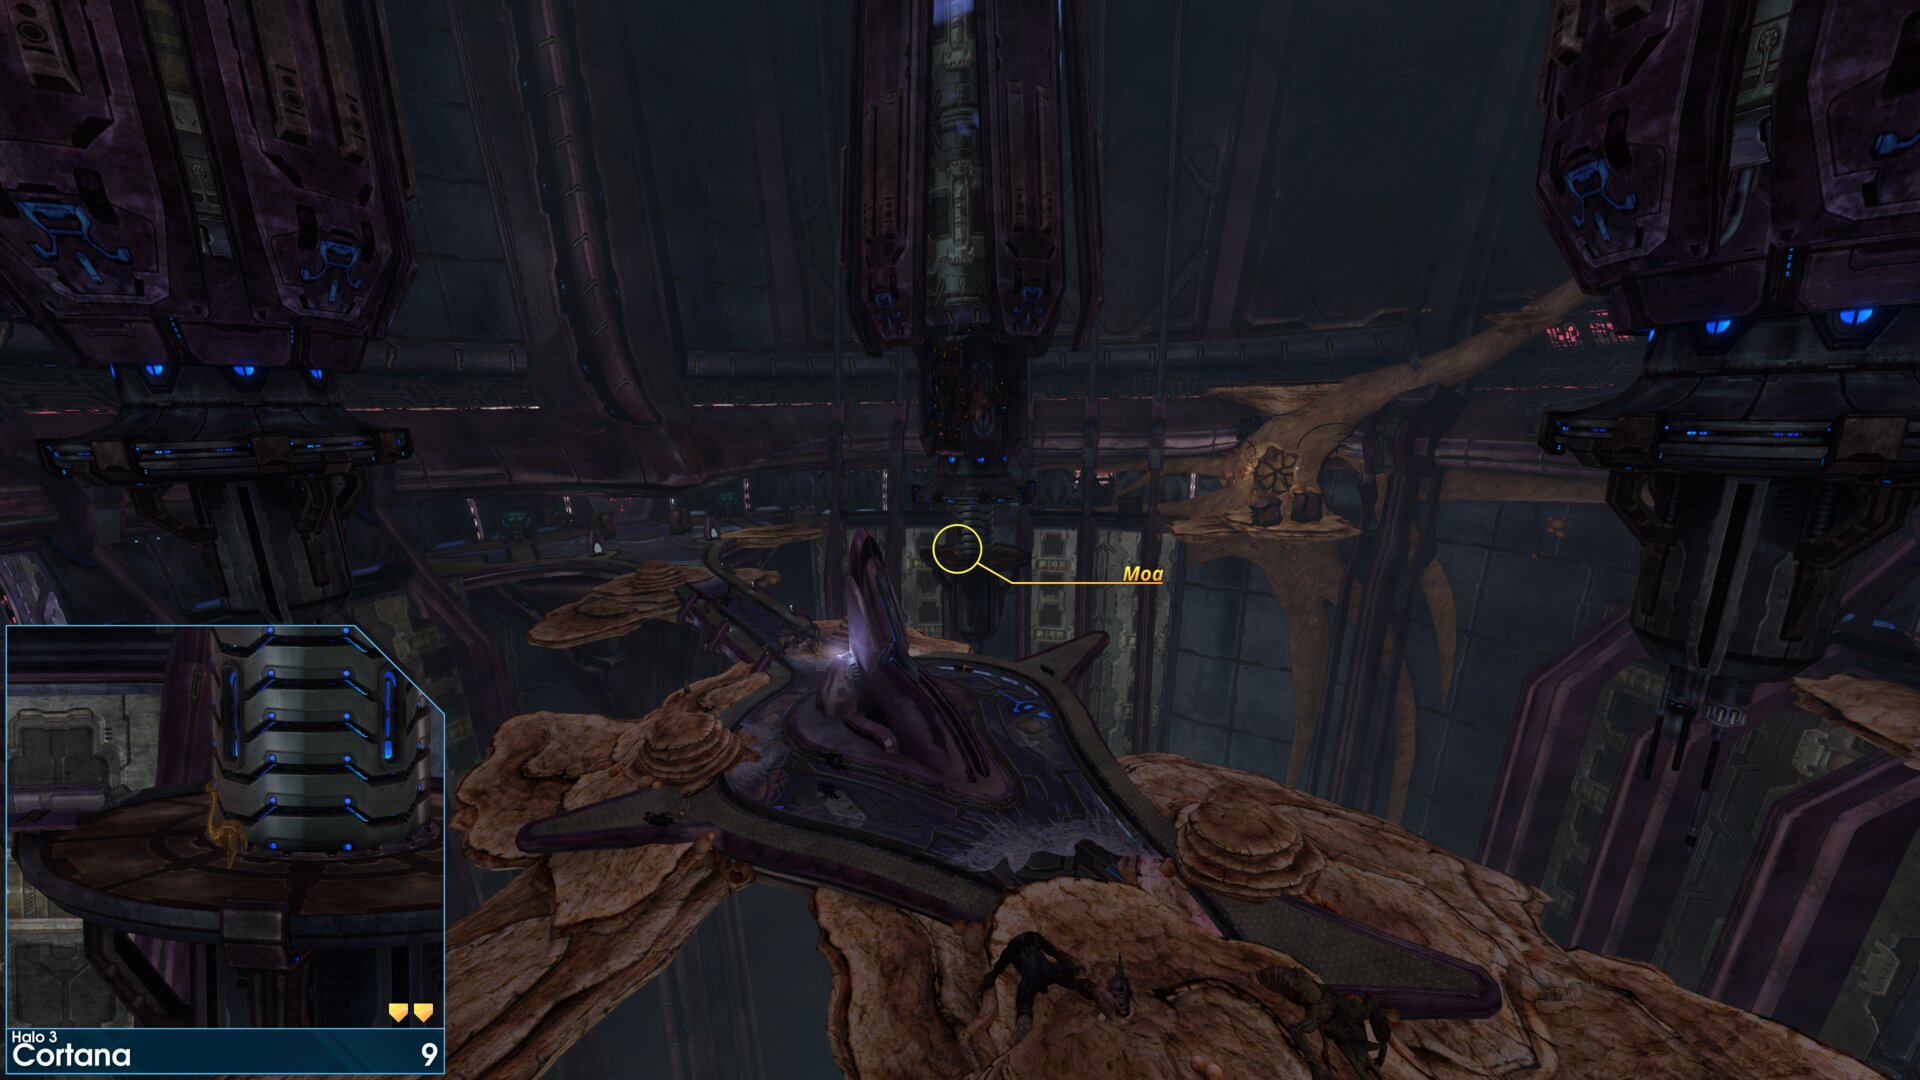
In the Reactor room, on the reactor that explodes as you enter the room.
➟ Halo
Rally Point: Alpha
Note: Moa's 2, 3 & 4 can be reached from rally point Bravo.
Rally Point: Bravo
Note: Moa's 2, 3 & 4 can be reached from rally point Bravo.
Golden Moa 1
Inside the crashed Pelican at the start.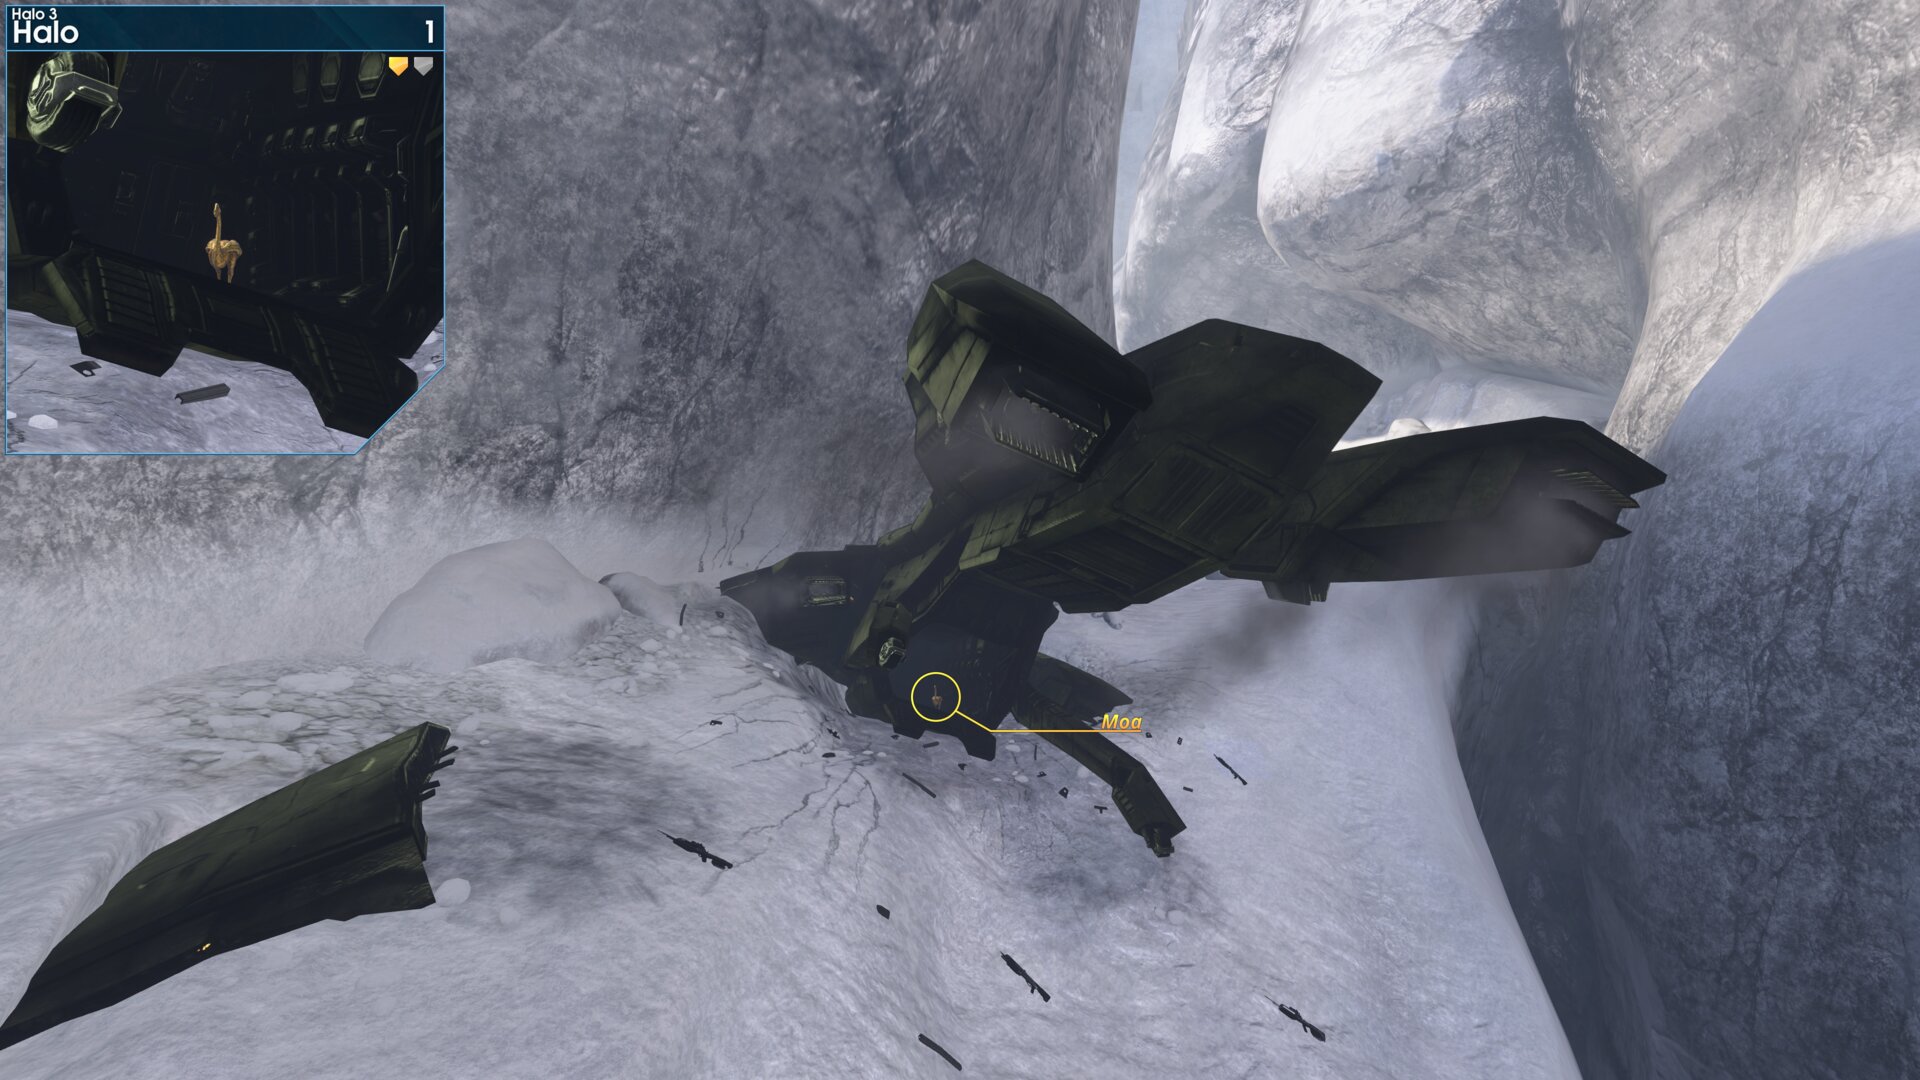
Inside the crashed Pelican at the start.
Golden Moa 2
On a ledge above the cave exit to the Control Room canyon.
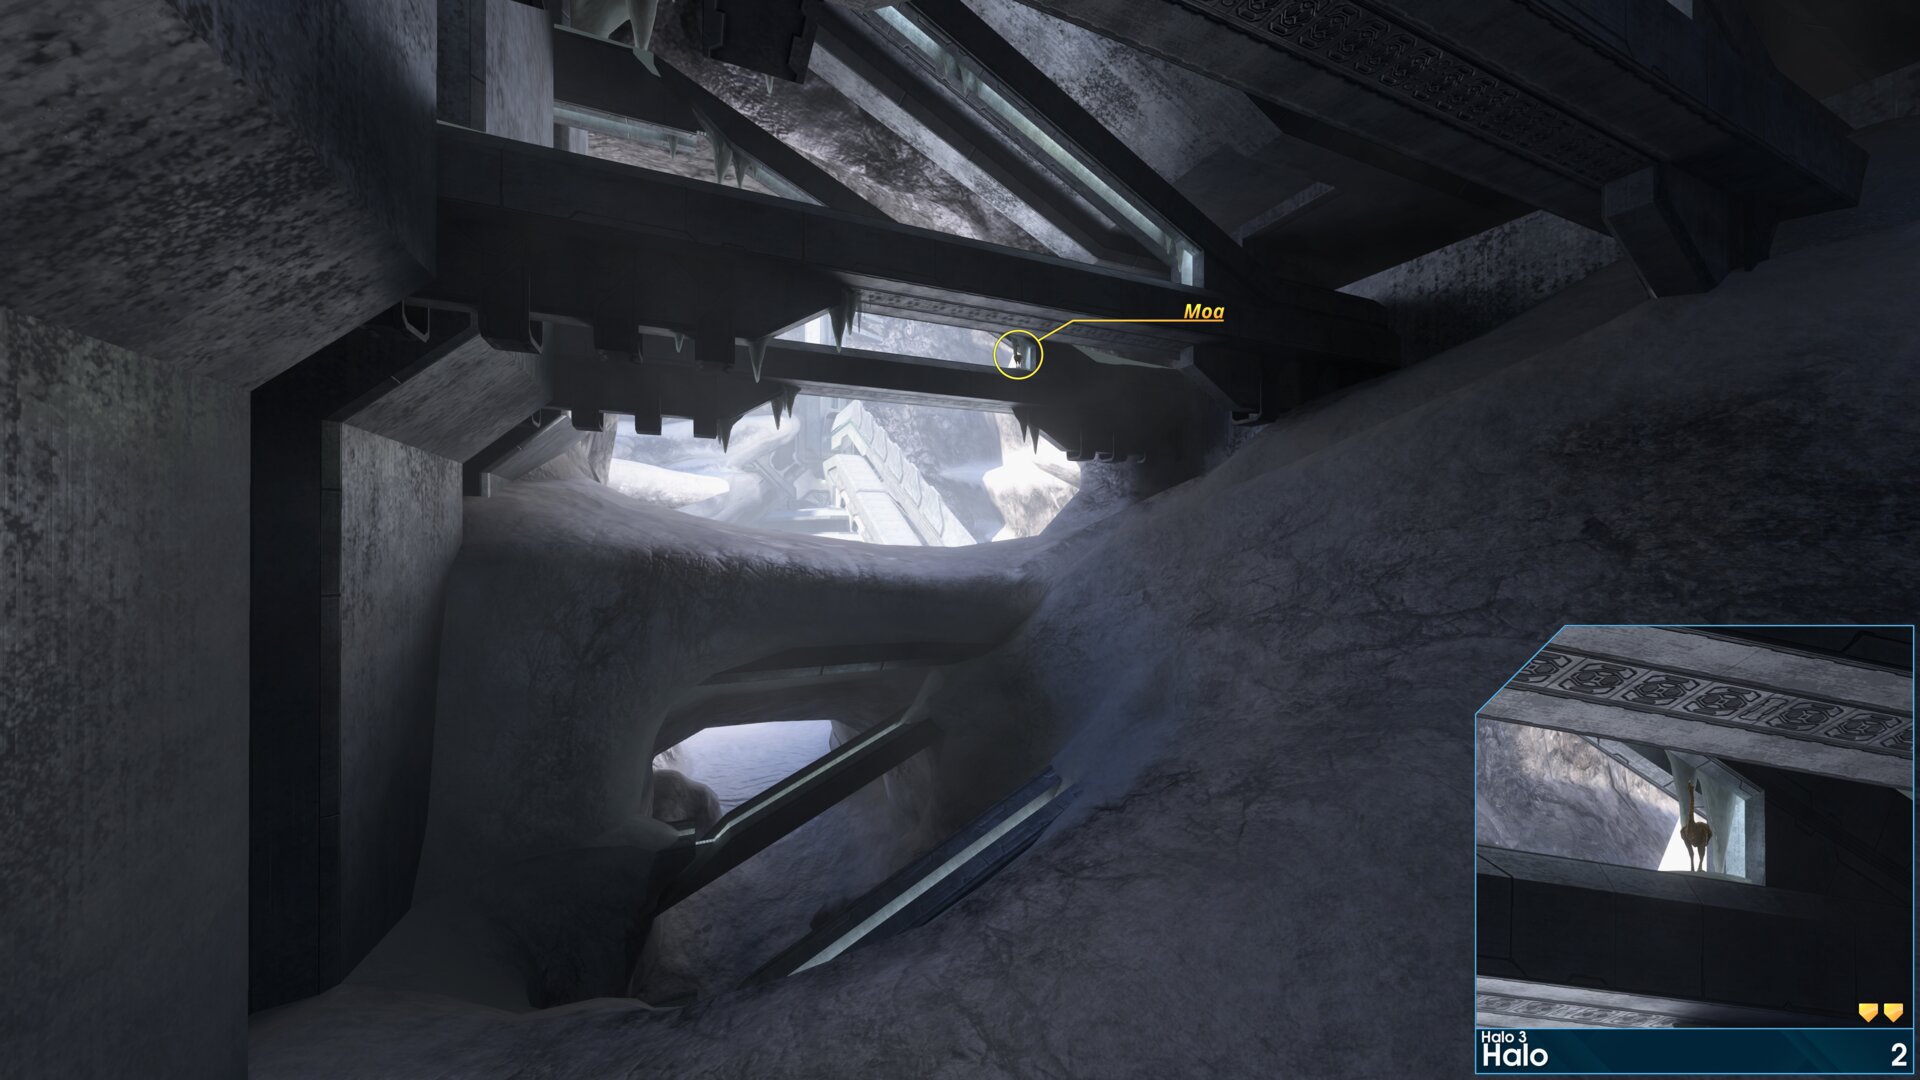
On a ledge above the cave exit to the Control Room canyon.
Golden Moa 3
On the cliff, to the left of the exterior Control Room door.
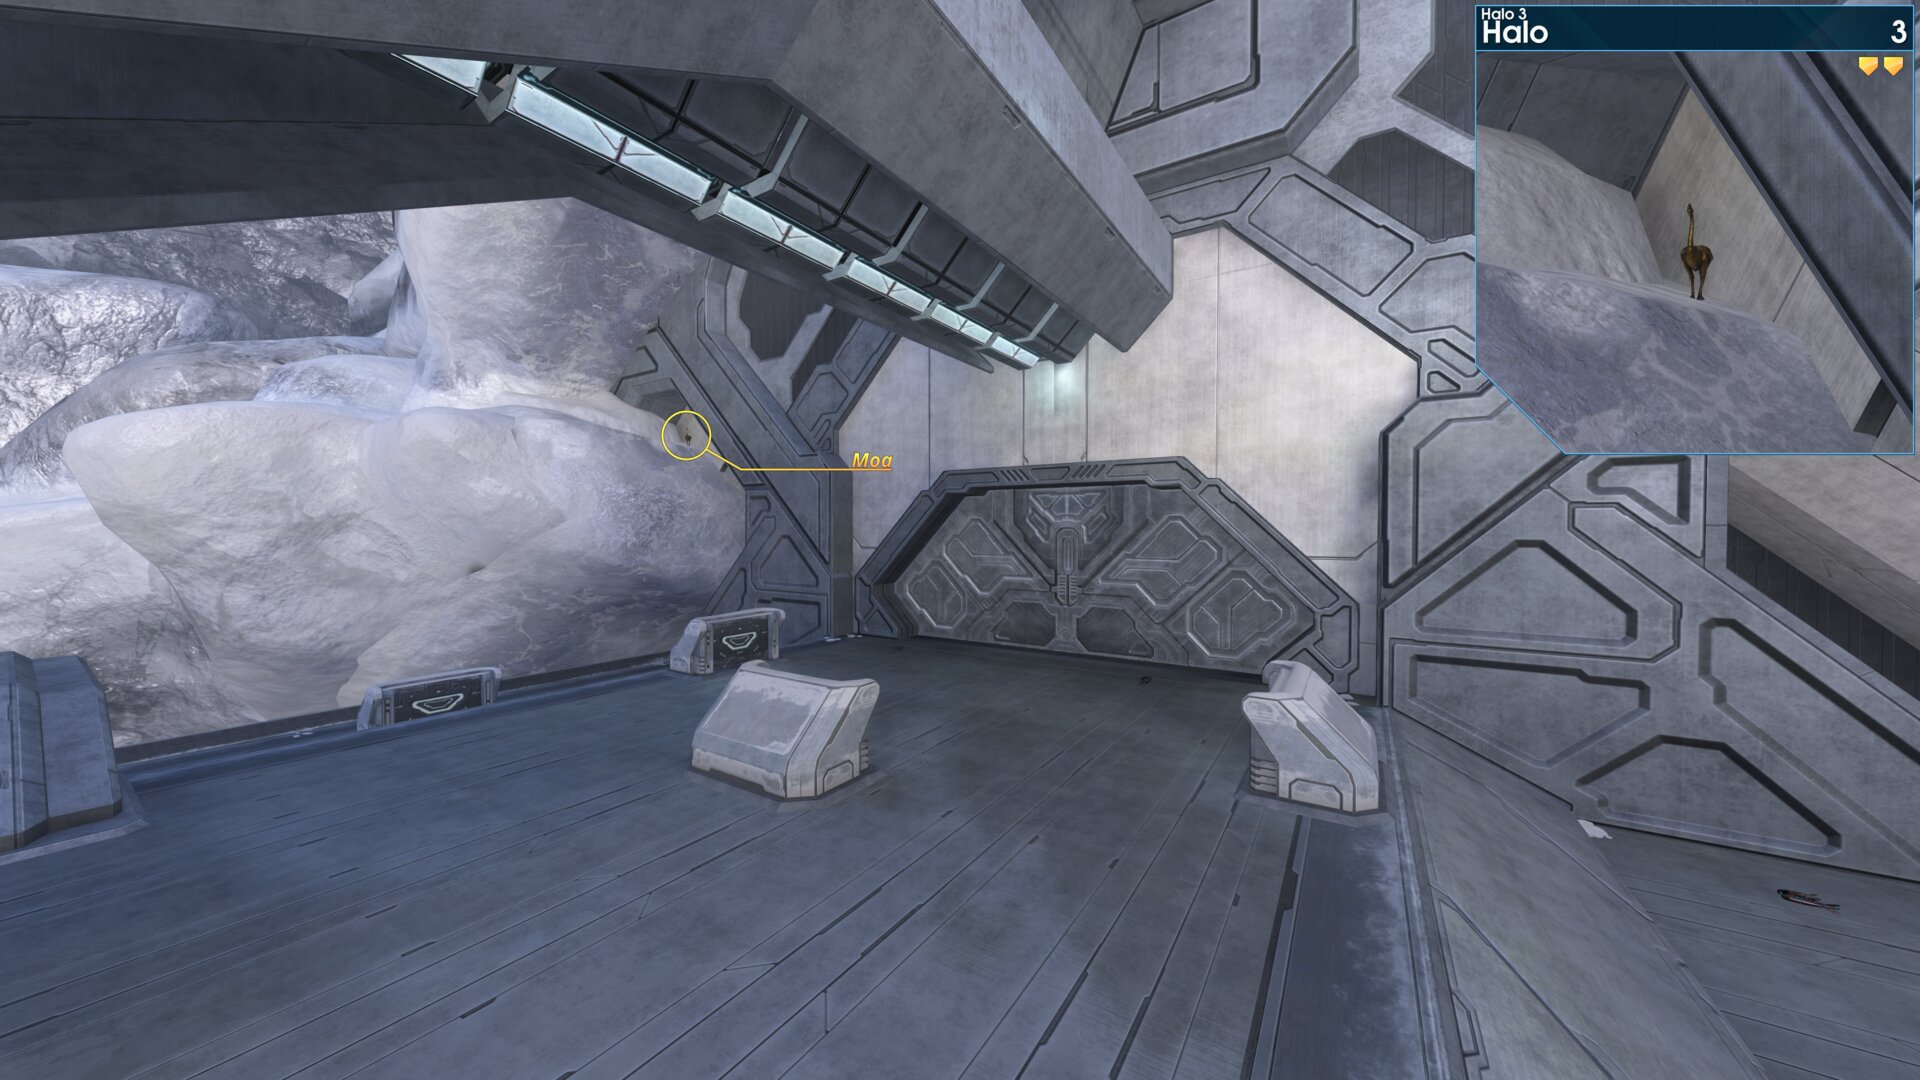
On the cliff, to the left of the exterior Control Room door.
Golden Moa 4
On the third last pedestal, along the left wall, as you enter the corridors to the Control Room.
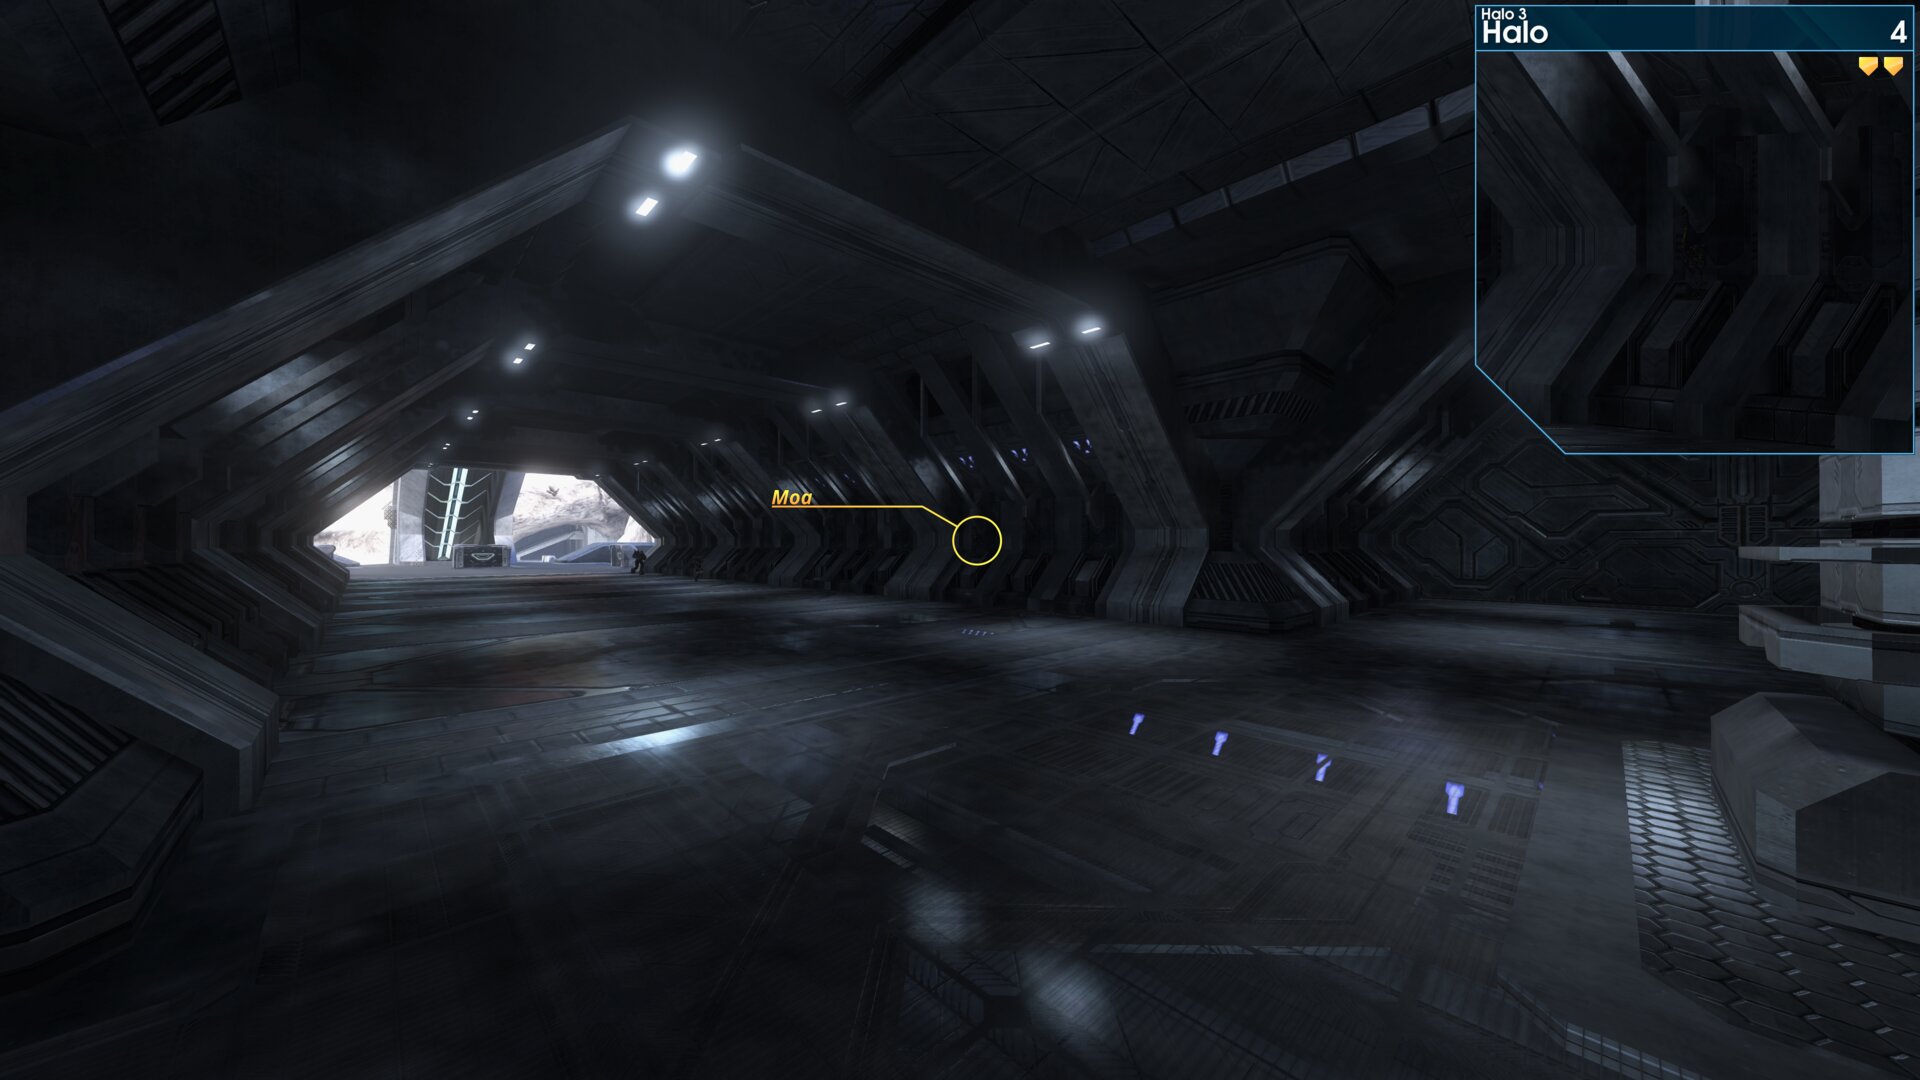
On the third last pedestal, along the left wall, as you enter the corridors to the Control Room.
Rally Point: Bravo
Golden Moa 5
Near the door that leads to the corridor with 4 Flood Carriers.
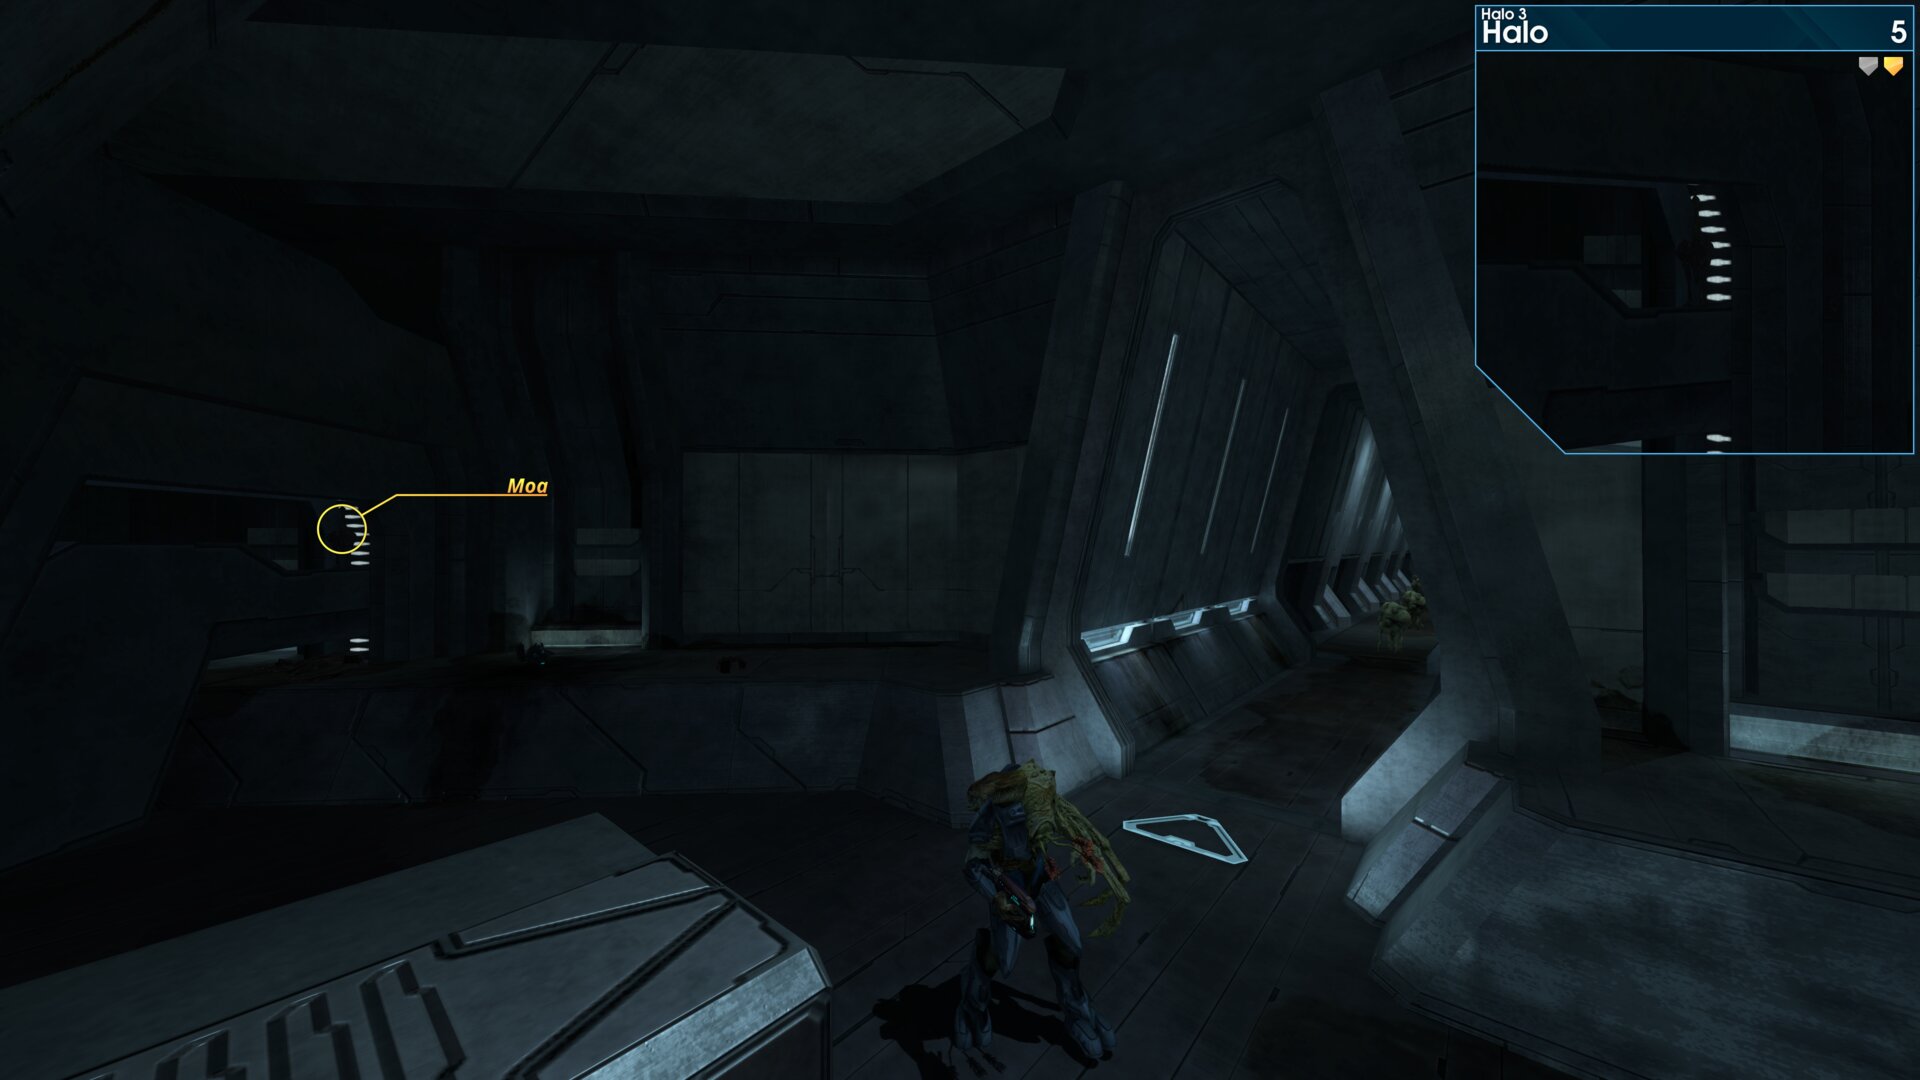
Near the door that leads to the corridor with 4 Flood Carriers.
Golden Moa 6
On a bolder, just beyond where you get the Warthog.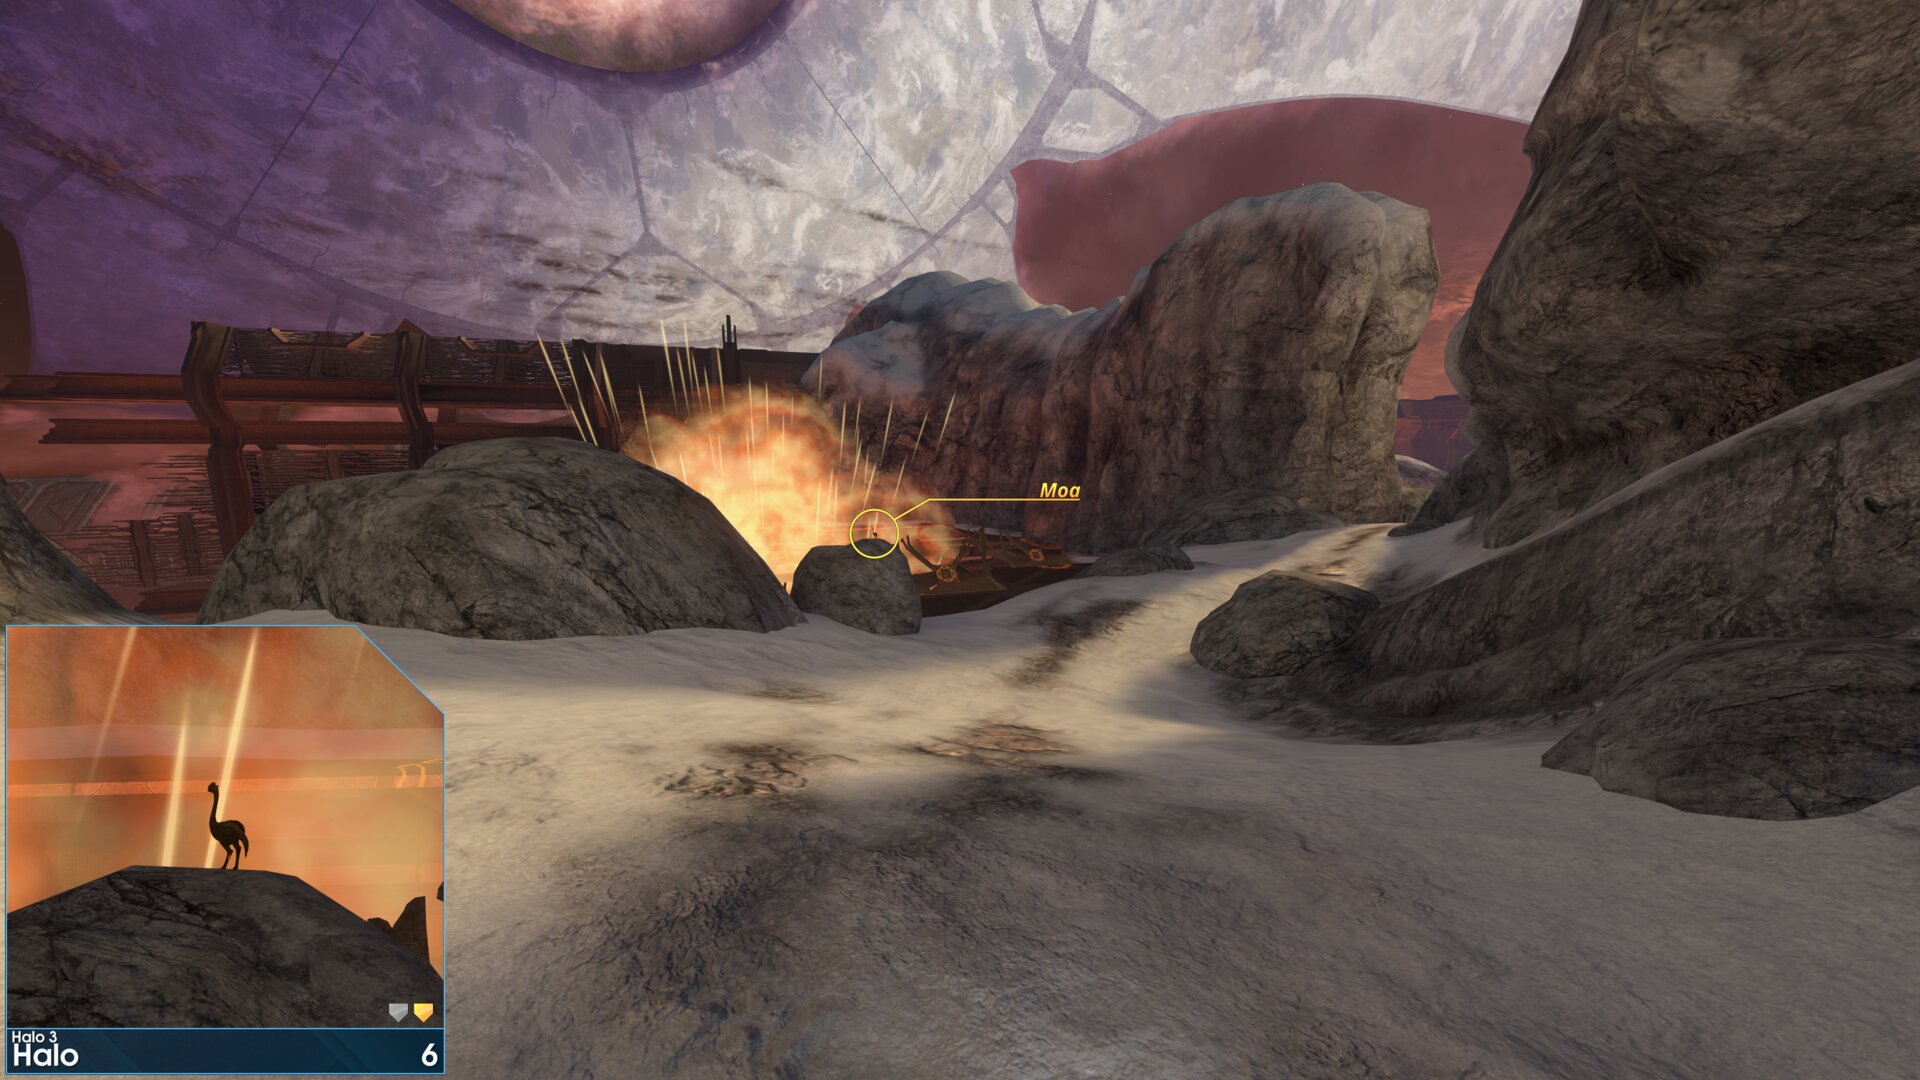
On a bolder, just beyond where you get the Warthog.
Golden Moa 7
It's at the exit of the first circular platform you'll drive around. Normally, you'll find the Moa in the floor with just it's head showing, this is because of the platform shifting. Alternatively it'll be up on the wall, as shown in the right image, this is where you'll find it when using the Acrophobia skull.
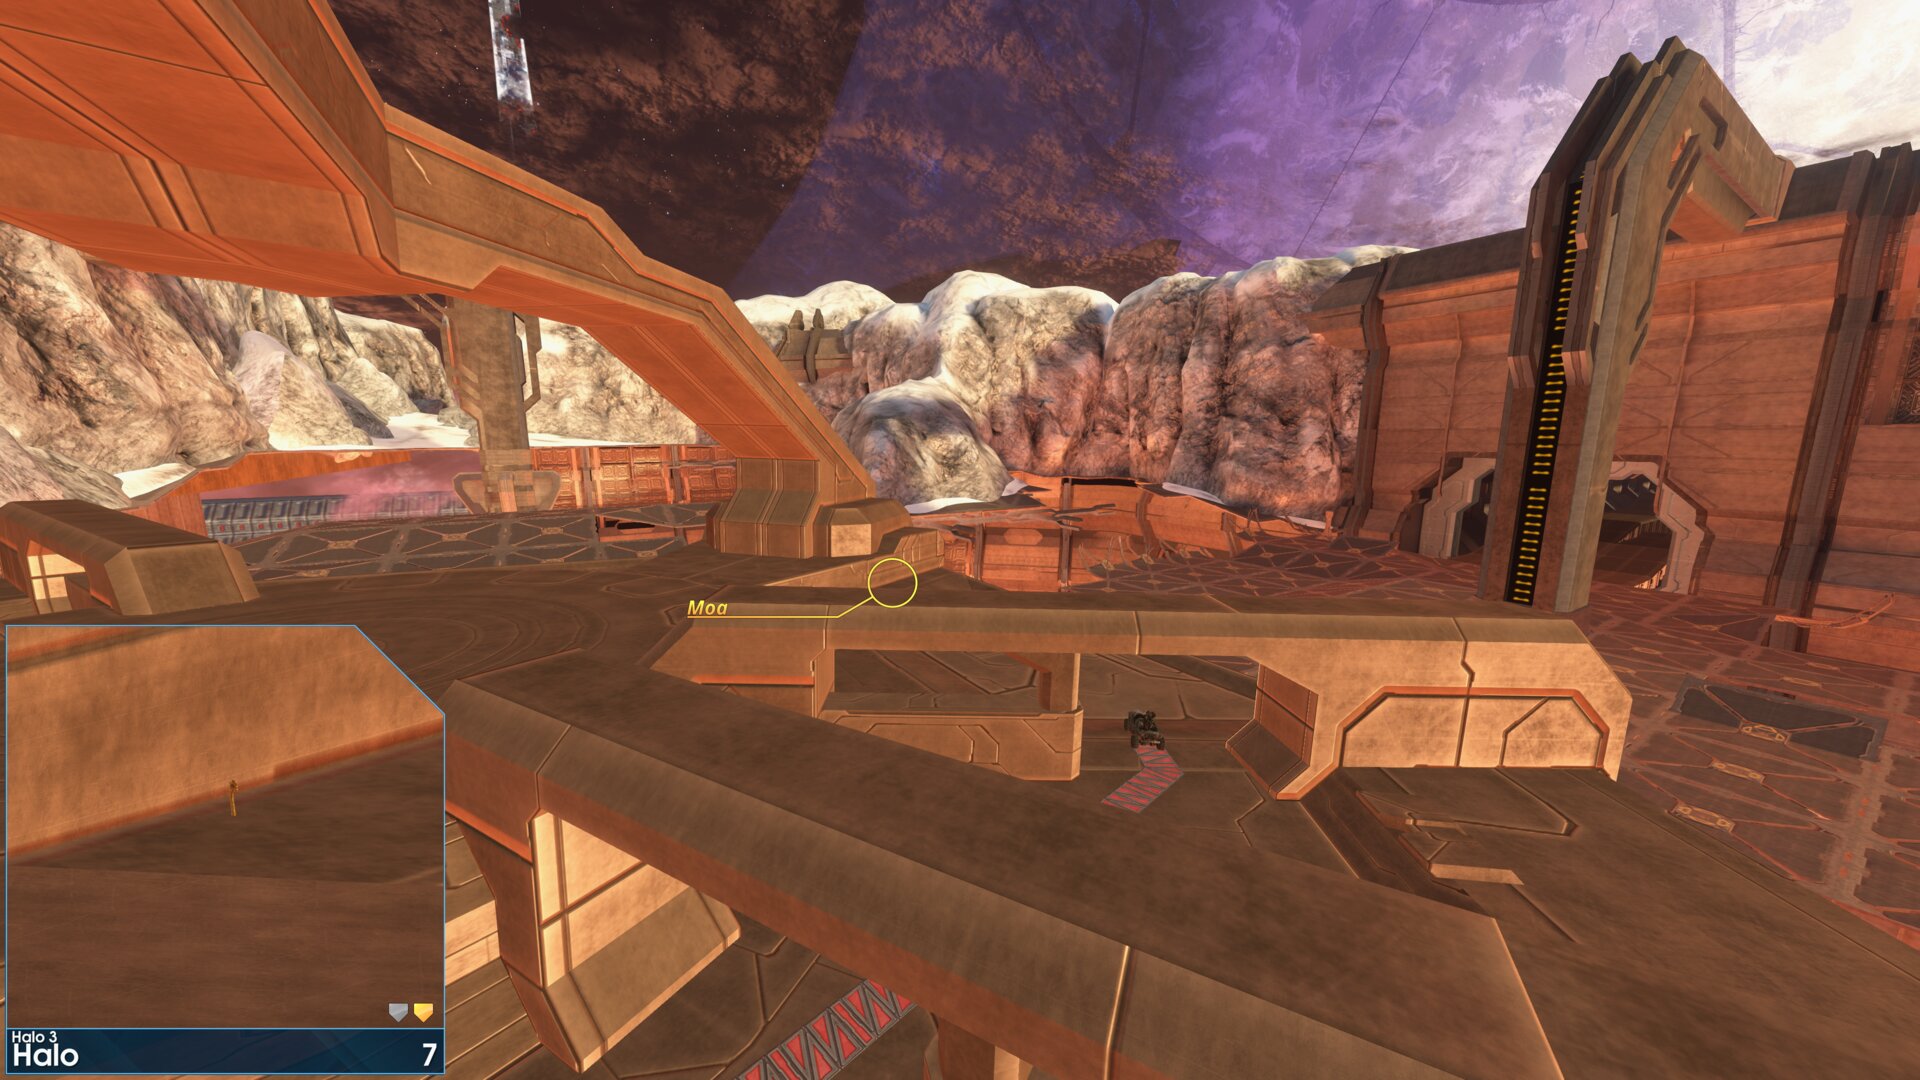
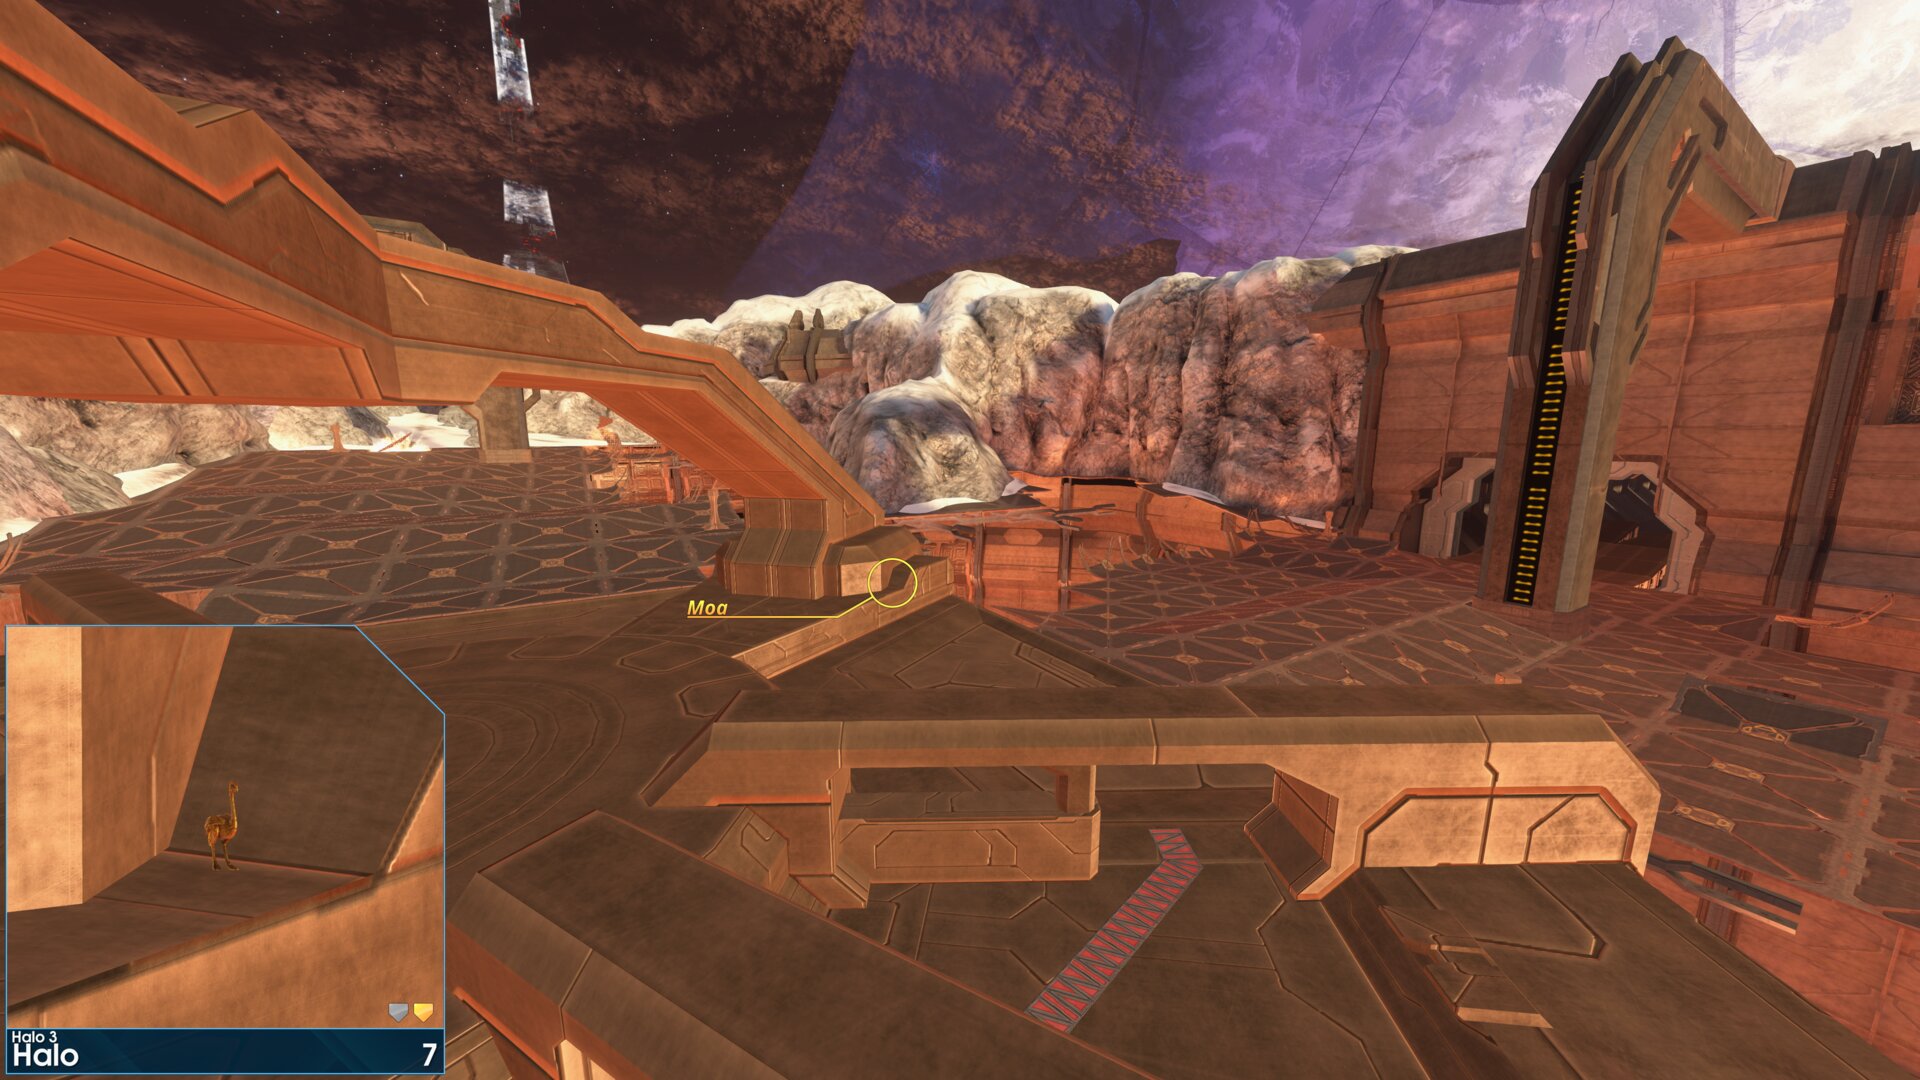
It's at the exit of the first circular platform you'll drive around. Normally, you'll find the Moa in the floor with just it's head showing, this is because of the platform shifting. Alternatively it'll be up on the wall, as shown in the right image, this is where you'll find it when using the Acrophobia skull.
Golden Moa 8
At the start of the second tunnel during the Warthog run, on a ledge, on the right side.
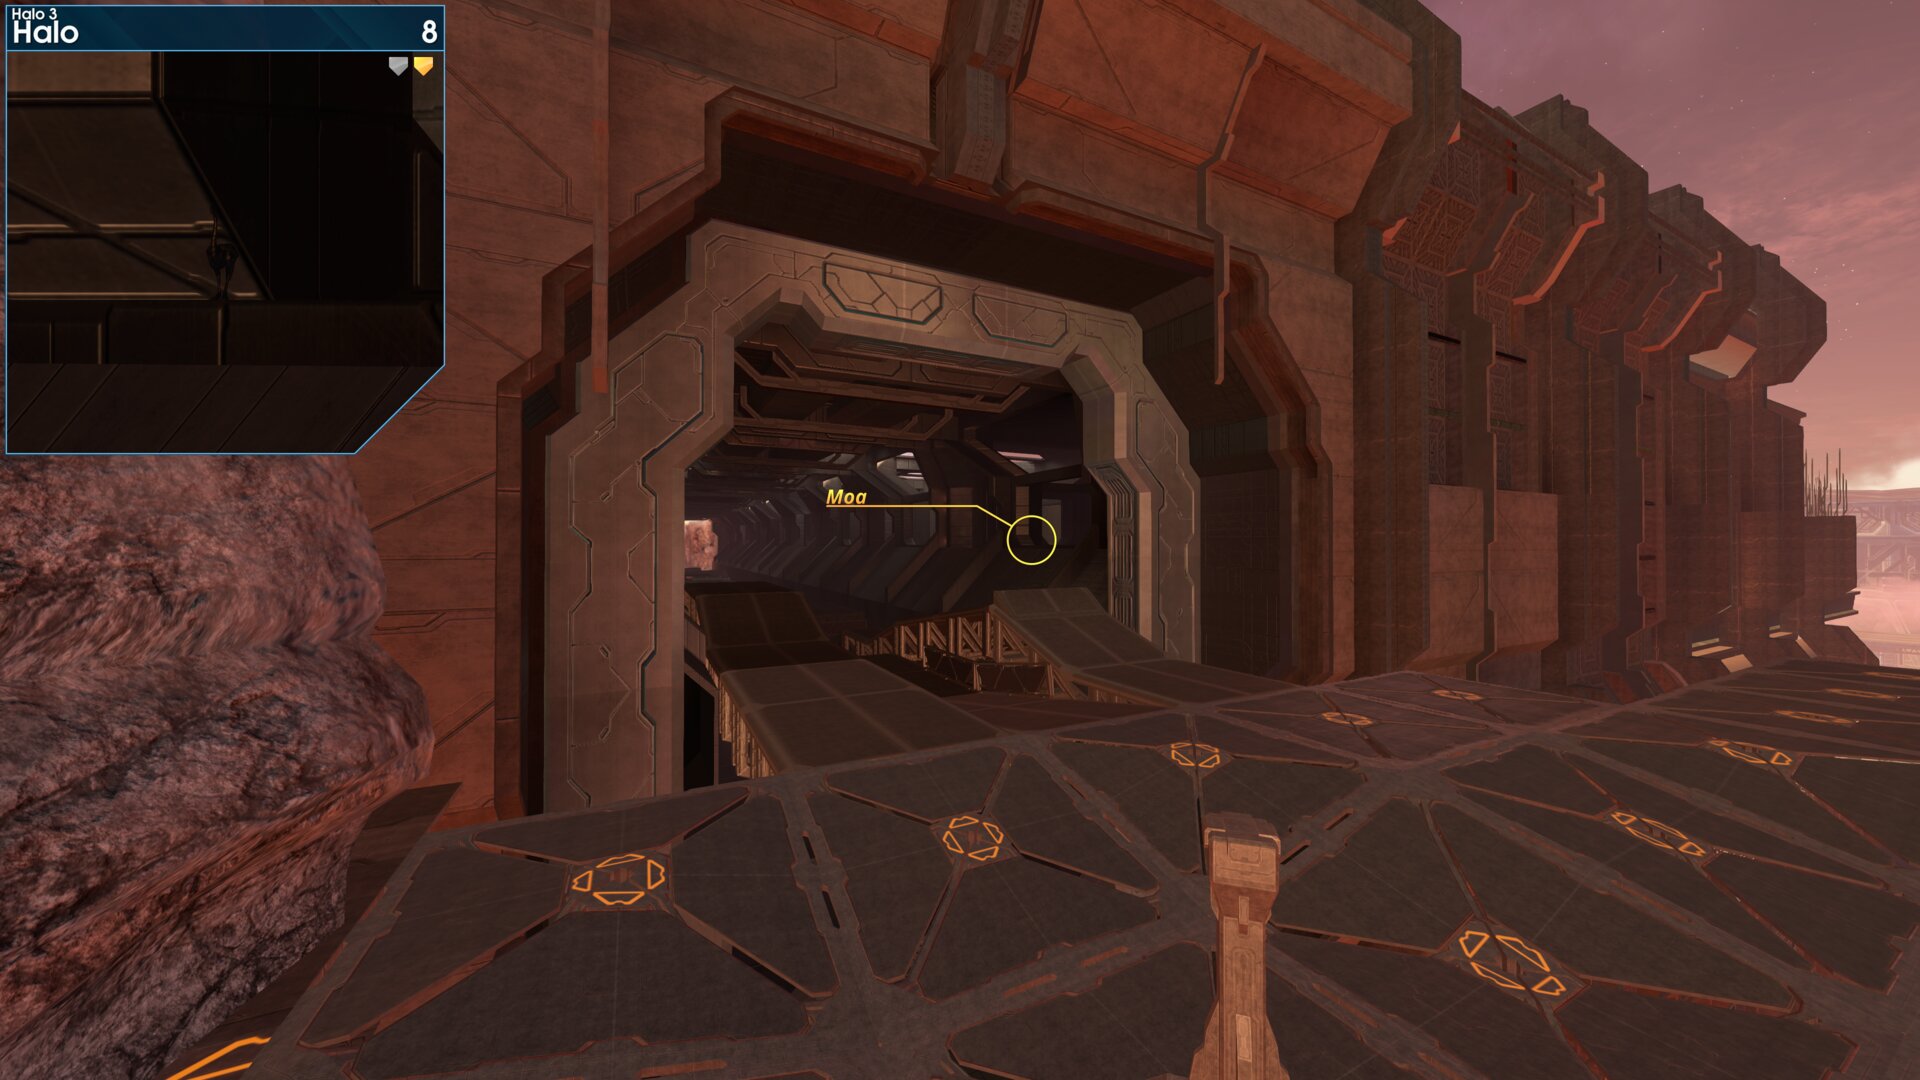
At the start of the second tunnel during the Warthog run, on a ledge, on the right side.
Golden Moa 9
Between some rocks at the exit of the second tunnel, to the left of the ramp.
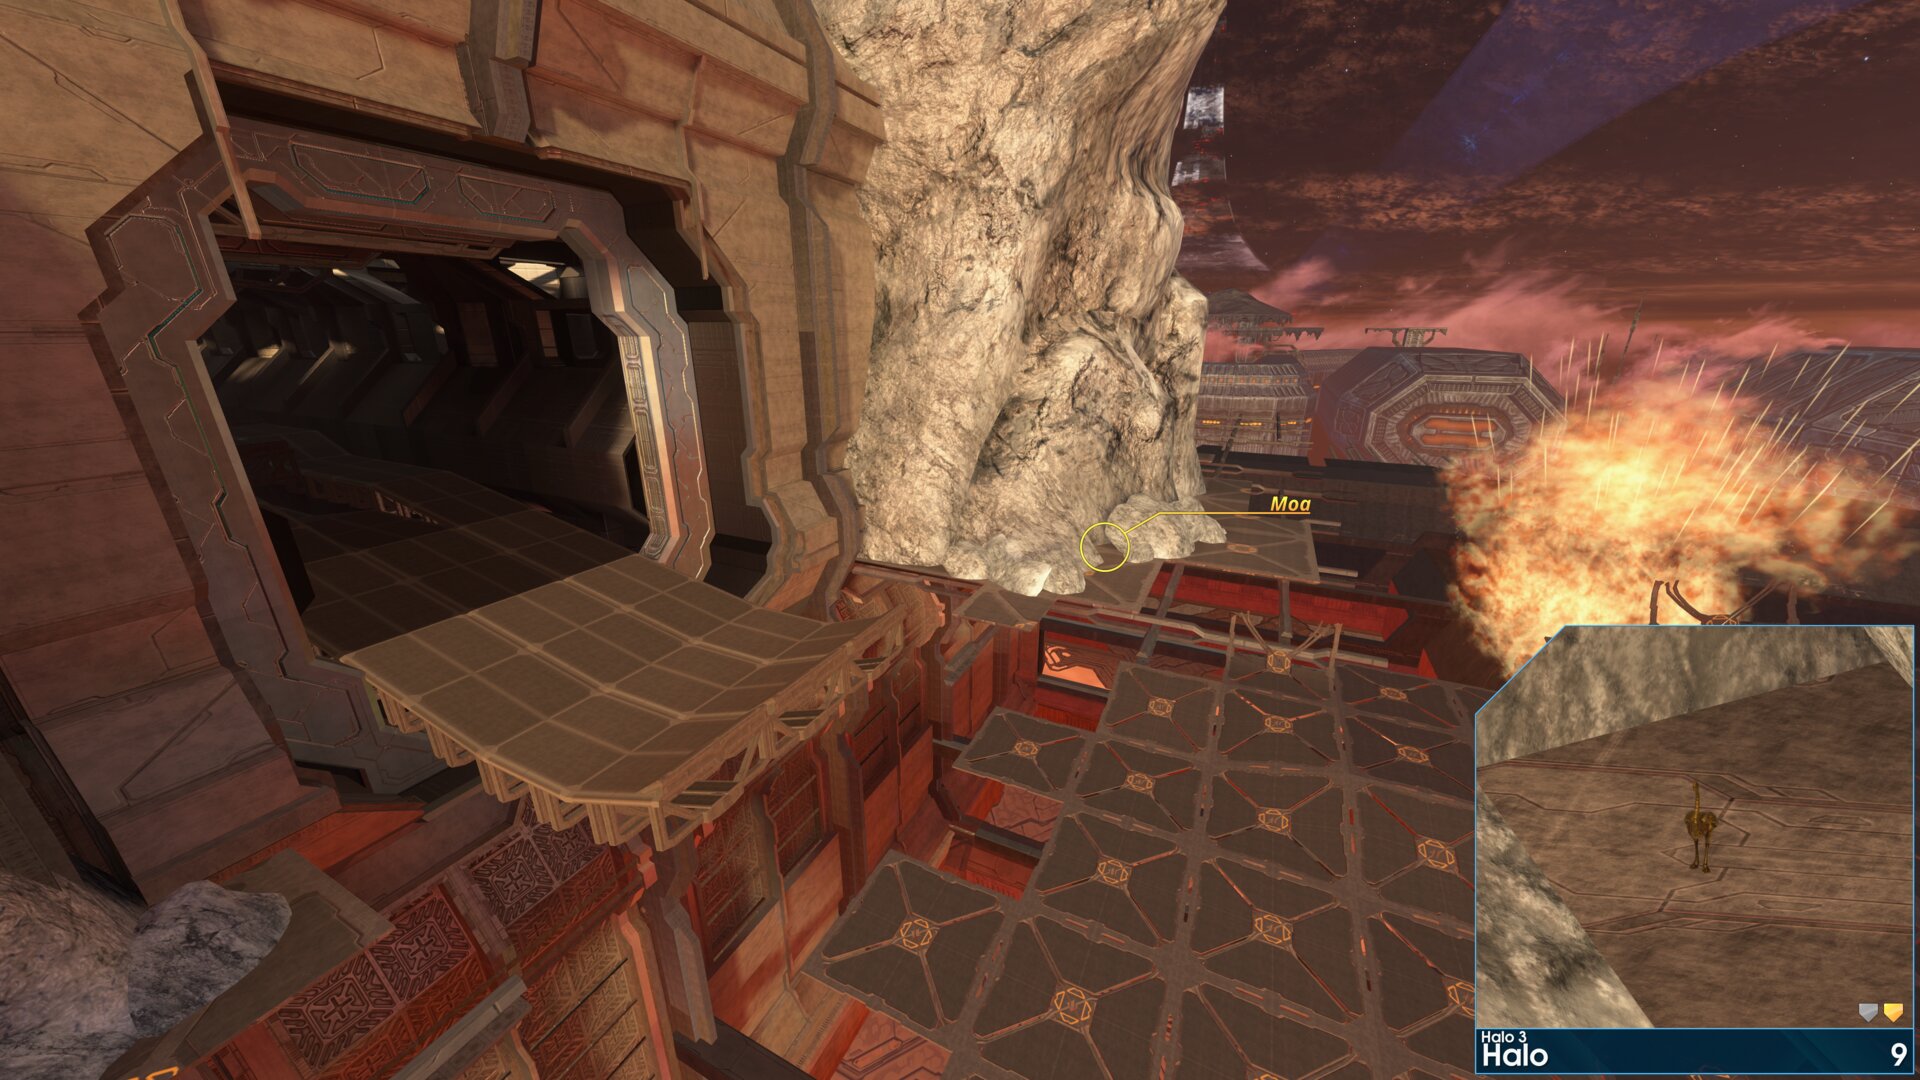
Between some rocks at the exit of the second tunnel, to the left of the ramp.
Halo 3: ODST
➟ Tayari Plaza
Rally Point: Alpha
Rally Point: Bravo
Rally Point: Charlie
Golden Moa 1
Beside the locked blast door at the start of the mission.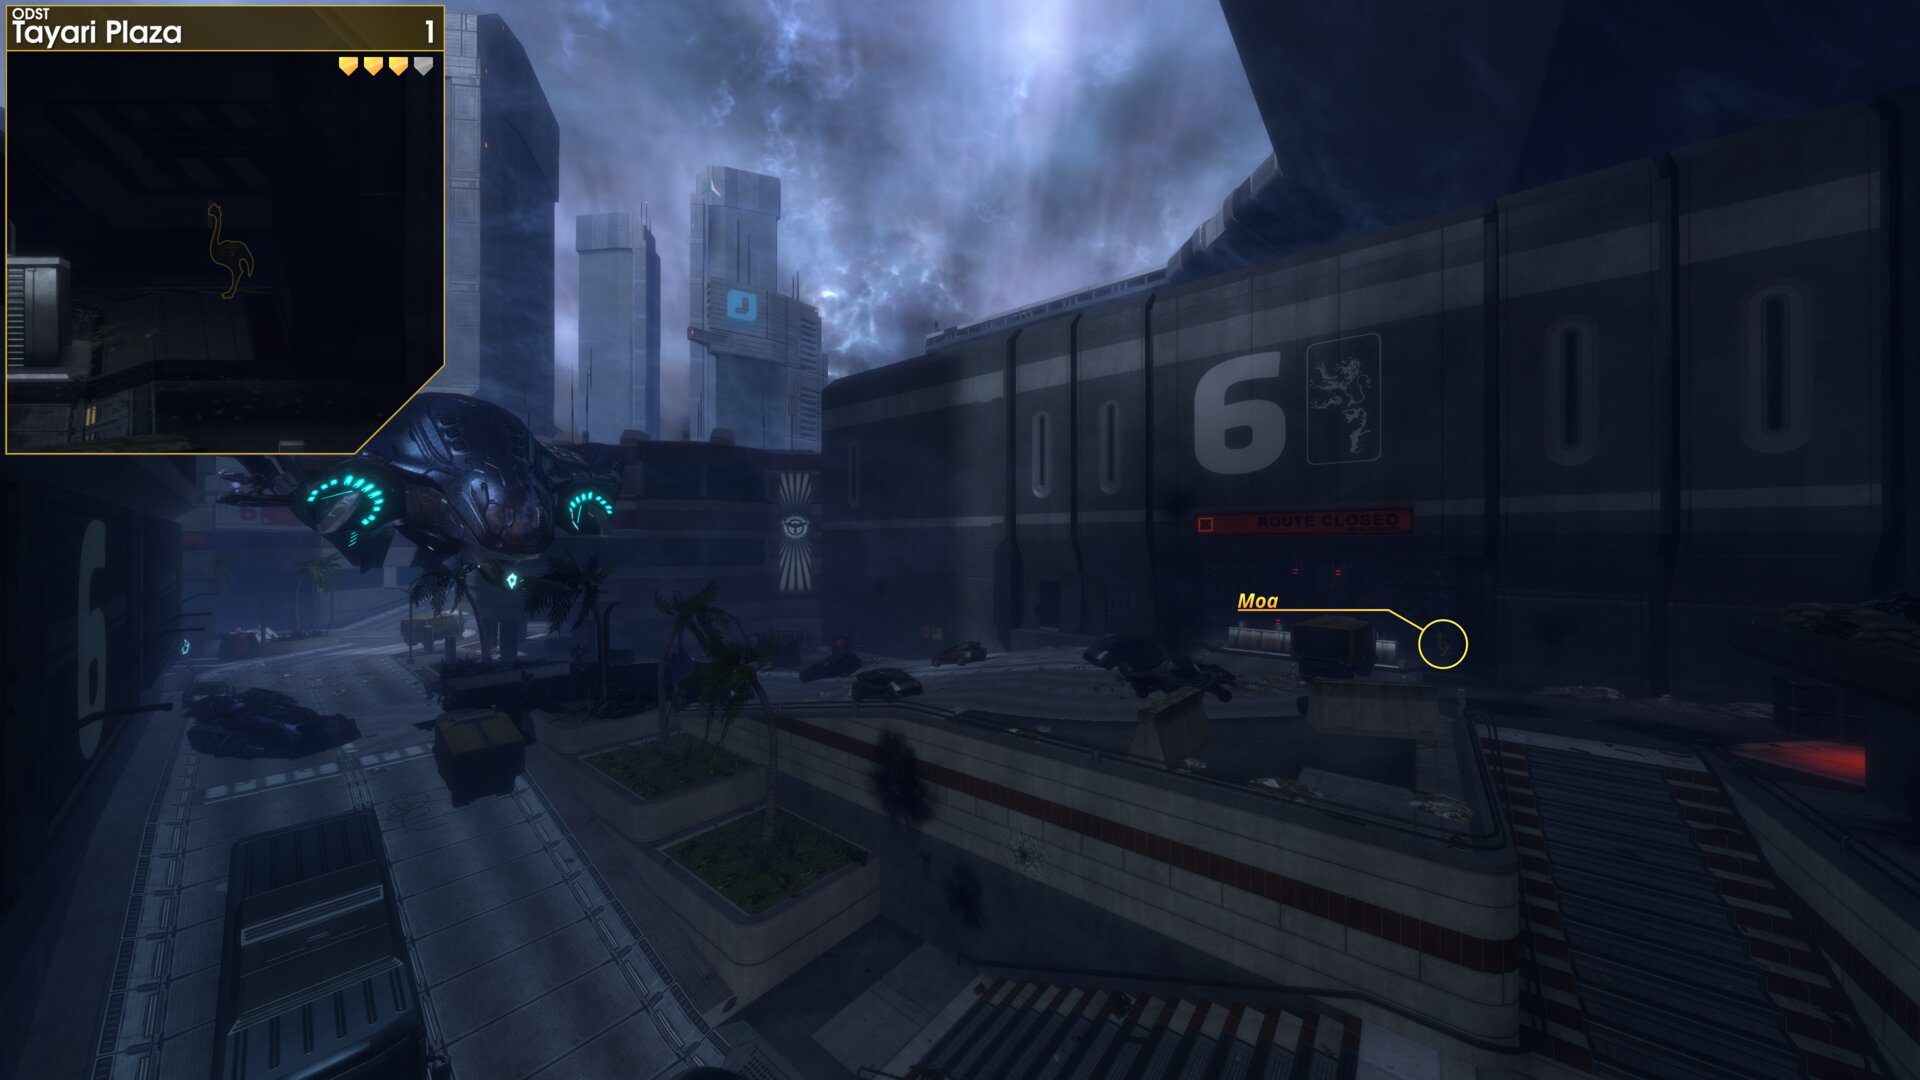
Beside the locked blast door at the start of the mission.
Golden Moa 2
From the start of the mission follow the road north past the Wraith, up to the Covenant comm relay, the Golden Moa is in the corner by the dumpster.
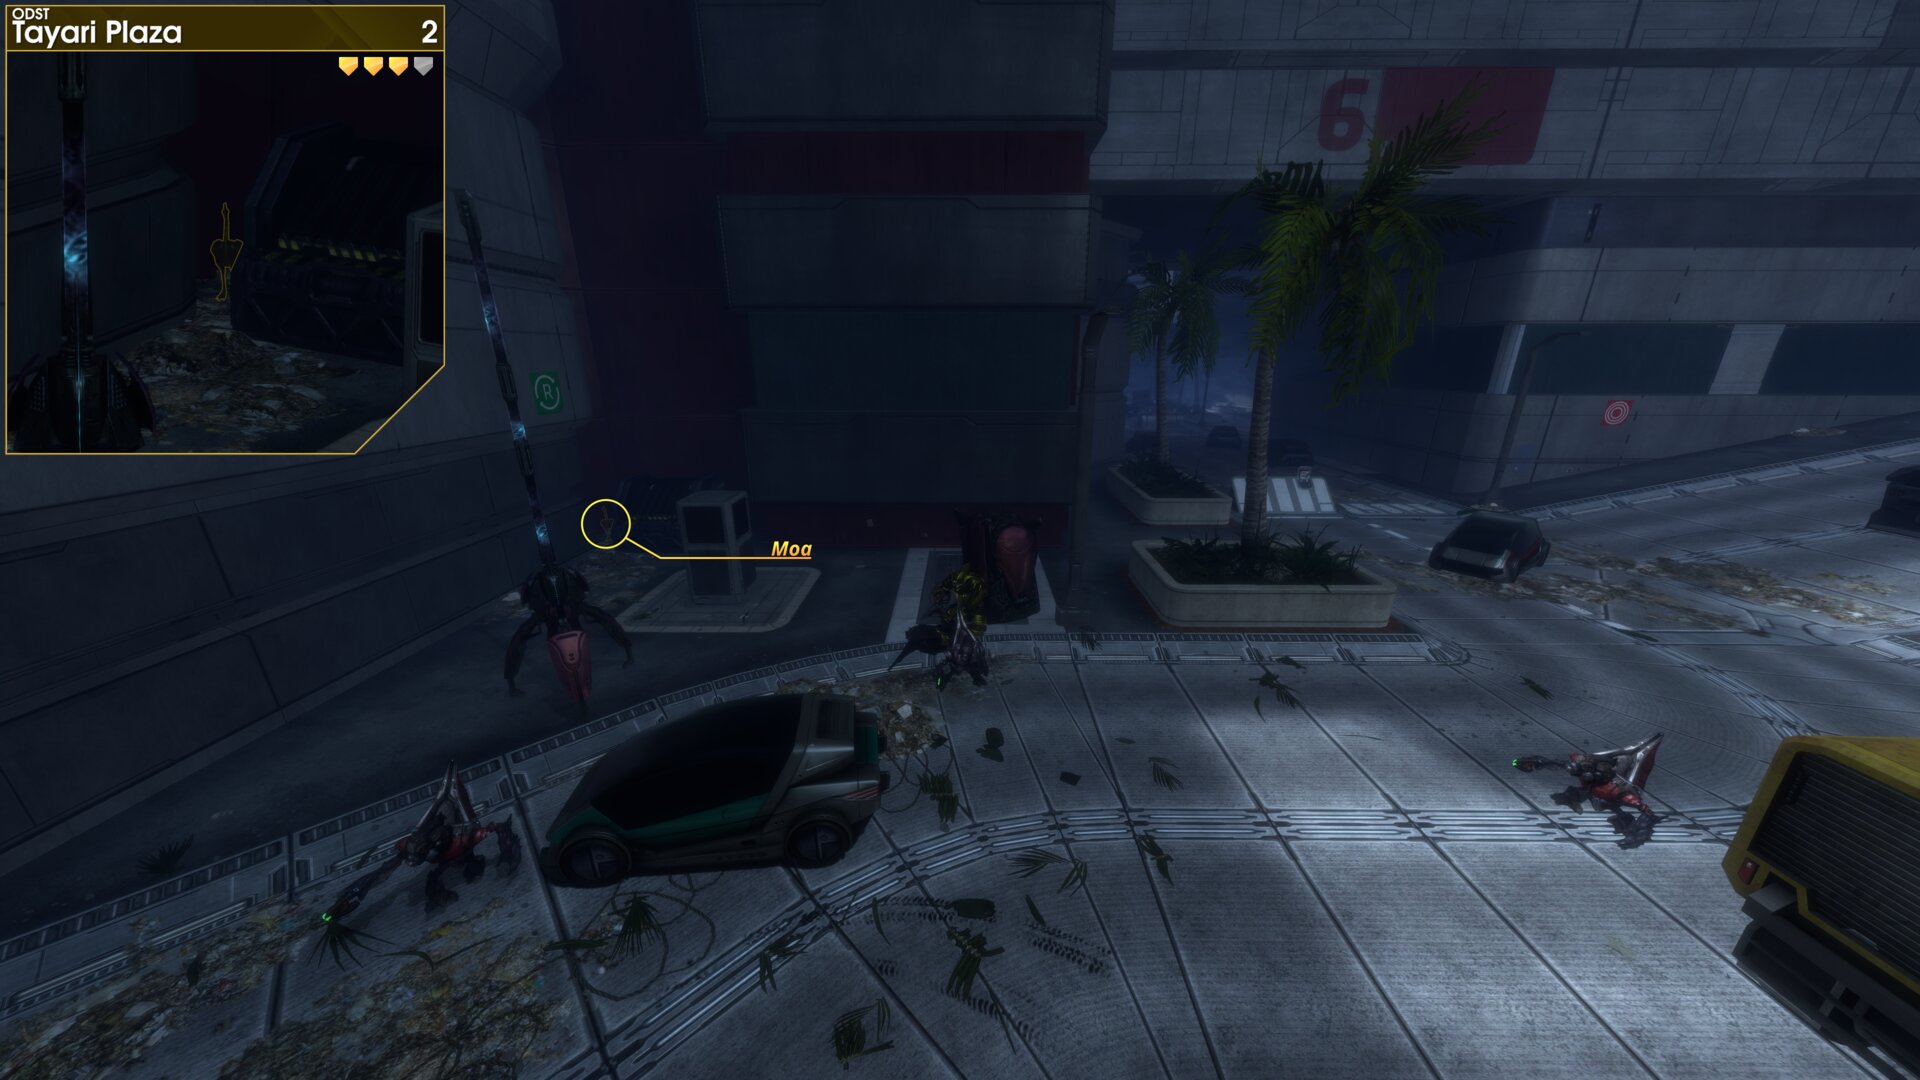
From the start of the mission follow the road north past the Wraith, up to the Covenant comm relay, the Golden Moa is in the corner by the dumpster.
Rally Point: Bravo
Golden Moa 3
After locating a couple of marines you will reach an
area with a group of Brutes, the Golden Moa is on a
balcony to the west.
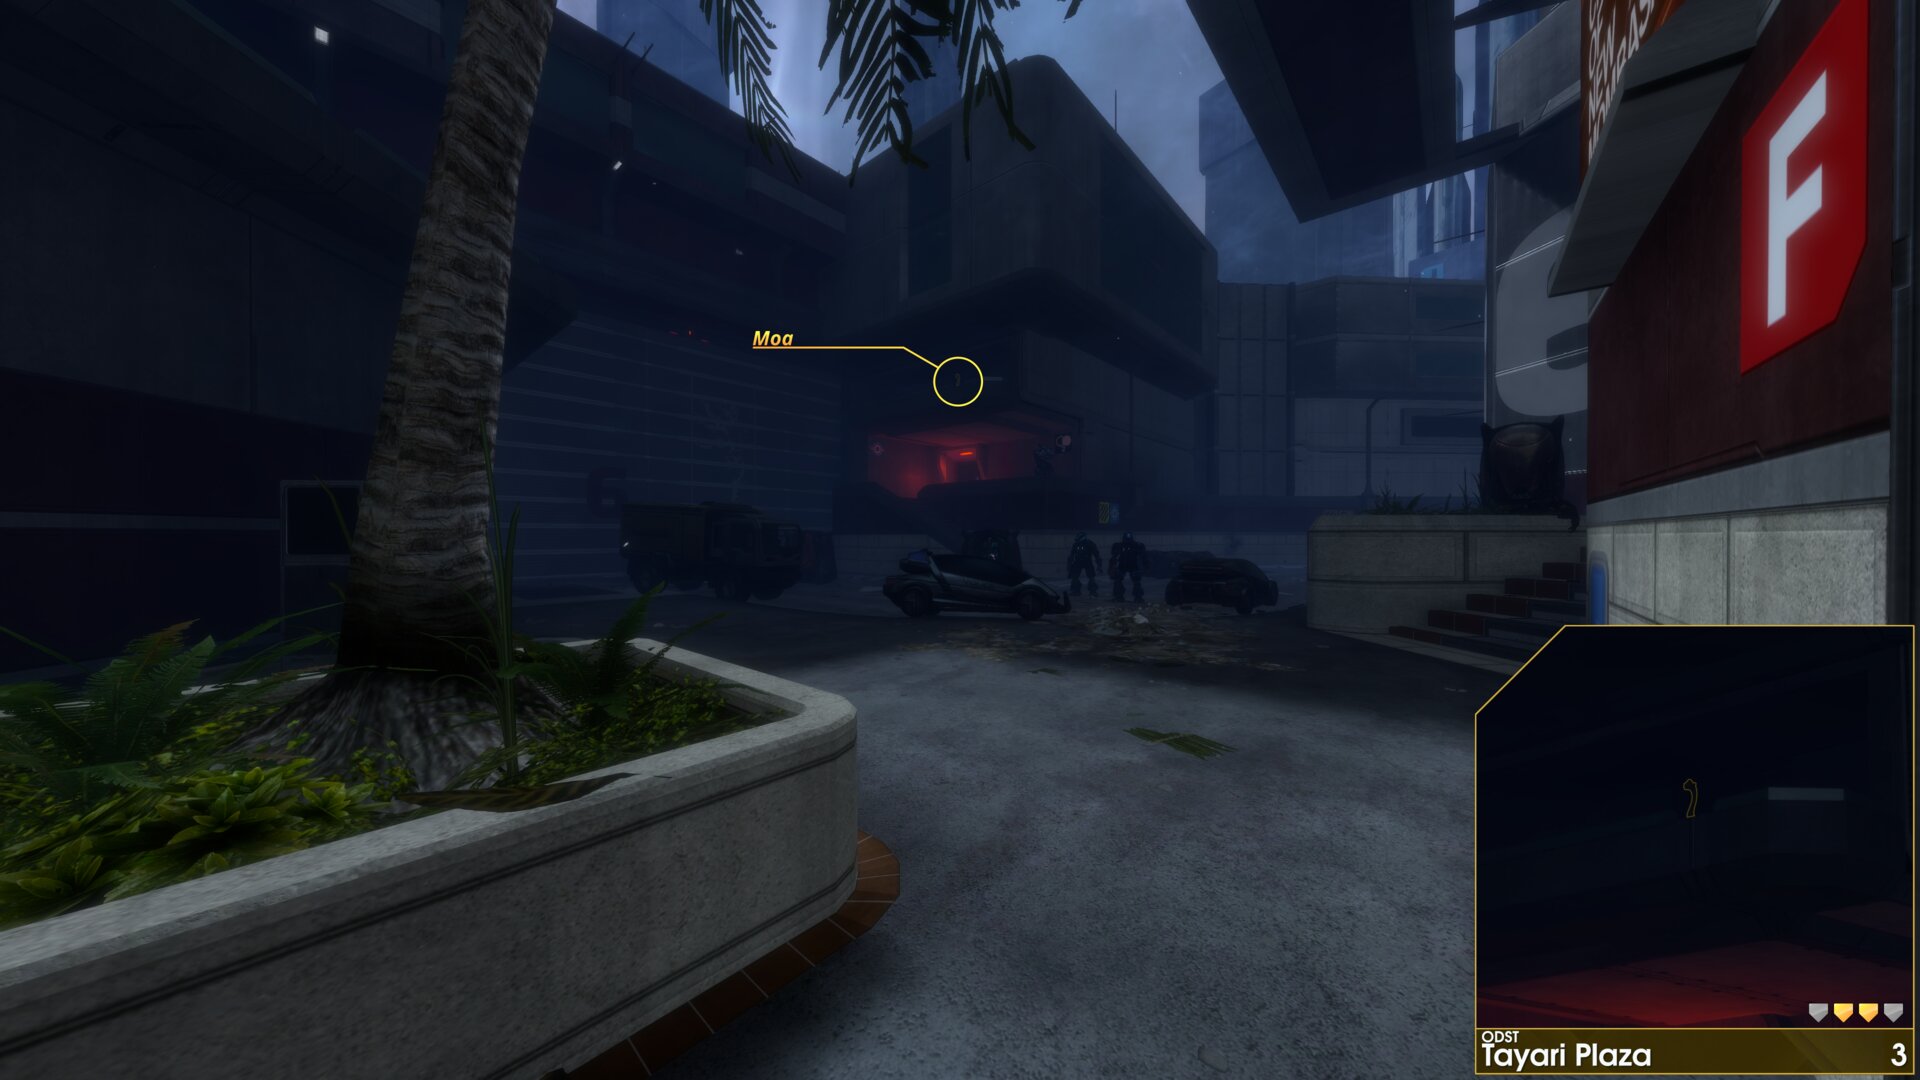
After locating a couple of marines you will reach an
area with a group of Brutes, the Golden Moa is on a
balcony to the west.
Rally Point: Charlie
Golden Moa 4
After passing the SinoViet fuel truck, go under the foot bridge, the Golden Moa is in the corner to the south east between a building and the sector wall.
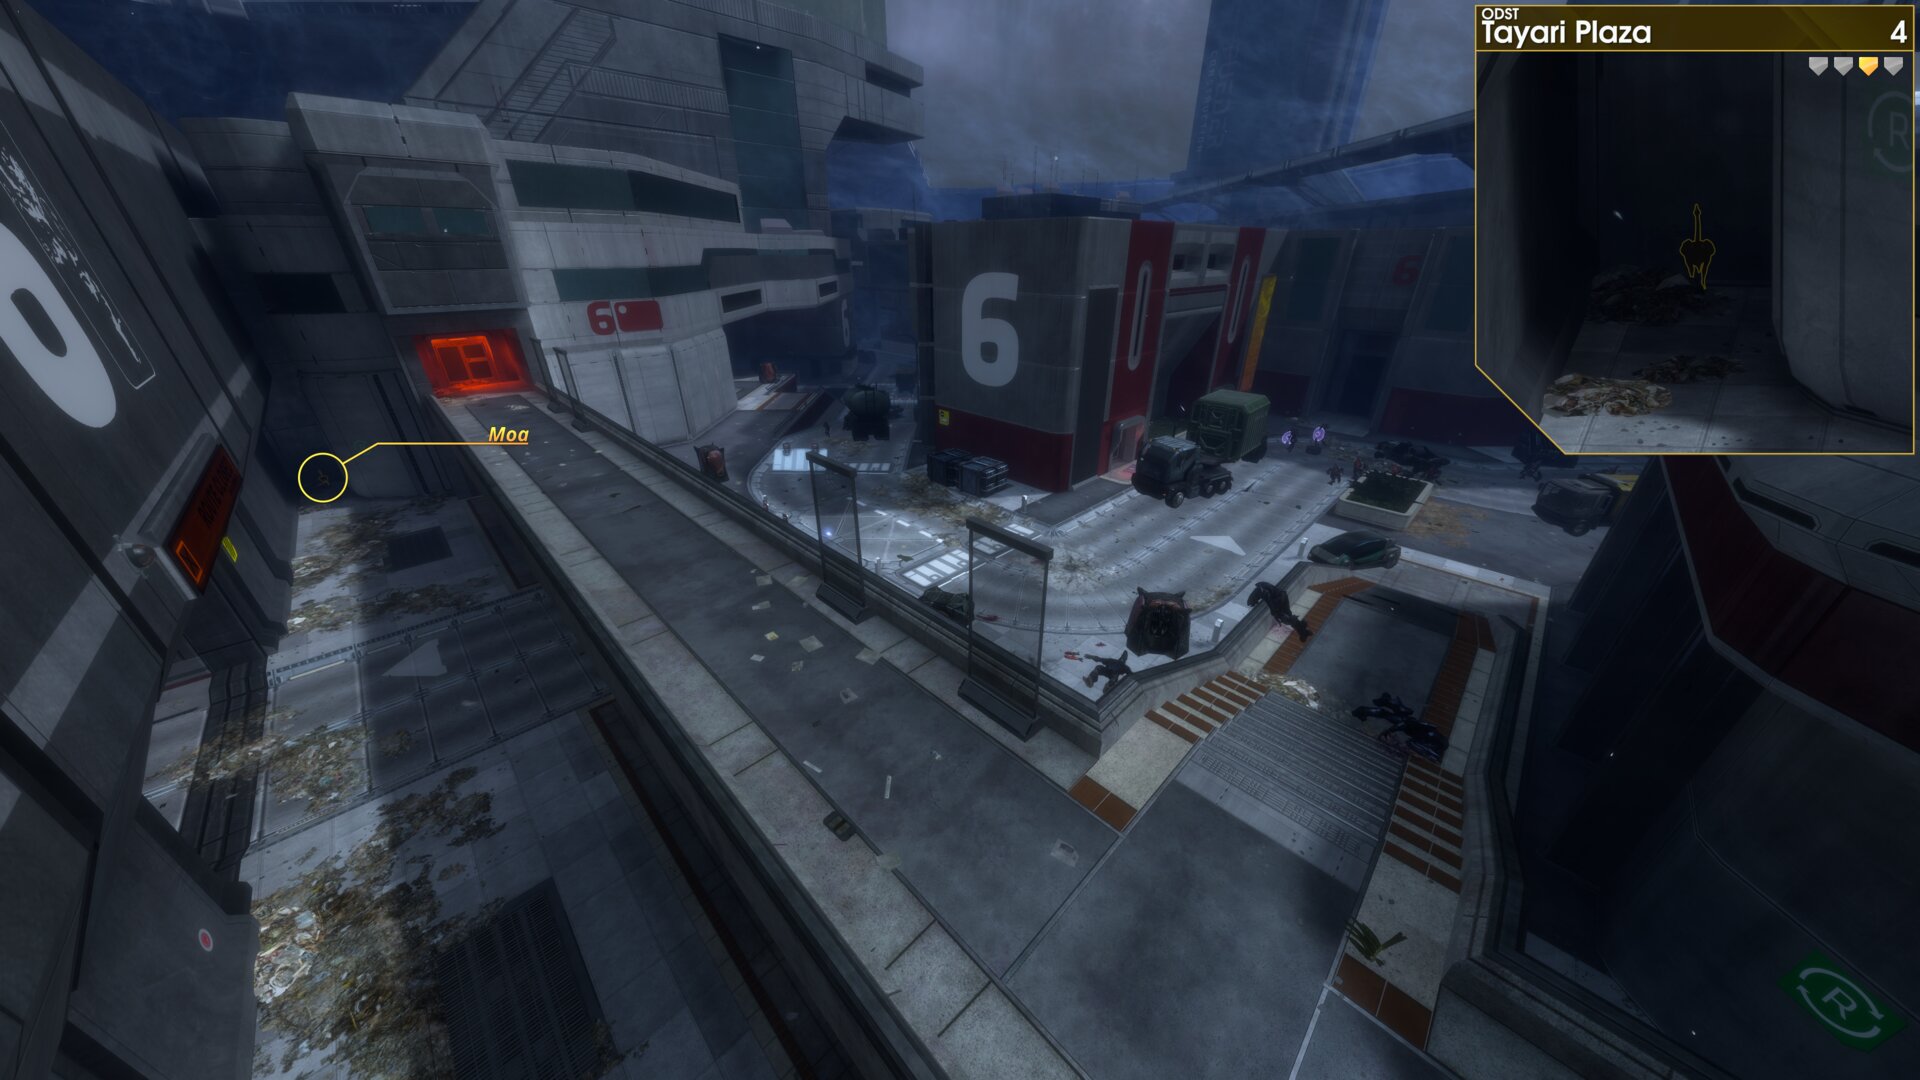
After passing the SinoViet fuel truck, go under the foot bridge, the Golden Moa is in the corner to the south east between a building and the sector wall.
Golden Moa 5
Near the Covenant deployable lookout tower, the Golden Moa is in a garden bed beside the truck hauling a Traxus container.
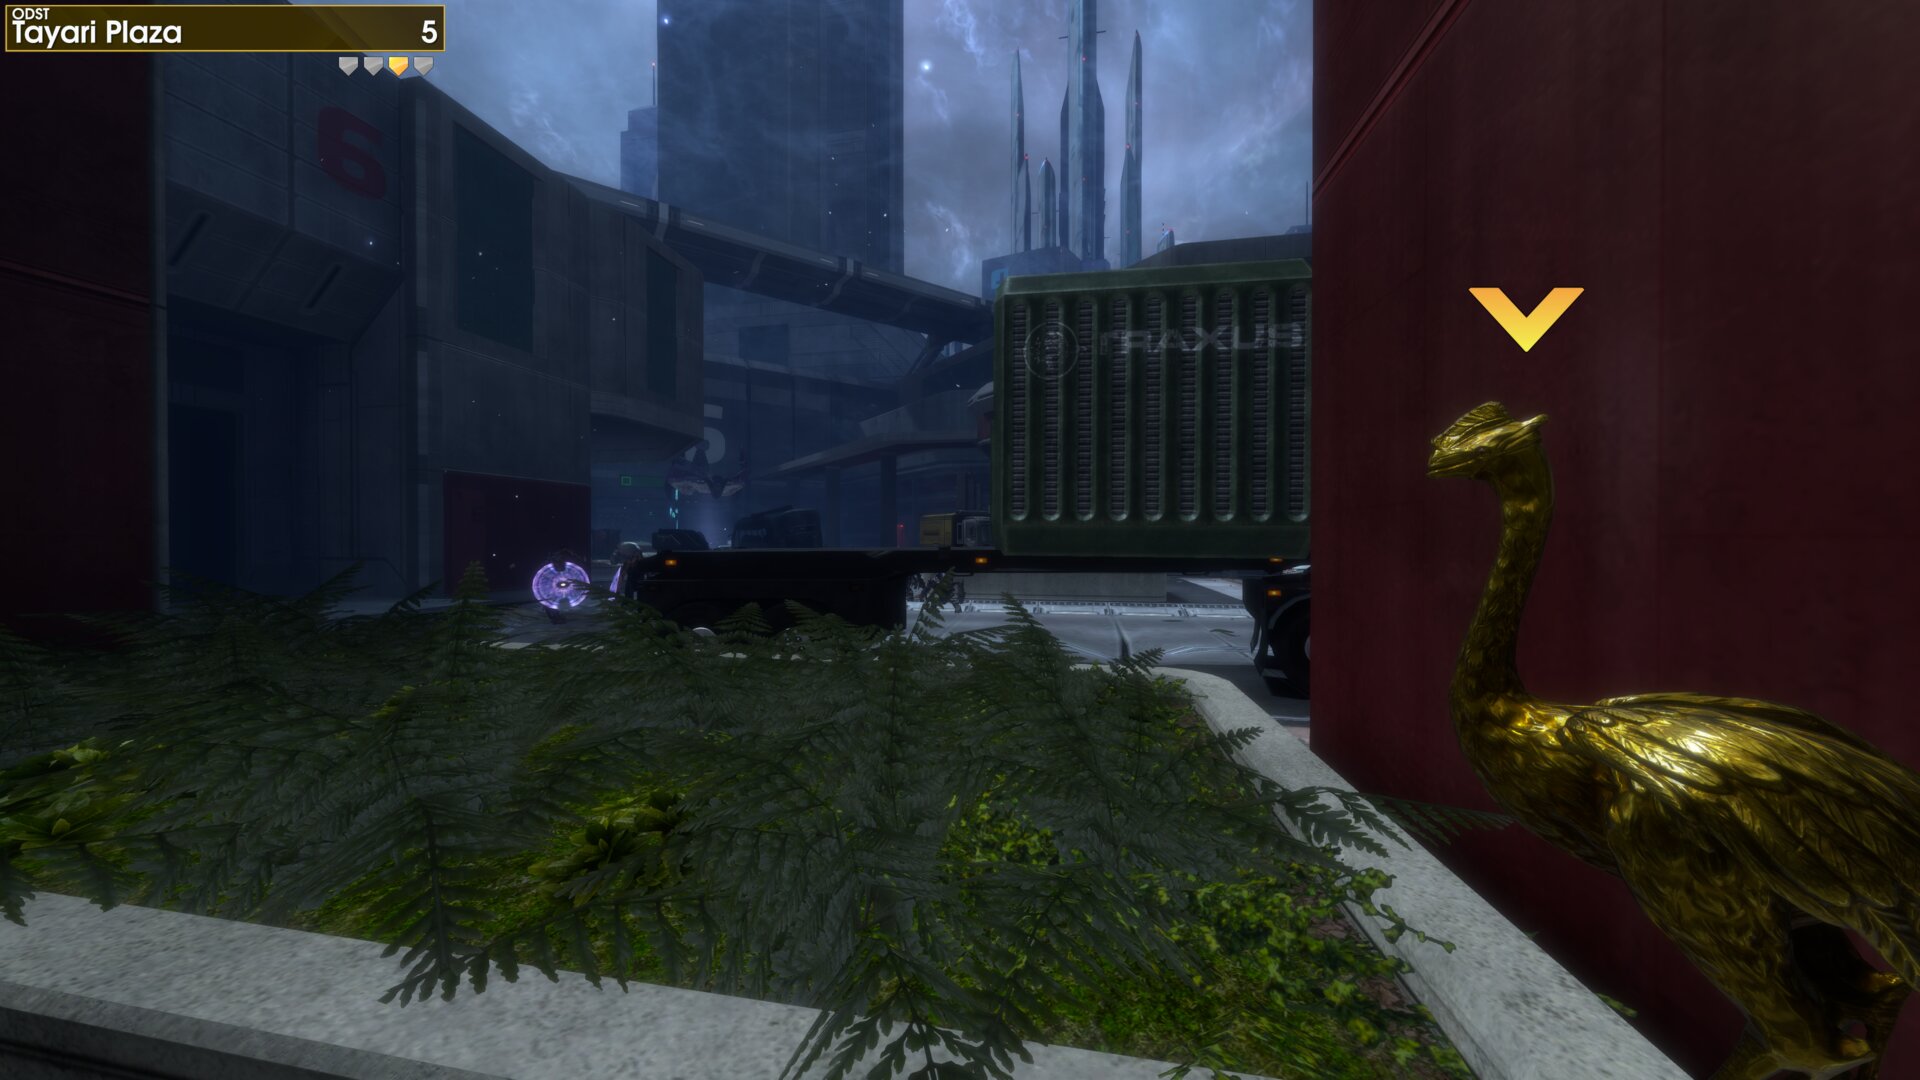
Near the Covenant deployable lookout tower, the Golden Moa is in a garden bed beside the truck hauling a Traxus container.
Golden Moa 6
Near the Covenant deployable lookout tower, the Golden Moa is in the corner past the truck hauling a Traxus container. (next to the City of New Mombasa sign)
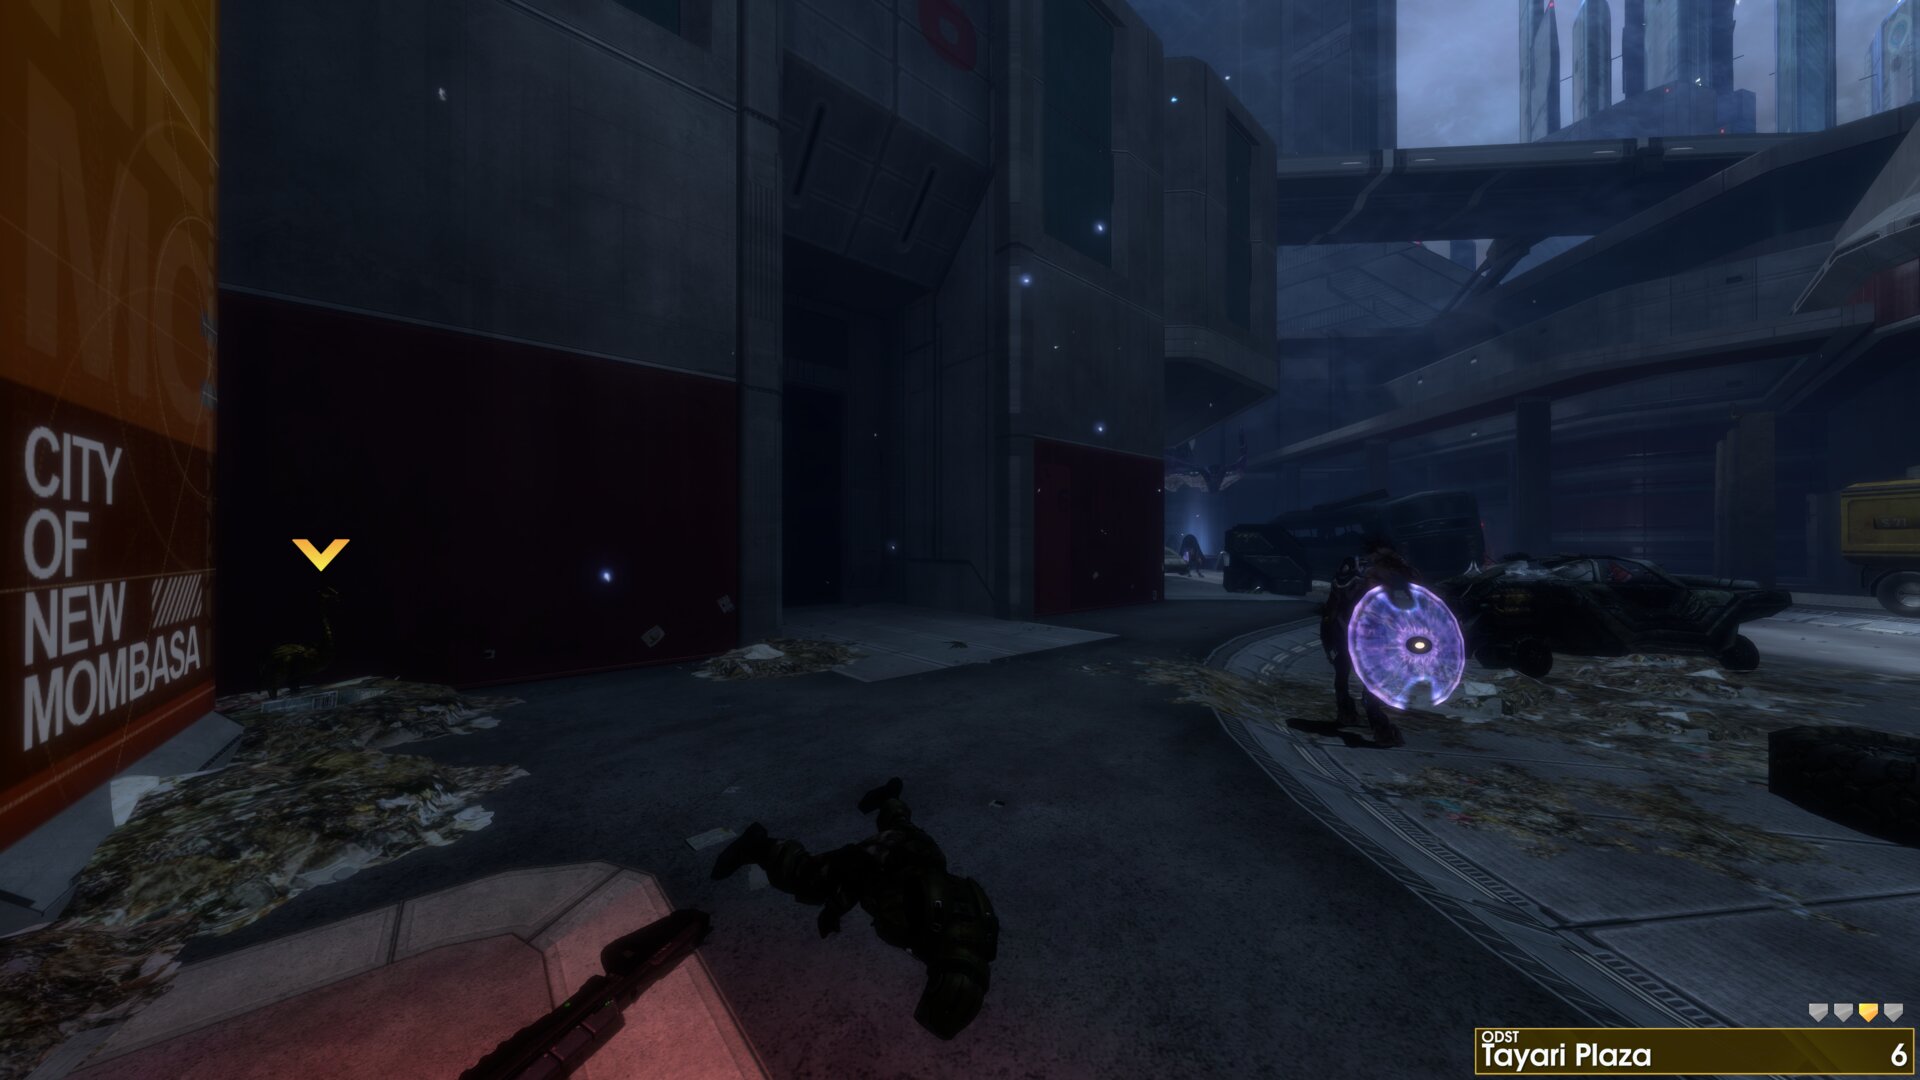
Near the Covenant deployable lookout tower, the Golden Moa is in the corner past the truck hauling a Traxus container. (next to the City of New Mombasa sign)
Golden Moa 7
The Golden Moa is on top of a stone pillar, beside the building to the north of the Covenant deployable lookout tower.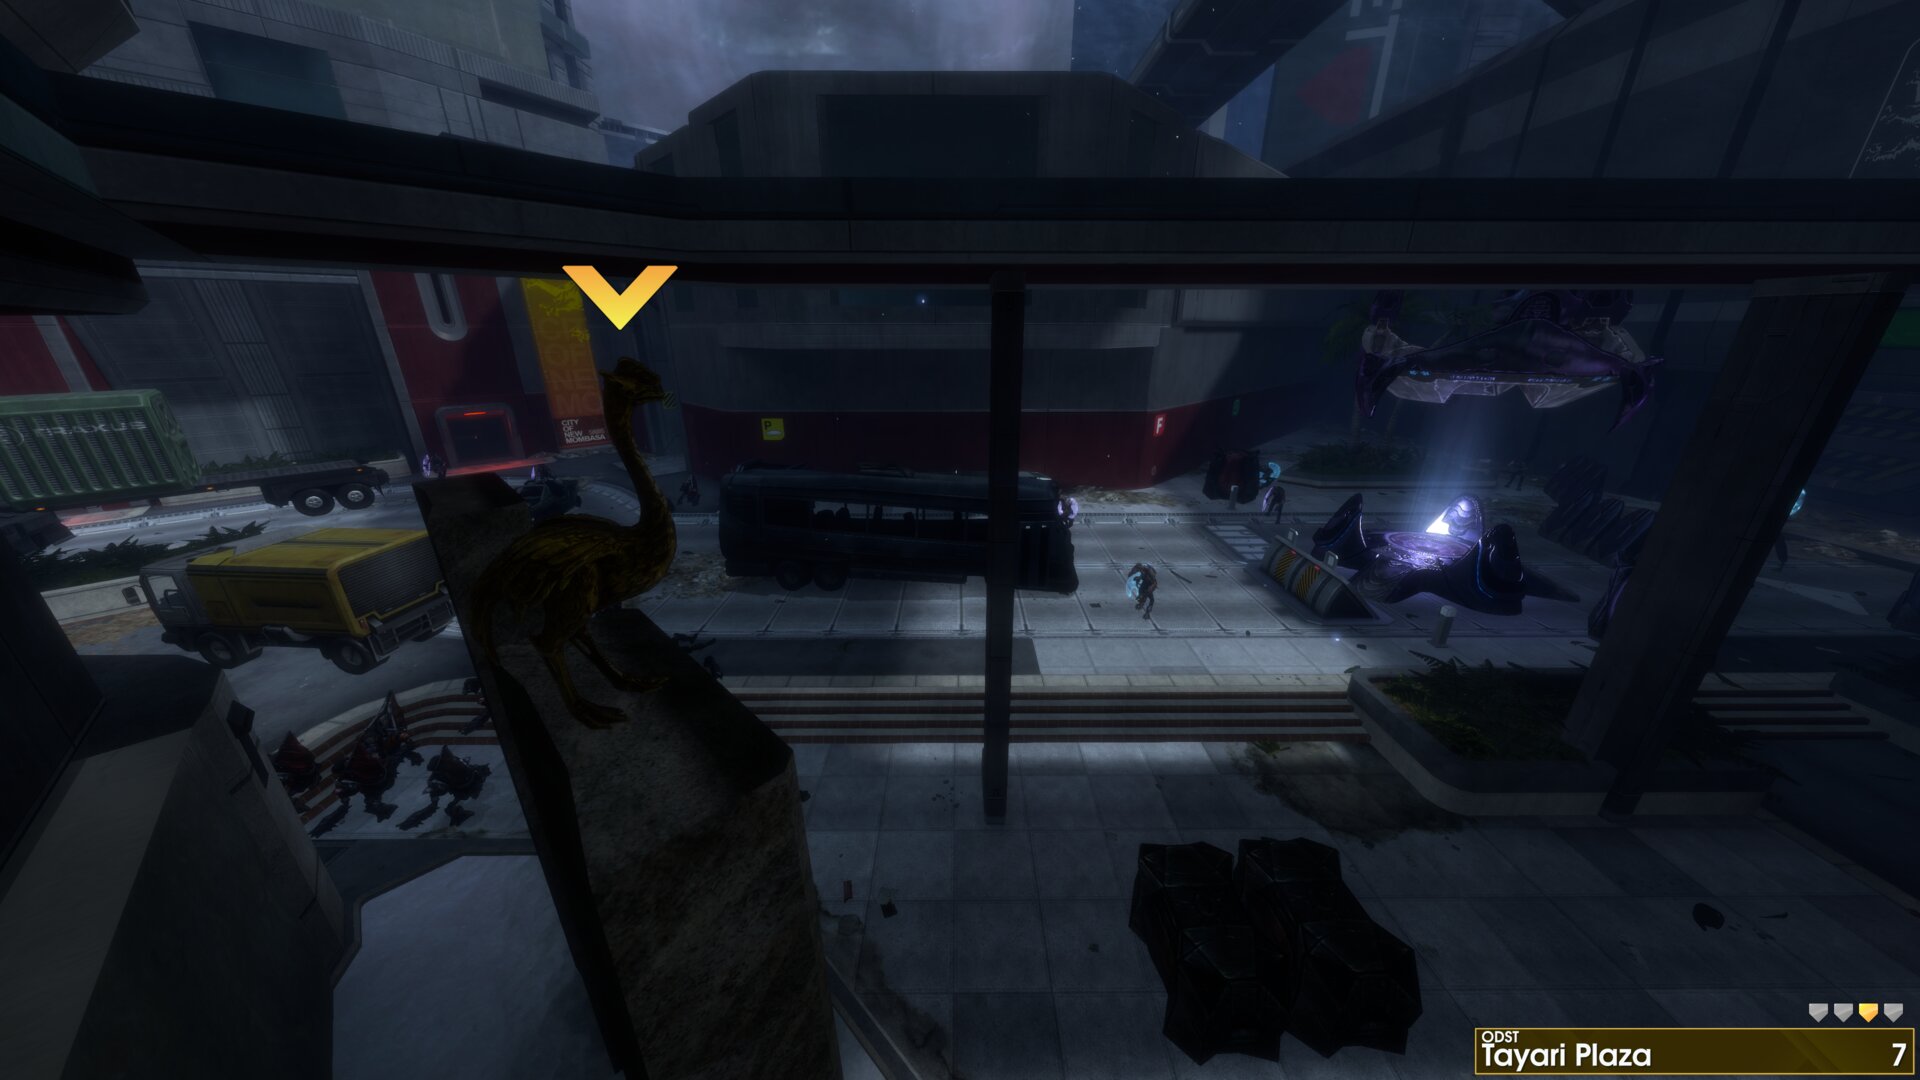
The Golden Moa is on top of a stone pillar, beside the building to the north of the Covenant deployable lookout tower.
➟ Uplift Reserve
Rally Point: Alpha
Rally Point: Bravo
Rally Point: Delta
Golden Moa 1
Behind Dutch’s drop pod (SOEIV, Single Occupant Exoatmospheric Insertion Vehicle).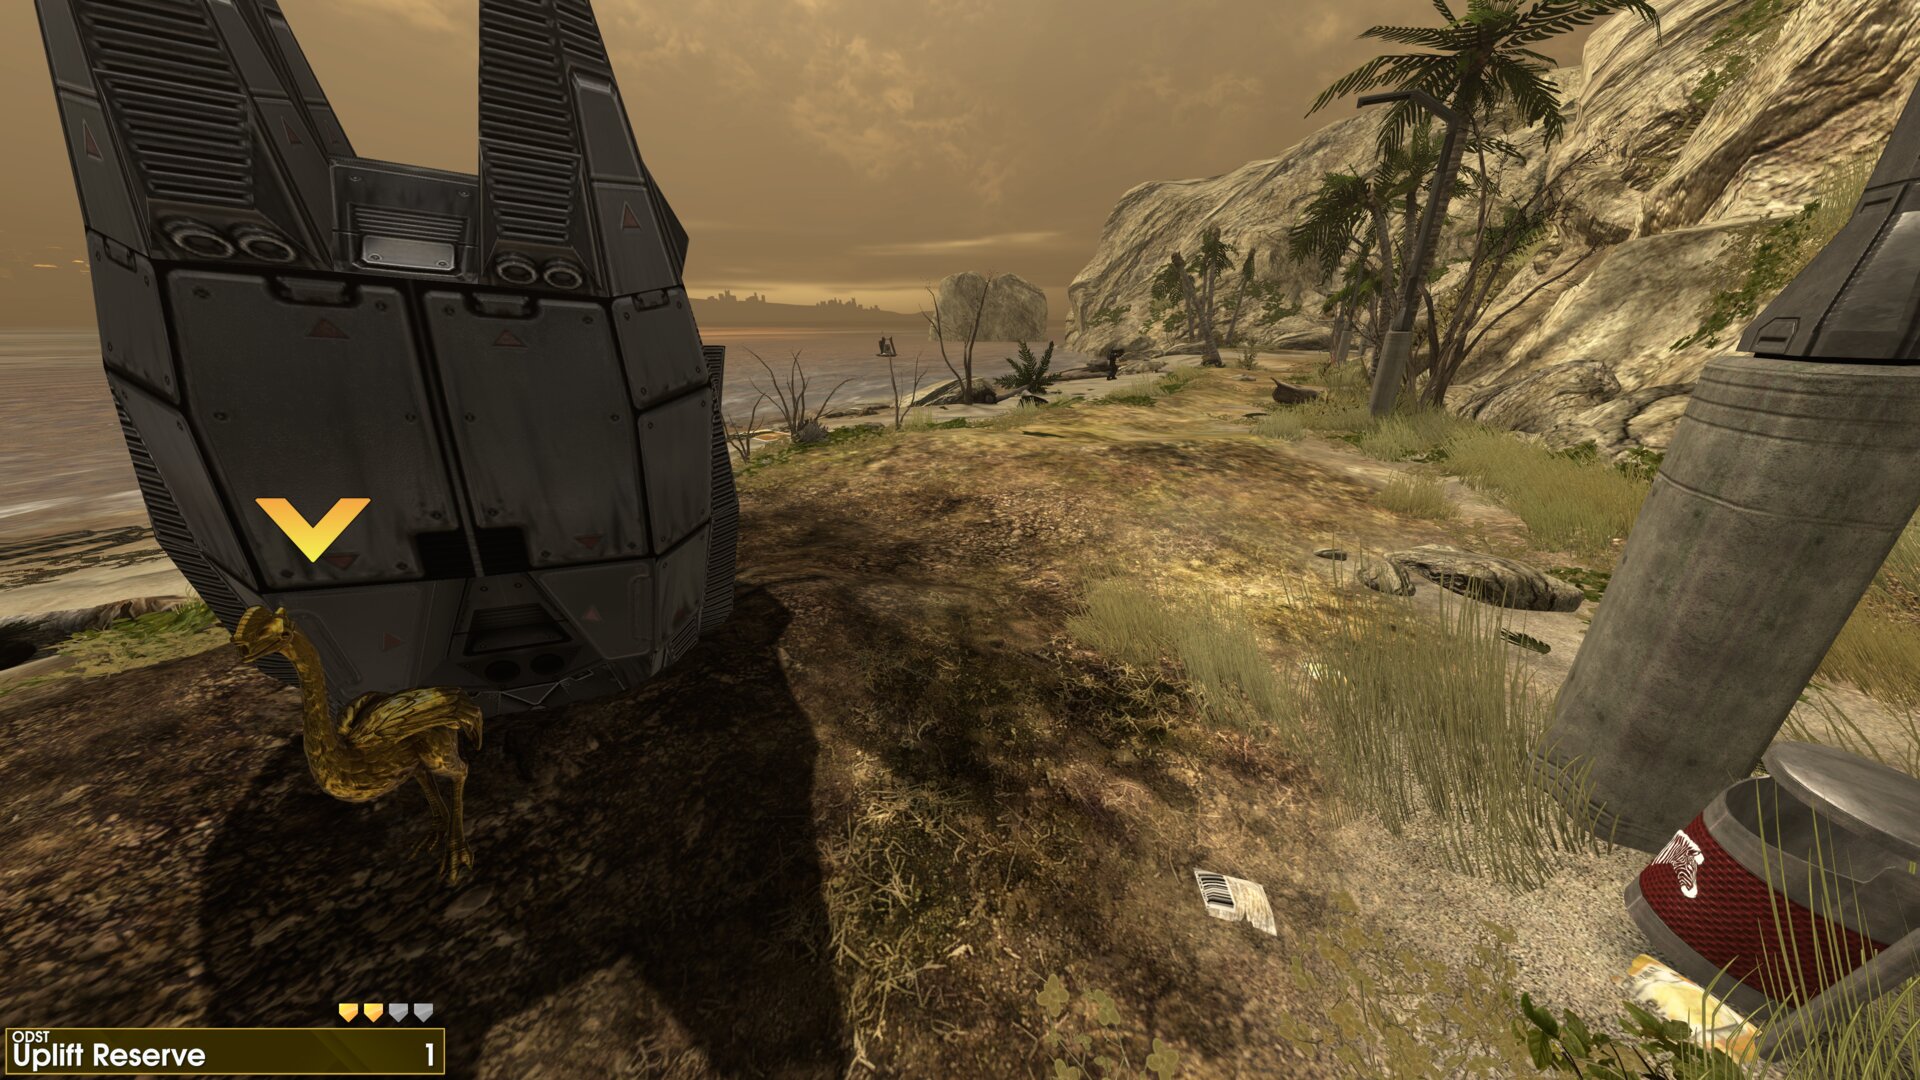
Behind Dutch’s drop pod (SOEIV, Single Occupant Exoatmospheric Insertion Vehicle).
Golden Moa 2
Up the path from the beach, the Golden Moa is hidden in the grass between a tree and a boulder to the right. (just before the light pole with the panda/rhino sign)
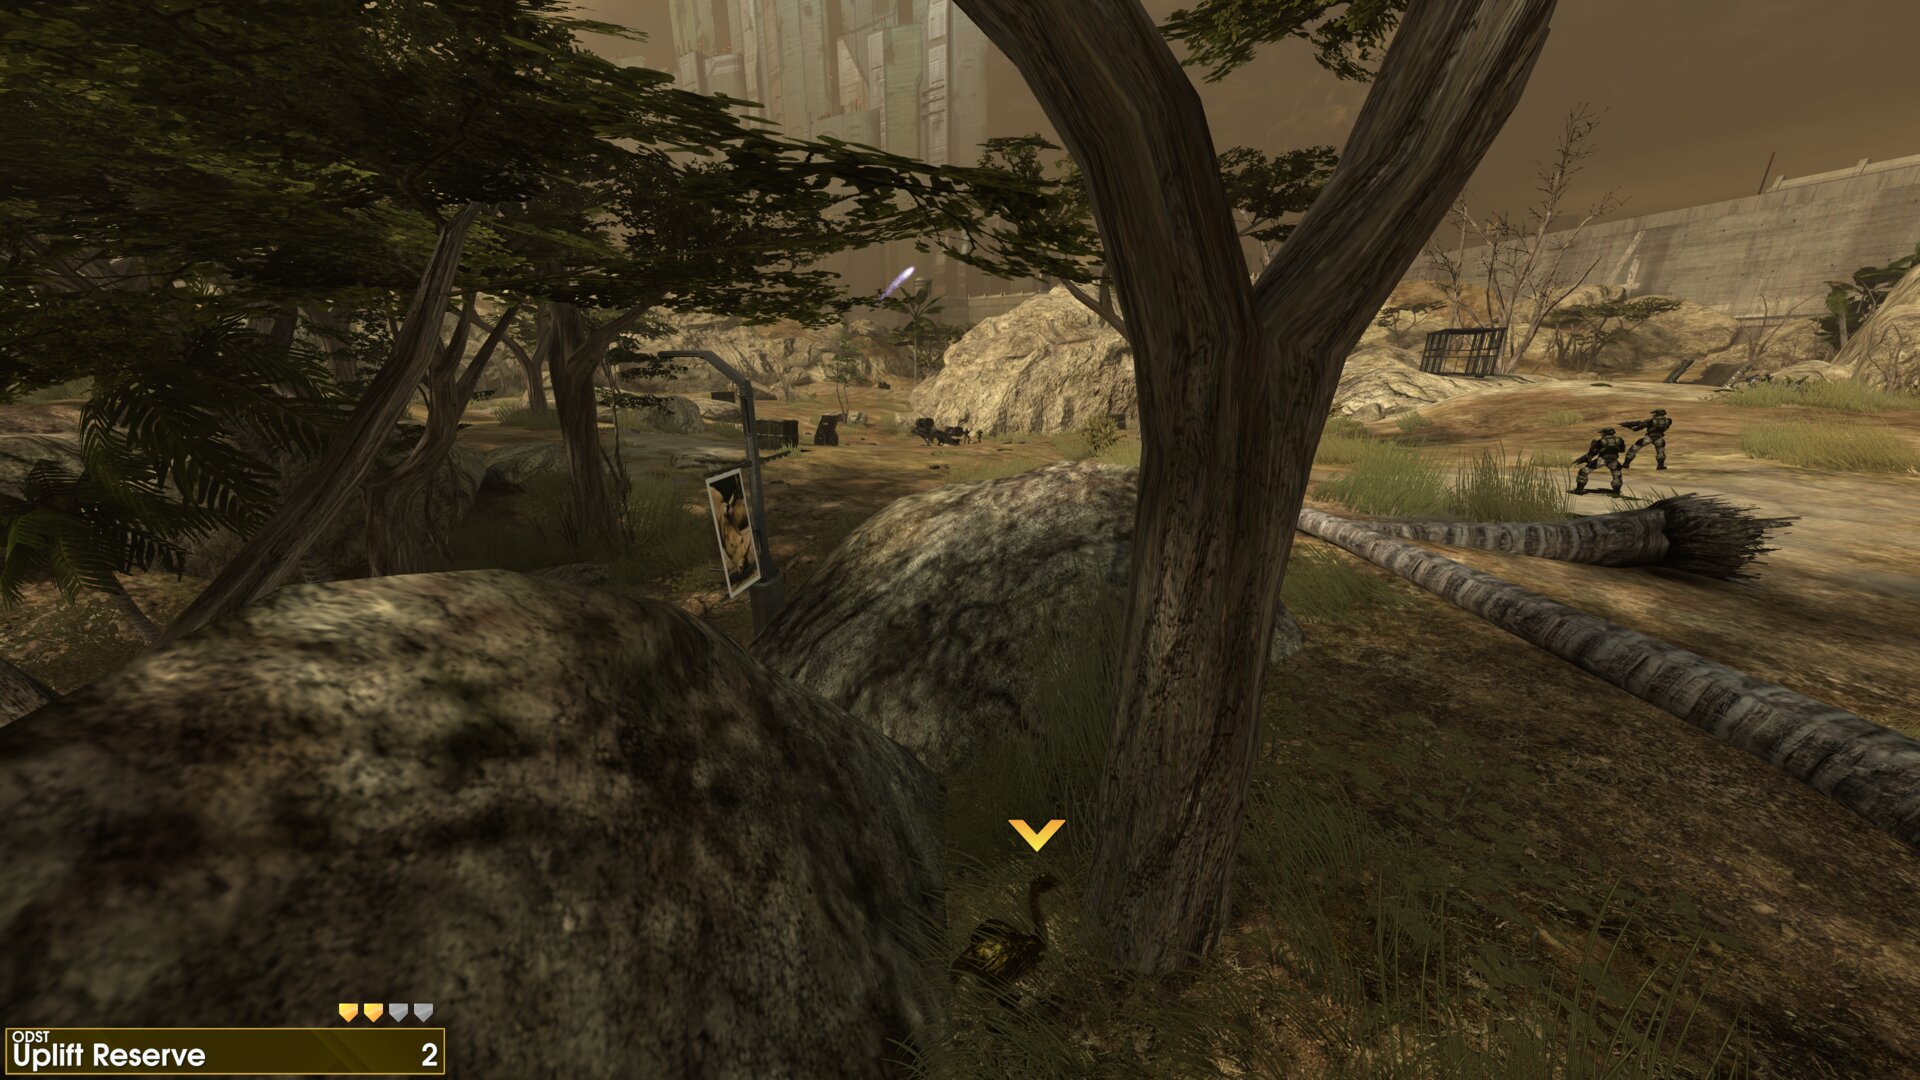
Up the path from the beach, the Golden Moa is hidden in the grass between a tree and a boulder to the right. (just before the light pole with the panda/rhino sign)
Golden Moa 3
In the middle of Section A is a pile of large boulders (straight ahead as you head up the path from the beach), the Golden Moa is among some trees on the north west side.
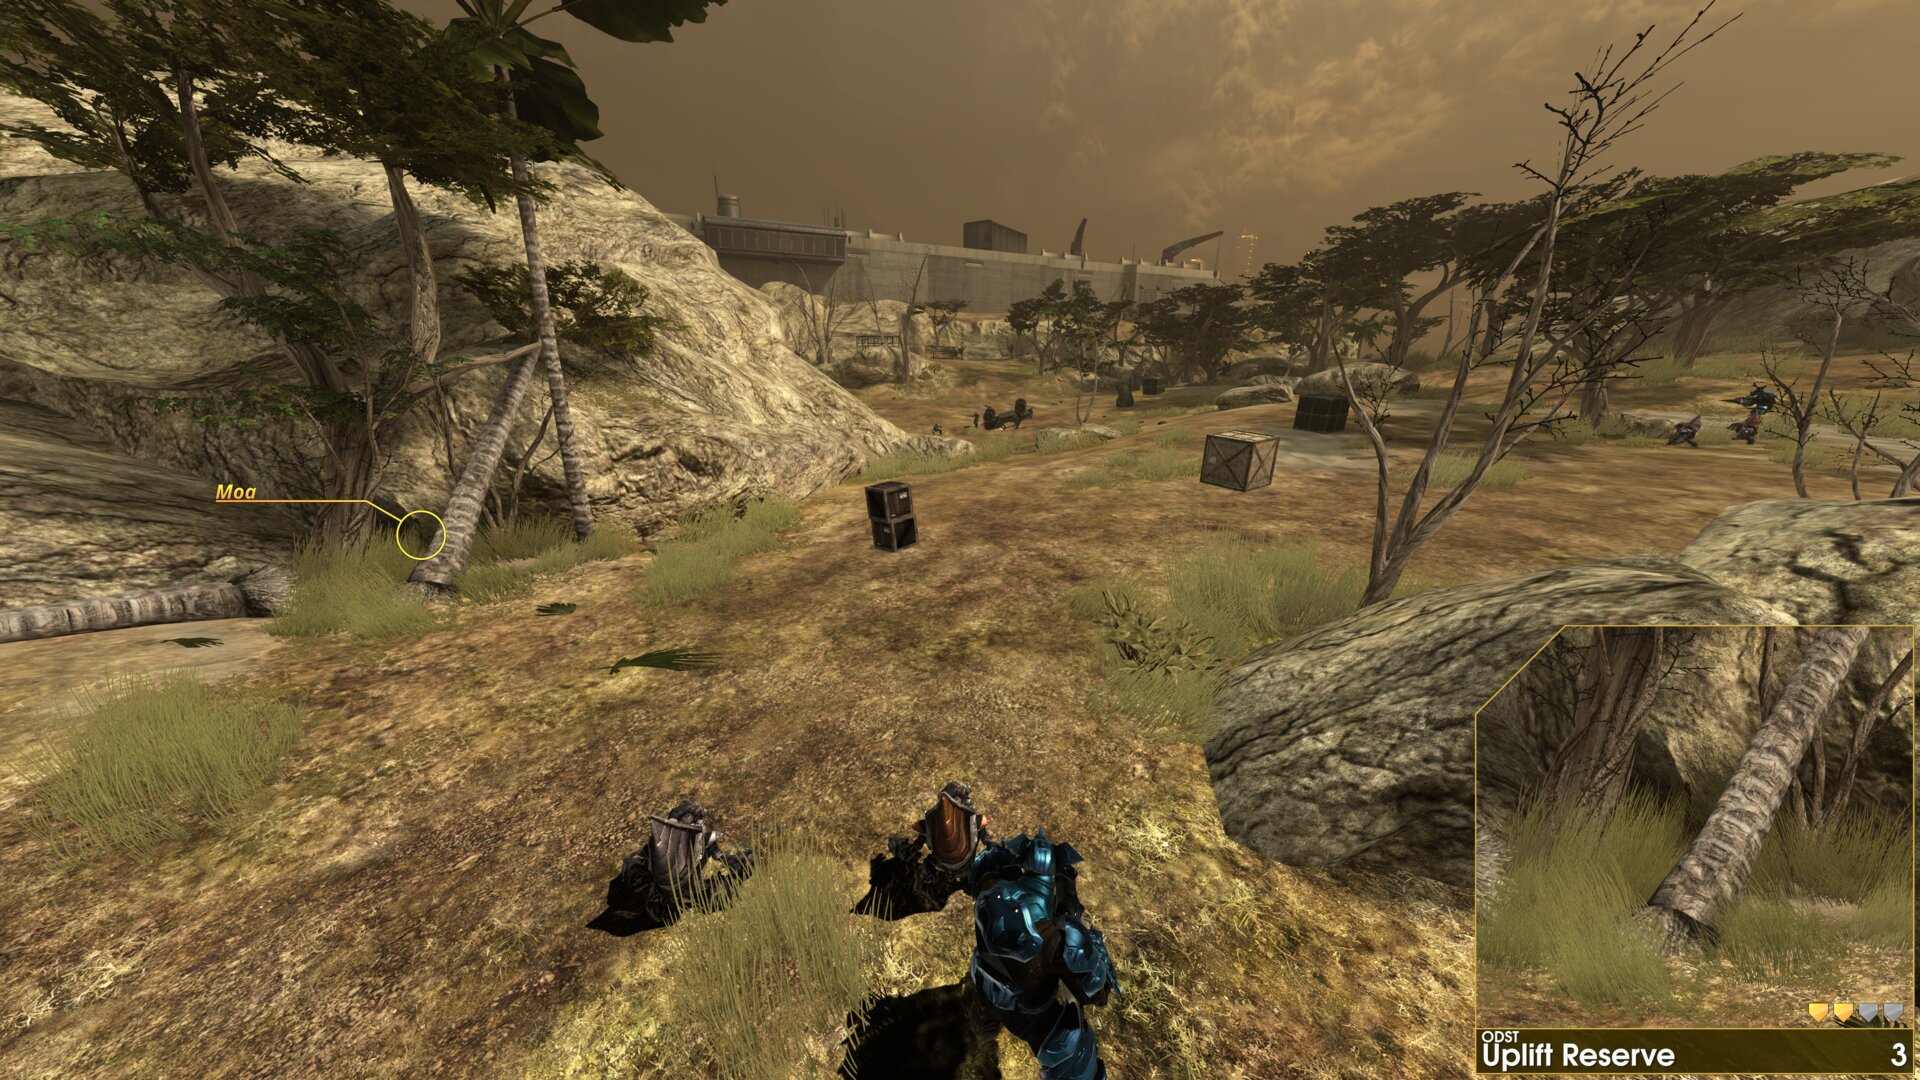
In the middle of Section A is a pile of large boulders (straight ahead as you head up the path from the beach), the Golden Moa is among some trees on the north west side.
Golden Moa 4
East of the large boulders in the middle of Section A is a smaller group of boulders, the Golden Moa is in the grass under the north west side.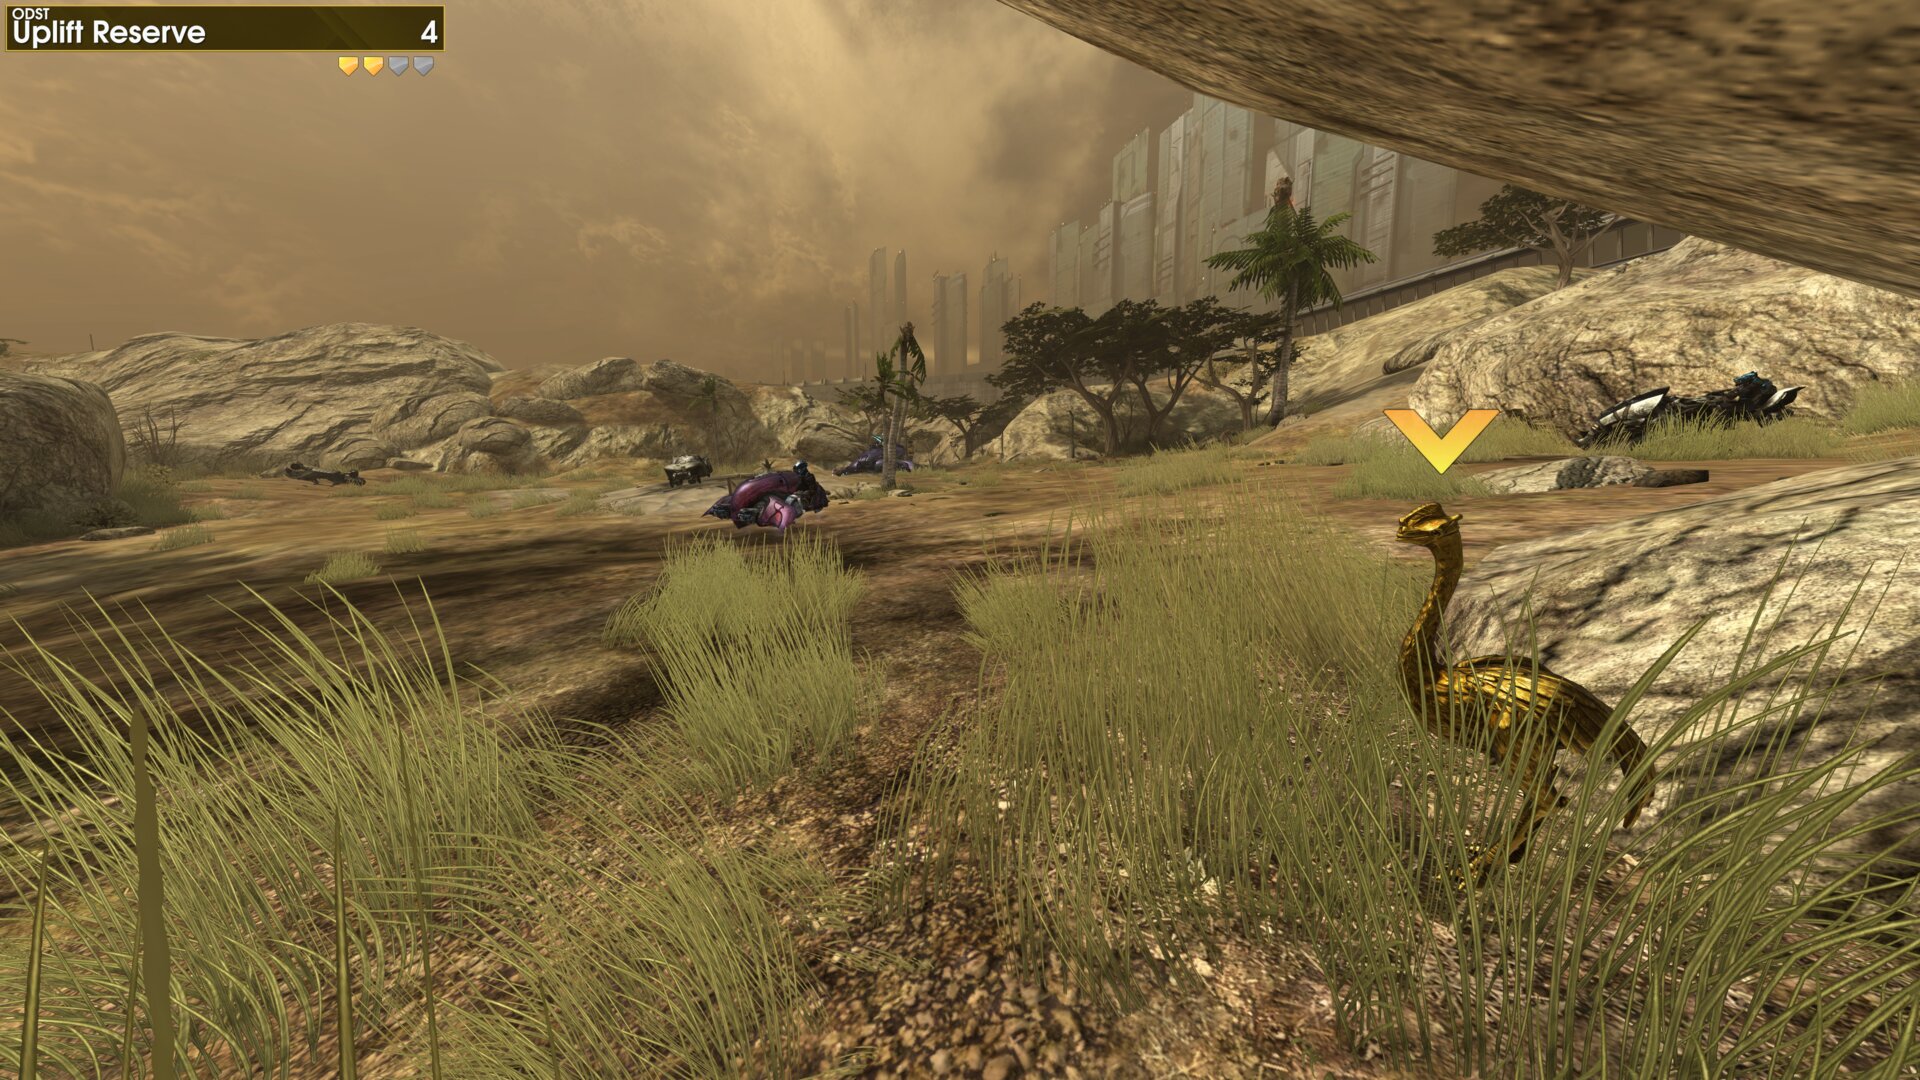
East of the large boulders in the middle of Section A is a smaller group of boulders, the Golden Moa is in the grass under the north west side.
Golden Moa 5
At the start of the path leading out of Section A, the Golden Moa is by the light pole, between the trash can and drink fountain.
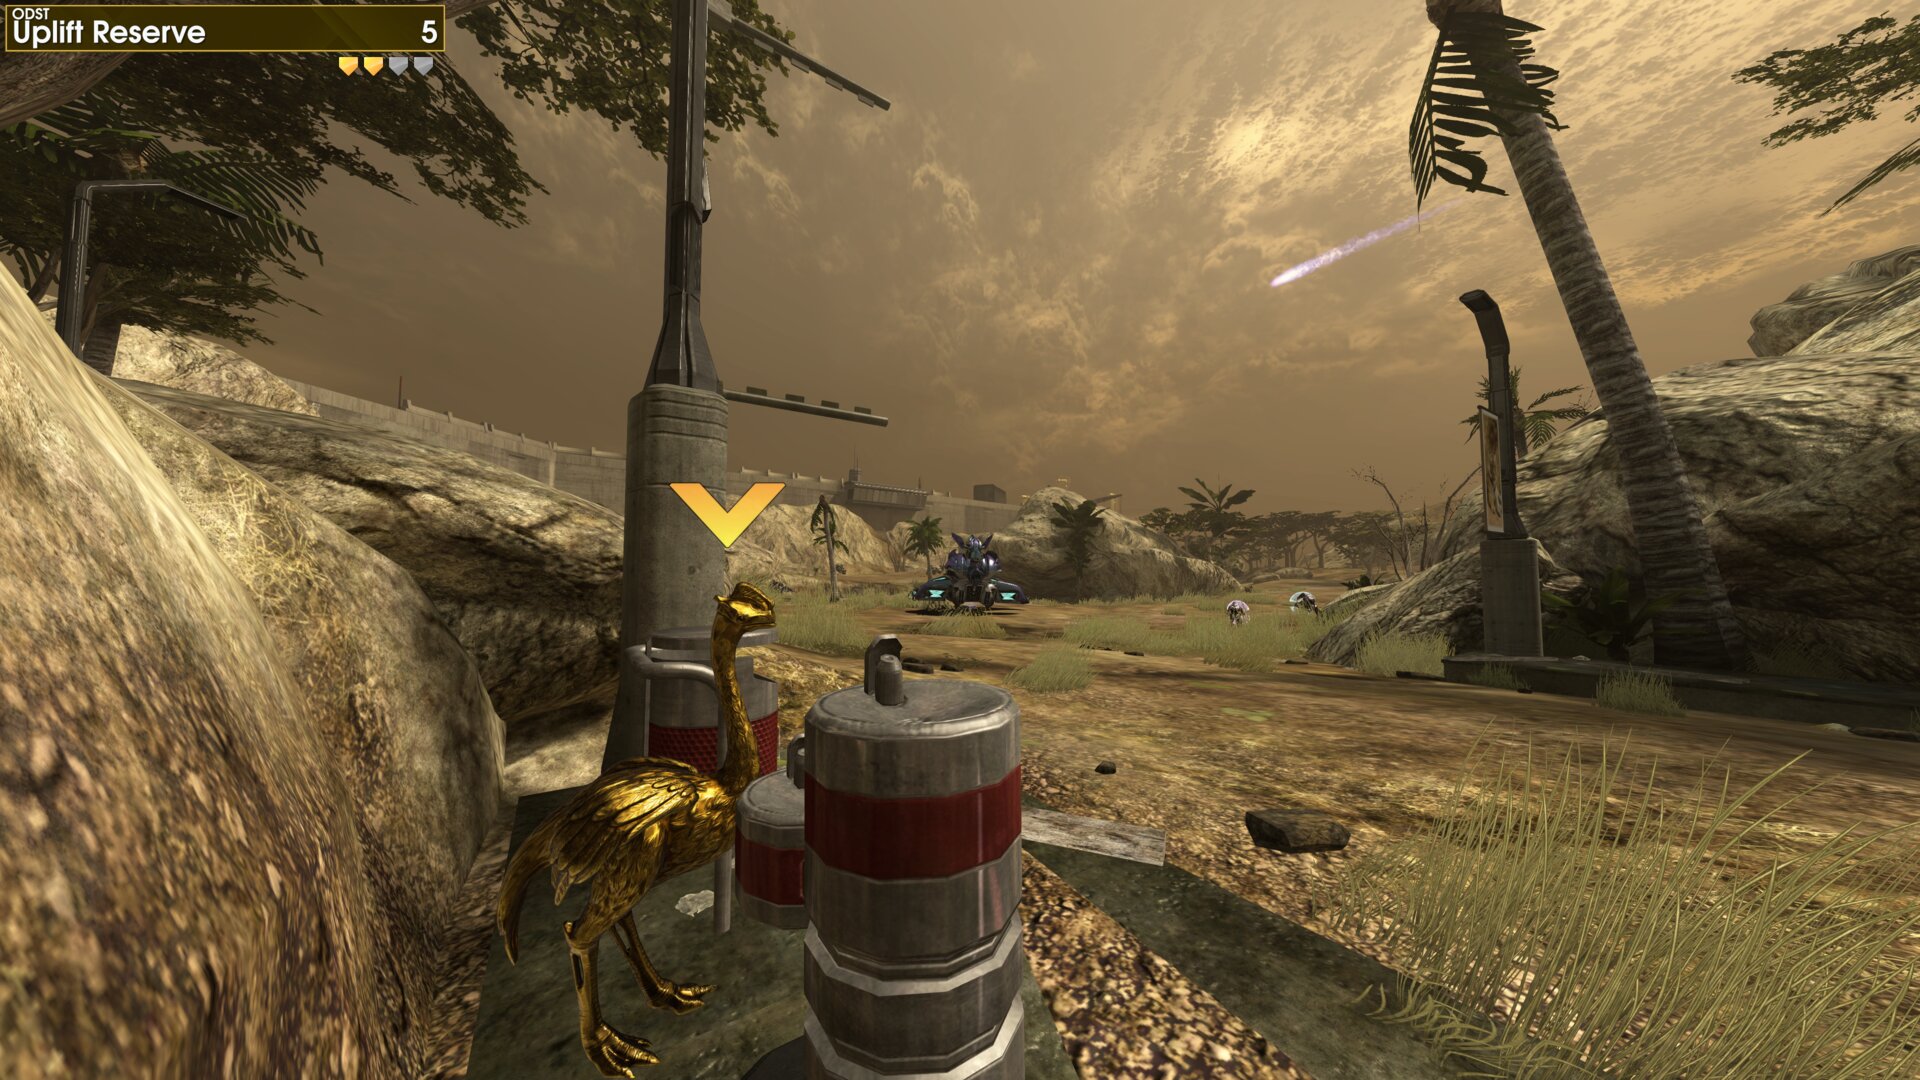
At the start of the path leading out of Section A, the Golden Moa is by the light pole, between the trash can and drink fountain.
Rally Point: Bravo
Golden Moa 6
The Golden Moa is in on top of a stump in shallow water, as you reach the first group of Shade turrets. (north west beach in the Section B)
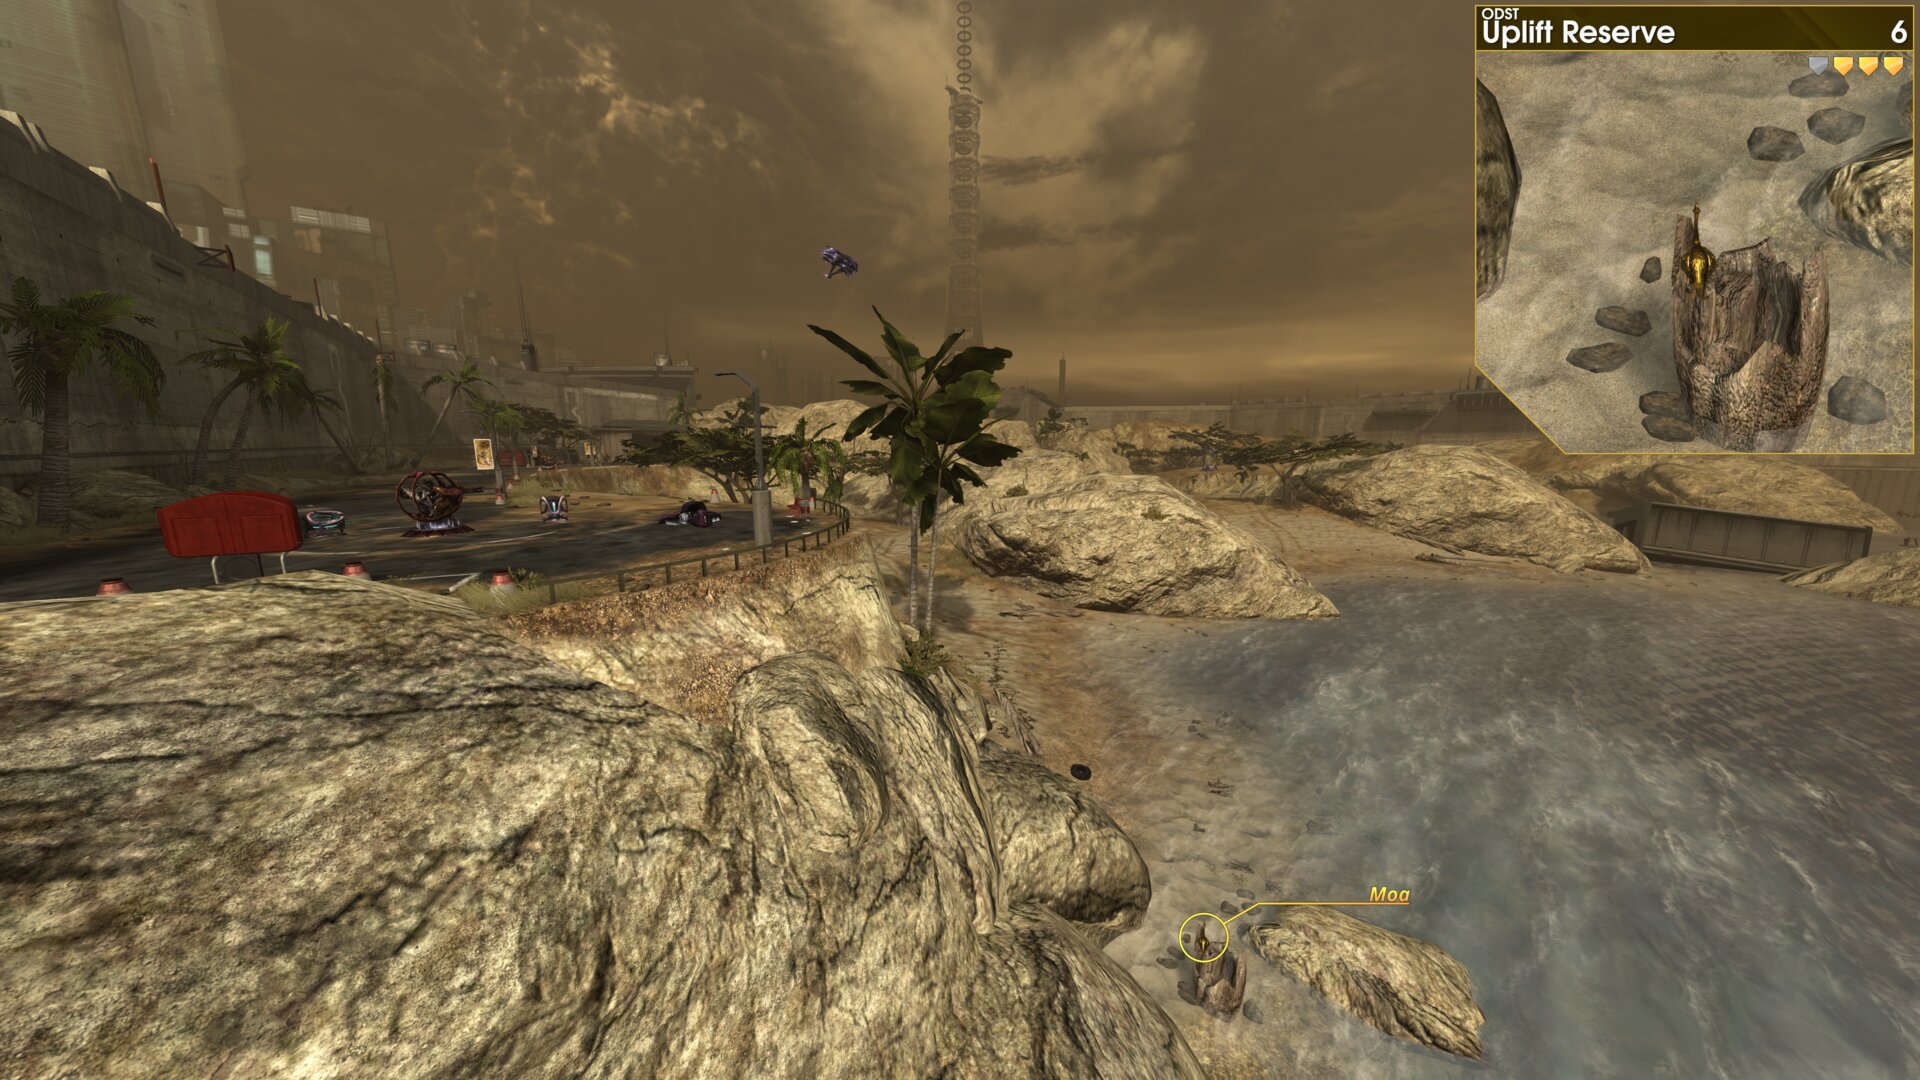
The Golden Moa is in on top of a stump in shallow water, as you reach the first group of Shade turrets. (north west beach in the Section B)
Golden Moa 7
North east of the first group of Shade turrets, inside the gate building, the Golden Moa is in a cage on the ground.
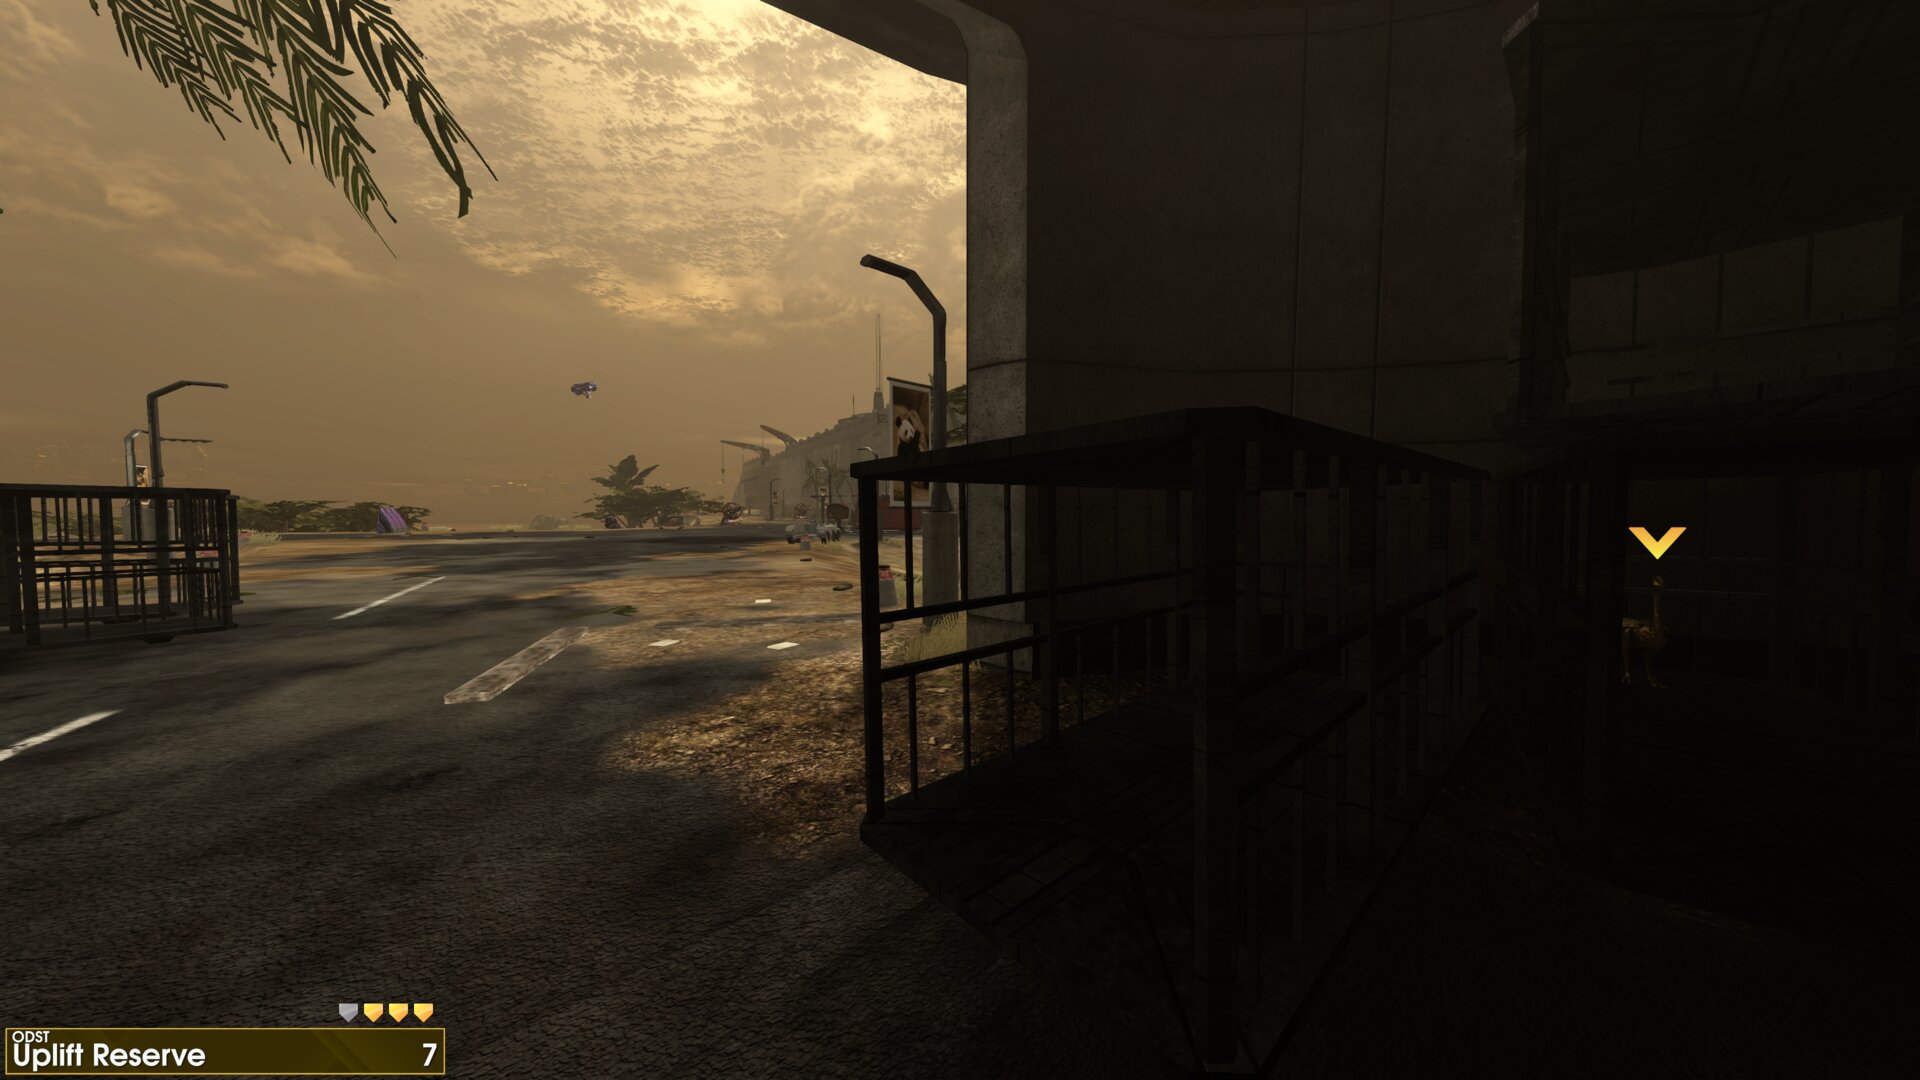
North east of the first group of Shade turrets, inside the gate building, the Golden Moa is in a cage on the ground.
Rally Point: Delta
Golden Moa 8
The Golden Moa is behind the rest/bus stop, near the
Spartan Laser, just before the Covenant cargo pad.
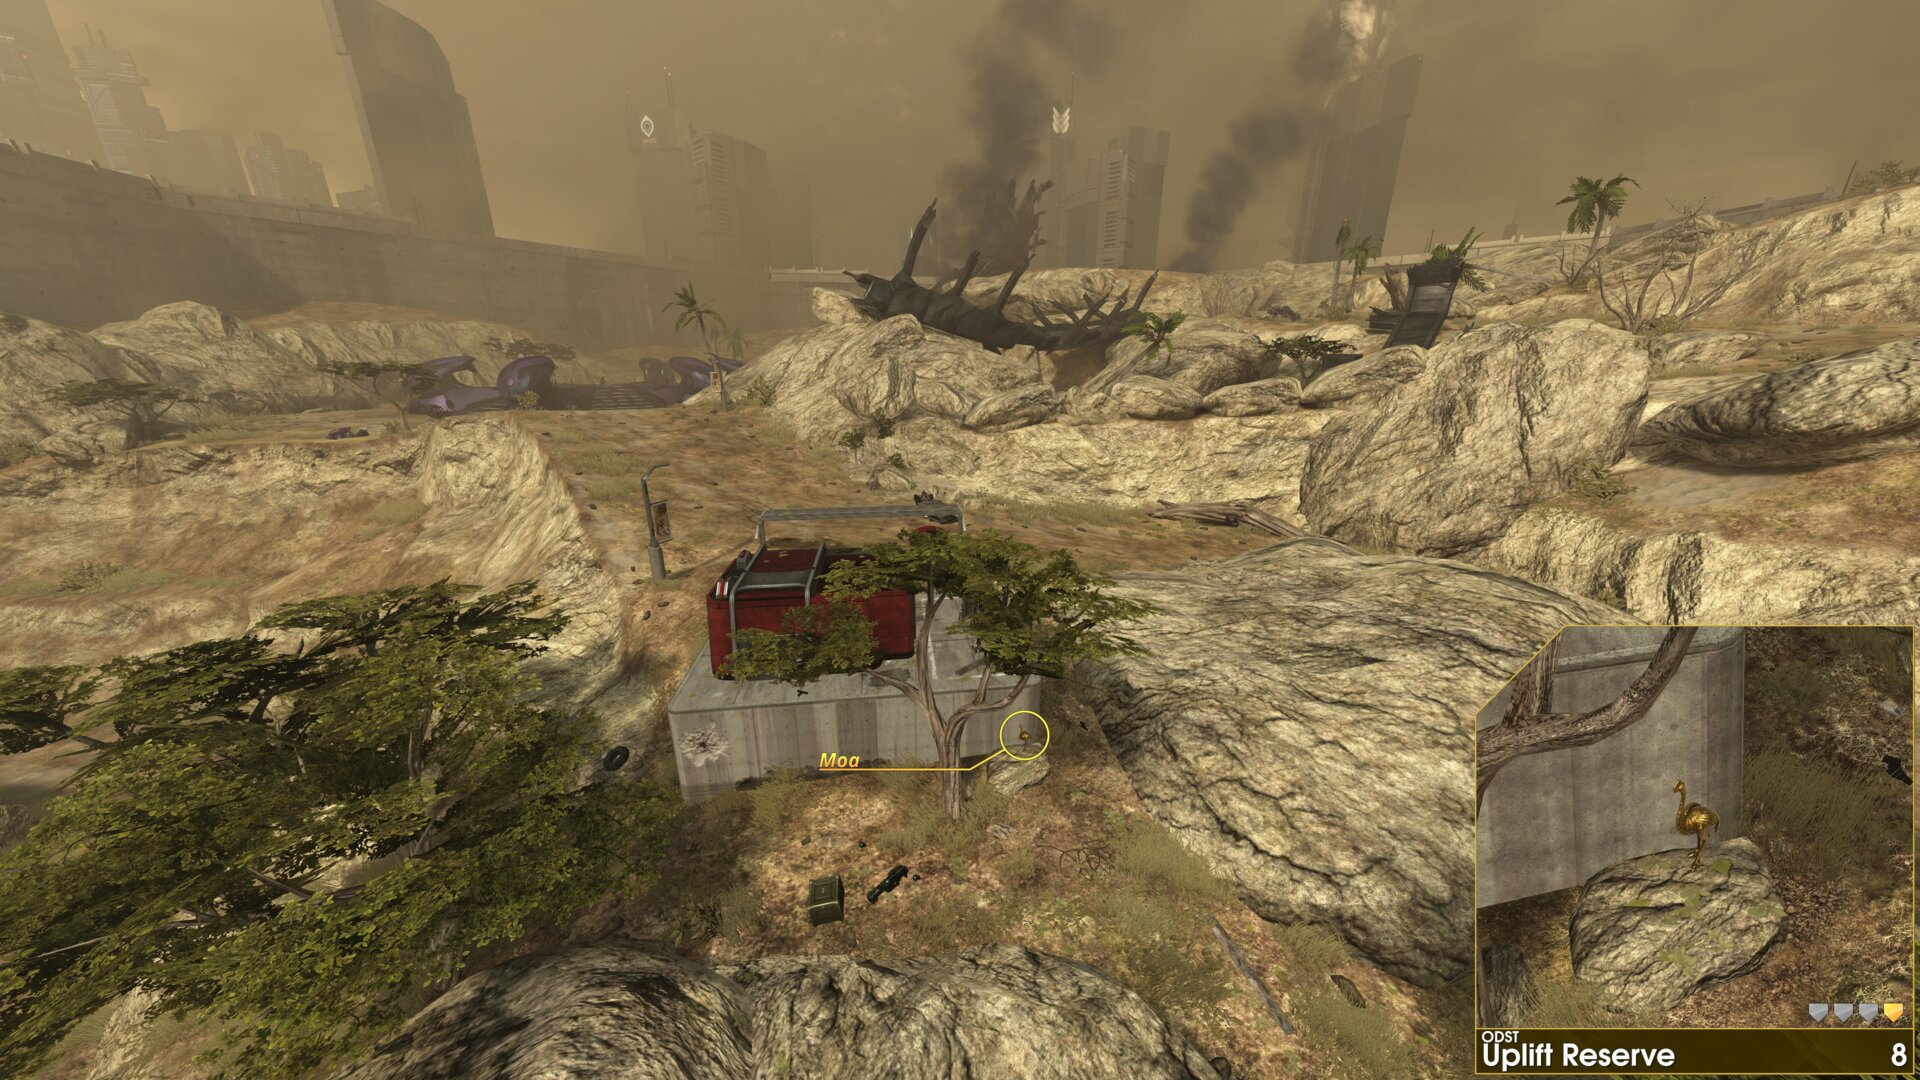
The Golden Moa is behind the rest/bus stop, near the
Spartan Laser, just before the Covenant cargo pad.
➟ Kizingo Boulevard
Rally Point: Alpha
Rally Point: Charlie
Golden Moa 1
Along the road Mickey is seen running down in the
intro cutscene (east of spawn), the Golden Moa is up
on a ledge next to the skybridge.
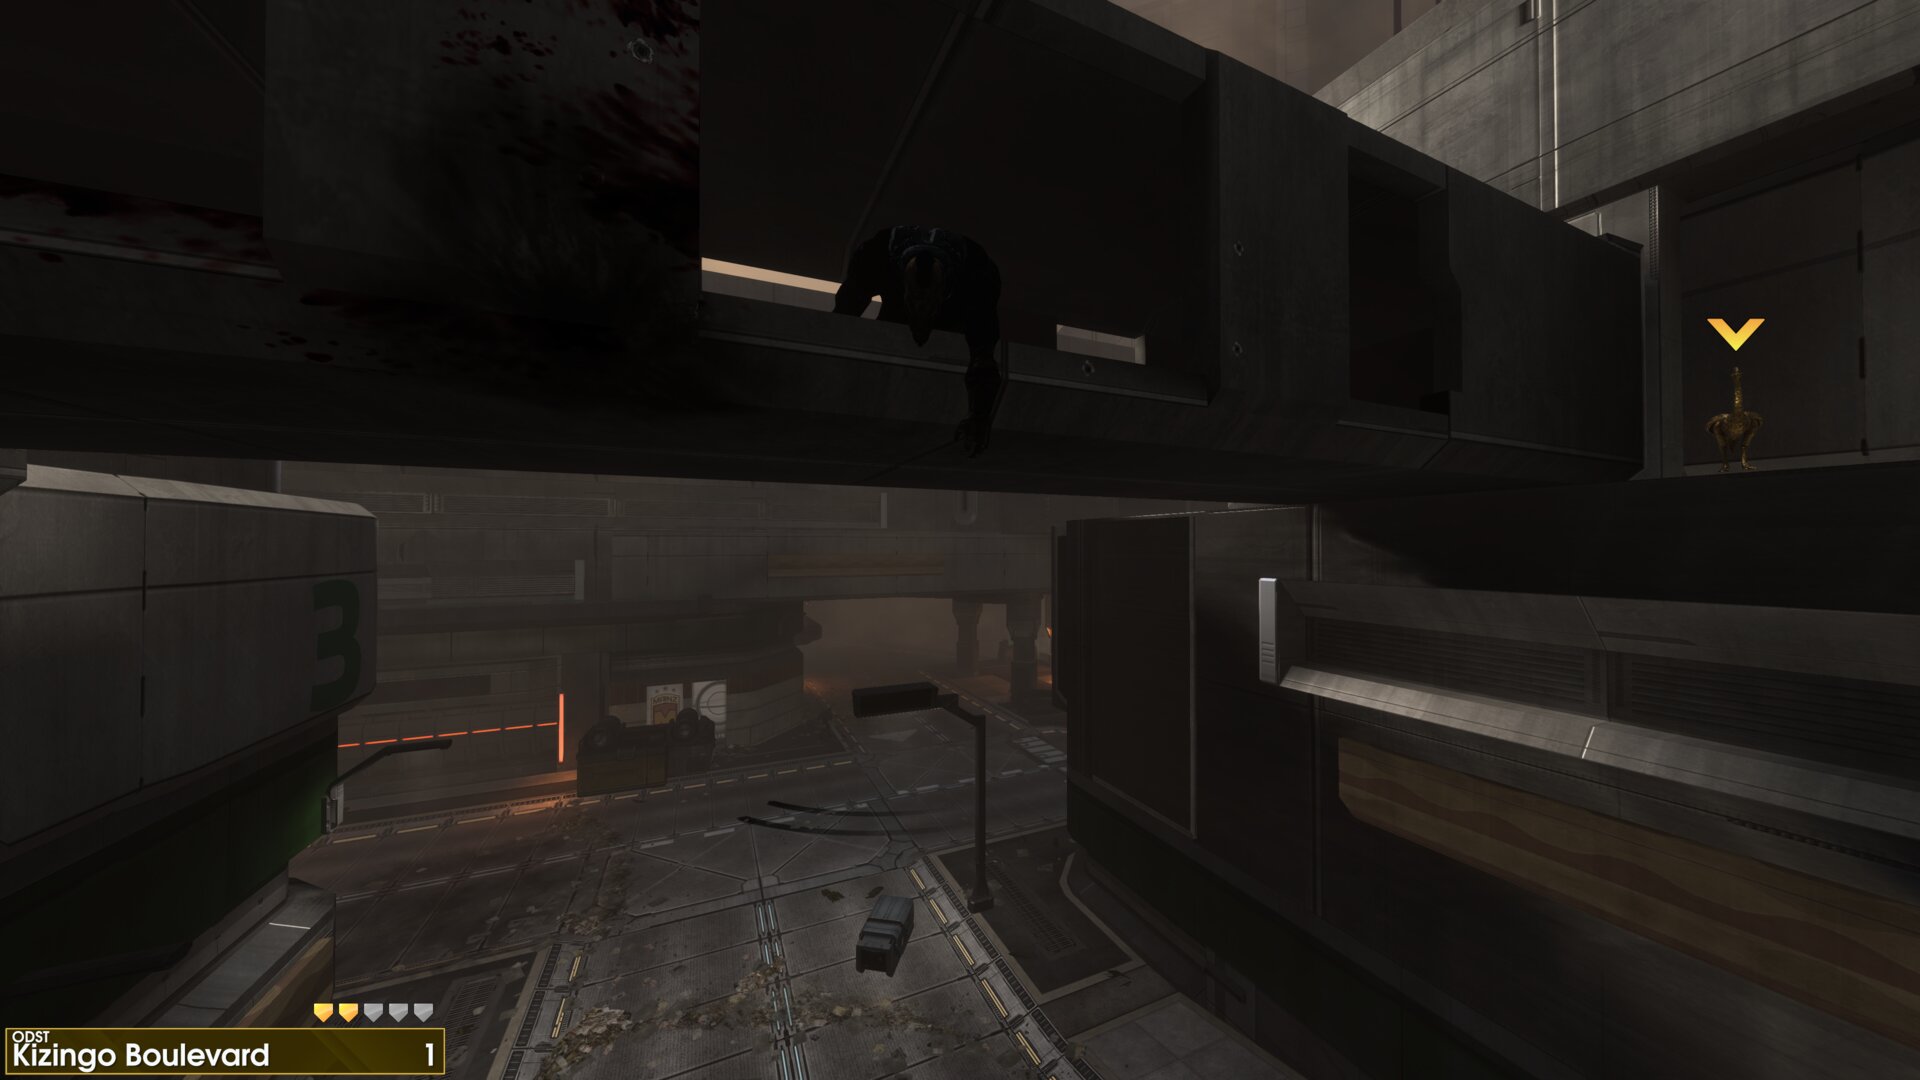
Along the road Mickey is seen running down in the
intro cutscene (east of spawn), the Golden Moa is up
on a ledge next to the skybridge.
Rally Point: Charlie
Golden Moa 2
The Golden Moa is on top of a beam sticking out of the
plaza building that has had a piece of the Mombasa
Tether (aka: New Mombasa Orbital Elevator) land on it.
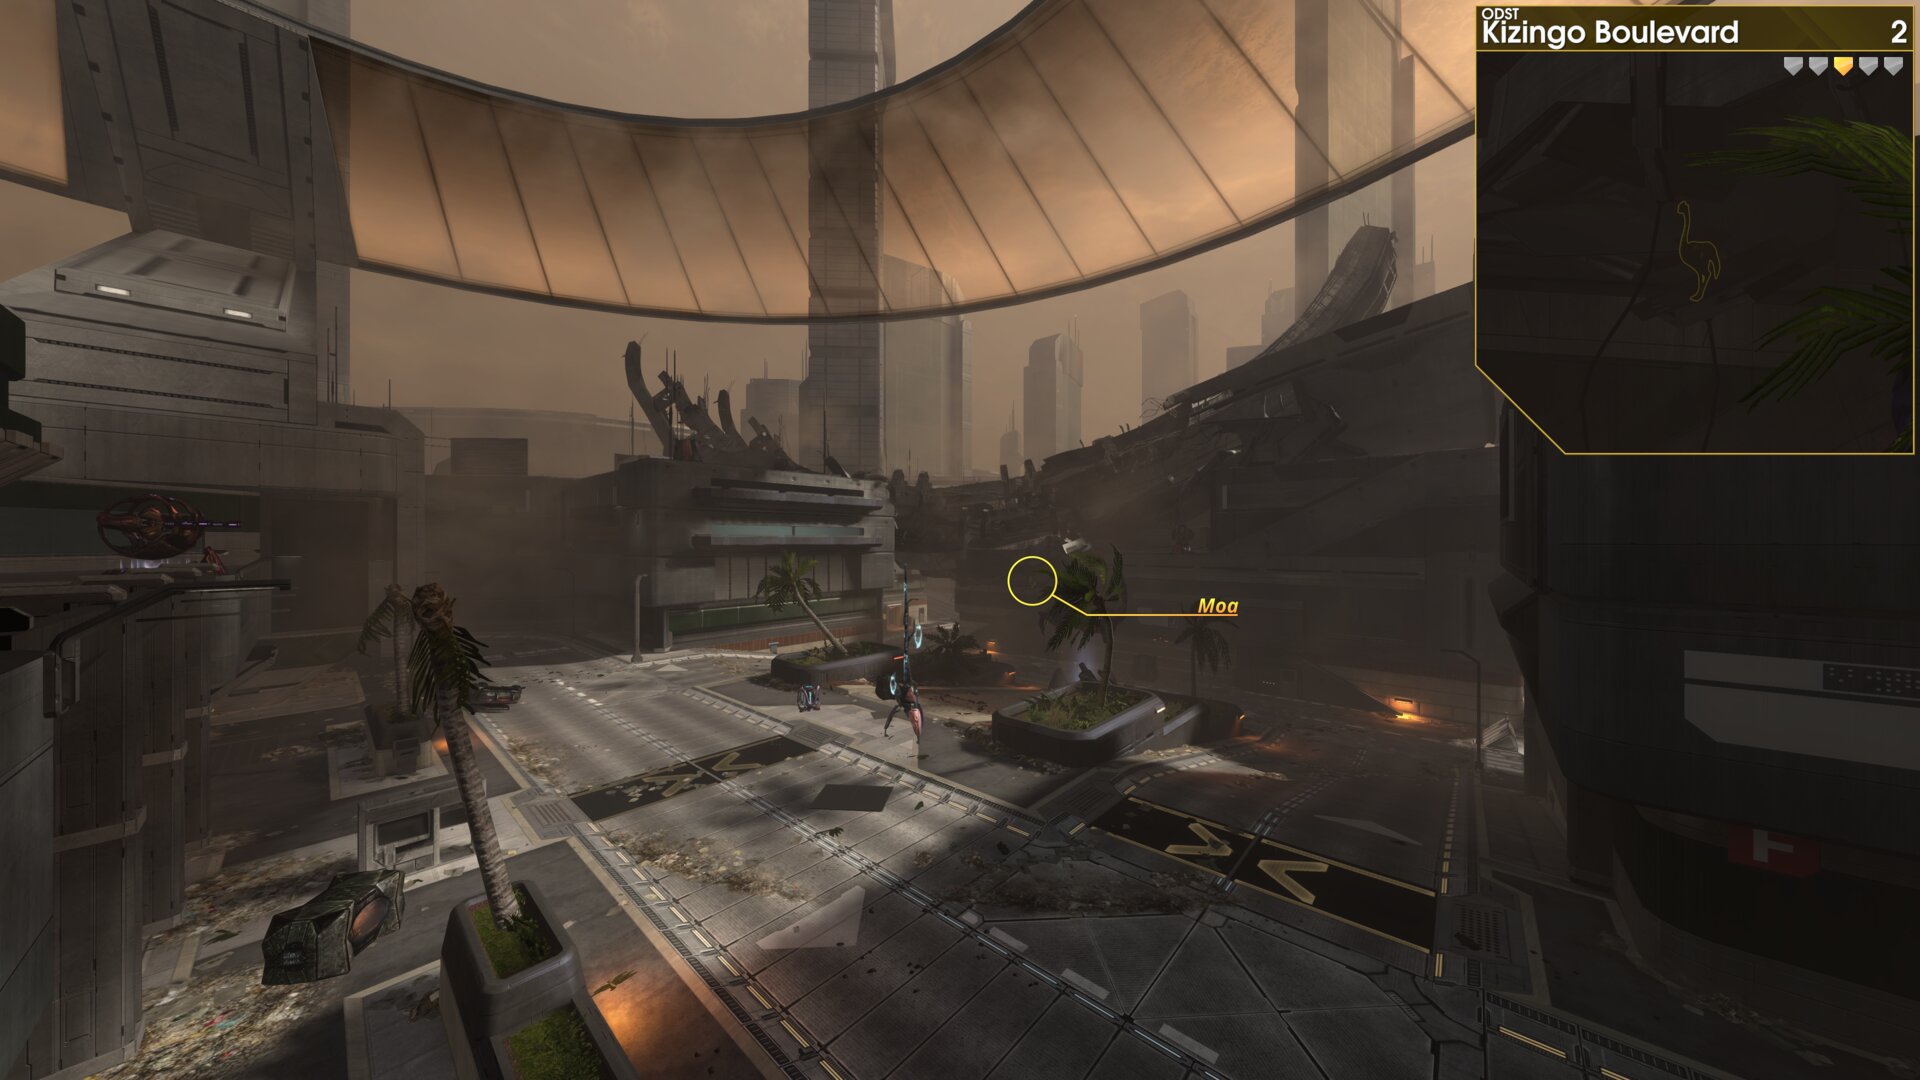
The Golden Moa is on top of a beam sticking out of the
plaza building that has had a piece of the Mombasa
Tether (aka: New Mombasa Orbital Elevator) land on it.
➟ ONI Alpha Site
Rally Point: Alpha
Golden Moa 1
The Golden Moa is by the seats at the northern end of
the bridge to ONI Alpha Site.
The Golden Moa is by the seats at the northern end of
the bridge to ONI Alpha Site.
➟ NMPD HQ
Rally Point: Delta
Golden Moa 1
Behind the last set of stairs, just before you reach the
makeshift bridge.
Behind the last set of stairs, just before you reach the
makeshift bridge.
➟ Kikowani Station
Rally Point: Alpha
Golden Moa 1
At the start of the mission, the Golden Moa is by the bottom of the stairs to the north east.
At the start of the mission, the Golden Moa is by the bottom of the stairs to the north east.
Golden Moa 2
Along the south west most railroad track at the start of the mission, the Golden Moa is by of the lit stopblock (aka: buffer stop, bumper block, etc).
Along the south west most railroad track at the start of the mission, the Golden Moa is by of the lit stopblock (aka: buffer stop, bumper block, etc).
➟ Data Hive
Rally Point: Alpha
Golden Moa 1
Beside the elevator at the start of the mission.
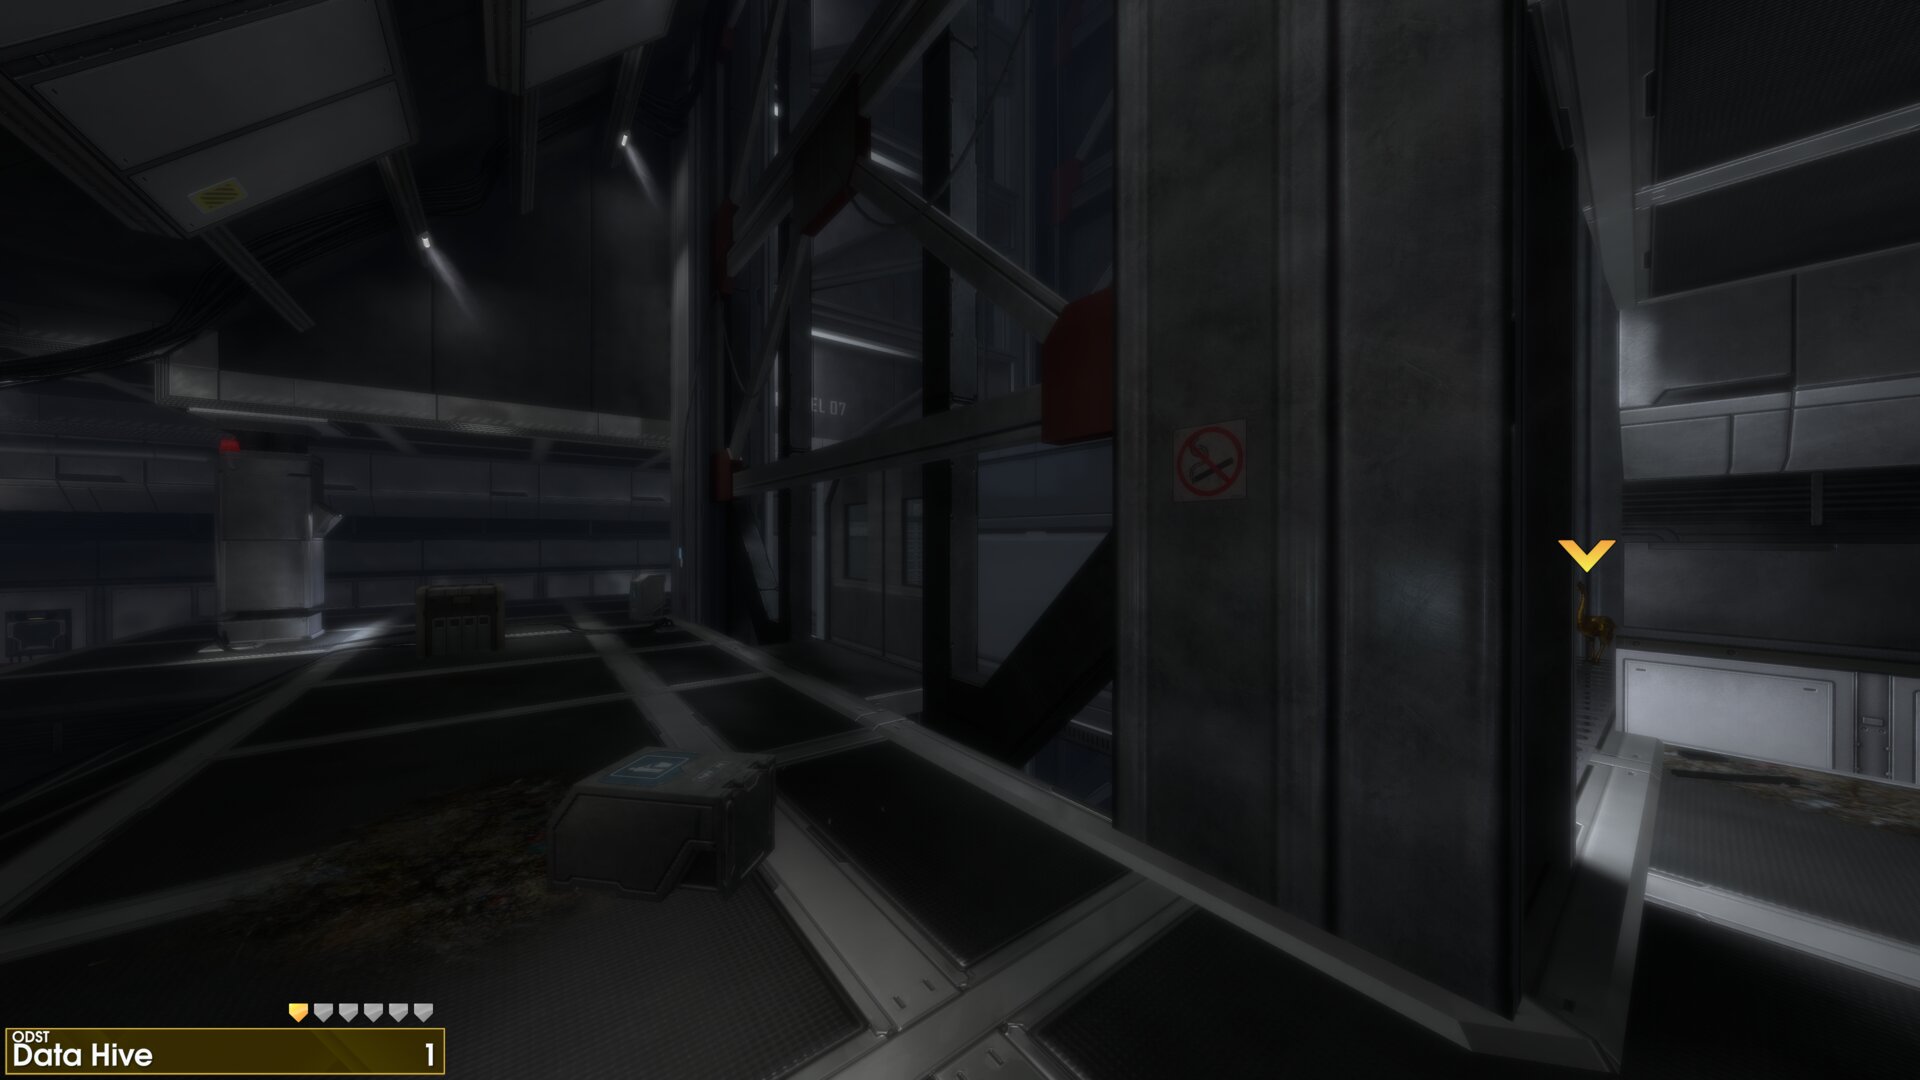
Beside the elevator at the start of the mission.
Golden Moa 2
The Golden Moa is on top of an air duct, just beyond the first door you go through.
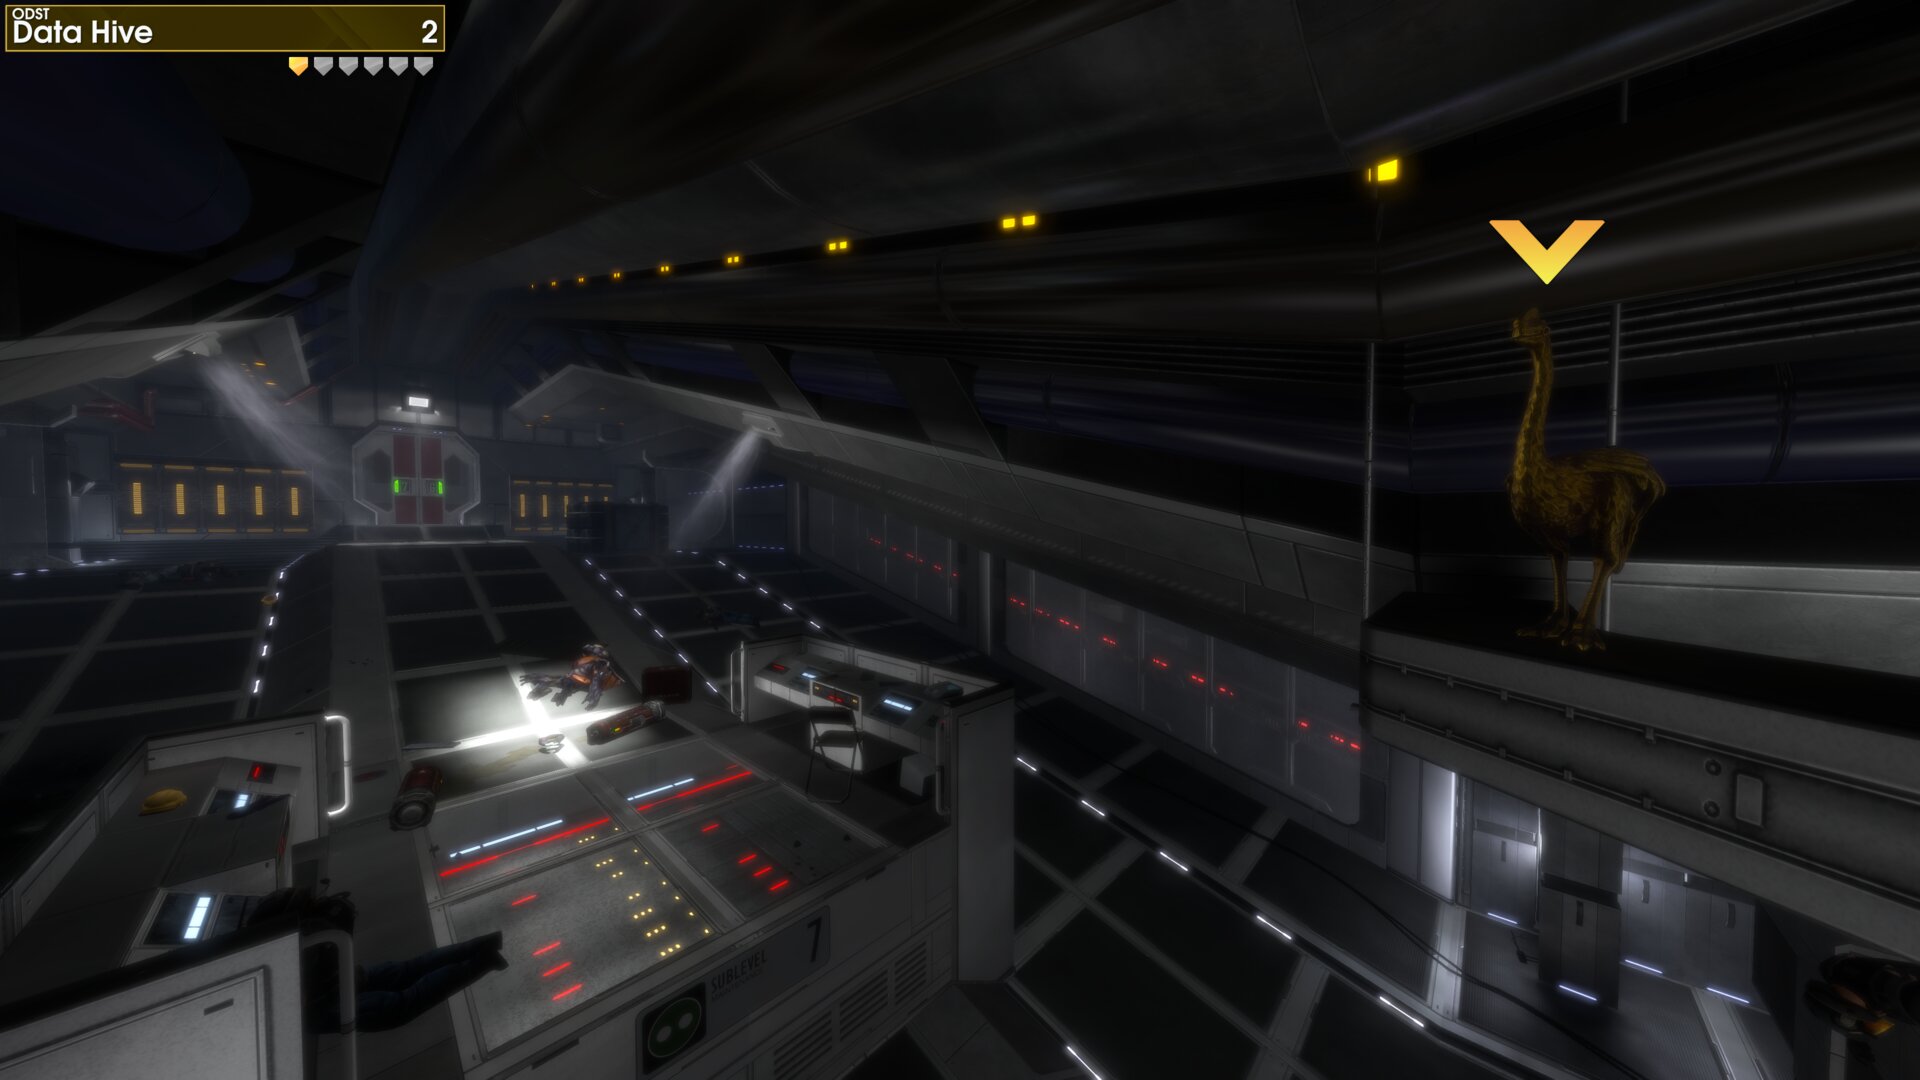
The Golden Moa is on top of an air duct, just beyond the first door you go through.
Golden Moa 3
The Golden Moa is behind a box at the far end of the first corridor, past all the Grunts.
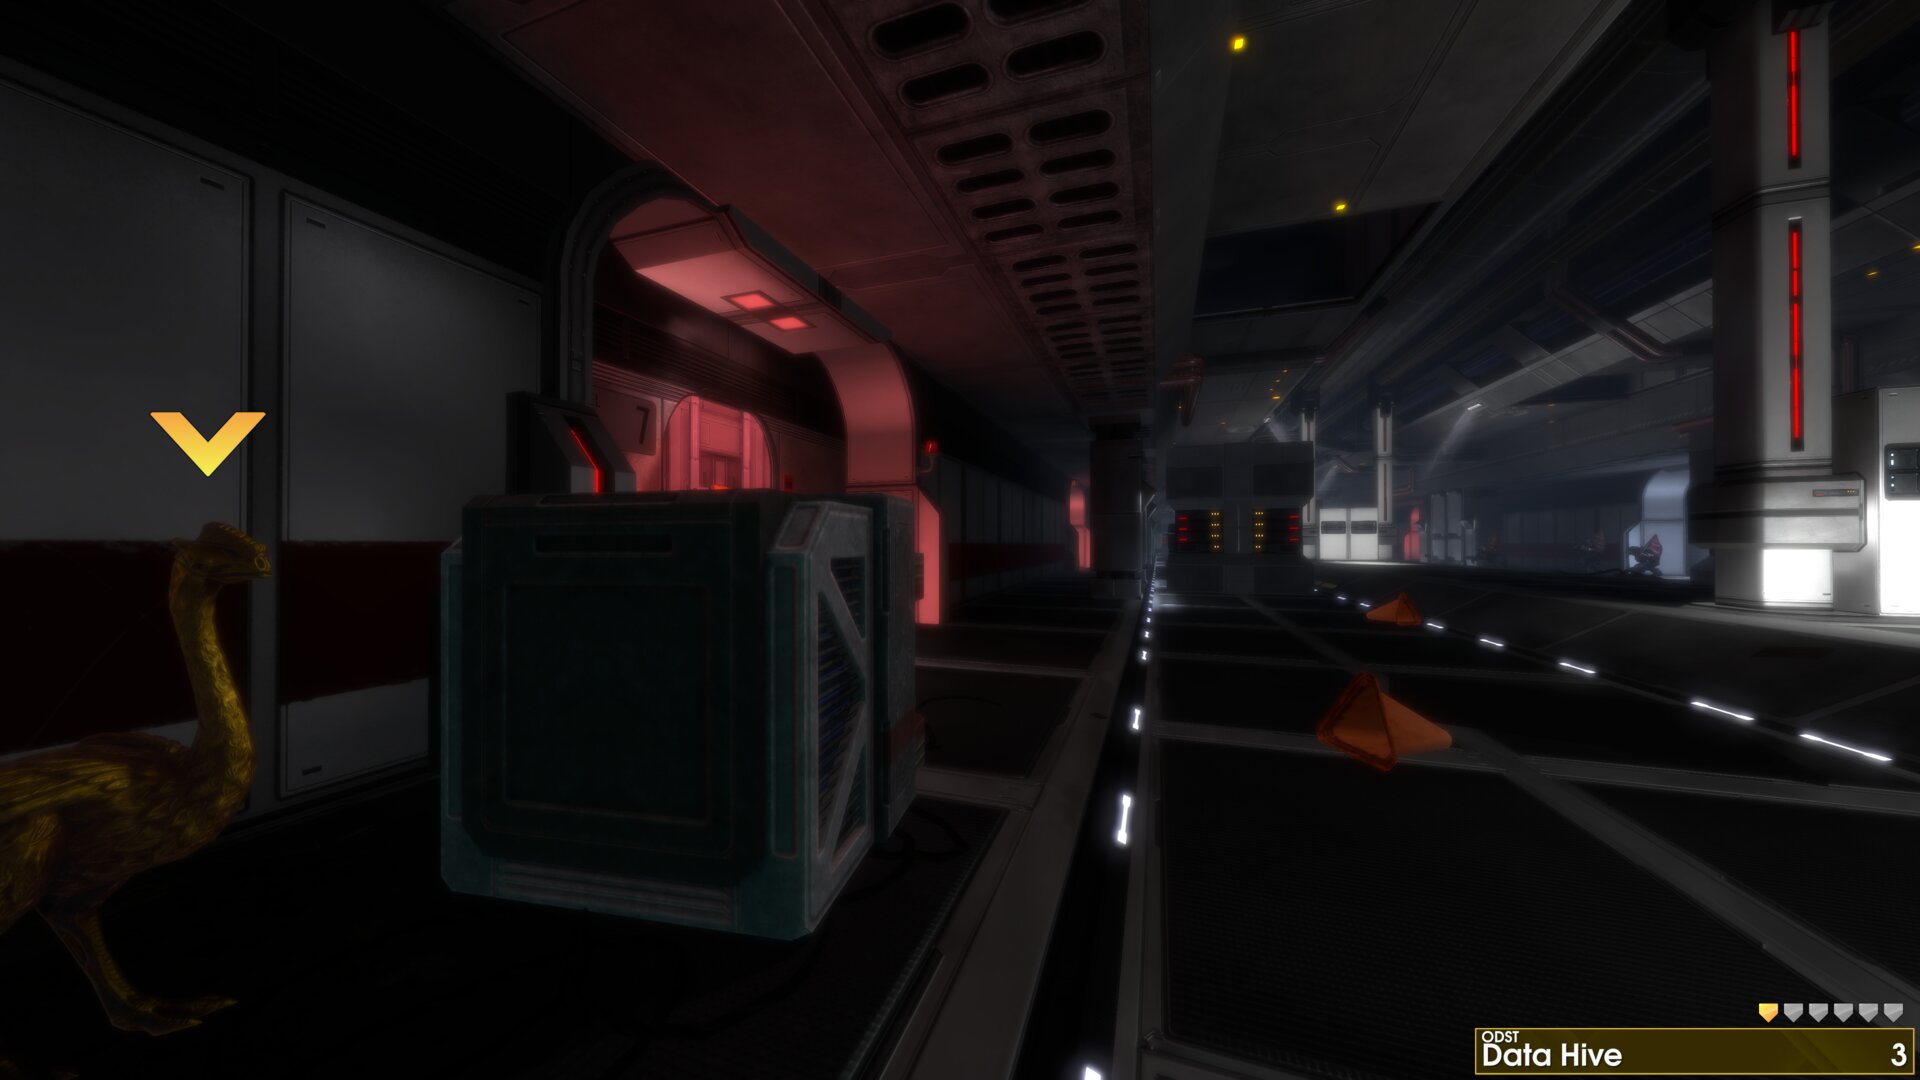
The Golden Moa is behind a box at the far end of the first corridor, past all the Grunts.
➟ Coastal Highway
Rally Point: Alpha
Golden Moa 1
The Golden Moa in the corner beside the first information booth.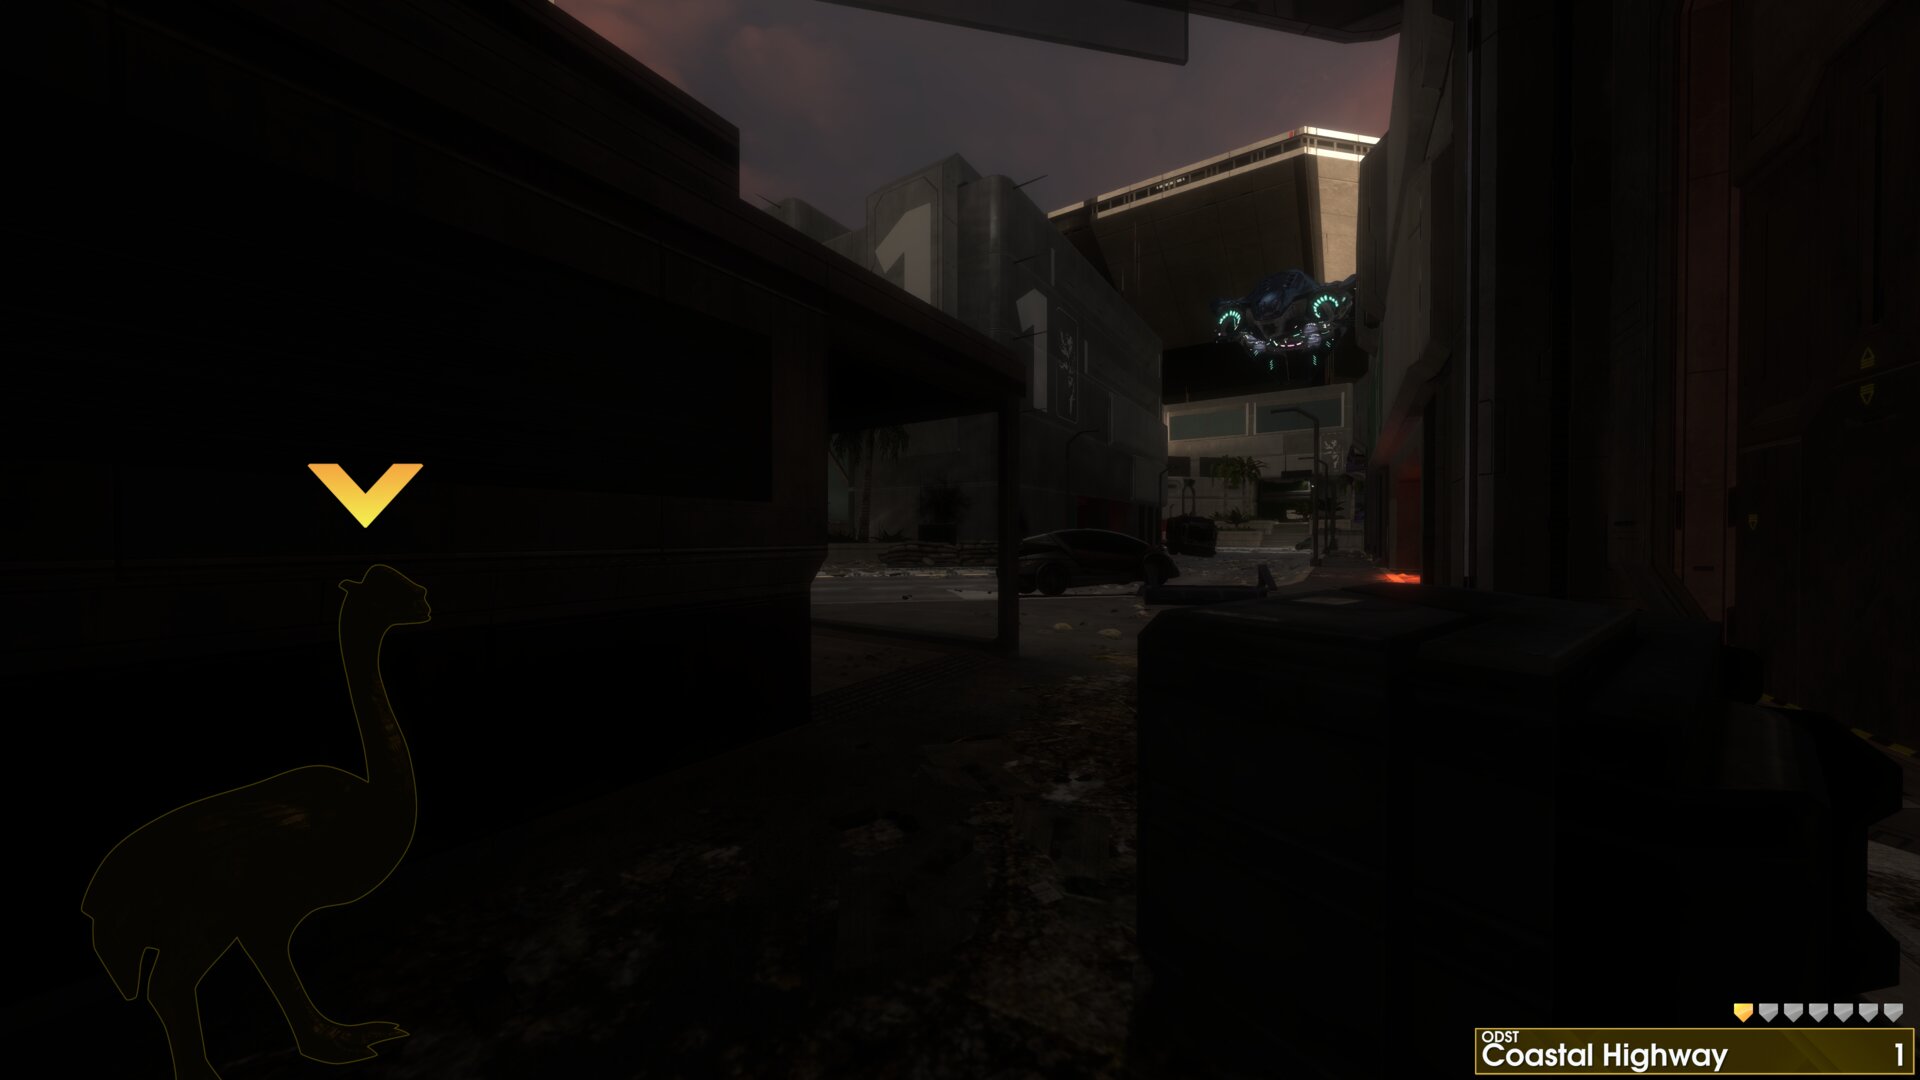
The Golden Moa in the corner beside the first information booth.
Golden Moa 2
Just before you reach the watchtower(Covenant deployable lookout tower), turn left at the under cover area lit with red light, the Golden Moa is in the corner with the trash bags.
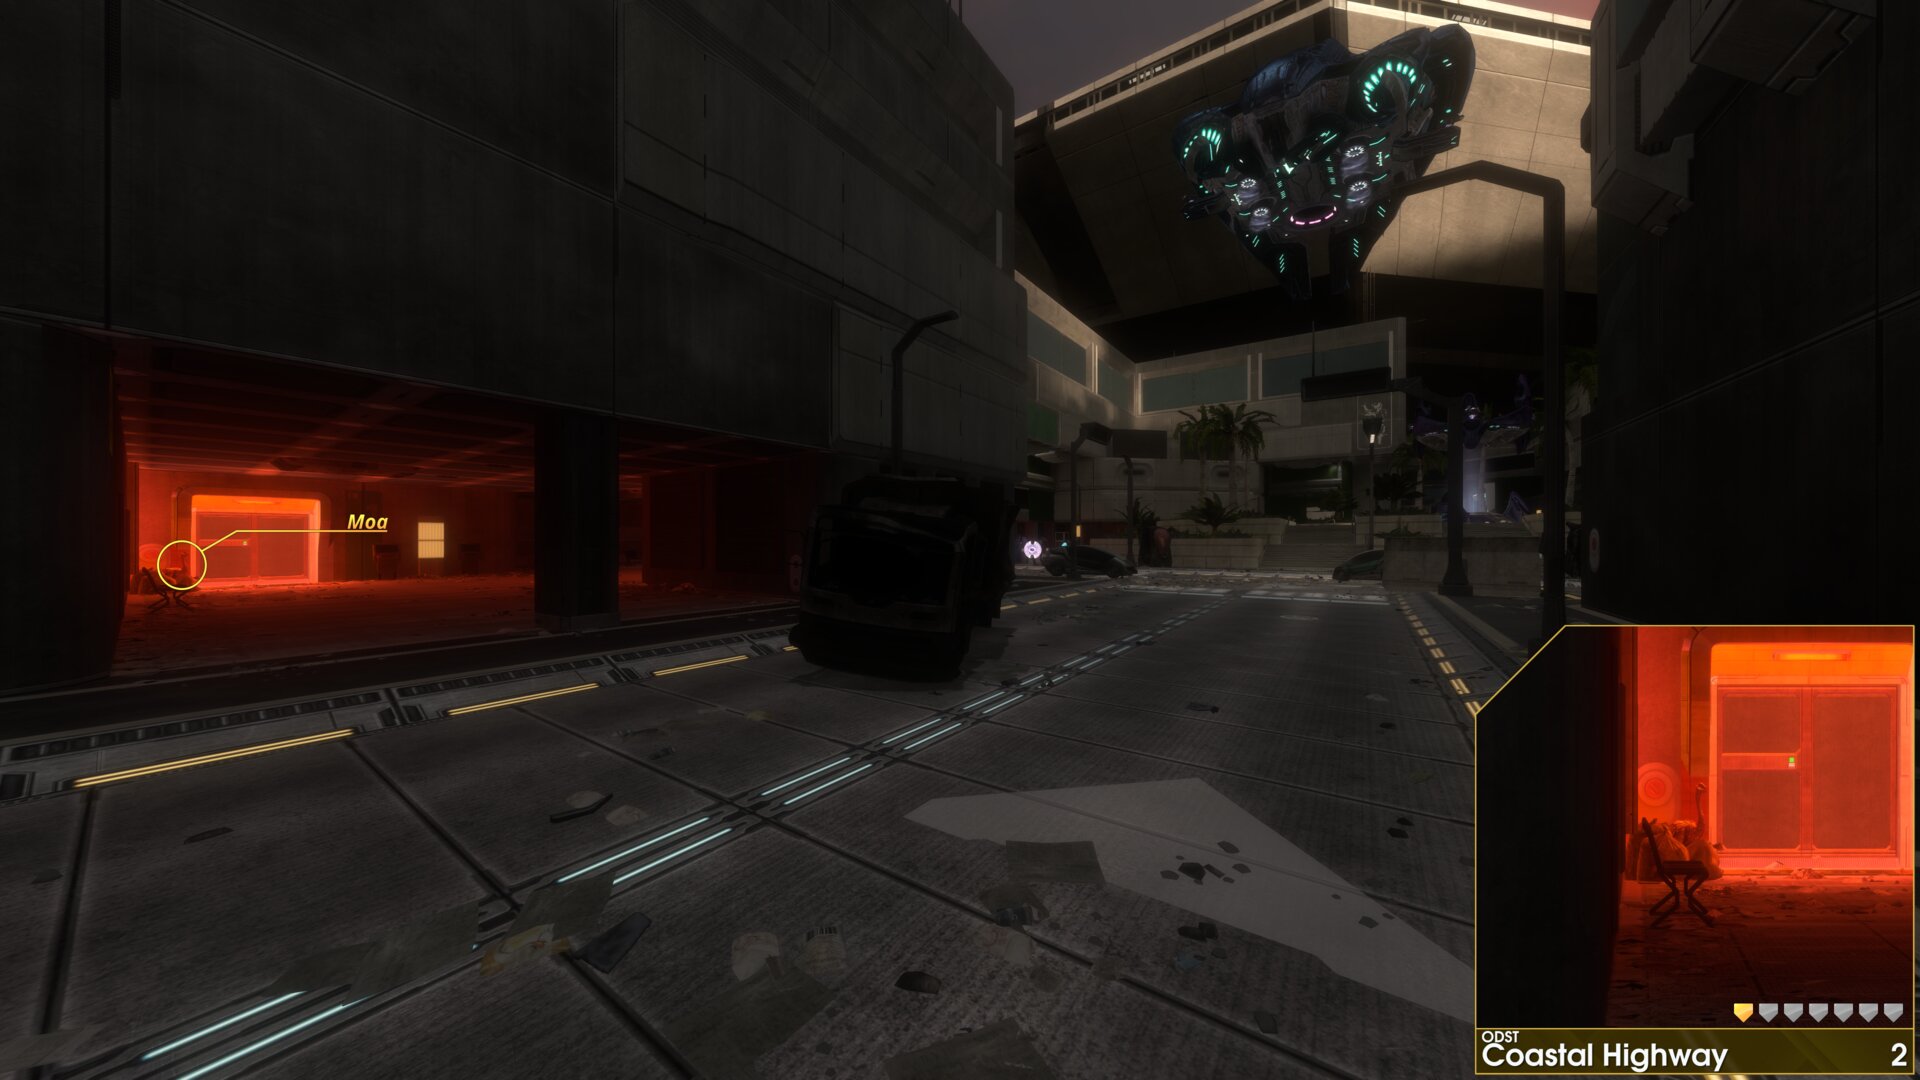
Just before you reach the watchtower(Covenant deployable lookout tower), turn left at the under cover area lit with red light, the Golden Moa is in the corner with the trash bags.
Golden Moa 3
As you reach the watchtower(Covenant deployable lookout tower), turn right at the intersection, the Golden Moa is by the doors of the building to the south.
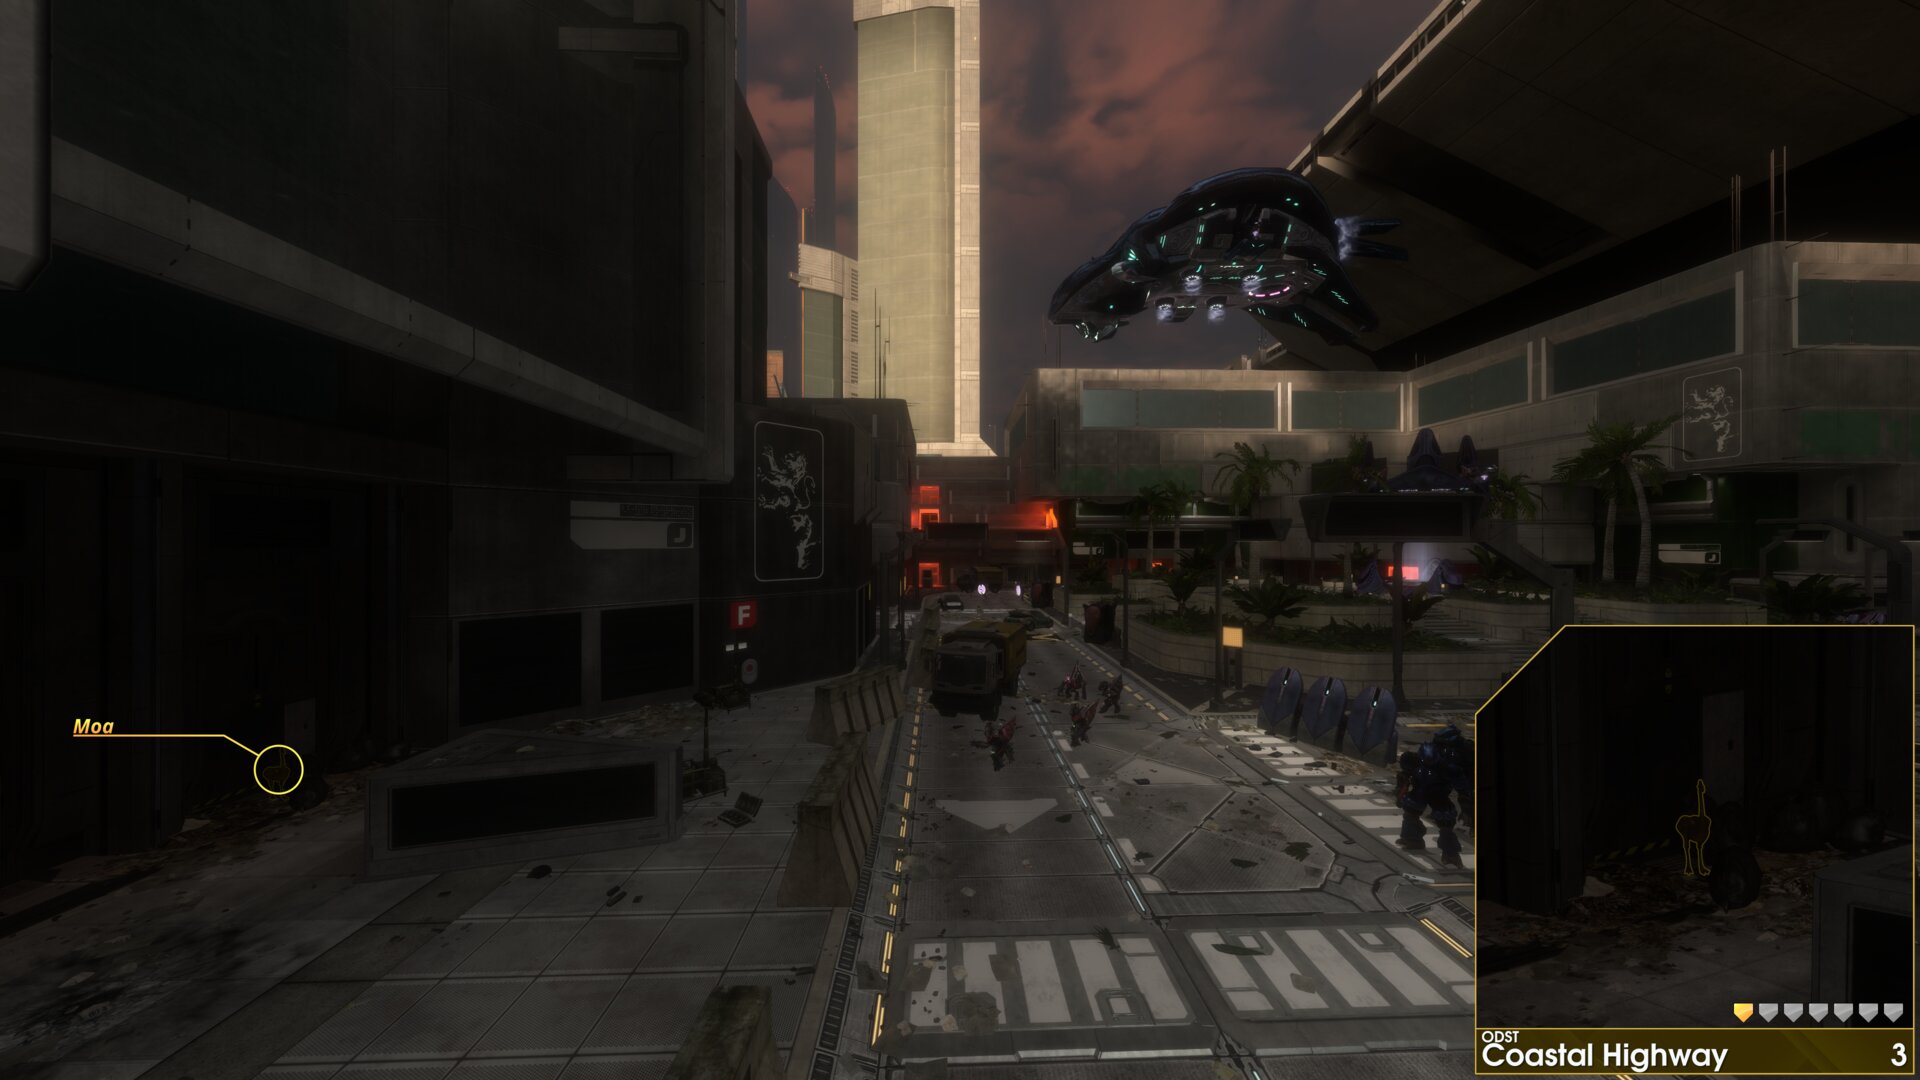
As you reach the watchtower(Covenant deployable lookout tower), turn right at the intersection, the Golden Moa is by the doors of the building to the south.
Golden Moa 4
After passing the watchtower(Covenant deployable lookout tower), the Golden Moa is at the end of the covered walkway, beside the eastern building.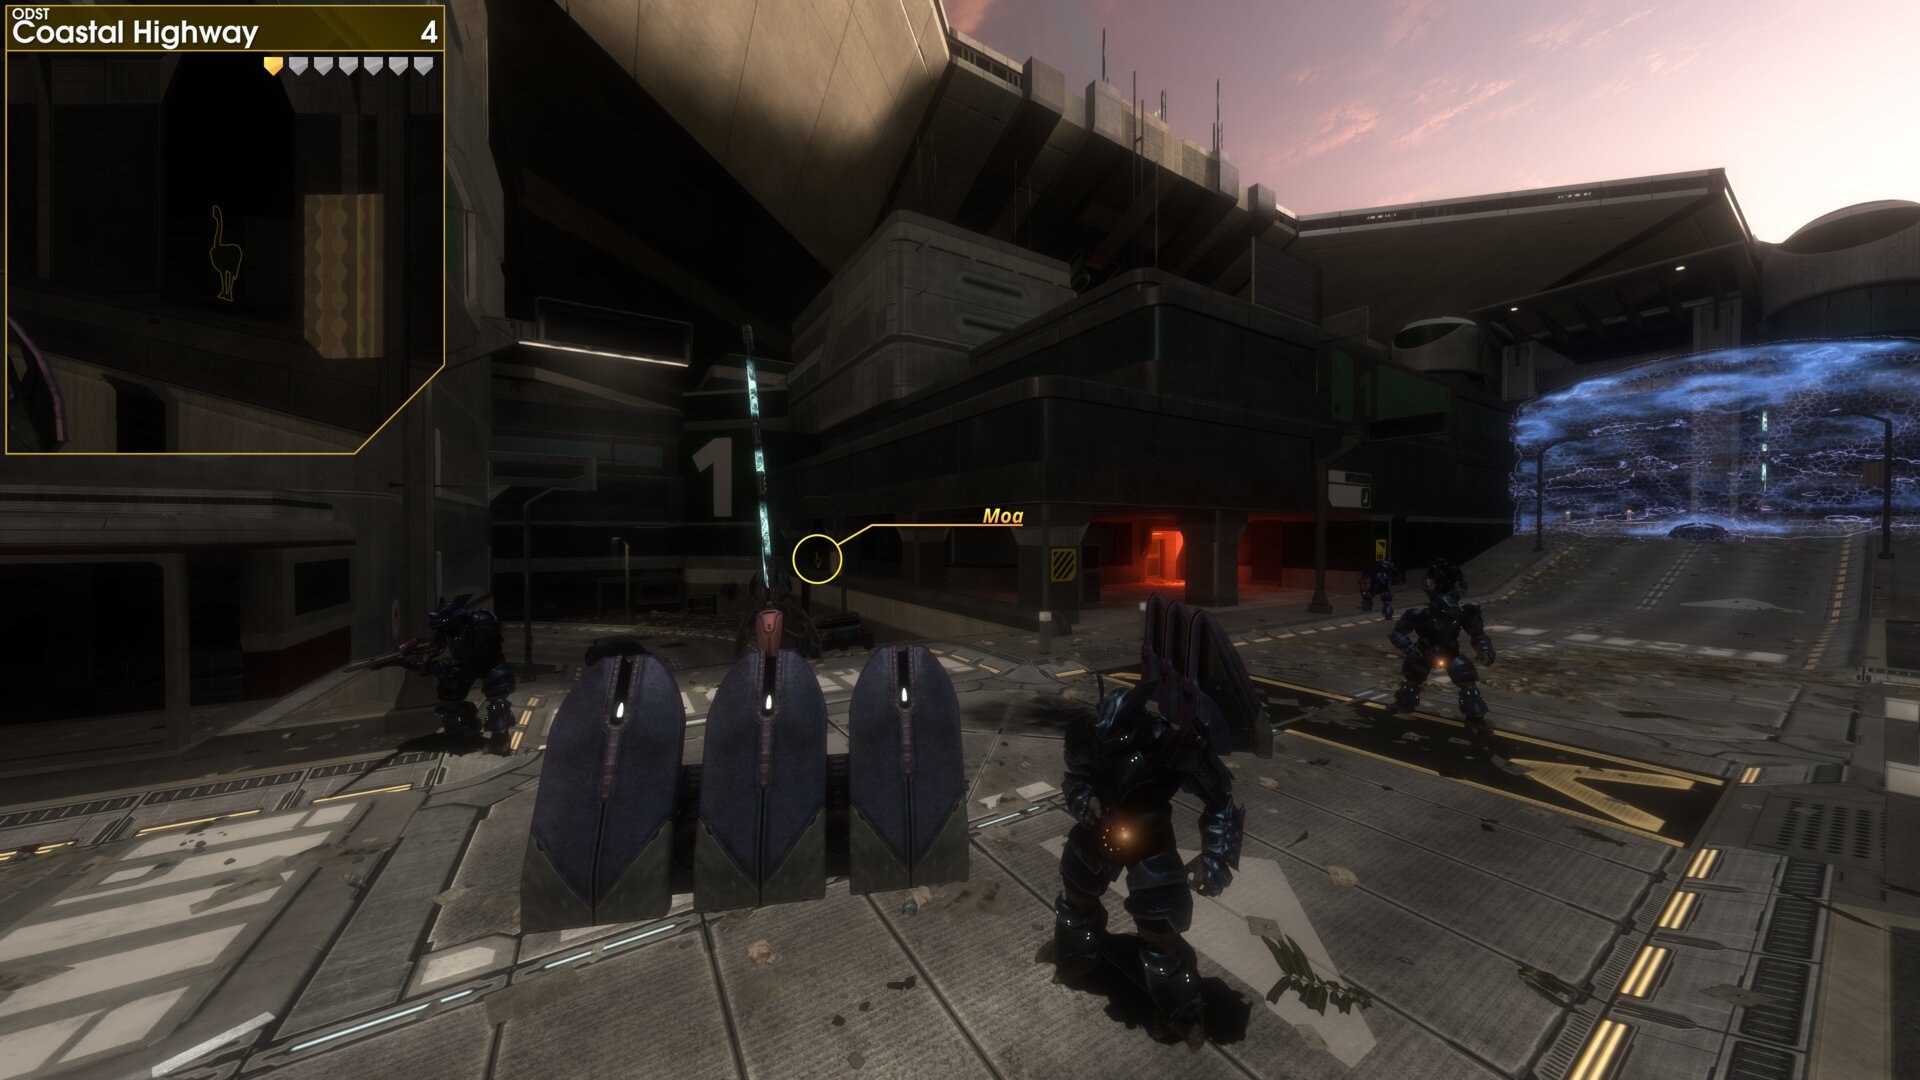
After passing the watchtower(Covenant deployable lookout tower), the Golden Moa is at the end of the covered walkway, beside the eastern building.
Golden Moa 5
The Golden Moa is off to the left of the door that leads to the Highway, inside the information booth.
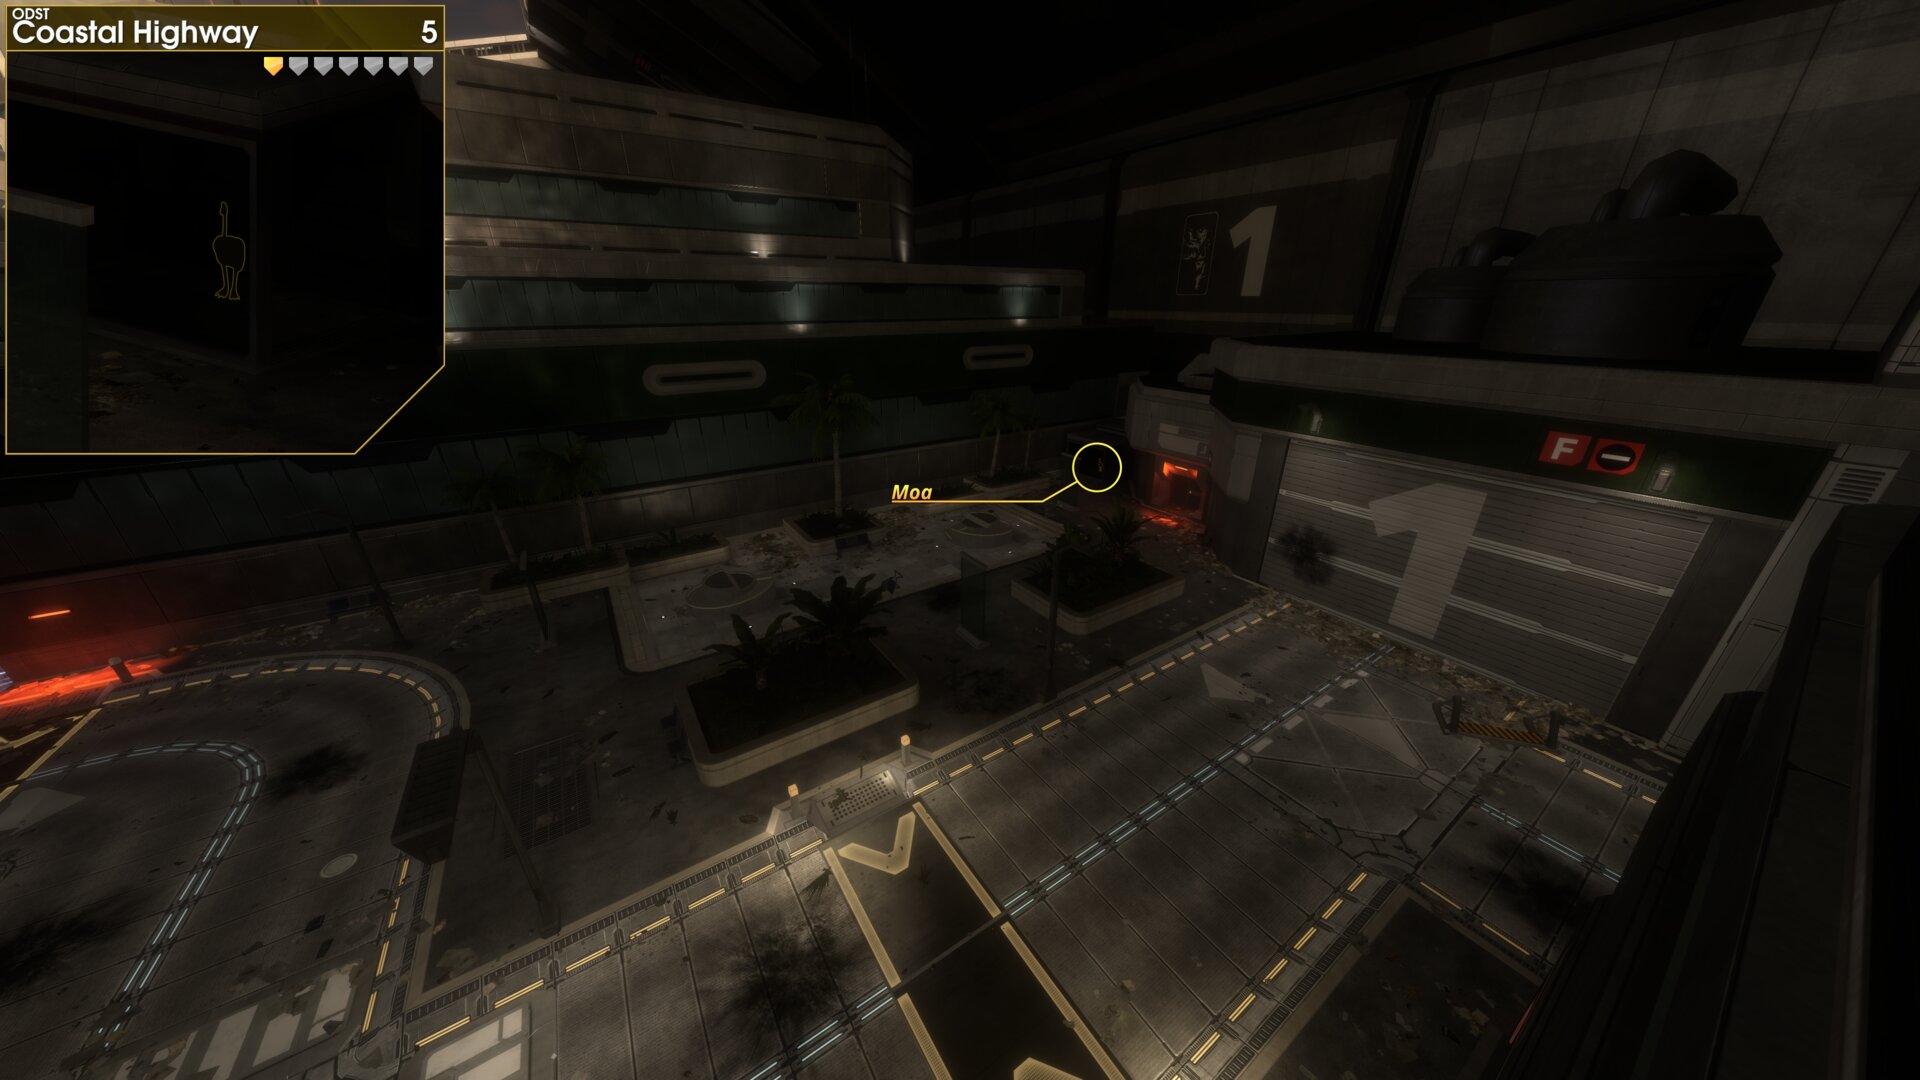
The Golden Moa is off to the left of the door that leads to the Highway, inside the information booth.
➟ (WIP) Mombasa Streets
Note: The Moa's in Mombasa Streets are usually best reached from the second rally point that they appear in. The Moa numbering and rally points have been labelled to match this fact.
A map will eventually be included to make finding these easier, no ETA.
Golden Moa 1
At the roundabout where you find the Drone Optics
Package, the Golden Moa is in a garden bed to the
east.
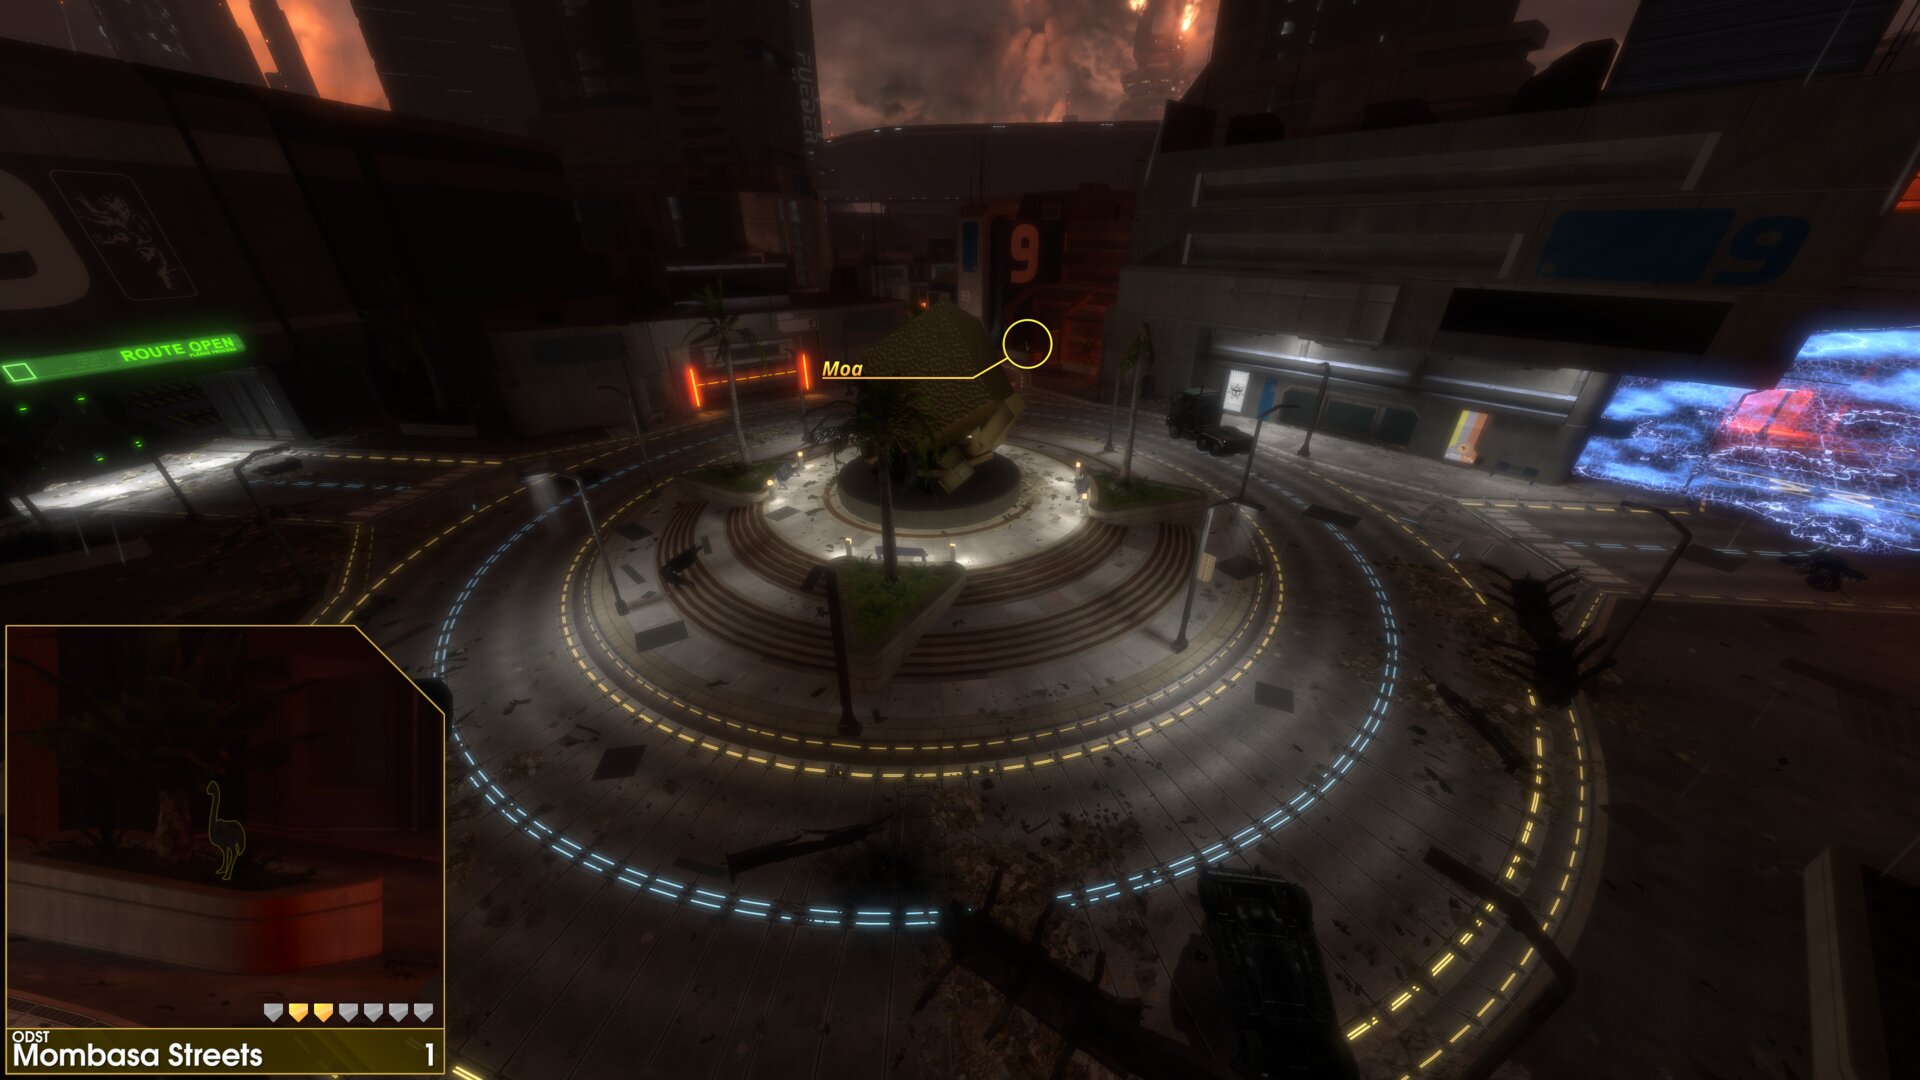
At the roundabout where you find the Drone Optics
Package, the Golden Moa is in a garden bed to the
east.
Rally Point: Remote Detonator
Golden Moa 2
At the roundabout south east of the ruined Gauss Turret, the Golden Moa is on top of a veranda to the north.
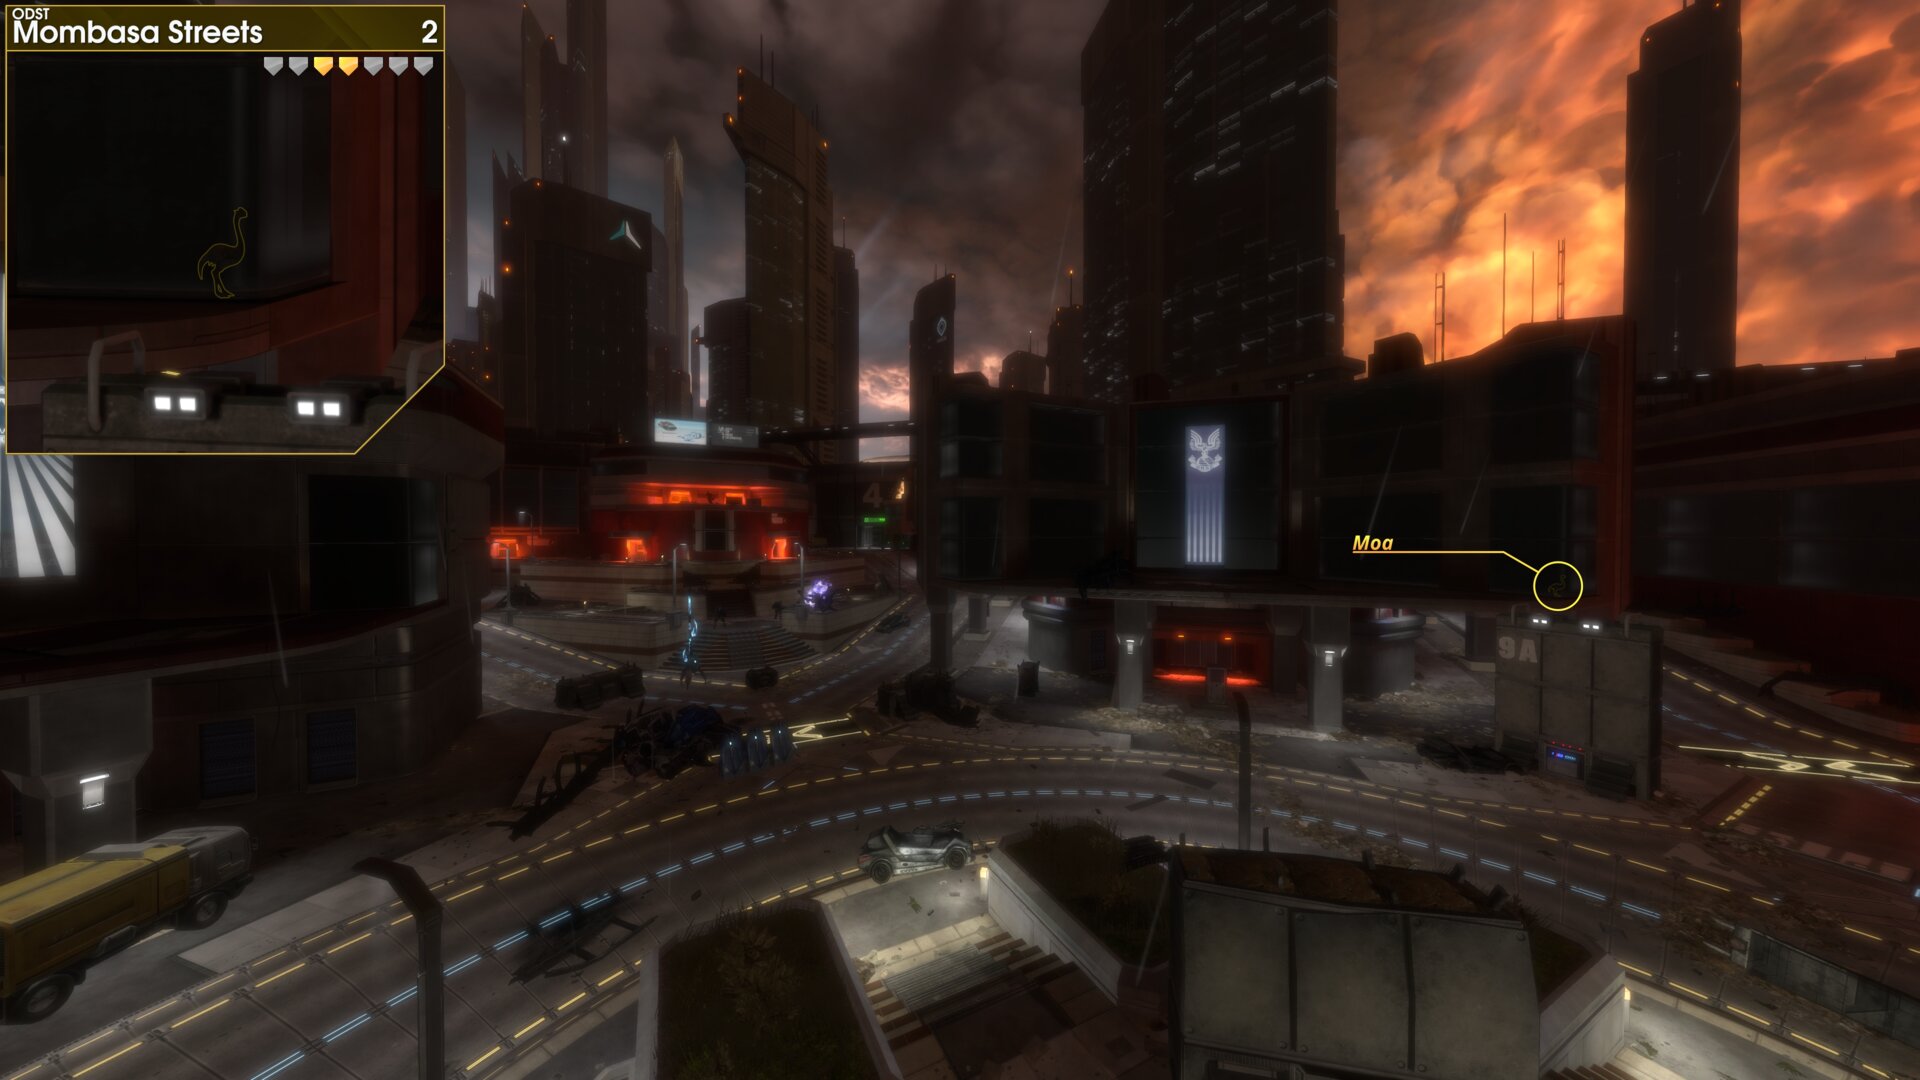
At the roundabout south east of the ruined Gauss Turret, the Golden Moa is on top of a veranda to the north.
Golden Moa 3
At the roundabout south east of the ruined Gauss Turret, the Golden Moa is in a garden bed to the south west, beside the stairs leading up to the blast door.
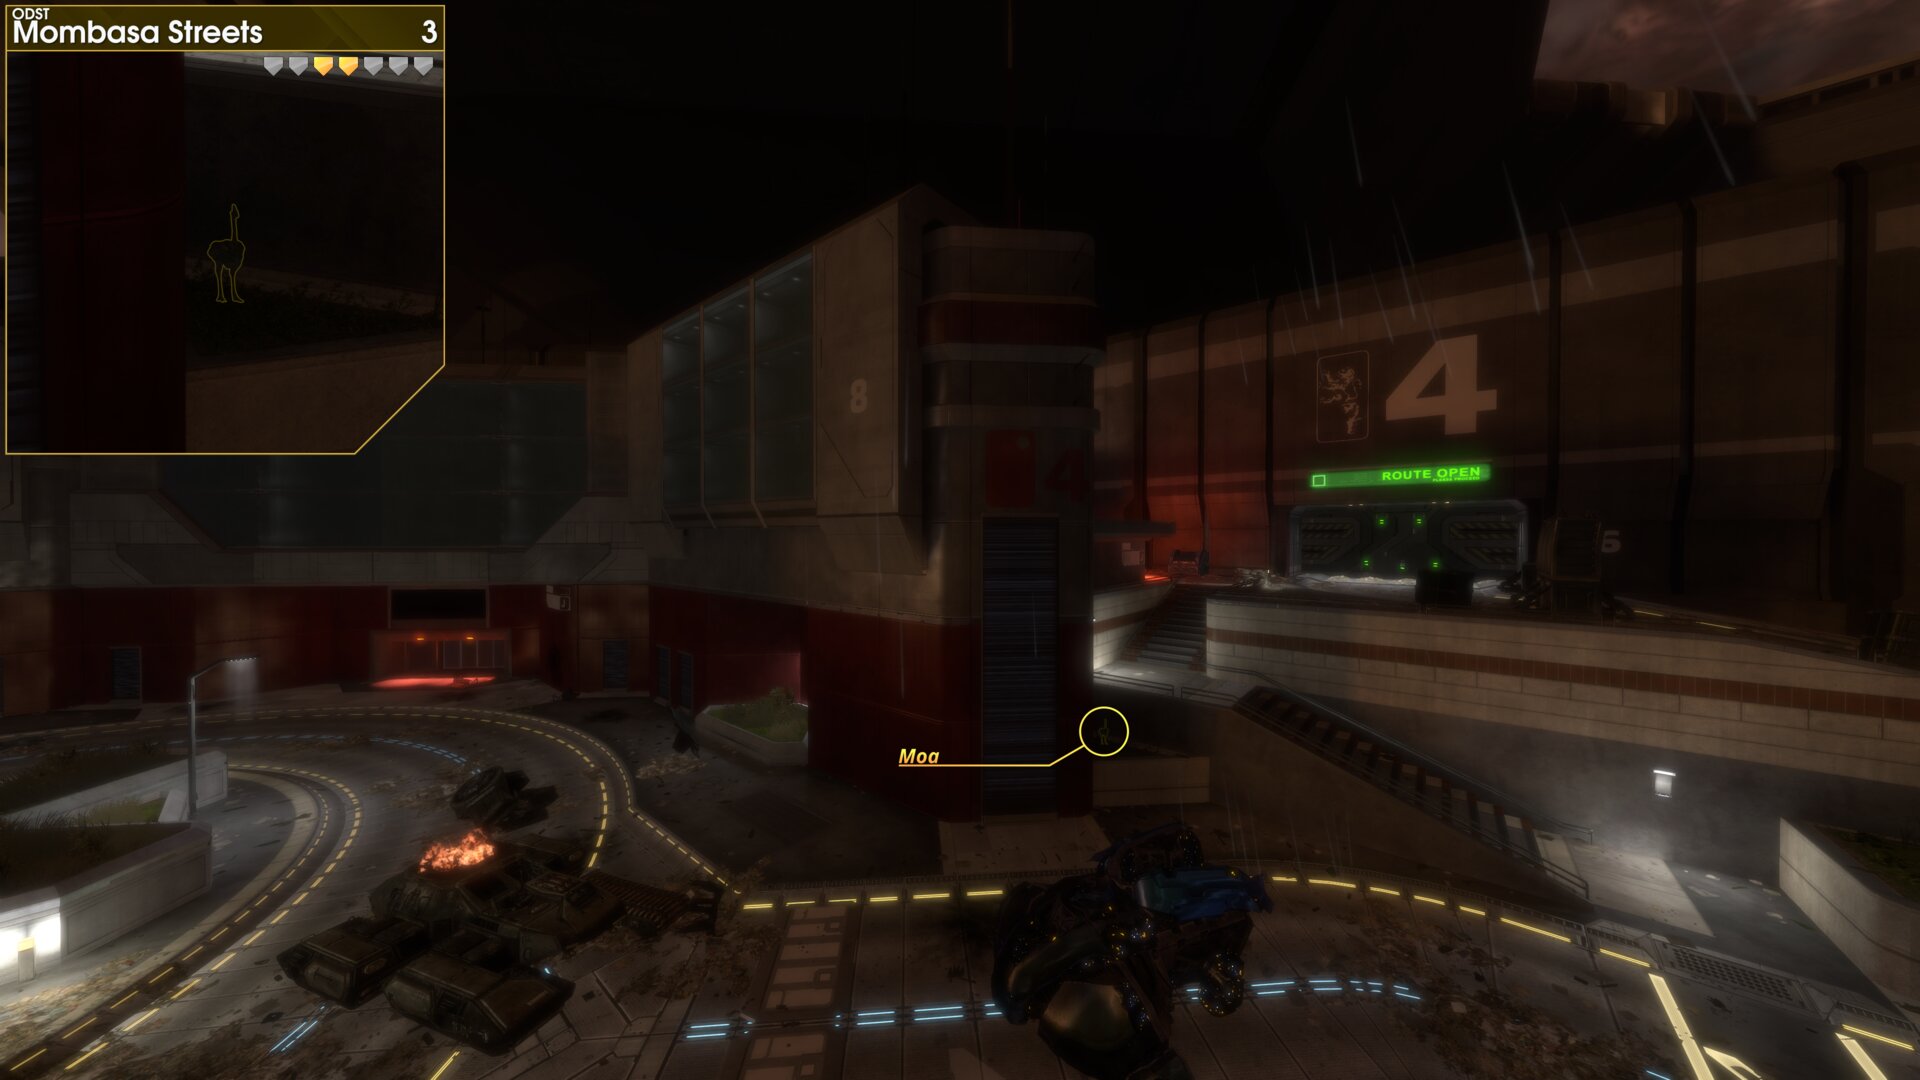
[/tr]At the roundabout south east of the ruined Gauss Turret, the Golden Moa is in a garden bed to the south west, beside the stairs leading up to the blast door.
Rally Point: BioFoam Canister
Golden Moa 4
At the roundabout where you find a bent Sniper Rifle, the Golden Moa is by the building to the north as you head towards the locked blast door.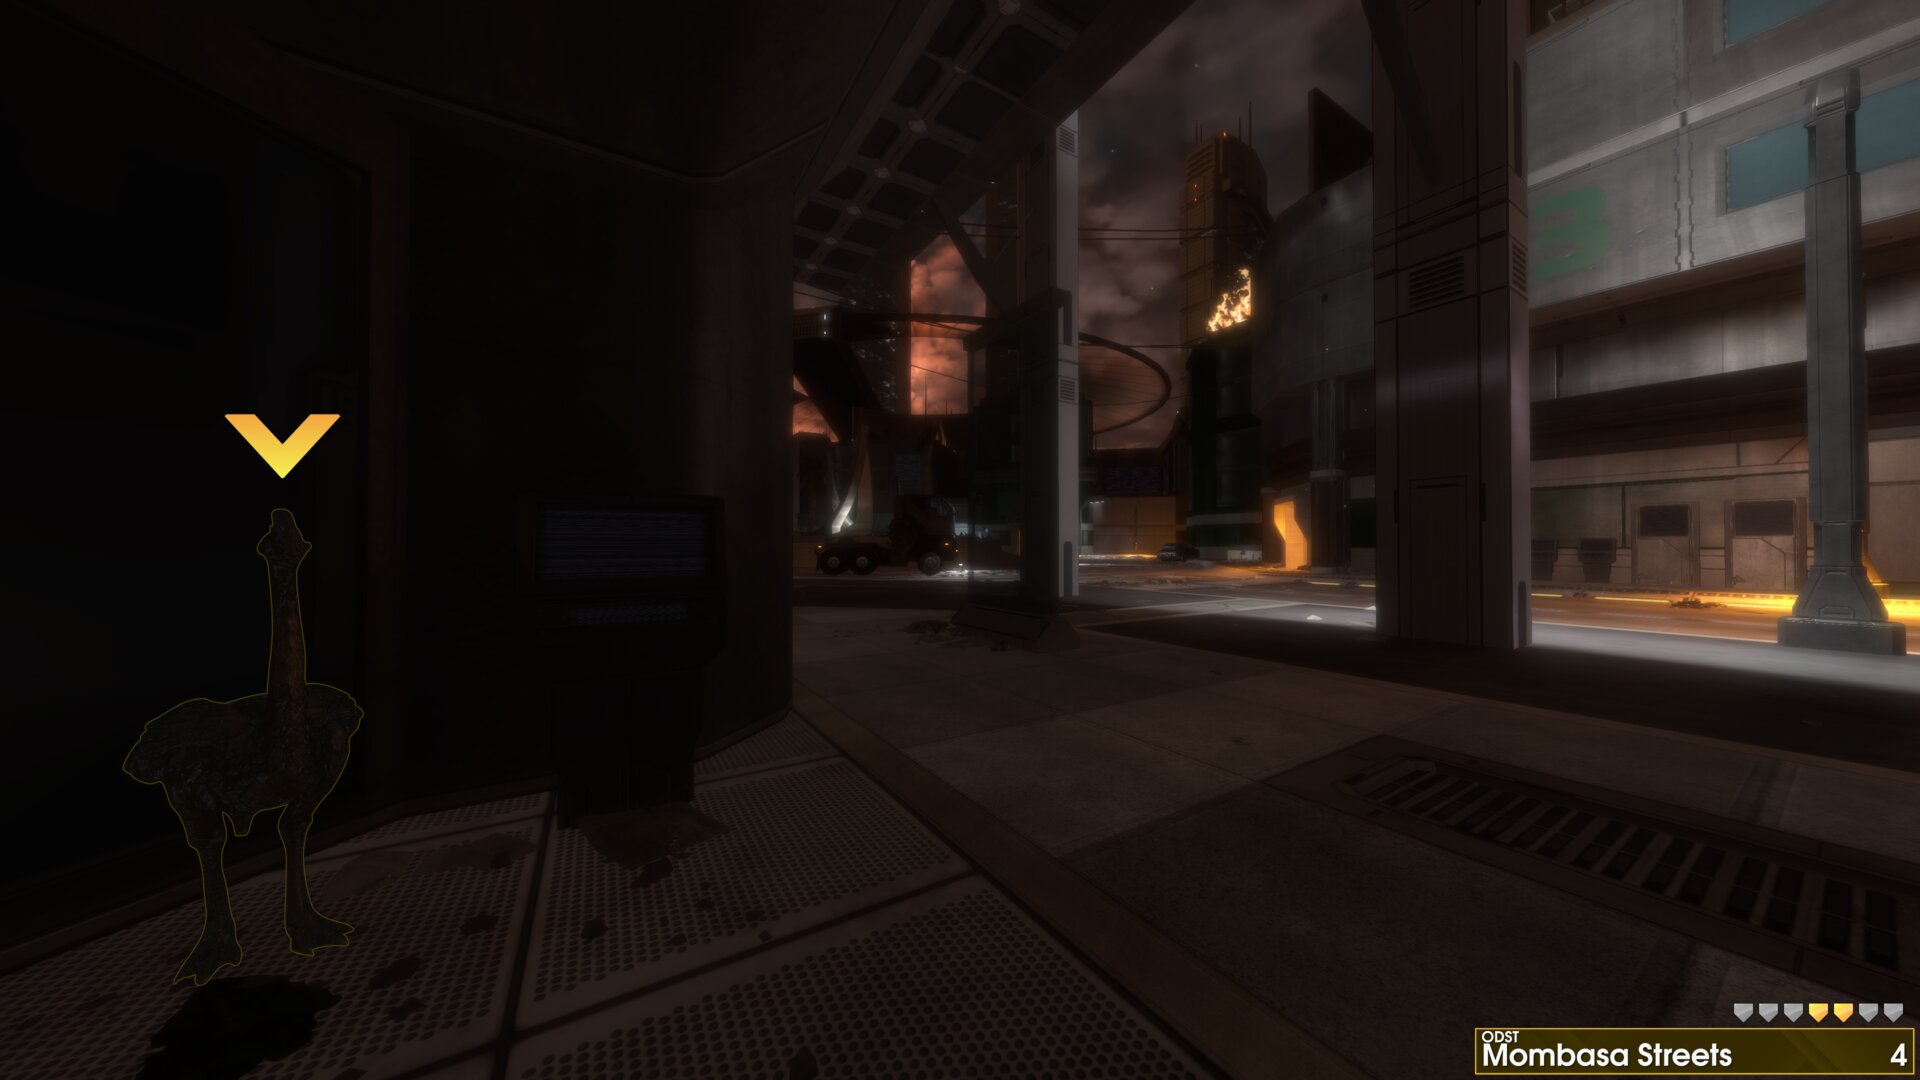
At the roundabout where you find a bent Sniper Rifle, the Golden Moa is by the building to the north as you head towards the locked blast door.
Golden Moa 5
From the roundabout where you find a bent Sniper Rifle, follow the road to the south until the next intersection. The Golden Moa on a balcony south west of this intersection.
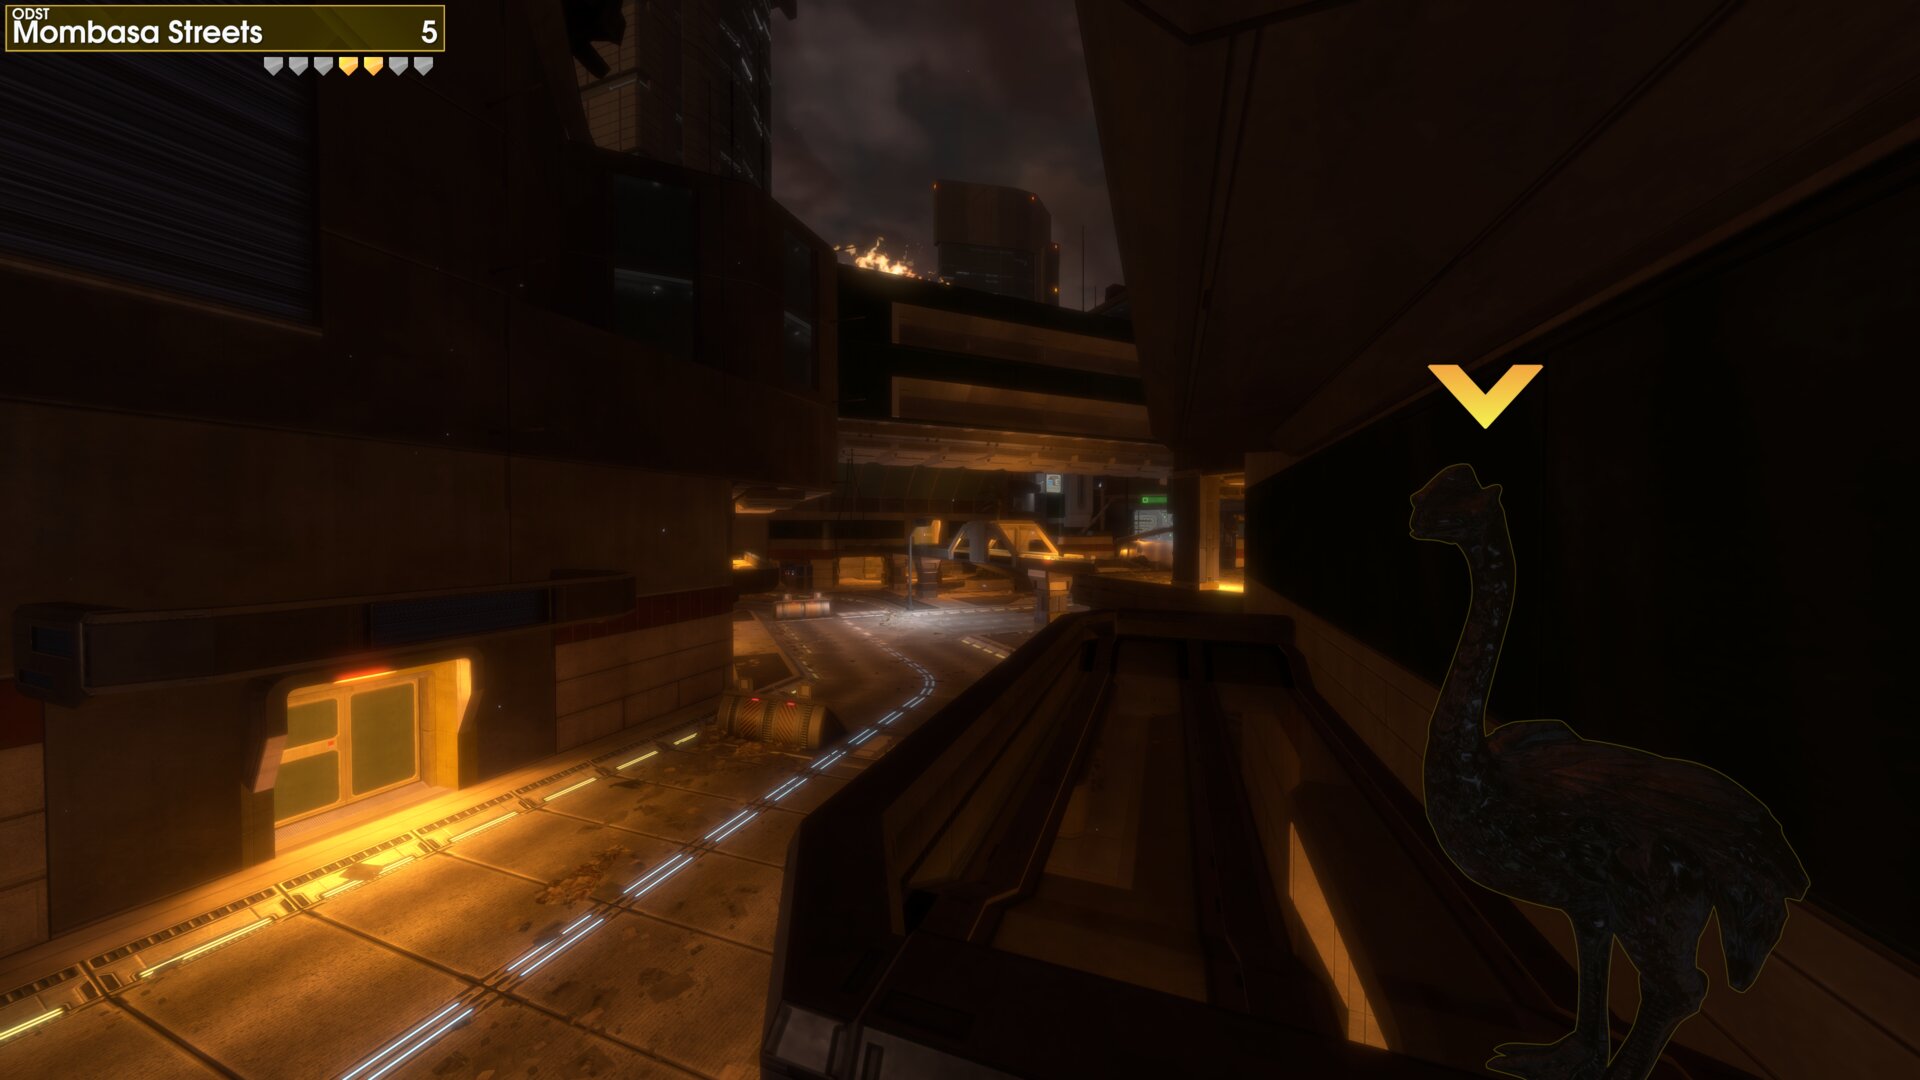
[/tr]From the roundabout where you find a bent Sniper Rifle, follow the road to the south until the next intersection. The Golden Moa on a balcony south west of this intersection.
Rally Point: Data Hive
Golden Moa 6
At Kikowani Station, the Golden Moa is behind the second last pillar to the north.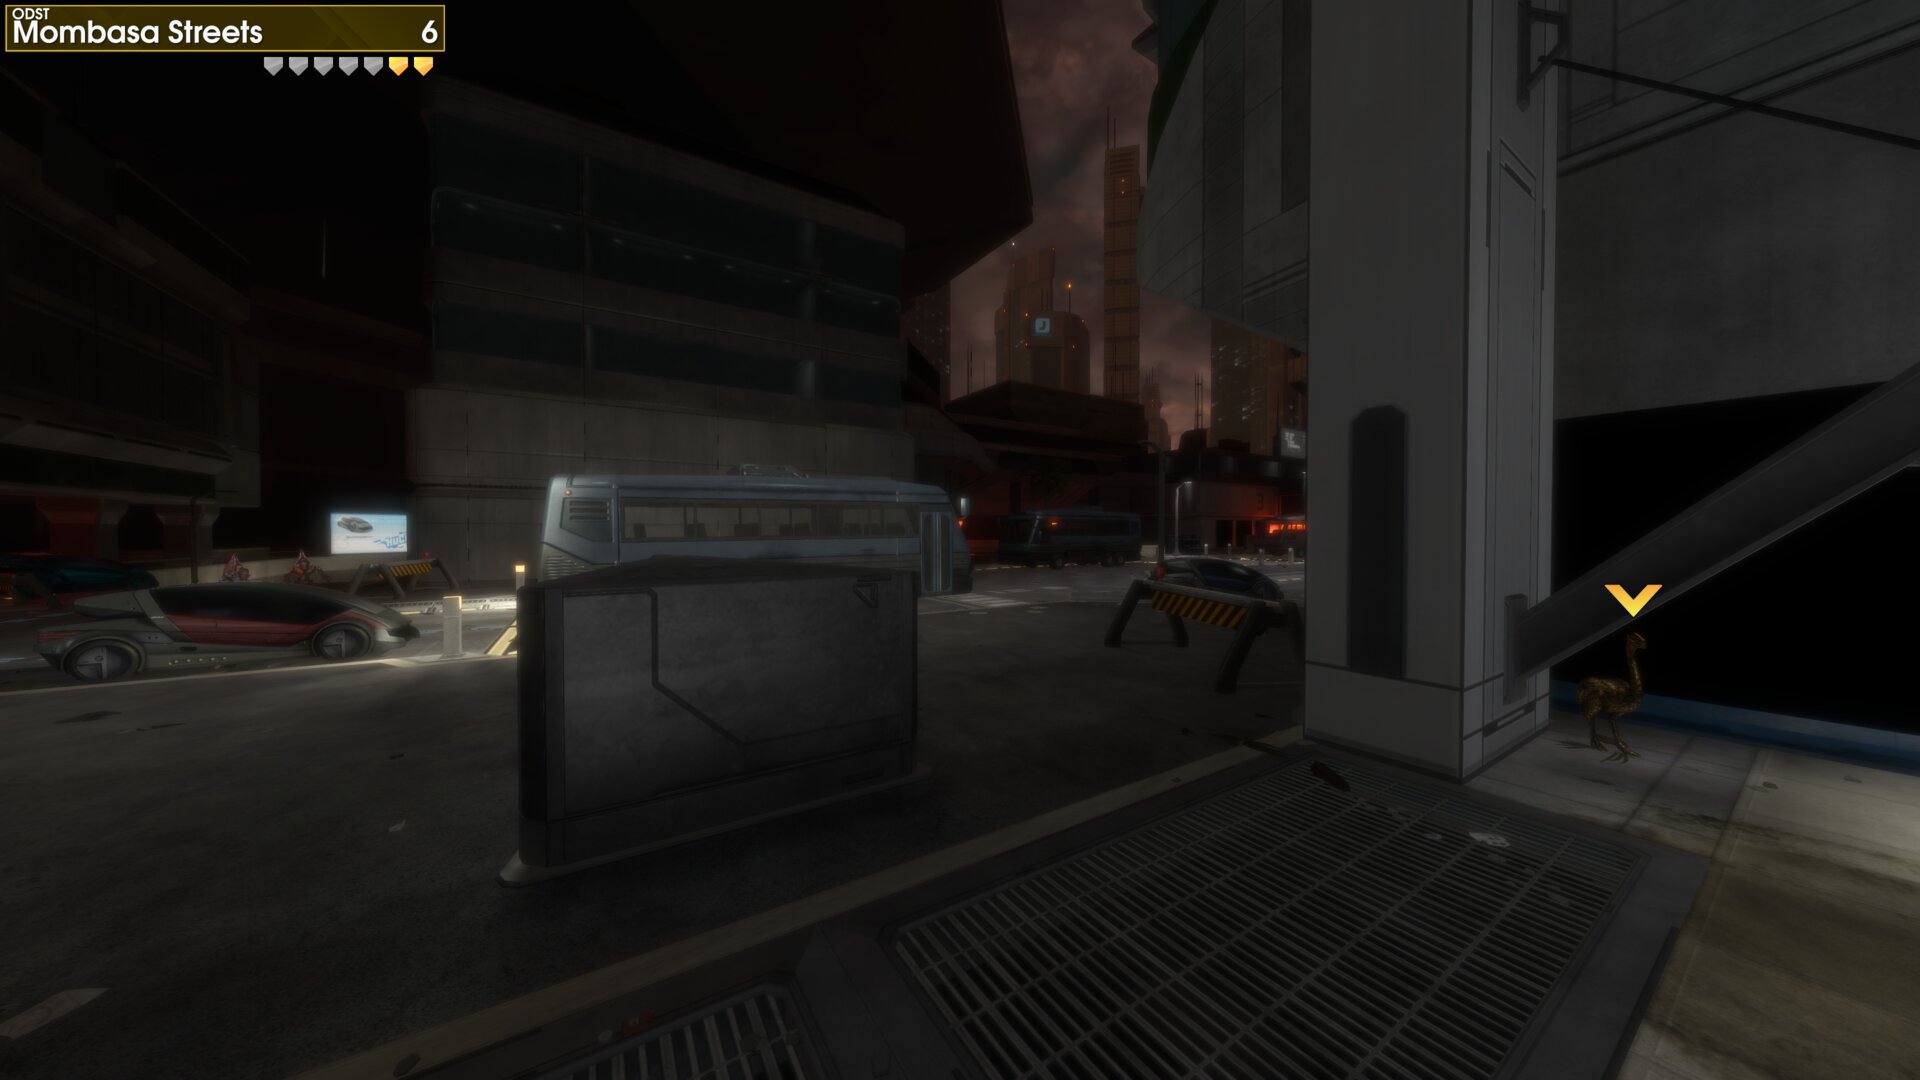
At Kikowani Station, the Golden Moa is behind the second last pillar to the north.
Golden Moa 7
From Kikowani Station follow the road south, until you reach the next intersection (Hunters). The Golden Moa is at the end of the covered walkway, beside the northern building.
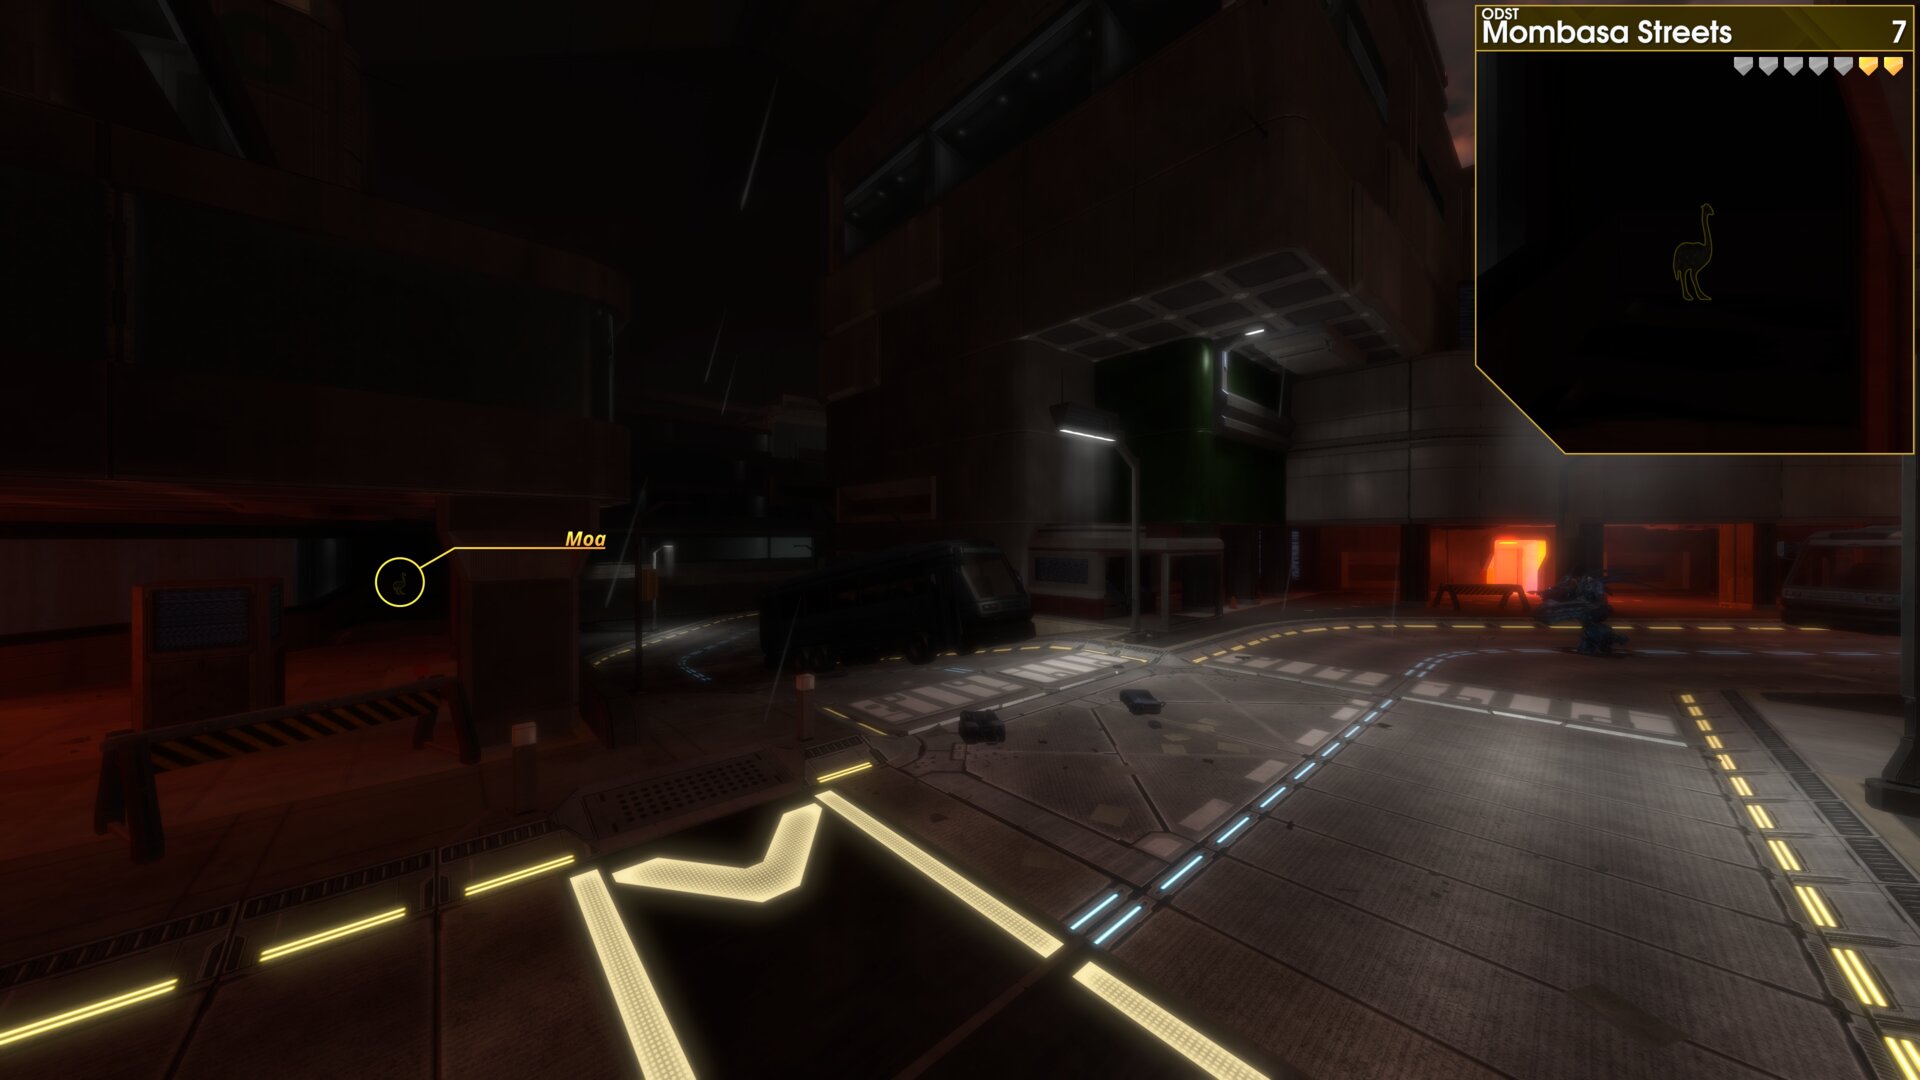
[/tr]From Kikowani Station follow the road south, until you reach the next intersection (Hunters). The Golden Moa is at the end of the covered walkway, beside the northern building.
Golden Moa 8
The Golden Moa is north east of the underground tunnel/elevator shaft (Data Hive), inside the information booth.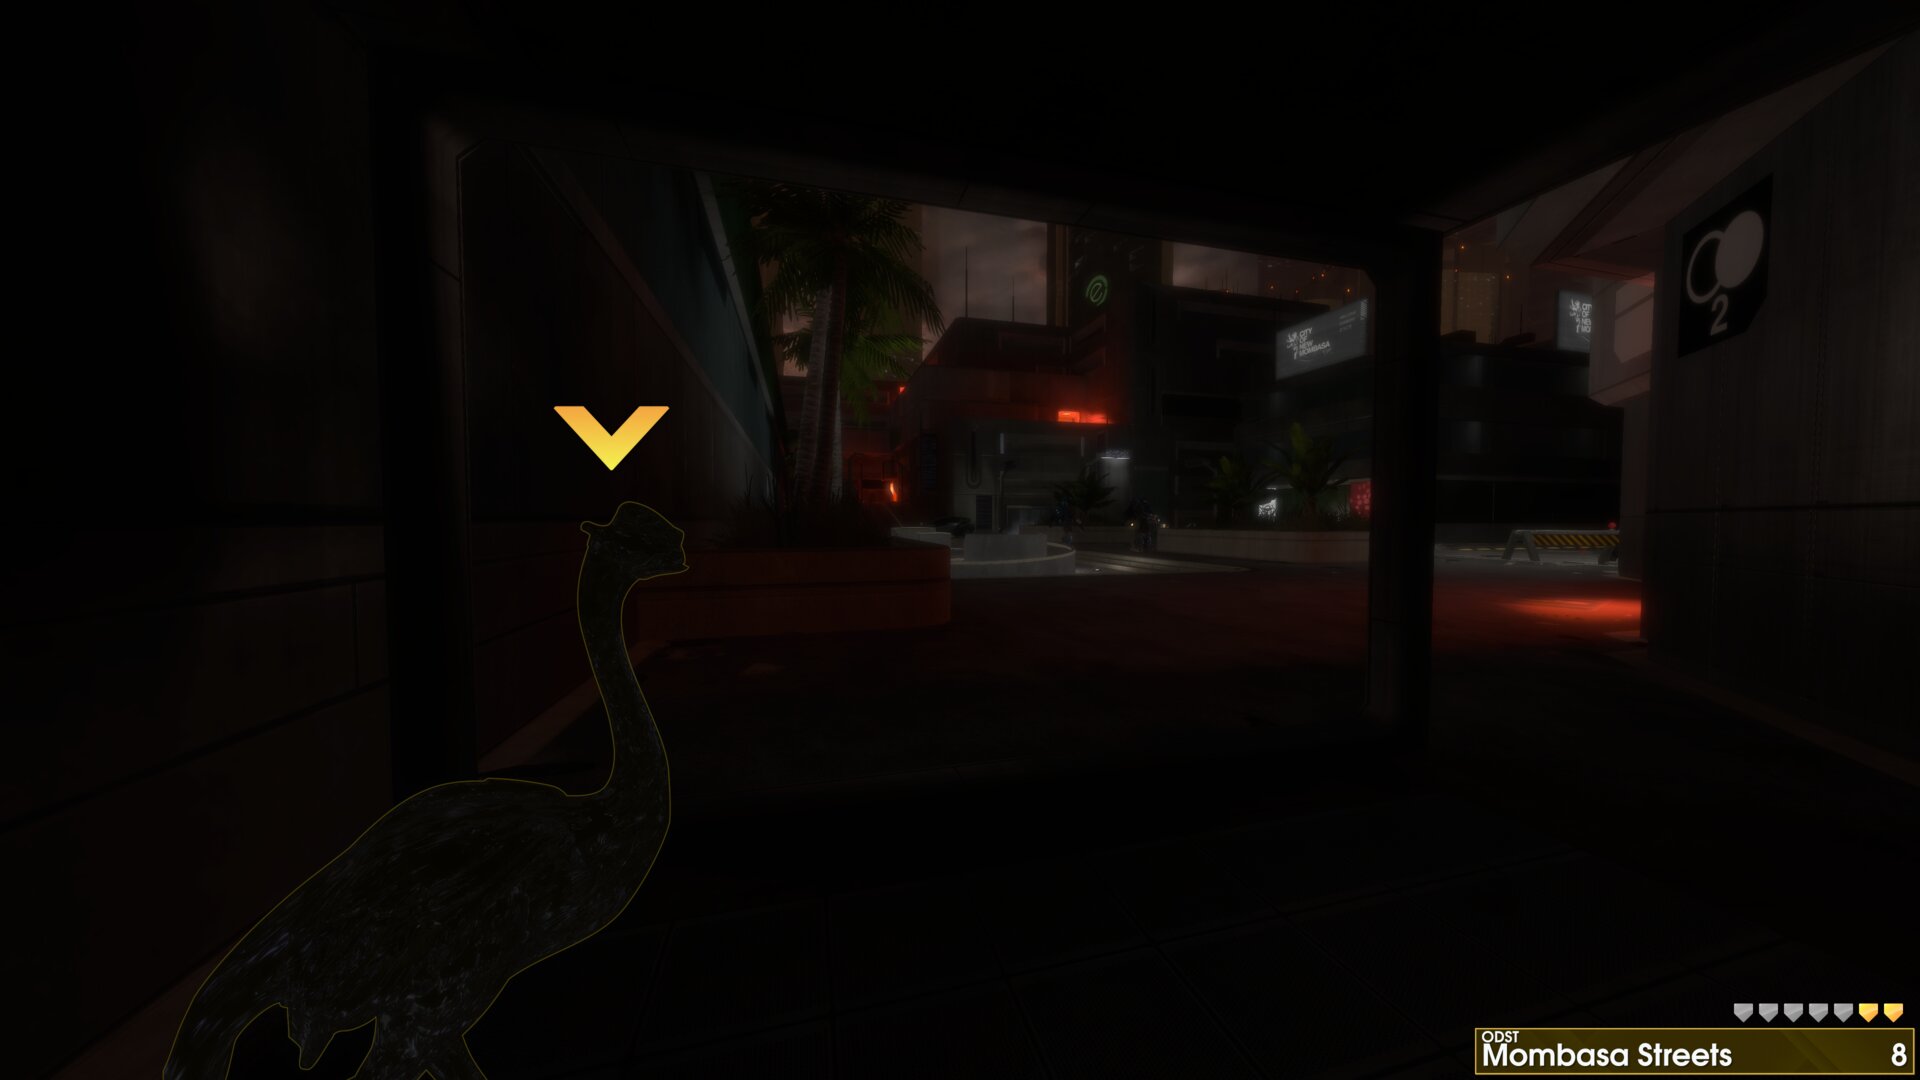
The Golden Moa is north east of the underground tunnel/elevator shaft (Data Hive), inside the information booth.
Golden Moa 9
In Sector 0, at the roundabout with a Supply Cache (this cache is the furthest to the north on the map). The Golden Moa is between two information booths to the east.
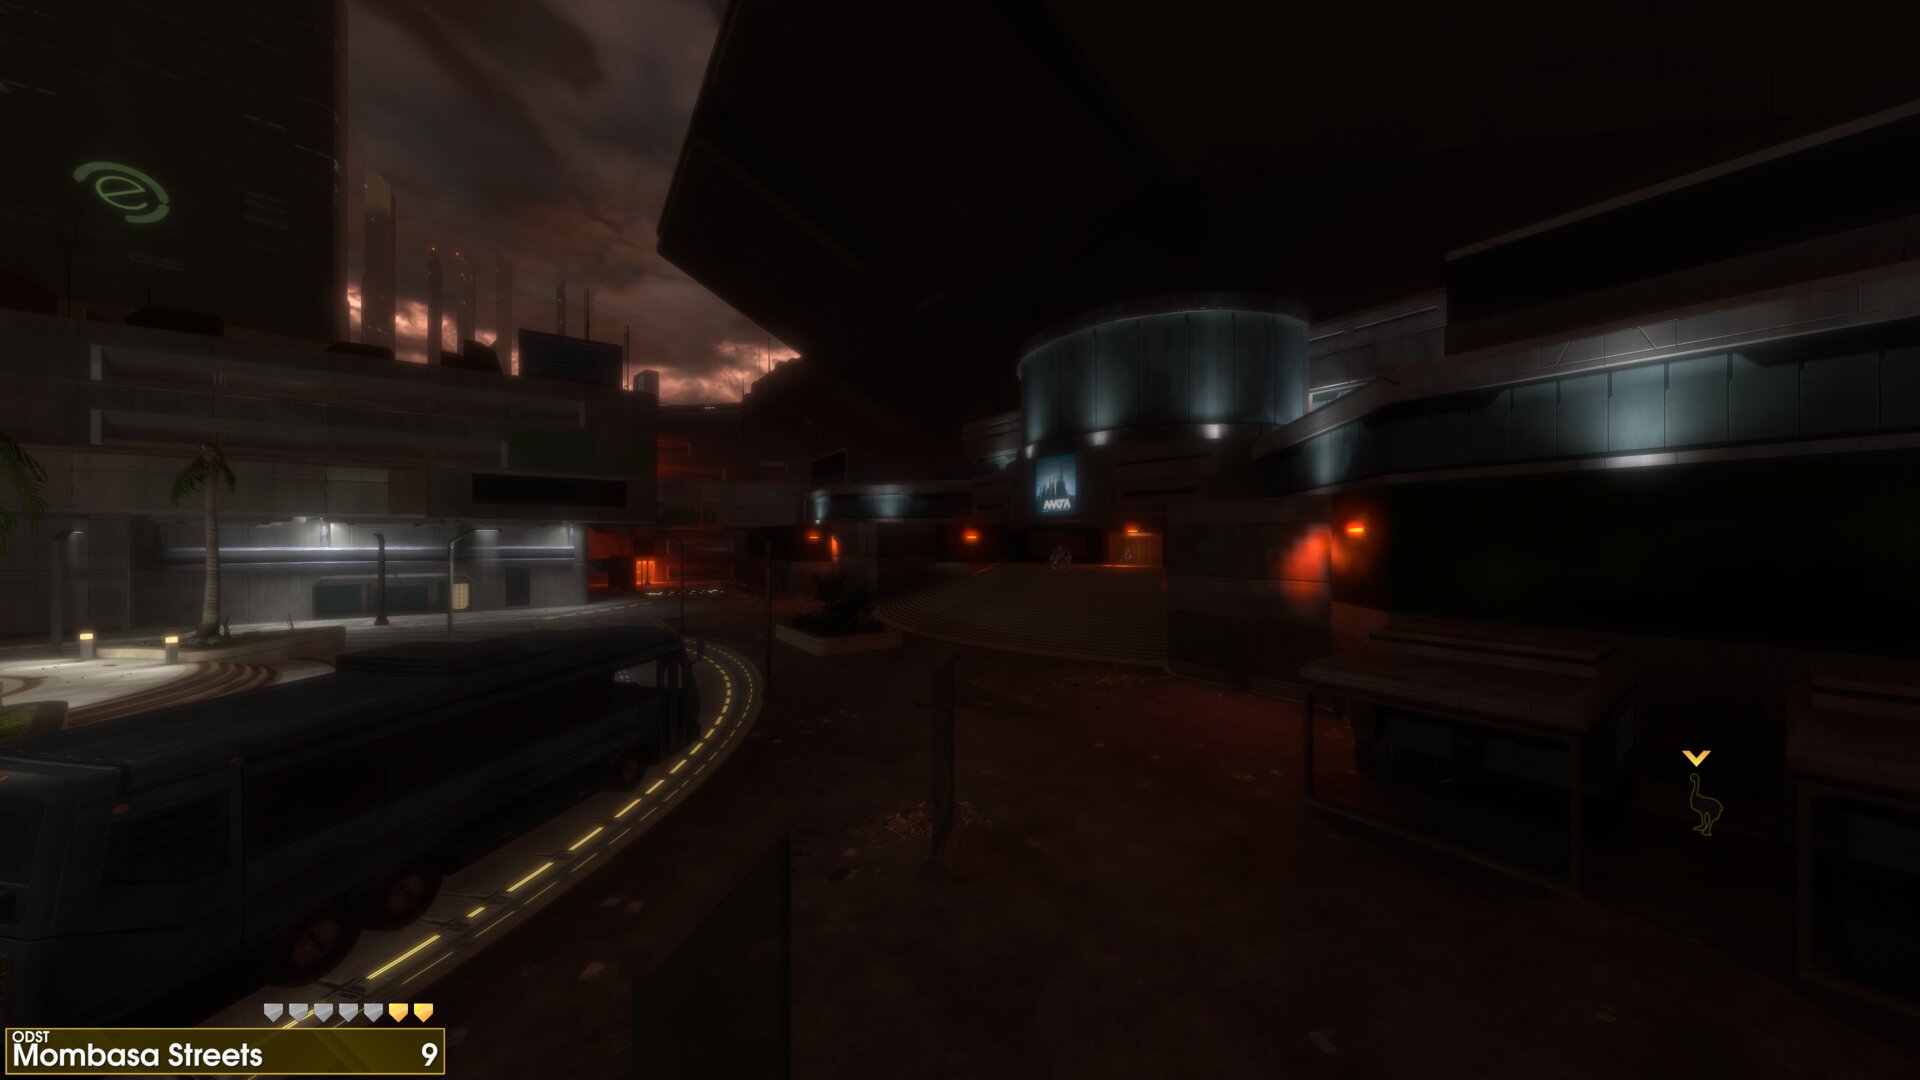
In Sector 0, at the roundabout with a Supply Cache (this cache is the furthest to the north on the map). The Golden Moa is between two information booths to the east.
Halo 4
➟ Dawn
Rally Point: Alpha
Rally Point: Bravo
Golden Moa 1
On the right side of Observation deck, this Golden Moa
is on the lower level behind some crates.
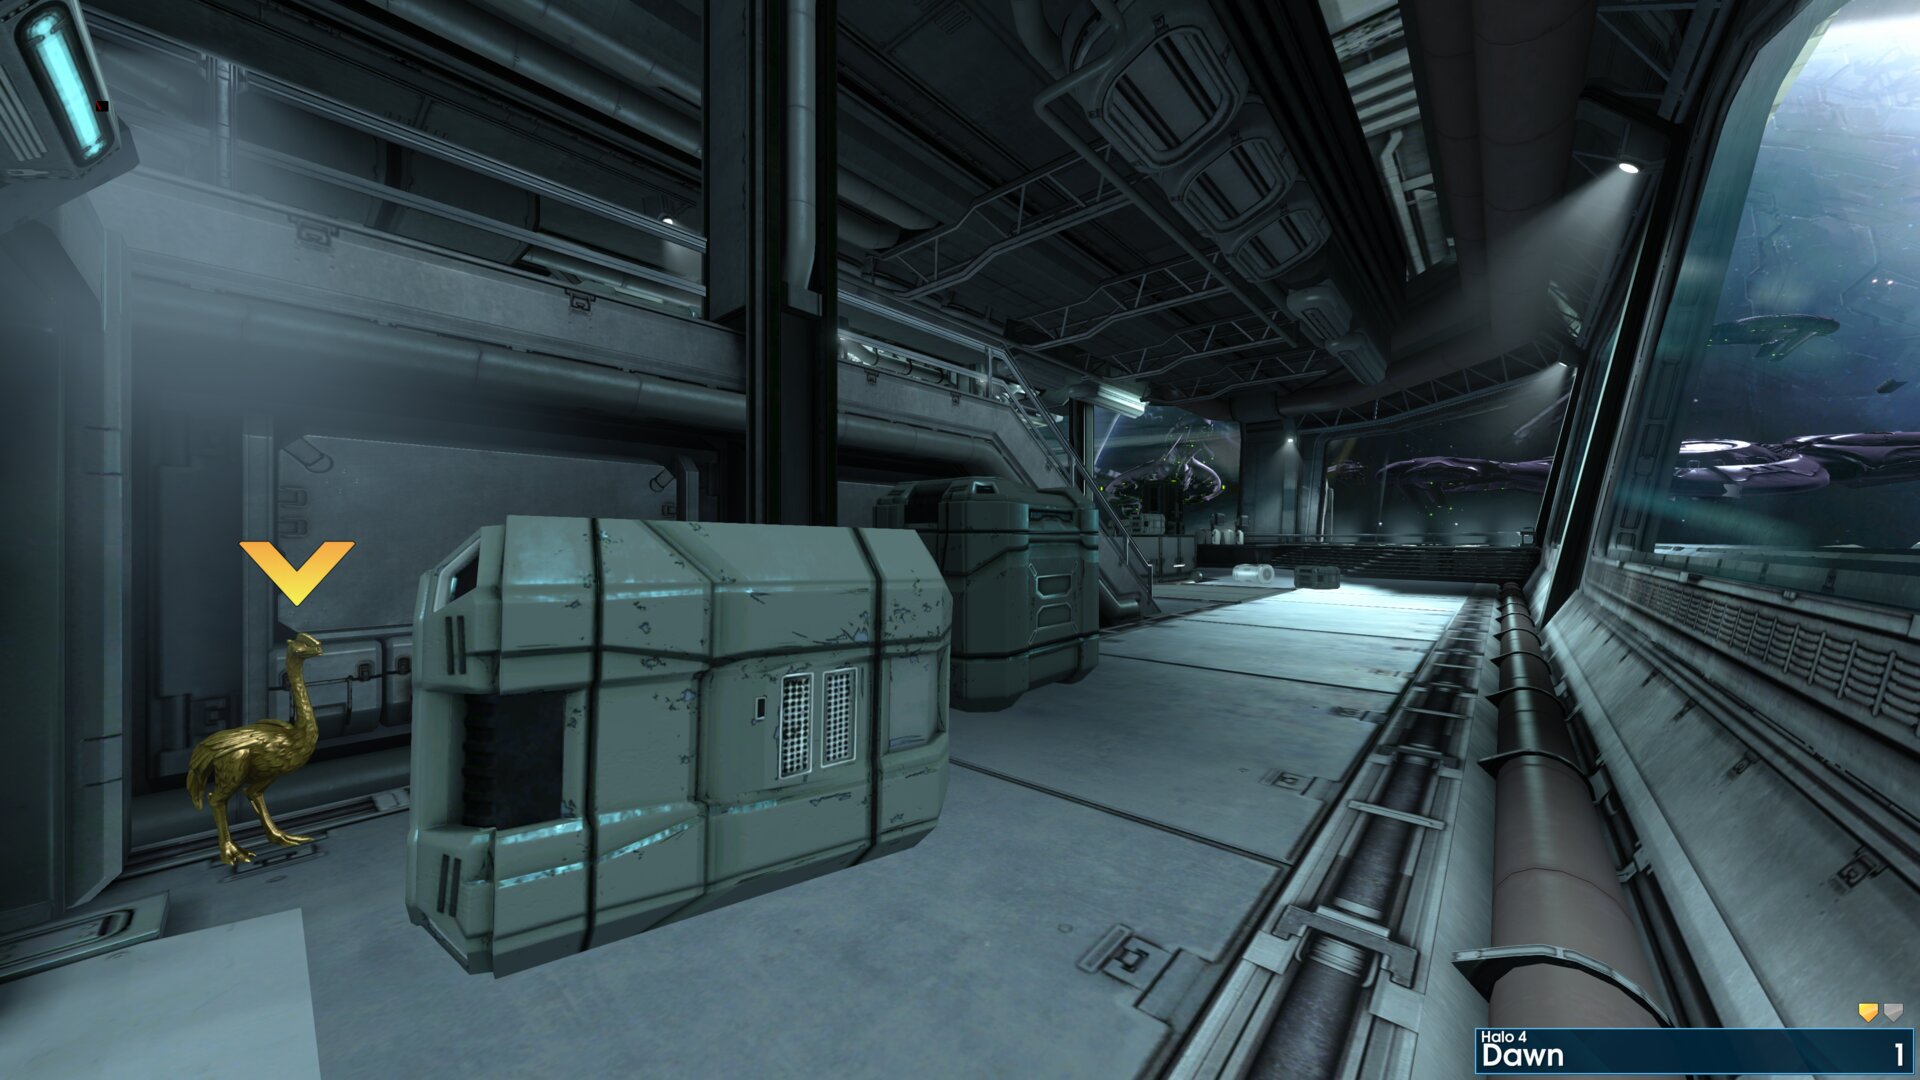
On the right side of Observation deck, this Golden Moa
is on the lower level behind some crates.
Rally Point: Bravo
Golden Moa 2
After taking the elevator down a few levels you’ll reach a stairway, the Golden Moa is on top of some pipes in the corner.
“"That cruiser's shields are down. Assuming they don't raise them, that missile's going to be one heck of a surprise.” Cortana
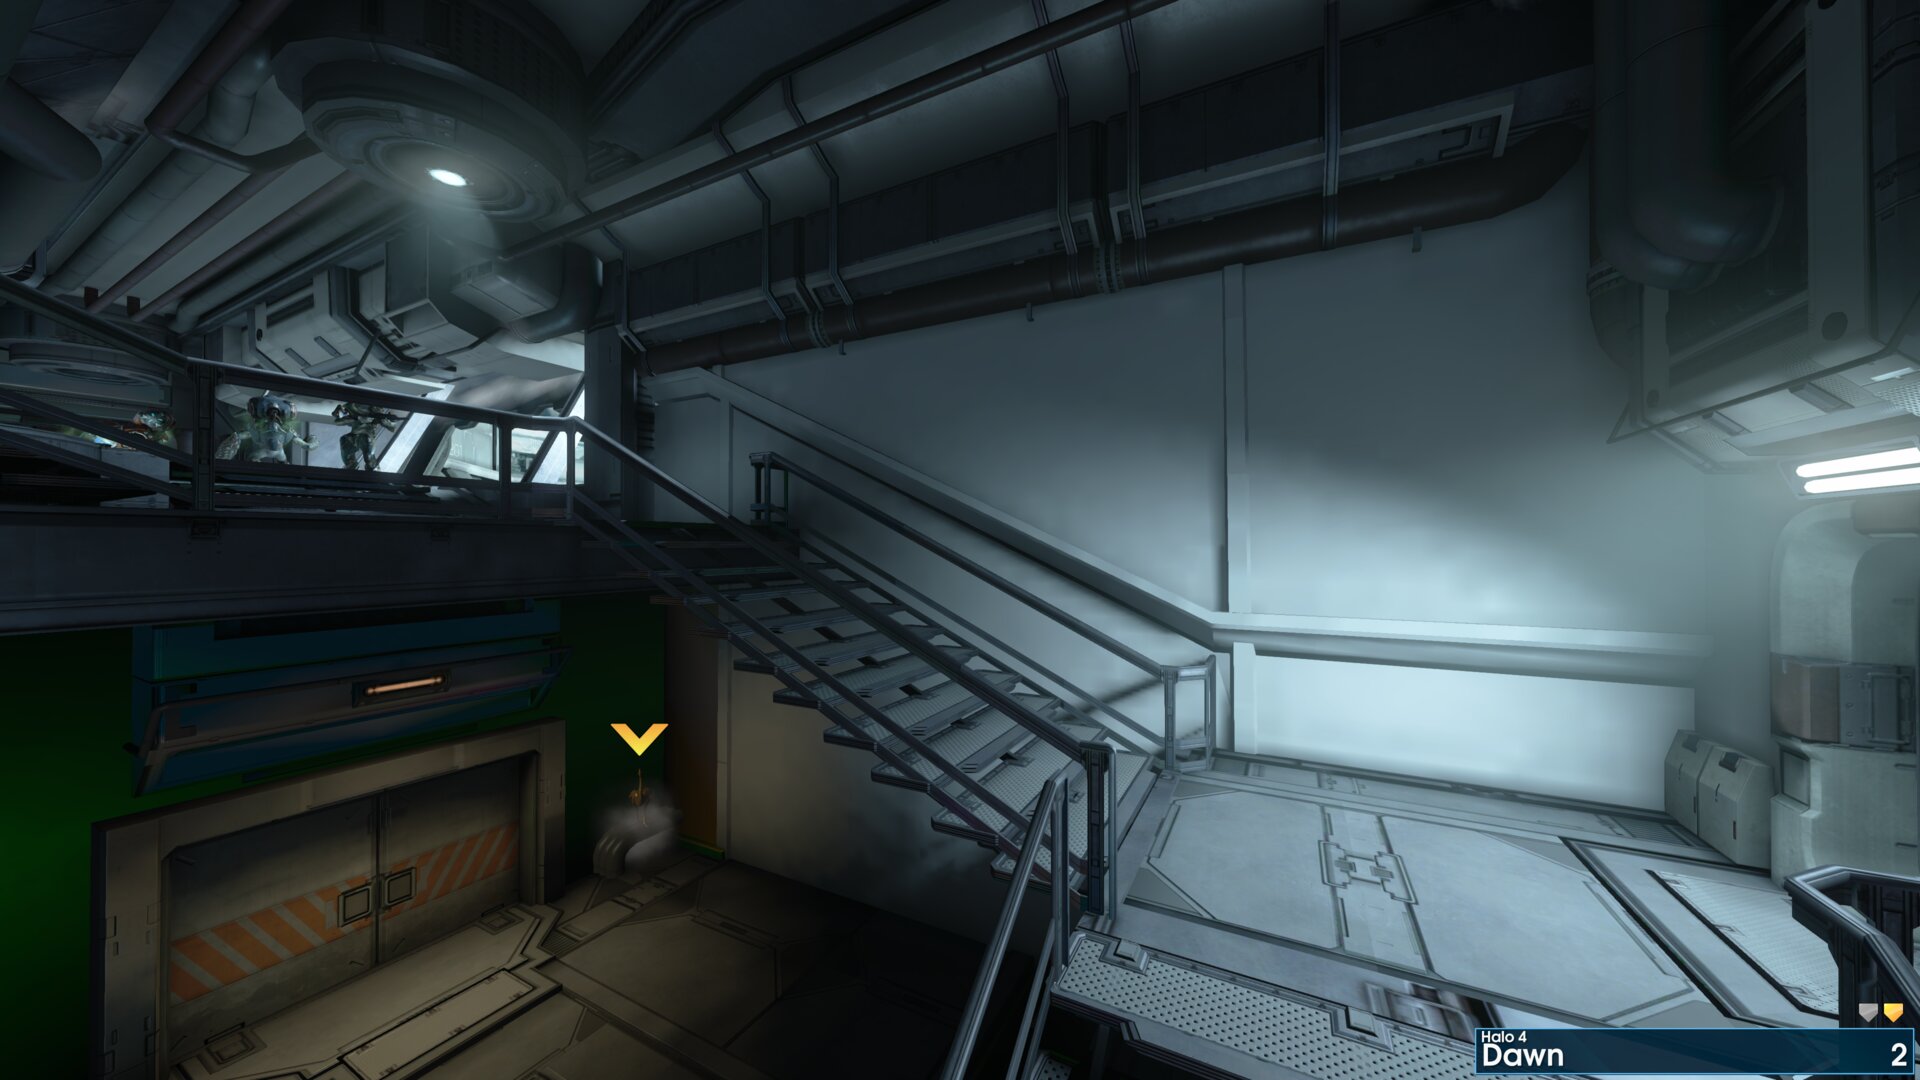
After taking the elevator down a few levels you’ll reach a stairway, the Golden Moa is on top of some pipes in the corner.
“"That cruiser's shields are down. Assuming they don't raise them, that missile's going to be one heck of a surprise.” Cortana
Golden Moa 3
In the doughnut room take the right path, the Golden Moa is on a ledge by a glowing yellow light.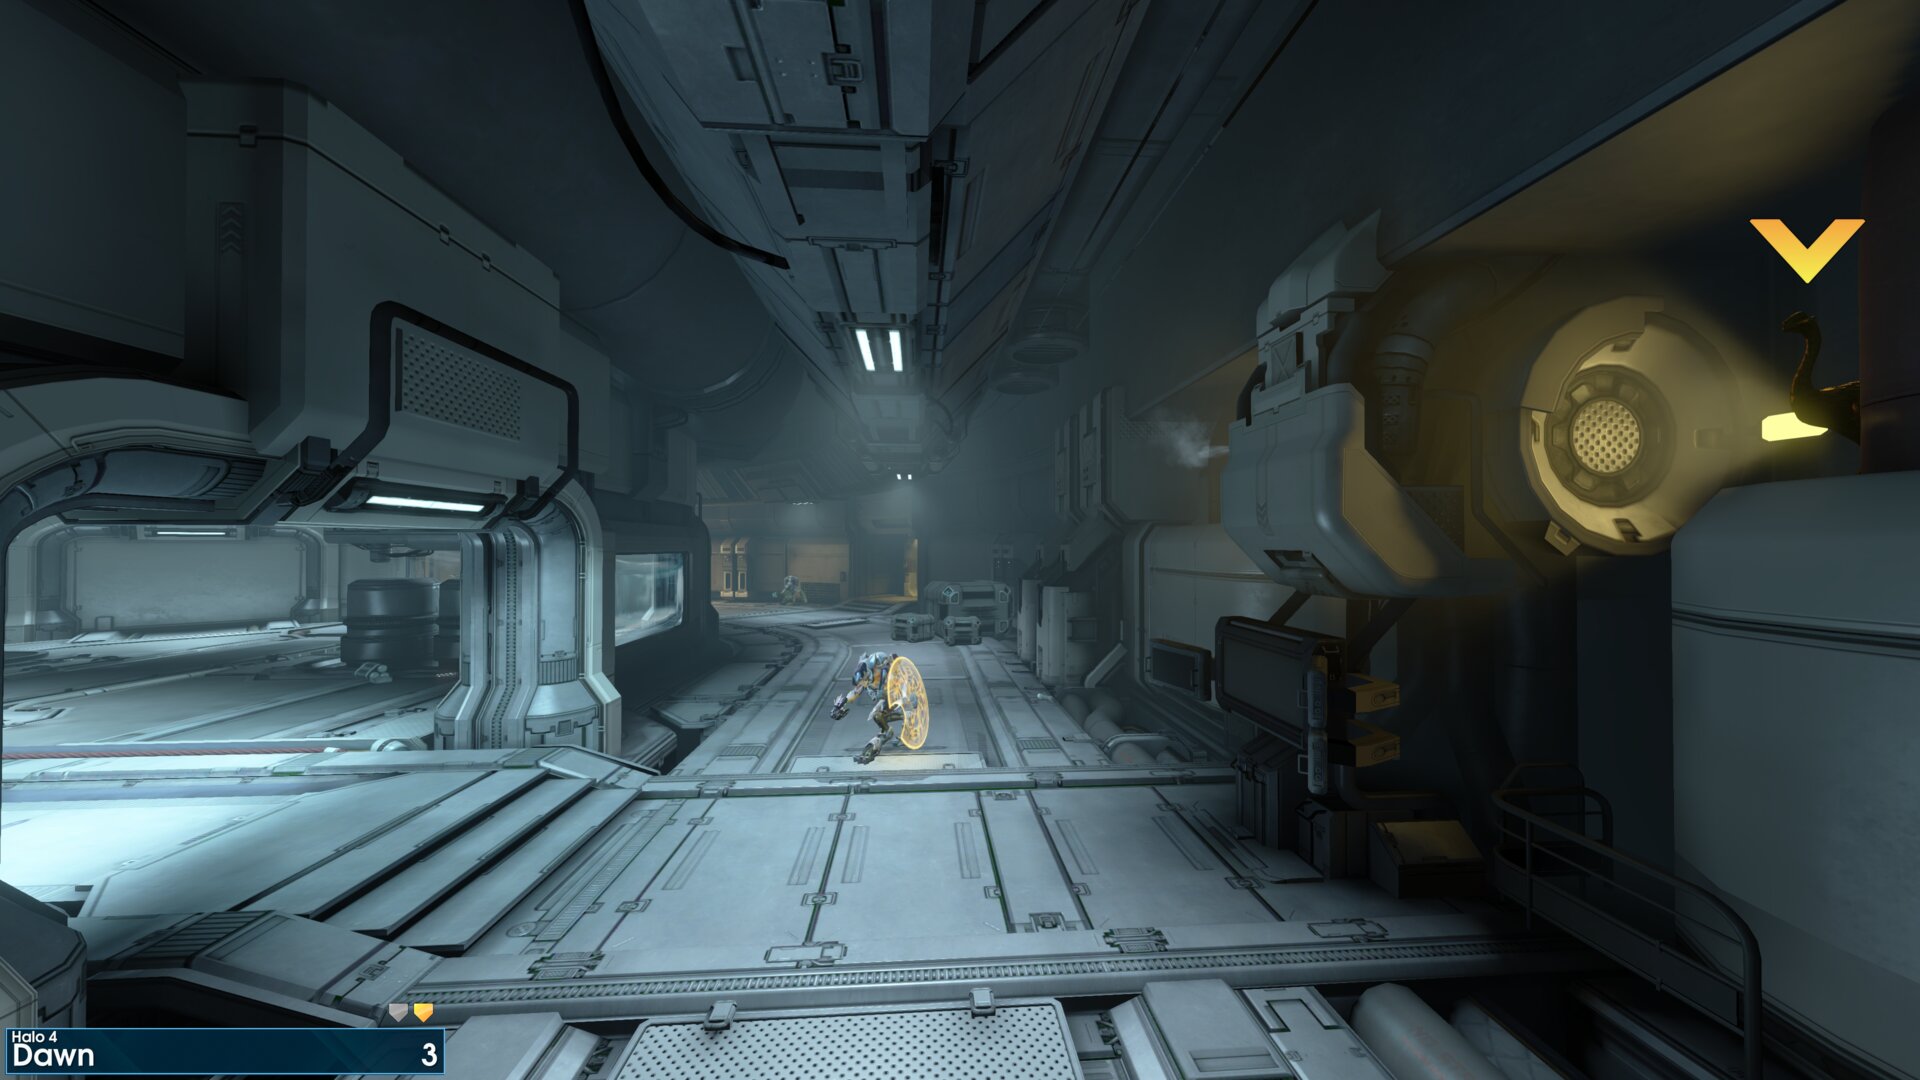
In the doughnut room take the right path, the Golden Moa is on a ledge by a glowing yellow light.
Golden Moa 4
Once you exit the airlock to the outer hull, look to the right, the Golden Moa is on a ledge nearby.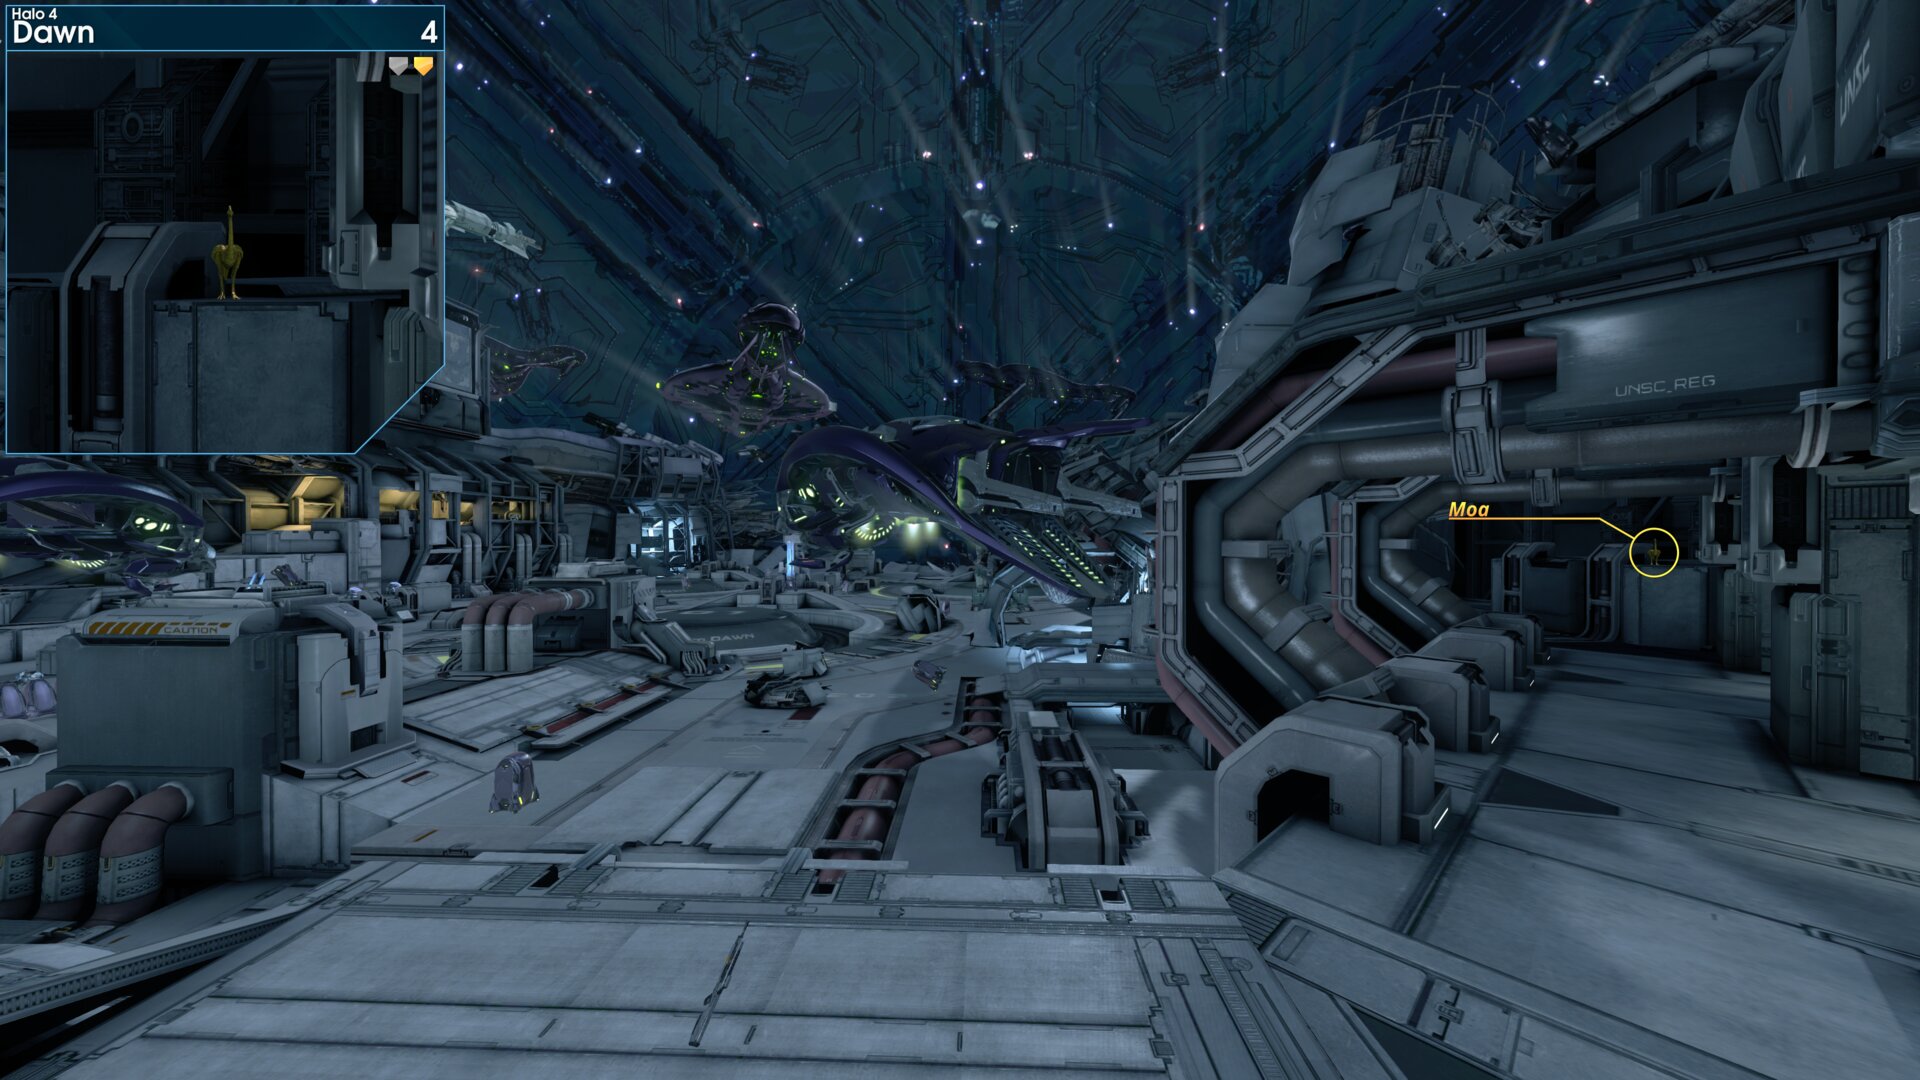
Once you exit the airlock to the outer hull, look to the right, the Golden Moa is on a ledge nearby.
Golden Moa 5
As you enter a passage with a few Grunts, a explosion in the ceiling with cause debris to collapse the floor, the Golden Moa is on the lower level to the right.
“All but one of the grav generators just went dark.” Cortana
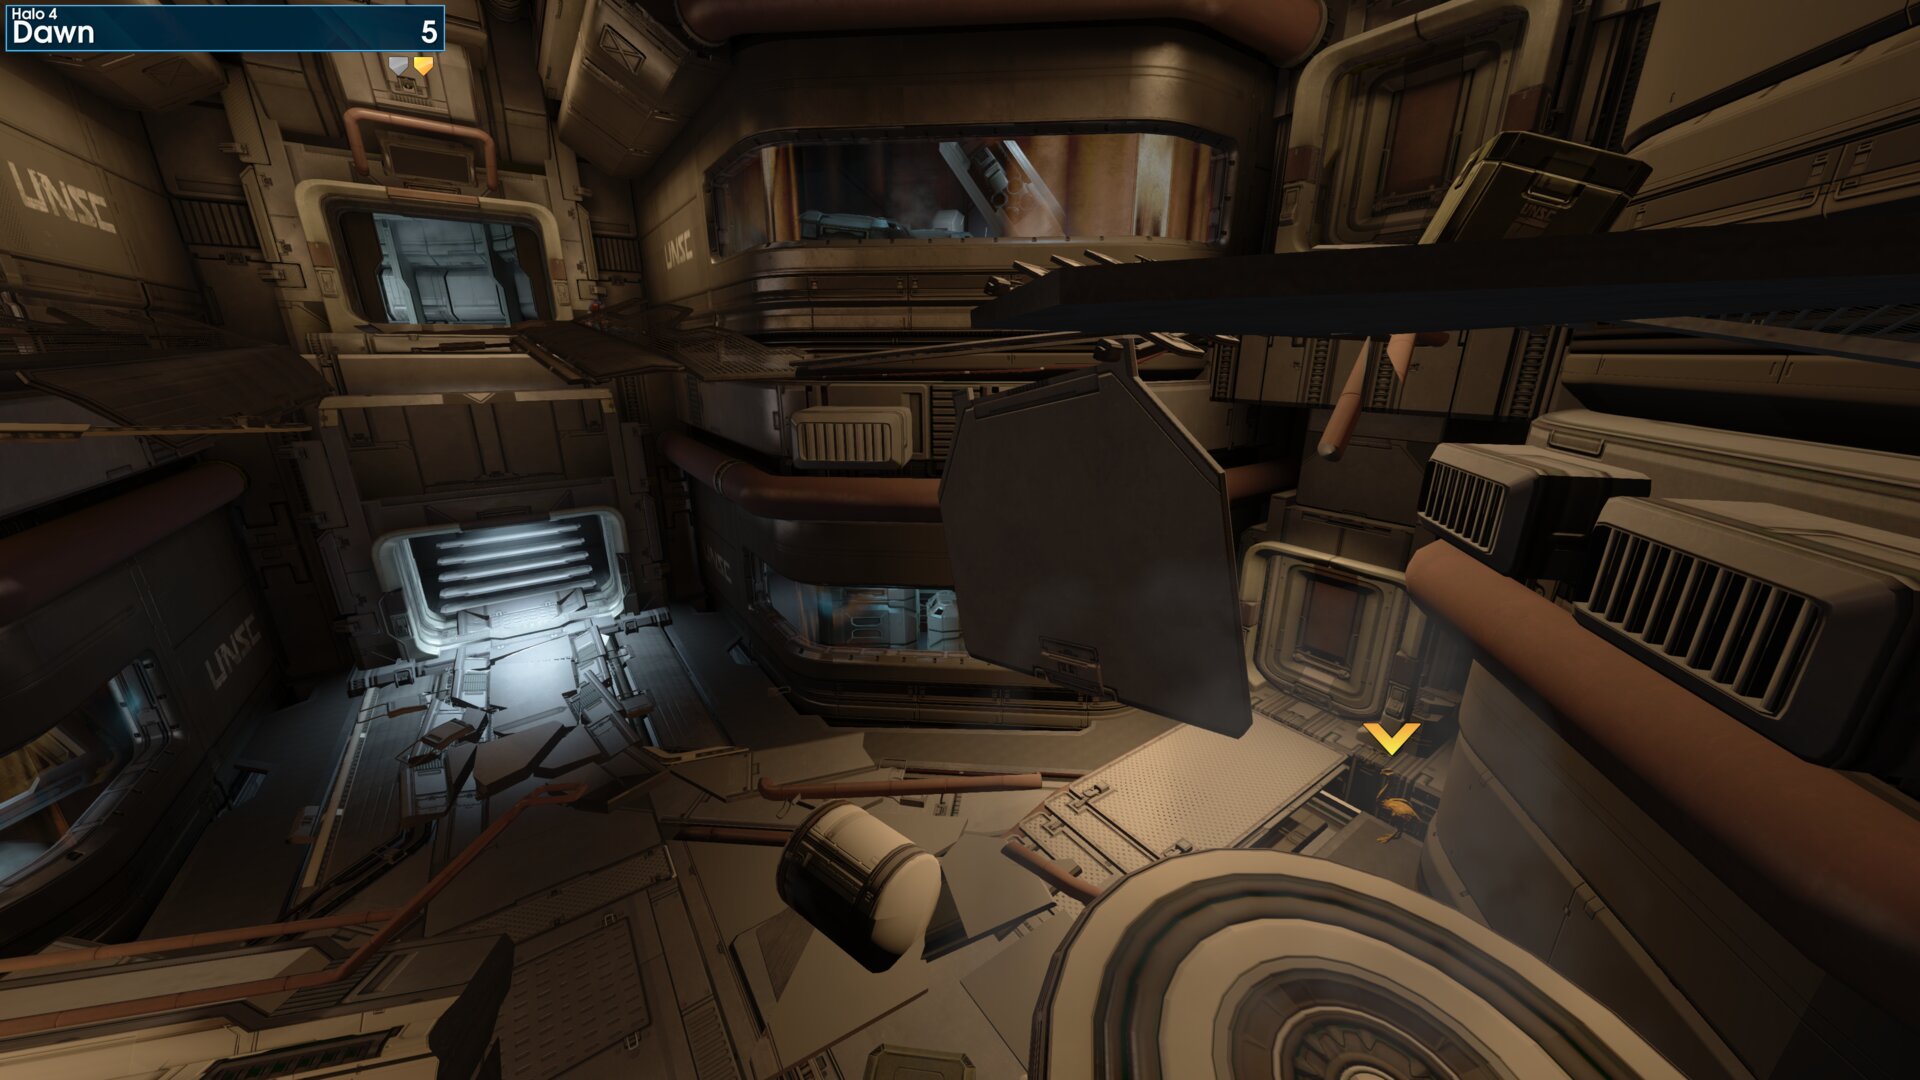
As you enter a passage with a few Grunts, a explosion in the ceiling with cause debris to collapse the floor, the Golden Moa is on the lower level to the right.
“All but one of the grav generators just went dark.” Cortana
Golden Moa 6
As you near the vehicle bay, you’ll reach a large room where the upper floor collapses, the Golden Moa is in the far right corner.
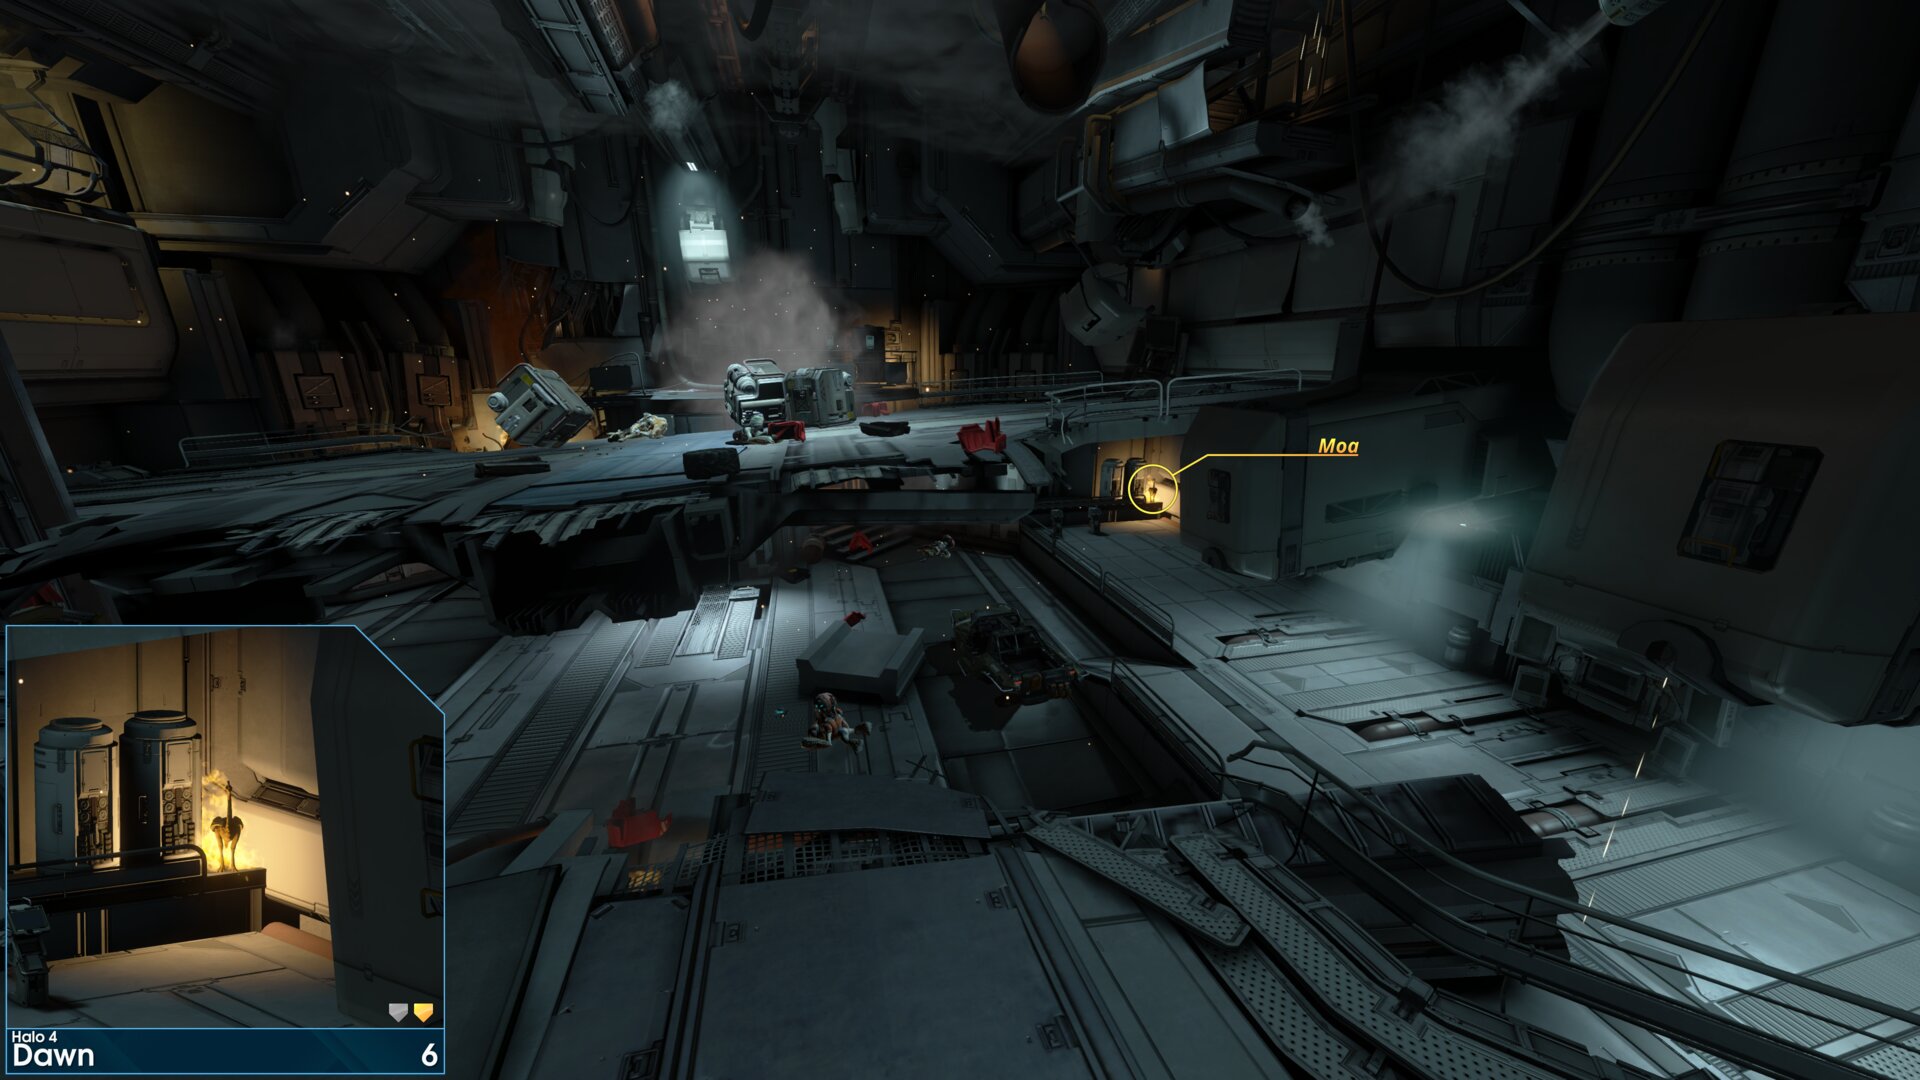
As you near the vehicle bay, you’ll reach a large room where the upper floor collapses, the Golden Moa is in the far right corner.
➟ Requiem
Rally Point: Alpha
Rally Point: Bravo
Golden Moa 1
After leaving the initial crash site you’ll come to a cliff edge, the Golden Moa is on top of a rock to the right.
(Just before you reach the Warthogs)
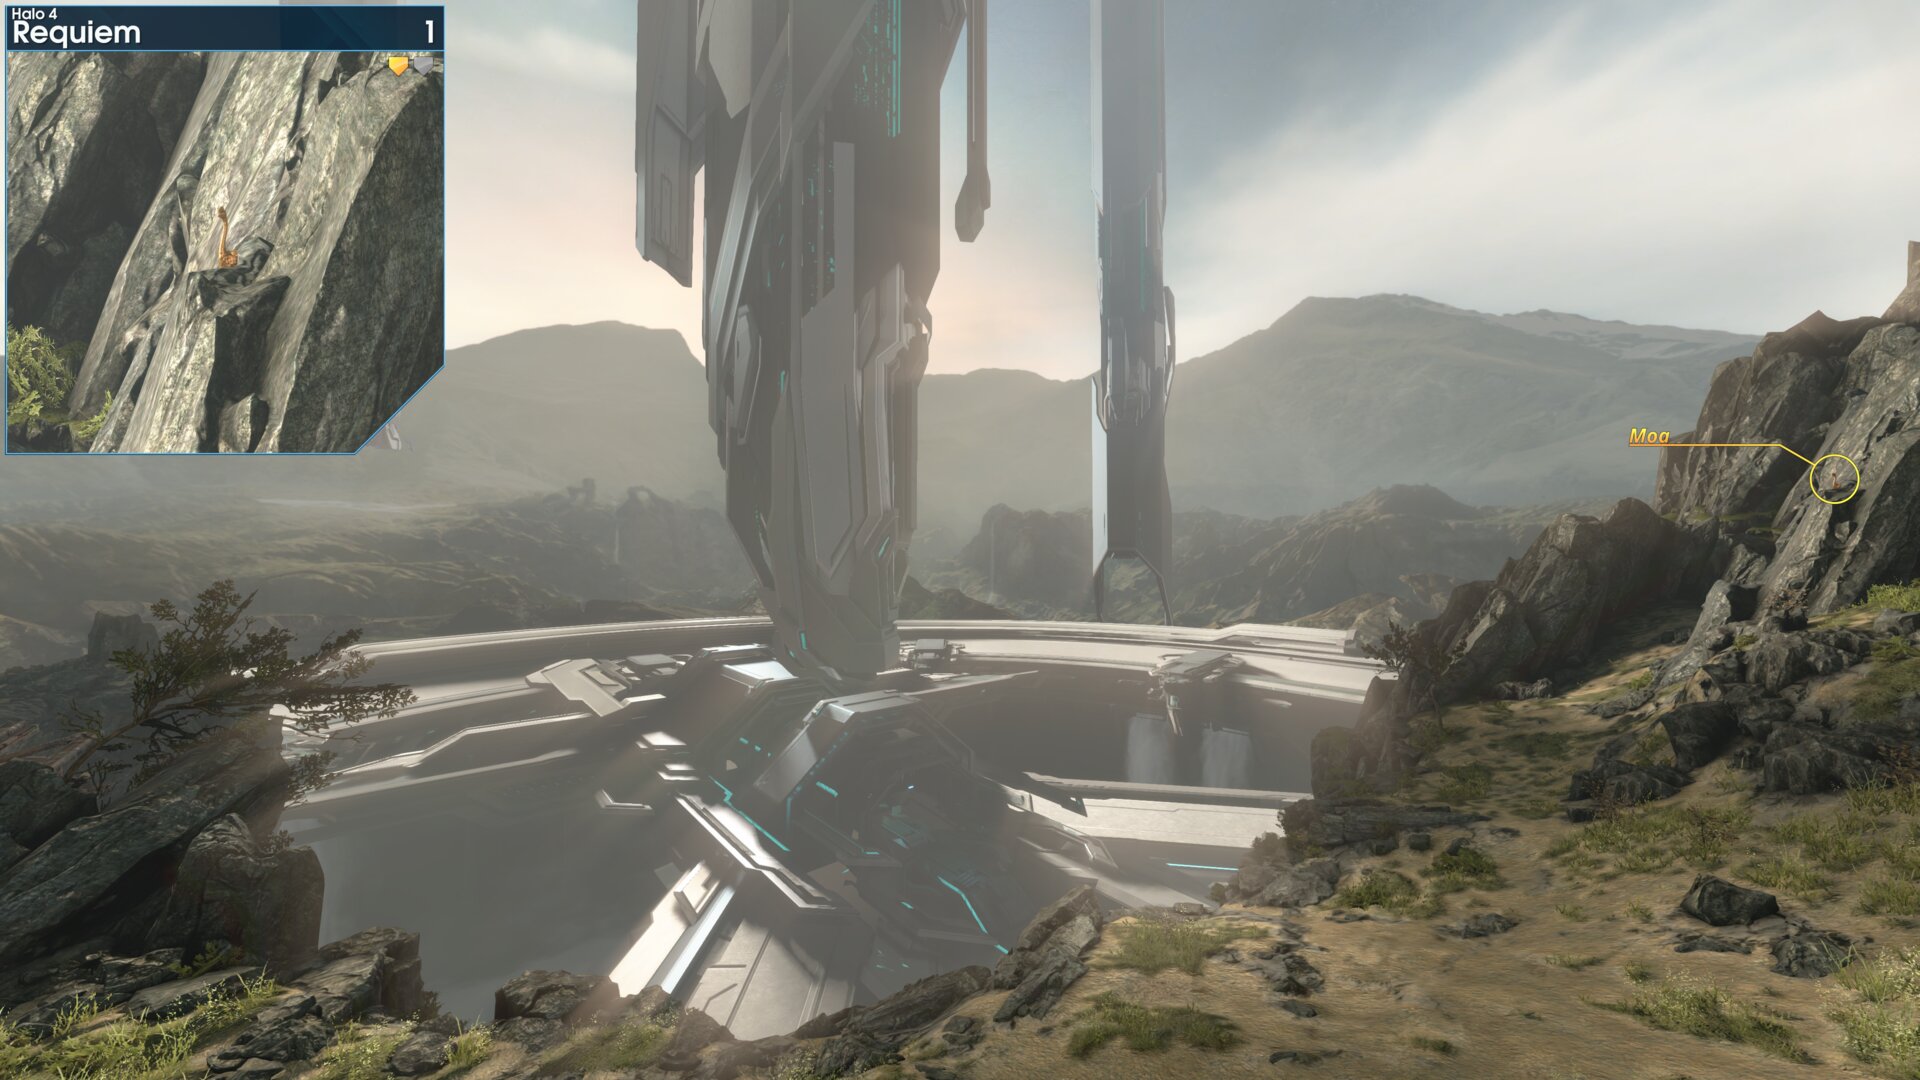
After leaving the initial crash site you’ll come to a cliff edge, the Golden Moa is on top of a rock to the right.
(Just before you reach the Warthogs)
Golden Moa 2
Grab a Warthog, continue into the next debris field. After the first ramp, you’ll reach a small clearing, the Golden Moa is on a mound of dirt to the right.
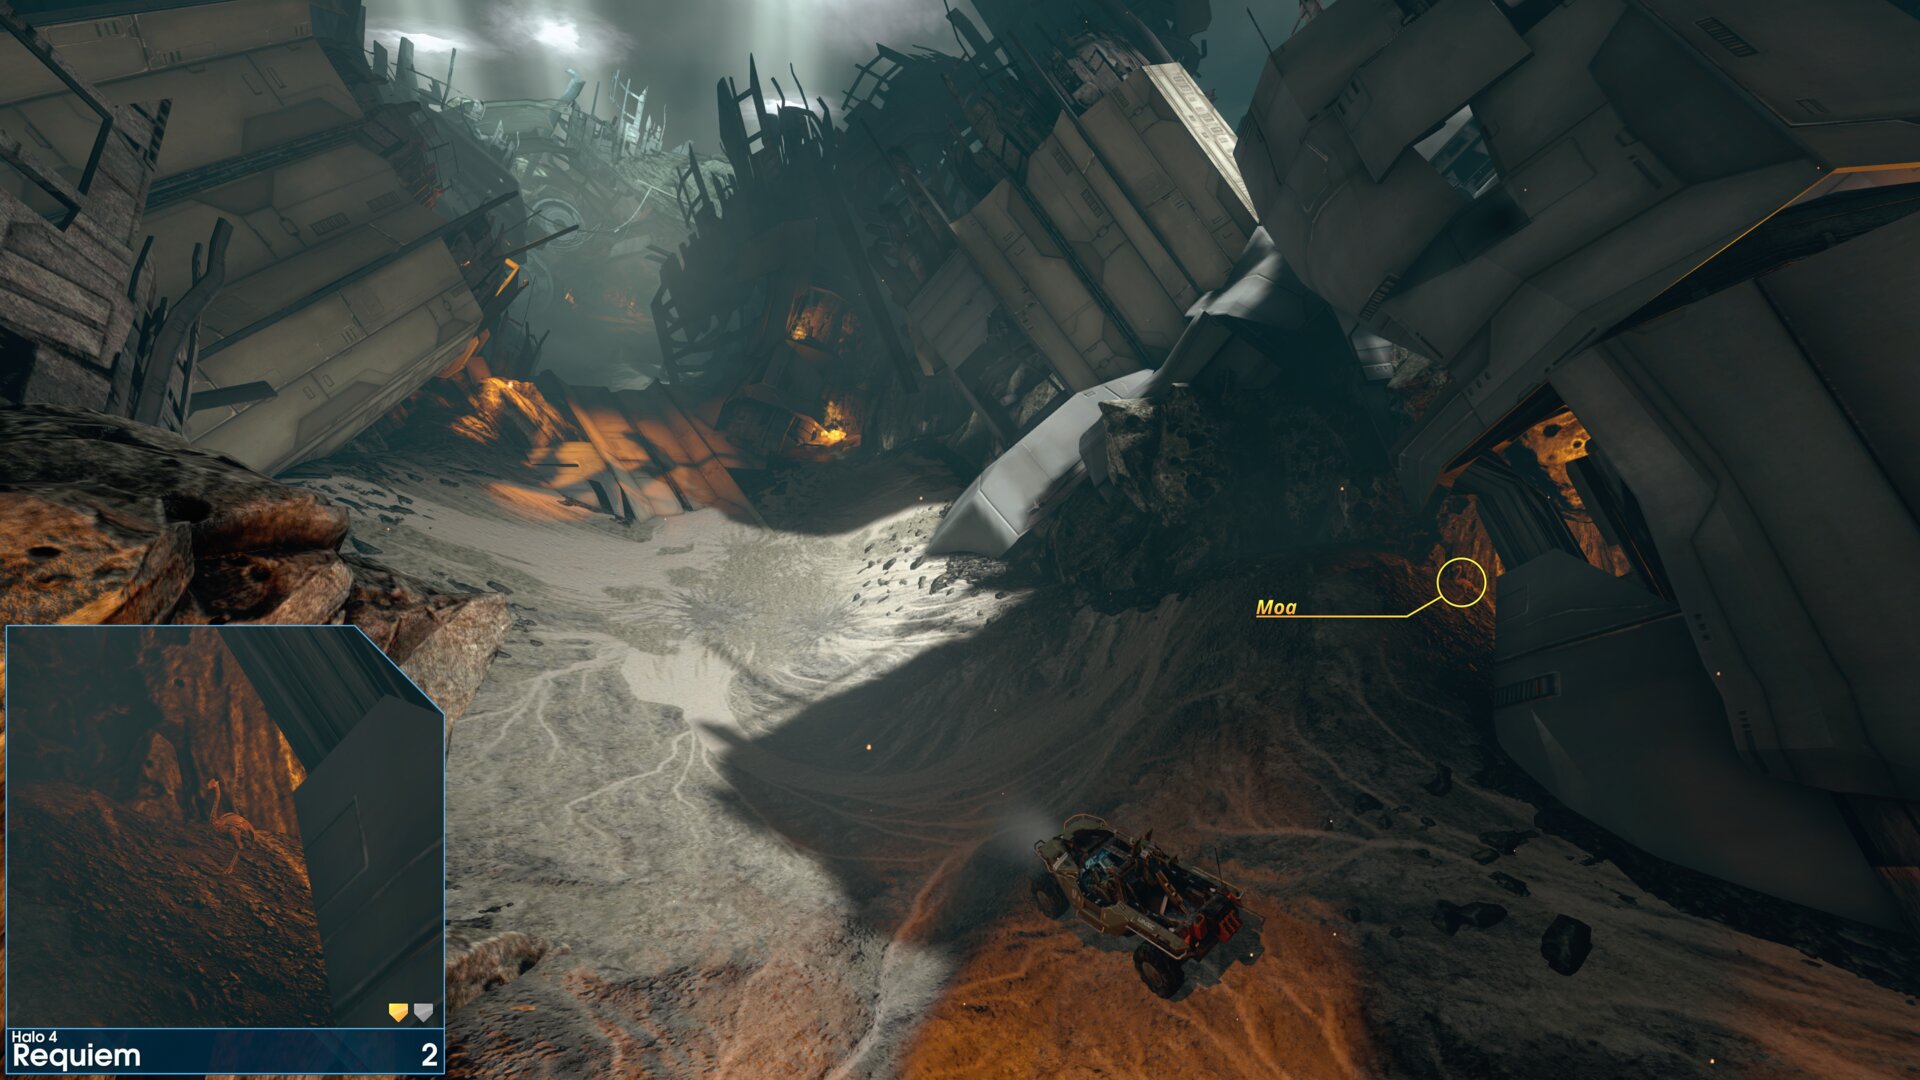
Grab a Warthog, continue into the next debris field. After the first ramp, you’ll reach a small clearing, the Golden Moa is on a mound of dirt to the right.
Golden Moa 3
This Golden Moa is on the rocks, on the left side of the first large Forerunner structure.
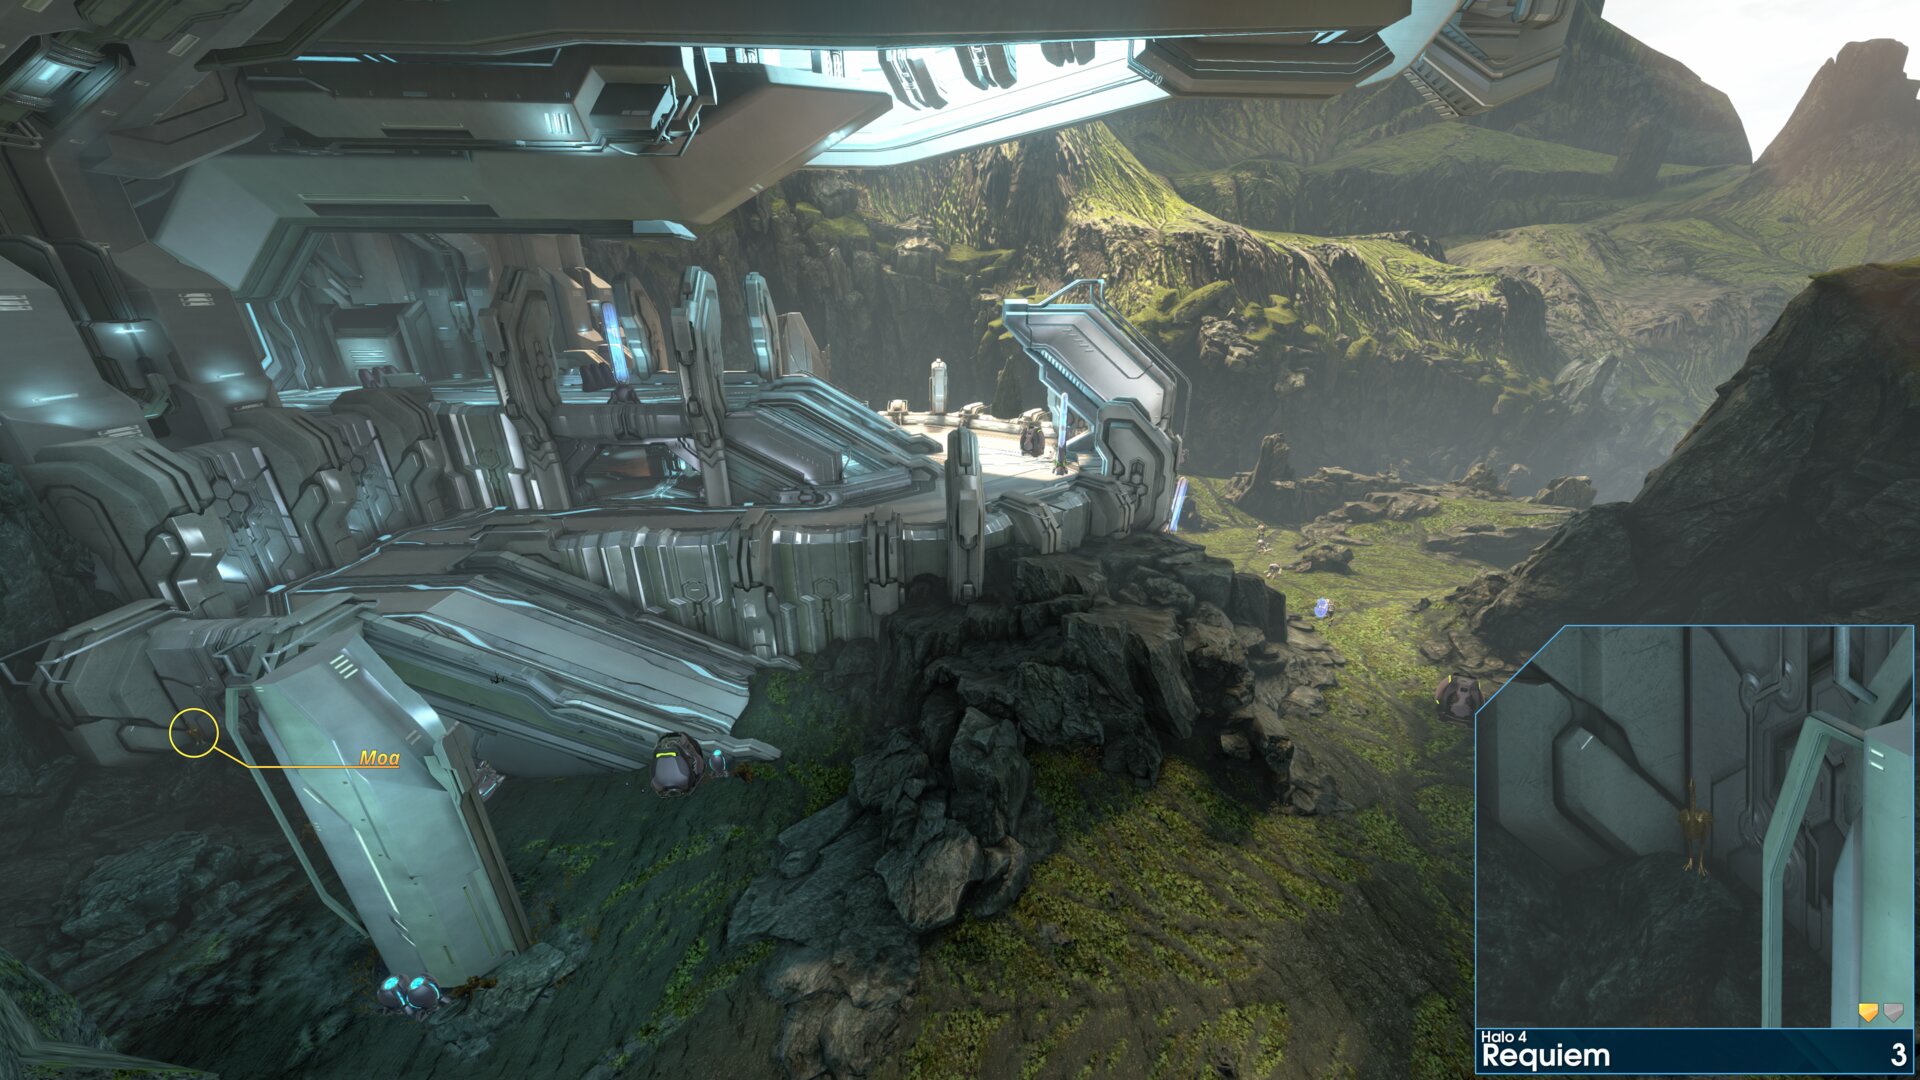
This Golden Moa is on the rocks, on the left side of the first large Forerunner structure.
Rally Point: Bravo
Golden Moa 4
Inside the first Forerunner structure (localized site Cartographer), head towards the far left corner of the room. The Golden Moa is on a pedestal behind a tree root.⠀⠀“Sentinels.” Master Chief
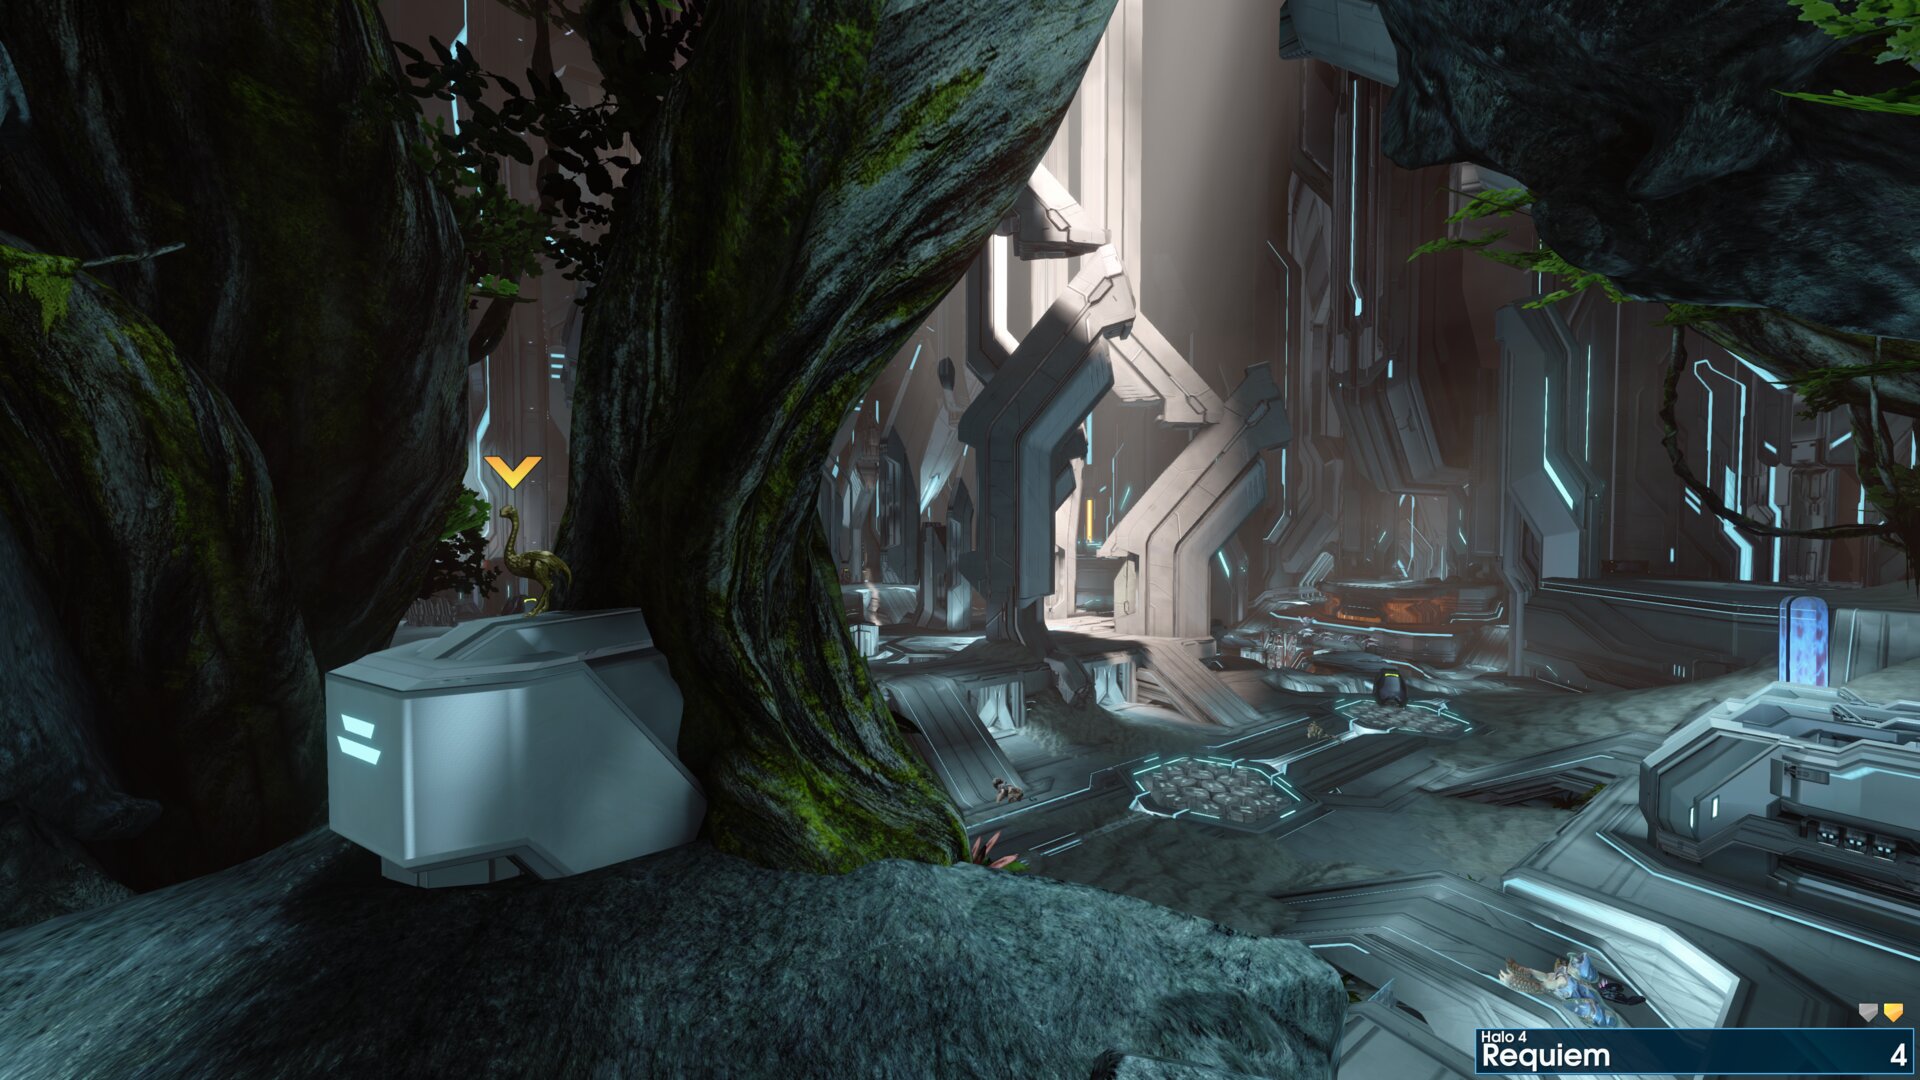
Inside the first Forerunner structure (localized site Cartographer), head towards the far left corner of the room. The Golden Moa is on a pedestal behind a tree root.⠀⠀“Sentinels.” Master Chief
Golden Moa 5
As you come to the middle of the bridge, the Golden Moa is on the lower level beneath the left ramp.
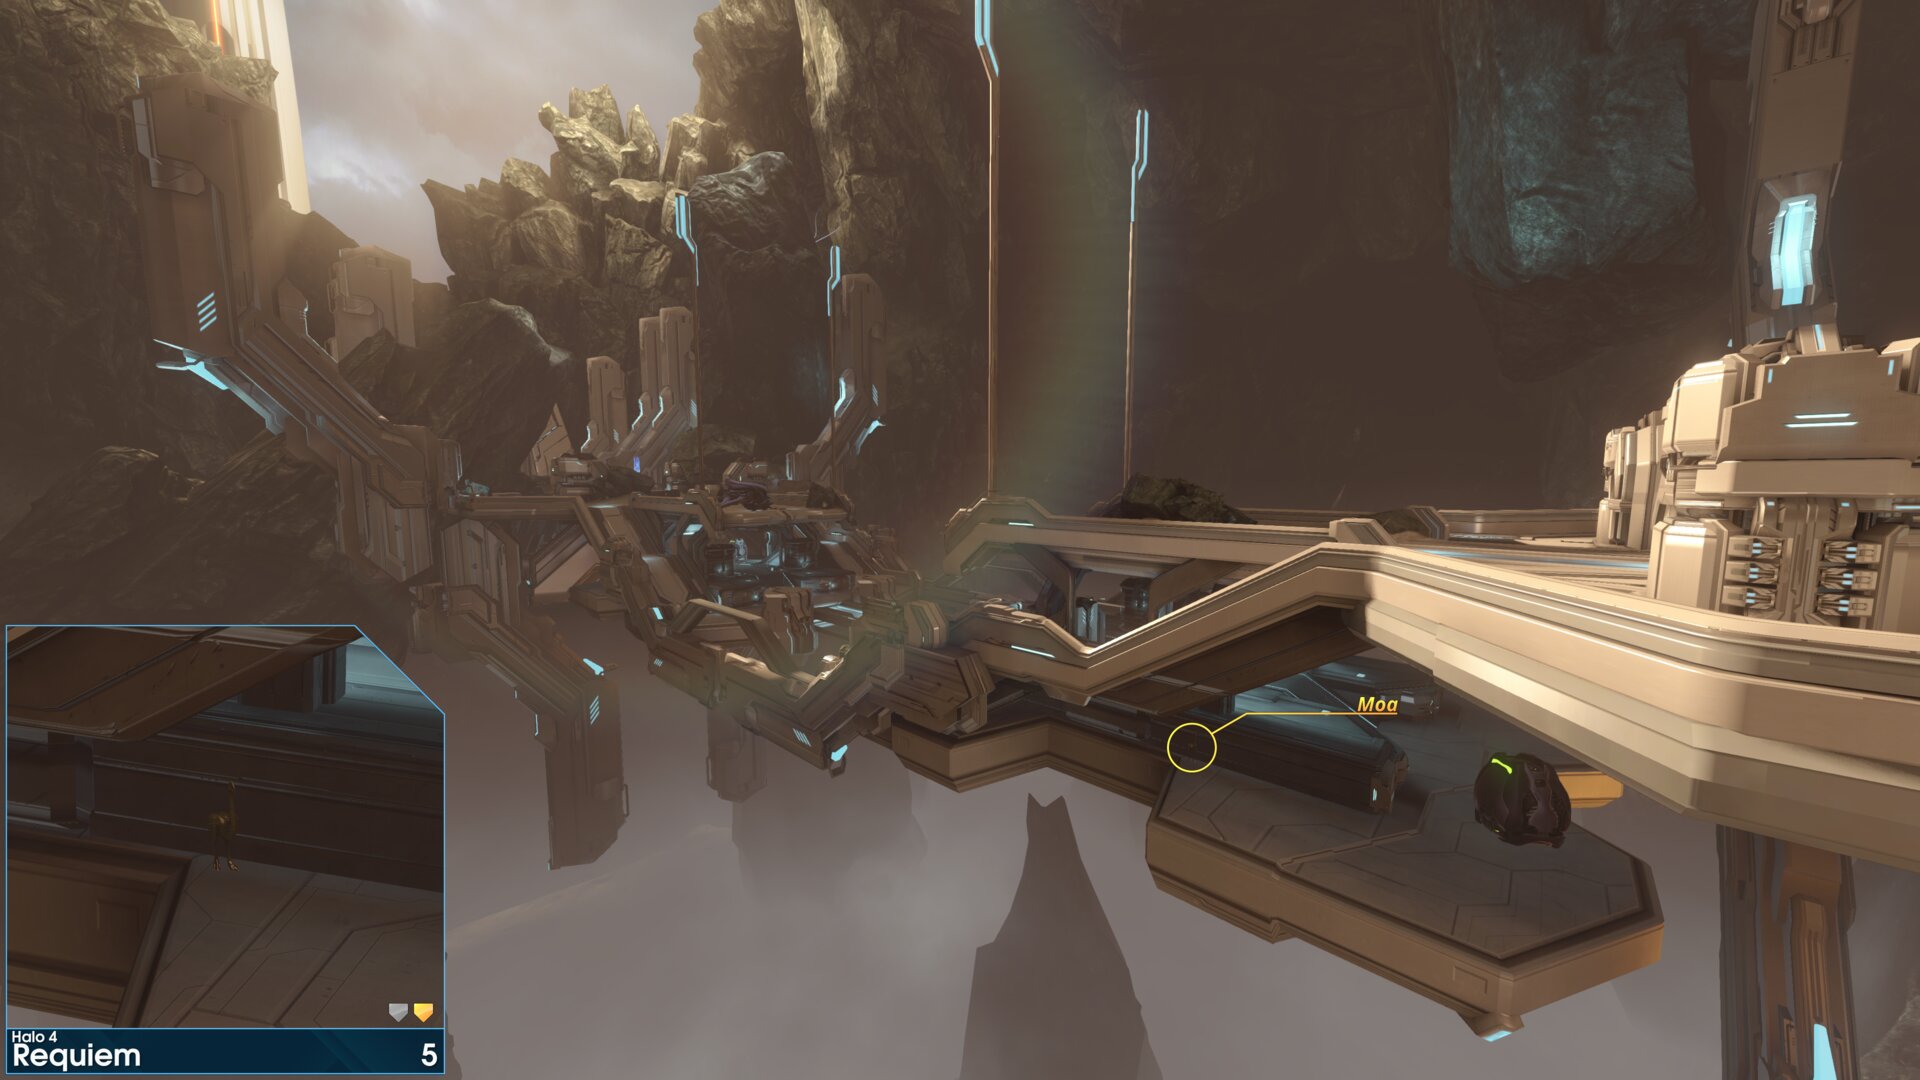
As you come to the middle of the bridge, the Golden Moa is on the lower level beneath the left ramp.
Golden Moa 6
At the end of the level below the path up to the elevator, the Golden Moa is behind the terminal.
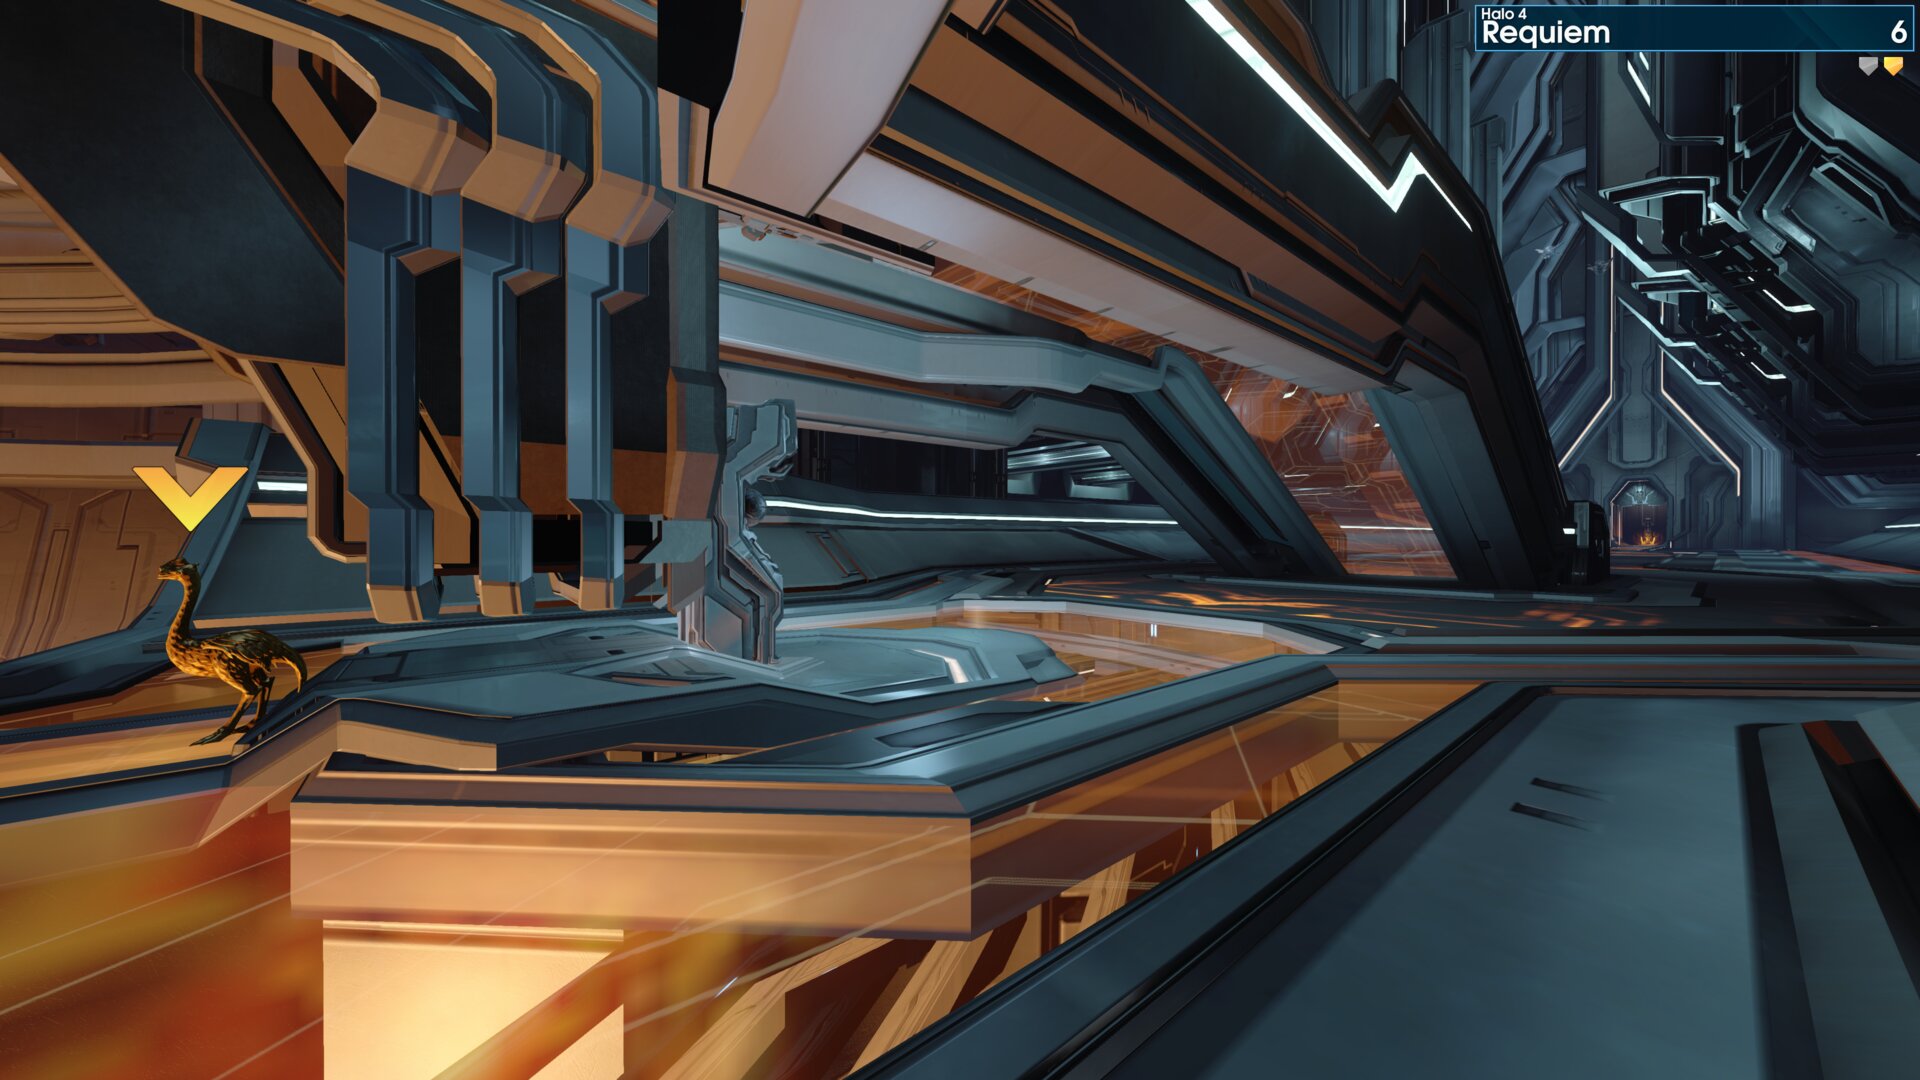
At the end of the level below the path up to the elevator, the Golden Moa is behind the terminal.
➟ Forerunner
Rally Point: Alpha
Rally Point: Bravo
Rally Point: Charlie
Golden Moa 1
At the start of the level, the Golden Moa is beneath the raised platform.
"Put me in the console." Cortana
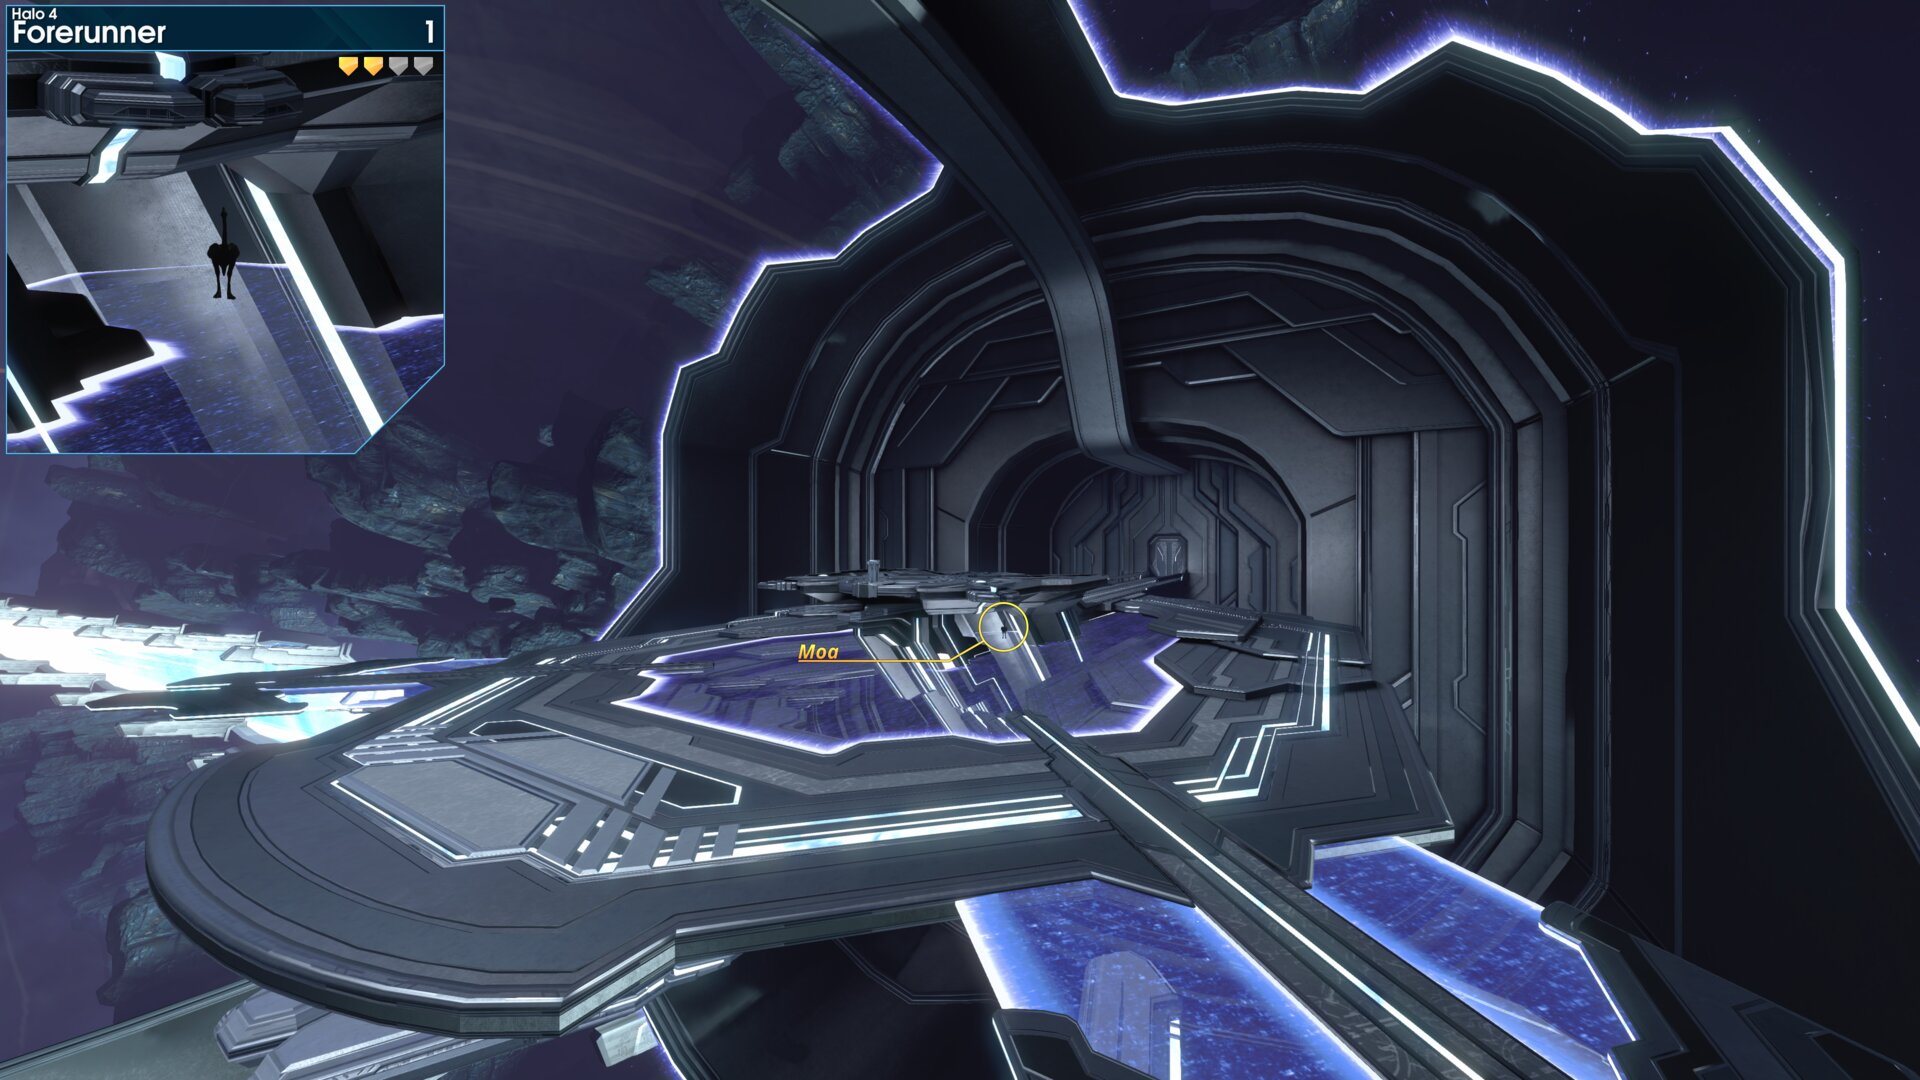
At the start of the level, the Golden Moa is beneath the raised platform.
"Put me in the console." Cortana
Golden Moa 2
In the area where you disturb the Promethean Crawlers, the Golden Moa is on top of a rock on the other side of a stream of lava.
(You will need to climb the rocks to be able to see it)
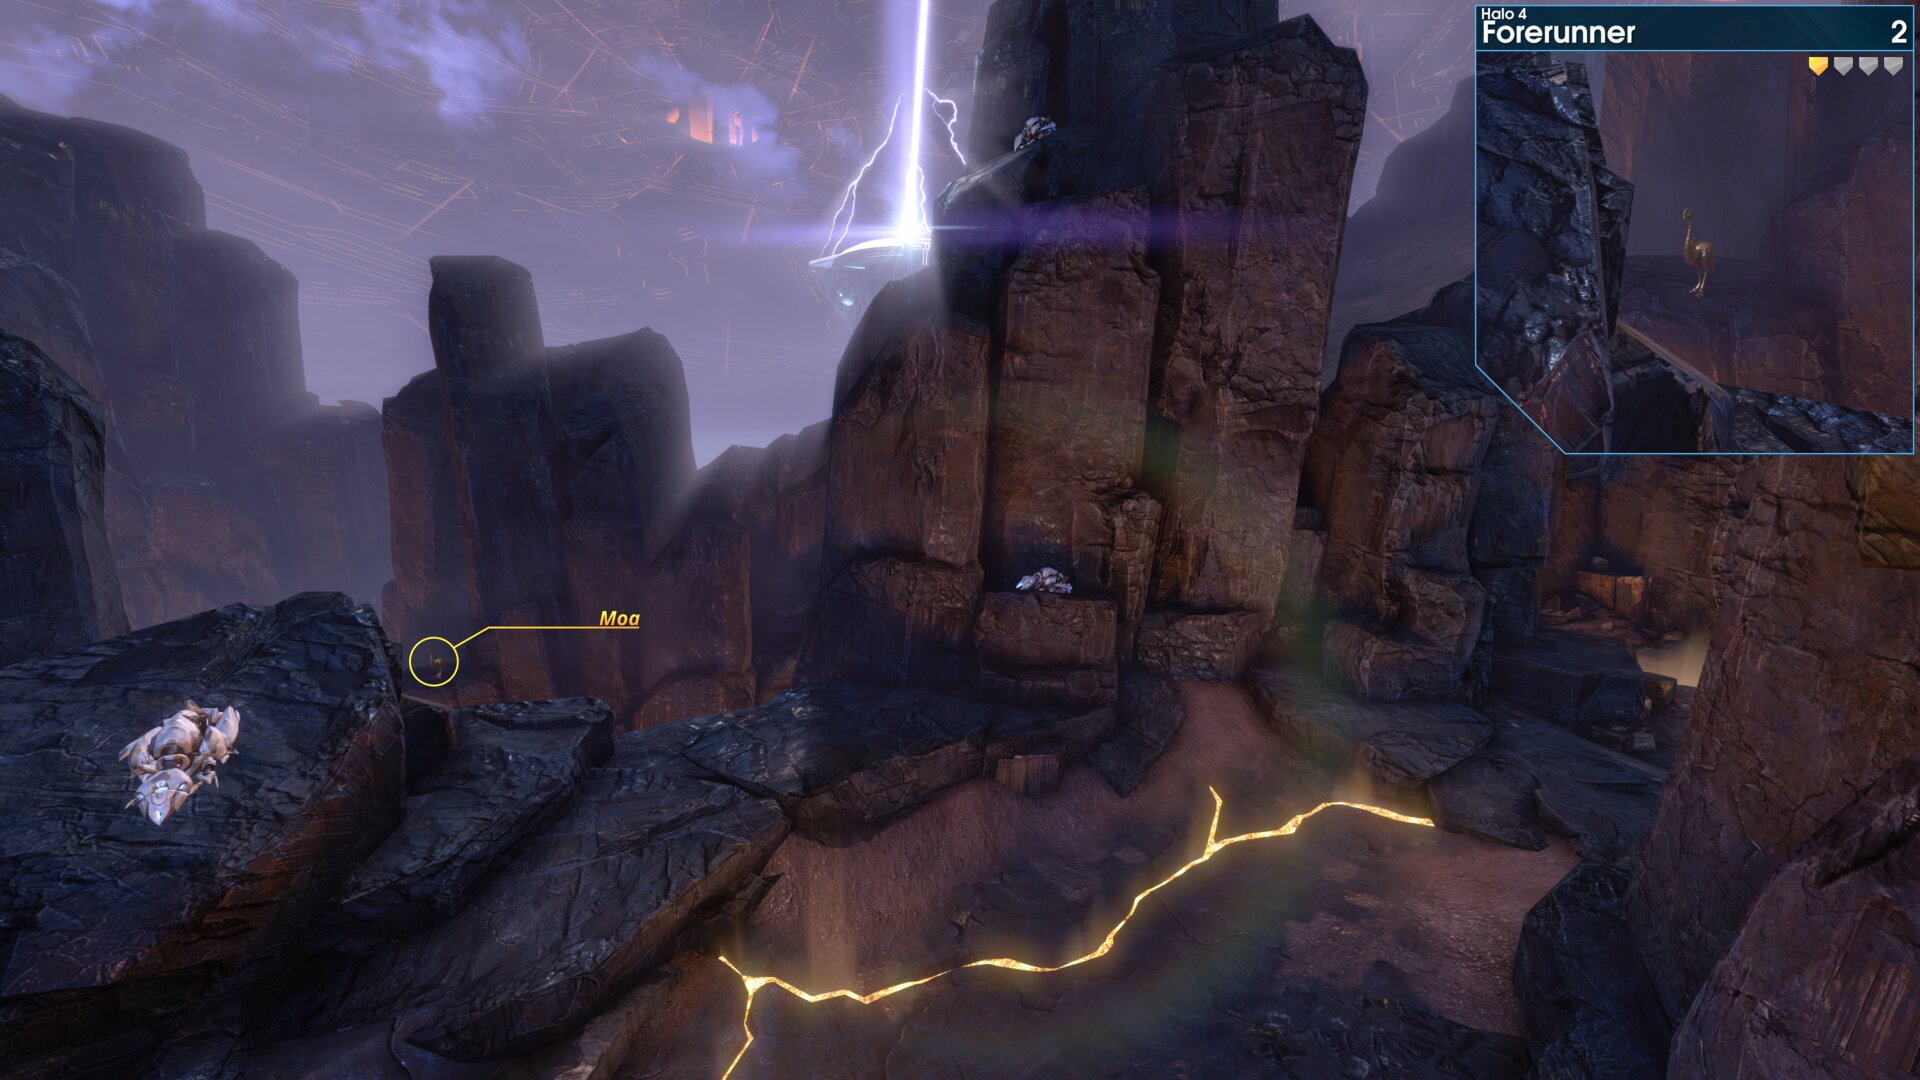
In the area where you disturb the Promethean Crawlers, the Golden Moa is on top of a rock on the other side of a stream of lava.
(You will need to climb the rocks to be able to see it)
Golden Moa 3
In the area where you fight the 1st Promethean Knight, the Golden Moa is up on top of the rocks to the left.
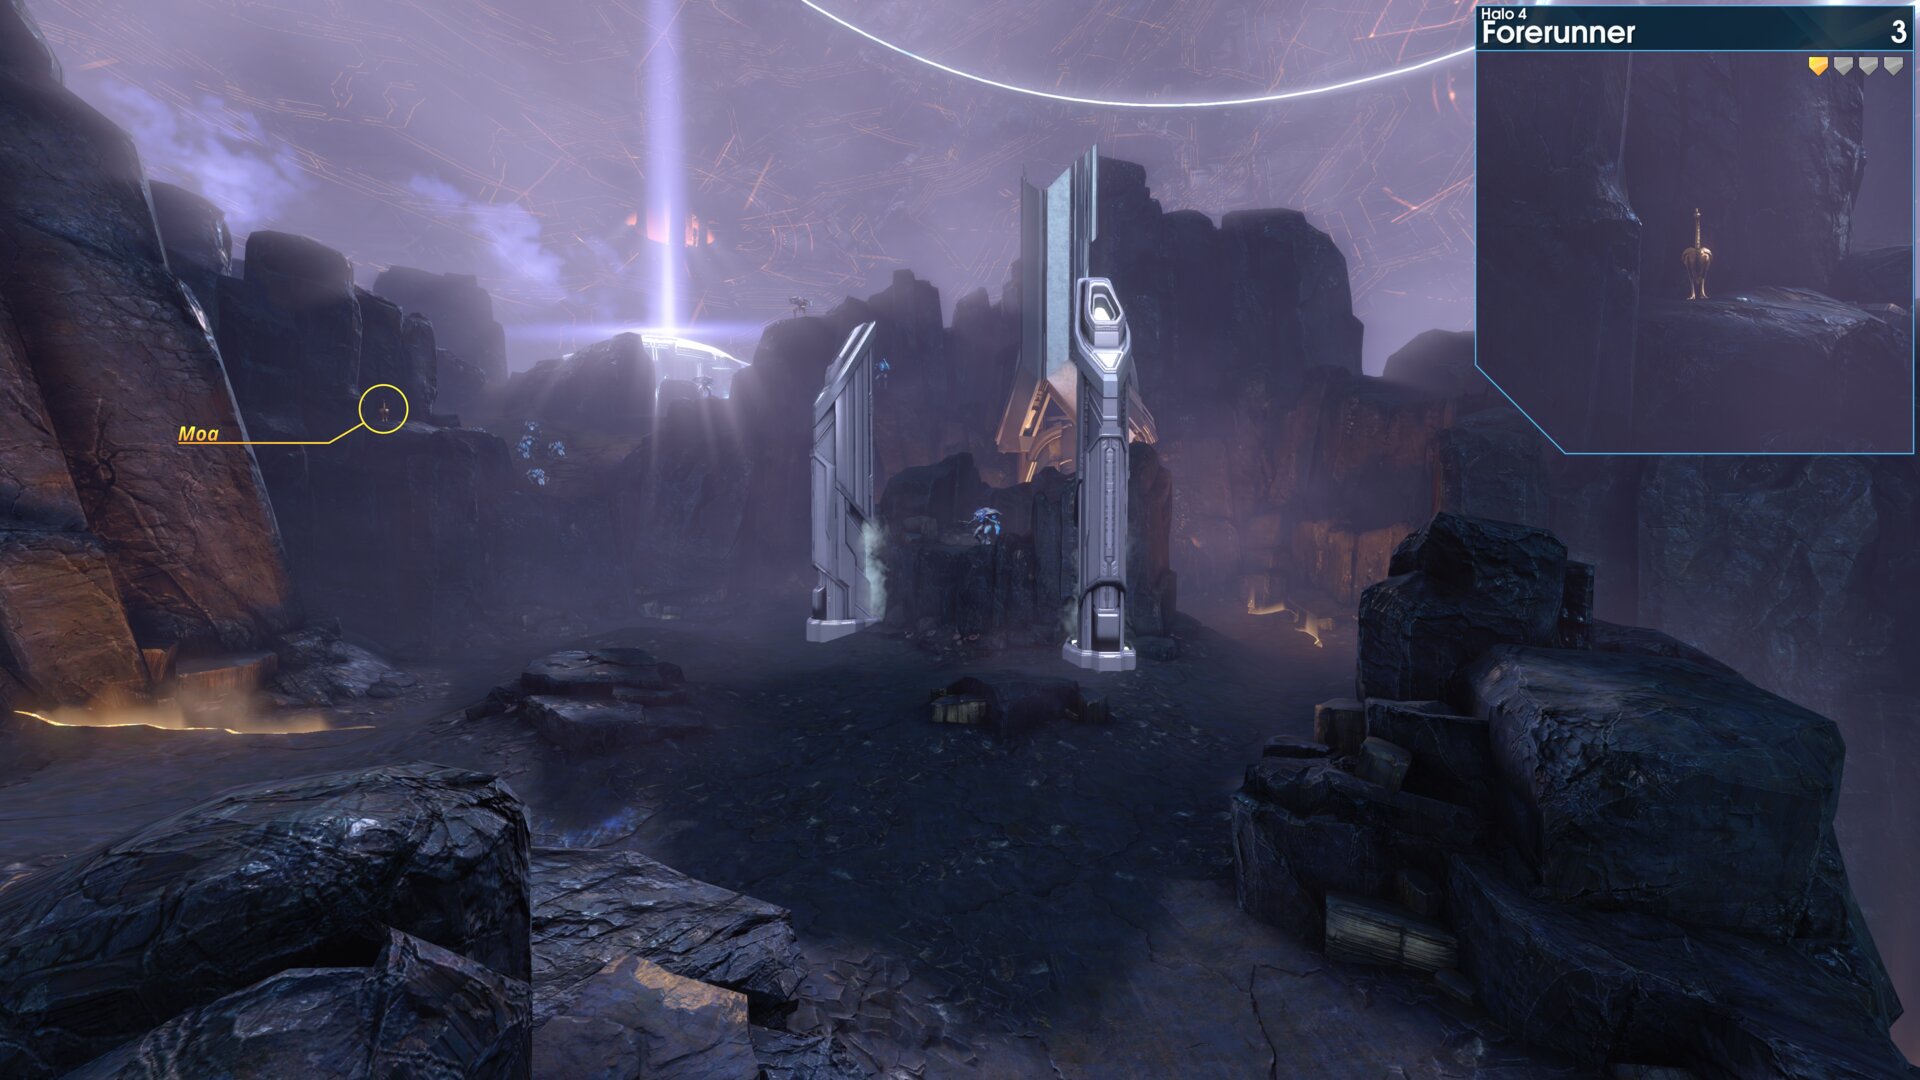
In the area where you fight the 1st Promethean Knight, the Golden Moa is up on top of the rocks to the left.
Rally Point: Bravo
Golden Moa 4
In the far left structure containing a power core for the
1st pylon, the Golden Moa is beside the weapons rack.
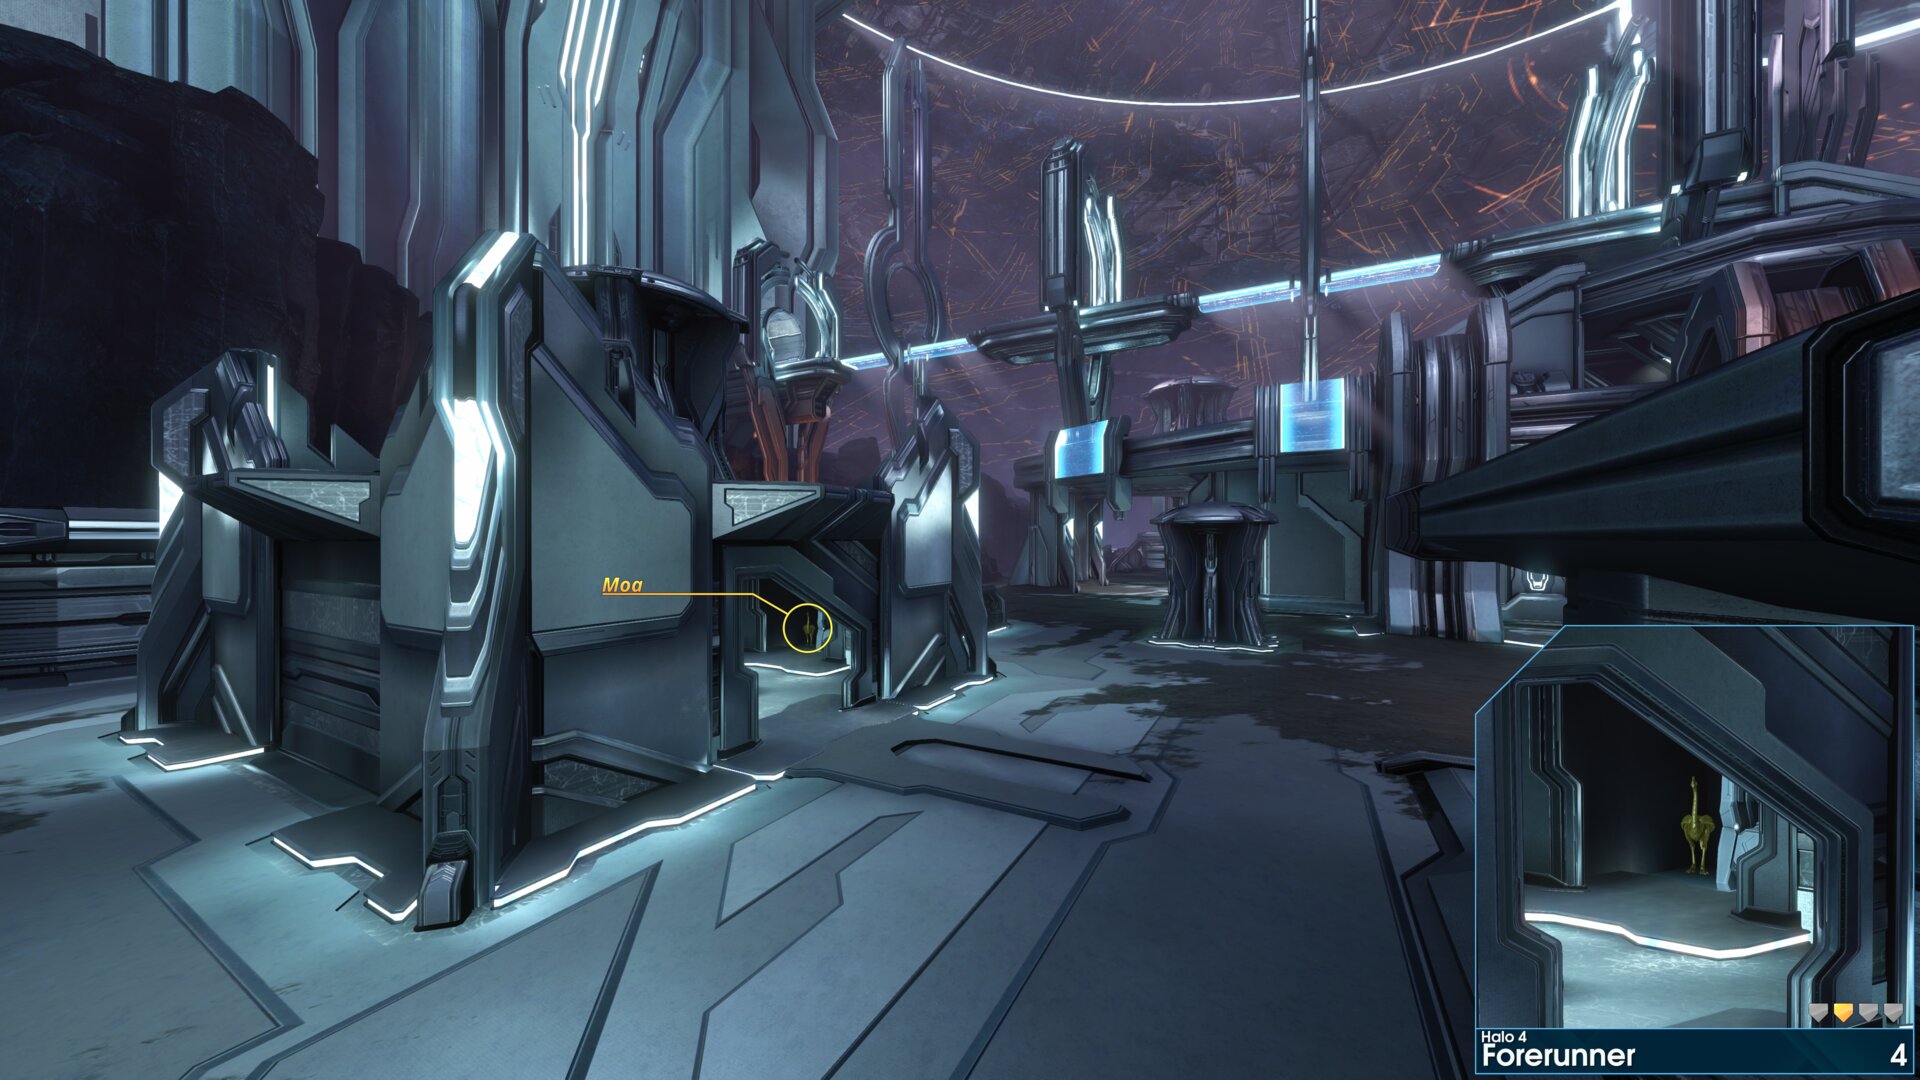
In the far left structure containing a power core for the
1st pylon, the Golden Moa is beside the weapons rack.
Rally Point: Charlie
Golden Moa 5
Once you reach the Ghost’s, take the right path. The Golden Moa is on top of a rock arch, past the crashed Phantom.
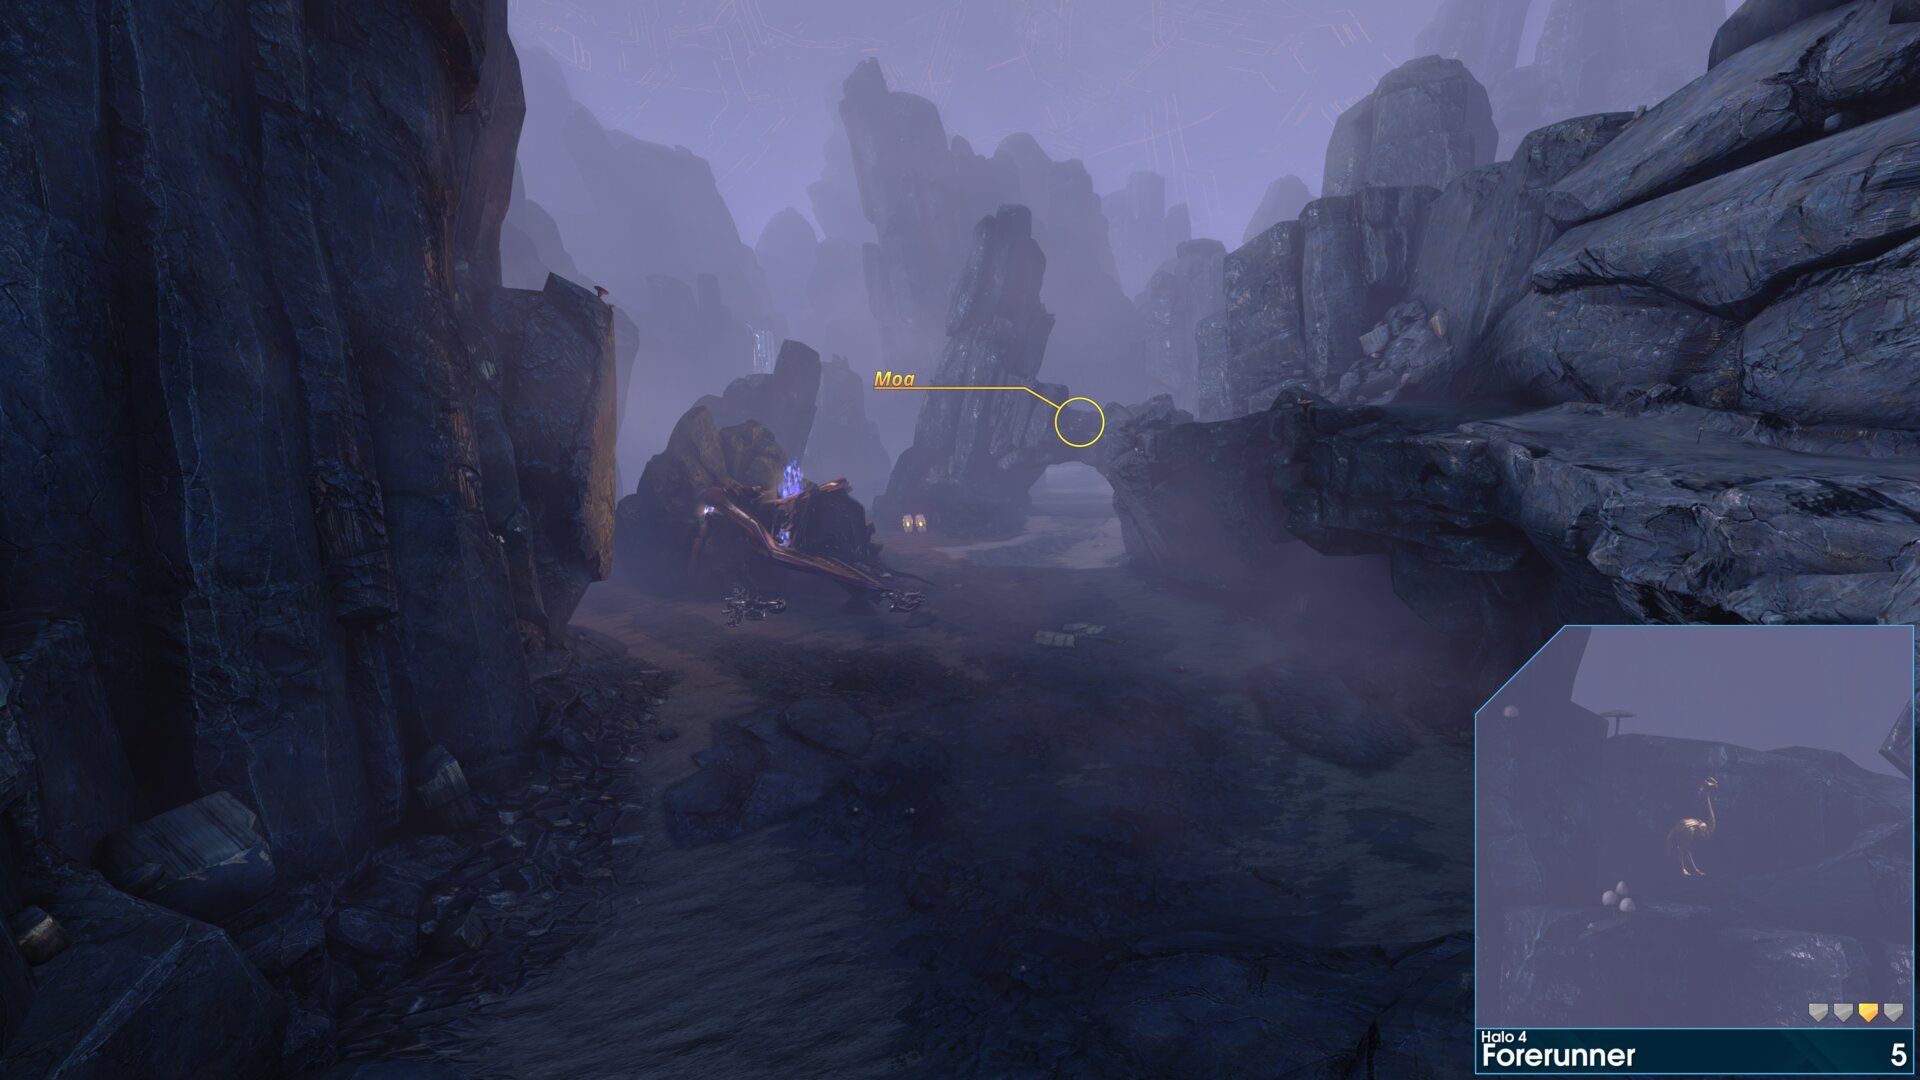
Once you reach the Ghost’s, take the right path. The Golden Moa is on top of a rock arch, past the crashed Phantom.
Golden Moa 6
As you enter the area with the 2nd pylon, the Golden Moa is near the top of a small tower by the left power core.
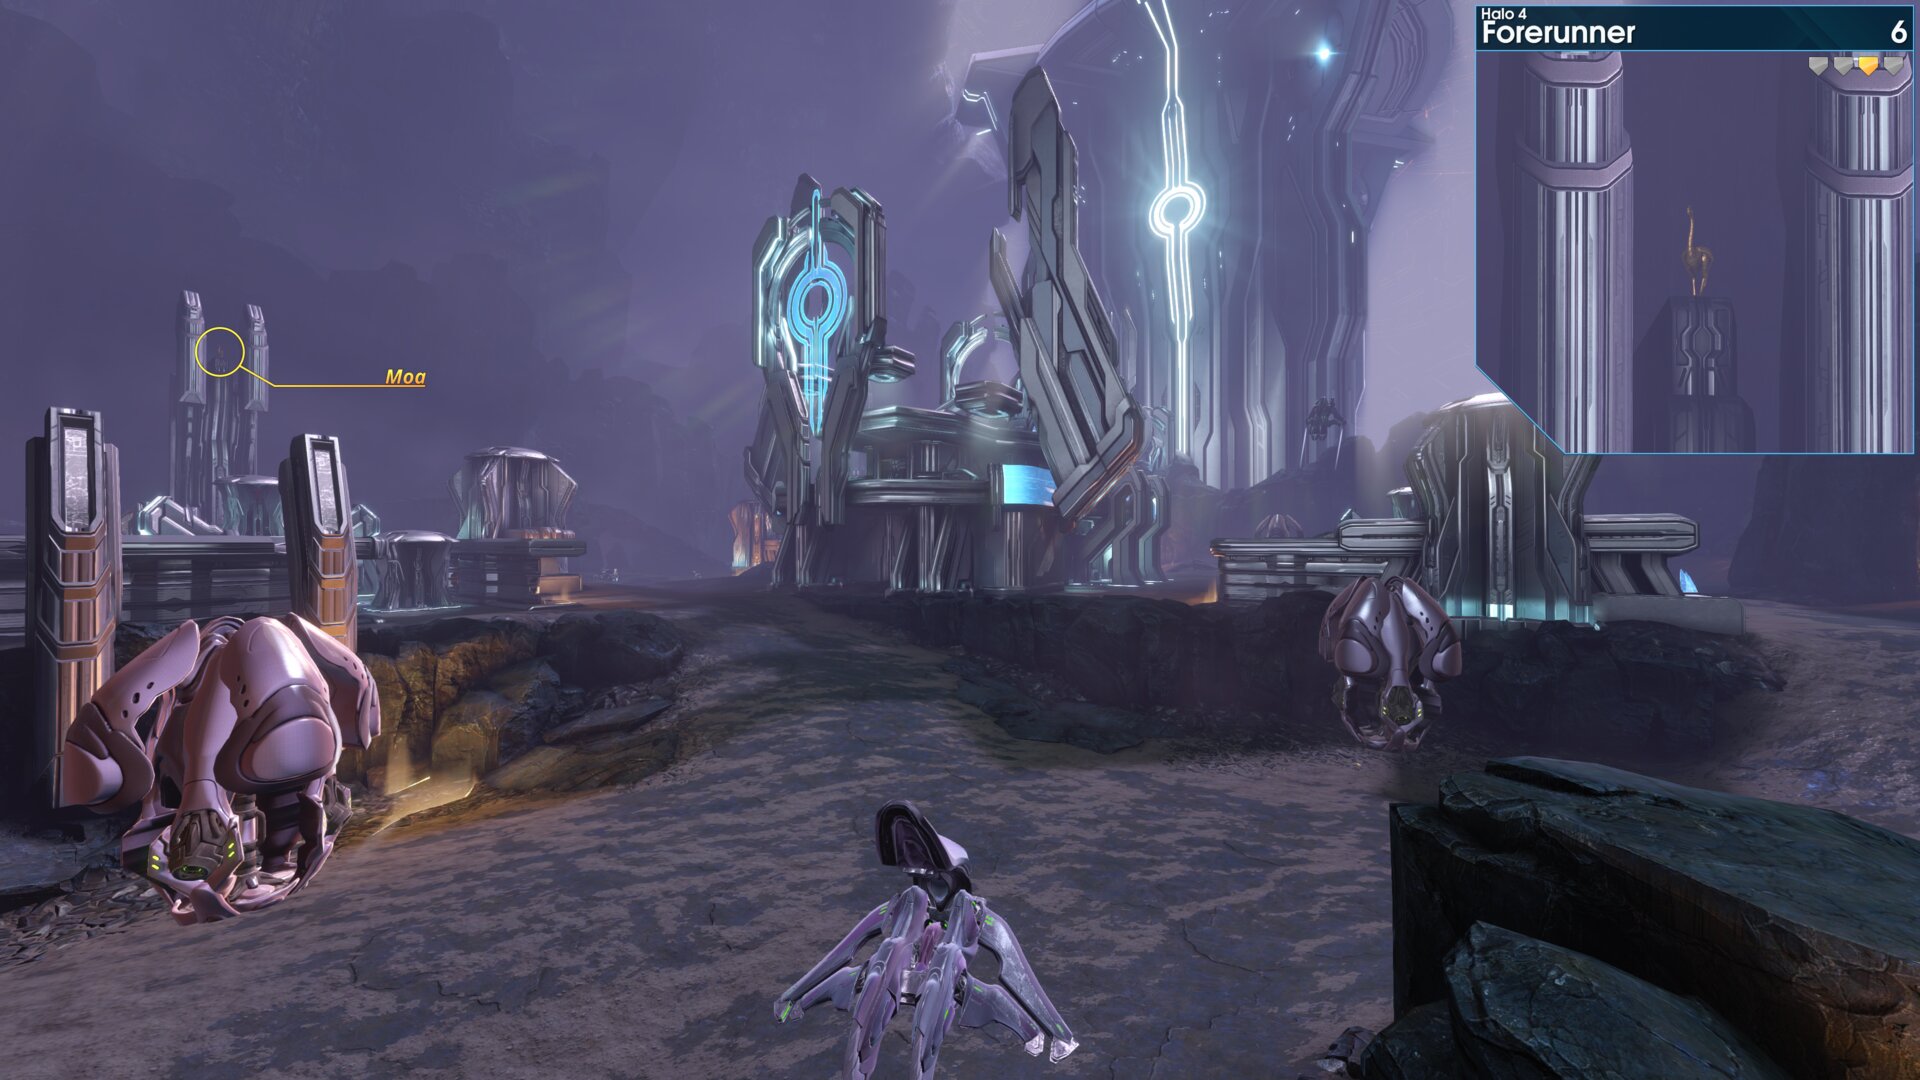
As you enter the area with the 2nd pylon, the Golden Moa is near the top of a small tower by the left power core.
➟ Infinity
Rally Point: Alpha
Rally Point: Bravo
Rally Point: Charlie
Golden Moa 1
At the 1st IFF tag, the Golden Moa is over to the right on a tree root.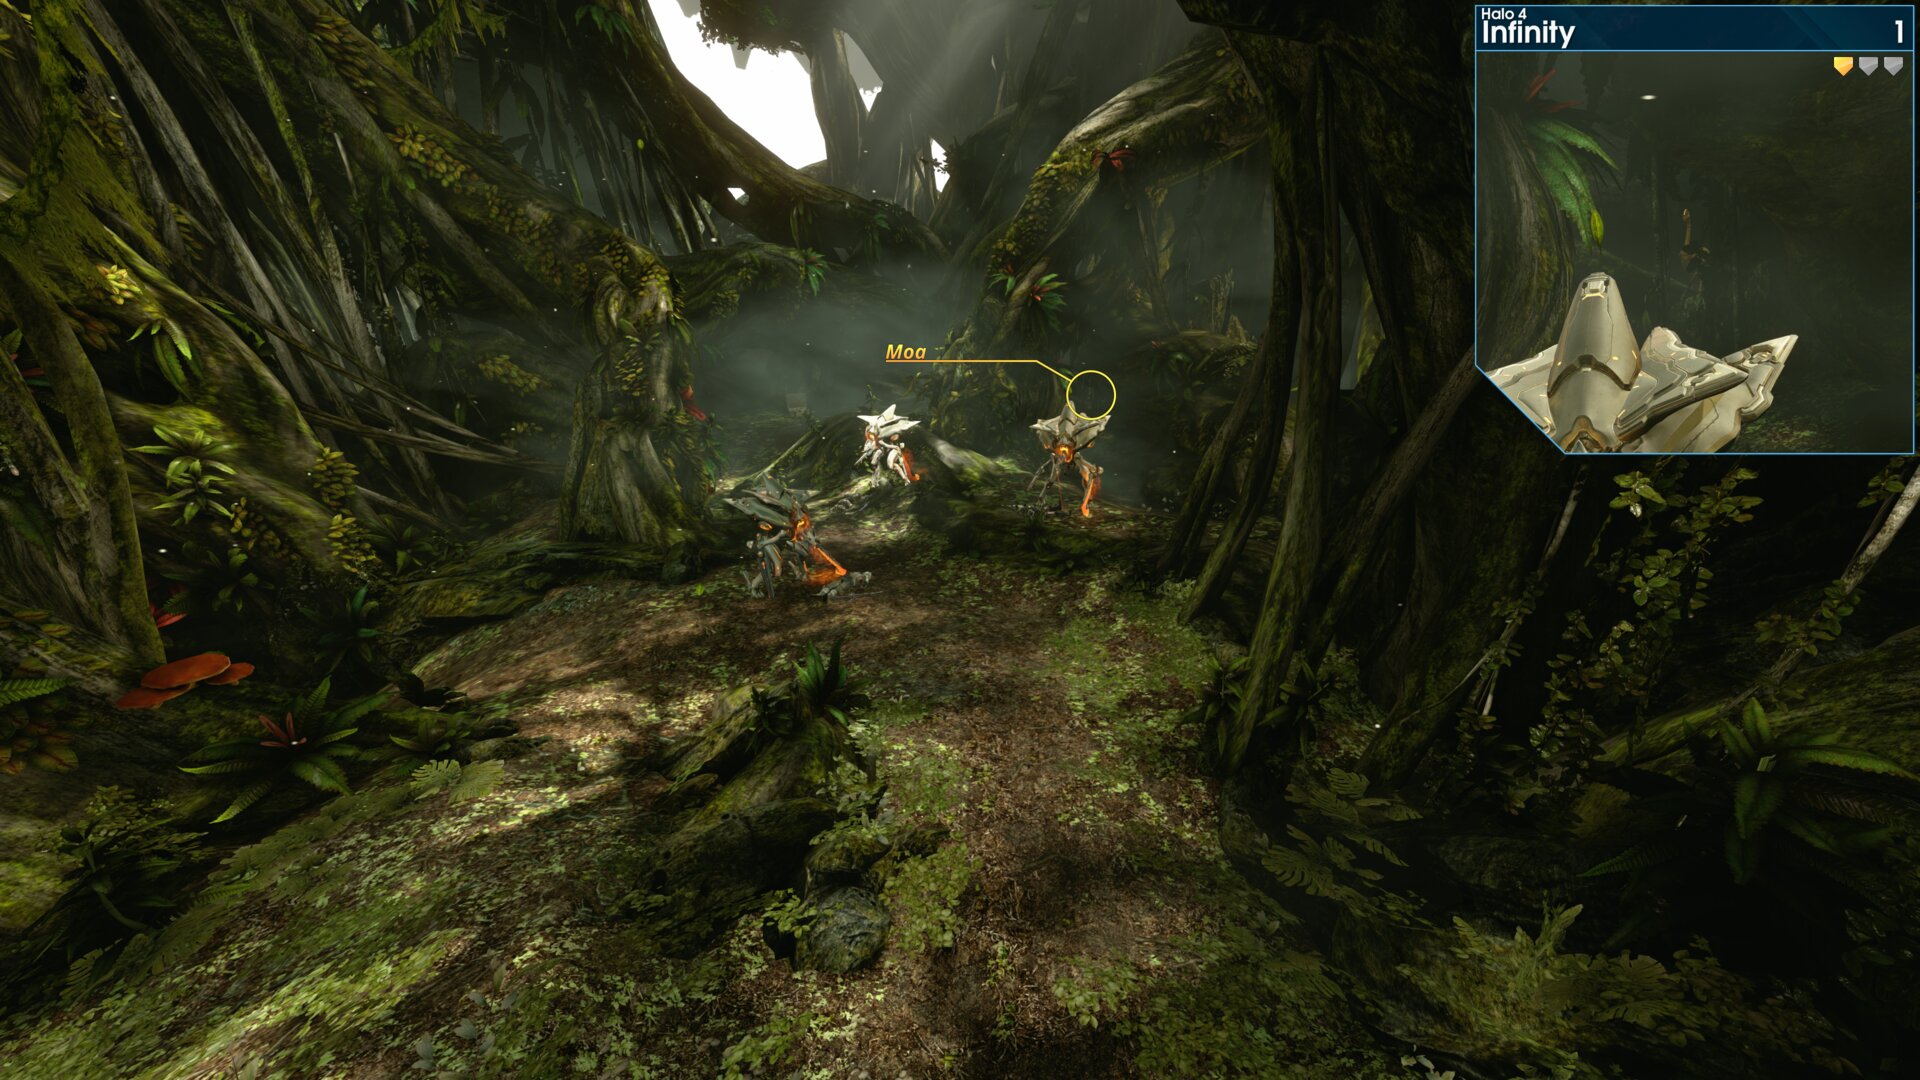
At the 1st IFF tag, the Golden Moa is over to the right on a tree root.
Golden Moa 2
As you make your way down the hill from the 1st IFF tag, look to the left side, the Golden Moa is up on top of a large tree root.
As you make your way down the hill from the 1st IFF tag, look to the left side, the Golden Moa is up on top of a large tree root.
Rally Point: Bravo
Golden Moa 3
After rescuing a group of Marines head up the hill to a
sealed door, the Golden Moa is on a rock to the left of
the door.
“The Marines got trapped trying to get through these
doors. Look for an interface.” Cortana
After rescuing a group of Marines head up the hill to a
sealed door, the Golden Moa is on a rock to the left of
the door.
“The Marines got trapped trying to get through these
doors. Look for an interface.” Cortana
Rally Point: Charlie
Golden Moa 4
As you make your way to Infinity (starboard hangar 2-19), you will pass multiple Covenant deployable lookout tower. Look to the right at the 4th lookout tower, the Golden Moa in on a rock under some debris.
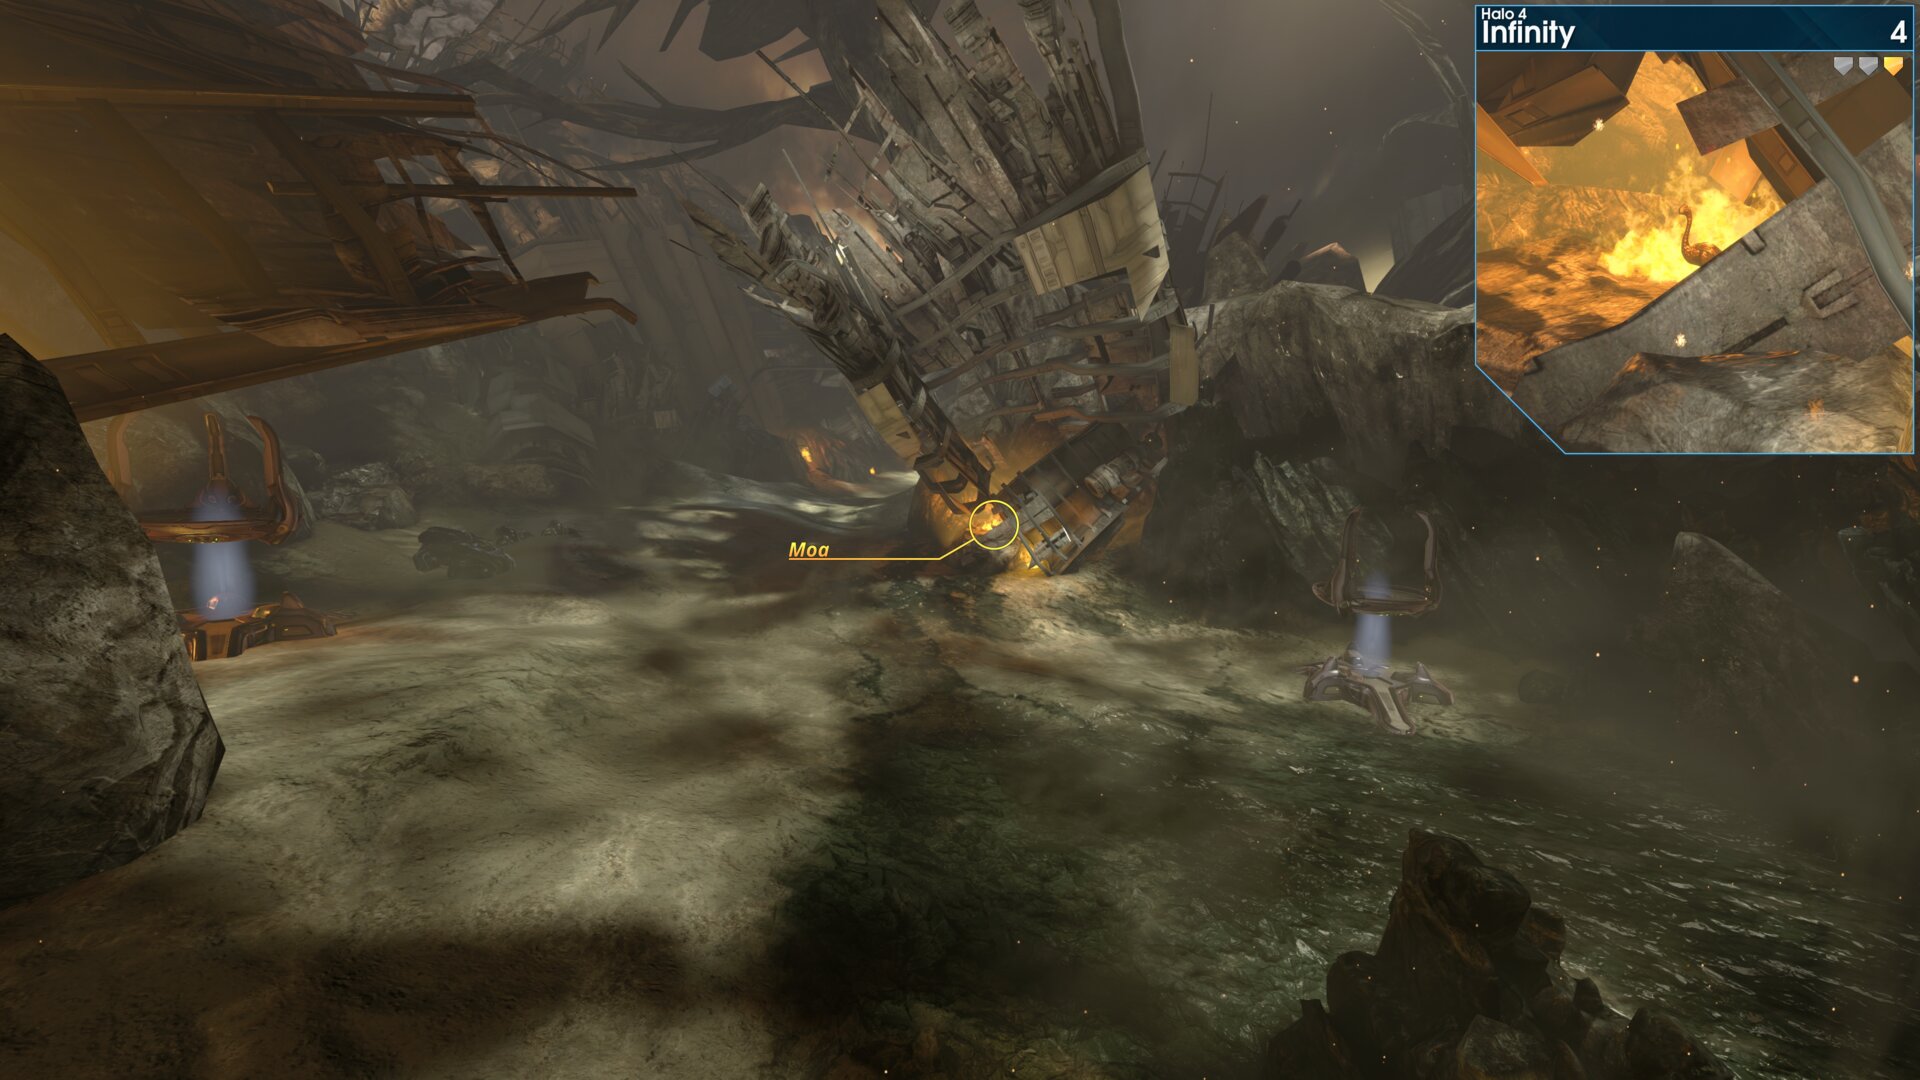
As you make your way to Infinity (starboard hangar 2-19), you will pass multiple Covenant deployable lookout tower. Look to the right at the 4th lookout tower, the Golden Moa in on a rock under some debris.
Golden Moa 5
After entering the maintenance causeway, you’ll find this Golden Moa up on a ledge past the 1st junction.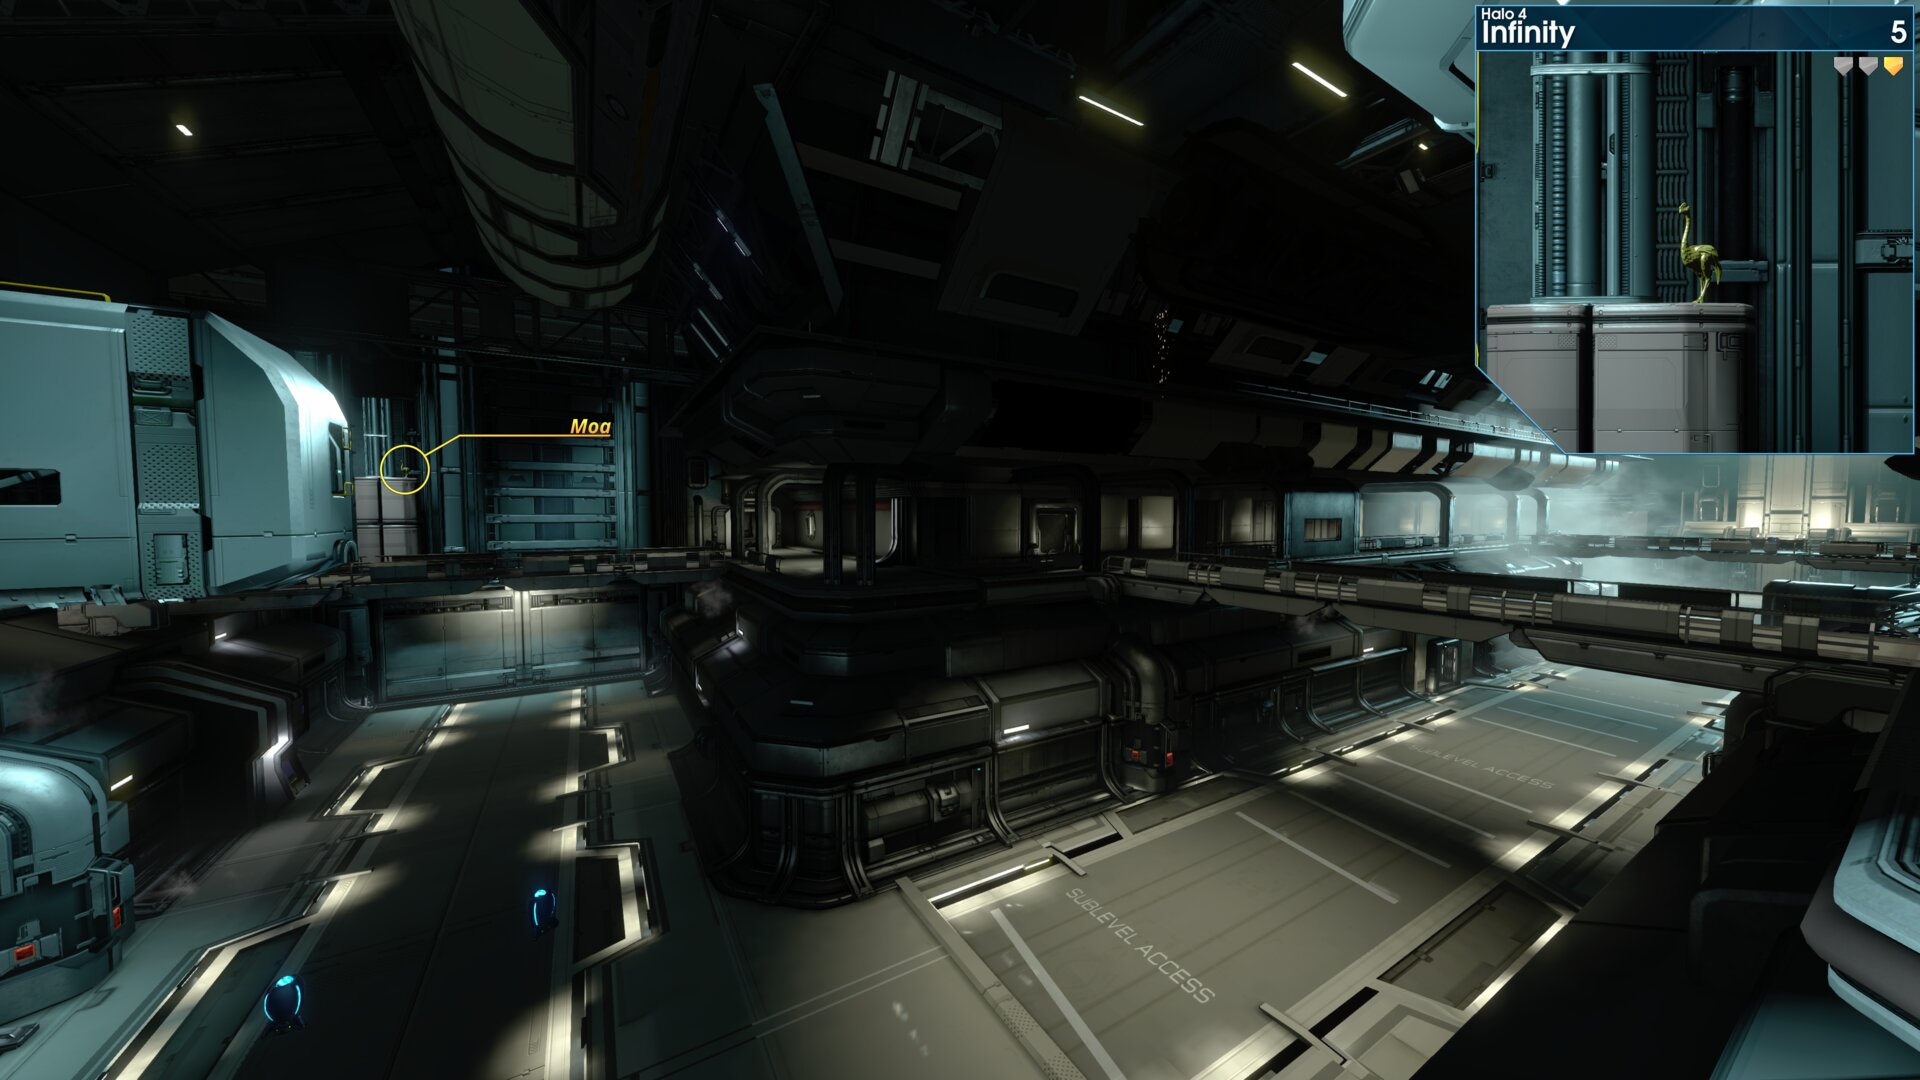
After entering the maintenance causeway, you’ll find this Golden Moa up on a ledge past the 1st junction.
Golden Moa 6
As you near the end of the maintenance causeway, you’ll pass multiple shipping containers. Behind the last container on the right, you’ll find the Golden Moa next to a maintenance console.
As you near the end of the maintenance causeway, you’ll pass multiple shipping containers. Behind the last container on the right, you’ll find the Golden Moa next to a maintenance console.
Golden Moa 7
On the outer hull of the Infinity, the Golden Moa is up on a ledge behind the left gun emplacement.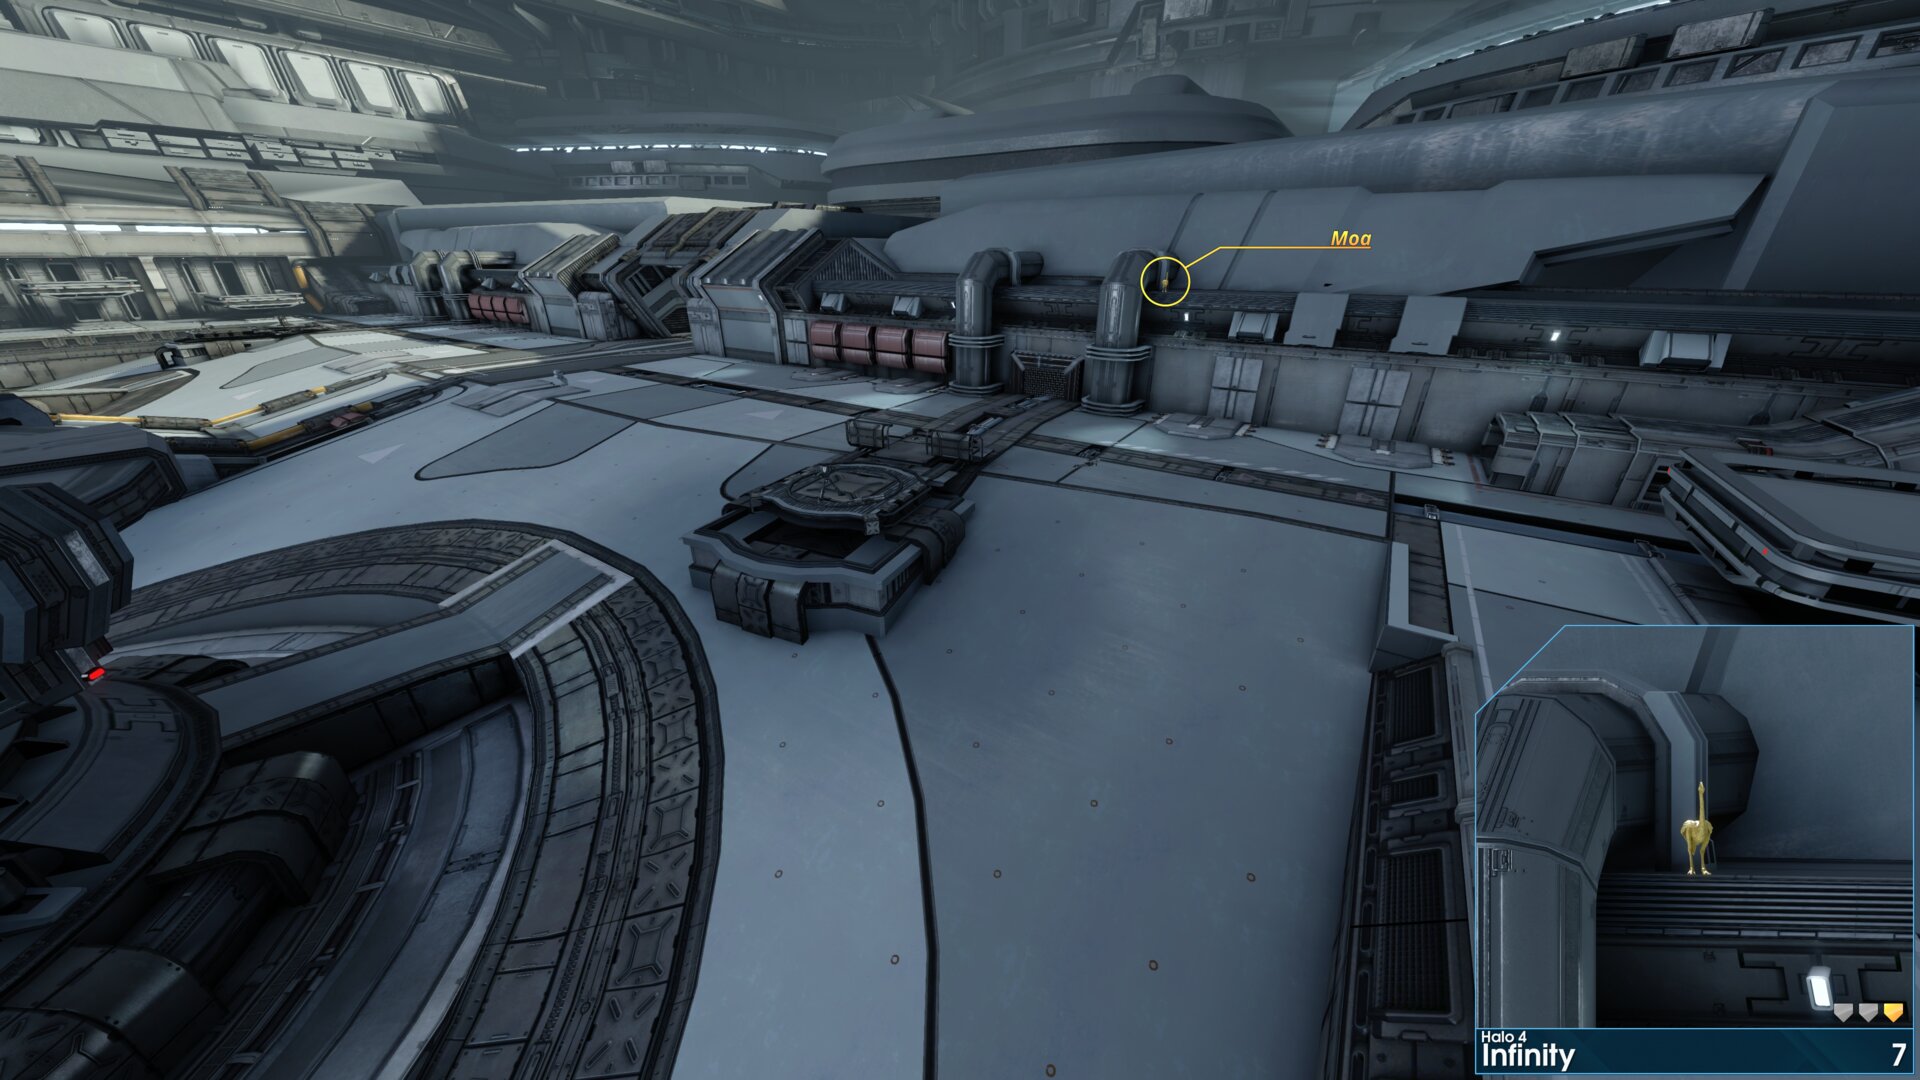
On the outer hull of the Infinity, the Golden Moa is up on a ledge behind the left gun emplacement.
➟ Reclaimer
Rally Point: Alpha
Rally Point: Bravo
Golden Moa 1
At the start of the level, the Golden Moa is among some rocks past the Mammoth.
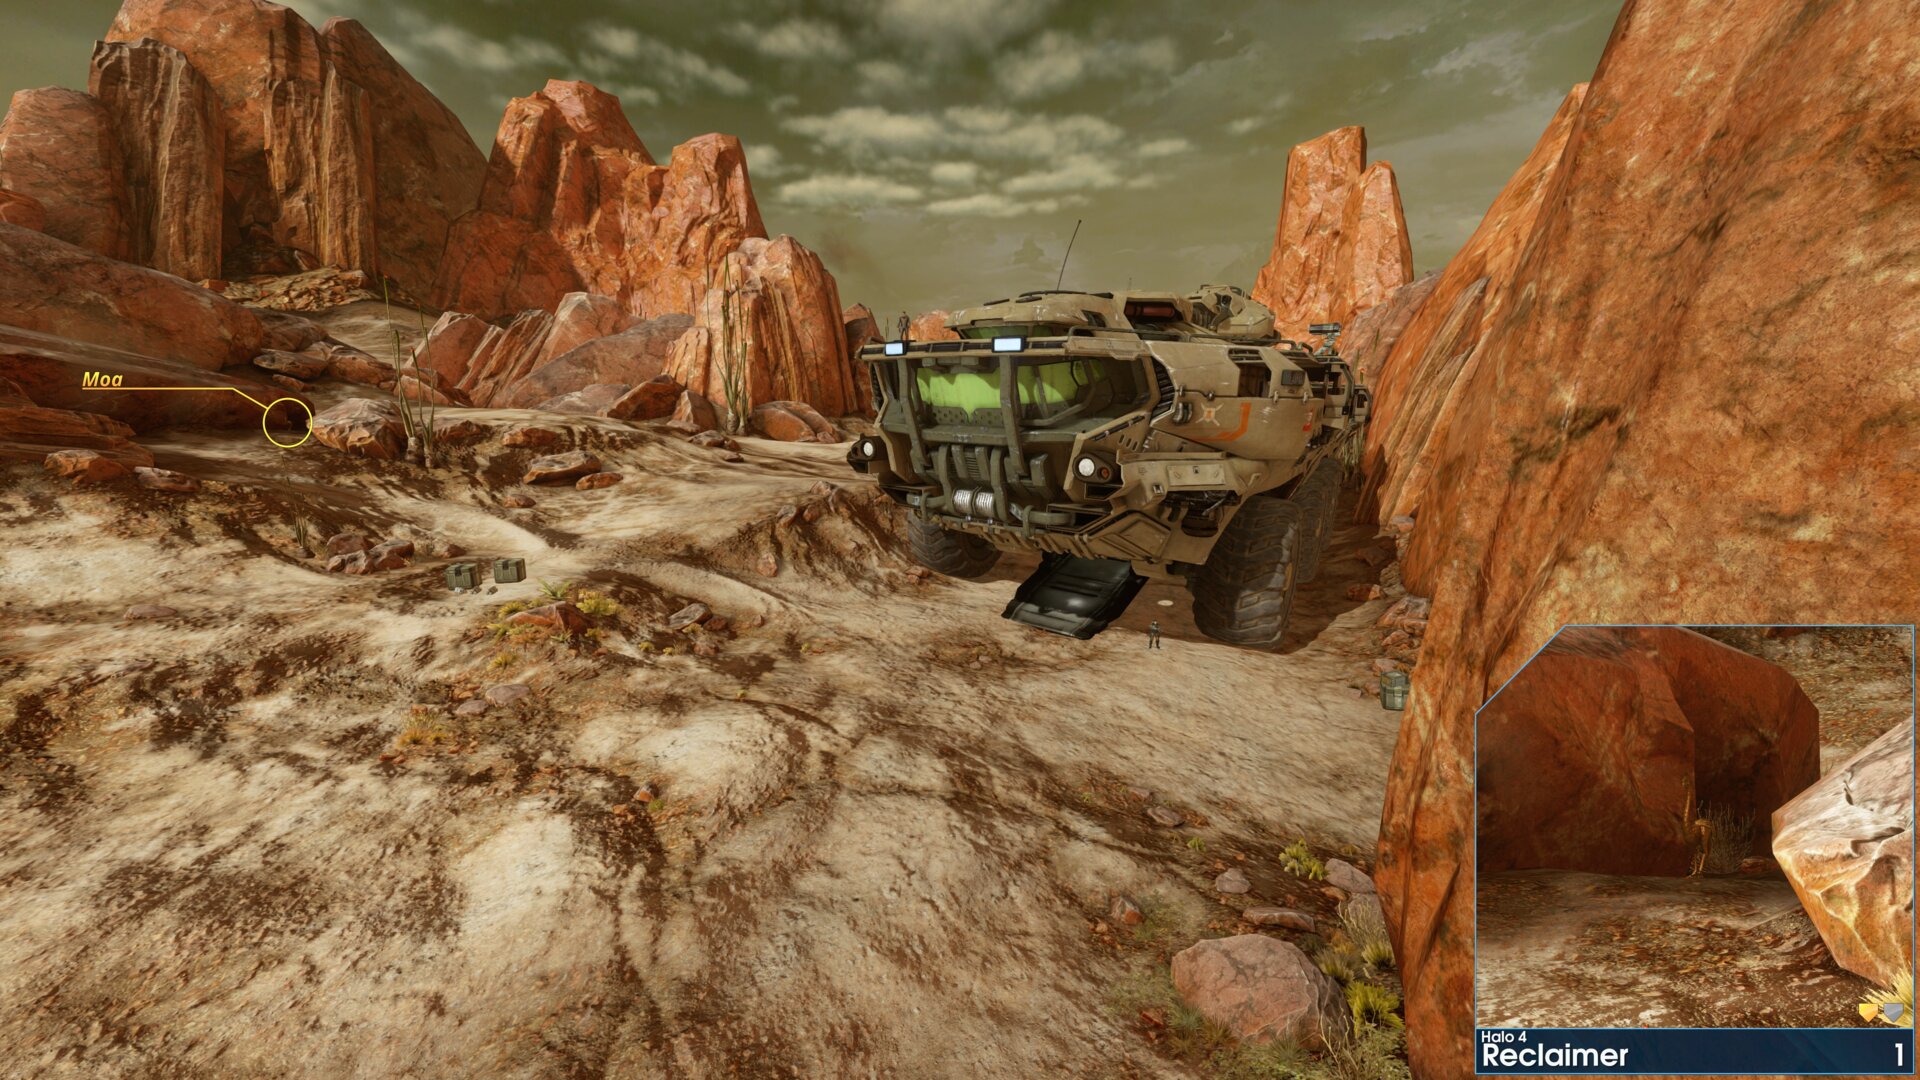
At the start of the level, the Golden Moa is among some rocks past the Mammoth.
Golden Moa 2
Past Gypsy_Seven’s Pelican crash site, the Golden Moa is on a rock next to the waterfalls.
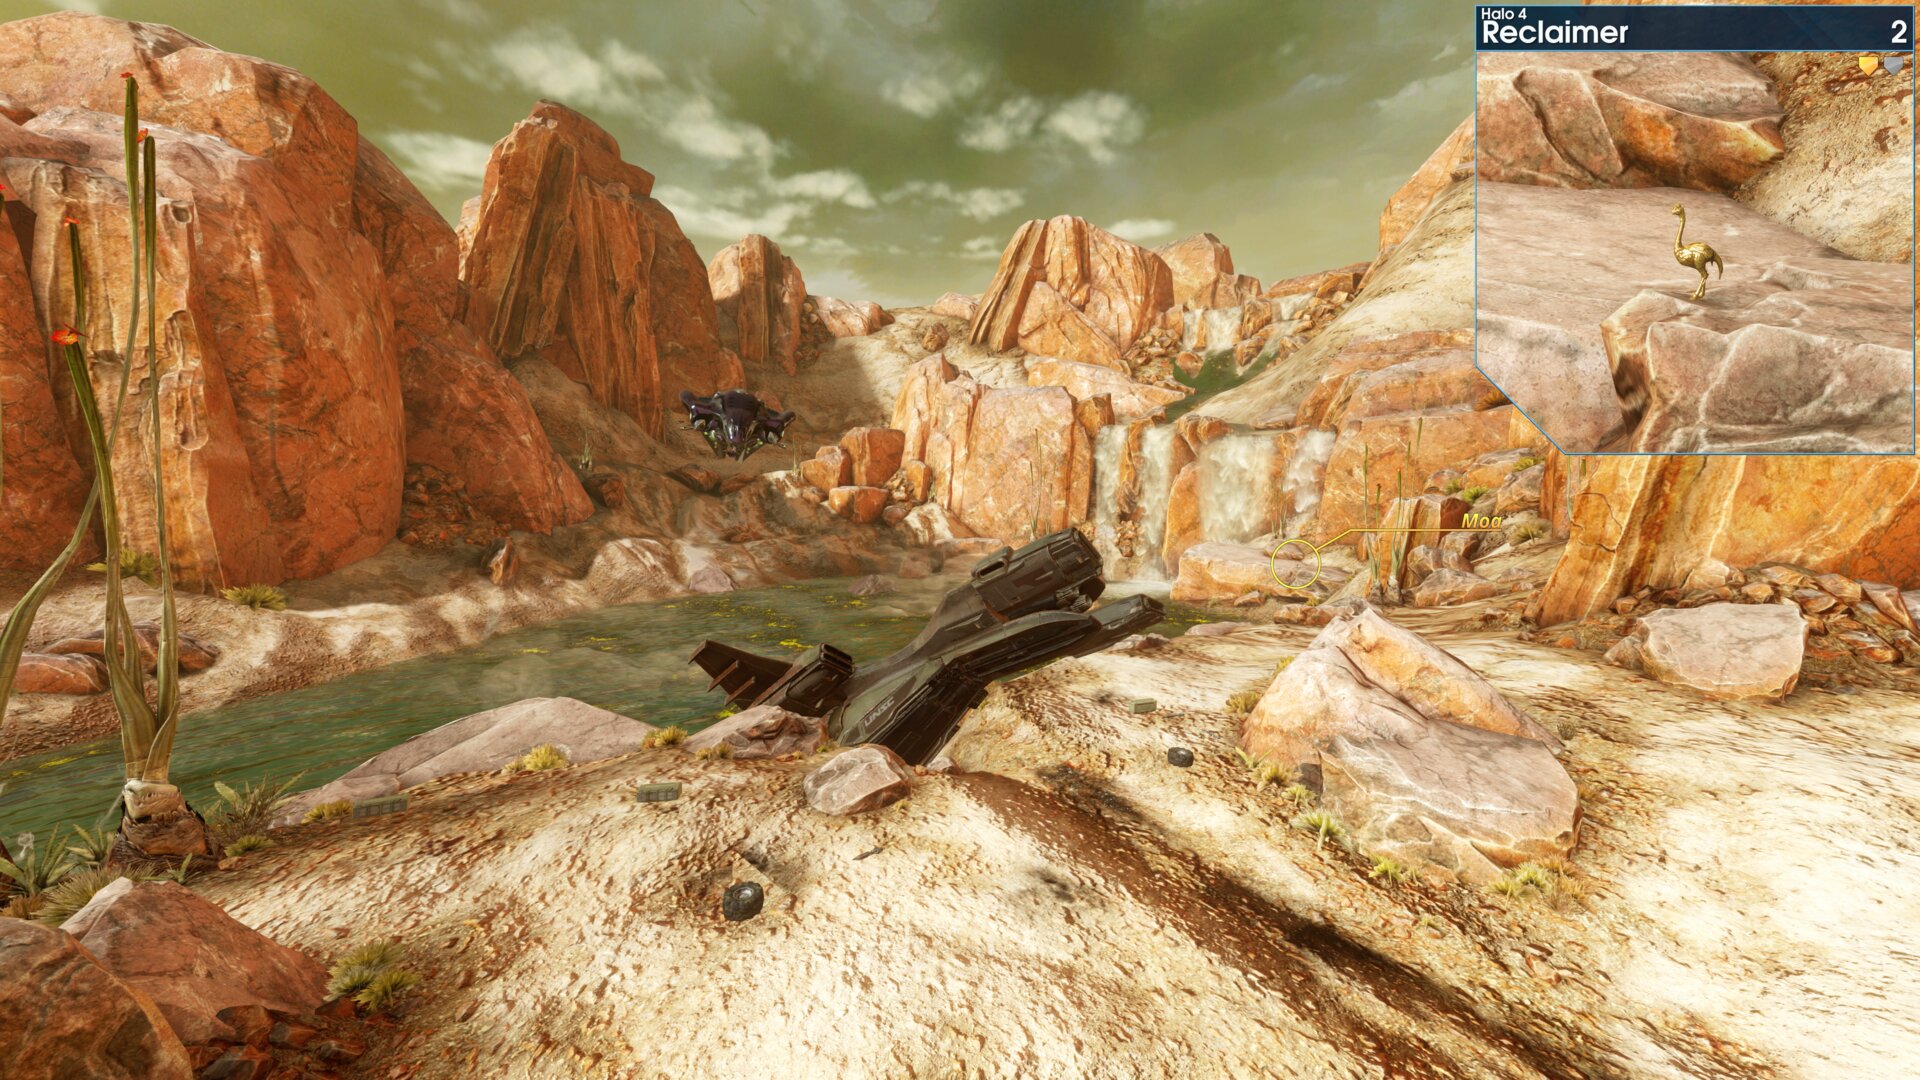
Past Gypsy_Seven’s Pelican crash site, the Golden Moa is on a rock next to the waterfalls.
Golden Moa 3
In the canyon with the 3 power sources generating a force field. The Golden Moa is on a rock near the closest power source.
In the canyon with the 3 power sources generating a force field. The Golden Moa is on a rock near the closest power source.
Golden Moa 4
After destroying the Lich, the Golden Moa is on a rock at the head of the 1st tributary (aka a stream).
“OK folks, terrain's too rough around these tributaries.” Commander Lasky
After destroying the Lich, the Golden Moa is on a rock at the head of the 1st tributary (aka a stream).
“OK folks, terrain's too rough around these tributaries.” Commander Lasky
Rally Point: Bravo
Golden Moa 5
At the 1st ramp to the Command Post, the Golden Moa is hidden in a shrub on the left side.
At the 1st ramp to the Command Post, the Golden Moa is hidden in a shrub on the left side.
Golden Moa 6
As you enter the Particle Cannon Control Room, the Golden Moa is in the corner to the right of the door.
“This looks like the place.” Cortana
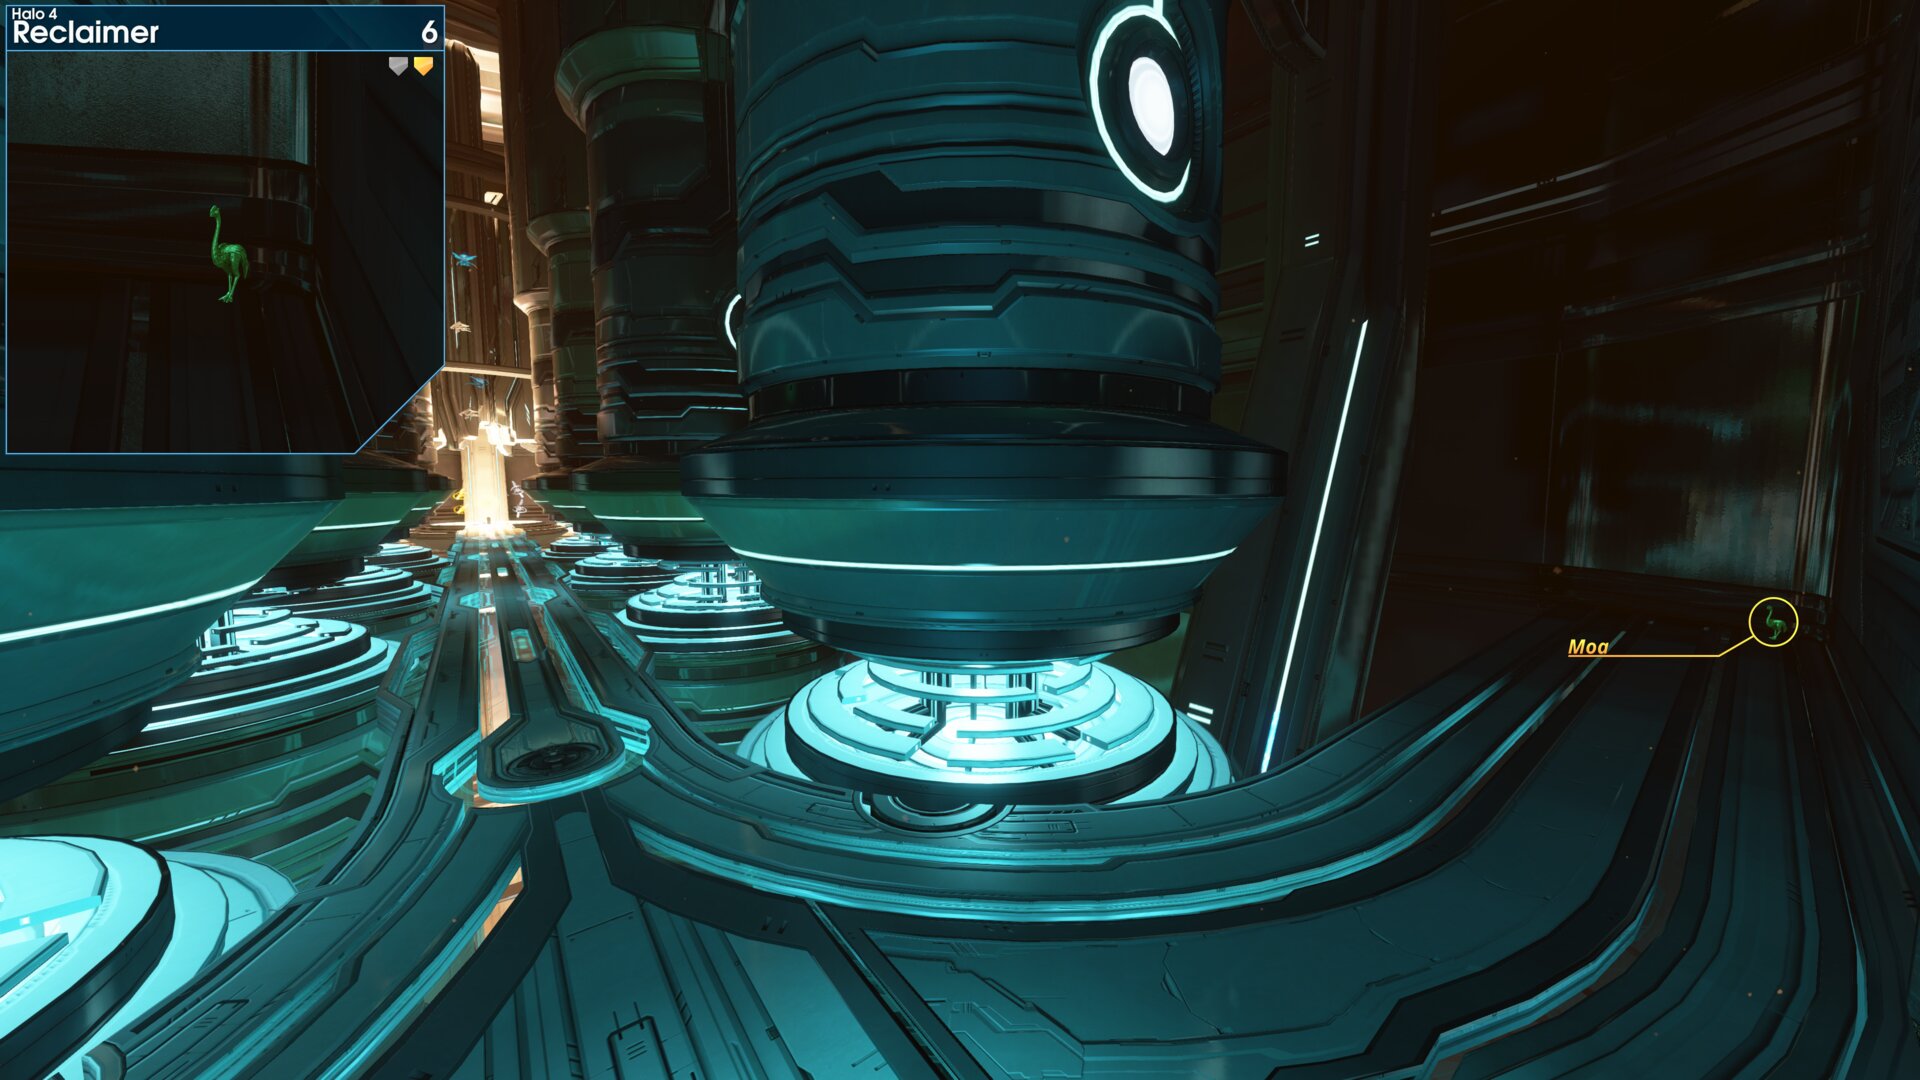
As you enter the Particle Cannon Control Room, the Golden Moa is in the corner to the right of the door.
“This looks like the place.” Cortana
➟ Shutdown
Rally Point: Alpha
Rally Point: Bravo
Rally Point: Charlie
Rally Point: Delta
Golden Moa 1
This Golden Moa is in the main control room of the
Motor Pool, beside the weapons rack.
This Golden Moa is in the main control room of the
Motor Pool, beside the weapons rack.
Rally Point: Bravo
Golden Moa 2
In the Carrier Wave Generator Tower, the Golden Moa is on a ledge to your right as you cross the light bridge to the gondola.
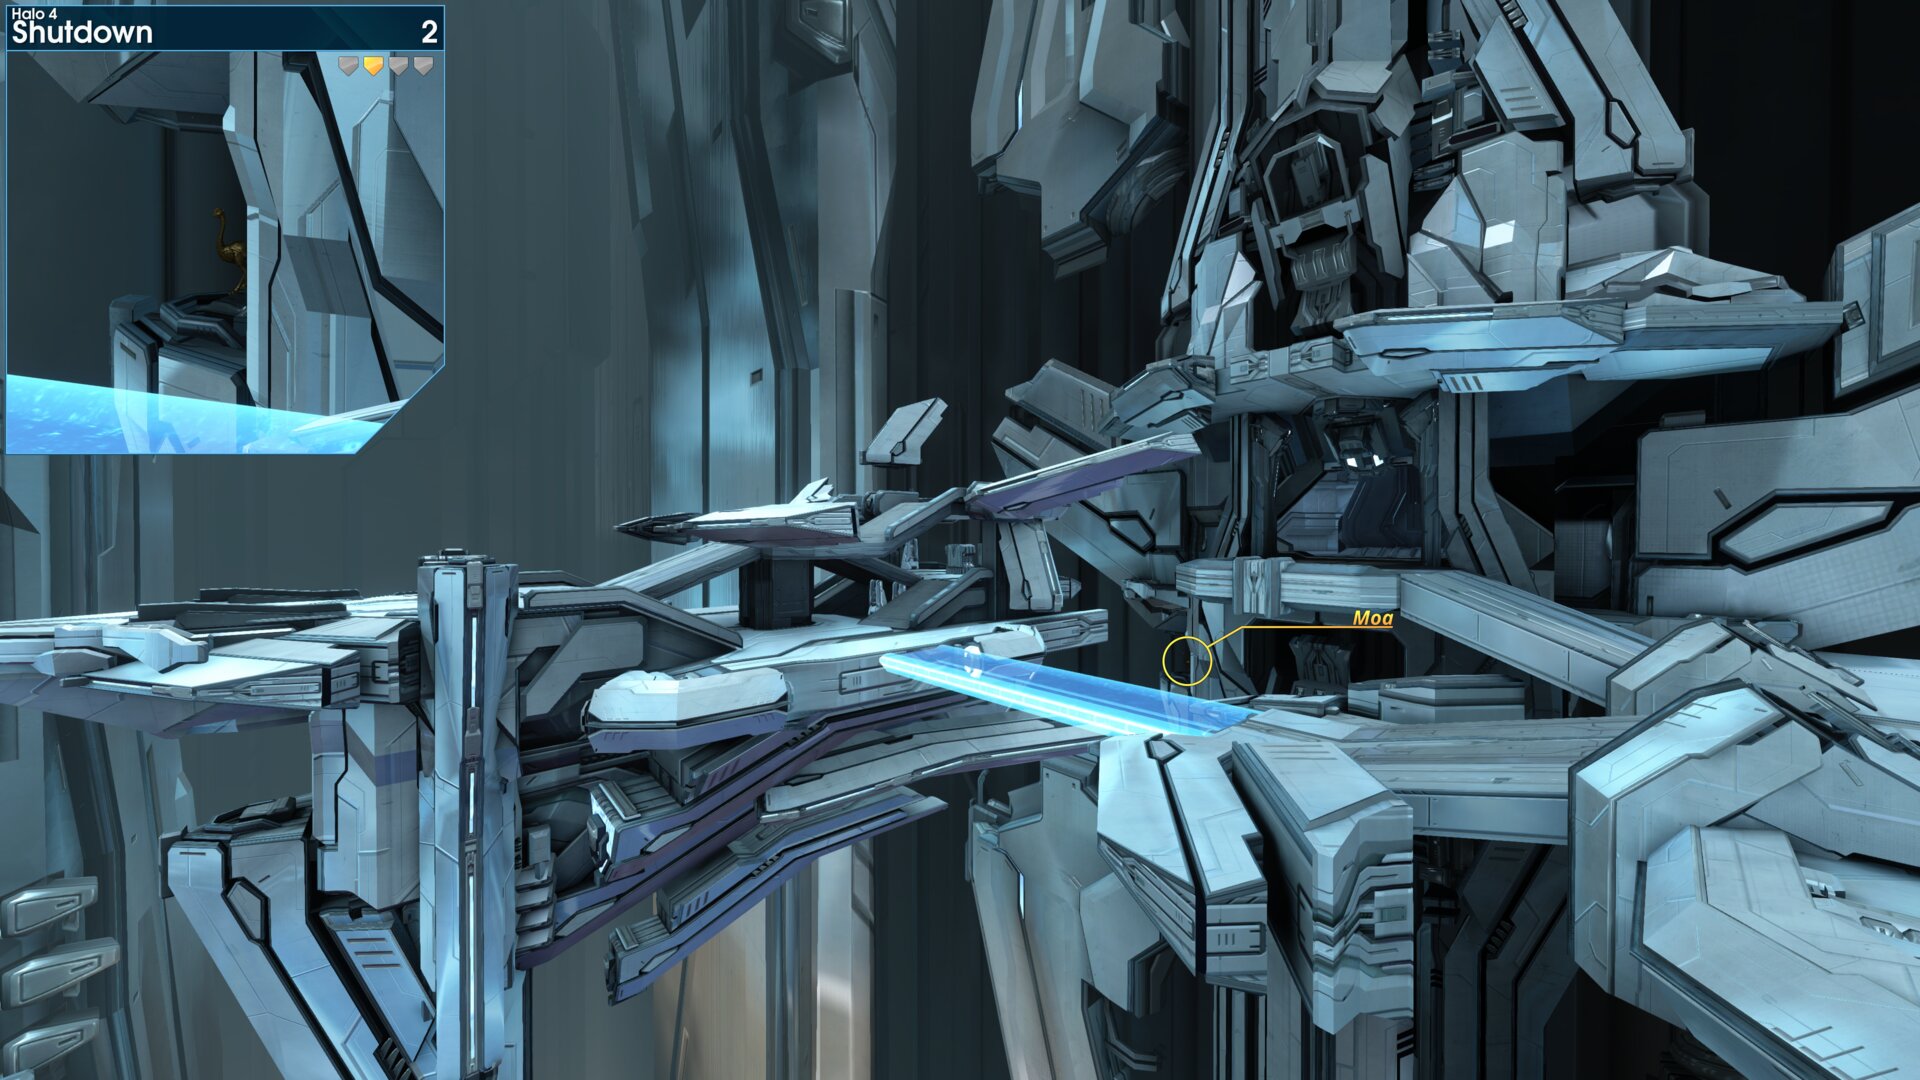
In the Carrier Wave Generator Tower, the Golden Moa is on a ledge to your right as you cross the light bridge to the gondola.
Golden Moa 3
On the far side of the 2nd gondola override station, the Golden Moa is on one of the lowest platforms behind a pillar.
On the far side of the 2nd gondola override station, the Golden Moa is on one of the lowest platforms behind a pillar.
Rally Point: Charlie
Golden Moa 4
In the Data Attenuator Tower, this Golden Moa is behind a weapons rack in the far left corner.
In the Data Attenuator Tower, this Golden Moa is behind a weapons rack in the far left corner.
Golden Moa 5
In the Data Attenuator Tower, this Golden Moa is on a platform to the right of the middle attenuator.
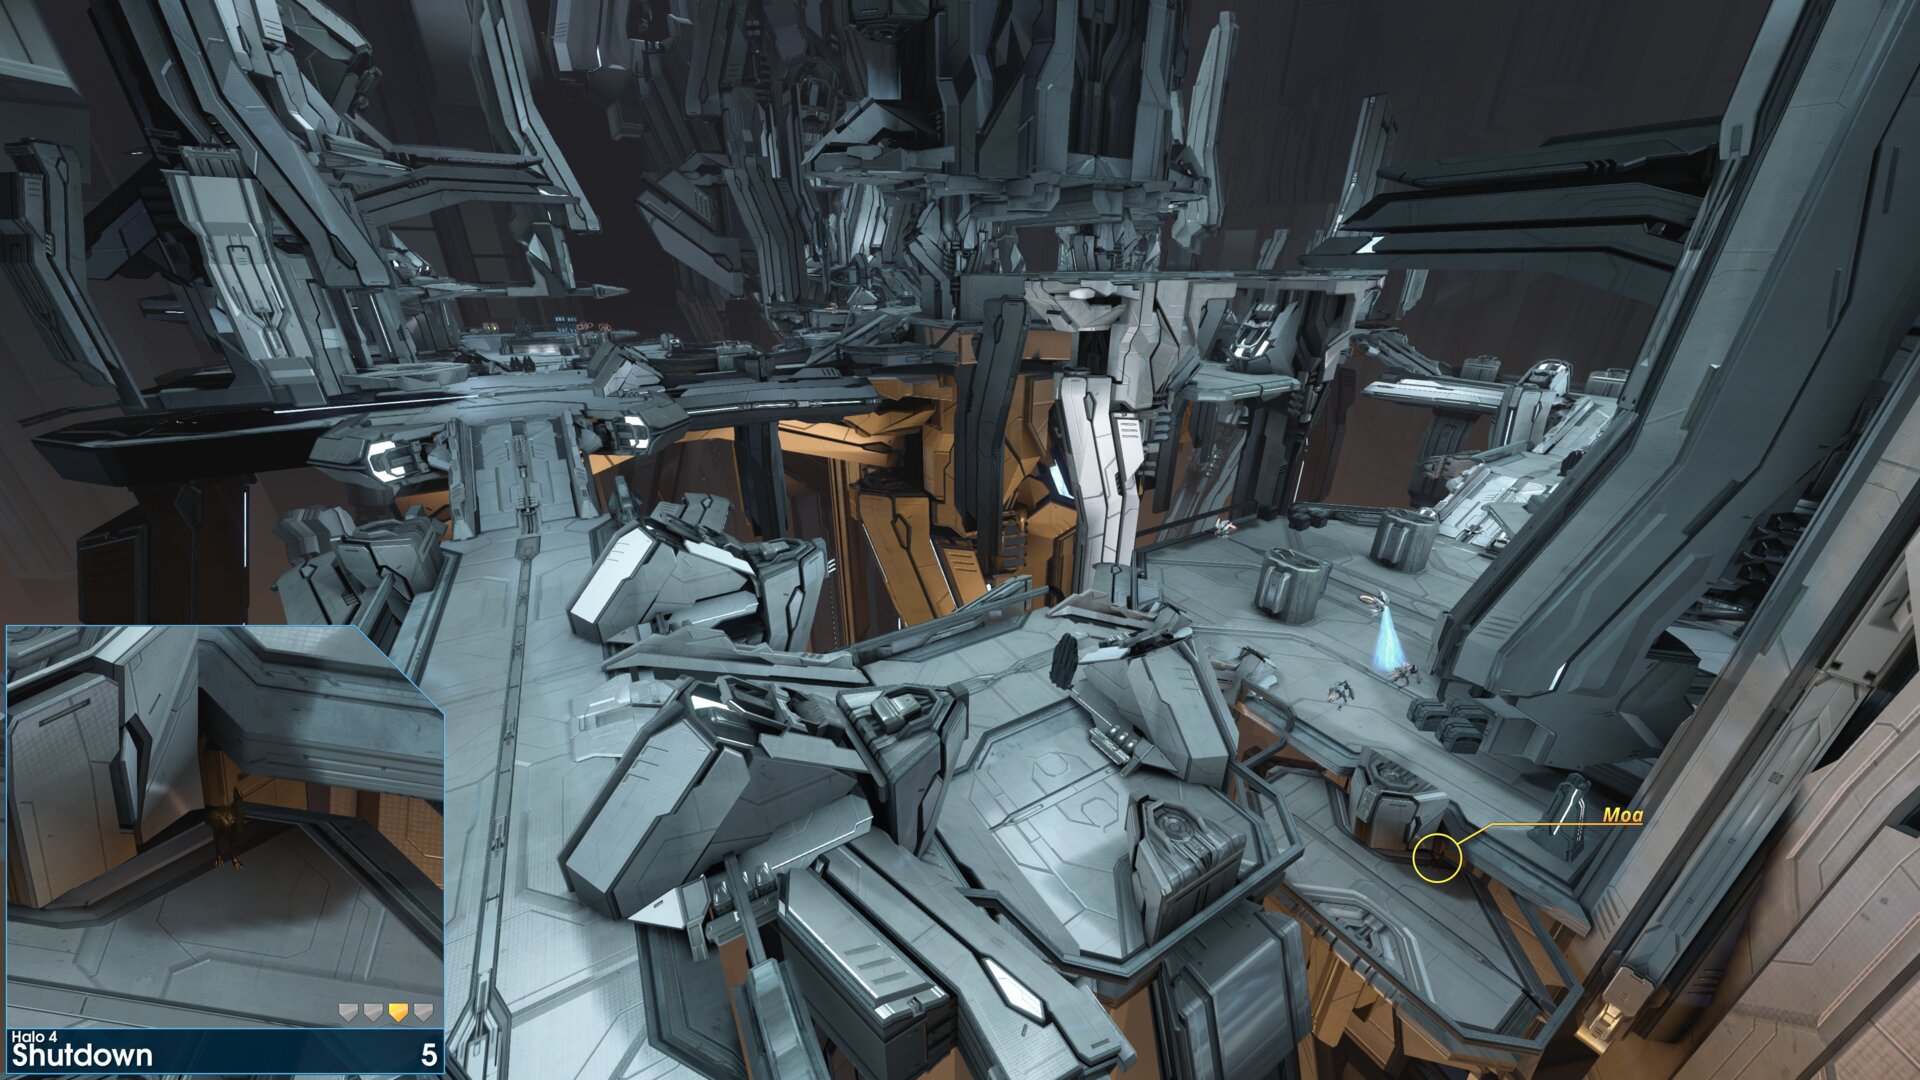
In the Data Attenuator Tower, this Golden Moa is on a platform to the right of the middle attenuator.
Rally Point: Delta
Golden Moa 6
In the final tower, the Golden Moa at the top of the
1st gravity lift.
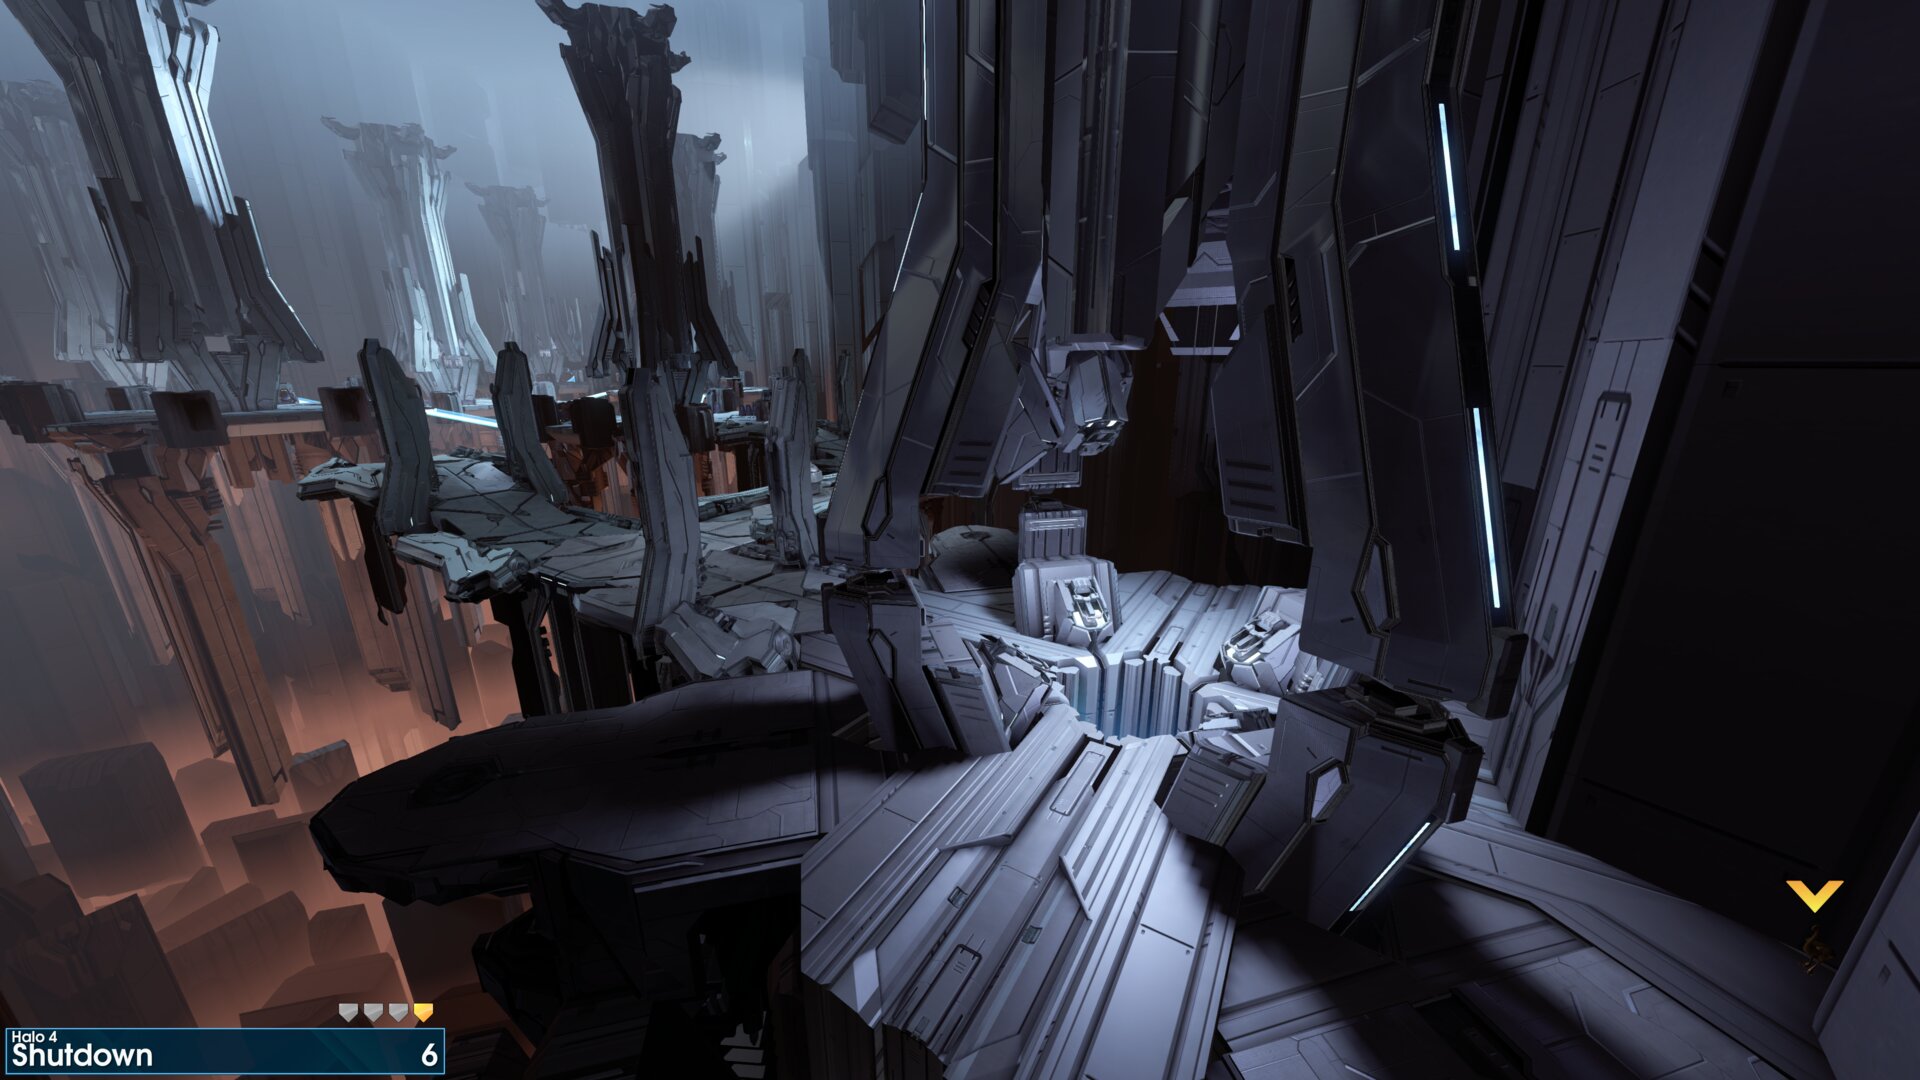
In the final tower, the Golden Moa at the top of the
1st gravity lift.
➟ Composer
Rally Point: Alpha
Rally Point: Bravo
Golden Moa 1
As you enter Hanger Bay 7, the Golden Moa is just round the corner to the left from the entrance.
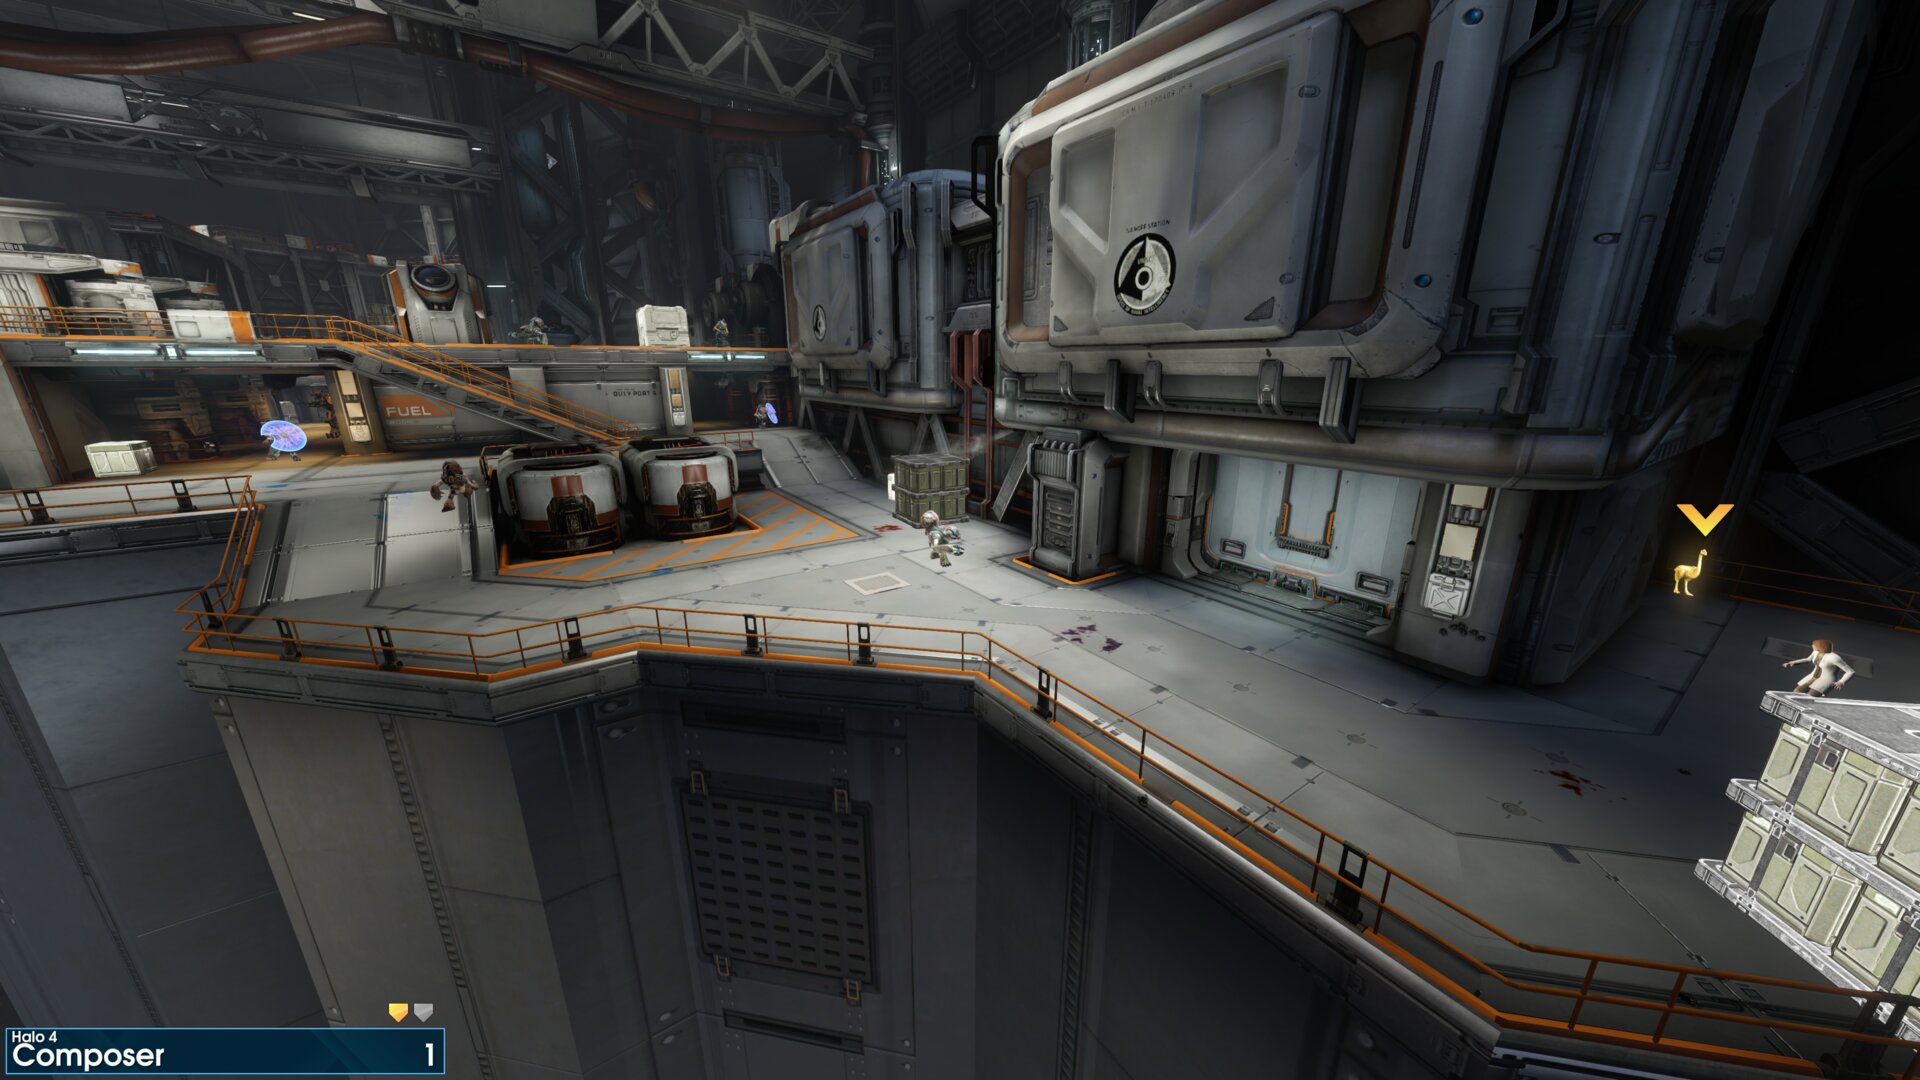
As you enter Hanger Bay 7, the Golden Moa is just round the corner to the left from the entrance.
Golden Moa 2
At the back of Hanger Bay 7, the Golden Moa is on the 2nd level platform by the Maintenance Shed’s left door.
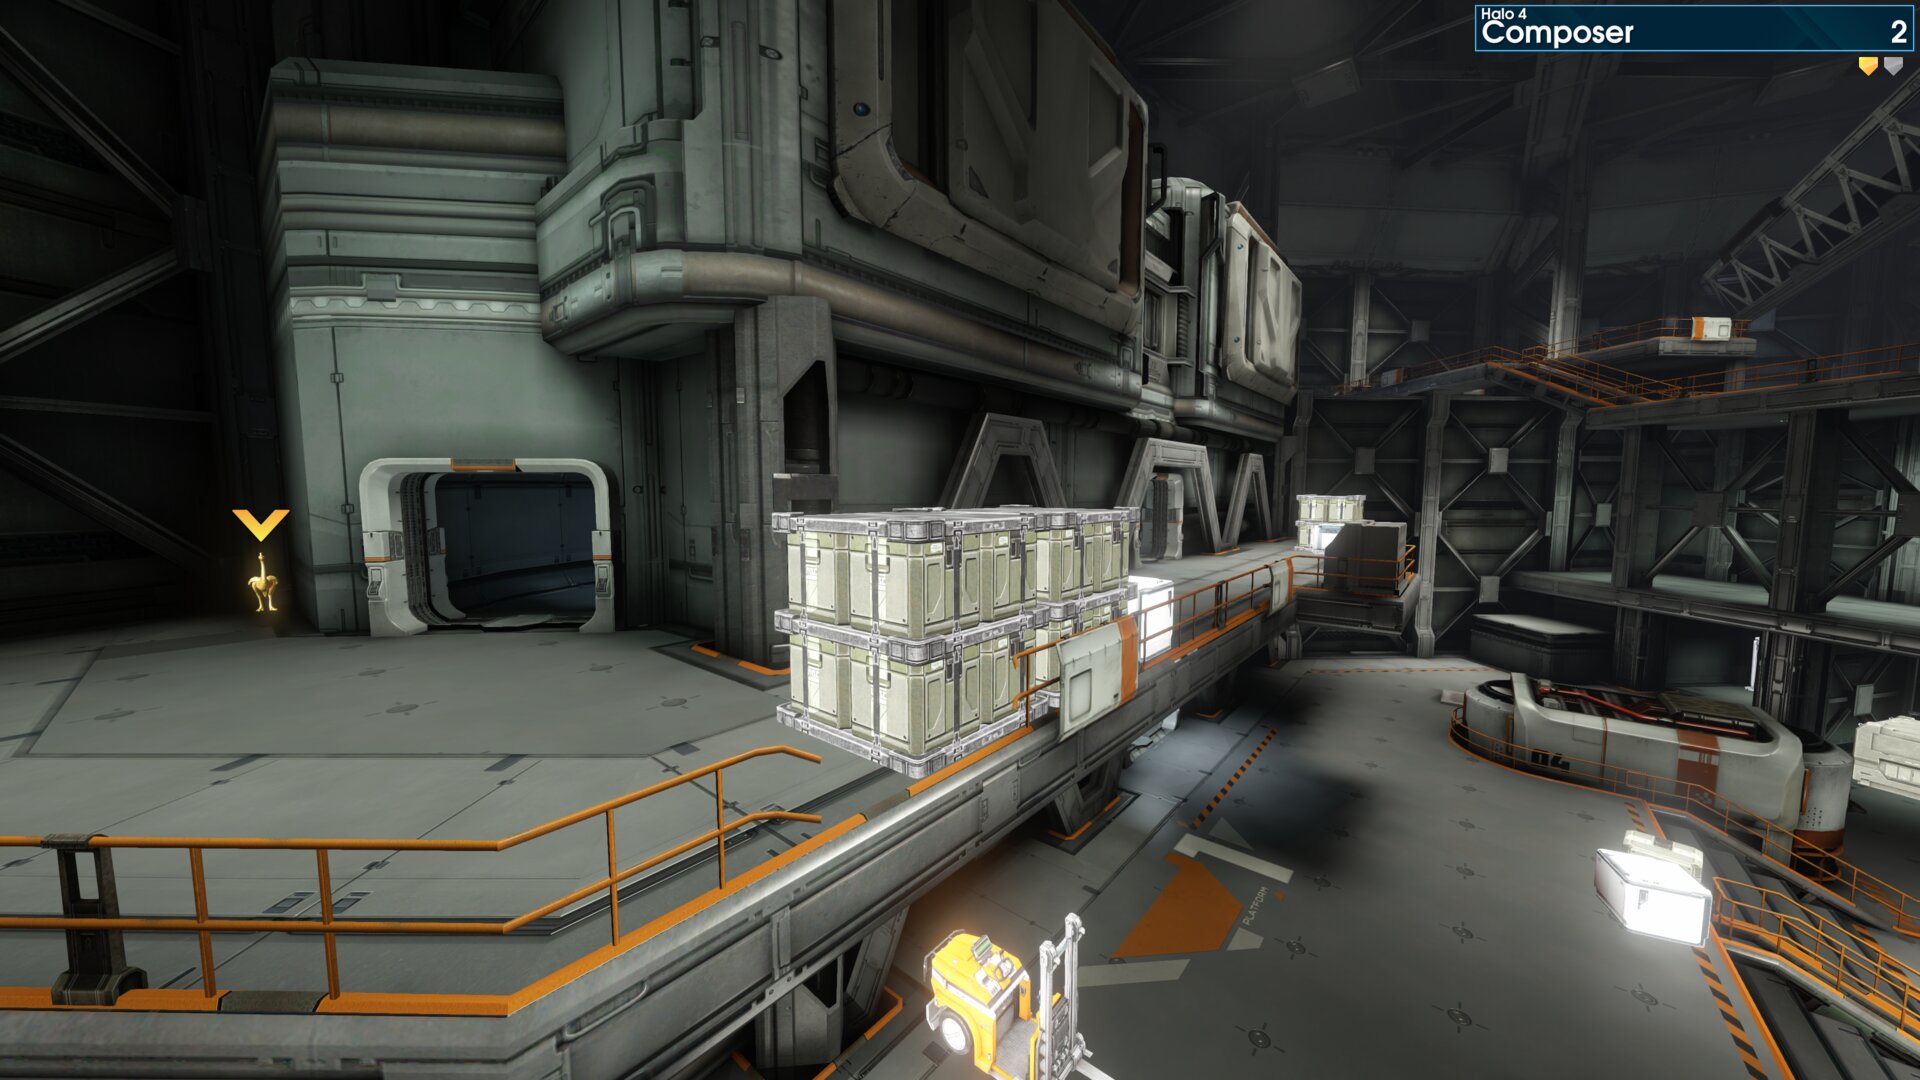
At the back of Hanger Bay 7, the Golden Moa is on the 2nd level platform by the Maintenance Shed’s left door.
Golden Moa 3
After closing the Harbor Barricade, go through the door to the next area. Head up the nearby stairs to the upper level, the Golden Moa is beside the empty weapons rack.
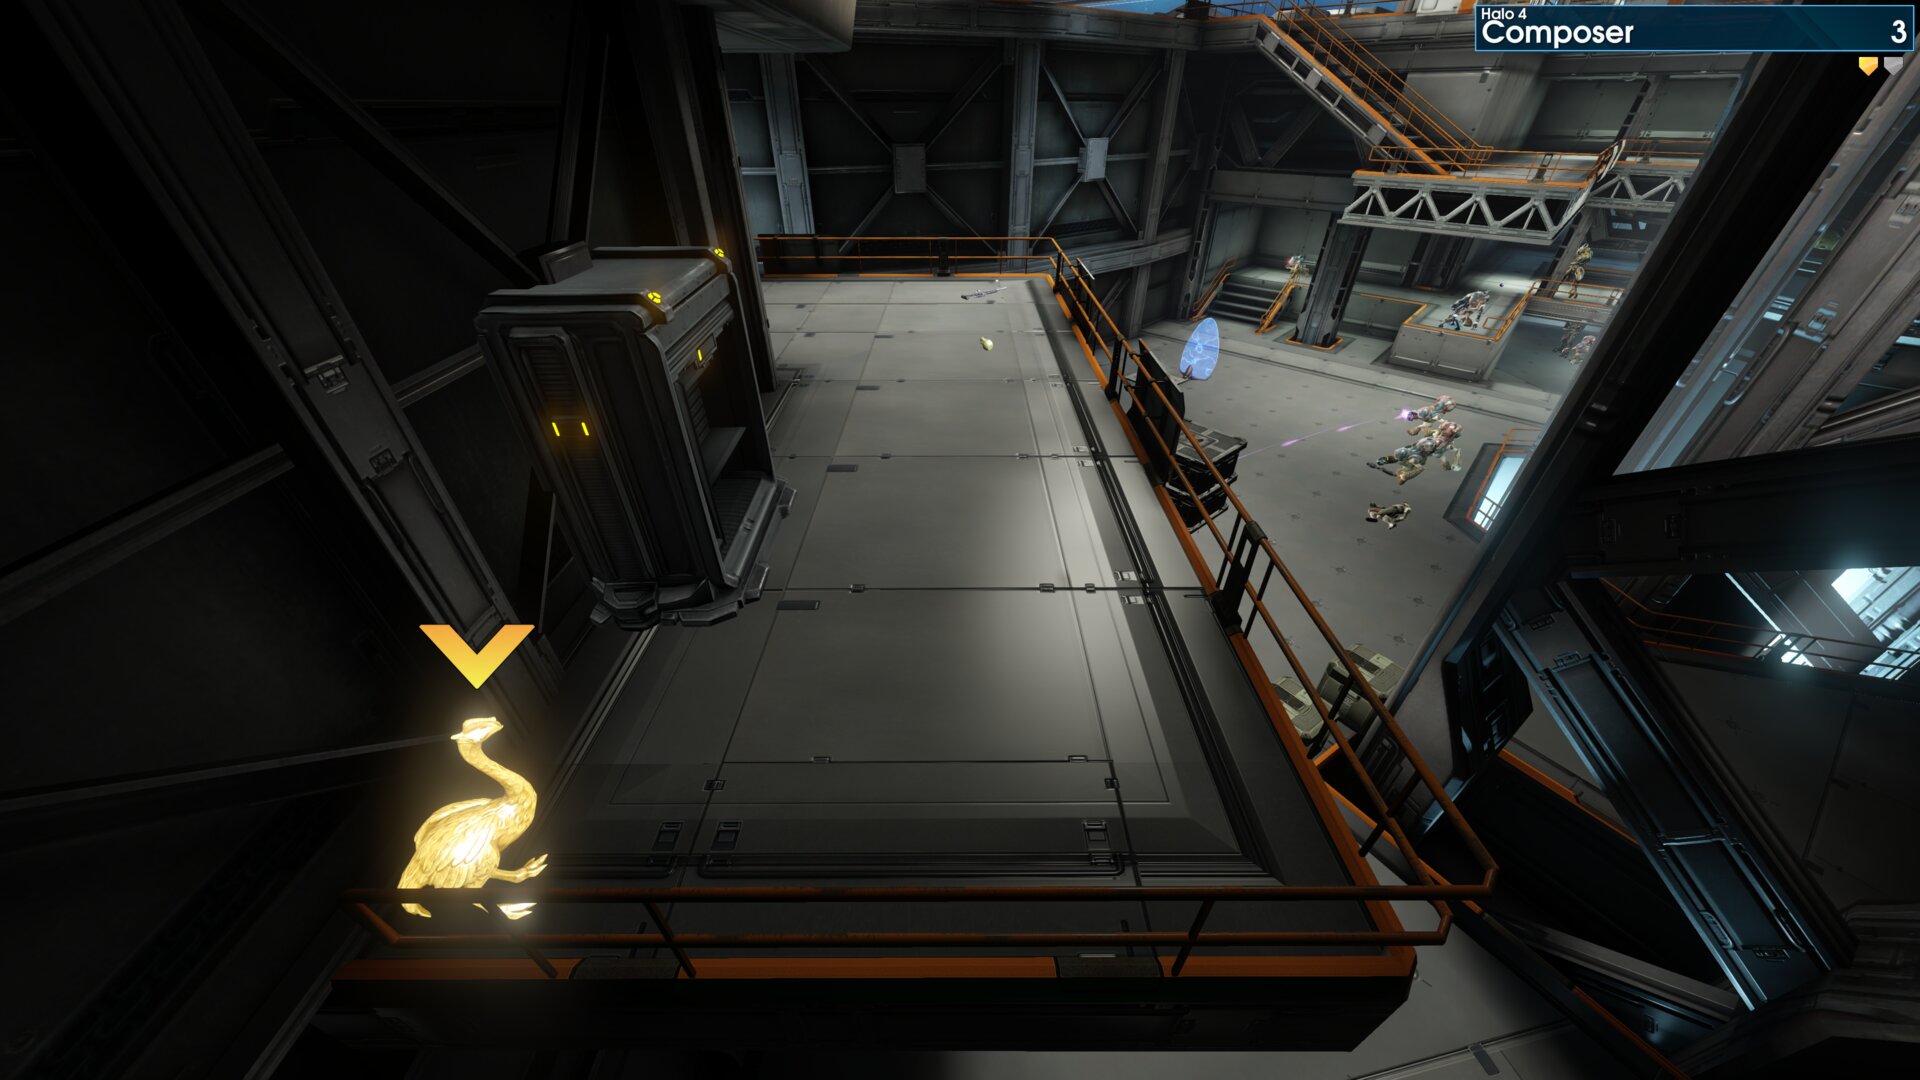
After closing the Harbor Barricade, go through the door to the next area. Head up the nearby stairs to the upper level, the Golden Moa is beside the empty weapons rack.
Golden Moa 4
In the side office of Examination Lab 03, the Golden Moa is in the corner on top of the lockers.
(Due to the lighting, this Golden Moa can be difficult to see)
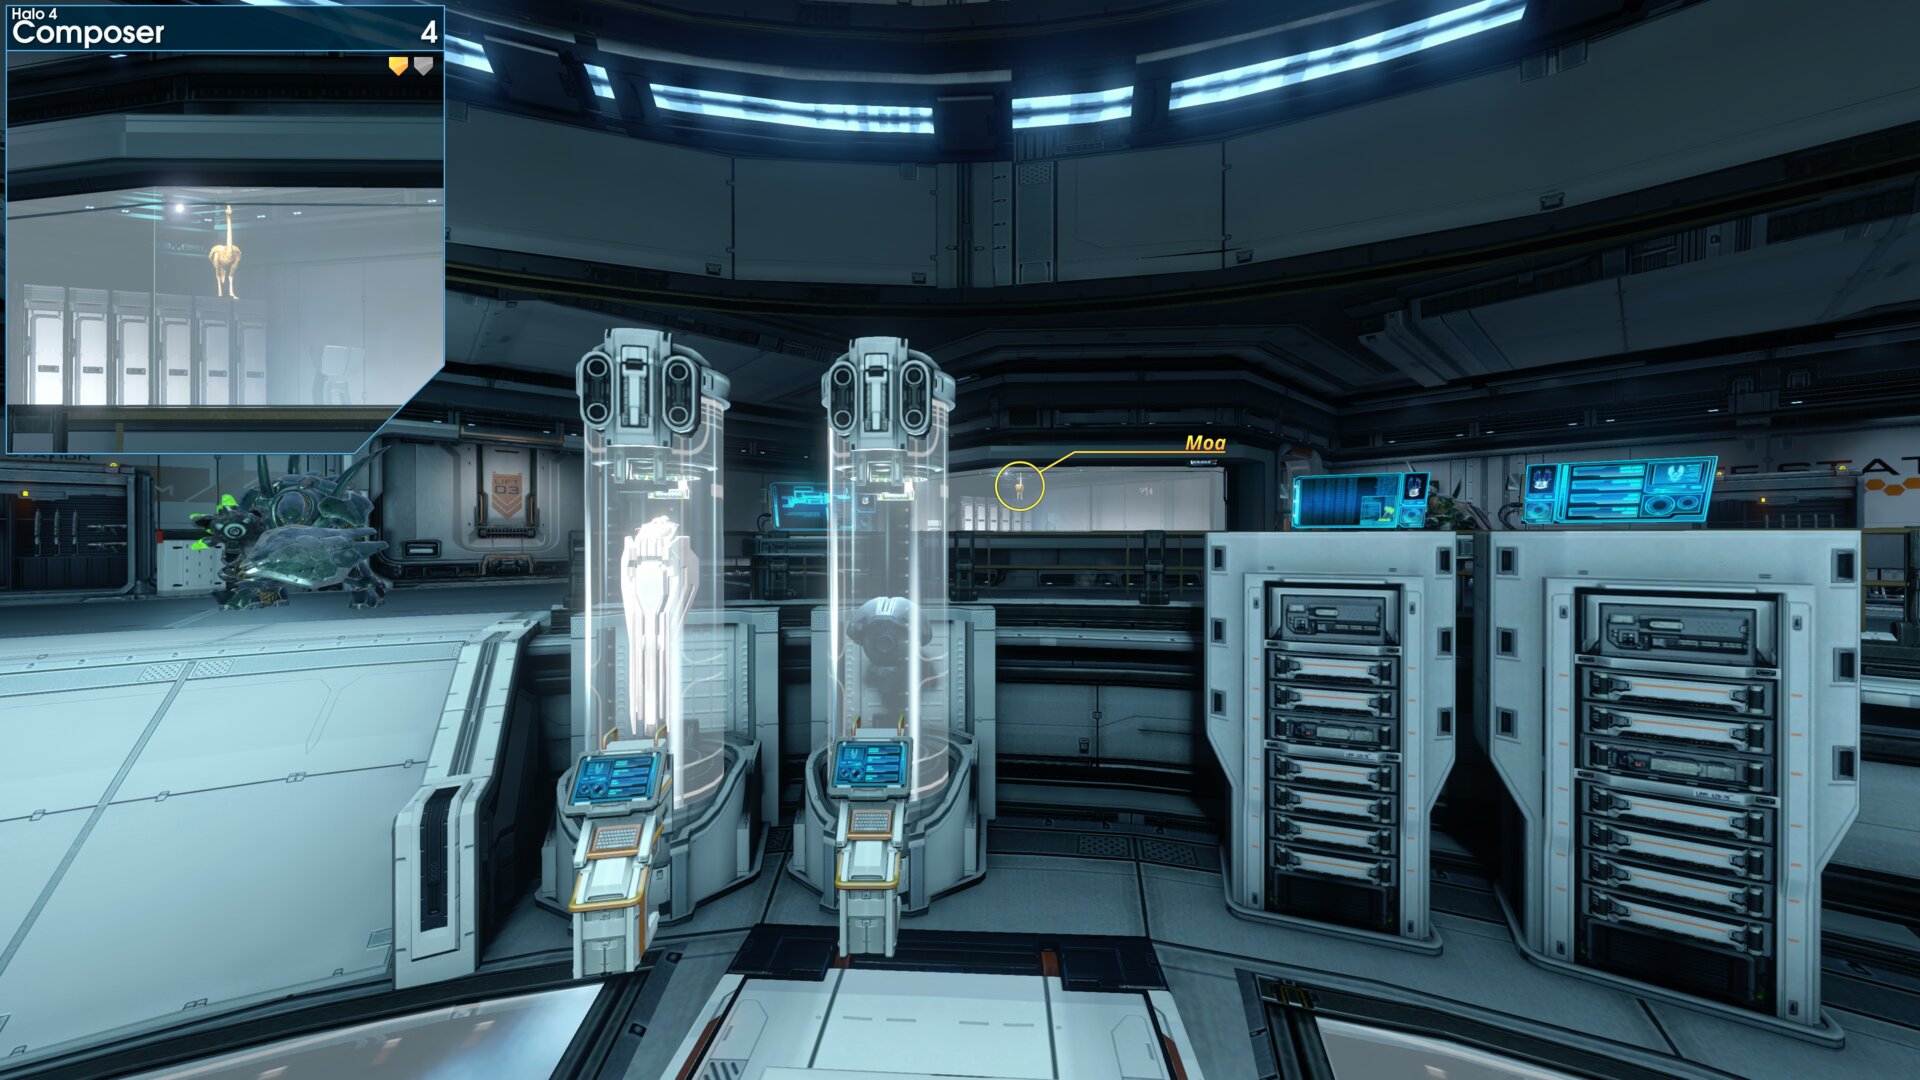
In the side office of Examination Lab 03, the Golden Moa is in the corner on top of the lockers.
(Due to the lighting, this Golden Moa can be difficult to see)
Rally Point: Bravo
Golden Moa 5
After entering the Atrium, follow the platform round to the second Lift 03 sign. The Golden Moa is just round the corner by the sign.
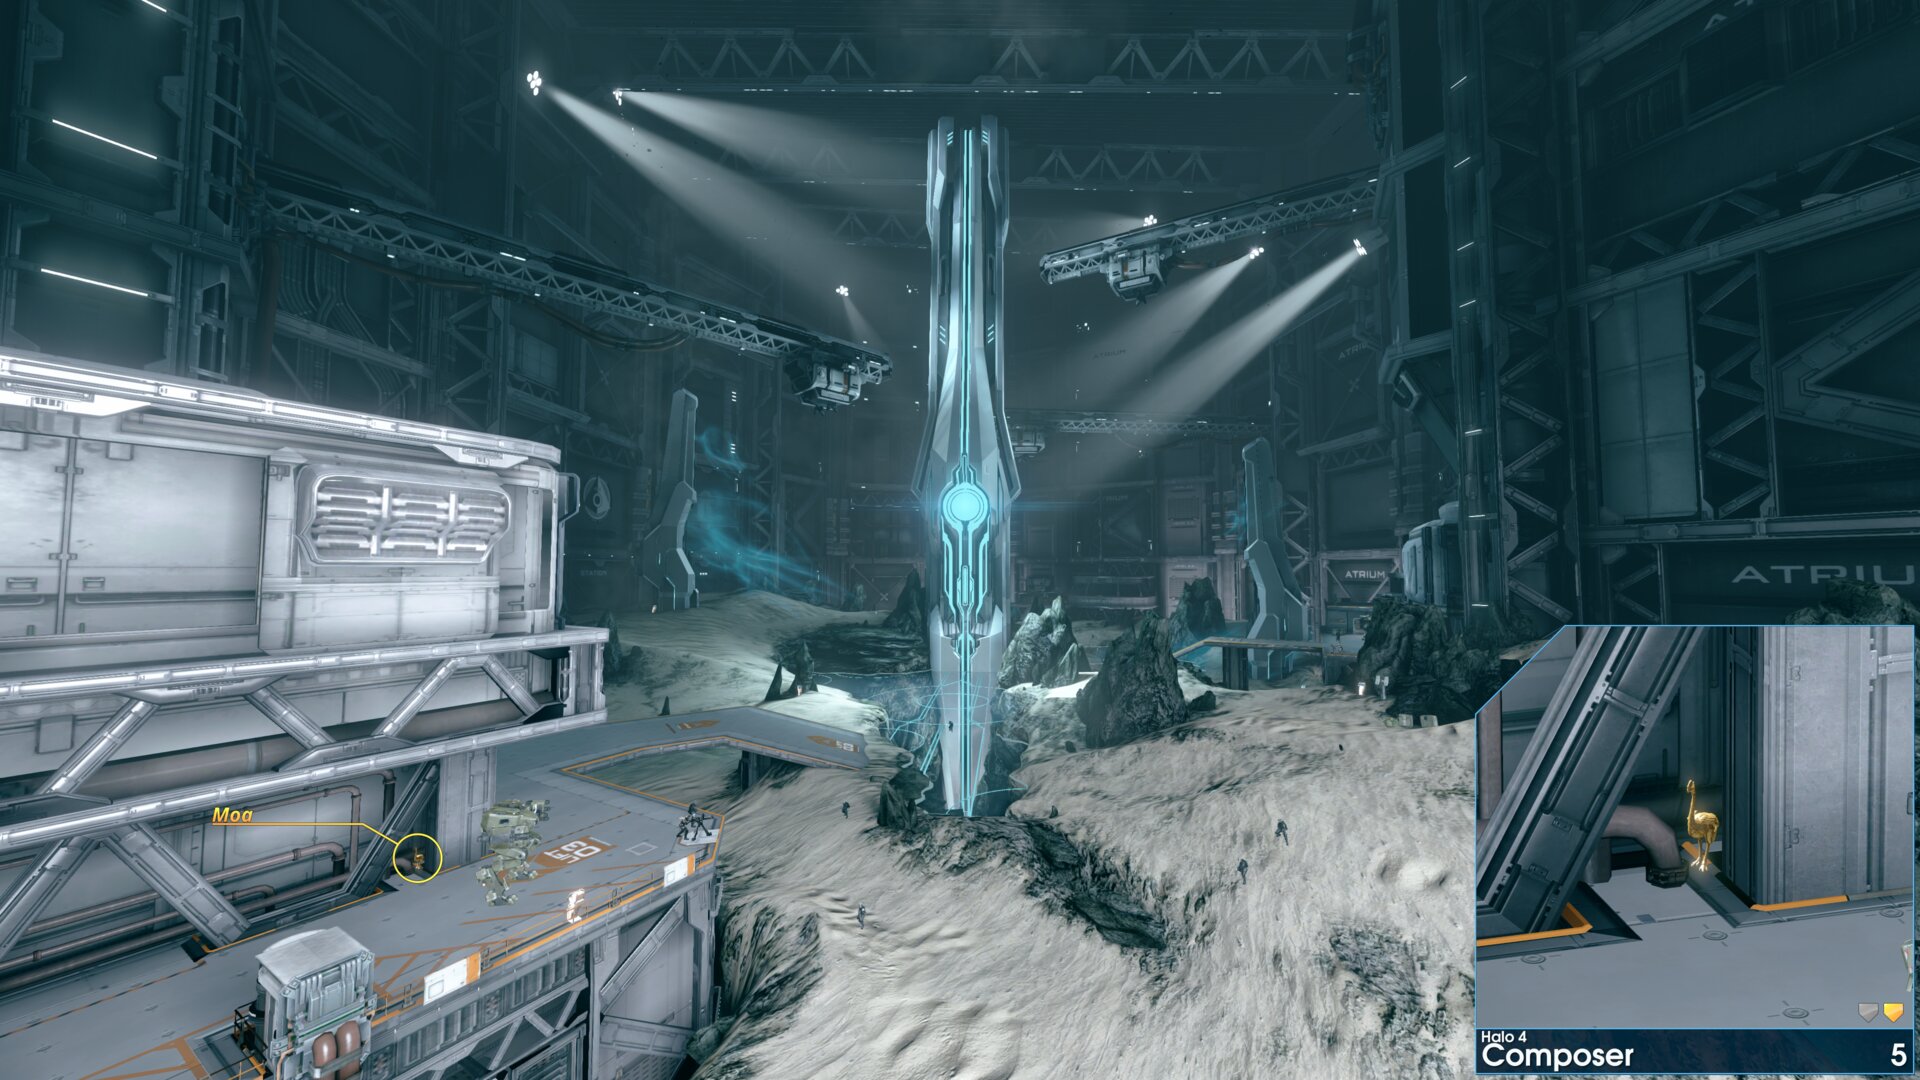
After entering the Atrium, follow the platform round to the second Lift 03 sign. The Golden Moa is just round the corner by the sign.
Golden Moa 6
As you make your way to Level A-2 Airlock, stop by Maintenance Shed 31. The Golden Moa is in the shed, beside the control panel.
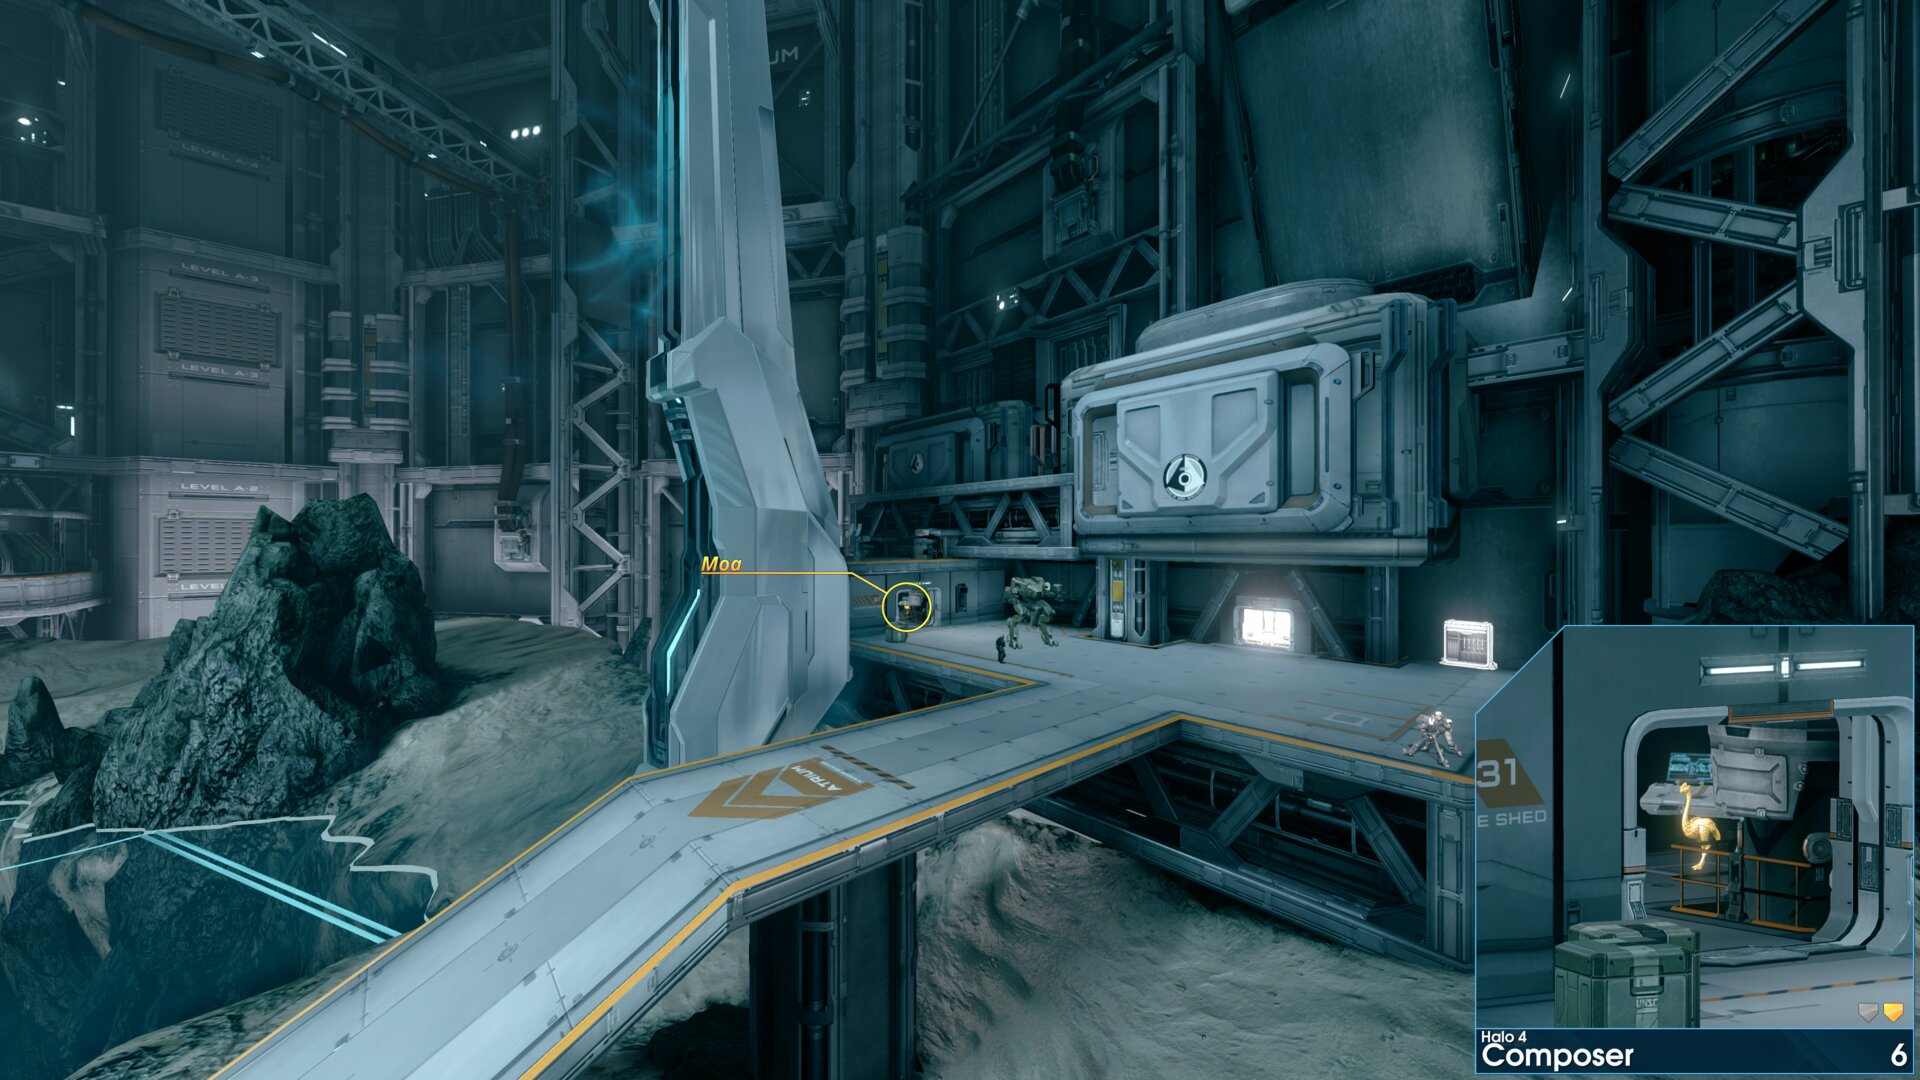
As you make your way to Level A-2 Airlock, stop by Maintenance Shed 31. The Golden Moa is in the shed, beside the control panel.
Golden Moa 7
After passing through a few hallways you’ll reach the entrance to Airlock Bay 01, the Golden Moa is in the side passage doorway that goes up to level 2.
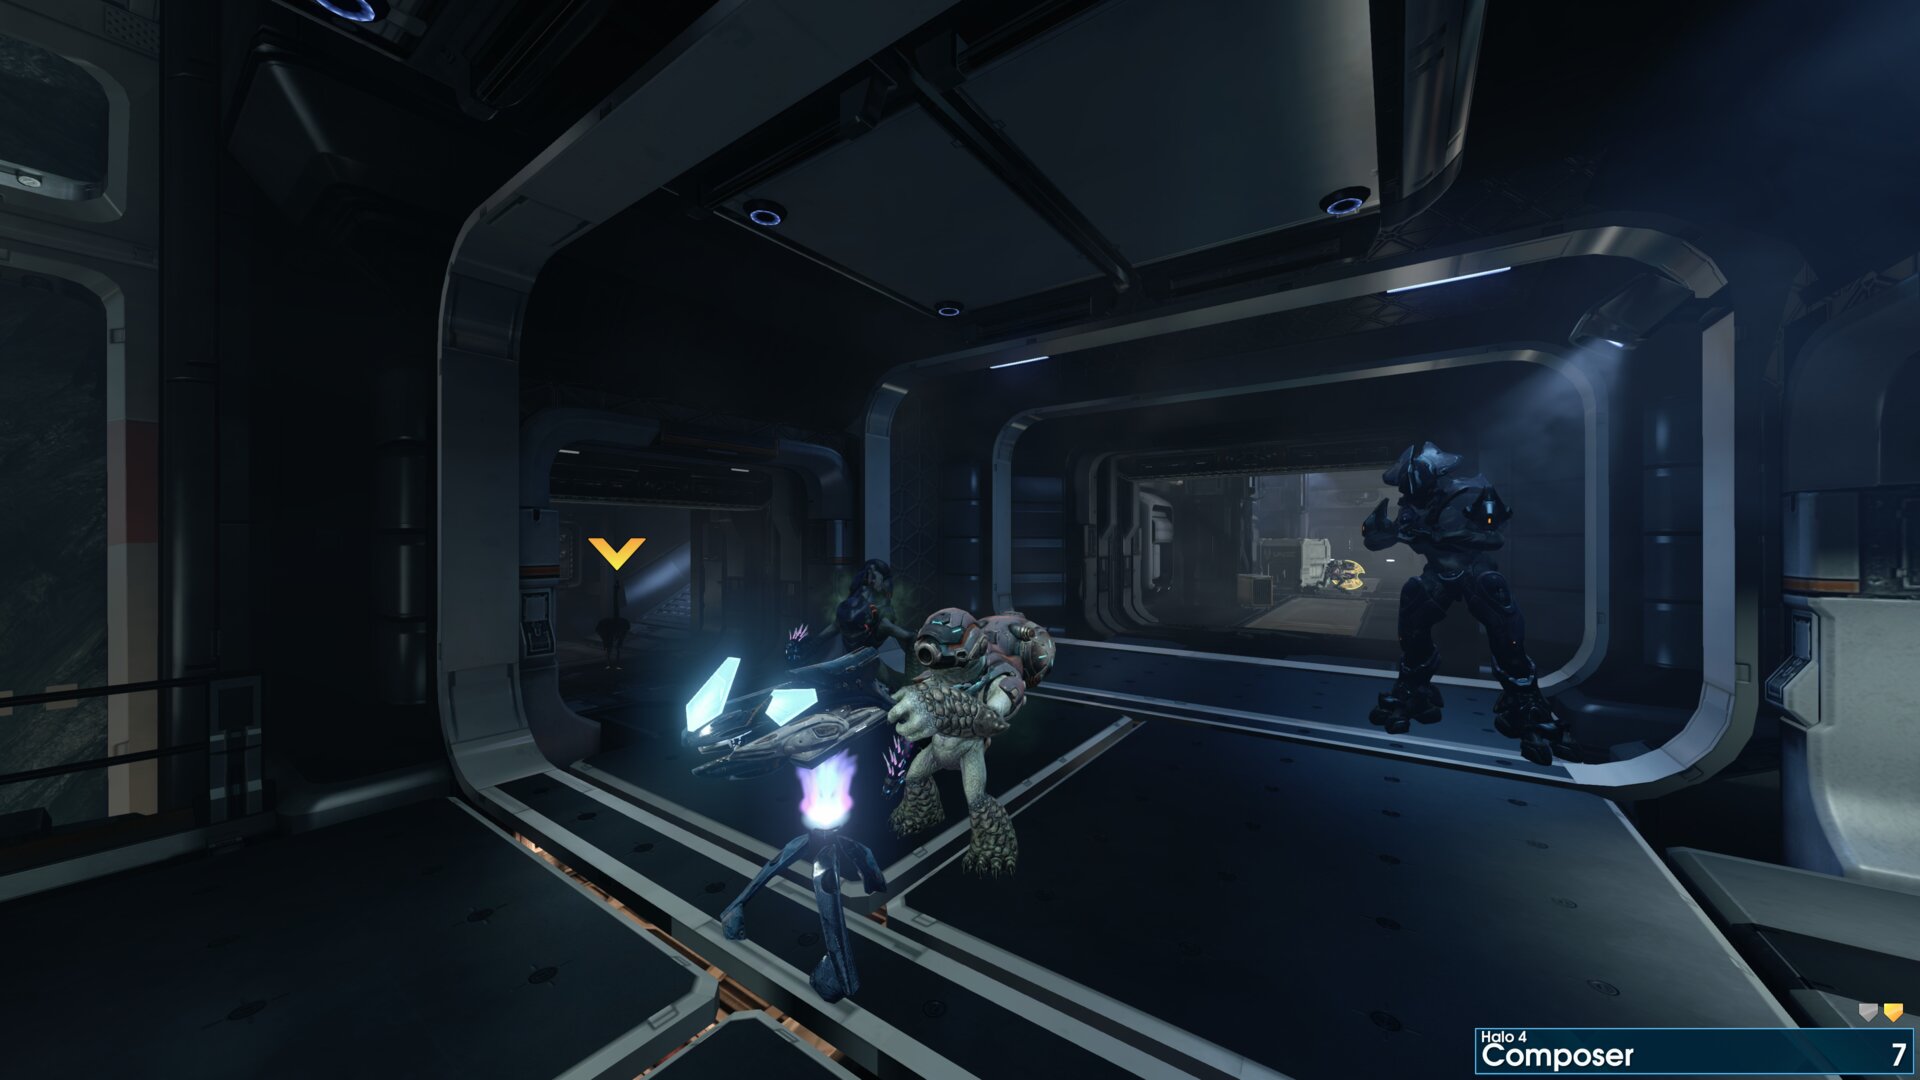
After passing through a few hallways you’ll reach the entrance to Airlock Bay 01, the Golden Moa is in the side passage doorway that goes up to level 2.
Golden Moa 8
In the room opposite the Defense Grid Console, the Golden Moa is behind the right weapons rack.
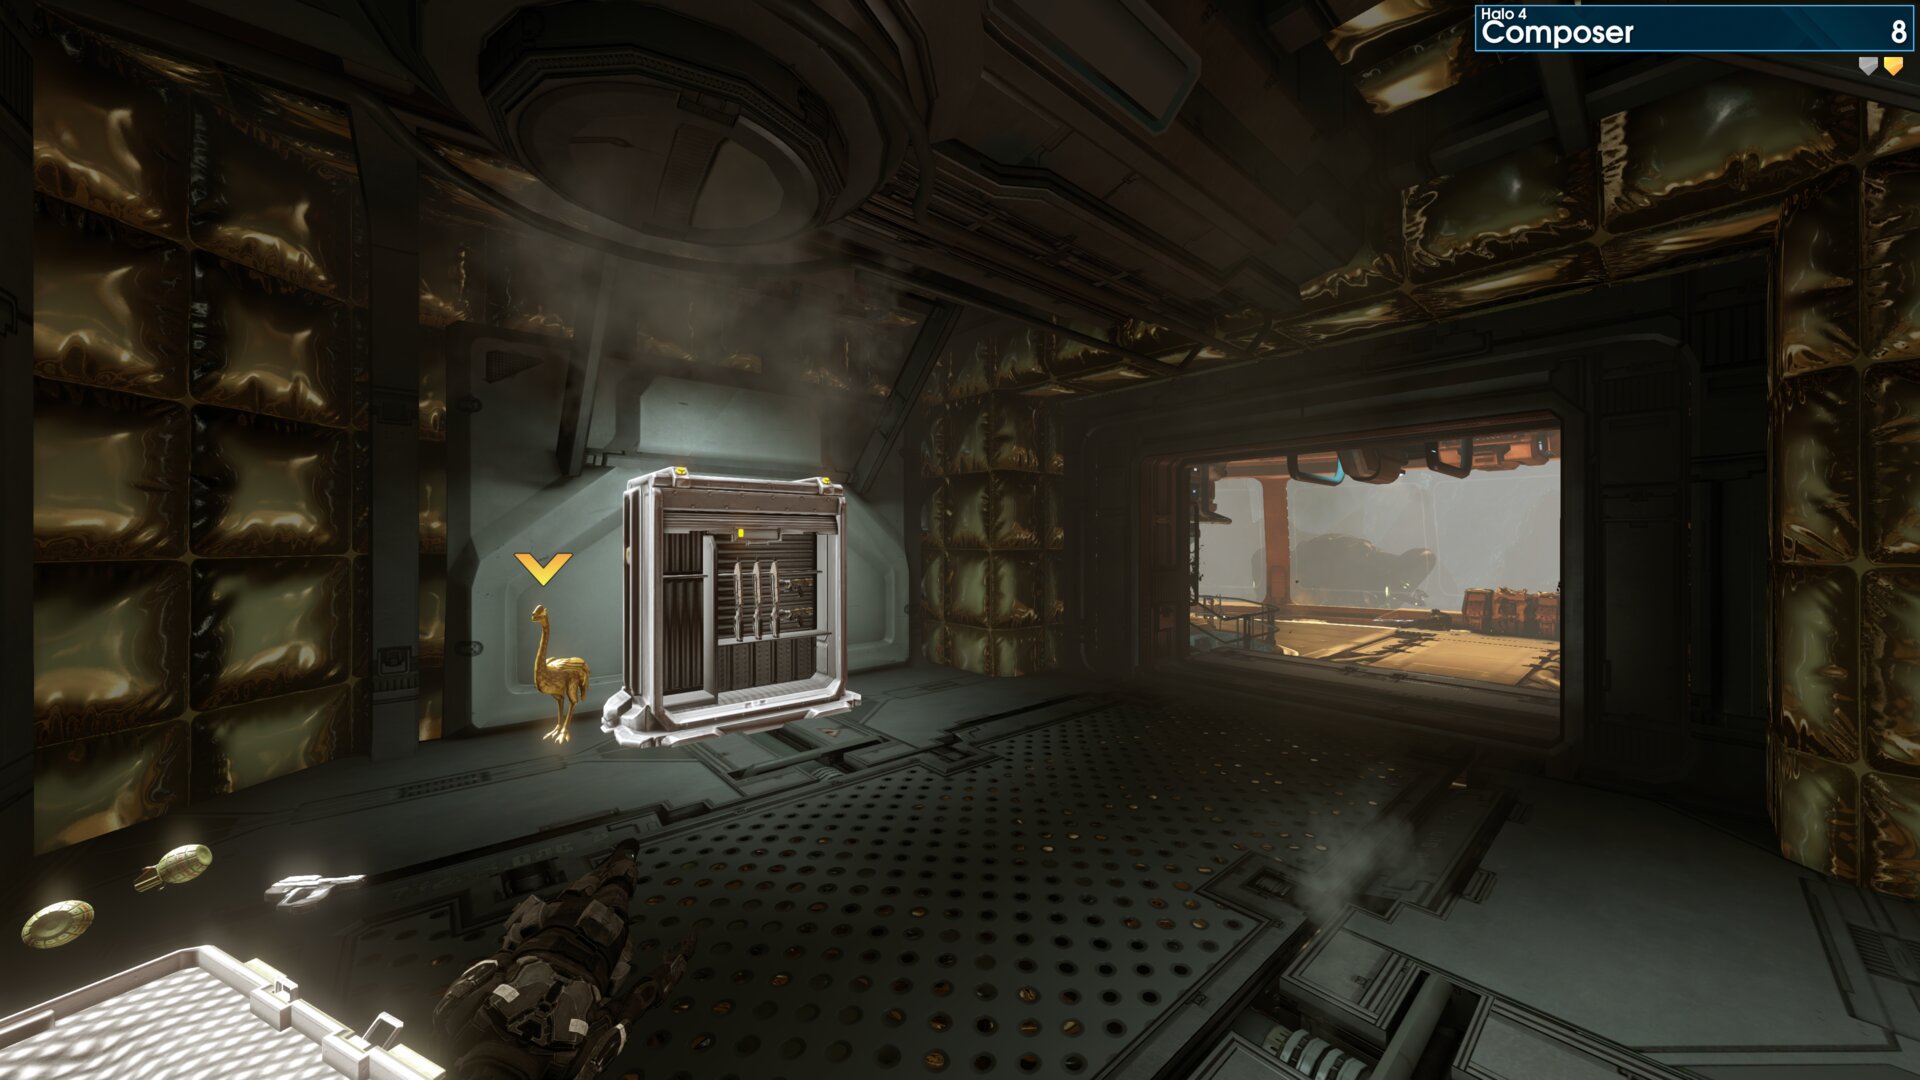
In the room opposite the Defense Grid Console, the Golden Moa is behind the right weapons rack.
➟ Midnight
Rally Point: Bravo
Rally Point: Charlie
Golden Moa 1
As you make your way past the 1st group of Promethean’s (Watchers & Focus Turrets). The Golden Moa is up on a ledge to the left, just before the next door.
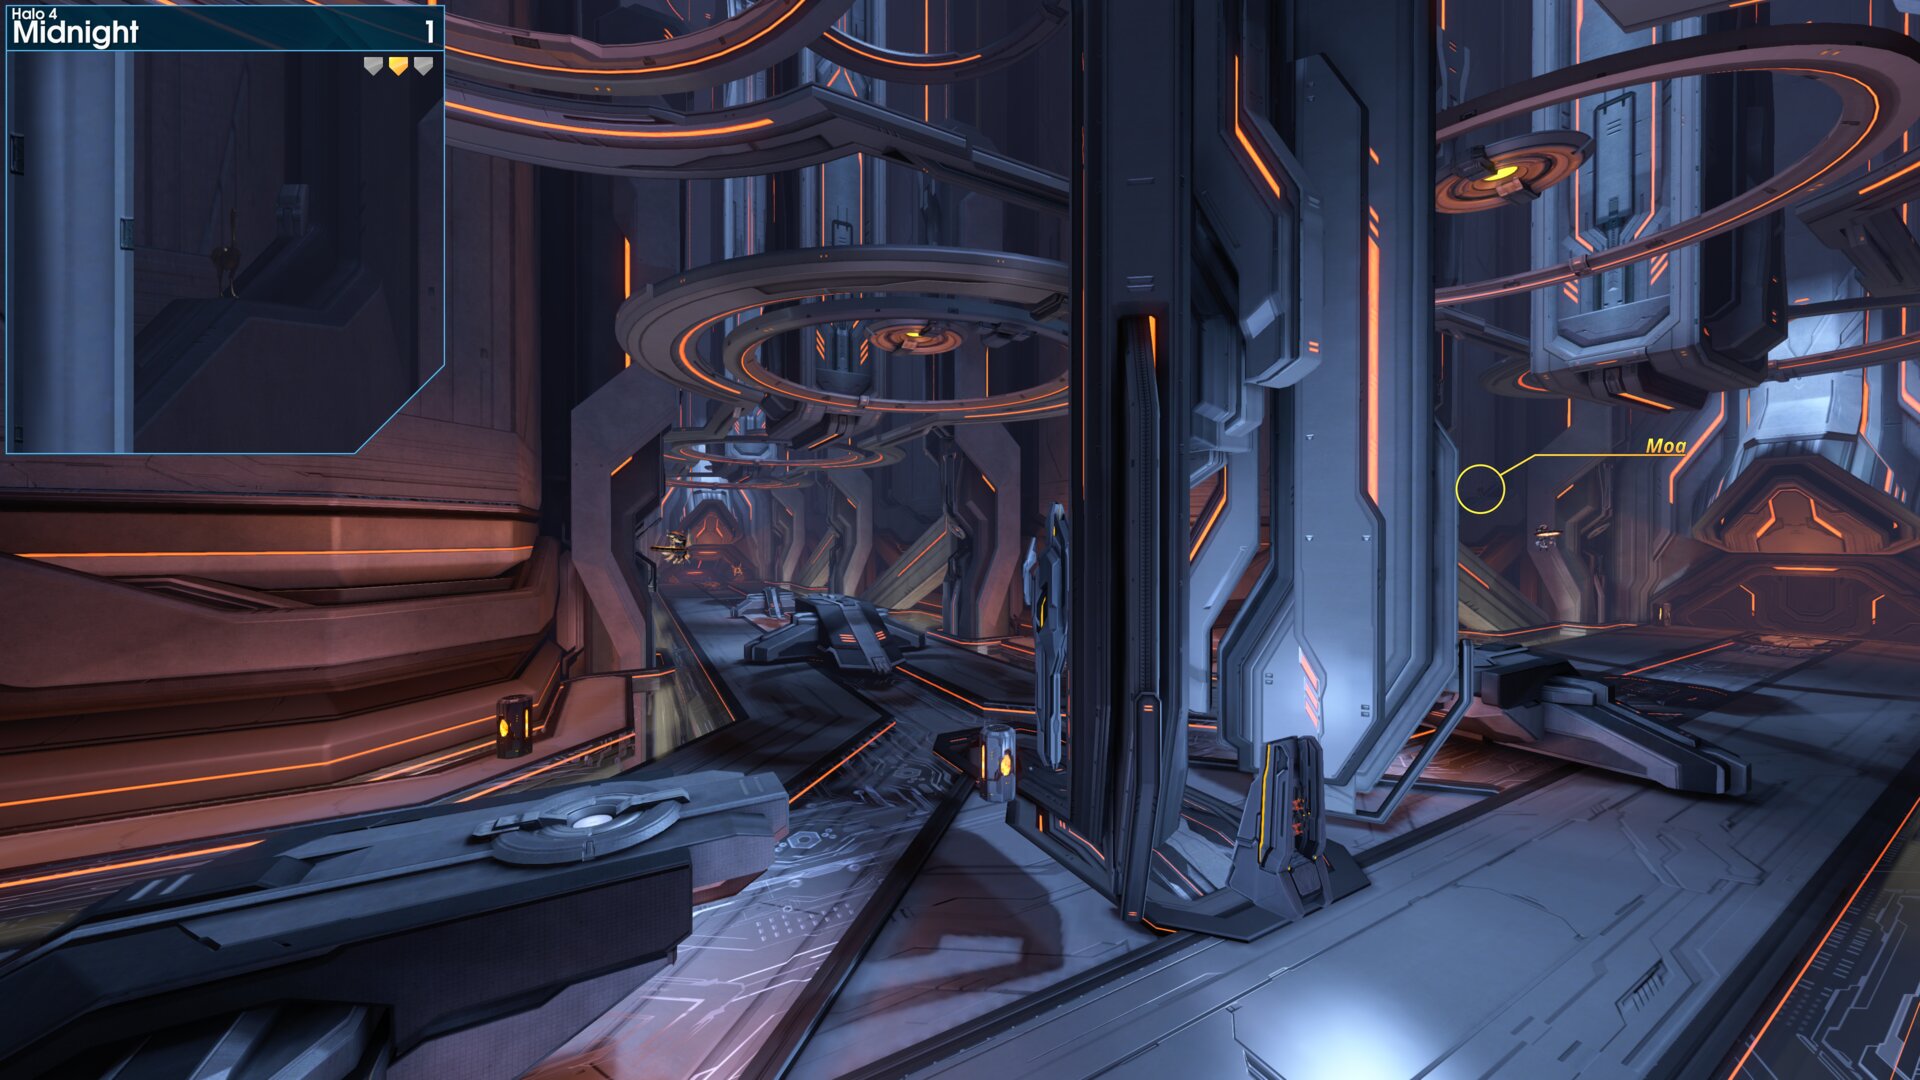
As you make your way past the 1st group of Promethean’s (Watchers & Focus Turrets). The Golden Moa is up on a ledge to the left, just before the next door.
Golden Moa 2
After going through a few doorways, Cortana will say ”I recommend entering the doorway to your left." The Golden Moa is on the floor, in the far right corner of the room.
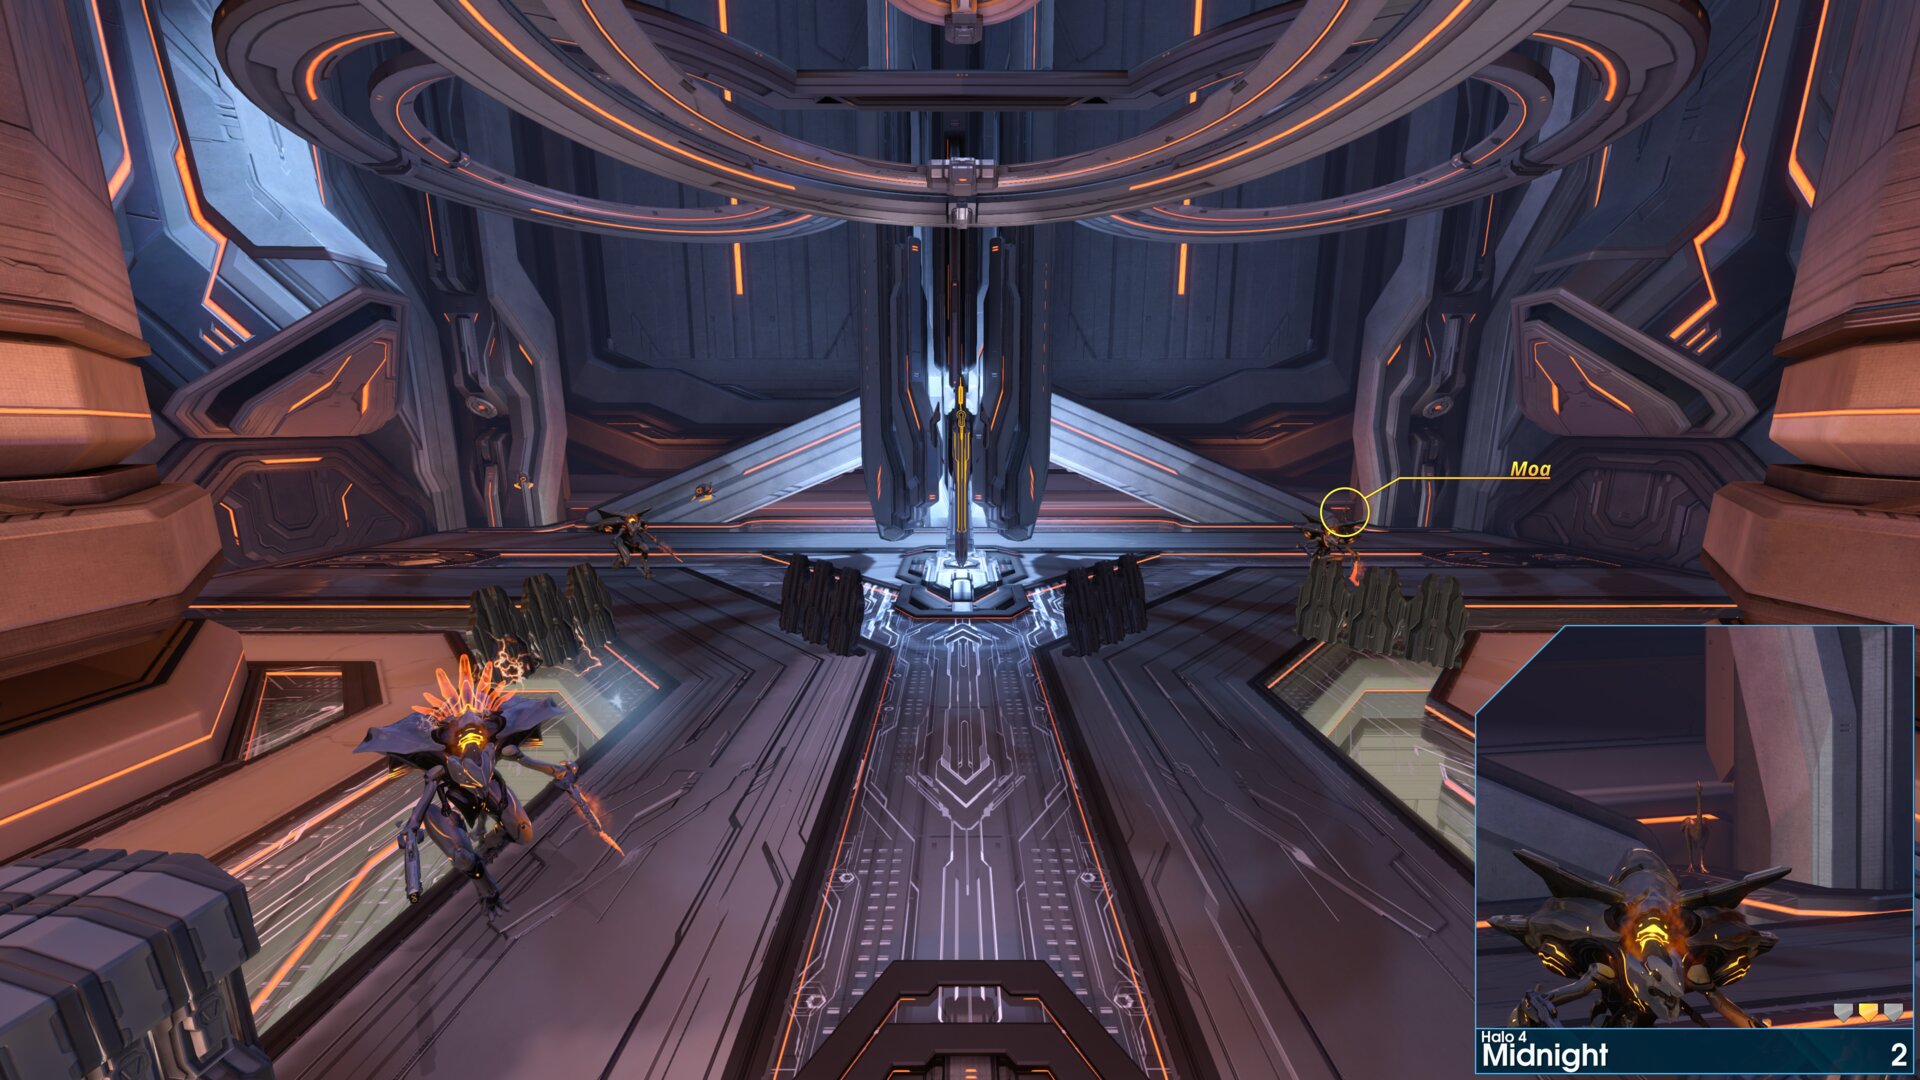
After going through a few doorways, Cortana will say ”I recommend entering the doorway to your left." The Golden Moa is on the floor, in the far right corner of the room.
Golden Moa 3
After going through the 1st portal, the Golden Moa is up on a ledge behind you.
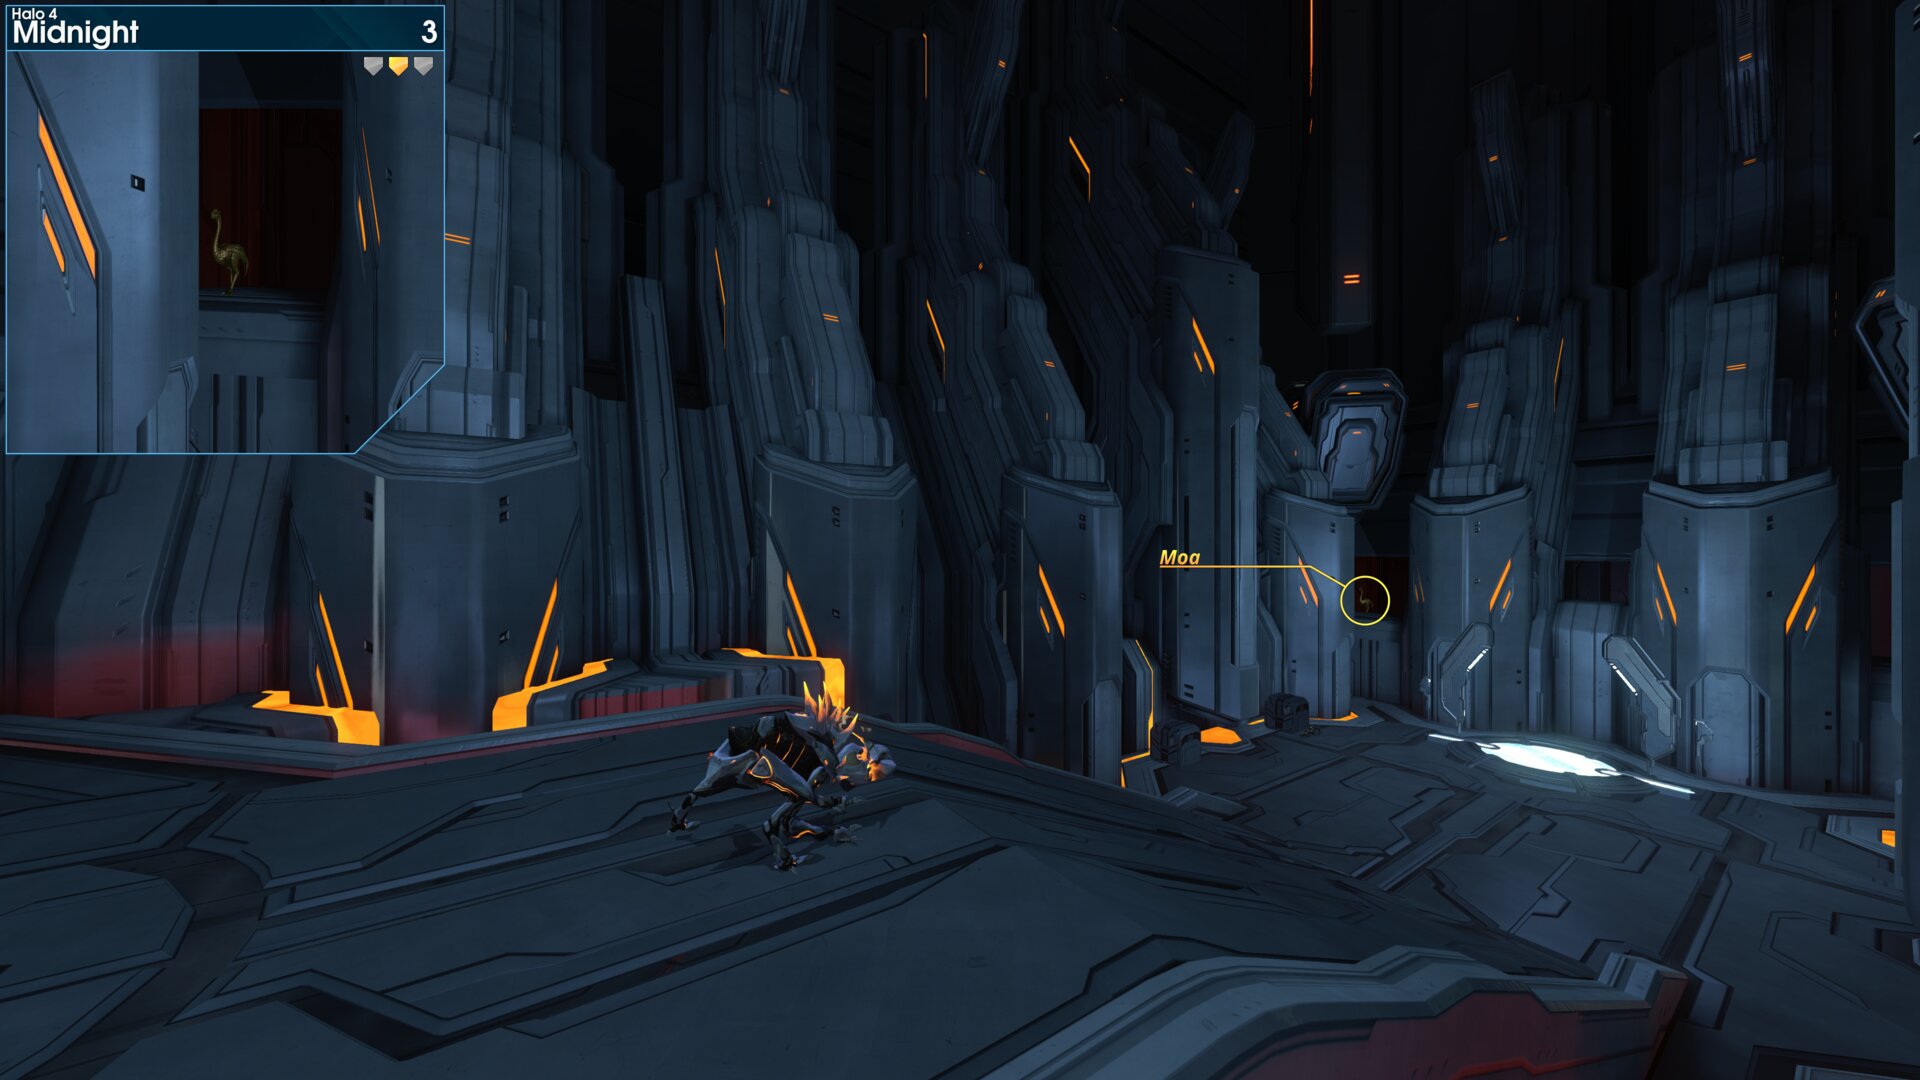
After going through the 1st portal, the Golden Moa is up on a ledge behind you.
Golden Moa 4
After traveling through a few portals, you’ll enter a T-shaped room where you will need to defend your position. The Golden Moa is up on top of a pillar, just past where the Promethean Knight spawns in.
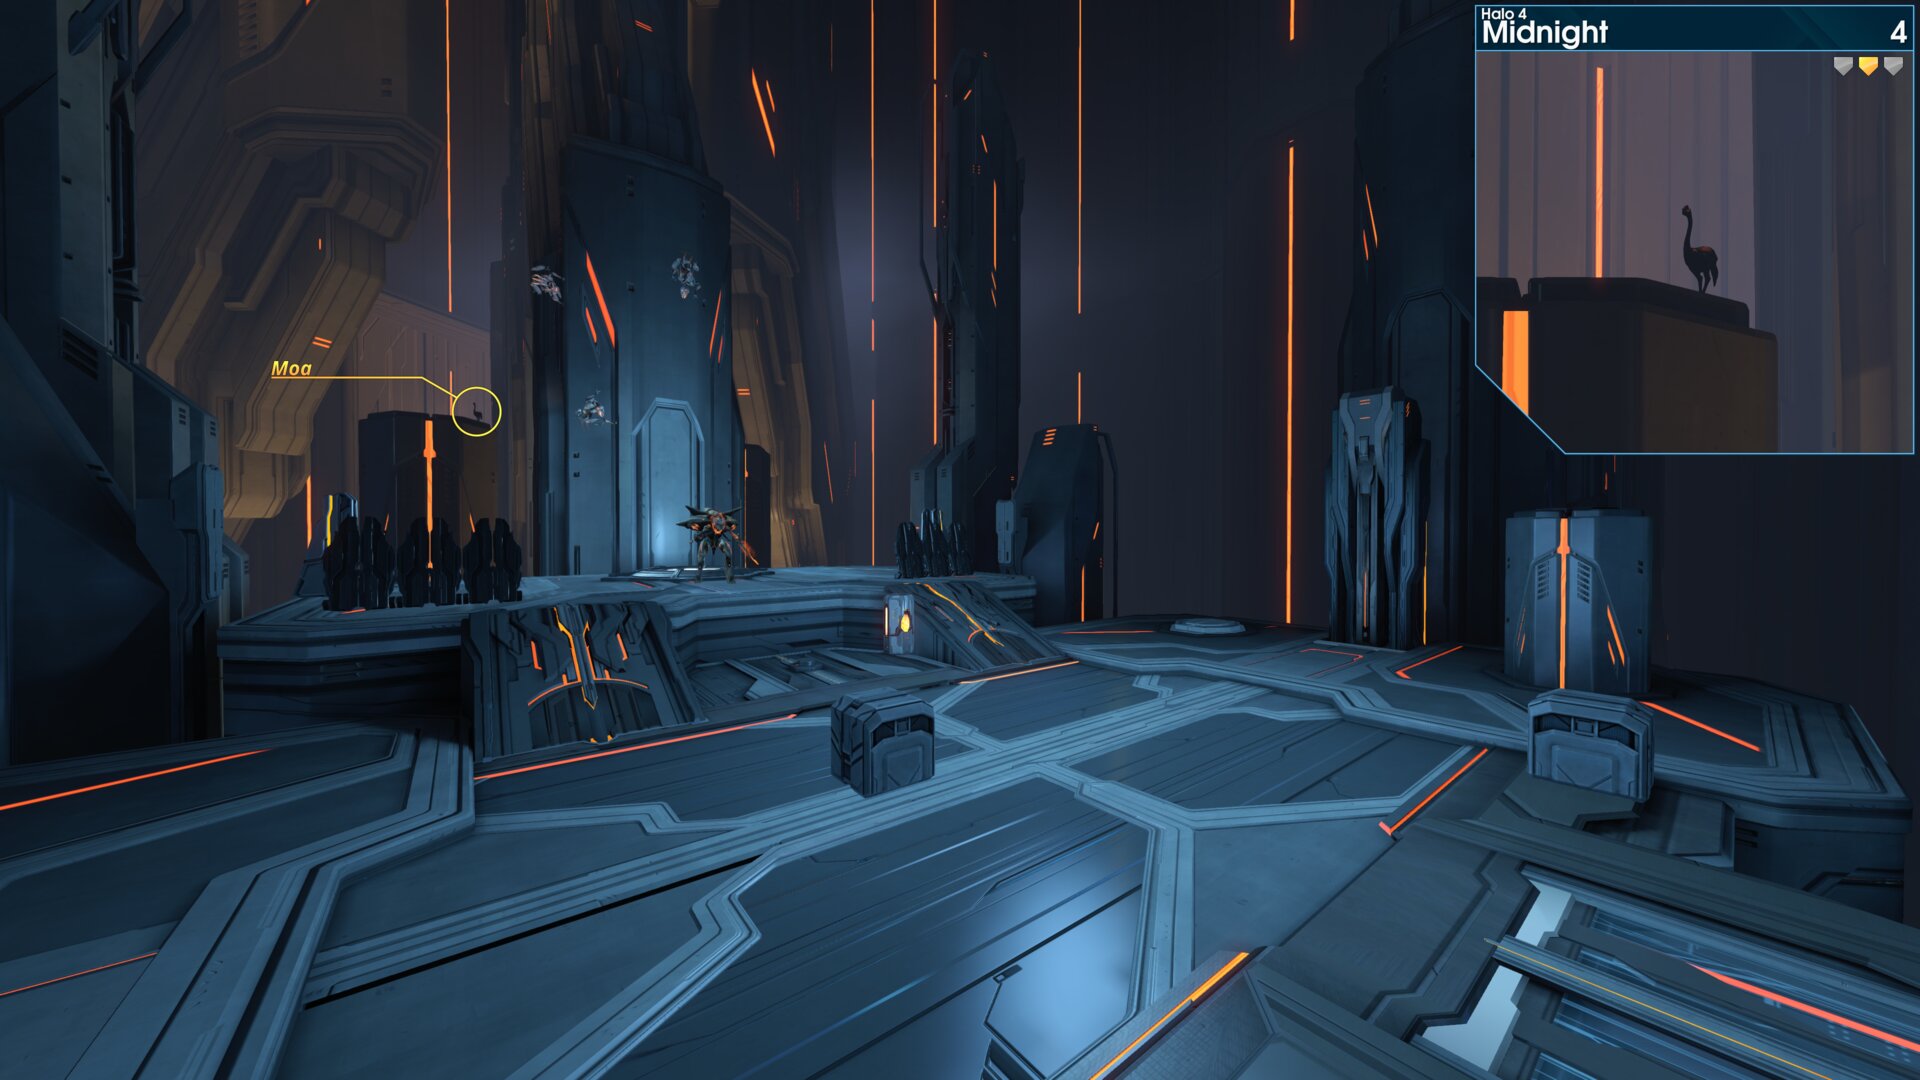
After traveling through a few portals, you’ll enter a T-shaped room where you will need to defend your position. The Golden Moa is up on top of a pillar, just past where the Promethean Knight spawns in.
Rally Point: Charlie
Golden Moa 5
In the final arena, before you find Cortana another terminal. The Golden Moa is in the corner to the right as you drop down to a lower level.
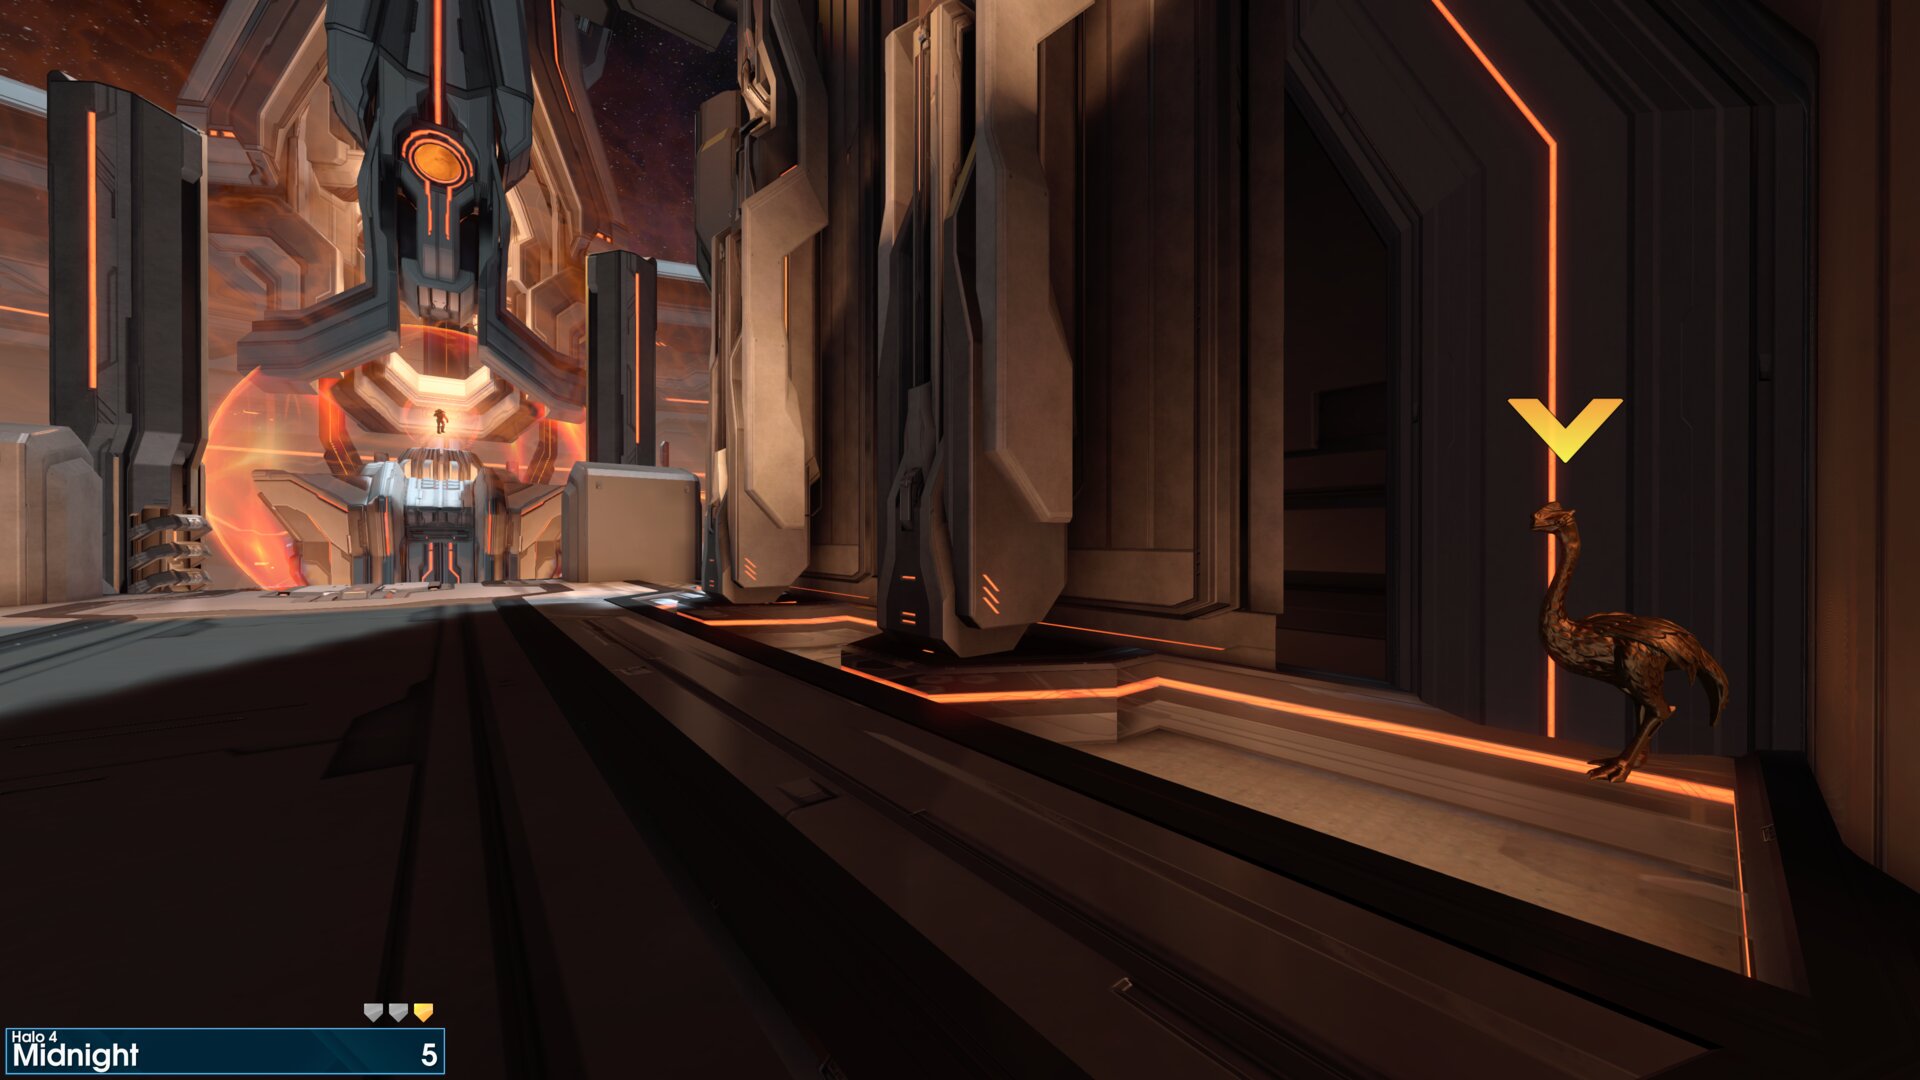
In the final arena, before you find Cortana another terminal. The Golden Moa is in the corner to the right as you drop down to a lower level.
Golden Moa 6
In the final arena, head to the left beam platform. The Golden Moa is on the 2nd level, behind the ramps to the 3rd level.
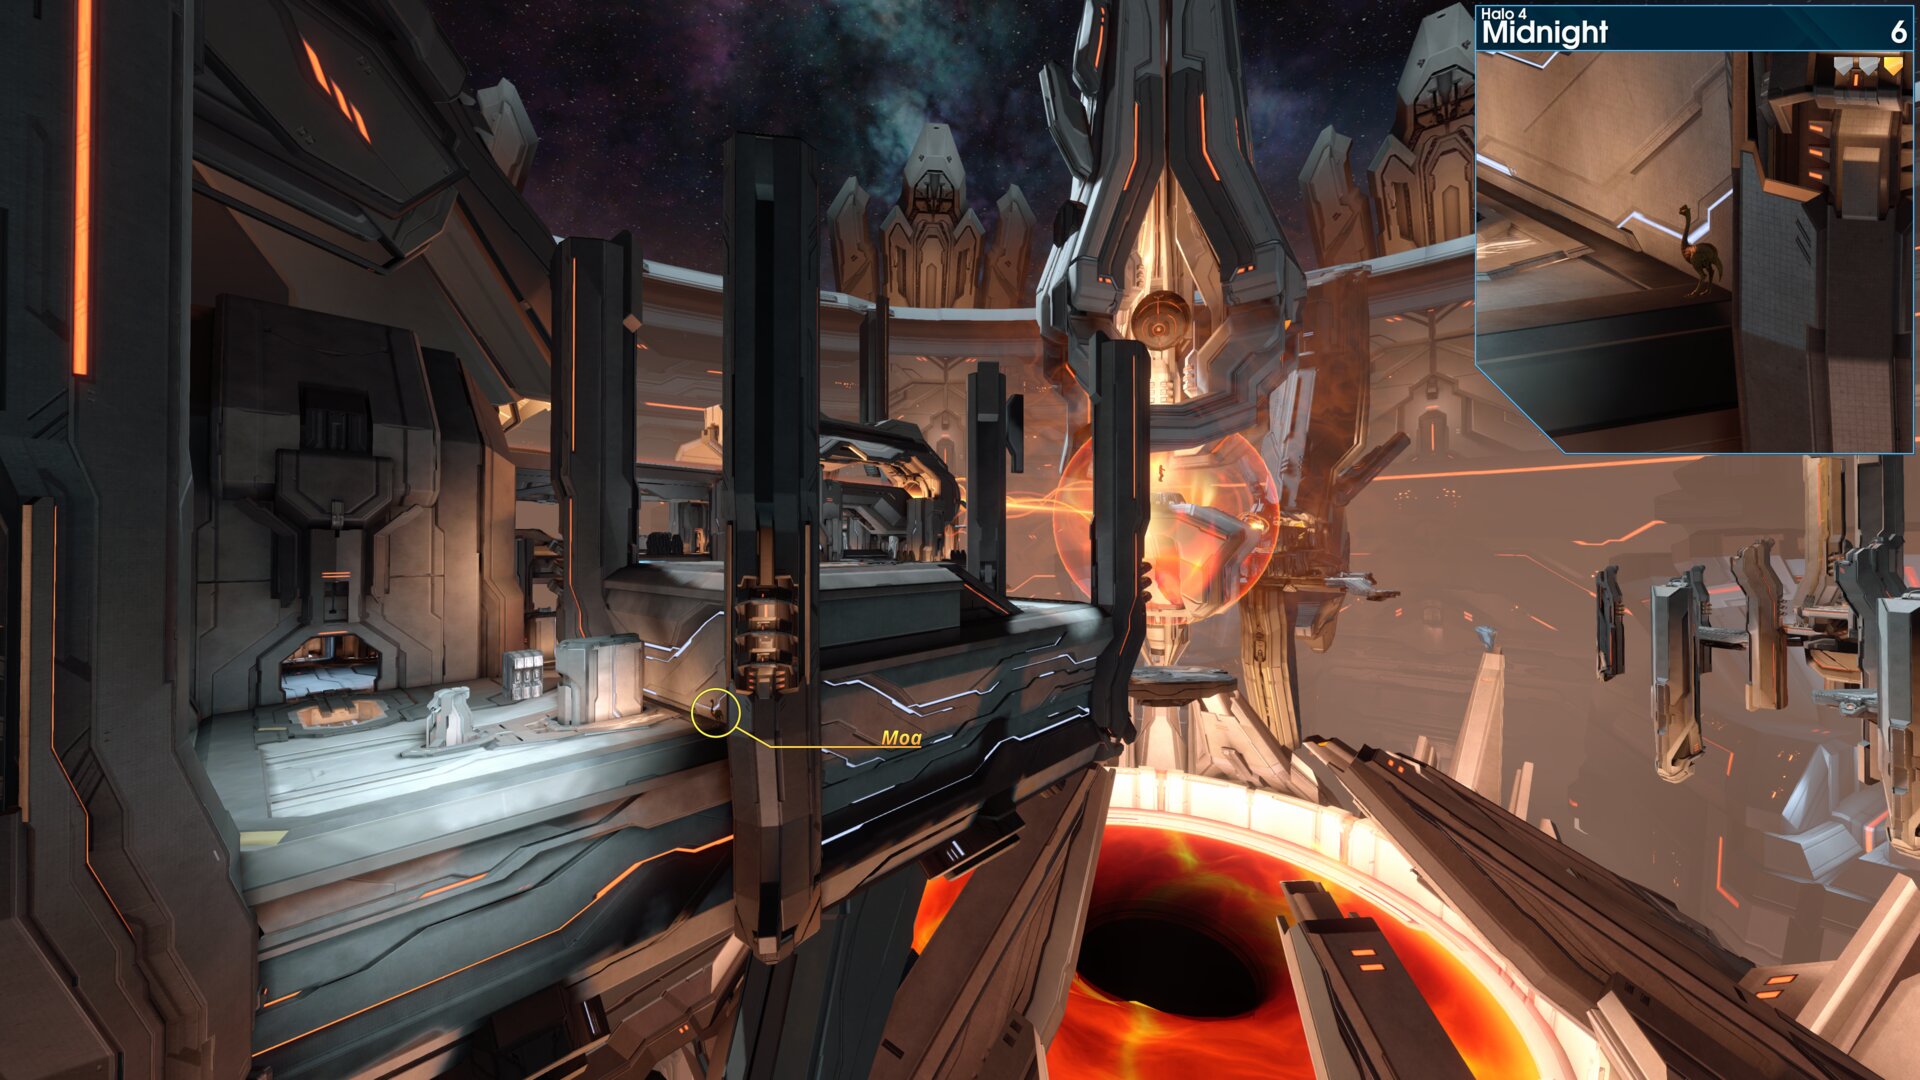
In the final arena, head to the left beam platform. The Golden Moa is on the 2nd level, behind the ramps to the 3rd level.
Golden Moa 7
In the final arena, head to the right beam platform. The Golden Moa is inside the side passage, on the 2nd level of this platform.
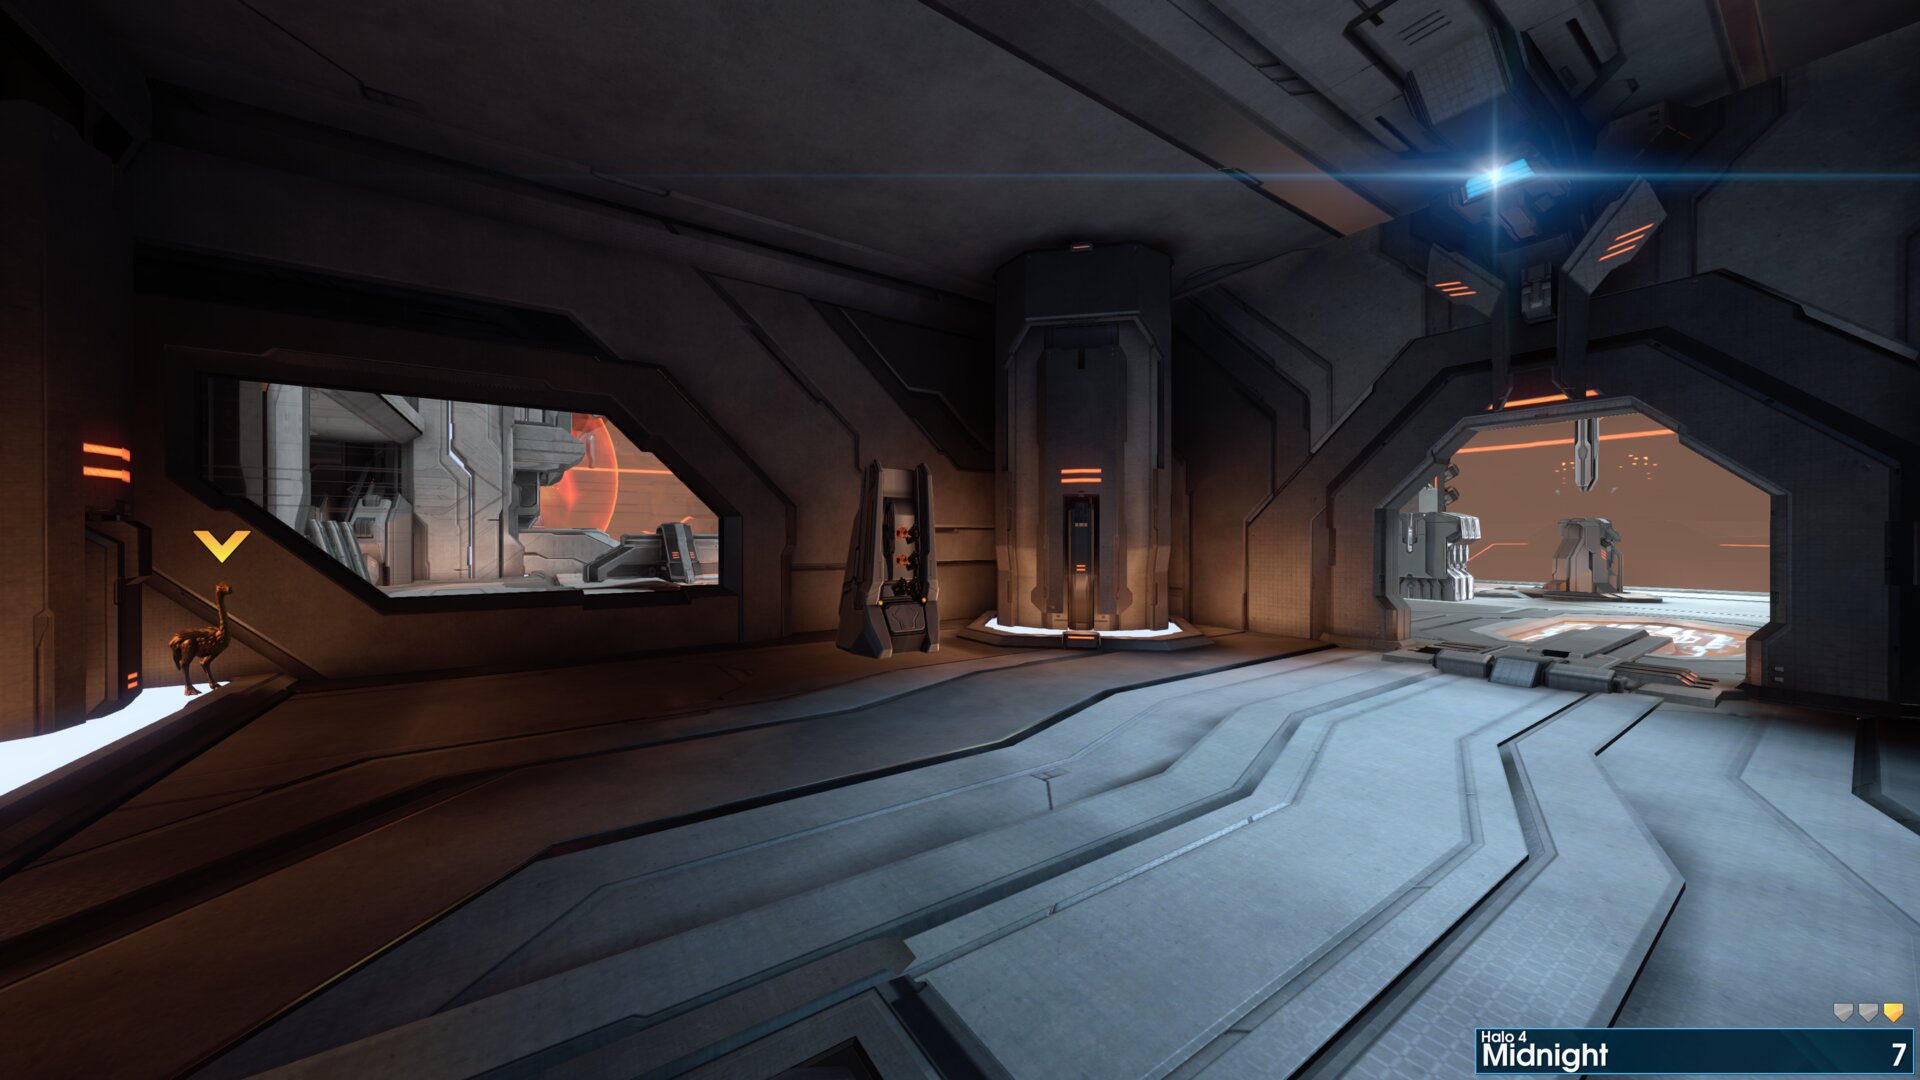
In the final arena, head to the right beam platform. The Golden Moa is inside the side passage, on the 2nd level of this platform.
More Halo: The Master Chief Collection guides
- Halo Reach: Collectibles★ 5 (1.2k)33k views2.3k ♥9 minUpdated Jul 4, 2021
- Halo: Reach - Full Achievement Guide★ 5 (823)28k views1.7k ♥12 minUpdated May 9, 2025
- MCC - Master Achievement Guide (Complete)★ 5 (479)19k views1.2k ♥5 minUpdated Aug 8, 2020
- Halo Combat Evolved: Collectibles★ 5 (1k)17k views2k ♥8 minUpdated Nov 20, 2020
- Halo: Combat Evolved - Full Achievement Guide★ 5 (504)16k views1.1k ♥7 minUpdated Jun 2, 2022
- Рекомендованный порядок прохождения серии Halo★ 4 (209)13k views448 ♥8 minRussianUpdated Feb 3



🔥 Popular guides
- Upgrading to PremiumTeam Fortress 2★ 5 (20k)1441k views11k ♥6 minUpdated May 11, 2022
- No More Room in Hell Official ManualNo More Room in Hell★ 5 (2.8k)569k views2.1k ♥29 minUpdated Apr 22, 2019
- NMRiH Community Hosting GuidesNo More Room in Hell★ 5 (526)351k views653 ♥1 minUpdated Aug 10, 2022
- Лучшие кооперативные игры SteamPAYDAY 2★ 5 (1.5k)315k views2.1k ♥56 minRussianUpdated Apr 27, 2025
- Desert Eagle Heat Treated | Blue GemCounter-Strike 2★ 5 (1.6k)292k views1.5k ♥2 minUpdated Jan 16
- Treasure Hunt Puzzle SolutionsTotal War: WARHAMMER II★ 5 (6.9k)281k views15k ♥3 minUpdated Aug 19, 2021






This guide was created by its original author on the Steam Community. Are you the author and want it removed? Request removal.