Know Your Dungeon: 15 Adventuring Tips
Welcome!
Your abbey's leaking, your jester has syphillis and your graveyard is like Walmart on Black Friday
btw - Welcome home!
Darkest Dungeon has quickly gained a reputation for being obscenely difficult and cruel - Even the good reviews talk of shredded bodies adourning their Hamlet. It's challenging, yes, but it's not an unfair death-walk... RNG and all. Played with a bit of caution and understanding of a few key points - it's actually not too difficult to keep a full roster of heroes well trained, happy and... most importantly... alive
The tips here are, by no means, the only way of playing. However, they've worked for me thus far (including after the infamous update everyone complained about) so might be of some use if you're stuck
If you're completely new to the game, check out the guide by SKaREO ("Darkest Dungeon Survival Guide") - It's a superb manual to cover how everything works. This guide will hopefully help to build upon the knowledge pertained there
1. You can always run
Well… almost…
 I’d wager most of us have grown up with games where running was never an option.
Running from battle meant you either faced a huge penalty or lost out on precious exp: Ultimately making you struggle later on in the long run. That’s assuming you could run even... many just stick you in a boss fight and make you duke it out until one of you loses (don’t lie, it was normally you).
But even then... it’s a pride thing. Running from combat just means you suck too much to be able to complete the game. If you quit now, you might as well not bother continuing and live under a rock playing tutorial levels for the rest of your life.
Darkest Dungeon flips this on its head. Running is an option – And in many cases, a wise one at that.
The only penalty to quitting is a small stress hit. On the flipside, your team is alive and you get to keep all of the loot you have picked up during your quest... all of it.
 In my botched venture against the Swine Prince... My team were having their innards handed to them in piggy doggy-bags. Only 3 left, and all on death’s door. The classic “oh well. I might as well die trying” sprung up. But thankfully, I decided to get the hell out of there. I was disappointed until I realised that, not only were guys alive, but I picked up a ton of loot on the way: Vastly more than the reward for completing the mission... All of which I would have lost had I pressed on and failed.
Get it?
You hear a lot of people whining about how this game skewers their favourites. I call BS. If your character goes to 0 HP – They are “at Death’s door”, and require another hit to knock them over the edge. But even then, characters have deathblow resistance, so can often hang in there for a hit or 2.
 In other words, you generally get some grace to get out of there. The reality is that you have to be quite unlucky to have a character die from sheer luck (I’ve had it only once). More often than not, they die because you pushed just that little too far. It is beautifully ironic, in a game that has you trying to repair the damage caused by the over-ambition of your ancestor... that the main killer of your heroes will be your very own over-ambition.
By all means, press your luck: But remember that running is always a valid option if things start to get hairy. The cost of dealing with a minor stress spike will be nothing compared to the lost coins you invested in the skills/armour of your favourite hero.
Also remember that you can use this to essentially scout out bosses. See how they fight. If you get into trouble, get out of there and return with a more suitable team or knowledge of what to do (worked for the Swine Prince...)
There are, however, 2 nasty caveats to beware of (the ominous ‘almost’ from earlier):
Firstly, your flee can sometimes fail (basically you don’t escape and that character’s turn is now finished). This creates a nasty quandary. But to be honest – unless you can finish a combat in 1 or 2 hits… take the gamble and get out of there. The only exception is if a character is on death’s door and the one selected can heal them – in some cases that might buy you some grace if your run fails (though it really depends on how many enemies are yet to make their move). But as a general rule, try not to cut it too fine – start running when your HP is low.
Secondly, some enemies - particularly bosses - can ‘trap’ one of your heroes, meaning fleeing would guarantee their death (you are at least warned if this would happen). In this case, the gamble is whether you want to risk trying to break them free. If you have enough health to, it’s almost always worth doing. But as soon as they’re out – get running. It won’t be long before another gets caught.
2. Keep your Torch well lit
Did you know that the dimmer your torch gets, the harder enemies hit?
 I didn’t. That’s why I kept dying.
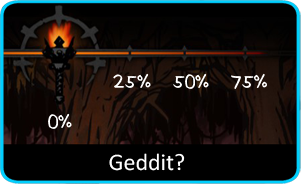
As the light passes each ‘notch’ on the torch bar, everything gets harder. Whilst it’s true that fighting in the dark can earn you a bit more loot (and some rare trinkets too); fighting in a well-lit environment can create considerably larger (and more reliable) hauls overall, especially earlier on.
After all: Enemies hit harder in the dark and your heroes get more stressed, so you’re likely to spend a fortune on giving your team hanky-panky to get them by (they didn’t have pick-up lines in those days)... assuming they even make it back.
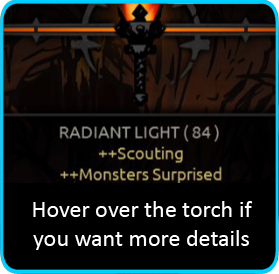 Staying well lit means you tend to score more victories with fewer wounds, meaning you can spend more time exploring and ultimately haul in more stuff. After all, 2 lots of 1,000 gold are better than the single 1,500 that left your guys without elbows and eating gravel through a straw. It also boosts your chance of ambushing the enemy whilst reducing the chance of it happening to you – further stacking the deck in your favour.
Fighting in the dark is basically a suicide mission that will wreck your team in order to get you an Ancestral teapot or something. Only do it when you want rare trinkets later on. In general, you’ll want to stay well-lit.
The trick is to keep your torch above the 75% mark (you can also do this mid-combat without using up a turn). The ideal place to top it up is just before you enter a room, as it will give you the best chance of scouting the next corridor or 2.
The good news is that the torch is not “real time” (i.e. reduces per second in the dungeon) - It only burns down each time you finish a round in combat or move to the next square/room when walking about. In other words, don’t worry if you need to go make a cuppa / sandwich / curl up in the foetal position in a corner, sobbing uncontrollably… the torch will wait. So take your time; you won’t actually save any torches by rushing about.
 Pack appropriately:
Short: 8 torches (maybe 9-10 more for Weald)
Medium: 14-16 torches
Long: Sod it. Take 24
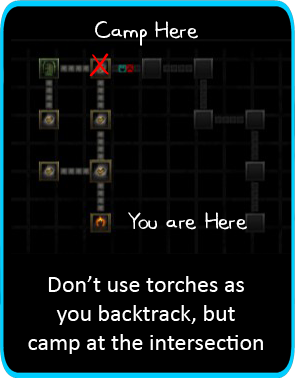
Note that camping will restore your torch to full. This is great if you have longer levels where you’re going back on yourself (i.e. the path split into 2 but you need to head down both). Keep the torch lit as you explore one path, then let it die down (save your torches) as you’re heading back. Camp when you reach the fork in the road (before heading to the other path) and you have a full torch again.
Just keep an eye out, as you occasionally will have new enemies pop up in old explored areas.
Some moves also boost your torch, but consider them more a bonus than something to rely upon. You don't want to limit your combat choices by being forced to go on lighthouse duty.
3. Golden Rule of Combat: Kill the Weakest
It may seem weird that I’m telling you to crush a bunch of spiders instead of the big fat dude with a ball-and-chain and a bad attitude.
But I am.
Squish them good.
The key element of winning fights in the Darkest Dungeon is to reduce the number of enemy attacks coming your way quickly.
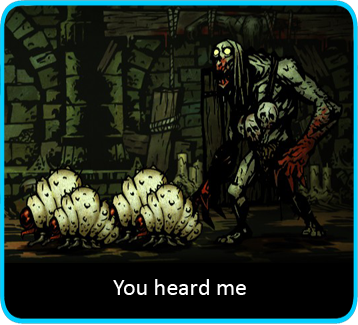
Truth be told, the big guys tend not to hit that much harder than the others. They just take longer to kill... time that their buddies will spend taking free shots at you. And believe me... they will cut through your lines much faster than he will.
Even if it’s not damage; it’s poison, stun or a bad case of diarrhoea. (No, really)
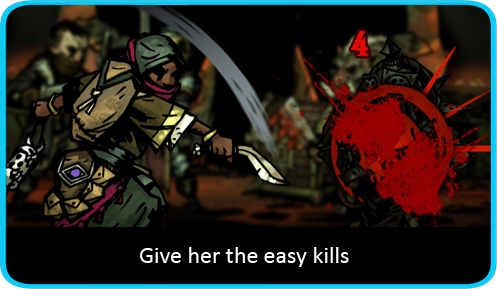
Therefore, pick the easy kills; the ones with low HP or no armour. Right off the bat, identify and crush them quickly to get the enemy numbers down. Don’t waste time with flashy dodges and set-up moves... blast them to ashes where they stand. Once there’s 1-2 left, you should find the fight much easier, even if they look ticked off (which they probably will be).
A classic mistake in this game is to try and take down the big guy first.
For this reason as well, use Area of Effect moves carefully (the ones that hit multiple foes). Whilst spreading out the damage can be great fun (and score some wonderful multi-kills); if you’re not actually taking any enemies out of play (but just wounding them), you’re still going to have their full set of attacks in your face.
4. Lead with the Heavy-Hitters
Darkest Dungeon offers a number of different ways of fighting... but to be brutally honest: always lead with a big stick.
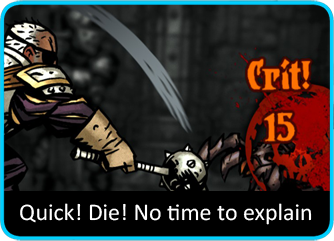
Stuns, moves, buffs, bleed/blights... they have their uses, but are ultimately there to assist your ability to smash things – not replace it.
So when selecting your team: Make sure you have at least 2 big hitters on board, if not 3 – And even then, ensure everyone has some good, solid attacks stashed away. Have the foundation and then add the support moves on top.
For example: A Vestal who can only heal and debuff is ok, but very situational. It potentially slows your team from ending fights quickly. As such, give her something like “Judgement” to let her join in with the Blitzkrieg. Not every fight is one to be played tactically – but they all benefit from the ability to smack things hard.
On this, it’s also helpful to keep an eye on your team’s speed as it gives them a greater chance of taking their turn sooner. Too many slowpokes or being bogged down by trinkets will add up, as the enemies will get to pile on damage before you can.
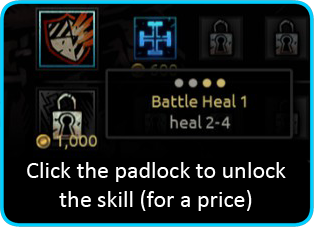 How do I get more moves?
If you haven’t already, take a jaunt to your Guild (2nd building from the right)
It does more than upgrade moves. You can unlock others right off the bat with no guild upgrades required.
If you drag a hero to the window, you’ll notice that their 7 abilities come up – the 4 they turned up with and 3 locked ones. For a price, you can unlock any of the other 3 to give them instead.
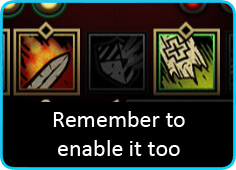 Just remember, they can only use 4 at a time (what is this, Pokémon?) – So in the character sheet, you’ll need to deselect an ability you don’t want and select your new one. Don’t worry, you can re-select it at any point, even mid-way through a quest! (Excellent spot by Batos)
5. Playing Smart – Stuns & Debuffs
So you smash the small ones – what do you do about the big cranky ones?
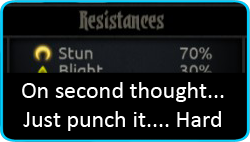 This is ultimately where Stuns and debuffs come in.
If an enemy is going to take a few turns to take down – you’ll get more use out of moves that reduce their effectiveness. (No point intimidating a little pig if you’re just going to skewer it with a crossbow)
Pay attention to their resistances and judge accordingly (remember – even if you hit, they can resist it, so be careful). For example, 3 of your team might gang up on the weaker ones, but 1 will instead try to stun the big, angry dude. Or maybe lower its attack. Executed correctly, you’ve removed many attacks coming your way, or at least softened them – which is ultimately what we want.
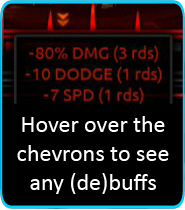 If you can’t kill ‘em: Stun ‘em.
If you can’t stun ‘em: Soften ‘em.
In effect, you kinda want to put the big targets ‘on hold’ whilst you punch the weaker ones a new sphincter. Give them the ferocity of a Care Bear with a Nerf-Gun and deal with them later.
Once alone, you can gang up on them. Just crack them open with your heaviest attacks... they’ll go down eventually.
6. Know when to Heal
Unless one of your guys has just tried to block a wrecking ball with their face, save your healing for the latter parts of combat when you’re down to 1 or 2 enemies.
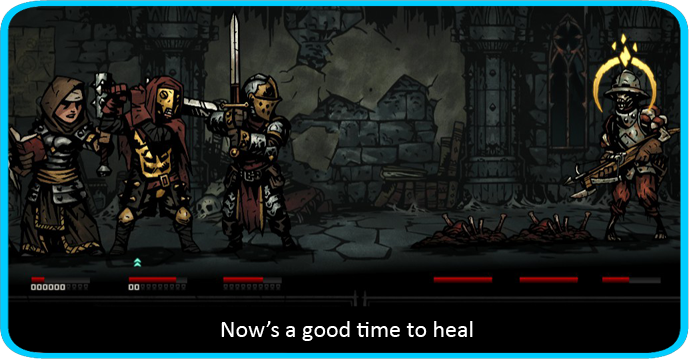
Against 4, your healing will be worthless... It’s unlikely you can heal faster than the enemy can shred. It is akin to building a card-house in a tornado. Worse, you’ll have just wasted a turn on it instead of taking enemies down. Not only do you reduce your attacks, but you don’t quickly reduce theirs either.
If you get kicked onto the defensive early in a fight – move quickly or get out of there. It’s a very messy situation where you’ll need either a heavy-hitter or a very lucky strike to reverse. So if you can, aim your healing for later in combat when it’s much safer to do so.
Now you might think “hey, I could just kick around a weakling for a bit whilst I heal up my team”.
Don’t.
If you’re caught stalling and playing Theme Hospital with your team, you’ll quickly have enemy reinforcements rushing to the aid of their beleaguered friend. Whilst the exact numbers are kicking about somewhere for the wiki-goblins amongst us, if you just want a simple rule of thumb:
If the remaining 1-2 enemies are the beefy frontline troops; you can safely dish out up to 2 heals or stun moves per turn. However, if all that is left are the ranged or flimsy ones who hang out at the back, keep it to just the 1. So far I’ve never tripped up with this.
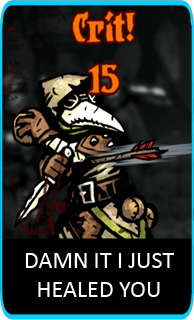 Now it’s generally a good idea to have a decent healer in your party. Grudgingly this tends to require you to always have a Vestal, Occultist or Crusader on board. The Arbalest and Plague Doctor have healing abilities – but generally pale in comparison. (Self-heals are also useful but don’t really count)
It’s not vital, but going without it means that a nasty critical hit could end your expedition early. Ending fights quickly is particularly important here, as you’ll have little to stem the gradual attrition of your HP. Food can heal some, but characters get full so you only get 4-8HP between combats if you’re lucky.
Don’t get me wrong, it’s certainly workable. Camping can also heal HP, so Med/Long levels offer some respite. But you still have less of a safety net, so it’s a gamble and best reserved for when your characters are higher levels and can hold their own more.
7. Dealing with Corpses
Corpses have really seemed to throw a lot of people...
In case you missed the memo: You don’t have to kill corpses.
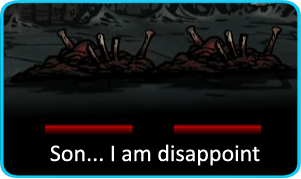 Basically, when an enemy dies; they tend to leave a crumpled mass of flesh, bone and disappointment in its place. Consider it a temporary placeholder that means other enemies don’t immediately shuffle forward. In other words: the angry skeleton in the backrow with the crossbow is still there. And he’s still unhappy to see you.
If you’re wasting turns bashing a bunch of corpses in order to hit that pig who got a daemonic drumkit for Christmas... you’re doing something wrong.
The secret?
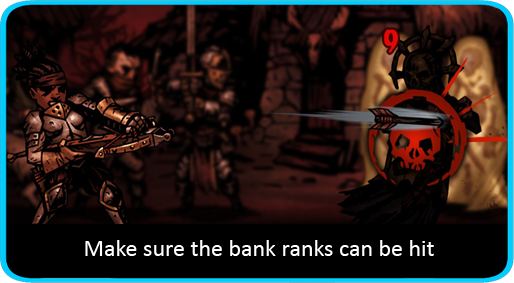
Pick attacks that hit the back ranks.
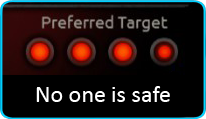 Having a team that can only hit the front row is asking for trouble. Most heroes (pretty much all except the Leper) have moves that let them hit the 3rd or 4th rows. So make sure you’re packing at least one per hero. Mix and match and aim to have all your heroes able to hit a variety of targets. Focus on enabling them to hit the front lines first (as this is where enemies tend to end up) and then tack on a ranged move or two if you can.
Don’t forget that you also have “Move Moves” such as the Bounty Hunter’s ‘Come Hither’. If you can’t hit an enemy from afar... bring them in range. Just make sure you have a big sword waiting to greet them.
And if you really get stuck... you have Corpse Clearing Moves: But if I’m really honest, I have never used these and consider them a bit of a wasted turn. (But then so is bashing corpses, so the lesser of 2 evils I guess...)
With appropriate preparation, corpses are fine. If anything, they let you get more use out of those beautiful ranged attacks like Abyssal Artillery and Blind Gas. The key is that you just need to be sure that your attacks are balanced to enable you to hit a wide variety of targets, not just the front.
8. Roster Management
The start of the game can be quite full-on: You have a run-down hamlet to rebuild and a team to attempt to string together.
Your most important element here is the Stage Coach – And is one of the first you want to upgrade, as a solid supply of heroes is important to get you started. So upgrade to get at least 3 new heroes per week, then turn your attention to the Roster size. Early game is rampant with stress, disease and number of other nasties, so having a large pool to work with is vital.
It’s the classic picking-the-football-team-at-school situation – No one is happy if your top-notch set of adventurers get stuck with the stressed out kleptomaniac who’s shoving crayons up their nose, because they had no one else to choose from.
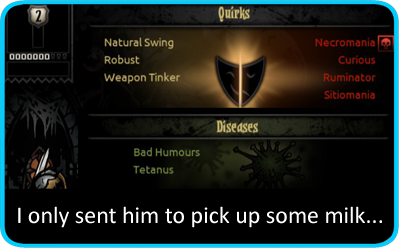 Now any hero at level 0-1 is, by and large, disposable. That’s not to say just let them die – but if they pick up a ton of diseases, acquire awful quirks and are stressed to the hilt... you know what... you’ll be spending a fortune just getting them back to a usable state. Dismiss them when you have a suitable replacement – it’s honestly not worth the effort sometimes. The only time you’ll want to make an exception is when a positive quirk is superb (like damage boosts) – as they’re the only things you cannot easily acquire (unlike moves / exp), so are worth the cost of keeping. Whilst you can lock positive quirks (i.e. stop them being replaced when a hero has 5 and picks up a new one) you obviously don’t have to worry about that until much, muuuuuuuch later.
After every expedition: Always check for available hamlet upgrades first and foremost. You don’t want to find you can acquire a cost reduction after you have already shelled out for a round of drinks.
Once your roster’s looking peachy, the next objective is to get your Blacksmith and Guild up and running. You’ll level up faster than you think, so need to be able to buff your heroes’ stats before they start demanding harder dungeons. Your heroes resolve levels purely reflect their confidence and resistances (including stress), so you won’t actually make them stronger until you boost them yourself. Besides, you’ll quickly get sick of them missing shots fresh off the stagecoach.
Steadily upgrade your crew and keep them sane, but always remember to keep around 3,000 in your back pocket to kit them out for expeditions. Build this number steadily so you’re not left stuffed if you’re forced to abandon a quest.
At this point you should in a good position to make a merry mess of everything below. Whilst you can generally upgrade however you like; the main prize to keep an eye on is the Sanitarium – specifically the number of slots. It takes a lot to upgrade – but you’ll want at least 2 slots (in both sections) for when your machine of war starts to pick up pace.
It doesn’t matter how much you upgrade their equipment or heal their stress; heroes accumulating nasty negative quirks and diseases will quickly become dead weight... Something you really don’t want on your veterans. You want to get to a point where you can start undoing negative afflictions as they happen – as that’s when you can start to get a reliable roster together.
9. Bleed & Blight
These ones are tricky...
The problem with Damage-Over-Time moves (also known as DoT) is that it requires several turns to get the full effect out of them... several turns that the enemy will spend turning your heroes into novelty knickknacks to be kept above their fireplace.
There’s very little point casting bleed or blight on a weak enemy if they can be dispatched with a well-aimed smack. You might as well just go with the latter and get rid of them quickly.
The well-armoured guys, however, take several turns to take down – so you get more bang for your buck with bleed/blight.
Now if you think that 3HP per turn is laughable – you’ll be right. You have to be a bit of a gravel-chomper to think this beats grabbing something heavy and taking off a much more sizeable chunk of health.
The trick to using these is to know that these moves stack.
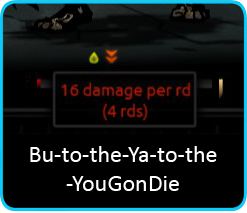 It’s not like most games where you poison and enemy and that’s that. If you keep casting these afflictions on the same enemy, the damage each turn increases! In other words, that 3HP bleed per turn becomes 6HP if you apply it again... then 9HP... and so on.
So you have to break habits a bit here – once you start afflicting DoT to an enemy – keep doing it. Instead of trying to spread your poison/bleed over a range of the enemies... gang up on the tough one until it’s puking up 12HP per turn.
It’s not very impressive when you first start out, but as armour values grow in harder dungeons, it starts to become more viable.
10. Marking
Making is one of those niche abilities that you can probably get away with not using for a lot of the early game. Most of the time, a turn spent marking an enemy could simply be better used just smacking it with something heavy and preferably painful. However, once you start facing off against huge brutes with a ton of HP and armour… it’s a little tactic well worth latching onto your utility belt.
The trick is not to do it willy-nilly… plan and build a team around using it. You either need to do it properly or not at all.
Basically, 3 of your heroes can take advantage of a marked target: The Bounty Hunter (Collect Bounty), Arbalest (Sniper Shot) and Houndmaster (Hound’s Rush). The same 3 can also mark a target, in addition to the Occultist (Vulnerability Hex). As a general rule, you’ll want at least 3 compatible heroes in a marking build (or 2 + Occultist), to really make it worthwhile.
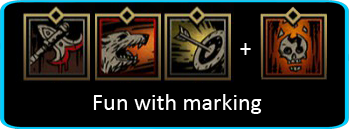
Whilst the Highwayman and Grave Robber can also benefit, it’s only a small boost (+25%) so consider it more a really cool bonus if they happen to be in your team, than the foundation.
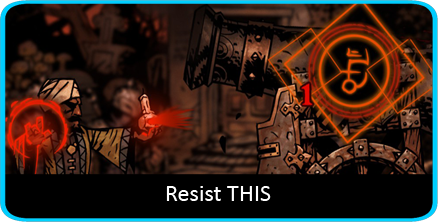
The secret with marking is that, unlike any other tactic: It cannot be resisted. Against well-armoured enemies with high debuff resistances… this is your ace in the hole.
11. Camping
If a quest involves camping, always bring enough supplies for a feast.
A feast is x2 a regular ration event – so will generally be 8. But remember to factor it in traits / trinkets that alter food consumption (i.e. a Grave Robber with the Raider’s Talisman will eat 2, so a regular ration event will be 5 for a full party – so 10 is needed for the feast)
Doing so gives your entire team a health and stress boost. In many cases this can service much of the light triage you’ll require – taking the pressure off a lot of your camping abilities. Speaking of which, if you’re wondering what ones to pack… Tick off the following:
Can heal HP & stress (2 of each)
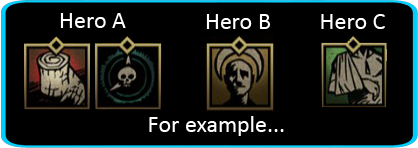
These 2 are must-haves. Whilst the feast can lightly heal everyone, you’ll need more than a penne a la carbonara if one of your team catches the wrong end of a mace or is developing a nervous twitch. Bear in mind as well that, unless explicitly stated otherwise, a lot of camping abilities cannot be used on self; so you’ll want at least 2 heroes able to play medic (for both stress and HP). Last thing you want is the only healer in your party being the one requiring medical attention.
Can block ambush (recommended)
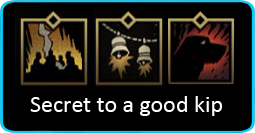
Whilst not vital, I find this very useful, especially if you’re bracing yourself for a boss fight. Basically your campers can sometimes be rudely awaken by a raiding party wanting a pillow fight – forcing a combat in both pitch darkess and having your heroes surprised (i.e. shuffled). Needless to say, this could very easily undo all of your healing efforts so the ability, whilst expensive, can often deter a giant crab-shaped headache.
If you’re confident you can handle the above then, by all means, feel free to skip this one.
Can bolster combat (for bosses)
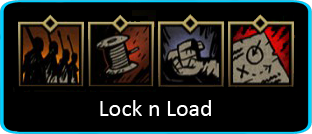
Bosses are tough, so you’ll want every advantage you can get. Once you have healing covered, fill any spare camping abilities with combat bonuses. The effects only last for 4 combats, so set up camp in the last room before the boss (who generally sits in the furthest room away from your starting point) and load up before heading in.
12. Trinket Management
Trinkets on a hero are like screams to a dungeon. You can go without, but it’s not as fun.
If you haven’t caught sight of the useful in-game hints – first up: you can sell them! Simply hold Ctrl + Left click on your trinket (back in the Hamlet) to offer it up for gold. You can get a pretty cool amount for them, so definitely worth doing if they’re only going to gather dust.
Speaking of which, if you stumble upon useless trinkets on your quest: don’t be so quick to discard them. Even a very common trinket can fetch 750 gold. So if you’re able to free up some space to bring it home, do so. Then you can ditch it.
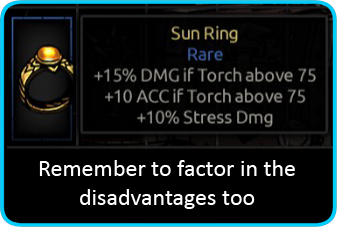 As for the ones you use, the key thing to understand: Trinkets aren’t strictly how you make your heroes better… they’re how you make them specialised.
With only 2 trinket slots – you can only boost a couple of traits at best. Worse, many also come with a downside. In other words – trinkets tend to enhance one playstyle to the detriment of others. As such, the key is that anything you boost must get a lot of use. Your best bet is to try out your teams and ultimately look for what you use the most often or trip up against. Are your status moves constantly resisted? Do enemies sneak the first hit? Are your guys incubating diseases like a long-haul flight?
Look for how you use each hero in your party, then ultimately look to how you can exaggerate it.
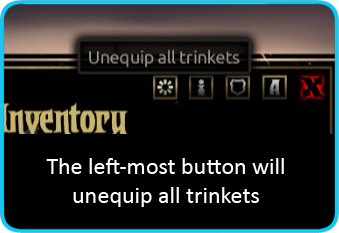 Once you’ve picked your favourites, it’s then just about keeping hold of them… So if any character is going for stress relief… always relieve them of their trinkets. Trust me. More often than not, they’ll likely do something inherently stupid and lose it. In the absence of being able to give them a huge in-game slap, you’ll have to make do with checking their bags before they hit the casino. It’s annoying, but so is losing your favourite trinket to a game of snap. Note: 31/05/2020 It looks like there's still a chance you could lose a trinket even if one is not equipped - thanks for the heads-up on that one Taskmaster! Whether un-equipping reduces this chance, I'm afraid I'm not sure.
Play combats carefully as well. If you lose a hero, you can salvage their kit so long as you finish the combat (you’ll get it amongst the post-combat loot) – Flee from the fight and it’s gone forever… so watch your back.
13. Know your surroundings
Truth be told, there aren’t a huge amount of differences between the locations on the estate –at least as far as your playstyle goes. The biggie tends to be whether the residents are predominantly resistant to bleed or blight. Make sure you direct any bleed-based ruffians to the Weald and Warrens, and any blighters to the Ruins or Cove. Other than that, a balanced strategy should work equally for all areas, only ever requiring the odd tweak to how many special items you bring (i.e. Herbs, keys…)
Where many enemies tend to be shared across the realms (such as the various cultists, bandits and spiders), you should always pack both bandages and anti-venom once you have a decent income and a team worth keeping (3 each is a good start).
Pack extra bandages if you’re heading to the cove… The fish love sharp objects.
As for the weald: Pack anti-venom until you could open up your own pharmacy.
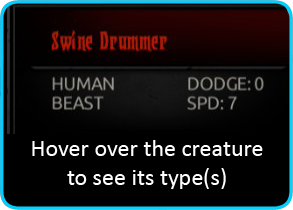 Other than that: The key difference in the areas is the types of creatures appear. Once you start picking up traits / trinkets that garner (dis)advantages against them – the only thing you really need to pay attention to is where they predominantly reside:
Ruins – Unholy
Warrens – Beast (many are also part-Human)
Weald – Mix of Eldritch and Human
Cove – Eldritch
14. Curios
It won’t take you long until you discover the random items lying around that just beg for you to touch them.
It also won’t take you very long to discover that most of them will deliver a sharp kick to your groinal region.
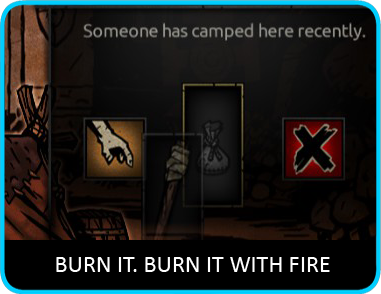 They are, however, where you can pick up a lot of useful quirks and loot. The trick is that many of them can be rendered ‘safe to touch’ by use of an item (akin to a blue-text event, for you awesome owners of FTL). Simply drag the item to the utility icon to try it out. Beware, if it doesn’t work, the item will still get used up.
Now I’ve been asked a few times to talk about what items to use… I’m not a fan of spoilers though. So I’ve had a look around, and if you want a fantastic breakdown of it all, head to Curio Guide by Layn. The work they’ve done there is truly superb and exceptionally thorough.
What I’m going to provide is a quick non-spoiler version - something to help you along but still allow you figure it out and get those “ah ha!” moments.
First thing to note is to start playing around with curious when you have a bit more cash. Pack a few extra items than you’d normally use, so you can afford to try a few out. Also note that not every curio can be cleansed. Additionally (and hilariously) some interactions can also backfire.
Now barring a few (rare) exceptions: The items you can use will predominantly fall to Shovels, Medicinal Herbs, Holy Water or Skeleton Keys. Less frequently, you can use a torch, bandages or anti-venom. As for which to use, here’s a few things to consider:
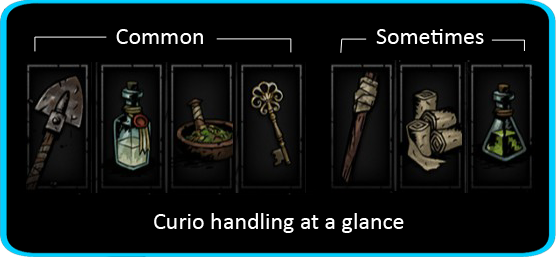
Shovels: In addition to their obvious function – they can also be used for heavy lifting or strong-arming a solution
Holy Water: The hint’s in the name… counters anything unholy. Anything that requires purity or might be related to malign spirits likely falls under this one.
Medicinal Herbs: Ultimately wipe out disease. Anything that might be considered infected or rotten is a good bet for this. This is not to be confused, however, with cleansing poison. (That be anti-venom’s job)
Skeleton Key: Ok, I’m not going to mess around here… if it has a padlock, you kinda need it.
Torch: Burning things
Bandages: Think covering blood, think patching up
Anti-Venom: This counters something bad… not sure what it is though… woodlice?
15. Know Your Heroes
- Plague Doctor

A trickier unit to use. It’s not that she’s weak per se, but she’s very specialised and her abilities need to synergise with harder-hitting allies; so you’ll need a solid team to help leverage her skills.
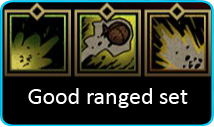 She’s a dedicated back-rank support unit, so keep her in the 3rd and 4th position. Noxious Gas and Blight Grenades are a good starting point, as they let you sow poison across the enemy ranks. She has the strongest blight abilities in the game, so abuse the heck out of them!
As for her stun moves: Blinding Gas is exceptionally useful, as you can stall the back ranks to gain a quick upper hand. Disorienting Blast, on the other hand, only hits one, but that can include the 2nd rank as well, so tends to be more useful later on in the fight. Generally pick just one of two.
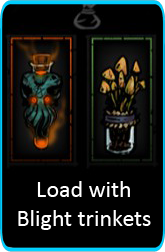 Trinkets that bolster her blight / stun chance are your best bet, as that is primarily her value-add.
Battlefield Medicine might seem niche, but it outperforms bandages/anti-venom (which only work on the turn of the afflicted, so they still have to face some damage) – so a lifesaver in ‘At Death’s Door’ situations. It also cures her of any bleed/blight as an added bonus.
Emboldening Vapours is also useful, but you obviously need someone already powerful to use it on, to really get anything out of it. (Don’t forget – it stacks too!) Incision is also ok, but a tad weak and not overly accurate.
- Bounty Hunter
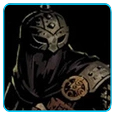

Big, beefy and the hamlet’s piñata-champion for 5 years running. The Bounty Hunter is a fantastic, versatile unit for the front ranks. A human swiss-army knife of reliable stuns, moves and just general mayhem. You really don’t need to be too subtle with him. Just smash things with his hand-axe and augment with neat moves. He’s also a dab hand at disarming traps and his stats are well balanced too, so able to soak up hits but also hit hard and fast.
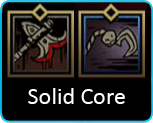 Collect Bounty is his default attack, and will certainly get a lot of use. But did you know that Finish Him can also hit the 3rd rank? It’s useful to bring along if you have the space, just to extend your reach.
Come Hither is a decent one to equip too, as it lets you pull back-rank enemies closer. Not only does it prevent ranged enemies using their deadlier moves, but brings them in range of your axe – an excellent way to bypass the corpses you will inevitably create. Uppercut and Flashbang also bring a decent stun with more shuffling of enemy ranks.
Mark Target has also received some additional love that now has it lower enemy PROT. The beauty here is that, even if no one else has a bonus against marked targets, the lowered PROT still allows them to crack opened armoured foes with greater ease. He’s like a can opener. Only grumpy.
- Vestal
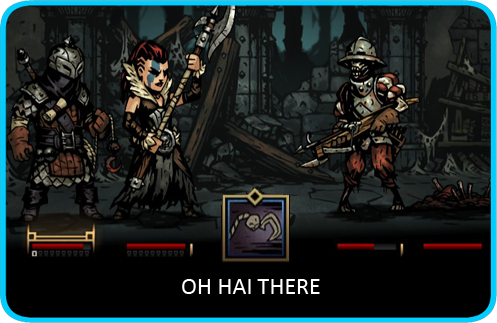
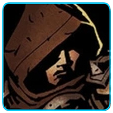 A reliable regular in quests – thanks to her decent array of attacks and consistent healing abilities. She works best in the back ranks where she can heal your party and still blast things with lightning (how the lightning gets underground, nobody knows)
Whilst you obviously want one of her 2 healings moves (or both) - Judgement is an absolute must-have. It can hit any enemy for a decent amount (very rare in this game) and also heals you, helping shrug off minor wounds. If you’re injured, it tends to be better to use this instead of healing yourself, as it allows you to remain on the offensive.
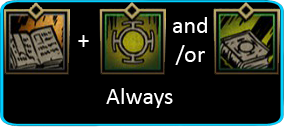 Equipping one of the 2 front-rank attacks (Illumination / Hand of Light) is also useful in case you get thrown out of position. Illumination is particularly good as you can use it in rank 3 (along with your main moves)
- Highwayman
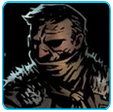
 A classic “Glass Cannon” – Excellent attacks but unable to withstand sustained damage. He’s very squishy and relies on dodging to survive and dogging to de-stress (sorry, couldn’t resist). His dodge isn’t amazing though, so ending fights quickly is important.
He’s a Swiss-Army Knife of attacks… but to be frank, you’d be doing a disservice to not make use of his guns. His melee moves are nice, but he tends to be outclassed by the more specialist front-line brutes. His guns let him sit further back and hit a wider array of targets. As such, Pistol Shot is a solid starting point, tag-teamed with a knife move to give him something to hit the front line with.
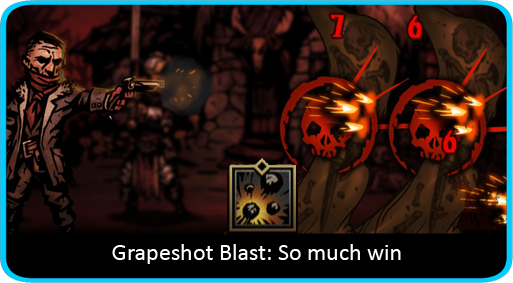
Grapeshot Blast also has to get a special mention as it hits the entire front 3 ranks, which is very cool. Seriously, crank up his damage with your trinkets and you’ll be laying down some exceptional crowd control! This is best suited to finishing off squishy mobs that have already been softened up.
In lieu of this: The Gunslinger's Buckle is a winner of a trinket if you can get your grubby mitts on it (and not lose it to a bad gambling habit) – Whilst it numbs your knife attacks slightly, the boost to ranged is superb if you find yourself making heavy use of them.
Duellist’s Advance is pretty much there to synergise with Point-Blank-Shot - as you need something to move you back into rank 1 after using Point-Blank Shot (or just bring 2 Highwaymen and take in turns spamming it!) – You can skip this ability if you don’t have the close-range attack.
Tracking Shot is the only situational move. It’s weak, but gives a stat boost to you. It’s best used on enemies with low HP – so you get to finish them off but cash in on the bonus.
- Jester
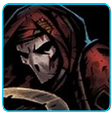
 A very unique class with unparalleled stress-reduction skills when camping. He’s a curious one in combat, though. He’s not a one-shot wonder, but one that really shines with a few turns to set up.
In combat, he generally has 3 functions for you to mix-and-match... Bleeding, buffing and jumping around like an idiot (no, really).
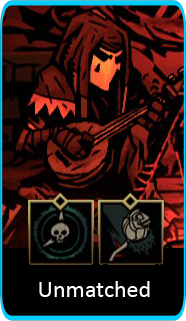 His bleeding abilities are pretty cool – With Slice Off and Harvest both functioning well for inflicting multiple bleeds or just straight-up damage. They’re good staples and you should combine at least one with Dirk Stab to let him hit a good range. Bleed trinkets are important here to maximise the bleeding chance.
His party-boosting abilities are also impressive. Battle Ballad is a fantastic buff and one of the few worth using at the start of the fight to give you a real edge. Inspiring Tune is good, but best saved for the later parts of combat... After all, there’s no point healing stress if you have loads of enemies ready to pile it back on.
The interesting one, however, is Finale. Every attack bolsters it a little bit, letting you pull off an immense strike to seal the deal. It’s one use per combat though, so build up the buffs and save until the end! Solo is pretty much there to make Finale even more insane, so don’t pack it unless you know what you’re doing. These moves also cause your Jester to jump all over the place – completely messing up any semblance of formation you had. As such, you must have a party which can cope with this – able to function in a variety of positions.
- Occultist
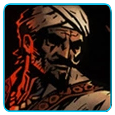 Squishy but knowledgeable and finds a good home in the back ranks. Much like the Highwayman, he needs to be used with finesse, as he can’t put up with a sustained attack much. So make sure you have good healing abilities and a strong team to support.
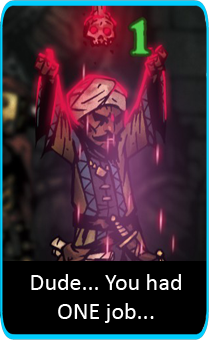 Wyrd Reconstruction tends to be a must-have. It is potentially one of the strongest, albeit unpredictable, heals in the game. Be careful though – It can cause bleed and heal for a big, fat 0... so don’t cut it too fine. It’s best used on people with 25-50% HP – so you still have some grace if it backfires.
I appreciate poking someone with a knife pales in comparison to summoning daemonic tentacles... but Sacrificial Stab is not to be sniffed at; and makes for a good, solid damage-dealing move. For the back ranks, you’ll want either Abyssal Artillery or Tentacle Grab. (Don’t worry though, they don’t pull off clothes like some sort of Japanese cartoon).
His Hexes are also pretty useful, but you’ll generally only want to bring 1. Pack Vulnerability Hex if you have the brutes to capitalise on it: It lowers dodge and doesn’t require a harder-hitting ally to sacrifice their turn on it. It’s a must if you have a Bounty Hunter, Arbalest or Houndmaster. If you have none, then Weakening Curse is the more useful.
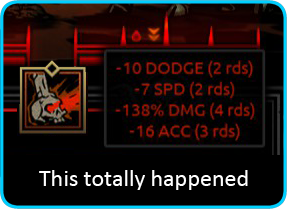
- Hellion
 She’s angry, and she has a glaive. The good news: She’s on your team.
She’s a bit fragile to use at first, but her damage output grows as she levels up. Wicked Hack and If It Bleeds are the 2 core moves I’d heartily recommend. They are reliable, have no downsides and hit a good range of enemies. The latter also comes with a strong bleed too, making it truly exceptional for damage-dealing.
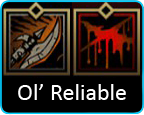 Iron Swan is a handy one to pack to take out anyone hiding at the back – only catch is that you must set her in the front ranks if you do. So make sure she’s guarded or your team can hit fast and hard.
The rest are trickier to use. They are either very situational or weaken her after use. They make her playstyle quite “high risk, high reward”, dishing out tons of damage but leaving her vulnerable after using them. As such, they’re best used as a tactical ace-in-the-hole to score a key advantage. You can tend to bypass them when getting started, however, as the previous 2 moves should cover the majority of situations you’ll find yourself in.
- Crusader
 Front-line fighter packing a ton of HP. He has some nice support moves, but to be really frank – you’ll want to load him down with at least 3 offensive attacks, as they all really kick butt.
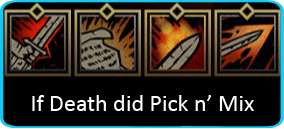
Smite (you’ll always want this one), Stunning Blow and Zealous Accusation all have their moments. Holy Lance grudgingly only works in the back ranks now (where little else does) – so is more your trump card to move you back into position if you get pushed. It’s a beautiful moment when you use it though, as the damage is pretty awesome.
Bulwark of Faith is handy for drawn-out fights and Battle Heal is also pretty good if you need more healing, but he predominantly functions best in the rage department.
His main downside, however, is his speed. He’ll generally go last in fights, giving the enemies a chance to inflict some nasty damage first. Whilst his HP can shrug off the majority of it, the same can’t be said of your allies – so it tends to help if you have a few fast attackers to accompany him, to help whittle down numbers.
- Man-at-Arms
 Versatile and powerful – The Man-At-Arms can function as a defending / support unit or front-line attacker... But to be really honest, with a mace like that, it’d be a waste not having him pound things into dust. His stats are great and he can both take and dish out a ton of damage.
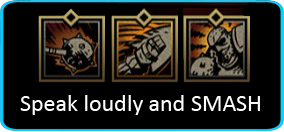
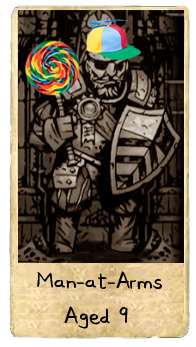 Crush is a reliable must-have. Rampart equally finds use in stunning enemies or moving you forward if you’re shoved out of place.
Bolster is not one to be sniffed at too. It lasts the battle so, in long fights, the dodge boost will really add up.
Riposte is impressive, but a slight gamble. Whilst it doesn’t deal a lot of damage up front... most attacks that come his way for the next 2 turns will get counter-attacked, even if they miss him! I say “most” as non-damaging stress-based attacks are not countered (such as stressful incantation). So you’ll want to use it when you have at least 3 damaging enemies and a healer on hand, as the punishment will add up if they target him. But remember, this relies on him being targeted... sometimes it’s just better to just smack things upfront before they can attack you at all.
Guard is there if you have either Riposte, Command or have made him stupidly tanky. The PROT boost just won’t be worth having double the incoming hits otherwise.
I’d only pack Bellow if you have debuff/accuracy boosts. Whilst crippling the speed of the entire enemy line can buy you a formidable advantage – the attack needs to land and bypass their resistances, so you really need to ensure it lands.
- Leper
 These hard-nut executioners are your heavy duty front-liners. Totally unsubtle... Just soak up a solid amount of damage and dish it back out. When they hit, the enemy will know about it. That’s if they hit though... Their accuracy is quite painful. You basically need 2 things to get the most out of them:
 Firstly, find ways to boost their accuracy (trinkets like Solar Rings), so you’re not spending most of the time going ‘whiff’. Secondly, make sure you support them with ranged attackers, as they are completely without means to attack the back ranks.
They only actually have 2 offensive attacks; Chop and Hew; both of which you should always include. The rest are an assortment of buffs / debuffs, so ultimately come down to your preference. Truth be told though, just have him hacking everything early on. He deals way too much damage to be wasted on flashy setups. It’s only in later dungeons when you can’t one-shot everything that you’ll really benefit from his more nuanced tricks.
Solemnity is always a safe bet. You can never go wrong with healing both HP and stress. It’s also worth noting that Revenge and Withstand last the entire battle and can even be combined if you know you’re really in for a long haul.
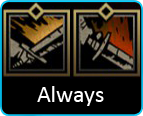
- Houndmaster
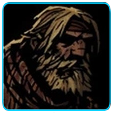
 The Houndmaster packs a hearty punch and brings some excellent support moves to the fray as well. He’s also versatile and can function anywhere from Row 2 onwards, making him a regular reliable for filling any gaps in your team. Quite frankly: It’s all about Hound’s Rush. It’s a decent attack that hits anywhere and is an absolute must-have. The bleed effect and damage boost against beasts are funky bonuses too.
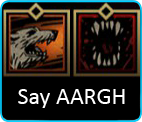 Hound’s Harry is interesting, but ideally must be used against a full set of 4 enemies or when 1 is really low on health. The damage and bleed is spread a little too thinly to win you any quick kills. That said… definitely give it a try against the Mutated Flesh boss. It shares a single health bar; so all 4 segments bleeding from one move essentially quadruples the bleed effect of Hound’s Harry. How cool is that?
Whistle is another good one to keep in your pocket. In addition to marking; it lowers enemy PROT, which is an exceptional boon against armoured foes. Followed up with Hound’s Rush (which gets a boost against marked targets) and you’re putting on a serious amount of hurt.
 Blackjack is also one of the stronger stun moves in the game (though nerfed slightly). At top level, its unmodified base chance is 150%... which means an enemy with 50% resistance should never be able to withstand it, so is worth packing if you can spare a slot. Though it does lock him into Row 2, so be careful.
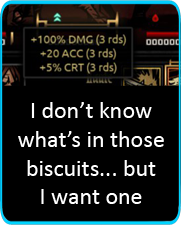
Timing of the doggie treat is vital. It gives a good boost for 3 turns (we’re talking +50% damage and more!) but you only get 2 per quest. Boss fight’s get priority obviously, but you basically want to use it with Hound’s Rush (anything else is too weak to really be worth it). If you can, try and wait until after you soften a big foe with Whistle… the boost will be immense!
- Grave Robber
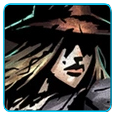 Floats like a butterfly, stings like a bee and would pilfer your teeth for giggles and sixpence.
Though fragile, she’s fast, accurate and pretty great at disarming traps. She’s also received some recent attention so now does more than give the enemy paper cuts. Sweet!
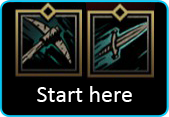 She comes with a cool set of melee and ranged moves, giving her great flexibility depending on where you place her. That said, you generally want Pick to the Face and Thrown Dagger as staples, and keep her in the 2nd/3rd rank. This allows her to hit every target and bring valuable armour piercing to the fray.
The rest depend on where you put her...
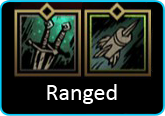 Flashing Daggers and Poison Darts bolster your ranged capabilities, letting you destroy lightly armoured mobs and stacking up needles of blight on the bigg’uns. With this, you can keep her tucked further back.
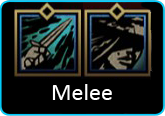 The front-line-setup is a bit fiddlier. Lunge is powerful but forces you forward, meaning you almost always have to synergise it with Shadow Fade to use it more than once. And just as well… the damage boost of Shadow Fade just begs for a strong follow-up attack! Understandably, this style will have her moving around a lot... so make sure your team can accommodate.
- Arbalest
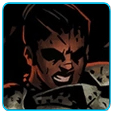 A reliable go-to when you need someone in the back rank who can dish out a ton of damage. Only 1 of her moves can function forward of the 3rd position however, so keep her back and have her unleash hell. Her camping abilities are also exceptional.
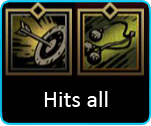 Sniper Shot is a must-have. No nonsense and can create some very satisfying one-shot kills. Bola is surprisingly good to include too, as it enables you to hit the front ranks for a decent amount of damage. Lead the way with these and support how you see fit.
Blindfire is useful in case you get kicked into the front row. Where it randomly hits a target, however, it’s useless in late combat where it’s highly likely to hit a corpse (that’ll teach it!) - But it’s handy in the start of combat for its generous speed boost (if there are no quick-kills to be had).
And don’t be quick to snub Battlefield Bandage. Whilst its healing is small, it enhances further healing on the same patient – So is perfect if you have another healer on board. Just make sure the enemy is weak when you use this though, as you’ll be using a few characters’ turns healing to get the most out of this.
Truthfully, only Rallying Flare is a move to avoid. Relieving stun is useful, but it relies on you having your turn before the affected ally, so can be a bit unreliable.
- The Abomination
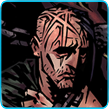
 An unusual but utterly awesome class. Unlike the others, you have all his combat moves available to you: 3 in Human form, 3 in Beast Mode and the Transform ability to switch between the two. So the good news is that you don’t need to worry about how to kit him out… but just how to use him.
The Transform ability is cool in that it doesn’t cost a turn, so you can use a move immediately after turning into a monster. The catch is that you can only monster-up once per combat. Not a problem? Well…
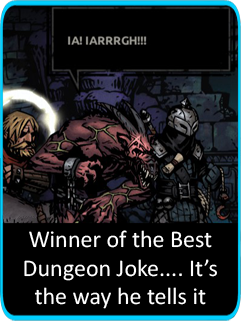 The nasty caveat with the Abomination is that he gains stress for each turn he’s in monster form. If his resolve is broken, he can get kicked out of beast mode. Where you can only transform once per combat, this means he’ll be stuck in human form for the rest of the fight… not a surprise you want when toe-to-toe with a boss and bad attitude.
As such, you ultimately have a time limit on the poor sucker. You need to end fights quickly when you transform, as drawn-out fights will take their toll quickly. You generally want to squeeze the most you can out of the human form until you’re in a position to score a quick win… and that’s one thing the beast can certainly do!
That said, you preferably don’t want to rely on your Abomination as your primary damage dealer. By all means, hulk up and wreck the living faeces out of everything… but make sure you have someone else doing the same, so you’re not caught short if your beast gets turfed prematurely.
So that’s the bad news…
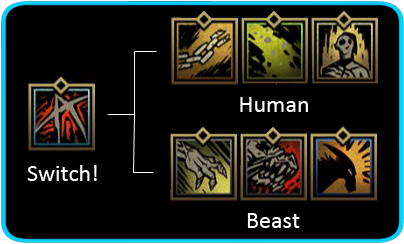
The beast-mode boasts a beautiful cavalcade of close-up wrecking abilities. Let Rage hilariously obliterate whatever it looks at and use Rake on large, squishy mobs where its damage stacks with consecutive uses. Then use Slam because it’s funny.
 The human form is a good mix. Manacles is surprisingly powerful and boasts a good stun – an excellent way to pick off enemies without monstering up. Beast’s Bile is your crowd control where it blights the middle 2 enemies. He can also heal himself for both HP and stress with Absolution, ultimately buying more time when you want to crack open that can-of-excessive-whooping.
Now beast mode operates best in ranks 1-2… human form in 2-3… so keep him in rank 2 where possible, to get the most out of both. Nothing’s more depressing than being kicked out of beast mode in rank 1 and only being able to self-heal.
If you’re heading to a boss fight, then it also might be worth packing a Restraining Padlock. Yes, it takes up the space a damage trinket could… but the -25% transform stress essentially buys you 25% more turns: a stronger boon to your attack capabilities in long fights.
- Antiquarian
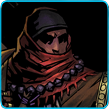 The Antiquarian is not a hero… She’s a treasure hunter.
Bluntly put, she’s is akin to bringing a twig to a gunfight. Seriously, she is awful in combat. Instead, her value add are the 2 passive abilities she brings to your team:
Firstly, she can increase the amount of gold you can hold per ‘stack’ (2,000 instead of the usual 1,750) – A real boon for haul’s when you’re juggling both gold and heirlooms.
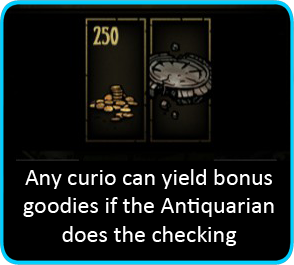 Her being present also means that you will regularly find artefacts amongst loot drops worth a cool amount of gold (250 – 1,000). Make sure she’s the one interacting with curios as well, as you’ll gain artefacts from them too if she’s the one poking around. Even a short mission can have you hauling in several thousand gold’s-worth of goodies from her alone.
As such, you only ever want one on a party. You’re effectively taking dead-weight with you, so need to be able to function with just 3 brutes. The rest of your team ideally need to be able to hit fast and hard. Don’t be too subtle – kit them out for damage and go crazy.
You should obviously also never pack her for boss fights and, to be honest, the only time you’ll want her stalking a Champion-level dungeon is get her to level 6. It’s also probably wise to not take her on any dark runs.
The ideal time to start including her is once your machine of war starts rolling (when your guys start hitting resolve level 2). Once you’re able to take the bulk of easier dungeons in your stride, tag-team with her to really start rolling in the cash (you’ll need it).
As for how to deck her out in combat… the phrase “making the best of a bad situation” springs to mind. She has some nice support moves, but their effects are far too puny to really be meaningful. Fortifying Vapours is sufficient to nudge someone off Death’s Door, so probably the only I’d definitely bring. Nervous Stab as well, maybe, just to have some semblance of damage and the ability to knock out the odd low-health enemy (saves using a stronger hero on it). Once you start hitting veteran dungeons, Flashpowder is also handy for de-stealthing. But yes, for the most part it’s a case of “well… she’s trying”.
Get Down is excellent for self-preservation if she’s already tucked at the back. Protect Me is the interesting one, however. There are 2 key situations to pack it.
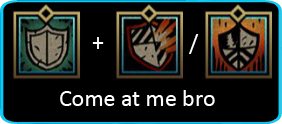 Firstly, if you have someone with riposte moves. The forced guard effectively doubles your chance of a counter-attack. Just make sure you have sufficient healing on hand to heal up the poor sod taking the hits.
The second is if you have someone with boosted PROT/dodge – either from trinkets or moves. This move confers stat boosts to them, not the antiquarian, and the buffs stack, potentially making them quite the formidable tank if their stats are already high. Now the reason I said “boosted PROT/dodge”... The likes of the Carapace Idol already gives the antiquarian a meaty 25% PROT. You can make her quite hardy, so would be silly to let someone with +10% PROT take the hits instead. In those instances, you’re better off with Get Down.
The only downside is that both moves are short-lived (a turn or 2). But like I said… making the best of a bad situation…
- Musketeer
 The Musketeer is simply an Arbalest reskin for the Adventurer Tier backers on the Kickstarter ALL THE PEOPLE (thanks, Red Hook). Her abilities are identical, so everything that worked for the Arbalest will work here too.
- Flagellant
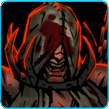 This legend of lashing loves his whips… and you should love them too! He can punish foes with an obscene amount of bleeding, letting even heavies melt away if given enough turns to lay into them. Much like the Hellion, he has a number of double-edged quirks which can make him formidable if you know what you’re doing. The good news, however, is that his basic set is easy to use and still kicks butt:
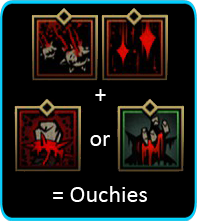 Start with Punish and Rain of Sorrows to give him full coverage of the enemy’s ranks. If anything has even a shred of blood, encourage them to spread the love and keel over in the process. Then simply pick one of his emergency moves: Either Exsanguinate or Redeem. Stick him up front and go nuts.
I say ‘emergency moves’ because their party trick is that they only activate when below 40% HP. The first is a heavy bleed attack, the other generously heals an ally. Both also heavily heal the Flagellant in the process – making them absolute winners when you’re cornered, if nothing else to keep the poor sod alive.
Now you might be wondering why so many of his other attacks hurt him in the process. Well… He has a naughty trick up what remains of his sleeves. He receives a number of boosts when low on health, broken or even killed. For seasoned players, this can lend itself to some risky yet powerful plays, but truth be told you can get away with just using him like any other hero. Simply let the boosts be a nice-to-have if you get into a messy situation. The enemy will still feel his presence when he’s healthy. Trust me.
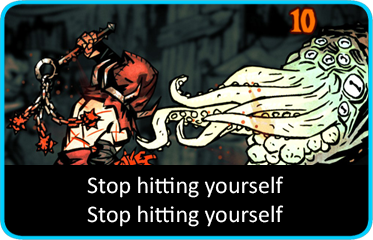
The only real headache is that he only flagellates for stress relief (unsurprising really) so can be expensive and frustrating to keep happy.
- Shieldbreaker
 The sheidlbreaker is very much like a blight-oriented hellion. Light and evasive but can satisfyingly plough her way through foes if given enough of a chance.
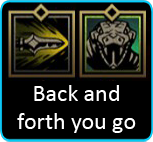 She belongs in Rank 1. Even if you don’t want her there, her moves will make sure of it… so don’t try and fight it. Just keep her there. Adder’s Kiss is probably her best move: Full damage and heavy blight. The catch is that she moves backwards doing so. But that’s where Pierce comes in. It’s a versatile attack that punches through armour which, for that alone, makes it an absolute must-have. But it also keeps you moving forward, setting you up nicely for Adder’s Kiss when you have a tough nut to crack. Those 2 moves make for a very deadly combo, and serve well as the mainstay of your shieldbreaker.
Her most interesting ability, however, is Serpent’s Sway. The ability to negate the damage of 2 attacks is not something to sniff at... Providing you use it well. Against the local riff-raff, it’s actually a bit of a wasted turn. Why block damage when you can do so permanently by skewering them? Besides, just because she’s safe, it doesn’t mean the rest of your team won’t be copping it either.
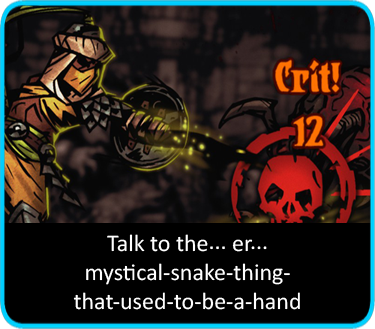 The trick is to keep in your back pocket for bosses or higher-level dungeon heavies. Ones that take a while to kill or utterly clobber the front line for massive amounts of damage. That’s when it earns its keep. It doesn’t expire (within battle, that is) so you can be confident in getting your money’s worth.
Bear in mind it only negates damage, not stress or added effects. So be sure to activate it when any flimsy minions are dealt with, so that it’s not wasted by light attacks.
She’s great fun. Just… watch your back if you invite her round the campfire…
Thoughts and Suggestions
Anything I've missed?
Anything you'd like more detail or explanations on?
Disagree with any of the above and want to challenge me to a game of Russian Roulette with Dungeon Curios?
Give me a shout!
Happy Gaming
- Curio Guide★ 5 (5.1k)96k views13k ♥10 minUpdated Feb 2, 2022
- Party Building/Composition★ 5 (2.2k)60k views5.8k ♥27 minUpdated Jun 28, 2018
- The Darkest Dungeon 101 - All You Need to Know★ 5 (2.1k)56k views6.1k ♥21 minUpdated Jun 20, 2022
- The Complete Guide to Provisions★ 5 (2.2k)50k views6.1k ♥20 minUpdated Jun 24, 2020
- Darkest Dungeon без боли: 100 страниц боевого опыта★ 5 (2.6k)48k views4.7k ♥179 minRussianUpdated Aug 30, 2020
- Интерактивные объекты или как не получить много проблем★ 5 (2.5k)46k views4.4k ♥5 minRussianUpdated Nov 2, 2021


- Upgrading to PremiumTeam Fortress 2★ 5 (20k)1441k views11k ♥6 minUpdated May 11, 2022
- No More Room in Hell Official ManualNo More Room in Hell★ 5 (2.8k)569k views2.1k ♥29 minUpdated Apr 22, 2019
- NMRiH Community Hosting GuidesNo More Room in Hell★ 5 (526)351k views653 ♥1 minUpdated Aug 10, 2022
- ULTIMATE GUIDE FOR GAME DEV TYCOONGame Dev Tycoon★ 5 (5.8k)326k views10k ♥4 minUpdated 23 Jan, 2014
- How to 'Git Gud' Soon™MORDHAU★ 5 (2k)318k views3k ♥68 minUpdated Nov 16, 2024
- Лучшие кооперативные игры SteamPAYDAY 2★ 5 (1.5k)315k views2.1k ♥56 minRussianUpdated Apr 27, 2025






This guide was created by its original author on the Steam Community. Are you the author and want it removed? Request removal.