LUX Shaders Cartoon/Anime Effect
What do you need to get started?
To get started, you'll need to download 2 add-ons from the Workshop and 2 file-editing programs.
LUX Shaders - if you haven't downloaded it yet
https://steamcommunity.com/sharedfiles/filedetails/?id=3749980470
LUX Shader Prepender Script - an add-on for it
https://steamcommunity.com/sharedfiles/filedetails/?id=3750779890
Clear Material Cache Script - We need it to quickly reload the materials
https://steamcommunity.com/sharedfiles/filedetails/?id=3740668603
Notepad++
https://notepad-plus-plus.org/
VTF Edit Reloaded
https://github.com/Sky-rym/VTFEdit-Reloaded/releases
(An optional better version of VTF Edit)
We need all these add-ons and programs to create the desired properties of this shader; unfortunately, there’s no other way to edit it.
As you can see in the PNG, here’s an example of this shader.
Before - After
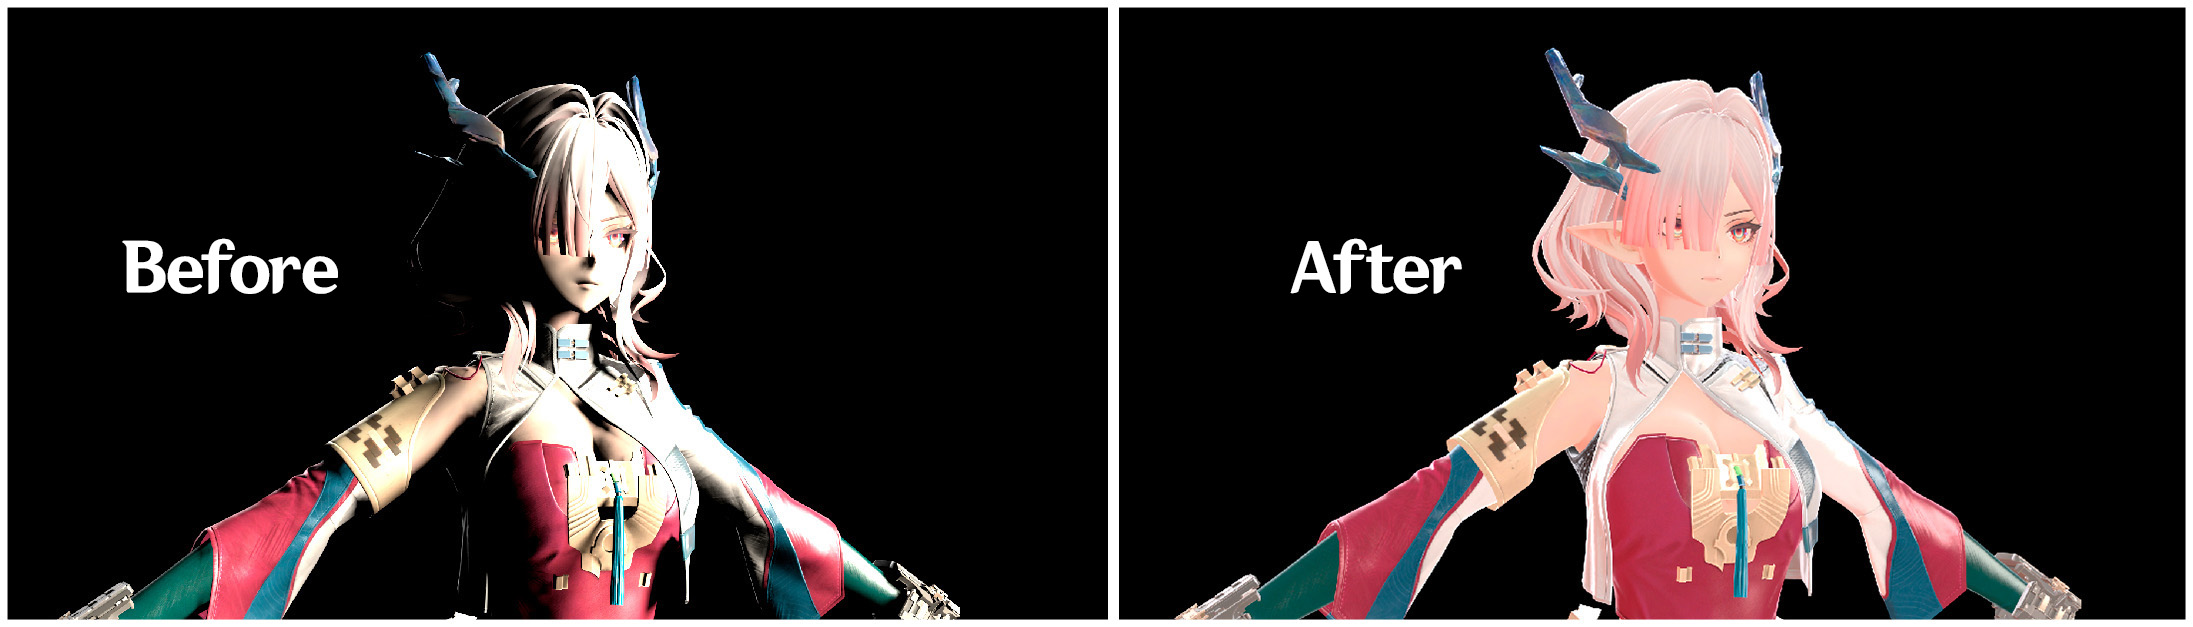
(There are two light sources there: the main light and the rimlight.)
Applying LUX to materials
After launching SFM, proceed as usual. Load the map, set up the camera, load any model you need to start the experiment, and position the camera angle so that you can clearly see, say, from the shoulders up to the top of the head—or however you prefer.
- Next, click on the model and locate the line “Shader_LUX_Prepender” in the RIG.
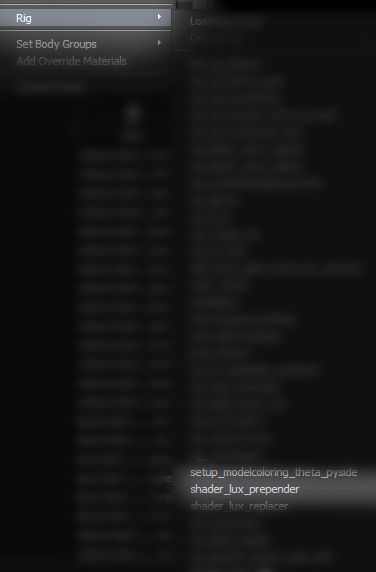
- Click to open a window showing the model's materials that it can edit.
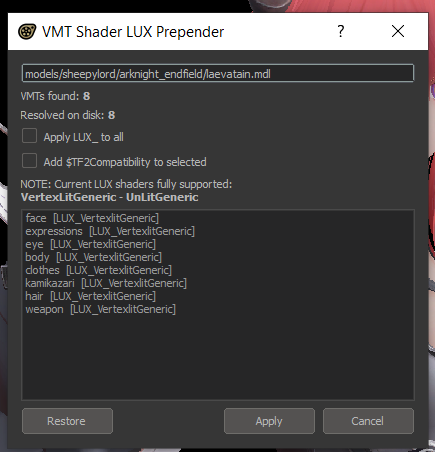
- It very easy. Click “Apply LUX_ to all”; this will automatically select all the model's supported materials, and then click the “Apply” button at the bottom.
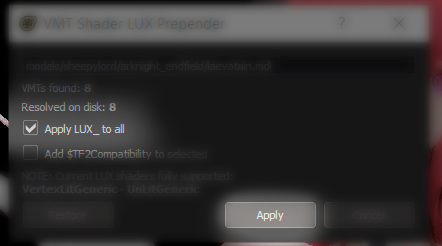
After that, a window will pop up saying that everything is done, and so on. This, in turn, shows us that it has created a couple of materials for its shader. To be specific, you’ve mastered 45% of this. Let’s move on.
Learning about VMT and how it all works in general
After all that, its time to edit the VMTs of the model(s).
First, you need to locate your VMTs, if you download it from the SFM Workshop, it would be in SourceFilmmaker/game/workshop/materials.
If its not from the SFM Workshop, simply locate it in whichever mod folder you placed it in, for example some people like putting things in usermod (this is a bad habit you should avoid and should instead use a custom mod folder).
Next, in the file browser just look for the folder containing your model’s materials, the ones you edited in with the Prepender Script
Found it? Great—that’s where tools like Notepad++ will come in handy.
Your icons should look roughly the same as mine. Now, click on almost any VMT file - not a VTF, but a VMT file—and right-click on it.
1.
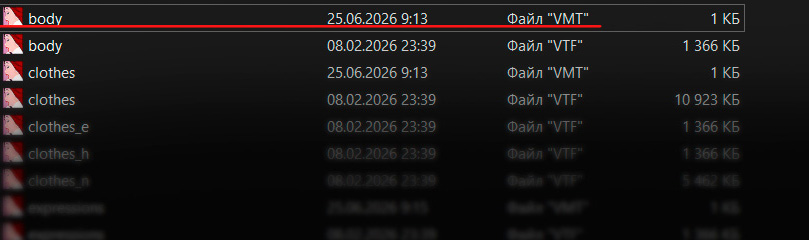
2.

And click “Edit” using Notepad++.
After that, a window should open showing all the commands for this tutorial, just as shown in the image. As you can see in the image, each model by different authors has its own methods, commands, paths, and so on.
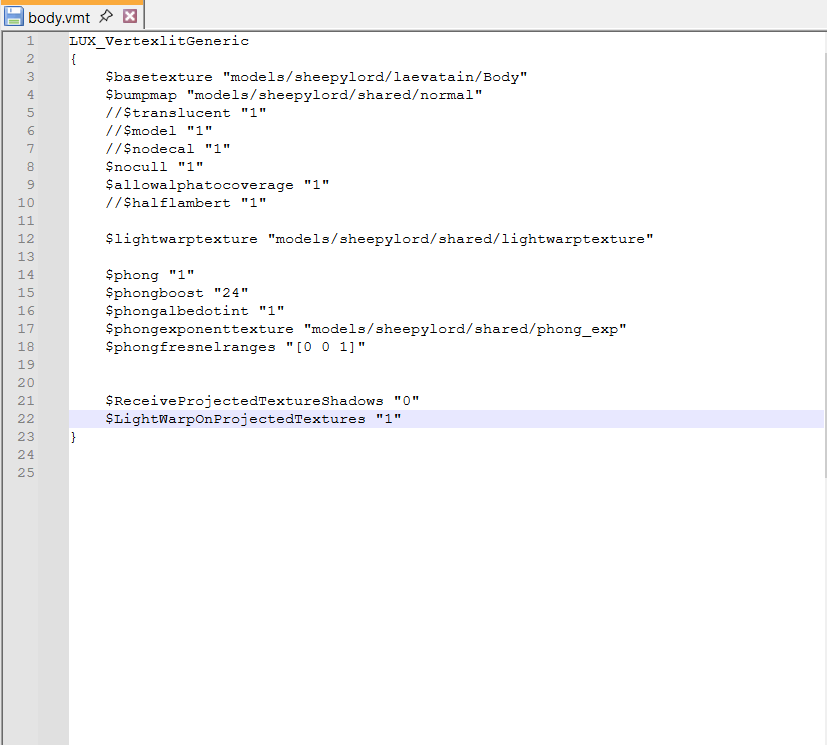
So now we're going to add two commands to make all of this work. But first, I'll explain what they do—based on their functions and which material names to apply them to.
Which materials will work
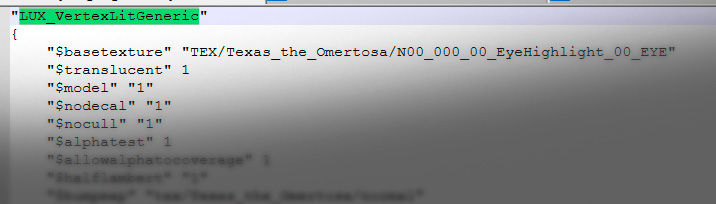
All of this will only work on materials that have “LUX_VertexLitGeneric” as the very first entry at the beginning. The attributes only works on materials using this shader.
- Selecting a Lightwarp -
To utilize a Lightwarp you must first define a Lightwarp texture to use in the VMT(s). The formatting is like so:- Enabling Lightwarp Usage -
This command allows SFM's dynamic lights to utilize the $LightwarpTexture defined in the VMT. Prior to LUX Shaders, it was only possible to use them with baked Hammer based lighting.
You must first define a VTF to use ("$lightwarptexture" "xyz.vtf") before this command will do anything.
You can use any Lightwarp you want, but for Anime / Toon models, a Two-Tone Lightwarp is best. Or in certain cases, like concave eye sockets or faces with extreme flexes, even a flat single color Lightwarp looks better.
- Disabling Shadows on a Material/Model Basis -
This command dictates weather the material will receive shadows from SFM's lights. Lightwarps are fundamentally opposed to shadowed lights, so SFM shadows don't work the same.
Generally its best to use either lights with shadows disabled or add this command to your model's materials if you plan to use:
If you want to utilize shadows, you need to use a proper Lightwarp texture; One that is split perfectly 50/50. For example, if your Lightwarp texture is 2048 pixels wide, the first 1024 pixels need to be black.
You can choose between shadows always off (per material) or shadows off per light.
Per material is good if you want to have non toon/anime characters next to them that would require shadows, or if you want the character to cast shadows on the environment.
If you want to use rimlights you also want to keep shadows enabled per material and disable them per light.
And that’s it—now your model has beautiful, blazing light, just like the shadows.
An example of how it should be done.
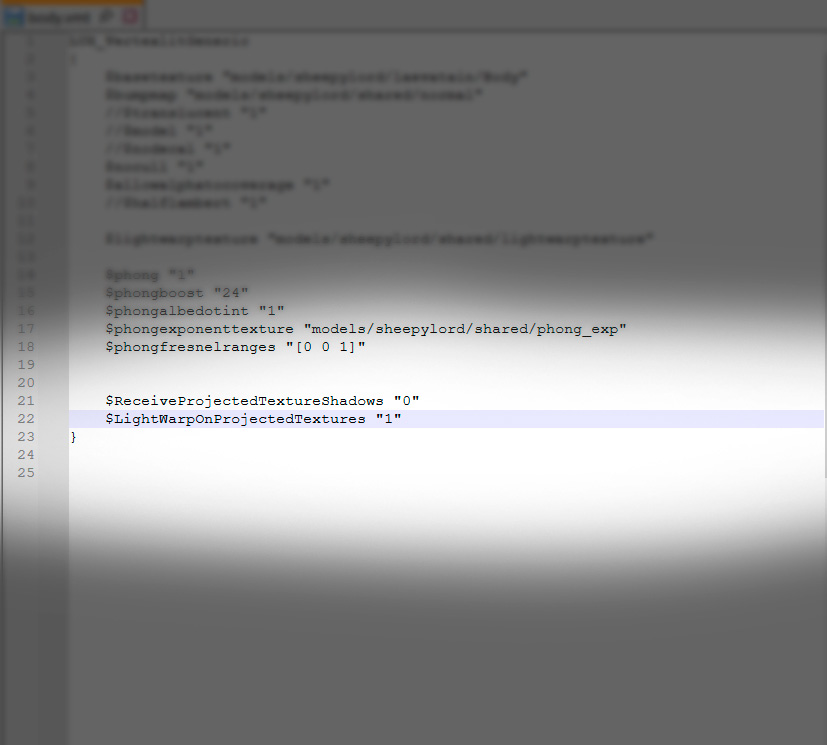
But we're not done yet—you need to save the material, and I hope you're not too clueless and know how to save it with a simple click. And do this for every VMT that has LUX_VertexLitGeneric on your model. After all that, you can close the Notepad++ tab
and check the model either by reloading the materials or clearing the material cache or by relaunching SFM.
Possible Questions
Now let’s move on to some clarifications!
1. Unexpected lighting?
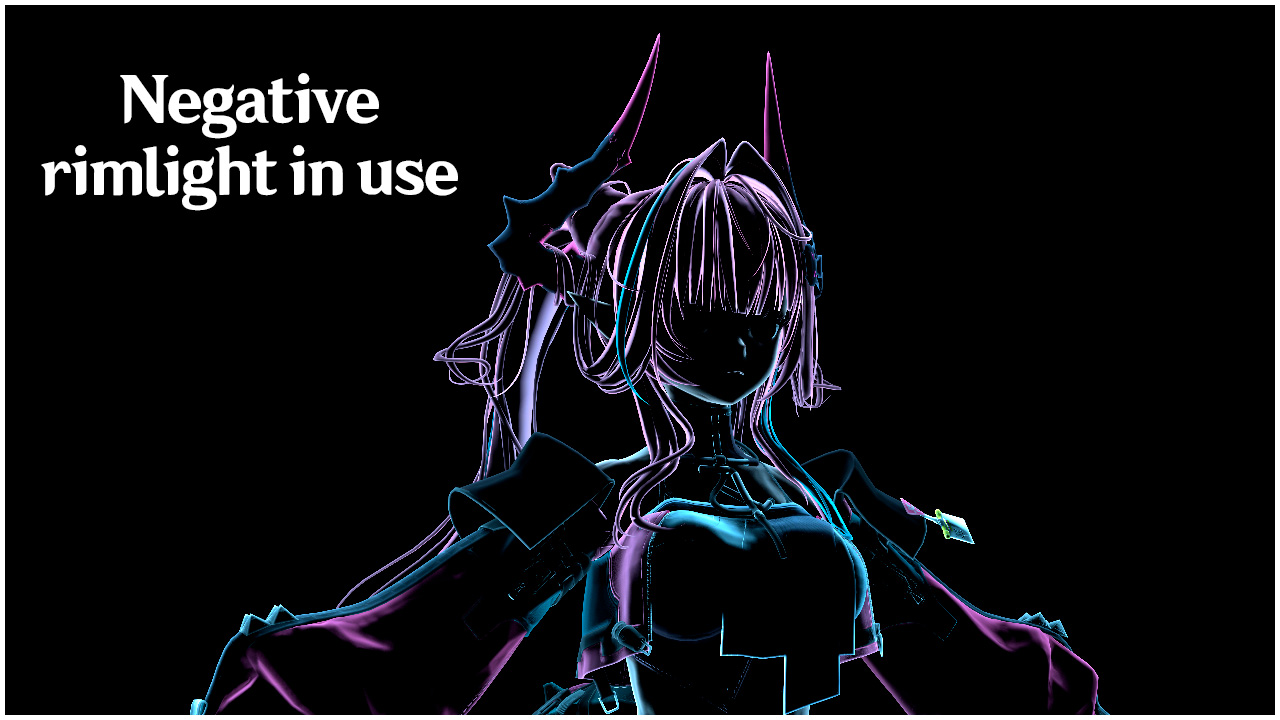
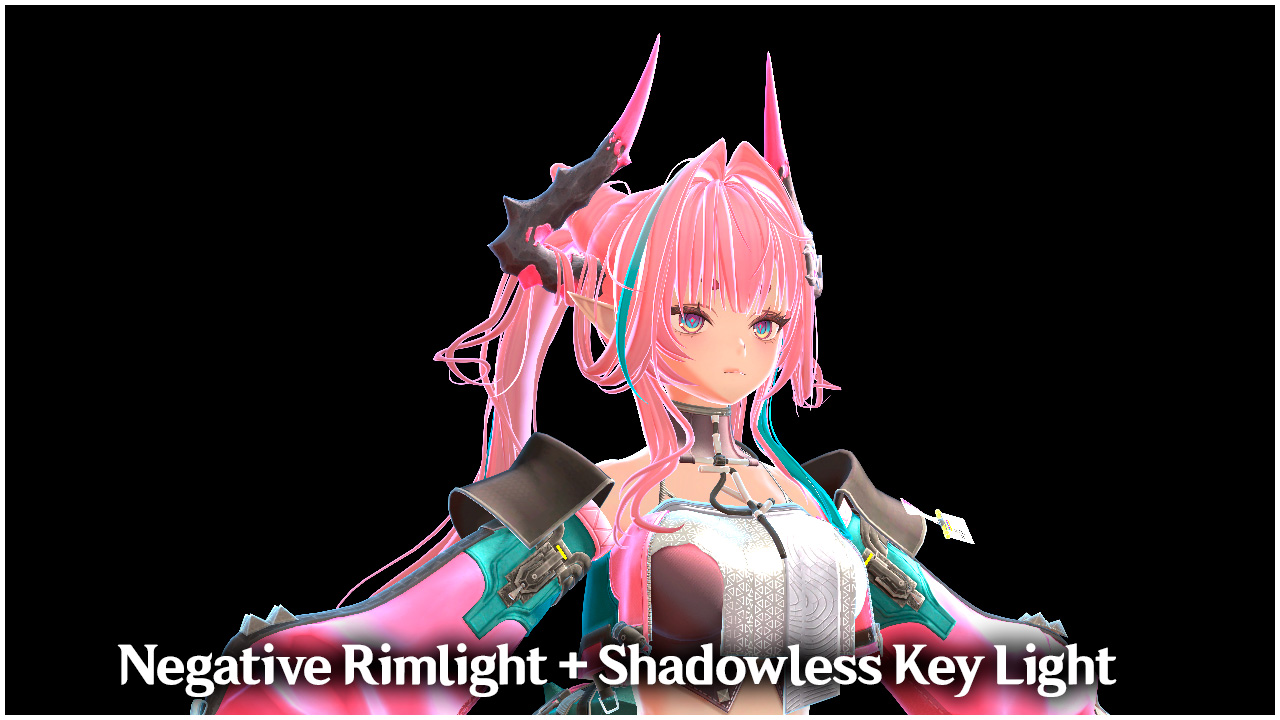
Using Lightwarps with SFM's lights essentially makes it so you can't utilize traditional rimlights.
Here, a light is placed behind the model.
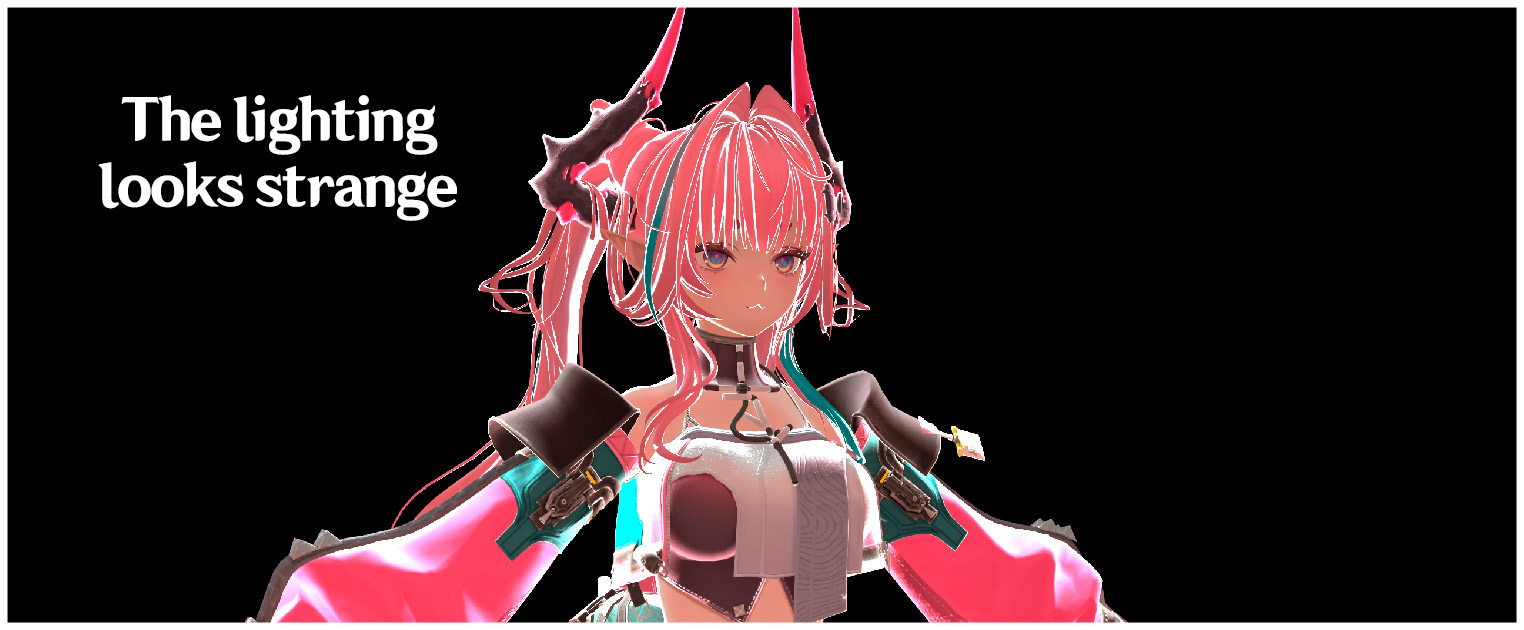
If you want a rimlight effect, set all materials to $ReceiveProjectedTextureShadows 1 and look into Negative Rimlights. This guide teaches how to use them in section 0.4.
https://steamcommunity.com/sharedfiles/filedetails/?id=1716880745
2.White wireframes?
If you have something like this, as shown in this picture;
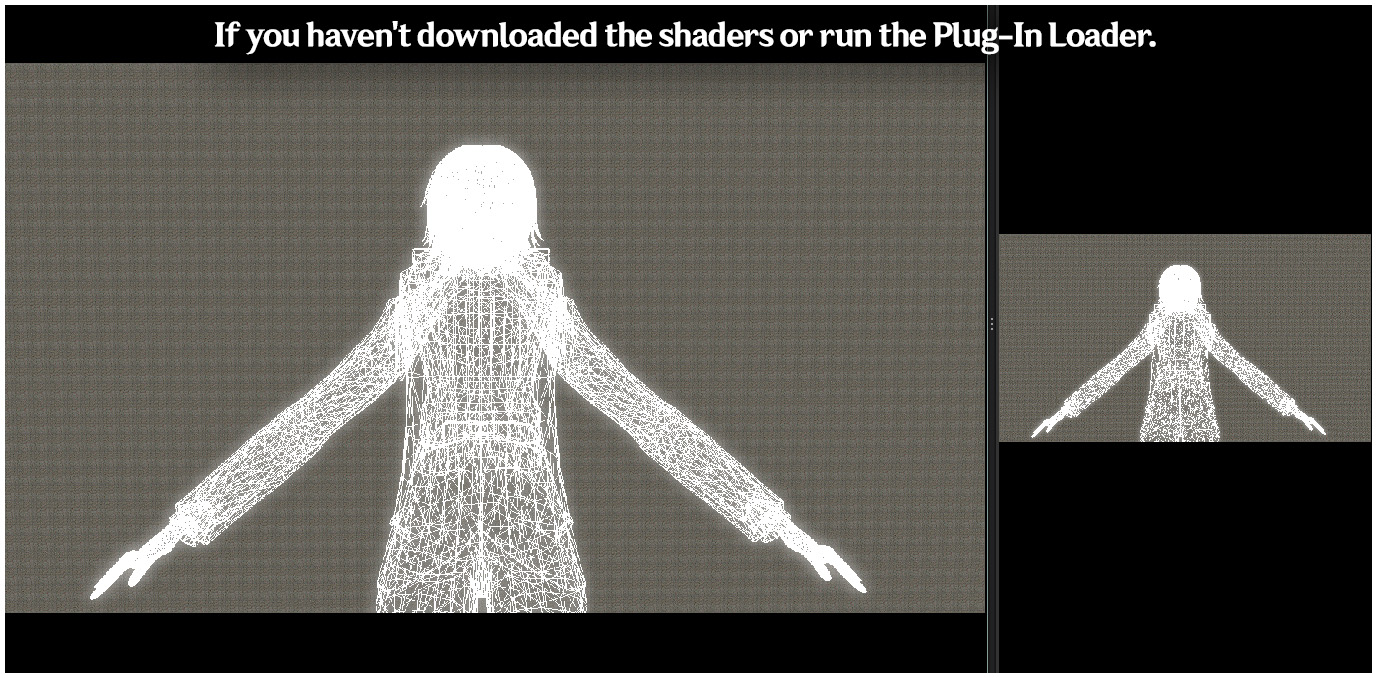
Then that can mean you're missing the shaders (like if you didn't actually download them), or you didn't run the Plug-In Loader script, or didn't also download the Shader Loader, or the shader name in the VMT is incorrect. To check whether it downloaded or not, click to download it again. If you have Steam running right now, log out and log back in; if not, log in to download it, then log out and log back in. After that, open the console—there should be a message like, “Hey man, you downloaded the shader—it’s active!” or something like that. Or sometimes even, the Plug-In Loader fails even when you've used it, so give it a few more tries until it does work.
3. The model is covered in squares?
At the time of this guide's writing, there's a bug for LUX that requires a $bumpmap to be defined. if your model isn't using one, you can simply input the following to use an unintrusive flat one.
4. Model is too bright?
Because of how Lightwarps are applied, each light pointed at it will make it brighter (similar to the old $emissiveblend bug that LUX fixes). To subdue this, you can use $color to make the textures darker.
The quickest and easiest way off doing this us using this the Proxy Sliders script:
https://steamcommunity.com/sharedfiles/filedetails/?id=1393076955
Apply it with $color and you can control the brightness of all materials equally and easily.
https://youtu.be/CNic8XW-E_A
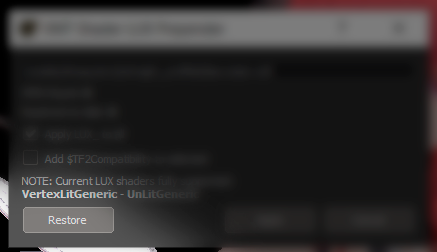
5. How do I restore the materials?
The LUX Prepender Script allows you to revert the materials.
To do this, just as before, go to RIG and find the script you used to set up LUX for the materials; as shown in the image, simply click the button. It’s best to click it so that all materials are selected at once.
Credits and Disclaimers
As I mentioned, this guide is a translation of the original Russian guide, intended for the English - speaking part of the SFM fandom—specifically, for those who want to understand the LUX shader. If you speak Russian or would like to check out the original version, here is a link to it.
https://steamcommunity.com/sharedfiles/filedetails/?id=3751424239
This guide was partially translated by the original author, A1046 (also known as BeerMan), and TurnTwister, one of the shader’s authors, who was responsible for the translation into the English - language fandom. He specifically asked me to create a similar guide for the English - language fandom.
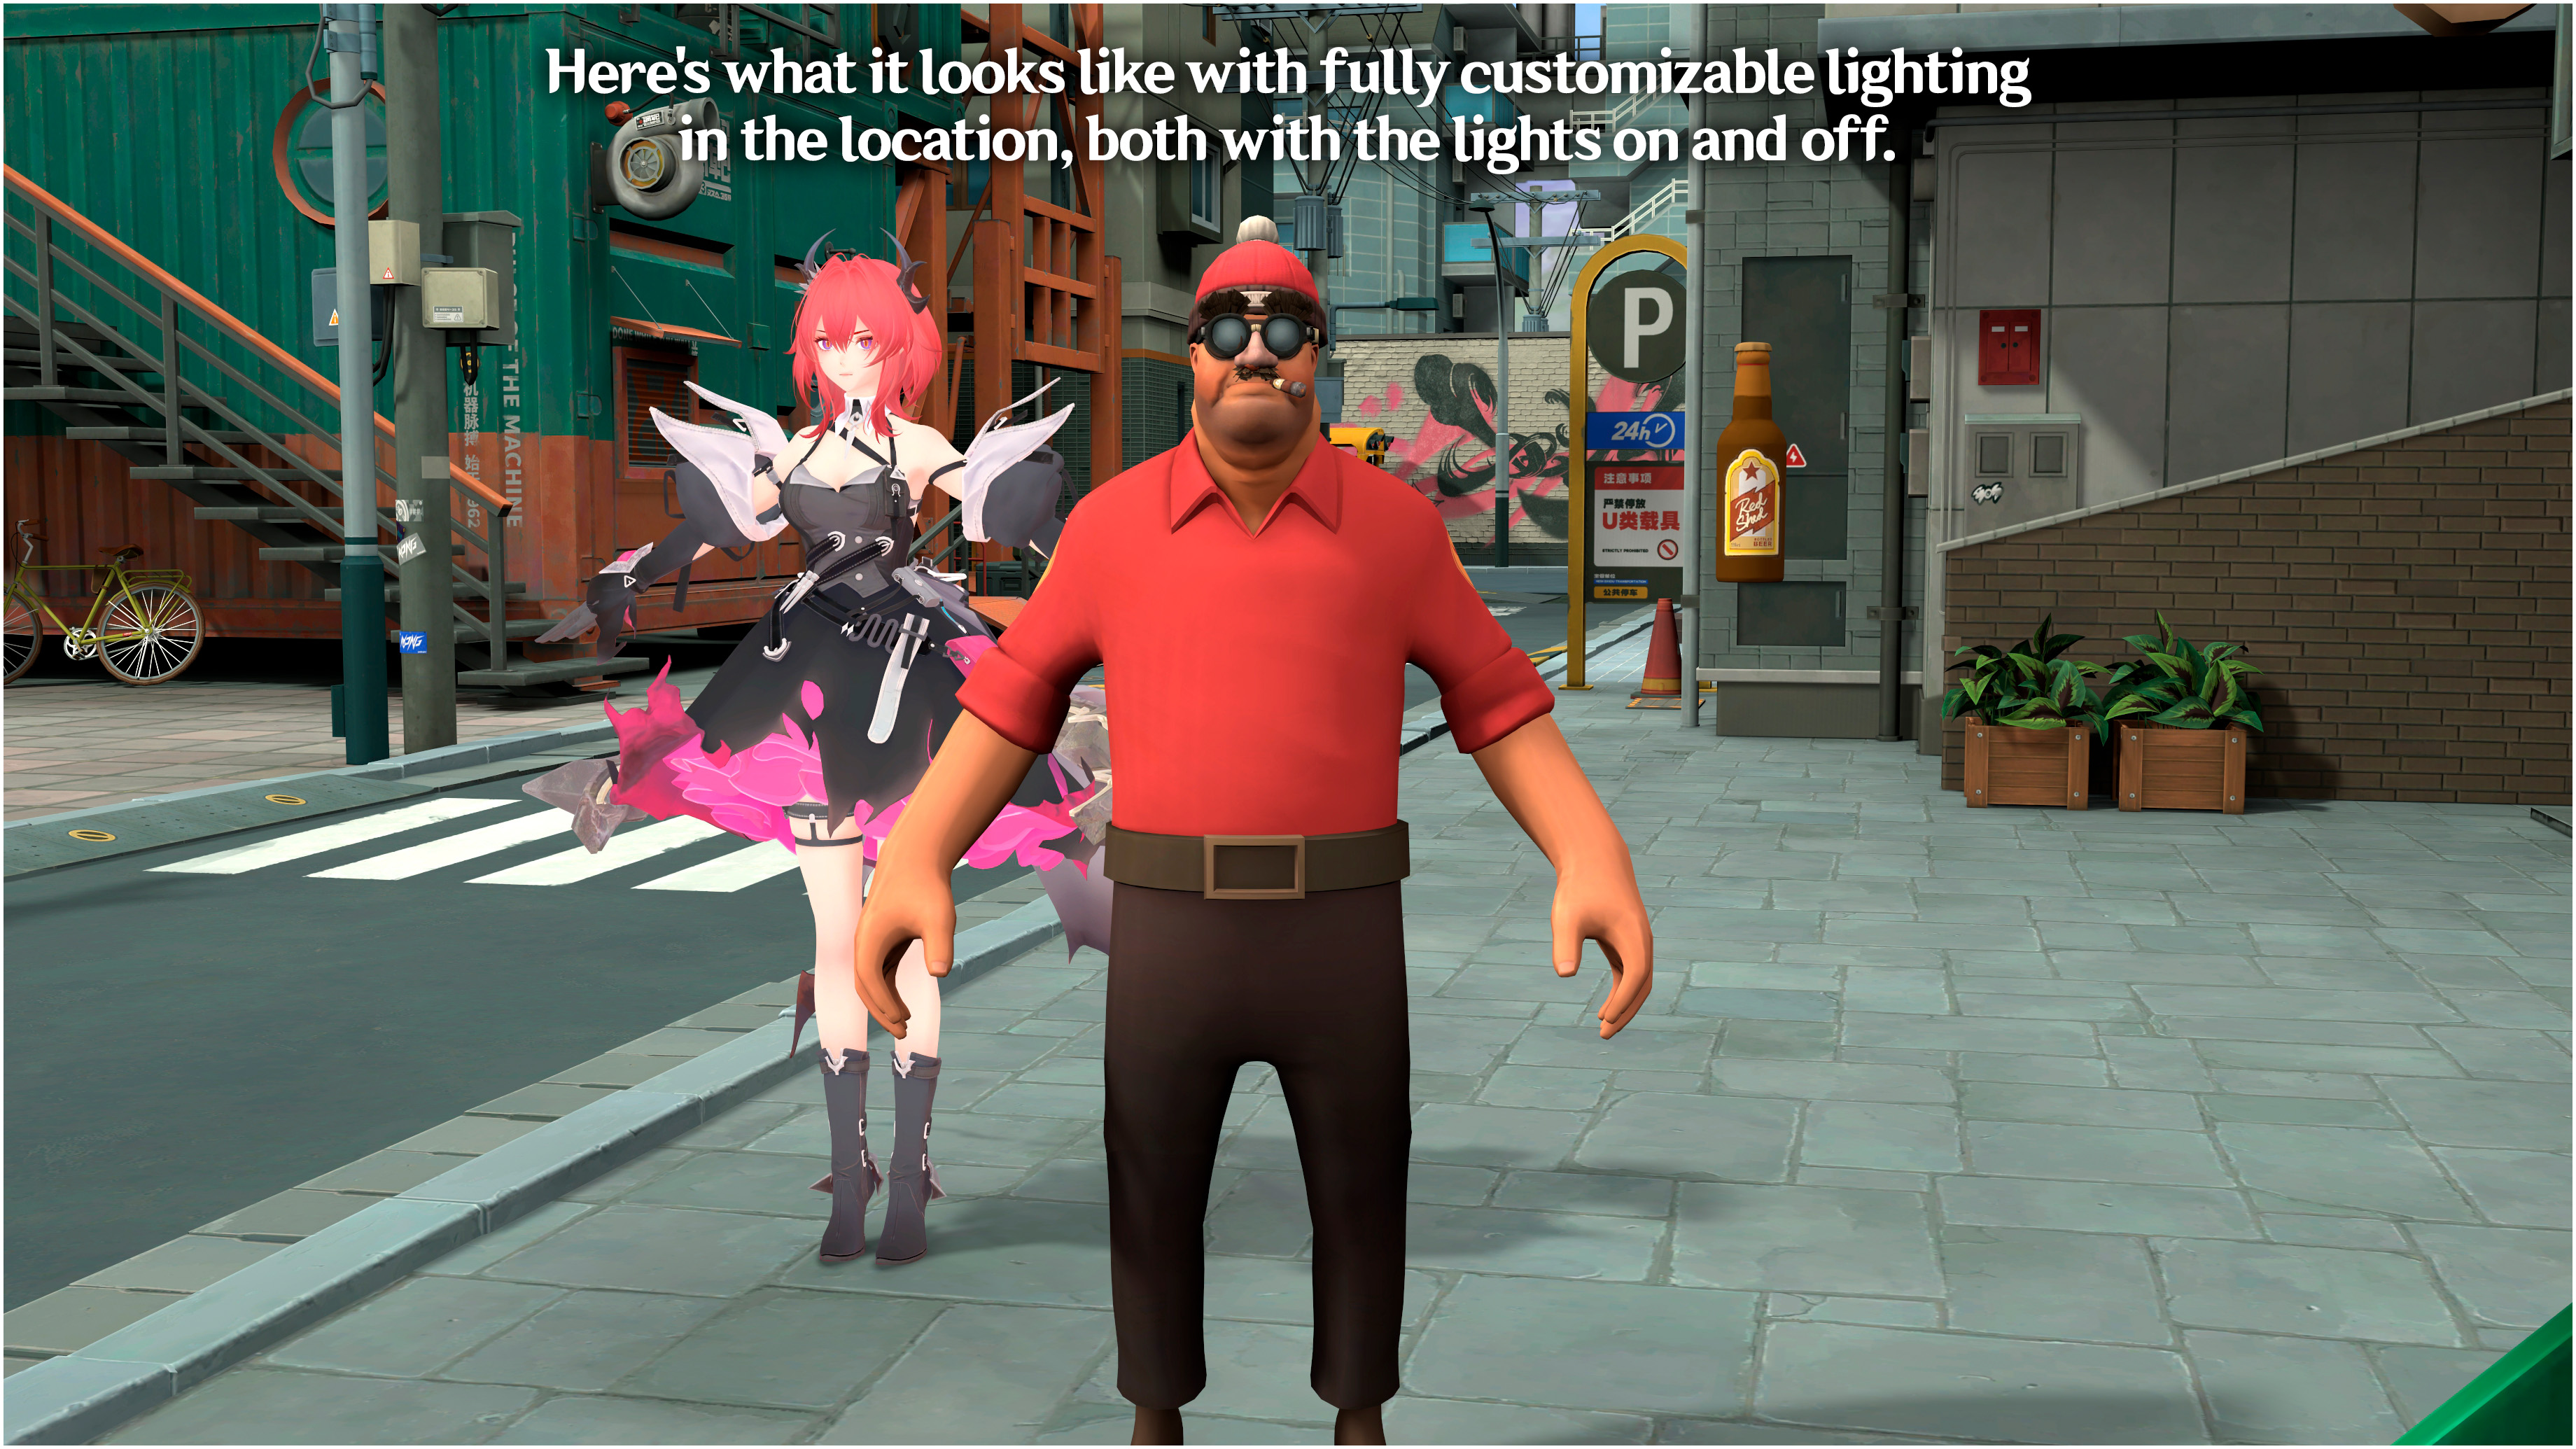
As stated at the beginning, this guide is intended to demonstrate one of the features of the LUX shader in SFM for inexperienced users. After all, not every beginner or veteran is familiar with SFM files and the materials contained within them.
In the image, you can see an example of this shader
Please support the guide with your likes and shares. Also, join the social media groups where the creators are active.
A1046 Community
I am an official content creator for Arknights Endfield, and I’m also trying to become one for the original Arknights game. I post models for these two games as I experiment with SFM. I’d appreciate it if you could support me.
Telegram[t.me]
TikTok[www.tiktok.com]
- Changing Textures Using Material Overrides★ 5 (1.4k)41k views2.7k ♥5 minUpdated Jul 26, 2014
- Manually Updating TF2 Content★ 5 (1.3k)35k views1.9k ♥2 minUpdated Nov 26, 2025
- The Fundamentals of SFM: For Beginners★ 5 (1.3k)25k views3.3k ♥55 minUpdated Apr 29
- Ваш первый постер★ 5 (1.1k)22k views2k ♥5 minRussianUpdated Oct 22, 2024
- Getting Gmod Workshop stuff too SFM★ 5 (510)15k views1.3k ♥1 minBulgarianUpdated Aug 4, 2015
- Animation Guide★ 5 (704)14k views1.9k ♥6 minUpdated Apr 9, 2023




- Upgrading to PremiumTeam Fortress 2★ 5 (20k)1441k views11k ♥6 minUpdated May 11, 2022
- No More Room in Hell Official ManualNo More Room in Hell★ 5 (2.8k)569k views2.1k ♥29 minUpdated Apr 22, 2019
- NMRiH Community Hosting GuidesNo More Room in Hell★ 5 (526)351k views653 ♥1 minUpdated Aug 10, 2022
- ULTIMATE GUIDE FOR GAME DEV TYCOONGame Dev Tycoon★ 5 (5.8k)326k views10k ♥4 minUpdated 23 Jan, 2014
- How to 'Git Gud' Soon™MORDHAU★ 5 (2k)318k views3k ♥68 minUpdated Nov 16, 2024
- Лучшие кооперативные игры SteamPAYDAY 2★ 5 (1.5k)315k views2.1k ♥56 minRussianUpdated Apr 27, 2025






This guide was created by its original author on the Steam Community. Are you the author and want it removed? Request removal.