Medic Dozer Build [Skills 2.0] [W.I.P]
Introduction
"Make way for the dozer!"
This build will guide you on how to be a nearly unstoppable helmet popping machine. Mow through waves of enemies with ease! Tested on the new changes to Overkill!
Skills
"Excessive force is my middle name!"
Soldier Tree:
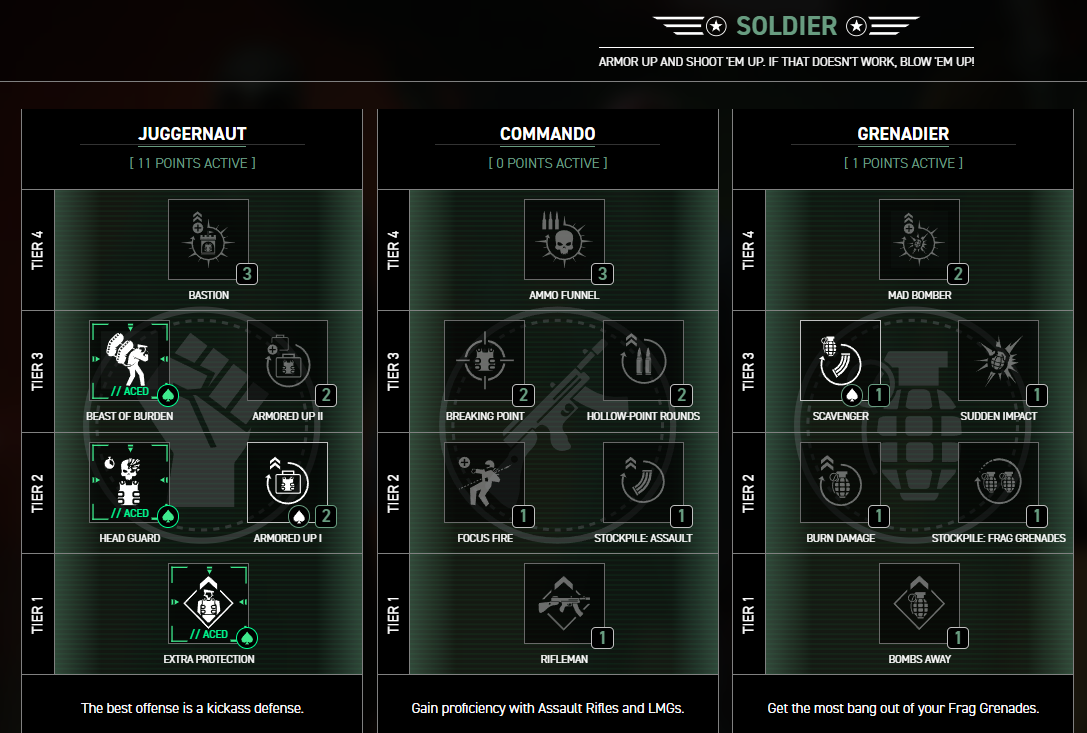
Juggernaut Branch:
- Beast of Burden (ACED): Beast of Burden is really the only skill that matters in this entire branch, but Head Guard ACED and Extra Protection ACED are decent for this build.
- Head Guard (ACED): Headshot kills reduce Armor Regeneration time by 0.6 seconds.
Useful, since this build uses 4 plate and the total regeneration time is about 7 seconds. - Armored Up I: Literally only here just so we can get to Beast of Burden (ACED).
- Extra Protection (ACED): The basic part of this skill is the one that really only matters:
"For every skill equipped in the juggernaut branch, gain 1% damage reduction to armor plates".
It's small, but it's something, and the reason why we have Armored Up I despite using Medic Bags for this build.
- Scavenger: Scavenger because I use shock grenades for Shields, which SWAT units group around.
Mechanic Tree:
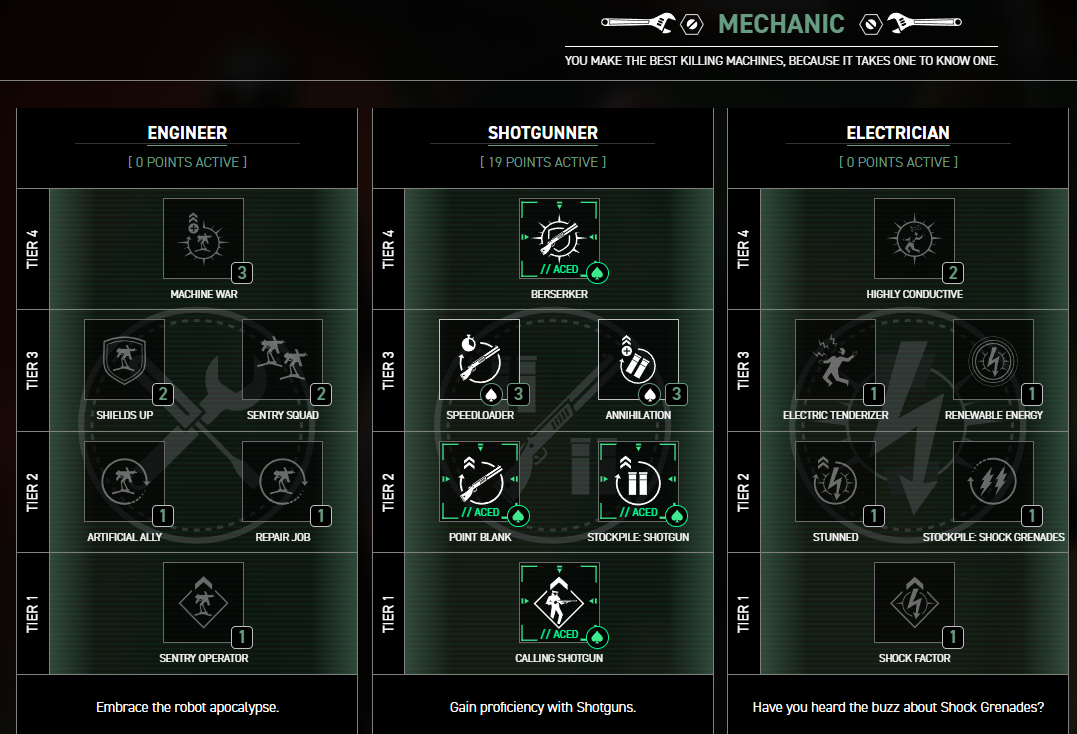
Shotgunner Branch:
- Calling Shotgun (ACED): For every equipped skill in the Shotgunner branch gives Shotgun pellets a 2.5% reduction to damage falloff and a 3% reduction of spread while aiming down sights.
- Point Blank (ACED): Your Shotgun deals an additional 50% damage to enemies within 5 meters.
- Stockpile: Shotgun (ACED): 80% more reserve ammo for your shotguns.
- Speed Loader: For each Shotgun pellet that hits an enemy, your next Shotgun reload is 1% faster, up to a maximum of 70%.
- Annihilation: Shotguns deal 4% more damage for each pellet that hits the same target. (Good for the M7 Pursuivant, the main weapon of this build)
- Berserker (ACED): You can reload and fire Shotguns while sprinting. While reloading a Shotgun, and for 2.5 seconds afterwards, you take 50% less damage from enemies within 8 meters.
Conman Tree:
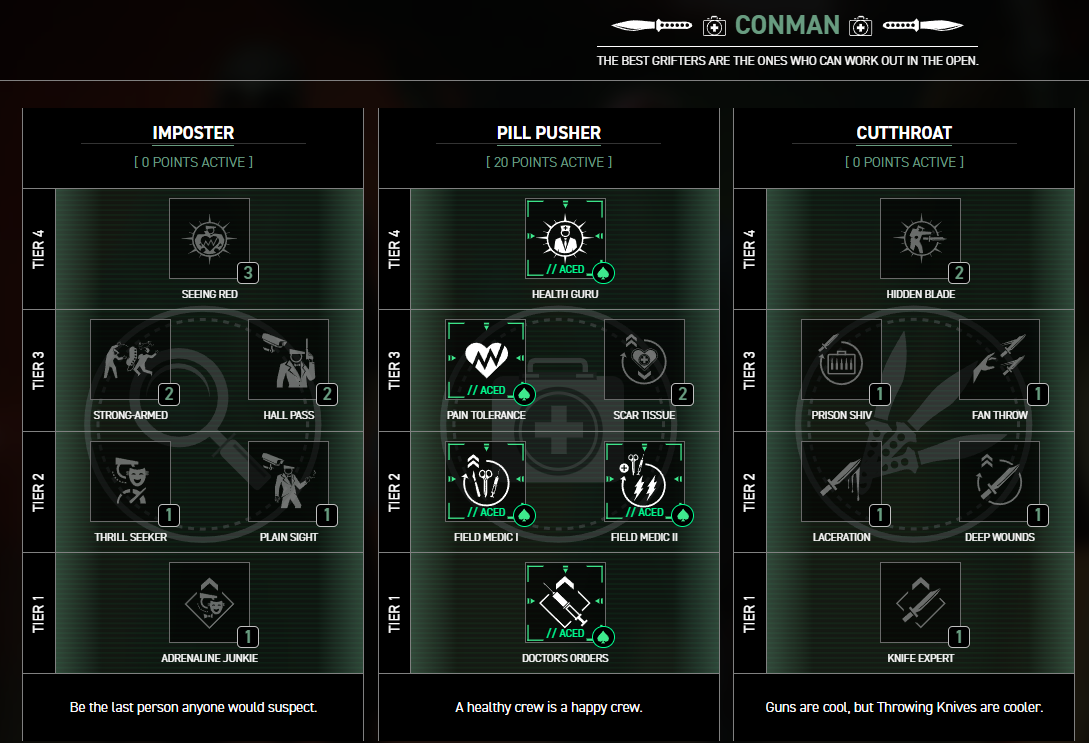
Pill Pusher Branch:
- Doctor's Orders (ACED): This is the start of the main bread and butter of this build.
For every skill equipped in this tree, you revive crewmates 5% faster (50%) AND for every skill equipped in the Pill Pusher branch, you (and your crewmate) are immune to damage for a period of 0.5 seconds (5 seconds) immediately after reviving a crewmate.
5 whole seconds of damage immunity for you and the crewmate you revived. - Field Medic I (ACED): Your Medic Bag comes with 3 additional charges. It's good to have.
- Field Medic II (ACED): Your Medic Bag comes with1 additional charge AND If your starting loadout contains a Medic Bag, receive 1 additional Medic Bag.
Field Medic II (ACED) is an invaluable part of this build with Health Guru (ACED). - Pain Tolerance (ACED): Between Pain Tolerance and Scar Tissue, Pain Tolerance (ACED) is the obvious choice.
Any damage inflicted on your Adrenaline is reduced by 10%. While at full health, you gain 25 adrenaline when you steal loose cash, perform a takedown, kill an enemy with a Throwing Knife, revive a crewmate, or when a crewmate uses your Medic Bag.
The only important parts of the second half are when you steal loose cash or revive a crewmate. Adrenaline is good to have when you want to minimize damage done to your armor plates (which we ideally want). - Health Guru (ACED): The main part of this build, mainly the ACED trait.
Aside from your Medic Bags healing 100% of a heister's maximum health, whenever you deploy a Medic Bag, you and all crewmates within 10 meters of the bag return to full health AND will revive any downed heisters within range.
Health Guru (ACED) should be used sparingly because it can be very useful in a pinch. Although, with Field Medic II (ACED) giving you an additional Medic Bag, you can be a little free when choosing to use this skill.
Equipment
"Beaten to a pulp, or riddled with hot lead?!? You don't get to choose!!!"
Primary Weapon: Rebel Tactics FSA-12G (FSA)
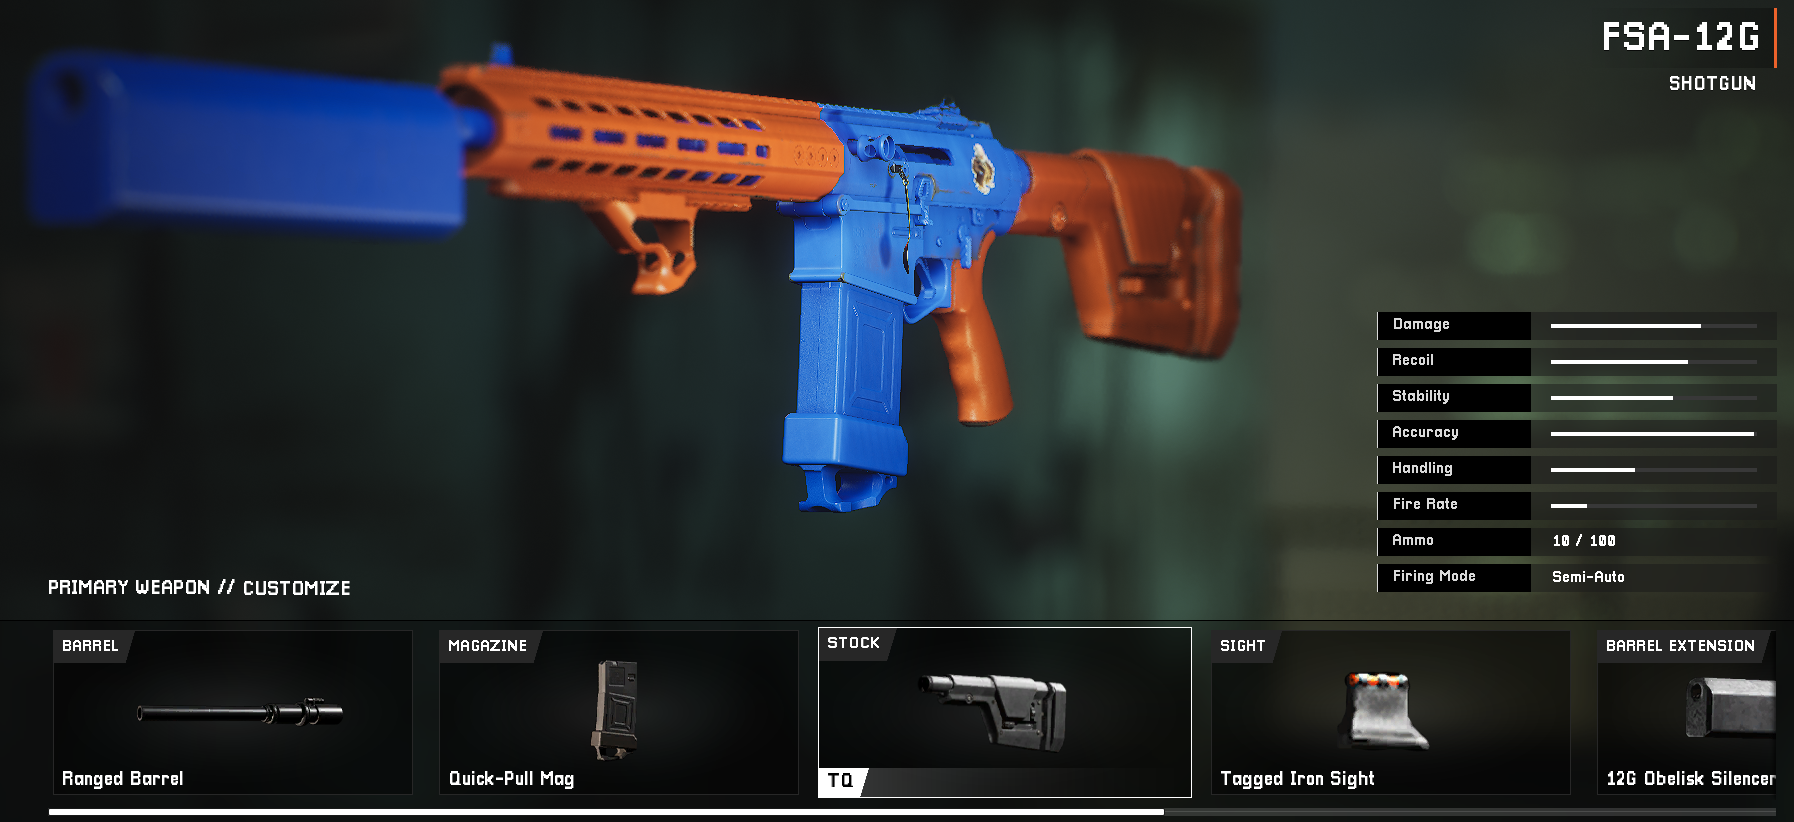 -
-Attachments:
- Ranged Barrel
- Quick-Pull Mag
- TQ Stock
- 12G Obelisk Silencer (Important for Assassin skills)
- Biofit Grip
- Angled Ghost Grip
After the update to shotguns, the FSA became the best shotgun in the game and arguably the best weapon in the game with how fast it is to take out Dozers.
I think's it's roughly 3-4 close up shots to their visor to take down a Dozer. It one shots most, if not all, SWAT units in close range. You will be mowing down everything in your path. Just be a little more cautious around Dozers.
Primary Weapon Alternative: Reinfeld 880
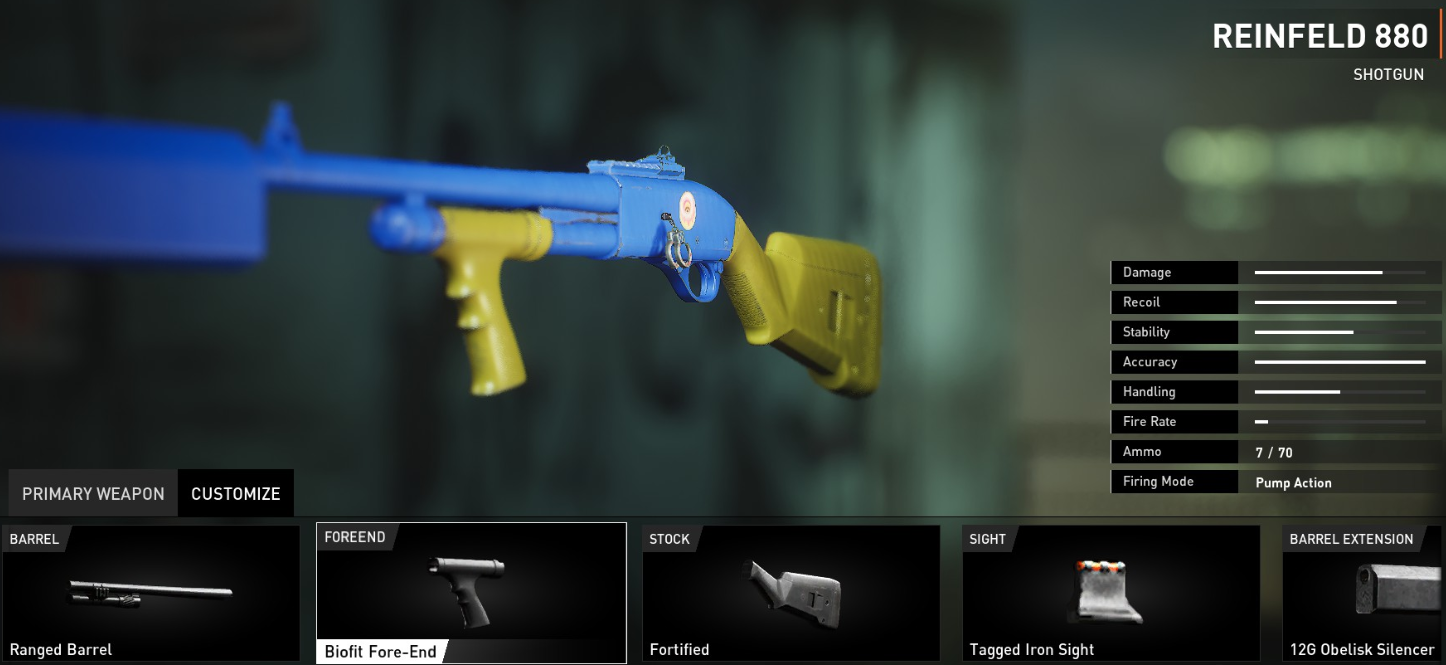 -
-Attachments:
- Ranged Barrel
- Biofit Fore-End (I don't actually know the difference in cycle speed, so I use the Biofit)
- Fortified Stock
- Tagged Iron Sight
- 12G Obelisk Silencer
For those of you without the Syntax Error weapon pack, the Reinfeld 880 is a close second for the best shotgun in the game, in my opinion, especially after it's buffs. Reliable for clearing out SWAT, just be careful when taking out Dozers.
Honorable Mention: KU-59
-
Attachments:
- Cylindric Silencer
- None (Barrel)
- Perforated Grip
- Quick-Pull Mag
- Padded Tube
- Classic RDS
- Quick Hold Grip
If you're having trouble with the new Snipers and need something for long range, I recommend the KU-59. Not as good for Dozers, but that's why we have our secondary weapons.
Secondary Weapons
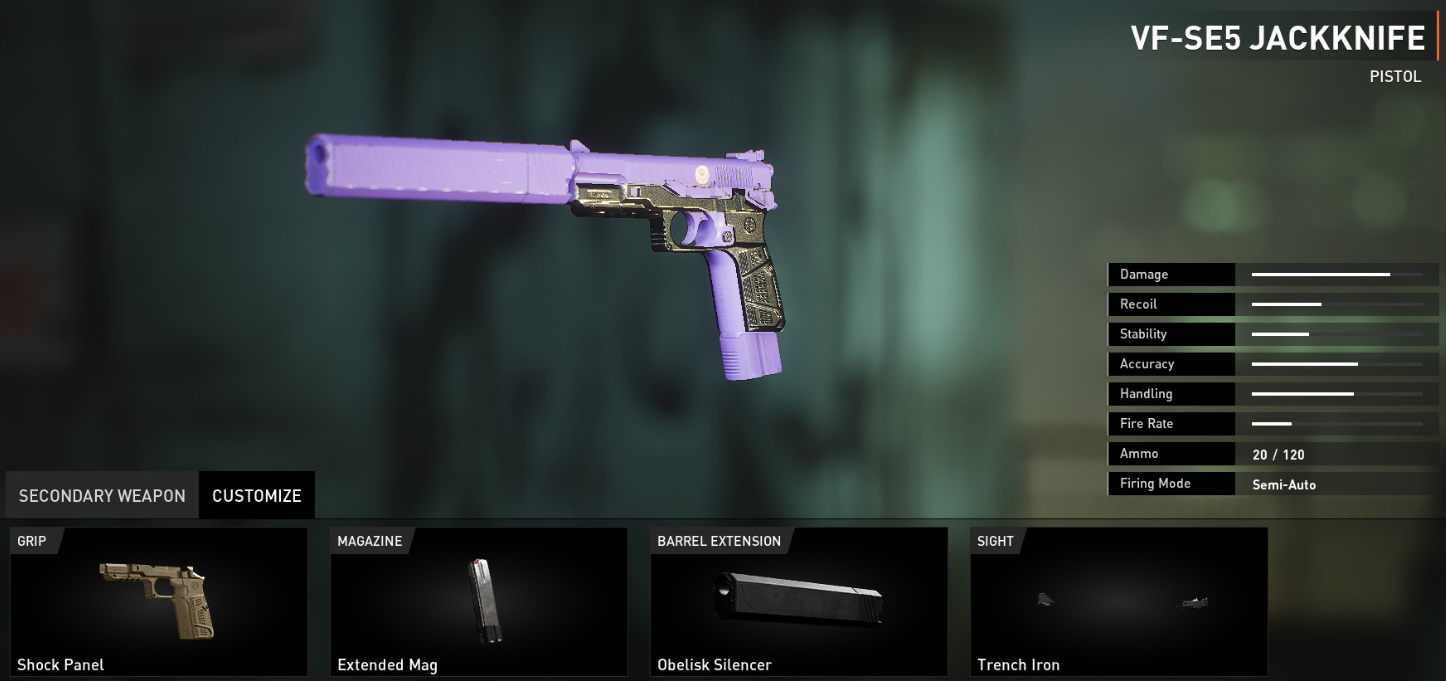
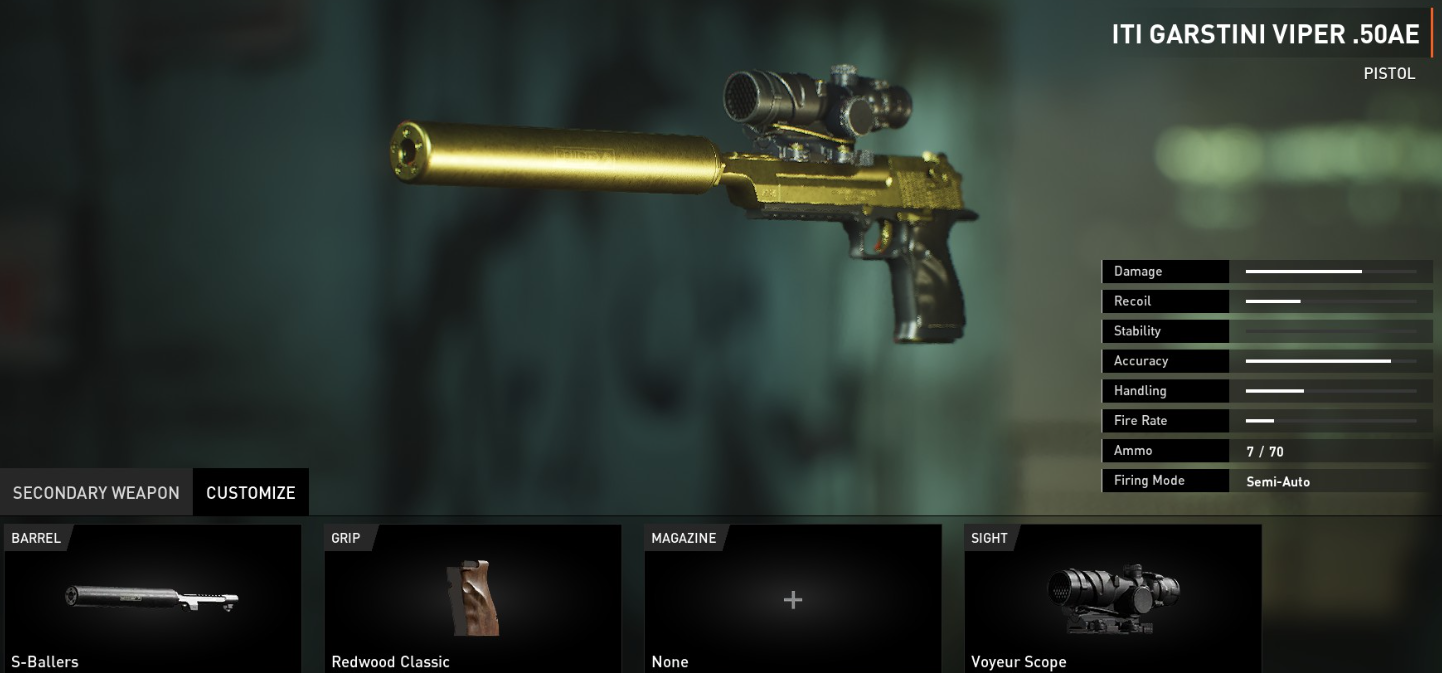
-
It doesn't really matter what your secondary weapon is or what its attachments are as long your secondary has a silencer.
I currently use The Judge (Justicar), but I've used the Jackknife and the Deagle in the past.
If you don't have any DLC, you can use the Justicar, Stryk 7 (Glock), or the SP-11.
If you chose the KU-59, and don't have any DLC, the Justicar is the weapon you'll be using as your Dozer shredder. That firearm fires as fast as you can click. It's literally faster than the Jackknife. Not to say the Jackknife and Deagle aren't viable choices.
Deployables, OVERKILL Weapon, Armor Set, Throwables, and Tools
-
- Armor Frame + Plates: Mercenary Frame; All Blue (Resistance) Plates
The Mercenary Frame has the unique ability of healing 3 points of trauma damage to your plates for every kill, this includes kills from your OVERKILL weapon. This is very obviously meant for blue plates, as a way to heal them without the use of other skills.
On top of this, the devs buffed blue plates to have a 60% damage reduction (from 25%).
This massive buff to blue plates is one of the reasons this build is so overpowered. - Deployable: Armor Bag
- OVERKILL/Overskill Weapon: M135 Arges
This weapon is the second reason why this build is so overpowered. For those that don't know, you can increase your damage reduction up to 90% with the Arges minigun.
Now, this won't make you entirely invincible, but you will, in theory, have an 150% damage reduction to your plates.
My friends have been swarmed by the two to three Dozers that spawn on Overkill now and I've witnessed them tank all of those Dozers without losing a plate.
If you can, have an M135 Arges equipped as much as possible. It's especially helpful if you have every other player in a group bring the Arges as their OVERKILL weapon. - Throwable: Smoke Grenades
- Tools: Trip Laser (unless it's Road Rage, then I'd recommend the Motion Sensor)
Play Style
"NOTHING can take ME down! I. AM. Atomic.
THE BULLDOZER!!!!!"
THE BULLDOZER!!!!!"
The Medic Dozer play style isn't quite as overpowered as the Diet Dozer build during Armor 2.0, but the Dozer kill loop that I mention can be quite satisfying. Just me mindful of your armor.
Play Style Tips:
- IMPORTANT: Find at least 1 armor repair kit (ARK) as fast as possible. You can usually find them in the lockers of camera rooms, but wherever you do find them, get at least 1.
Any time you use an ARK on a damaged plate, you gain 2 seconds of damage invulnerability.
Use this 2 seconds of invulnerability to take down Dozers, then take the Dozer's dropped ARK, and repeat. - Take cover to regenerate your impact plate. It's the first plate to get damaged and it's the safeguard for the rest of your three blue plates.
- On every heist, if you can, use an Armor Bag favor just in case you lose any of your three blue plates. Obviously, if there's a more useful favor that nobody else has chosen use that, but if not, bring an Armor bag favor.
- Use your shock grenades on Shields. SWAT AI crowd around Shields, so taking out a Shield and stunning the rest of the SWAT units are useful for you and your crew.
- For some reason, you can spam click the M7 Pursuivant and it'll fire much faster than I think it's supposed to, so use that knowledge how you will (preferably for Dozers).
- As I mentioned before, use Health Guru relatively sparingly. Being able to completely heal or instantly revive any nearby crewmates is very helpful.
Diet Dozer's Worst Nightmares
"THAT, was my SECOND FAVORITE VISOR!!"
Remember when I said you'd be nearly unstoppable? Well, these have the potential to stop you.
Snipers
With the new changes to Snipers, Snipers now shoot faster within 2 seconds of being in their line of sight (from the previous 7 seconds). If you know where all the possible spawns are, you should be fine. Be a bit careful if you're not aware though.
Zappers
Kill Zappers on sight! I hate Zappers. It's not the Zapper themselves, per say, it's their shock mines. 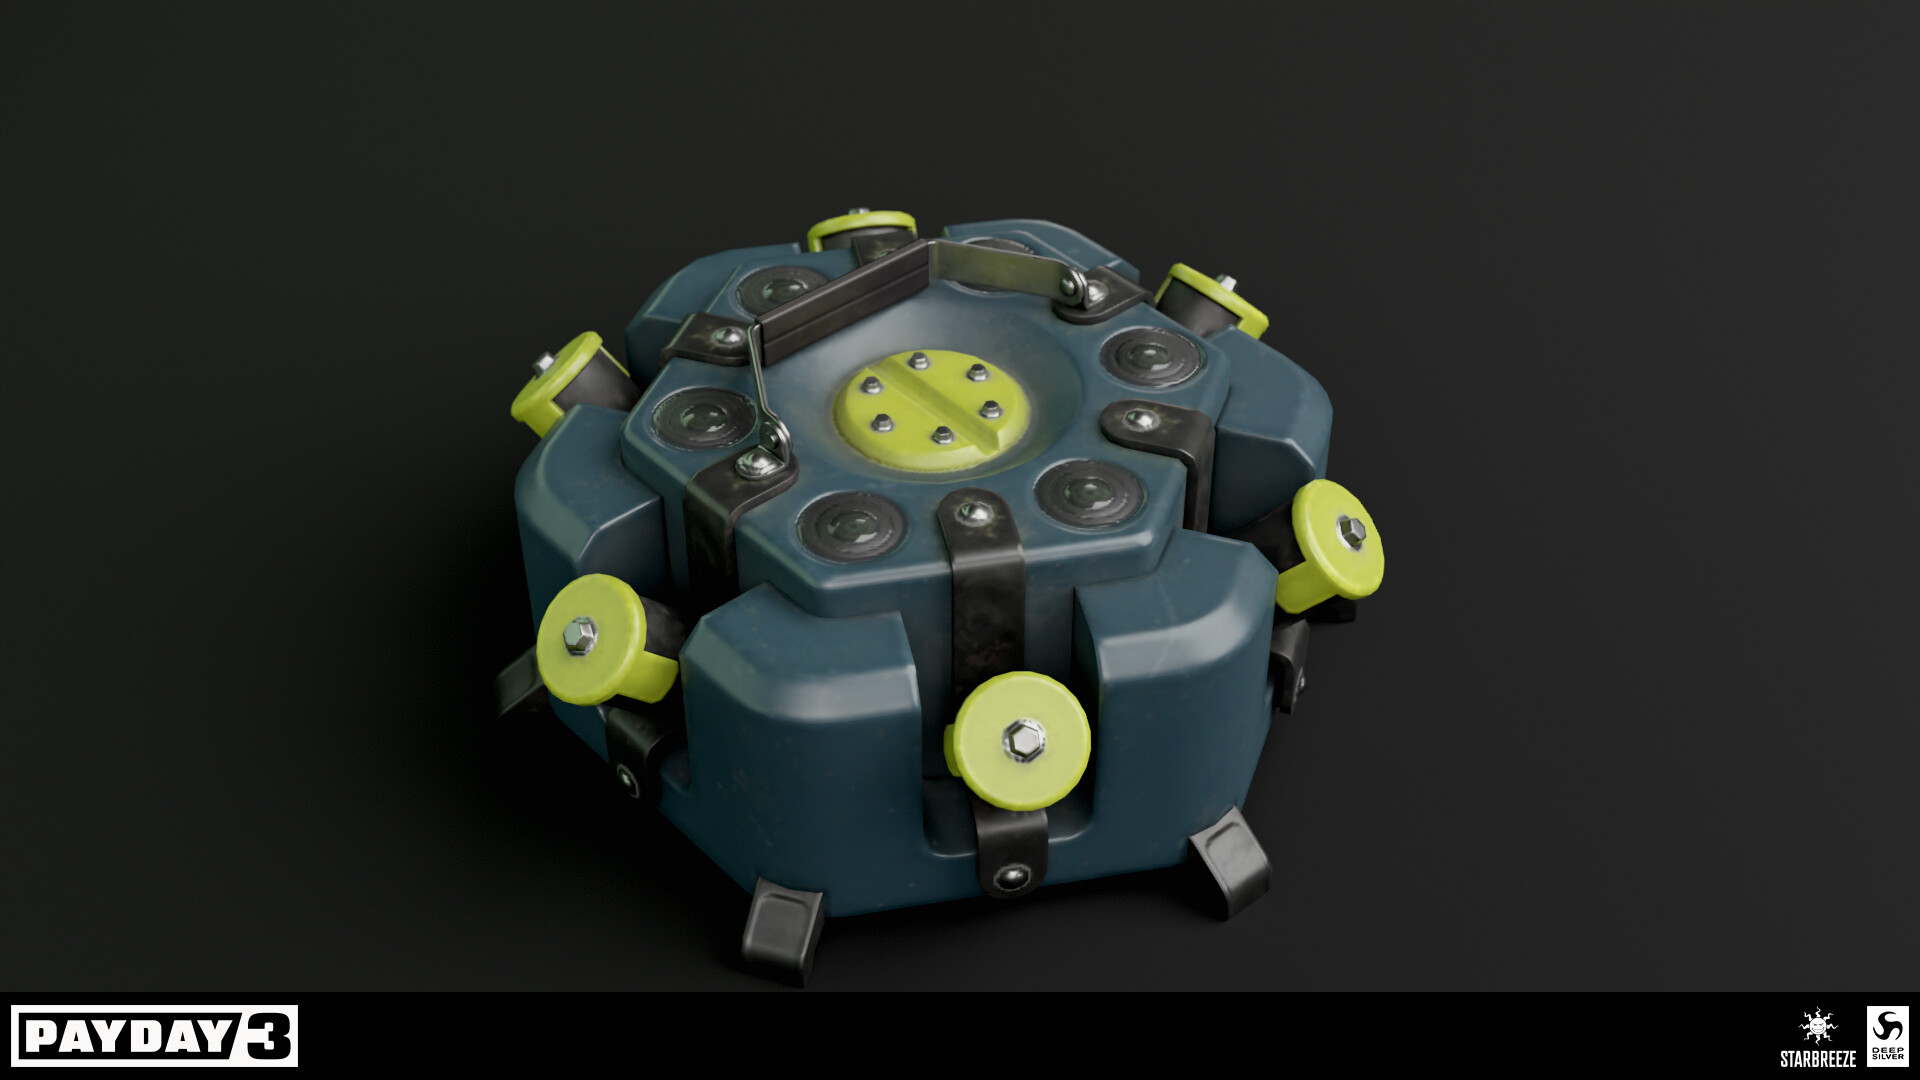 (Dmitry Bely)
-
I've stepped on so many of these things, especially on Cook Off where they're everywhere! Beware stepping on one of these little monsters. They will mess you up!
Cloakers
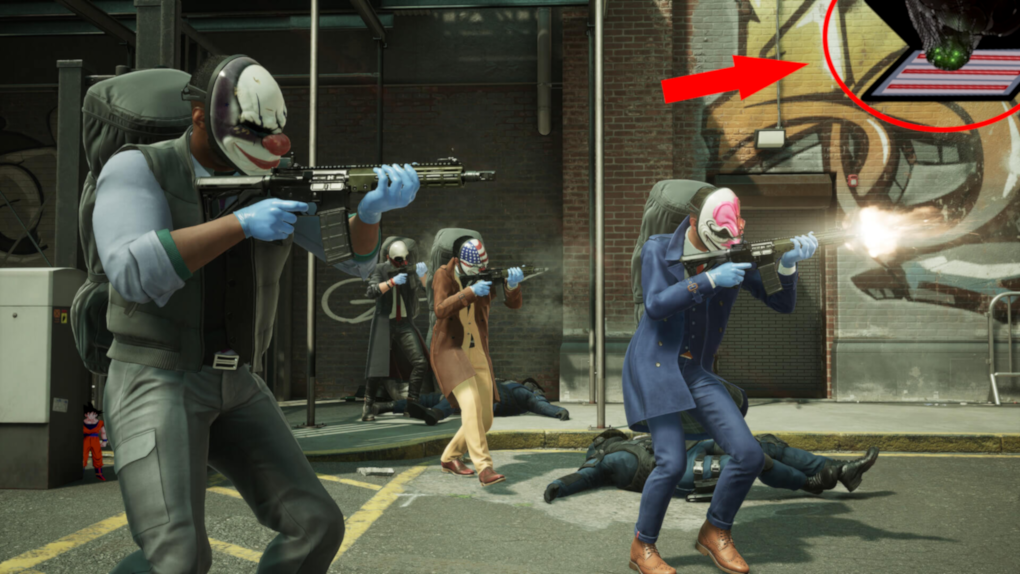
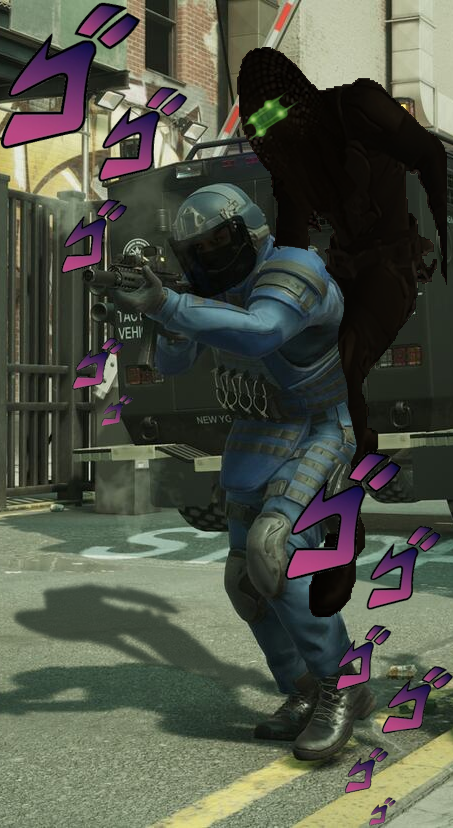
Just don't get blindsided by one. Keep your eyes and ears open when you hear their crackling. Be mindful of the places Cloakers can spawn from, such as ඞ vents ඞ and elevators! The Jewelry Workshop in Dirty Ice, the server and physical evidence rooms in Houston Breakout, etc.
-
I spent way more time than I needed on these images.
Dozers
Pretty self-explanatory, yeah? You will absolutely get your guts rearranged by buckshot if you aren't careful around Dozers. Use an Armor Repair Kit for the 2 seconds of damage immunity and take out the Dozer as quick as possible. Or if one of your crewmates got downed by one, revive them and use the 5 seconds of damage immunity to take it out instead.
Thank you for reading my guide!
I hope it helps you succeed in more heists and gives you that "Payday power fantasy" that was very prevalent in Payday 2.
Credits
Dmitry Bely's Shock Mine: https://www.artstation.com/artwork/Evl51v
Me, for spending like 4 hours making this guide.
More PAYDAY 3 guides
- Payday 3 Full Achievement Guide★ 5 (298)18k views657 ♥12 minUpdated Sep 1, 2024
- FPS Boost + Stuttering Mitigation + Force HDR★ 4 (158)17k views290 ♥2 minUpdated Oct 8, 2023
- Best MODS List - Improvements and fixes [PAYDAY 3]★ 4 (129)13k views256 ♥4 minUpdated Sep 1, 2024
- How to install MODS [PAYDAY 3]★ 4 (61)9.4k views139 ♥6 minUpdated Sep 1, 2024
- The Lengthy Guide★ 5 (286)7.9k views522 ♥282 minUpdated Oct 2, 2024
- [ОБНОВЛЕНИЕ ПРИОСТАНОВЛЕНО] САМЫЙ ЛУЧШИЙ ЛАУД БИЛД★ 5 (193)7.3k views380 ♥10 minRussianUpdated Oct 27, 2025






This guide was created by its original author on the Steam Community. Are you the author and want it removed? Request removal.