Oxygen Not Included Mid-Game Guide
Prerequisites
- Overlays
- How to use most of the tools in the game
- How priorities work
- How Plumping (and venting) works.
- How the basic tiers of research work
So, you just exited what most players would call "Early game" and don't know what to do? Or you just need help figuring out how to do said stuff.
Look no further, in this guide I will attempt to explain stuff!
What do you mean by early game?
- Explored outside your starting biome
- Made a somewhat stable food production (Mealwood, Bristle blossom or dusk cap farms)
- Have a somewhat stable oxygen production (Oxygen Diffuser or Algae Terrarium, or a basic Electrolyzer setup)
- Have sufficient morale by using the different rooms
- Have researched some of the most important basic researches
More specifically, I am referring to early game as the part described in my other guide: "Oxygen Not Included Early game guide"
https://steamcommunity.com/sharedfiles/filedetails/?id=2816209155
So what now?
As such, this guide shouldn't be read from one end to the other. Instead go to whatever section you need to go to, though I will try to place the stuff you should do first at the top, and the stuff you should do later at the bottom.
For now, the best things to do would be to either Upgrade your oxygen supply, Start refining metals or start ranching hatches and other critters.
You can also explore more to get useful materials.
Better Oxygen Supply
Until now you've probably used oxygen diffusers to get oxygen, and while there's plenty of algae at the start of the game, in time it will run out, even if you get algae by distilling slime from the swamp. By switching to a water-based oxygen production, you will be using a much more renewable resource.
First off, you'll need the "Air Systems" research completed, as well as plumping and ventilation, and while you can make a more effective system using automaton, using a simple gas filter is - well, simpler. So you'll need those as well.
Start by making a room, at least 4 x 4 (Though it should preferably be bigger). Making it so the only way in and out is with a waterlock is preferable, though it is not needed.
Then, Connect Gas pumps in pairs to the input of a Gas filter set to filter hydrogen. The normal output of the filter will be where oxygen should go, and the hydrogen should come out of the filter output (the orange output).
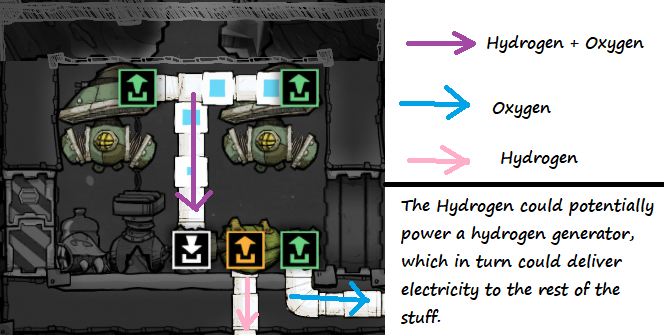
After that, you can connect the Electrolyzers to a water supply.
You can then connect the hydrogen output to a hydrogen Generator, which could power the rest of the machine. That kind of contraption usually goes by the name "SPOM" (Self Powered Oxygen Module)
Hatch Ranching
Providing both Food and useful materials, hatches are a great way to start learning how ranching works.
Start off by making a big room. Max. 96, though. The closer to this number, the more hatches you can ranch (You can make multiple rooms, though).
Then, place a grooming station, along with a critter feeder in the room, and make sure it accepts sandstone or another plentiful rock. If you want, you can even feed them sedimentary rock, which will be very beneficial for later.
Also place a Critter drop-off in the room, and set it to hatches allowed.
Make sure there's no other critters in the room, either by killing them, or wrangling them and then placing a critter-drop off with that critter type allowed at another location.
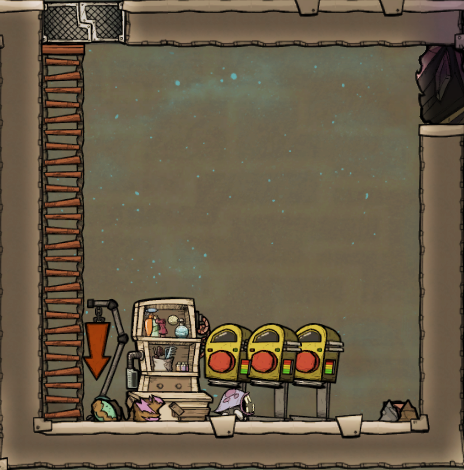 A very simple hatch ranch
Any duplicants with the "Critter Ranching" skill will then be able to groom the hatches, taming them over the course of a few days. From then on, the hatches will eat more, lay more eggs and produce more materals.
Normal hatches will eat rocks and produce coal, though you have probably seen a few green hatches at this point. Which leads us to the next topic of Critter Ranching:
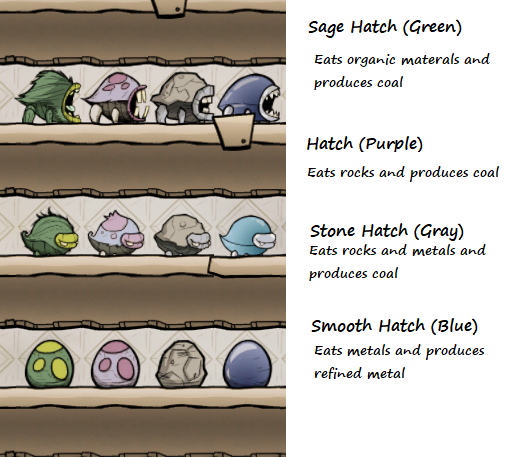
Most critters have variations, some of which are incredibly useful.
While this is not the best solution, it will make the ranch a lot more effective for now, with a lot less micromanaging.
Refining Metal
As you want to construct more advanced buildings and equipment, refined metal becomes a must.
Refined metal can be obtained in a few ways:
Rock Crusher
The rock crusher may very well be the easiest way to get refined metal, however it is not very effective: Half of the metal will be converted into refined metal, while the other half gets converted into sand. This is good enough if you want only small amounts of refined metal, however it's not a good idea to use it if you need a lot of it.
Metal Refinery
The upgrade to the Rock Crusher, the metal refinery converts metal to refined metal at a 100% rate. It, however, requires you to cool the refinery down using water. The Refinery will create a lot of heat, which will be dumped into the water. For now you shouldn't have a problem with heating, but at some point you will have to think about temperature and cooling. If you find an ice biome, you can dump the hot water produced by the refinery there, as a temporary solution.
You can also use the heated water in the electrolyzer, as the electrolyzer outputs its products at 70°C (Or more if the water is above 70°C). What this means is that by using hot water, you're creating less heat than if the water was cold.
Do note that the metal refinery requires large amounts of electricity, and you will need either heavi-watt or conductive wires to power it.
Smooth Hatches
Another way to get refined metal, is by ranching hatches, specifically smooth hatches. Smooth hatches will eat metal and produce refined metal. While they are only 75% effective compared to the metal refinery's 100%, they do not require much duplicant labor, nor do they produce any heat.
Exploring beyond the center
Once you have gotten yourself a good oxygen supply as well as some refined metal, you can start exploring further by making exosuits. Exosuits will enable your duplicants to enter locations with low amounts of oxygen for extended periods of time.
Place the exosuit docks, along with a checkpoint, so that the only way outside of your colony is through this point.
Then either connect your oxygen production to the docks, or make a seperate oxygen production for the exosuits.
As you explore, you may stumble across new biomes, which will most likely contain useful resources.
Do note that what whether or not you have spaced out enabled, as well as what asteroid type your colony is located on, will affect what biomes you can find.
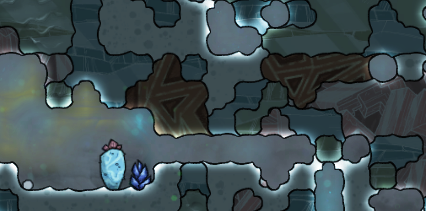
The Tundra is full of ice, and is one of the only cold biomes in the game. It contains many useful resources, such as wolfram, wheezeworts, and the Sleet Wheat. The Tundra is also the only place you can find anti-entropy nullifier.
If you are running low on water, you can excavate the ice from the tundra and bring it down to your colony. If you make them into Tempshift Plates, it will melt much faster.
If you find a Tundra and want to explore it, skip ahead to the "Tundra" section of this guide.
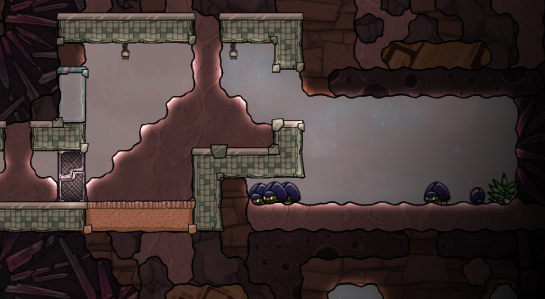 The wasteland is probably one, if not the, easiest biome to explore. No dangers, no toxic gasses, nothing. But there's not much to gain either. Unless you want to domesticate Sweetle's or grubgrubs, it's just a useless location.
If you do however want to obtain what few resources the wasteland holds, skip ahead to the "Wasteland" section of this guide.
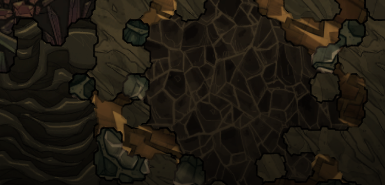 The Barren biome is essentially just a pile of rocks. However, it's actually not as useless as it sounds, as you can find refined iron here.
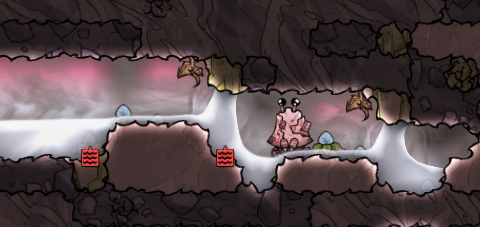
The Tide Pools is Oxygen Not Included's ocean biome. Here you will find large quantities of salt water. The critters in this biome can be aggressive sometimes, so skip to the "Tide Pools" section of this guide before venturing into this biome.
The Tundra
The tundra is mainly made of ice, and some granite. At least in the base game. If you have the Spaced Out DLC, it will also have rust and salt in it, but in both versions, the most important resources are present:
By constructing an insulated pipeline, with segments made of radiant pipes, you can make a circuit that goes from the nullifier to your base, with the radiant segments where you want your colony to be cooled down.
The Wasteland
The Wasteland, while not having a lot of useful resources, is a pretty safe biome to explore. With no hazardous gasses or germs it is very easy to just enter it and start excavating.The biome itself is mostly made out of sand and various rocks as well as copper and sulfur. Sucrose is sometimes found here as well.
The Tide Pools
The Tide Pools are Oxygen Not Included's ocean biome. Most of the Tide Pools are filled with salt water, sand, sedimentary rock and granite.
Salt and Bleach stone can also be found here.
The atmosphere is made of hydrogen, which will give major eye irritation to duplicants who enter without atmo suits.
They, however, are aggressive towards duplicants when an egg is nearby.
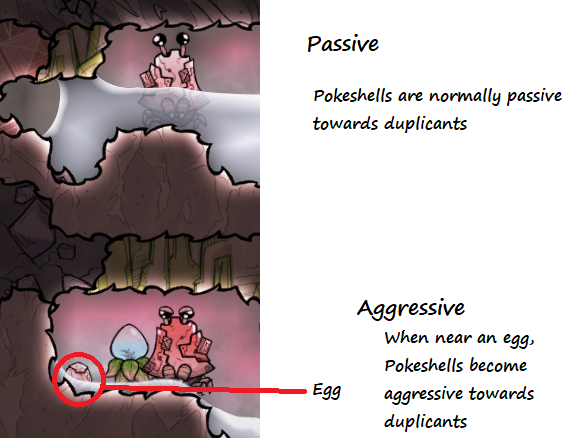
If you want to ranch pokeshells, autosweepers should be used to pick up the eggs as soon as they are laid, to avoid duplicants from being harmed by aggressive pokeshells.
Waterweed only grows when in water, but not too much water. The maximum amount of water is around 700 kg, and the minimum is 1 g.
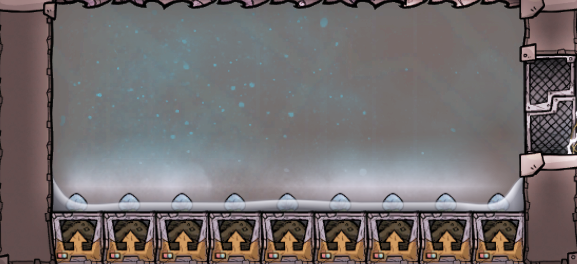
this means you can put a lot of water (Or salt water) in a room and just let it drain through a hole. The leftover water will be enough for waterweeds to grow.
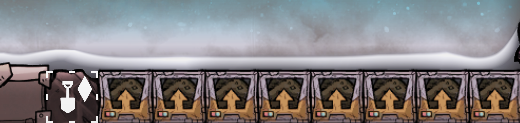
They also require a steady supply of saltwater through hydroponic farms, and also bleachstone, which should be plentiful in the biome.
Bleach Stone, however, evaporate into chlorine, though this can be prevented by storing it underwater, just like how you would store slime.
Temperature Control
At some point, your base will start to heat up. This is usually caused by exploration into warmer biomes, along with electrical equipment. And while your duplicants should be able to withstand these higher temperatures for quite some time, your plants aren't as lucky.
at 30°C most plants you may have been using will start to wilt, which means your food production will come to a halt. Something you want to avoid.
Short term solutions consists of transporting ice from the tundra into your base, which will cool the surrounding area, or simply switching to another food source, such as hatch ranching. In the long run, however, you want a more permanent solution.
The two easiest ones are the following:
Anti-entropy Nullifier
By making a Liquid pipe that loops around your base and back to the anti-entropy nullifier, you can cool down your base by supplying the nullifier with hydrogen from your oxygen production. This of course requires you to have found an anti-entropy nullifier in the first place, though they shouldn't be too hard to find.
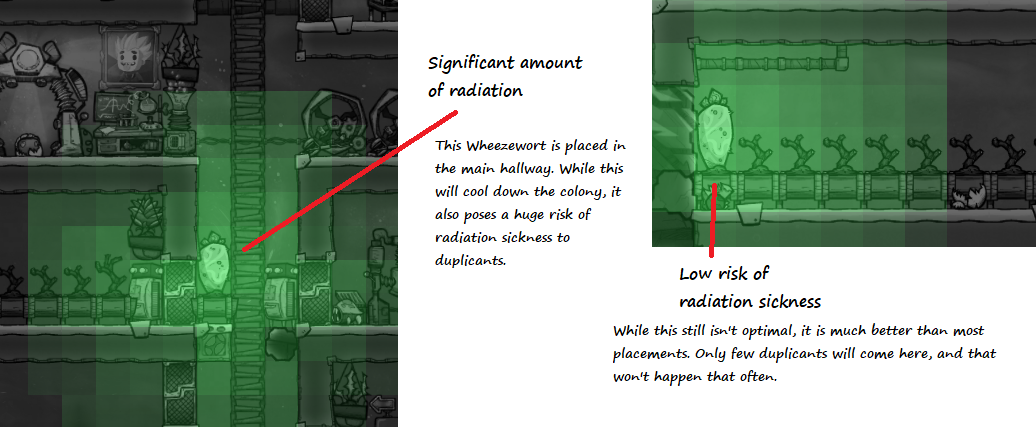
Wheezeworts are plants (Actually, in lore they are animals, but for gameplay purposes they are a plant) found in the Tundra. What's special about Wheezeworts is their ability to cool down air around them. By placing a few wheezeworts around your colony, it will slow down, or even reverse the heating. They do require Phosphorite, which can be found in large quantities in the Jungle, or you can make a drecko farm, as dreckos produce a decent amount of phosphorite.
Note!
If you play with the Spaced Out DLC enabled, wheezeworts give of a significant amount of radiation. This means you should place them in low-traffic areas to avoid radiation sickenss.
Improving Morale
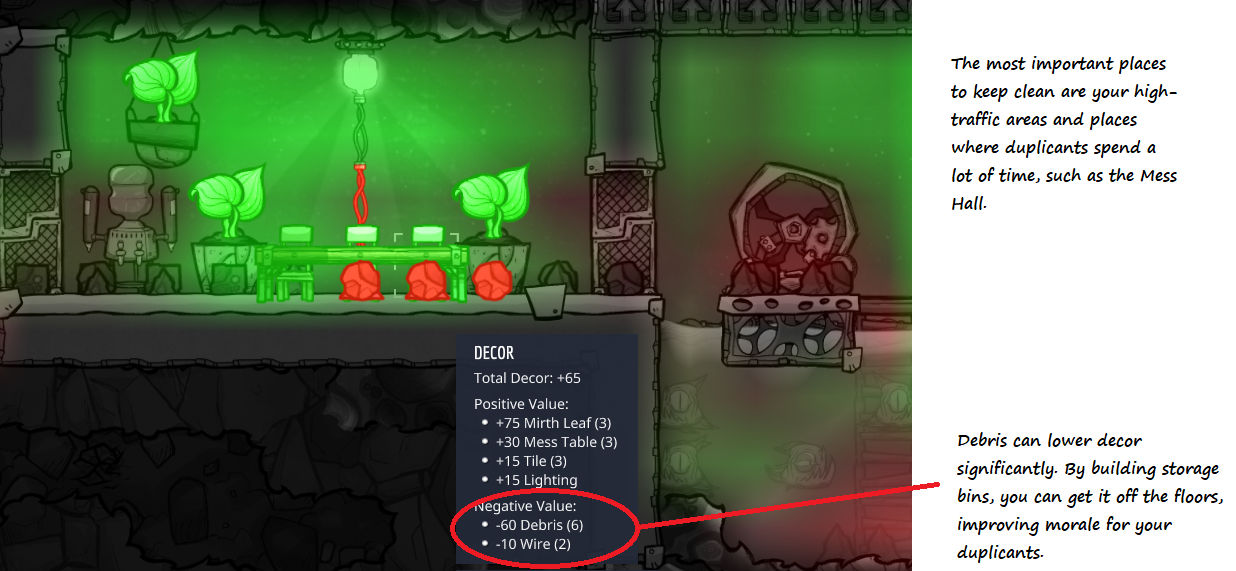
As your duplicants become increasingly more skilled, it is important to make sure they have a high morale to not only prevent stress, but also reap the rewards of overjoyed responses. By far the easiest way to increase morale at this point, assuming you have already made the basic rooms such as the great hall and barracks, is to improve decor.
Do note that buddy-buds give less decor in a smaller radius, but does provide direct stress-reduction to nearby duplicants. It also triggers allergies in duplicants with allergic reactions.

Drecko Farming
At some point, you may want to ranch dreckos, as they are extremely useful critters. Not only do they give almost free meet, they can also produce plastic when morphed into Glossy Drecko's.
To make a drecko farm, you will however need to make a room that gasses cannot exit or enter, by constructing a waterlock or other mechanism for keeping the gasses where they should be.
If you fill the room with tiles, and then construct the waterlock, you can demolish the tiles afterwards which will create a vacuum. You can then pump the gasses needed into this room.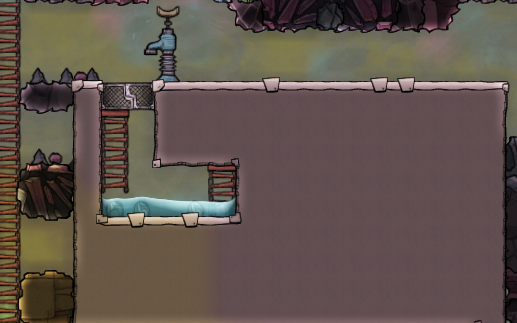 Drecko ranch under construction. By placing tiles, you can fill up the waterlock with water, then demolish the tiles to create vacuum. Remember to make sure duplicants have to wear atmo suits to enter.
Normal or Glossy dreckos?
Dreckos are special critters: They can walk upside-down, climb on walls, produce phosphorite and they have scales. It is specifically this last point that is important for drecko ranching. Dreckos will regrow their scales when in a hydrogen atmosphere. Normal drecko scales are made of reed fibers while glossy dreckos have plastic scales. This means you can get either reed fiber or plastic very easily.
Reed fiber is a pretty useful material, as it is used for paintings and atmo suits, while plastic can be used for advanced technologies. Plastic is especially important if you have Spaced Out enabled, as plastic is used when conducting the highest tiers of research.
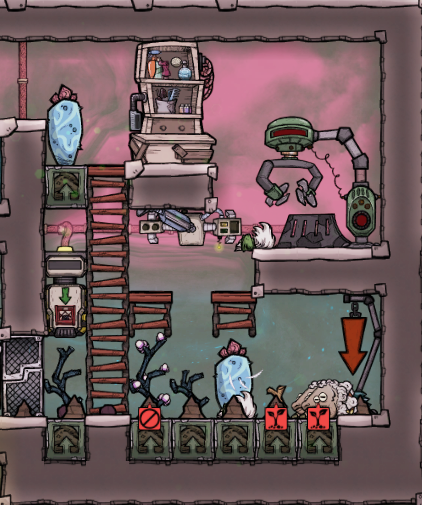
Automating your ranches
If you have a lot of refined metal, you can automate your ranches. While you could just let the critters be in their ranch and let the eggs they lay hatch into new critters, this means you're missing out on a lot of food, such as meat and eggs, as well as egg shells which are useful for steel production.
By placing an auto-sweeper in the ranch, with coverage of all of the floor, you can send the eggs to another room, so that the critters in the ranch can continue to lay eggs.
You can then use one of the following designs to make sure that the ranch is fully-automatic or at least make it so you need to micromanage it less.
This design utilizes priorities, a very useful tool for telling your duplicants what task they should focus on first.
(Not to be confused with the priority tab that deals with what type of task each duplicant should do first)
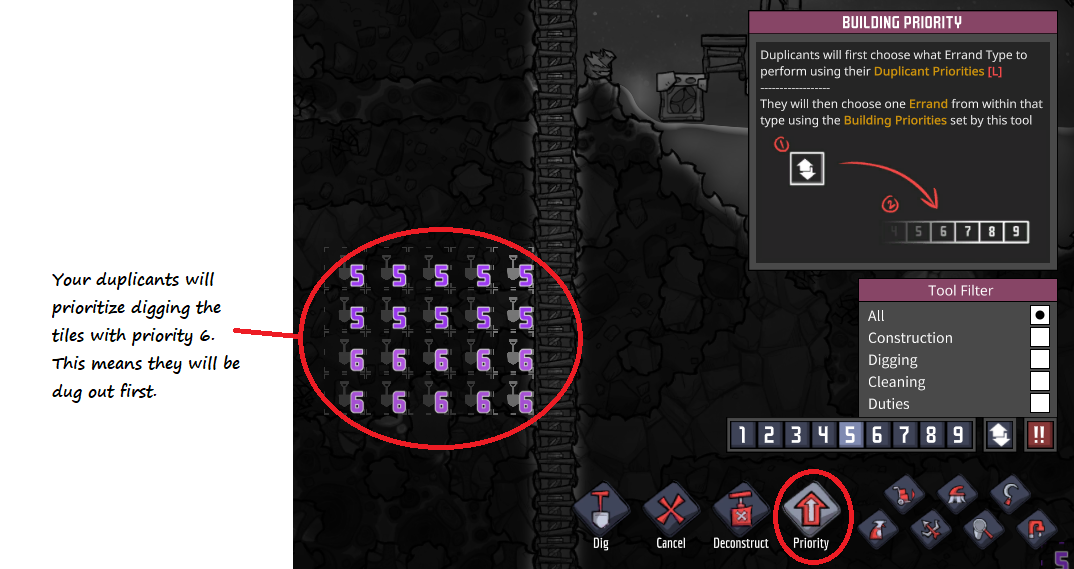
The priorities and settings should be as follows:
Main room: Should contain at max. 6 - 8 critters, auto-wrangle may be turned on, but it should not be necessary. Prioritiy should be 7.
Hatchery: Should be set to have at max. 0 critters, and have auto-wrangle turned on. Priority should be 5.
Disposal: Should be set to max. 20 critters (Maximum) and have auto-wrangle turned off. Priority should be 6.
This way, when an egg hatches in the hatchery, a duplicant will come and wrangle it. If there is room in the main ranch, it will be released there, otherwise it will be taken to the disposal room where it will starve to death.
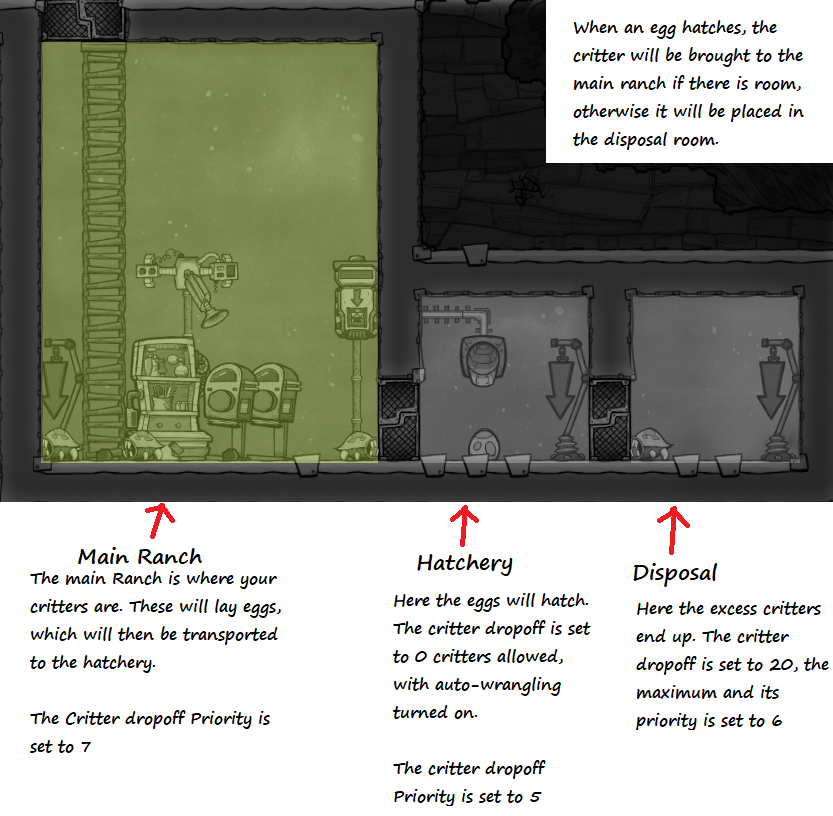
You may need multiple disposal rooms, or a way to kill the critters.
This design works for most critter ranches, except for pufts.
In this design, the eggs will be transported to the hatchery, just like in the previous, but instead of letting them hatch, they are put into the incubator. If there's already an egg in the incubator, it will instead be put into the storage bin, where it will crack over the course of 10 cycles.
Having an auto-sweeper in the hatchery is a good idea, to prevent any eggs from hatching on their own.
Do note that eggs sometimes hatch on their own in the incubator, though this shouldn't happen too often. If it does happen, you can let it stay in the room, as it will die of starvation at some point.
Geysers and Vents
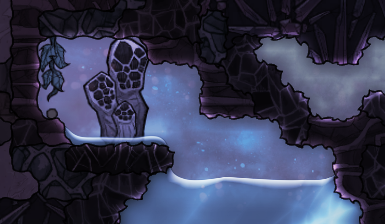
For this guide, I will refer to all of them as "geysers" unless talking about a specific type of geyser, vent or vulcano.
(A few geysers and vents does not follow this naming convention, but for most this is how their names relate to what they produce)
By placing gas or liquid pumps, you can transport the resources from the geyser to your colony, where you can use them for whatever you want.
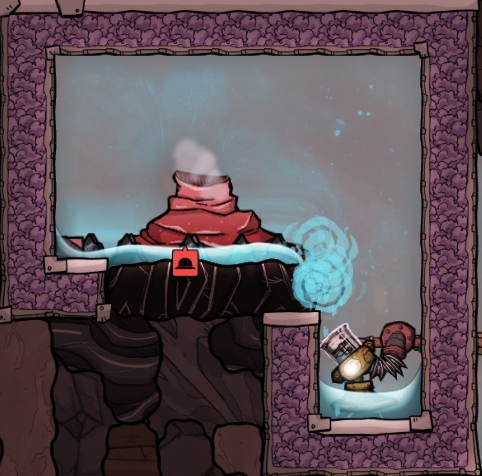
A water geyser can provide a lot of water for free. Just remember to use gold or steel for the pump, to prevent them from overheating.
Do keep in mind that most geysers produce resources that are very hot, so you will need something to cool the resources down before they enter your colony. An example of this would be to use wheezeworts to cool water from a water geyser down.
An alternative, would be to use the Tundra to cool down the product, though this won't work in the long term.
In any case, making sure you can store a lot of whatever the geyser produces, to use during dormant periods, is a good idea.
- Hydrogen vent: Hydrogen vents produce too little to be useful, one barely being able to power a single hydrogen generator!
Natural Gas
Natural Gas is one of the most common geysers, and can be found in the jungle or swamp biome. The Natural gas they produce can be used to generate power with a natural gas generator.
Natural gas generators produce a lot of power, as well as polluted water and carbon dioxide. The carbon dioxide will be taken via pipe, however the polluted water will leak out of the machine. This means there should be mesh tiles underneath the generator.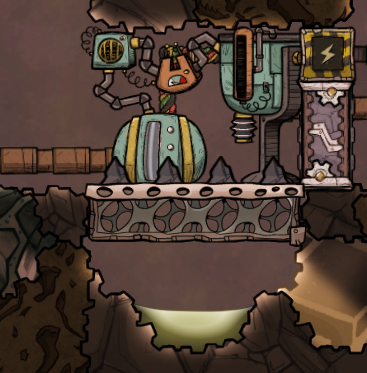
Do keep in mind that the carbon dioxide and polluted water is very hot.
Outermost Exploration
When you have explored for some time, you will probably stumble across the two last biomes not covered yet:
The Surface and The Core
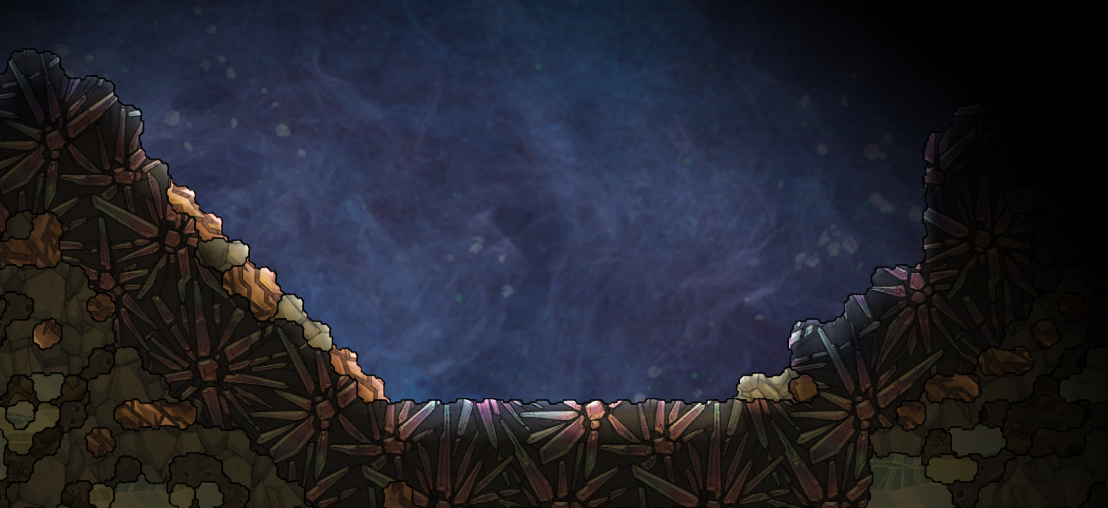
The surface is located at the top of the world where you will find a lot of regolith, as well as mafic rock.
If you're playing the base game, asteroids will periodically rain from the sky, which brings with them lots of regolith, as well as metals.
If you wish to know more about the Surface, and perhaps start exploring space, skip to the "Surface" Section of this guide.
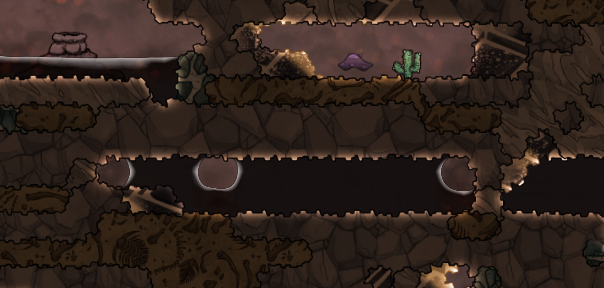
The oil biome is located near the bottom of the world. It is home to the slicktsters, as well as the dangerous Sporechid. You can also find oil wells which you can use to obtain oil at the cost of water.
Proceed with caution and skip to the "Oil and The Core" Section of this guide if you plan on exploring the oil biome.
 The Core is located bellow the oil biome, and is essentially just a giant pool of lava. Unless you want to exploit the enourmous heat energy that is located here, you should not enter it, as it is very hot.
Oil and The Core
The Oil Biome is found in the deepest layers of your asteroid, and it contains a lot of useful materials. Not only oil, but also lead, fossils and sometimes even diamonds. You can also find oil reservoirs and slicksters, as well as the sporechid.
It's also full of carbon dioxide, and is pretty hot, so remember atmosuits.
This oil can then be pumped to an oil refinery to turn it into petrolium and natural gas, which can then be used at a petrolium generator to produce power, or turned into plastic at a polymer press.
If you research Hydrocarbon Propulsion you can also use it as rocket fuel.
When slicksters are in high temperature environments, they will lay Molten Larva eggs, which will hatch into Molten Slicksters. Molten slicksters require even higher temperatures, but produce petrolium instead of oil.
You can also encounter sporechids, plants that only live in carbon dioxide, but provide a high amount of decor, the highest of any plant. They, however, release zombie spores. This means that care should be taken when handling sporechids. Atmo suits will keep your duplicants safe, and uprooting them will prevent any more zombie spores from being generated.
Note
Zombie spores don't actually turn your duplicants into zombies. They will, however, get a hefty stat reduction for 18 cycles.
The core is at the lowest layer of the map. The Core is essentially just a lot of magma, and a bit of obsidian. The only reason to ever breach the abyssalite border of the core is to make use of the heat from the magmaPlastic Production and Oil Refineries
When you have gotten access to oil, you can start producing petrolium. Petrolium is the only way to use oil, so building an oil refinery is a must.
The polymer press also produces small amounts of steam, as well as hot carbon dioxide. The Steam will leak out of the machine.
The Surface
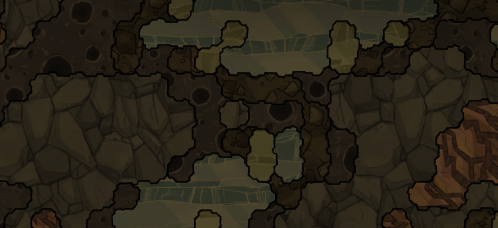 Just before you reach the surface, you will find a huge layer of mafic rock, ice and other materials. By continuing to dig upwards, you will eventually reach the surface. If you're playing without the "Spaced Out" DLC, you will instead find a luge layer or regolith and mafic rock.
At the surface, there's no background layer, which means any liquids or gasses will vanish. To counter this, either make a waterlock or use drywall wherever you need to use gasses or liquids.
If you're playing the Base game or Spaced Out on a Classic-mode asteroid, the surface will be made out of regolith, while the Spaced Out version is just a layer of abyssalite.
Besides that, you will need a high amount of batteries, as solar panels, as the name implies, only produces power when the sun shines.
Glass Production
To make glass, you will need to research "Superheated Forging", which in Spaced Out will require you to use materials study. If you're playing spaced out and haven't started conducting Materials Science Research, skip ahead to the "Materials Science Research", and then come back here when you have read that.
When you have Superheated Forging researched, you can make a glass forge. The glass forge consumes a lot of power, and glass is produced in liquid form. It will quickly cool down once exiting the forge, via pipes. You should use insulated pipes to lead it to a place where it can cool down. Water that is about to be used in an electrolyzer is a good option.
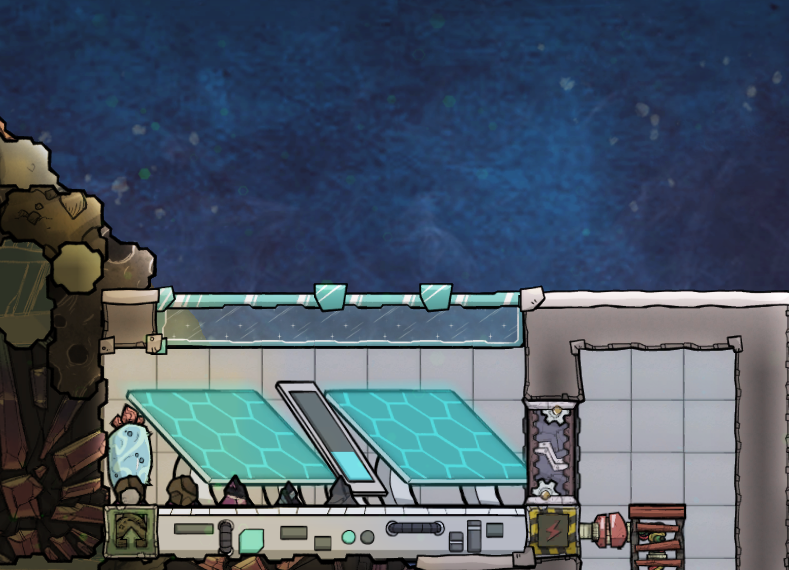 A simple Solar Panel Setup for Spaced Out. In the base game, meteor detection, as well as bunker doors, are needed.
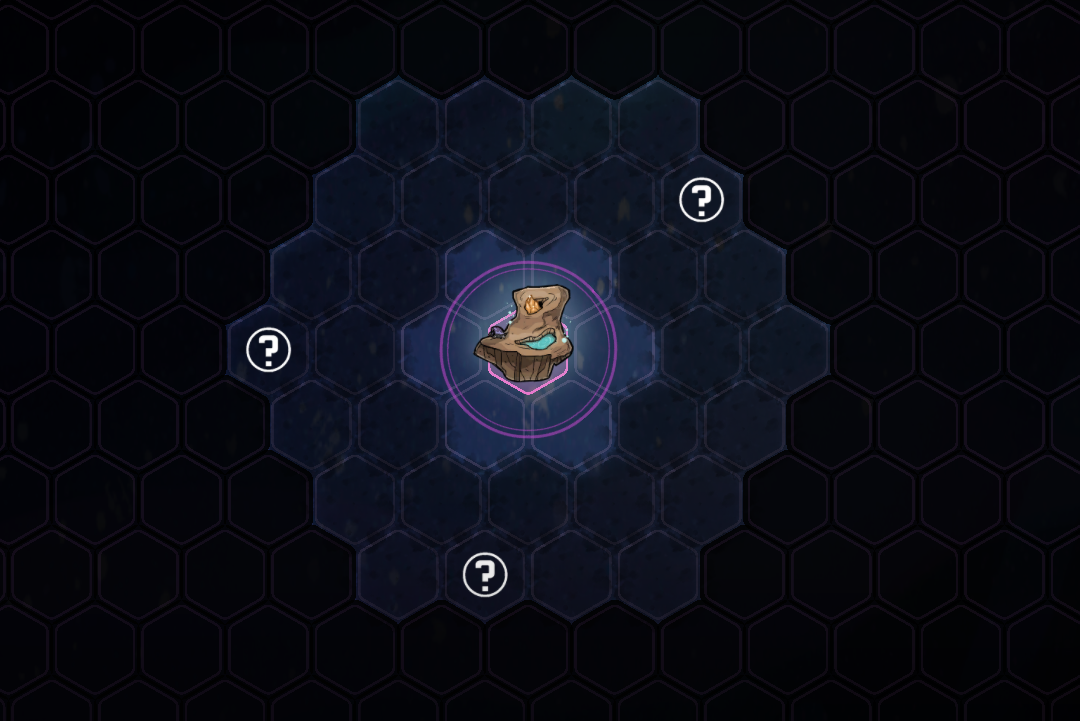 The Starmap as seen in Spaced Out
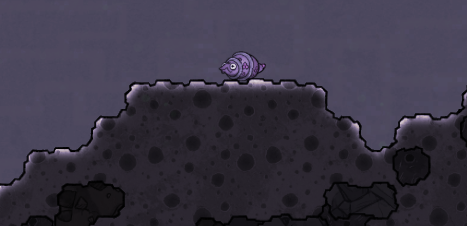
If your asteroid has regolith on the surface, there will be shove voles as well. Shove voles can dig through most tiles, except abyssalite and metal tiles (They also won't enter liquid of high enough mass). Shove voles will eat regolith and dirt, and produce solid blocks of whatever material they eat.
This means they should be kept at the surface. Make sure there's no tiles they can burrow through.
Steel Production
As you prepare to send your first rockets into space, you may want to start producing steel. Steel is used to make rockets (Though you can use other metals if you're playing with the Spaced out DLC enabled).
To make steel, you'll first need refined iron. By this point you'll probably already have a way to produce refined iron, so this should be fine.
You also need refined carbon, which you make out of carbon at a kiln. Kilns produce a lot of heat, but they require no electricity, so you can just place them far away from your colony, or use a wheezewort to cool the area down. They also require almost no duplicant labor.
The third ingredient, Lime, however, is a bit more tricky. If you have a hatch ranch, or any other ranch for that matter, it will be much easier. To obtain lime you will have to crush egg shells or fossils at the rock crusher. Fossils can be found in the Oil biome and the Tide pools.
Once you have obtained enough of these three ingredients you can start producing steel at the metal refinery.
A Note on Space Travel
It will, however, cover space travel for Spaced Out, at least up to a certain point.
If you do not have spaced out, this guide is essentially over at this point.
If you do have Spaced Out, keep on reading.
Space Travel (Spaced Out)
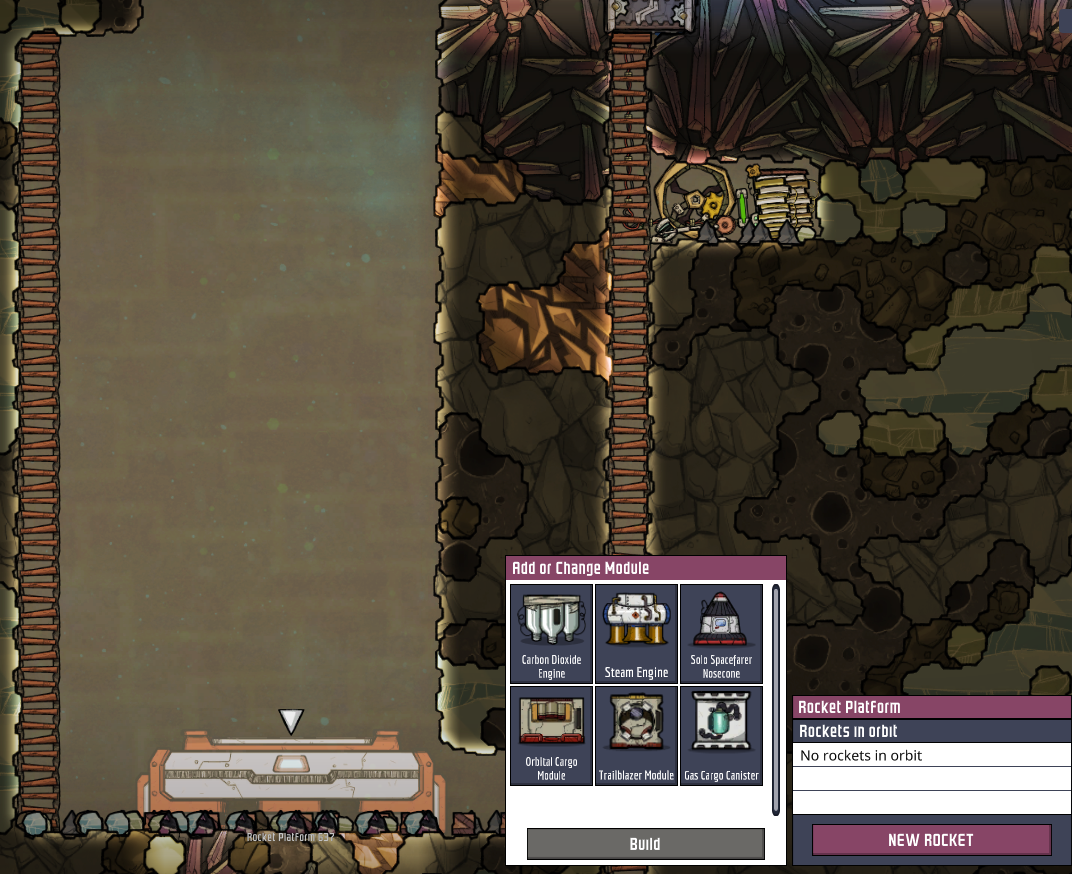
You can then select the modules you have access to. You'll need a nosecone, a command module and an engine. For now, a solo spacefarer nosecone should be fine, which will function both as a nosecone and a command module. For engine, I suggest you research "Advanced Gas Flow" for a carbon dioxide engine or "Advanced Combustion" for a sugar engine. You can also research "Renewable Energy" to gain access to the steam engine.
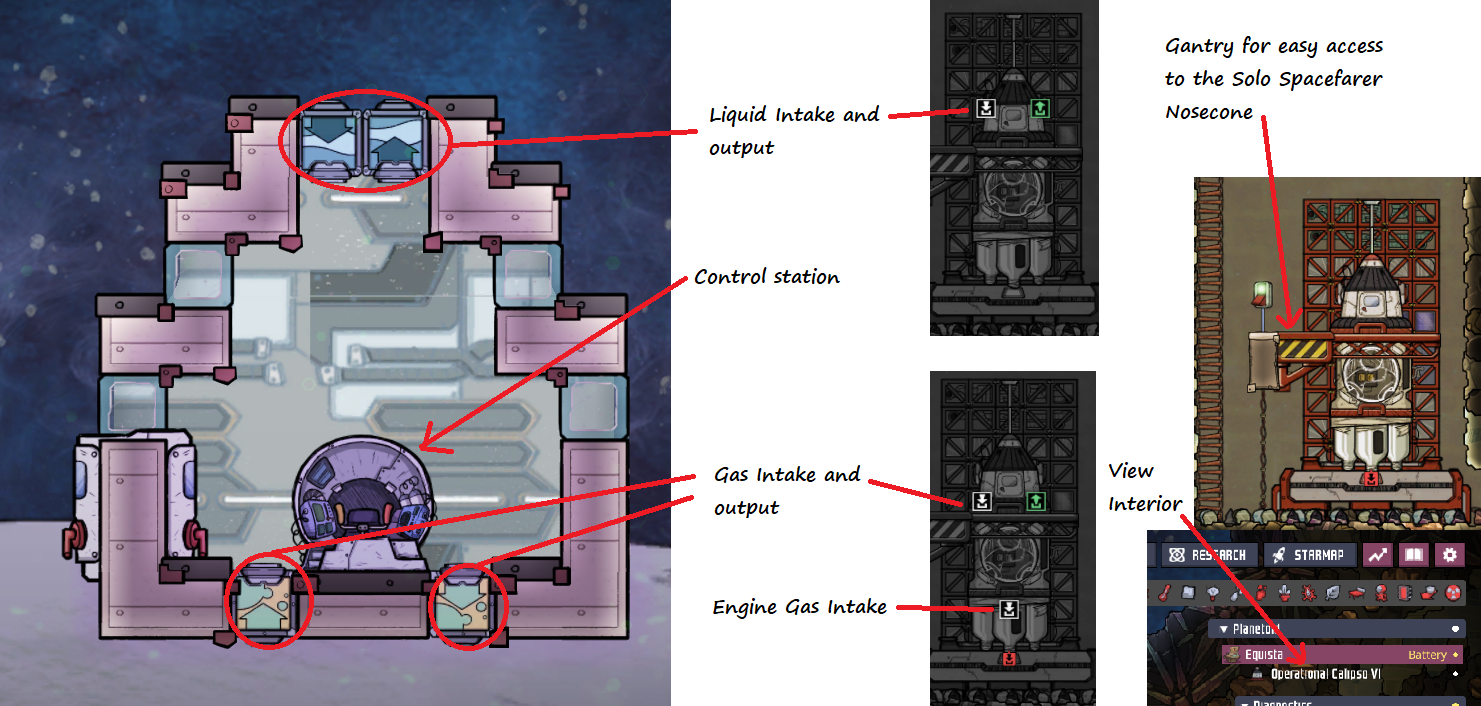 Simple Rocket with Solo Spacefarer Nosecone, Trailblazer module and Carbon Dioxide Engine, made for one-way colonization of nearby asteroids
Once you have these you can send a rocket into space!
Though, maybe first you should figure out what to do with the rocket before you do it.
So do research "Crash Plan" before you send up a rocket into space, as you will need the modules it gives access to.
You can also gain a small amount of data banks from analyzing geysers and inspecting buildings in ruins. If you analyze all geysers at your starting asteroid, you will get enough to research at least 2 - 3 of the researches requiring Data Analysis Research.
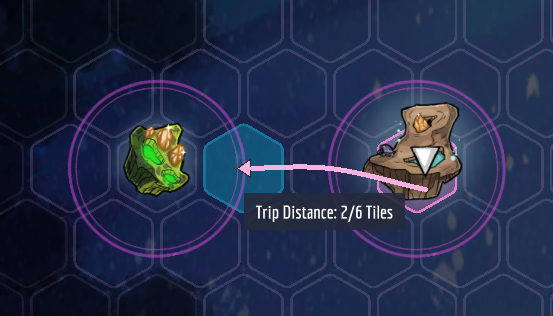 A simple rocket consisting of a carbon dioxide engine, a trailblazer module and a solo spacefarer nosecone can be used to send a single duplicant to a nearby asteroid for colonization.
Carbon Dioxide
If you choose to use a Carbon Dioxide engine, you will need large amounts of CO2. If you have dug a pit for CO2 collection, and not placed a carbon skimmer, you can use this CO2 to power your rocket's first trip. Otherwise, if you have a fossil-fuel based power supply, you can collect the CO2 produced by it.
Steam Engine
While water is somewhat easy to get, heating it up may prove a bit harder. You will also have to take into account the fact that if it is cooled down, it will turn back into water. Using insulated pipes will help with this during transport, and once inside the rocket, it will stay in gas form.
If you find a vulcano near your rocket platform, you can use it to heat up water until it becomes steam.
A rocket is launched into space
You may want to put an atmo suit inside of the rocket and/or pump oxygen inside before you launch, as otherwise your duplicant will suffocate.
Other stuff you may want to pack is food, building materials, seeds and critter eggs, though you will have to blow up your rocket to get it onto the asteroid.
You can also place a cartographic module on a rocket to map out space far from your asteroids. When a rocket with a cartographic module is next to an unexplored hex, it will be revealed.
Alternatively you can place a telescope inside a your rocket, which your duplicants can then use in outer space to map out nearby areas.
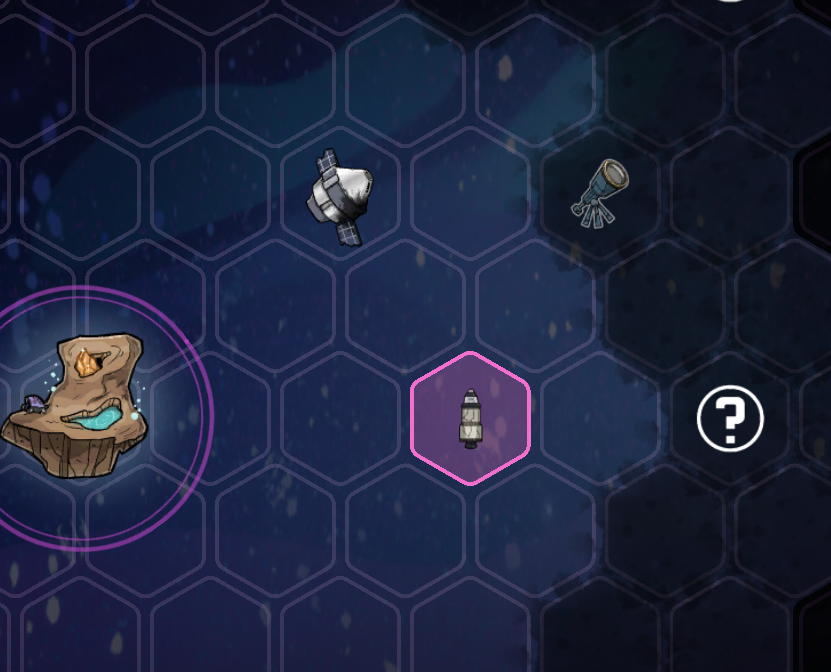
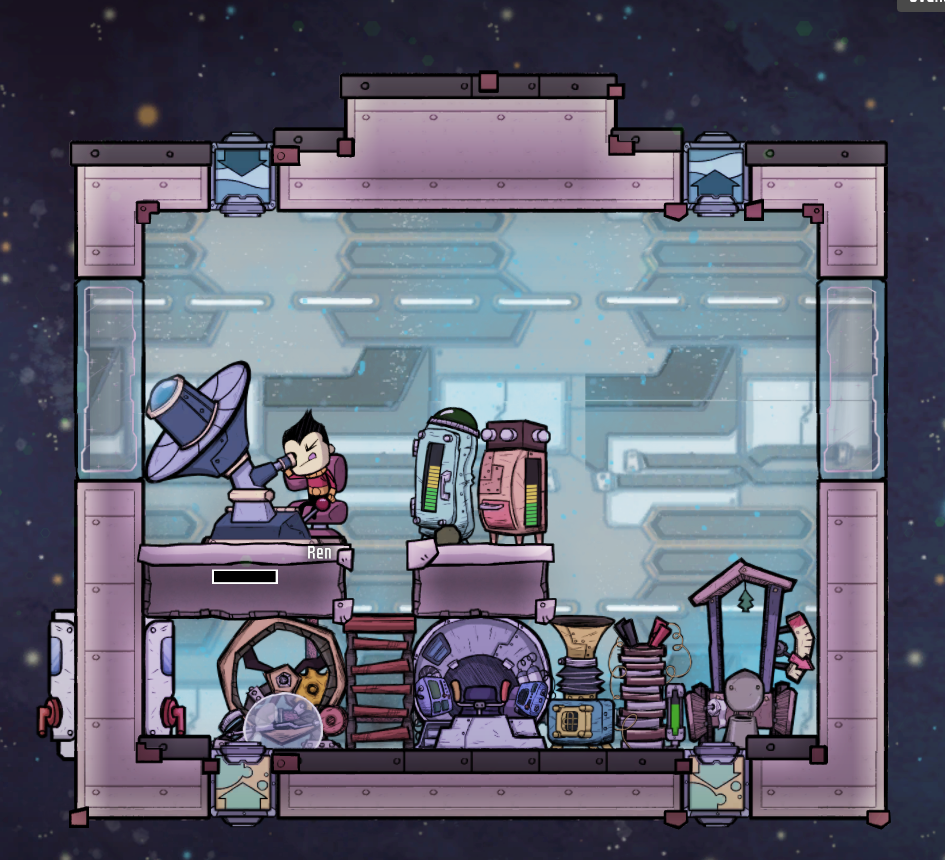 A simple rocket with a telescope.
On a final note, if you're using regular telescopes, you may want to replace them with enclosed telescopes, as they have a longer range.
Colonization
Spaced Out Only!
A duplicants lands on an unexplored asteroid
When your space rocket finally arrives at your chosen location, you can choose to blow it up, or use a trailblazer module if you have one in your rocket, to get your duplicant(s) onto the nearby asteroid. When they have landed safely, you should quickly get them to dig towards a nearby source of oxygen (Either a small cave with oxygen or oxylite tiles).
You can then look around for materials to use for construction of basic buildings you will need to survive, such as outhouses, oxygen production and food production.
From then on, you'll just have to expand your new colony and make it sustainable. You can even make a Mini-Pod and start printing new duplicants (All printing pods share the same cooldown, so if you print something on one asteroid, you can't print something on another for 3 cycles).
At any point, you can switch between your colonized asteroids (And any rockets you have) by clicking on their name in the "Planetoid" Section.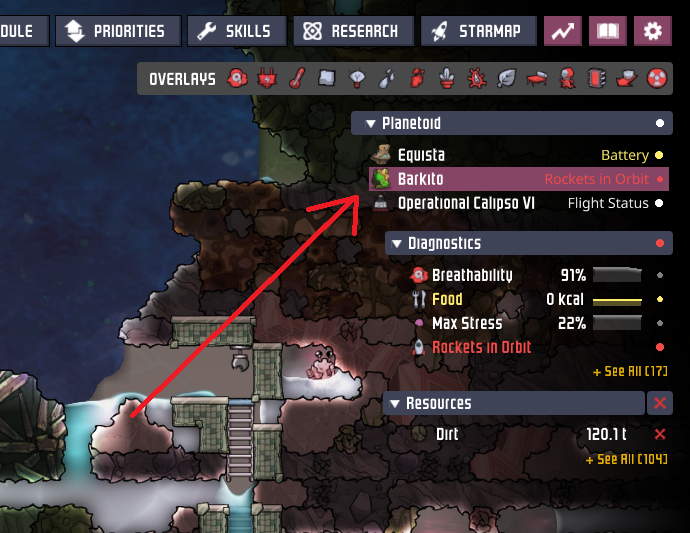
Materials Science Research
Spaced Out Only!
At some point you'll need to research even higher tiers of science, and to do that, you need materials science research. First, you'll need to build a materials study terminal.
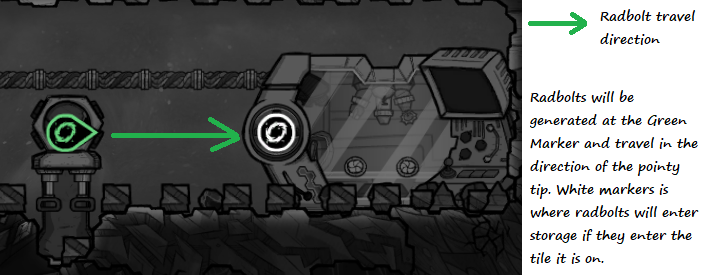
When fabrication of radbolts is queued, a duplicant will use the generator to produce radbolts at the cost of uranium. These radbolts will then be sent in the chosen direction (In this case towards the materials study terminal). These radbolts can then be used to research stuff requiring Applied Science Research.
Uranium can be found either in the radioactive biome or in geodes found rarely around the asteroid.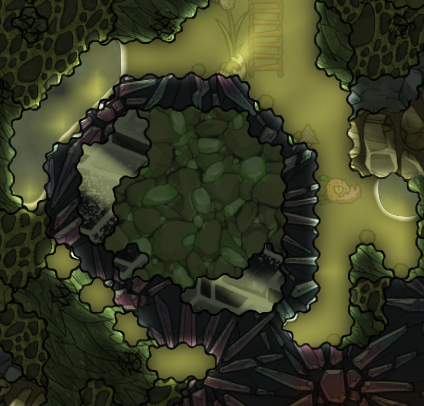
Sources of Radiation
If you do use a Radbolt Generator, you will need a source of radiation. The more radiation, the faster generation of radbolts.
At this point, one of the best radiation producers is actually the wheezewort, with a radiation output at around 300 each cycle at a short distance. By planting a few wheezeworts around your Radbolt Generator, you can get a lot of radbolts each cycle.
If you have a somewhat stable colony on a planetoid with a crushed satelite, you can conduct all of your radbolt-requiring research there, as crushed satelites are incredibly useful for generating a lot of radbolts.
End of Mid-game
Whatever you do, I hope you found this guide helpful.
- ONI - Surviving the Early Game★ 5 (2.4k)83k views6.3k ♥54 minUpdated 6 Aug, 2019
- Useful Construction Patterns★ 5 (1.8k)74k views5.2k ♥66 minUpdated 29 Aug, 2020
- 10* things I wish I knew sooner...★ 5 (754)58k views1k ♥4 minUpdated 6 Oct, 2017
- ONI - Surviving the Mid-Game★ 5 (1.3k)44k views3.8k ♥150 minUpdated 6 Sep, 2019
- Not Quite Beginner's Guide★ 5 (361)32k views1.1k ♥91 minUpdated Mar 26, 2023
- Руководство для начинающих. (ОСНОВЫ)★ 5 (629)32k views1.2k ♥21 minRussianUpdated 20 Apr, 2019




- Upgrading to PremiumTeam Fortress 2★ 5 (20k)1441k views11k ♥6 minUpdated May 11, 2022
- No More Room in Hell Official ManualNo More Room in Hell★ 5 (2.8k)569k views2.1k ♥29 minUpdated Apr 22, 2019
- NMRiH Community Hosting GuidesNo More Room in Hell★ 5 (526)351k views653 ♥1 minUpdated Aug 10, 2022
- ULTIMATE GUIDE FOR GAME DEV TYCOONGame Dev Tycoon★ 5 (5.8k)326k views10k ♥4 minUpdated 23 Jan, 2014
- How to 'Git Gud' Soon™MORDHAU★ 5 (2k)318k views3k ♥68 minUpdated Nov 16, 2024
- Лучшие кооперативные игры SteamPAYDAY 2★ 5 (1.5k)315k views2.1k ♥56 minRussianUpdated Apr 27, 2025






This guide was created by its original author on the Steam Community. Are you the author and want it removed? Request removal.