Quake Secrets
Useful Information


Quake Secrets Guide Contents
- Quake Secrets
- Scourge of Armagon Secrets
- Dissolution of Eternity Secrets
- Dimension of the Past Secrets
- Dimension of the Machine Secrets
- Horde Mode Secrets
Introduction
 This guide contains detailed images and descriptions to help you find every secret in Quake. It lists the rewards contained in each secret and also includes the four hidden exits to the secret levels. There are 113 secrets across 32 levels, as well as several unmarked secrets (which don't count as official secrets but often have substantial rewards).
The four episodes of Quake can be completed in any order however this guide lists them as though you play them with the following path:
- Episode 1: Dimension of the Doomed
- Episode 2: The Realm of Black Magic
- Episode 3: The Netherworld
- Episode 4: The Elder World
- End: Shub-Niggurath's Pit
Items
There are many weapons and items to find, many of which will be inside secrets:Weapons

Axe

Shotgun

Double-Barreled Shotgun

Nailgun

Super Nailgun

Grenade Launcher

Rocket Launcher
Thunderbolt
Ammo

Small Shells

Large Shells

Small Nails

Large Nails

Small Rockets

Large Rockets

Small Cells

Large Cells
Powerups

Green Armor

Yellow Armor

Red Armor

Small Health

Large Health

Megahealth

Quad Damage

Pentagram of Protection

Ring of Shadows

Biosuit
START: Introduction
Extra Secret
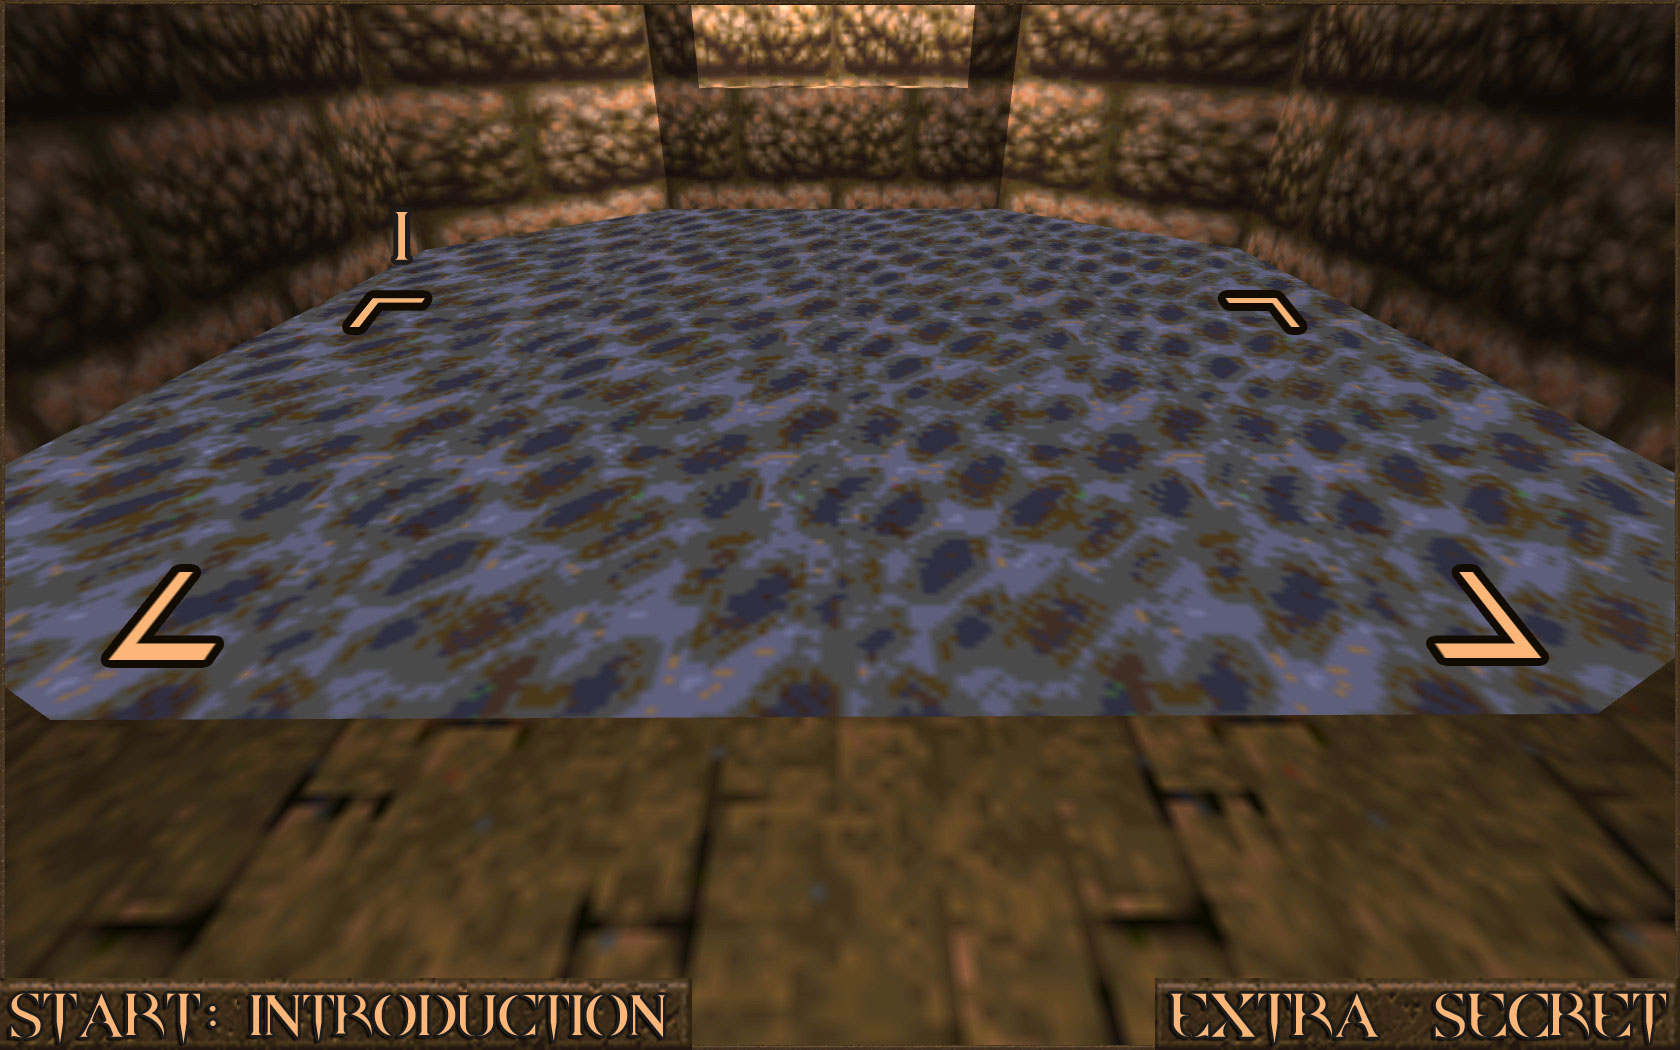
The introductory level for Quake does not really have any secrets. However, finding the Nightmare Difficulty portal can be considered an unmarked secret. If you don't want to activate Nightmare Difficulty then you can just ignore this secret and move on.To find the Nightmare Difficulty portal head towards the entrance to Episode 4: The Elder World and jump in to the water (
 ).
).
The water is actually suspended in the air and if you swim too far down you will fall through. While swimming in the water turn around and swim under the ledge that you were just standing on until you hit the wall (
 ). Now stop swimming and let yourself fall down.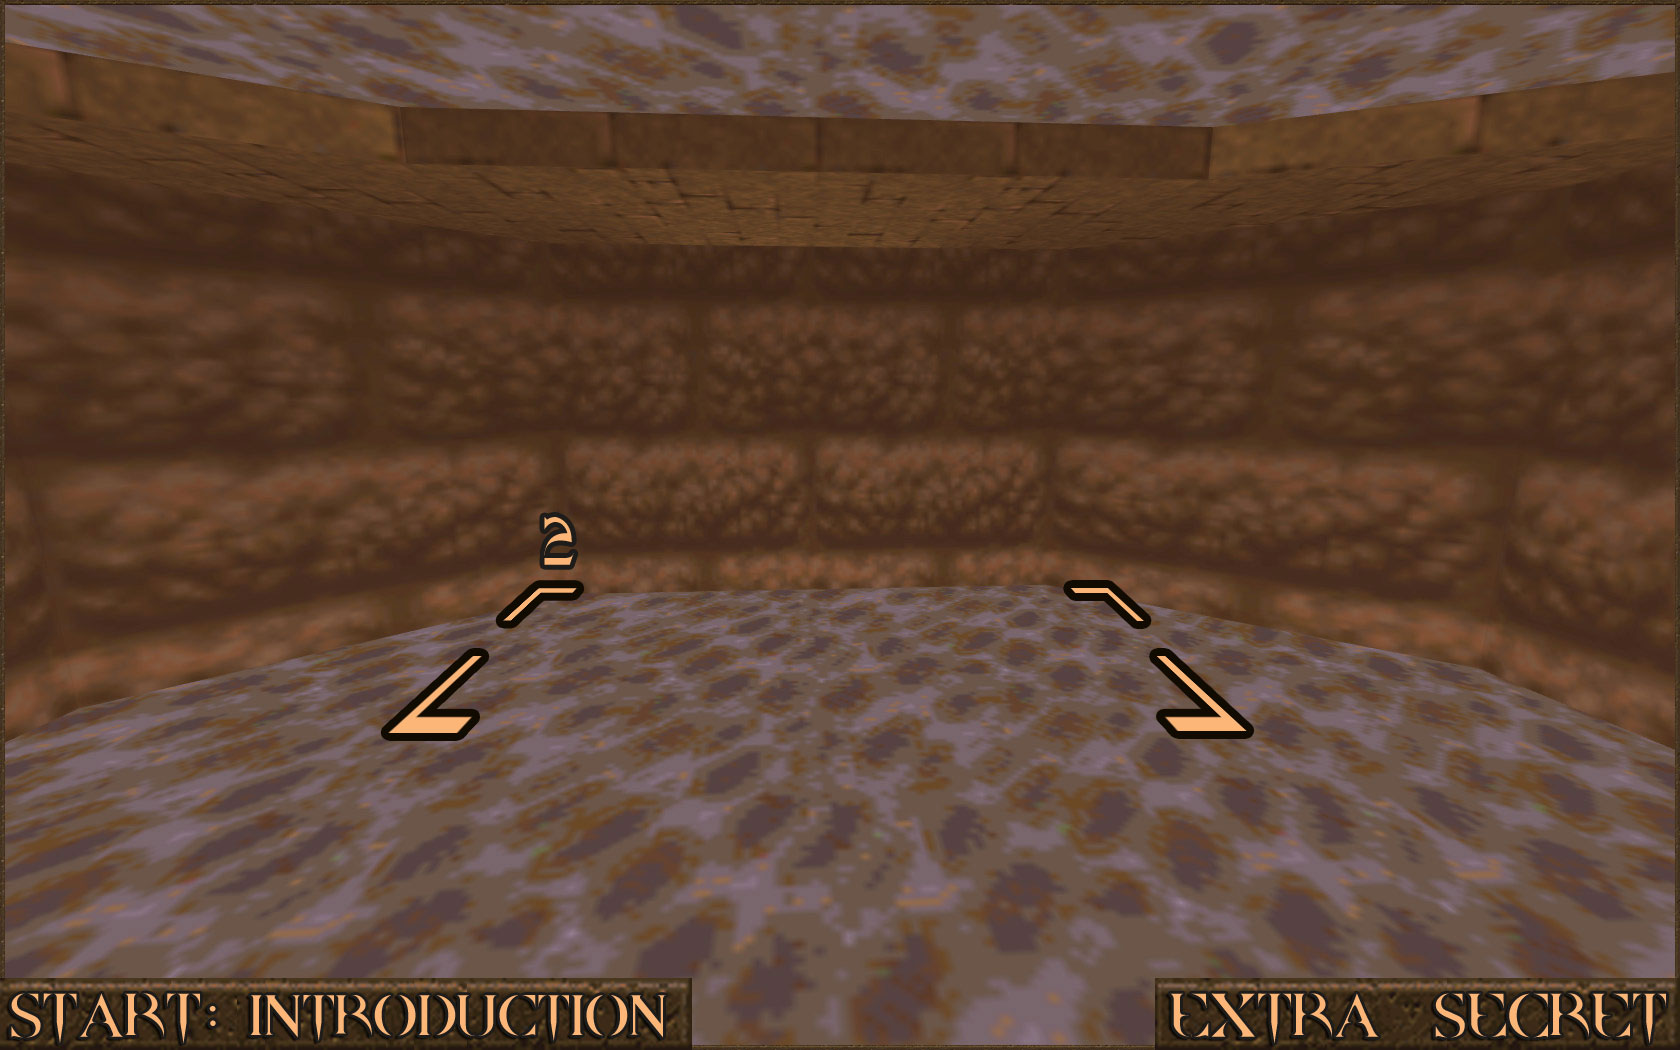
Instead of falling to the floor you will instead land on some wooden beams. Look around and you will see an exit in the wall (
 ). Head in to it.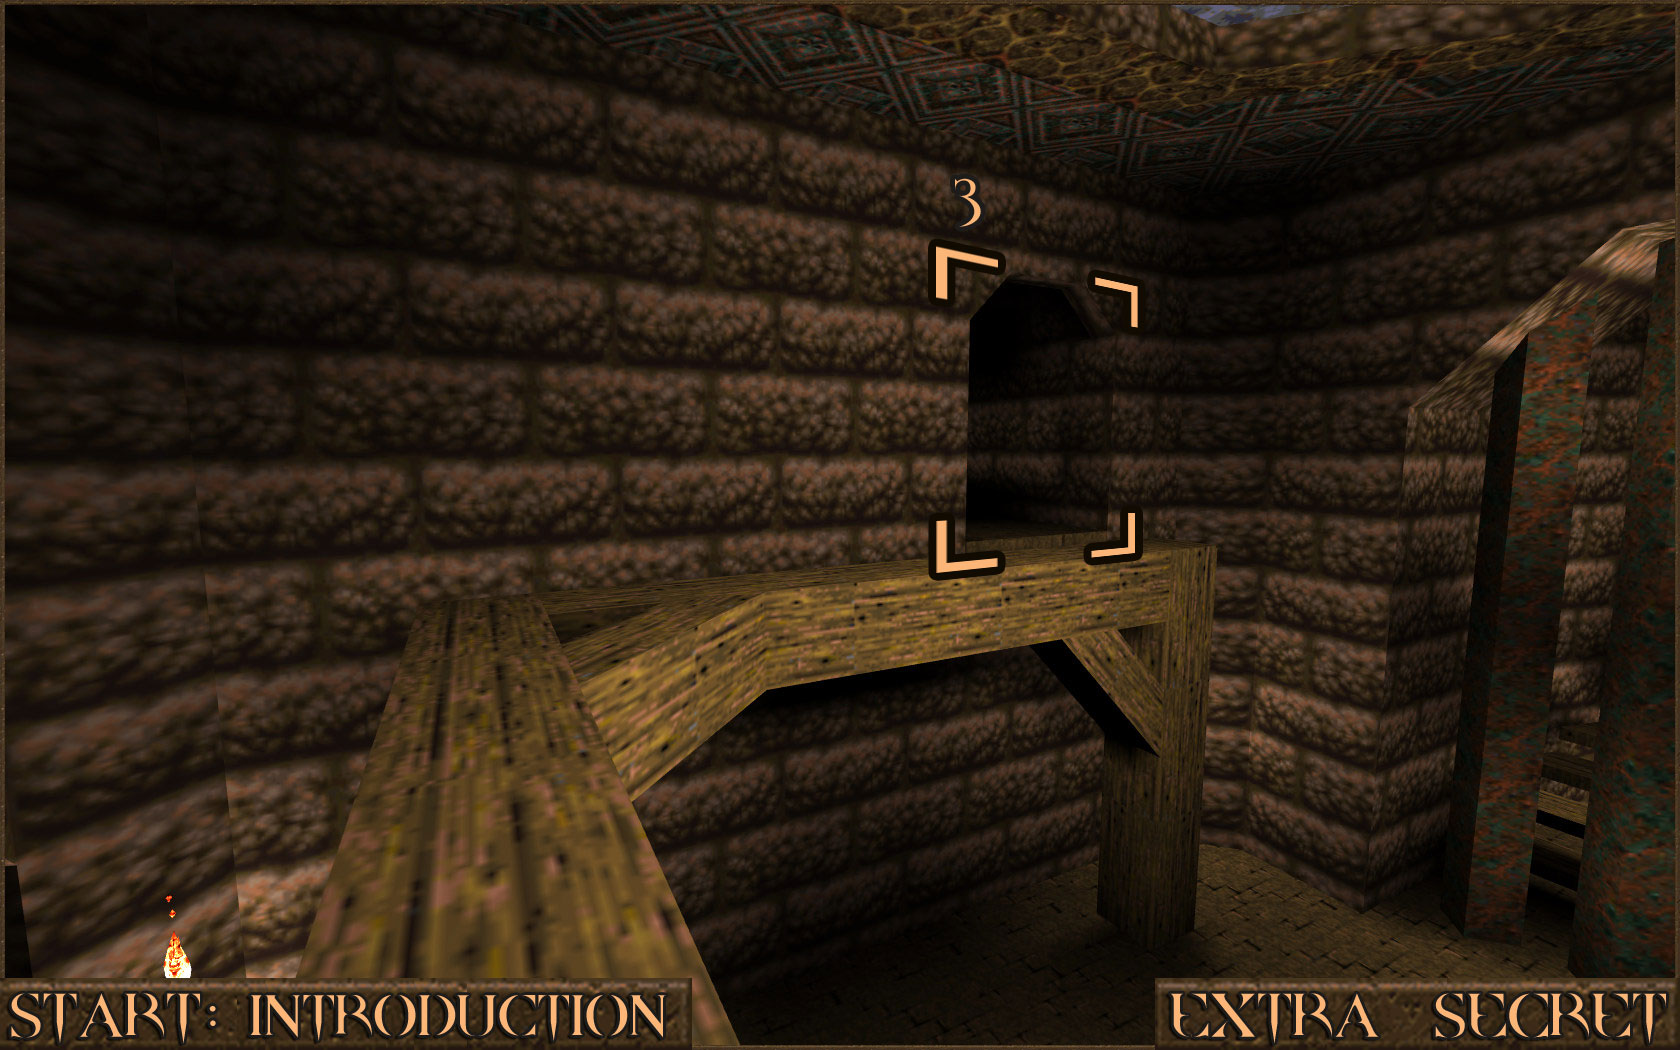
At the end of the tunnel is the Nightmare Difficulty portal. However there is also something else to discover here. Shoot the square that contains some tortured faces that is next to the portal (
 ). You will receive the message "The Well of Wishes awaits you in the Crypt of Decay." which is a clue to another unmarked secret in the level E2M3: The Crypt of Decay which will be covered later on. Head in to the portal to activate Nightmare Difficulty and teleport back to the episode selection area.
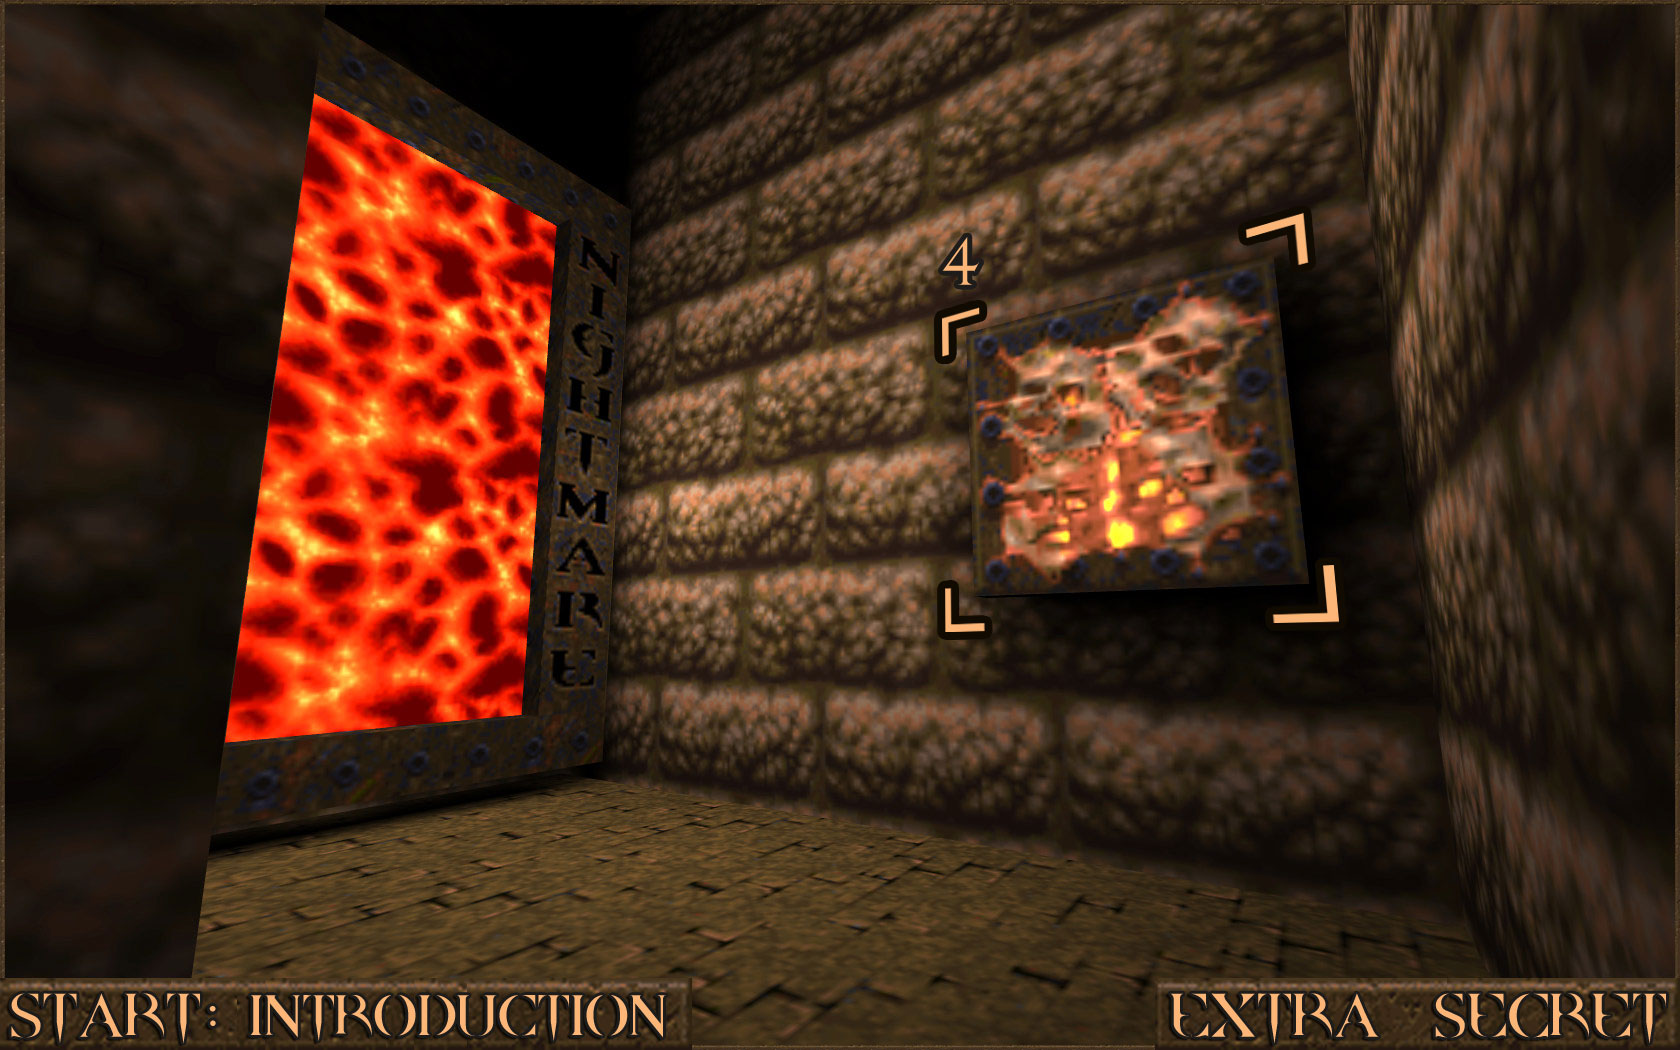 Reward: Nightmare Difficulty
E1M1: The Slipgate Complex
Secret 1 of 6
In the first room look to your right and you will see an area with a blinking light. Shoot the wall which has two red lights on it to reveal the secret.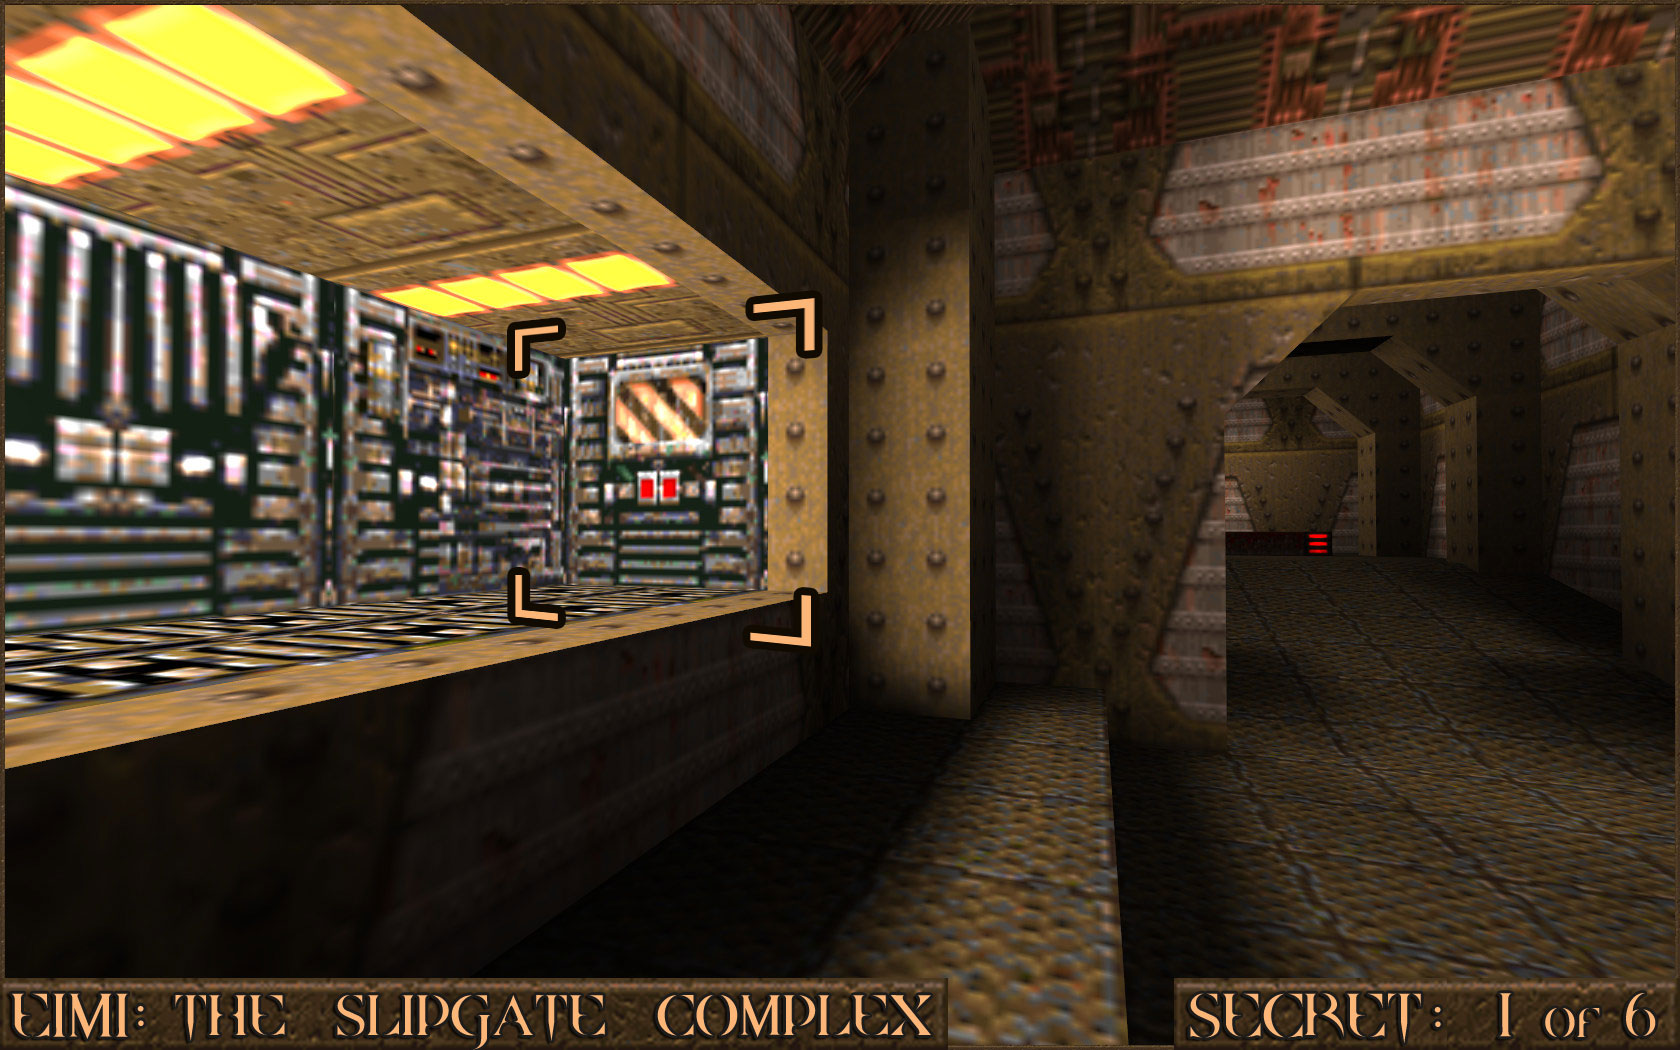 Reward:
 Secret 2 of 6
After going down the elevator you will come across a metal bridge. Drop down in to the water under the bridge and follow it to the right to enter a small cave. Climb out of the water on to the platform you come across to find the secret.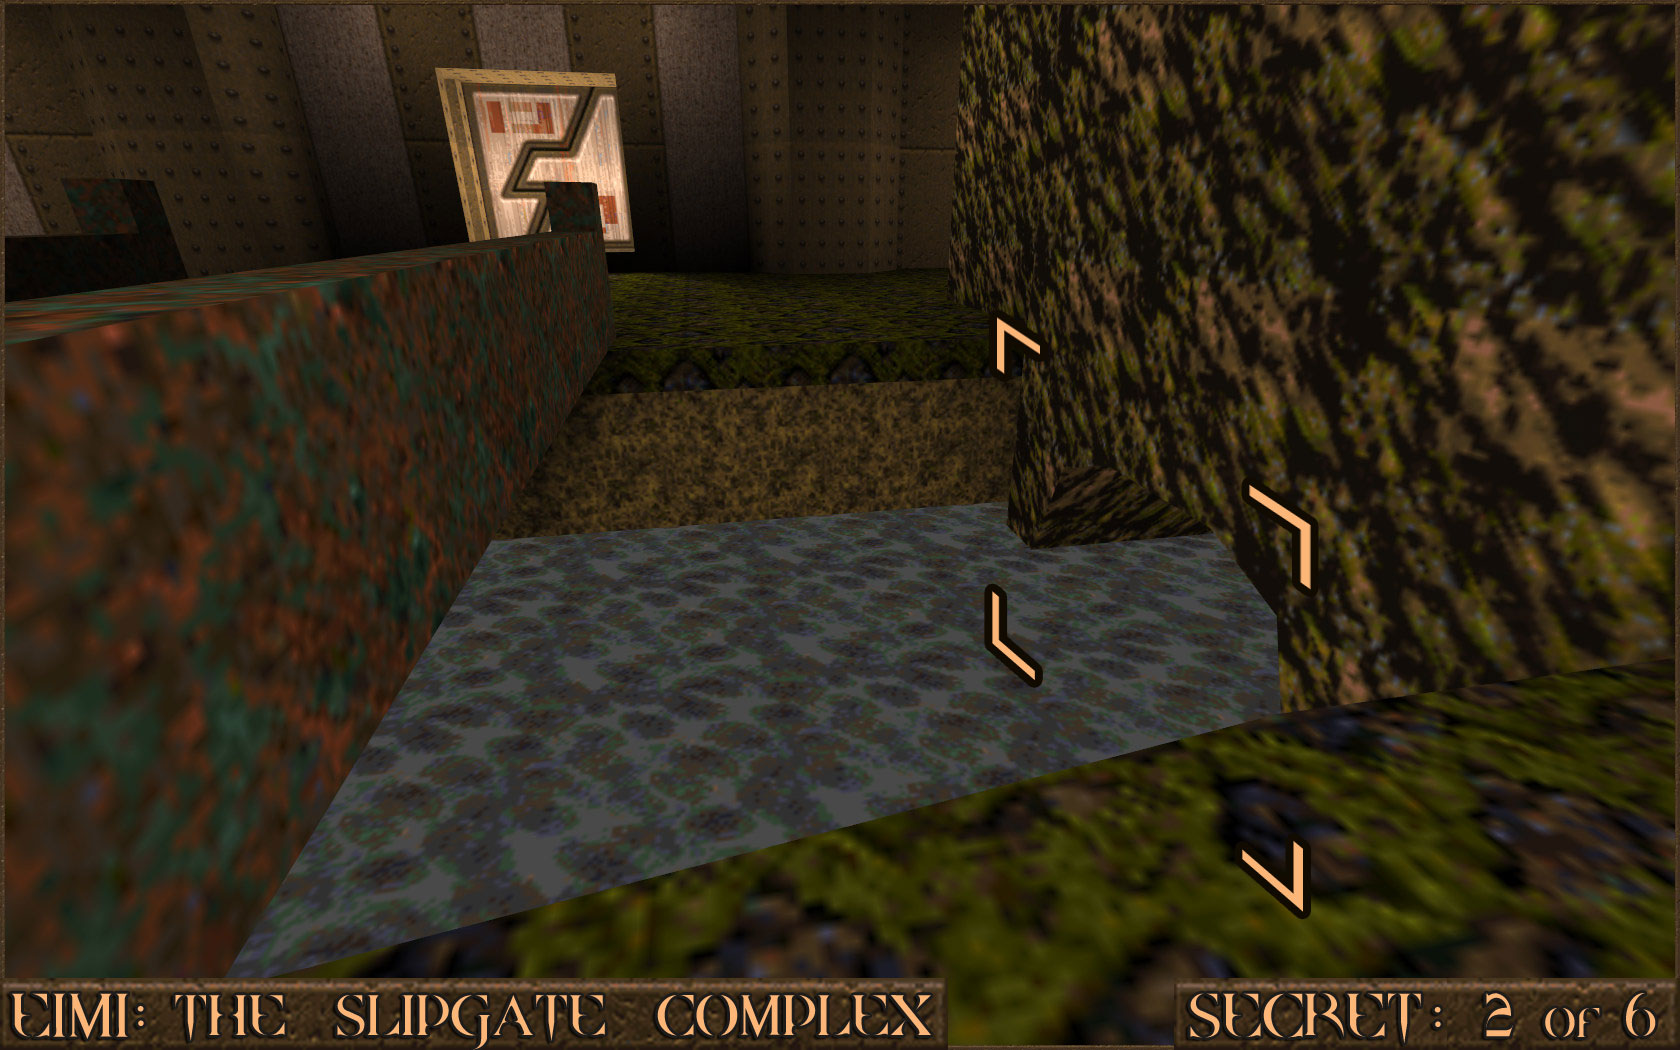 Reward:
 Secret 3 of 6
In the room where you press a switch to cover the slime pit, look to the left to see a red target () hidden in a recess in the wall. Shoot it to open a door () to the left.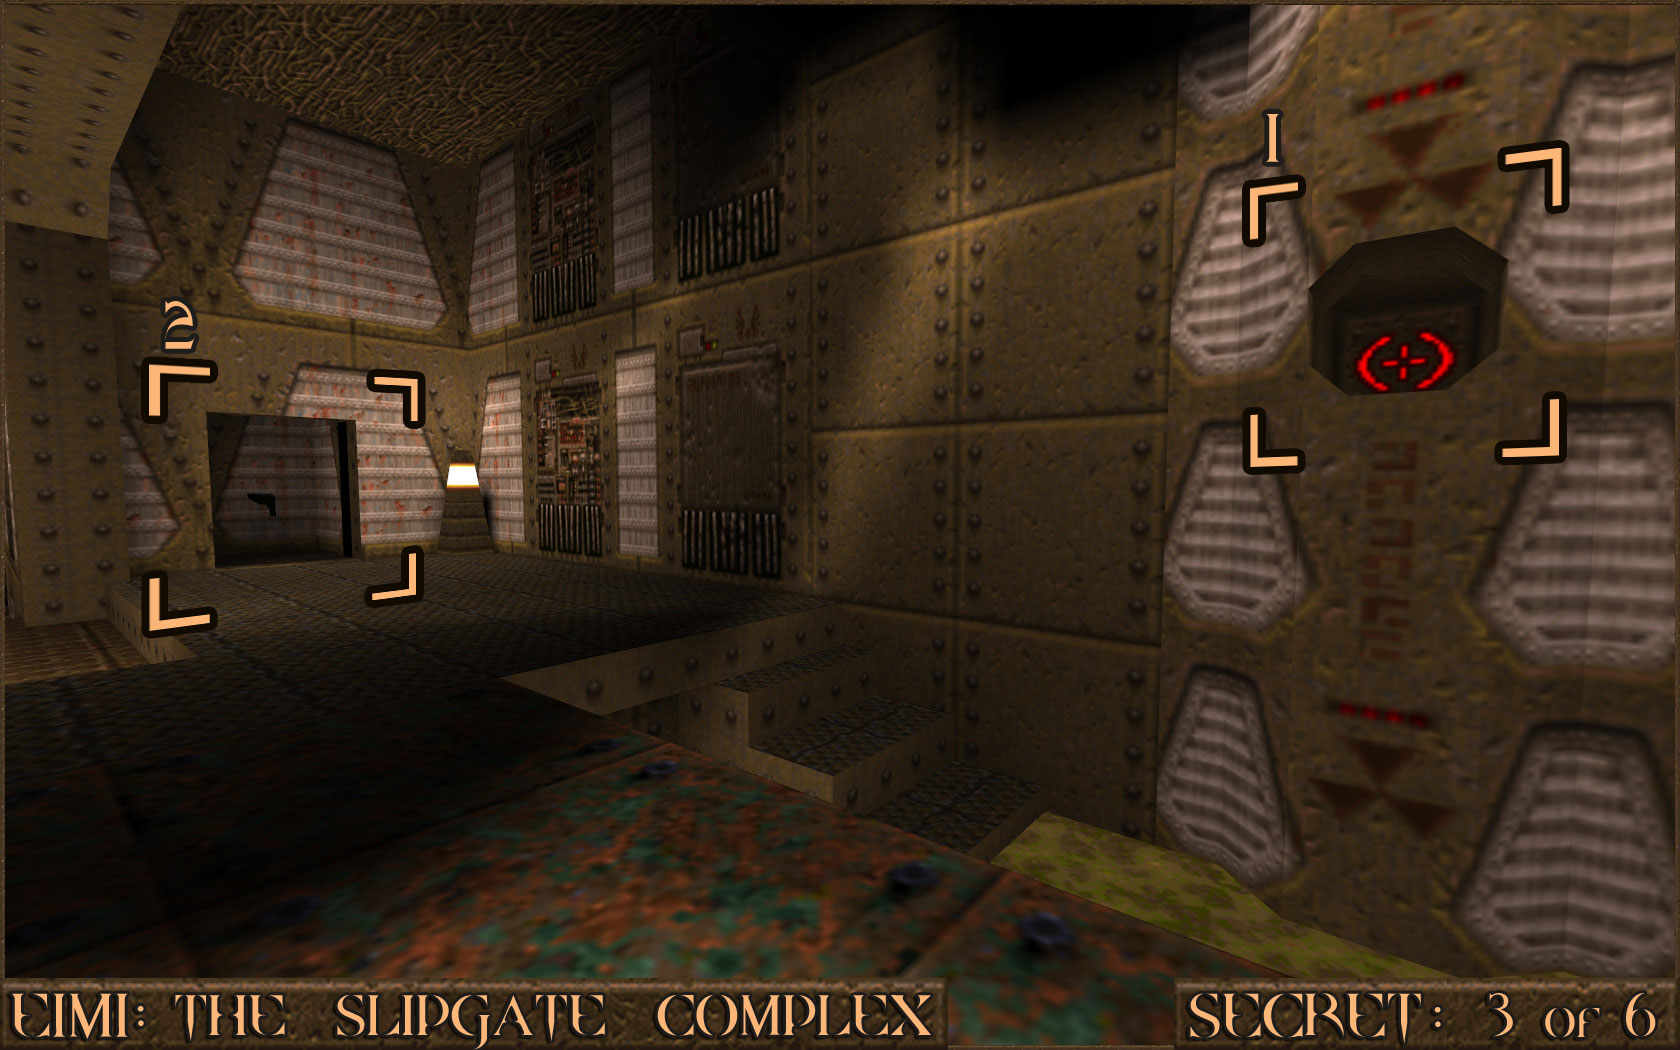 Reward:
 Secret 4 of 6
Before going down to the area with the three red buttons, shoot the orange wall that is on your right.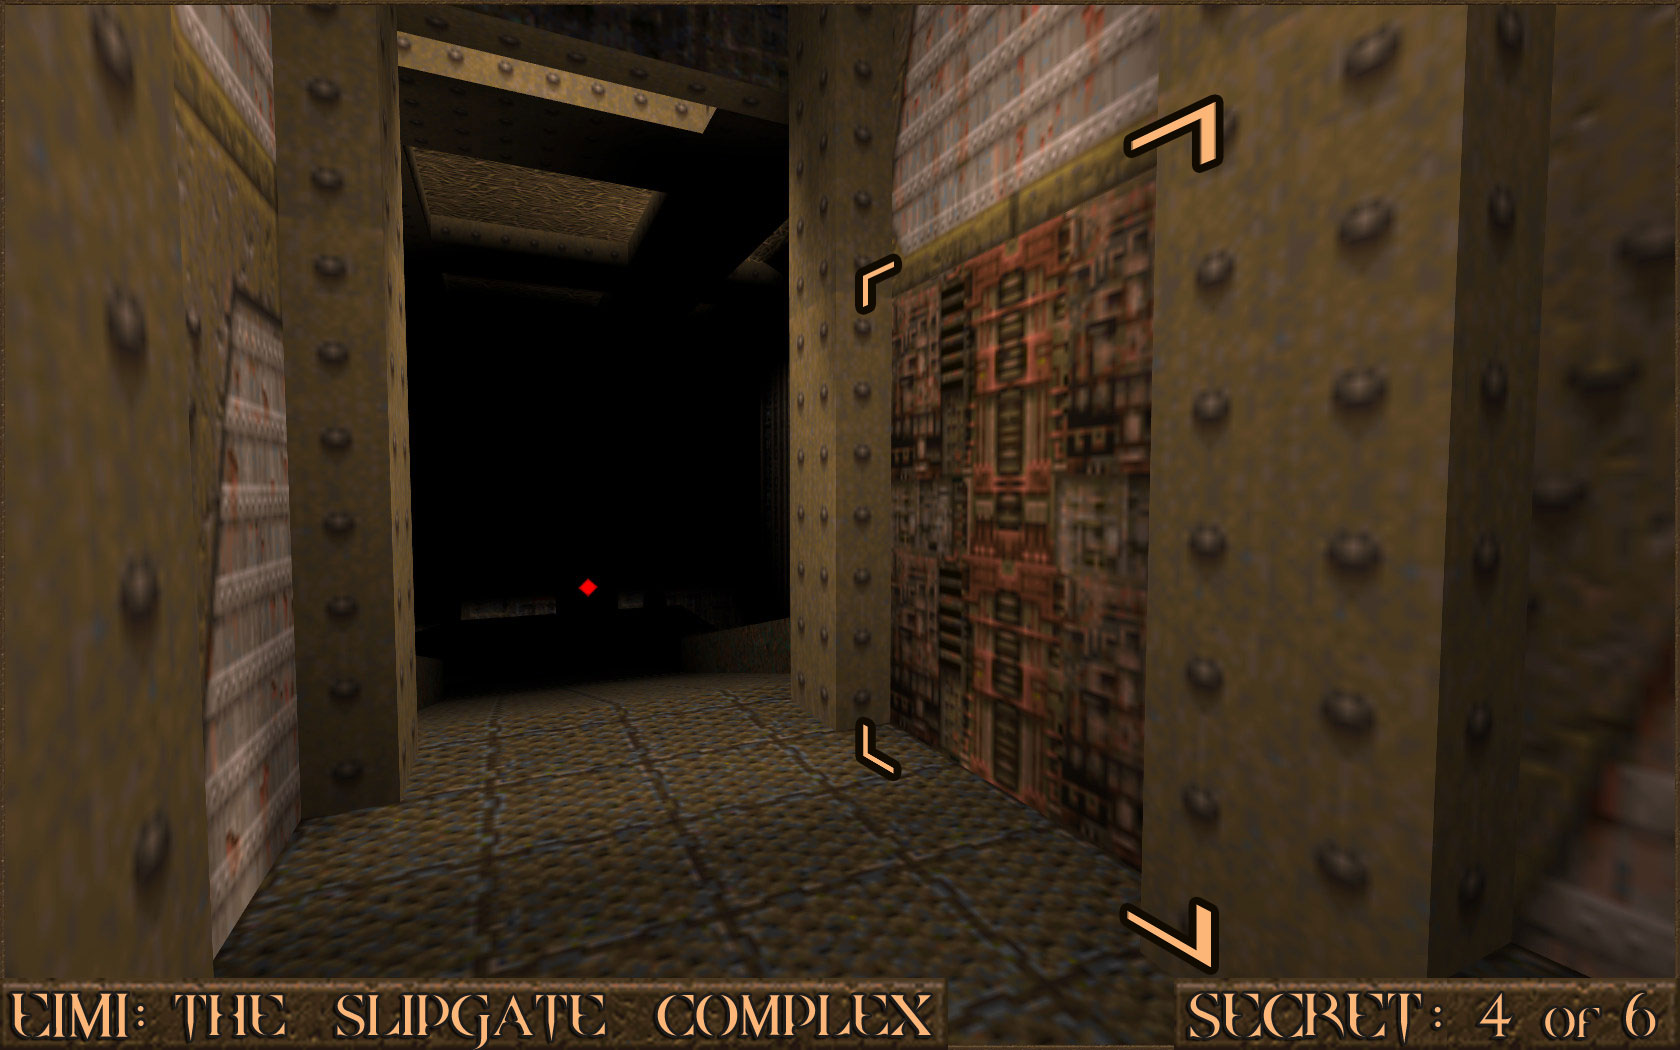 Reward:
 Secret 5 of 6
When you reach the third red button if you look up you can see a small room above you. Jump on to the side of the platform (), then on to the light (), then on to the button (), then over to the small metal steps that are sticking out of the wall (). Jump up the rest of these steps to get in to the small room ( ).
).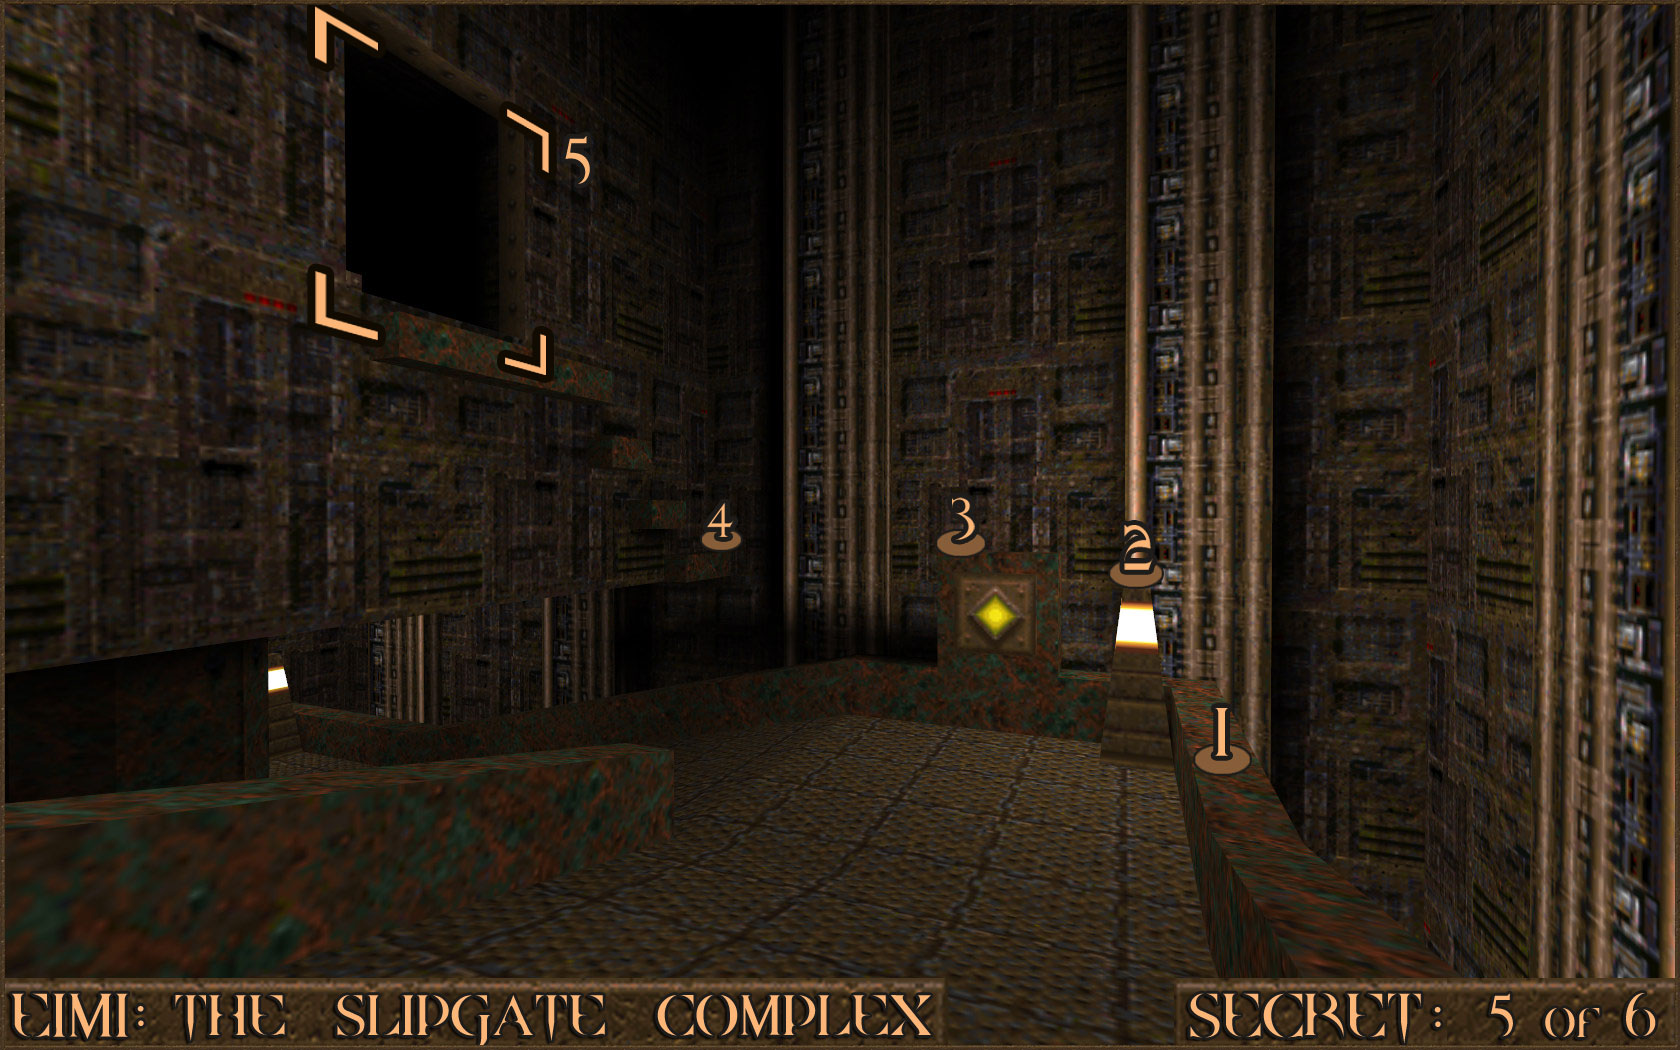 Reward:
 Secret 6 of 6
At the bottom of the ramp after the three red buttons there is a Biosuit hidden behind a pillar (). Pick it up then jump over the side in to the slime. 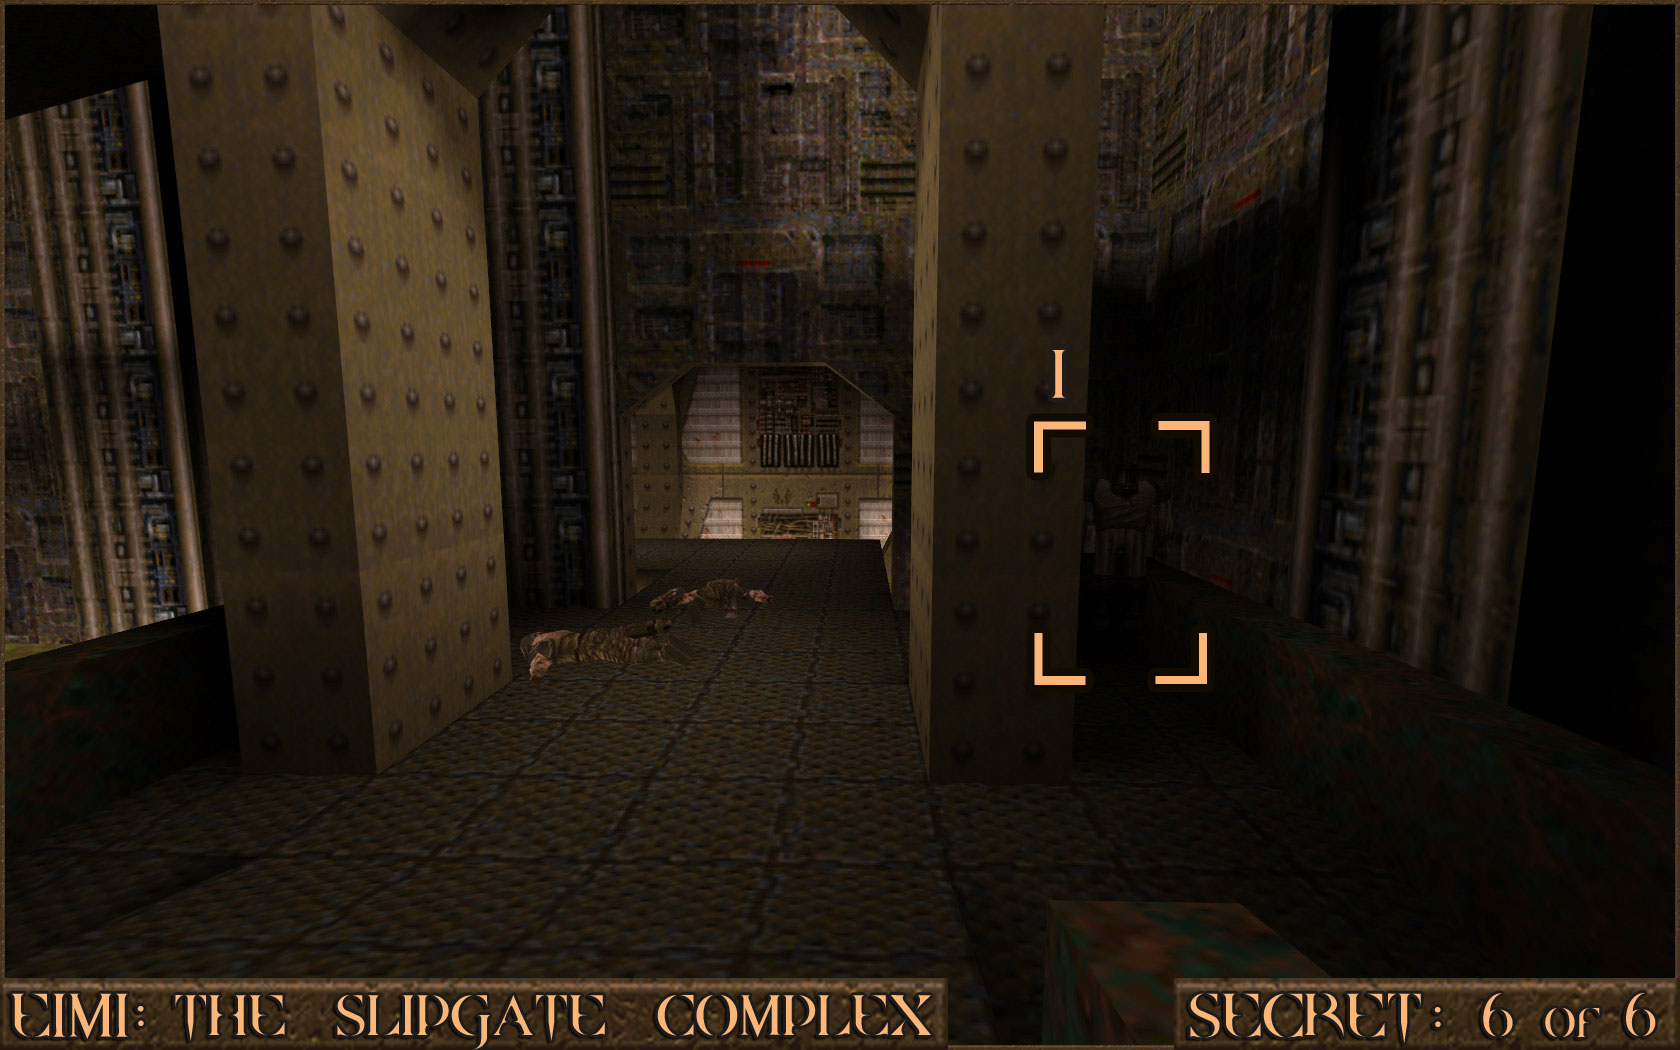 Look for a tunnel () while under the slime and follow it.
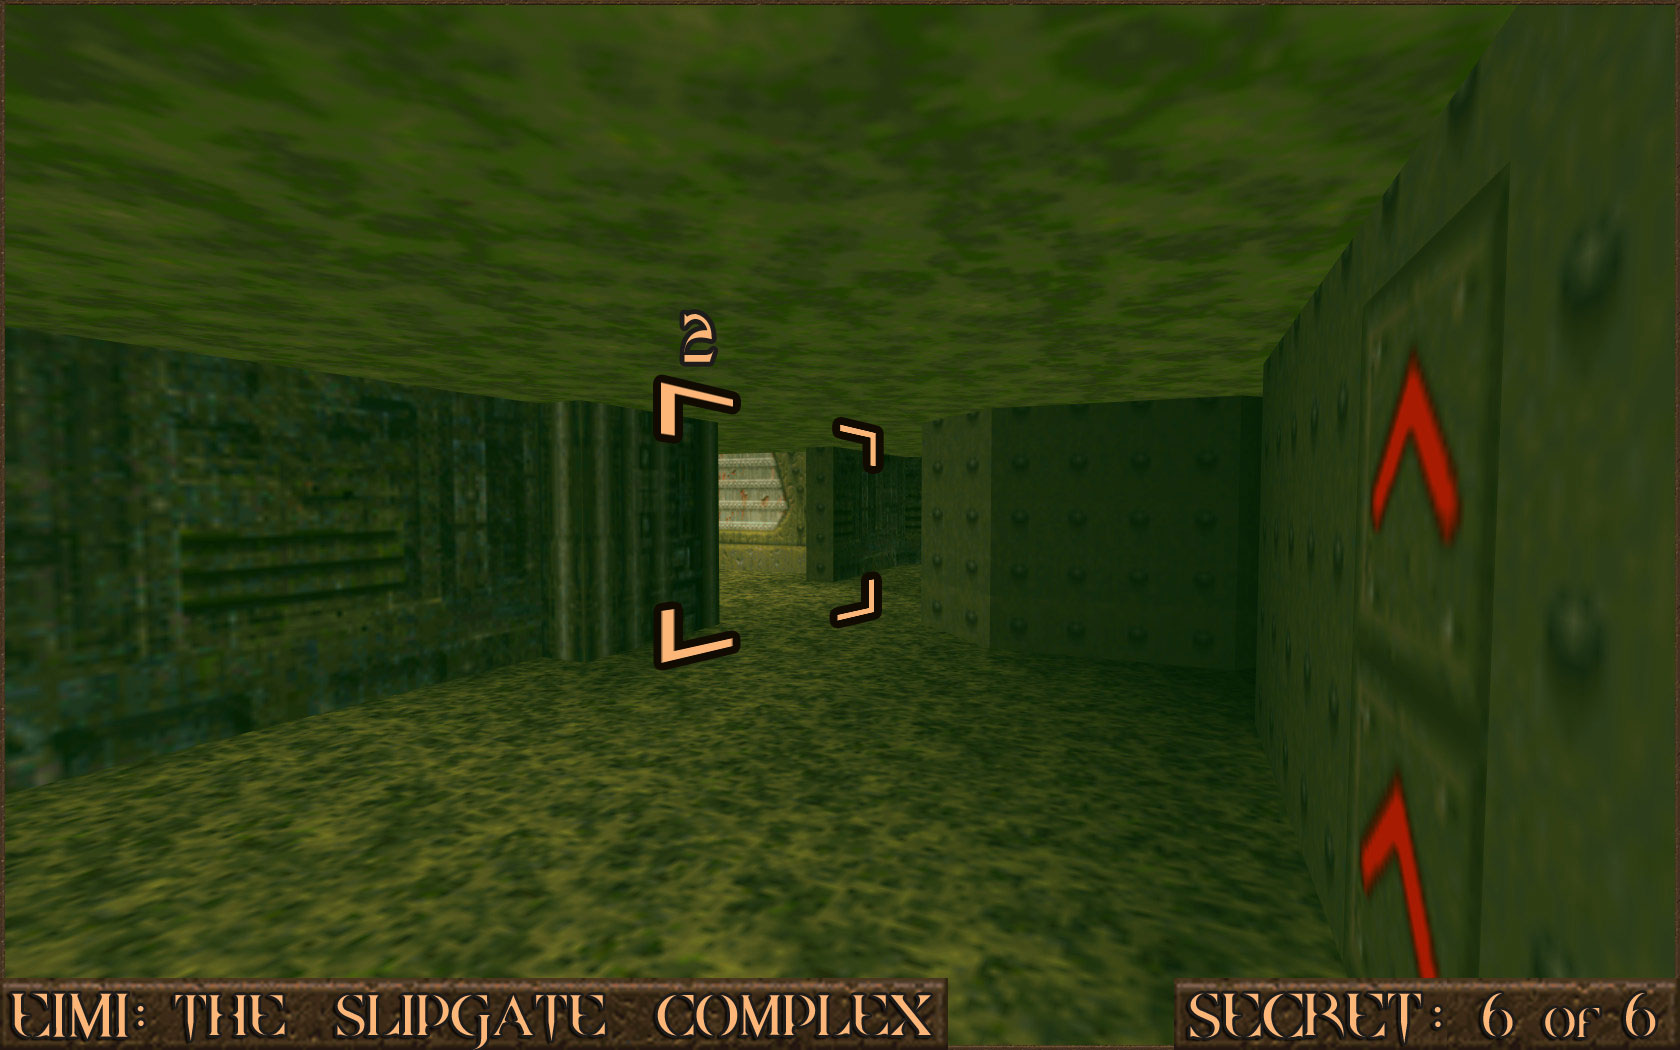 You will come to a metal tube sticking down in to the slime (). Exit the slime through the tube to find the secret area.
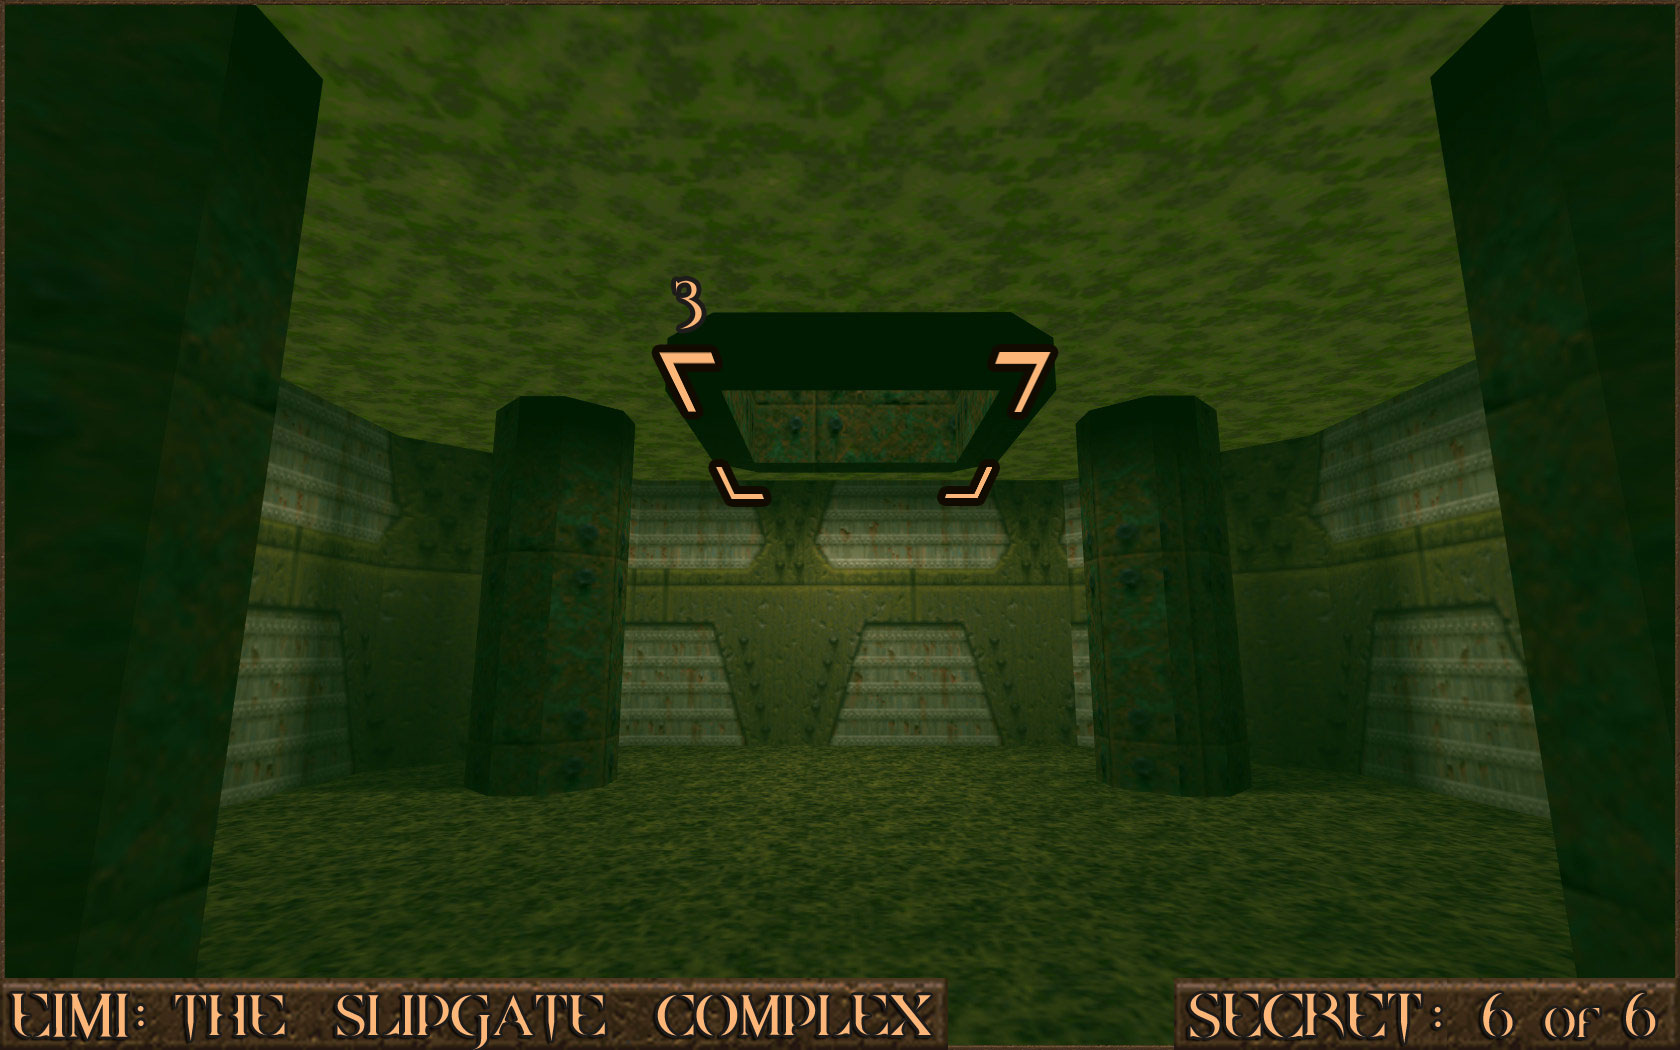 Reward:
 E1M2: Castle of the Damned
Secret 1 of 3
From the start you can see a bridge going over some water. Jump in to the water and to the right of the bridge is a wall that when shot will reveal a secret area.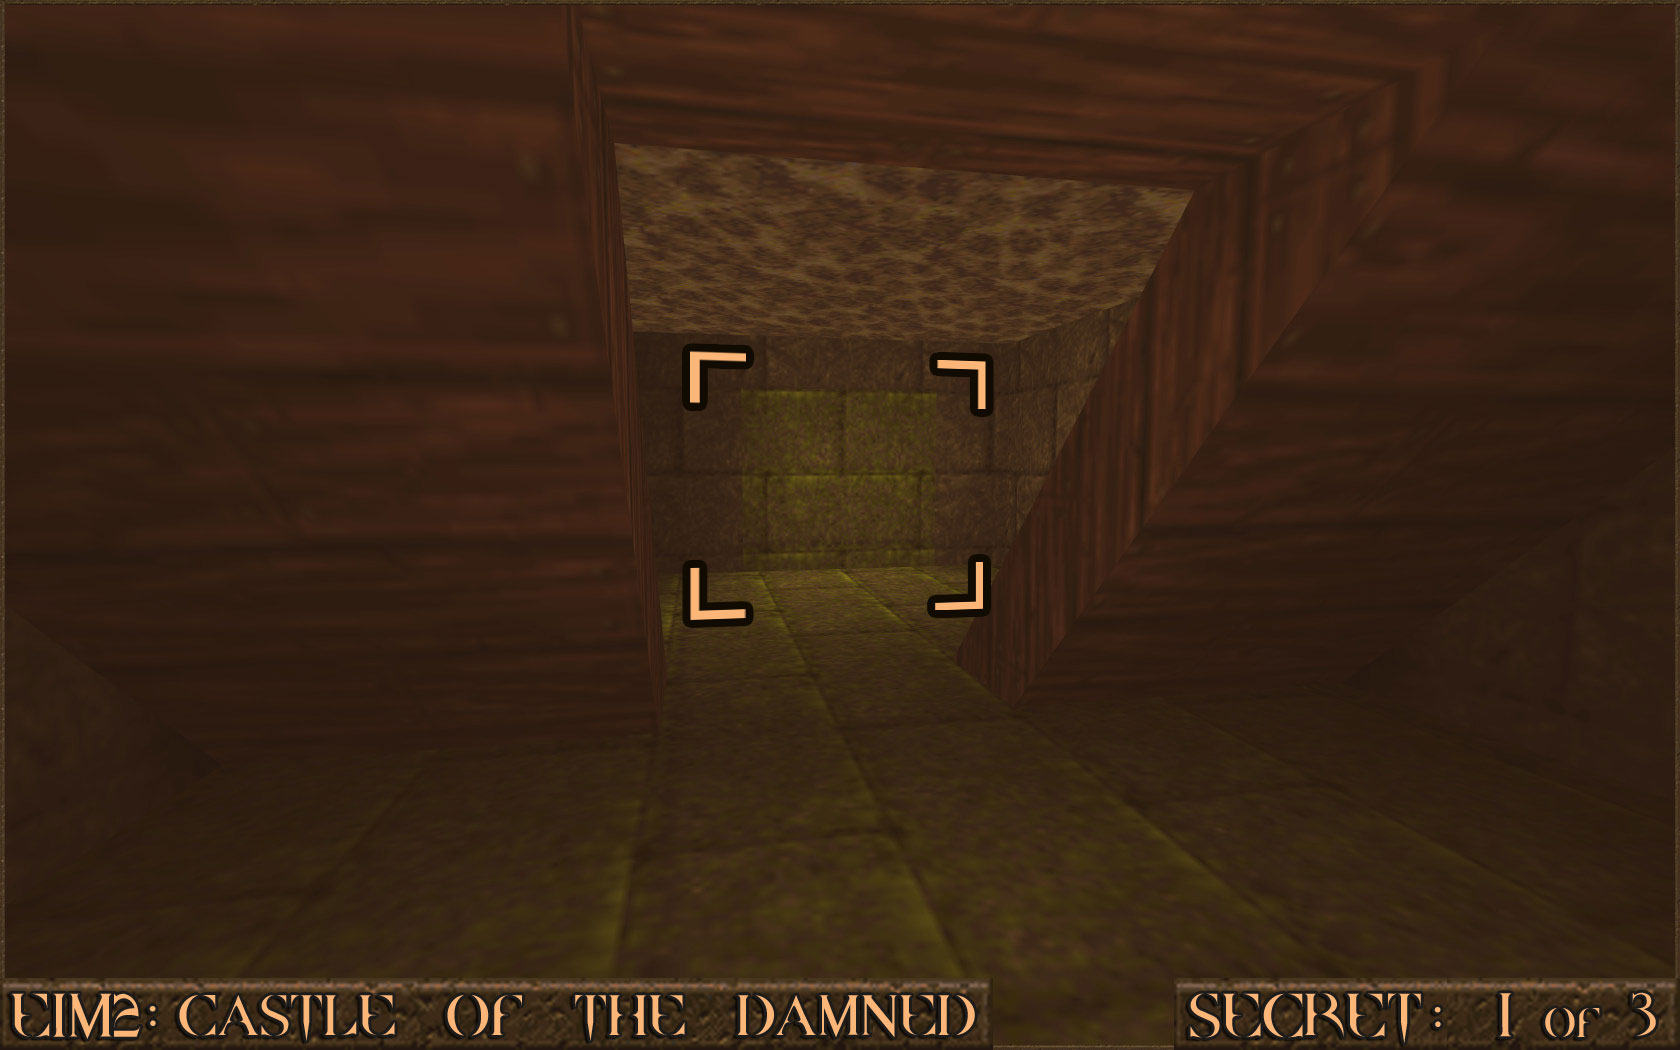 Reward:
 Secret 2 of 3
When you come to an area with a checkerboard floor look behind one of the pillars for a push switch that slightly sticks out (). Once pushed a nearby wall () will open to reveal a secret area.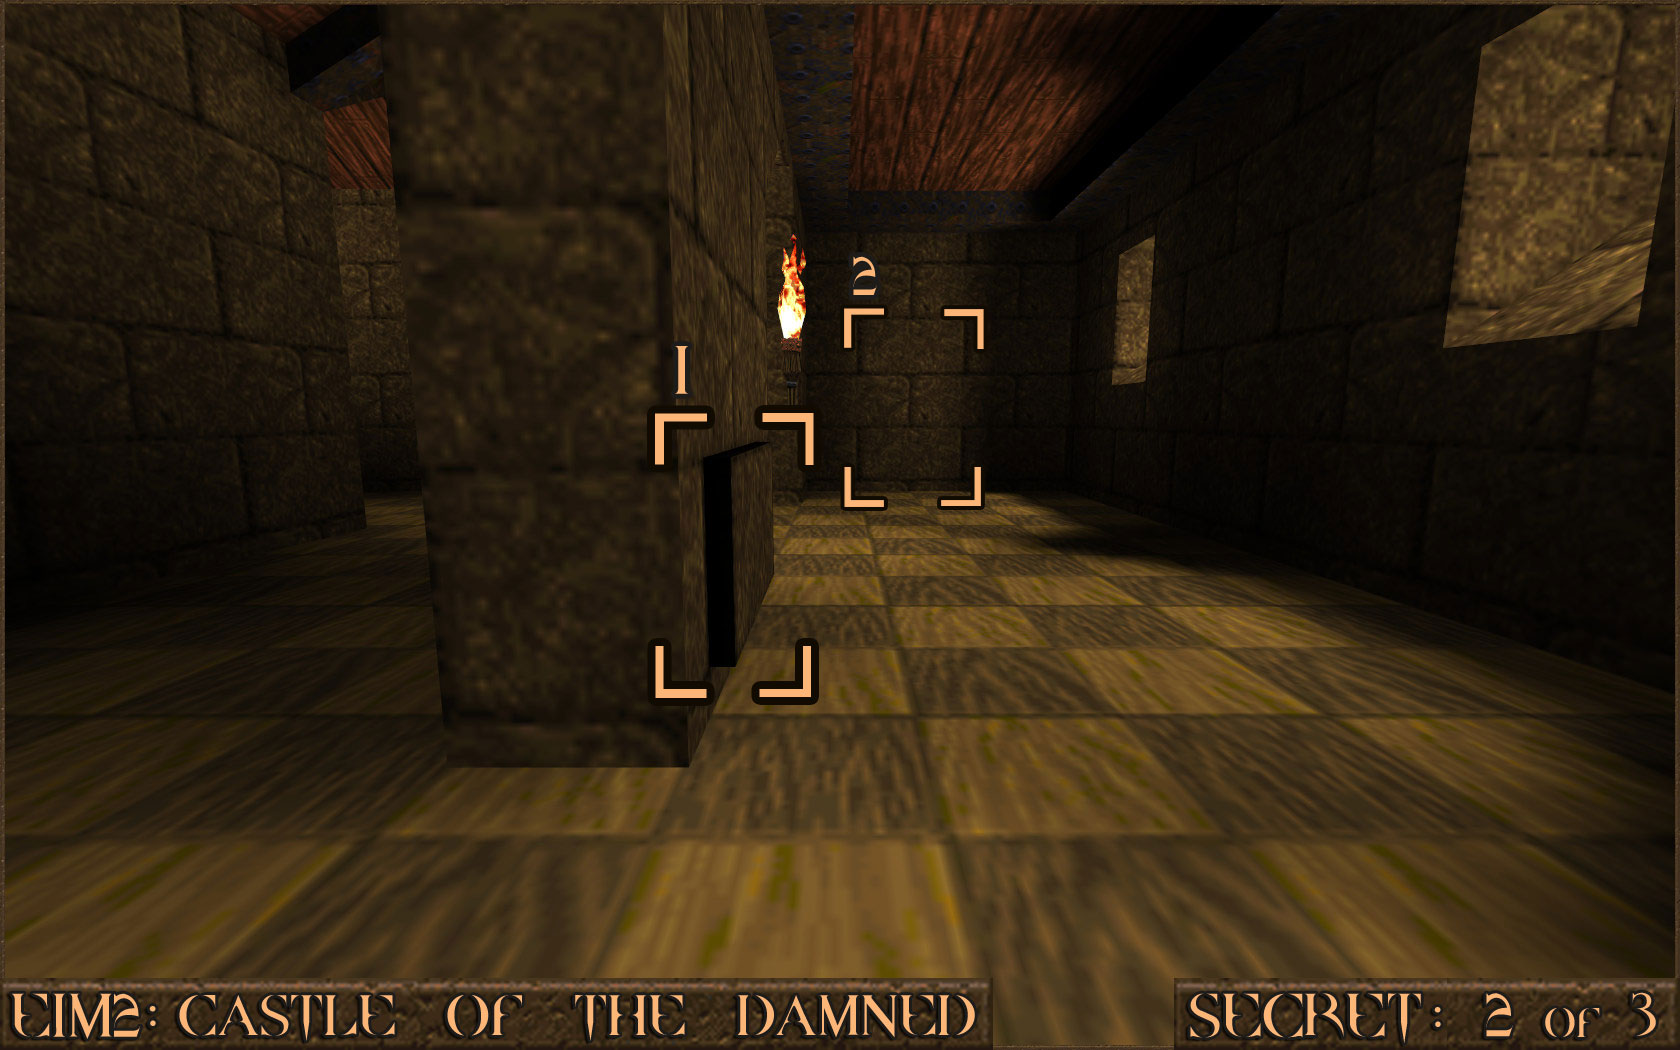 Reward:
 Secret 3 of 3
In the room which has a Yellow Armor on a raised platform jump down in to the water. Approach the wall directly underneath the red shootable switch. The wall will automatically move and allow you in to the secret area.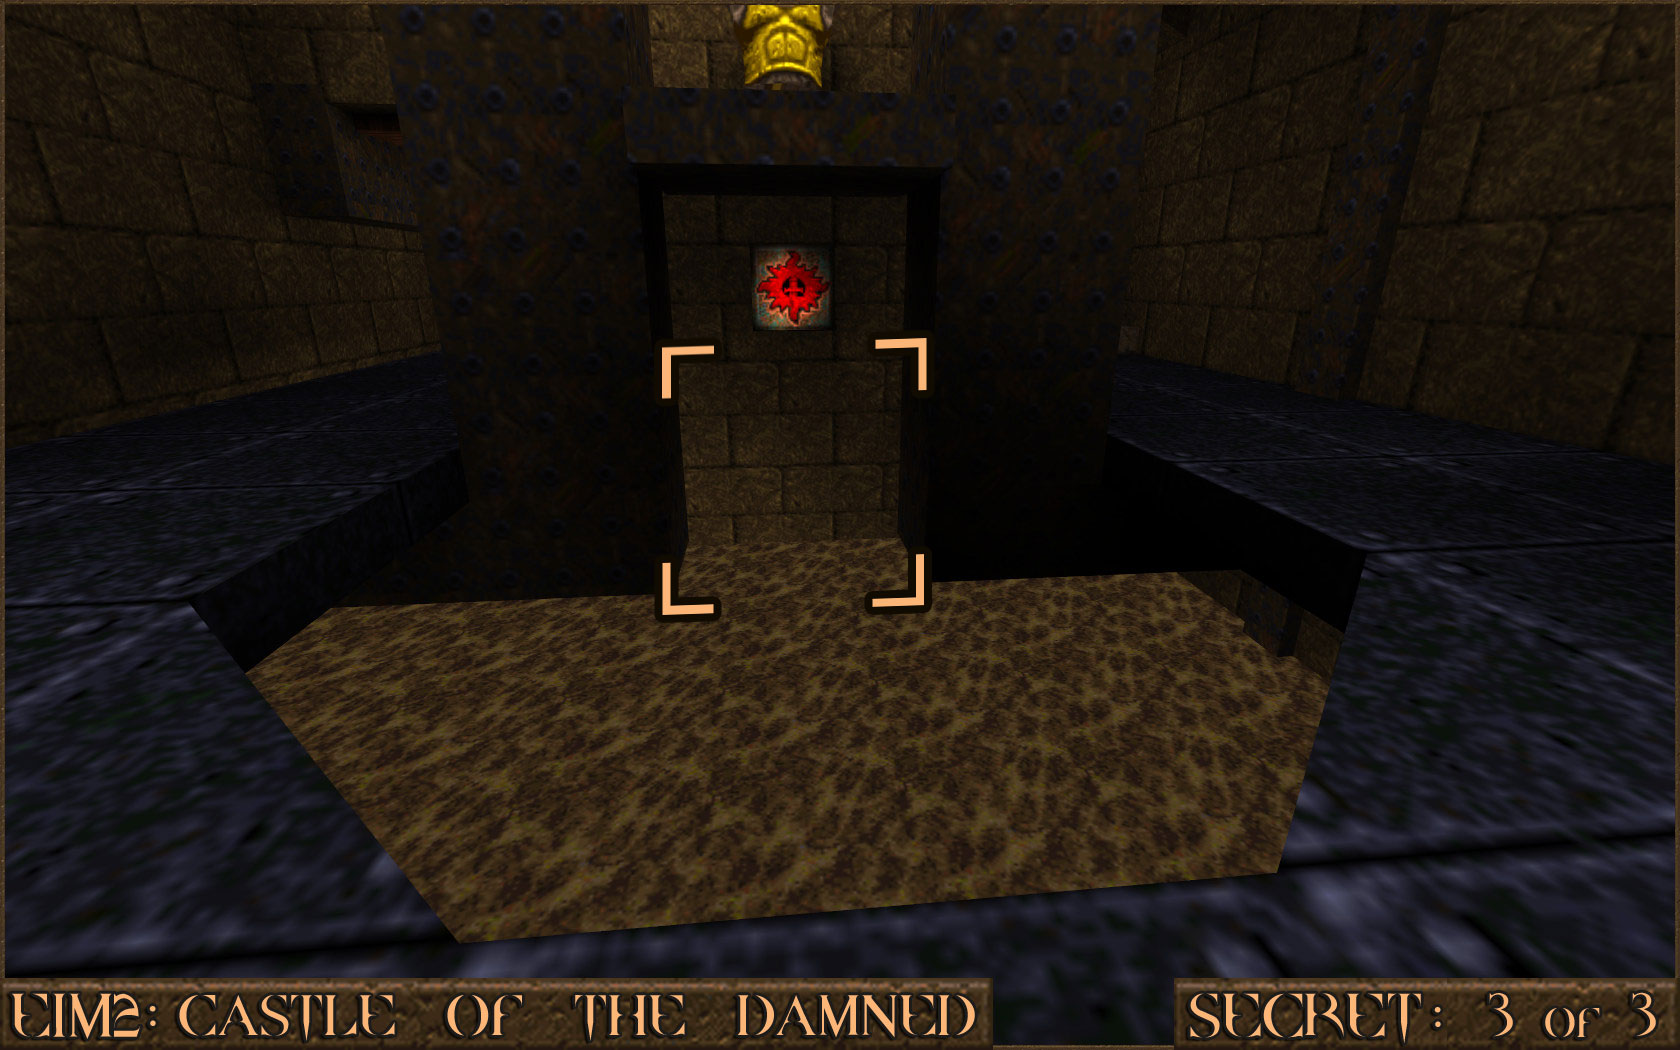 Reward:
 E1M3: The Necropolis
Secret 1 of 3
You will be attacked by Zombies from below when you go over a very small bridge. Drop down in to the area where the Zombies were and shoot a wall which is behind a pack of Small Nails. It will move and reveal the secret area.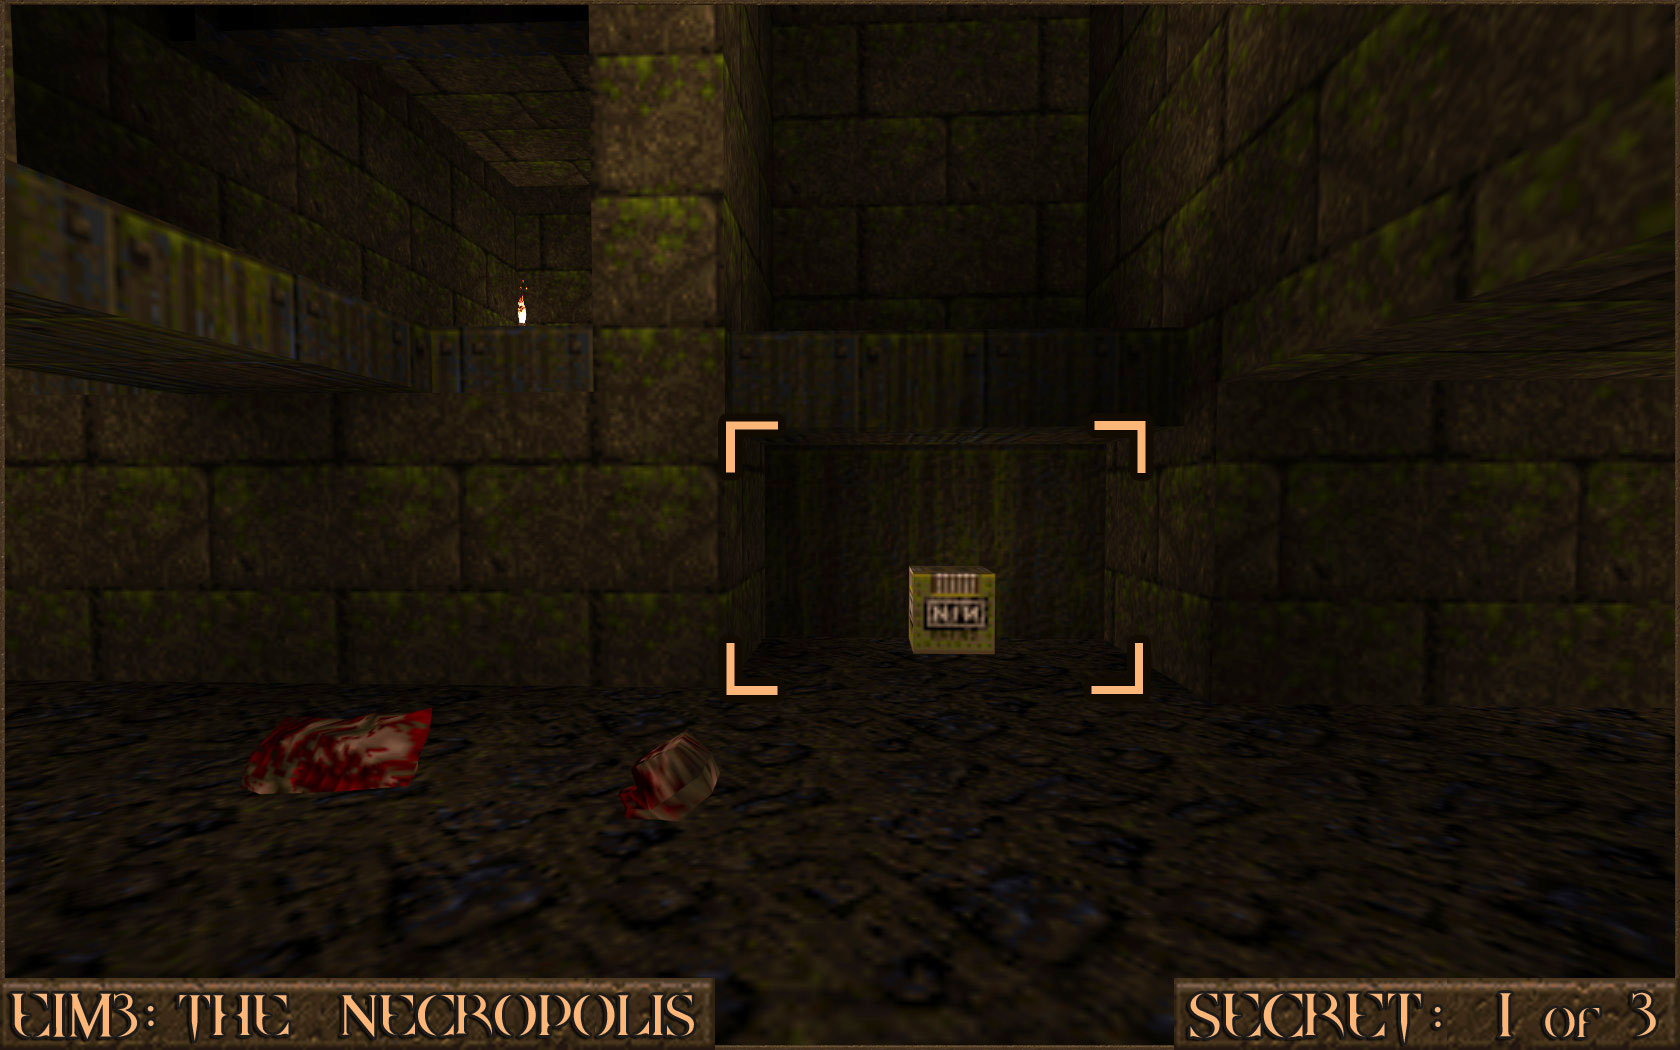 Reward:
 Secret 2 of 3
When you are in the flooded area where you pick up the Golden Key head to the back of the cave to find a section of the water that is deep enough to swim down in to. Follow this small underwater cave and surface at the other end to find this secret.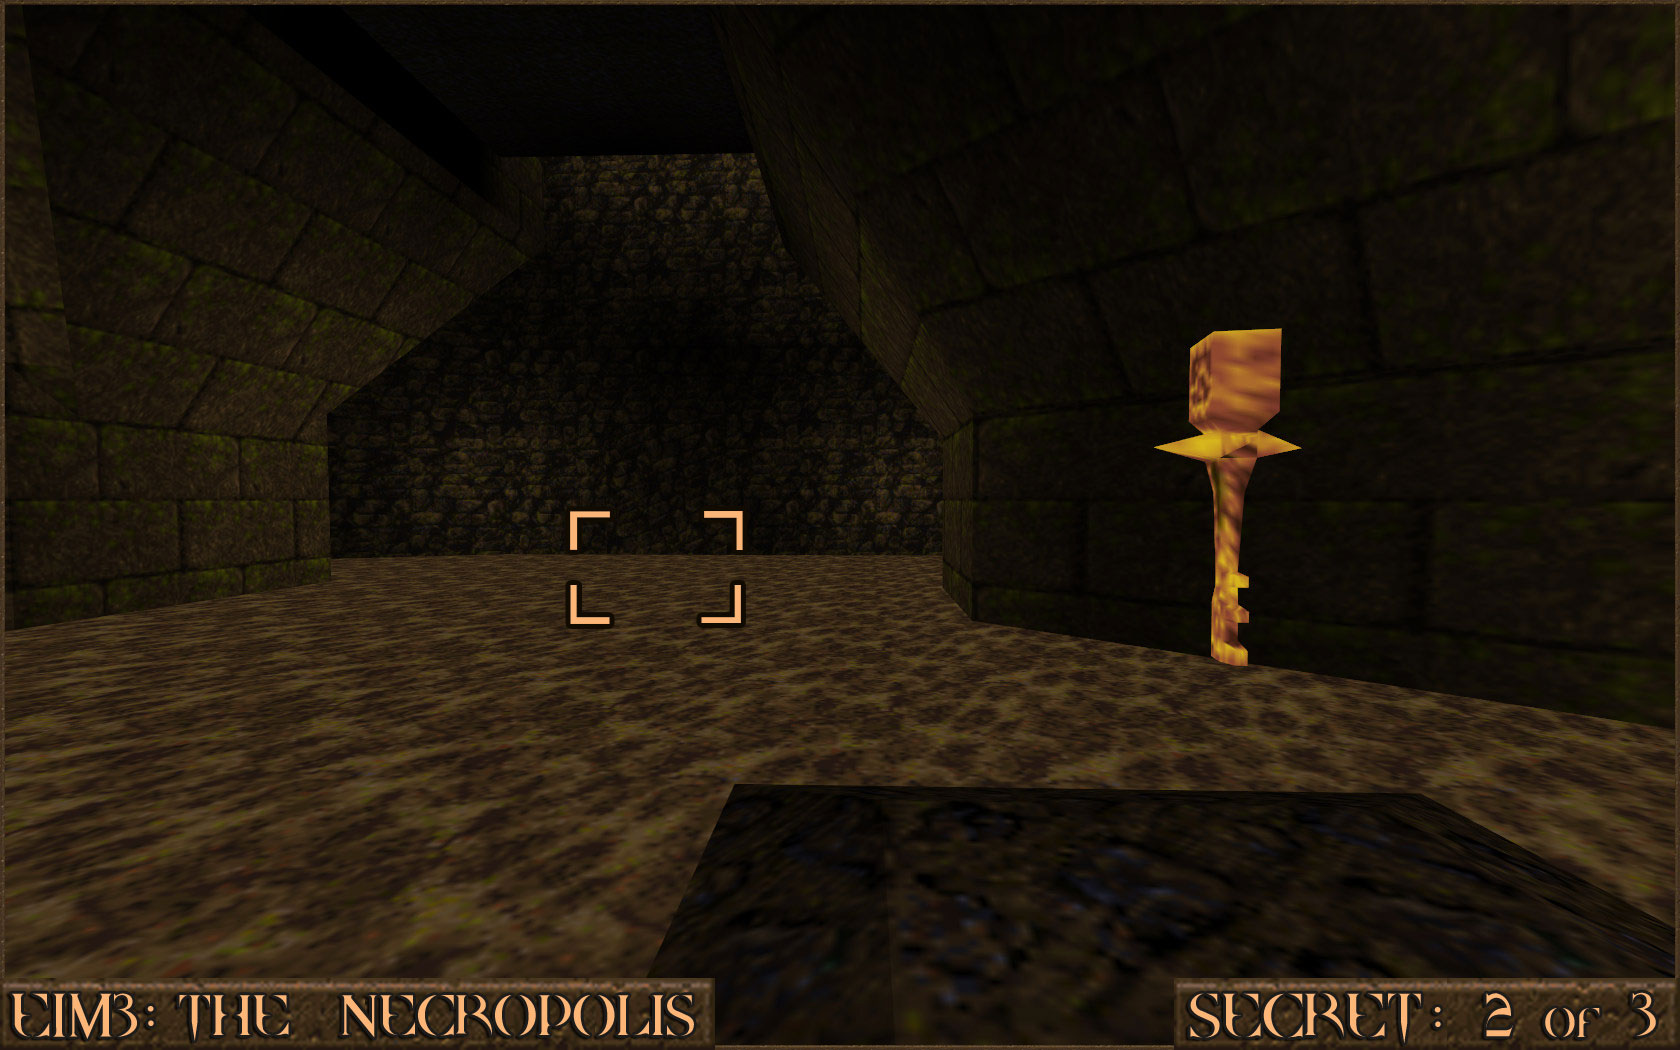 Reward:
 Secret 3 of 3
You will enter a room that contains two Ogres who are high up on platforms (+). 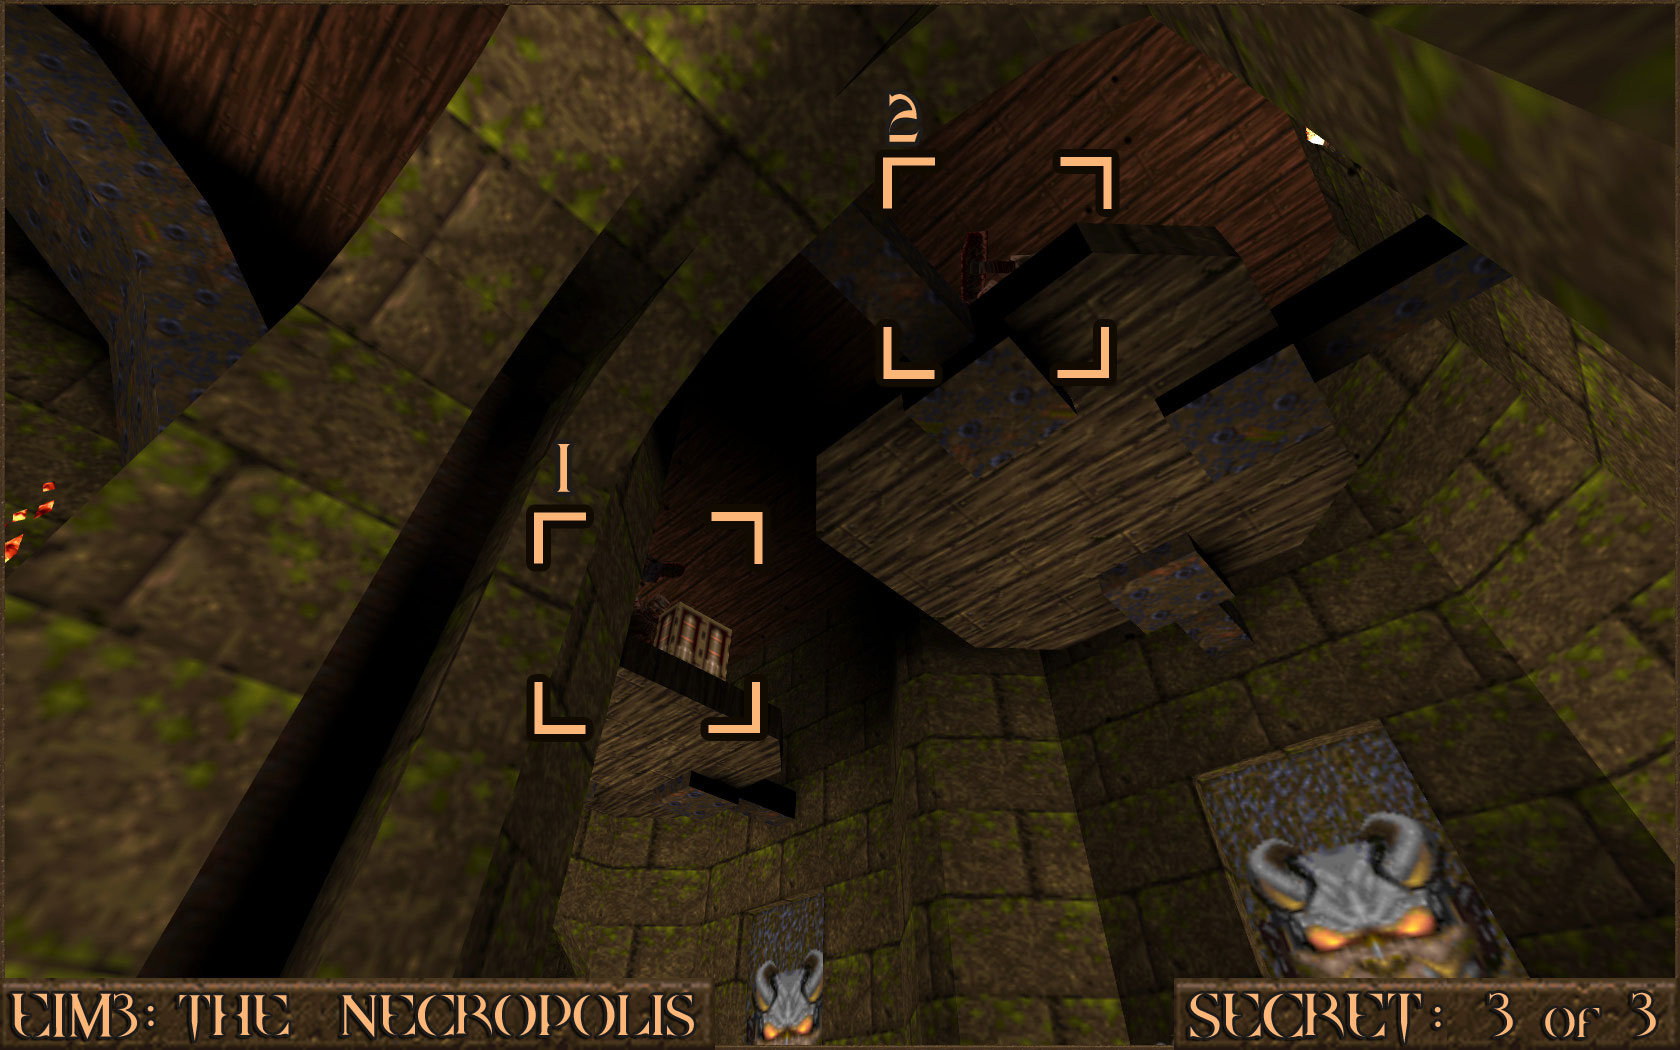 Kill them both to remove the bars () that block access to a Yellow Armor and Large Shells. Shoot the wall behind these items to reveal a teleporter that will take you up to the top of the room and the actual secret.
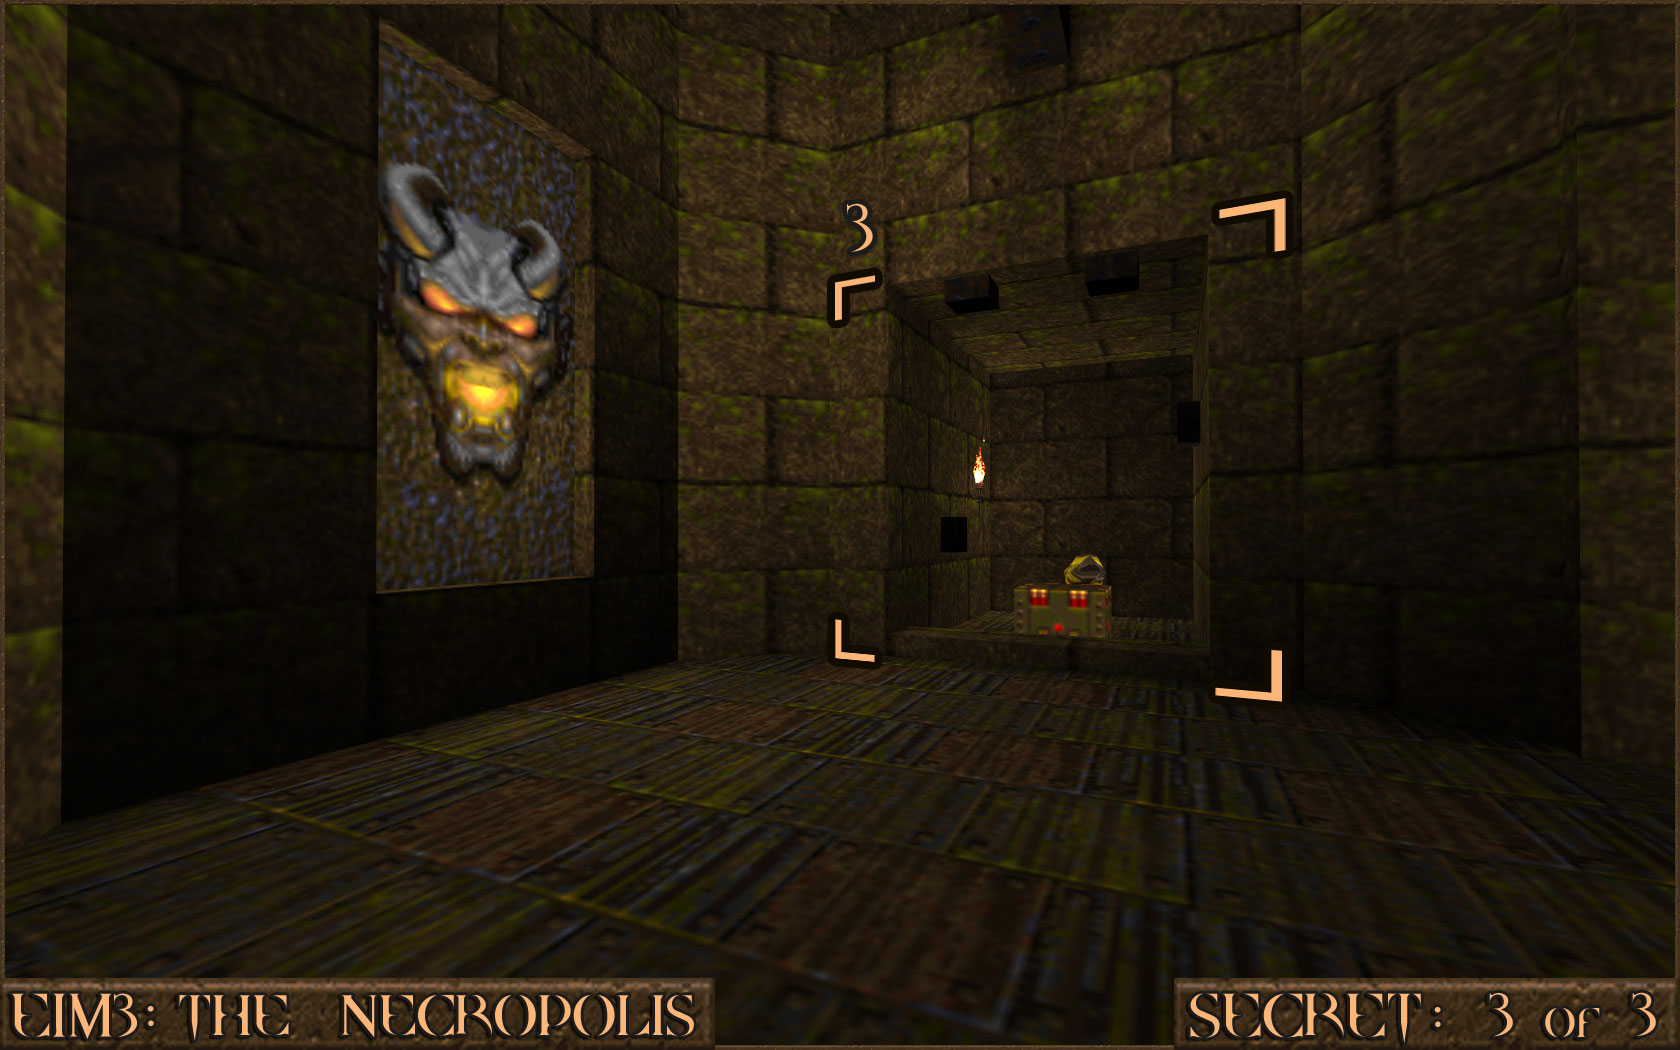 Reward:
E1M4: The Grisly Grotto
Secret 1 of 3
After you go through the first door you will see two red shootable targets to your left and right (+). Shoot them both in any order to release a platform that will fall down in front of you. Jump down to discover the secret.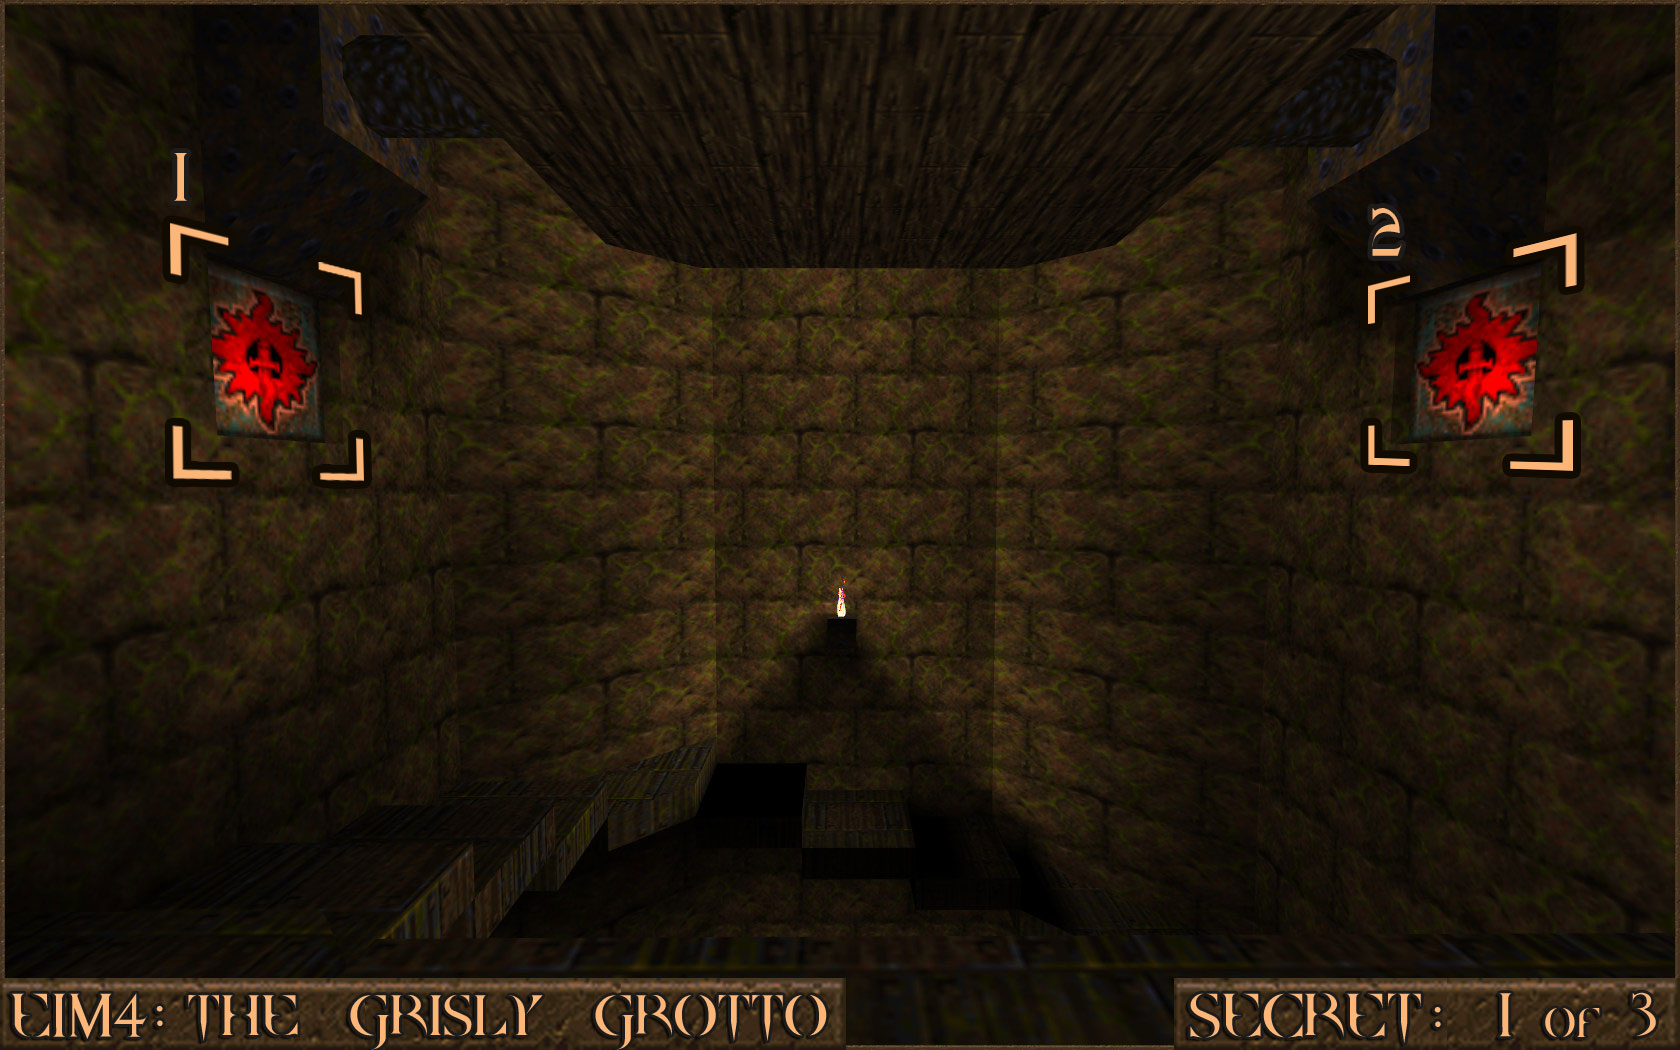 Reward:
 Secret 2 of 3
You will come to a large open room full of water. After jumping in dive down underwater and then follow the wall to the right to find a small hole in the wall. Swim through and surface to find this secret area.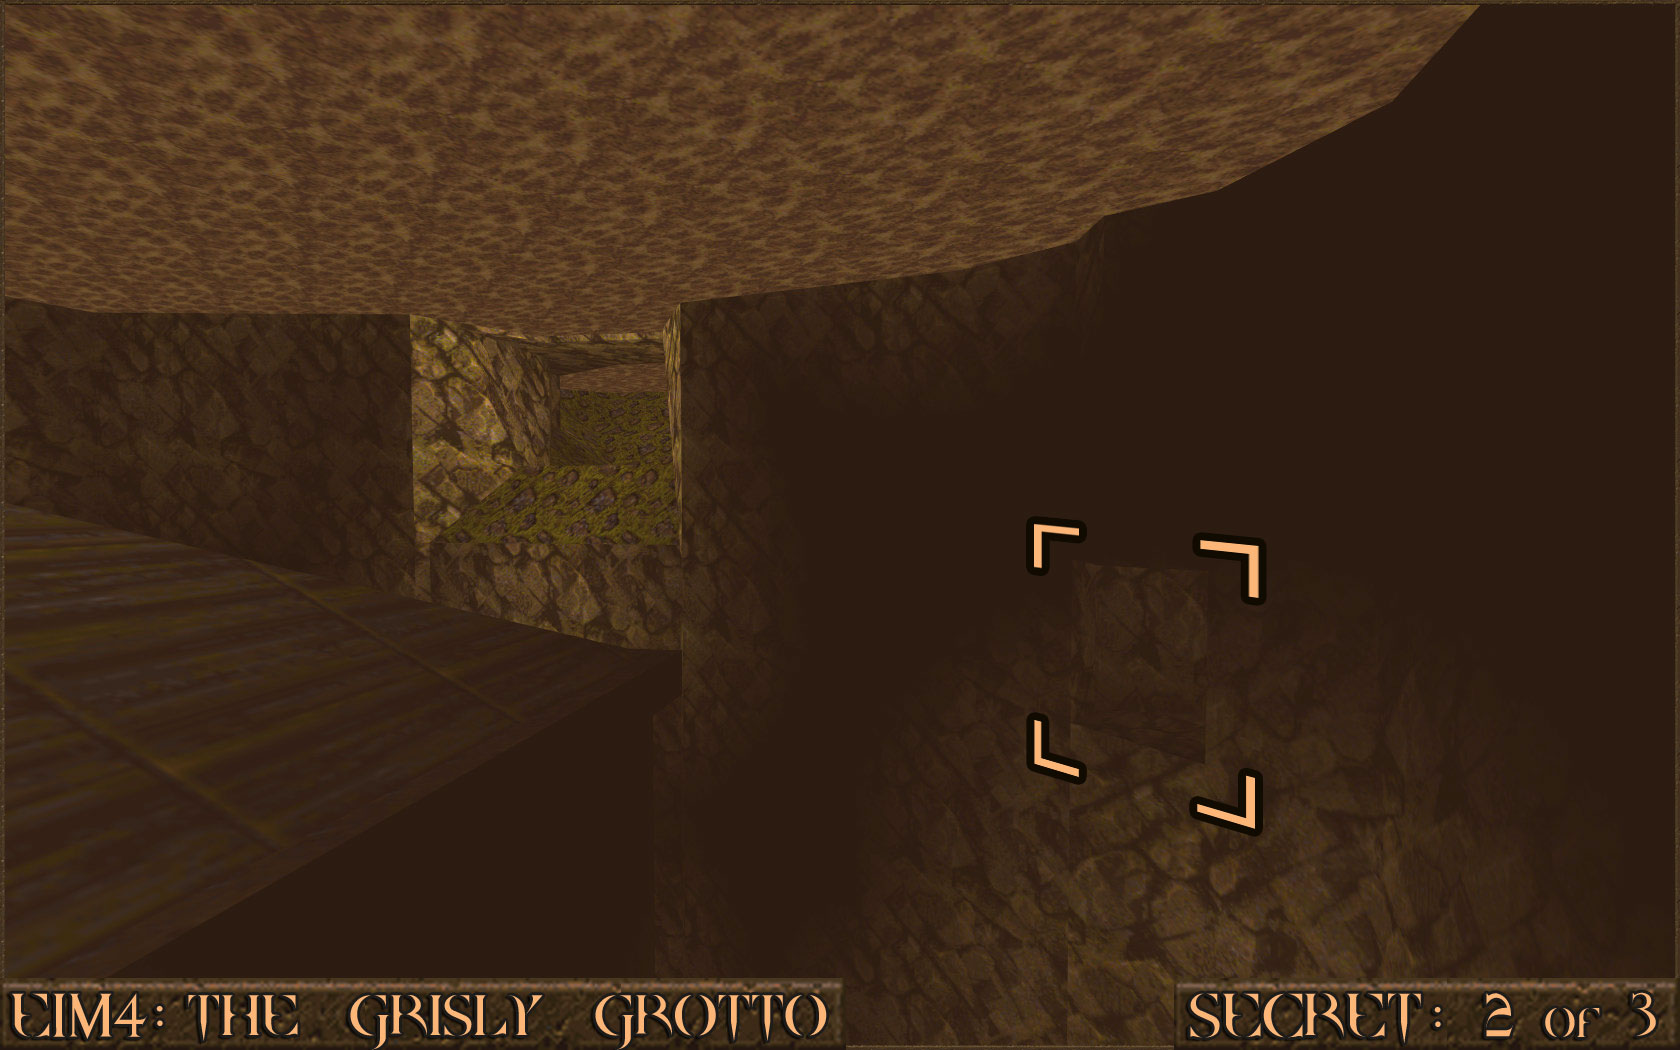
Reward:
Secret 3 of 3
After going up an elevator you will see five brown switches (++++) on the floor all with the Quake symbol on them. Running over them all in any order will activate nail traps around the room but after they have all been pressed two doors will open nearby.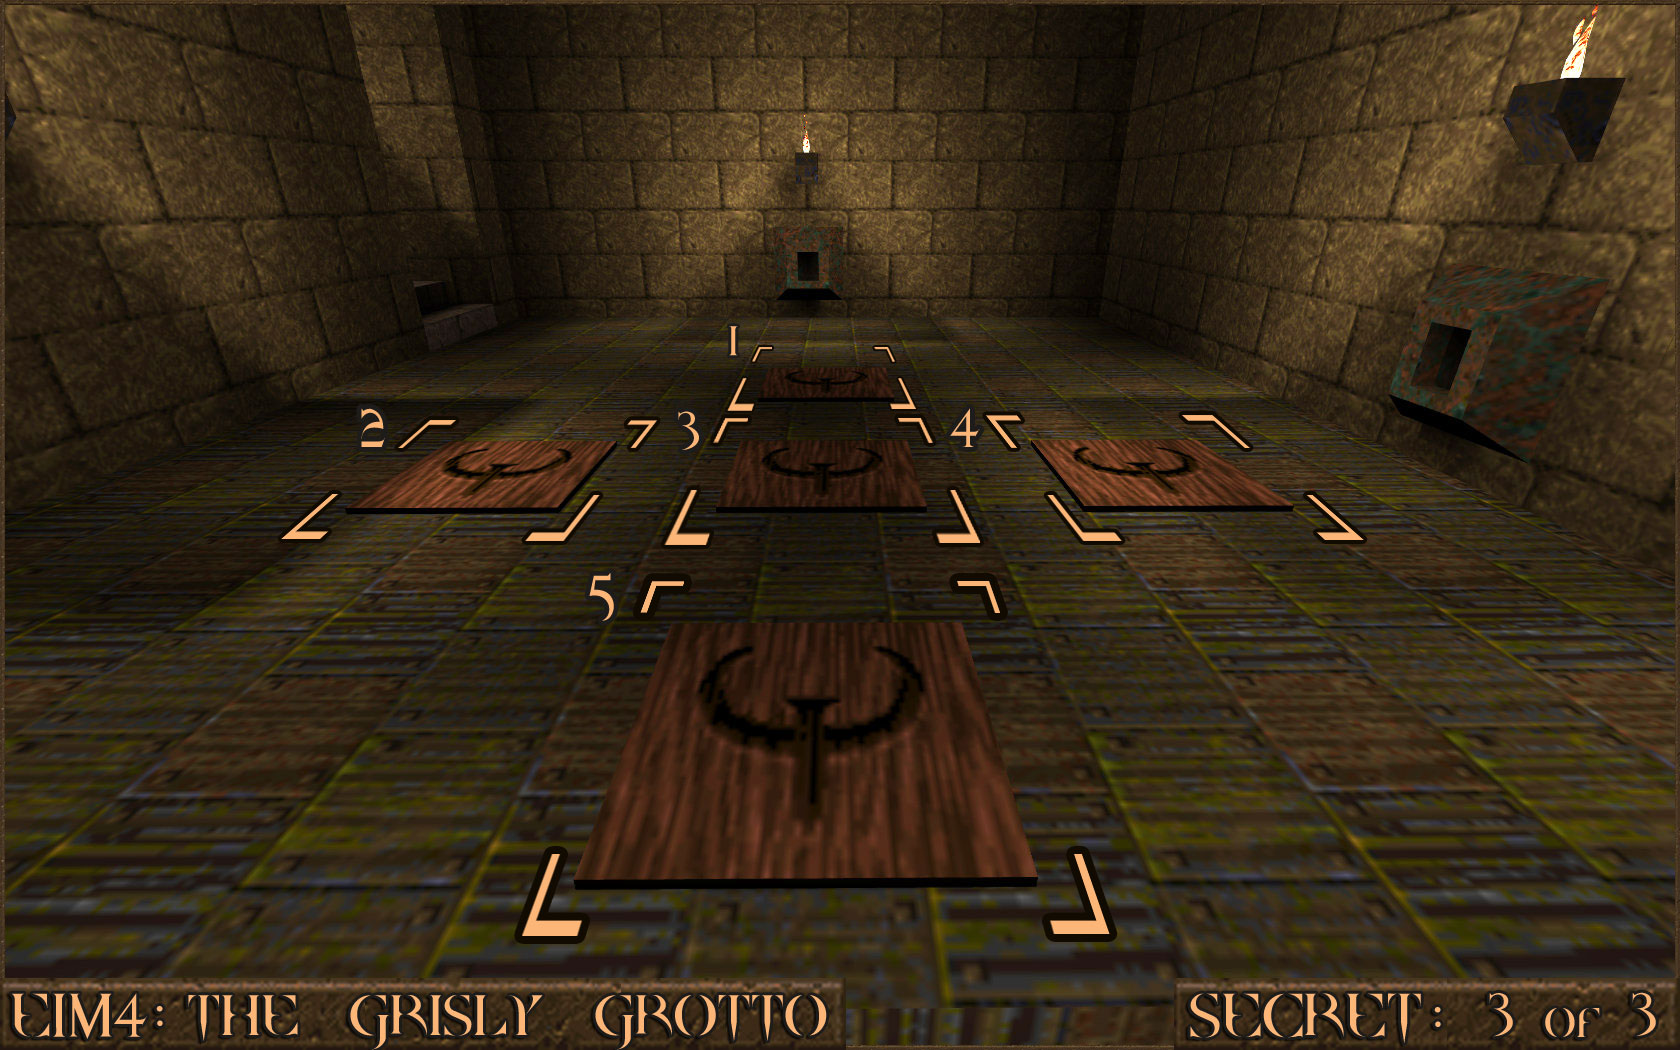 Jump down one of the holes (
 ) and press the blue switch that is nearby. Then go back up the elevator and jump down the other hole (
 ) and press the other blue switch. A message stating "A secret cave has opened" will appear.
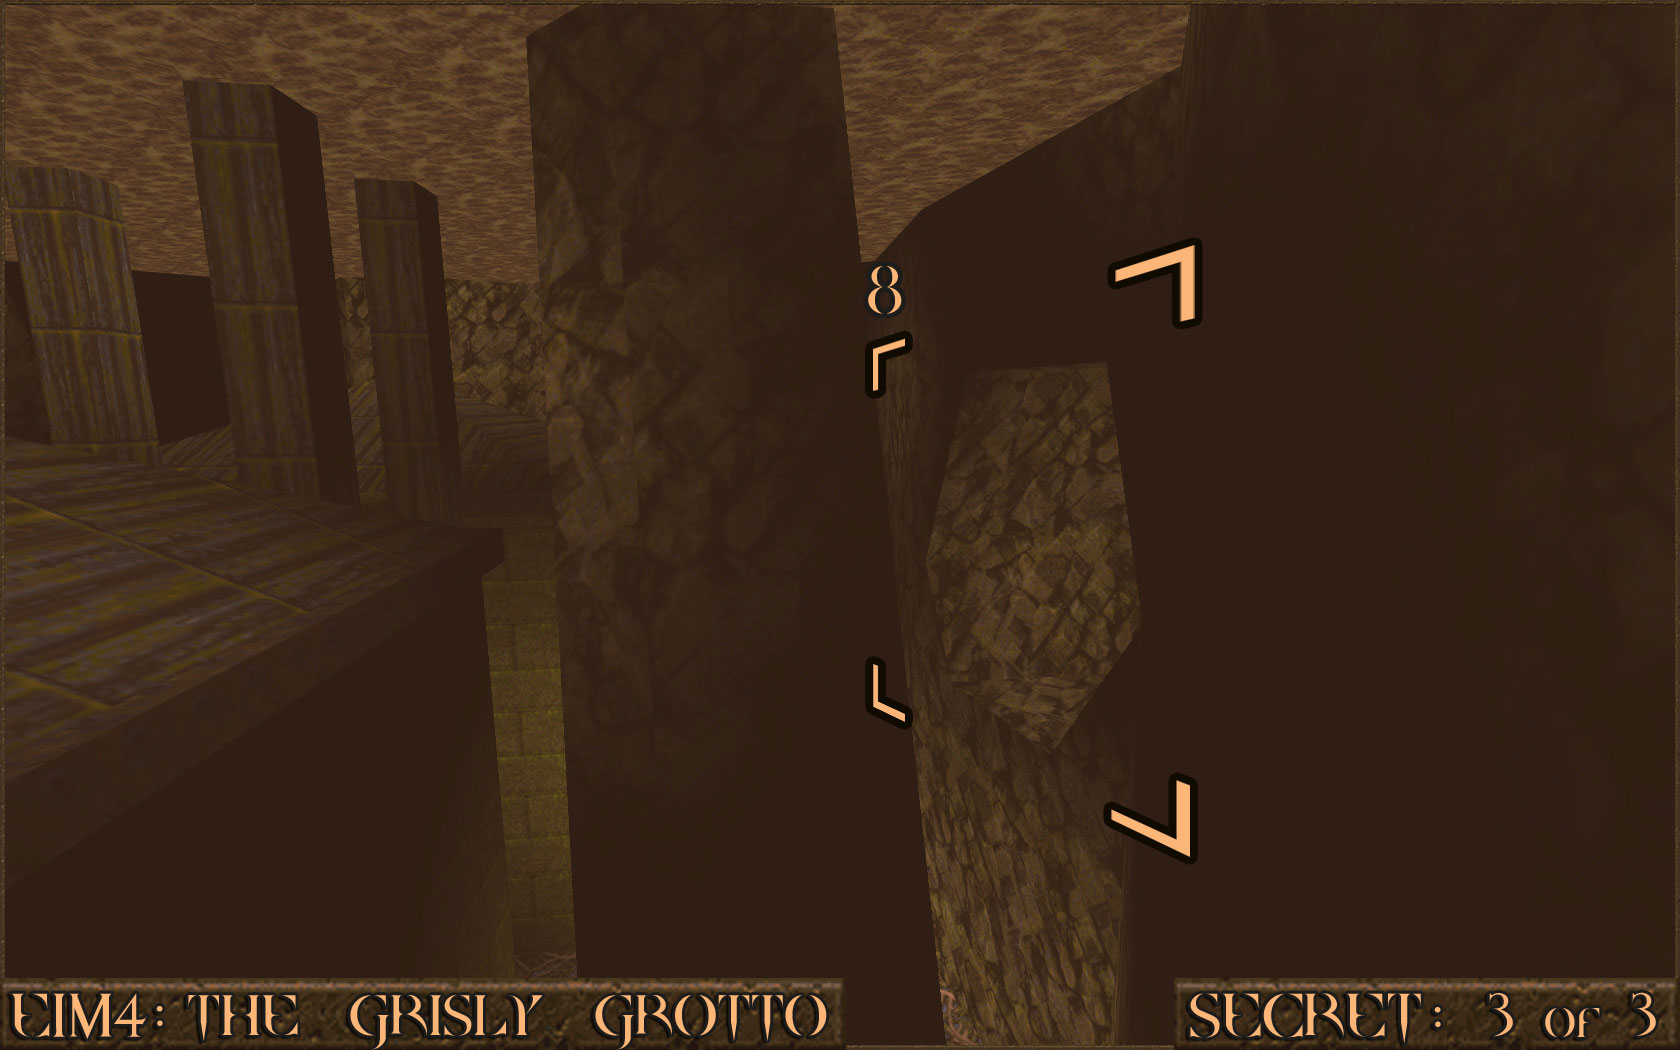
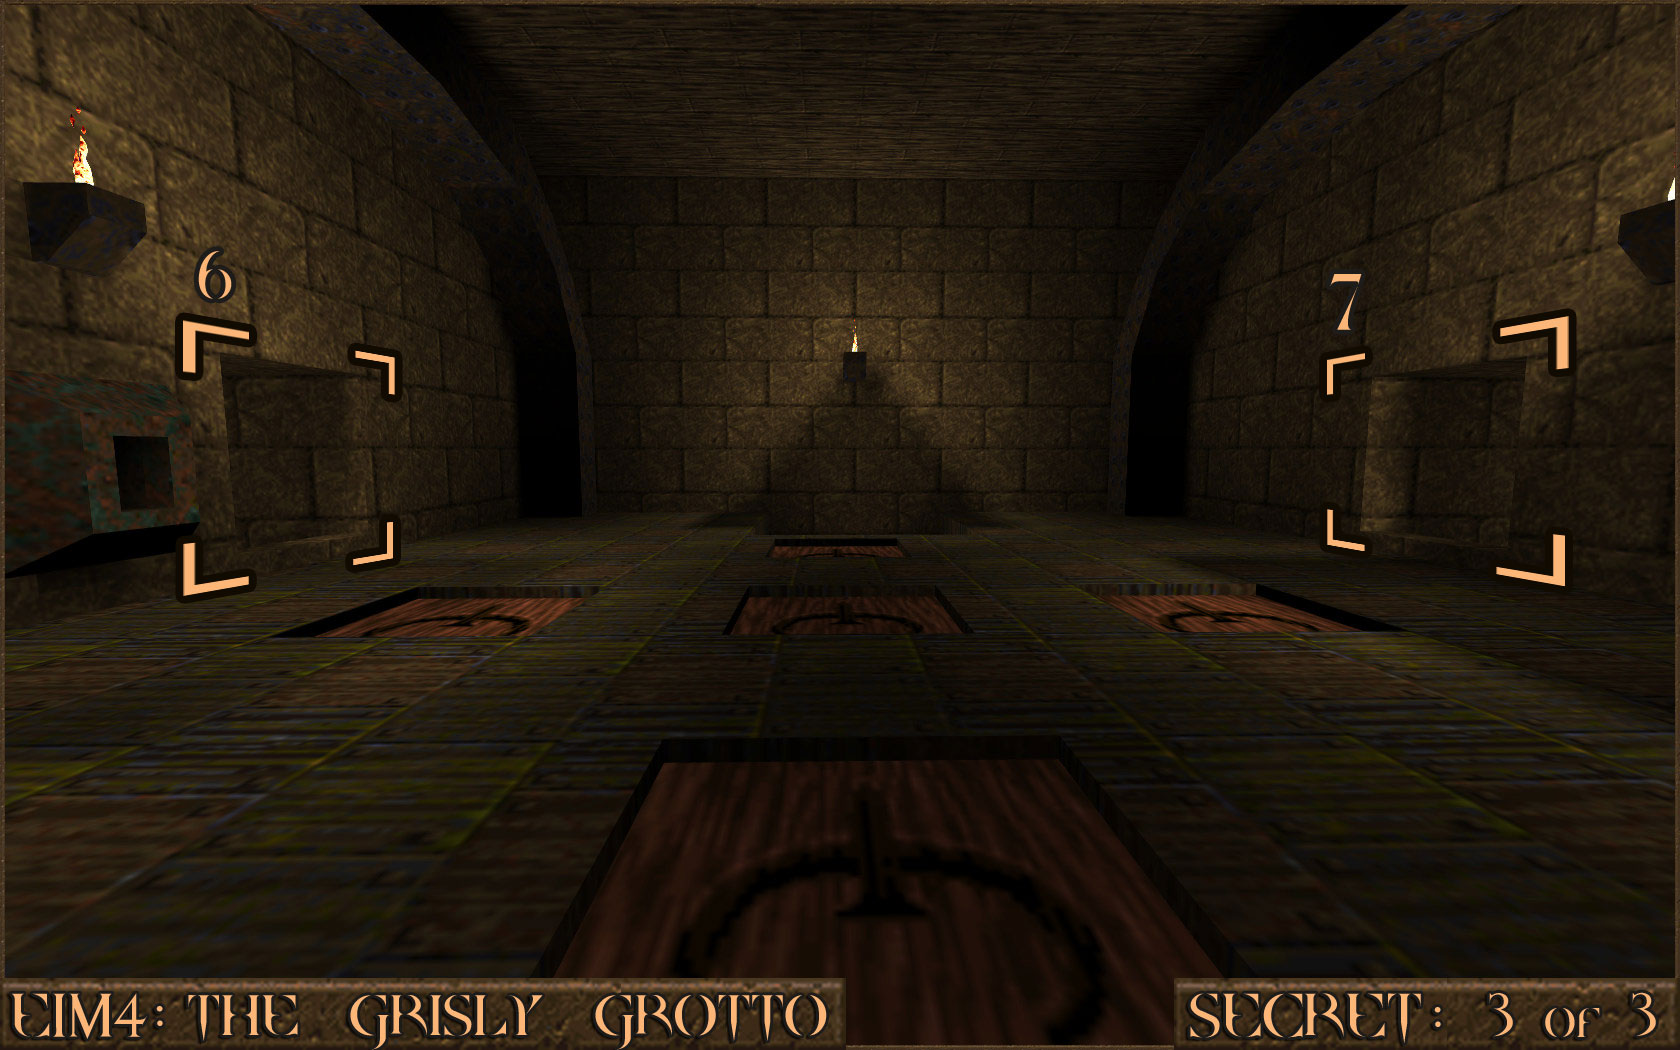 Head back to the large flooded area that contained Secret 2 and look for a new cave entrance (
 ) underwater. Head through and surface to find the secret and the exit to the secret level for this episode: E1M8: Ziggurat Vertigo.
 Reward: SECRET LEVEL
E1M8: Ziggurat Vertigo [Secret Level]
Secret 1 of 2
Near to the start look for a Pentagram of Protection (). Pick it up for invincibility then jump in to the nearby lava (). In the corner is a deeper section of the lava that you can swim down in to. Follow this tunnel and surface to find the secret.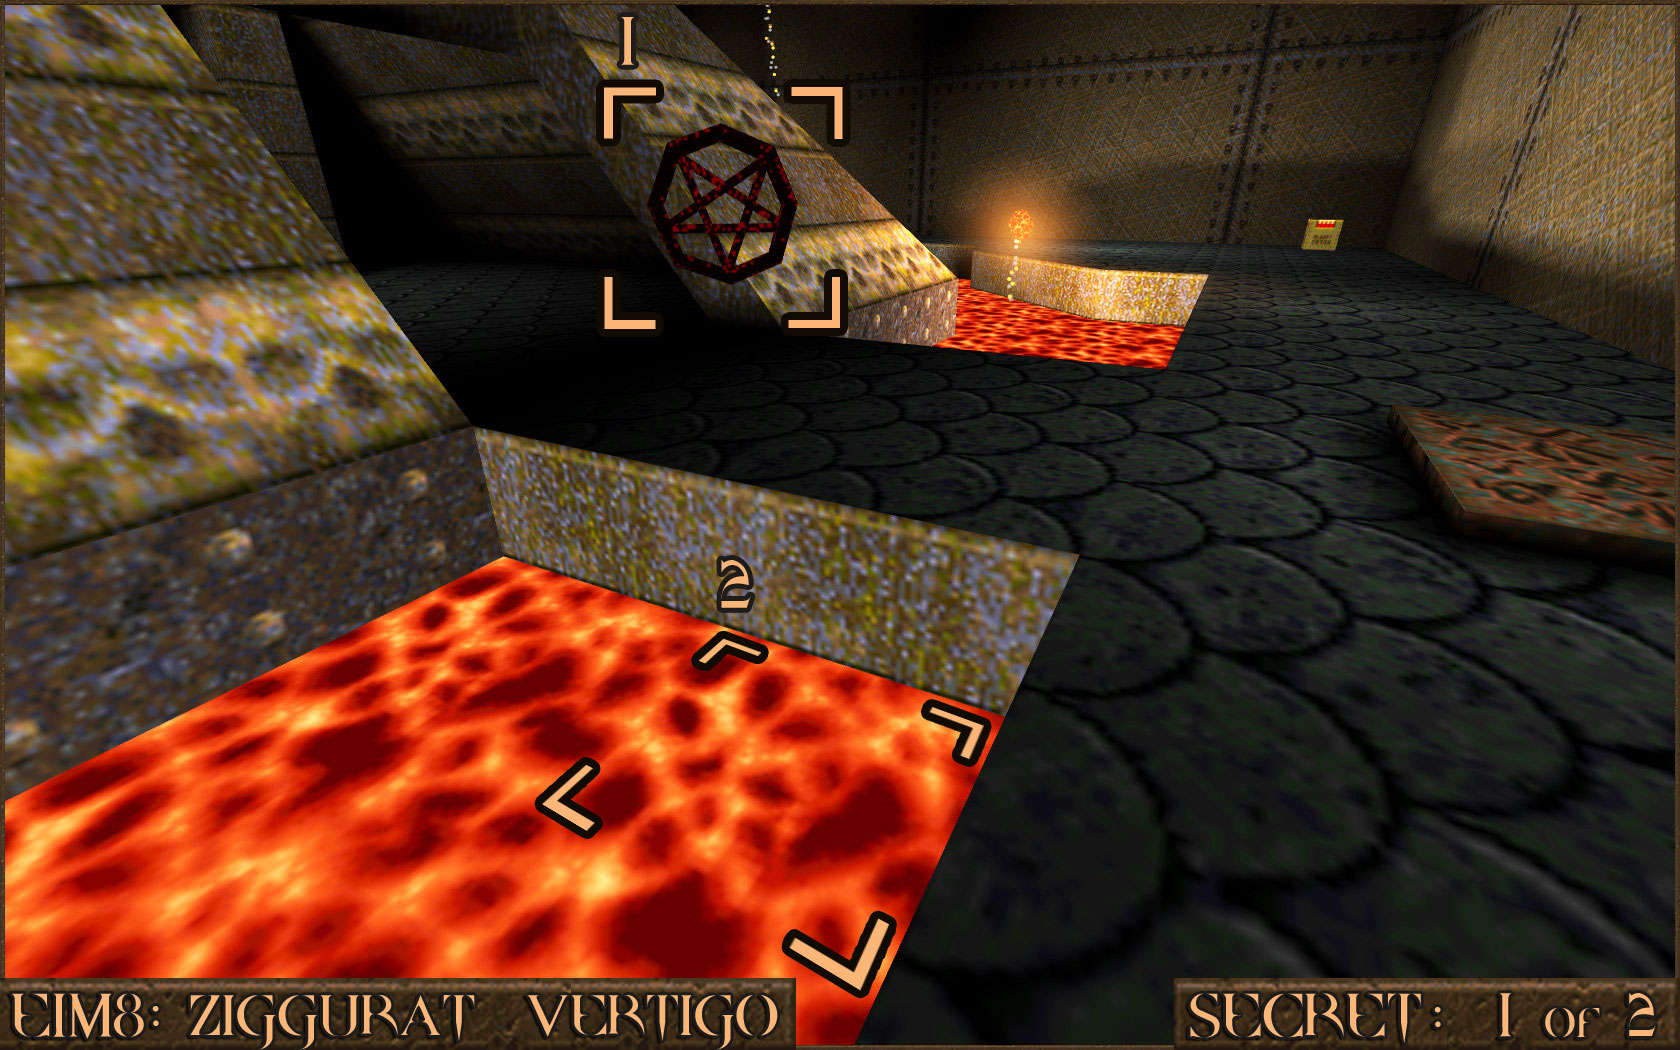 Reward:
 Secret 2 of 2
Close by to the level exit is a slightly recessed wall that when shot will open to reveal a secret area.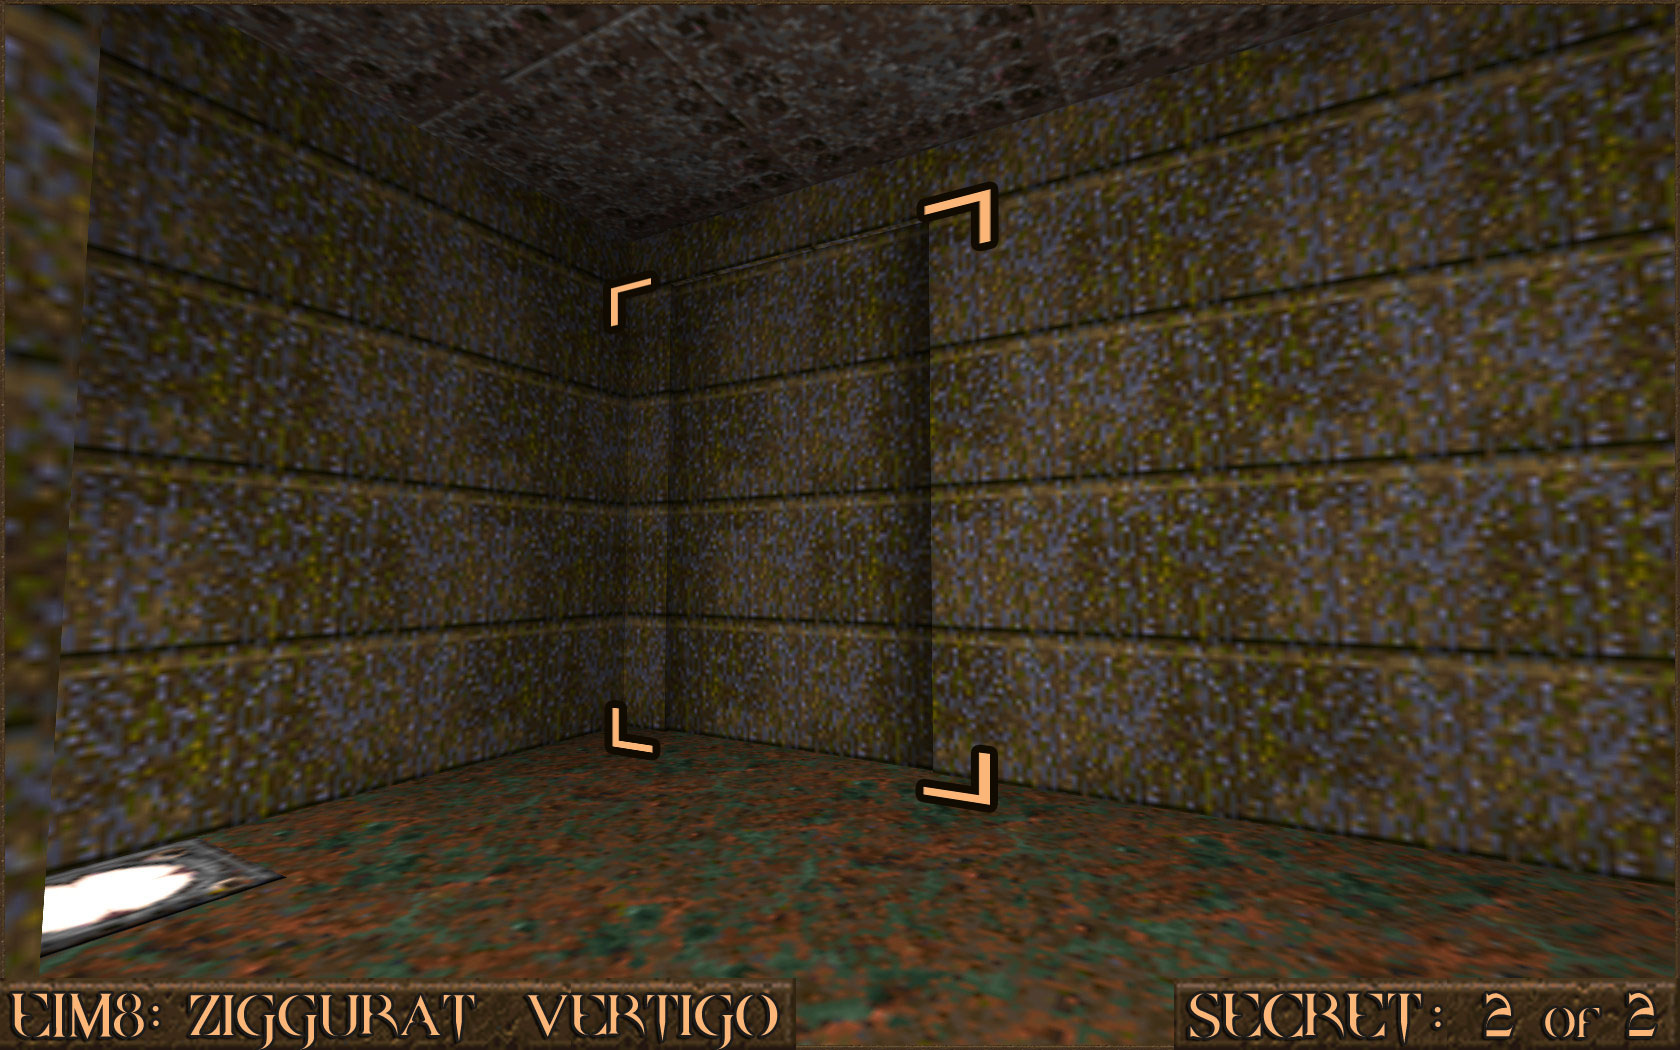
Reward:
E1M5: Gloom Keep
Secret 1 of 5
From the start turn right and jump down in to the water. There should be a small cave opening underwater.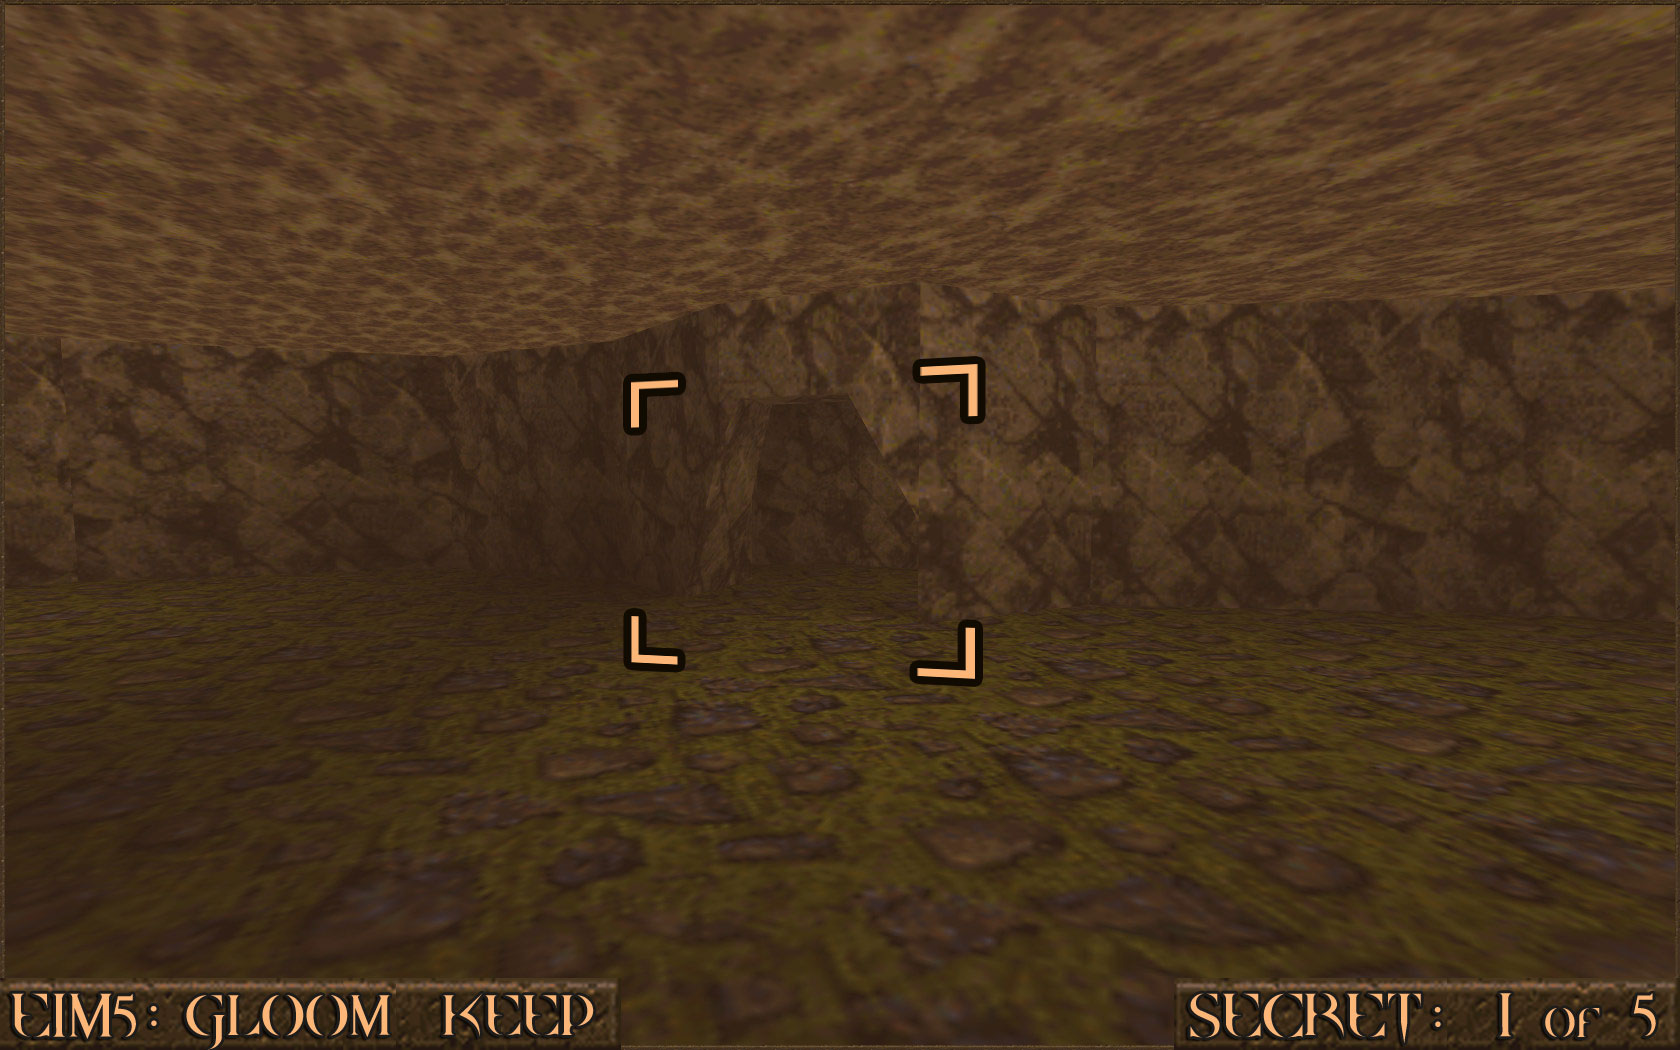 Reward:
 Secret 2 of 5
When you come to the room that contains a Super Nailgun look for the nearby wall mounted torch (). Position yourself underneath it and jump to activate this hidden switch. A section of the wall () behind the torch will move to reveal the secret area.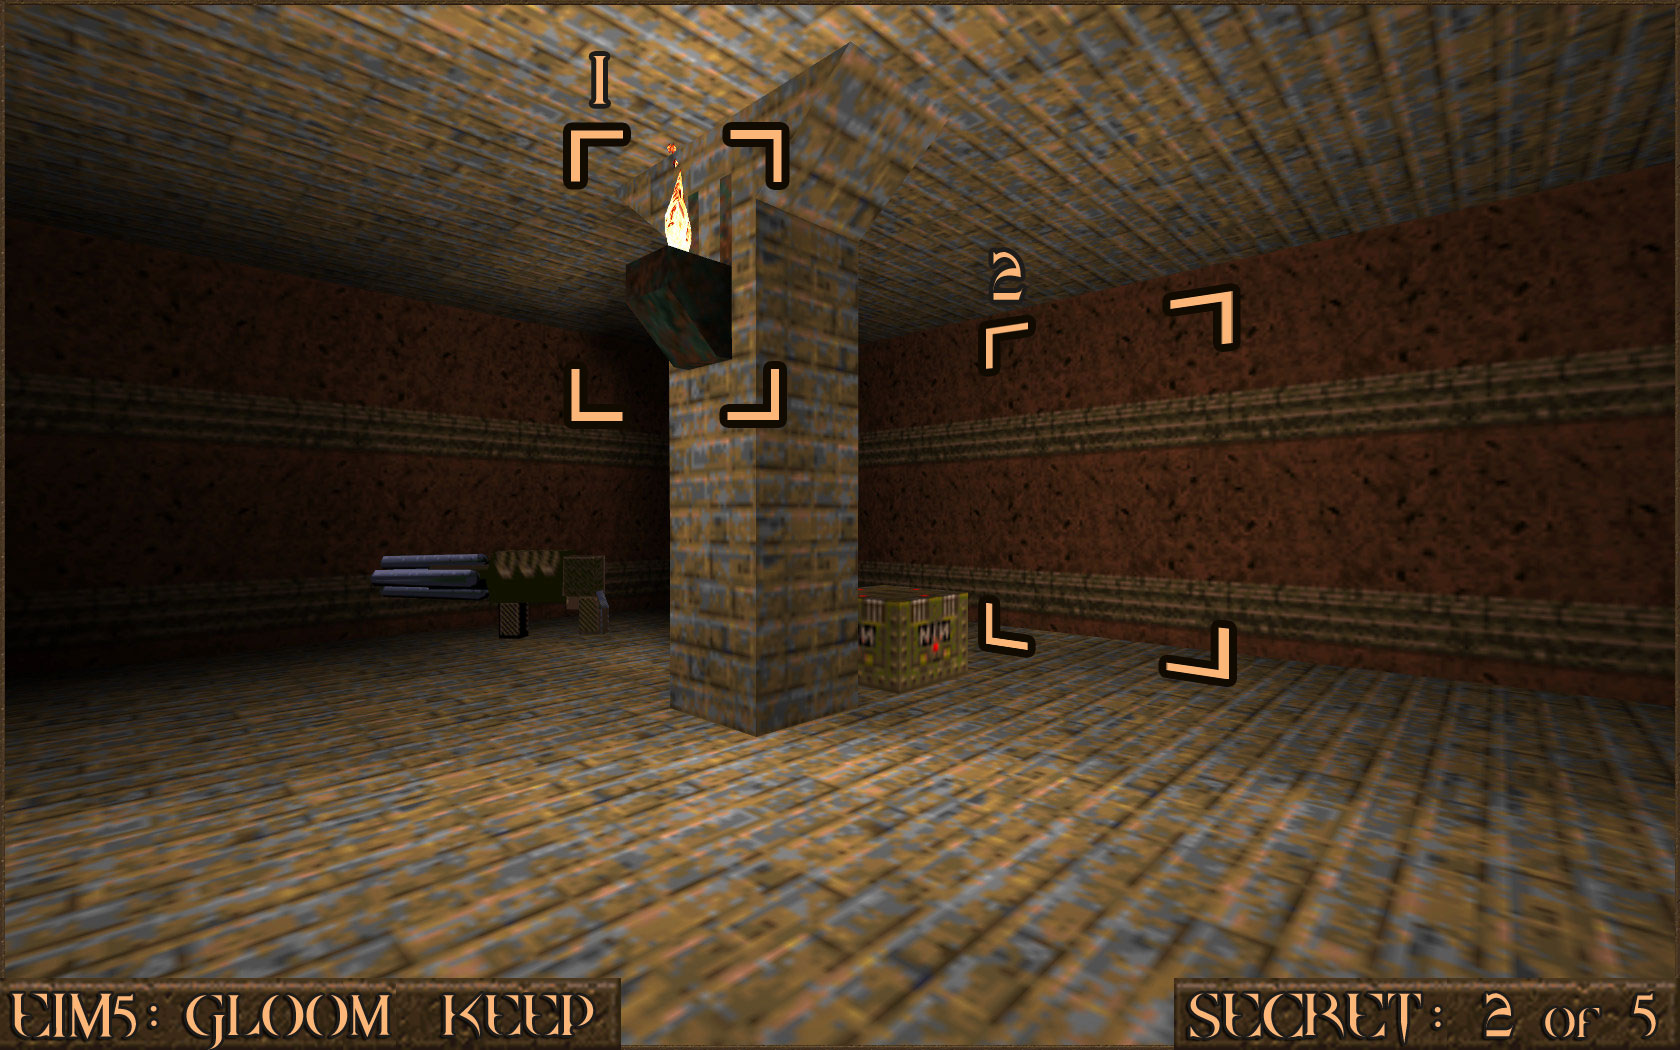 Reward:
 Secret 3 of 5
You will enter a room which has a large shadow on the floor in the form of a large Quake symbol and there is a large teleporter at the end of the room. Instead of entering the teleporter from the front, head around the back of it and enter it from the other side. You will be teleported to a secret area.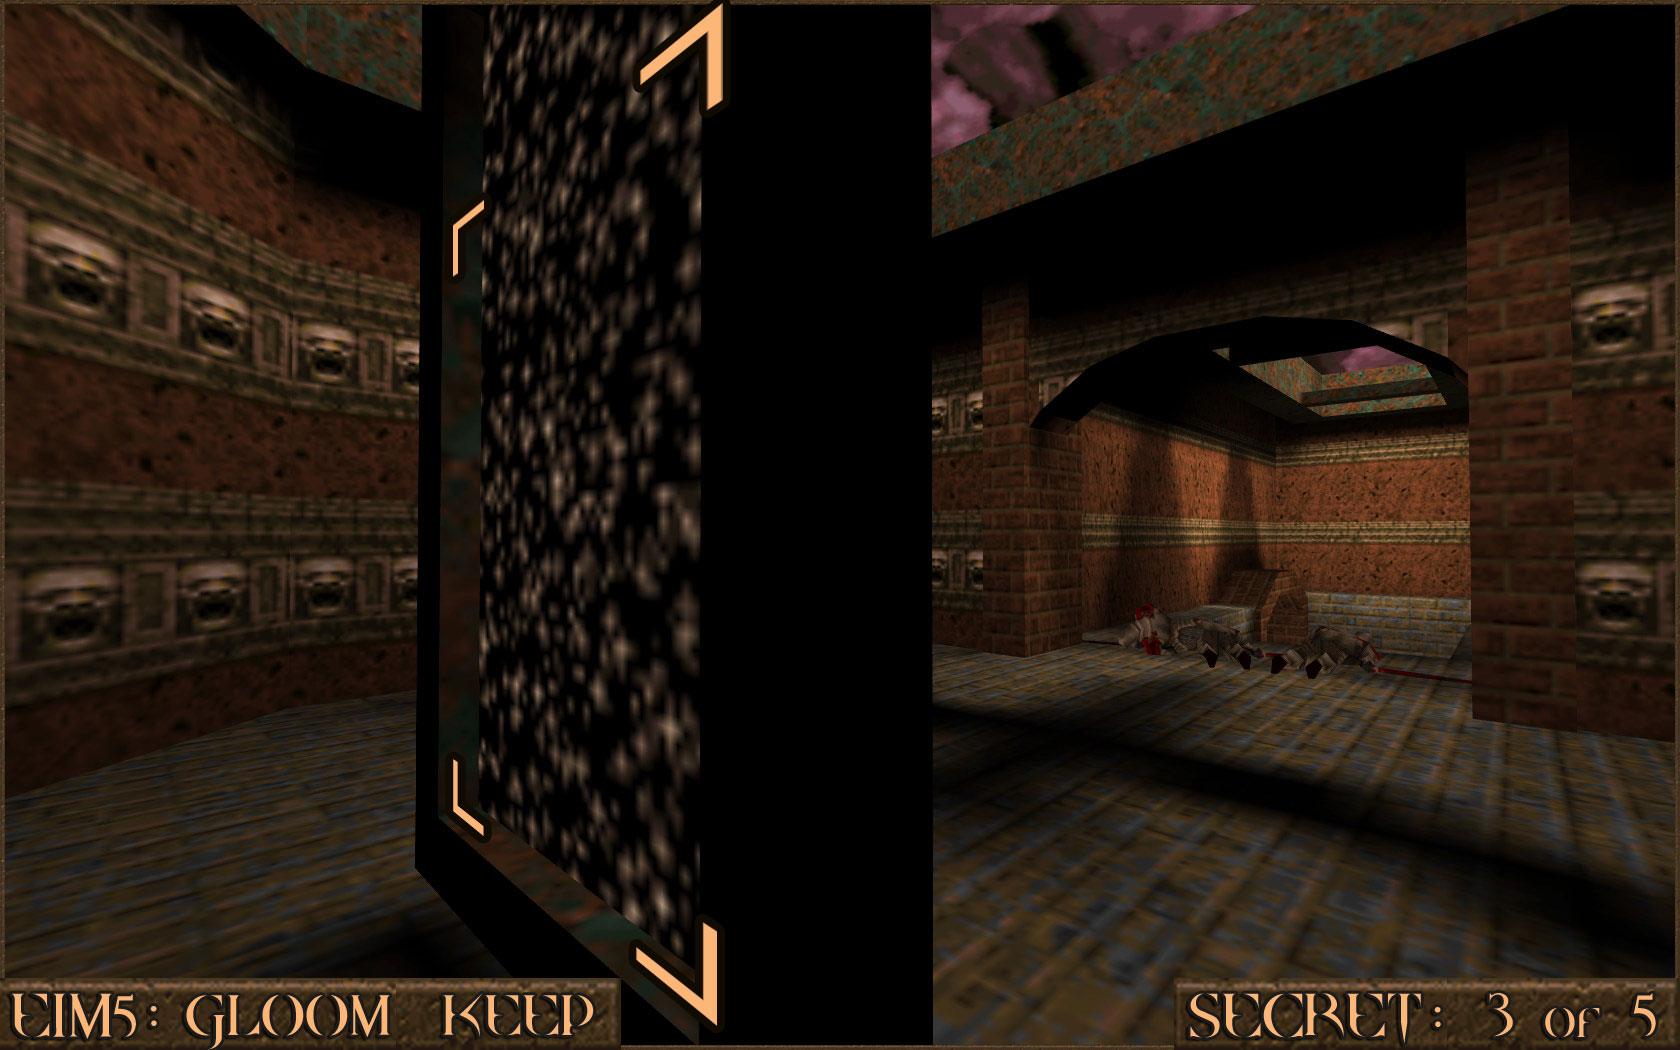 Reward:
 Secret 4 of 5
In a room that contains some steps and flame images on the walls head to the top of the steps. Jump on to the side () and then make another jump on to the thin wall (). Run down the thin wall () and jump over to the platform in the corner of the room () to find the secret.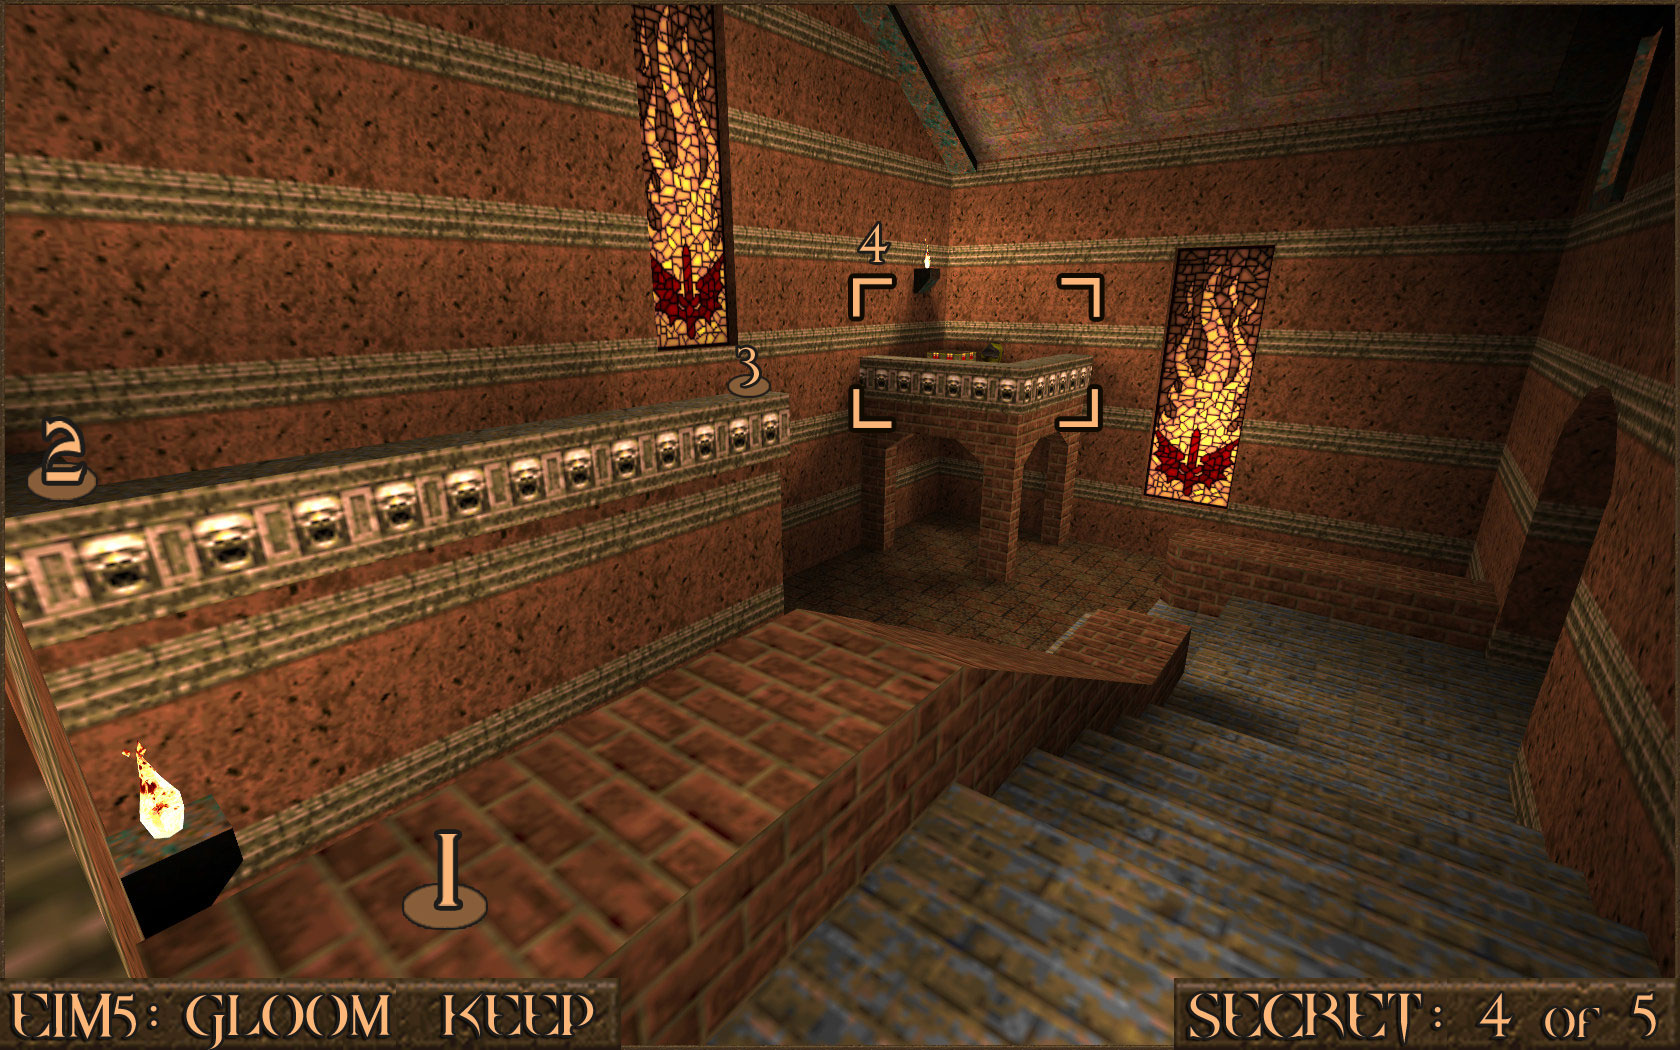 Reward:
 Secret 5 of 5
Before leaving the level through the exit teleporter turn around to see a section of wall that is slightly slanted. Shoot it to reveal the secret and a way back to the rest of the level.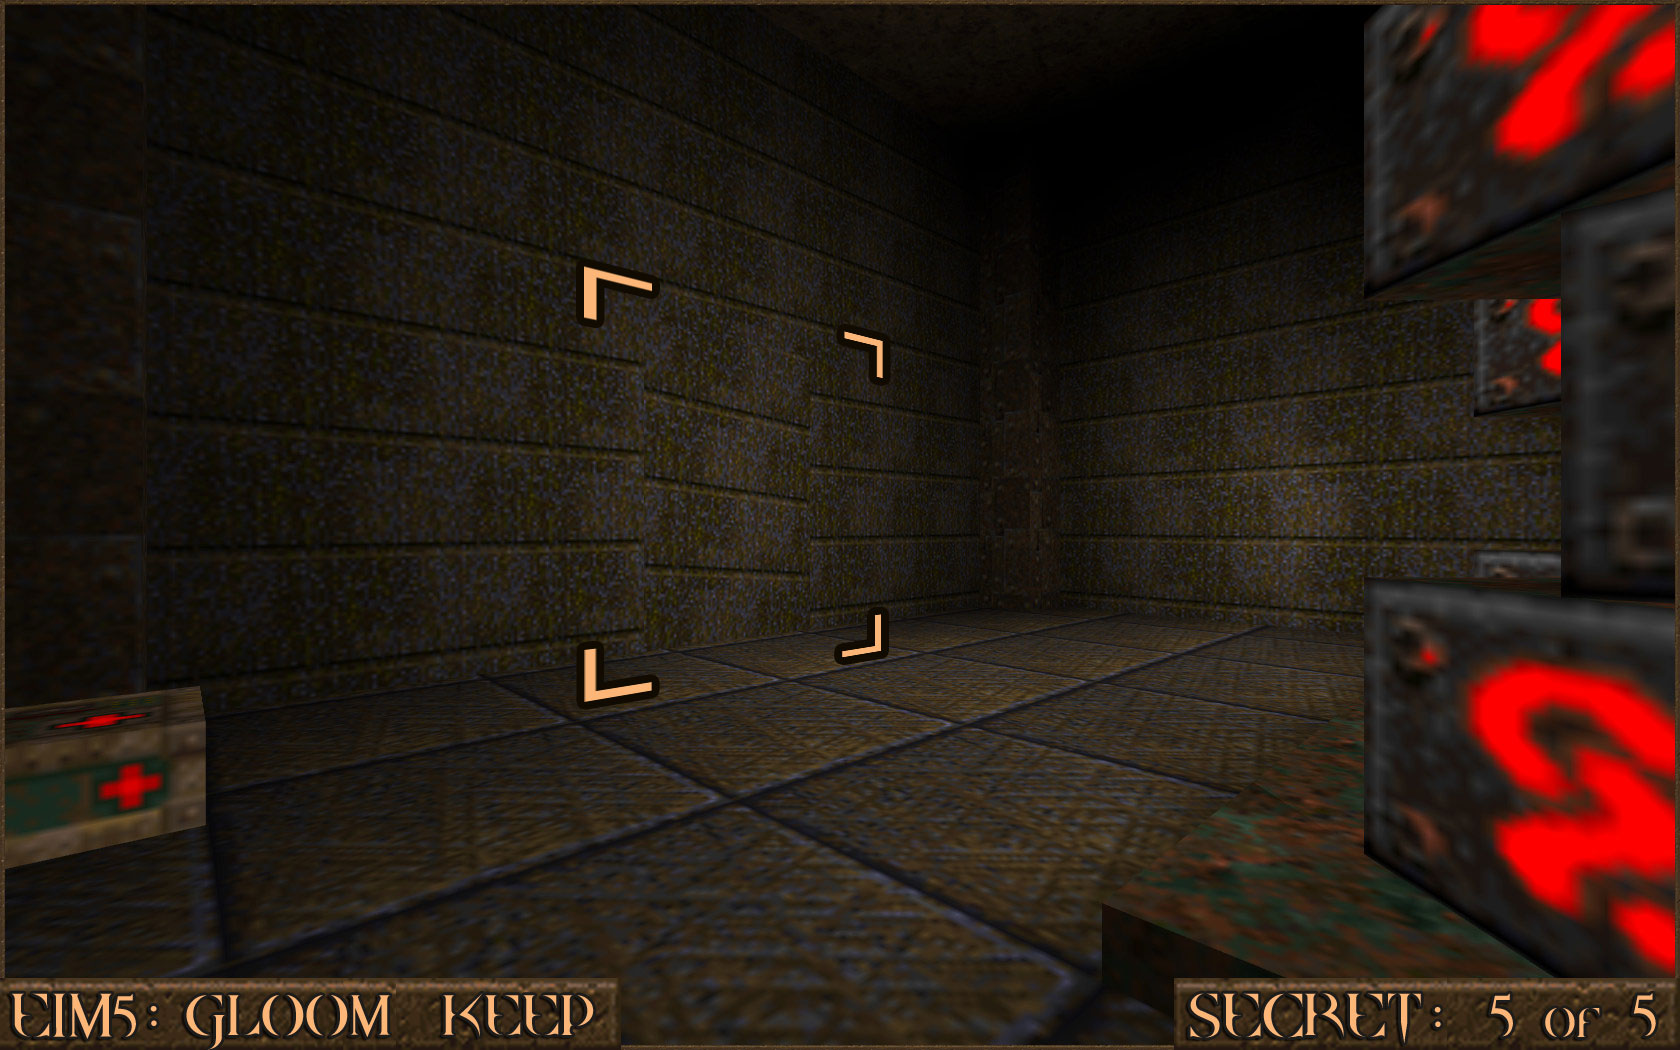 Reward:
 E1M6: The Door to Chthon
Secret 1 of 4
When you come to a room which contains the Rocket Launcher look up to see a red shootable switch (). After you shoot it a wall () behind the Rocket Launcher will open revealing an elevator.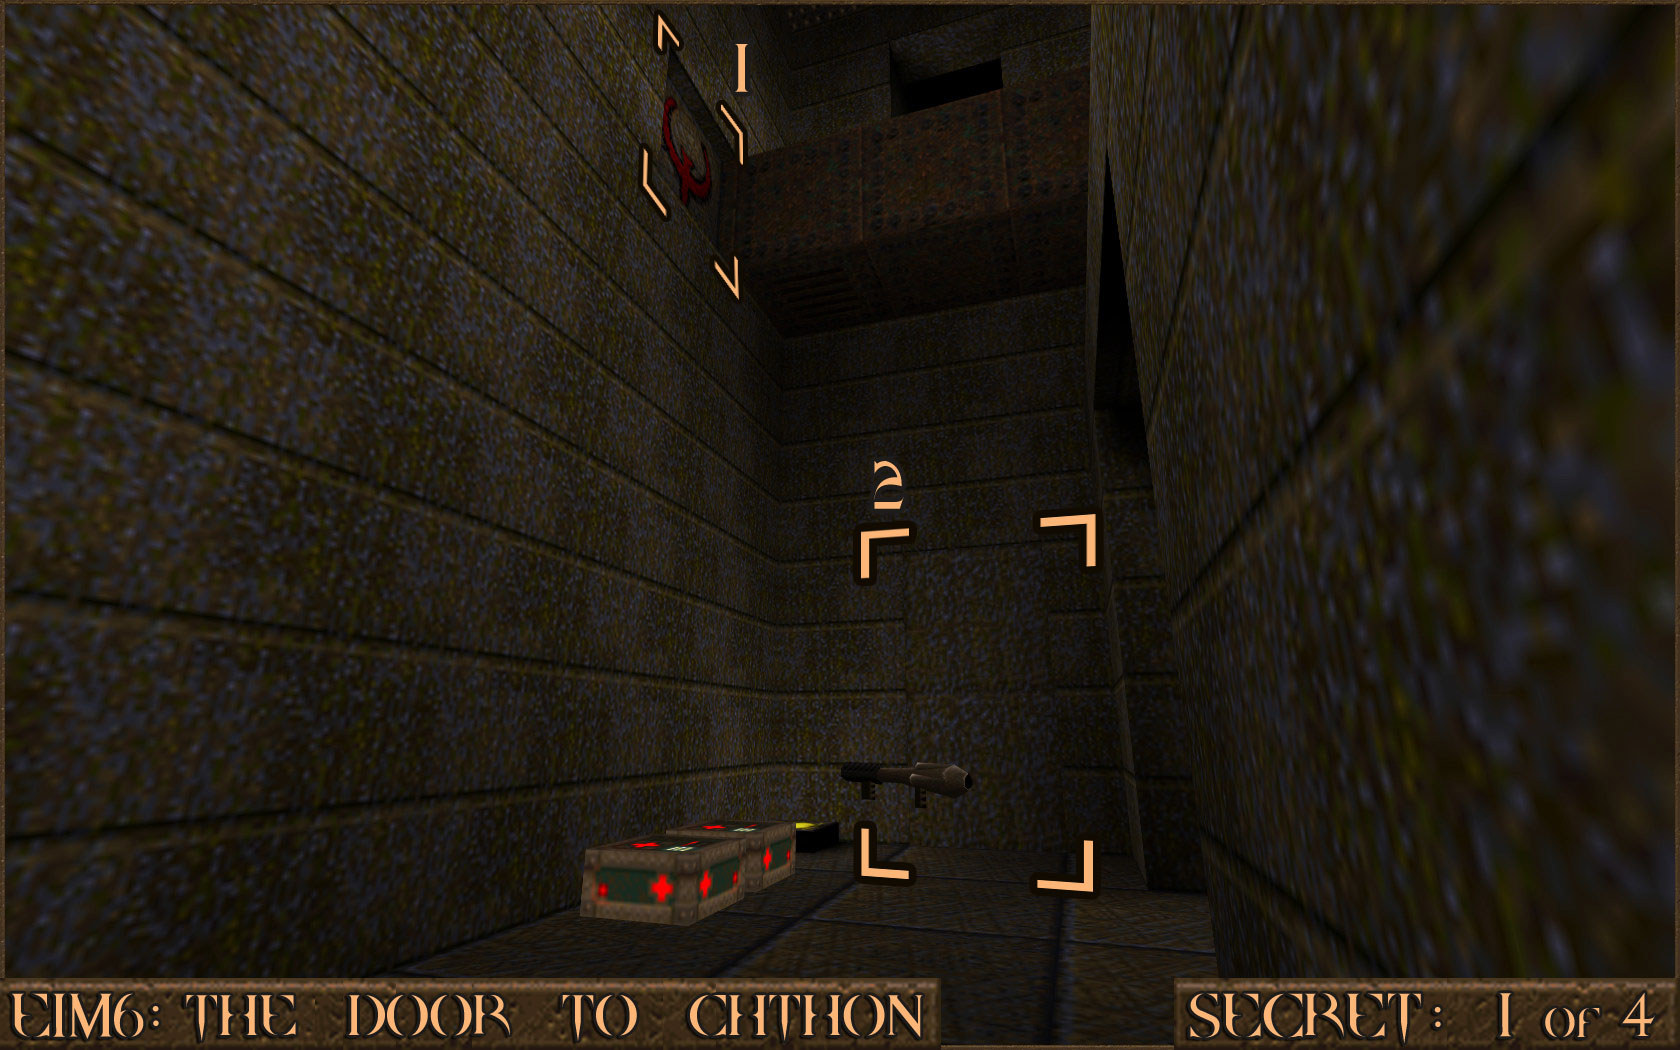 Ride the elevator to the top and then look below the platform you are standing on to see another hidden platform (). Jump down to it to find the secret.
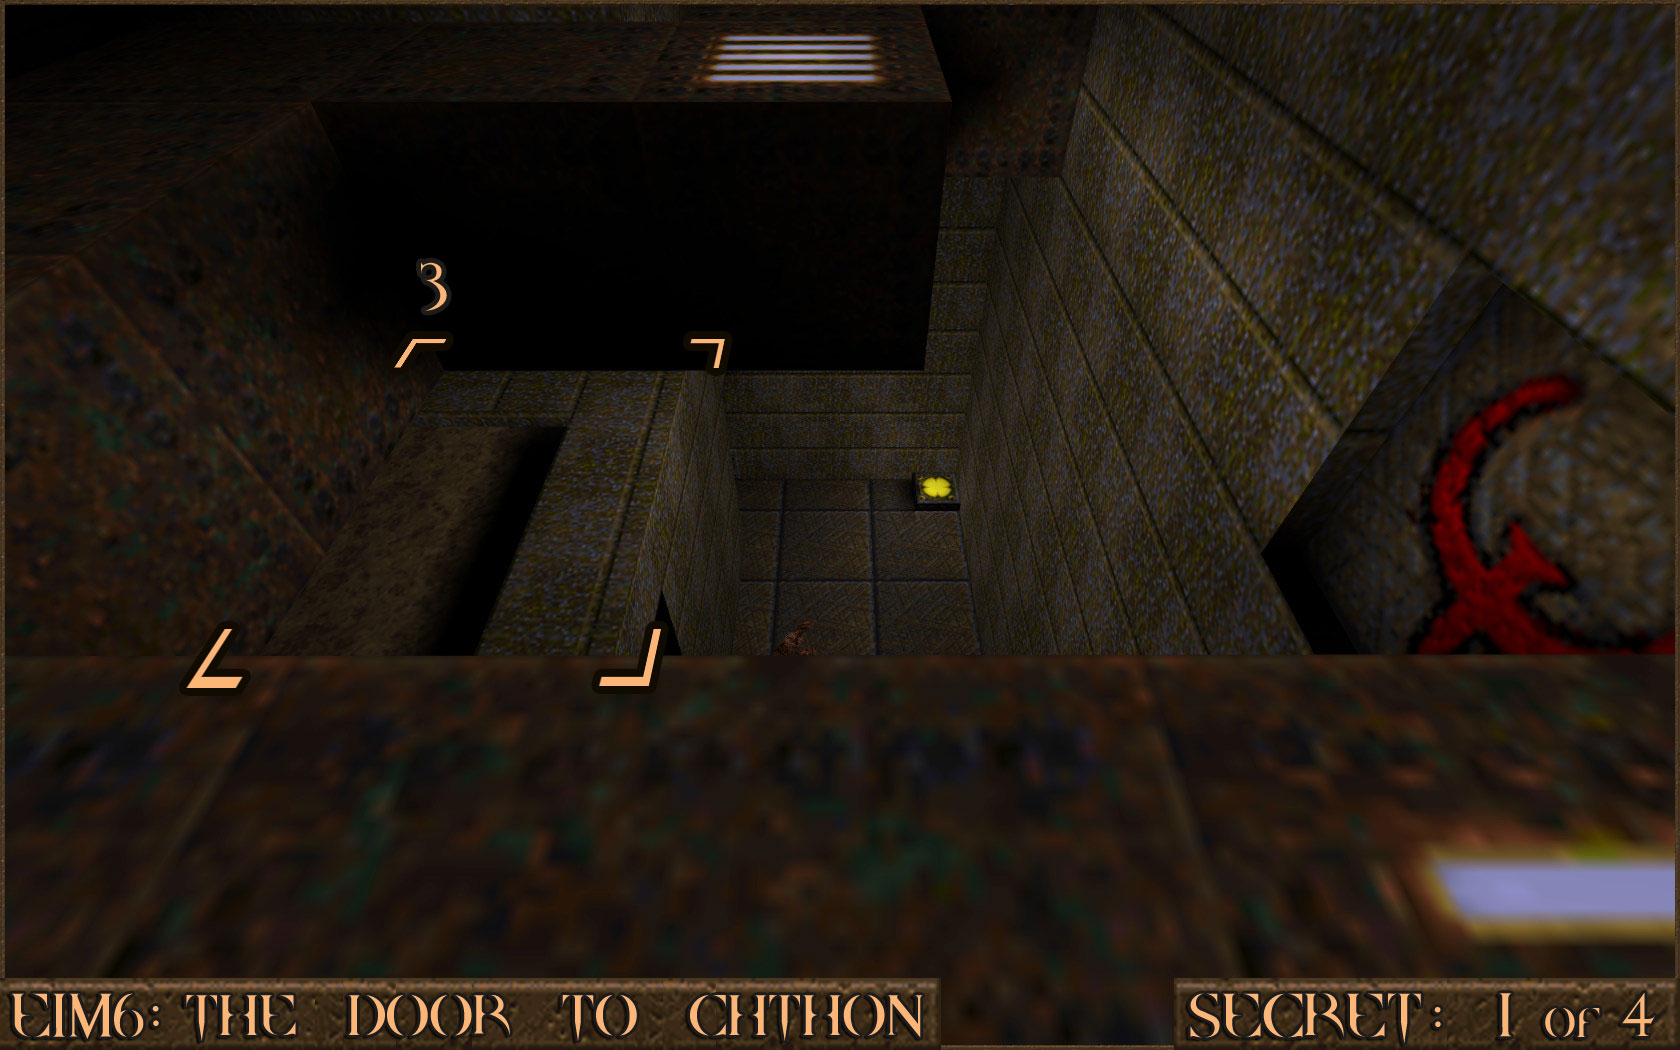 Reward:
 Secret 2 of 4
In one room a spiked wall will start moving and attempt to crush you. To escape normally you would take the elevator up but instead wait by the elevator and allow the spiked wall to pass you. Now run back down the tunnel to find a teleporter to the secret.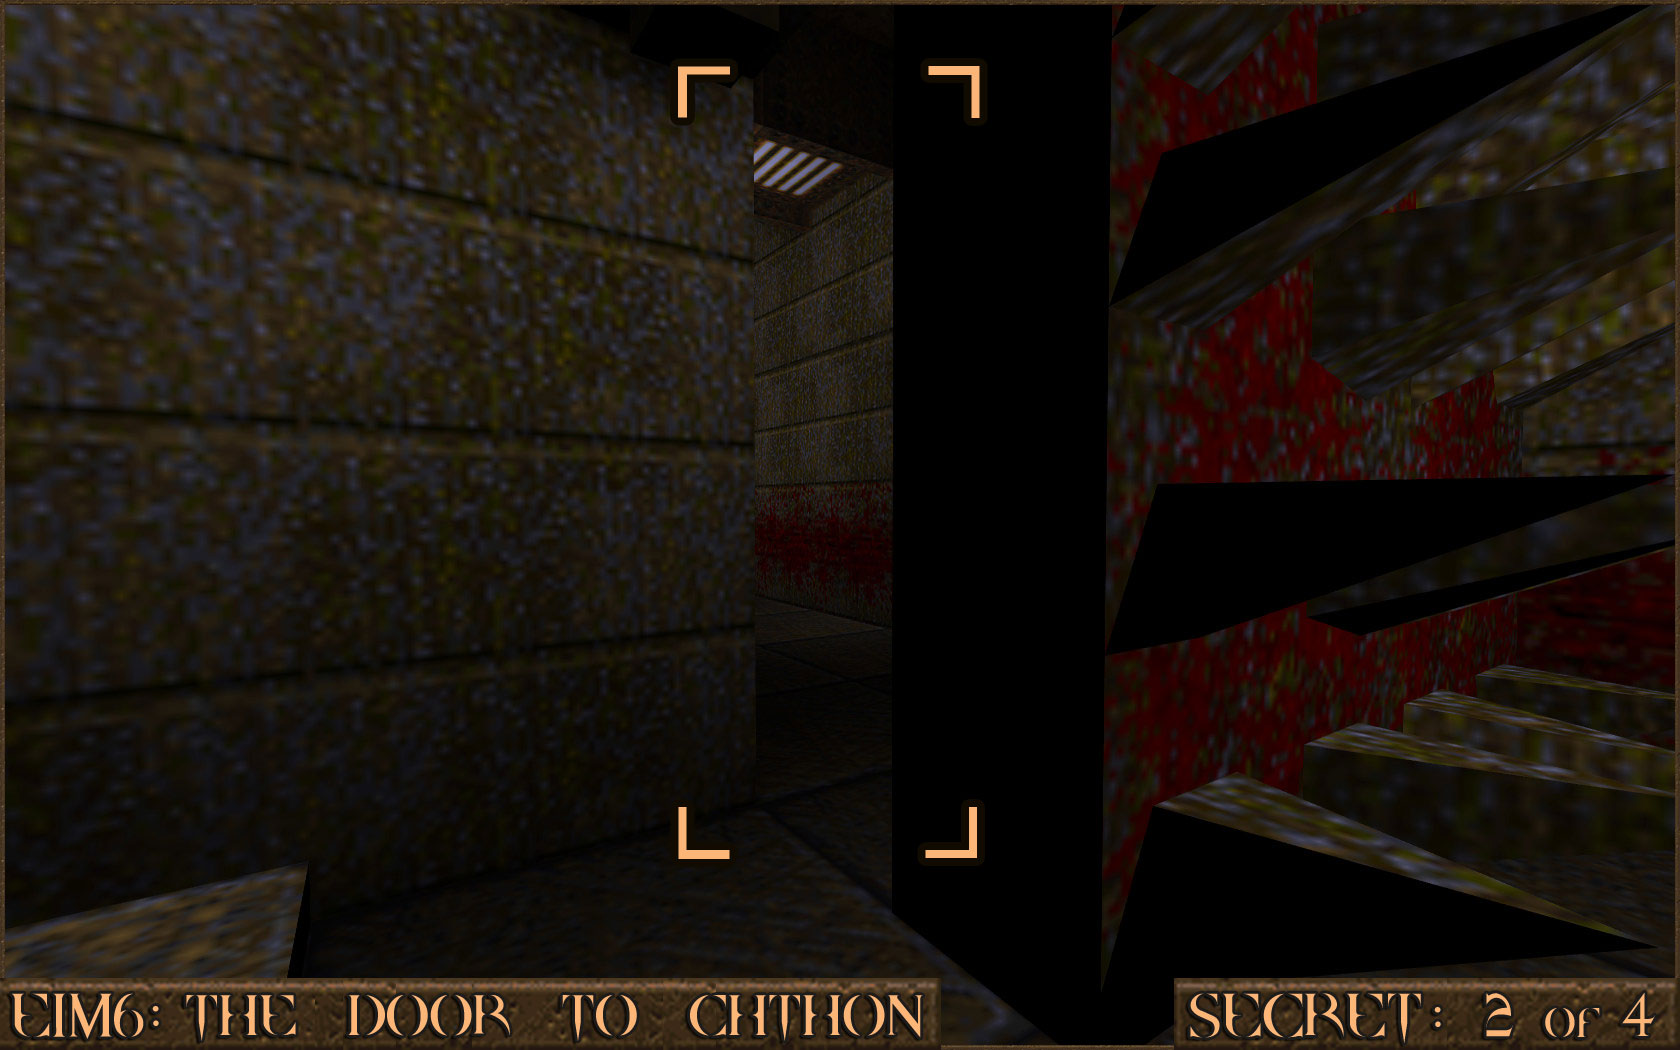 Reward:
 Secret 3 of 4
After getting past the dark area there is a room with a push button (). After it is pushed some Zombies will fall from the ceiling but it will also reveal a red rune button () in a pillar. Shoot the button to make the stairs () to the left move out of the way and reveal the secret area.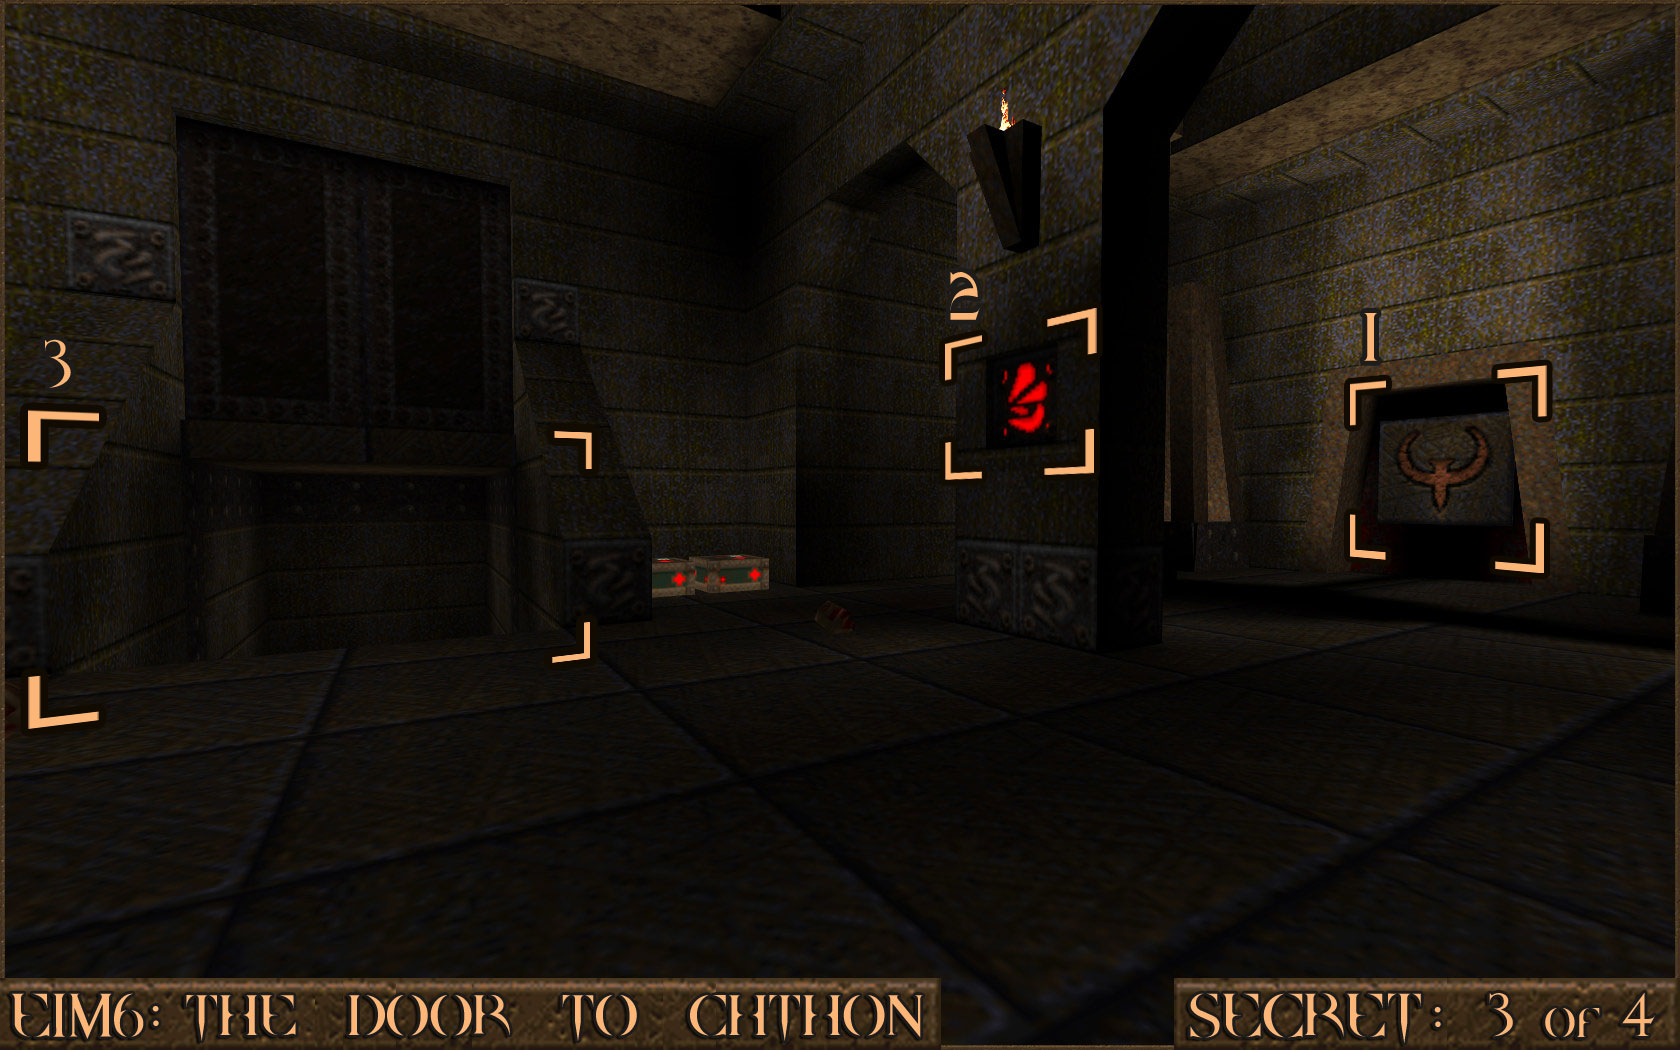 Reward:
 Secret 4 of 4
While still inside the Secret 3 area, don't head straight back out up the stairs. Instead wait for the stairs to move back to their original position to reveal a new secret area.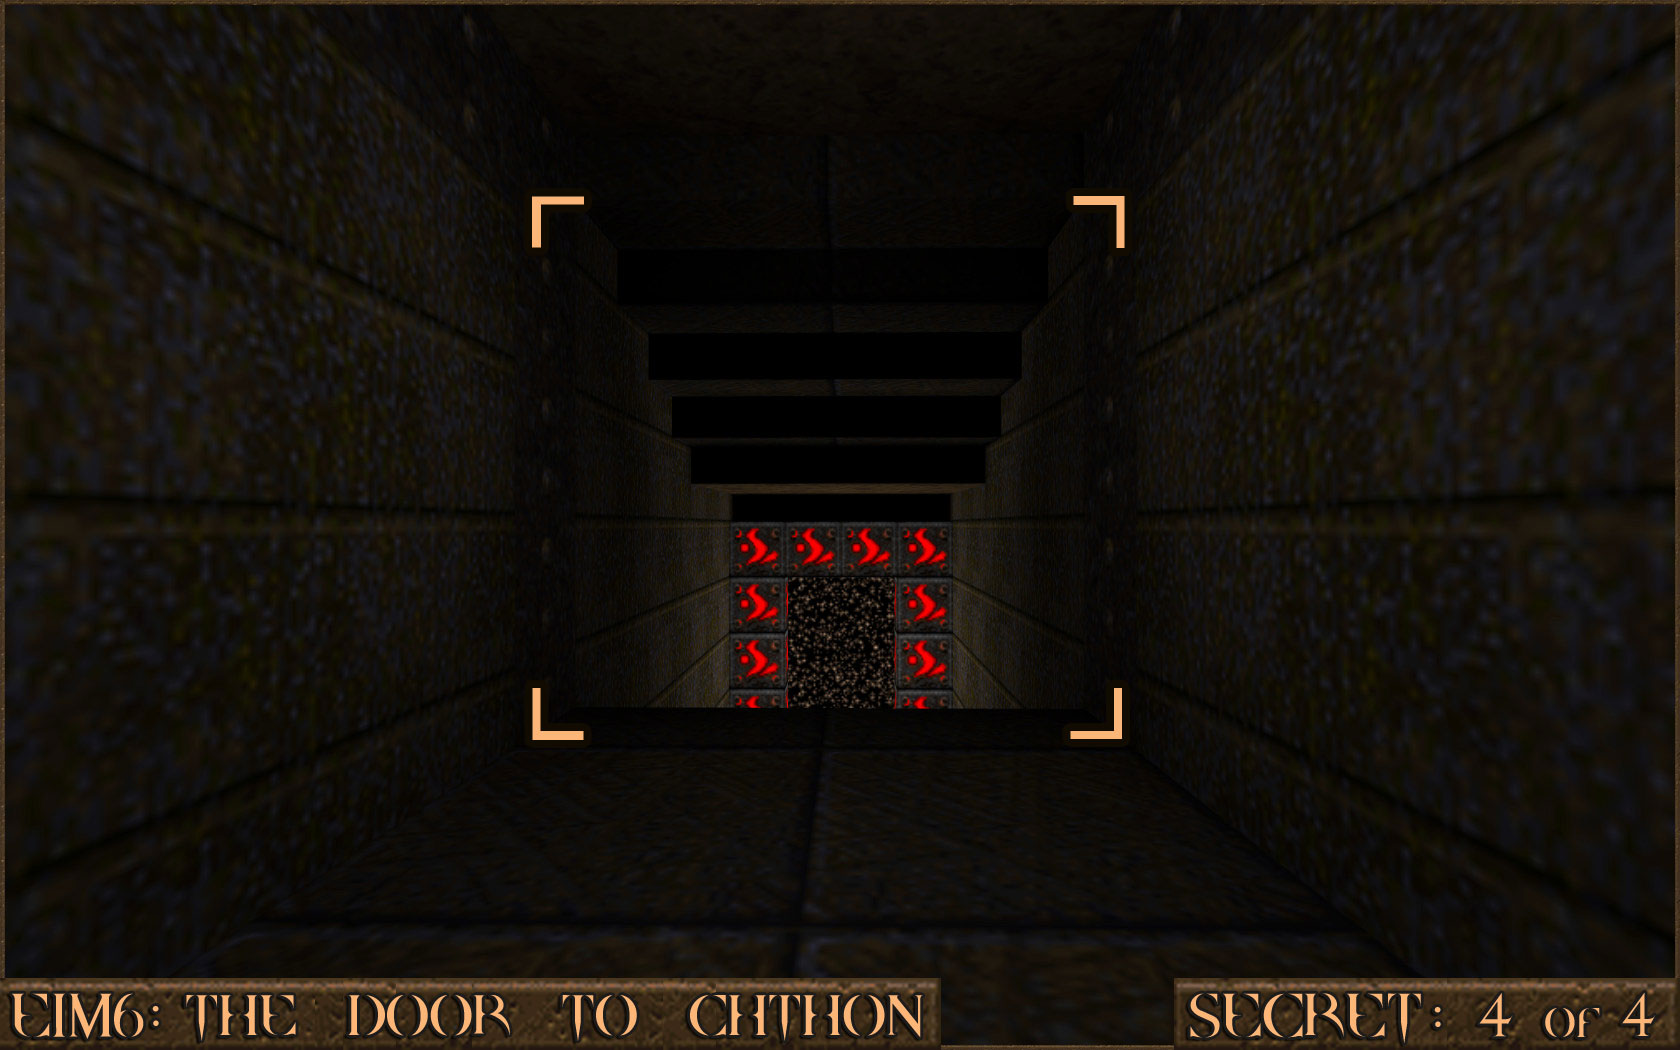 Reward:
 E1M7: The House of Chthon
NOTE: There are no secrets in this level.
E2M1: The Installation
Secret 1 of 7
You will come to large room with a pathway over some water. Jump in to the water and in one of the corners of the room is a hidden area you can surface. Exit out of the water here to find the secret.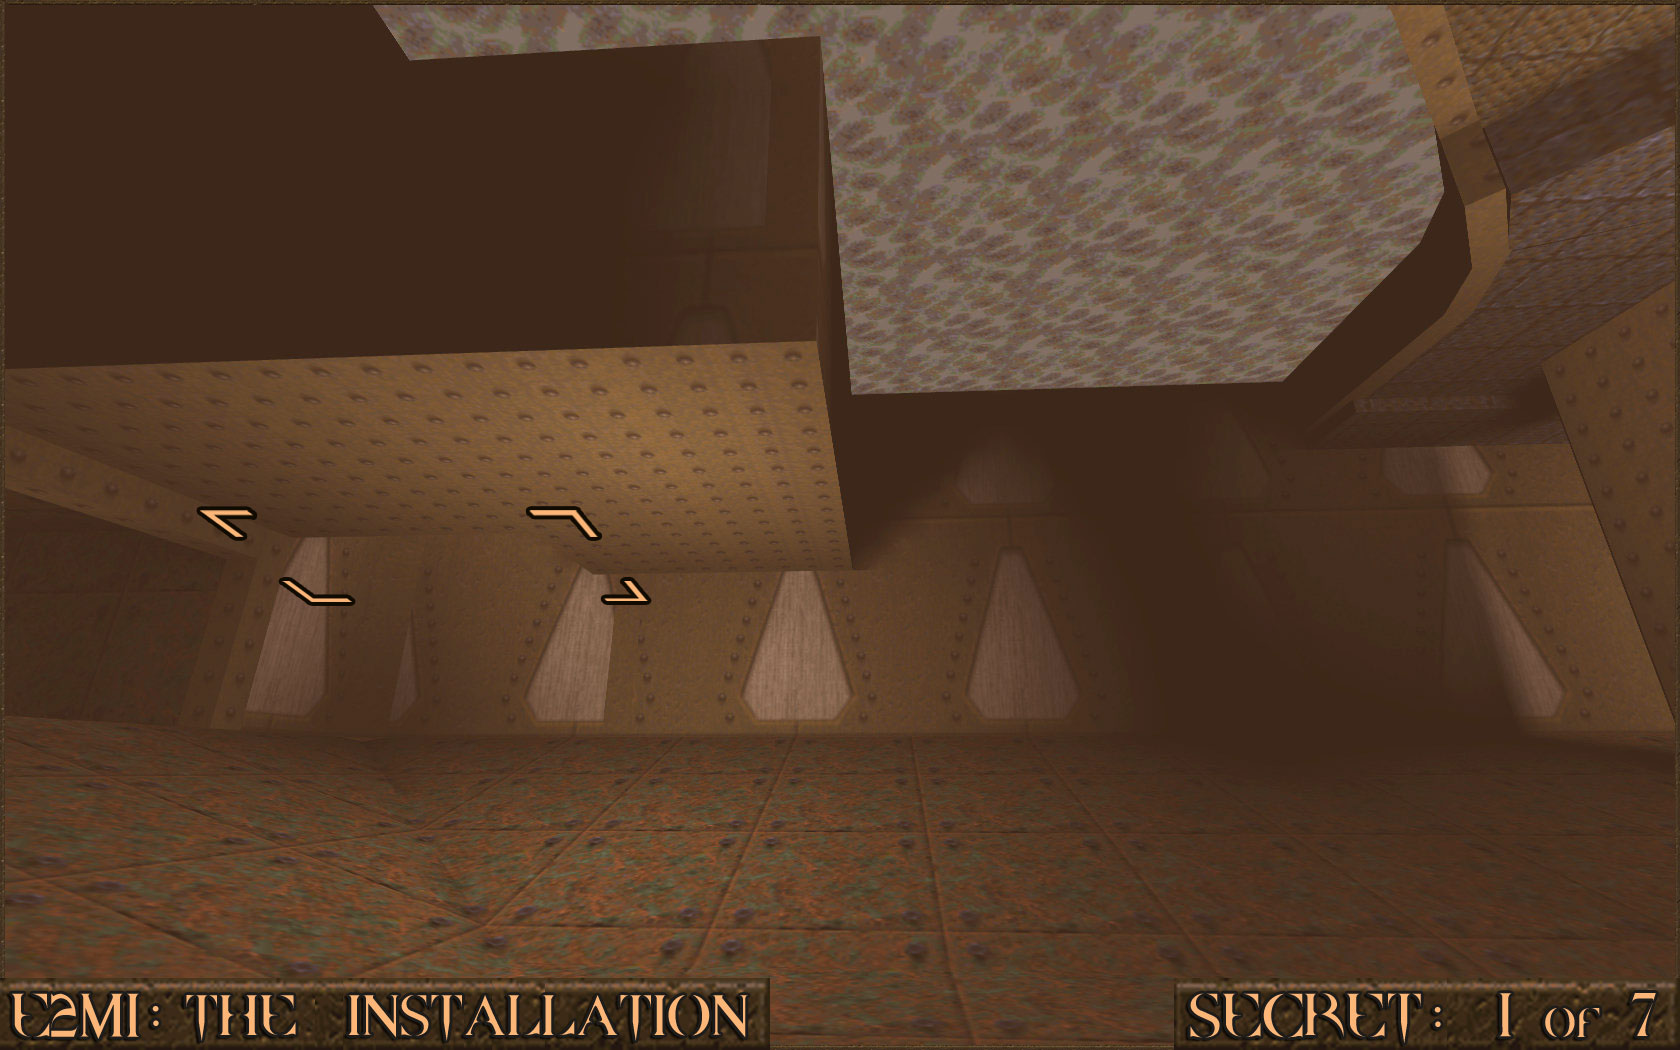 Reward:
 Secret 2 of 7
In the room with the Gold Keycard there is a part of the wall that has a blinking light. Look closely at the metal bars embedded in the wall and you will notice that there are actually some small ledges you can jump up (+). Once you are on the top of the metal bars you can pass straight through a fake wall () to find the secret.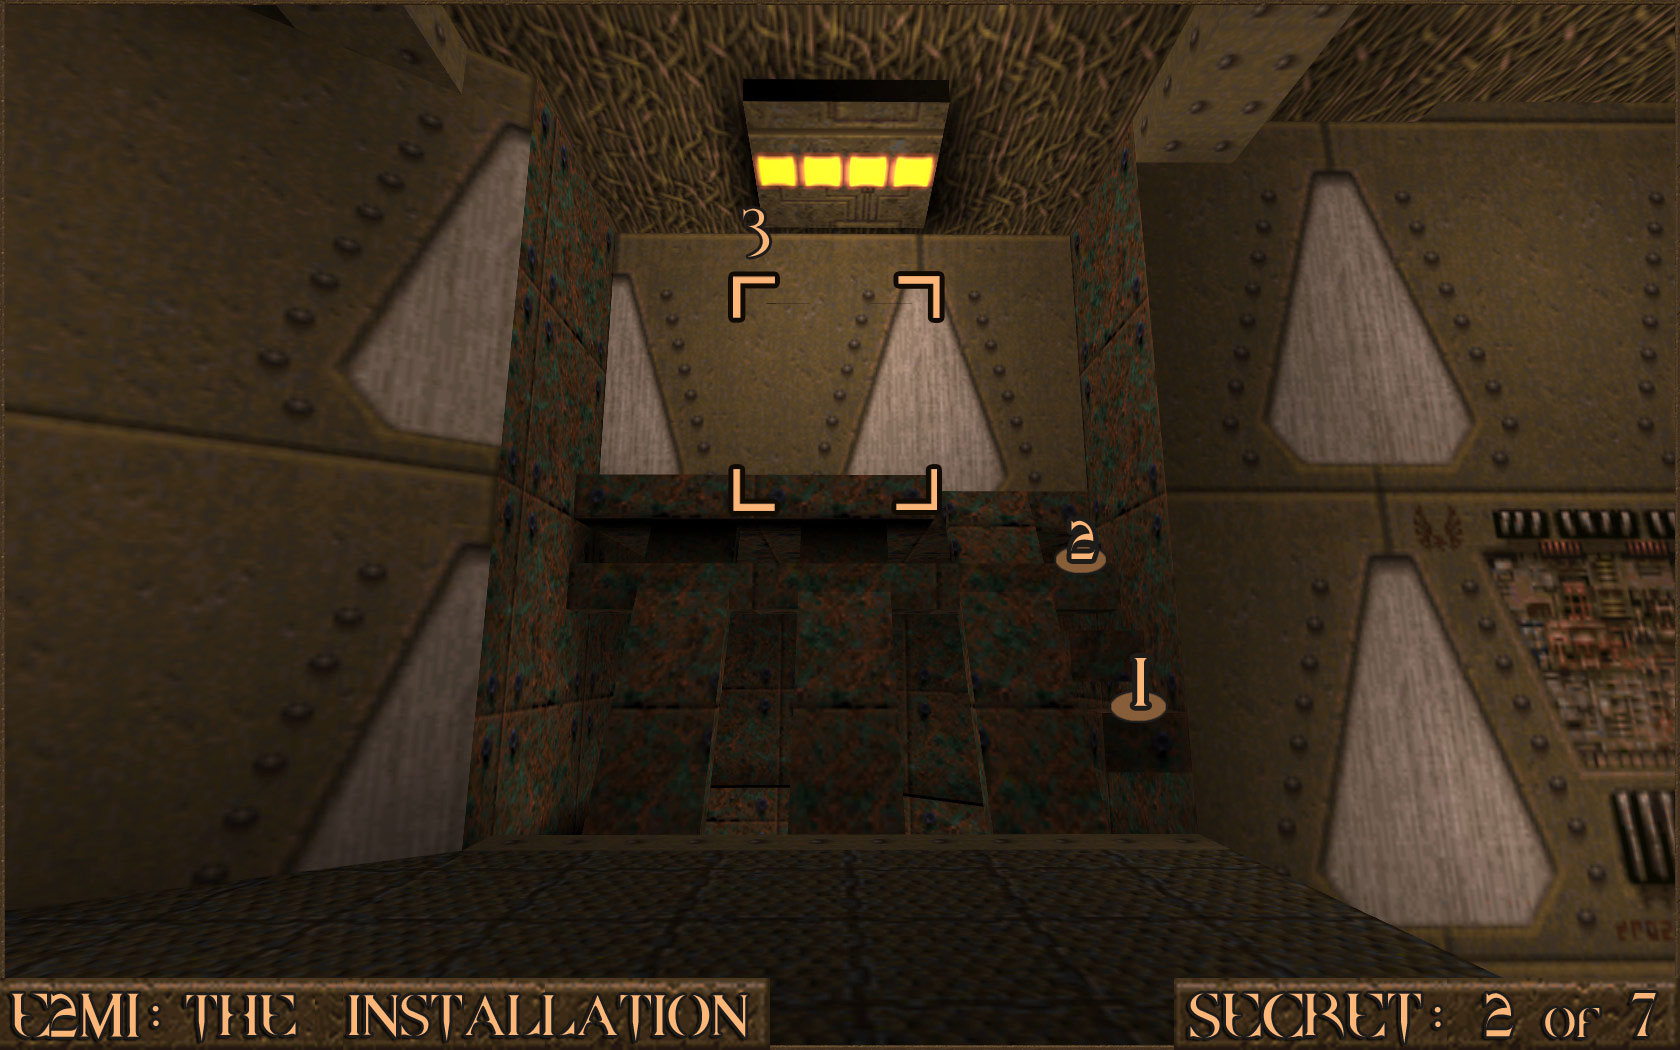 Reward:
 Secret 3 of 7
In the same room as the Gold Keycard there is a small area of water that you can dive in to. Under the water are two tunnels that both lead round to the same place where you will exit the water and find the secret.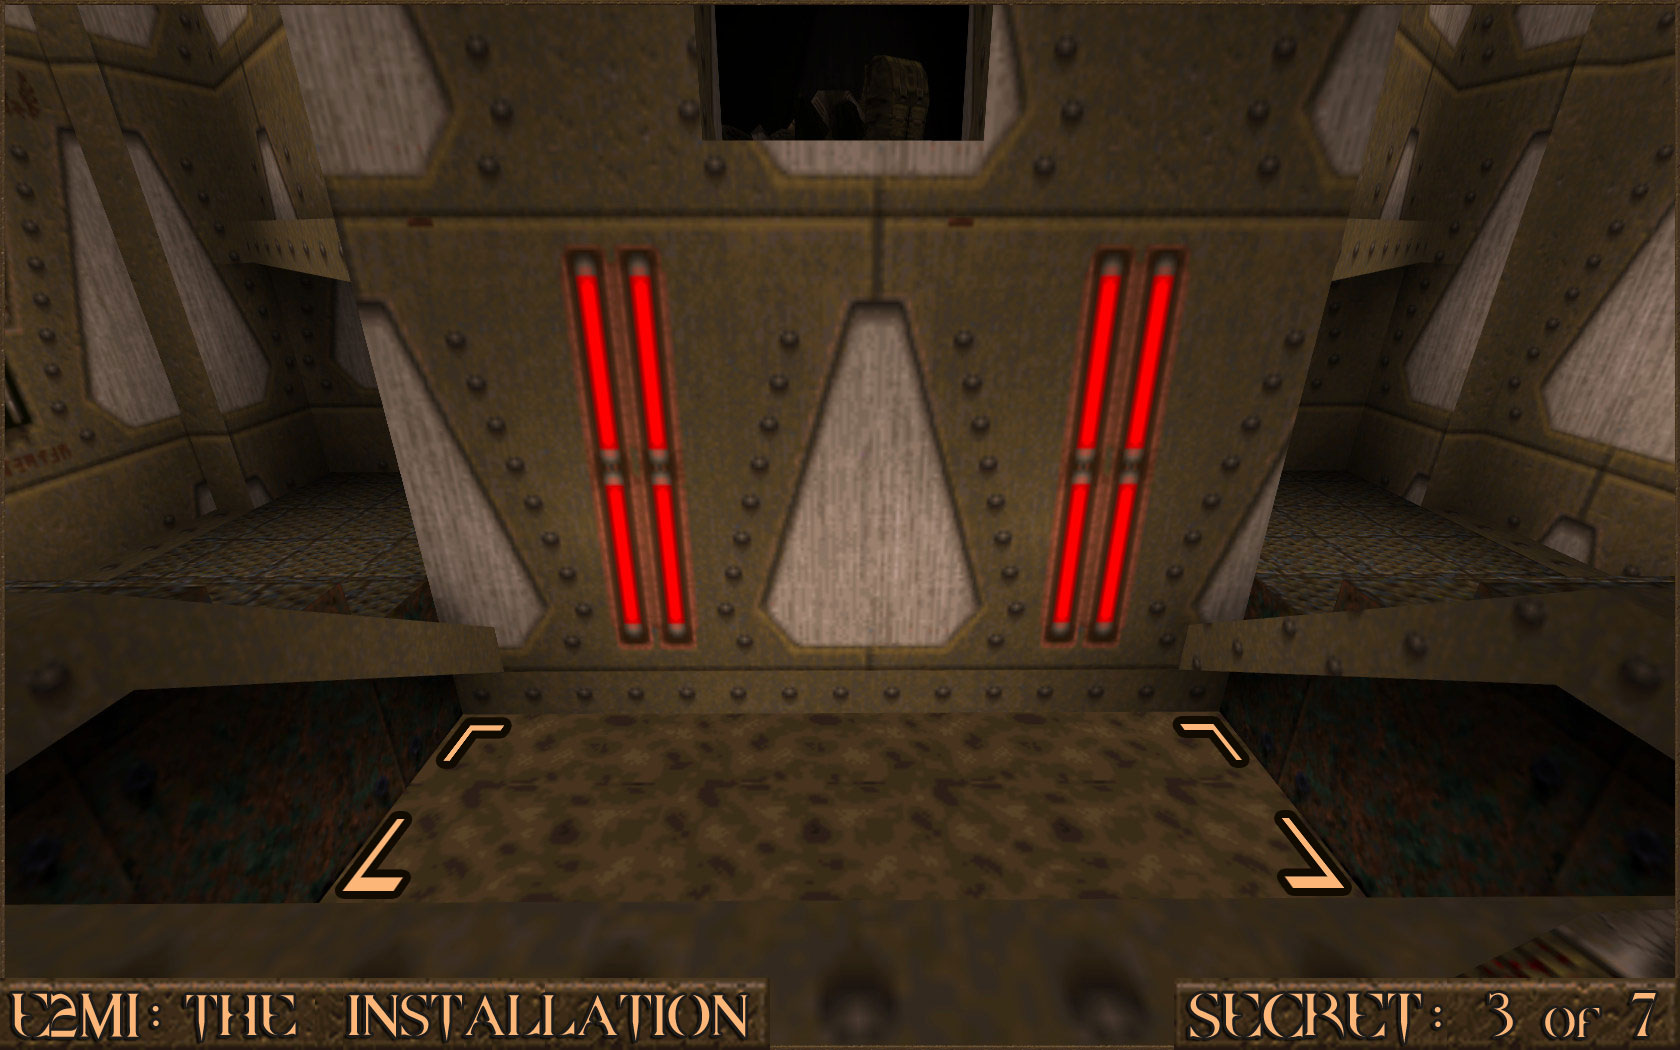 Reward:
 Secret 4 of 7
Later in the level you will come across the Gold Keycard Door. Instead of going through it turn around and jump over the edge of the balcony and in to the water below ().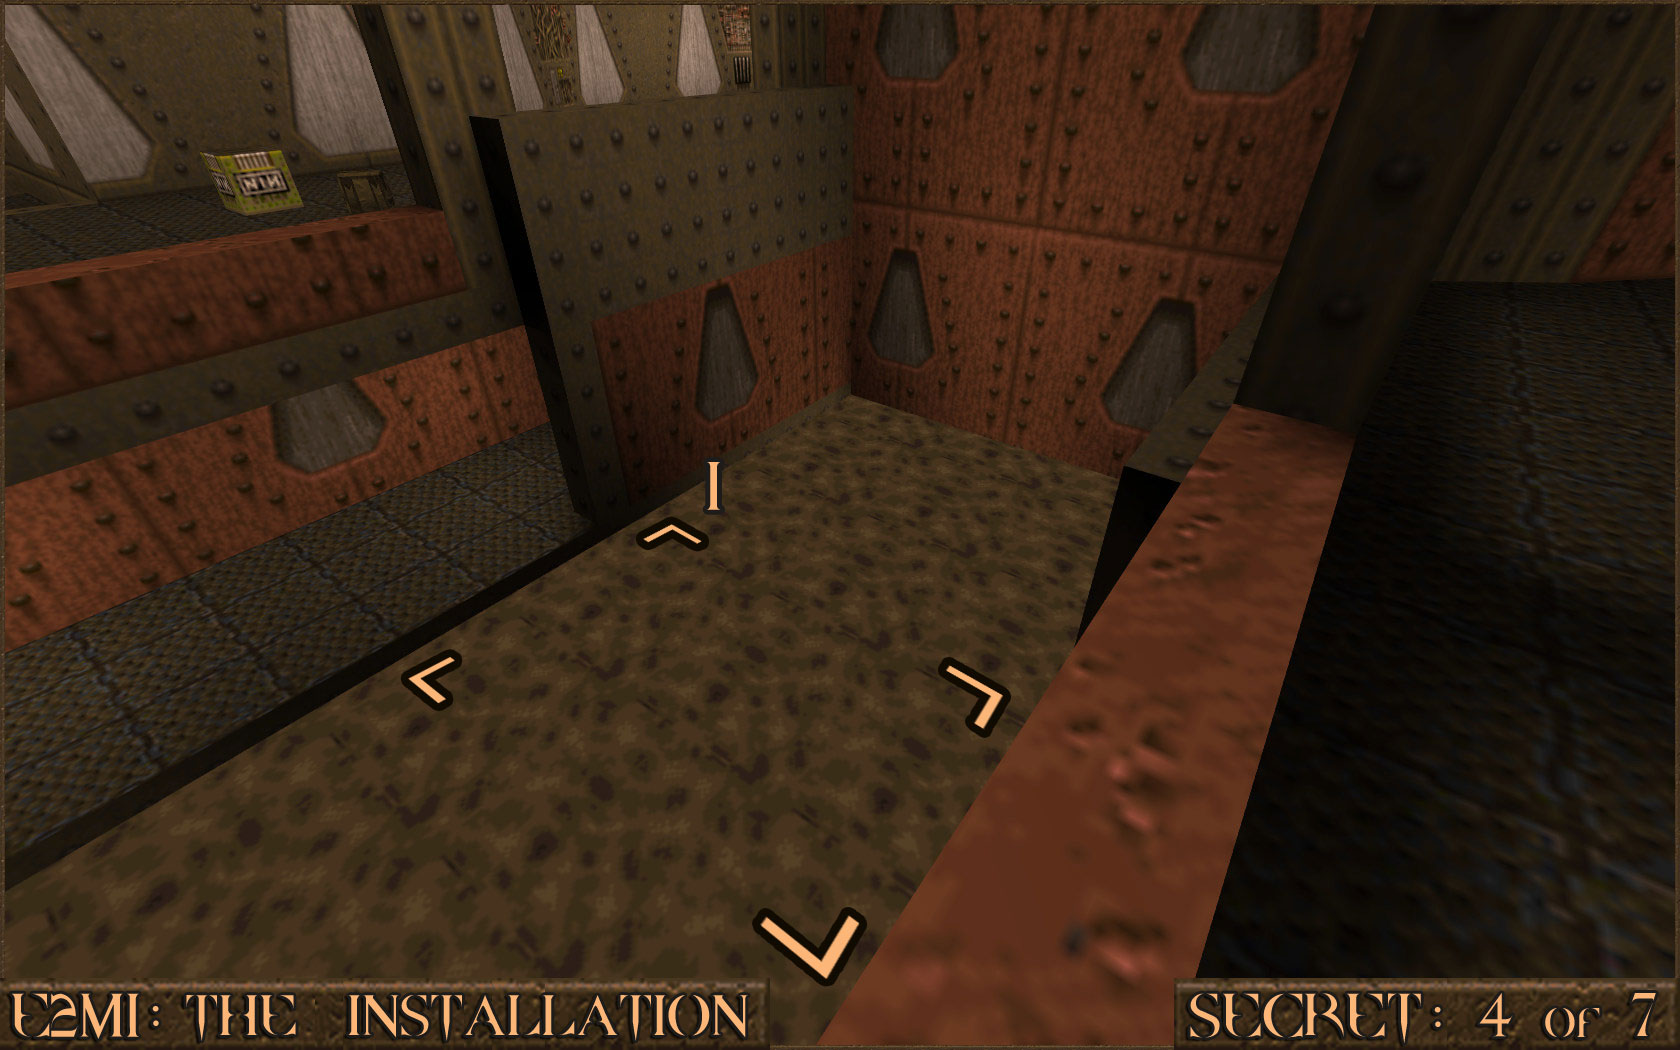 Look around for a small grate () under the water and shoot it to reveal a hidden passage. Swim through the passage (there is a Biosuit on the way) and surface to find the secret.
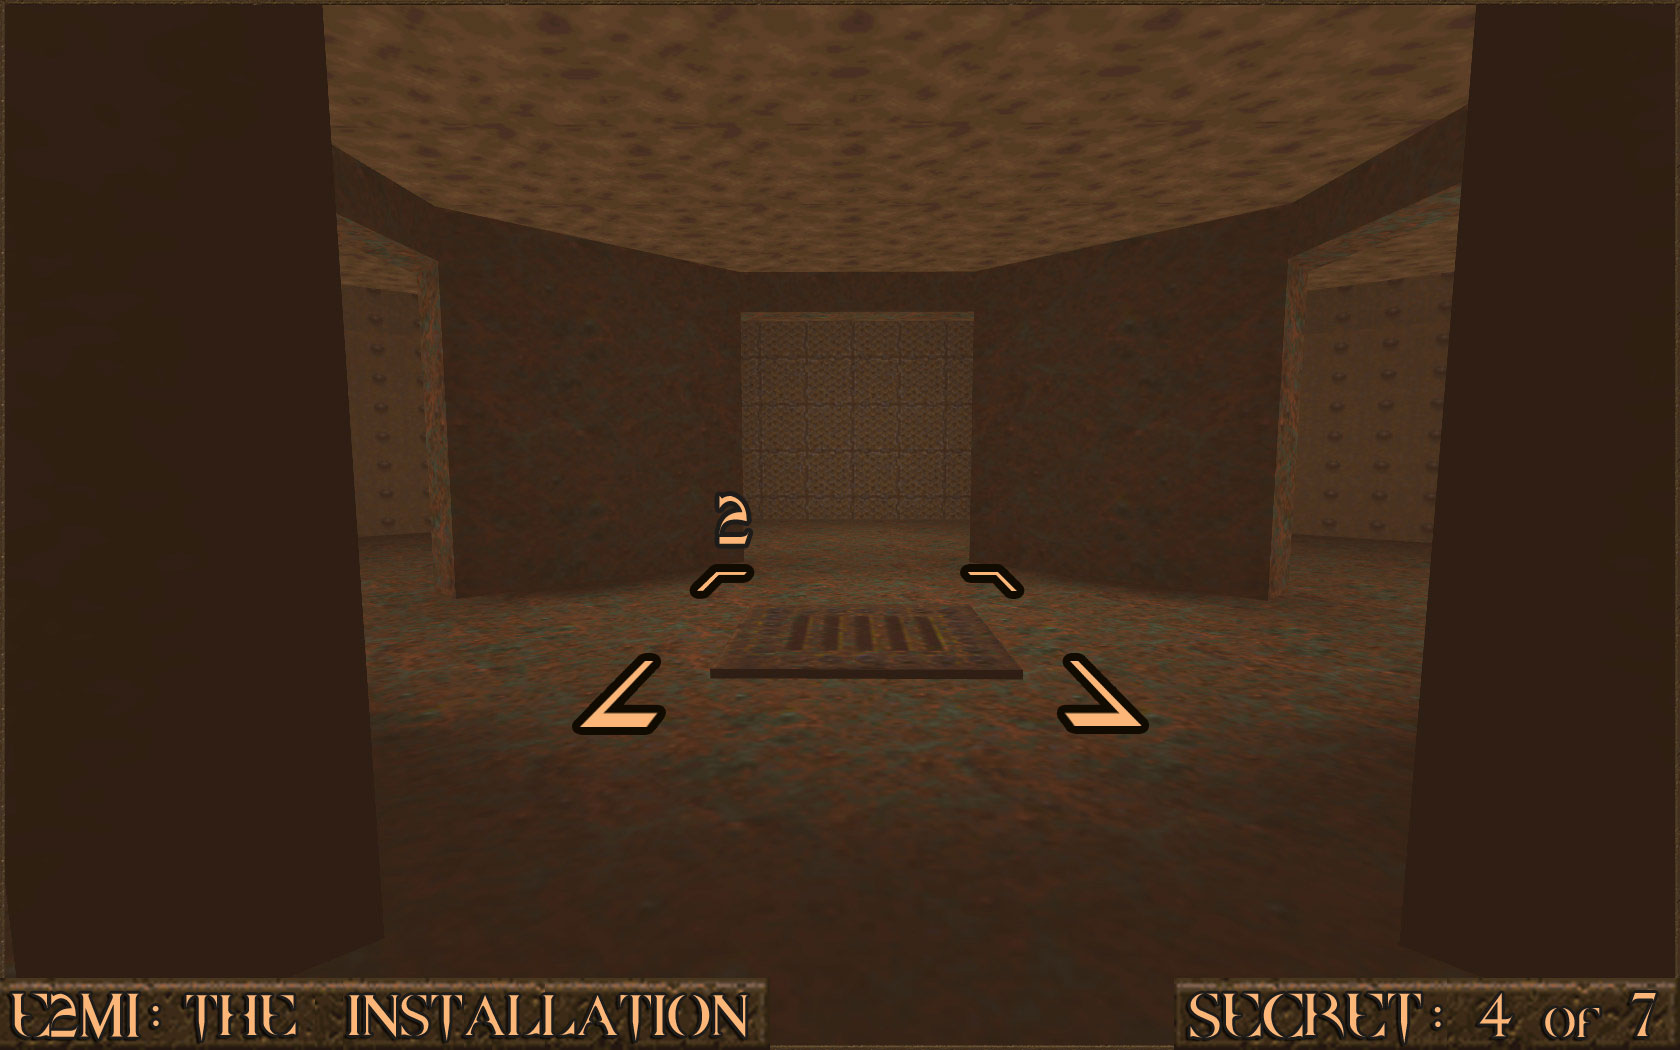 Reward:
 Secret 5 of 7
While still in the area for Secret 4, turn around and swim back the way you came (where the Biosuit was). You will see another grate () at the end of the tunnel which you can shoot to activate a hidden door.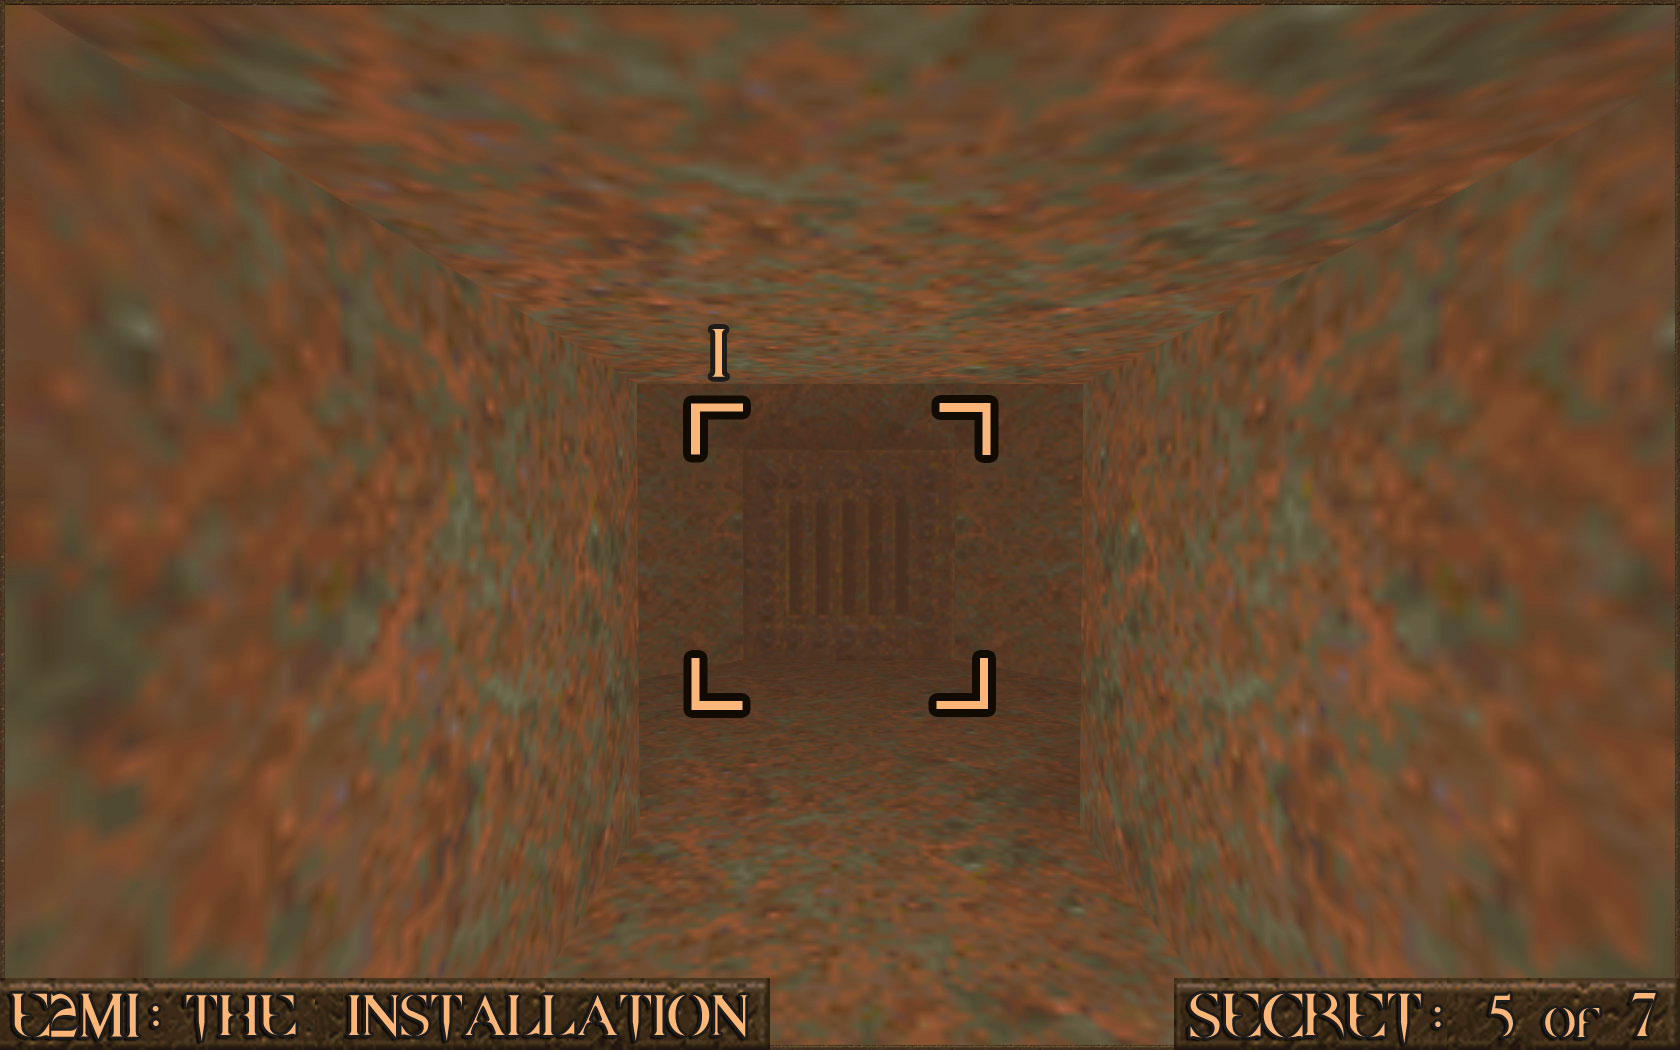 Once the trigger is activated swim back to the area containing Secret 4. A new door () will have opened that reveals a new secret.
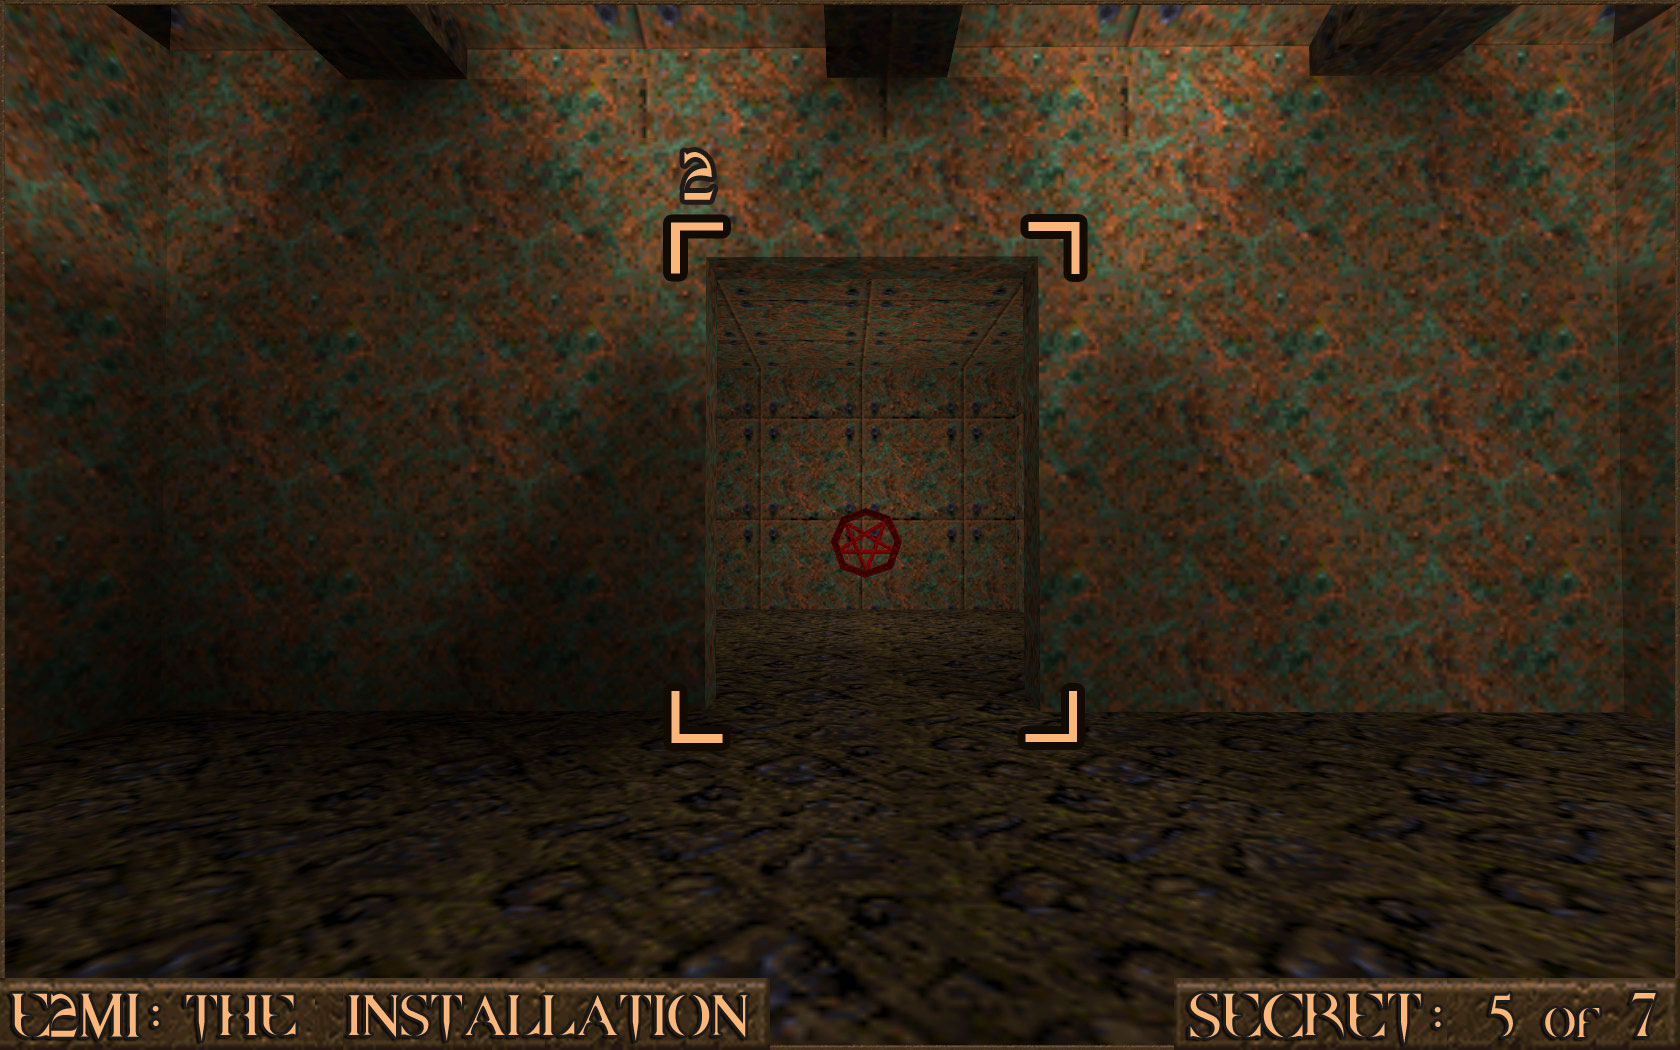 Reward:
 Secret 6 of 7
In the area with a large cage there is a pack of Small Shells behind a small elevator. Shoot the wall to the left of the Small Shells to reveal a hidden area.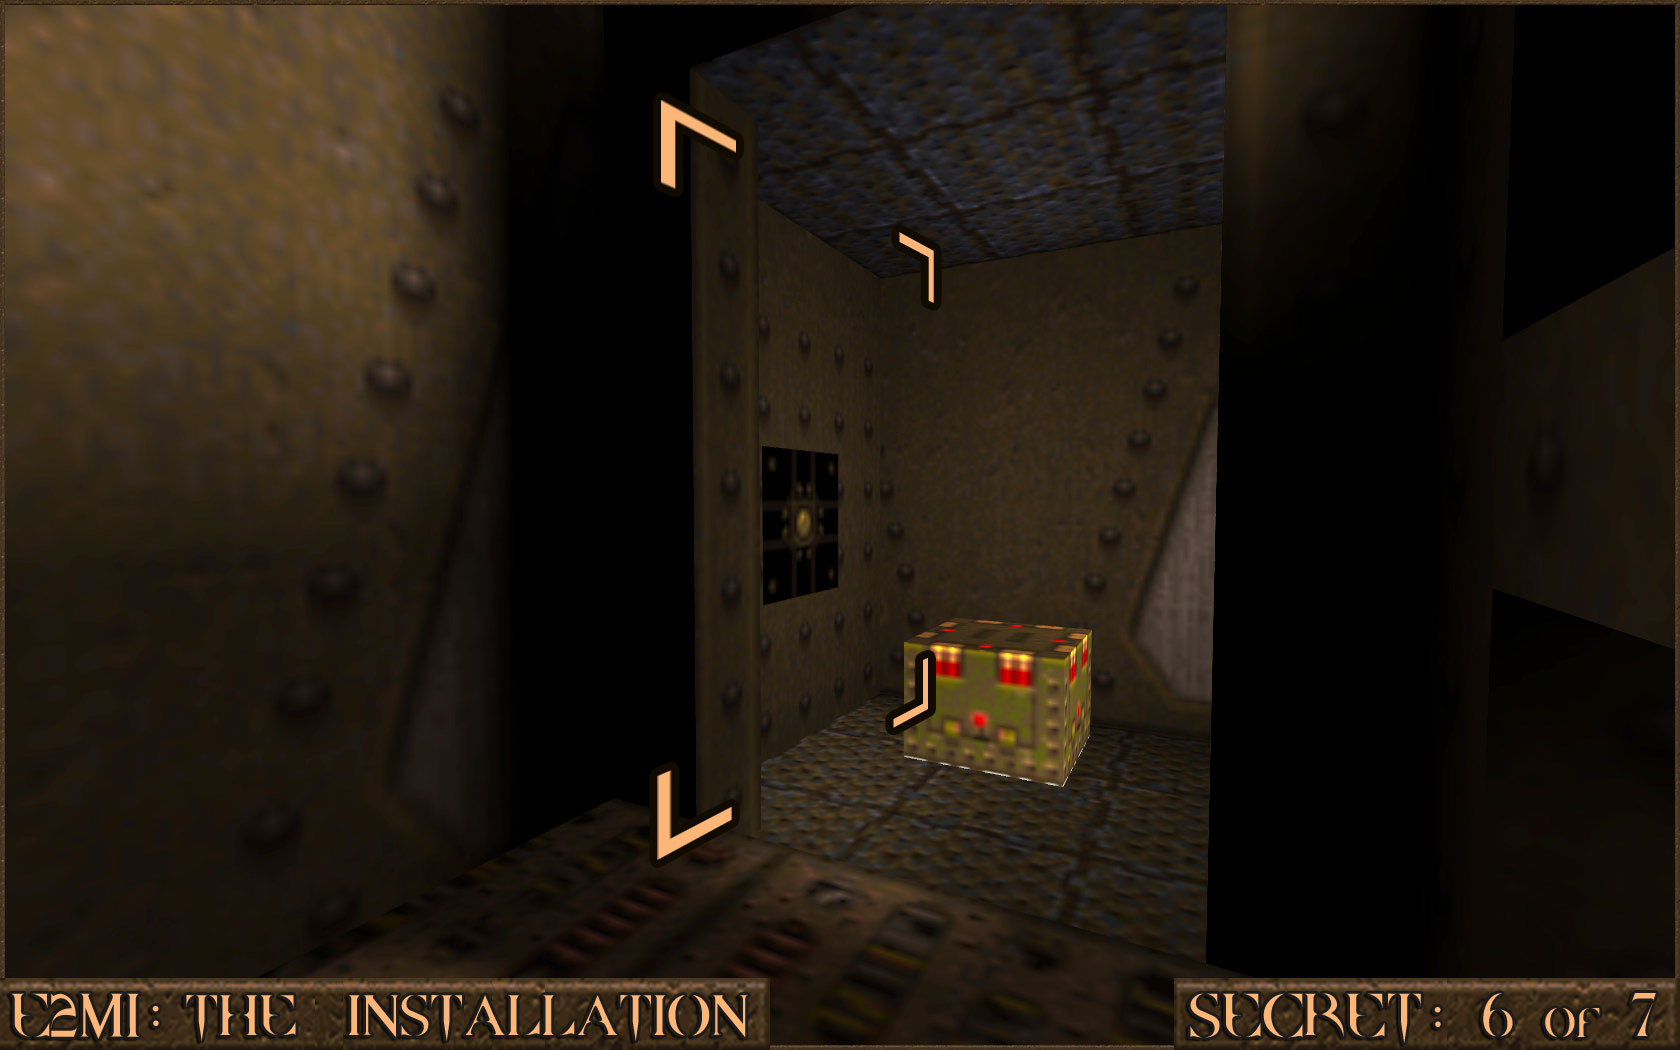 Reward:
 Secret 7 of 7
In the room with the large cage and after going up several elevators you will come to some descending steps. Look to your right to find a gap in the cage large enough to fit through. Look around inside the cage to find the secret.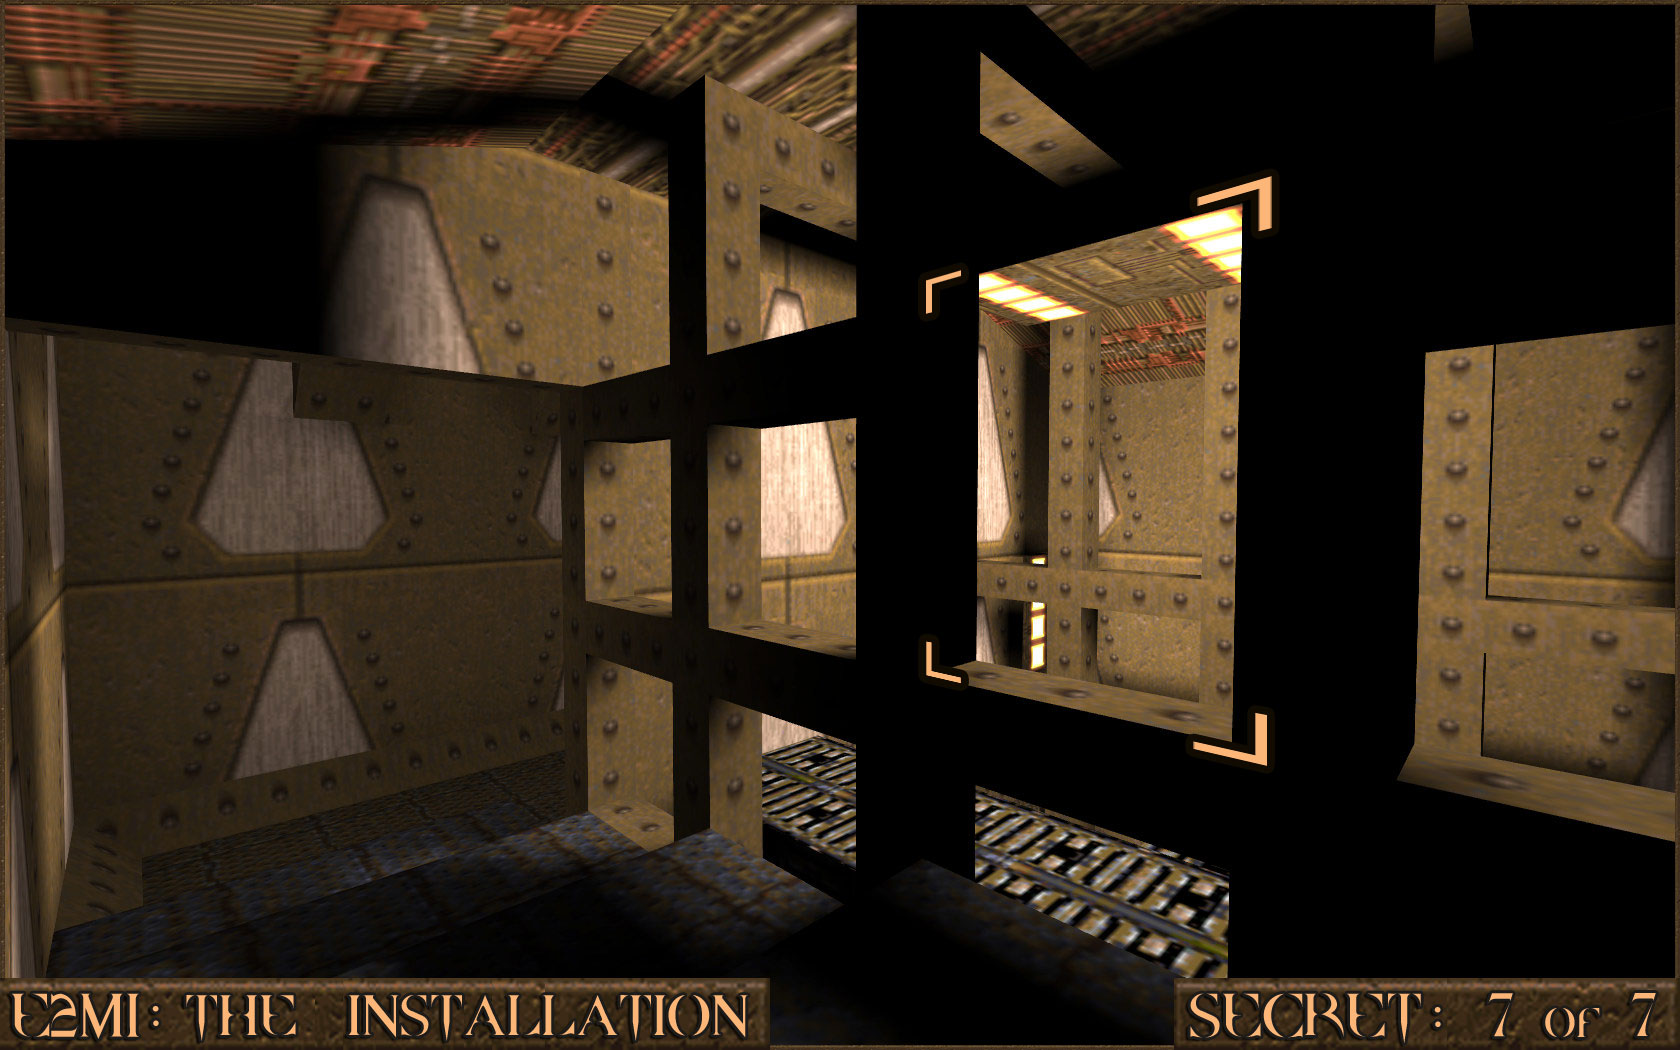 Reward:
 E2M2: The Ogre Citadel
Secret 1 of 3
When you come to the bridge over the moat jump down in to the water on the left hand side and look for a cave entrance. Take the elevator up to find the secret.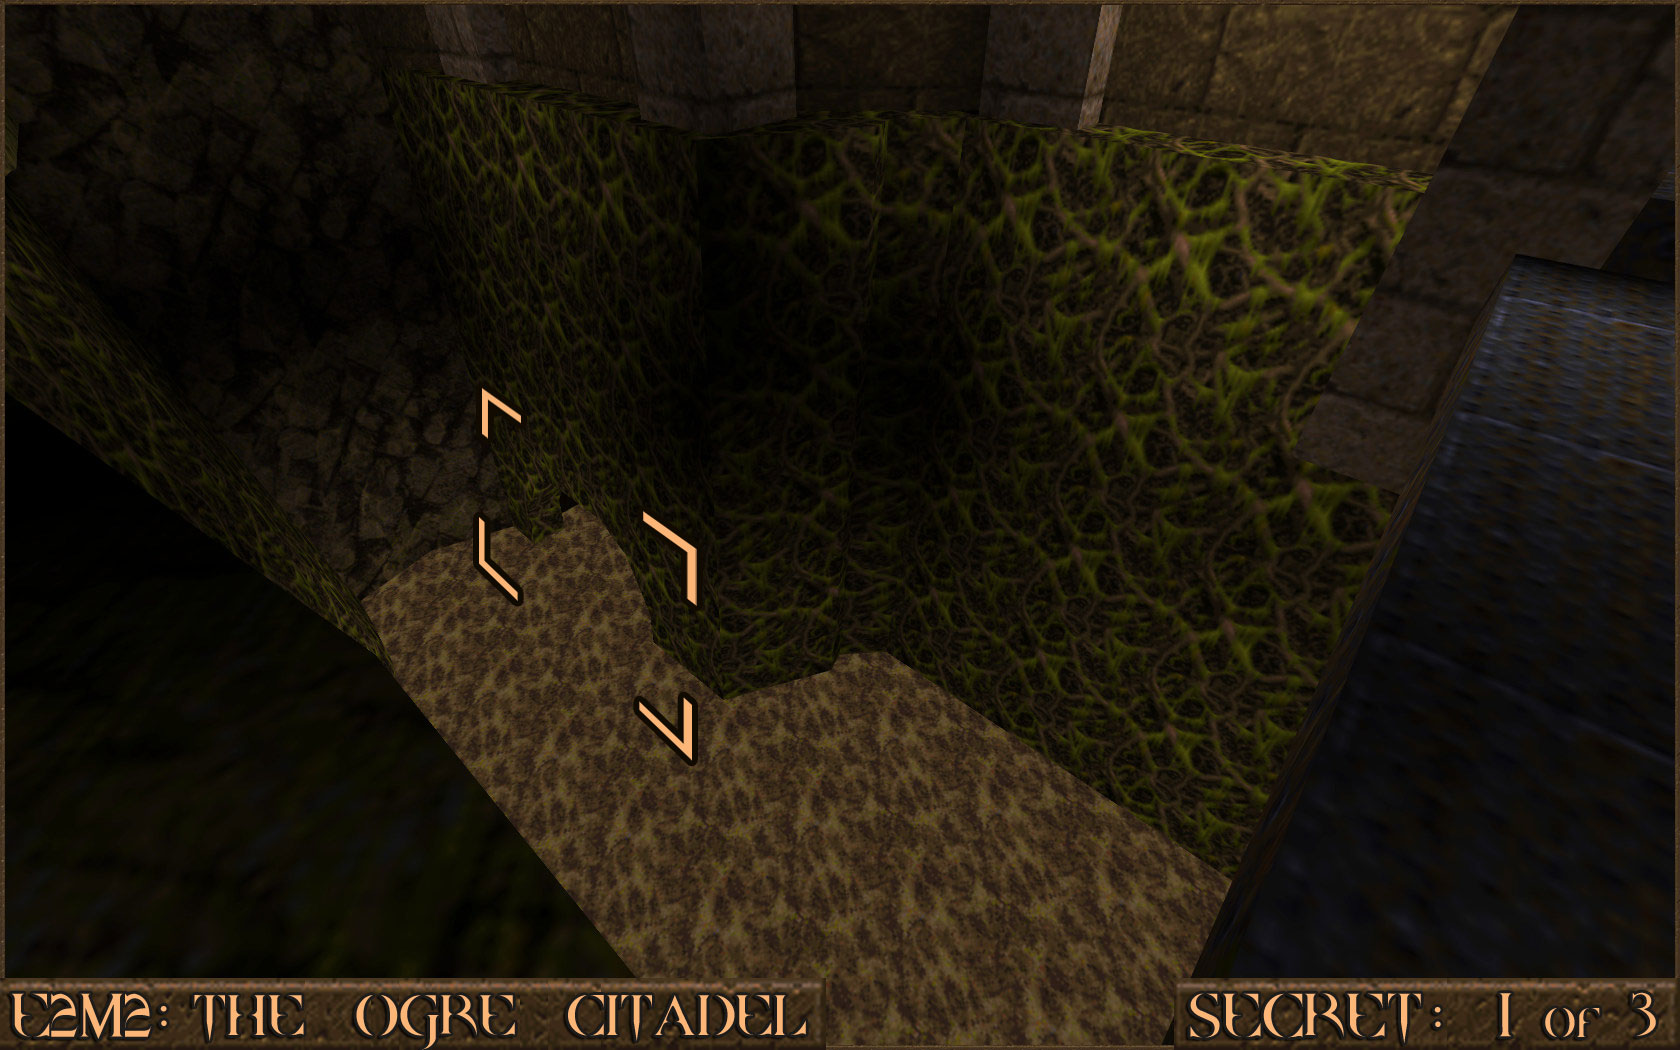 Reward:
 Secret 2 of 3
Just as you come out of the area from Secret 1 follow the shallow water to the left ().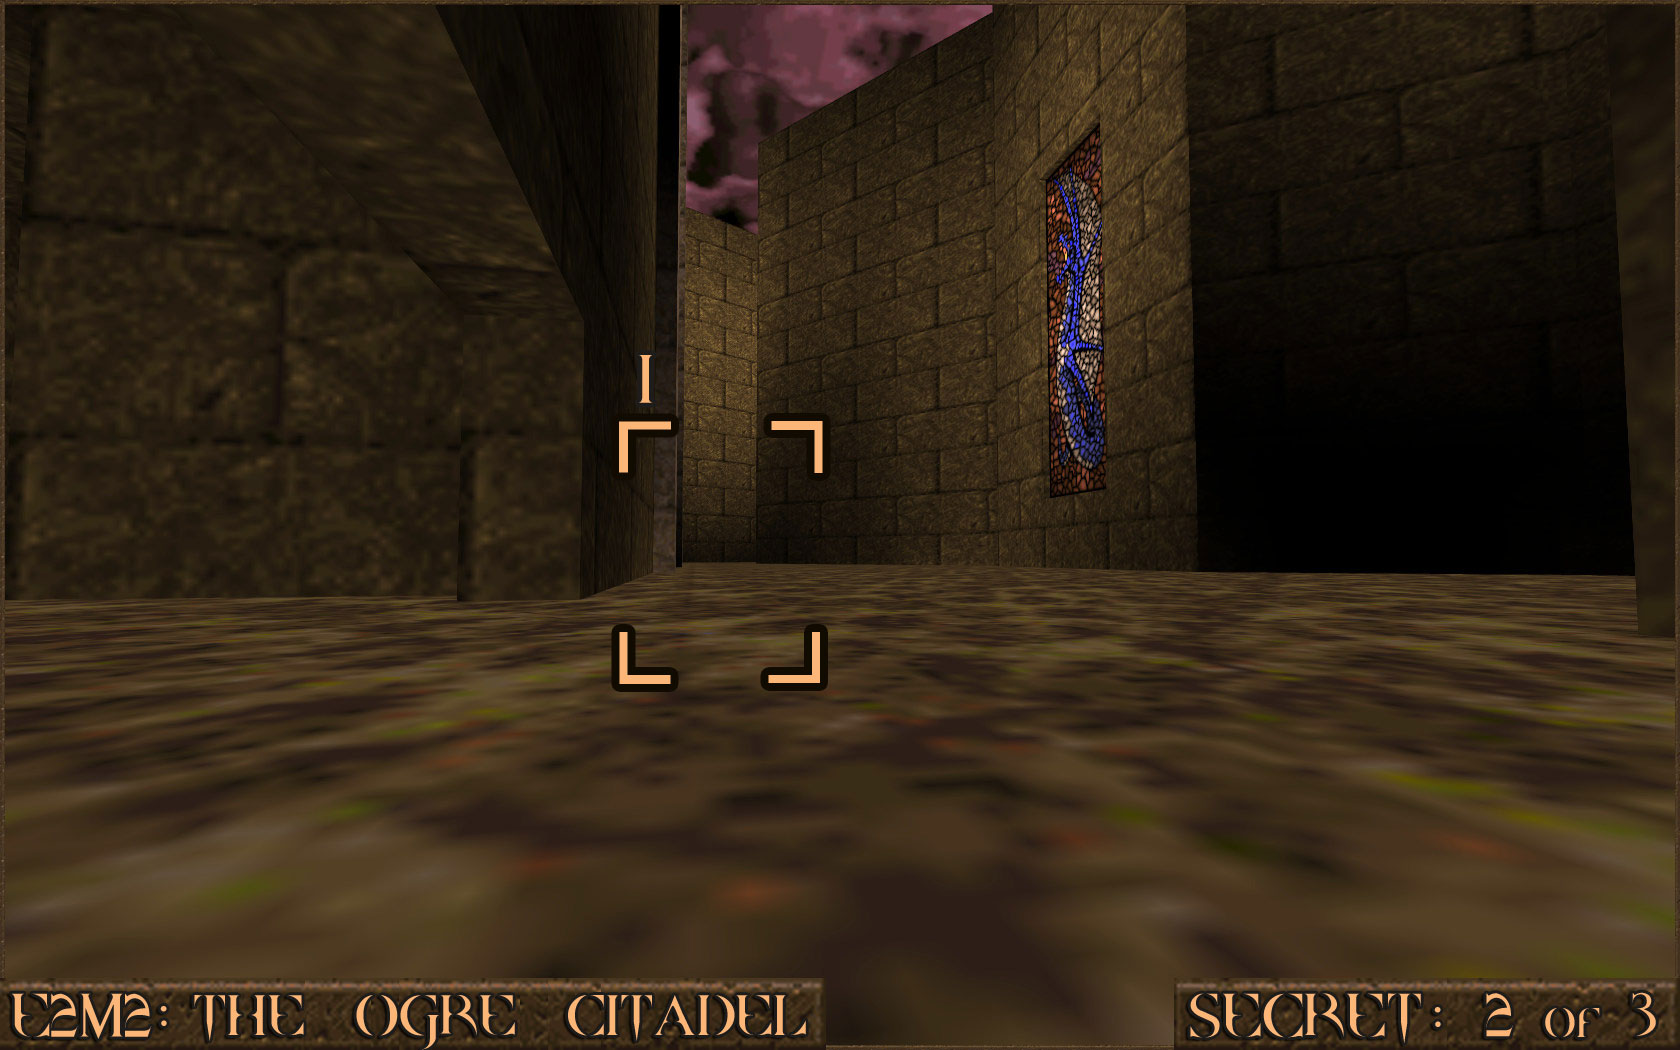 Keep following the water as you go under a metal bridge that has a Yellow Armor and then in to a small dark area (). Go up the small steps here to find the secret.
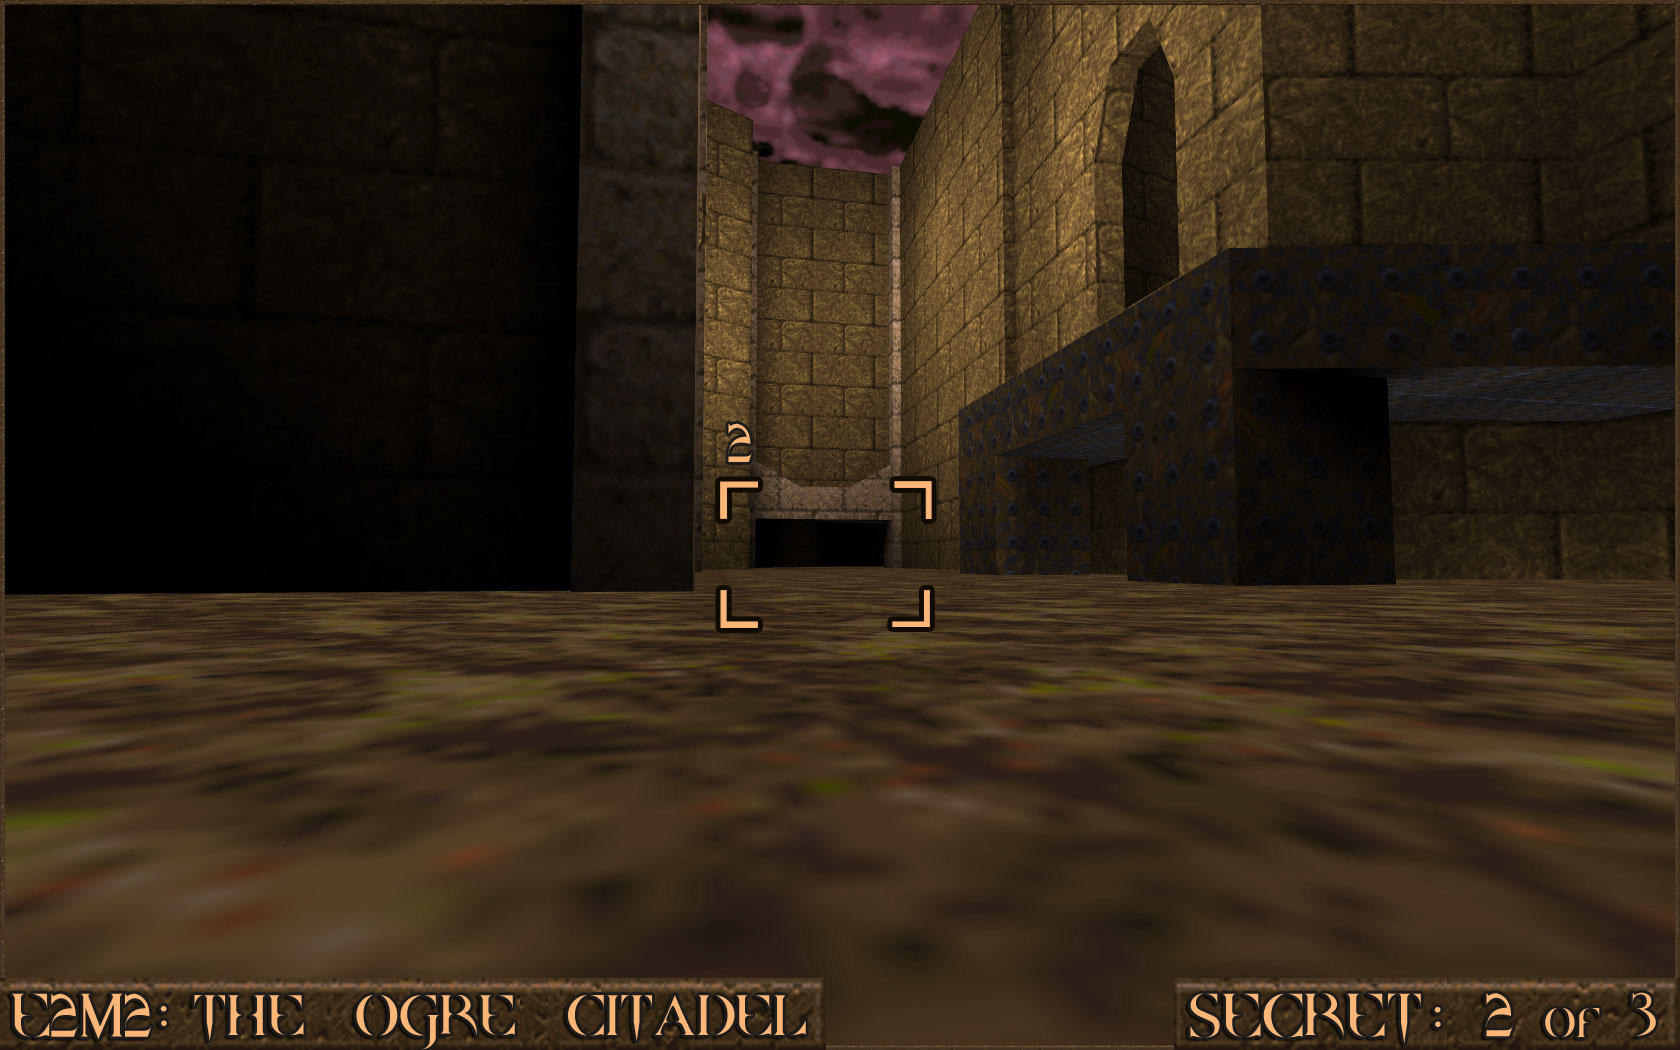 Reward:
 Secret 3 of 3
Later on in the level once you are inside the main building you will come across a window. Across the other side you can see another window which is where the secret lies. To reach it carefully jump out of the window to land on the metal bridge with the Yellow Armor that you saw earlier in Secret 2. Follow the bridge across to find the secret area.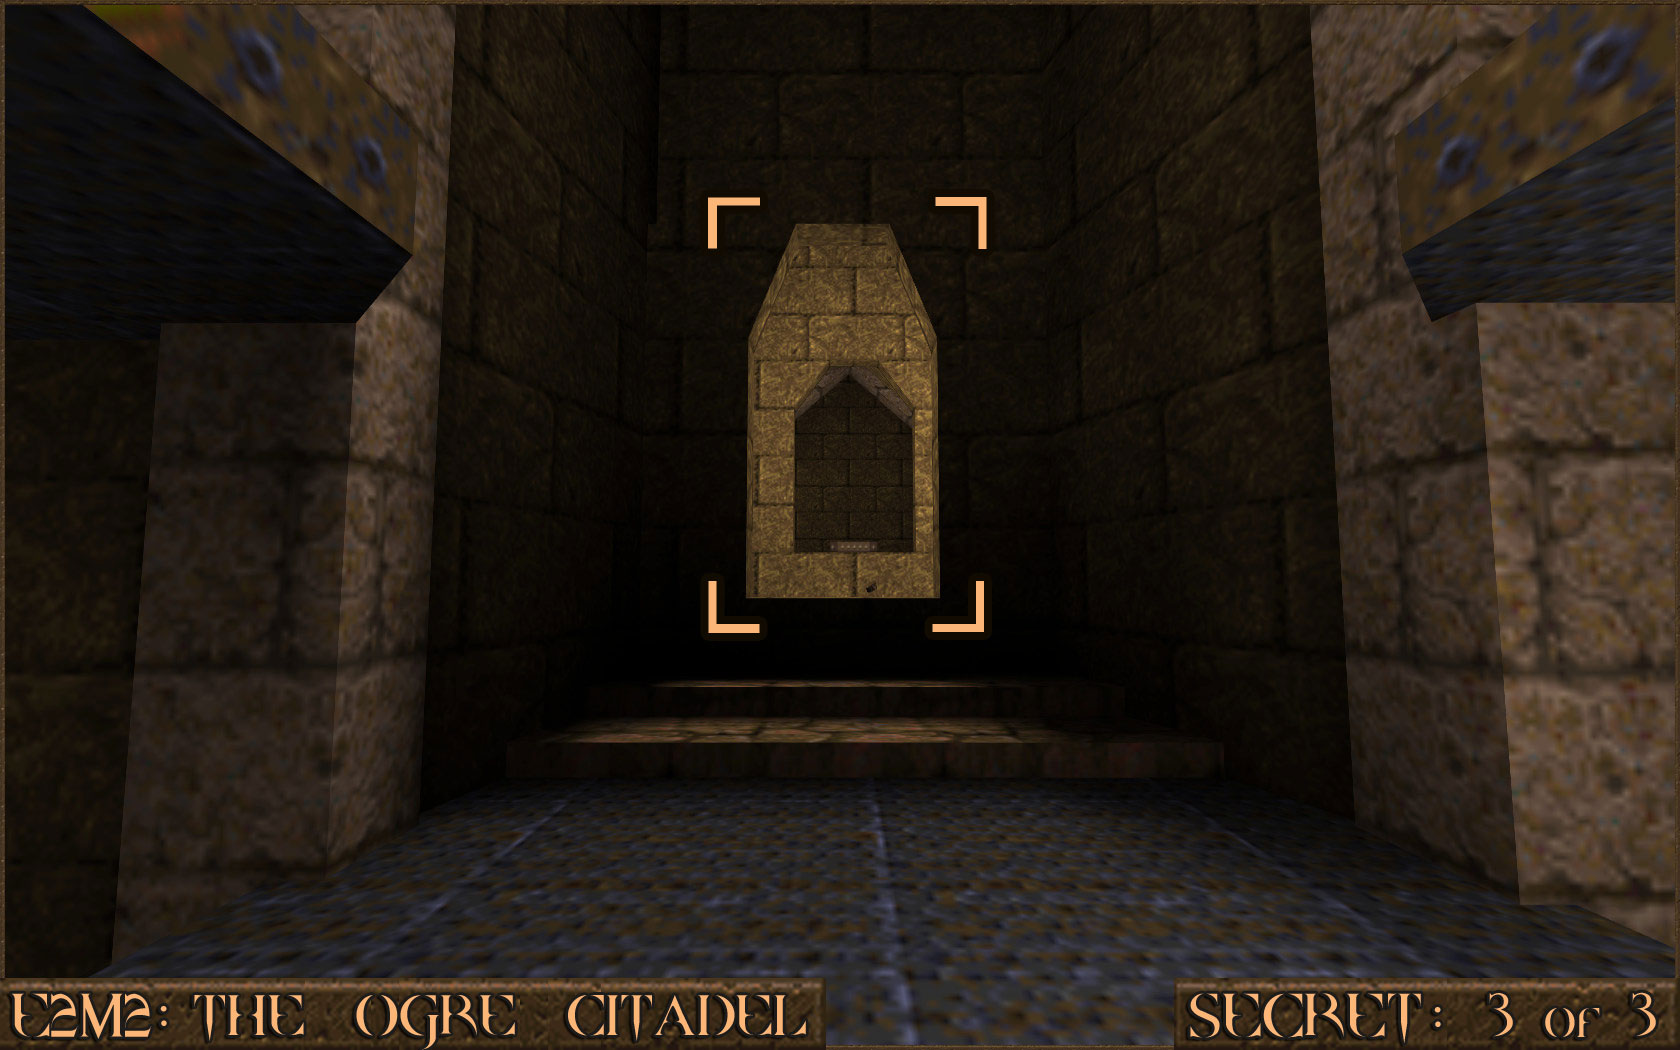 Reward:
 E2M3: The Crypt of Decay
Secret 1 of 4
During the level you will see a small balcony with Zombies on it that appears to be inaccessible. There is a shootable wall () behind the Zombies that will open a secret tunnel () you can use to access the area. Blowing up the Zombies with an explosive is enough to trigger the wall.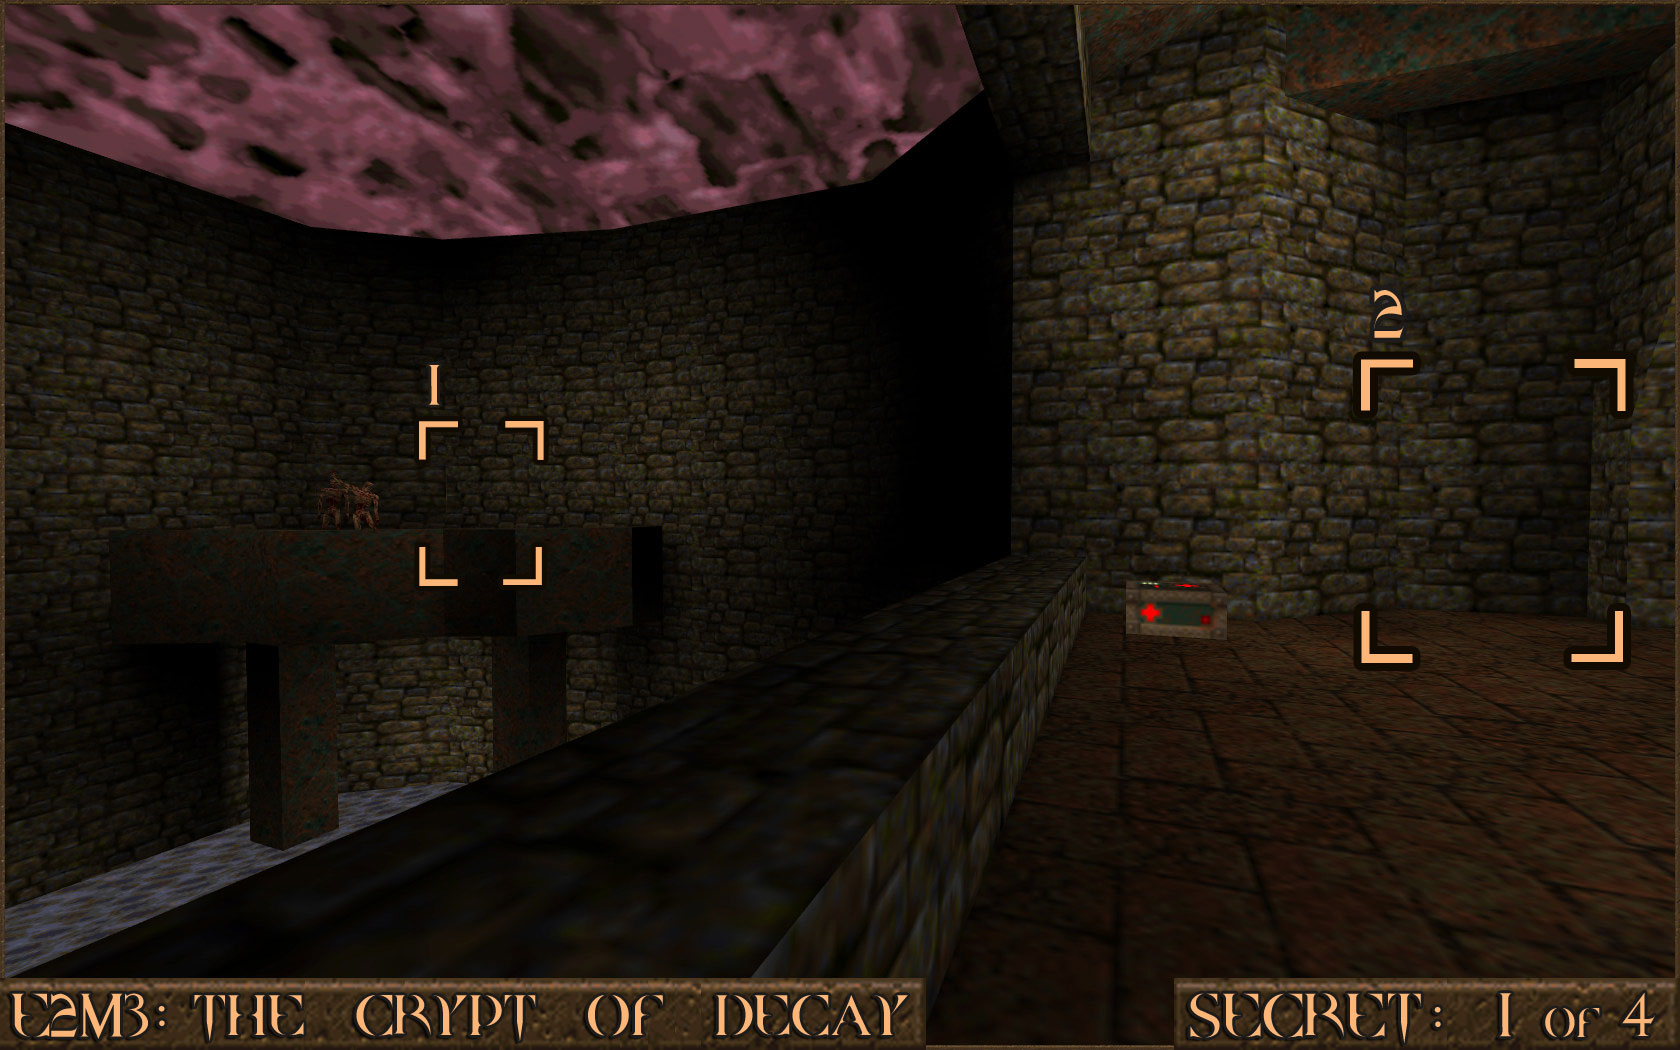 Reward:
 Secret 2 of 4
After discovering Secret 1 jump over the side in to the water. You should see a small hole you can swim through to find this secret.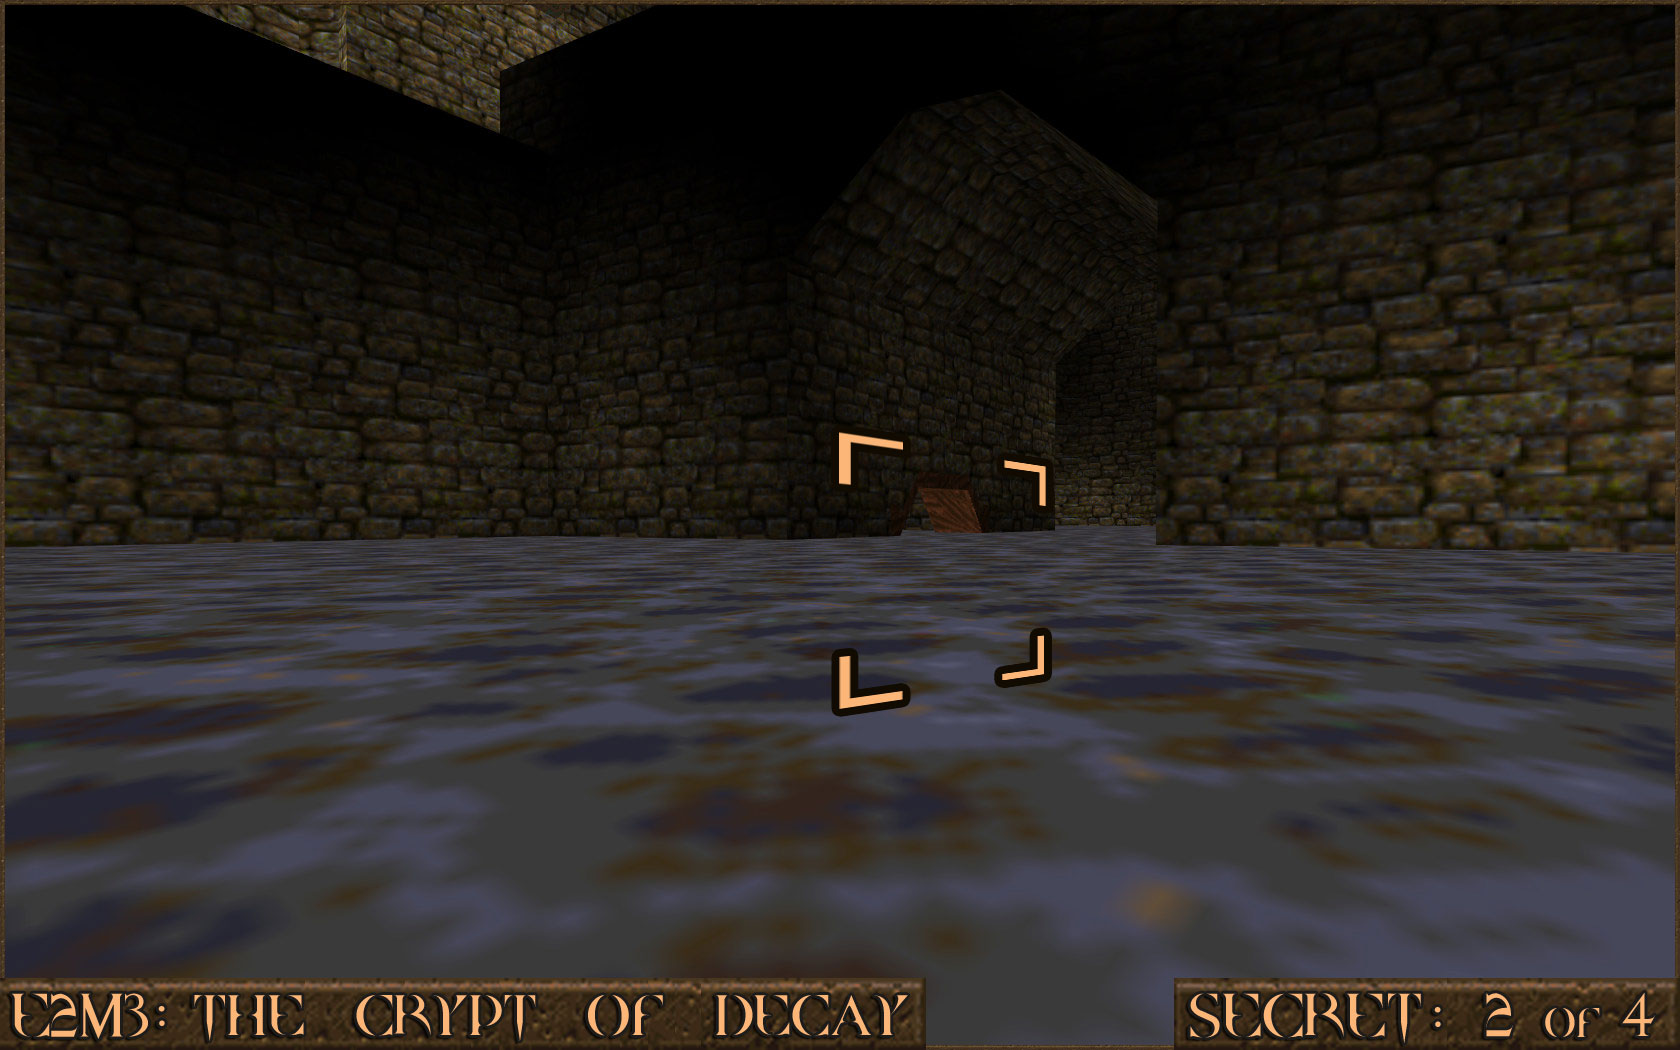 Reward:
 Secret 3 of 4
In the room that contains the Gold Key you will activate some doors when you pick it up. Once you have killed the enemies shoot the wall to the right of where the Gold Key was to reveal a secret area. Take note that there is a barred area under the water that will be accessible later.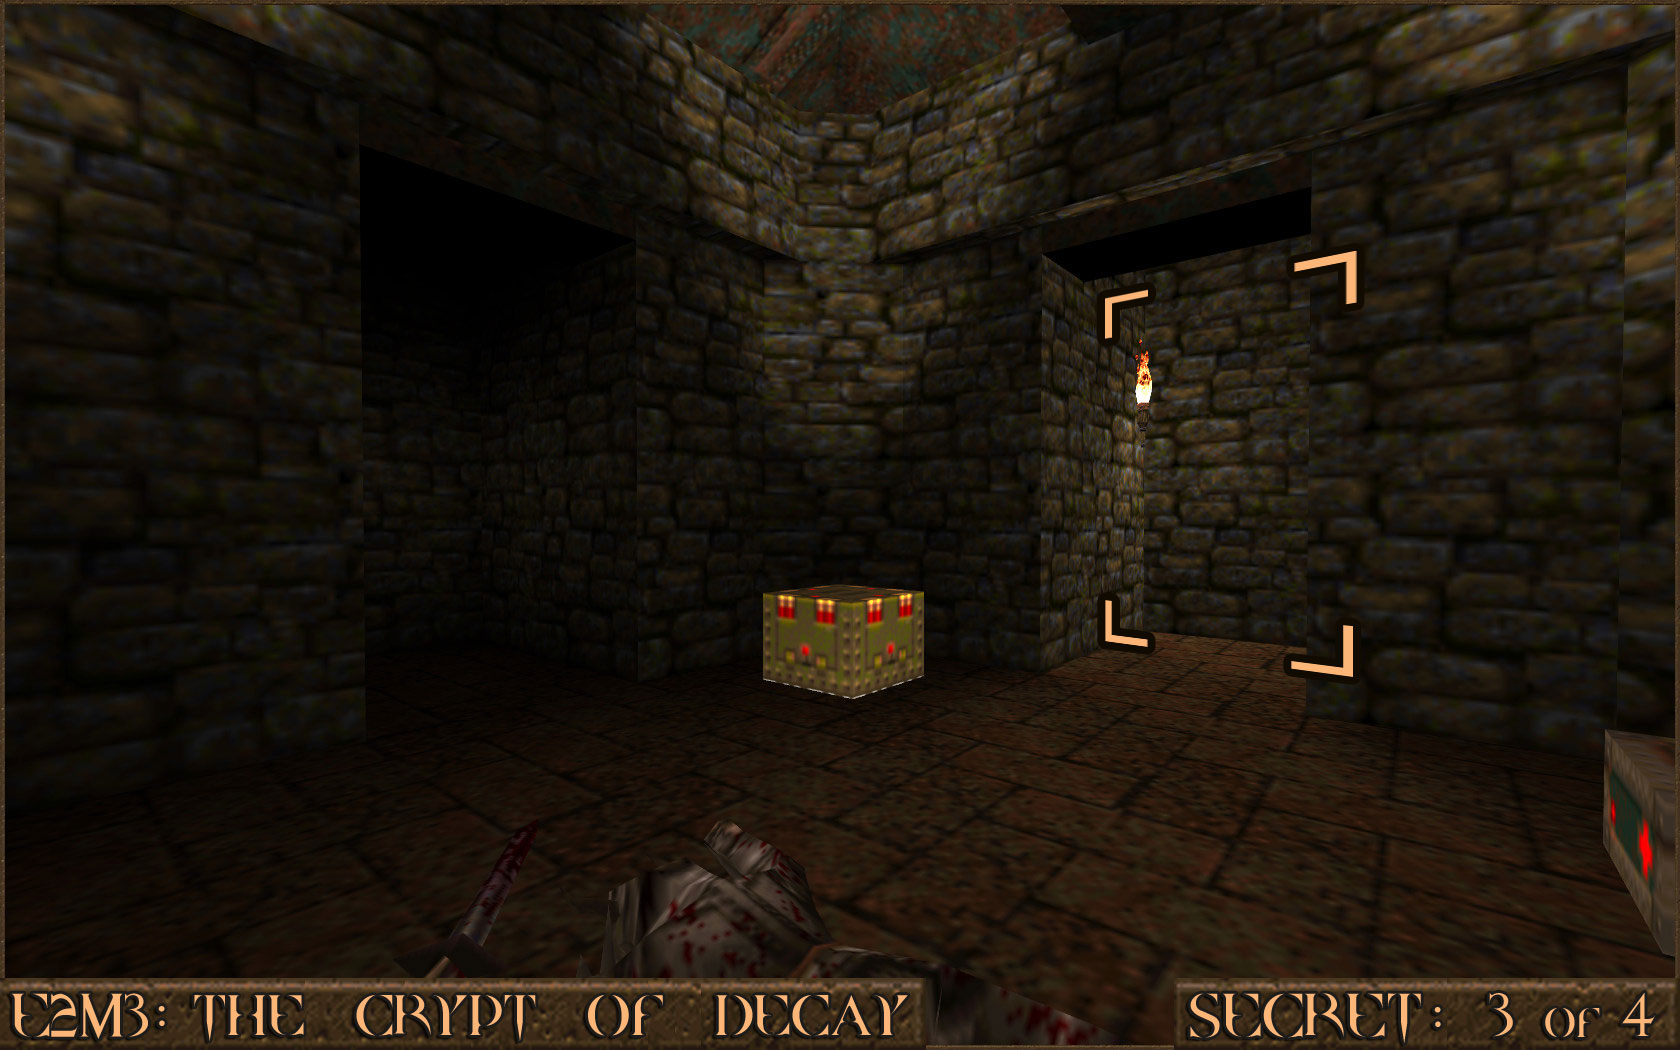 Reward:
 Extra Secret
There is an unmarked secret in this level and it is what the secret message in the level Start: Introduction alludes too. To find it go to the large bridge () near the nail traps that shoot at you. Look to your left to see a very dark hidden alcove. Do a running jump over to the dark alcove () and then you will see a very thin section of wall you can follow around (). At the end of this is a dark hole in the wall () you can jump through to find the "Well of Wishes" which contains the Dopefish. Exiting this area takes you back in to Secret 3.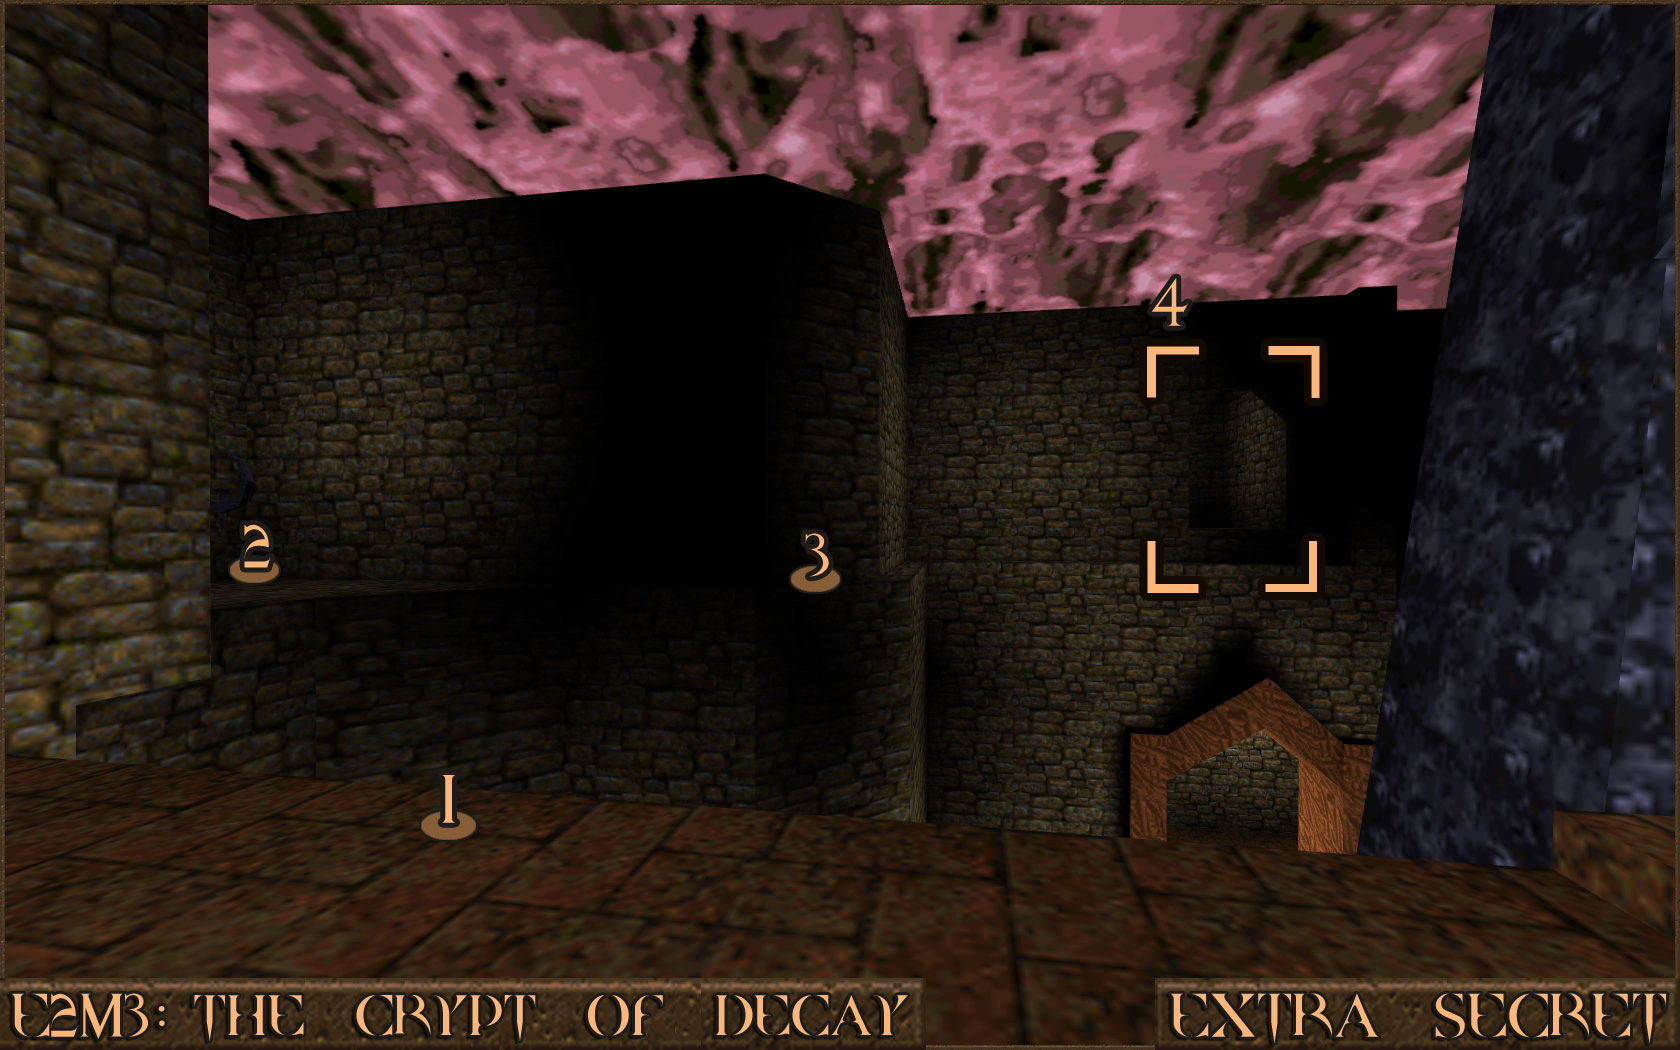 Reward:
 Secret 4 of 4
Near the end of the level you will find a small room with some square blocks stacked up. Look to the ceiling to find a red shootable switch (). This triggers some small steps and hidden wall between the square blocks. Press the push-switch that you find in this small area.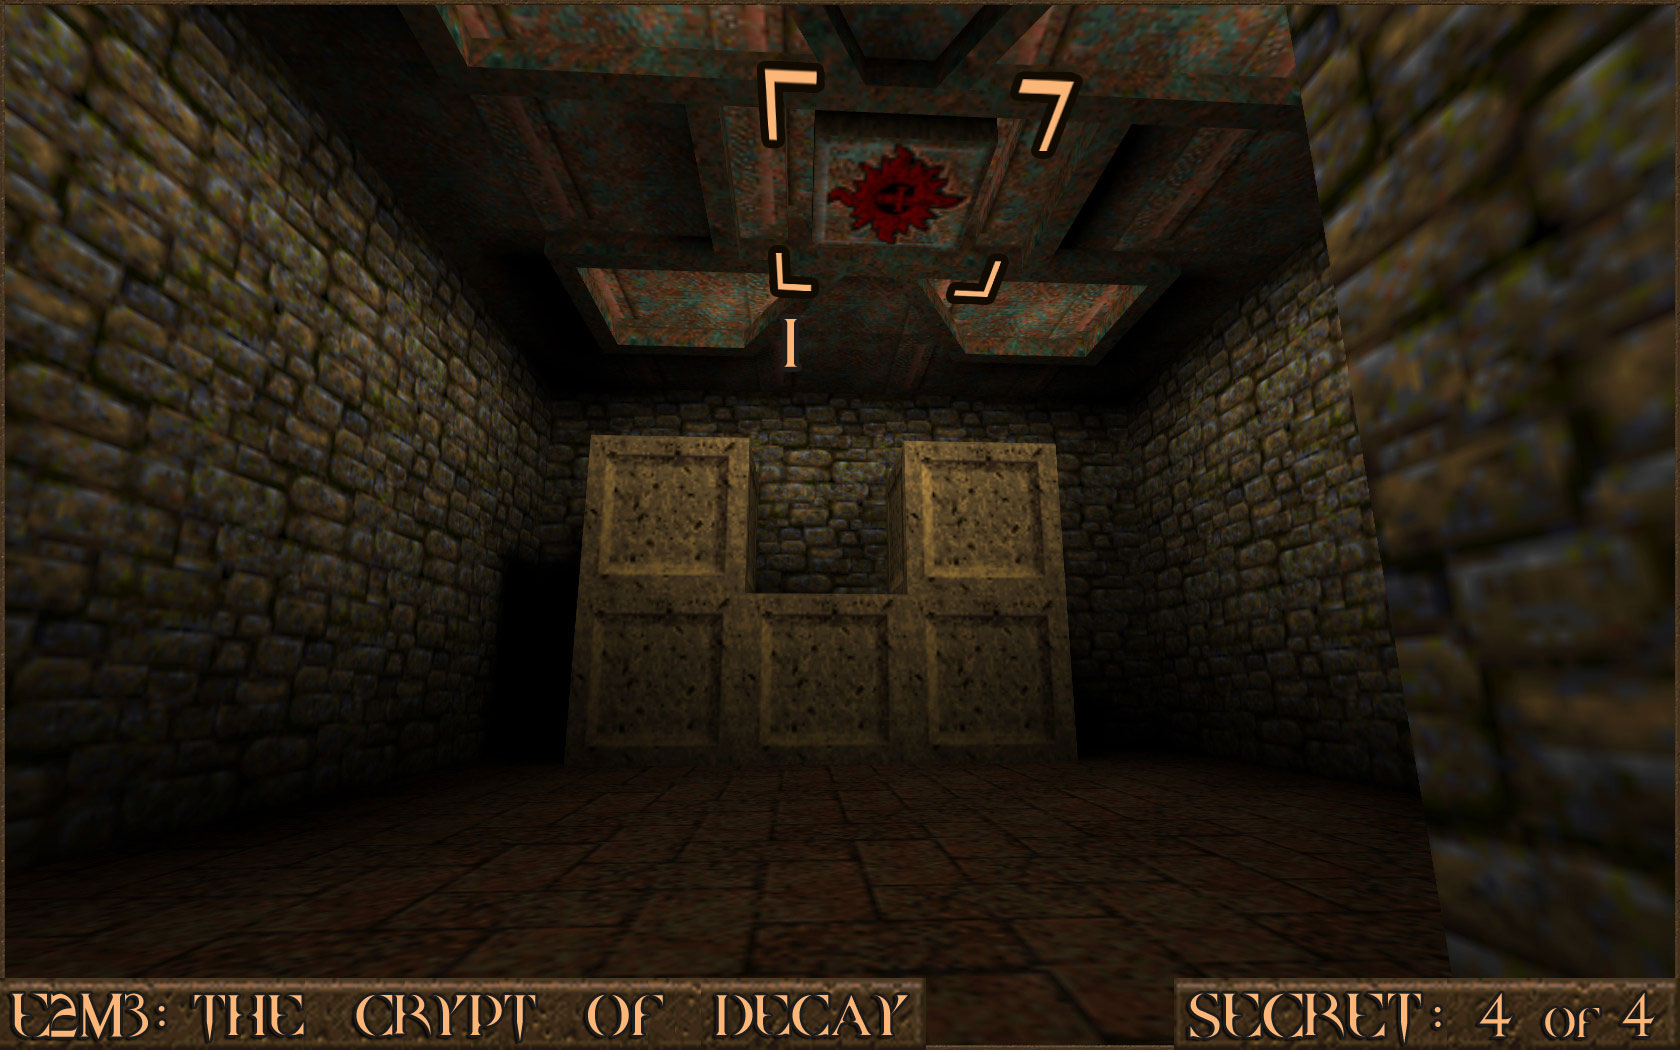 Triggering the push-switch will lower the barrier () found underwater in Secret 3. Head back there to gain access to the secret level for this episode: E2M7: The Underearth.
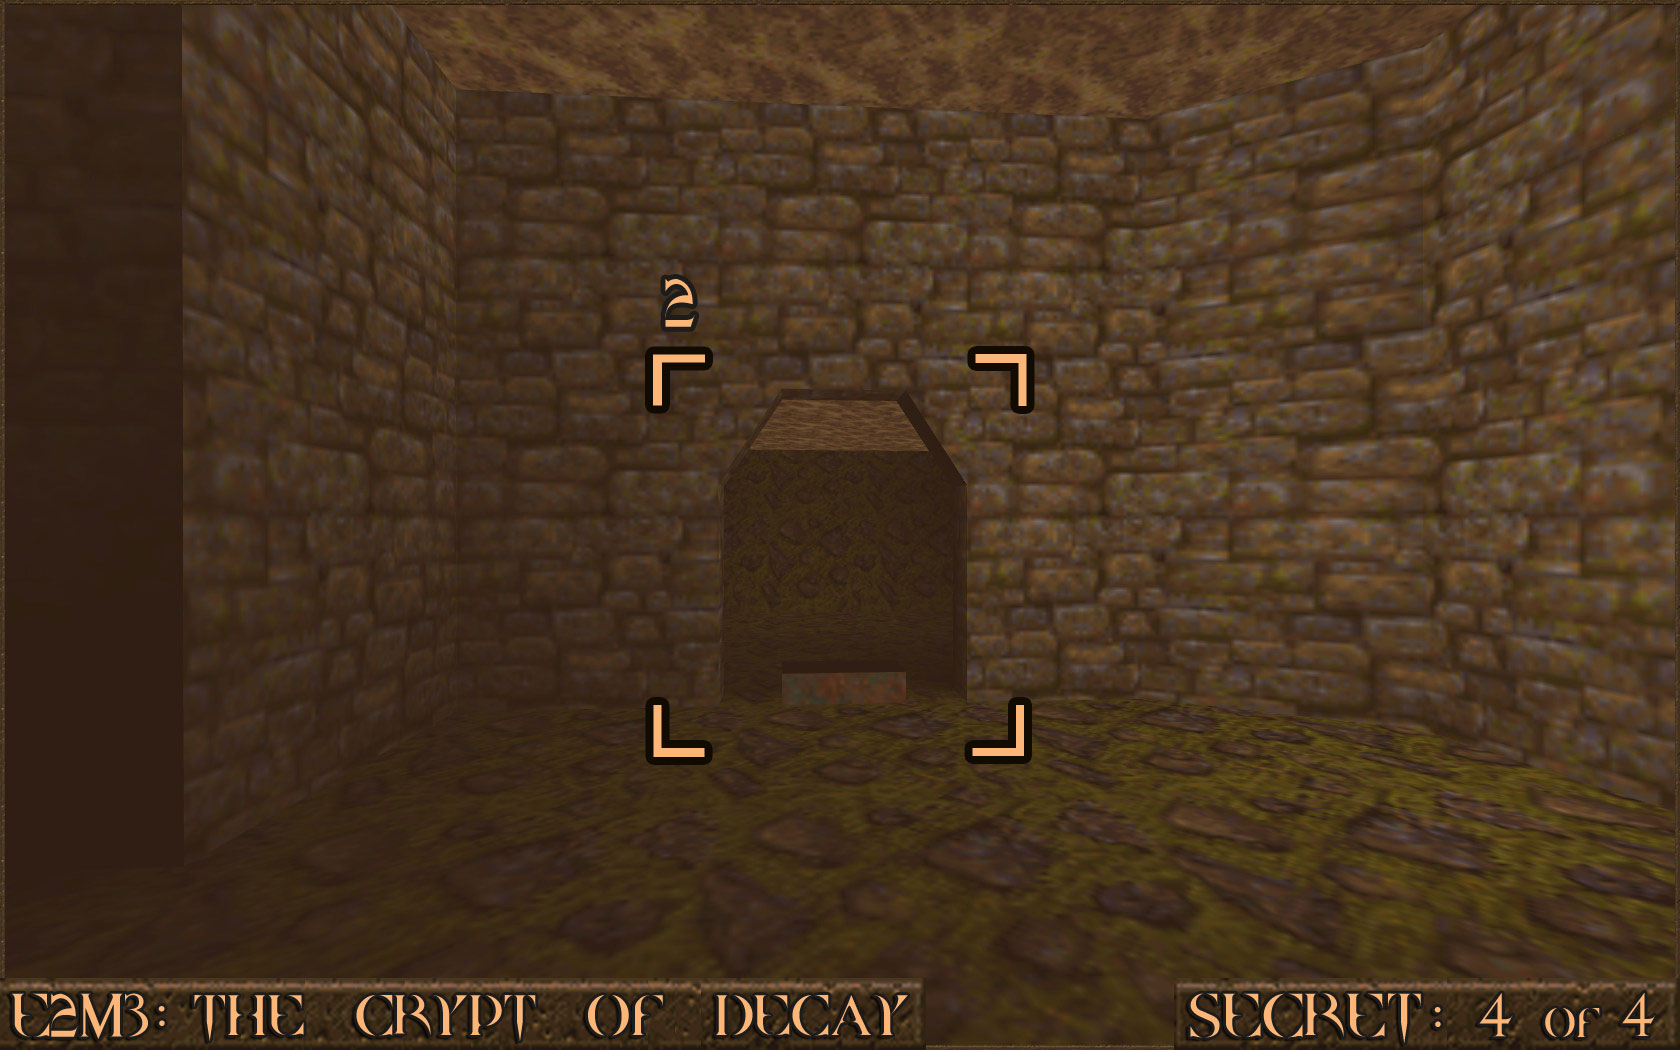 Reward: SECRET LEVEL
E2M7: The Underearth [Secret Level]
Secret 1 of 2
Next to the Golden Key Door you will see a Quad Damage blocked by a vertical bar. There is a push-switch () that looks like a brick just to the right of this that lowers the bar () and activates the secret.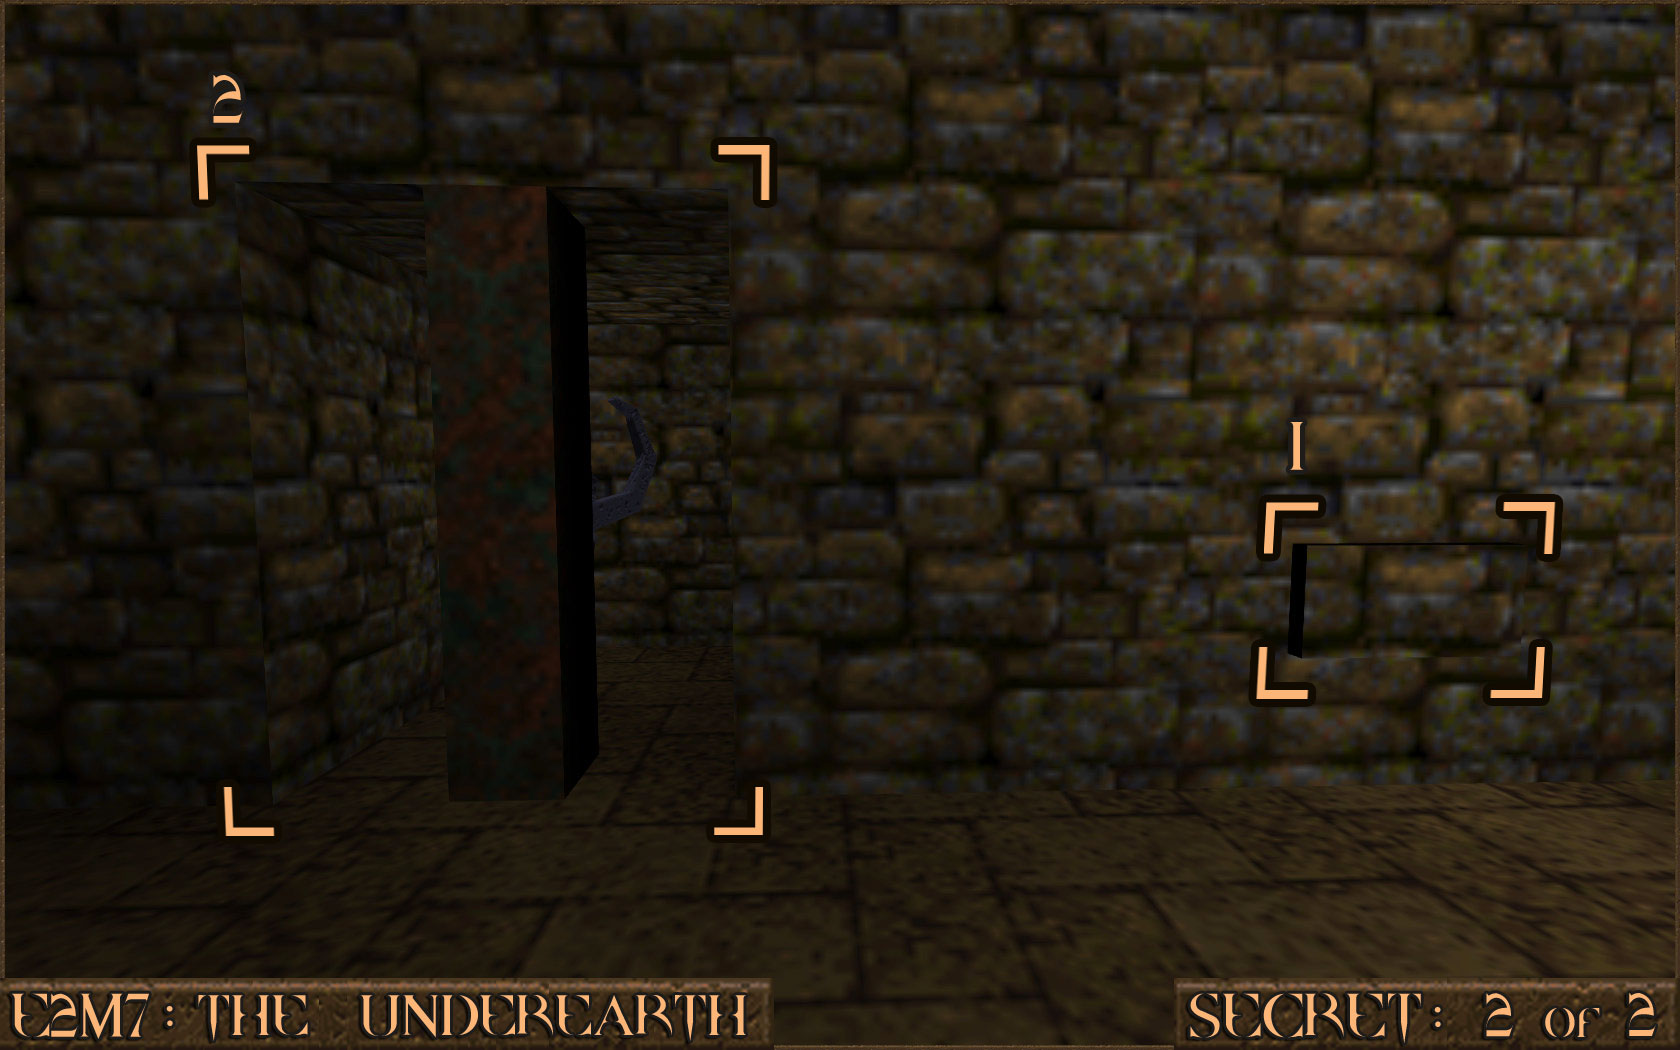 Reward:
 Secret 2 of 2
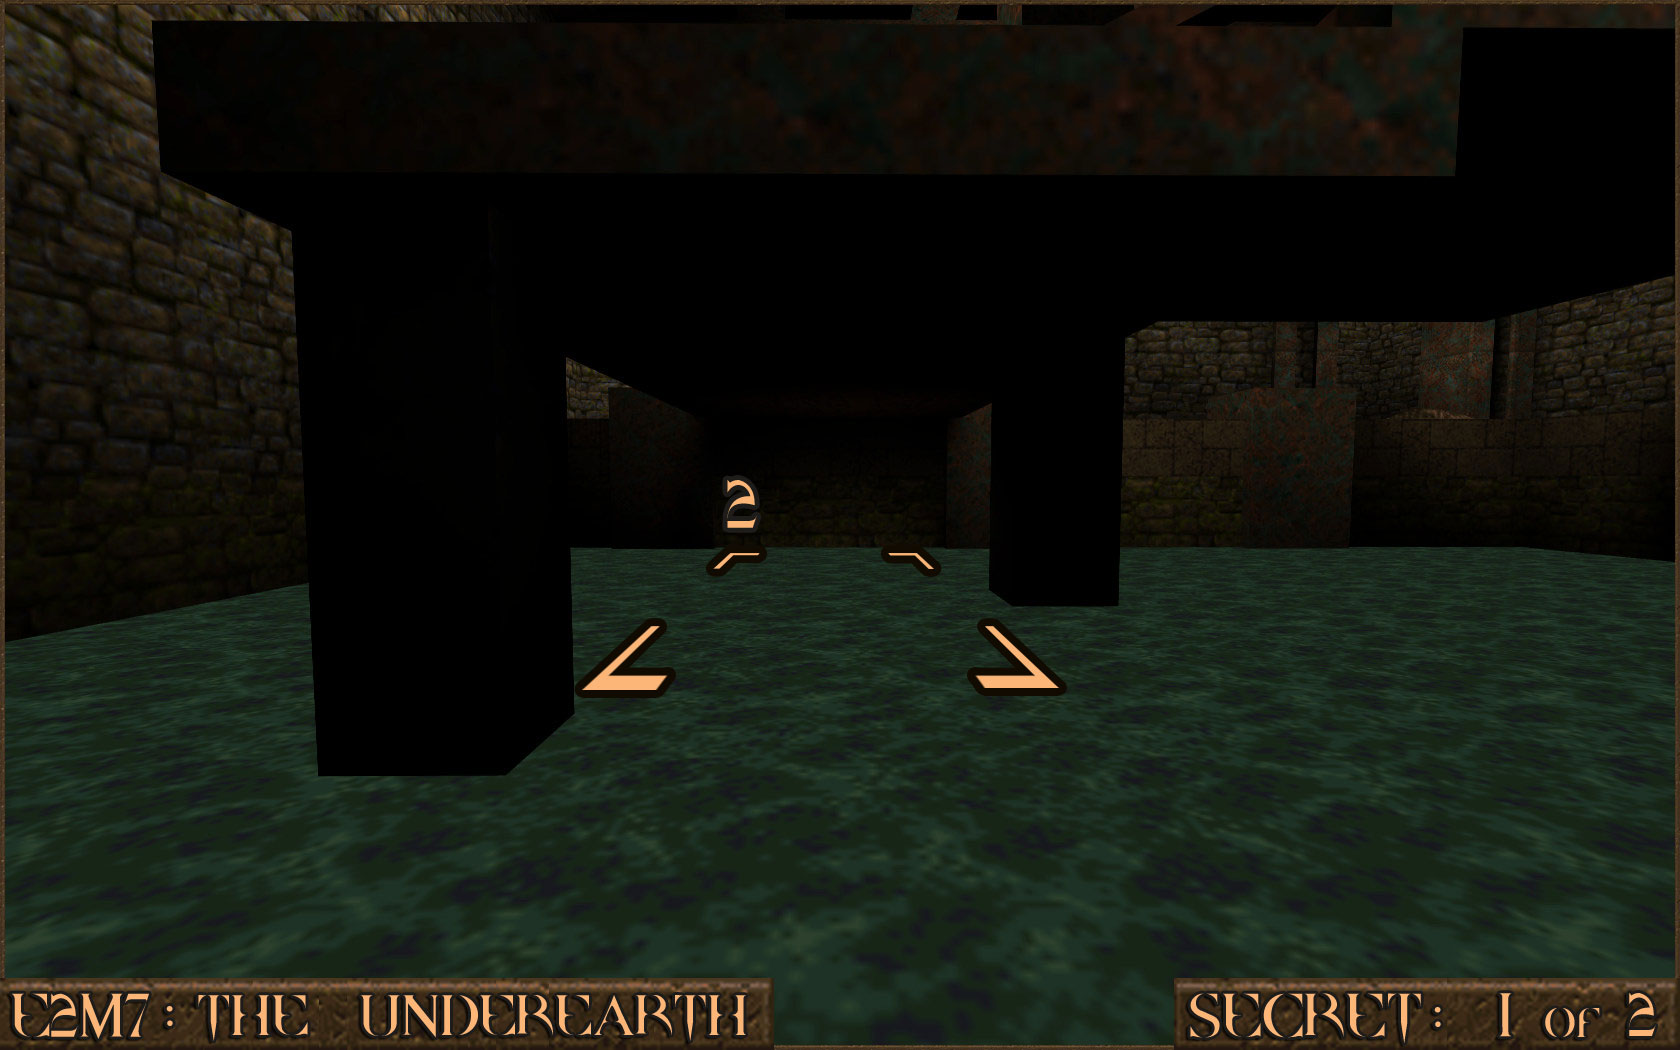
After going through the Golden Key Door you will come in to a room consisting of a winding platform over some green slime. Look below the platform to see a small entrance () next to a push-switch you will use later. Go inside the small cave and pick up some Large Nails and a Biosuit which will help you find the actual secret.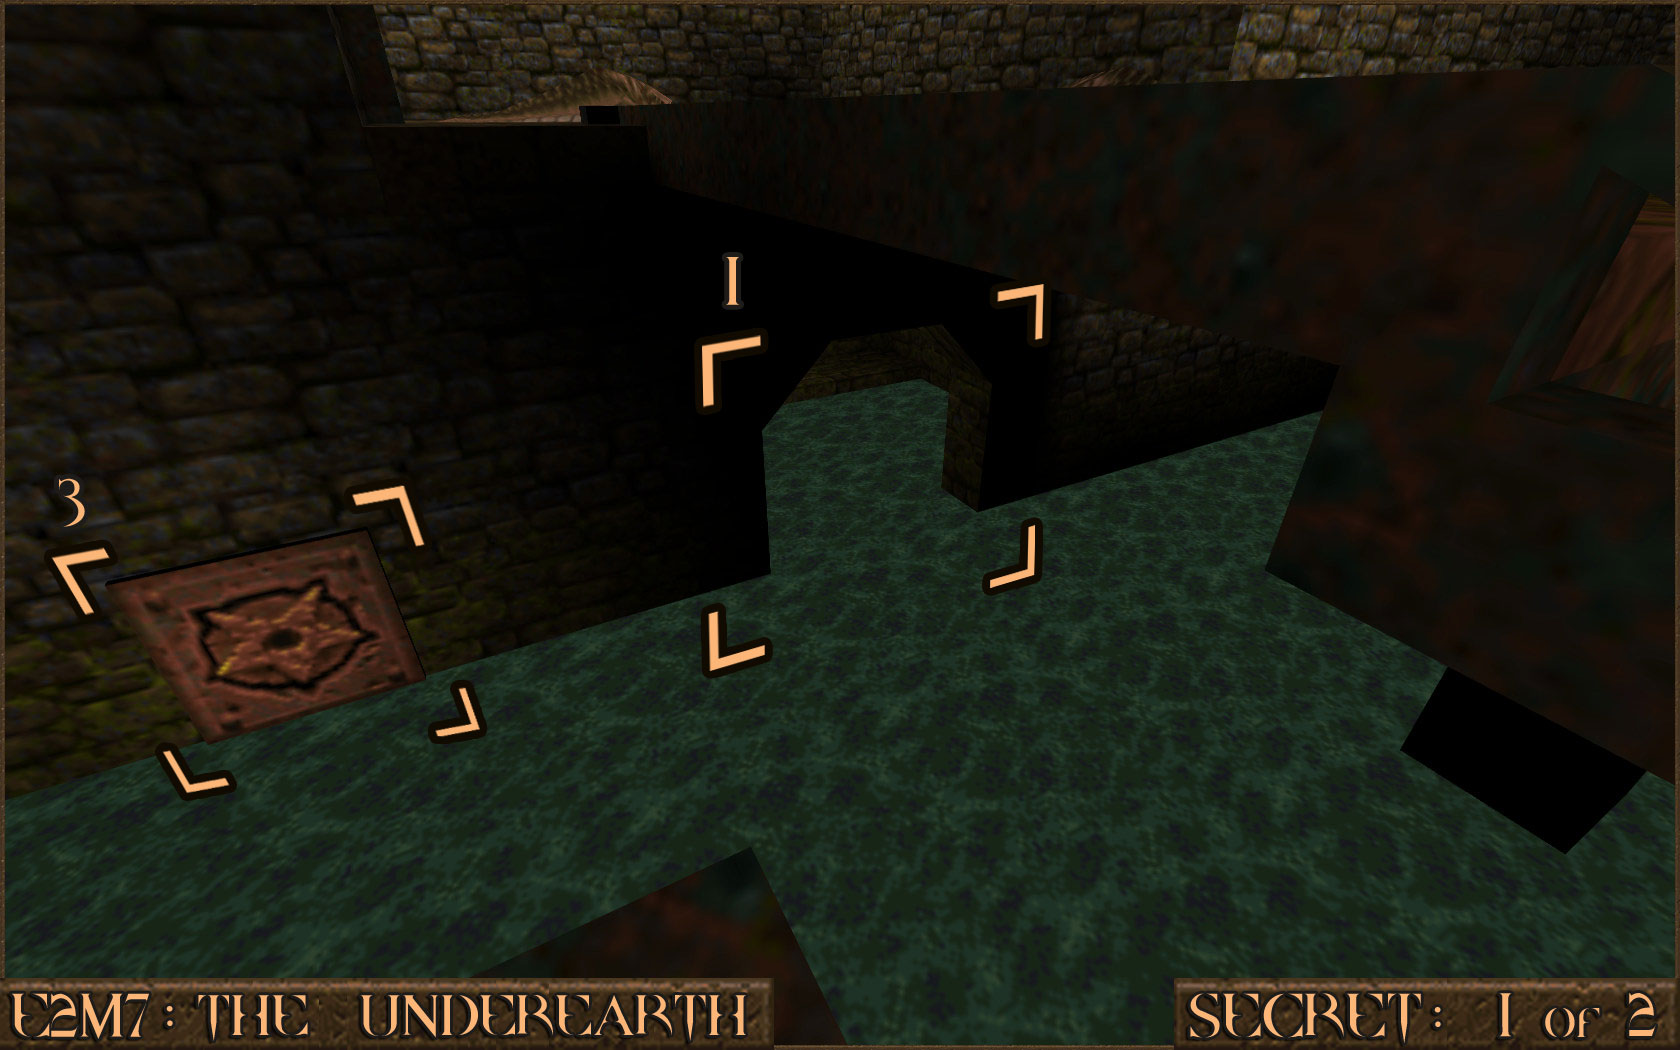 Go back in to the green slime room and on the other side under the platform is a section of the green slime that is deep enough to swim down in to (). Follow it down to find a small tunnel that contains the secret. To exit head back out and press the push-switch () you saw earlier to reveal some stairs.
 Reward:
 Extra Secret
There is an unmarked secret on this level. There are a total of seven gargoyle faces () scattered throughout the level. They are all in plain sight throughout the level so just shoot them all when you see them.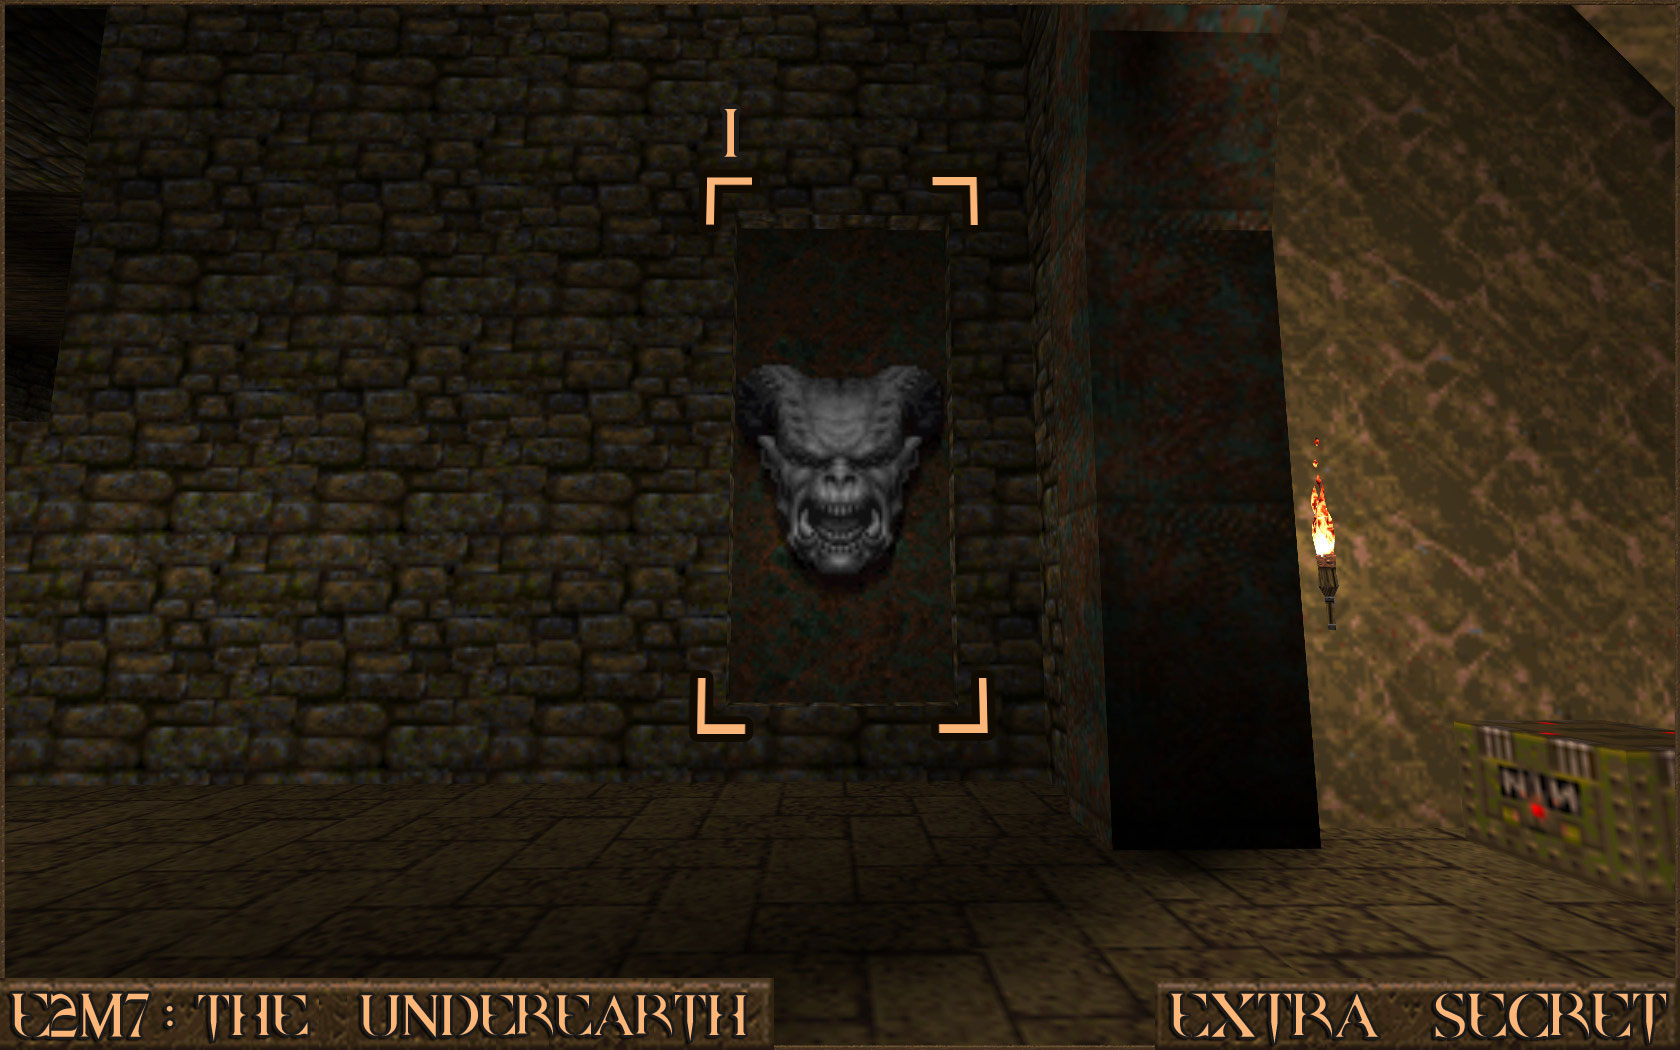 Once all of them have been shot there is a secret wall () in a dark recess that can now be shot to reveal a secret room.
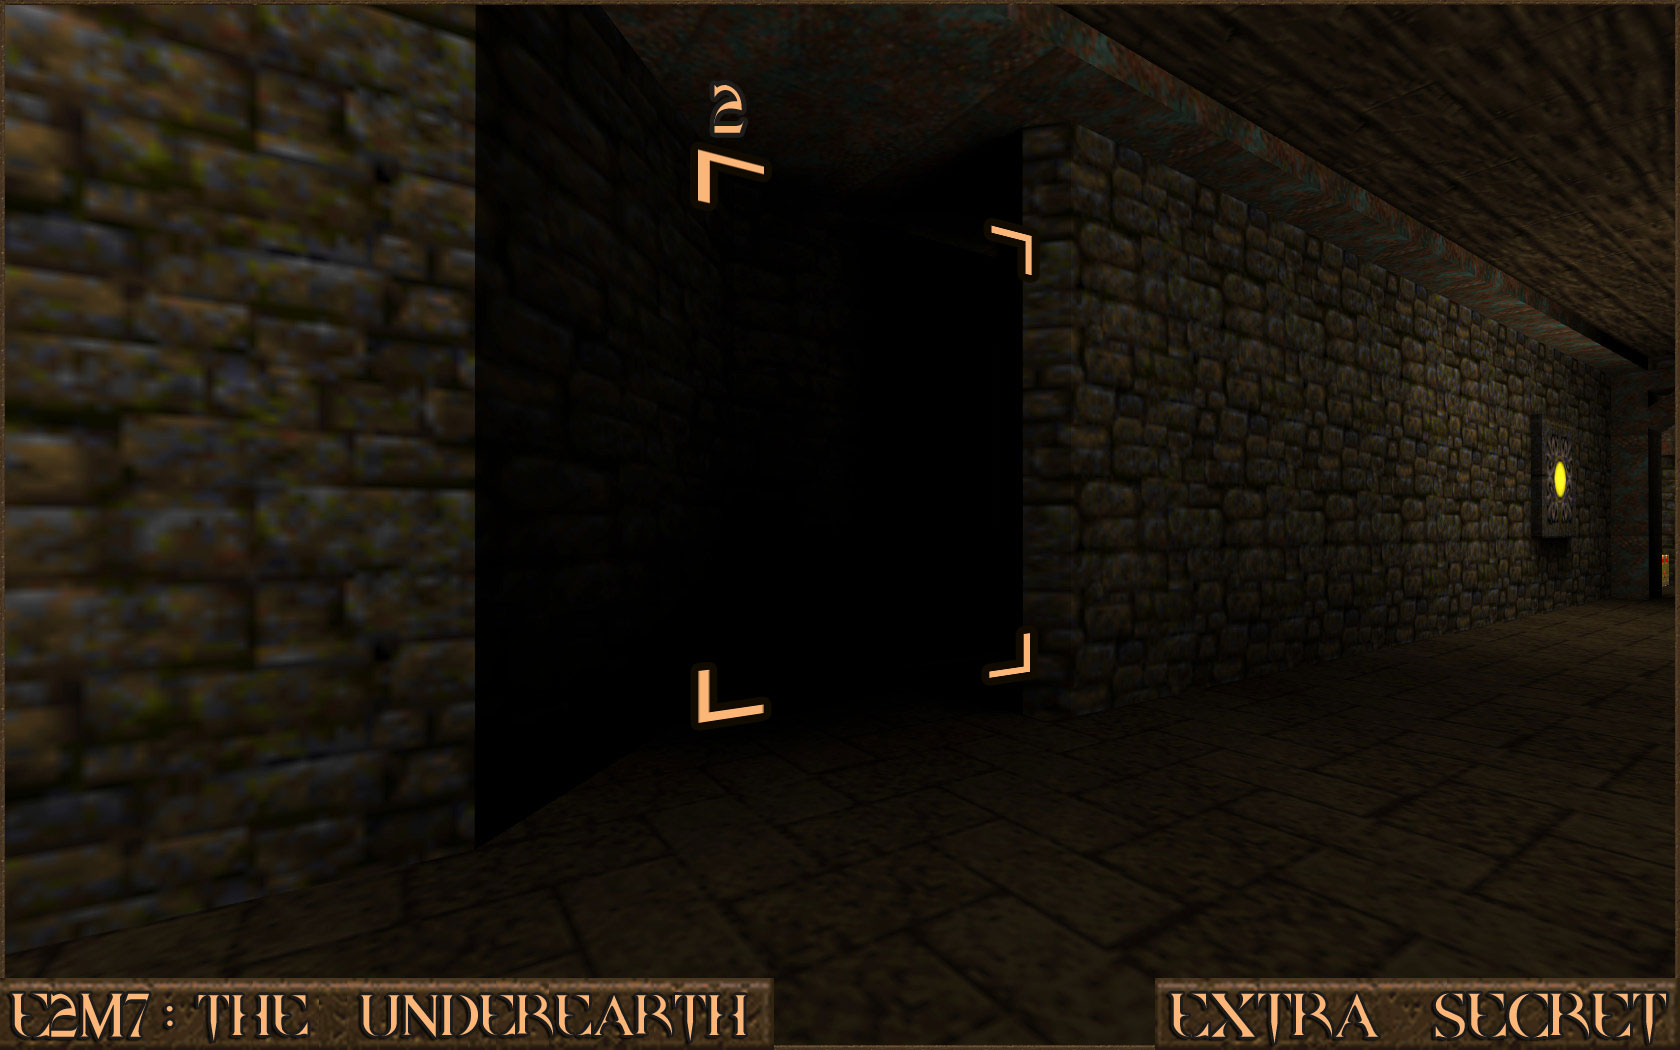 Reward: NONE
E2M4: The Ebon Fortress
Secret 1 of 4
In the water area outside the fortress battlements there is a corner that is deep enough to dive down in to. Swim down to find the secret underwater cave.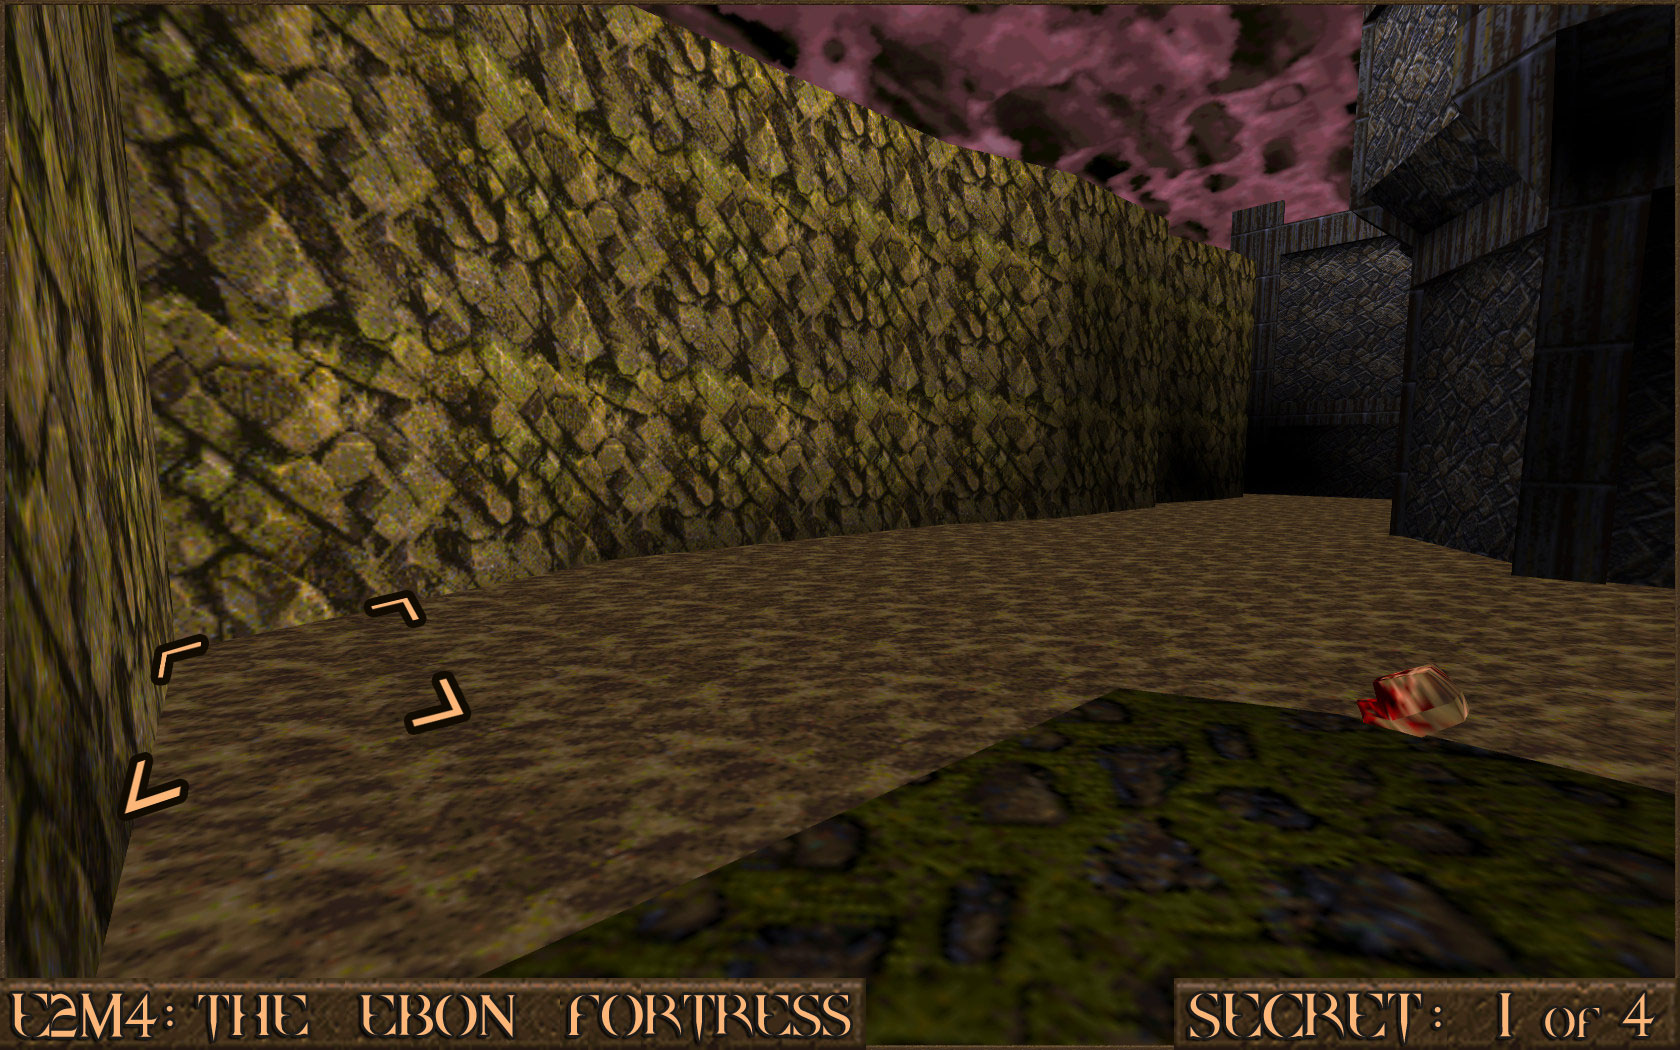 Reward:
 Secret 2 of 4
After you have crossed over the battlements you will go down some stairs. Turn around to see a small blue wall under the steps. Shoot the wall to reveal a secret area.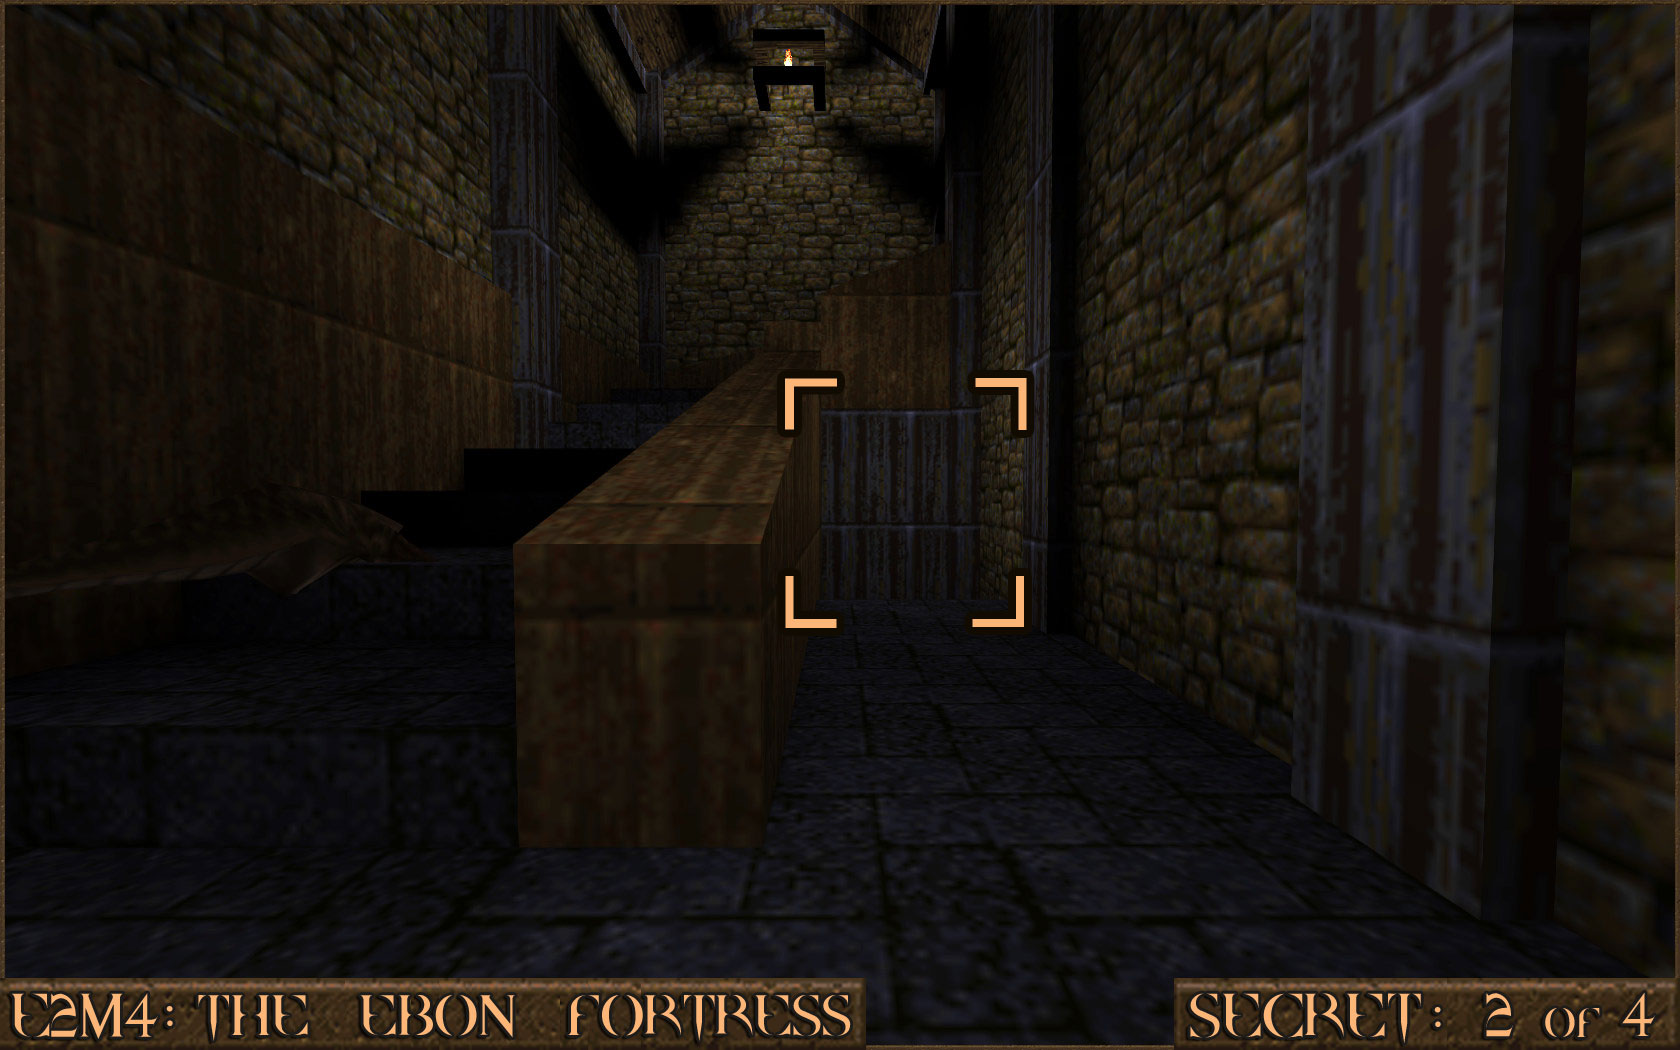 Reward:
 Secret 3 of 4
In the same room where you found Secret 2 ascend some nearby stairs. Look over to the brick wall opposite you as you go up the stairs to see a wooden panel. Shoot it to reveal this secret.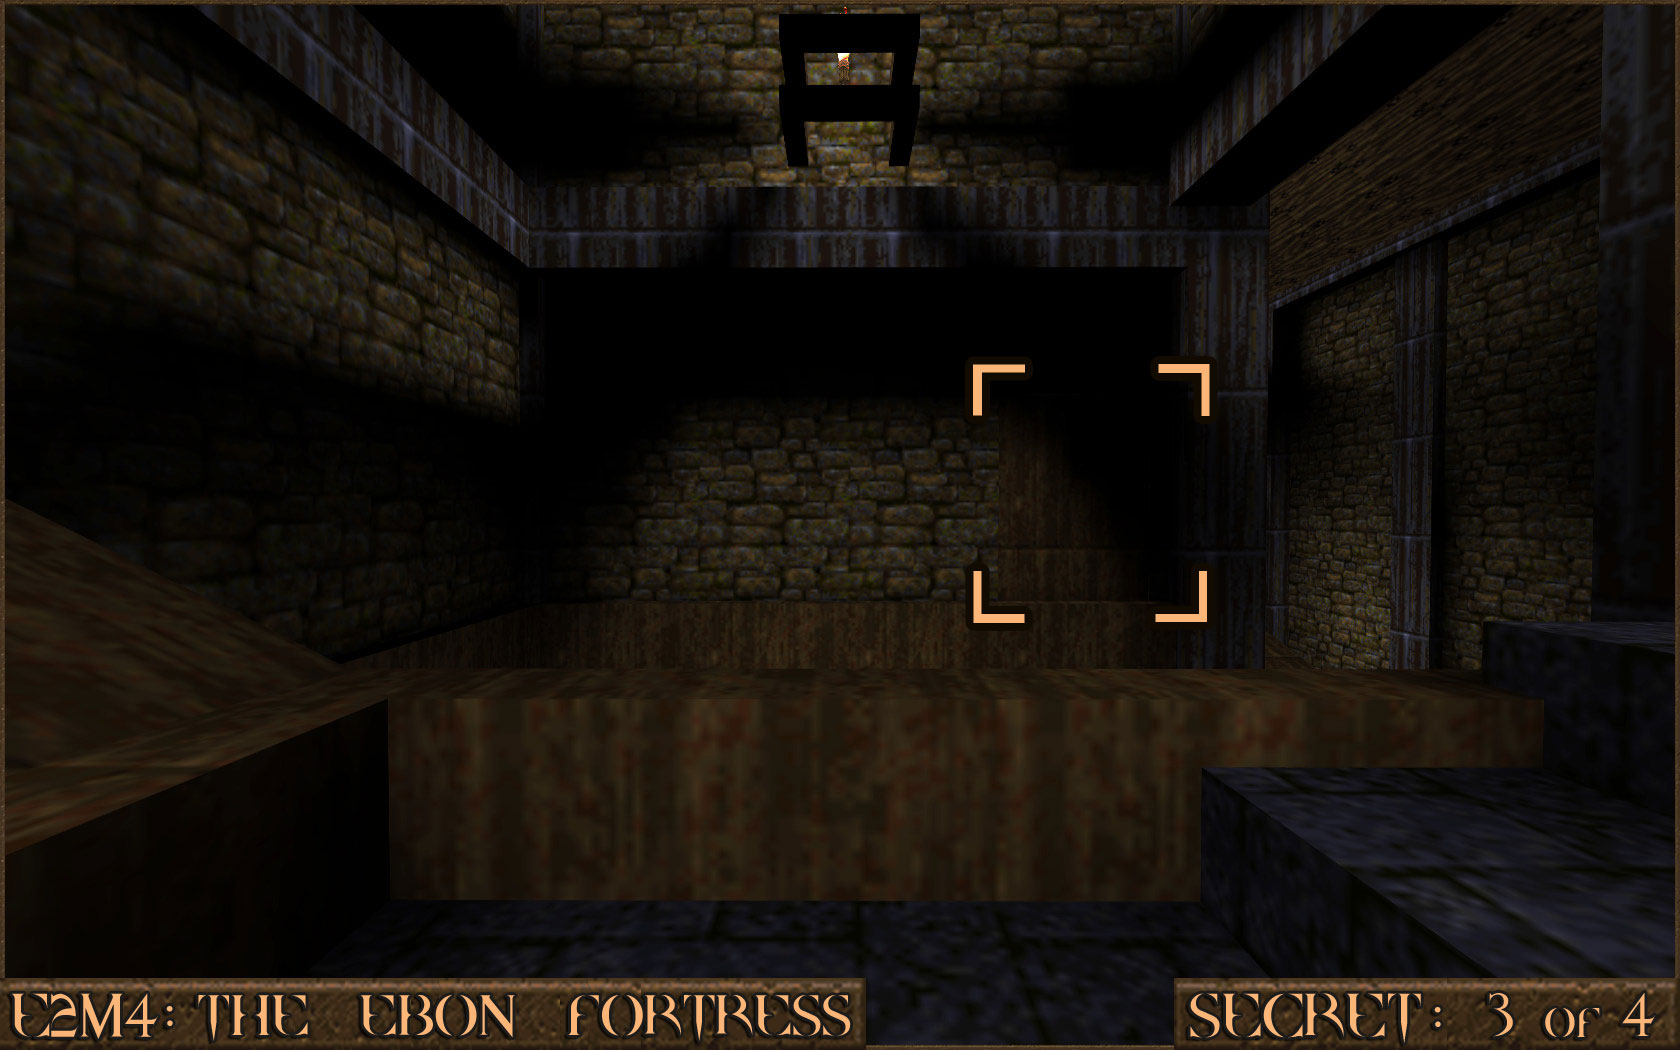 Reward:
 Secret 4 of 4
In the room where you can obtain the Silver Key look for a small patch of slime down the side of the room. It leads to a small opening that contains a secret.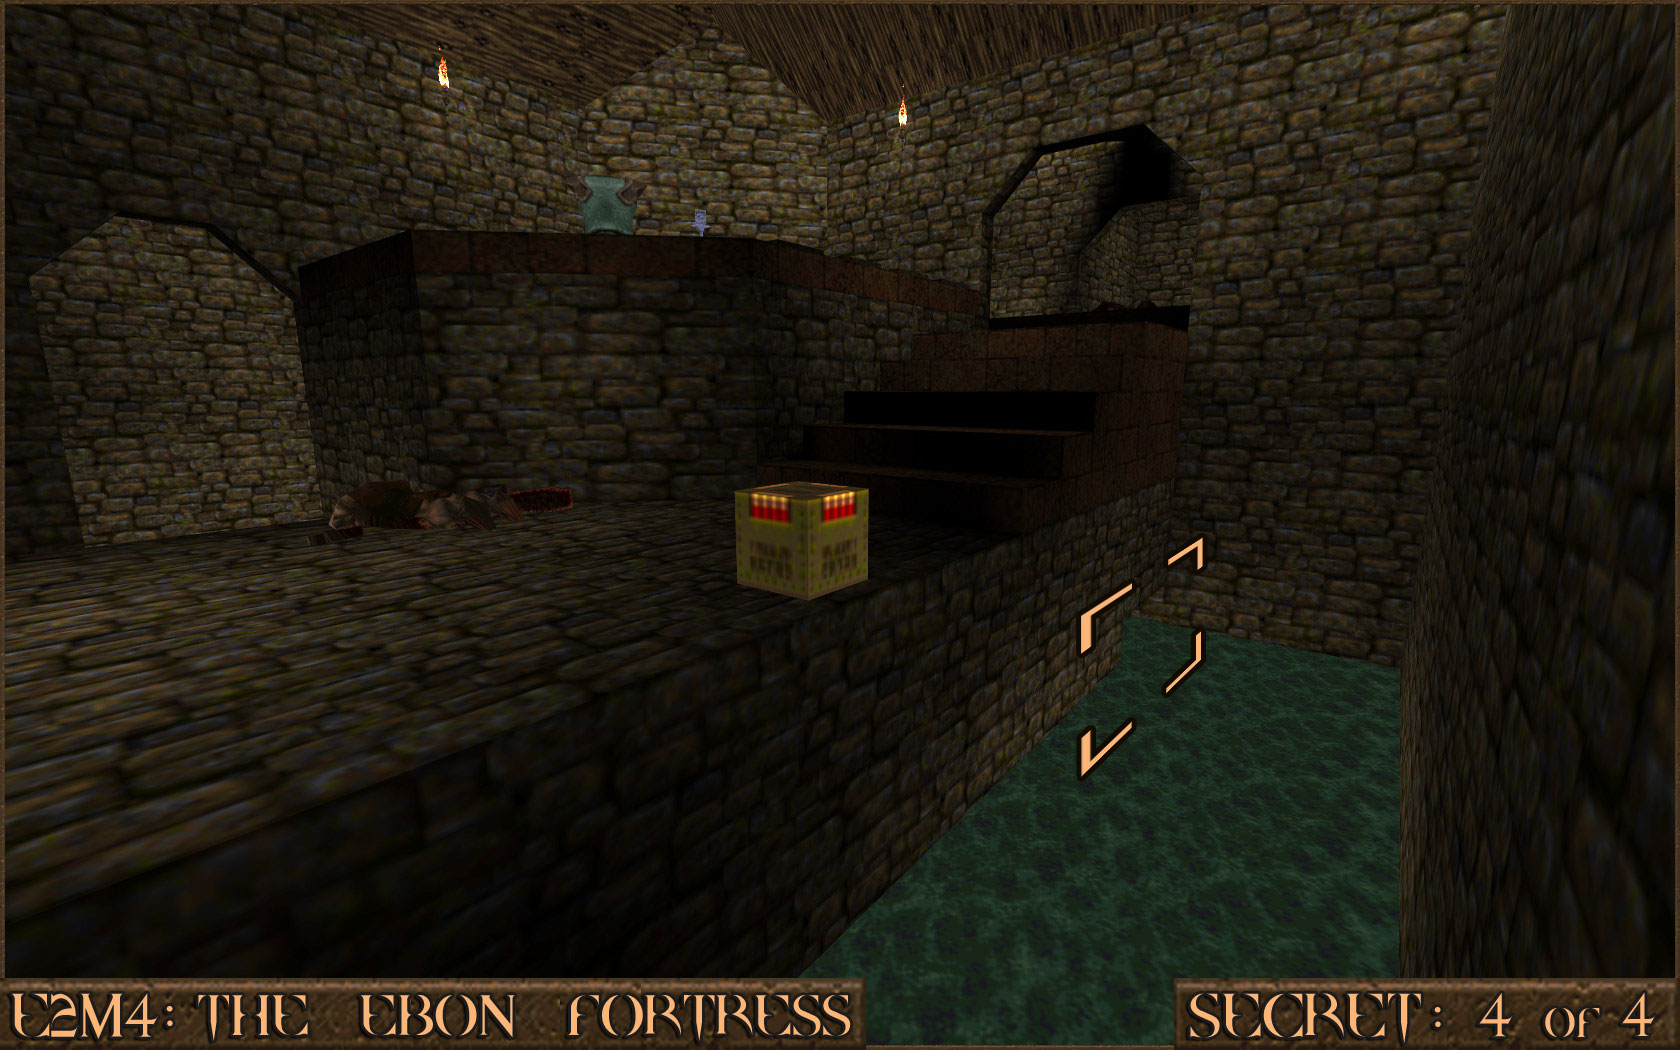 Reward:
 Extra Secret
Near the Silver Key Door you will see an area barred by blue barriers. If you make a running jump over to the barriers () you are greeted with the message "I don't think so..." but by doing so you will have revealed a secret switch elsewhere. 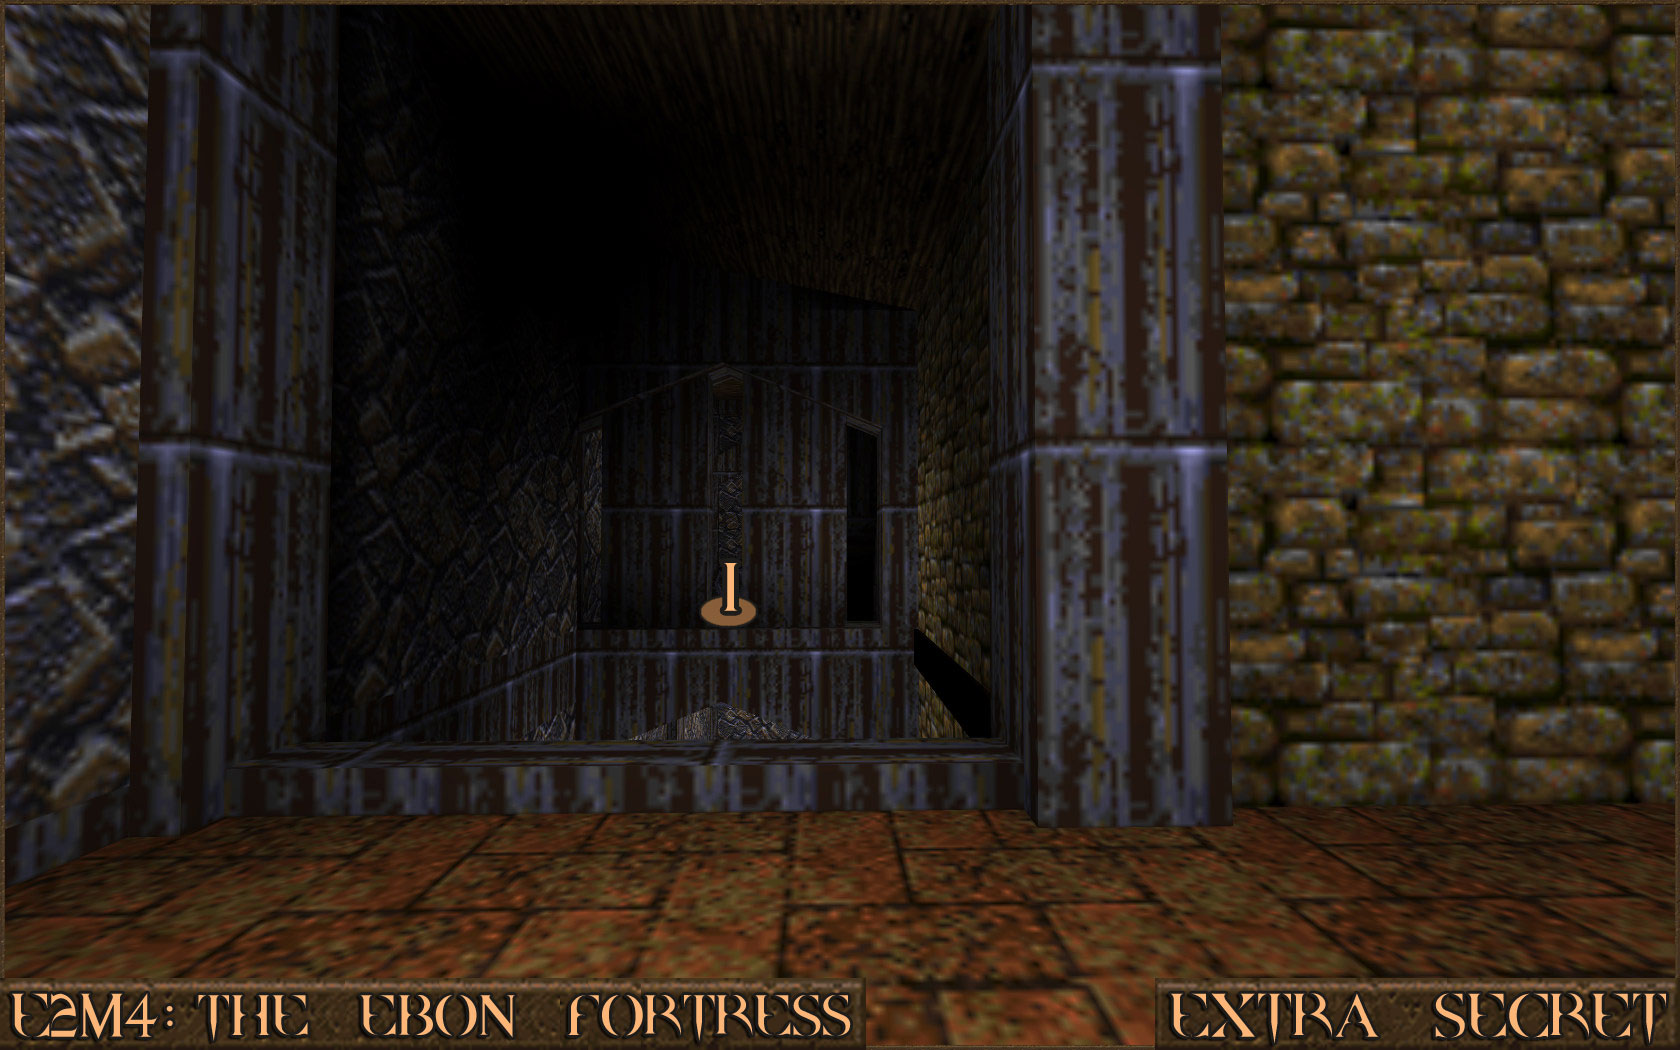 Head back to the Silver Key Door and face it, then turn around and look out the nearby balcony to see a shootable red switch (). Shoot it to remove the blue barriers and head back over there to claim the items.
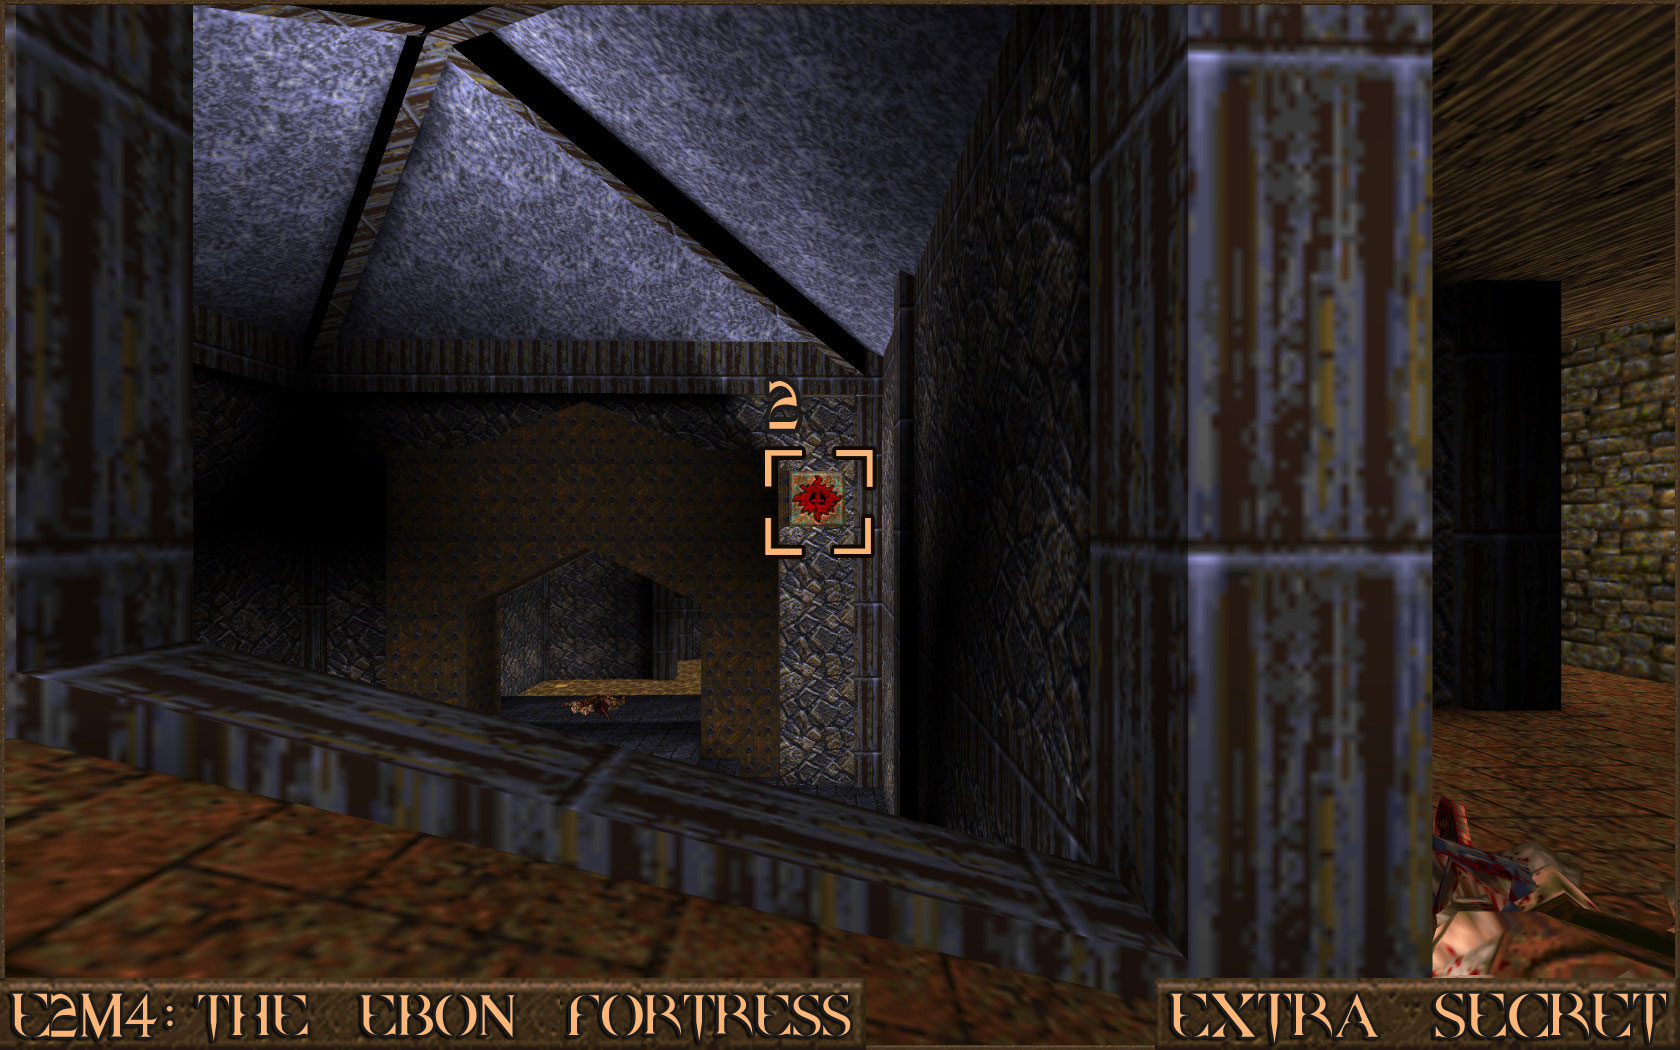 Reward:
 E2M5: The Wizard's Manse
Secret 1 of 2
Near the very start of the level you will come across a long bridge over some water. Jump down in to the water and look for a circular tower in the middle of the area. There is an opening on one side of the tower that contains an elevator to the secret.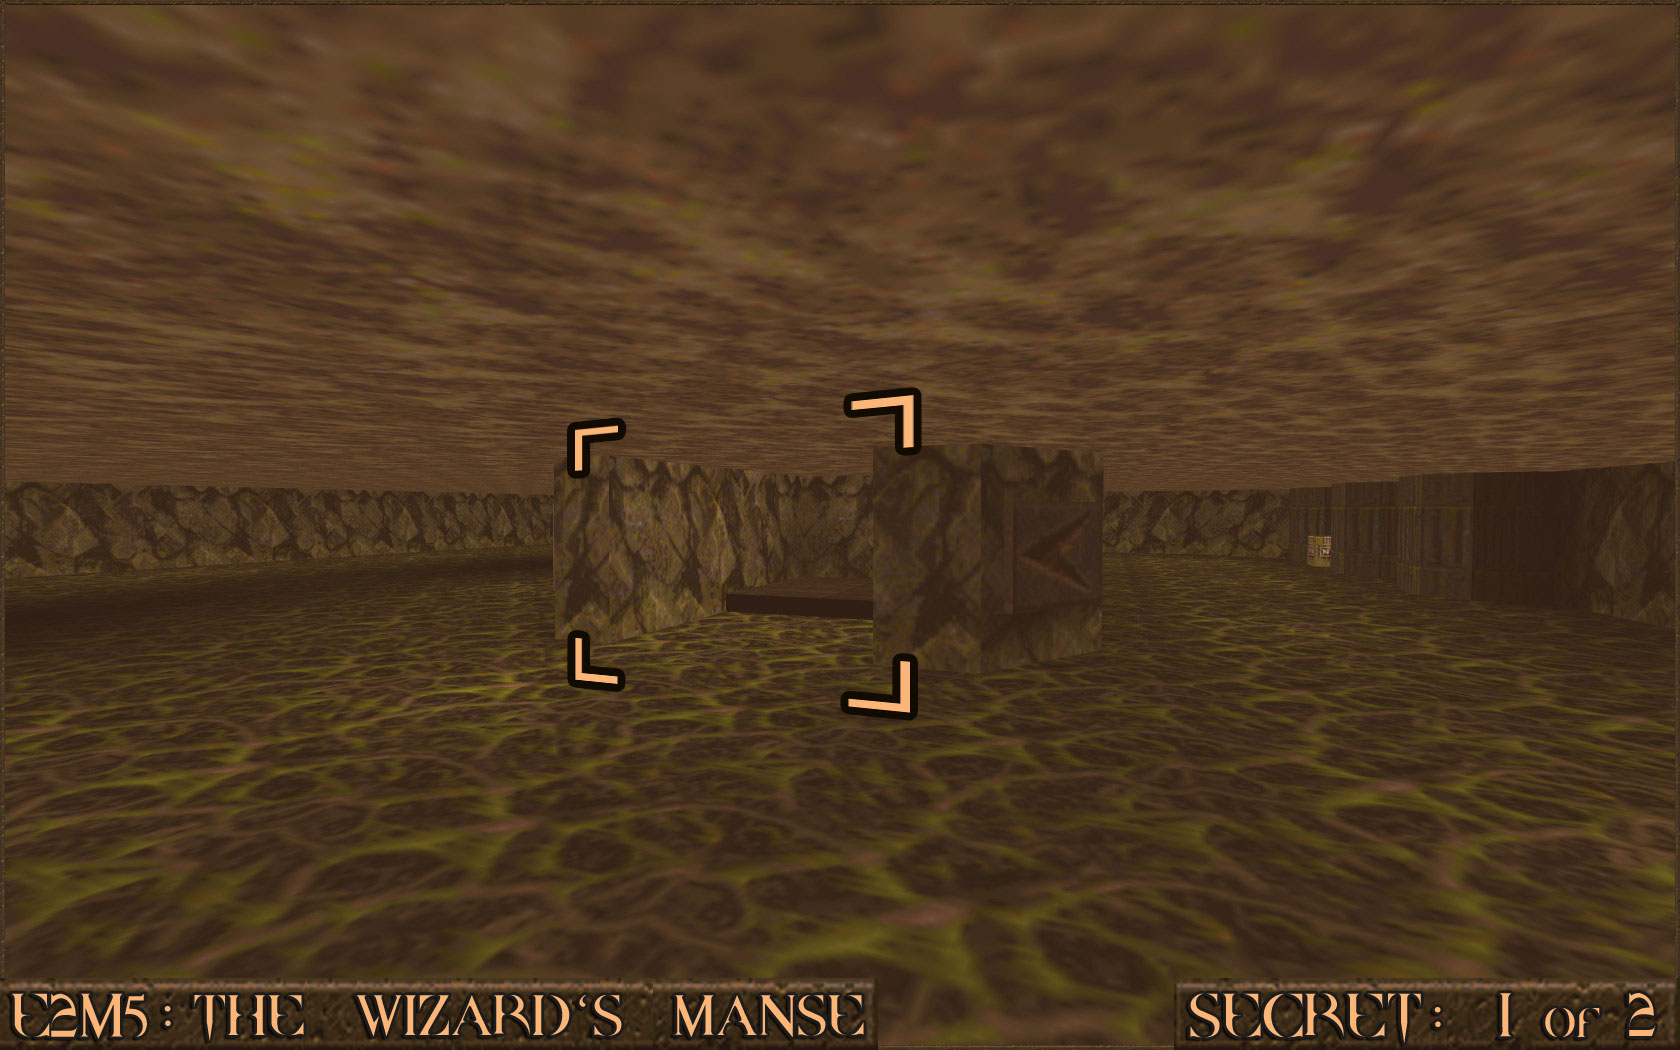 Reward:
 Secret 2 of 2
Just before you pick up the Golden Key take a close look at one of the nearby walls. A section of it is missing the metal decoration the other parts of the wall have. Shoot this wall to reveal a secret area.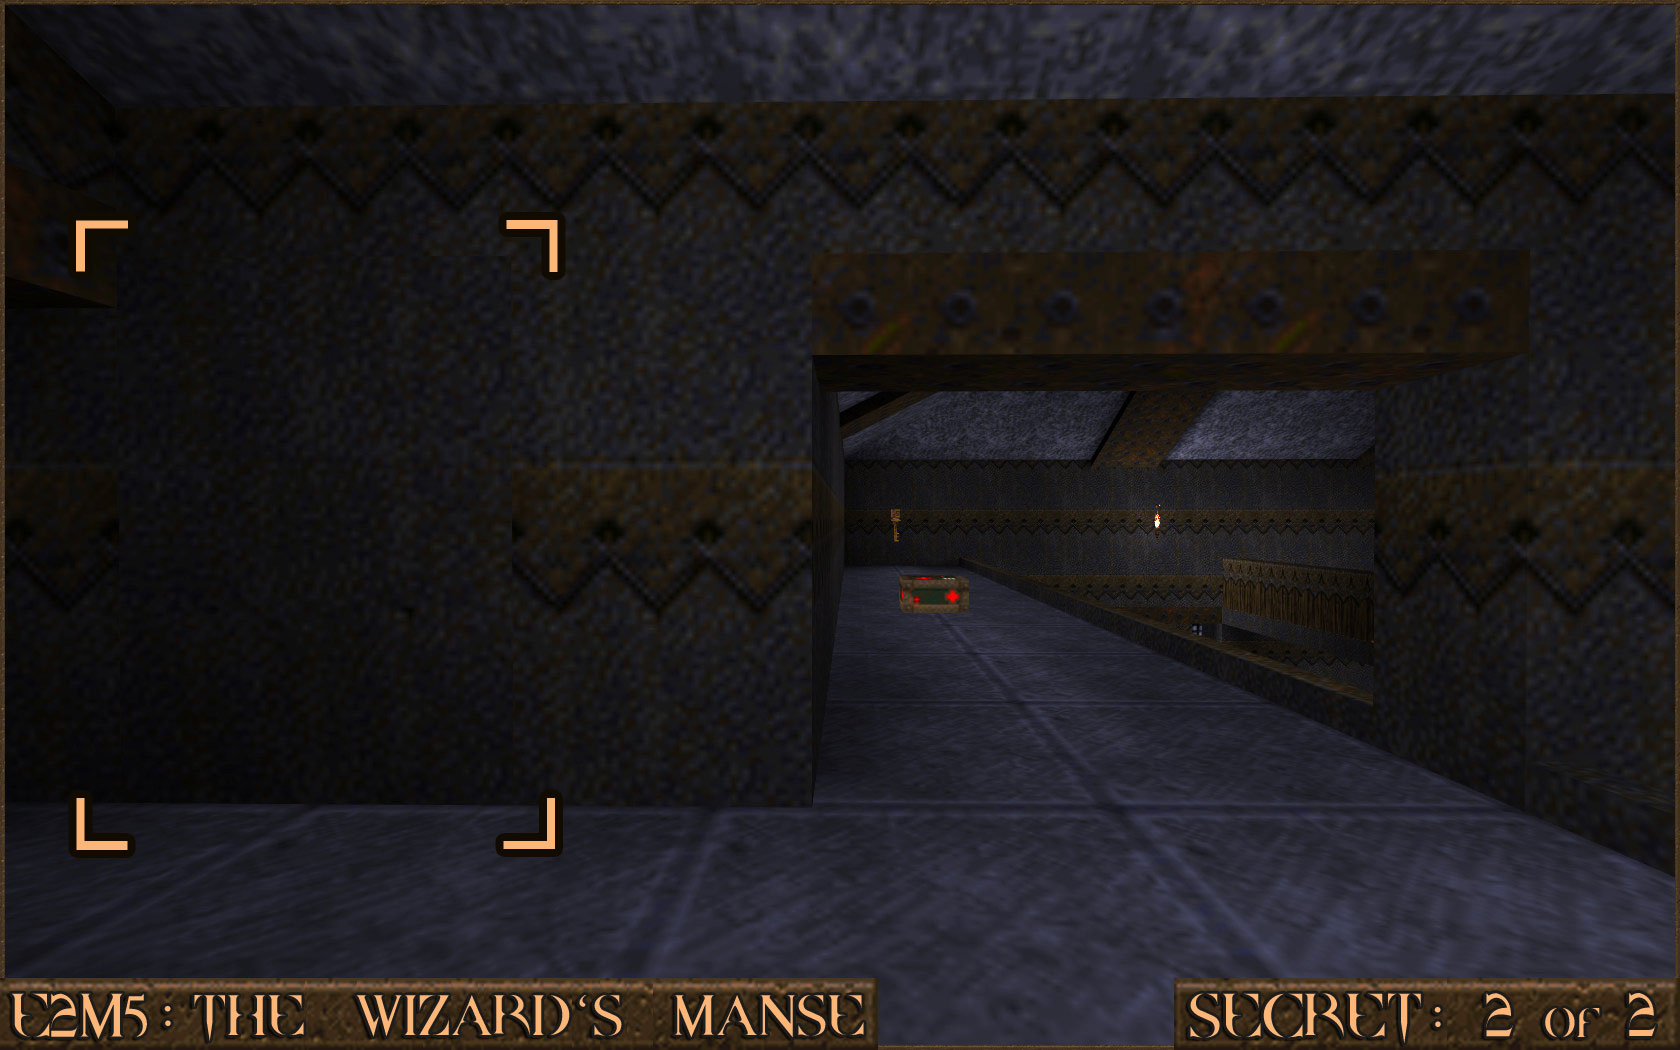 Reward:
 E2M6: The Dismal Oubliette
NOTE: The 2021 update for Quake has restored a cut section of this level and increased the secret count from 2 to 3. If you are playing the original 1996 release of Quake then you can ignore the first secret.
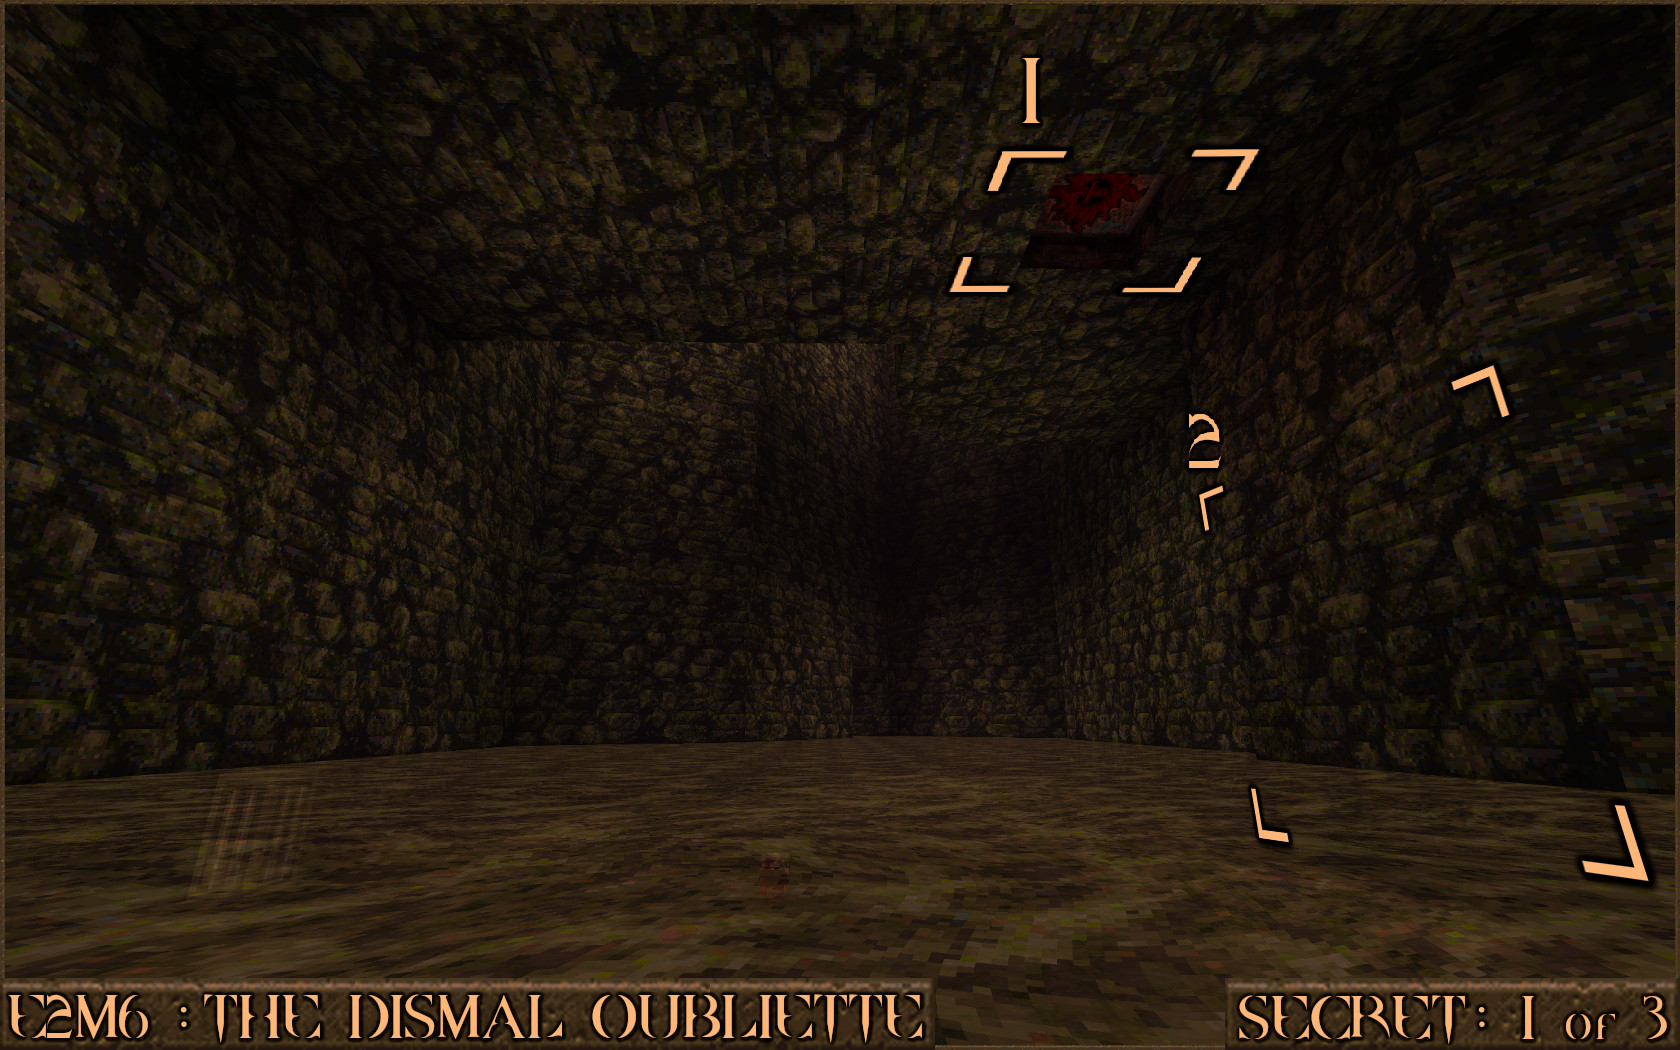
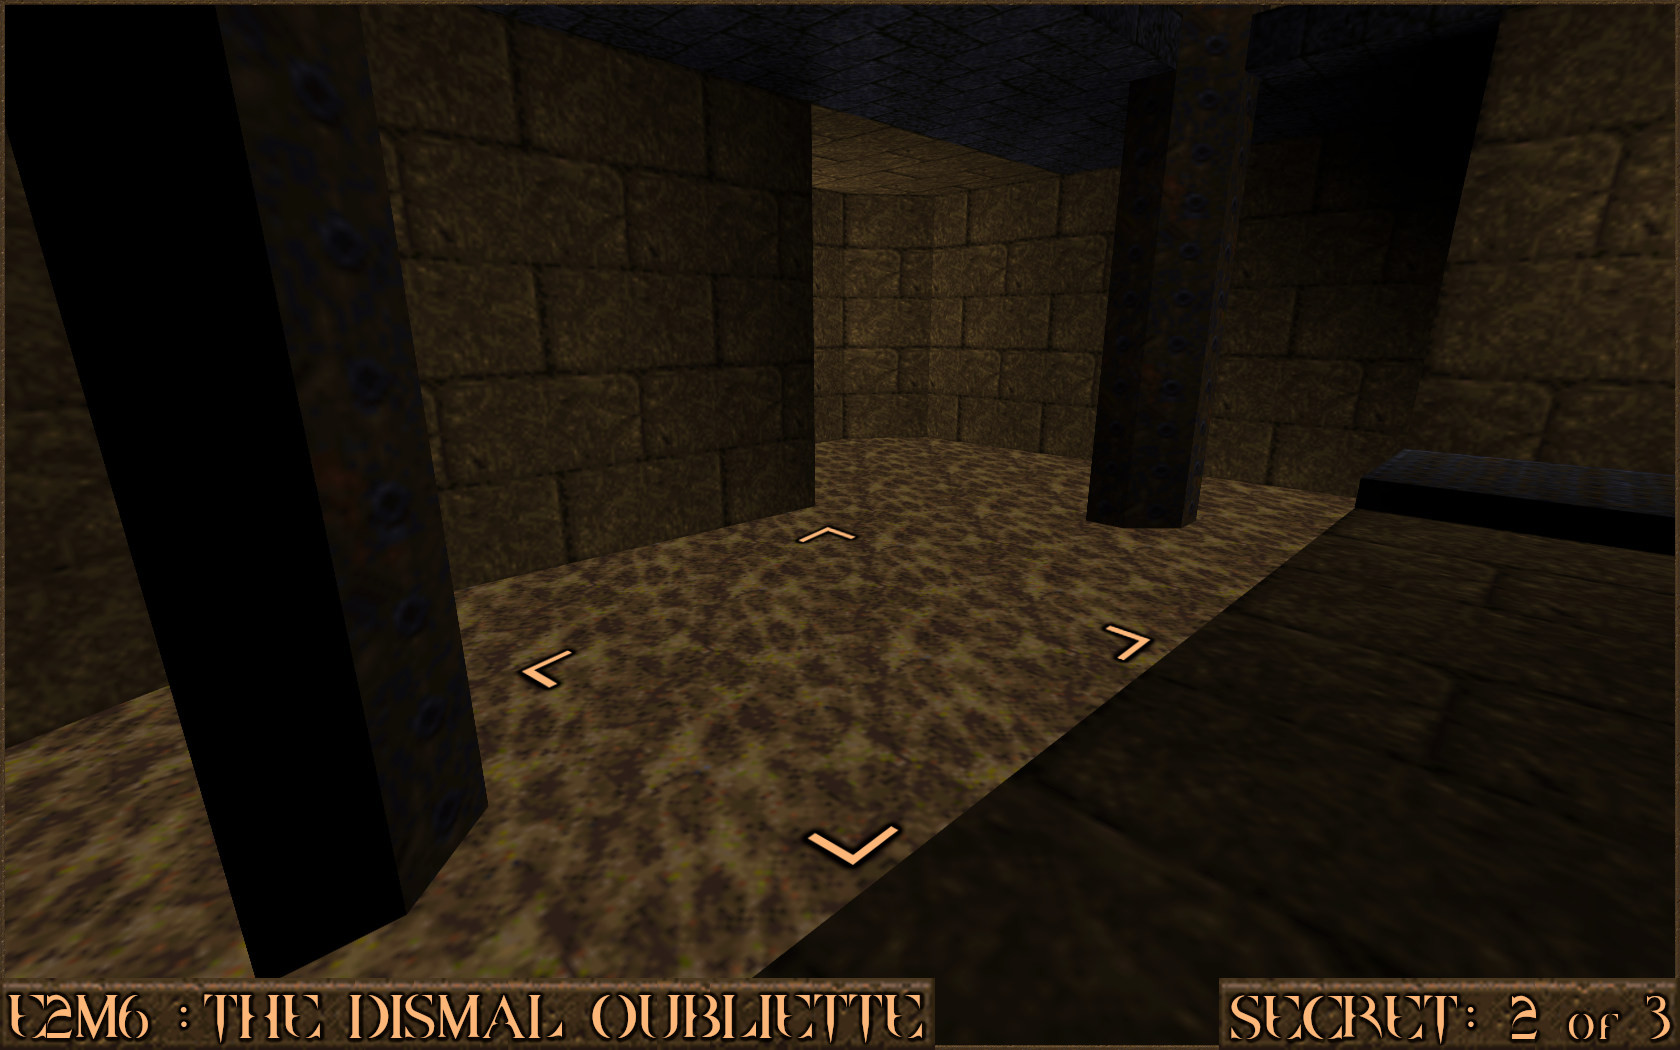
) which when shot will reveal a nearby secret ().
Reward:
Reward:
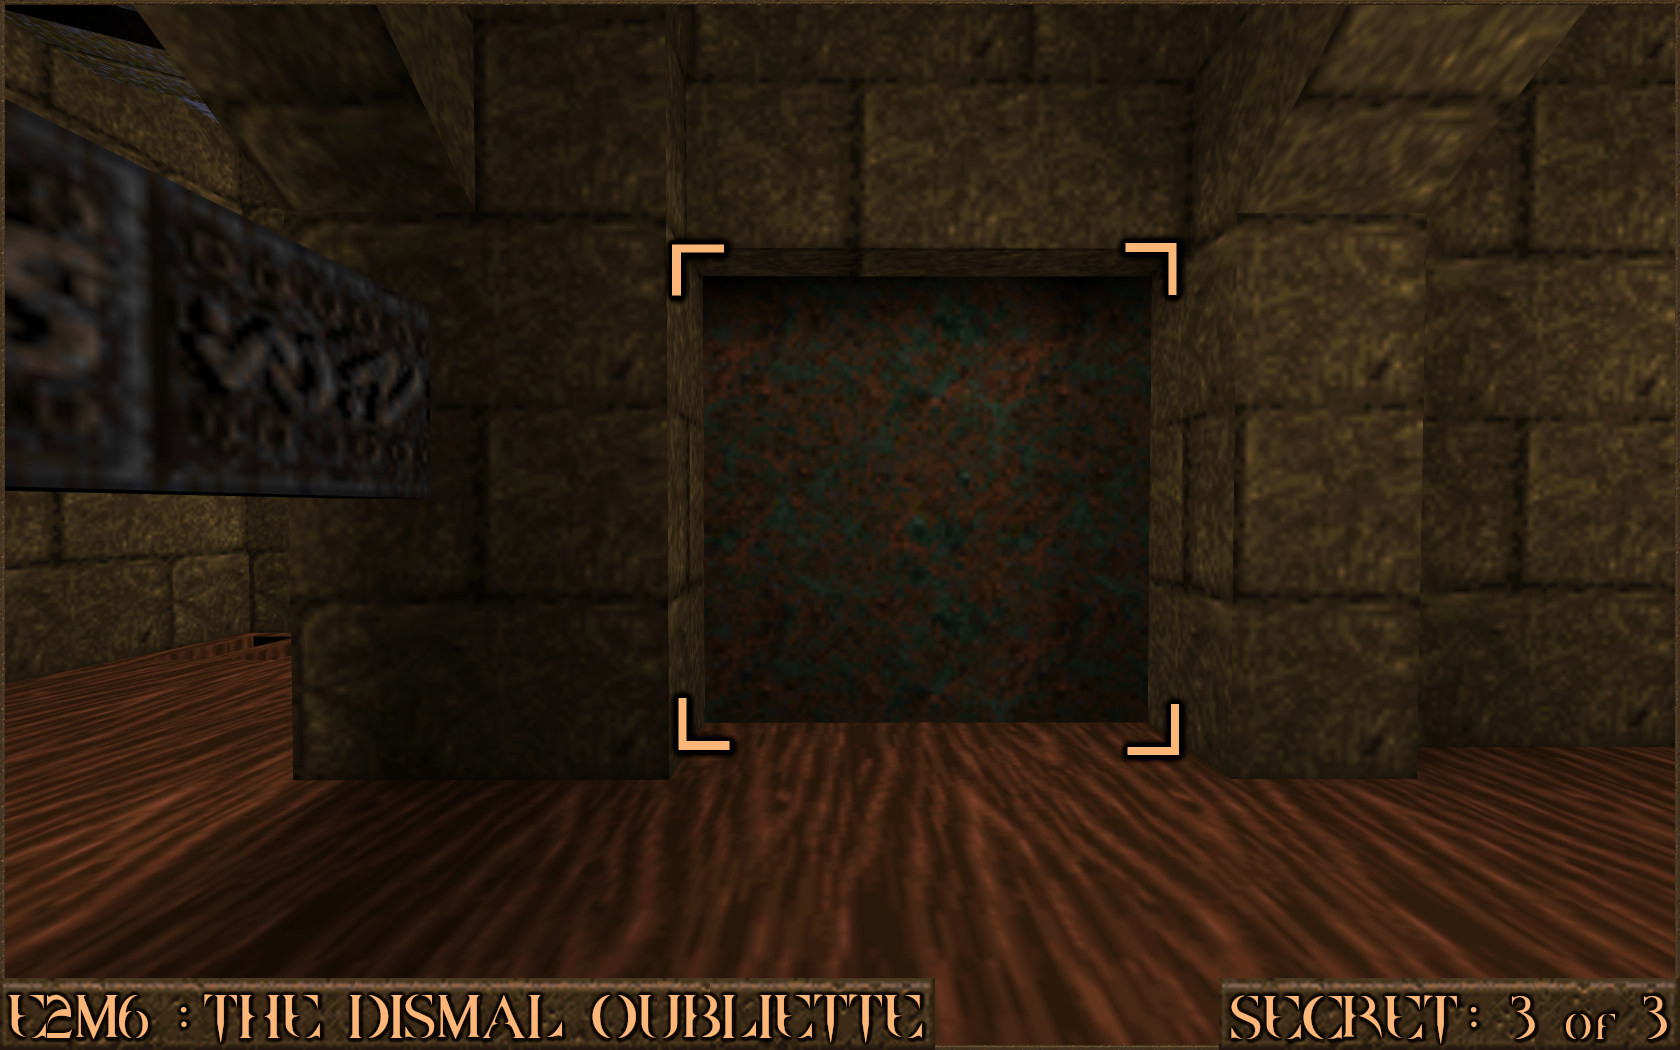
Reward:
Secret 1 of 3
As soon as you start the level jump down in to the shallow water. Follow the left wall through some archways until you come to a Zombie and a pack of Rockets. Look up to see a shootable switch () which when shot will reveal a nearby secret ().Reward:
Secret 2 of 3
Progress through the level and you will eventually activate a switch and the message "A bar has been drawn..." will appear. Head to the room that contains this bar and you will see a patch of water by an elevator. Jump in to the water and swim under the platform to find the secret area.Reward:
Secret 3 of 3
After receiving the message "The second floor is accessible." take the elevator to the second floor. You will see a blue metal barrier blocking your way but just to the right of this is a rusty metal wall that can be shot to reveal some steps down to the secret.Reward:
E3M1: Termination Central
Secret 1 of 5
While going down a narrow corridor you'll see a red arrow on the wall. Before turning down that corner shoot the metal wall on your right to reveal a secret area.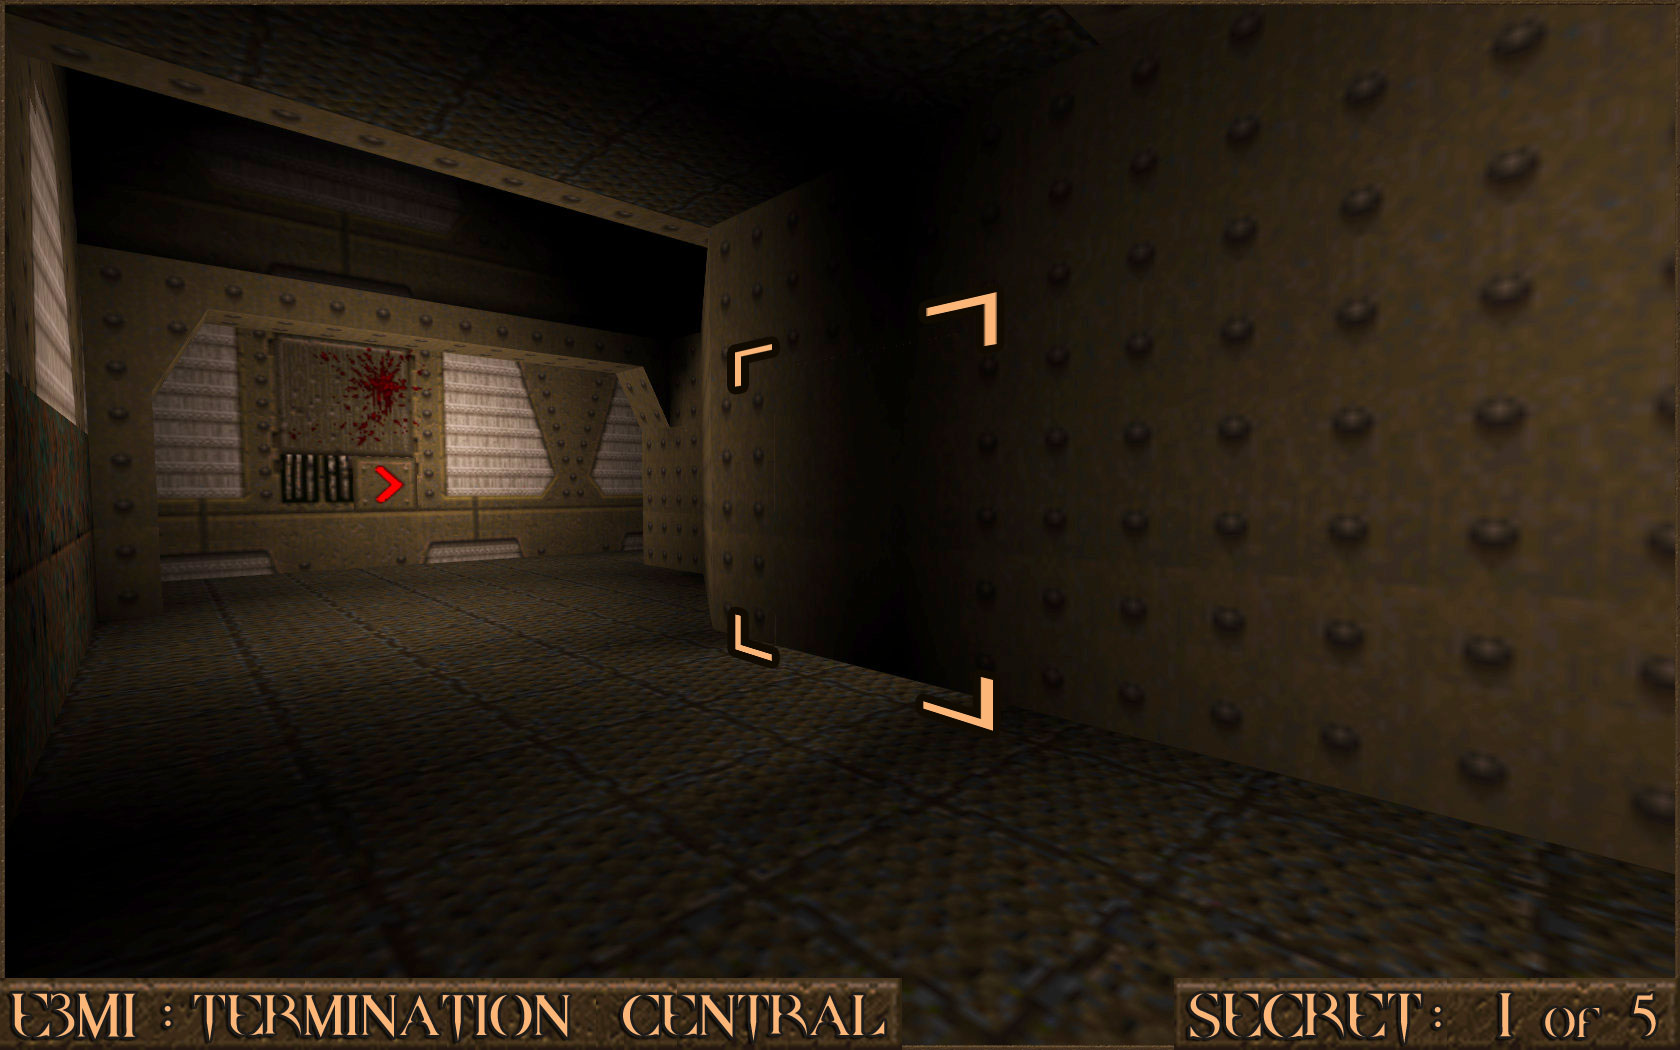 Reward:
 Secret 2 of 5
You will come to a large area with a Quad Damage in the centre of a large platform as well as some explosive crates dotted around. After clearing the platform of enemies approach the edge of the platform where the explosive crates were to see a second platform underneath you. Jump down to find a hidden area.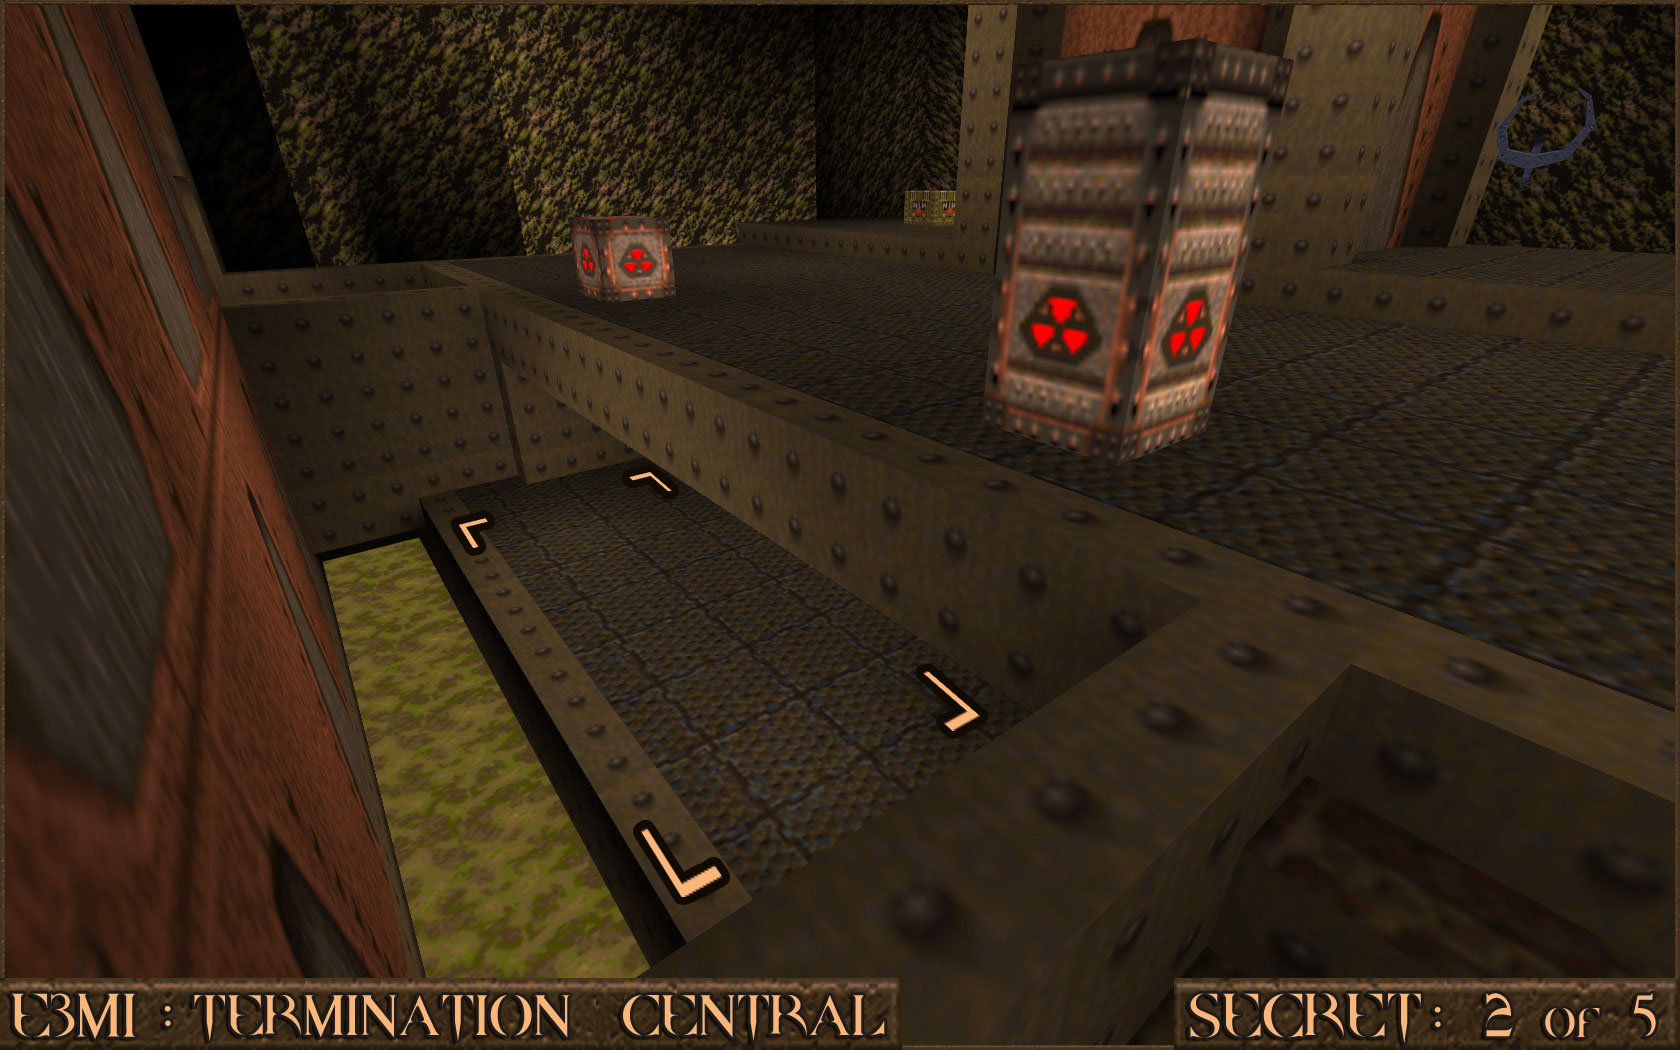 Reward:
 Secret 3 of 5
On the same platform that had the explosive crates and Quad Damage head over to the diagonal button that is attached to the centre tower. While facing the button turn around head straight off the edge in to the slime. You should find a deep part of the slime you can dive under and follow a small cave to a secret area.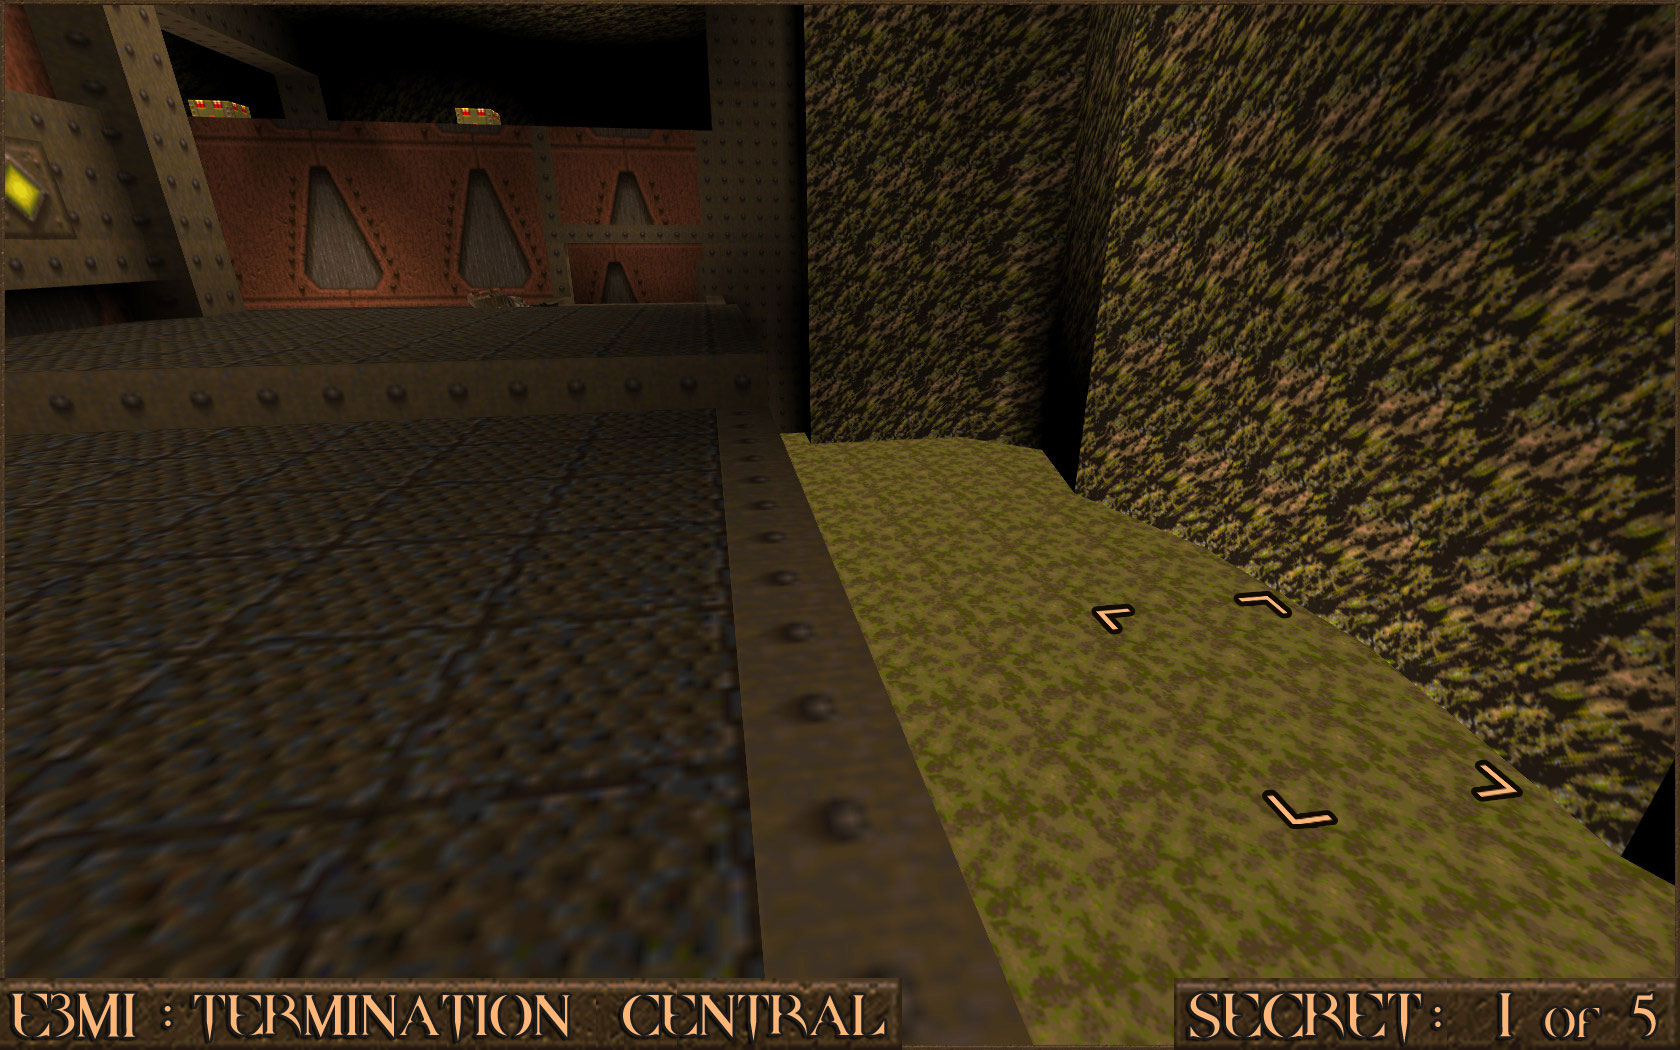 Reward:
 Secret 4 of 5
When you come across a stack of metal boxes jump up them to reach the top of the pile. Shoot a nearby wall to reveal a secret area.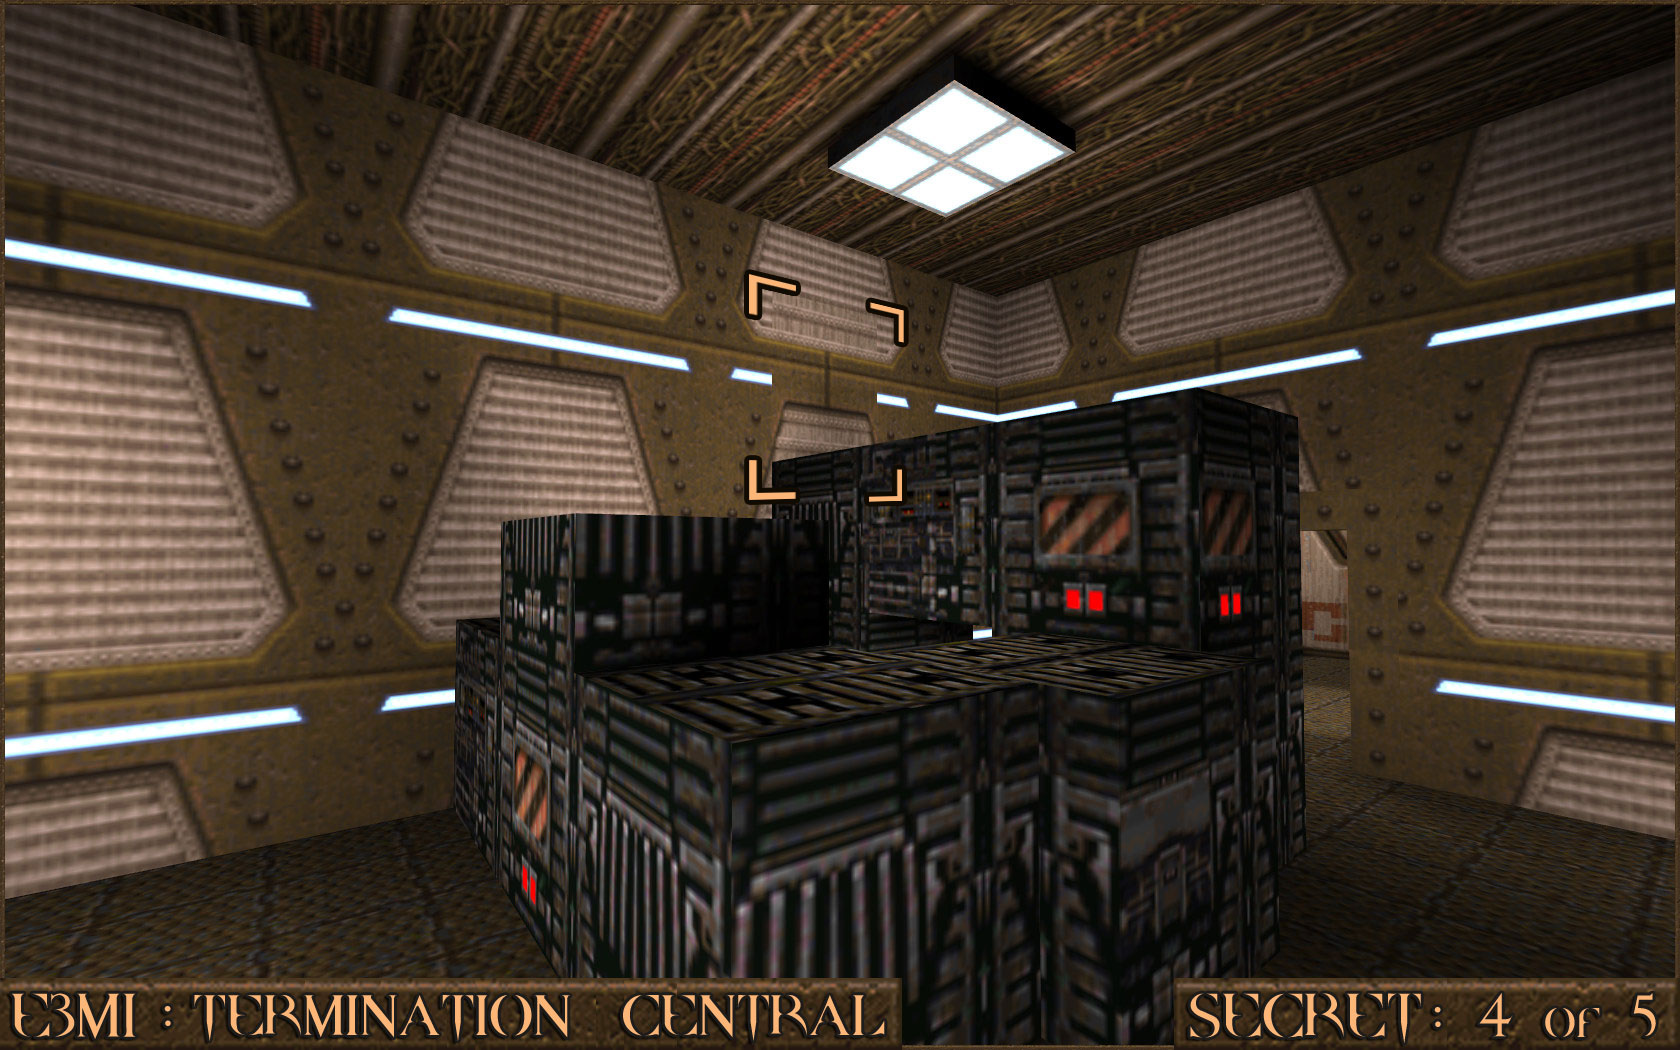 Reward:
 Secret 5 of 5
From the area that contains Secret 4 head back down the elevator to the area nearby (). Look for a rather dark area close by (). Jumping directly in to this dark area can be difficult as you will tend to hit your head on the above platform and fall down. If this happens there is a small elevator to take you back up. An easier way to get over to the dark area is just to run off the platform without jumping and you will still reach it. Once in the dark area follow the thin wall () around to reach the secret area ().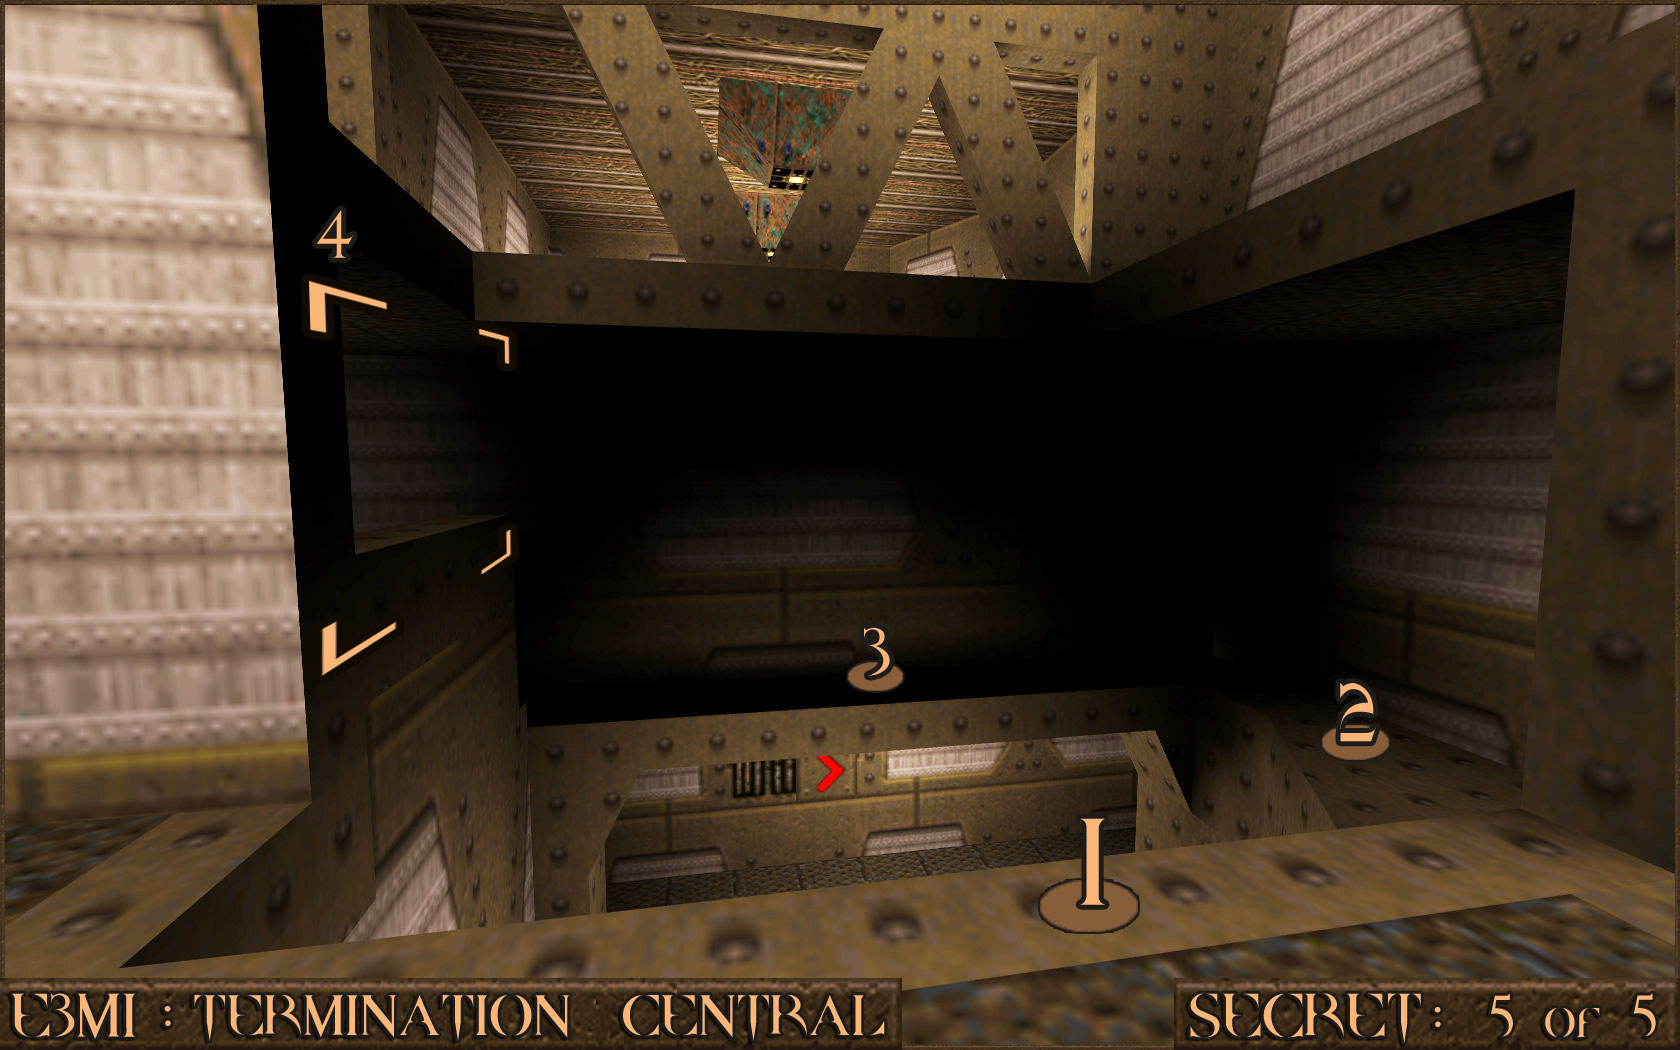 Reward:
 E3M2: The Vaults of Zin
Secret 1 of 3
After jumping over a pit to pick up a Grenade Launcher stop and look down the pit. You will see that there is actually a small platform down there next to the lava as well as some Zombies. Destroy the Zombies and jump down there to find the secret.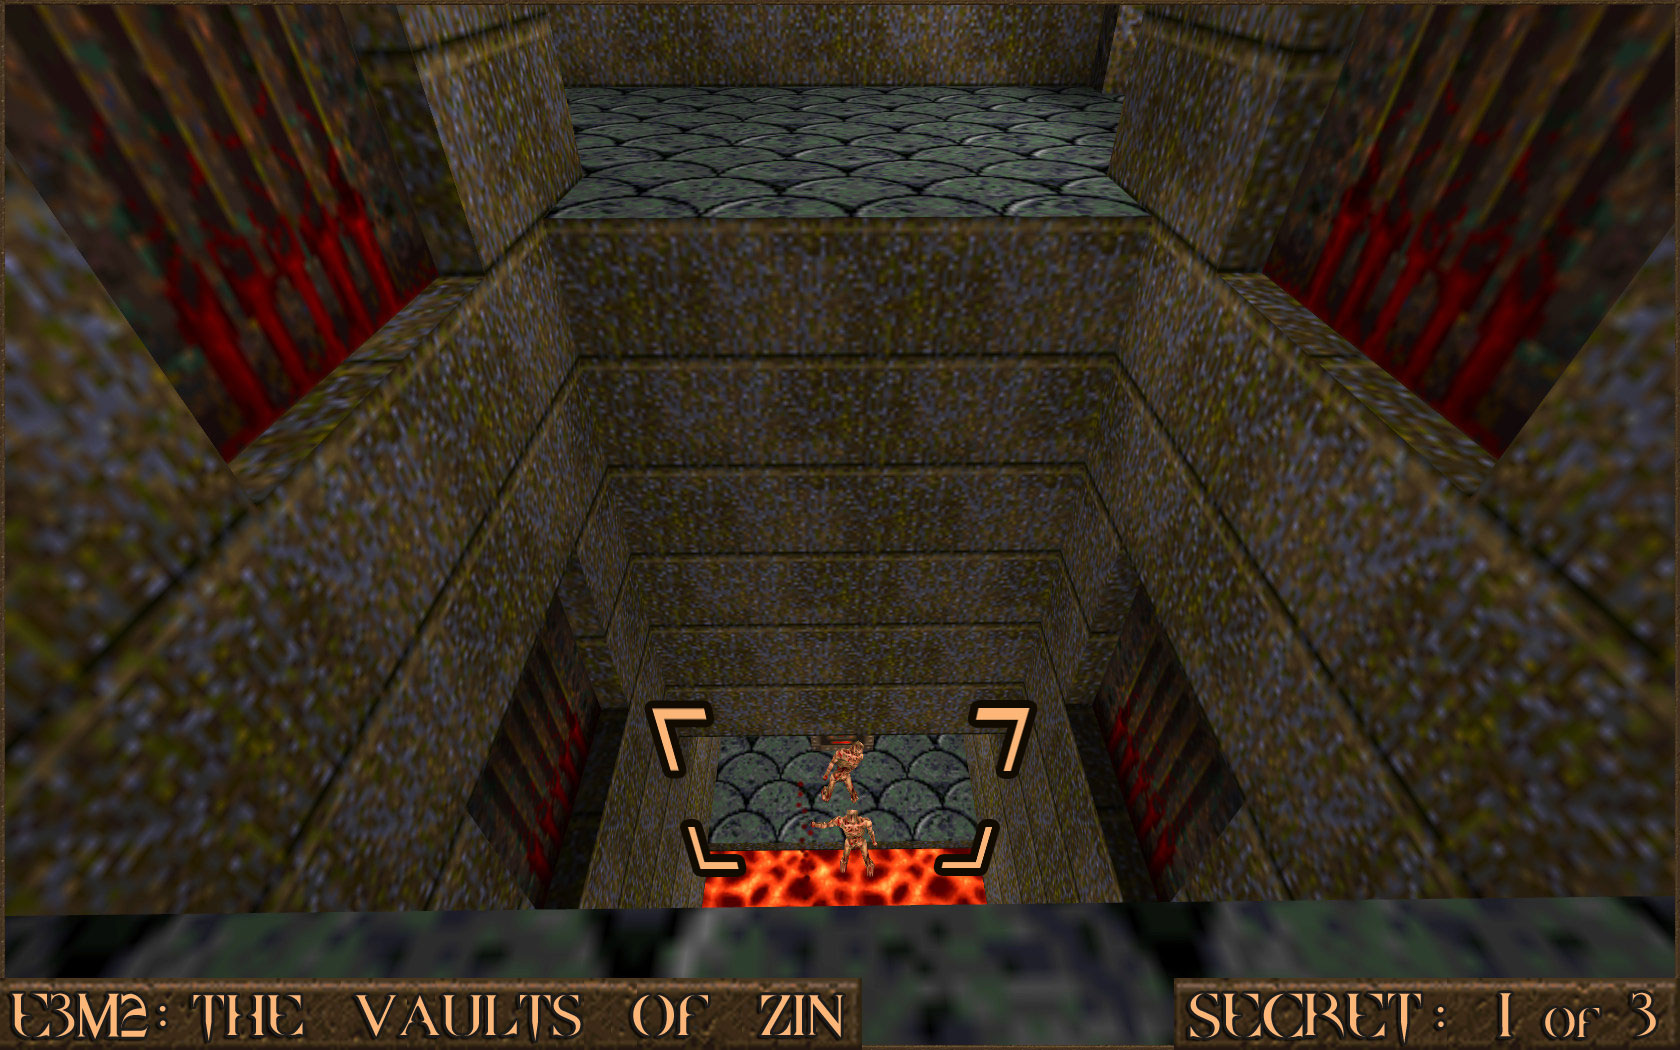 Reward:
 Extra Secret
You will enter a room with a small pool of lava in the centre of the room. Look on the wall to the right to see a skull decoration on the wall. Shoot it to reveal a small room.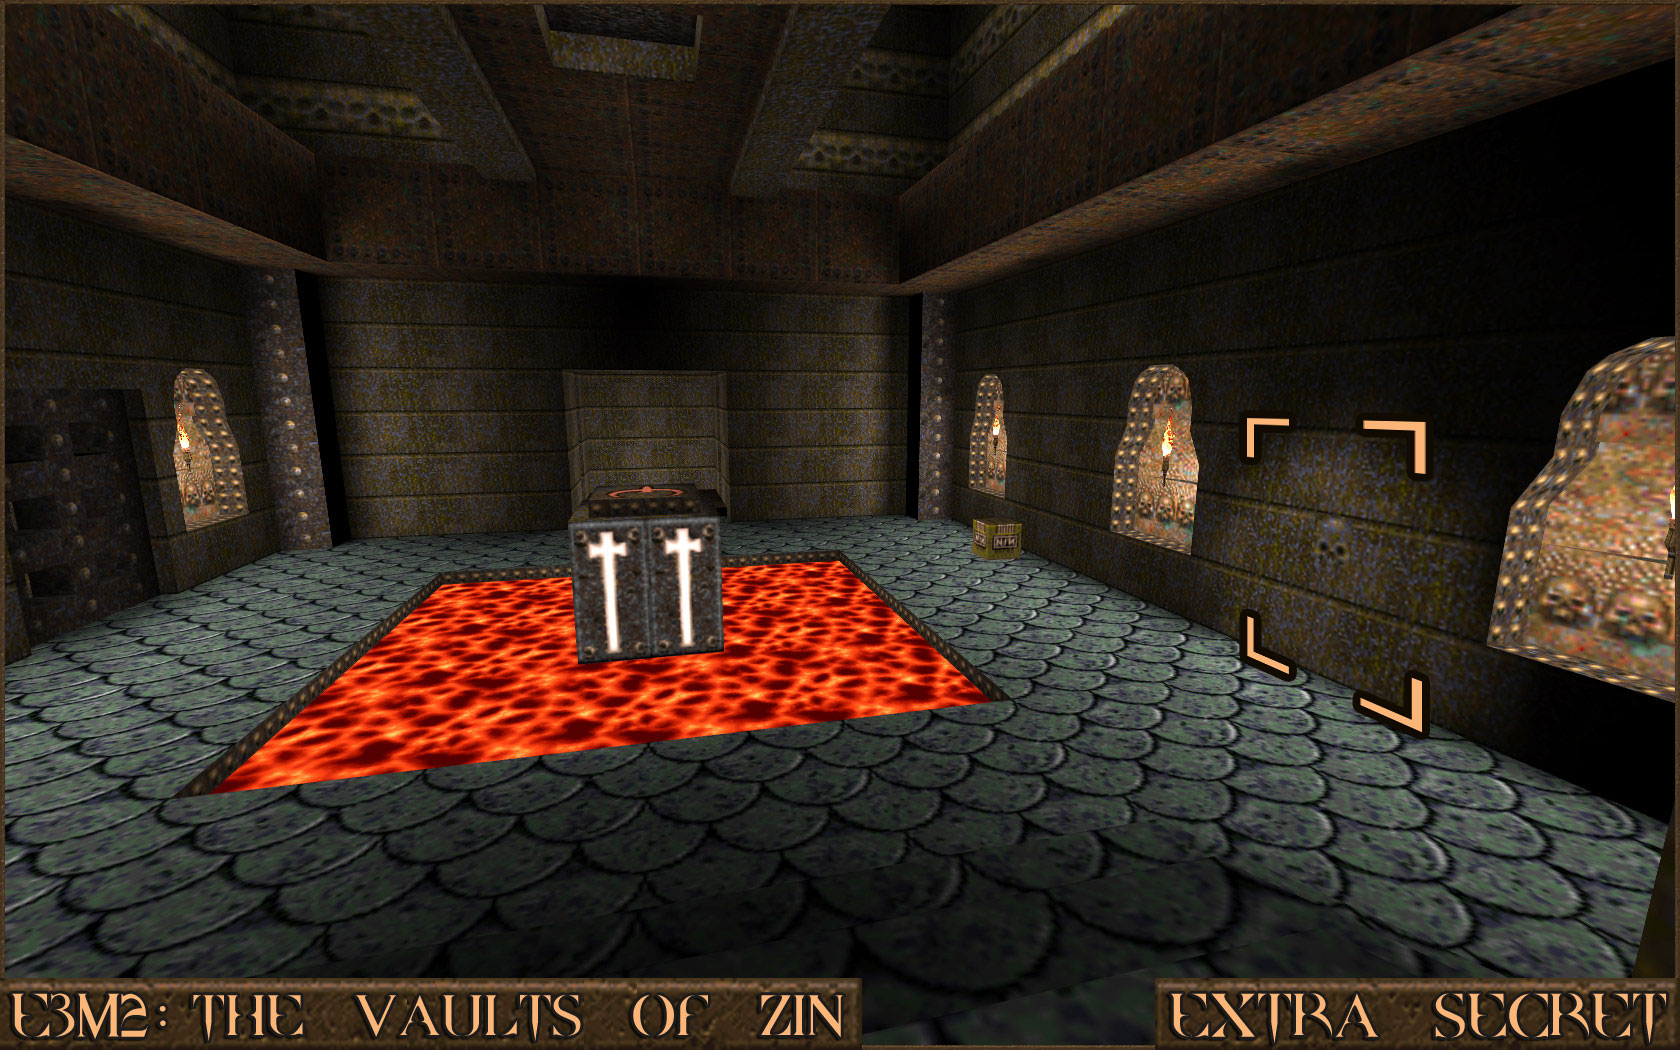 Reward:
 Secret 2 of 3
In a large room near there is a slightly recessed part of the wall with crucifixion imagery upon it. To the right of this is a small section of the wall that when shot will move aside to reveal the secret.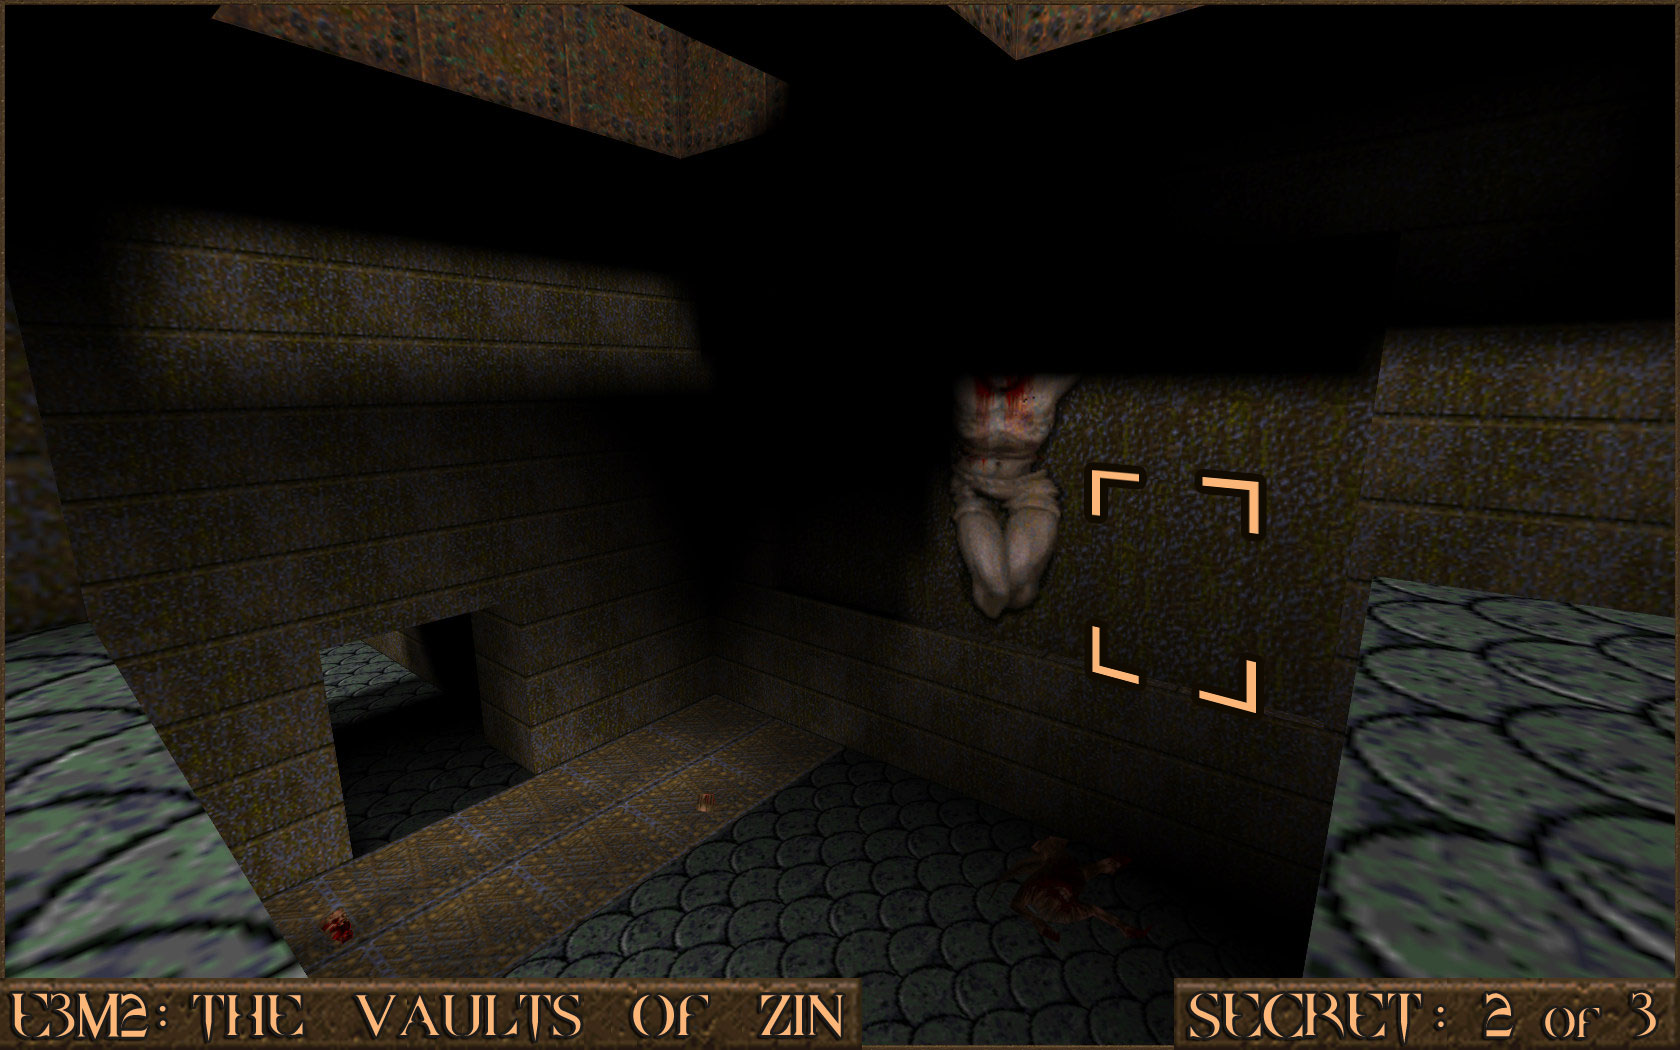 Reward:
 Secret 3 of 3
During your progress through the level you will lower a section of wall that is between some red runes. This area is near to Secret 2. Once inside there is a part of the wall that is darker than the rest. Shoot it to reveal another secret.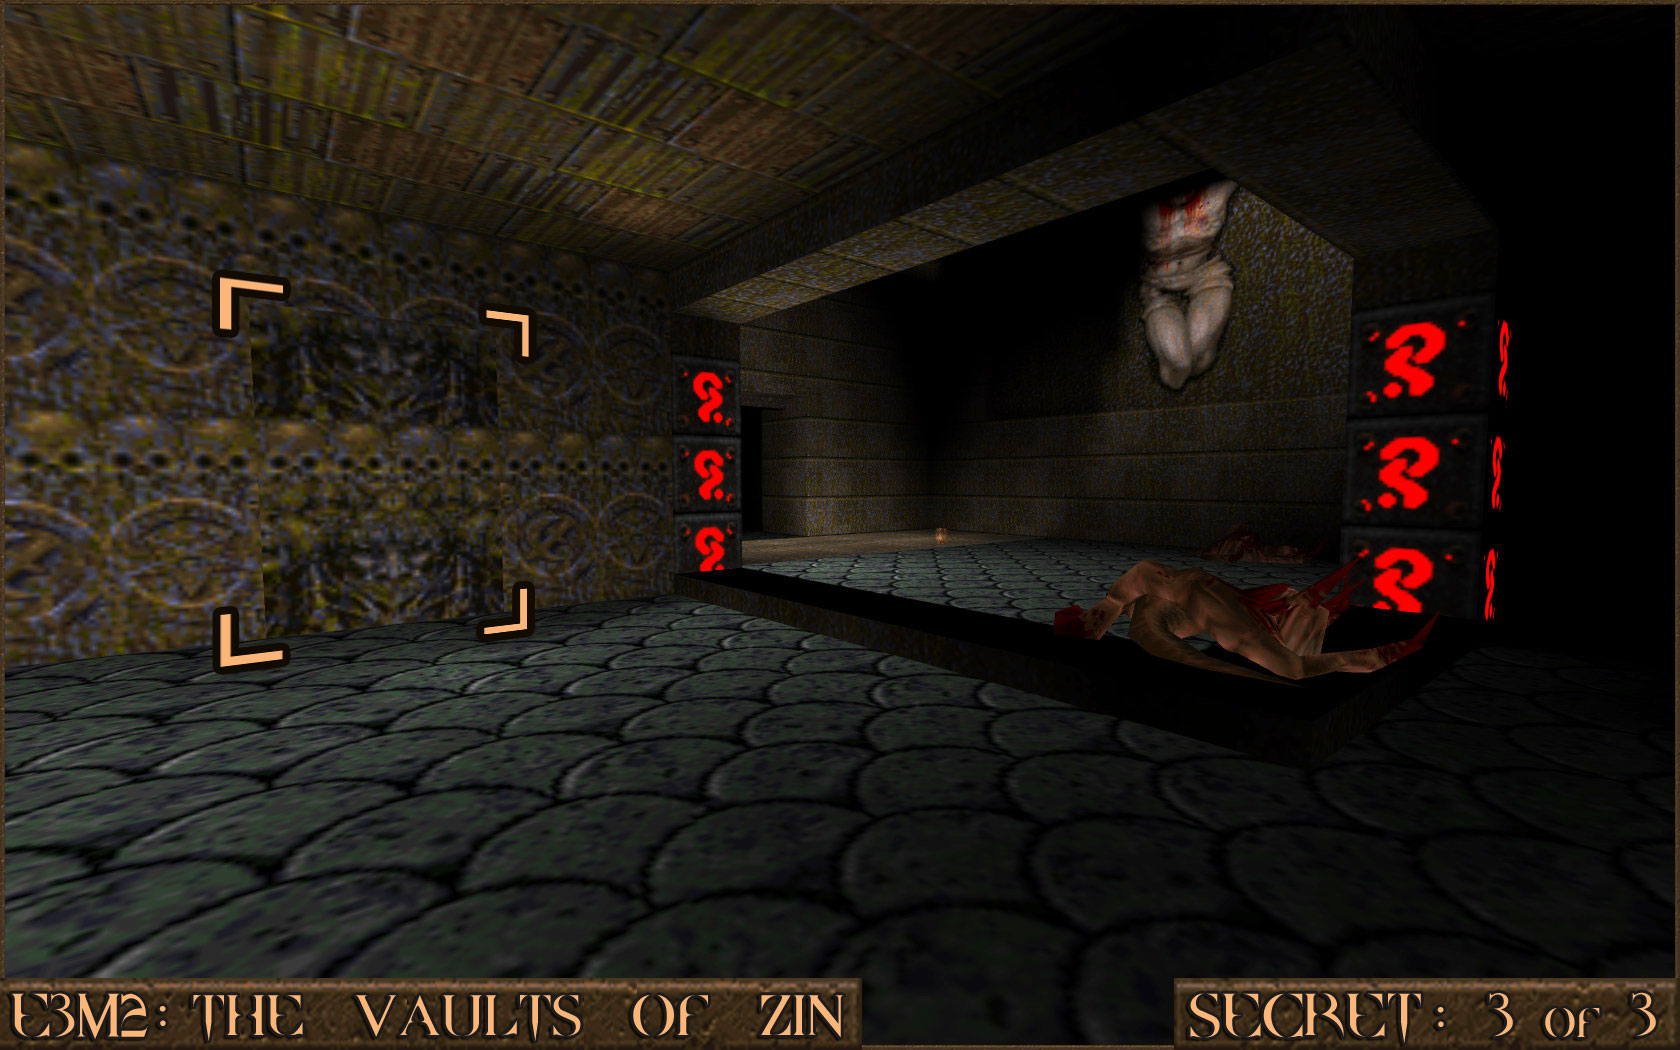 Reward:
 E3M3: The Tomb of Terror
Secret 1 of 2
As soon as you have crossed over the lava on the temporary steps look to your right. High up you will notice a shootable red switch () that when activated will open a secret door () just below it. Run in to the door to find the secret.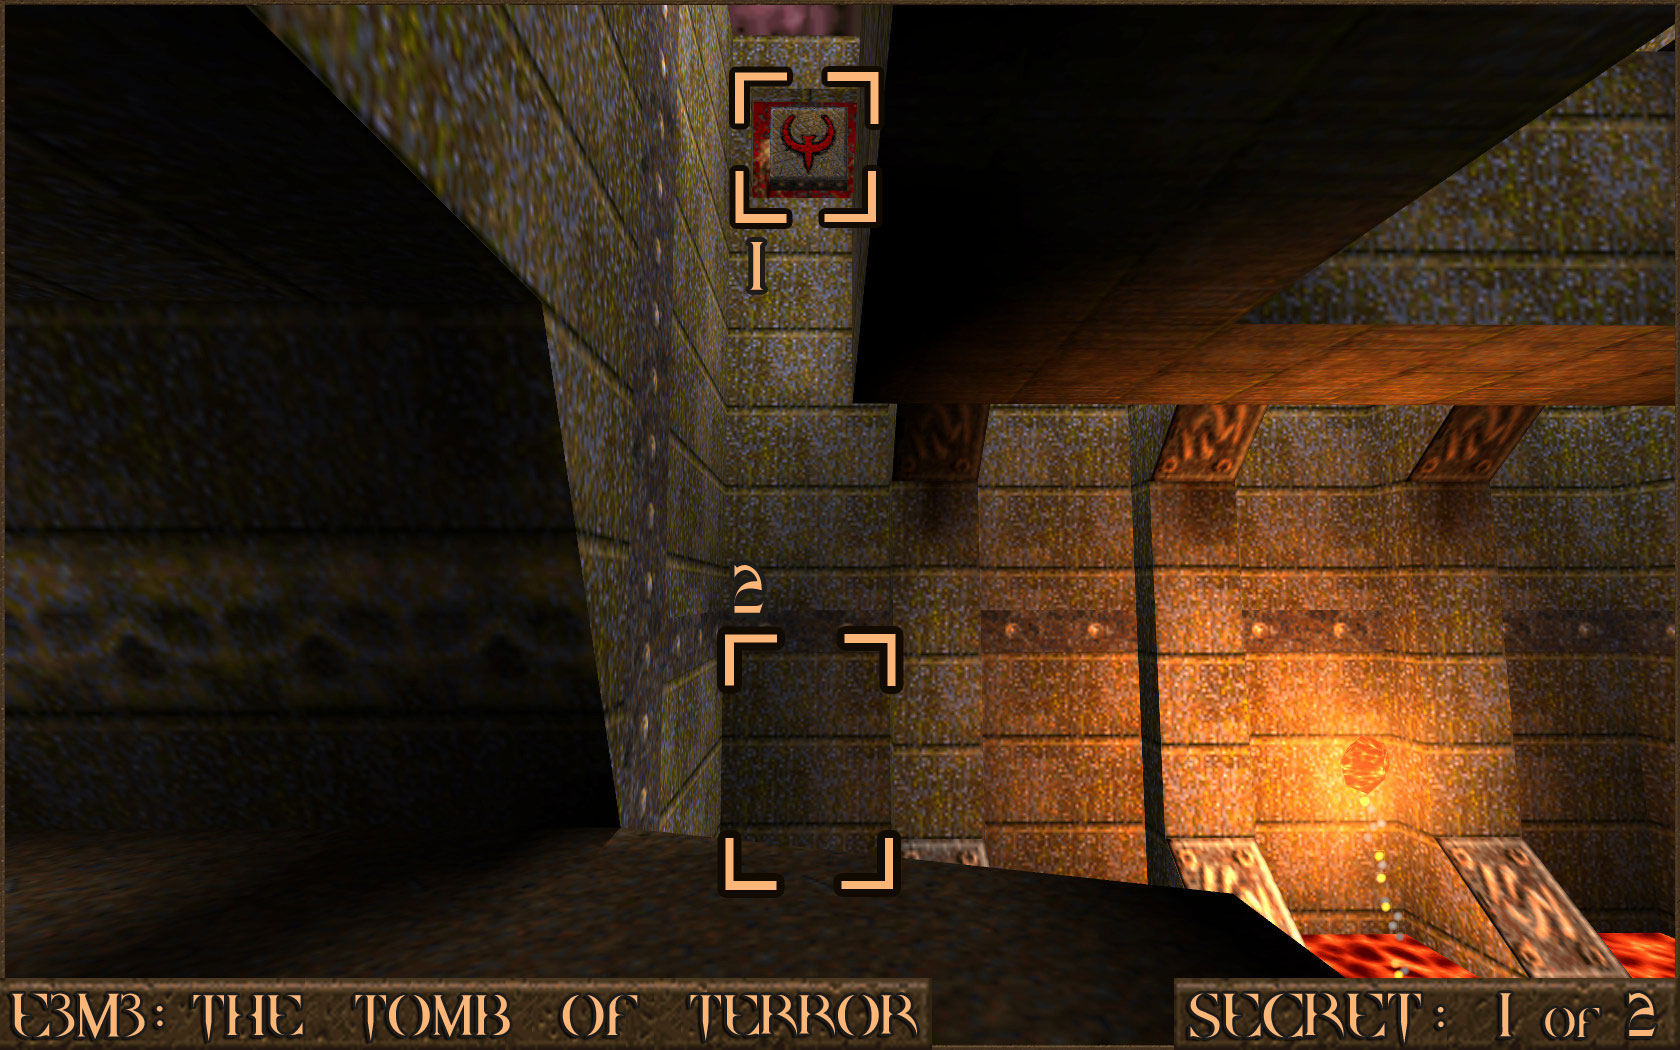 Reward:
 Secret 2 of 2
When you come to a trough of blue water jump in to it and dive down to locate a secret.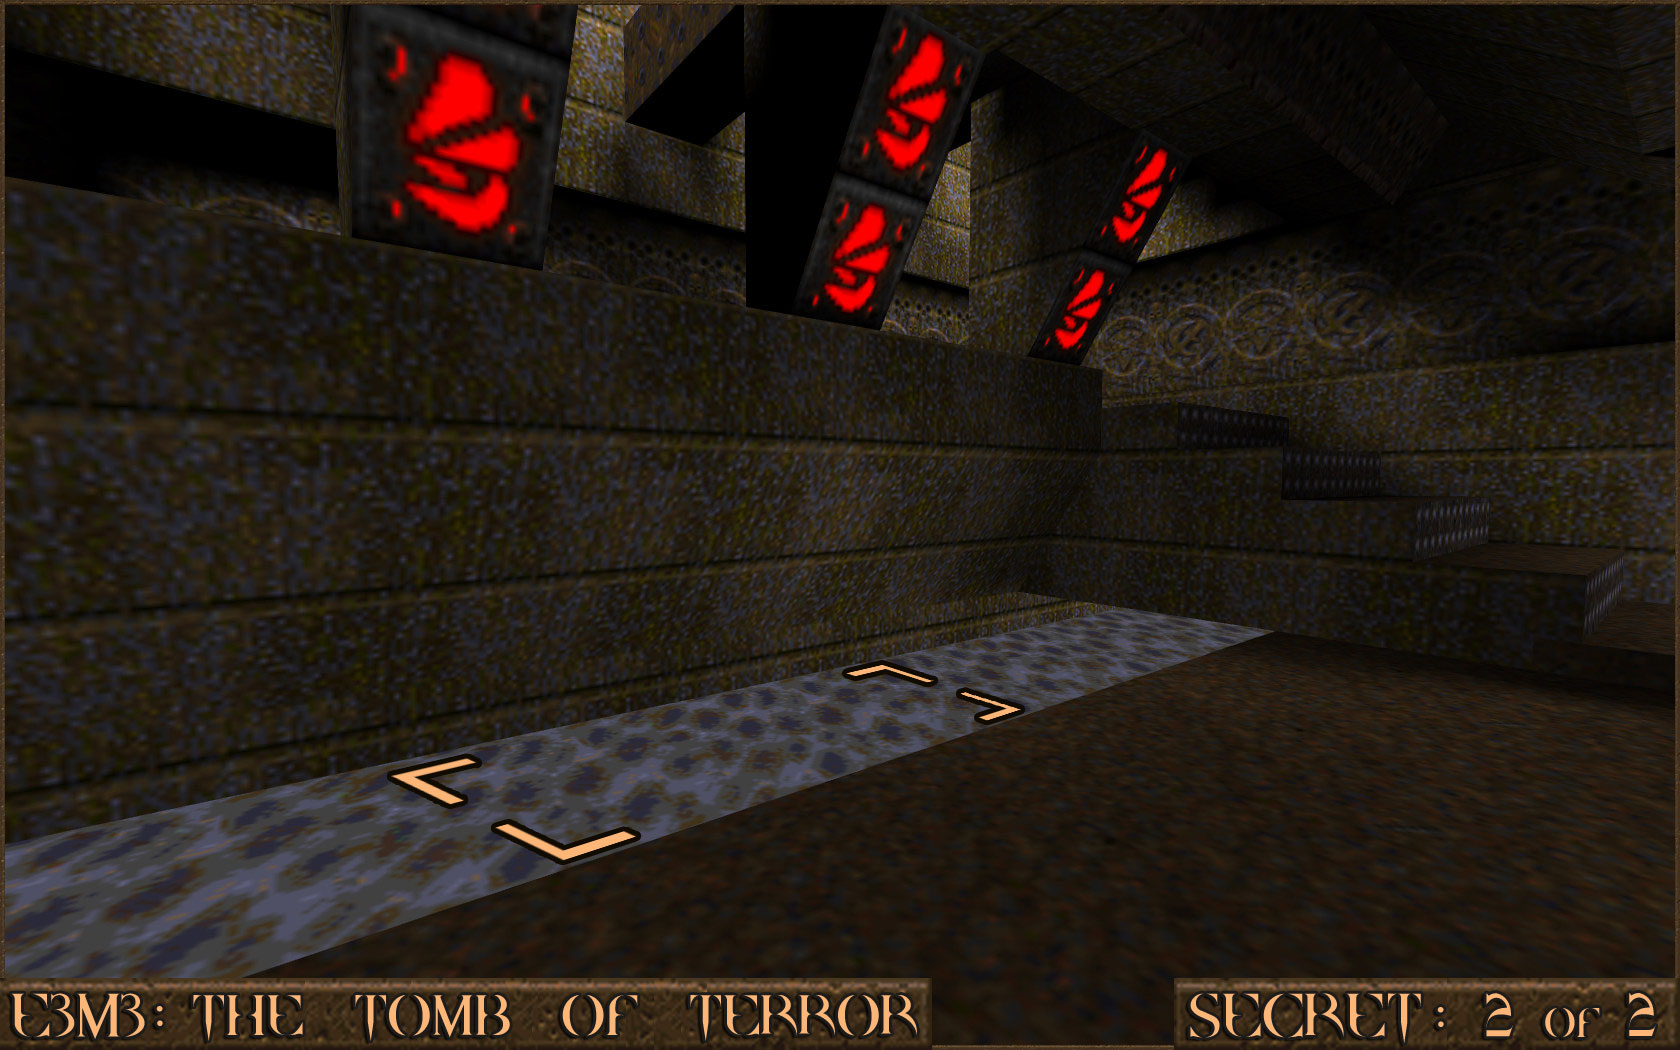 Reward:
 E3M4: Satan's Dark Delight
Secret 1 of 4
As you leave the room in which you were trapped with some Ogres, go up some steps and turn around to see a bright yellow light. Shoot it to activate some steps that allow you access to the secret.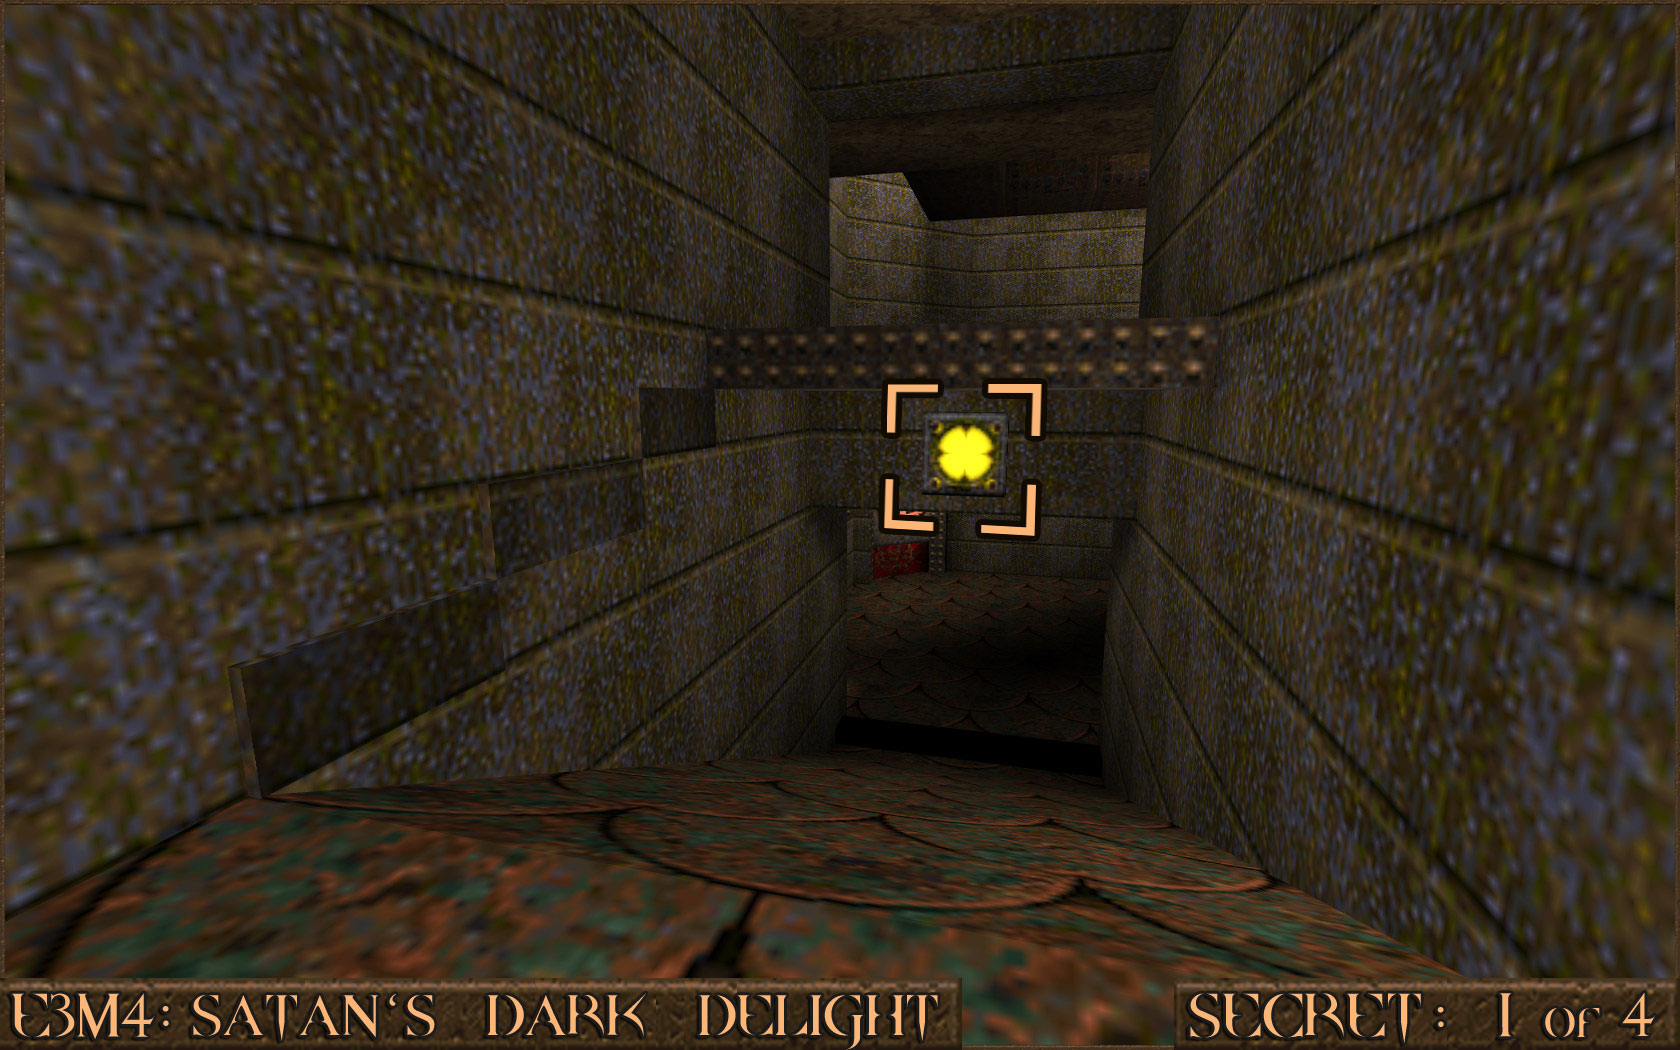 Reward:
 Secret 2 of 4
While you are on the moving platform it will take you past several other platforms. Jump down to the one that contains a Large Health and a Small Health. As you approach the nearby corner the wall will automatically move to allow you in to the secret.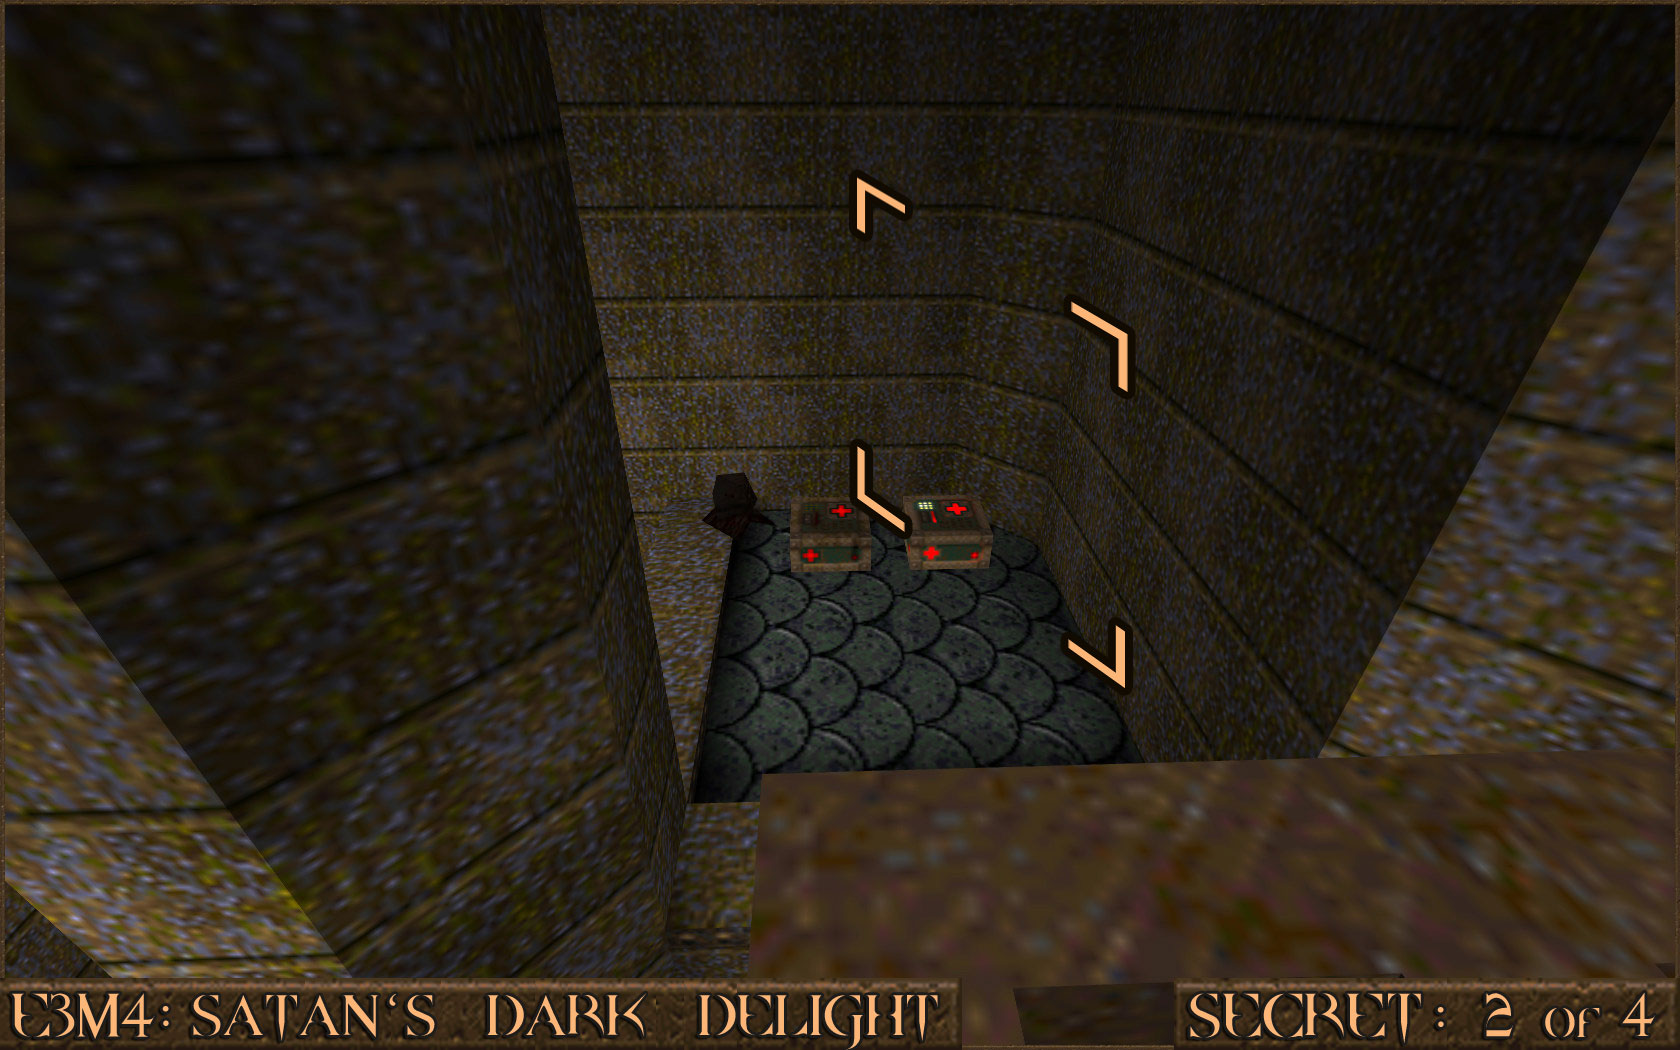 Reward:
 Secret 3 of 4
While inside Secret 2 you will see four lights on the wall (+++). Shoot all four and a nearby wall () will move that allows access to another secret.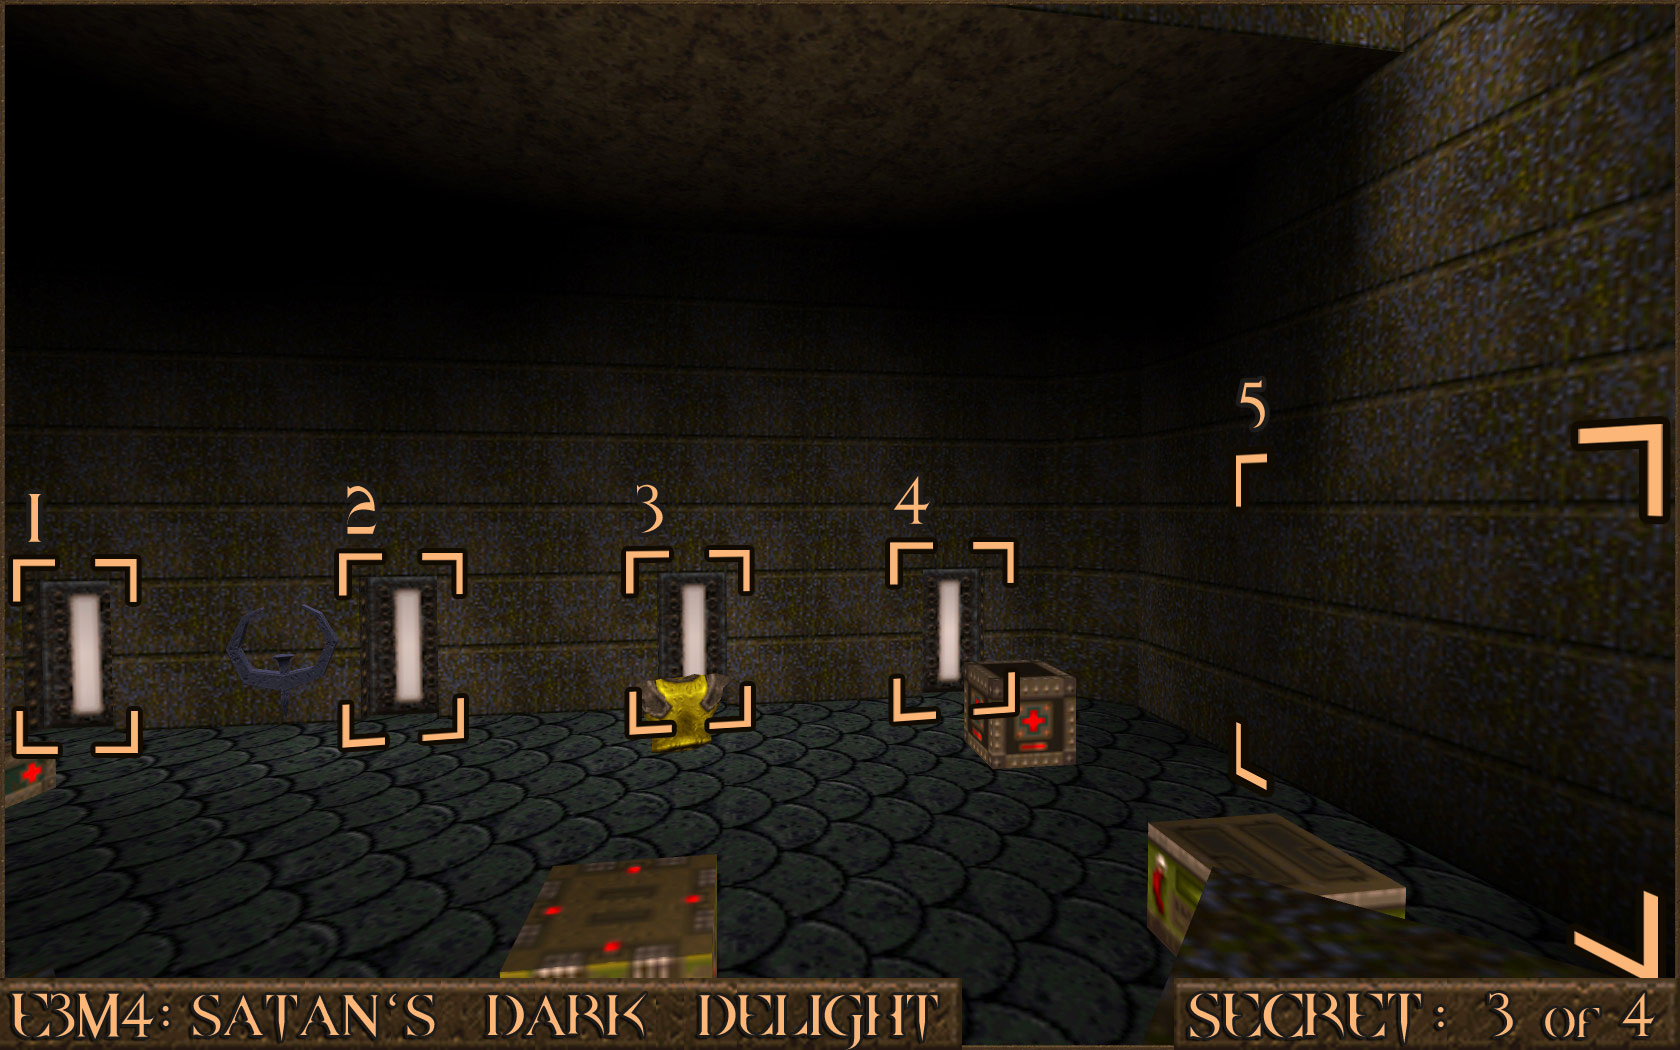 Reward:
 Secret 4 of 4
You will reach a room that has several square ceiling lights. One of these lights is yellow () instead of white and is actually a shootable switch. Once shot a nearby wall () will move to reveal the secret area.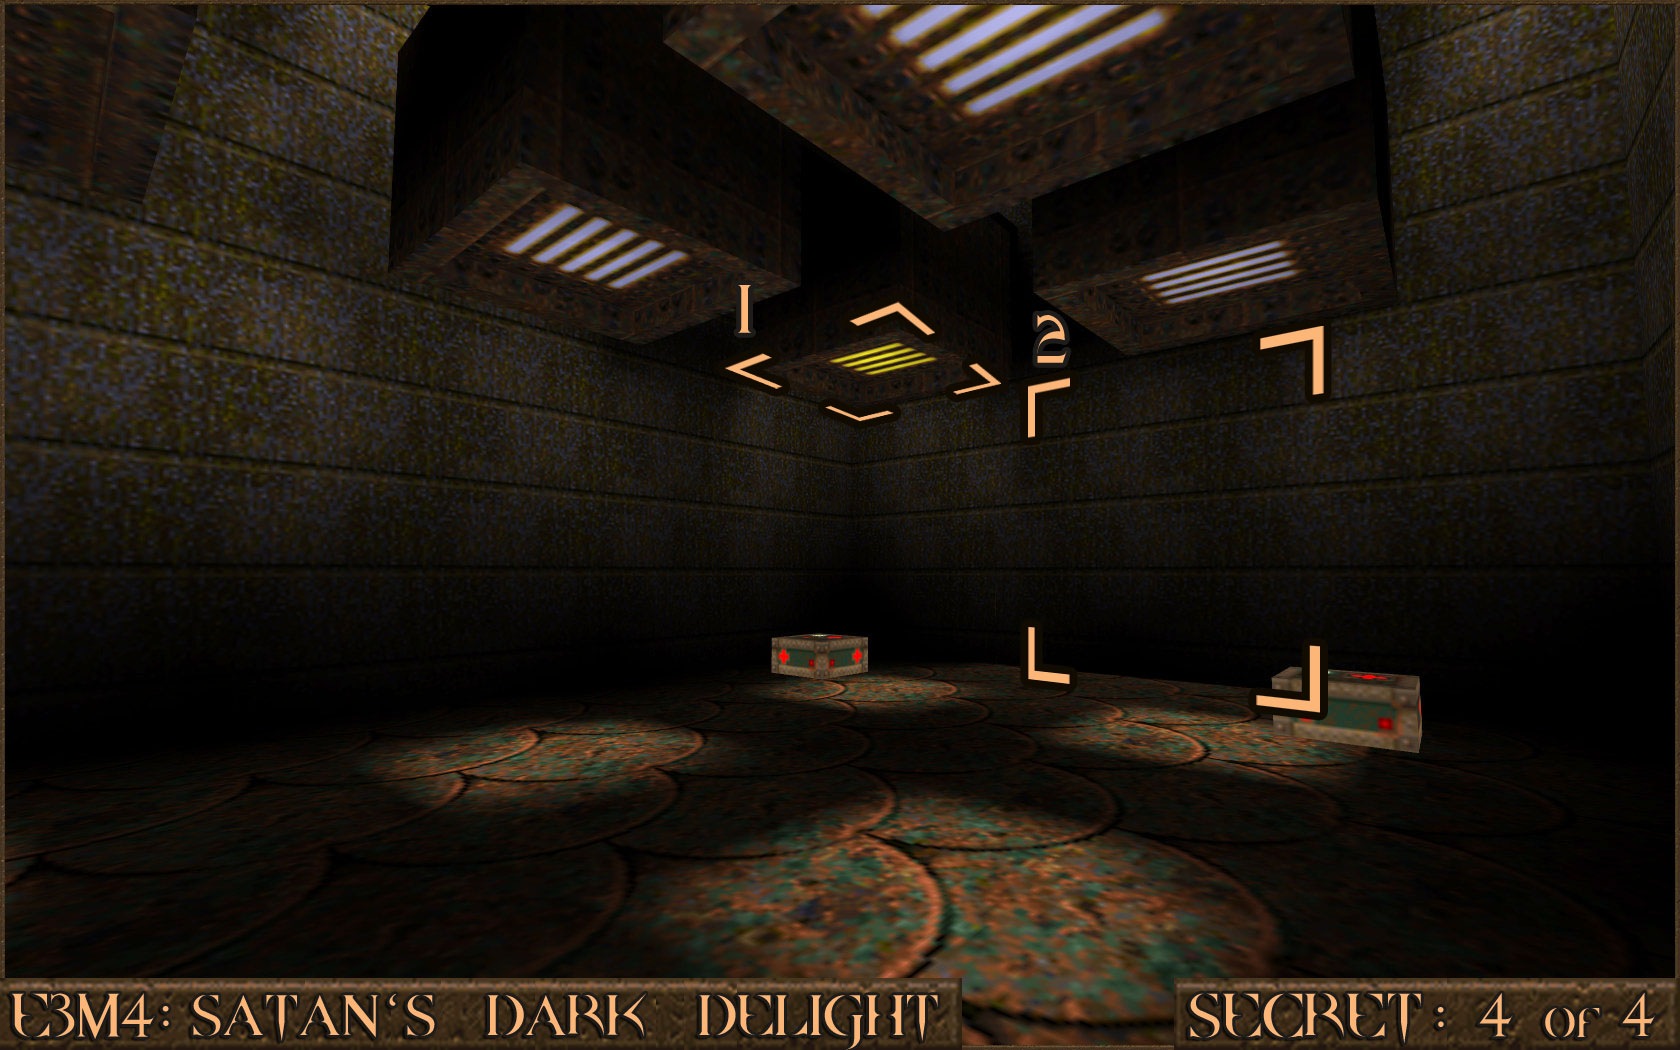 Reward:
 Extra Secret
There is an unmarked secret in this level. In a large room you will notice several platforms filled with lava. Carefully look under the stairs you came down to see a circular hole in the lava. Jump down it to find the exit to the secret level for this episode: E3M7: The Haunted Halls.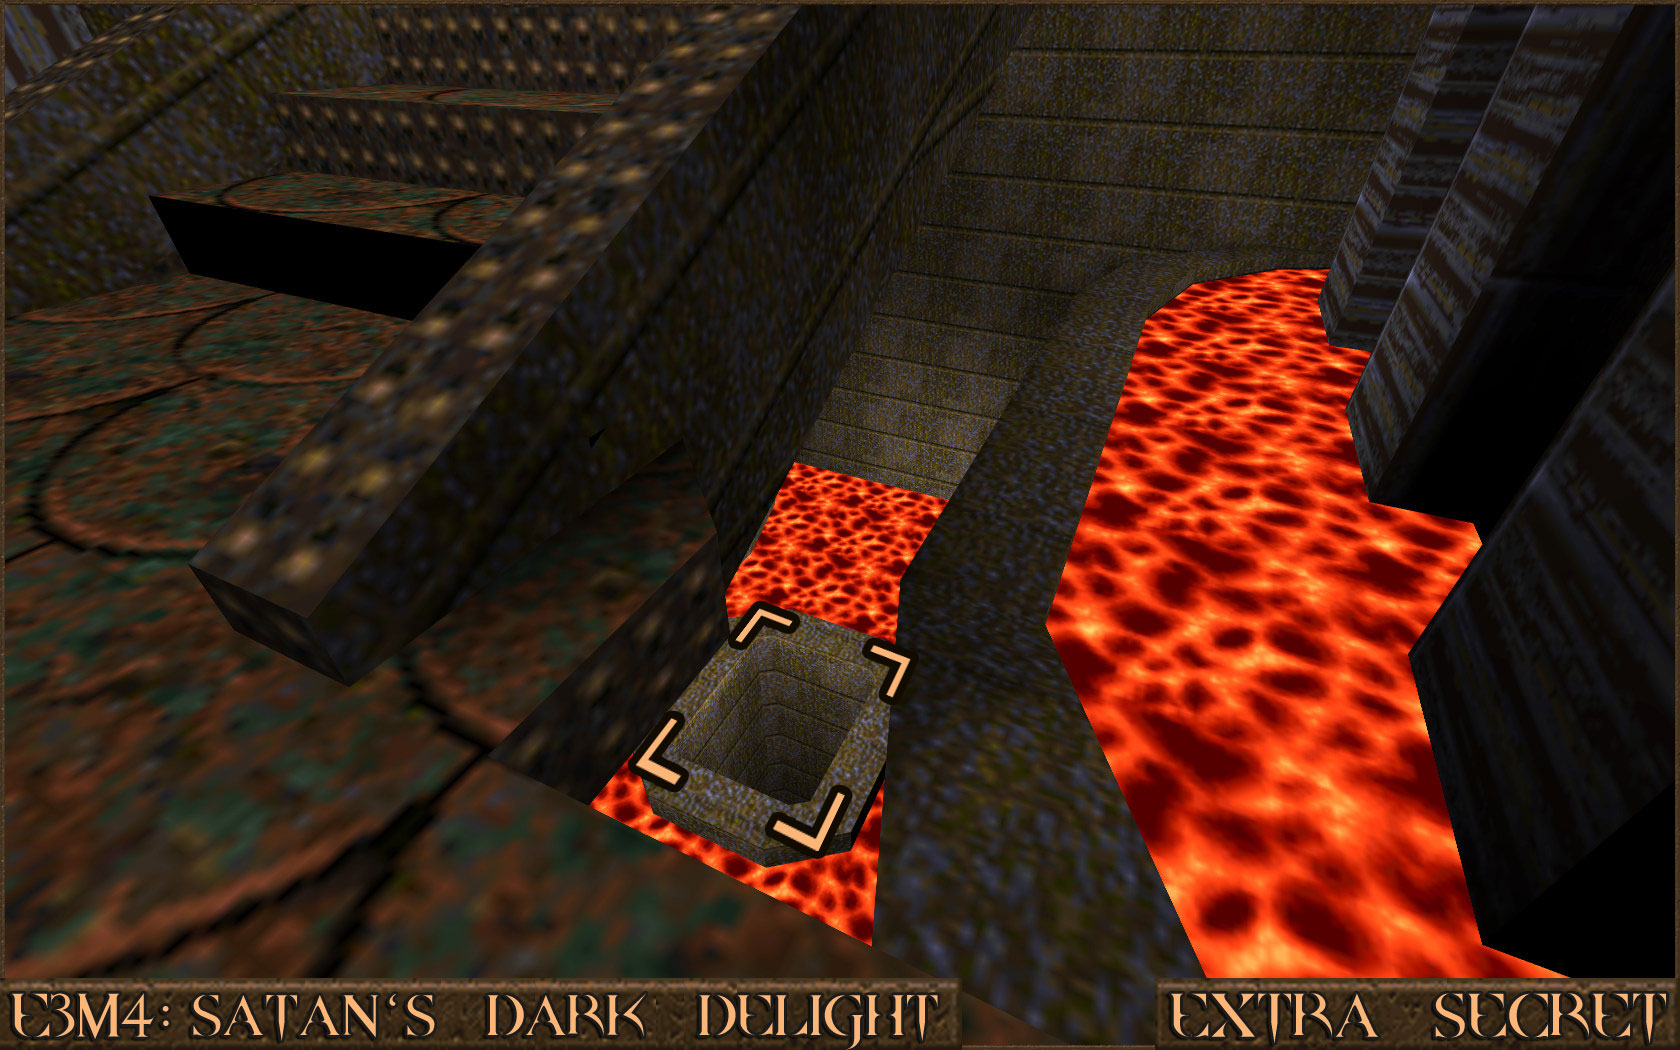 Reward: SECRET LEVEL
E3M7: The Haunted Halls [Secret Level]
Secret 1 of 4
Look for a bloody grate on your right as you walk on a platform over some lava. Shoot the grate to reveal a hidden recess in the wall that contains the secret.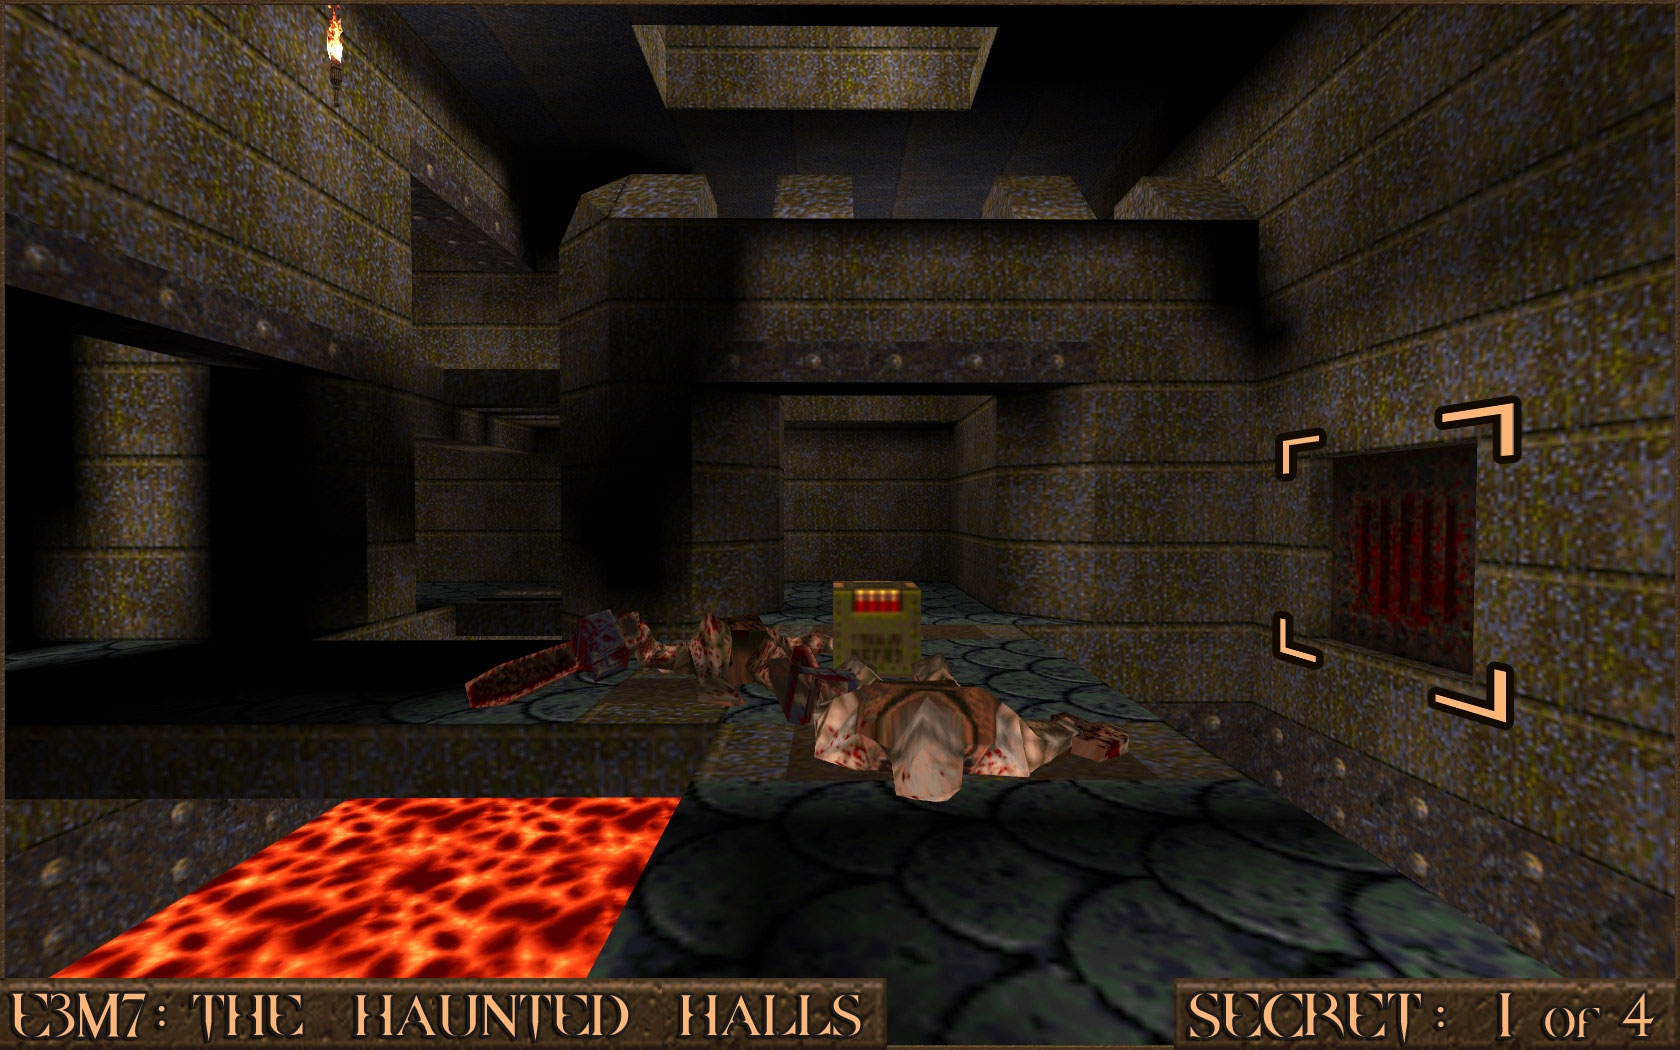 Reward:
 Secret 2 of 4
During the level you will come across an elevator near a Small Health. Run on to the elevator to activate it then immediately run back off it and then go under it to find a dark hole which contains the secret area.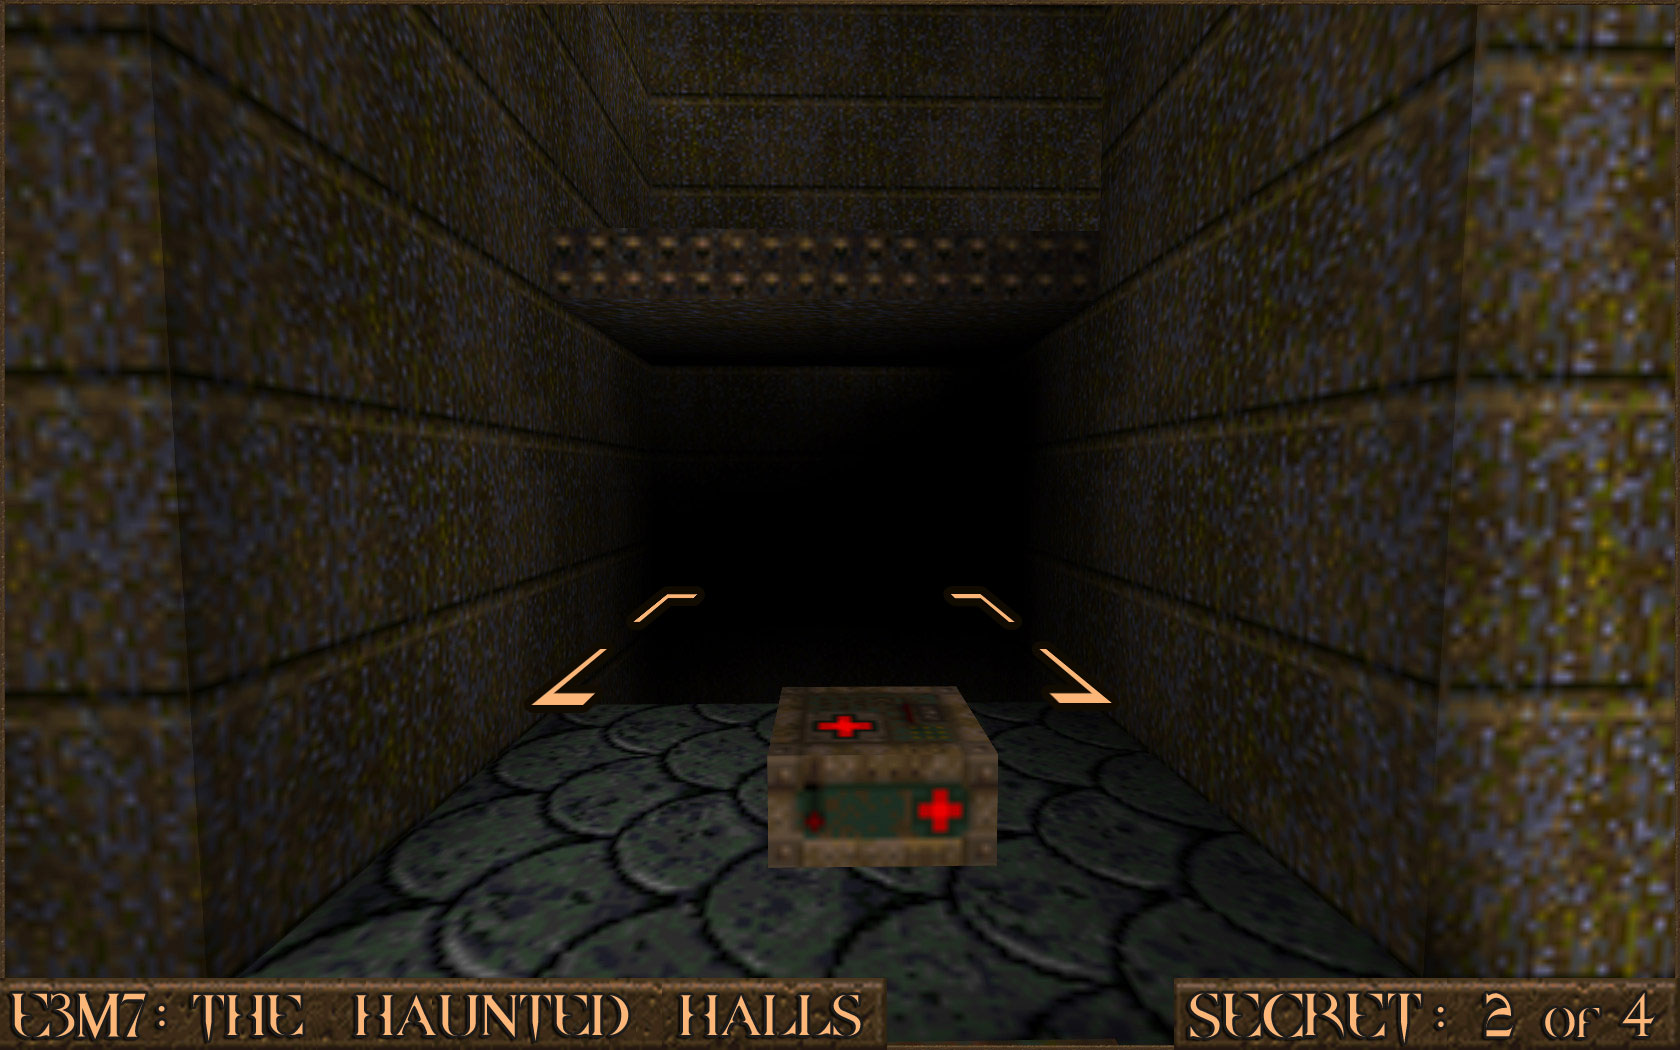 Reward:
 Secret 3 of 4
In a large room separated by a pit of lava turn to your left and look up at the corner. There you will see a shootable red switch () that when shot will reveal a hidden secret area nearby ().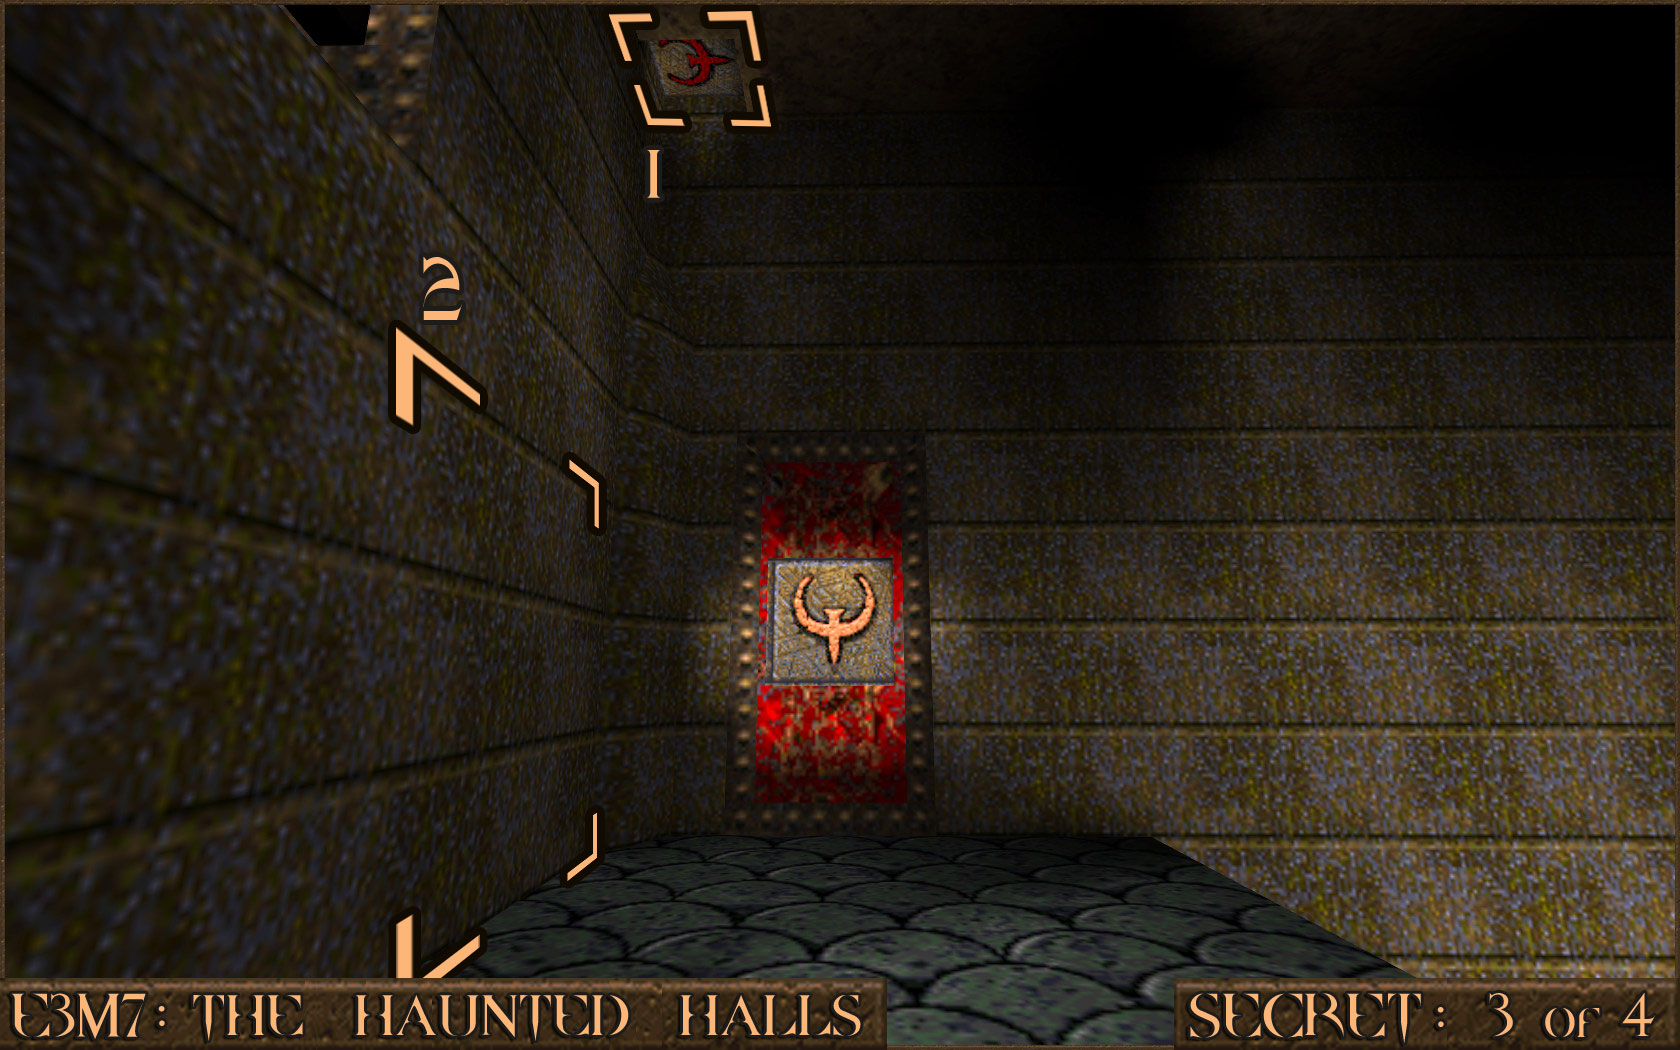 Reward:
 Secret 4 of 4
In the same room as Secret 3 take the elevator up to the bridge. Look around to see a metal cage above the lava and take a running jump on to the top of it. As you land the nearby wall will automatically open revealing the secret.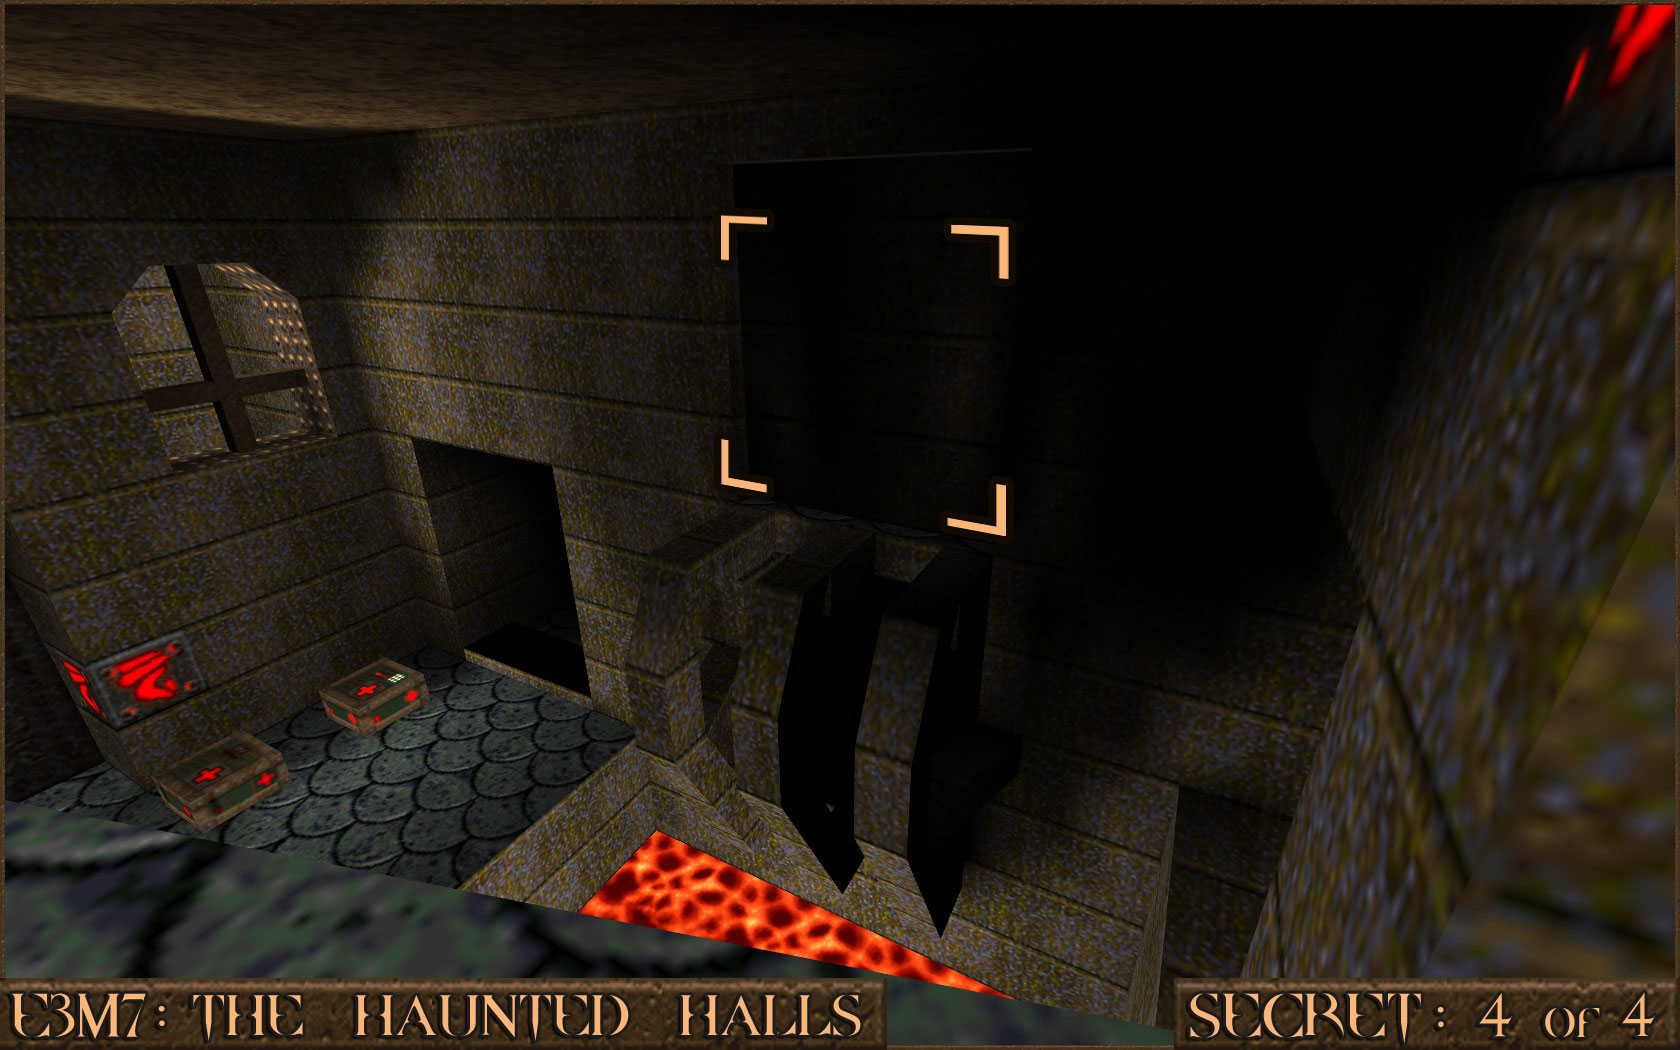 Reward:
 E3M5: The Wind Tunnels
Secret 1 of 4
As you are going through the tunnel with the yellow lights on the walls look carefully at the corners. One of the corners actually contains a hole down to a secret area.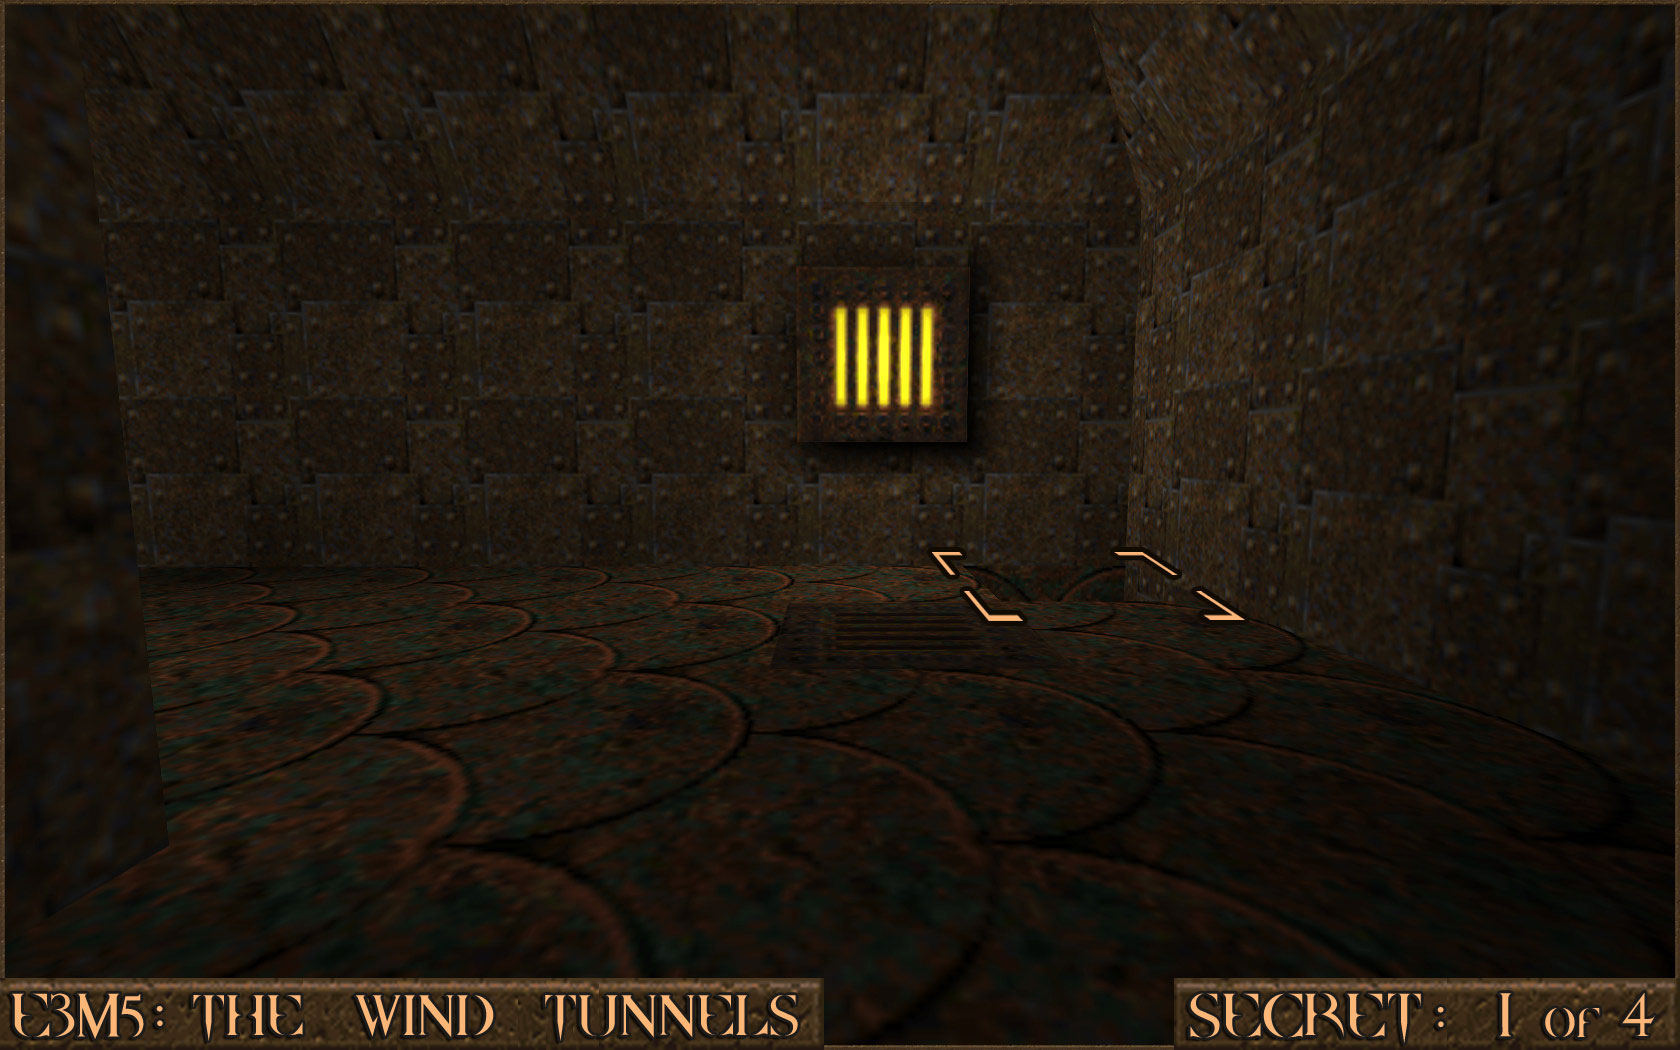 Reward:
 Secret 2 of 4
After going through the wind tunnel marked with a red rune you will come across a room with two Small Nails and some Green Armor. Jump in to the nearby water and you will find an underwater entrance to a secret area.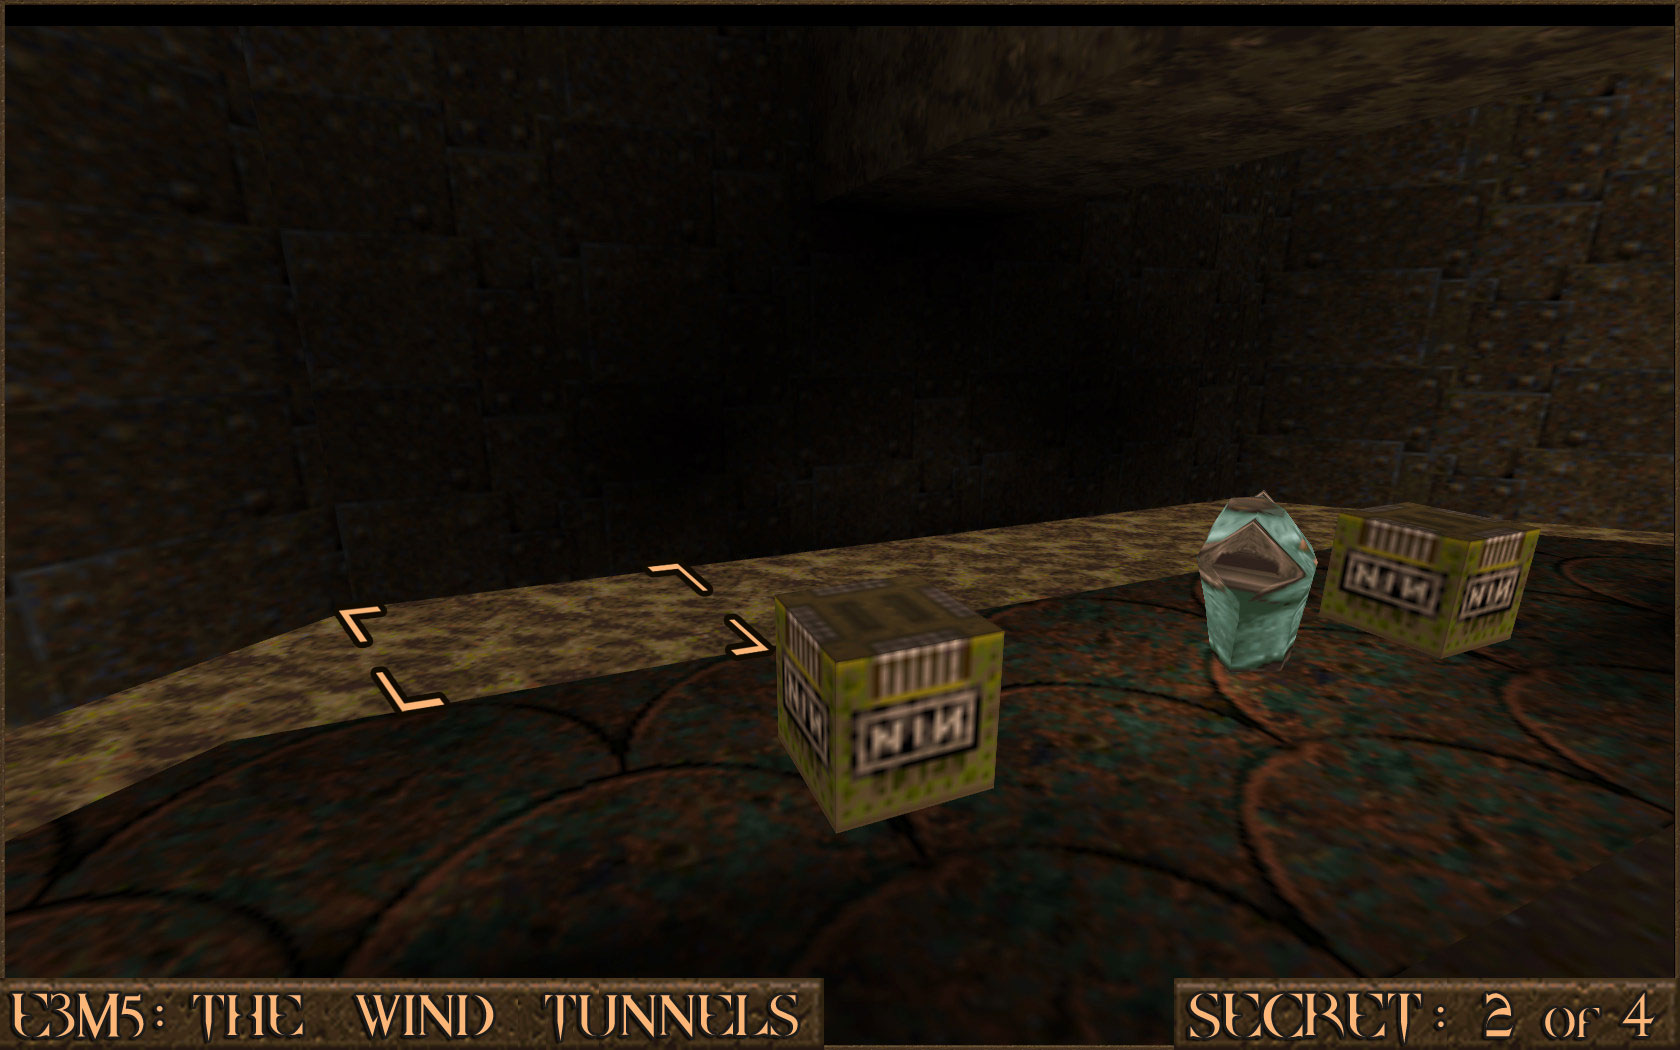 Reward:
 Secret 3 of 4
While you are on the edge of a very large pit look at the large beam above you. On one side of it is a large shootable red switch (). Shooting this will move a section of the wall () to reveal a secret.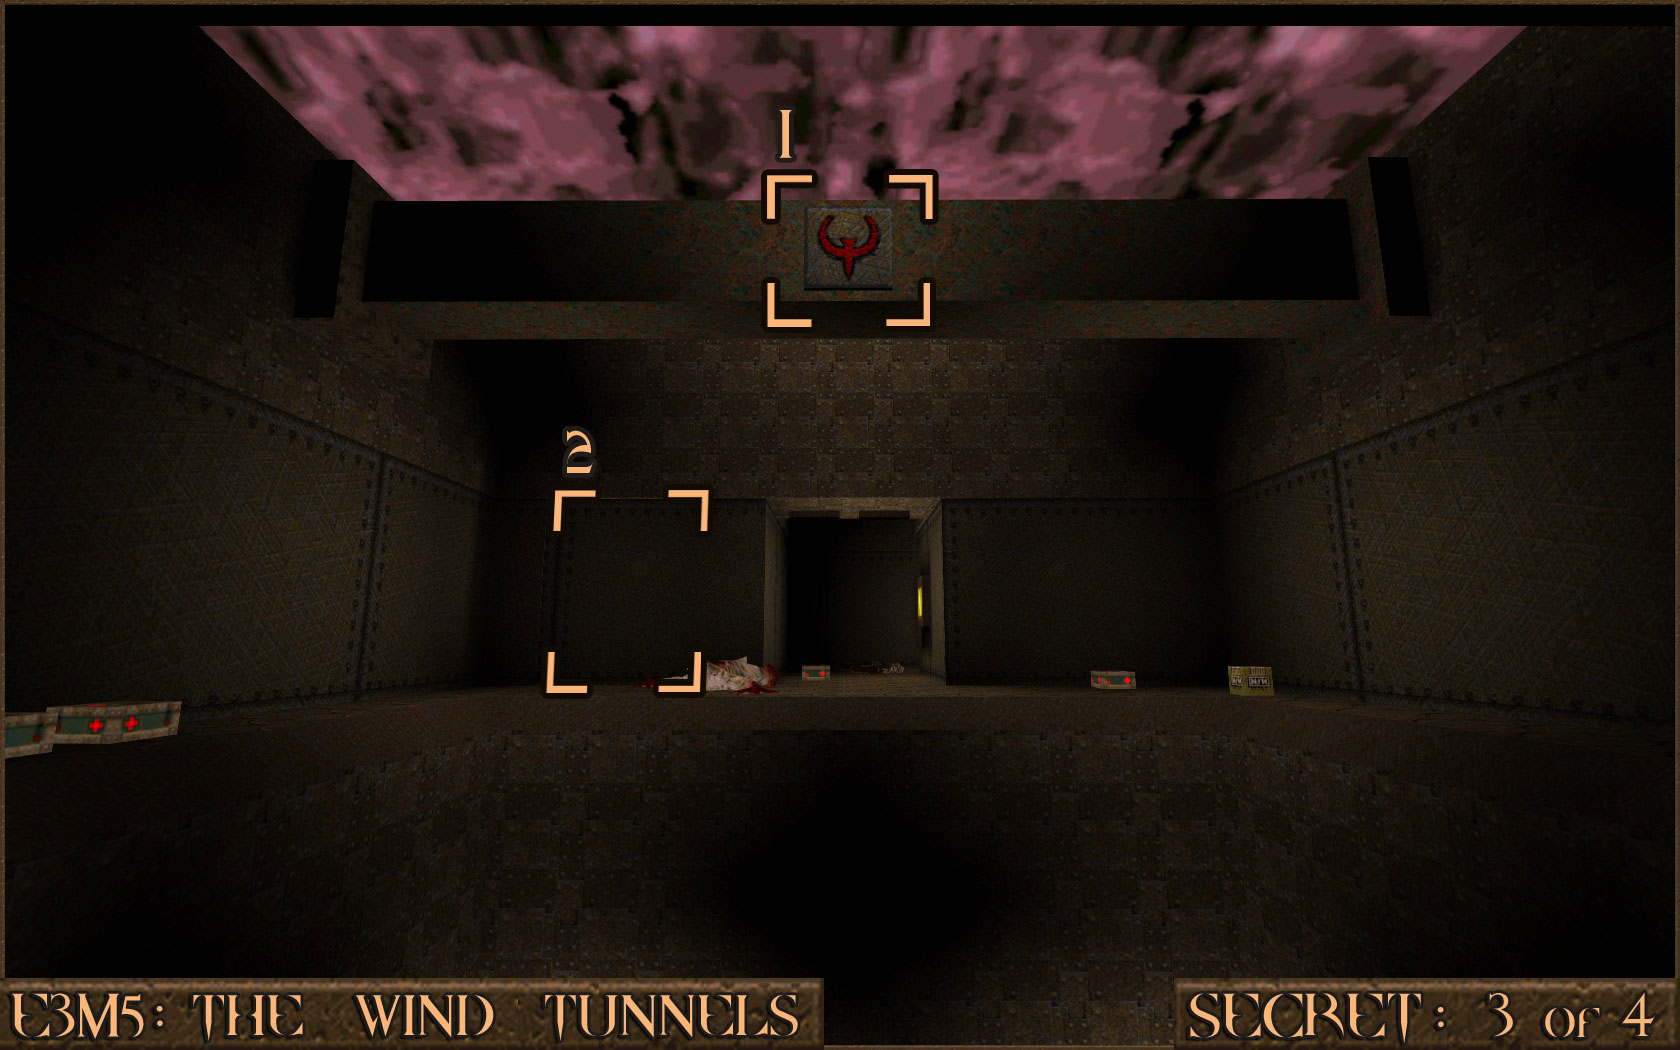 Reward:
 Secret 4 of 4
Just before you go through the exit portal there is an octagonal recess in the floor. Shoot it to make it move out of the way and give you access to the secret area.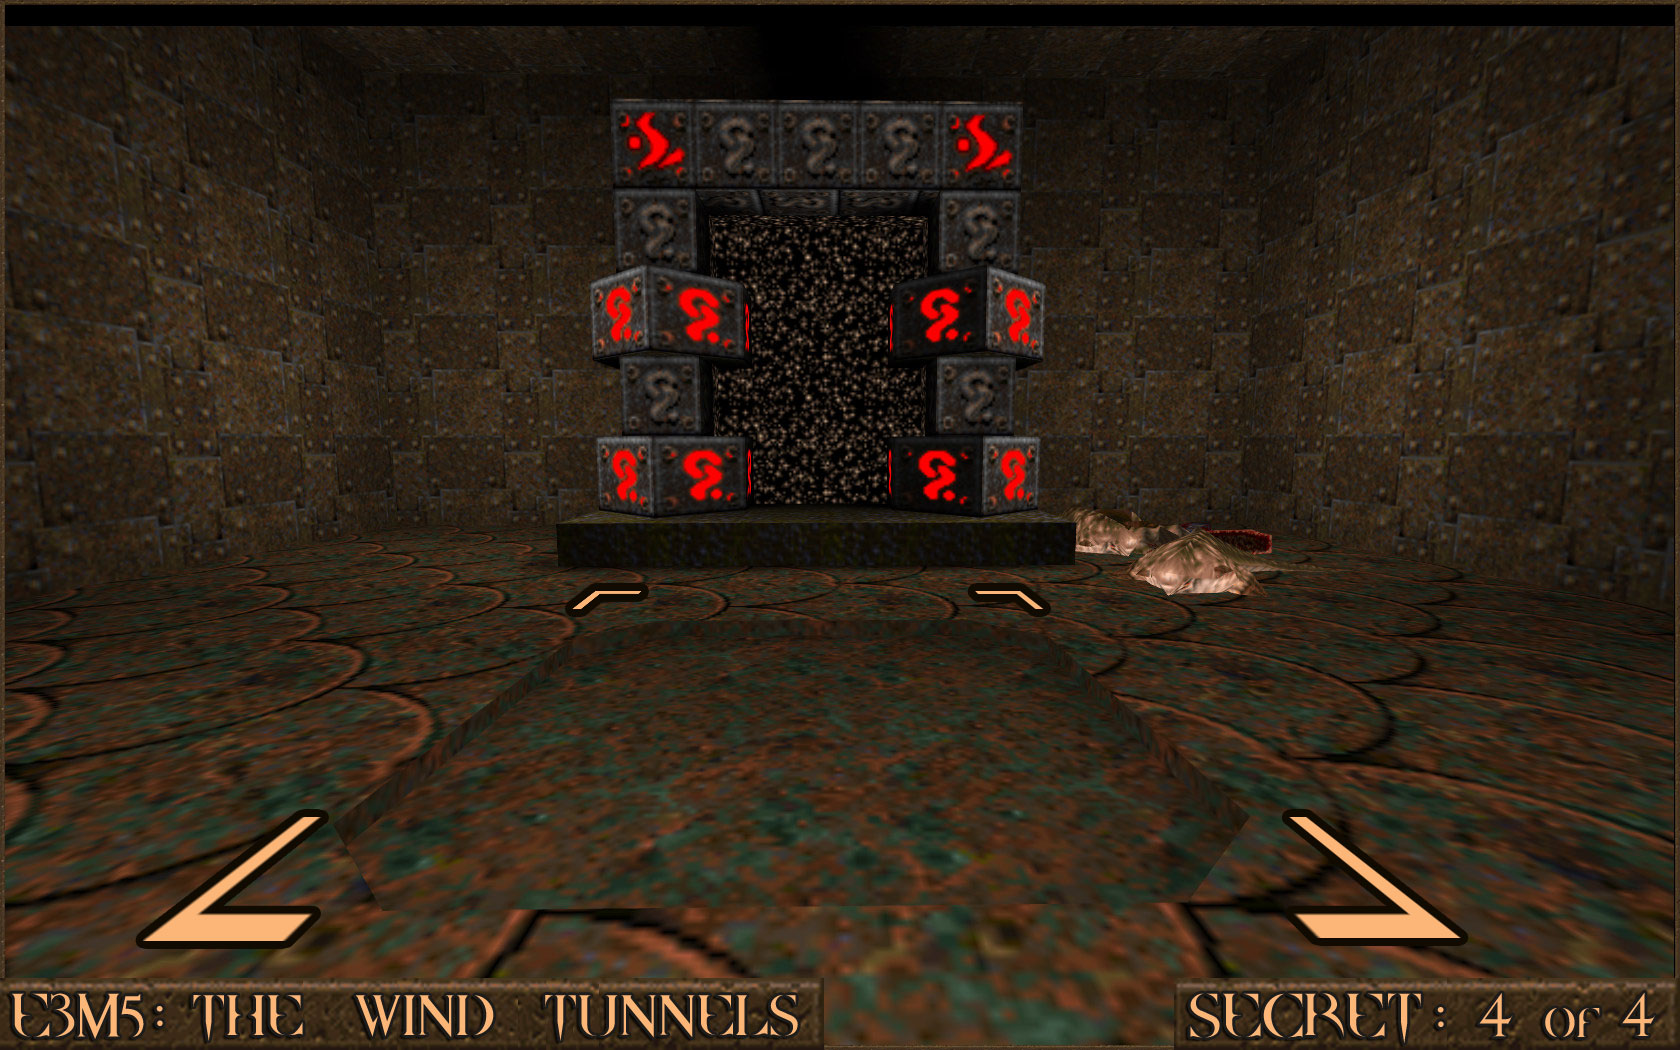 Reward:
 E3M6: Chambers of Torment
Secret 1 of 2
Just as you pick up the Silver Rune Key the nearby ceiling will move and enemies will attack you. After you've dealt with the enemies look up at the ceiling where they came from to see a shootable red switch (). Shoot it to make part of the blue wall move () and allow you access to the secret.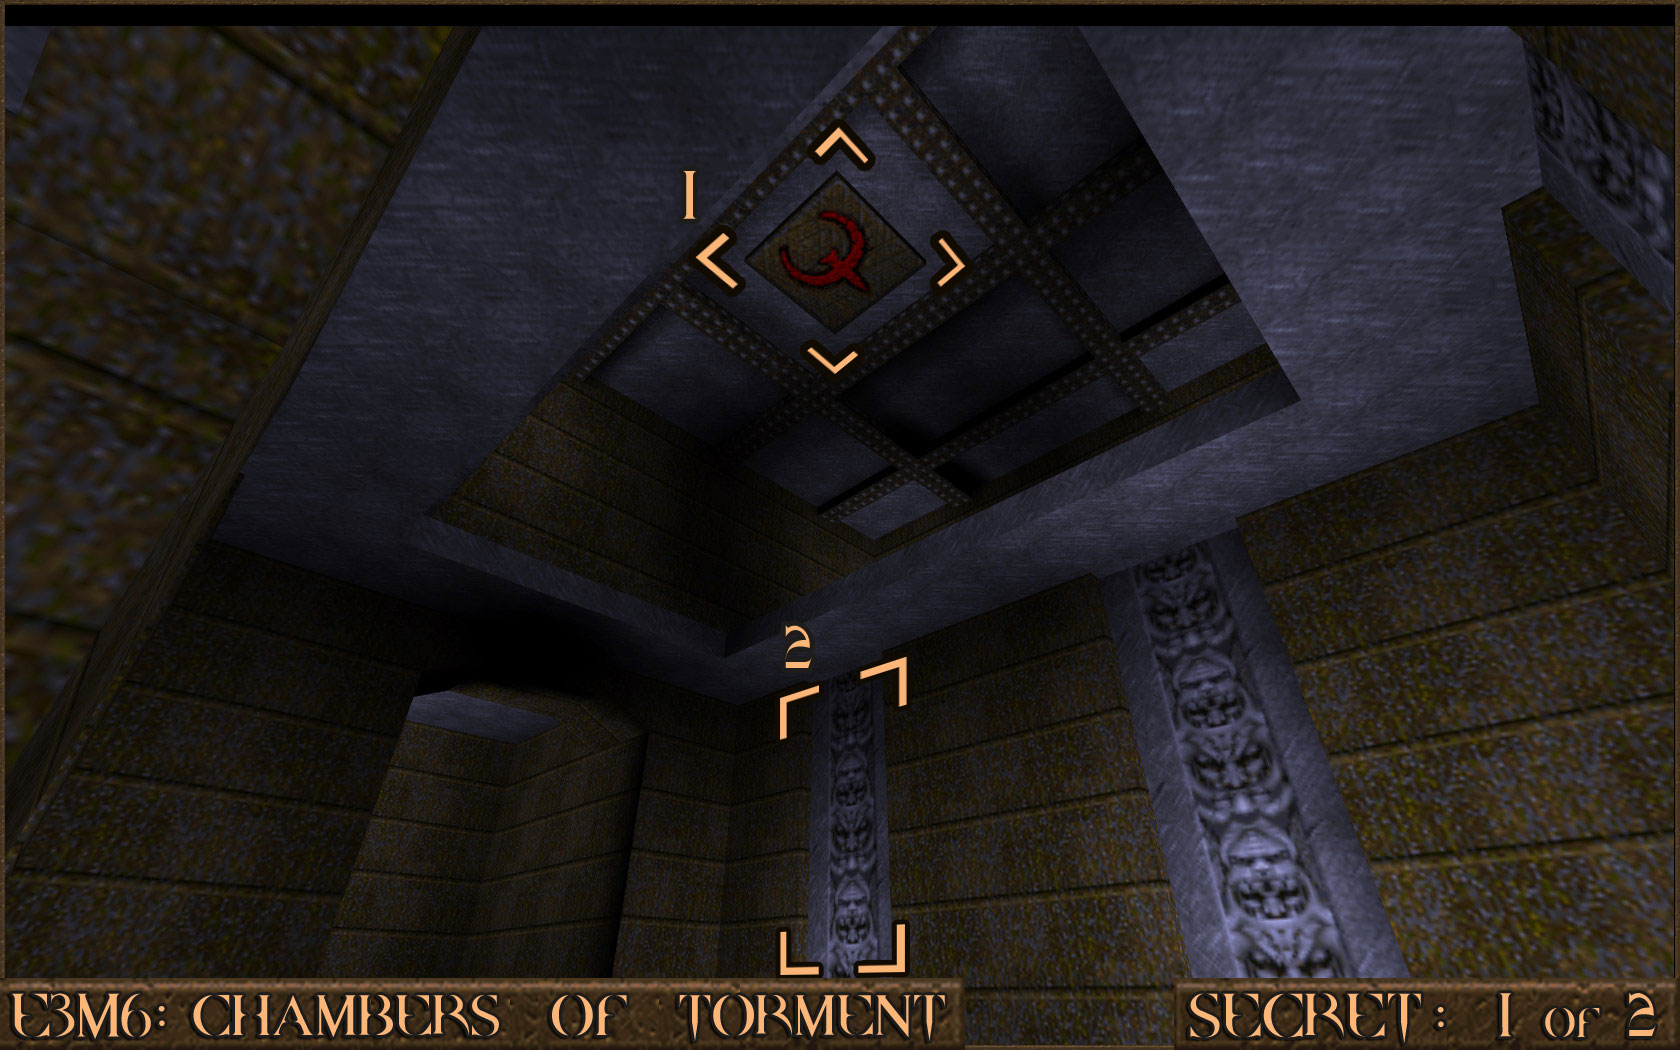 Reward:
 Secret 2 of 2
While going up a long elevator look straight up at the ceiling. You should see a shootable red switch () that when activated will move a nearby bar (). This allows you access to the rafters of the previous room which is a secret area.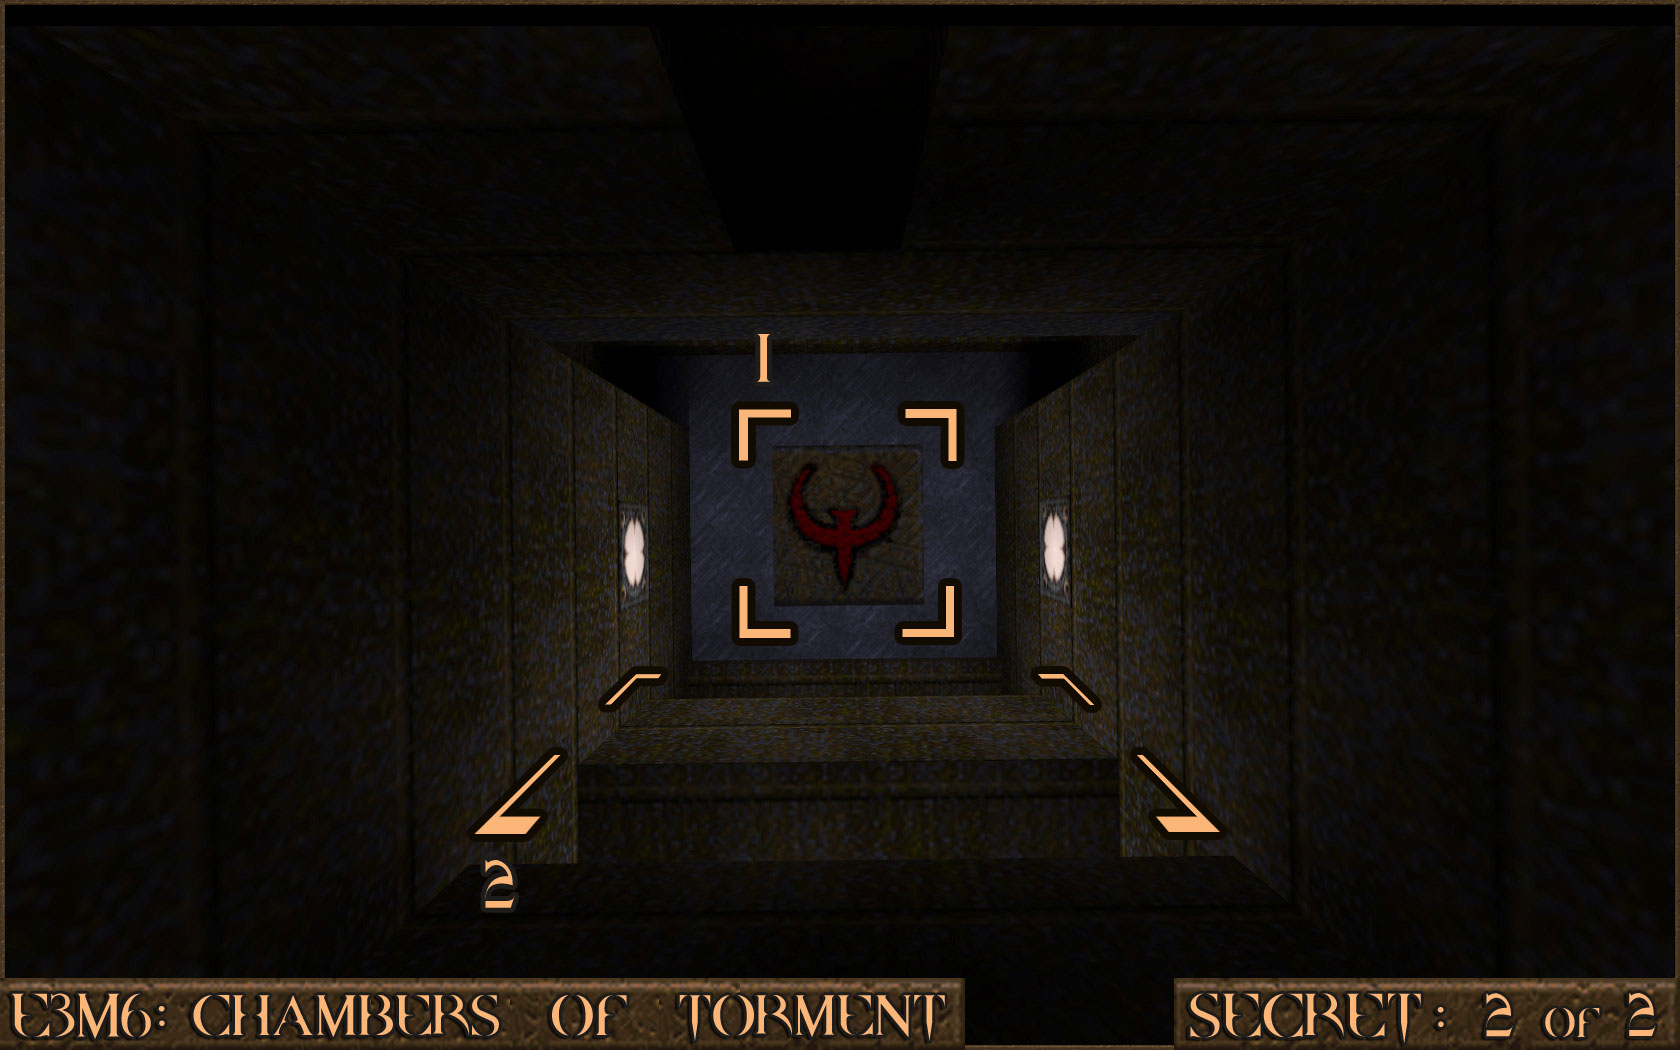 Reward:
 E4M1: The Sewage System
Secret 1 of 4
After riding the elevator up and out of the water look for a metallic section of the wall. Shooting this will reveal a secret area.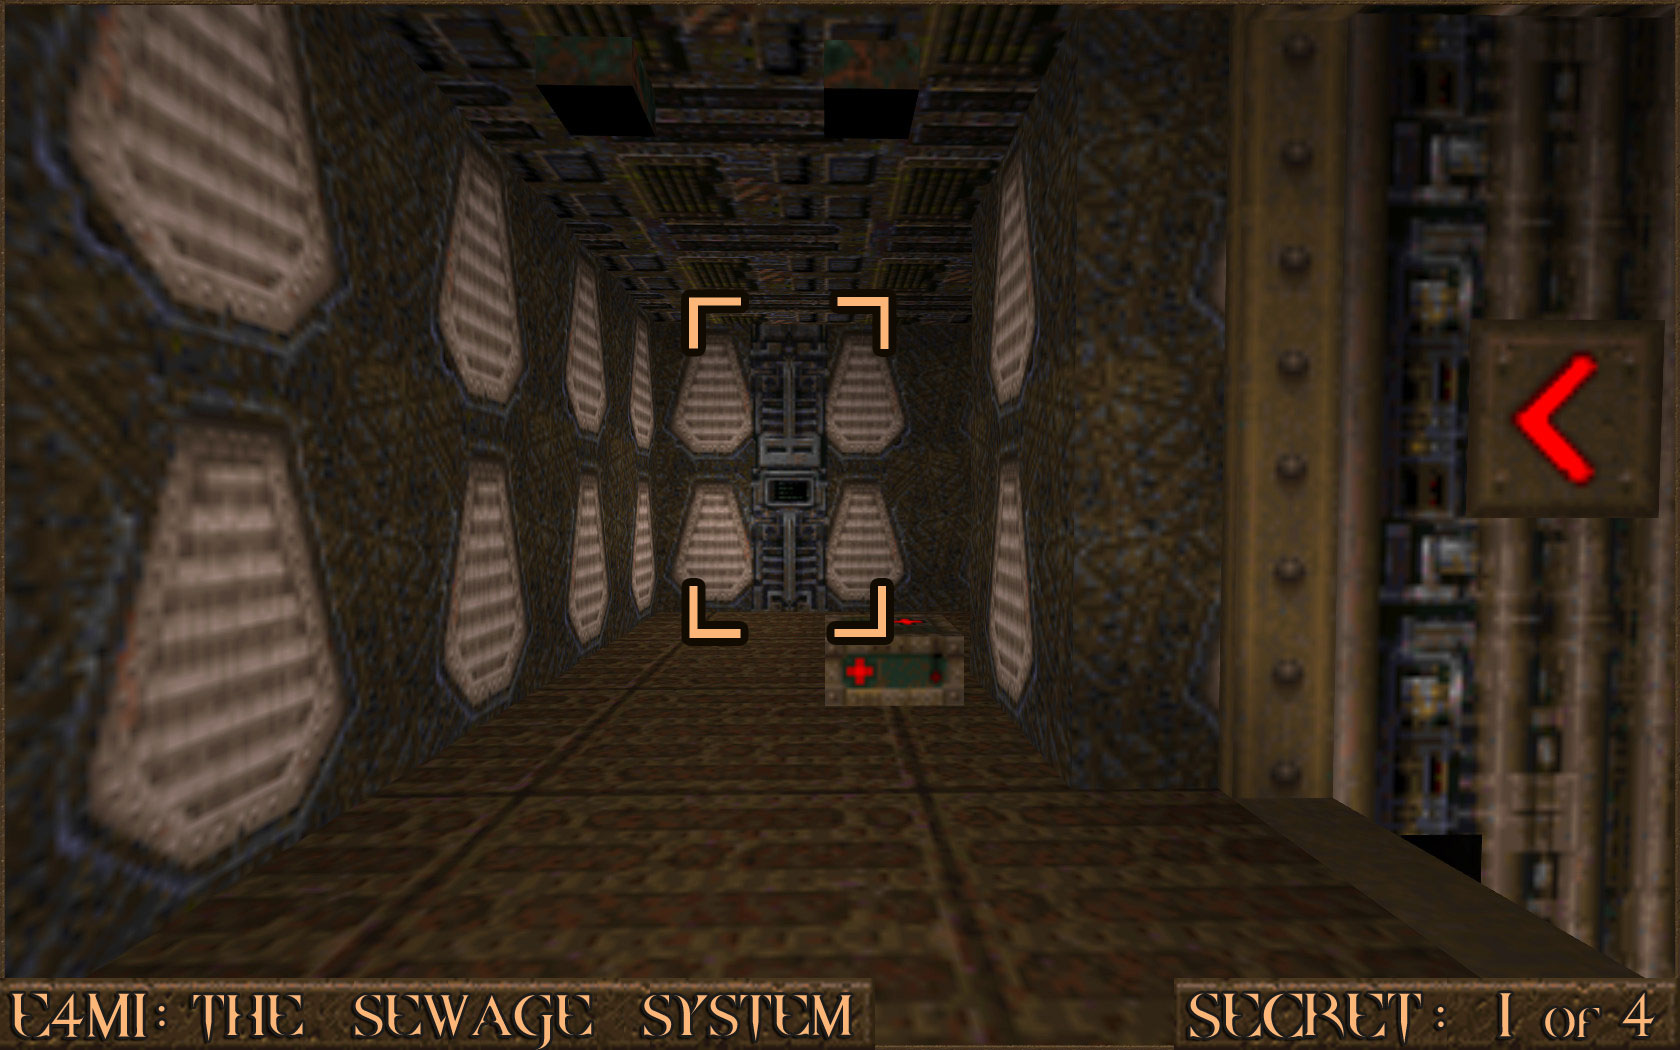 Reward:
 Secret 2 of 4
Starting from the bottom of the ramp () run straight up it. Jump just before you reach the top () and you should do a slightly higher jump than usual. You should jump high enough to bump in to the blinking light fixture () above the ramp. Doing this will trigger a nearby secret wall () which allows entrance to the secret.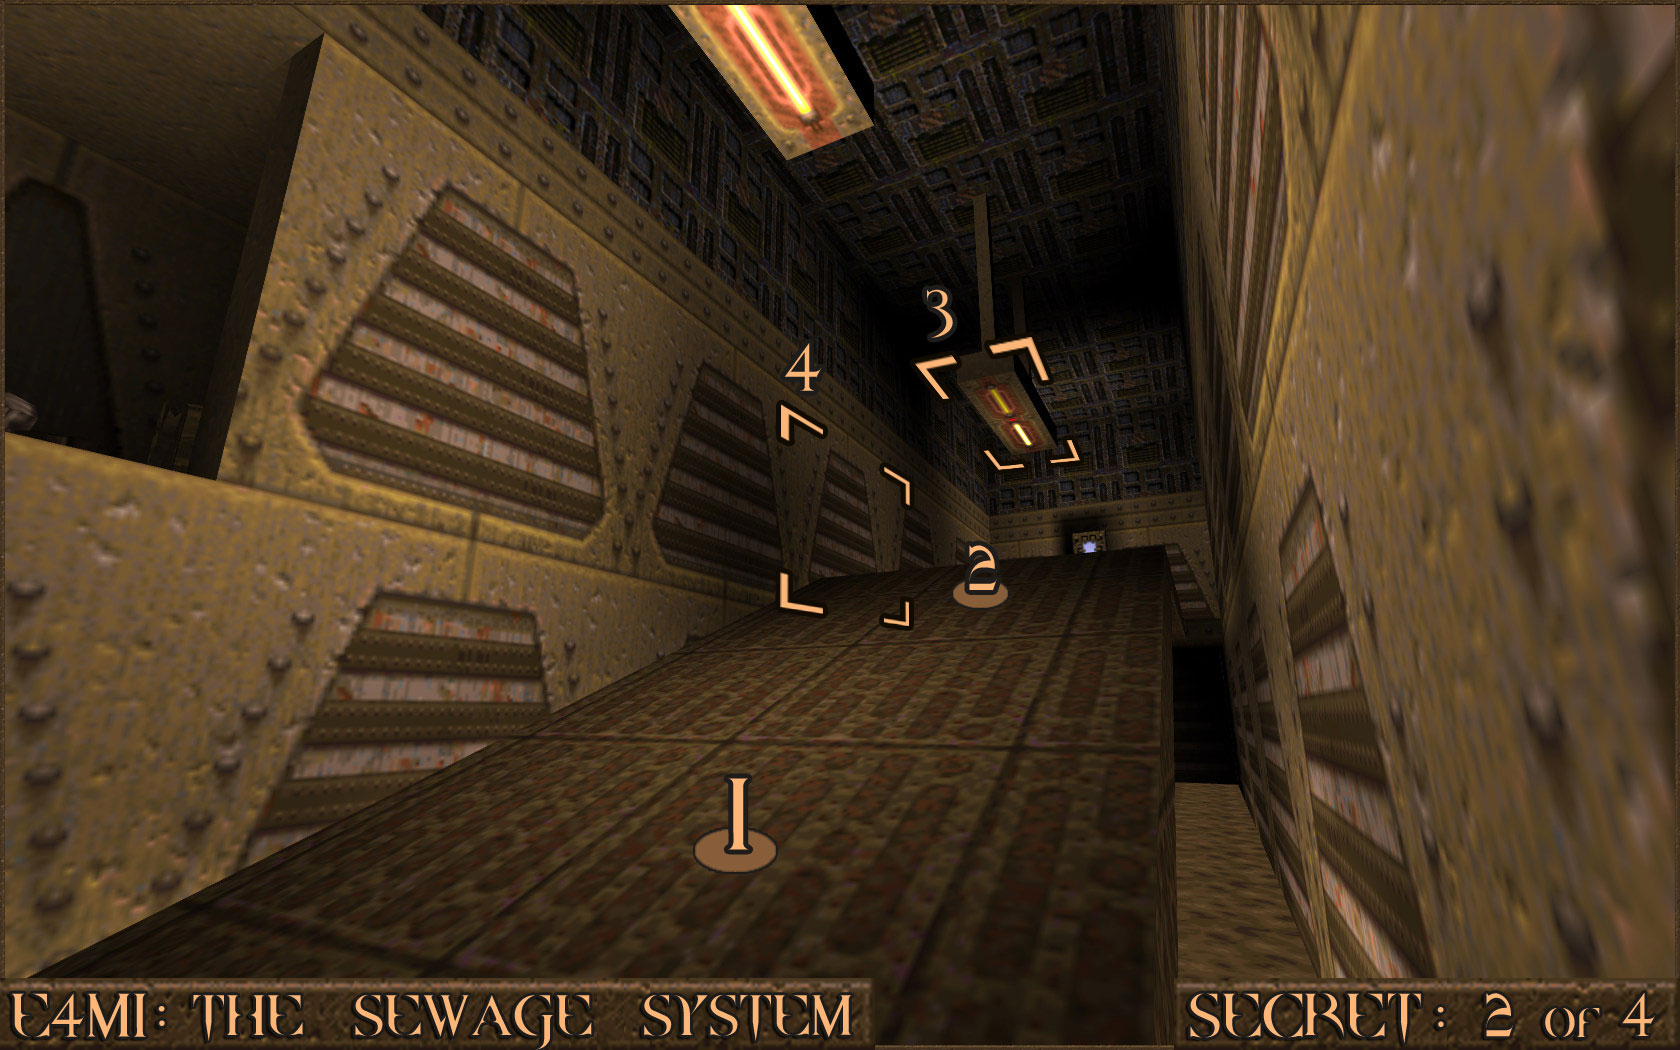 Reward:
 Secret 3 of 4
Near where you pick up a Biosuit look above a doorway to see a red target switch ().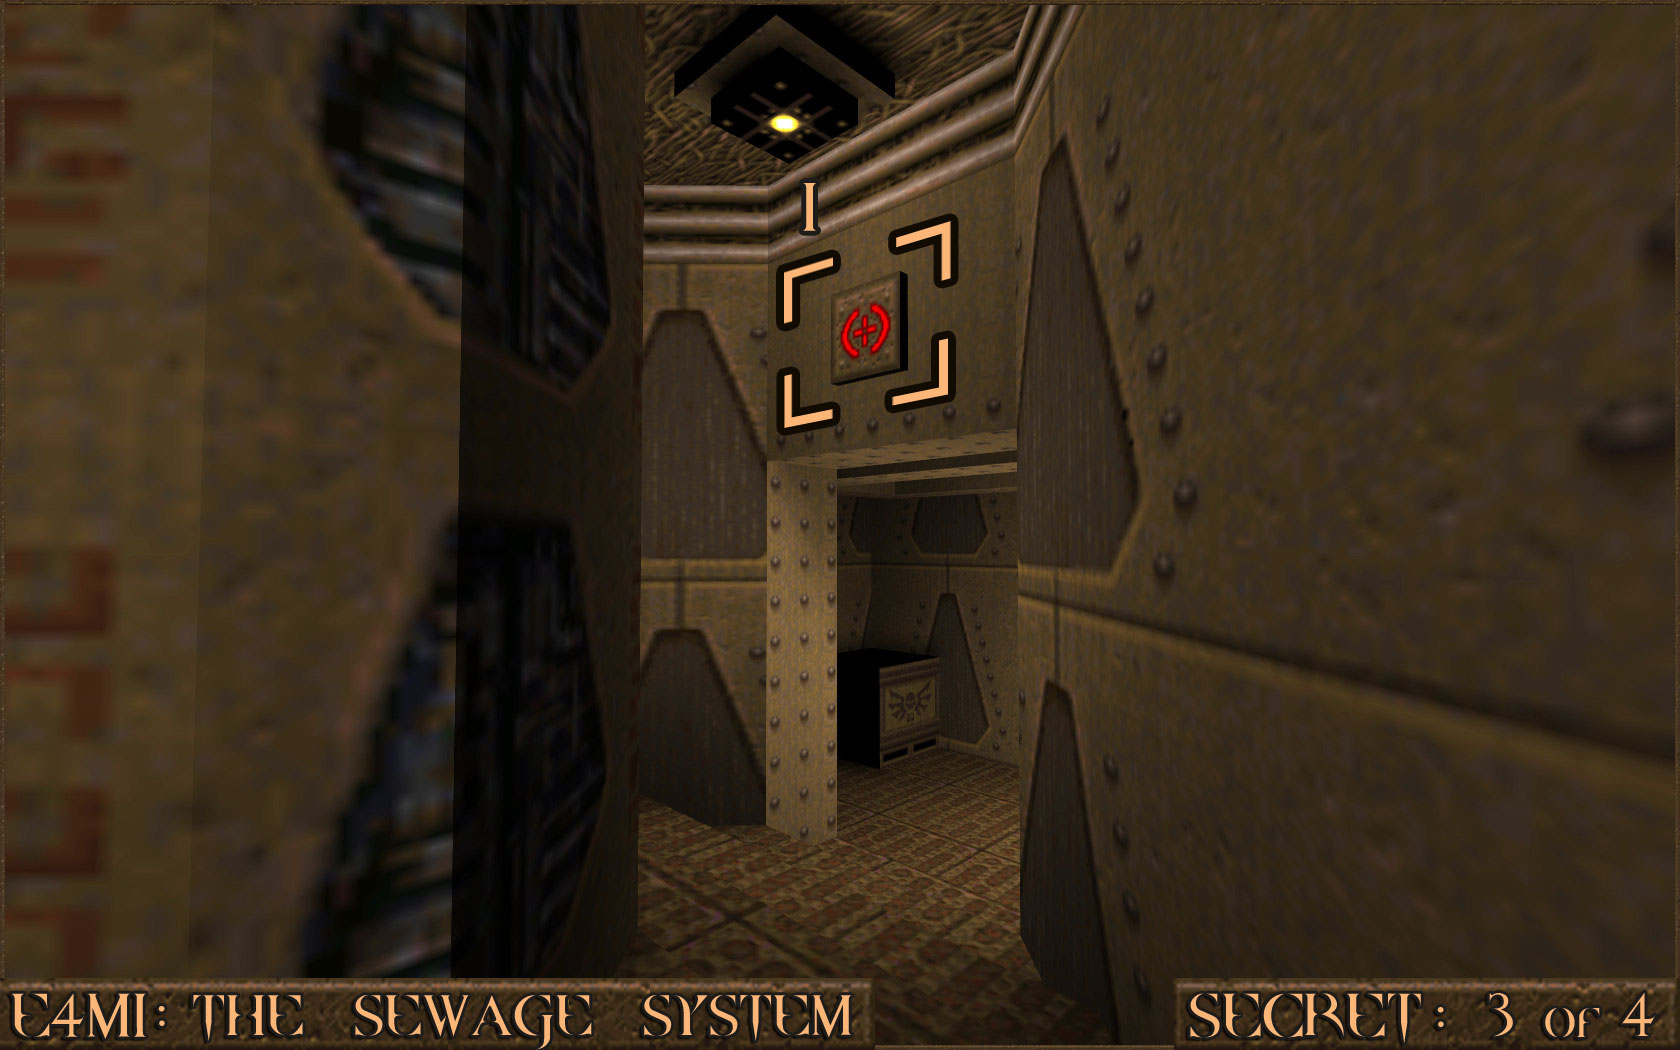 Once the switch has been a shot exit through the doorway and look to your right. You should see the secret area () now that the wall has moved out of the way.
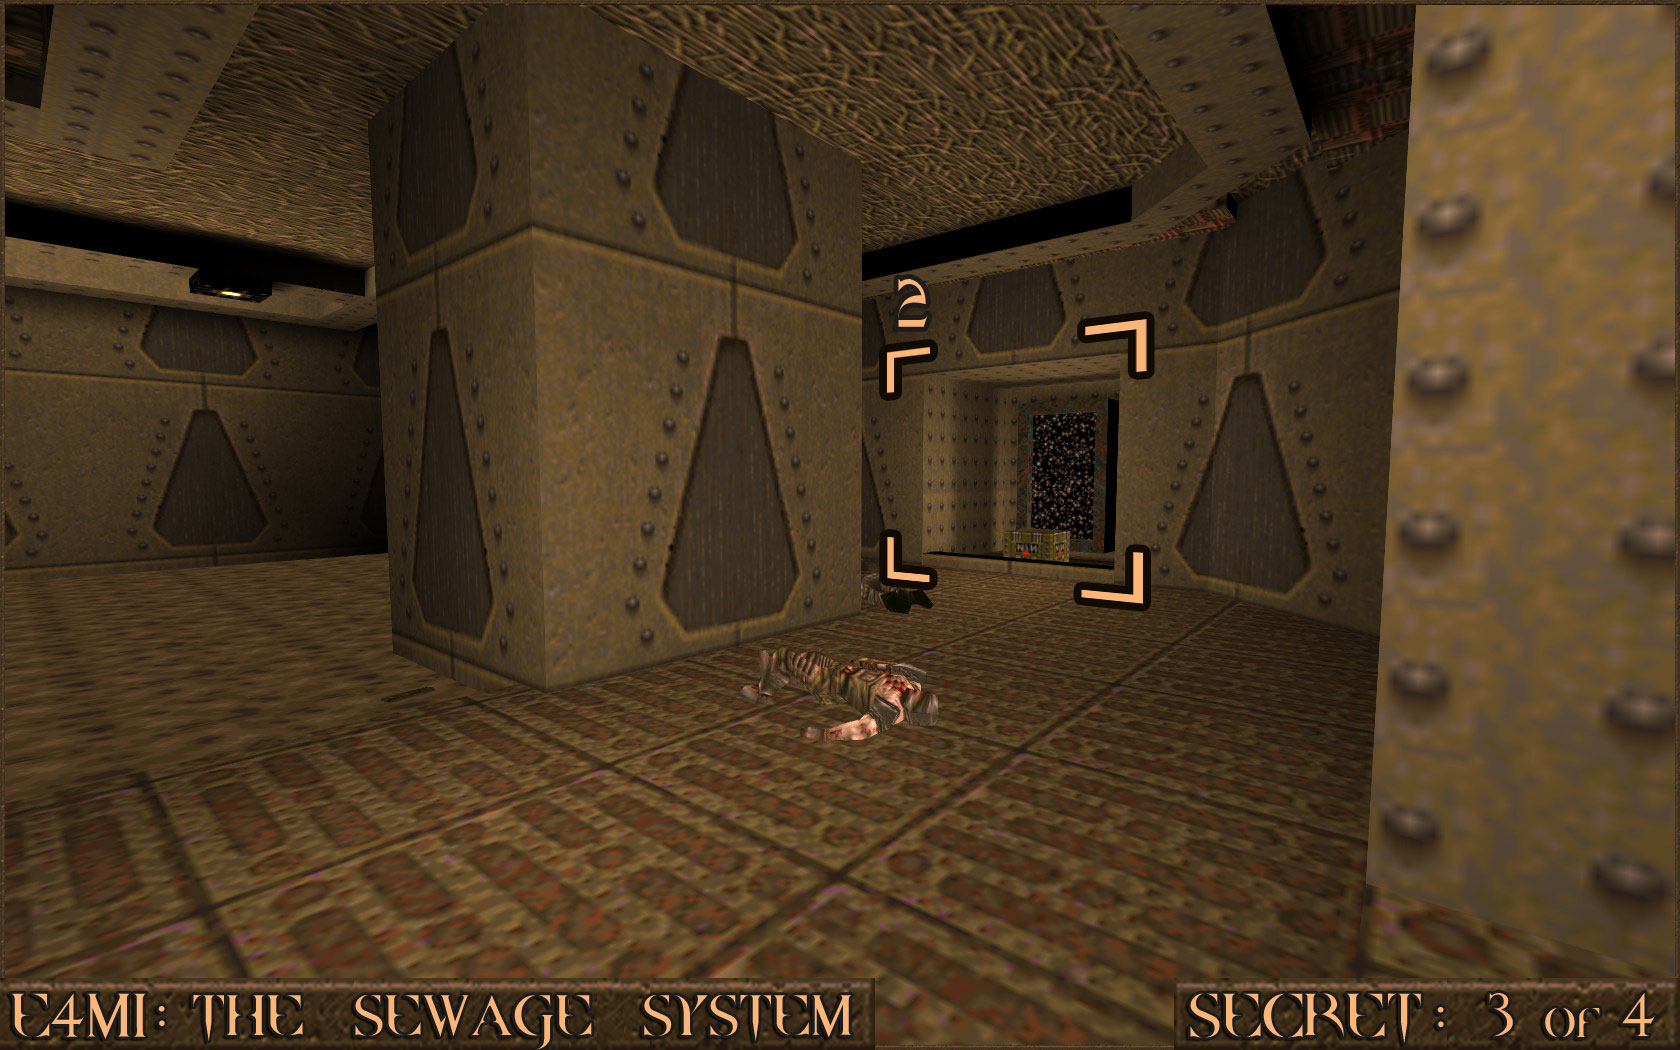 Reward:
 Secret 4 of 4
In a large underwater area look up to the sides of the room. You will notice a long thin area where it is possible to surface. Jump out in to the small room to find the secret.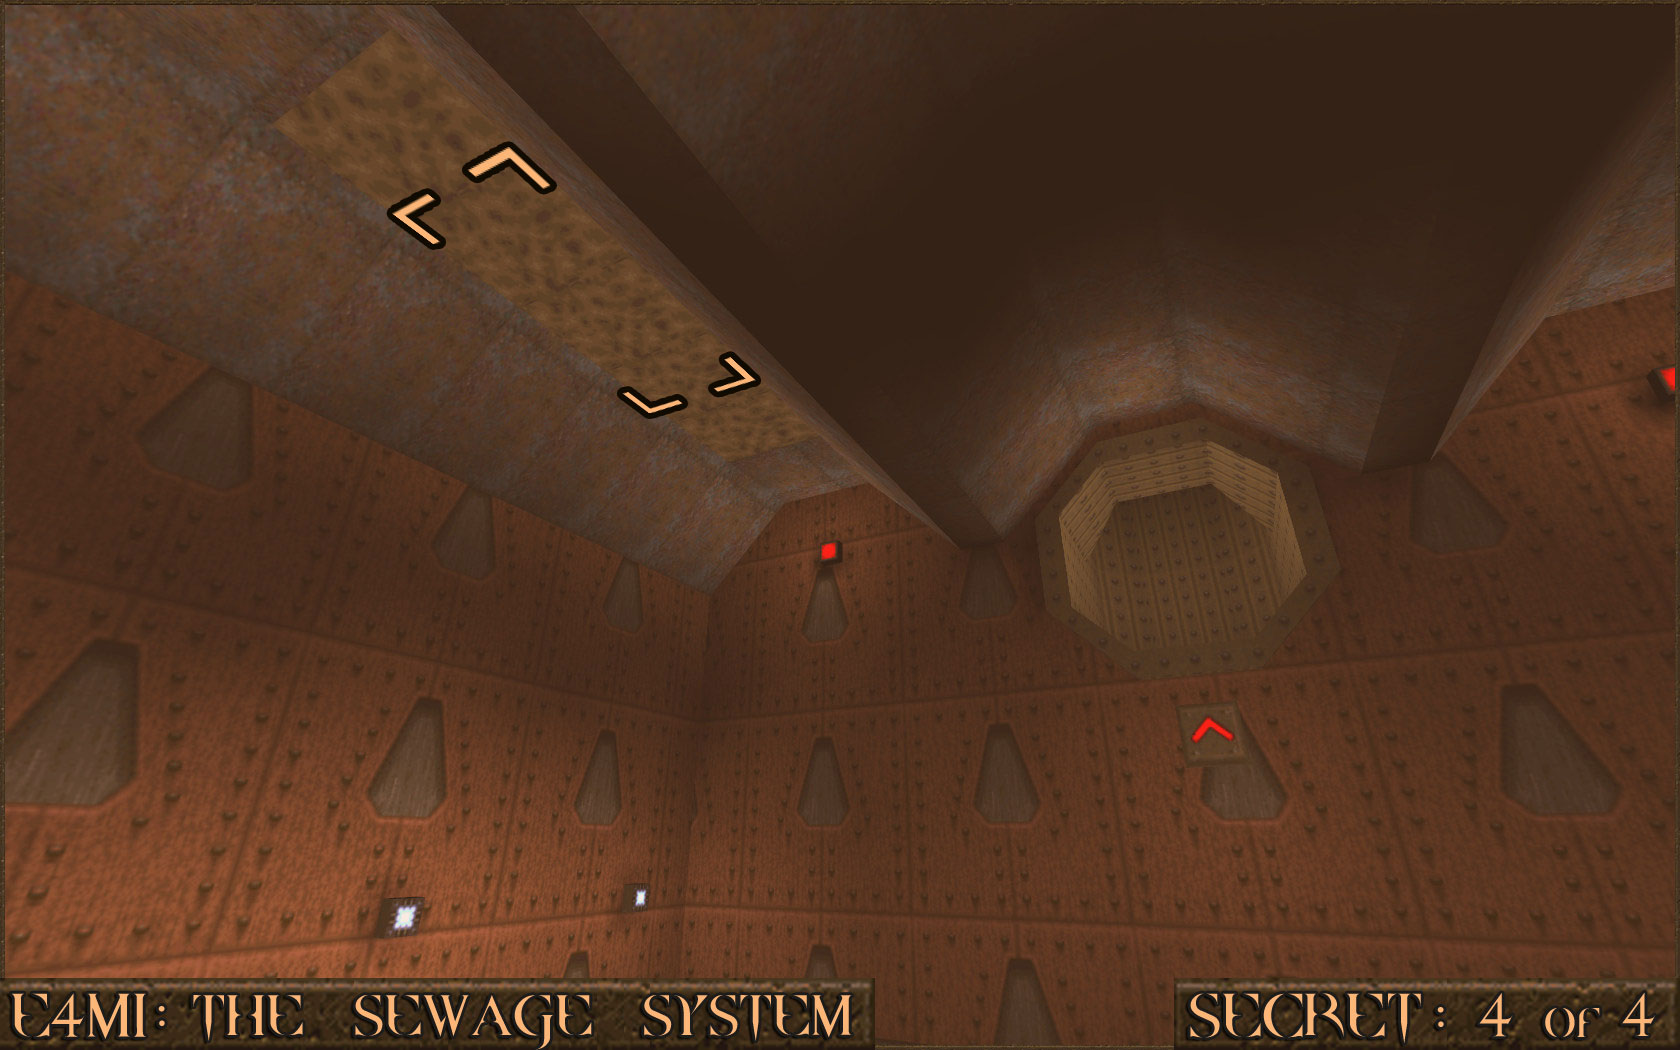 Reward:
 E4M2: The Tower of Despair
Secret 1 of 5
After falling down the hole at the start the message "The window is a key to a secret." will appear. In this room is a large red circular window () that is actually a shootable trigger. After it has been shot a small dagger switch () is revealed underneath the window. After pressing the dagger switch another message stating "You opened the cages!" will appear. The cages are in the corner of the room and contain the secret.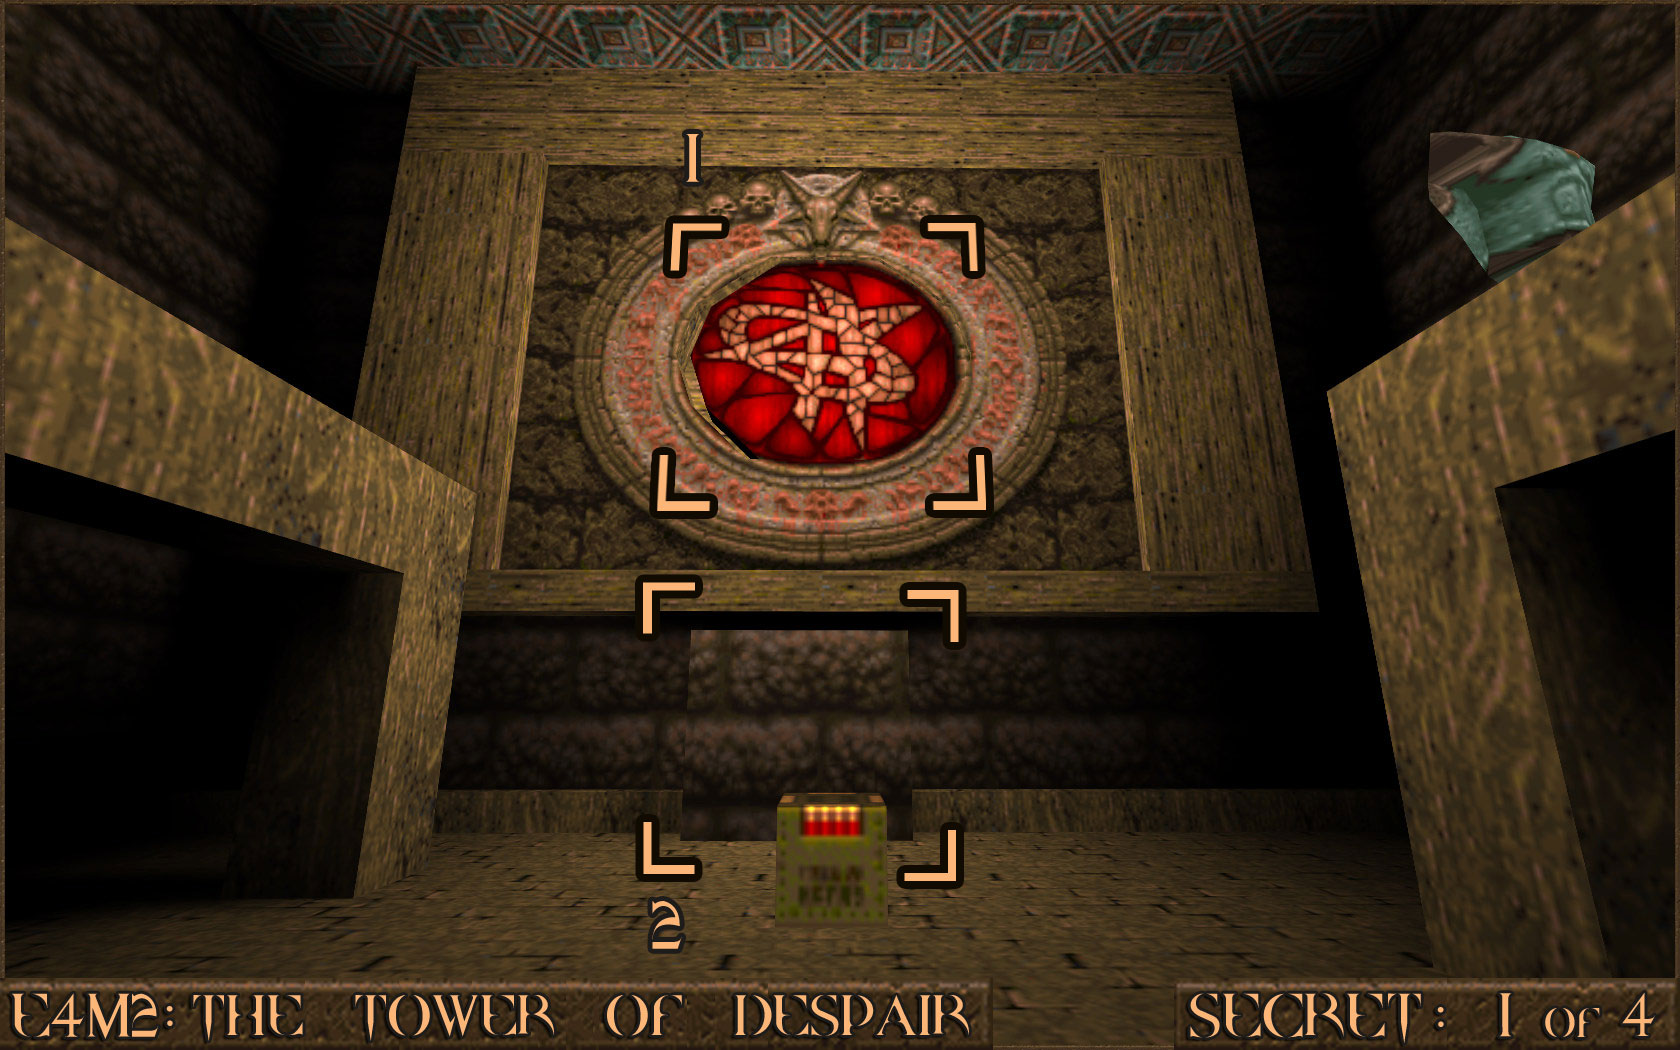 Reward:
 Secret 2 of 5
You will reach the end of a corridor that is apparently a dead end. However look for a gap in the skirting board at the bottom of the wall. Shoot the section of wall that has the gap to reveal the secret room.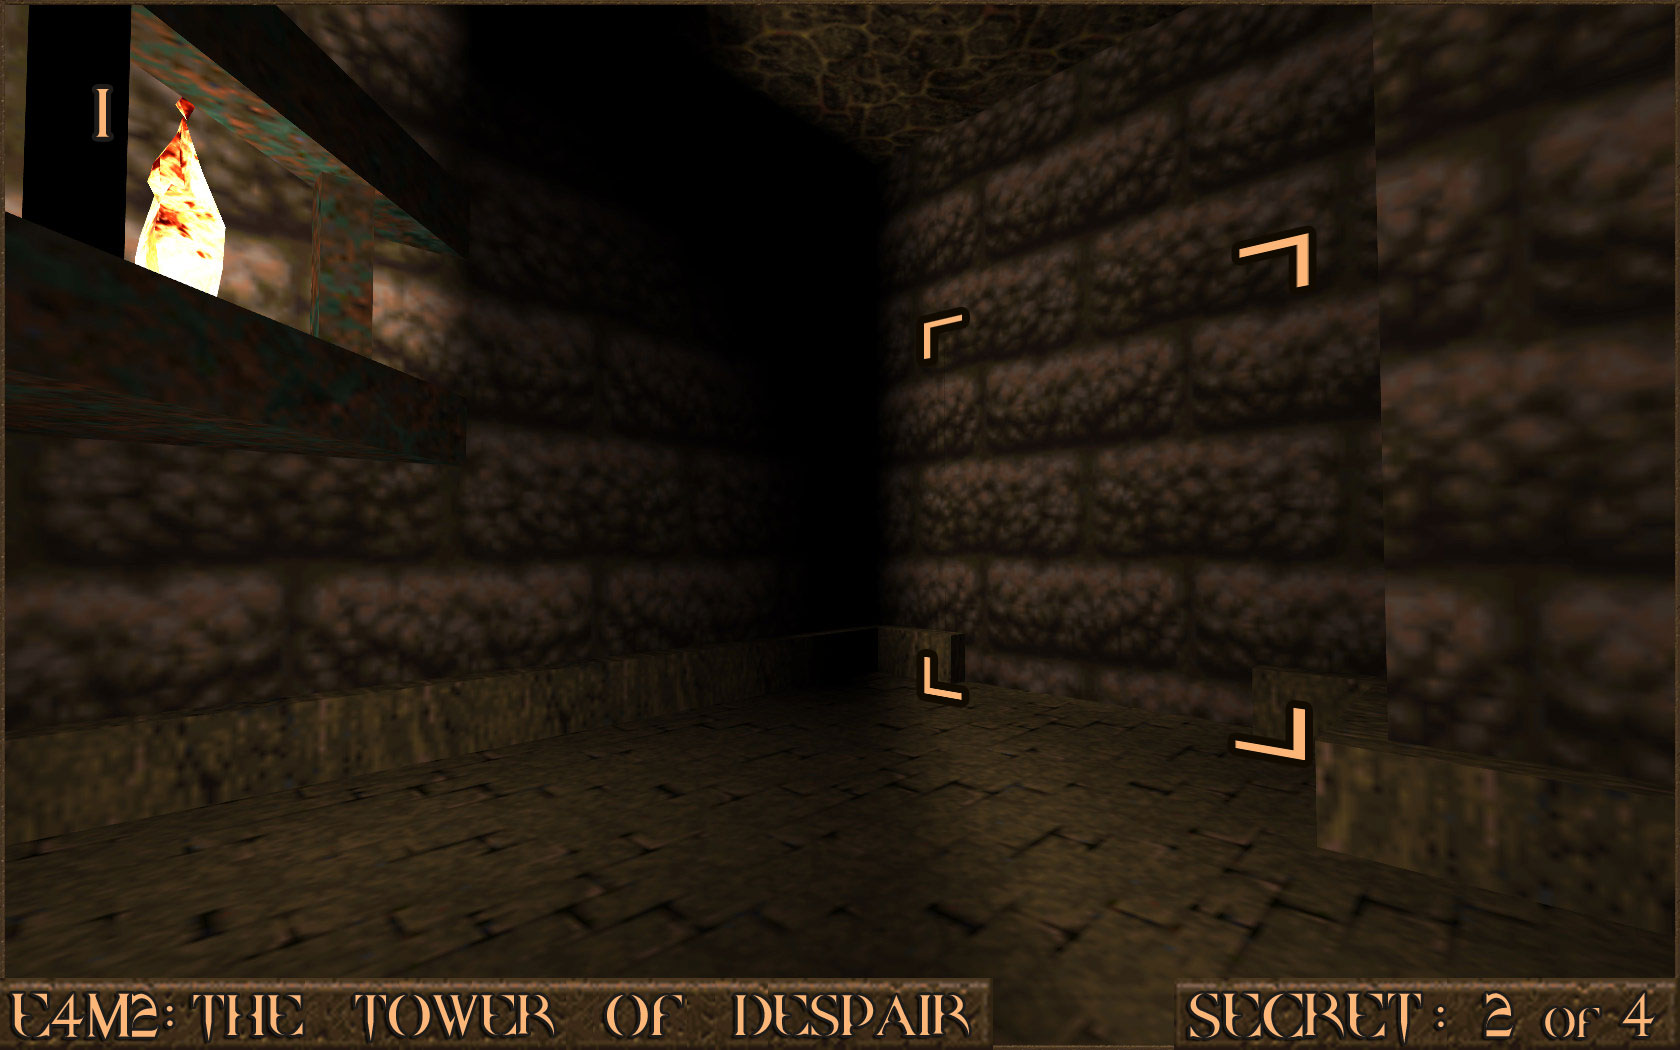 Reward:
 Secret 3 of 5
While inside Secret 2 wait for the wall to close behind you. The small recess in the wall where the door was contains a hidden dagger switch (). Press the switch then shoot the wall again to leave.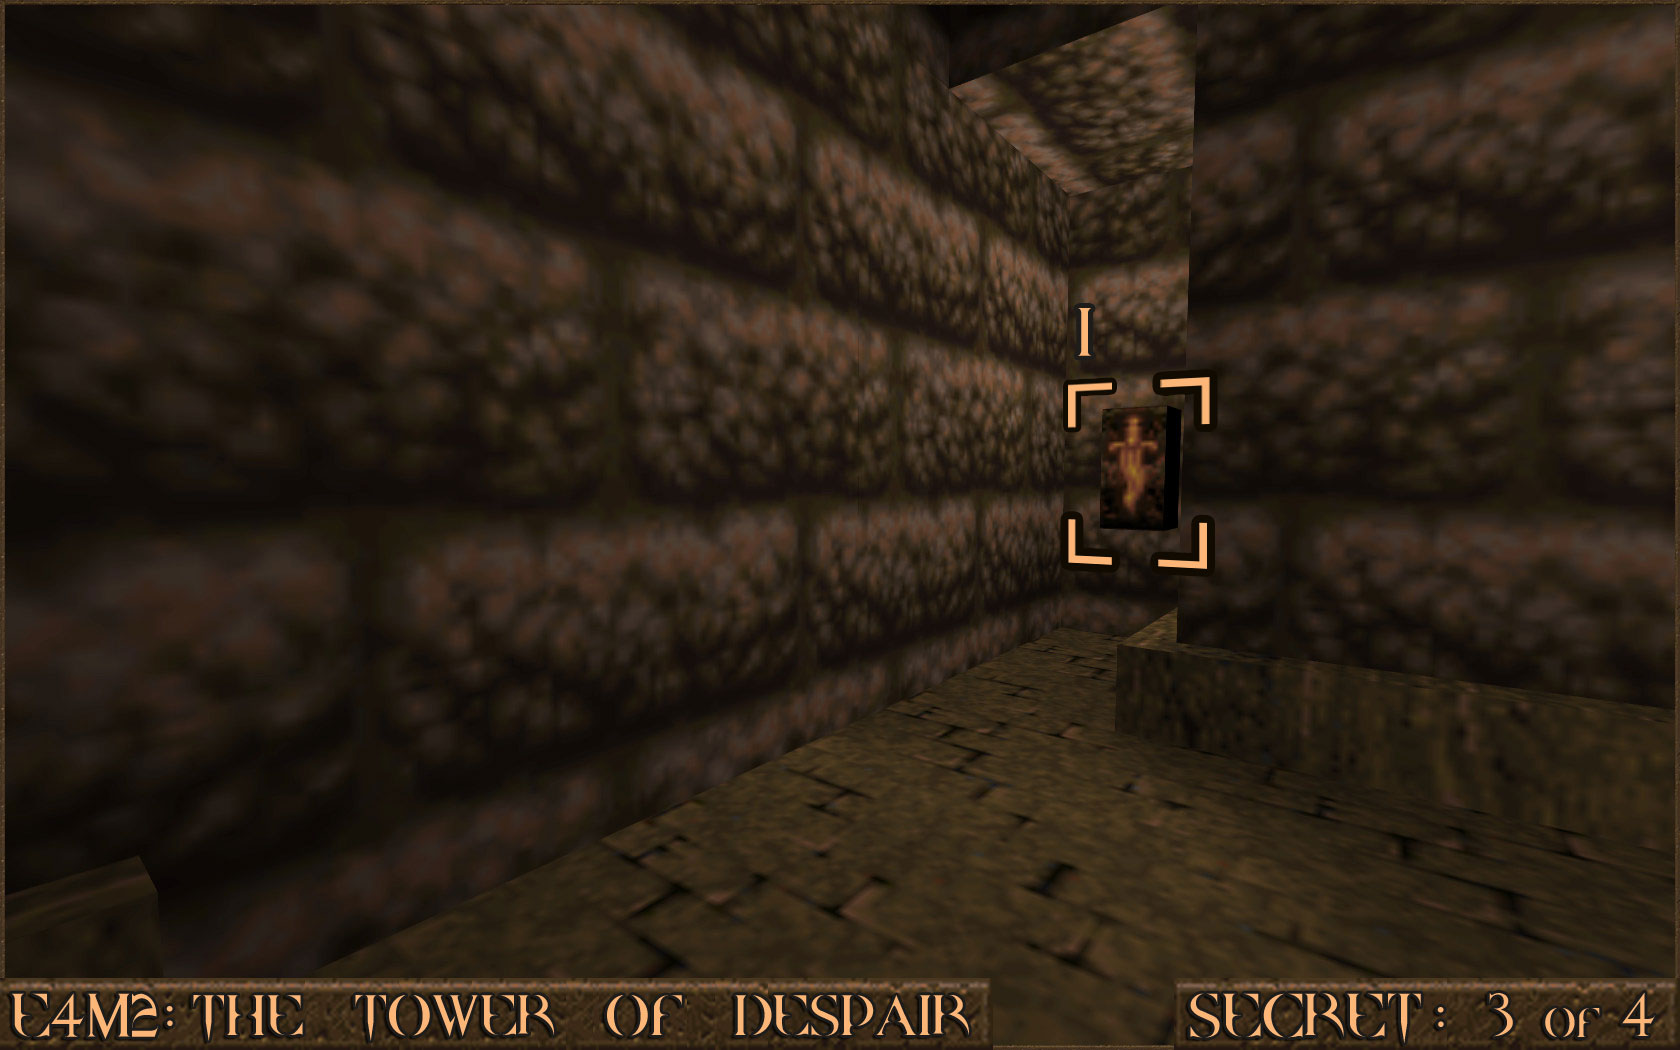 You will now see a section of the floor () has changed in to steps down to some Green Armor. When you attempt to pick up the Green Armor you will actually be teleported away to the actual secret area.
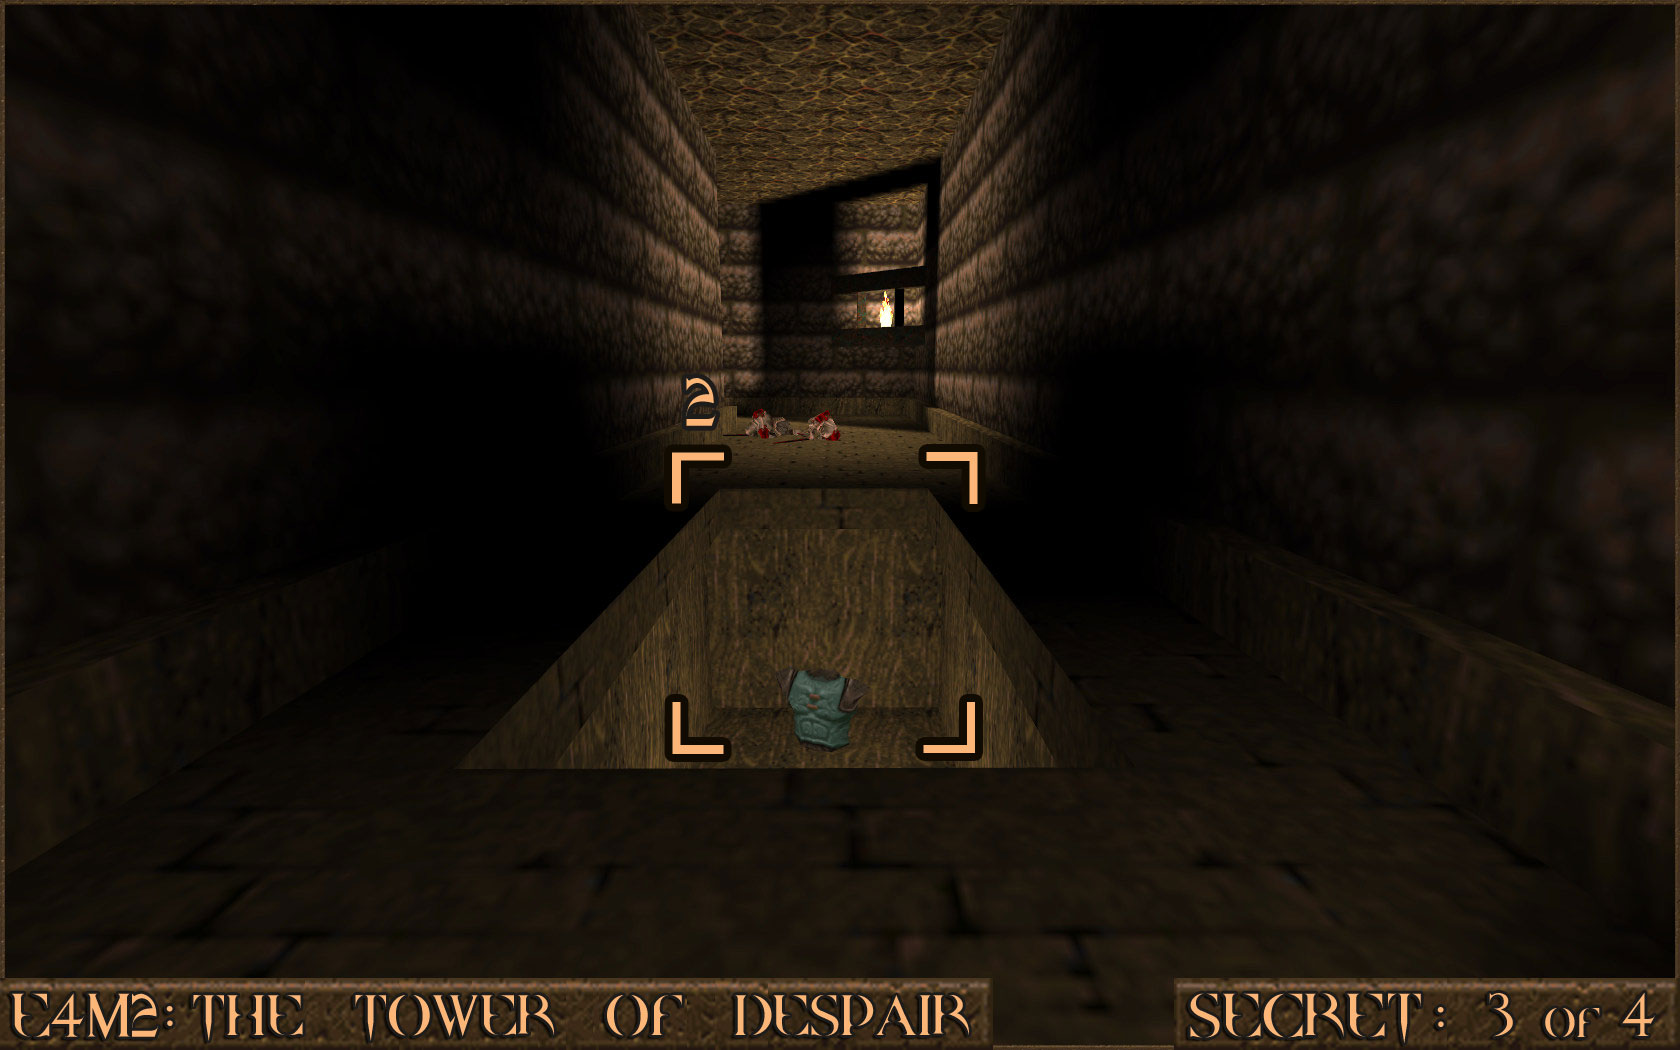 Reward:
 Secret 4 of 5
Near to another red window like in Secret 1 are some suspended beams with a few items on them. Jump on to the lower beam () and work your way up to the dark corner to find a hidden area ().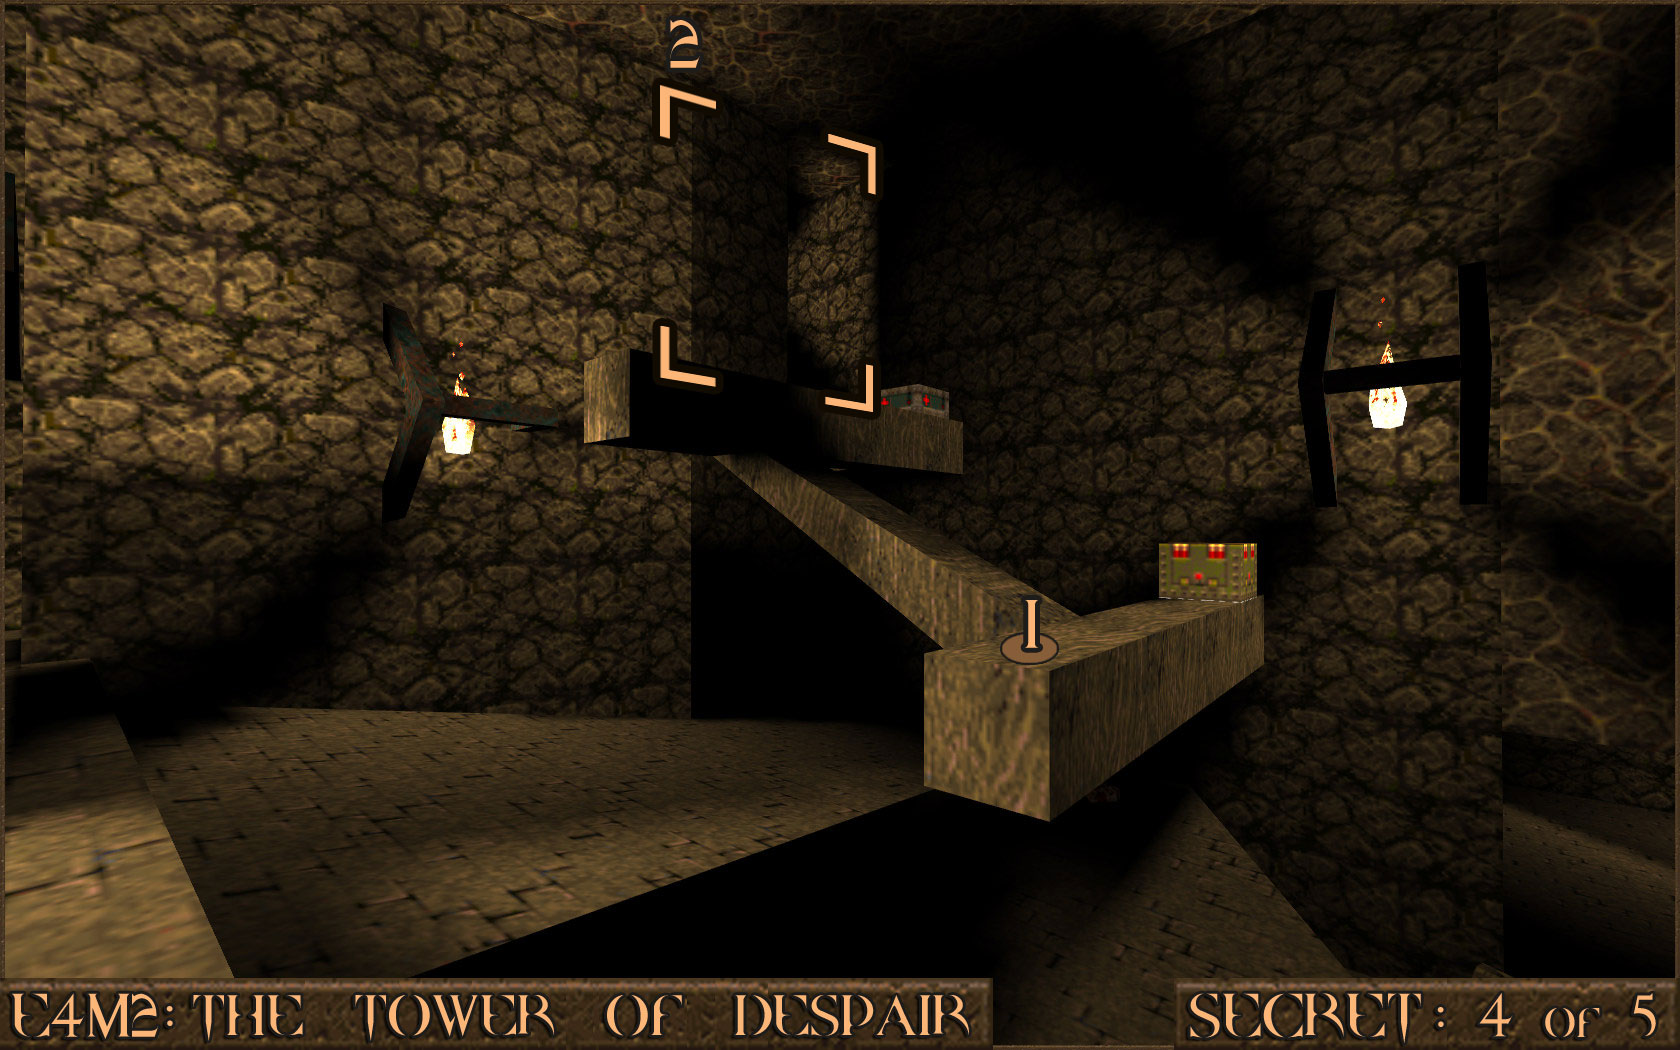 Follow the hidden area to find yourself above a corridor from earlier in the level. Jump down on to the bars and pick up the Megahealth () to discover the secret.
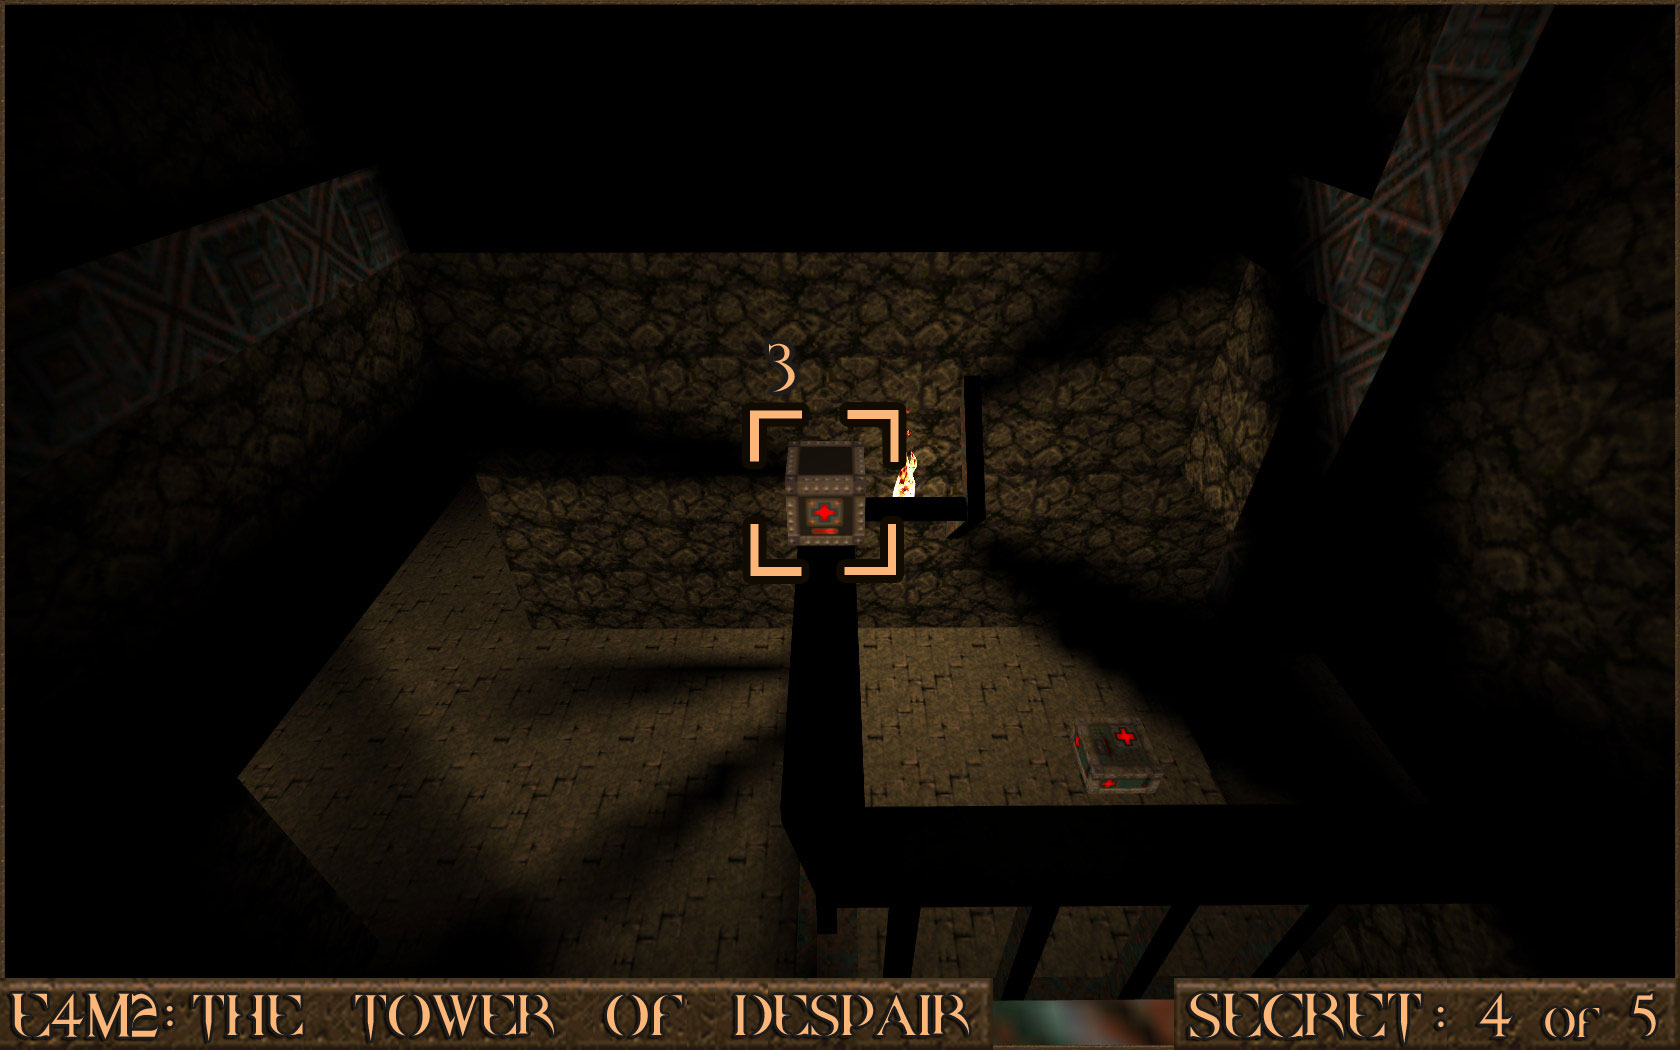 Reward:
 Secret 5 of 5
During the course of the level will jump through the second red window that is near Secret 4. After you have taken the elevator up you will be facing a dagger switch over some bars. To the right of this switch is a shootable wall that reveals a secret area. However it is advisable to press the dagger switch first, quickly get away from the bars and then activate the secret wall as the dagger switch removes a barrier that will stop you from going back if you go through the secret first.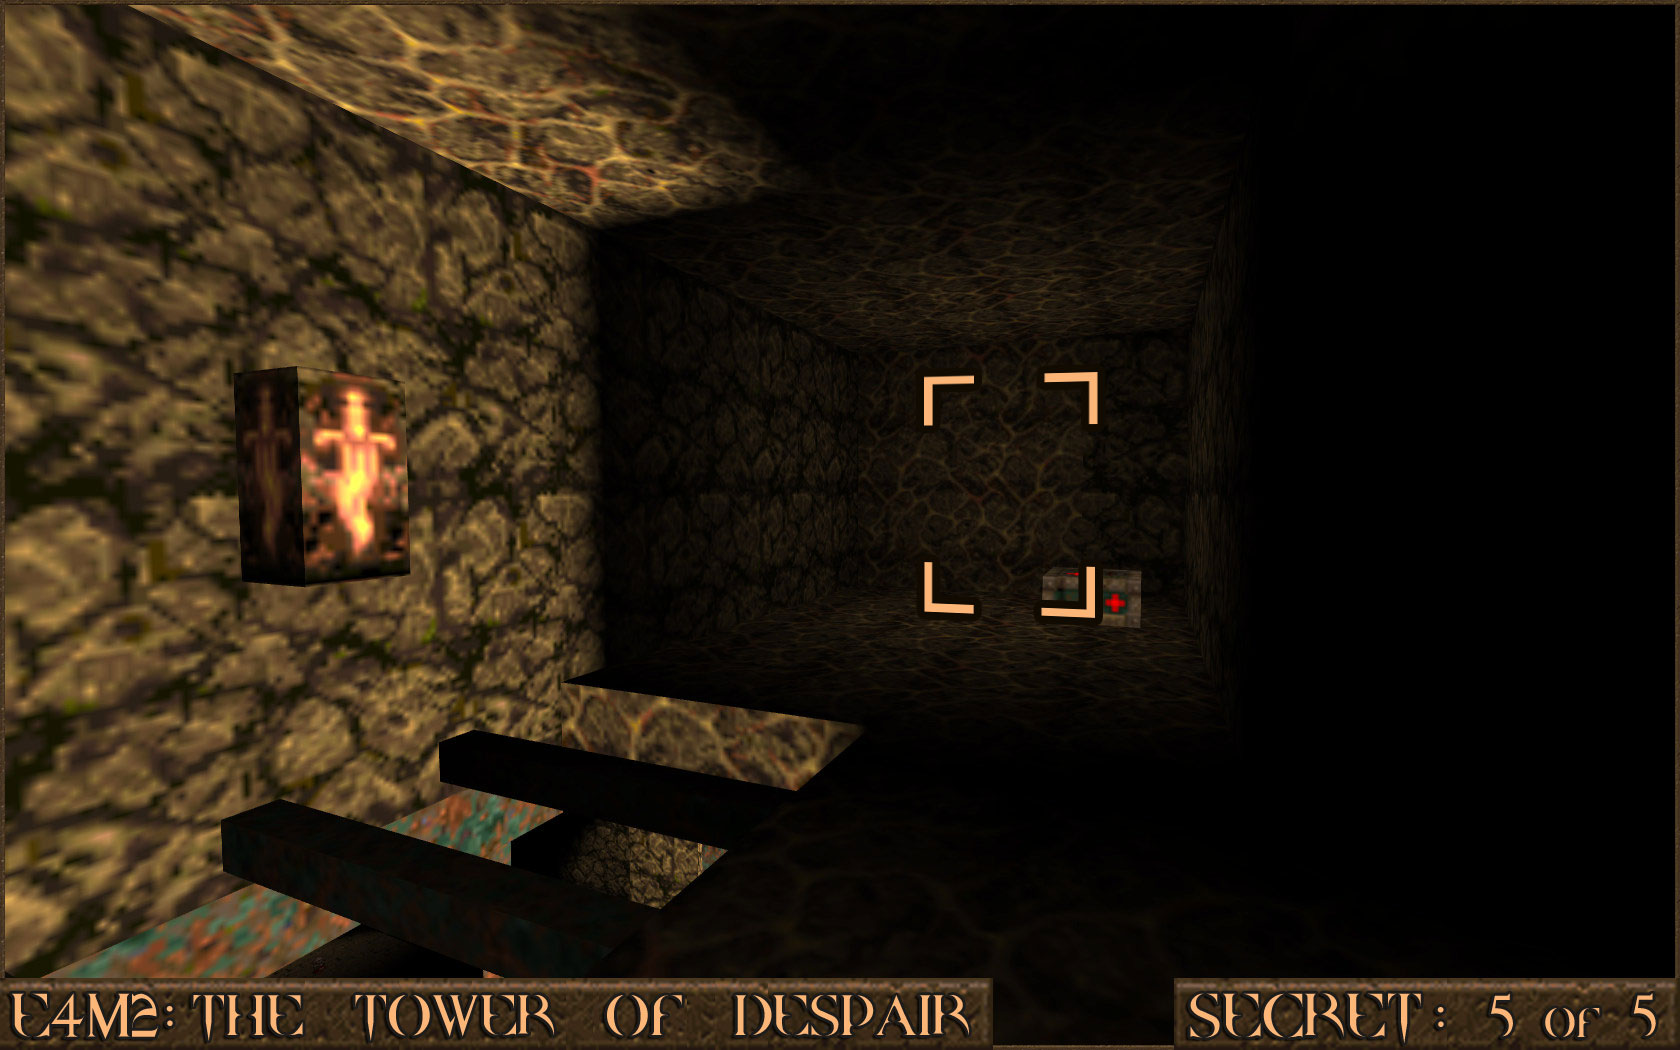 Reward:
 E4M3: The Elder God Shrine
Secret 1 of 3
After you have taken a small elevator up you will notice two stained glass windows. The one of the right is actually a false wall that you can walk right through.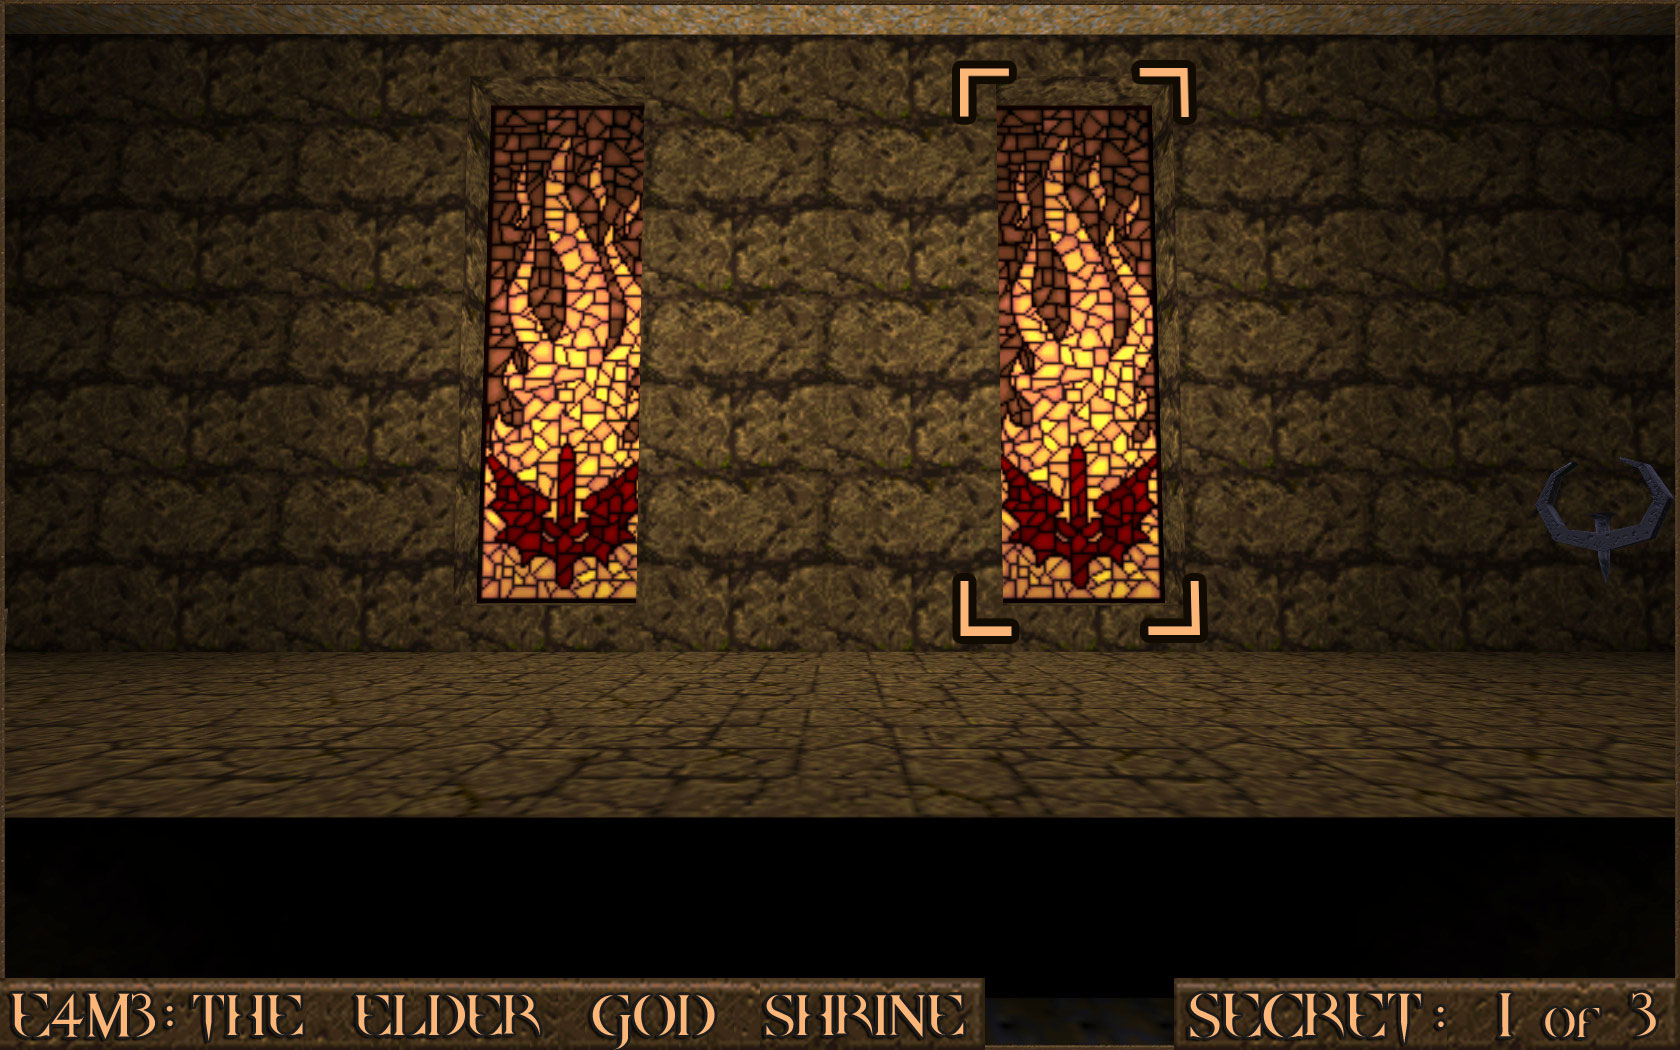 Reward:
 Secret 2 of 3
In a large square room you will find a large switch. Press it to lower the floor and activate the secret.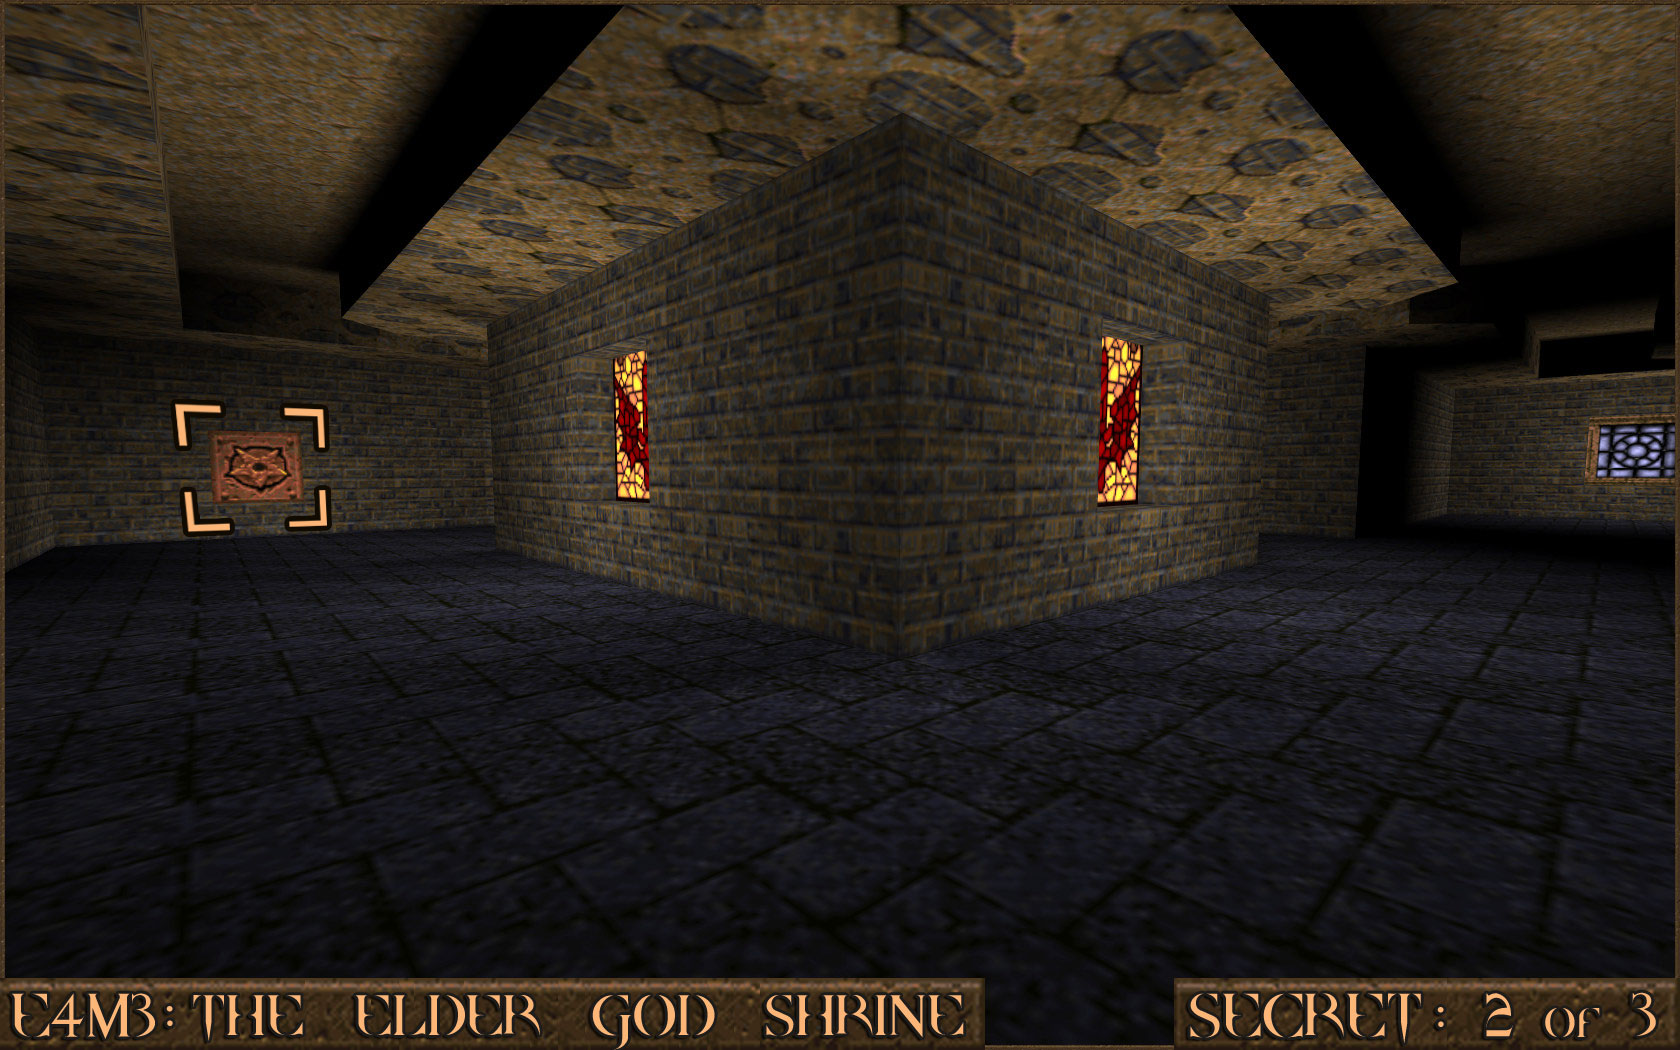 Reward:
 Secret 3 of 3
While still in the area that contains Secret 2 jump on to the elevator () that takes you back up but immediately pull back ().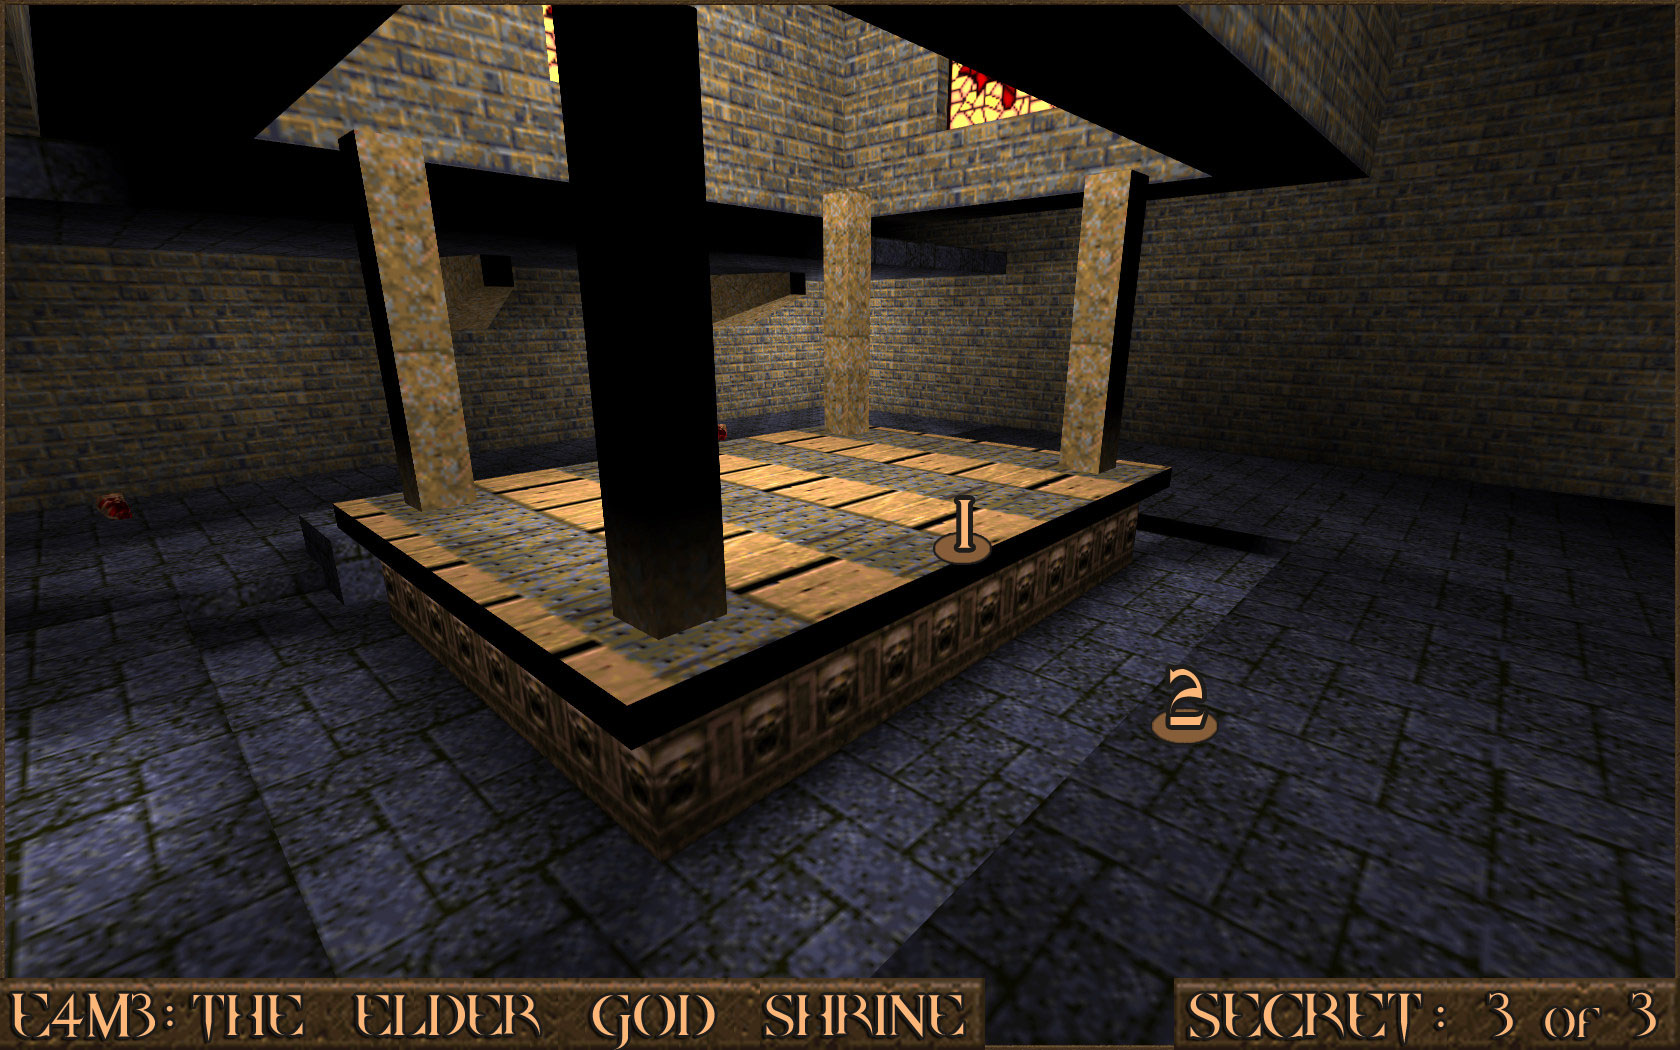 Now the elevator has gone up without you it has revealed a teleporter () to the next secret.
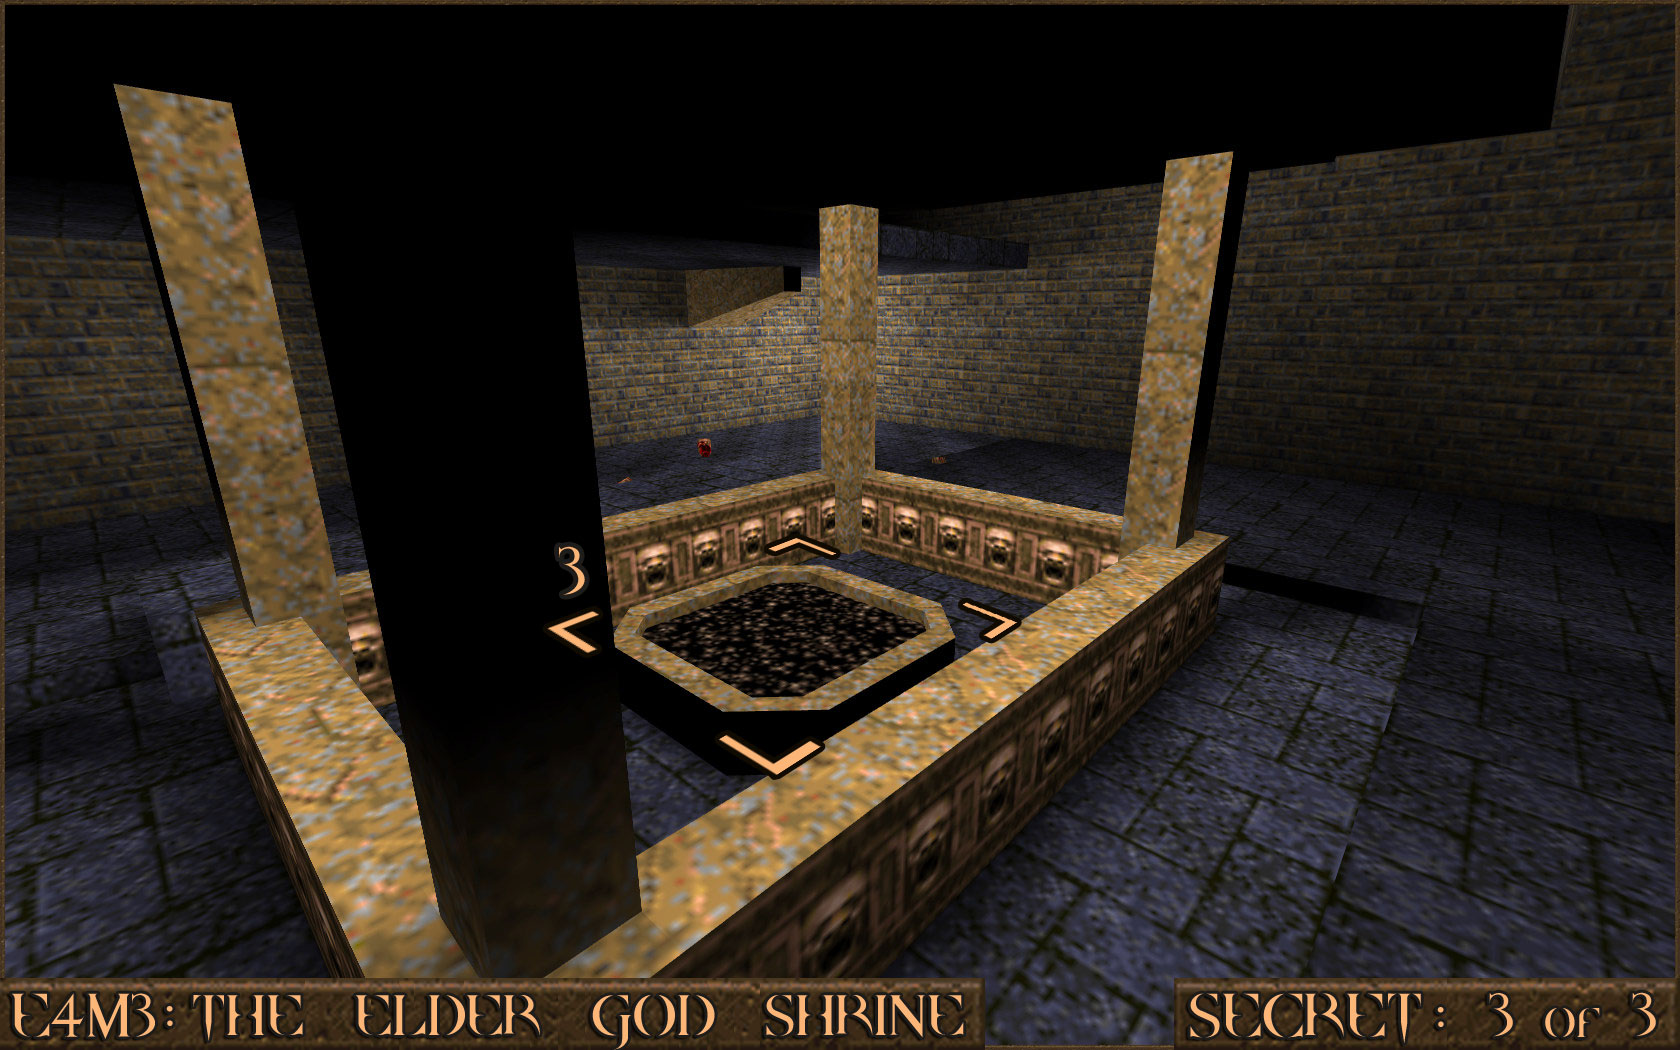 Reward:
 E4M4: The Palace of Hate
Secret 1 of 5
You will come to a large red window facing a dagger decoration on the wall (). Shooting the dagger decoration will move the red window wall () to reveal a secret area.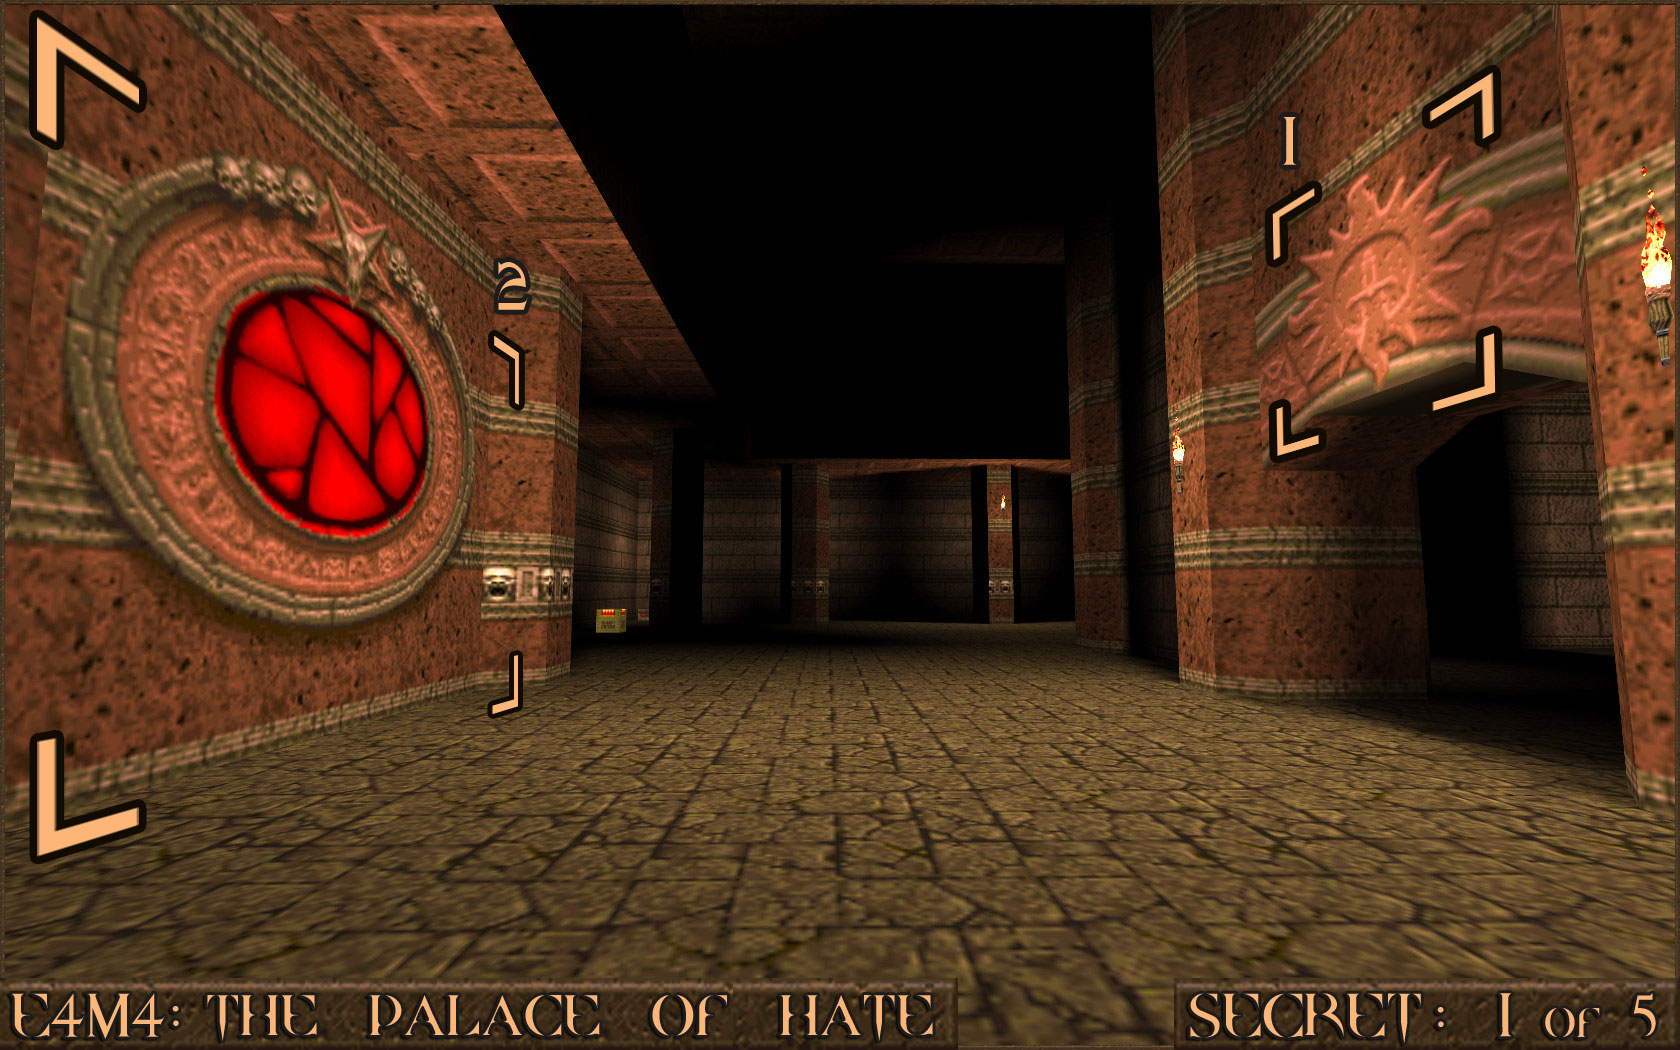 Reward:
 Secret 2 of 5
Walk through the doorway that is under the dagger decoration from Secret 1 and you will see a small pool of water. Jump in to receive the message "You found a healing pool!" which also counts as a secret.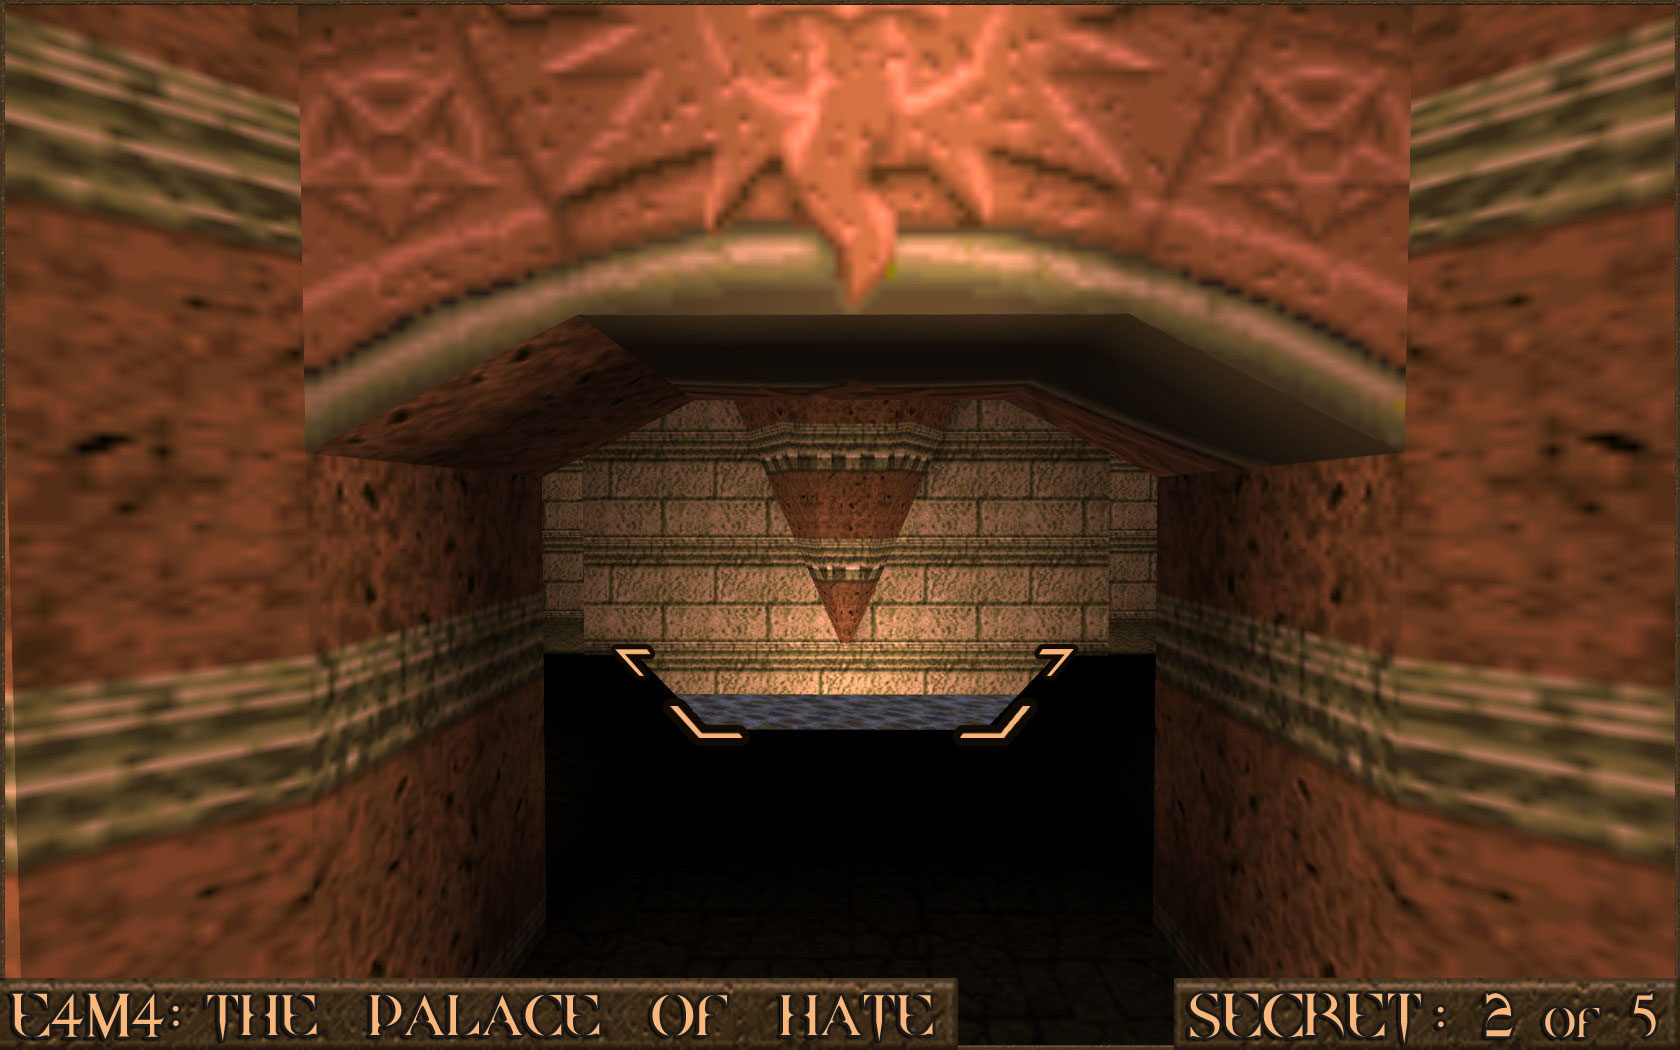 Reward:
 Secret 3 of 5
After you have gone up a few wooden steps you will enter a very dark corridor. Look to your right as you go and you will notice another dark corridor which contains an elevator. Instead of riding it up, quickly move on to it () and pull back off it ().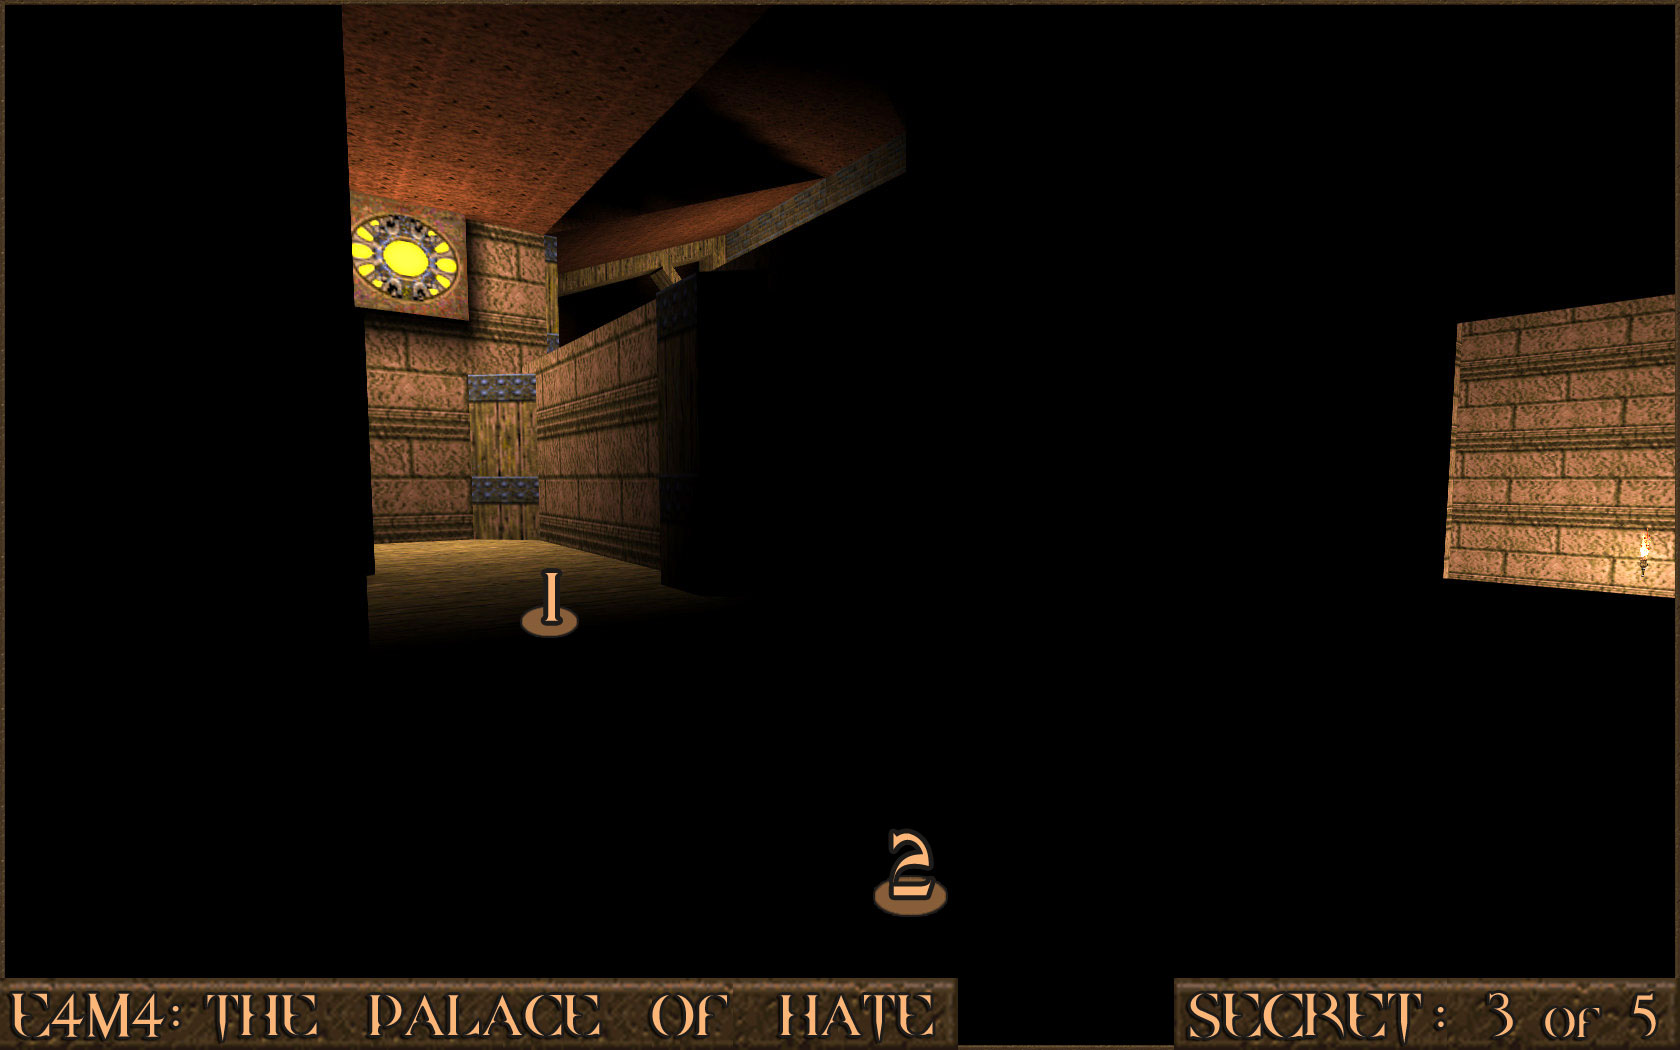 It is revealed that underneath the elevator is another passage () that you can follow to the secret area.
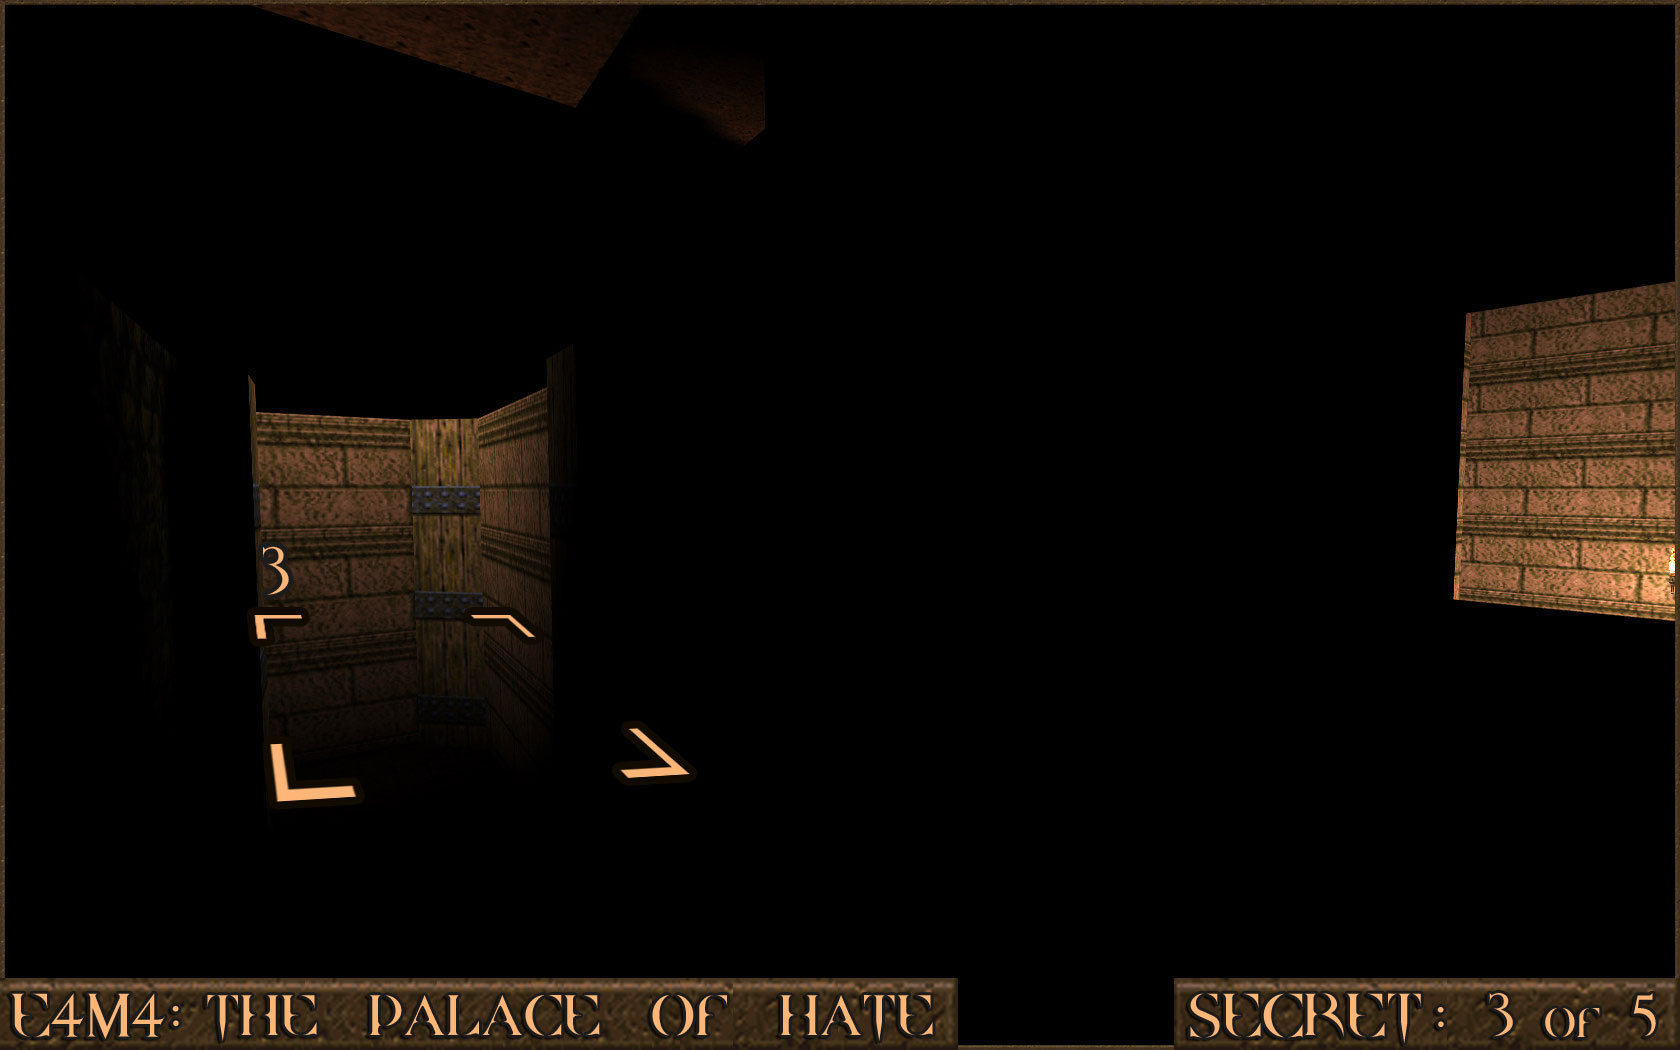 Reward:
 Secret 4 of 5
As you come to one room that has a box of Small Nails in it a section of wall will lower down and you will be attacked by some Knights. After dealing with them head in to the far corner () then walk towards the other wall (). Doing so will activate the other wall () and allow you access to an elevator and the secret.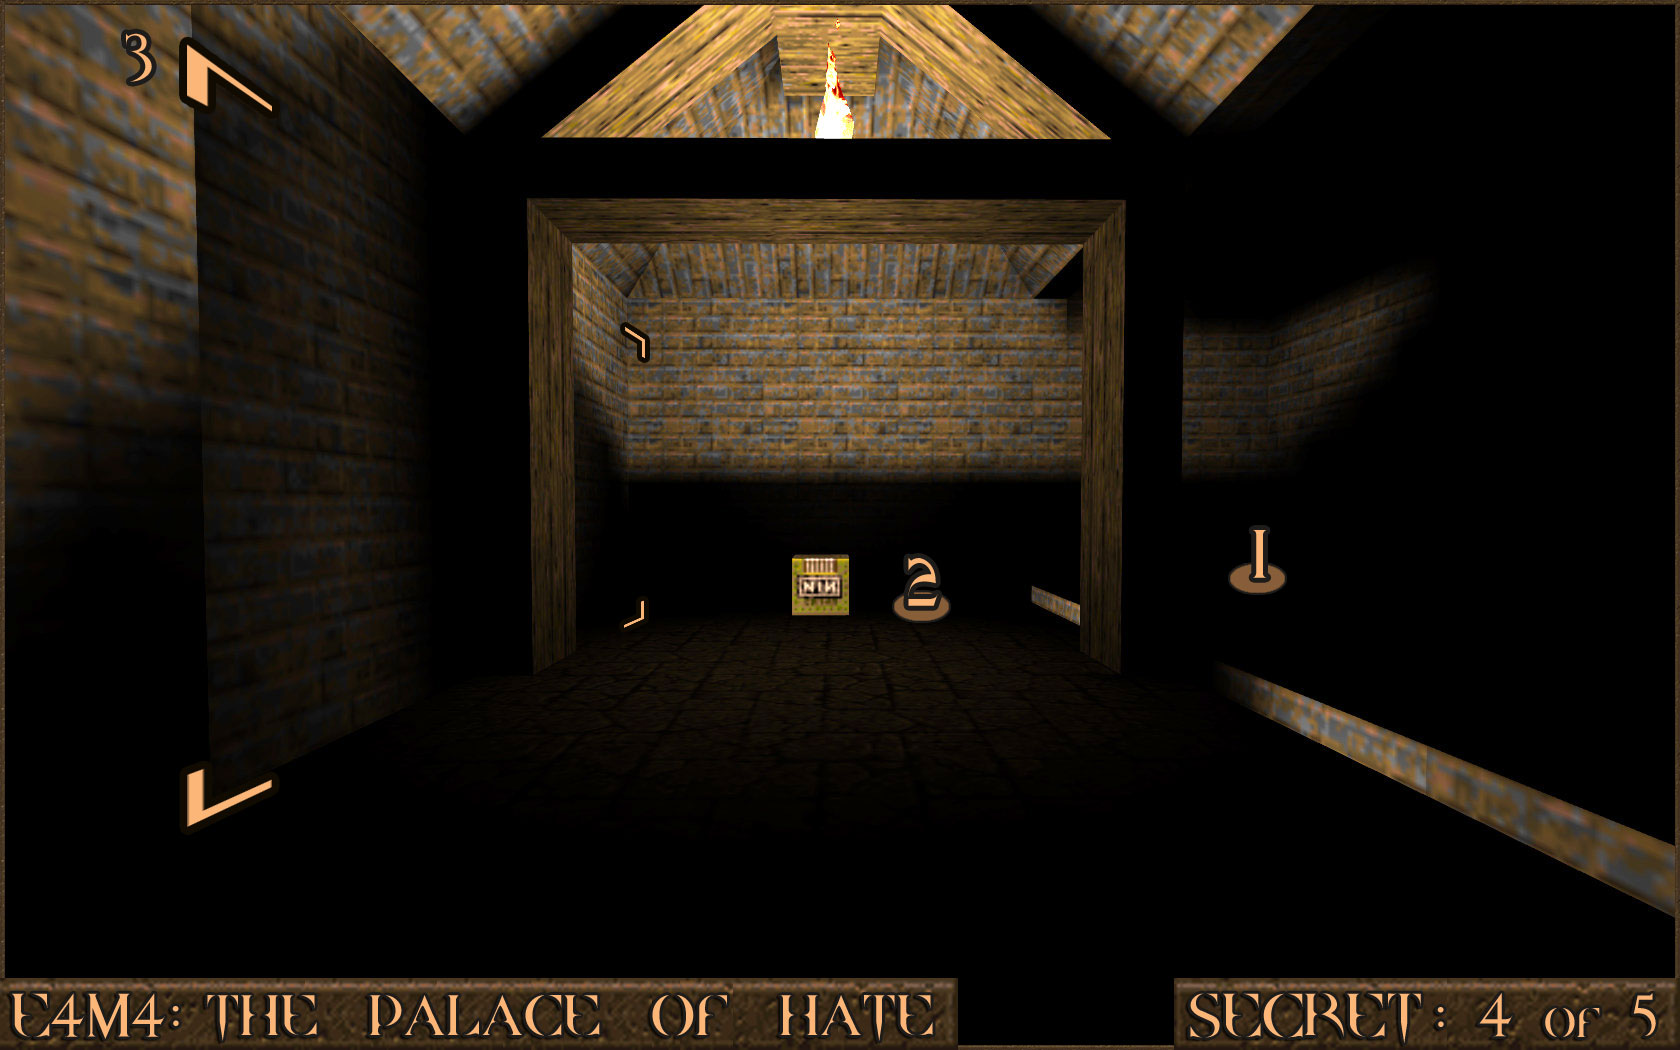 Reward:
 Secret 5 of 5
For this secret you will need the Grenade Launcher. Pick up the nearby Pentagram of Protection () so that you become invincible. Now shoot a grenade in to the small square hole () underneath the teleporter. Standing on top of this grenade when it explodes will propel you up enough to reach the teleporter () and take you to the secret. 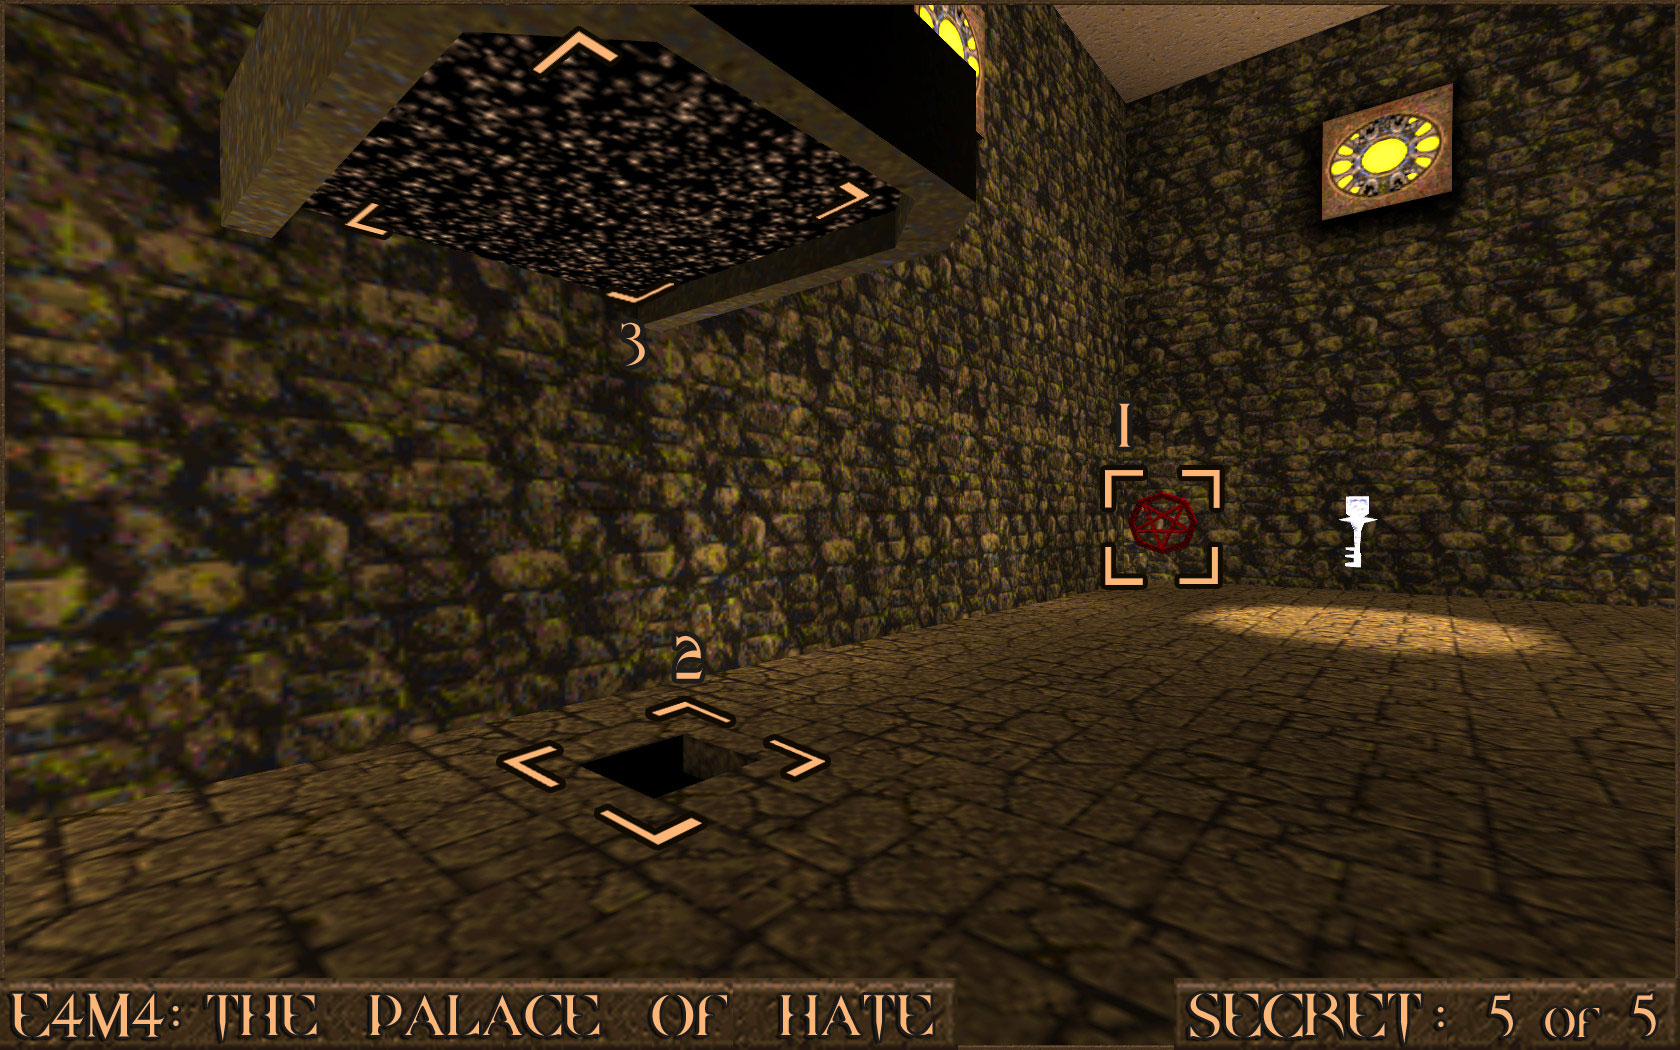 Reward:
 E4M5: Hell's Atrium
NOTE: The secret exit on this level requires that you do not use the Silver Key to activate the bridge so keep this in mind when progressing through the level otherwise you would have to restart.
) in the centre. Stepping on the button activates a nearby lift () that you should ride to the top.
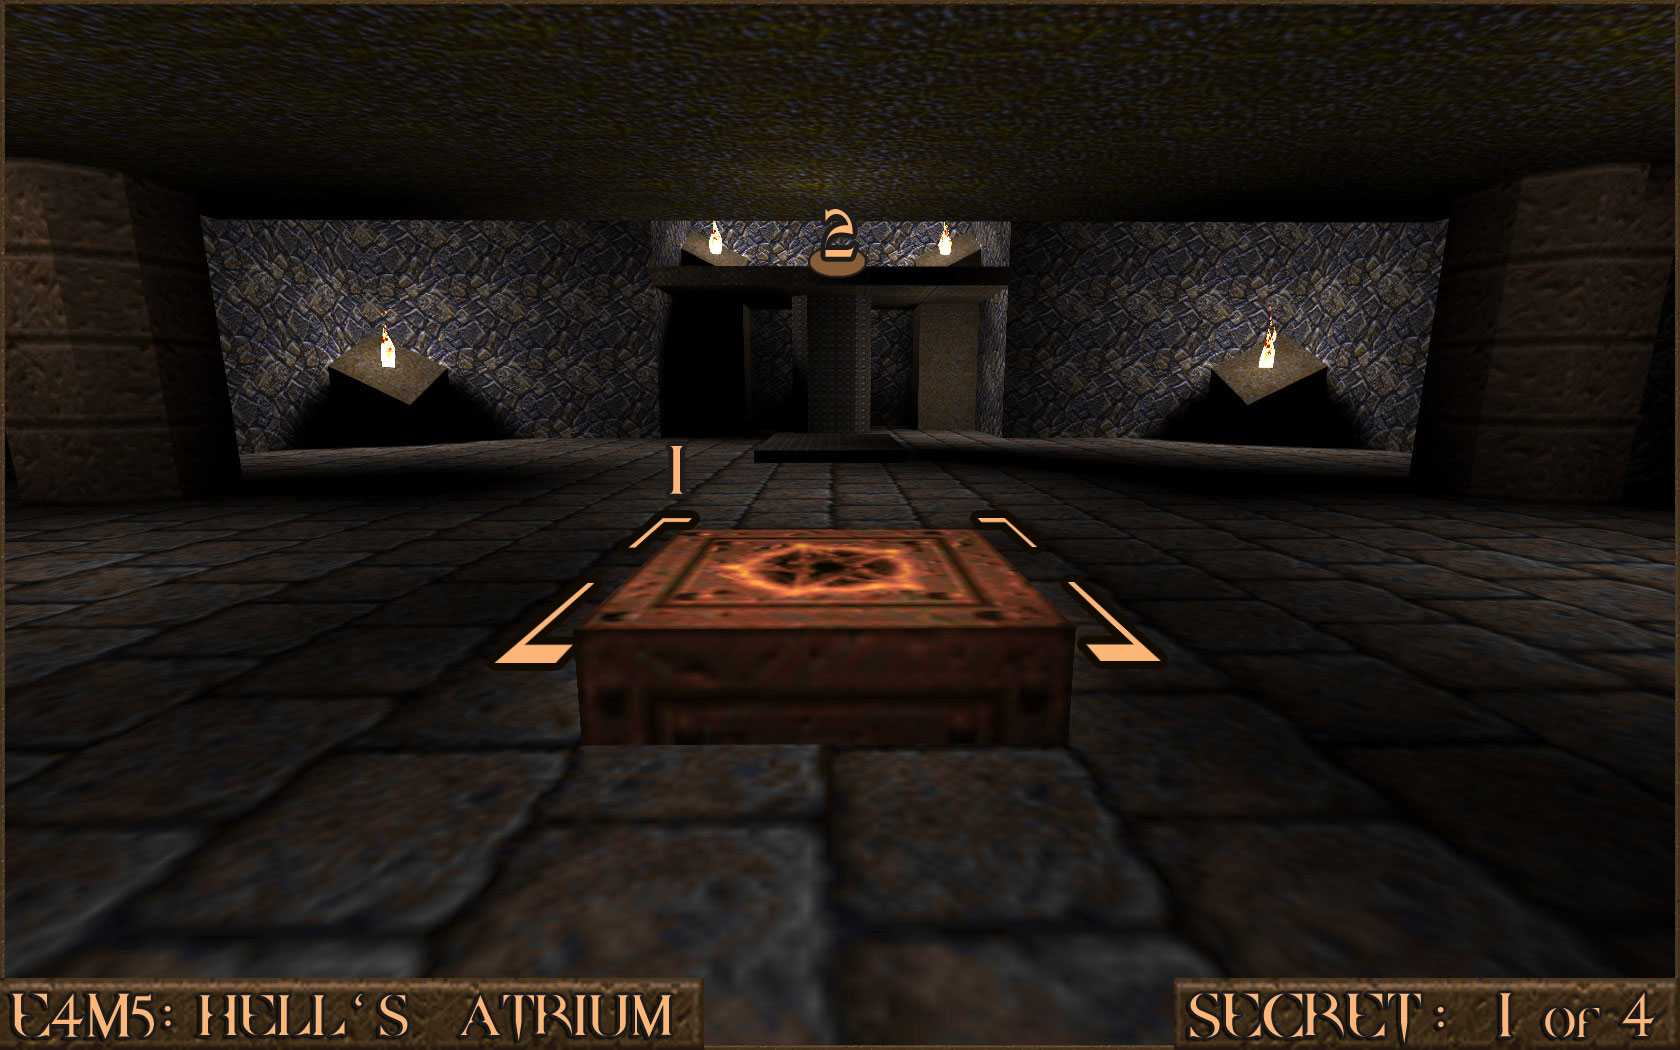 While at the top of the lift look around for a shootable red switch (). Triggering this will activate a bridge to a nearby room that contains the secret.
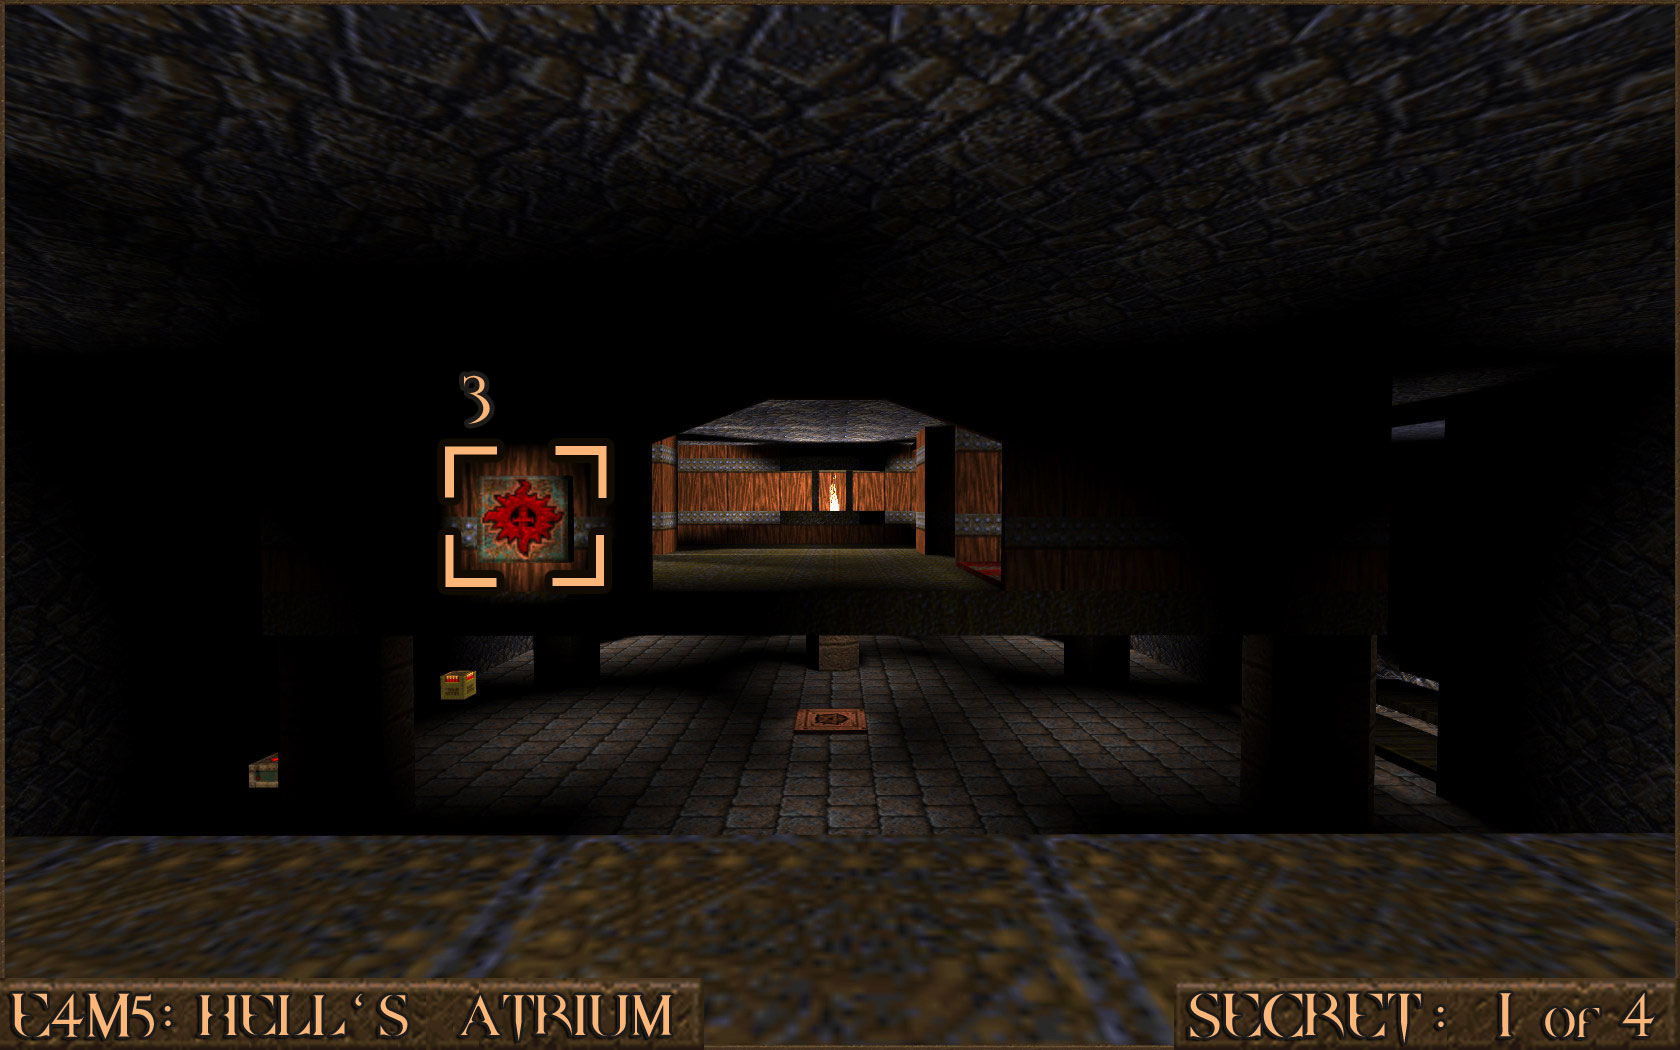 Reward:
) and can be shot to trigger a nearby wall ().
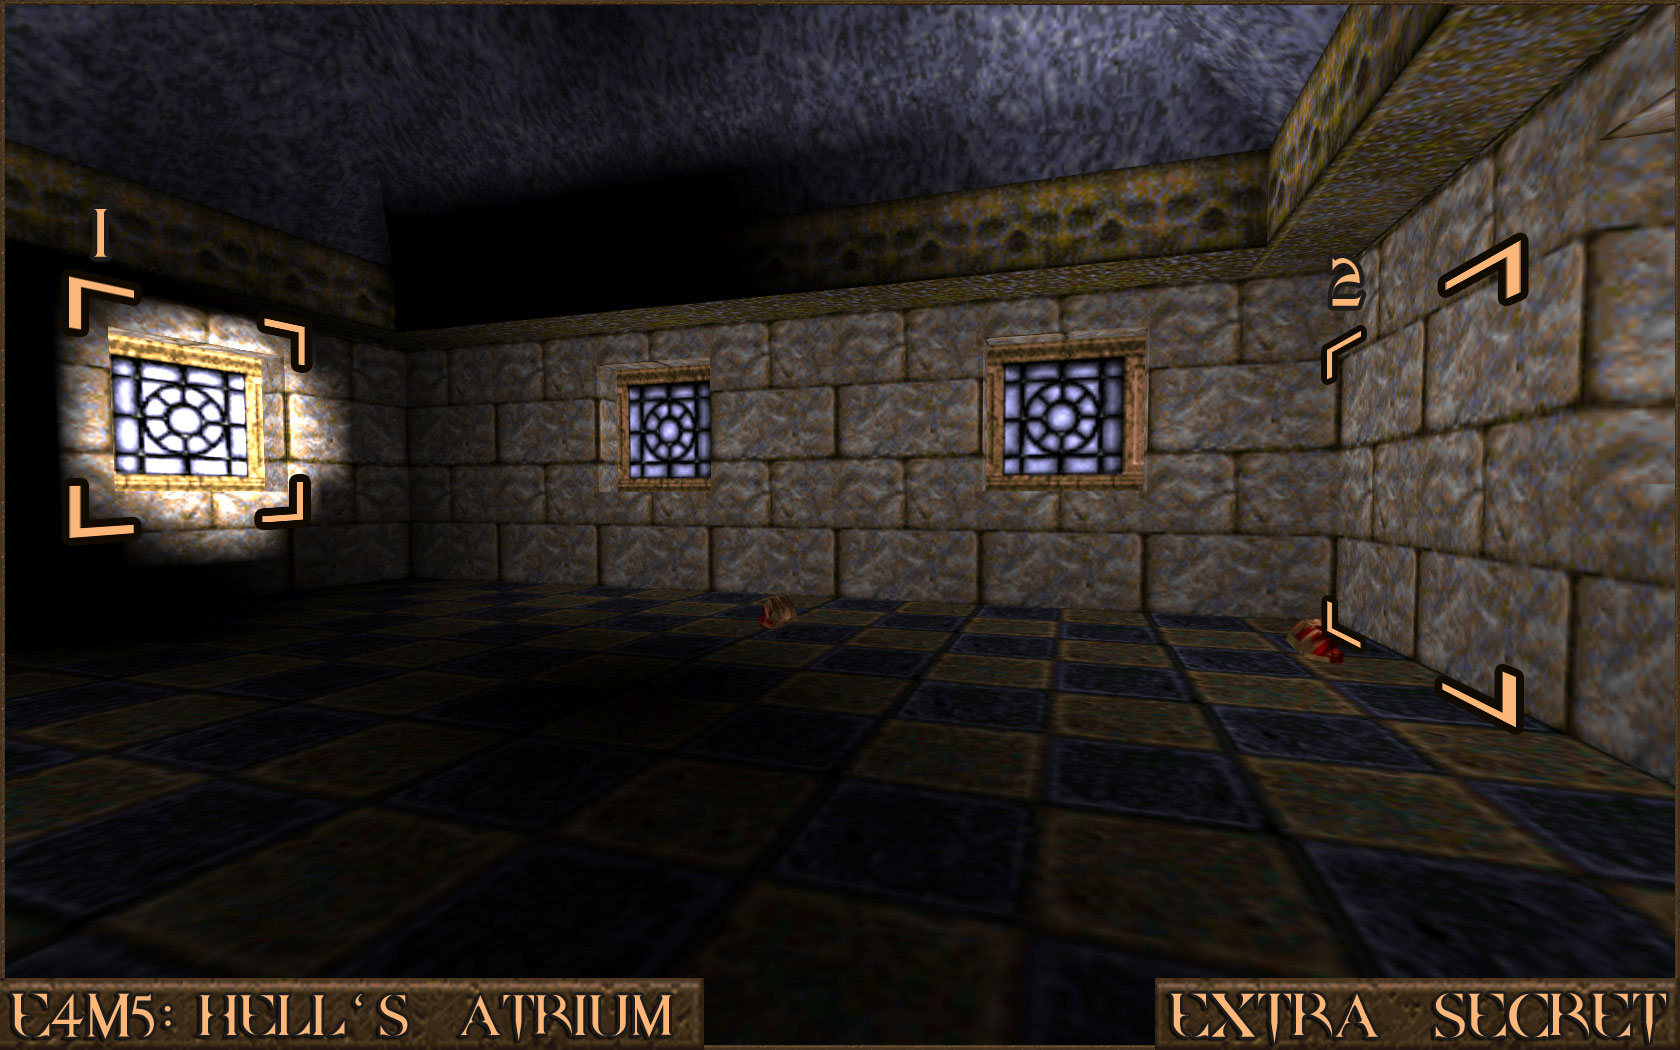 Reward:
). Activating this will move the stained glass windows () and reveal several Zombies.
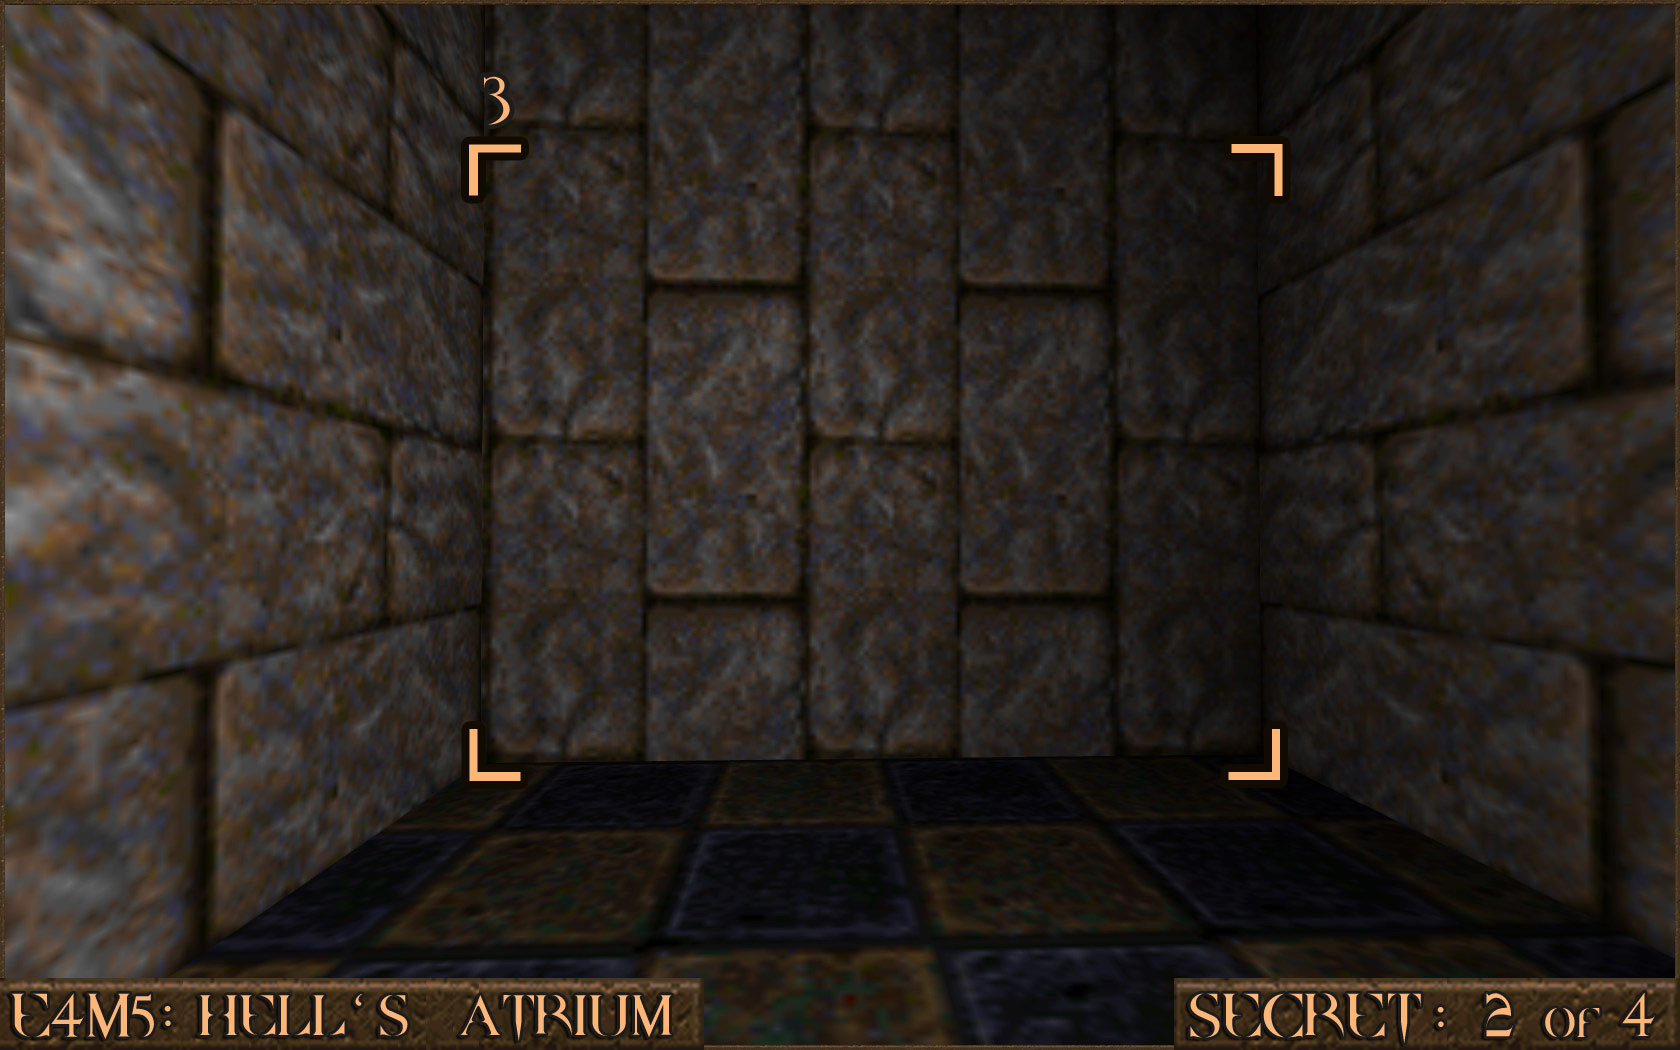
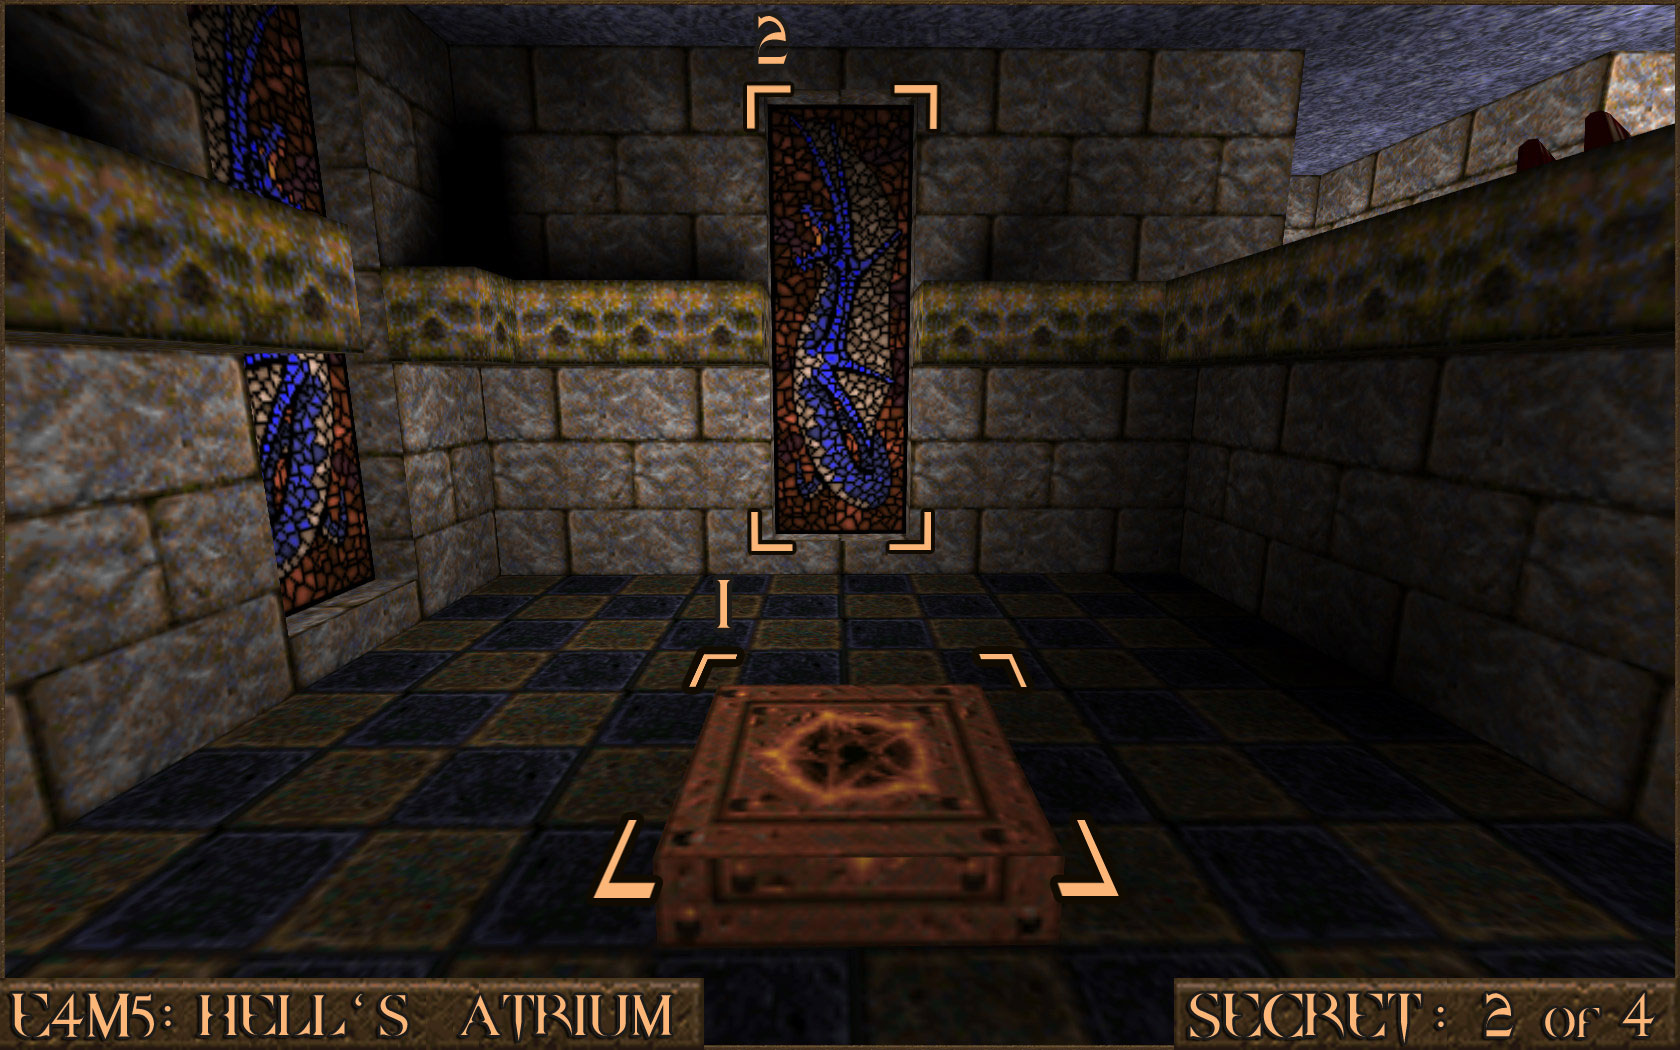 Inside one of these areas is a wall where the bricks are arranged vertically rather than horizontally (). Shoot this wall to reveal an elevator that you can ride up. After exiting the elevator there will be a pool of slime on your left which contains the secret.
 Reward:
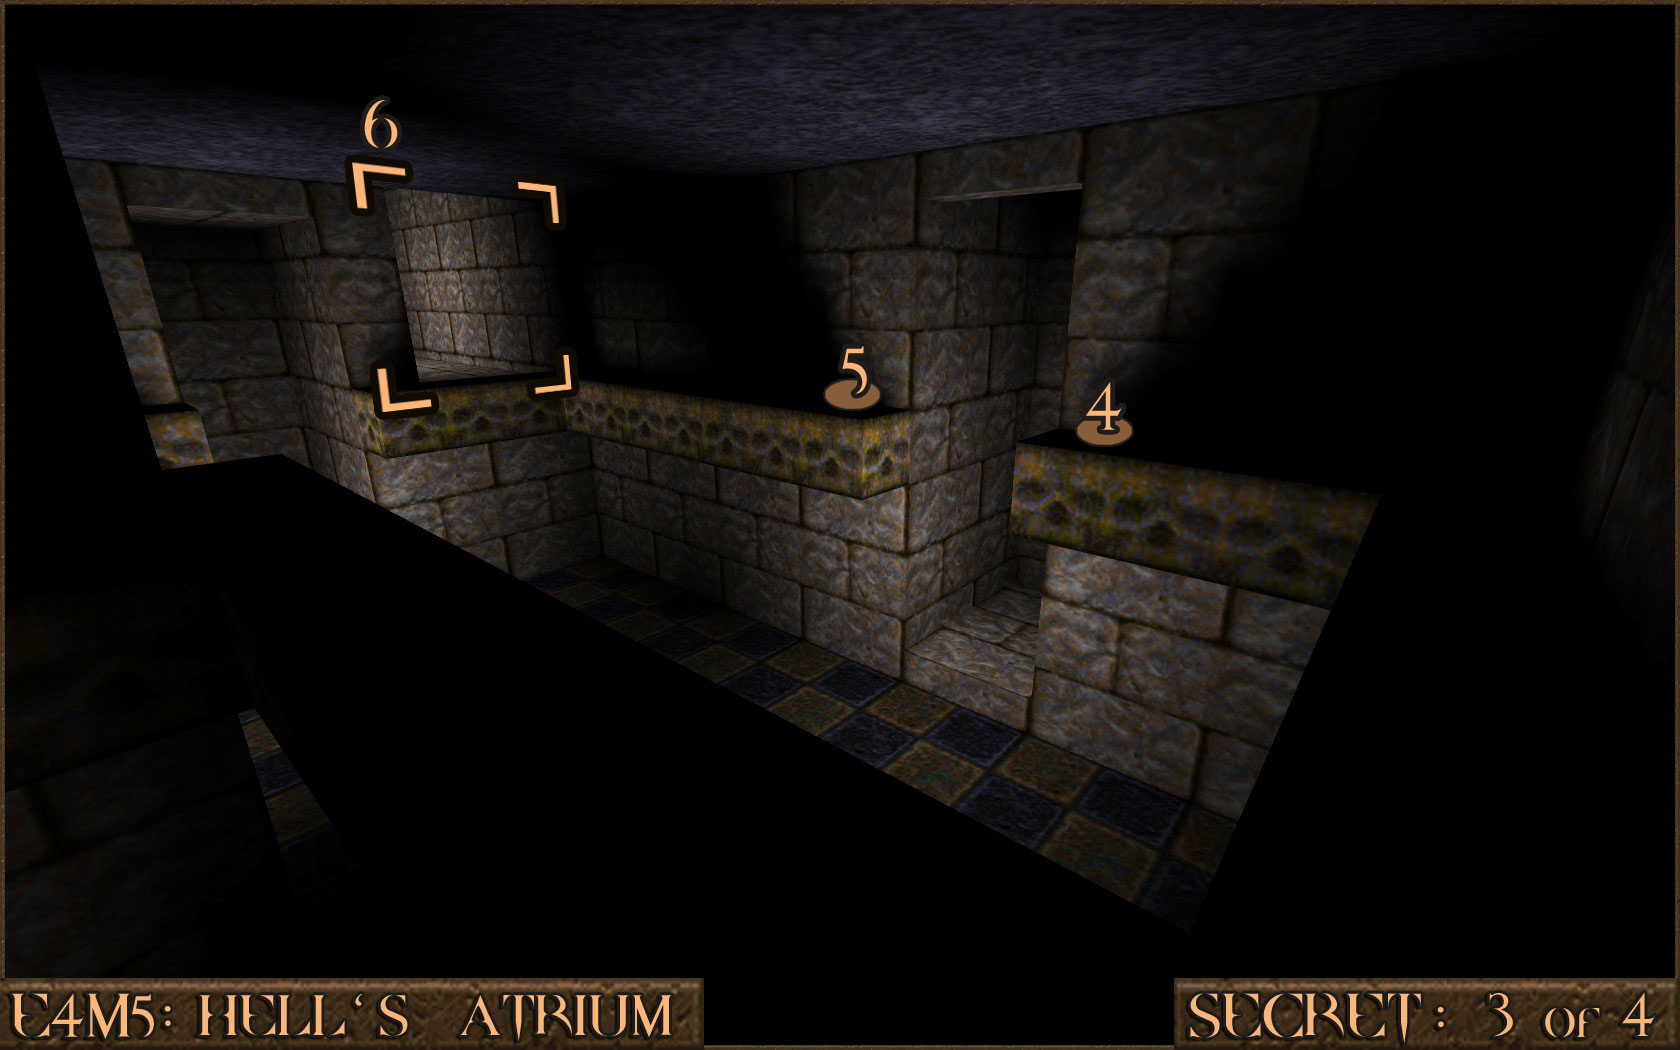
) jump over the small gap to the other side () and follow the small platform across ().
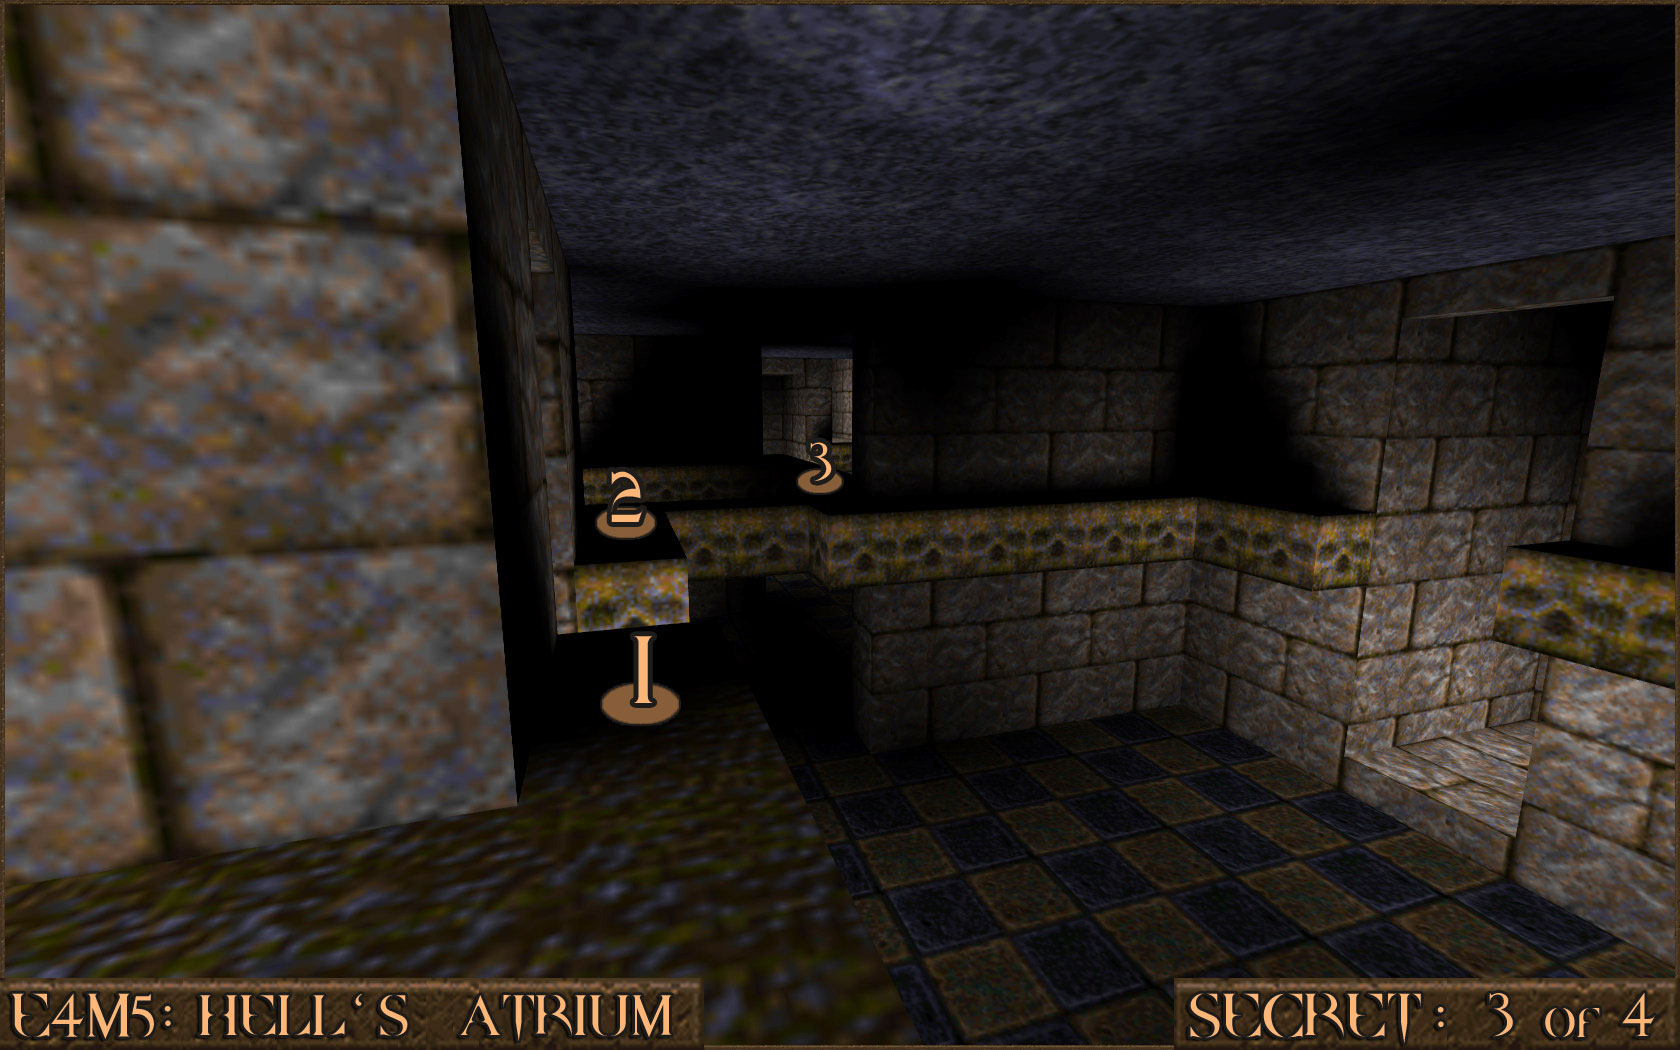 Continue following the platform () and make another small jump across (). You will now be next to an entrance in the wall () which contains the secret.
 Reward:
) and jump over at the highest point to the next one ().
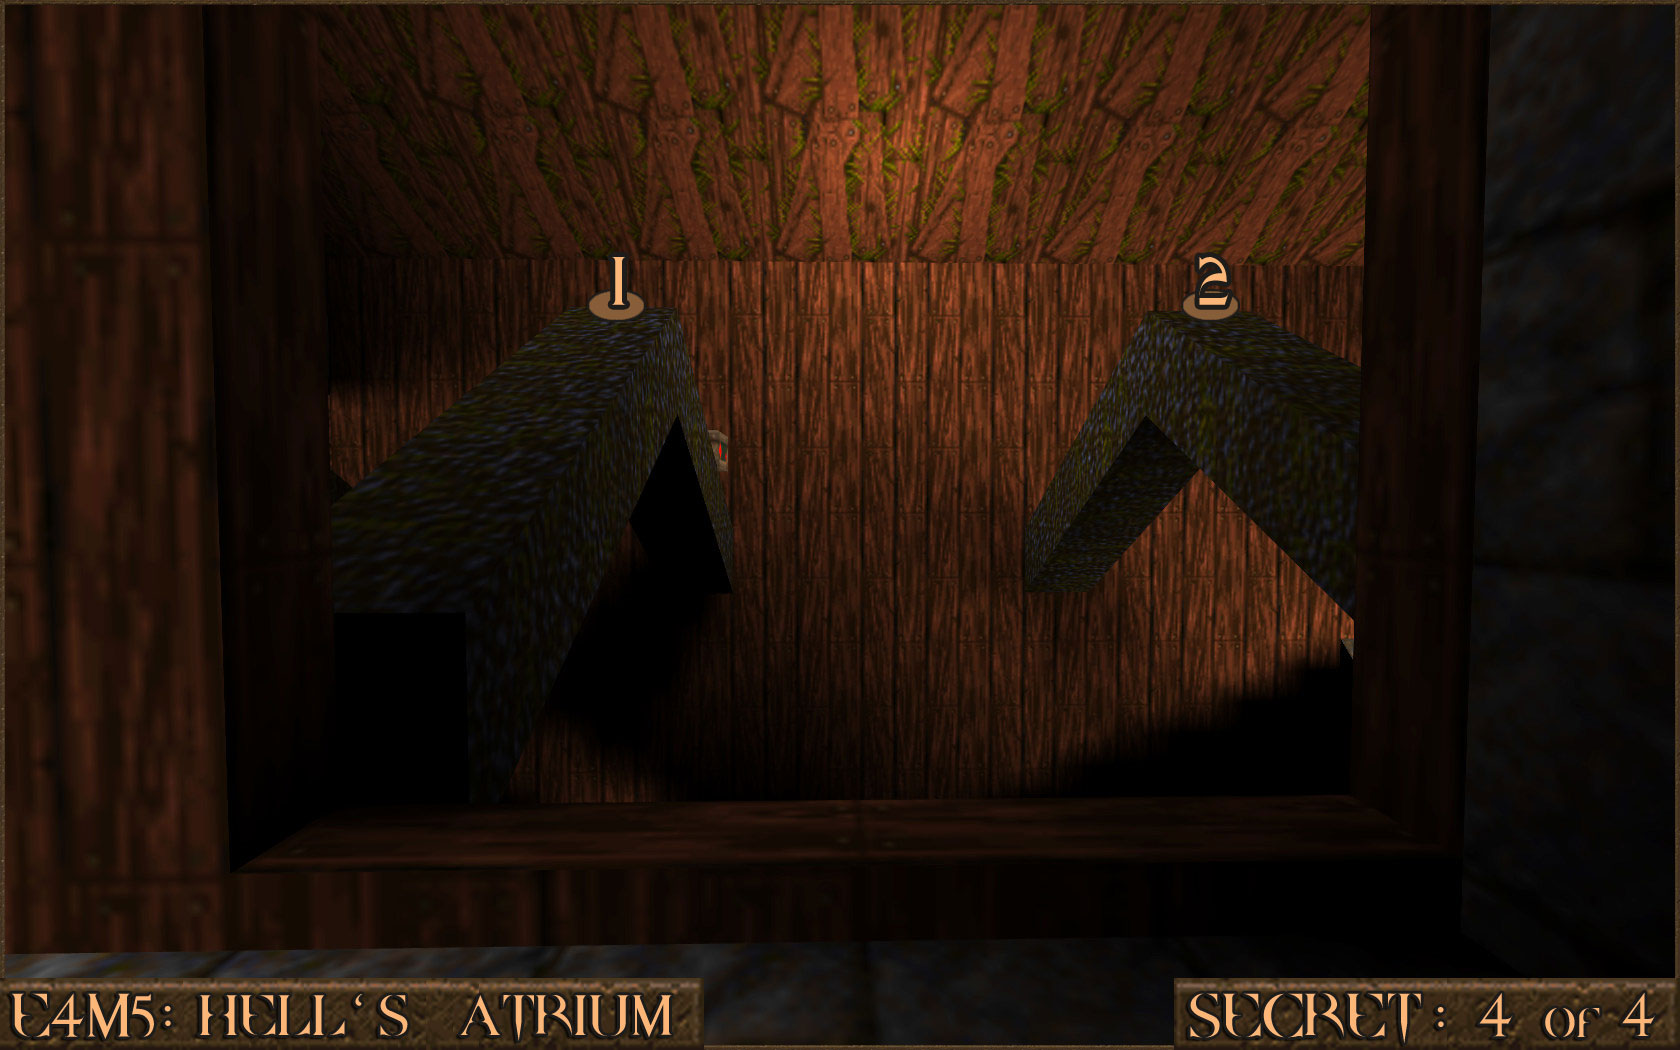 Make another large running jump over to the next beam (). This jump is harder then the previous one.
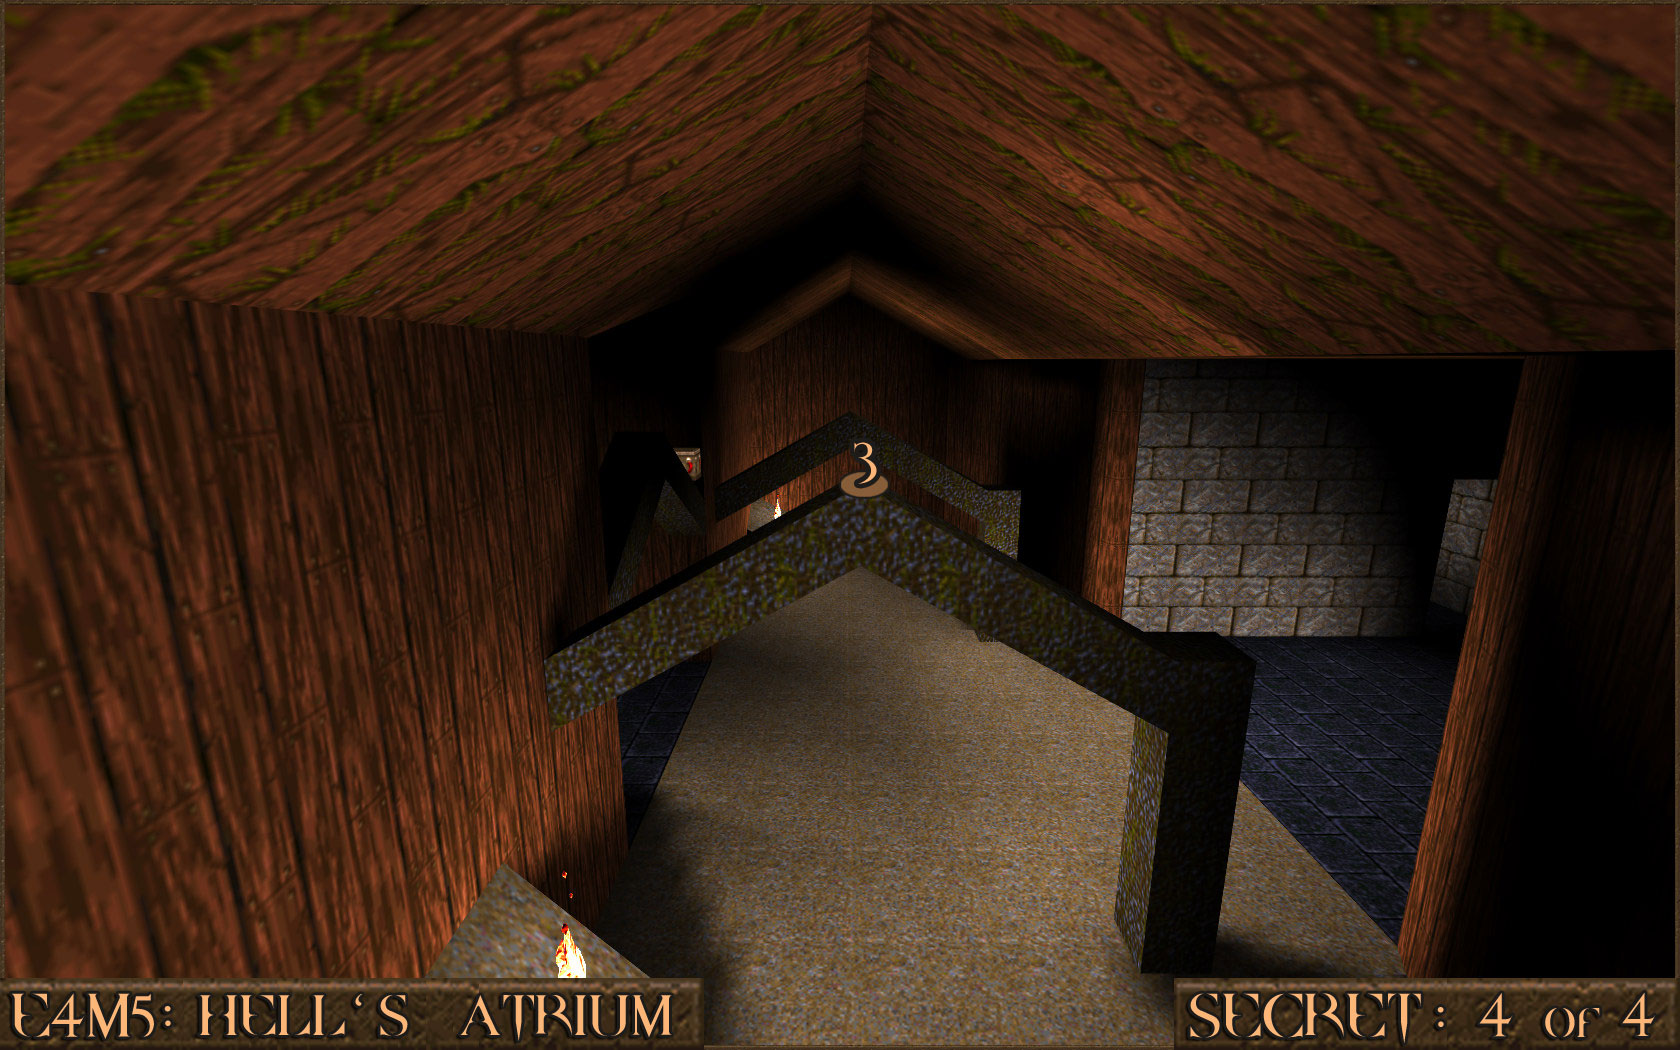 Slide down to the lower part of the beam () and then make a short hop around the corner to the next beam (). Pick up the item to activate the secret. Make another jump to the nearby beam () to pickup the other item.
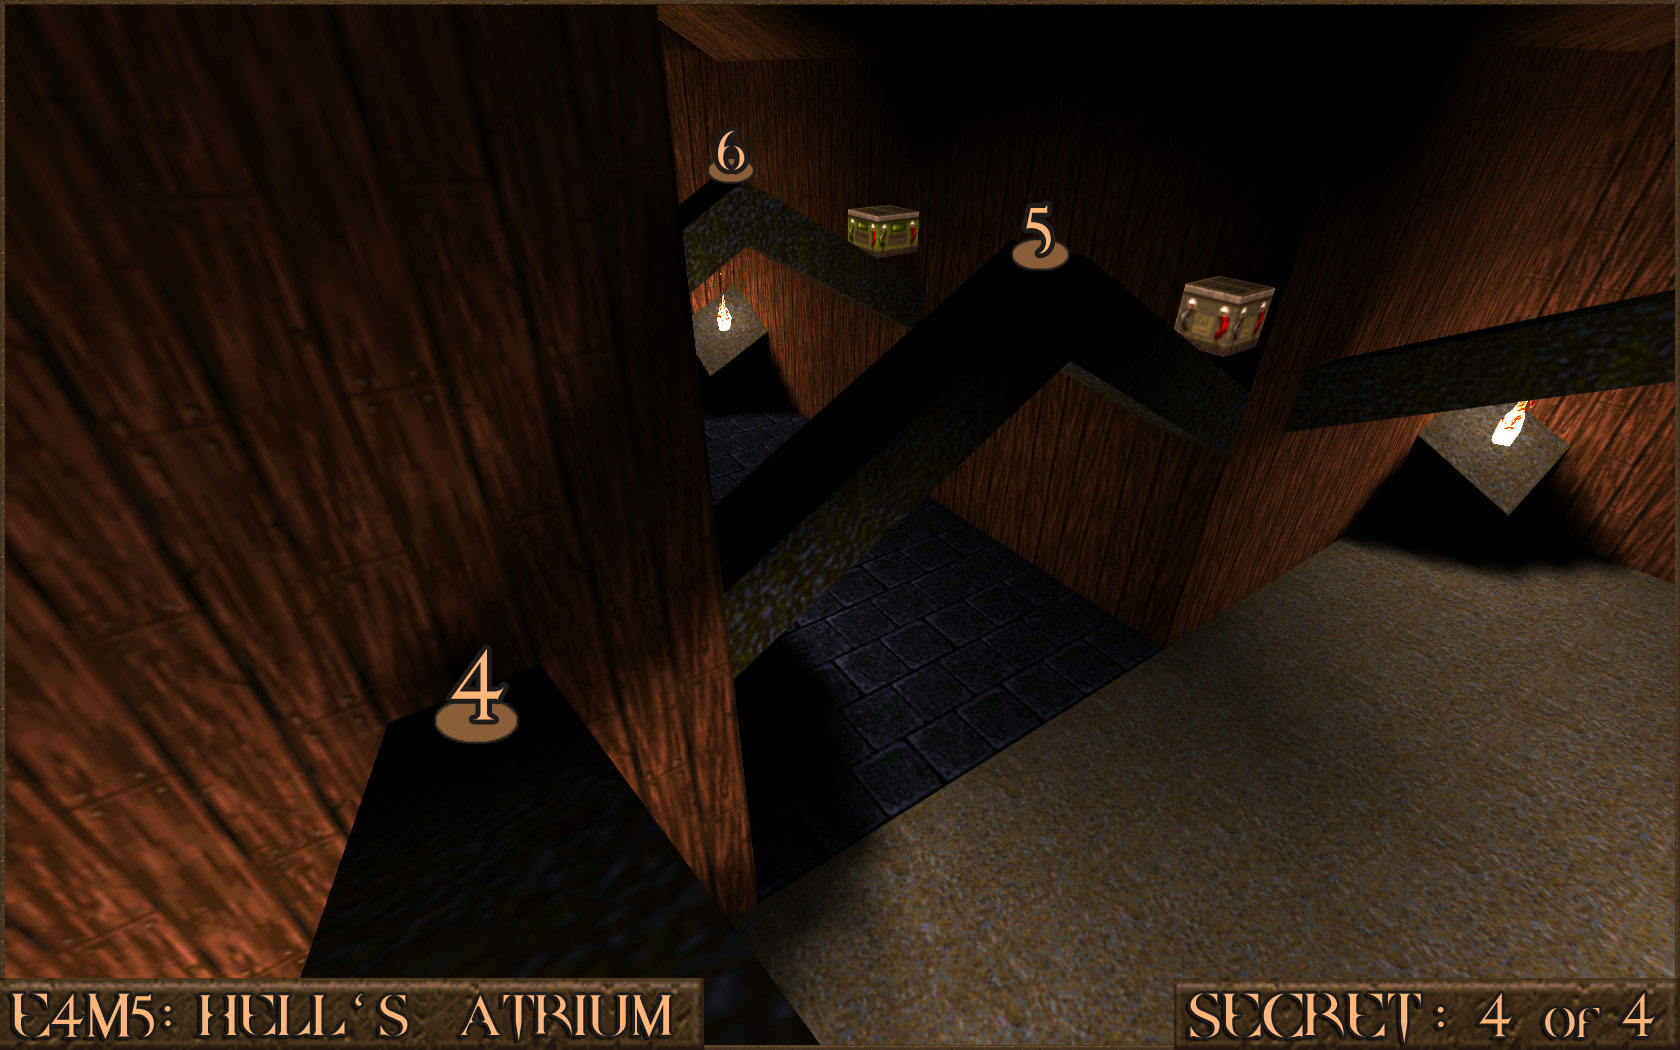 Reward:
) and then over the next pole (). From there make another jump over to solid ground ().
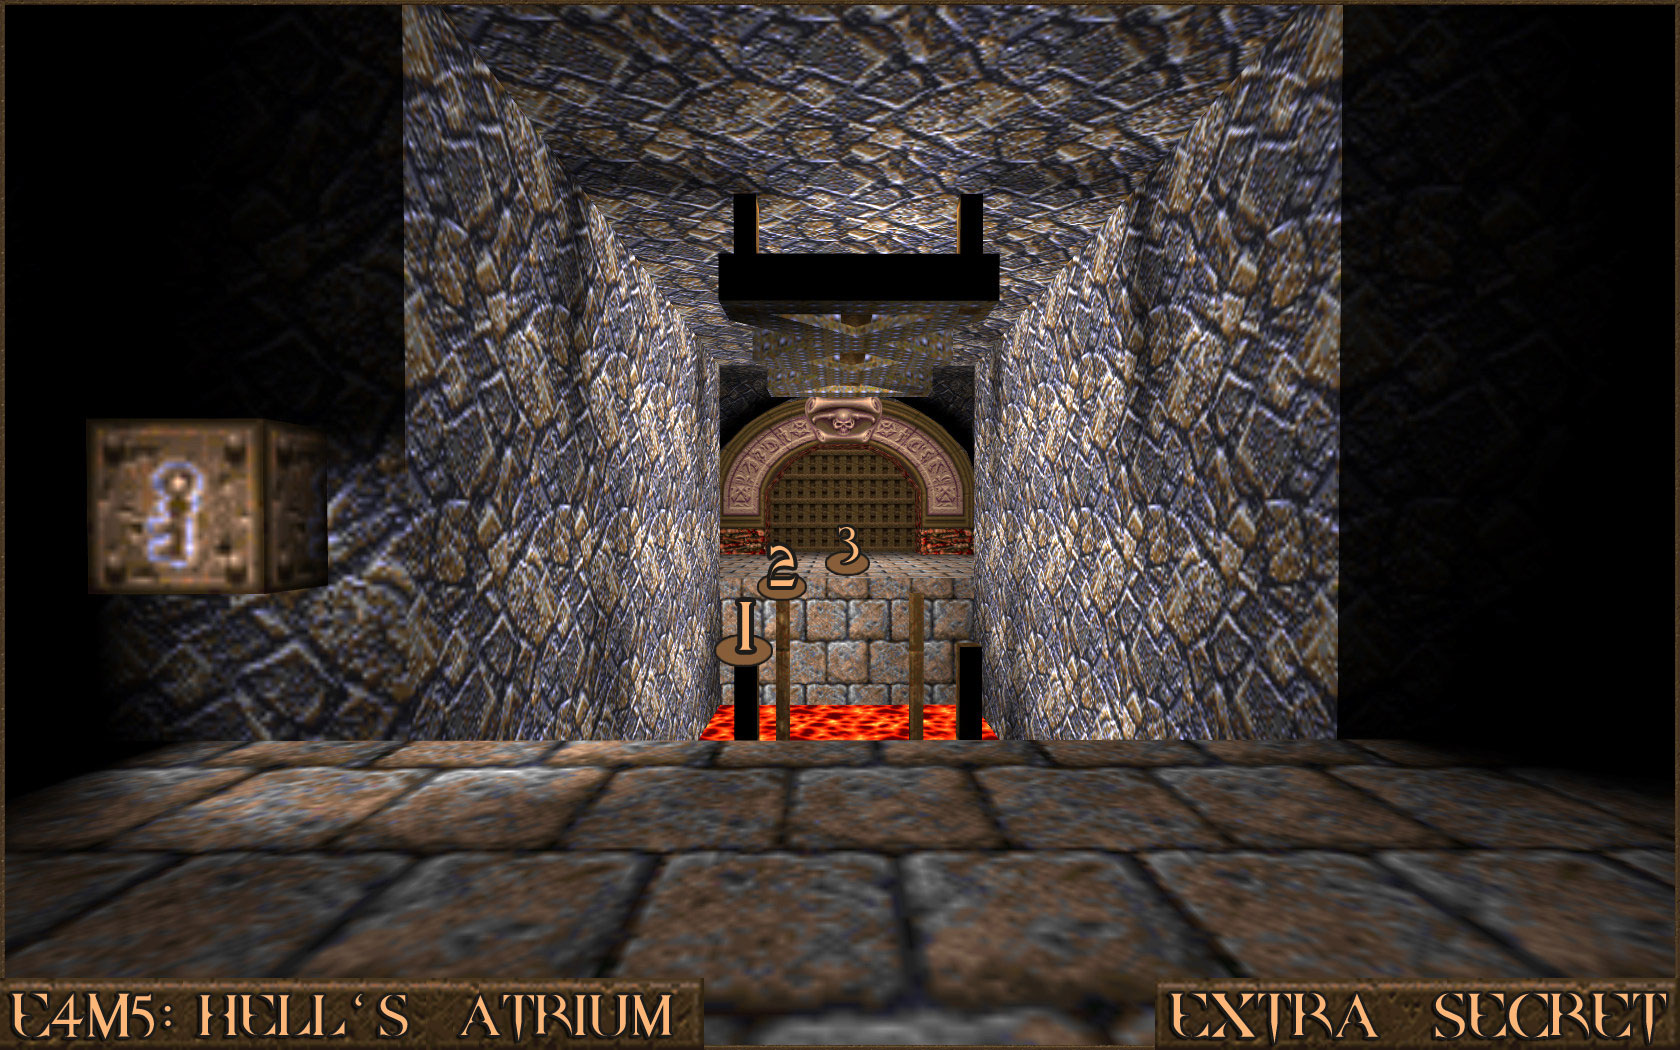 Once you are over to the other side you can open the nearby door () with the unused Silver Key and gain access to the secret level for this episode: E4M8: The Nameless City.
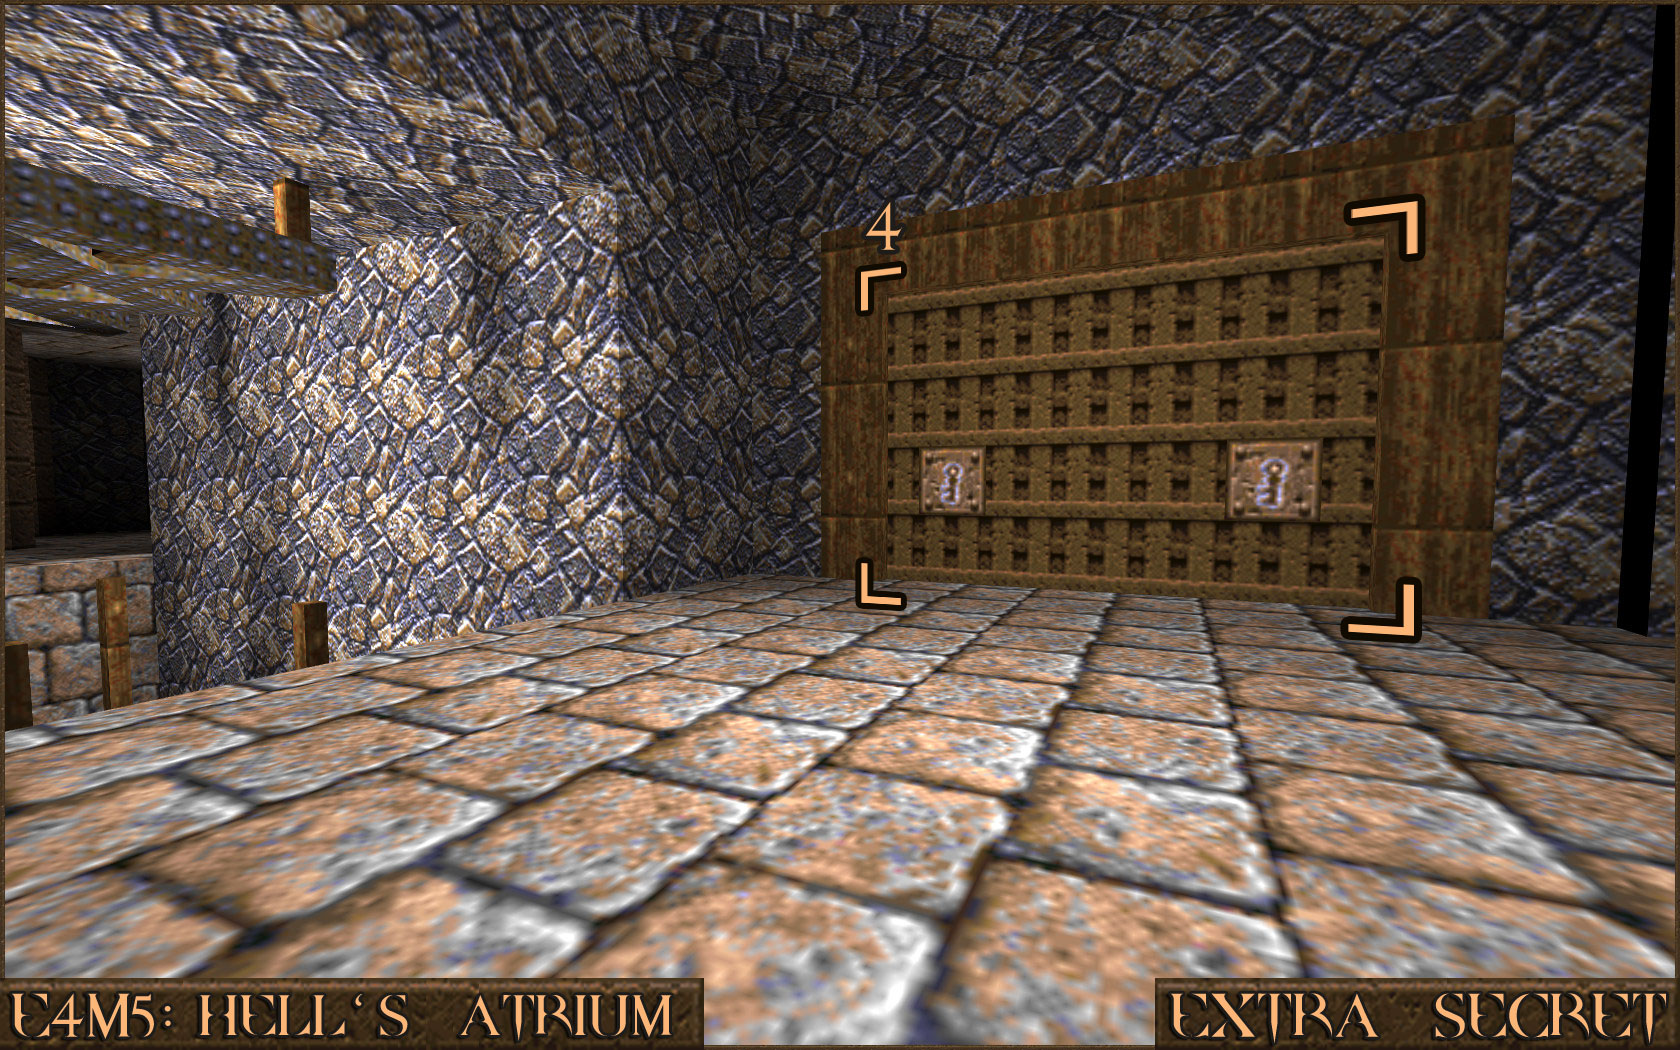 Reward: SECRET LEVEL
Secret 1 of 4
You will come to a large room with a prominent orange button () in the centre. Stepping on the button activates a nearby lift () that you should ride to the top.While at the top of the lift look around for a shootable red switch (). Triggering this will activate a bridge to a nearby room that contains the secret.Reward: Extra Secret 1
In a room you will come across several blue square windows. One of these is considerably brighter than the others () and can be shot to trigger a nearby wall ().Reward: Secret 2 of 4
In the room with several stained glass windows there is another floor switch (). Activating this will move the stained glass windows () and reveal several Zombies. Inside one of these areas is a wall where the bricks are arranged vertically rather than horizontally (). Shoot this wall to reveal an elevator that you can ride up. After exiting the elevator there will be a pool of slime on your left which contains the secret.Reward: Secret 3 of 4
While still on the upper floor from Secret 2 you will notice several small platforms embedded in to the walls you can run across. From the platform you are on () jump over the small gap to the other side () and follow the small platform across (). Continue following the platform () and make another small jump across (). You will now be next to an entrance in the wall () which contains the secret.Reward: Secret 4 of 4
While still in the area for Secret 3 you will come to a window that overlooks an earlier part of the level as well as several beams. Jump out and on to the left beam () and jump over at the highest point to the next one ().Make another large running jump over to the next beam (). This jump is harder then the previous one.Slide down to the lower part of the beam () and then make a short hop around the corner to the next beam (). Pick up the item to activate the secret. Make another jump to the nearby beam () to pickup the other item.Reward: Extra Secret 2
Instead of using the Silver Key to lower the bridge over the lava you must instead make several delicate jumps on the poles that are sticking out of the lava. Jump to one of the nearest poles () and then over the next pole (). From there make another jump over to solid ground ().Once you are over to the other side you can open the nearby door () with the unused Silver Key and gain access to the secret level for this episode: E4M8: The Nameless City.Reward: SECRET LEVELE4M8: The Nameless City [Secret Level]
Secret 1 of 4
You will come across a push-switch () that is too high up to press. Follow a small dark tunnel that is nearby to find a ledge that allows you jump out and press the switch. Doing so will move a nearby wall ().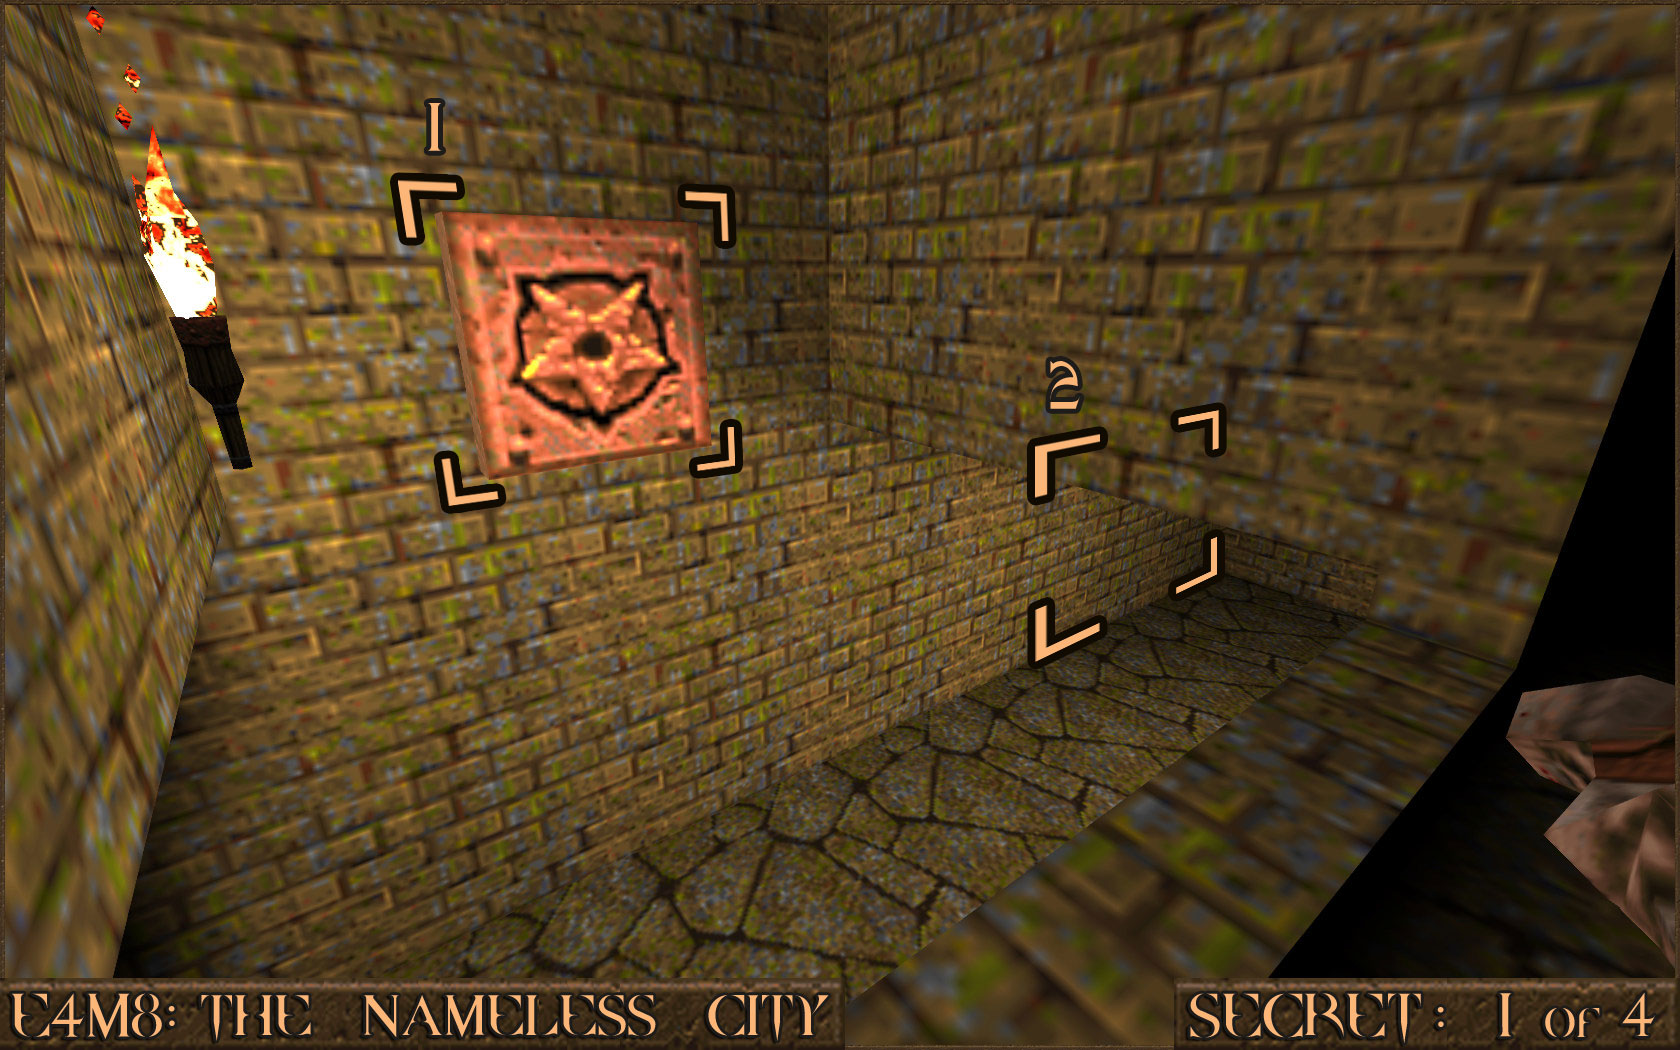 Reward:
 Extra Secret
In the same area as where you jumped off to hit the switch for Secret 1 there is a circular hole in the floor filled with Zombies. Behind the Zombies is an odd looking wall that when shot will reveal an area that contains some items.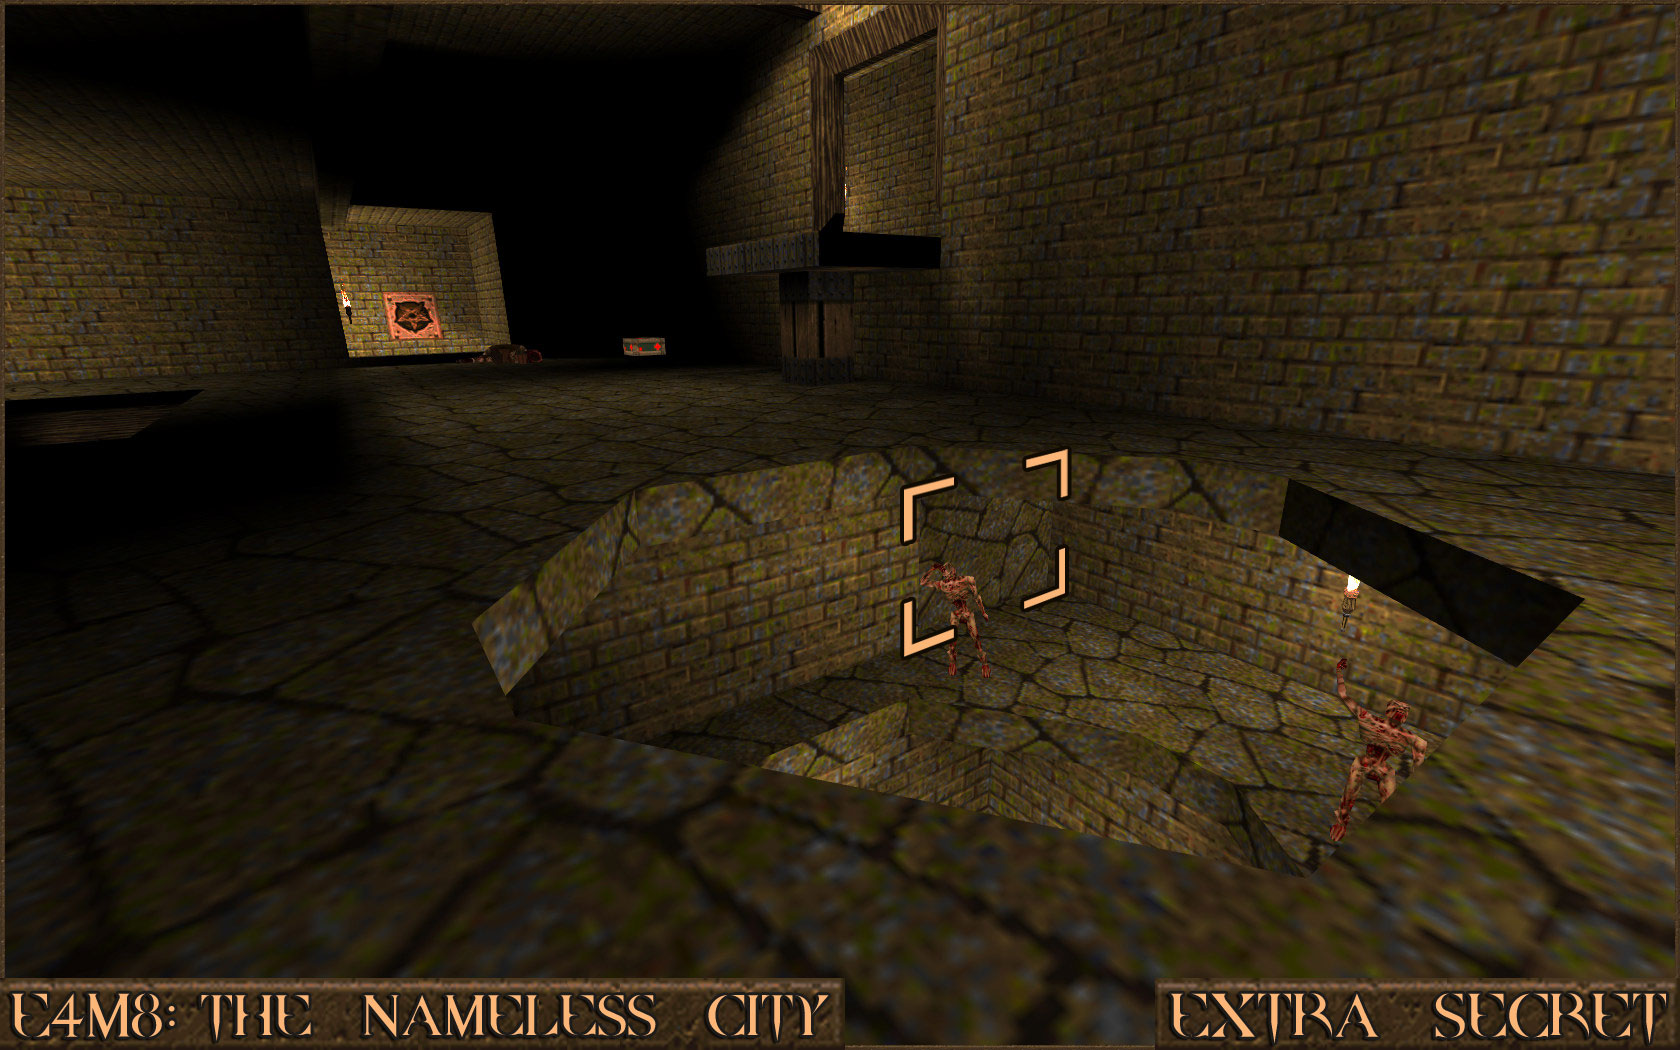 Reward:
 Secret 2 of 4
In the same area as the previous Extra Secret look down the nearby hole. If you look carefully you can see a ledge in the darkness that contains items. Carefully drop down towards the ledge to find the secret.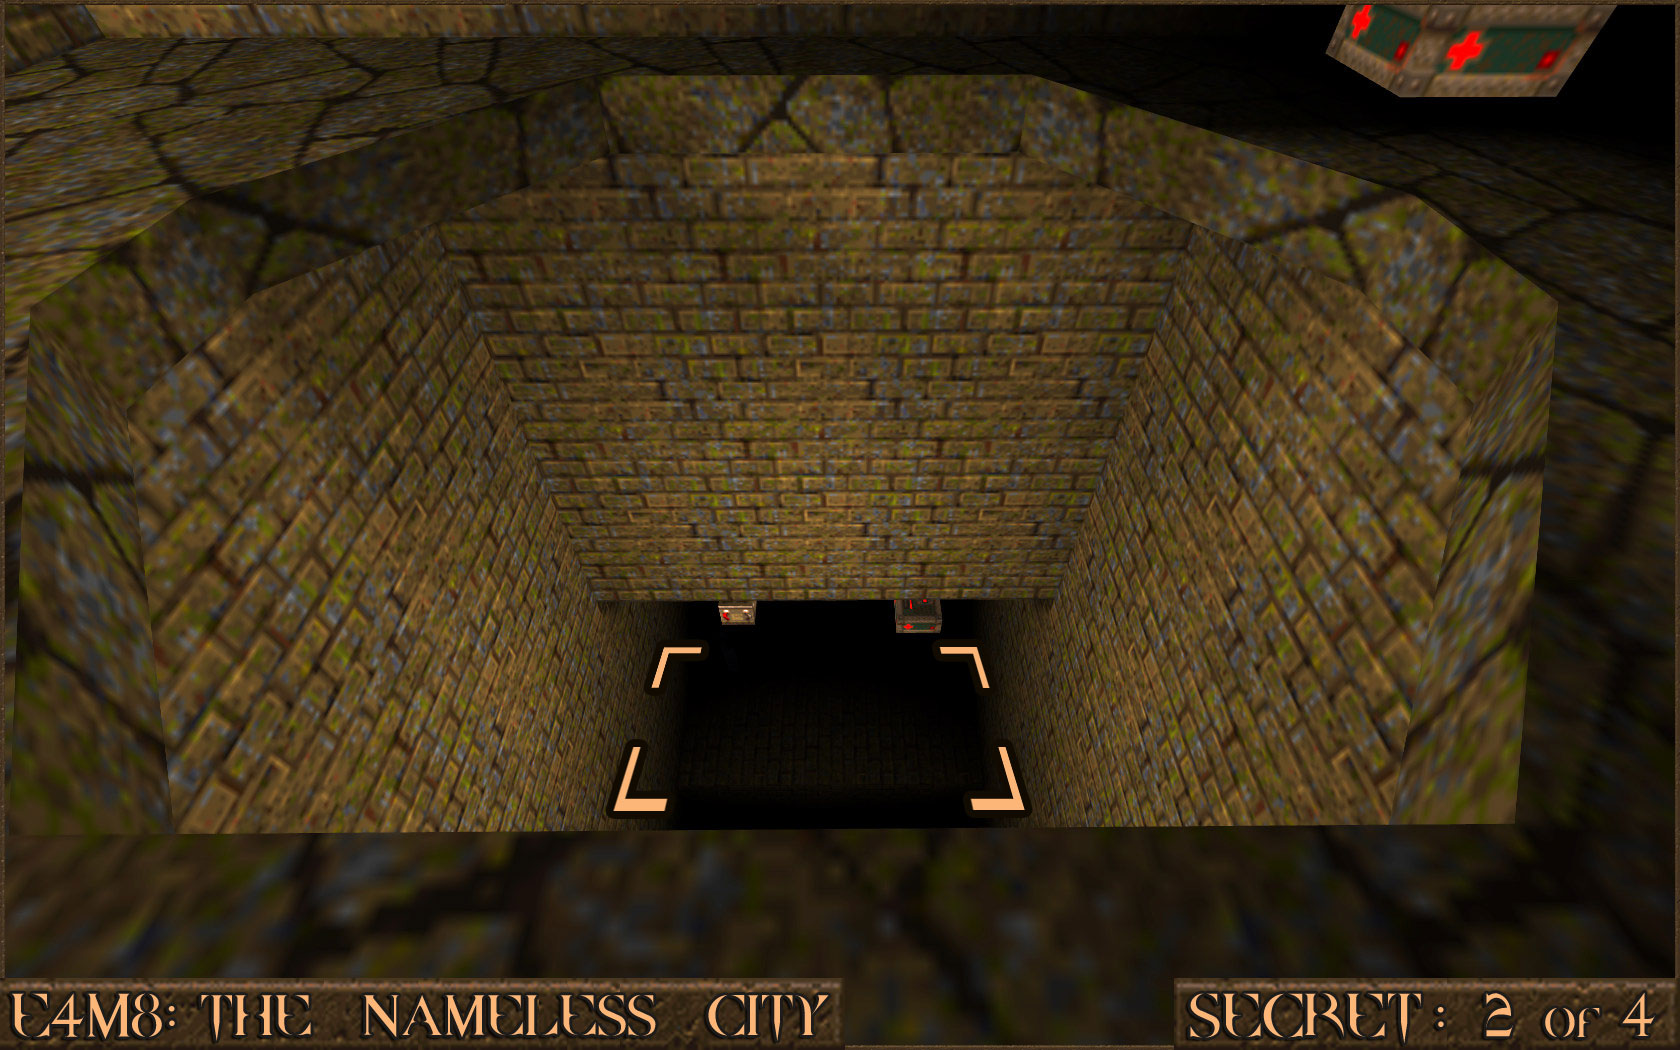 Reward:
 Secret 3 of 4
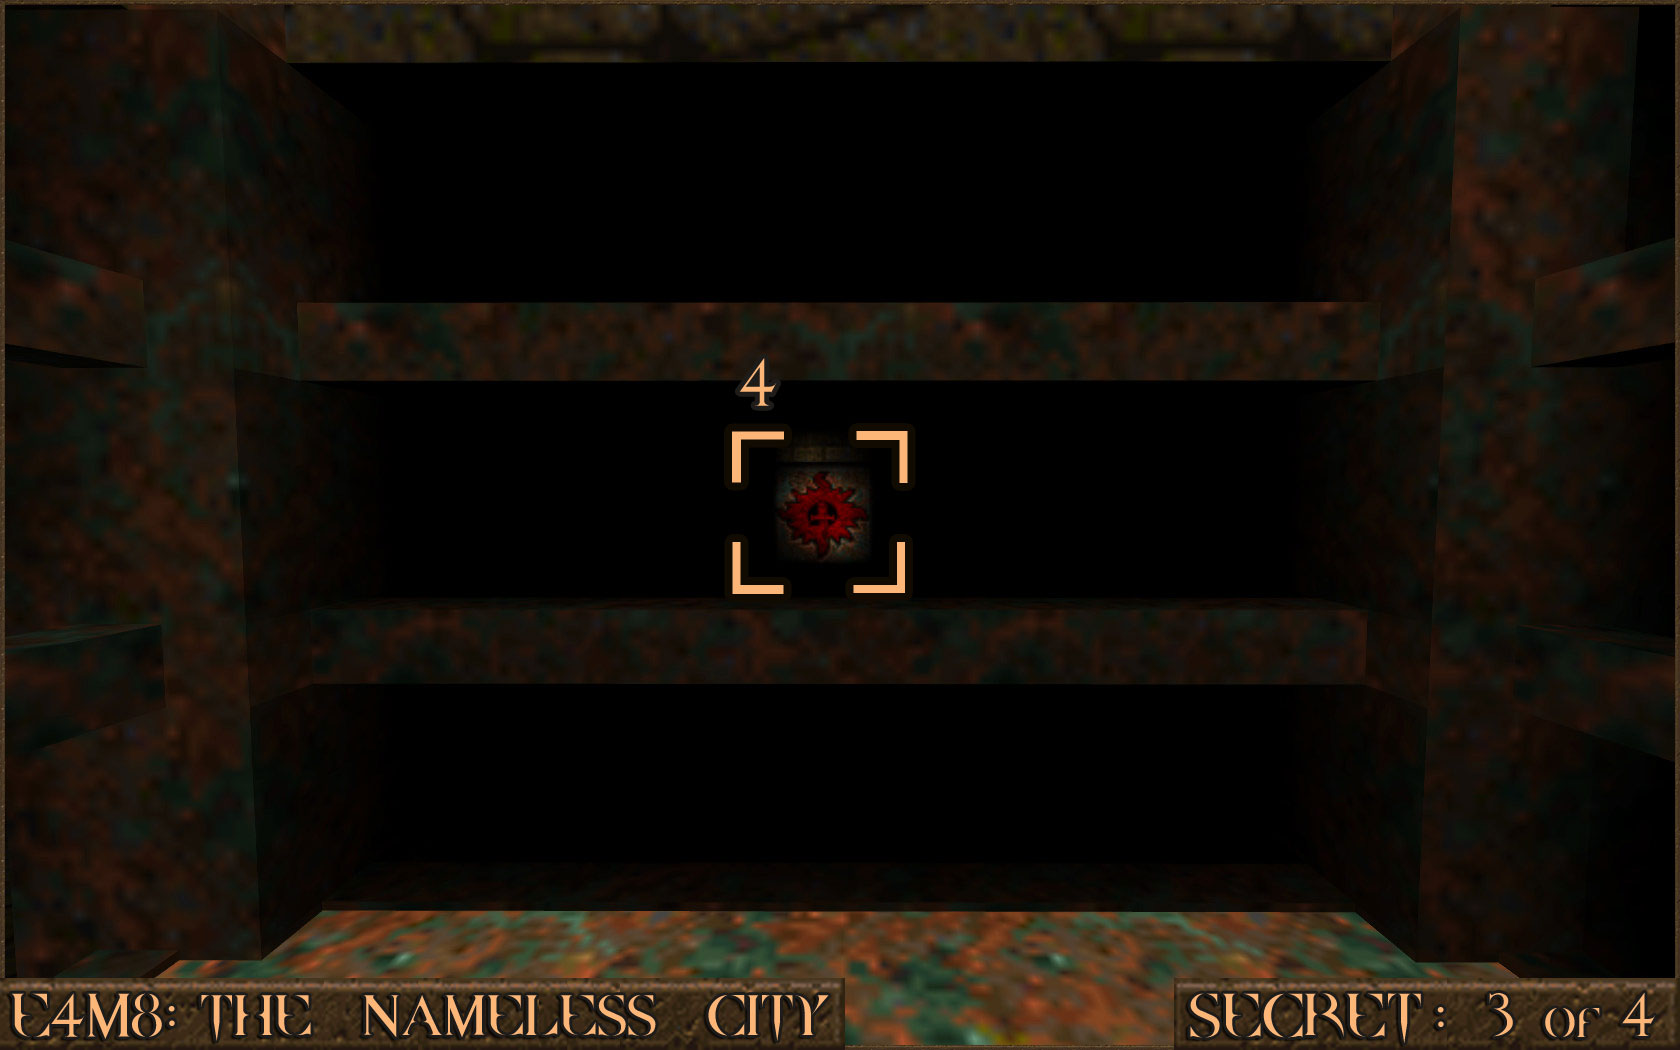
You will come to a room with a large cage in the centre. On a wall near the cage is a push switch () that activates a nearby wooden beam () which can be used as an elevator. Ride the elevator up and follow the wooden beams around until you get to the point where you can drop in to the cage that is in the middle of the room. Press the switch that is inside the cage ().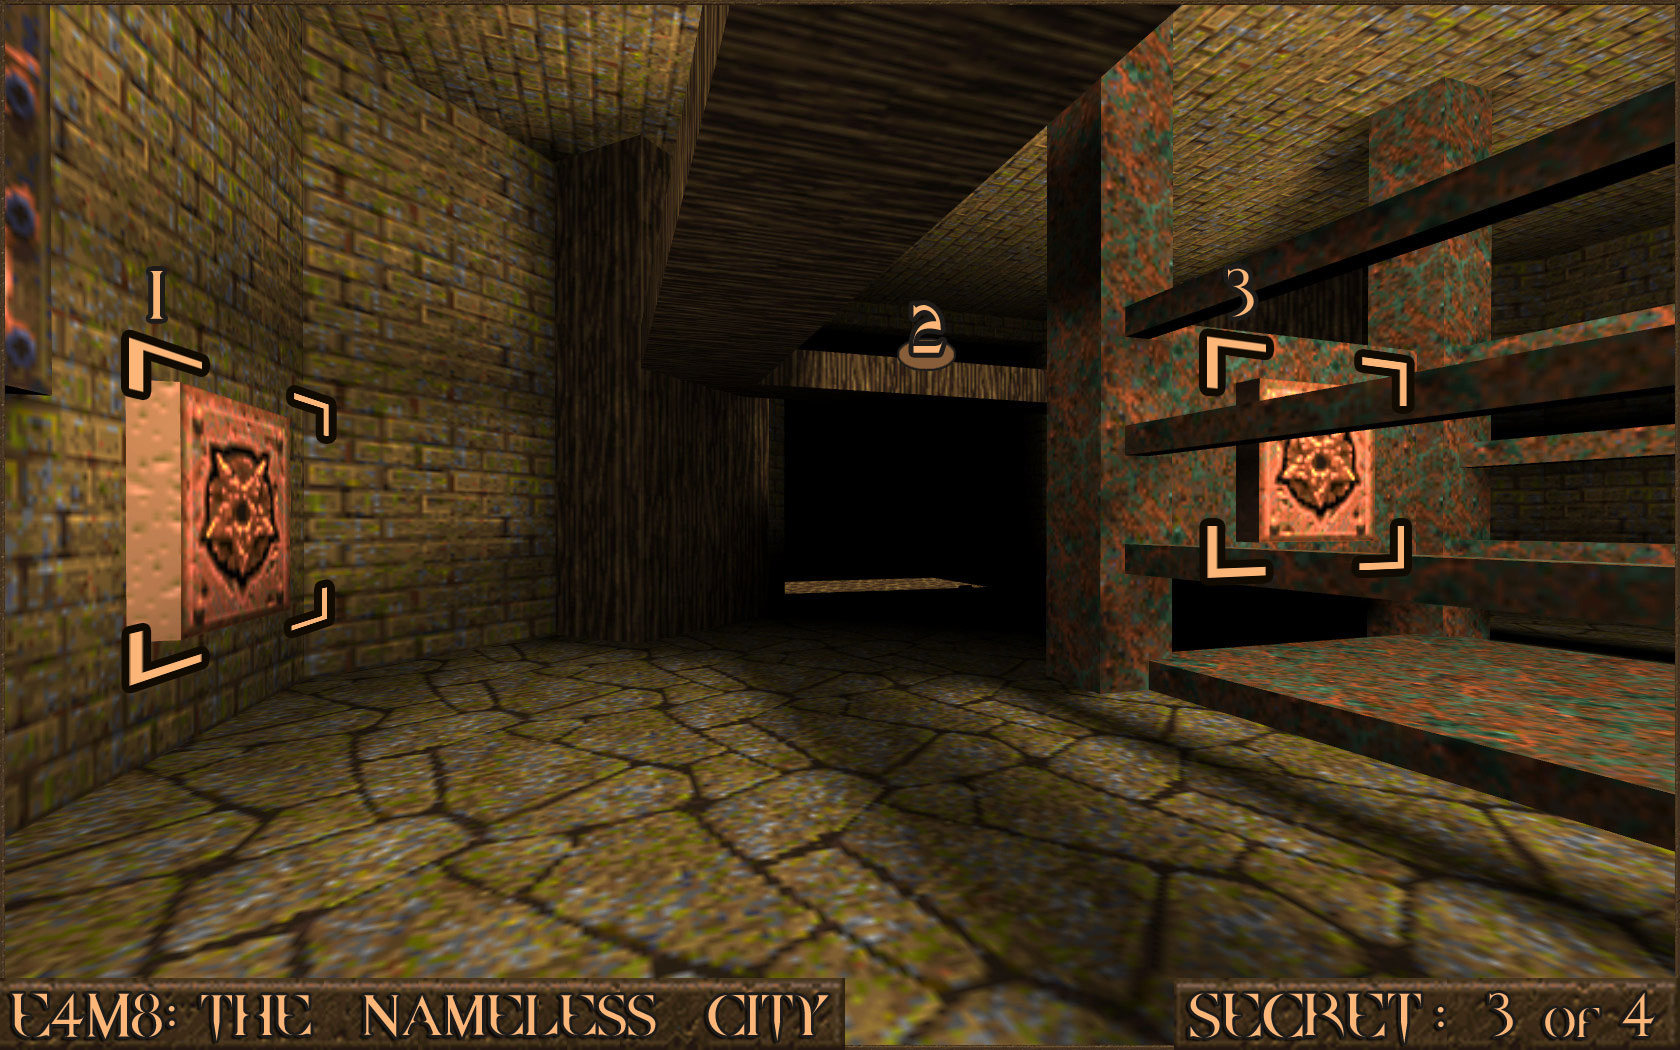 You will be dropped down in to a dark room surrounded by Zombies. In the darkness you can see a shootable red switch () that allows you out of the cage. Keep following the path ahead of you and ride an elevator up.
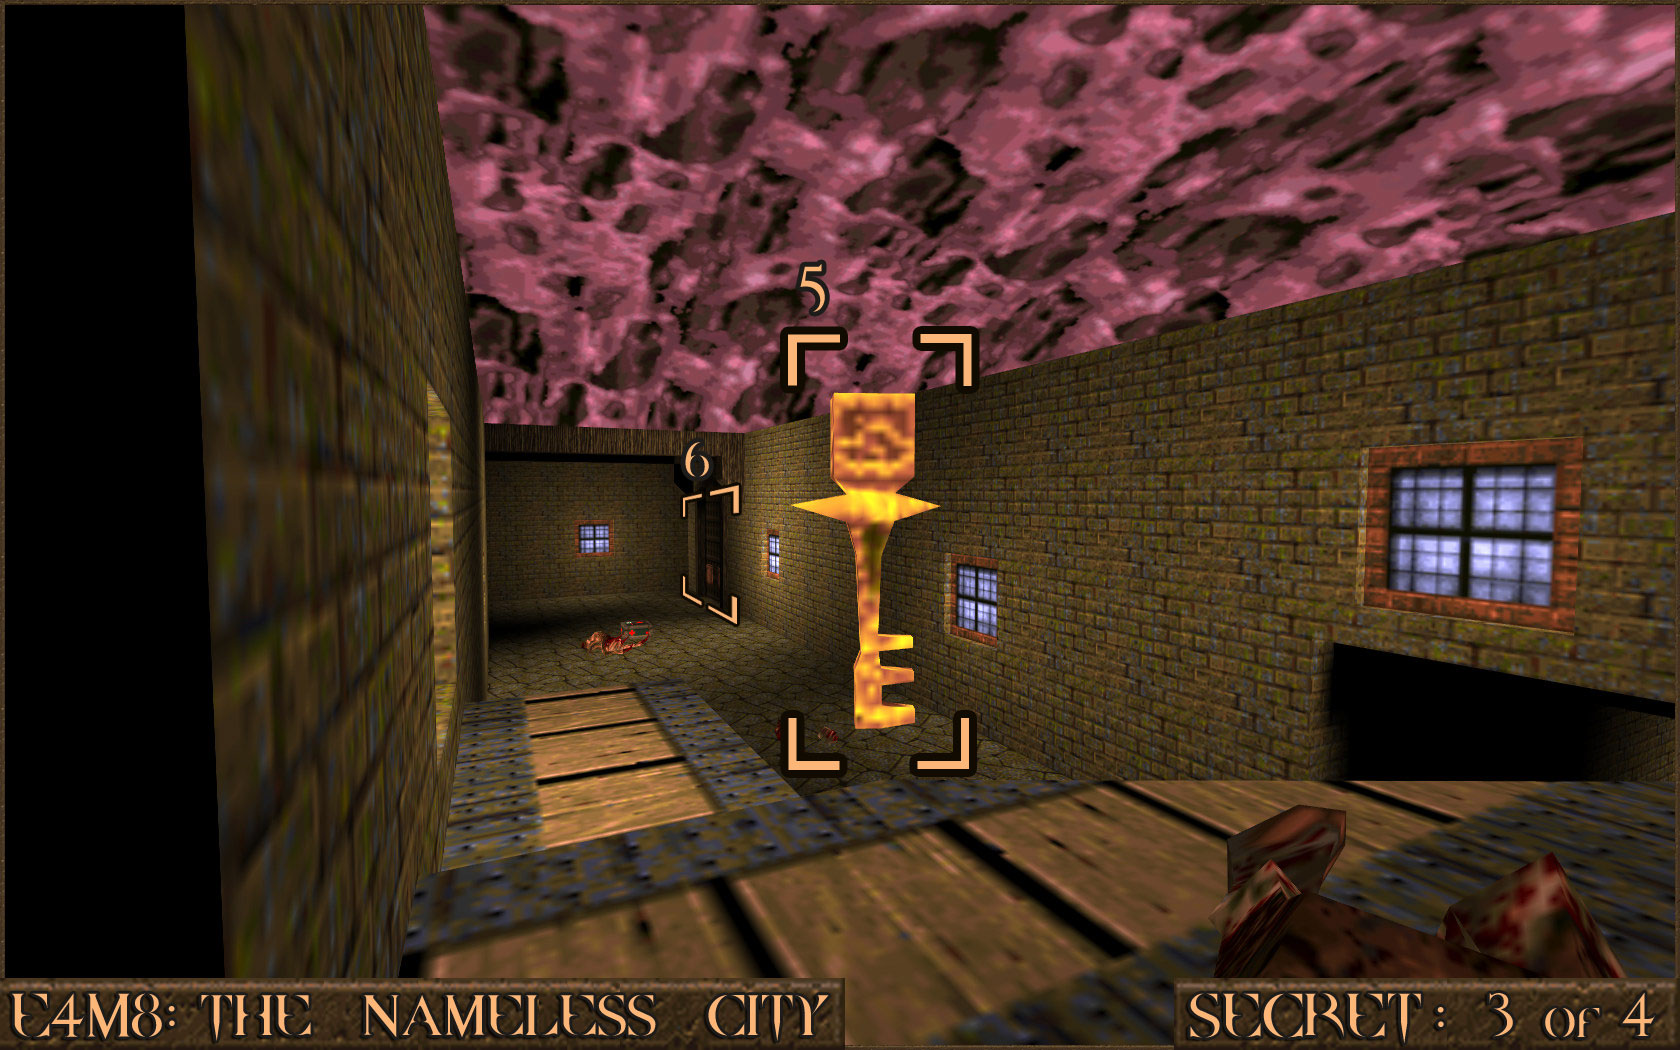
 You will come to the Golden Key () so pick it up. In the distance you can see the Golden Key Door () so head over there and open it to claim the secret.
 Reward:
 Secret 4 of 4
After opening the Silver Rune Key Door you will come across a room with several metal bars over a pit. Look for a triangular section of the pit that has a broken bar. You can actually fall through this gap and in to the secret.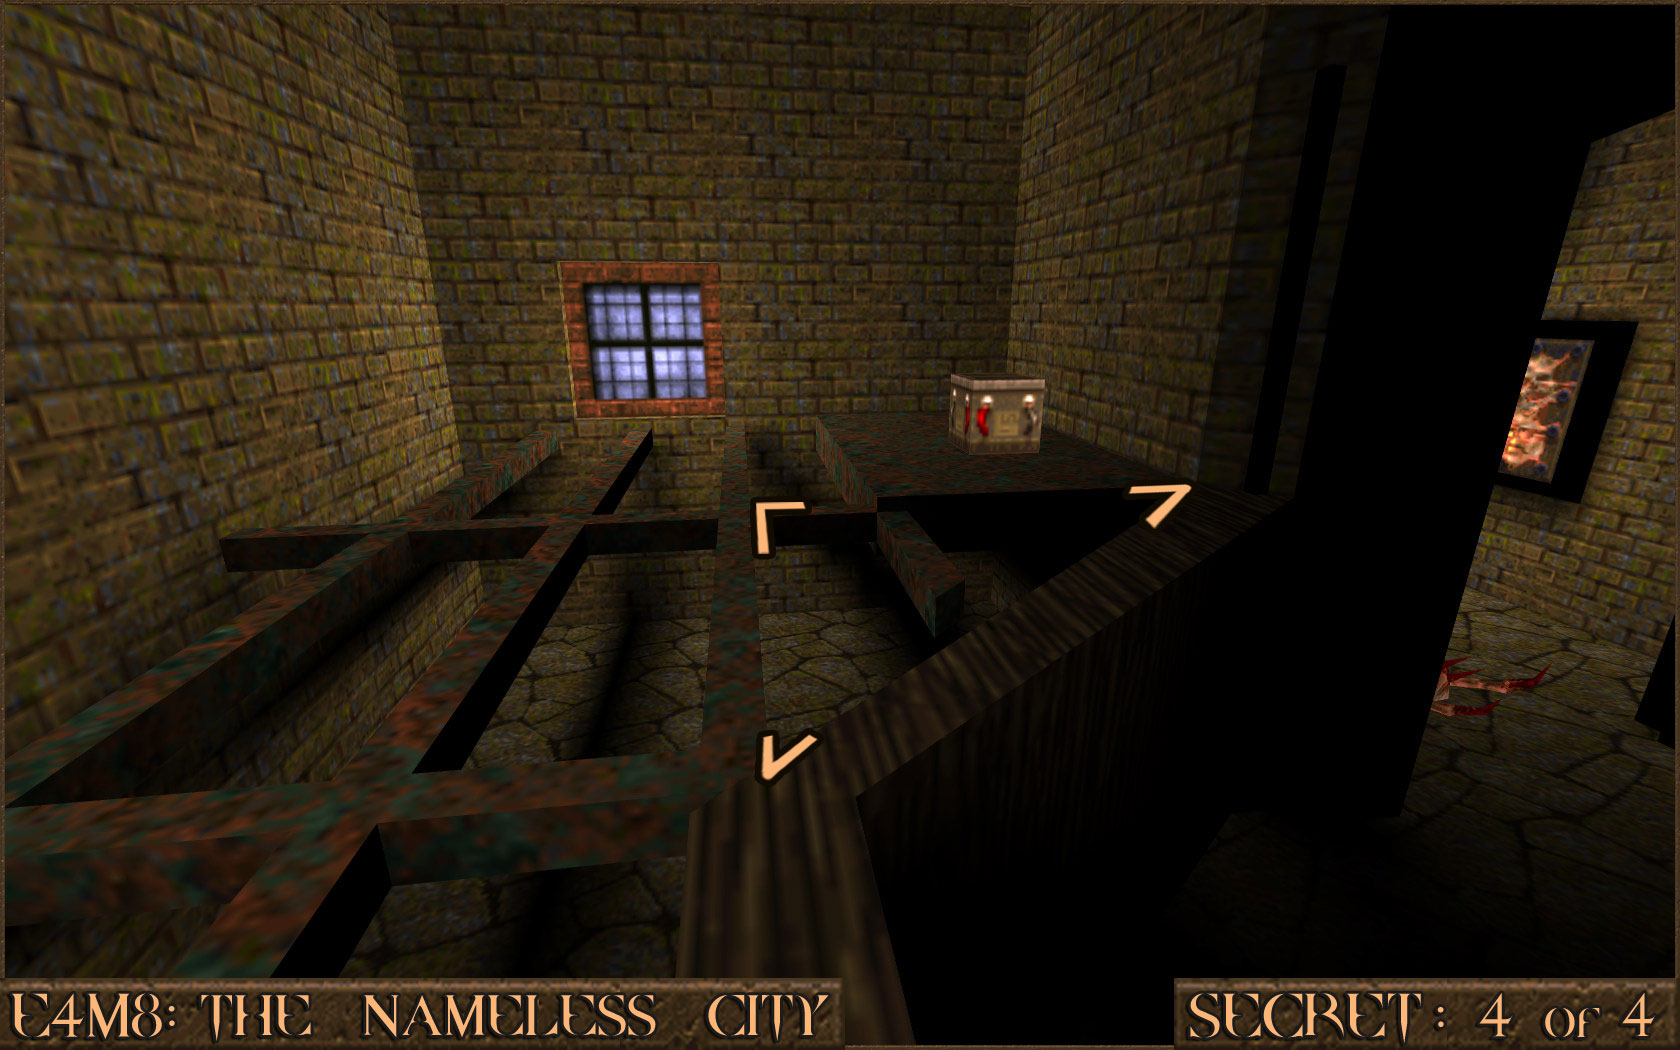 Reward:
 E4M6: The Pain Maze
Secret 1 of 4
Near the beginning of the level is a room with several columns. On one of these columns is a push-switch () but it is hidden in darkness so look carefully. A nearby wall () will open when the switch is triggered.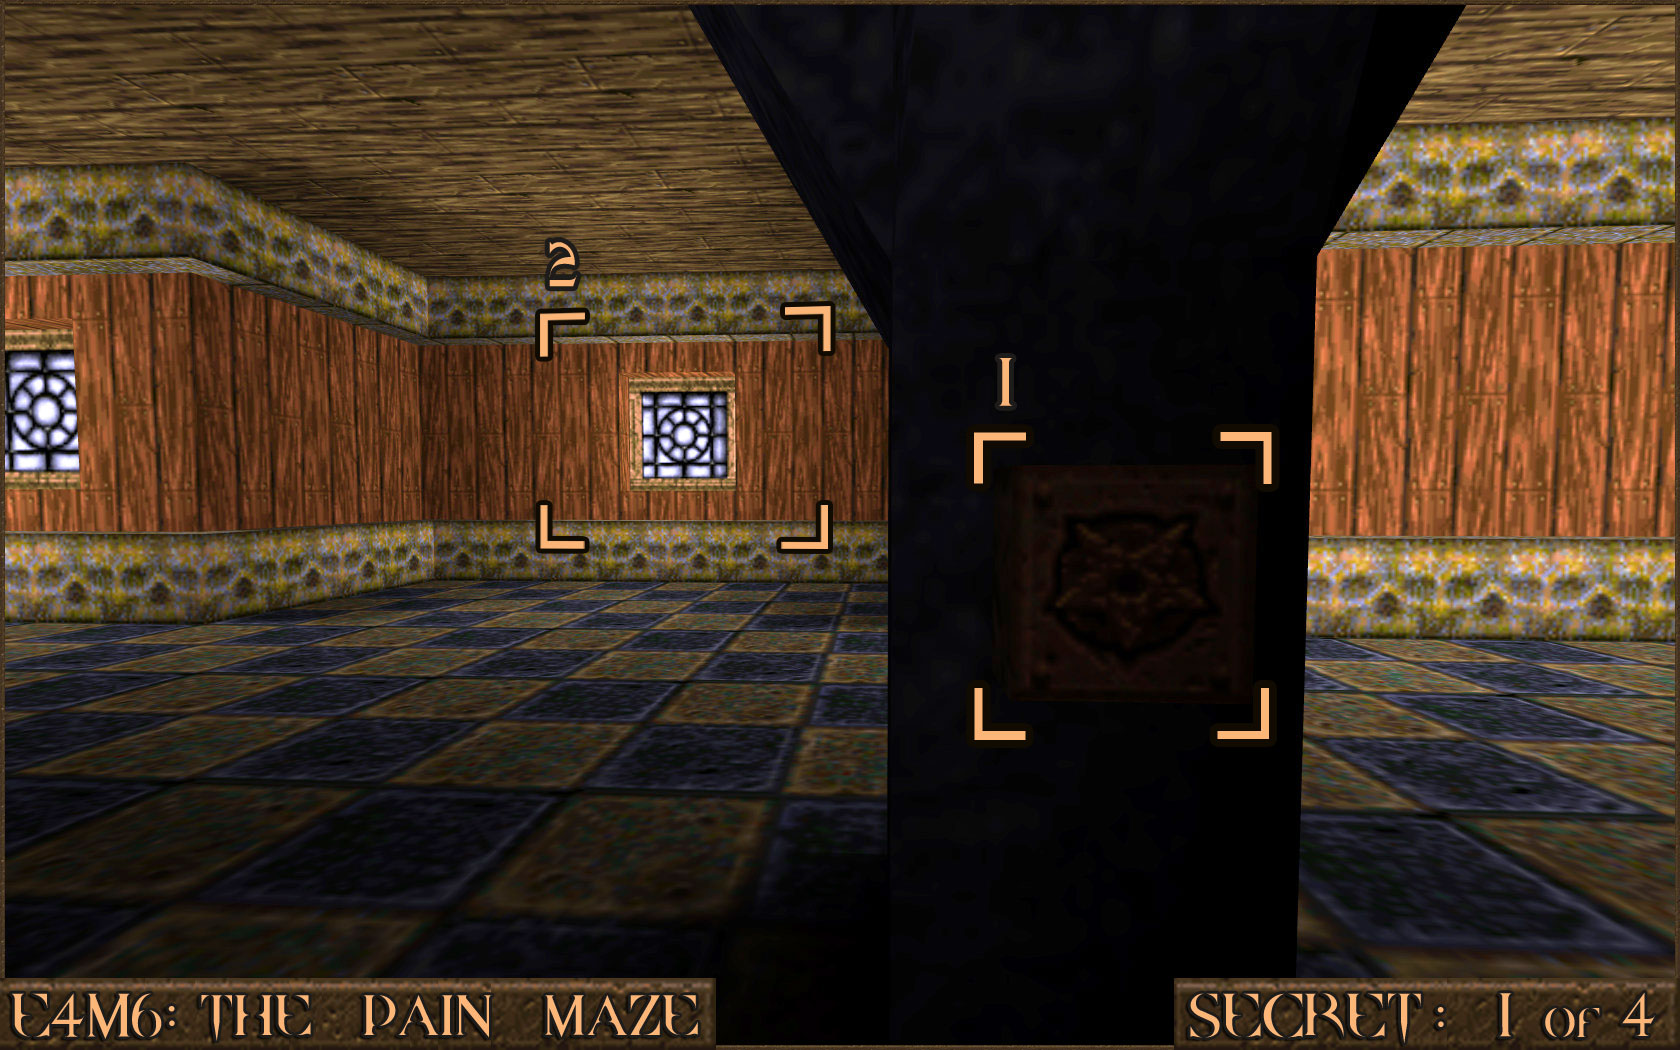 Reward:
 Secret 2 of 4
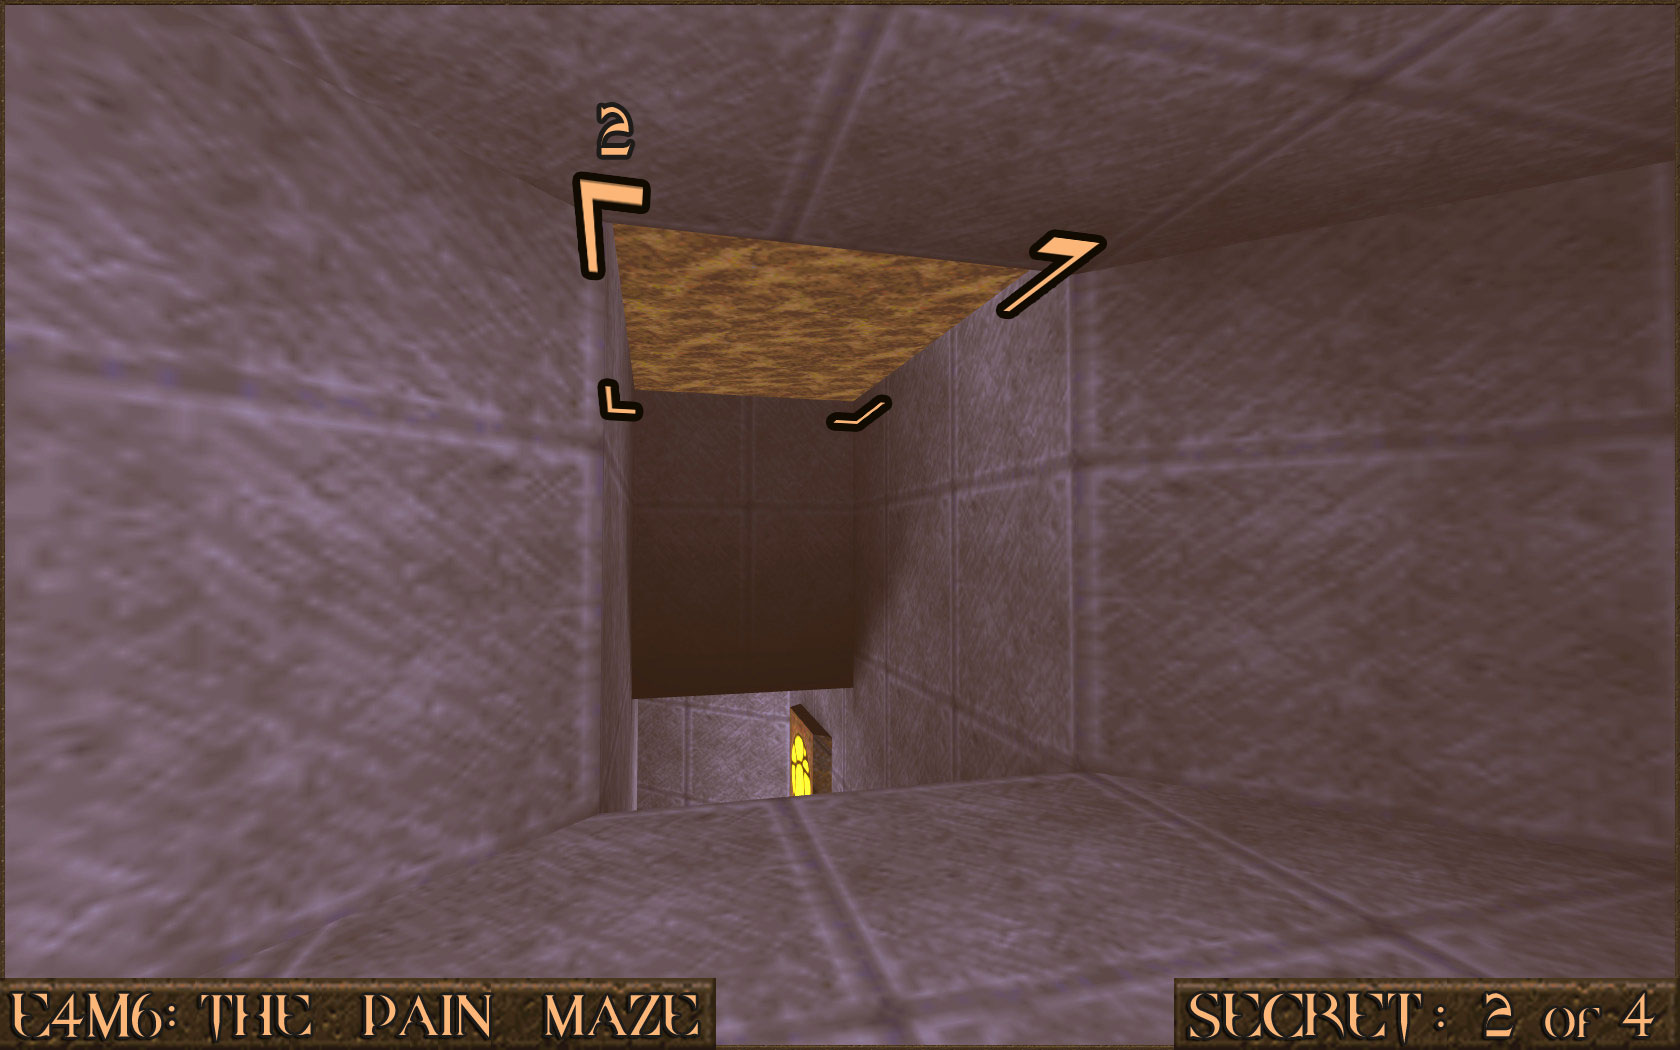
At some point during the level you will come across a pool of water (). Swim down in to it.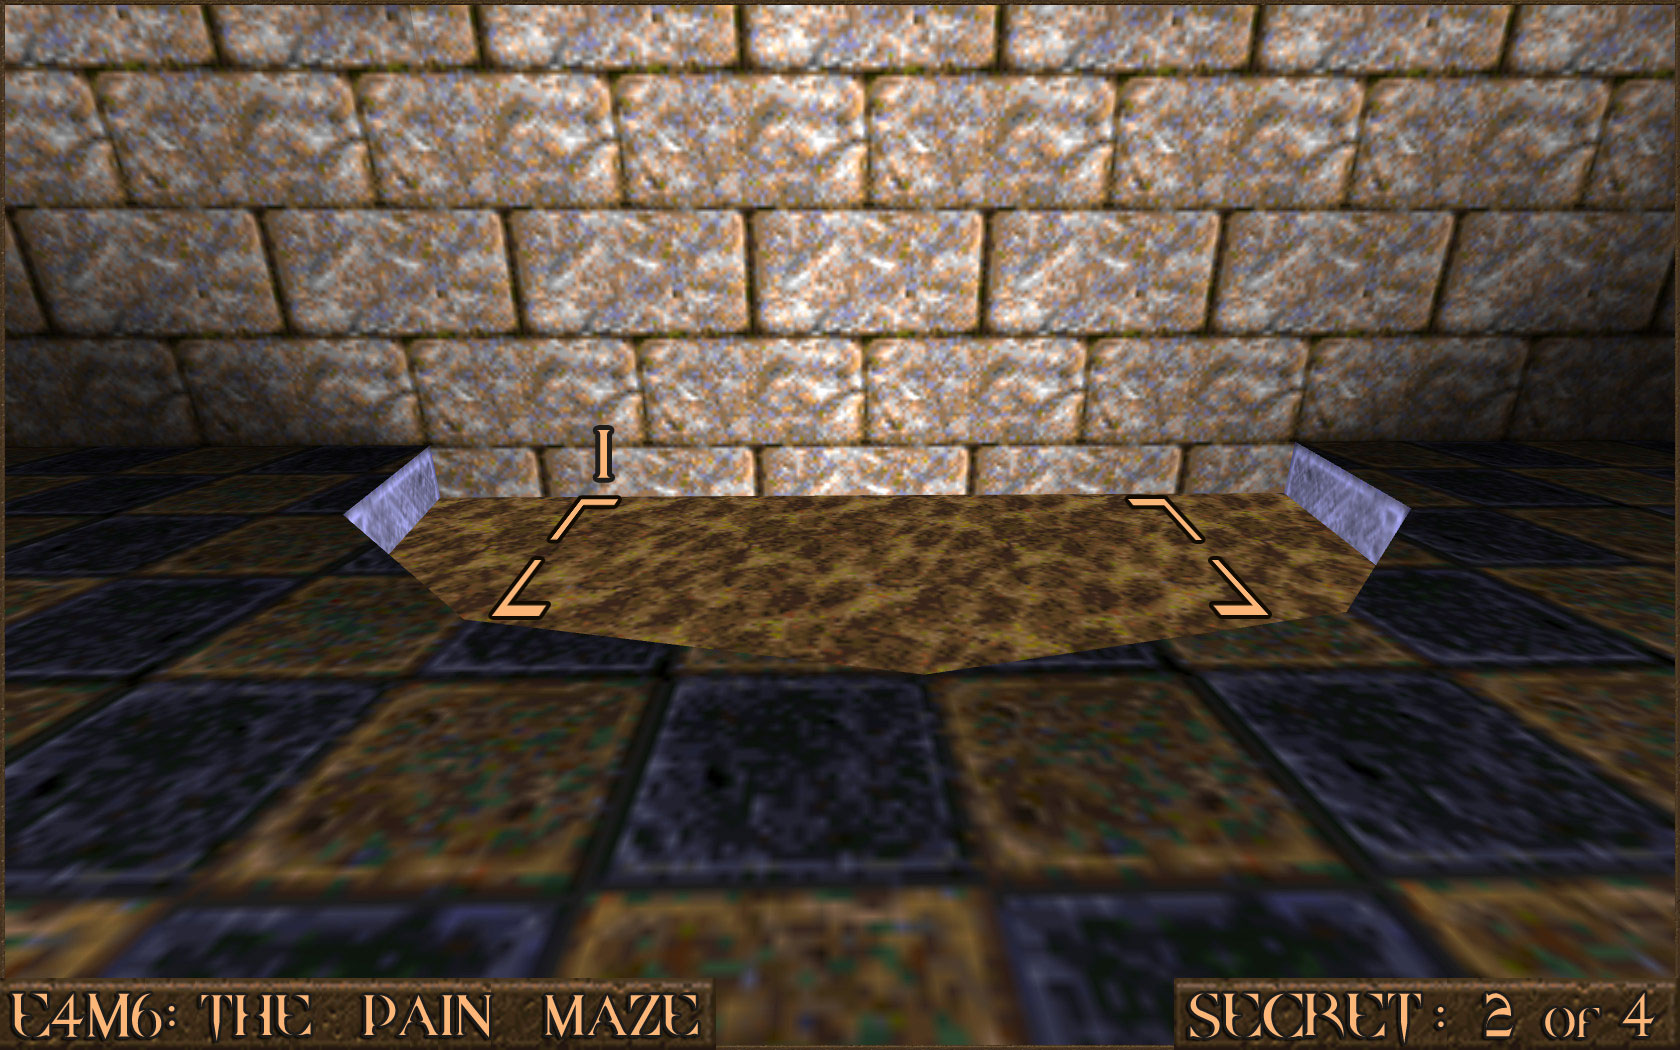 While underwater you will soon notice a nearby area where you can surface (). Do so and you will find a hidden room that contains the secret.
 Reward:
 Secret 3 of 4
In the large room with lots of water dive down. Look carefully at the centre area to see a part of the wall is slightly different to the rest. Shoot it to reveal a secret area.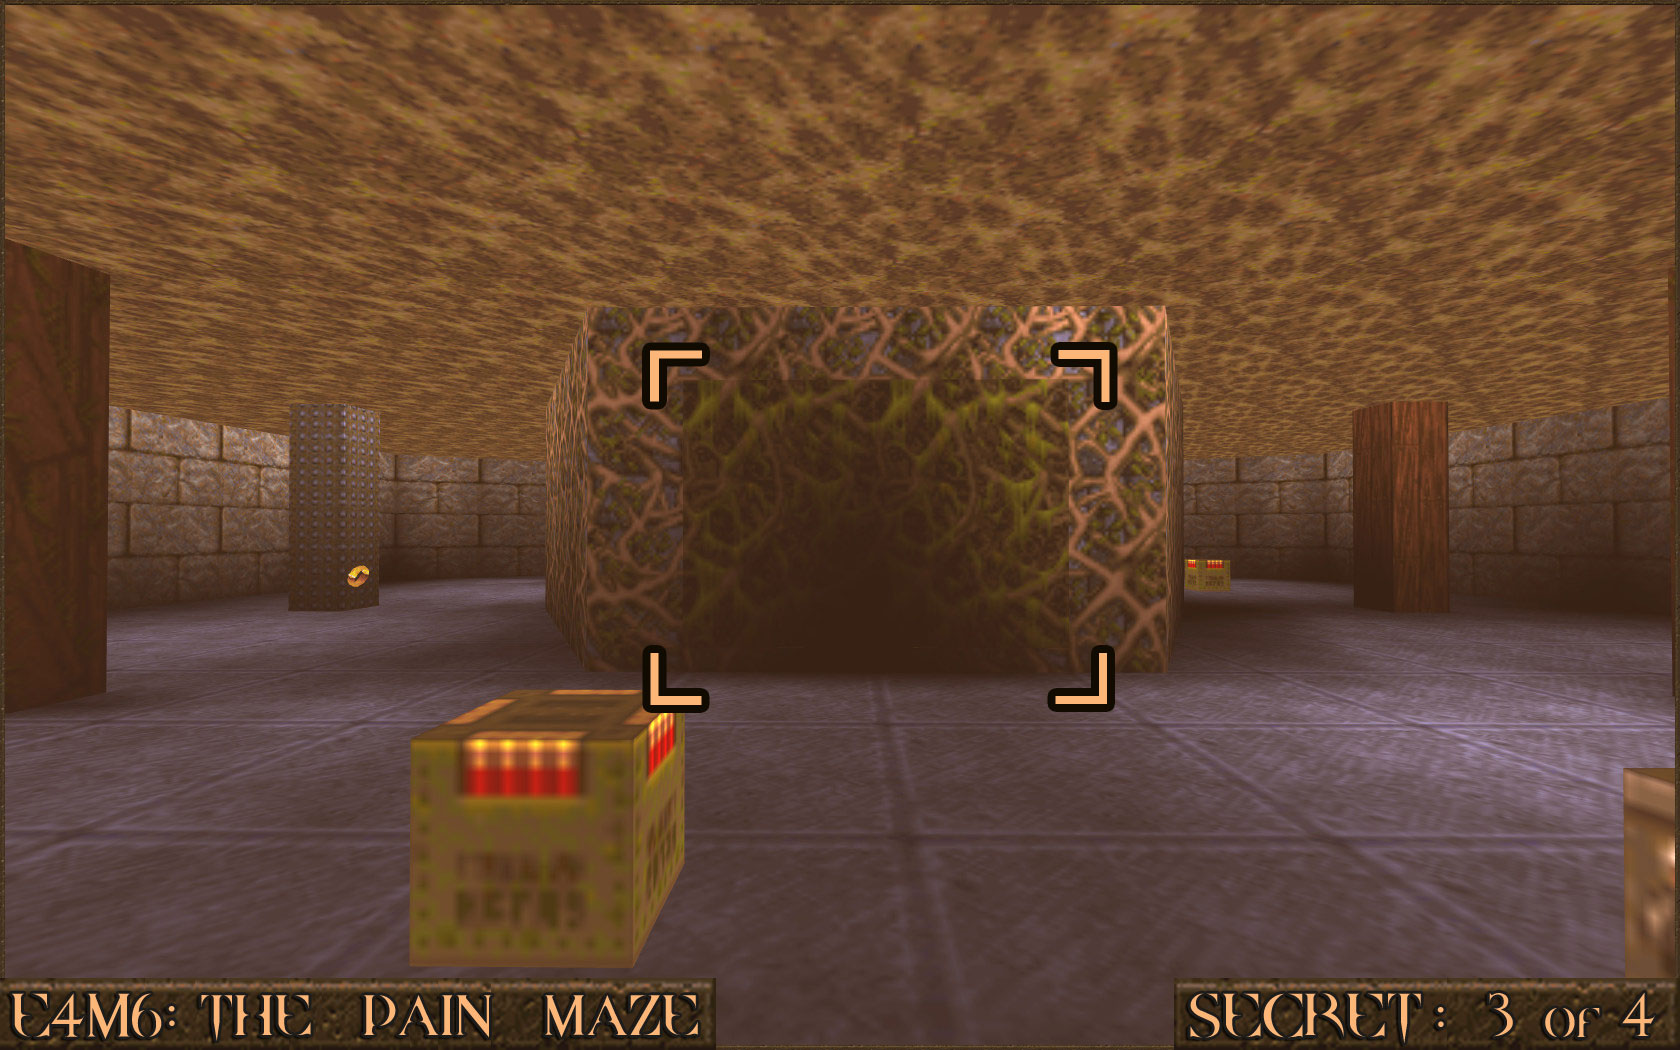 Reward:
 Secret 4 of 4
In the same room as Secret 3 you will use the Golden Key to activate a small elevator which allows access to the high beams around the room. Stand on the beam closest to the wall () and then look up at the ceiling and shoot the yellow light (). This will activate the beam you are currently standing on and will allow you to jump over and discover the nearby secret. If you activated the beam without standing on it first you can still claim this secret later on in the level by doing a running jump over the items from high up.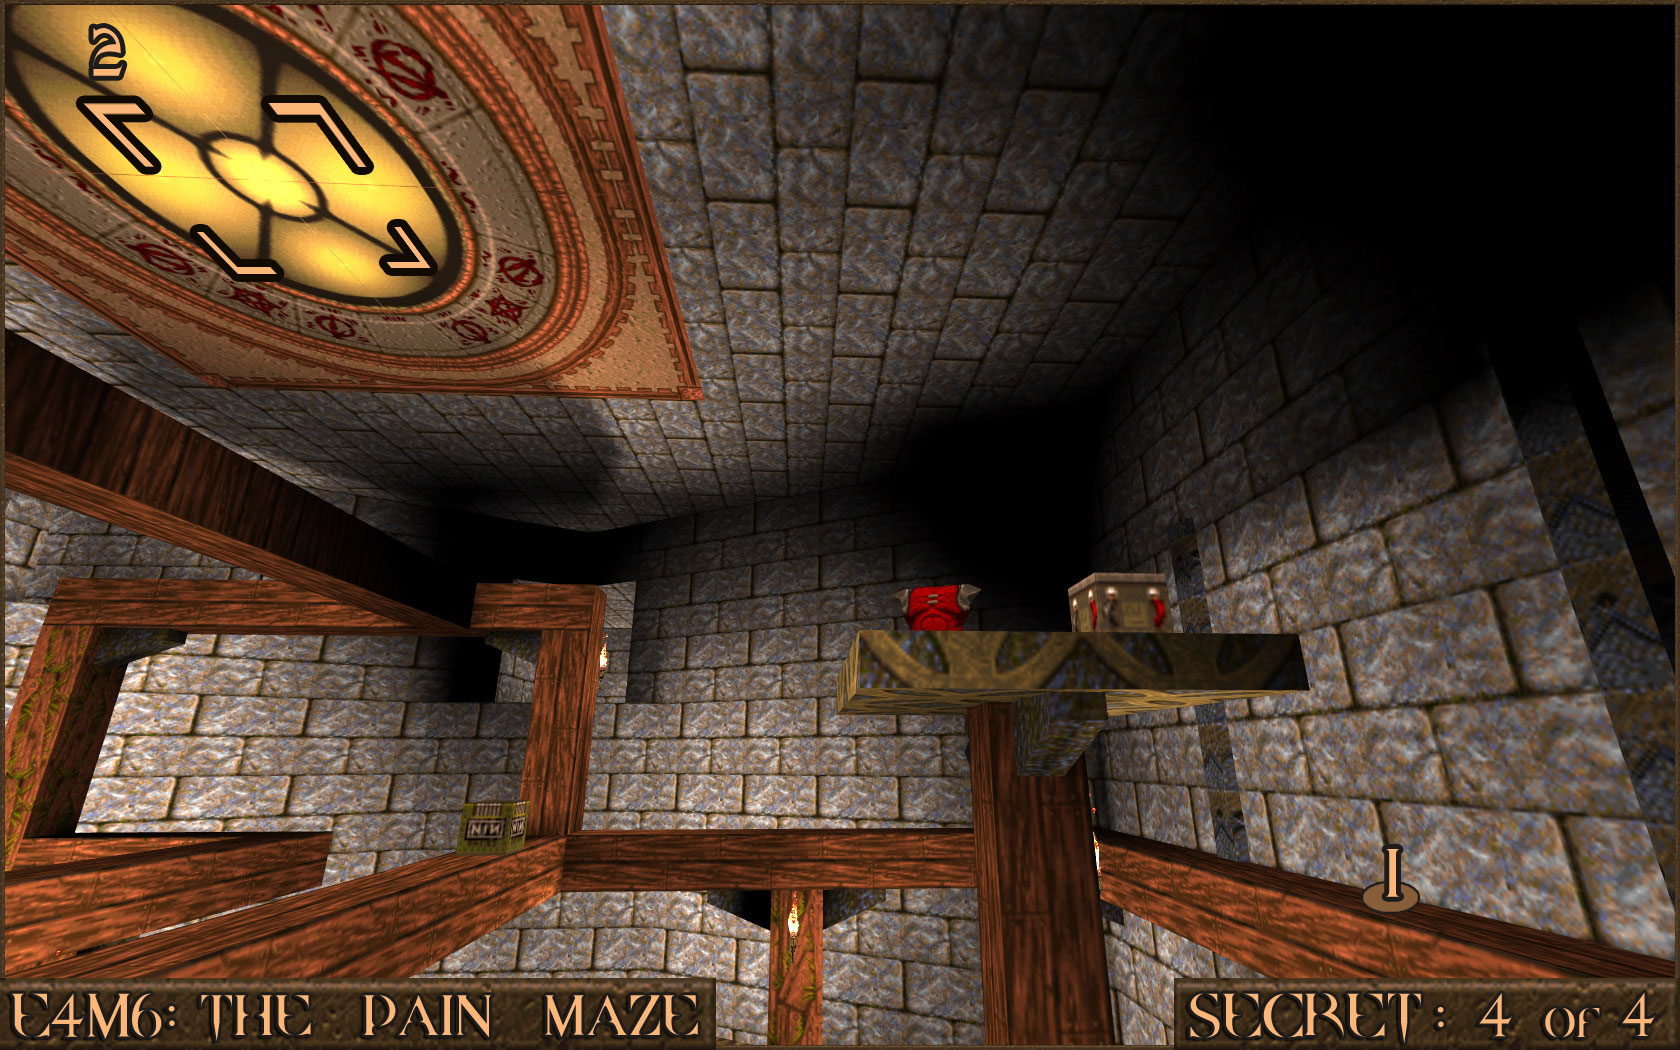 Reward:
 E4M7: Azure Agony
Secret 1 of 9
You will come across a Quad Damage near a yellow light (). When you approach it the floor will shift and you fall down in to a slime pit.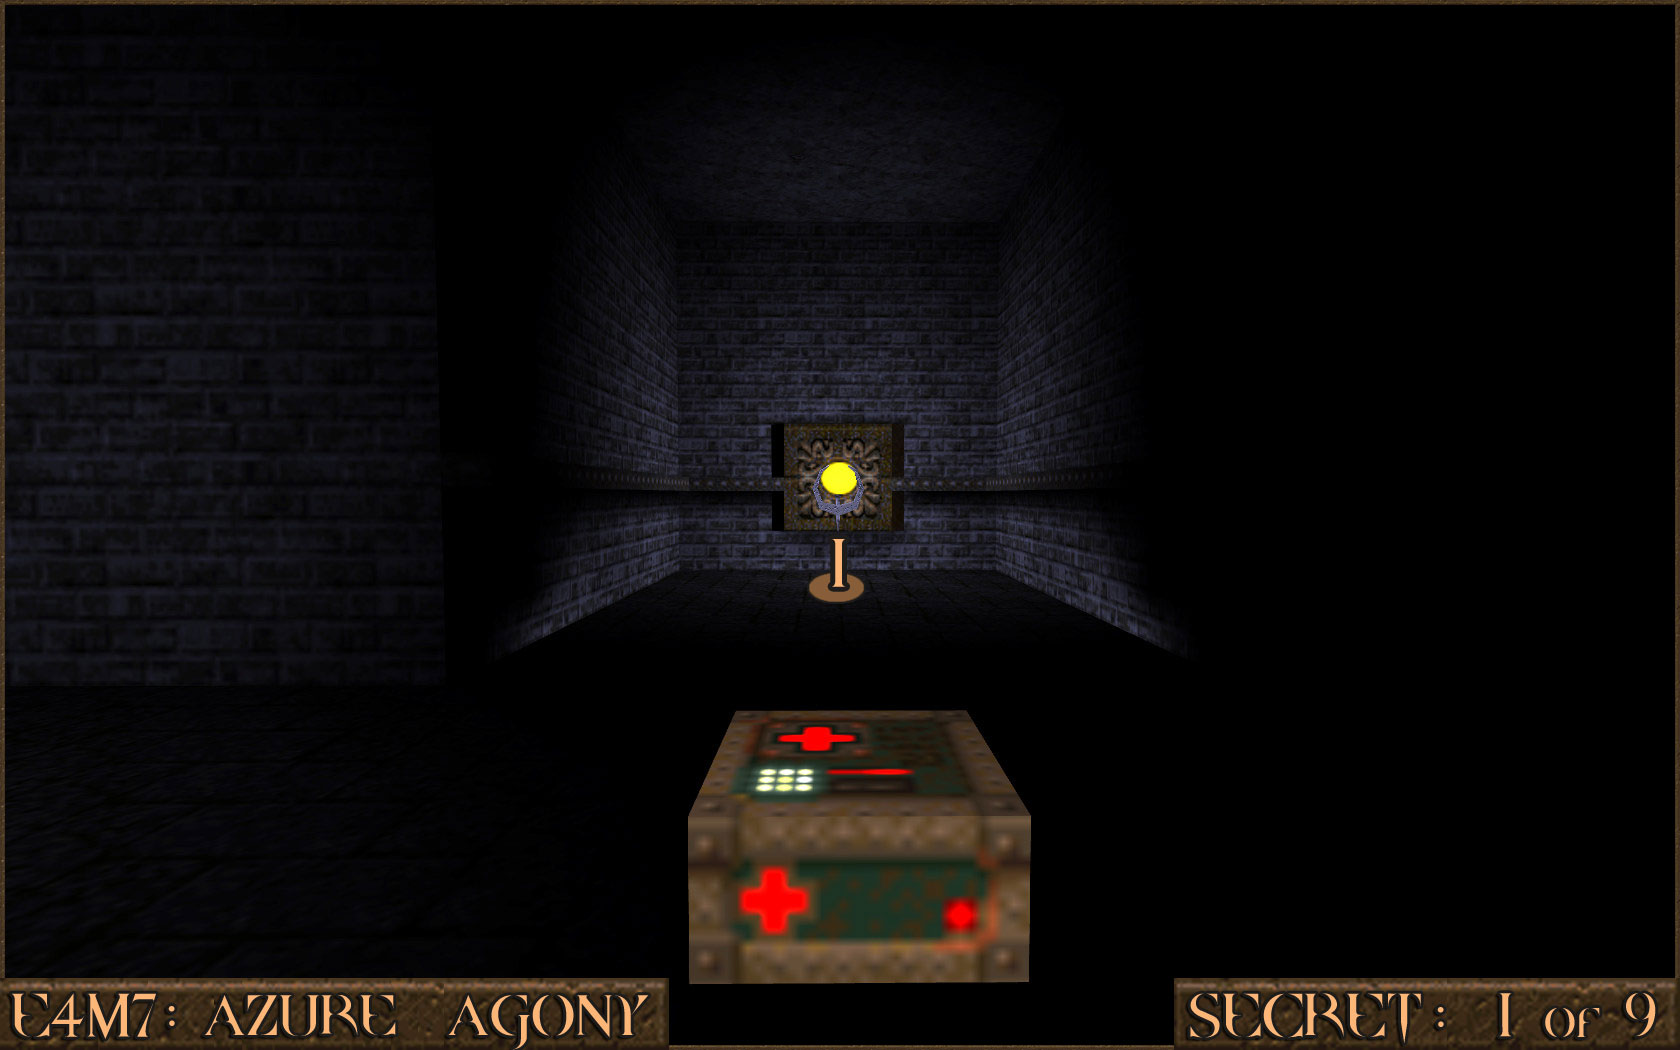 Ignore the first teleporter you see and instead follow the slime round the corner ().
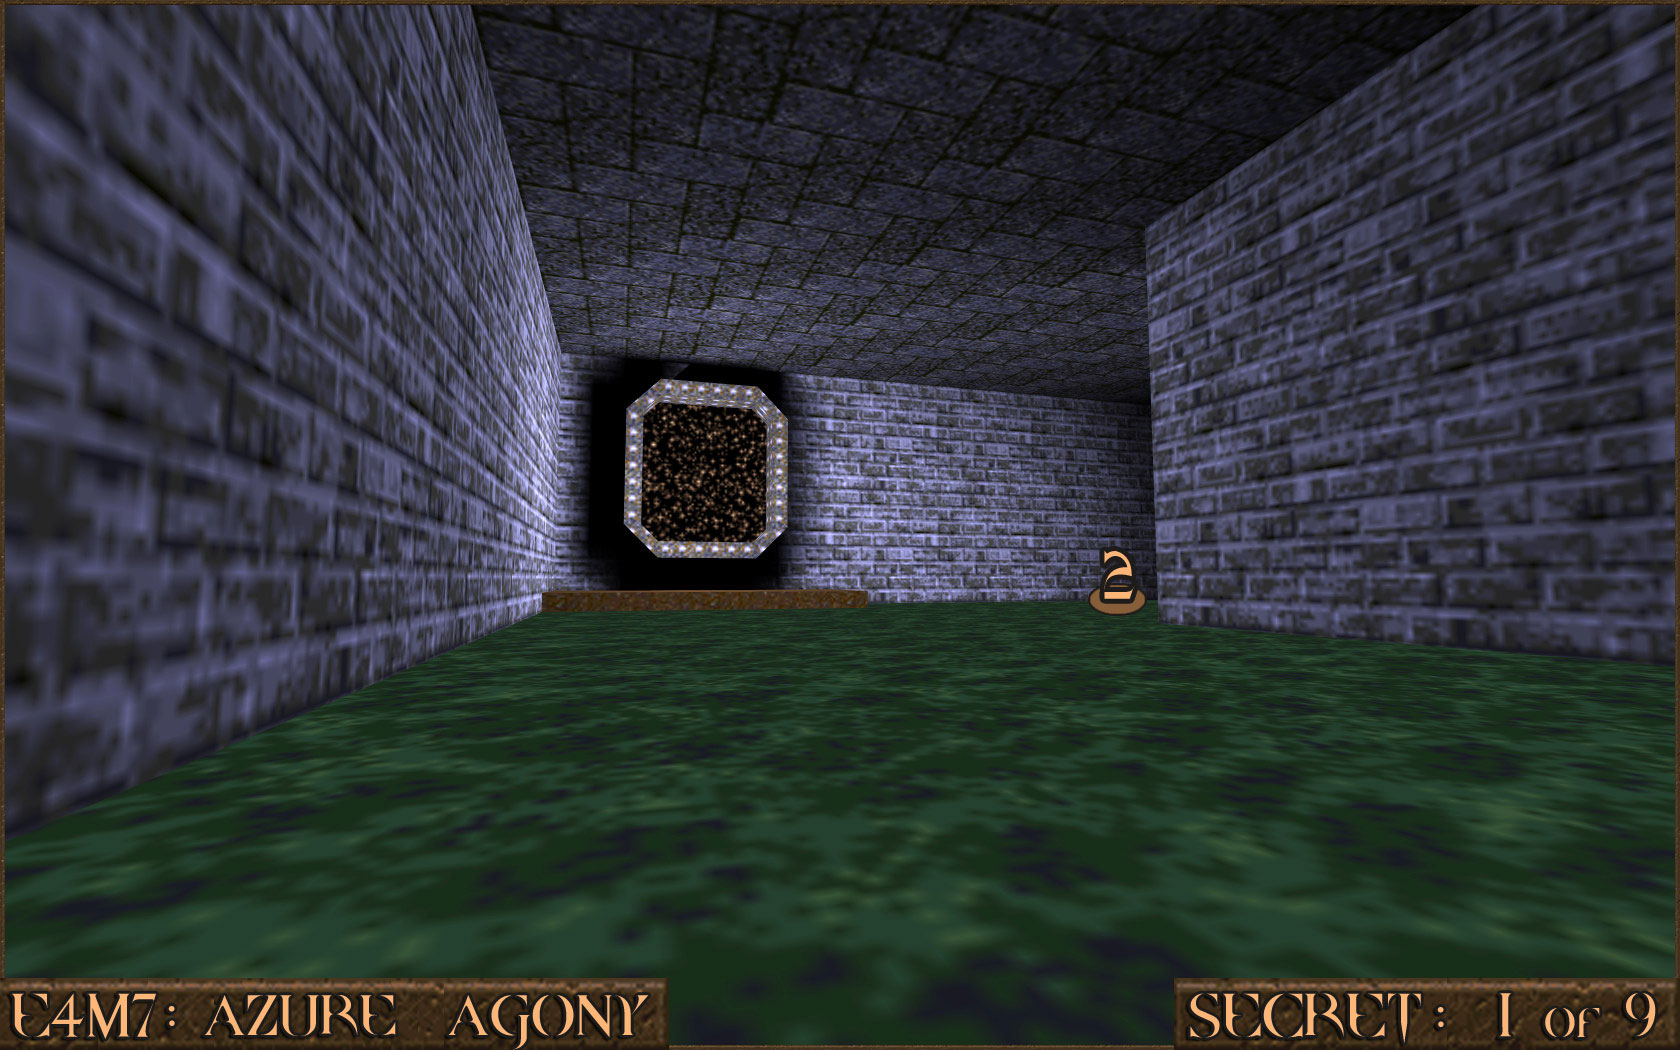 A second teleporter () is available that takes you to the secret.
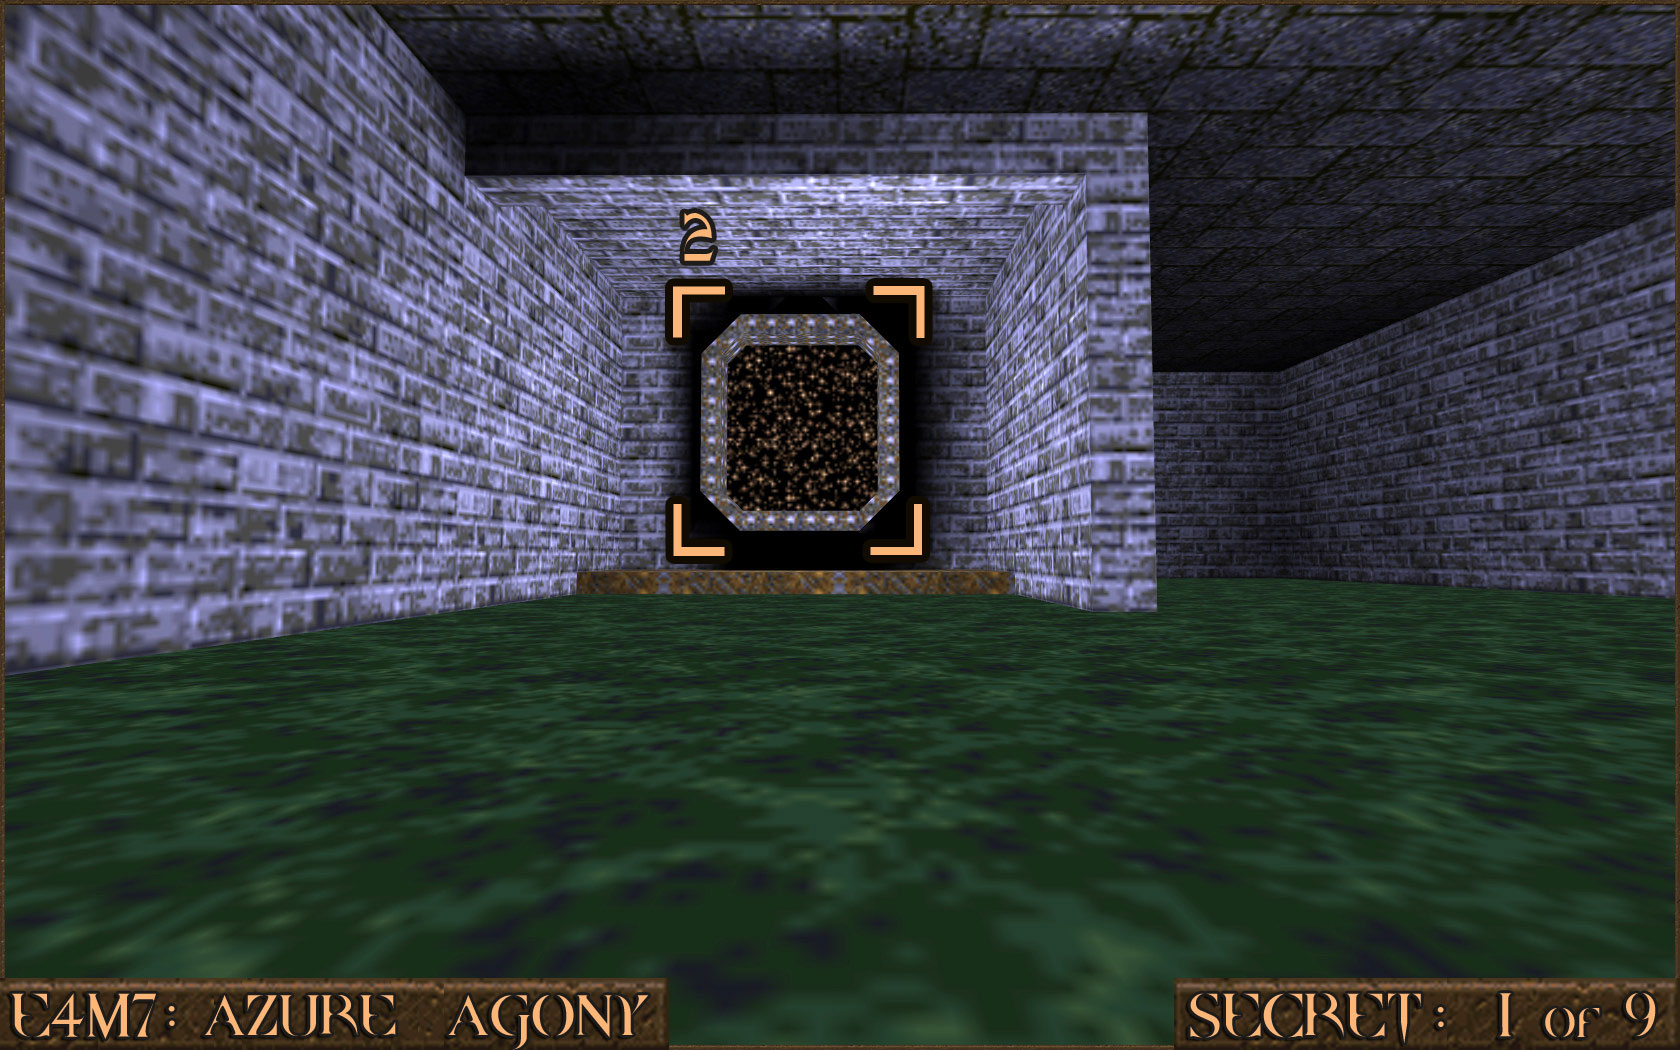 Reward:
 Secret 2 of 9
While traveling through the area with blue brick walls and lots of yellow wall lights you will go down several stairs. Turn around and look behind one of the stairs to see a red shootable switch. Shooting it will make those stairs start to raise up. If you're quick and jump on to them you will be taken up to the secret. If you are too slow you will have to work your way back around to the other side of the stairs.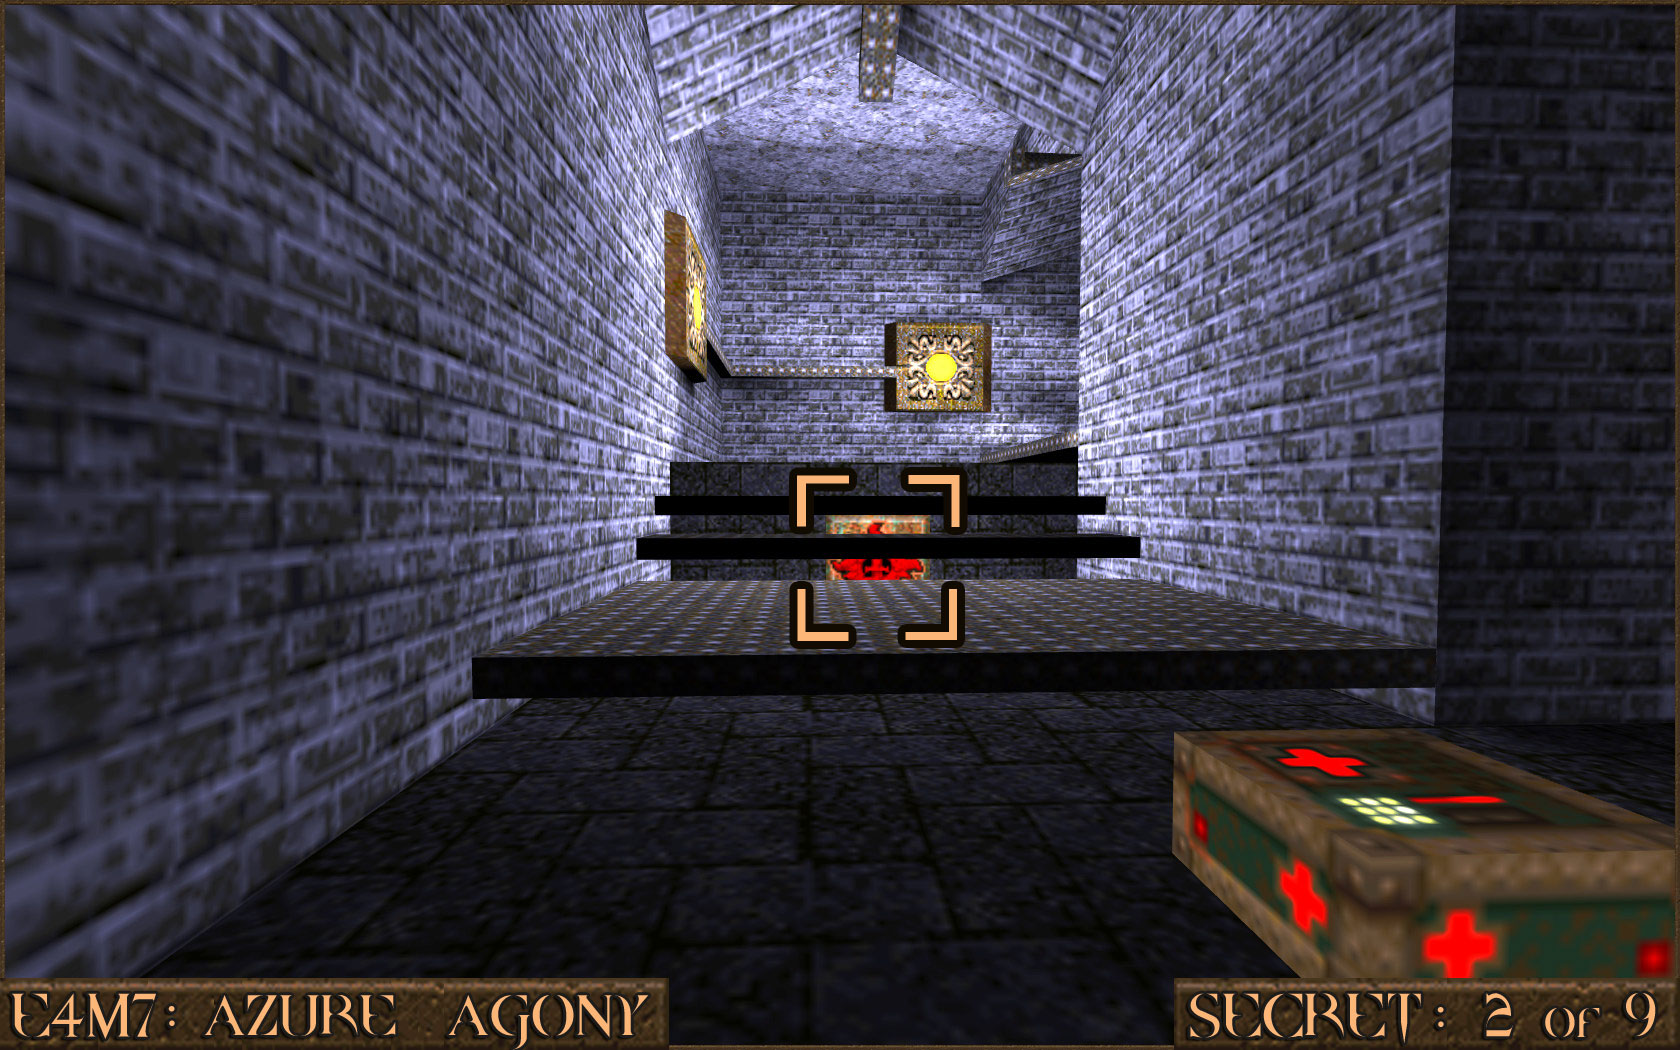 Reward:
 Secret 3 of 9
While still on the platform that contains Secret 2 look on the left wall to see a section of the wall is very brightly lit. Shoot it to reveal the secret.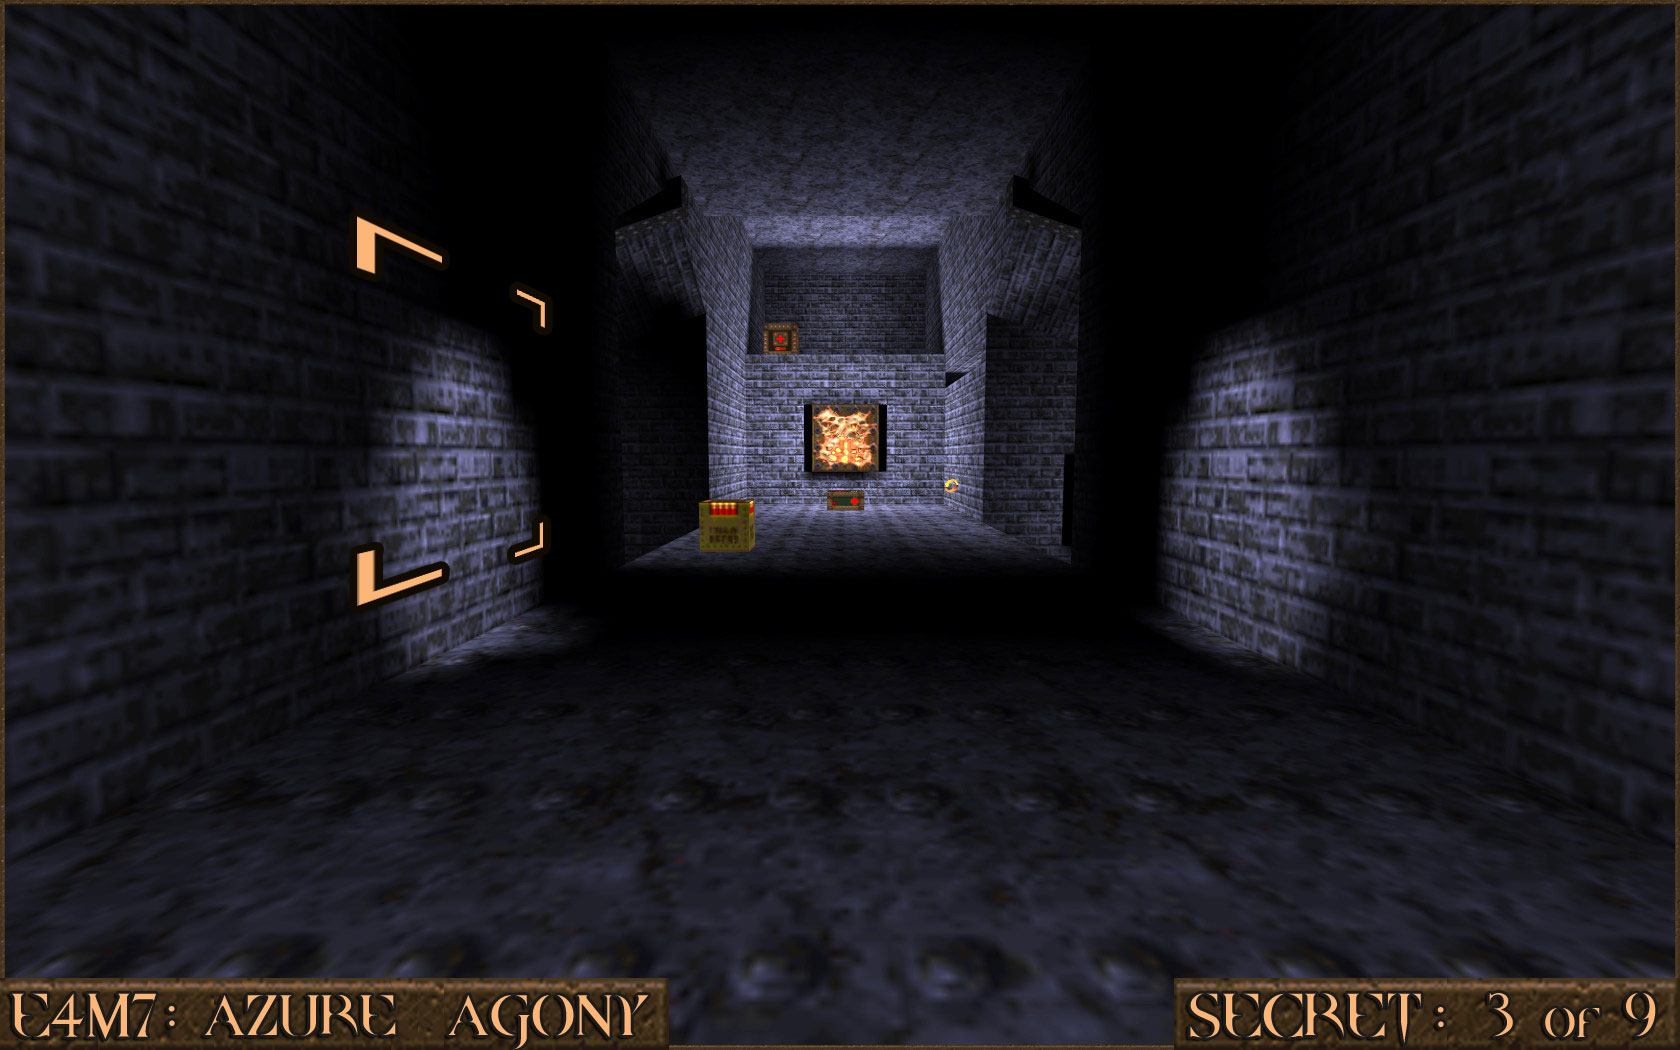 Reward:
 Secret 4 of 9
Exactly opposite Secret 3 is another section of wall that is brightly lit. In exactly the same way shoot it to reveal another secret.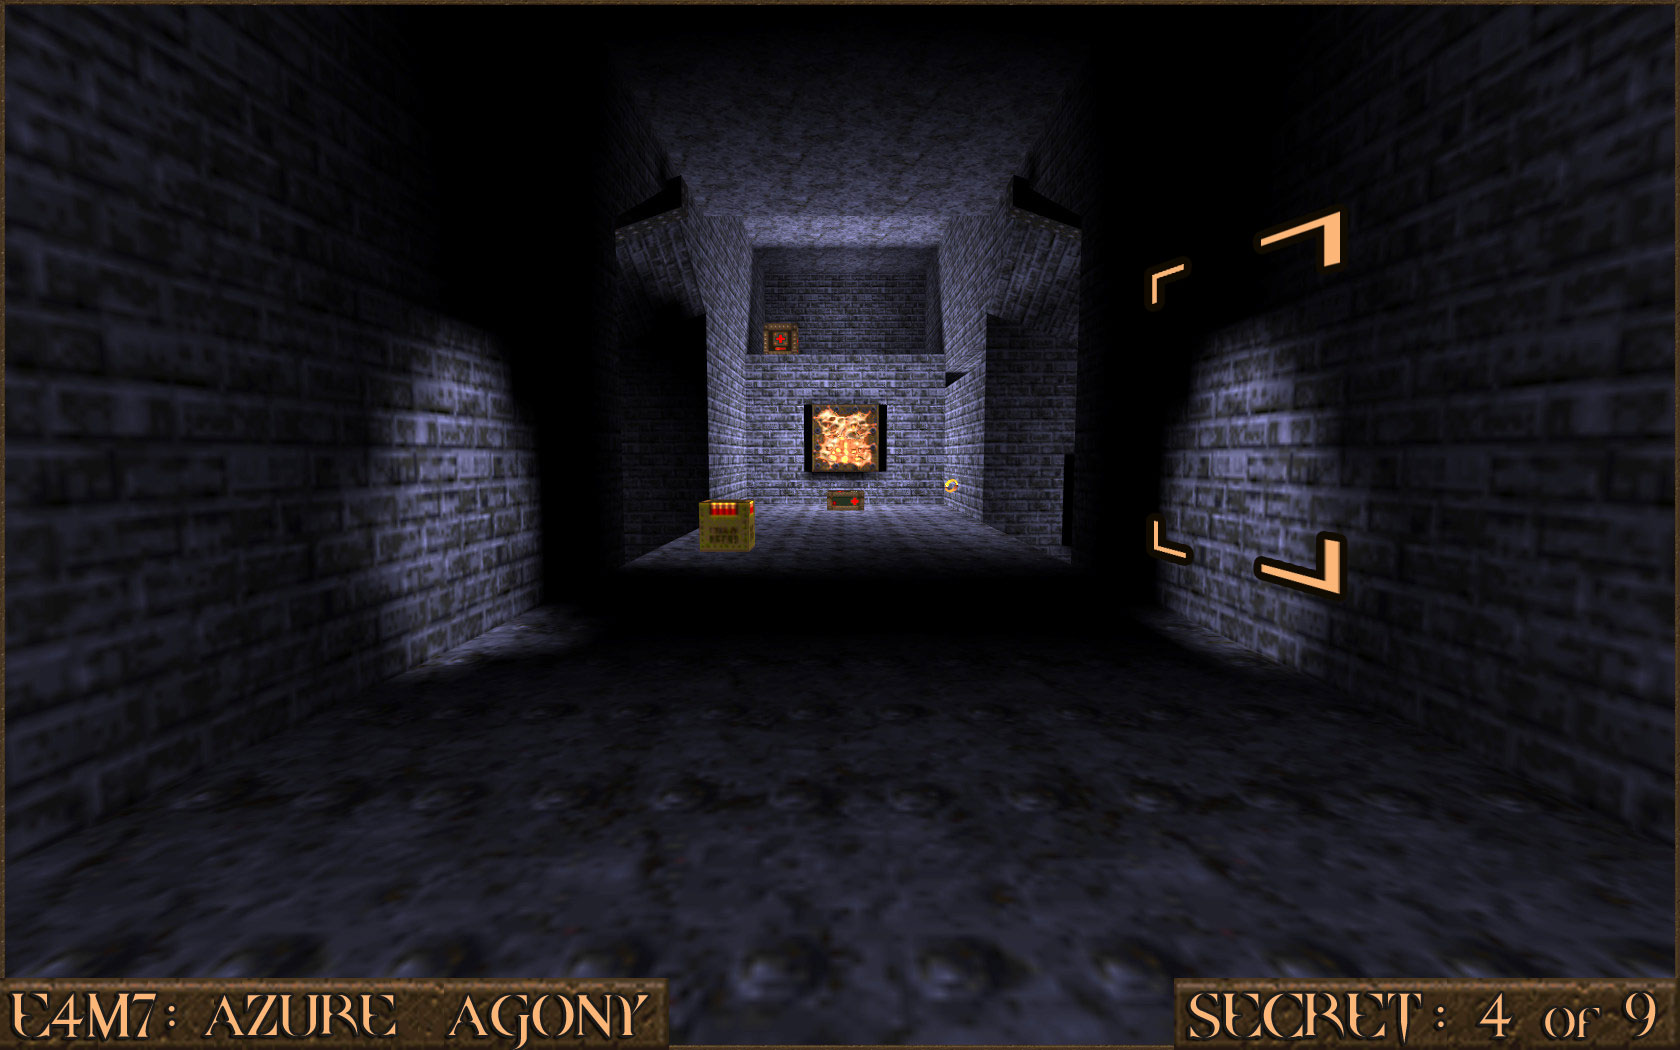 Reward:
 Secret 5 of 9
Still in the area for Secrets 2, 3 and 4 go to the end of the platform. You will notice a section of the wall has a gap at the top. Shoot this wall to reveal the secret area inside.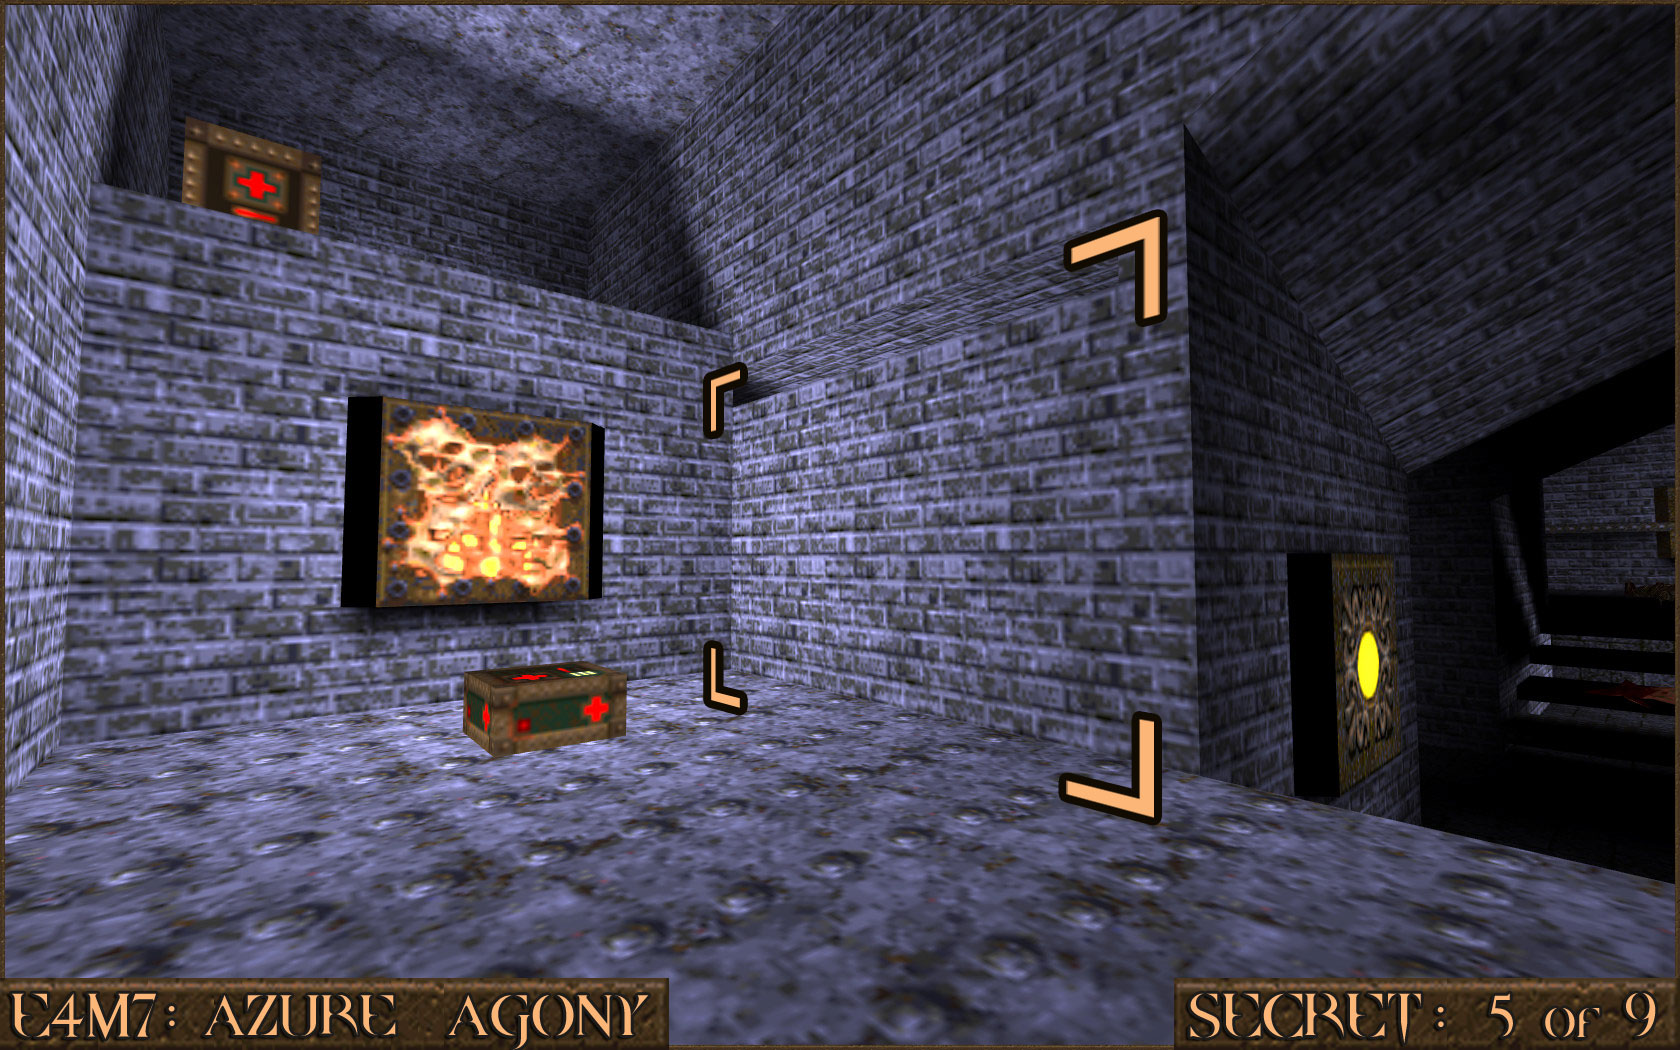 Reward:
 Secret 6 of 9
Later on in the level you will come to a large room filled with water and a red circle on the ceiling. Jump down in to the water ().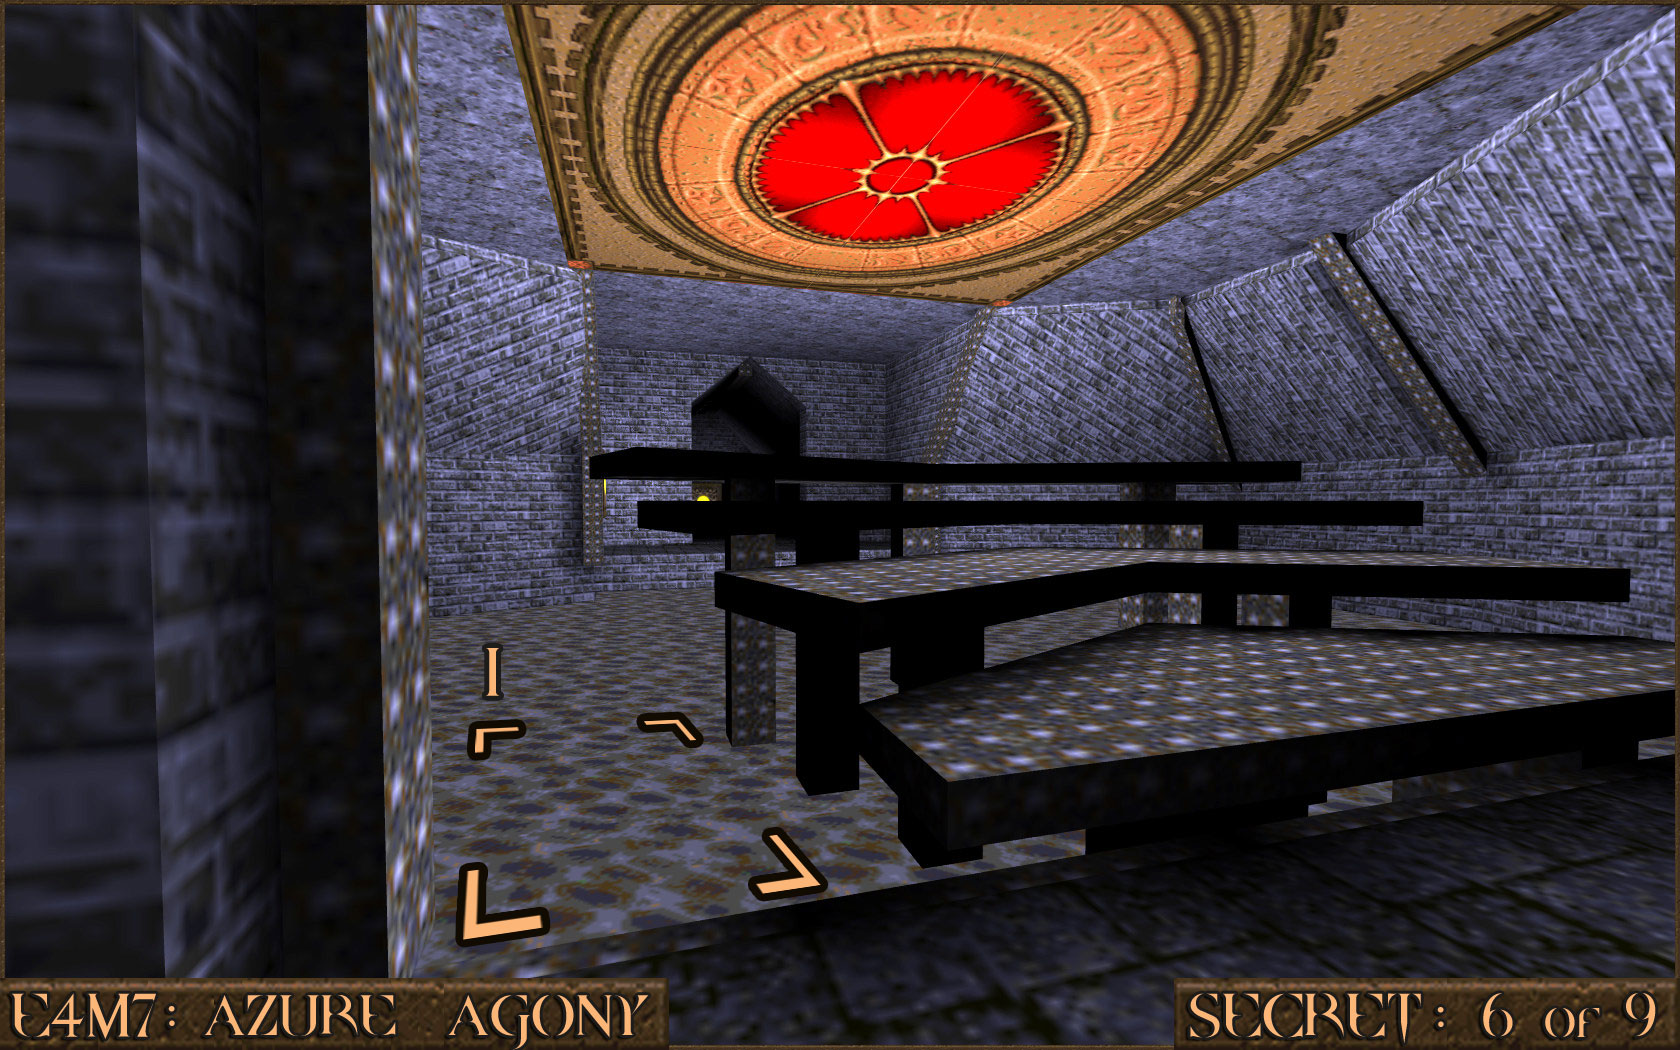 You will see a push-switch () under the platform you were standing on. Press it and the message "A secret lurks in the hall of red brick." will appear. Swim over to the teleporter to be taken out of the water facing the steps.
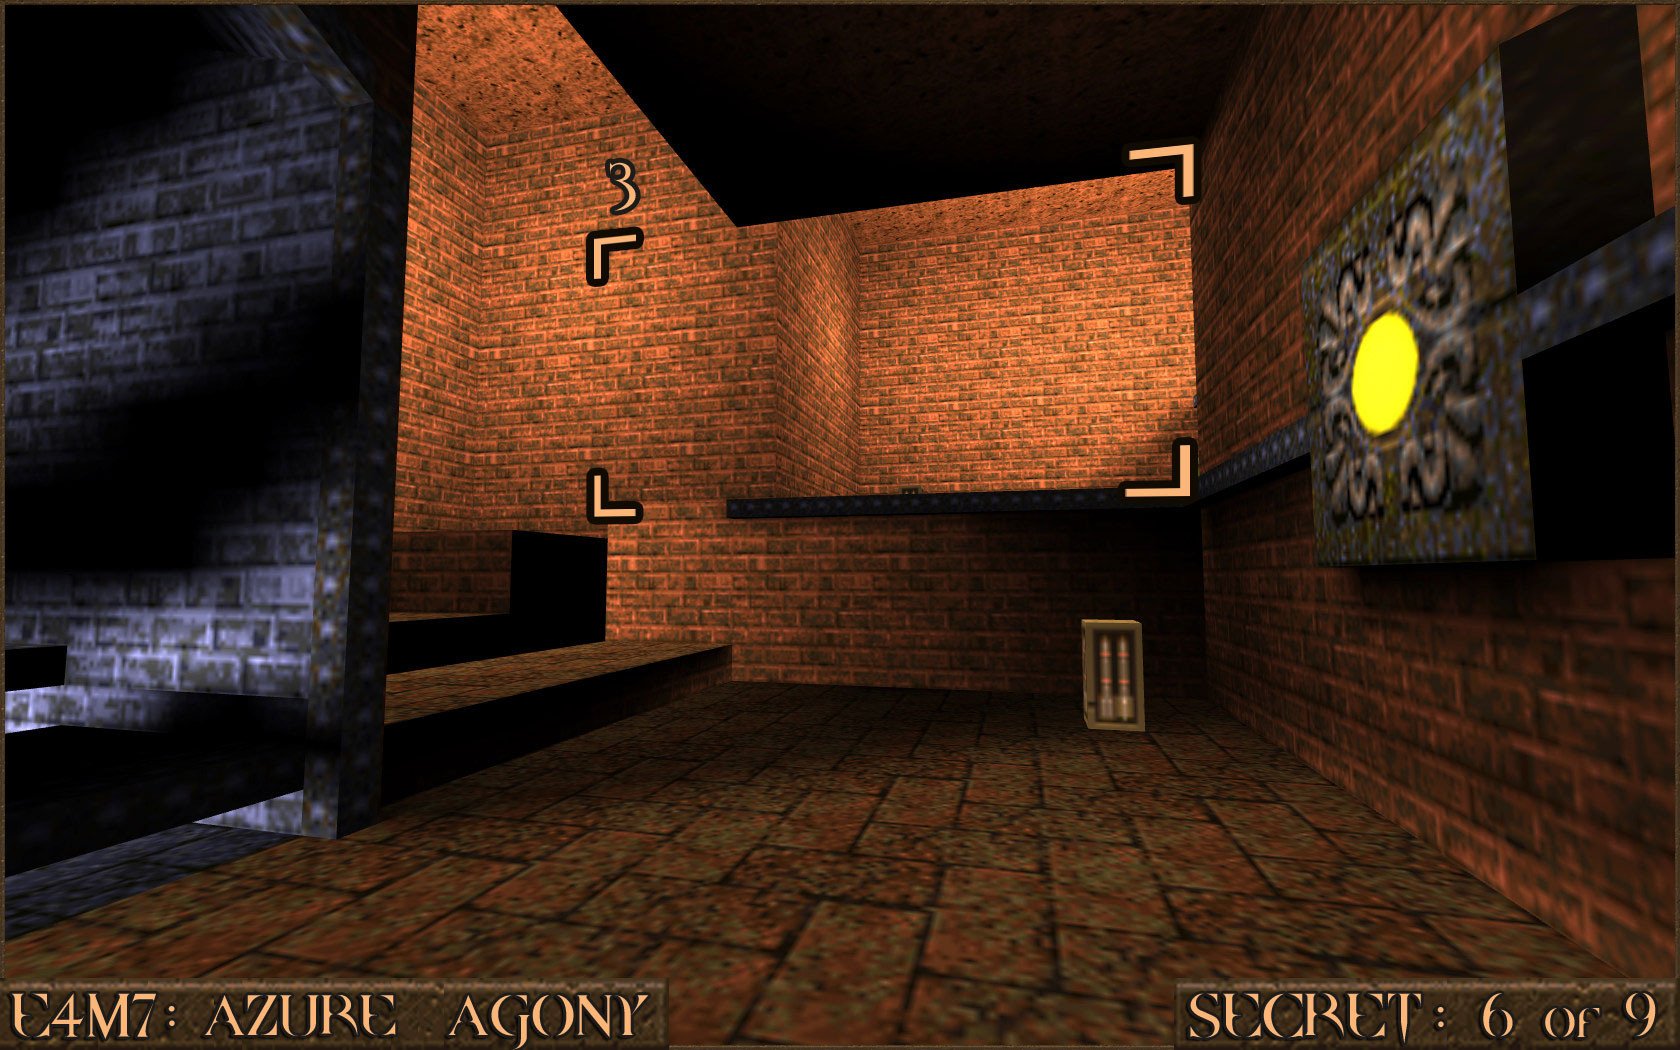
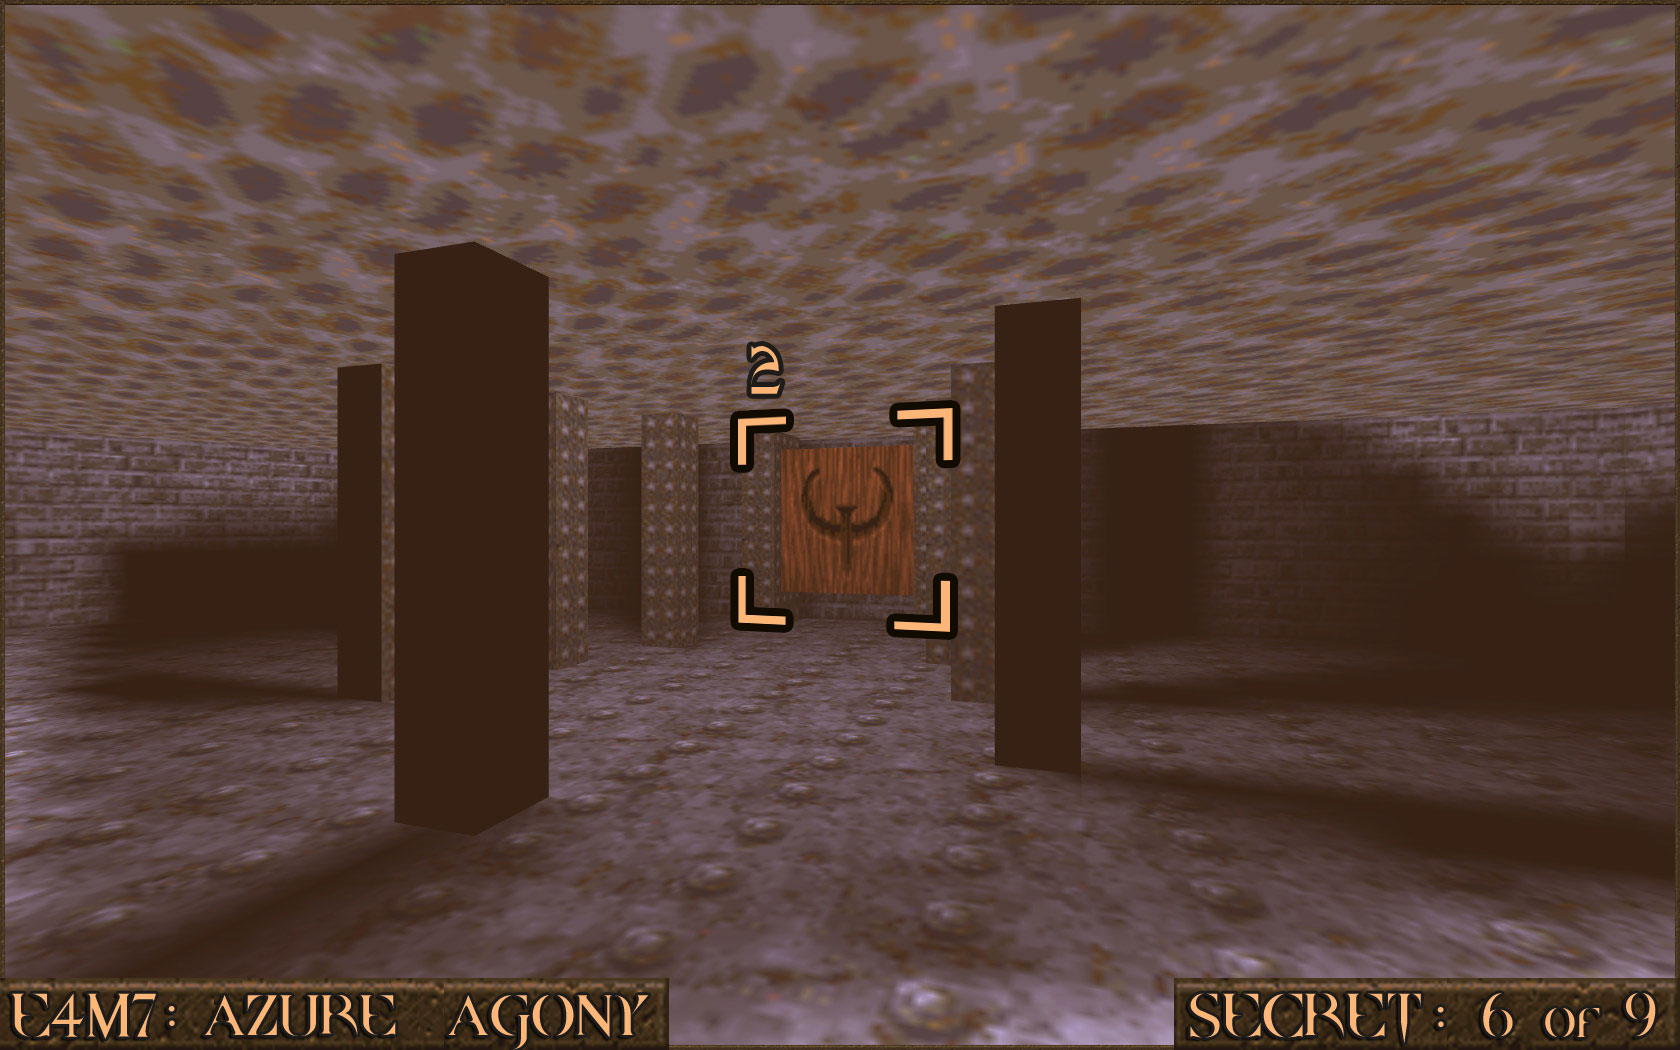 From the steps turn around and start heading back the way you came. Head past all the blue brick wall area and you will come to the red brick area. A wall () has moved revealing the secret area.
 Reward:
 Secret 7 of 9
Further in to the level you will come to another large room with the Silver Rune Key in the middle. Shoot the large red circle on the ceiling () and then dive down in to the water.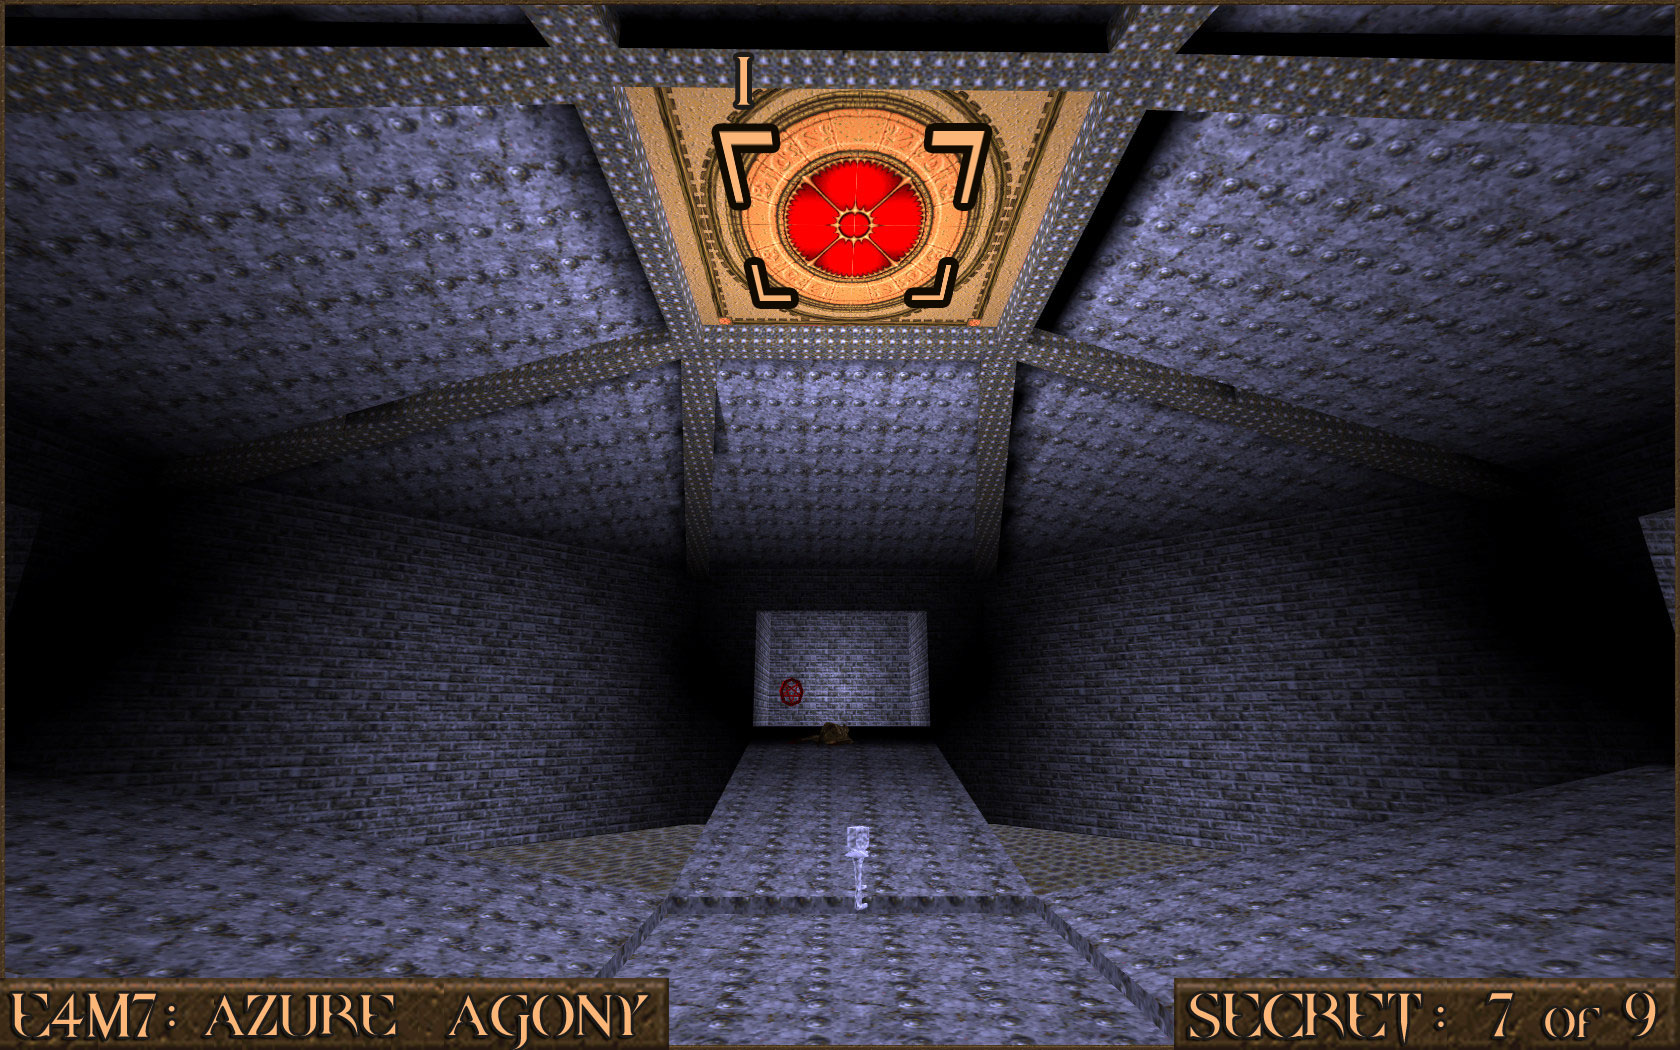 Shoot the second red circle that is underwater () to activate the movable walls for both this secret and the next. Head in to the area behind the first wall () to find the secret. Alternatively, you can just directly shoot the wall if you know where they are to reveal the secret.
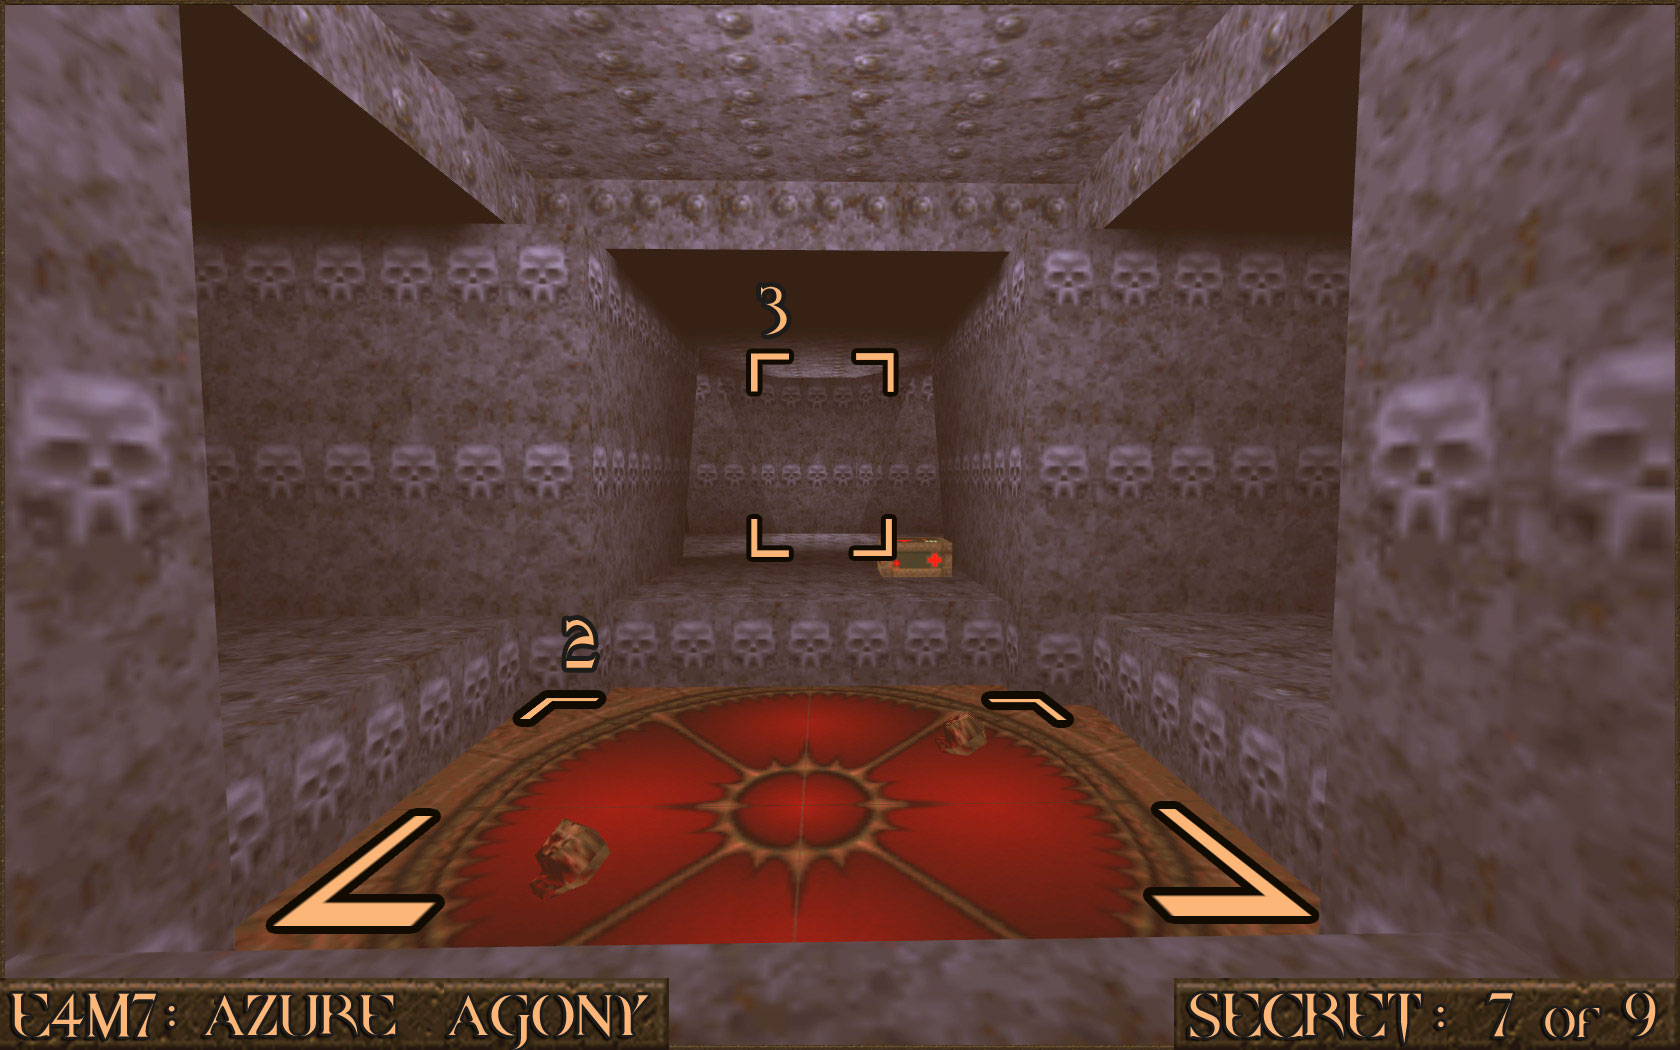 Reward:
 Secret 8 of 9
If you have followed the instructions for Secret 7 then this teleporter should also have been revealed. Head over to it to activate the secret. There are no items for this secret as it merely allows you access to the next one.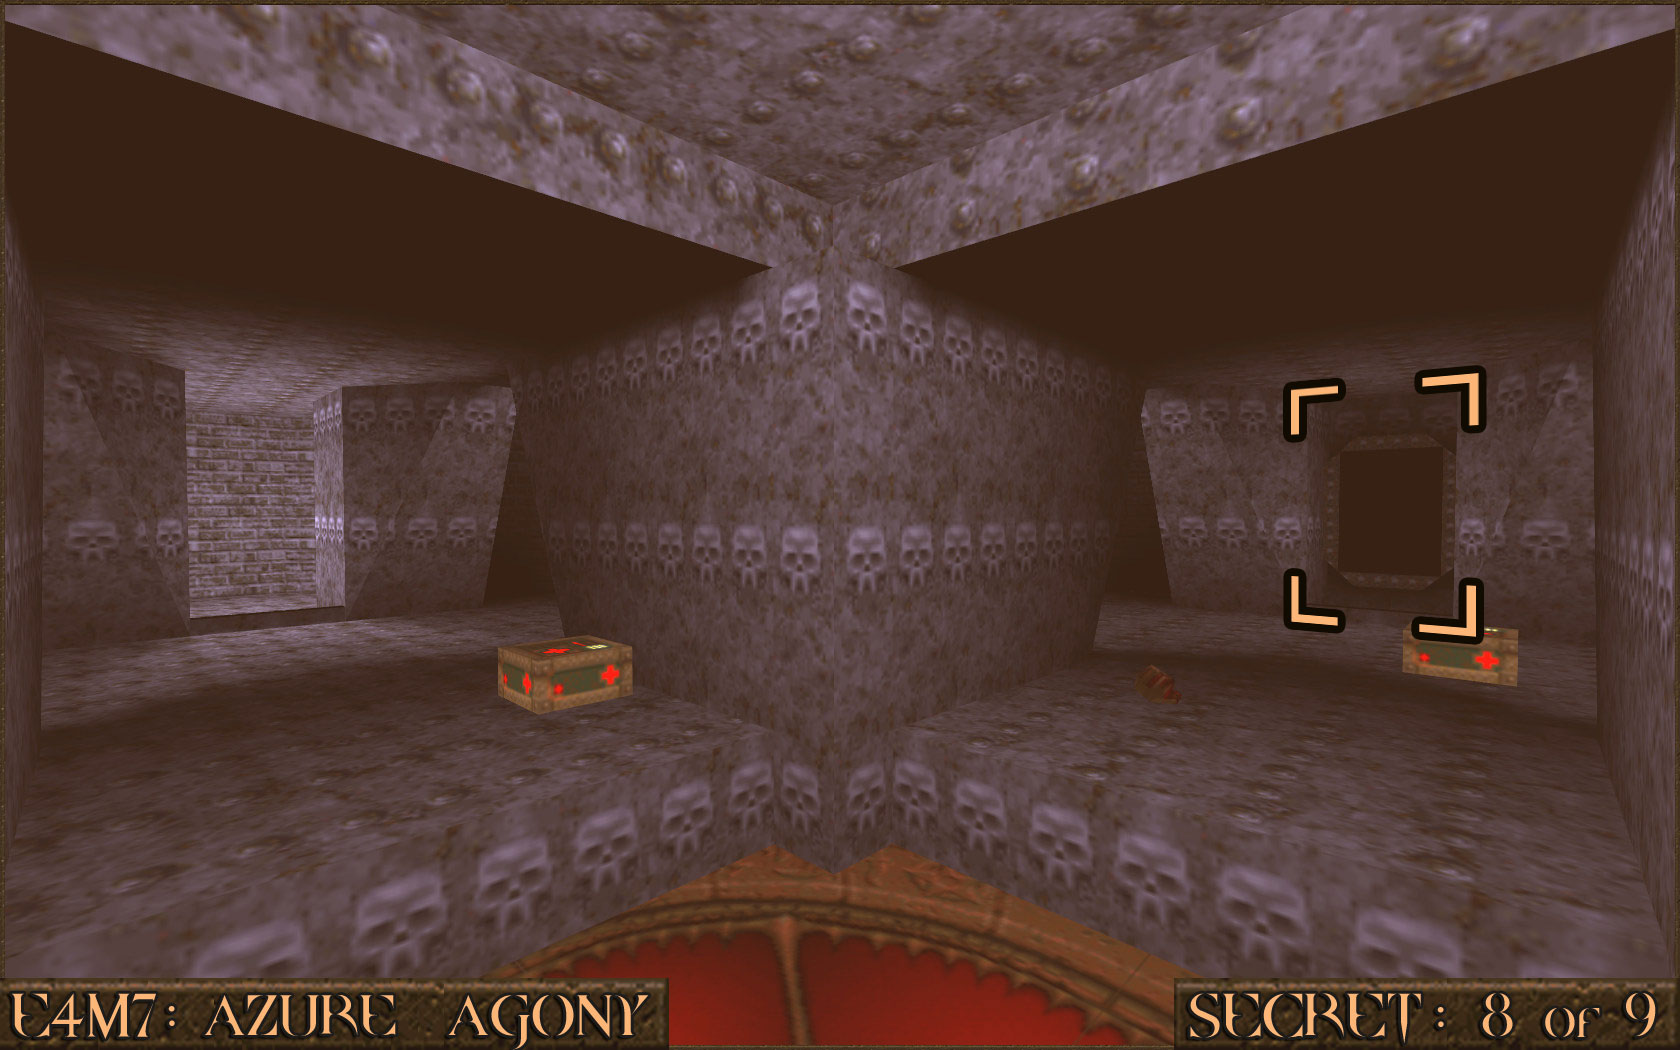 Reward: NONE
Secret 9 of 9
As soon as you pass through the teleporter for Secret 8 you will instantly discover this secret.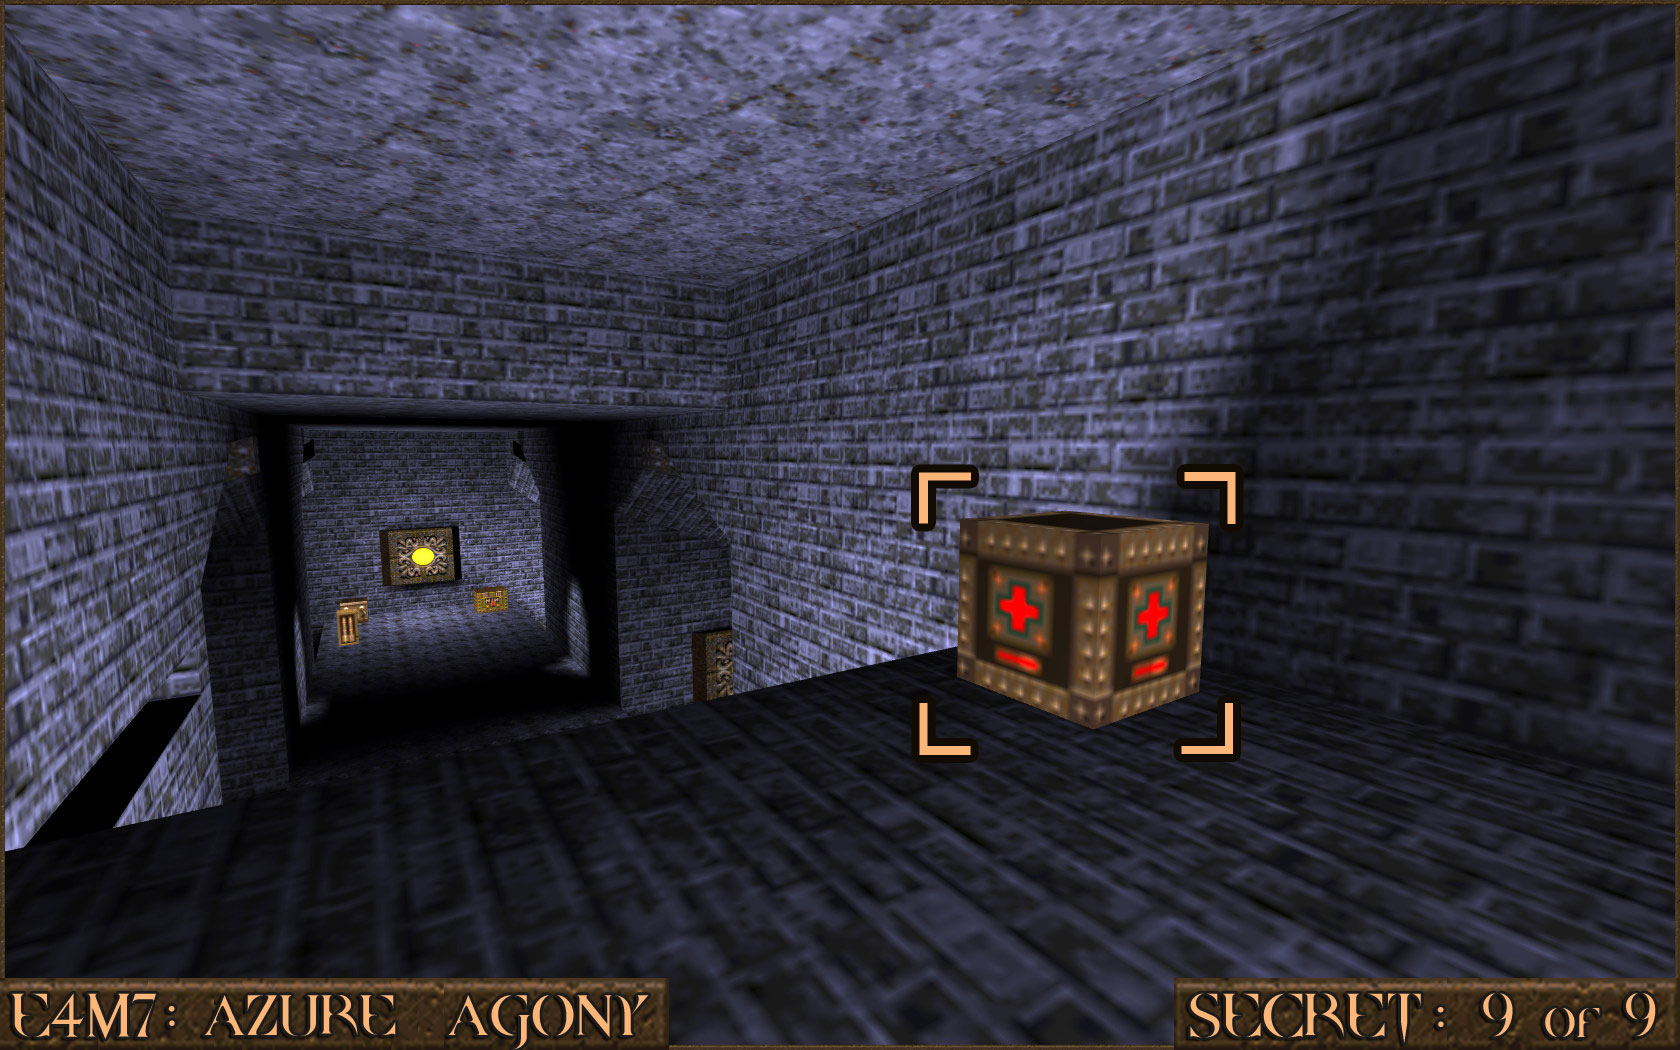 Reward:
 END: Shub-Niggurath's Pit
Secret 1 of 1
In the large area that contains Shub-Niggurath proceed until you are looking at the teleporter. Carefully look over the edge on the right side to see another ledge lower down. Jump down to it and follow the path around to find the secret area and a teleporter.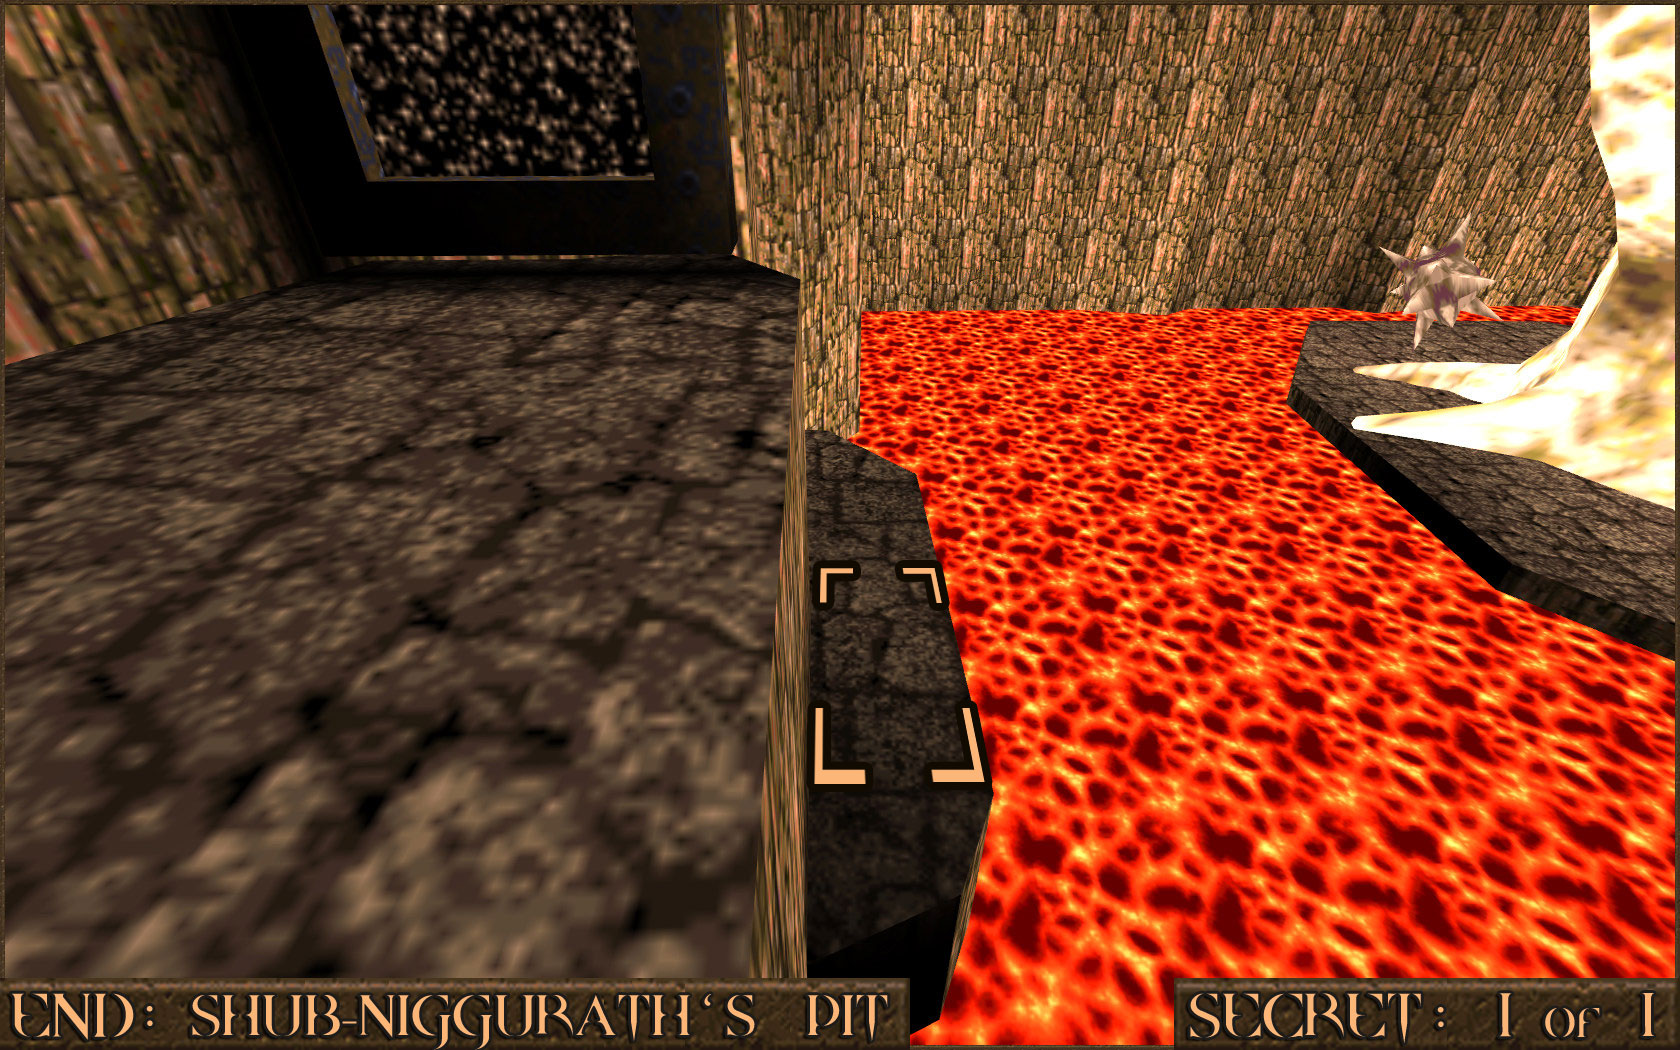 Reward:
 More Quake Secrets Guides

Now that you have finished the main game of Quake you can go on to the 1st expansion pack, Scourge of Armagon, to find even more secrets!
These guides cover the rest of the secrets available in Quake:
https://steamcommunity.com/sharedfiles/filedetails/?id=2585506034https://steamcommunity.com/sharedfiles/filedetails/?id=2585506770https://steamcommunity.com/sharedfiles/filedetails/?id=2585507550https://steamcommunity.com/sharedfiles/filedetails/?id=2585508012https://steamcommunity.com/sharedfiles/filedetails/?id=2803162869
There are more secrets to be found in the sequel Quake II:
https://steamcommunity.com/sharedfiles/filedetails/?id=3025659929
More Quake guides
- Quake Soundtrack Solutions★ 5 (822)34k views1.1k ♥15 minUpdated Apr 2, 2020
- How I play Quake in the Current Year (2023 update: Use Ironwail or Quakespasm-Spiked instead of Quakespasm)★ 5 (903)23k views1.3k ♥8 minUpdated Nov 12, 2023
- List of Quake 1 clones on the Steam store★ 5 (457)20k views854 ♥2 minUpdated May 20
- Quake Achievements★ 5 (1k)16k views1.5k ♥29 minUpdated Nov 4, 2025
- Quakespasm: How to activate CHUNKY MODE★ 5 (303)9.6k views357 ♥2 minUpdated Sep 23, 2023
- List of compatible mods for Quake Remastered★ 5 (166)6.7k views304 ♥7 minUpdated Apr 5, 2024




This guide was created by its original author on the Steam Community. Are you the author and want it removed? Request removal.