Quake Achievements
Important Information


When you start Quake make sure to play using the enhanced version as this is the only version that will give achievements. The main game and all expansions are included in the enhanced version so don't try use the "Original" releases to obtain achievements as they won't activate.
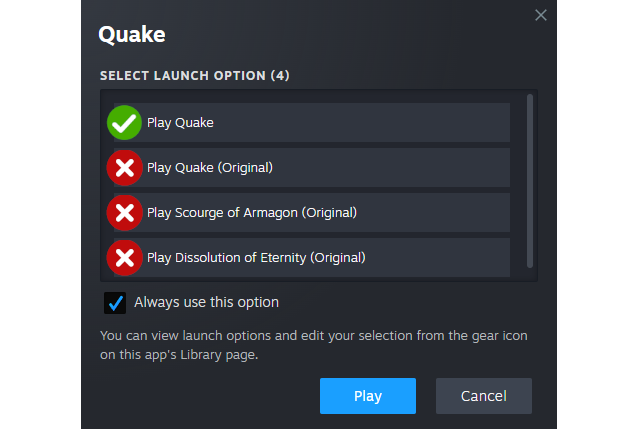
Quake consists of the original game and several expansion packs. Completing each episode of Quake and each expansion pack will unlock a corresponding achievement and completing them on Nightmare Difficulty awards additional achievements. There are also secret level exits in most of the episodes of the game that give achievements when discovered.
It is very important that you always start a new game from the main menu specifically by selecting Single-Player -> New Game -> Quake (or one of the expansion packs). Do not use the Level Select option to try get the episode completion or "Nightmare Difficulty" achievements as they will only unlock when completing episodes via New Game.
[Quake]
In Quake there are four episodes that can be completed in any order and each give an unmissable achievement. Each episode contains a Rune and all four need to be collected to unlock the way to the final boss: Shub-Niggurath. Killing Shub-Niggurath will also unlock another unmissable achievement and complete Quake.
From the main menu select Single Player -> New Game -> Quake. Do not use the Level Select menu option to start the game as the episode completion and nightmare difficulty achievements do not activate that way.

Sink the Horror Electric
Complete Quake Episode 1: Dimension of the Doomed in single player.
Complete Quake Episode 1: Dimension of the Doomed in single player.

Bottom of the Well
Complete Quake Episode 2: The Realm of Black Magic in single player.
Complete Quake Episode 2: The Realm of Black Magic in single player.

Beneath the Blue Chambers
Complete Quake Episode 3: The Netherworld in single player.
Complete Quake Episode 3: The Netherworld in single player.

The Last Unexplored Path
Complete Quake Episode 4: The Elder World in single player.
Complete Quake Episode 4: The Elder World in single player.

Indigestion
Defeat Shub-Niggurath in single player.
Defeat Shub-Niggurath in single player.
Nightmare Difficulty

Into Shub's Bud
Complete Quake on Nightmare in single player.
Complete Quake on Nightmare in single player.
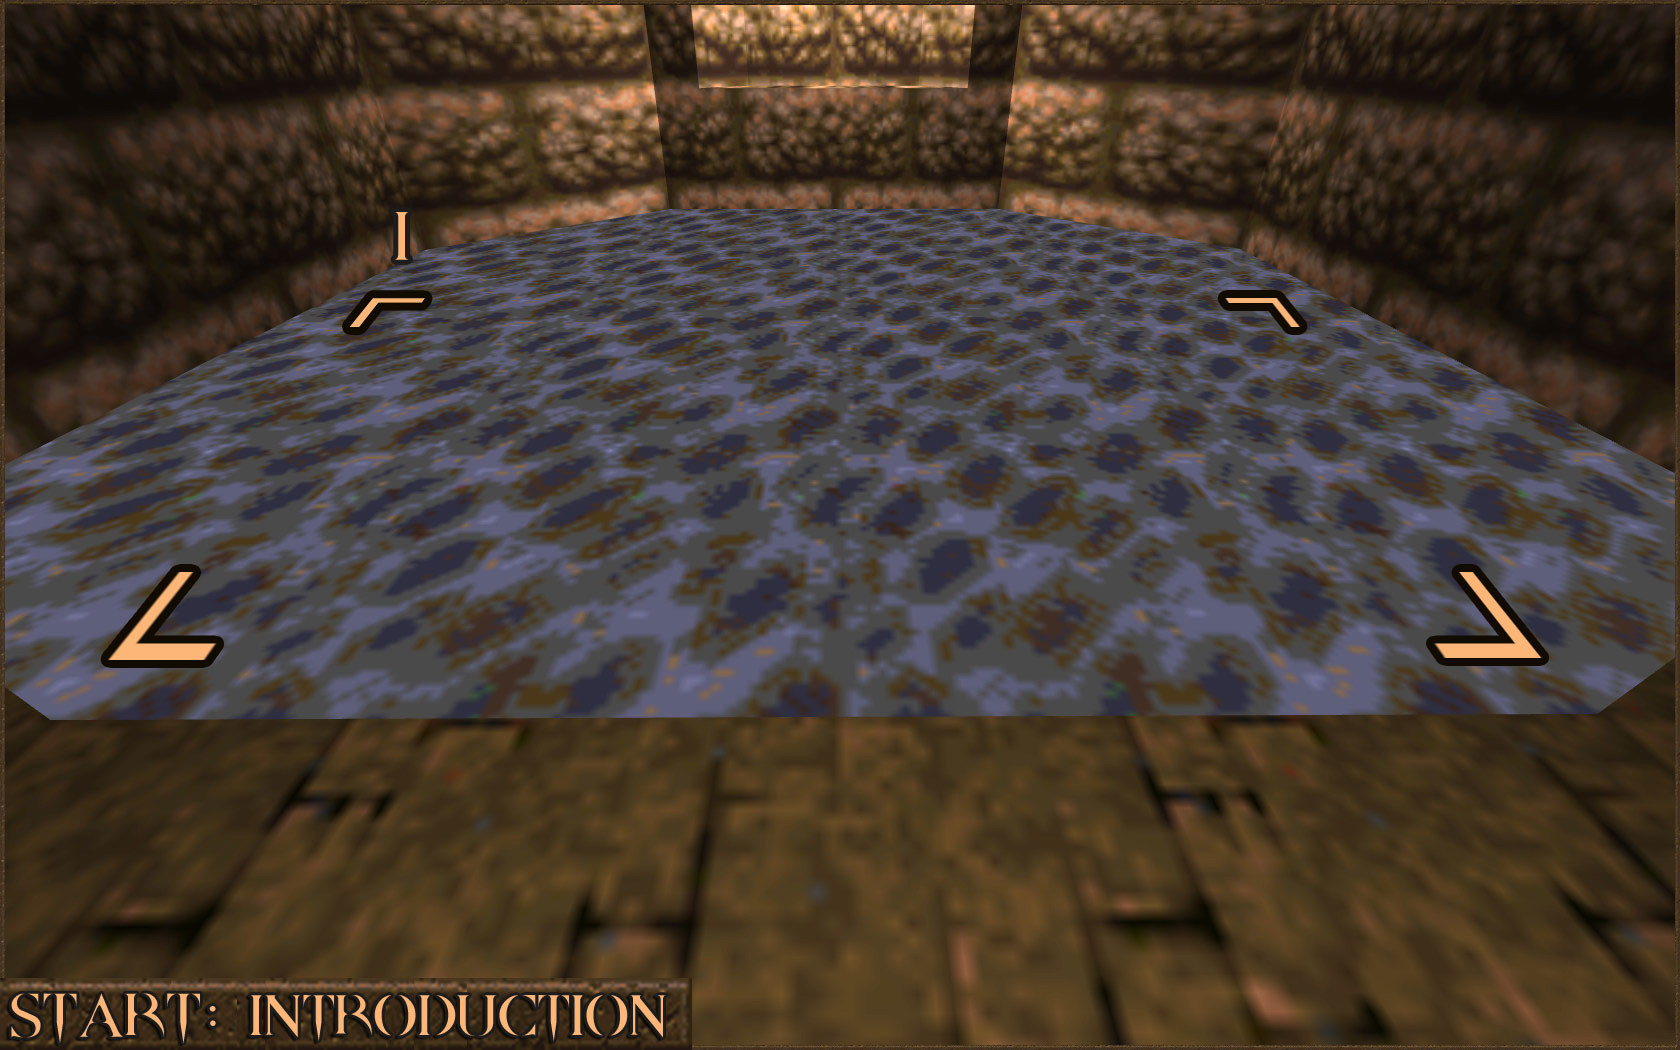
First you need to find the Nightmare Difficulty portal. After starting a new game of Quake (start using New Game, do not use Level Select) go through any difficulty portal then head towards the entrance to Episode 4: The Elder World and jump in to the water (
 ).
).
The water is actually suspended in the air and if you swim too far down you will fall through. While swimming in the water turn around and swim under the ledge that you were just standing on until you hit the wall (
 ). Now stop swimming and let yourself fall down.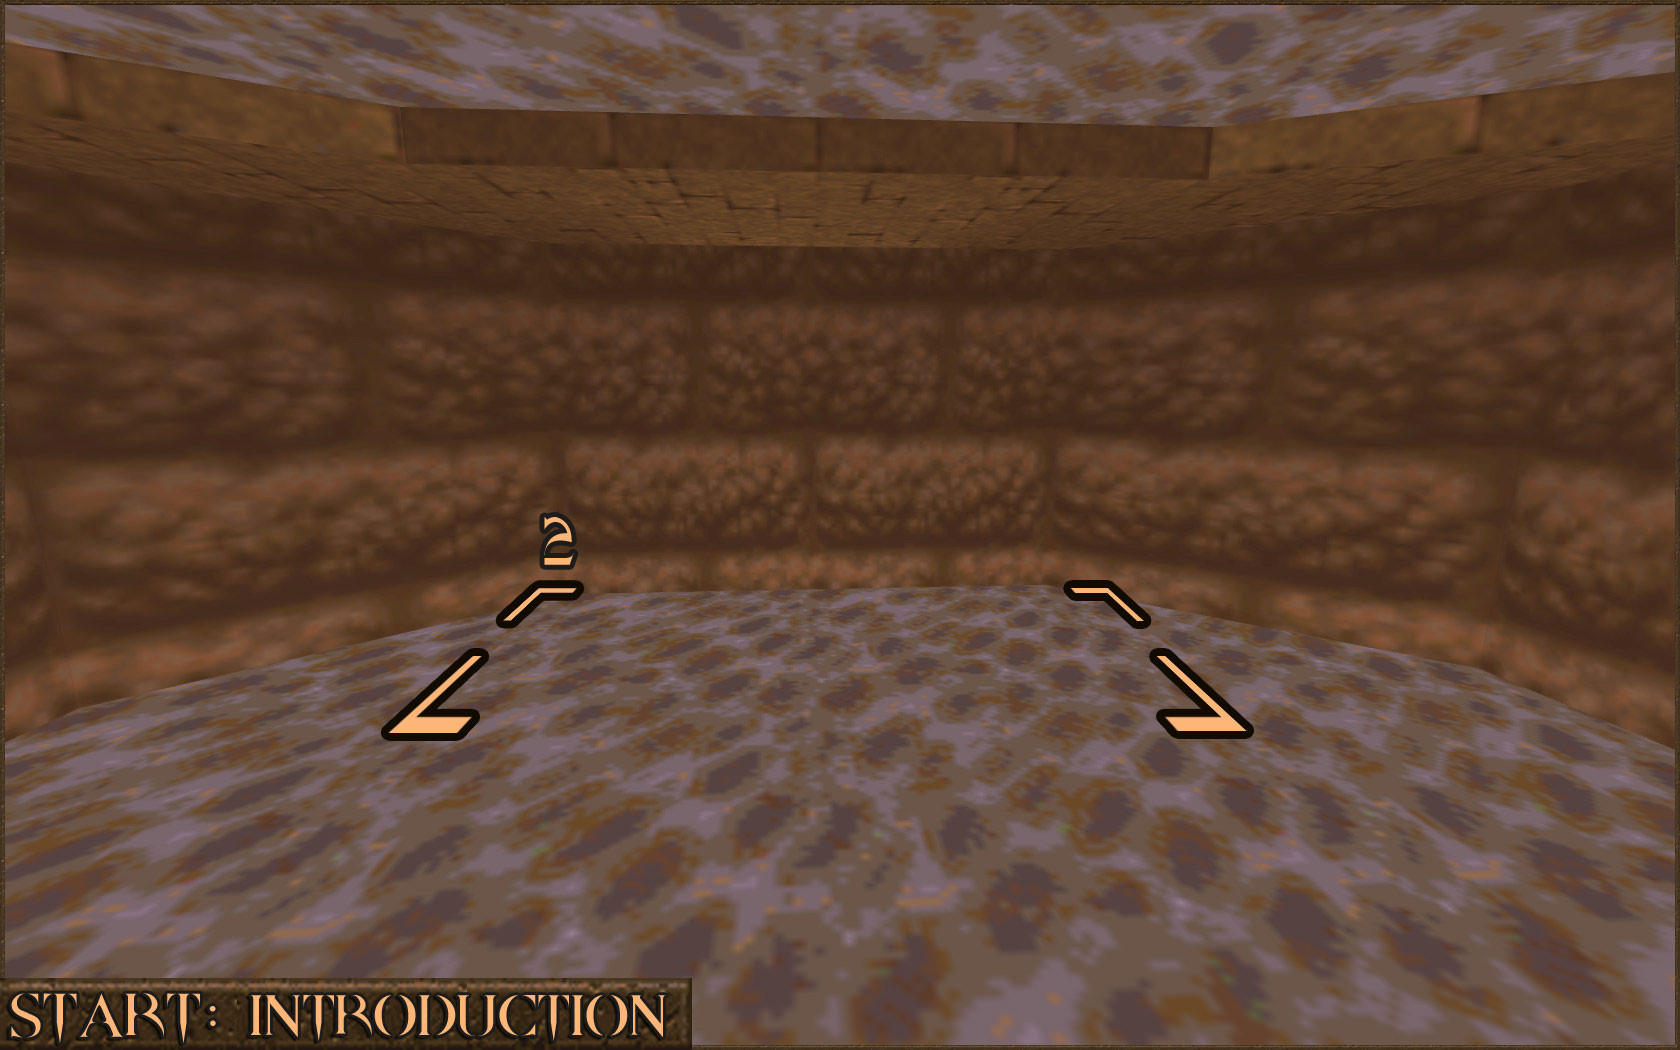
Instead of falling to the floor you will instead land on some wooden beams. Look around and you will see an exit in the wall (
 ). Head in to it.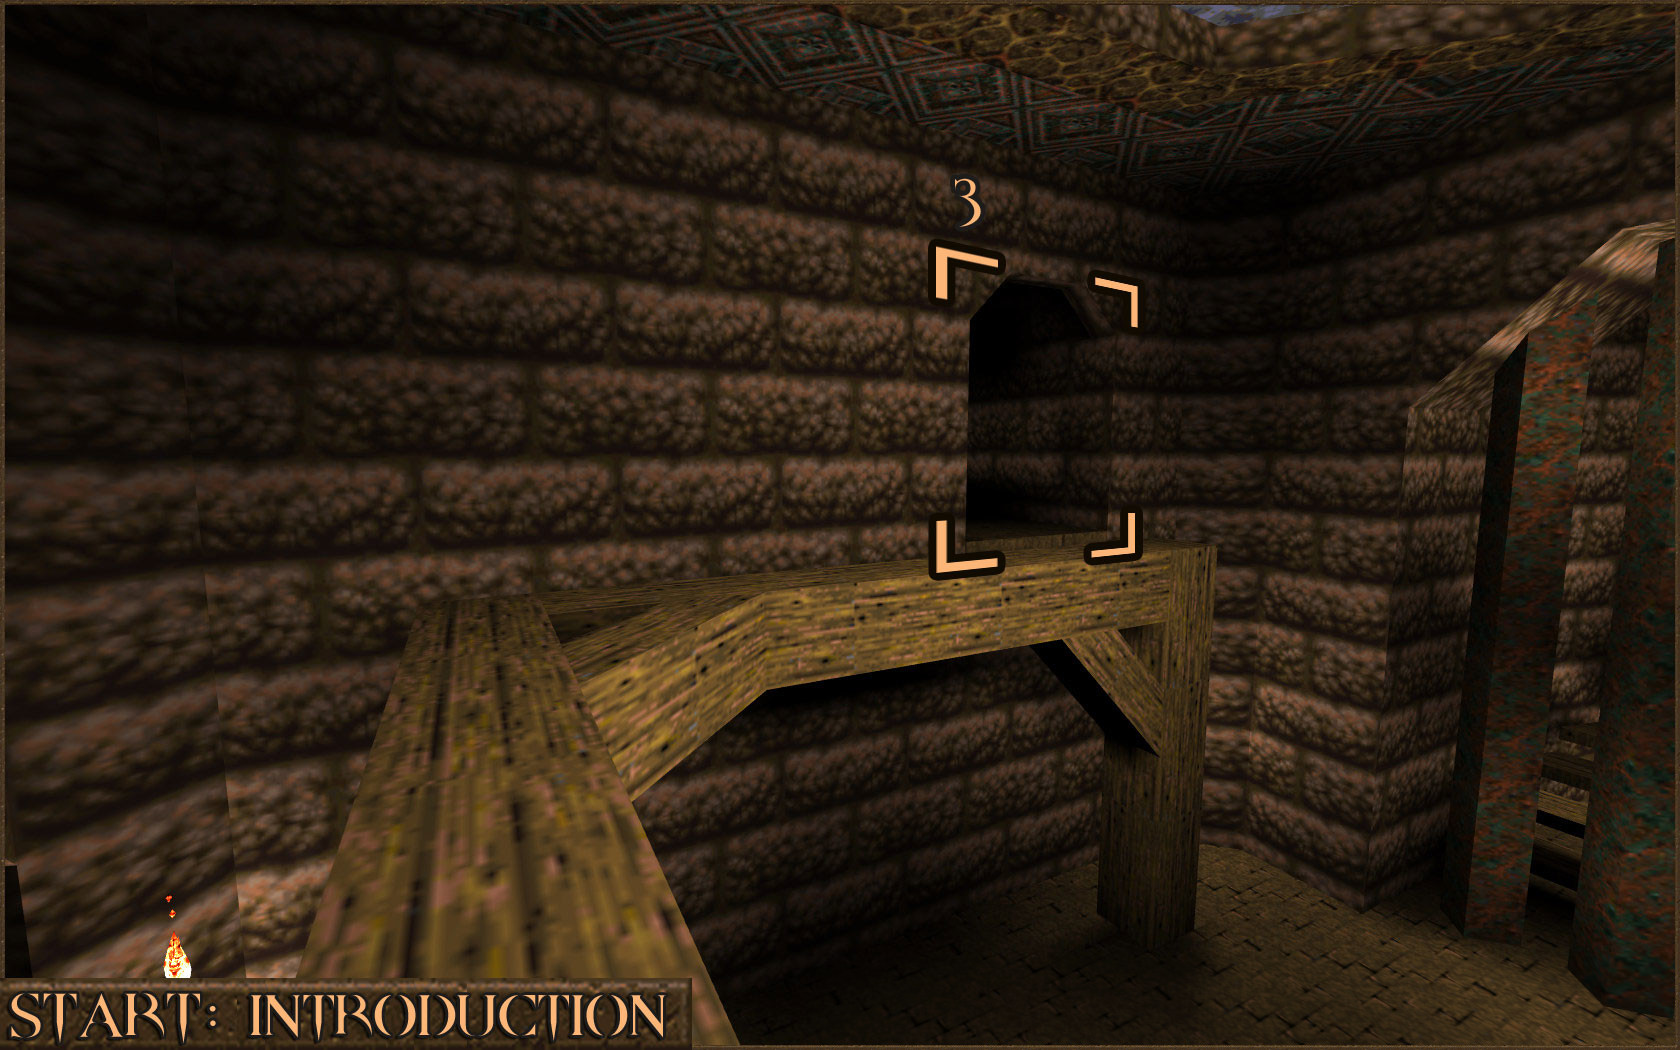
At the end of the tunnel is the Nightmare Difficulty portal. Head in to the portal to activate Nightmare Difficulty and teleport back to the episode selection area.
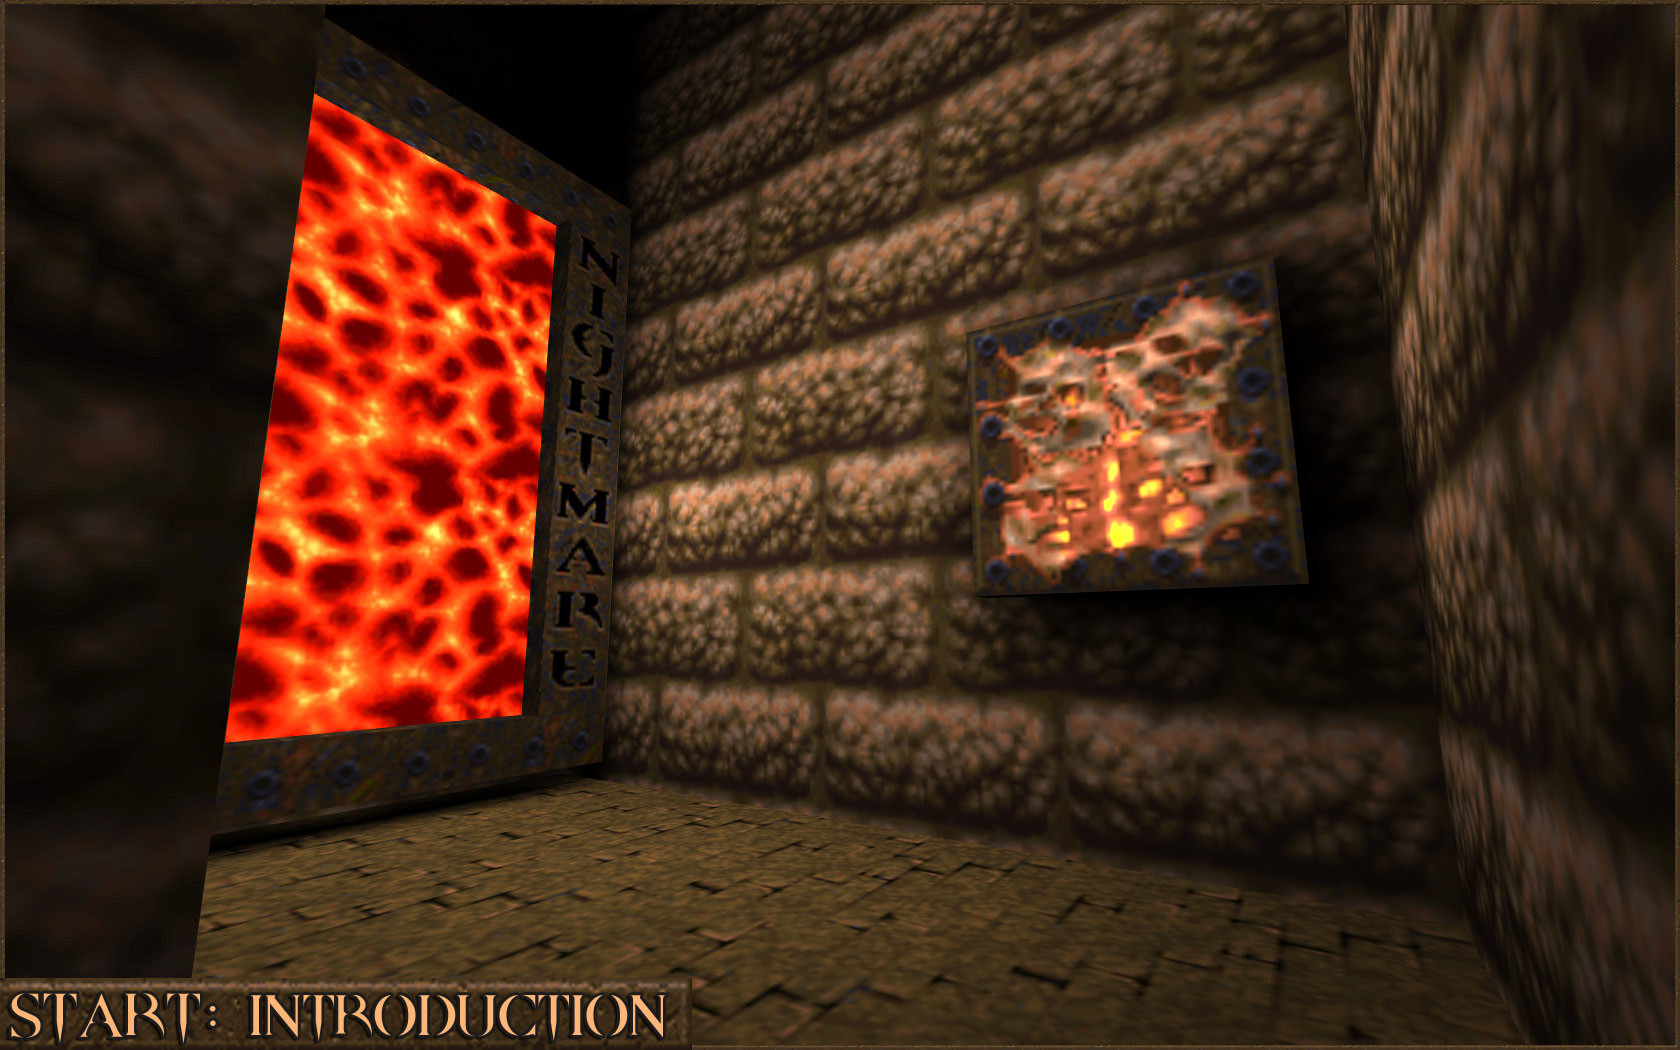
Now that Nightmare Difficulty has been enabled you will need to beat all four episodes of Quake and the final boss to earn the achievement.
In Nightmare Difficulty your maximum health is capped at 50 instead of 100. If you're having a tough time I recommend following this additional secrets guide as the extra hidden health, ammo and especially Quad Damage and Pentagram of Protection items will be particularly useful in this difficulty mode.
https://steamcommunity.com/sharedfiles/filedetails/?id=620893331
Slipgate Pacifist

Slipgate Pacifist
Complete E1M1: The Slipgate Complex on Nightmare without firing a shot.
Complete E1M1: The Slipgate Complex on Nightmare without firing a shot.
If you're playing through the game on Nightmare Difficulty you can obtain this achievement during the first level E1M1: Slipgate Complex.
Alternatively if you only want this achievement you can use the level select option on the main menu with the following settings:
Episode: Quake
Map: E1M1: Slipgate Complex
Difficulty: Nightmare
Whichever way you start you now need to get through to the exit of the first level without shooting a gun. You are however allowed to do the following:
- Attack and kill enemies with the Axe weapon.
- Let enemies kill each other with friendly fire.
In Nightmare difficulty your maximum health is capped at 50. This makes the Armor and Megahealth upgrades very useful as otherwise you'll go down very quickly to the shotgun equipped Grunts.
 At the end of the first room you'll find some steps leading up to some Green Armor () which will help mitigate some of the damage you receive.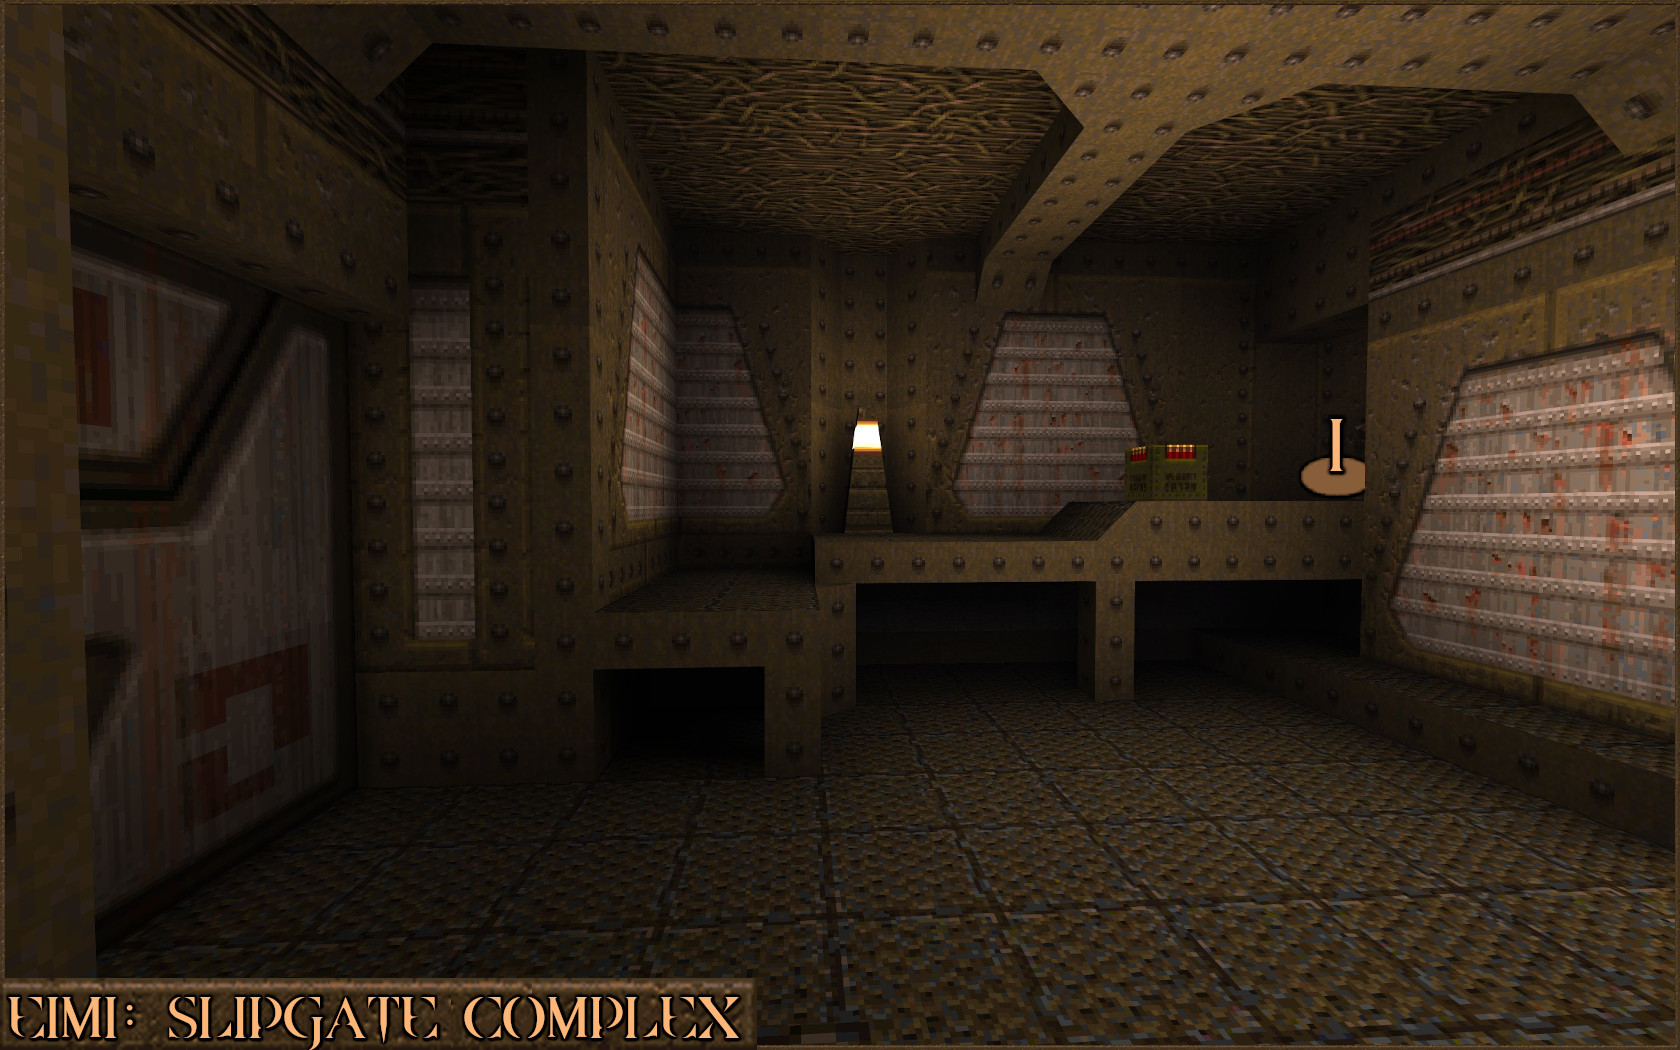
 After heading down the lift, jump straight in the water below the bridge and head right (). You'll find a Megahealth item that will overcharge your health with +100 health. This goes beyond the maximum health of 50 but will slowly degrade over time back down to 50 so speed is of the essence to get the most out of it.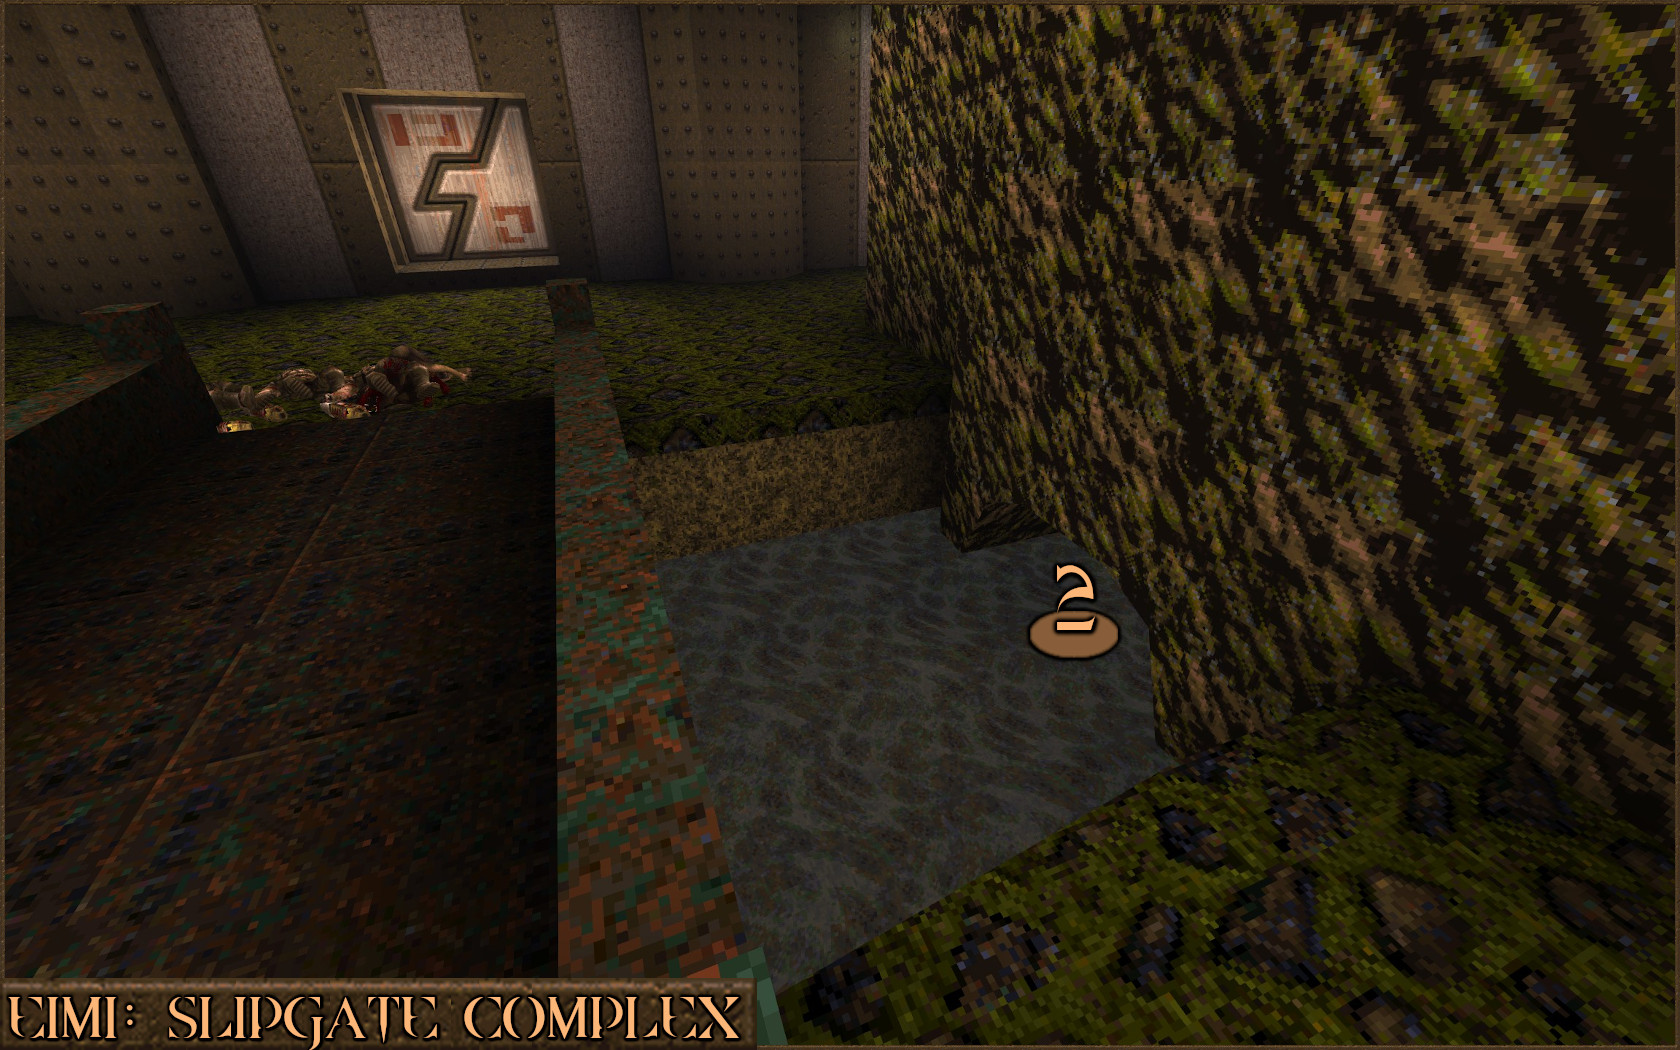
 Head back up an elevator and then cross over the bridge from before. There are several enemies within this next room but they are fairly spaced out. So you can either lure them out and dispatch them one by one with the axe or just run at maximum speed and get out of there as quickly as possible.
You will need to very quickly press the red button to extend the platform over the slime pit while being shot by a large squad of Grunts. Fortunately because they are clustered close together they will mostly shoot each other with friendly fire which should give you enough time to run past them all with minimal damage or finish them off with the axe.
 Round the next corner there is a secret Quad Damage behind the orange wall () which will be helpful. Your Axe will kill all enemies with a single hit while it lasts.
There are two options for dealing with the next downward ramp room. The first is to charge ahead and press all the buttons and take down the Grunts head on, though this is quite risky and you'll likely take a couple of hits. Alternatively, if you jump over the side of the very top of the ramp (
 ) you'll fall straight to the lower level (try to avoid grabbing the Biosuit for now) and you can take out the enemies from behind. This is particularly effective if you picked up the Quad Damage. Either way you will need to go and press all three red buttons to open the door to the final corridors but be aware of a Grunt hiding above you in a dark room who will be shooting at you while you do so.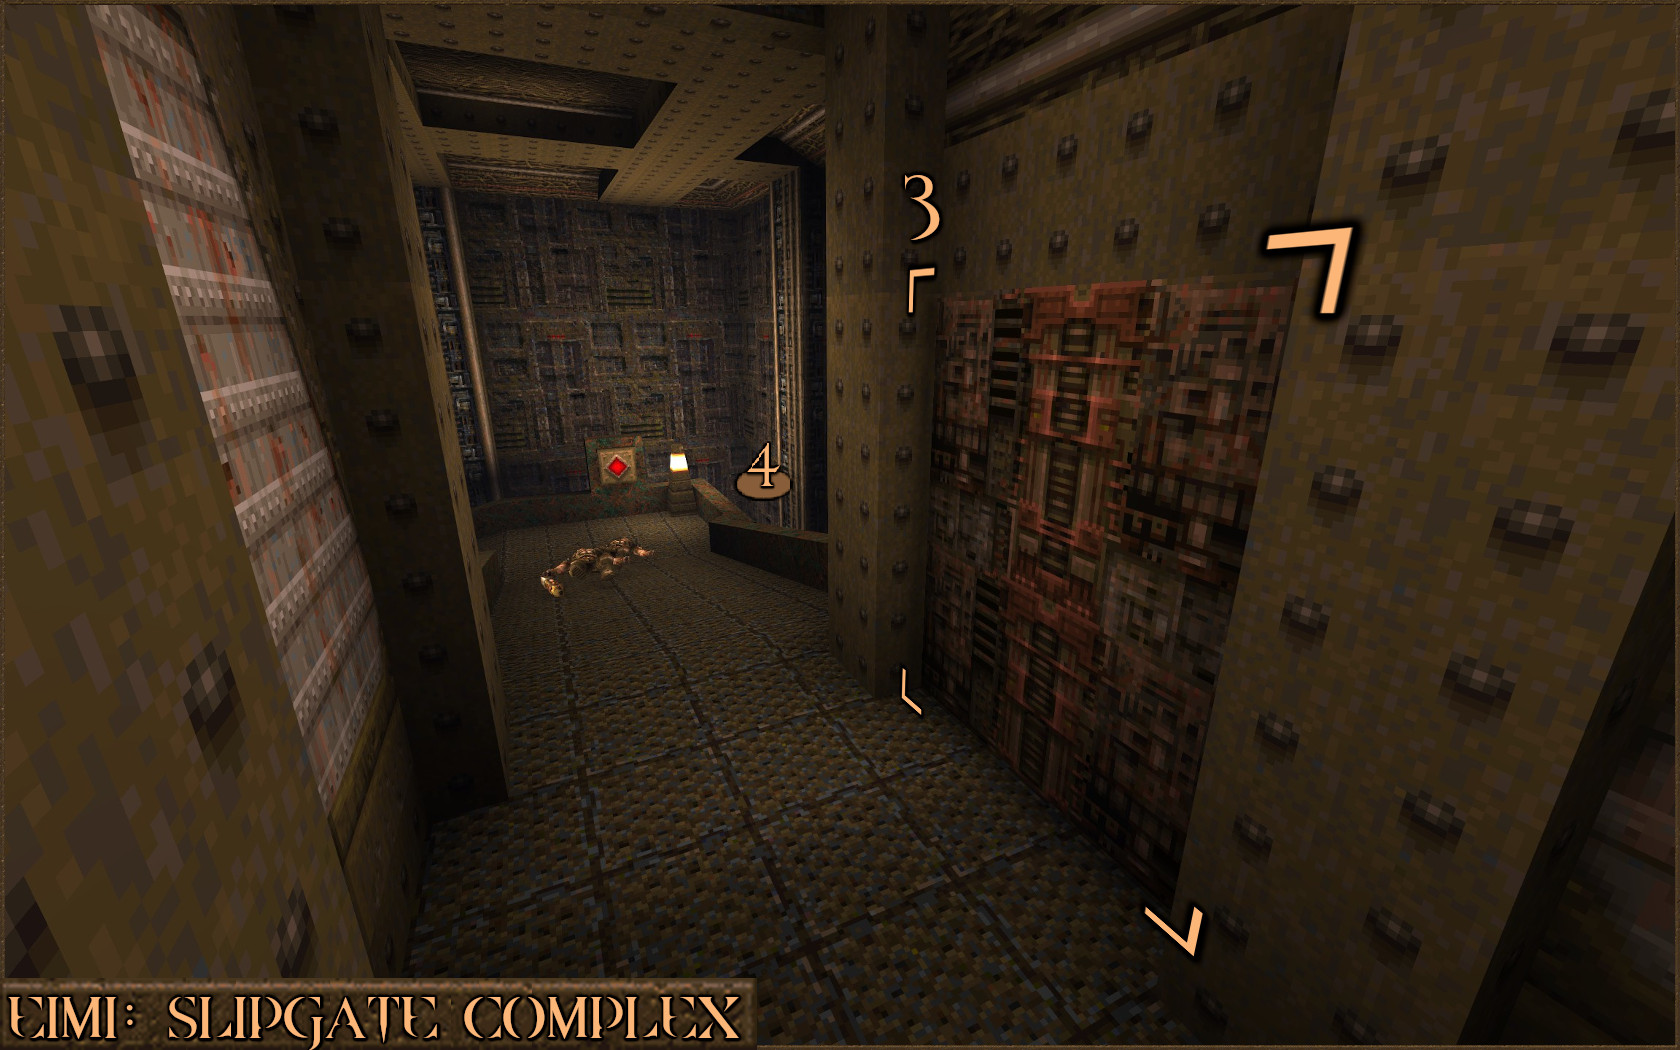
 There is another secret here that will help you if you are very low on health. If you grab the nearby Biosuit (
 ) behind the pillar, jump in to the slime and swim through the tunnel you can find a secret containing a Yellow Armor and some Health. If you have enough time left in your Biosuit I recommend swimming back the way you came rather than taking the teleporter, as the teleporter takes you quite far back in the level and if there are still enemies there you might end taking more damage then you recovered.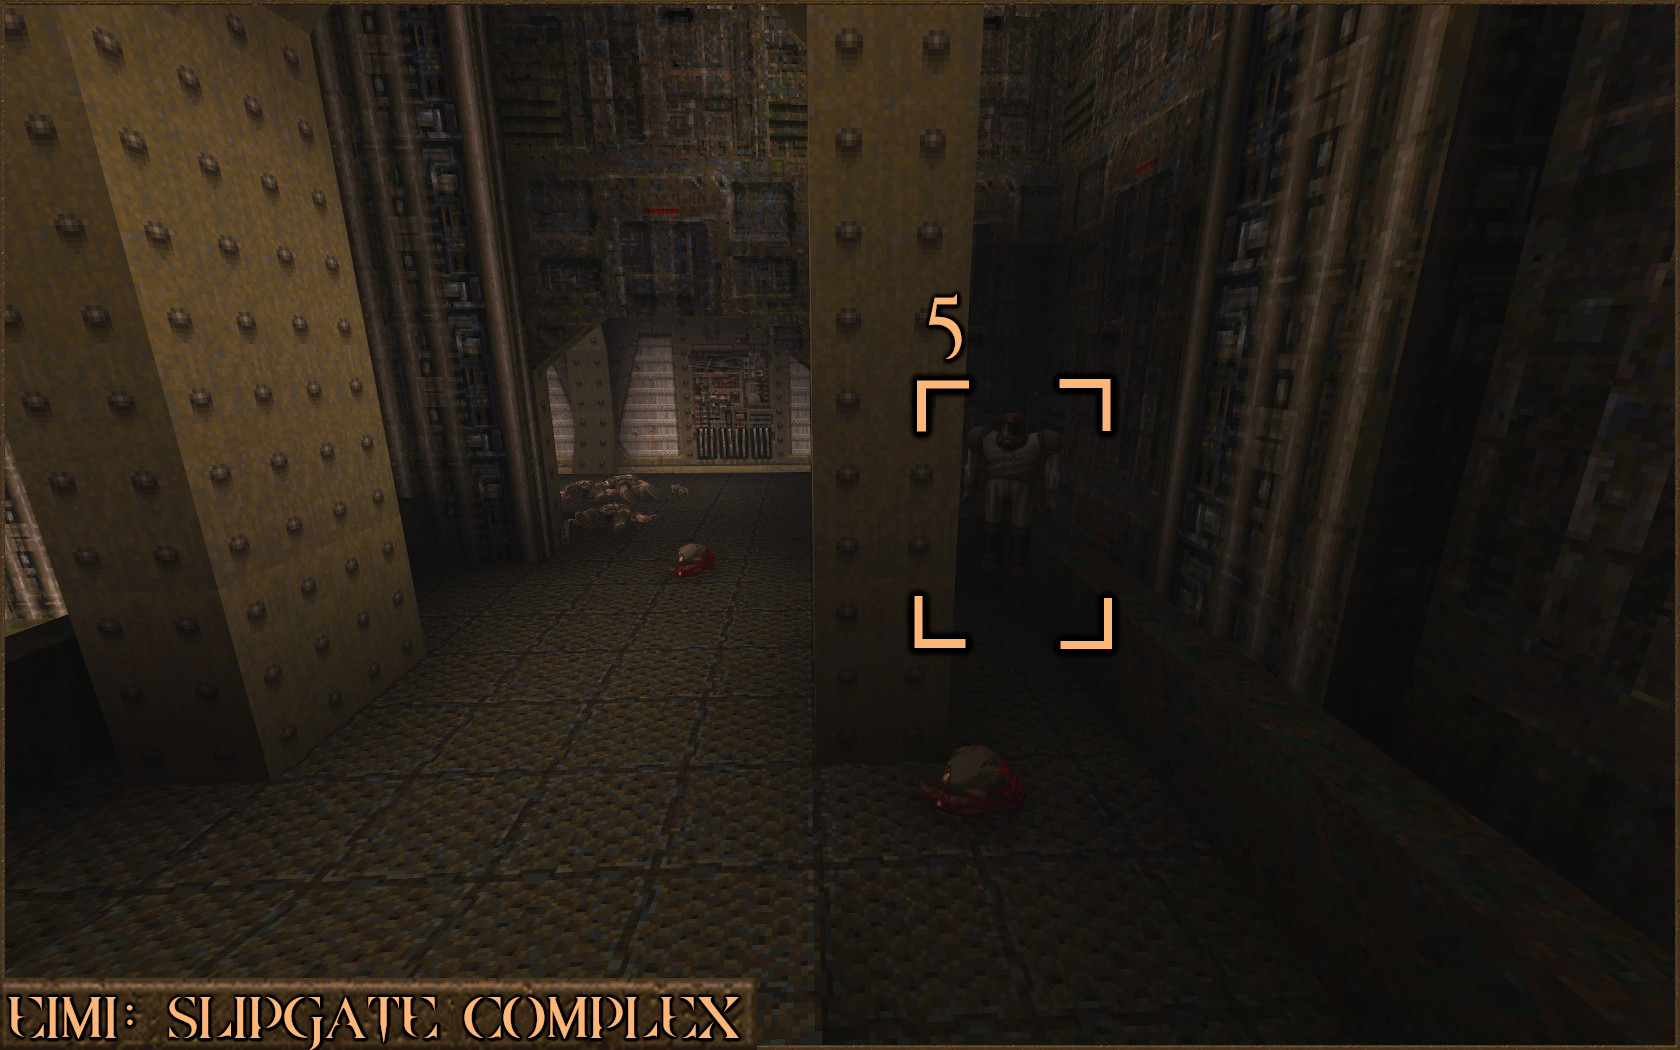
For the final corridors it is not recommended to try to run past the enemies. Instead, quickly move around the corner and retreat again to get their attention and then dispatch the Dogs and Grunts with your Axe one by one. After the corridors are cleared of enemies you'll be able to walk in to the red Slipgate to exit the level and receive the achievement.
Secret Exit: Episode 1

Vertical Vengeance
Find the secret exit in Quake Episode 1: Dimension of the Doomed.
Find the secret exit in Quake Episode 1: Dimension of the Doomed.
The secret exit in Episode 1 is located in the level E1M4: The Grisly Grotto.
Proceed through the level until you go up an elevator and in to a room that contains five brown switches (
++++) on the floor all with the Quake symbol on them. Running over them all in any order will activate nail traps around the room but after they have all been pressed two doors will open nearby.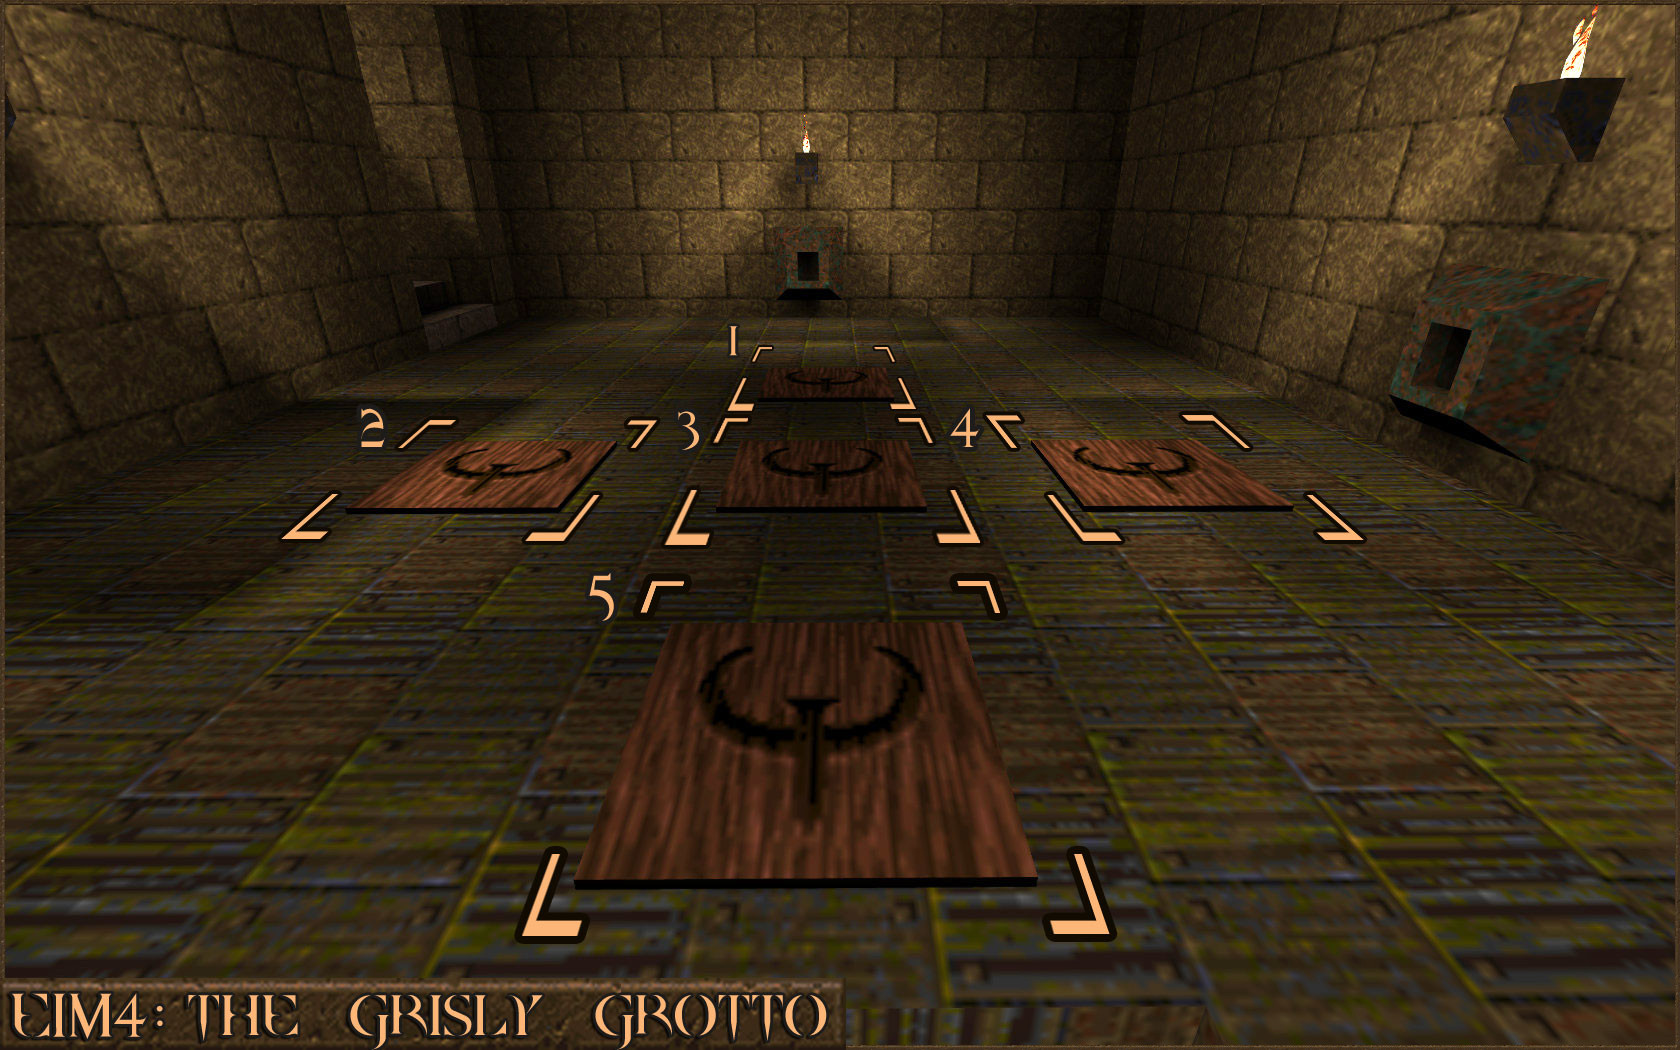
Jump down one of the holes (
 ) and press the blue switch that is nearby. Then go back up the elevator and jump down the other hole (
 ) and press the other blue switch. A message stating "A secret cave has opened" will appear.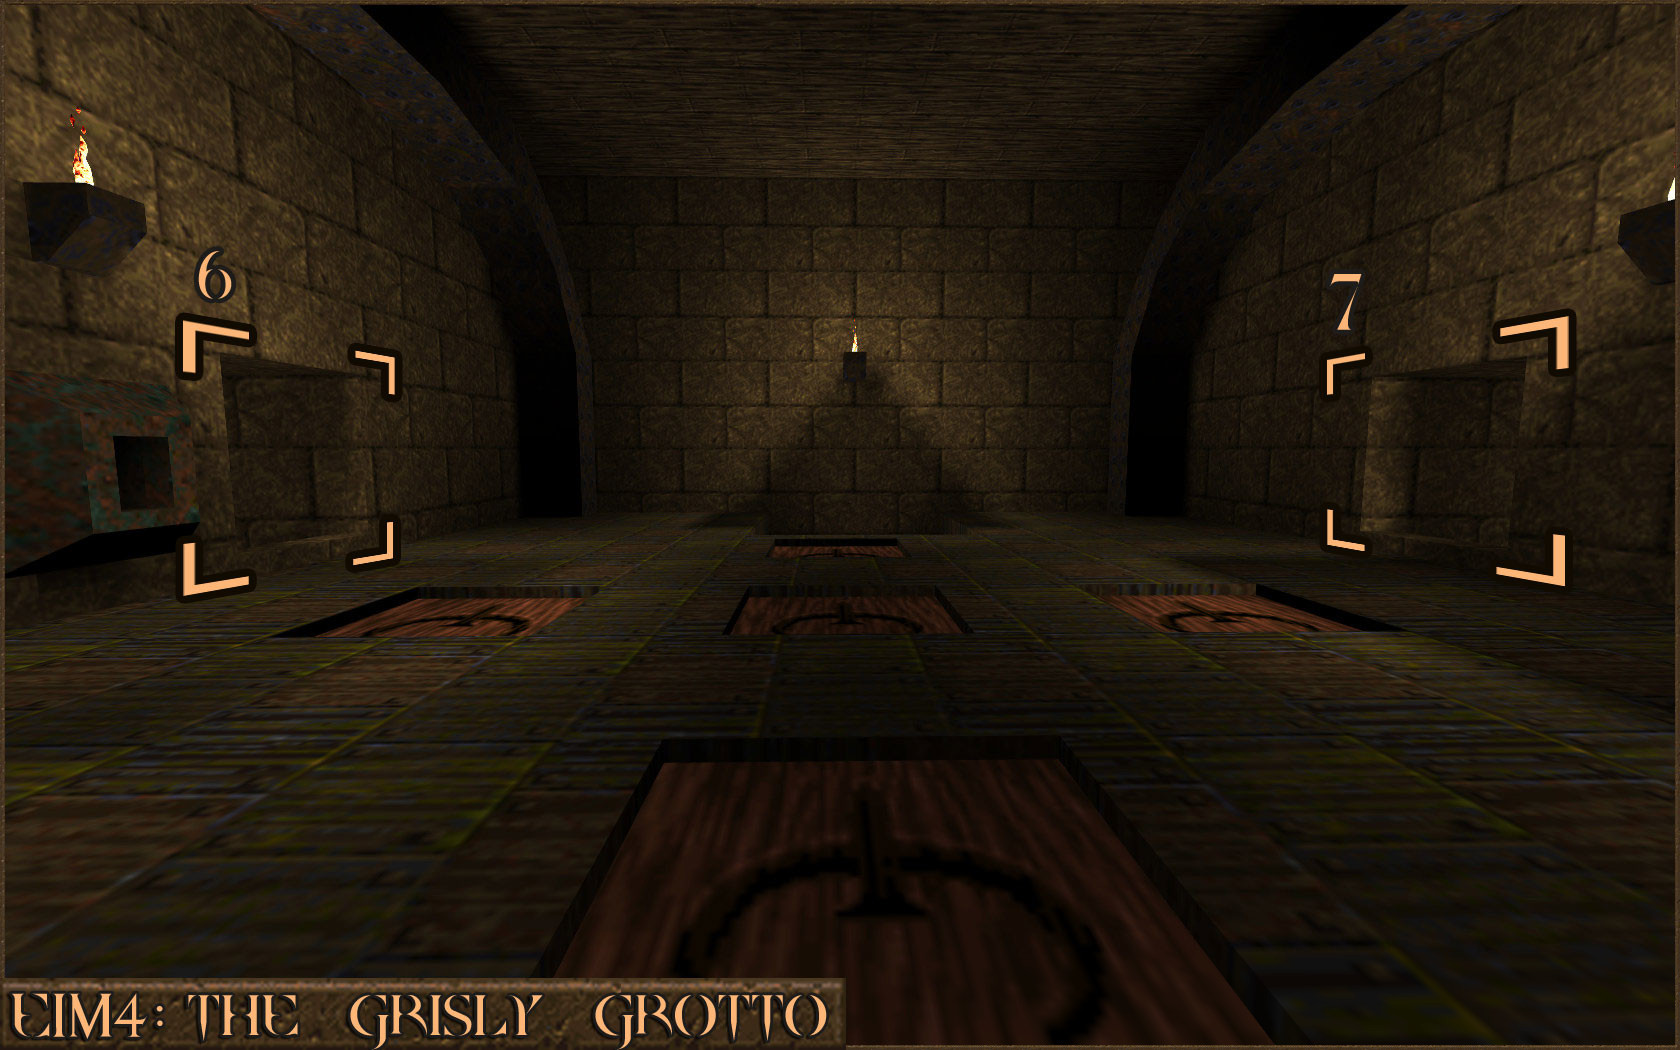
Head back to the large flooded area that you passed through earlier in the level and look for a new cave entrance (
 ) underwater. Swim through this underwater entrance.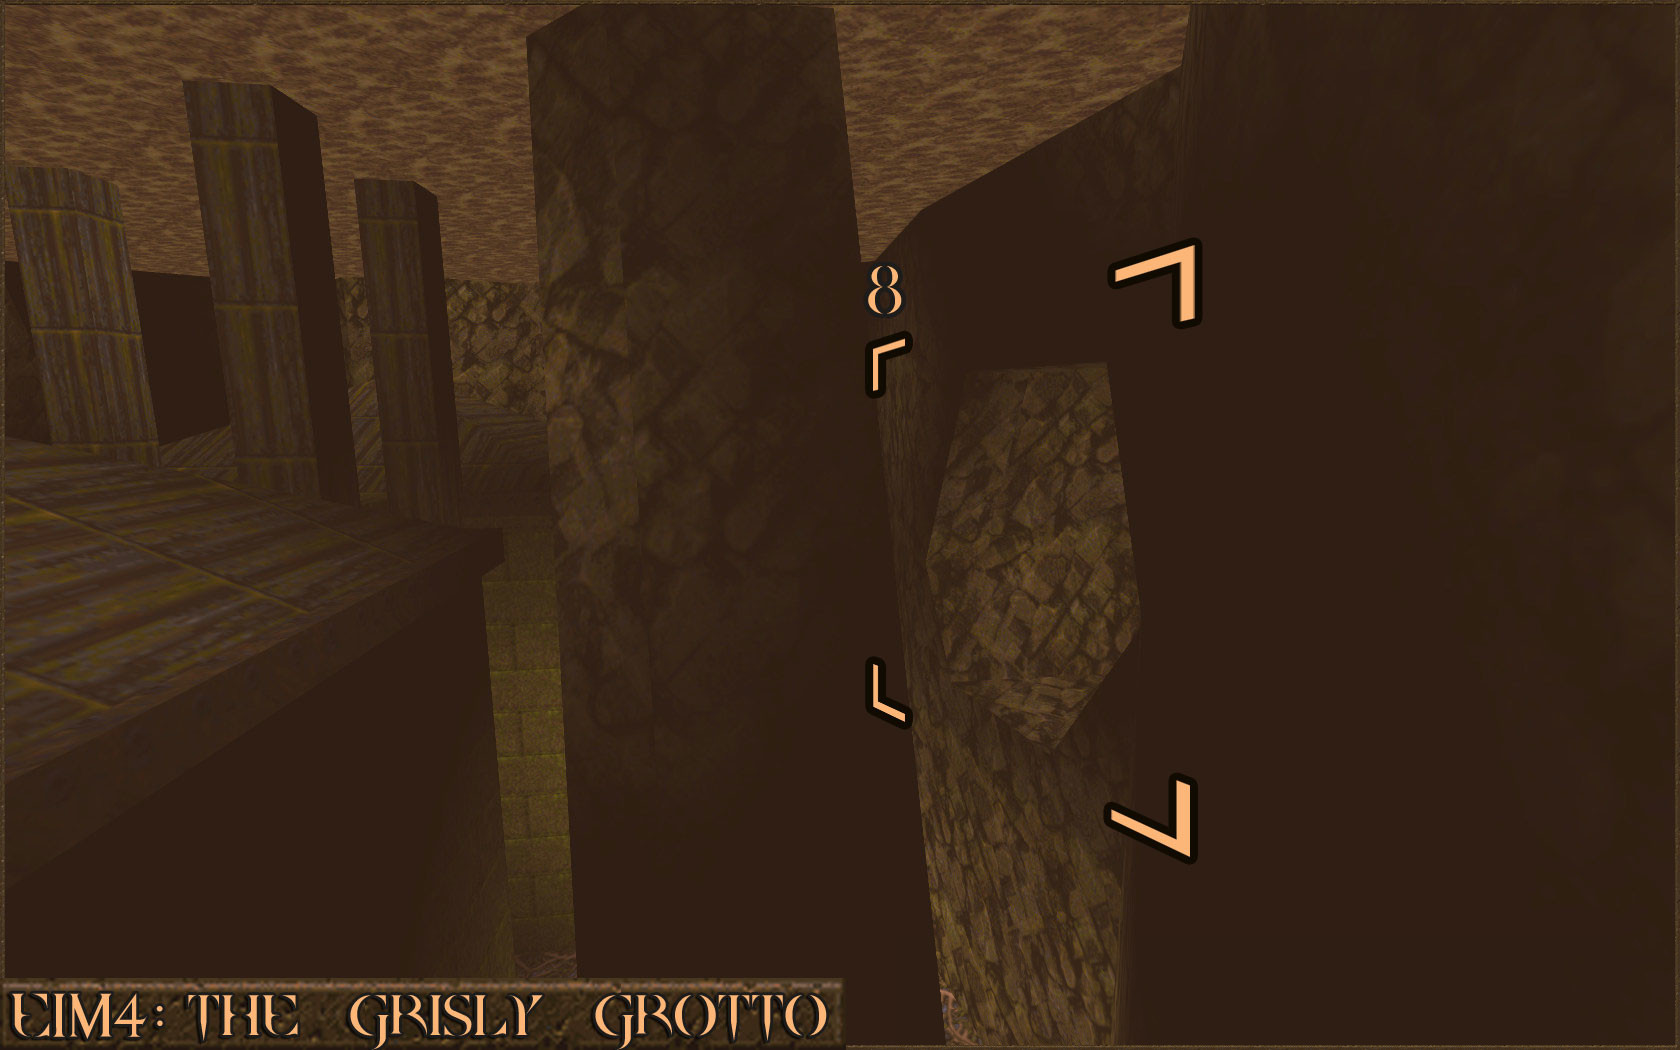
Emerge from the water to find the exit to the secret level for this episode: E1M8: Ziggurat Vertigo. Enter the portal to receive the achievement.
Secret Exit: Episode 2 & Well of Wishes

Nevermore
Find the secret exit in Quake Episode 2: The Realm of Black Magic.
Find the secret exit in Quake Episode 2: The Realm of Black Magic.

The Well of Wishes
Find the Well of Wishes in the Crypt of Decay.
Find the Well of Wishes in the Crypt of Decay.
During Episode 2 proceed to the level E2M3: The Crypt of Decay which contains both the Well of Wishes and the secret exit. Getting both together at once is a good idea as one leads right to the other.
Proceed almost all the way through the level until you come to a big bridge full of nail traps shooting at you. The entrance to the Well of Wishes is nearby but first we need to find a hidden switch to open the secret exit. Make your way across this bridge and you will find a small room with some square blocks stacked up.
Look to the ceiling to find a red shootable switch (
). This triggers some small steps and hidden wall between the square blocks. Press the push-switch that you find in this small area which will open the secret exit later.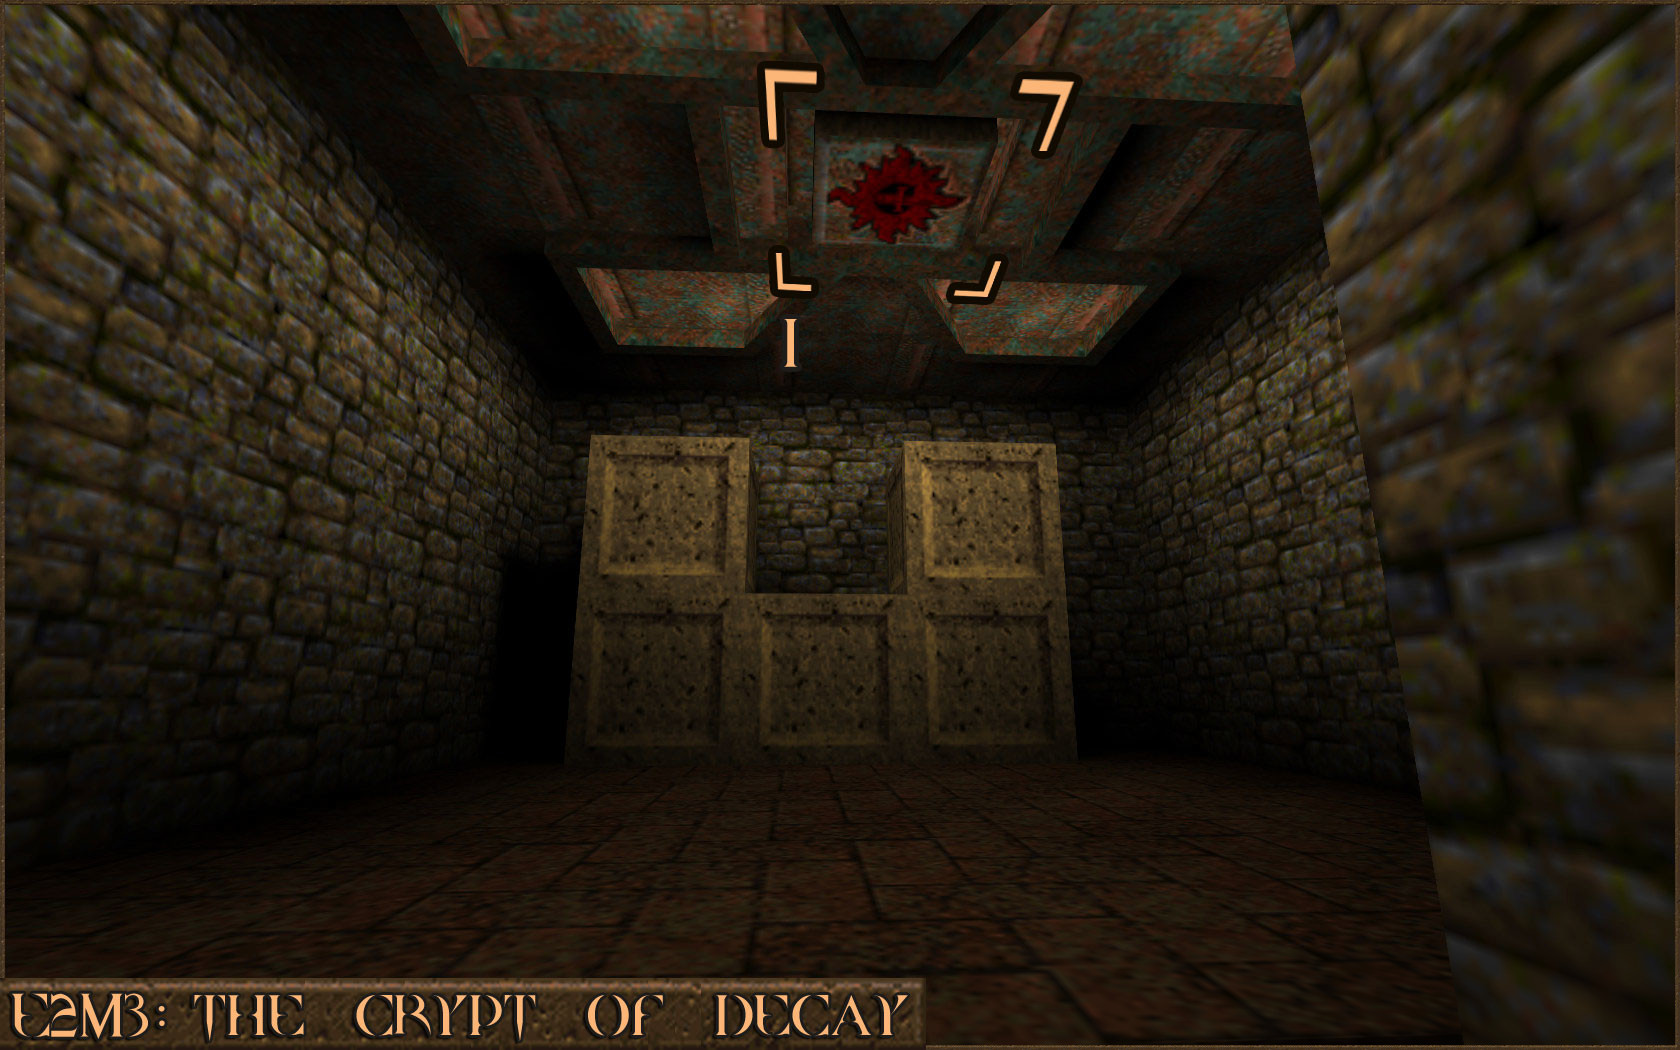
Return to the bridge (
) with the nail traps and look carefully at the distant walls to see a very dark hidden alcove. Do a running jump over to the dark alcove () and then you will see a very thin section of wall you can follow around (). Finally at the end of this is a dark hole in the wall () you can jump through.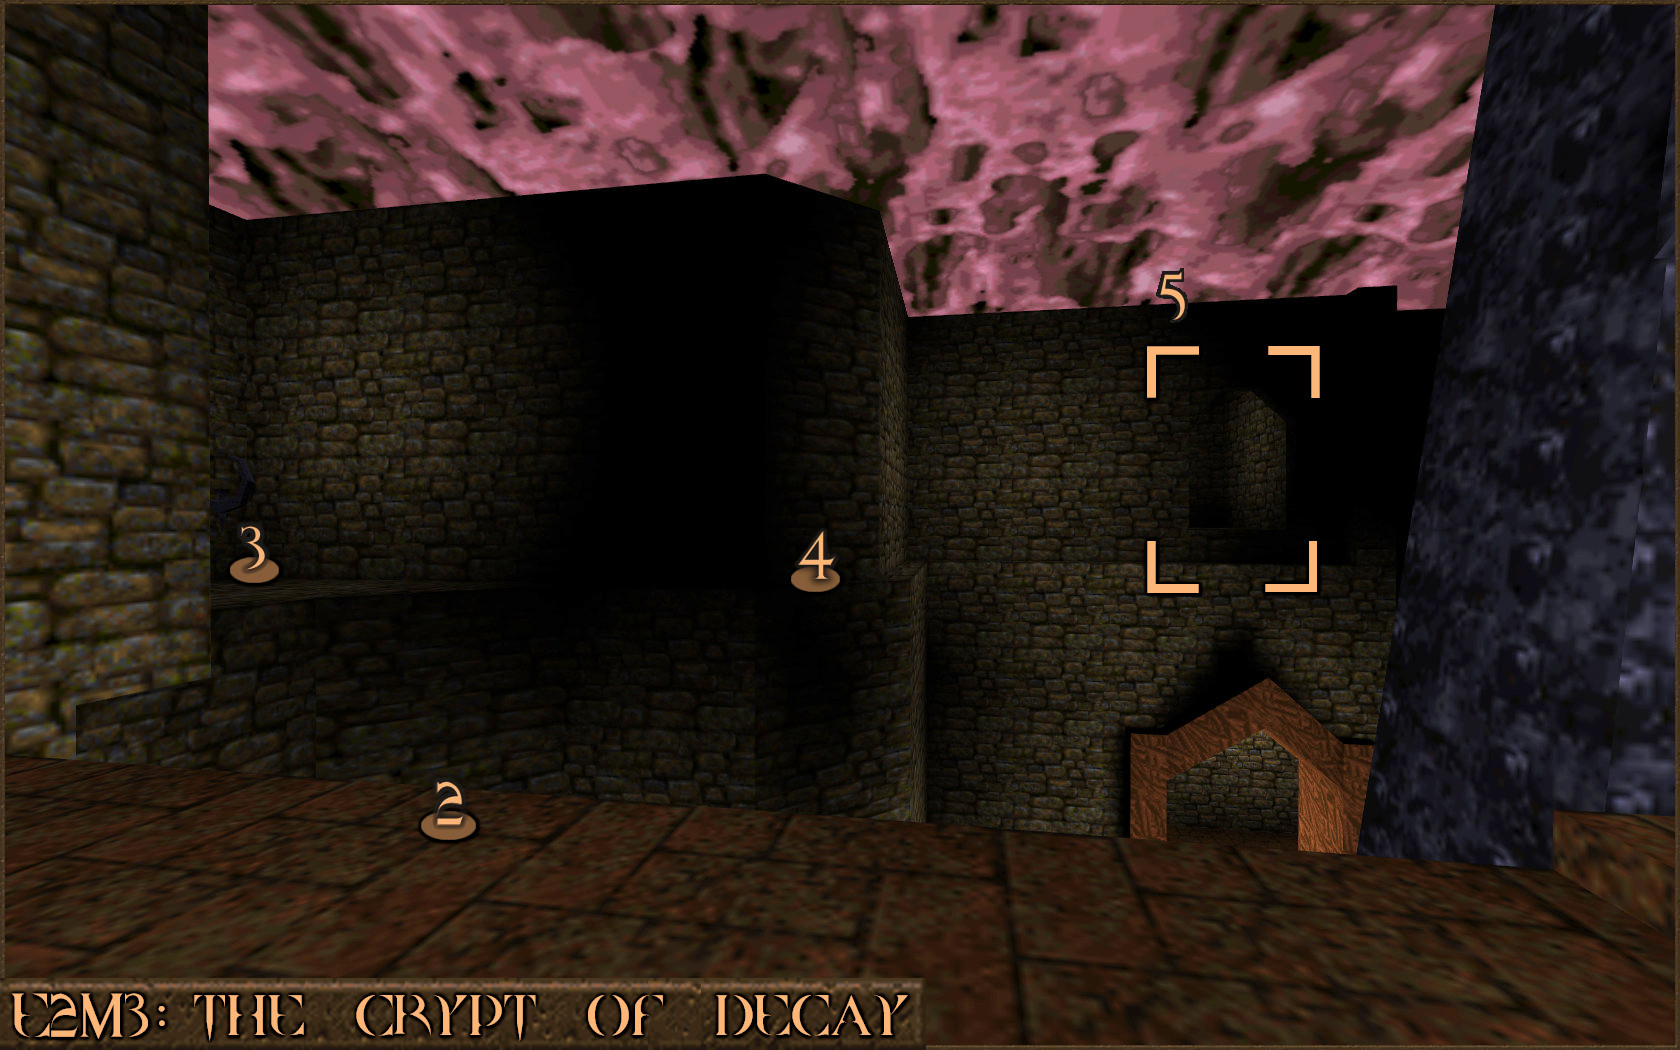
You have now discovered the "Well of Wishes" which contains the legendary Dopefish.
When you exit the Well of Wishes area, turn right and you will immediately find the unlocked entrance (
) to the secret exit which leads to E2M7: The Underearth.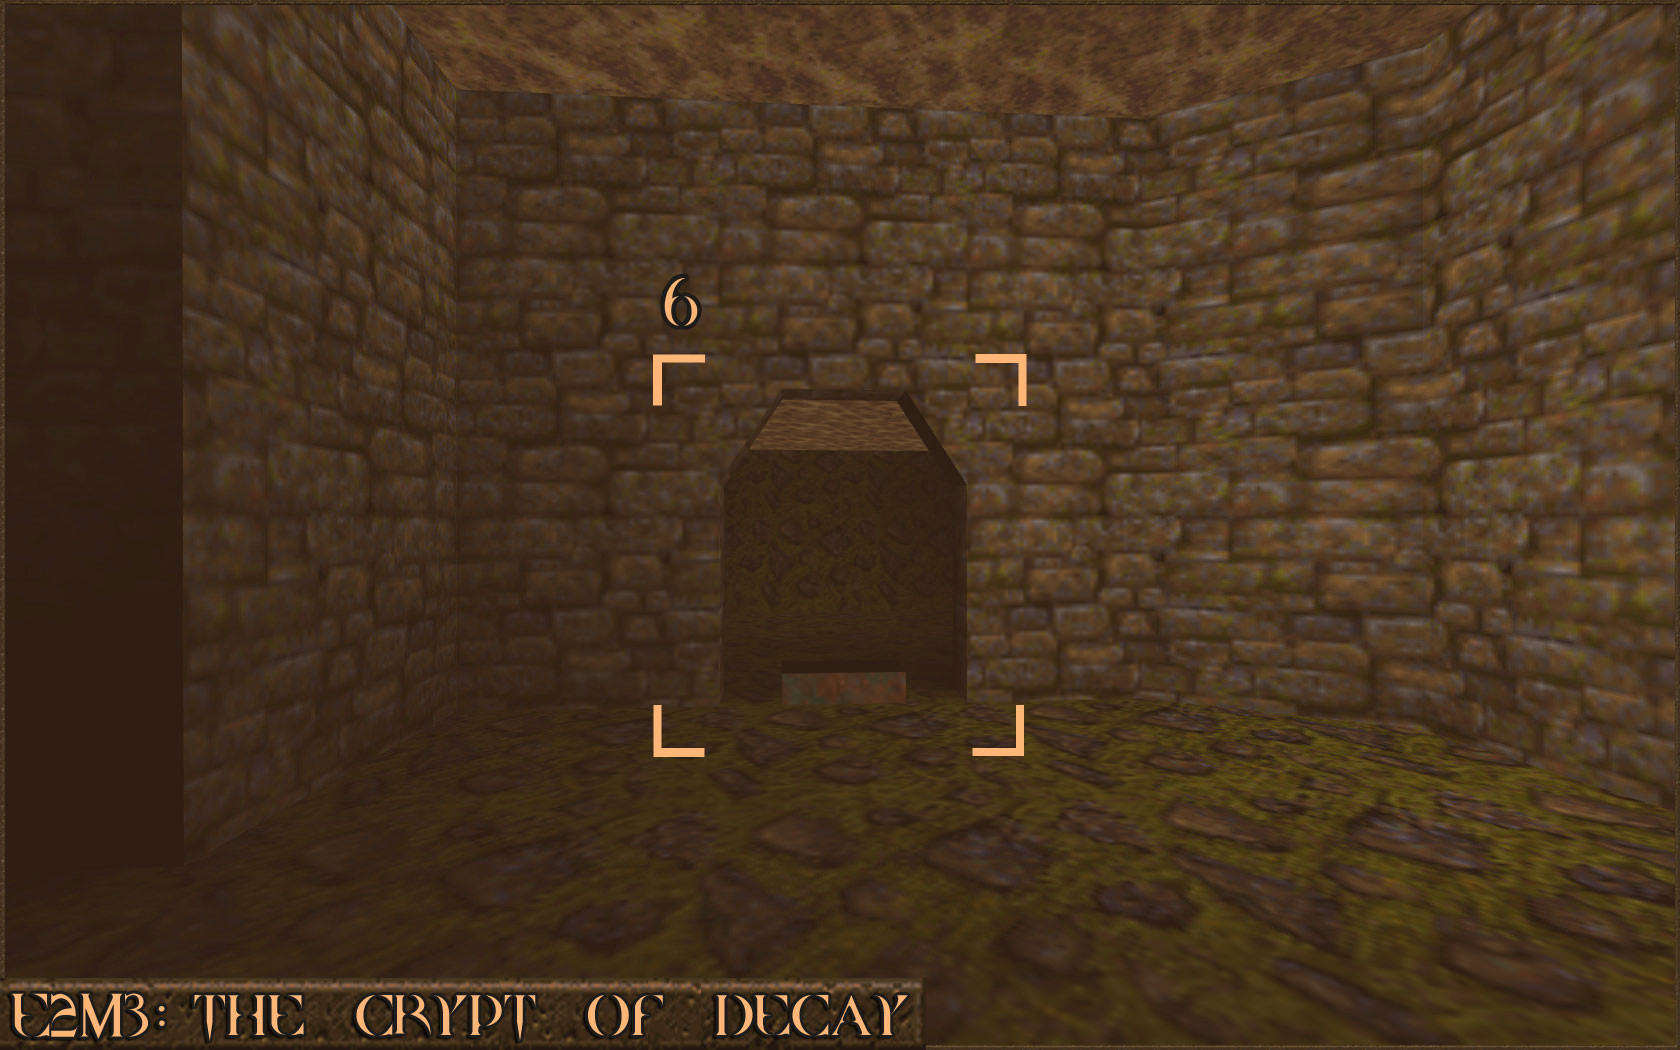
Secret Exit: Episode 3

The Hot And Winding Road
Find the secret exit in Quake Episode 3: The Netherworld.
Find the secret exit in Quake Episode 3: The Netherworld.
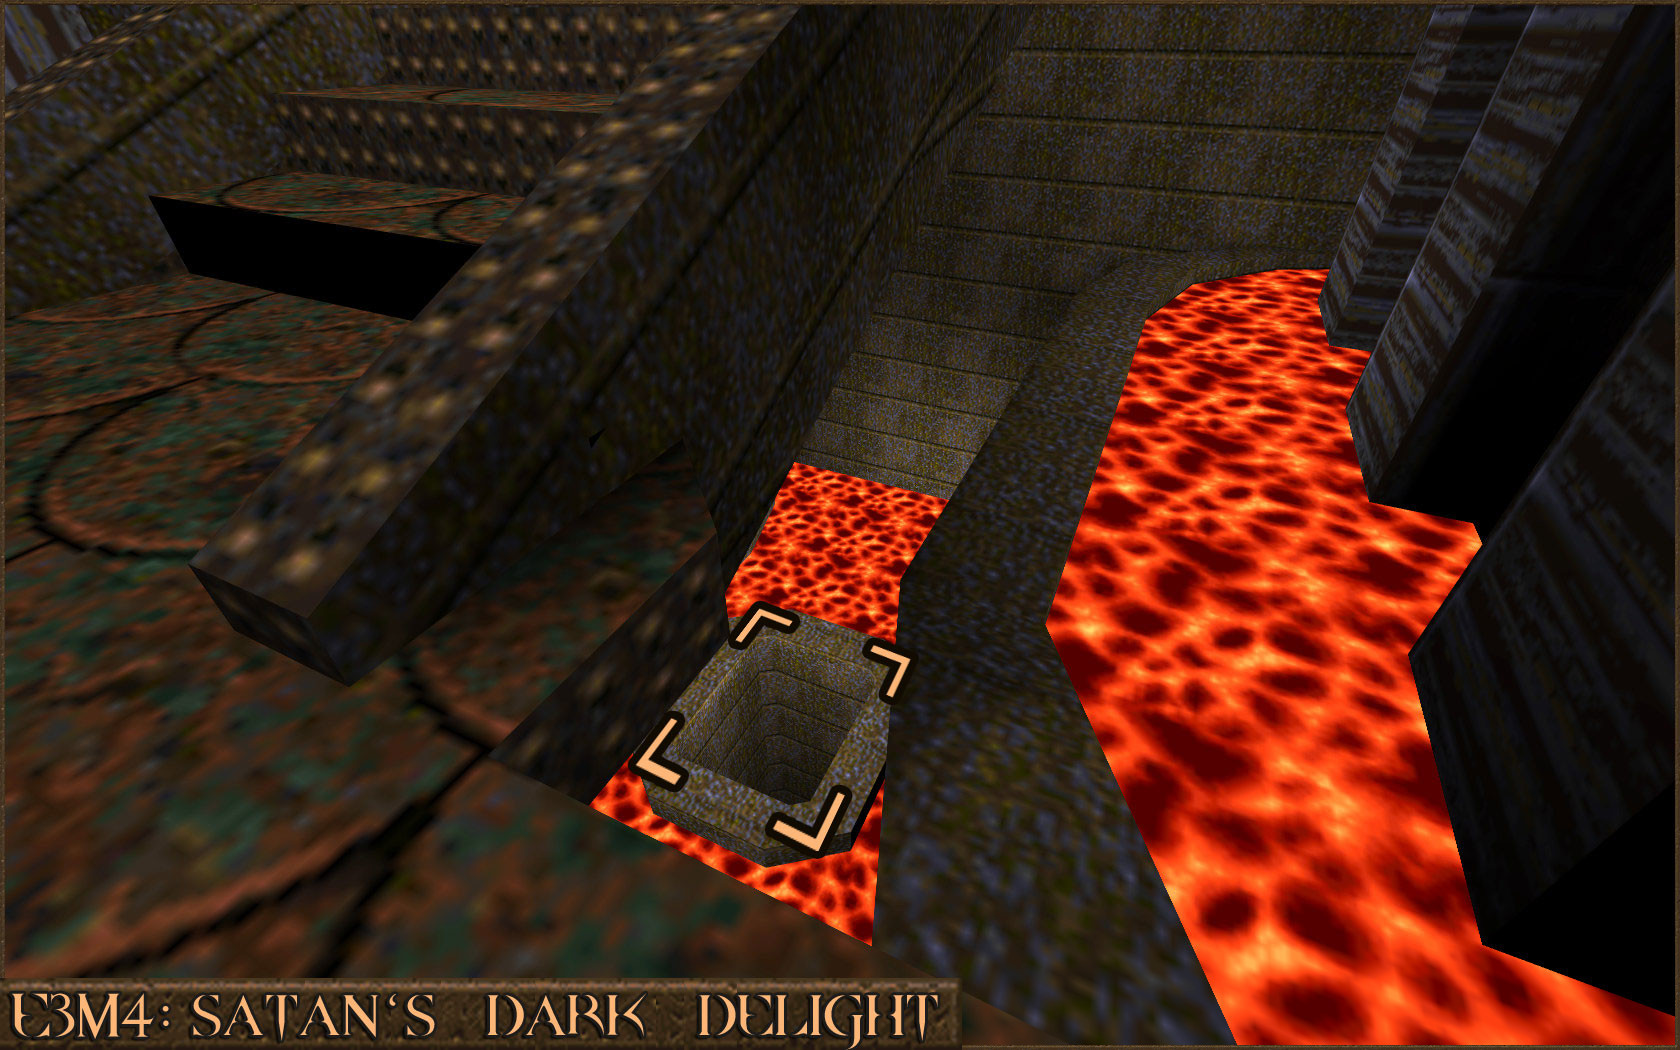
During Episode 3 this secret exit can be found in the level E3M4: Satan's Dark Delight.
In a large room you will notice several platforms filled with lava. Carefully look under the stairs you came down to see a octagonal hole in the lava. Simply jump down it to find the exit to the secret level for this episode: E3M7: The Haunted Halls.
Secret Exit: Episode 4

Into Sandy's City
Find the secret exit in Quake Episode 4: The Elder World.
Find the secret exit in Quake Episode 4: The Elder World.
In Episode 4 this secret exit can be found in E4M5: Hell's Atrium.
This secret exit can made inaccessible if you are not careful. Once you have acquired the Silver Key it is extremely important that you DO NOT use it to lower the bridge over the lava.
Instead you must make several delicate jumps on the poles that are sticking out of the lava. Jump to one of the nearest poles (
) and then over the next pole (). From there make another jump over to solid ground ().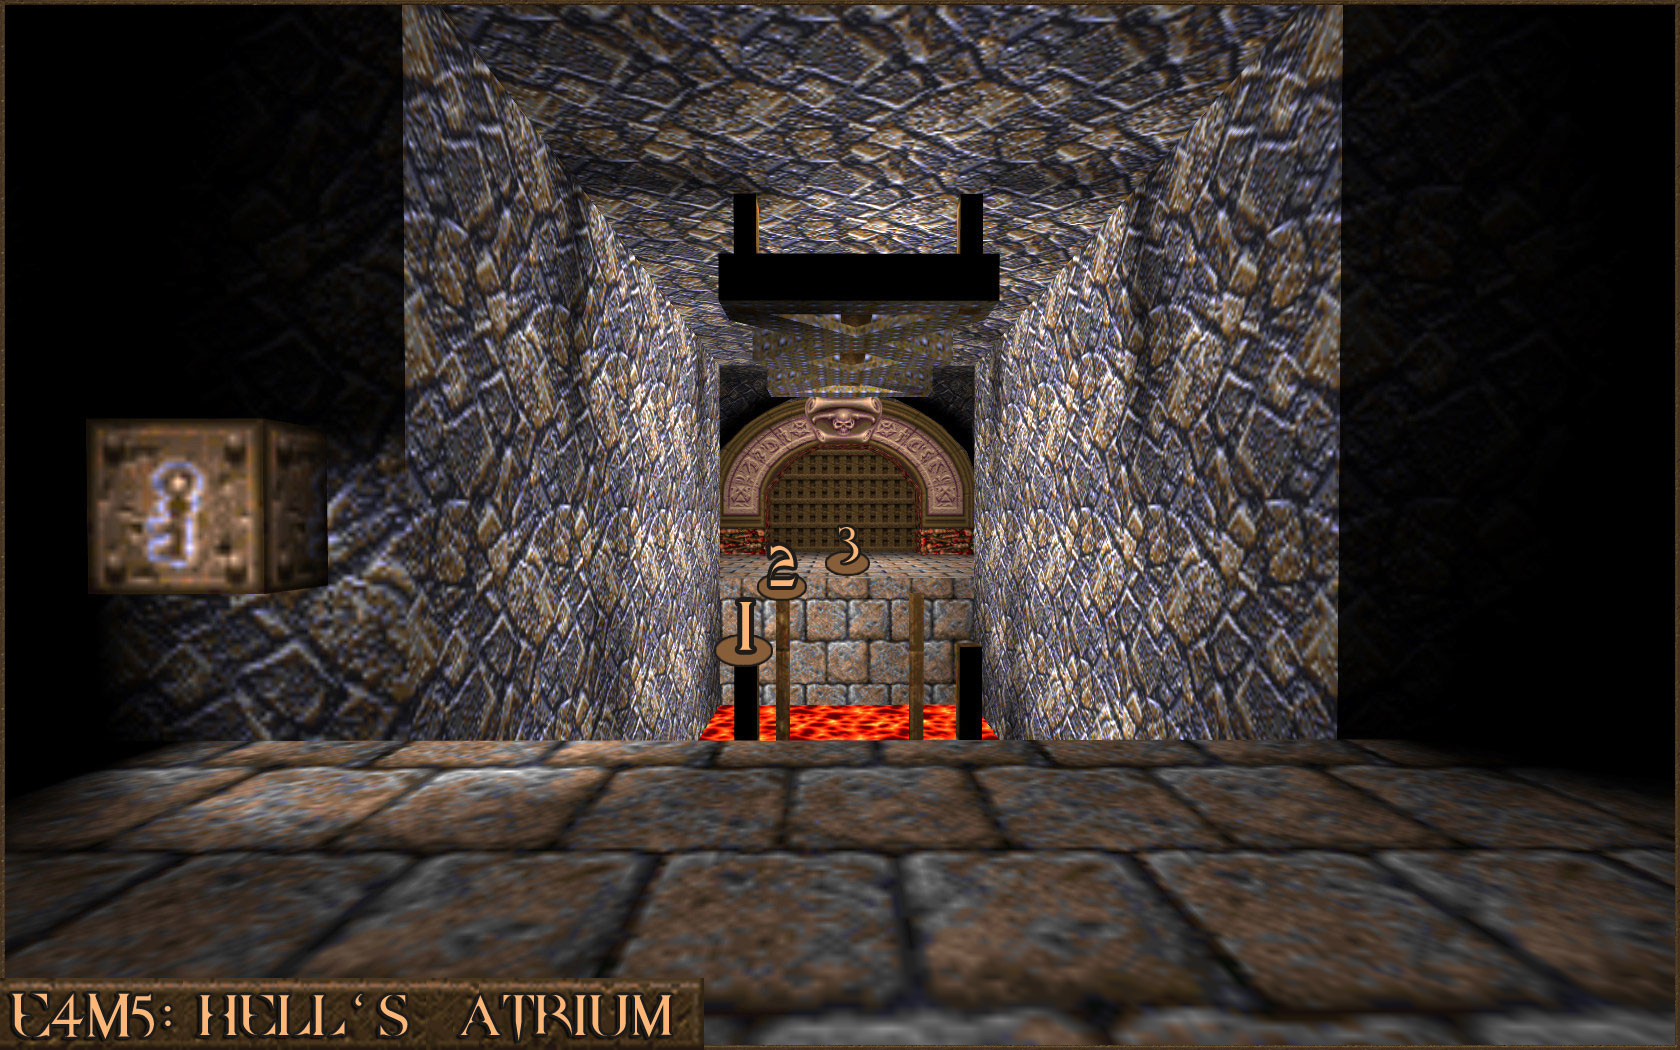
Once you are over to the other side you can open the nearby door (
) with the unused Silver Key and gain access to the secret level for this episode: E4M8: The Nameless City.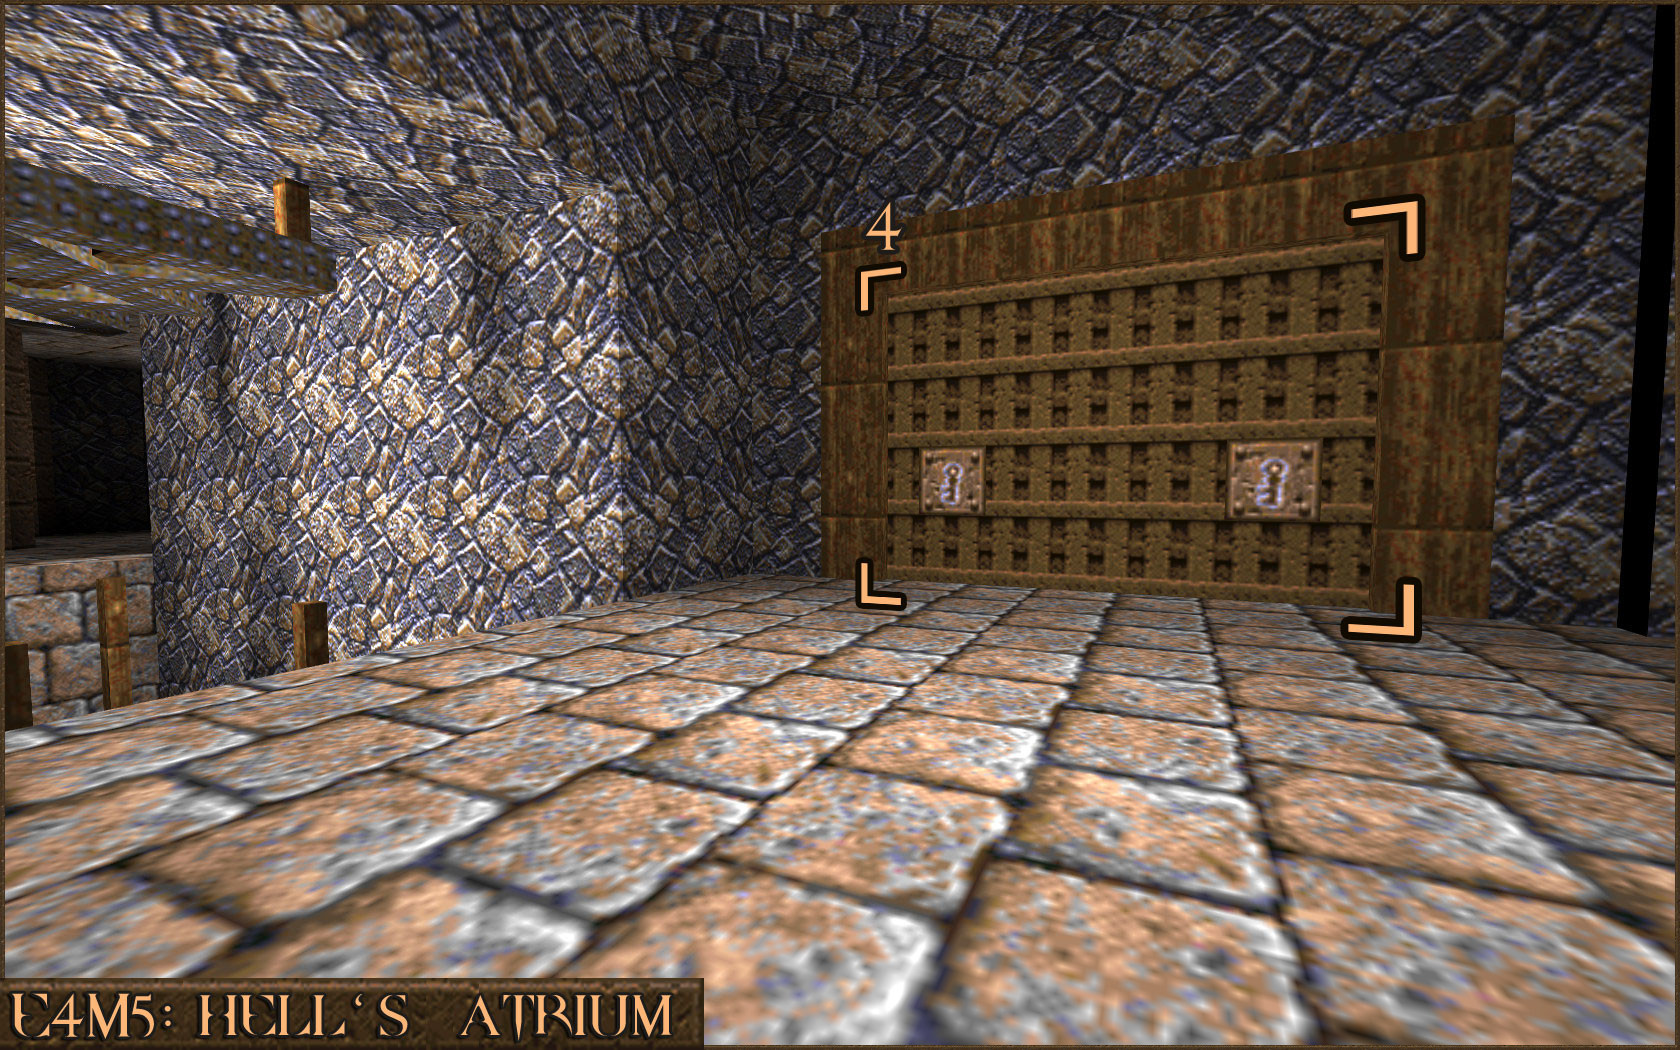
The Painless Maze

The Painless Maze
Complete E4M6: The Pain Maze on Nightmare without taking damage.
Complete E4M6: The Pain Maze on Nightmare without taking damage.
The Painless Maze achievement requires you to beat the level E4M6: The Pain Maze on Nightmare Difficulty without taking damage.
It is highly recommended to attempt this achievement during your full playthrough of Quake on Nightmare Difficulty, as that will mean you start the level with all of your weapons and ammo from the previous level. Try to acquire the Super Nailgun and Thunderbolt from the previous levels with as much ammo as you can for each.
If you use the Level Select option to go straight to this level you will only have a Shotgun for most of the level which makes this challenge extremely difficult due to the sheer amount of enemies.
Make good use of quick-save and quick-load as a single bit of damage will invalidate the achievement.
There are several very helpful powerups throughout this level that should be used efficiently:
Quad Damage will give you quadruple damage for a time which is extremely effective for killing enemies quickly. Ring of Shadows provides temporary invisibility but once a monster notices you it no longer affects them. A useful trick is to grab the Ring of Shadows and then use it to get the Gold Key in the green room filled with Spawns, as they will all ignore you while you are invisible.
 Pentagram of Protection provides temporary invincibility and allows you to get hit and not invalidate the achievement while it is active.
[Scourge of Armagon]

Scourge of Armagon is the first expansion pack for Quake and it features new weapons, items and enemies. There are three unmissable achievements for completing each episode in this expansion pack.
From the main menu select Single Player -> New Game -> Scourge of Armagon. Do not use the Level Select menu option.

Gateway Traveller
Complete Scourge of Armagon Episode 1: Fortress of the Dead in single player.
Complete Scourge of Armagon Episode 1: Fortress of the Dead in single player.

Dominated Dominion
Complete Scourge of Armagon Episode 2: Dominion of Darkness in single player.
Complete Scourge of Armagon Episode 2: Dominion of Darkness in single player.

Arma-gone
Complete Scourge of Armagon Episode 3: The Rift in single player.
Complete Scourge of Armagon Episode 3: The Rift in single player.
Nightmare Difficulty

Scourge Done Slick
Complete Scourge of Armagon on Nightmare in single player.
Complete Scourge of Armagon on Nightmare in single player.
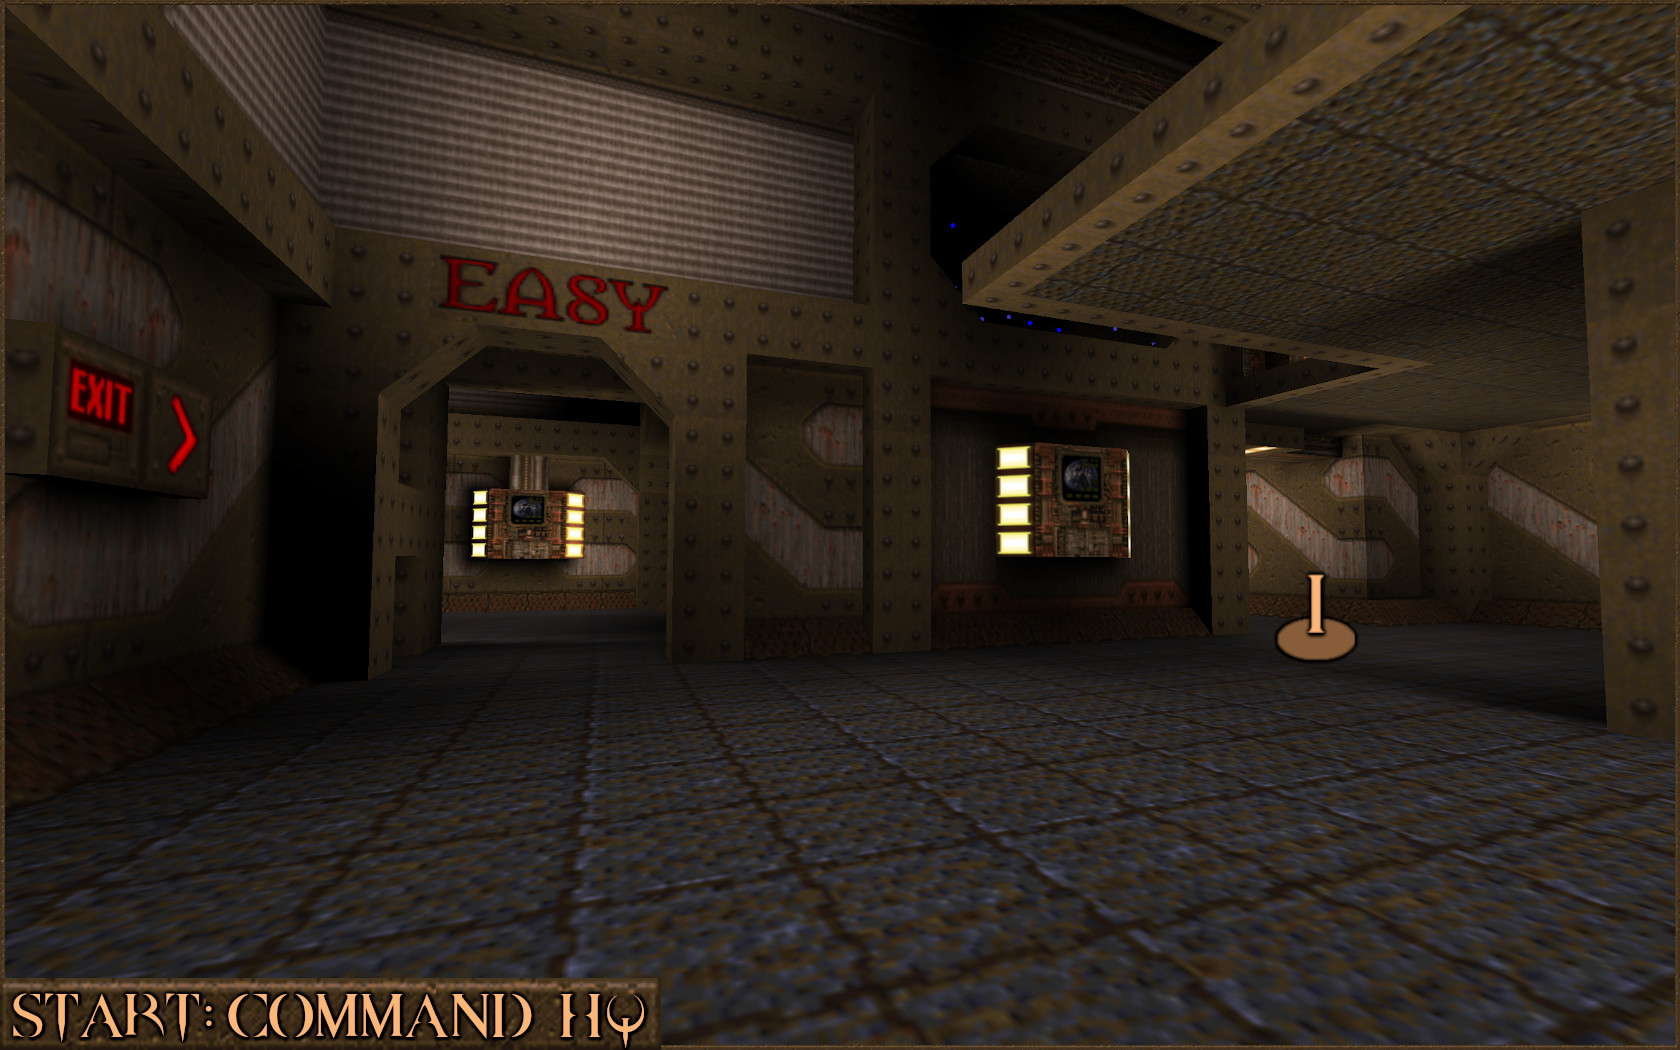
To find the Nightmare Difficulty portal for this expansion head down the left corridor marked "EASY". Follow the corridor around until you find an EXIT sign pointing to another "EASY" sign. Don't go in there, instead carry on down the corridor to the right (
).
In the next room you will find a storage area for crates. Move between the gap (
) to the middle of this small area.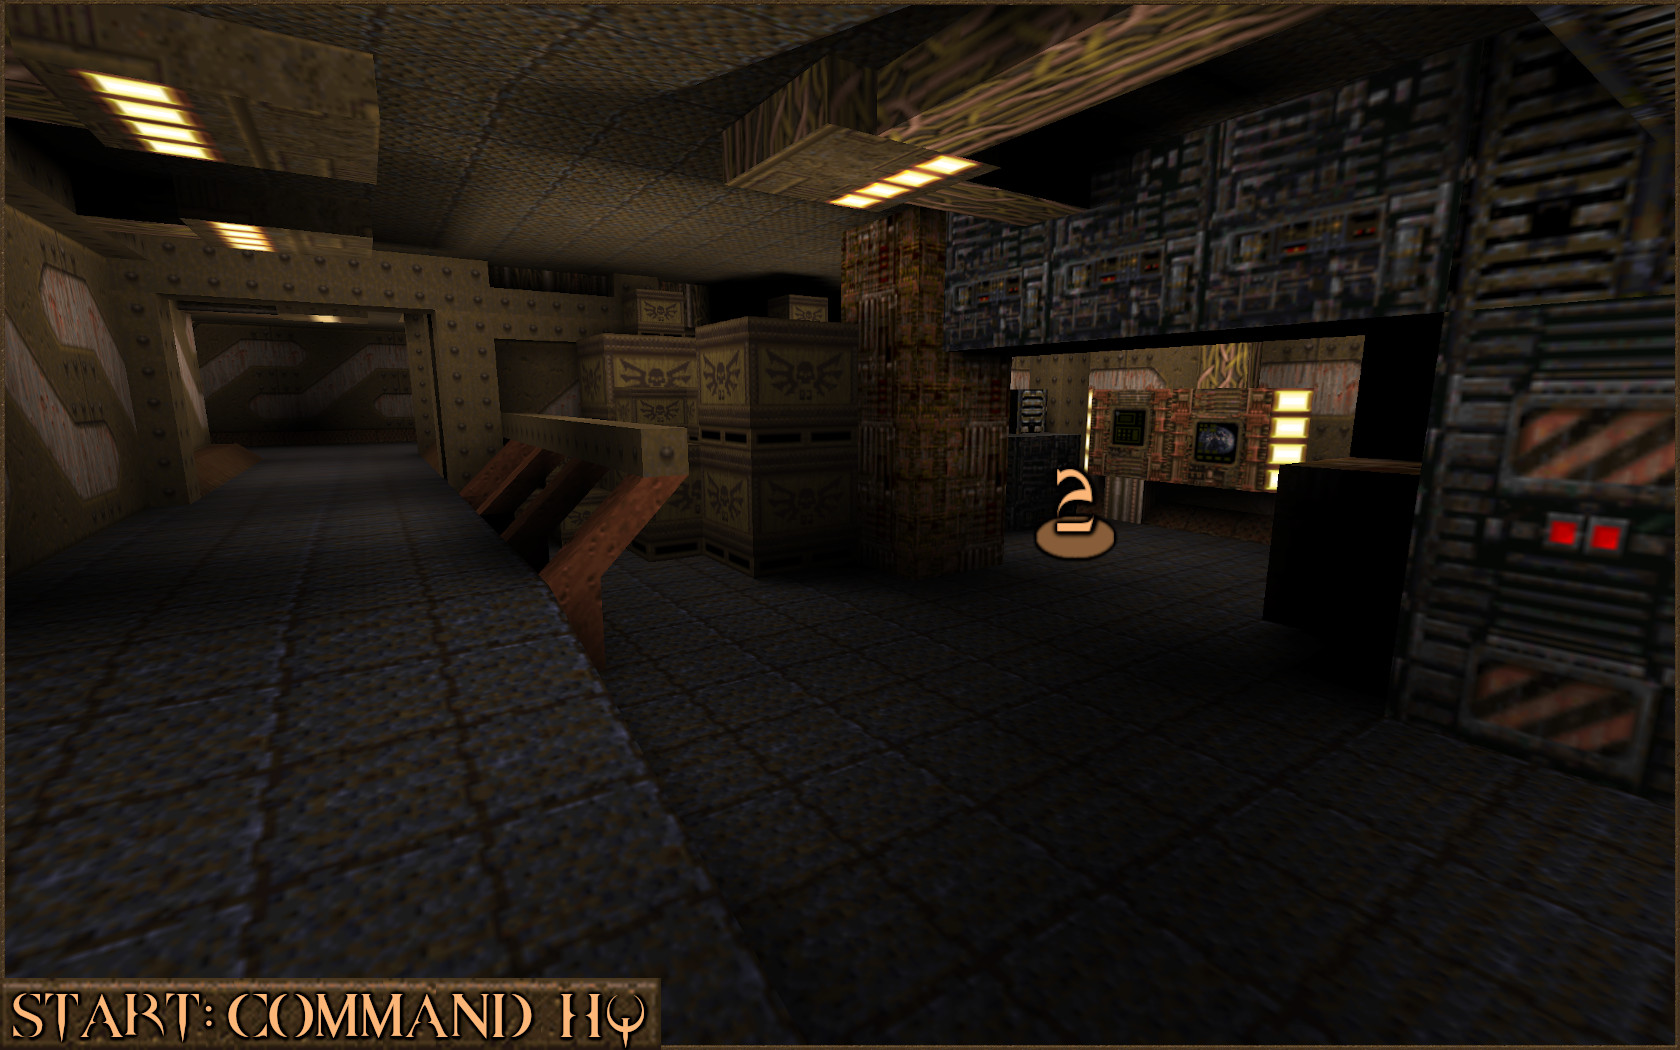
From here you can see a stack of various brown crates. Jump up the smaller ones (
) to find an elevator which will take you up to an area containing the Nightmare Difficulty portal.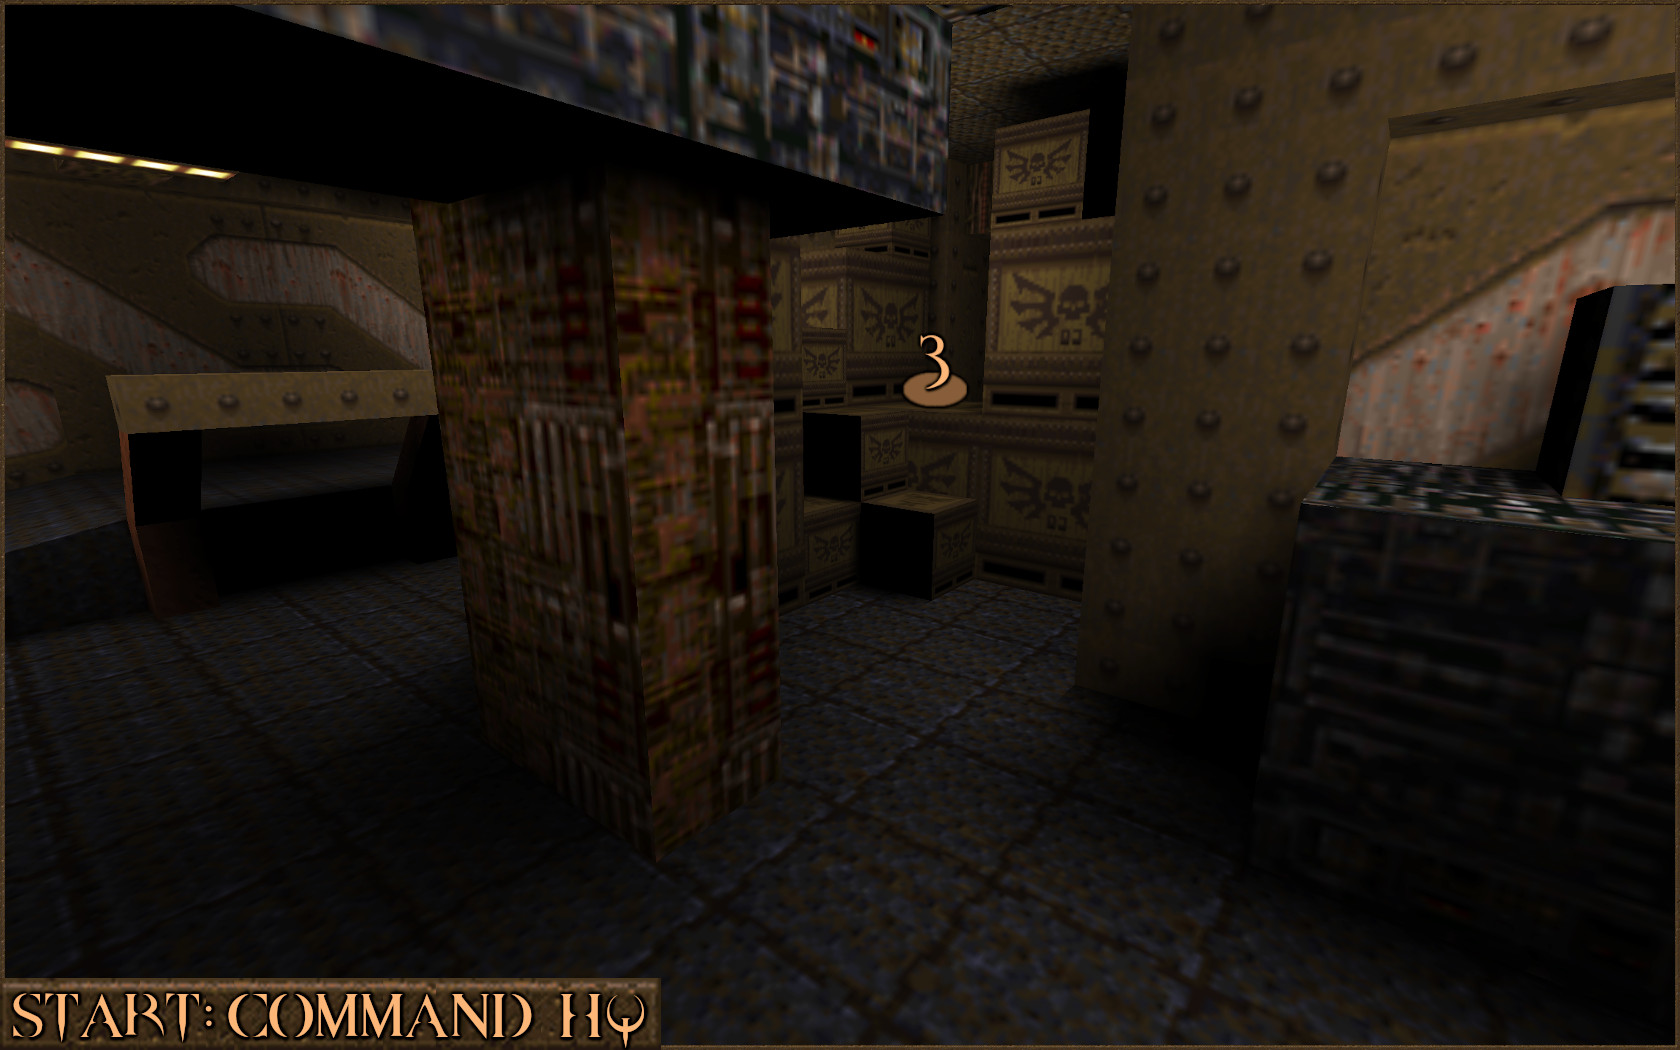
With Nightmare Difficulty enabled you can work your way through the three episodes that this expansion contains to earn this achievement.
The most important thing to remember in the Scourge of Armagon is that the new floating Spike Mine enemies have a large amount of health but will explode immediately when popped with a single nail from the Nailgun or Super Nailgun.
If you're finding this expansion pack tough then don't forget to use the secrets guide to find extra items to help you get through.
https://steamcommunity.com/sharedfiles/filedetails/?id=2585506034
Secret Exit: Episode 1

Military Complex
Find the secret exit in Scourge of Armagon Episode 1: Fortress of the Dead.
Find the secret exit in Scourge of Armagon Episode 1: Fortress of the Dead.
The secret exit in Episode 1 is found in the 2nd level: HIP1M2: Storage Facility.
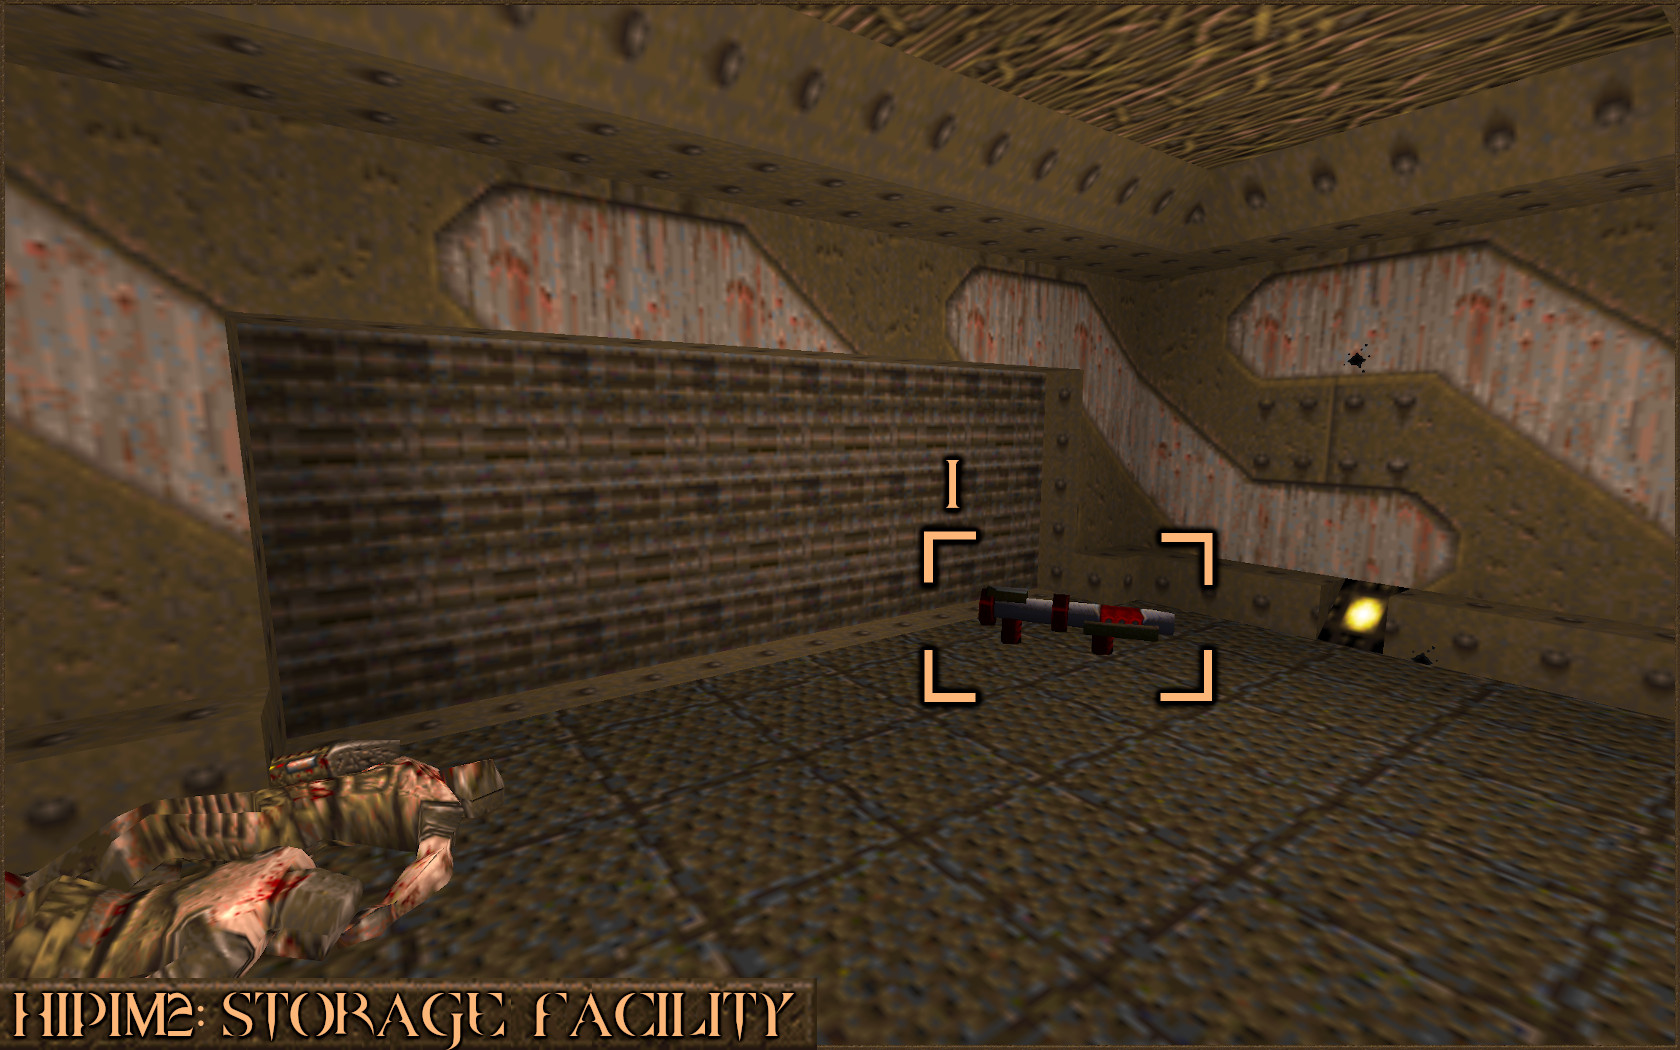
To find this secret exit you will need a Proximity Launcher weapon. Progress through the level and shortly after you acquire the Gold Keycard you will find a Proximity Launcher (
).
Drop down in to the room directly in front of you. Above the door in that room is a red target switch (
) that temporarily activates the secret exit door & bridge. The problem is it shuts off before you'll be able to run across the force bridge and reach it. To overcome this time limit, equip the Proximity Launcher and fire a proximity grenade directly on to the red target switch.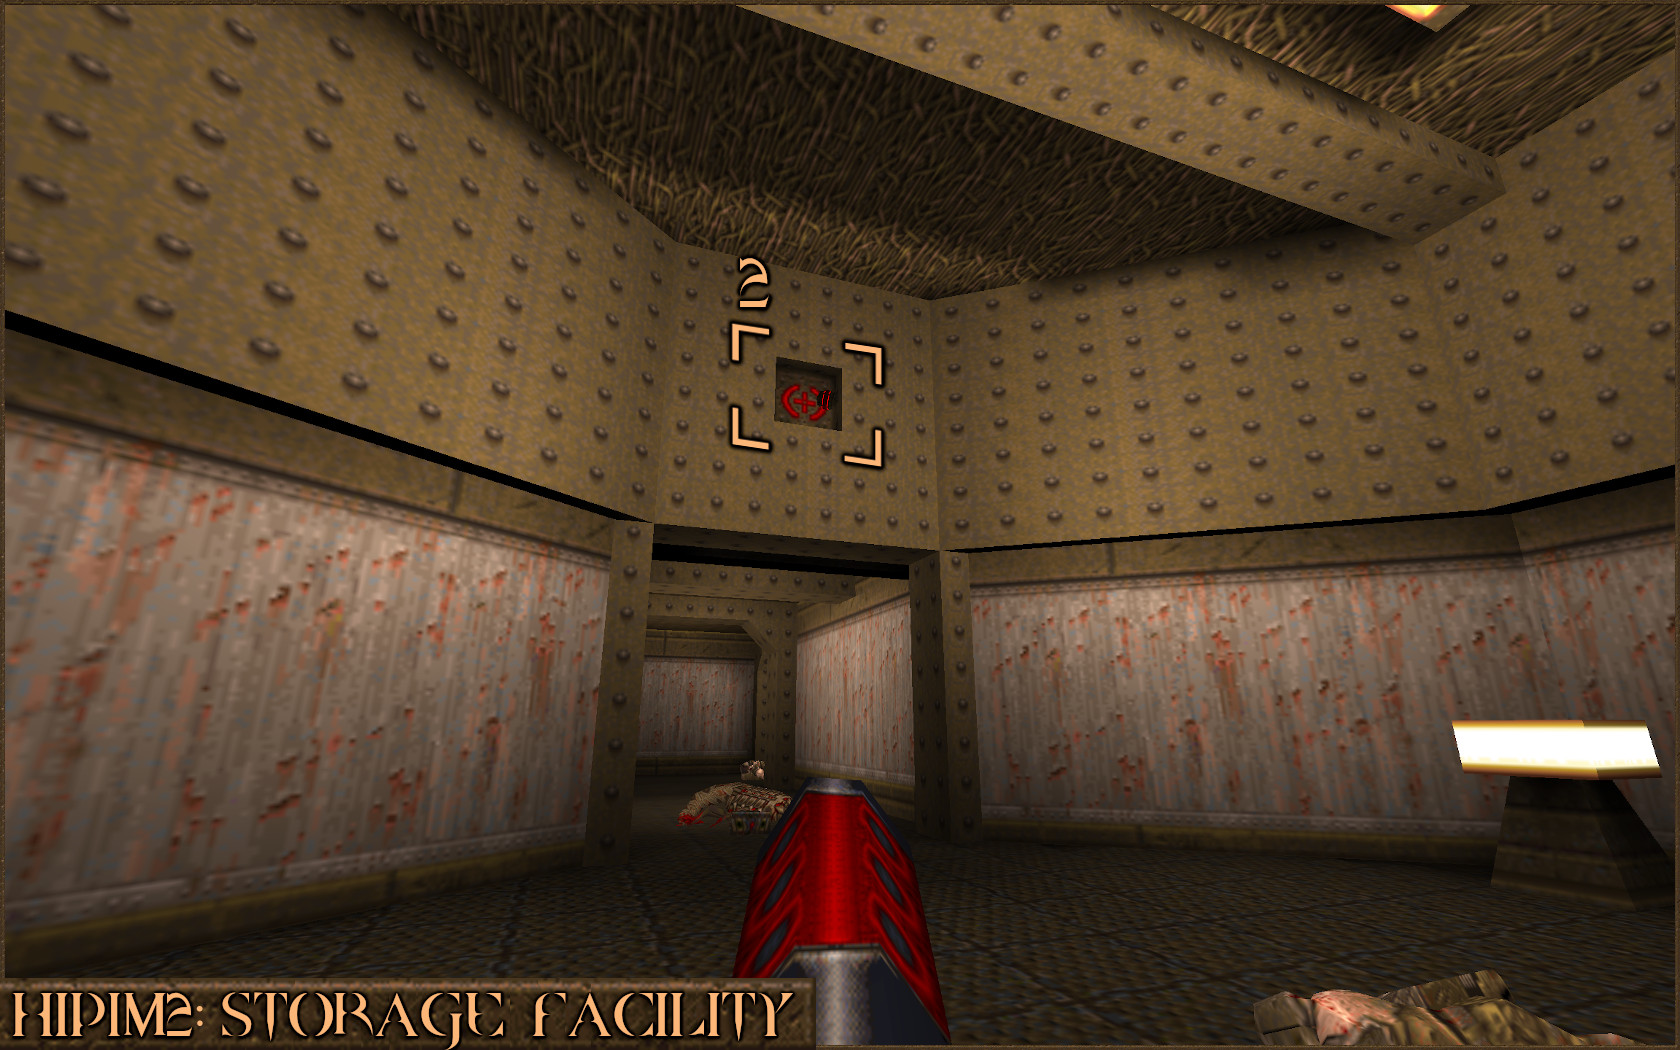
The proximity grenades explode after approximately 20 seconds which will give you more than enough time to run through the door beneath the switch, over the force bridge (
), up the stairs and in to the room containing the secret exit (). This takes you to the secret level: HIP1M5: Military Complex.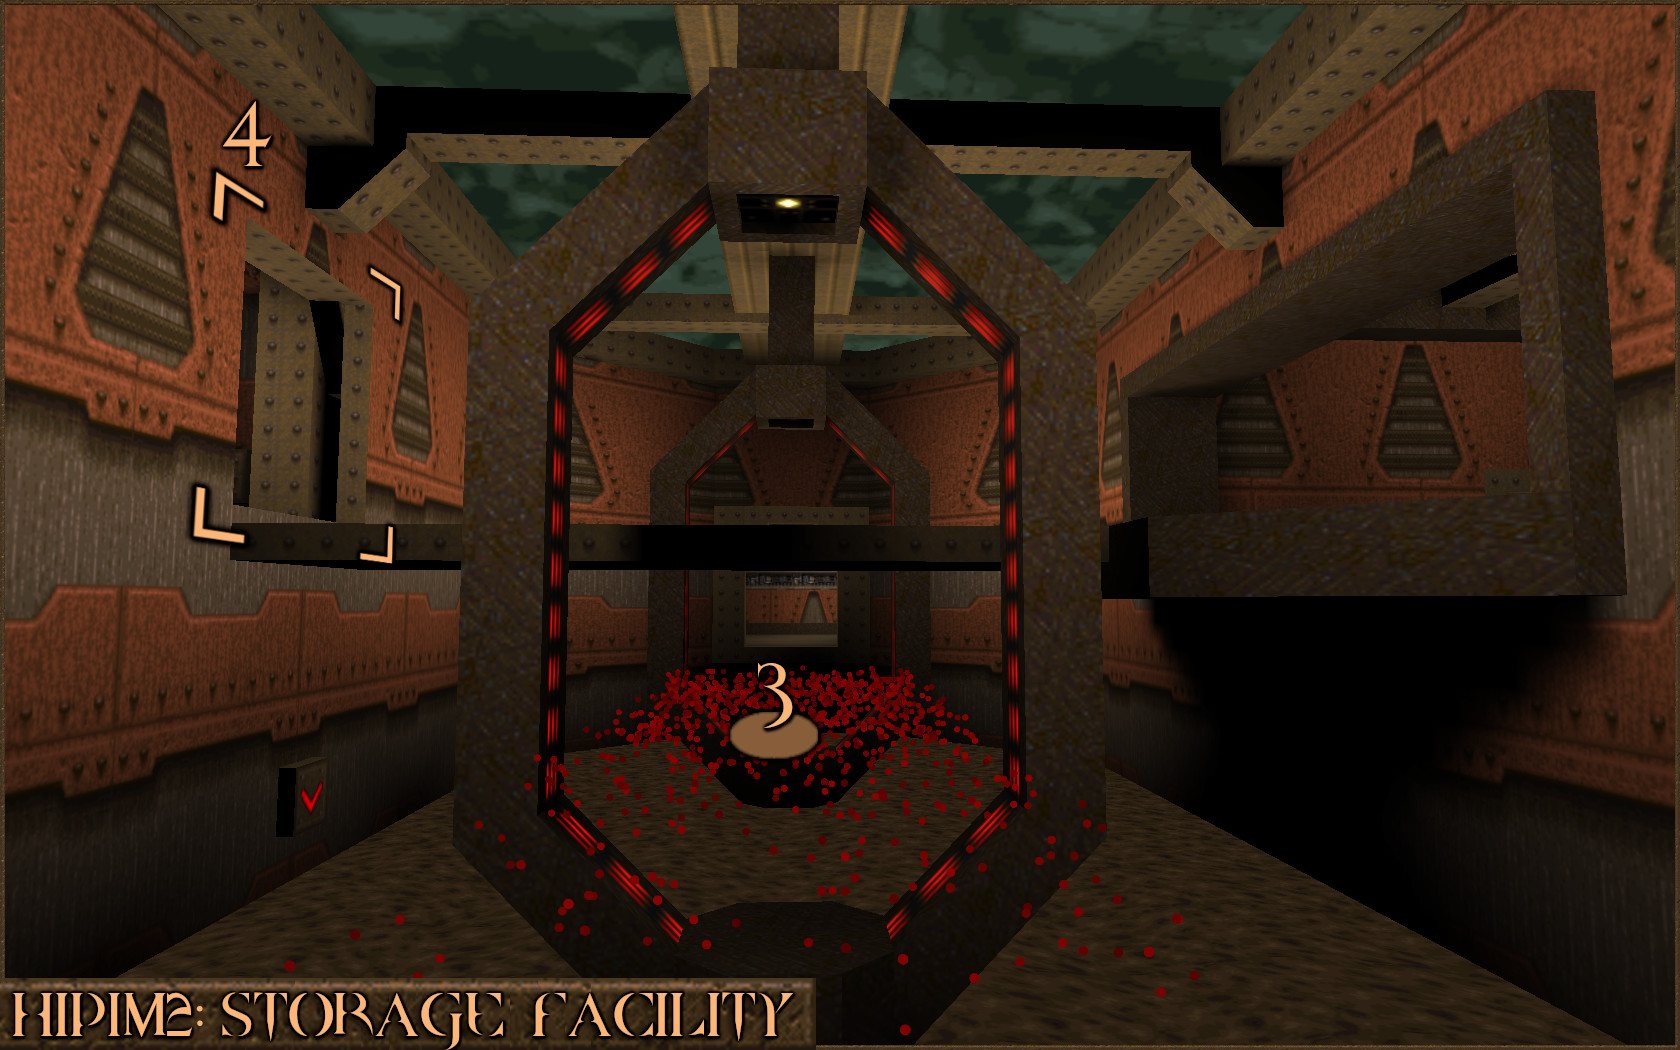
Secret Exit: Episode 2

The Gremlin's Domain
Find the secret exit in Scourge of Armagon Episode 2: Dominion of Darkness.
Find the secret exit in Scourge of Armagon Episode 2: Dominion of Darkness.
The secret exit in Episode 2 is found within the first level: HIP2M1: Ancient Realms.
Quite soon after you enter the castle you will come across a room with a strange door. Activate the device next to it (
) to make the door swing upwards. Now head back up the stairs and make a running jump on top of the door and then nudge the brick that is slightly sticking out of the wall (). This will open up a secret area () next to the door but the way through is currently barred and the message "This barrier is opened elsewhere" will appear. Remember this location for later.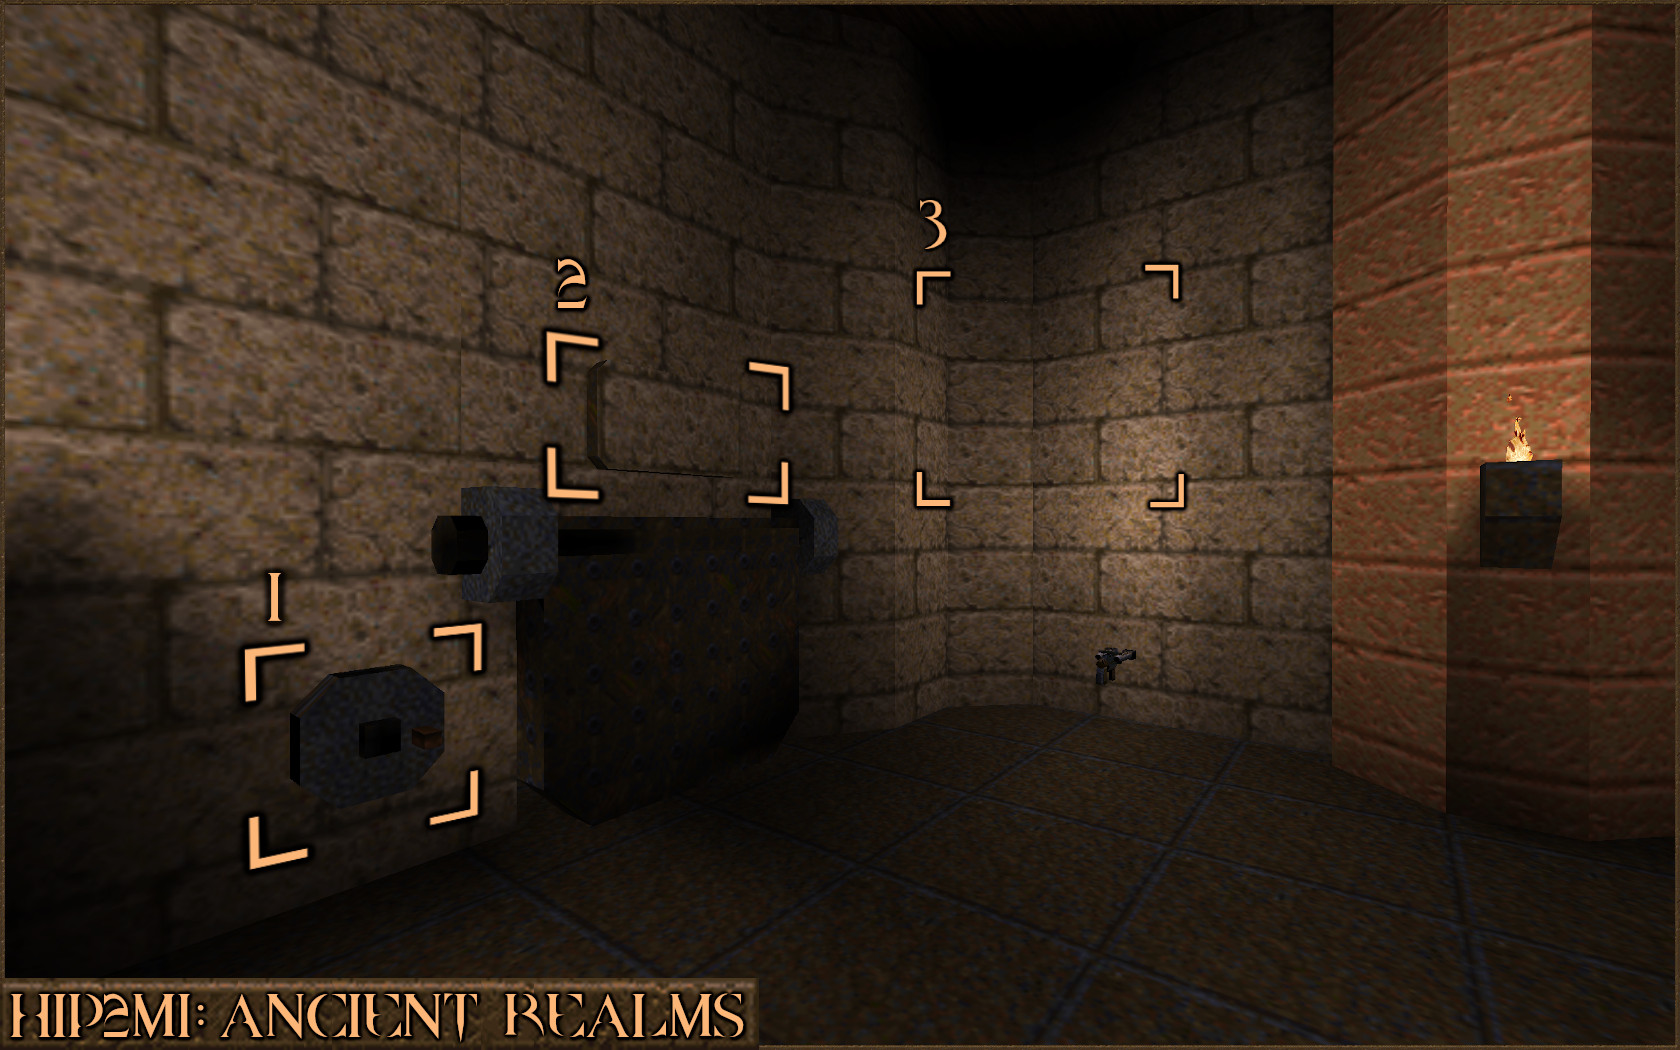
Continue through the entire level until you reach the large exit door for the level. Don't go inside, this is just the normal exit, but instead look above the exit to see a shootable red switch (
). Shooting this will lower the barrier you found earlier so return there and proceed down the now accessible elevator to find the secret level for this episode: HIP2M6: The Gremlin's Domain.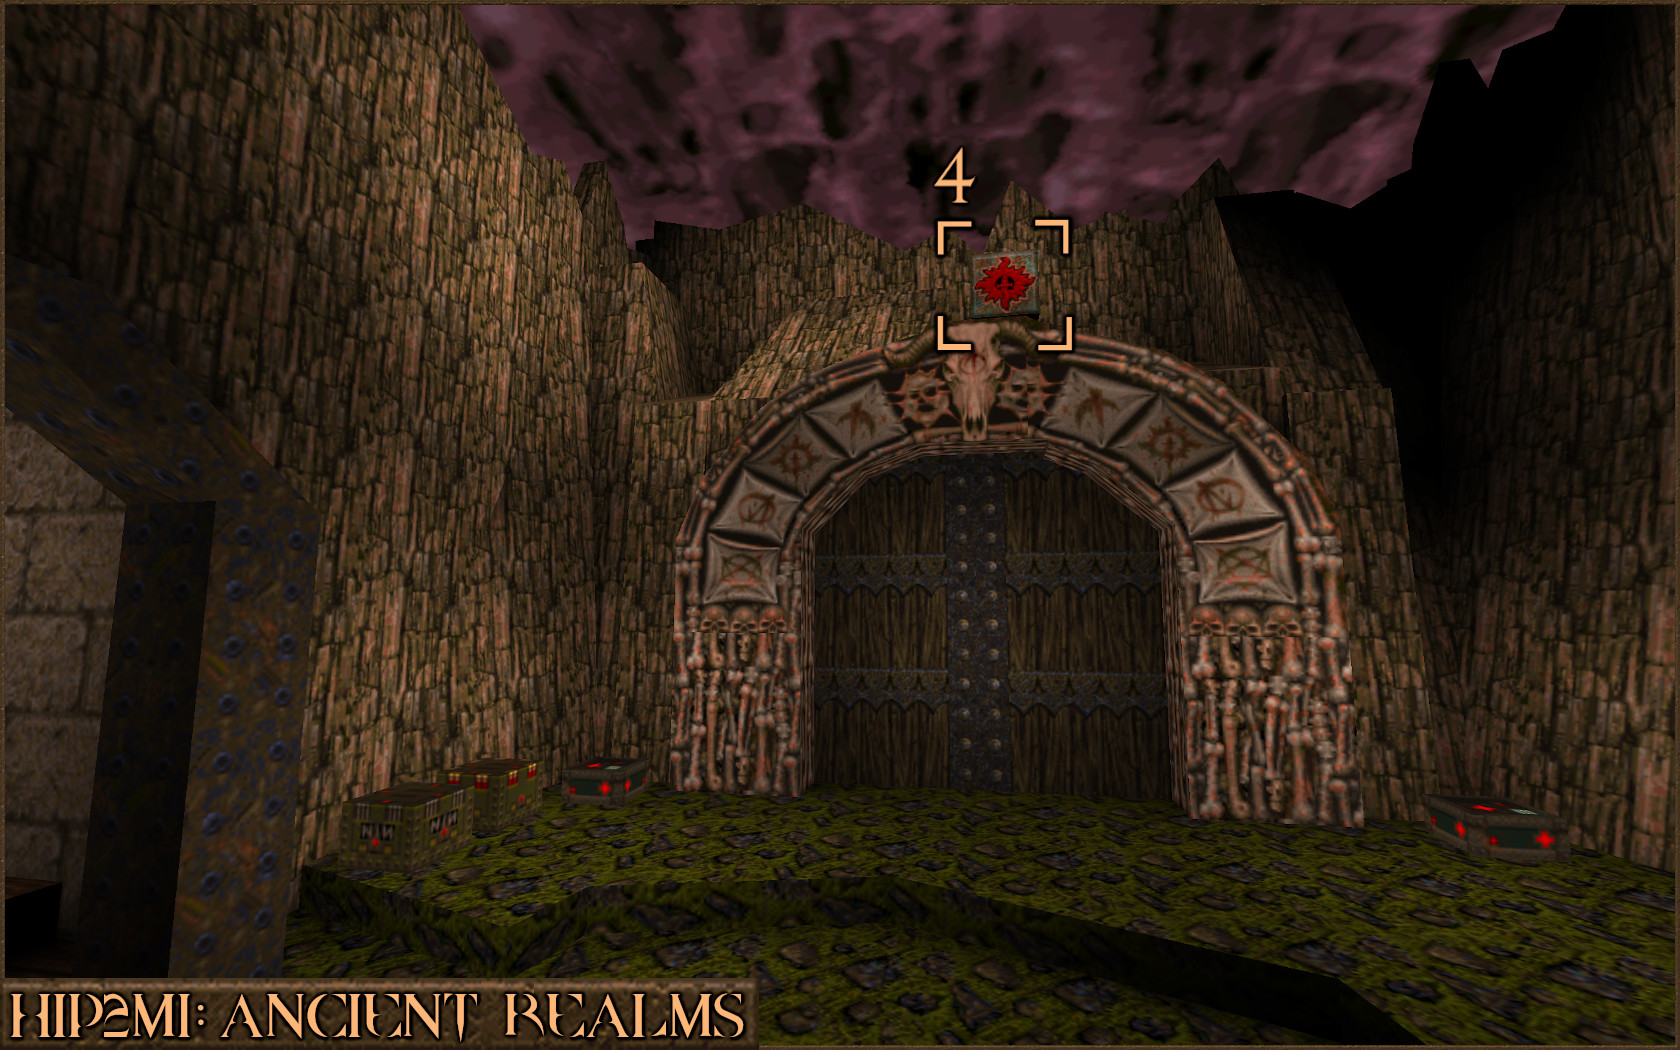
You're not supposed to be here!

You're not supposed to be here!
Find the secret message in Tur Torment.
Find the secret message in Tur Torment.
You’ll come across the level containing this achievement during Episode 3 or you can use the level select option on the main menu with the following settings:
Episode: Scourge of Armagon
Map: HIP3M1: Tur Torment
Difficulty: Any difficulty will work, but Easy has fewer enemies.
From the start of the level look nearby for an orange button (
). Pressing this will activate a nearby aerial lift which will follow the track towards you. Depending on what difficulty you picked there will be either a Knight or a Death Knight on the lift and which will have to be killed.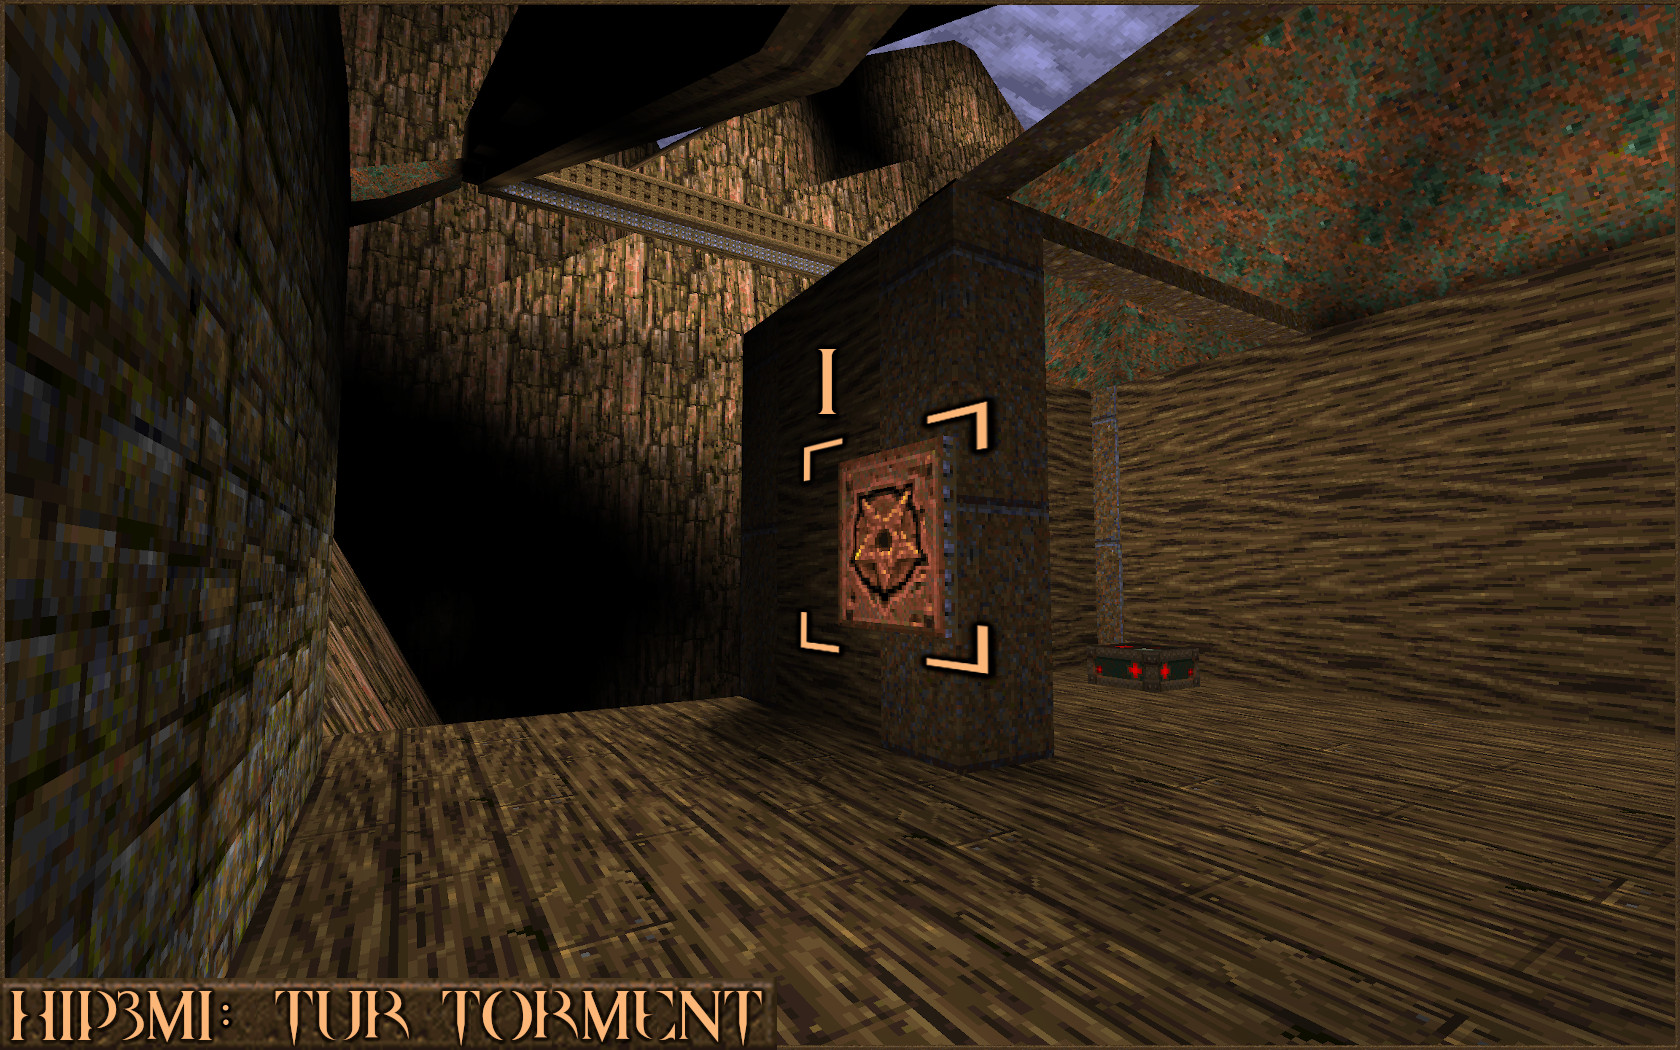
Once the lift arrives get on and press the orange button again to start the lift. Get ready to make a running jump off the lift on to the roof of the building you were just in (
). Once you are on the roof look for a muddy incline on the side of the mountain (). Jump over to it and follow it up the side of the mountain.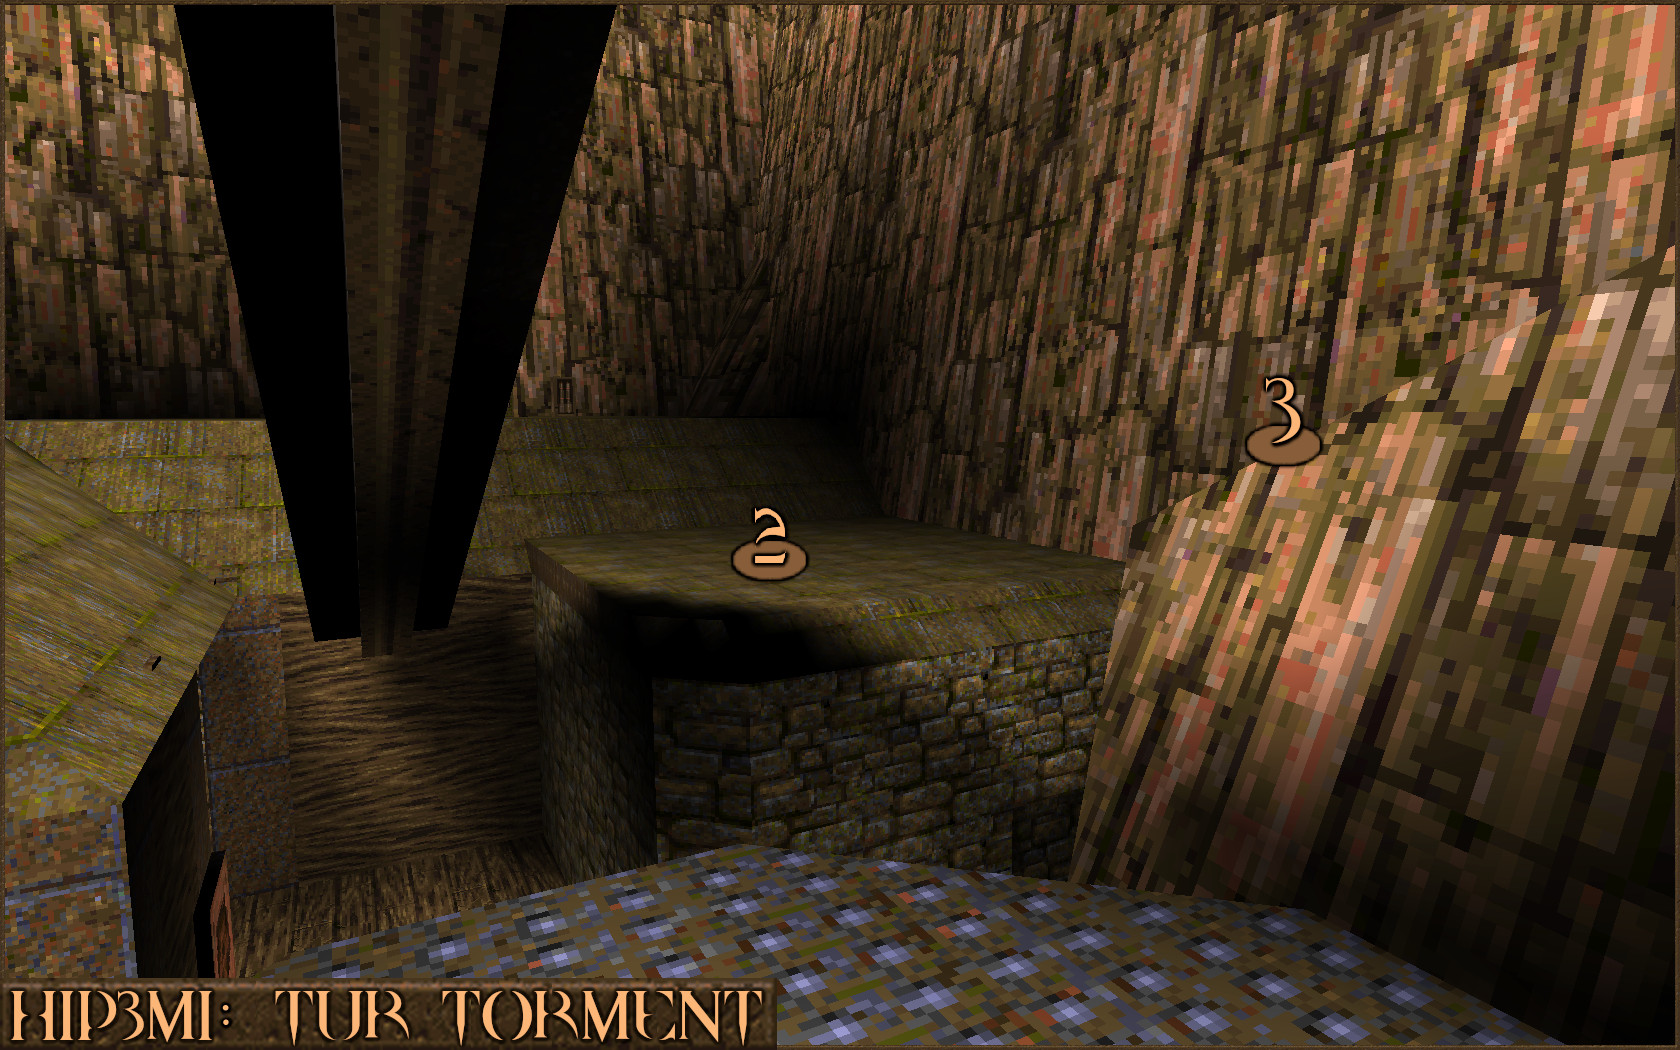
 You'll find a pack of Rockets here and the text "You have found a secret area!" will appear, but this is not the secret we are here to find. Look closely at the mountain wall to see another ledge that you can jump over to (). Very carefully follow this extremely thin ledge up to the top of the mountain ().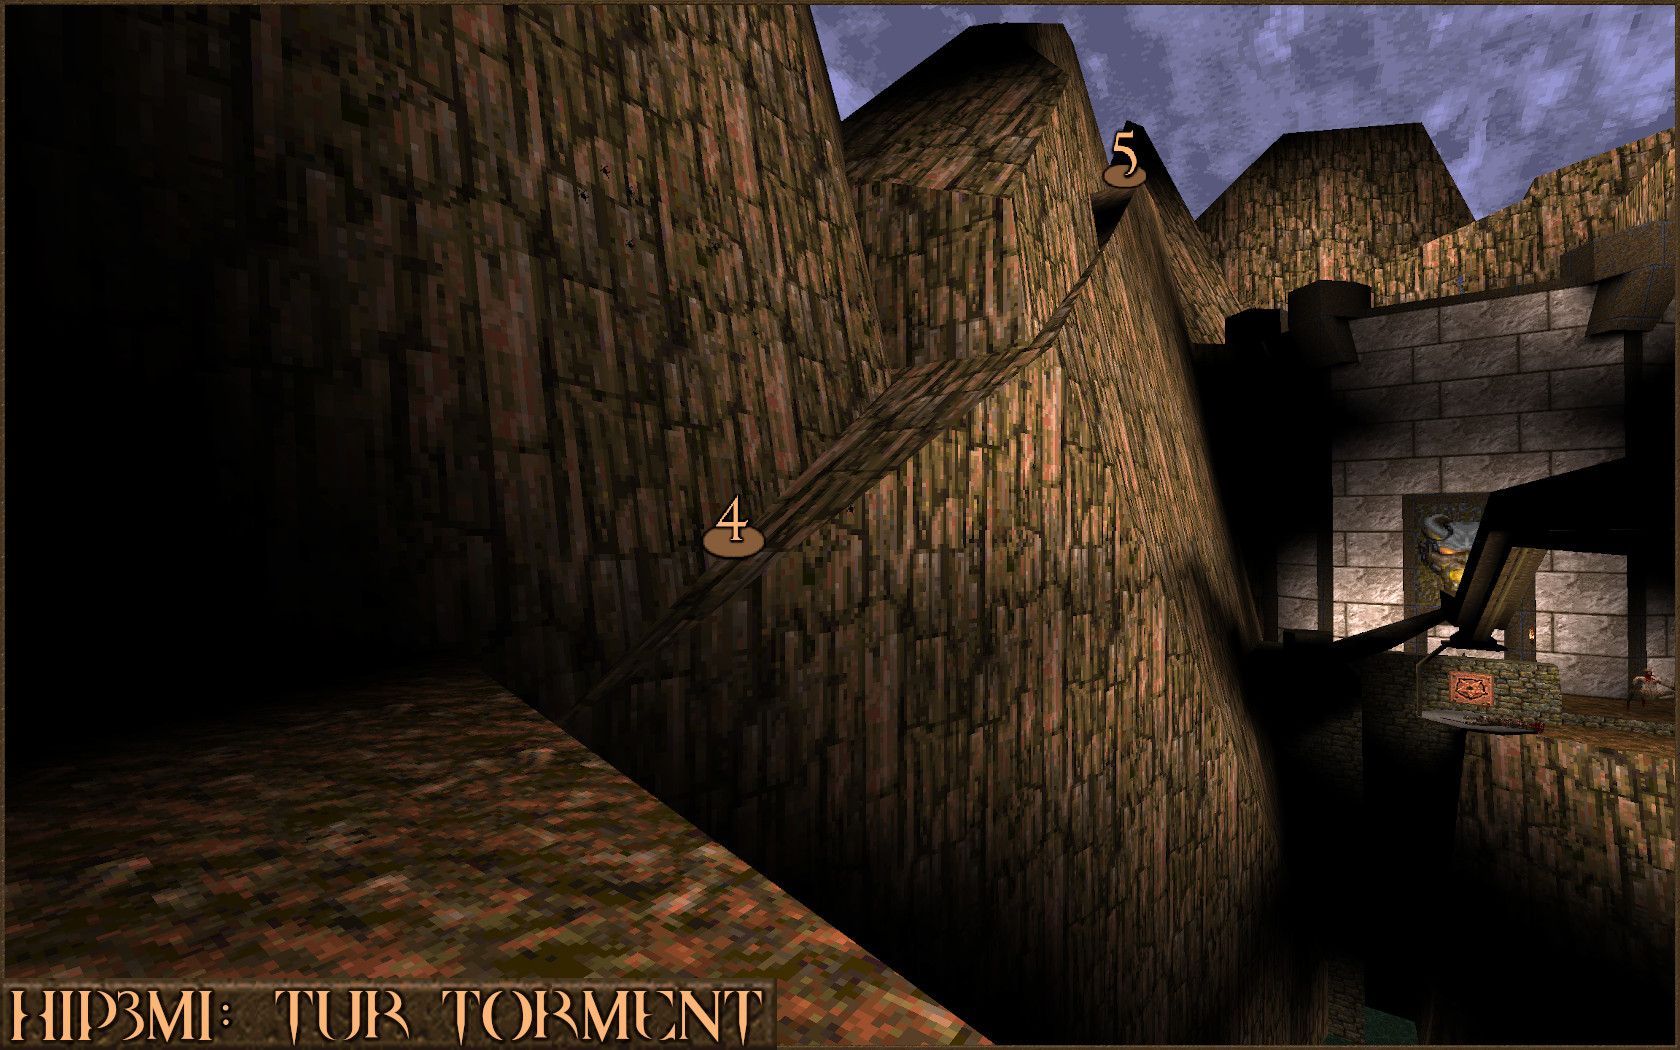
 Once you're at the top the text "You're not supposed to be here!" will appear and you will get the achievement. Be careful when finding this secret as, depending on your difficulty level, several Spike Mines spawn and will immediately start attacking you.
 Secret Exit: Episode 3

A Long Yard
Find the secret exit in Scourge of Armagon Episode 3: The Rift.
Find the secret exit in Scourge of Armagon Episode 3: The Rift.
The secret exit in Episode 3 is found within the 3rd level: HIP3M3: Limbo.
Proceed through the level until you reach a large blue room that contains the Silver Key and a large pipe with water pouring out of it. Shoot the small red switch above the pipe (
) and nothing will happen yet, as a second switch needs to be shot as well.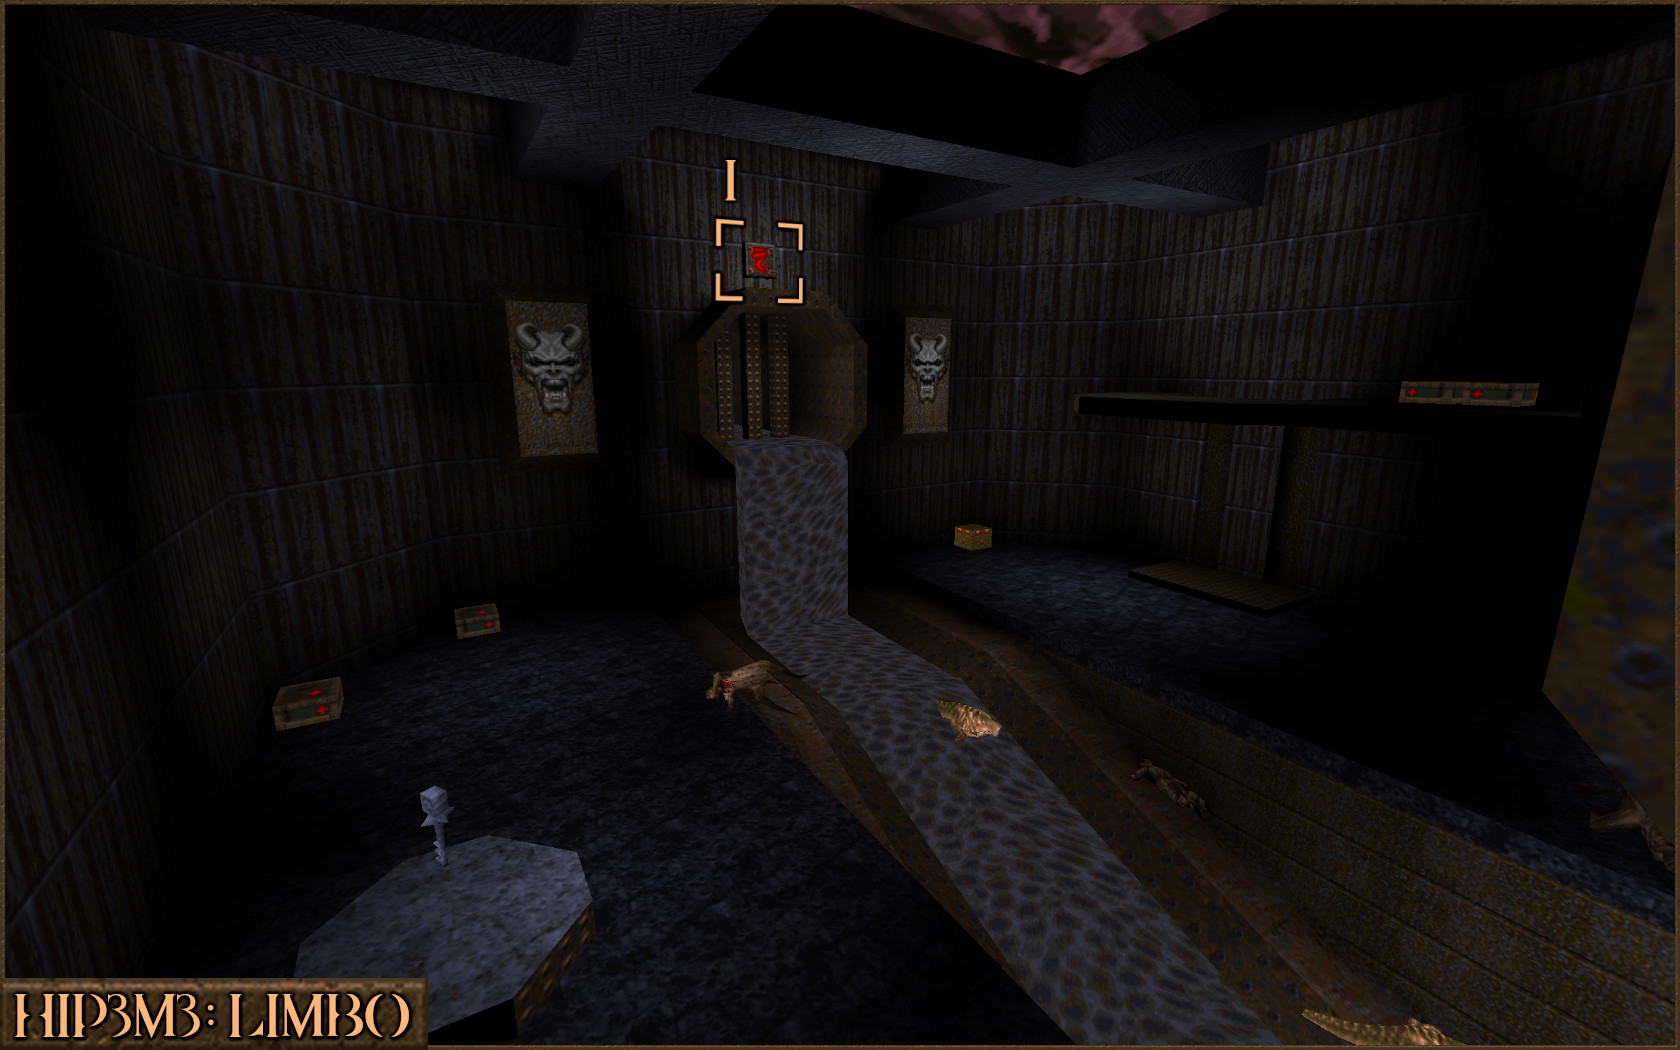
Now that you have the Silver Key head back up to the beginning of the level and unlock the Silver Key Door. Inside you will find the Gold Key but what you really need to look for is a small white cross shaped block above the water grate (
). Shoot this second switch and now that both have been triggered the water grate will open.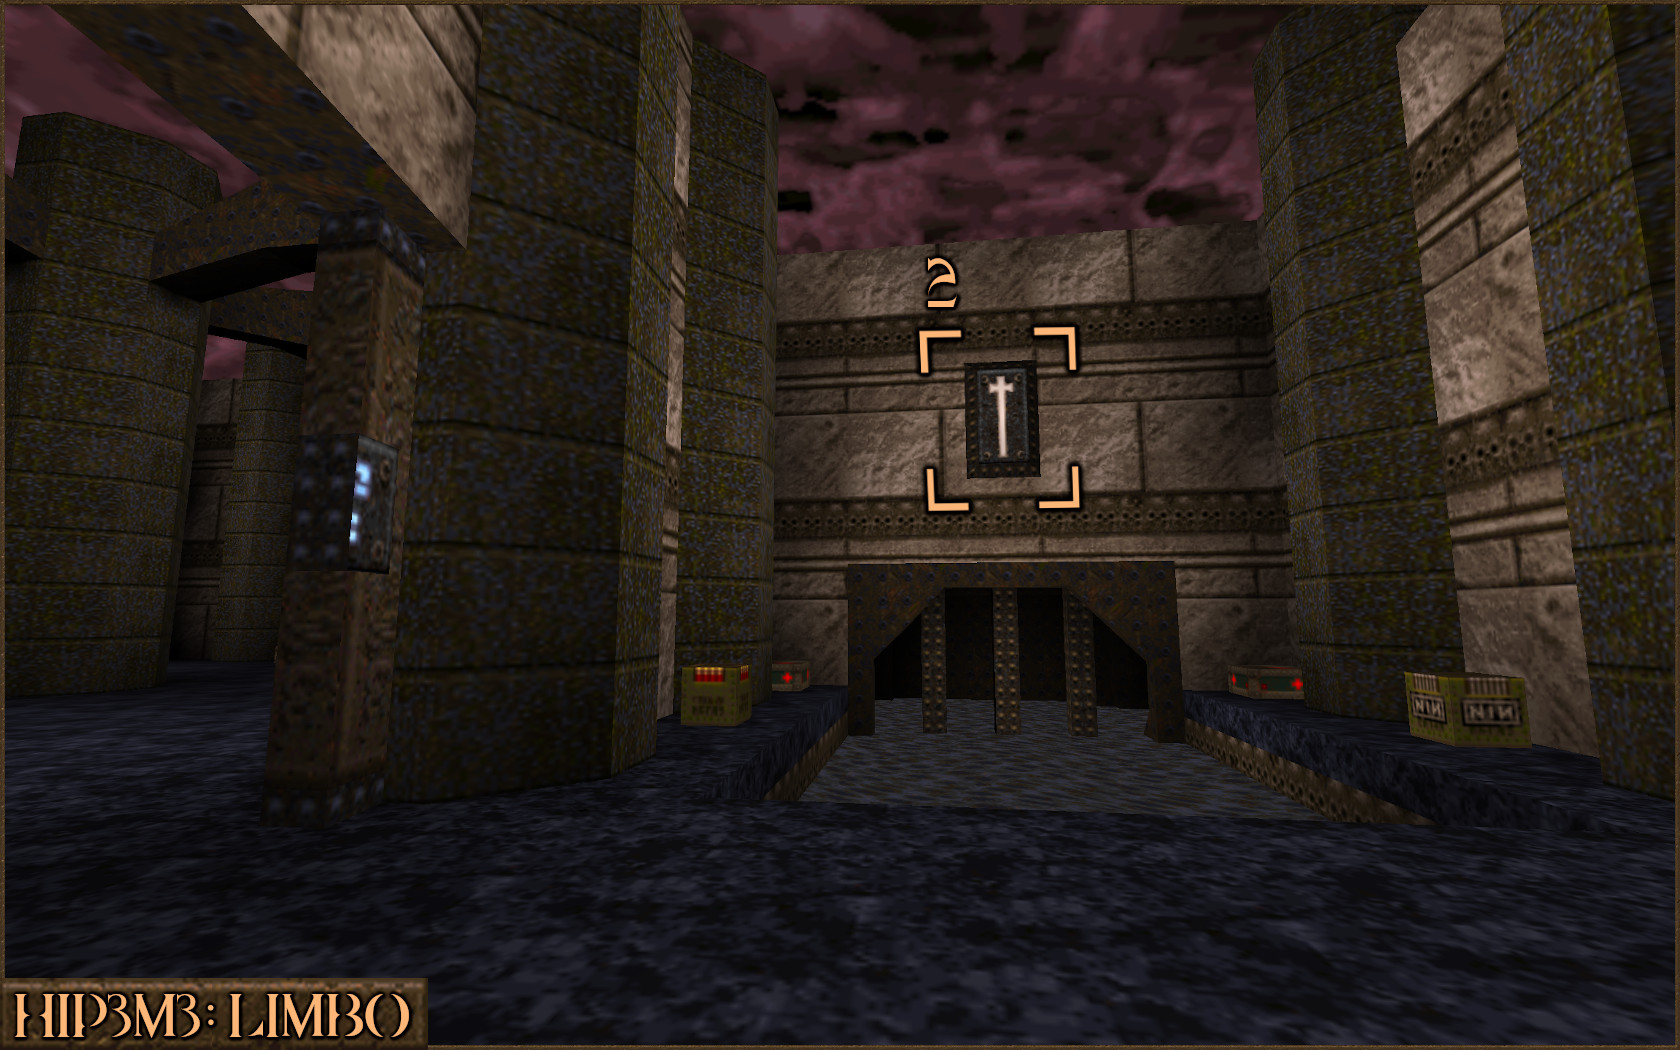
When you enter the water look for a hole in the bottom of it. (
) Swim through it to find the secret exit to the level: HIPDM1: The Edge of Oblivion.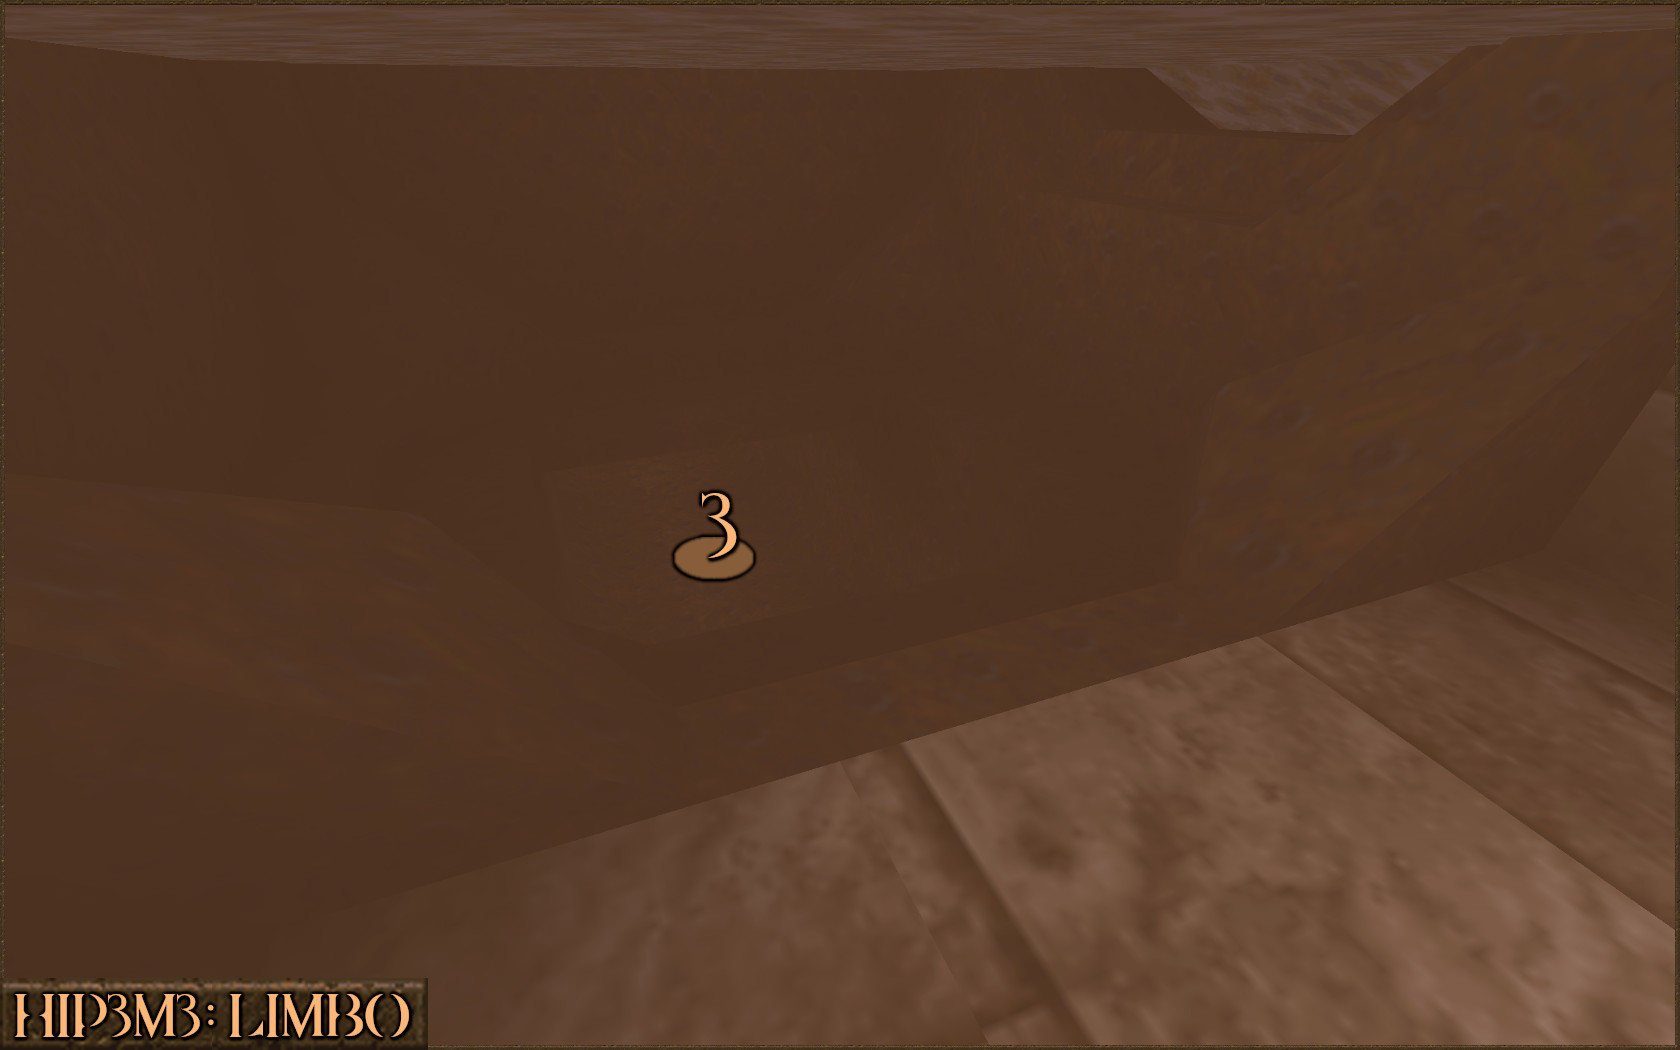
[Dissolution of Eternity]

Dissolution of Eternity is the second expansion pack for Quake and it features many new enemies. Instead of new weapons the player will have alternate ammo types for some weapons. There are two episodes in this expansion pack.
From the main menu select Single Player -> New Game -> Dissolution of Eternity. Do not use the Level Select menu option.

Overlord Overdone
Complete Dissolution of Eternity Episode 1: Hell's Fortress in single player.
Complete Dissolution of Eternity Episode 1: Hell's Fortress in single player.

Dragonslayer
Complete Dissolution of Eternity Episode 2: The Corridors of Time in single player.
Complete Dissolution of Eternity Episode 2: The Corridors of Time in single player.
Nightmare Difficulty

Rogue Ranger
Complete Dissolution of Eternity on Nightmare in single player.
Complete Dissolution of Eternity on Nightmare in single player.
To find the Nightmare Difficulty portal in the Dissolution of Eternity expansion immediately go in to any of the difficulty portals. As soon as you appear on the other side of the teleporter, stop and turn around. The first shootable red switch (
) is behind the teleporter at the end of the room. You can just see it from the side or just shoot it through the teleporter itself.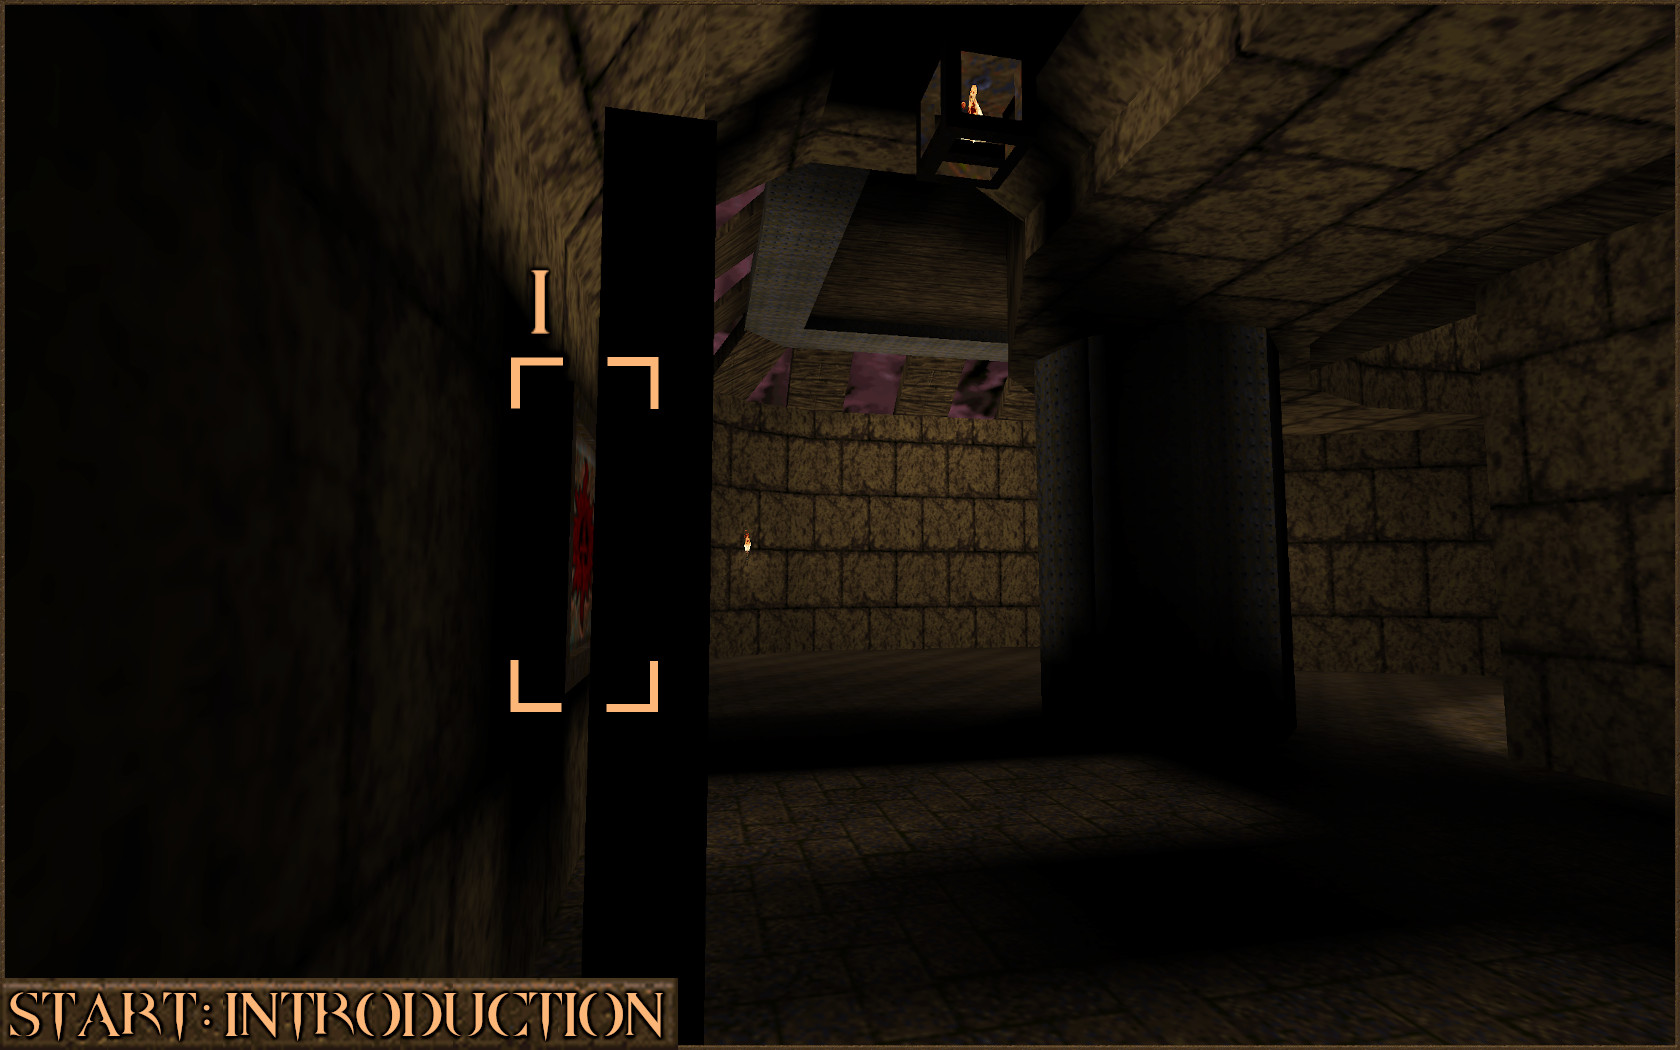
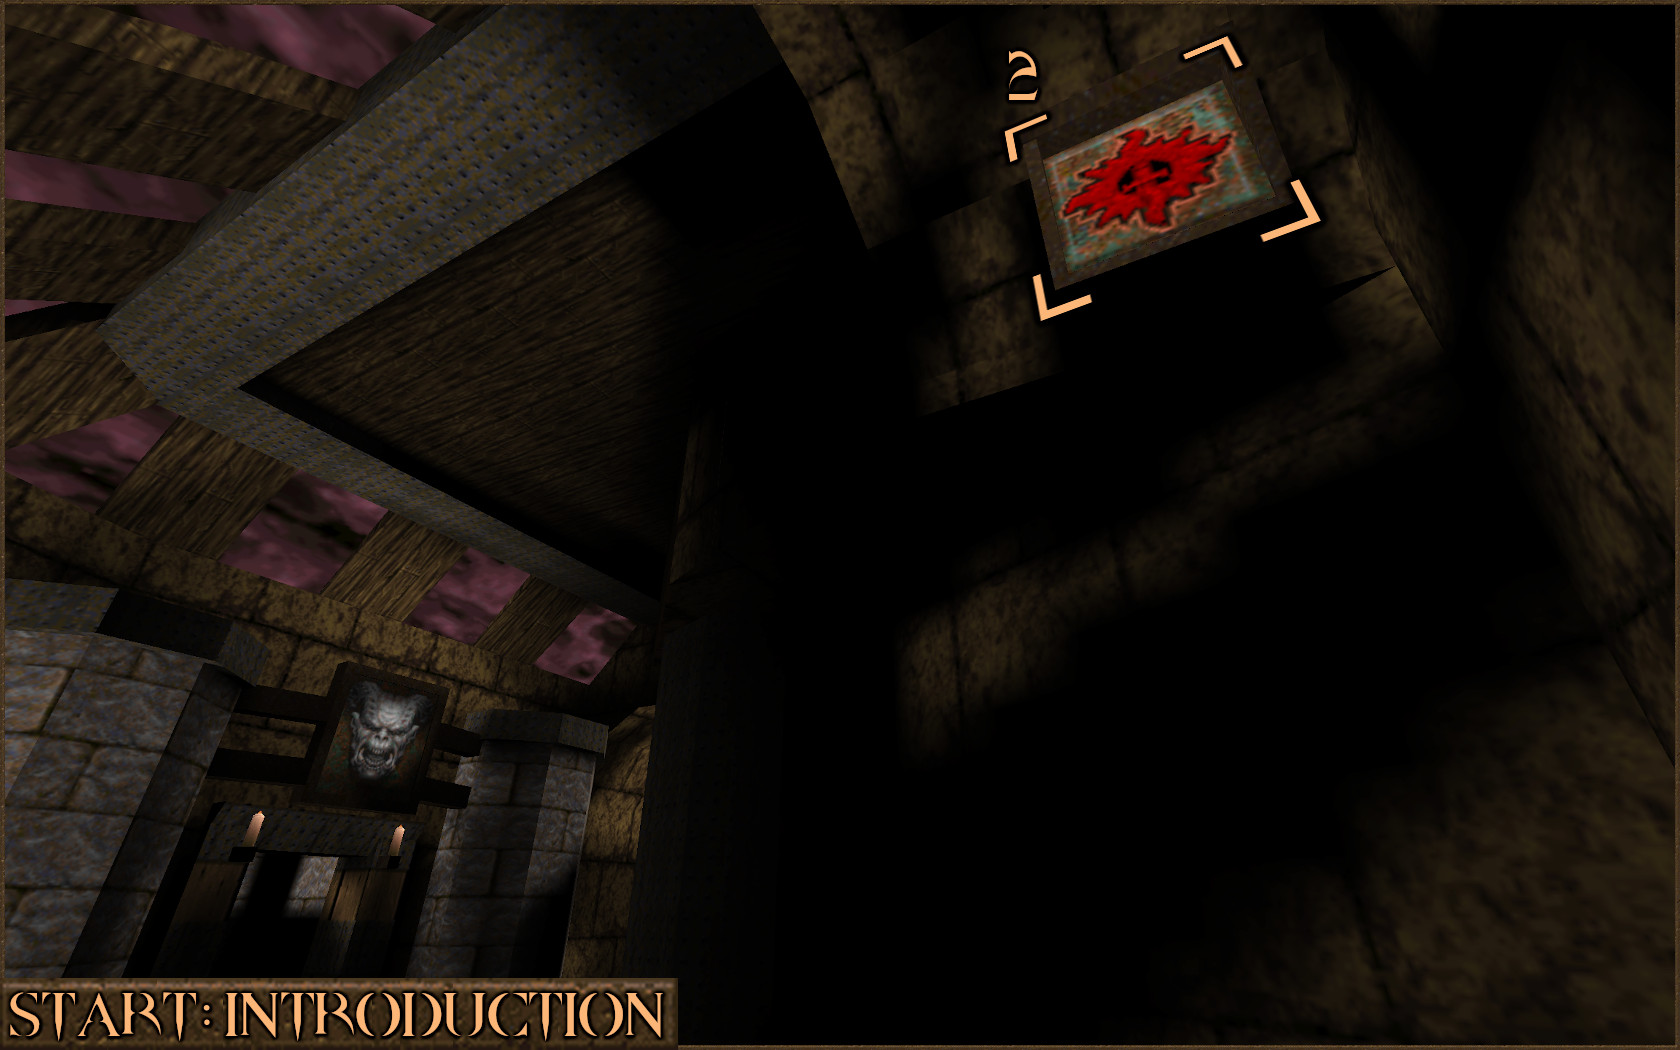
Proceed on and you will come to two doors that lead to the different episodes. Don't go in these, instead head to the left and look carefully at the top of the wall to find the second shootable red switch (
).
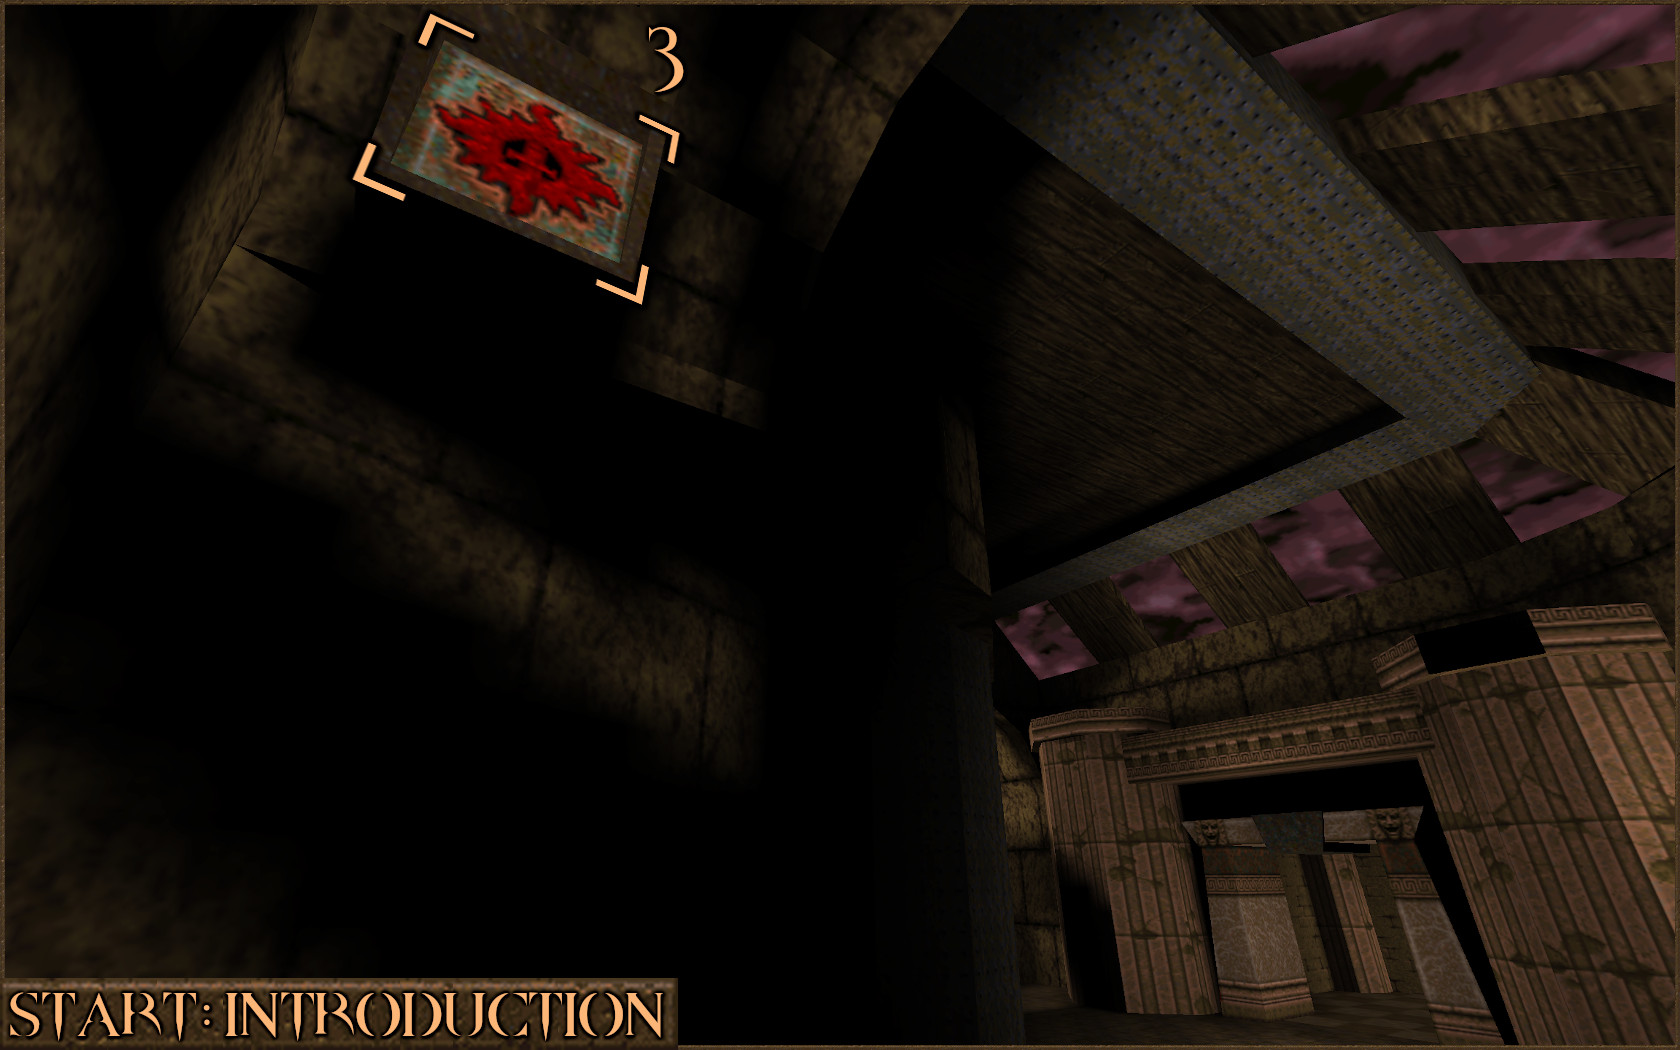
Now head to the opposite side of this room and in a similar position at the top of the wall is the third shootable red switch (
).
Now all three switches have been activated, head to the centre of the room and you will notice some ominous lava that is suspended in the ceiling. Two small lifts (
+) are now active underneath this lava that will push you up in to a teleporter and activate Nightmare Difficulty.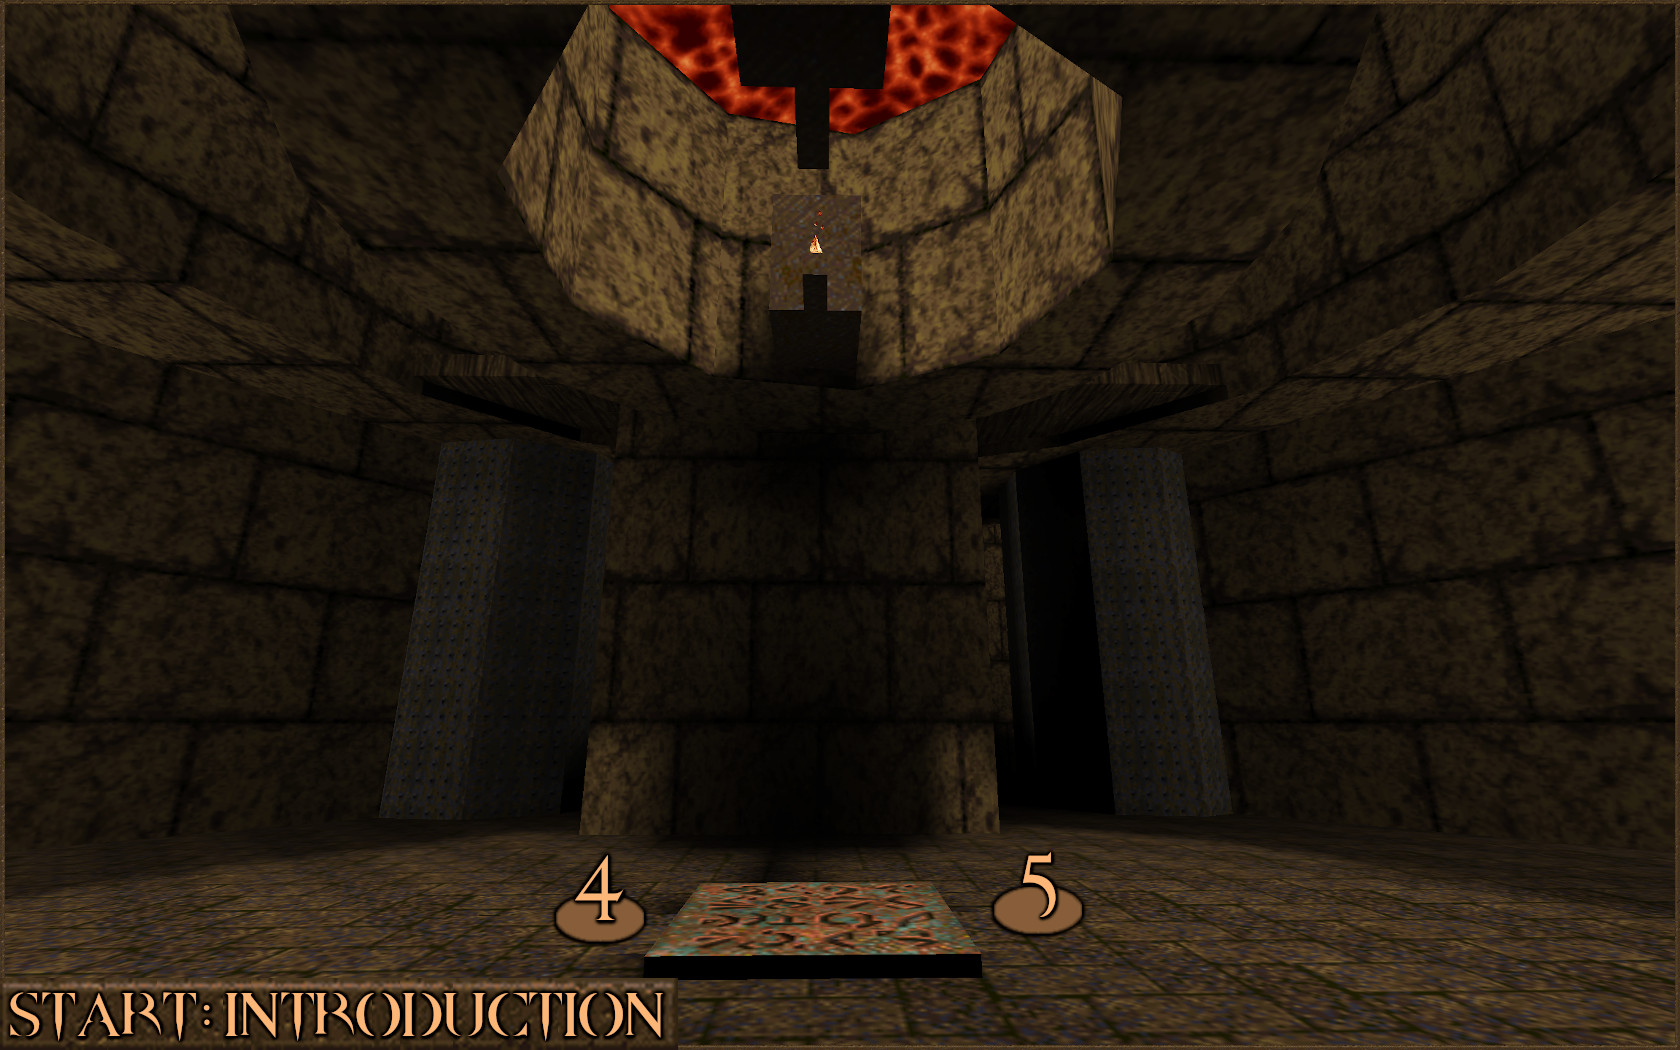
Now that Nightmare Difficulty is active you can now proceed to the episode selection and beat the two episodes in Dissolution of Eternity to earn this achievement.
Use the secrets guide for this expansion pack if you need some items. There are many hidden Red Armor powerups within the secret areas which dramatically reduce the damage you take.
https://steamcommunity.com/sharedfiles/filedetails/?id=2585506770
[Dimension of the Past]

Dimension of the Past is an expansion pack that was created by MachineGames and released in 2016 to celebrate Quake's 20th anniversary. It contains one episode that you need to complete in order to earn this achievement.
From the main menu select Single Player -> New Game -> Dimension of the Past. Do not use the Level Select menu option.

The Year Zero
Complete Dimension of the Past in single player.
Complete Dimension of the Past in single player.
Nightmare Difficulty

Otherworldly
Complete Dimension of the Past on Nightmare in single player.
Complete Dimension of the Past on Nightmare in single player.
To find the Nightmare Difficulty portal start by heading in to any of the difficulty selection teleporters. Ahead of you will be the red Slipgate that will take you to the main levels but instead of using that keep to the left and go past the Slipgate. Drop down in to some shallow water (
) and take a left to find a hidden corridor to the Nightmare Difficulty portal.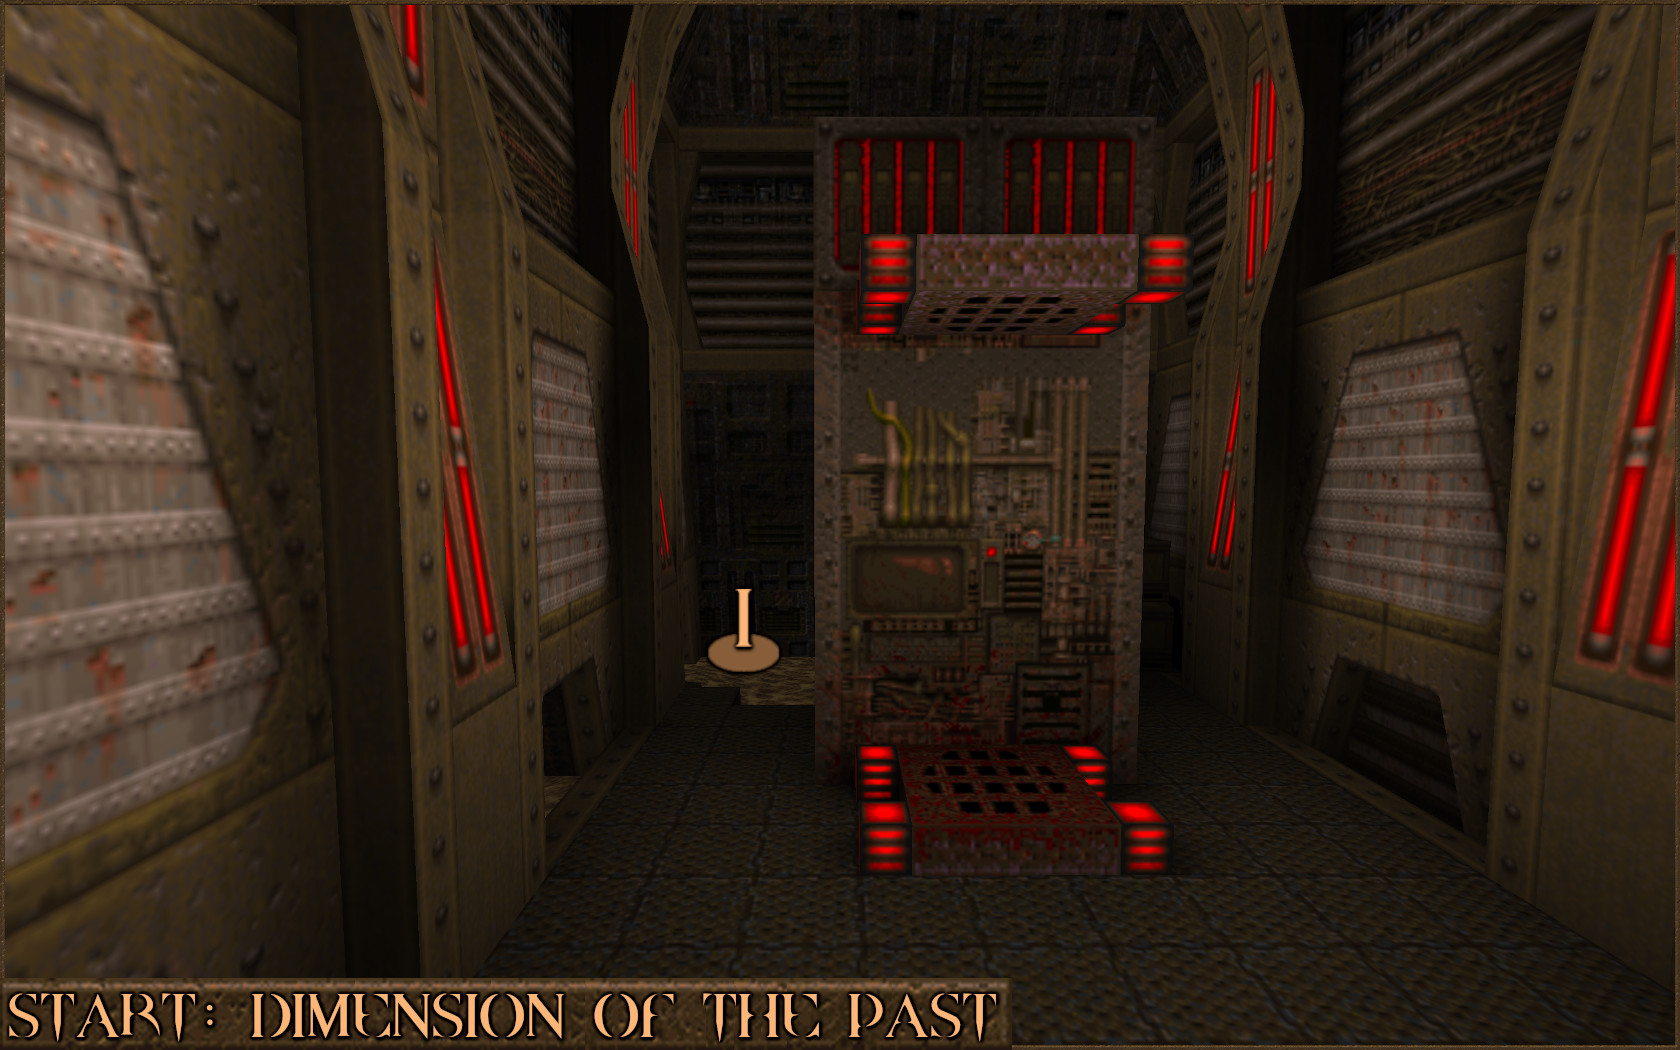
Nightmare Difficulty is now enabled so you can proceed in to the red Slipgate to start the first level of this episode. Complete the whole episode to earn this achievement.
I recommend following the secrets guide for this expansion pack if you find yourself low on ammo as it is harder to come by in this expansion compared to the others. The extra Quad Damage items will be very useful especially in the last level E5END: The Year Zero which features a tremendous amount of Shamblers and Vores.
https://steamcommunity.com/sharedfiles/filedetails/?id=2585507550
Secret Exit

The House of Doom
Find the secret exit in Dimension of the Past.
Find the secret exit in Dimension of the Past.
This expansion has two secret levels in it but only the second secret level counts for the achievement. The first secret level is accessed via E5M3: The Dark Days and leads to E5SM1: The Forgotten Castle but is not required for this achievement.
The second secret level is accessed via E5M6: The Underworld and takes you to E5SM2: The House of Doom which will give you the achievement.
During the level E5M6: The Underworld progress through the level normally past both the Silver Key Door and the Gold Key Door. You will eventually come across a room with lava moat and a floating platform that circles around it (
). Jump on to the platform but be careful of an enemy ambush.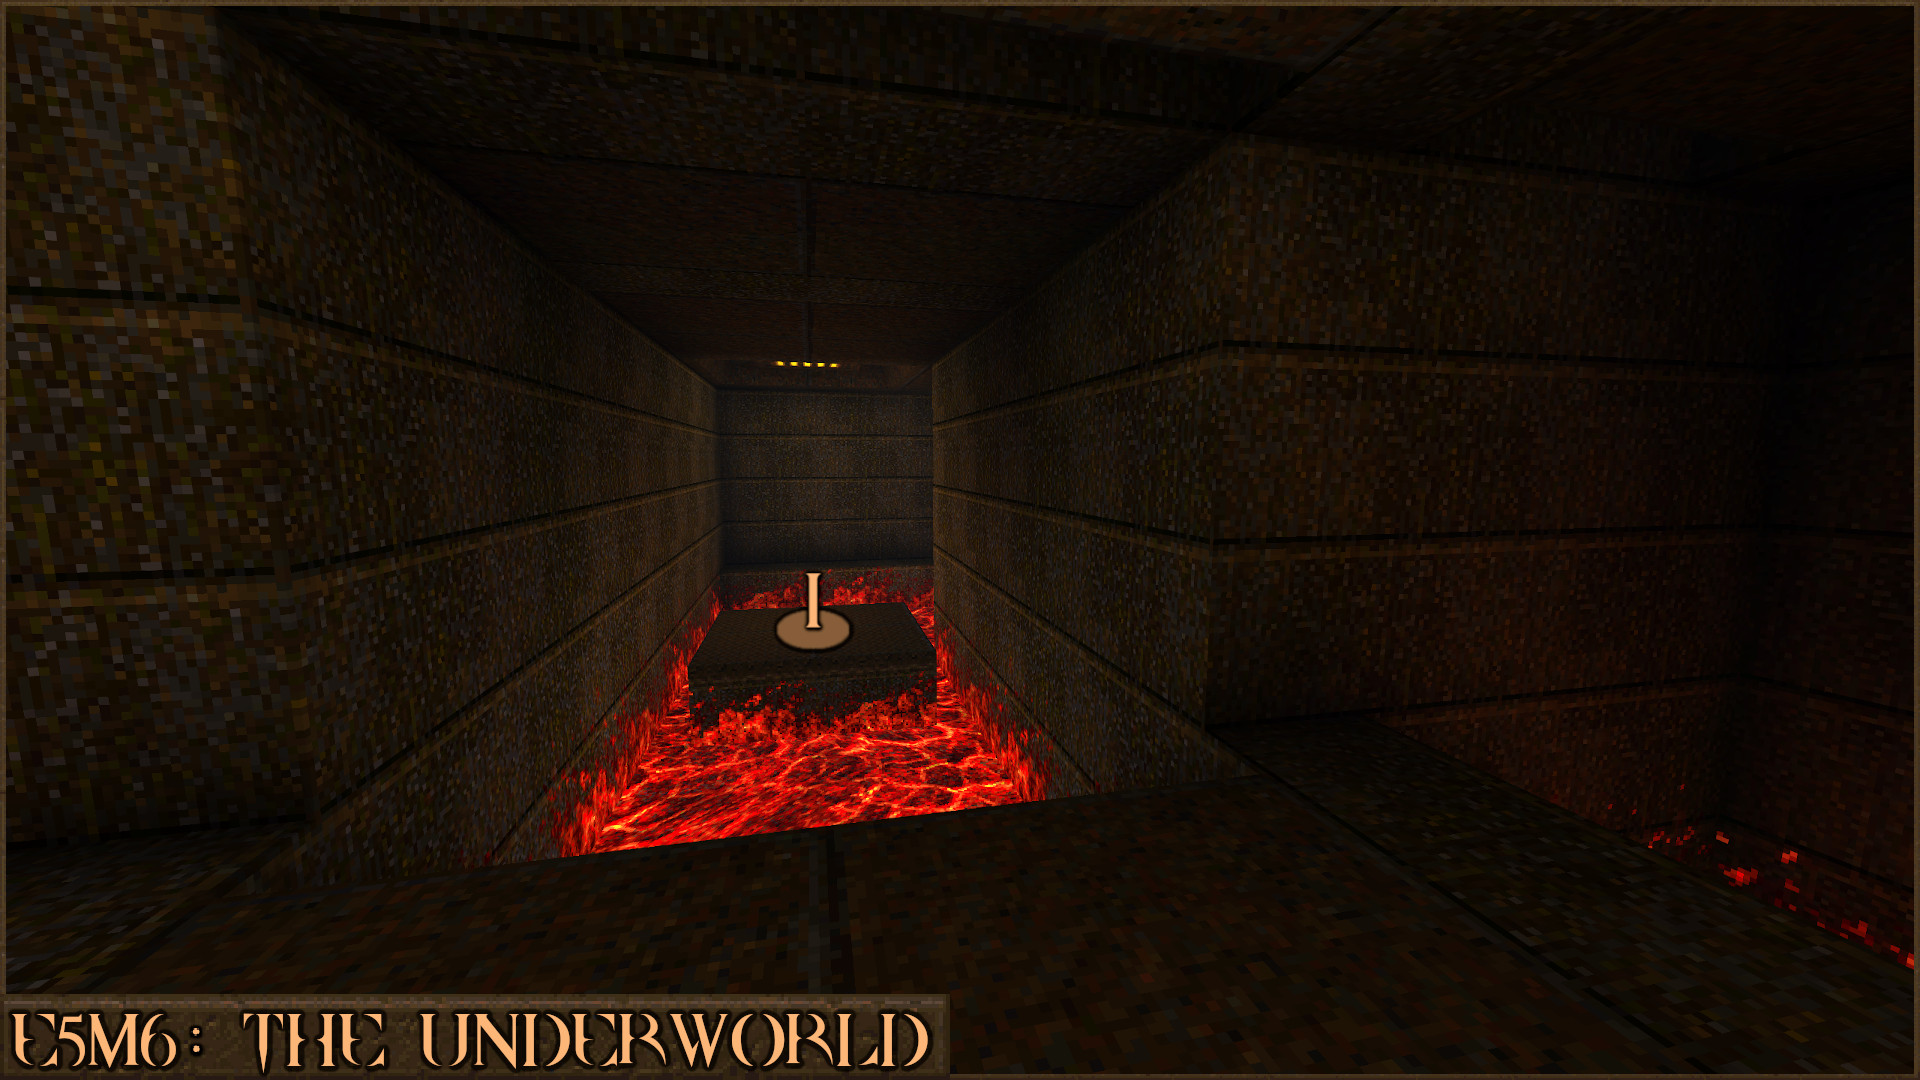
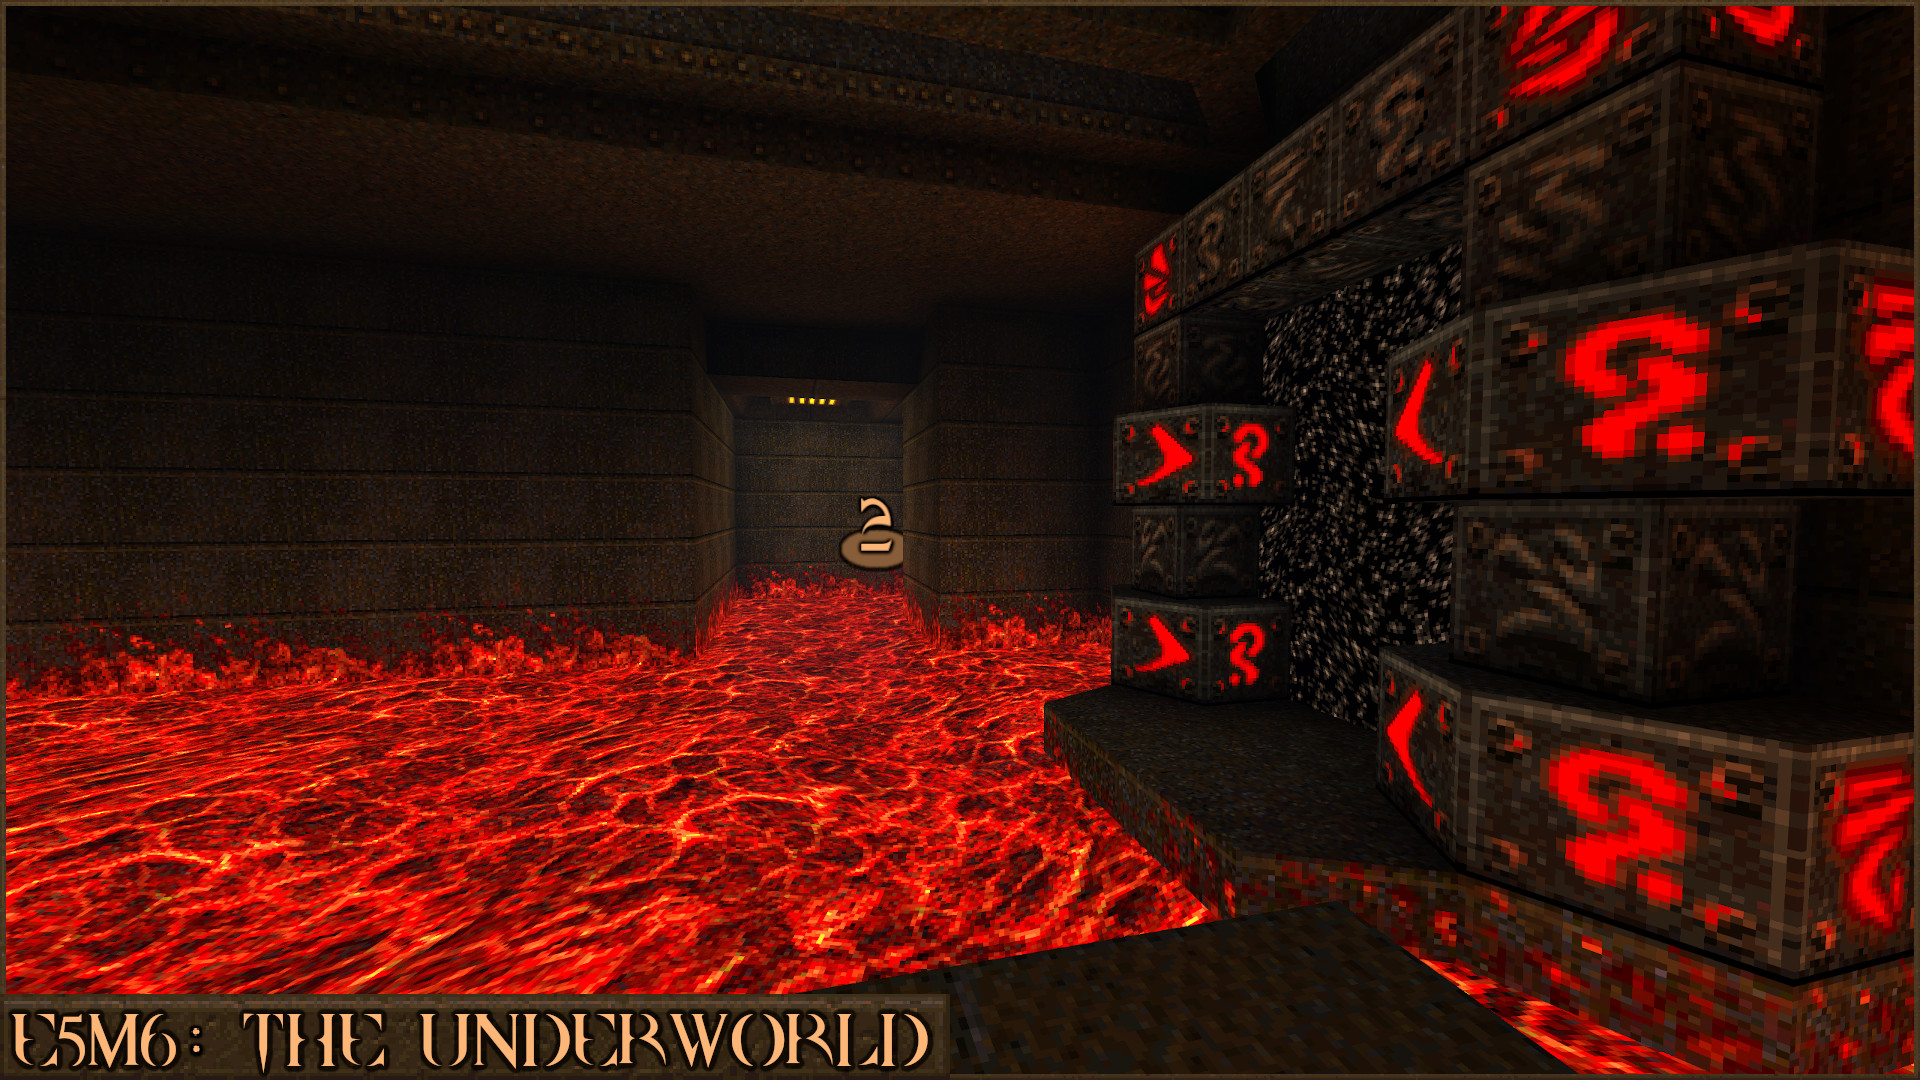
Follow the floating platform as it hovers over the lava. You will see the normal exit first but do not jump in to it. Instead stay on the floating platform as it travels around the corner (
).
Once you're round the corner carefully jump up on to the nearby metal floor before you get knocked off in to the lava. The message "You found a secret Rune Gate!" will appear and nearby will be the secret exit portal (
) that will take you to the secret level: E5SM2: The House of Doom.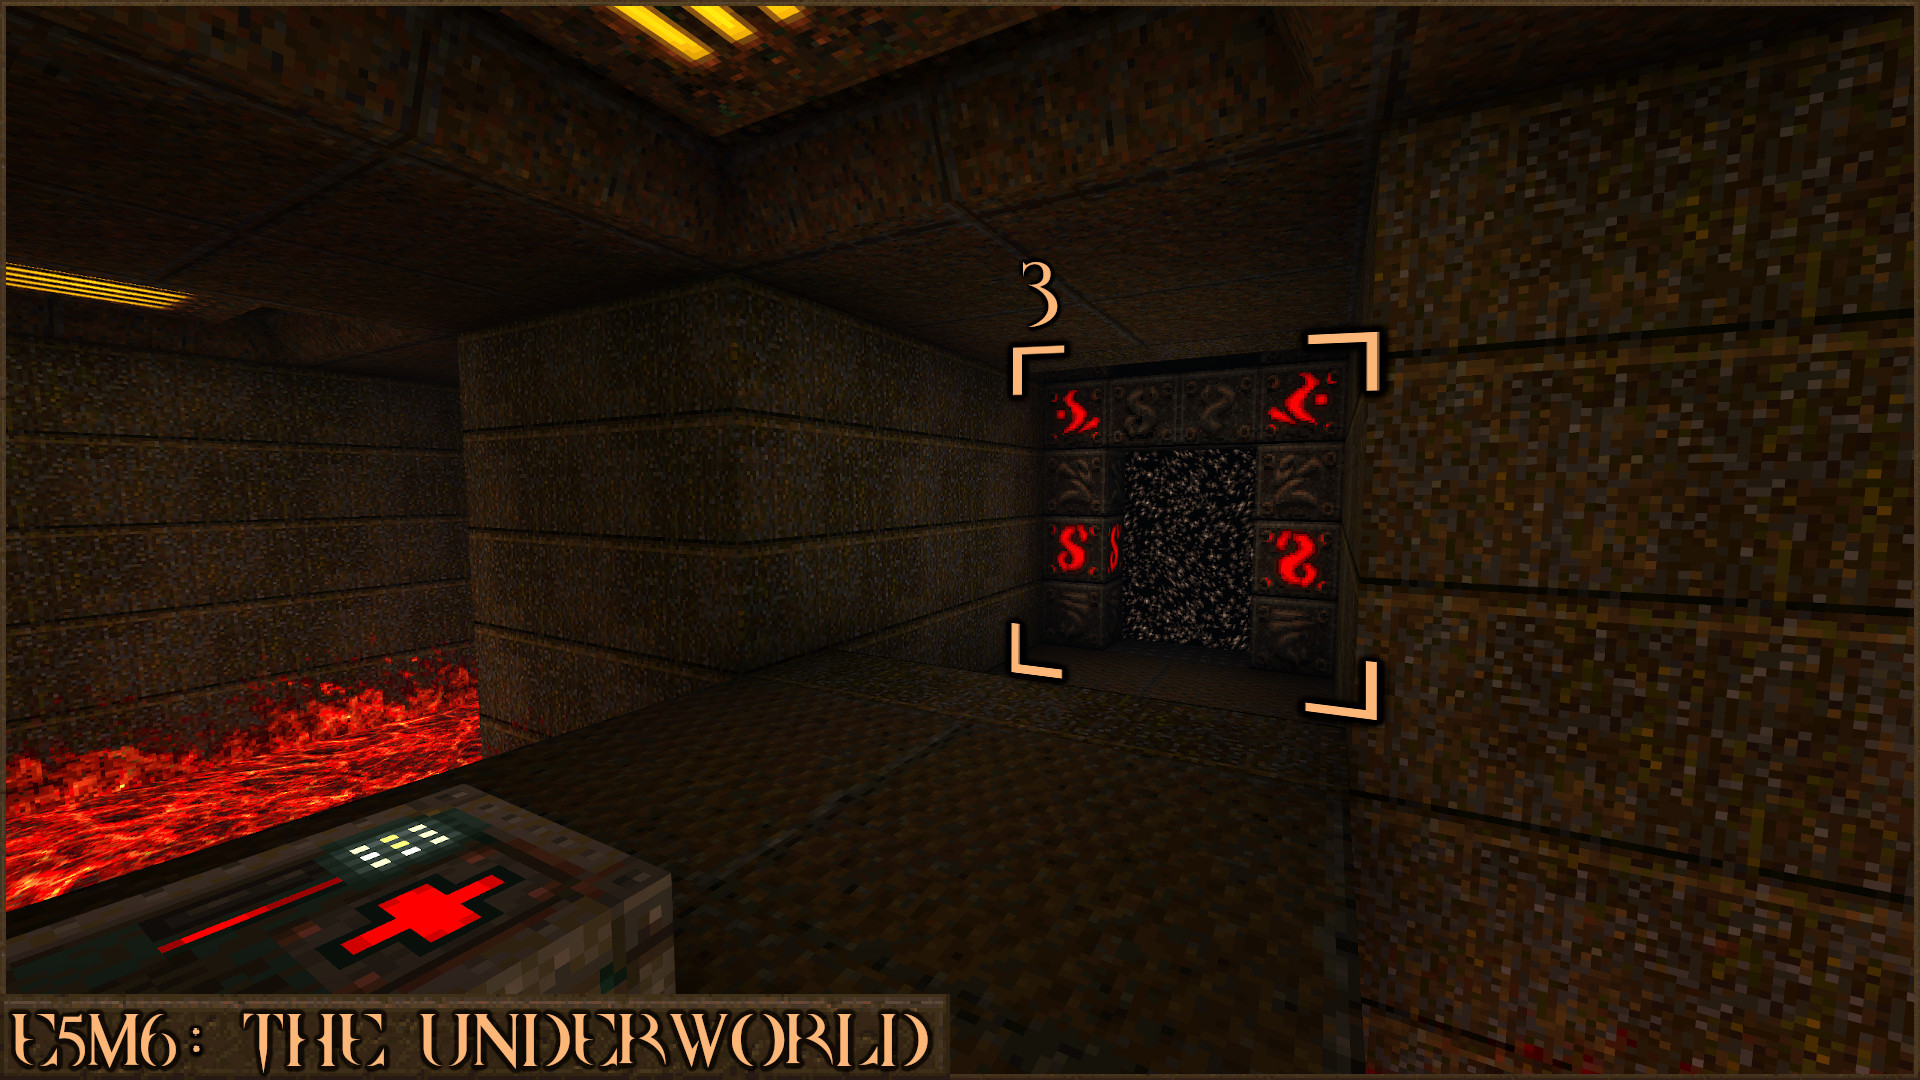
[Dimension of the Machine]

Dimension of the Machine is an expansion pack created by MachineGames and released in 2021. It consists of a hub level and several smaller episodes. Complete this expansion pack to earn this achievement.
From the main menu select Single Player -> New Game -> Dimension of the Machine. Do not use the Level Select menu option.

Vengeance Denied
Complete Dimension of the Machine in single player.
Complete Dimension of the Machine in single player.
Nightmare Difficulty

Machinehead
Complete Dimension of the Machine on Nightmare in single player.
Complete Dimension of the Machine on Nightmare in single player.
To find the Nightmare Difficulty portal start by moving forward in to the large room. Take a right (
) to head towards the Hard Difficulty portal but don't enter it.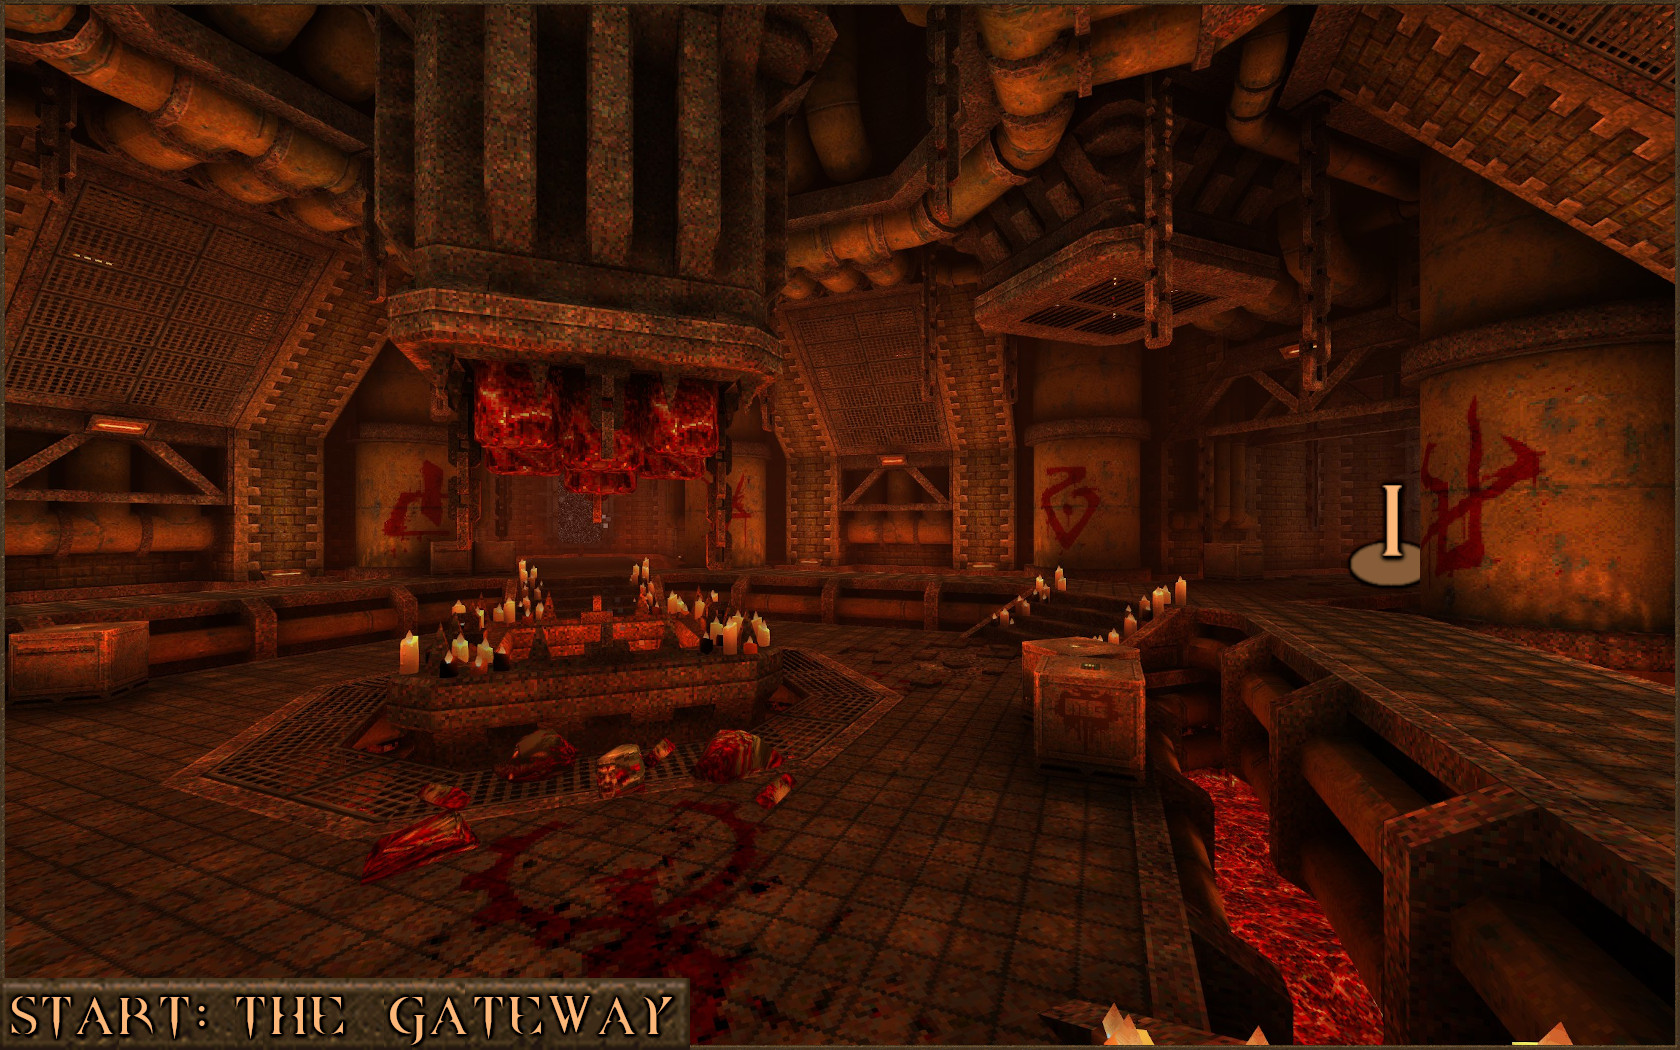
Look closely at the wall to the right of the Hard Difficulty portal and you will notice a hole in the wall (
) shrouded in darkness. Make a very careful jump in to the hole and proceed through this dark area.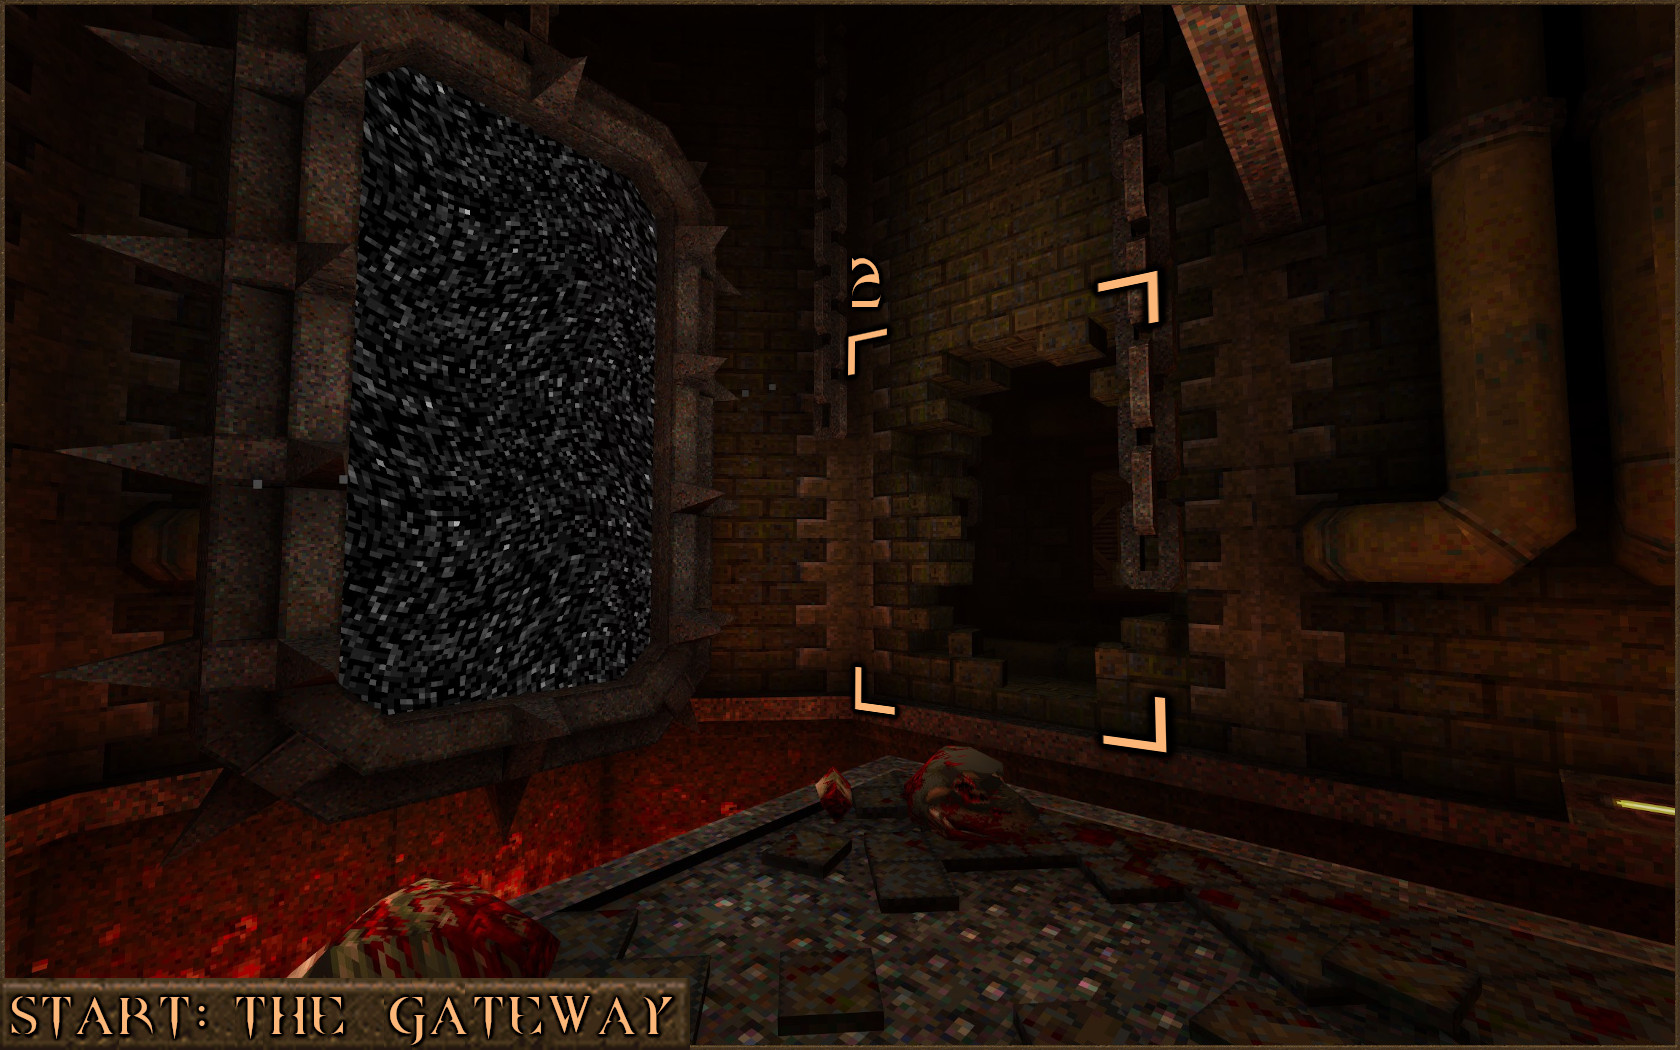
Ahead you will be able to see the Nightmare Difficulty portal (
) so carefully run forward to land on the nearby platform and then make a large running jump over the lava pit to reach the portal.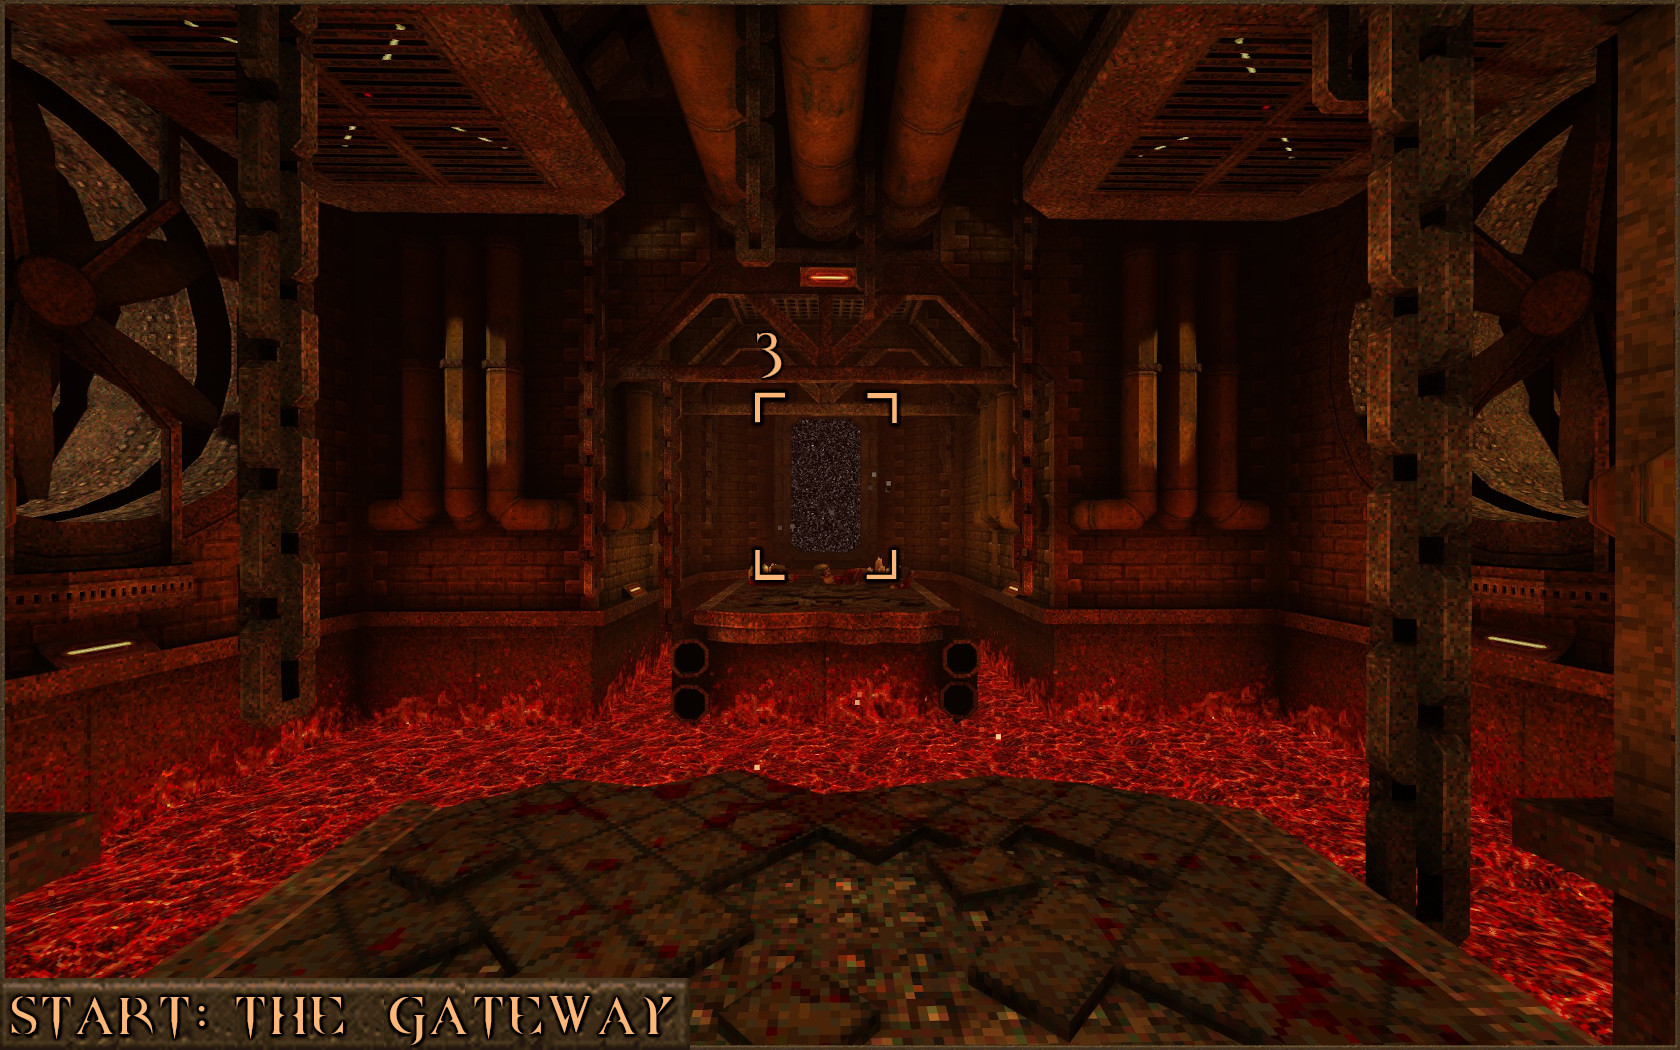
This expansion pack contains larger and more complex levels then the previous ones so if you're having trouble refer to this secrets guide to get some extra help.
https://steamcommunity.com/sharedfiles/filedetails/?id=2585508012
Secret Exit

Sandy's Room
Find the secret exit in Dimension of the Machine.
Find the secret exit in Dimension of the Machine.
The secret level for this expansion can be found in the first level of the Realm of the Machinist's episode: MGE1M1: The Pain Drain.
Proceed through the level until you reach the large circular metal lift suspended by four chains. After you find a Quad Damage and step off the lift it will start to slowly move up and down between the ground floor and the upper floor. After dealing with the enemies here ride the lift to the upper floor and you will soon see a Silver Key behind a stuck door. Take a left here.
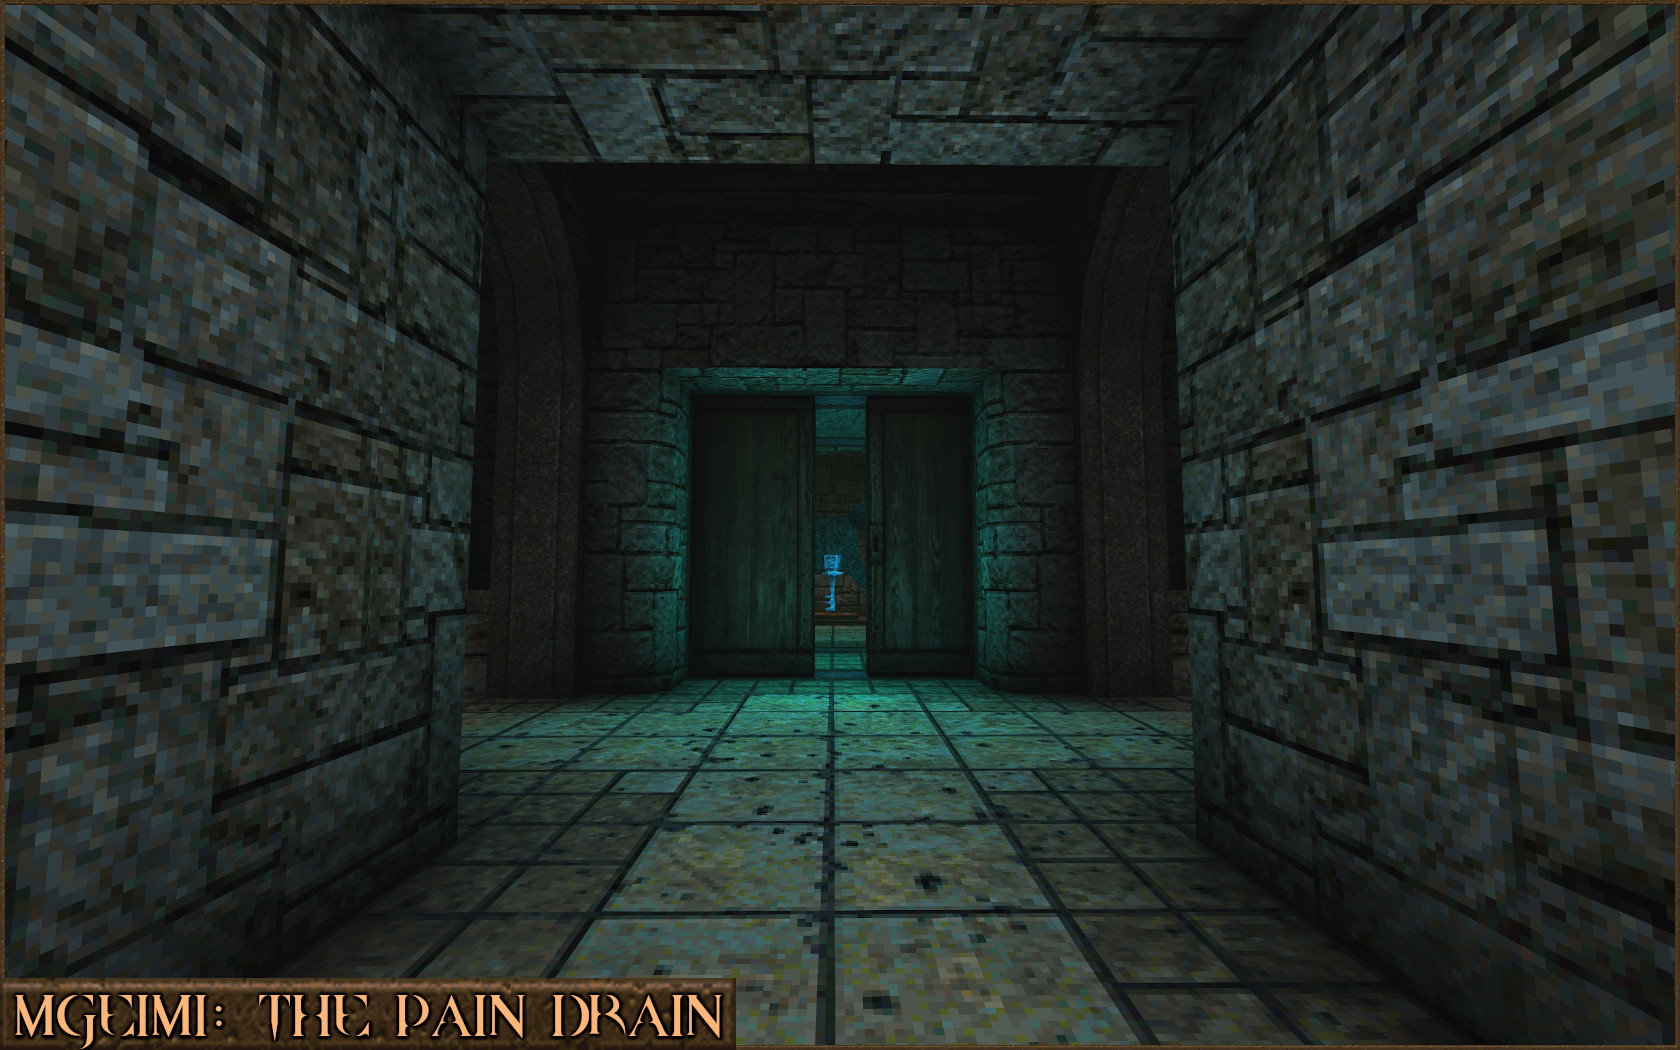
Look closely at the blocks on the walls as you want to find one with a runic symbol on it (
) and shoot it. This is the first of four hidden runic blocks that need to activated. 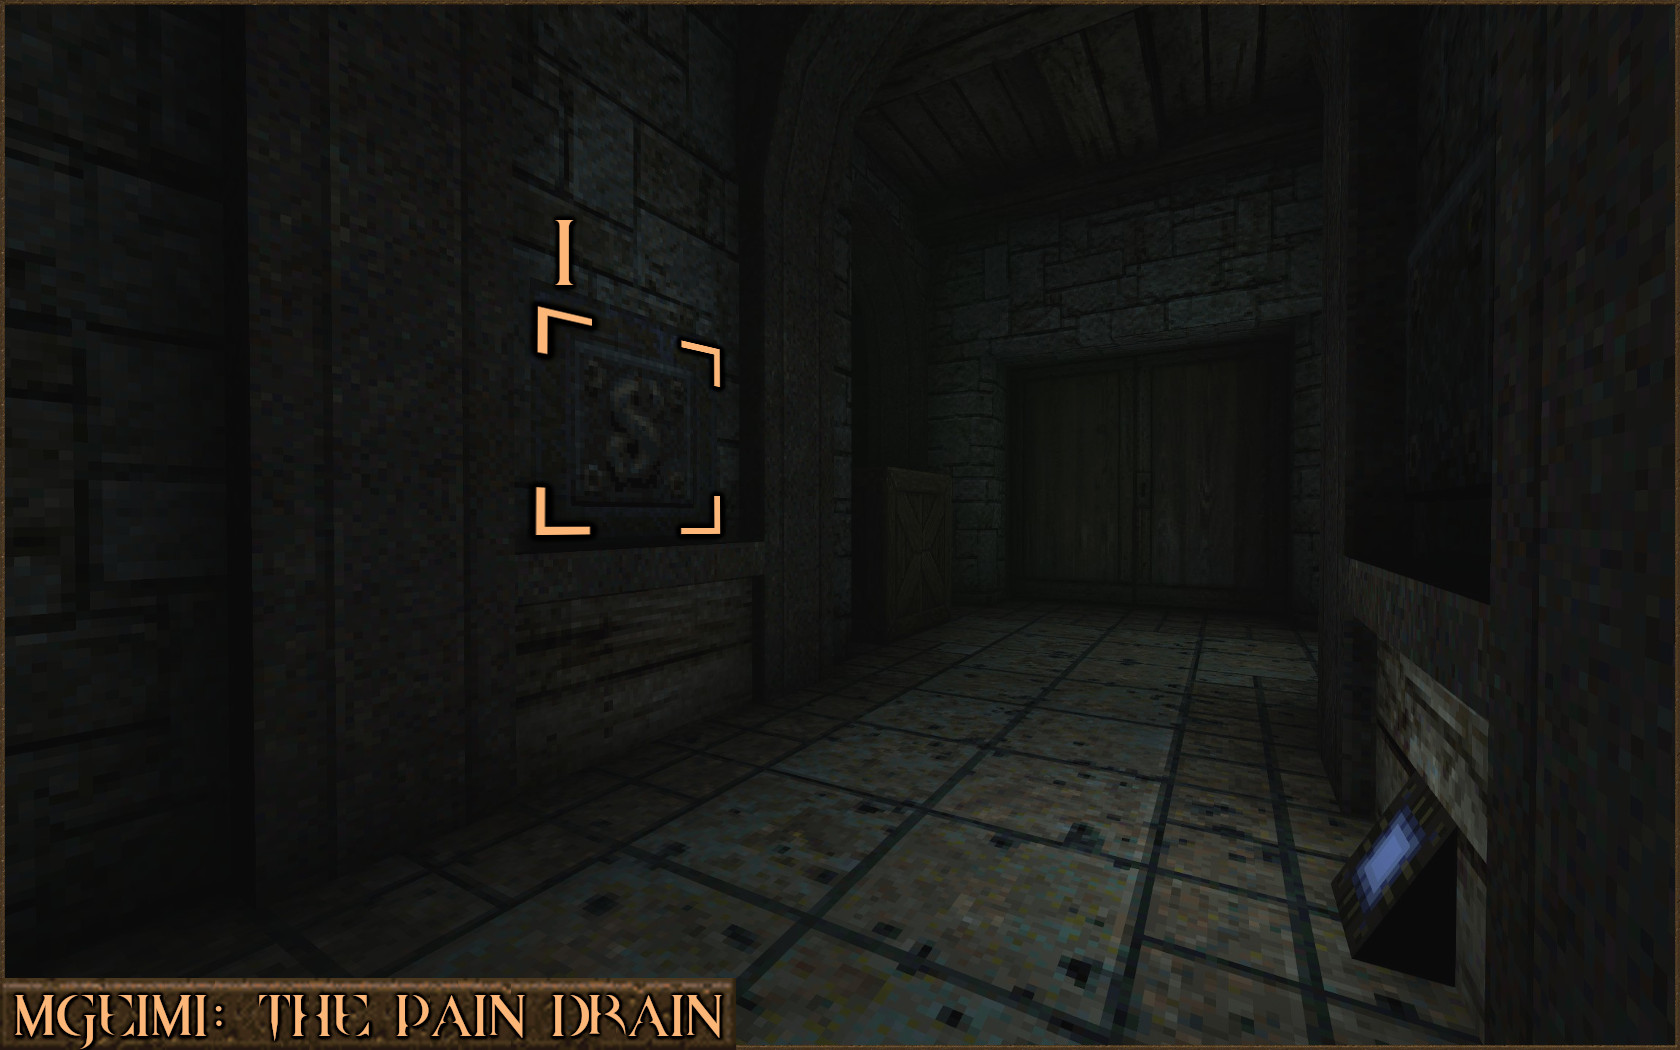
There is a second runic block on the opposite side of the same room (
). There are several plain looking blocks that can be ignored so find the second runic block and shoot it to activate it and then pick up the Silver Key.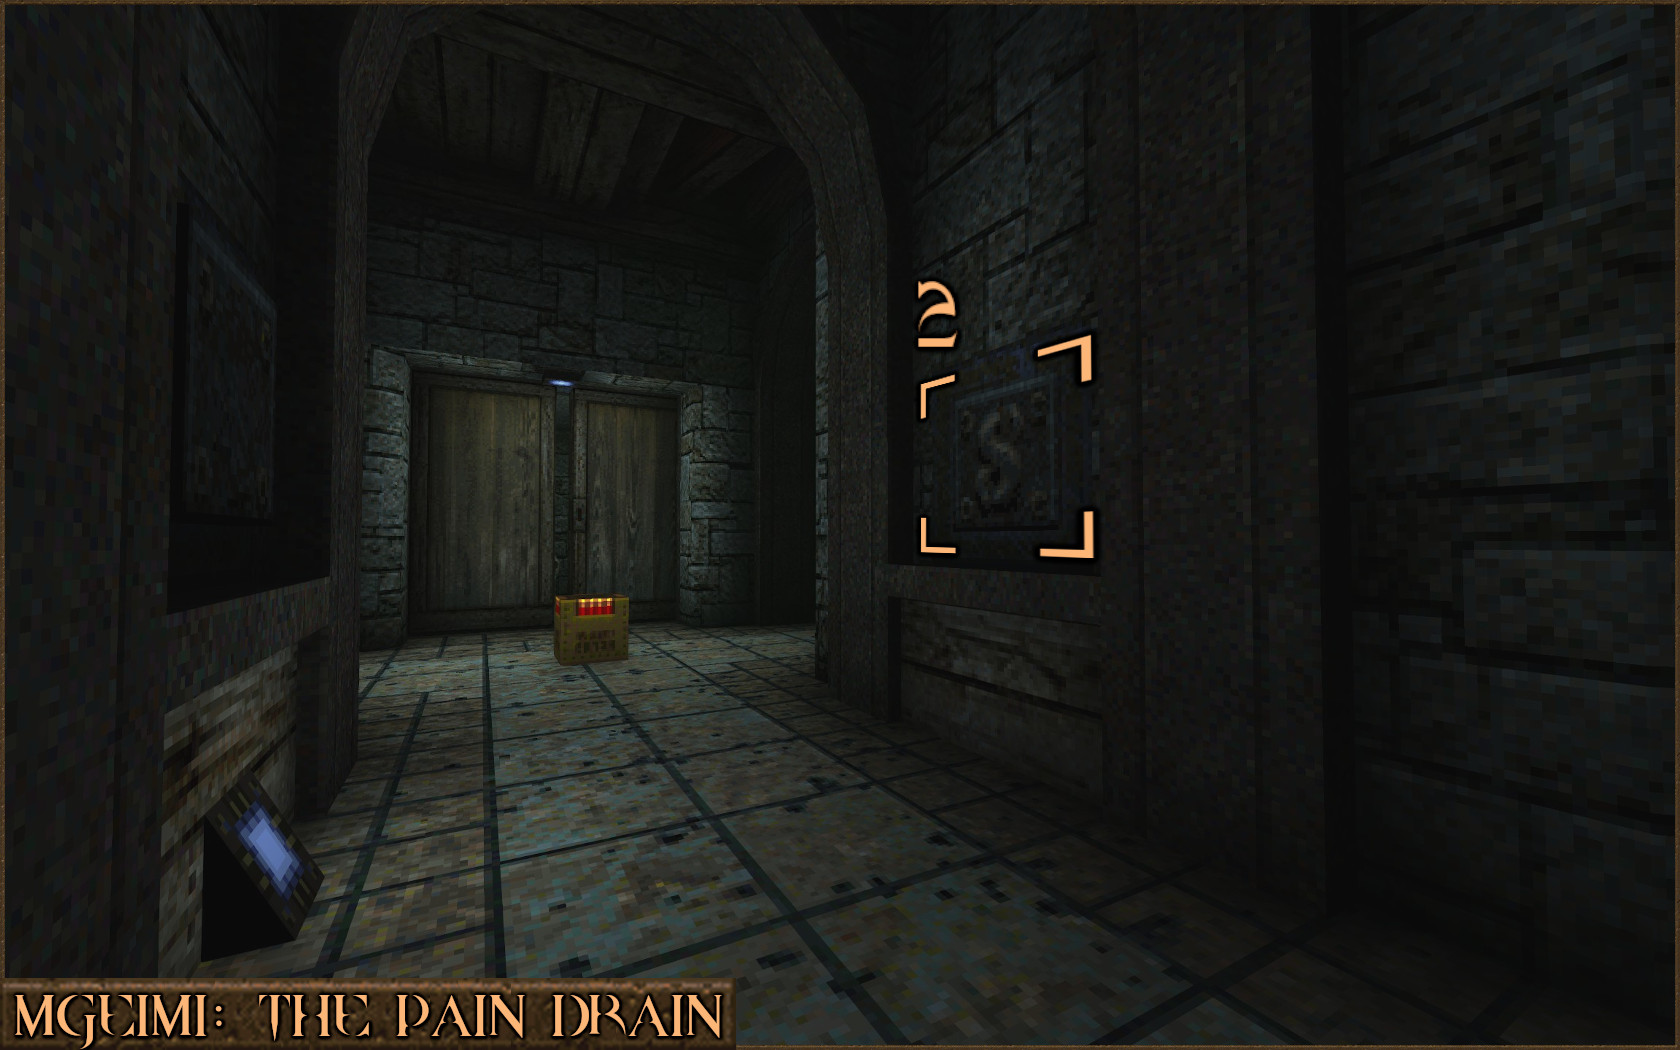
Head back to the circular lift and you will probably notice that two of the four runic blocks here have also turned red. Drop down to the ground floor, open the Silver Key Door and head in to a large green room. As you enter this large room keep to the left and you will see a pack of Shotgun Shells. Just above this is another runic block on a wall (
), shoot it activate the third runic block.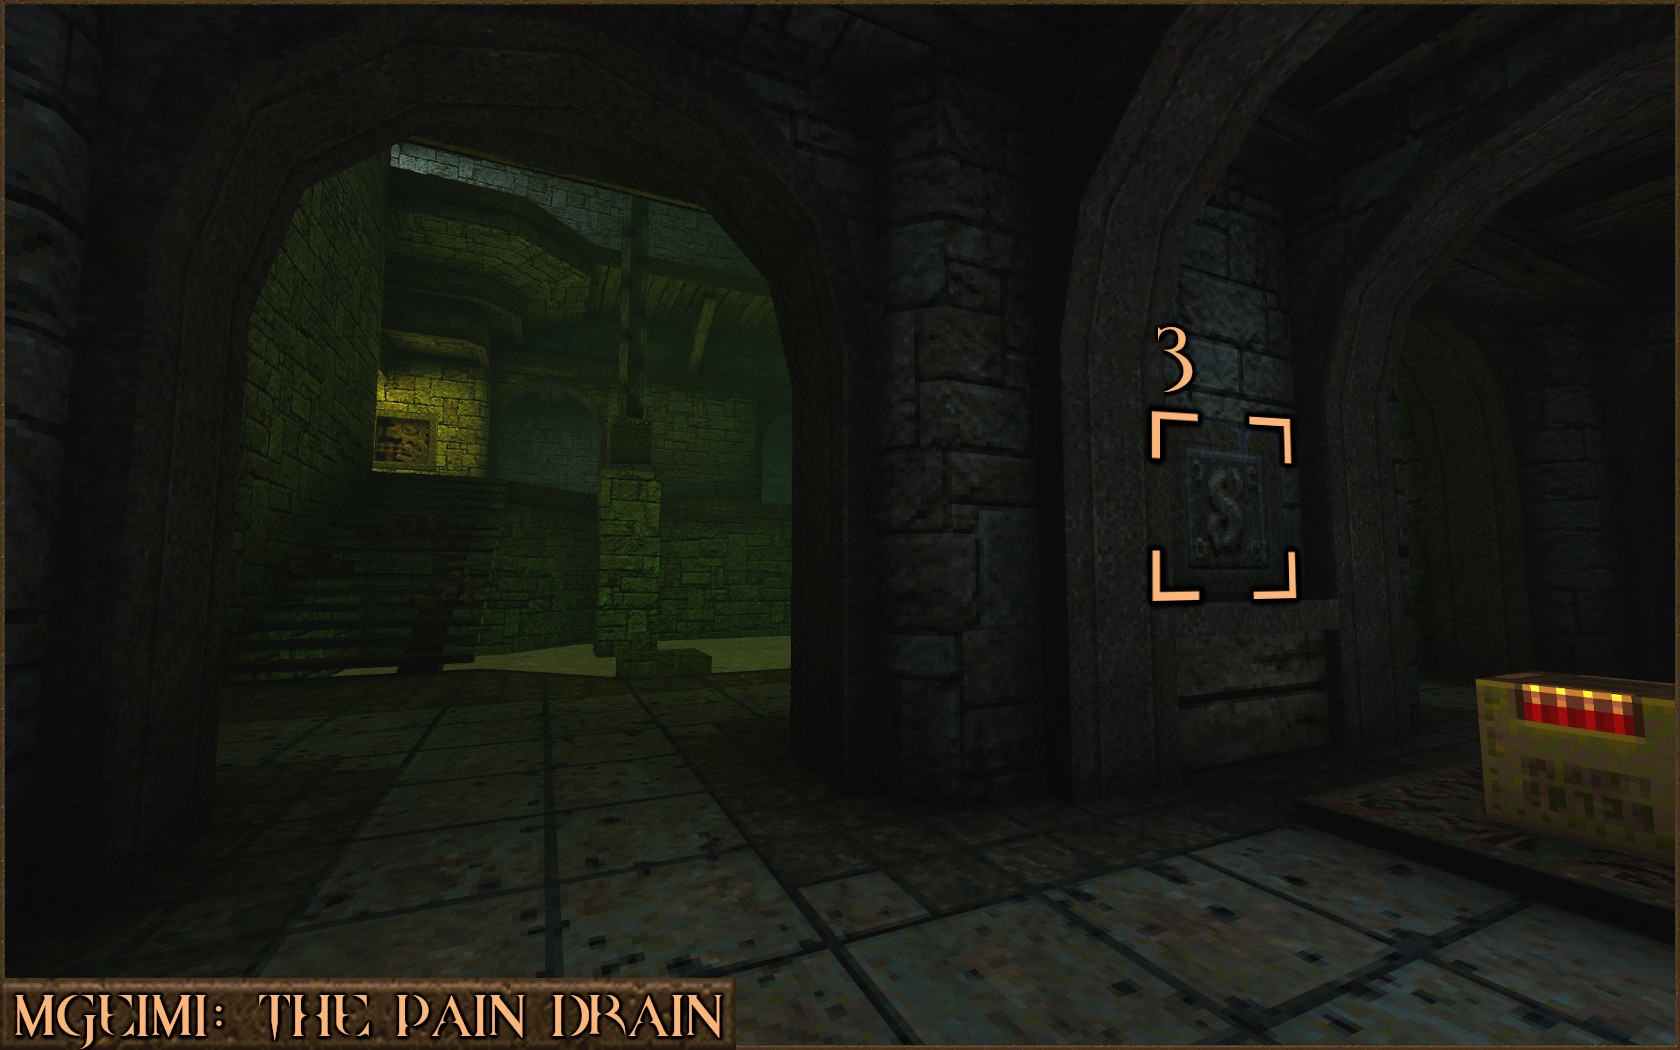
From here head up the stairs and in to another little nook and the final runic block is on the wall (
). When all four runic blocks have been shot then the message "A door has been opened." will appear.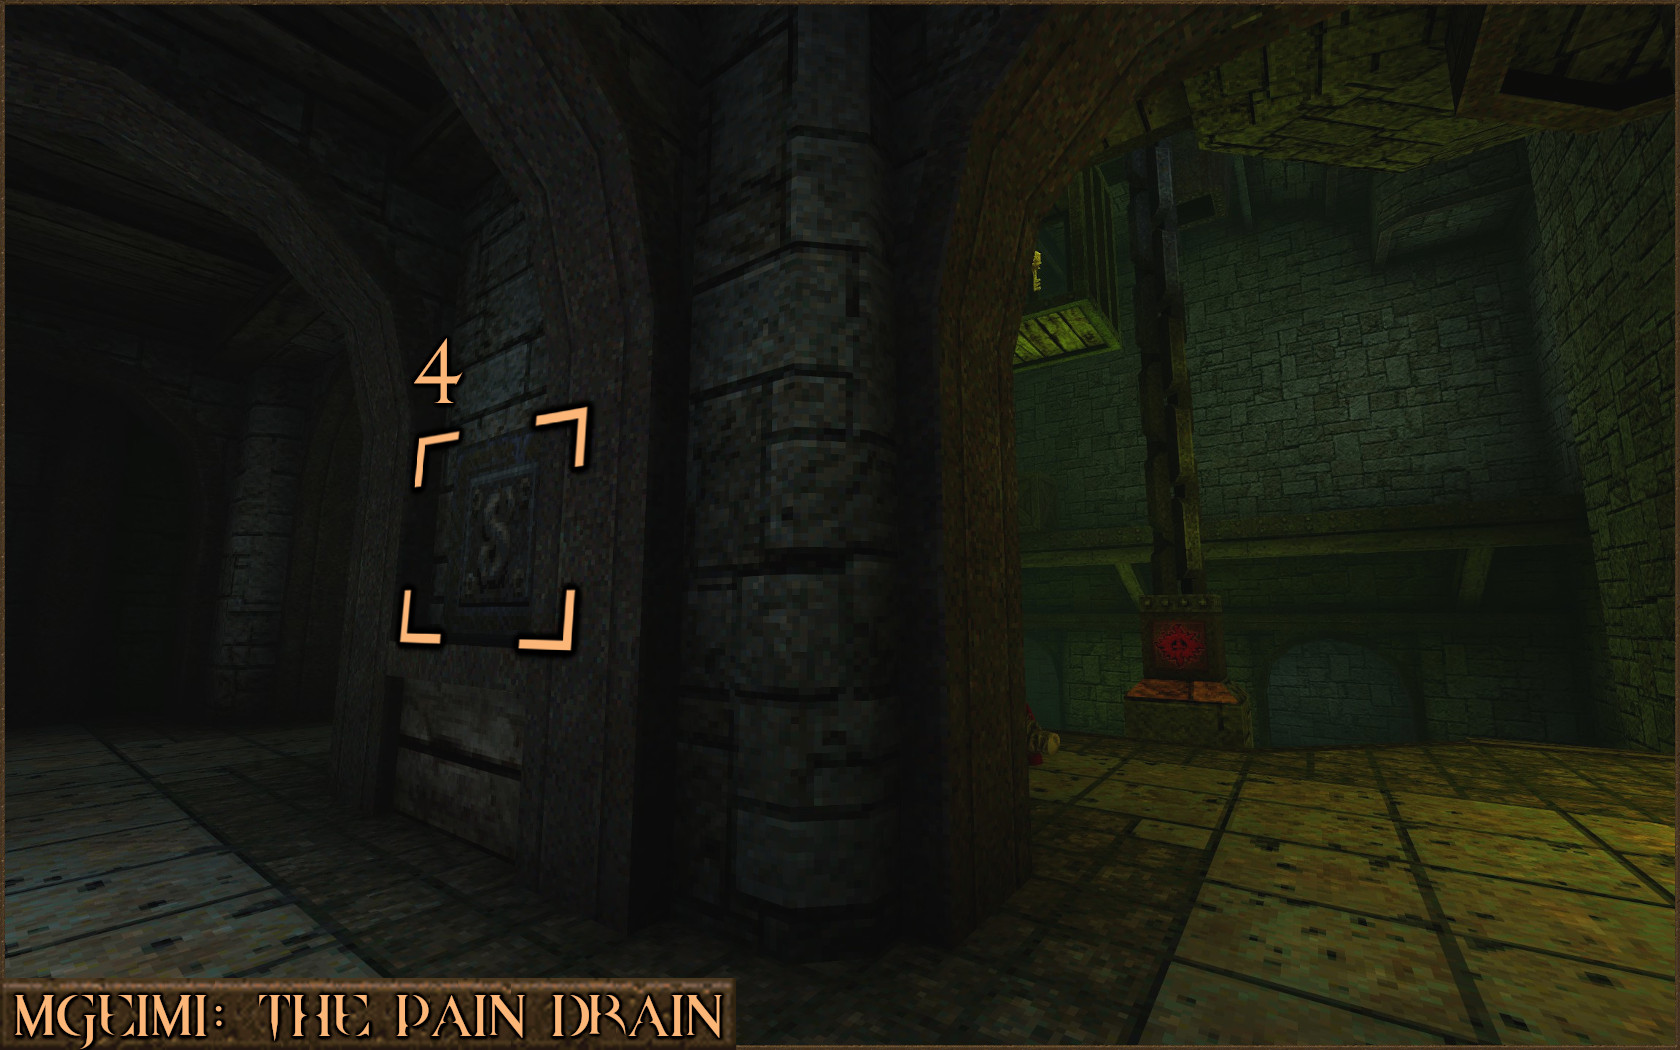
Head back to the circular lift again and ride it up to the upper floor (the same floor you found the Silver Key). You will see that a new door has opened and revealed a pressure plate switch and a Biosuit (
). Grab the Biosuit, press the pressure plate switch and the message "An underwater gate has been raised..." will appear.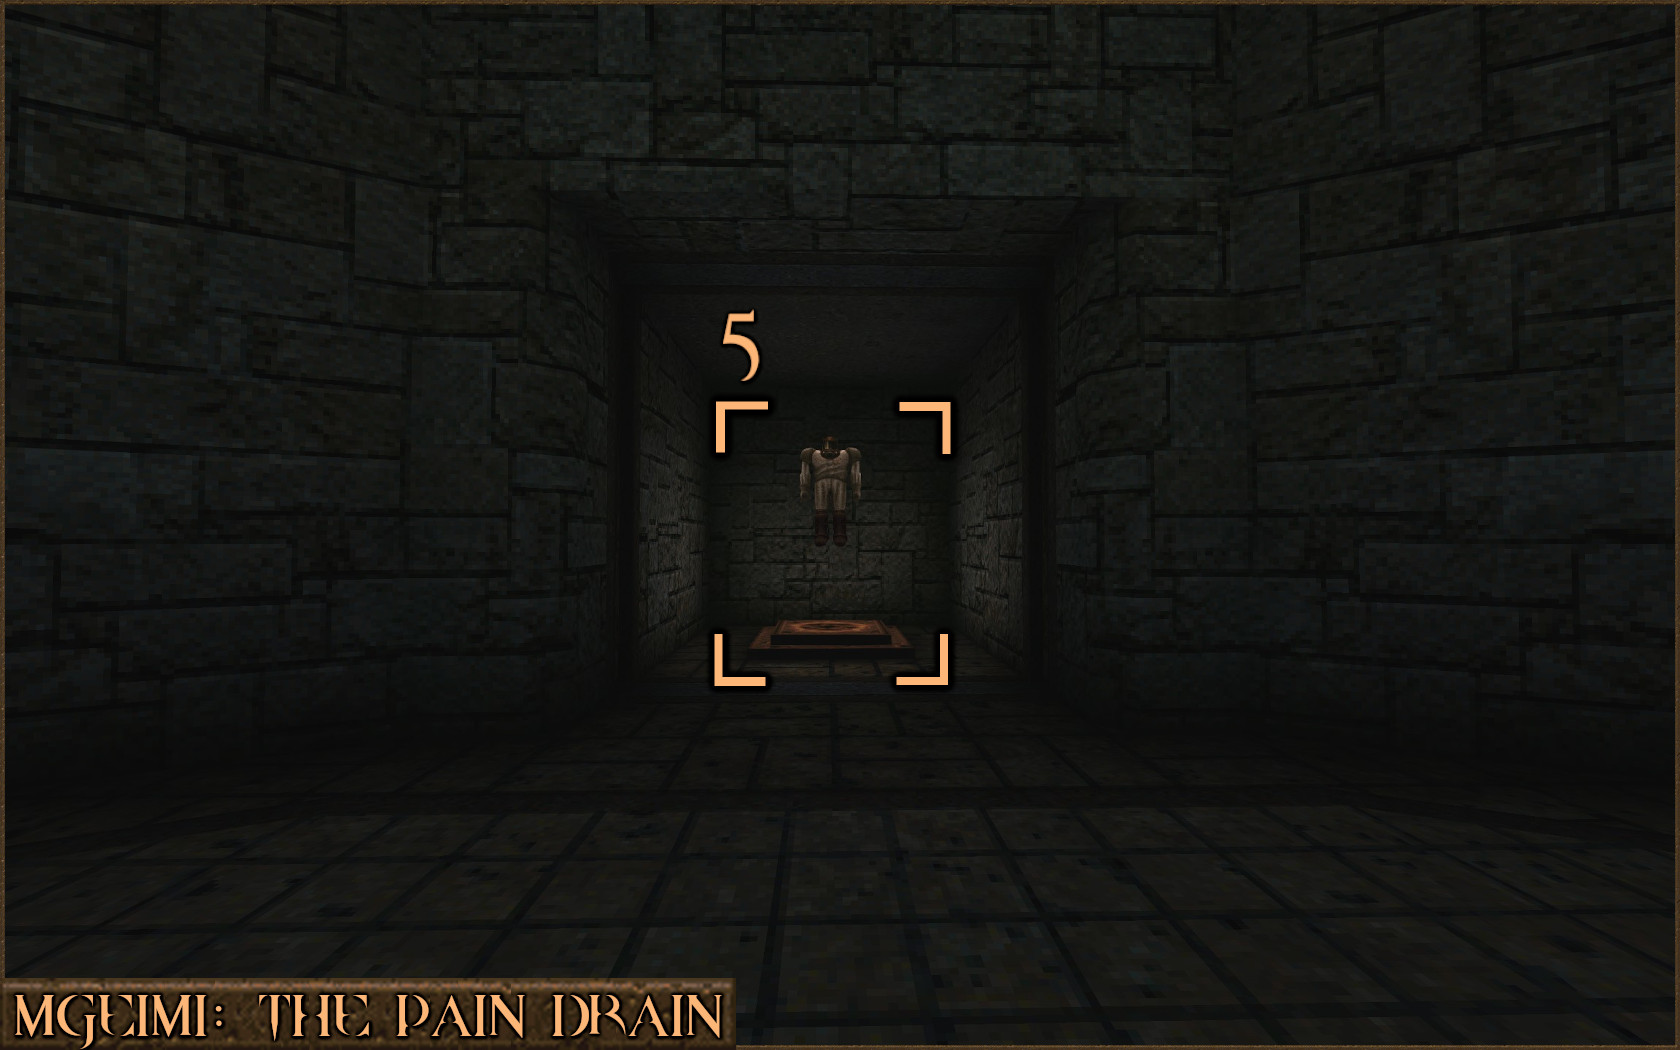
Jump back down to the ground floor and jump off the side in to the green slime. Swim around this area (your Biosuit will stop you taking damage) and quickly find the large hole in the side of this slime pit (
). When you approach it the message "Exit to the secret level." will appear. Go through it to be taken to the secret level: MGE1M3: Sandy's Room.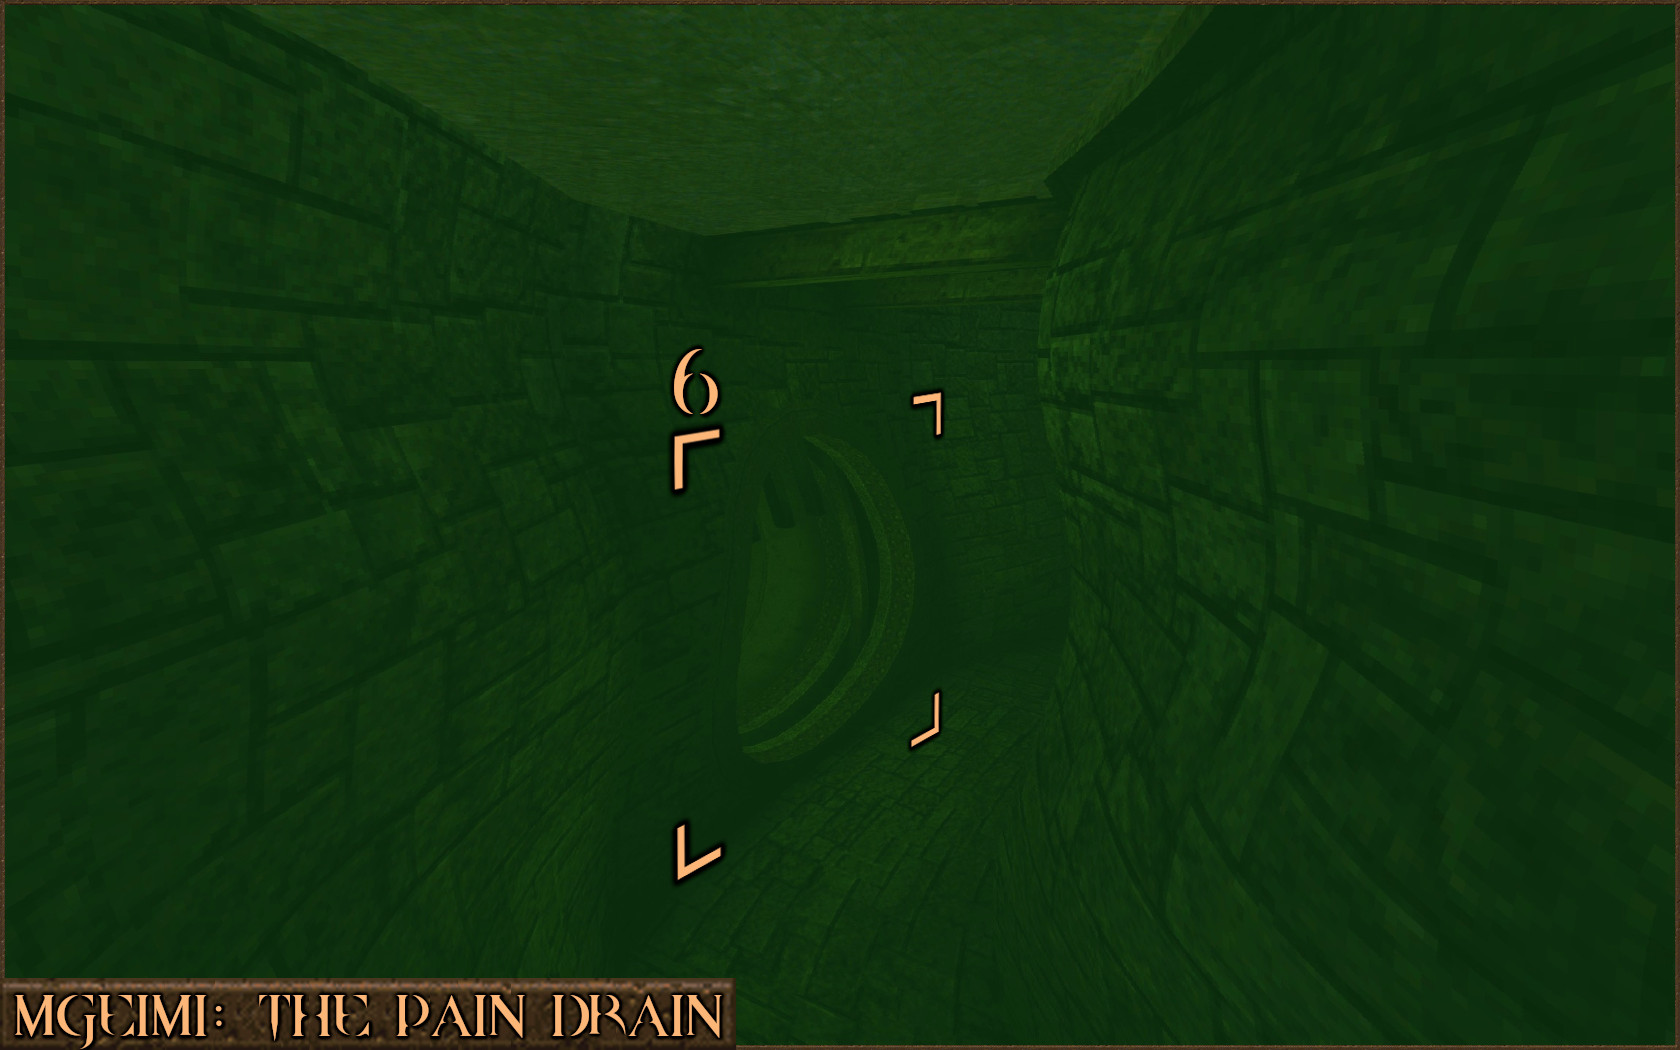
[Miscellaneous]
Friendly Fire

Friendly Fire
Kill a monster with another monster's attack.
Kill a monster with another monster's attack.
Just as the original Quake manual used to say "Some monsters hate one another almost as much as they hate you!". Essentially if you can trick one enemy in to shooting another they will usually start fighting amongst themselves until one of them is dead.
This achievement will most likely activate when you're going for the Slipgate Pacifist achievement as the large clusters of Grunts in the level E1M1: The Slipgate Complex tend to shoot each other when aiming for you and end up killing their buddies.
Secret Sleuth

Secret Sleuth
Find a secret area.
Find a secret area.
There are hundreds of secret areas hidden throughout Quake you'd actually have to try very hard to complete the game without finding at least one. Shooting hidden switches, doors or even fake walls can all reveal secrets. Even the secret exits in each episode sometimes count as a secret.
Finding secrets can help you complete other achievements too, such as completing Quake in Nightmare Difficulty, due to all the extra weapons and items they can offer. Here is a guide that covers the secrets in Quake:
https://steamcommunity.com/sharedfiles/filedetails/?id=620893331
The Shambler Dance

The Shambler Dance
Kill a shambler before it is able to cast its lightning attack.
Kill a shambler before it is able to cast its lightning attack.
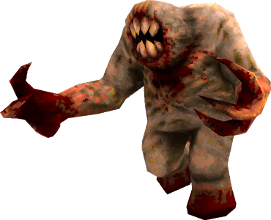 You will find the Shambler enemy occasionally throughout the levels and it is one of the tougher enemies in Quake. Don't bother using the Grenade Launcher or Rocket Launcher against them as they are highly resistant to explosive damage.
The Shambler uses its lightning attack whenever you are at medium range. To prevent this it is best to get in to melee range and dodge its vicious swipe melee attacks while hitting it with the most damaging weapons you have, such as a Super Nailgun or Thunderbolt.
You can also try to fight them from long range with a weapon such as the Super Nailgun or even the normal Shotgun (although that will take a lot of ammo). This way they will never get close enough to even start using the lightning attack.
If there is a Quad Damage nearby that can help kill them even quicker. Combined with the Lightning Gun it can kill a Shambler in less than one second.
A Close Shave

A Close Shave
Kill a shambler with an axe.
Kill a shambler with an axe.
For this achievement you will need to kill a Shambler using the starting Axe weapon. Fortunately there are several strategies to achieve this.
If you find a Pentagram of Protection near a Shambler you can use that to remain invincible while you hack away before it runs out.Alternatively you can use a Quad Damage to massively increase the damage your axe does to quickly dispatch them before taking too much damage.You can also wear down their health with other weapons and finish them off with an axe. However note that the achievement activates just before the Shambler dies, not actually from the final blow. That means you technically need to hit the Shambler with the axe when their health is very, very low to get this achievement.
If you're looking for a quick level to get this achievement then head to E1M5: Gloom Keep. Find the room with a teleporter and large Quake symbol shadow on the floor. Enter the back of this teleporter to be taken to a secret containing a Quad Damage. Now head back in to the teleporter to be taken to a Gold Key. When you pick up the key a Shambler will appear that you can destroy easily while your Quad Damage is active.
Discharge

Discharge
In deathmatch, electrocute an enemy in water without dying.
In deathmatch, electrocute an enemy in water without dying.
This Multiplayer only achievement requires you to fire the Thunderbolt weapon while both you and your opponent are underwater which subsequently causes everyone nearby, including yourself, to explode. However for this achievement you also need to survive this attack and to do that you need to have picked up a Pentagram of Protection.
This achievement can be achieved against real people or bots. Bots are the easier option as you can set their difficulty level as low as you like. When facing against bots you can only play designated Deathmatch levels and only some of these have a Thunderbolt, Pentagram of Protection and water. Those levels are DM3: The Abandoned Base and DM5: The Cistern.
I recommend the level DM5: The Cistern as you can find both the Thunderbolt, Pentagram of Protection and water all in the same room.
To get started from the main menu select Multiplayer -> Local Play -> Change Settings.... From this menu make sure to have the Multiplayer settings as follows:
Game Mode: Deathmatch
Episode: Quake
Map: DM5: The Cistern
Number of Bots: 1
Bot Skill: Training
Frag Limit: 20
Time Limit: 10
Then go back up to the previous menu and select Play.
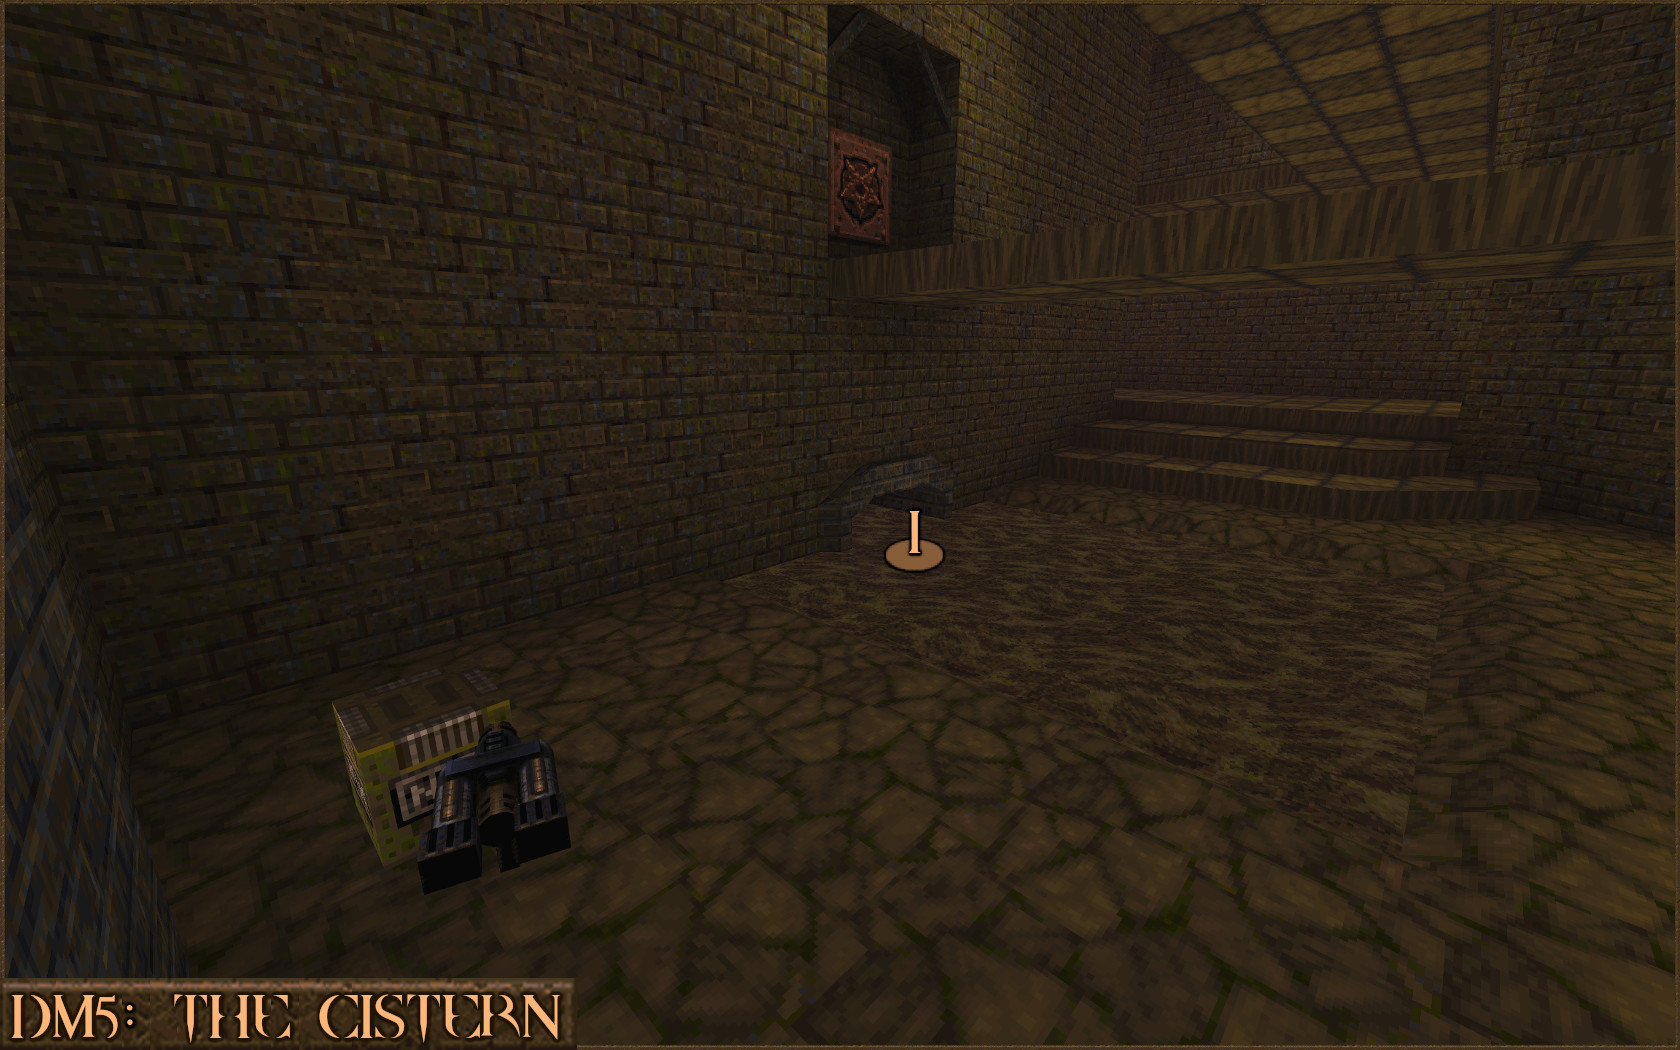
Once in the level you need to quickly locate the water room. You can enter it through this submerged entryway (
).
Quickly search the room for this alcove that contains the Pentagram of Protection and the Thunderbolt (
). Now all you need to do is jump back in to the water and wait for the bot to go swimming in the water too. Then fire the Thunderbolt and he'll explode and you will receive the achievement.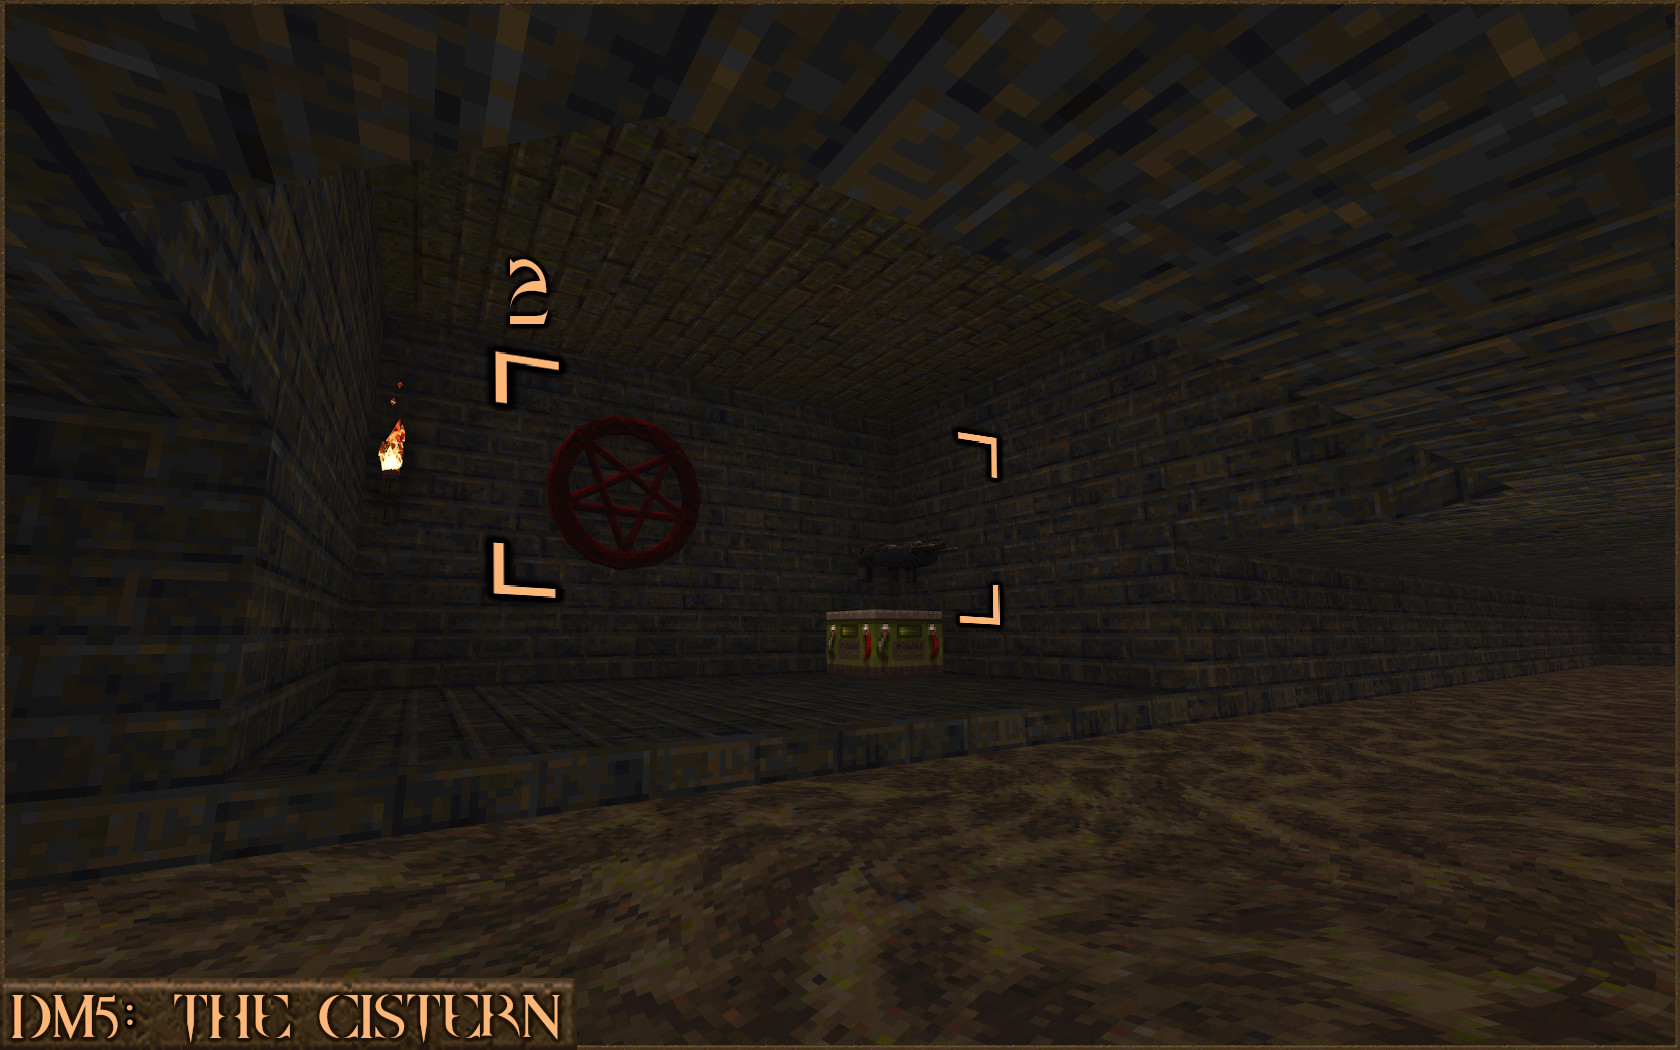
If you make a mistake or the Pentagram of Protection runs out it is best to quit and restart the match as the Pentagram of Protection takes five minutes to respawn.
🏆
Beat Quake's achievements?
Flex it — let your friends know you pulled it off.
More Quake guides
- Quake Soundtrack Solutions★ 5 (822)34k views1.1k ♥15 minUpdated Apr 2, 2020
- How I play Quake in the Current Year (2023 update: Use Ironwail or Quakespasm-Spiked instead of Quakespasm)★ 5 (903)23k views1.3k ♥8 minUpdated Nov 12, 2023
- List of Quake 1 clones on the Steam store★ 5 (457)20k views854 ♥2 minUpdated May 20
- Quake Secrets★ 5 (1.1k)14k views1.8k ♥39 minUpdated Feb 23
- Quakespasm: How to activate CHUNKY MODE★ 5 (303)9.6k views357 ♥2 minUpdated Sep 23, 2023
- List of compatible mods for Quake Remastered★ 5 (166)6.7k views304 ♥7 minUpdated Apr 5, 2024






This guide was created by its original author on the Steam Community. Are you the author and want it removed? Request removal.