Scourge of Armagon Secrets
Useful Information



Quake Secrets Guide Contents
- Quake Secrets
- Scourge of Armagon Secrets
- Dissolution of Eternity Secrets
- Dimension of the Past Secrets
- Dimension of the Machine Secrets
- Horde Mode Secrets
Introduction
 This guide will help you find all the secrets in the 1st Quake expansion pack: Scourge of Armagon.
This expansion has a total of 77 secrets across 18 levels, as well as several unmarked secrets (which don't count as official secrets but often have substantial rewards).
Scourge of Armagon is divided in to three episodes:
- Episode 1: Fortress of the Dead
- Episode 2: Dominion of Darkness
- Episode 3: The Rift
Items
This expansion pack includes several new weapons and items exclusive to these levels:Weapons

Axe

Shotgun

Double-Barreled Shotgun

Nailgun

Super Nailgun

Grenade Launcher

Rocket Launcher

Thunderbolt

Proximity Launcher

Laser Cannon

Mjolnir
Ammo

Small Shells

Large Shells

Small Nails

Large Nails

Small Rockets

Large Rockets

Small Cells

Large Cells
Powerups

Green Armor

Yellow Armor

Red Armor

Small Health

Large Health

Megahealth

Quad Damage

Pentagram of Protection

Ring of Shadows

Biosuit

Empathy Shield

Wetsuit

Horn of Conjuring
START: Command HQ
Extra Secret
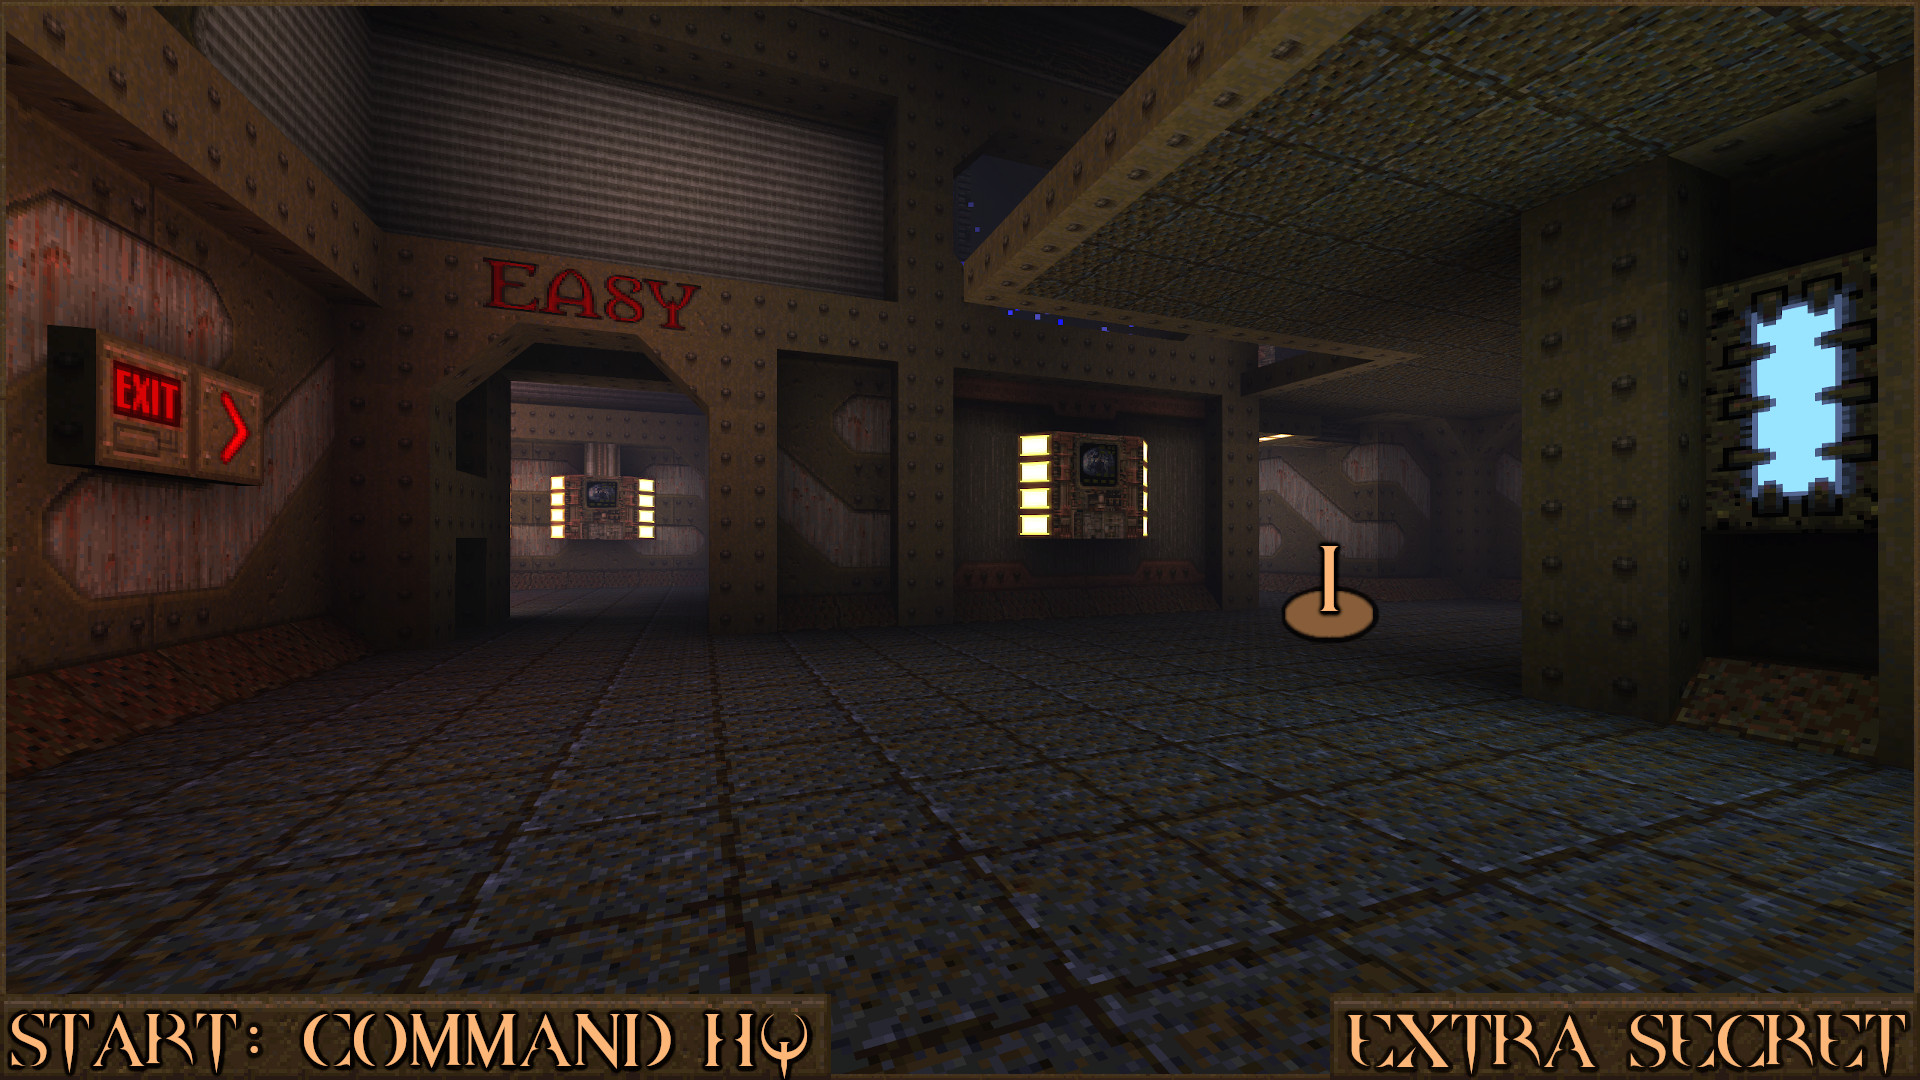
Like the original Quake the introductory level for Scourge of Armagon also has a hidden Nightmare Difficulty portal. If you want to find it head down the left corridor marked "EASY". Follow the corridor around until you find an EXIT sign pointing to another "EASY" sign. Don't go in there, instead carry on down the corridor to the right ( ).
).
In the next room you will find a storage area for crates. Move between the gap (
 ) to the middle of this small area.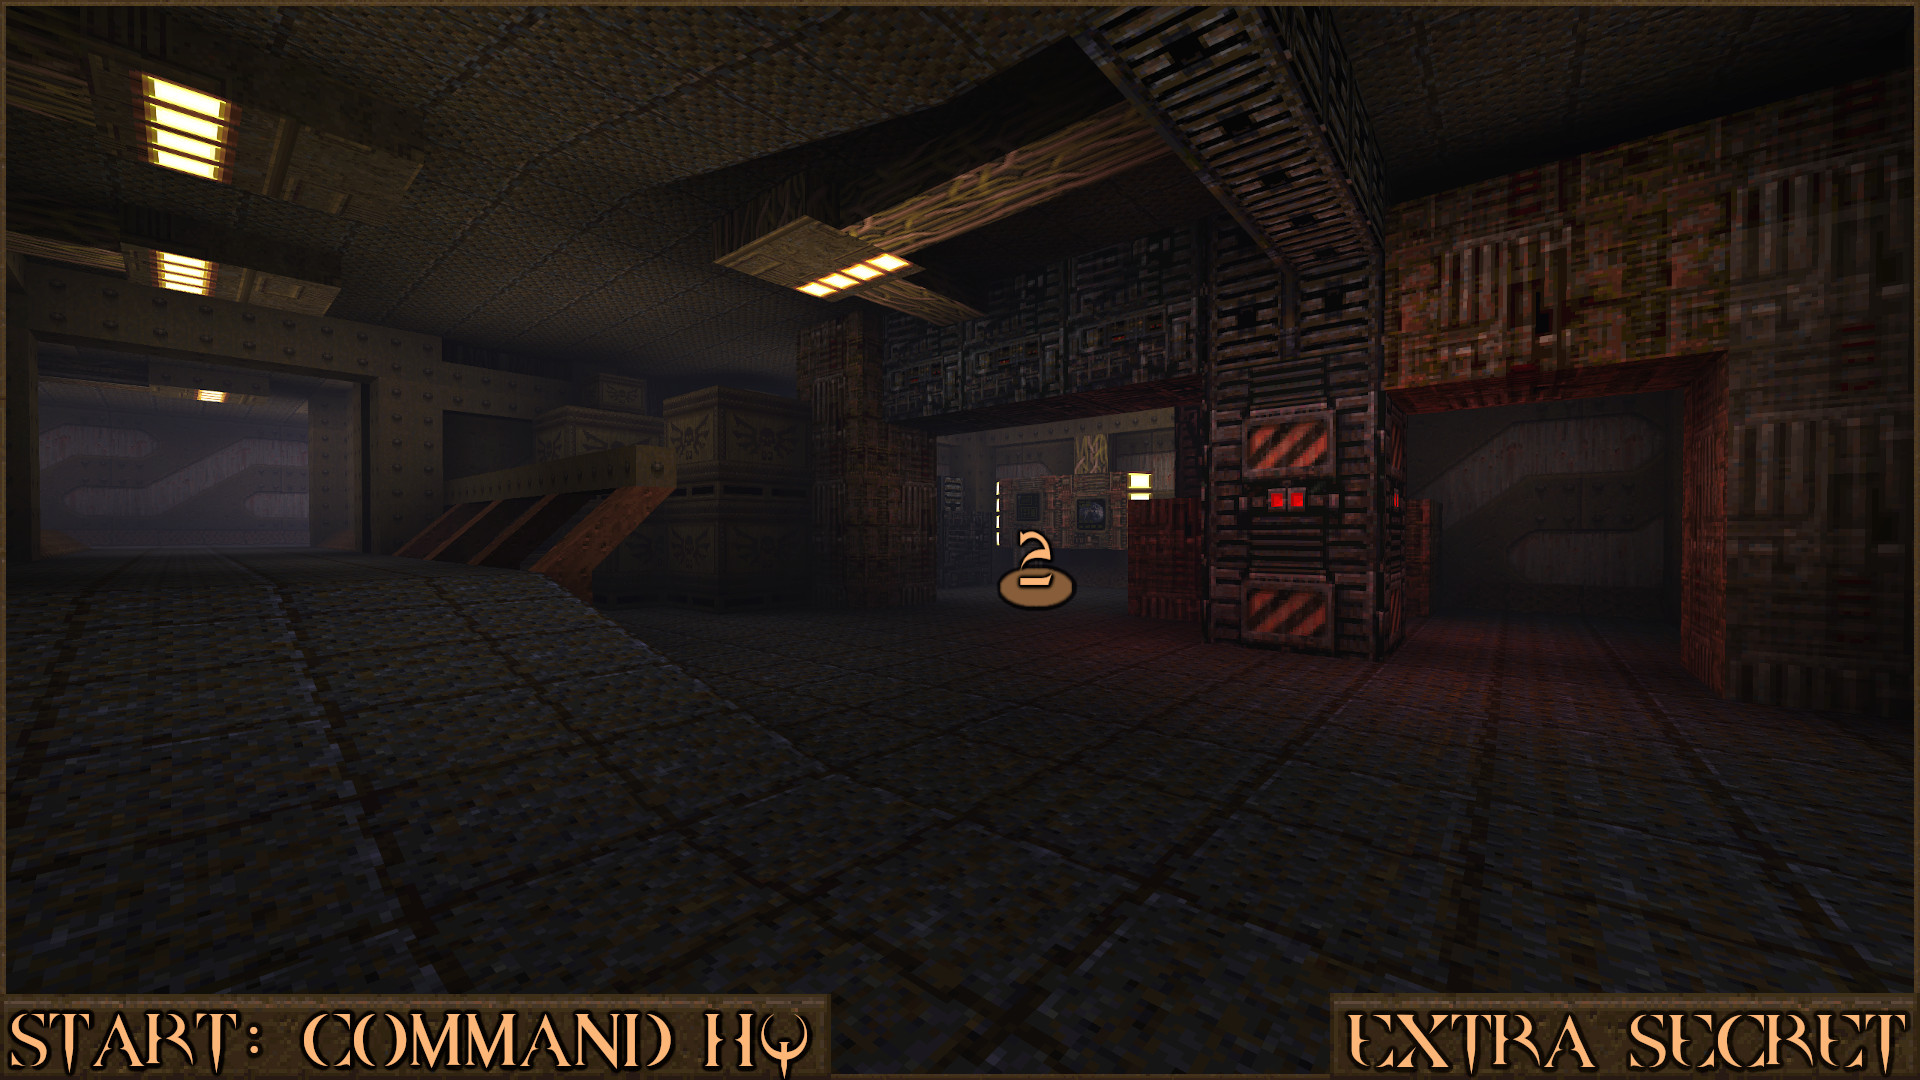
From here you can see a stack of various brown crates. Jump up the smaller ones (
 ) to find an elevator which will take you up to an area containing the Nightmare Difficulty portal.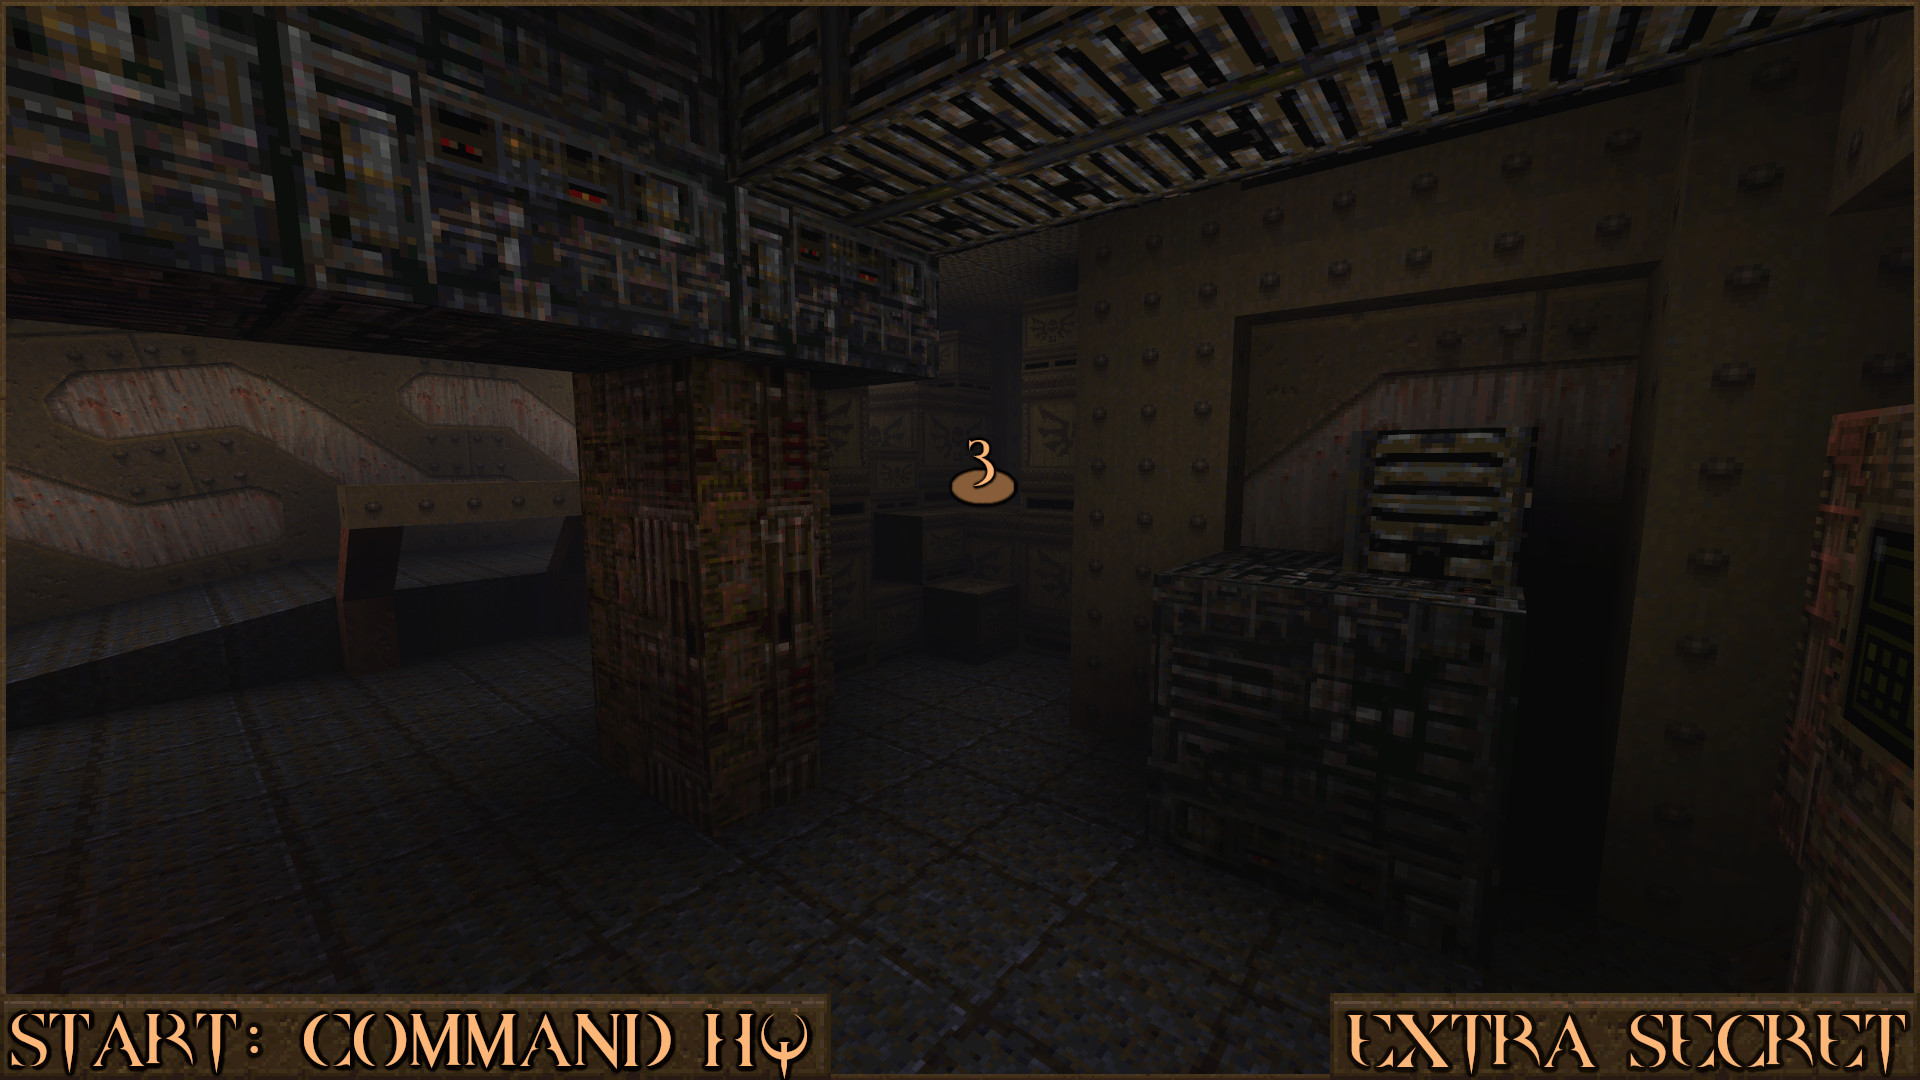
Reward: Nightmare Difficulty
HIP1M1: The Pumping Station
Secret 1 of 5
While descending the first set of stairs go through the door on your right. In this large room look for a red target switch () embedded in the ceiling of a dark area. Shoot it and a wall () will move and reveal a dark secret area.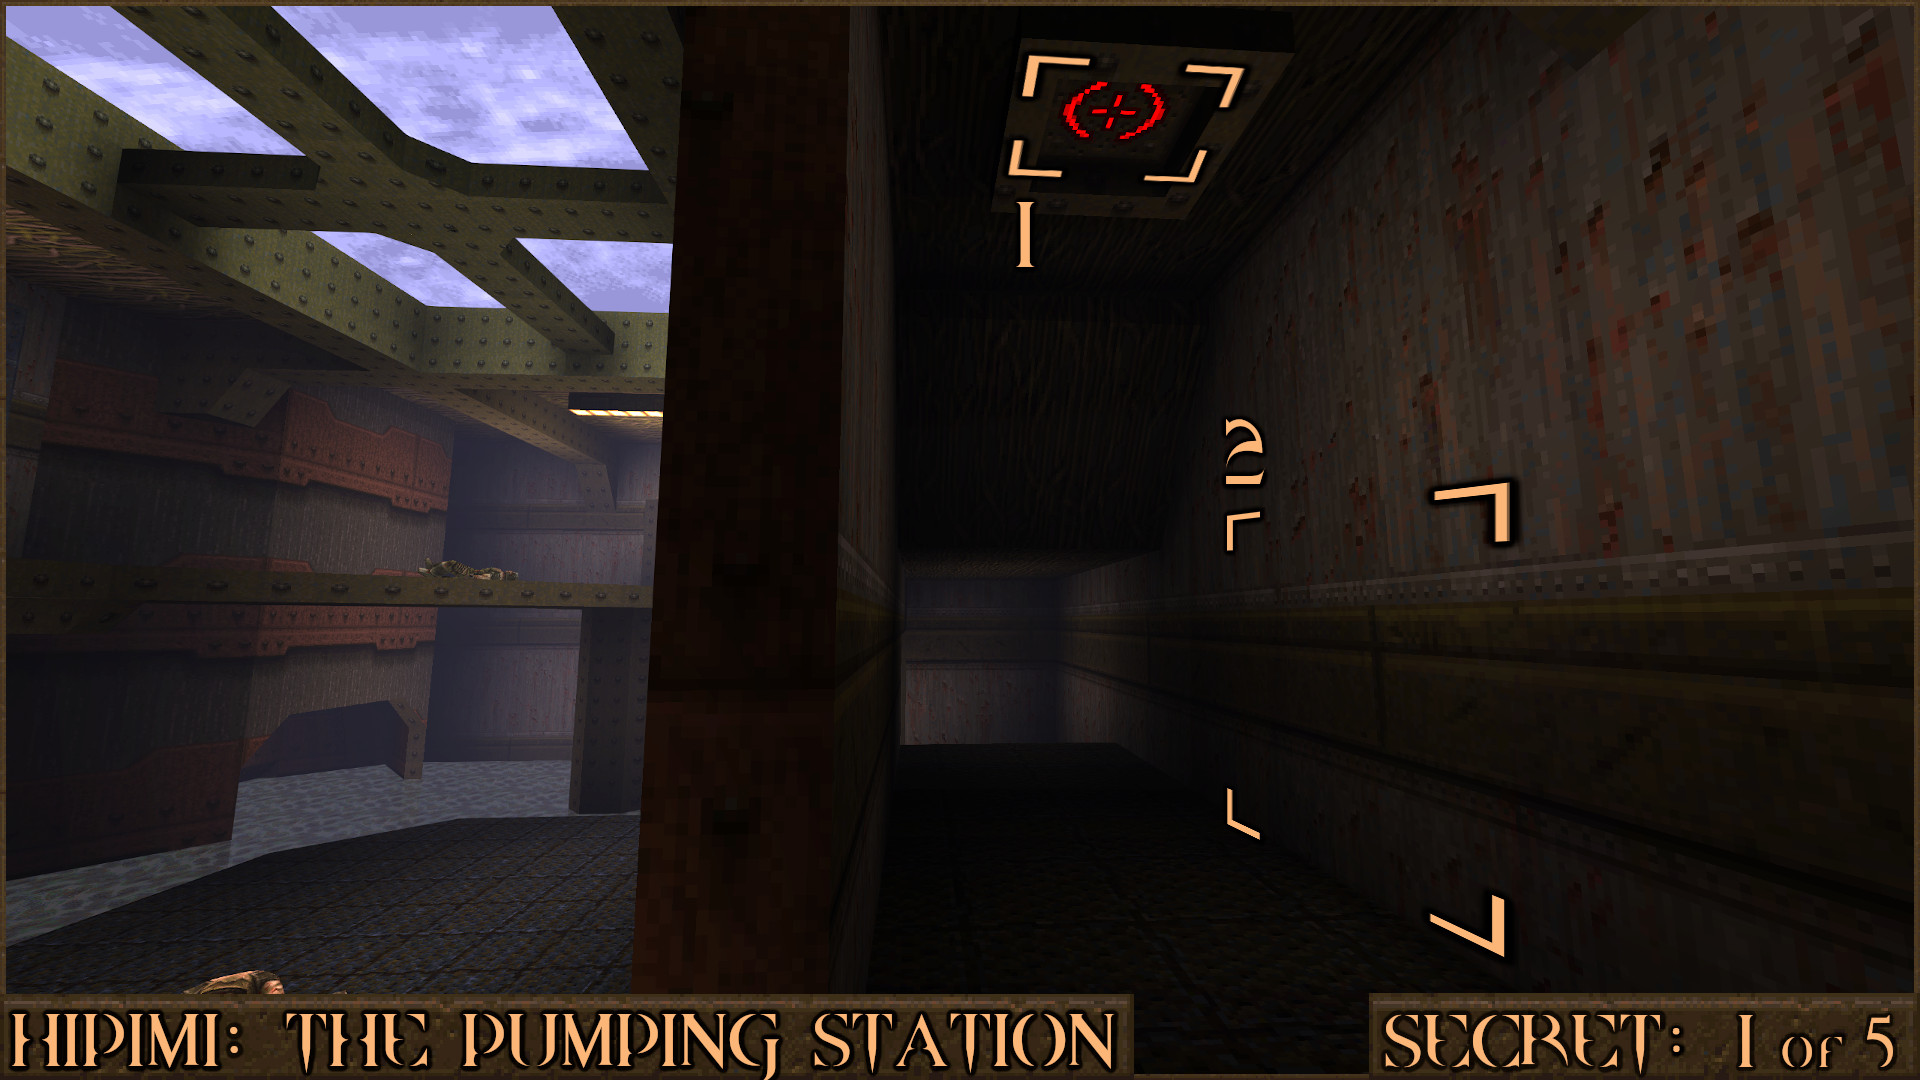
Reward:
Secret 2 of 5
Return to the first set of stairs and go down in to the next room that contains a Nailgun and several other items. Shoot the wall just to the left of the two Small Health items to reveal a secret.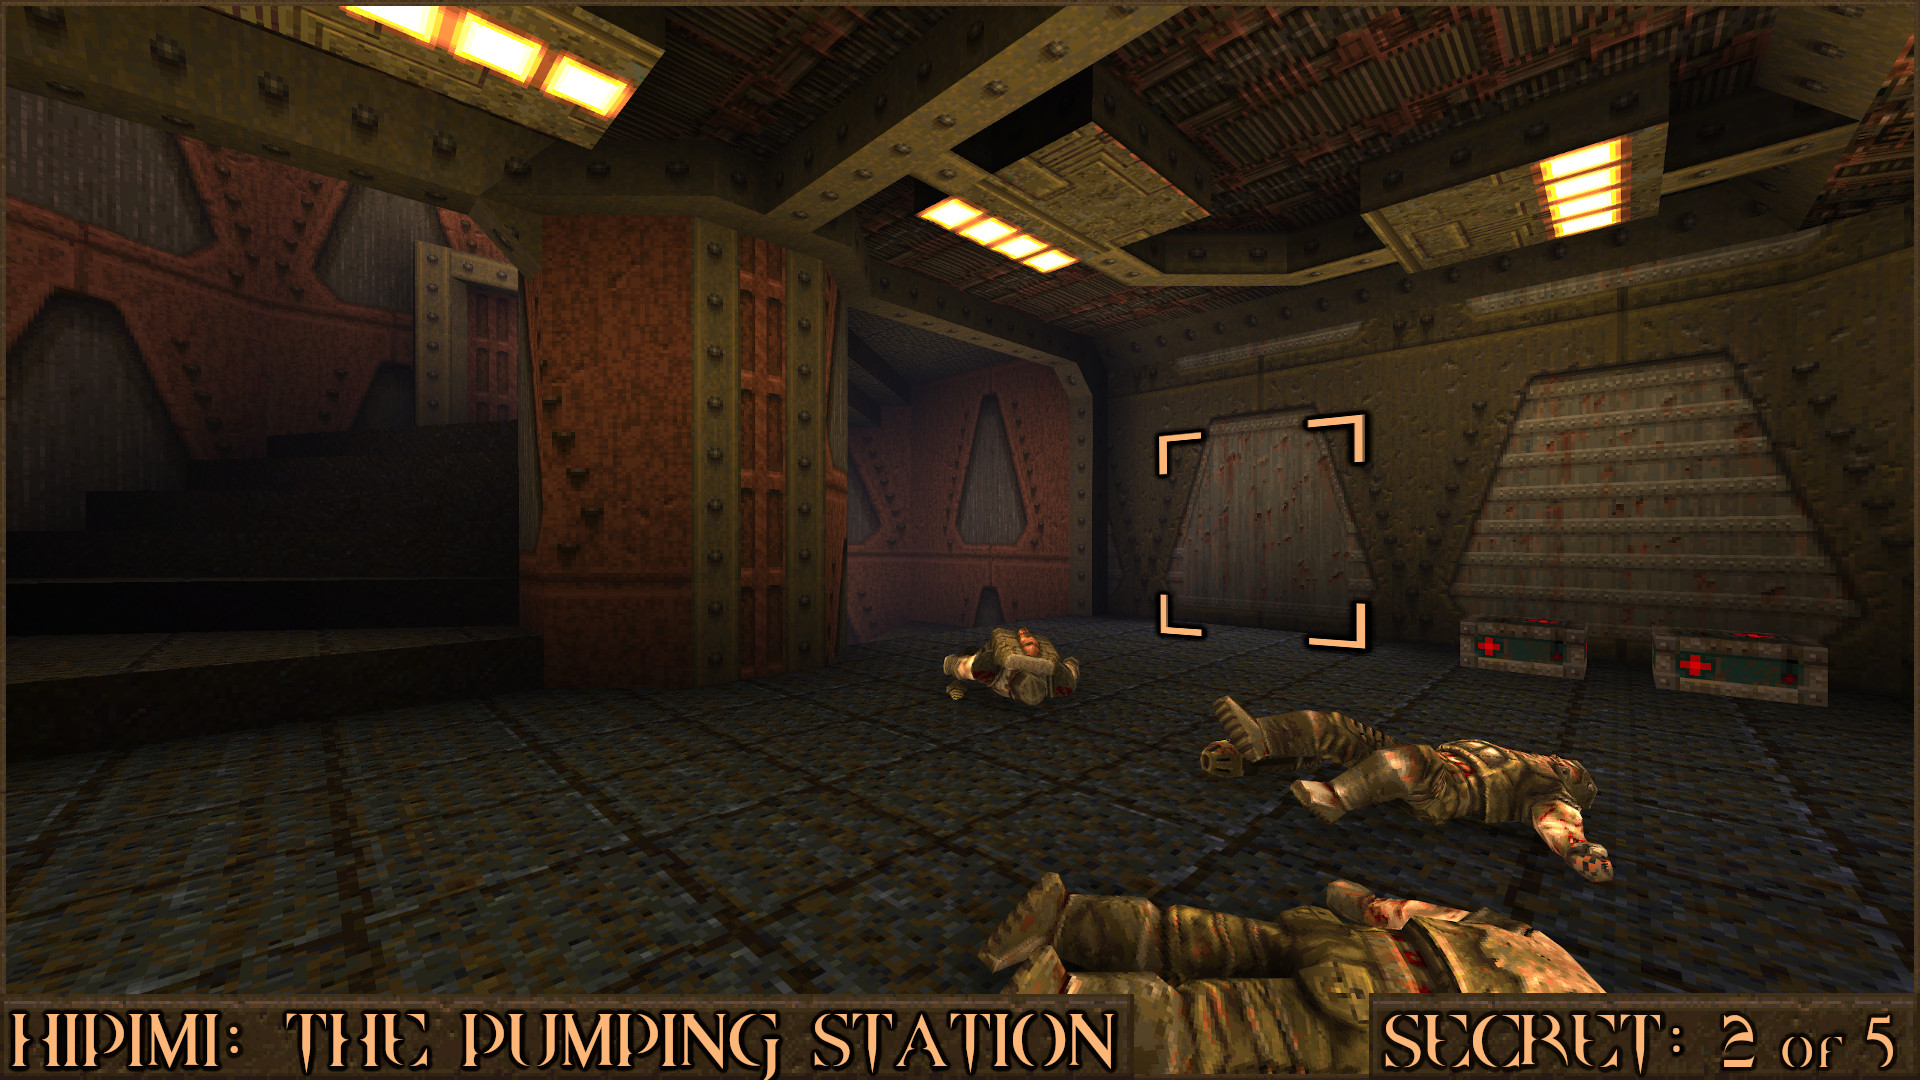
Reward:
Secret 3 of 5
From the room where you found Secret 2, take the only exit that isn't a set of stairs. After a corridor containing a Laser Cannon you will find a room that contains a blue forcefield and a computer console. Shoot the slightly darker part of one of the ceiling lights () to reveal a secret behind the computer console ().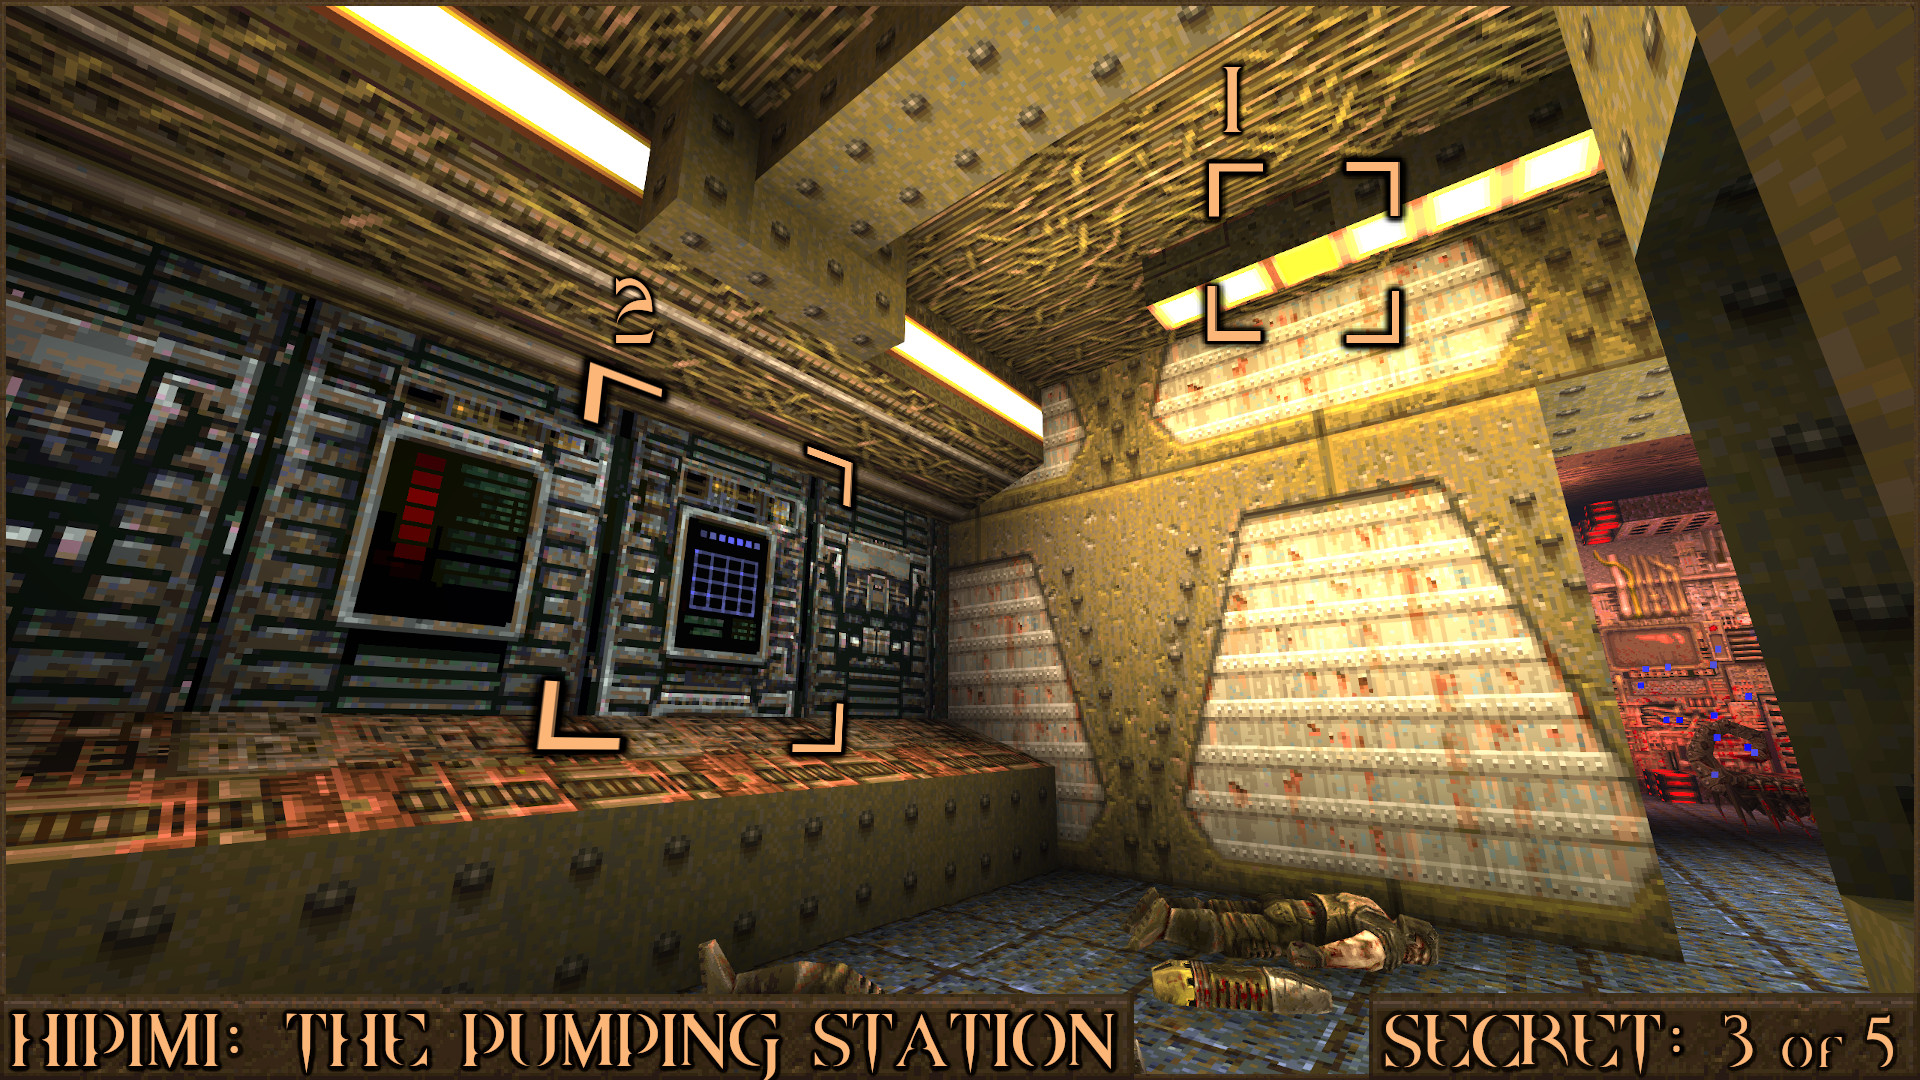
Reward:
Secret 4 of 5
Once you reach the large outside area head underneath the metal bridge structure. Look up to see a red target switch () that when shot will make a nearby secret wall () move. Inside you will find the Proximity Launcher which is one of the new weapons for this expansion pack.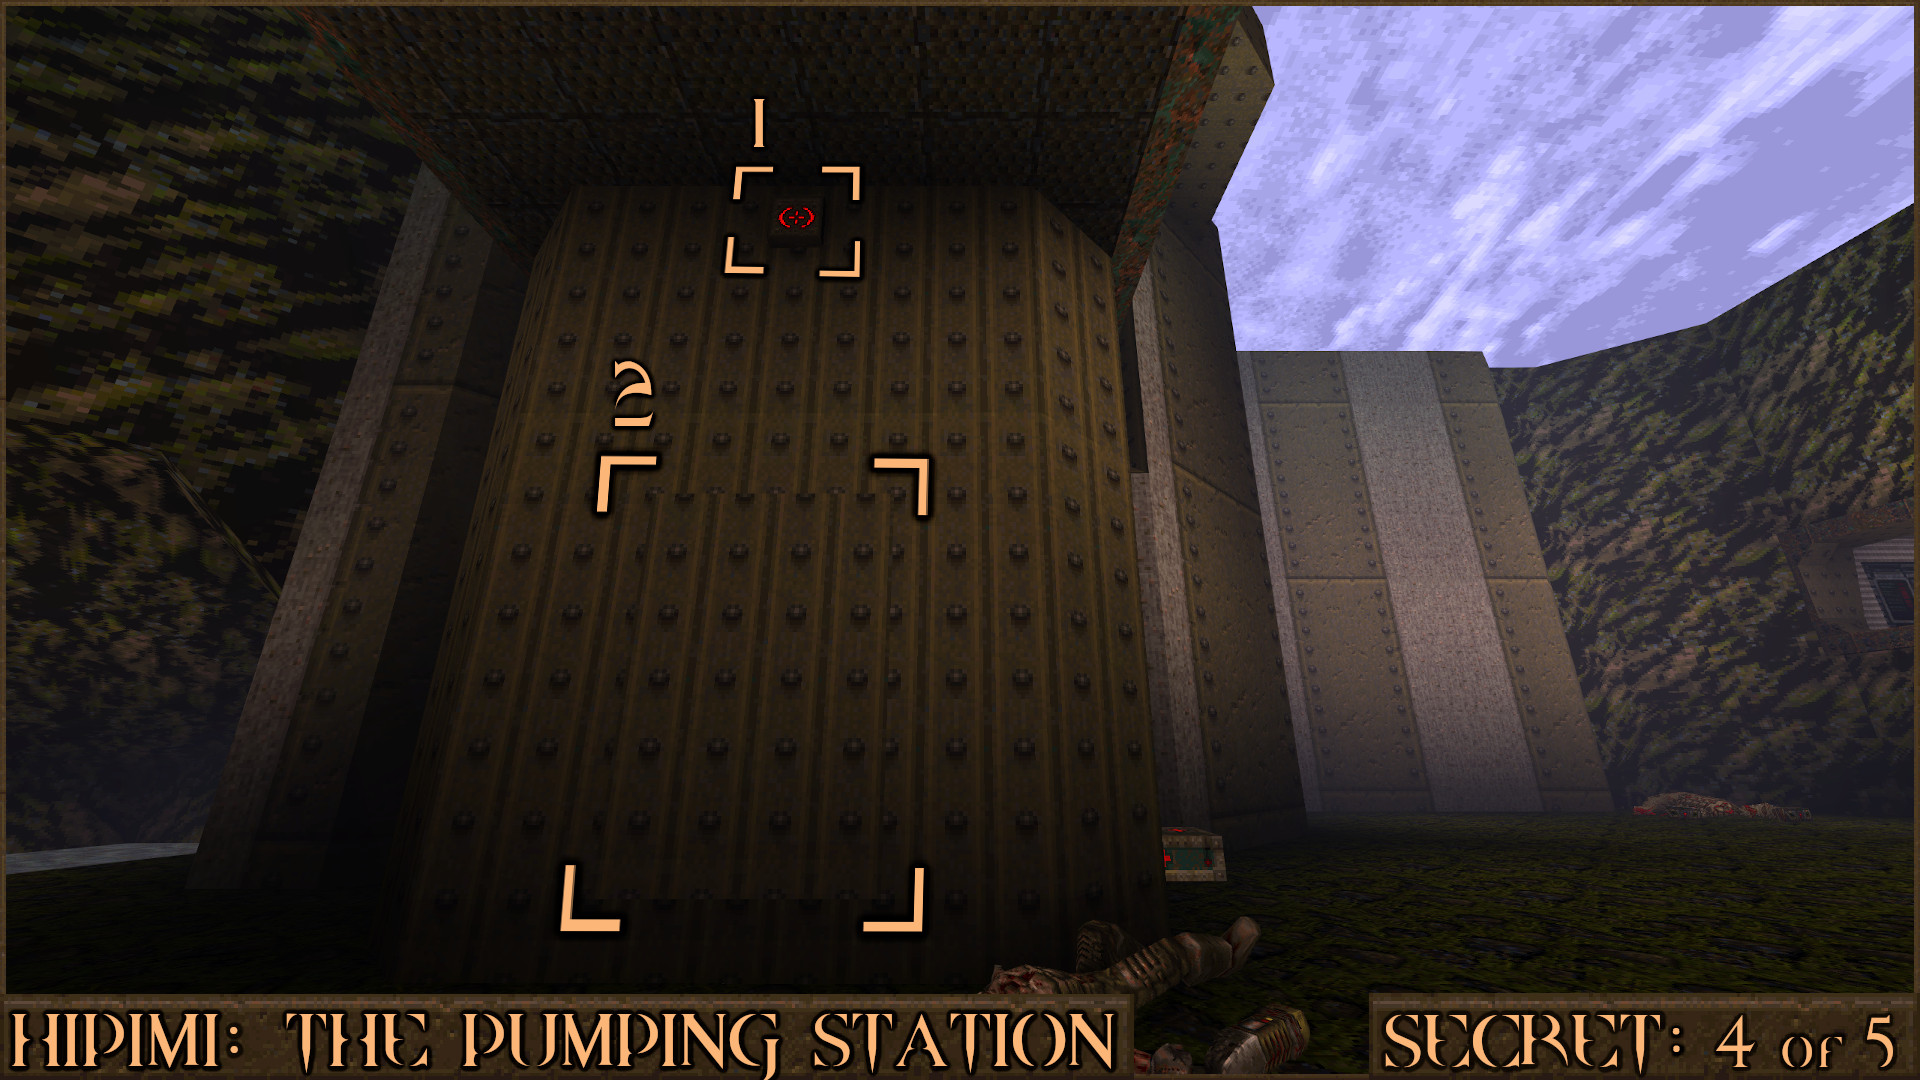
Reward:
Secret 5 of 5
Shortly after opening the Gold Keycard Door you will be in the final room with the exit Slipgate. Don't go in yet, instead try jumping up and down near the brown crates and you can just see a red switch () embedded in to the top of one. Shoot it to have several smaller crates pop out that will allow you to jump up the top () and drop down behind the Slipgate to find the secret.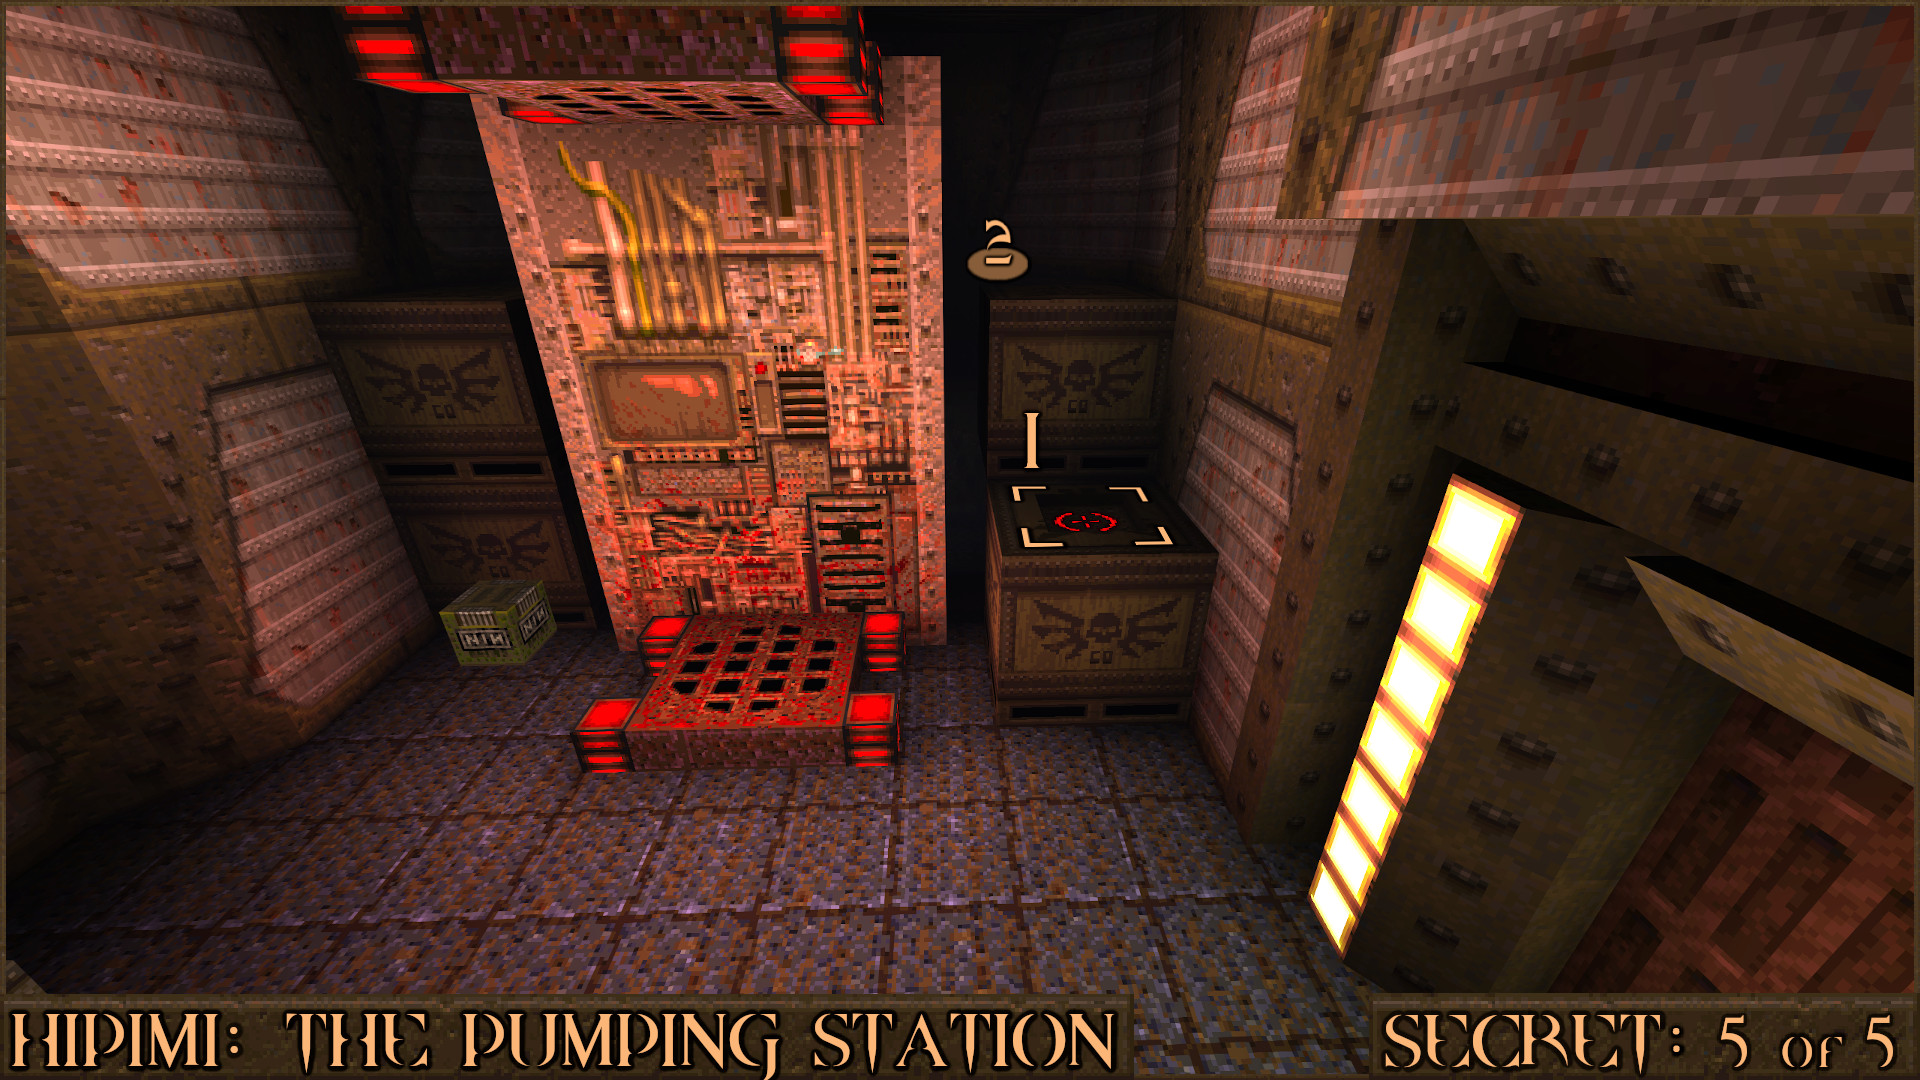
Reward:
HIP1M2: The Storage Facility
Secret 1 of 3
After you have activated the hover platforms over the water you will go up some stairs and straight ahead is a Super Nailgun. On your right is a large viewing window that overlooks the Slipgate entrance for this level. Shoot a specific part of the wall when looking out the window to reveal a secret area.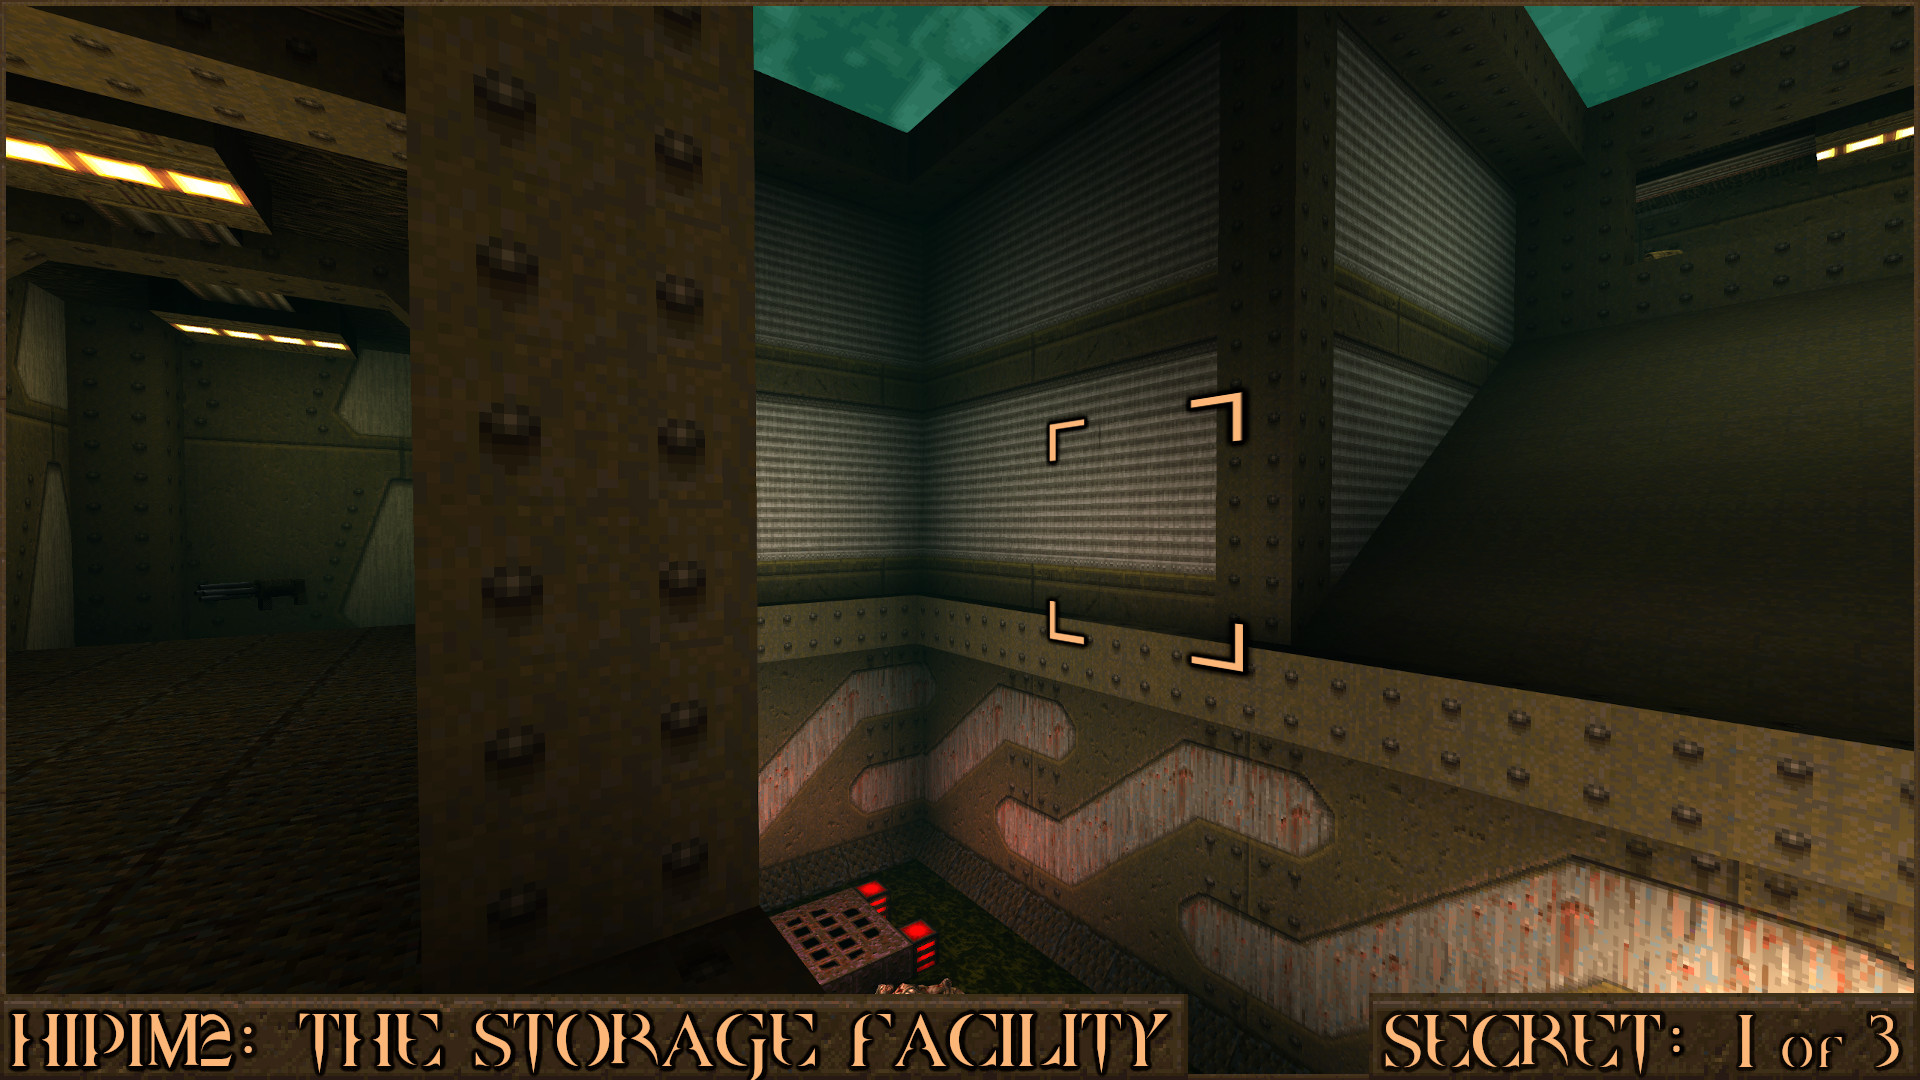
Reward:
Secret 2 of 3
Shortly after Secret 1 you will enter a room filled with crates and there is an ambush with many Grunts and Enforcers. There are several items on the crates but one counts as a secret. Drop down from above or jump up from some other crates to this crate () near some Small Shells. Go through a small gap between the crates in to a dark area to find the secret.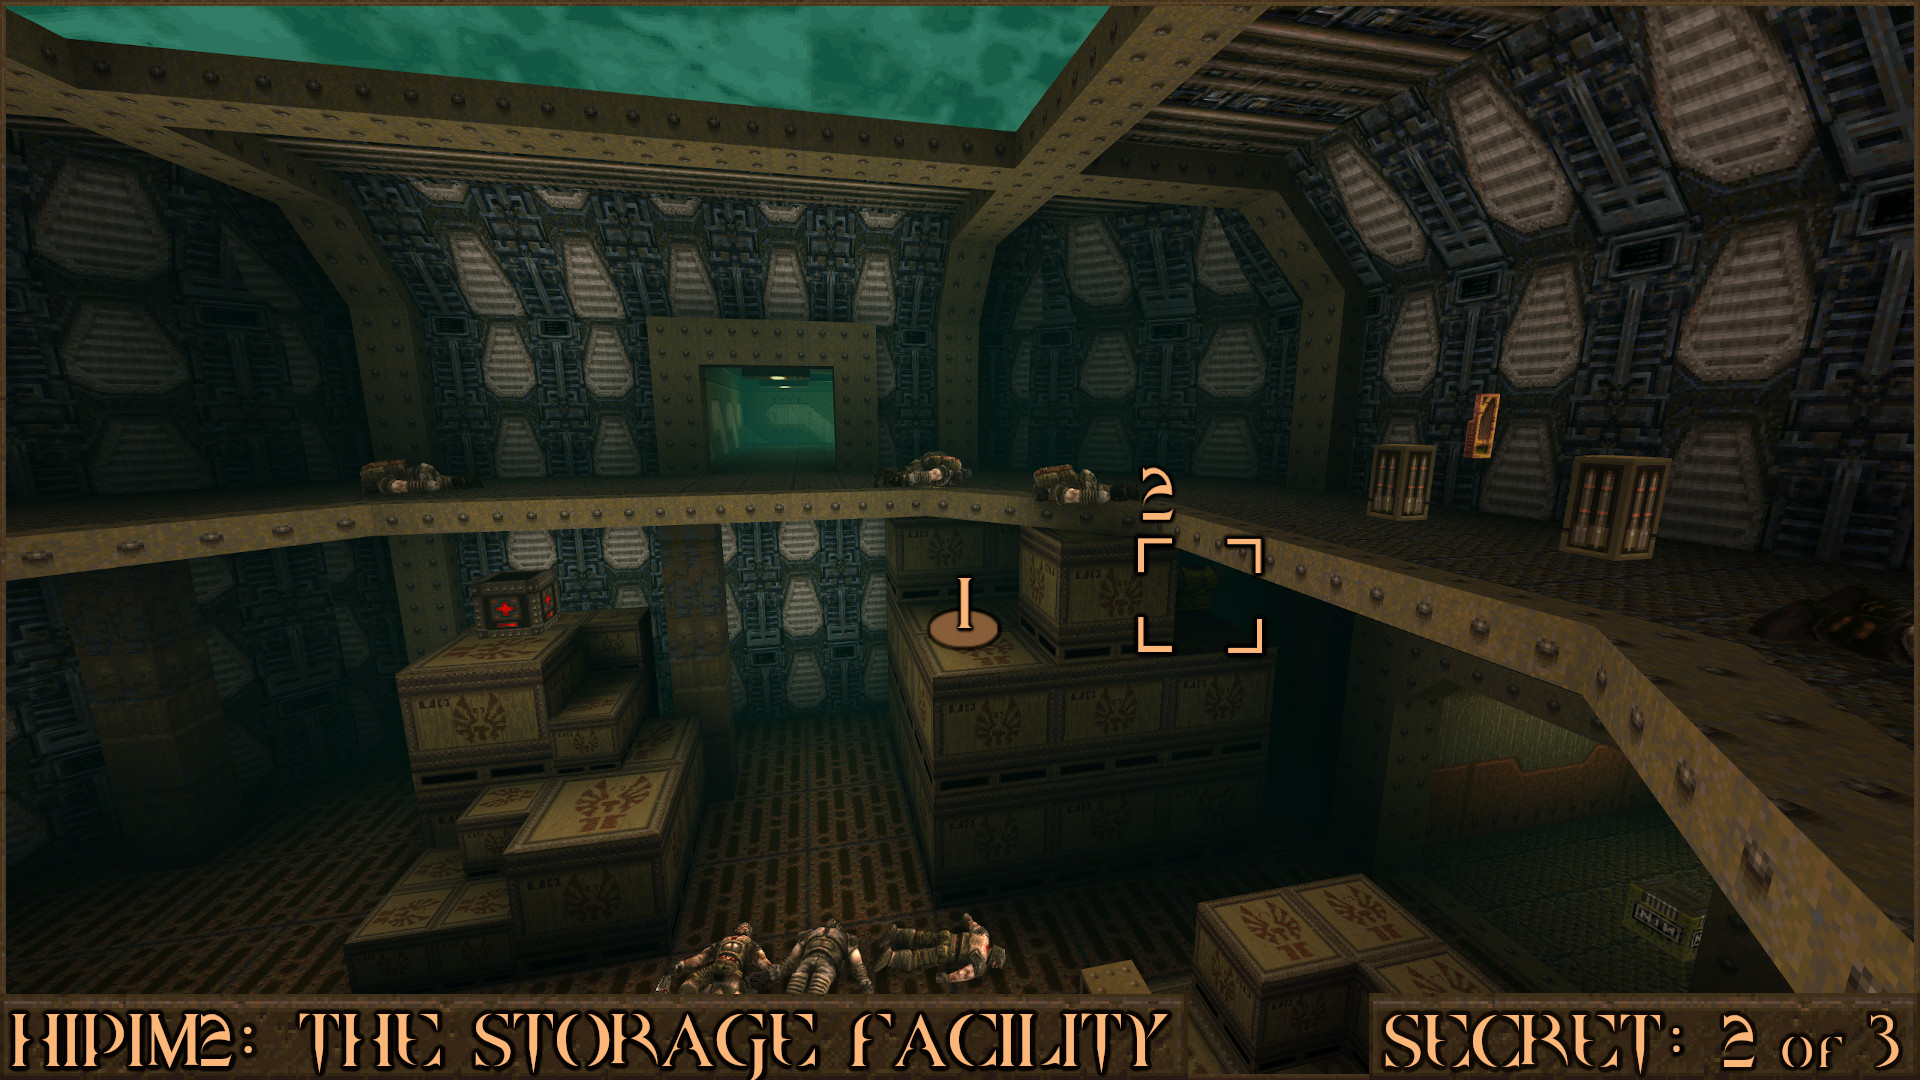
Reward:
Secret 3 of 3
To find the secret exit for this episode you will need the Proximity Launcher weapon. Shortly after you leave the room for Secret 2 you will find a Proximity Launcher ().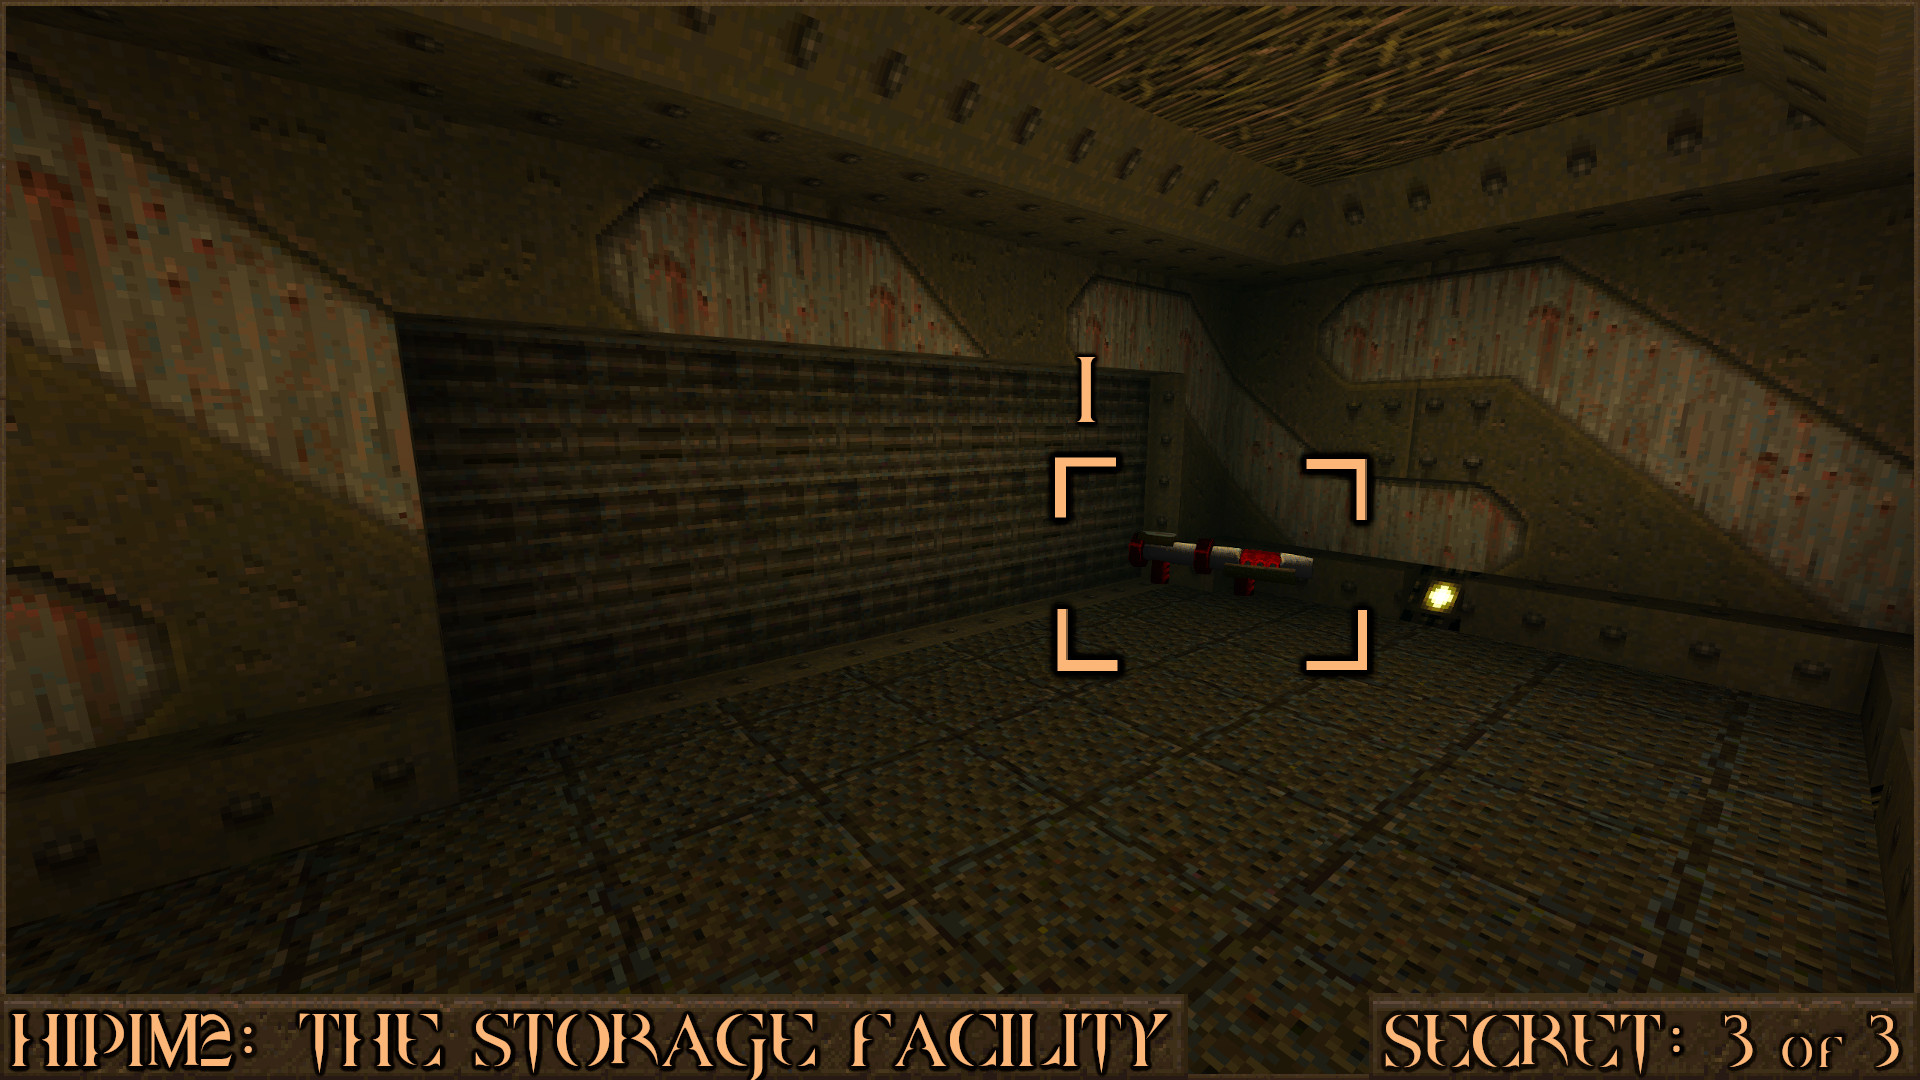
Drop down in to the room directly in front of you. Above the door in that room is a red target switch (
) that temporarily activates the secret exit door and bridge. The problem is it shuts off before you'll be able to run across the force bridge and reach it. To overcome this time limit, equip the Proximity Launcher and fire a proximity grenade directly on to the red target switch.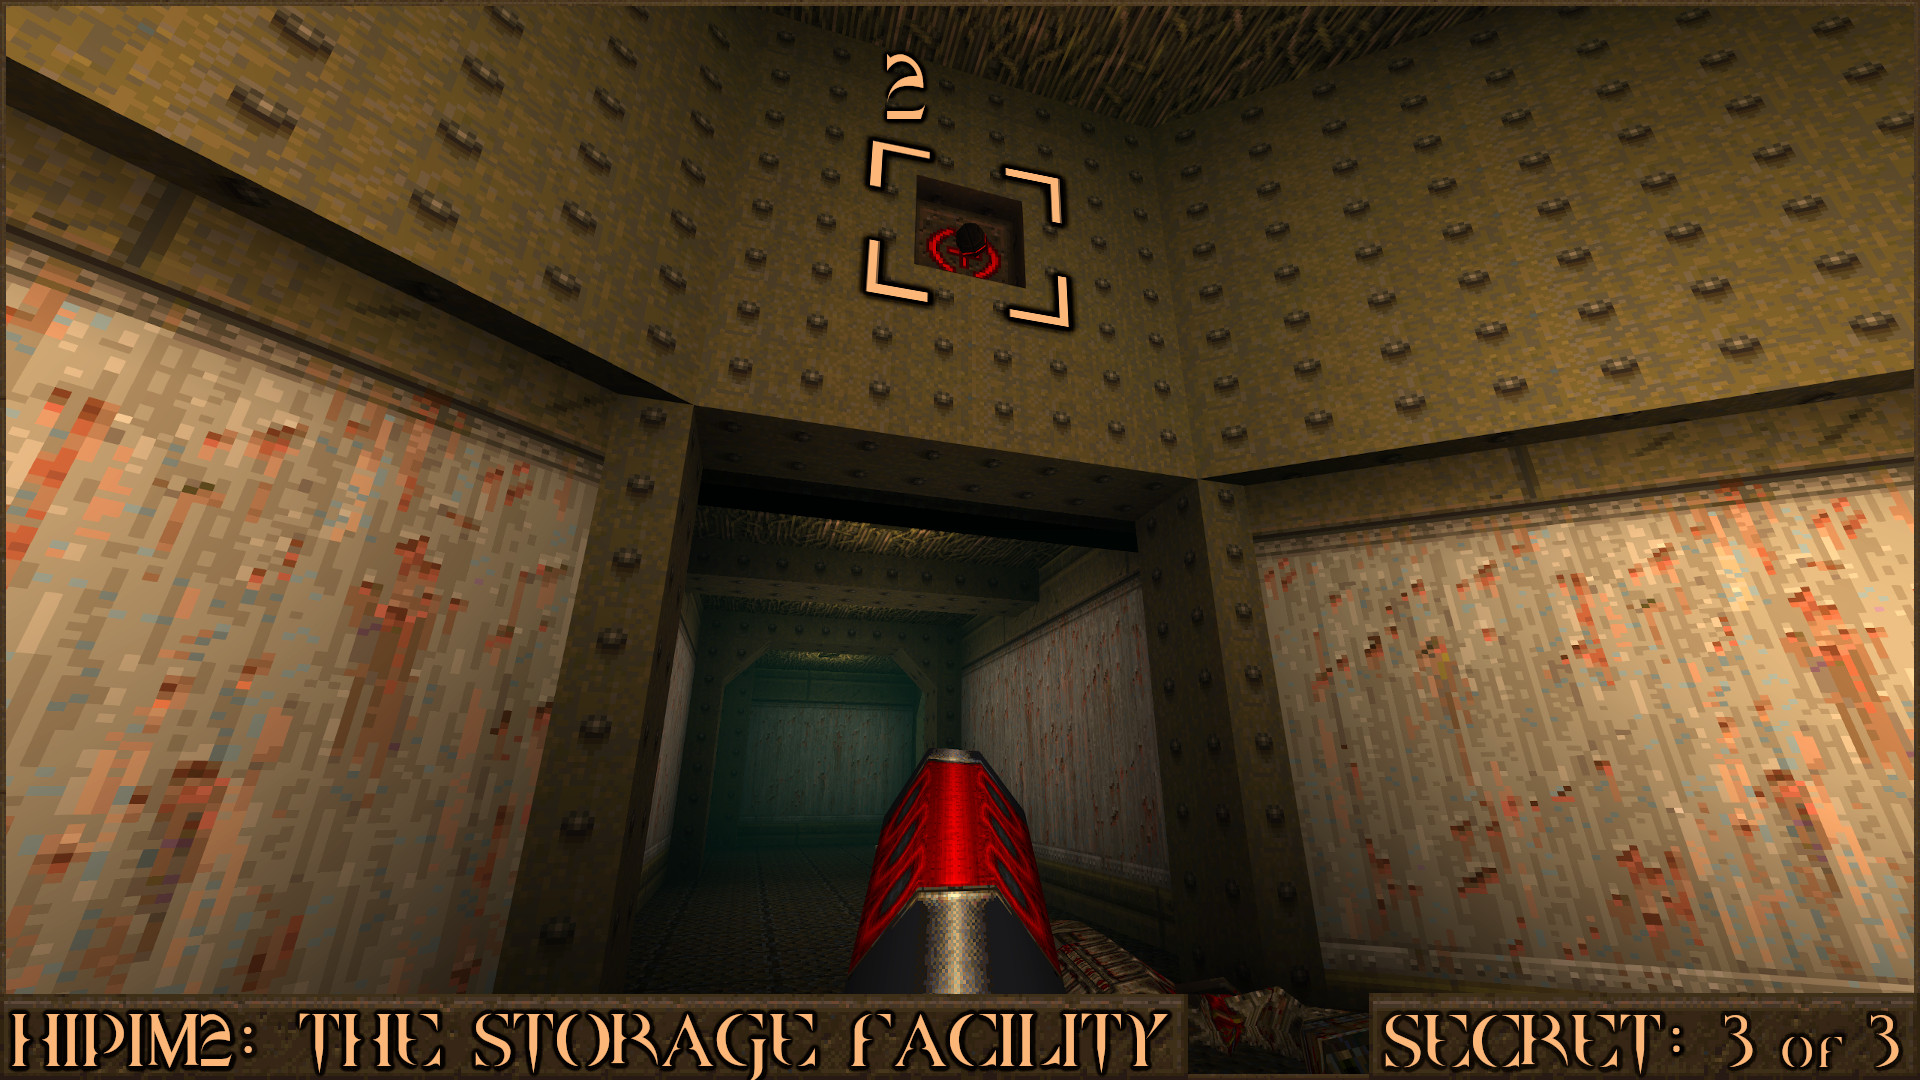
The proximity grenades explode after approximately 20 seconds which will give you more than enough time to run through the door underneath the switch, over the force bridge (
), up the stairs and in to room containing the exit ( ) to the secret level for this episode: HIP1M5: Military Complex.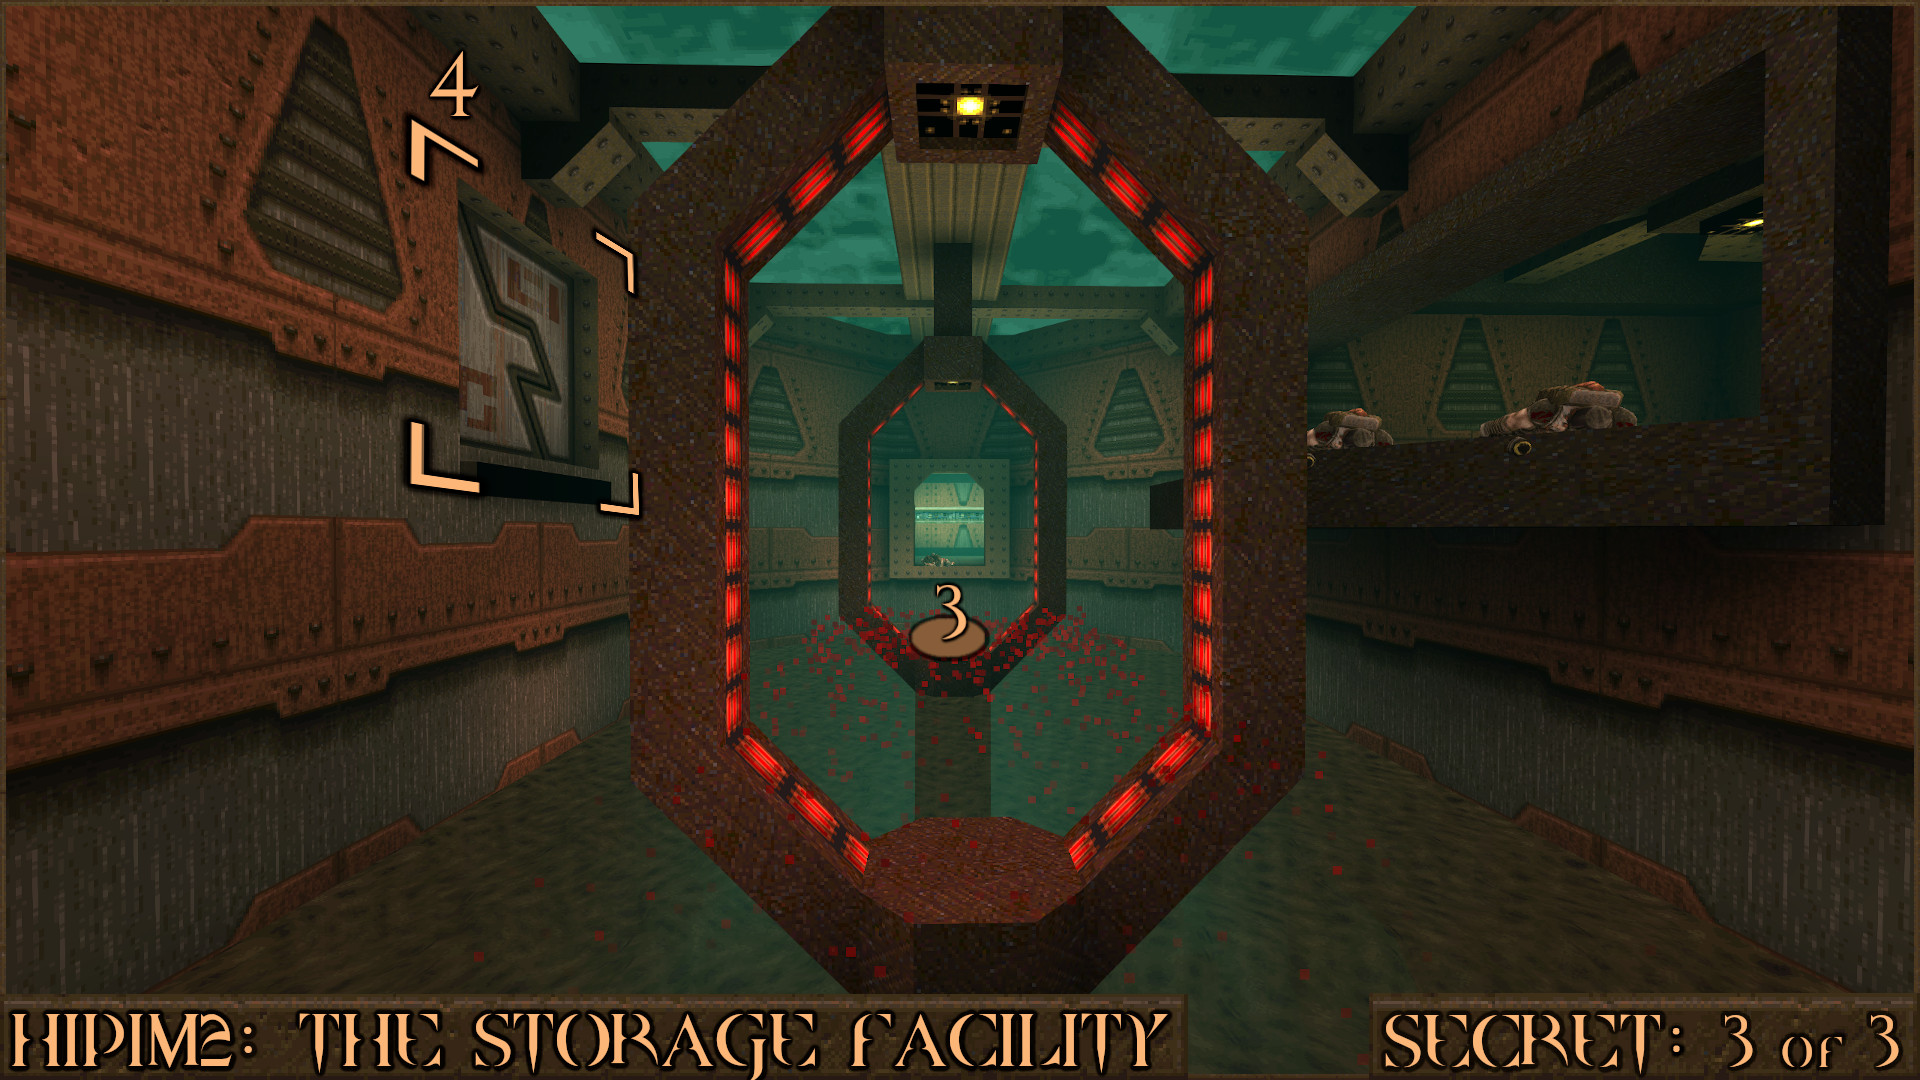
Reward: SECRET LEVEL
HIP1M5: Military Complex [Secret Level]
Secret 1 of 7
At the start of the level jump in to the water and head through the metal tunnel. When you come to the corner of the tunnel look straight up to see a red target switch that when shot will cause a lift to raise you up out of the water and in to the secret.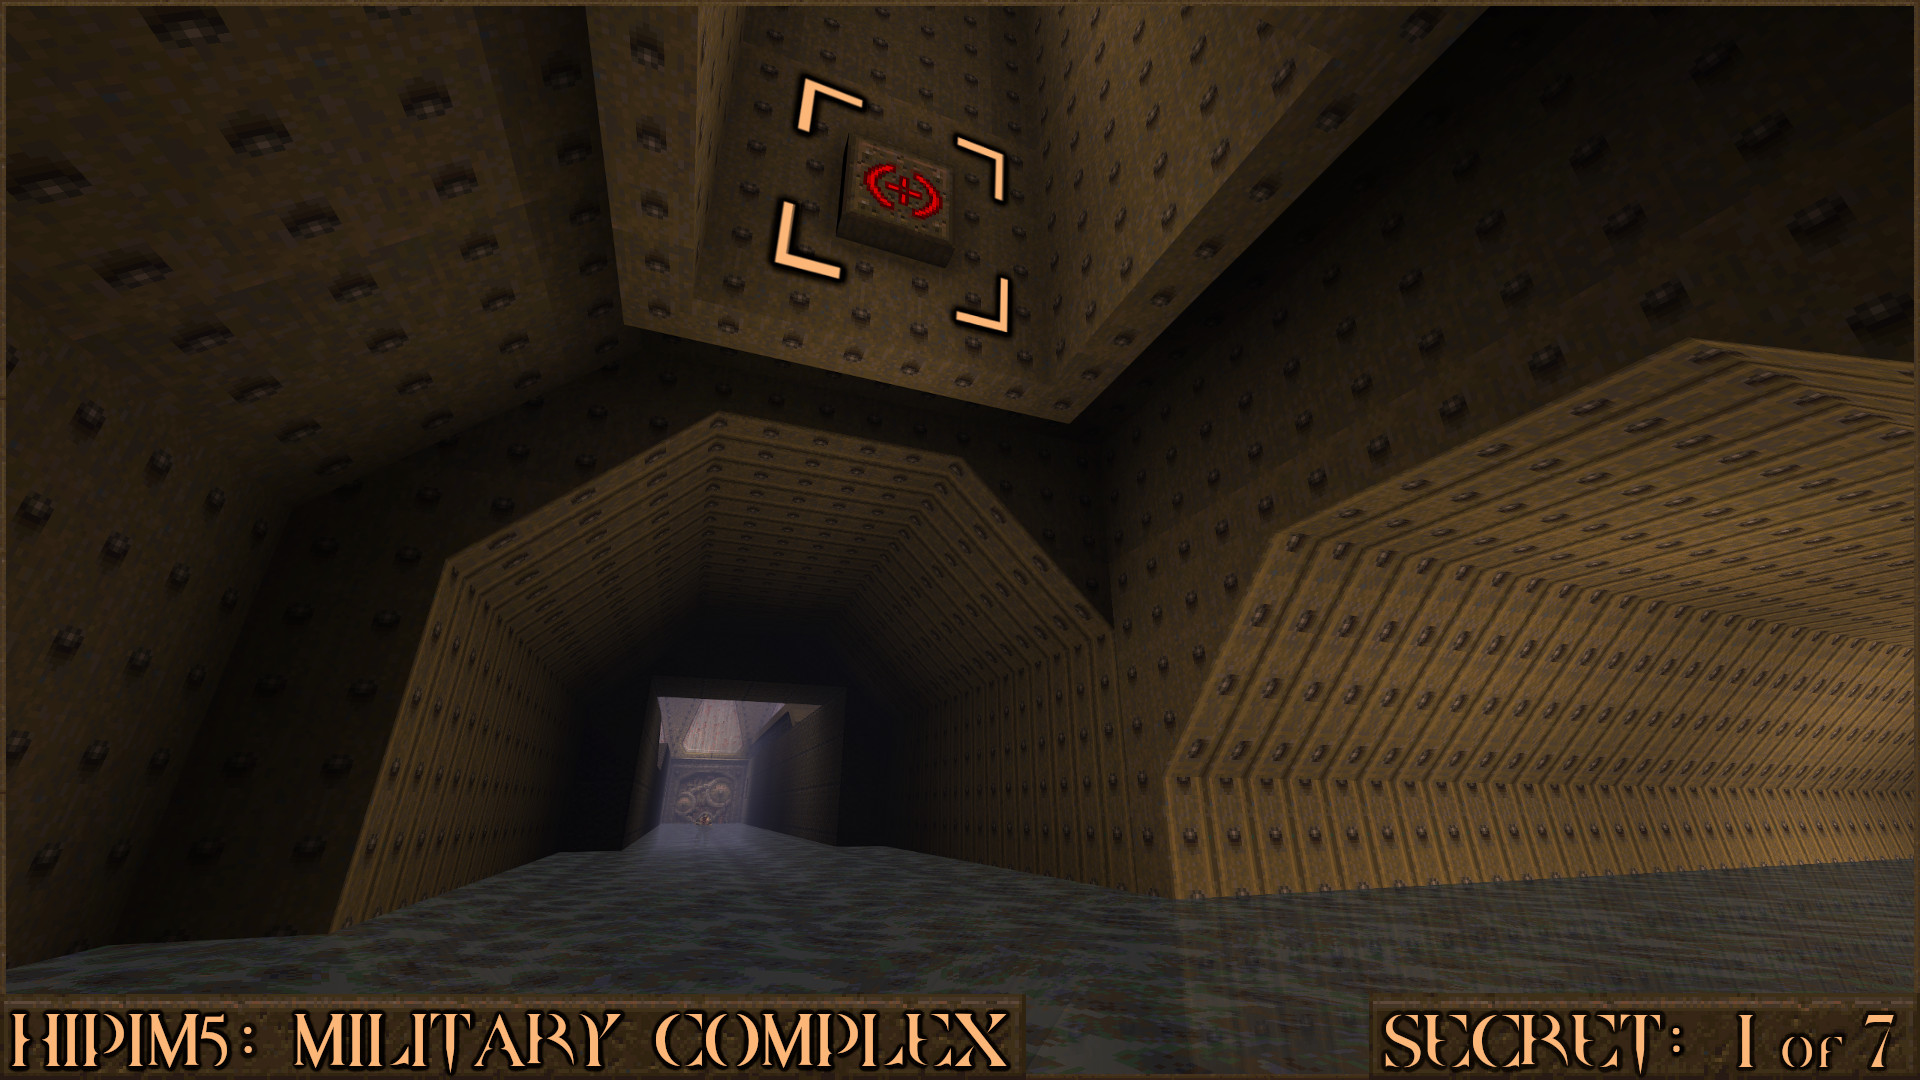
Reward:
Secret 2 of 7
While you are tracking down the red diamond buttons to continue the level you will briefly head outside to this small area with a guard tower. Look carefully in to the guard tower to see a red target switch. Shoot it to allow access to the guard tower and the secret.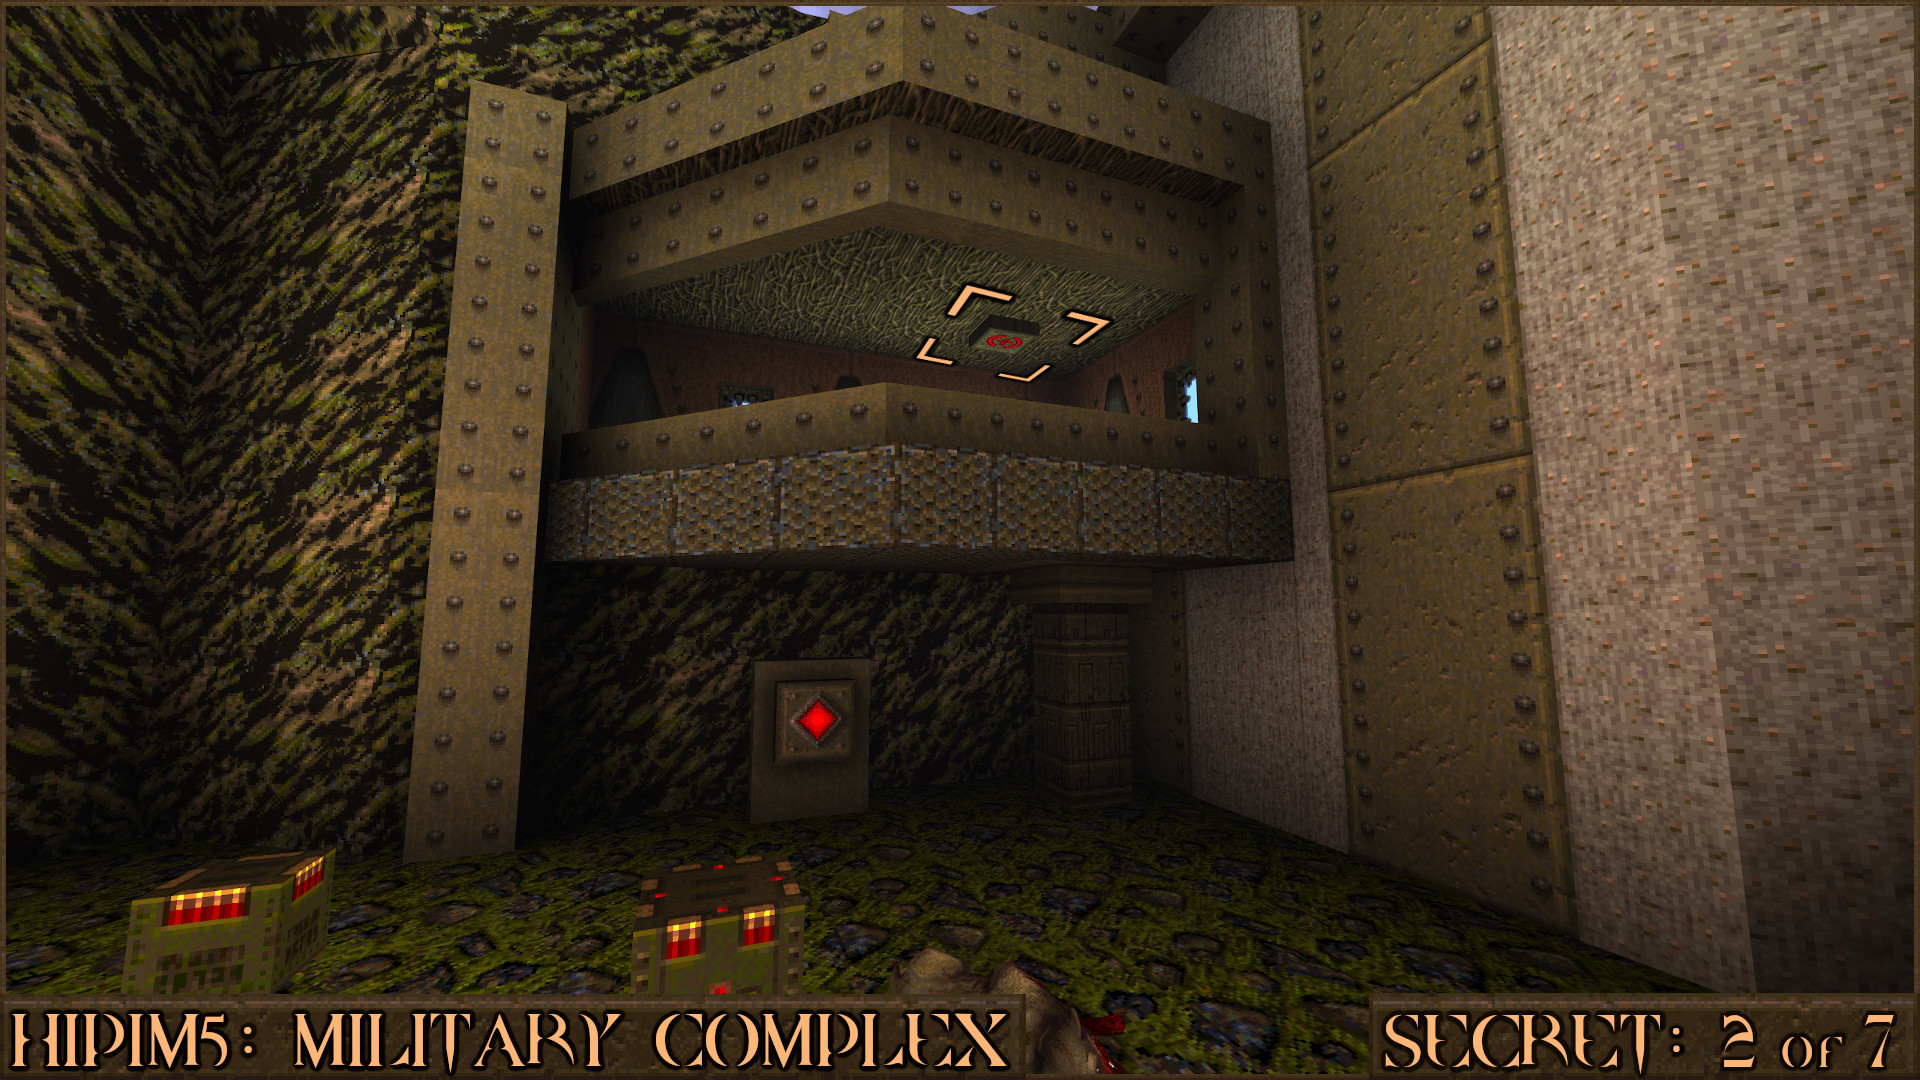
Reward:
Secret 3 of 7
Shortly after Secret 2 you will come across a metal bridge. Jump up on the side () and look for corner with several boxes of Large Nails(). Approach them to claim the secret.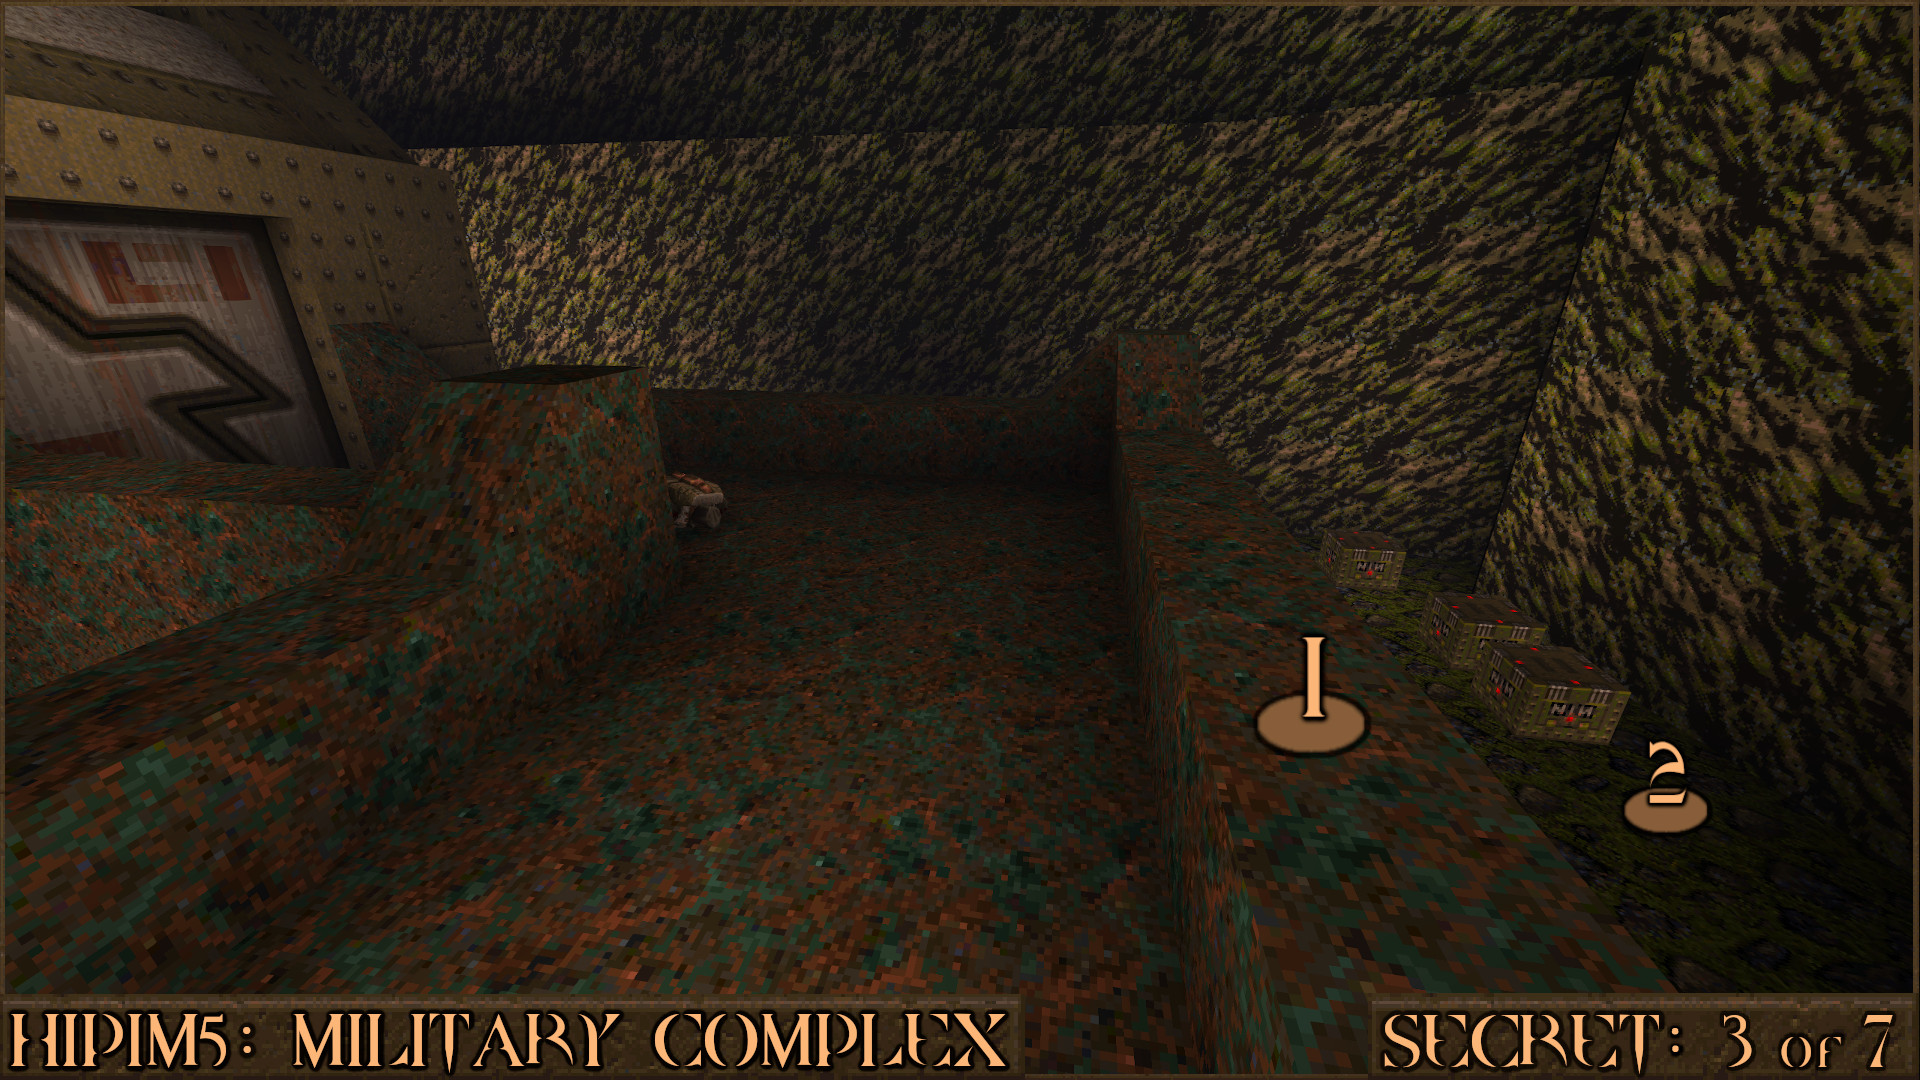
Reward:
Secret 4 of 7
Right next to another red diamond button you will see a large window that overlooks the start of the level. Jump out of the window and on to a nearby ledge (), then head across it to find a secret Super Nailgun ().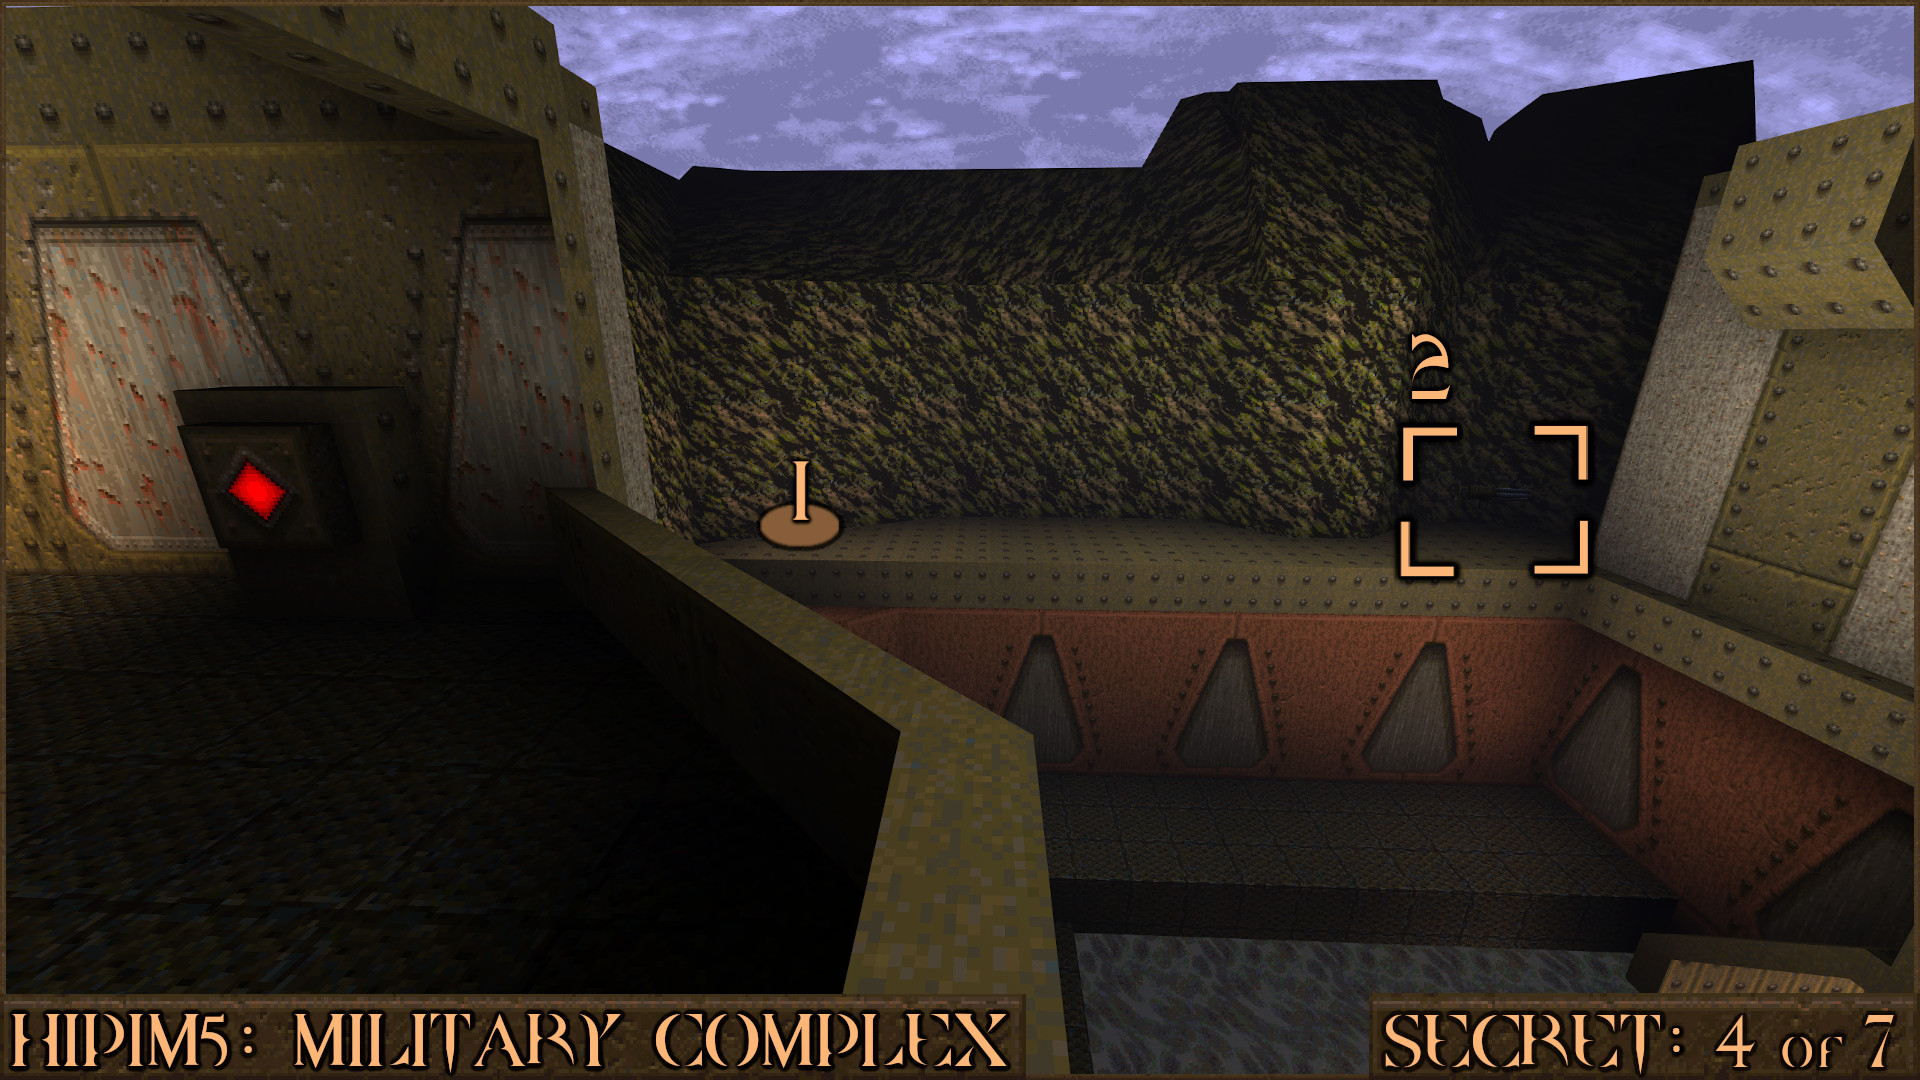
Reward:
Secret 5 of 7
After descending a dark ramp and after several lights turn on you will enter a room with several metallic boxes. Jump up them and then jump on one that has a red arrow pointing upwards (). As soon as you land on that box a nearby pillar () will move to reveal a secret.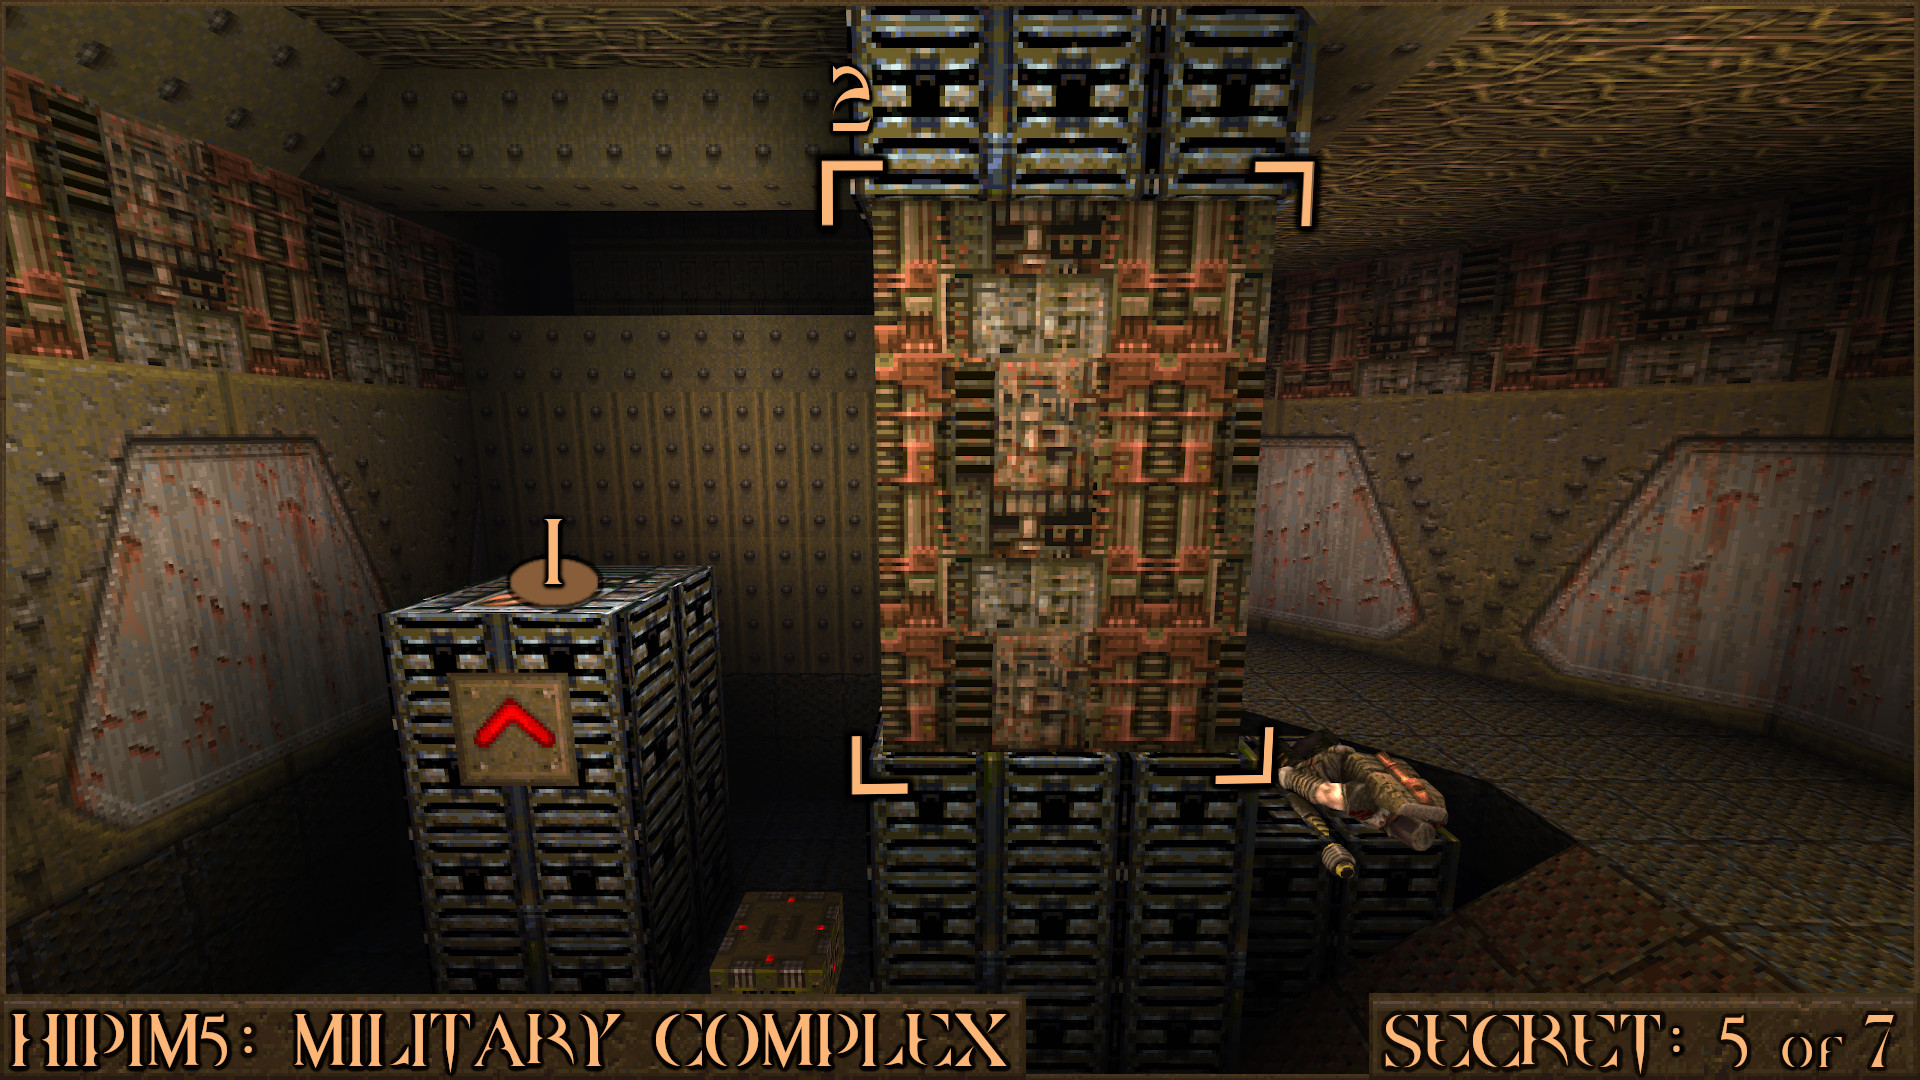
Reward:
Secret 6 of 7
You will enter a room which has a metal bridge over some shallow water. As soon as you enter just drop off the side () to find a secret under the bridge.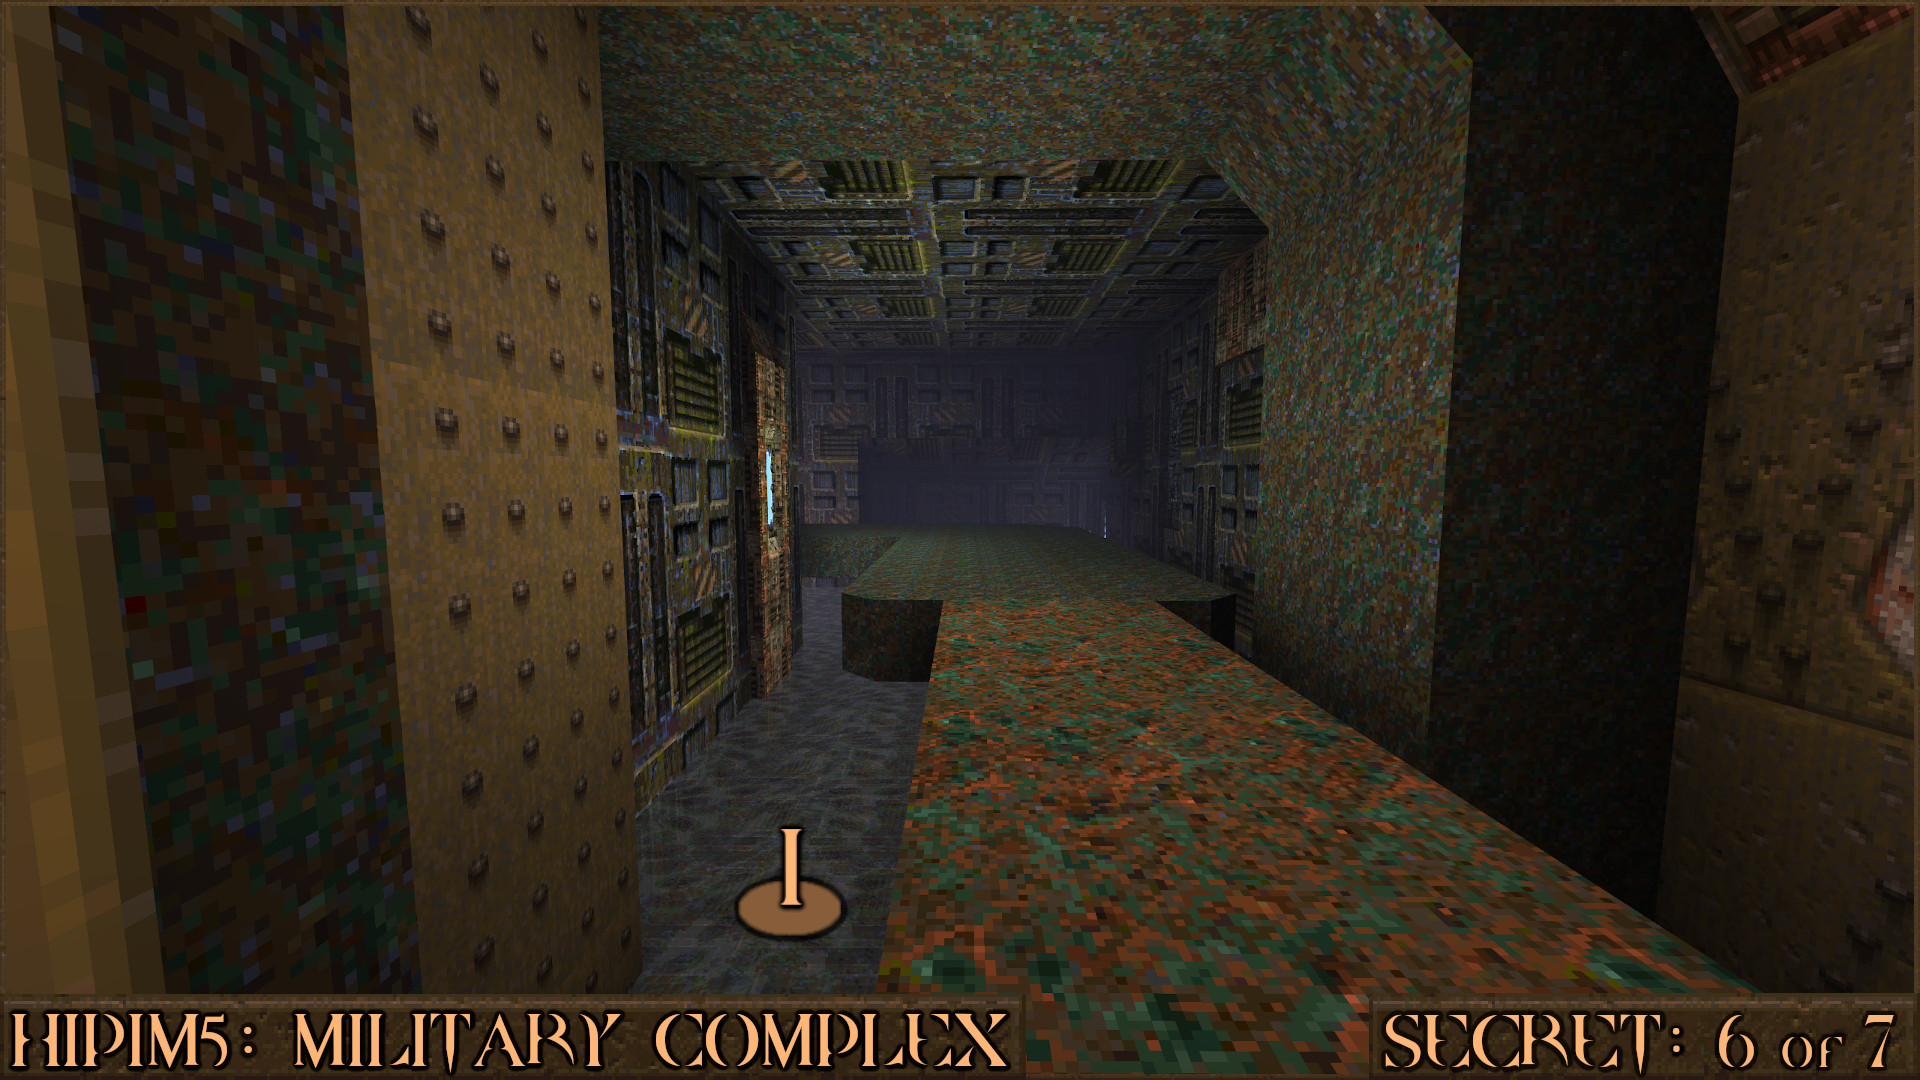
Reward:
Secret 7 of 7
After opening the Silver Keycard Door you will find yourself on a ledge above the Gold Keycard Door. Look carefully at the wall on your right to see a damaged section. Shoot it to reveal a secret area.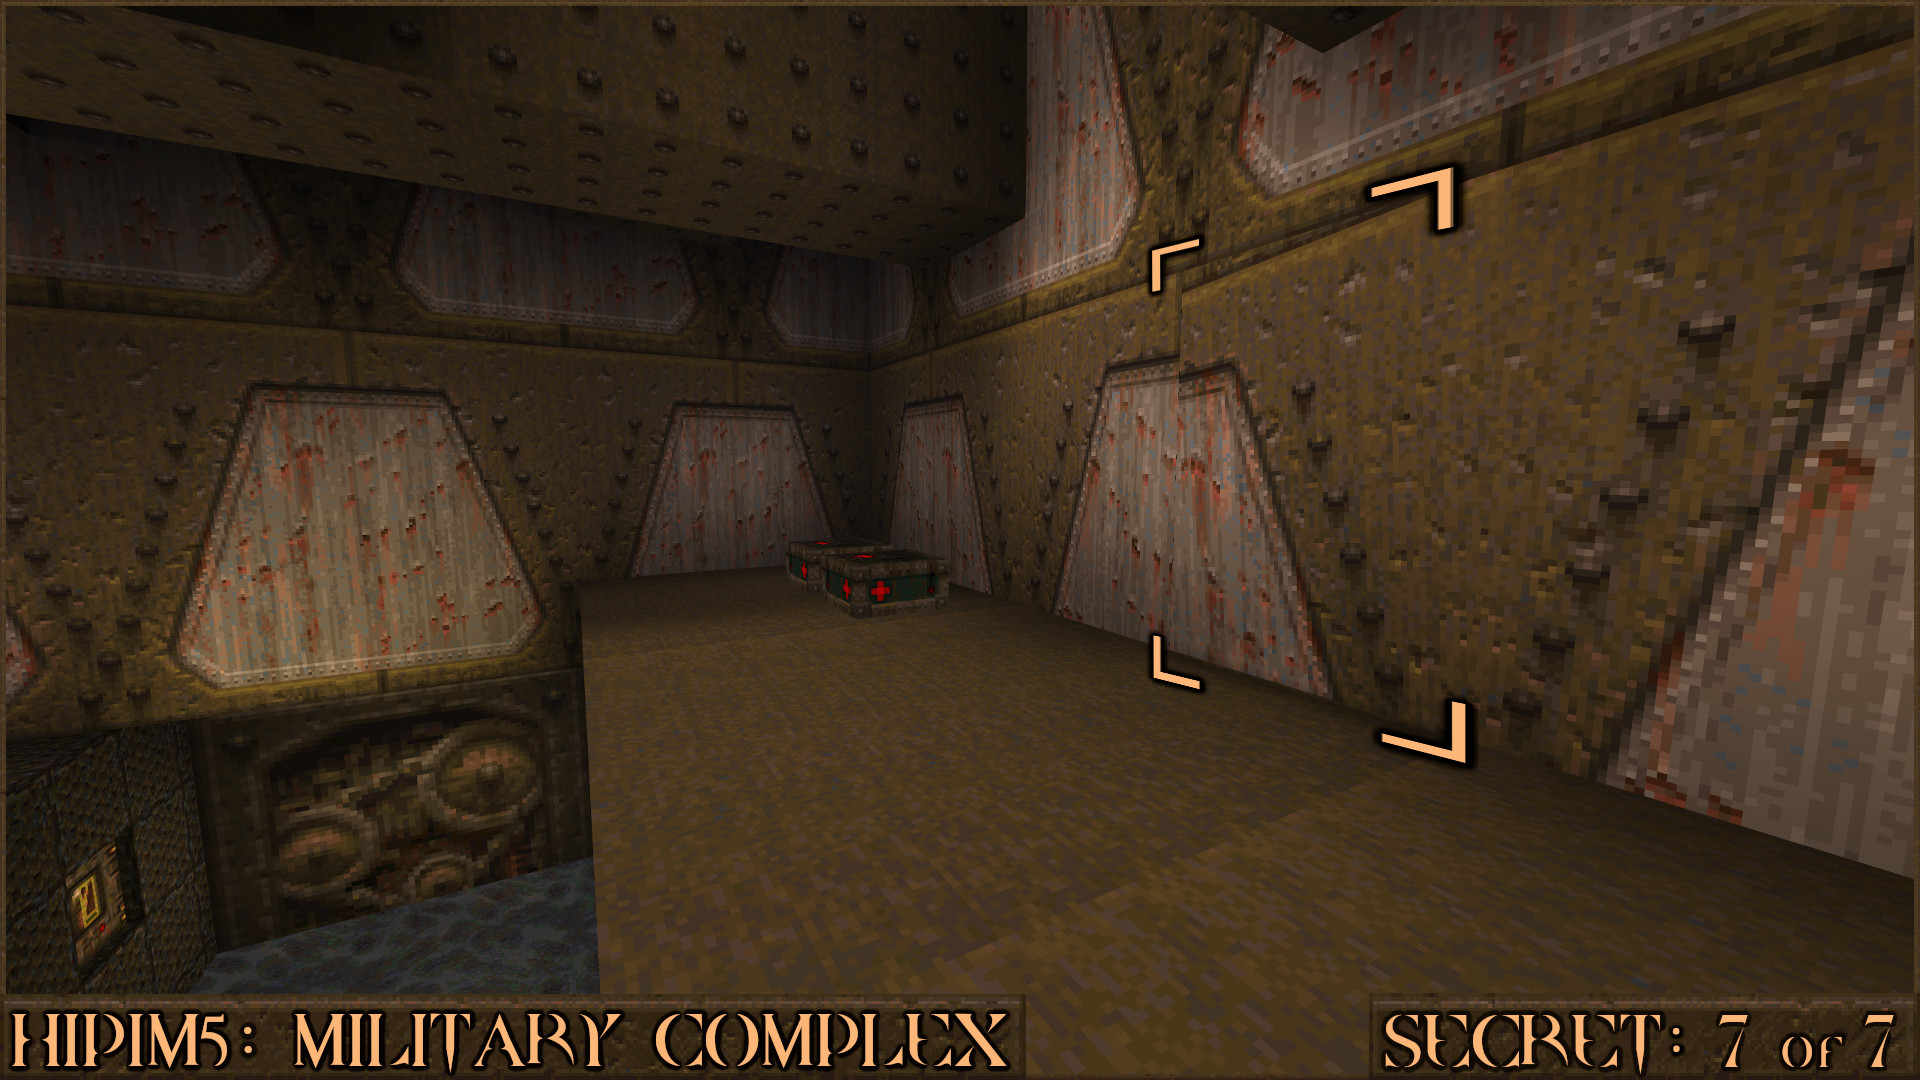
Reward:
HIP1M3: The Lost Mine
Secret 1 of 3
Once you enter the actual mine you will head some dark tunnels. Shortly after a rolling boulder chases you will see a small pipe () on the left. Jump up on to it and follow in to the next room.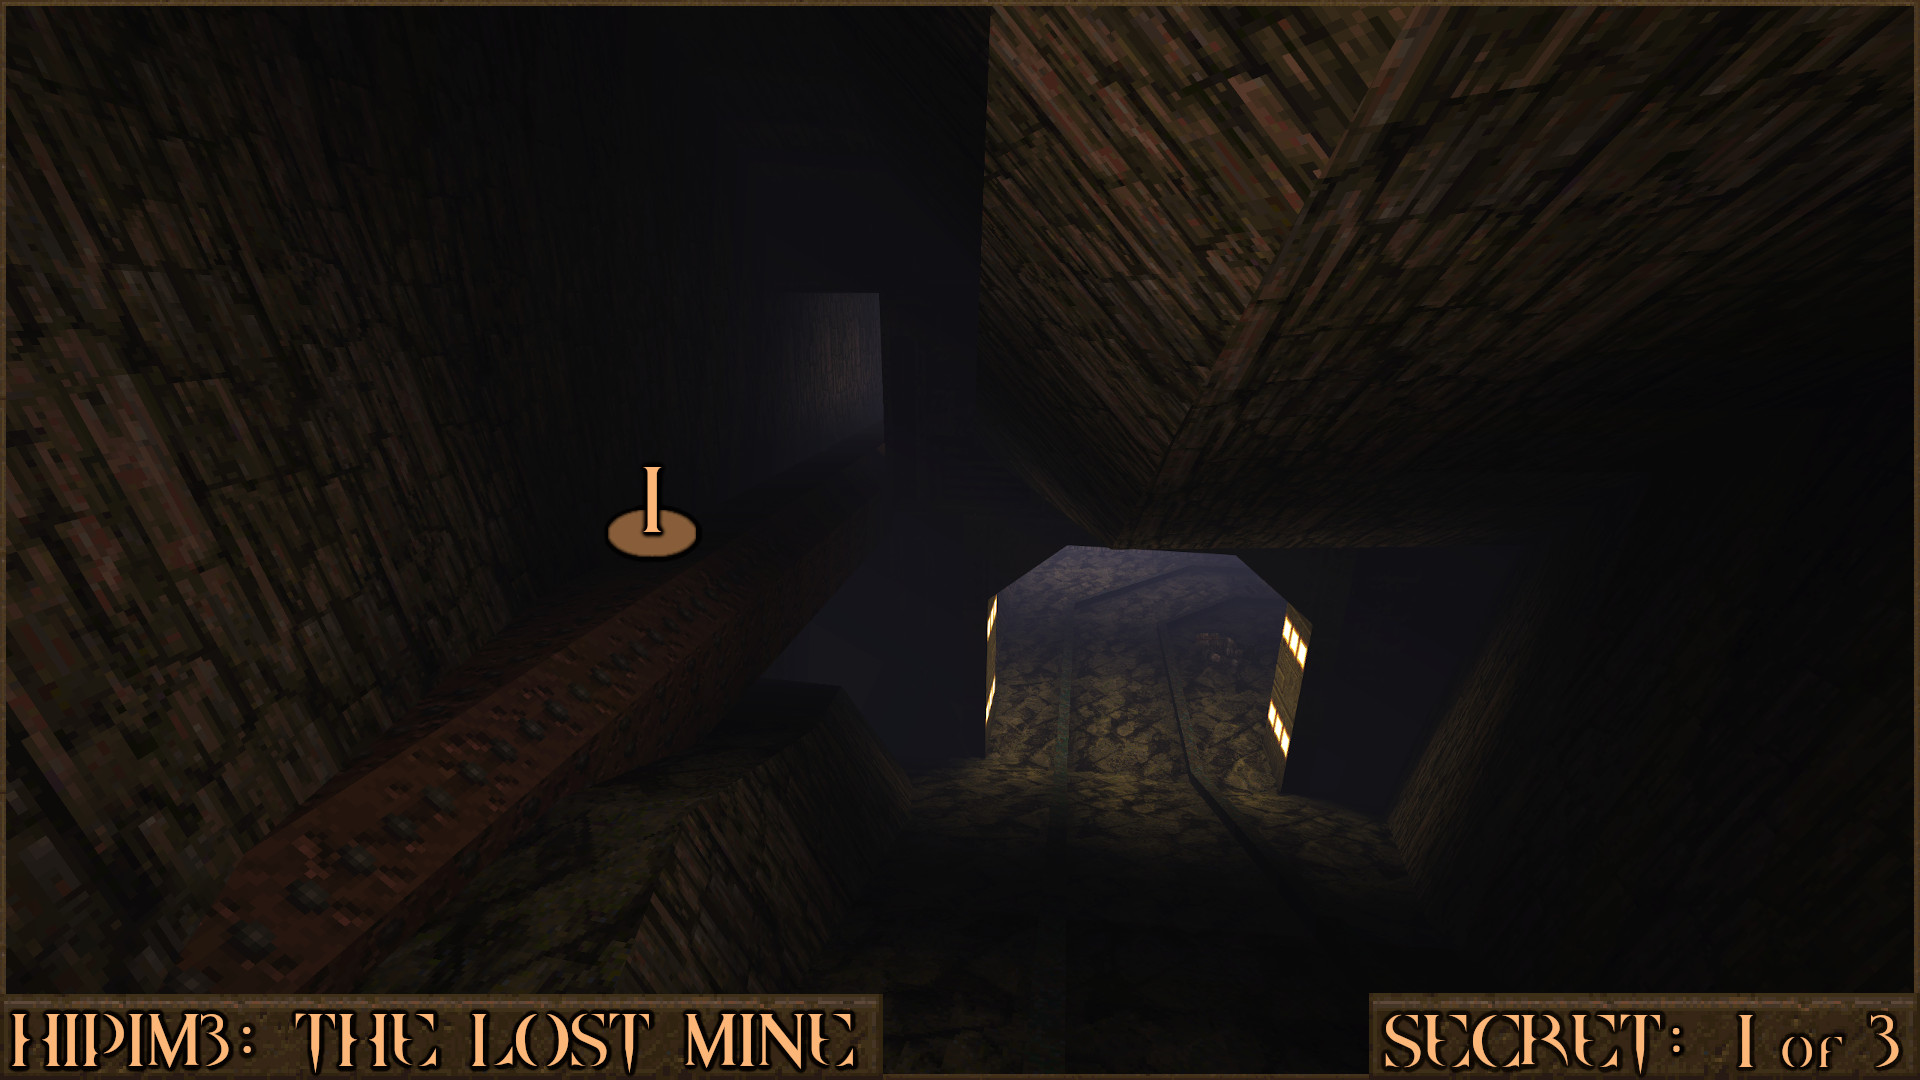
Straight ahead of you will a dark orange door (
) that will move out the way when you walk in to it. Go inside to find the secret.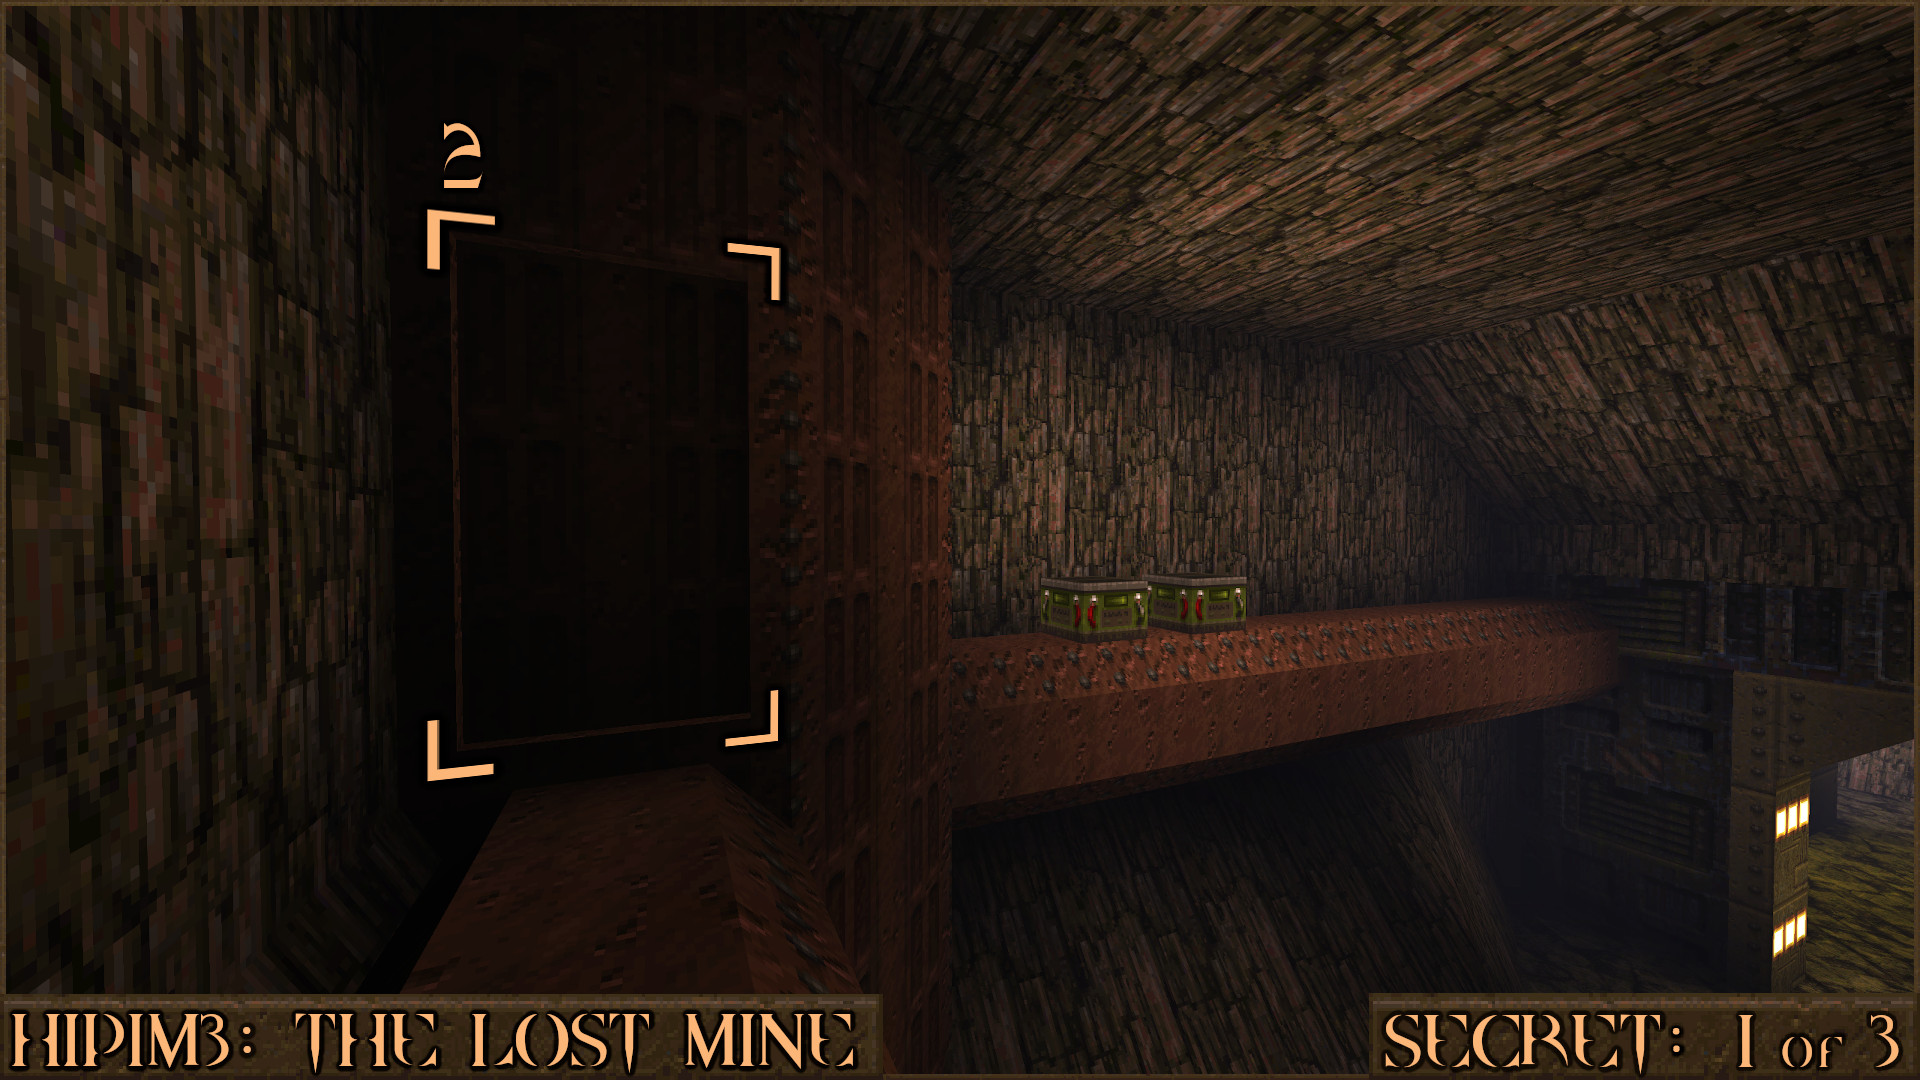
Reward:
Secret 2 of 3
You will come across some explosive boxes wedged in to the rock. First jump up on to the bent metal track (), then on to the rock () and then jump in to the corner (). All you find here is a small light fixture but by jumping up here you will have discovered the secret.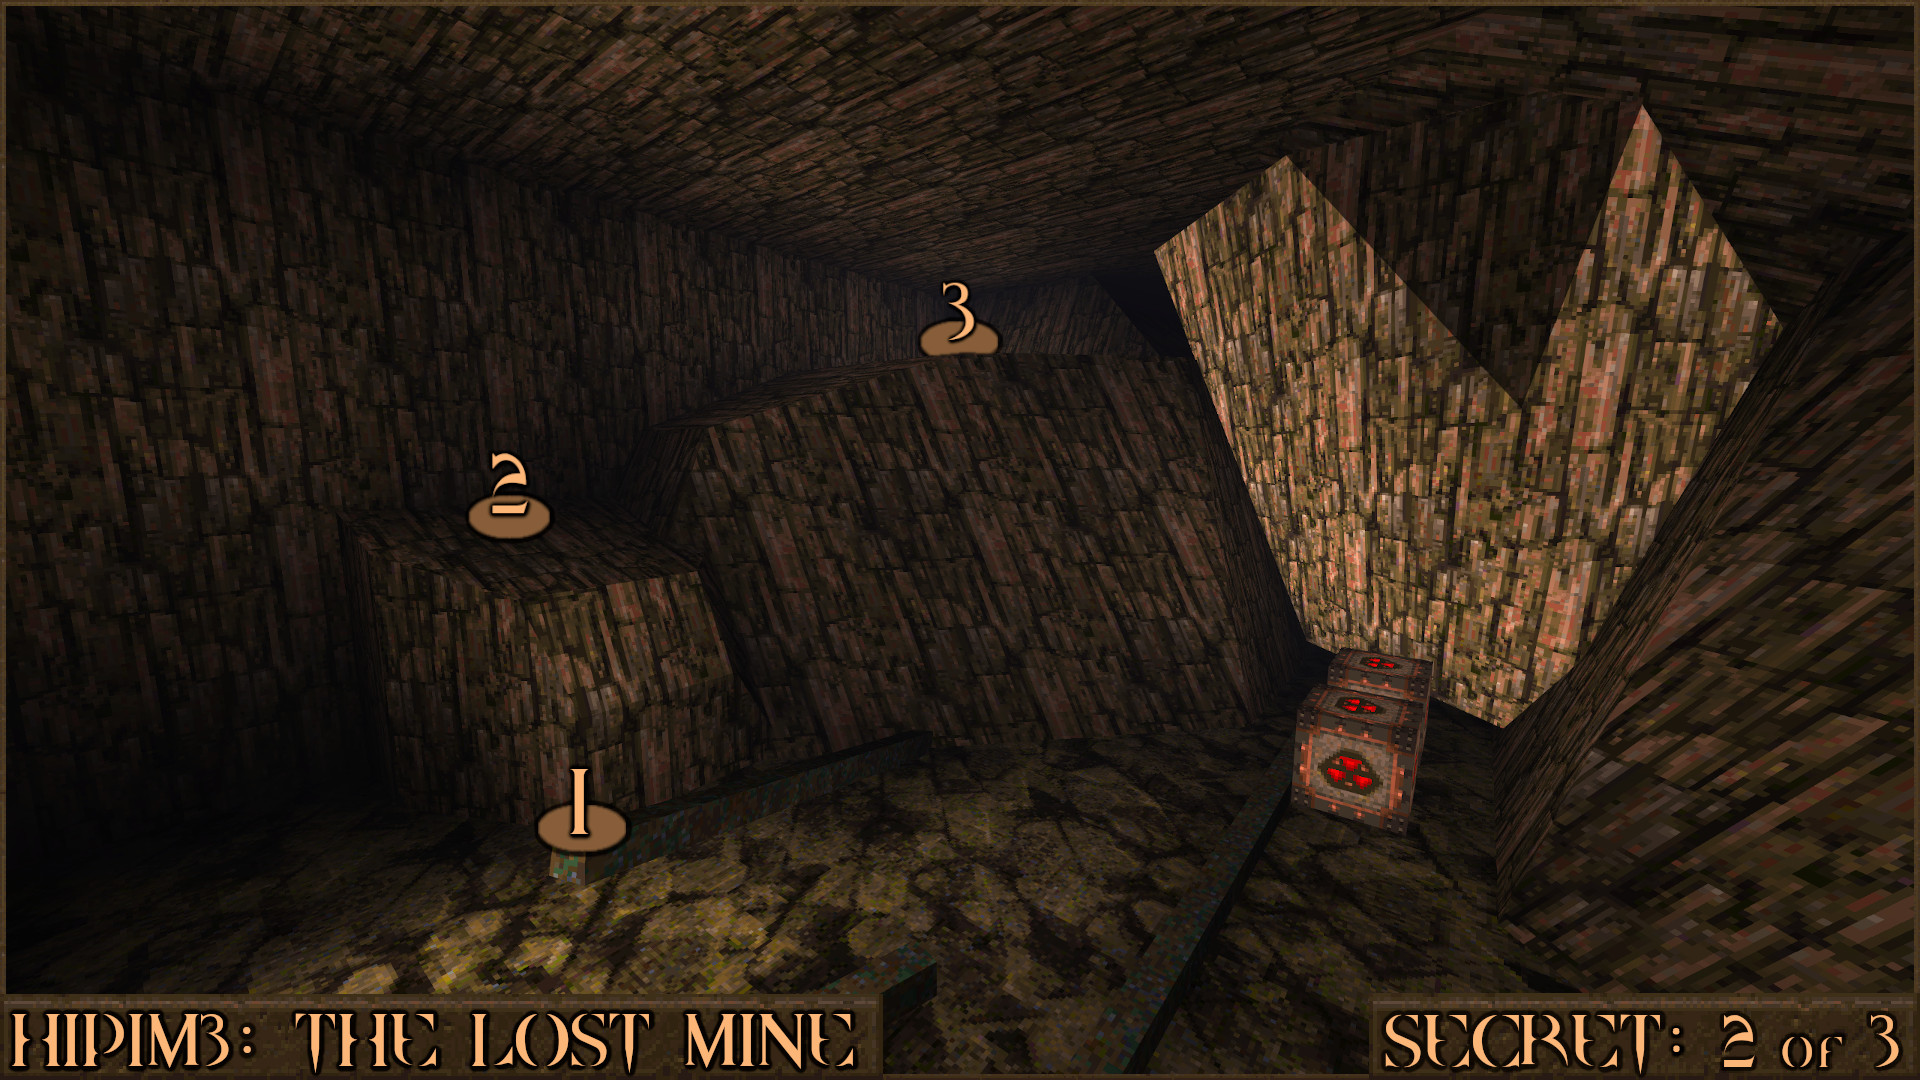
To actually get the reward for this secret you must return to the previous room and look at the computer panels (
). You'll see that one has moved to reveal a Ring of Shadows.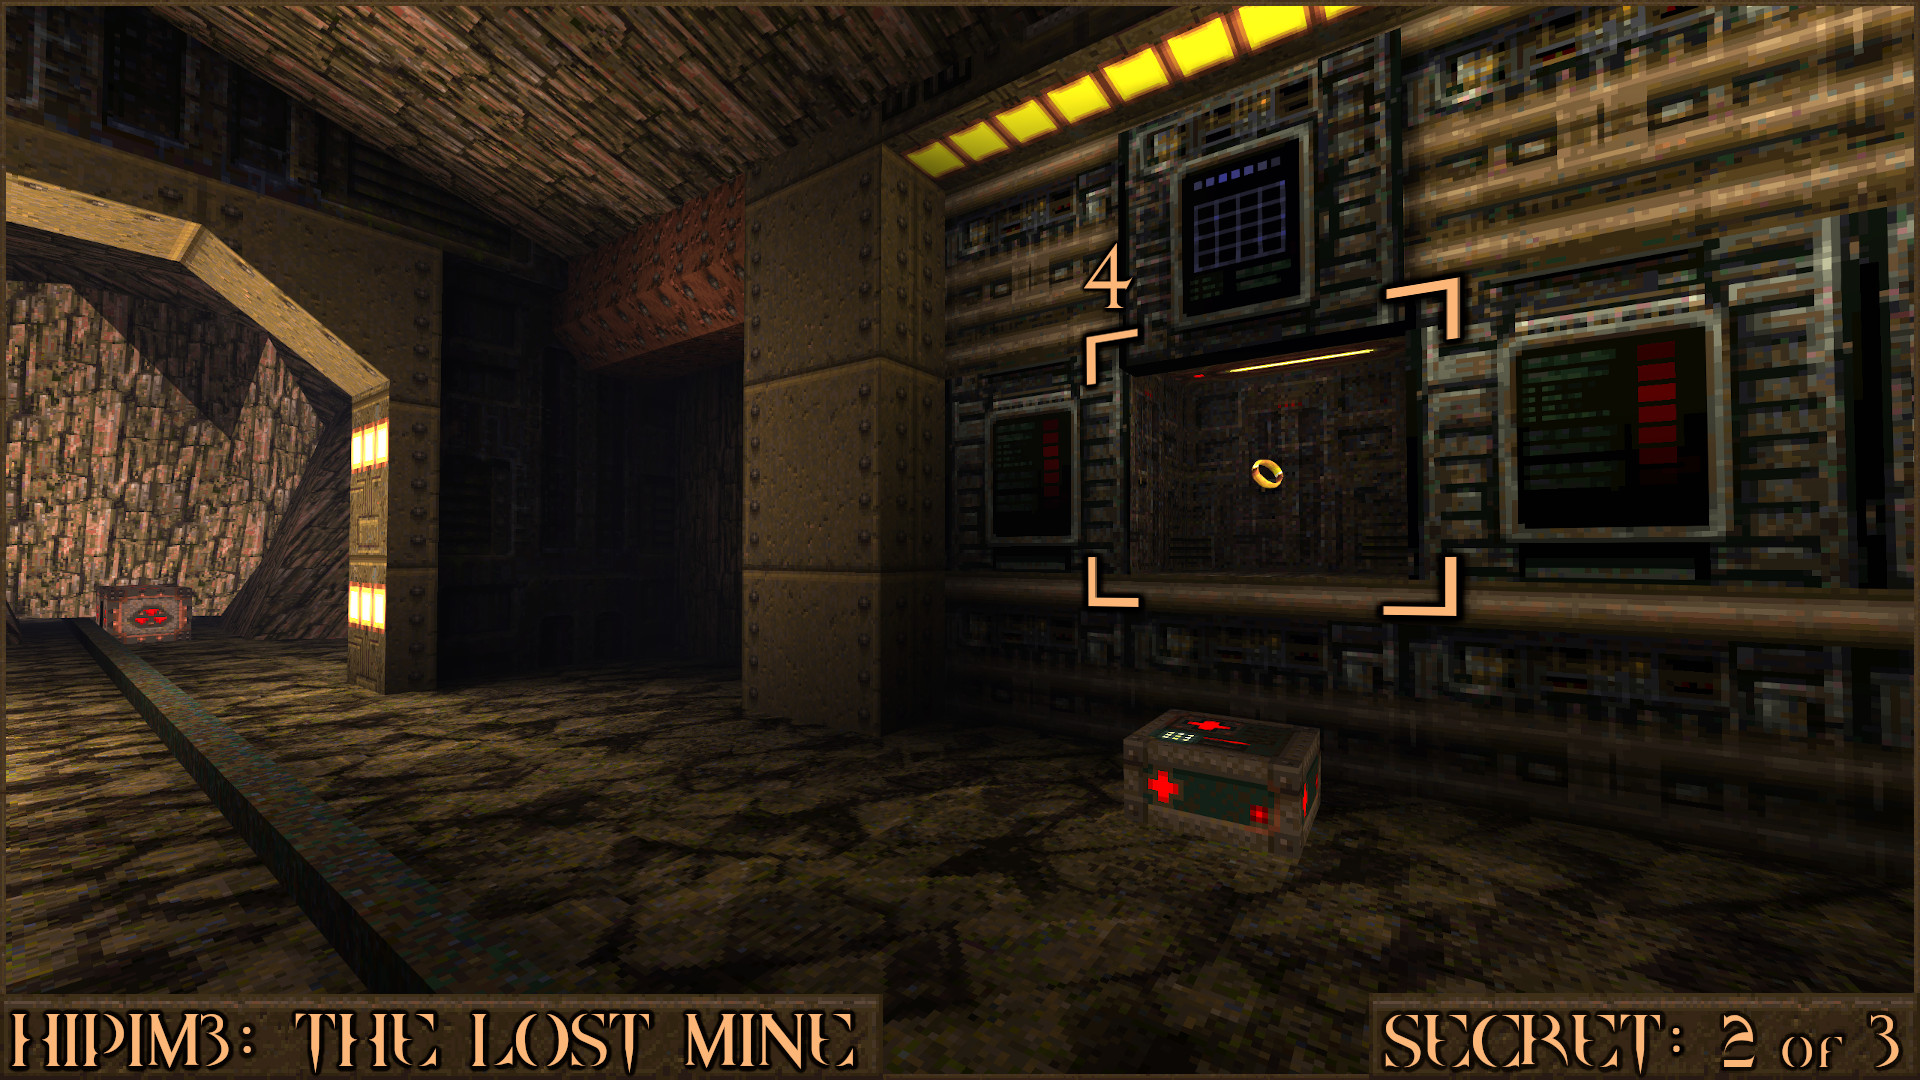
Reward:
Secret 3 of 3
After passing a window that shows a tumbling boulder machine you will enter a small room with electronic panels everywhere. Look around for a red diamond button () that when pushed will transform the red striped platforms in to stairs. Use them to climb up to the top of room ().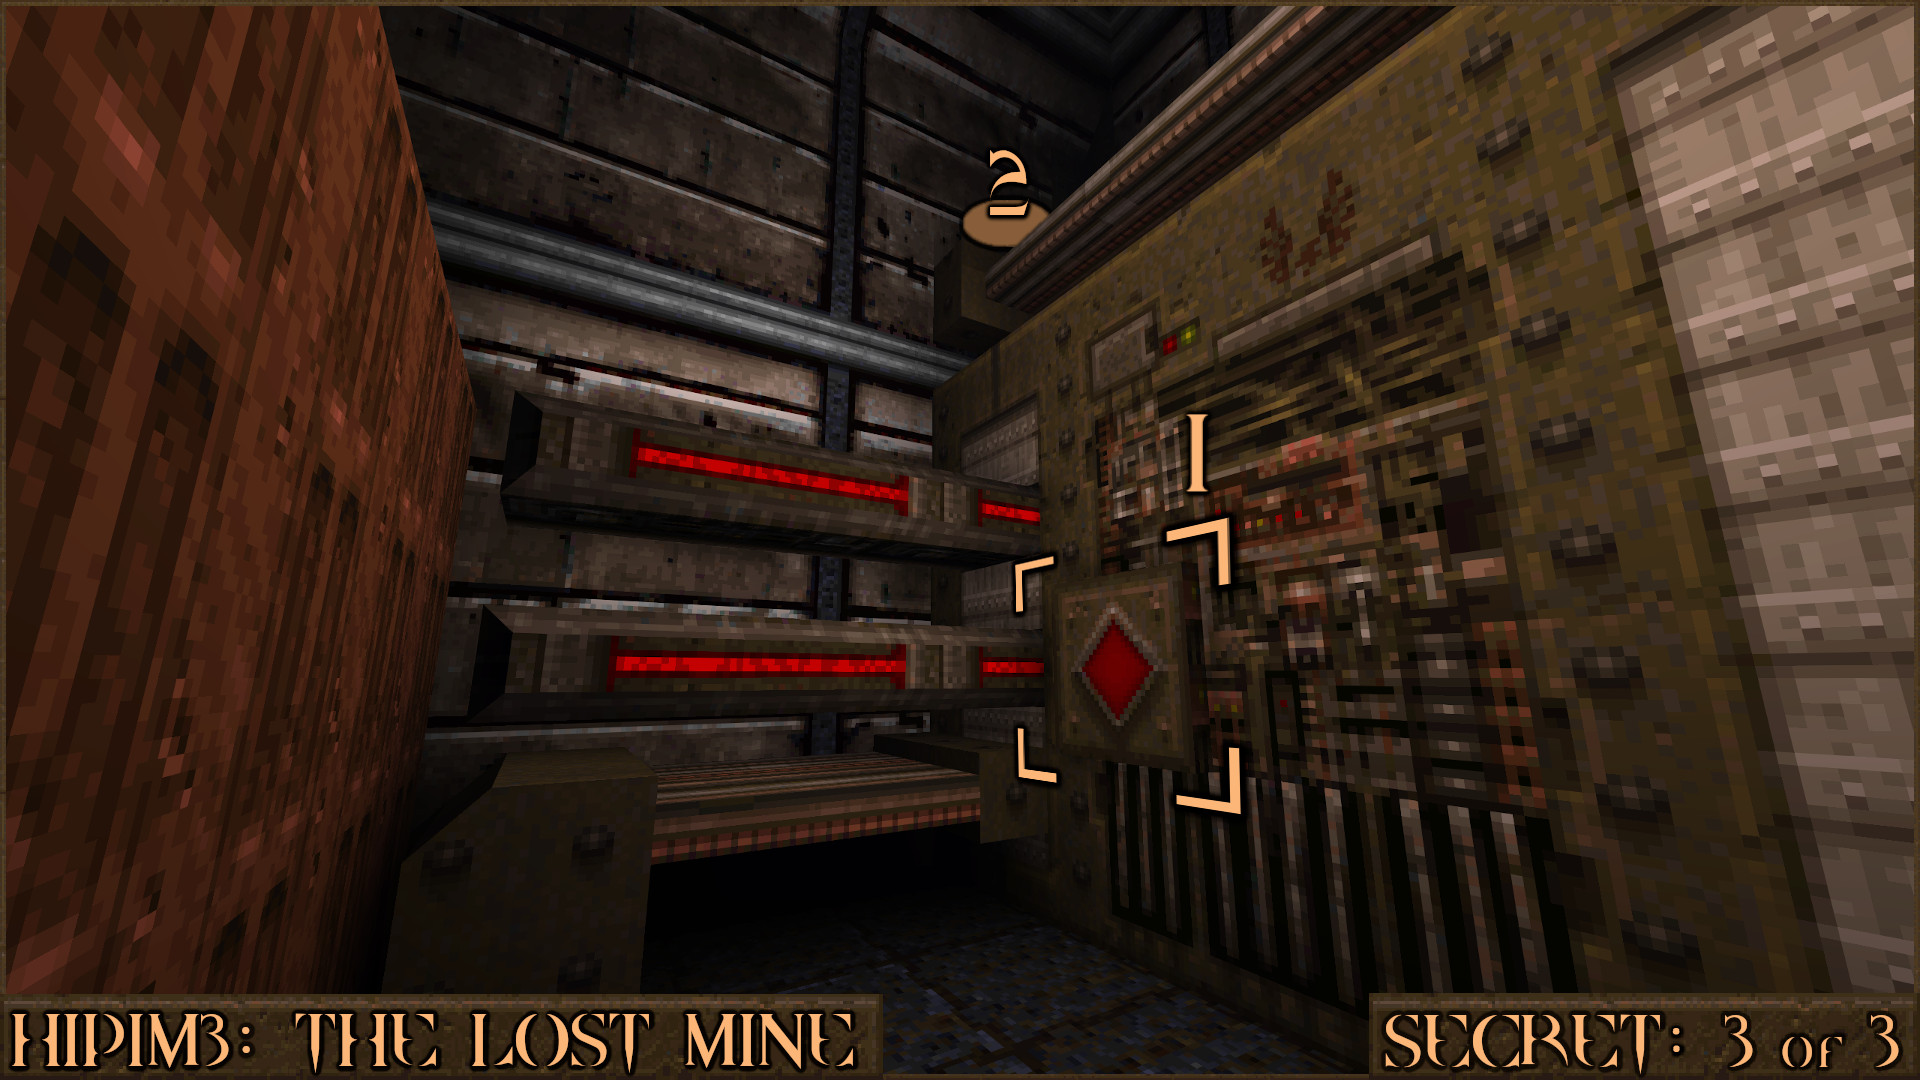
From here follow the computer cable platform round the corner (
) to find the secret.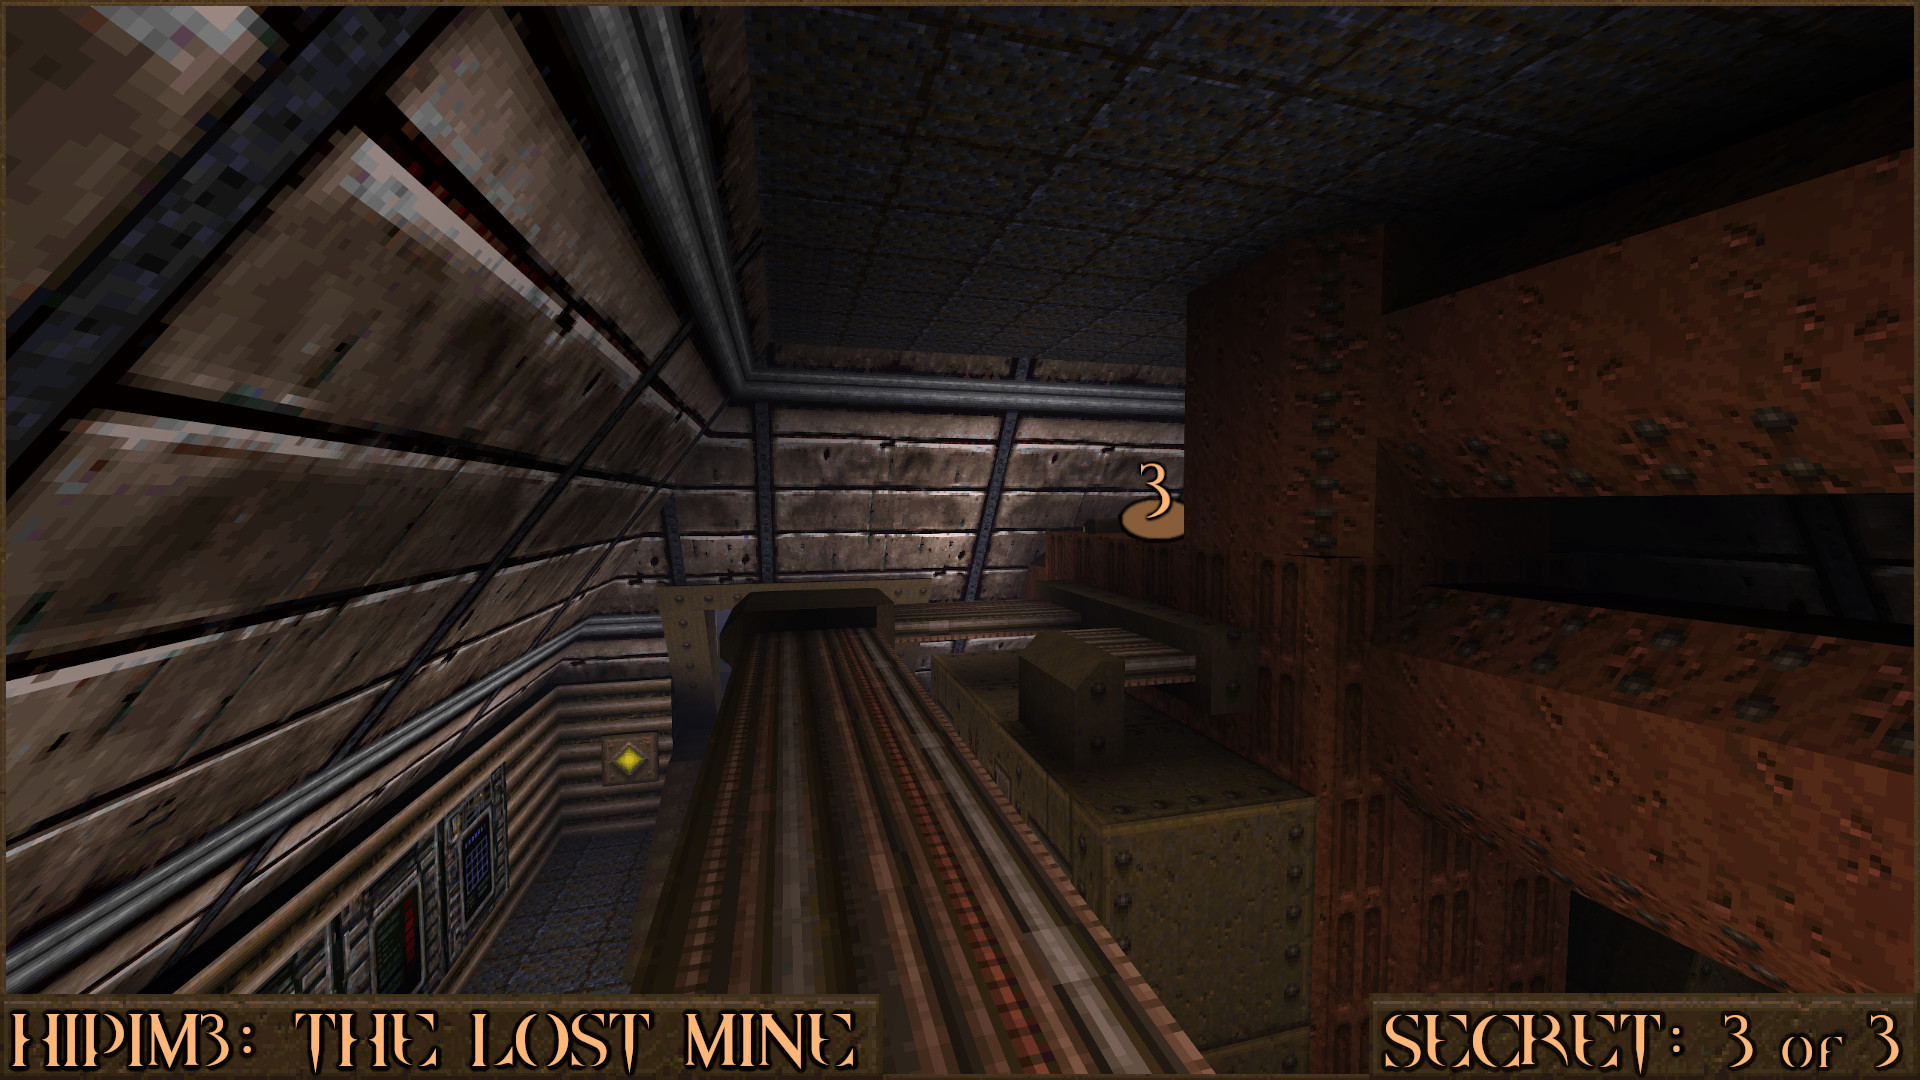
Reward:
HIP1M4: Research Facility
Secret 1 of 3
In the room that contains the Silver Keycard you can take some ramps up to the top of the room. When you reach a certain spot () you can hear the faint sound of a wall moving.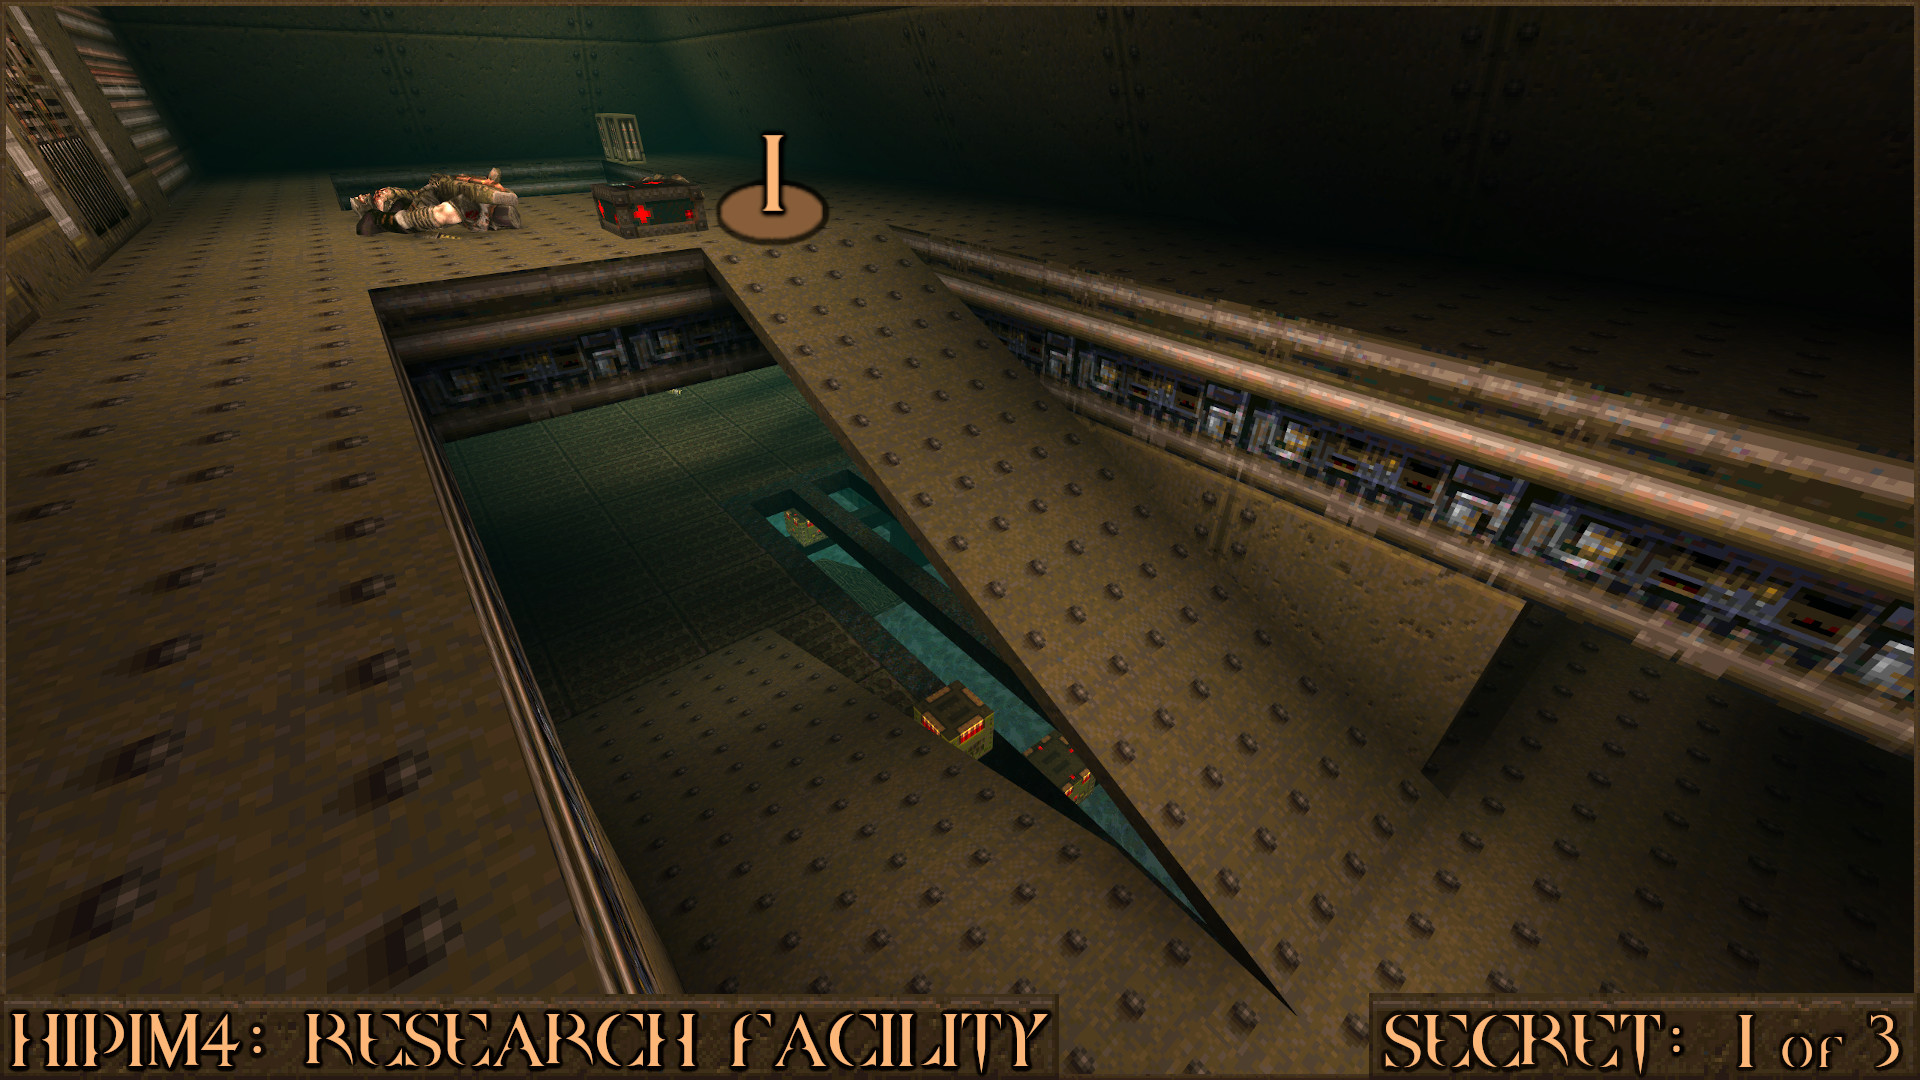
Immediately head back down the ramp to this corner of the room. A wall (
) will have moved revealing this secret. If you aren't quick enough head back up the ramp to try again.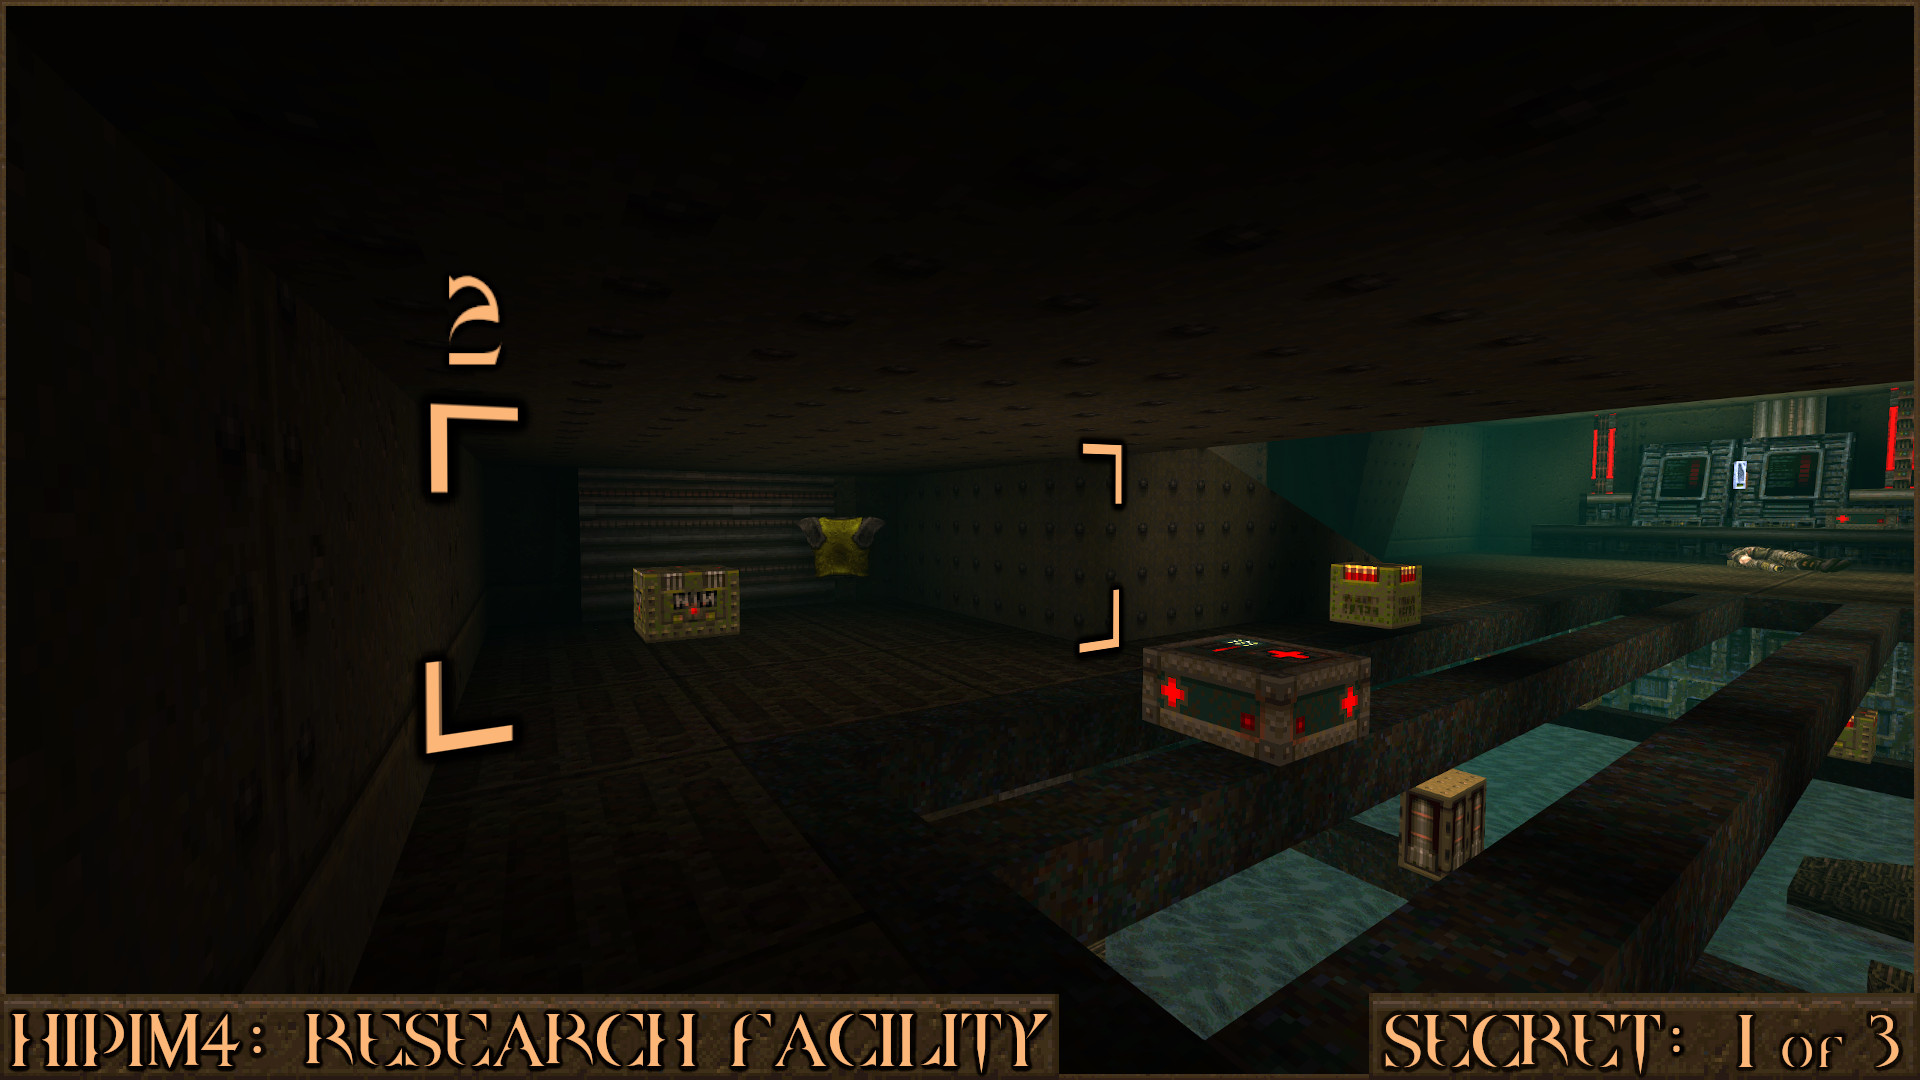
Reward:
Secret 2 of 3
After opening the Silver Keycard Door you will take an elevator in to a computer room. In the far corner on the side of one of the desks is a red diamond push button ().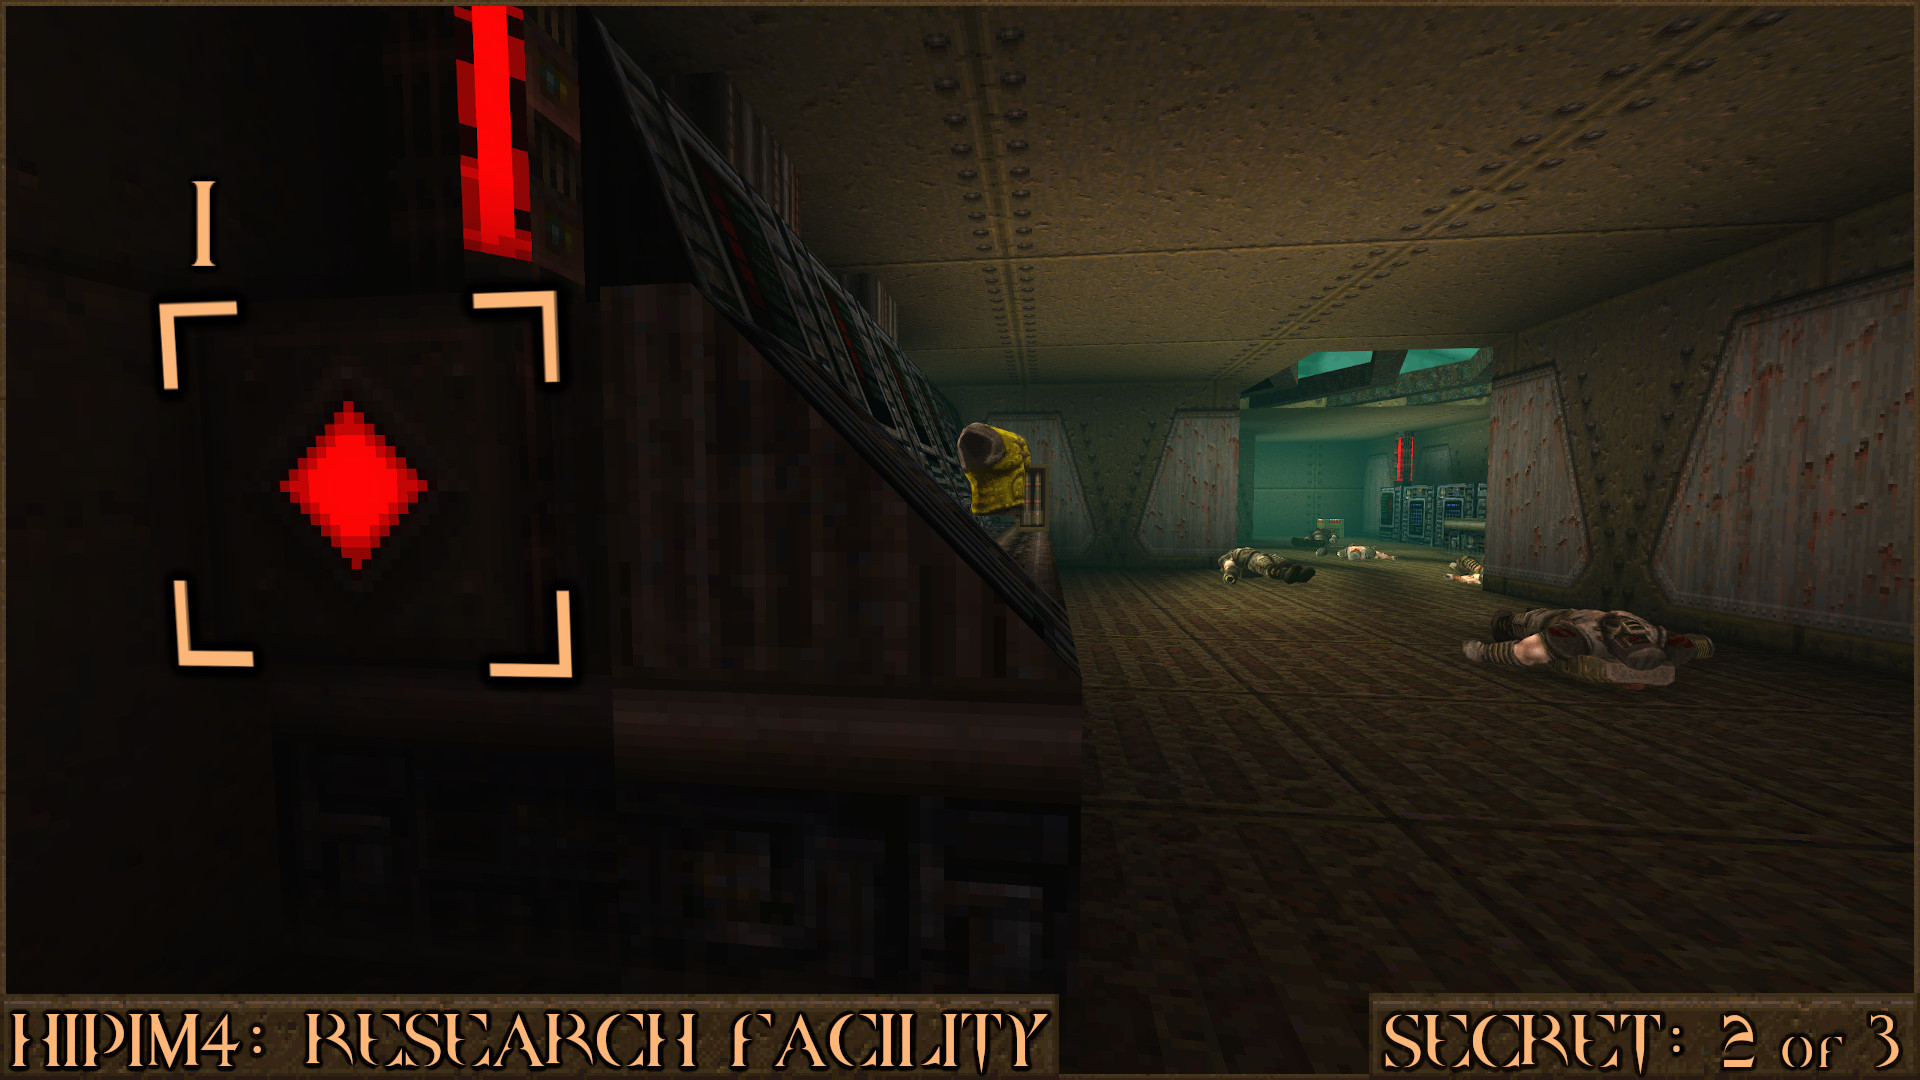
After the pushing the button check the computer panels on the desk. One of them (
) will have moved to reveal a secret.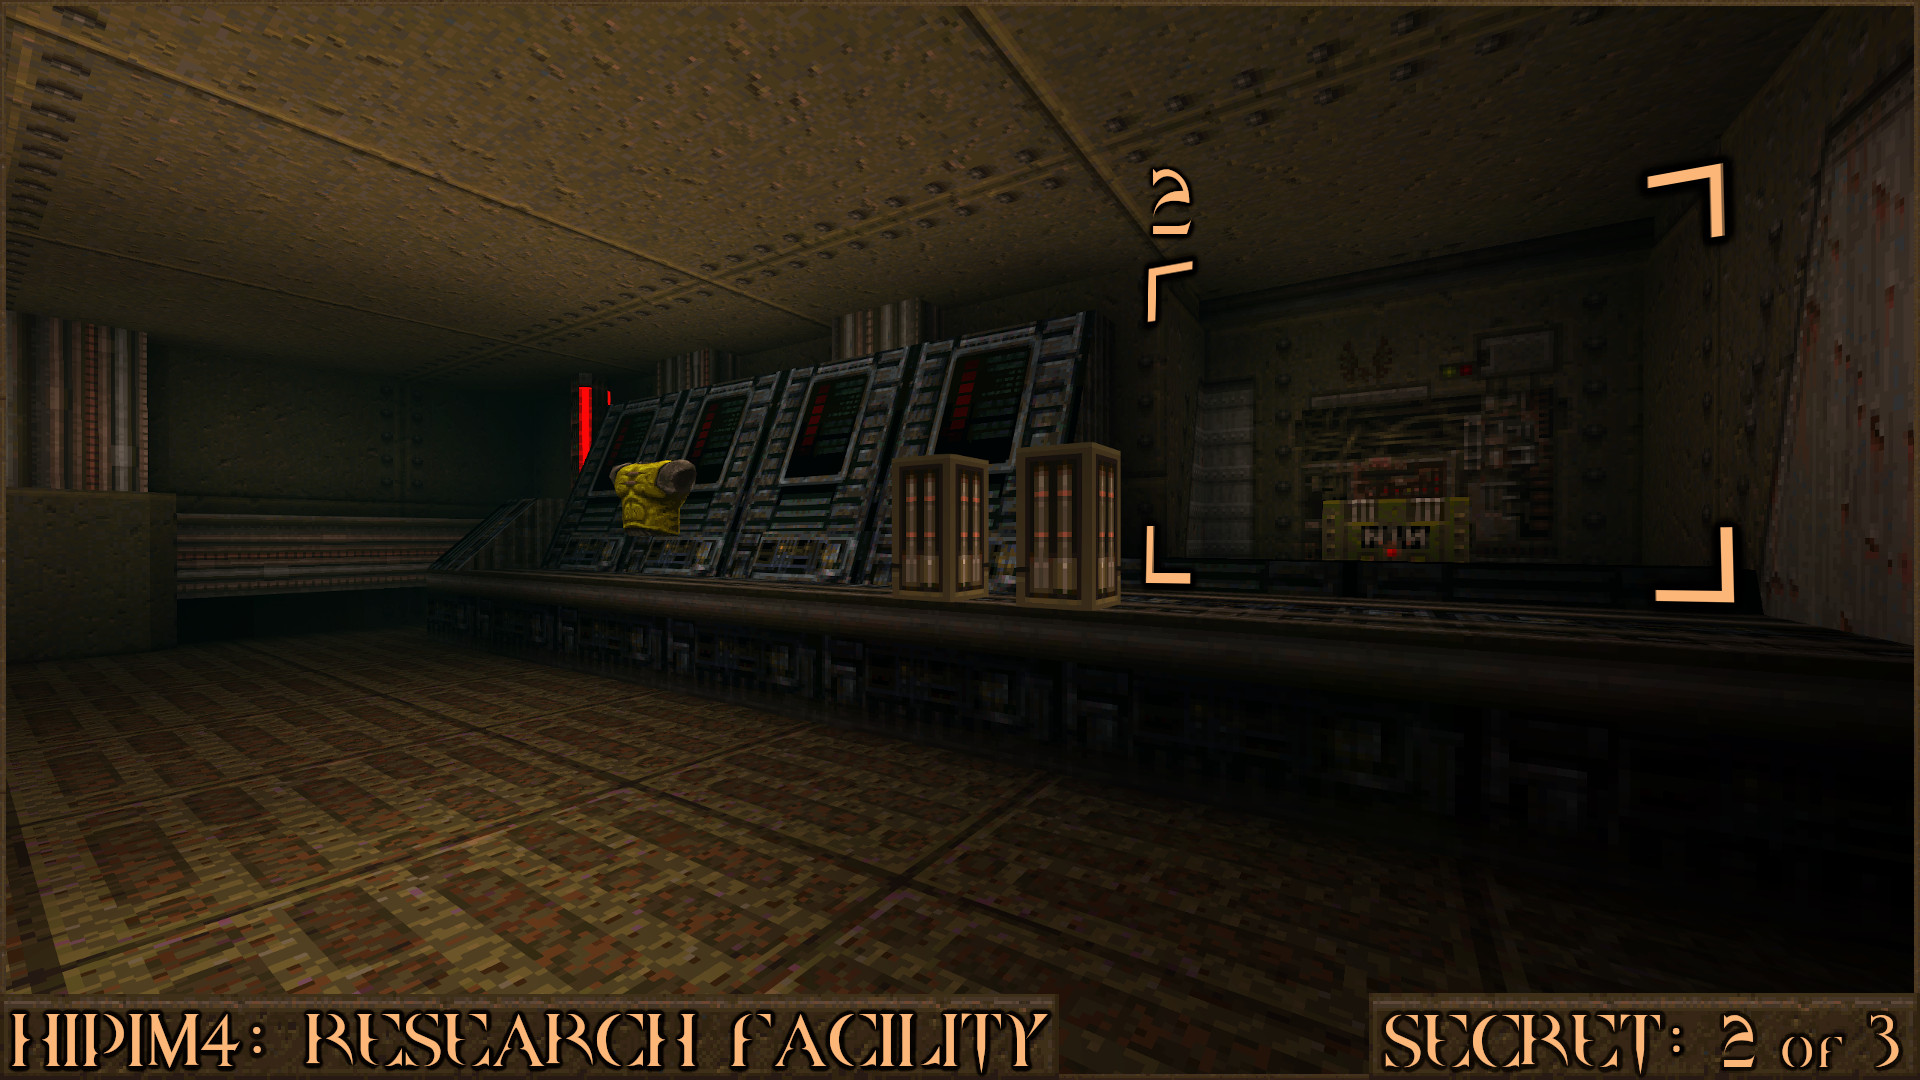
Reward:
Extra Secret
Here is an interesting extra secret. Near to Secret 2 is a small balcony with a Laser Cannon however on the roof of this area () is a hidden item. The easiest way to get up there is to rocket jump. To do a rocket jump select your Rocket Launcher and aim down at your feet. Jump and then shoot the rocket launcher at the ground to give yourself a massive jump boost. This will also damage you so be careful with this method. When you land on the roof the message "...thought you'd get up here somehow." will appear.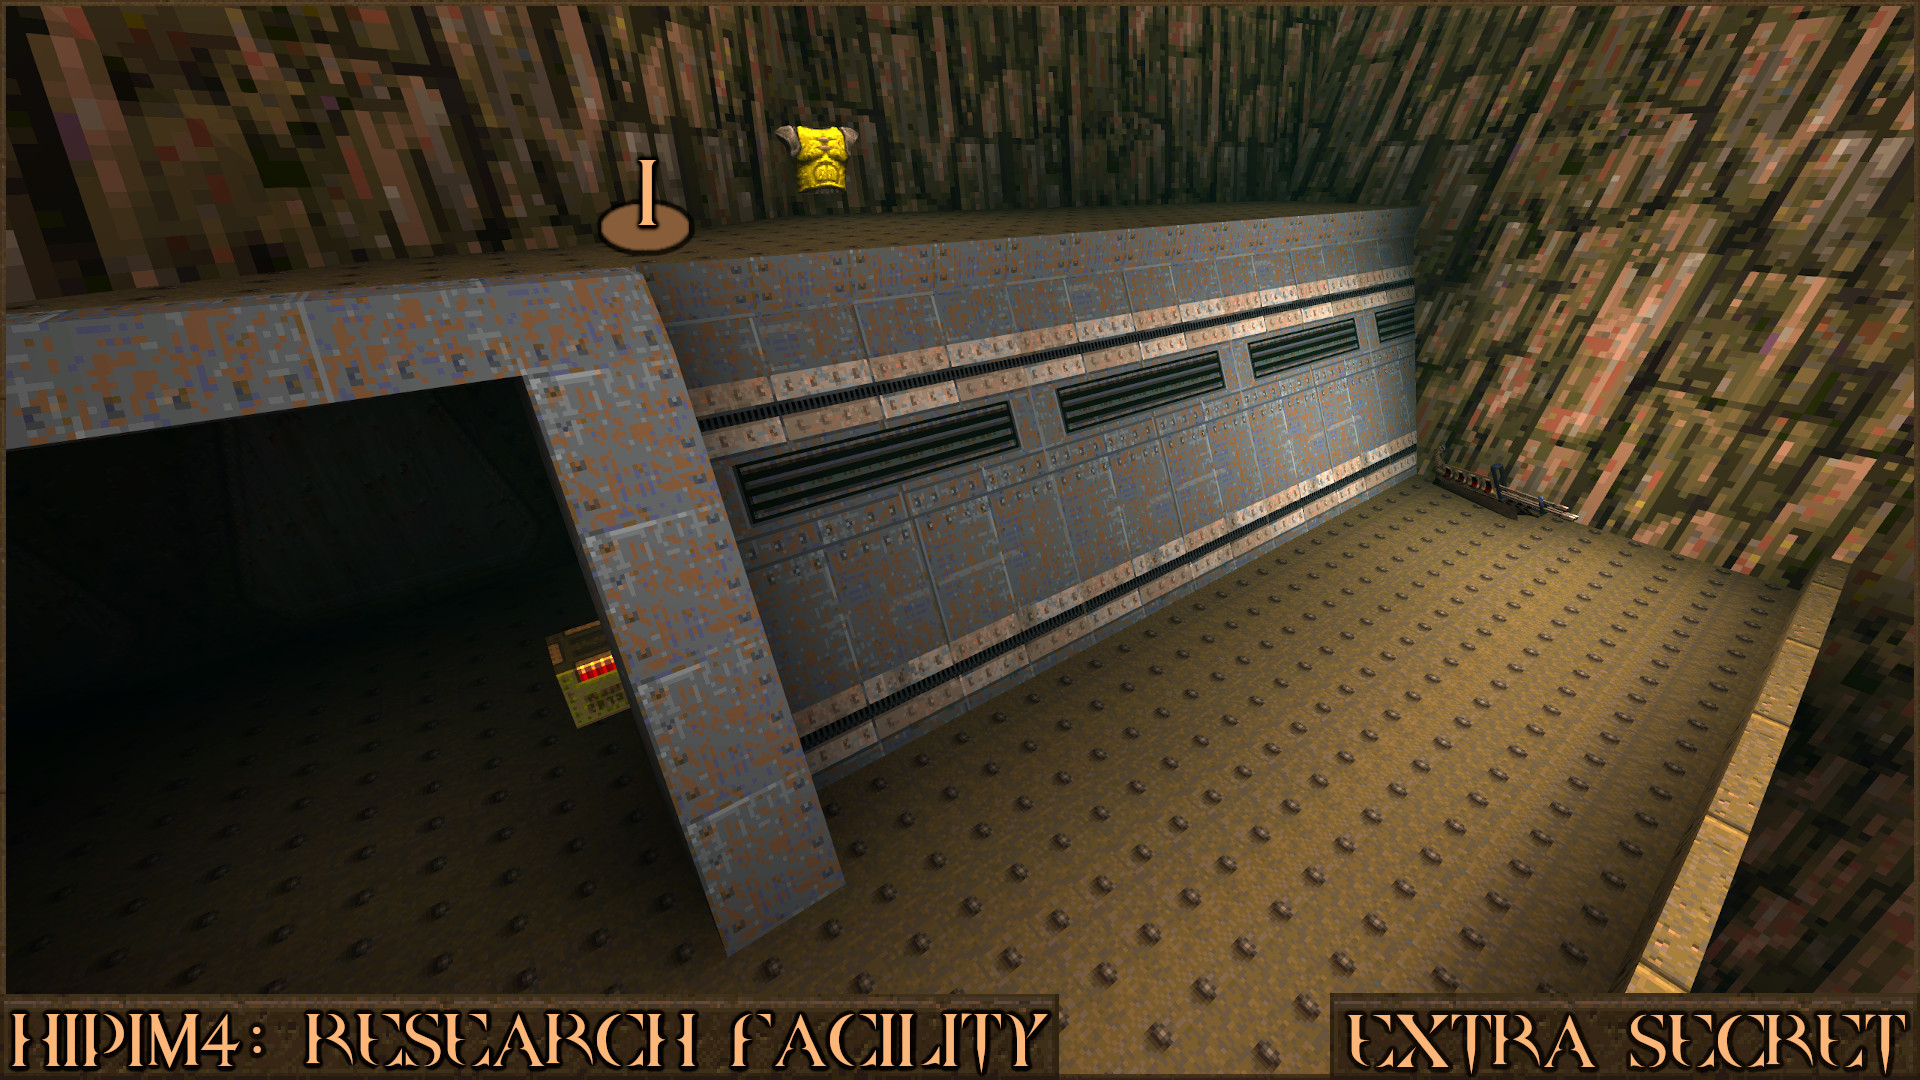
Reward:
Secret 3 of 3
Next to the Gold Keycard Door look for this small blue light (). Shoot it to make the nearby panel () move out of the way and reveal a small secret.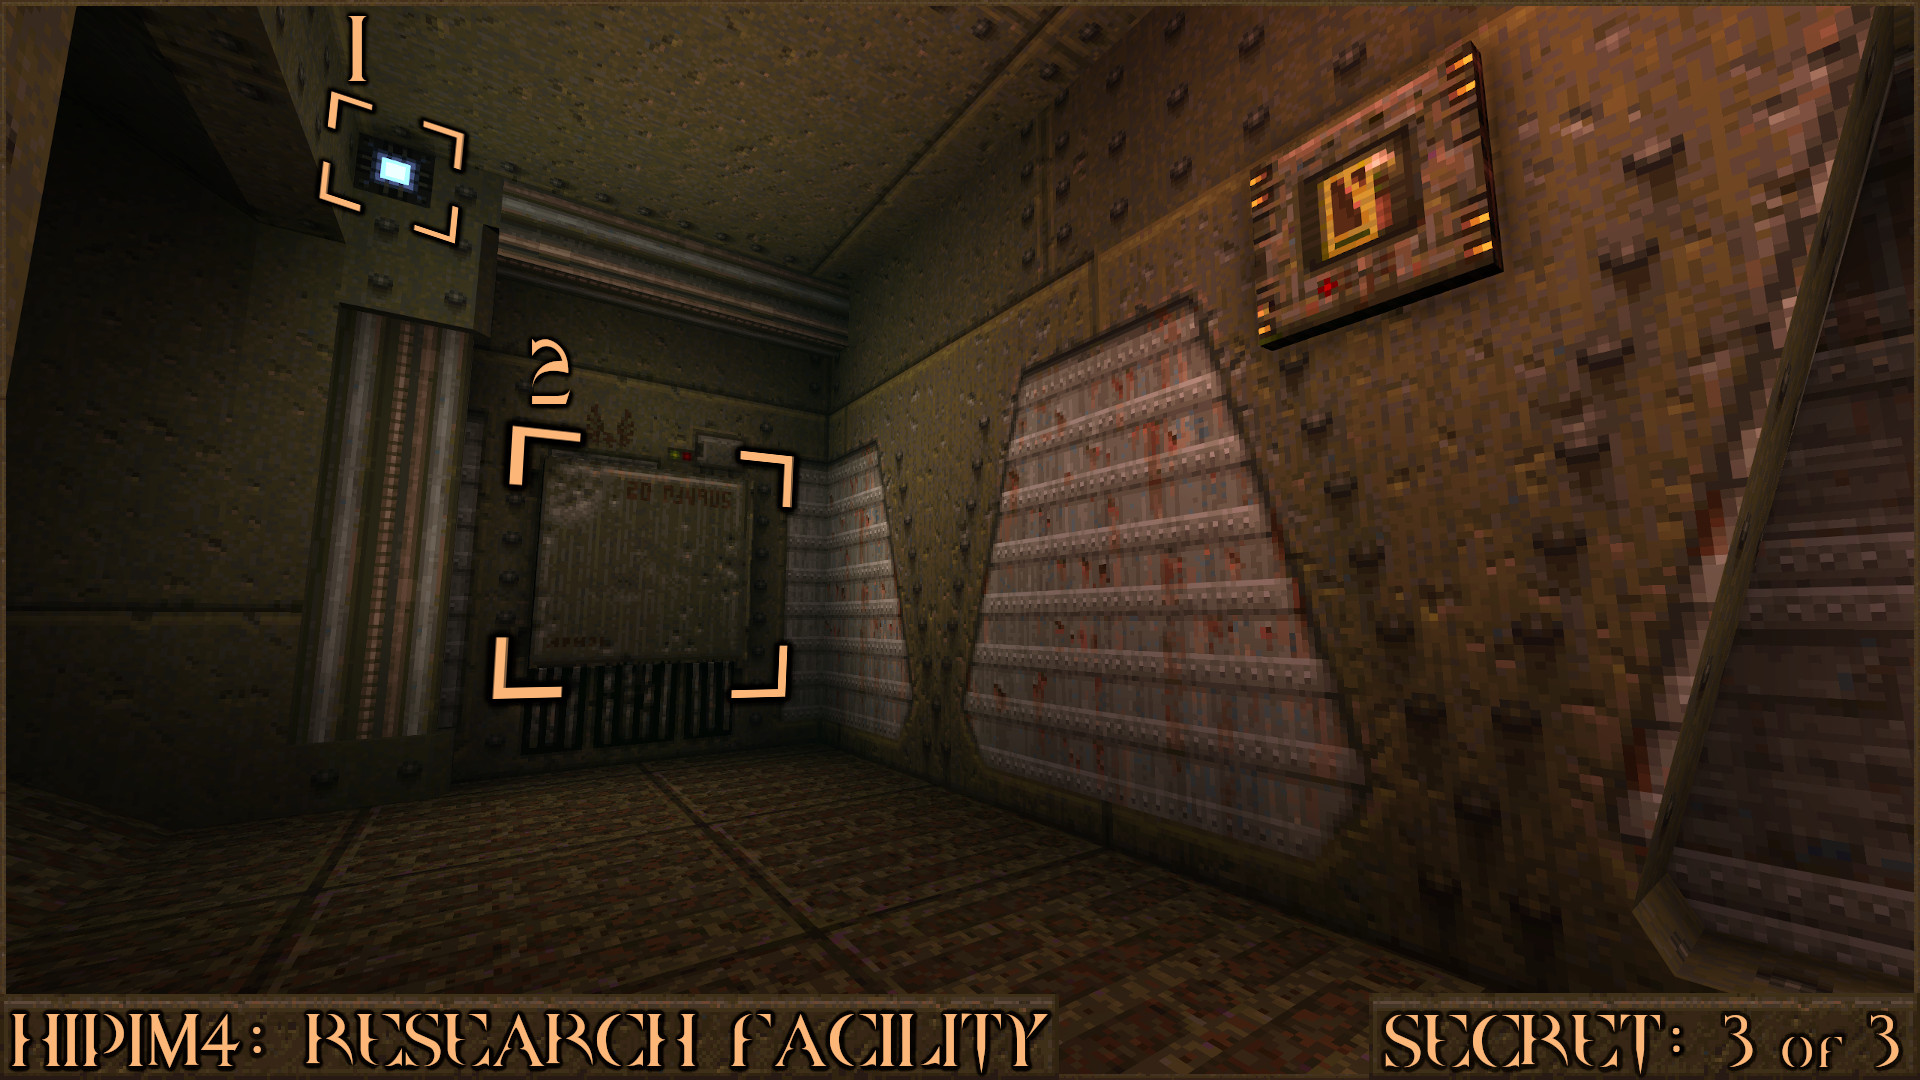
Reward:
HIP2M1: Ancient Realms
Secret 1 of 8
After starting the level approach the large door and look up and the left. Shoot the red shootable switch () that is hidden in the corner and it will make a nearby pool of water () accessible. Swim through a short tunnel to find the secret.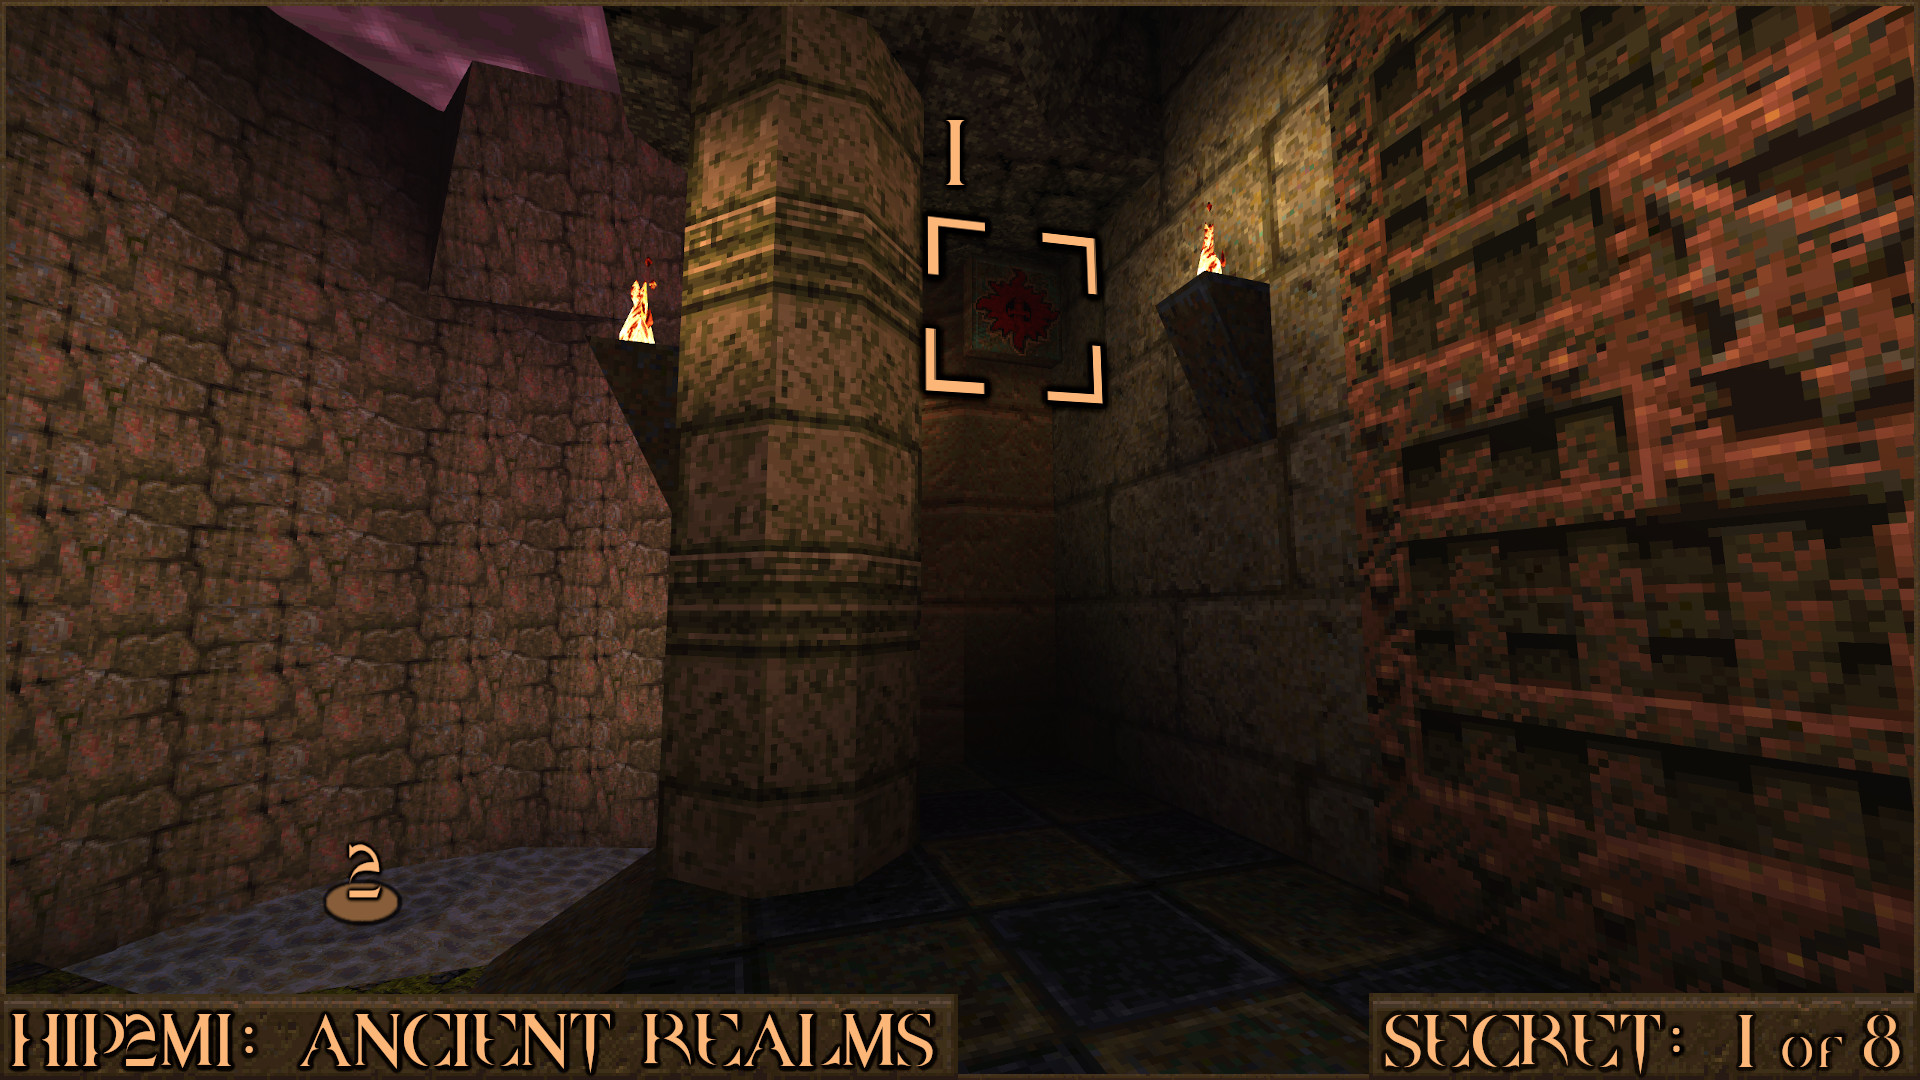
Reward:
Secret 2 of 8
Quite soon after you enter the castle you will come across a room with a strange door. Activate the device next to it () to make the door swing upwards. Now head back up the stairs and make a running jump on top of the door and then nudge the brick that is slightly sticking out of the wall (). This will open up a secret area () next to the door but the way through is currently barred and the message "This barrier is opened elsewhere" will appear. Remember this location for later during Secret 8.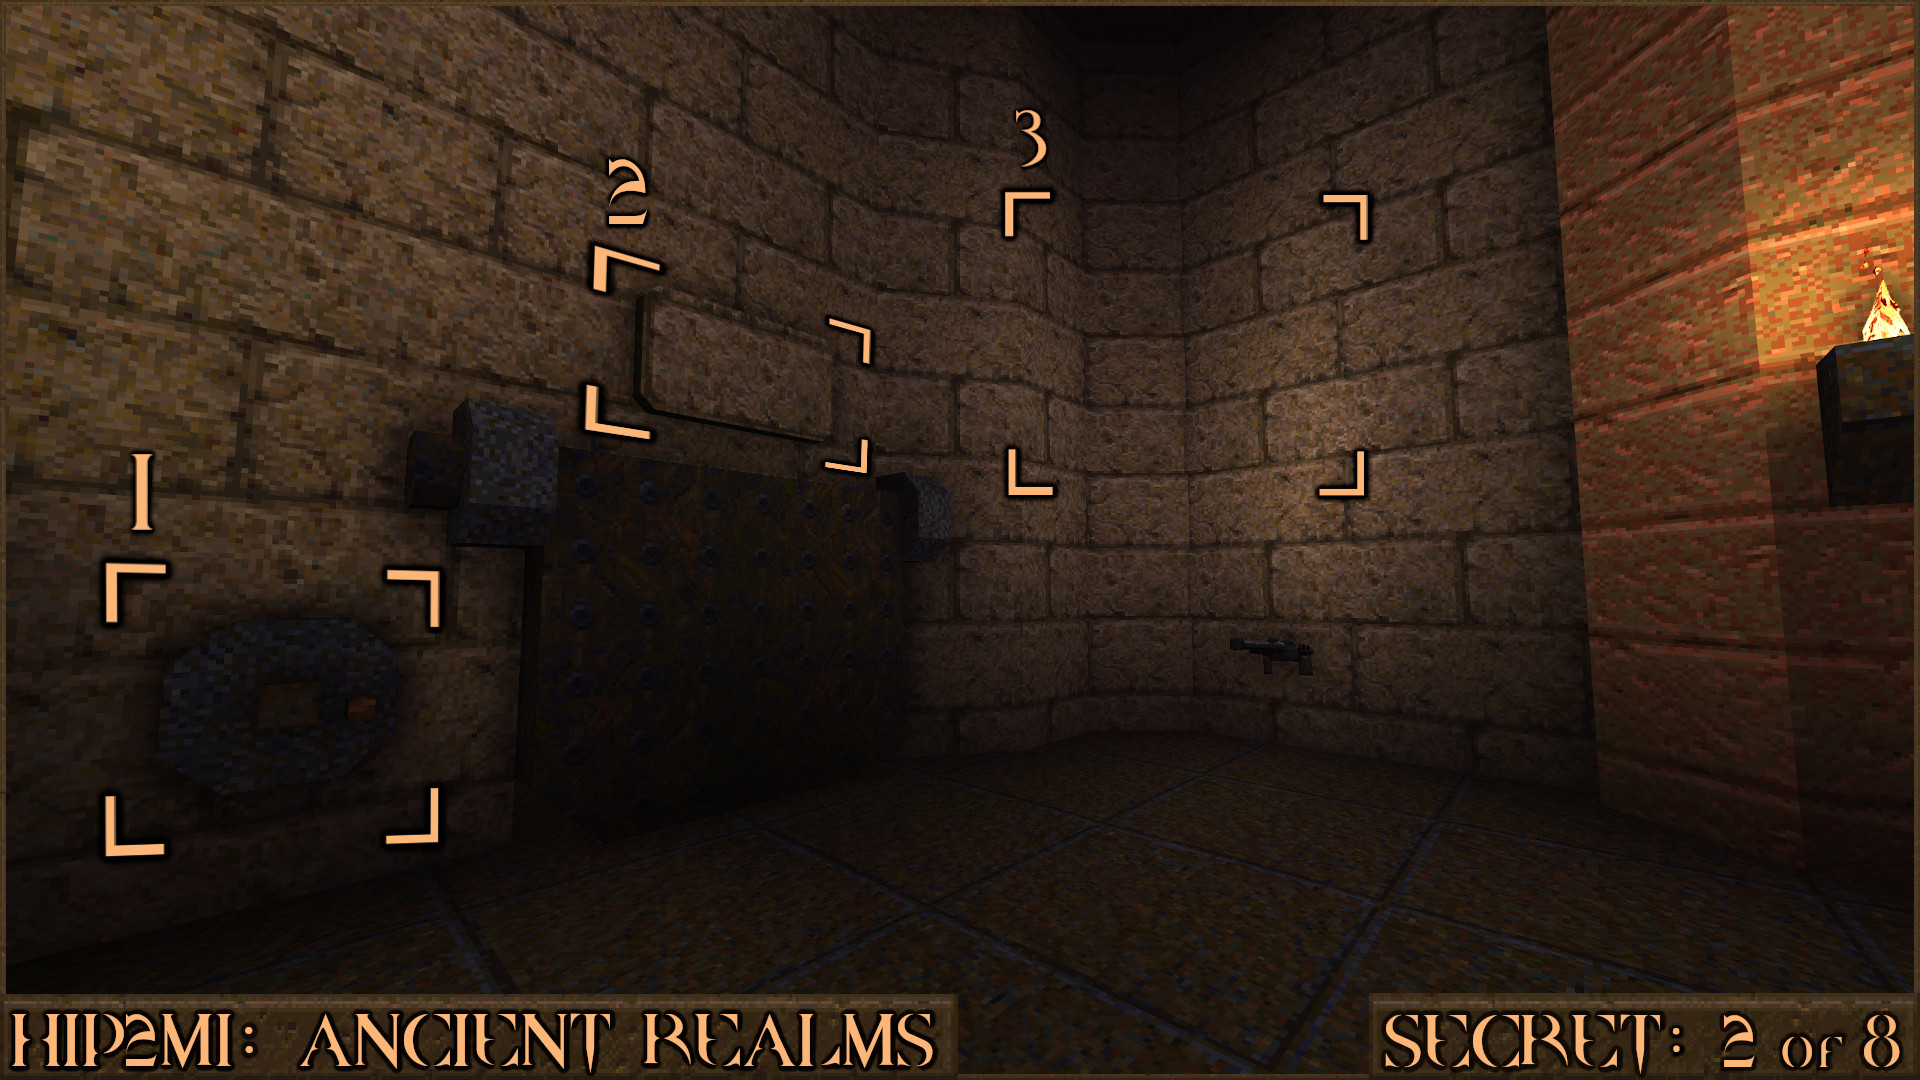
Reward:
Secret 3 of 8
In the same room as the door from Secret 2 pick up a nearby Nailgun to trigger an enemy ambush. Look in the corner of the area the monsters came from to see a metal panel. Shoot it to make it move and allow access to a secret.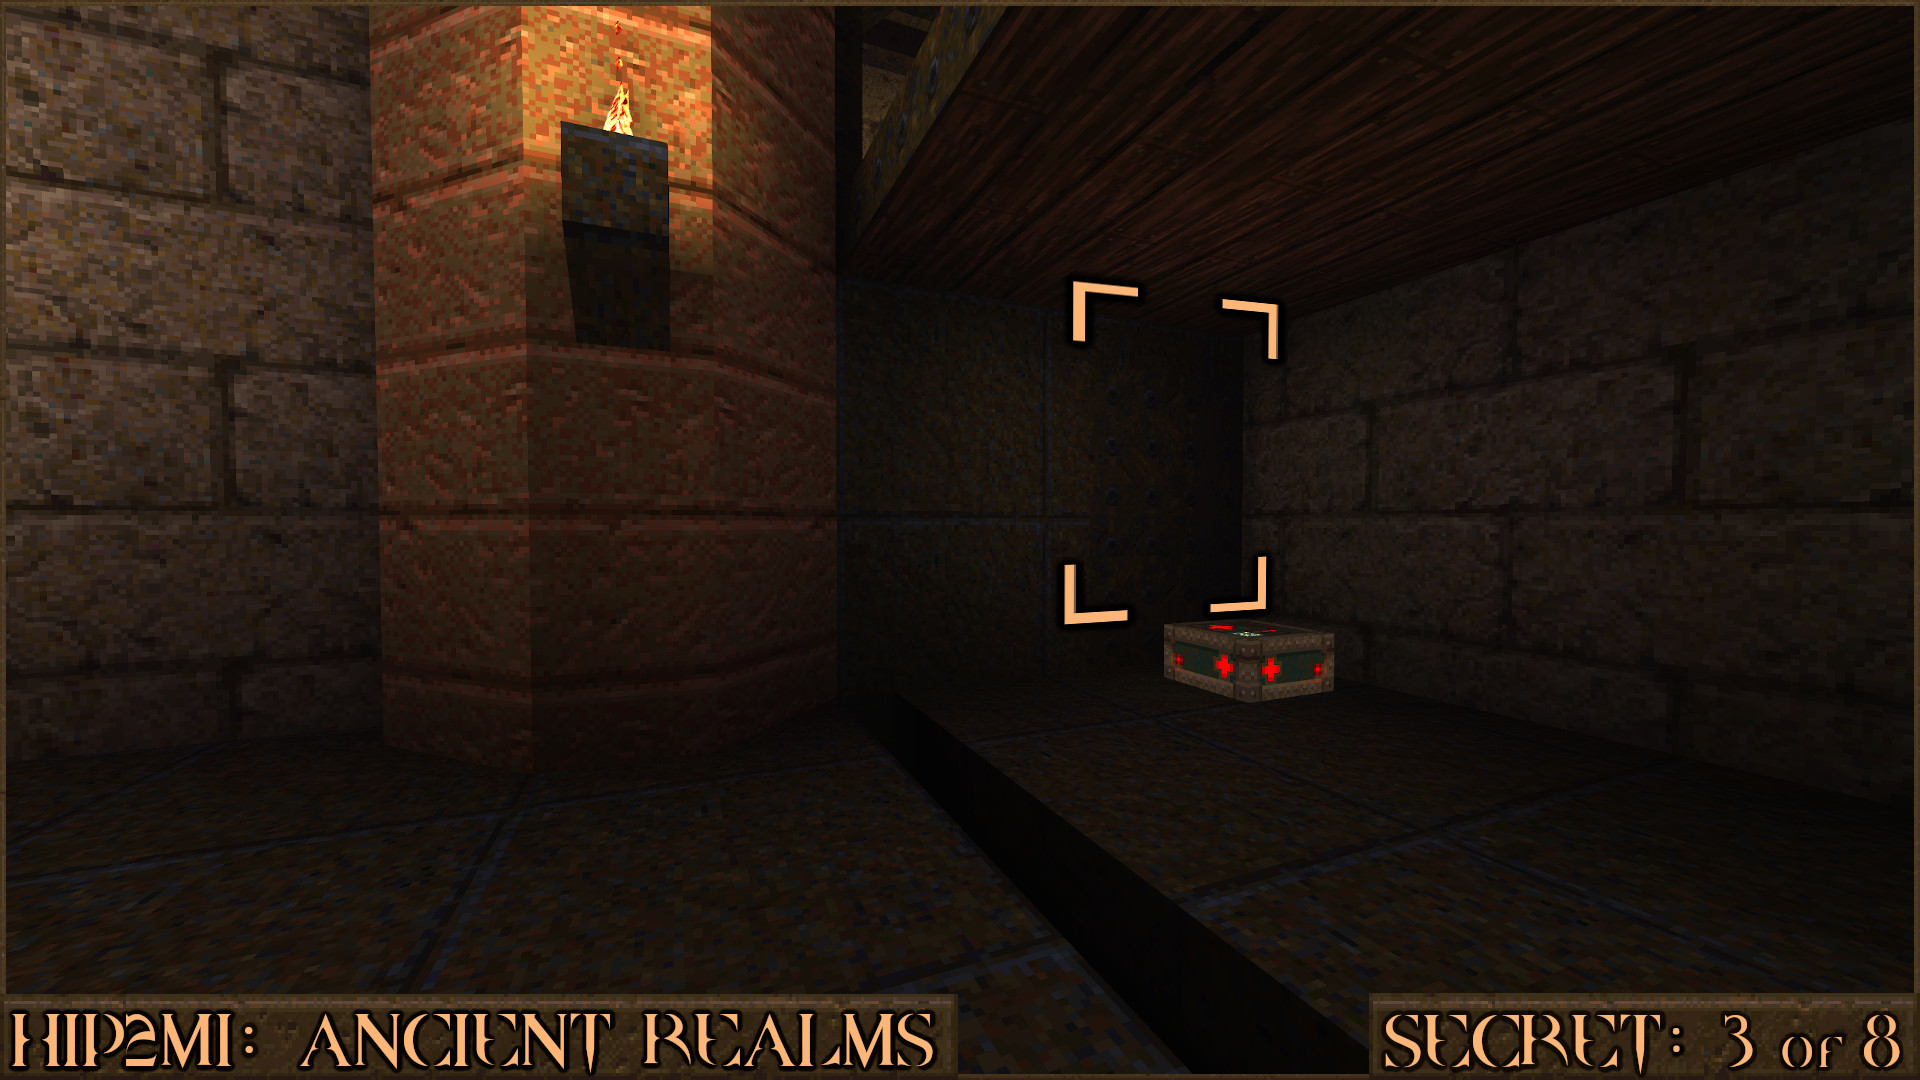
Reward:
Secret 4 of 8
In the next large section of the level you need to hit three orange buttons to continue. Near one of the buttons on a staircase is a red shootable button (). Activating it will make a nearby wall () move to reveal the secret.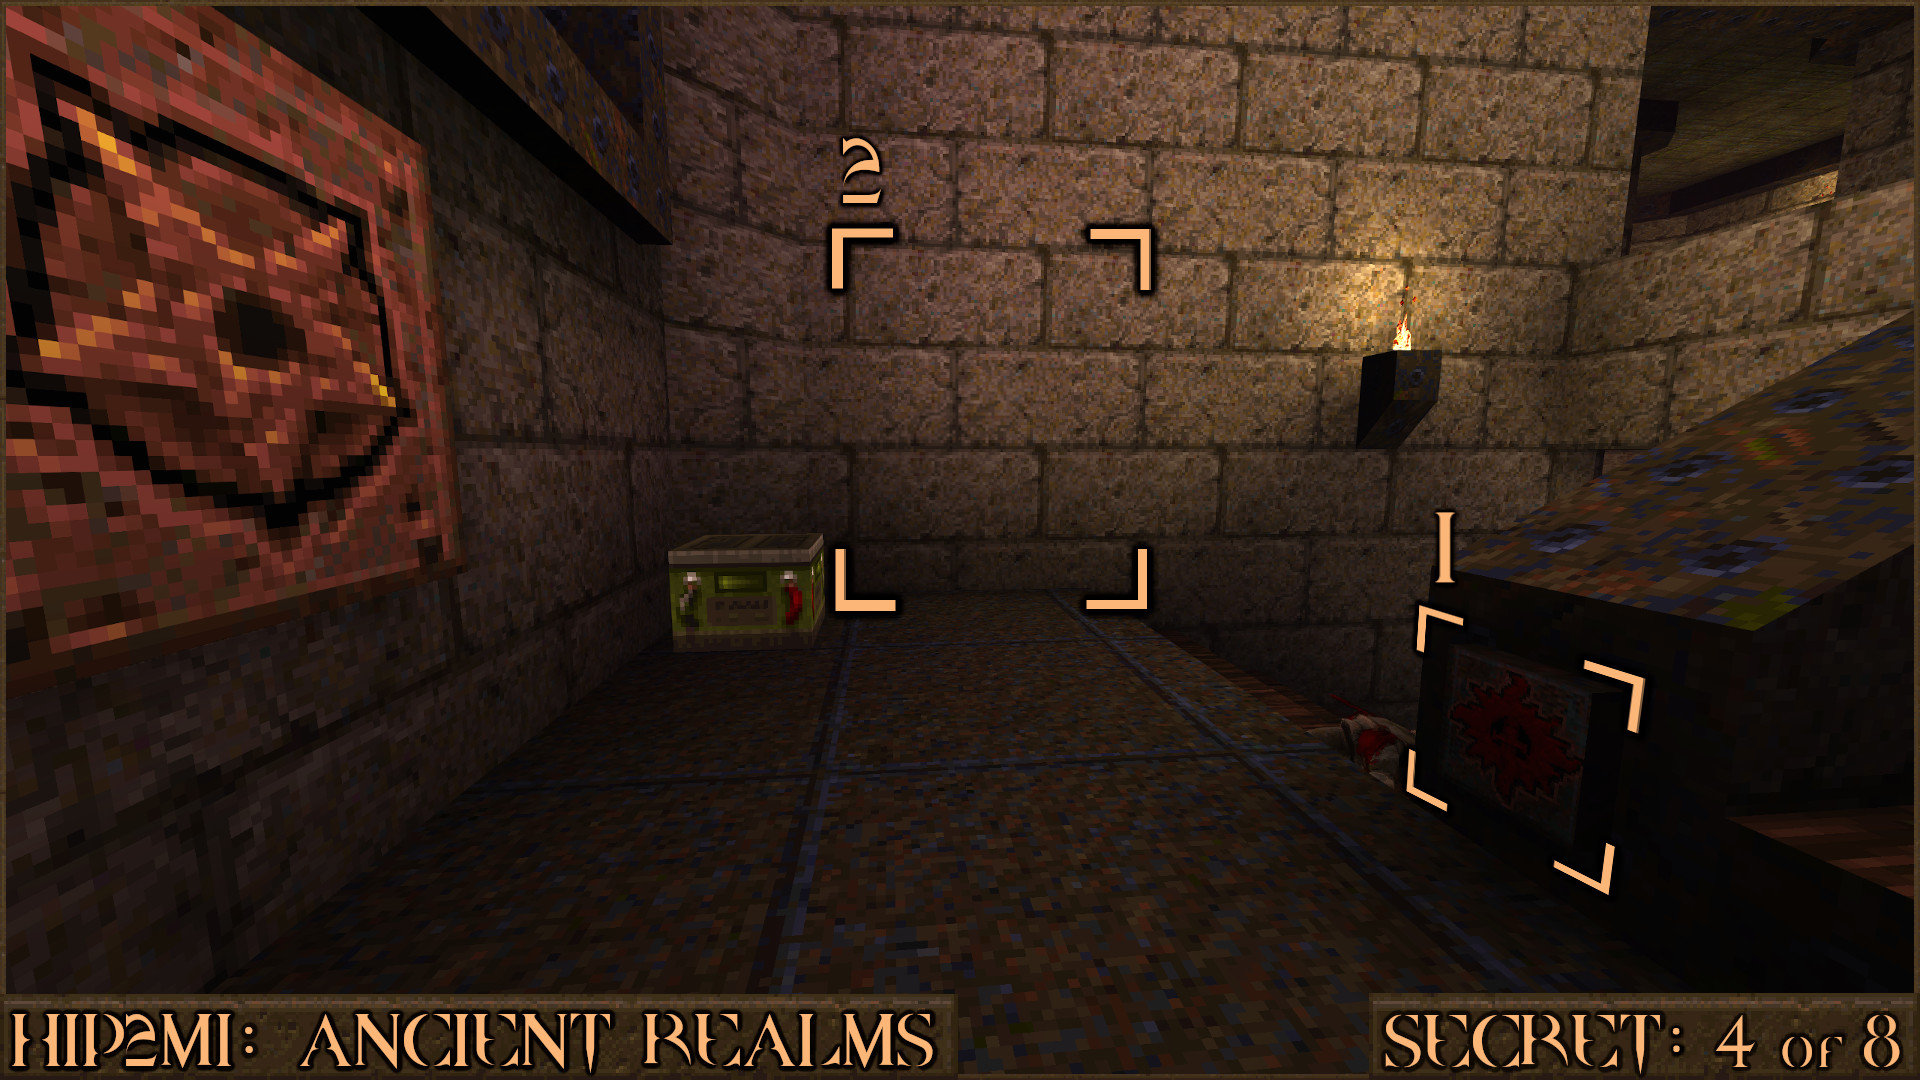
Reward:
Secret 5 of 8
Near another one of the orange buttons is a room with some stairs and a Green Armor. Look up to see a several wooden beams and a red shootable switch (). 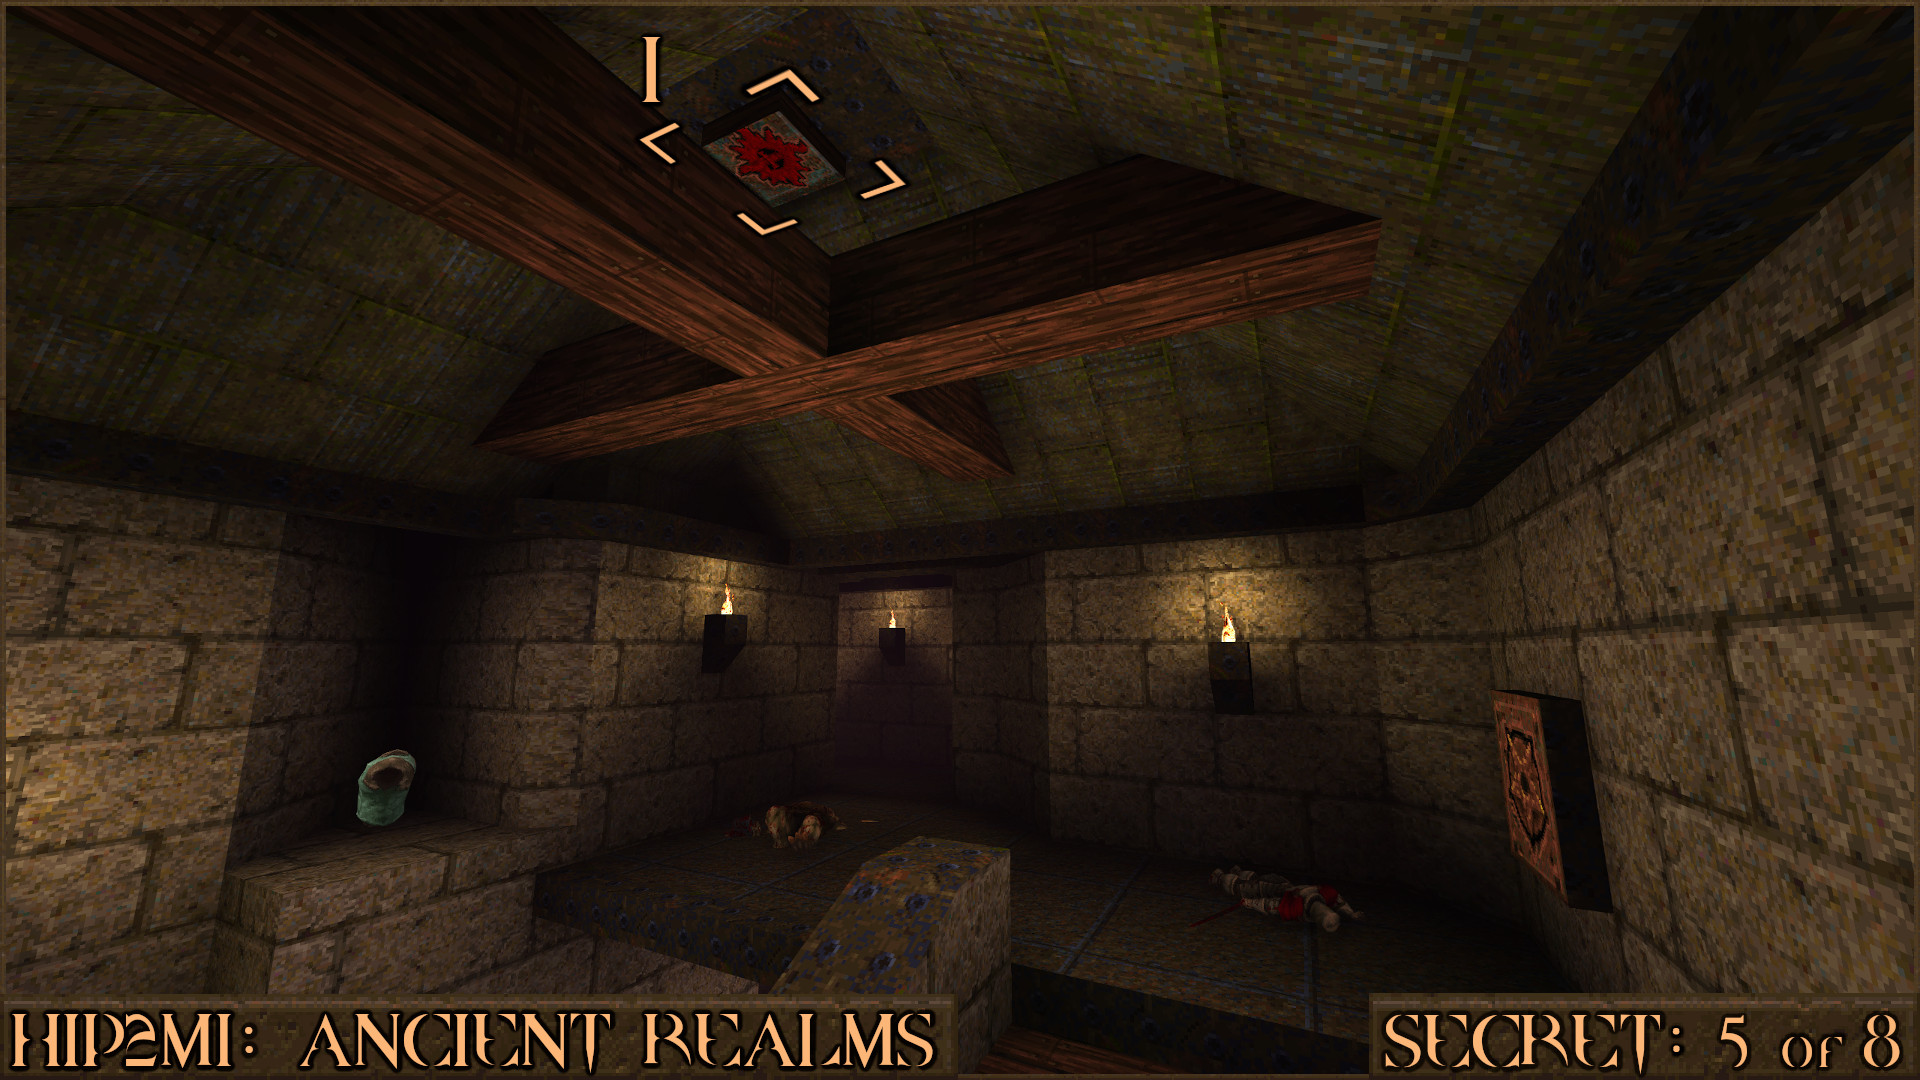
After shooting the switch head down the stairs to see a portion of the wall has moved (
) to allow you access to the secret.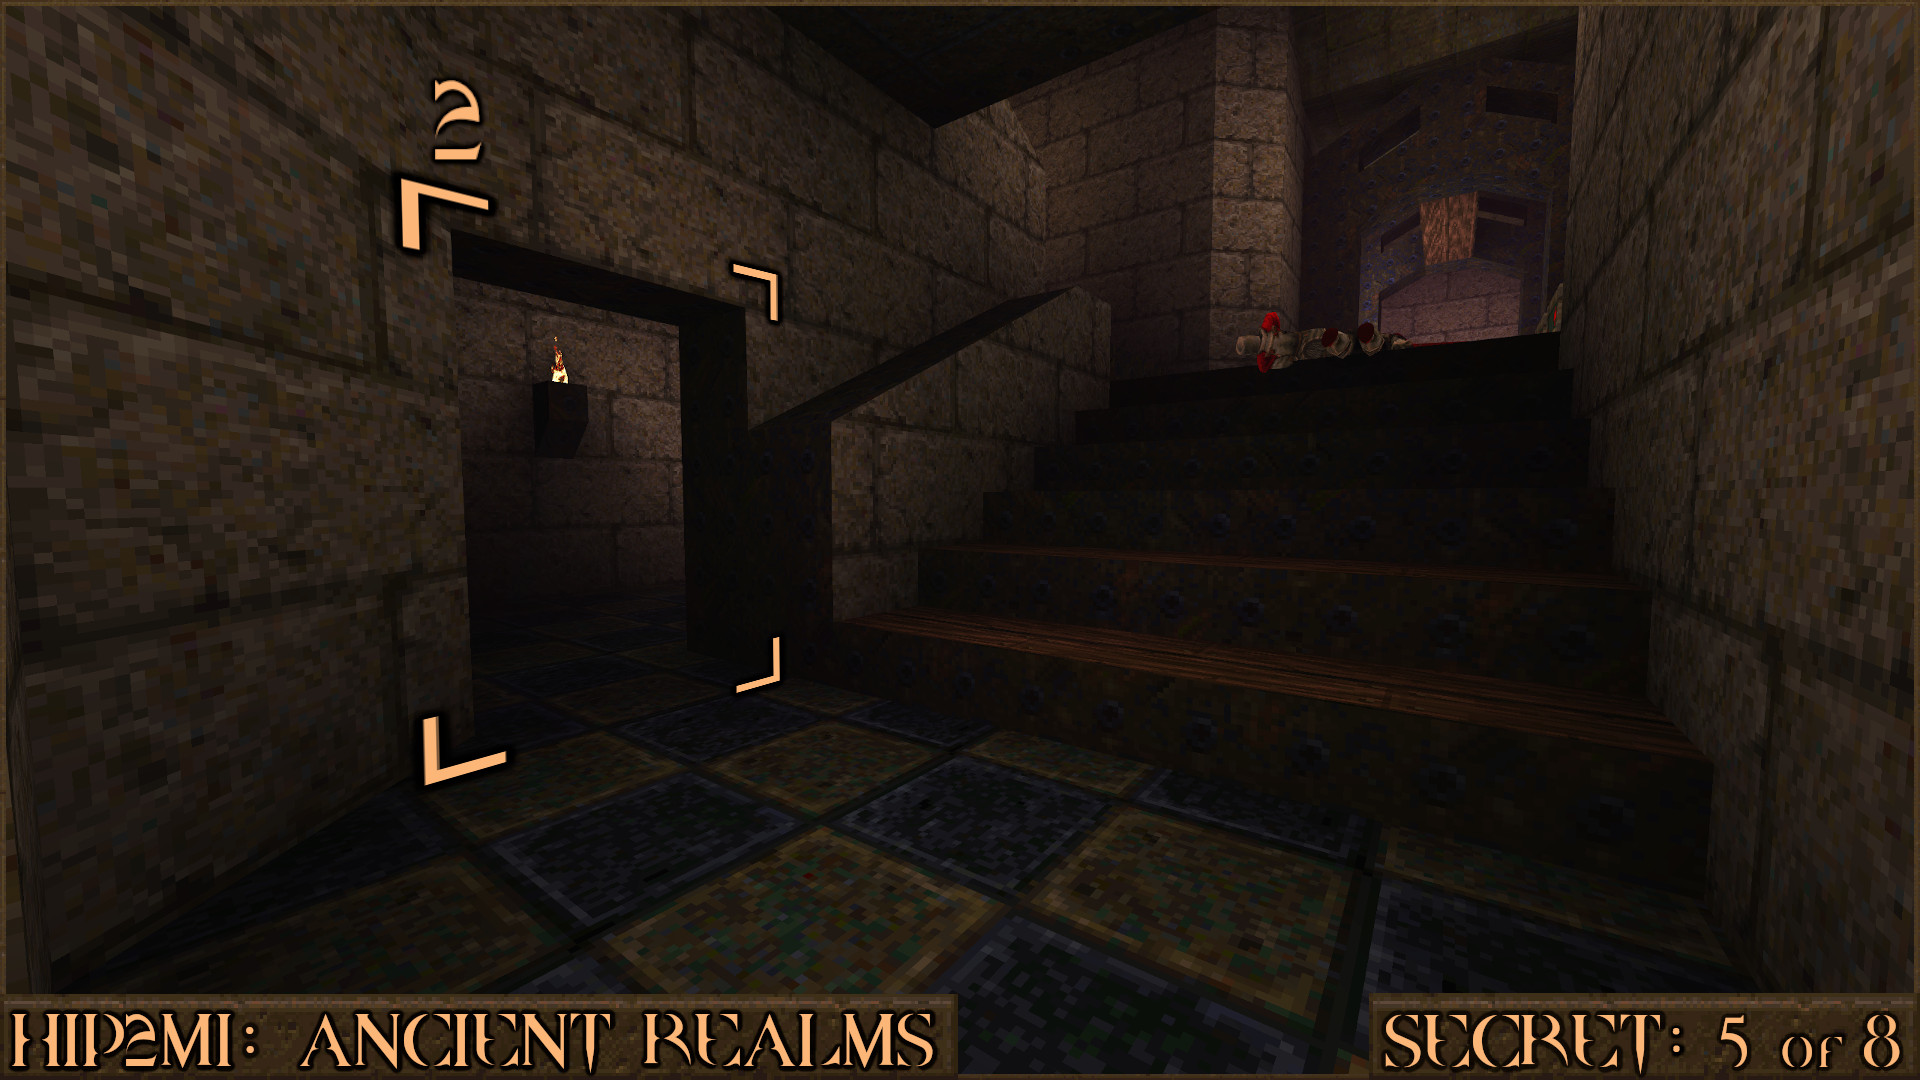
Reward:
Secret 6 of 8
After opening the Silver Key Door you will see a cross shape of wooden beams. Shoot a grenade near it to destroy it and allow access to the secret inside.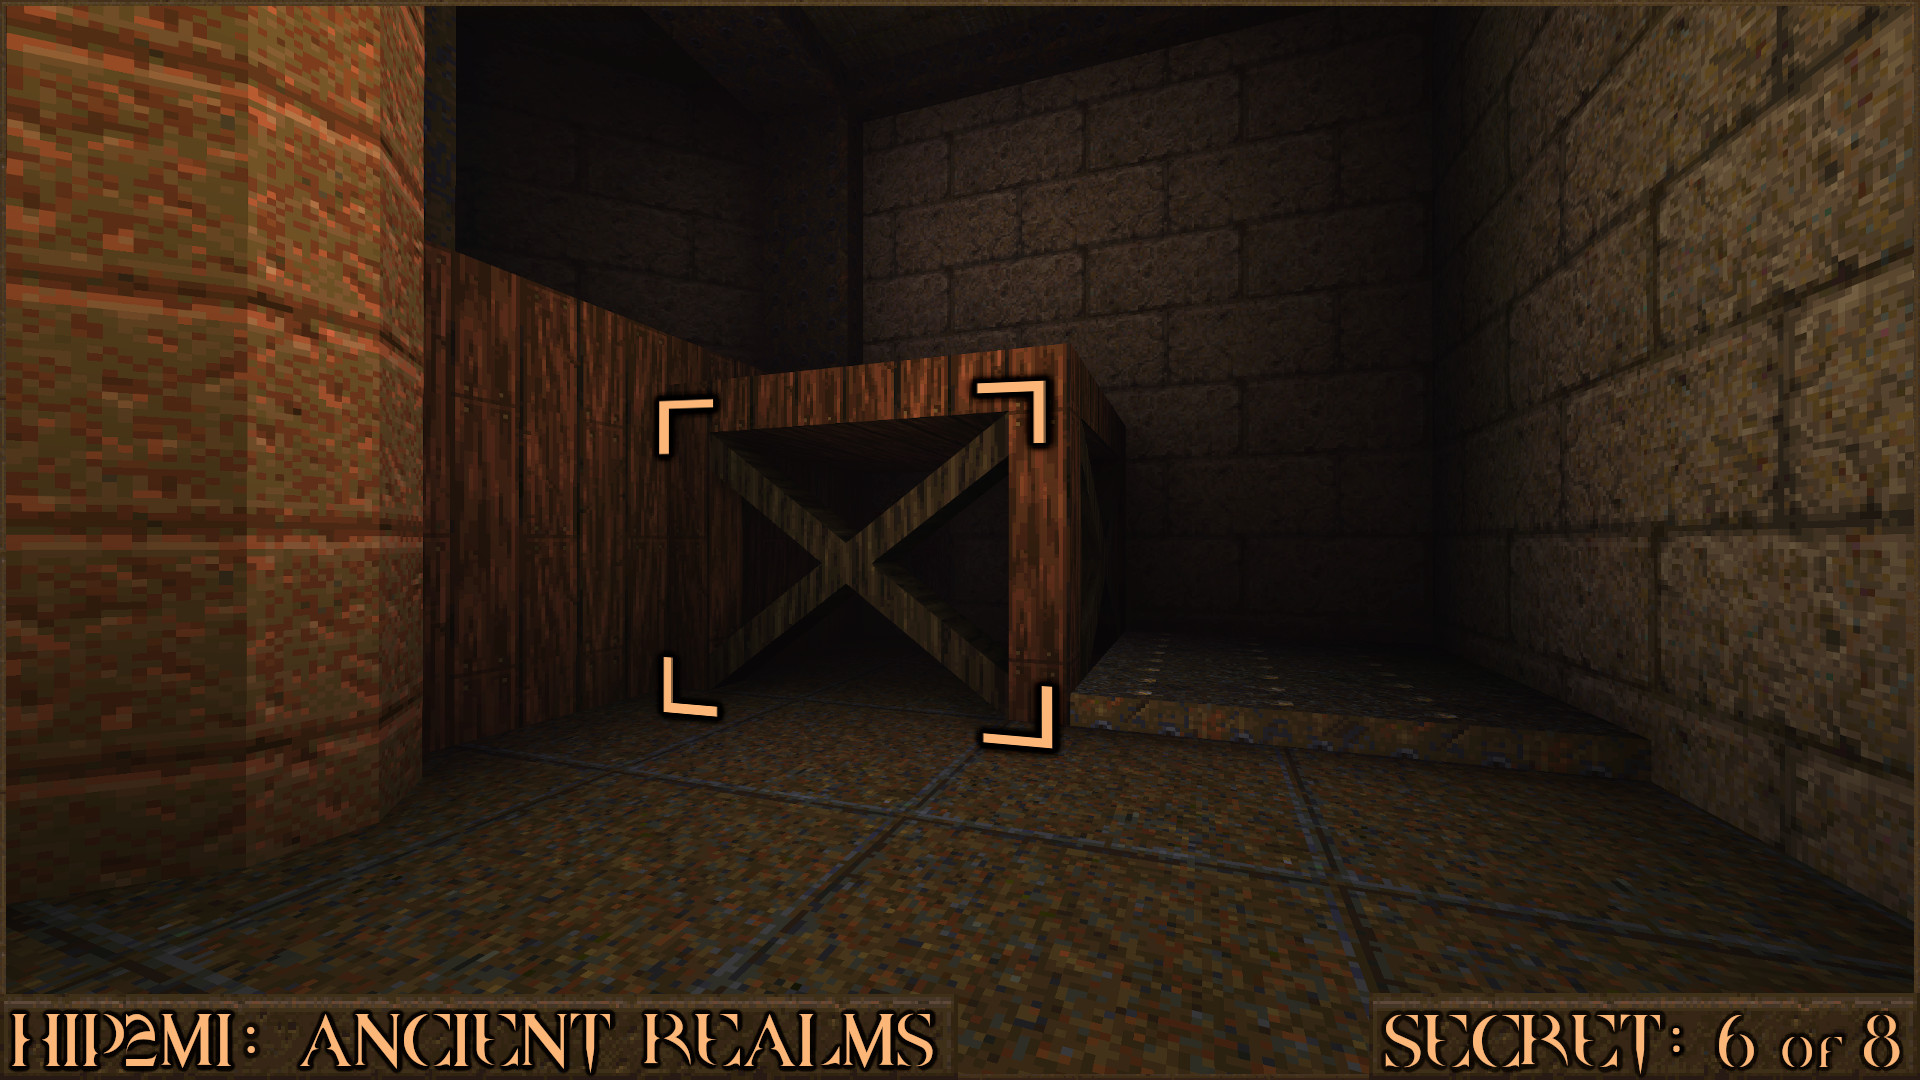
Reward:
Secret 7 of 8
You will come to a ledge where you can see a blue window () and a red stained glass window. Shoot the blue window and it will make the adjacent wall move (). Look inside to find the secret.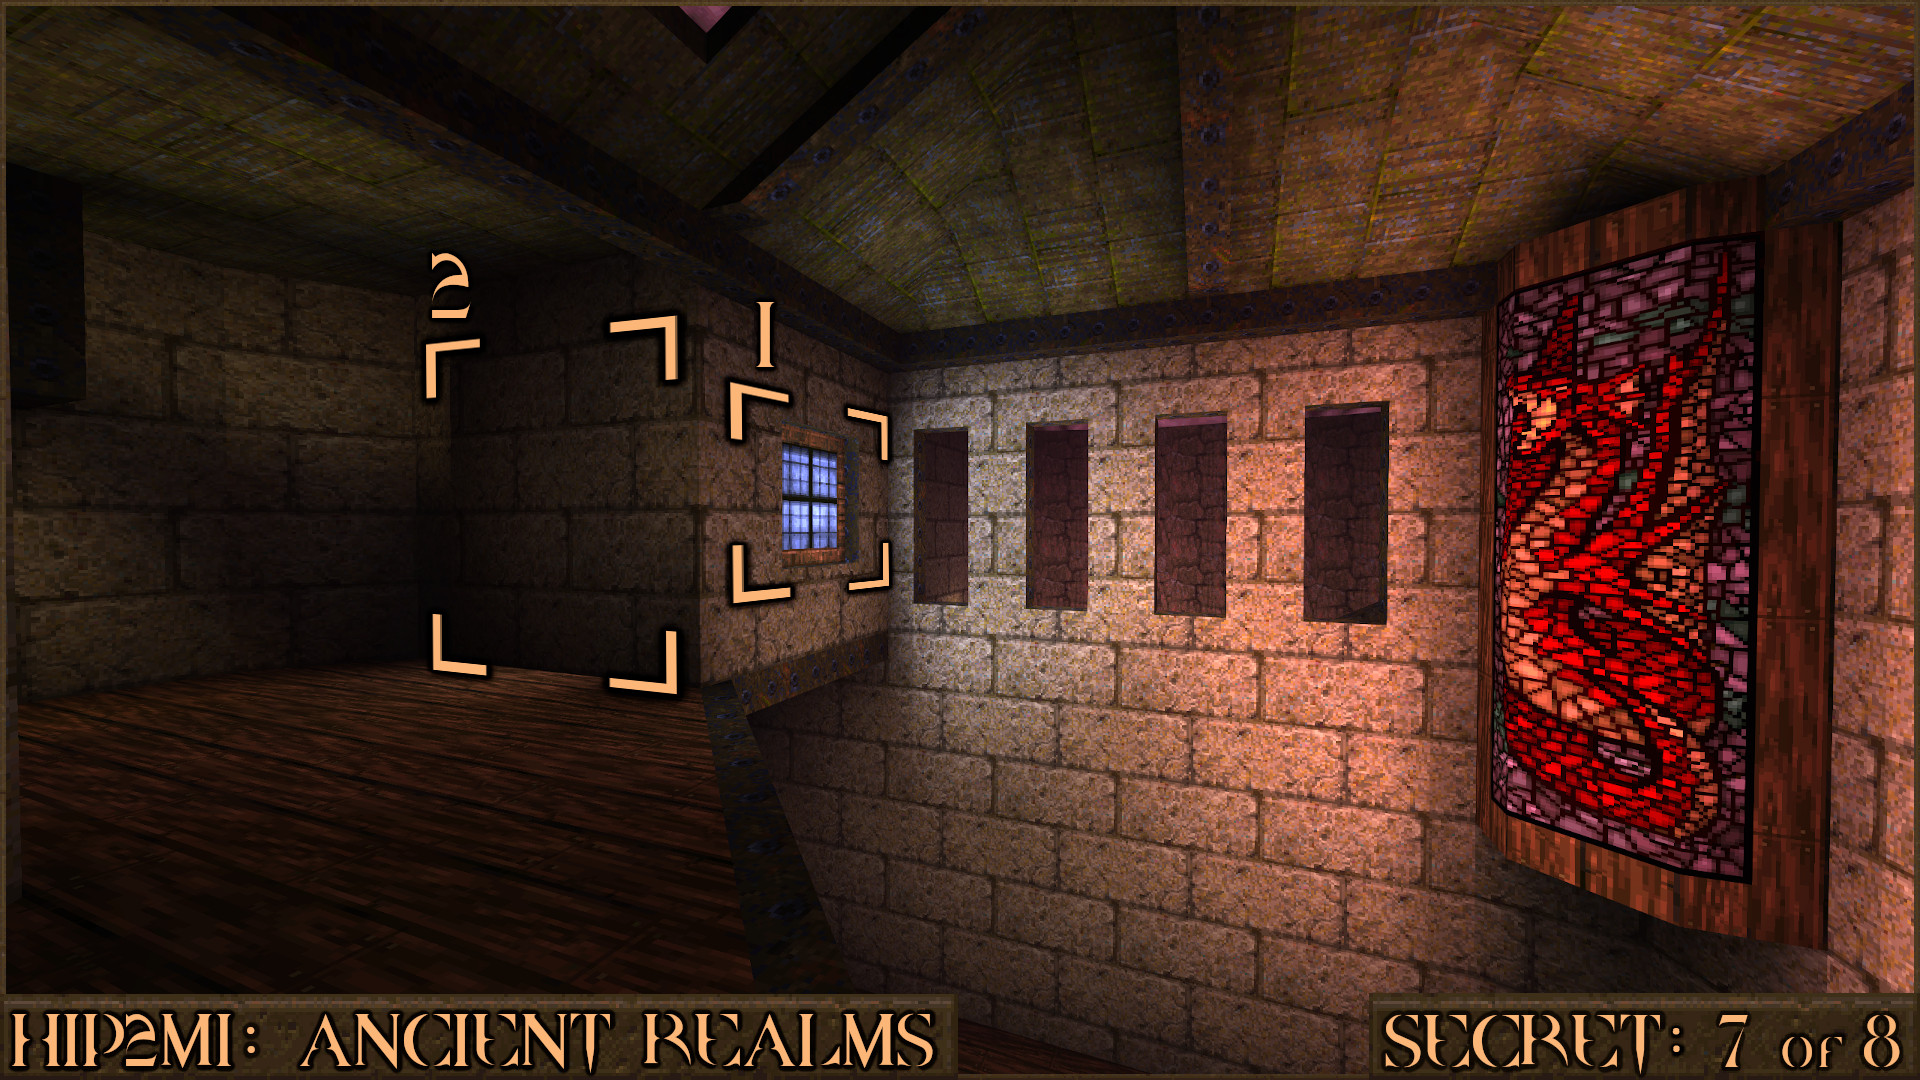
Reward:
Secret 8 of 8
Continue through the level until you reach the large final exit door. Don't go inside, this is just the normal exit, but instead look above the exit to see a shootable red switch ().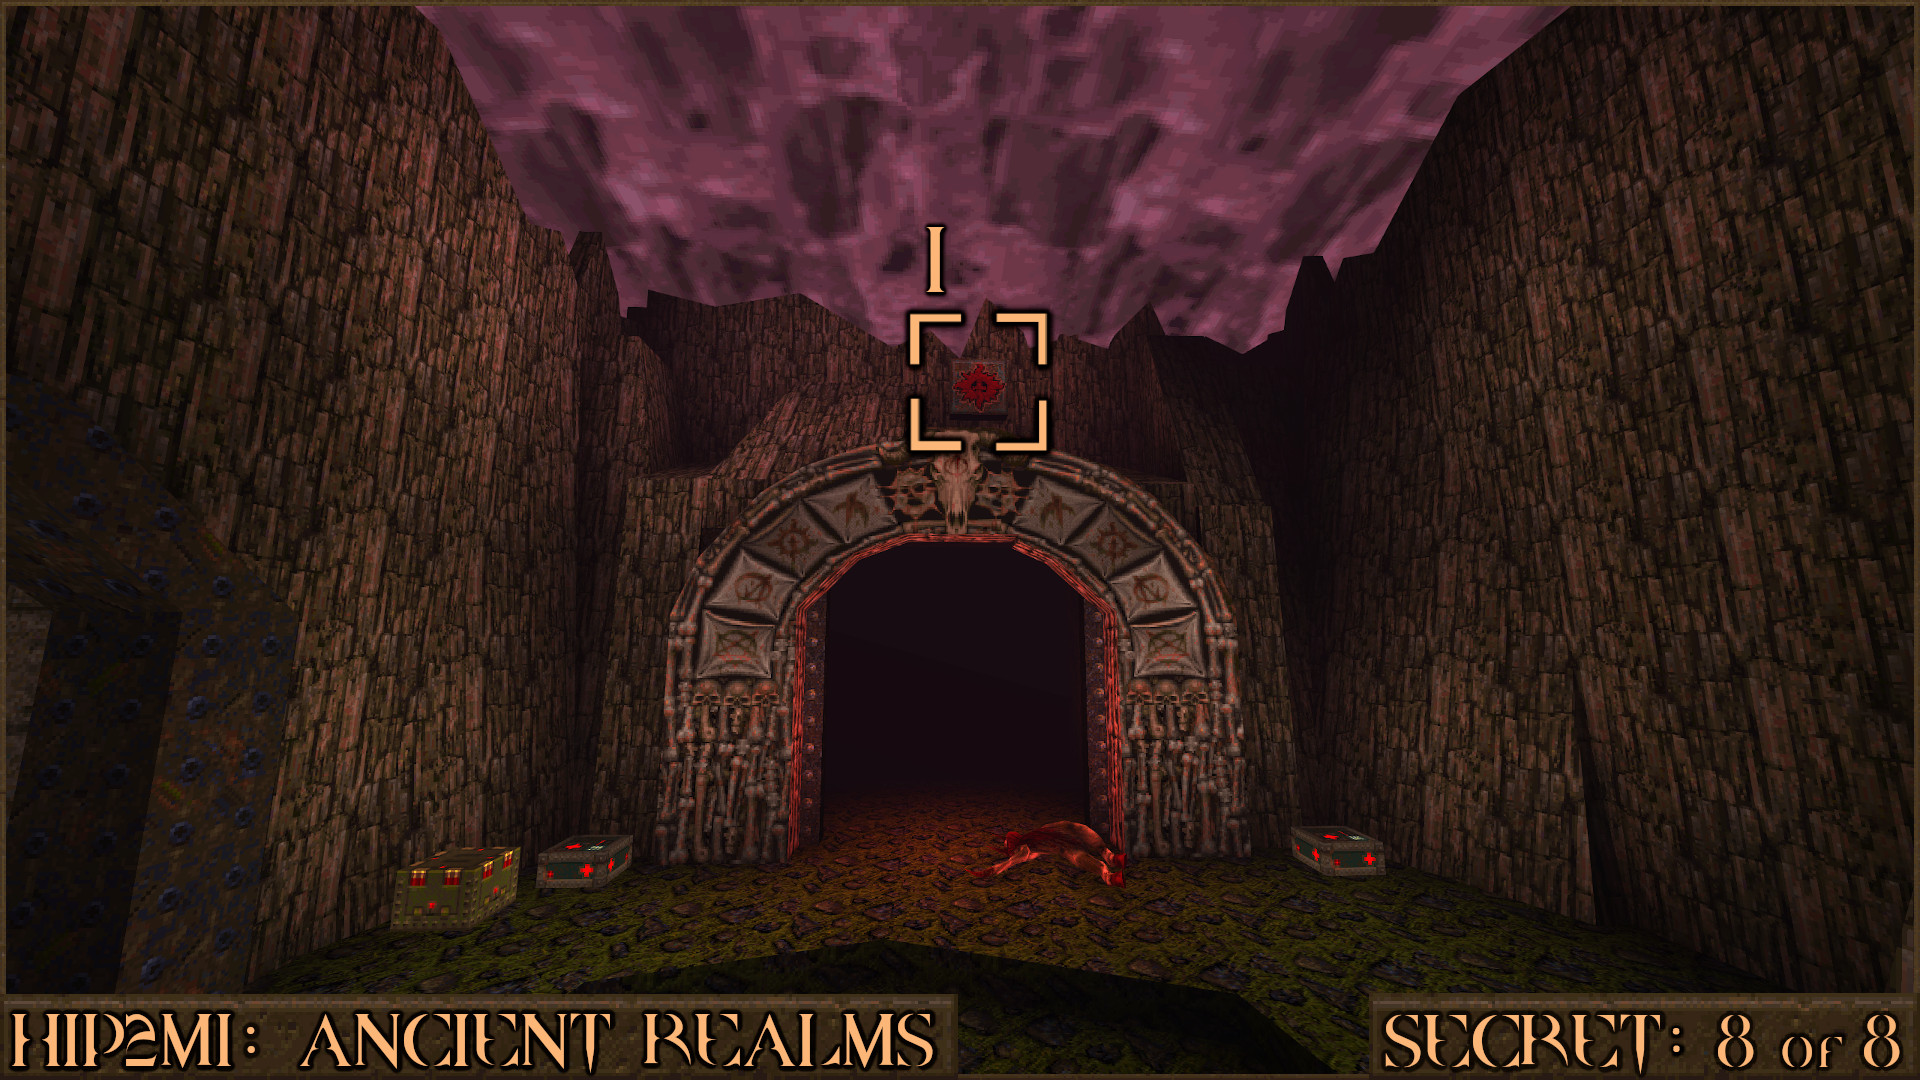
Shooting the switch has lowered the barrier (
) you found earlier within Secret 2 so return there now. Proceed down the now accessible elevator to find the secret level for this episode: HIP2M6: The Gremlin's Domain.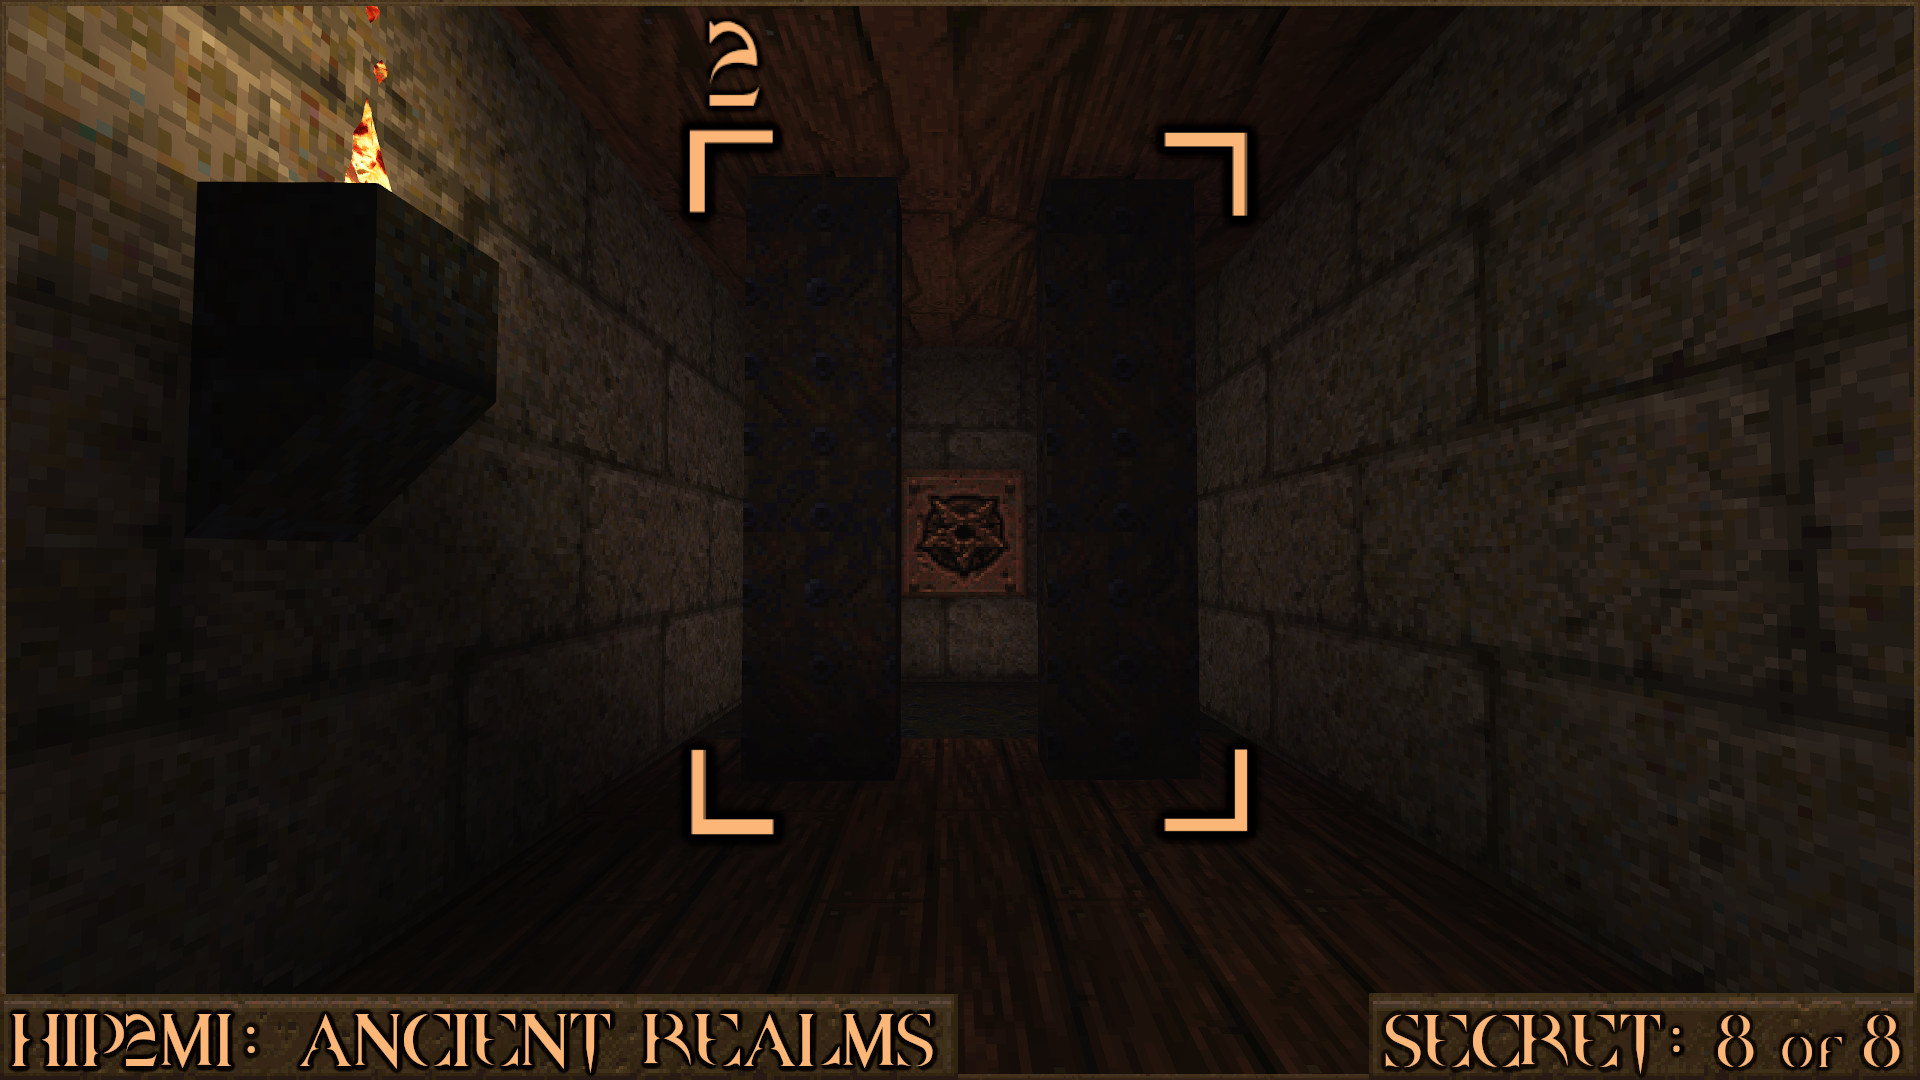
Reward:
SECRET LEVEL
HIP2M6: The Gremlin's Domain [Secret Level]
Secret 1 of 6
Near the start of the level you will see an Ogre behind some bars. Just to the lower right of this is a section of wall that will move when shot. It allows access to behind the bars where you will find the secret.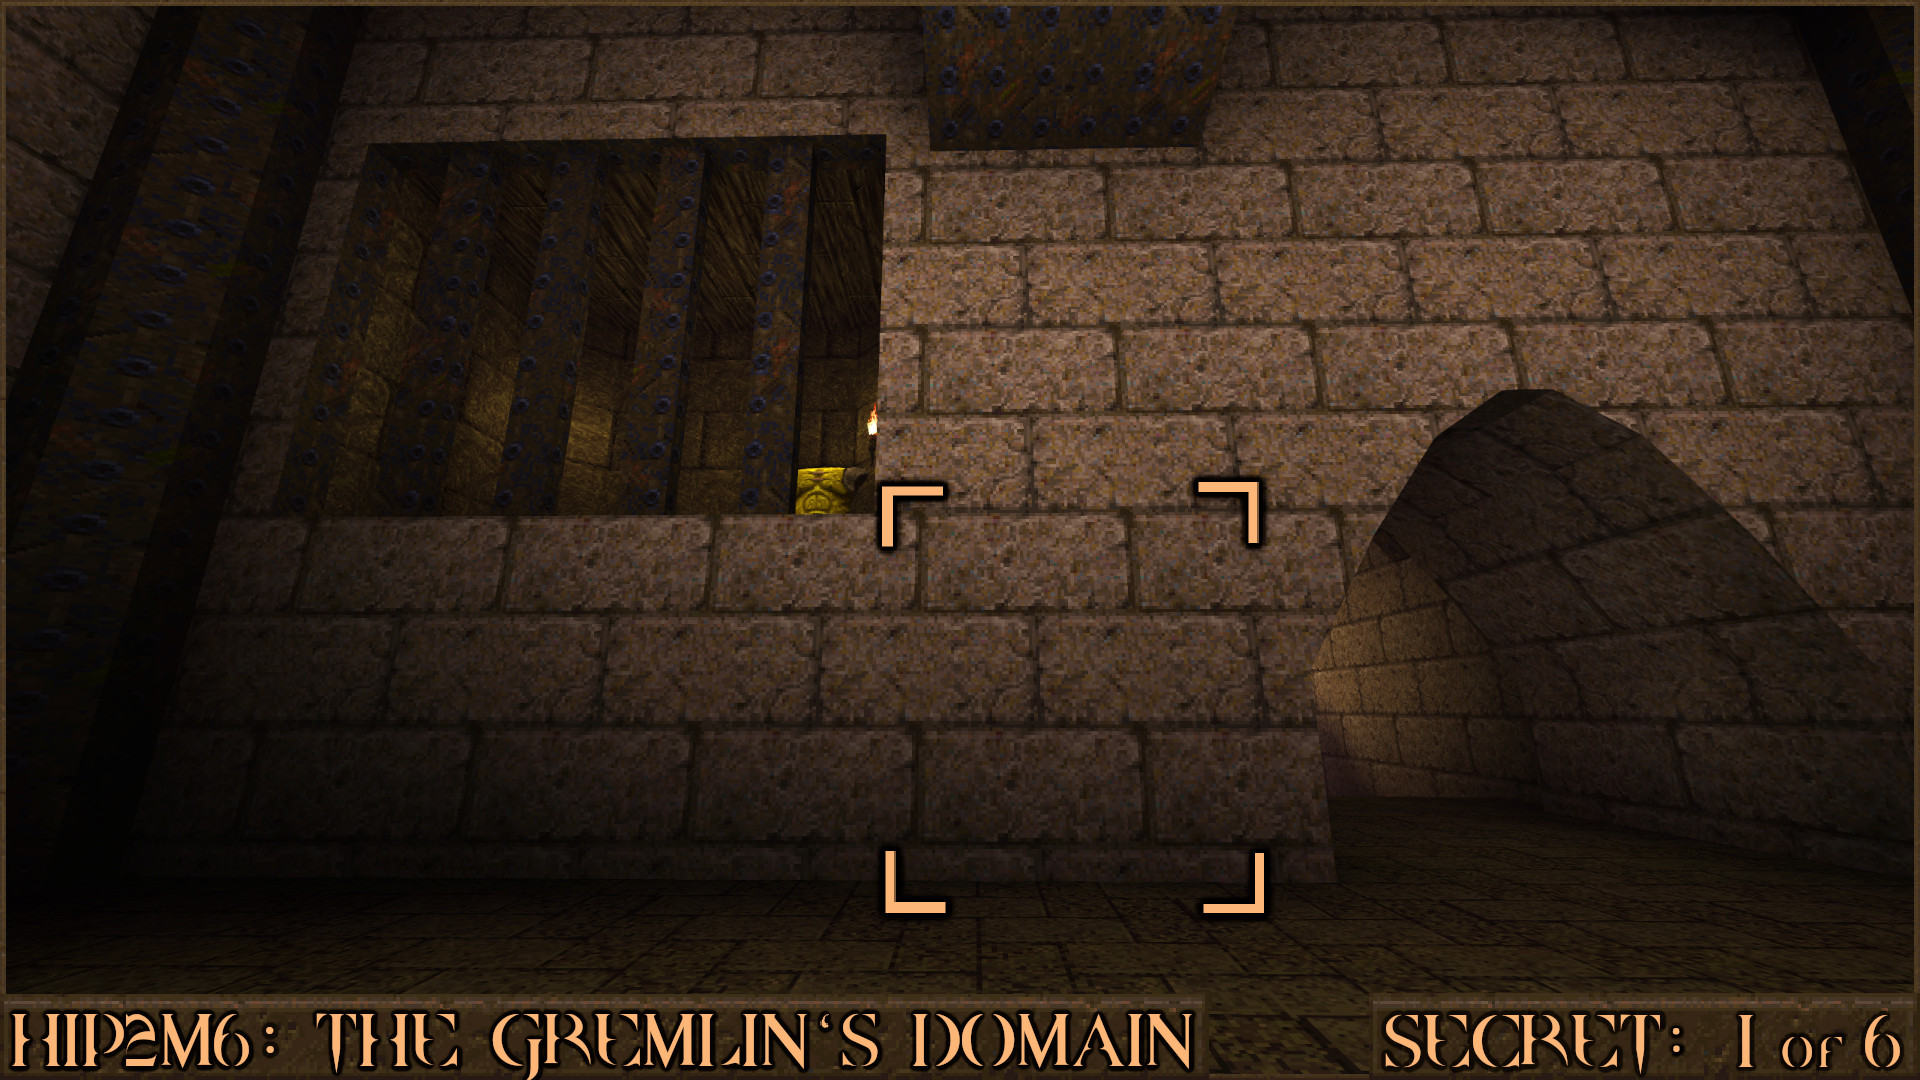
Reward:
Secret 2 of 6
While descending some stairs you will see a small room with a metal grate on the floor. While still on the stairs look straight up to see the first red shootable switch (). After shooting it return back up the stairs.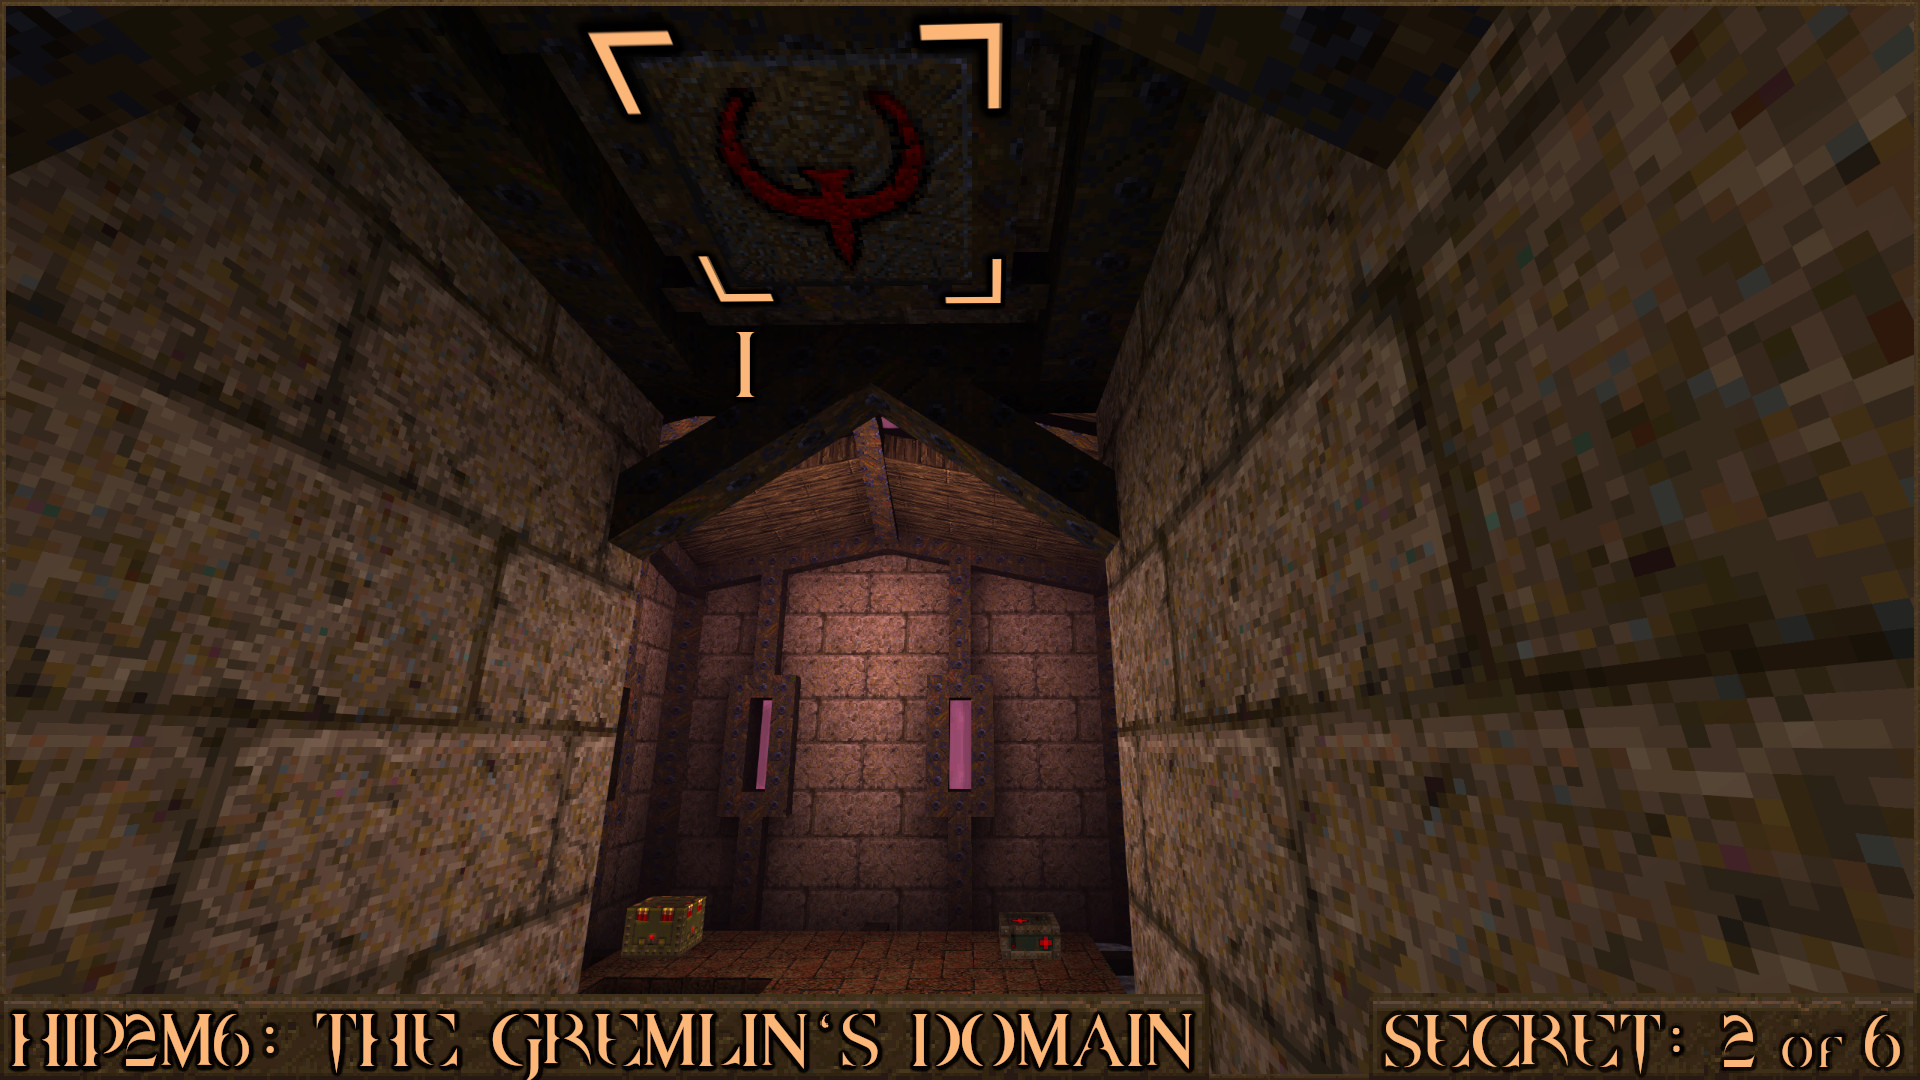
You will notice a central pillar has moved to reveal a Megahealth. Look straight up above the Megahealth to see a second red shootable switch (
). Shooting this will make a nearby wall move and steps appear () to allow you access to the secret area.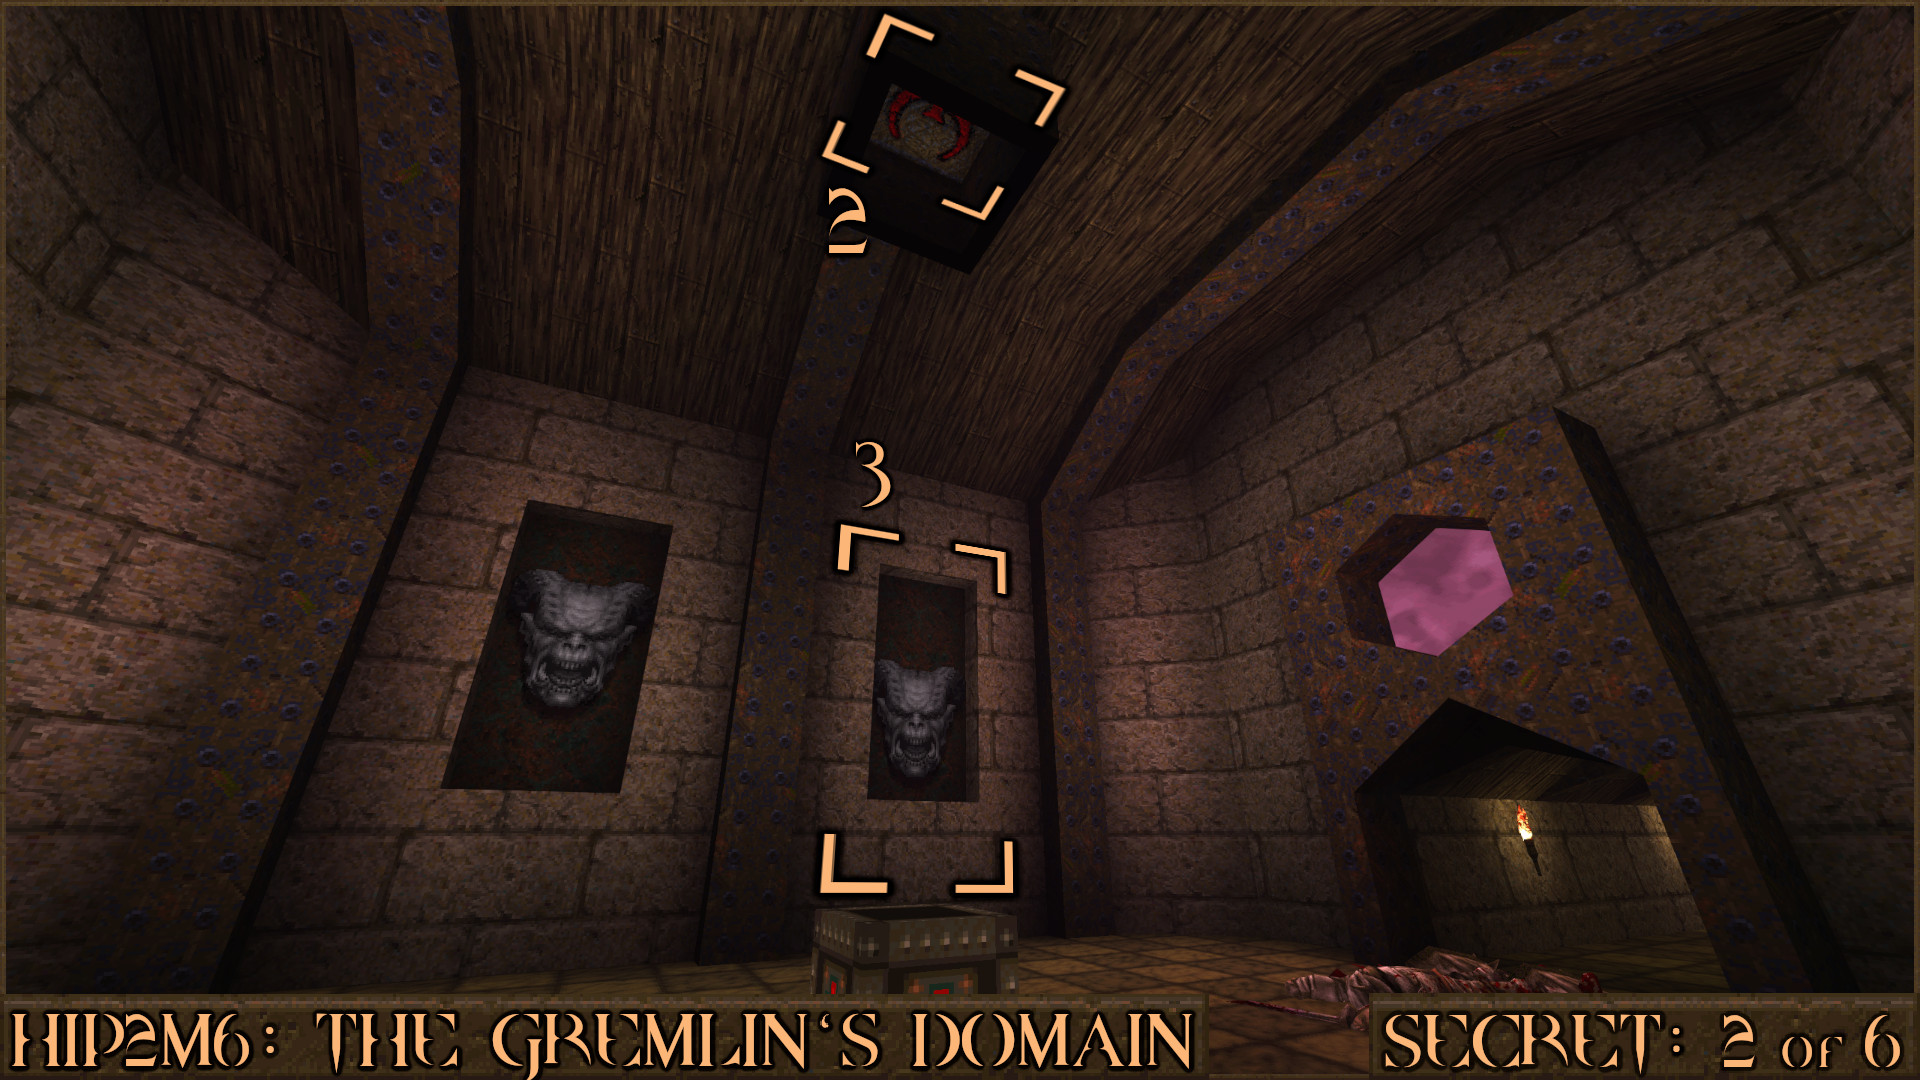
Reward:
Secret 3 of 6
Shortly after picking up a Wetsuit and a Rocket Launcher you will see some water. Look straight up before going in to the water to see a red shootable switch (). Shoot it then jump in to the water.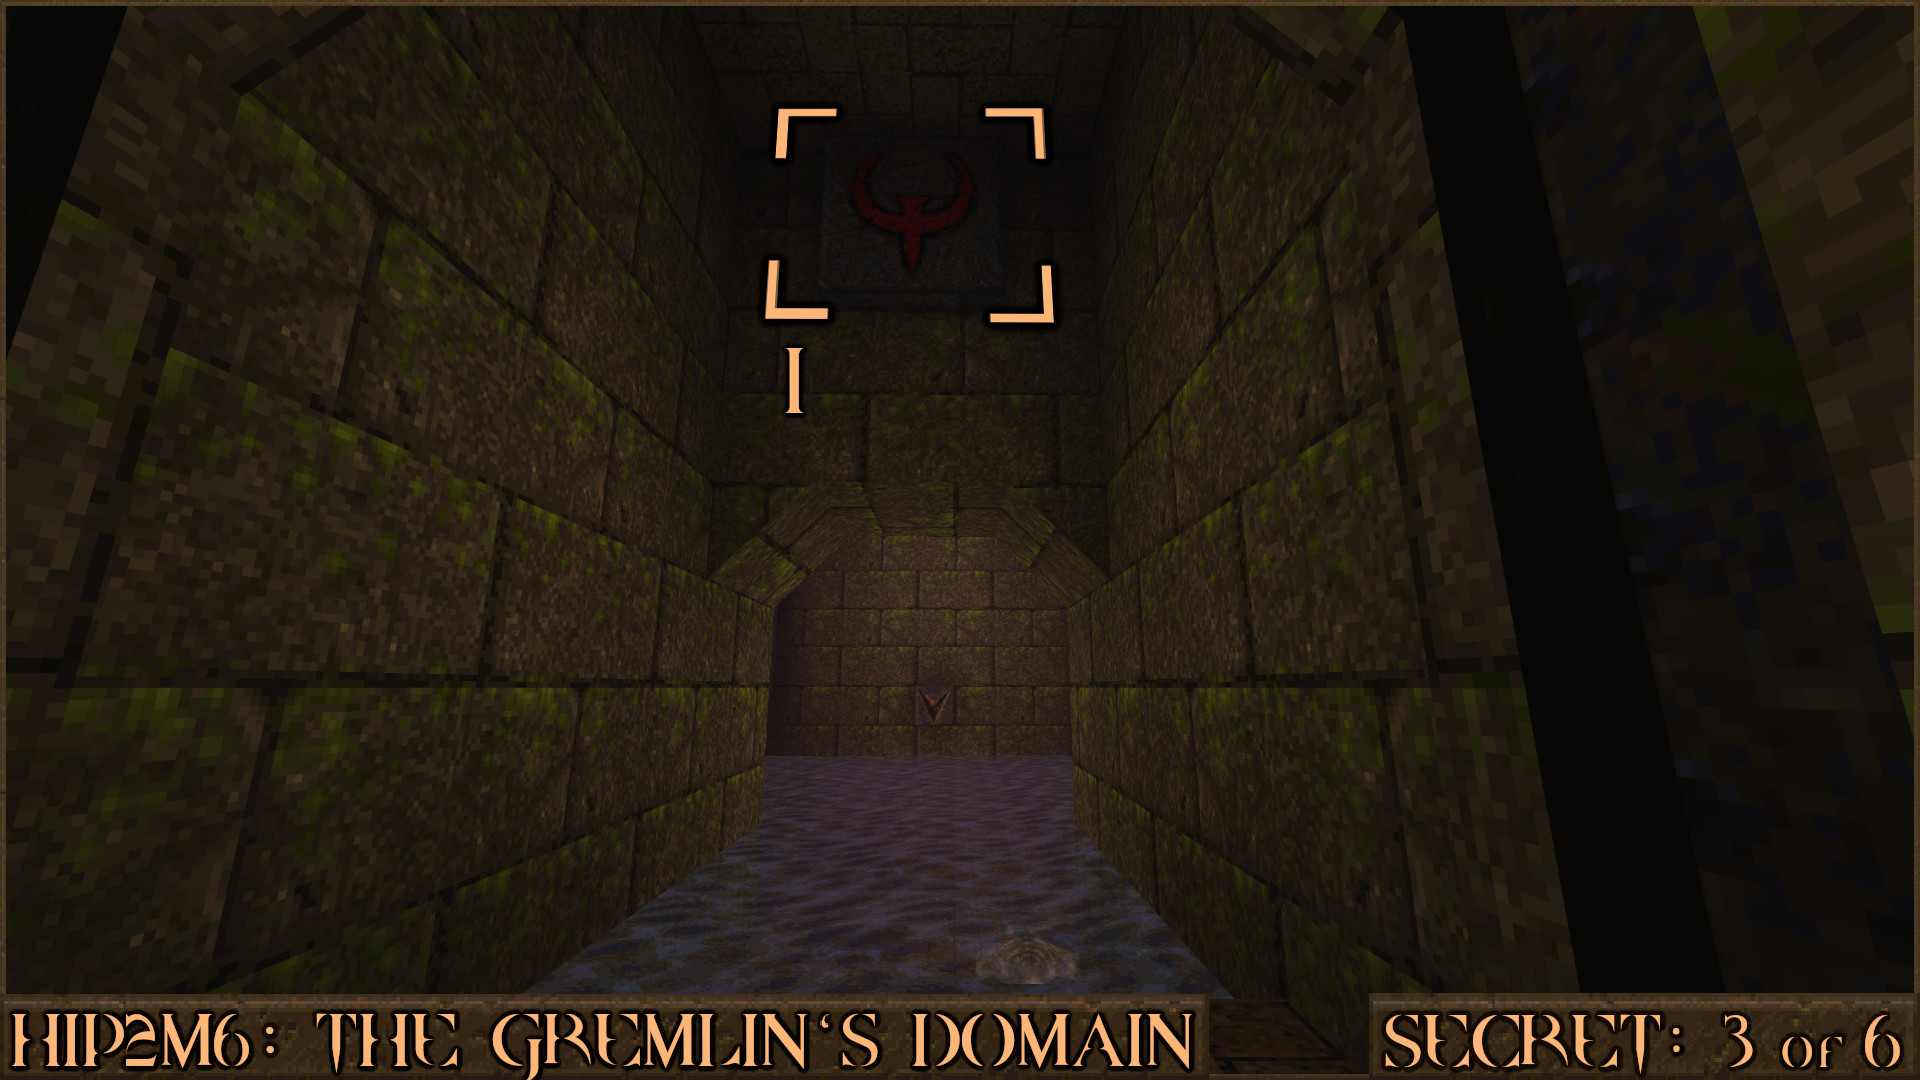
Swim straight ahead and you will see a hole (
) you can use to get out of the water. In this small room you will find the secret.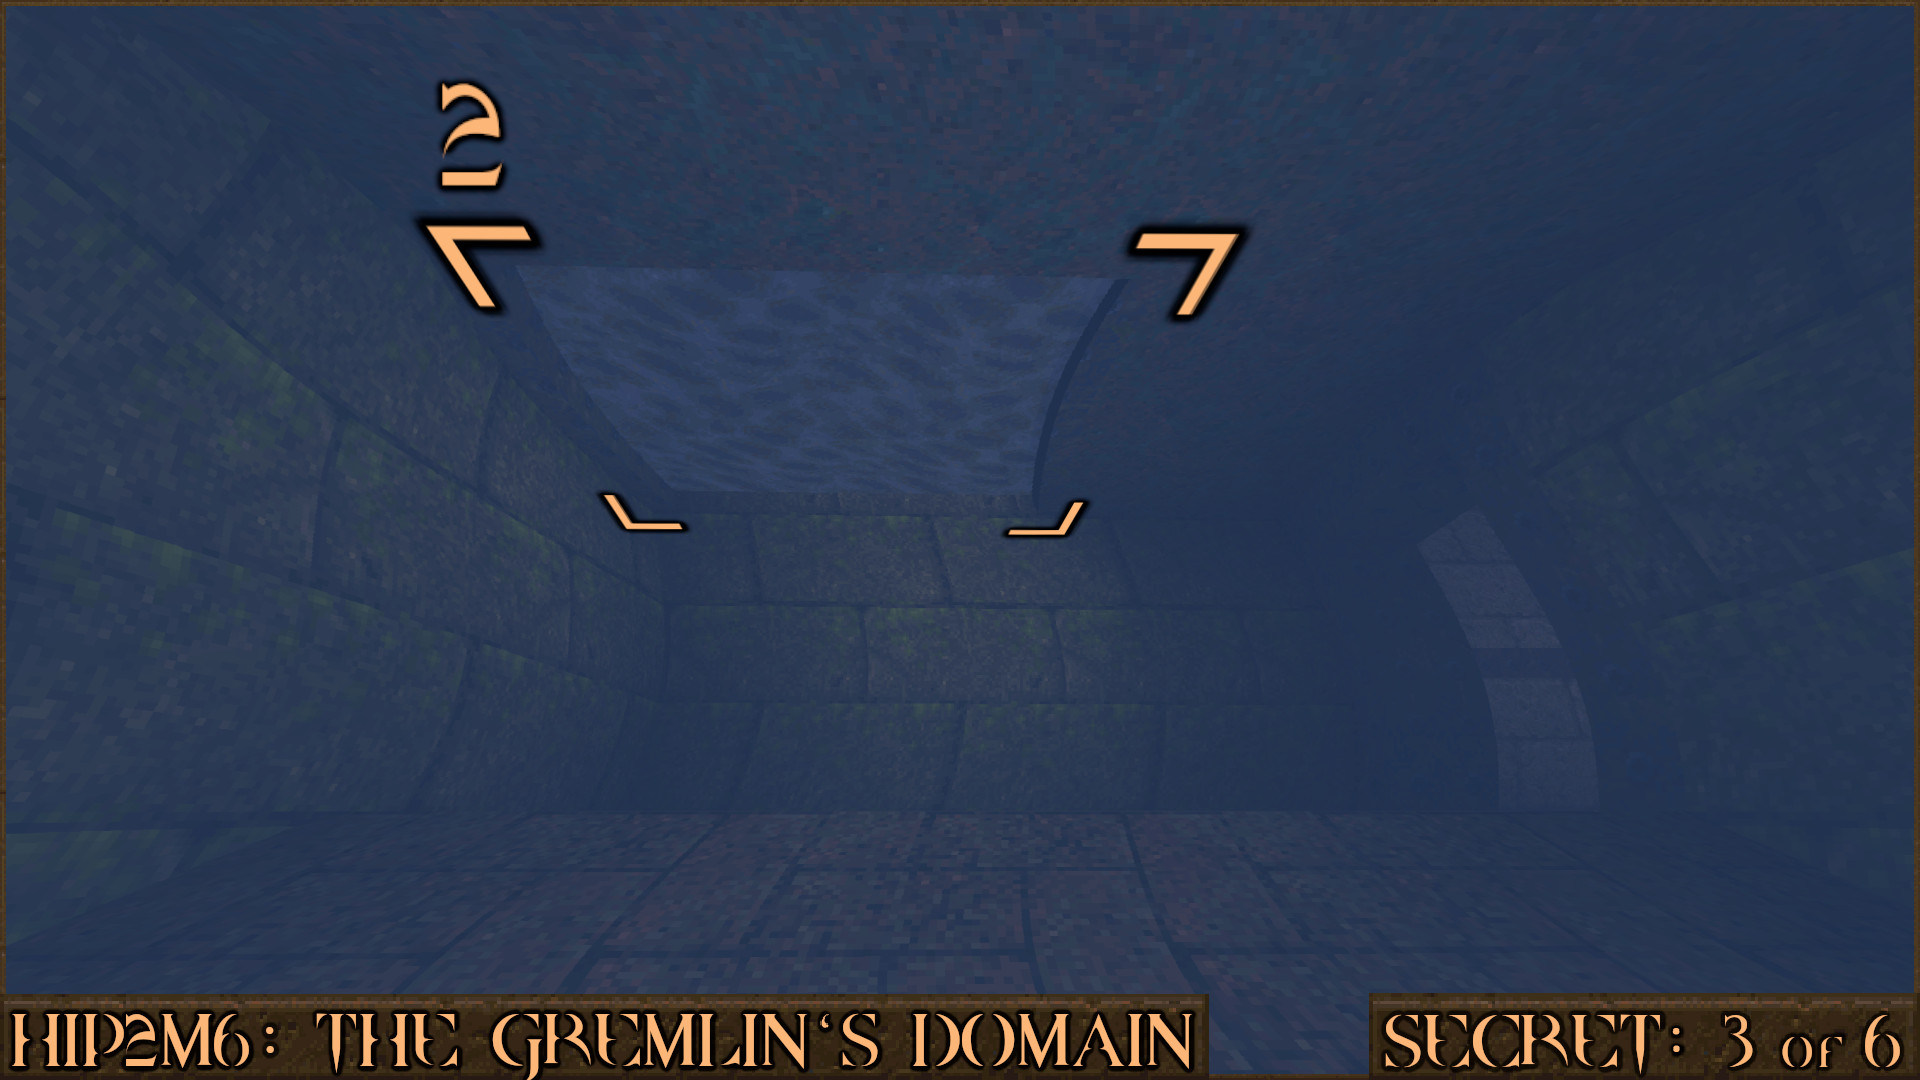
Reward:
Secret 4 of 6
Shortly after Secret 3 you find the Silver Key. Look to the side to see a large square on the side of the wall. Shoot it to make the wall move out of the way and continue swimming through to find the secret.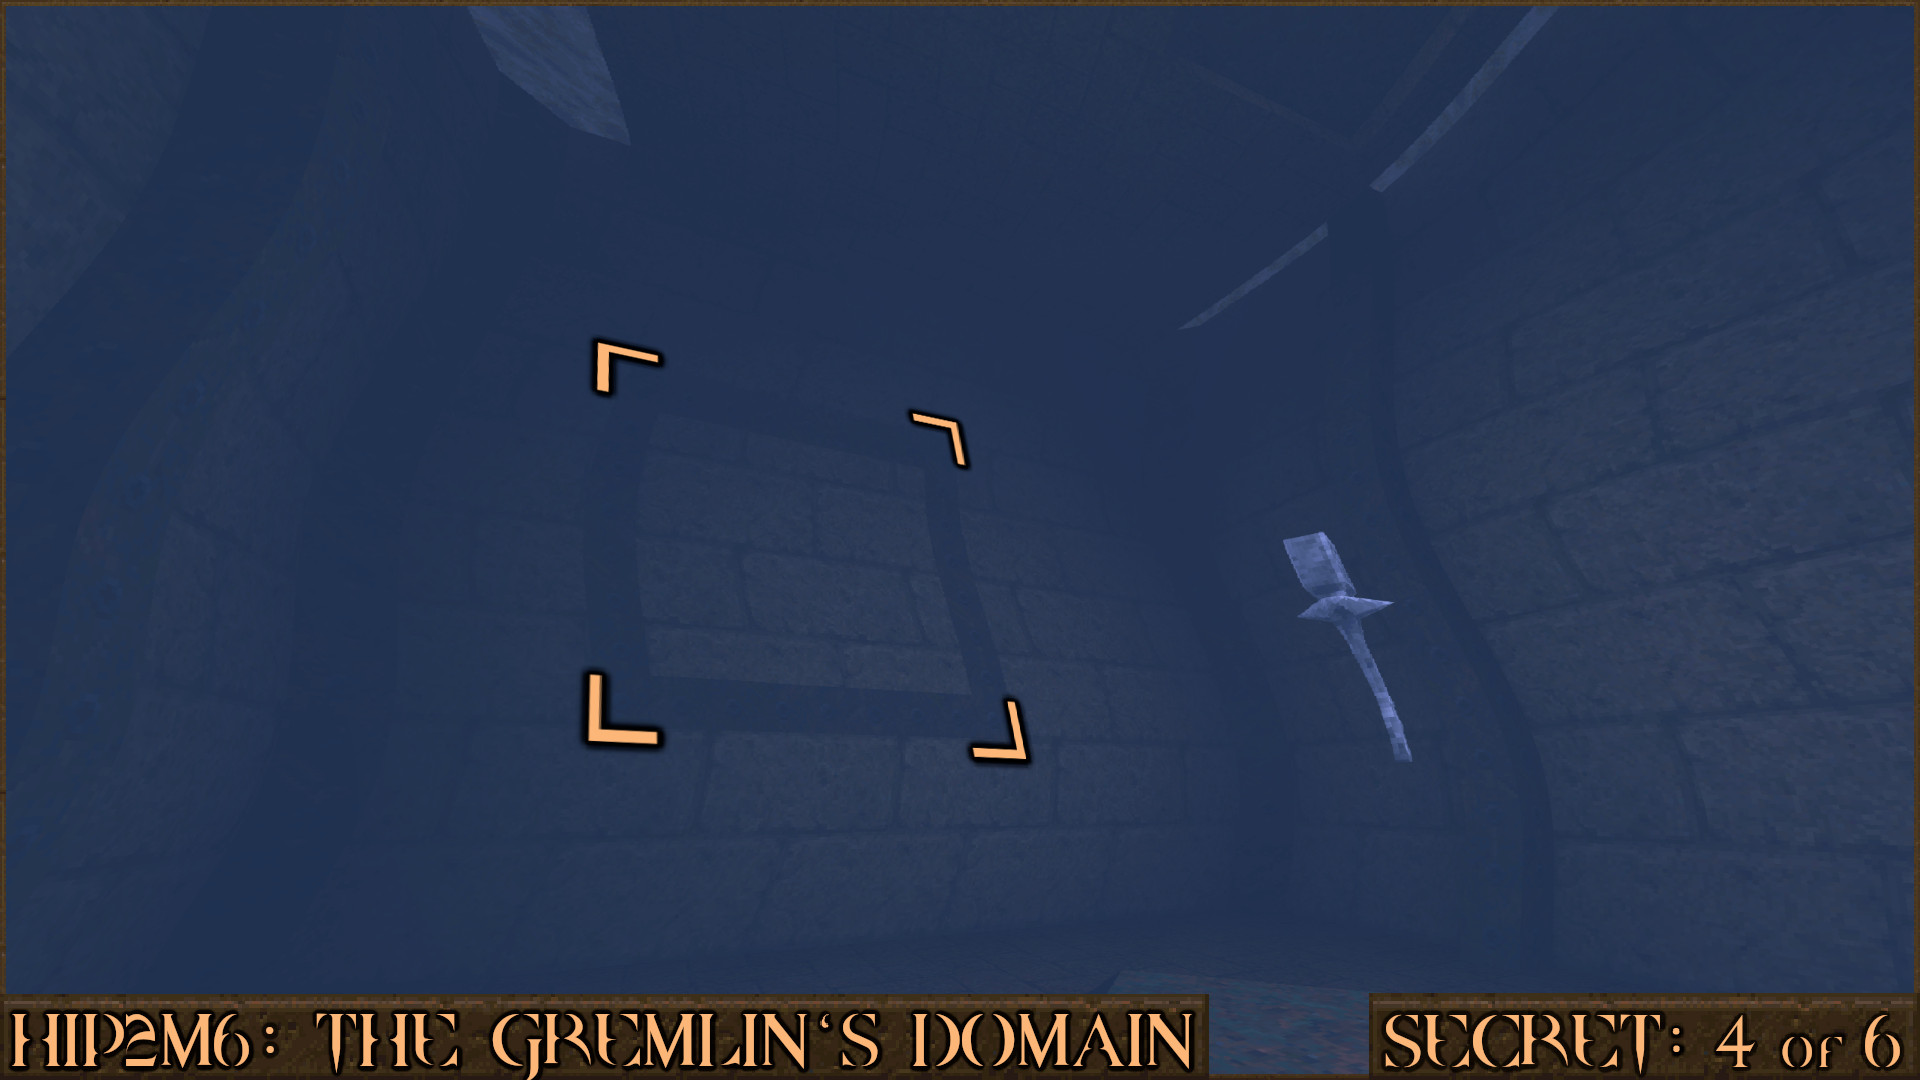
Reward:
Secret 5 of 6
Opposite the Silver Key Door is a yellow and purple stained glass window. Shoot it to allow access to a hidden teleporter behind it that will take you to the secret.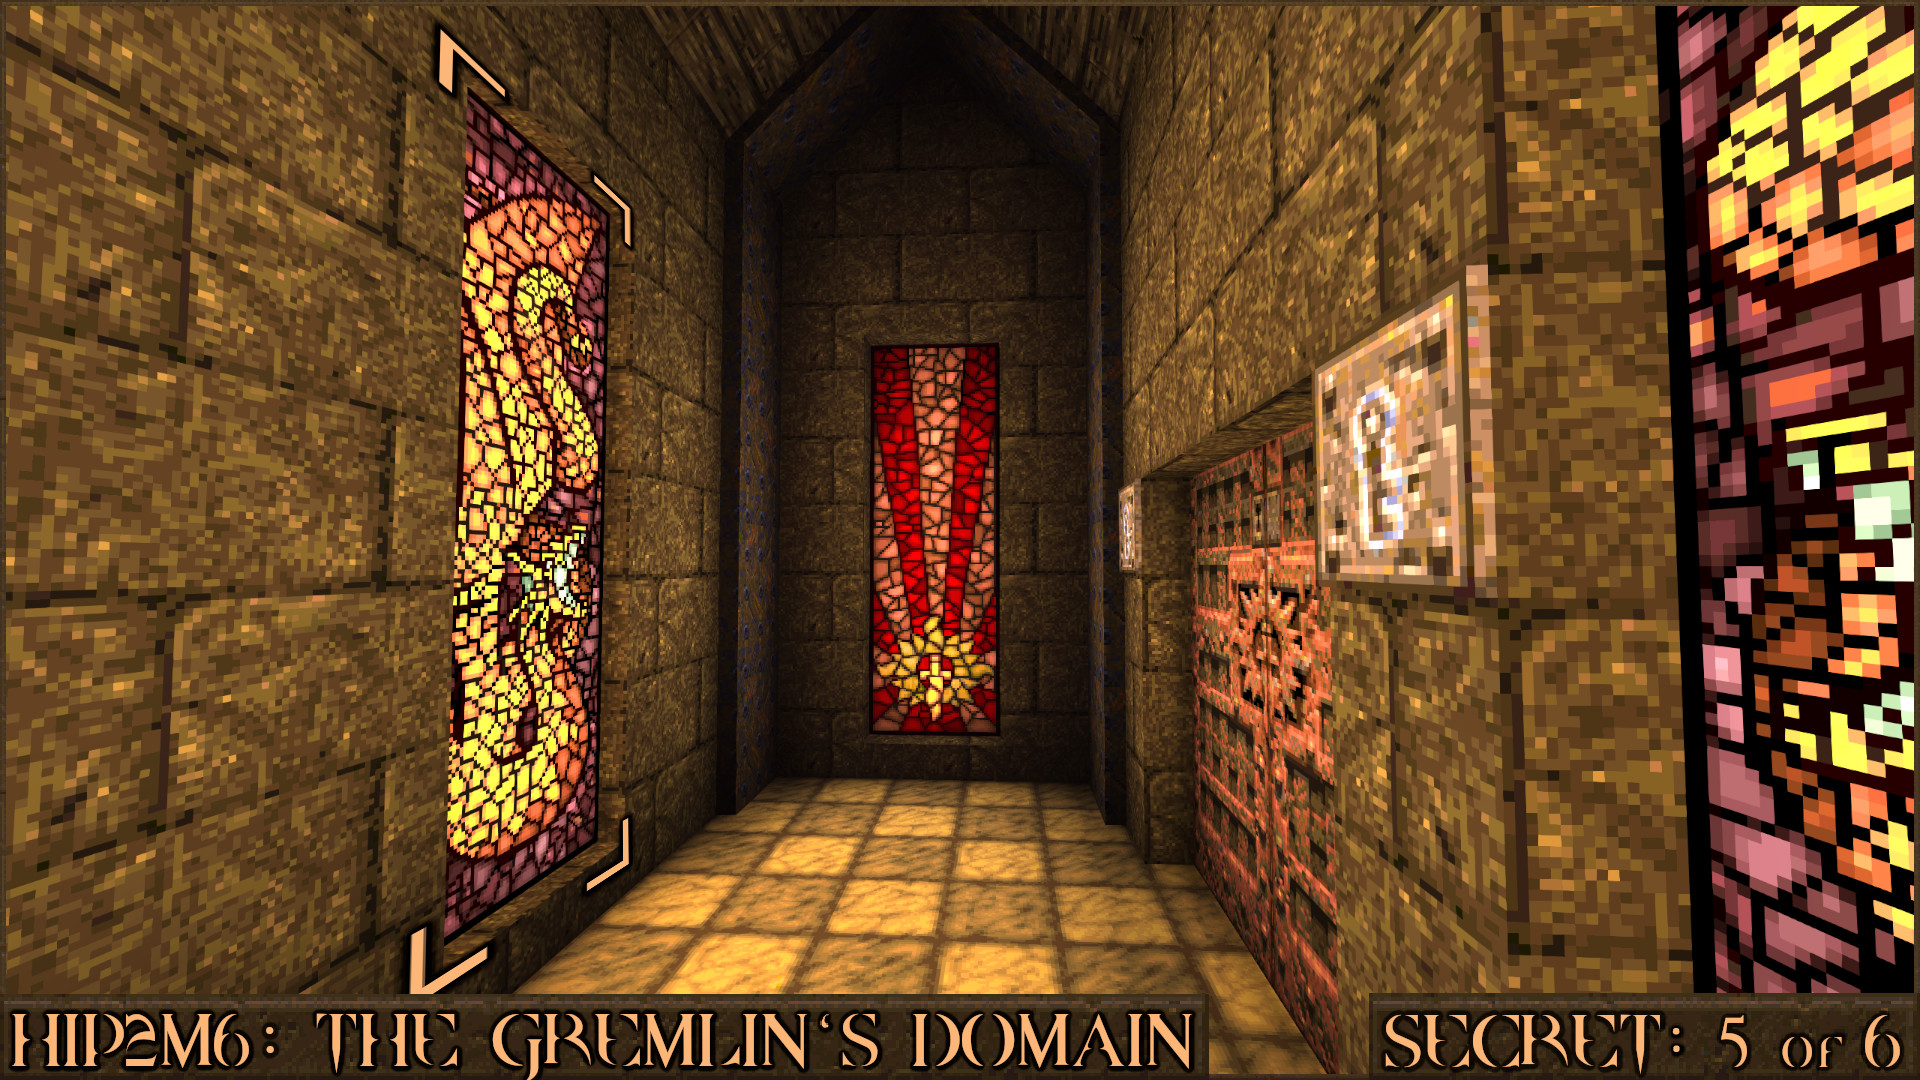
Reward:
Secret 6 of 6
Right at the end of the level you will come across a room with a glowing monster face on the wall. Shoot it to reveal a small secret area.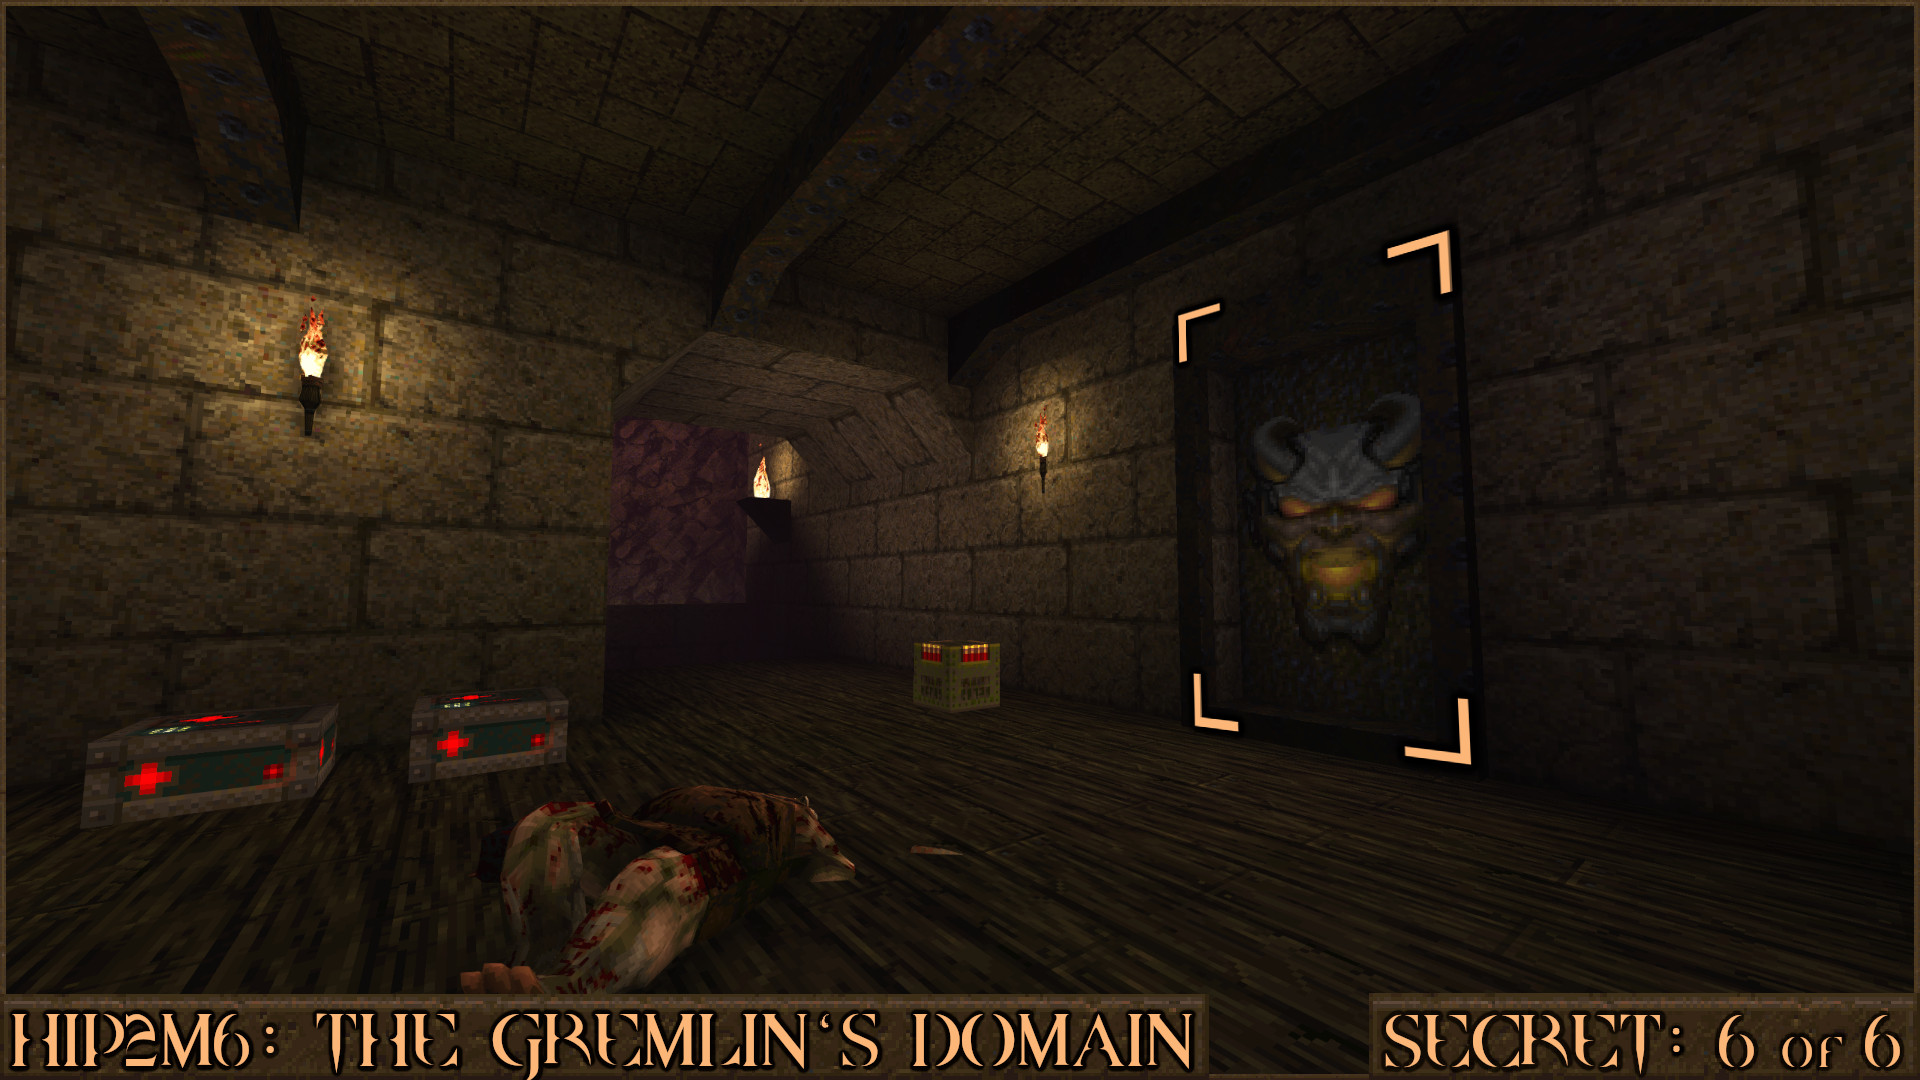
Reward:
HIP2M2: The Black Cathedral
Secret 1 of 5
After going down some stairs you will enter a large room with several bookcases in the corner. Look carefully to see a small blue book () sticking out of the bookcase. Push it to make the other bookcase () swing round to reveal a secret.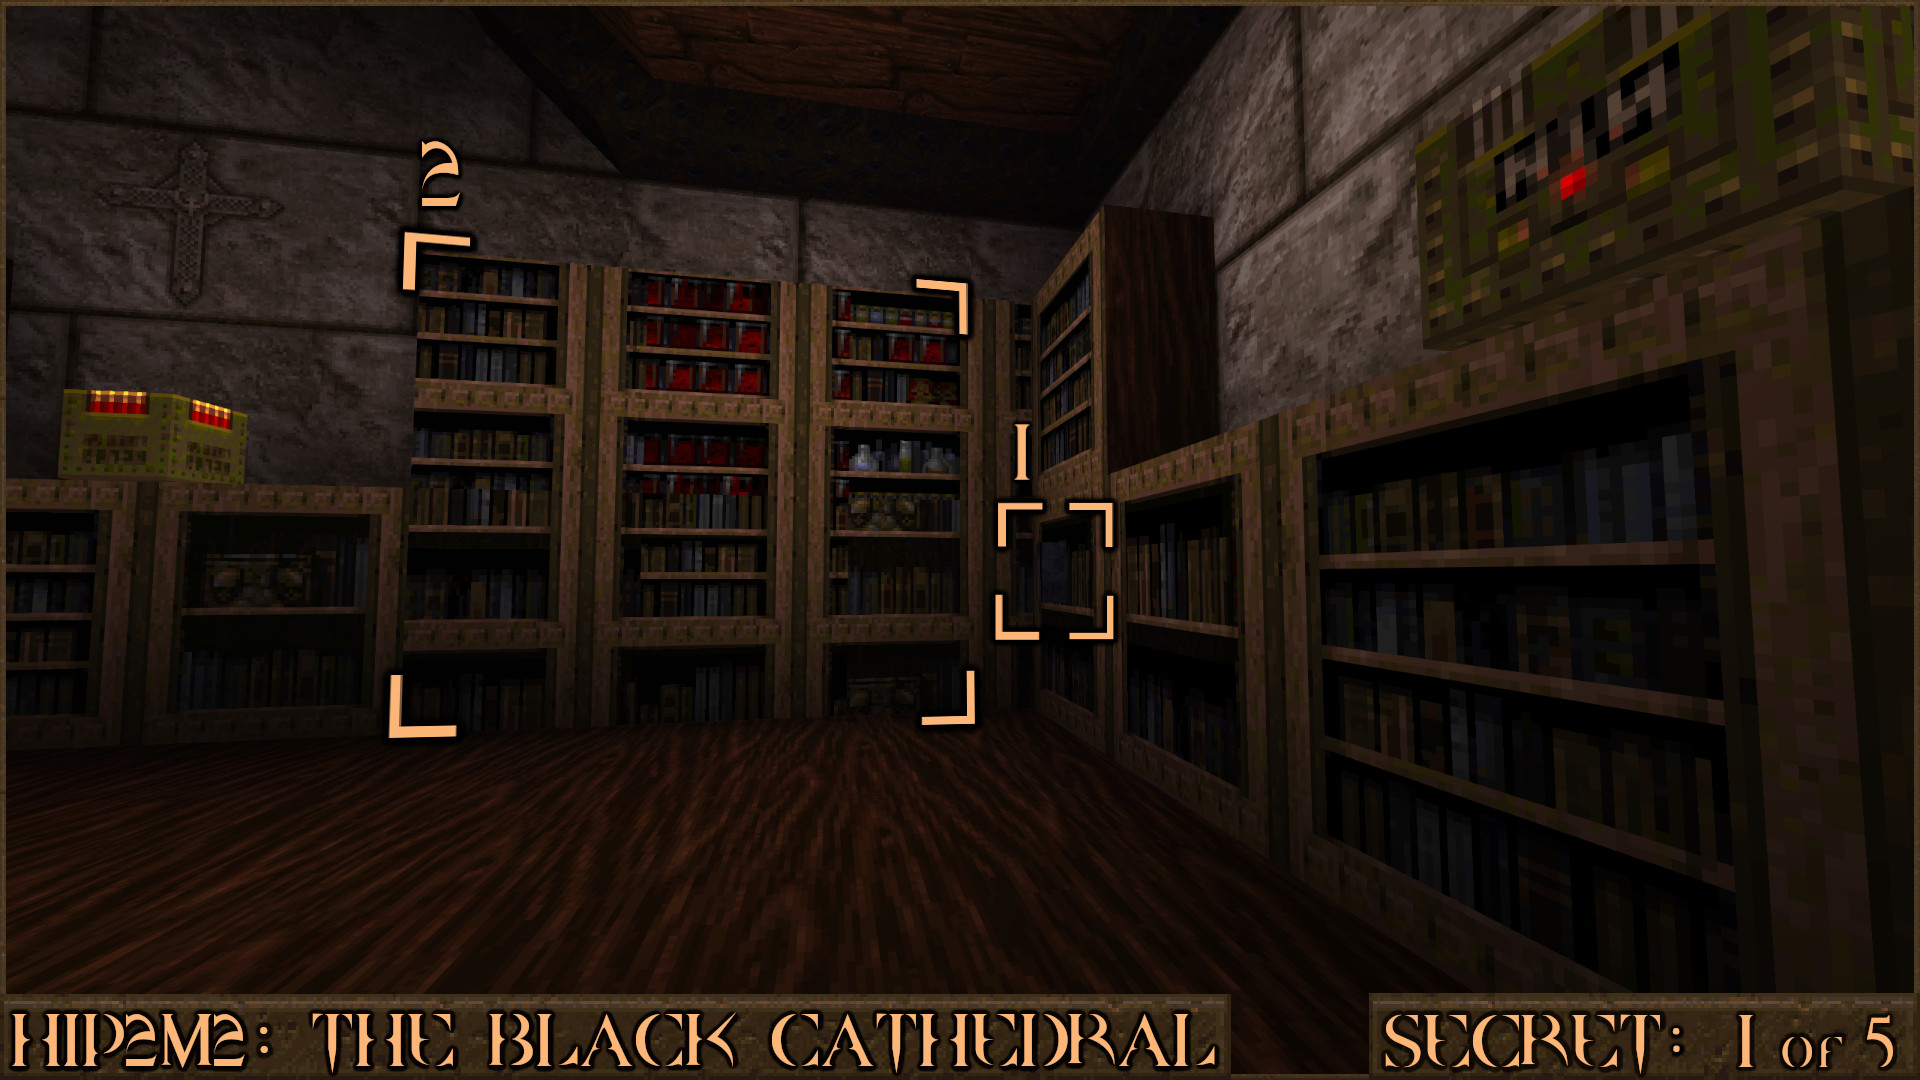
Reward:
Secret 2 of 5
When you enter the large area with a lectern and seats jump up and approach the lectern () and the message "Look to the heavens for the answer..." will appear. Now look up to see a tiny red switch () embedded in to the ceiling. Shooting it will make the seat on the left () move out the way to reveal a teleporter. Jump in to it to claim the secret.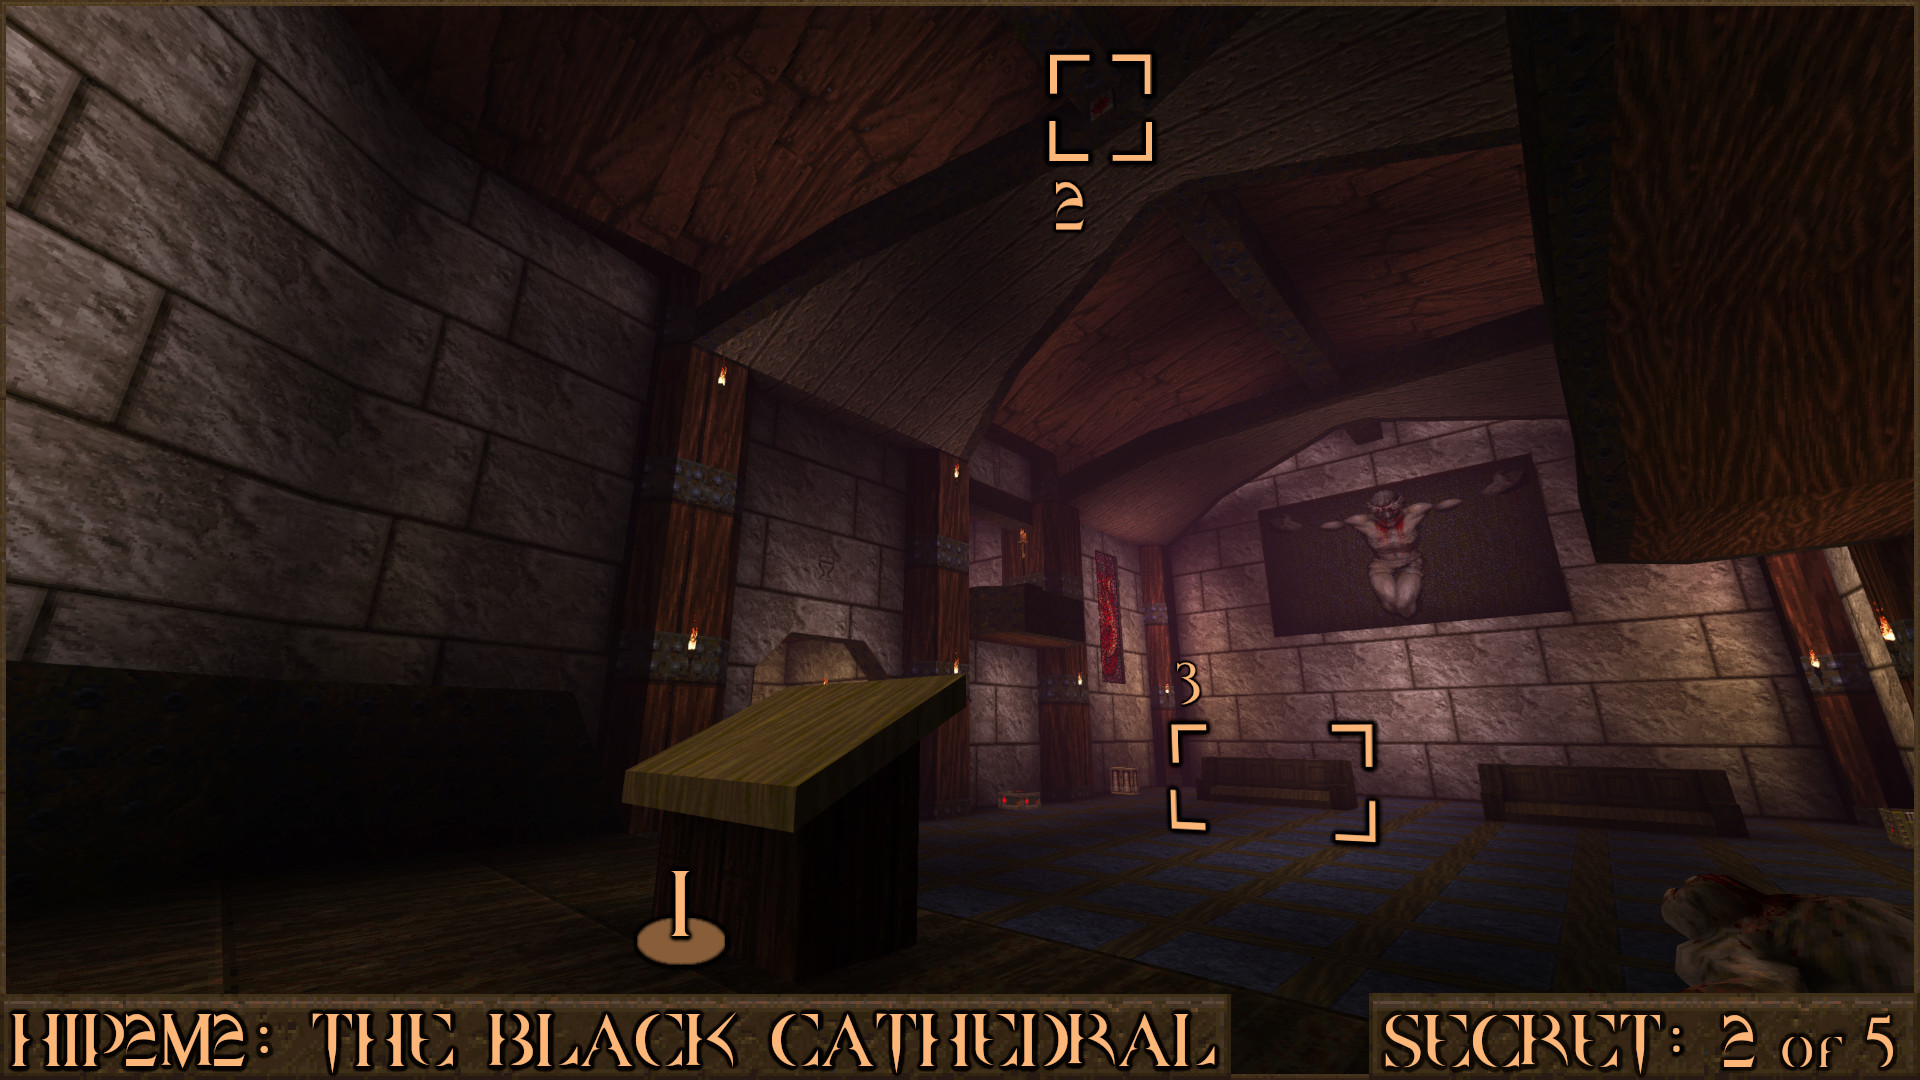
Reward:
Secret 3 of 5
There is a room where you are ambushed by some Fiends hidden behind a wall. To the right of that you will notice that part of the wall is a vertical brick that when shot will reveal a secret.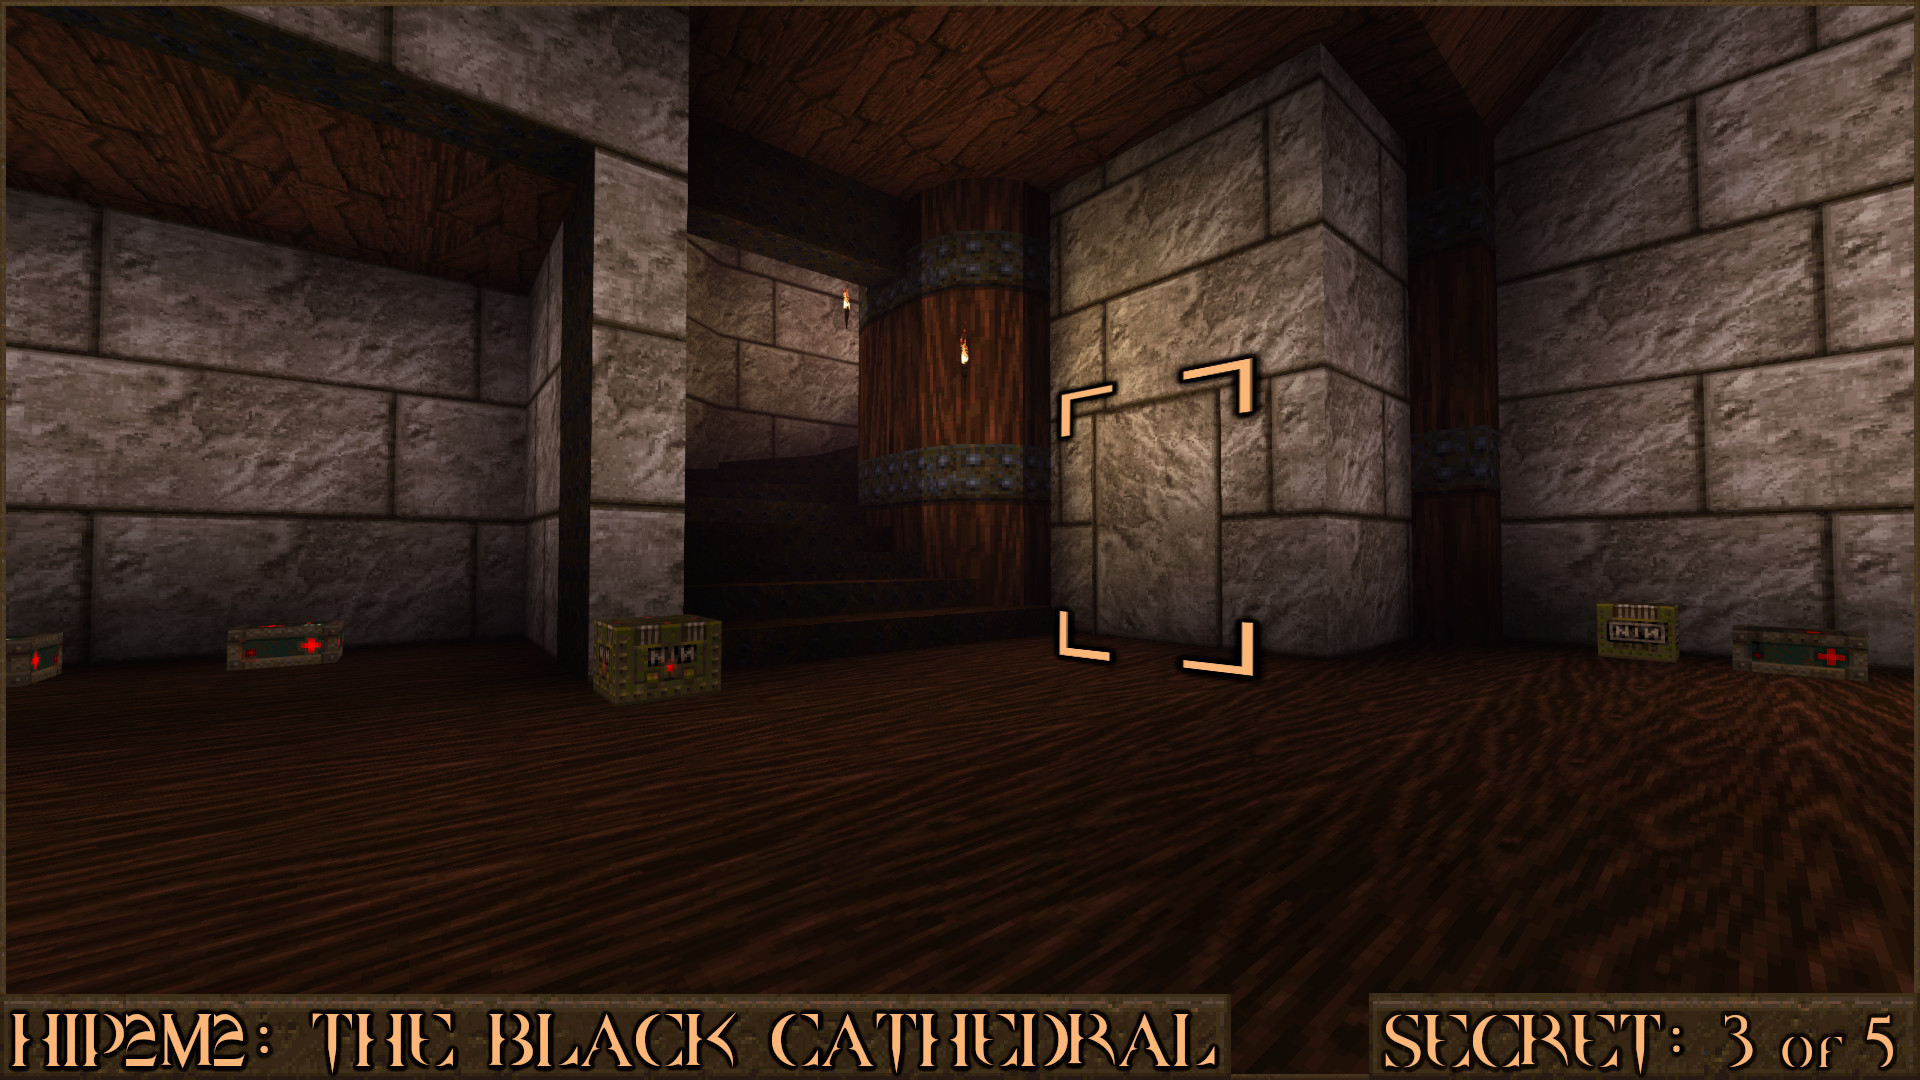
Reward:
Secret 4 of 5
After picking up the Silver Key don't jump in to the nearby teleporter, instead return to the previous room and take the other exit. After some stairs you will come across another bookcase. Look for another small blue book to press and it will move the entire bookcase to allow you in to the secret.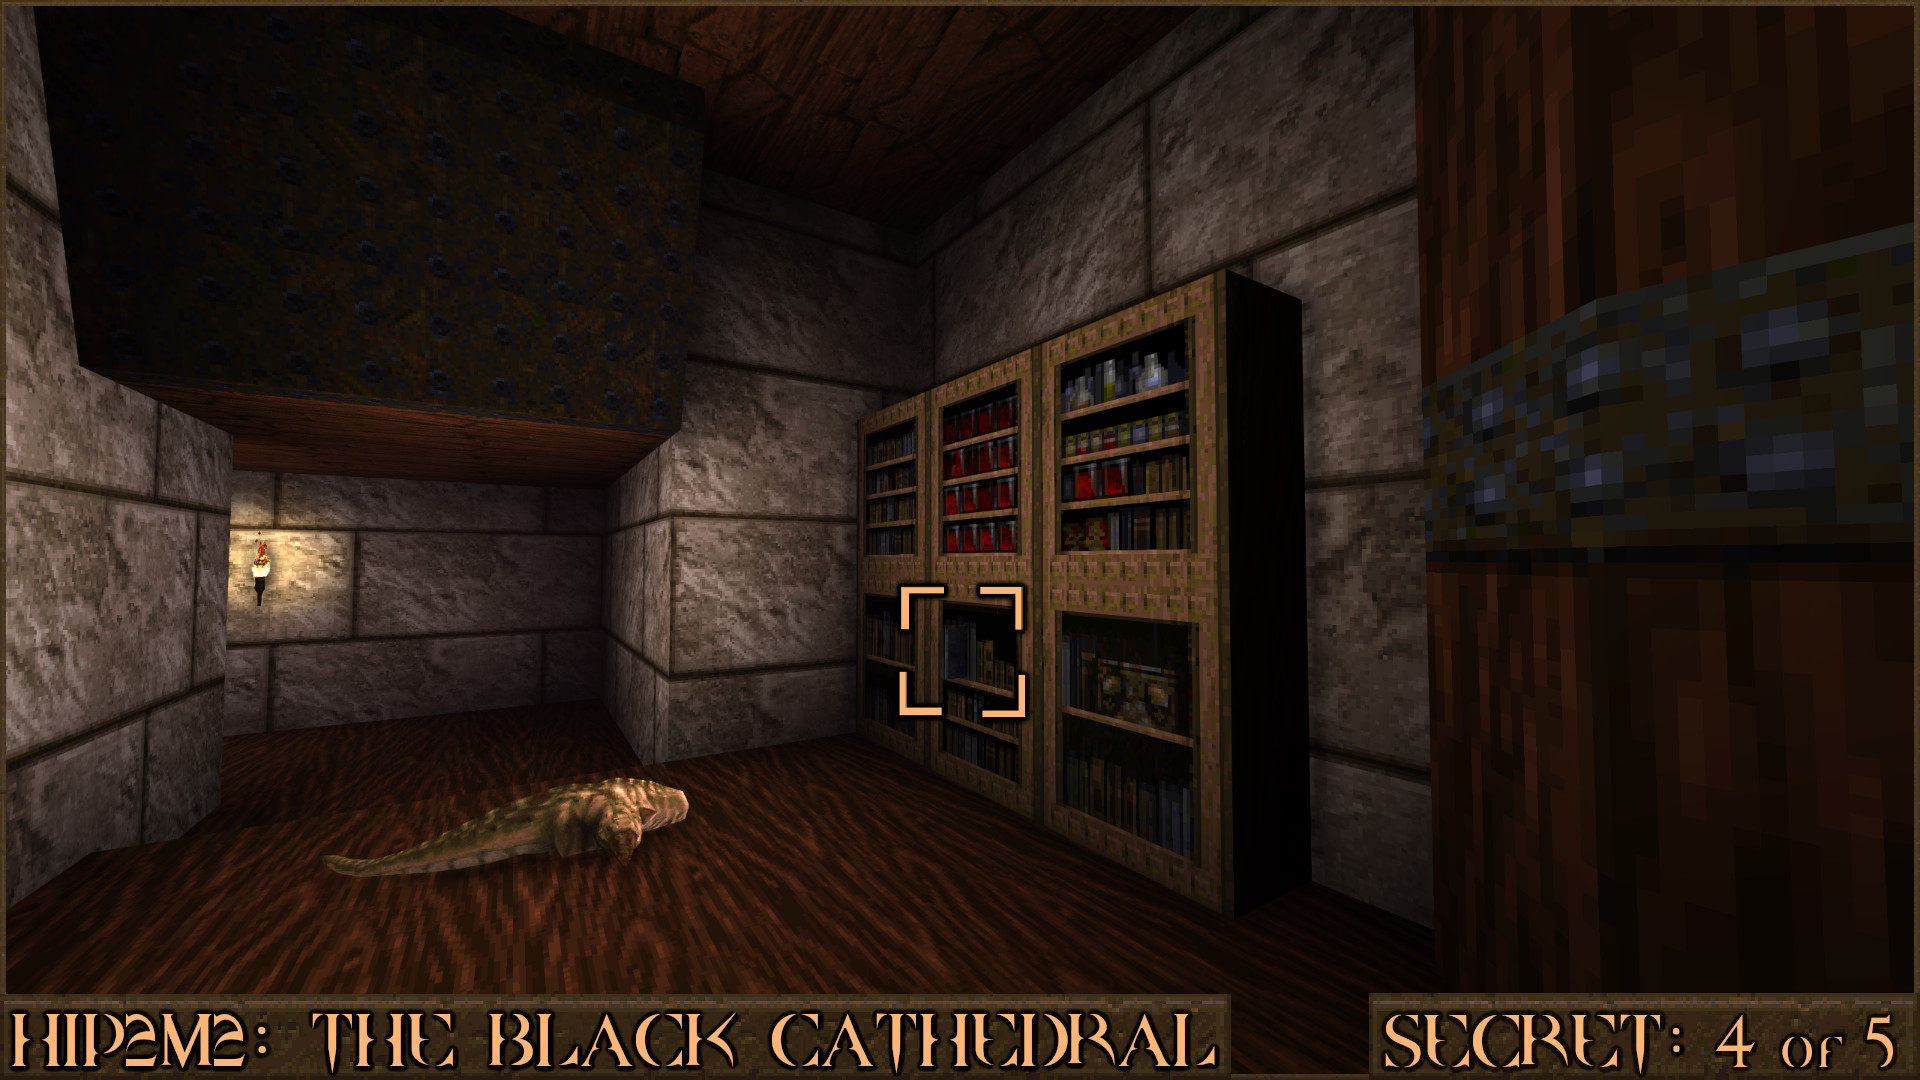
Reward:
Secret 5 of 5
Near the end of the level you will come across a dangerous room with fake floor tiles and lava. Shoot this chunk of stone () above you to make a nearby stained glass window () transform in to a shortcut back to the start of the level. Make sure to press the orange button before you go through to make the level exit appear there too.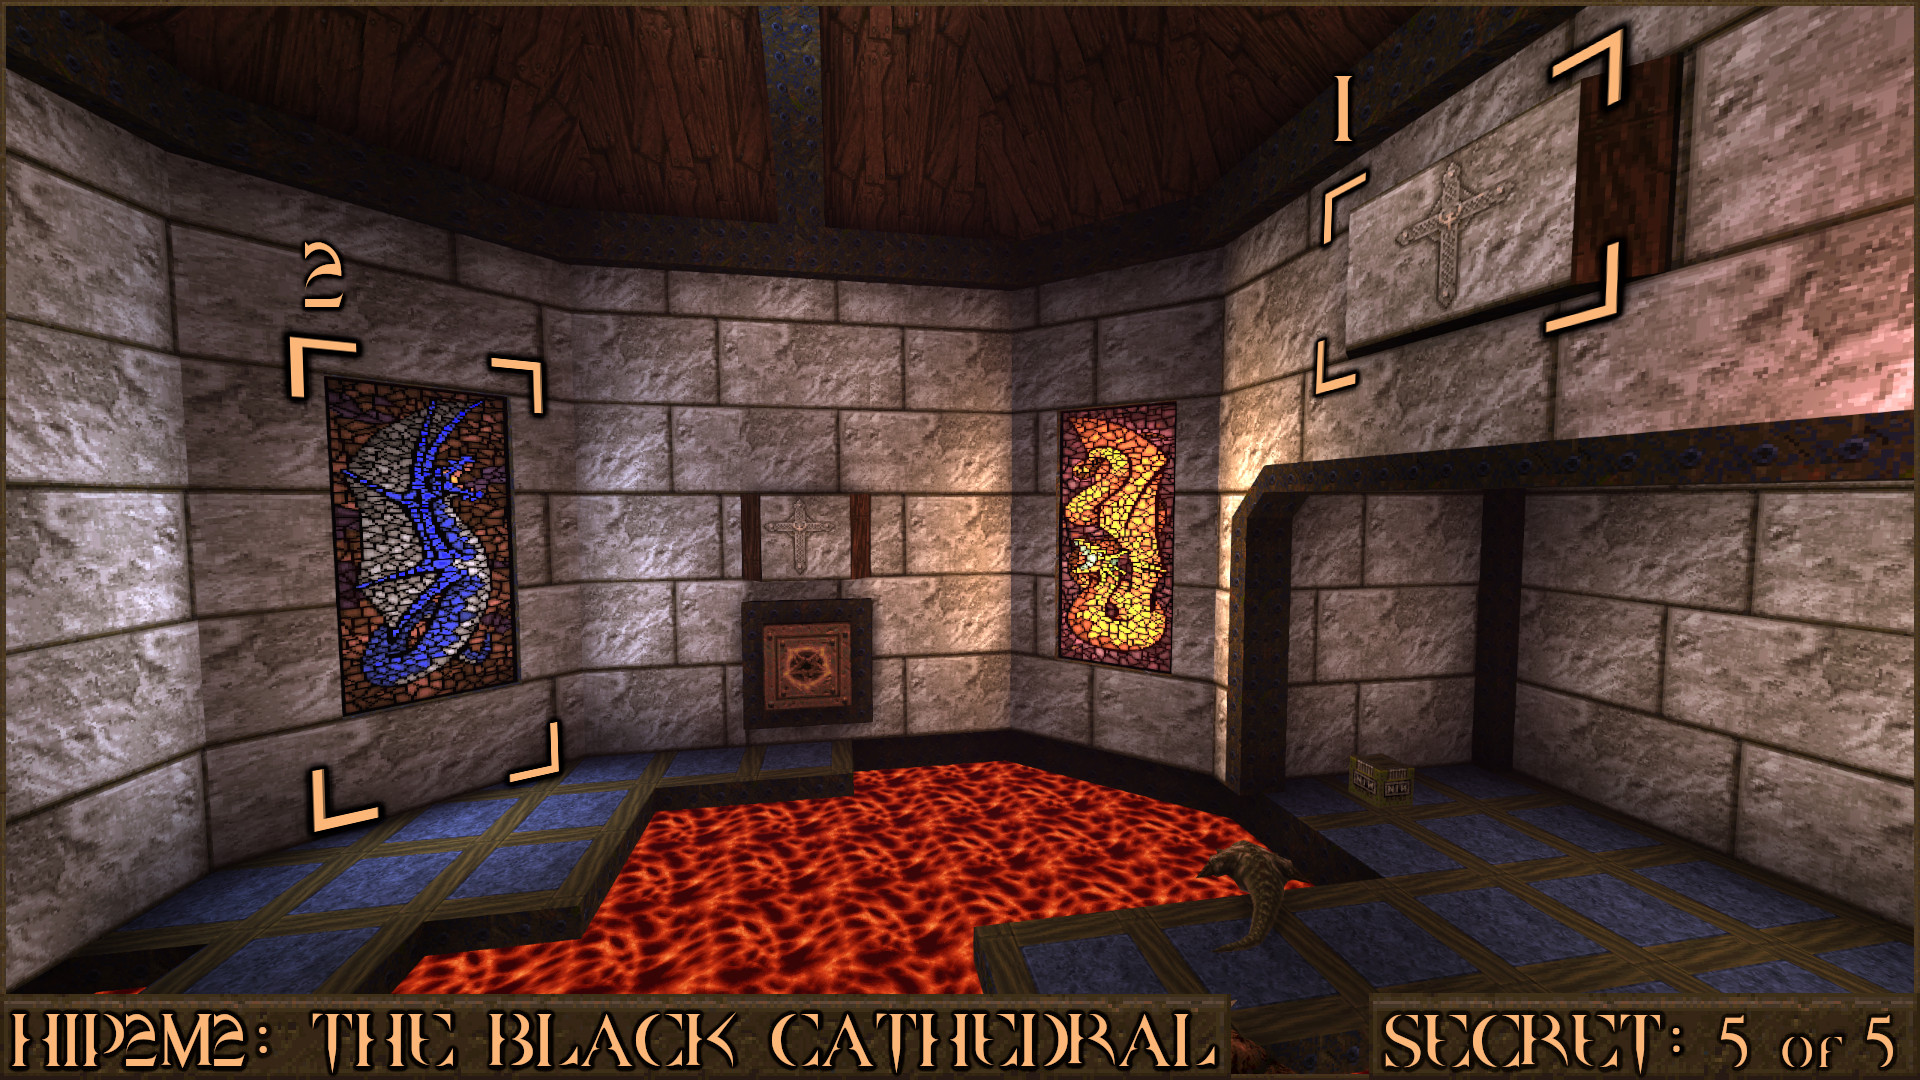
Reward:
HIP2M3: The Catacombs
Secret 1 of 4
In the lava cave near the beginning of the level you will find a Megahealth item. Shortly after this look carefully at the walls to see several small ledges jutting out. Jump on to the first one () then jump over to the other wall () and finally climb up to the top to claim a Large Cells () and this secret.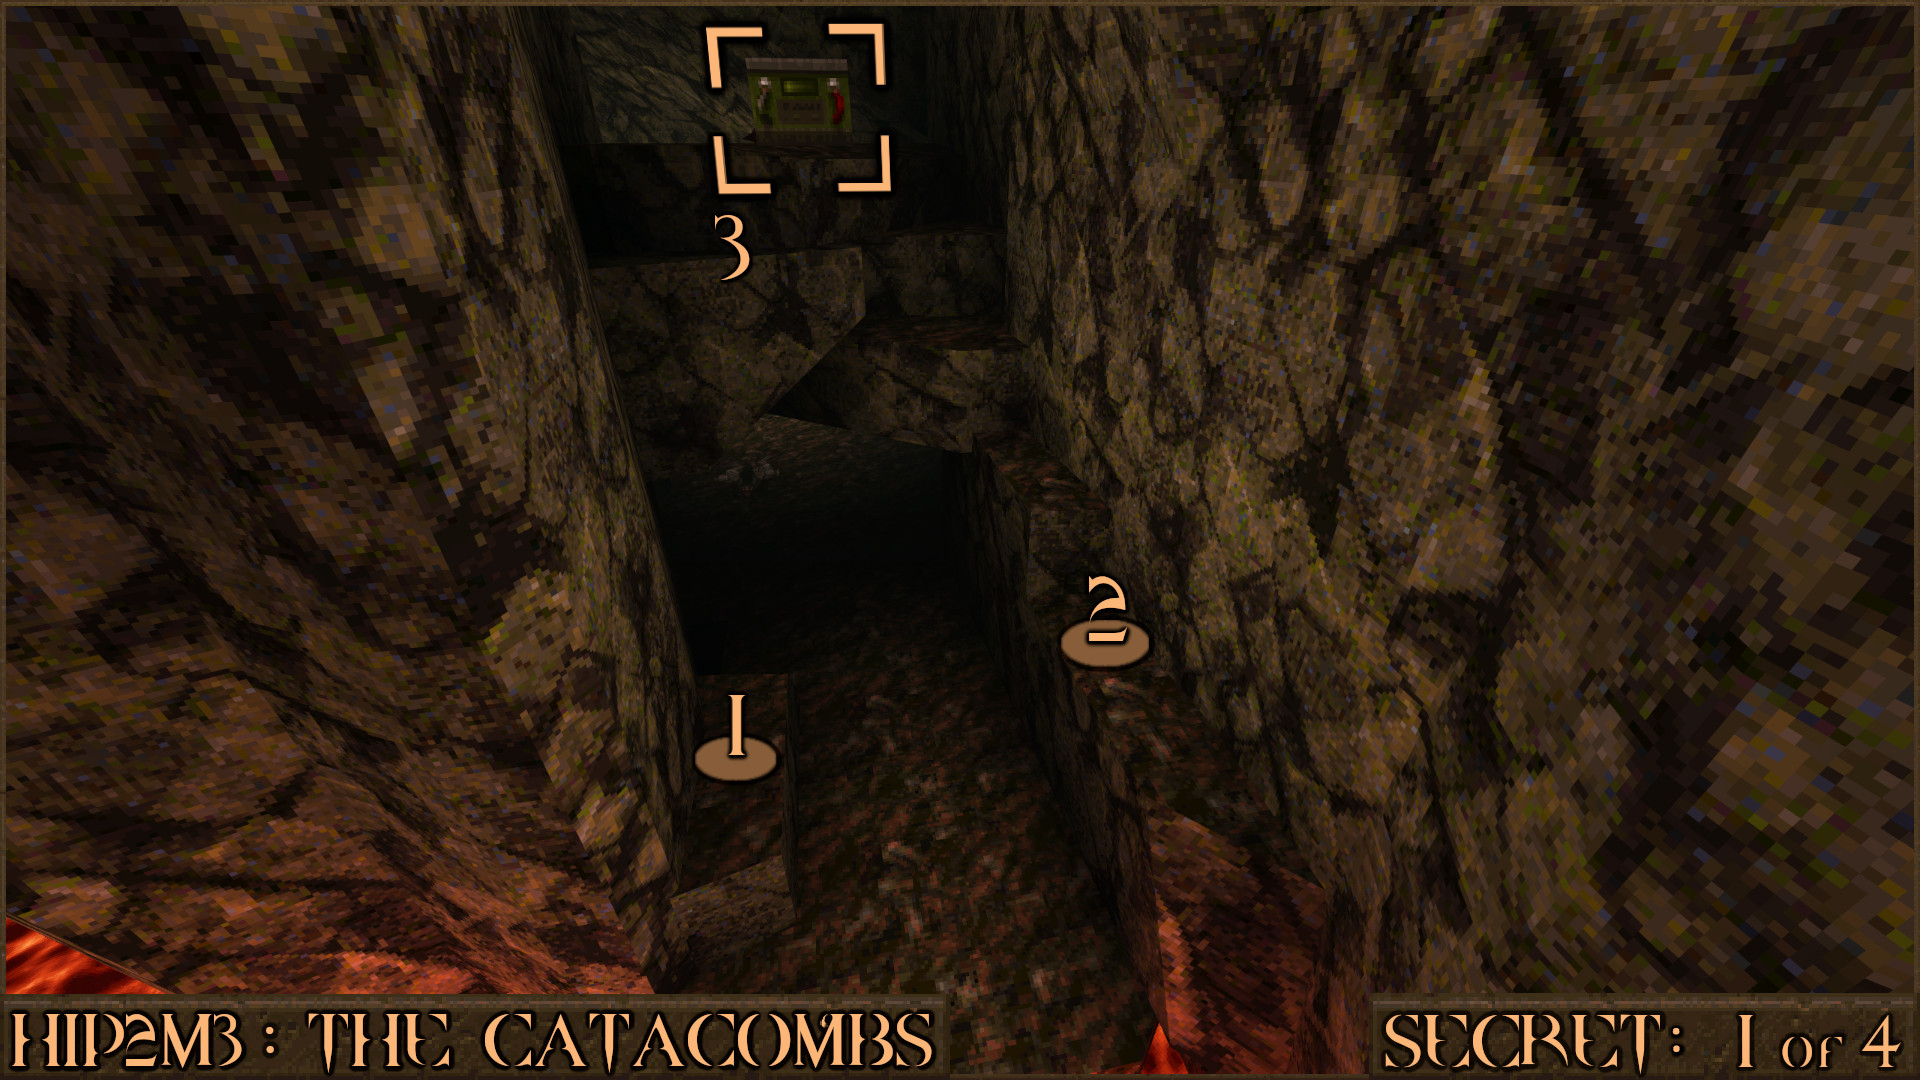
Reward:
Secret 2 of 4
Once you enter the castle look for a corridor with several items at the end of it. Stand underneath the torch () and jump to nudge it. This will activate a nearby wall () and reveal the secret.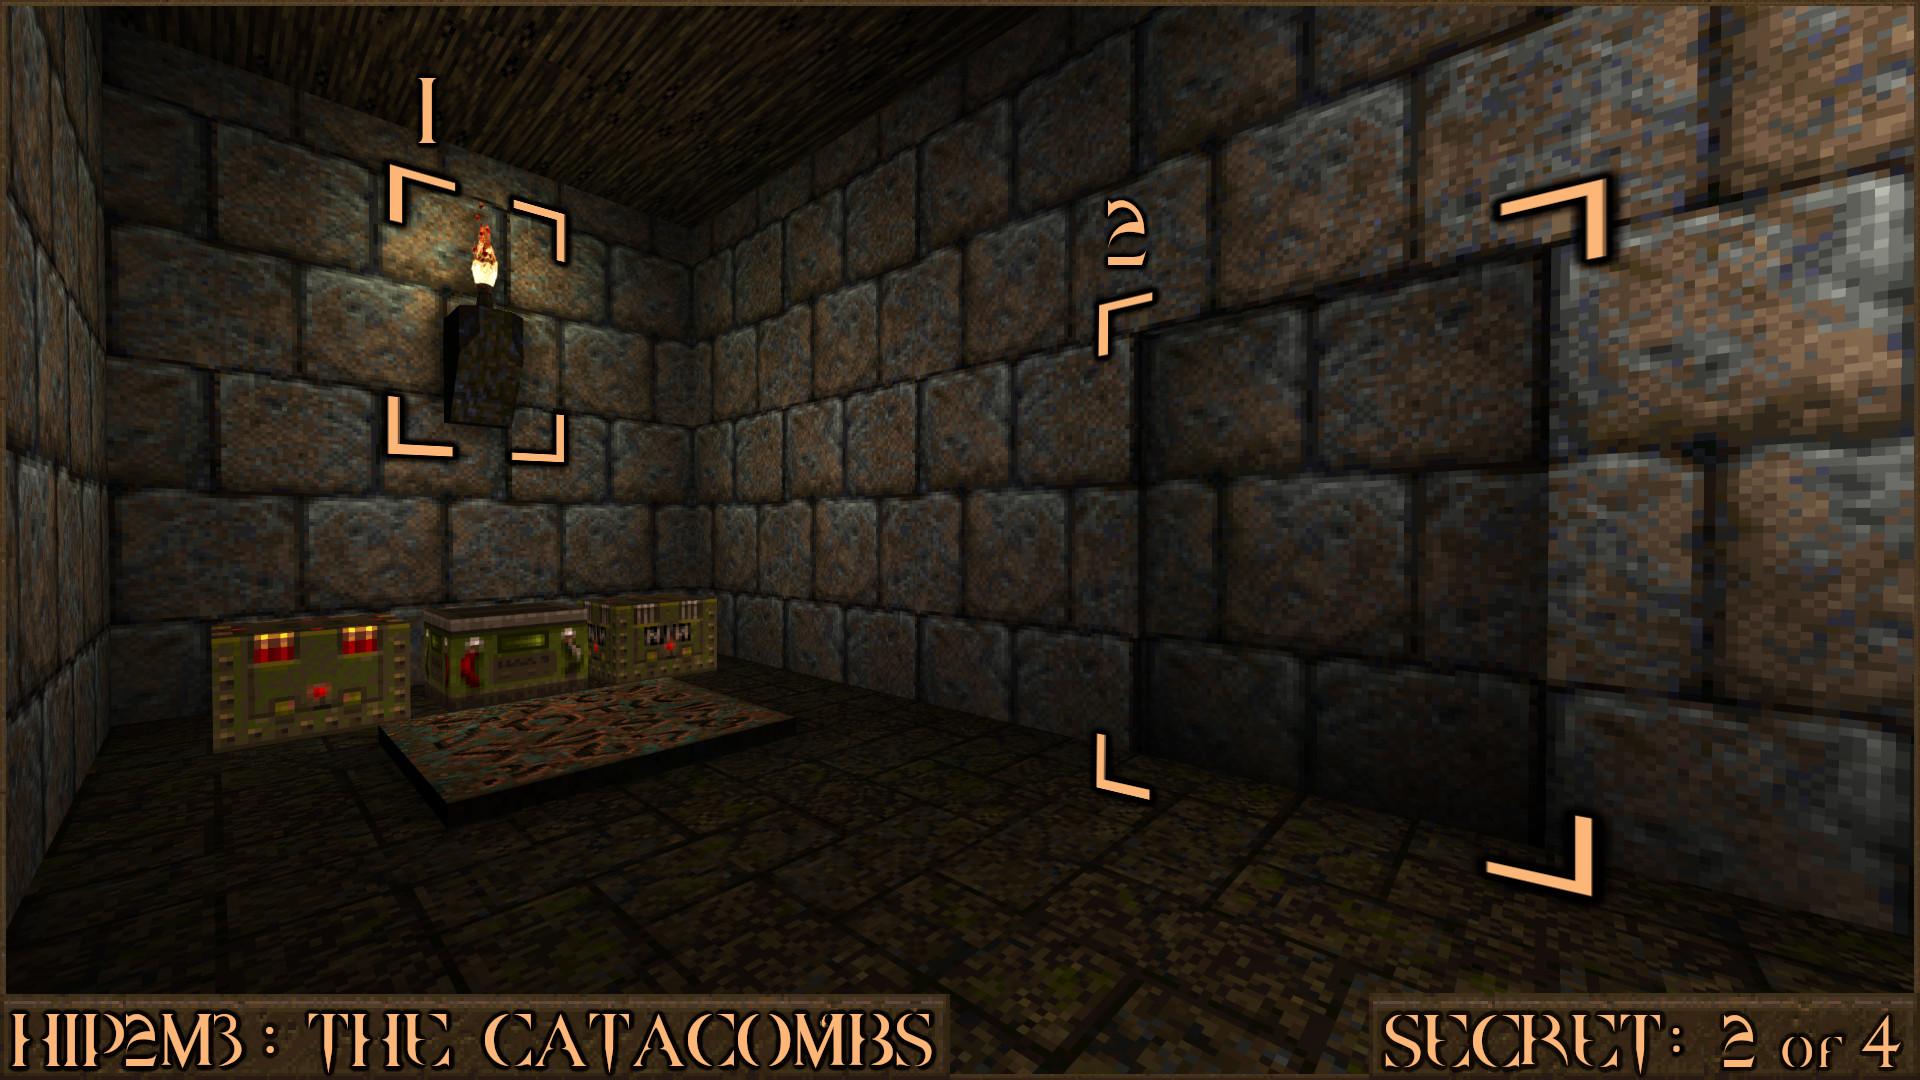
Reward:
Secret 3 of 4
Next to the Gold Key Door you will see a cross () that slowly pulsates with light. Shoot it to make a hidden Megahealth drop on to the floor ().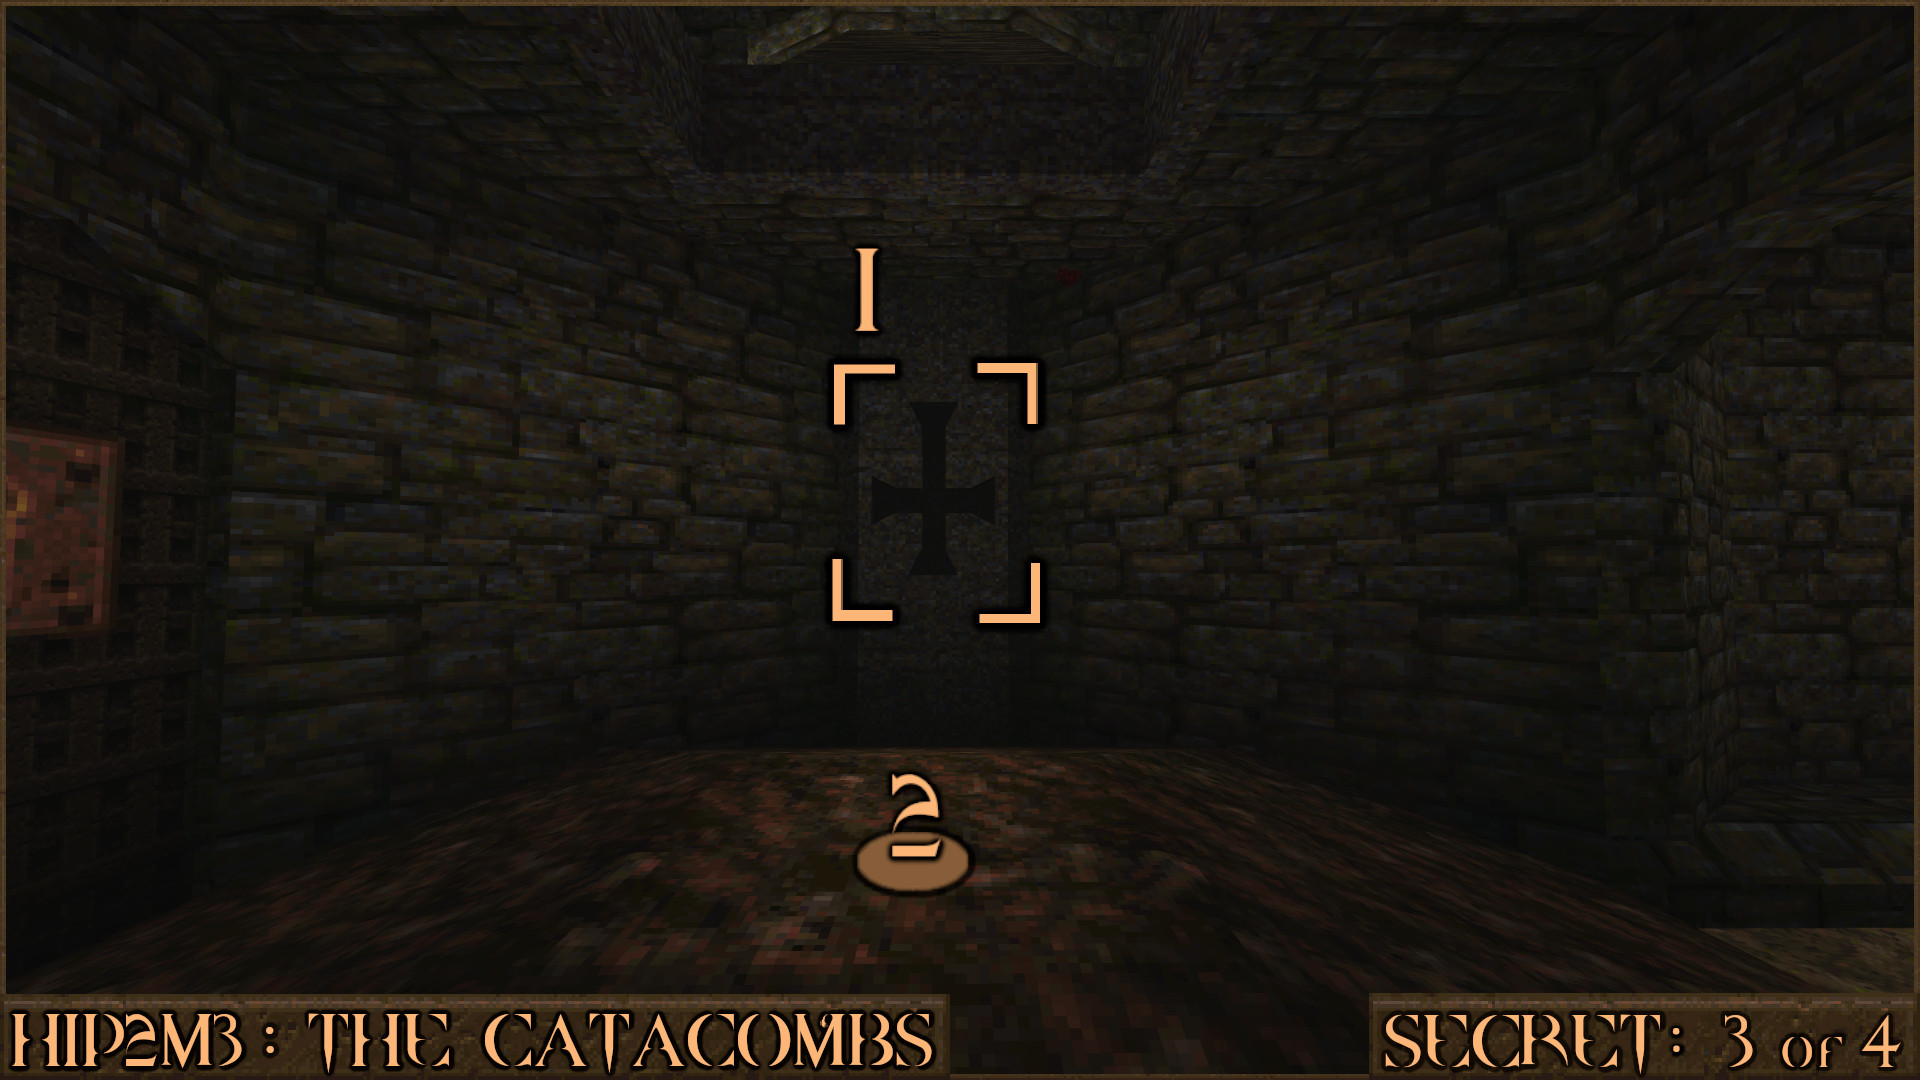
Reward:
Secret 4 of 4
Immediately after you pick up the Mjolnir weapon you will go up some steps. When you reach the top of the steps () you will hear a sound as several bricks behind you come out of the wall. Turn around to see they have formed a set of steps () up the side of the wall. Jump up steps to find a hidden area that will let you fall down in to the actual secret area.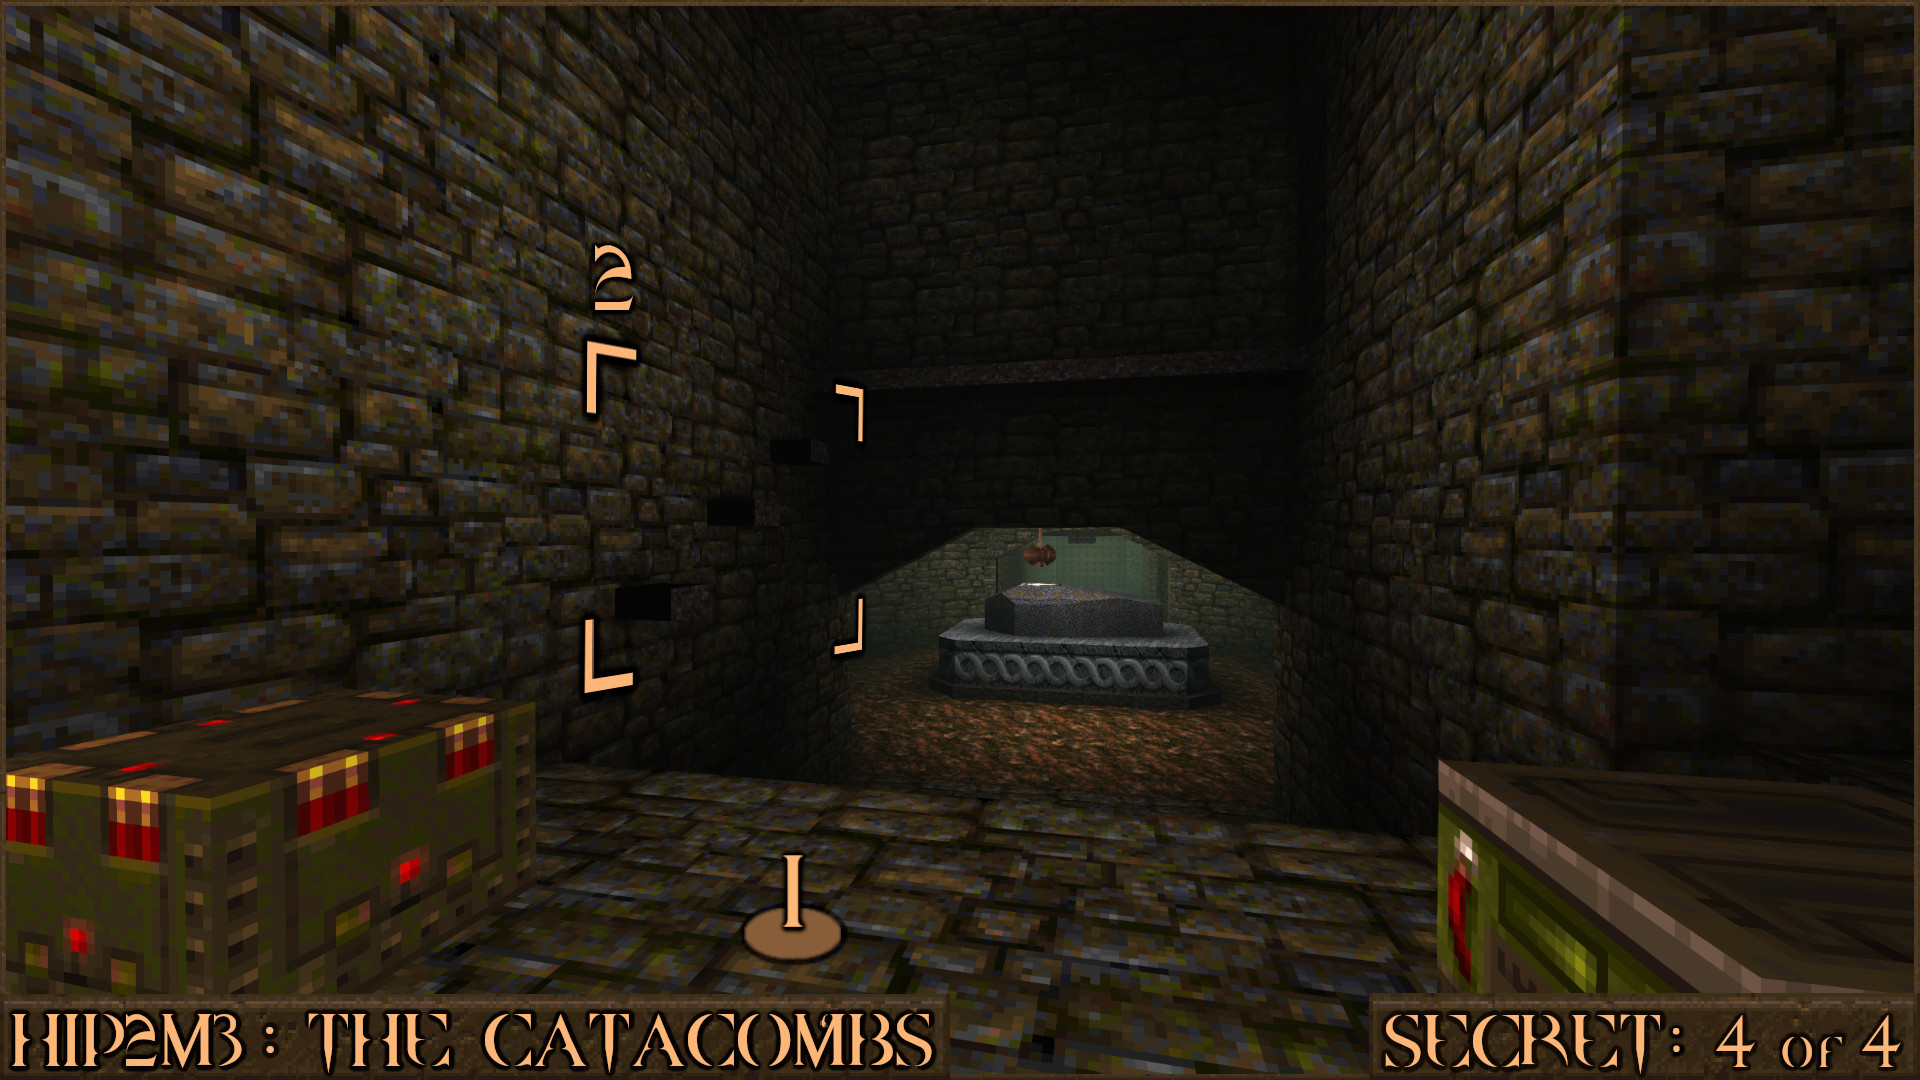
Reward:
HIP2M4: The Crypt
Secret 1 of 6
This secret involves jumping in to a shelf () to make a nearby wall move (). This secret is unusual because if you are playing on Easy there will actually be a step-ladder nearby to help you on to the shelf. However if you're playing on any other difficulty there won't be a step-ladder so the best method to get up there is to use your Rocket Launcher to rocket jump up there.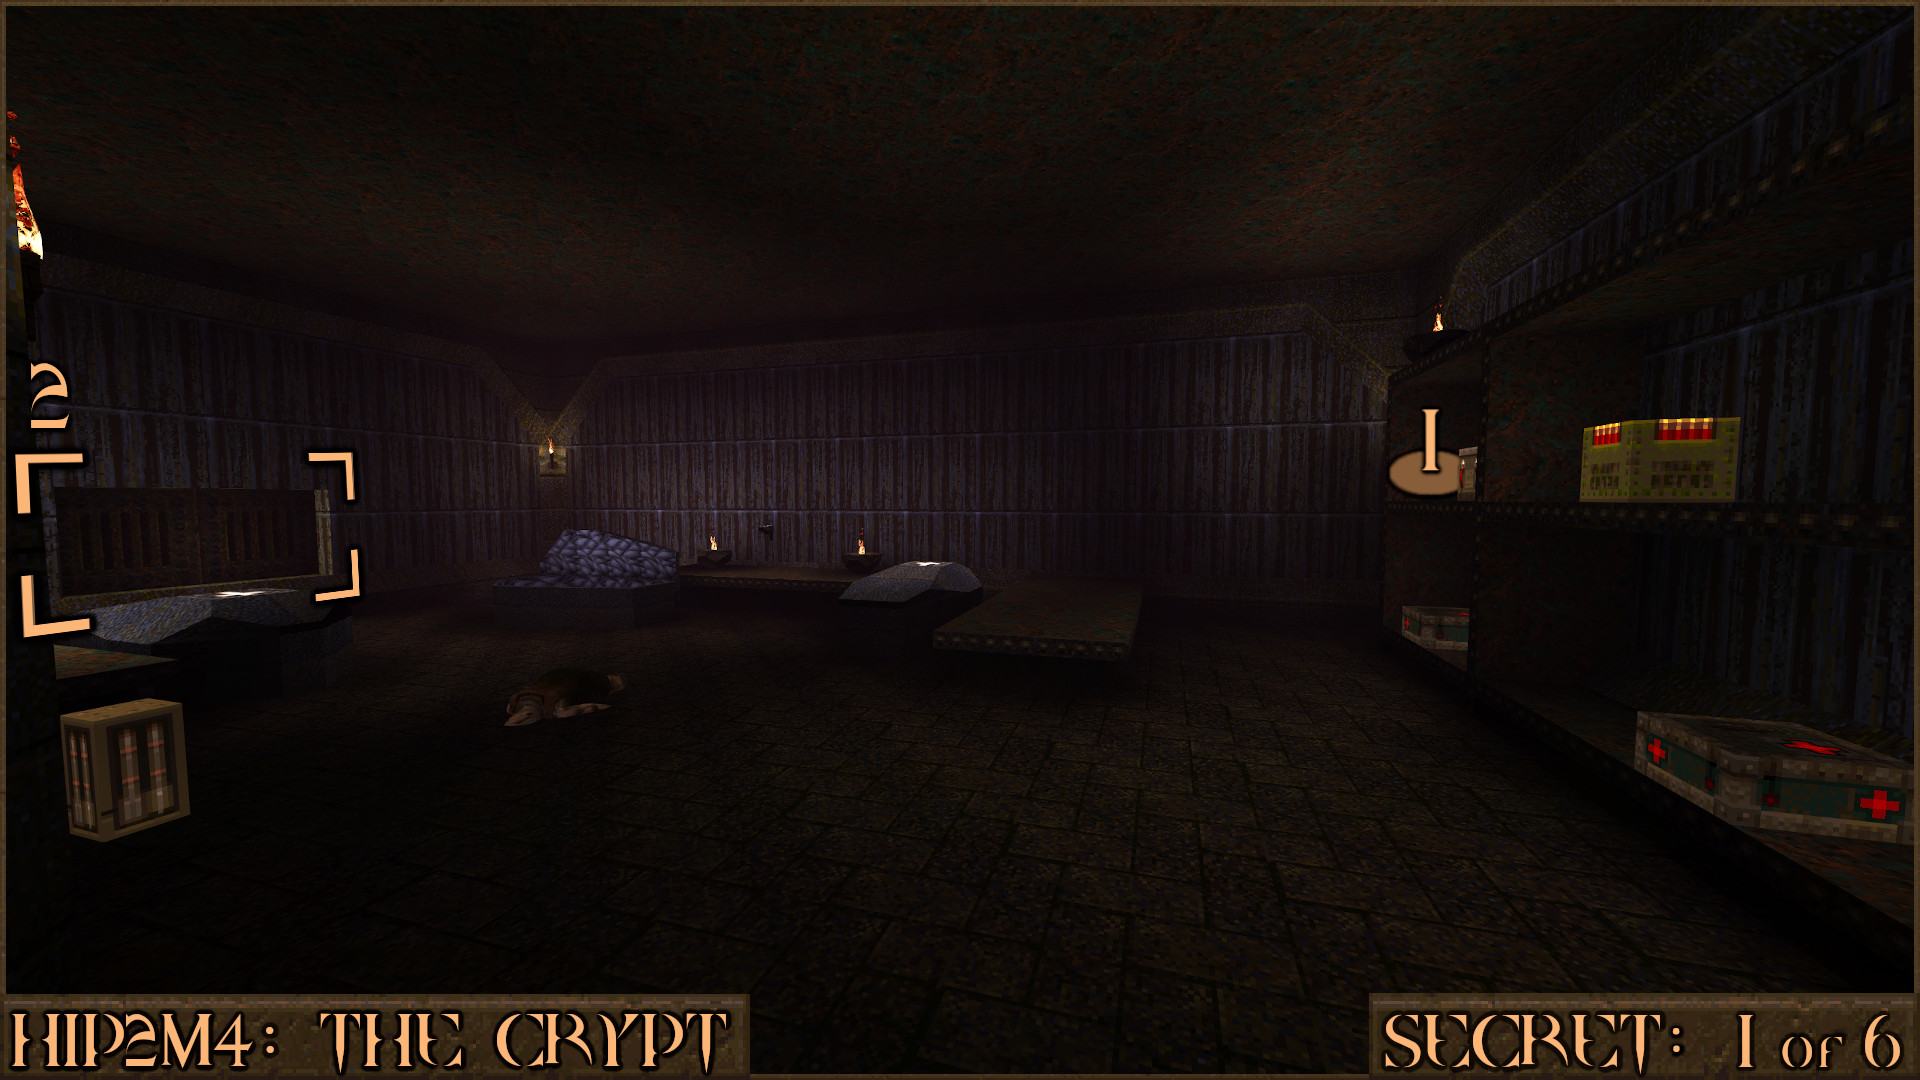
Reward:
Secret 2 of 6
In the same room as Secret 2 collecting the Double-Barreled Shotgun will make two Zombies spawn in the coffins. After killing the Zombies look in one of the coffins to see a piece of metal with a skull on it. Step on this to be teleported to the secret.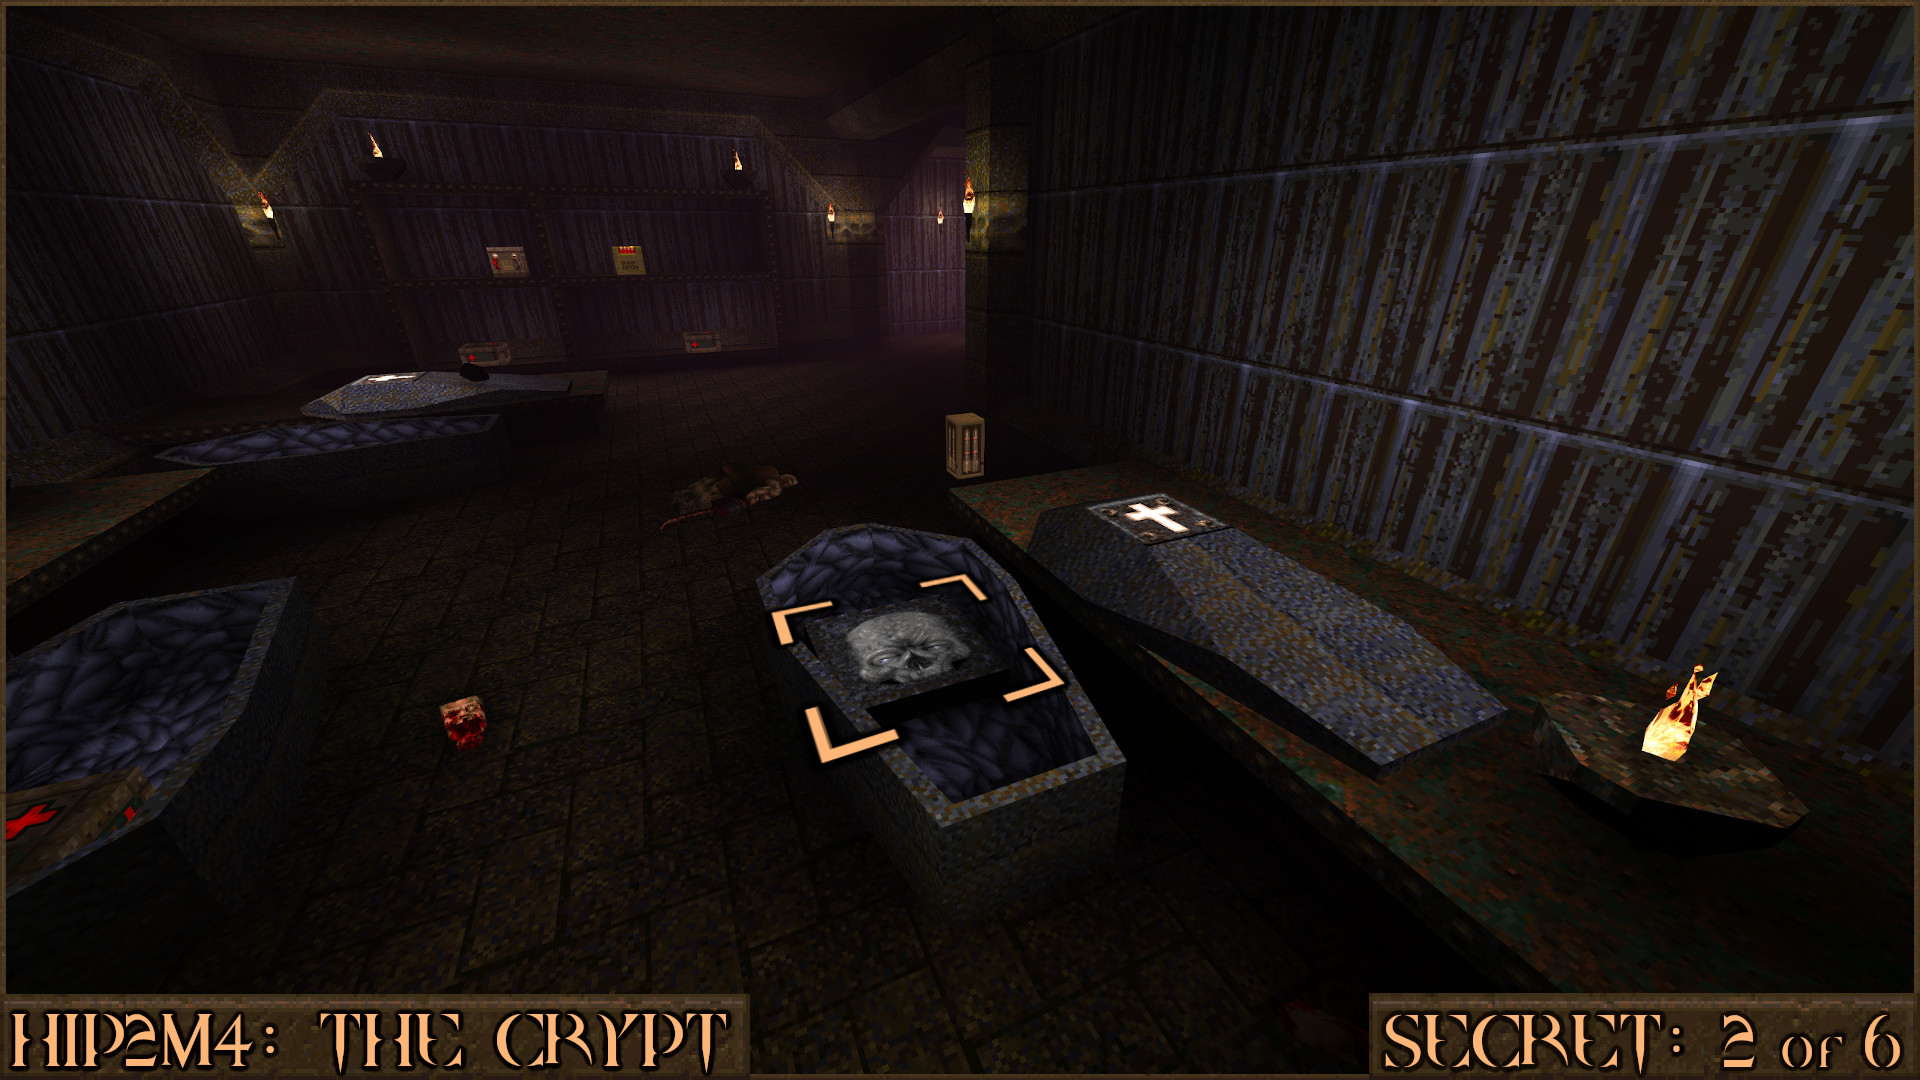
Reward:
Secret 3 of 6
Later in the level you will see a small vent () in the corner of a corridor that will propel you in to the air when you step on it. Use that to reach this higher ledge ().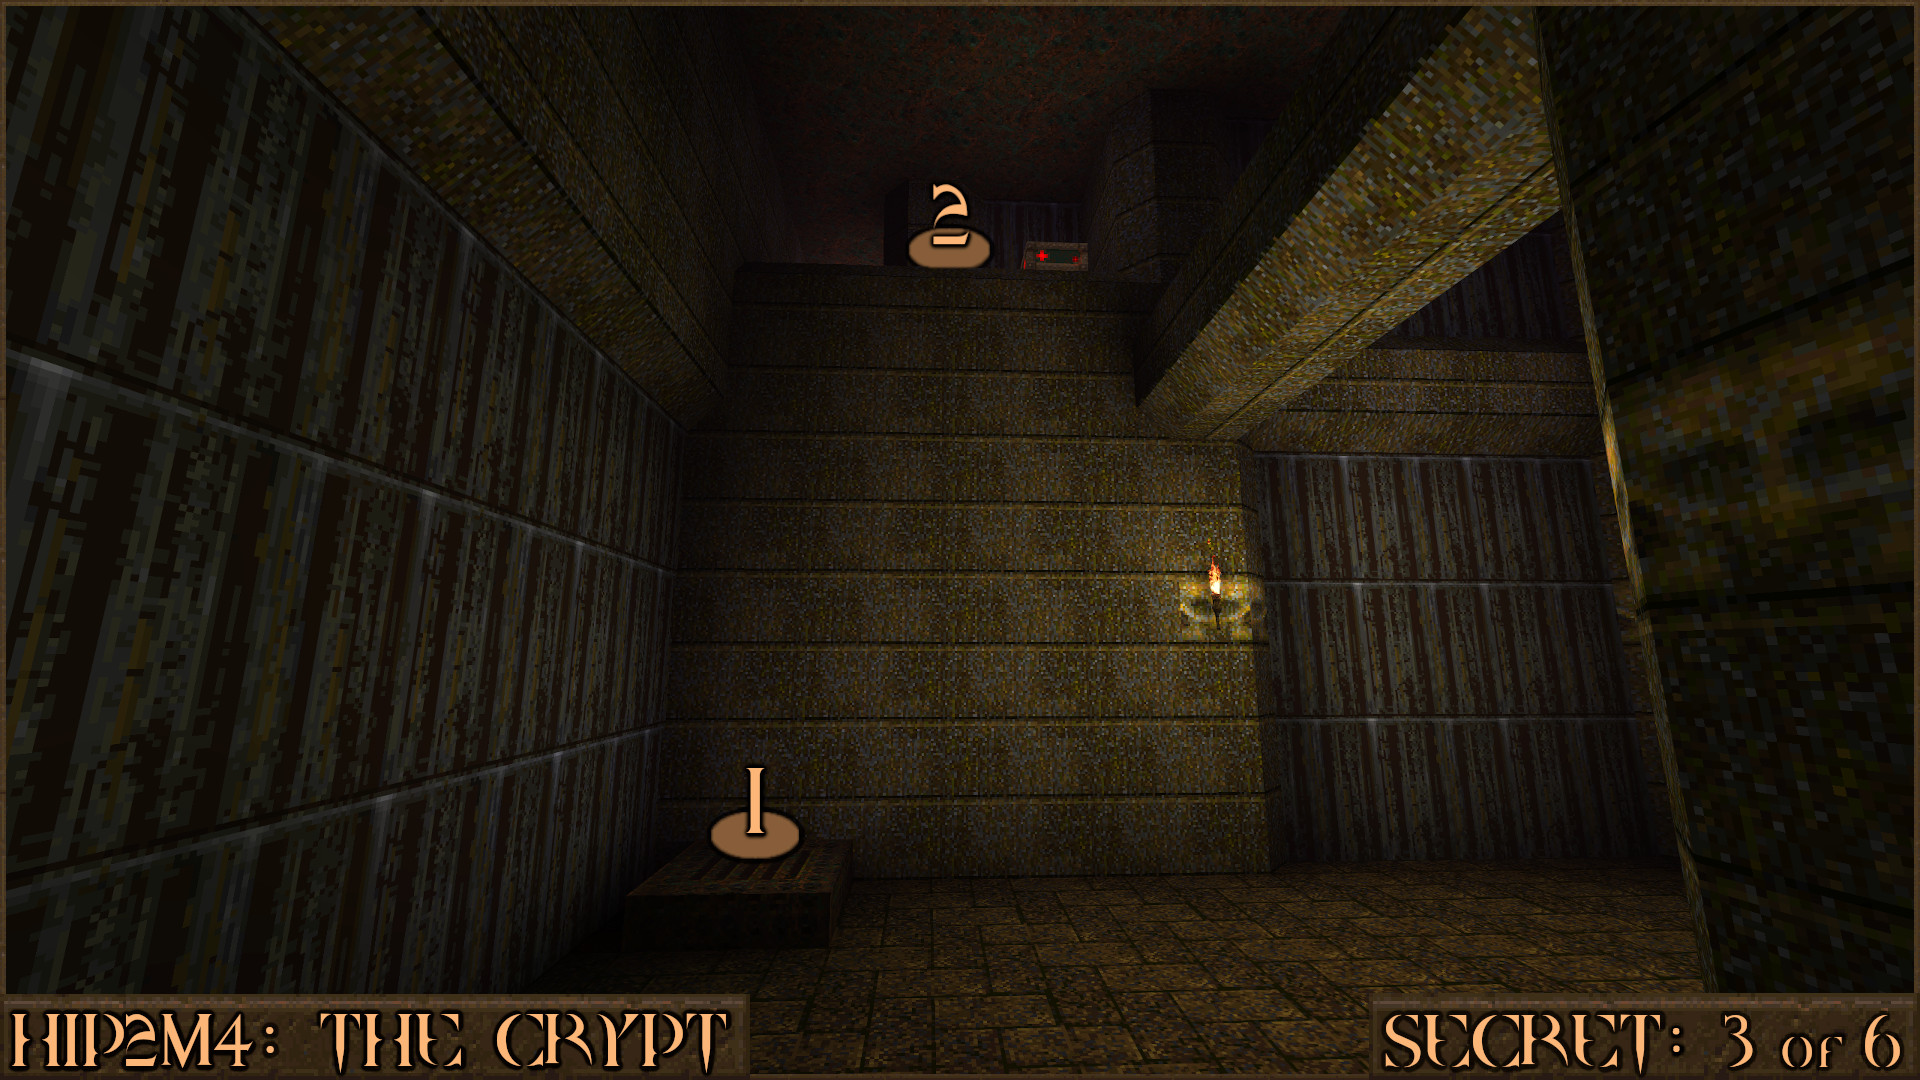
Turn around and look across the gap to see a blue wall (
). Carefully jump over the beam to reach this wall and it will move to let you in to the secret.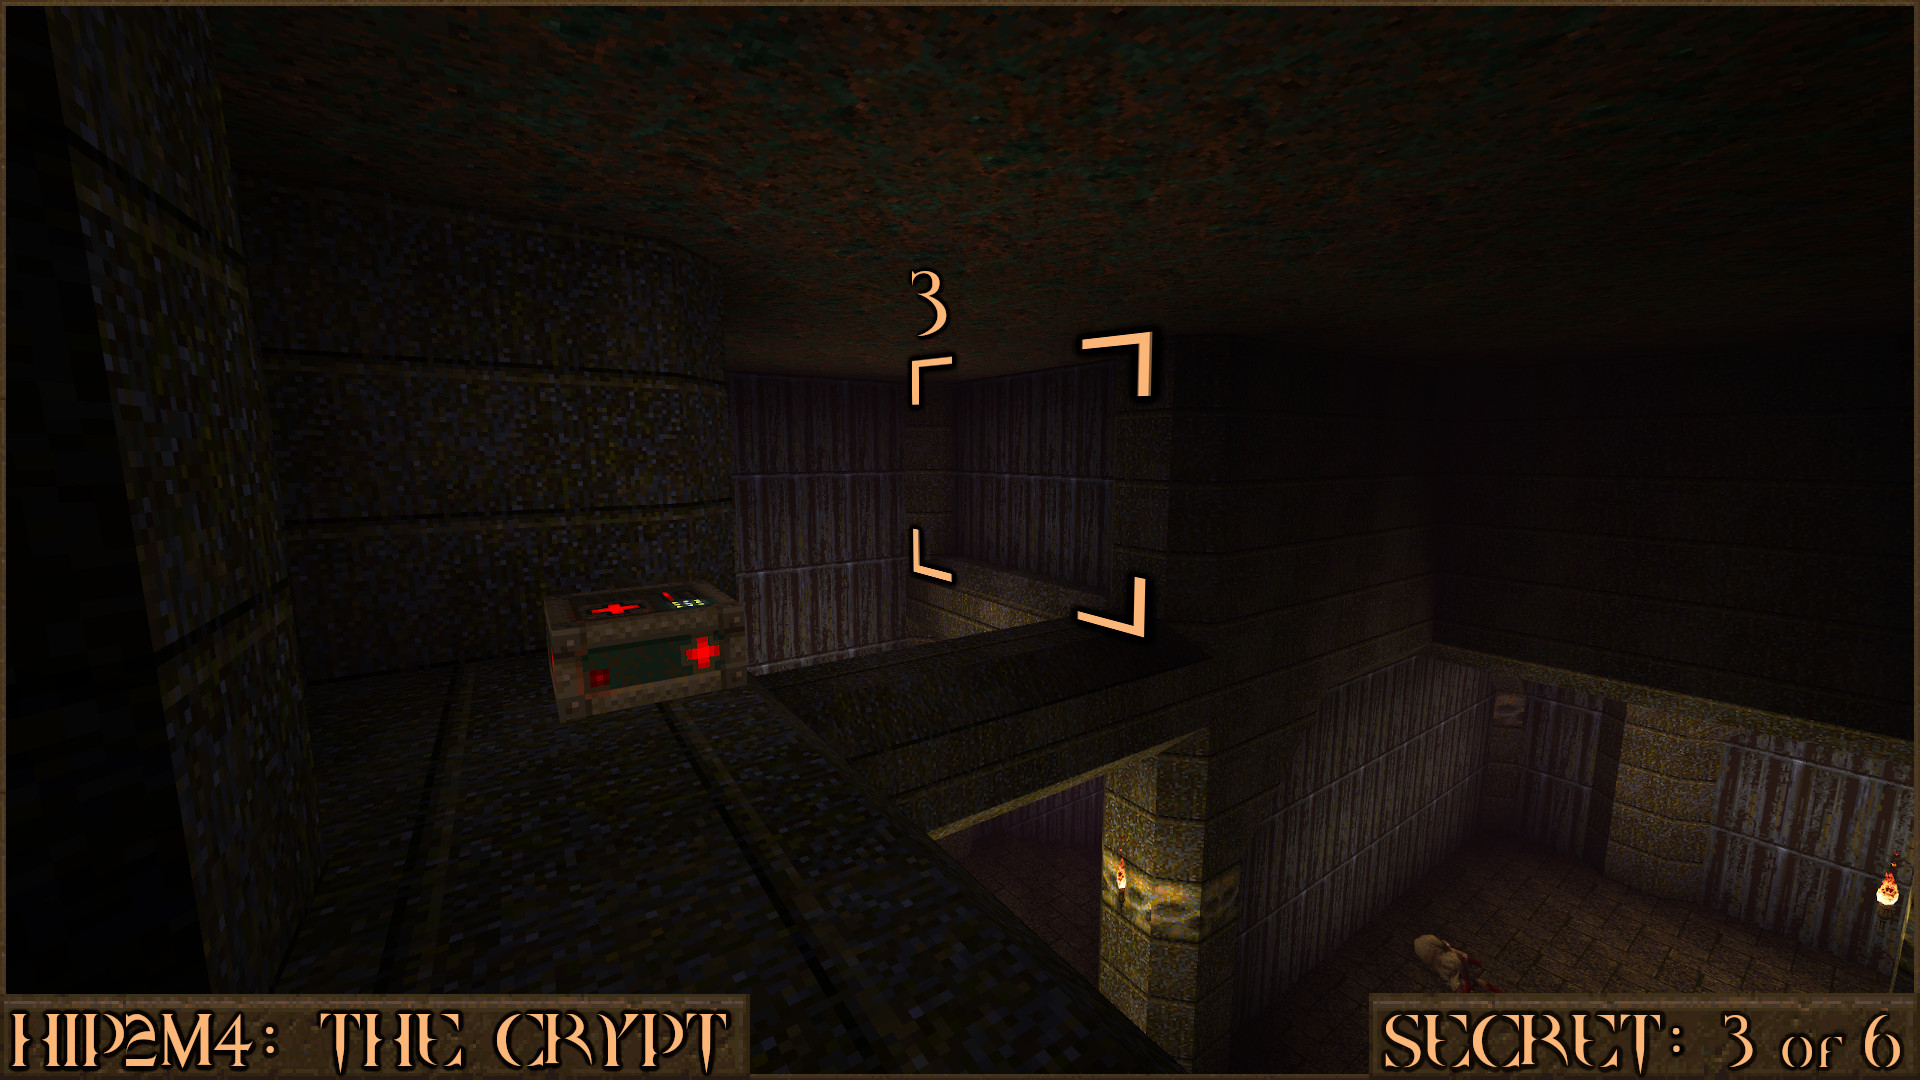
Reward:
Secret 4 of 6
Return to the high ledge from Secret 3 and activate the nearby lever (). This will shift a platform () which will allow you access to a nearby Pentagram of Protection () which you should pick up.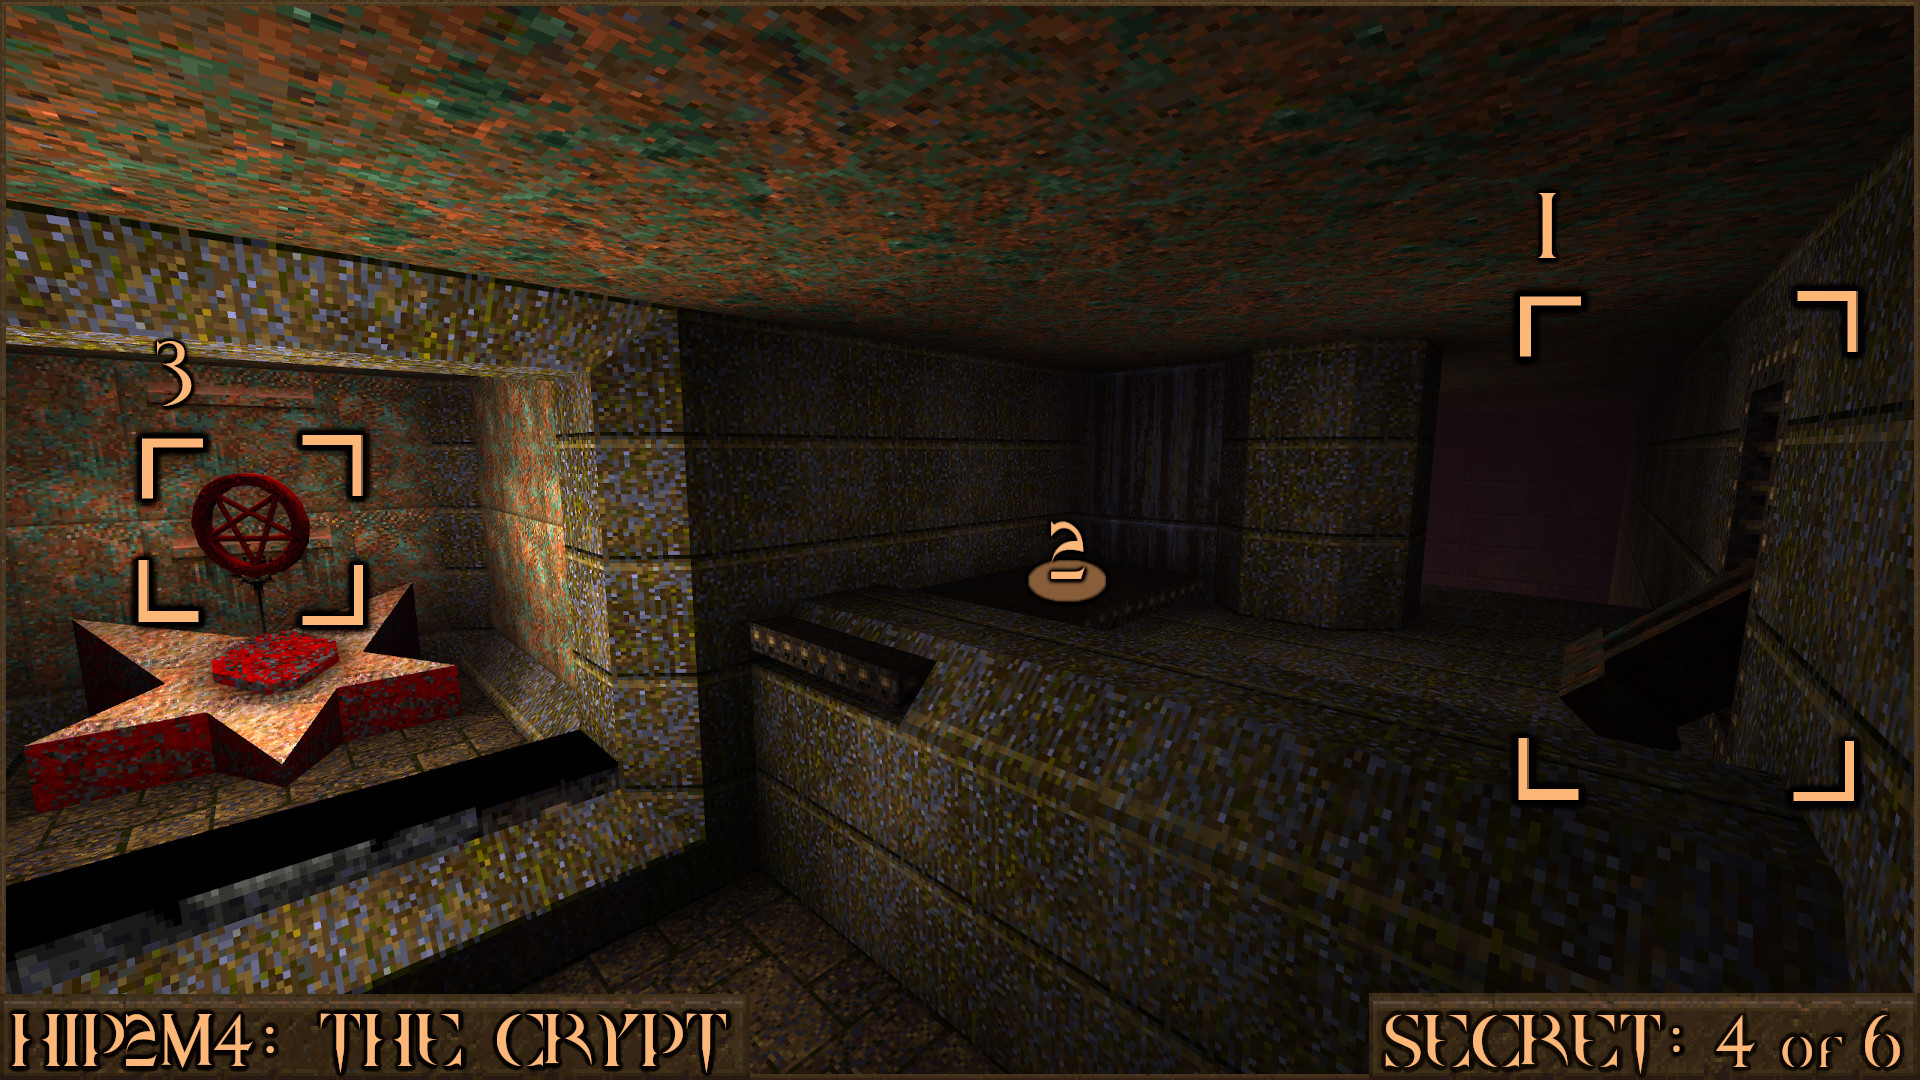
Quickly move down the corridor and you will see a bridge made out of metal girders. Jump over the edge of the bridge at this specific point (
) and you will fall in to the lava. Your Pentagram of Protection will prevent you from dying.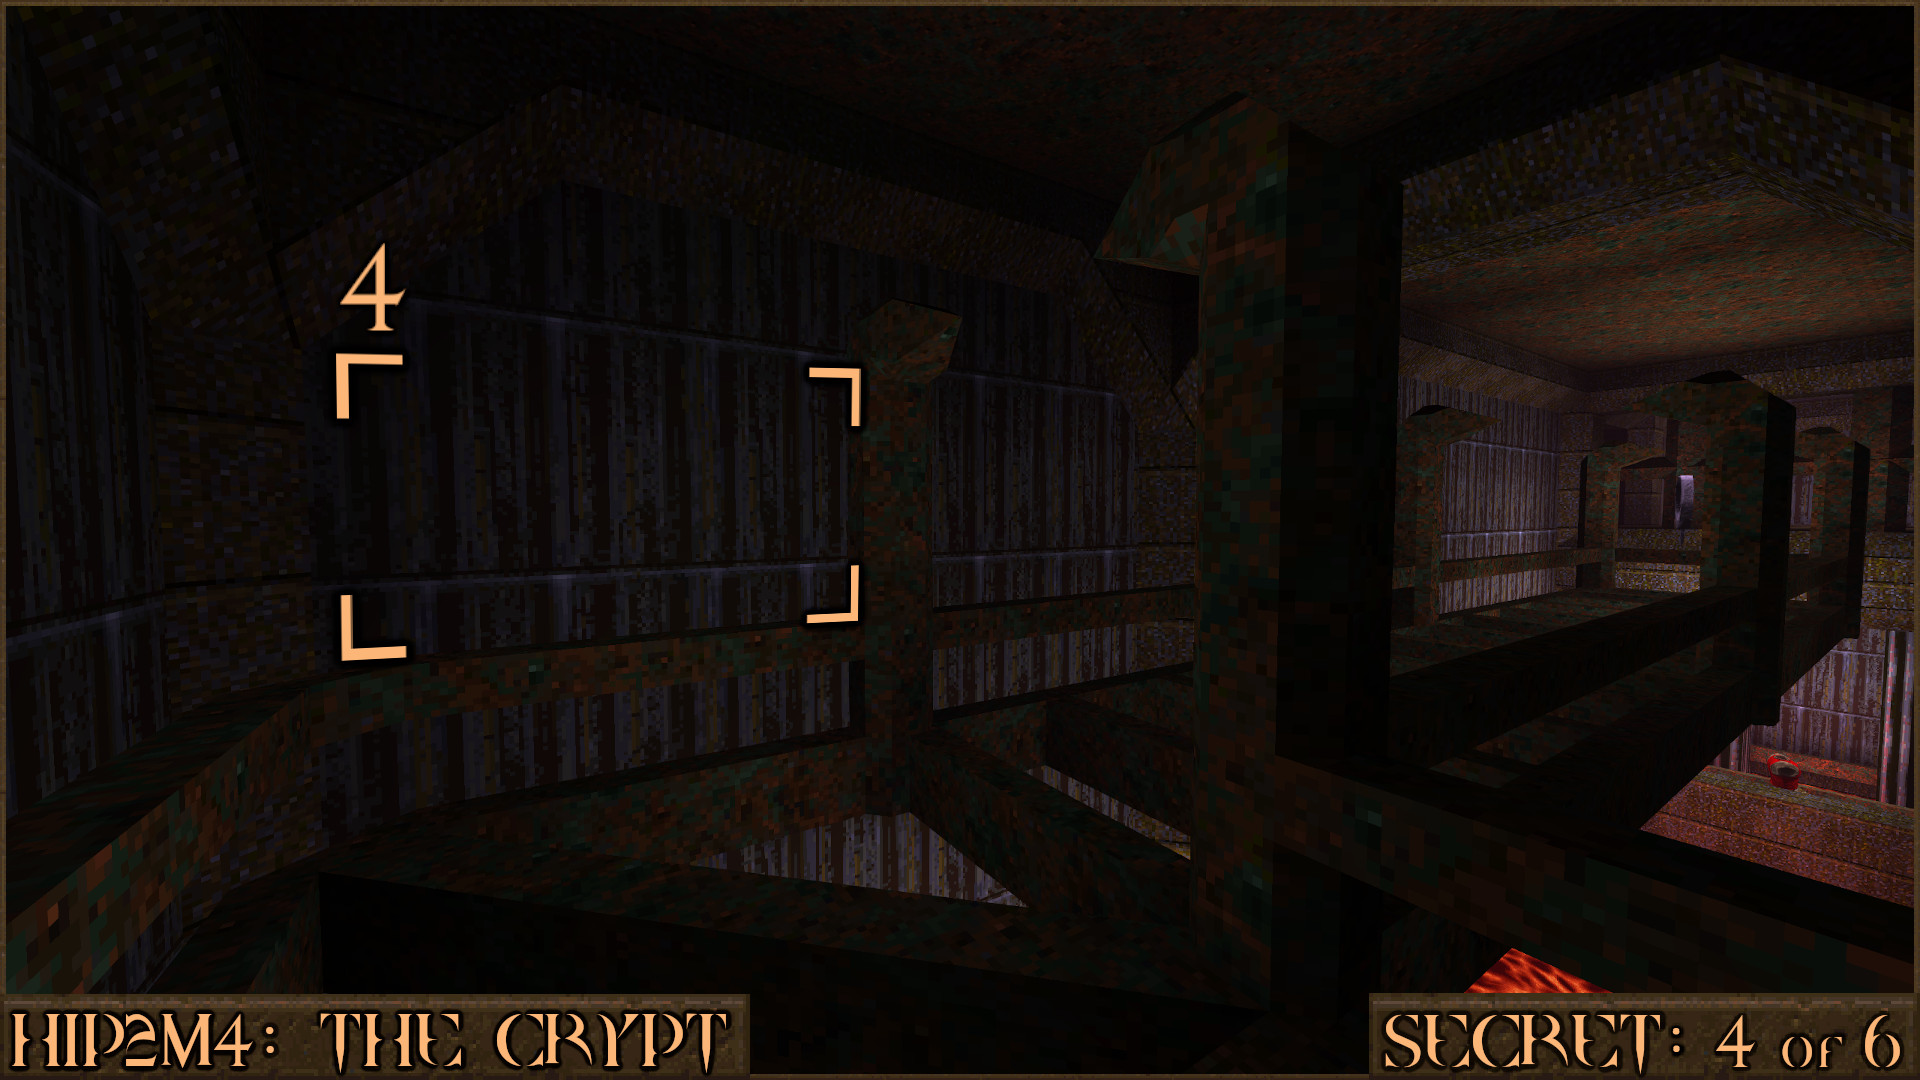
Quickly search the area for an indented blue wall (
 ). Jump out of the lava and push in to the wall to make it move and find the secret. The special message "The Levelord is impressed!" will also appear.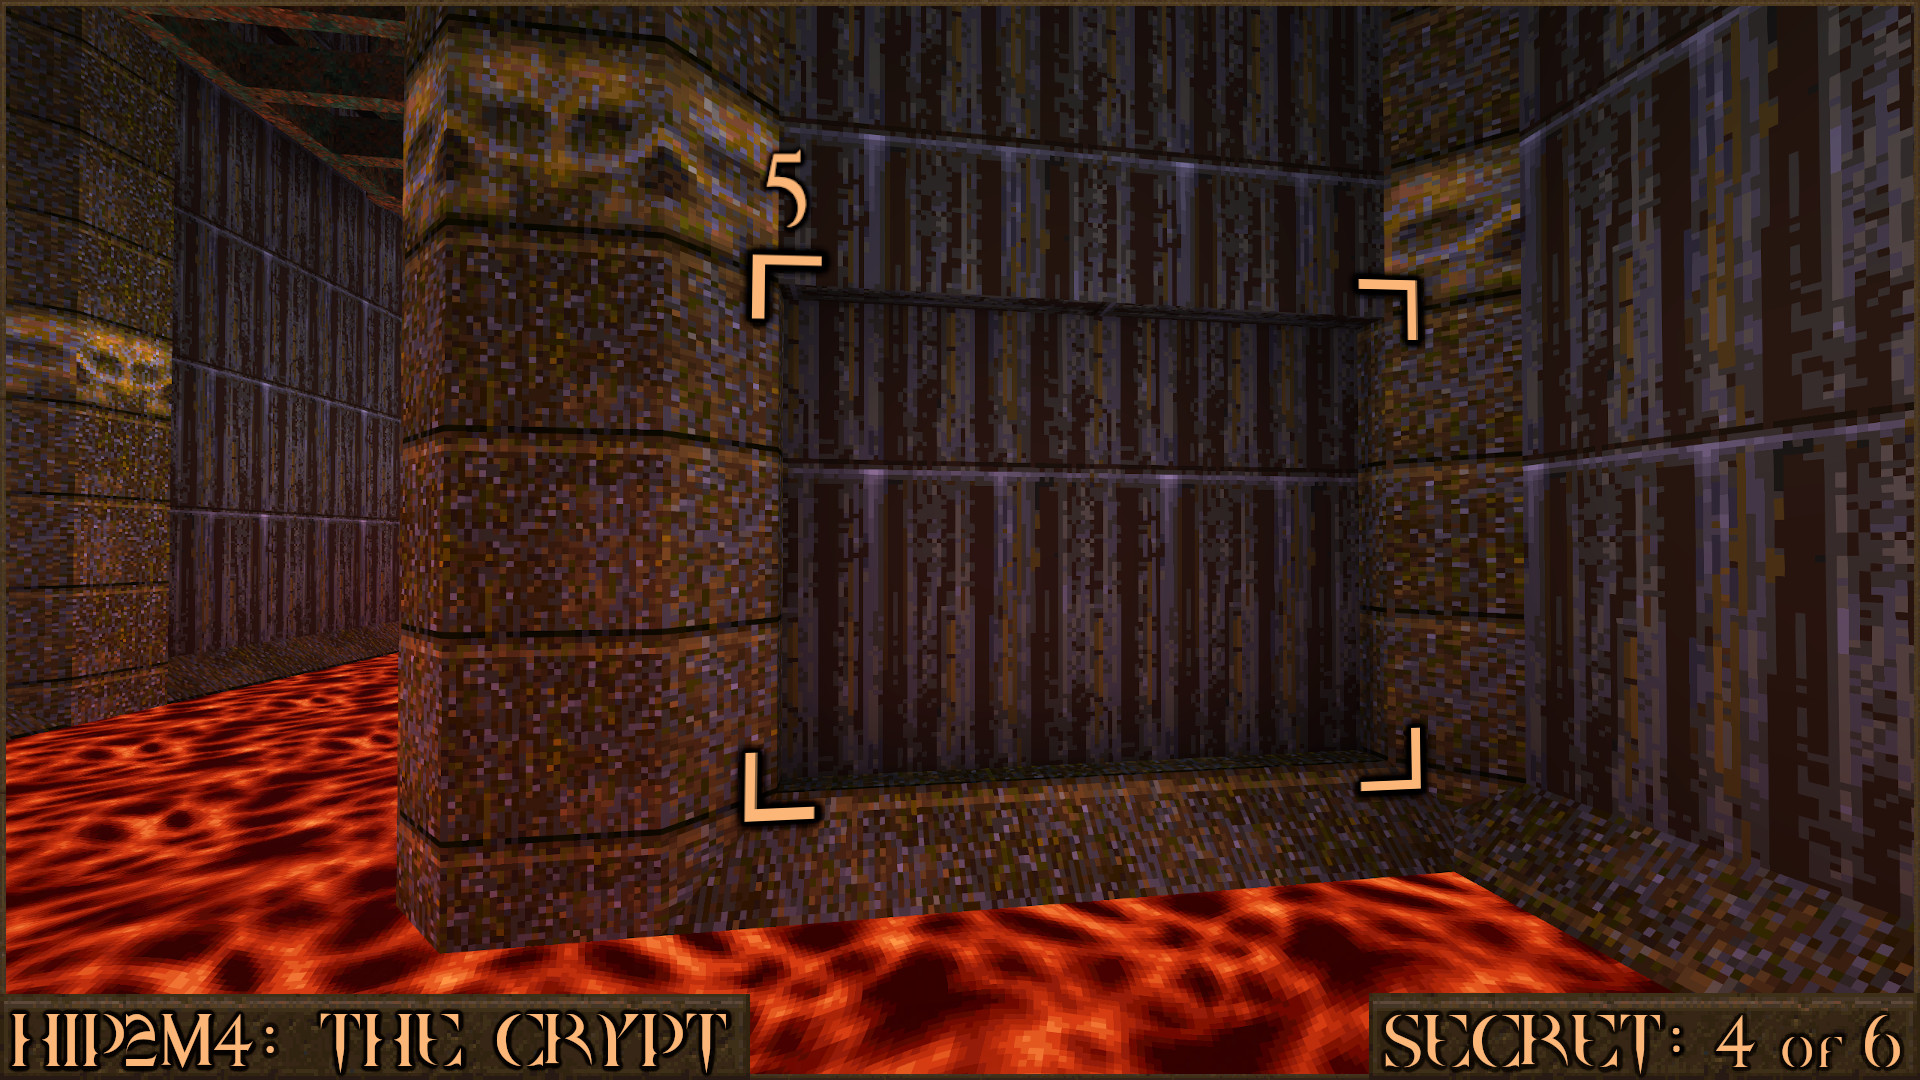
Reward:
Secret 5 of 6
Shortly after the dangerous spike-pole trap room you will go down some stairs in to a room containing several coffins and gravestones. Jump up these blue blocks () and a nearby wall () will move to reveal a secret area.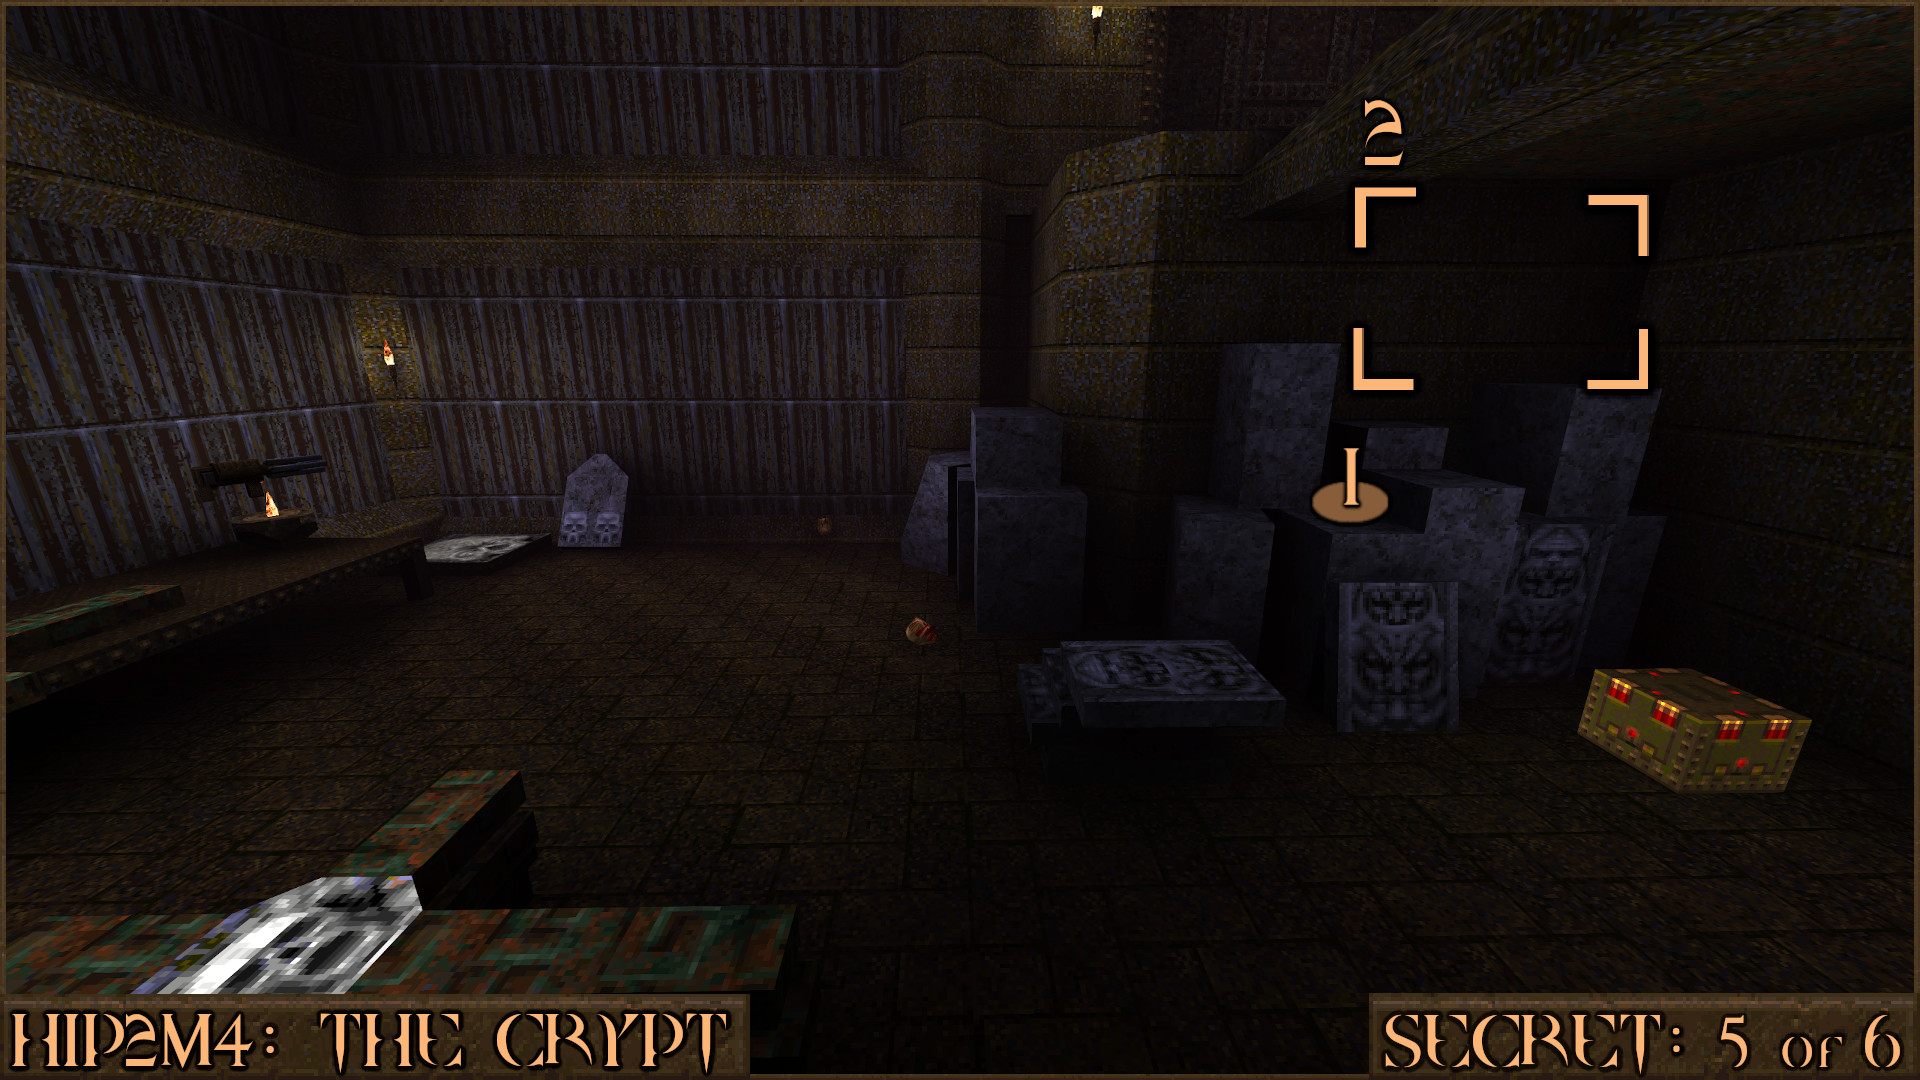
Reward:
Secret 6 of 6
In the same room as Secret 5 you will use a metal skull teleporter to move to the next room. After you appear immediately take a right and look carefully at another indented blue wall that is on a thin ledge. Approach it to gain access to a secret area.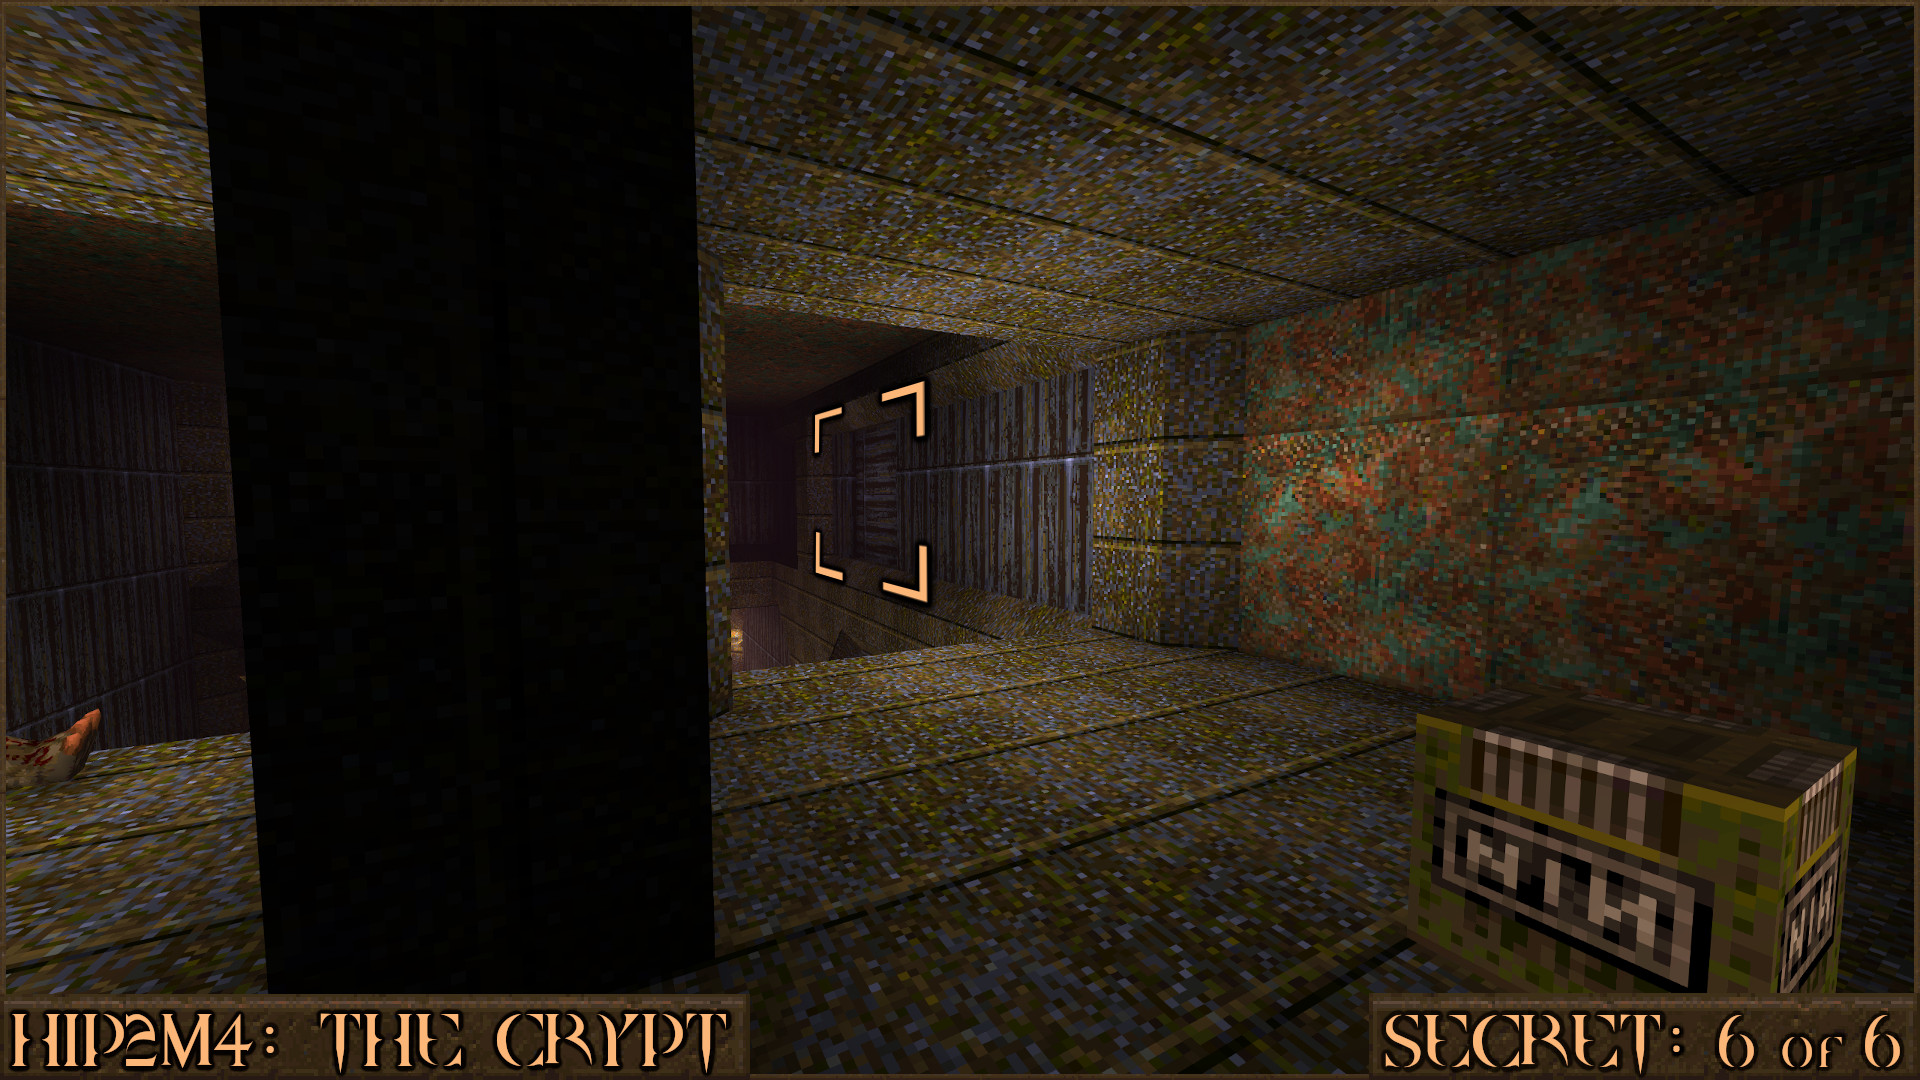
Reward:
HIP2M5: Mortum's Keep
Secret 1 of 6
Near the start of the level you will see two columns with a monster face decoration () between them. Shooting the face causes the nearby metal girder () to rotate and allow access to a secret.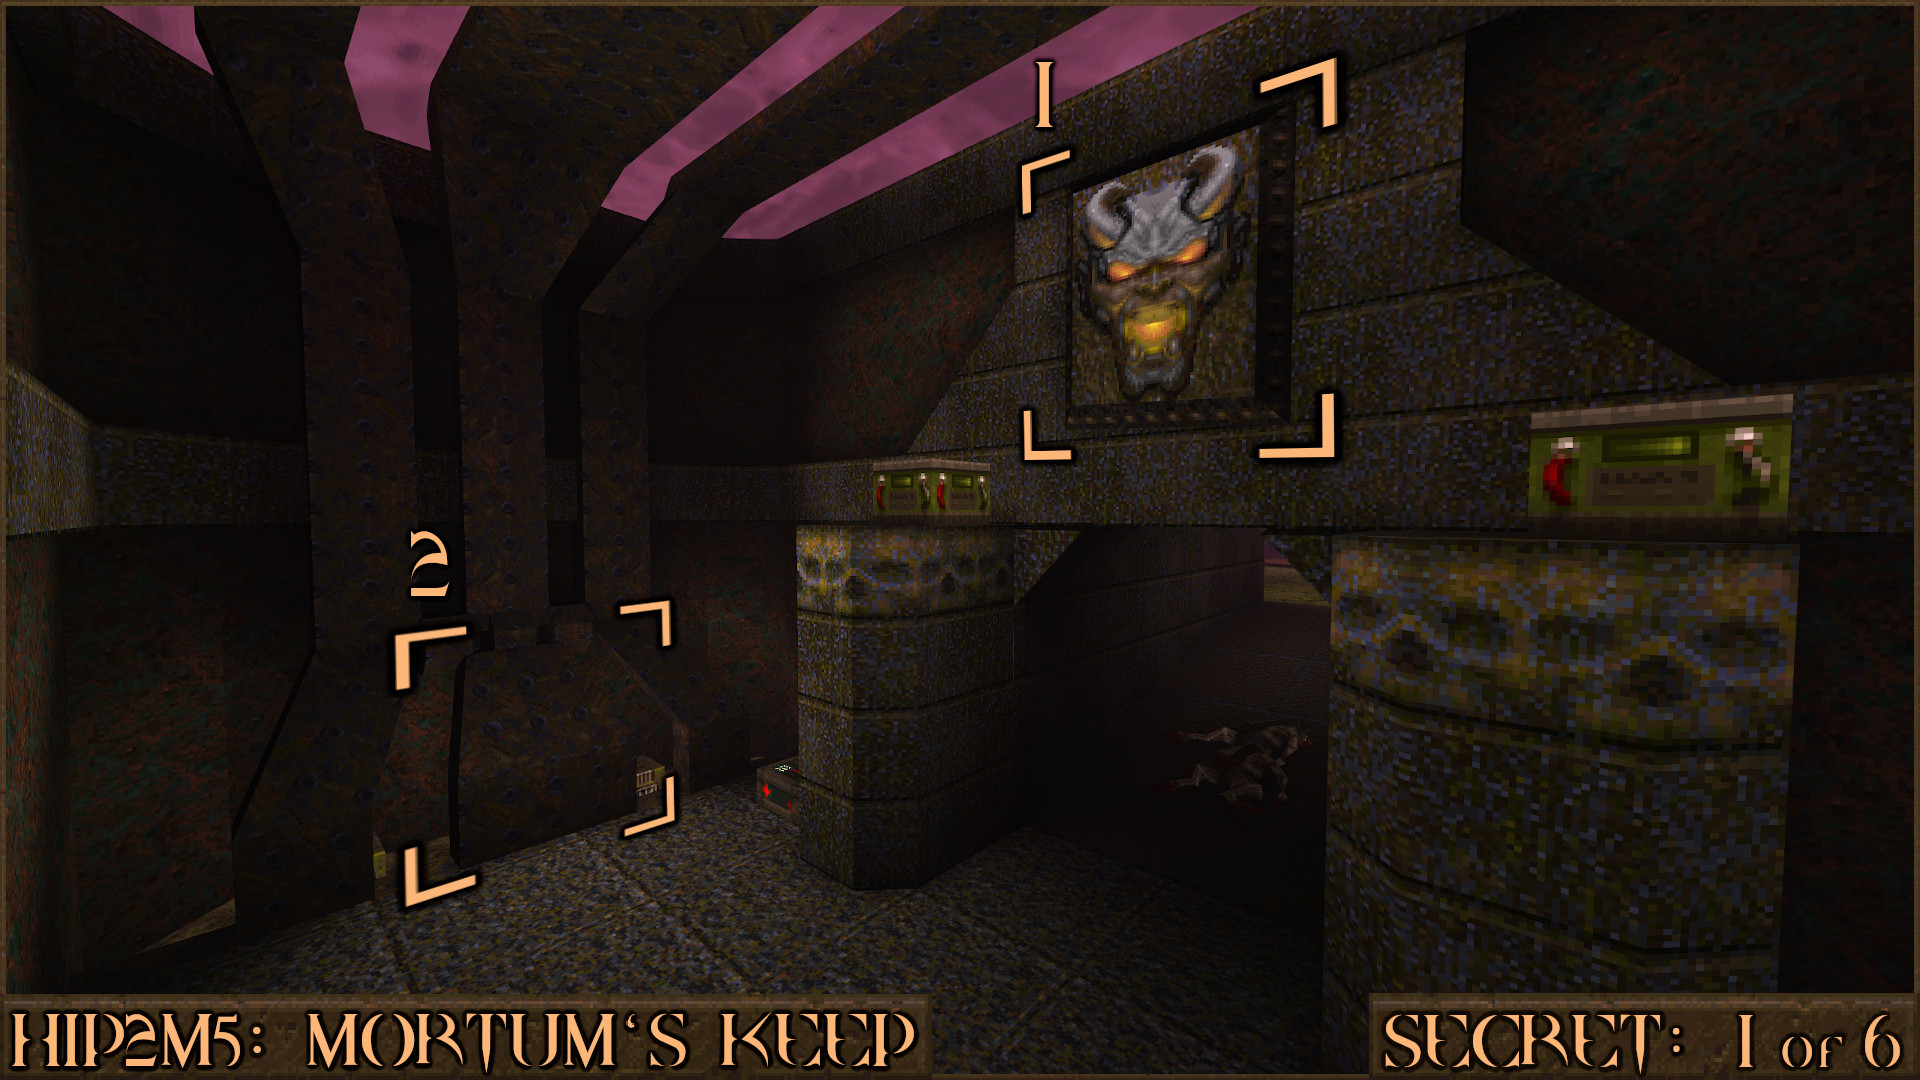
Reward:
Secret 2 of 6
In the same location as Secret 2 shoot the monster face again to make the metal girder return to it's original position. Now jump on top of it and shoot the monster face yet again to make it lift you high up (). While you are up here you can grab the two Large Cells but the real secret requires you to jump over to the other side and touch this wall () to reveal a hidden area.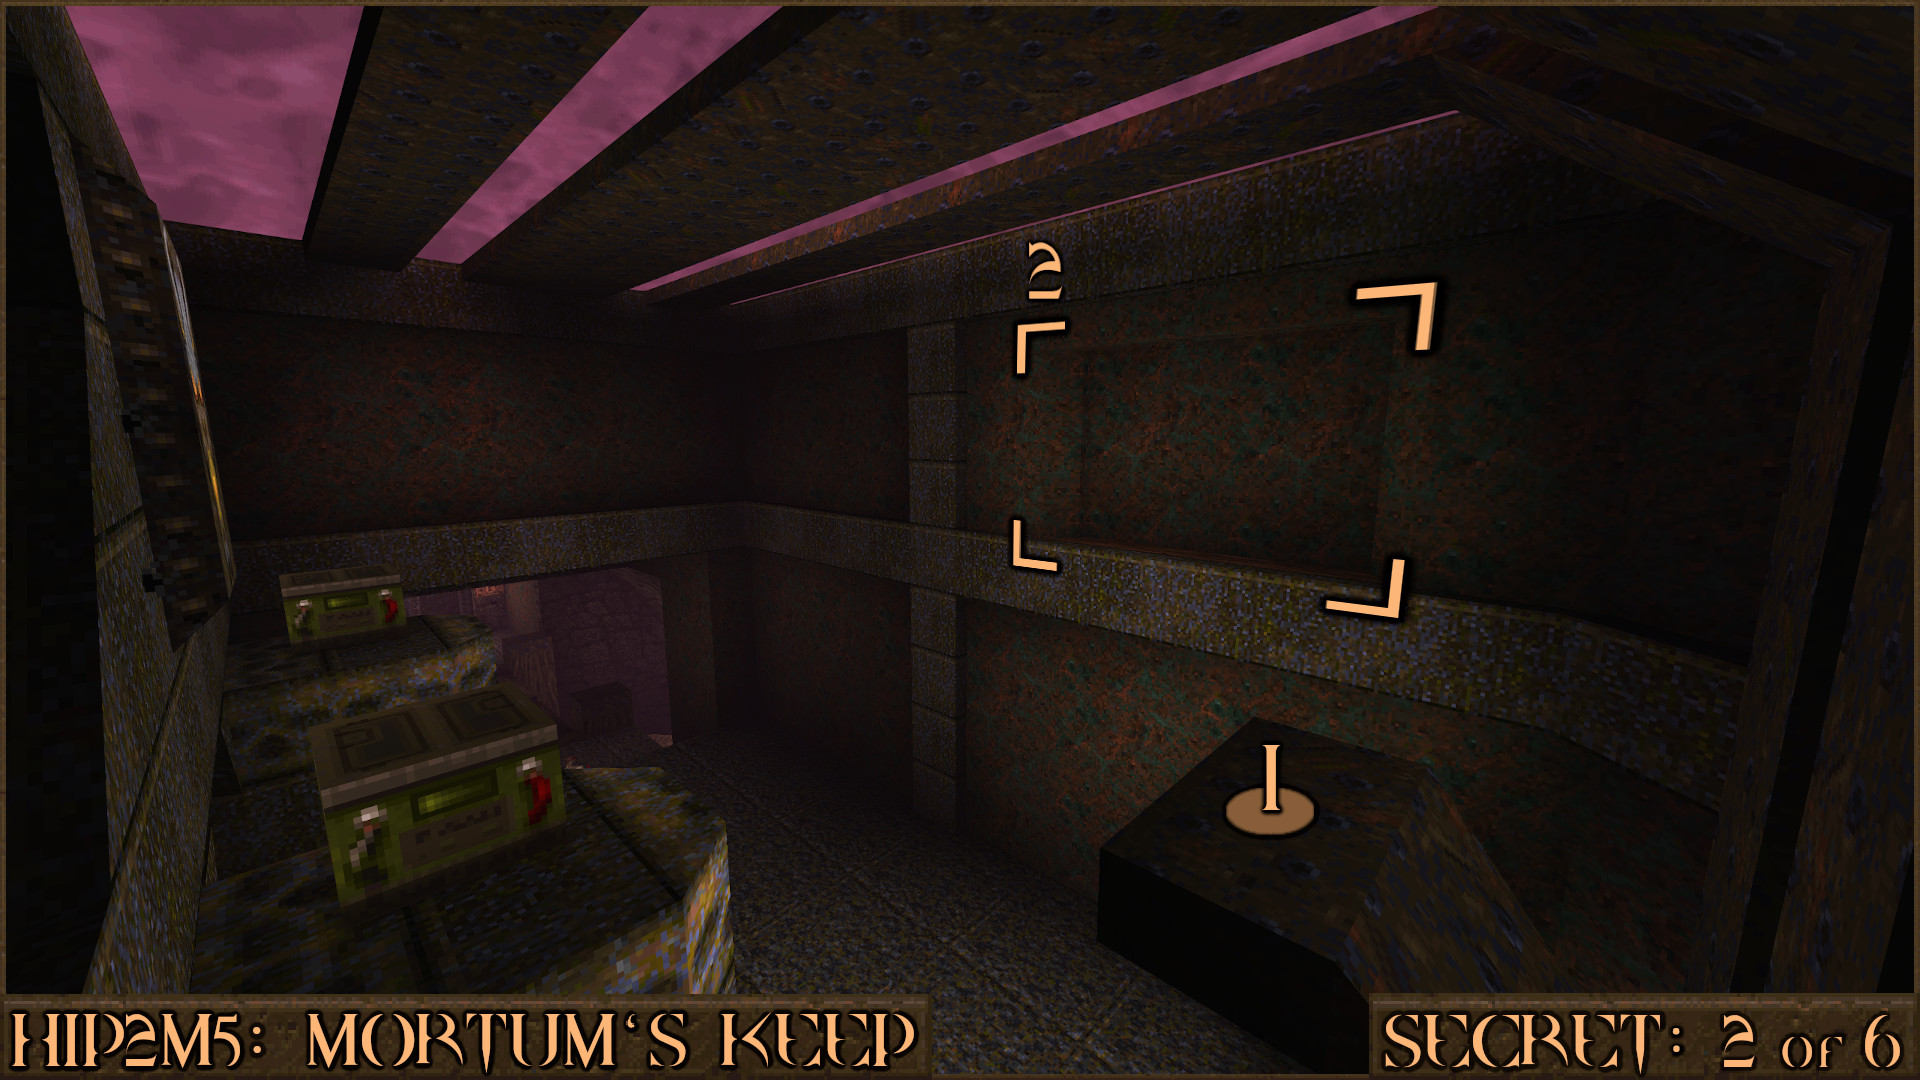
Reward:
Secret 3 of 6
This secret requires some complex jumping. First jump on to the metal pole () next to the stairs. Then make a big jump over to the crates (). Now carefully jump on top of the torch in the corner () and then jump on top of the tallest crate (). Once you've done this a nearby wall will activate () and move to reveal a teleporter that will take you to the top of this room and the secret.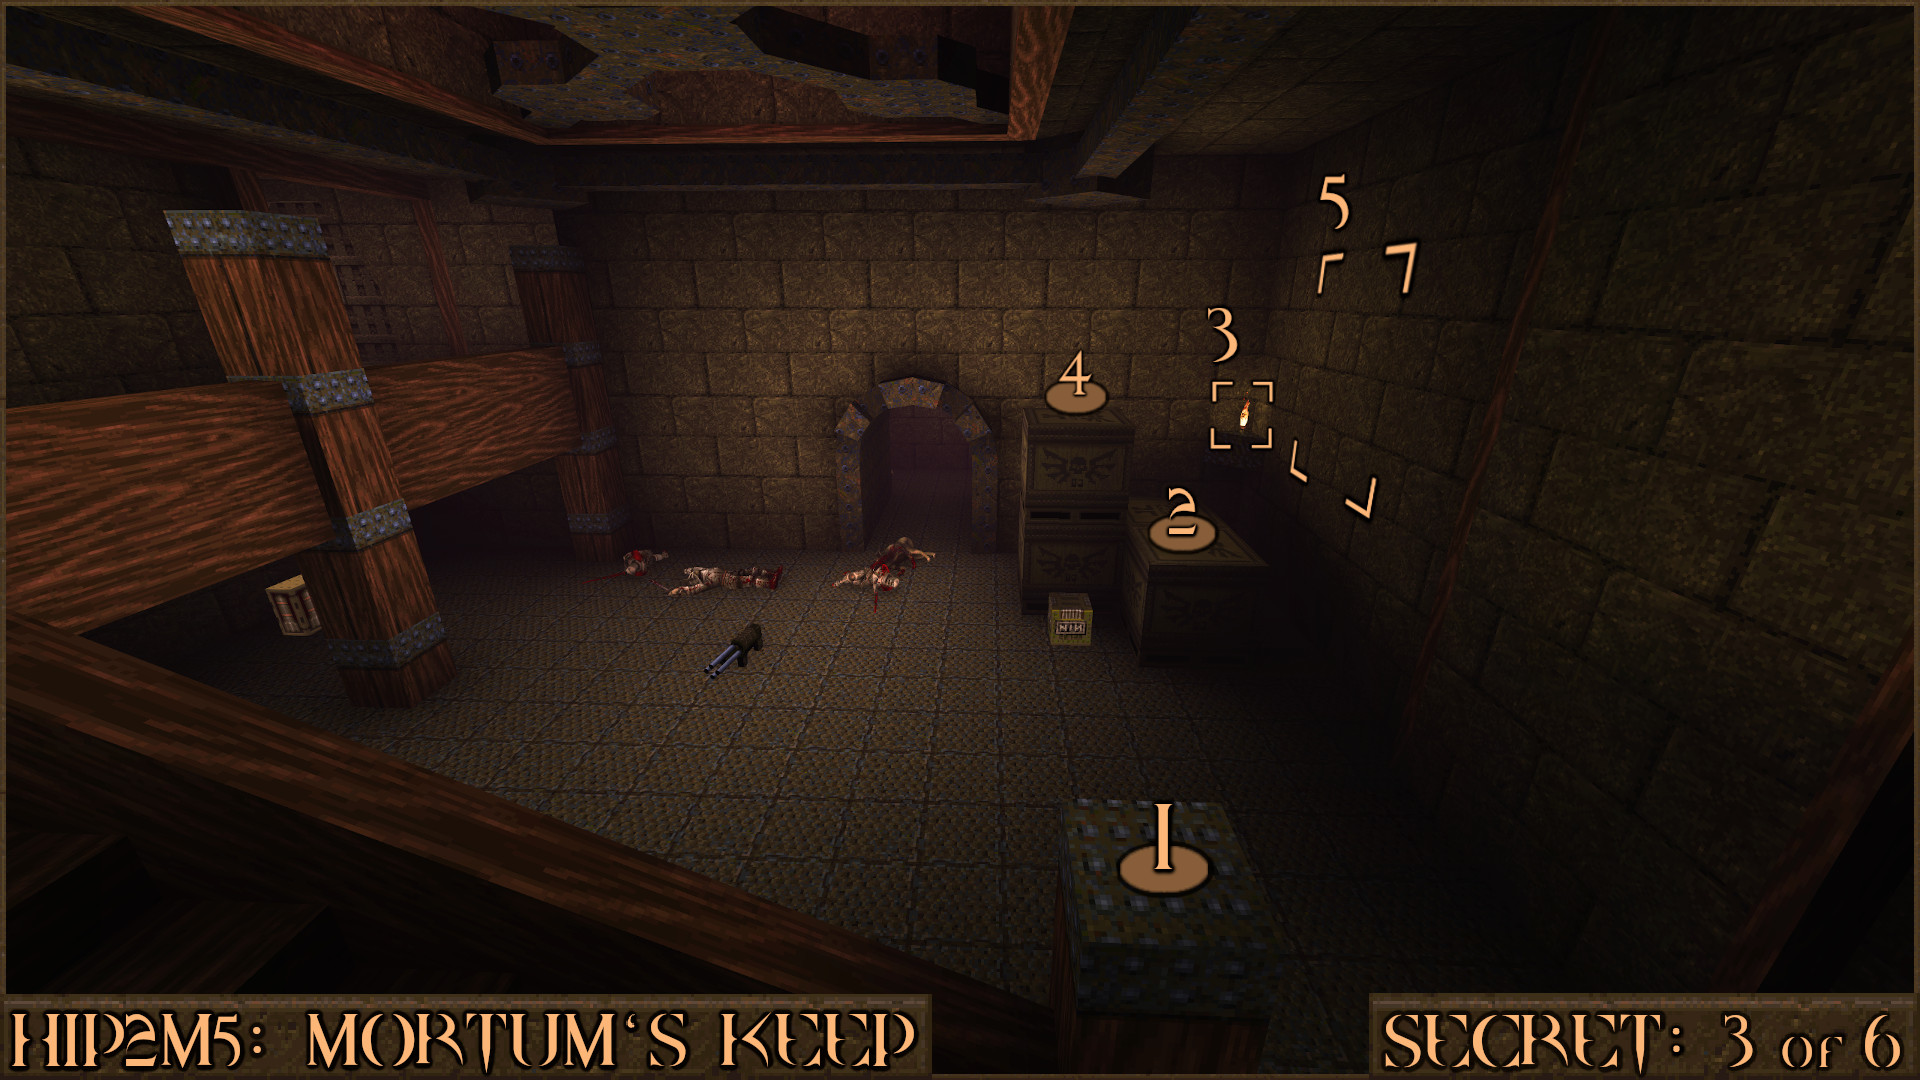
Reward:
Secret 4 of 6
Shortly after opening the Silver Key Door you will come out to a ledge that over looks the entrance doorway from the start of the level. Look for a slightly darker part of the wall and jump over to it and it will open to reveal a secret stash of items.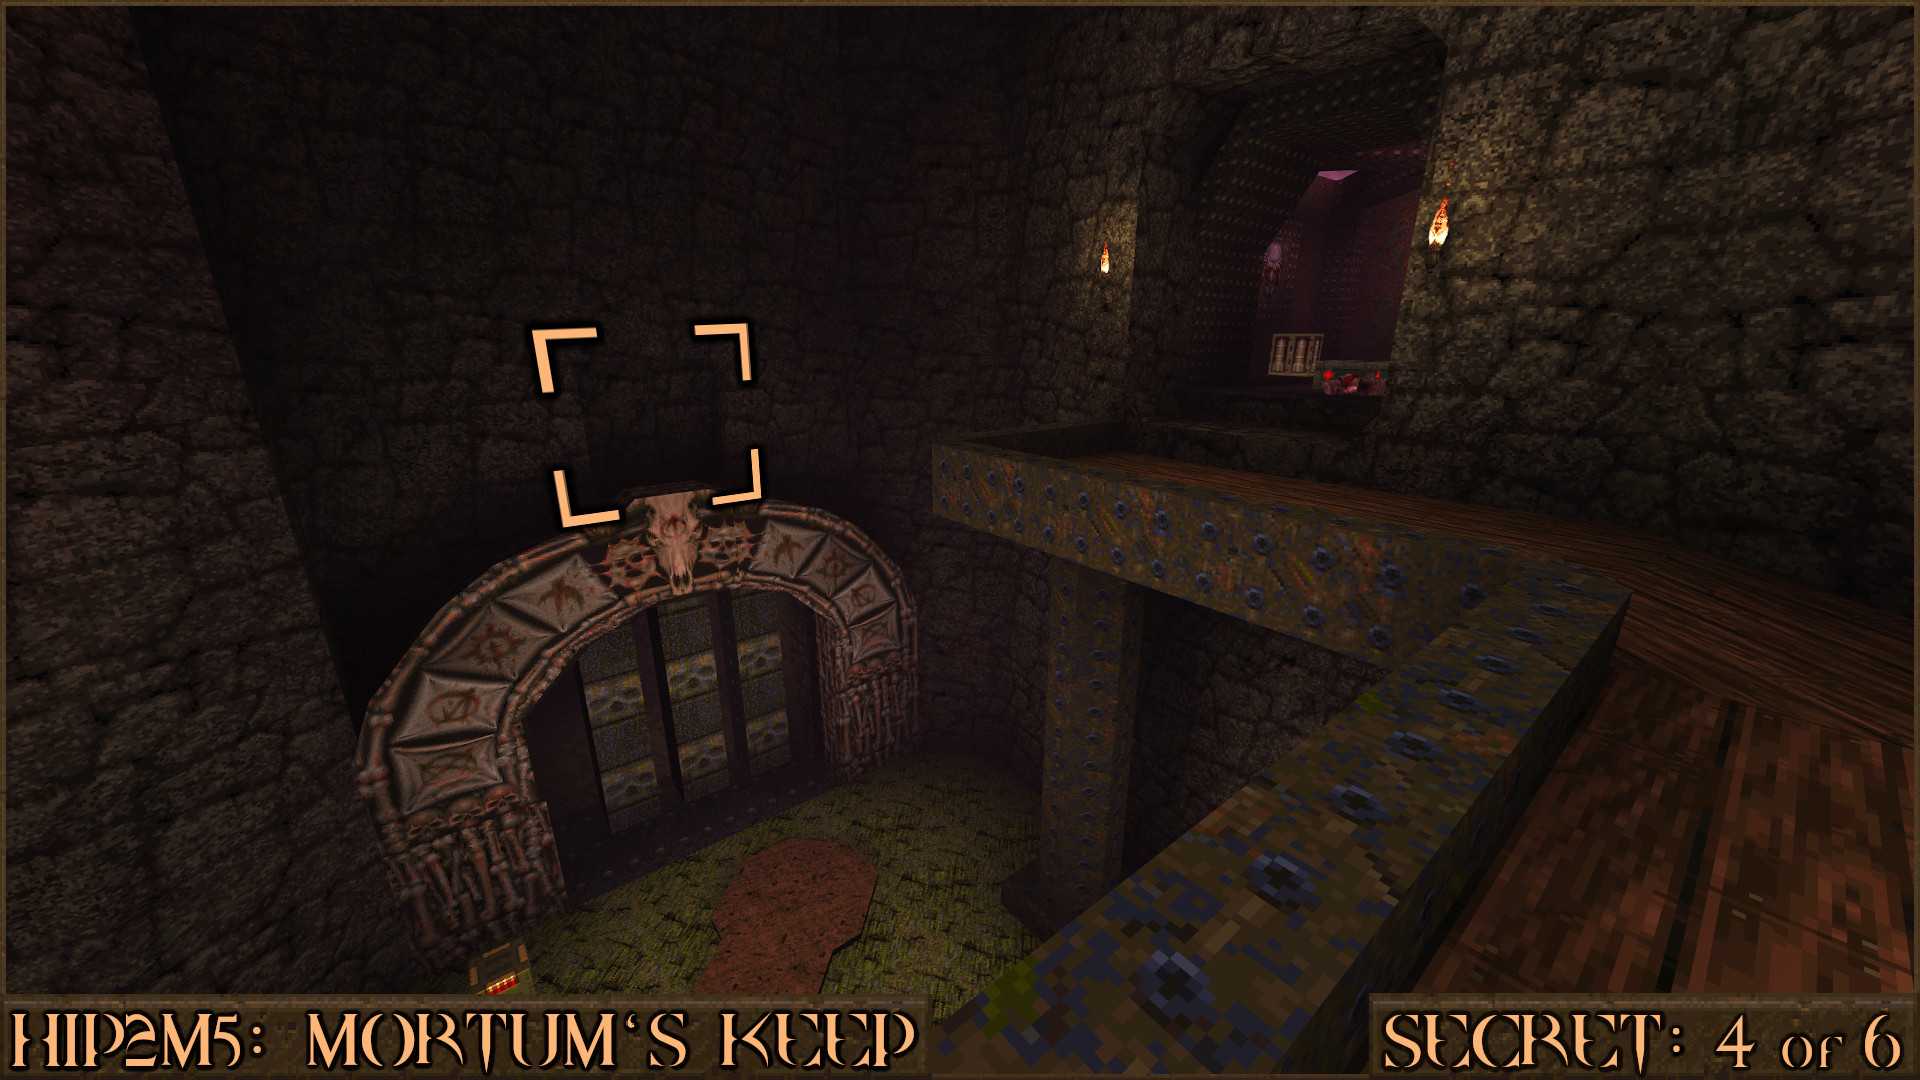
Reward:
Secret 5 of 6
You will enter a room with a strange looking contraption with two wooden lids. In the centre of this is a small brown block () that if you jump on will make a nearby wall () move out of the way. Go through to find a secret way up to the side platform.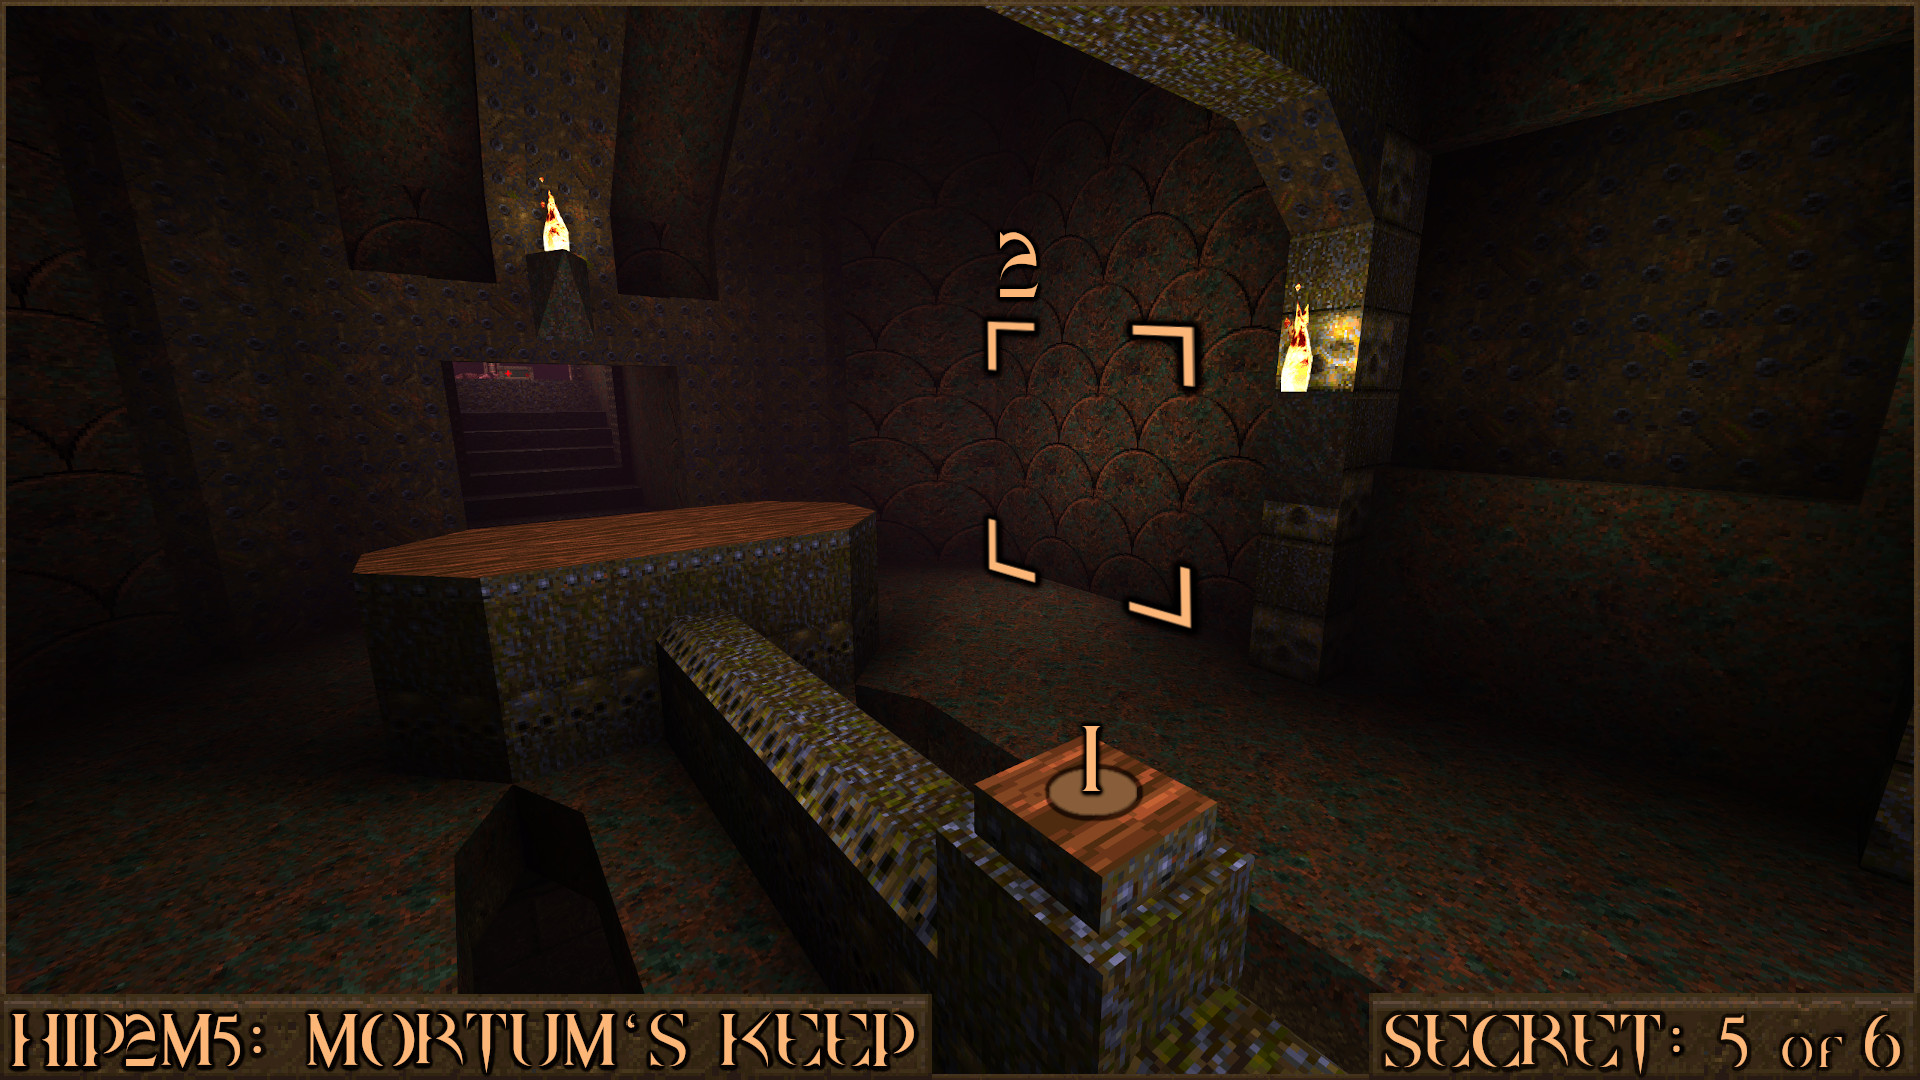
Reward:
Secret 6 of 6
After opening the Gold Key Door you will enter a room with a small pool of water in the centre. Look below the platform near the stairs to see a small brick () sticking out of the wall. 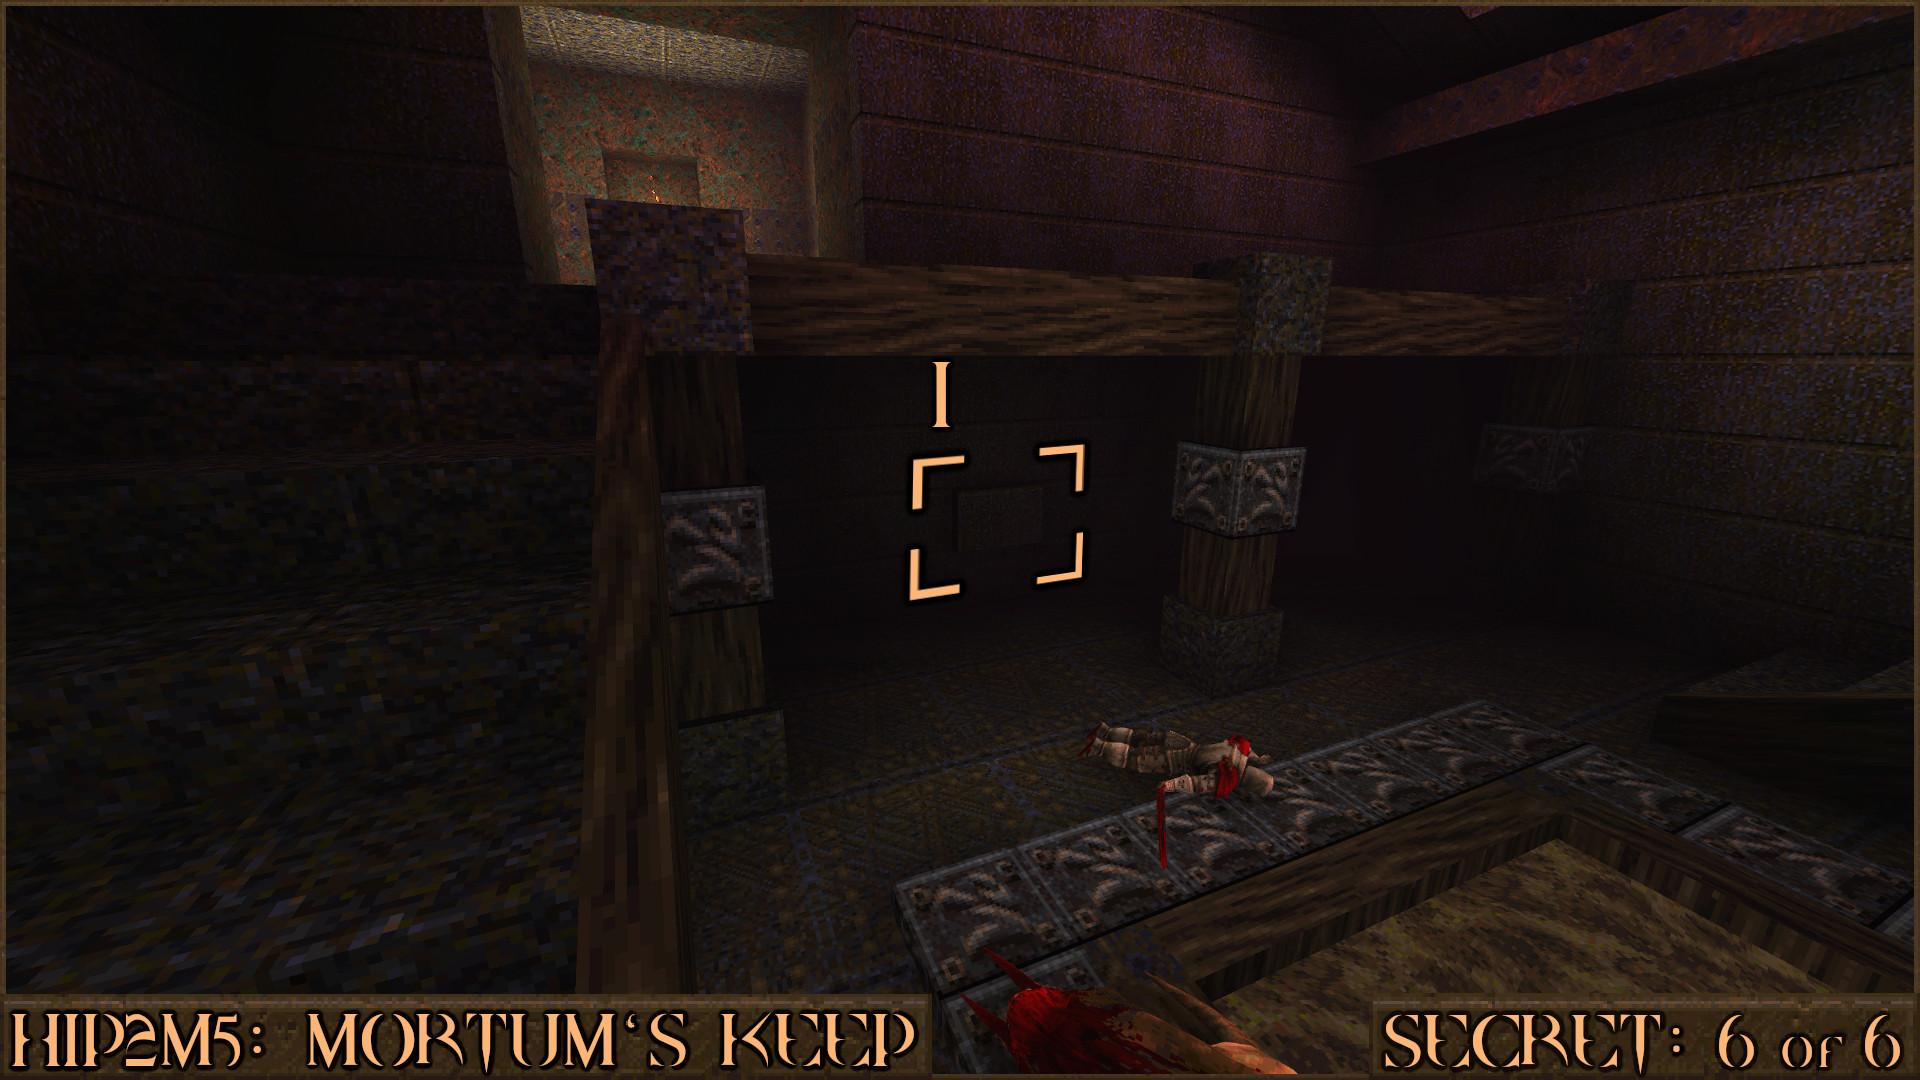
After pushing the brick turn around to look at the wall on the other side of the room. A chunk of the wall (
) will move out of the way to reveal the secret.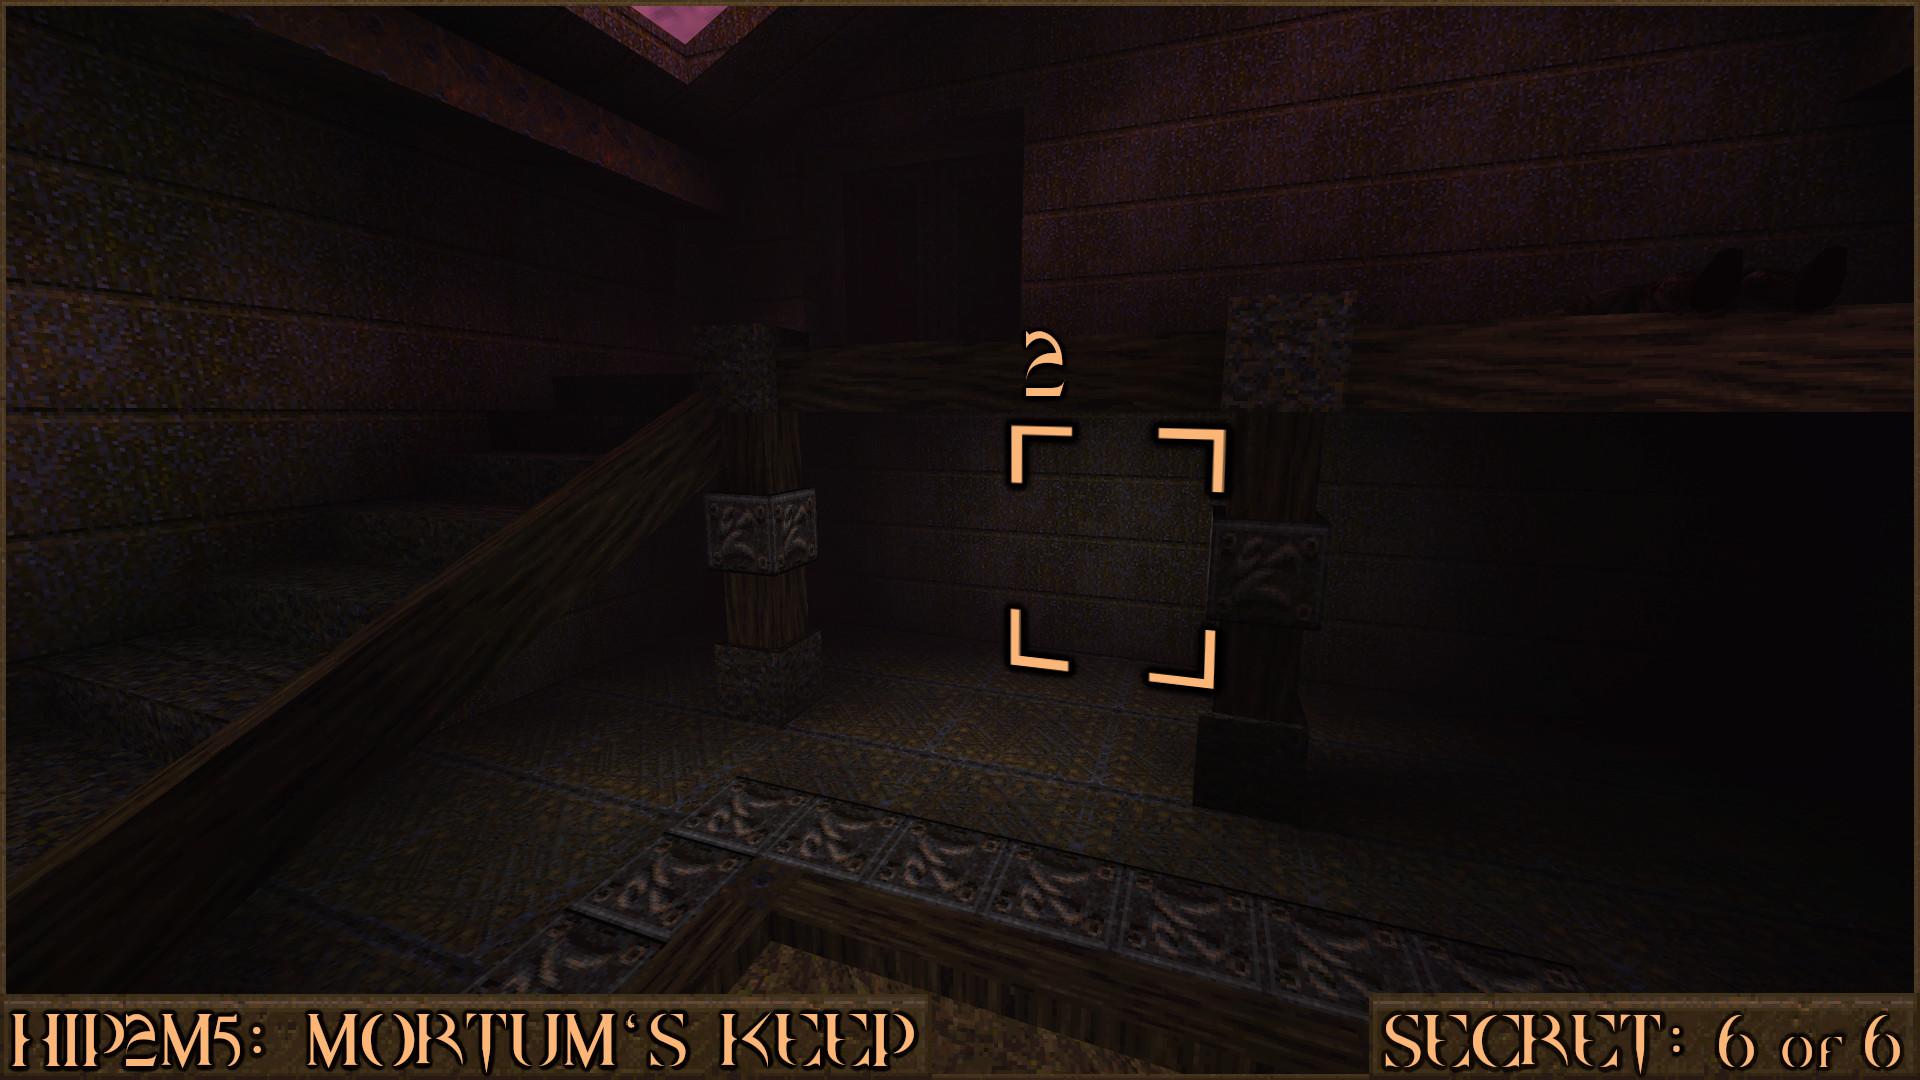
Reward:
HIP3M1: Tur Torment
Secret 1 of 6
From the start of the level look for the section of the building that looks out over the slime pit. Look carefully at the edge to find a thin ledge that leads to an indented section of wall that will move out of the way when you approach. Go inside to find the secret.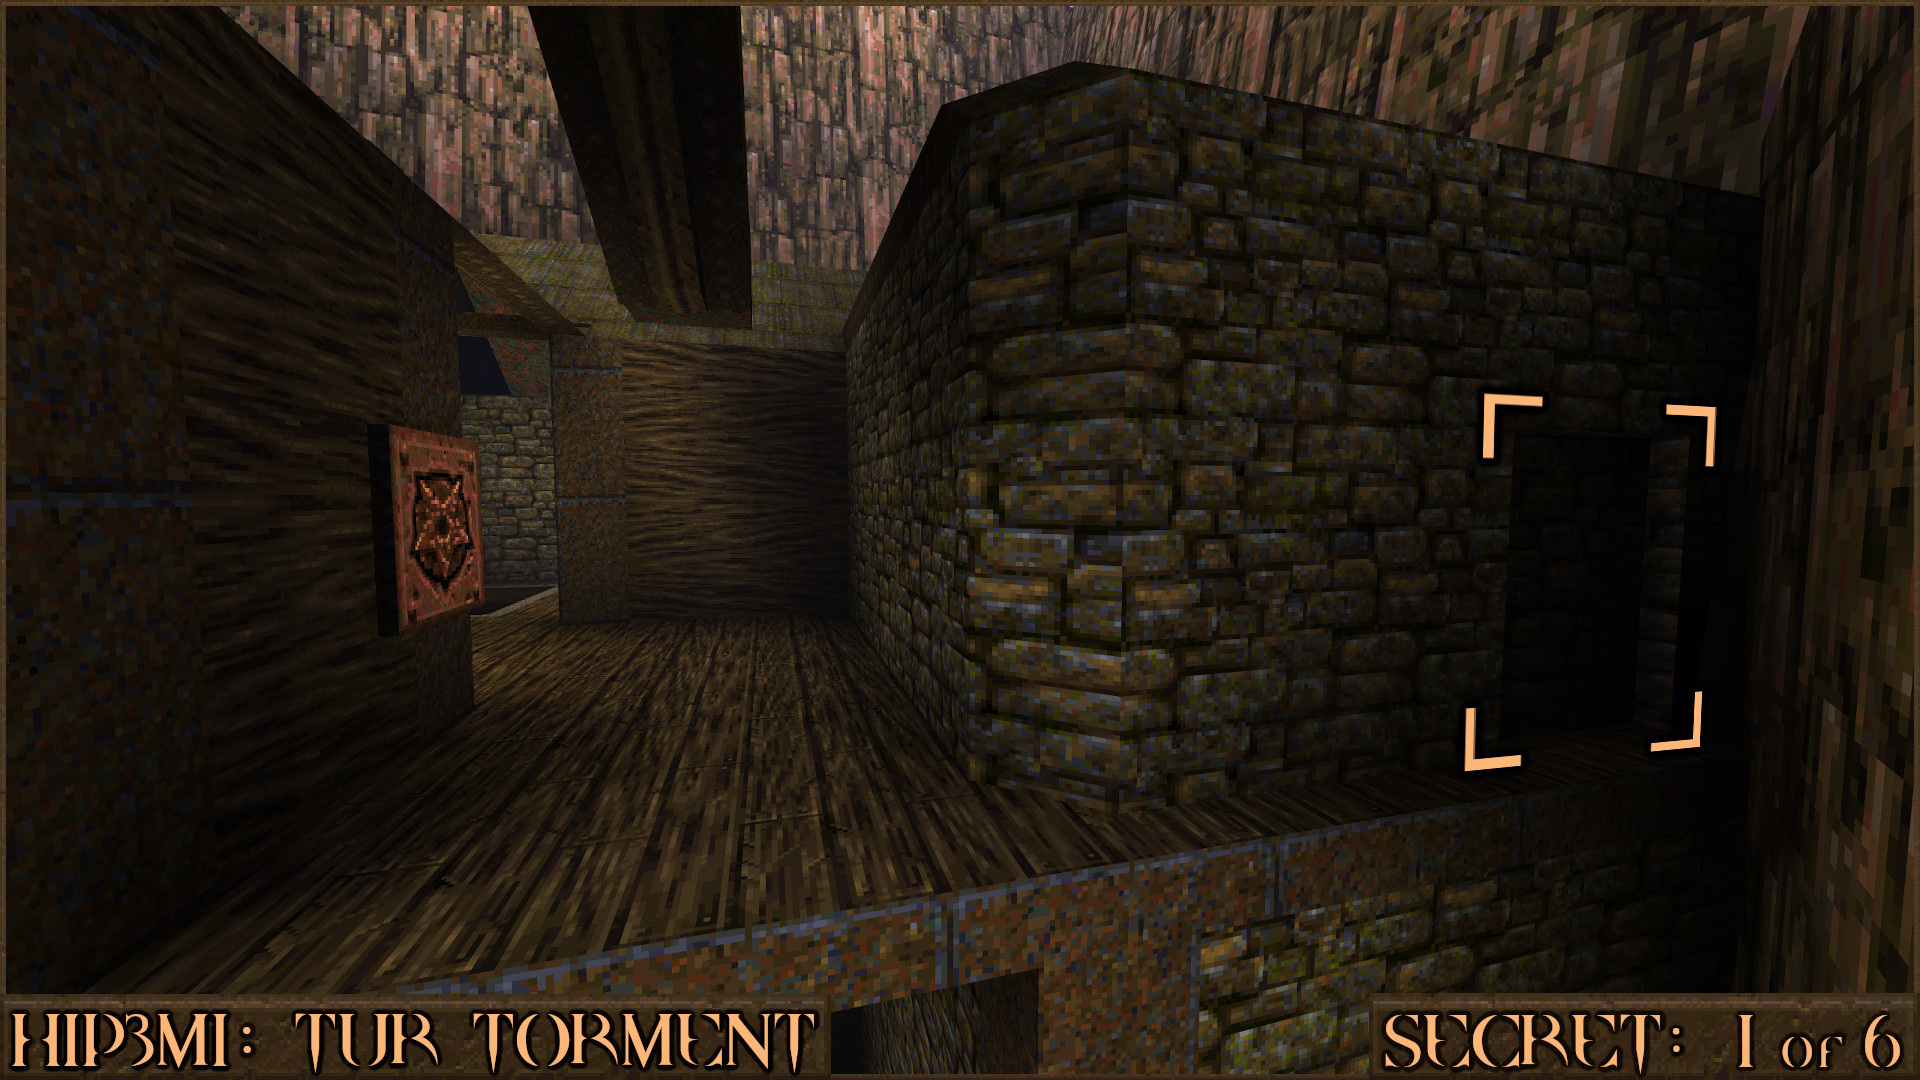
Reward:
Secret 2 of 6
Press the orange button () to activate a nearby aerial lift which will follow the track towards you. Once it arrives jump on and press the orange button again to start it.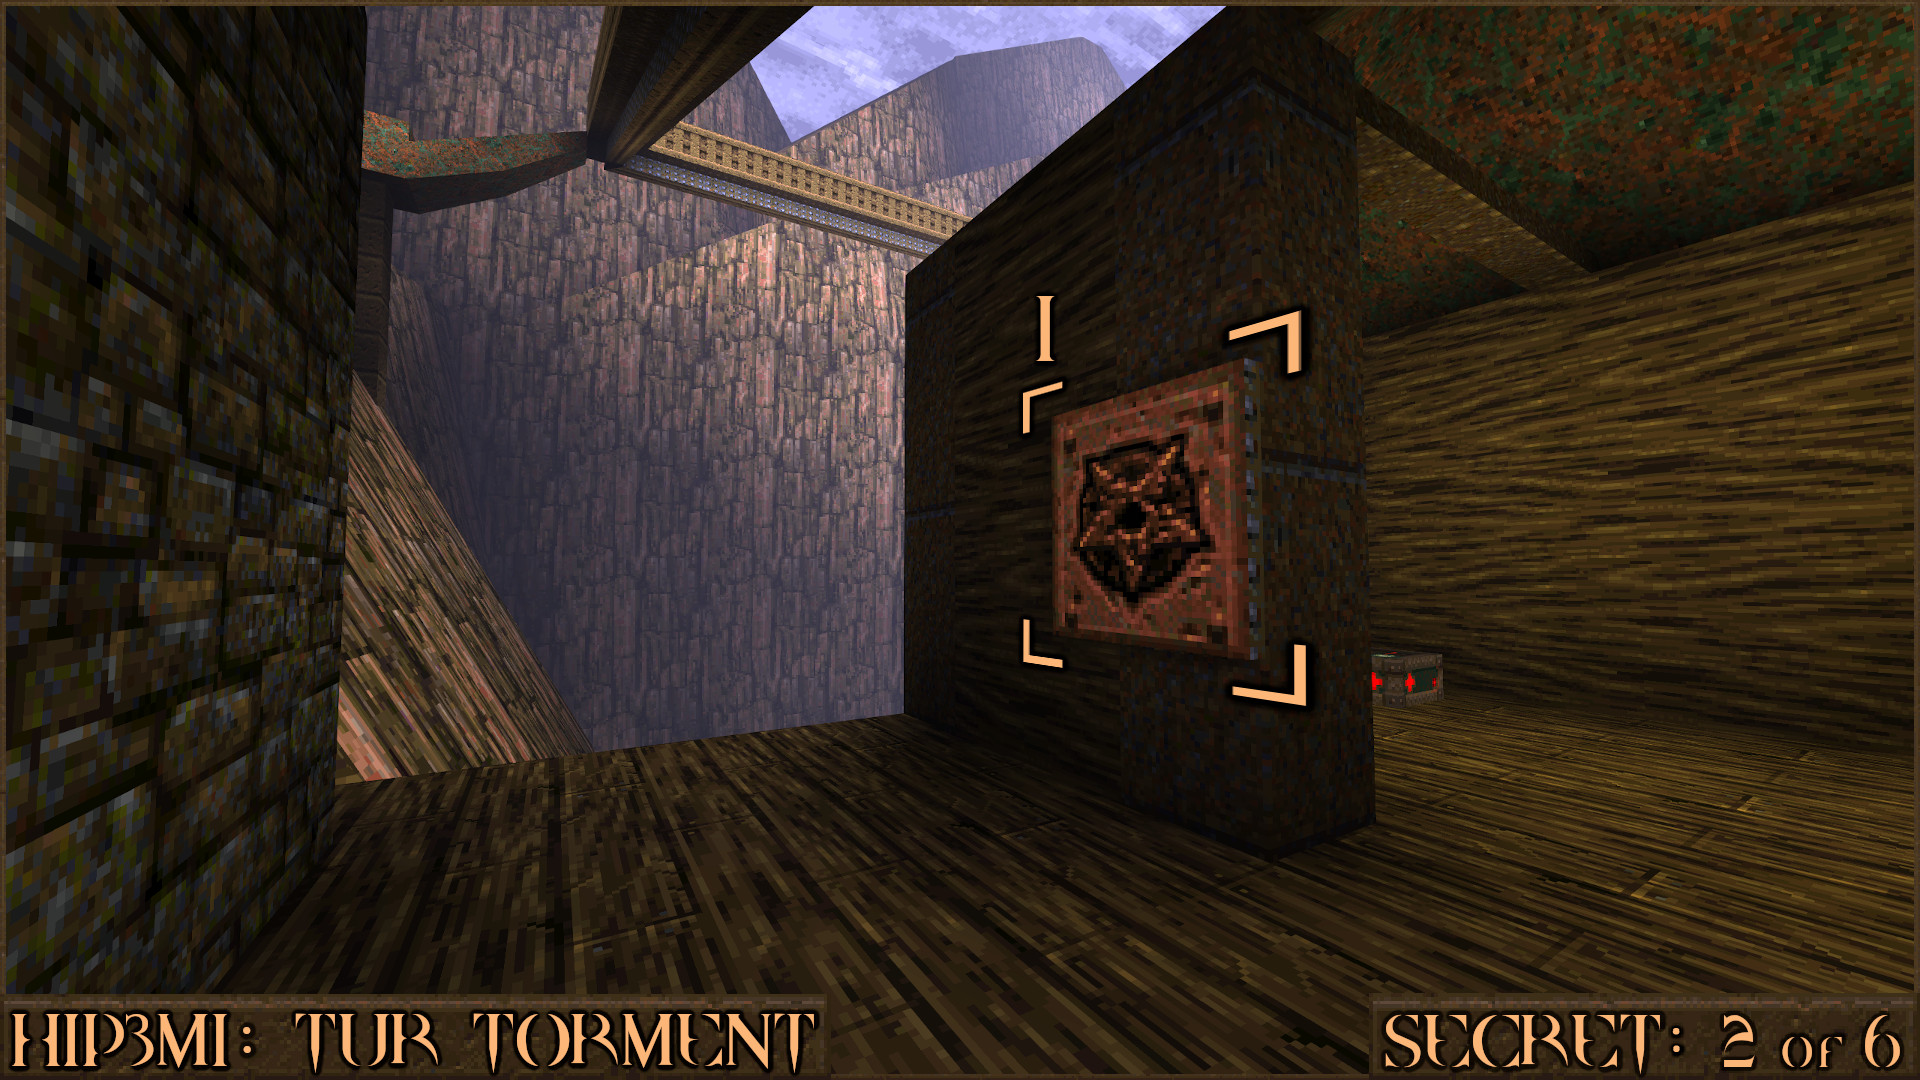
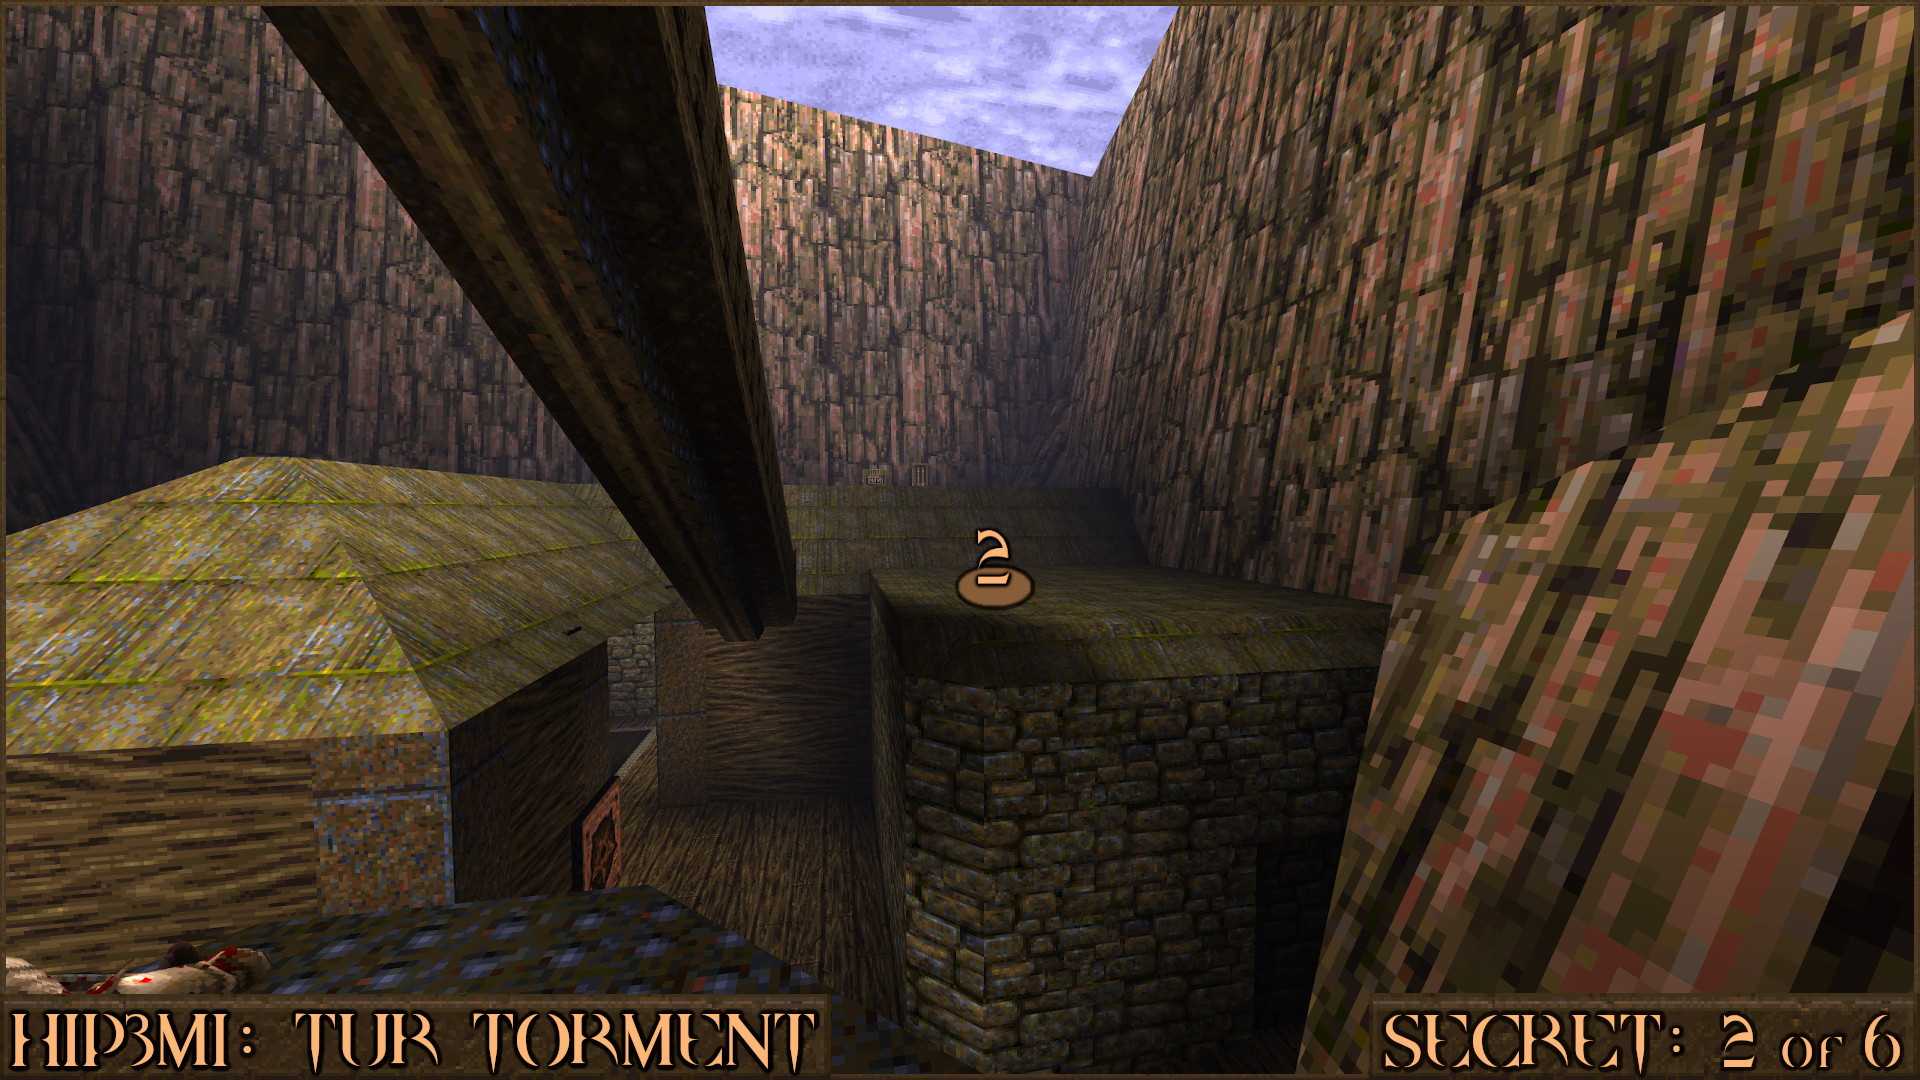
Quickly turn around to face the building you were just in and then making a running jump on to the roof (
).
Now that you're on the roof you can find a pack of Small Nails and also some Small Rockets. Carefully look over the side of the building to see a Megahealth on a hidden ledge (
). Drop down to find the secret.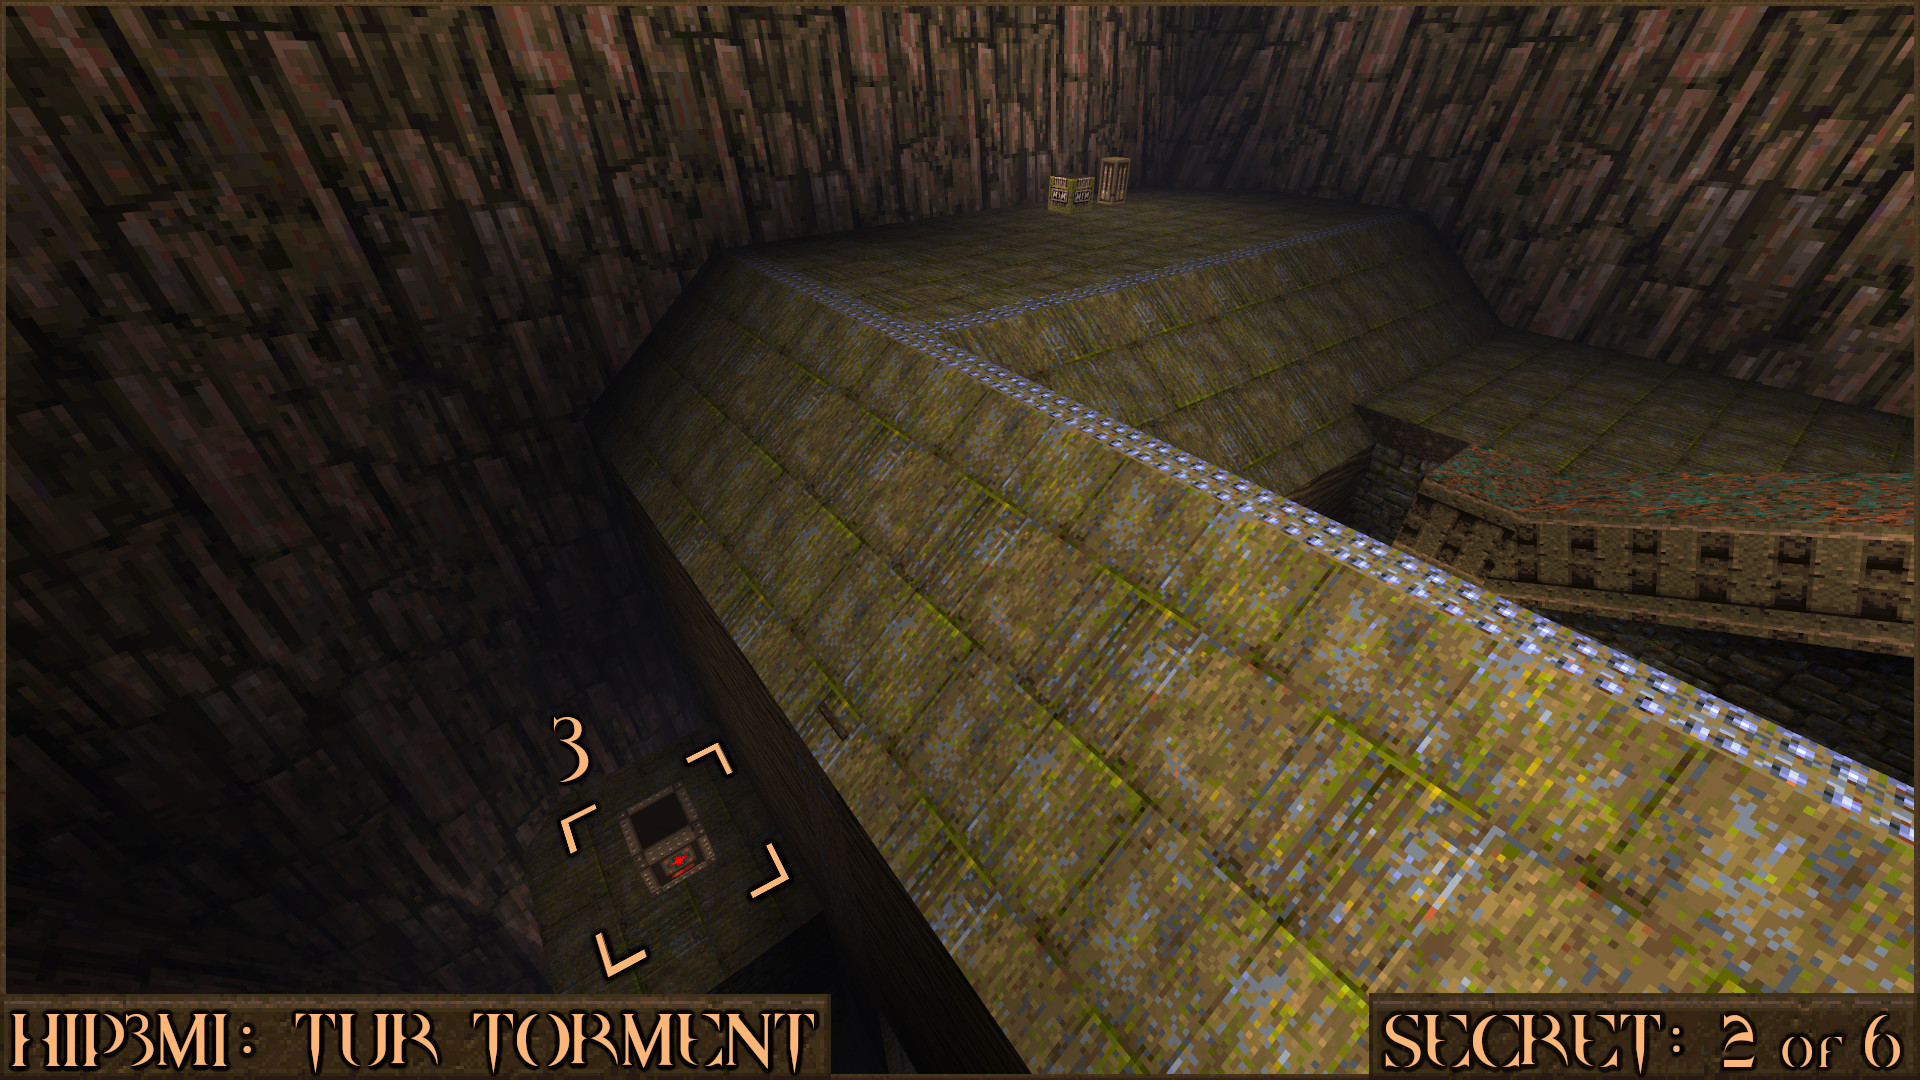
Reward:
Secret 3 of 6
Return all the way back up to the roof again except this time look for a thin ledge on the side of the mountain () you can jump over to. Continue to follow the ledge to eventually find a pack of Large Rockets.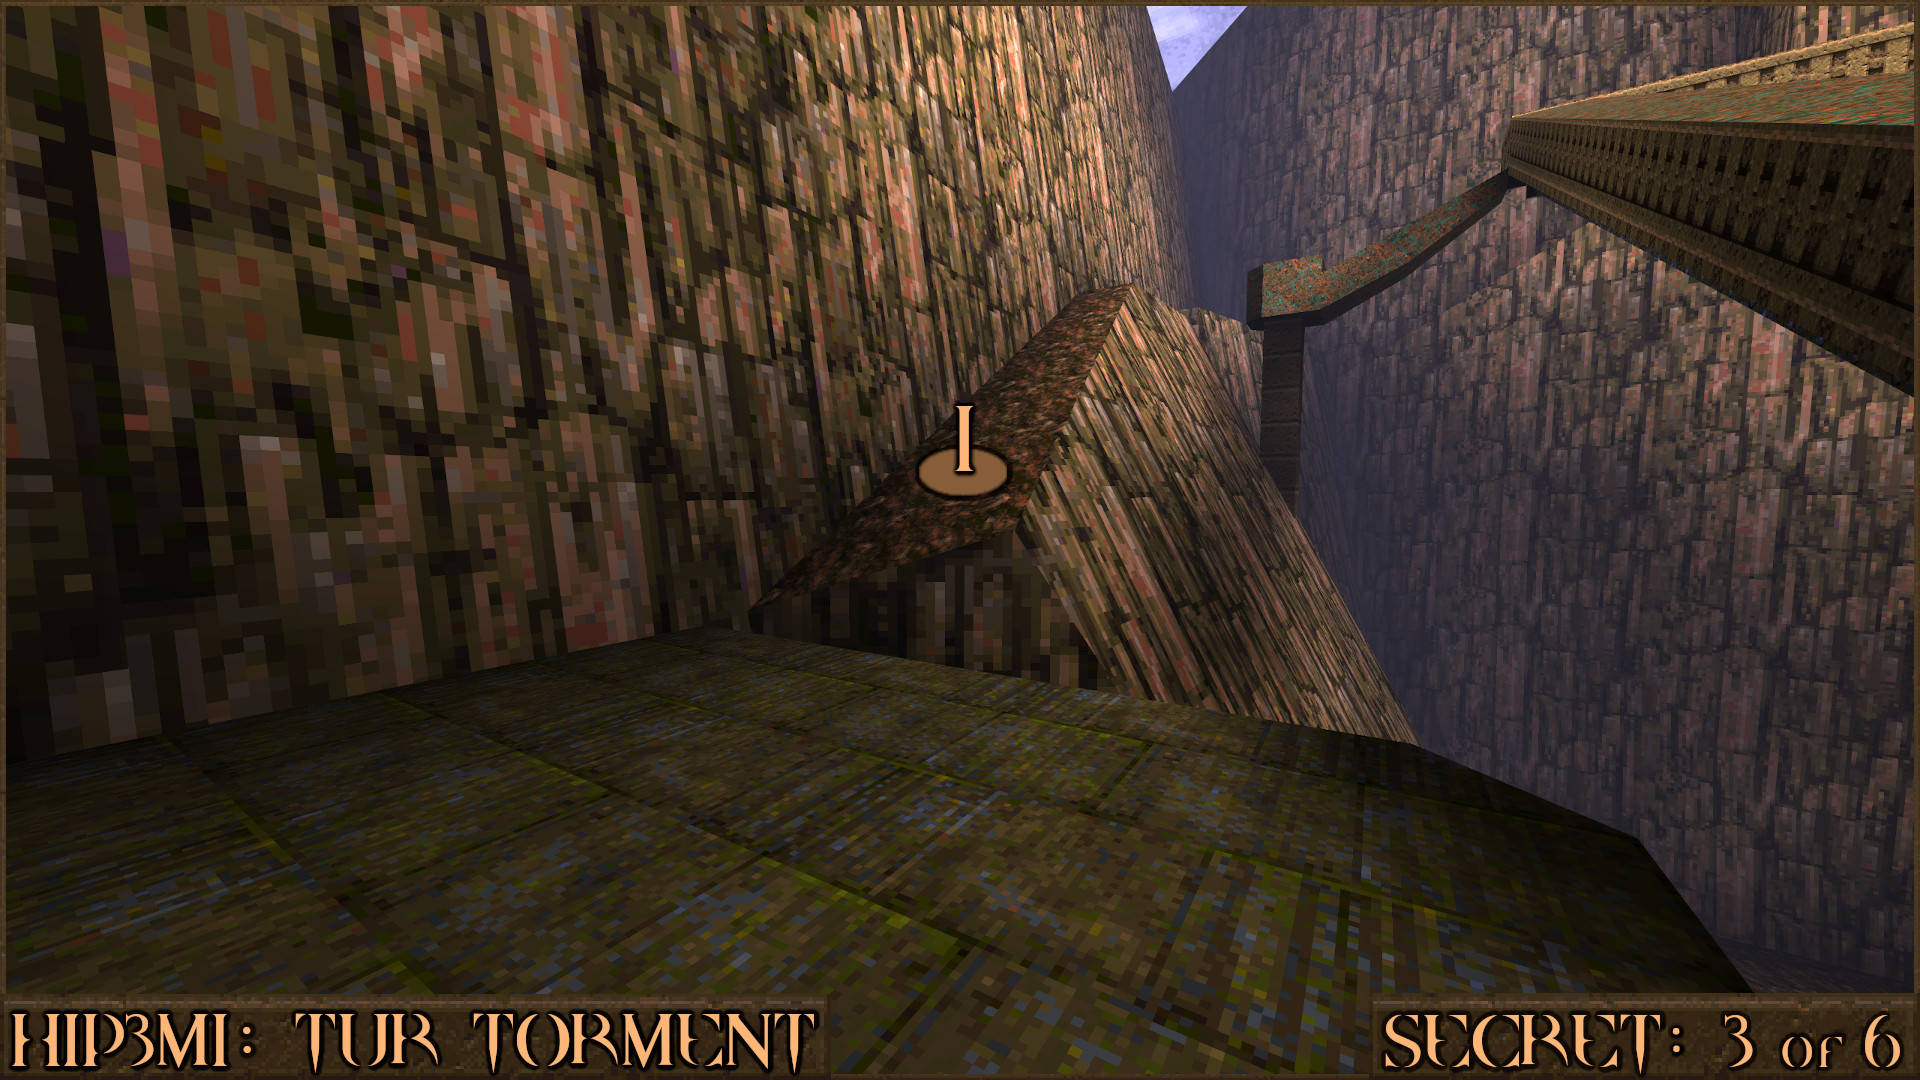
Reward:
Extra Secret 1
From Secret 3 look closely at the mountain wall to see another ledge that you can jump over to (). Very carefully follow this extremely thin ledge up to the top of the mountain (). Once you're at the top the text "You're not supposed to be here!" will appear and several Spike Mines spawn and will immediately start attacking you. From here you can also jump straight to the top of the tower and get the Silver Key early but this is a risky option due to the tough enemies in this area.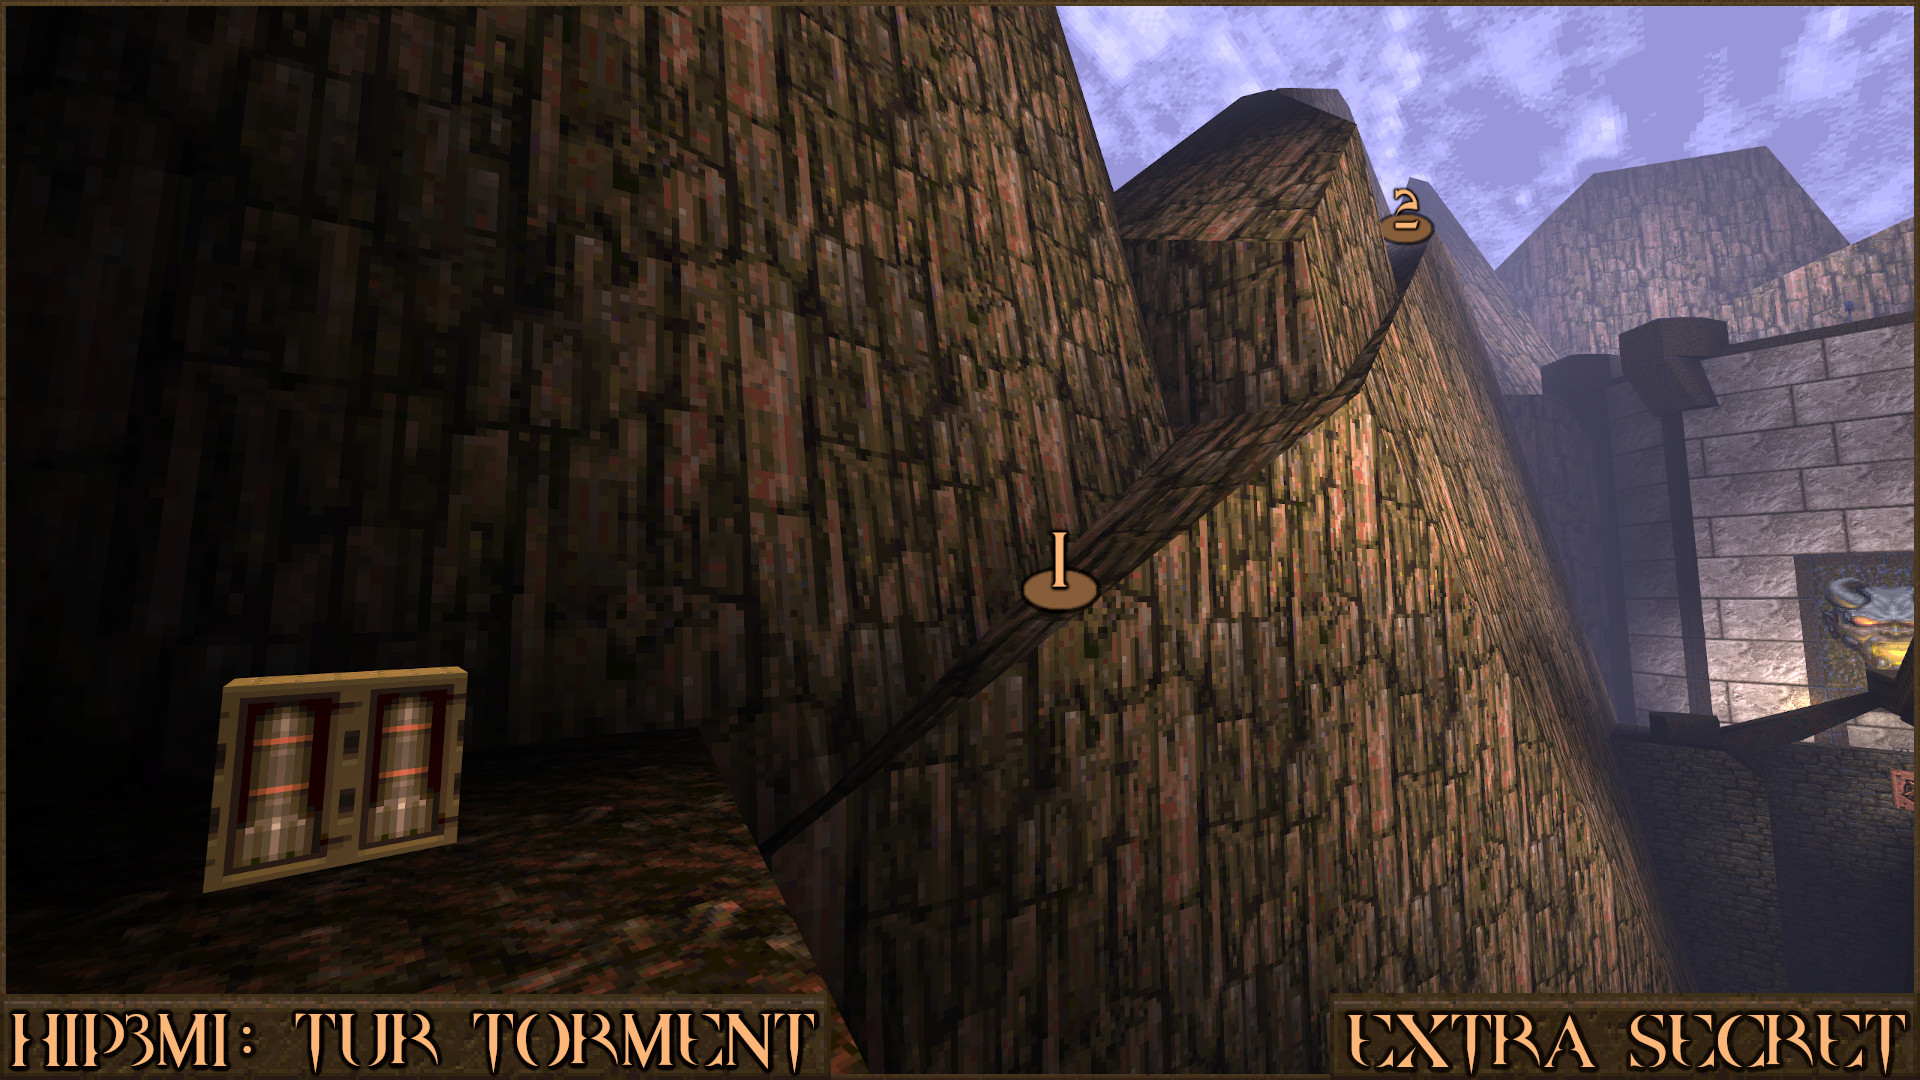
Reward: NONE
Secret 4 of 6
After you enter the main tower go up several staircases until you reach the room just below the roof. Look at the ceiling to see a red shootable switch ().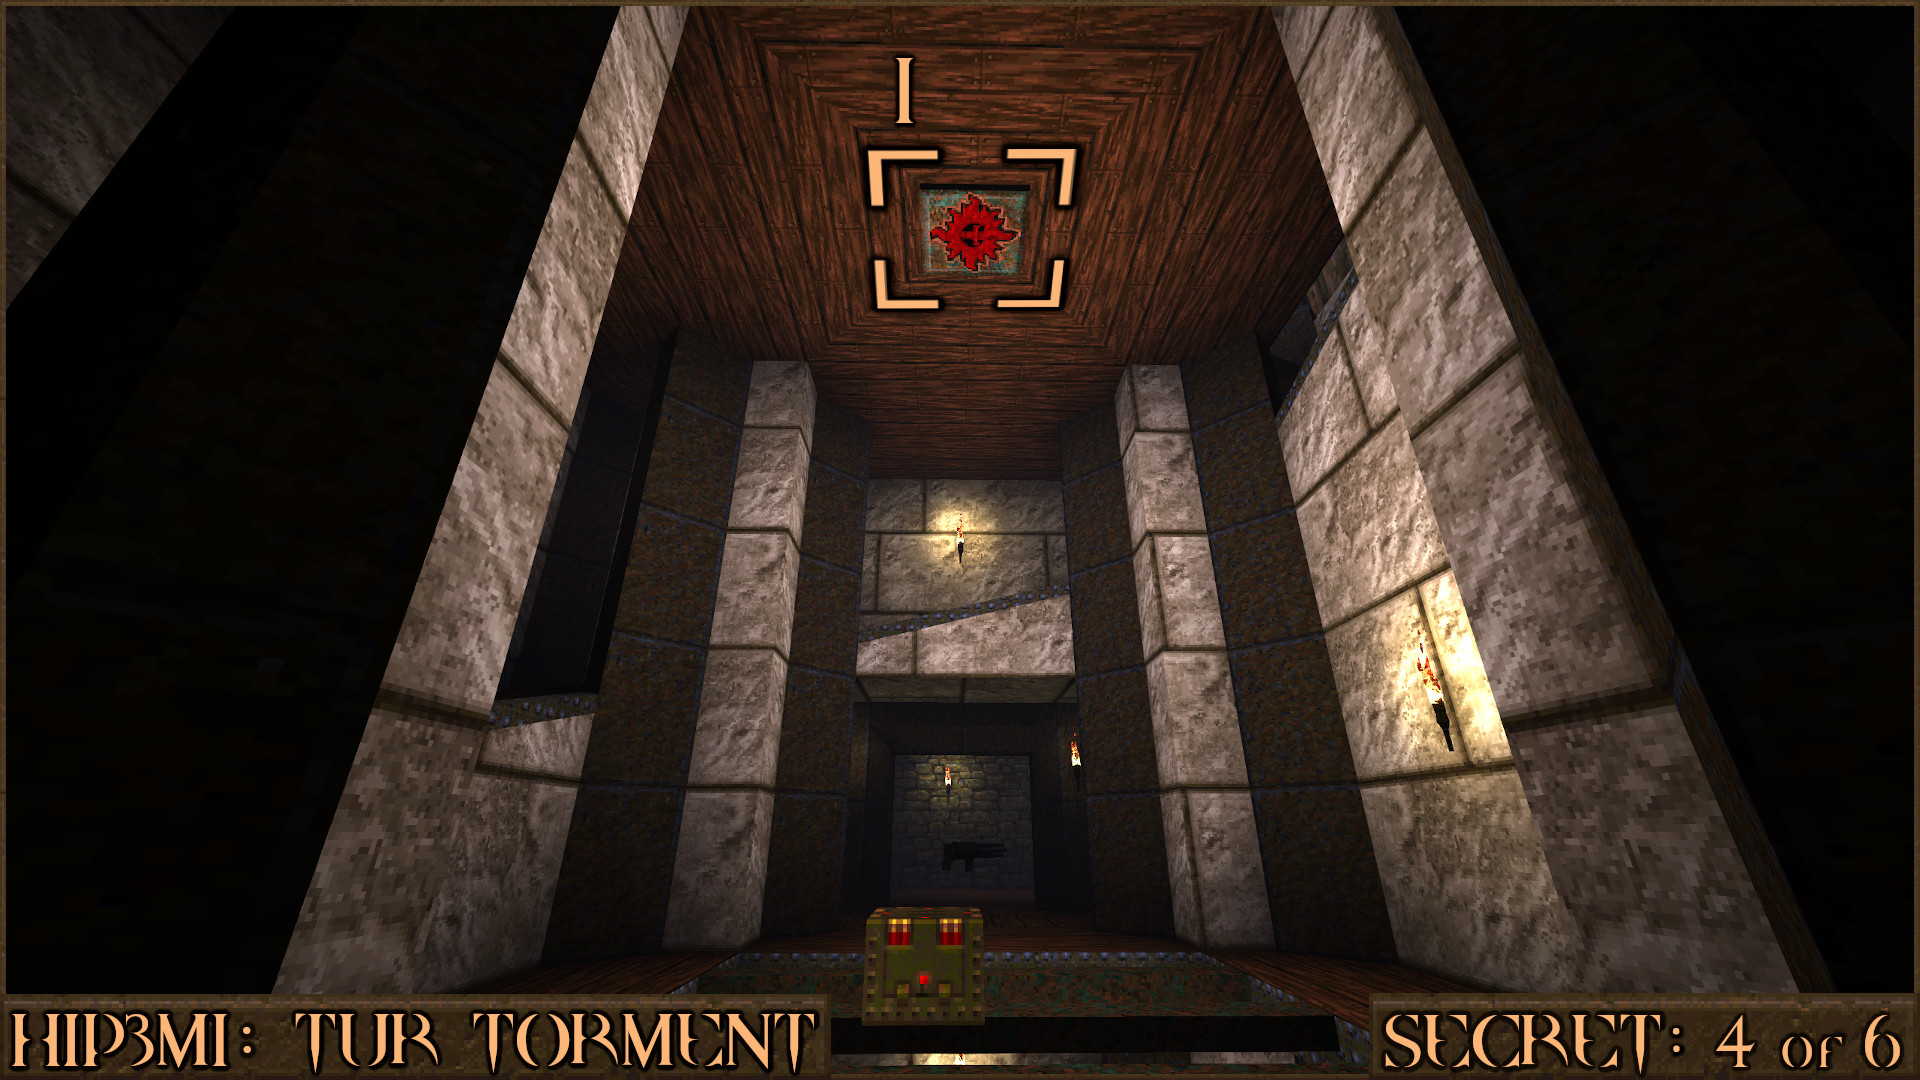
After shooting it go back down the staircase and you will notice that the large monster face panel (
) has opened to reveal a secret.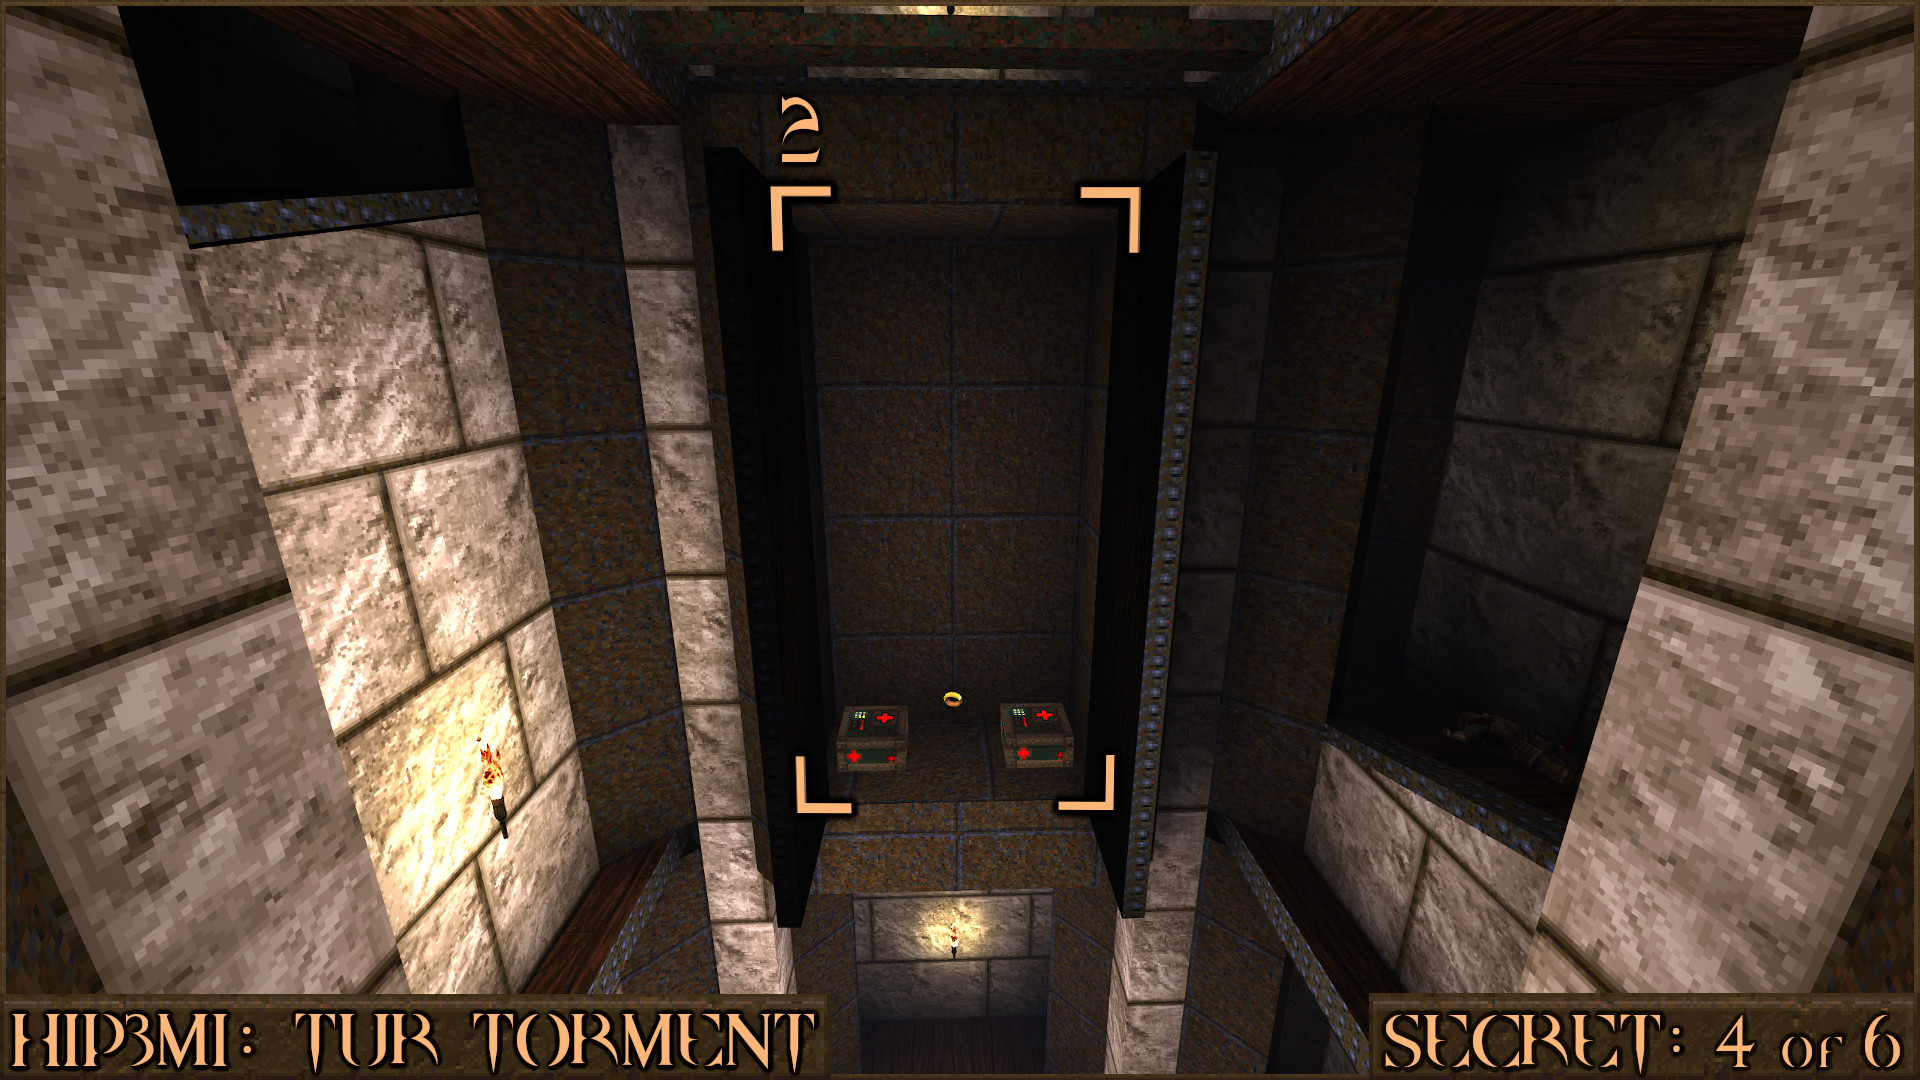
Reward:
Secret 5 of 6
Look opposite the Silver Key Door to see three monster face panels embedded in the wall. Touch the one on the left and it will move to allow access to the secret. However be careful as this will immediately spawn a Spike Mine ambush.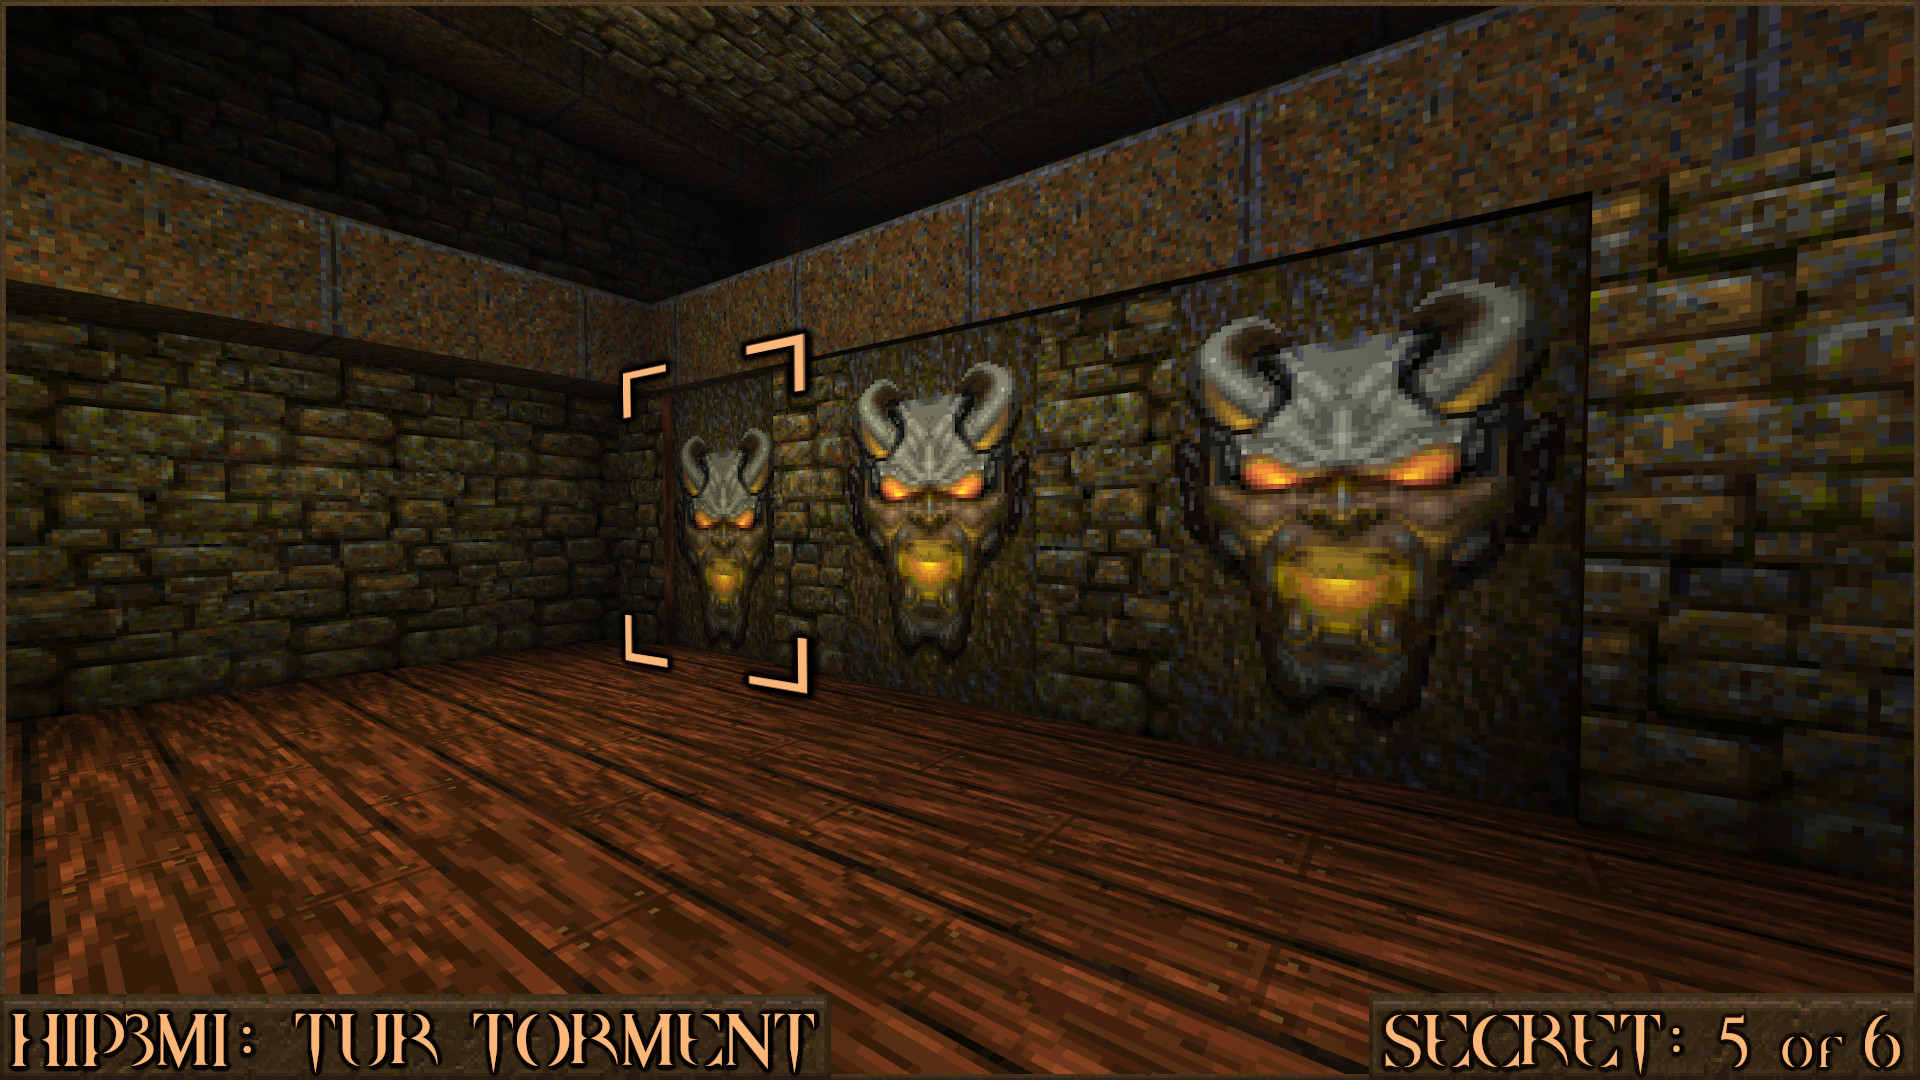
Reward:
Secret 6 of 6
After opening the Silver Key Door look to the right and on the far wall you will see one of the white bricks has a cup etched in to it (). Shoot it and two more white bricks (+) will jut out of the wall and a Megahealth will appear on the ledge. Jump on the white bricks to reach the secret.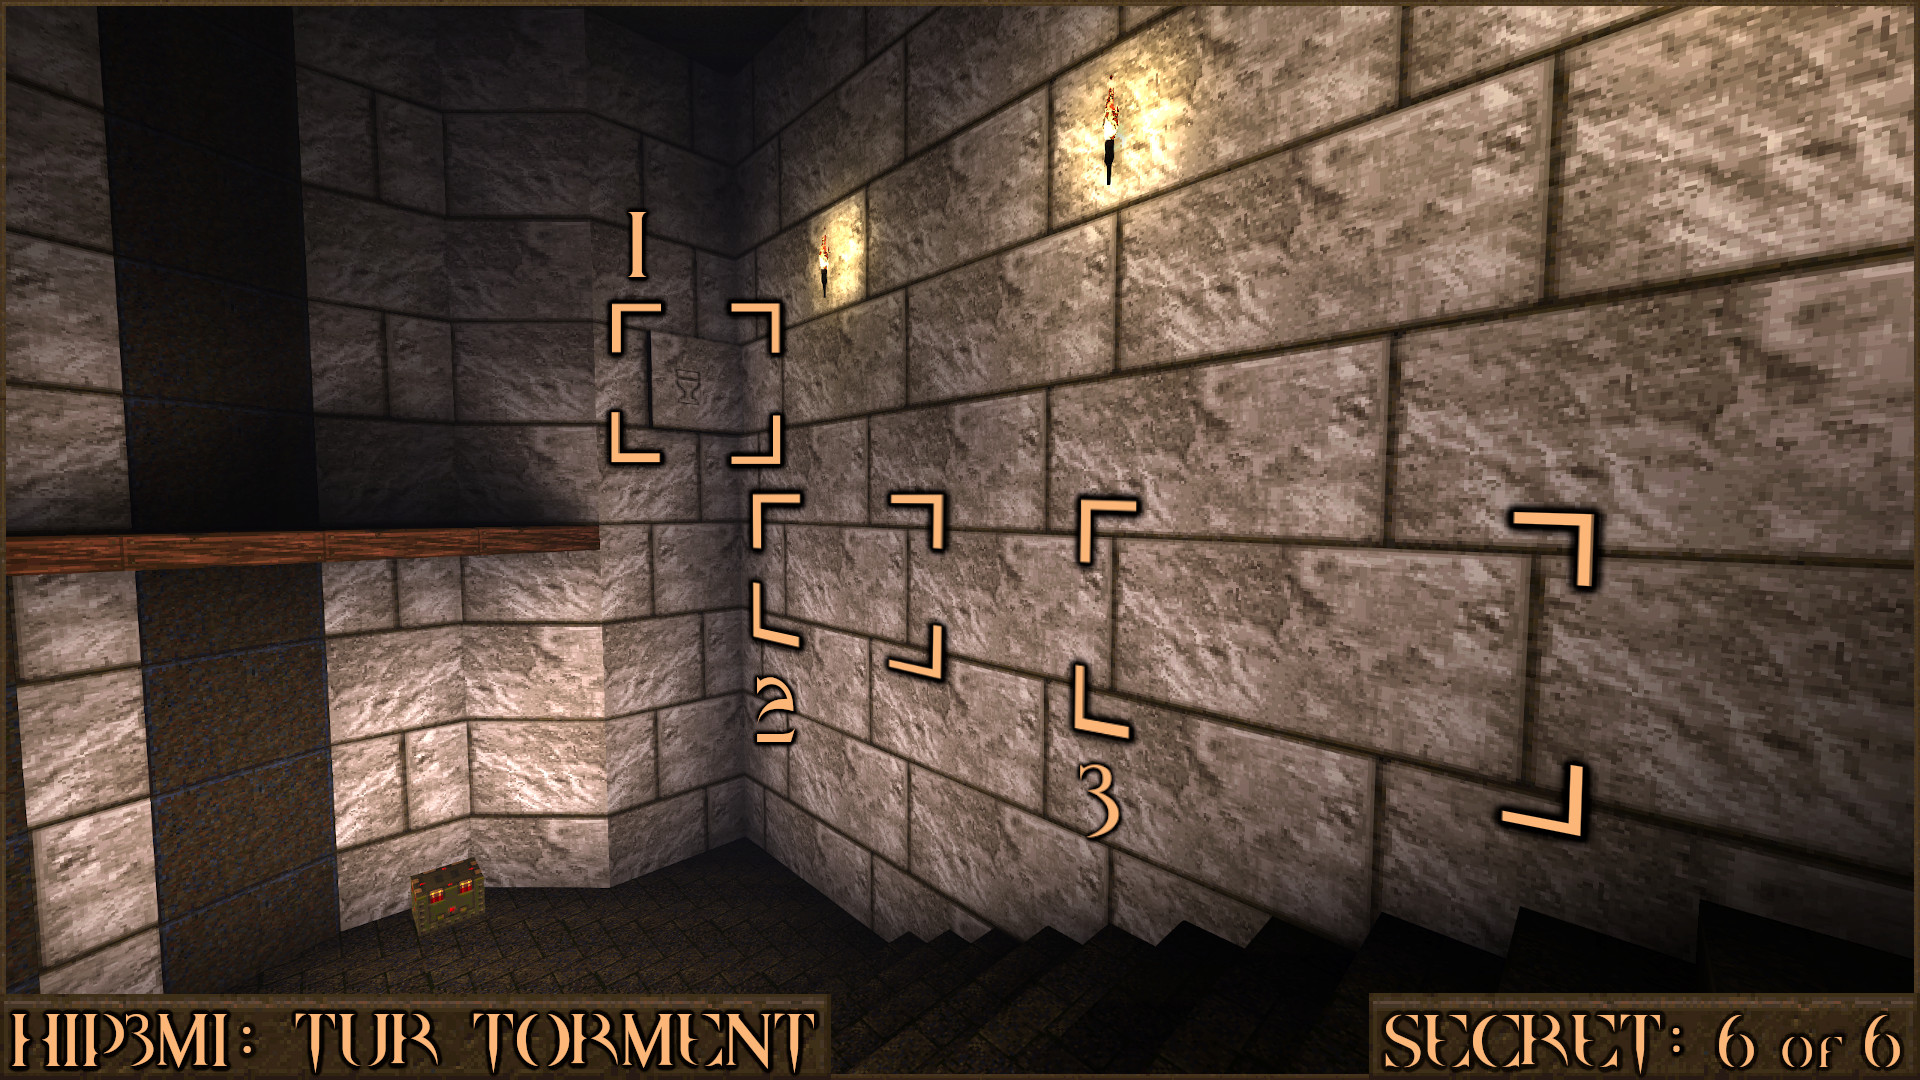
Reward:
Extra Secret 2
Near the end of the level you will find the Gold Key Door. Opening the door will also make a statue to the left of the door start moving and it will reveal a hidden teleporter that will take you to a Pentagram of Protection.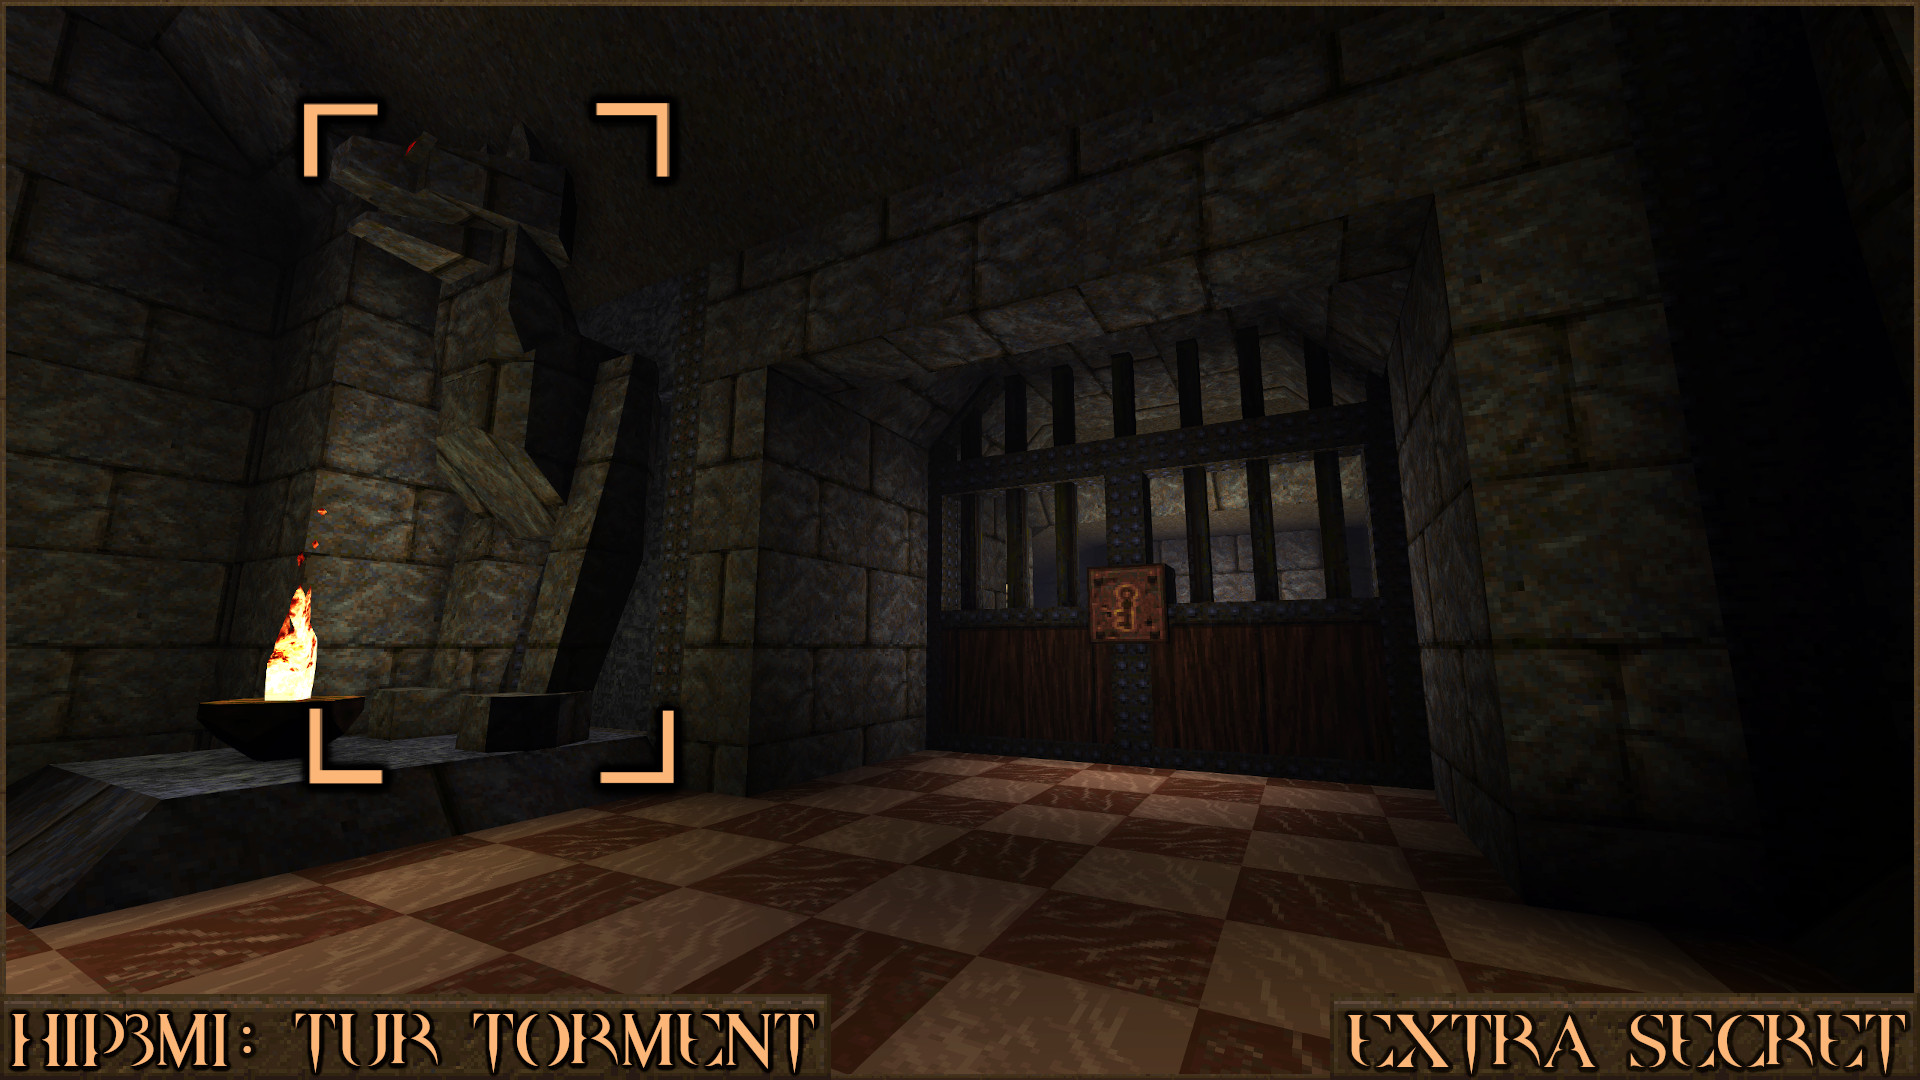
Reward:
HIP3M2: Pandemonium
Secret 1 of 5
At the start of the level look near the lava cauldron to see a yellow light fitting (). Shoot it to move a section of wall () above where you started.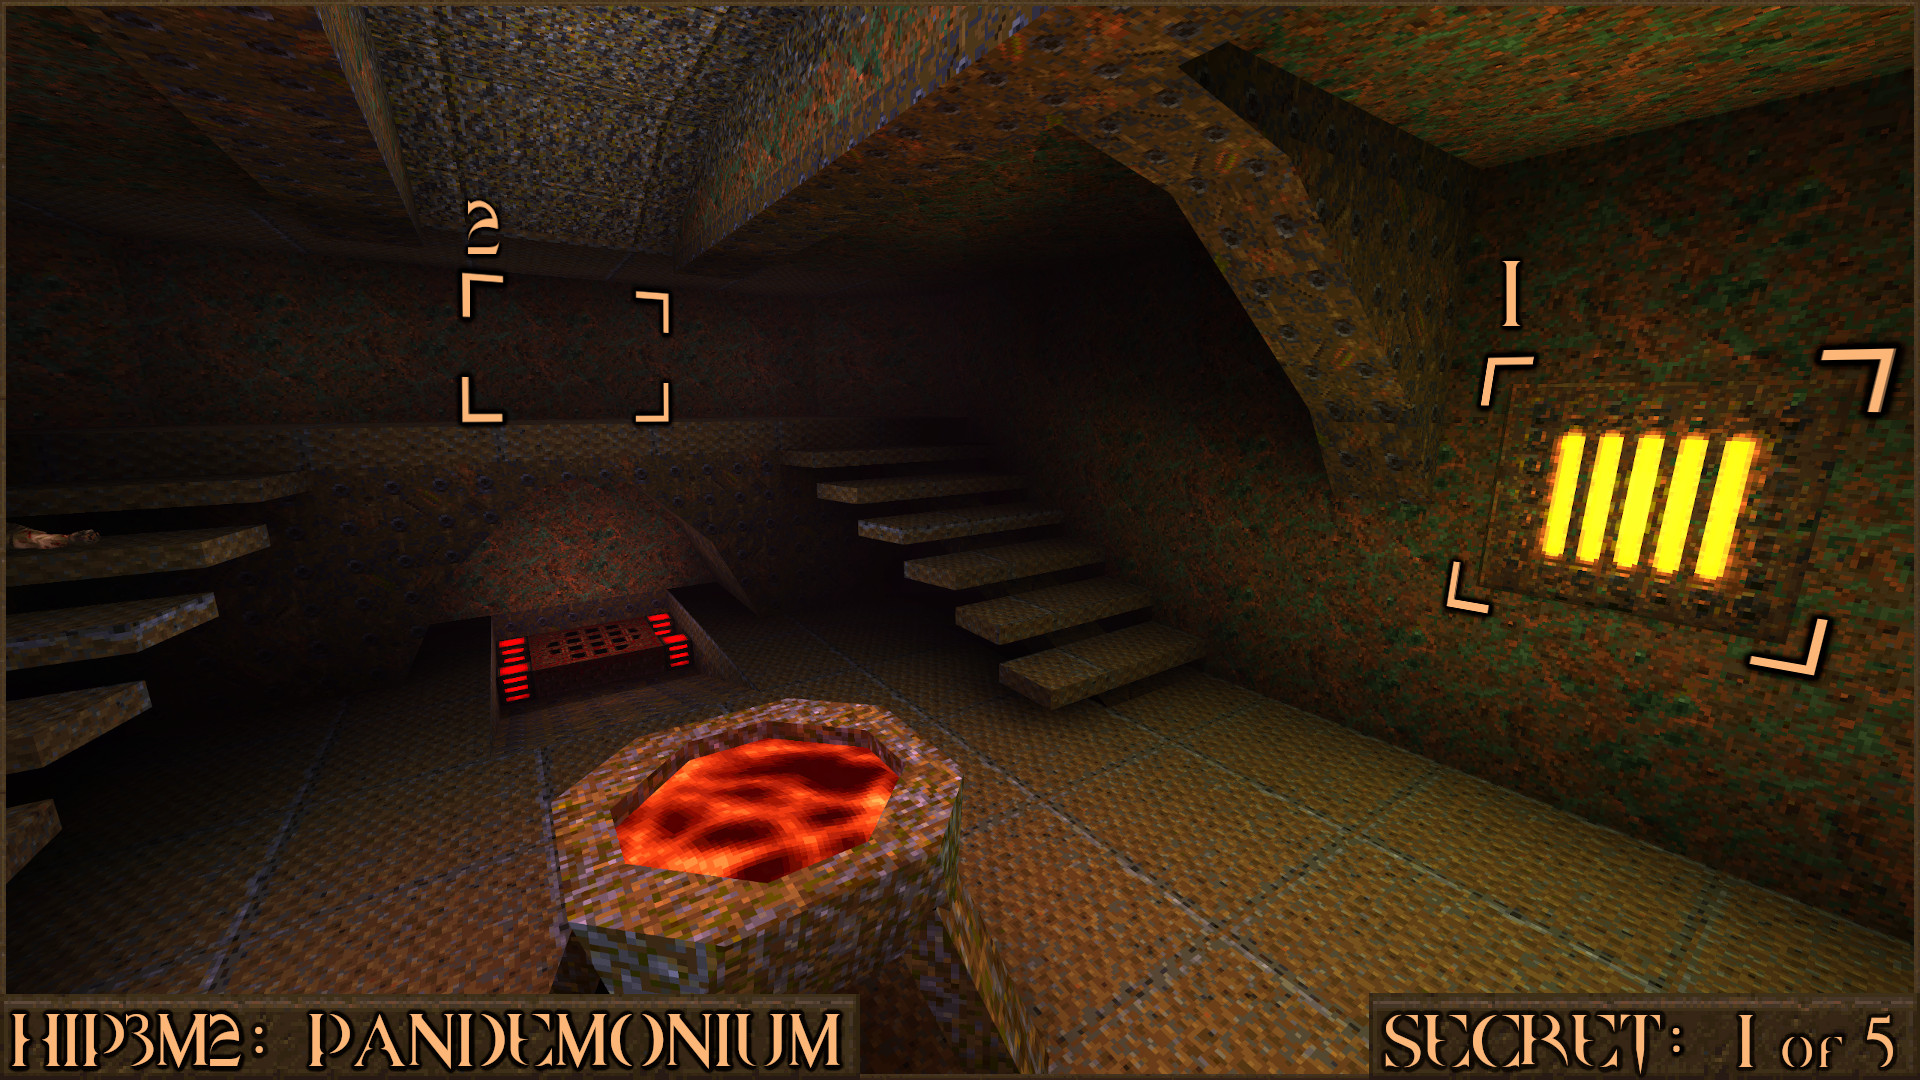
Reward:
Secret 2 of 5
In the next room with the elevator you will see a white vent panel in the wall. Shoot it to allow access in to the room where the Grunts were shooting at you.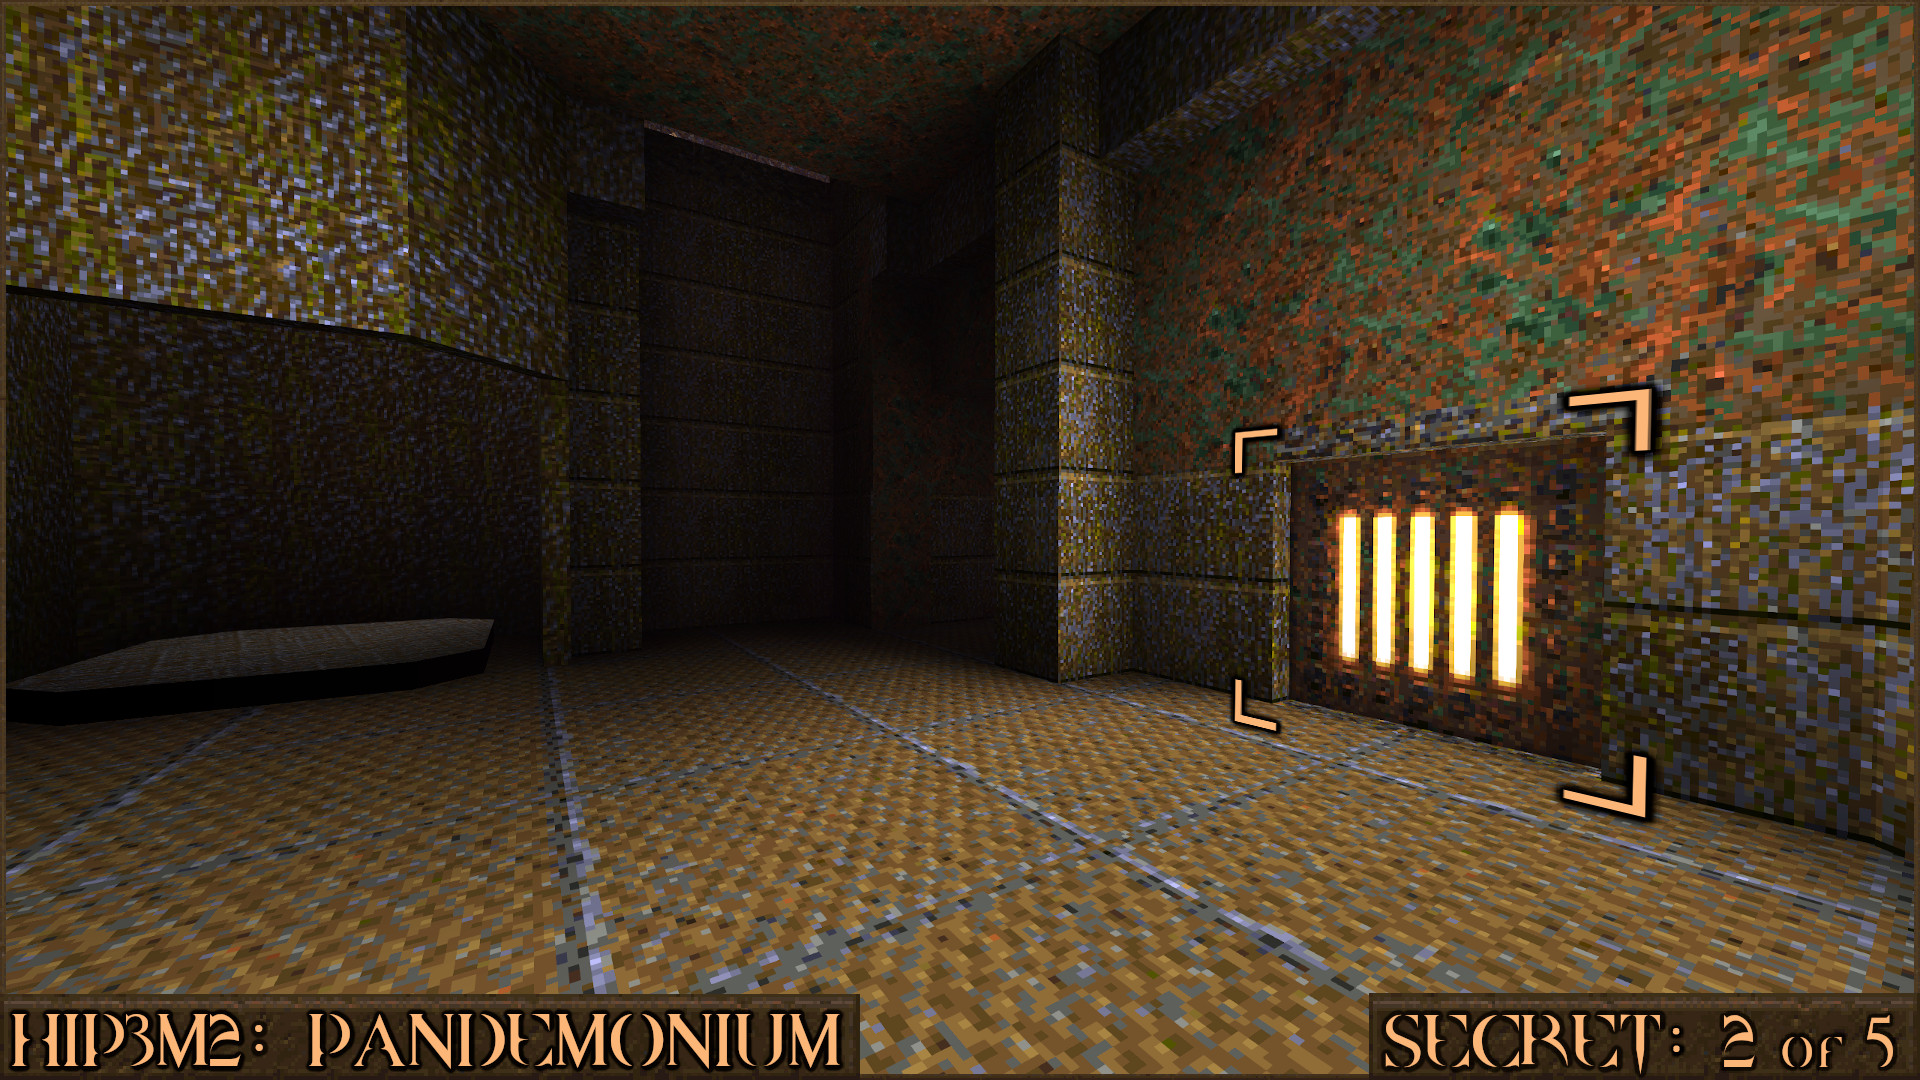
Reward:
Secret 3 of 5
Later in the level you will press a switch and the text "A barrier has opened..." will appear. When you return to where the barrier was located you'll find a Large Shells next to some stairs. Look to the left to see a metal panel that when shot will reveal the secret area.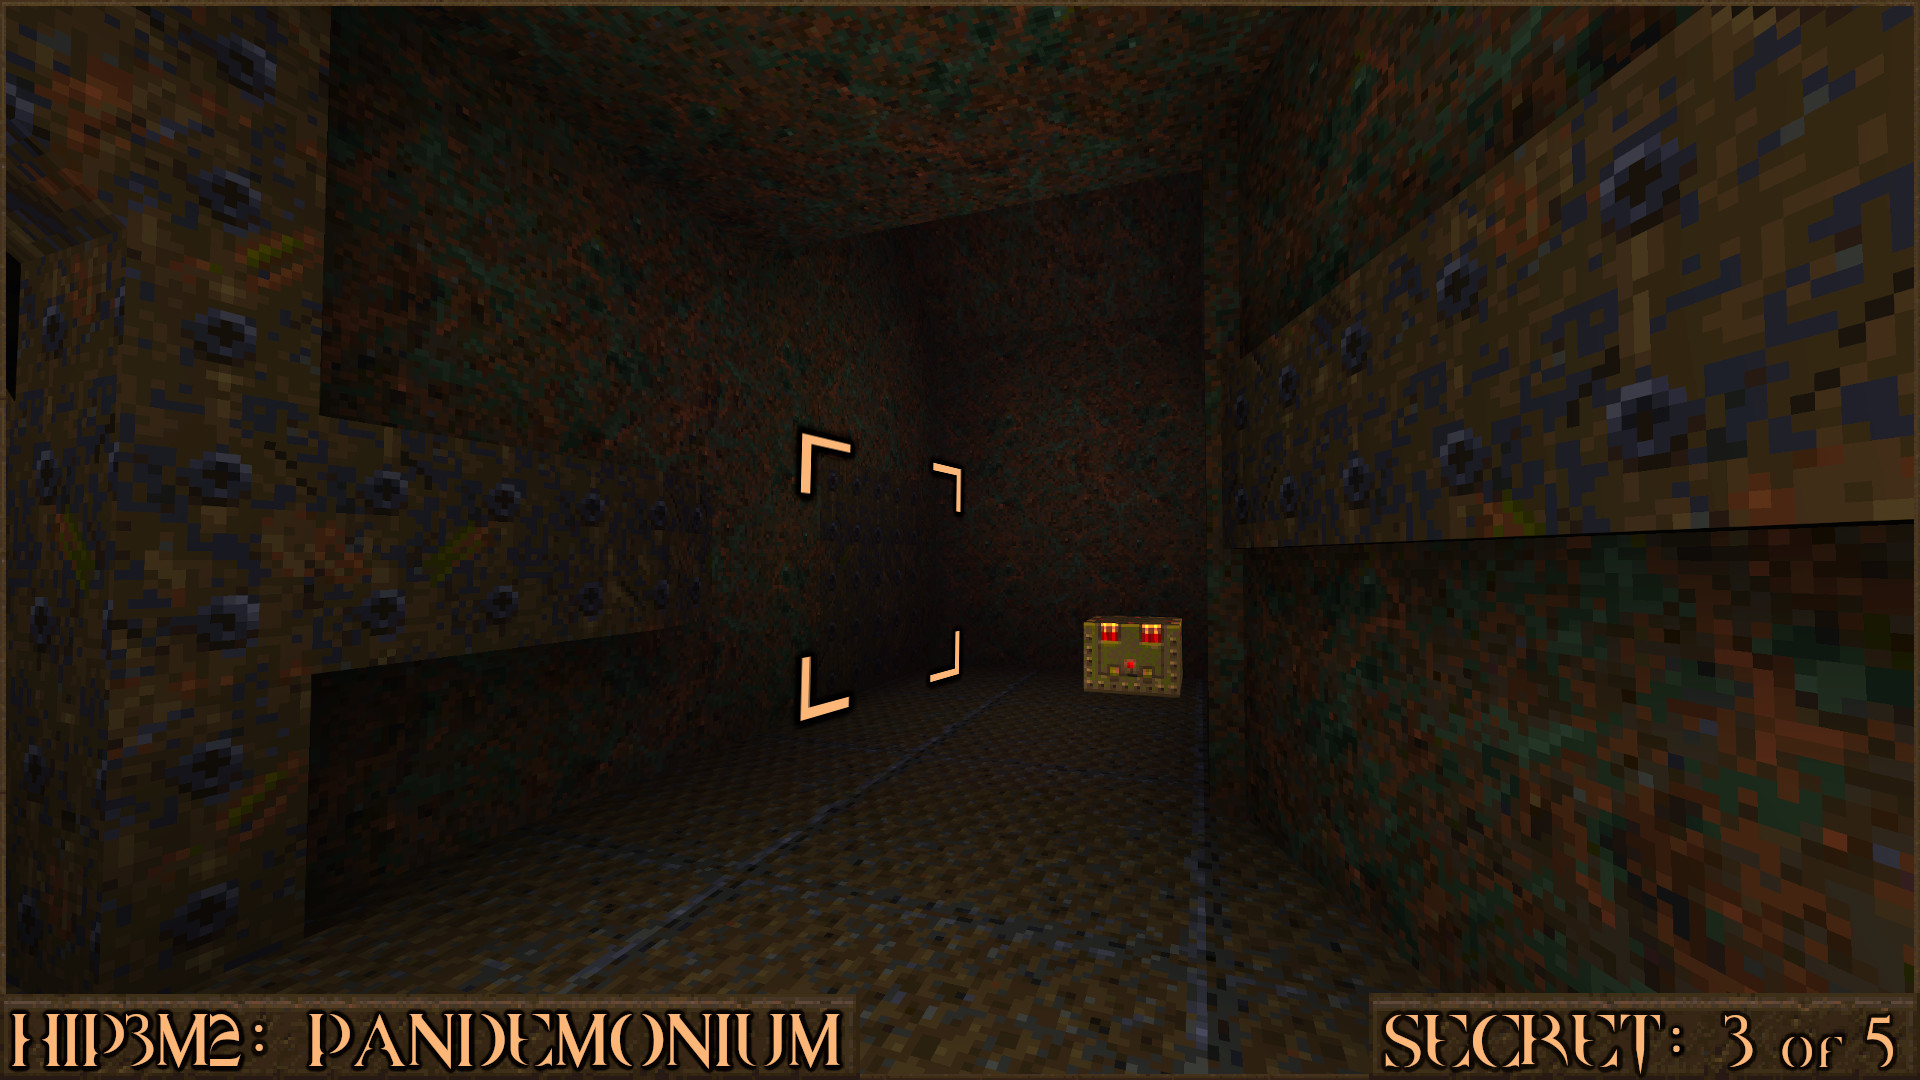
Reward:
Secret 4 of 5
Shortly after you find Secret 3 you will find the Silver Runekey. Shoot the wall behind it to reveal a teleporter to a secret area.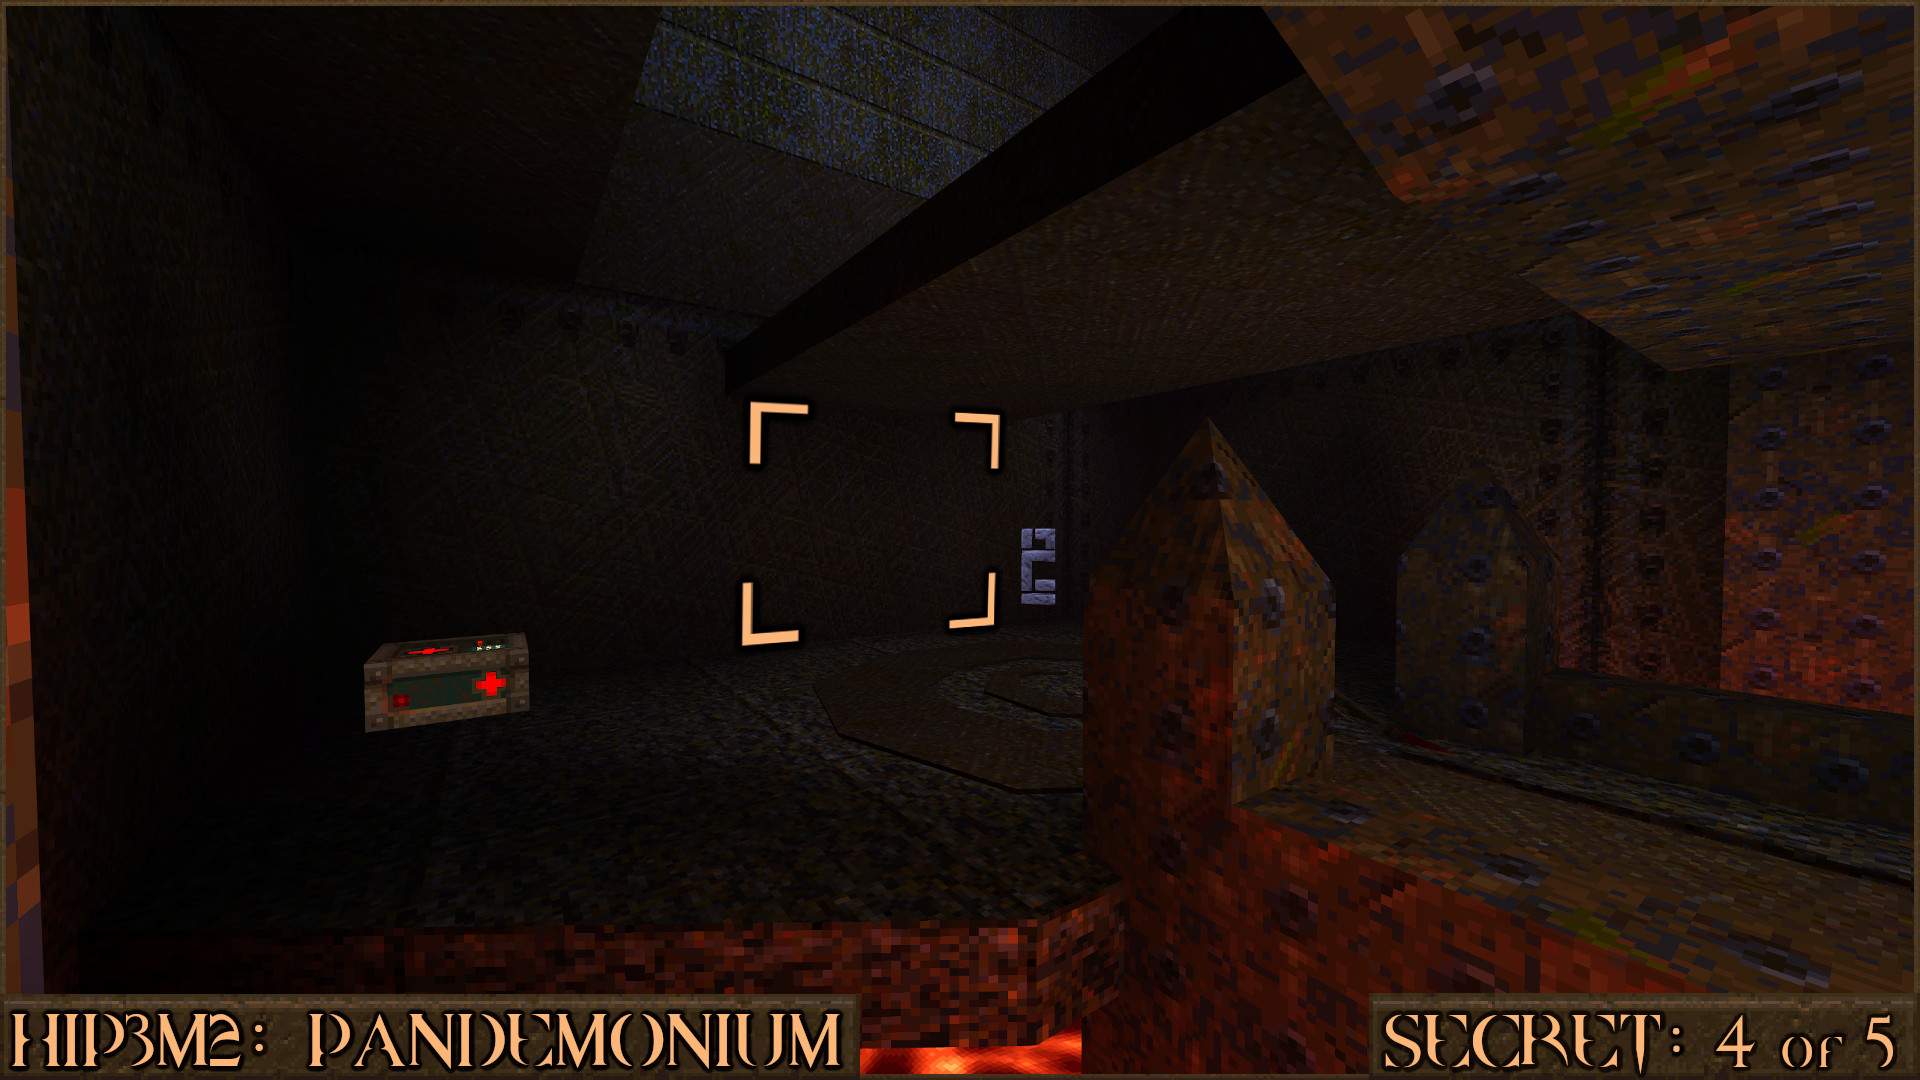
Reward:
Secret 5 of 5
After you pick up the Gold Runekey turn around and look over the edge. You will see a red shootable switch () on top of a platform. Shoot it to make a piece of the wall () ahead of you move and reveal the secret.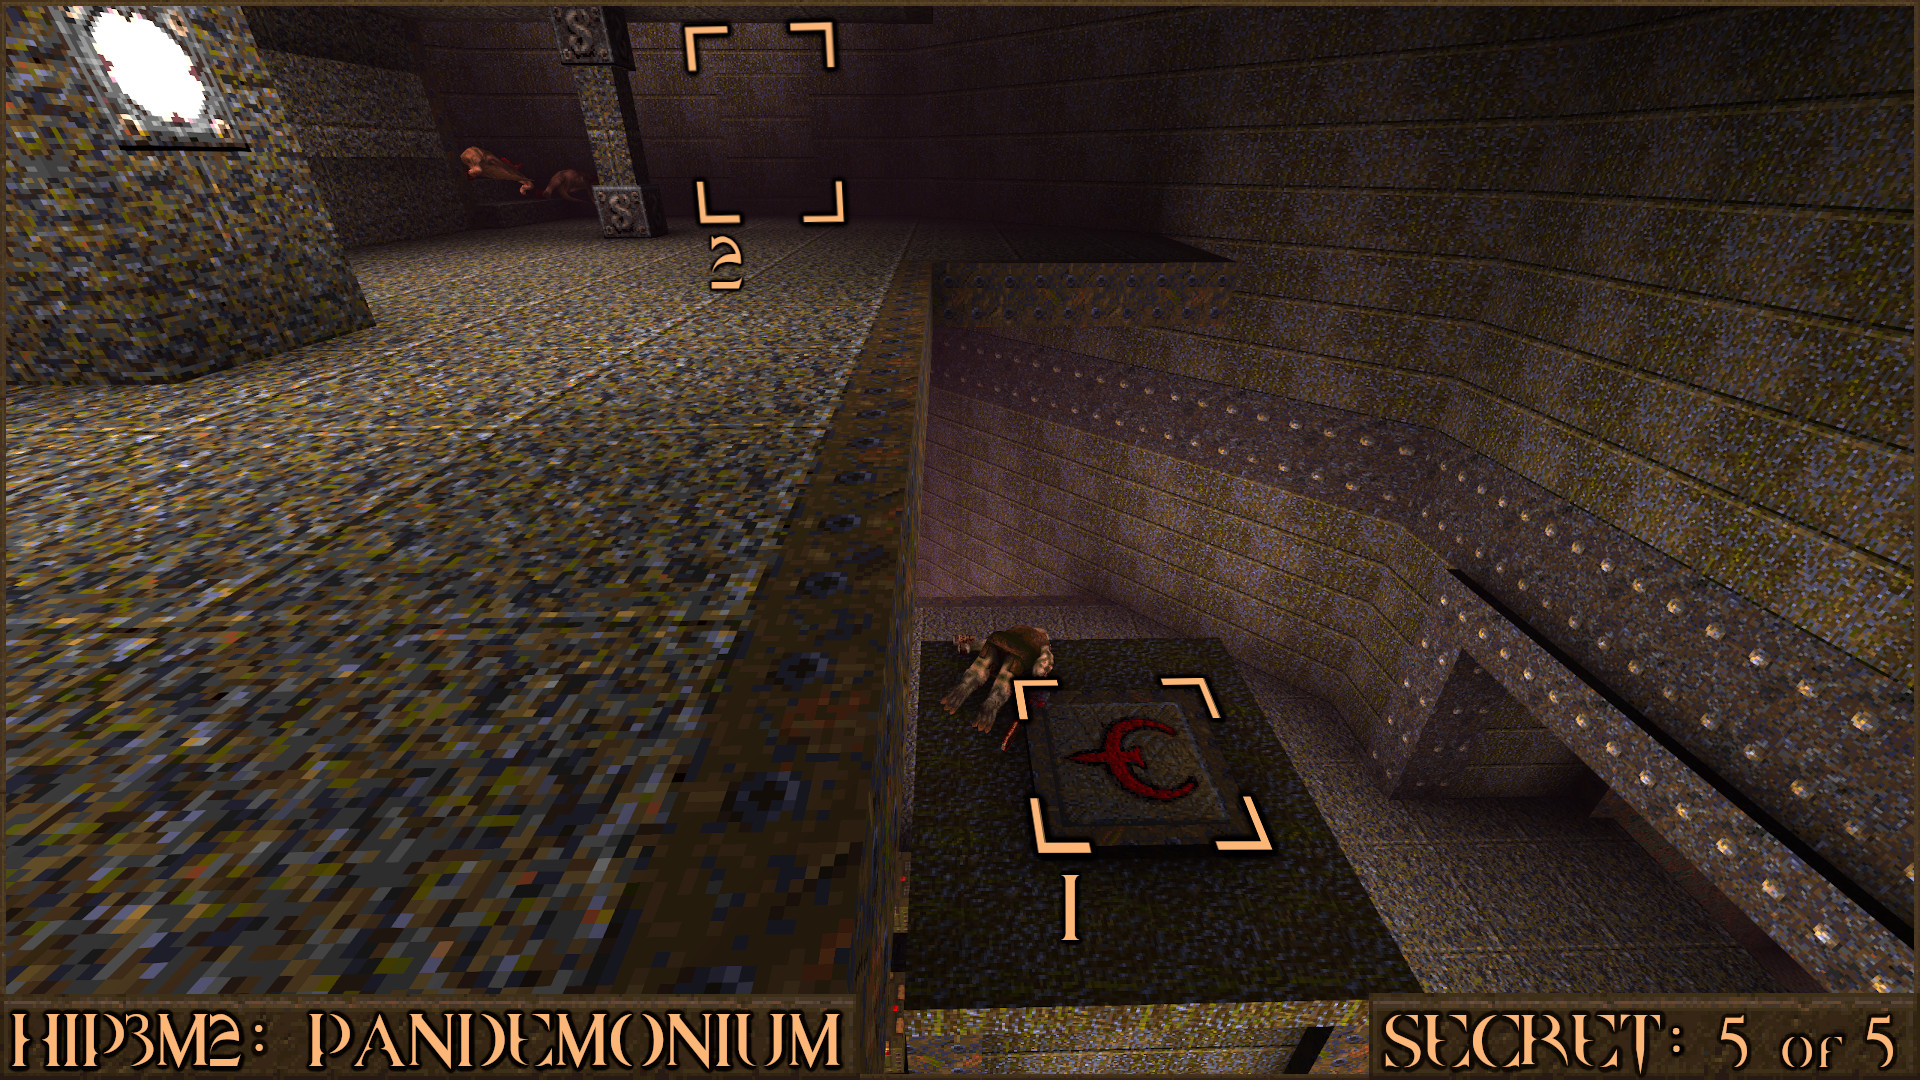
Reward:
HIP3M3: Limbo
Secret 1 of 4
Near the start of the level you will descend a set of curved stairs. In this room you will be ambushed by some Gremlins. Once they are dead look for a block with a white cross on it () and shoot it. It will cause a nearby wall to move and reveal a secret.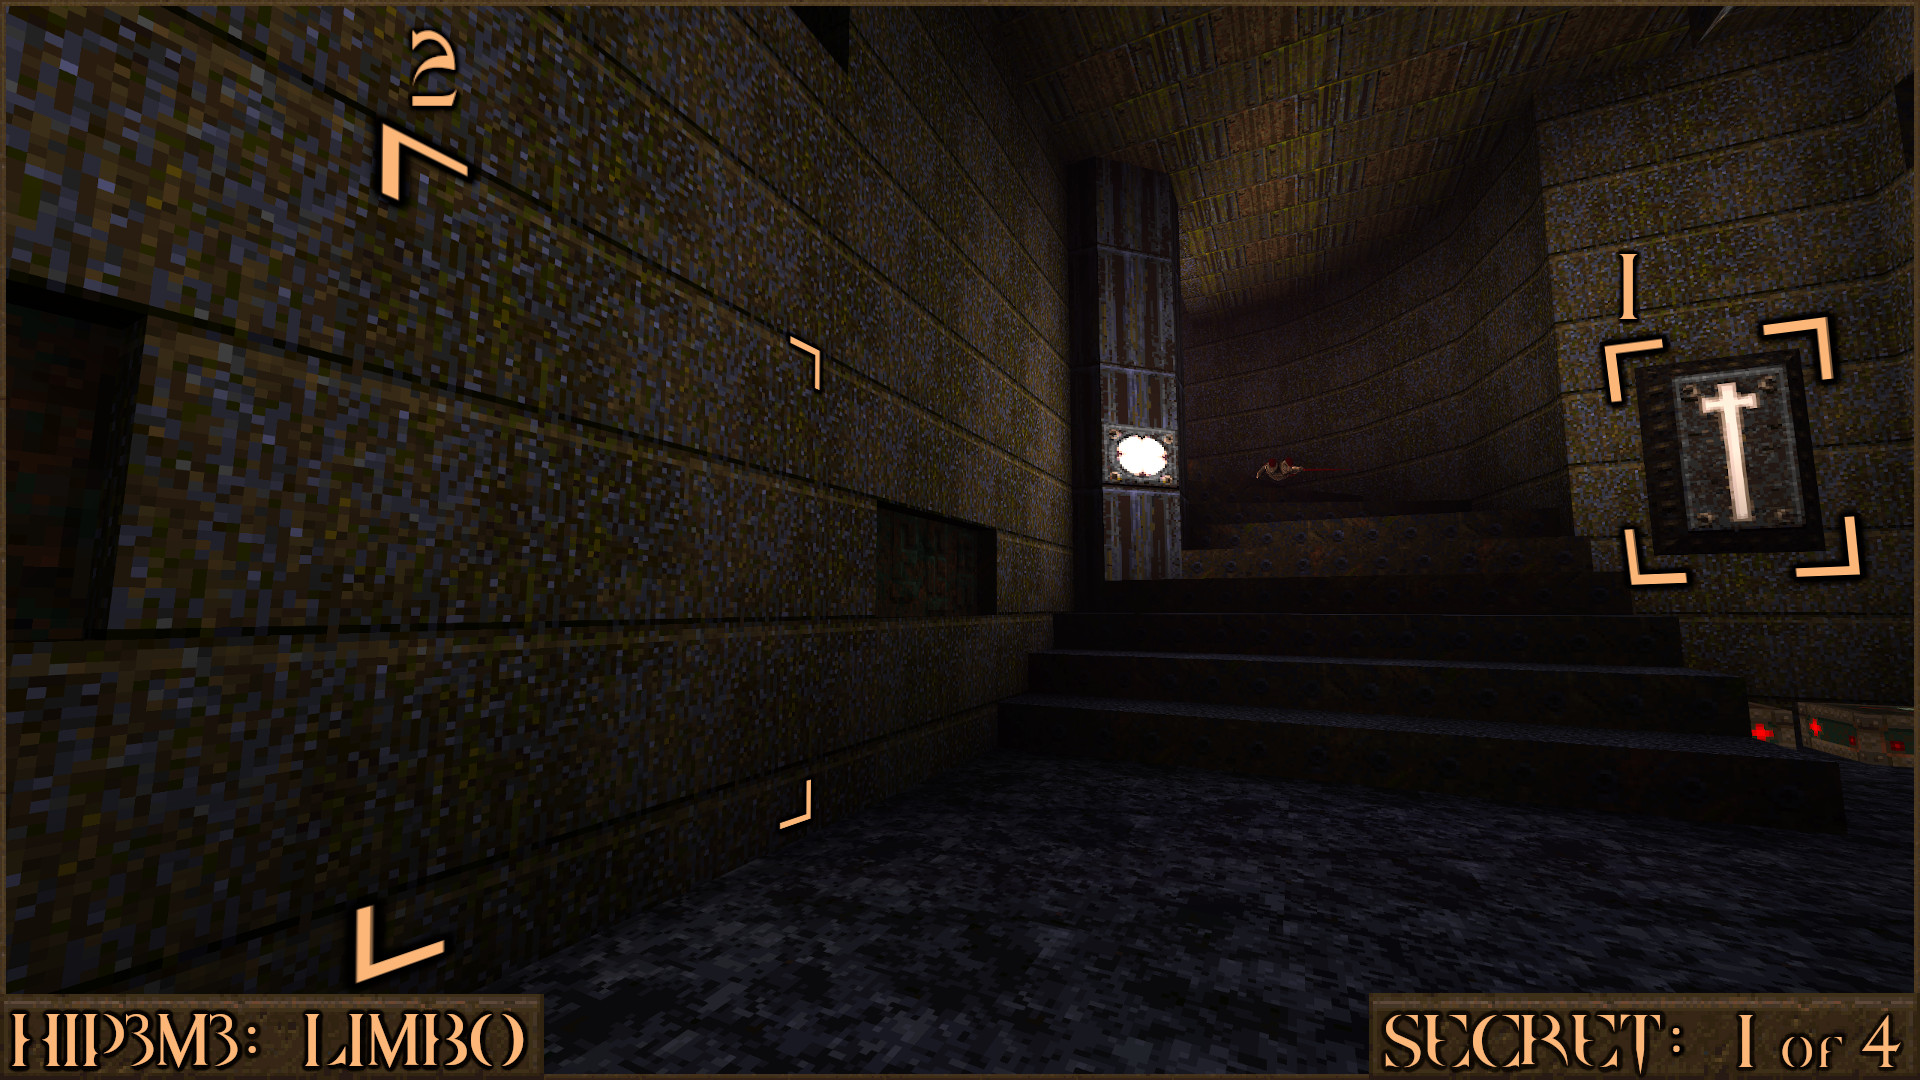
Reward:
Secret 2 of 4
You will enter a series of tunnels which feature metal bridge platforms over water. In one of the tunnels is a Wetsuit so grab it and jump in to the water but watch out for all the Rotfish. After they are dead look around for a metal panel that when shot will reveal a secret.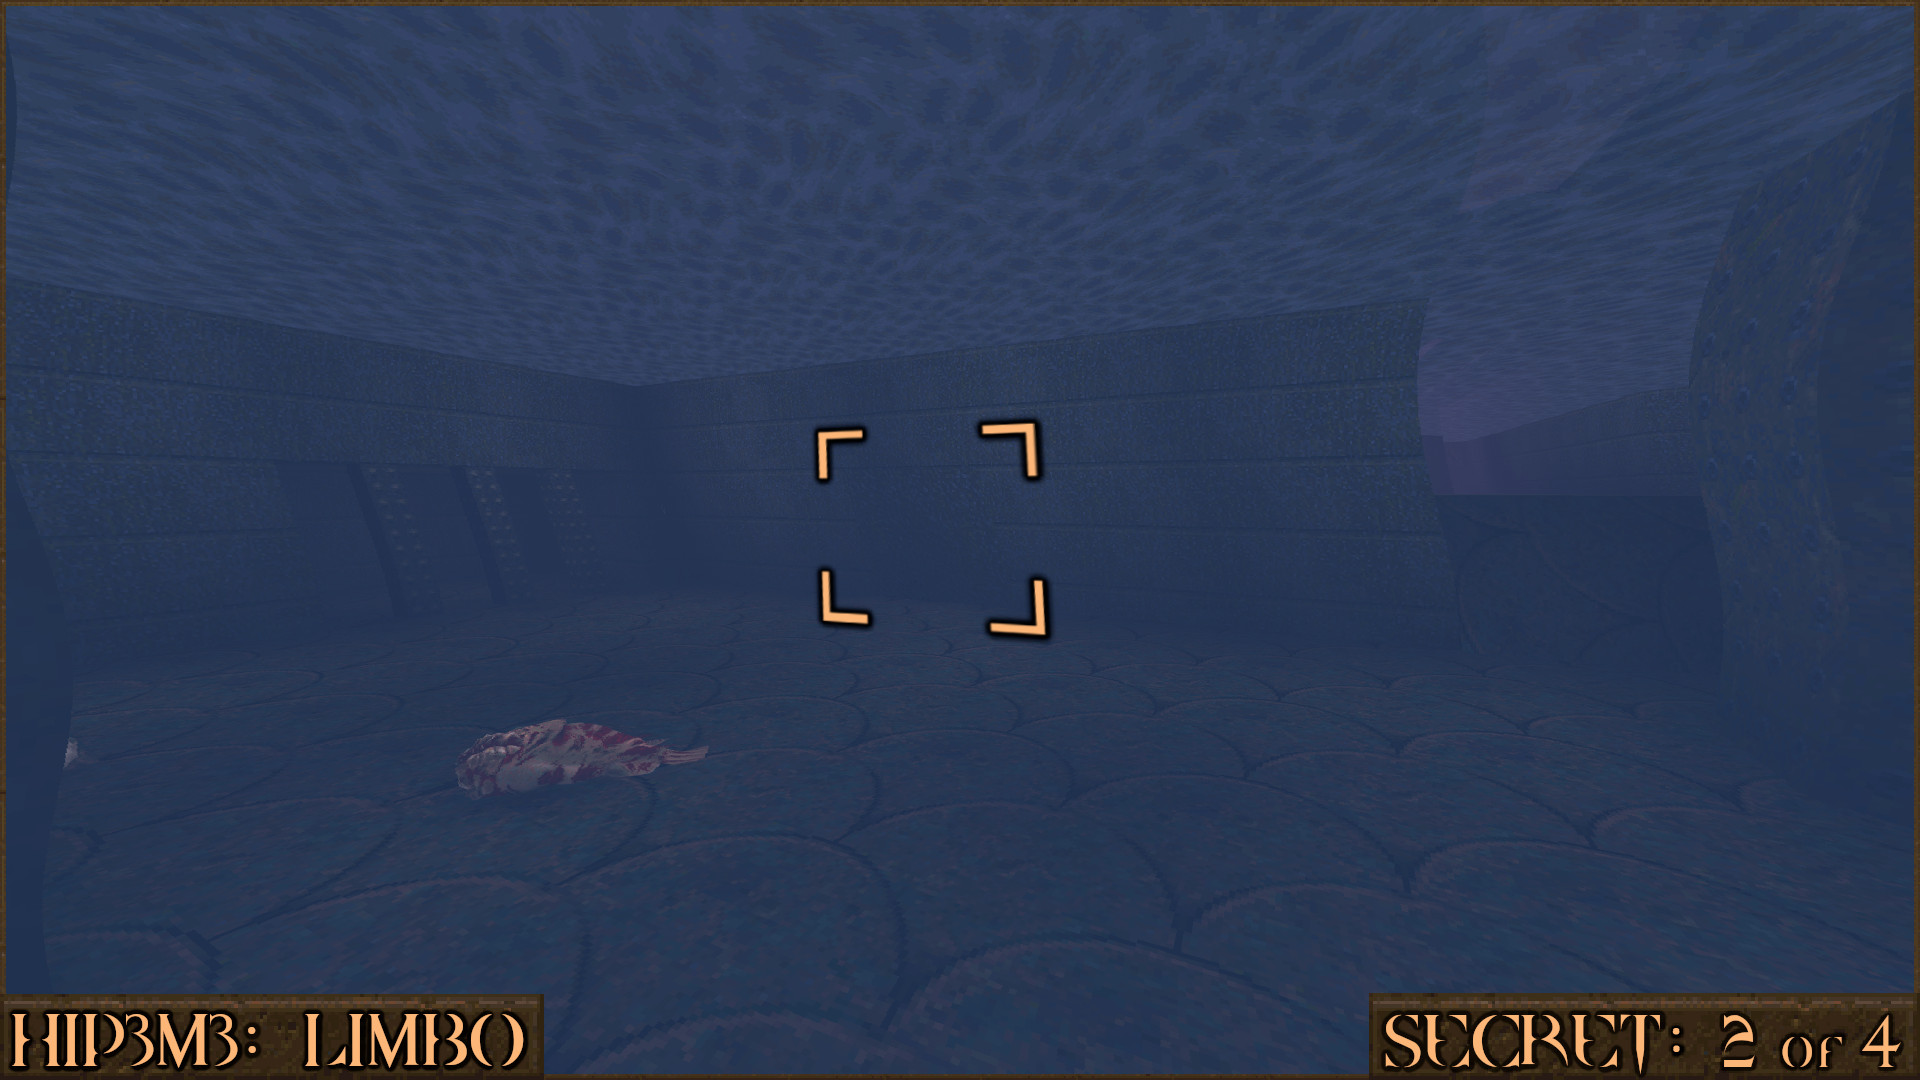
Reward:
Secret 4 of 4 (Part 1)
Soon after Secret 2 you will enter a large room with the Silver Runekey. It is recommended to shoot the red rune switch () in this area now as it is required to find Secret 4 later in the level.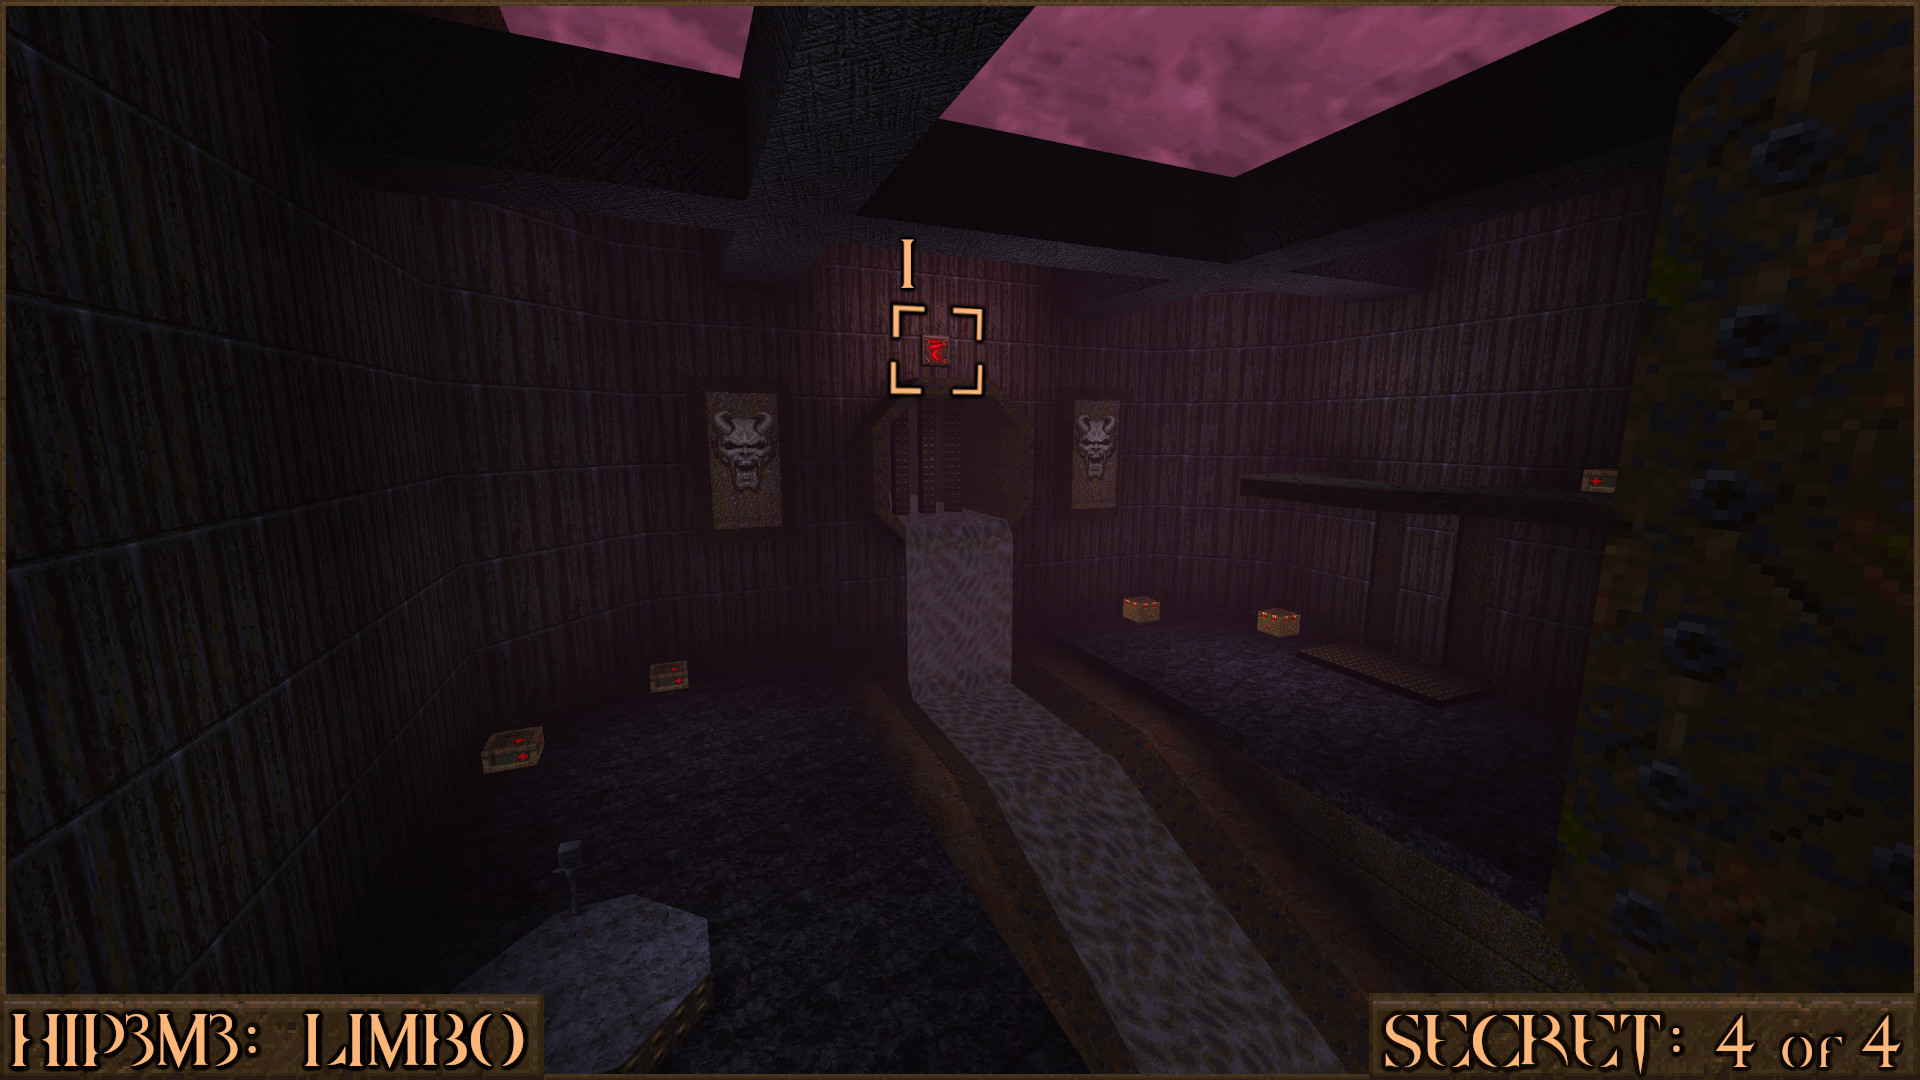
Secret 3 of 4
After opening the Silver Runekey Door you will immediately see the Gold Runekey. Shoot the wall behind it to reveal a small secret area.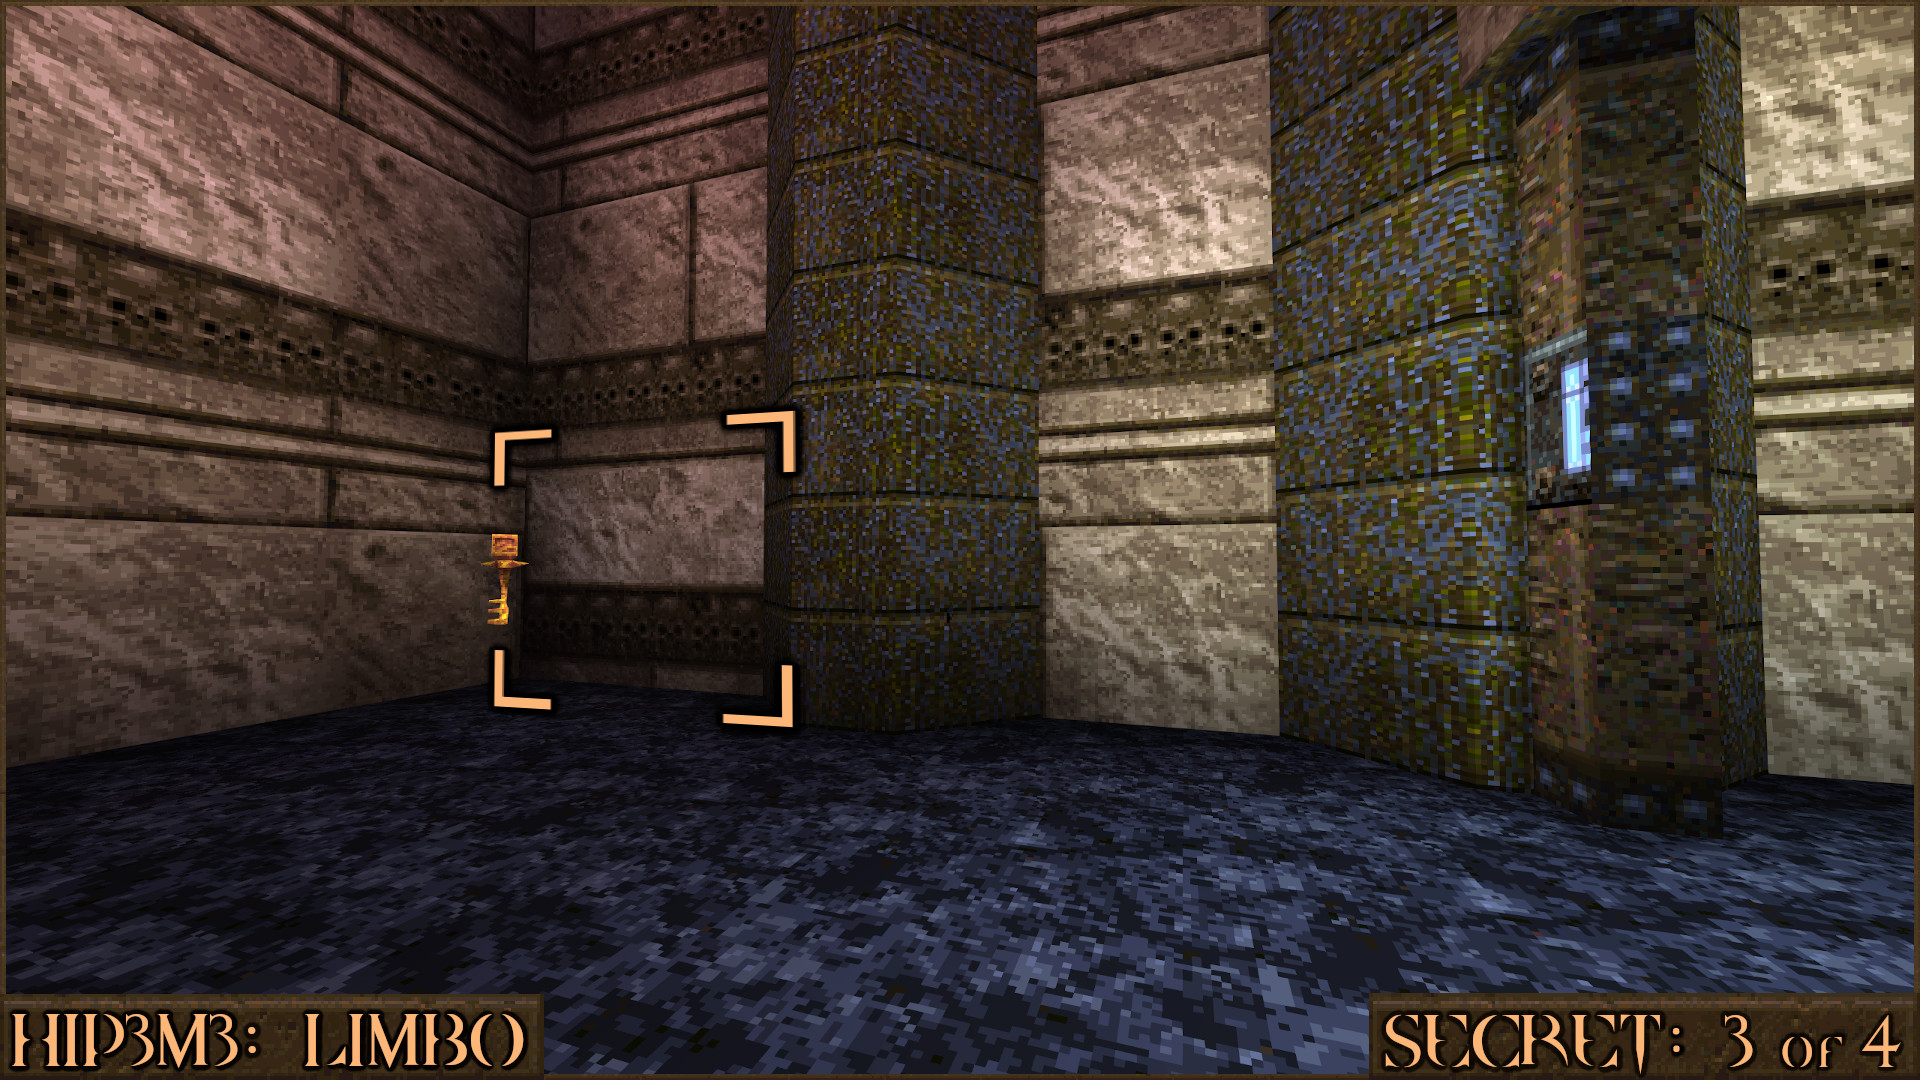
Reward:
Secret 4 of 4 (Part 2)
In the same room as Secret 3 look for a white cross block () above the barrier and then shoot it. If you have also shot the red rune block from Secret 4 (Part 1) earlier in the level then the barrier here will move to allow access to the water.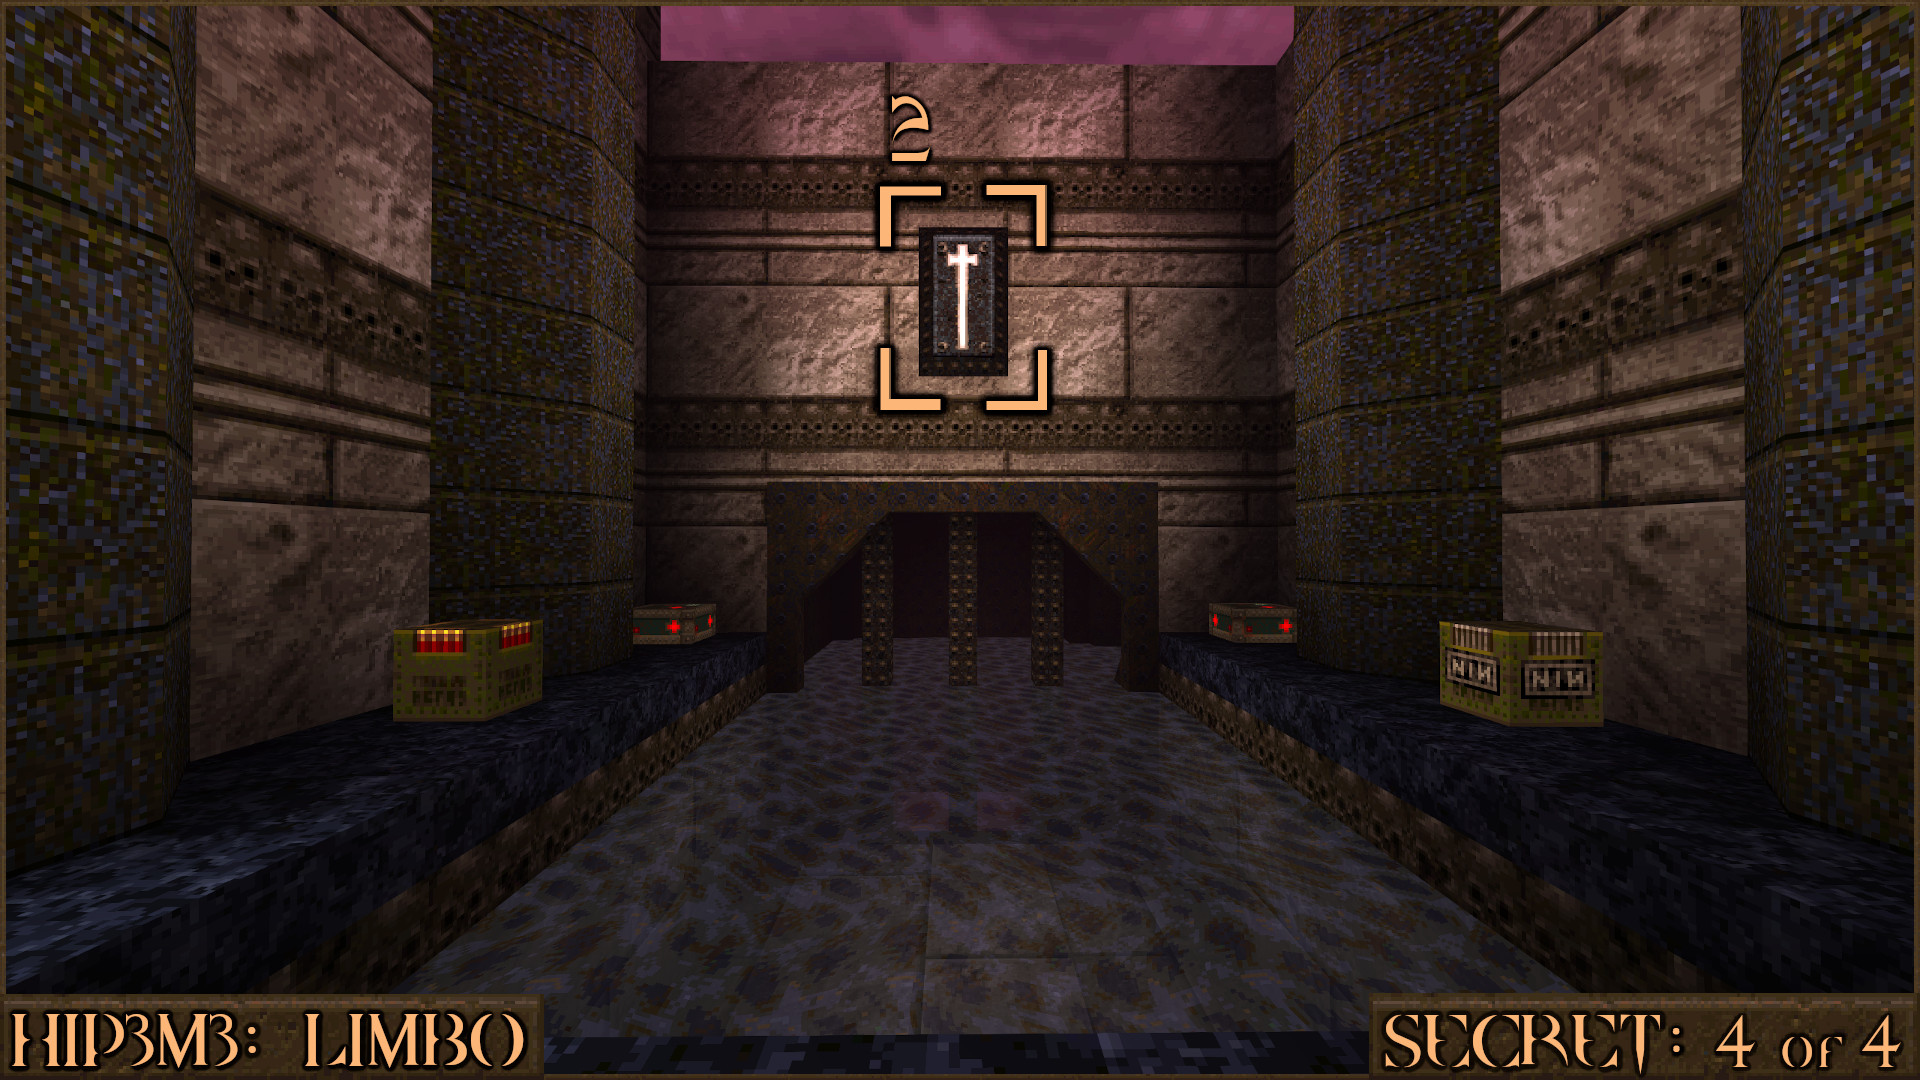
When you enter the water look for a hole in the bottom of it (
). Swim through it to find the secret exit for this episode: HIPDM1: The Edge of Oblivion.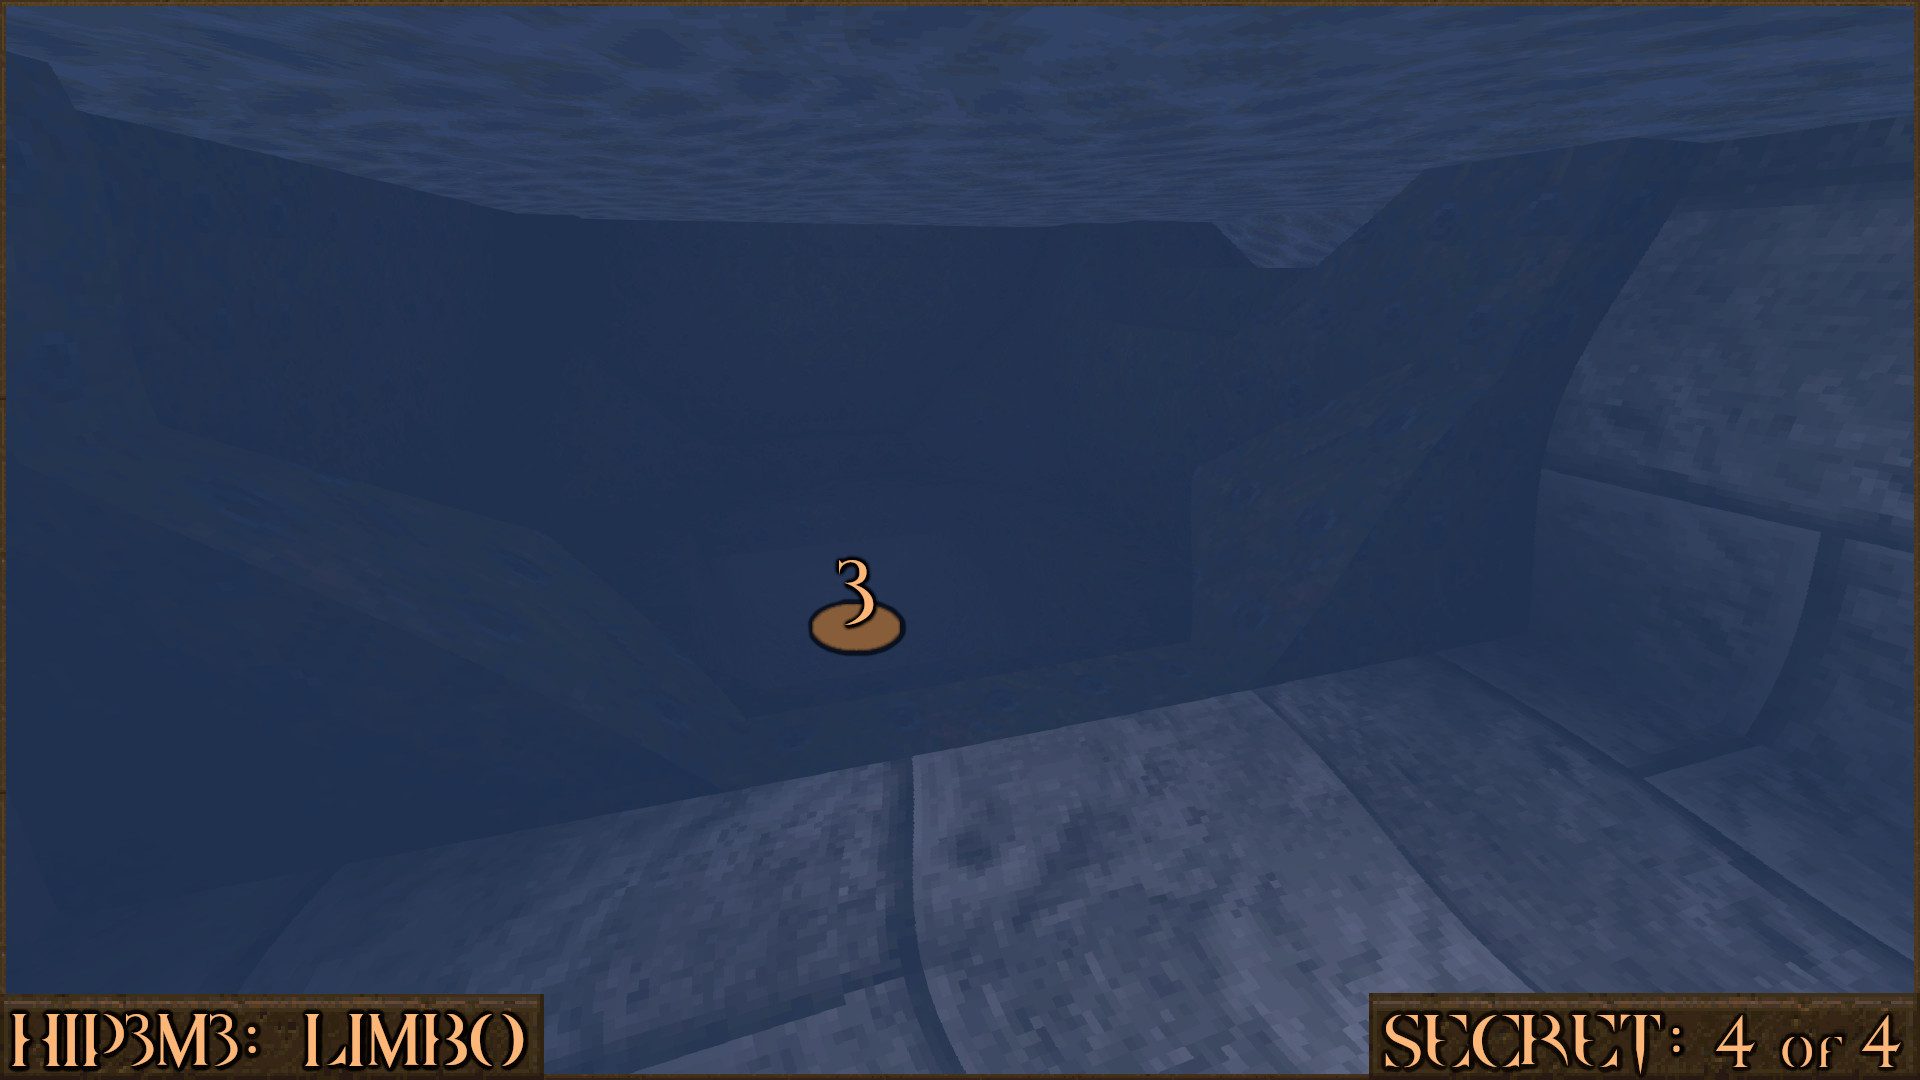
Reward: SECRET LEVEL
HIPDM1: The Edge of Oblivion [Secret Level]
NOTE: There are no secrets in this level.
HIP3M4: The Gauntlet
Secret 1 of 6
The room you start in has several metallic monster faces on the wall. Shoot the ones on the left wall (+).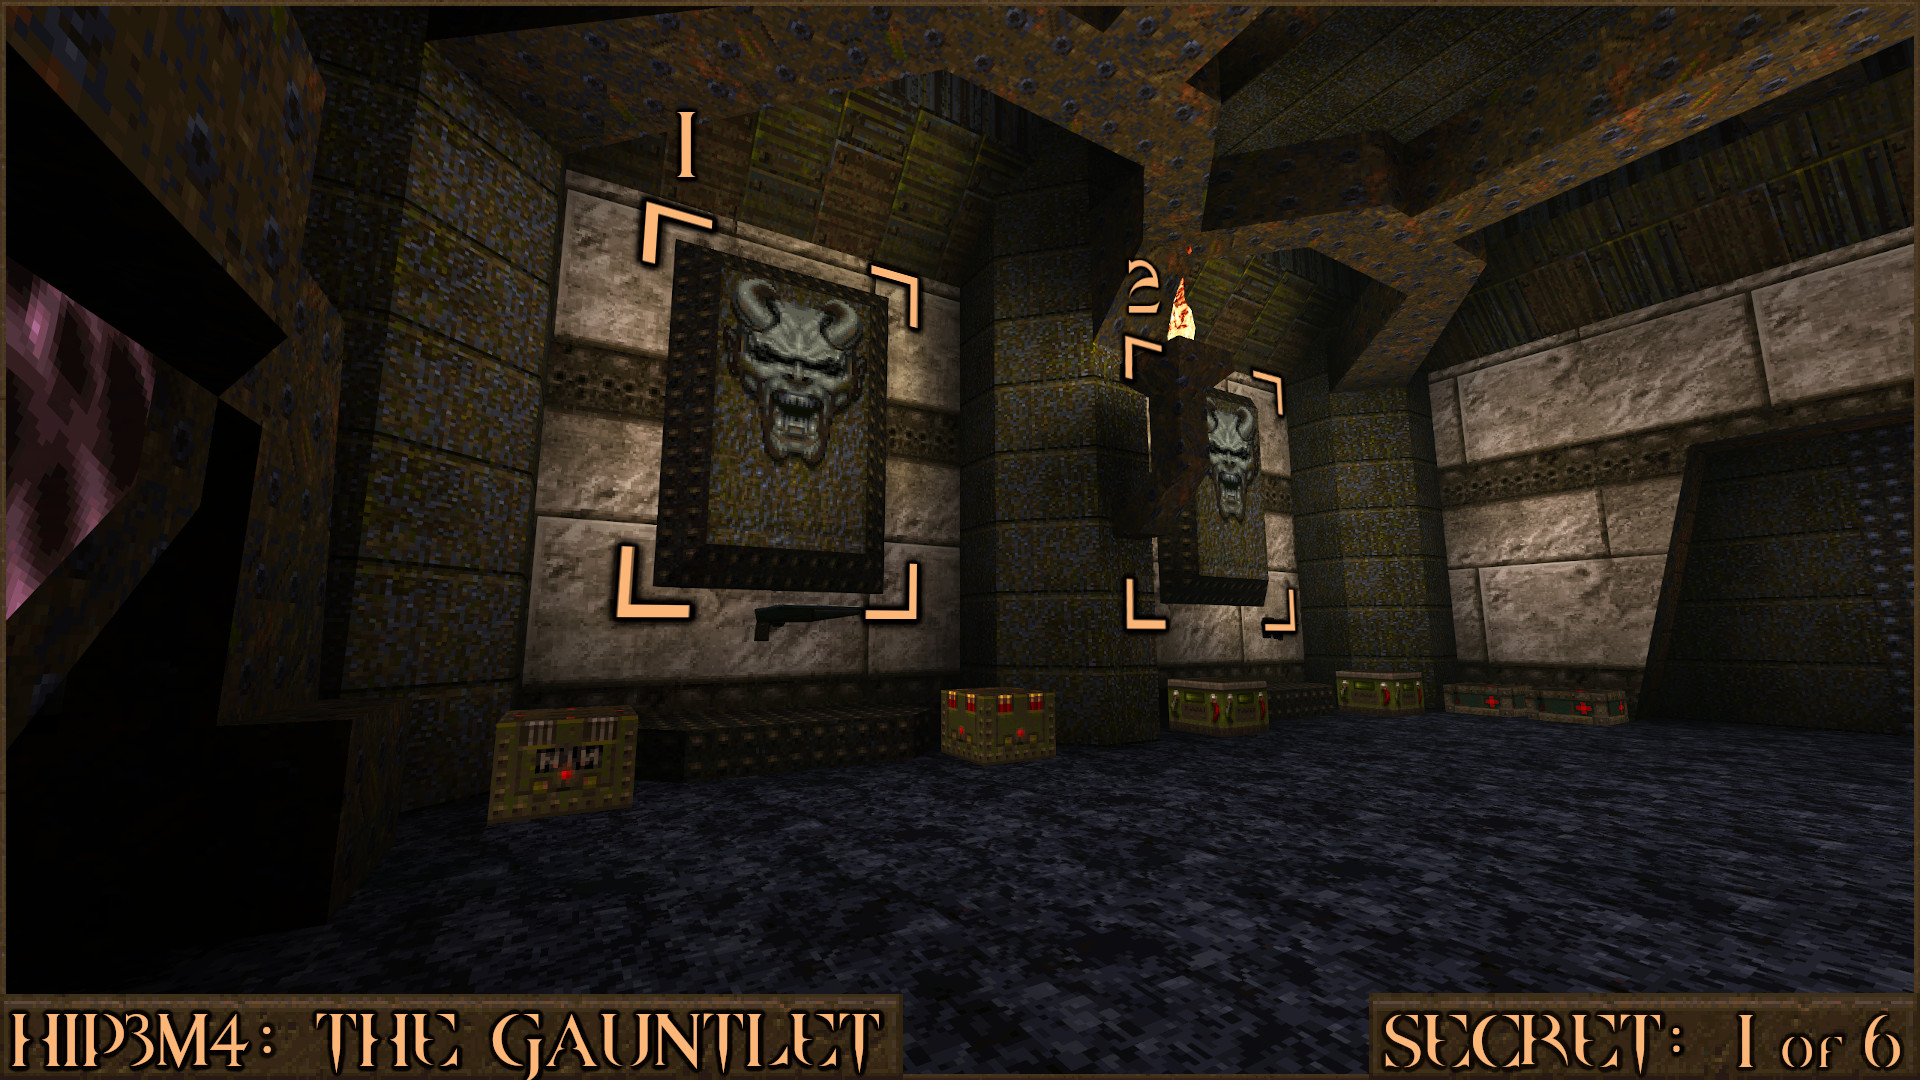
There are two more on the right wall (
+). When all four have been shot an orange button () will appear in the floor. Step on it to make a secret Red Armor appear out of the floor.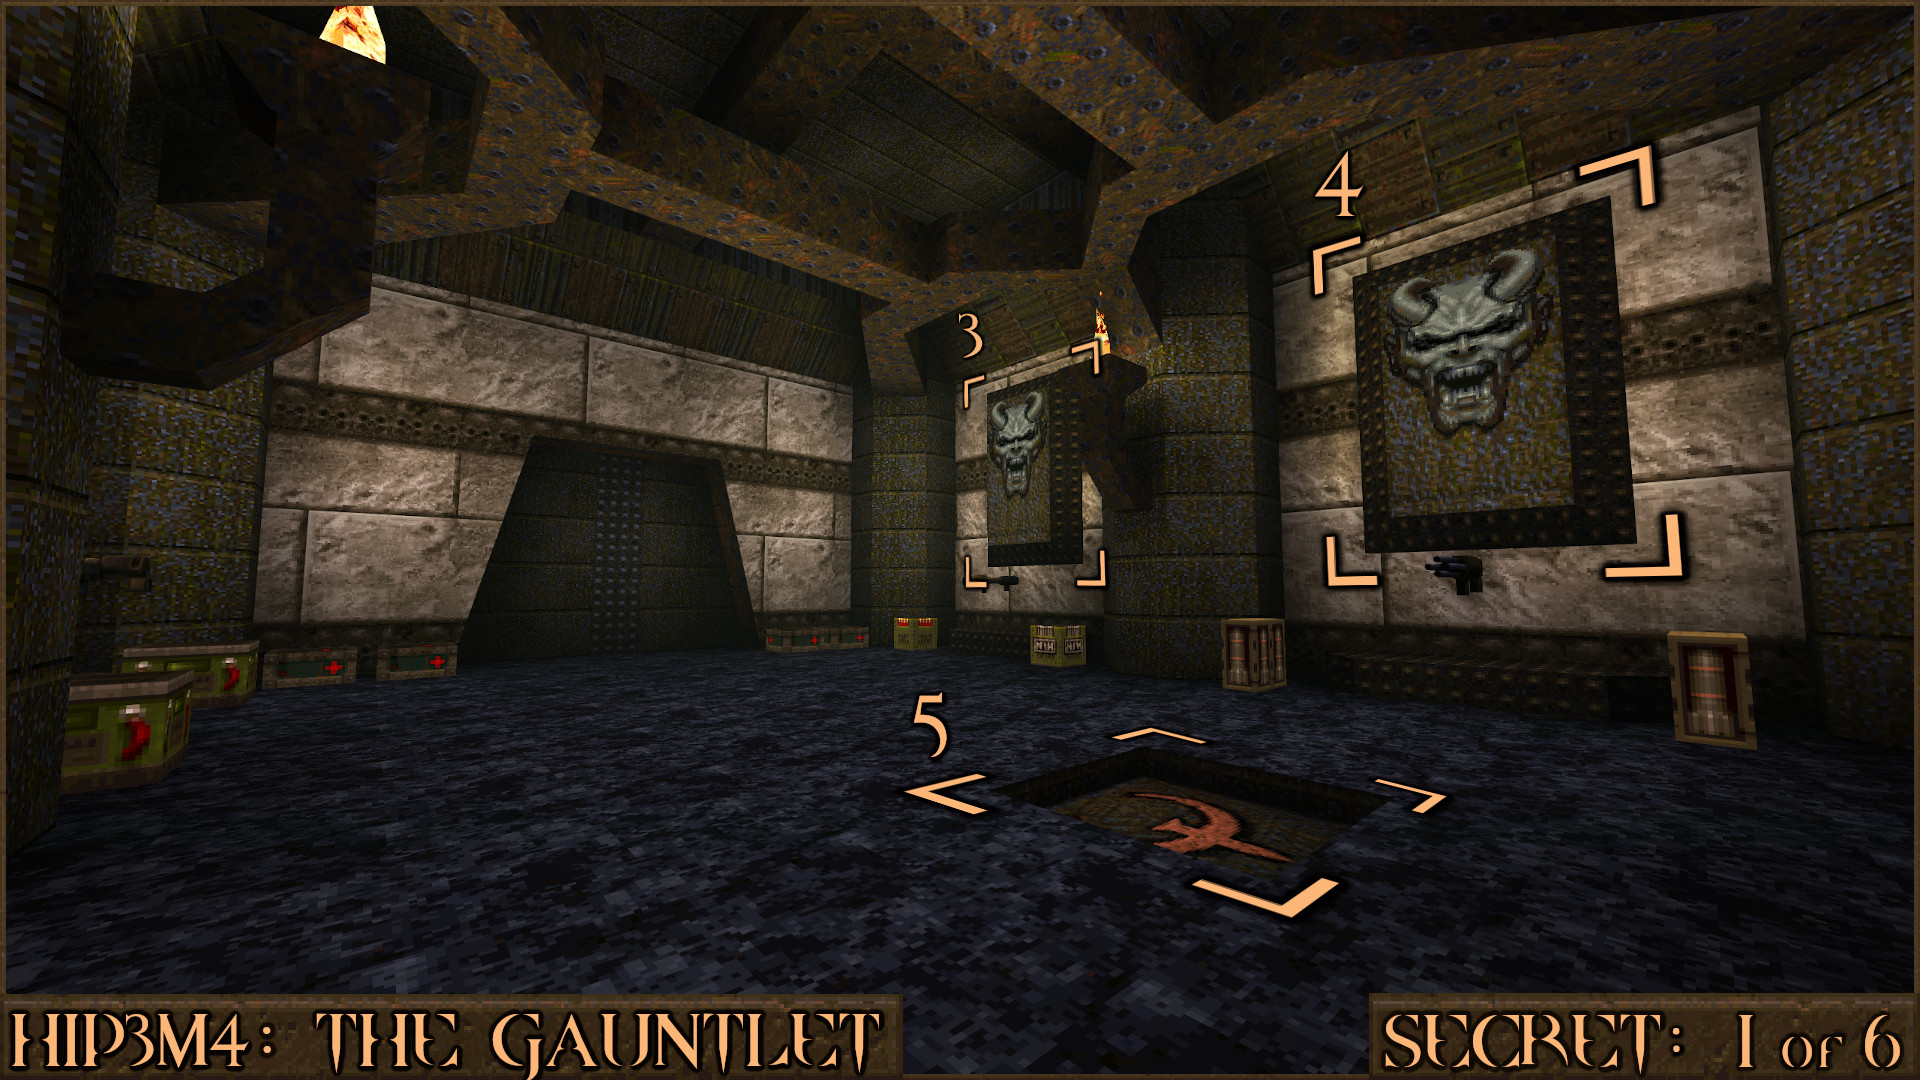
Reward:
Secret 2 of 6
After you take a large elevator up to another floor you will see another metallic monster face panel () on the left. Shoot it to make the nearby wall move () and allow access to a secret.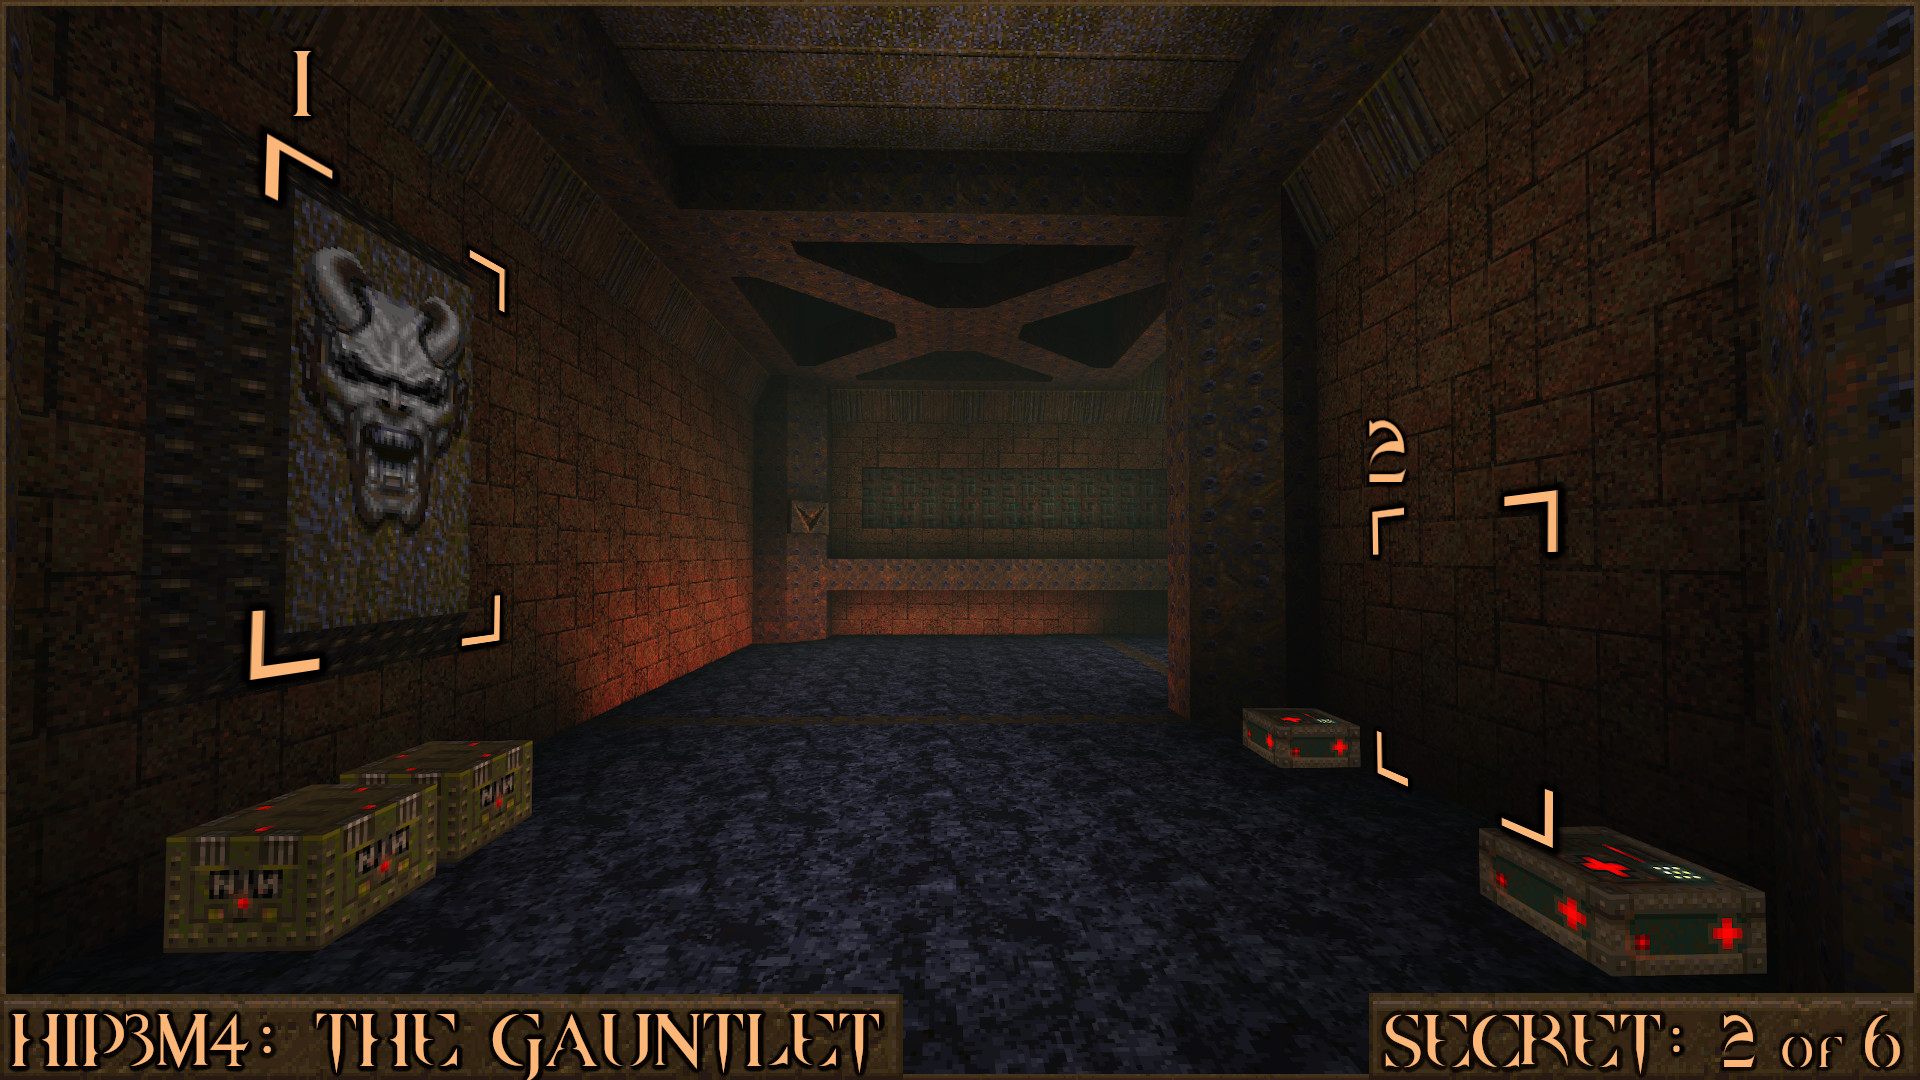
Reward:
Extra Secret
You will enter a room with several wooden platforms over some blood water. When you see a gap in the side jump down in to the water and swim round to the back of this room to find a Ring of Shadows and a teleporter to get back.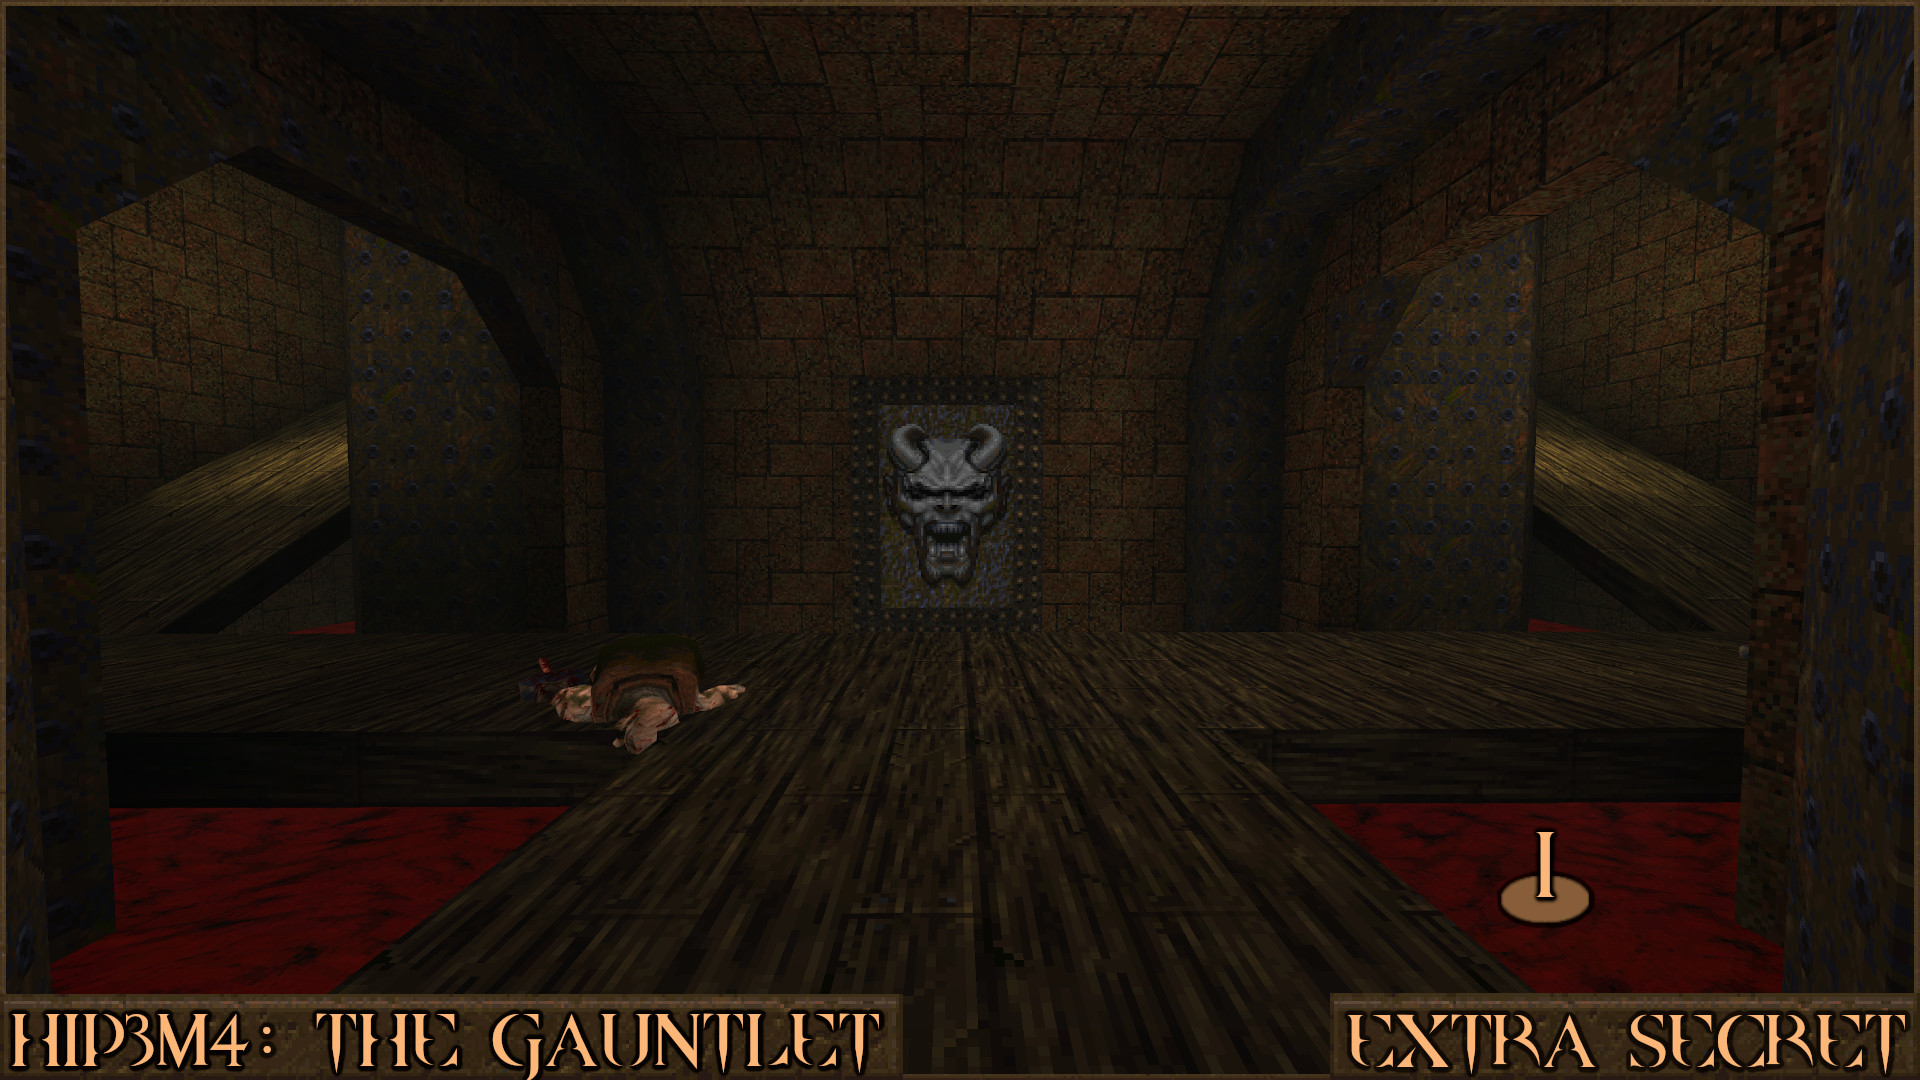
Reward:
Secret 3 of 6
After you go through the Silver Key Door turn around and look above the doorway. There is a small brick sticking out of the wall (). Go up the nearby steps and jump over to press it and a nearby wall () will reveal another room.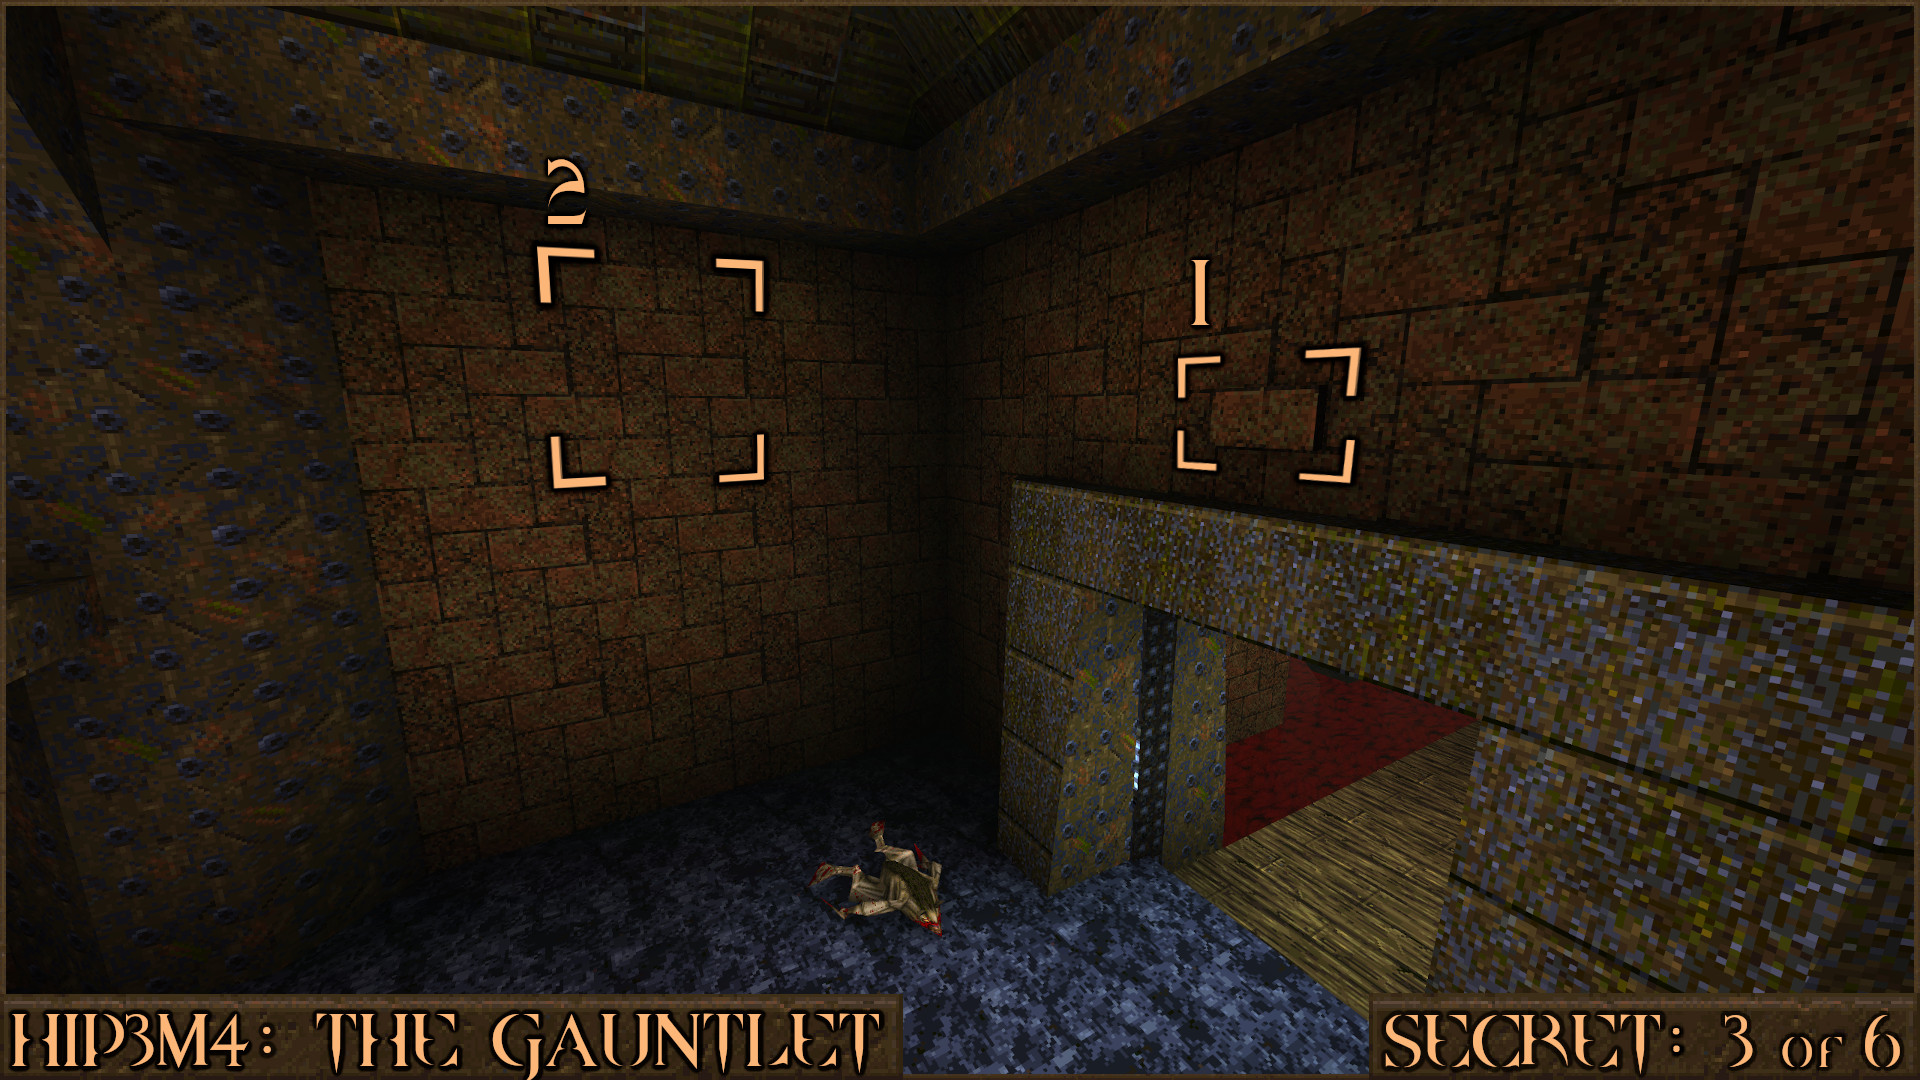
Once inside you will find a Pentagram of Protection and the secret. For a bonus look up and you will see a red shootable trigger (
). Activating it will make the giant swirl pattern start to rotate. This is a reference to the logo for Hipnotic Software, the company that originally created this expansion pack.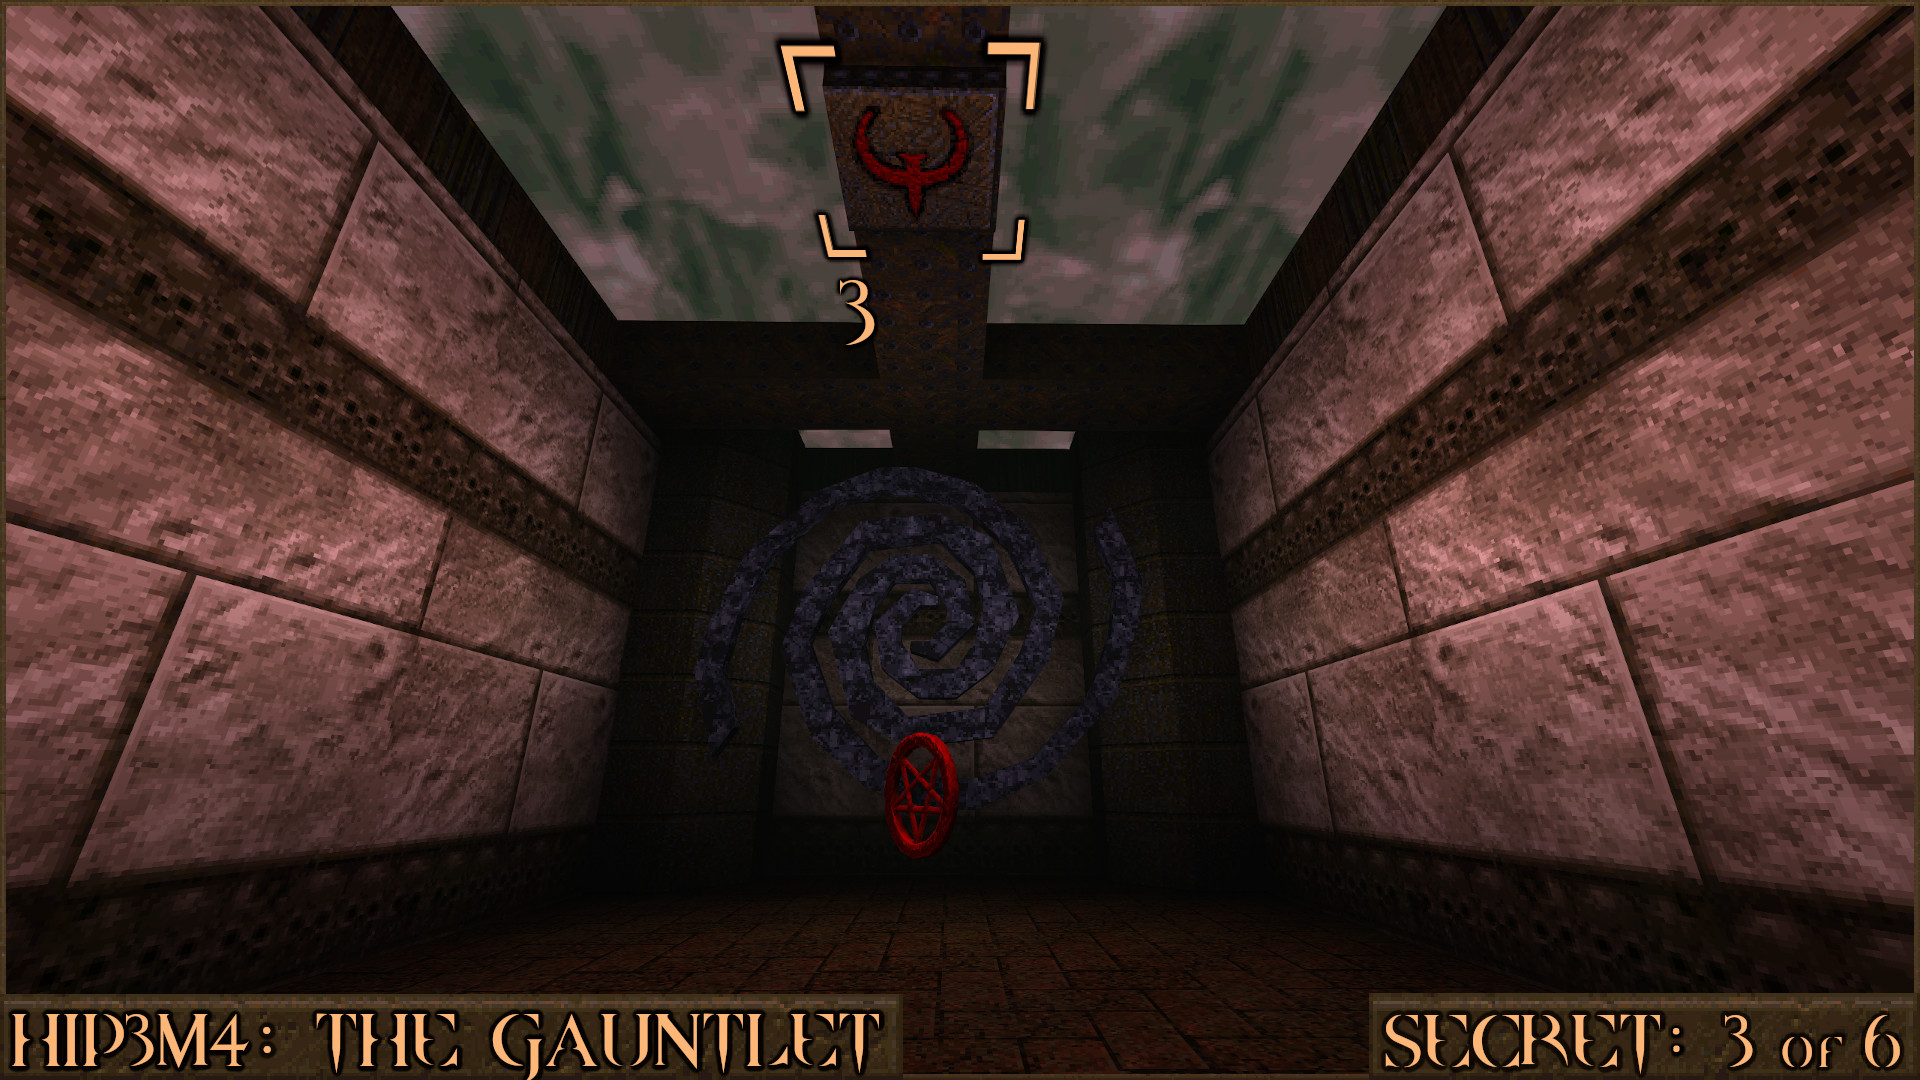
Reward:
Secret 4 of 6
Return to the room where you found Secret 3 and look behind the steps to find a secret wall. Shoot it to make it move and allow access to a teleporter that takes you to the top of the room and a Quad Damage powerup.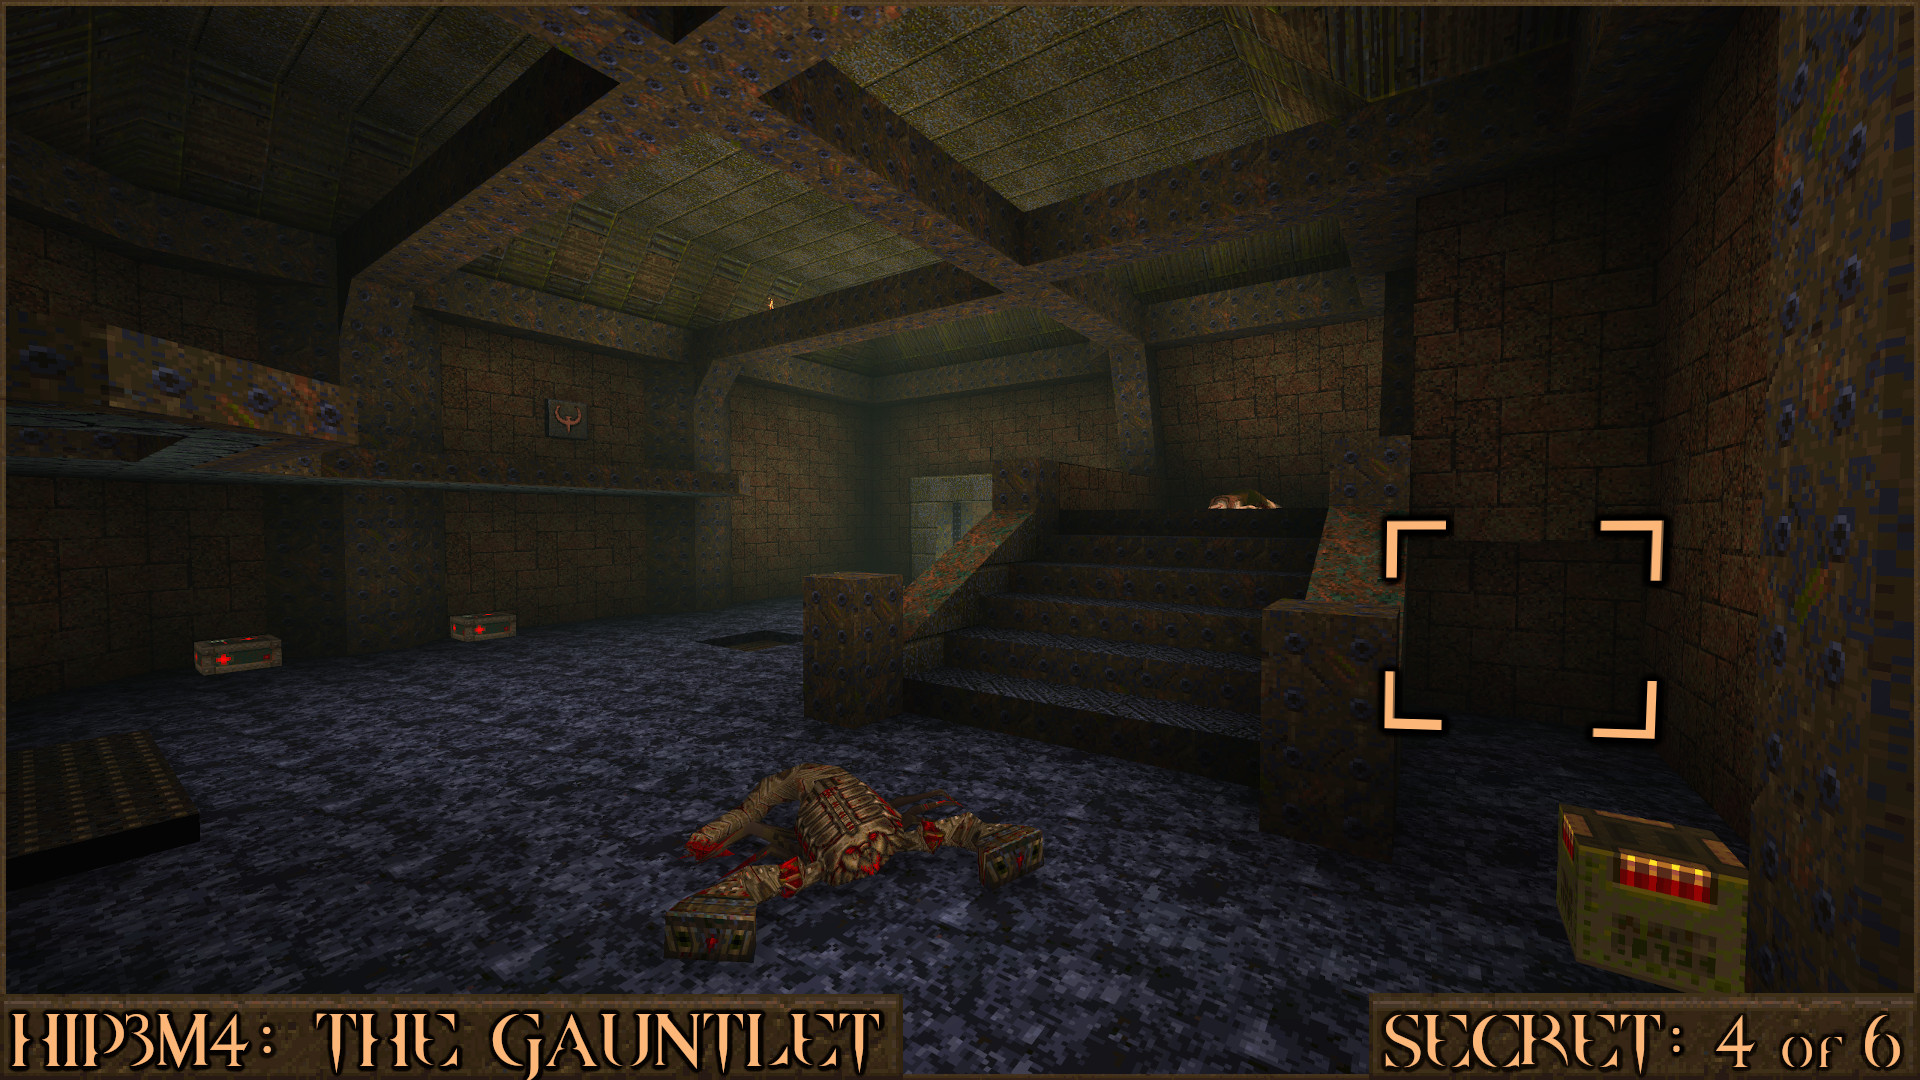
Reward:
Secret 5 of 6
You will come to a small bridge over some more blood water. Jump in to the blood water ().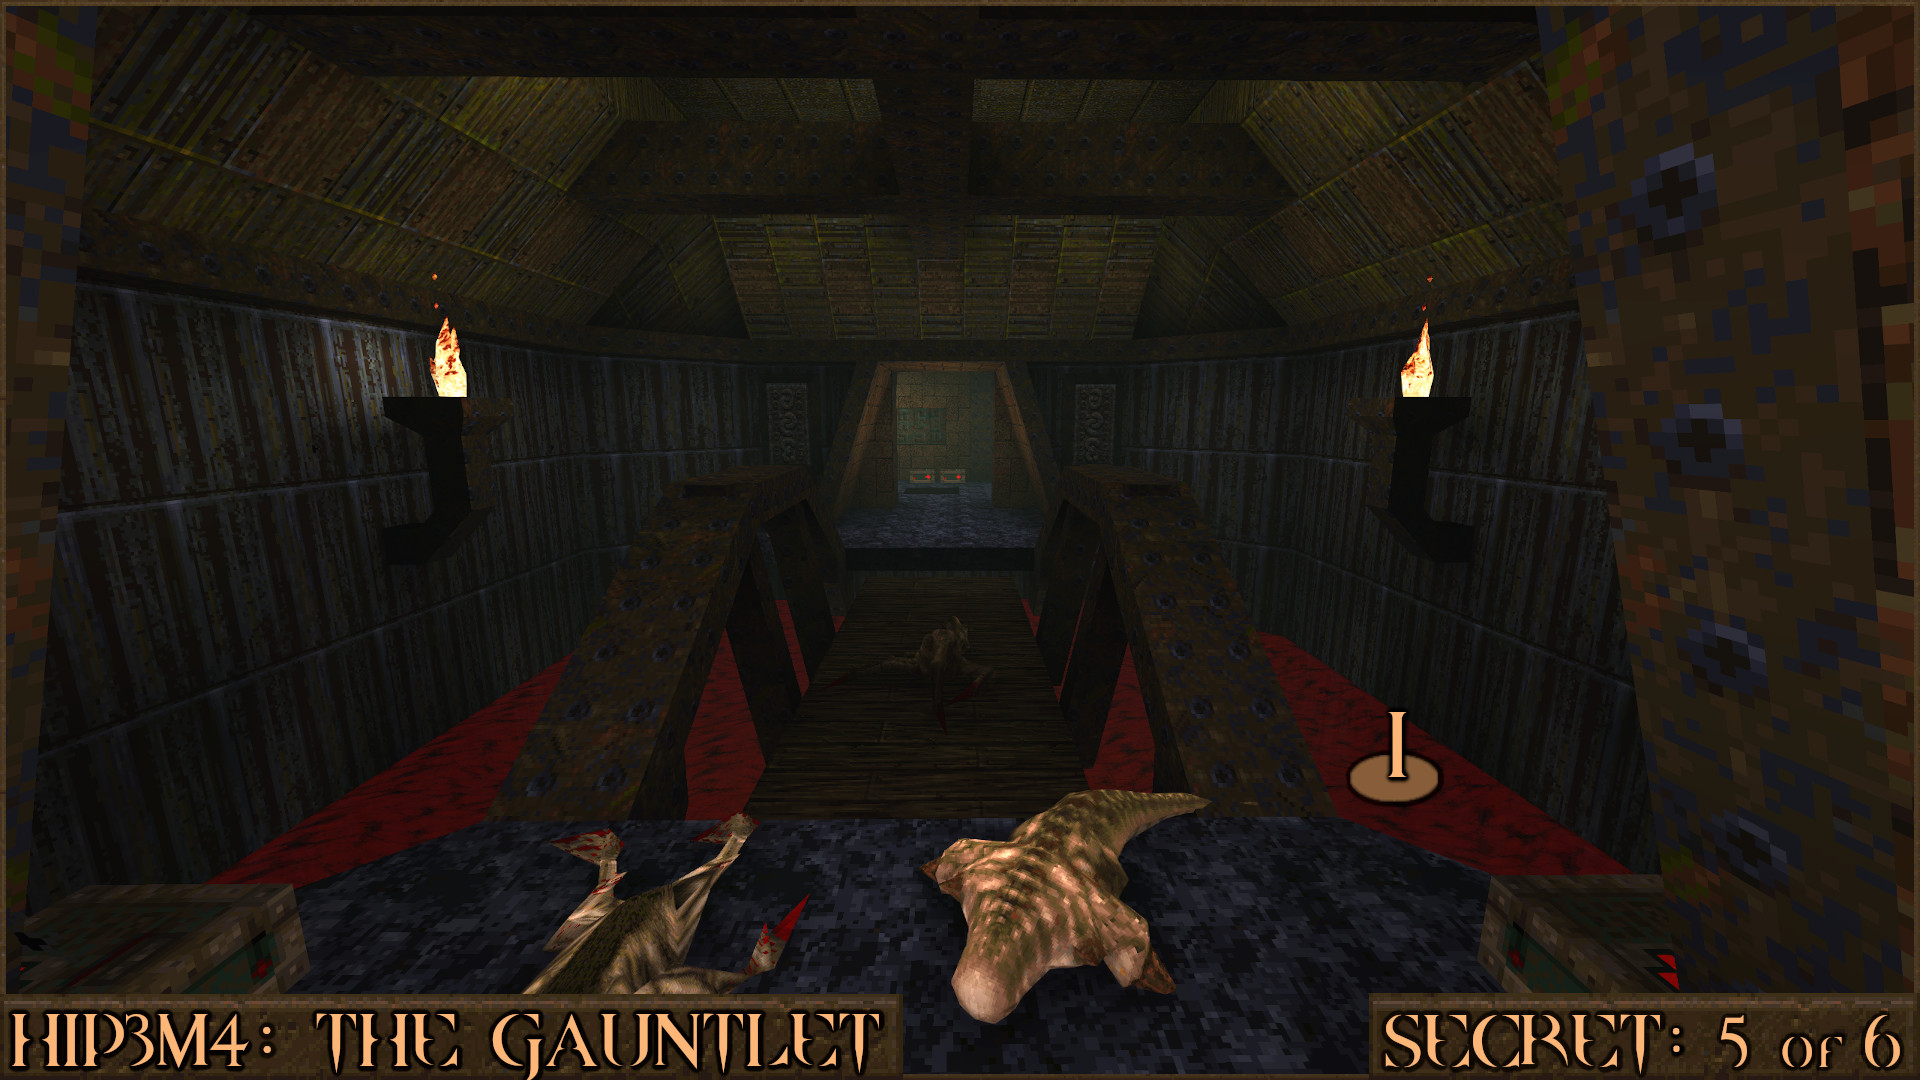
Look carefully at the wall on the right to see a small tunnel (
) you can swim through to find the secret.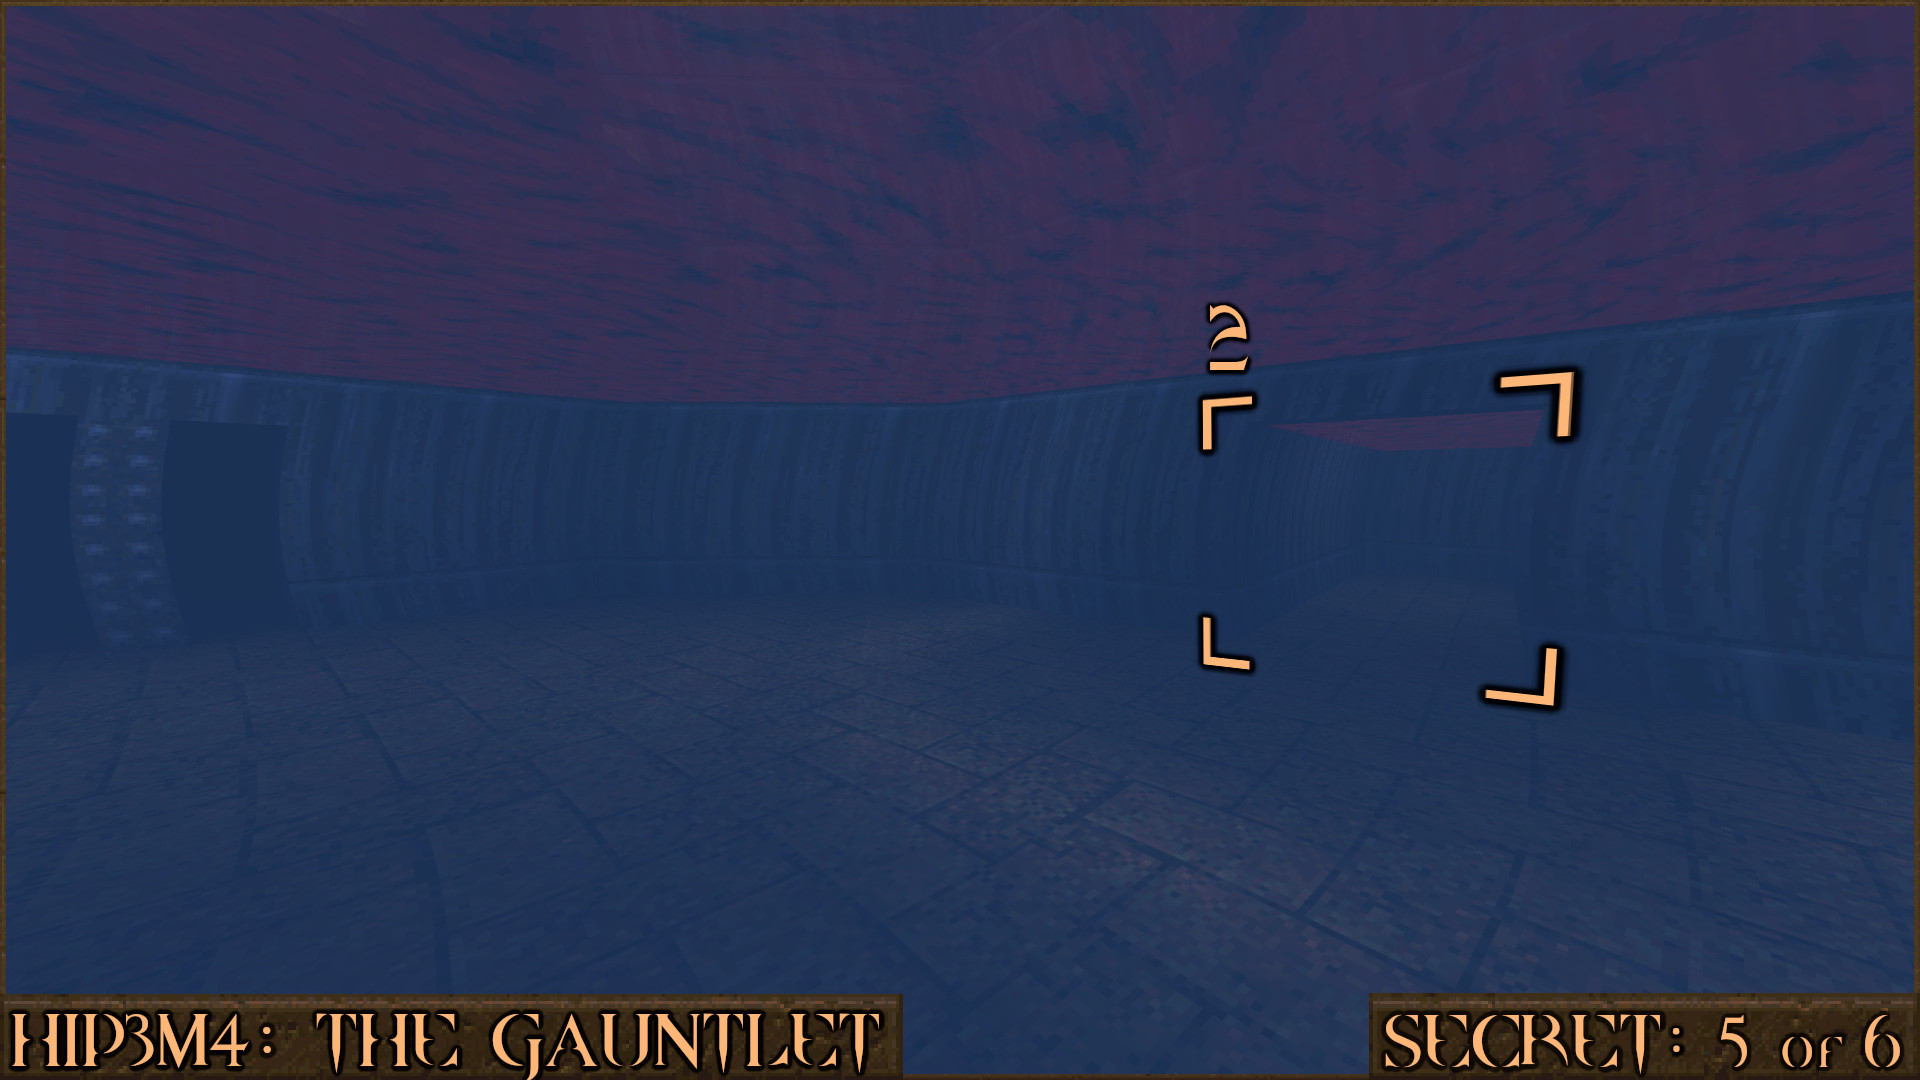
Reward:
Secret 6 of 6
After swimming through another blood water tunnel filled with Rotfish you will surface in to a large room with a giant metallic monster face panel. Walk directly in to the wall to the left of the monster face to make it swing out of the way and reveal the last secret of this level.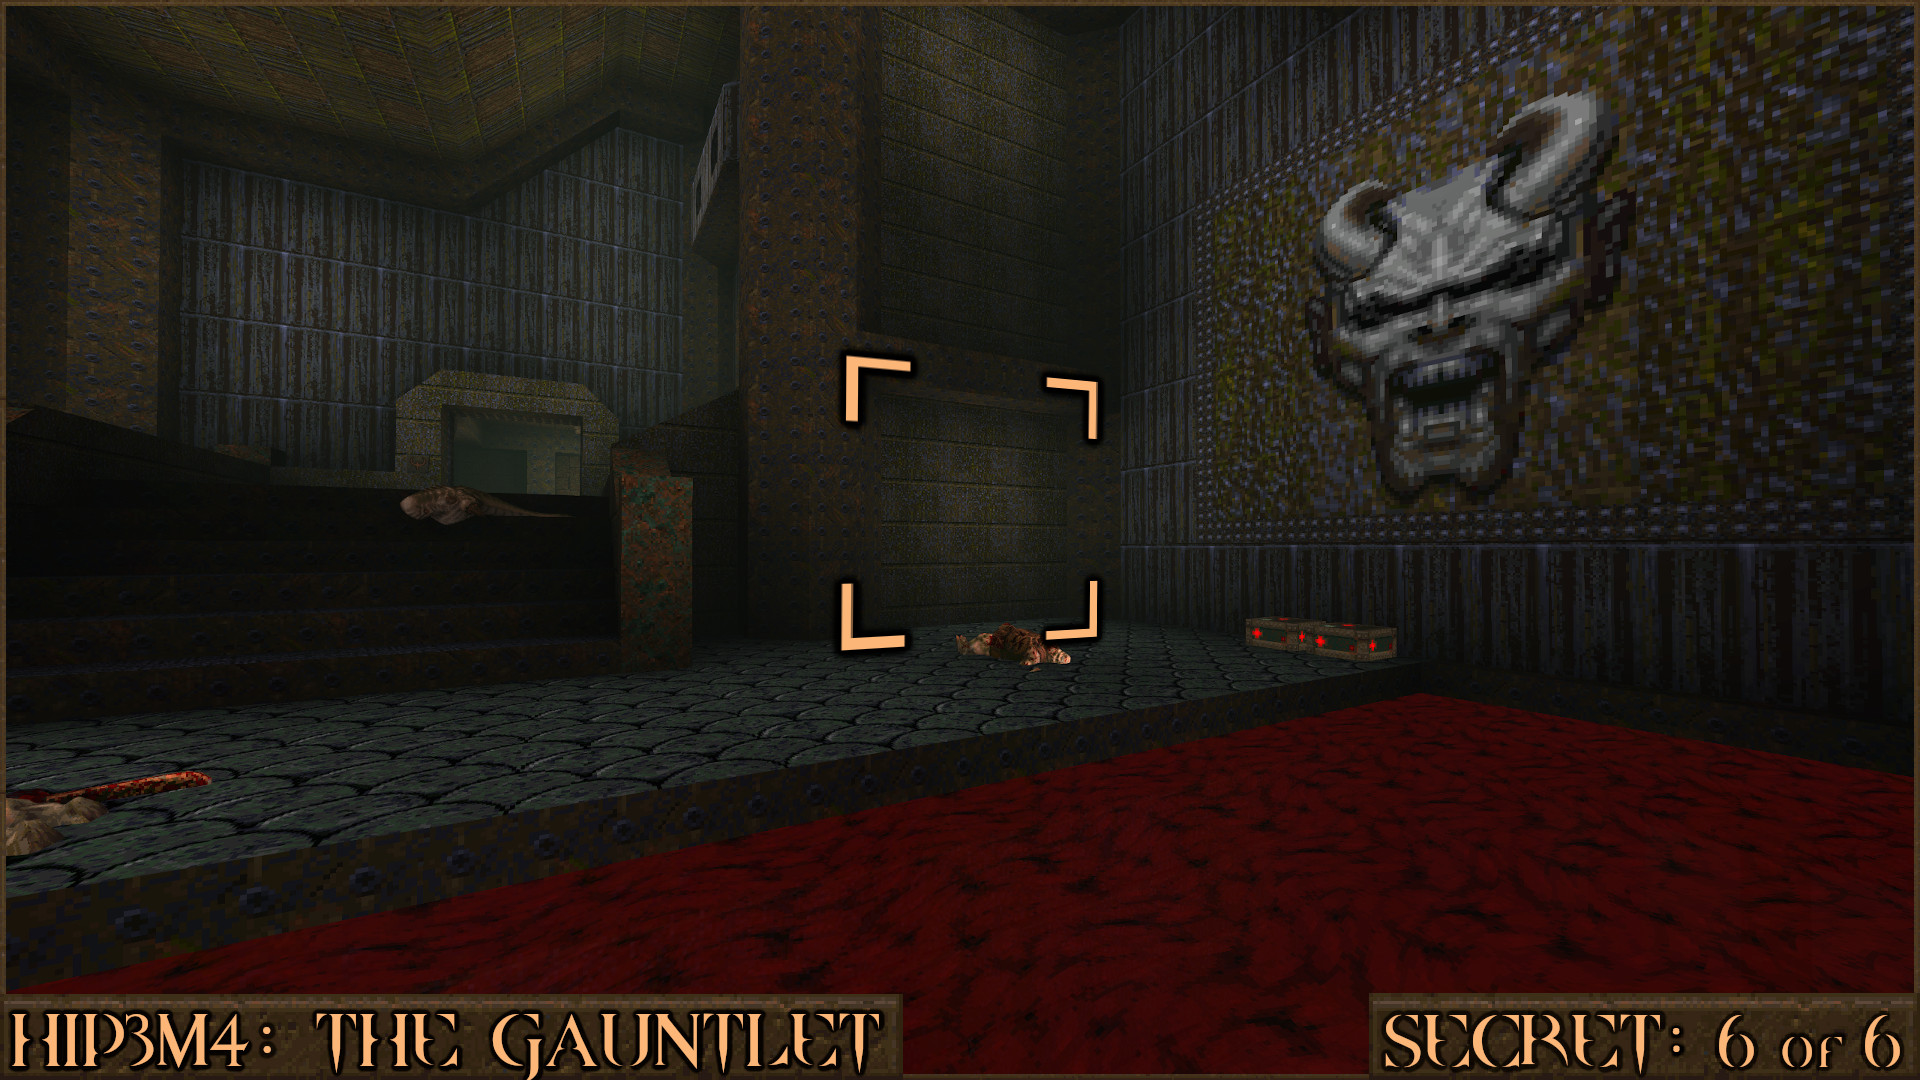
Reward:
HIPEND: Armagon's Lair
NOTE: There are no secrets in this level.
More Quake Secrets Guides

Now you've beaten the 1st expansion pack for Quake you can progress to the 2nd: Dissolution of Eternity.
These additional guides cover the rest of the secrets available in Quake:
https://steamcommunity.com/sharedfiles/filedetails/?id=620893331https://steamcommunity.com/sharedfiles/filedetails/?id=2585506770https://steamcommunity.com/sharedfiles/filedetails/?id=2585507550https://steamcommunity.com/sharedfiles/filedetails/?id=2585508012https://steamcommunity.com/sharedfiles/filedetails/?id=2803162869
There are more secrets to be found in the sequel Quake II:
https://steamcommunity.com/sharedfiles/filedetails/?id=3025659929
More Quake guides
- Quake Soundtrack Solutions★ 5 (822)34k views1.1k ♥15 minUpdated Apr 2, 2020
- How I play Quake in the Current Year (2023 update: Use Ironwail or Quakespasm-Spiked instead of Quakespasm)★ 5 (903)23k views1.3k ♥8 minUpdated Nov 12, 2023
- List of Quake 1 clones on the Steam store★ 5 (457)20k views854 ♥2 minUpdated May 20
- Quake Achievements★ 5 (1k)16k views1.5k ♥29 minUpdated Nov 4, 2025
- Quake Secrets★ 5 (1.1k)14k views1.8k ♥39 minUpdated Feb 23
- Quakespasm: How to activate CHUNKY MODE★ 5 (303)9.6k views357 ♥2 minUpdated Sep 23, 2023





This guide was created by its original author on the Steam Community. Are you the author and want it removed? Request removal.