Dissolution of Eternity Secrets
Useful Information



Quake Secrets Guide Contents
- Quake Secrets
- Scourge of Armagon Secrets
- Dissolution of Eternity Secrets
- Dimension of the Past Secrets
- Dimension of the Machine Secrets
- Horde Mode Secrets
Introduction
 This guide will help you find all the secrets in the 2nd Quake expansion pack: Dissolution of Eternity.
This expansion has a total of 59 secrets across 16 levels, as well as several unmarked secrets (which don't count as official secrets but often have substantial rewards).
Dissolution of Eternity is comprised of two episodes:
- Episode 1: Hell's Fortress
- Episode 2: The Corridors of Time
Items
This expansion introduces several new alternate weapons, ammo types and items:Weapons

Axe

Shotgun

Double-Barreled Shotgun

Nailgun

Lava Nailgun

Super Nailgun

Super Lava Nailgun

Grenade Launcher

Multi-Grenade Launcher

Rocket Launcher

Multi-Rocket Launcher
Thunderbolt

Plasma Gun
Ammo

Small Shells

Large Shells

Small Nails

Large Nails

Small Lava Nails

Large Lava Nails

Small Rockets

Large Rockets

Small Multi-Rockets

Large Multi-Rockets

Small Cells

Large Cells

Small Plasma Cell

Large Plasma Cell
Powerups

Green Armor

Yellow Armor

Red Armor

Small Health

Large Health

Megahealth

Quad Damage

Pentagram of Protection

Ring of Shadows

Biosuit

Power Shield

Anti-Grav Belt
START: Split Decision
Extra Secret
To find the Nightmare Difficulty portal start off by jumping in to any of the difficulty portals. As soon as you appear on the other side turn around and find the teleporter that would take you back. The first shootable red switch ( ) is behind this teleporter. You can just shoot it from the side or just shoot it through the teleporter itself.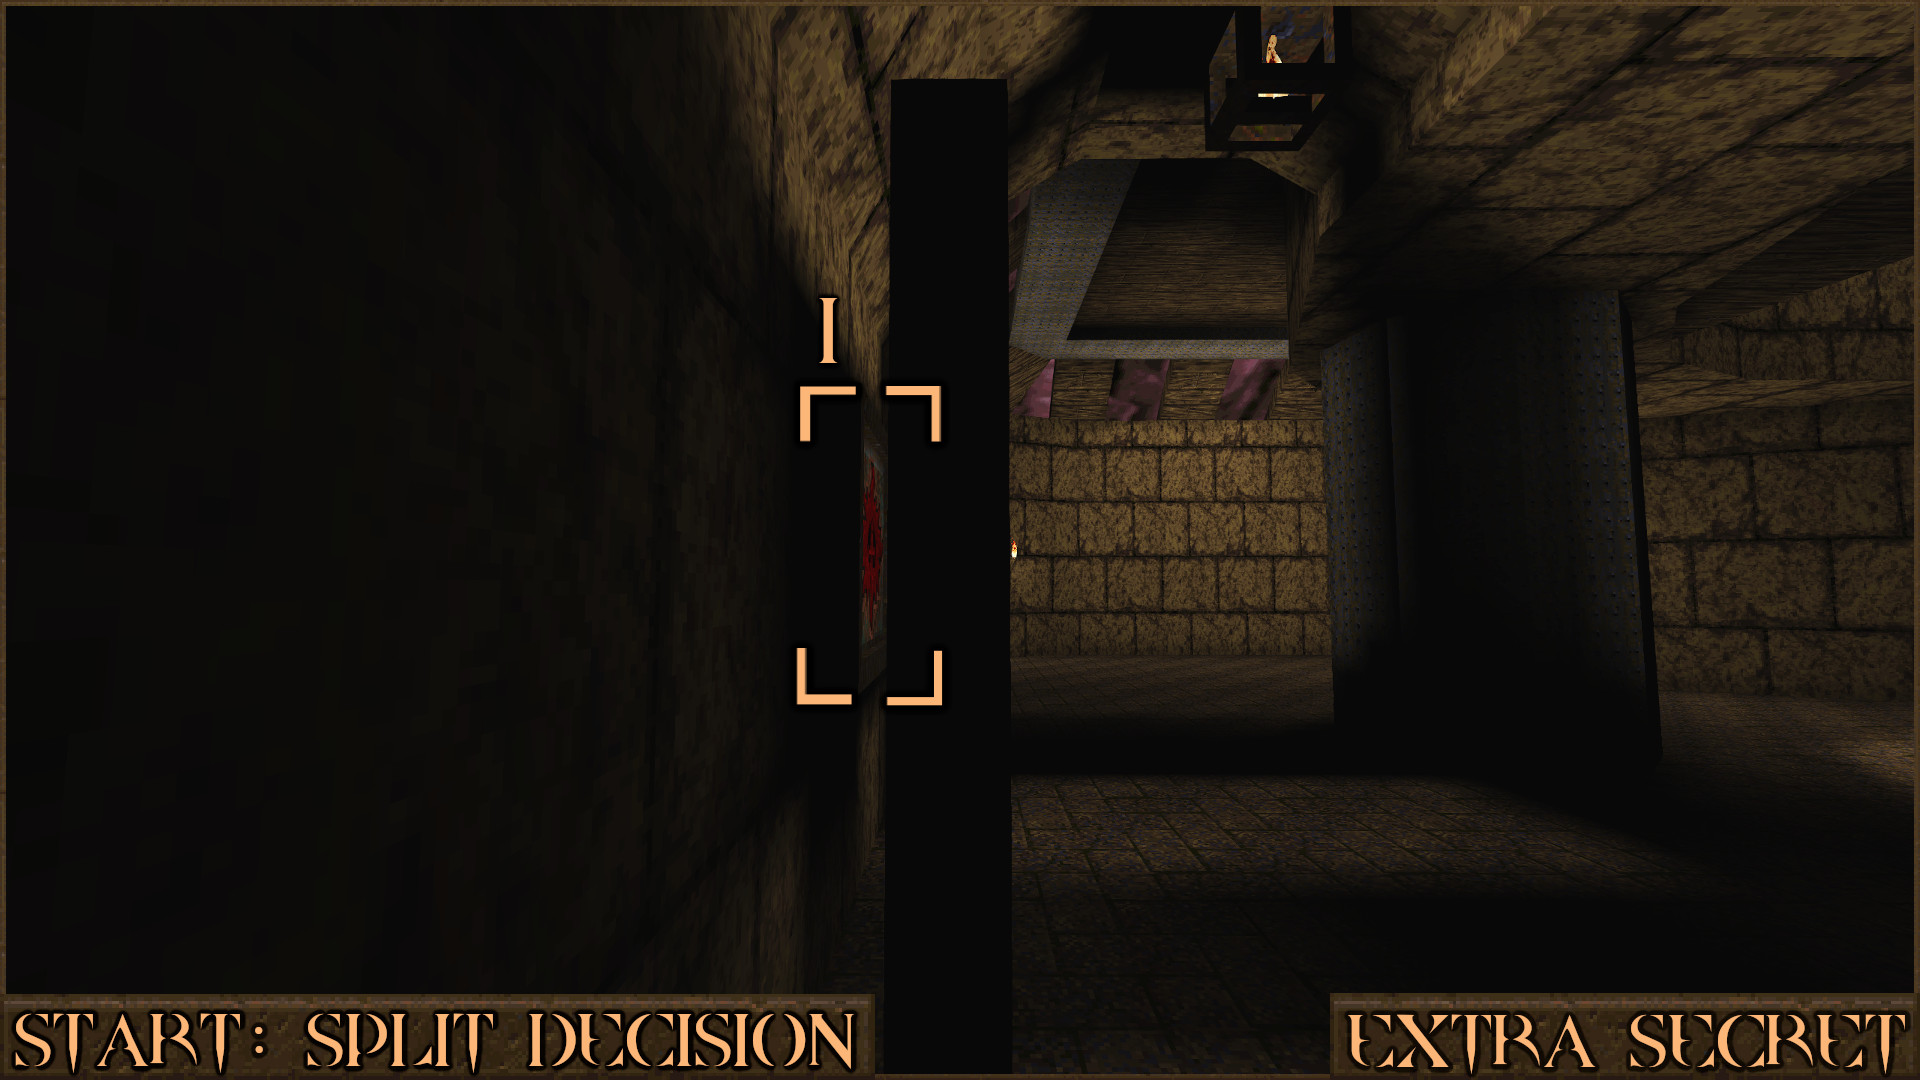
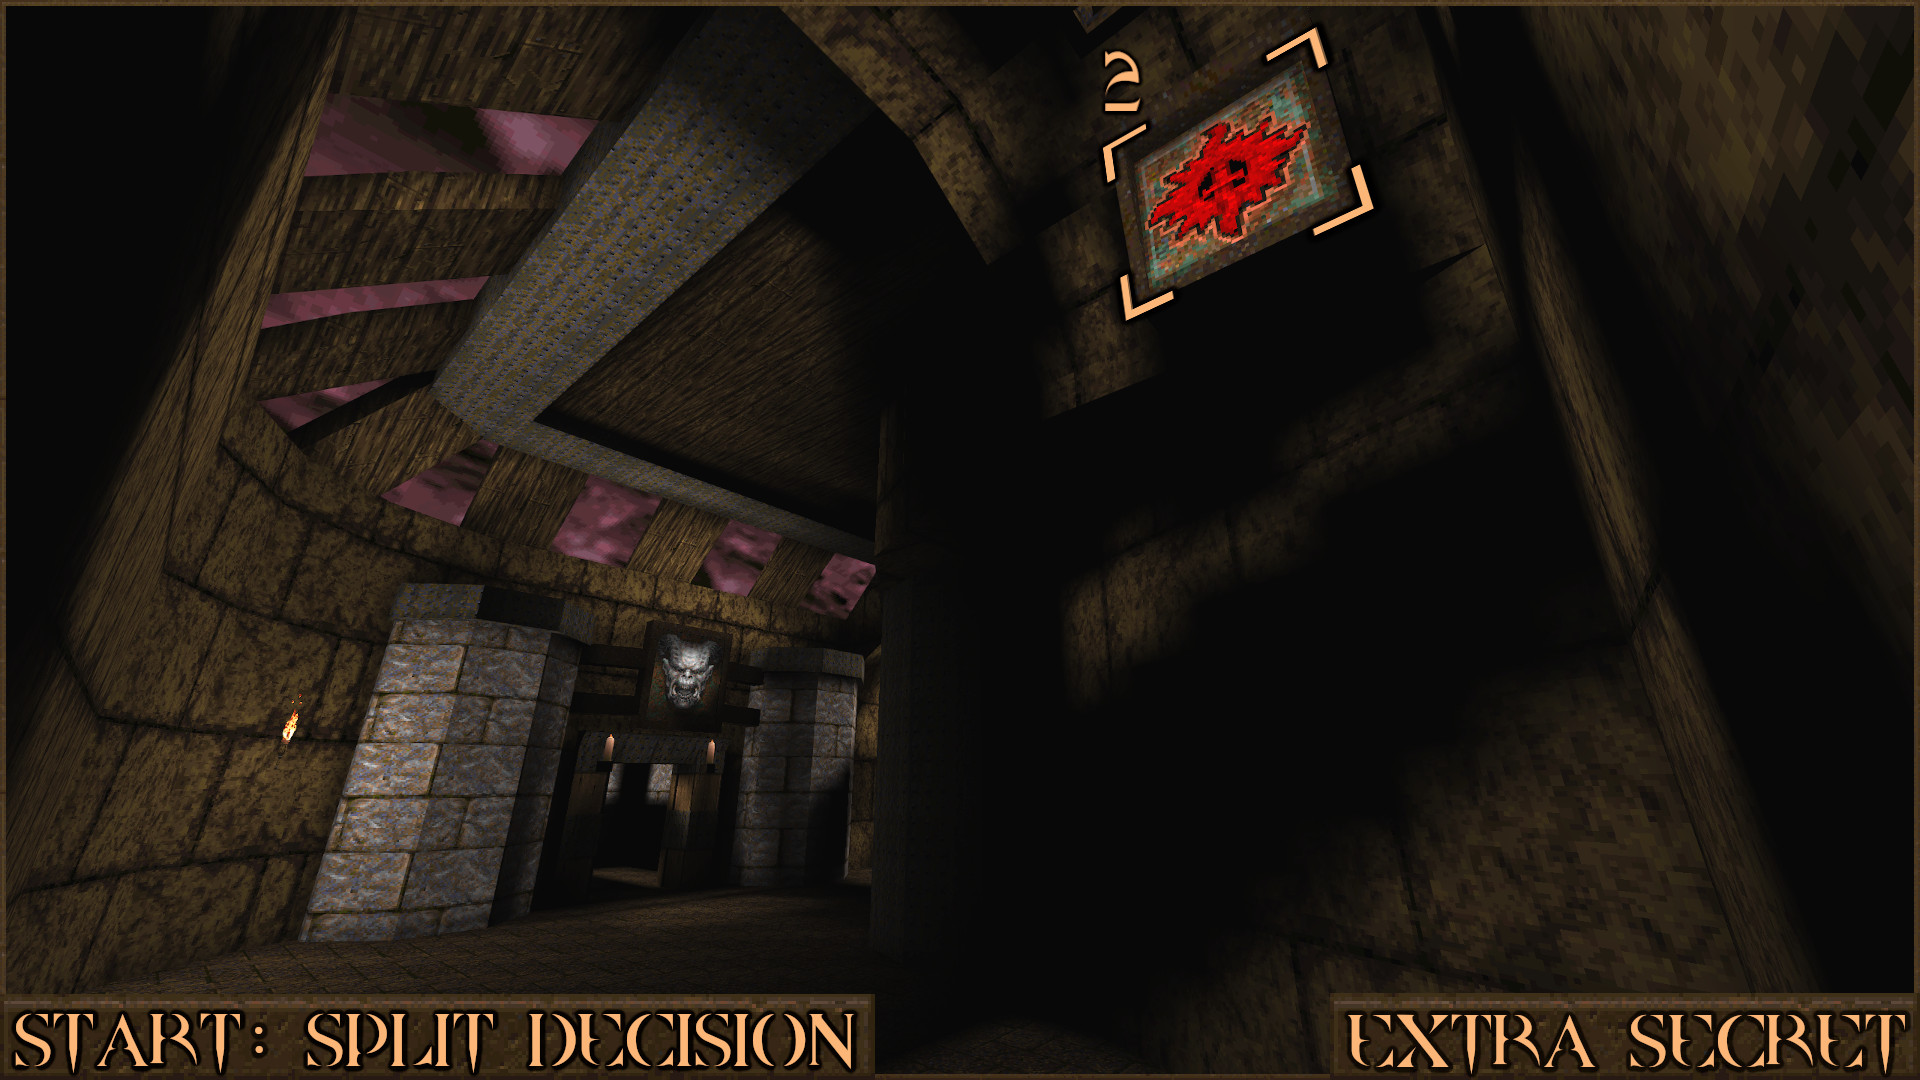
Proceed onwards and you will see two entrances that lead to the different episodes. Don't go in these, instead head to the left and look carefully at the top of the wall to find the second shootable red switch (
 ).
).
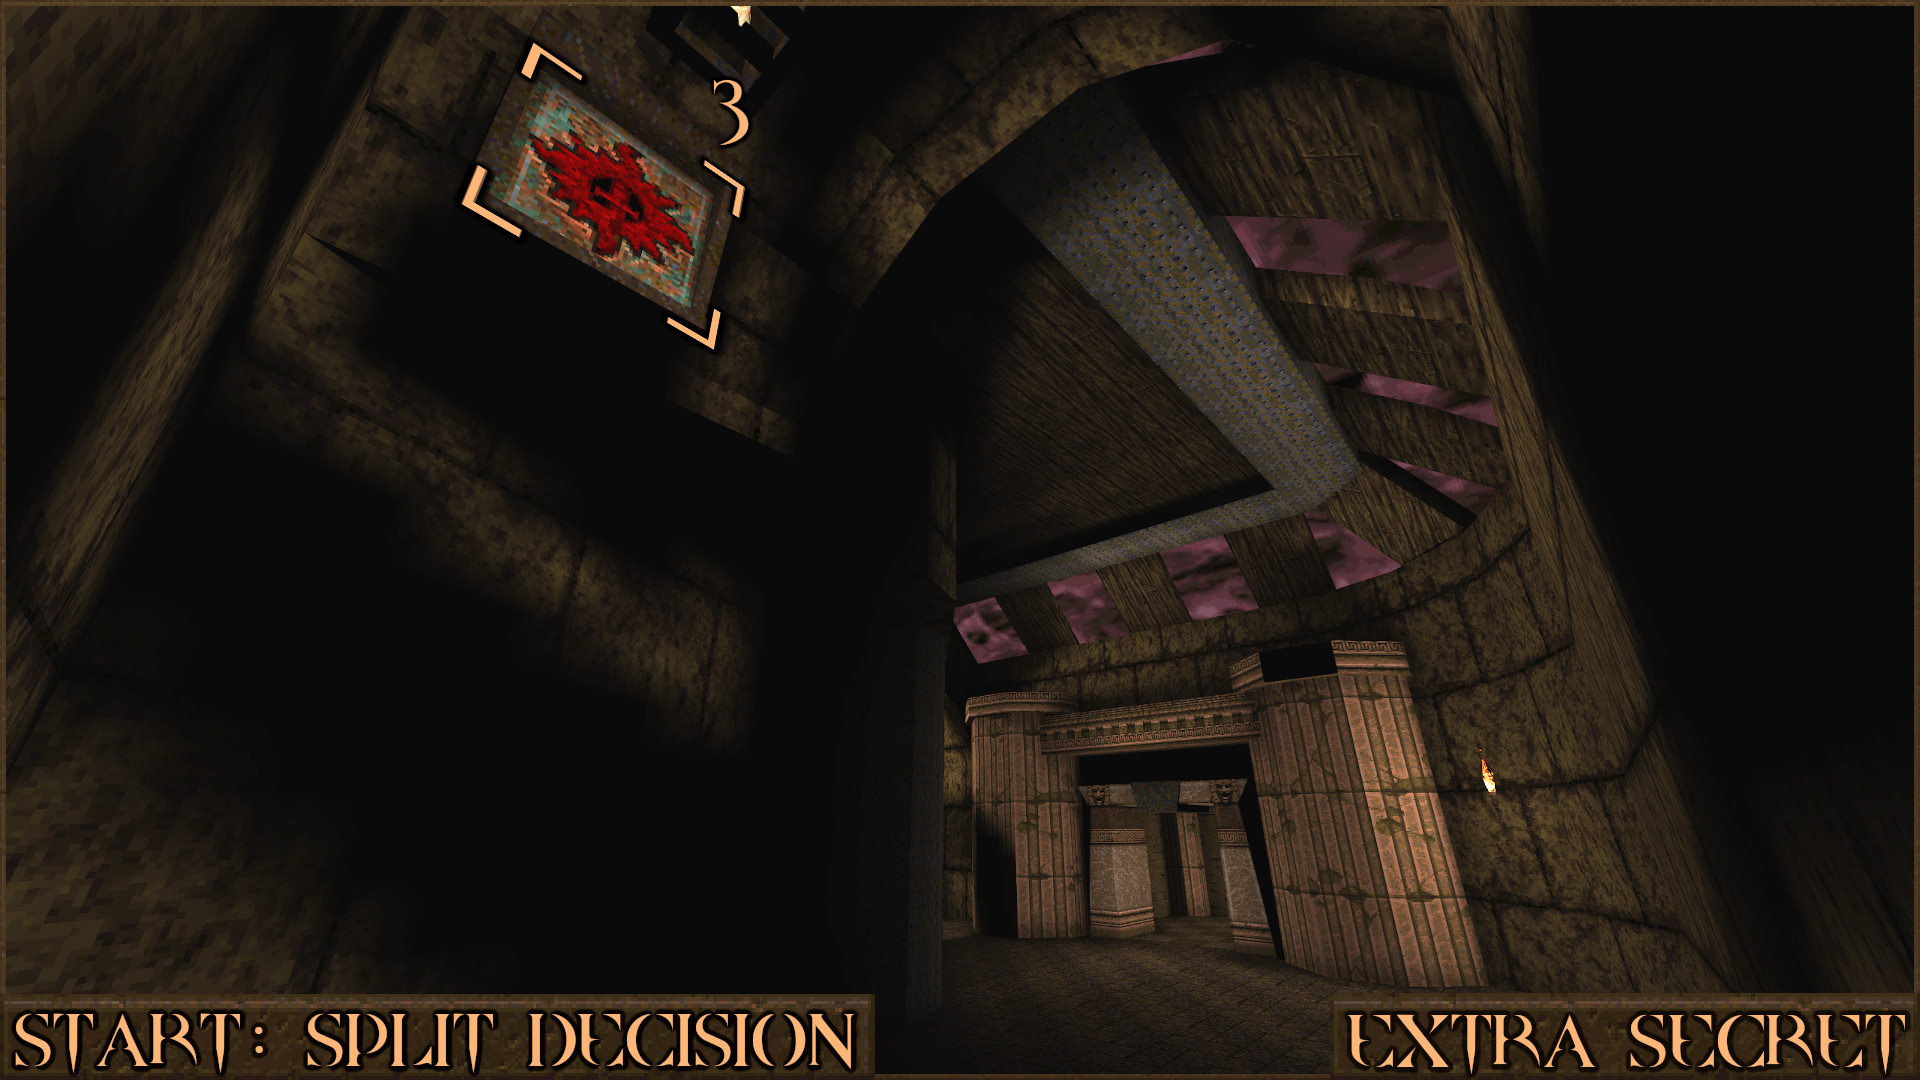
Now head to the opposite side of this room and in a similar position at the top of the wall is the third shootable red switch (
 ).
).
Now all three switches have been activated, head to the centre of the room and you will notice some ominous lava that is suspended in the ceiling. Due to activating all the switches two small lifts (
 +
+ ) are now active underneath this lava and will push you up in to a teleporter and activate Nightmare Difficulty.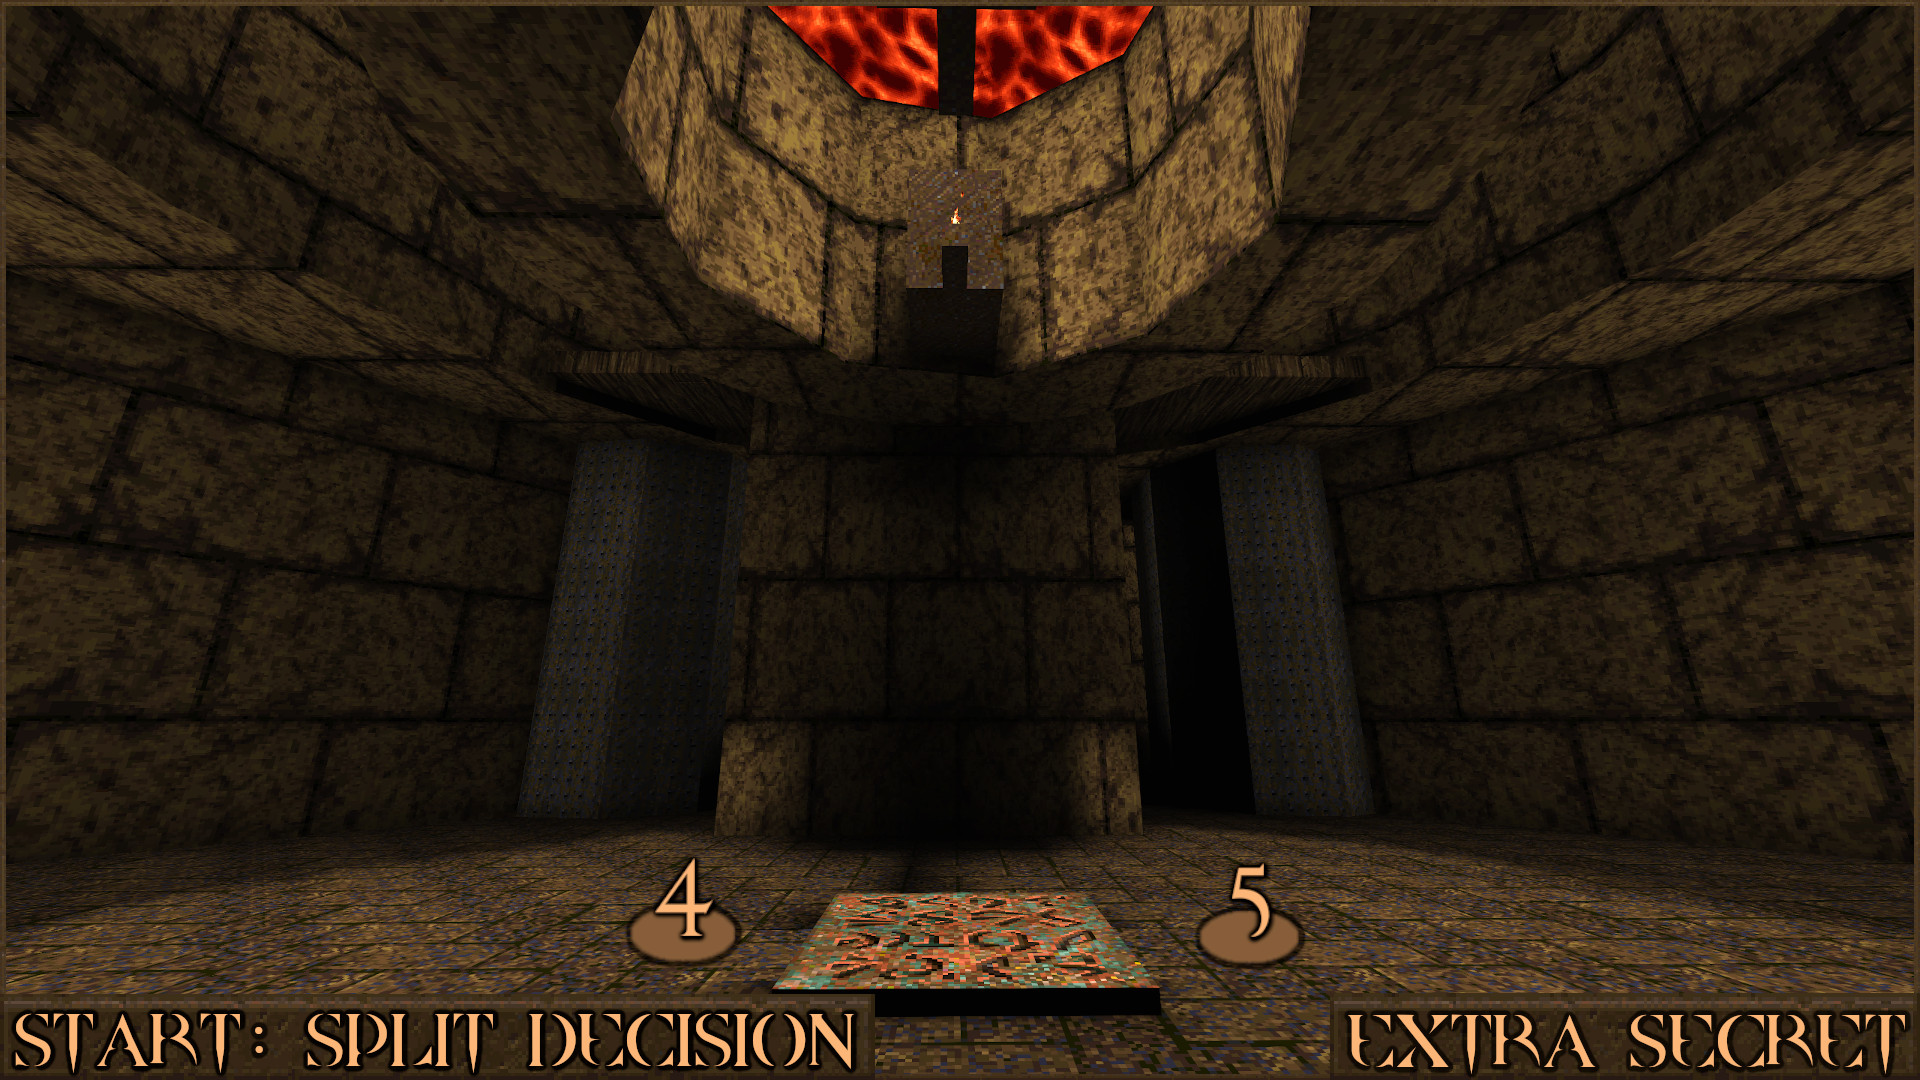
Reward: Nightmare Difficulty
R1M1: Deviant's Domain
Secret 1 of 4
After you head outside at the start of the level go forward to see a large green slime river below you. Jump in to it (). 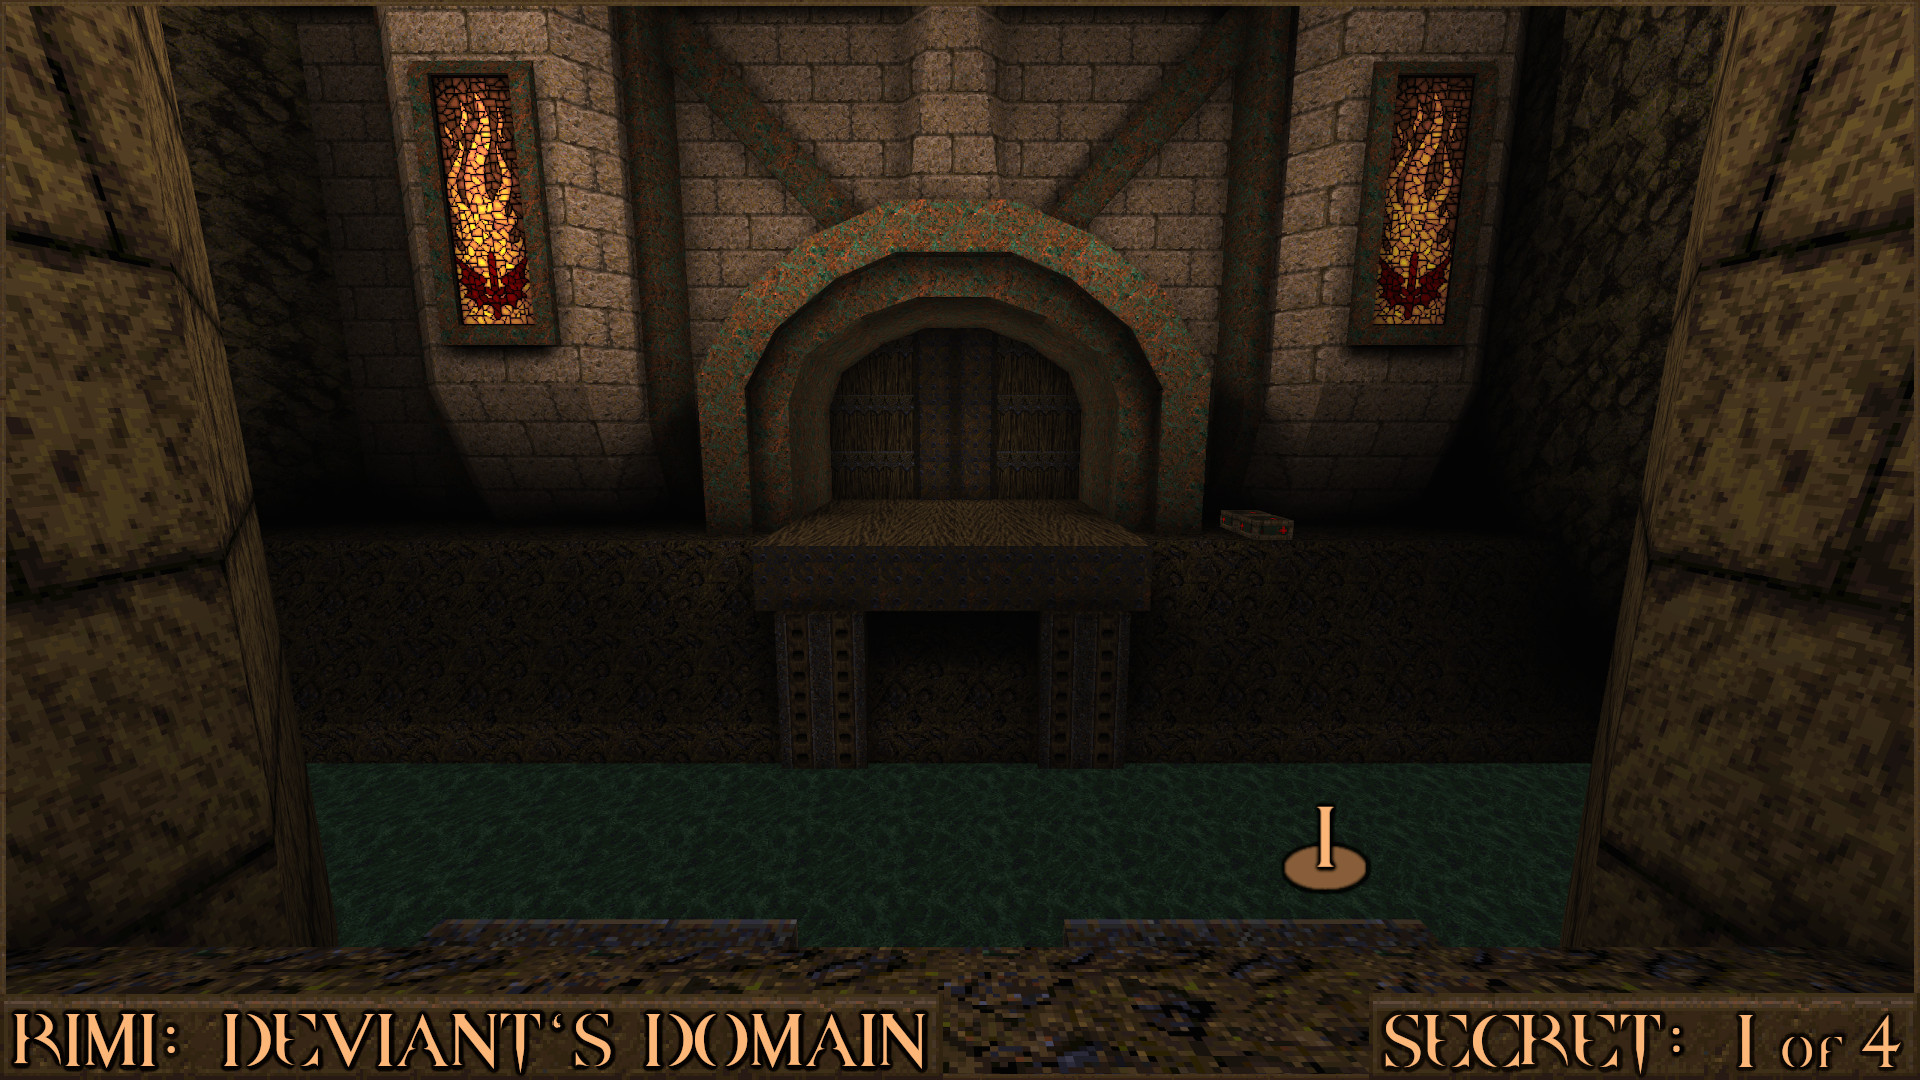
Quickly locate the Biosuit (
) to avoid taking too much damage and find the secret. Look around the bottom of this slime river to find several items then take the elevator back up ().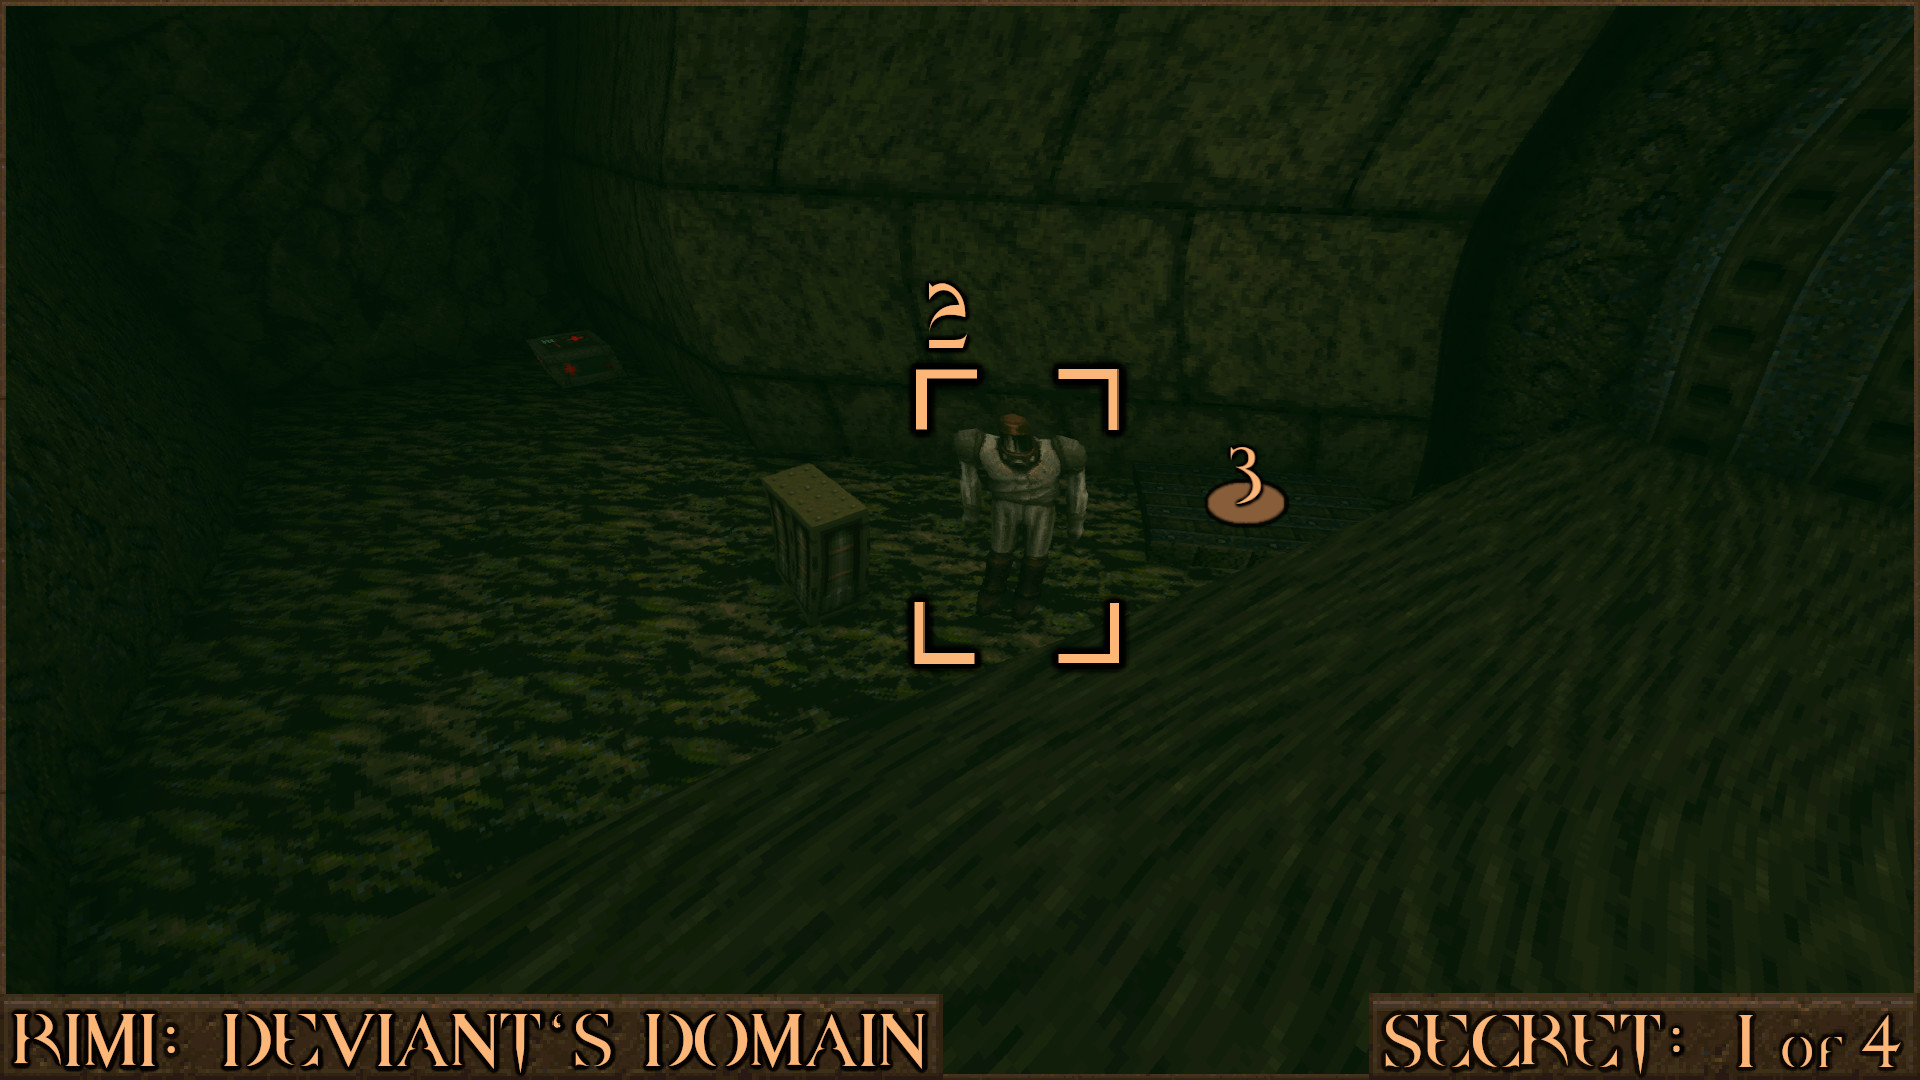
Reward:
Secret 2 of 4
Go through a door () to enter a small building near the start. 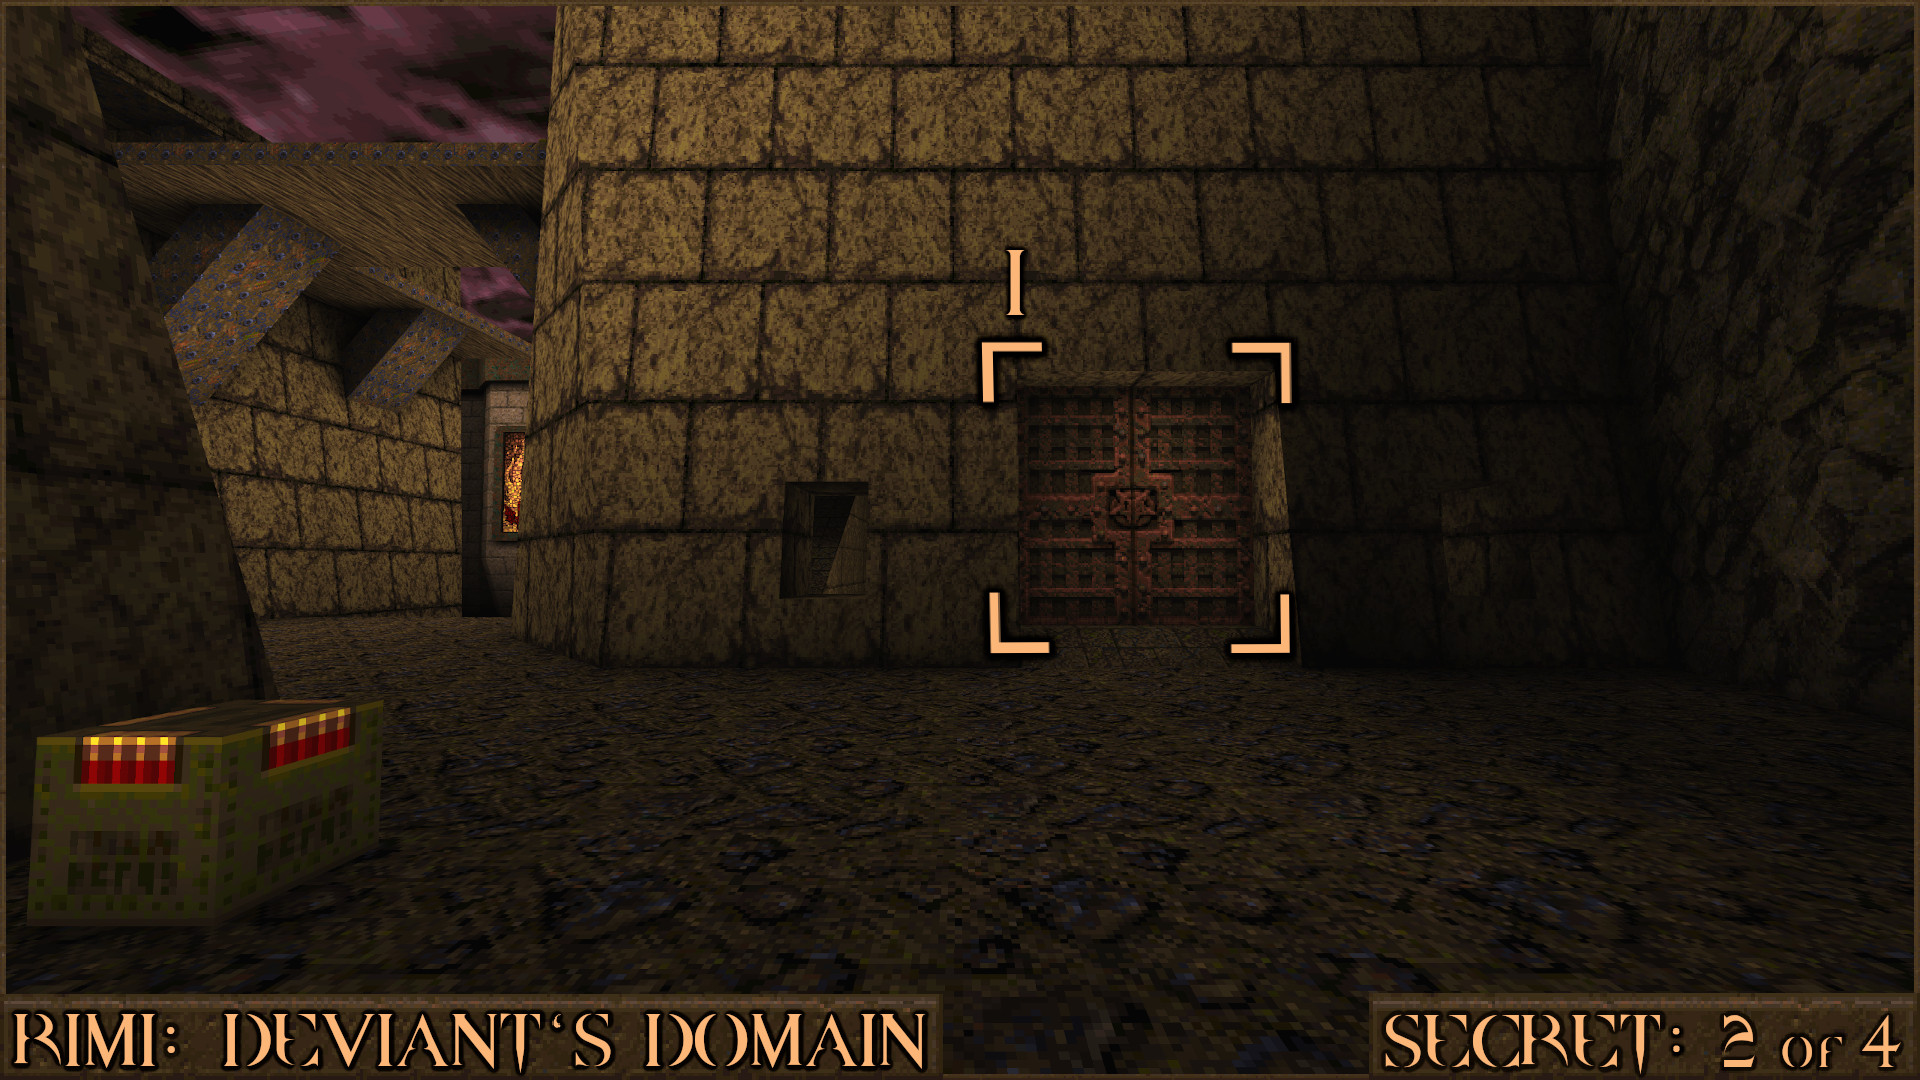
At the back of this building is an elevator which has a gap underneath. Walk on the elevator (
), quickly back off it and then drop down the gap to find the secret.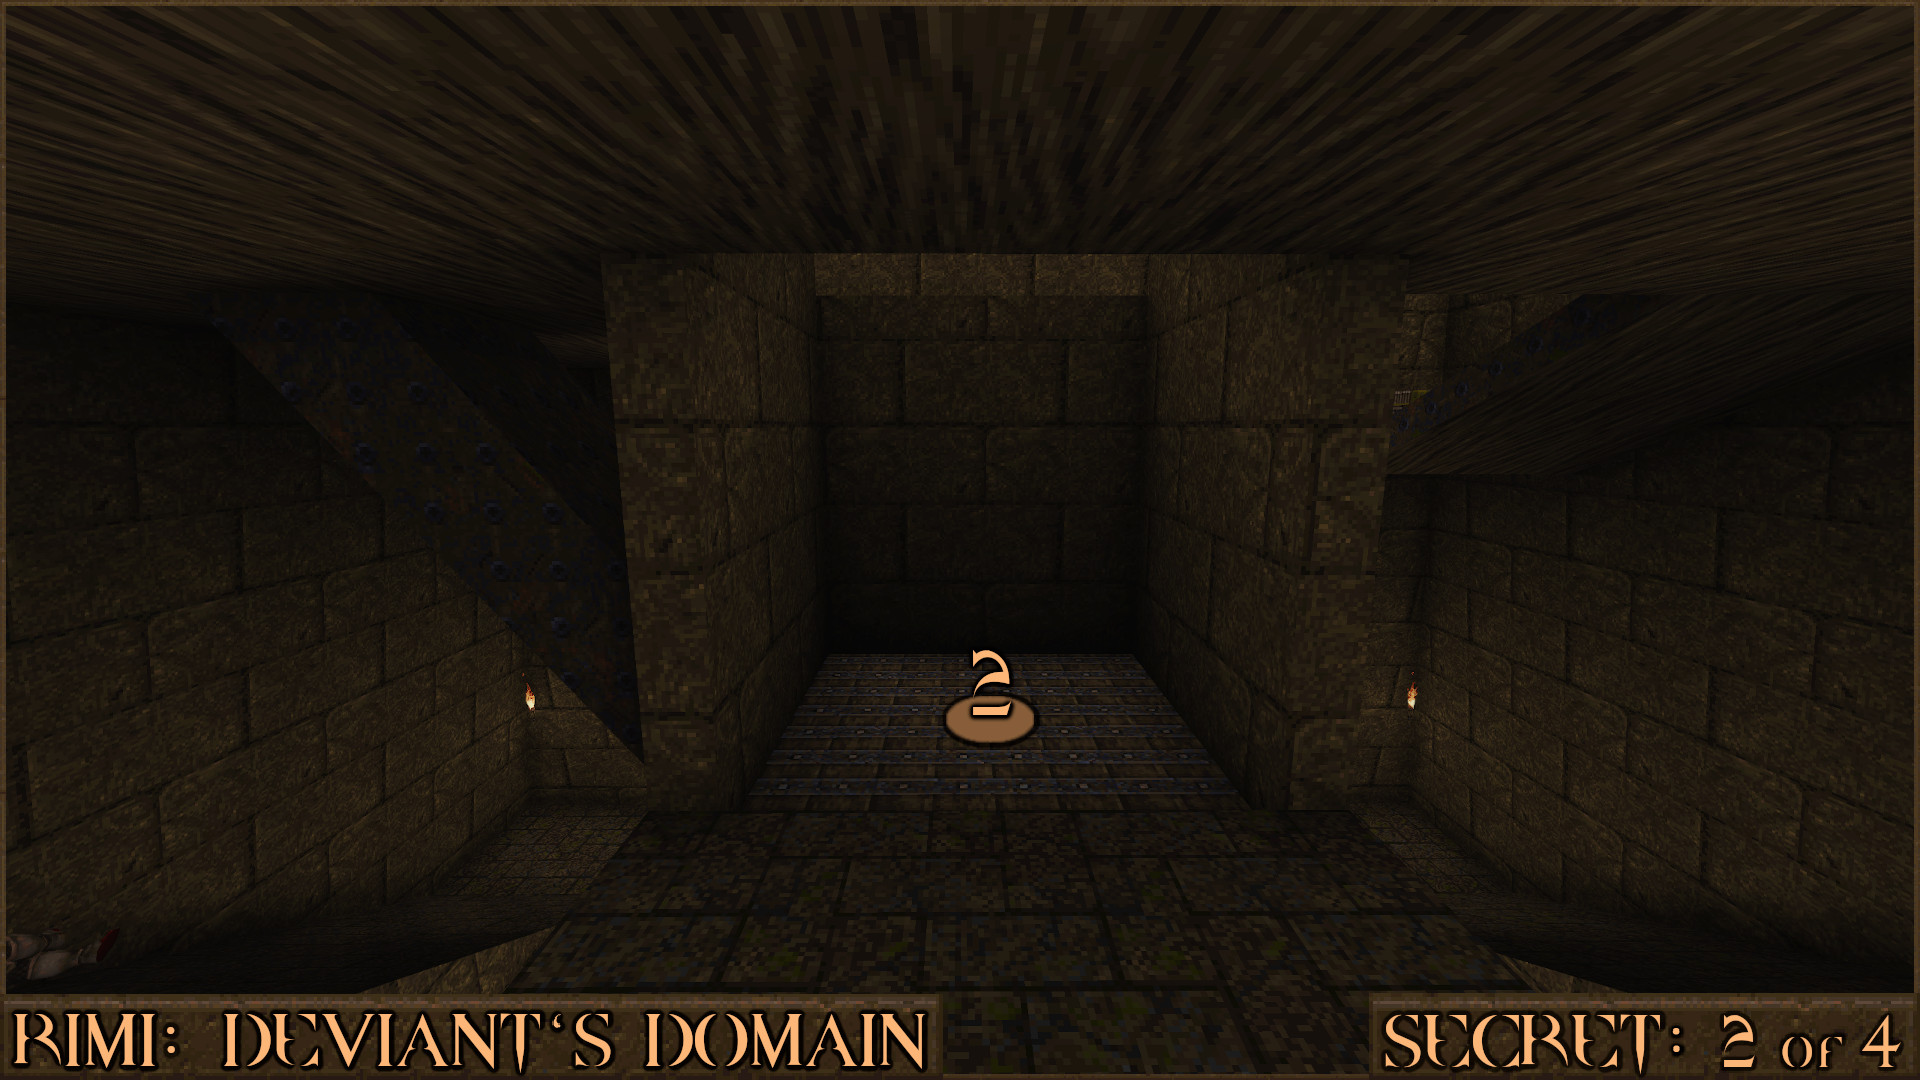
Reward:
Secret 3 of 4
You will reach a small dock with a wooden boat on some green slime. Don't go on the boat yet, instead turn around and head back to the elevator that you just rode down on to see another small pit of green slime. Jump in to find a Biosuit then swim forward and surface in a new small area to find the secret.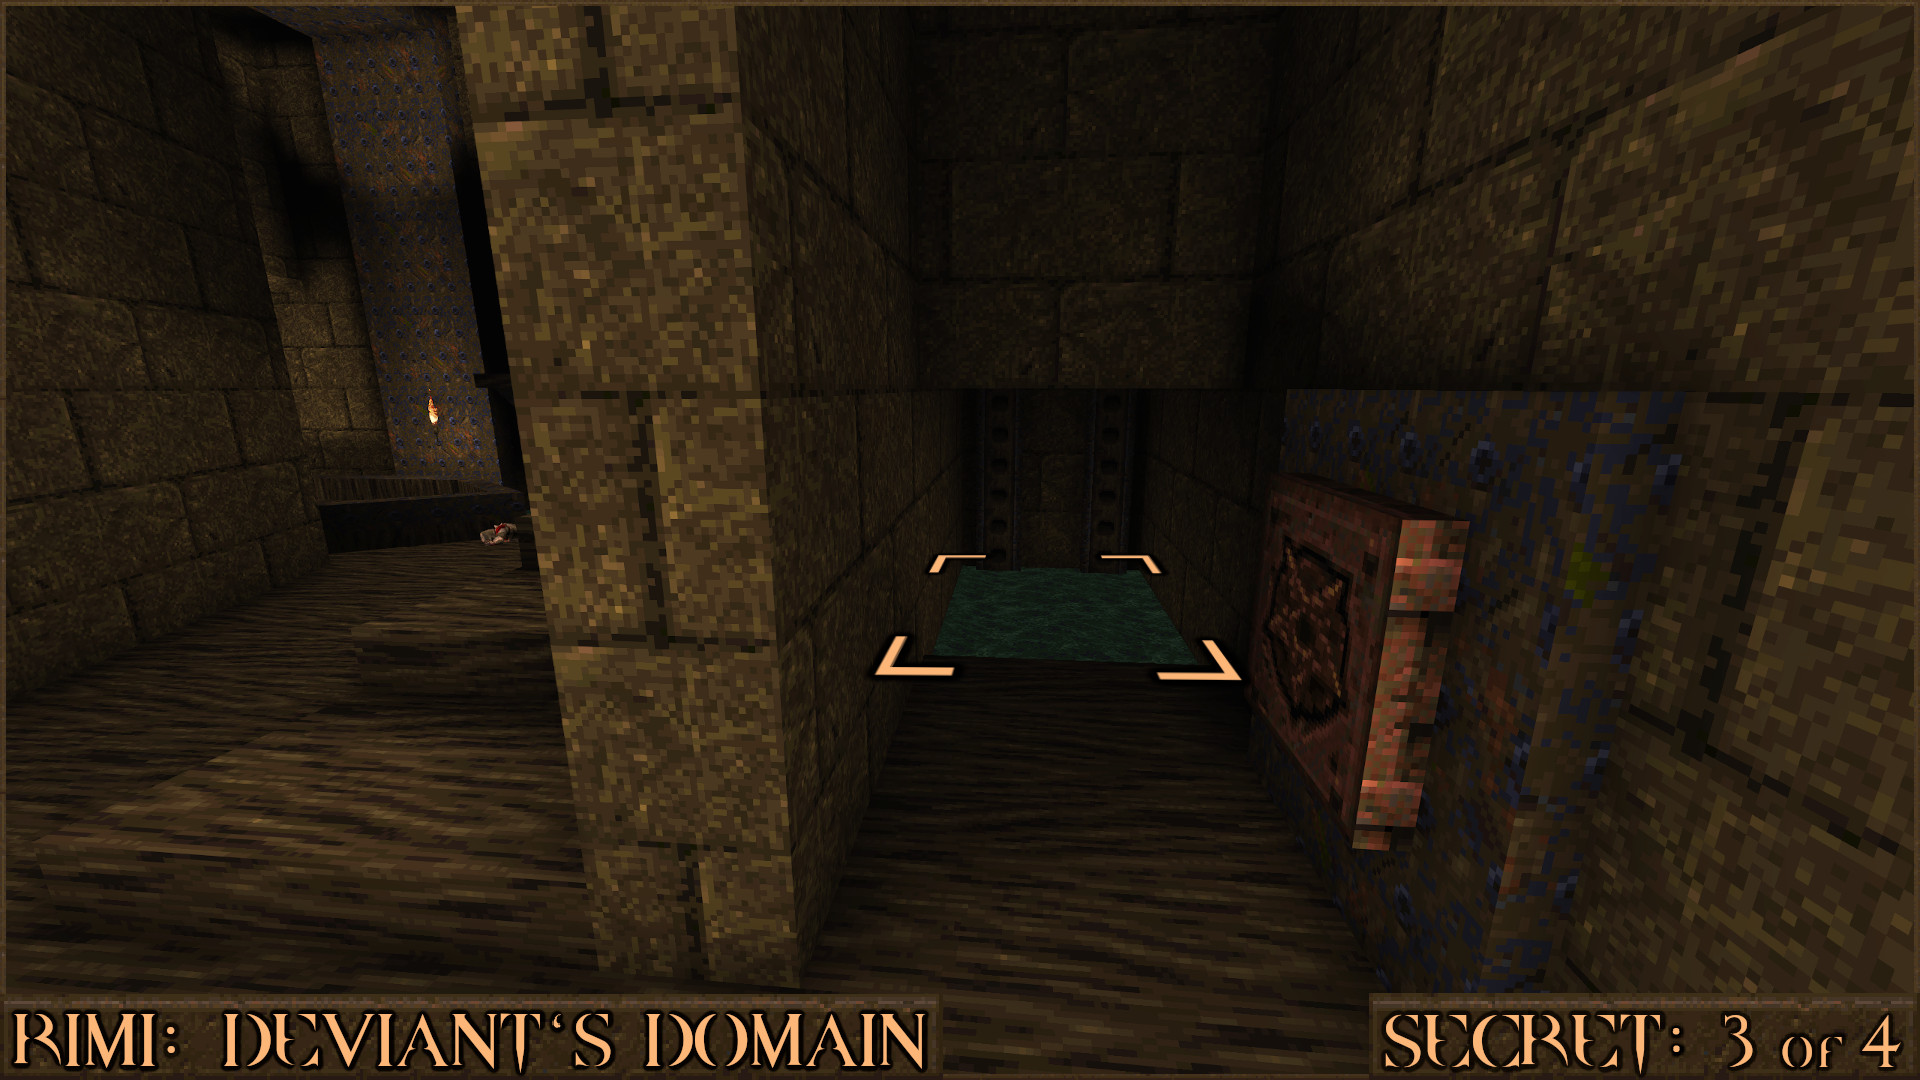
Reward:
Secret 4 of 4
At the end of the 2nd boat ride you will go through this doorway () in to a small room with stairs. 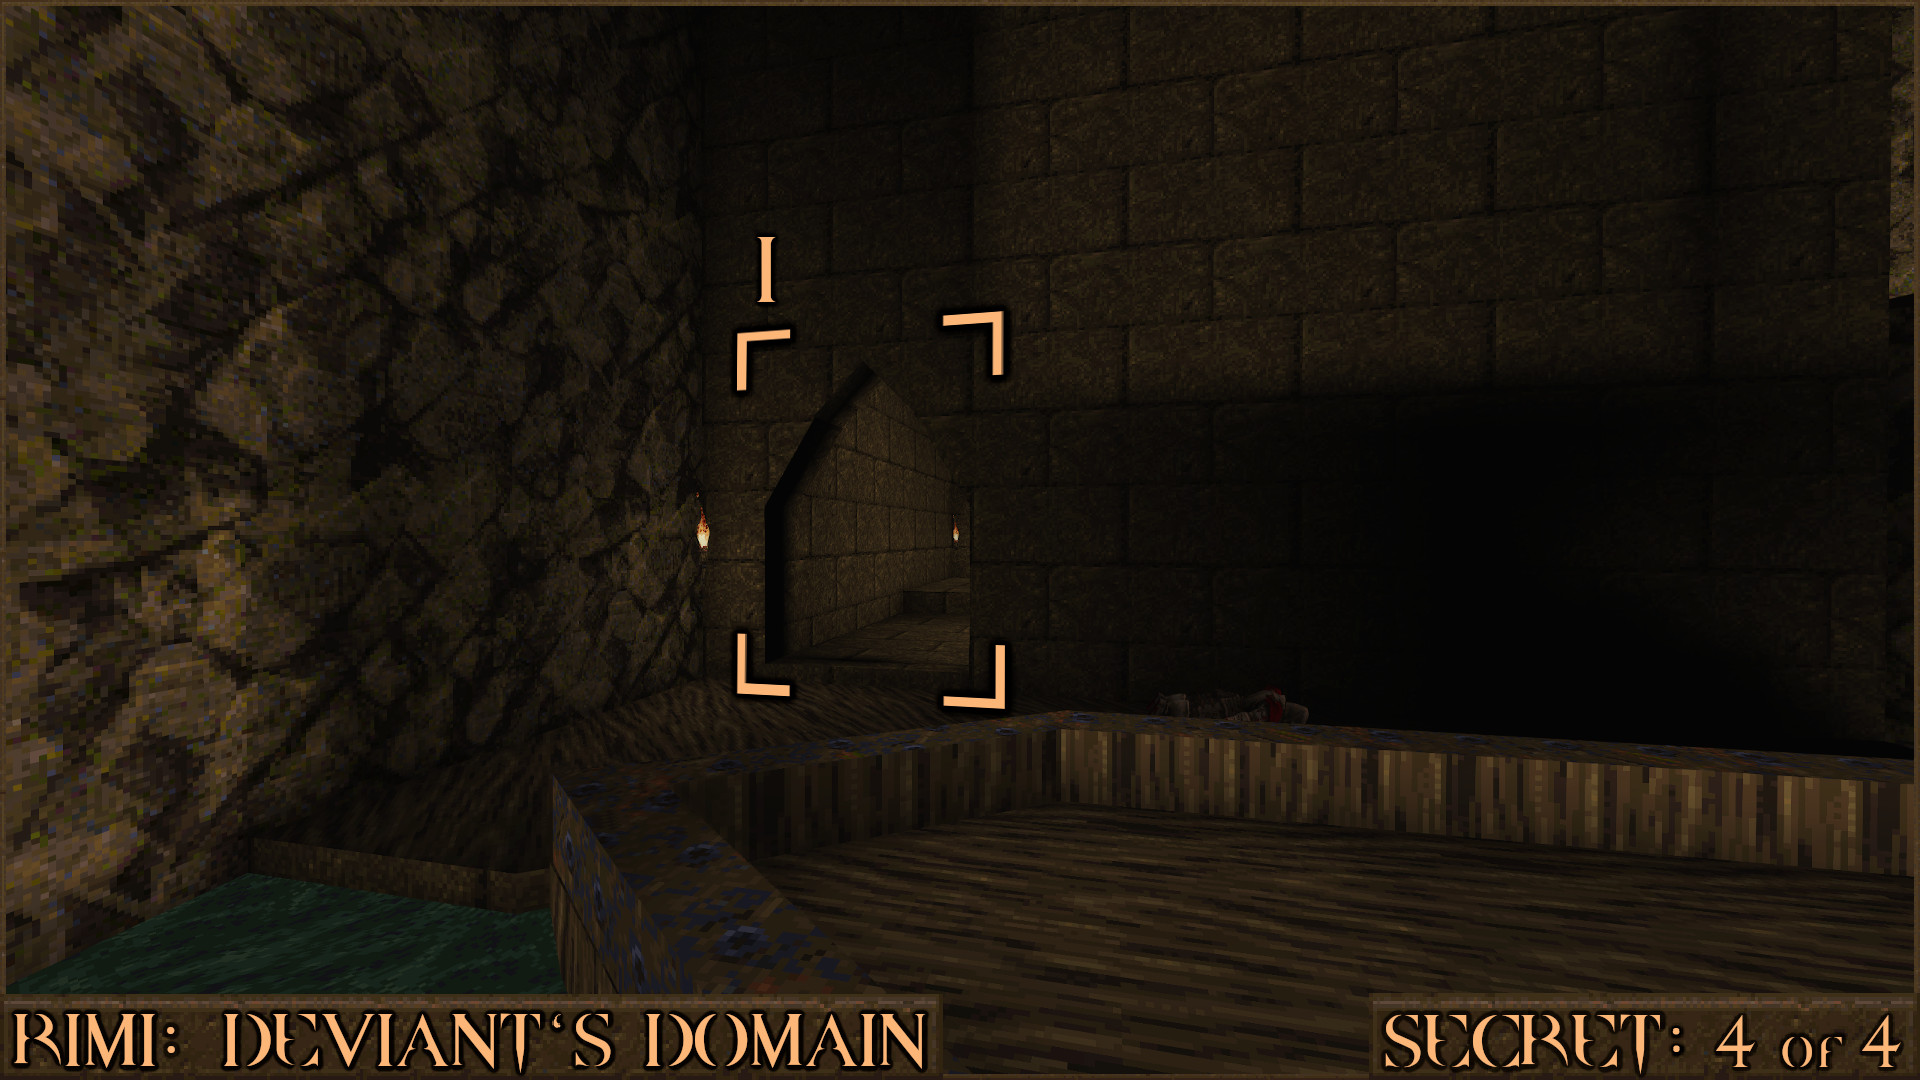
Turn around and look above the doorway you just went through to see a red shootable switch (
). After shooting it look in the distance () to see a Power Shield item rise out of the floor. Pick it up to claim the secret.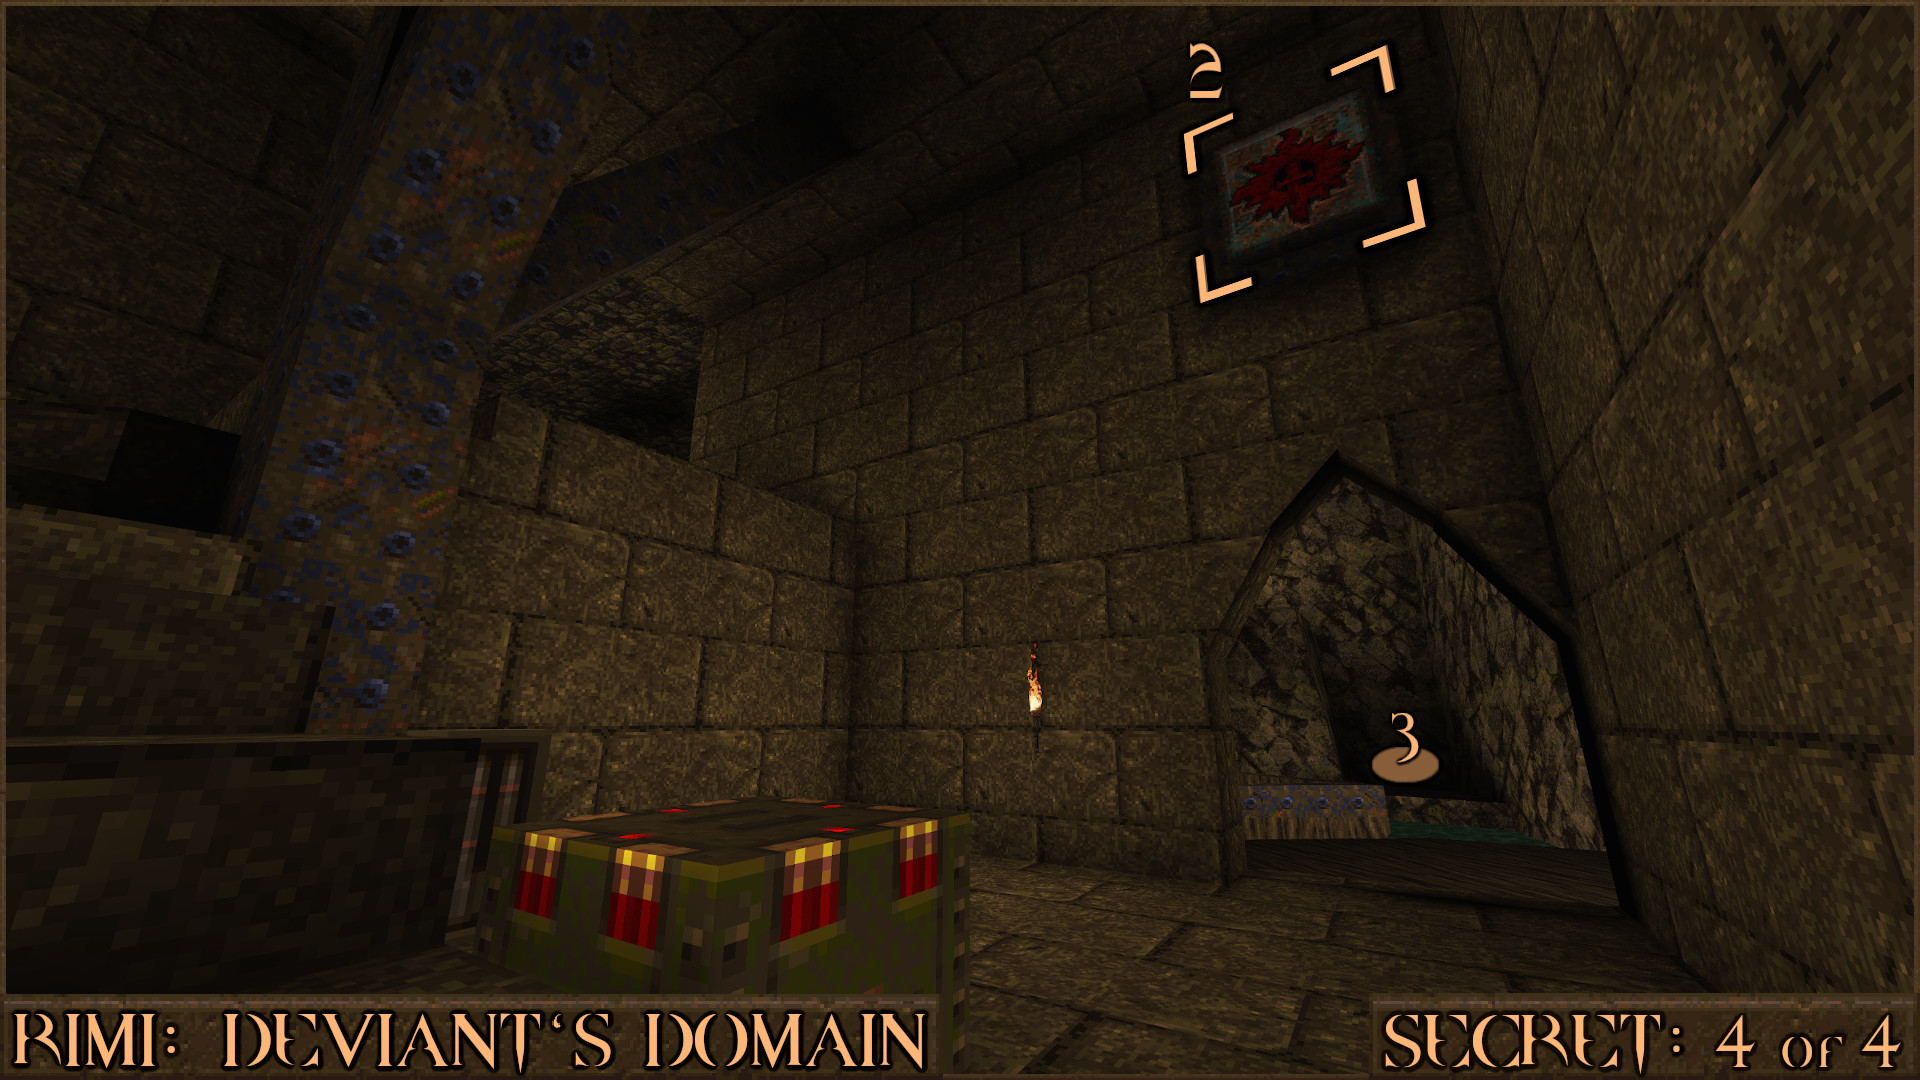
Reward:
R1M2: Dread Portal
Secret 1 of 4
At the start of the level look for holes filled with water in the corners of the room (). Jump in to find a large underwater pool. 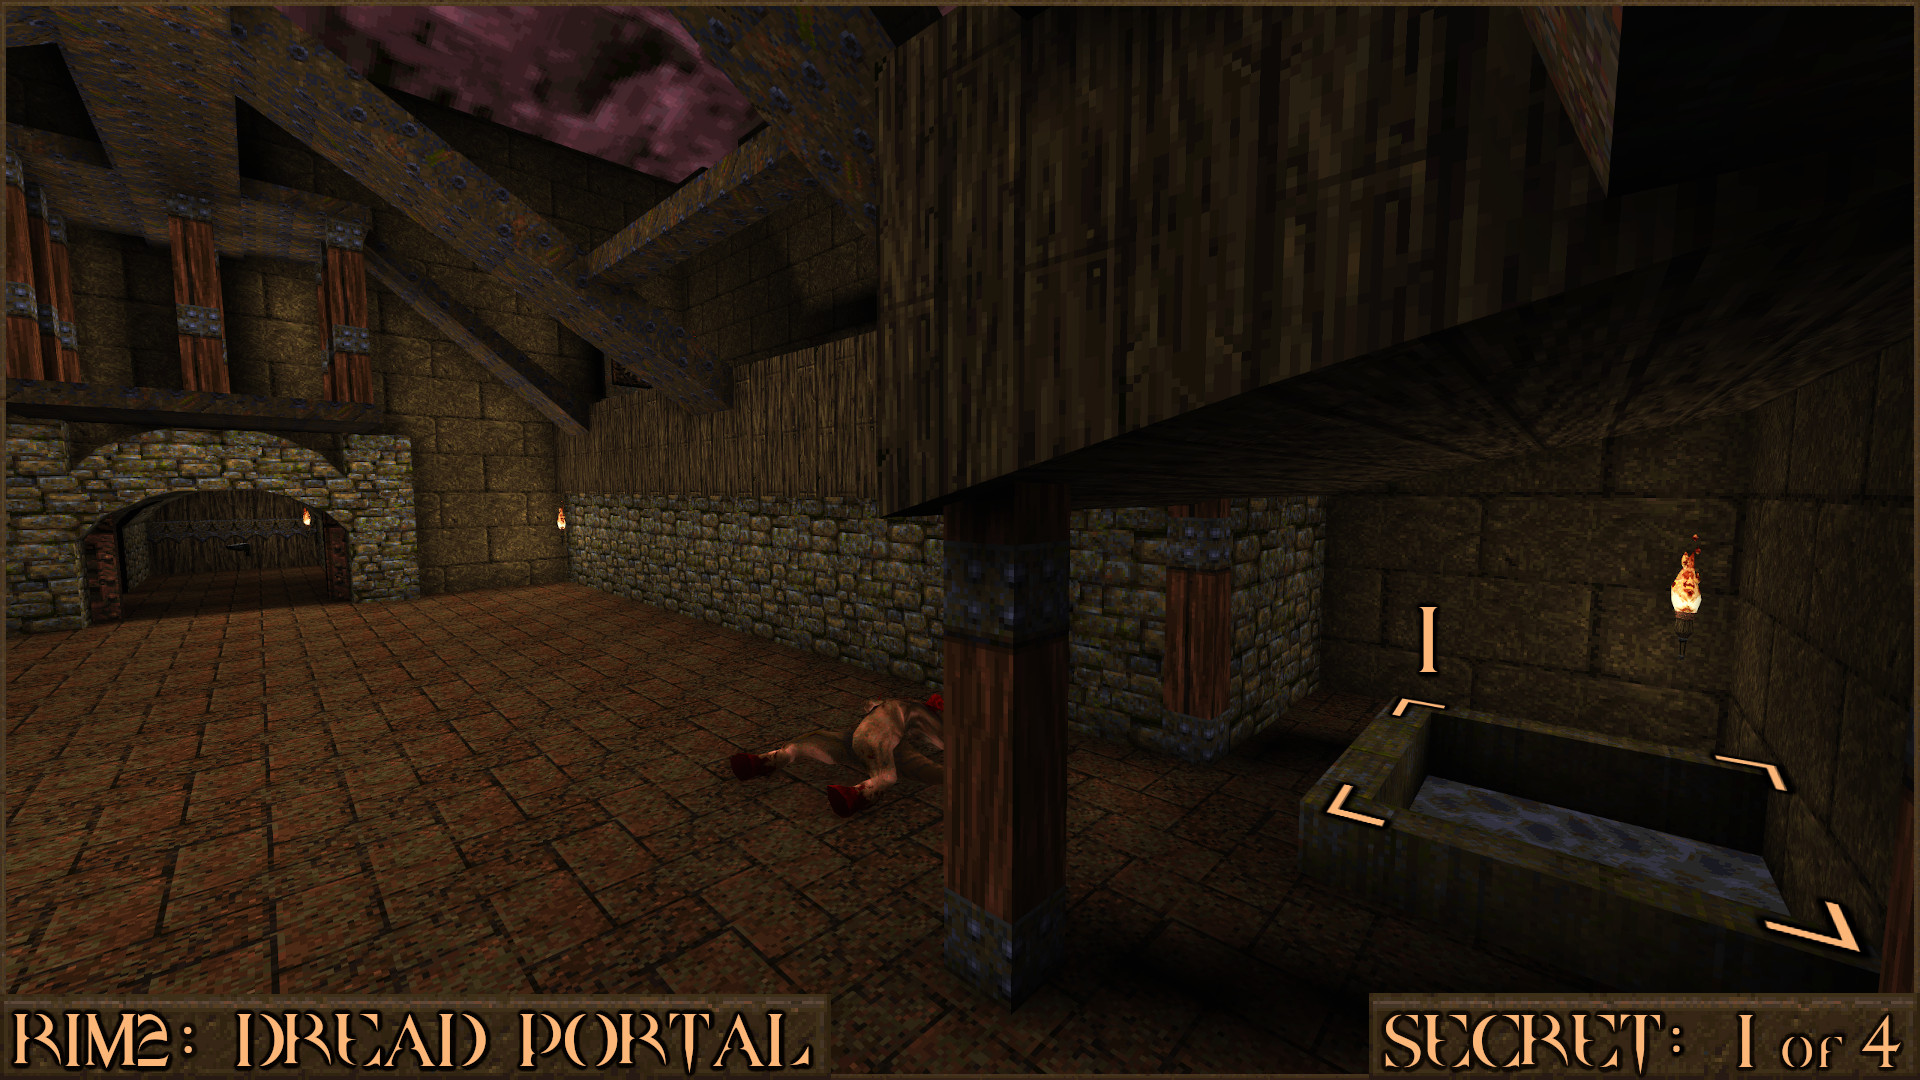
On one wall is a push switch (
) that will move a large piece of the central geometry () and allow access to the secret.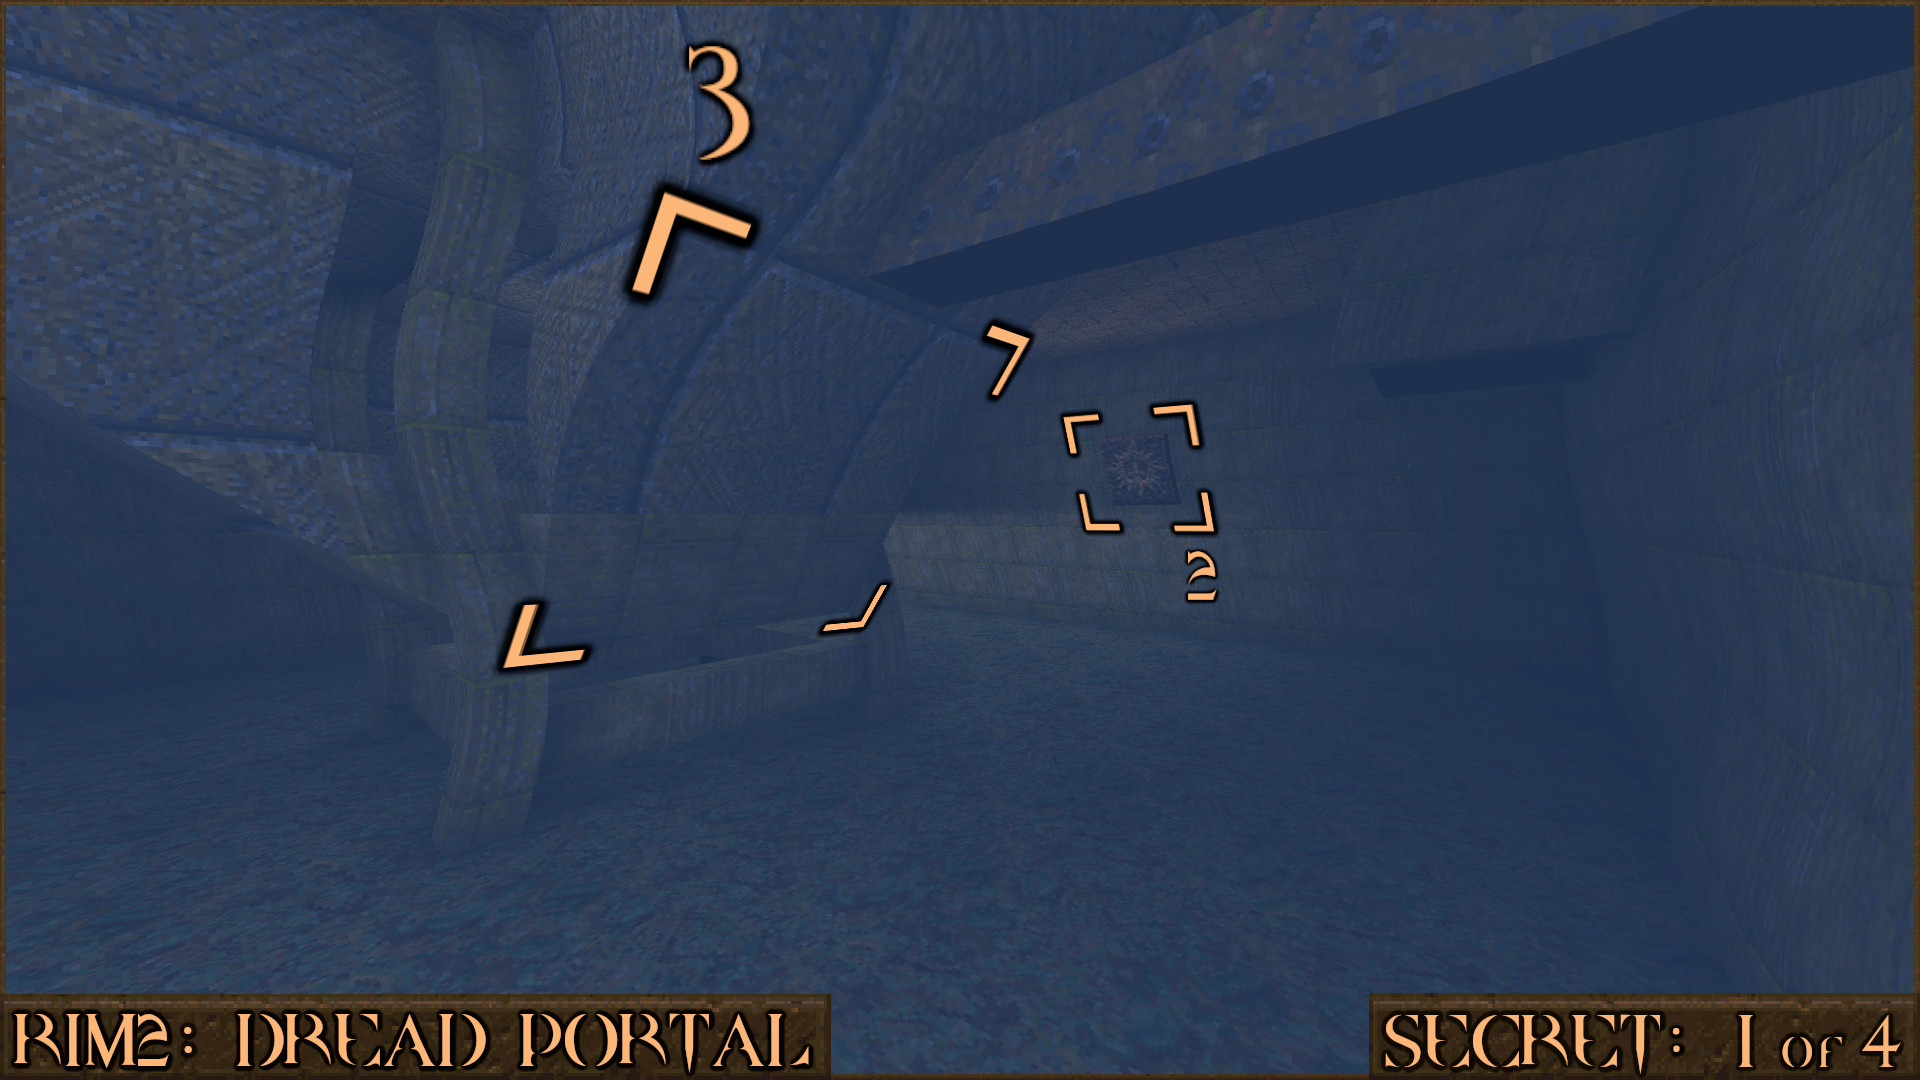
Reward:
Secret 2 of 4
In the same underwater area as Secret 1 look to the left of the push switch. There is a 4th hole that you can use to surface in to a secret area containing several items.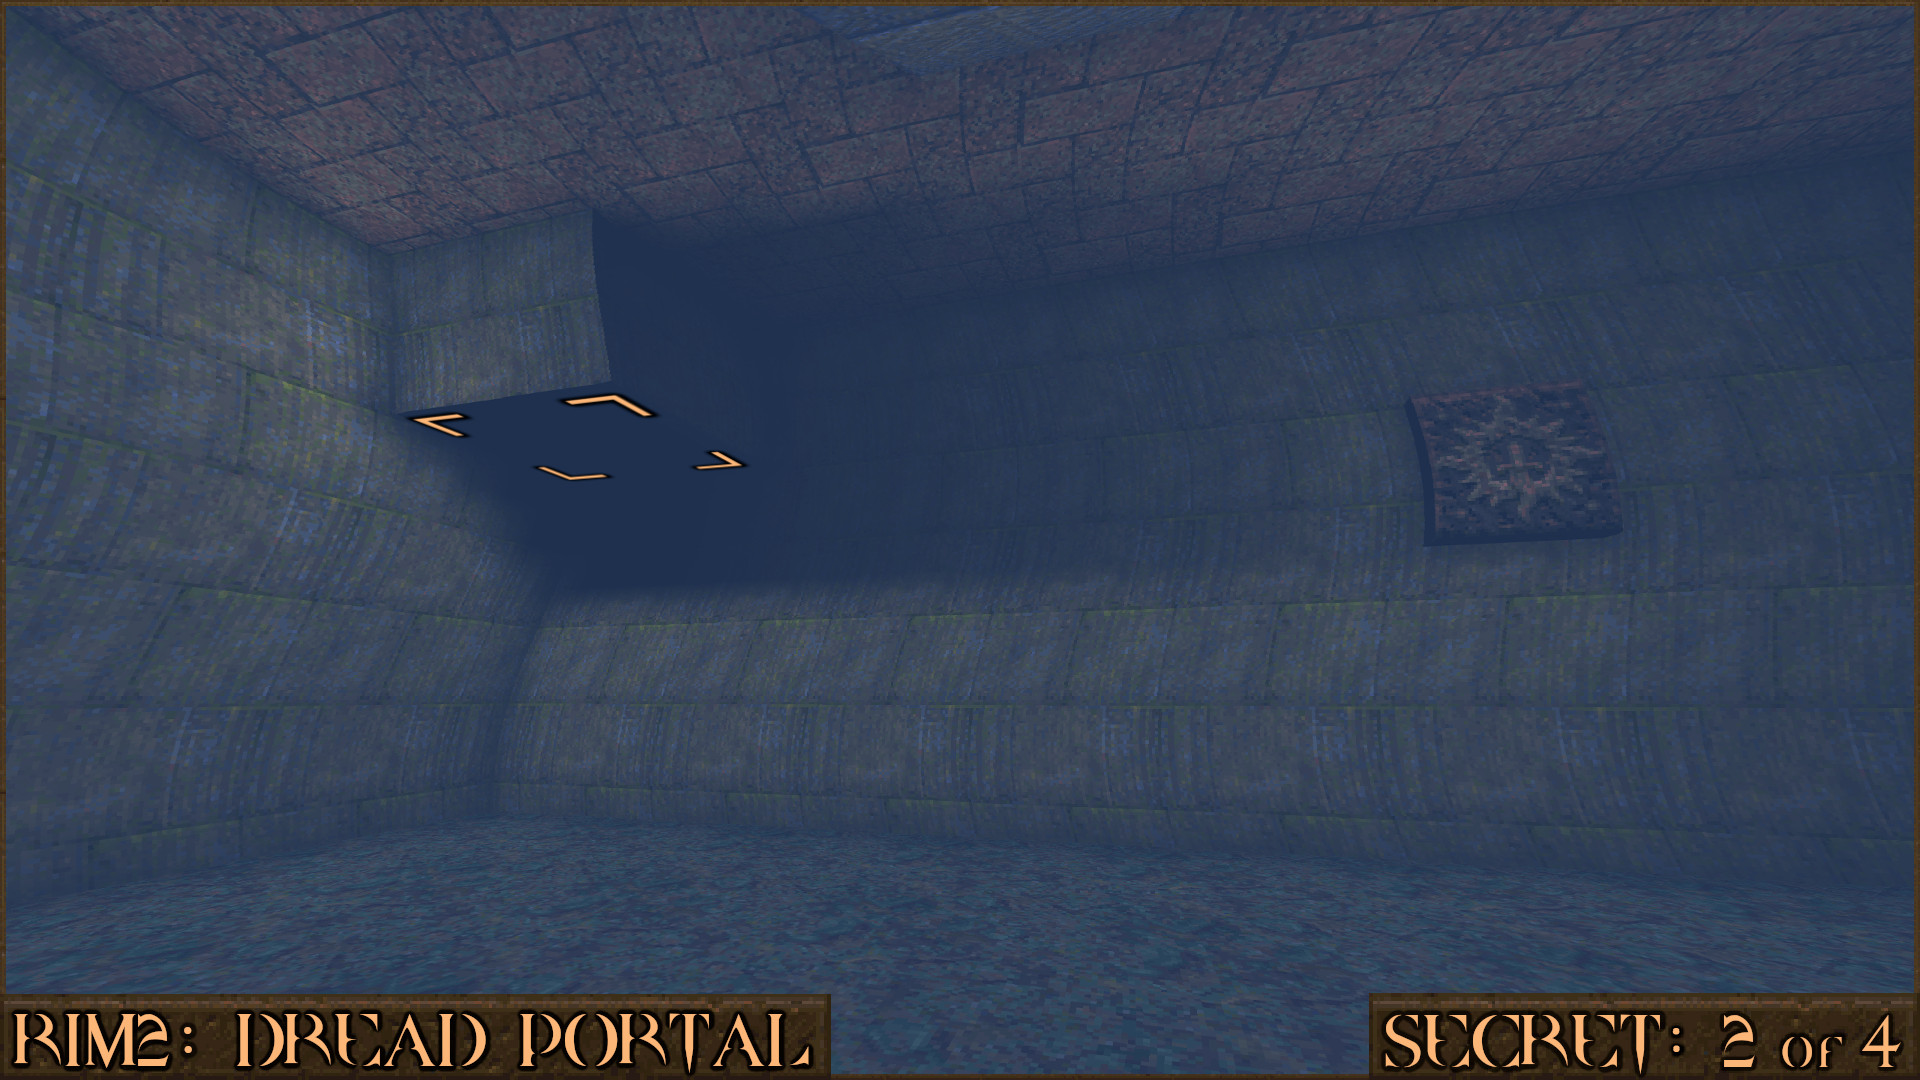
Reward:
Secret 3 of 4
After you pick up the Silver Key you will drop back down then ride a very small elevator () up in to a cramped space with a Large Health and a pack of Small Rockets. 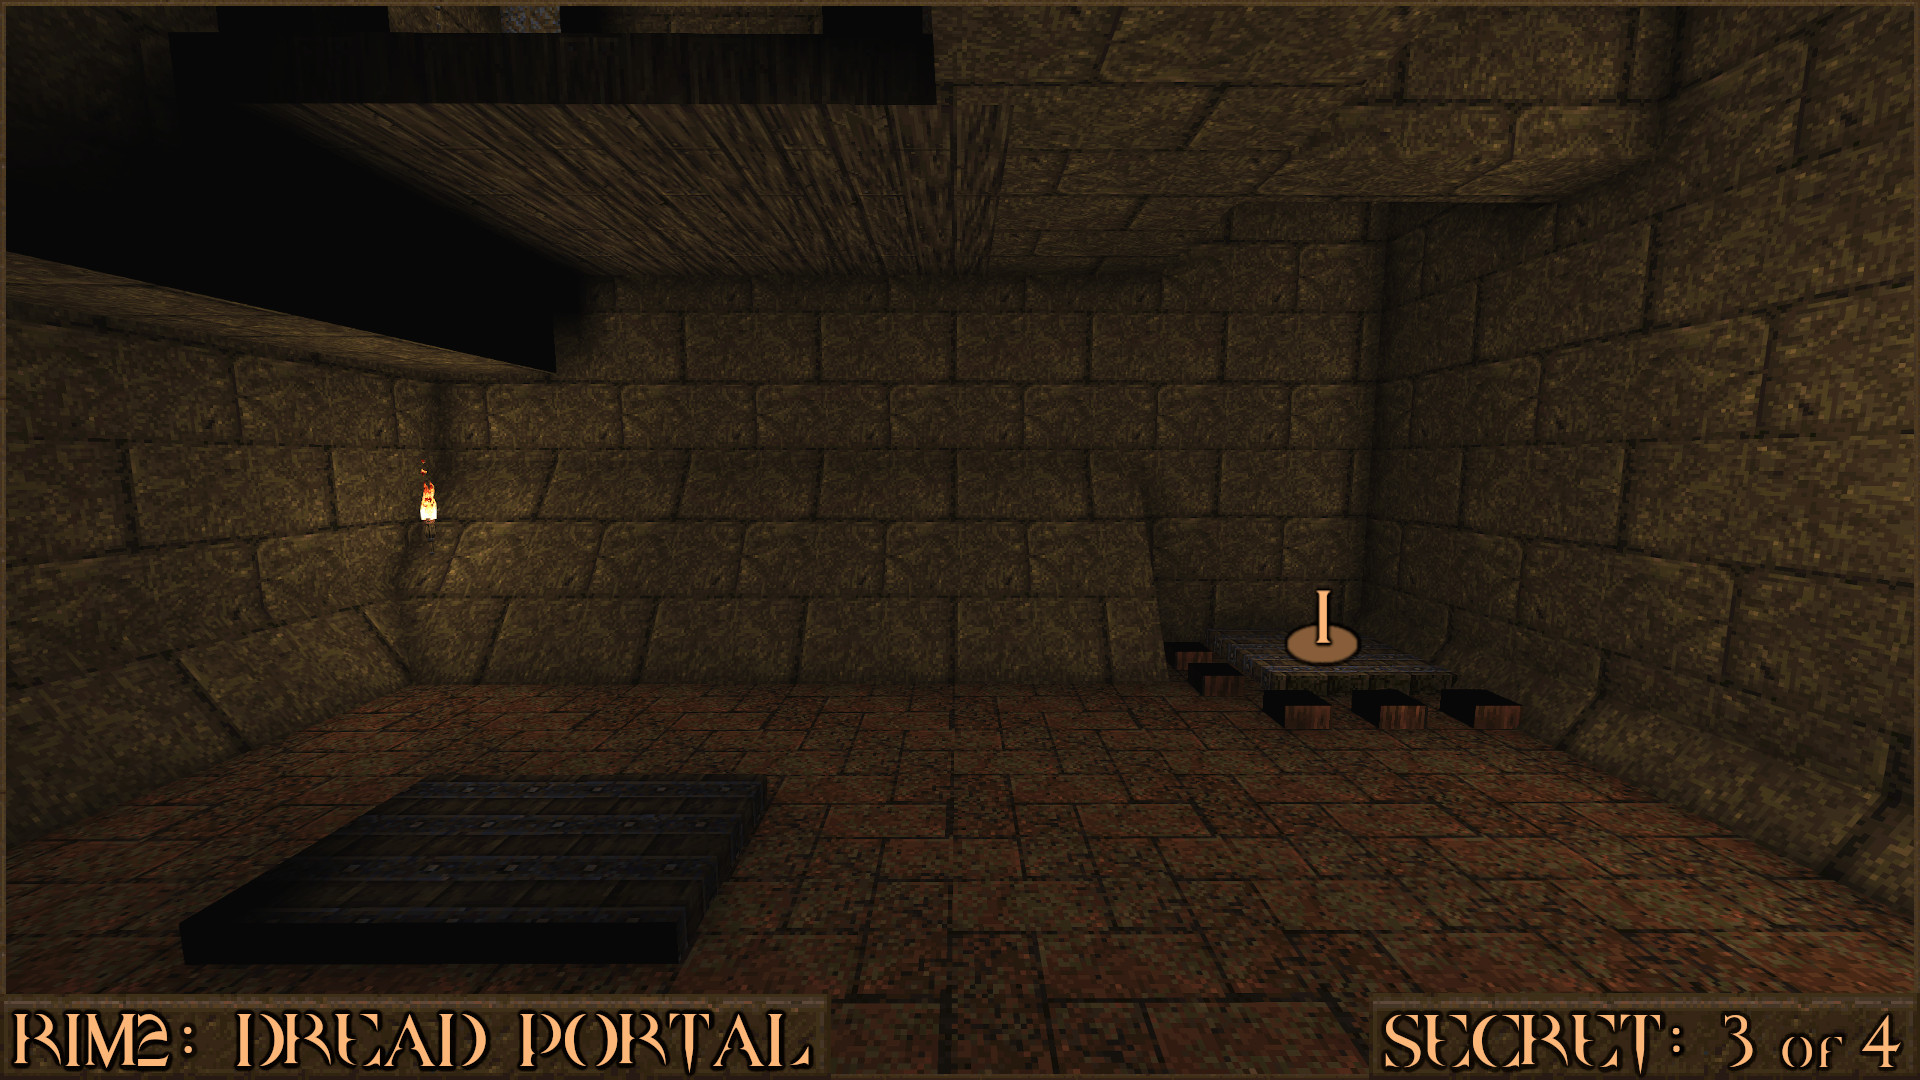
As soon as you drop down the hole in front you of look to your right to see a wall open (
) containing the secret. This wall is only open for a few seconds so be quick. If it closes before you can find it then just head pack to the cramped elevator and jump down the hole again to reopen it.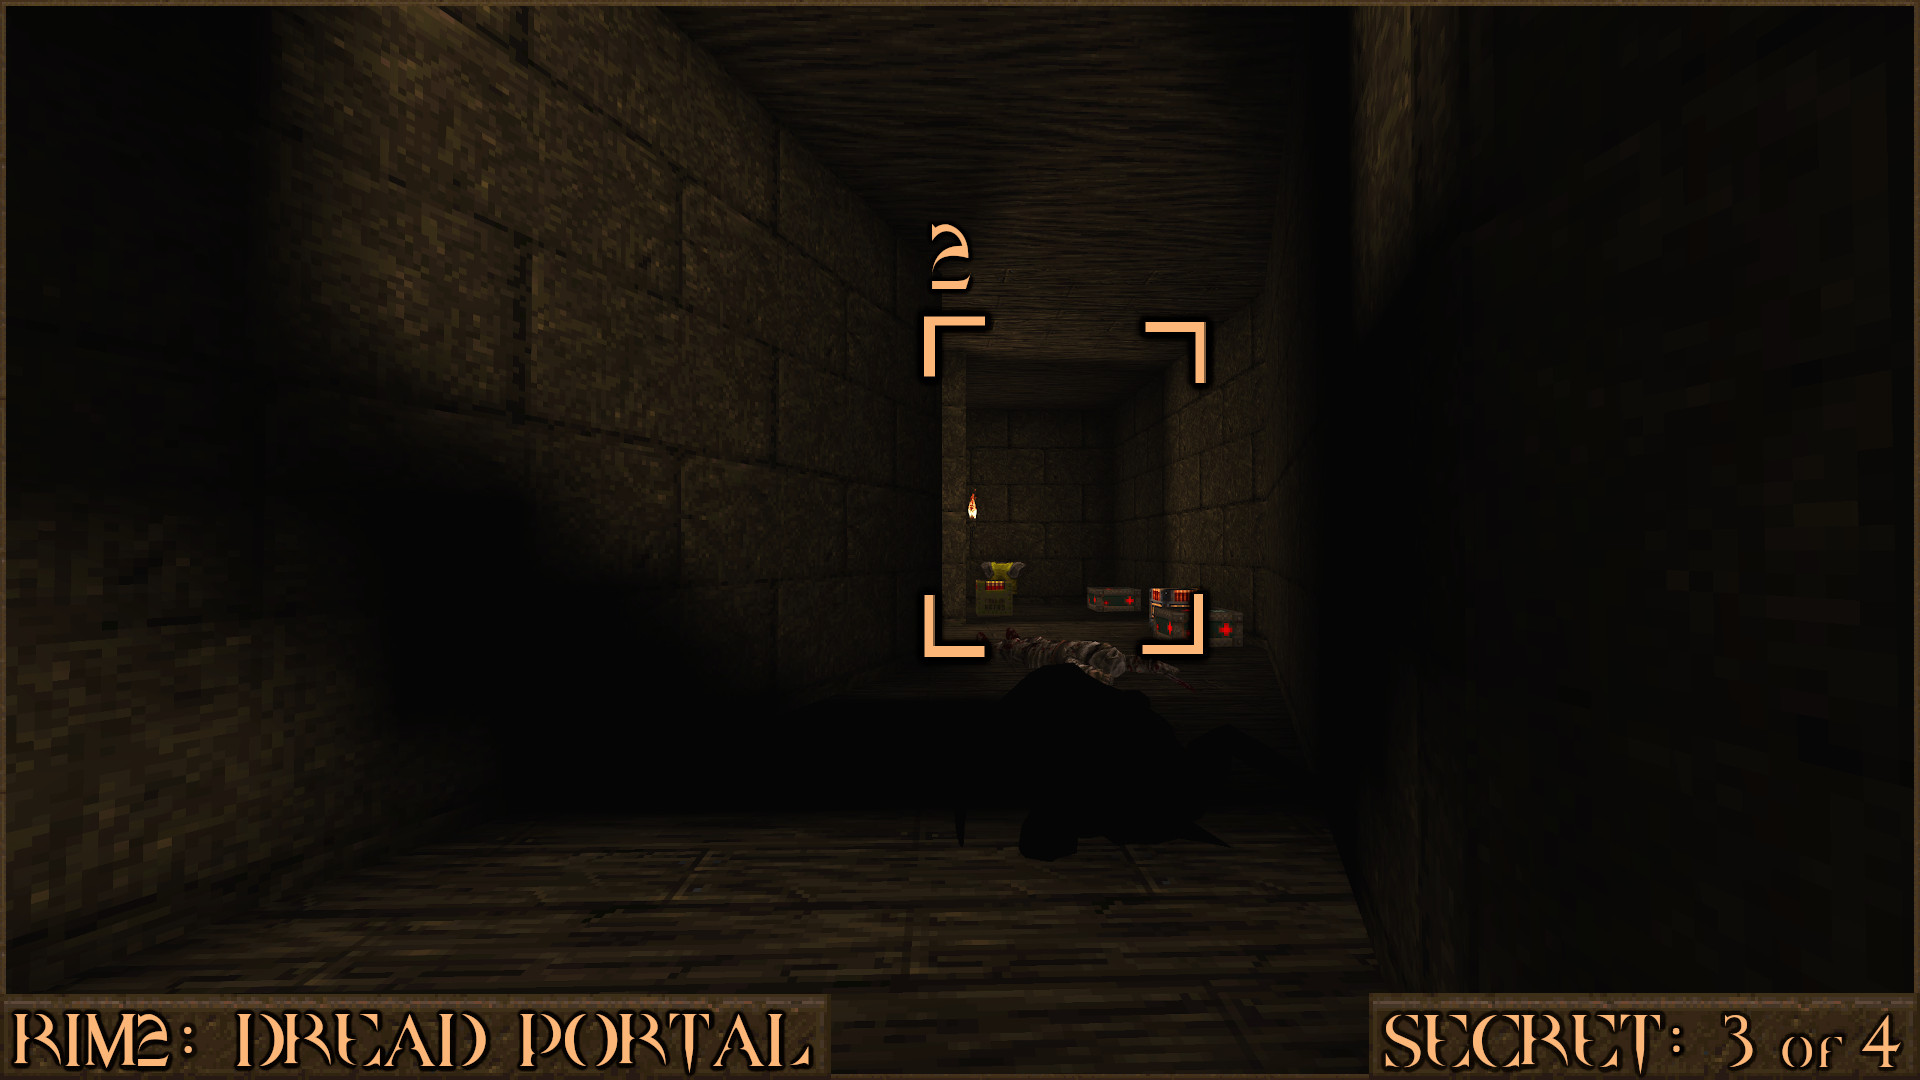
Reward:
Secret 4 of 4
You will come to a large square room with a Nailgun and two push switches. It is very important to only press the LEFT button () as the other will lock you out of the secret.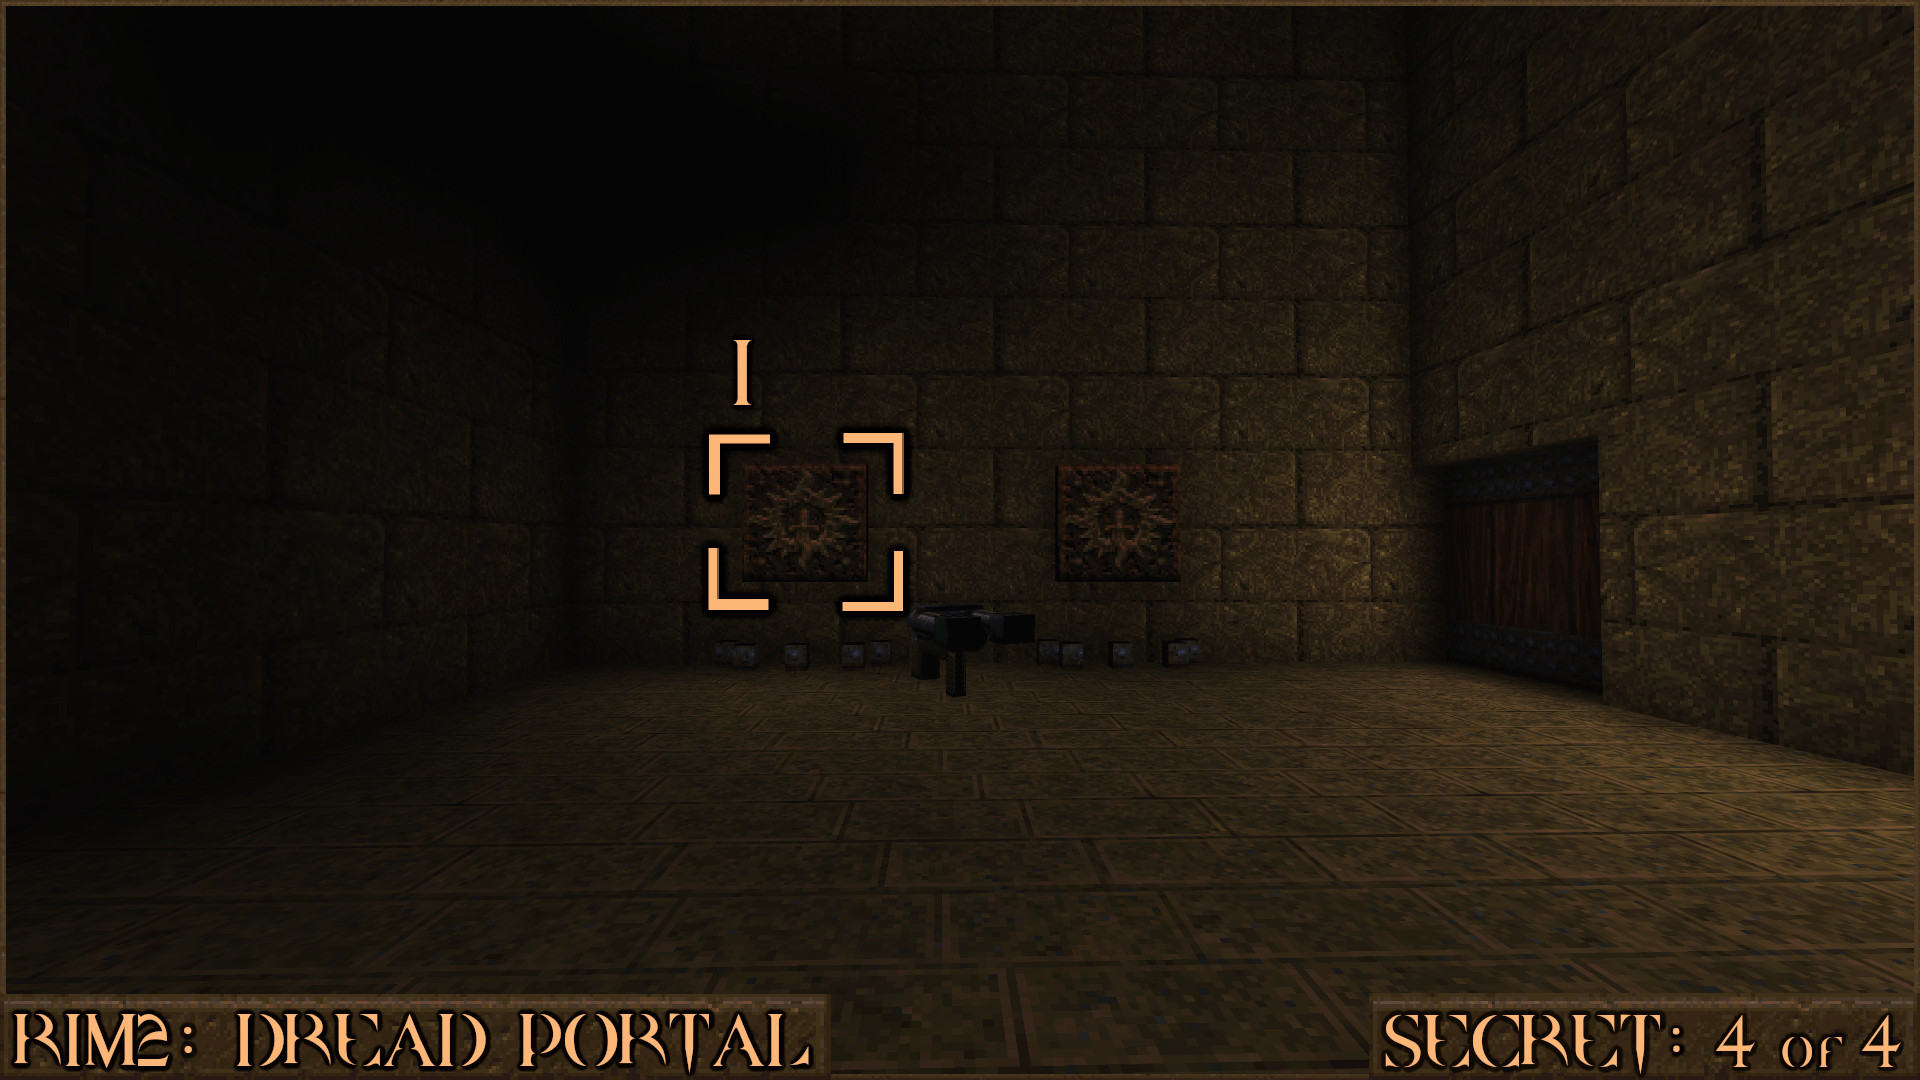
Pressing the left button will immediately start moving the roof to crush you so quickly find the small hole in the ceiling (
) and stand under it. Once it has hit the floor you can jump on top of the roof and ride it back up.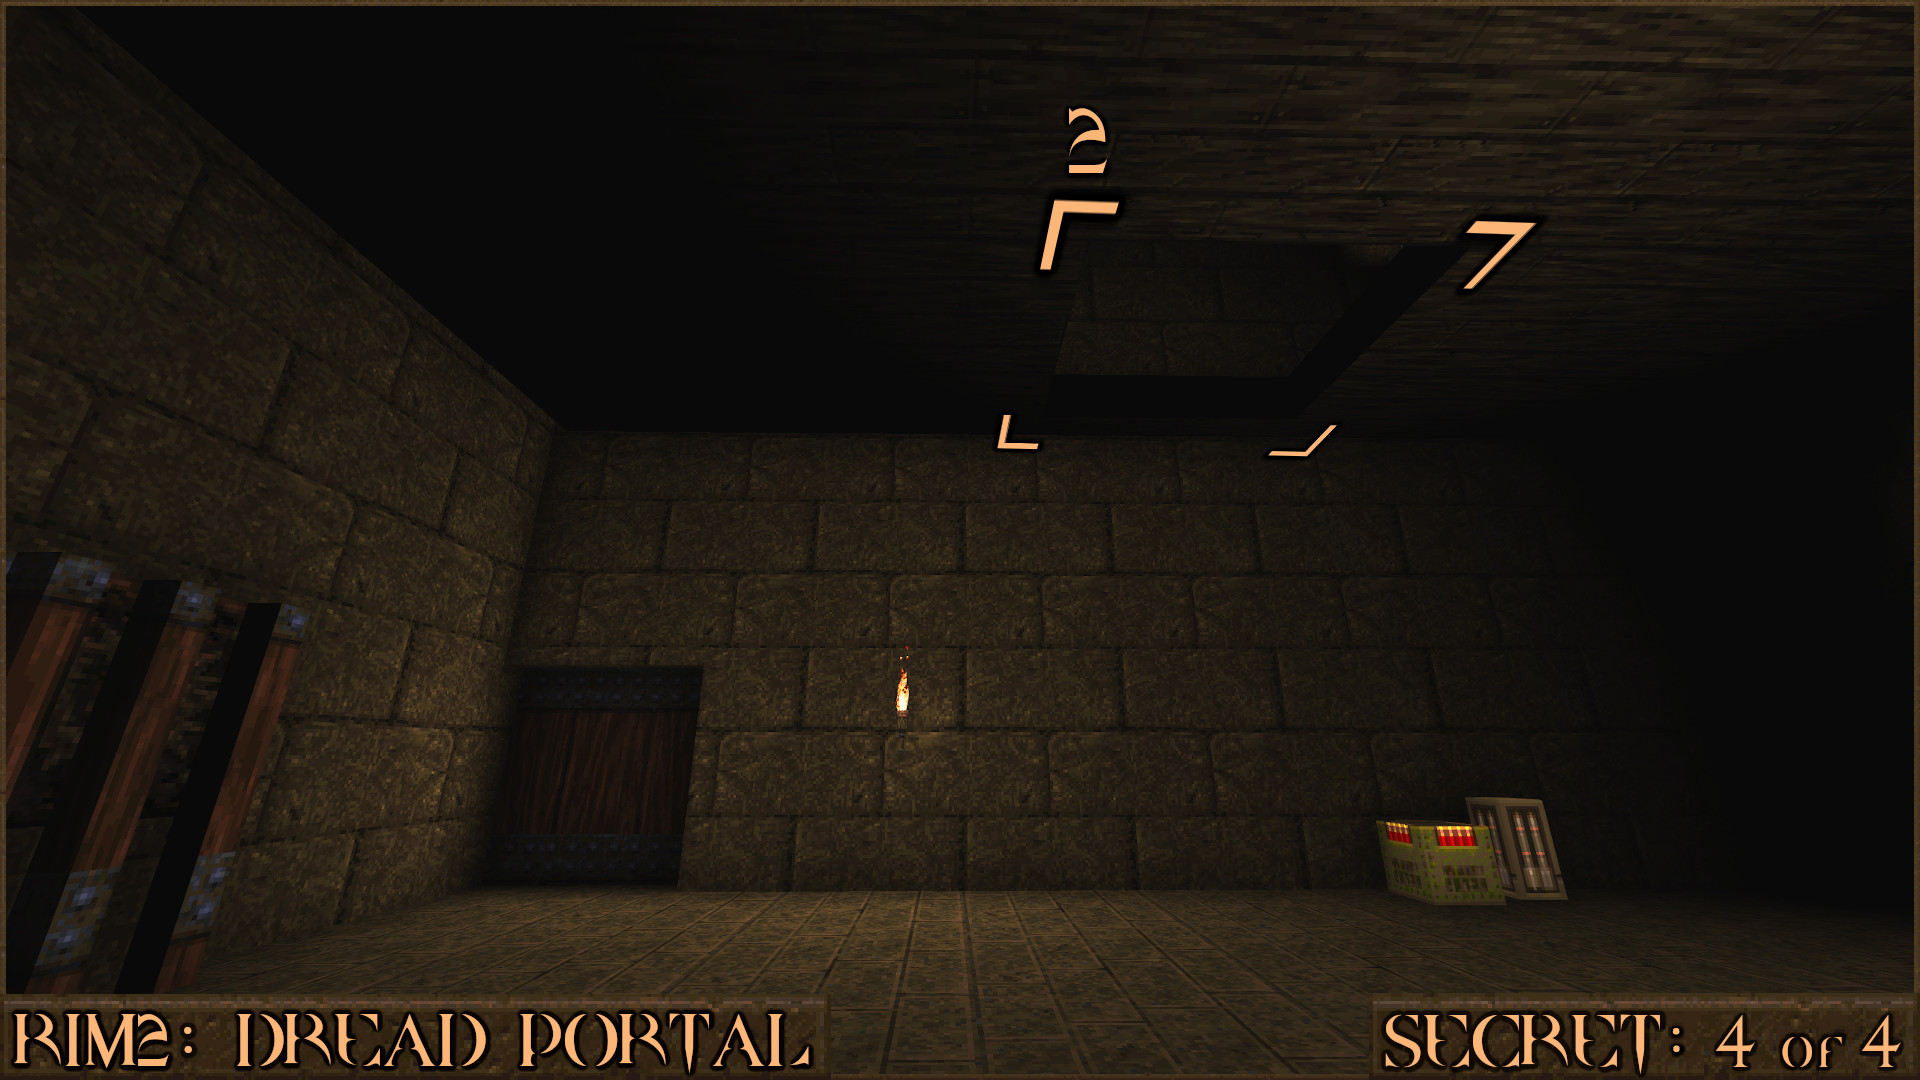
When it has reached the top you can see an exit at the side (
) that will take you to the secret.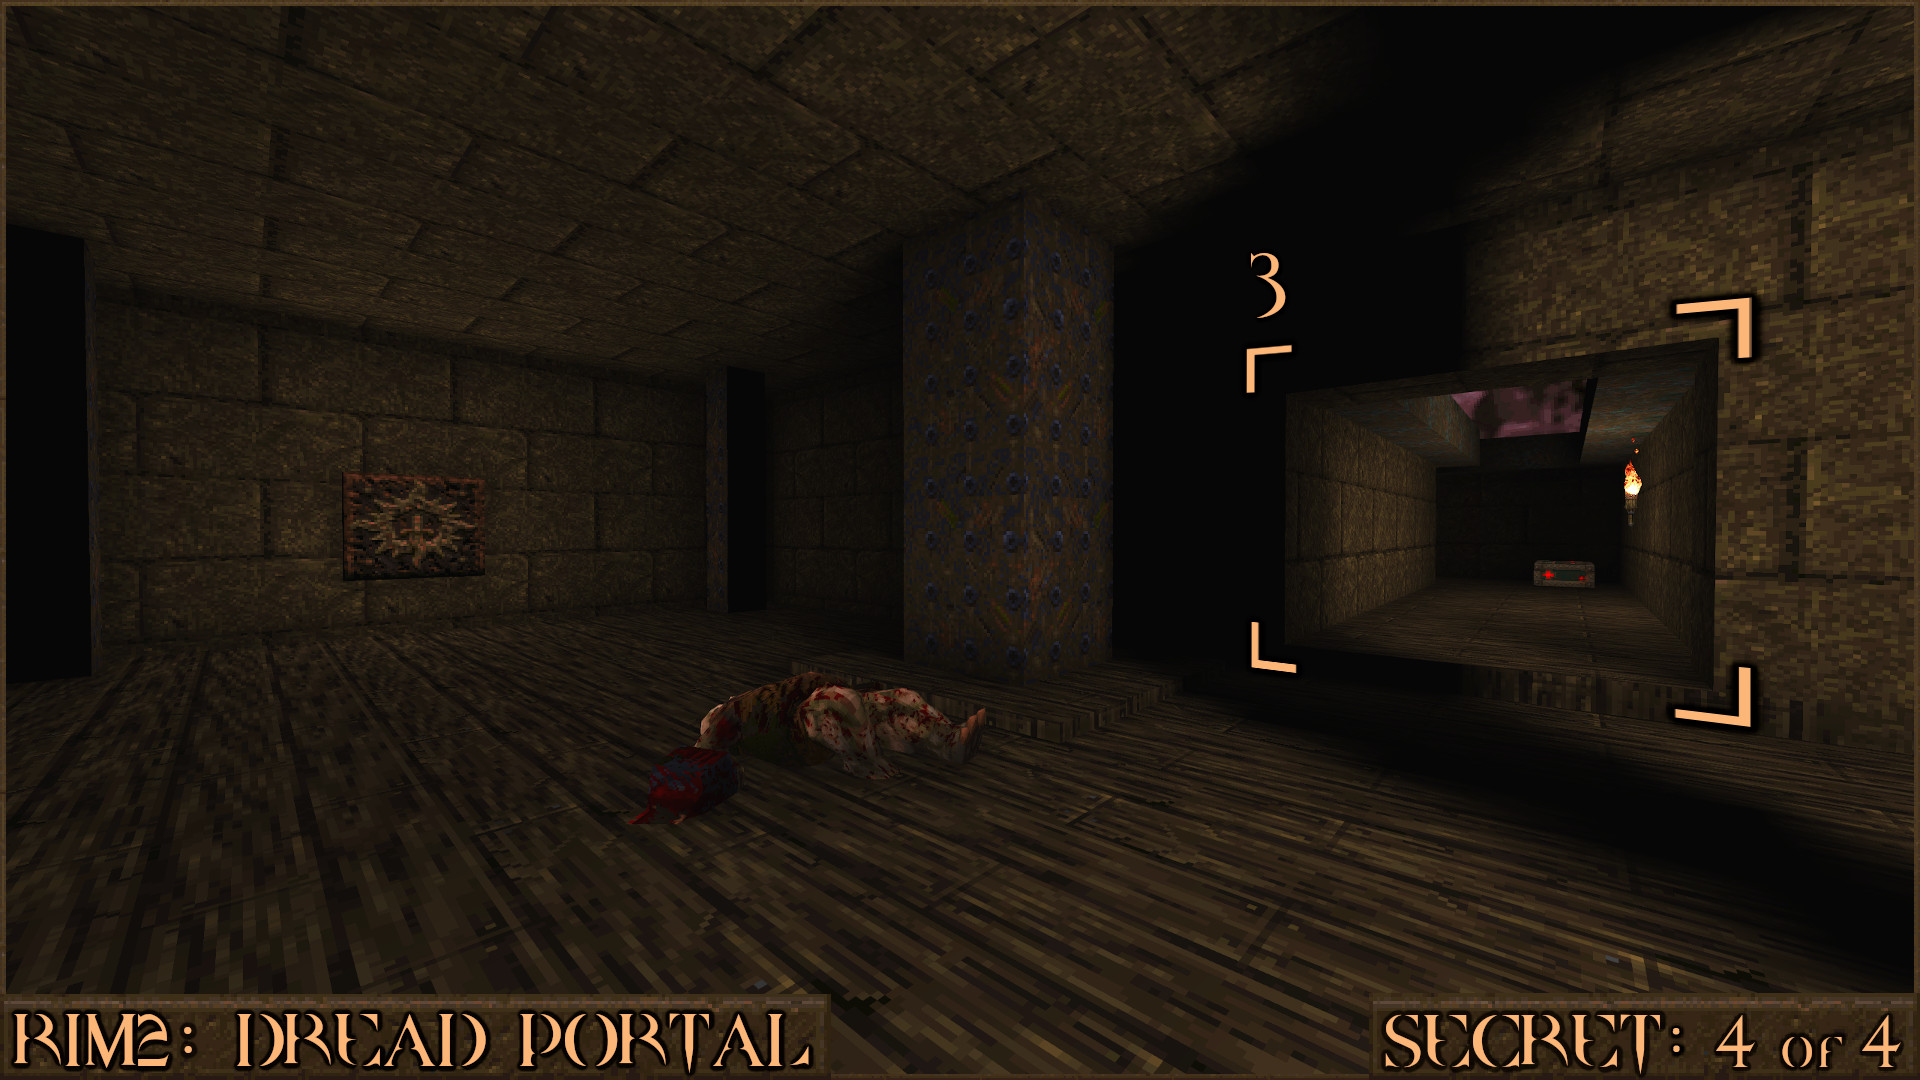
Reward:
R1M3: Judgement Call
Secret 1 of 6
From the start of the level walk under a large arch. In front of you is a small platform with wooden beams next to it and in the distance is the Gold Key. Jump down the gap next to the wooden beams to find a hidden ledge and the secret.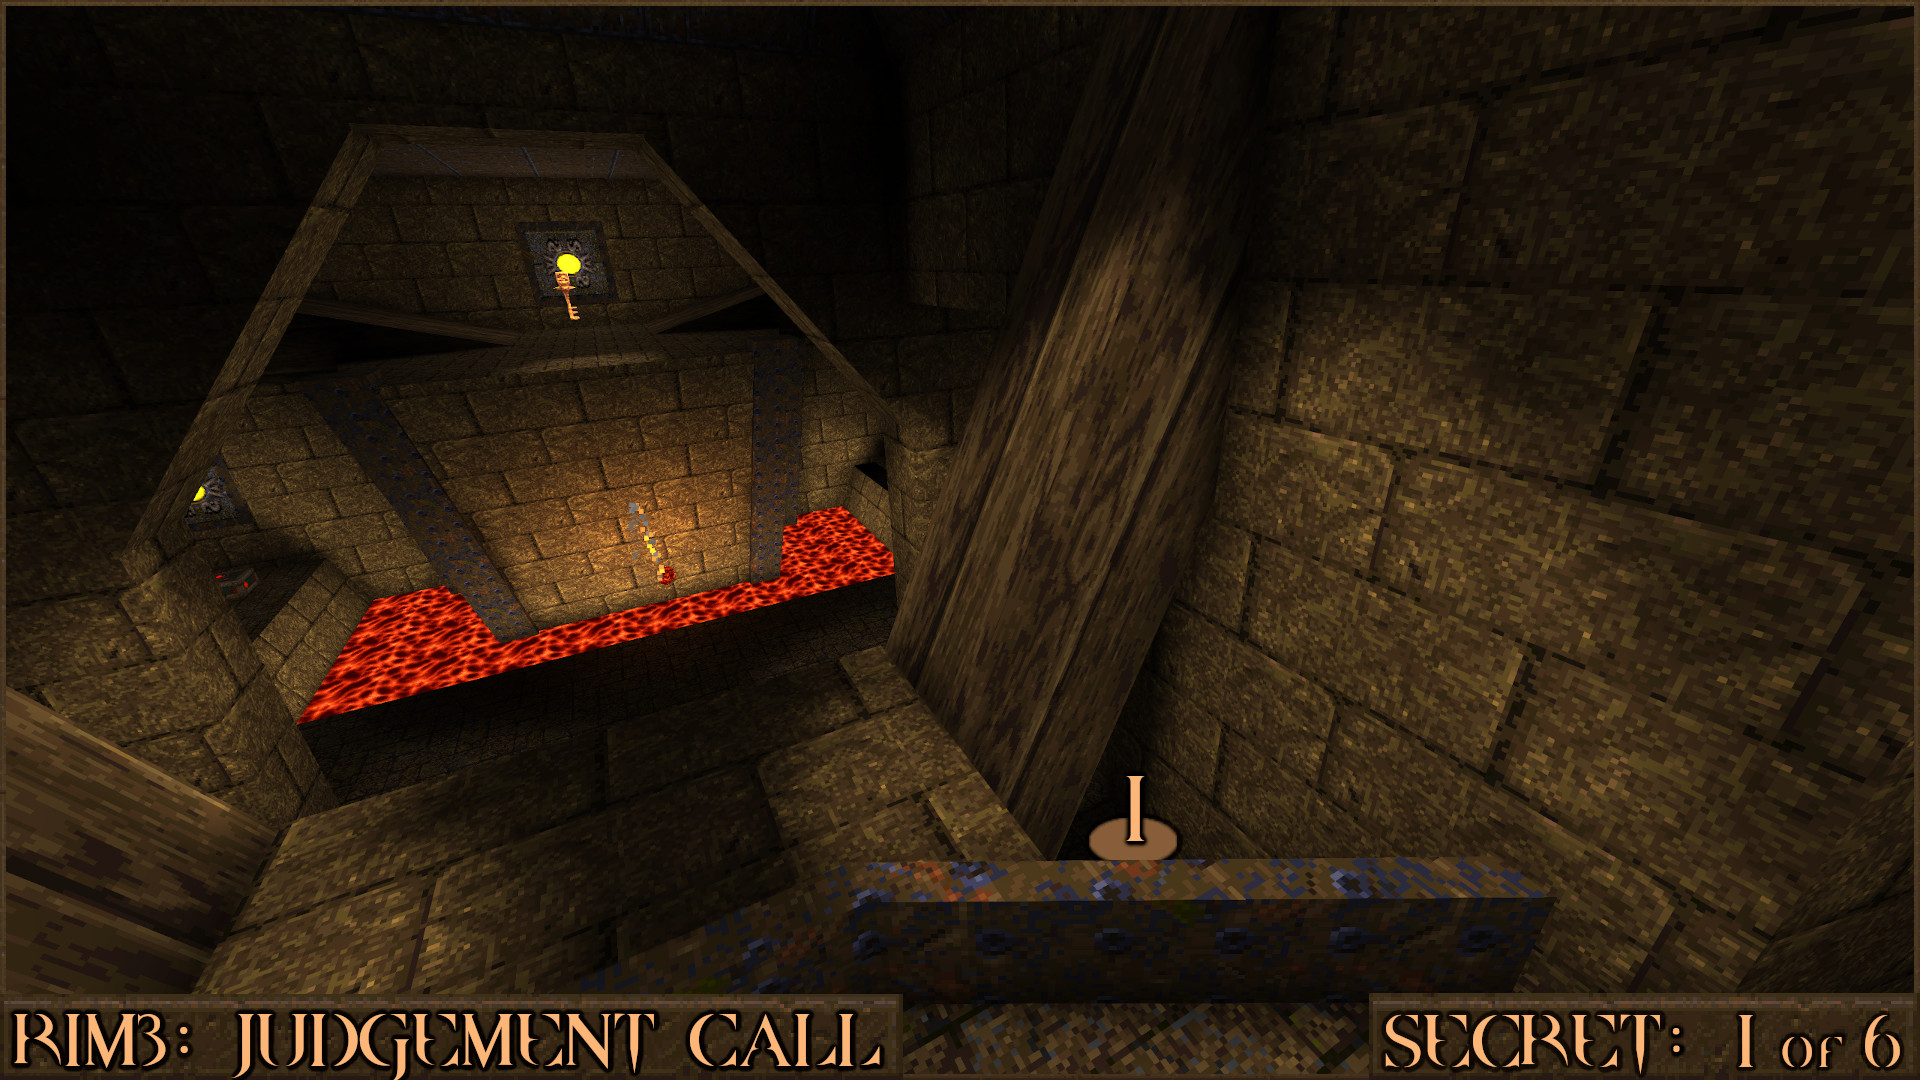
Reward:
Secret 2 of 6
In the room with the Double-Barreled Shotgun you will also see a large red stained-glass window (). Shoot it to make a nearby wall move () and reveal a secret.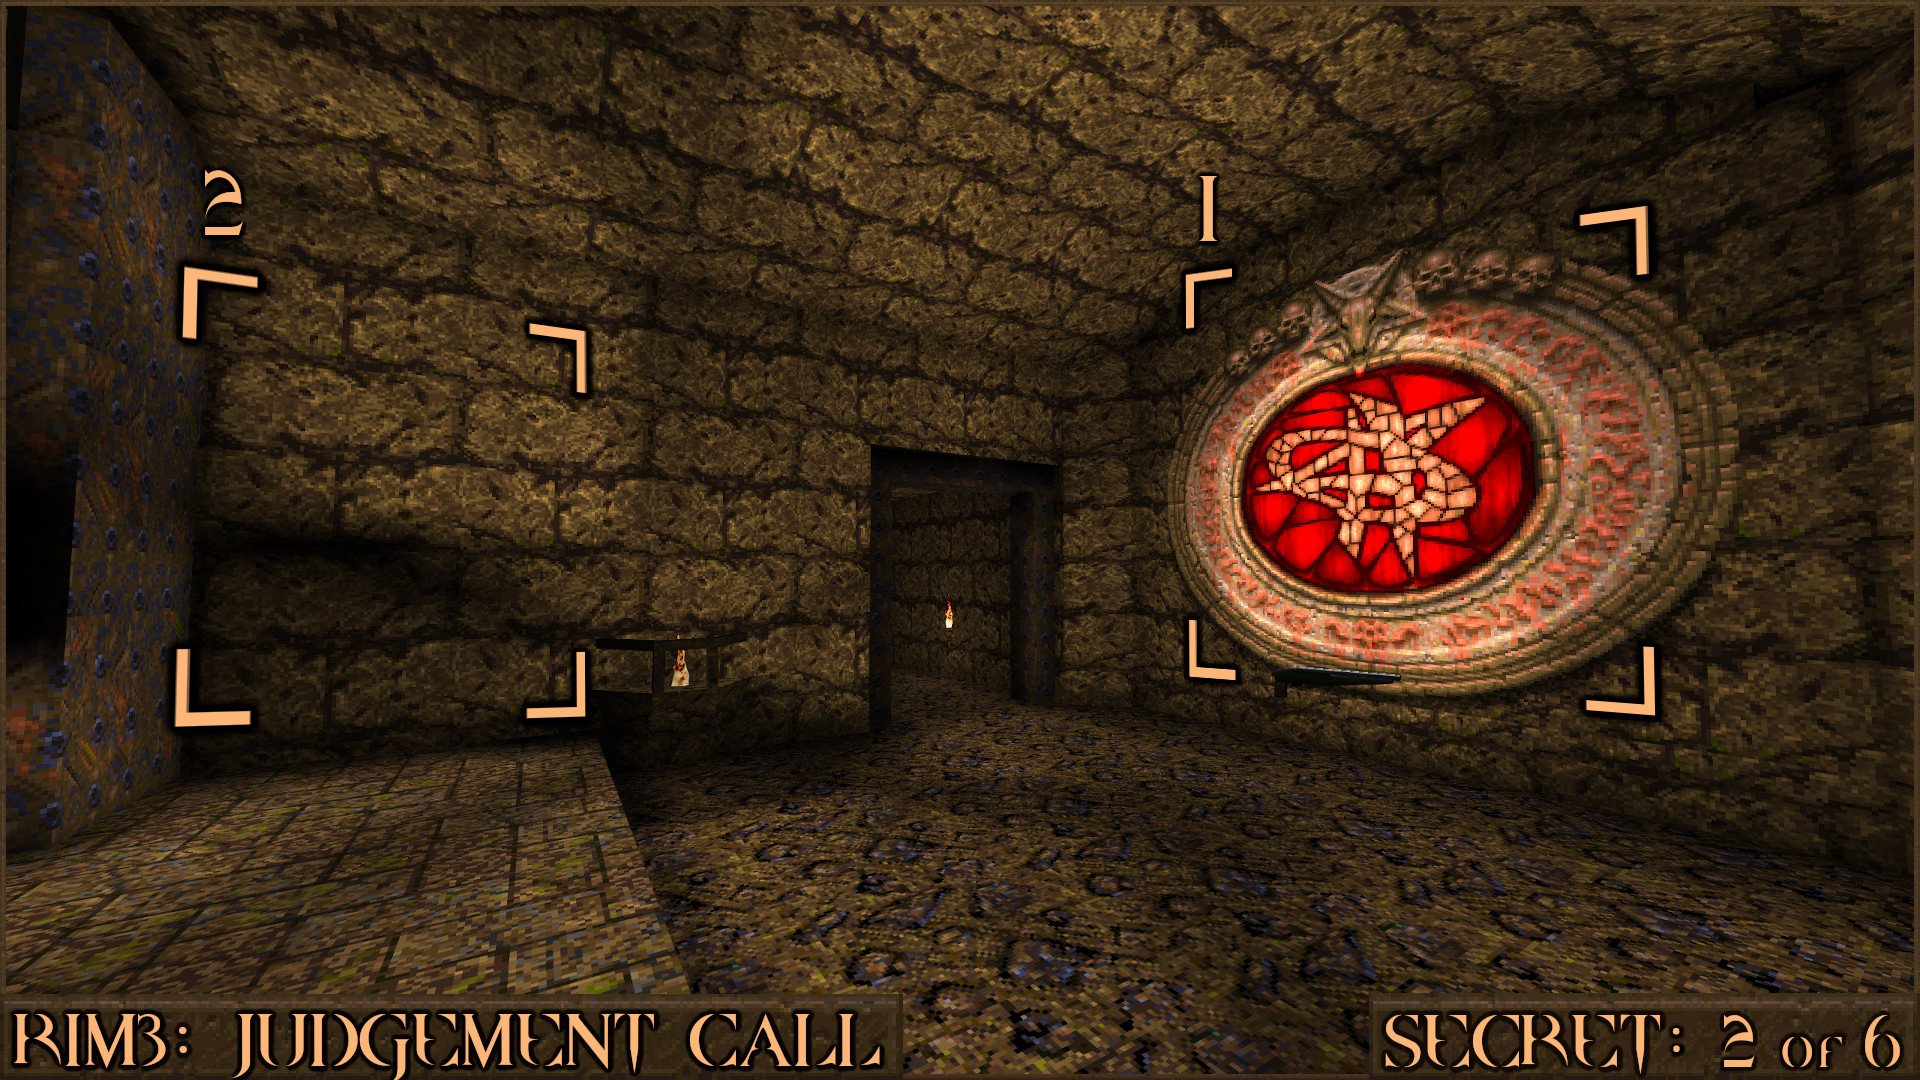
Reward:
Secret 3 of 6
You will take a lift down in to a room with an orange switch that states "You've opened the underwater passage" when used. Turn around and look above the doorway you entered to see a red shootable switch that activates two walls next to the elevator. Enter the one on the left for the first secret ().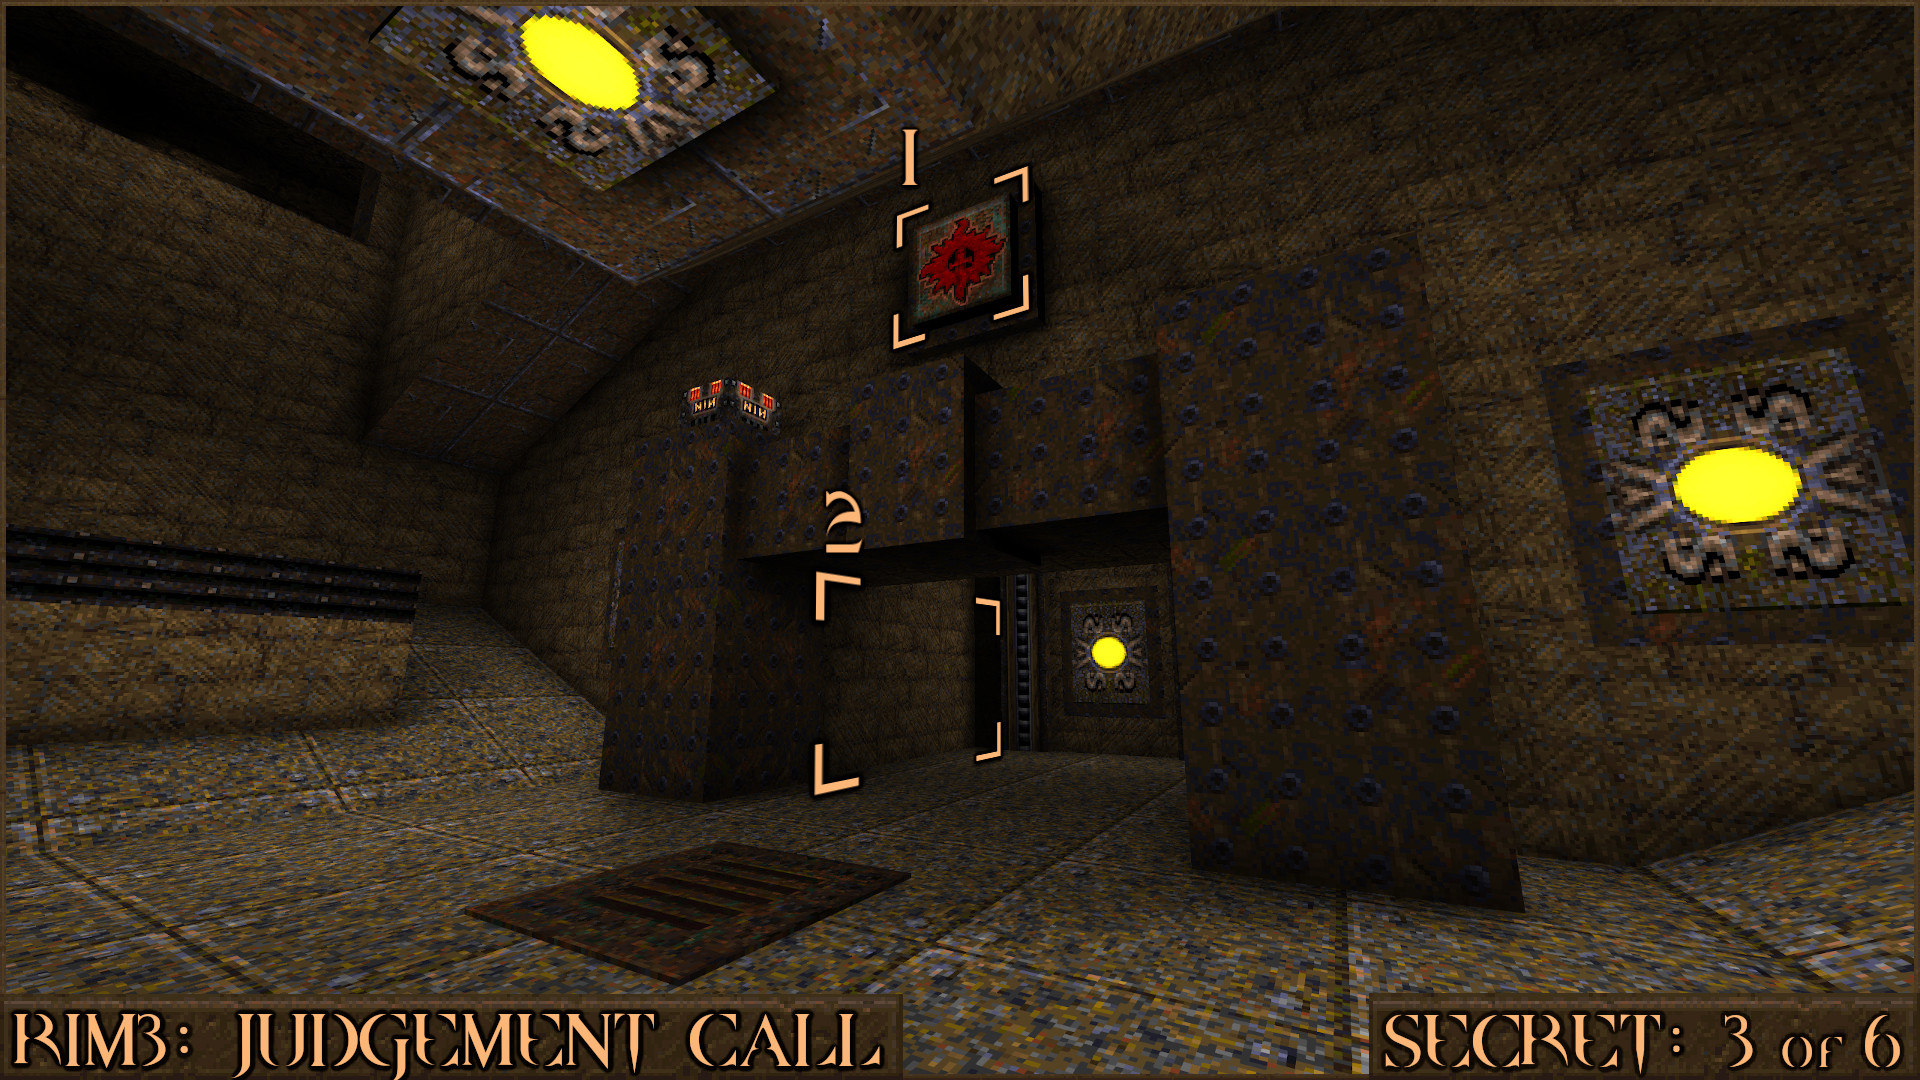
Reward:
Secret 4 of 6
Opposite the secret area of Secret 3 you will notice that another wall also moved to reveal a similar area that counts as another secret.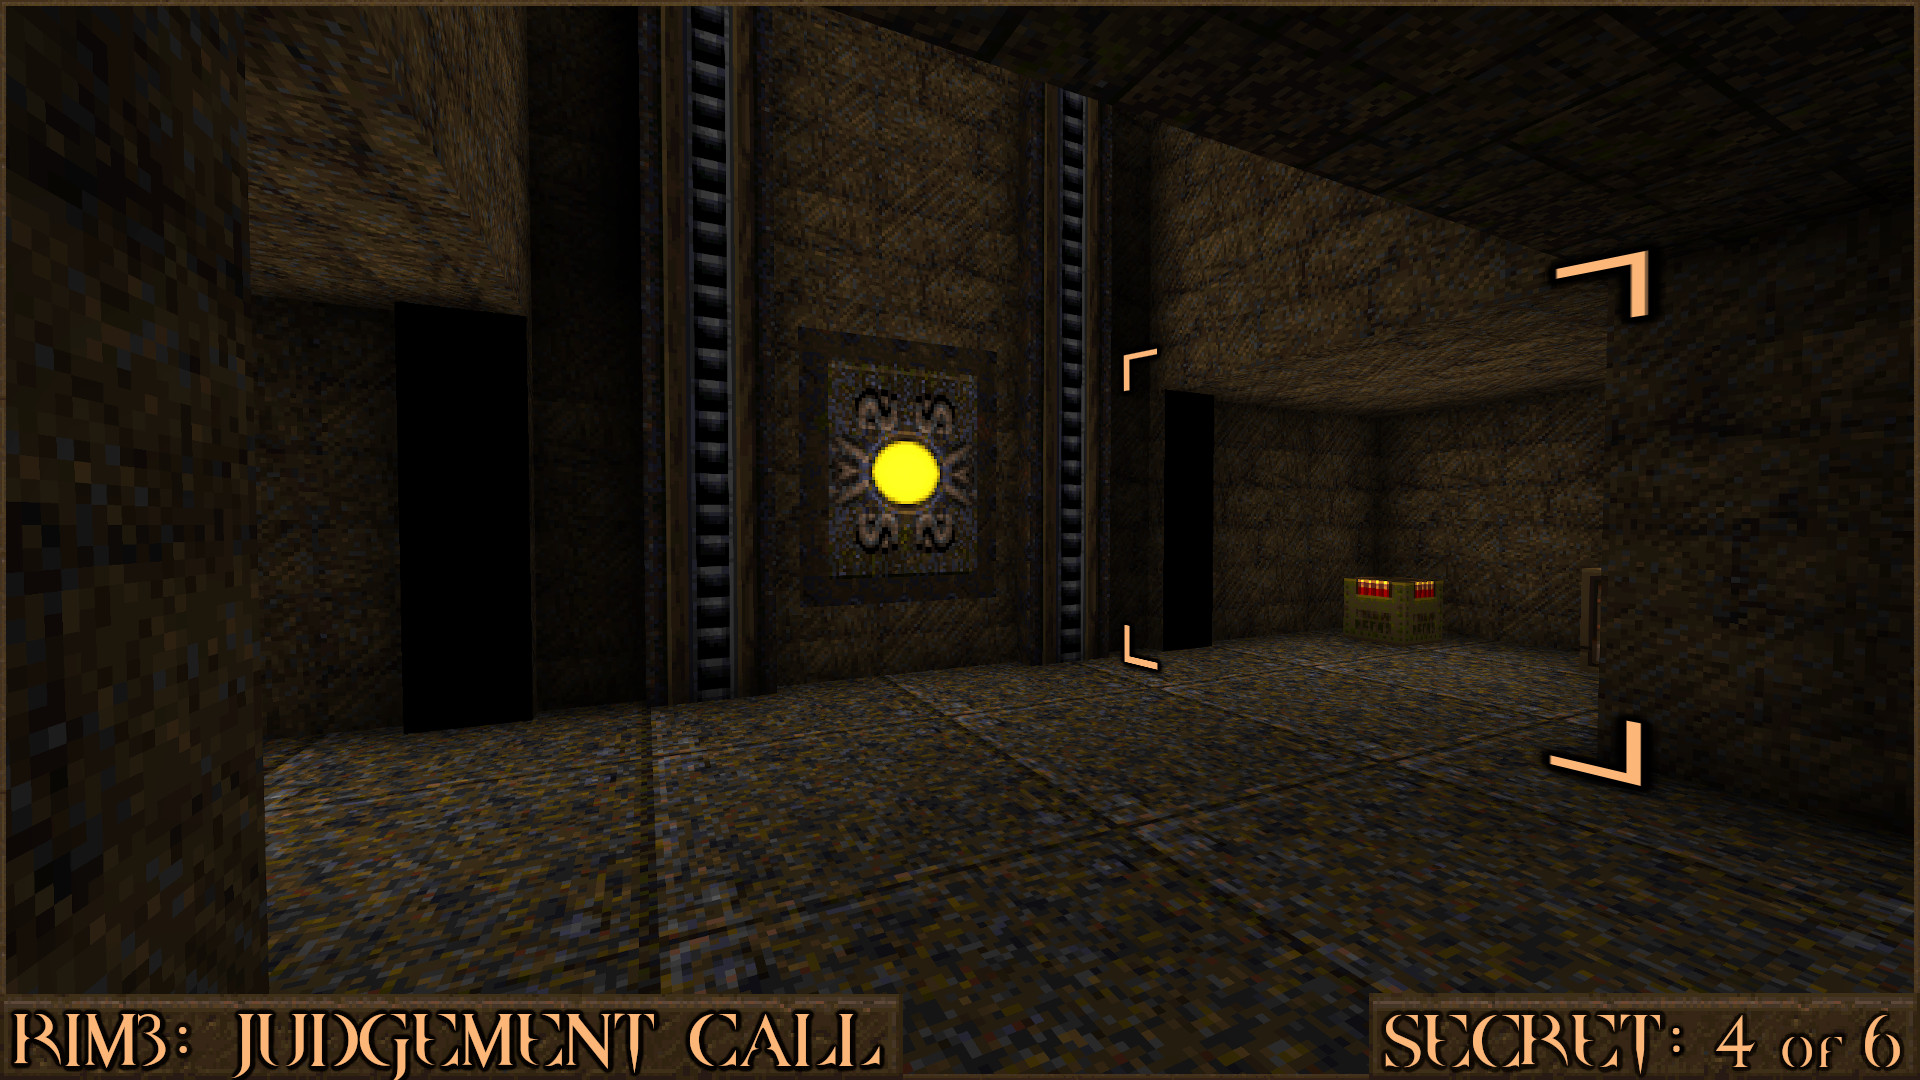
Reward:
Secret 5 of 6
Shortly after Secrets 3 & 4 you will jump in to an underwater area. Surface to see four yellow lights embedded in to the ceiling. Shoot the one that is blinking () to make a nearby underwater door move.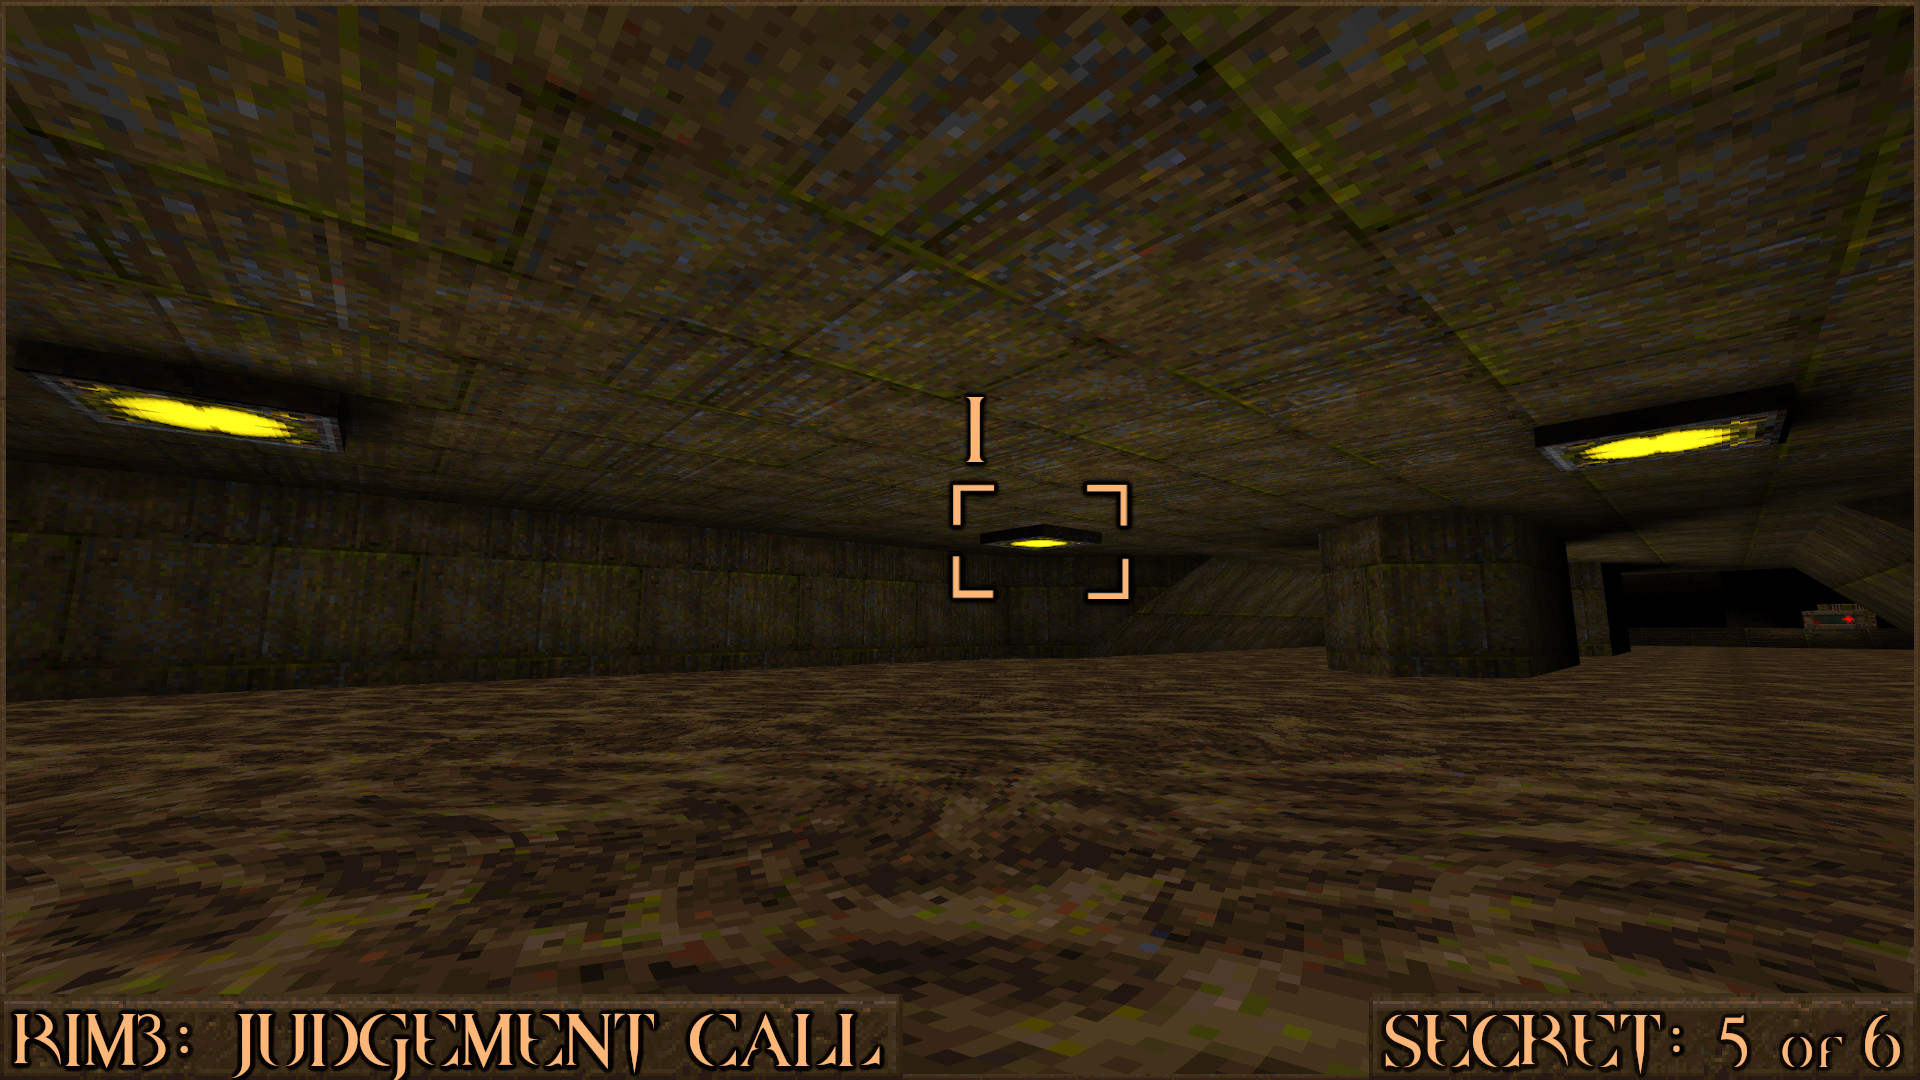
Swim back down to find a now accessible Megahealth (
) next to the ramp.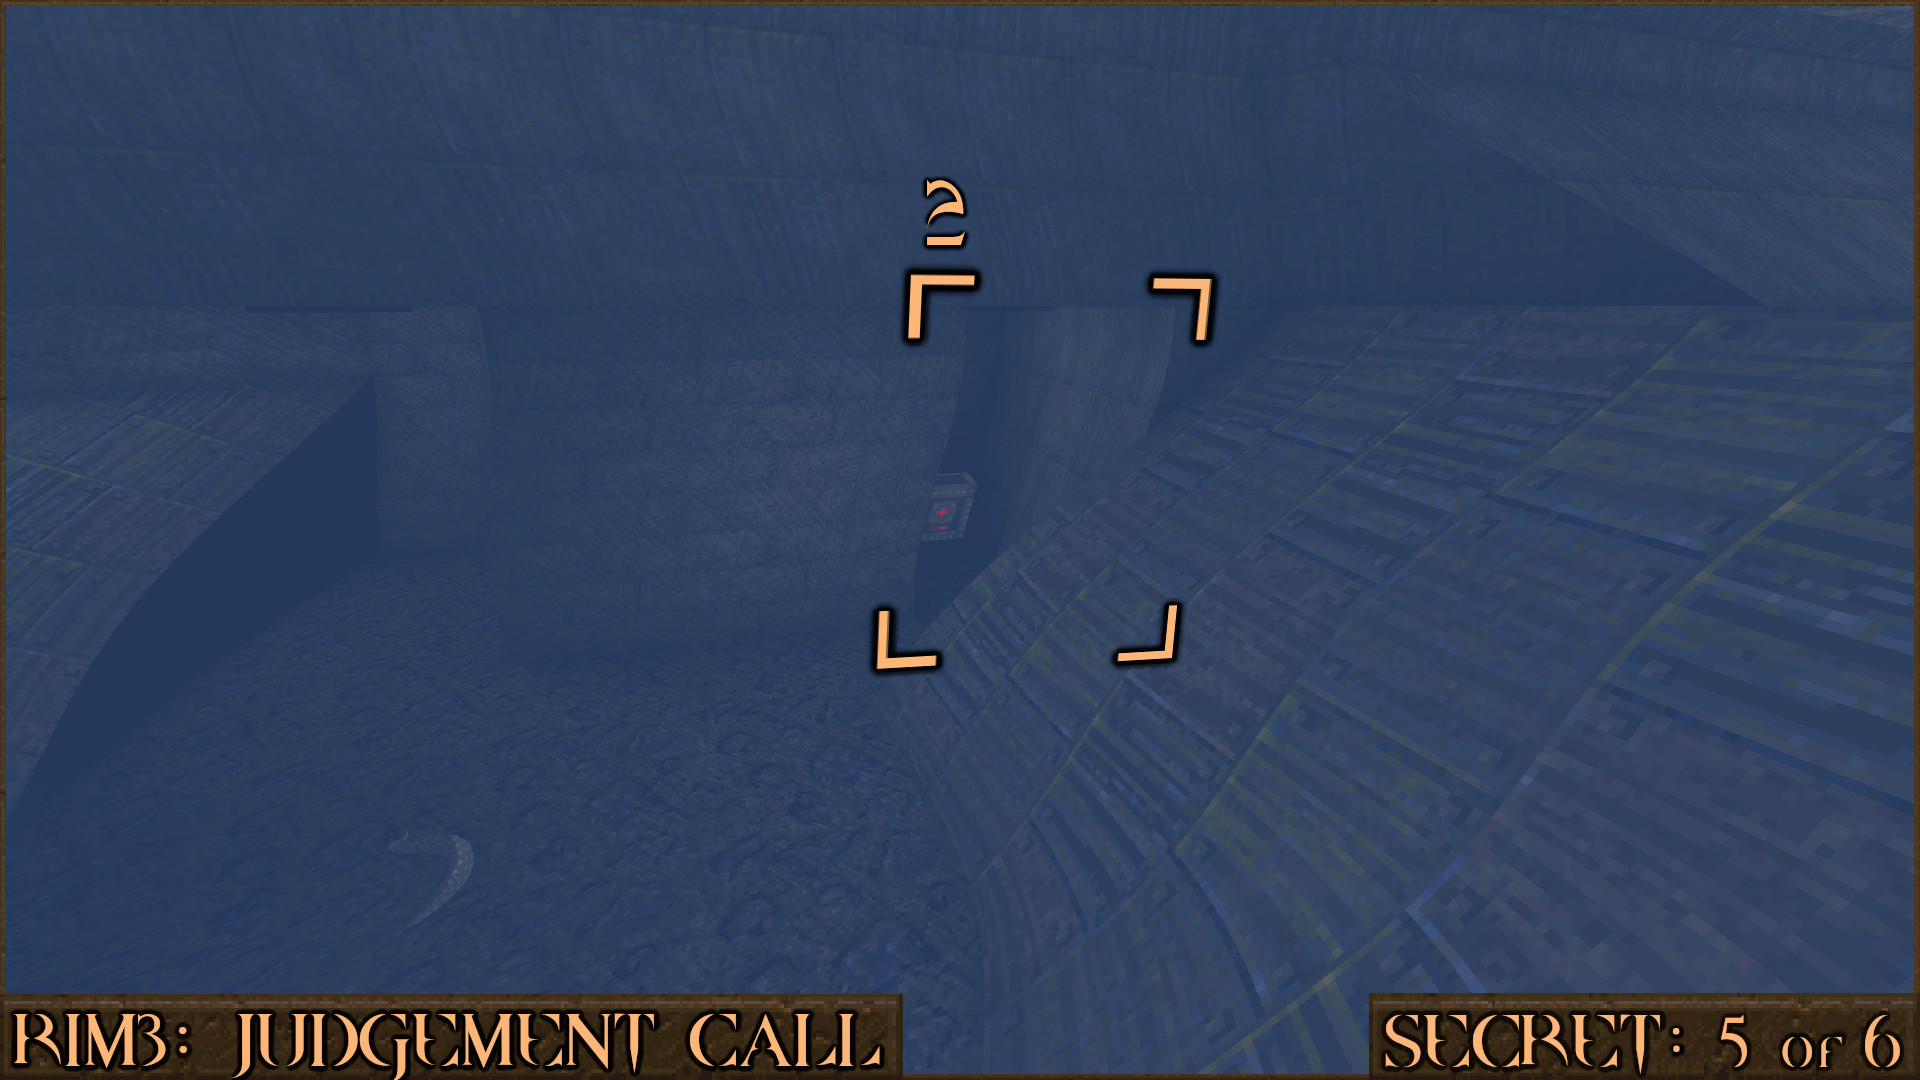
Reward:
Secret 6 of 6
In the room after opening Golden Key Door look to your left and try to jump through the wall. It is actually fake and you can freely move through it to find the secret on the other side.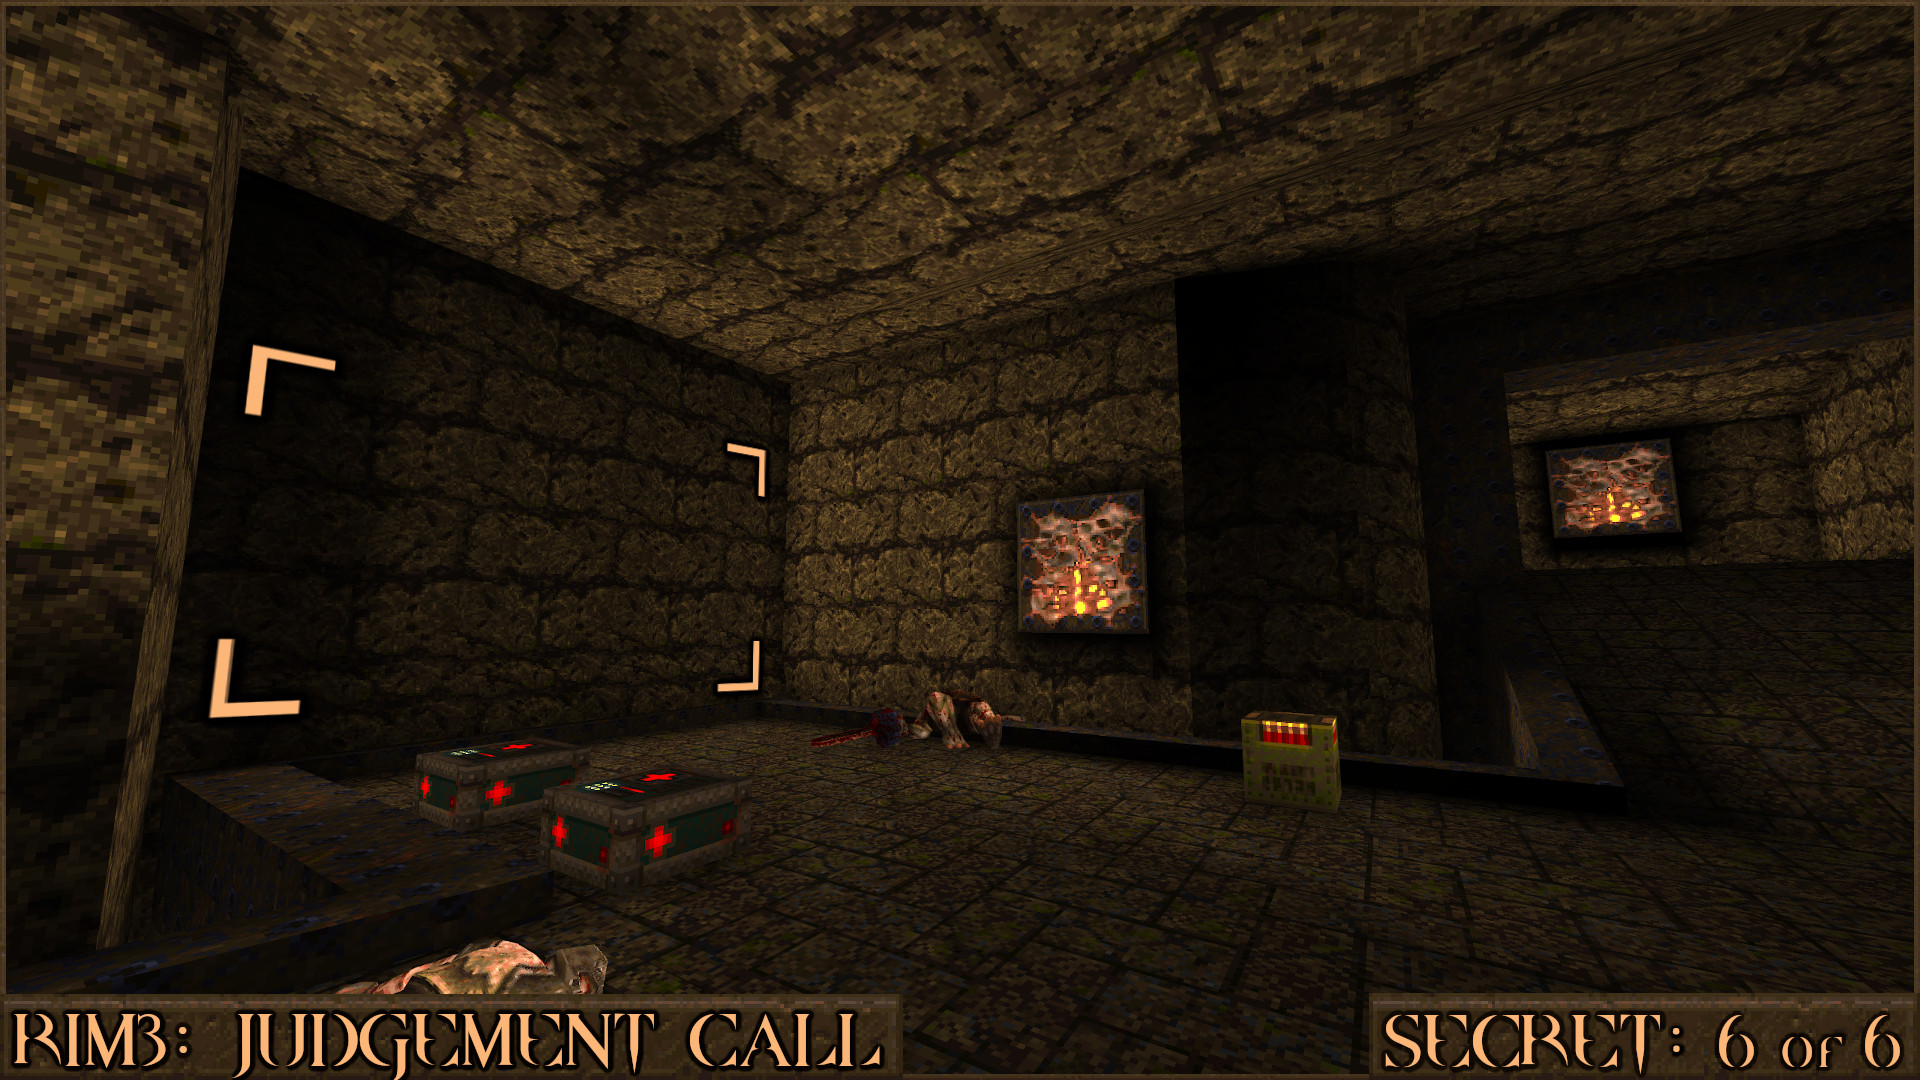
Reward:
R1M4: Cave of Death
Secret 1 of 4
You will enter a large dark cave area and the message "Find the 3 buttons" will appear. Head to opposite end of the cavern and near a Large Health look on the wall to see a red shootable switch (). Shoot it and you can hear a wall move nearby. 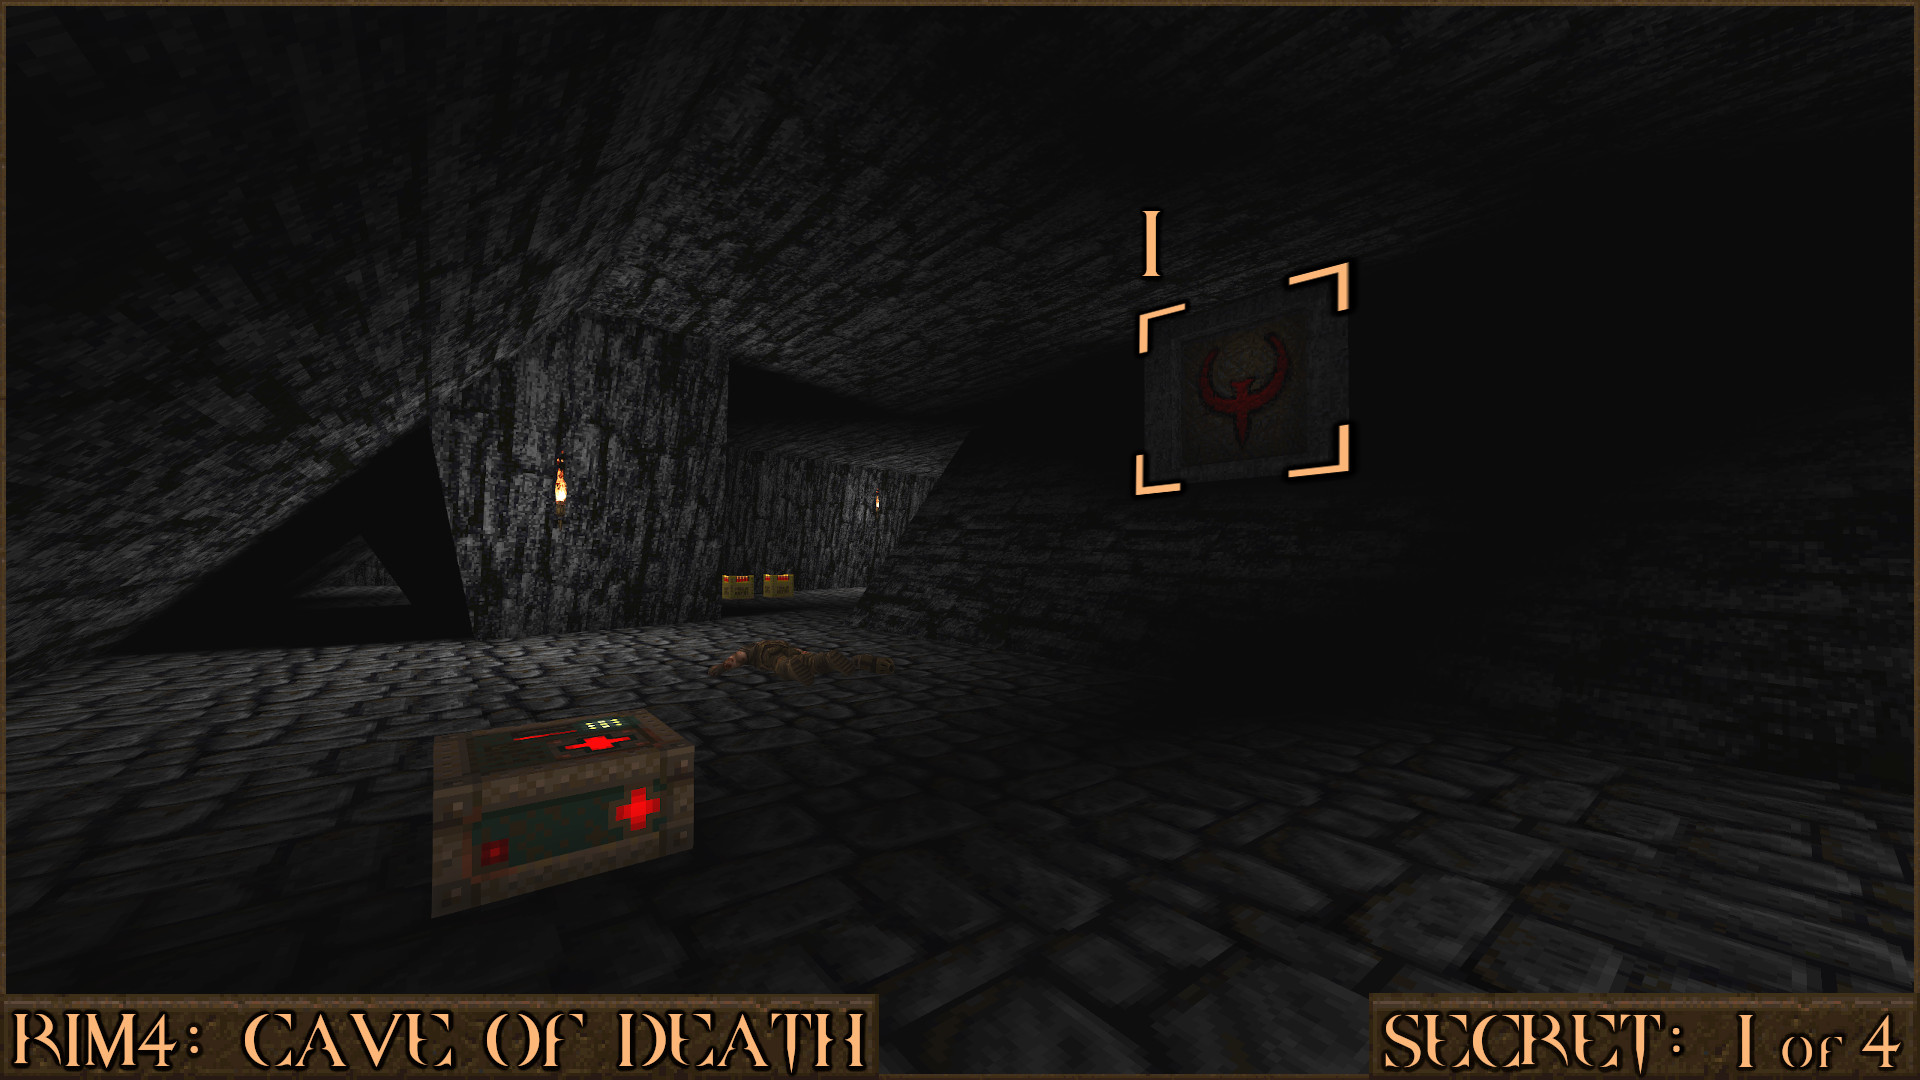
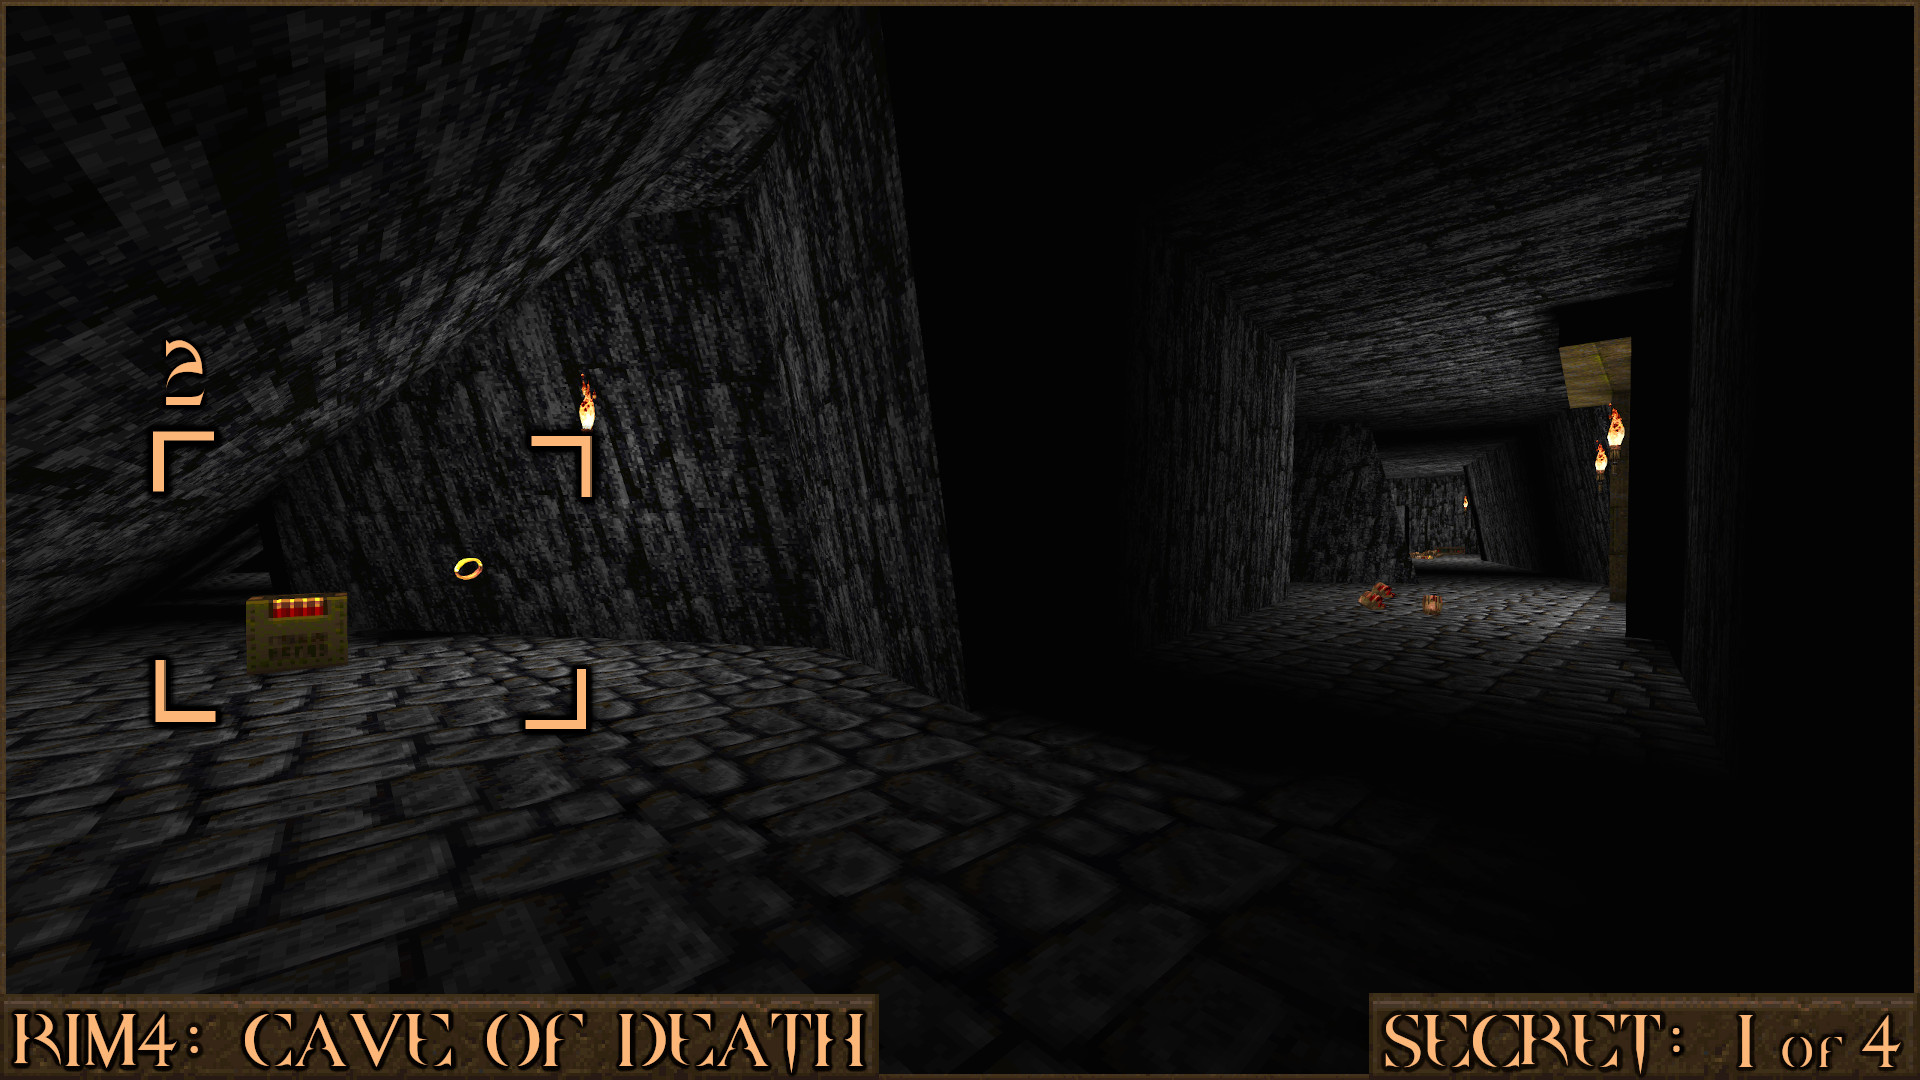
From the red switch turn right and look around the corner to find a wall has moved to reveal some secret items (
).
Reward:
Secret 2 of 4
You will enter a room with a pool of water at the bottom. Jump in and simply swim behind this wall () to find a secret stash of items.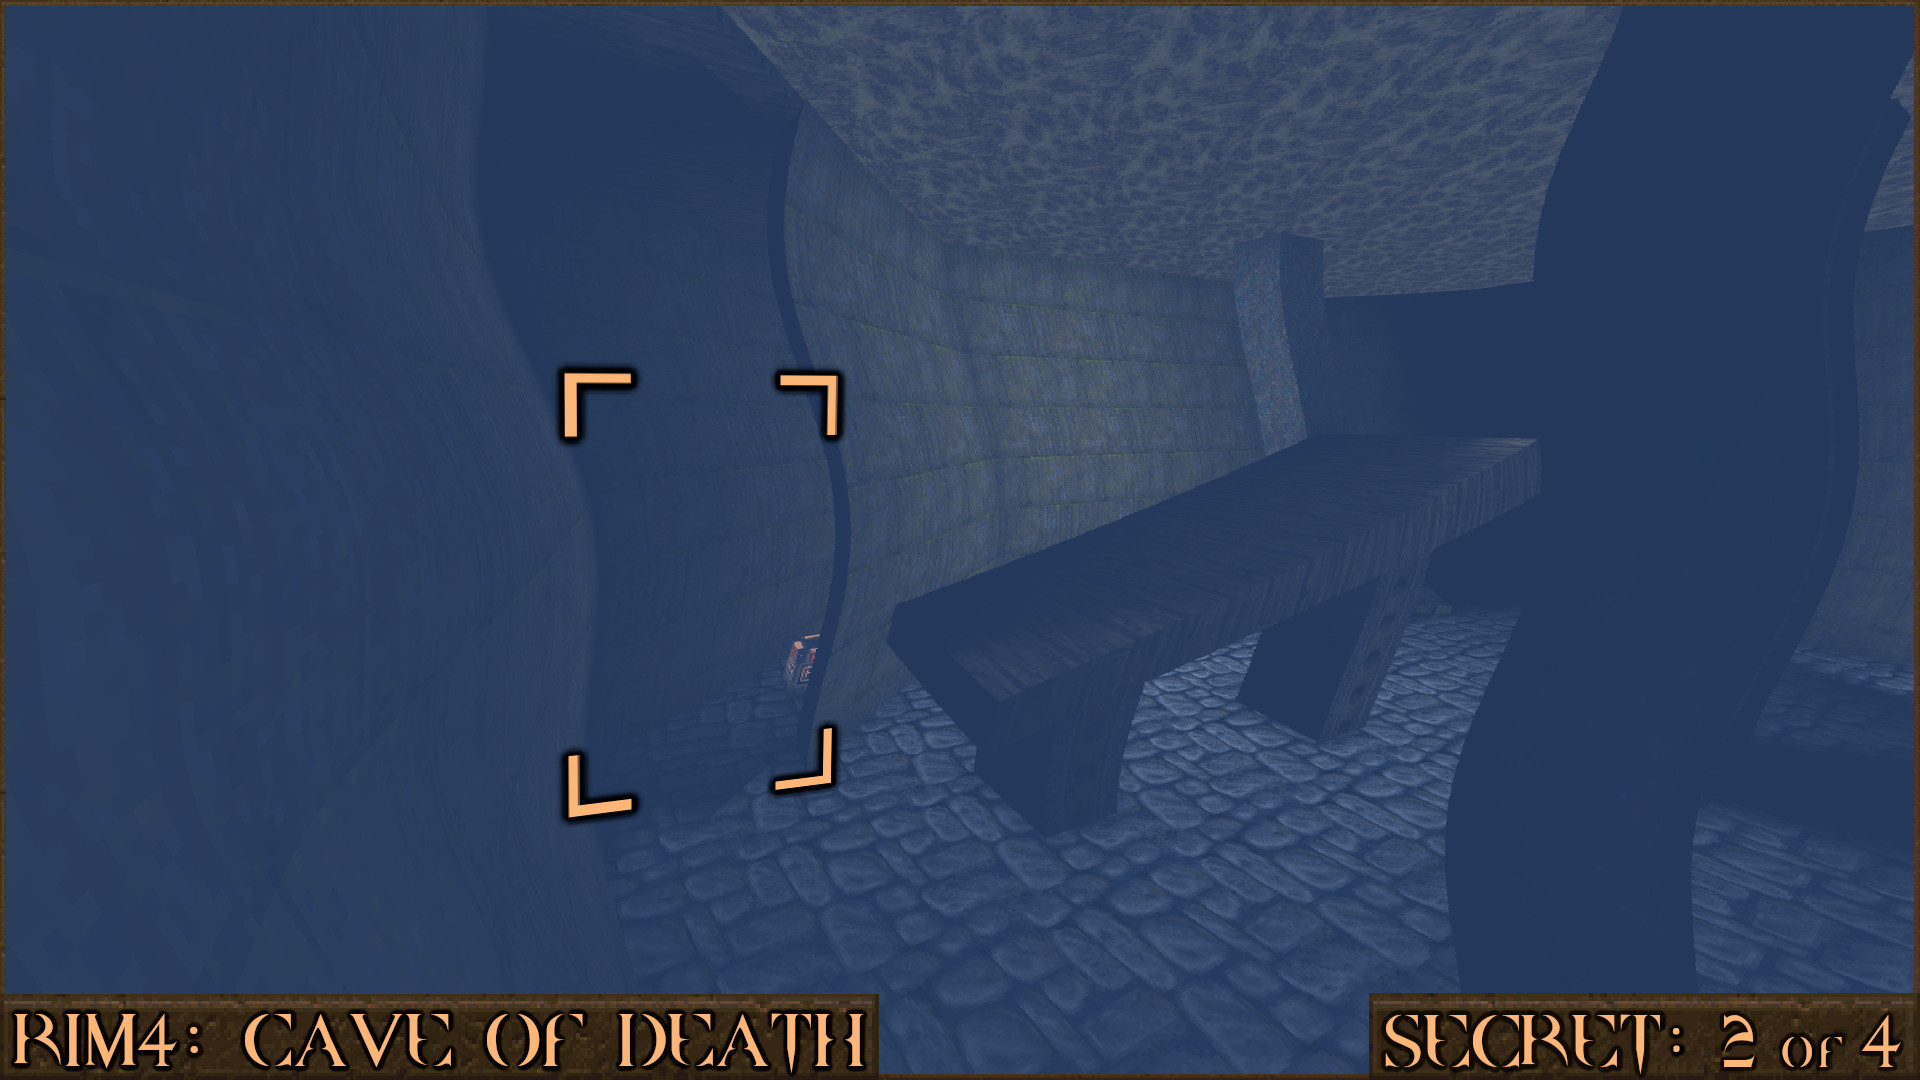
Reward:
Secret 3 of 4
After you exit the moving cage you will see a damaged bridge. After crossing it turn around and look under the bridge to see a red shootable switch (). Shooting it makes a part of the wall () next to the bridge move out the way to reveal a secret.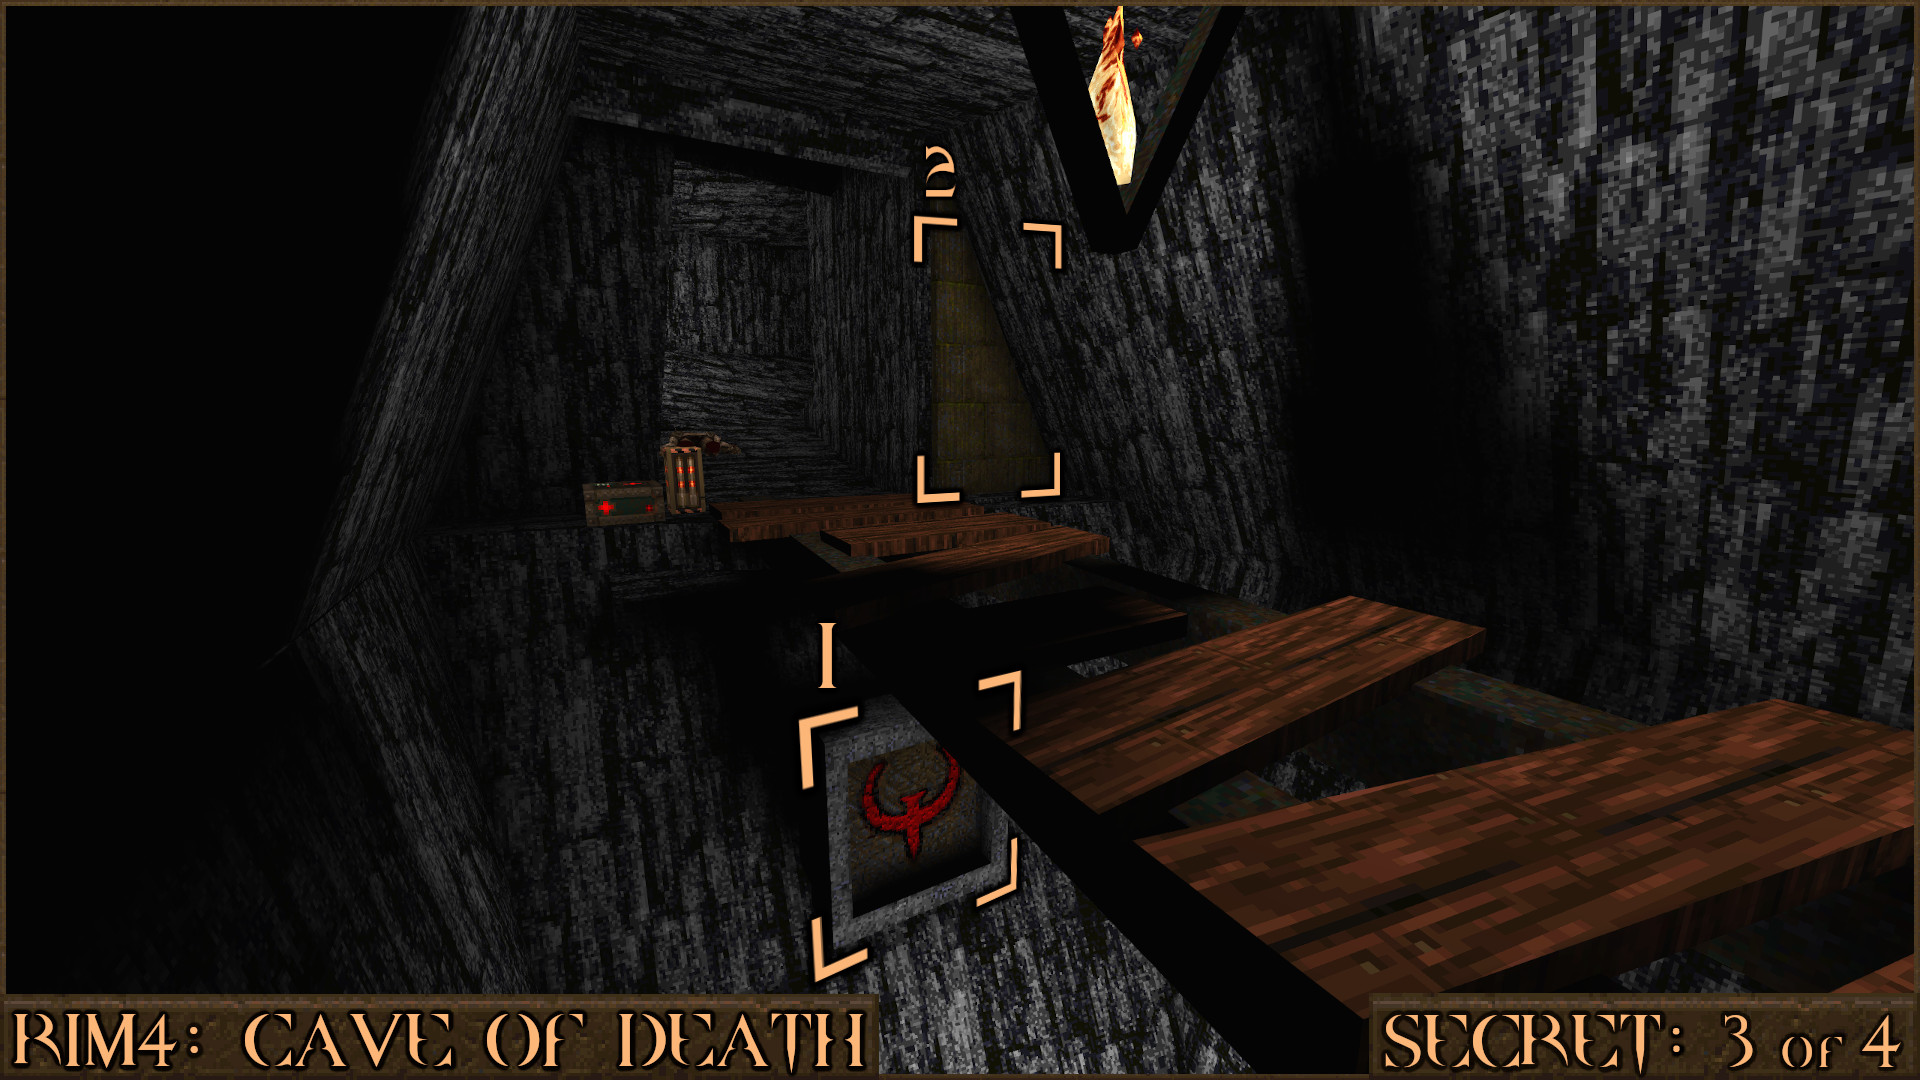
Reward:
Secret 4 of 4
In the final room with lava in it the message "Watch your step..." will appear. Very carefully work your way up the small wooden planks and be careful of the ones that disappear. When you reach the top () don't jump in to the tube yet. Stepping on the last plank under the tube will have activated a nearby metal lift (). Drop back down and ride it up to find the secret.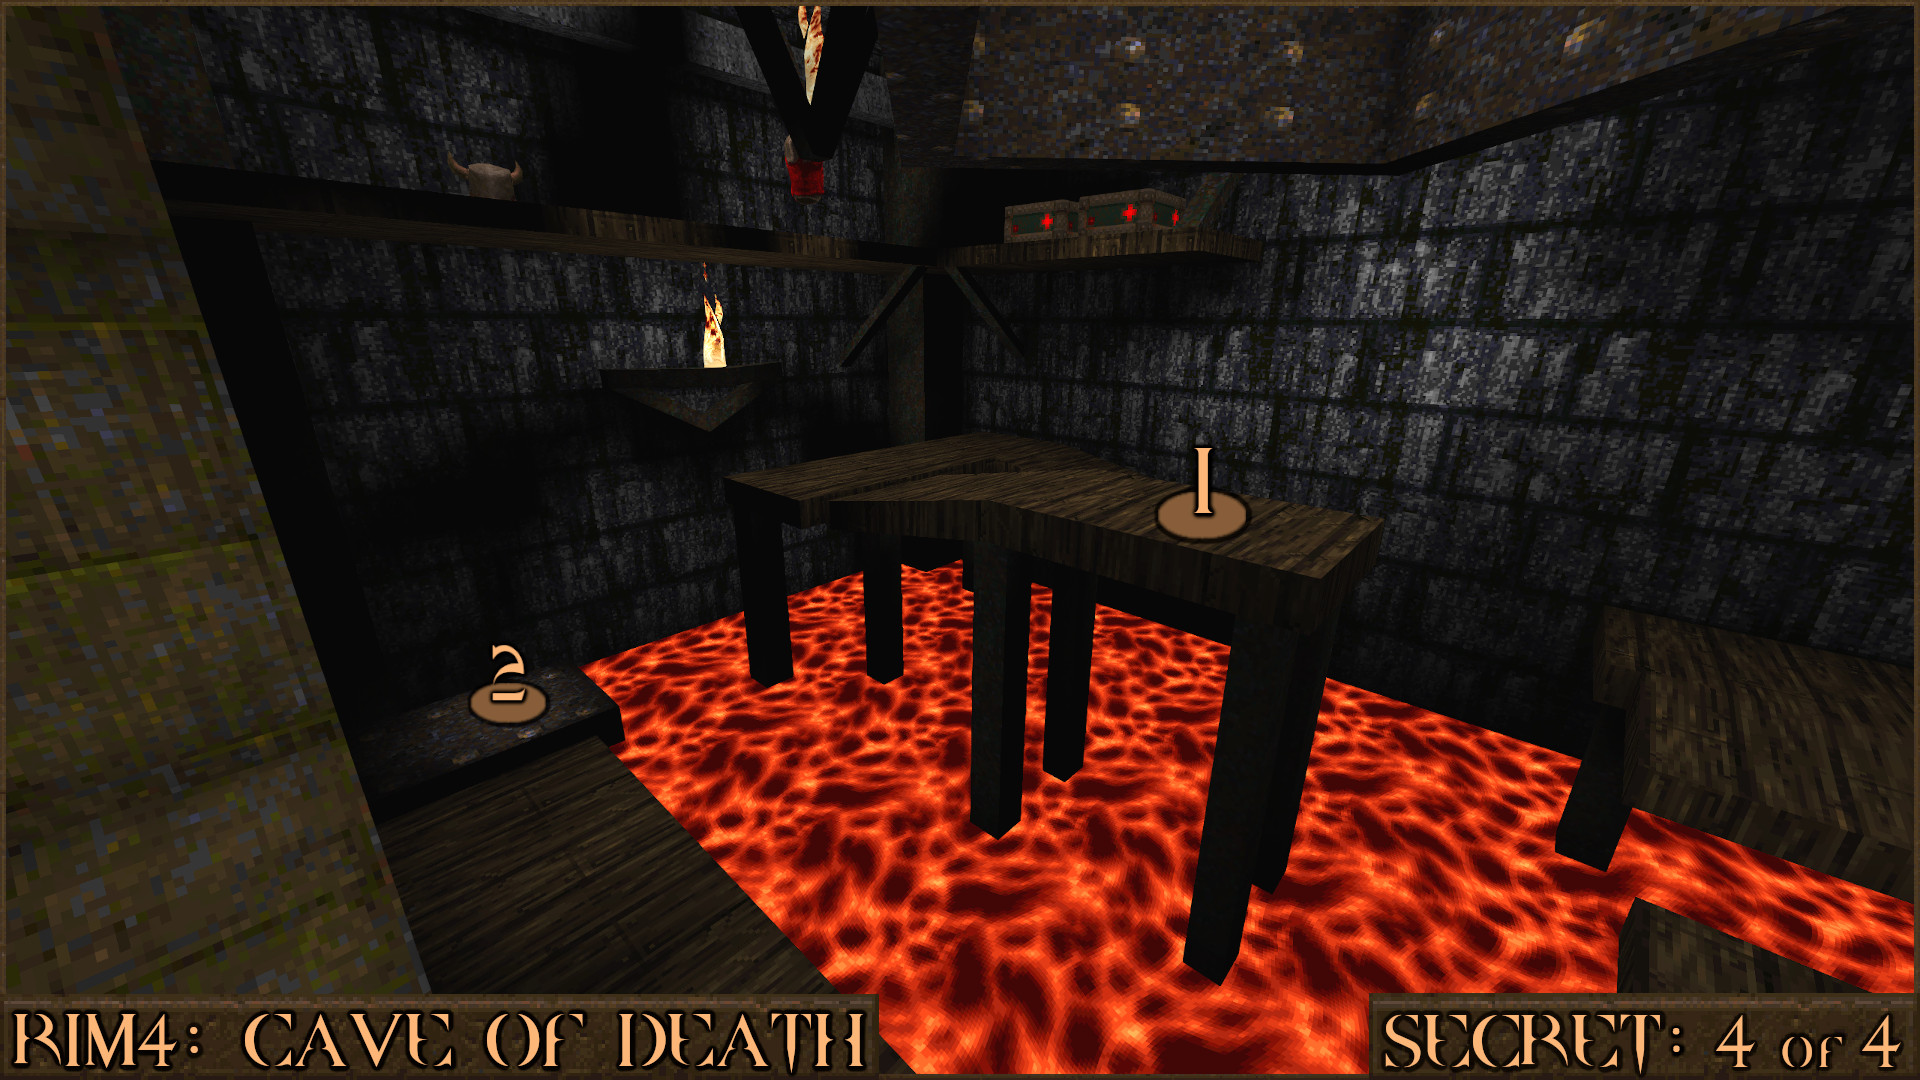
Reward:
R1M5: Towers of Wrath
Secret 1 of 7
After passing through a large room with lava on your left you will enter a small corner room (). 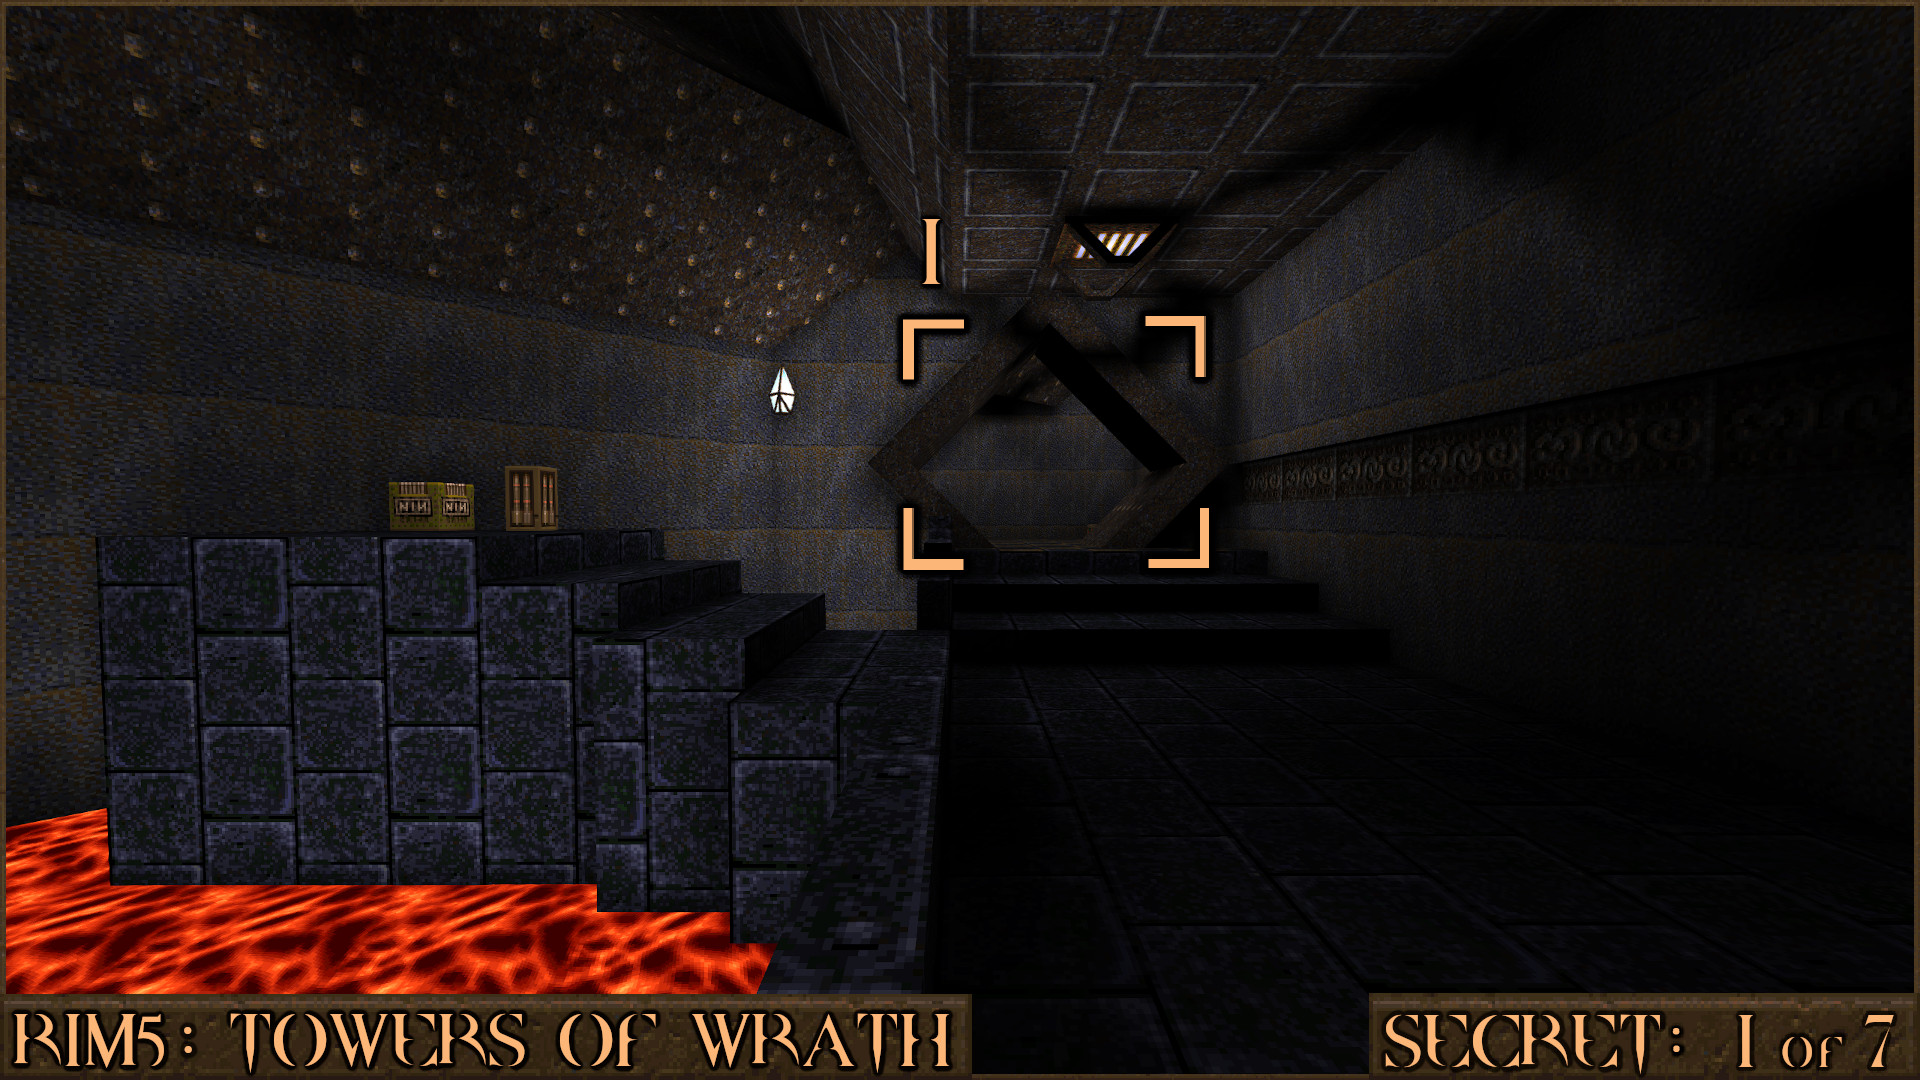
Shoot the blinking light (
) above you to shift a nearby wall () and reveal a teleporter to the secret.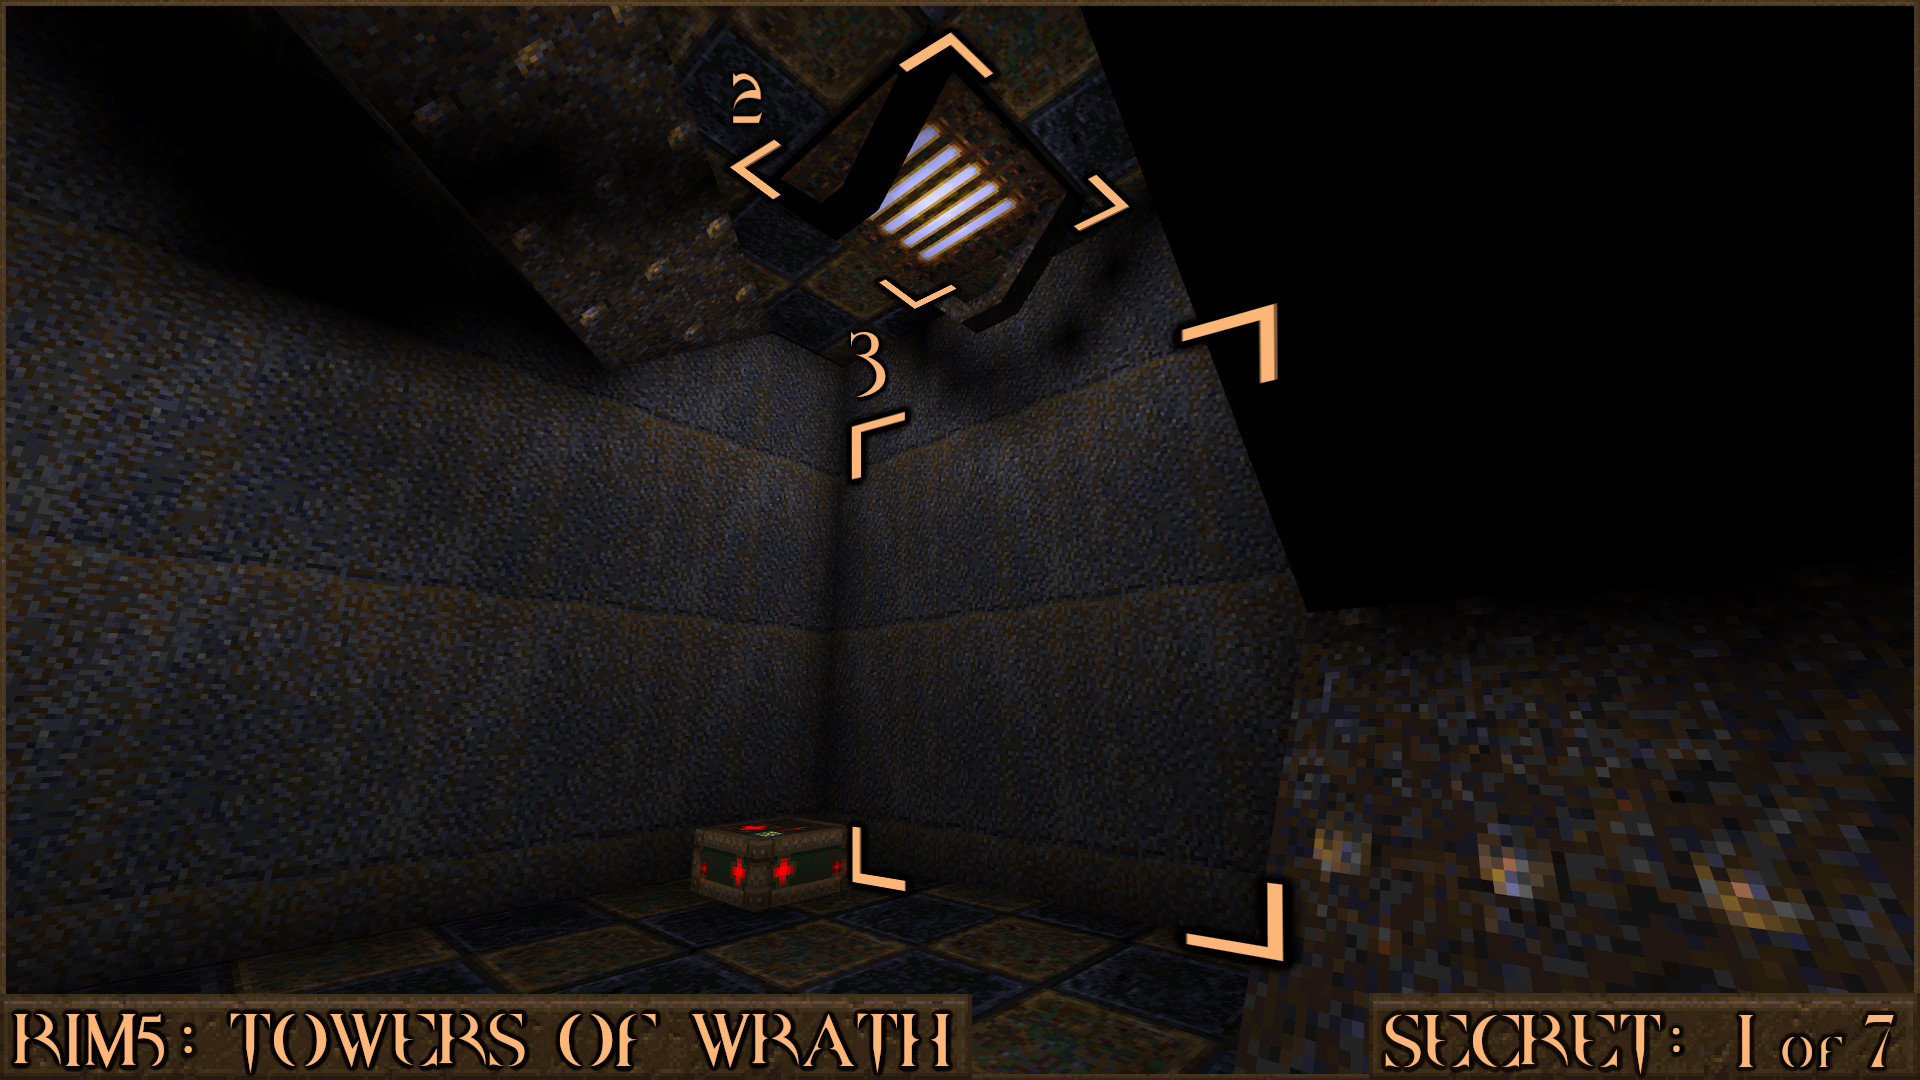
Reward:
Secret 2 of 7
You will take an elevator down in to a large room. Move through this area but listen carefully as you reach the top of this ramp (). You will hear a wall behind you move () so head back to find the secret.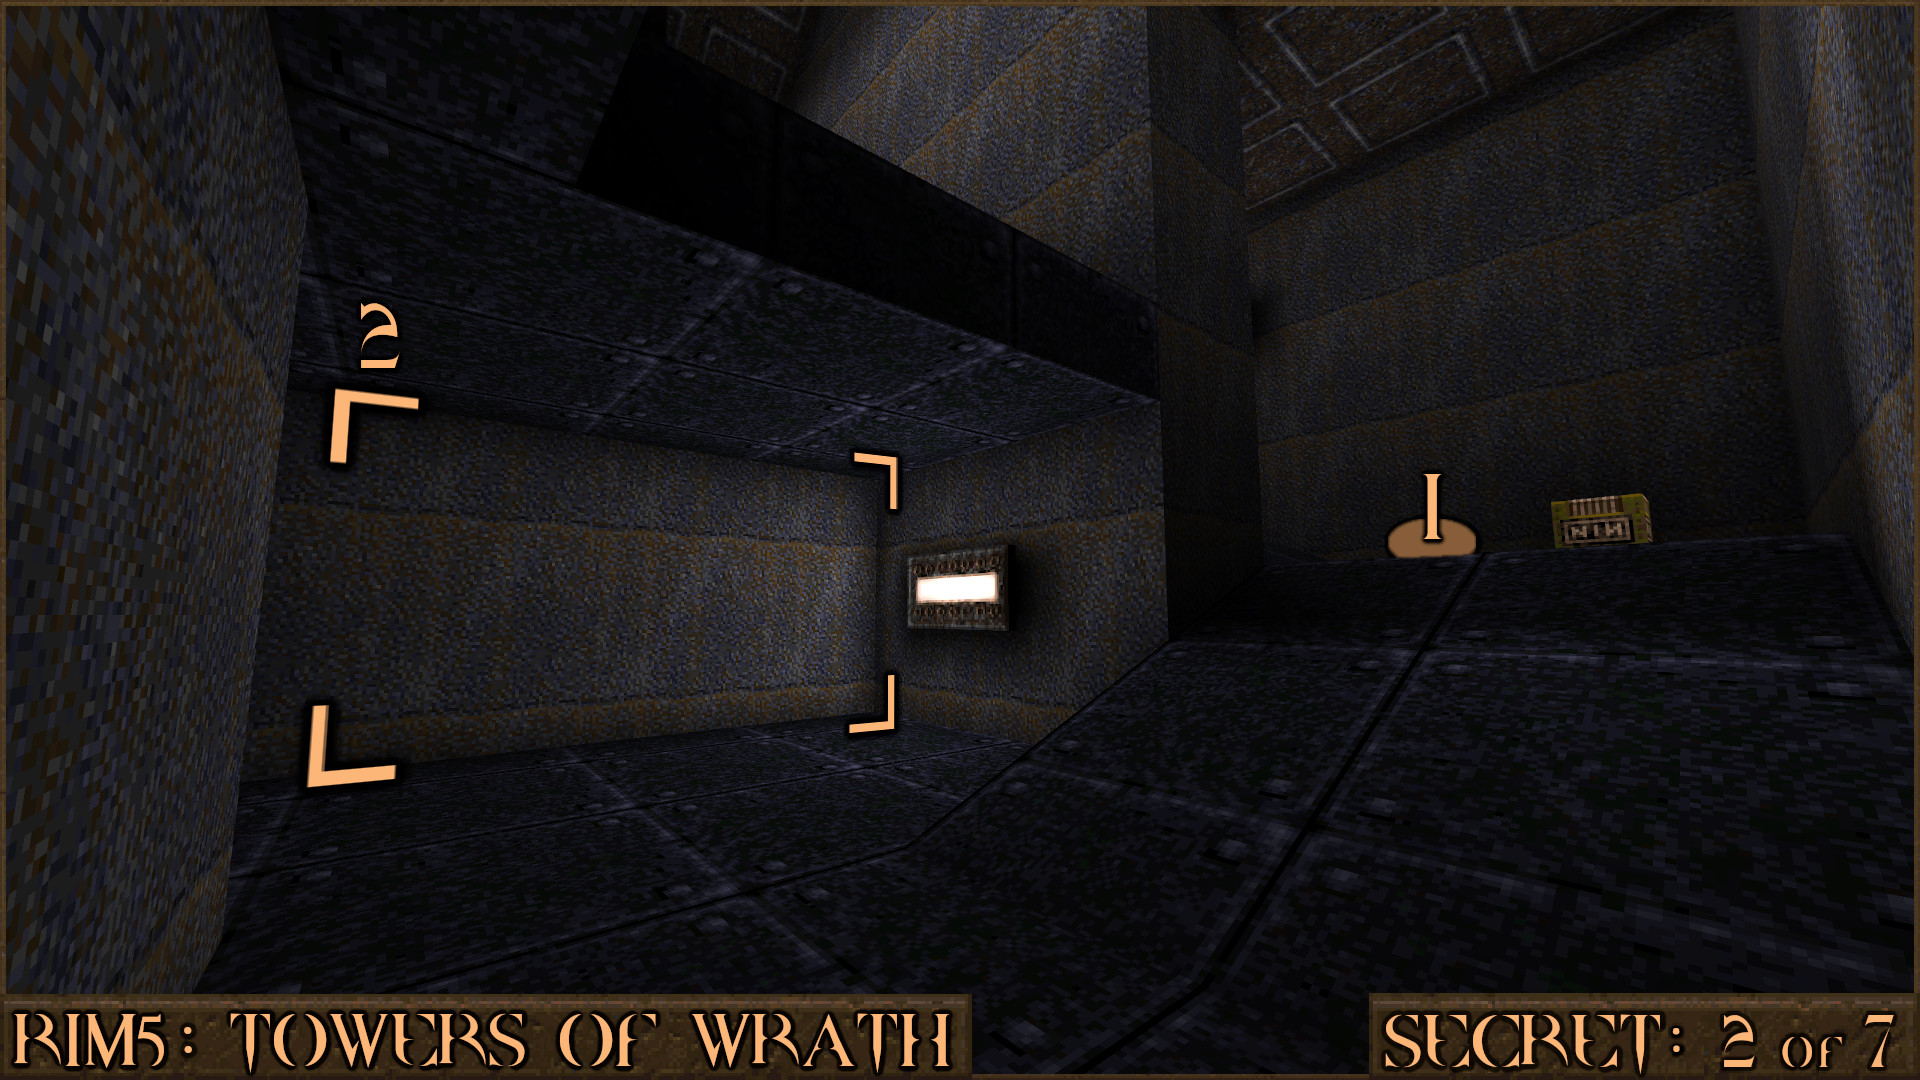
Reward:
Secret 3 of 7
You will enter the room which contains the Silver Key Barrier and a set of stairs in the middle of the room. Behind the stairs is a red shootable switch () and a pool of water. When the switch is activated it will move a piece of the floor () covering a separate section of water. Jump in to it to find the secret.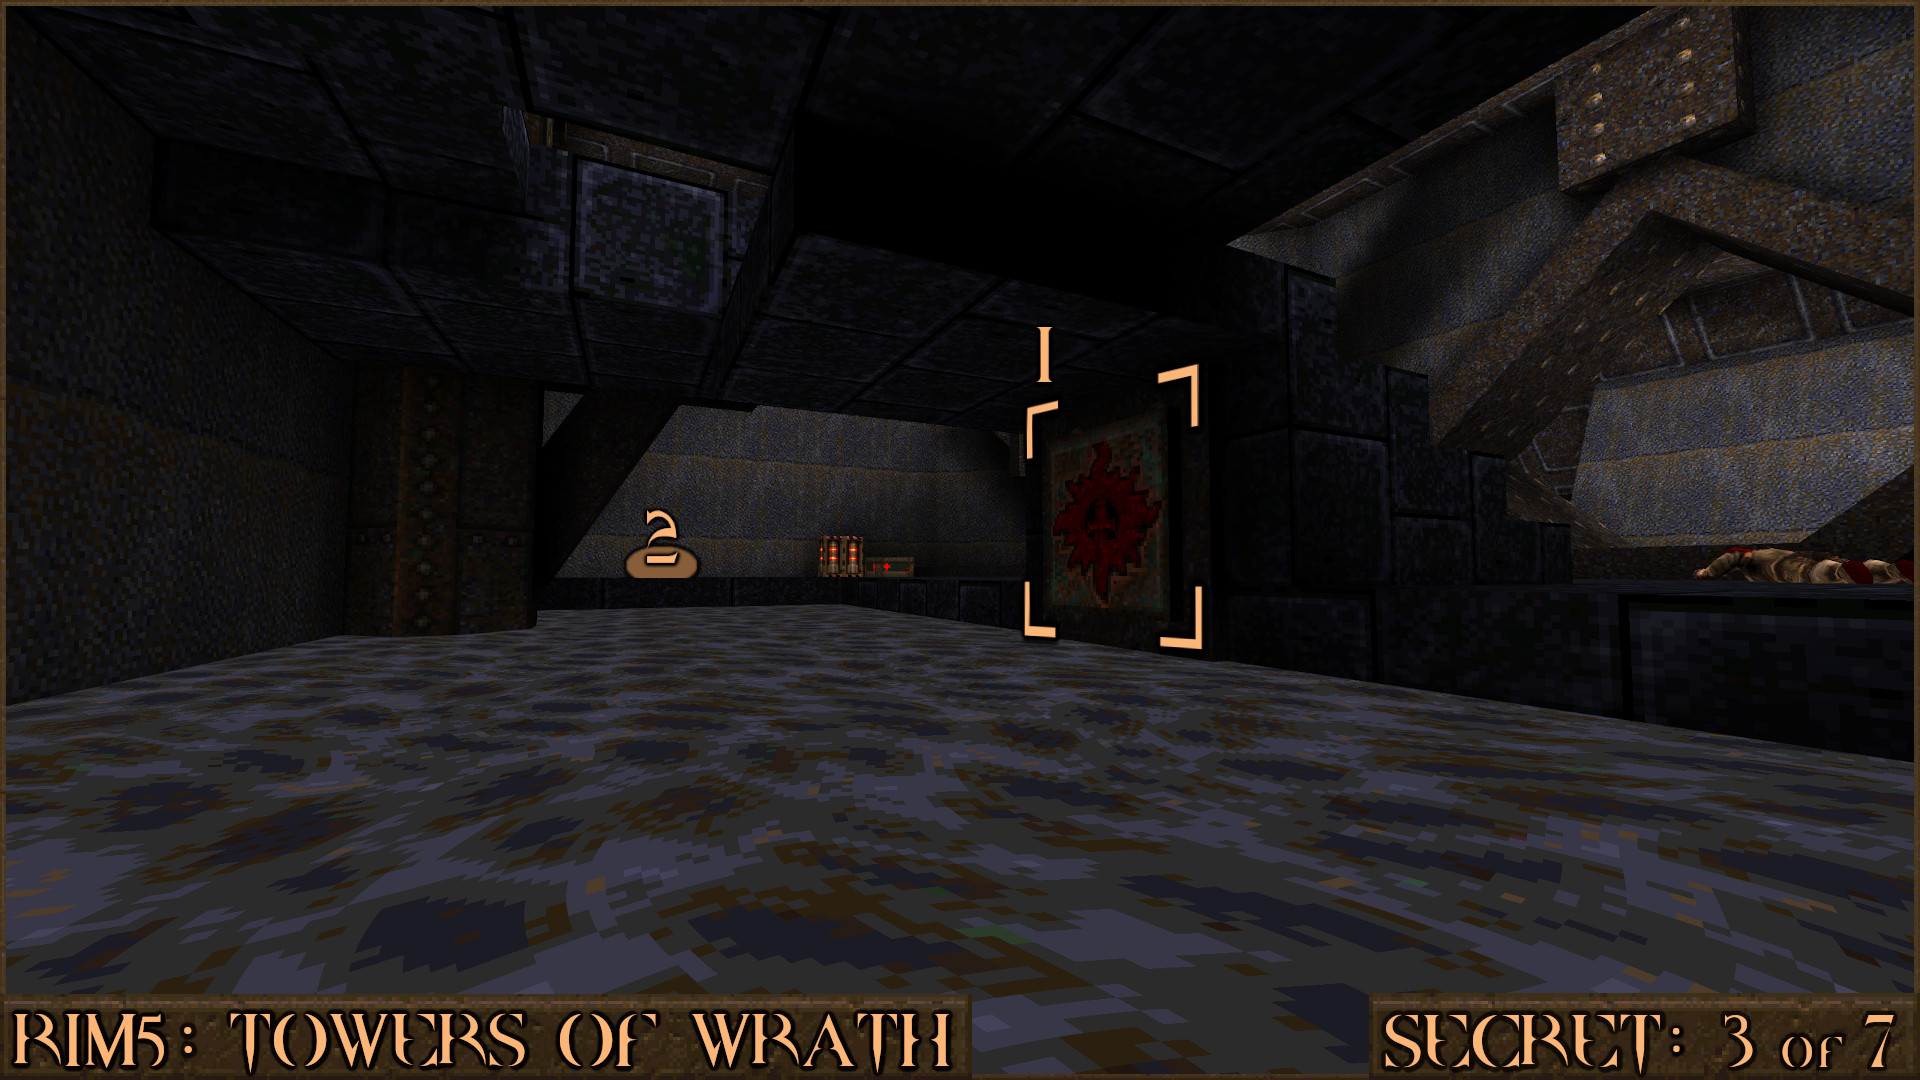
Reward:
Secret 4 of 7
In this room you can see the Silver Key in a cage above you. Opposite of this is a misaligned piece of wall. Shoot it to reveal a small secret area.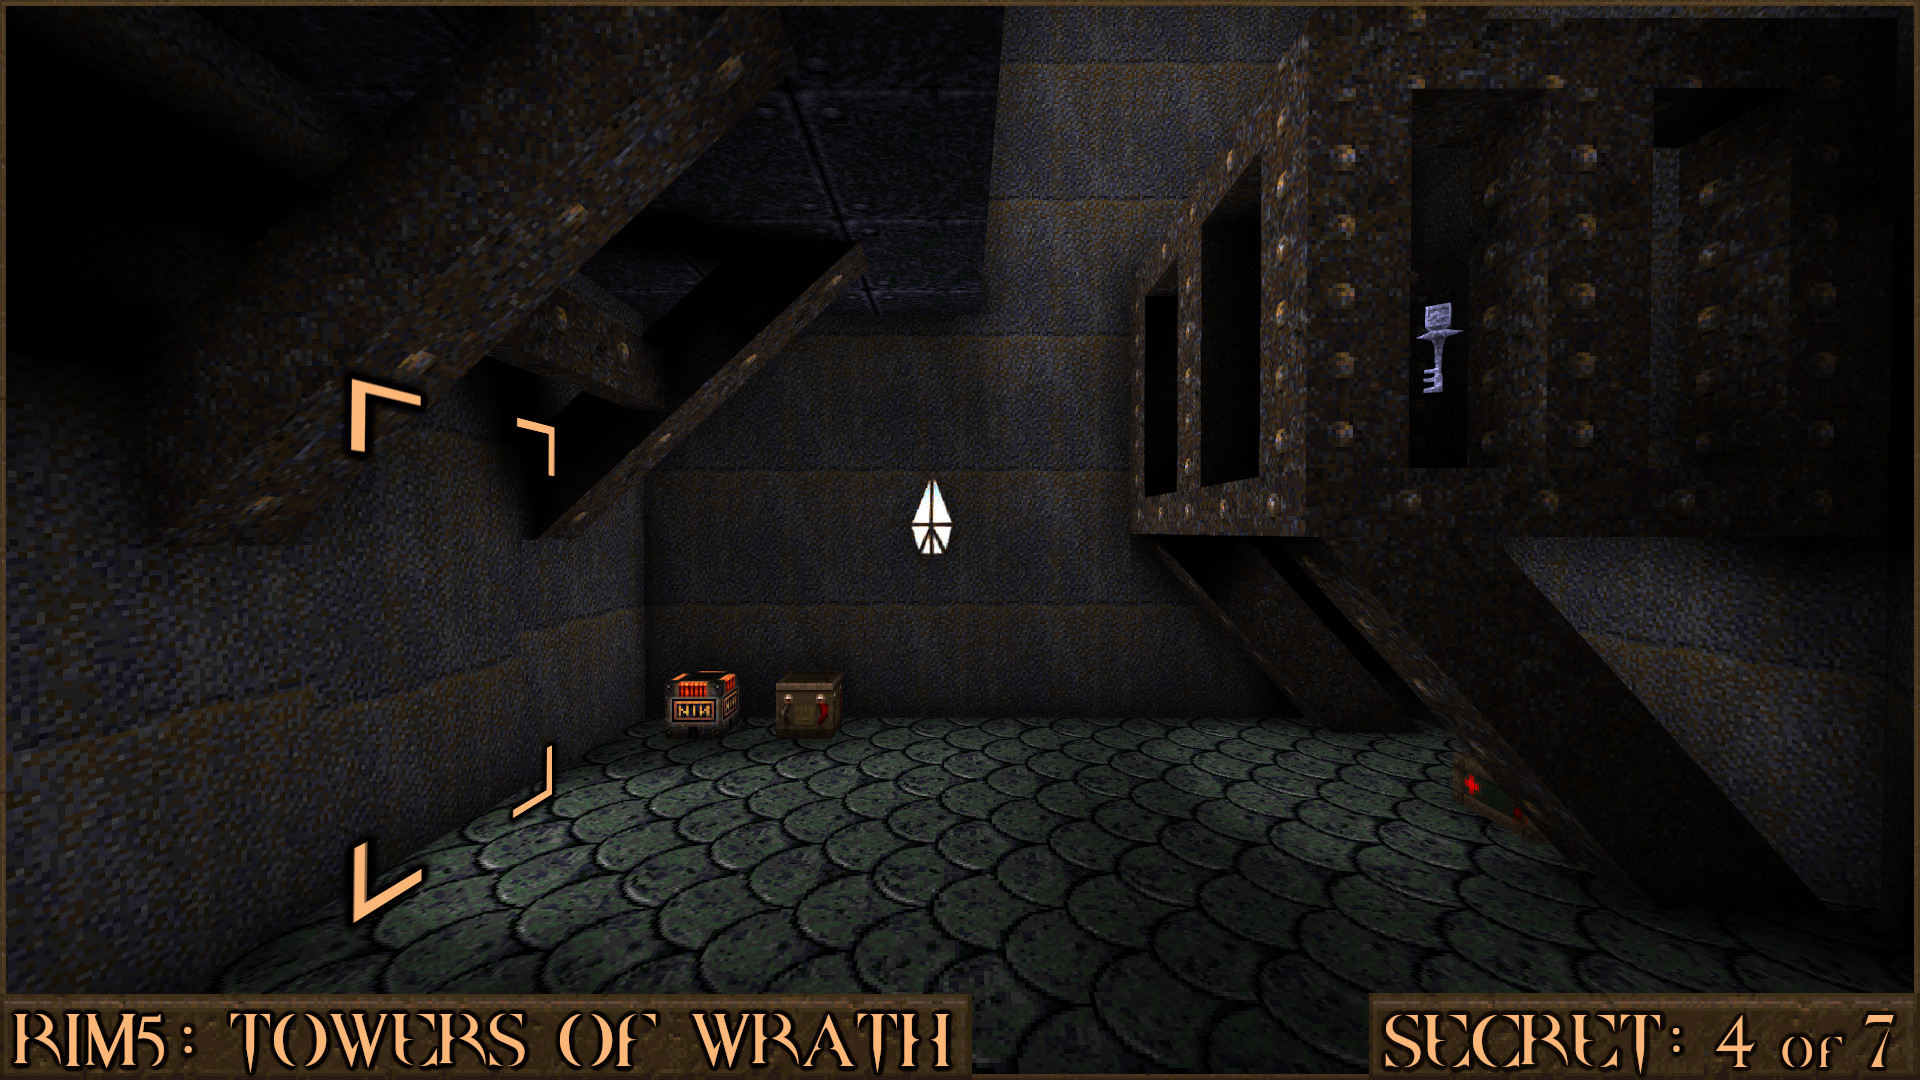
Reward:
Secret 5 of 7
Not long after Secret 4 you'll go down some stairs and in to some water. Swim behind the stairs to find a secret Biosuit.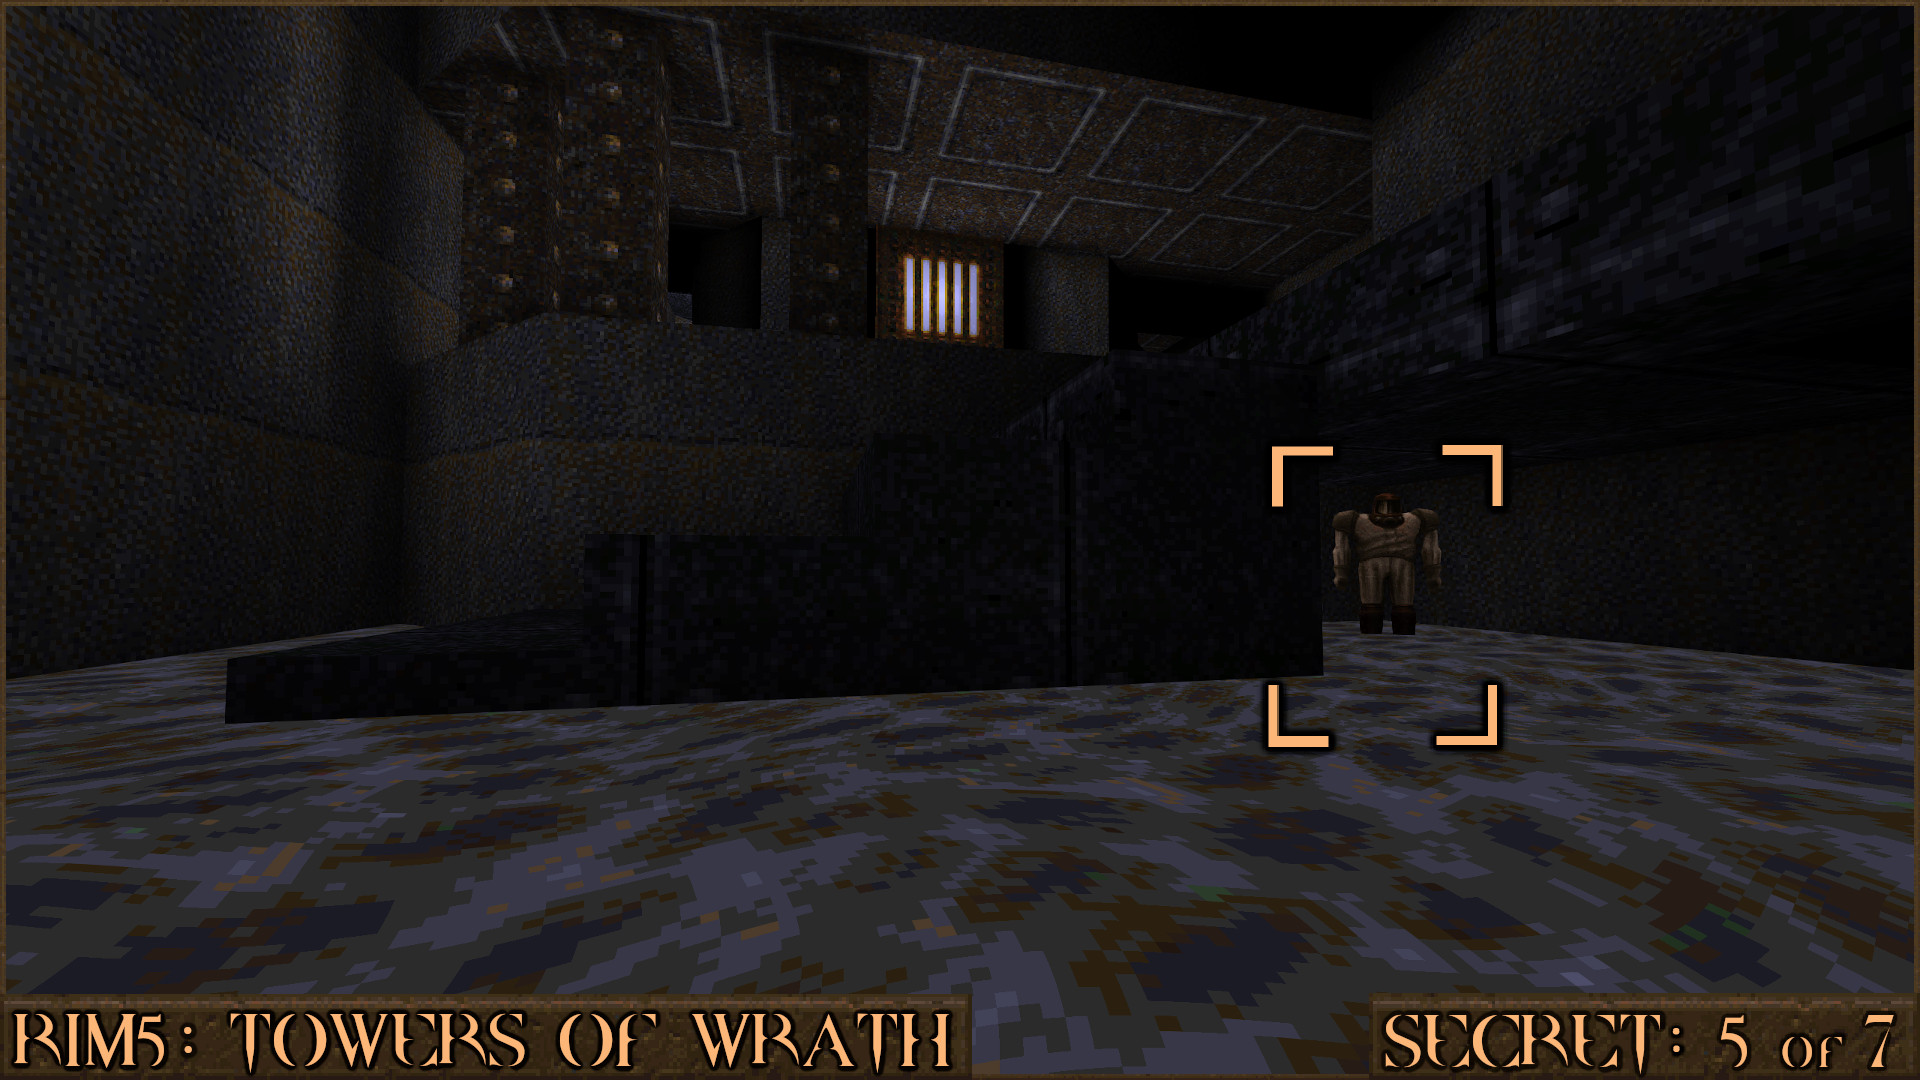
Reward:
Secret 6 of 7
In this room you will be ambushed by Shamblers. After they are dead make some jumps from this platform () over to the Shambler lift (). Now try to jump up and on to this pipe () to get the Megahealth and discover the secret.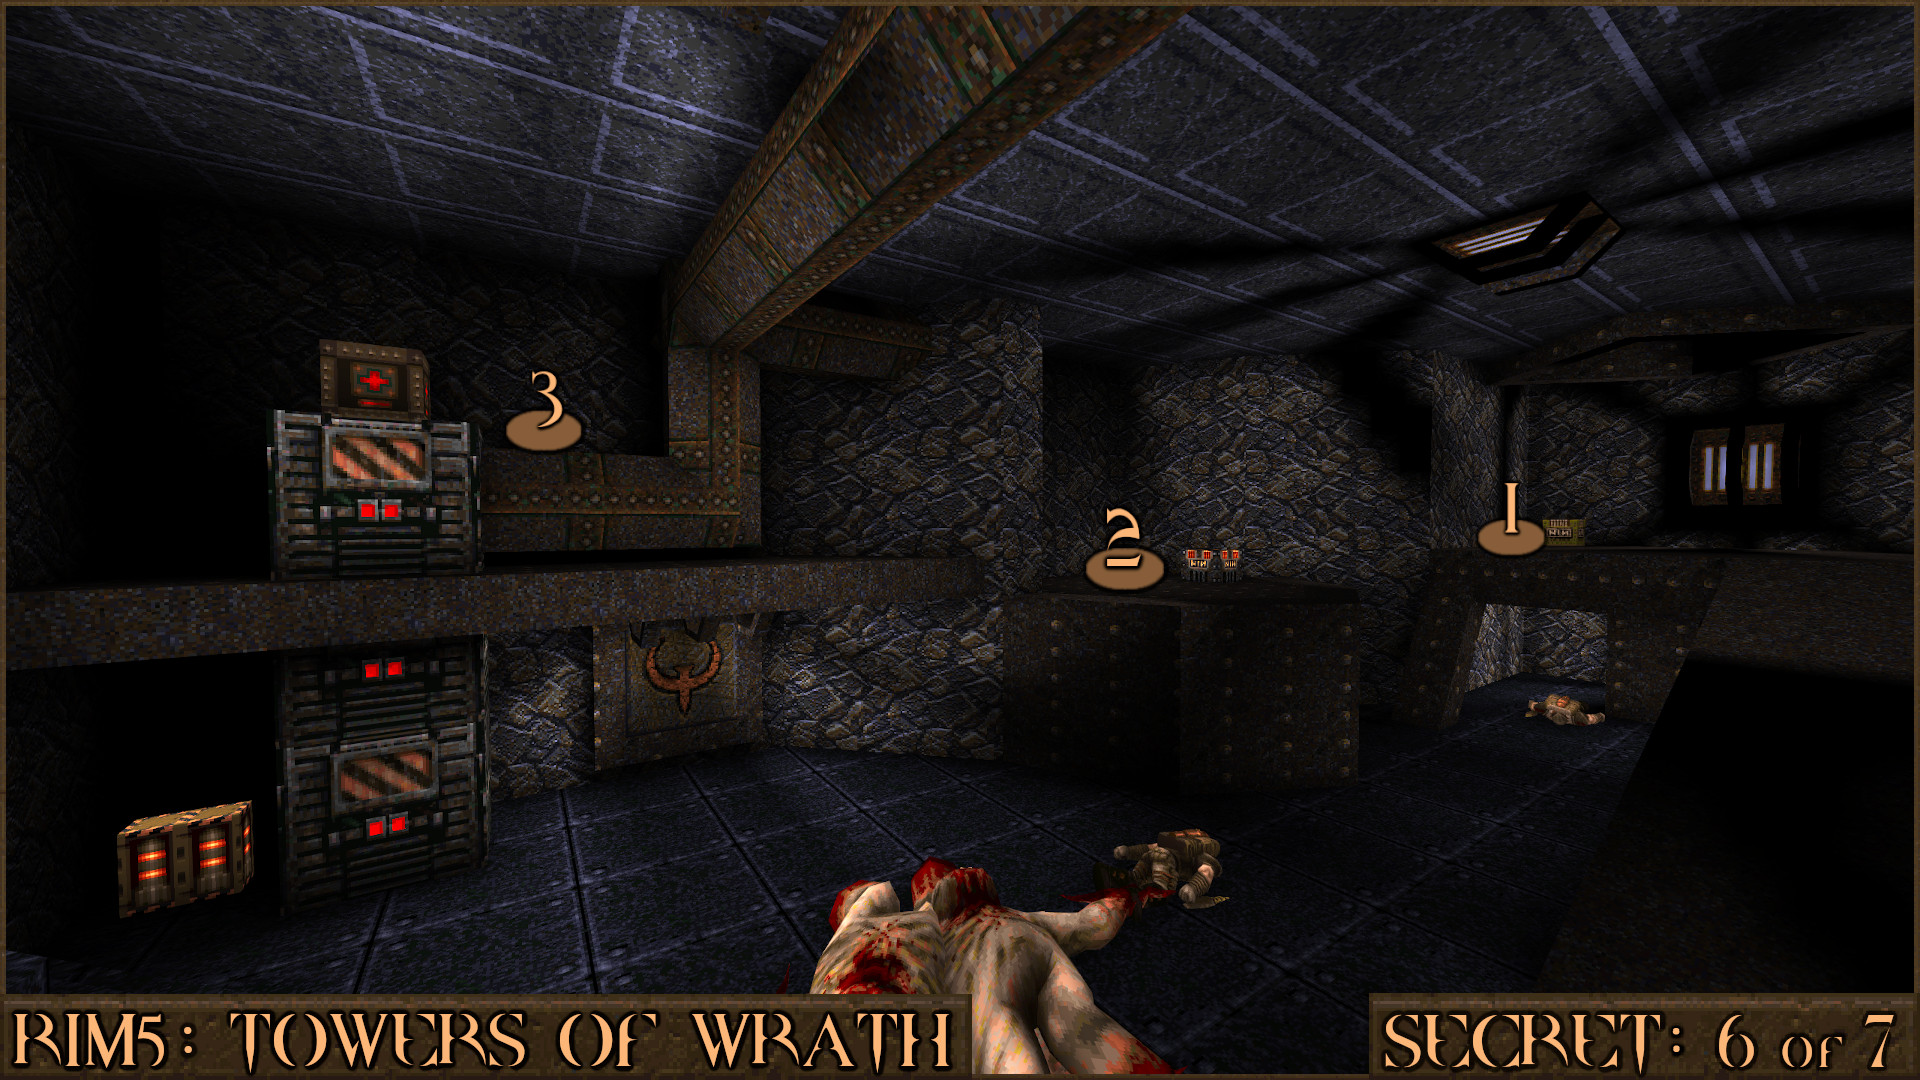
Reward:
Secret 7 of 7
After activating the electricity machine you will enter a library with several bookshelves. Touch the right brown book () to open a section of the shelves () and reveal a secret area.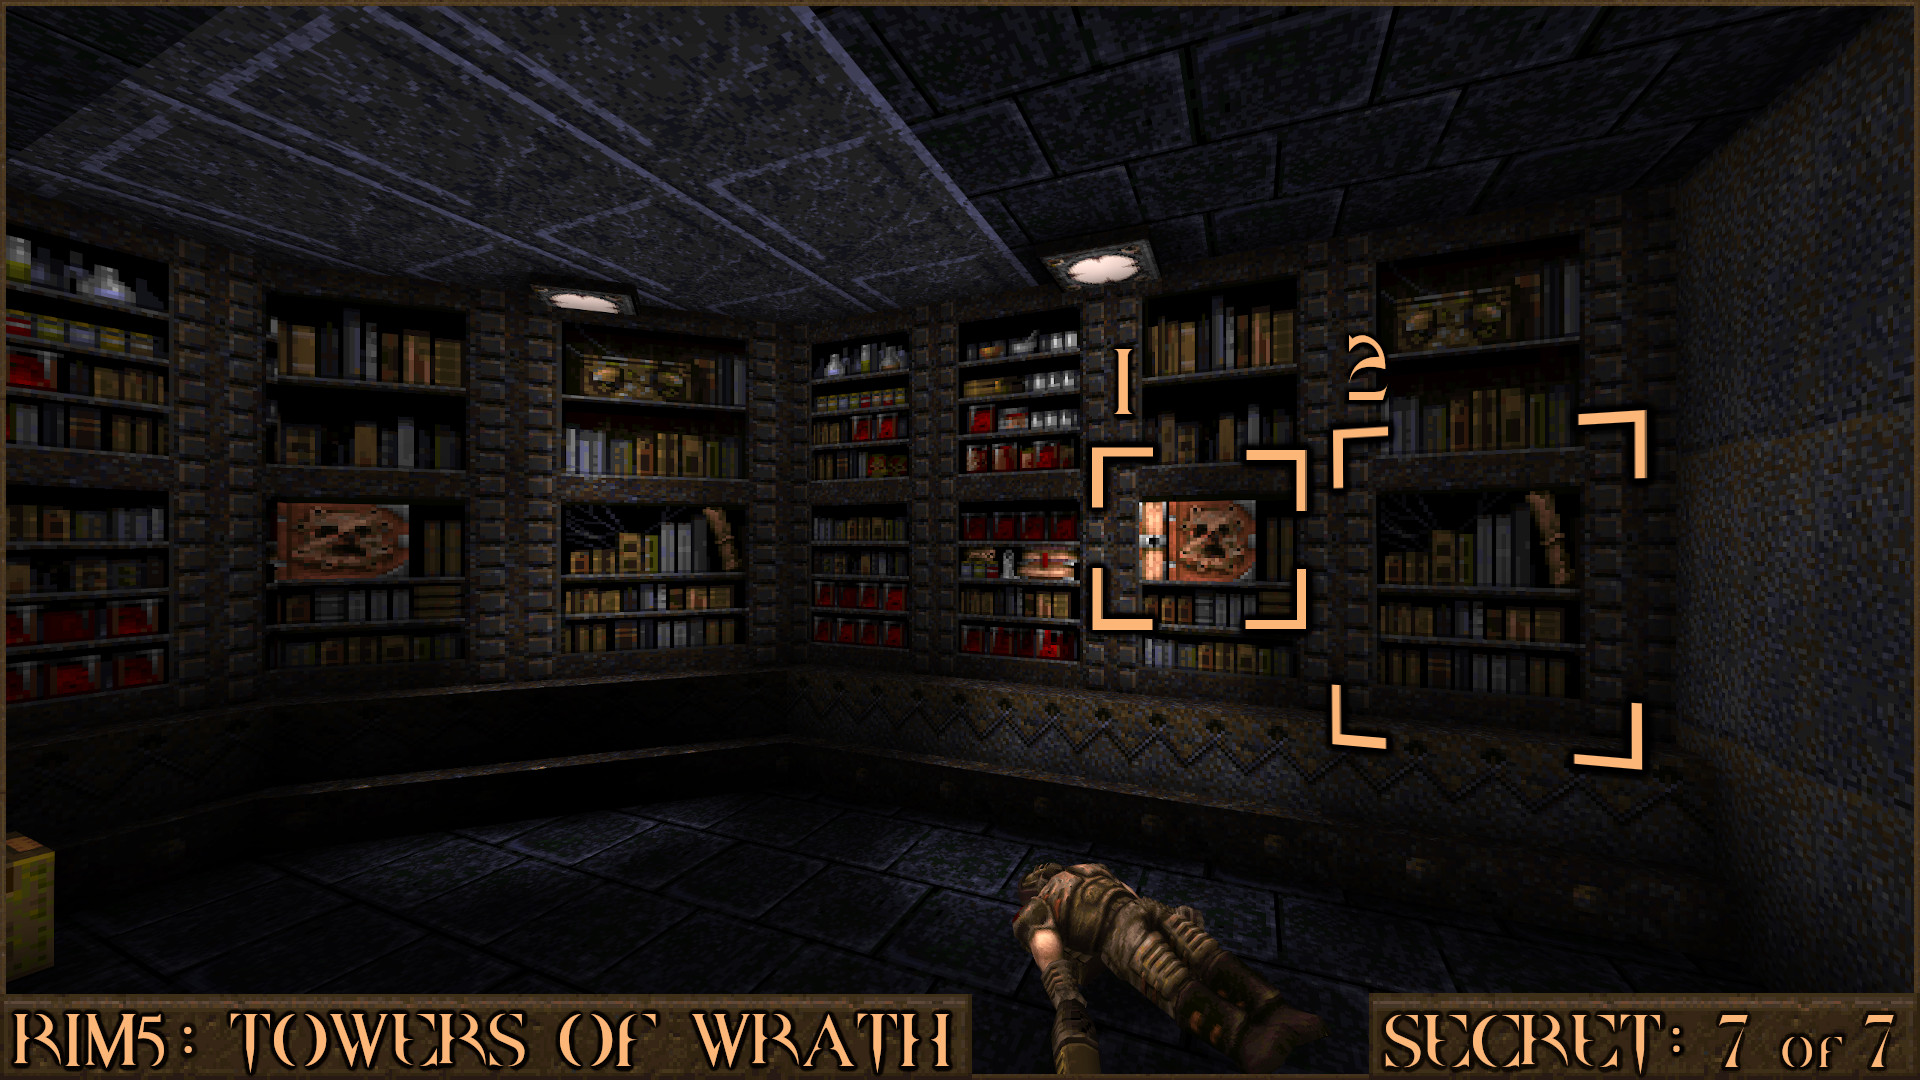
Reward:
R1M6: Temple of Pain
Secret 1 of 5
There is a tunnel with several lanterns hanging from the ceiling. Look for a small plank of wood () stuck on the back wall. Jump in to it to nudge it and reveal a secret area to your right ().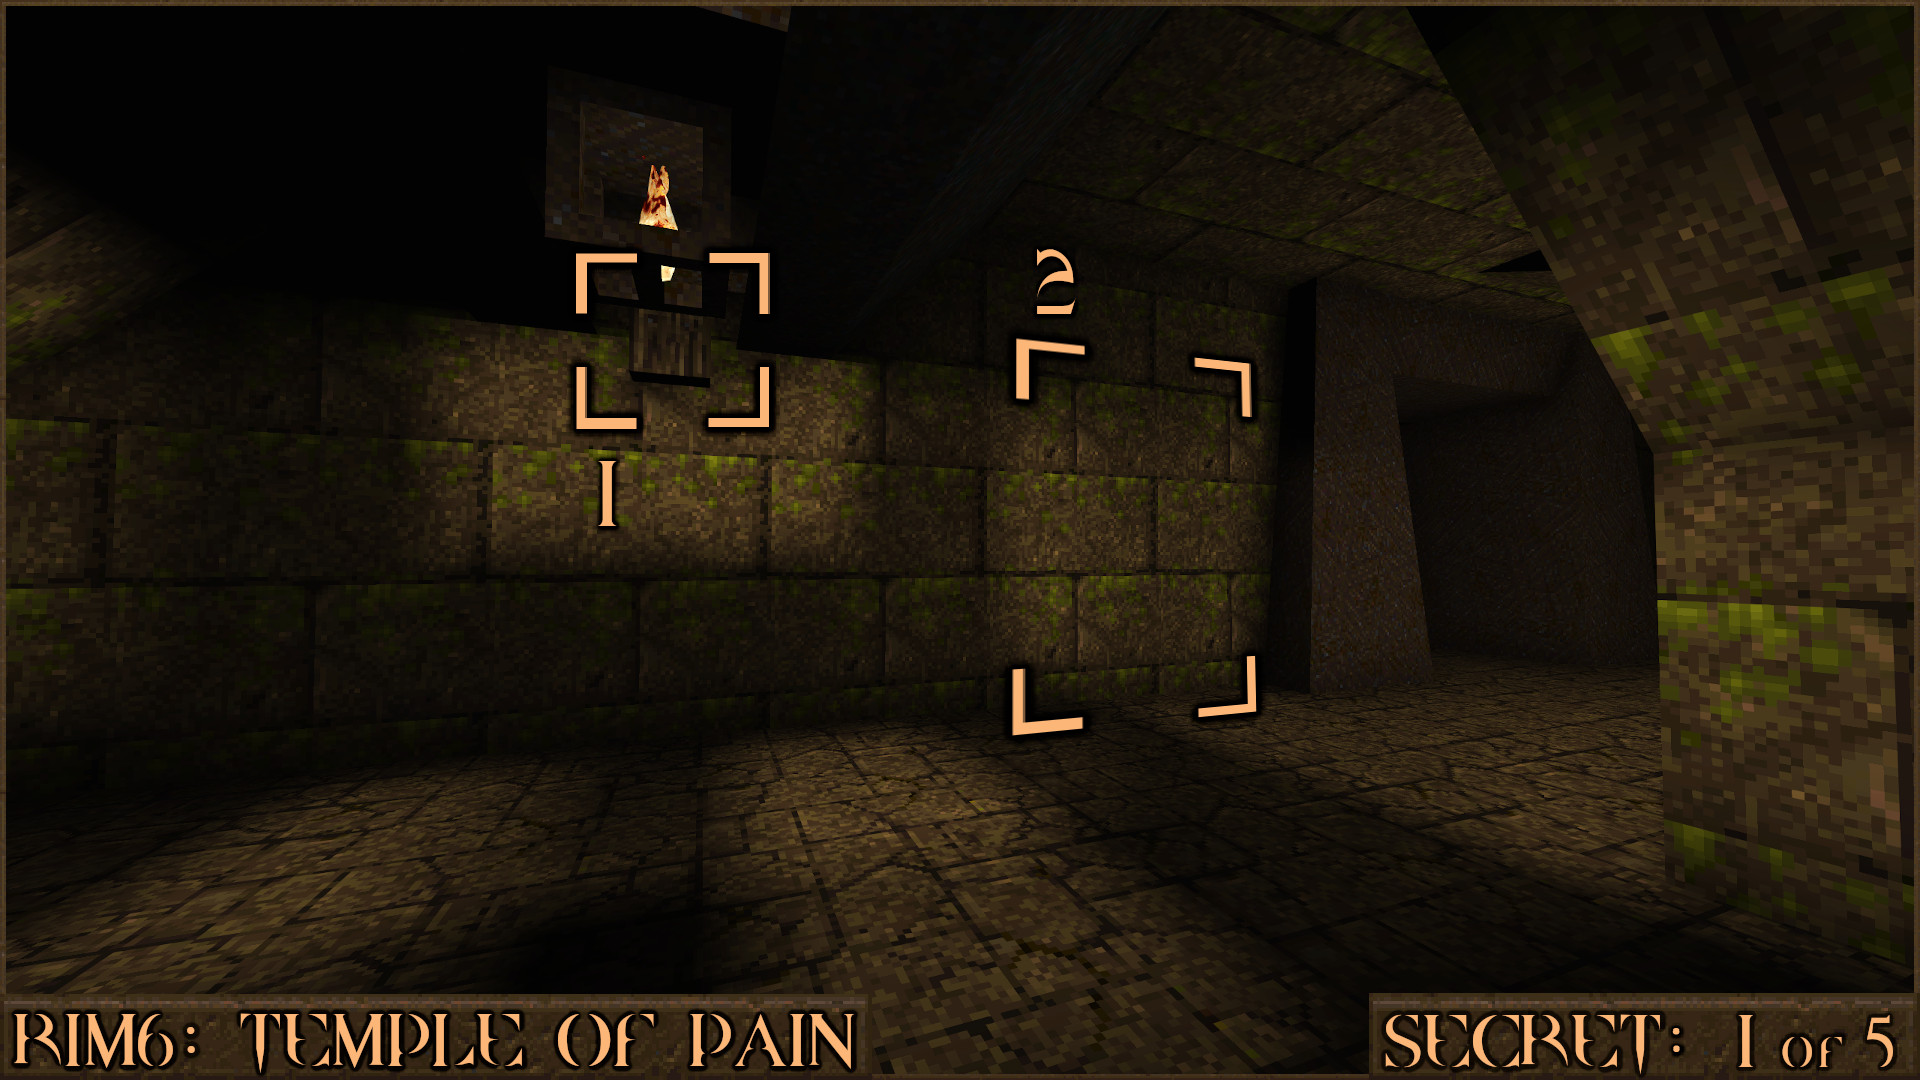
Reward:
Secret 2 of 5
At the end of the graveyard area you will see a large metal pentagram symbol above you. Look to your left to see a small step on the back of a metal girder (). Jump on it then jump on to some more steps that are jutting out of the wall (). Follow them all the way up the side of the wall and you'll reach the top of the pentagram and find the secret.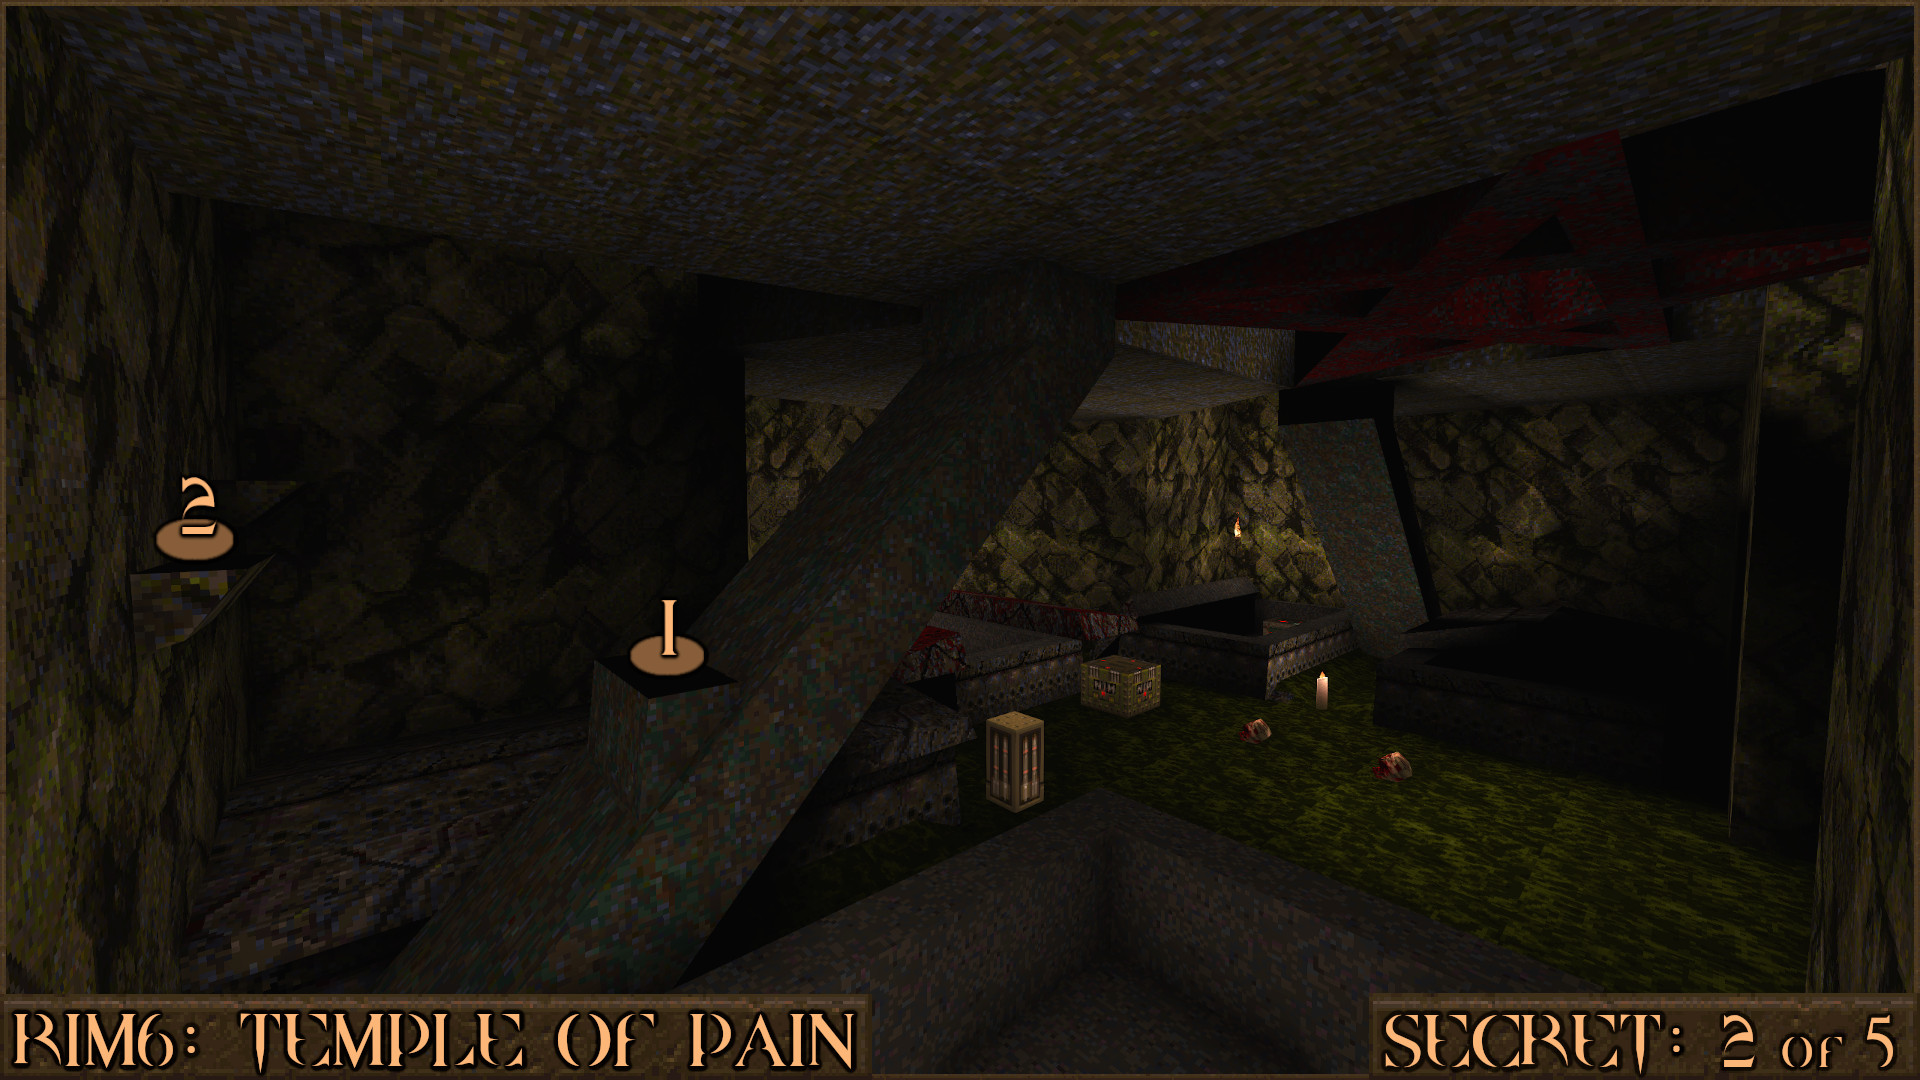
Reward:
Secret 3 of 5
Next to the Gold Key Door you will see an altar surrounded by lava. Look straight above it to see a glowing monster face. Shooting this will cause a red block to rise out of the lava and provide a stepping stone to get on top of the altar and claim the secret.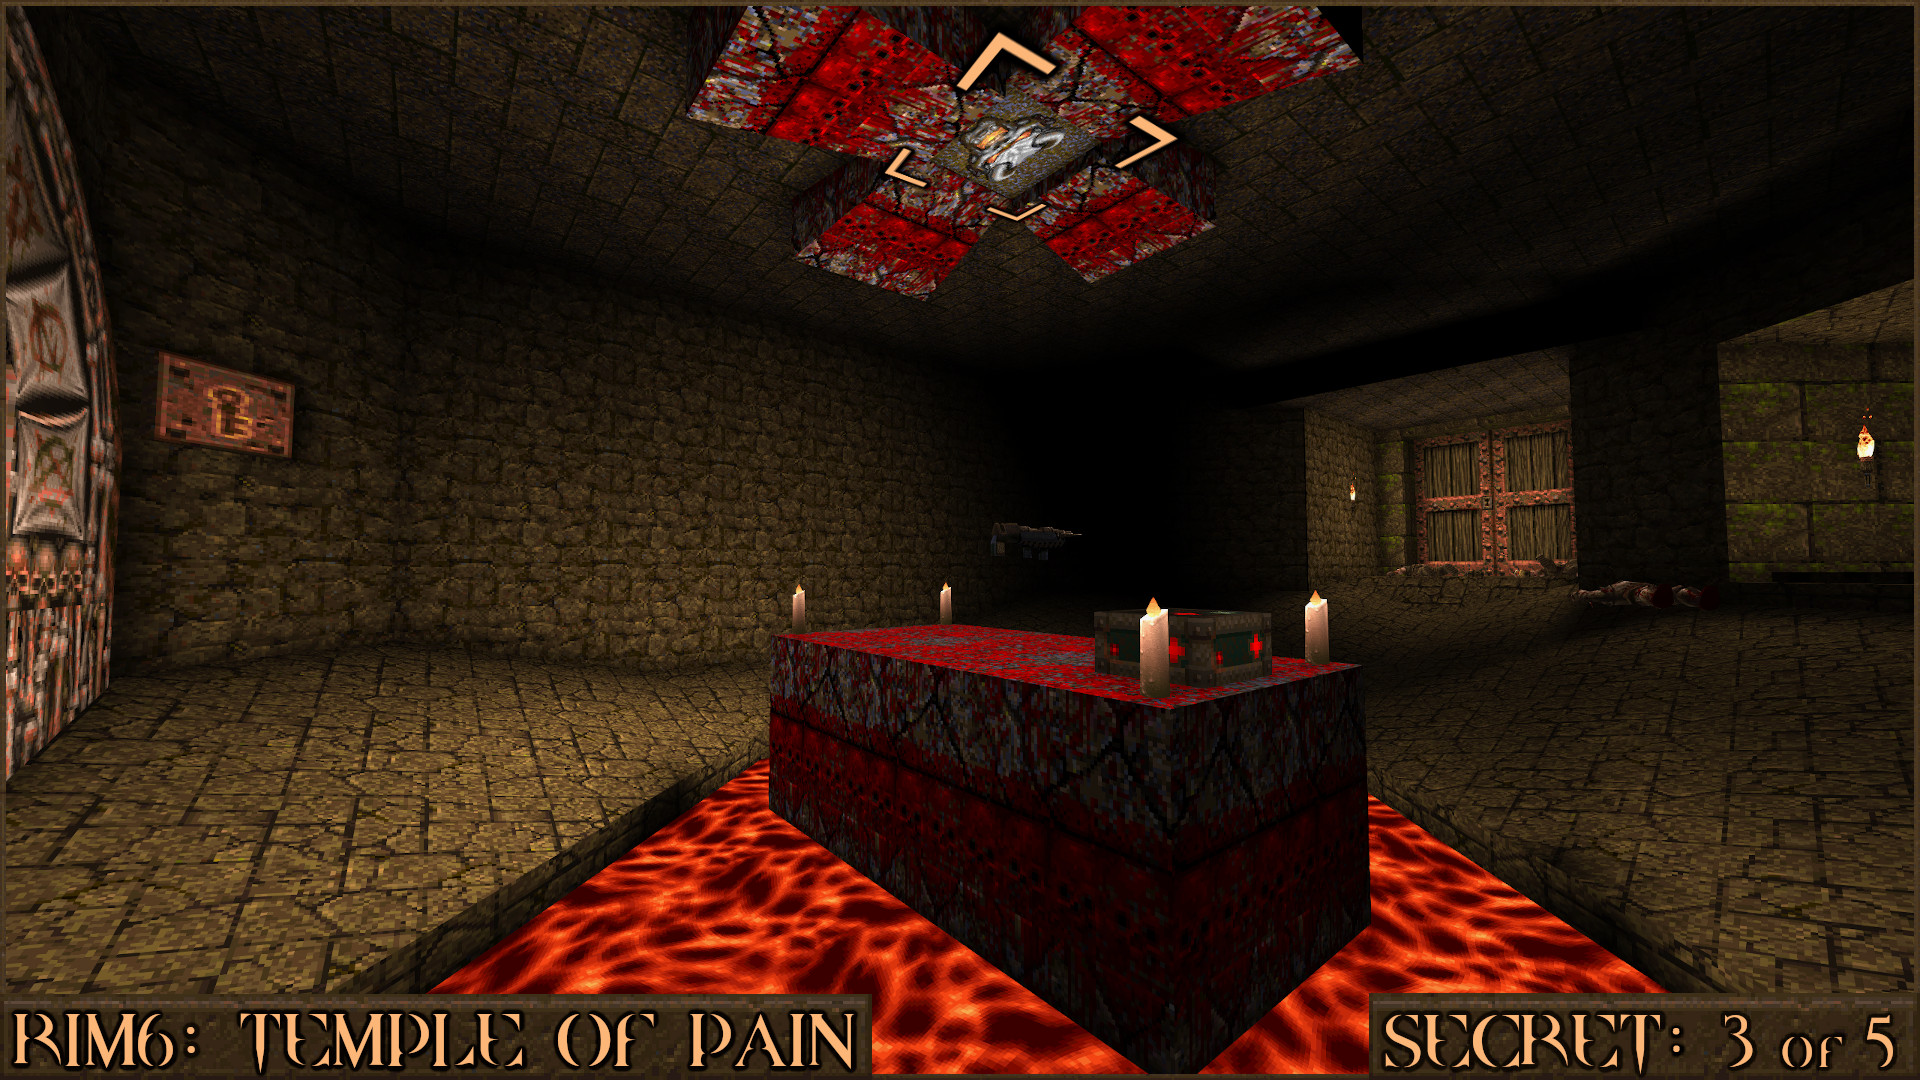
Reward:
Secret 4 of 5
After entering a large room with a tapestry of a Wrath on the back wall head down the right corridor ().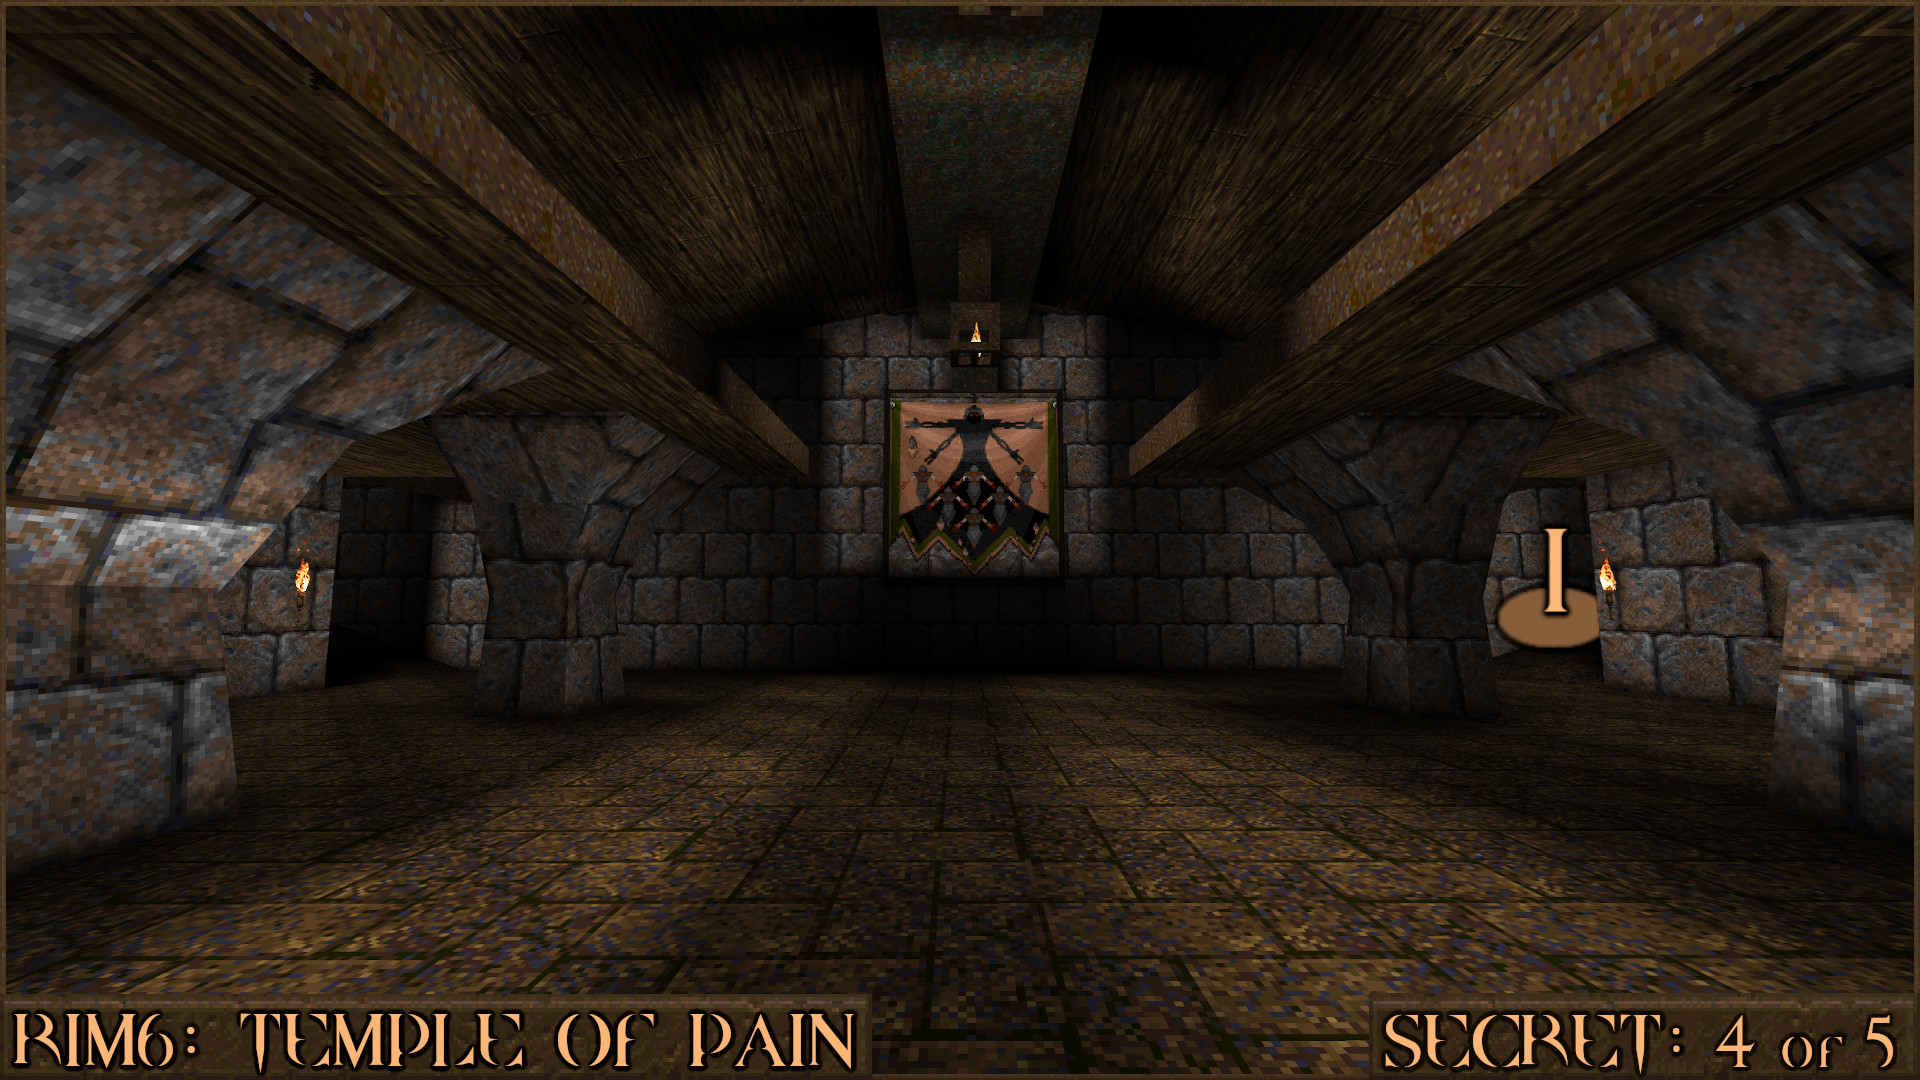
It looks like a dead end but if you jump in to the lantern (
) and nudge it you will open a secret teleporter behind a nearby wall ().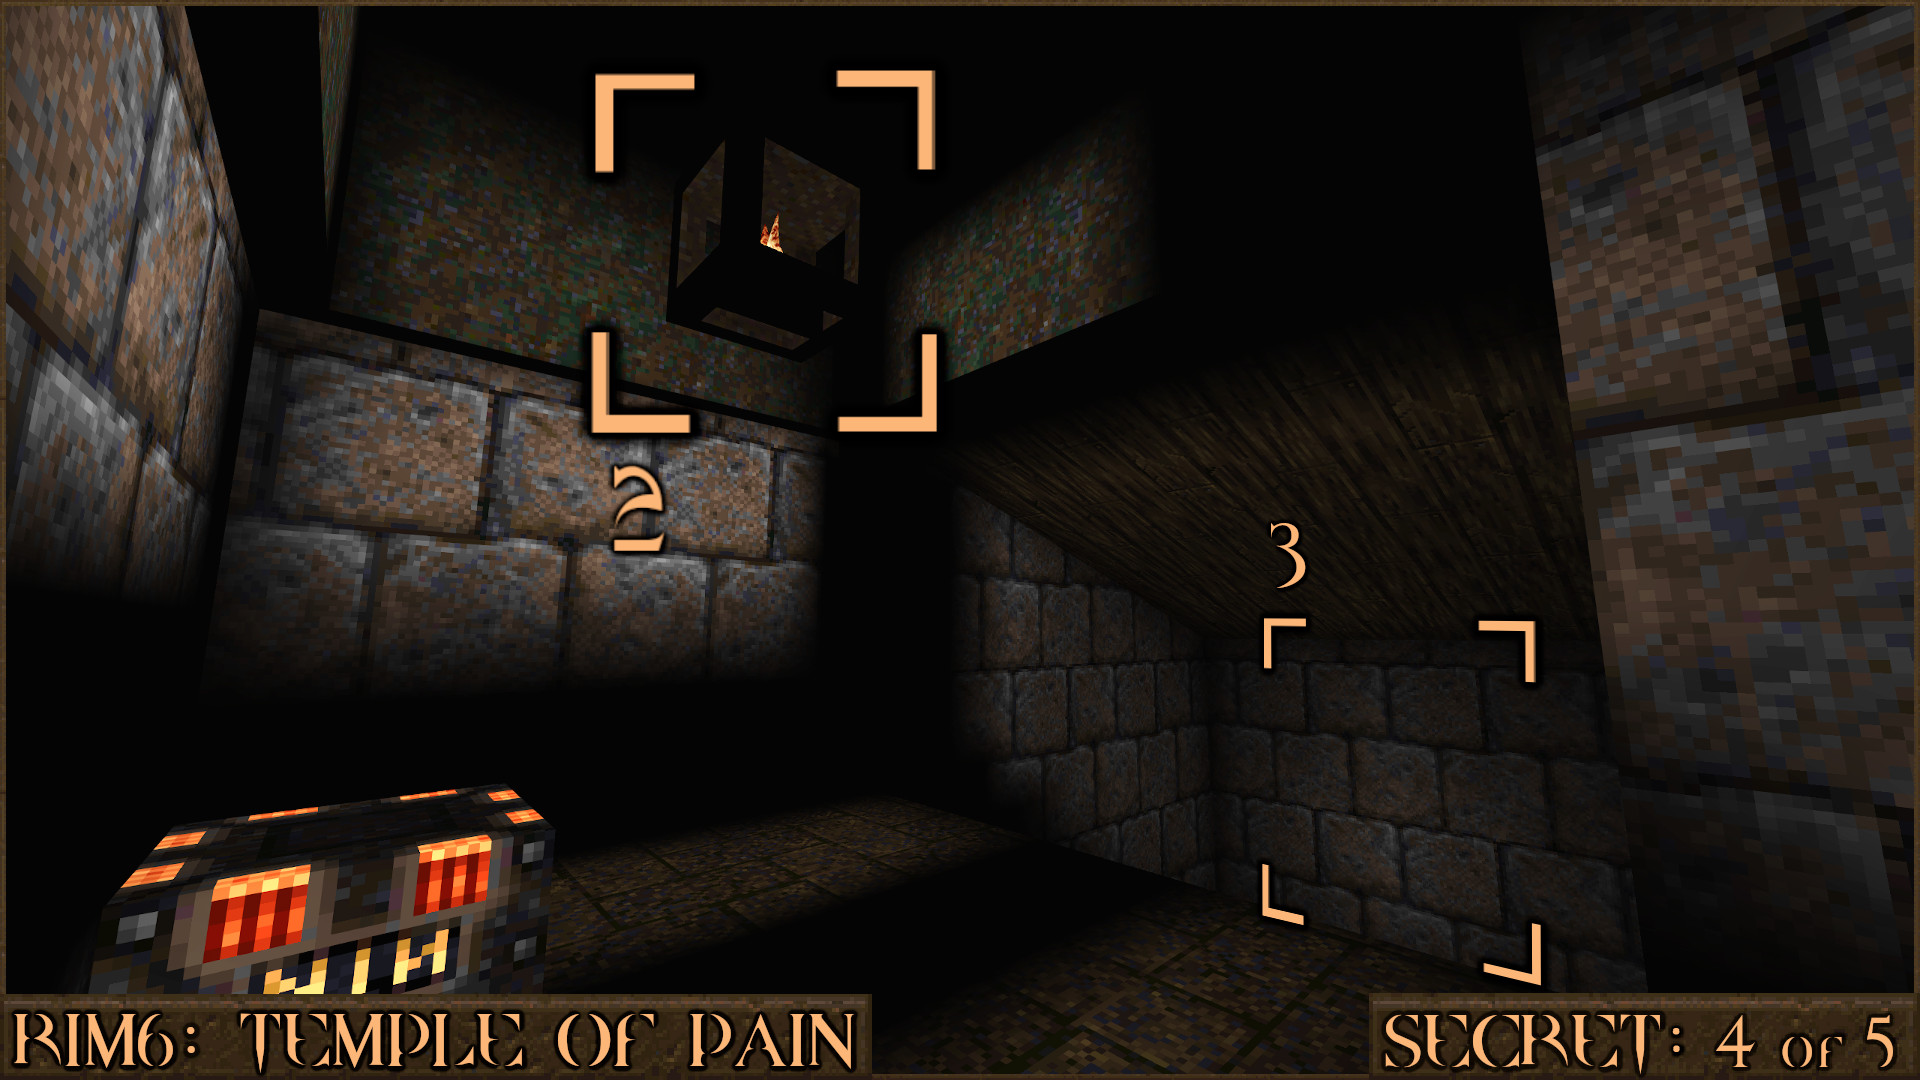
Reward:
Extra Secret
In the room with the Gold Key you will fight several Wraths. After they are dead inspect the unique stained-glass windows at the back of the room to find that they are all fake walls. The Pestilence window () contains a Yellow Armor, the Death and War windows () both lead to the same Megahealth and the Famine window () contains a teleporter that will take you back to the Gold Key Door. Don't use the teleporter yet as the next secret is closer to where you already are.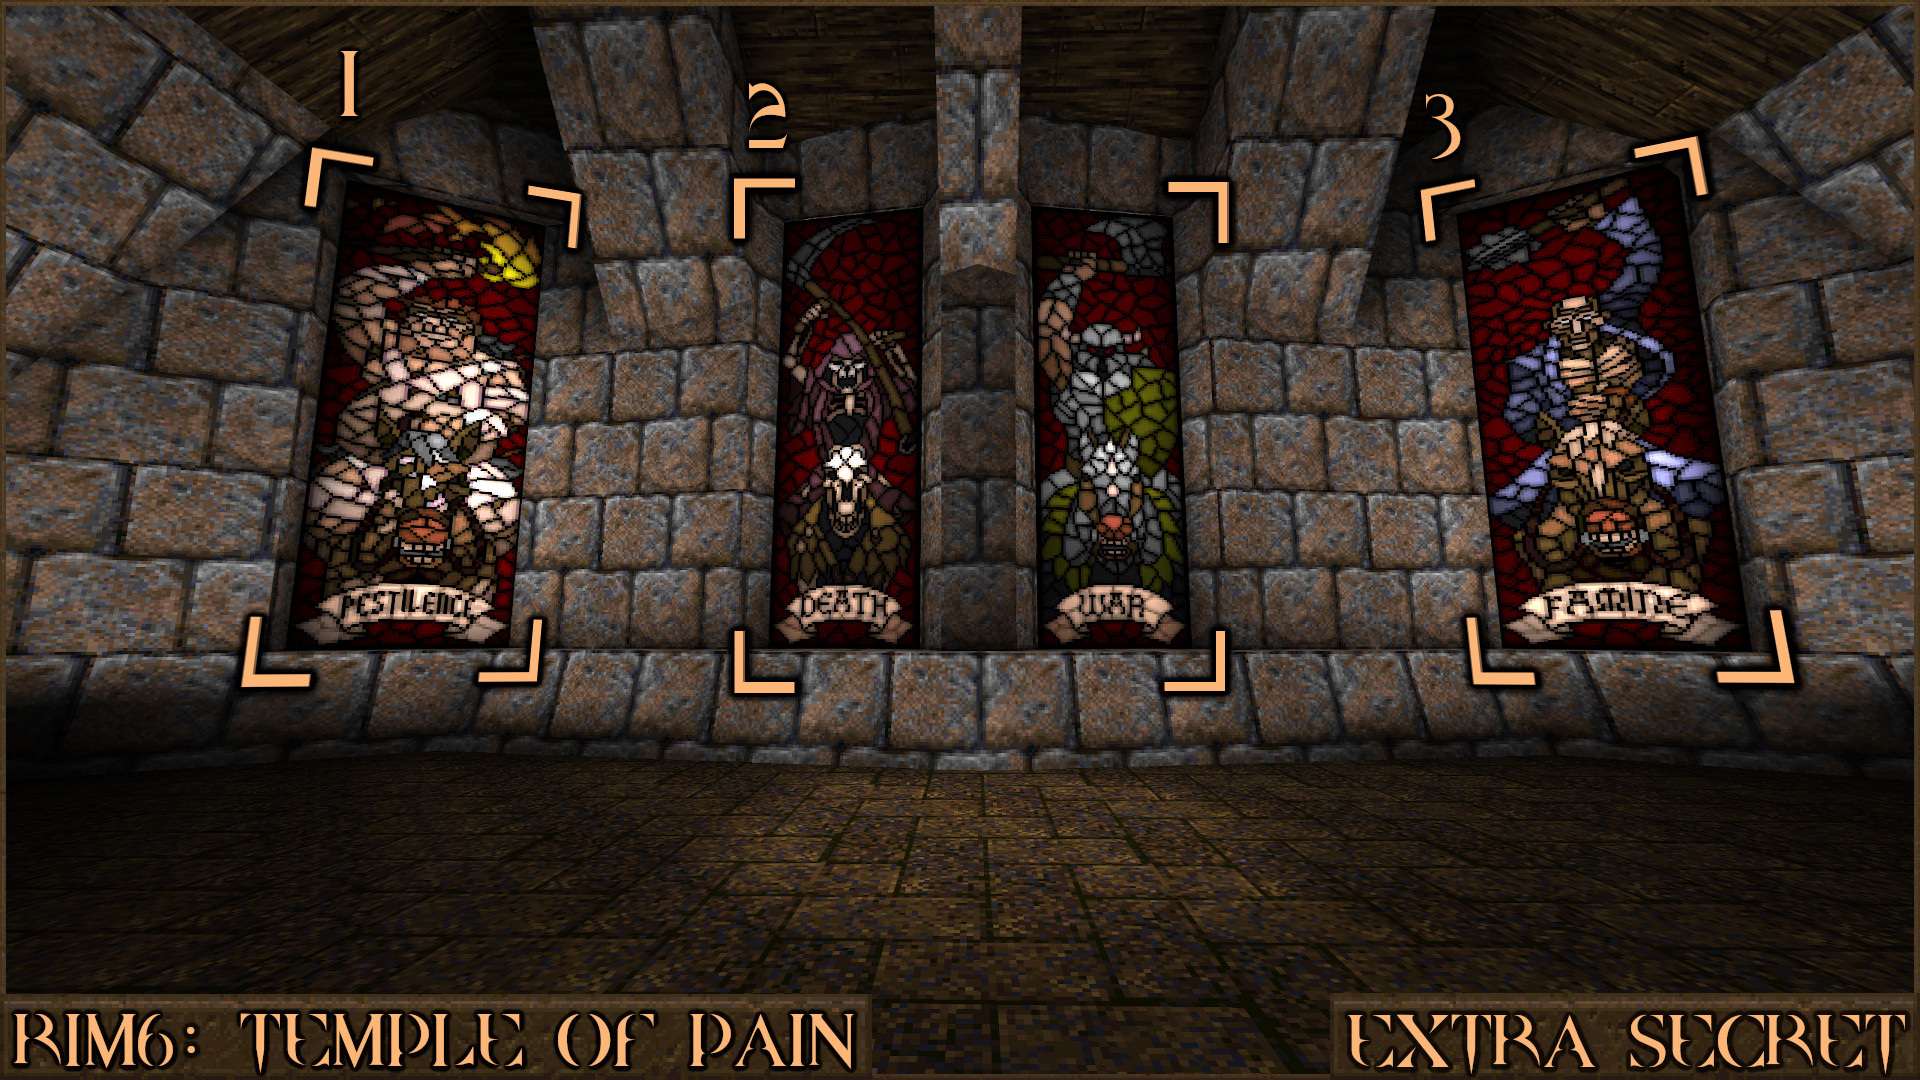
Reward:
Secret 5 of 5
From the room containing the Extra Secret backtrack along the corridor until you come across the bloody altar. Now that you have picked up the Gold Key this altar has moved out the way to reveal a secret pool of water. Jump in and swim through to find a Power Shield.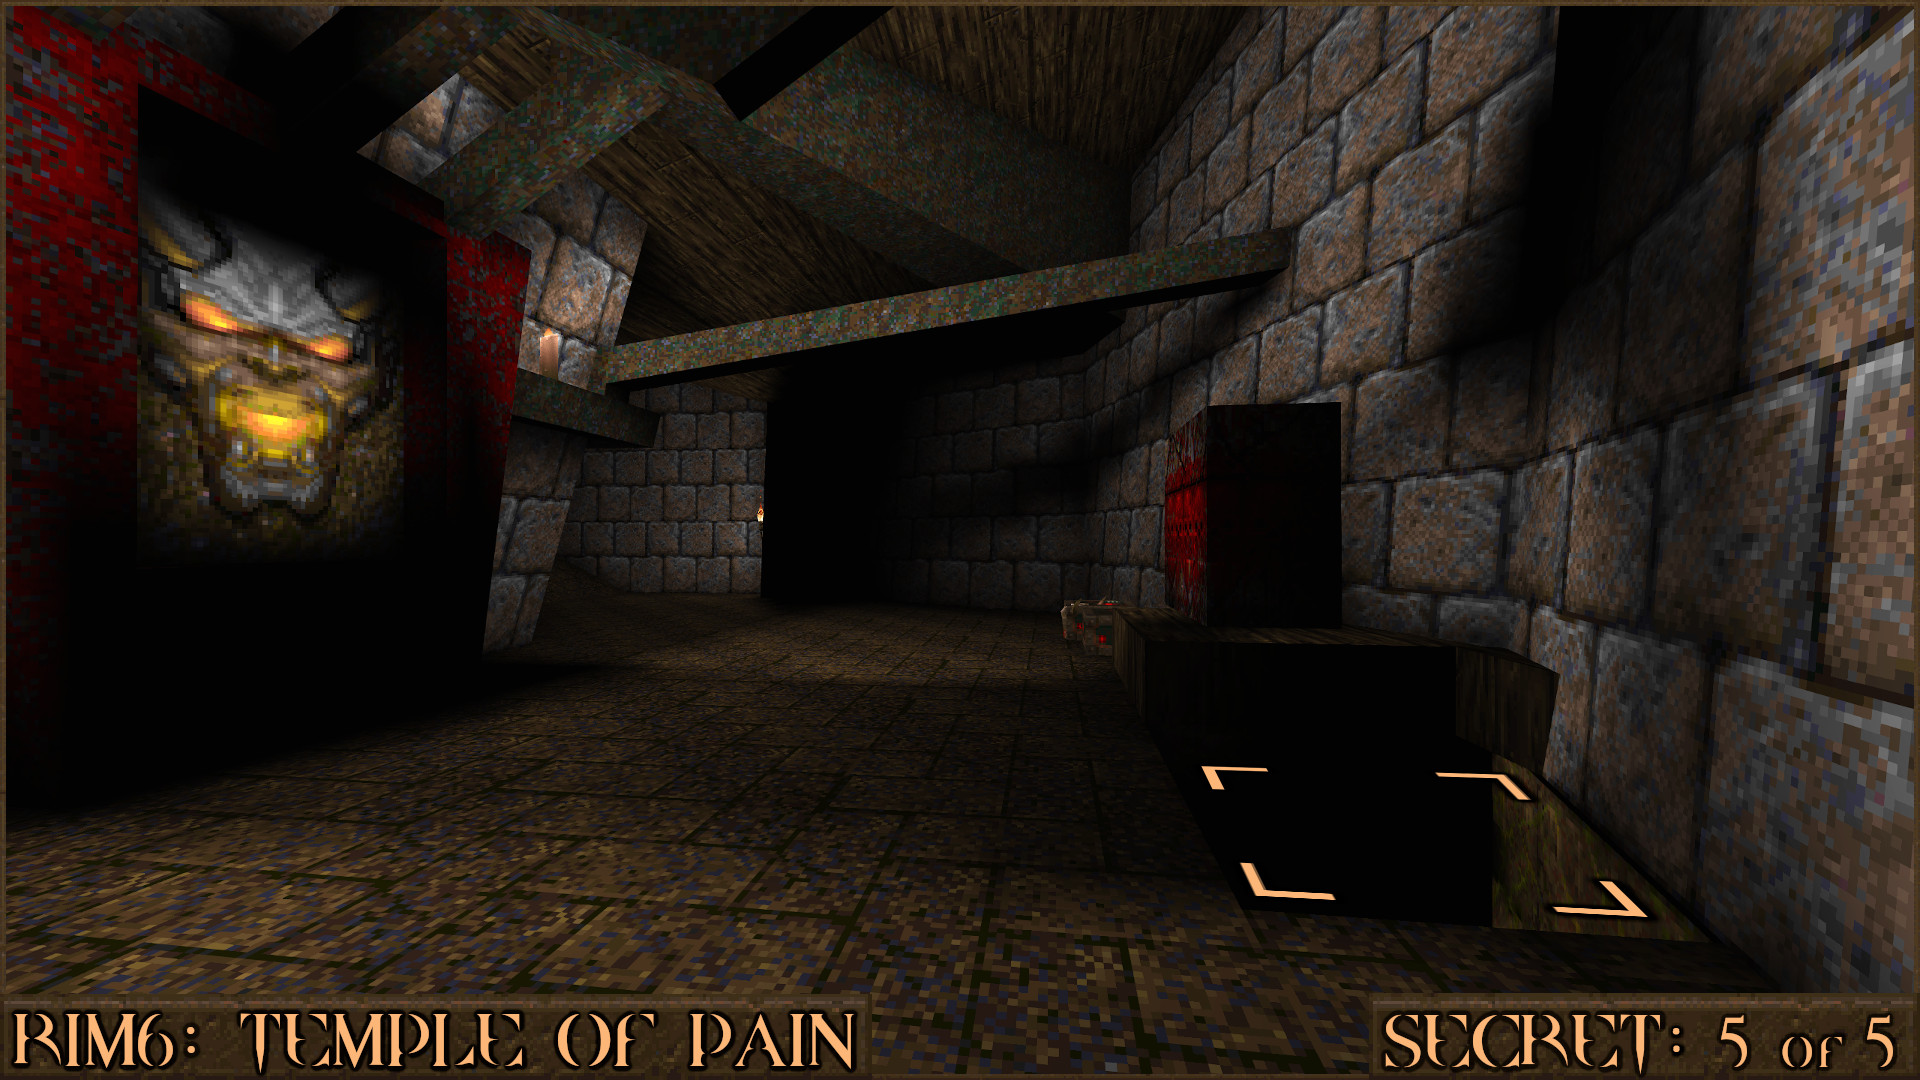
Reward:
R1M7: Tomb of the Overlord
Secret 1 of 4
The first half of this level involves finding four orange buttons. In front of one of these orange buttons is a hallway lined with nail traps on both sides. However if you look carefully at one of them you'll notice one is fake (). Push the fake one to make part of the nearby ramp move () and reveal a secret area.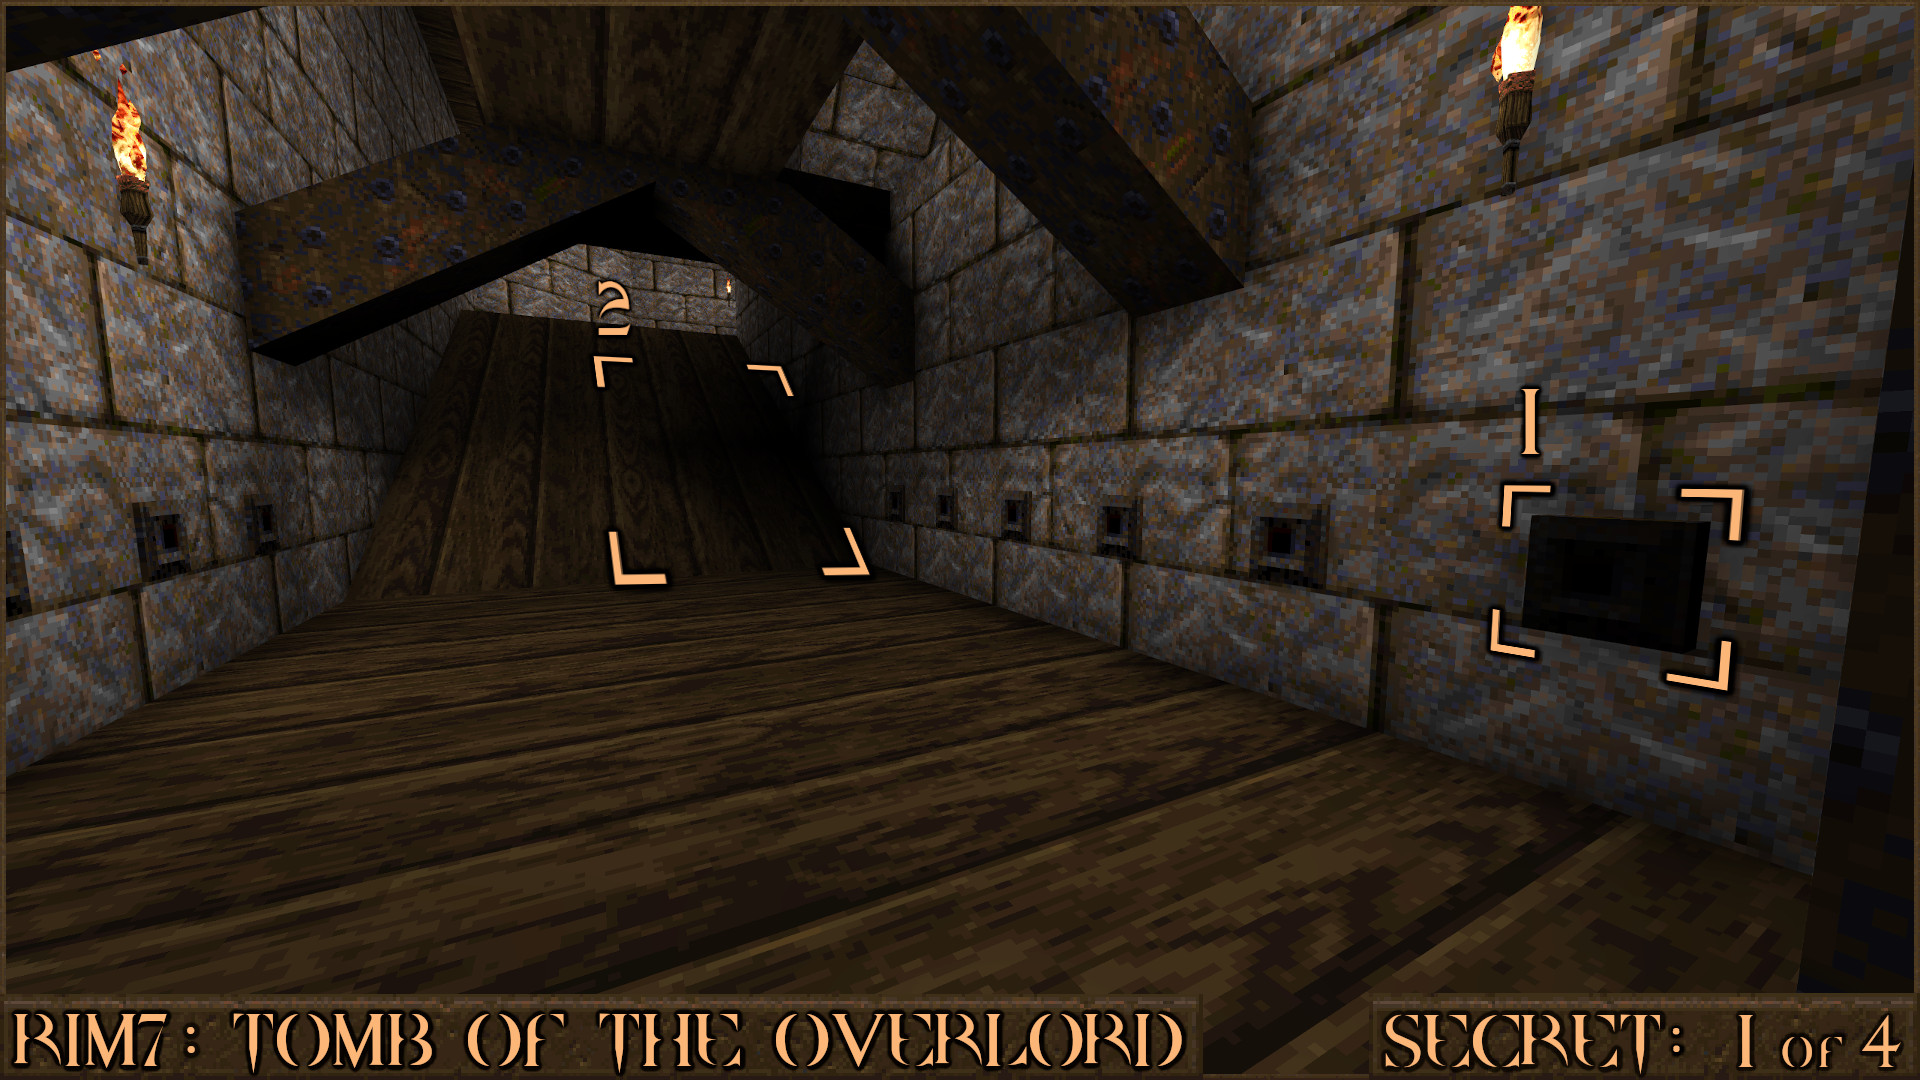
Reward:
Secret 2 of 4
After completing all four orange switches you will drop down in a room with a central pillar covered in Death stained-glass windows. Look carefully to see that one of them is reversed, Shoot it to reveal a secret within the column.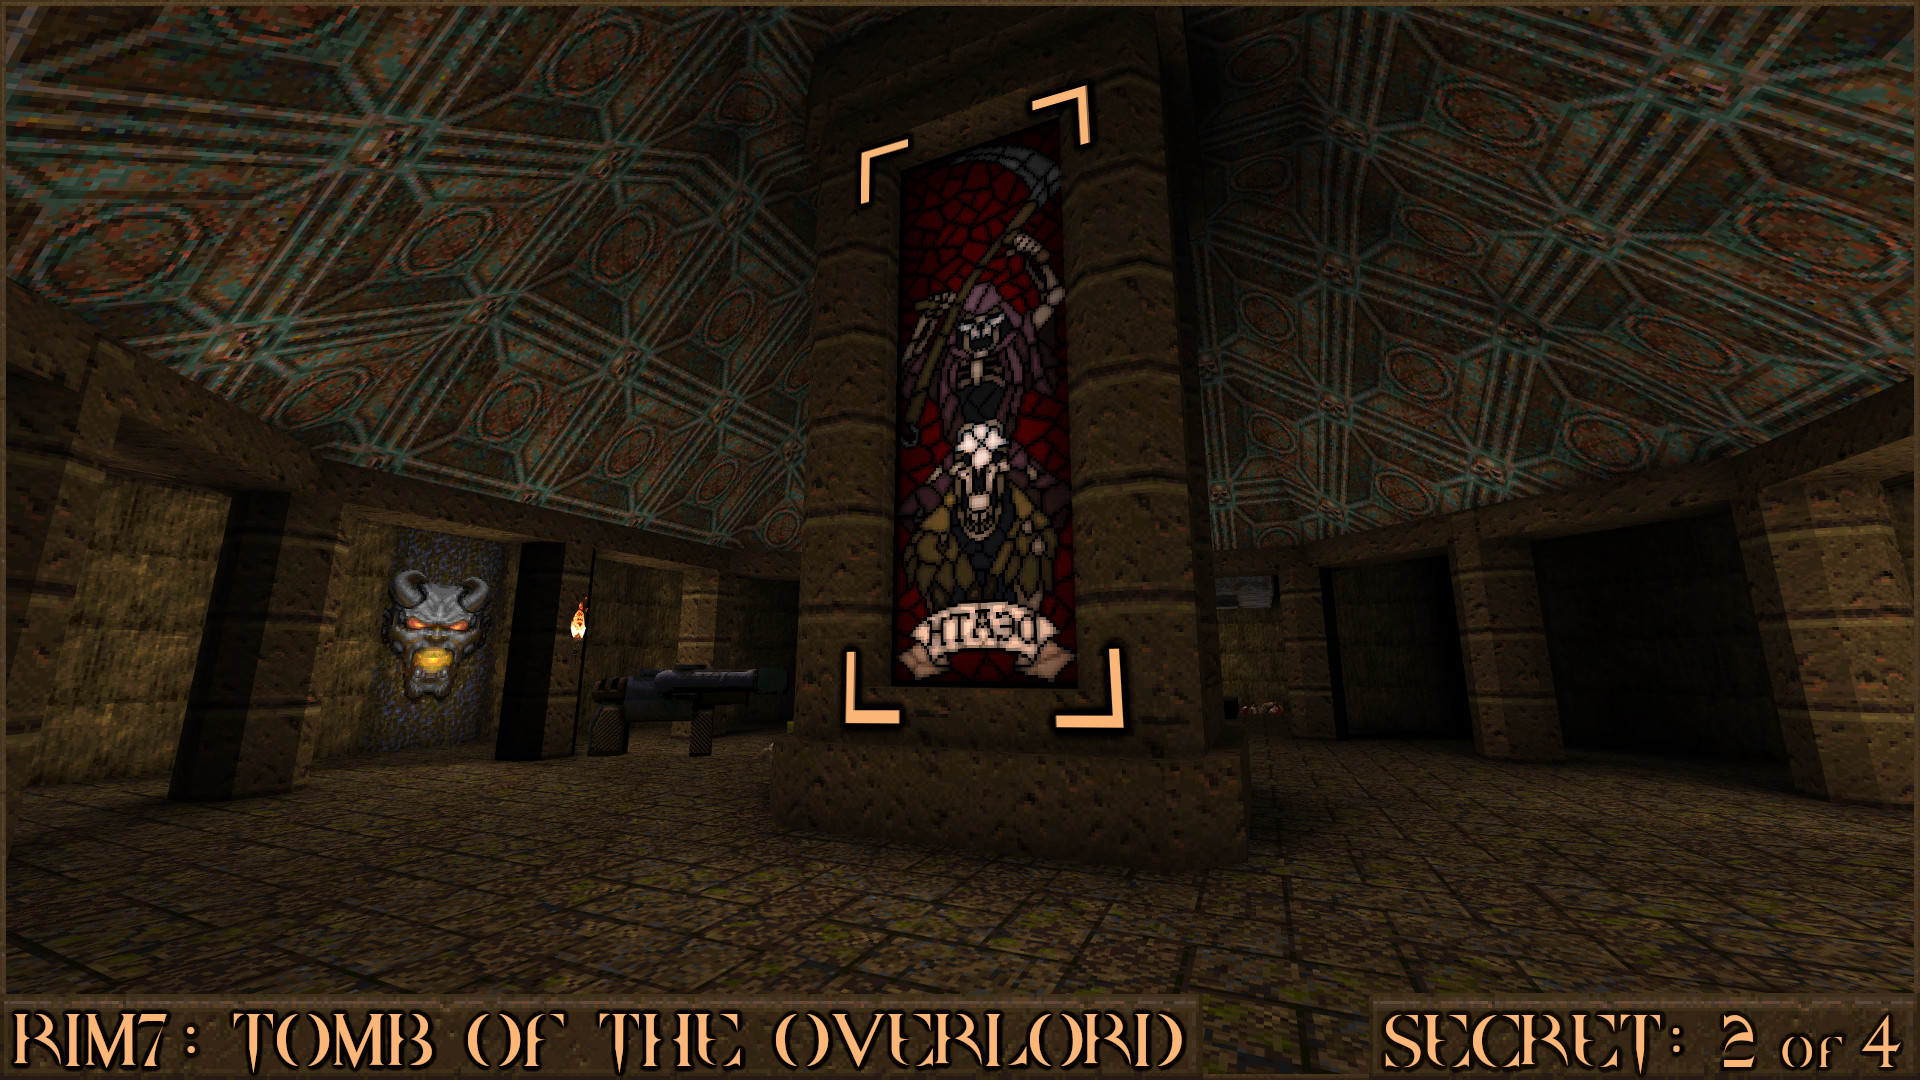
Reward:
Secret 3 of 4
You will enter a crypt with several Zombies. There are actually many ledges () all over the walls for this room so carefully jump up them until you reach the top of the room and enter the secret ().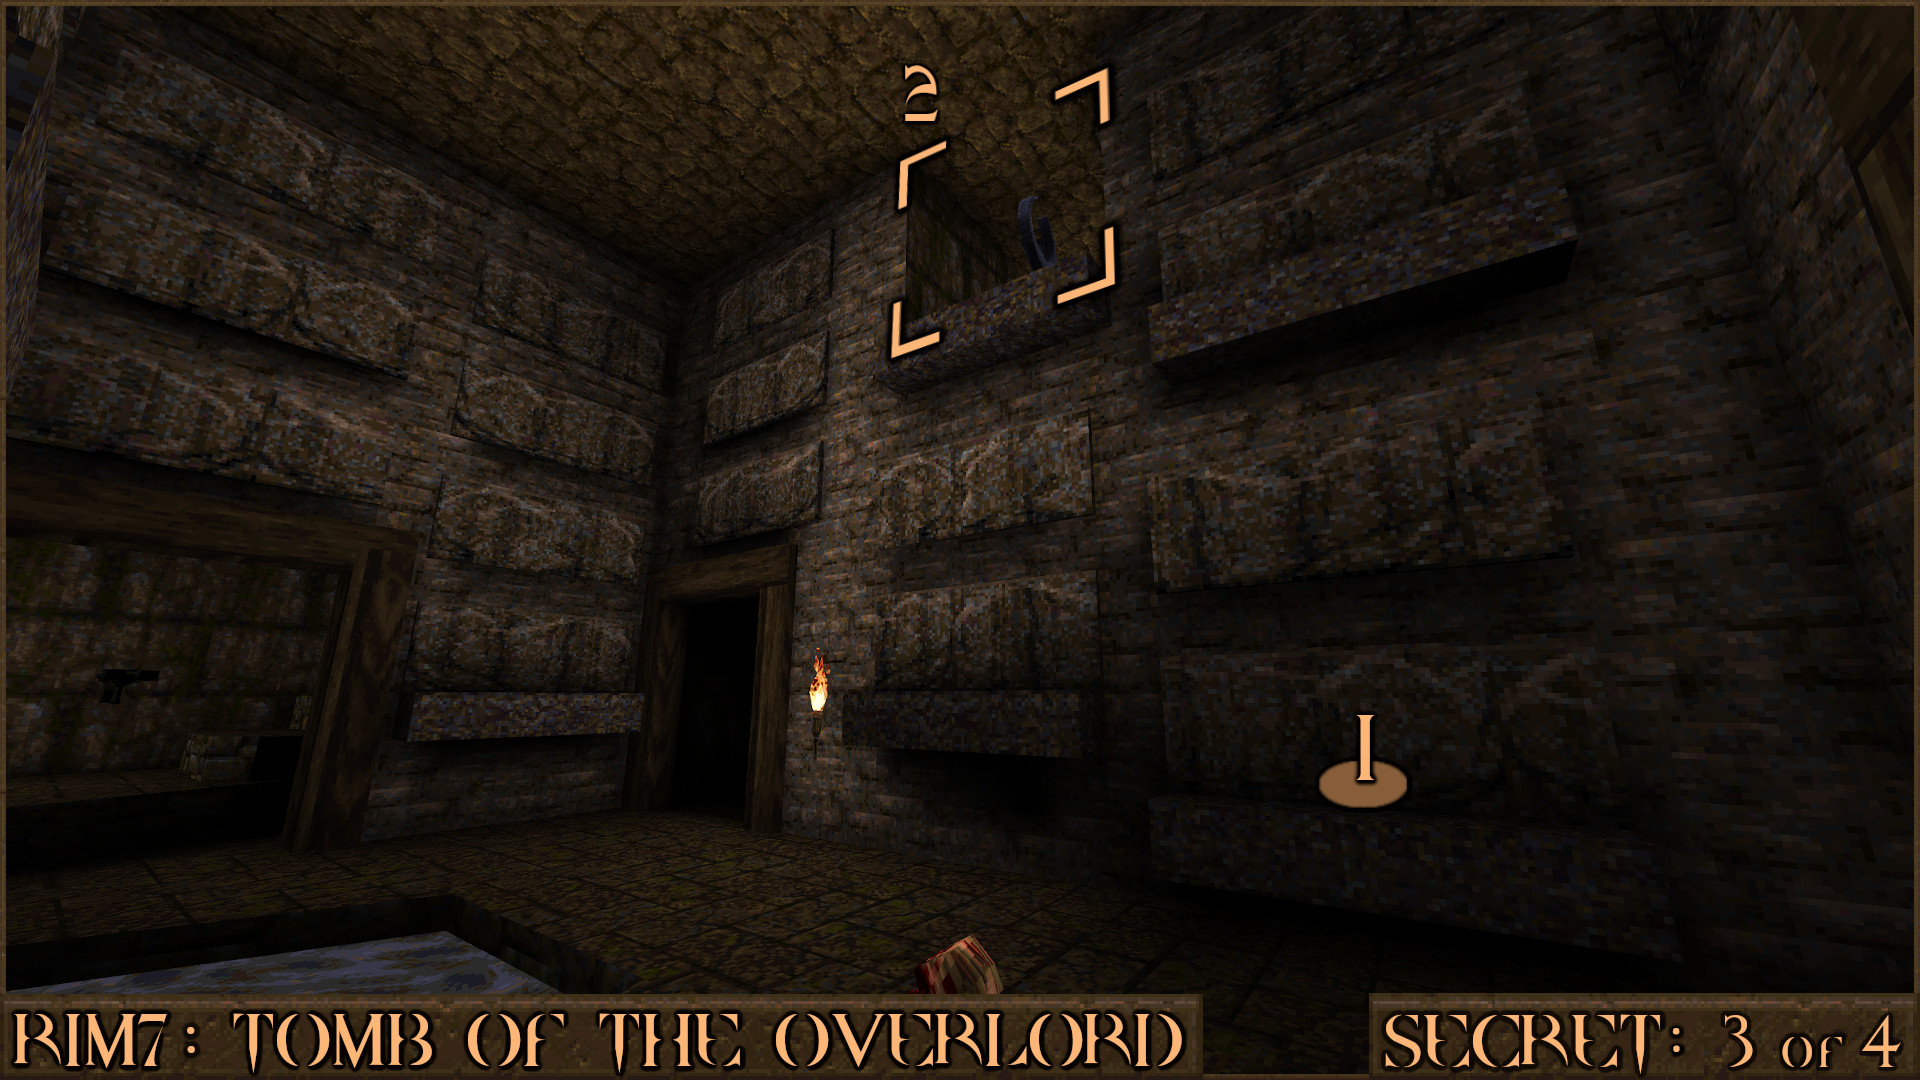
Reward:
Secret 4 of 4
In front of the giant skull fortress is a river of green slime. Look to the right of the slime to see a small area under the wall that contains a secret.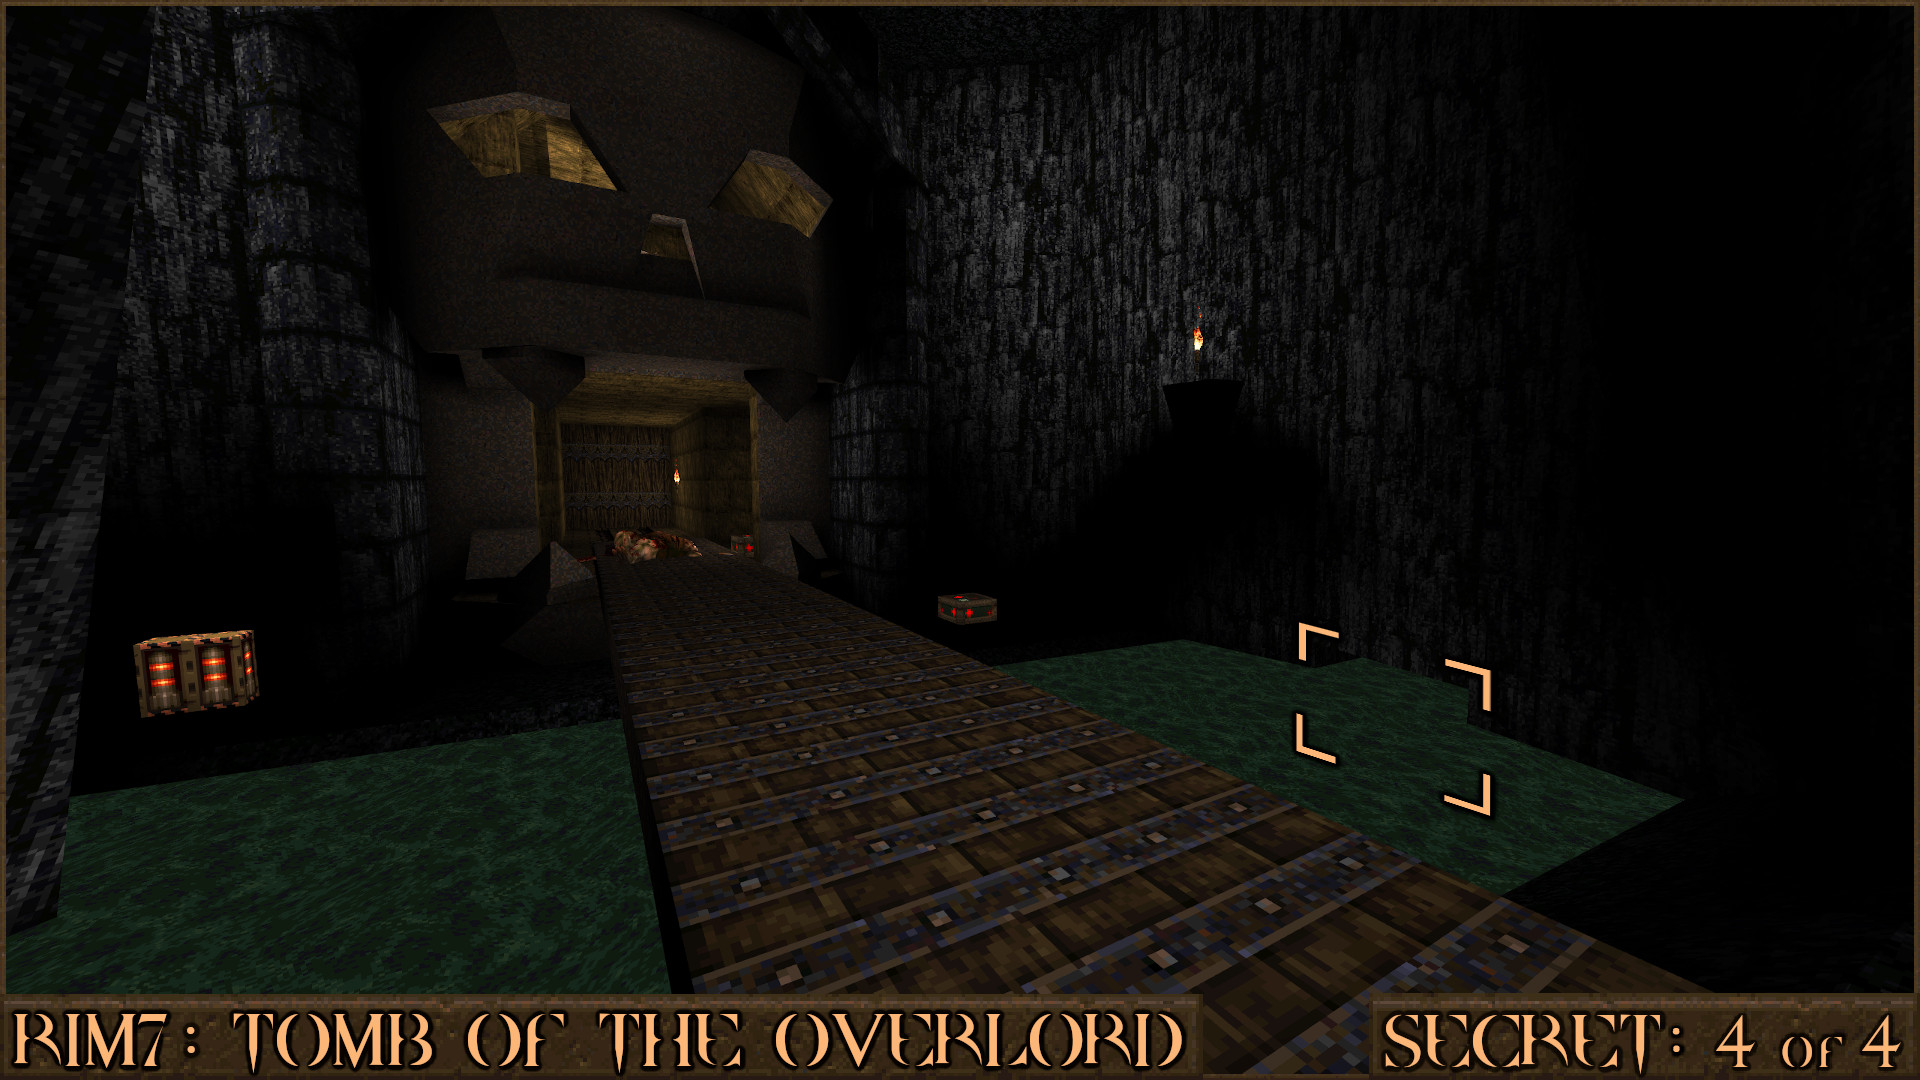
Reward:
R2M1: Tempus Fugit
Secret 1 of 3
Quite far in to the level you will find a Quad Damage powerup and then make a jump over an alley from one building to another ().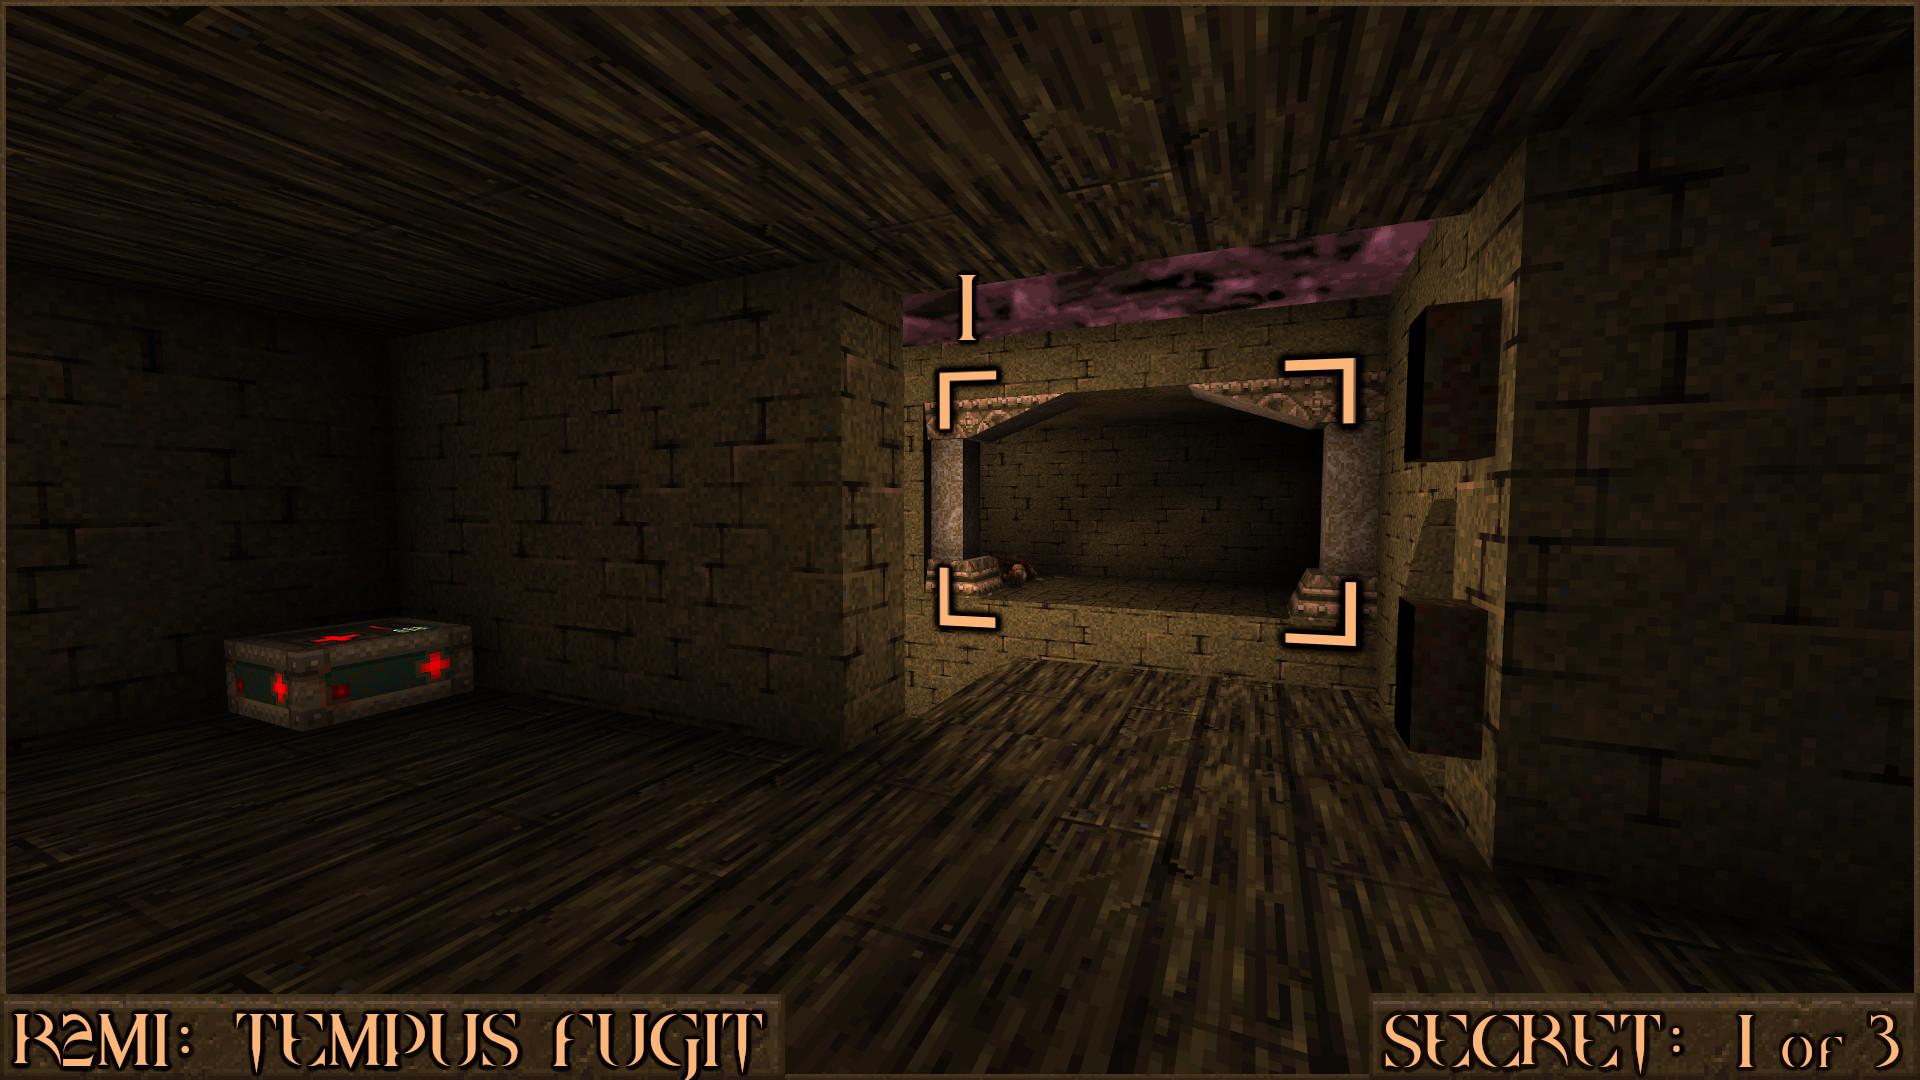
Once inside you will see a Super Nailgun at the end of the tunnel. Shoot the wall to left of this (
) to find a secret area with more items.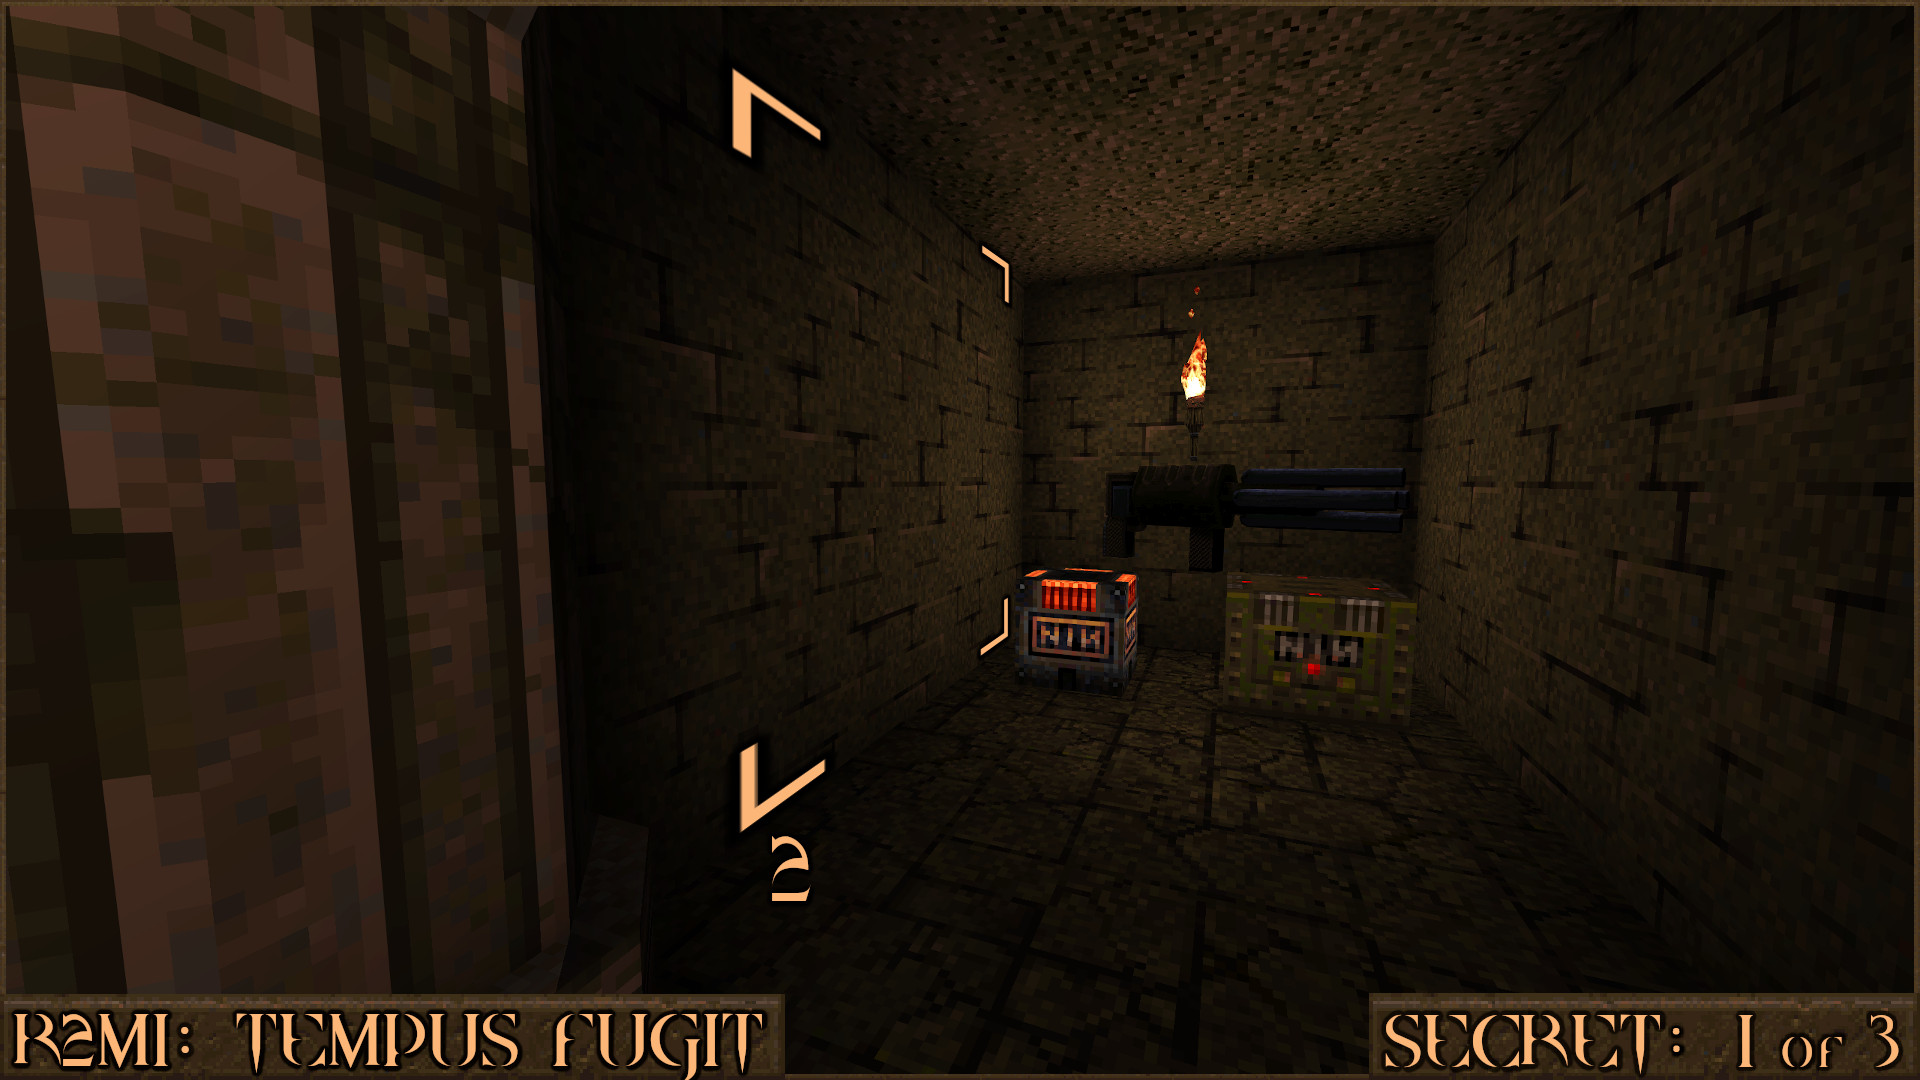
Reward:
Secret 2 of 3
Later in the level you will have to jump in to a small hole filled with water () and swim through a tunnel.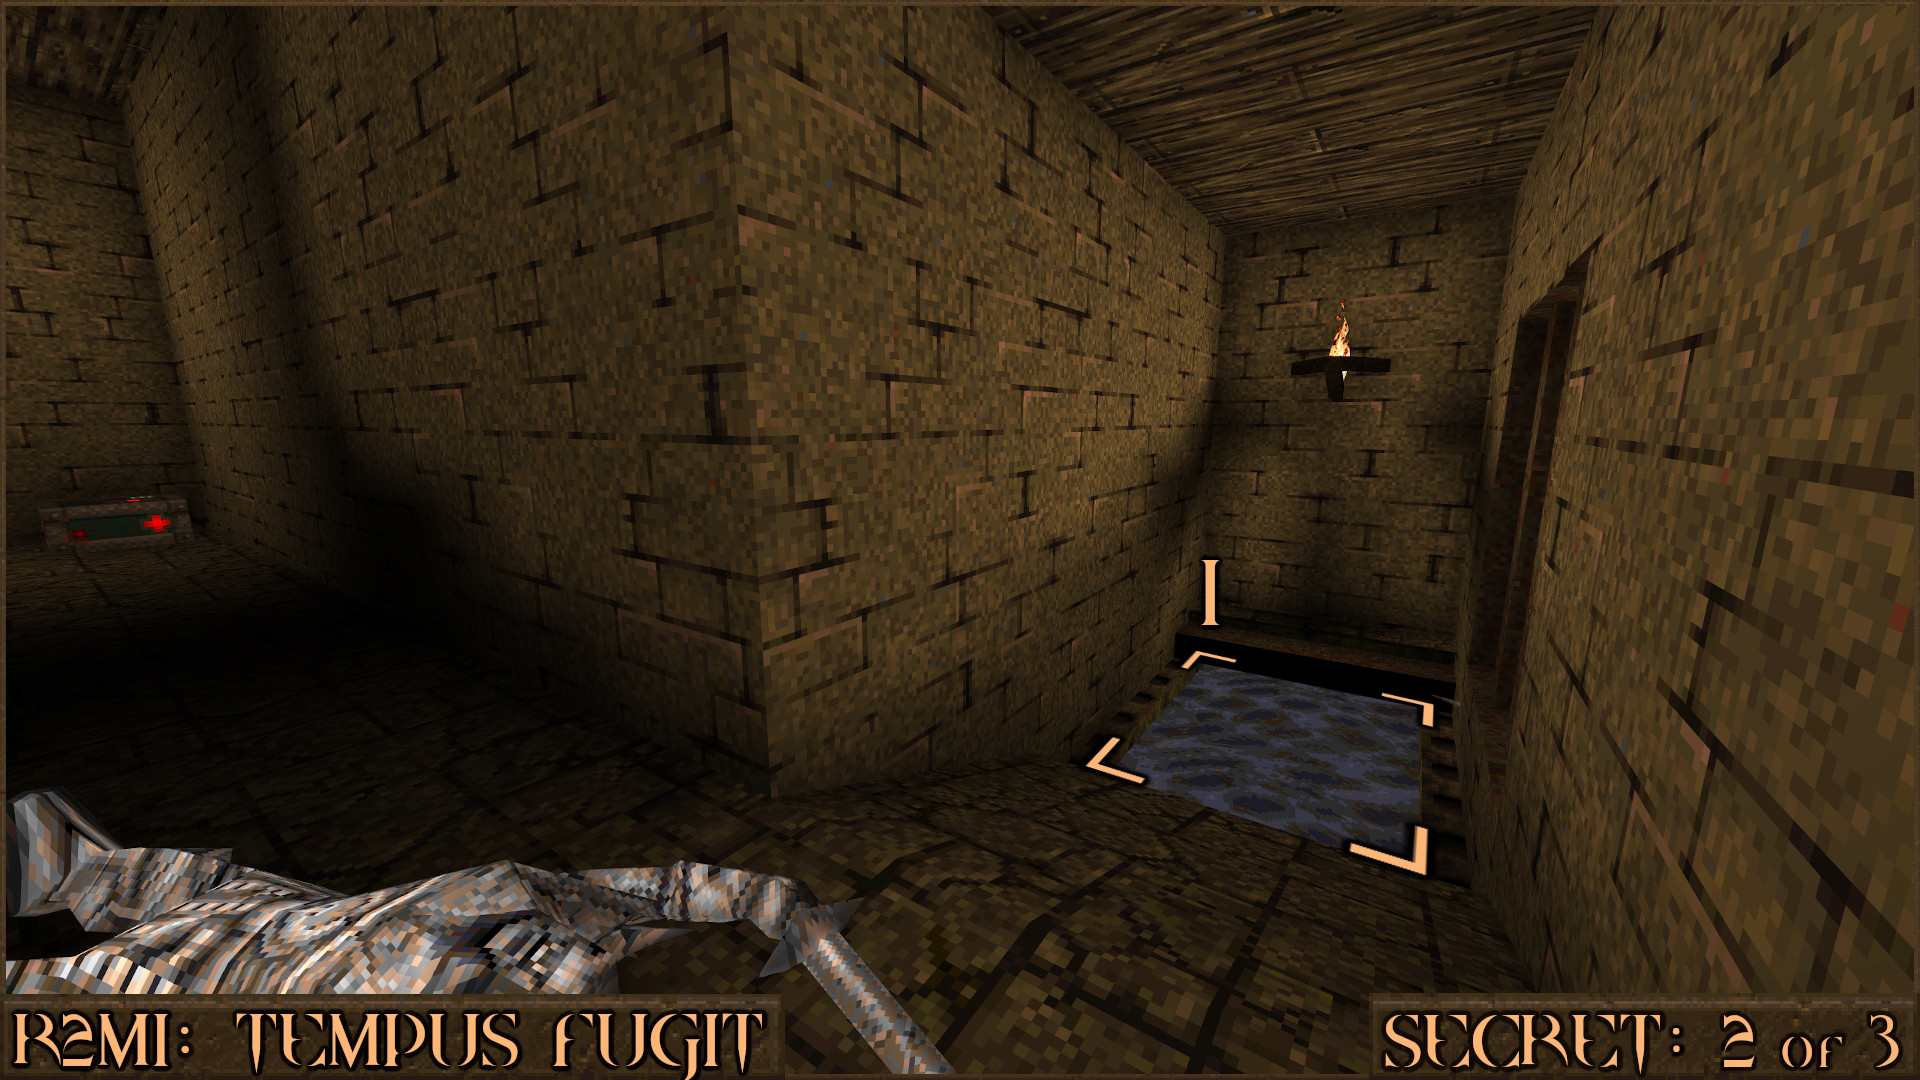
About half way through the tunnel you should shoot this wall (
) to reveal a secret area.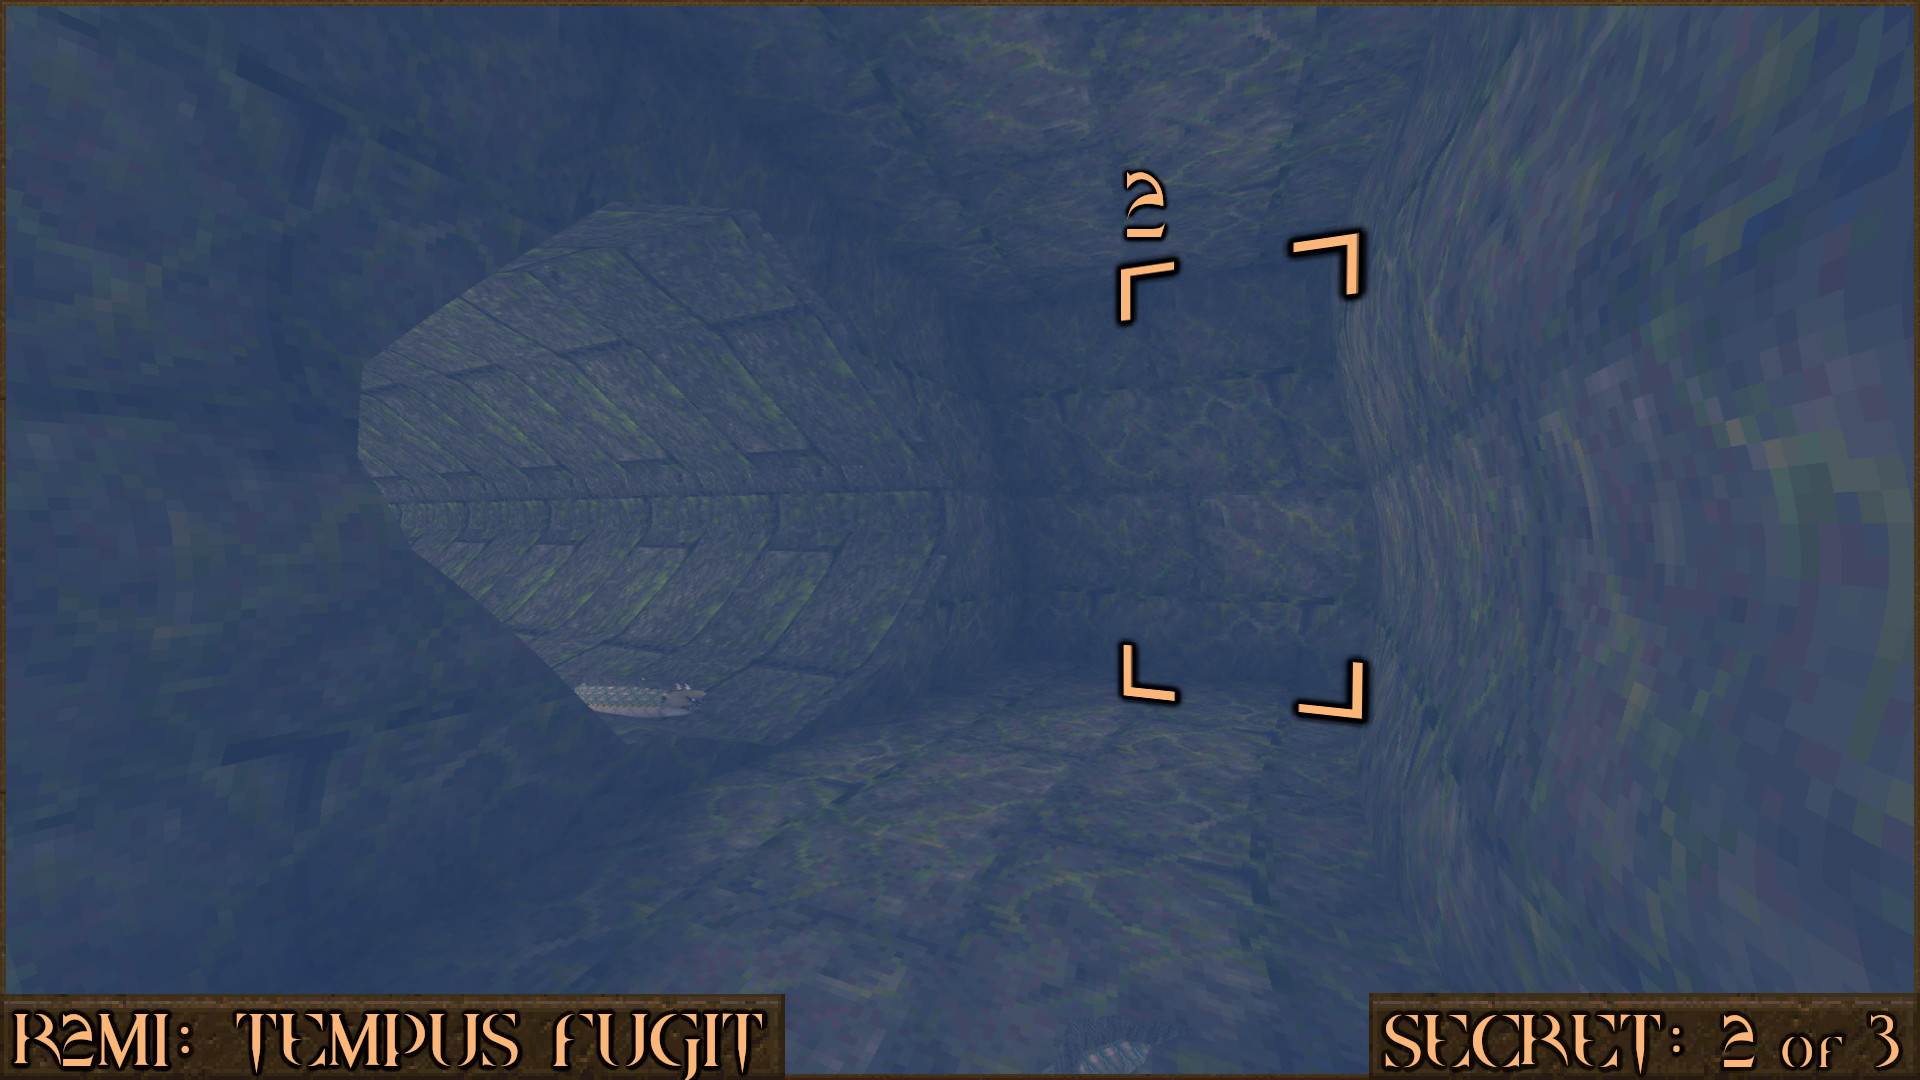
Reward:
Secret 3 of 3
Near the very end of the level you will approach a large temple. Notice the metal Quake symbol in the very centre. Jump on top of it () to be instantly transported to the upper platforms overlooking the temple and you will discover the secret.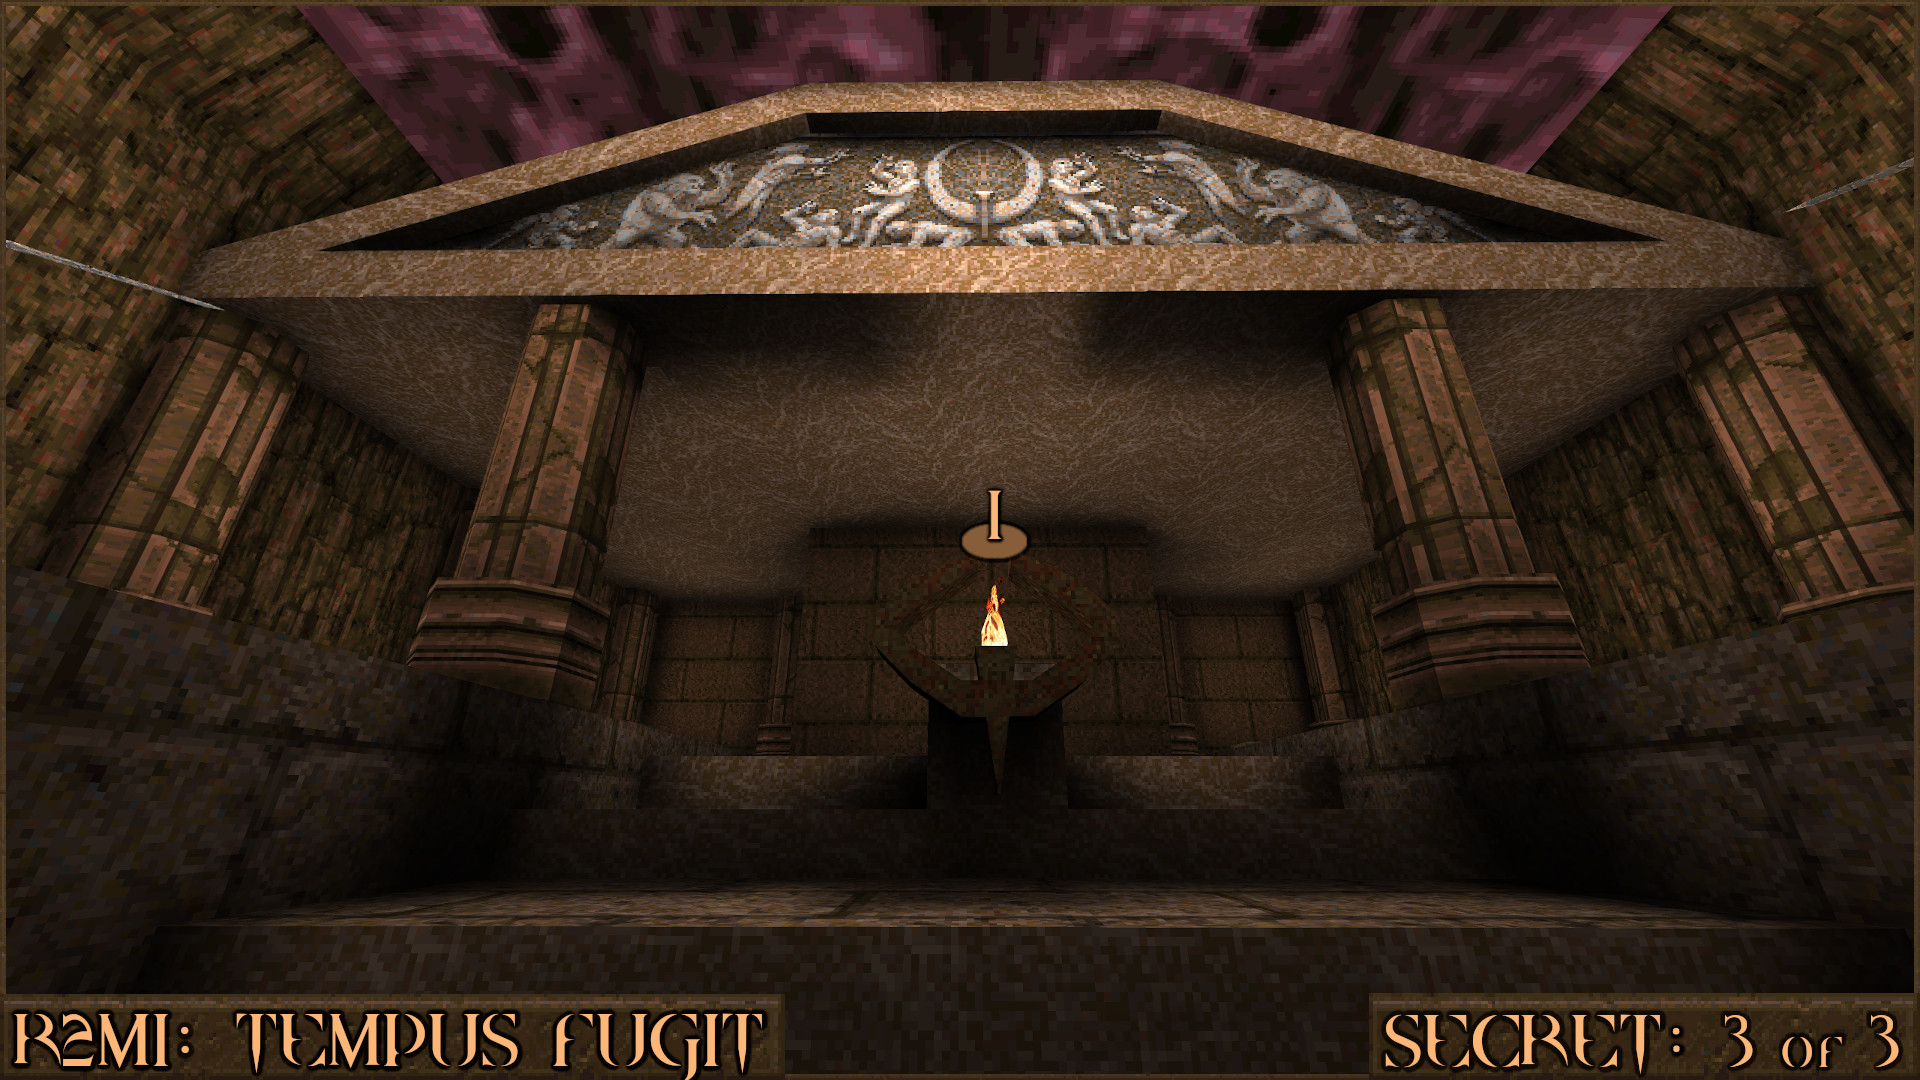
Reward:
R2M2: Elemental Fury I
Secret 1 of 2
The first half of this level features the trial of Earth. In this section look for a large metal block that moves up and down. Jump underneath it when it is at it's highest point and head underneath to find a secret area.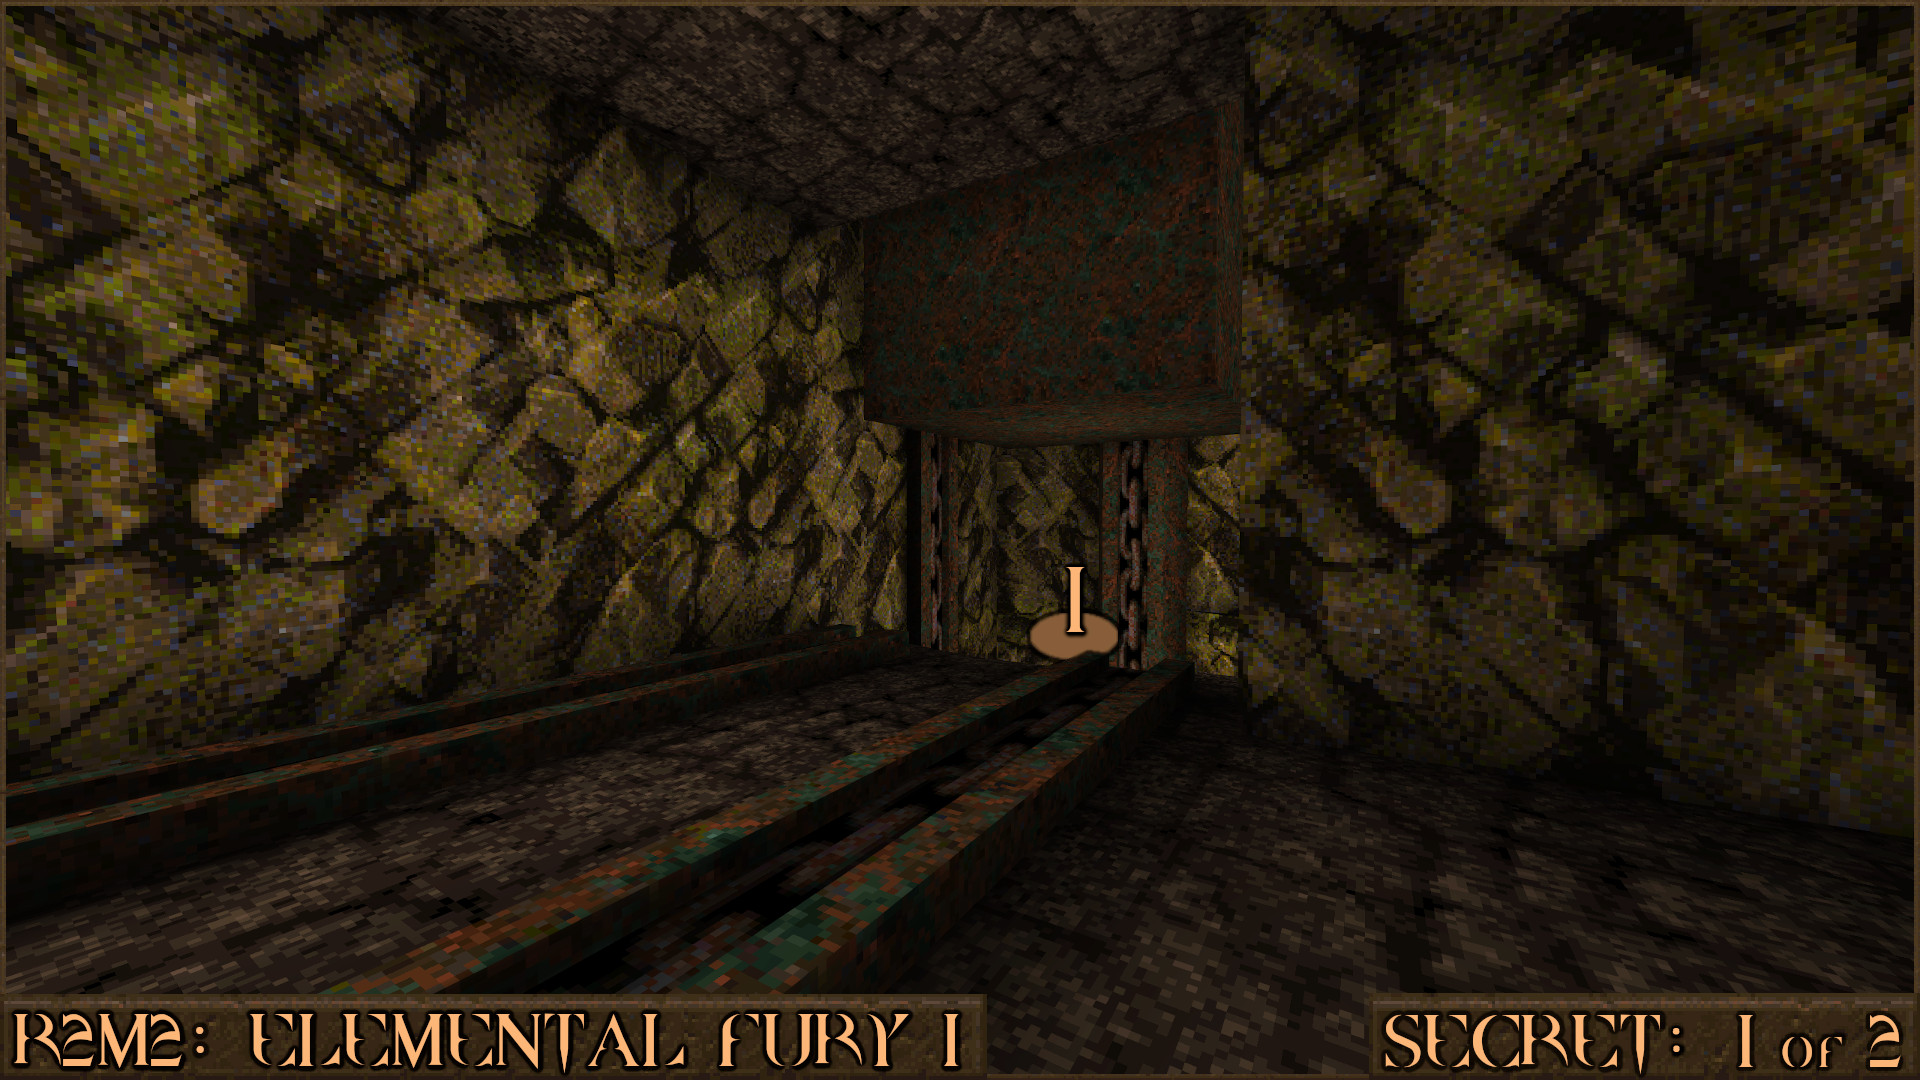
Reward:
Secret 2 of 2
The second half of level features the trial of Air. In the central chamber for this section you will see four tubes each with a red number on the front. Shoot the first two numbers (+).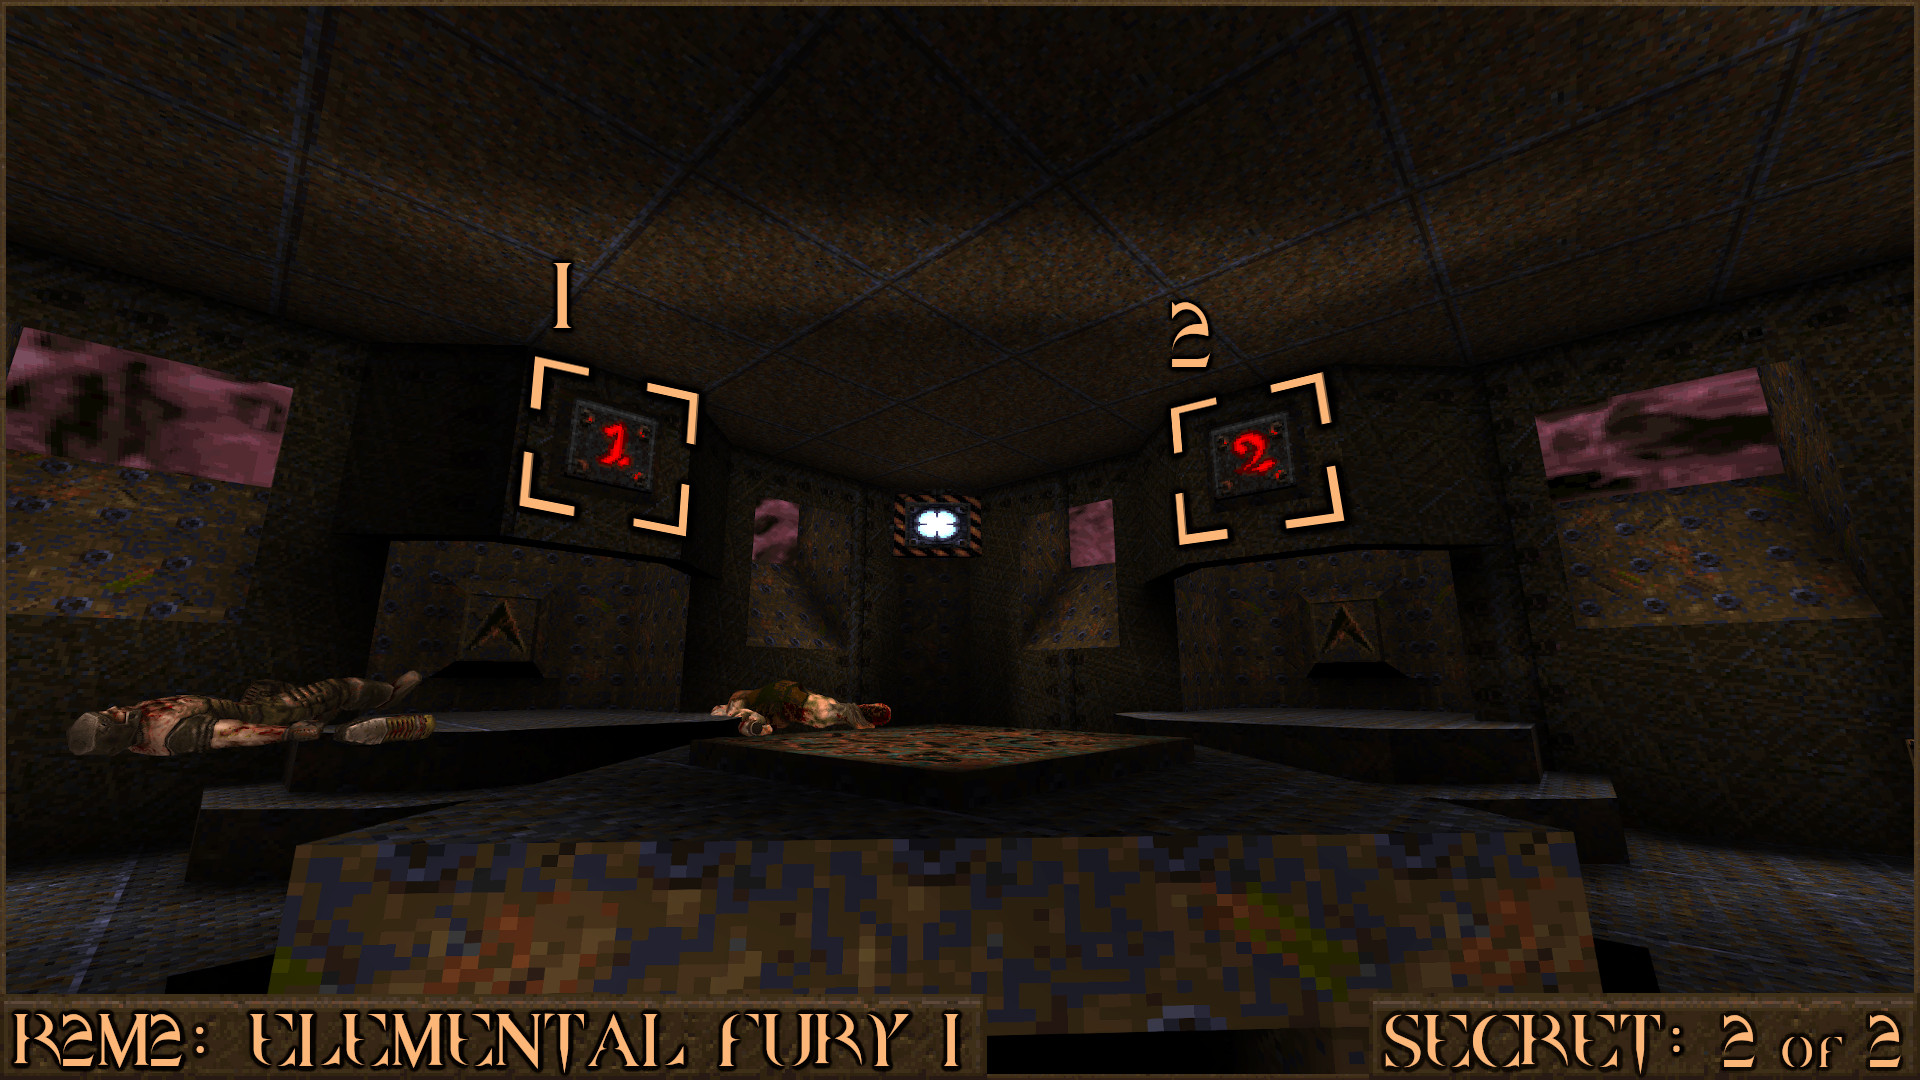
Turn around and shoot the other numbers (
+) and the text "Try behind the passage to Water!" will appear.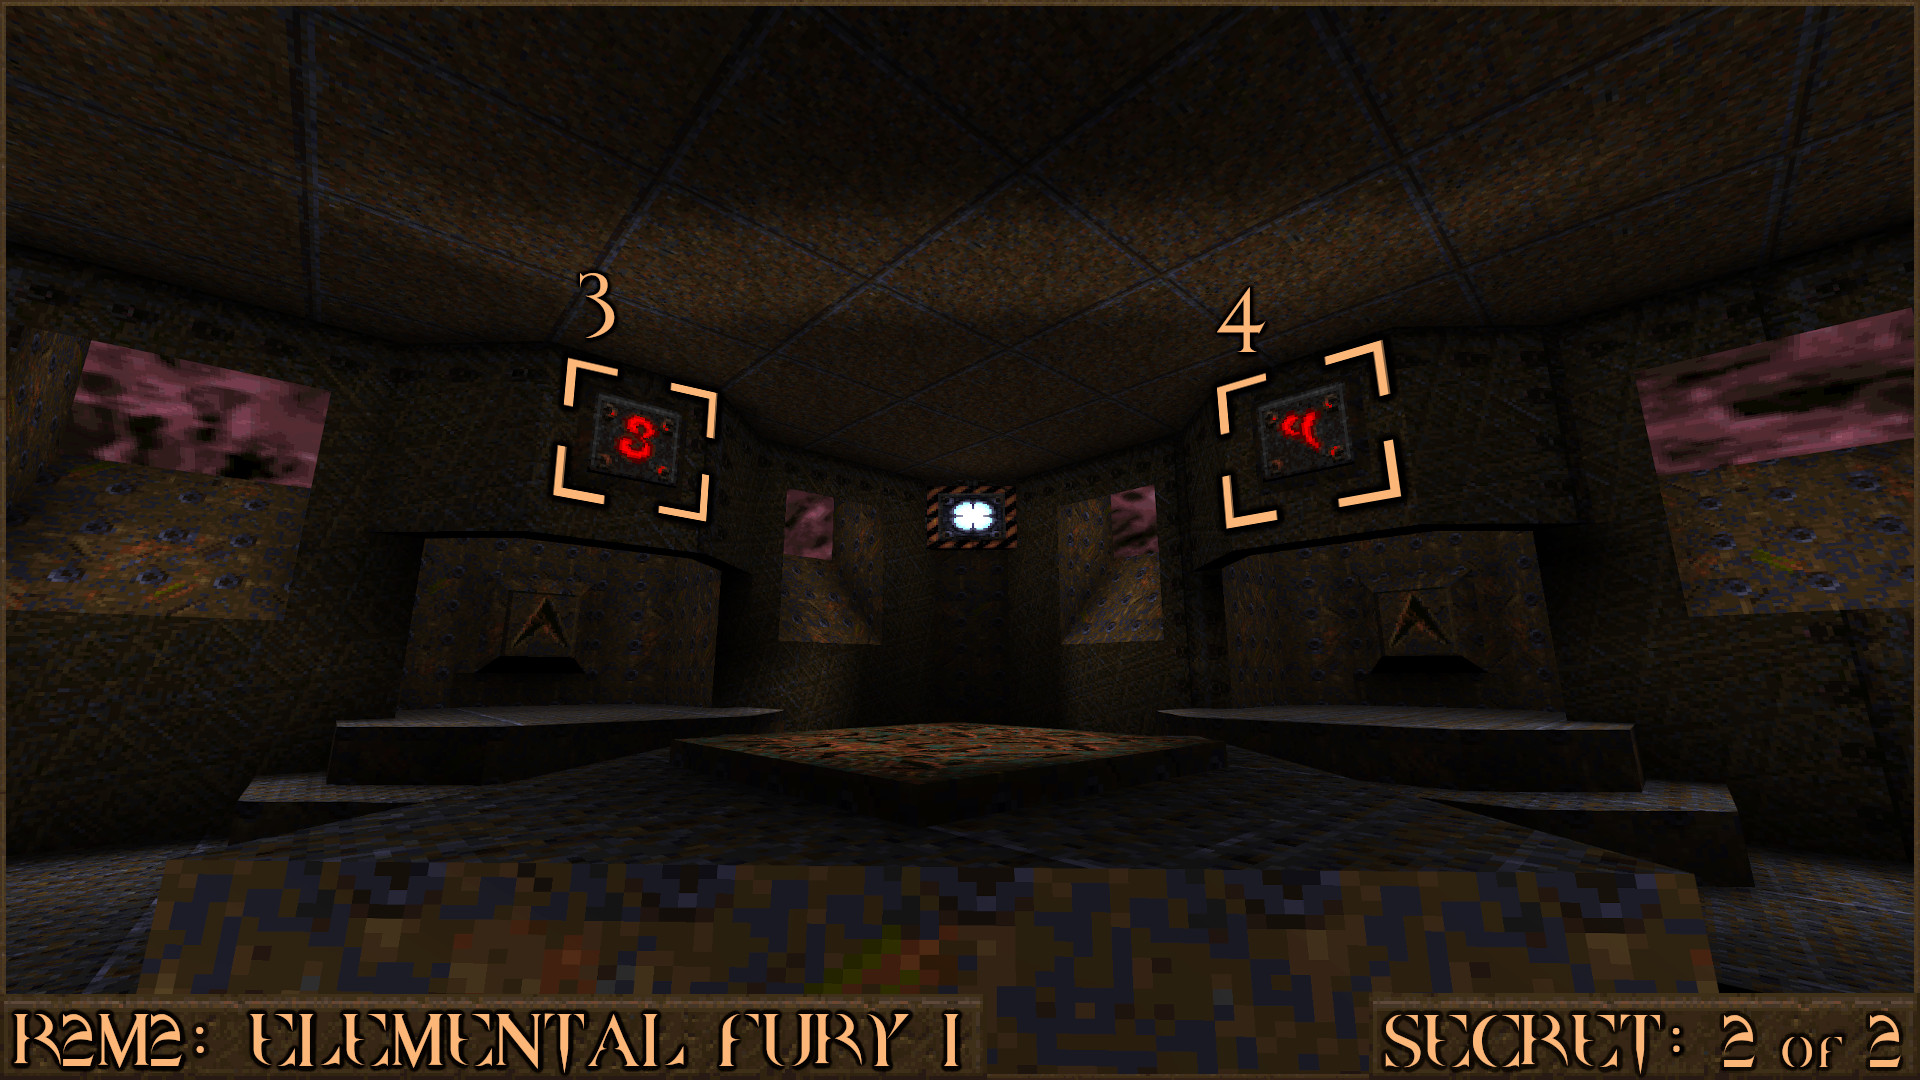
Jump in the number 2 air tube to be taken to a section where you will see a Quad Damage on top of the exit for this level. Head around the back to see a lift you can now use to reach the secret.
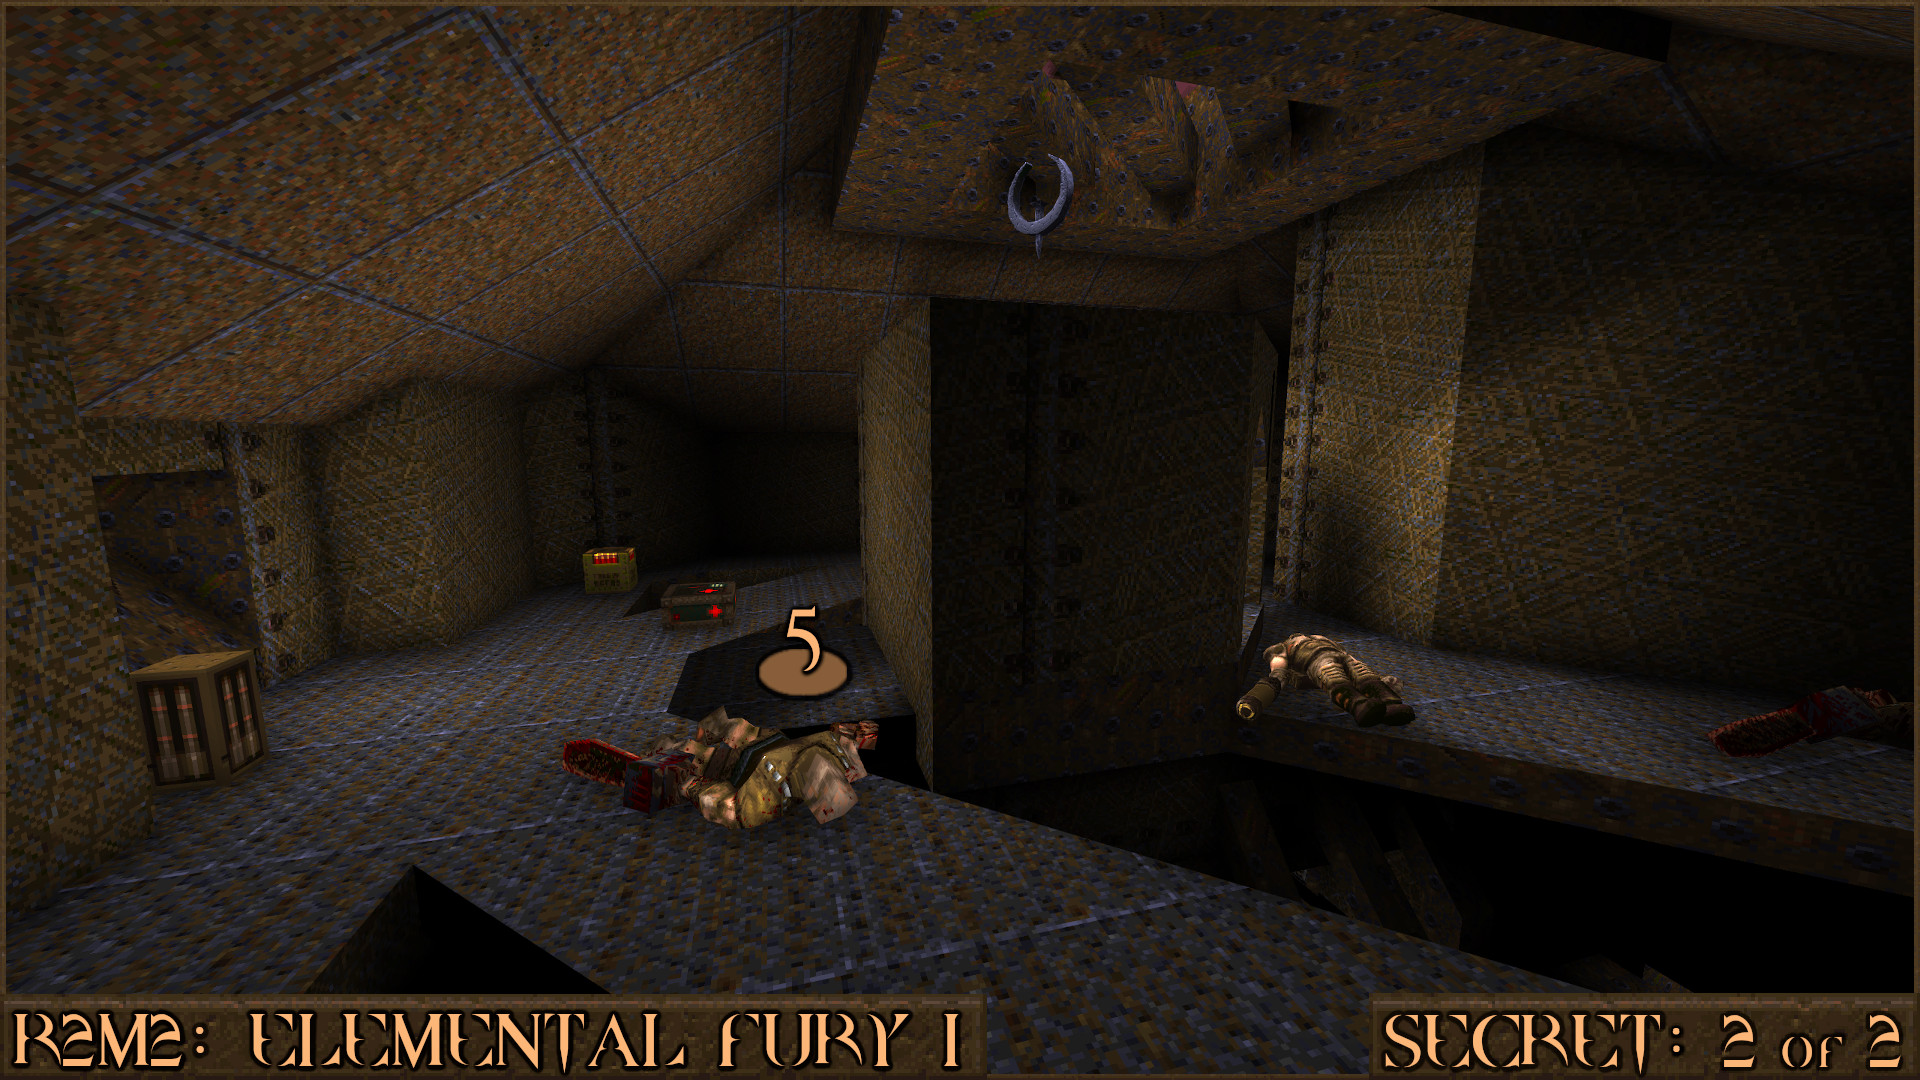
Reward:
R2M3: Elemental Fury II
Secret 1 of 1
The second half of this level features the trial of Fire. Look for the tunnel that is lined with lava nail traps down each wall and go past it. Examine the wall to the right of the Nailgun and you'll figure out that this wall () is fake. Walk through and shoot the red shootable switch.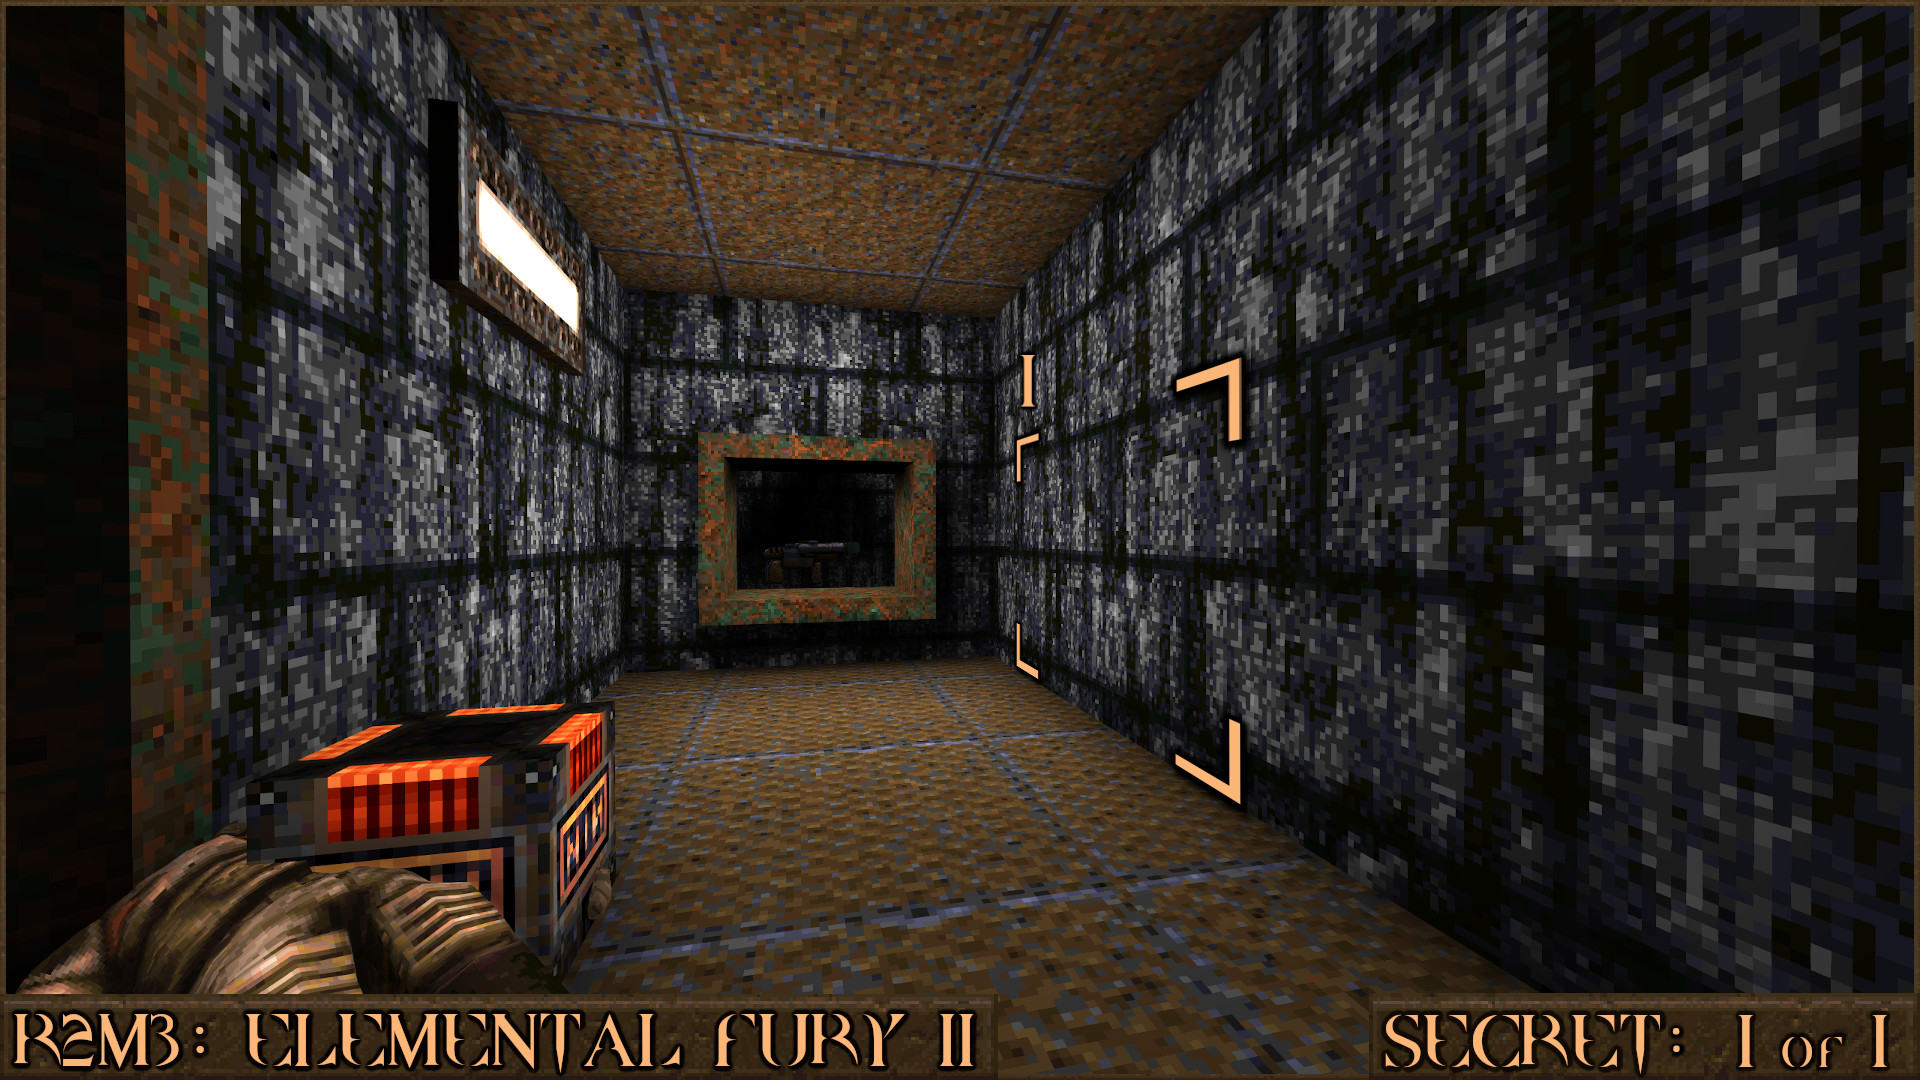
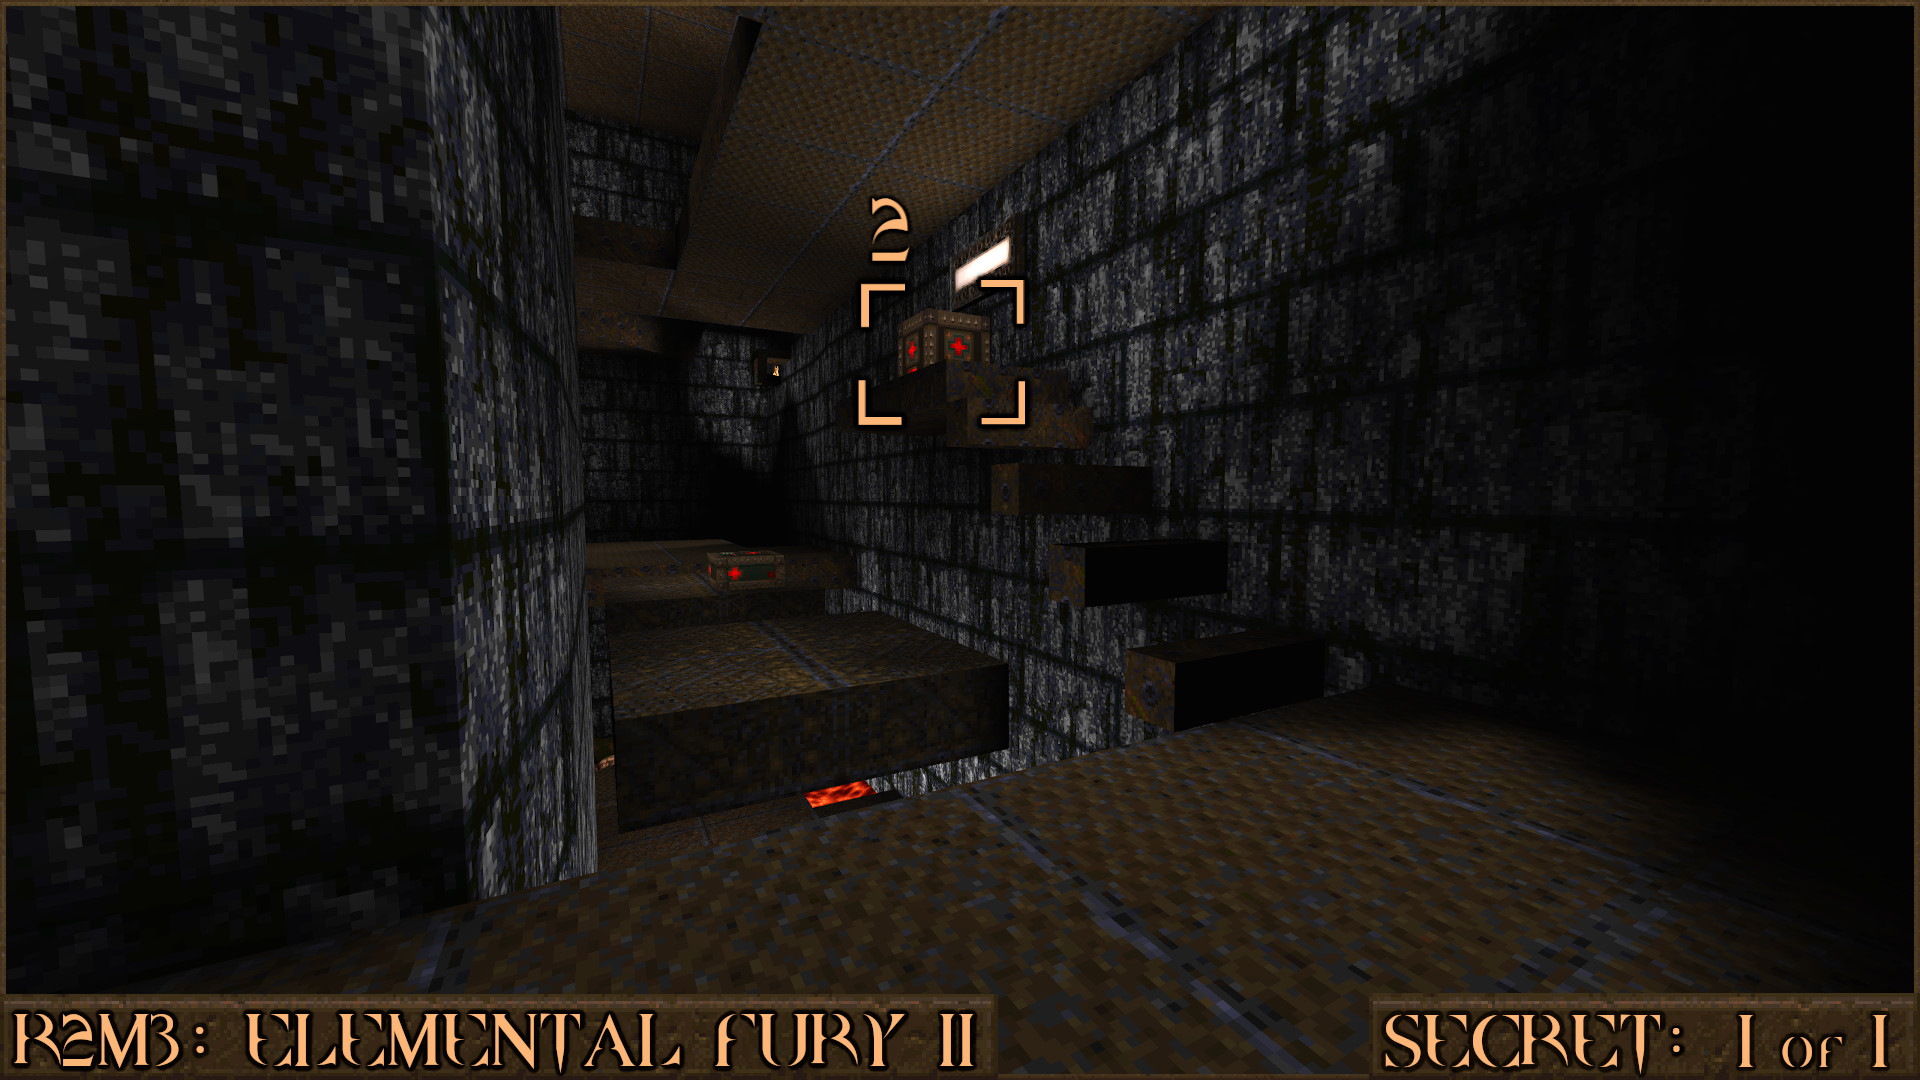
Return past the lava nail traps and you will notice some steps have appeared to take you up to the secret Megahealth (
).
Reward:
R2M4: Curse of Osiris
Extra Secret 1
This level is quite confusing as it involves a large labyrinth and several teleporters. One area you will go through several times is a "treasure vault" room that features a shifting block and multiple entrances. The first entrance is found by shooting the red switch () underneath the large sphinx head. This will make a hole appear () that you can go through. After going through a teleporter you will be in a section of the treasure vault with a Yellow Armor but bars stop you going any further.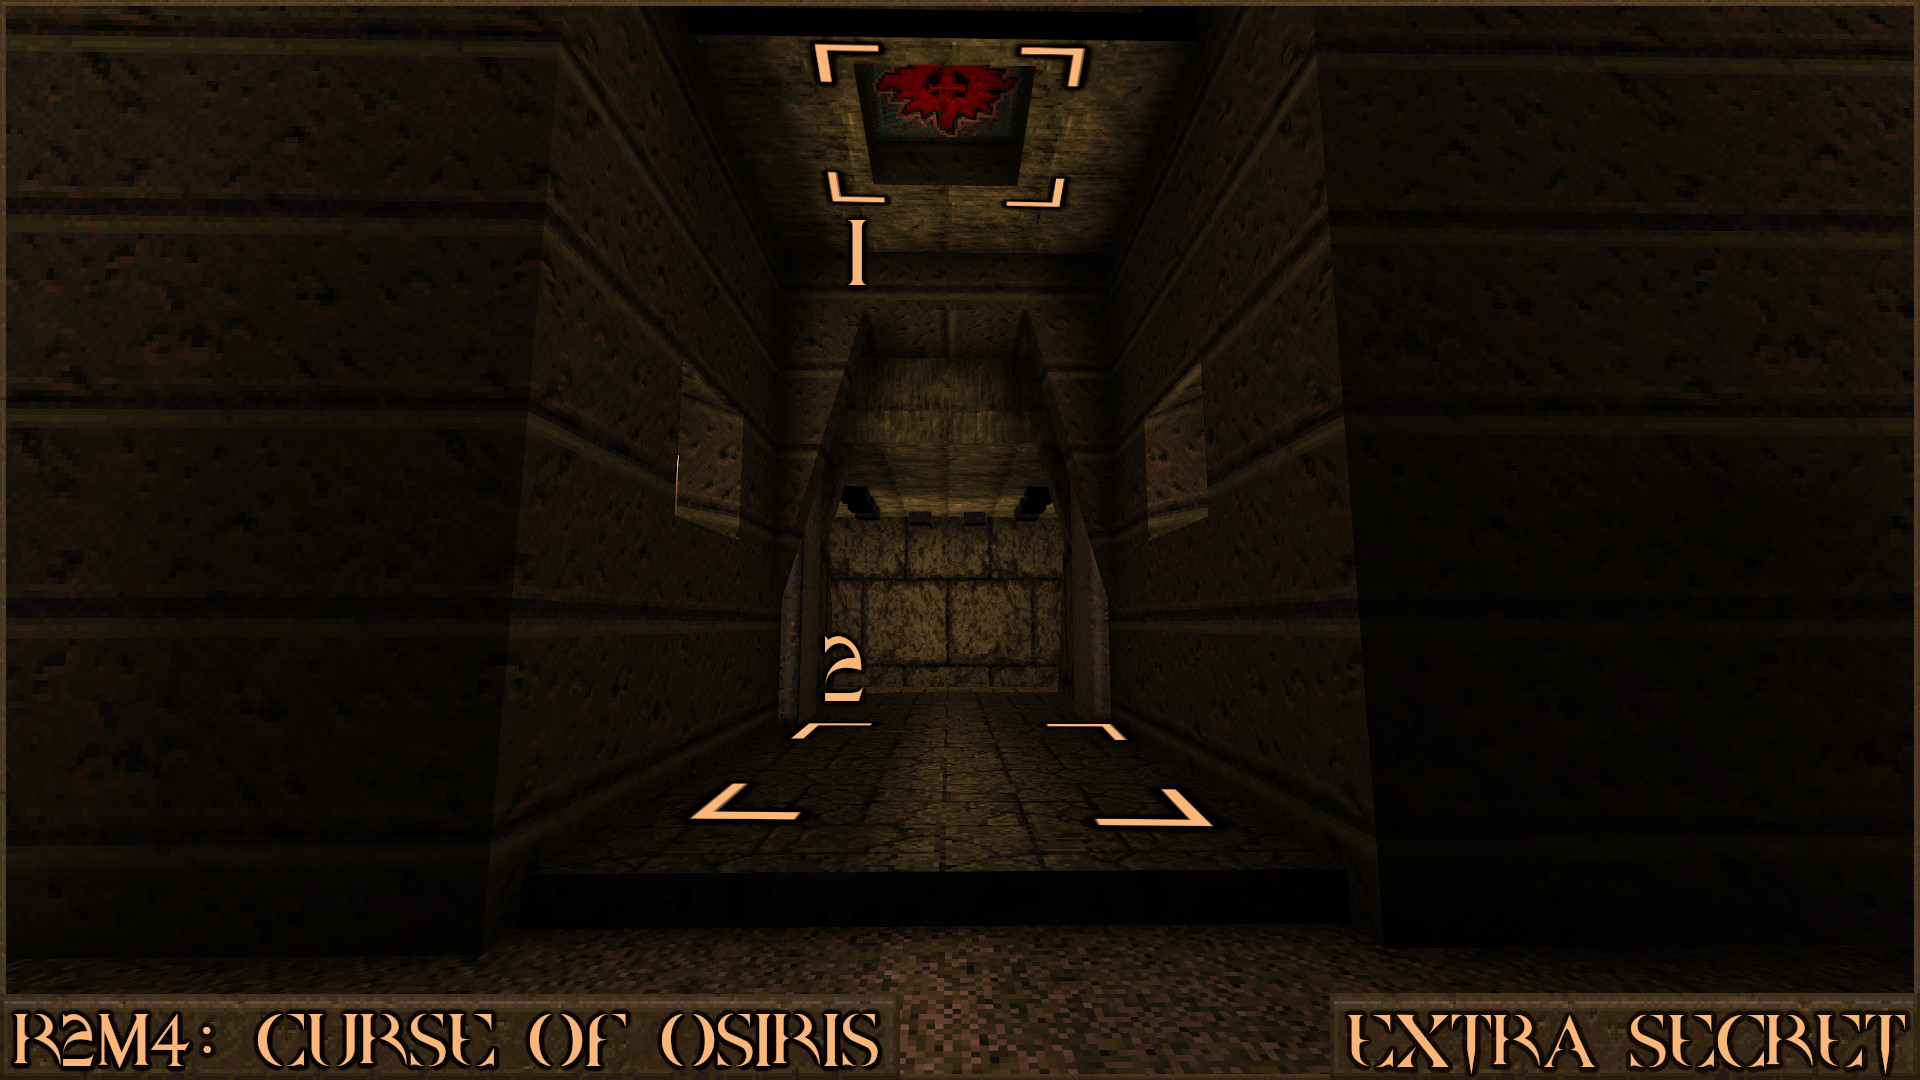
Reward:
Extra Secret 2
You will enter a large maze room so follow the corridor to the right and you will find a square room with one of the orange buttons you need to push to exit the maze. Look around the edge of this room to see a red shootable switch () that will make a nearby teleporter accessible (). This takes you back in to the treasure vault room and this time you can pick up a Megahealth.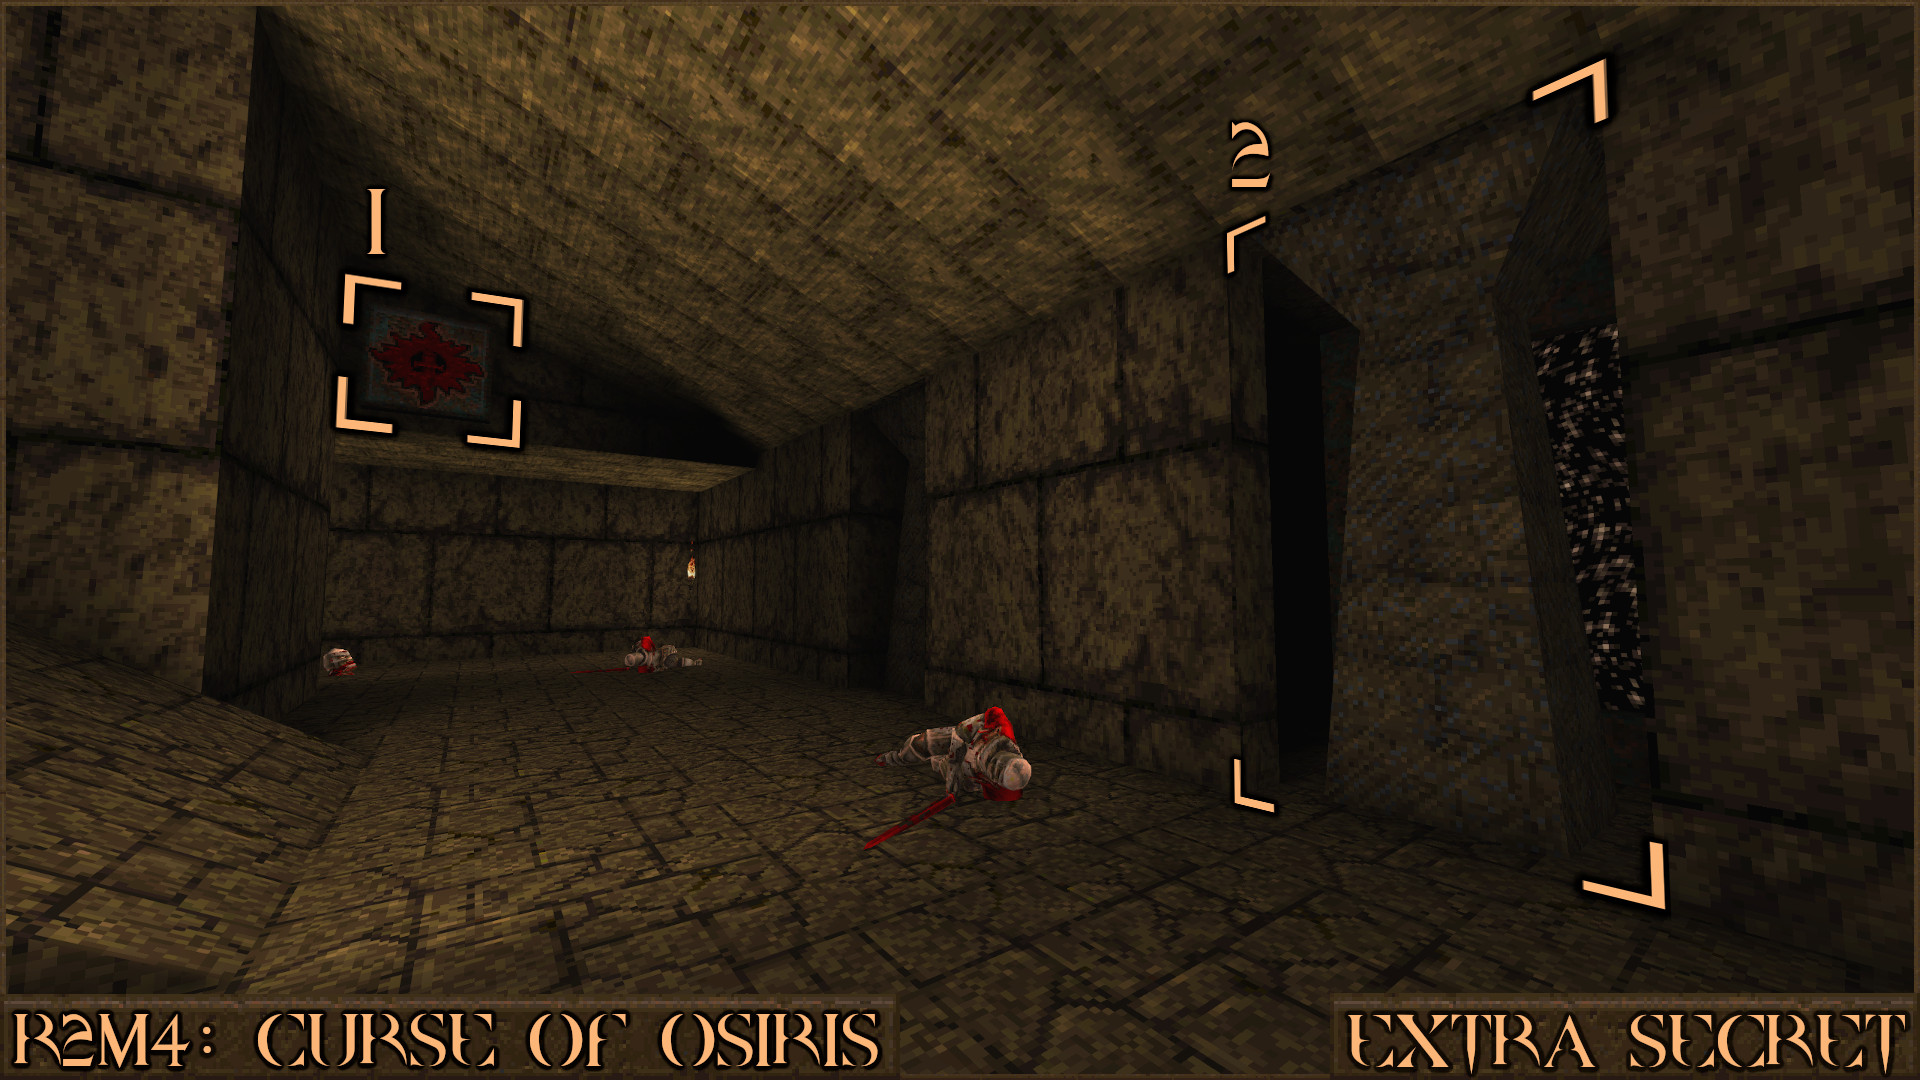
Reward:
Secret 1 of 5
After exiting the large the maze area you will find an Anti-Grav Belt in a room filled with nail traps. Turn to the right around this corner ().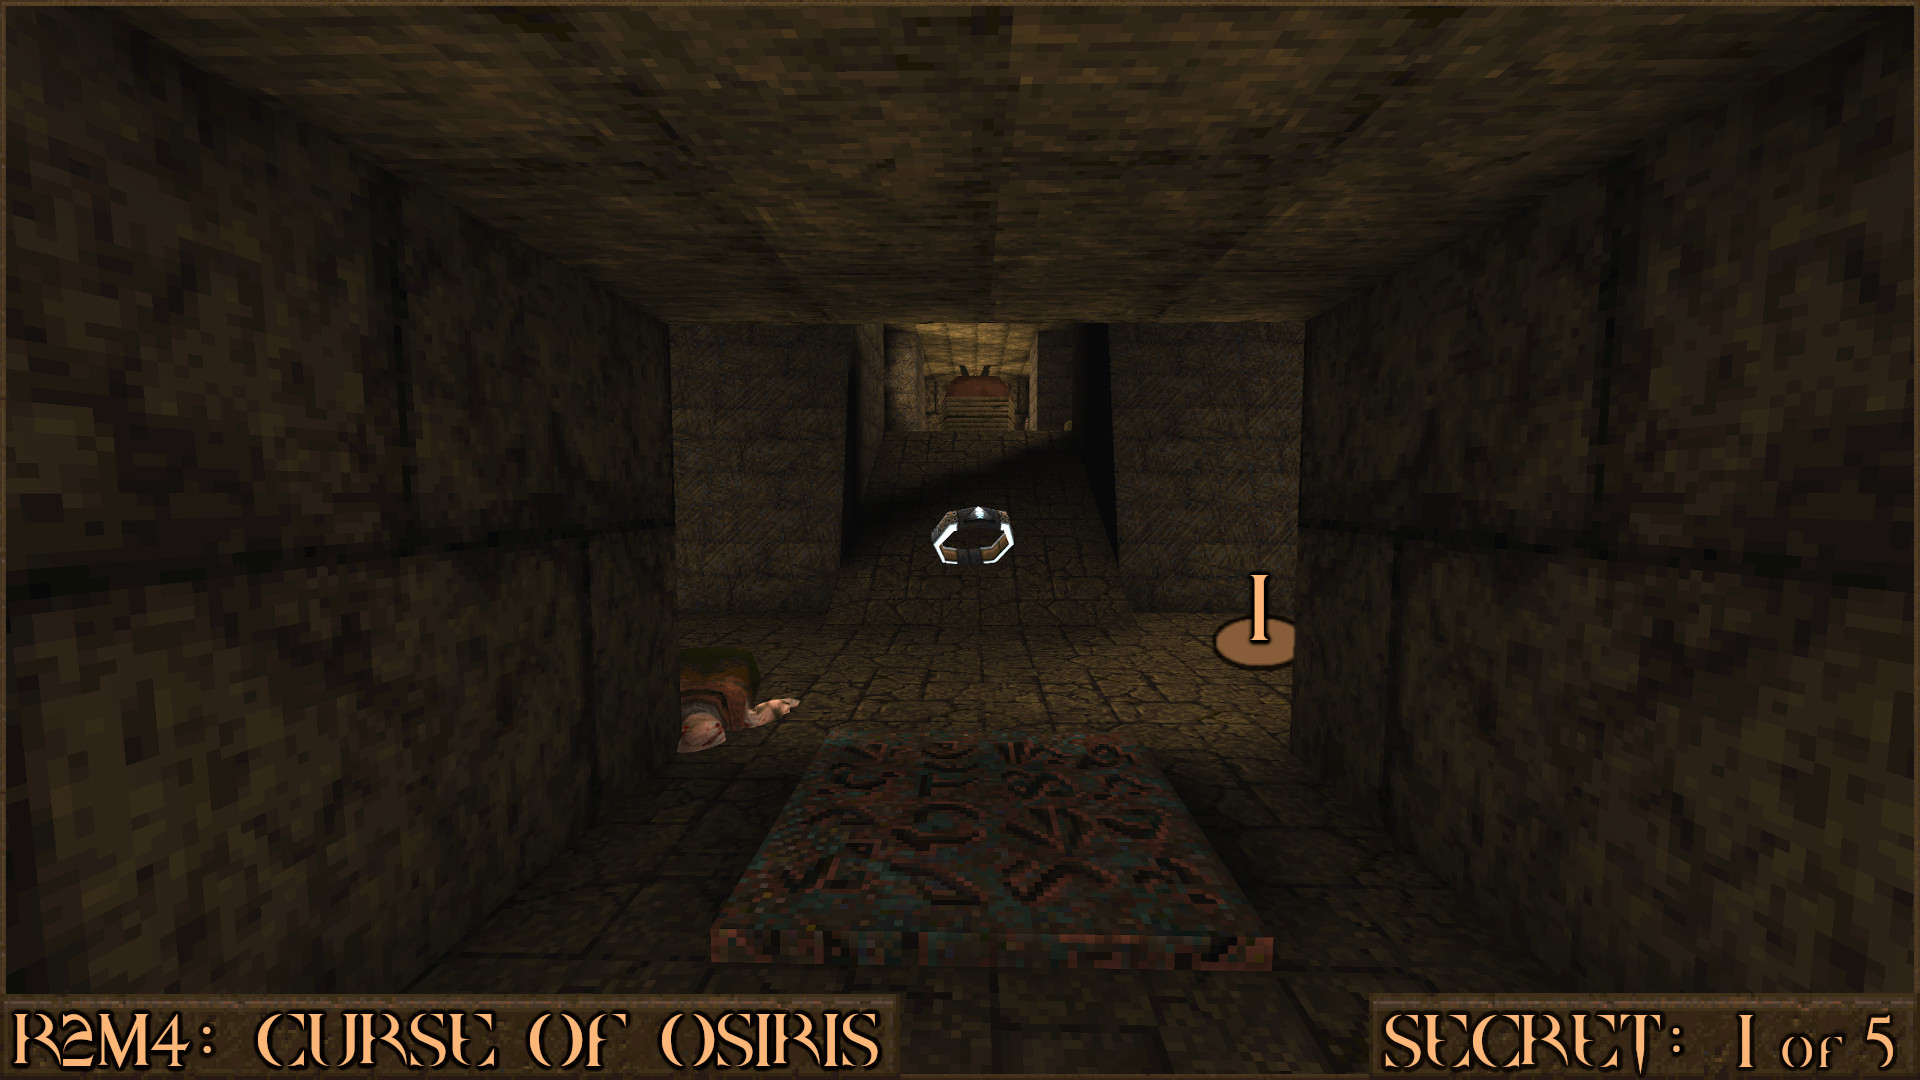
Look above the nail trap column in the corner to see a red shootable switch (
). When triggered part of the structure () will move to allow access to a secret area.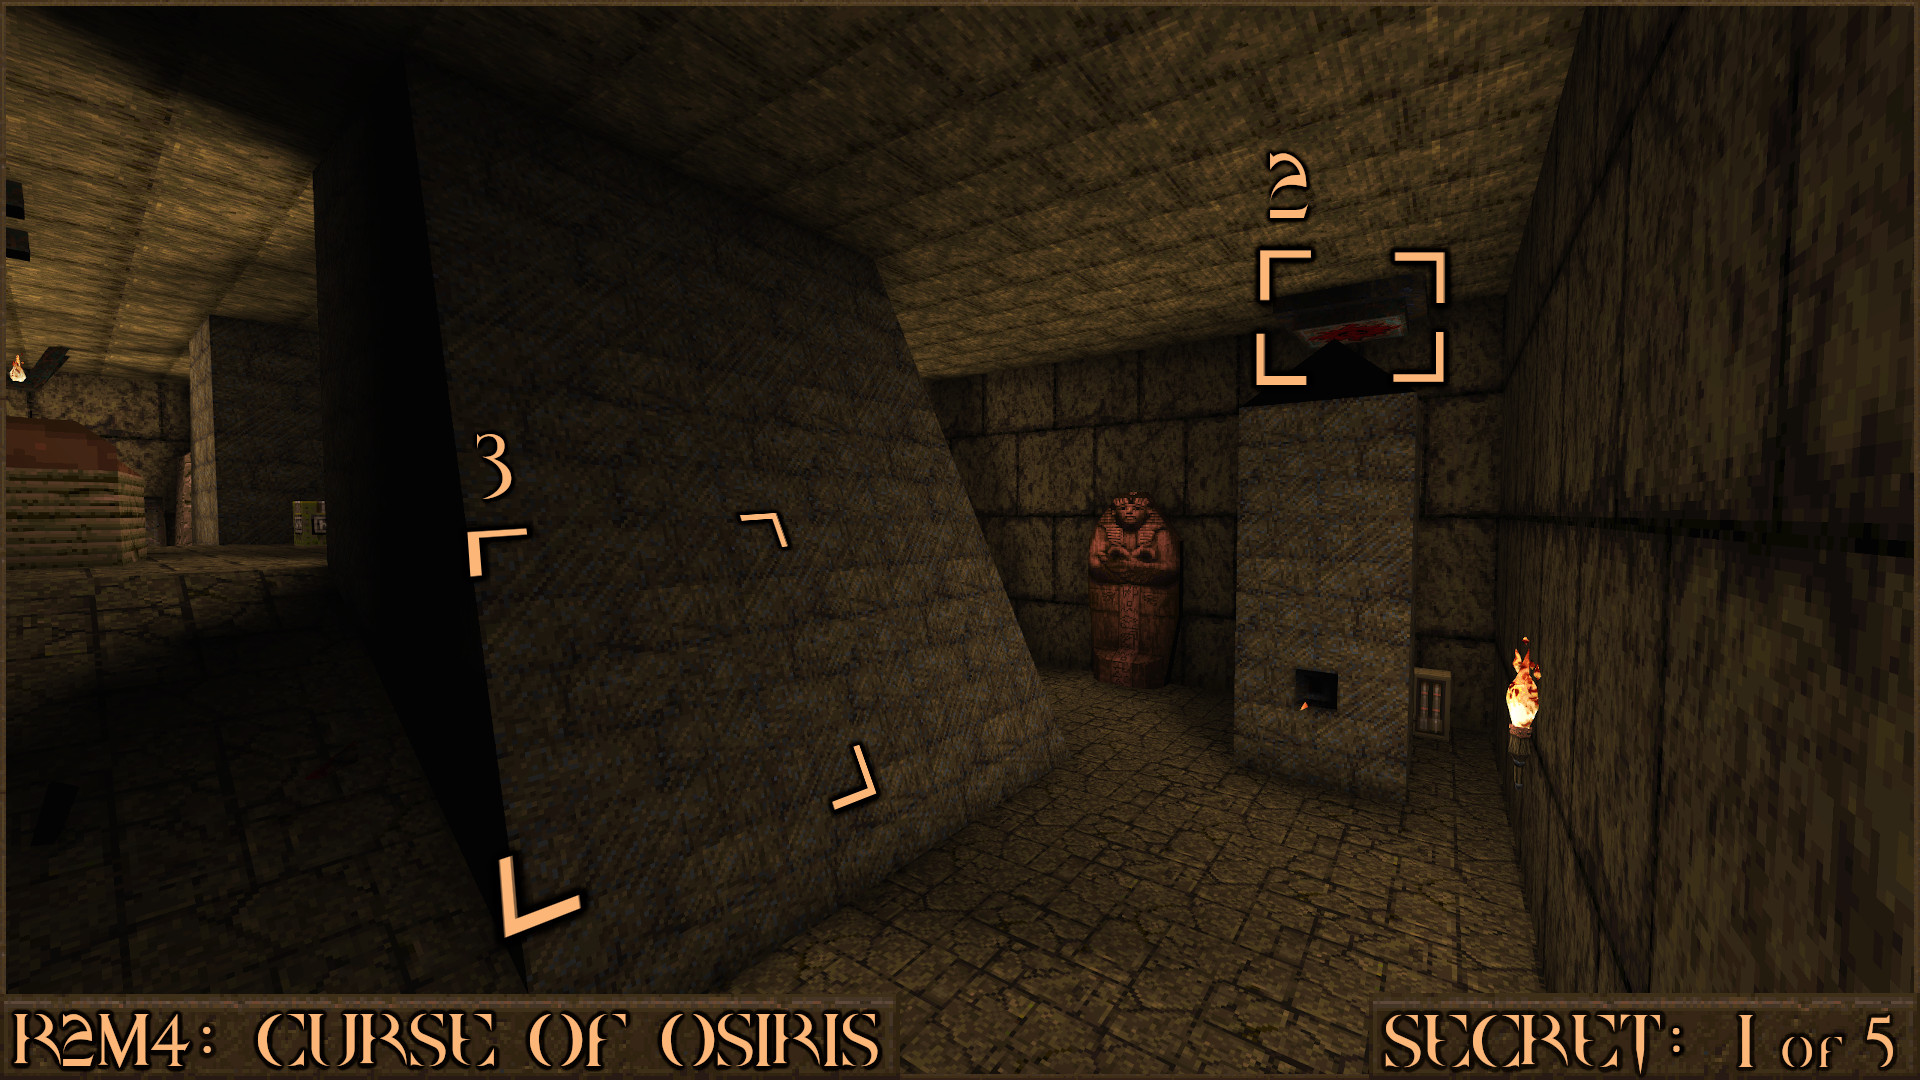
Reward:
Secret 2 of 5
You will enter a room with a large wooden boat. Look over the side to see several oars sticking out the side (). Jump on these then jump up the small plank steps () sticking out the side of the boat. When you're on the roof grab the Megahealth () and claim this secret.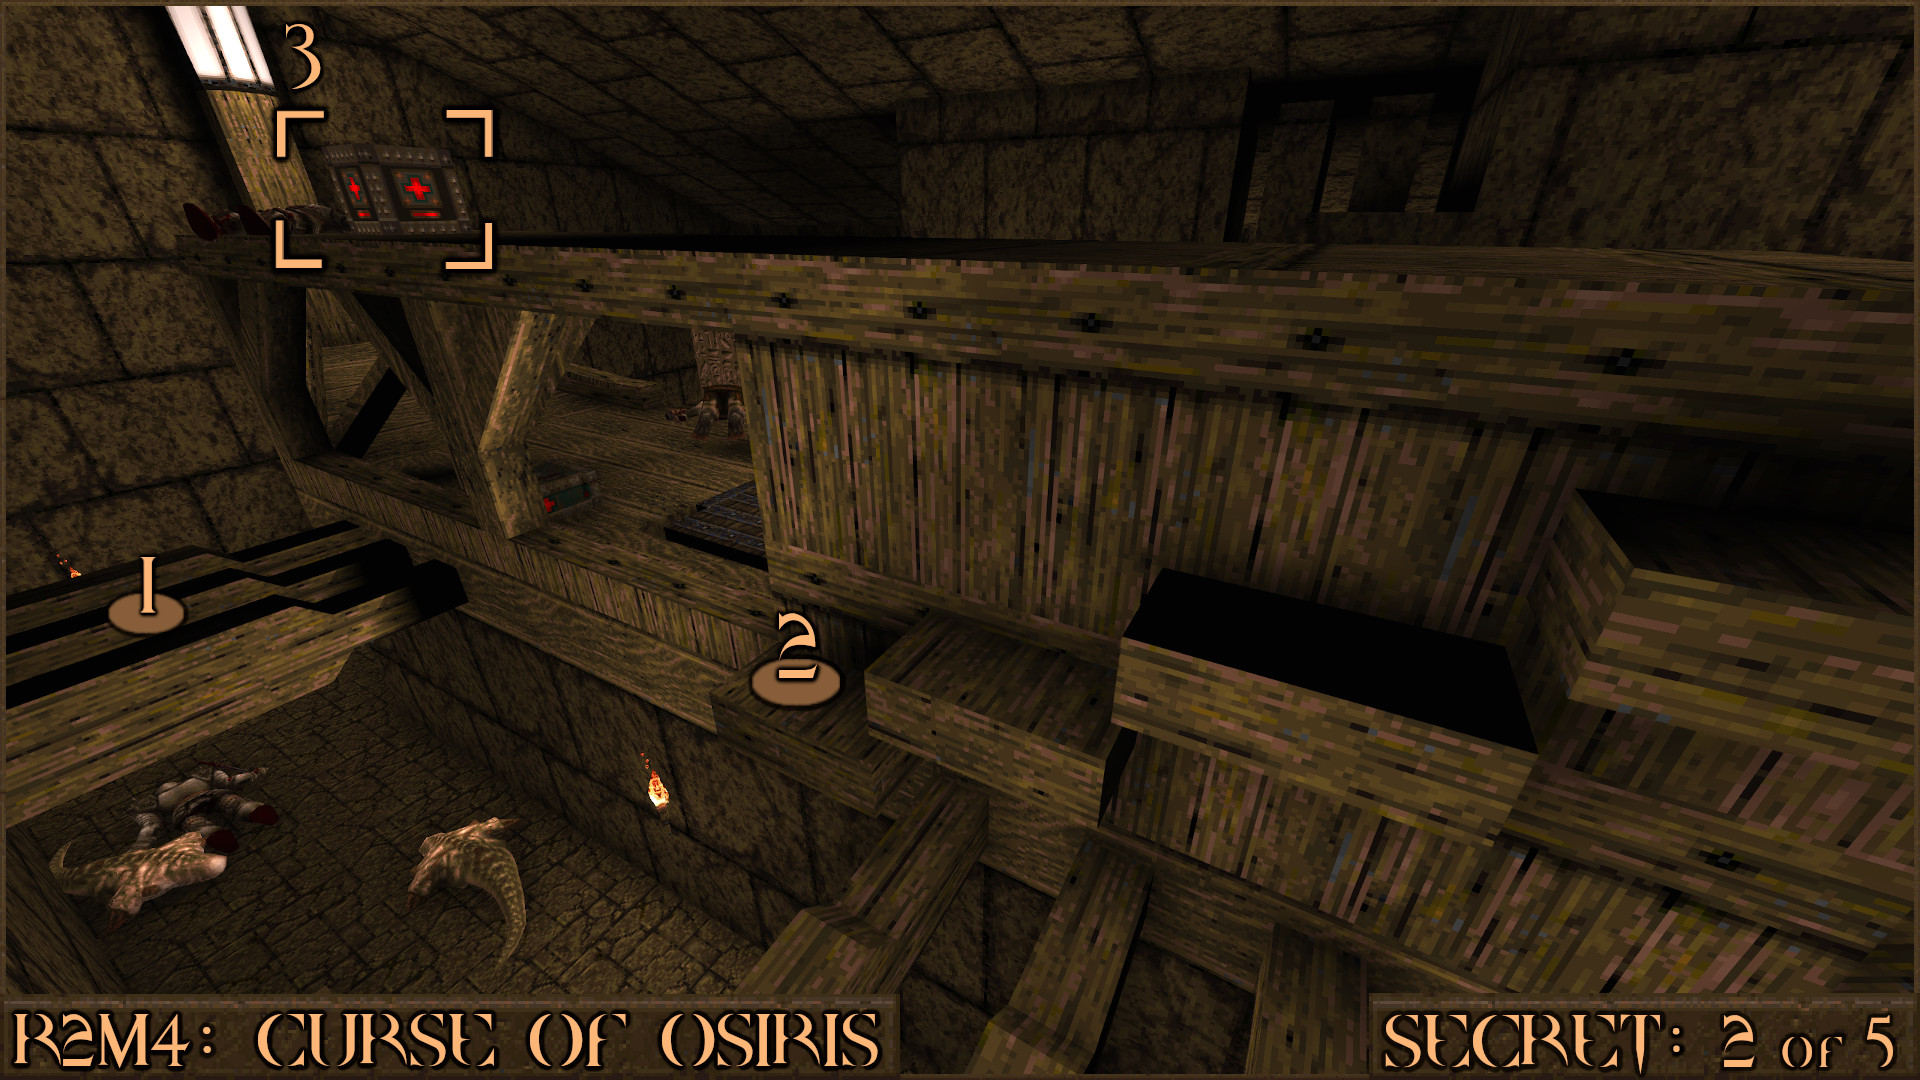
Reward:
Secret 3 of 5
As you continue through the level and will enter the treasure vault and then exit it via an elevator to go up to the next floor. You will come across these ankh symbols with a red dot on them (). 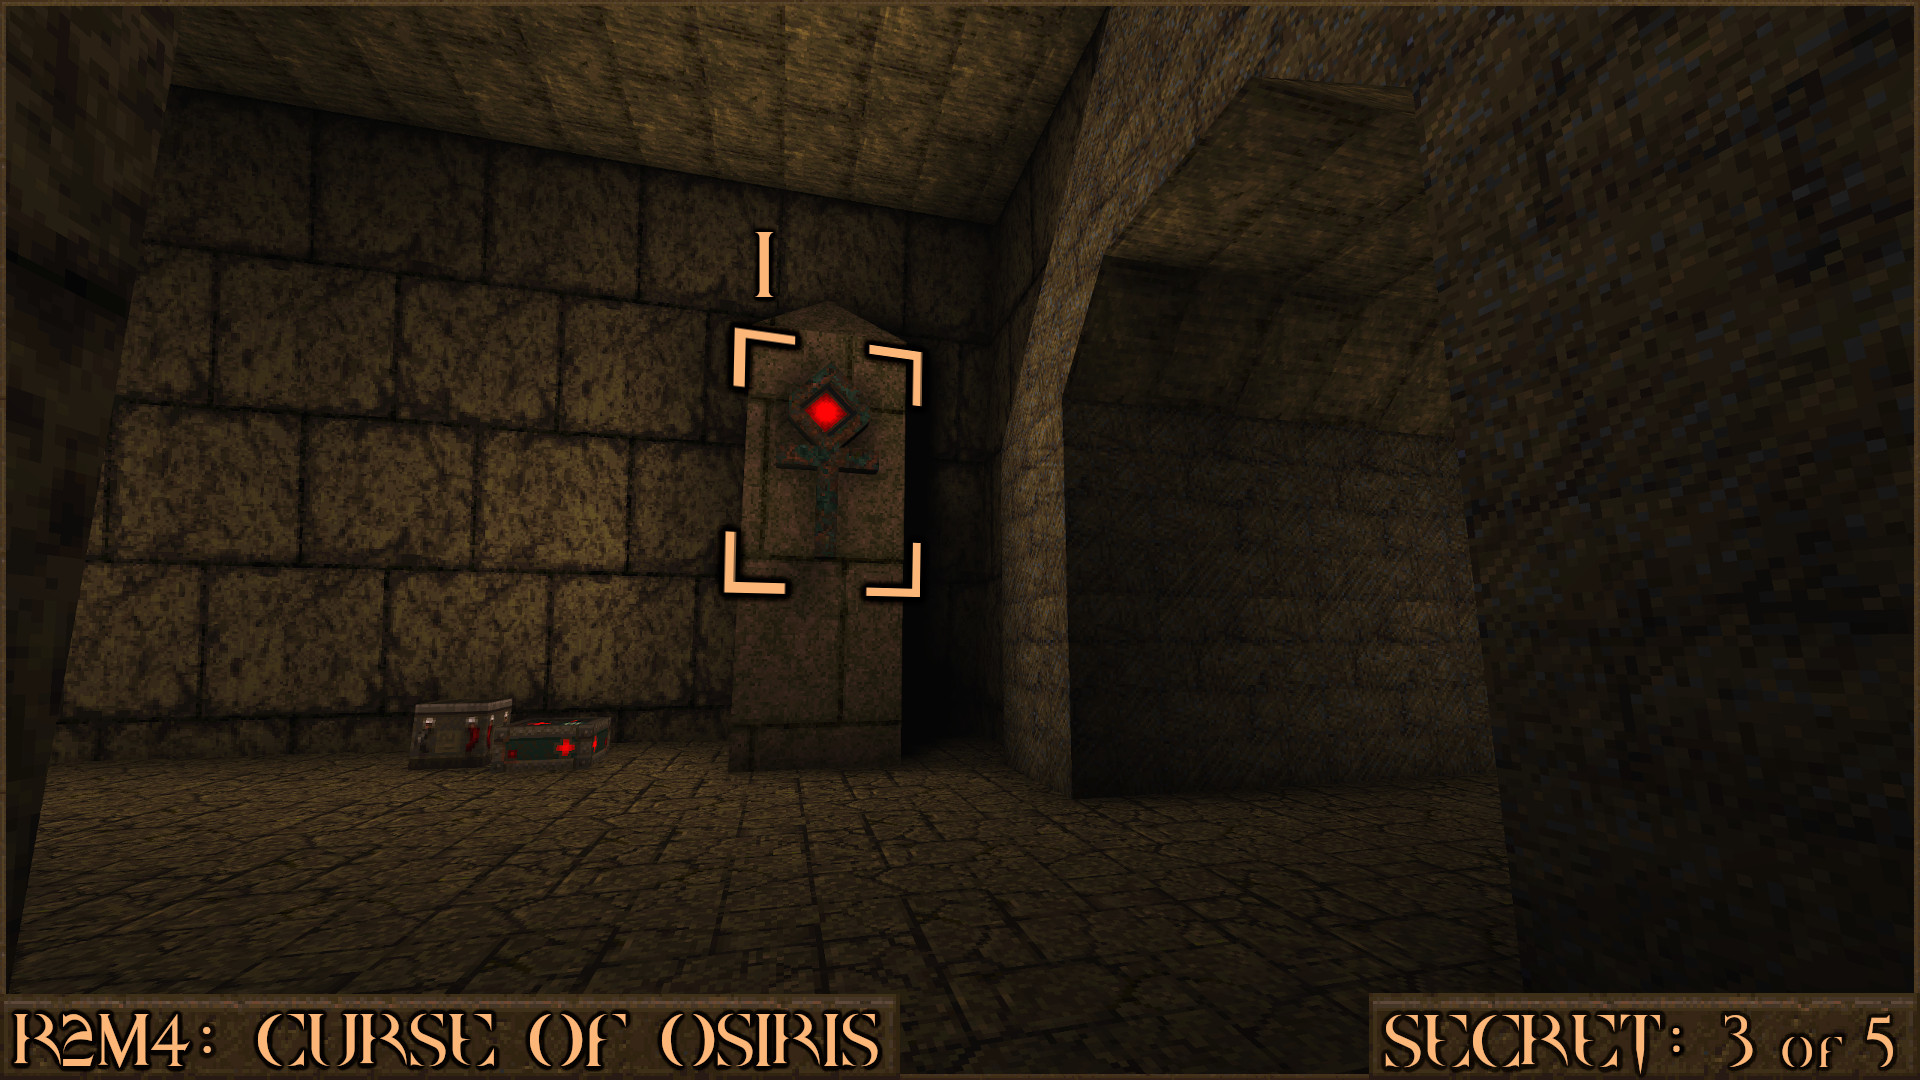
Shoot this first one then turn around to see a statue has moved to reveal a hole (
) that will drop you in to a secret in the treasure vault.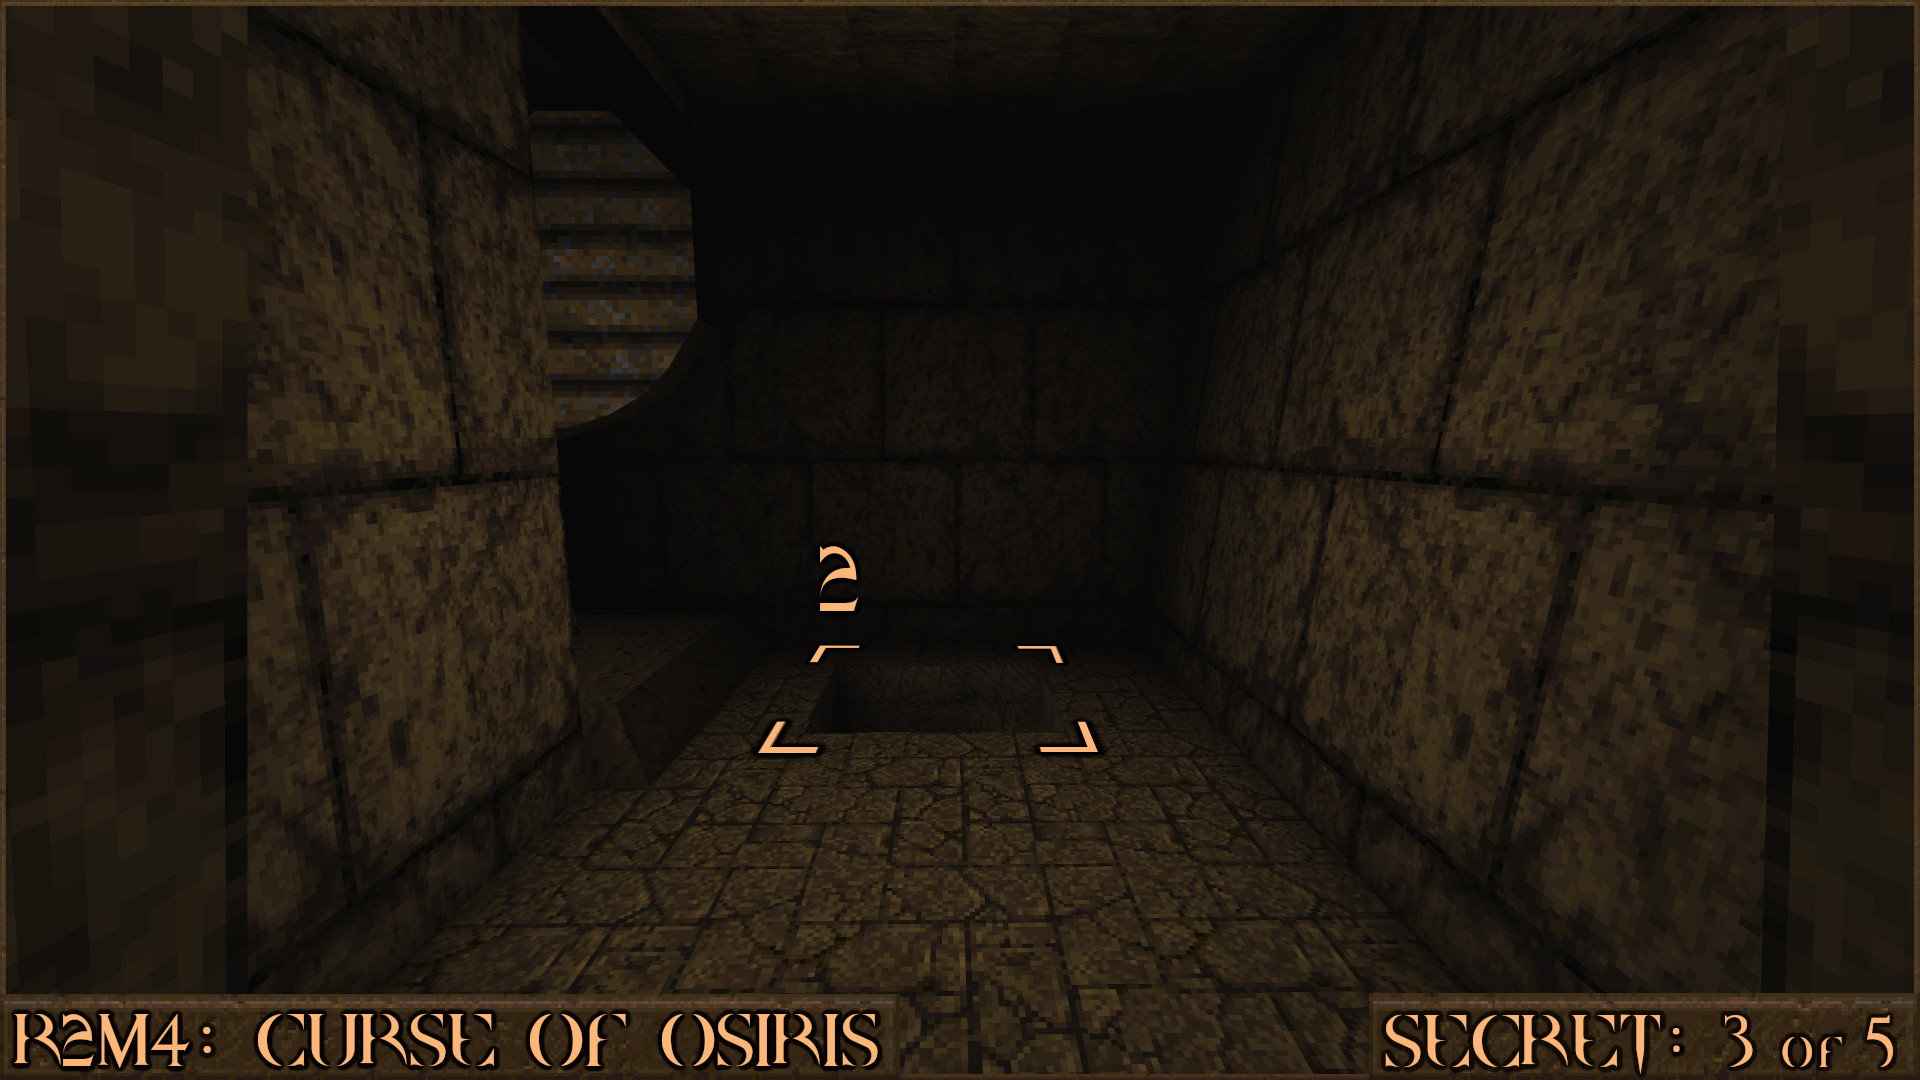
Reward:
Secret 4 of 5
Exit the treasure vault and head back up the elevator to the red ankh room again and look at the other corner to find another red ankh ().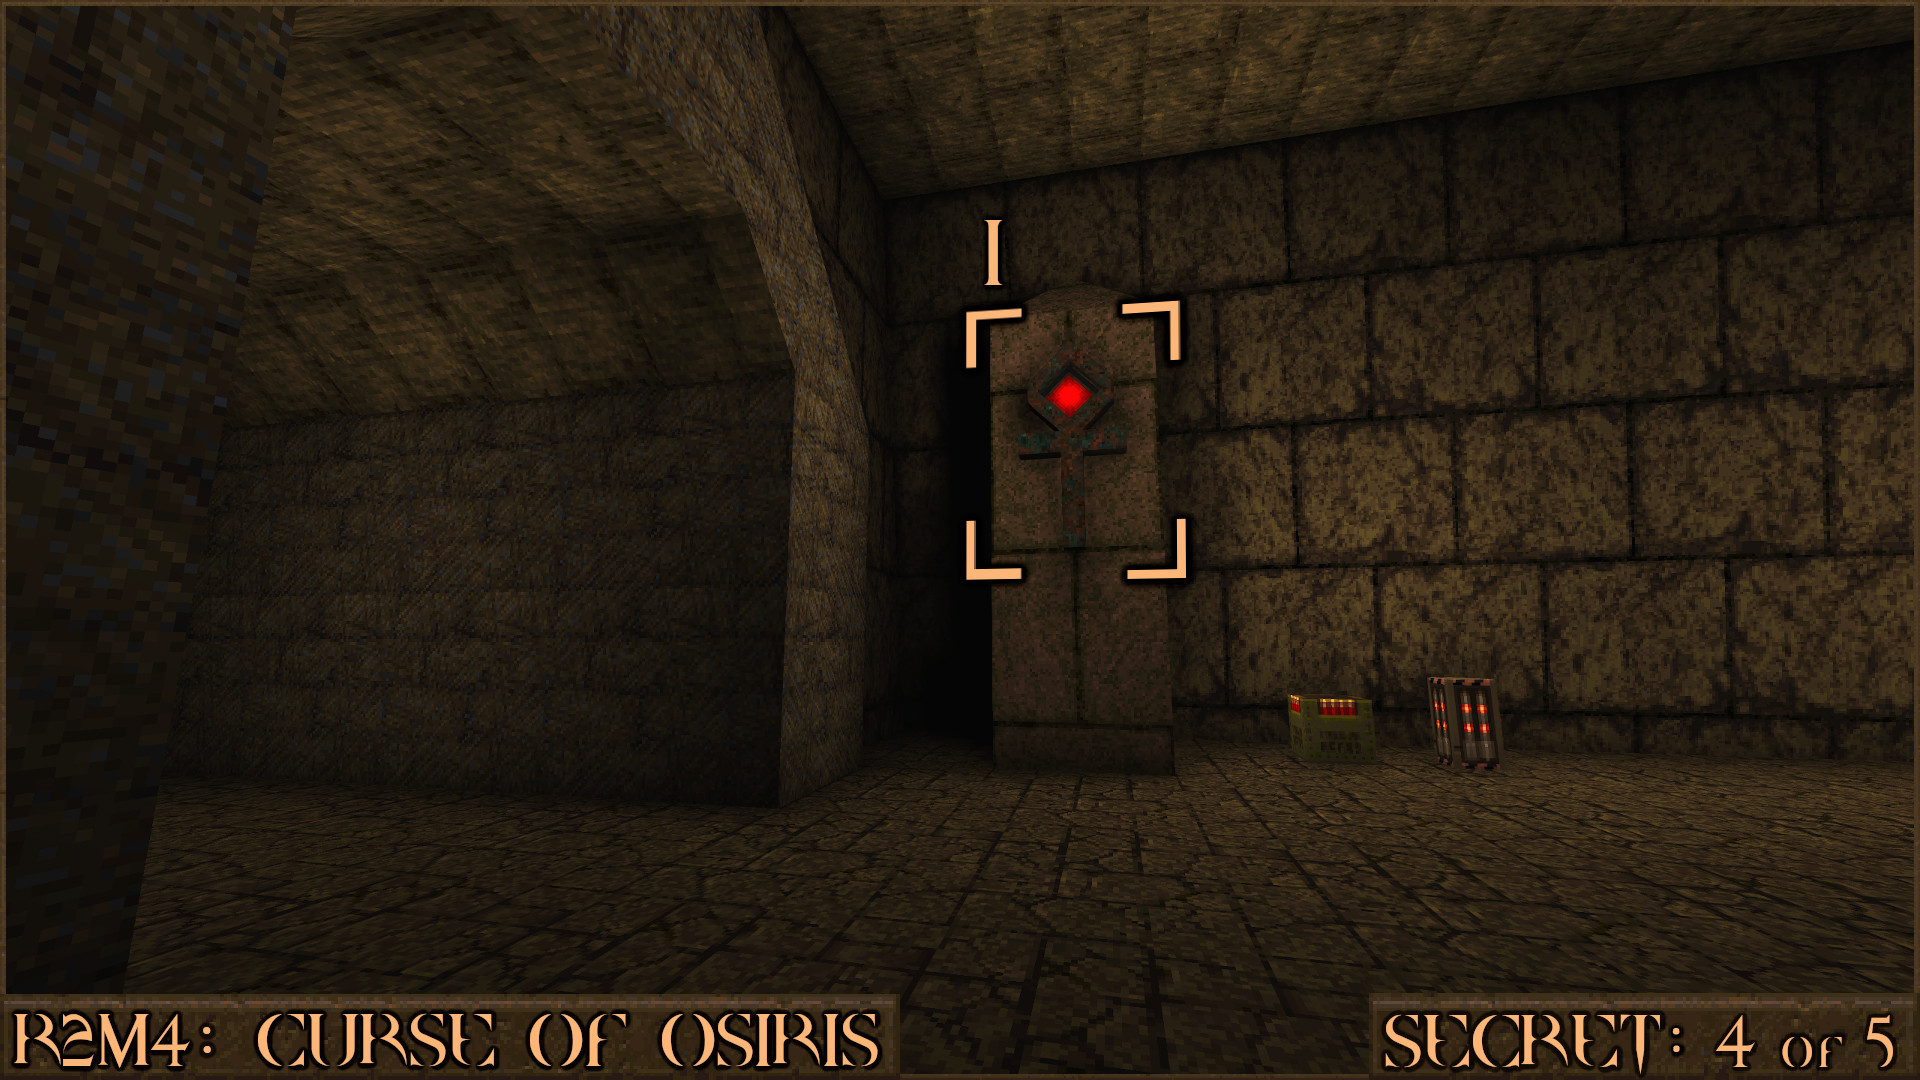
After shooting this second ankh turn around again to see another statue has moved and revealed another secret hole (
) in to the treasure vault.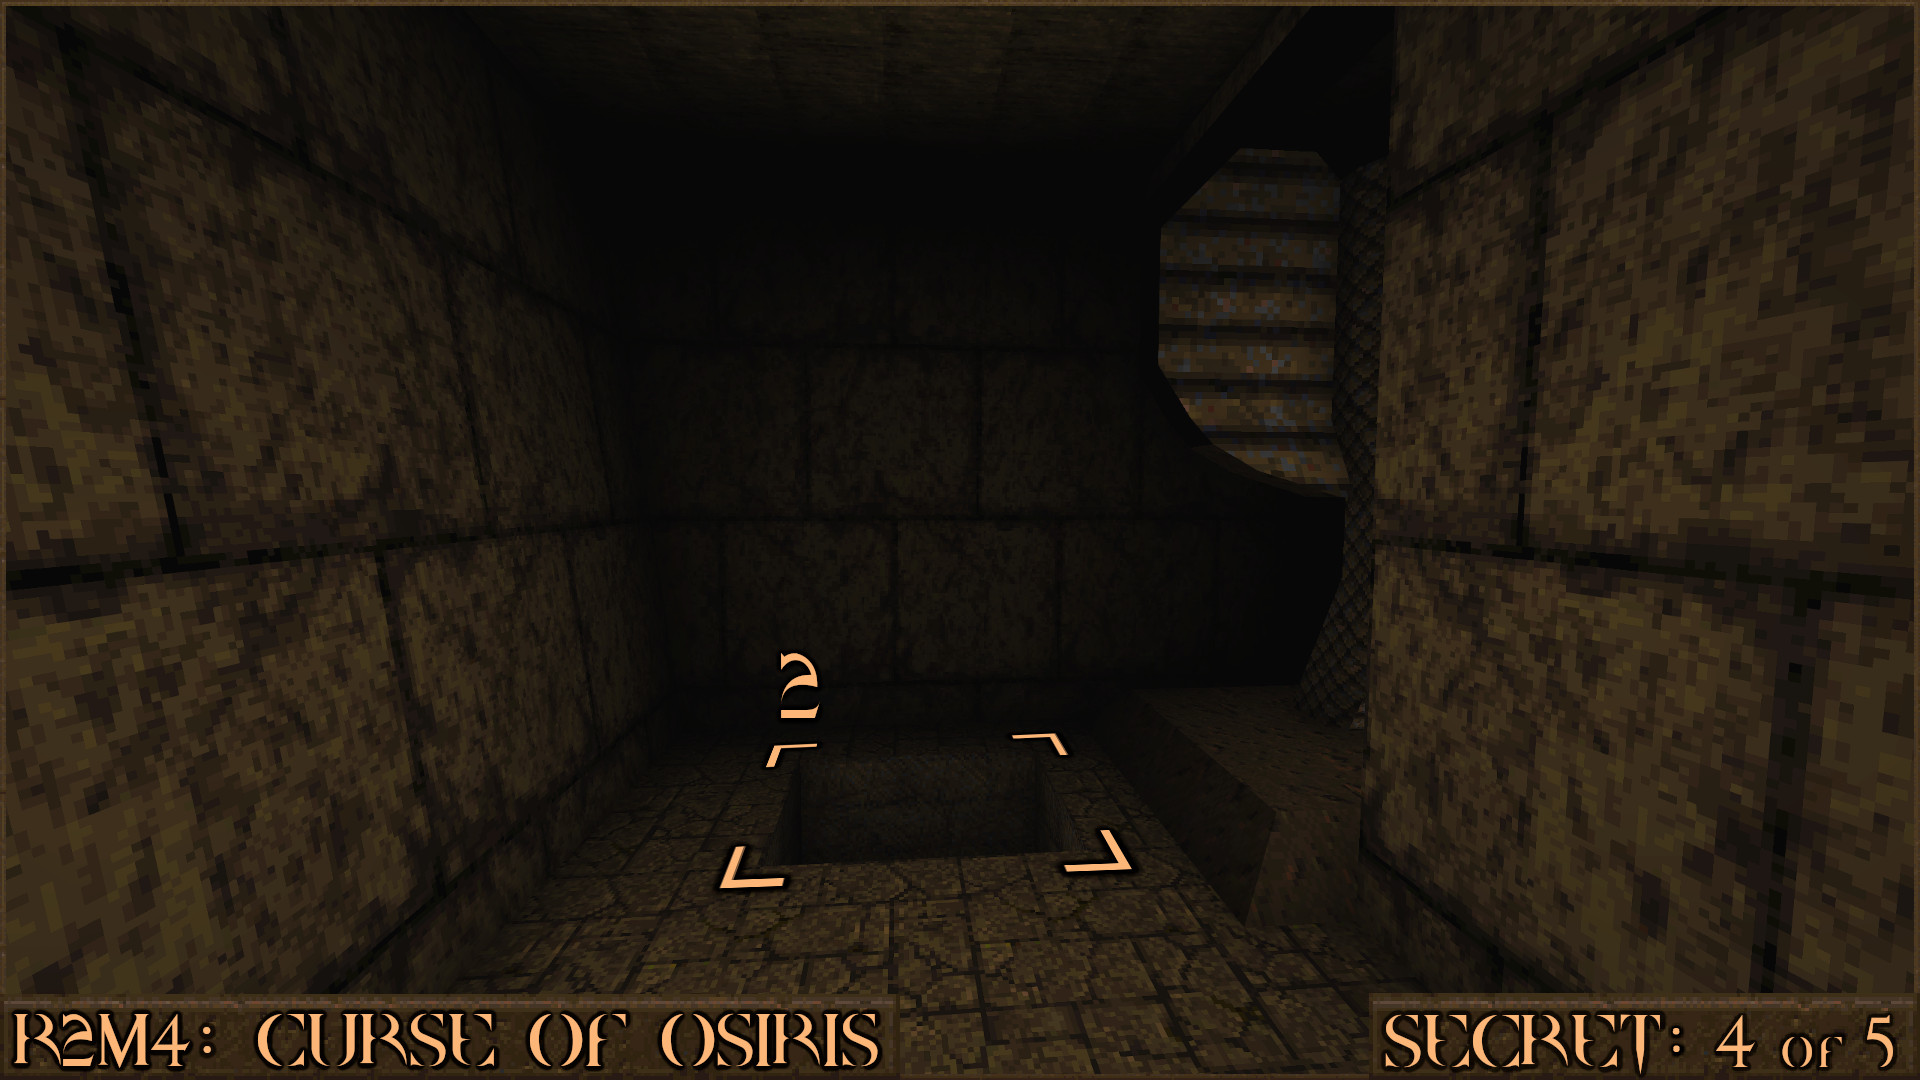
Reward:
Secret 5 of 5
In the final room of the level with the golden pyramid shoot the hieroglyphs that adorn the wall to the left to reveal a teleporter that will take you to this secret.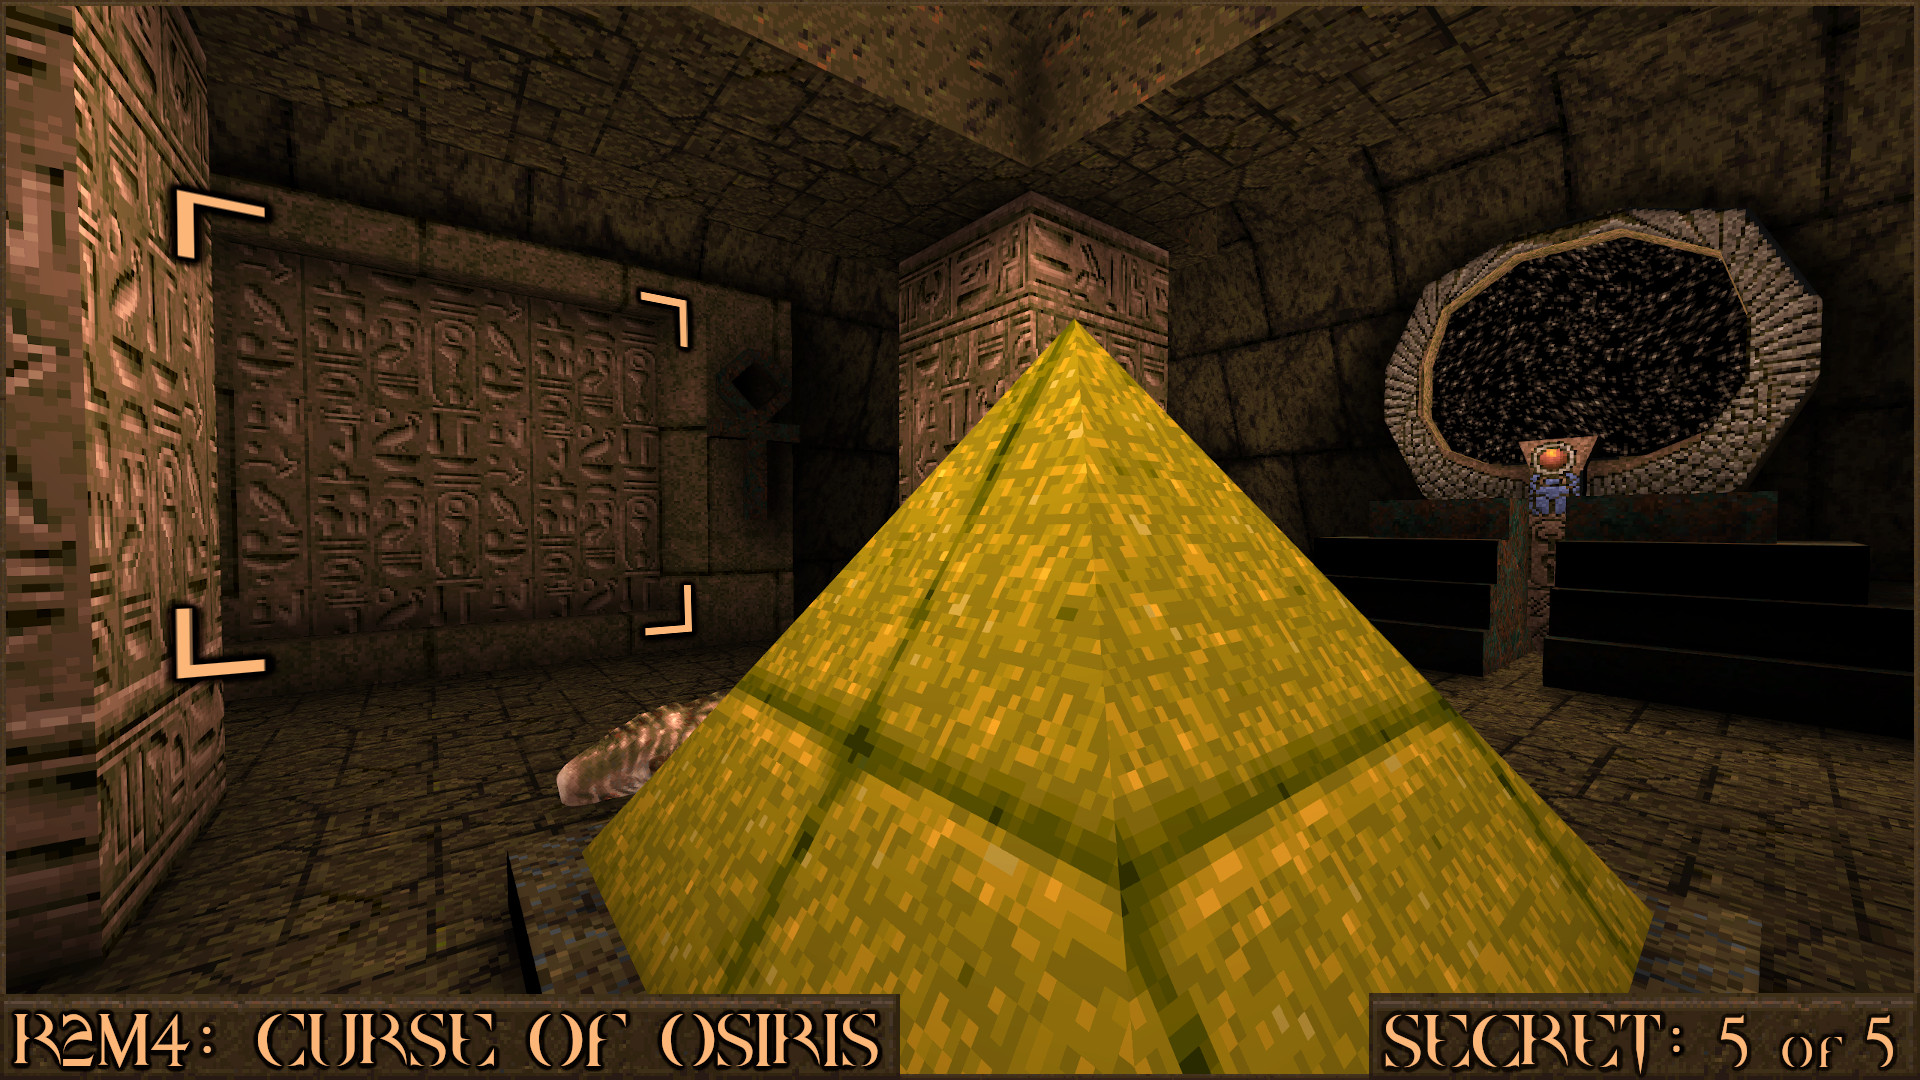
Reward:
R2M5: Wizard's Keep
Secret 1 of 4
At the start of the level take the elevator down and you will immediately see some bookcases. Jump up and nudge the small piece of wood between the two shelves () and a section will move to reveal a secret ().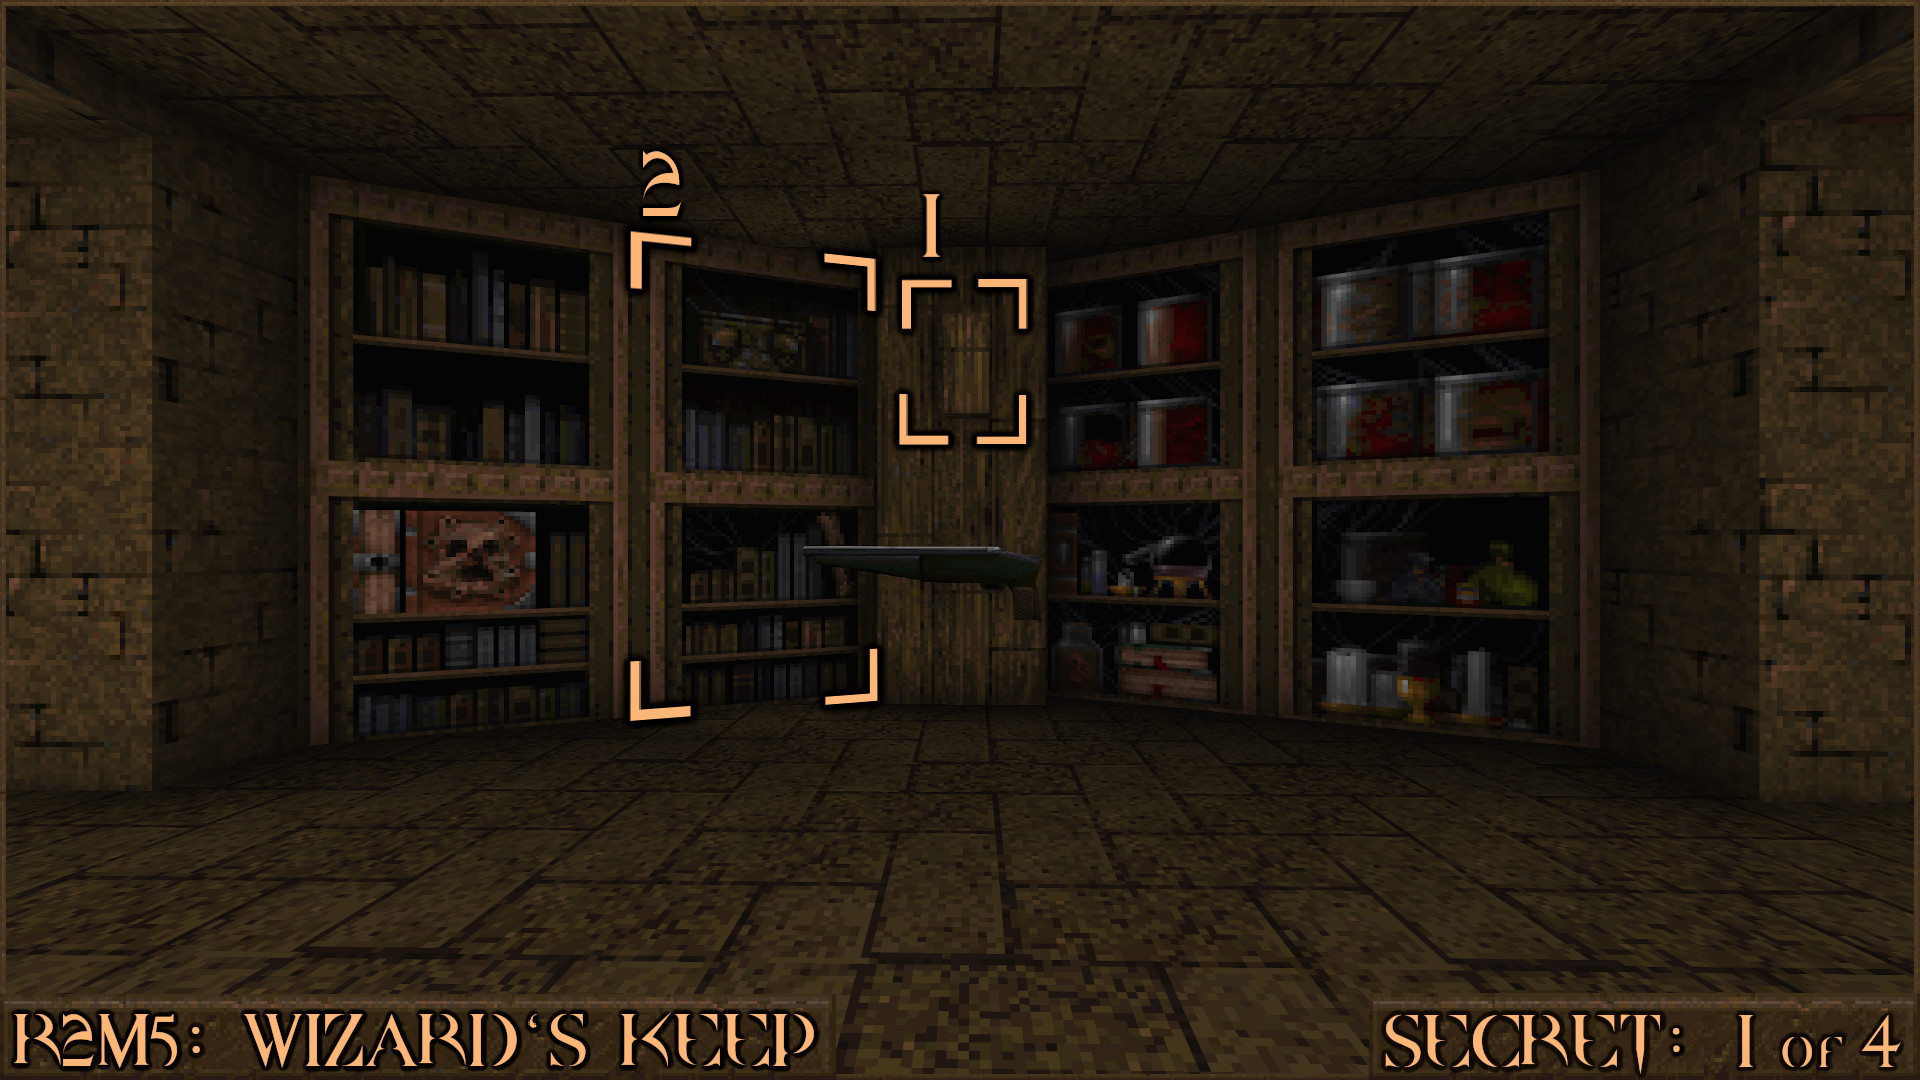
Reward:
Secret 2 of 4
You will come across a very large bloody altar with candles behind it. Shoot the darker middle candle () to make a secret hatch () open on the front of the altar. Shoot the red shootable switch behind the hatch to make the red stained-glass window move (). It will allow access to an area where you'll find the actual secret.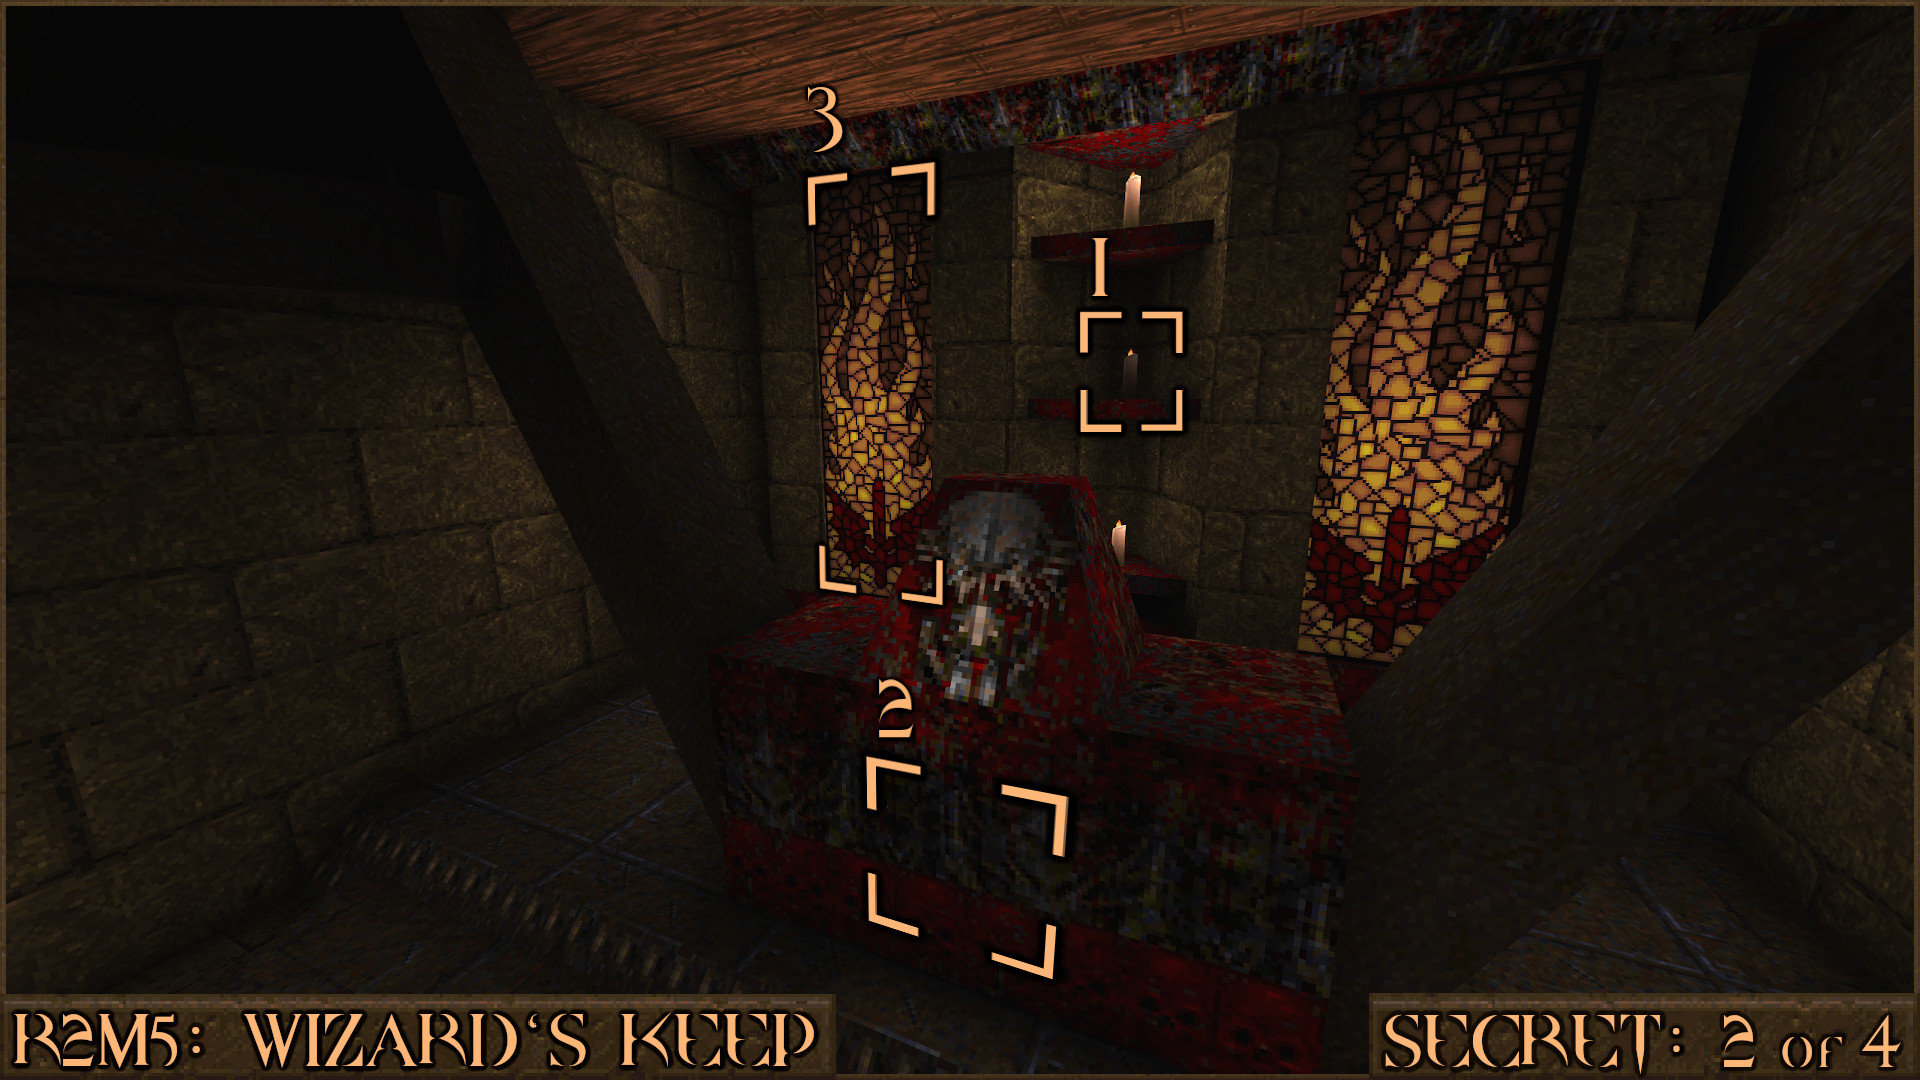
Reward:
Secret 3 of 4
Next to the Silver Key Door you'll notice a red bar above some spikes. Make a running jump from the floor nearby () over the spikes and land on the vent ().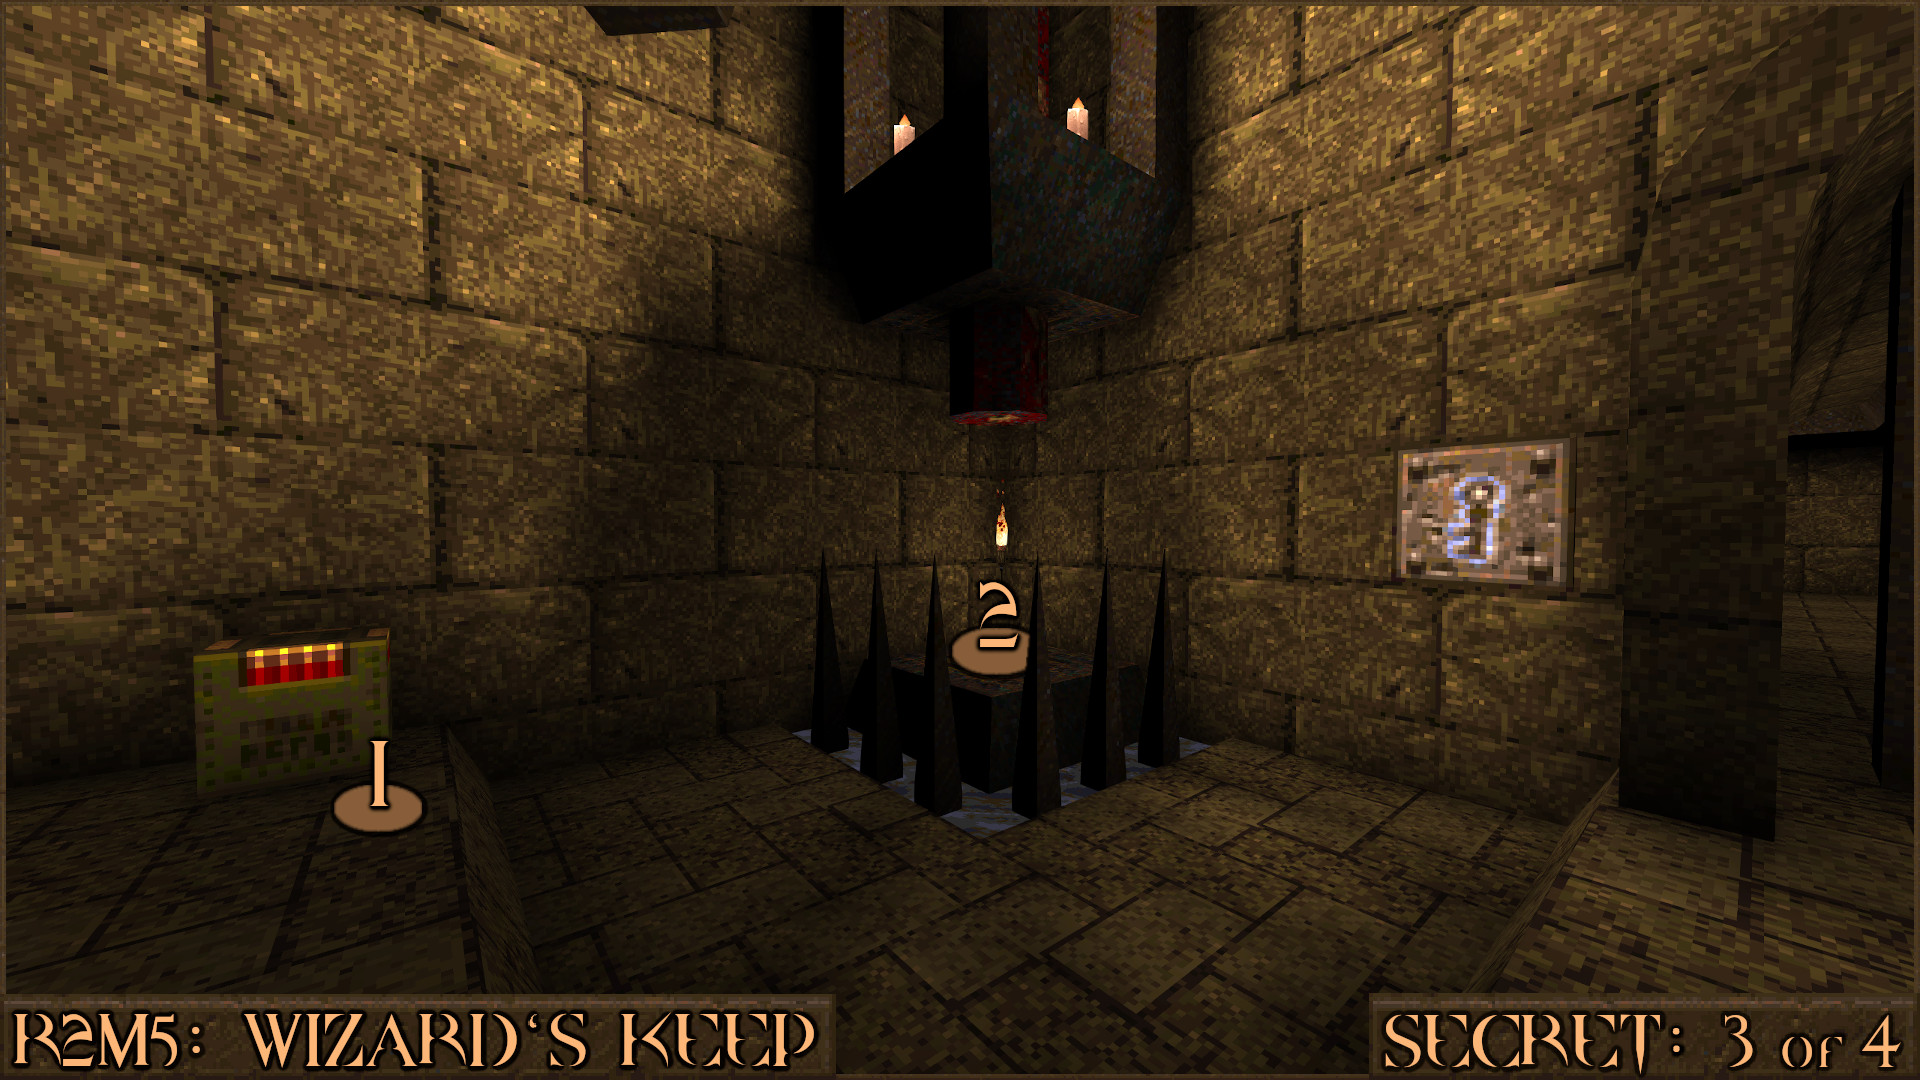
Doing all of this will have moved a wall (
) in the previous room. Head back to the room with the nail trap column and look in the corner to find the secret.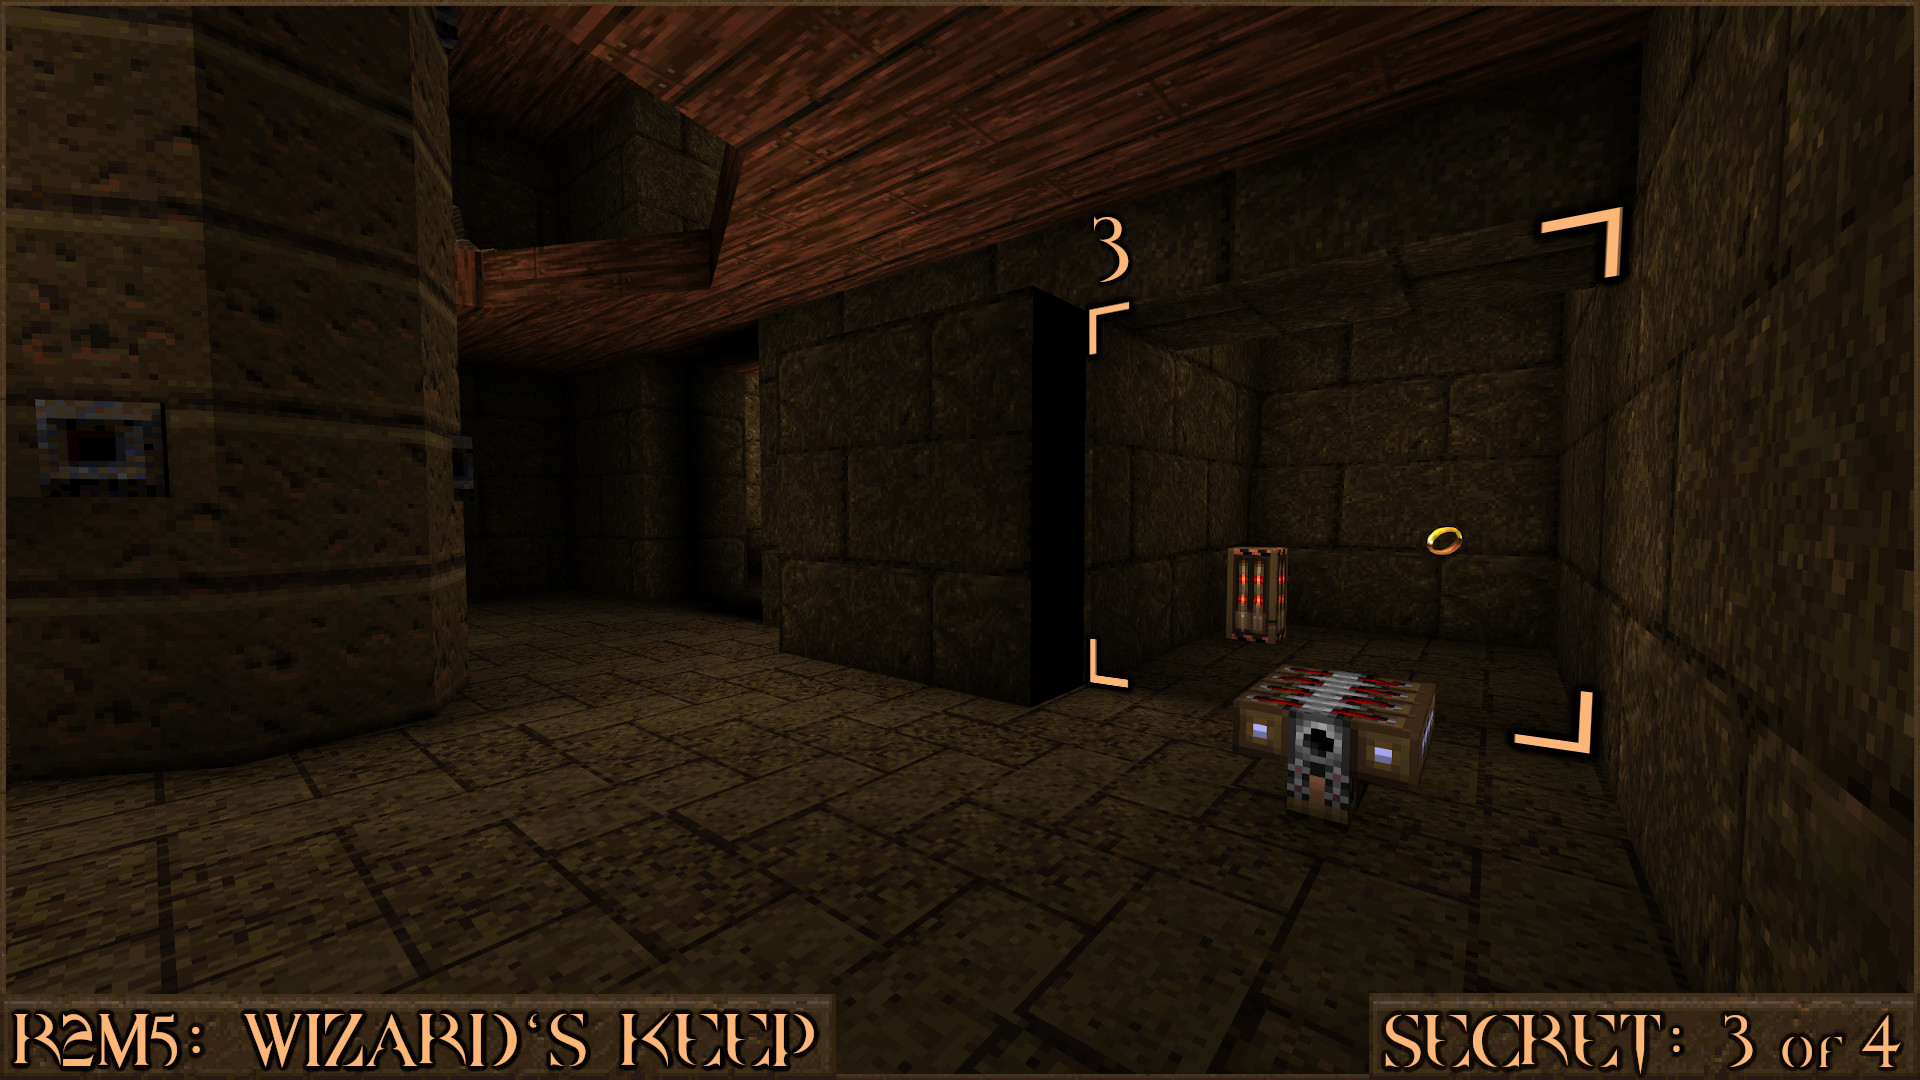
Reward:
Secret 4 of 4
You will come across an orange switch that when pressed will say "Outside access areas are now open". Near this is a bright red stained-glass window (). Shooting this will enable a small elevator () to lift you up in to the secret when stepped on.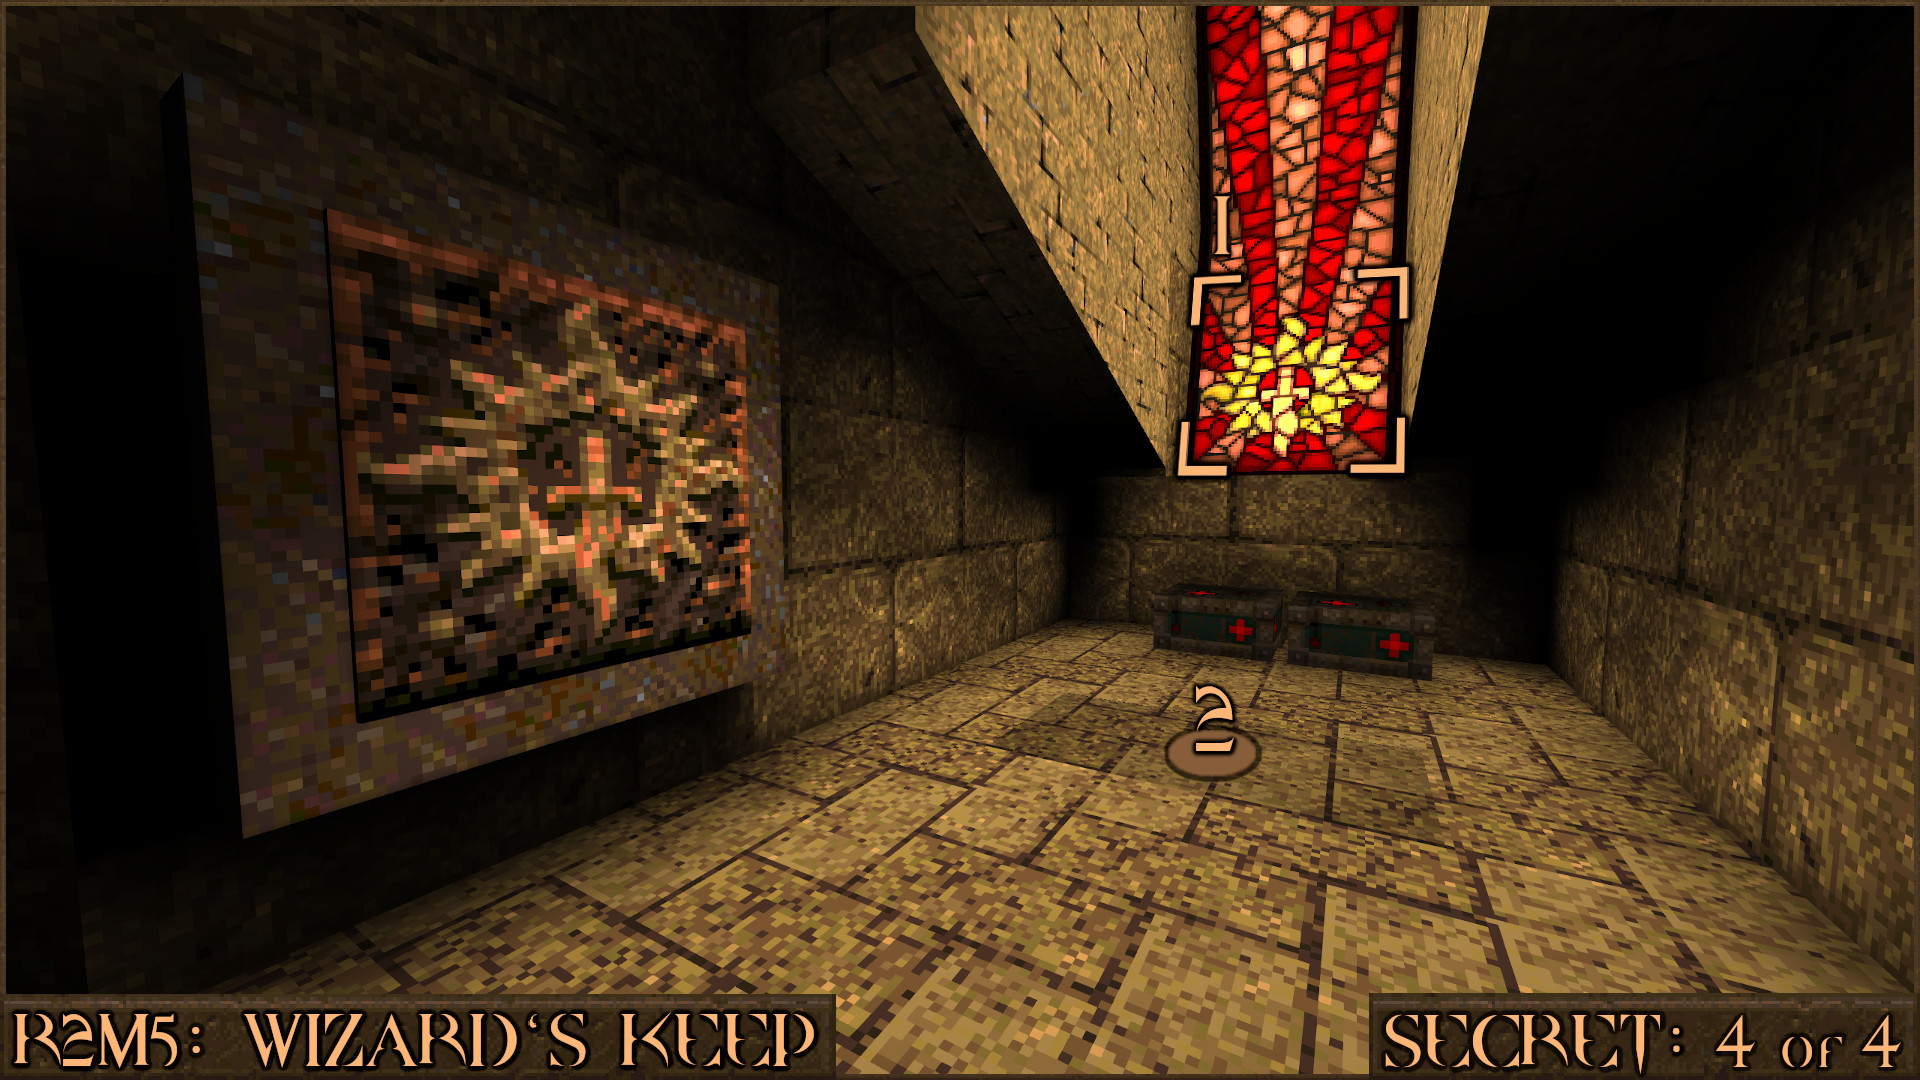
Reward:
Extra Secret
Later in the level you will enter a large room with another bookshelf in the far corner. Run up to it and press the hidden switch () on it.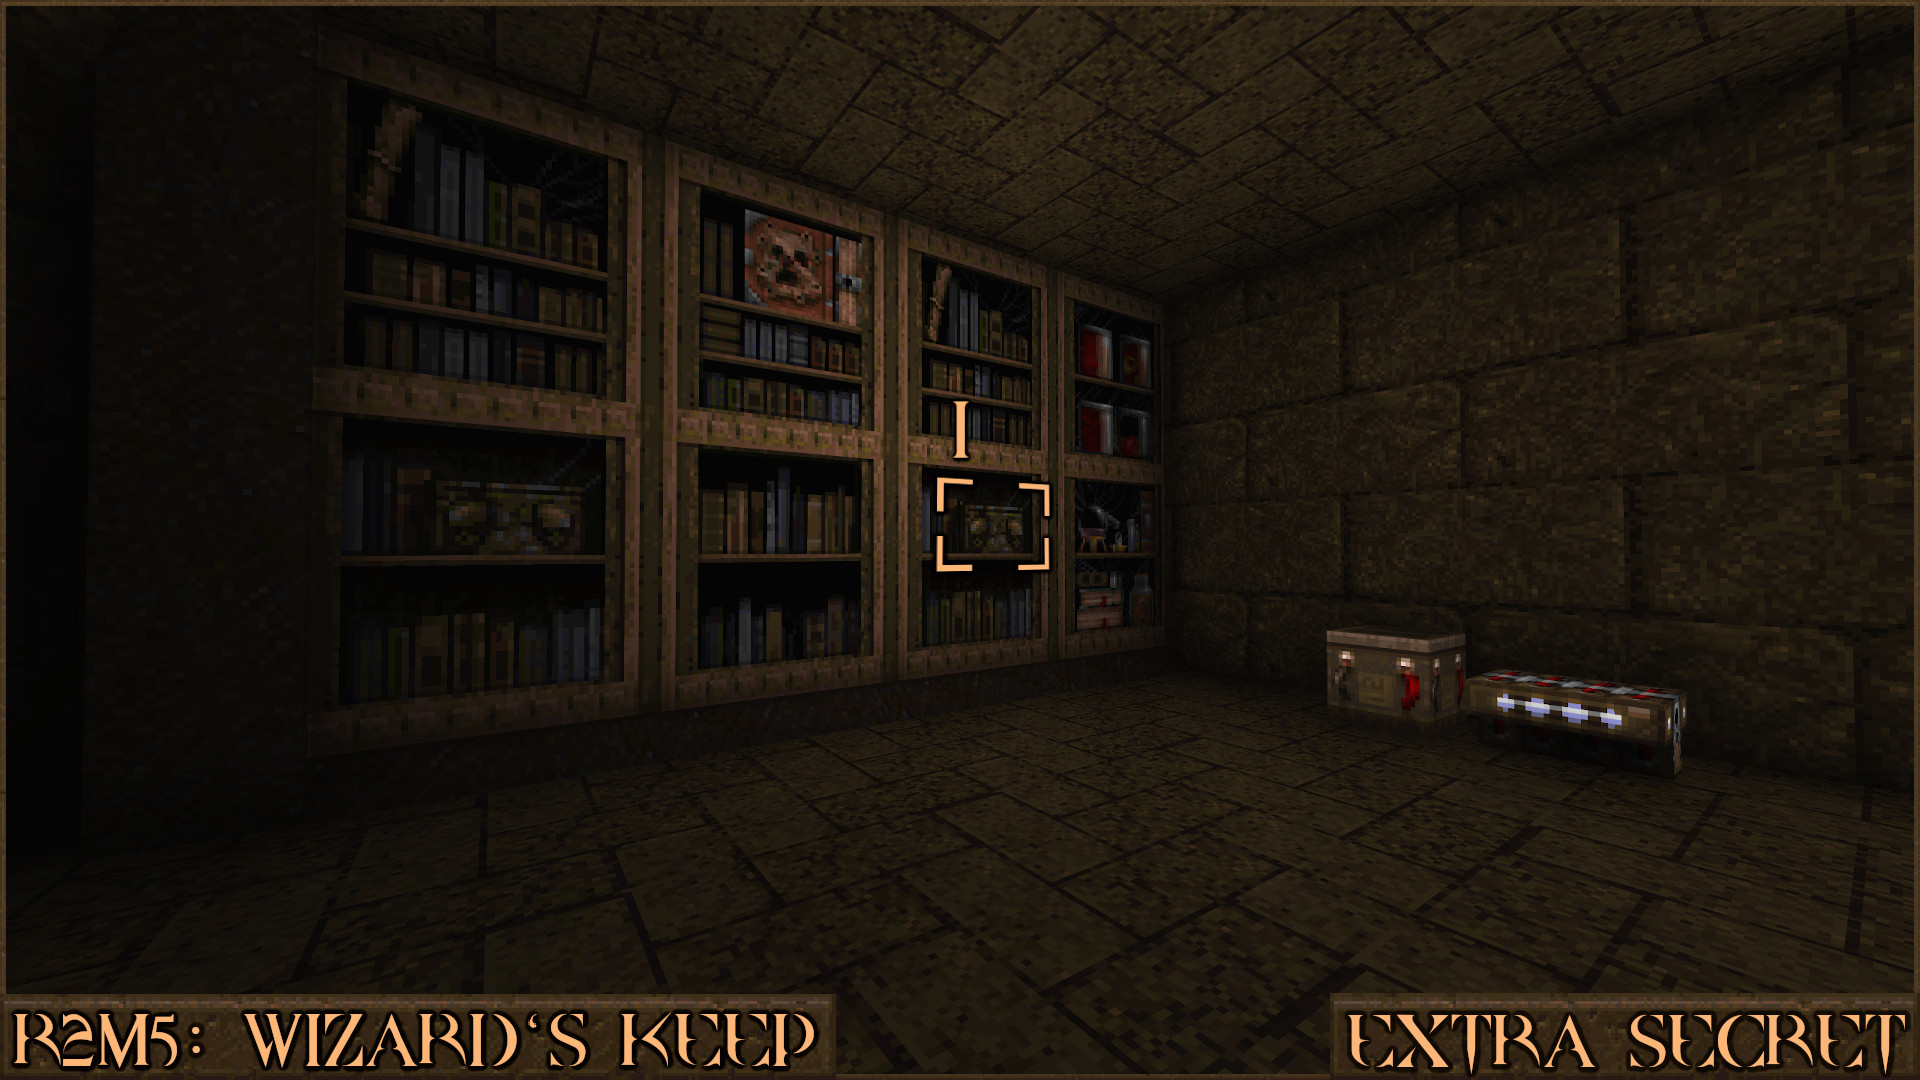
On the opposite end of the room is a candelabra mounted on the wall (
). Jump in to it to activate the second switch. Once both have been activated a section of the wall will move () to reveal a secret.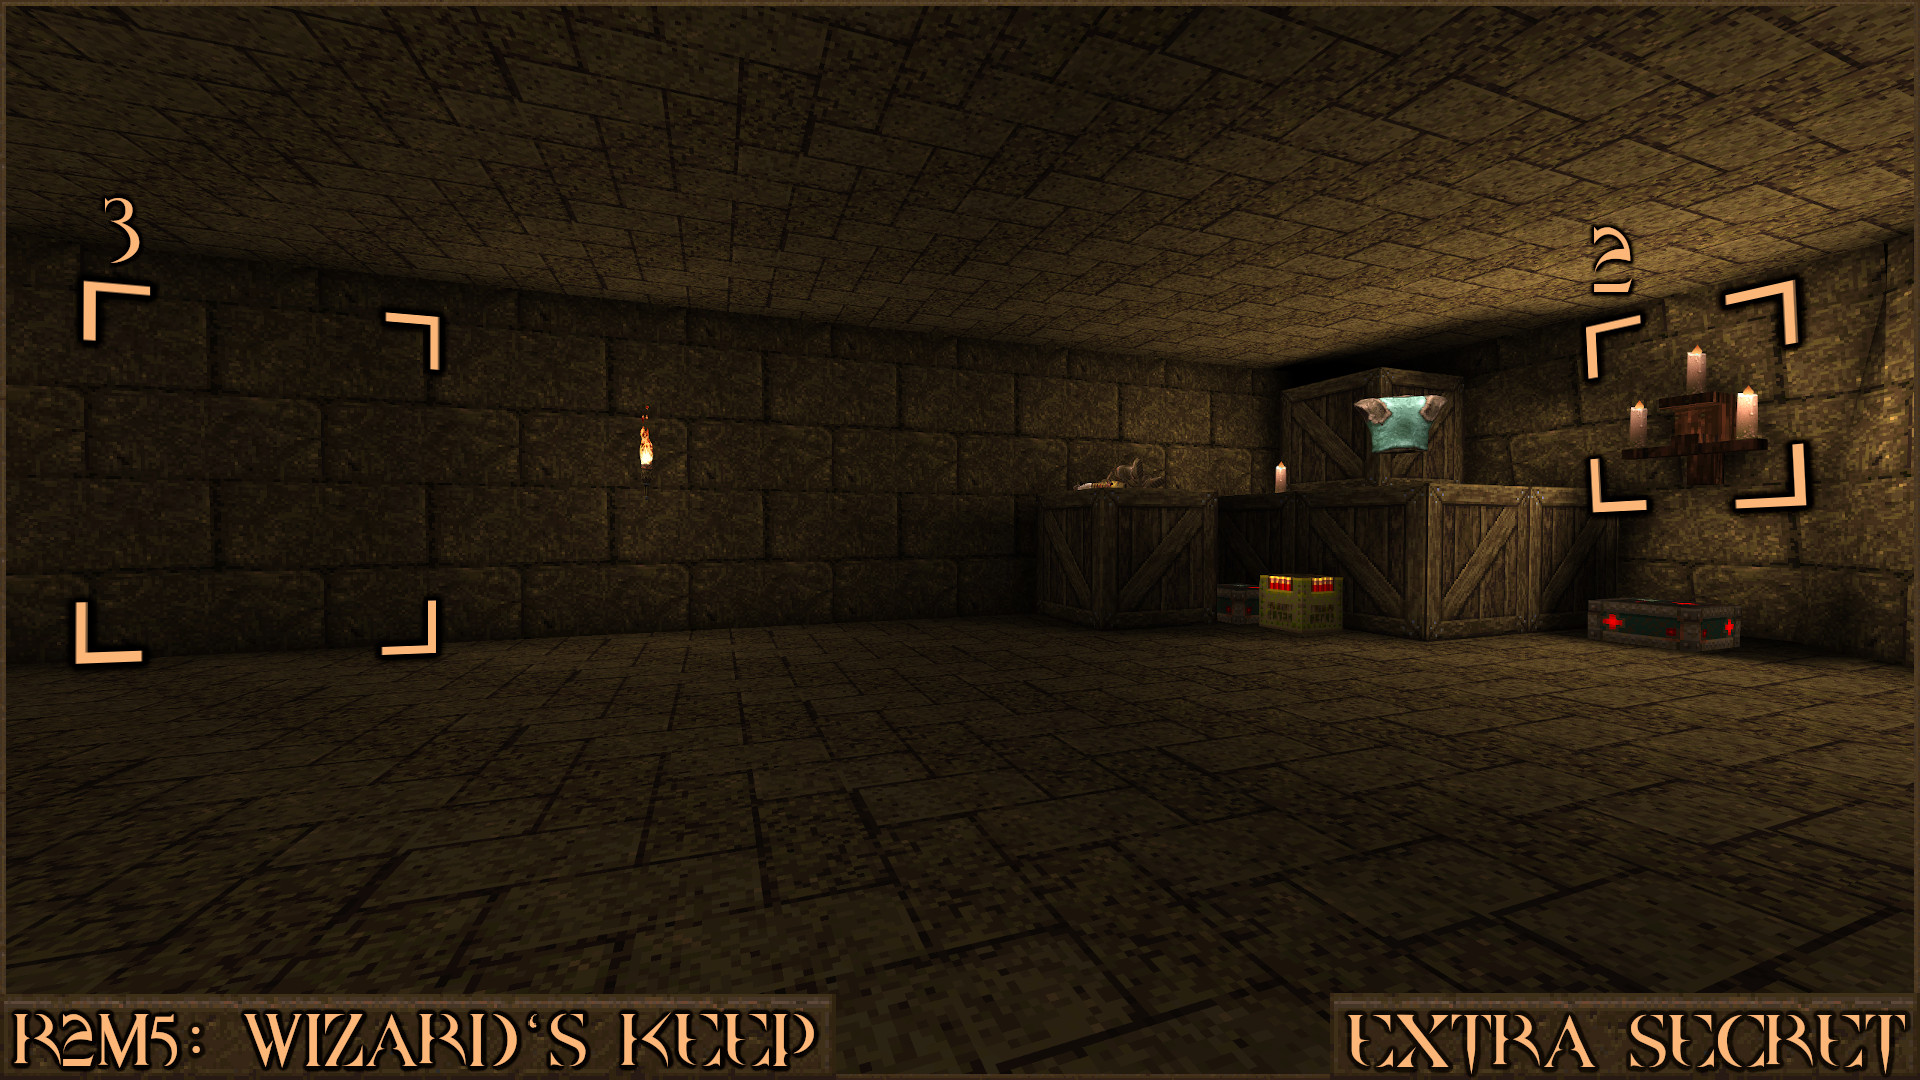
Reward:
R2M6: Blood Sacrifice
Secret 1 of 5
Immediately after the room with the block floating over the lava look carefully at the wall ahead. A slightly misaligned texture indicates where there is a fake wall. You can simply walk through it and claim a secret Anti-Grav Belt. Although not part of the secret it is recommended to use this Anti-Grav Belt to grab the Power Shield that's on a high ledge just around the corner.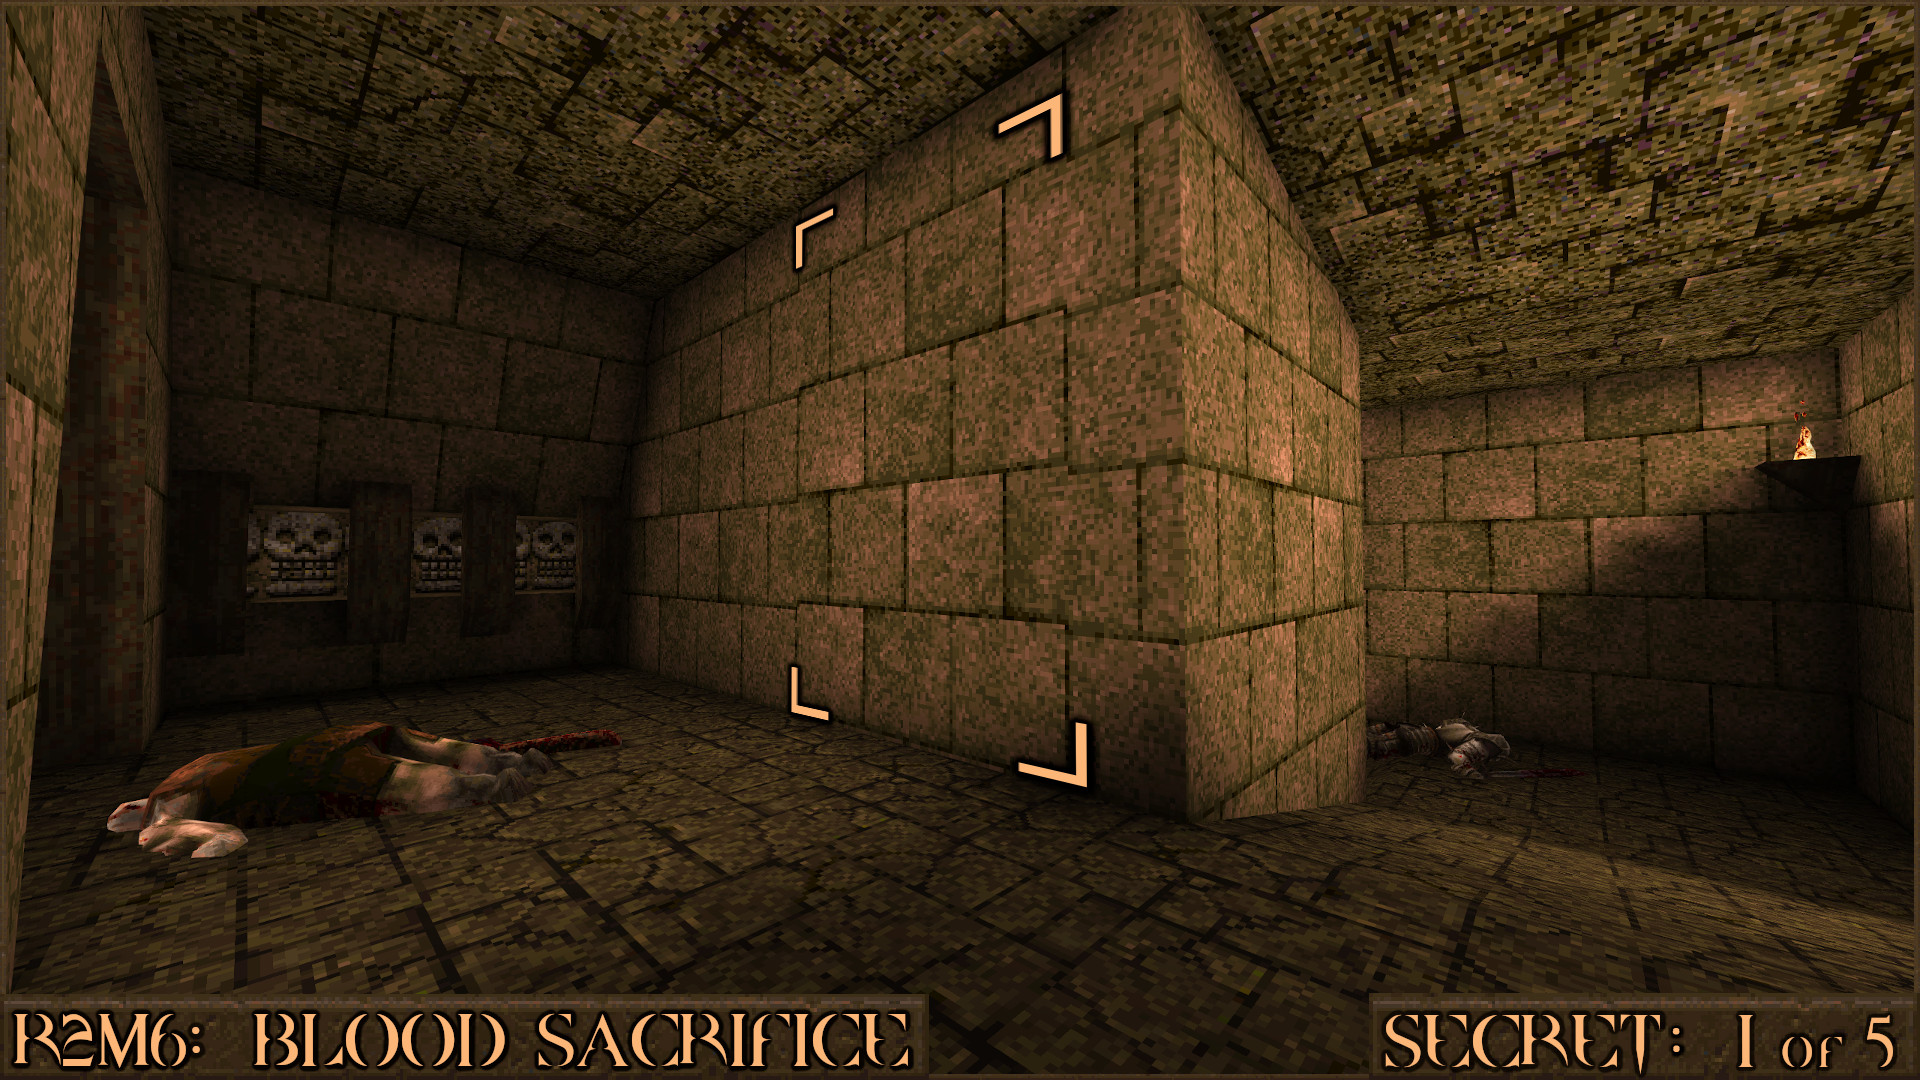
Reward:
Secret 2 of 5
You will come across a metal buzz-saw embedded in the ceiling. It will probably kill a nearby Fiend who tries to attack you. A wall near to this buzz-saw can be shot to reveal a secret area.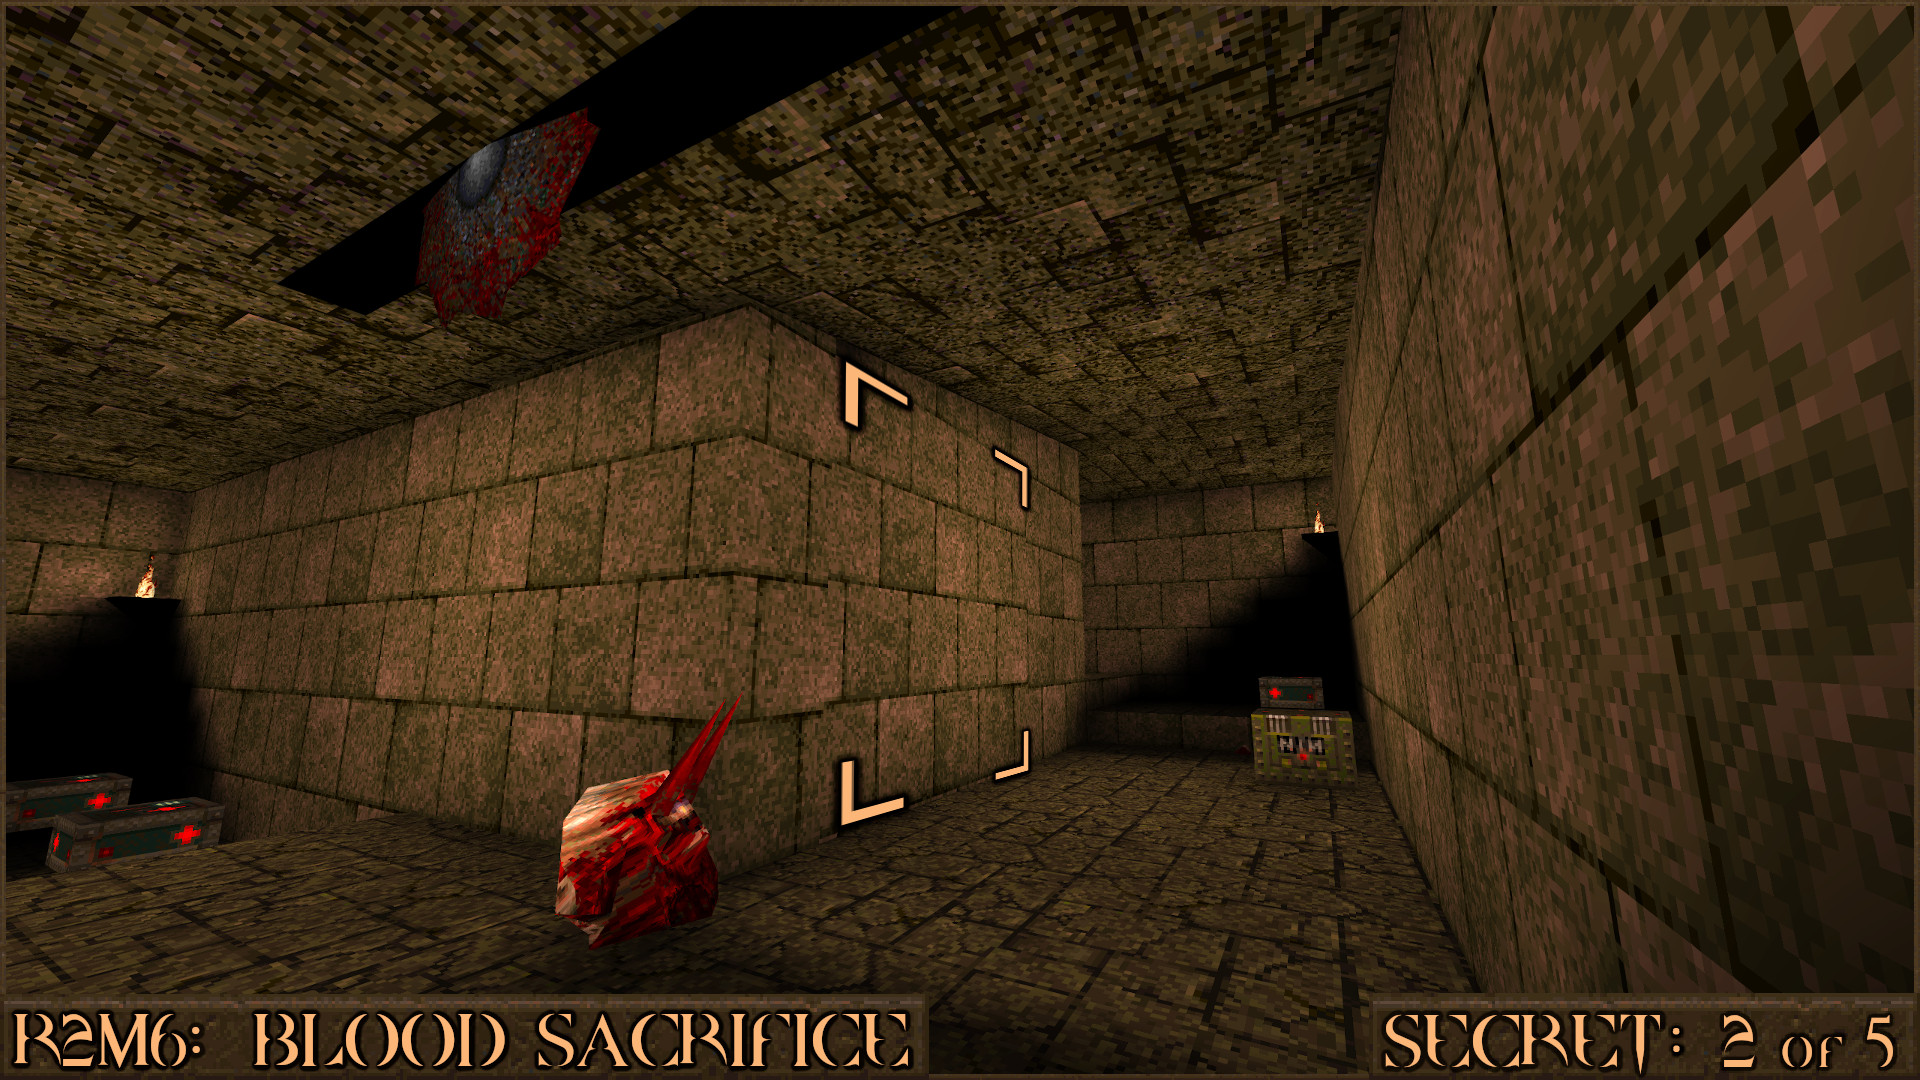
Reward:
Secret 3 of 5
After disabling the giant electric serpent machine and opening the door to the left of it, shoot this corner wall to reveal a secret area filled with items.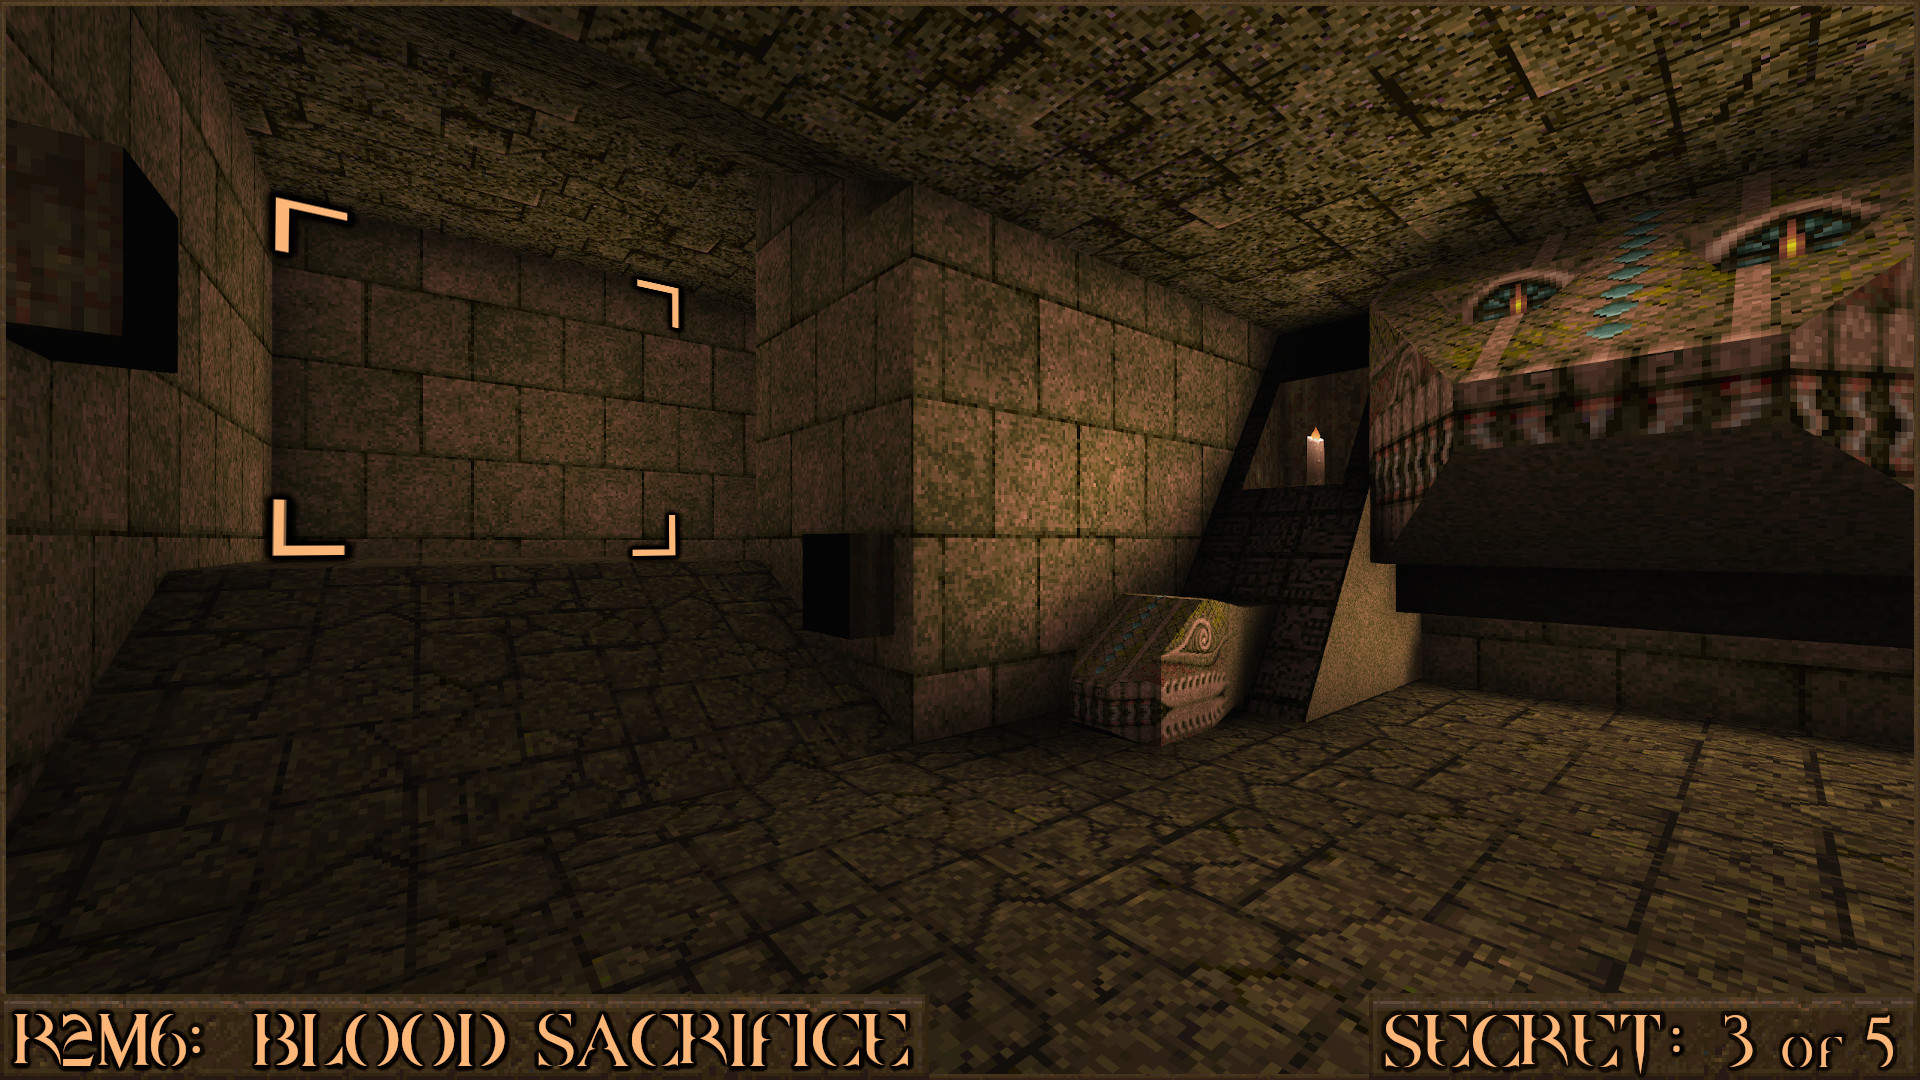
Reward:
Secret 4 of 5
You'll notice an odd sort of skull altar. Jump on top of it () and the message "You've opened a secret area!" will appear. 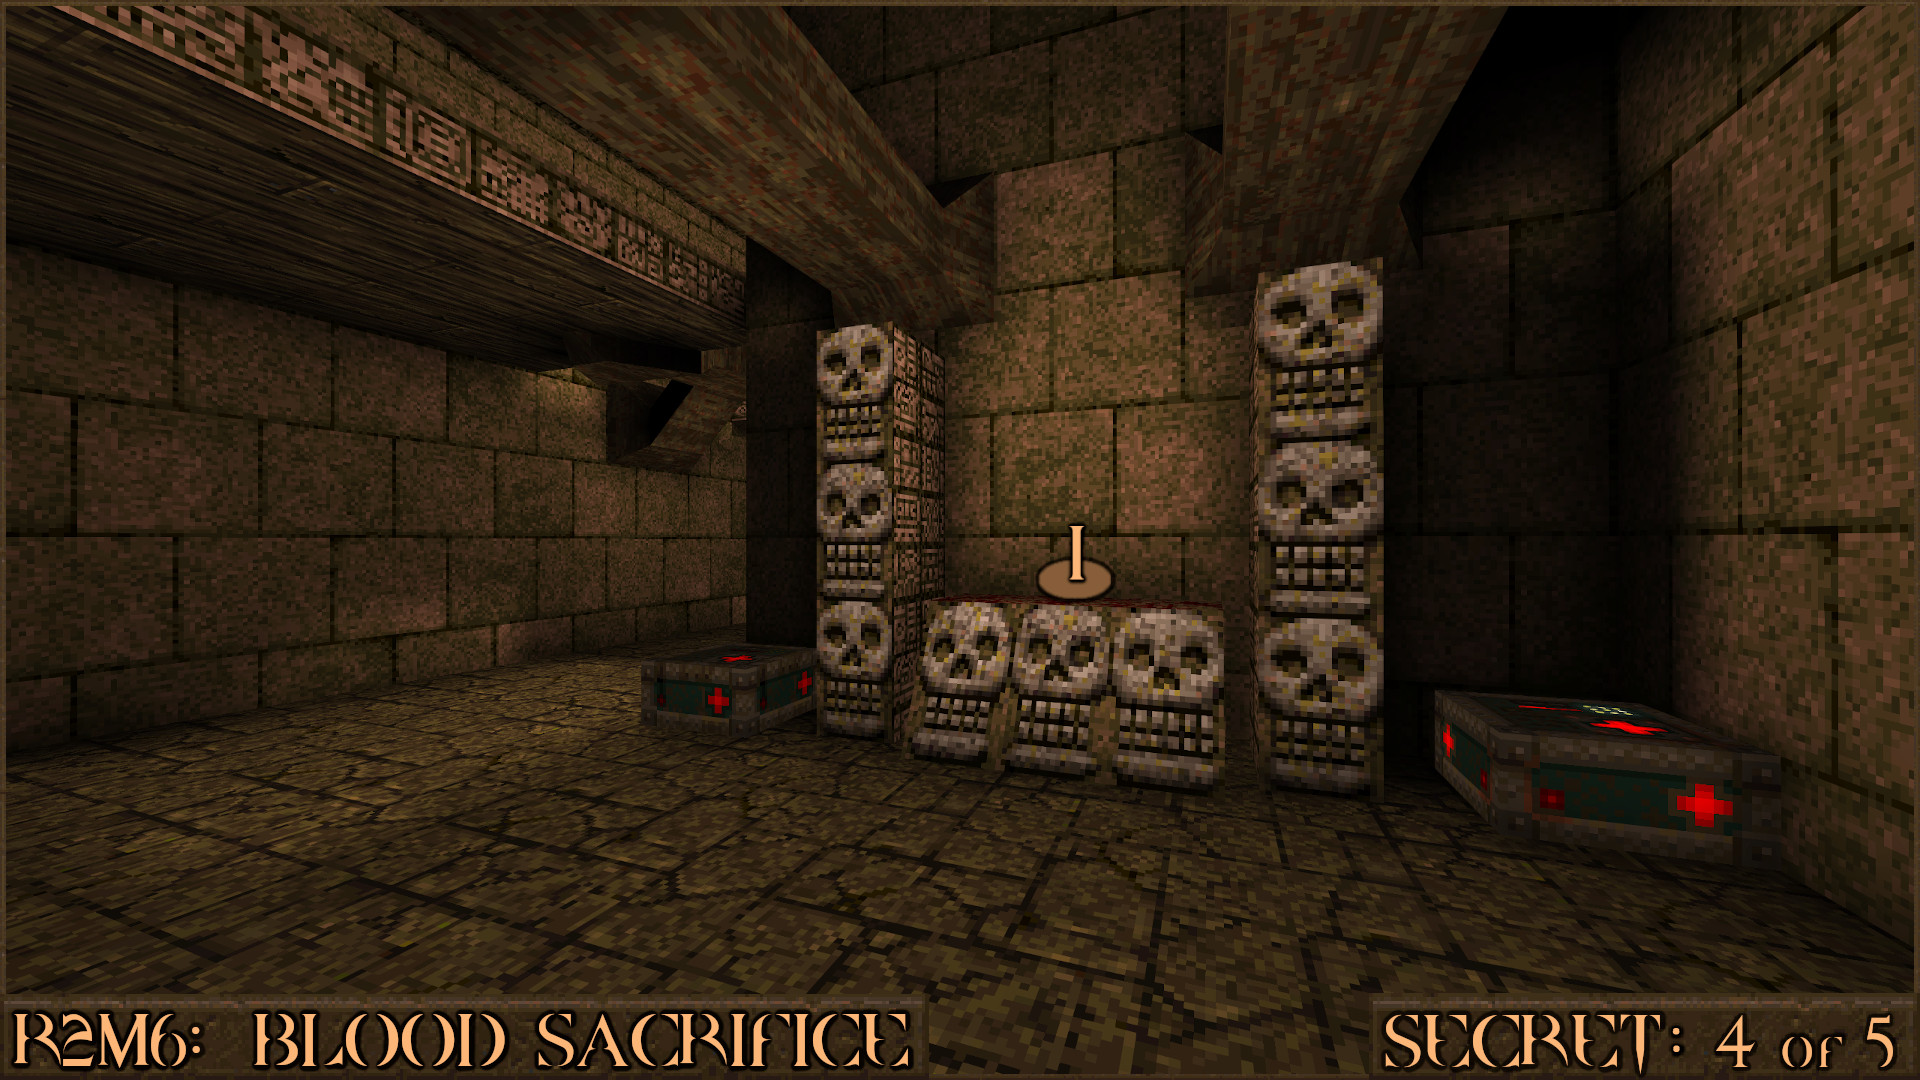
Head around the corner to see a wall has moved (
) to reveal a secret area that contains some items and a teleporter to even more items.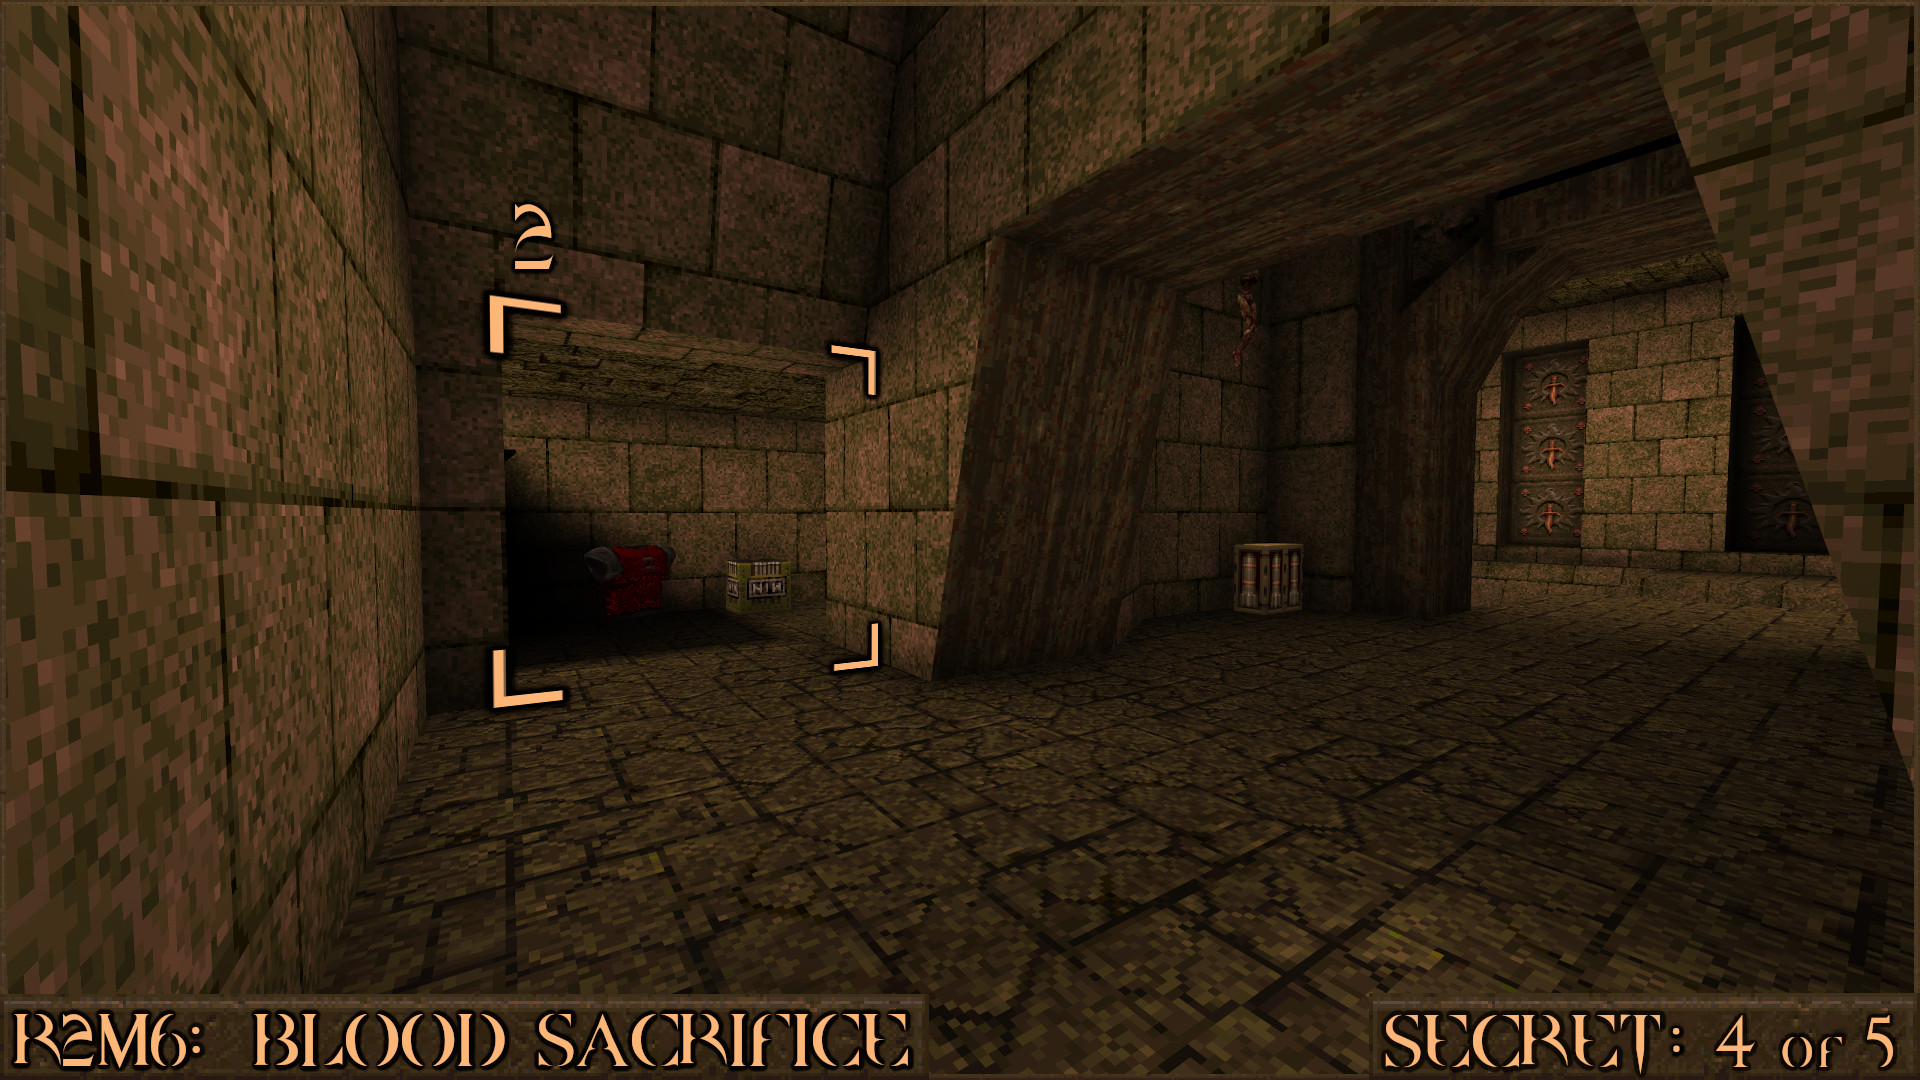
Reward:
Secret 5 of 5
After picking up the Silver Key you'll run through a corridor with lava spikes shooting up at you. When you turn a corner look for a snake head decoration (). Jump in to it to nudge it and a nearby panel will move to reveal the secret ().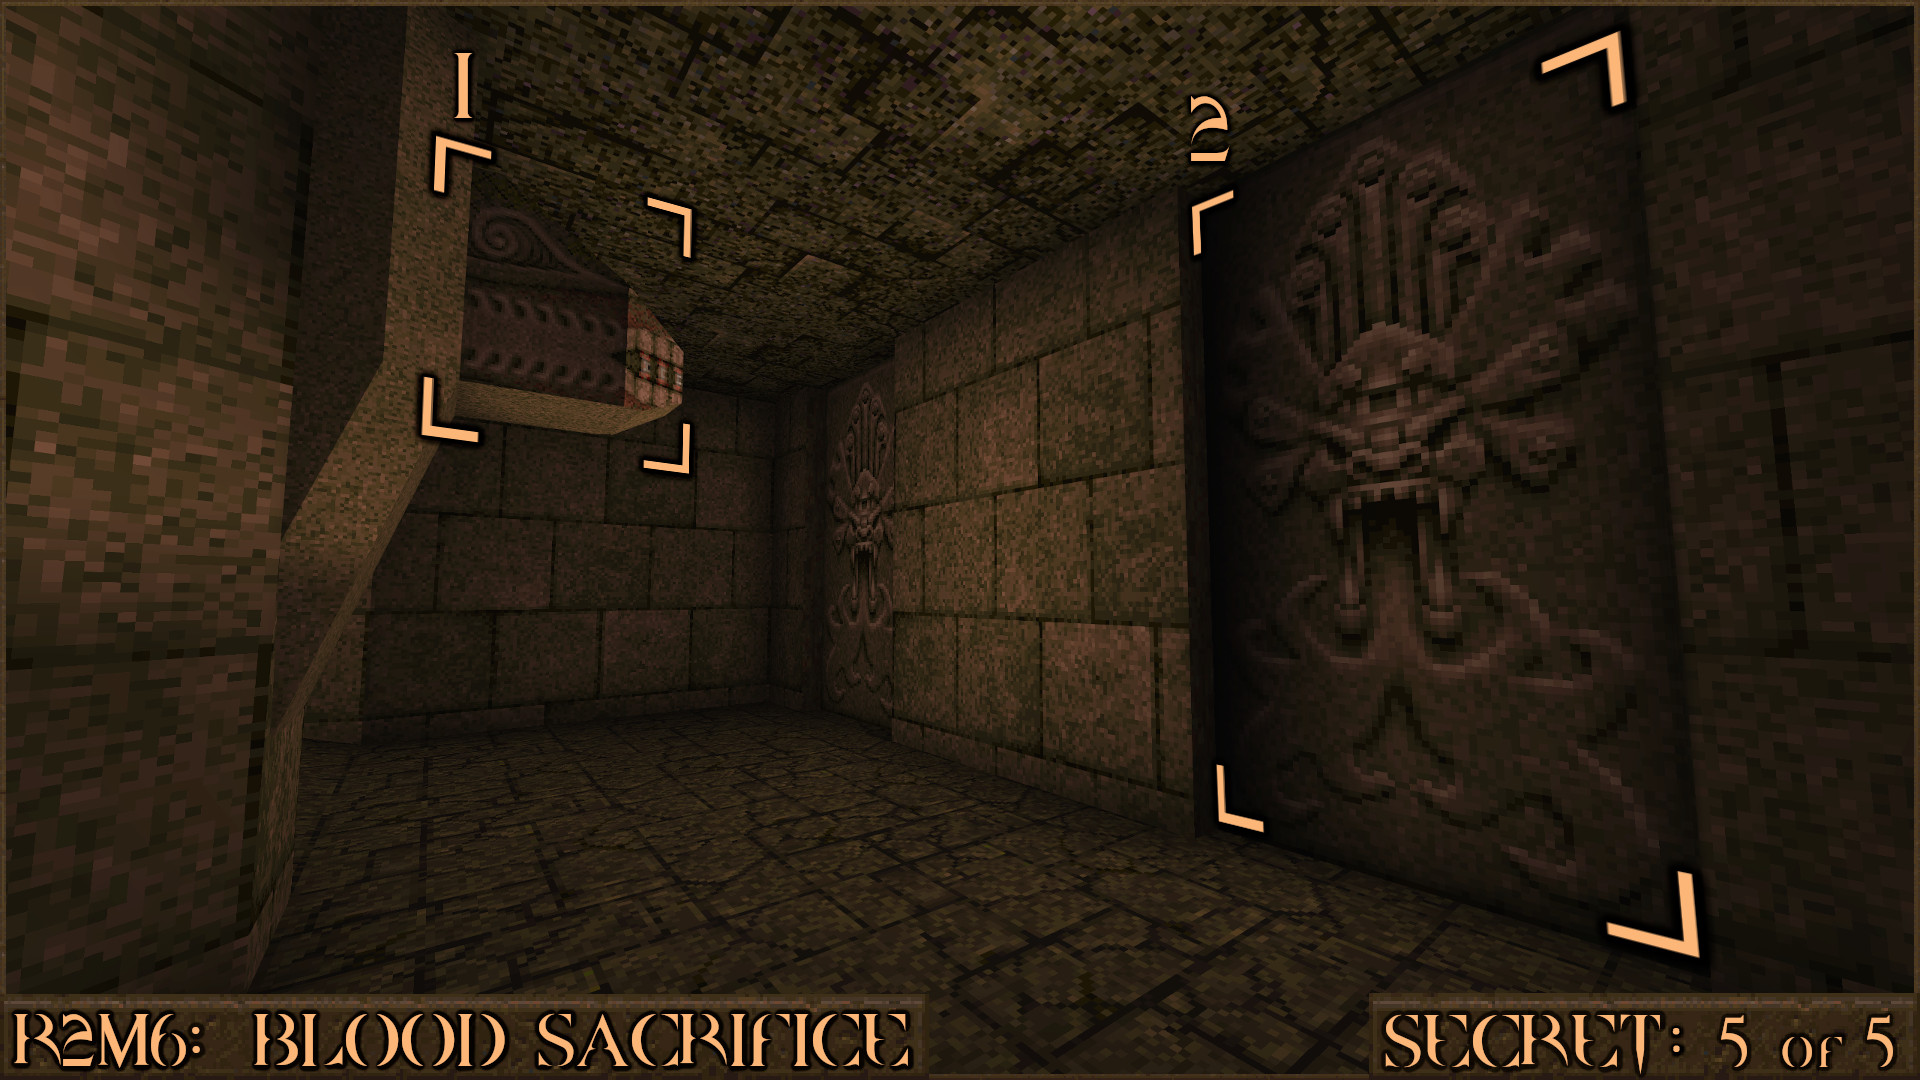
Reward:
R2M7: Last Bastion
Secret 1 of 5
At the start of the map go outside and jump in to the water to the left of the bridge ().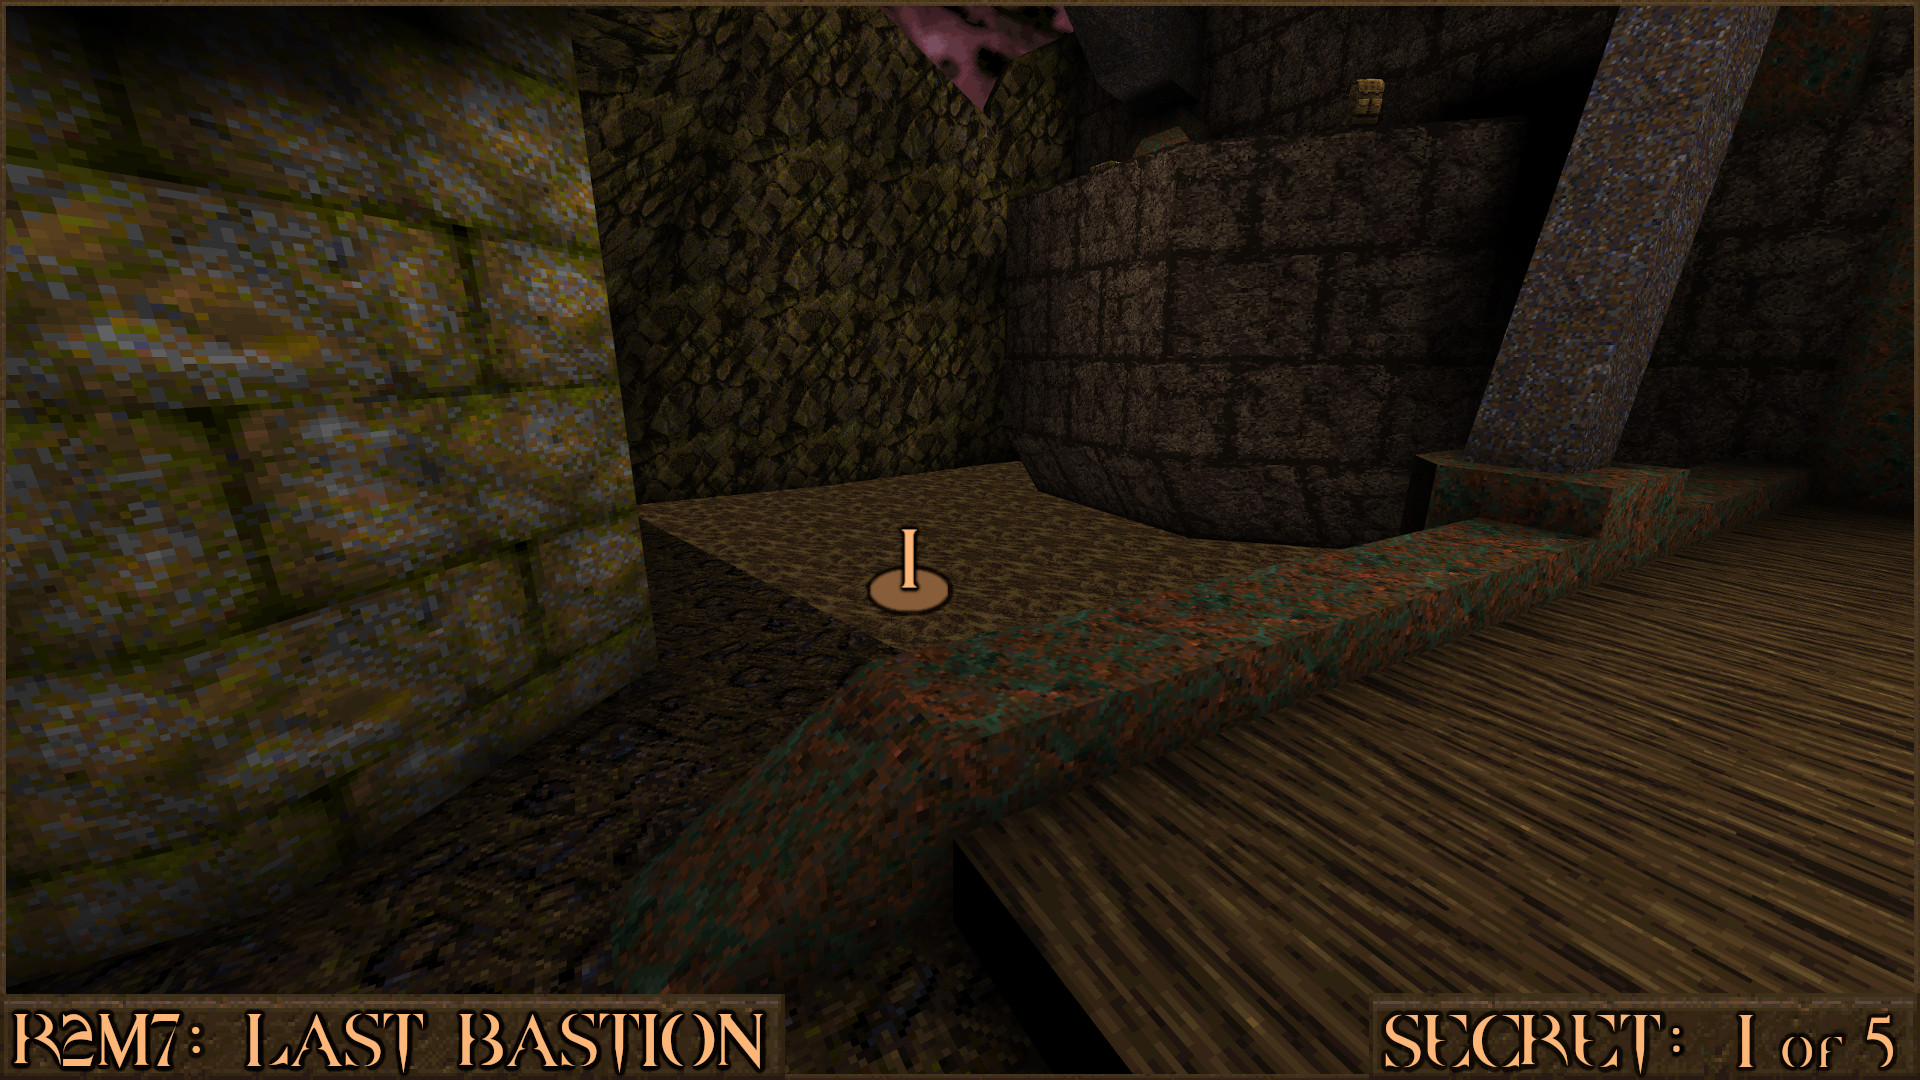
Quickly locate an underwater cave entrance (
) to find the secret.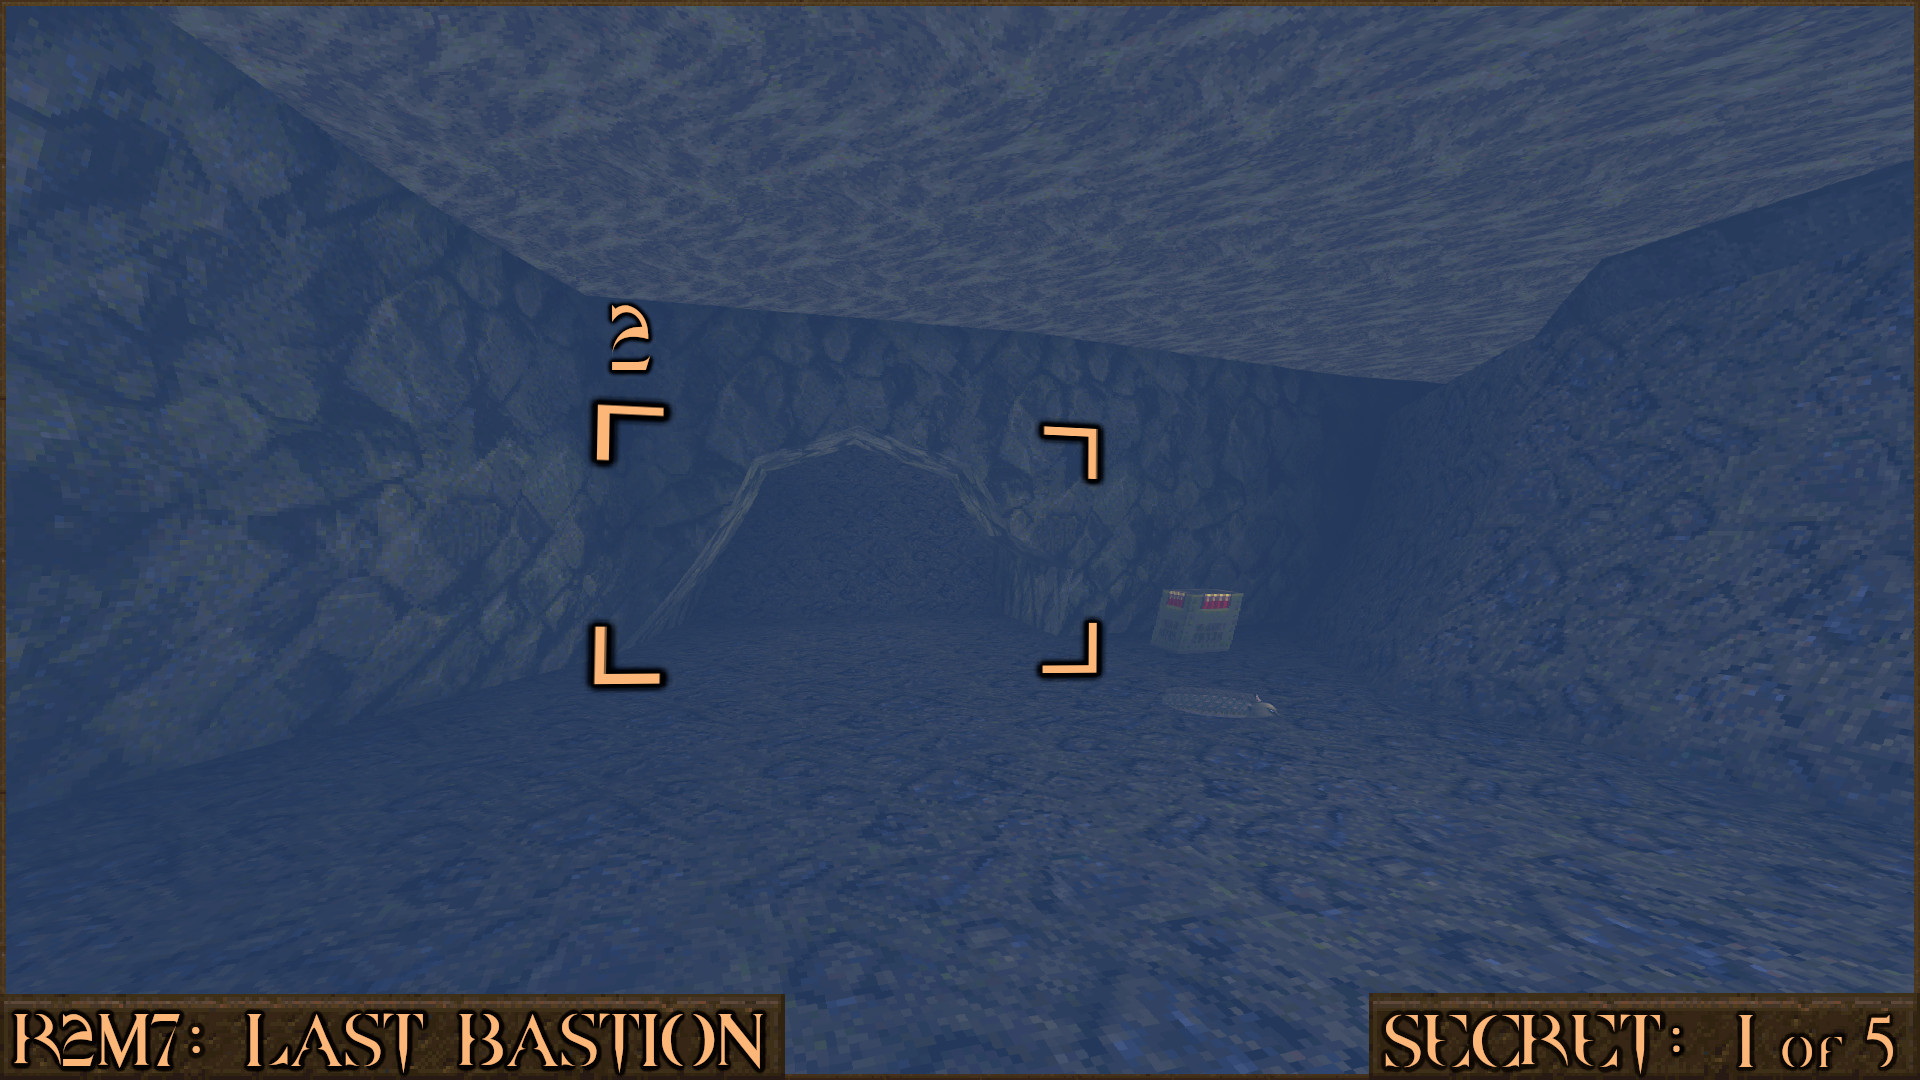
Reward:
Secret 2 of 5
Inside the castle look for the tunnel smeared in blood as it contains a large spike crusher. Stepping in to the tunnel will start the crusher so quickly shoot the red shootable switch () behind the swinging axes to open the barrier. Don't go past the axes though, turn around and wait for the crusher to start going backwards. Follow it and then get behind it.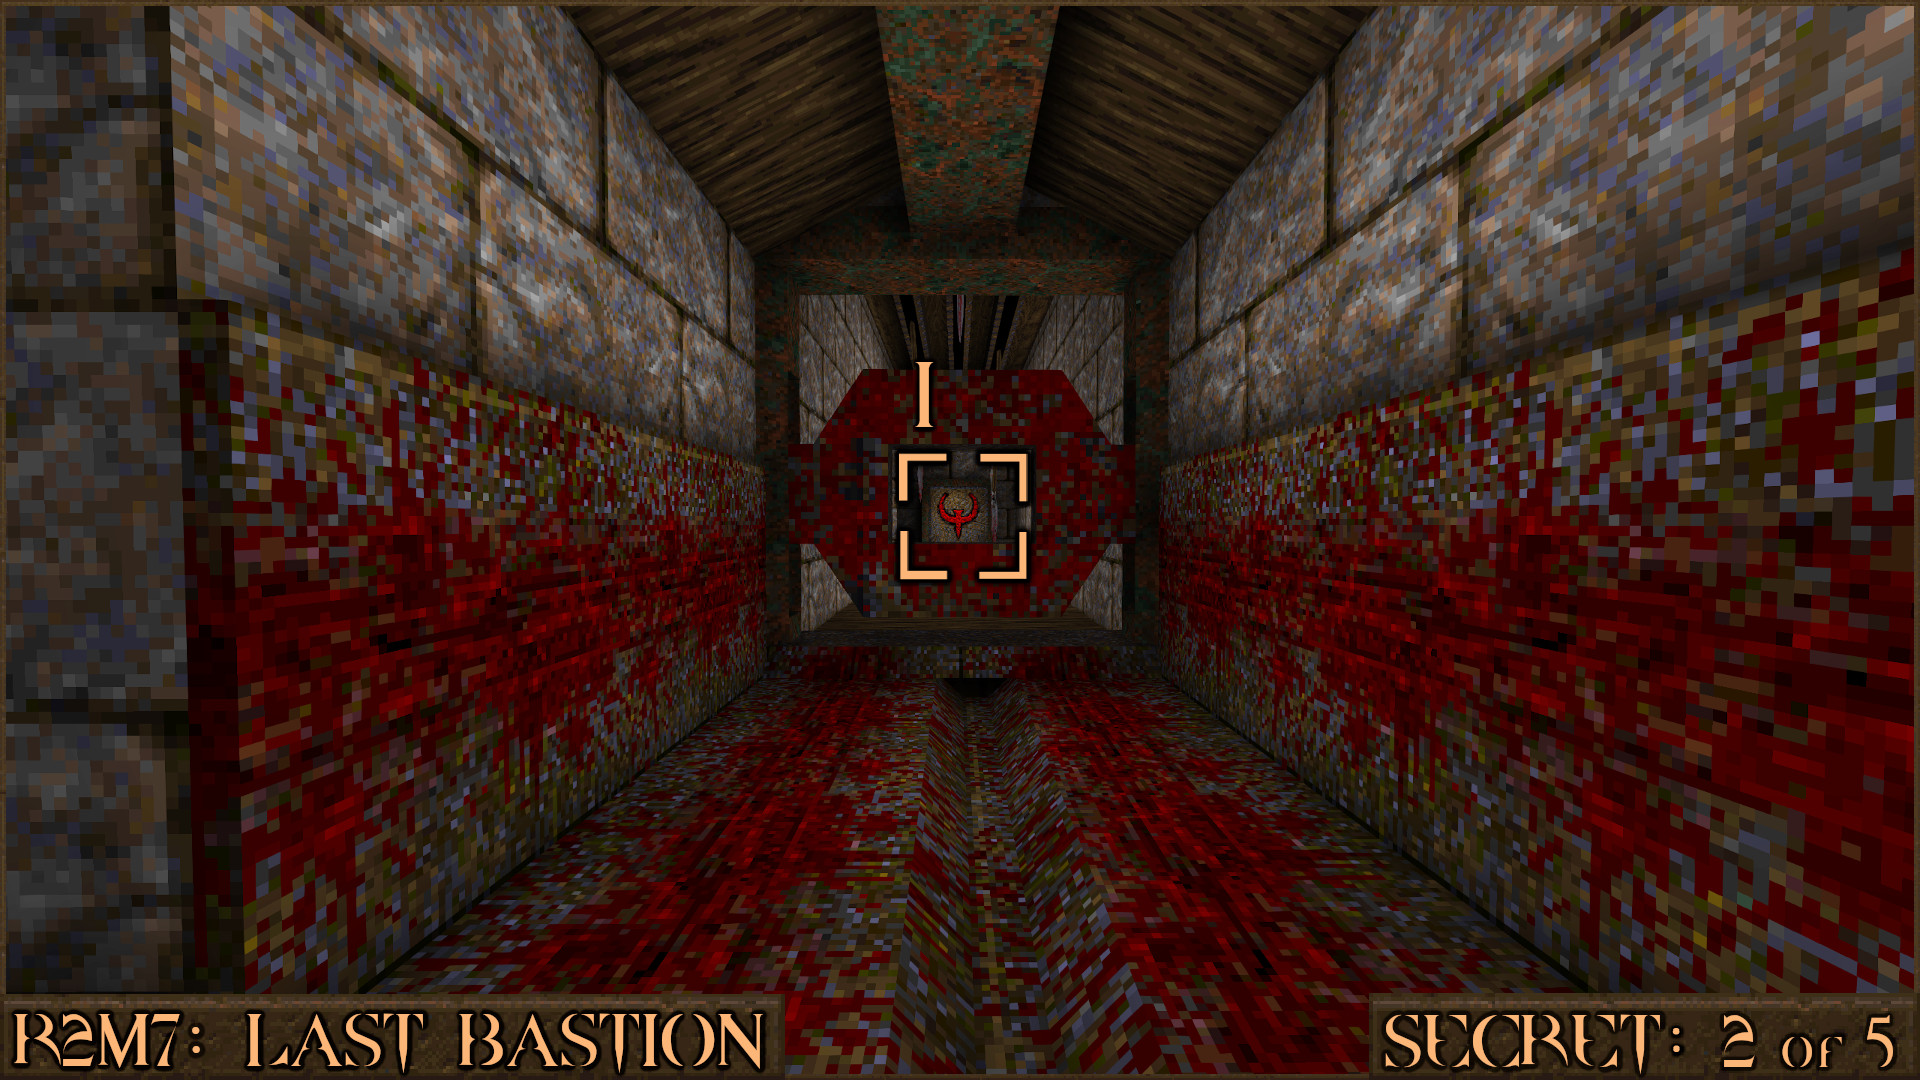
Behind the crusher you will see an orange push switch (
). Pushing it will make the text "You've opened a secret area!" appear. Now exit the crusher the way you originally came in.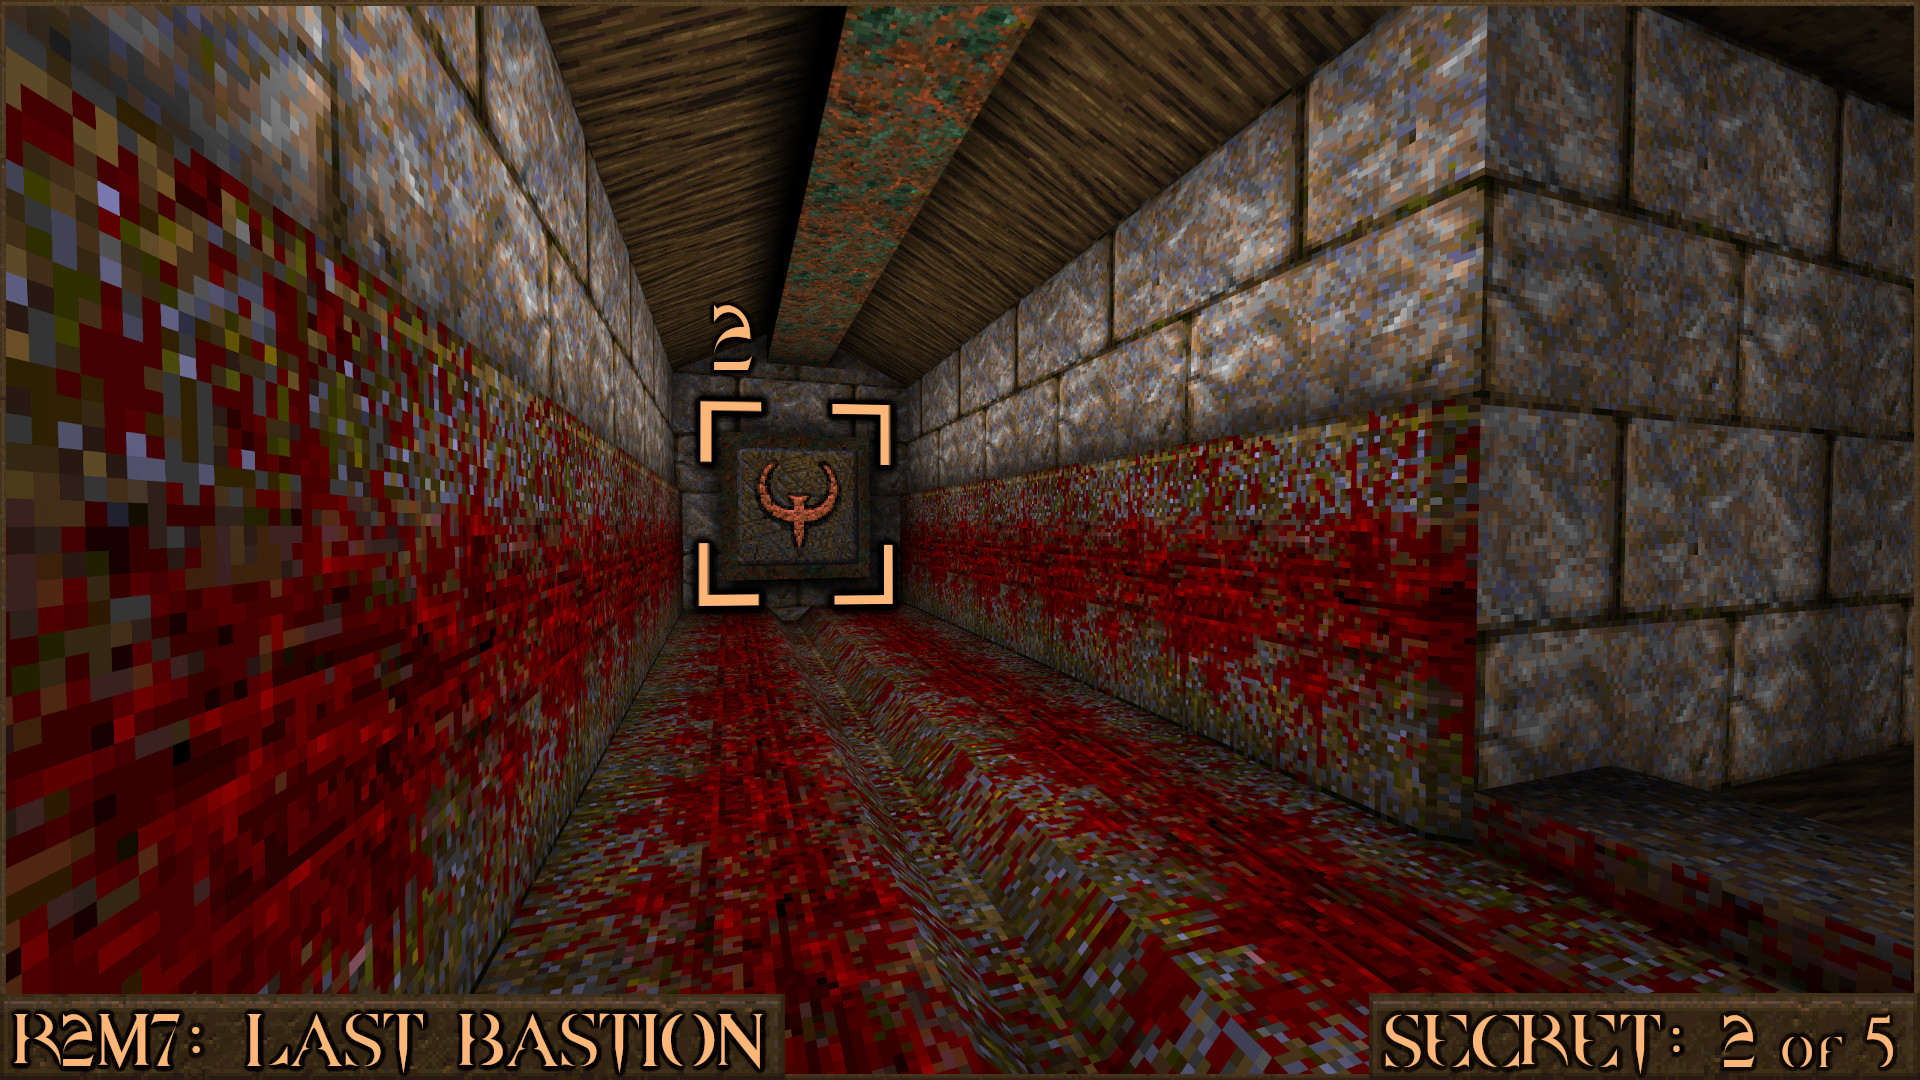
If you haven't already you need to find the Silver Key. Once you have it open the Silver Key Barriers then look between them (
). The orange switch you pushed earlier has revealed the secret containing a Ring of Shadows.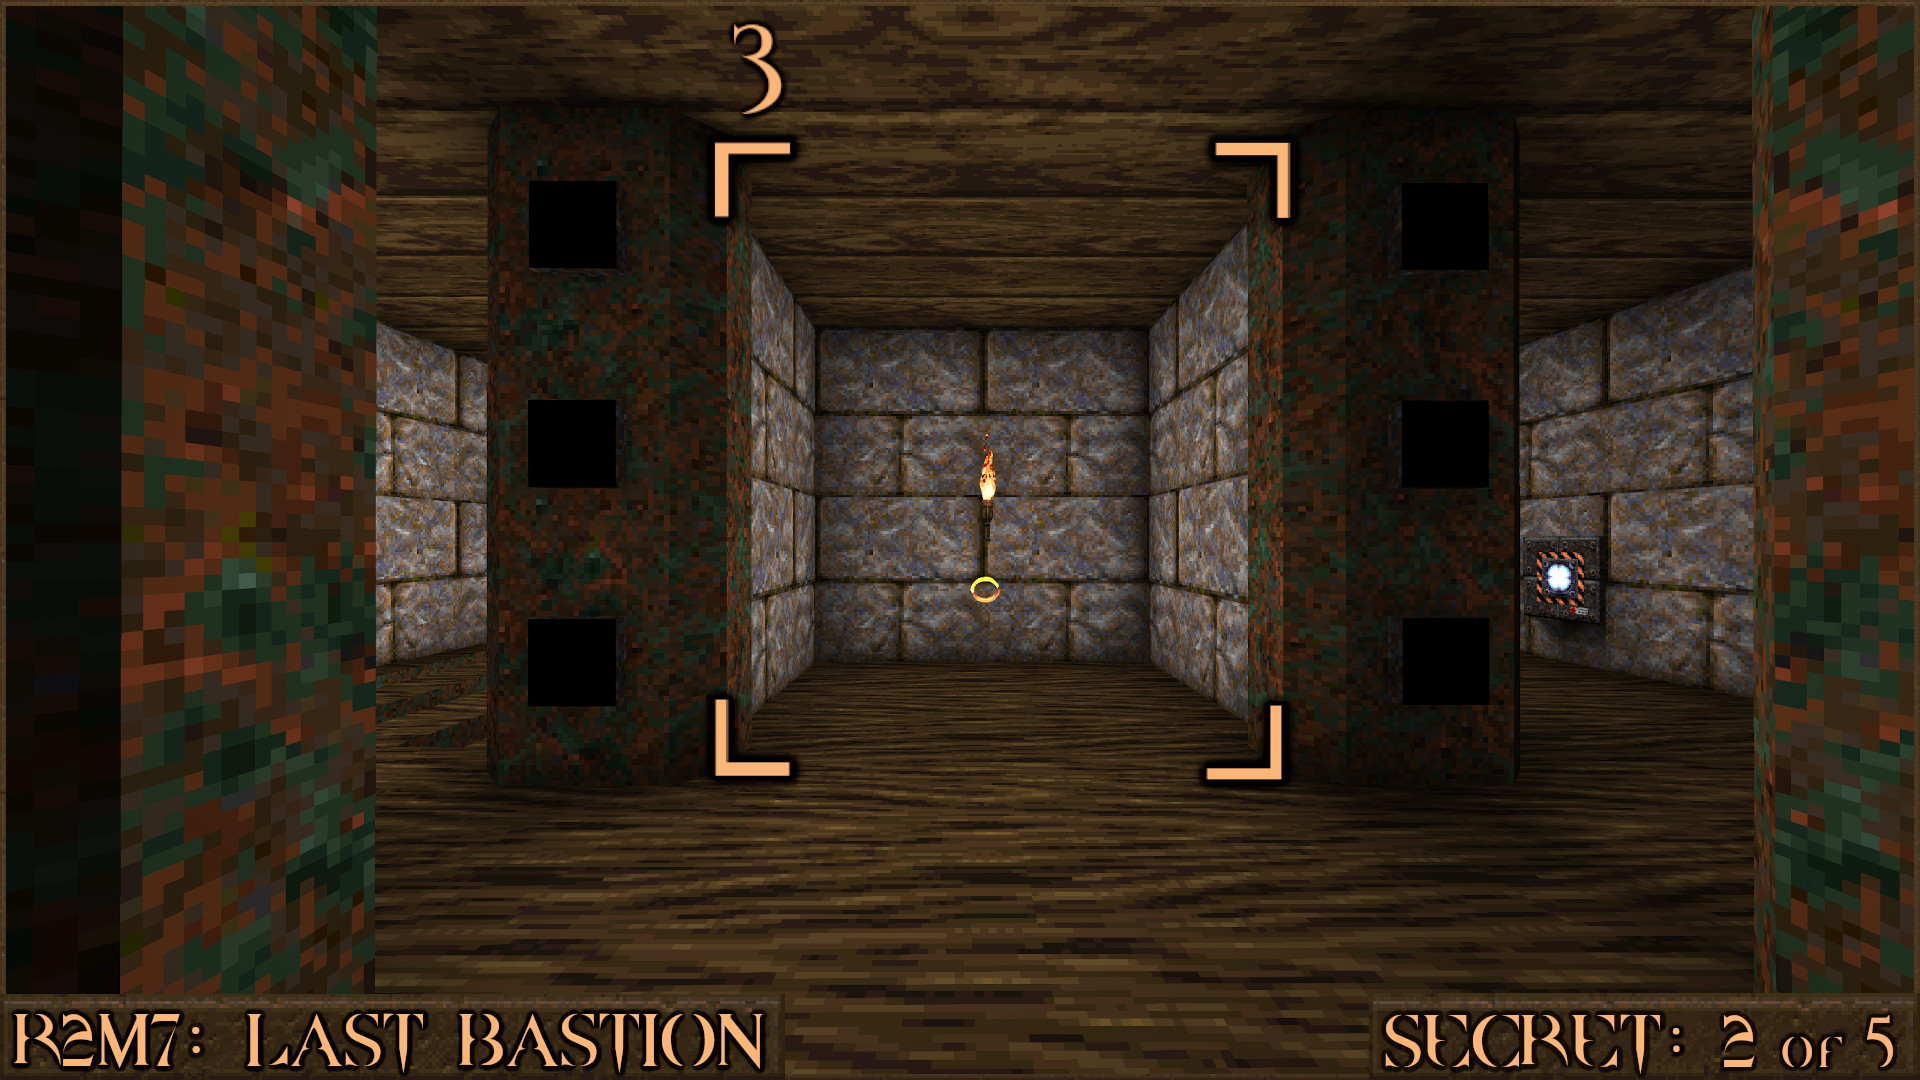
Reward:
Secret 3 of 5
Head back to the spike crusher and then continue past the swinging axes. You will come to an electrical machine above some green slime. Shoot the red shootable switch () on the machine to reveal a small secret area ().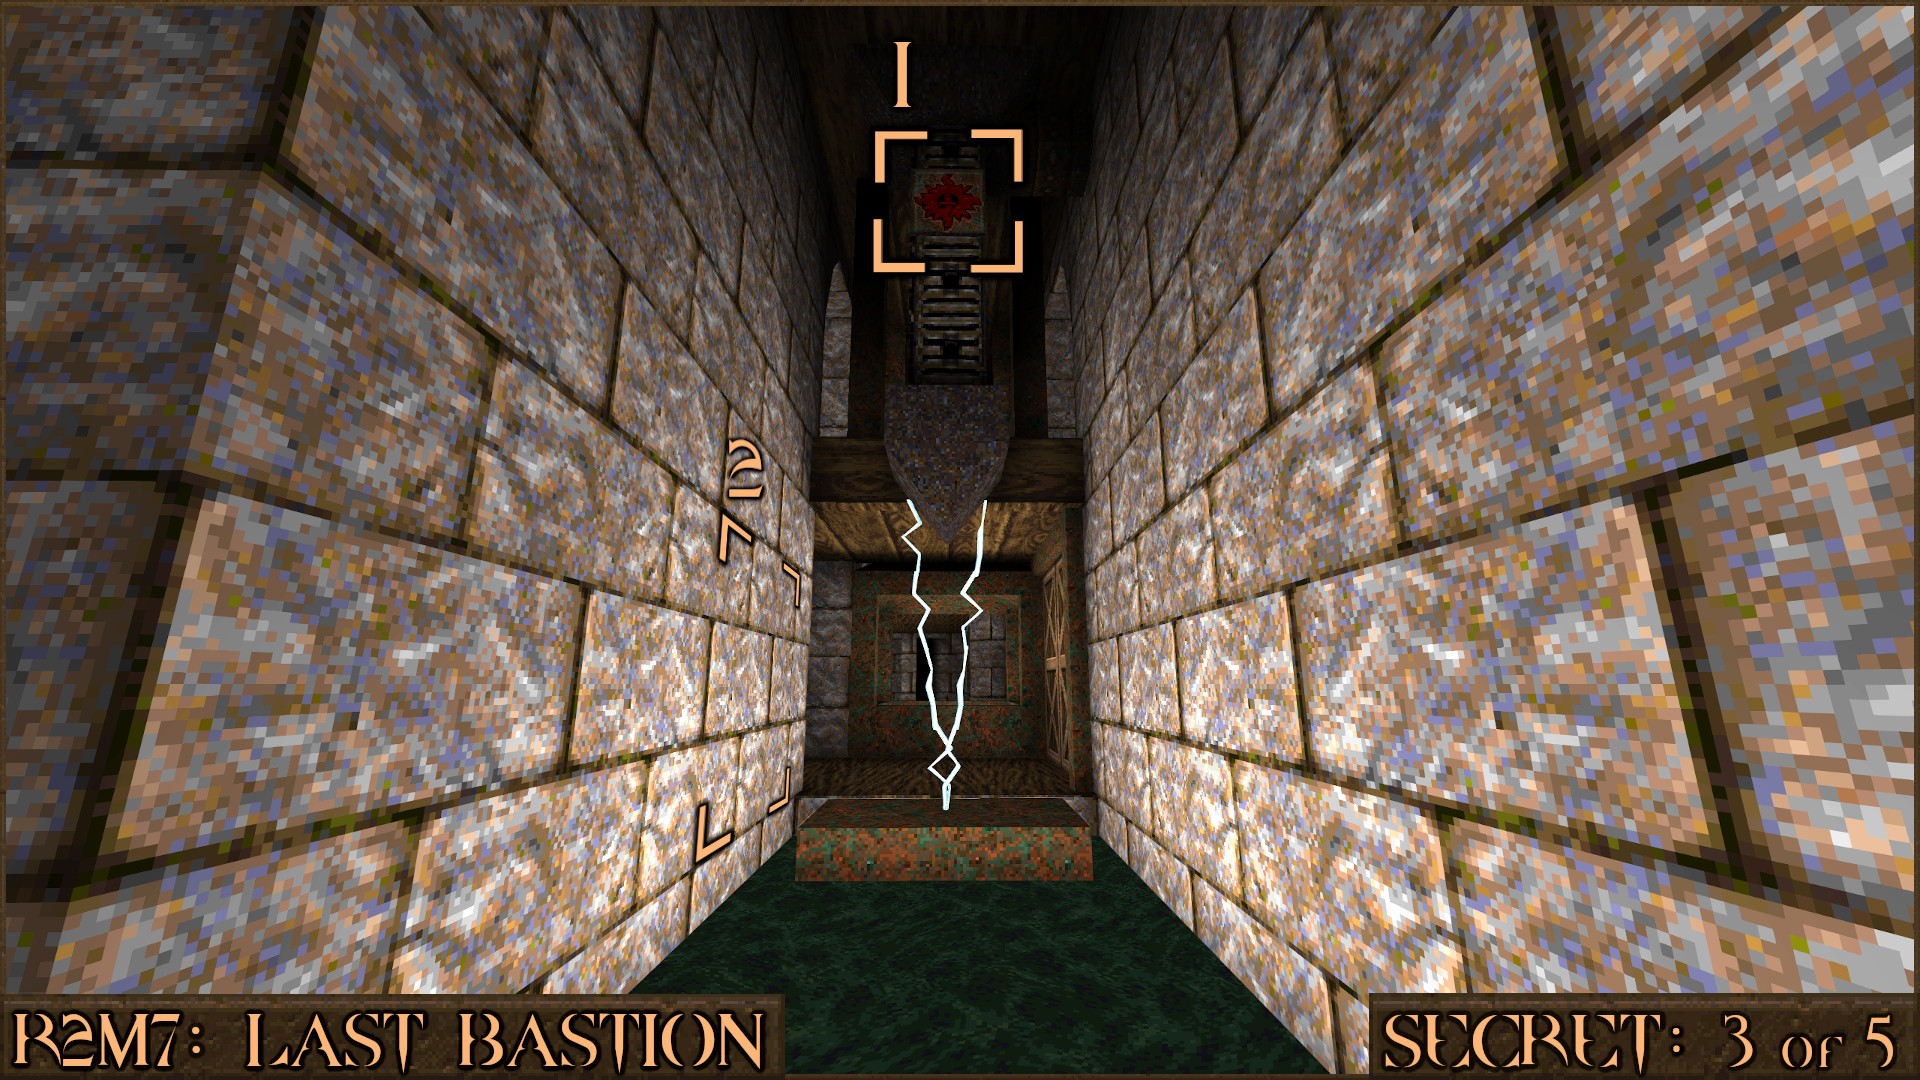
Reward:
Secret 4 of 5
After falling through the fake floor the text "Join the zombies..." will appear. In this area head down either on of the tunnels and then shoot the two candles (+).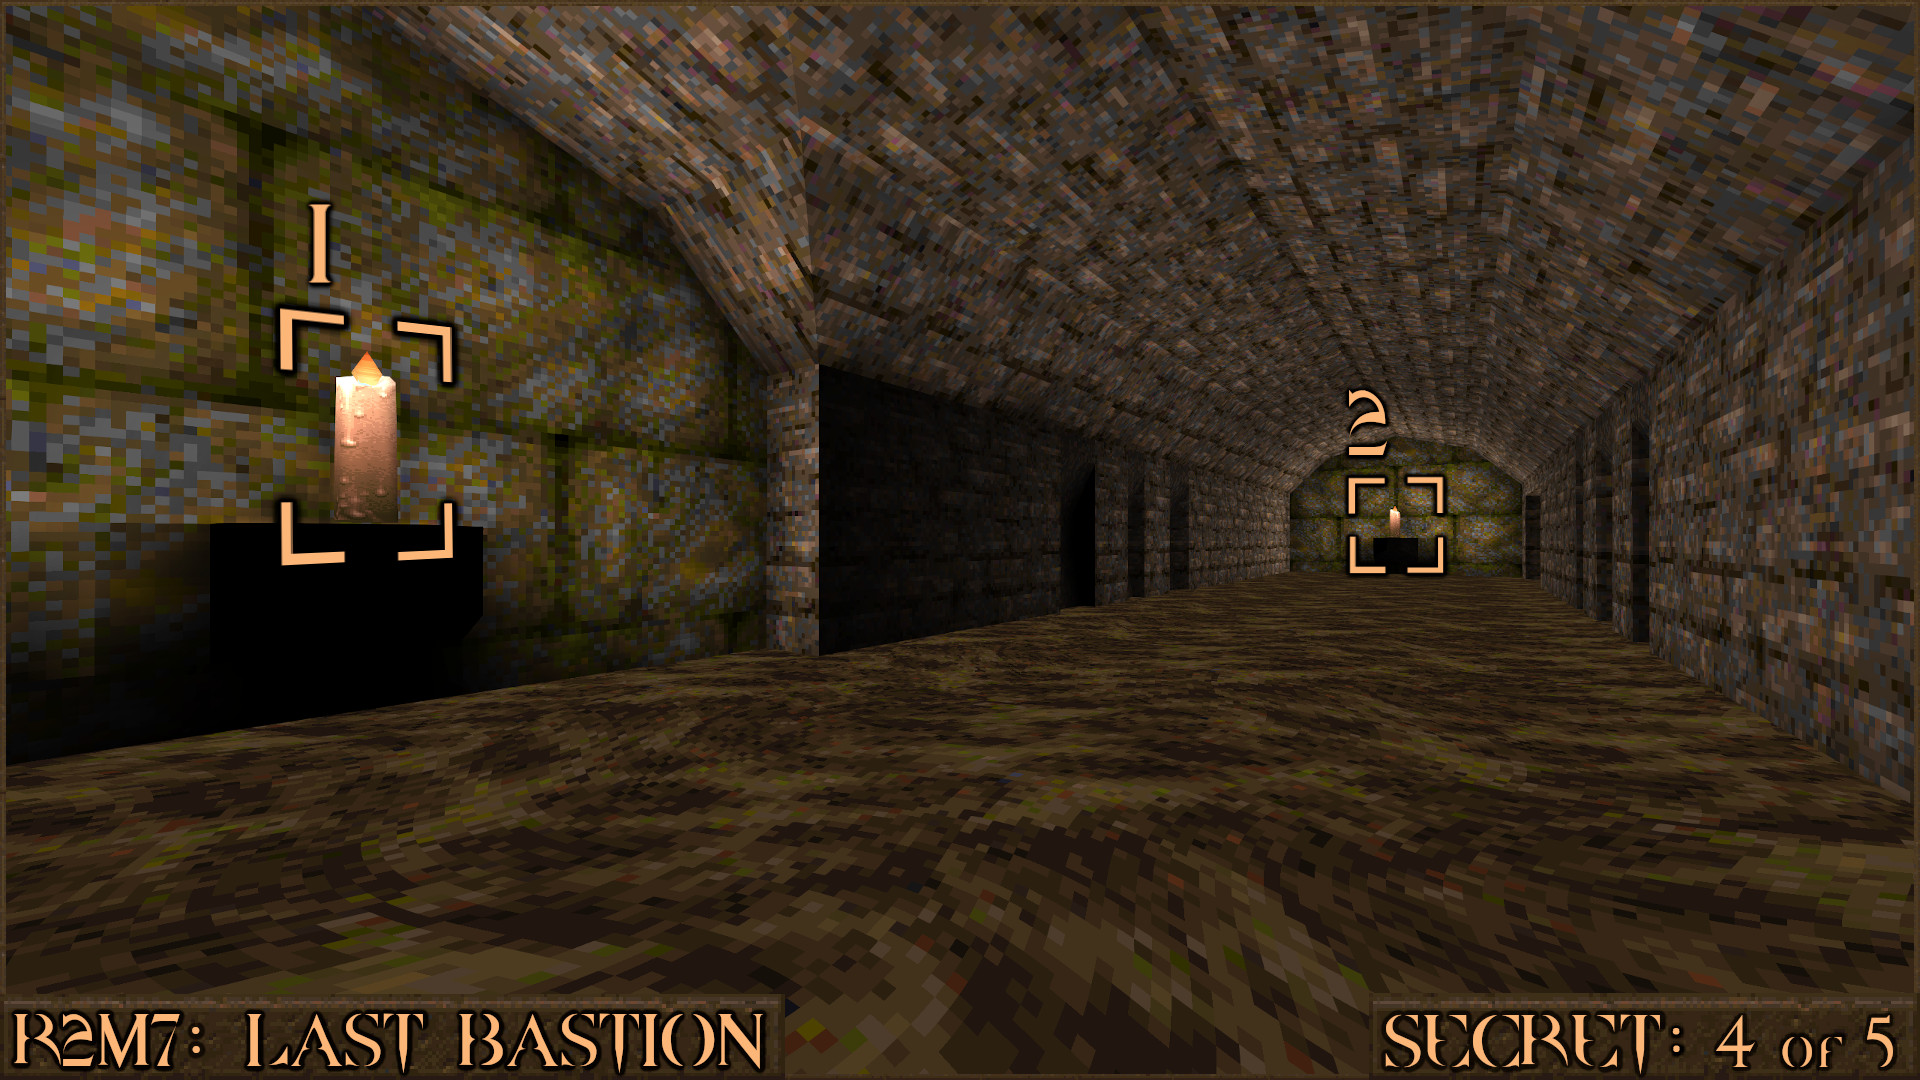
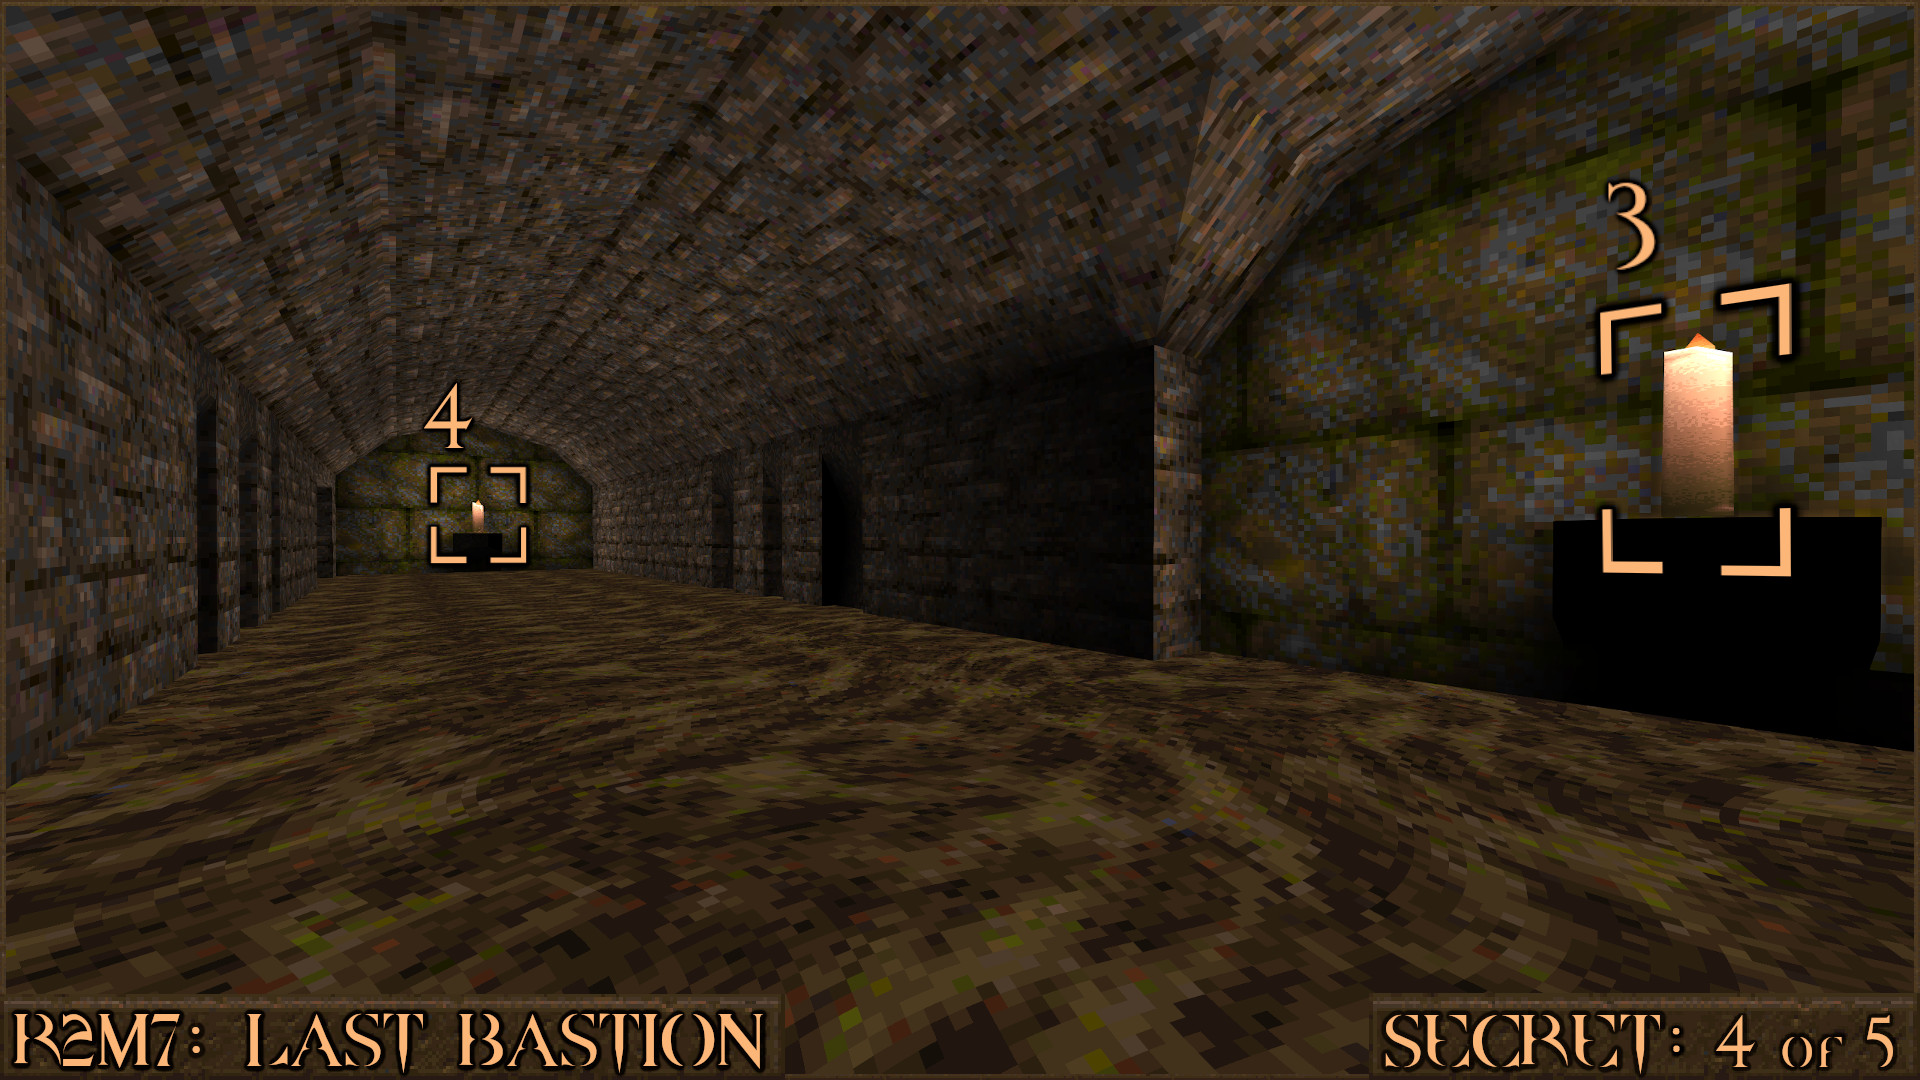
Now head down the other tunnel on the opposite side and shoot two more candles (
+).
Return to the centre of the shallow water area to see a metal wall has moved (
) to reveal the secret.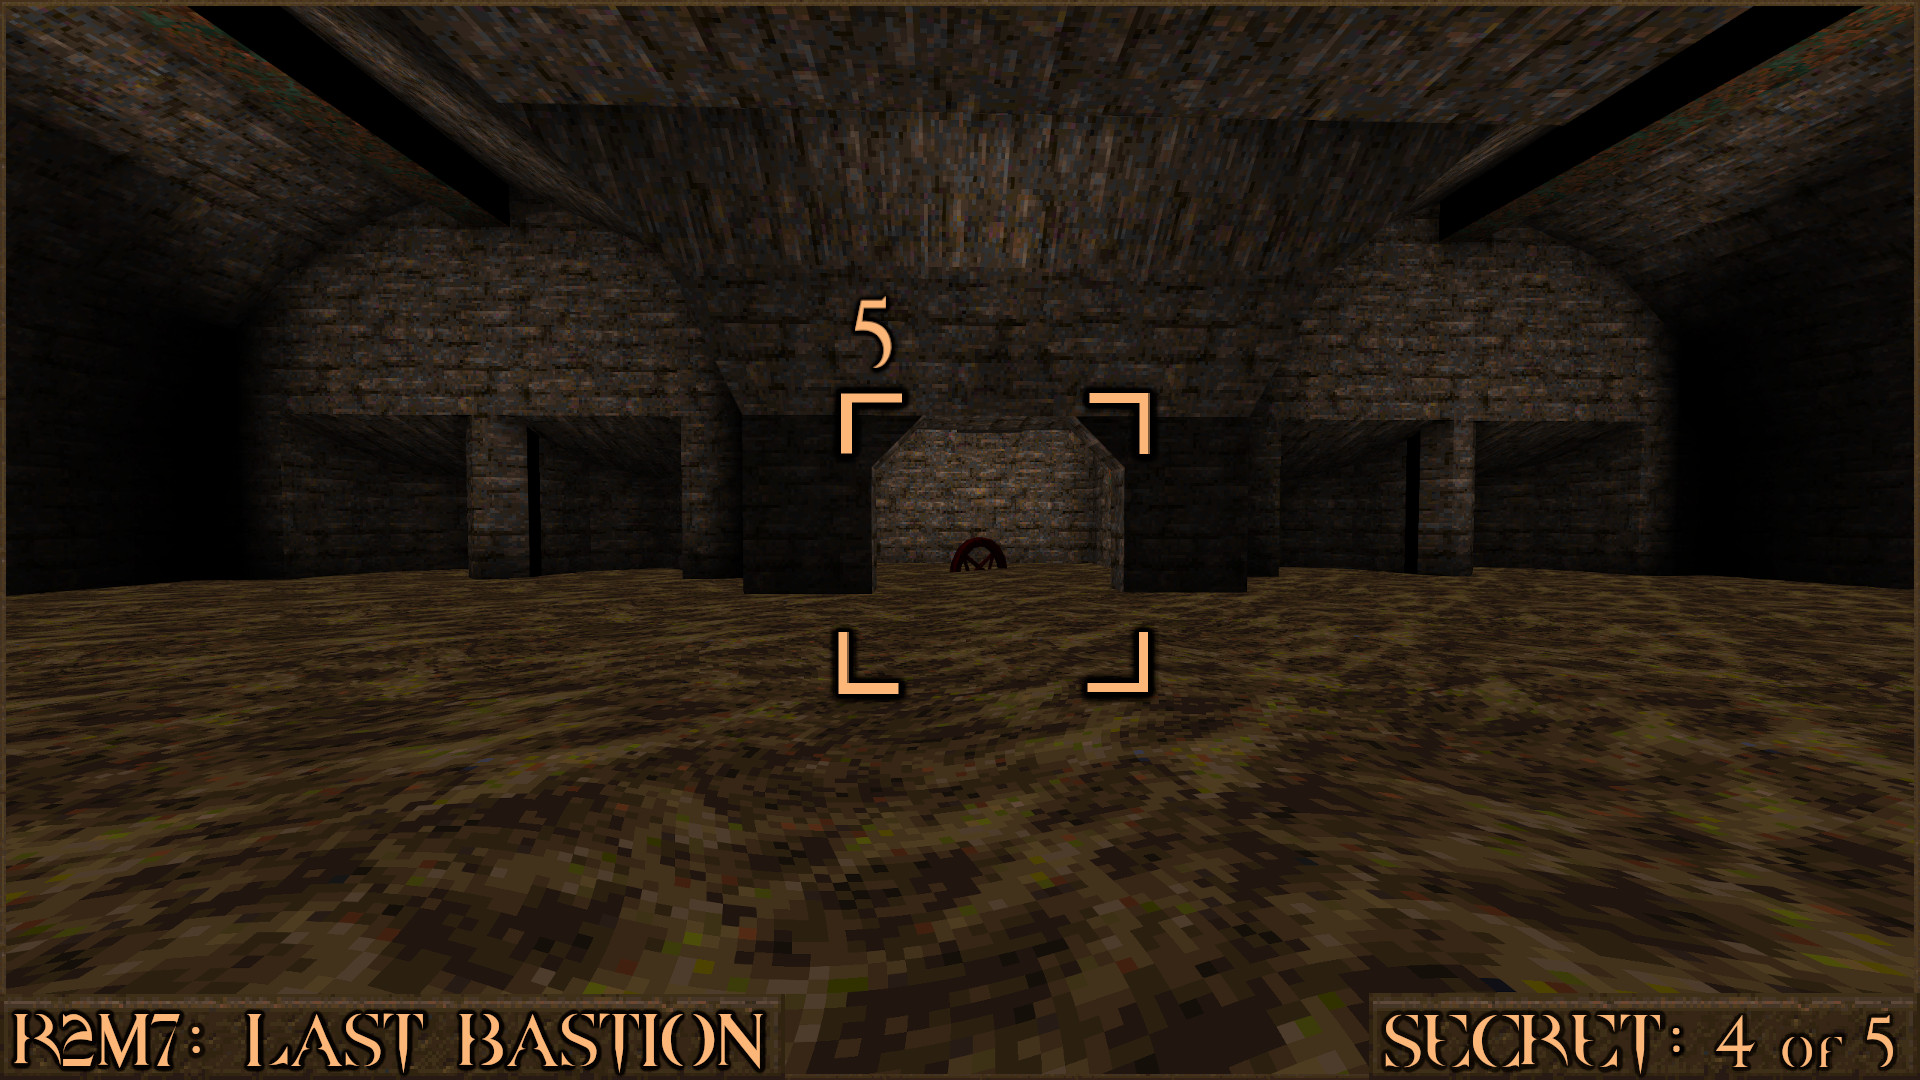
Reward:
Secret 5 of 5
After activating the portcullis and the bridge you will take an elevator up to another room. Look up at the top of the wall and shoot the red switch (). This will make several metal blocks jut out of the opposite wall which allows access to the secret ().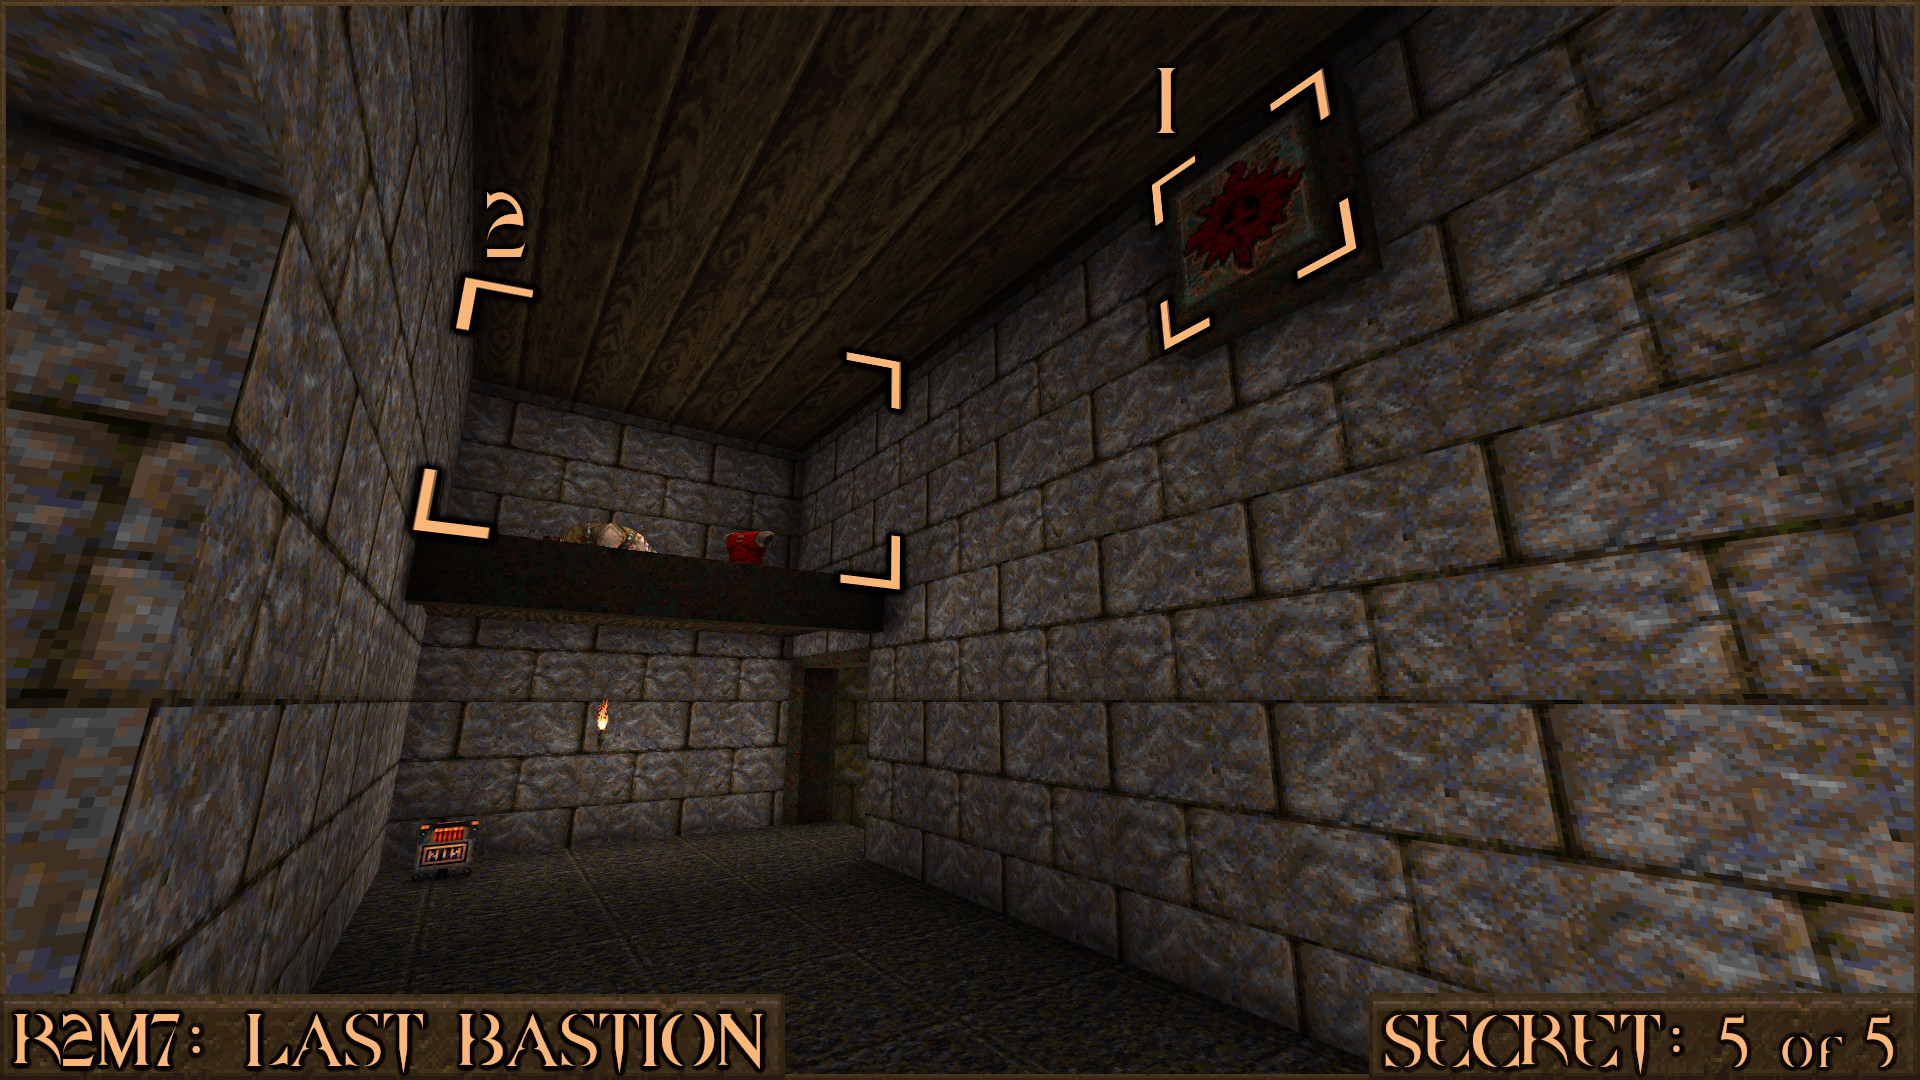
Reward:
R2M8: Source of Evil
NOTE: There are no secrets in this level.
More Quake Secrets Guides

You've explored your way through the 2nd Quake expansion pack but you're ready for more? Try the 3rd expansion pack: Dimension of the Past.
These guides cover the rest of the secrets available in Quake:
https://steamcommunity.com/sharedfiles/filedetails/?id=620893331https://steamcommunity.com/sharedfiles/filedetails/?id=2585506034https://steamcommunity.com/sharedfiles/filedetails/?id=2585507550https://steamcommunity.com/sharedfiles/filedetails/?id=2585508012https://steamcommunity.com/sharedfiles/filedetails/?id=2803162869
There are more secrets to be found in the sequel Quake II:
https://steamcommunity.com/sharedfiles/filedetails/?id=3025659929
More Quake guides
- Quake Soundtrack Solutions★ 5 (822)34k views1.1k ♥15 minUpdated Apr 2, 2020
- How I play Quake in the Current Year (2023 update: Use Ironwail or Quakespasm-Spiked instead of Quakespasm)★ 5 (903)23k views1.3k ♥8 minUpdated Nov 12, 2023
- List of Quake 1 clones on the Steam store★ 5 (457)20k views854 ♥2 minUpdated May 20
- Quake Achievements★ 5 (1k)16k views1.5k ♥29 minUpdated Nov 4, 2025
- Quake Secrets★ 5 (1.1k)14k views1.8k ♥39 minUpdated Feb 23
- Quakespasm: How to activate CHUNKY MODE★ 5 (303)9.6k views357 ♥2 minUpdated Sep 23, 2023



This guide was created by its original author on the Steam Community. Are you the author and want it removed? Request removal.