~ RE6 Everything Guide ~
Game Setup and Foreknowledge before playing anything -
You can skip this whole section if you have played before and/or are at least past the prologue but I do talk a little about records and saved data location.
Before you actually play and get right into the "action", you need to configure a couple things as well as know a few things beforehand. Also, you may or may not want to read the whole guide before playing but mainly look at this whole section and the combat section. Don't worry I will hide spoilers. Although if you are over concerned about spoilers, pick and choose what sections/categories you read and what seems like spoilers and avoid them altogether.
Console players, skip to after the 2 pictures to where it says "Now before you press play know this", just above Saved Data Management. If not on console, please at least read the first 3 sentences.
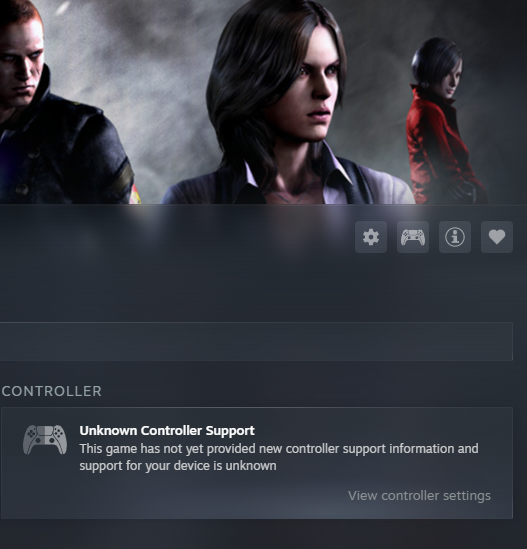
In steam you can find the controller input icon in the top right of the margin by the other 3 icons or under that by clicking controller settings. In big picture mode this is even easier to find but it looks the same. You know you've found it if you see a big controller and some buttons. All you have to do is enable steam input. That's it.
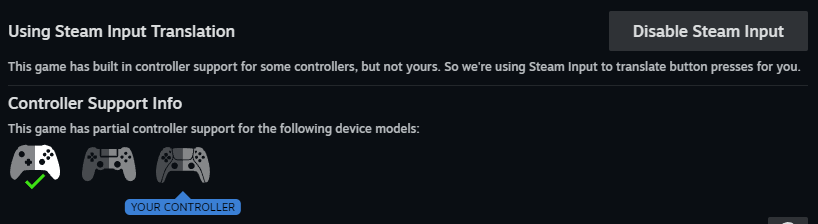
Now this is the important part and do this AFTER what I said previously; when you launch the game (don't launch the game yet but..) make damn sure when the game loads, that you press the keys on your keyboard, shift and tab, together to open steam overlay, click the tiny controller icon, TURN OFF STEAM CONTROLLER INPUT, THEN TURN IT BACK ON. You will only have to do this once unless you delete your saved data or unless something weird happens. Make sure it works before you proceed. If it doesn't work when it wants you to play, just shift + tab and exit game and fix it then try again.
If none of this works, try using a controller input program as a last resort. You can also mess with the config and ini files in the documents folder and/or the game folder. Partial Credit: Данил Данилов
Now before you press play know this, #1: set the brightness higher than it says to like 35 at least because this game is DARK! Now, everything you do and including the prologue, is recorded in your records and you can view it at any time in the main menu under "Records". So, whatever you care about whether that be gun-accuracy% or deaths or kills or time spent walking/running/sprinting/crawling and even your kill methods, times revived or saved from being grabbed, make sure you know what you are trying to avoid before you do it. I suggest this; play the prologue once without caring about that and just try to memorize the very short mission. After that close the game and look at "Saved Data Management".
(CONSOLE WAY) Delete your saved data. You can use usb drive to back up your saved data, or use cloud saving.
You can manage your saved data to basically make a load point that you can go back to to revert anything you had done after the last backup. This works with anything inclusions records and savepoints in chapters.
You could actually just watch a YouTube video of the prologue and then play for real.
Now you can play the prologue "for real" this time. You can delete your saved data and try again as much as you want. Make sure to look at the Records in the main menu to see everything once you get past the prologue. To see if a creature killed you, go to creatures and it will say "Times Defeated" which means how many times that creature defeated YOU--This is NOT simply being put into the downed status but getting downed by anything(even yourself) and THEN them making you die ONCE downed, usually a zombie will eat you on the ground and/or you will see the you died screen and your partner will scream your name.
*Note: ALWAYS be on your guard when cutscenes happen because it might not be a cutscene and you will have to do a quick time event or some button input.
Press play, watch cutscene and be ready. Spam the button it says, you have a lotta time. Move on. Get through the door. You must interact with the magnifying glass icon to proceed. Now at your first enemy encounter (not a cutscene so get ready) you can dual wield the pistols AS SOON AS you get knocked down by holding aim and pressing the button you see by your ammo on the right which is Y on controller or triangle or you get the idea. However it makes no difference because even though you will technically have more ammo the outcome does not change no matter WHAT you do with your gun. Learn the controls here while you have the chance and learn how to shoot and kick. You can also mess with game settings here by pressing.. uh... not the pause button but the other one.. select or the gamebase button? You will know it when your character kneels down and a menu pops up. You can do a kick on a stunned enemy for a takedown kill and it saves bullets, but watch your stamina bar.
An easy way to combine herbs really fast is to simply memorize an input; Y, X, X, A, A. That is the xbox/PC controls so remap it in your head and use as necessary.
You can get some extra kills by staying in one spot and not progressing past the big van after you jump off the balcony. Look in the near distance for those. When the main character says "RUN" run backwards towards the camera, not forward. By that I mean Left stick toward you and away from the screen or press S on keyboard and hold the sprint button which is A on xbox. After that it is quick time events and that's it. When the quick time event wants you to shake the stick or spam wasd, use both sticks not just one, every time.
Before you actually play and get right into the "action", you need to configure a couple things as well as know a few things beforehand. Also, you may or may not want to read the whole guide before playing but mainly look at this whole section and the combat section. Don't worry I will hide spoilers. Although if you are over concerned about spoilers, pick and choose what sections/categories you read and what seems like spoilers and avoid them altogether.
Console players, skip to after the 2 pictures to where it says "Now before you press play know this", just above Saved Data Management. If not on console, please at least read the first 3 sentences.
Controls Support
(PC ONLY) If you are playing on a controller you may have some problems on the first play, even if you use steam input all the time, this game has a bug you must fix now. If you know how or you are a keyboard player you can skip past it below this paragraph and the following 2 pictures to "Now before you press play know this". You may either be stuck using keyboard or your controls will be messed up. First thing you need to do is make sure your steam controller input is working. If you are a steam noob don't worry I'll help you but if not, read just after the 2 pictures.In steam you can find the controller input icon in the top right of the margin by the other 3 icons or under that by clicking controller settings. In big picture mode this is even easier to find but it looks the same. You know you've found it if you see a big controller and some buttons. All you have to do is enable steam input. That's it.
Now this is the important part and do this AFTER what I said previously; when you launch the game (don't launch the game yet but..) make damn sure when the game loads, that you press the keys on your keyboard, shift and tab, together to open steam overlay, click the tiny controller icon, TURN OFF STEAM CONTROLLER INPUT, THEN TURN IT BACK ON. You will only have to do this once unless you delete your saved data or unless something weird happens. Make sure it works before you proceed. If it doesn't work when it wants you to play, just shift + tab and exit game and fix it then try again.
If none of this works, try using a controller input program as a last resort. You can also mess with the config and ini files in the documents folder and/or the game folder. Partial Credit: Данил Данилов
Now before you press play know this, #1: set the brightness higher than it says to like 35 at least because this game is DARK! Now, everything you do and including the prologue, is recorded in your records and you can view it at any time in the main menu under "Records". So, whatever you care about whether that be gun-accuracy% or deaths or kills or time spent walking/running/sprinting/crawling and even your kill methods, times revived or saved from being grabbed, make sure you know what you are trying to avoid before you do it. I suggest this; play the prologue once without caring about that and just try to memorize the very short mission. After that close the game and look at "Saved Data Management".
Saved Data Management
(PC ONLY)On your computer in windows go to OS-Drive:\Program Files (x86) \Steam\userdata\whatever_your_user_id_is\221040. If you aren't on windows and are on another OS just go to wherever the steam program is (just be careful because you can mess your stuff up on other OS's doing it this way and I suggest using steam's built in save management for this if you are or look up how to do this part online). Your saved data location may be different, in which case do a google search on where based on what your exact setup and game version/platform is. You want to delete or backup the files/folders called "remote" and "remotecache.vdf". You can also take these and back them up by copying to your desktop if you want to revert your save file to what it was last time you backed it up by putting the backed up files back where you got them and replacing all files.(CONSOLE WAY) Delete your saved data. You can use usb drive to back up your saved data, or use cloud saving.
You can manage your saved data to basically make a load point that you can go back to to revert anything you had done after the last backup. This works with anything inclusions records and savepoints in chapters.
You could actually just watch a YouTube video of the prologue and then play for real.
Now you can play the prologue "for real" this time. You can delete your saved data and try again as much as you want. Make sure to look at the Records in the main menu to see everything once you get past the prologue. To see if a creature killed you, go to creatures and it will say "Times Defeated" which means how many times that creature defeated YOU--This is NOT simply being put into the downed status but getting downed by anything(even yourself) and THEN them making you die ONCE downed, usually a zombie will eat you on the ground and/or you will see the you died screen and your partner will scream your name.
Quick Brief
Now because I wanna do the settings explanation in the next section, and you need to beat the prologue to do that, I will brief you on the prologue real quick but only stuff relevant to getting started. You can skip this part, its easy and no missables but there is a couple things you may wanna know in terms of gameplay mechanics but I'll reiterate them in another part.*Note: ALWAYS be on your guard when cutscenes happen because it might not be a cutscene and you will have to do a quick time event or some button input.
Press play, watch cutscene and be ready. Spam the button it says, you have a lotta time. Move on. Get through the door. You must interact with the magnifying glass icon to proceed. Now at your first enemy encounter (not a cutscene so get ready) you can dual wield the pistols AS SOON AS you get knocked down by holding aim and pressing the button you see by your ammo on the right which is Y on controller or triangle or you get the idea. However it makes no difference because even though you will technically have more ammo the outcome does not change no matter WHAT you do with your gun. Learn the controls here while you have the chance and learn how to shoot and kick. You can also mess with game settings here by pressing.. uh... not the pause button but the other one.. select or the gamebase button? You will know it when your character kneels down and a menu pops up. You can do a kick on a stunned enemy for a takedown kill and it saves bullets, but watch your stamina bar.
An easy way to combine herbs really fast is to simply memorize an input; Y, X, X, A, A. That is the xbox/PC controls so remap it in your head and use as necessary.
You can get some extra kills by staying in one spot and not progressing past the big van after you jump off the balcony. Look in the near distance for those. When the main character says "RUN" run backwards towards the camera, not forward. By that I mean Left stick toward you and away from the screen or press S on keyboard and hold the sprint button which is A on xbox. After that it is quick time events and that's it. When the quick time event wants you to shake the stick or spam wasd, use both sticks not just one, every time.
Controller on PC Problems continued
If when you launch the game, your controller icons appear as numbers and axes(x and y axis with arrows), your controls don't work right, when you look up you move left or something similar, this is for you.
Turn Steam Controller input off, then on, then off, then on again, just trust me. Boot up the game and do it again, then quit (you don't need to save the game). Back up your saved data. In Windows it’s usually in C:\Program Files (x86)\Steam\userdata\user id\221040. [Linux or other OS users will have to use an alternative method because backups tend to be wonky] Backup somehwere (maybe to desktop), delete current save in 221040 and start a new game in the prologue, turn steam controller input off, then on again, or just on if you left it off prior, quit game, replace from backup. It should be fixed, and if not, repeat the fix ONCE and turn steam input off then on again and test it first before repeating the fix. If after multiple attempts this doesn’t work, you actually have a completely different issue (let me know in the comments). This is probably due to a logging issue as it can happen in a new game or even during normal gameplay. Not sure what causes it but something probably gets corrupt, so when you start a new game with a fresh save it writes new "fresh" logs and will use those logs on next game launch. To put in in laymen's terms I guess. I could be way off but it doesn't matter, that's how you fix it.
If all else fails you can try deleting the game and reinstalling it, that sometimes works.
DON'T DO IT THIS WAY IF ON LINUX OR ANY OTHER OS OTHER THAN WINDOWS (You can still do it in this style, but you must find a different way to backup your data, if you do, go ahead and try this fix.)
Turn Steam Controller input off, then on, then off, then on again, just trust me. Boot up the game and do it again, then quit (you don't need to save the game). Back up your saved data. In Windows it’s usually in C:\Program Files (x86)\Steam\userdata\user id\221040. [Linux or other OS users will have to use an alternative method because backups tend to be wonky] Backup somehwere (maybe to desktop), delete current save in 221040 and start a new game in the prologue, turn steam controller input off, then on again, or just on if you left it off prior, quit game, replace from backup. It should be fixed, and if not, repeat the fix ONCE and turn steam input off then on again and test it first before repeating the fix. If after multiple attempts this doesn’t work, you actually have a completely different issue (let me know in the comments). This is probably due to a logging issue as it can happen in a new game or even during normal gameplay. Not sure what causes it but something probably gets corrupt, so when you start a new game with a fresh save it writes new "fresh" logs and will use those logs on next game launch. To put in in laymen's terms I guess. I could be way off but it doesn't matter, that's how you fix it.
If all else fails you can try deleting the game and reinstalling it, that sometimes works.
DON'T DO IT THIS WAY IF ON LINUX OR ANY OTHER OS OTHER THAN WINDOWS (You can still do it in this style, but you must find a different way to backup your data, if you do, go ahead and try this fix.)
Settings Overview / Options
I'm only going to explain confusing settings.
Adjust all graphical options here.
If you experience performance issues, try matching your display frequency to your frame rate to reduce instability or stuttering.
Changing from Full Screen to Windowed will make it easier to use another program like a trainer or cheat engine.
--------------------------------------------------
DEFAULT
Uses a red dot reticle. Wherever the dot is placed is exactly where the shot will land, regardless of weapon alignment. You can also shoot behind walls or terrain if the reticle is on the target.
[insertimageshere]
Replaces the dot with a laser sight. Shots depend on weapon alignment and collision. You also cannot aim well when playing the end of Chris’s Campaign when playing as Piersbecause his arm has no laser sight and you cannot see where you are shooting.
[insertimageshere]
Changes which shoulder the camera sits on and which hand your character leads with while aiming.
You can manually swap shoulders in-game (R3 on PlayStation).
AUTO
Shoulder swaps automatically when moving left or right in cover.
MANUAL
Shoulder remains fixed unless manually changed.
Note:
Main characters (Leon, Chris, Jake, Ada) default to right shoulder.
Partner characters default to left.
Cutscenes may reset shoulder position.
AUTO
Pressing fire while empty automatically reloads.
MANUAL
Pressing fire while empty does nothing. You must reload manually.
--------------------------------------------------
X AXIS / Y AXIS
Inverts camera movement. Separate settings for aiming and normal movement.
AIMING DIRECTION
Controls how aiming behaves relative to camera position and character direction.
Changes camera height during sprint.
Options: EYE LEVEL or CENTERED.
FOV
Adjust field of view for:
HUD POSITION
Keeps health and ammo fixed in your chosen position regardless of shoulder swap.
LASER SIGHT COLOR
Changes laser color for all weapons, including scopes and throwing arcs.
AUTO ACTION BUTTON
Automatically completes scripted quick time events that happen in certain campaign related scenes. Does not work for regular gameplay.
--------------------------------------------------
BRIGHTNESS
Increase this if the game appears too dark.
Recommended minimum: 30.
--------------------------------------------------
Adjust overall volume levels (0–100%).
CHAT VOLUME
Controls in-game voice communication only.
Does NOT affect Steam, Discord, or other external voice apps.
LANGUAGE
Changes spoken audio language only.
Does not change menu language.
--------------------------------------------------
If your game is linked to resident evil net:
https://game.capcom.com/residentevil/en/six.html
You can upload gameplay data to update your online profile and unlock certain in-game rewards.
--------------------------------------------------
In CONTROLLER BINDINGS, locate:
ACTION / CONFIRM ALT
You can bind this to function as an alternate sprint button (similar to Call of Duty-style sprint setups).
In KEYBOARD BINDINGS, you can change a lor of different hotkeys and requires some experimentation
Graphics Settings
Adjust all graphical options here.
If you experience performance issues, try matching your display frequency to your frame rate to reduce instability or stuttering.
Changing from Full Screen to Windowed will make it easier to use another program like a trainer or cheat engine.
--------------------------------------------------
Controls
AIMING RETICLE
DEFAULT
Uses a red dot reticle. Wherever the dot is placed is exactly where the shot will land, regardless of weapon alignment. You can also shoot behind walls or terrain if the reticle is on the target.
[insertimageshere]
- Easy to use
- Less realistic
- Reticle moves the longer you aim
- Reset reticle by un-aiming and re-aiming
Replaces the dot with a laser sight. Shots depend on weapon alignment and collision. You also cannot aim well when playing the end of Chris’s Campaign when playing as Piersbecause his arm has no laser sight and you cannot see where you are shooting.
[insertimageshere]
- More realistic
- Gun must physically line up with the target
- Close enemies can alter shot placement
- Similar to RE4 and RE5 aiming
DOMINANT HAND
Changes which shoulder the camera sits on and which hand your character leads with while aiming.
You can manually swap shoulders in-game (R3 on PlayStation).
AUTO
Shoulder swaps automatically when moving left or right in cover.
MANUAL
Shoulder remains fixed unless manually changed.
Note:
Main characters (Leon, Chris, Jake, Ada) default to right shoulder.
Partner characters default to left.
Cutscenes may reset shoulder position.
RELOAD
AUTO
Pressing fire while empty automatically reloads.
MANUAL
Pressing fire while empty does nothing. You must reload manually.
--------------------------------------------------
Camera
X AXIS / Y AXIS
Inverts camera movement. Separate settings for aiming and normal movement.
AIMING DIRECTION
Controls how aiming behaves relative to camera position and character direction.
- CAMERA-based: Character snaps to where the camera faces
- PLAYER-based: Camera snaps to the direction the character is facing
Changes camera height during sprint.
Options: EYE LEVEL or CENTERED.
FOV
Adjust field of view for:
- Normal gameplay
- Aiming
- Camera distance from the character’s shoulder
Game Settings
HUD POSITION
Keeps health and ammo fixed in your chosen position regardless of shoulder swap.
LASER SIGHT COLOR
Changes laser color for all weapons, including scopes and throwing arcs.
AUTO ACTION BUTTON
Automatically completes scripted quick time events that happen in certain campaign related scenes. Does not work for regular gameplay.
--------------------------------------------------
Display
BRIGHTNESS
Increase this if the game appears too dark.
Recommended minimum: 30.
--------------------------------------------------
Audio
Adjust overall volume levels (0–100%).
CHAT VOLUME
Controls in-game voice communication only.
Does NOT affect Steam, Discord, or other external voice apps.
LANGUAGE
Changes spoken audio language only.
Does not change menu language.
--------------------------------------------------
Auto Data Upload
If your game is linked to resident evil net:
https://game.capcom.com/residentevil/en/six.html
You can upload gameplay data to update your online profile and unlock certain in-game rewards.
--------------------------------------------------
Alternate Confirm Button
In CONTROLLER BINDINGS, locate:
ACTION / CONFIRM ALT
You can bind this to function as an alternate sprint button (similar to Call of Duty-style sprint setups).
In KEYBOARD BINDINGS, you can change a lor of different hotkeys and requires some experimentation
Resident Evil .net
RE.net was changed to be incorporated with the RE portal so don't use re.net anymore. Use https://game.capcom.com/residentevil/six/en/windows/chapter.html
To link it with you game you need to create or login to the portal and sync it with whatever platform you are playing on. Click here, https://game.capcom.com/residentevil/en/renet.html and go to the link page for the game.
With RE6 you have to go to settings in game, aka "options" in the main menu, choose auto data upload, select yes or ok. It helps to have the portal open at the same time when you do this as well as being online in steam. It might take some messing with to get it to work. If you backup/reload your saved data or there is a change you may have to do it again. Once you do that, go back to the portal in said game and choose sync.
You can get costumes unlocked in game by going here, https://game.capcom.com/residentevil/six/en/windows/gameitems.html
You can use points gotten from other games to unlock here if you want.
If this is unavailable and you want the dlc costumes, go to the unlockables section of this guide for help.
To link it with you game you need to create or login to the portal and sync it with whatever platform you are playing on. Click here, https://game.capcom.com/residentevil/en/renet.html and go to the link page for the game.
With RE6 you have to go to settings in game, aka "options" in the main menu, choose auto data upload, select yes or ok. It helps to have the portal open at the same time when you do this as well as being online in steam. It might take some messing with to get it to work. If you backup/reload your saved data or there is a change you may have to do it again. Once you do that, go back to the portal in said game and choose sync.
You can get costumes unlocked in game by going here, https://game.capcom.com/residentevil/six/en/windows/gameitems.html
You can use points gotten from other games to unlock here if you want.
If this is unavailable and you want the dlc costumes, go to the unlockables section of this guide for help.
Combat and Movement breakdown
- COMBAT -
TWO-HIT MELEE COMBO
Pressing fire without aiming performs a melee attack. Pressing it again within the combo window triggers a second strike that can put an enemy into a stun. The first hit uses no stamina and the second hit consumes a stamina bar. You can follow up with a standard melee action.
CHARGING ATTACK
While sprinting, pressing fire performs a charge attack. Male characters do a shoulder charge, female characters do a jumping kick. Both attacks deal moderate damage and can set up a stun. Consumes a bar of stamina.
SLIDE
Pressing aim while sprinting causes the player to slide on their back. The slide can stun an enemy and can stack stun furthering their level of stun with each slide. Firing during the slide allows dodge rolls to start immediately. Reloading is possible at the start of the slide. The move consumes one stamina bar.
RELOAD CANCEL
Slide immediately after or even before reloading to cancel the animation. Allows sliding when out of stamina or after being revived.
SLIDE SHOT
Fire while sliding to attack and immediately roll left or right afterward.
KNIFE SLIDE
Slide into an enemy and knife them. Proper timing can open J’avo for a Frontal Takedown.
QUICK-SHOT
Pressing aim and fire at the same time makes the character shoot the nearest enemy automatically at close-close/mid range only. Quick-shot can stun the target and also reset the stun timer. Some weapons, like grenade launchers, do not have quick-shot. Uses one stamina bar. Some weapons in the game have special quick shots that you can chain together like Helena's shotgun and Jake's Martial Arts.
FAST MELEE
Tap backwards on your movement while firing to stab with the knife. Once the first stab lands, hold aim and fire while continuing to tap backwards to repeat quickly.
MELEE LUNGE
Tap forward while firing to lunge with the knife. Can set up a Rear Takedown and consumes one stamina bar.
BEHIND ATTACK
Performing a melee while an enemy is behind the player triggers an over-the-shoulder attack: elbow bash for males, back kick for females. The bash causes a hard stun, the kick flips the enemy to land facing the player. Consumes a stamina bar. A good way to do this is to turn your back to an enemy while the camera is facing the enemy.
COUNTERS
When a red prompt appears during an enemy attack, pressing fire performs a counter. The counter timing varies depending on enemy type, attack, held weapon, and player position. See the Counters section of this guide. There is actually a video showing all counters, here: https://youtu.be/B-BntXy0USY?si=ZvmUI76EE27hmuKt , and here is another in case of video deletion: https://youtu.be/J6LTZbvHvso?si=nDTJBFFI-1MuvONW
STANDARD MELEE
A basic attack that you can use on a stunned enemy when a red prompt appears that hits and launches all enemies nearby in an AOE style move. Certain frames give priority over enemy attacks.
FRONTAL TAKEDOWN
Similar to the Standard Melee but happens when the enemy is double stunned. Launches an enemy forward, usually killing them and possibly flinching others. The player is fully invulnerable during the animation.
ENVIRONMENT/WEAPON TAKEDOWN
Just like the Frontal Takedown ^^ except the enemy can be any level of stunned. If the enemy is close to either a wall, ledge, railing, or they are holding a "special" weapon, a unique takedown will happen.
REAR TAKEDOWN
Strikes an enemy from behind when the enemy is double stunned, sometimes knocking over additional enemies. Full invulnerability applies.
COUP DE GRÂCE
A powerful melee attack that generally kills most enemies when said enemy is triple stunned. The player is fully invulnerable during the animation. See glitches and tricks for a powerful use for this.
ENEMY STUNS
FLINCH
Enemy flinches, interrupting their action. Most enemies will attack immediately after. Can sometimes be hit by a Standard melee.
STUN
Enemy flinches for longer, and can be hit by a Standard Melee.
DOUBLE STUN
Enemy is staggered and can be hit with a Frontal or Rear Takedown.
TRIPLE STUN
Enemy is concussed and can be finished with a Coup De Grâce or Rear Takedown.
Very *stunning*. (cough)
KNOCKDOWNS
All knockdowns make enemies open to a follow up.HEADSHOT KNOCKDOWN
Shooting a running enemy in the head knocks them over, usually backward.
KNEE KNOCKDOWN
Shooting a running enemy in the knee knocks them over, usually forward.
QUICK-SHOT KNOCKDOWN
Quick-shotting a running enemy can knock them down forward or backward.
- MOVEMENT/OTHER -
COVER
You can take cover behind a low barrier by aiming and pressing the sprint button. You will stay as long as you keep holding the aim button. You can take cover behind walls by aiming close to it while facing it and pushing towards it. You can pop out from behind cover by moving toward the edge of the surface and holding the aim button.
SLIDE
Pressing aim while sprinting triggers a backslide. Can be used defensively or to reach low spaces. Slide can second stage or heavy stun enemies. Firing or reloading is possible during the slide. Uses one stamina bar. You can use slide as a faster alternative to jumping off a ledge in some cases.
SLIDING WITHOUT CONSUMING STAMINA
Slide and reload cancel before hitting the ground. No stamina is used, but you can’t dodge or control direction mid-slide, except for a reverse 180. RELOAD CANCEL - Slide immediately after or even before reloading to cancel the animation.
180 TURN WHILE SLIDING
Move backward while sliding and hold aim to flip direction. Extra distance can help evade enemy attacks.
DODGING/ROLLING
Pressing a direction plus sprint while aiming causes a dodge. Sprinting without direction crouches the player and gives them i-frames for a moment. While prone, pressing a direction rolls in that direction. You stay on your back if you hold the aim button, then slight analog stick input moves the character instead of rolling, and full quick stick input makes them roll but only left, right, or back. When specific melee weapons are held the movements change with most of them having the back dodge be an attack, and the side dodges not be a roll. When using Jake's Martial Arts, you can dodge while sprinting. - see COBRA STRIKE
ROLLING INTO COVER
While prone, face a coverable object and move toward it to automatically go into cover. You can also Slide into cover.
FAST STAMINA RECOVERY
Stamina recovers faster while prone or in cover. Jake’s Hand-to-Hand targeting animation also benefits from this.
AUTOMATIC HERB MIXING
Herbs automatically combine: two green herbs make three tablets, three green makes six, one green and one red make six. Red-green mixes happen first. Or if no red herb is held, it will combine 1 green and 2or1 green. If tablet count is max (12), no herbs are mixed unless the combination exceeds the limit.
STAGGER RECOVERY
Holding the sprint input while being knocked away lets you recover your stance. Sometimes it’s better to remain down depending on the situation.
180 TURN
Move backward and press sprint to perform a quick 180 turn.
AIM FACING
Rotate the camera and then press aim to face the intended direction. Helps ensure correct positioning for melee attacks. Only works if your settings are correct.
COUNTER AIMING
Aim at an enemy about to attack, draw your weapon, then holster it to guarantee a counter by facing the enemy.
EXTRA MODES ONLY
You can taunt with the same button used for navigation from the campaign. Taunting will make your stamina replenish very quickly. You can also use this button while sprinting to turn left and right much faster.
Counters
WIP, Check counters in combat breakdown for a useful video.
When you initiate a counter, don’t try to predict when the proper time is to press the button. While you can use the predictive method to help you, don’t rely on it. Instead, watch for the button prompt at the bottom of the screen and only press it when it is being displayed. You can use this to learn the true proper time to counter.
To practice counters, it is recommended to boot up a mercenaries match. Another good way to practice if you have a friend, is to use survivors mode and practice countering on the regular enemies in the area. Of course you can practice anywhere, and the campaign is also a good place to do so.
In Mercenaries, Power Counter is very good.
When countering, you must be facing the enemy. You can do this quickly by aiming at the enemy for a short duration (like less than a second), by tapping the aim button. That’s why the camera settings are important and can change this depending on how you have it set. You want it to aim where the camera is pointing, not aim where the player is looking.
When you initiate a counter, don’t try to predict when the proper time is to press the button. While you can use the predictive method to help you, don’t rely on it. Instead, watch for the button prompt at the bottom of the screen and only press it when it is being displayed. You can use this to learn the true proper time to counter.
To practice counters, it is recommended to boot up a mercenaries match. Another good way to practice if you have a friend, is to use survivors mode and practice countering on the regular enemies in the area. Of course you can practice anywhere, and the campaign is also a good place to do so.
In Mercenaries, Power Counter is very good.
When countering, you must be facing the enemy. You can do this quickly by aiming at the enemy for a short duration (like less than a second), by tapping the aim button. That’s why the camera settings are important and can change this depending on how you have it set. You want it to aim where the camera is pointing, not aim where the player is looking.
Jake's Martial Arts
STANDARD MELEE
Jake’s basic two-hit combo followed by a context. Unsafe compared to his hand-to-hand attacks, slower, and leaves him a bigger target. Best avoided in most situations.
FLYING KNEE
Jake’s version of the shoulder charge. Sprint and press fire to perform. Sets most fodder enemies up for a light stun. Works well with hand-to-hand: knee cannon an enemy, then follow with a quick jab to set up a hard stun.
FRONTAL TAKEDOWN
Basic frontal takedown with decent AoE. Not the fastest, but reliable.
REAR TAKEDOWN
Slower than the frontal takedown but has good AoE. In Mercenaries, prefer frontal takedown for faster animations.
COUP DE GRÂCE
Jake’s version of Wesker’s Windfall. Comes out fast and has a small AoE cone in front, letting you catch multiple enemies if timed right.
COUNTER
Fast and reliable. Makes Jake a smaller target and lines him up with the enemy, reducing the chance to miss.
COBRA STRIKE
BEST MOVEWhen hand-to-hand stance is charged via holding the quick shot buttons. Locks onto the nearest enemy in front; targets can be changed with movement inputs via stance dodge. Running toward the enemy can be canceled by releasing aim or using a stance dodge. No stamina is consumed no matter what. Combos well with hand-to-hand quickshots to break Napad armor. Can launch enemies into the air or away, enabling follow-ups with jumping strikes. Avoid using quickshots on zombies unless behind or to the side. When the strike hits the target and it is the regular attack (not the backflip kick) while still holding the aim button you can immediately dodge left, right, or back(best), and then immediately hold attack button again (while still holding the aim button the entire time and not letting go until the enemy is dead) to instantly charge the attack and let it go an the enemy that is targeted and is infinitely spammable because of the stamina cost being zero.
STANCE DODGES
Used to reposition during Cobra Strike or hand-to-hand combos. Cancels running or attacking animations while maintaining control. Simply dodge left or right. Have to be aiming the whole time.
STANCE DODGE CANCELLING
Cancel the Cobra Strike or other stance animations to regain mobility or reset targeting. Do another action to break out.
CHARGE
From Cobra Strike stance, you can do a special sprint toward enemies ending with a strike. It is essentially a lock on. You'll know if you try it. Hold quick shot buttons together with martial arts. This move is basically the cobra strike but long range, about 15-20 meters. The attack changes based on enemy vertical positioning into a backflip. It is the same as the cobra strike, just long range. Just keep aiming the whole time.
CHARGE DODGES
Dodges performed during charge to avoid attacks while maintaining setup for Cobra Strike. Just press left or right during the attack long range.
HAND-TO-HAND THREE HIT COMBO
Quick series of jabs while holding aim. First hit flinches or hard stuns a light-stunned enemy. Second hit applies light stun. Third hit can add another light or hard stun if the enemy was already light-stunned. Alternately, do first two jabs, pause, then first jab again to save stamina. Can follow up Knee Cannon for a fast hard stun.
HAND-TO-HAND DODGES
Dodges executed while in hand-to-hand stance (or aiming his fists). Useful for repositioning and stamina management.
RISING KICK
Performed when targeting an elevated enemy or downed enemy during charge stance or quickshot. Wide AoE in front, launches multiple enemies. Consumes one stamina bar. Long recovery frames; avoid using on prone zombies unless behind or to the sides.
QUICKSHOT COMBO
Chaining hand-to-hand quickshots: Panther Fang → Ghost Butterfly → Jumping Strike or leg sweep. First quickshot targets nearest enemy. Proper timing lets you combo a single target fully or strike multiple enemies nearby. Mix with stance dodges and Cobra Strike to manage stamina.
JUMPING STRIKE
Activated on prone enemies or armored J’avo after a drop kick. Performs a downward chop; headshots deal most damage. Long recovery frames make it situational.
THROW
Pick up a downed enemy and throw toward another. Can knock down multiple enemies, including triggering chain reactions like Telo-Eksplozija explosions. Long animation, can be used defensively.
PRONE KICK
Used after sliding into an enemy to stun or reset stun on Strelats. Can chain kicks using shoulder switching to maintain angle and continue stunlocking. Very effective when timed correctly.
Melee Damage
Melee Damage Overview
All melee attacks in RE6 have been normalized, meaning unless specified, all characters do the same amount of damage.
Light Melees
One-Handed Weapon (No Stun)
Damage: 100
Light Stun
Damage: 200
Damage (Assault Rifle RN melees): 400
Two-Handed Weapons
Normal hits: 120
Bayonet: 200
Dash Attack
Male: 250
Female: 200
Back Melee
Male: 150
Female: 200
Slide
Damage: 50
Collateral Damage
Damage: 300 (when hitting one enemy with another)
Zombie's Weapon
Damage: 1,000 (every weapon type)
Heavy Stun
Head Melee (Front)
Helena, Sherry, Jake: 600
Leon, Piers, Ada, Agent: 1,000
Chris: 1,200 (1,600 to zombies)
Head Melee (Back)
Leon, Sherry, Ada: 1,000
Piers, Jake: 1,500
Helena, Chris, Agent: 2,000
Combat Knife: 3,000
Coup de Grace
Damage: 800
Head Slam
Damage: 1,000
Ground Melees
Stomp: 400
Two-Handed Weapon: 500
Stab (Knife/Bayonet): 700
Stun Rod
First Hit: 500
Second Hit: 100
Counters
Universal: 400 (standard counters)
Leaping Zombies: 500, 100% crit
Leaping Zombie Dogs: 3,000, 100% crit
Zombie’s Weapon Counter: 1,000/400 (target/collateral)
Impaling J’avo with Their Own Sword: 700
Combat Knife: 550 (static, unaffected by skills)
Jake's Hand-to-Hand Moves
Left Hook: 100
Right Hook: 100
Spinning Elbow: 100
Thrust Palm: 250
Tiger Uppercut: 200
Cobra Strike: 250
Sweep: 300
Ground Strike: 400
Leg Toss: 500
Backflip: 400
All melee attacks in RE6 have been normalized, meaning unless specified, all characters do the same amount of damage.
Light Melees
One-Handed Weapon (No Stun)
Damage: 100
Light Stun
Damage: 200
Damage (Assault Rifle RN melees): 400
Two-Handed Weapons
Normal hits: 120
Bayonet: 200
Dash Attack
Male: 250
Female: 200
Back Melee
Male: 150
Female: 200
Slide
Damage: 50
Collateral Damage
Damage: 300 (when hitting one enemy with another)
Zombie's Weapon
Damage: 1,000 (every weapon type)
Heavy Stun
Head Melee (Front)
Helena, Sherry, Jake: 600
Leon, Piers, Ada, Agent: 1,000
Chris: 1,200 (1,600 to zombies)
Head Melee (Back)
Leon, Sherry, Ada: 1,000
Piers, Jake: 1,500
Helena, Chris, Agent: 2,000
Combat Knife: 3,000
Coup de Grace
Damage: 800
Head Slam
Damage: 1,000
Ground Melees
Stomp: 400
Two-Handed Weapon: 500
Stab (Knife/Bayonet): 700
Stun Rod
First Hit: 500
Second Hit: 100
Counters
Universal: 400 (standard counters)
Leaping Zombies: 500, 100% crit
Leaping Zombie Dogs: 3,000, 100% crit
Zombie’s Weapon Counter: 1,000/400 (target/collateral)
Impaling J’avo with Their Own Sword: 700
Combat Knife: 550 (static, unaffected by skills)
Jake's Hand-to-Hand Moves
Left Hook: 100
Right Hook: 100
Spinning Elbow: 100
Thrust Palm: 250
Tiger Uppercut: 200
Cobra Strike: 250
Sweep: 300
Ground Strike: 400
Leg Toss: 500
Backflip: 400
Piers in Chapter 5-3_5-4
Piers Chapter 5 Arm
Warning! Major SpoilersAt the ending boss fight of Chapter 5 in Chris/Piers Campaign, when Piers injects himself with the virus after losing his arm in order to save Chris from HAOS, Piers's abilities and status changes and have some caveats.Using this "cool new weapon" can be a little bit confusing.
This weapon acts as a gun and a melee weapon, however you can't use it to melee because Piers's stamina will permanently be at zero and you will only do the No Stamina Attack which is useless at this point.
Instead you can use it to attack HAOS'sweak point when it is vulnerable. Chris is also capable of damaging HAOS's weak point in the same way with his knife.
As Piers, you do not need to and cannot reload with this "weapon". Instead aiming and shooting this weapon will use a 3rd of a health block for every shot (18 shots). This attack can damage the blisters on HAOS.
Aiming and holding the fire button without letting go will charge the weapon and letting it go will unleash a big blast of lightning and will stunHAOS and is really only indented to break the boss cocoon to open up for a melee attack. This attack will not destroy weak points. Does not use any ammo or health and is free to spam.
Regardless of how you take damage, Piers can regenerate his lost health over time.
Partner control mechanics
When playing alone in a singeplayer campaign, you can tell your partner what to do.
By holding the partner button(circle on PlayStation) and then pressing one of the prompts, you can do various things such as send them at enemies, make them focus on a specific enemy, call them back to you, tell them to hold their position, make them cover you from behind, thank them, or compliment them. You can do all of these in multiplayer but it is up to your partner to listen to you.
If you aim at an enemy and press the partner button, you can send your partner at a specific enemy, marking the enemy with a red dot. You can also use this to see the enemy through walls temporarily.
By holding the partner button(circle on PlayStation) and then pressing one of the prompts, you can do various things such as send them at enemies, make them focus on a specific enemy, call them back to you, tell them to hold their position, make them cover you from behind, thank them, or compliment them. You can do all of these in multiplayer but it is up to your partner to listen to you.
If you aim at an enemy and press the partner button, you can send your partner at a specific enemy, marking the enemy with a red dot. You can also use this to see the enemy through walls temporarily.
Quick Time Events
Enemy specifics
Some enemies have specific qte interactions separate from counters (counters always being “the attack button”)For instance, if you stun the Strelats enemy that shoots spikes and gas at you, you can enter a melee context and you will have to input 3 buttons in a row, usually being the same 3 every time but not always.
Breakouts
You will occasionally be grabbed by enemies. J’avo are much less common to be grabbed by and Zombies grab you almost all the time. When grabbed you will have to do one of three things. Movement stick, spam button, and/or a narrow button press.Movement stick - When grabbed or needing to open a valve or something similar, rotate both sticks when on controller, not just one, and the direction does not matter and you can even rotate one clockwise and the other counter-clockwise. This is the most standard one. Most Urban Chaos enemies grab you this way. Dogs always grab you this way.
Button spam - When grabbed, you will have to spam the button shown, usually A (xbox). I recommend using both thumbs. Most Mining the Depths enemies grab you this way except for dogs.
Narrow button input - Usually triggered if you take too long breaking out of any grab. You need to time the button press (usually right trigger on xbox and r2 on ps) and hit it while the marker is in the blue area on the wheel.
There is one QTE in the end of Jake’s Campaign that has a hidden trick. Sometimes when 1v1ing Ustanak barefisted in the final fight on the narrow platform when your weapons are gone, he will pick you up and throw you behind him; after which he will charge at you. You have two options. Either jump out of the way, or (and this is the one I’m talking about) you can counter him with the attack button. For whatever reason, if you press the attack button too soon it doesn’t fail or penalize you, meaning you can just spam attack really fast and get the counter every single time.
Exact Weapon Statistics
Disclaimer: These numbers are not exact but are extremely close. If anyone wants to correct feel free to comment.
Nine-Oh-Nine (909)
Ammo: 9mm
Characters: Chris, Jake, Agent
Clip: 15
Damage: 150
Crit: 12.5%
Picador
Ammo: 9mm
Characters: Helena, Carla
Clip: 16
Damage: 160
Crit: 6%
Wing Shooter
Ammo: 9mm
Characters: Leon
Alt Fire: Dual-Wield
Clip: 18 / 36
Damage: 120
Crit: 8%
Triple Shot
Ammo: 9mm
Characters: Sherry
Alt Fire: 3-Round Burst
Clip: 20
Damage: 130
Crit: 8%
Ammo Box 50
Ammo: 9mm
Characters: Ada, Helena
Clip: 50
Damage: 90
Crit: 5%
Elephant Killer
Ammo: .500 Magnum
Characters: Jake, Sherry
Clip: 5
Damage: 1600
Crit: 12.5%
Lightning Hawk
Ammo: .50 AE Magnum
Characters: Leon, Helena, Chris, Sherry
Clip: 7
Damage: 1200
Crit: 8%
Shotgun
Ammo: 12-Gauge
Characters: Leon, Helena, Jake, Sherry
Clip: 8
Damage: 140x7 or 980 (Far) / 180x7 or 1,260 (Close)
Hydra
Ammo: 10-Gauge
Characters: Helena
Clip: 3
Damage: 120x7 or 840 (Far) / 170x7 or 1,190 (Close)
Assault Shotgun
Ammo: 12-Gauge
Characters: Chris, Piers, Ada
Clip: 7
Damage: 150x7 or 1050 (Far) / 170x7 or 1,190 (Close)
MP-AF
Ammo: 9mm
Characters: Piers, Ada
Alt Fire: Full Auto
Clip: 30
Damage: 100
Crit: 6%
Assault Rifle RN
Ammo: 5.56mm
Characters: Leon, Helena
Clip: 30
Damage: 210
Crit: 2.5%
Assault Rifle (Special Tactics)
Ammo: 5.56mm
Characters: Chris
Clip: 30
Damage: 200
Crit: 6%
Bear Commander
Ammo: 5.56mm / 40mm Explosive
Characters: Jake, Sherry, Ada
Alt Fire: Explosive Rounds
Clip: 30
Damage: 190
Crit: 4%
Explosive rounds: 1000
Sniper Rifle
Ammo: 7.62mm
Characters: Jake, Sherry, Ada
Clip: 6
Damage: 700
Crit: 100%
Semi-Auto Sniper Rifle
Ammo: 7.62mm
Characters: Leon, Helena, Chris, Jake, Agent
Clip: 5
Damage: 600
Crit: 75%
Anti-Materiel Rifle
Ammo: AMR Ammo
Characters: Piers
Alt Fire: Thermal Scope
Clip: 10
Damage: 1000
Crit: 100%
Grenade Launcher
Ammo: 40mm (Explosive / Acid / Nitrogen)
Characters: Chris, Piers, Leon, Helena, Jake, Carla
Clip: 6
Damage (Explosive): 1000 + 500 Explosion
Damage (Acid): 250 + 200 Explosion
Damage (Nitrogen): 300
Rocket Launcher
Characters: Leon, Chris
Damage: 30000 Base-dmg + 2000 Explosion-dmg
Crossbow
Ammo: Arrows / Pipe Bomb Arrows
Characters: Ada
Clip: 1
Damage (Normal): 550
Damage (Pipe Impact): 150
Damage (Pipe Explosion): 1000 + 500 Explosion
Crit: 100%
Hand Grenade
Damage: 1200 + 600 Explosion
Incendiary Grenade
Damage: 800 + 400 Explosion
Flash Grenade
Damage: 1 (or 2)
Remote Bomb
Damage: 1600 Base-dmg + 800 Explosion-dmg
Survival Knife
Characters: Leon, Jake, Agent
Damage: 180
Combat Knife
Characters: Chris
Damage: 180
Stun Rod
Characters: Sherry, Ada
Damage: 140
Damage (Charged): 240 + 40 + 80
Very Effective Against: Chrysalids
First-Aid and Health-Tablets heal both players if they are close to one another, so always stand close to them.
Handguns
Nine-Oh-Nine (909)
Ammo: 9mm
Characters: Chris, Jake, Agent
Clip: 15
Damage: 150
Crit: 12.5%
Picador
Ammo: 9mm
Characters: Helena, Carla
Clip: 16
Damage: 160
Crit: 6%
Wing Shooter
Ammo: 9mm
Characters: Leon
Alt Fire: Dual-Wield
Clip: 18 / 36
Damage: 120
Crit: 8%
Triple Shot
Ammo: 9mm
Characters: Sherry
Alt Fire: 3-Round Burst
Clip: 20
Damage: 130
Crit: 8%
Ammo Box 50
Ammo: 9mm
Characters: Ada, Helena
Clip: 50
Damage: 90
Crit: 5%
Magnums
Elephant Killer
Ammo: .500 Magnum
Characters: Jake, Sherry
Clip: 5
Damage: 1600
Crit: 12.5%
Lightning Hawk
Ammo: .50 AE Magnum
Characters: Leon, Helena, Chris, Sherry
Clip: 7
Damage: 1200
Crit: 8%
Shotguns
Shotgun
Ammo: 12-Gauge
Characters: Leon, Helena, Jake, Sherry
Clip: 8
Damage: 140x7 or 980 (Far) / 180x7 or 1,260 (Close)
Hydra
Ammo: 10-Gauge
Characters: Helena
Clip: 3
Damage: 120x7 or 840 (Far) / 170x7 or 1,190 (Close)
Assault Shotgun
Ammo: 12-Gauge
Characters: Chris, Piers, Ada
Clip: 7
Damage: 150x7 or 1050 (Far) / 170x7 or 1,190 (Close)
Machine Guns
MP-AF
Ammo: 9mm
Characters: Piers, Ada
Alt Fire: Full Auto
Clip: 30
Damage: 100
Crit: 6%
Assault Rifles
Assault Rifle RN
Ammo: 5.56mm
Characters: Leon, Helena
Clip: 30
Damage: 210
Crit: 2.5%
Assault Rifle (Special Tactics)
Ammo: 5.56mm
Characters: Chris
Clip: 30
Damage: 200
Crit: 6%
Bear Commander
Ammo: 5.56mm / 40mm Explosive
Characters: Jake, Sherry, Ada
Alt Fire: Explosive Rounds
Clip: 30
Damage: 190
Crit: 4%
Explosive rounds: 1000
Sniper Rifles
Sniper Rifle
Ammo: 7.62mm
Characters: Jake, Sherry, Ada
Clip: 6
Damage: 700
Crit: 100%
Semi-Auto Sniper Rifle
Ammo: 7.62mm
Characters: Leon, Helena, Chris, Jake, Agent
Clip: 5
Damage: 600
Crit: 75%
Anti-Materiel Rifle
Ammo: AMR Ammo
Characters: Piers
Alt Fire: Thermal Scope
Clip: 10
Damage: 1000
Crit: 100%
Explosive Weapons
Grenade Launcher
Ammo: 40mm (Explosive / Acid / Nitrogen)
Characters: Chris, Piers, Leon, Helena, Jake, Carla
Clip: 6
Damage (Explosive): 1000 + 500 Explosion
Damage (Acid): 250 + 200 Explosion
Damage (Nitrogen): 300
Rocket Launcher
Characters: Leon, Chris
Damage: 30000 Base-dmg + 2000 Explosion-dmg
Special Weapons
Crossbow
Ammo: Arrows / Pipe Bomb Arrows
Characters: Ada
Clip: 1
Damage (Normal): 550
Damage (Pipe Impact): 150
Damage (Pipe Explosion): 1000 + 500 Explosion
Crit: 100%
Thrown Weapons
Hand Grenade
Damage: 1200 + 600 Explosion
Incendiary Grenade
Damage: 800 + 400 Explosion
Flash Grenade
Damage: 1 (or 2)
Remote Bomb
Damage: 1600 Base-dmg + 800 Explosion-dmg
Melee Weapons
Survival Knife
Characters: Leon, Jake, Agent
Damage: 180
Combat Knife
Characters: Chris
Damage: 180
Stun Rod
Characters: Sherry, Ada
Damage: 140
Damage (Charged): 240 + 40 + 80
Very Effective Against: Chrysalids
First-Aid and Health-Tablets heal both players if they are close to one another, so always stand close to them.
Damage modifiers
Damage System Overview
Covers how different enemies receive damage based on hitzones, weapon interactions, and special weaknesses. So you take whatever the base damage is that you are dealing and multiply it based on the applicable modifiers.Example: 500 damage being done to a zombie’s arms/legs on amateur without any skills would really deal 800 damage. 500 x0.8 = 400 x2 = 800 The calculation is multiplicative and thus there is no order of operations needed.
There is data still yet to be uncovered by the community so keep that in mind.
**Zombie**
Head: x1.5
Body: x1
Arms/legs: x0.8
Arrows: x0.1
**J'avo**
Head: x1.2
Body: x0.6
Arms: x1
Legs: x0.9
**Napad**
Armor: x0.6
Flesh/head: x1.2
Weak point on back: x1.8
Arms/Legs: x0.3
Grenade: x1.2
Napad looses the armor on its back when that area has sustained 600 damage.
Napad looses the armor on its shoulders when that area has sustained 1200 damage.
**Bloodshot**
Heart: x3
Flash Grenade: x2 (damage done to regular enemies=1)
**Shrieker**
Throat bulge ;) : x4
**Whopper**
Body: x0.5
Arms: x0.5
Legs: x0.5
Head: x0.6 (damage done by the standard head shot modifier of x1.5 is reduced by 80%)
Unsure yet if butt crack shots do more but it acts like a critical. Or maybe its just poo.
Remote Bomb: x1.2
Difficulty Scaling:
**Difficulty Modifiers**
Amateur: x2
Normal: x1
Veteran: x0.93
Professional: x0.8
No Hope: x0.7
Skills alter final total even more but some skills do not interact with each other. Firearms disables skills like:
Shooting Wild
Last Shot
Critical hit
Records
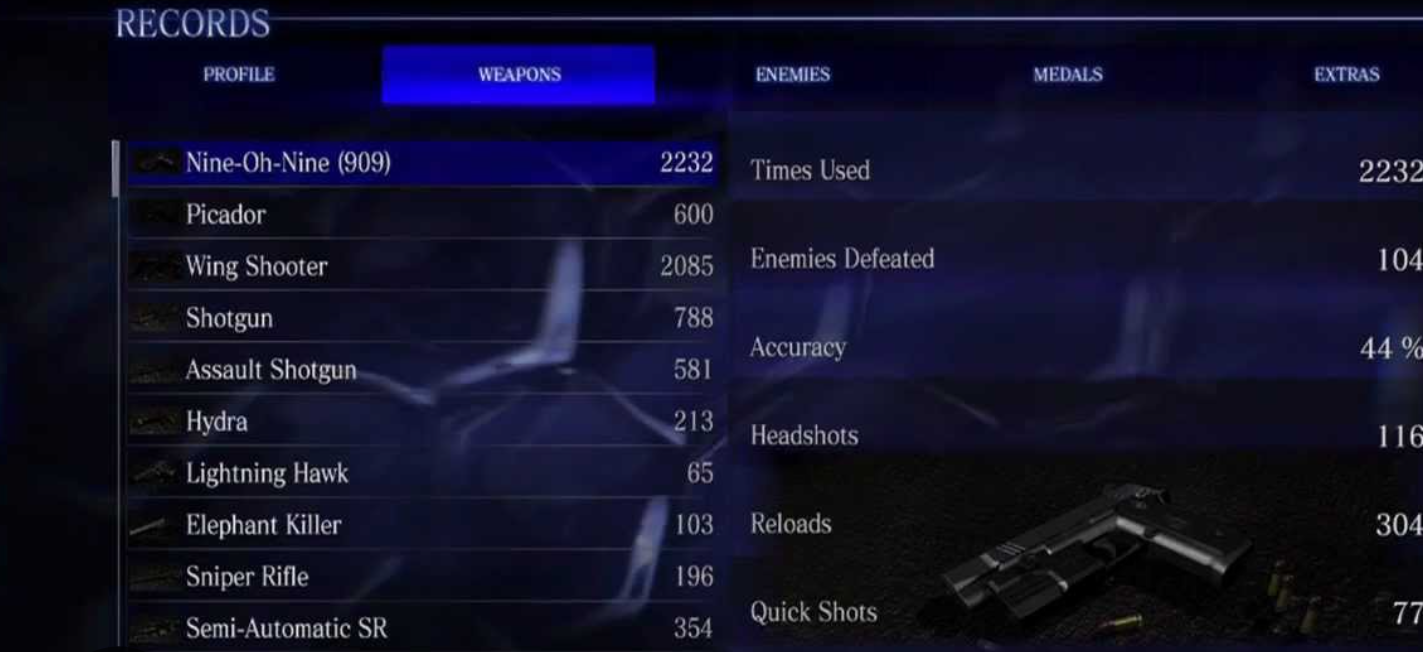 The game keeps track of almost everything you do. From Crawling to Sprinting. Every time a creature killed you. How many kills with the flash grenade you have (yes that's a thing). Weapon accuracy. All medals you have earned and how many of each. How many times you rescued someone and how many times you have been rescued. Yes Records uh.. records. It does what it says anyway. If you don't want any negative stats staining your save file it can be a pain trying to manage it all, but what can you do. Either way, to do that you need to know what all the stats are and what they even keep track of because otherwise it can be confusing. I'll try to keep it brief but here is what everything means in order of how it is presented.
~Profile~
-Profile name- Name of account associated with current platform and locks it to the saved data, making it incompatible with other people's accounts.
Serpent Emblems Found - Found only in campaigns and you need to destroy them with any attack. I will show where all of these are when I talk about all the campaigns and I will make a quick category called serpent emblems showing also. Here is what they look like:

Skill Points Earned - Skill points are used to buy skills to use in every game mode that enhance your abilities. To earn them you need to pick them up. They are dropped by enemies in most modes including campaign and excluding predator. They can also be found in chests in the campaigns. There are multiple kinds and they change in value. Don't forget to pick them up or it won't count. They have a blue line above them on the ground This is an example of one:
Play Time: Time spent playing any mode. Main menu does not count.
-Completed- Campaign only. Shows if you have completed any given chapter in any given difficulty and what rank you got. Ranks are from worst to best, E, D, C, B, A, S. The rank requirements change every chapter but are based on Accuracy (shots fired that hit/missed), Deaths, Chapter, Clear Time, Enemies Killed. You do not share rank with your partner as they have their own although it is shown at the end of each multiplayer session.
-Times Rescued- Having to do exclusively with being grabbed, trapped, hanging onto a ledge, or very specific campaign related events, usually where you need to do a quick time event to get out of it. This is only affected by you or your partner, or very very occasionally a friendly npc if they get the chance but often not. This does not have anything to do with being revived but instead is just being helped out of a circumstance.
Rescued Partner - Helping a partner either on a ledge or externally during their quick time event. Lone Wolf does nothing to this. Average Time starts when their animation begins and ends when you either input a button press or interrupt their animation, or when the animation itself depending on what it is finishes.
Rescued by Partner - Being helped anytime you are grabbed and don't finish the quick time event (sometimes you are helped so fast that you don't even get the button prompt, but you will see the animation), you are on a ledge and are pulled up, certain campaign related events that act similarly to being grabbed. Lone Wolf only works in single-player with a bot partner and not that well but it does help as they can still help you but they do it less. Average Time starts when your animation begins and ends when your partner either inputs a button press or interrupts your animation, or when the animation itself depending on what it is finishes. You have to account for lag sometimes but not usually, especially if you are player 1 / the host of the session.
Times Saved from Dying- Having to do only when reduced to no health (if first have at least 1 health block) and are put in the downed/revive me state and revives/recoveries.
Saved Partner - How many times you revived your partner with either a health tablet or no health tablet alike. Average Time starts the moment the downed animation starts and ends when you press the revive button.
Saved by Partner - How many times you got revived by your partner whether that be npc partner or player partner. Average Time starts the moment the downed animation starts and ends when partner presses the revive button.
Times Restored Own Health - When you are in the dying state and no one comes to revive you, no enemies nearby do a kill on you, you take no damage, you will stand back up with no health and cannot go back into the dying state (and instead will just die on the spot next time you take damage) until you get at least 1 block of health back first. This keeps track of how many times. If you cheat and make your health back to any positive value less than or equal to the character's max health, you will just immediately get back up and it won't count as any record statistic other than you being in the dying state.
-Distance Covered- The amount of in game distance you traveled doing a certain action. Some are campaign reliant like Snow Mobile, Military Vehicle, VTOL, Helicopter, and Motorcycle. The rest are Character based only with the only confusing one being on back(you can move on your back by aiming and pressing forward and the dodge button together while holding the aim button the whole time and not stopping and then moving around with the move controls).
~Weapons~
All weapons are the same save for a few so I will call the special ones out. The stats all mean the same thing.
Times used - Synonymous to shots fired or times thrown. Same thing. Or literally times used with items and healing.
Enemies Defeated - The number of creatures you have brought to 0 health / killed with the given weapon. (For flash grenades you can only get kills by throwing one at a Meset(s) or at an animal weak to flash like bats for instance)
Accuracy - The total number of shots you made with the weapon that actually hit the target. Doesn't have to affect the target's health value. You can shoot armor and shields and still bring your accuracy up. You can unload a magazine into an enemy's armor and it will bring your accuracy up for every shot it makes. Audio is your friend here.
Headshots - Number of headshots with the weapon. Does not need to kill the target.
Quick Shots - To do a quick shot with a weapon, press aim and shoot together (uses stamina and won't work without stamina). You don't need to hit or kill anything for the stat to go up.
~Enemies~
Every time you kill a creature or are killed by a creature, it will unlock the creature here as well as display those stats. There are hidden animals throughout the game that you can kill and unlock here.
Enemies Defeated - How many times YOU defeated that enemy.
Times Defeated - How many times the enemy has killed you.
~Medals~
How many medals you have accumulated at the end of any game mode results screen. *Note: The game must successfully save the data. Check the Medals category for details on how to get every medal if you want to. You can change game mode medals at the top.
~Extras~
-Agent Hunt- Keeps track of events in 2 game modes. Campaign and Agent Hunt.
Times played - Number of multiplayer Agent Hunt sessions played as a creature.
Total Time Played - Time in Agent Hunt sessions as a creature.
Agents Killed - Number of human players you successfully killed as a creature in Agent Hunt.
Creature Invasions - Number of times someone playing Agent hunt has joined your game as a creature. (This is a setting you can turn on and allow when you play a campaign and are online.)
Creature Kills - Creatures you killed in the campaign that was being controlled by another player who was playing agent hunt that joined your game
I just ran out of room.
Records Continued
-Mercenaries + No Mercy-
Times Played - Times played a Mercenaries stage either duo or solo.
Total Time Played - Time in Mercenaries stages messing around ;)
High Score - The highest score you have obtained on any regular Mercenaries Stage.
Creature Kills - Number of all creatures killed across all times you have played.
Hidden Bosses Encountered - Each Mercenaries stage(and No Mercy stage, they are the same) has a hidden "boss" (regular strong enemy) that you can bring out by doing a specific thing that is specific to that stage. You don't need to kill the boss, only do the challenge associated. I will talk about this somewhere else in the guide.
-Survivors-
Times Played - Times played a map on the Survivors Mods.
Total Time Played - Time spent in the map in Survivors.
Wins (Team Match) - Number of times your team won in the Team mode
Wins (Death Match) - Number of times you came in first in the free for all mode, death match
Times MVP Awarded - Number of MVP medals earned in Survivors
Agent's Killed - Number of kills in Survivors you have
Times Defeated - Times killed in Survivors by either an NPC or player
Times Resurrected - Times you got a kill when playing as a non-agent
-Onslaught-
Times Played - Matches with another player
Total Time Played - Time of each match totaled
Wins - Wins either from points or by other player's death
Enemies Sent - Enemies killed and then sent to the other player in their world. These enemies are green.
Enemies from opponent - Enemies killed and then sent to the you from another player in their world. These enemies are green.
-Predator-
Times played - Times in a match.
Total Time Played - Time spent in a Predator Match.
Came in 1st - Times with the highest score out of everyone in the match.
Agents Killed - When playing as Ustanak, how many kills you have. If you capture the last Agent, it counts as a kill.
Times Ustanak Defeated - When playing as an Agent and how many times your team killed Ustanak.
Times Defeated - On either team how many times you were killed.
-Siege-
Times Played - Times played a whole match.
Total Time Played - Time played in matches.
Wins - Number of match wins you have.
Agents Killed - When playing as the BOWs, how many times you killed another player.
BSAA agents defeated - When playing as the BOWs, how many times you killed a BSAA NPC.
BSAA agents rescued - How many times when playing as the Agents, your team successfully kept the BSAA agent alive.
Times Defeated - As either team, how many times you were killed.
Times Played - Times played a Mercenaries stage either duo or solo.
Total Time Played - Time in Mercenaries stages messing around ;)
High Score - The highest score you have obtained on any regular Mercenaries Stage.
Creature Kills - Number of all creatures killed across all times you have played.
Hidden Bosses Encountered - Each Mercenaries stage(and No Mercy stage, they are the same) has a hidden "boss" (regular strong enemy) that you can bring out by doing a specific thing that is specific to that stage. You don't need to kill the boss, only do the challenge associated. I will talk about this somewhere else in the guide.
-Survivors-
Times Played - Times played a map on the Survivors Mods.
Total Time Played - Time spent in the map in Survivors.
Wins (Team Match) - Number of times your team won in the Team mode
Wins (Death Match) - Number of times you came in first in the free for all mode, death match
Times MVP Awarded - Number of MVP medals earned in Survivors
Agent's Killed - Number of kills in Survivors you have
Times Defeated - Times killed in Survivors by either an NPC or player
Times Resurrected - Times you got a kill when playing as a non-agent
-Onslaught-
Times Played - Matches with another player
Total Time Played - Time of each match totaled
Wins - Wins either from points or by other player's death
Enemies Sent - Enemies killed and then sent to the other player in their world. These enemies are green.
Enemies from opponent - Enemies killed and then sent to the you from another player in their world. These enemies are green.
-Predator-
Times played - Times in a match.
Total Time Played - Time spent in a Predator Match.
Came in 1st - Times with the highest score out of everyone in the match.
Agents Killed - When playing as Ustanak, how many kills you have. If you capture the last Agent, it counts as a kill.
Times Ustanak Defeated - When playing as an Agent and how many times your team killed Ustanak.
Times Defeated - On either team how many times you were killed.
-Siege-
Times Played - Times played a whole match.
Total Time Played - Time played in matches.
Wins - Number of match wins you have.
Agents Killed - When playing as the BOWs, how many times you killed another player.
BSAA agents defeated - When playing as the BOWs, how many times you killed a BSAA NPC.
BSAA agents rescued - How many times when playing as the Agents, your team successfully kept the BSAA agent alive.
Times Defeated - As either team, how many times you were killed.
Creature Compendium
As stated in the Records section, you need to either be killed or kill a creature to unlock it in records.
Here are all the creatures and where to find every one. You can also check each Extra Modes stages in the guide to see what stages have what enemies. WORK IN PROGRESS You gotta kill Carla Spores with melee if you don’t get it normally.
Note: Not all the locations in this guide are the end all be all, as you can find these creatures in other areas as well. It is mainly for if you absolutely can’t get the enemy, you can go to the locations listed.
J'AVO
- J'avo: Chris & Jake campaigns (all chapters); Ada Chapters 1, 3–5
- Machine Pistol: Chris Ch1–3; Jake Ch1–4
- Sniper Rifle: Chris Ch2–5; Jake Ch2
- Machine Gun: Chris Ch5; Jake Ch1 & 4
- Rocket Launcher: Chris Ch1–2 & 5
- Stun Rod: Jake Ch3
- Machete: Chris Ch1 & 3; Jake Ch3–4
- Knife: Chris Ch2; Jake Ch1–2
- Wrist Blades: Chris Ch4–5; Jake Ch5
- Paratrooper: Chris Ch2 (Bridge)
J'AVO'S MUTATION REACTIONS
- Glava-Sluz: Chris Ch3; Jake Ch3; Ada Ch1
- Glava-Smech: Chris Ch4–5; Ada Ch1; Mercenaries (several maps)
- Glava-Begunats: Chris Ch4; Jake Ch2–3; Ada Ch3
- Glava-Dim: Jake Ch3–4; Ada Ch3; Mercenaries (Rail Yard/Fire maps)
- Ruka-Srp: Chris Ch1–5; Jake Ch3–4; Ada Ch3; Mercenaries (many maps)
- Ruka-Khvatanje: Chris Ch2–4; Jake Ch4; Ada Ch1–3
- Ruka-Bedem: Chris Ch2–5; Mercenaries (Steel Beast/Rail Yard)
- Noga-Trchanje: Chris Ch1–4; Jake Ch3; Mercenaries (Rail Yard)
- Noga-Let: Chris Ch1–5; Jake Ch1–5; Ada Ch3; Mercenaries (multiple)
- Noga-Skakanje: Chris Ch3–4; Jake Ch4; Mercenaries
- Noga-Oklop: Chris Ch2; Mercenaries
- Telo-Eksplozija: Chris Ch4–5; Mercenaries (multiple)
- Telo-Krljusht: Jake Ch1–2
- Telo-Magla: Chris Ch2–5; Jake Ch5; Ada Ch3–4; Mercenaries (Rail Yard)
AFTER CACOON
- Strelats (Lizard): Chris Ch2; Jake Ch3–4; Ada Ch3; Mercenaries (Mining Depths/Rail Yard)
- Mesets (Bird): Jake Ch2; Mercenaries (Liquid Fire)
- Napad (Gorilla): Chris Ch2–5; Ada Ch2; Mercenaries (Urban Chaos/Steel Beast)
- Gnezdo (Bees): Chris Ch3–5; Ada Ch1–4; Mercenaries (multiple maps)
ENEMIES IN VEHICLES
- Enemy Attack Chopper - S: Chris Ch2 (city aerial combat); Chris Ch5 (final assault segments); Ada Ch5 (helicopter sections); Mercenaries (Steel Beast, Requiem for War)
- Enemy Attack Chopper - L: Chris Ch2 & Ch5 (heavier variants); Ada Ch5 (final aerial combat); Mercenaries (Steel Beast, Requiem for War)
- Enemy Car: Chris/Piers Ch3 (high-speed city escape sequence)
- Enemy Motorcycle: Jake/Sherry Ch4-1 (snowmobile/motorbike chase)
ZOMBIE
- Zombie: Leon all chapters; Ada Chapter 2 & 5; Mercenaries modes
- Zombie - No Equipment: Leon Chapters 1–3 (various interior + street areas)
- Zombie - Assault Rifle: Leon Ch1 (Street/Gas Station/Gun Shop), Ada Ch5 (Rooftop), Mercenaries (Urban Chaos, Mining the Depths)
- Zombie - Knife: Leon Ch1 (Garage/Courtyard/Study/Wine Area), Ada Ch2 (Crypt Area)
- Zombie - Bat: Leon Ch1 (Entrance Hall/Dorm/Tunnel/Street), Mercenaries (Urban Chaos)
- Zombie - 2 x 4: Leon Ch1 (Security Area/Tunnel), Ch2 (Lab)
- Zombie - Hand Ax: Leon Ch1 (Courtyard/Security/Tunnel/Street/Gas Station)
- Zombie - Pipe: Leon Ch1 (Garage/Tunnel/Wine/Gas Station), Ch2 (Cathedral/Altar), Mercenaries (Urban Chaos)
- Zombie - Fire Extinguisher: Leon Ch1 (Tunnel/Wing Area)
- Zombie - Golf Club: Leon Ch1 (Gun Shop), Ch5 (Stairway), Mercenaries (Urban Chaos)
- Zombie - Sledgehammer: Leon Ch1 (Courtyard/Entrance/Tunnel/Behind Wine), Ch5 (Street/Stairway), Mercenaries (Urban Chaos)
- Zombie - Bottle: Leon Ch1 (Courtyard/Entrance/Dorm), Ch2 (Lab), Ch4 (Airplane), Ch5 (Street/Stairway), Mercenaries (Urban Chaos/Mining Depths)
- Zombie - Shovel: Leon Ch2 (Graveyard/Crypt Maze), Ada Ch2 (Crypt Area), Mercenaries (Catacombs)
- Zombie - Cleaver: Ada Ch2 (Crypt Area)
- Zombie - Crank: Leon Ch3 (Catacombs Watery Gate event enemy)
- Zombie - Lantern: Leon Ch2–3 (Altar/Cavern), Ada Ch2 (Altar), Mercenaries (Catacombs)
- Zombie - Flaming 2 x 4: Leon Ch1–3 (Gun Shop/Cathedral/Cavern), Mercenaries (Urban Chaos/Catacombs)
- Zombie - Chest Light: Leon Ch1 (Street/Gun Shop), Ch2 (Lab)
- Zombie - Machete: Leon Ch2 (Crypt Maze/Altar), Ada Ch2 (Altar), Mercenaries (Catacombs)
- Zombie - Dynamite: Leon Ch3 (Cavern), Ada Ch2 (Crypt Area), Mercenaries (Mining Depths)
- Zombie - Helmet: Leon Ch1 (Town/Gas Station), Ch3 (Catacombs/Cavern), Mercenaries (Urban Chaos/Catacombs)
- Zombie - Liquid Nitrogen Tank: Leon Ch2 (Lab Room 012/Corridors)
- Zombie - Old Ax: Leon Ch3 (Catacombs), Ada Ch2 (Crypt Area), Mercenaries (Catacombs)
- Zombie - Hat: Leon Ch1 (Tunnel/Sewer Stairway/Street/Gun Shop)
- Zombie - Stone: Leon Ch3 (Catacombs/Cavern), Mercenaries (Catacombs)
- Bloodshot (Crimson Head): Leon Ch1 (Gun Shop), Ch2–3 (Cathedral/Catacombs/Cavern), Mercenaries (multiple maps)
- Shrieker (Screamer): Leon Ch1–3 (Wine Area/Crypt/Lab/Cavern), Mercenaries (Mining Depths)
- Whopper (Fat Zombie): Leon Ch1 (Gun Shop), Ch3 (Cavern), Ada Ch5 (Rooftop), Mercenaries (Urban Chaos/Catacombs)
- Zombie Dog C: Leon Ch1 (Tunnels), Ch2 (Crypt Maze/Lab cages), Mercenaries (Urban Chaos/Mining Depths)
- Rasklapanje: Leon Ch4, Ada Ch4, Jake Ch5, Mercenaries (Liquid Fire, Catacombs, Hangar variants)
MINI BOSSES & BOSSES
- Lepotitsa: Leon Ch2 (Cathedral encounters); Leon Ch4 (Airplane section); Mercenaries (Catacombs)
- Iluzija: Chris Ch3 (building sequence after helicopter fight)
- Ustanak: Jake Ch1 (warehouse); Jake Ch4 (airplane crash site); Jake Ch5 (Liquid Fire area); Leon Ch4 (airplane crash site encounter)
- Ogroman: Chris Ch2 (City Hall fight); Jake Ch2 (City Hall fight); Chris Ch4 (aerial encounter); Mercenaries (Requiem for War)
- Deborah: Leon Ch2 (Primitive Altar encounters)
- Brzak: Leon Ch3 (Catacombs water section)
- Haos: Chris Ch5 (final boss encounter)
- Simmons: Leon Ch5 (final boss sequence encounters)
- Carla Spore - S: Ada Ch4 (during Carla boss fight, sometimes need to kill with melee for it to count)
- Carla Spore - L: Ada Ch4 (at the end, shoot the nitrogen)
ANIMALS
- Rat: Chris Ch1 (Poisawan Inner Area – Room with 10000 skill points); Leon Ch1 (Kitchen/Sewers); Ada Ch1 (Submarine air ducts)
- Rooster: Leon Ch4 (Market)
- Crow: Leon Ch1 (Courtyard); Leon Ch2 (Graveyard near wooden building)
- Bat: Jake Ch2 (Cave)
- Spider: Leon Ch3 (Catacombs – wall above Simmons Family Ring door)
- Snake: Leon Ch3 (Catacombs – inside coffins)
L4D PACK
- The Mini Tank:
- The Witch:
Here are all the creatures and where to find every one. You can also check each Extra Modes stages in the guide to see what stages have what enemies. WORK IN PROGRESS You gotta kill Carla Spores with melee if you don’t get it normally.
Note: Not all the locations in this guide are the end all be all, as you can find these creatures in other areas as well. It is mainly for if you absolutely can’t get the enemy, you can go to the locations listed.
J'AVO
- J'avo: Chris & Jake campaigns (all chapters); Ada Chapters 1, 3–5
- Machine Pistol: Chris Ch1–3; Jake Ch1–4
- Sniper Rifle: Chris Ch2–5; Jake Ch2
- Machine Gun: Chris Ch5; Jake Ch1 & 4
- Rocket Launcher: Chris Ch1–2 & 5
- Stun Rod: Jake Ch3
- Machete: Chris Ch1 & 3; Jake Ch3–4
- Knife: Chris Ch2; Jake Ch1–2
- Wrist Blades: Chris Ch4–5; Jake Ch5
- Paratrooper: Chris Ch2 (Bridge)
J'AVO'S MUTATION REACTIONS
- Glava-Sluz: Chris Ch3; Jake Ch3; Ada Ch1
- Glava-Smech: Chris Ch4–5; Ada Ch1; Mercenaries (several maps)
- Glava-Begunats: Chris Ch4; Jake Ch2–3; Ada Ch3
- Glava-Dim: Jake Ch3–4; Ada Ch3; Mercenaries (Rail Yard/Fire maps)
- Ruka-Srp: Chris Ch1–5; Jake Ch3–4; Ada Ch3; Mercenaries (many maps)
- Ruka-Khvatanje: Chris Ch2–4; Jake Ch4; Ada Ch1–3
- Ruka-Bedem: Chris Ch2–5; Mercenaries (Steel Beast/Rail Yard)
- Noga-Trchanje: Chris Ch1–4; Jake Ch3; Mercenaries (Rail Yard)
- Noga-Let: Chris Ch1–5; Jake Ch1–5; Ada Ch3; Mercenaries (multiple)
- Noga-Skakanje: Chris Ch3–4; Jake Ch4; Mercenaries
- Noga-Oklop: Chris Ch2; Mercenaries
- Telo-Eksplozija: Chris Ch4–5; Mercenaries (multiple)
- Telo-Krljusht: Jake Ch1–2
- Telo-Magla: Chris Ch2–5; Jake Ch5; Ada Ch3–4; Mercenaries (Rail Yard)
AFTER CACOON
- Strelats (Lizard): Chris Ch2; Jake Ch3–4; Ada Ch3; Mercenaries (Mining Depths/Rail Yard)
- Mesets (Bird): Jake Ch2; Mercenaries (Liquid Fire)
- Napad (Gorilla): Chris Ch2–5; Ada Ch2; Mercenaries (Urban Chaos/Steel Beast)
- Gnezdo (Bees): Chris Ch3–5; Ada Ch1–4; Mercenaries (multiple maps)
ENEMIES IN VEHICLES
- Enemy Attack Chopper - S: Chris Ch2 (city aerial combat); Chris Ch5 (final assault segments); Ada Ch5 (helicopter sections); Mercenaries (Steel Beast, Requiem for War)
- Enemy Attack Chopper - L: Chris Ch2 & Ch5 (heavier variants); Ada Ch5 (final aerial combat); Mercenaries (Steel Beast, Requiem for War)
- Enemy Car: Chris/Piers Ch3 (high-speed city escape sequence)
- Enemy Motorcycle: Jake/Sherry Ch4-1 (snowmobile/motorbike chase)
ZOMBIE
- Zombie: Leon all chapters; Ada Chapter 2 & 5; Mercenaries modes
- Zombie - No Equipment: Leon Chapters 1–3 (various interior + street areas)
- Zombie - Assault Rifle: Leon Ch1 (Street/Gas Station/Gun Shop), Ada Ch5 (Rooftop), Mercenaries (Urban Chaos, Mining the Depths)
- Zombie - Knife: Leon Ch1 (Garage/Courtyard/Study/Wine Area), Ada Ch2 (Crypt Area)
- Zombie - Bat: Leon Ch1 (Entrance Hall/Dorm/Tunnel/Street), Mercenaries (Urban Chaos)
- Zombie - 2 x 4: Leon Ch1 (Security Area/Tunnel), Ch2 (Lab)
- Zombie - Hand Ax: Leon Ch1 (Courtyard/Security/Tunnel/Street/Gas Station)
- Zombie - Pipe: Leon Ch1 (Garage/Tunnel/Wine/Gas Station), Ch2 (Cathedral/Altar), Mercenaries (Urban Chaos)
- Zombie - Fire Extinguisher: Leon Ch1 (Tunnel/Wing Area)
- Zombie - Golf Club: Leon Ch1 (Gun Shop), Ch5 (Stairway), Mercenaries (Urban Chaos)
- Zombie - Sledgehammer: Leon Ch1 (Courtyard/Entrance/Tunnel/Behind Wine), Ch5 (Street/Stairway), Mercenaries (Urban Chaos)
- Zombie - Bottle: Leon Ch1 (Courtyard/Entrance/Dorm), Ch2 (Lab), Ch4 (Airplane), Ch5 (Street/Stairway), Mercenaries (Urban Chaos/Mining Depths)
- Zombie - Shovel: Leon Ch2 (Graveyard/Crypt Maze), Ada Ch2 (Crypt Area), Mercenaries (Catacombs)
- Zombie - Cleaver: Ada Ch2 (Crypt Area)
- Zombie - Crank: Leon Ch3 (Catacombs Watery Gate event enemy)
- Zombie - Lantern: Leon Ch2–3 (Altar/Cavern), Ada Ch2 (Altar), Mercenaries (Catacombs)
- Zombie - Flaming 2 x 4: Leon Ch1–3 (Gun Shop/Cathedral/Cavern), Mercenaries (Urban Chaos/Catacombs)
- Zombie - Chest Light: Leon Ch1 (Street/Gun Shop), Ch2 (Lab)
- Zombie - Machete: Leon Ch2 (Crypt Maze/Altar), Ada Ch2 (Altar), Mercenaries (Catacombs)
- Zombie - Dynamite: Leon Ch3 (Cavern), Ada Ch2 (Crypt Area), Mercenaries (Mining Depths)
- Zombie - Helmet: Leon Ch1 (Town/Gas Station), Ch3 (Catacombs/Cavern), Mercenaries (Urban Chaos/Catacombs)
- Zombie - Liquid Nitrogen Tank: Leon Ch2 (Lab Room 012/Corridors)
- Zombie - Old Ax: Leon Ch3 (Catacombs), Ada Ch2 (Crypt Area), Mercenaries (Catacombs)
- Zombie - Hat: Leon Ch1 (Tunnel/Sewer Stairway/Street/Gun Shop)
- Zombie - Stone: Leon Ch3 (Catacombs/Cavern), Mercenaries (Catacombs)
- Bloodshot (Crimson Head): Leon Ch1 (Gun Shop), Ch2–3 (Cathedral/Catacombs/Cavern), Mercenaries (multiple maps)
- Shrieker (Screamer): Leon Ch1–3 (Wine Area/Crypt/Lab/Cavern), Mercenaries (Mining Depths)
- Whopper (Fat Zombie): Leon Ch1 (Gun Shop), Ch3 (Cavern), Ada Ch5 (Rooftop), Mercenaries (Urban Chaos/Catacombs)
- Zombie Dog C: Leon Ch1 (Tunnels), Ch2 (Crypt Maze/Lab cages), Mercenaries (Urban Chaos/Mining Depths)
- Rasklapanje: Leon Ch4, Ada Ch4, Jake Ch5, Mercenaries (Liquid Fire, Catacombs, Hangar variants)
MINI BOSSES & BOSSES
- Lepotitsa: Leon Ch2 (Cathedral encounters); Leon Ch4 (Airplane section); Mercenaries (Catacombs)
- Iluzija: Chris Ch3 (building sequence after helicopter fight)
- Ustanak: Jake Ch1 (warehouse); Jake Ch4 (airplane crash site); Jake Ch5 (Liquid Fire area); Leon Ch4 (airplane crash site encounter)
- Ogroman: Chris Ch2 (City Hall fight); Jake Ch2 (City Hall fight); Chris Ch4 (aerial encounter); Mercenaries (Requiem for War)
- Deborah: Leon Ch2 (Primitive Altar encounters)
- Brzak: Leon Ch3 (Catacombs water section)
- Haos: Chris Ch5 (final boss encounter)
- Simmons: Leon Ch5 (final boss sequence encounters)
- Carla Spore - S: Ada Ch4 (during Carla boss fight, sometimes need to kill with melee for it to count)
- Carla Spore - L: Ada Ch4 (at the end, shoot the nitrogen)
ANIMALS
- Rat: Chris Ch1 (Poisawan Inner Area – Room with 10000 skill points); Leon Ch1 (Kitchen/Sewers); Ada Ch1 (Submarine air ducts)
- Rooster: Leon Ch4 (Market)
- Crow: Leon Ch1 (Courtyard); Leon Ch2 (Graveyard near wooden building)
- Bat: Jake Ch2 (Cave)
- Spider: Leon Ch3 (Catacombs – wall above Simmons Family Ring door)
- Snake: Leon Ch3 (Catacombs – inside coffins)
L4D PACK
- The Mini Tank:
- The Witch:
All Unlockables
To unlock the main rest of the game, complete the prologue.
Ada Story:
PS3 / Xbox 360 (Unpatched): Complete all chapters of Leon's, Chris' and Jake's story once.
Every other version: Unlocked by default.
Agent Hunt mode:
(obsolete)PS3, PS4, Xbox 360, Xbox One, PC: Complete all five chapters of one story. (obsolete)
Nintendo Switch and all platforms: Unlocked by default.
The Mercenaries No Mercy:
PS3, Xbox 360: This mode cannot be unlocked in these versions.
PC, PS4, Xbox One, Nintendo Switch: Unlocked by default.
Survivors, Predator, Onslaught, and Siege modes:
Unlocked via DLC purchases.
Steel Beast map and Mining the Depths map:
Unlocked by default.
Rail Yard, High Seas Fortress, The Catacombs, Requiem for War, Liquid Fire, Rooftop Mission, and Creature Workshop maps:
Complete each subsequent unlocked map with at least an A rank starting with Mining the Depths.
Helena Harper:
Complete Urban Chaos in The Mercenaries or The Mercenaries No Mercy with a B rank or higher or by playing survivors.
Piers Nivans:
Complete Steel Beast in The Mercenaries or The Mercenaries No Mercy with a B rank or higher or by playing survivors.
Chapter Selects:
Beat the chapter that comes before the one you are trying to access. You can skip to the end of the chapter in chapter select if you want to and it will work.
Sherry Birkin:
Complete Mining the Depths in The Mercenaries or The Mercenaries No Mercy with a B rank or higher. or by playing survivors.
Ada Wong:
Complete Ada's Campaign or play survivors.
Carla Radames:
Unlocked by obtaining all default and EX1 Costumes in the game.
EX1 Costumes:
All EX1 Costumes are unlocked by playing with the DEFAULT costume of a character in The Mercenaries or The Mercenaries No Mercy and obtaining an "A" or "S" on either SOLO or DUO mode in every version of the game. I have had trouble with getting them in no mercy so better try with regular.
EX2 Costumes:
PS3, Xbox 360 and PC: Unlocked by using RE Points on resident evil net. Each costume costs 60,000 REP. https://game.capcom.com/residentevil/en/renet.html You need to register your play data by linking the game with your account.
PS4, Xbox One: Randomly unlocked by playing the Extra Content. (Onslaught is most likely to drop EX2 costumes). I have personally had lots of luck just by playing predator with a friend while trying to get the ex3 stumes. Just make sure you are using the target character and the subsequent costume.
Nintendo Switch(allegedly): Unlocked by getting an S rank in any Mercenaries mode with the target character (i.e. using Ada will unlock EX2 Ada but not EX2 Chris) or randomly via the Extra Content.
You can also unlock these costumes and everything with this save editor instead of using resident evil net. http://redirect.viglink.com/?key=71fe2139a887ad501313cd8cce3053c5&subId=5490376&u=http%3A/www.mediafire.com/download/rfc3x1qaarrbng8/Resident+Evil+6+Save+Editor+.exe If you can't get it, lmk.
EX3 Costumes:
PS3, Xbox 360 and PC: Unlocked by using Extra Tickets on resident evil net. Each costume costs 1 Extra Ticket. https://game.capcom.com/residentevil/en/renet.html Oh my gosh its so bad. Must... use.... save editor. http://redirect.viglink.com/?key=71fe2139a887ad501313cd8cce3053c5&subId=5490376&u=http%3A/www.mediafire.com/download/rfc3x1qaarrbng8/Resident+Evil+6+Save+Editor+.exe If you can't get it, lmk.
PS4, Xbox One: Randomly unlocked by playing the Extra Content. (Predator is most likely to drop EX3 costumes) It took me about 90 wins all together btw..... maybe 60 if you are lucky. Use a friend. Just make sure you are using the target character and the subsequent costume.
Nintendo Switch(allegedly): Unlocked by getting an S rank in any Mercenaries mode with the target character (i.e. using Ada will unlock EX2 Ada but not EX2 Chris) or randomly via the Extra Content.
Figurines:
Get all the Serpent Emblems and unlock all costumes and Charaters. Go to the Serpent Emblems portion of this guide to see what the specific unlocks are.
Skills:
Grenade Power Up – Level 1 – 40,000 SP – Increases damage dealt with grenades by 100% – Get 800 kills with grenades
Handgun Master – Level 1 – 37,000 SP – Increases damage dealt with handguns by 100% – Get 1,500 kills with handguns
Shotgun Master – Level 1 – 38,000 SP – Increases damage dealt with shotguns by 100% – Get 1,000 kills with shotguns
Magnum Master – Level 1 – 40,000 SP – Increases damage dealt with magnums by 100% – Get 800 kills with magnums
Sniper Master – Level 1 – 39,000 SP – Increases damage dealt with sniper rifles by 100% – Get 1,000 kills with sniper rifles
Machine Pistol Master – Level 1 – 38,000 SP – Increases damage dealt with machine pistols by 100% – Get 1,500 kills with machine pistols
Assault Rifle Master – Level 1 – 37,000 SP – Increases damage dealt with assault rifles by 100% – Get 1,500 kills with assault rifles
Grenade Launcher Master – Level 1 – 40,000 SP – Increases damage dealt with grenade launchers by 100% – Get 800 kills with grenade launchers
Crossbow Master – Level 1 – 40,000 SP – Increases damage dealt with crossbows by 100% – Get 800 kills with crossbows
Infinite Handgun – Level 1 – 79,000 SP – Unlimited ammo for the handgun – Unlocked after all campaigns completed
Infinite Shotgun – Level 1 – 89,000 SP – Unlimited ammo for the shotgun – Unlocked after all campaigns completed
Infinite Magnum – Level 1 – 99,000 SP – Unlimited ammo for the magnum – Unlocked after all campaigns completed
Infinite Sniper Rifle – Level 1 – 79,000 SP – Unlimited ammo for the sniper rifle – Unlocked after all campaigns completed
Infinite Machine Pistol – Level 1 – 89,000 SP – Unlimited ammo for the machine pistol – Unlocked after all campaigns completed
Infinite Assault Rifle – Level 1 – 89,000 SP – Unlimited ammo for the assault rifle – Unlocked after all campaigns completed
Infinite Grenade Launcher – Level 1 – 99,000 SP – Unlimited ammo for the grenade launcher – Unlocked after all campaigns completed
Infinite Crossbow – Level 1 – 79,000 SP – Unlimited ammo for the crossbow – Unlocked after all campaigns completed
Campaign Weapons: Find them and beat the level or get to another save point in the chapter. Must be done with BOTH Characters. If you start new game plus you need to find them all over again with that Character.
Ada Story:
PS3 / Xbox 360 (Unpatched): Complete all chapters of Leon's, Chris' and Jake's story once.
Every other version: Unlocked by default.
Agent Hunt mode:
(obsolete)PS3, PS4, Xbox 360, Xbox One, PC: Complete all five chapters of one story. (obsolete)
Nintendo Switch and all platforms: Unlocked by default.
The Mercenaries No Mercy:
PS3, Xbox 360: This mode cannot be unlocked in these versions.
PC, PS4, Xbox One, Nintendo Switch: Unlocked by default.
Survivors, Predator, Onslaught, and Siege modes:
Unlocked via DLC purchases.
Steel Beast map and Mining the Depths map:
Unlocked by default.
Rail Yard, High Seas Fortress, The Catacombs, Requiem for War, Liquid Fire, Rooftop Mission, and Creature Workshop maps:
Complete each subsequent unlocked map with at least an A rank starting with Mining the Depths.
Helena Harper:
Complete Urban Chaos in The Mercenaries or The Mercenaries No Mercy with a B rank or higher or by playing survivors.
Piers Nivans:
Complete Steel Beast in The Mercenaries or The Mercenaries No Mercy with a B rank or higher or by playing survivors.
Chapter Selects:
Beat the chapter that comes before the one you are trying to access. You can skip to the end of the chapter in chapter select if you want to and it will work.
Sherry Birkin:
Complete Mining the Depths in The Mercenaries or The Mercenaries No Mercy with a B rank or higher. or by playing survivors.
Ada Wong:
Complete Ada's Campaign or play survivors.
Carla Radames:
Unlocked by obtaining all default and EX1 Costumes in the game.
EX1 Costumes:
All EX1 Costumes are unlocked by playing with the DEFAULT costume of a character in The Mercenaries or The Mercenaries No Mercy and obtaining an "A" or "S" on either SOLO or DUO mode in every version of the game. I have had trouble with getting them in no mercy so better try with regular.
EX2 Costumes:
PS3, Xbox 360 and PC: Unlocked by using RE Points on resident evil net. Each costume costs 60,000 REP. https://game.capcom.com/residentevil/en/renet.html You need to register your play data by linking the game with your account.
PS4, Xbox One: Randomly unlocked by playing the Extra Content. (Onslaught is most likely to drop EX2 costumes). I have personally had lots of luck just by playing predator with a friend while trying to get the ex3 stumes. Just make sure you are using the target character and the subsequent costume.
Nintendo Switch(allegedly): Unlocked by getting an S rank in any Mercenaries mode with the target character (i.e. using Ada will unlock EX2 Ada but not EX2 Chris) or randomly via the Extra Content.
You can also unlock these costumes and everything with this save editor instead of using resident evil net. http://redirect.viglink.com/?key=71fe2139a887ad501313cd8cce3053c5&subId=5490376&u=http%3A/www.mediafire.com/download/rfc3x1qaarrbng8/Resident+Evil+6+Save+Editor+.exe If you can't get it, lmk.
EX3 Costumes:
PS3, Xbox 360 and PC: Unlocked by using Extra Tickets on resident evil net. Each costume costs 1 Extra Ticket. https://game.capcom.com/residentevil/en/renet.html Oh my gosh its so bad. Must... use.... save editor. http://redirect.viglink.com/?key=71fe2139a887ad501313cd8cce3053c5&subId=5490376&u=http%3A/www.mediafire.com/download/rfc3x1qaarrbng8/Resident+Evil+6+Save+Editor+.exe If you can't get it, lmk.
PS4, Xbox One: Randomly unlocked by playing the Extra Content. (Predator is most likely to drop EX3 costumes) It took me about 90 wins all together btw..... maybe 60 if you are lucky. Use a friend. Just make sure you are using the target character and the subsequent costume.
Nintendo Switch(allegedly): Unlocked by getting an S rank in any Mercenaries mode with the target character (i.e. using Ada will unlock EX2 Ada but not EX2 Chris) or randomly via the Extra Content.
Figurines:
Get all the Serpent Emblems and unlock all costumes and Charaters. Go to the Serpent Emblems portion of this guide to see what the specific unlocks are.
Skills:
Grenade Power Up – Level 1 – 40,000 SP – Increases damage dealt with grenades by 100% – Get 800 kills with grenades
Handgun Master – Level 1 – 37,000 SP – Increases damage dealt with handguns by 100% – Get 1,500 kills with handguns
Shotgun Master – Level 1 – 38,000 SP – Increases damage dealt with shotguns by 100% – Get 1,000 kills with shotguns
Magnum Master – Level 1 – 40,000 SP – Increases damage dealt with magnums by 100% – Get 800 kills with magnums
Sniper Master – Level 1 – 39,000 SP – Increases damage dealt with sniper rifles by 100% – Get 1,000 kills with sniper rifles
Machine Pistol Master – Level 1 – 38,000 SP – Increases damage dealt with machine pistols by 100% – Get 1,500 kills with machine pistols
Assault Rifle Master – Level 1 – 37,000 SP – Increases damage dealt with assault rifles by 100% – Get 1,500 kills with assault rifles
Grenade Launcher Master – Level 1 – 40,000 SP – Increases damage dealt with grenade launchers by 100% – Get 800 kills with grenade launchers
Crossbow Master – Level 1 – 40,000 SP – Increases damage dealt with crossbows by 100% – Get 800 kills with crossbows
Infinite Handgun – Level 1 – 79,000 SP – Unlimited ammo for the handgun – Unlocked after all campaigns completed
Infinite Shotgun – Level 1 – 89,000 SP – Unlimited ammo for the shotgun – Unlocked after all campaigns completed
Infinite Magnum – Level 1 – 99,000 SP – Unlimited ammo for the magnum – Unlocked after all campaigns completed
Infinite Sniper Rifle – Level 1 – 79,000 SP – Unlimited ammo for the sniper rifle – Unlocked after all campaigns completed
Infinite Machine Pistol – Level 1 – 89,000 SP – Unlimited ammo for the machine pistol – Unlocked after all campaigns completed
Infinite Assault Rifle – Level 1 – 89,000 SP – Unlimited ammo for the assault rifle – Unlocked after all campaigns completed
Infinite Grenade Launcher – Level 1 – 99,000 SP – Unlimited ammo for the grenade launcher – Unlocked after all campaigns completed
Infinite Crossbow – Level 1 – 79,000 SP – Unlimited ammo for the crossbow – Unlocked after all campaigns completed
Campaign Weapons: Find them and beat the level or get to another save point in the chapter. Must be done with BOTH Characters. If you start new game plus you need to find them all over again with that Character.
Skills
You can see skills in any game mode by selecting the game mode and navigating to skills / skill customization. You can also see your currently equipped skills IN game via the menu by looking at "equipped skills". Obviously, skills alter your gameplay and act as a loadout. You can change your skills for any game mode in the main menu or after a match in the current session. In campaign you can change skill sets. You need to buy all skills with skill points, and sometimes unlock them first, the buy them. Each game mode has different skills that are equip-able. The number of skills you can equip at one time is different for every mode. Some of the skills you purchase in one game mode will also show as purchased in other game modes, meaning you only have to buy it once.
Firearm – Level 3 – Level 1: 12,000 SP / Level 2: 29,000 SP / Level 3: 75,000 SP (Total: 116,000 SP) – Increases firearm power by 10% / 20% / 50%
Melee – Level 3 – Level 1: 10,000 SP / Level 2: 25,000 SP / Level 3: 75,000 SP (Total: 110,000 SP) – Increases melee attack power by 10% / 20% / 50%
Defense – Level 3 – Level 1: 3,200 SP / Level 2: 28,000 SP / Level 3: 80,000 SP (Total: 111,200 SP) – Reduces damage taken by 20% / 30% / 50%
Lock-On – Level 2 – Level 1: 2,800 SP / Level 2: 31,000 SP (Total: 33,800 SP) – Steadies aim while shooting
Rock Steady – Level 2 – Level 1: 3,500 SP / Level 2: 33,000 SP (Total: 36,500 SP) – Reduces recoil after firing
Critical Hit – Level 3 – Level 1: 3,500 SP / Level 2: 13,000 SP / Level 3: 32,000 SP (Total: 48,500 SP) – Increases critical hit chance by 50% / 75% / 100%
Piercing – Level 3 – Level 1: 12,000 SP / Level 2: 28,000 SP / Level 3: 55,000 SP (Total: 95,000 SP) – Allows bullets to penetrate 1 / 2 / 3 enemies
J'avo Killer – Level 2 – Level 1: 3,000 SP / Level 2: 25,000 SP (Total: 28,000 SP) – Increases damage against J’avo by 20% / 50%
Zombie Hunter – Level 2 – Level 1: 3,000 SP / Level 2: 25,000 SP (Total: 28,000 SP) – Increases damage against zombies by 20% / 50%
Eagle Eye – Level 1 – 3,000 SP – Adds an extra level of magnification to sniper scopes
Quick Reload – Level 1 – 10,000 SP – Reload weapons 20% faster
Last Shot – Level 1 – 55,000 SP – Increases final round damage by 300%
Shooting Wild – Level 1 – 65,000 SP – Removes targeting reticle but increases firepower by 50%
Combat Gauge Boost – Level 2 – Level 1: 70,000 SP / Level 2: 90,000 SP (Total: 160,000 SP) – Increases Combat Gauge by 3 / 5 blocks
Breakout – Level 1 – 2,800 SP – Escape enemy grabs faster
Item Drop Increase – Level 1 – 3,500 SP – Increases item drop rate by 40%
Recovery – Level 2 – Level 1: 10,000 SP / Level 2: 70,000 SP (Total: 80,000 SP) – Reduces downed recovery time to 10 / 7 seconds
Team-Up – Level 1 – 14,000 SP – Increases partner attack power when nearby
Field Medic – Level 2 – Level 1: 12,000 SP / Level 2: 95,000 SP (Total: 107,000 SP) – AI partner provides health tablets when rescuing you
Lone Wolf – Level 1 – 100 SP – Prevents AI partner from assisting you but doesn't work well if at all.
Assault Rifle Ammo Pickup Increase – Level 1 – 8,000 SP – Increases chance of finding 5.56 NATO ammo
Shotgun Shell Pickup Increase – Level 1 – 8,000 SP – Increases chance of finding shotgun shells
Magnum Ammo Pickup Increase – Level 1 – 25,000 SP – Increases chance of finding Magnum ammo
Rifle Ammo Pickup Increase – Level 1 – 8,000 SP – Increases chance of finding rifle ammo
Grenade Launcher Ammo Pickup Increase – Level 1 – 22,000 SP – Increases chance of finding 40mm rounds
Arrow Pickup Increase – Level 1 – 20,000 SP – Increases chance of finding crossbow arrows
Grenade Power Up – Level 1 – 40,000 SP – Increases grenade damage by 100%
Handgun Master – Level 1 – 37,000 SP – Increases handgun damage by 100%
Shotgun Master – Level 1 – 38,000 SP – Increases shotgun damage by 100%
Magnum Master – Level 1 – 40,000 SP – Increases magnum damage by 100%
Sniper Master – Level 1 – 39,000 SP – Increases sniper rifle damage by 100%
Machine Pistol Master – Level 1 – 38,000 SP – Increases machine pistol damage by 100%
Assault Rifle Master – Level 1 – 37,000 SP – Increases assault rifle damage by 100%
Grenade Launcher Master – Level 1 – 40,000 SP – Increases grenade launcher damage by 100%
Crossbow Master – Level 1 – 40,000 SP – Increases crossbow damage by 100%
Infinite Handgun – Level 1 – 79,000 SP – Unlimited handgun ammo
Infinite Shotgun – Level 1 – 89,000 SP – Unlimited shotgun ammo
Infinite Magnum – Level 1 – 99,000 SP – Unlimited magnum ammo
Infinite Sniper Rifle – Level 1 – 79,000 SP – Unlimited sniper rifle ammo
Infinite Machine Pistol – Level 1 – 89,000 SP – Unlimited machine pistol ammo
Infinite Assault Rifle – Level 1 – 89,000 SP – Unlimited assault rifle ammo
Infinite Grenade Launcher – Level 1 – 99,000 SP – Unlimited grenade launcher ammo
Infinite Crossbow – Level 1 – 79,000 SP – Unlimited crossbow ammo
Creature Offense – Level 3 – Level 1: 5,000 SP / Level 2: 15,000 SP / Level 3: 60,000 SP (Total: 80,000 SP) – Increases damage dealt by 10% / 20% / 50%
Creature Defense – Level 3 – Level 1: 5,000 SP / Level 2: 15,000 SP / Level 3: 60,000 SP (Total: 80,000 SP) – Reduces damage taken by 10% / 20% / 30%
Creature Health – Level 3 – Level 1: 5,000 SP / Level 2: 15,000 SP / Level 3: 60,000 SP (Total: 80,000 SP) – Increases health by 20% / 50% / 100%
Creature Stamina – Level 3 – Level 1: 5,000 SP / Level 2: 15,000 SP / Level 3: 60,000 SP (Total: 80,000 SP) – Increases stamina bar by 6 / 7 / 10 units
Eagle Eye – Level 1 – 3,000 SP – Adds an extra level of magnification to all scoped weapons
Item Drop Increase – Level 1 – 3,500 SP – Increases item drop rate by 40%
Go For Broke! – Level 1 – 60,000 SP – When timer is below 30 seconds, combo window increases to 17 seconds
Time Bonus + – Level 1 – 90,000 SP – Yellow hourglasses now give 70 seconds instead of 60
Combo Bonus + – Level 1 – 50,000 SP – Extended combo bonuses last 10 seconds longer
Limit Breaker – Level 1 – 60,000 SP – After 50 combo, kills give +50 extra points per enemy
Blitz Play – Level 1 – 5,000 SP – Attacking immediately after another player increases damage by 50%
Quick Shot Damage – Level 1 – 15,000 SP – Increases Quick Shot damage by 50%
Power Counter – Level 1 – 8,000 SP – Counter attacks deal 25% more damage
Second Wind – Level 1 – 6,000 SP – Deal 10% more damage when health is at 2 bars or lower
Martial Arts Master – Level 1 – 25,000 SP – Melee damage +25%, firearm damage -50%
Target Master – Level 1 – 25,000 SP – Firearm damage +25%, melee damage -50%
Last Stand – Level 1 – 30,000 SP – Deal 30% more damage but take 300% more damage
Pre-emptive Strike – Level 1 – 7,000 SP – Back attacks deal 25% more damage
Dying Breath – Level 1 – 15,000 SP – Deal 300% more damage while dying; recovery reduced to 5 seconds
Pharmacist – Level 1 – 17,000 SP – Herb tablets restore 2 health blocks
Medic – Level 1 – 12,000 SP – Heal 1 health block to teammate at any range
First Responder – Level 1 – 15,000 SP – Partner gains 1 free health block when rescued
How to earn skill points
Skill points are earned by picking up one of the many skill point variants dropped randomly by enemies you kill in any mode, or by loot chests within the campaign mode. There are many kinds of skill point items but they all are items that you can pick up and they vary in value and looks with zero functional difference other than how many skill points the item gives you. They are based on Chess pieces and vary in color mostly, indicating how valuable they are. They all have a blue item line when they are dropped as an item.All Campaign Skills
It costs 2,249,400 SP to buy and max out all Campaign Skills.Firearm – Level 3 – Level 1: 12,000 SP / Level 2: 29,000 SP / Level 3: 75,000 SP (Total: 116,000 SP) – Increases firearm power by 10% / 20% / 50%
Melee – Level 3 – Level 1: 10,000 SP / Level 2: 25,000 SP / Level 3: 75,000 SP (Total: 110,000 SP) – Increases melee attack power by 10% / 20% / 50%
Defense – Level 3 – Level 1: 3,200 SP / Level 2: 28,000 SP / Level 3: 80,000 SP (Total: 111,200 SP) – Reduces damage taken by 20% / 30% / 50%
Lock-On – Level 2 – Level 1: 2,800 SP / Level 2: 31,000 SP (Total: 33,800 SP) – Steadies aim while shooting
Rock Steady – Level 2 – Level 1: 3,500 SP / Level 2: 33,000 SP (Total: 36,500 SP) – Reduces recoil after firing
Critical Hit – Level 3 – Level 1: 3,500 SP / Level 2: 13,000 SP / Level 3: 32,000 SP (Total: 48,500 SP) – Increases critical hit chance by 50% / 75% / 100%
Piercing – Level 3 – Level 1: 12,000 SP / Level 2: 28,000 SP / Level 3: 55,000 SP (Total: 95,000 SP) – Allows bullets to penetrate 1 / 2 / 3 enemies
J'avo Killer – Level 2 – Level 1: 3,000 SP / Level 2: 25,000 SP (Total: 28,000 SP) – Increases damage against J’avo by 20% / 50%
Zombie Hunter – Level 2 – Level 1: 3,000 SP / Level 2: 25,000 SP (Total: 28,000 SP) – Increases damage against zombies by 20% / 50%
Eagle Eye – Level 1 – 3,000 SP – Adds an extra level of magnification to sniper scopes
Quick Reload – Level 1 – 10,000 SP – Reload weapons 20% faster
Last Shot – Level 1 – 55,000 SP – Increases final round damage by 300%
Shooting Wild – Level 1 – 65,000 SP – Removes targeting reticle but increases firepower by 50%
Combat Gauge Boost – Level 2 – Level 1: 70,000 SP / Level 2: 90,000 SP (Total: 160,000 SP) – Increases Combat Gauge by 3 / 5 blocks
Breakout – Level 1 – 2,800 SP – Escape enemy grabs faster
Item Drop Increase – Level 1 – 3,500 SP – Increases item drop rate by 40%
Recovery – Level 2 – Level 1: 10,000 SP / Level 2: 70,000 SP (Total: 80,000 SP) – Reduces downed recovery time to 10 / 7 seconds
Team-Up – Level 1 – 14,000 SP – Increases partner attack power when nearby
Field Medic – Level 2 – Level 1: 12,000 SP / Level 2: 95,000 SP (Total: 107,000 SP) – AI partner provides health tablets when rescuing you
Lone Wolf – Level 1 – 100 SP – Prevents AI partner from assisting you but doesn't work well if at all.
Assault Rifle Ammo Pickup Increase – Level 1 – 8,000 SP – Increases chance of finding 5.56 NATO ammo
Shotgun Shell Pickup Increase – Level 1 – 8,000 SP – Increases chance of finding shotgun shells
Magnum Ammo Pickup Increase – Level 1 – 25,000 SP – Increases chance of finding Magnum ammo
Rifle Ammo Pickup Increase – Level 1 – 8,000 SP – Increases chance of finding rifle ammo
Grenade Launcher Ammo Pickup Increase – Level 1 – 22,000 SP – Increases chance of finding 40mm rounds
Arrow Pickup Increase – Level 1 – 20,000 SP – Increases chance of finding crossbow arrows
Grenade Power Up – Level 1 – 40,000 SP – Increases grenade damage by 100%
Handgun Master – Level 1 – 37,000 SP – Increases handgun damage by 100%
Shotgun Master – Level 1 – 38,000 SP – Increases shotgun damage by 100%
Magnum Master – Level 1 – 40,000 SP – Increases magnum damage by 100%
Sniper Master – Level 1 – 39,000 SP – Increases sniper rifle damage by 100%
Machine Pistol Master – Level 1 – 38,000 SP – Increases machine pistol damage by 100%
Assault Rifle Master – Level 1 – 37,000 SP – Increases assault rifle damage by 100%
Grenade Launcher Master – Level 1 – 40,000 SP – Increases grenade launcher damage by 100%
Crossbow Master – Level 1 – 40,000 SP – Increases crossbow damage by 100%
Infinite Handgun – Level 1 – 79,000 SP – Unlimited handgun ammo
Infinite Shotgun – Level 1 – 89,000 SP – Unlimited shotgun ammo
Infinite Magnum – Level 1 – 99,000 SP – Unlimited magnum ammo
Infinite Sniper Rifle – Level 1 – 79,000 SP – Unlimited sniper rifle ammo
Infinite Machine Pistol – Level 1 – 89,000 SP – Unlimited machine pistol ammo
Infinite Assault Rifle – Level 1 – 89,000 SP – Unlimited assault rifle ammo
Infinite Grenade Launcher – Level 1 – 99,000 SP – Unlimited grenade launcher ammo
Infinite Crossbow – Level 1 – 79,000 SP – Unlimited crossbow ammo
Agent Hunt Skills
Costs 320,000 SP to buy and max all these skills.Creature Offense – Level 3 – Level 1: 5,000 SP / Level 2: 15,000 SP / Level 3: 60,000 SP (Total: 80,000 SP) – Increases damage dealt by 10% / 20% / 50%
Creature Defense – Level 3 – Level 1: 5,000 SP / Level 2: 15,000 SP / Level 3: 60,000 SP (Total: 80,000 SP) – Reduces damage taken by 10% / 20% / 30%
Creature Health – Level 3 – Level 1: 5,000 SP / Level 2: 15,000 SP / Level 3: 60,000 SP (Total: 80,000 SP) – Increases health by 20% / 50% / 100%
Creature Stamina – Level 3 – Level 1: 5,000 SP / Level 2: 15,000 SP / Level 3: 60,000 SP (Total: 80,000 SP) – Increases stamina bar by 6 / 7 / 10 units
Mercenaries/Mercenaries No Mercy Skills
Full list total: 481,500 SP. Minus duplicates from campaign which are Eagle Eye and Item Drop Increase. (-6,500 SP), so 475,000 SP for everything here.Eagle Eye – Level 1 – 3,000 SP – Adds an extra level of magnification to all scoped weapons
Item Drop Increase – Level 1 – 3,500 SP – Increases item drop rate by 40%
Go For Broke! – Level 1 – 60,000 SP – When timer is below 30 seconds, combo window increases to 17 seconds
Time Bonus + – Level 1 – 90,000 SP – Yellow hourglasses now give 70 seconds instead of 60
Combo Bonus + – Level 1 – 50,000 SP – Extended combo bonuses last 10 seconds longer
Limit Breaker – Level 1 – 60,000 SP – After 50 combo, kills give +50 extra points per enemy
Blitz Play – Level 1 – 5,000 SP – Attacking immediately after another player increases damage by 50%
Quick Shot Damage – Level 1 – 15,000 SP – Increases Quick Shot damage by 50%
Power Counter – Level 1 – 8,000 SP – Counter attacks deal 25% more damage
Second Wind – Level 1 – 6,000 SP – Deal 10% more damage when health is at 2 bars or lower
Martial Arts Master – Level 1 – 25,000 SP – Melee damage +25%, firearm damage -50%
Target Master – Level 1 – 25,000 SP – Firearm damage +25%, melee damage -50%
Last Stand – Level 1 – 30,000 SP – Deal 30% more damage but take 300% more damage
Pre-emptive Strike – Level 1 – 7,000 SP – Back attacks deal 25% more damage
Dying Breath – Level 1 – 15,000 SP – Deal 300% more damage while dying; recovery reduced to 5 seconds
Pharmacist – Level 1 – 17,000 SP – Herb tablets restore 2 health blocks
Medic – Level 1 – 12,000 SP – Heal 1 health block to teammate at any range
First Responder – Level 1 – 15,000 SP – Partner gains 1 free health block when rescued
Skills Continued
Take It Easy – Level 1 – 20,000 SP – Health recovers twice as fast while in cover
Natural Healing – Level 1 – 15,000 SP – Health and combat gauge recover 25% faster
Lock-On – Level 2 – Level 1: 2,800 SP / Level 2: 31,000 SP (Total: 33,800 SP) – Steadies aim while shooting
Rock Steady – Level 2 – Level 1: 2,800 SP / Level 2: 31,000 SP (Total: 33,800 SP) – Reduces recoil after firing
Stealth Movement – Level 1 – 350 SP – Move without making noise
Eagle Eye – Level 1 – 3,000 SP – Adds extra scope magnification
Quick Reload – Level 1 – 10,000 SP – Reload weapons faster
Shooting Wild – Level 1 – 65,000 SP – Removes targeting sight but increases firepower by 50%
Blitz Play – Level 1 – 5,000 SP – Attack immediately after another player for +50% damage
Quick Shot Damage – Level 1 – 15,000 SP – Quick Shot deals 50% more damage
Power Counter – Level 1 – 8,000 SP – Counter attacks deal 25% more damage
Second Wind – Level 1 – 6,000 SP – Deal 10% more damage at 2 health bars or lower
Martial Arts Master – Level 1 – 25,000 SP – Melee +25%, firearm -50%
Target Master – Level 1 – 25,000 SP – Firearm +25%, melee -50%
Last Stand – Level 1 – 30,000 SP – Deal +30% damage, take +300% damage
Revenge – Level 1 – 8,000 SP – Increased damage against players who defeated you
Dying Breath – Level 1 – 15,000 SP – 300% more damage while dying; recovery shortened
Pharmacist – Level 1 – 17,000 SP – Herb tablets restore 2 health blocks
Medic – Level 1 – 12,000 SP – Heal 1 health block to teammate at any range
First Responder – Level 1 – 15,000 SP – Partner gains 1 health block when rescued
Take It Easy – Level 1 – 20,000 SP – Recover health twice as fast in cover
Natural Healing – Level 1 – 15,000 SP – Health and combat gauge recover 25% faster
Lock-On – Level 2 – Level 1: 2,800 SP / Level 2: 31,000 SP (Total: 33,800 SP) – Steadies aim while shooting
Rock Steady – Level 2 – Level 1: 2,800 SP / Level 2: 31,000 SP (Total: 33,800 SP) – Reduces recoil after firing
Eagle Eye – Level 1 – 3,000 SP – Adds extra scope magnification
Quick Reload – Level 1 – 10,000 SP – Reload weapons faster
Shooting Wild – Level 1 – 65,000 SP – Removes targeting sight but increases firepower by 50%
Breakout – Level 1 – 2,800 SP – Escape enemy grabs faster
Item Drop Increase – Level 1 – 3,500 SP – Increases item drop rate by 40%
Limit Breaker – Level 1 – 60,000 SP – After 50 combo, kills grant +50 extra points
Quick Shot Damage – Level 1 – 15,000 SP – Quick Shot deals 50% more damage
Power Counter – Level 1 – 8,000 SP – Counter attacks deal 25% more damage
Second Wind – Level 1 – 6,000 SP – Deal 10% more damage at low health
Martial Arts Master – Level 1 – 25,000 SP – Melee +25%, firearm -50%
Target Master – Level 1 – 25,000 SP – Firearm +25%, melee -50%
Last Stand – Level 1 – 30,000 SP – Deal +30% damage, take +300% damage
Dying Breath – Level 1 – 15,000 SP – 300% more damage while dying; recovery shortened
Pharmacist – Level 1 – 17,000 SP – Herb tablets restore 2 health blocks
Medic – Level 1 – 12,000 SP – Heal 1 health block to teammate at any range
First Responder – Level 1 – 15,000 SP – Partner gains 1 health block when rescued
Take It Easy – Level 1 – 20,000 SP – Recover health twice as fast in cover
Natural Healing – Level 1 – 15,000 SP – Health and combat gauge recover 25% faster
Lock-On – Level 2 – Level 1: 2,800 SP / Level 2: 31,000 SP (Total: 33,800 SP) – Steadies aim while shooting
Rock Steady – Level 2 – Level 1: 2,800 SP / Level 2: 31,000 SP (Total: 33,800 SP) – Reduces recoil after firing
Eagle Eye – Level 1 – 3,000 SP – Adds extra scope magnification
Quick Reload – Level 1 – 10,000 SP – Reload weapons faster
Shooting Wild – Level 1 – 65,000 SP – Removes targeting sight but increases firepower by 50%
Combat Gauge Boost – Level 2 – Level 1: 70,000 SP / Level 2: 90,000 SP (Total: 160,000 SP) – Increases Combat Gauge by 3 / 5 blocks
Quick Shot Damage – Level 1 – 15,000 SP – Quick Shot deals 50% more damage
Second Wind – Level 1 – 6,000 SP – Deal 10% more damage at low health
Martial Arts Master – Level 1 – 25,000 SP – Melee +25%, firearm -50%
Target Master – Level 1 – 25,000 SP – Firearm +25%, melee -50%
Last Stand – Level 1 – 30,000 SP – Deal +30% damage, take +300% damage
Dying Breath – Level 1 – 15,000 SP – 300% more damage while dying; recovery shortened
Pharmacist – Level 1 – 17,000 SP – Herb tablets restore 2 health blocks
Medic – Level 1 – 12,000 SP – Heal 1 health block to teammate at any range
First Responder – Level 1 – 15,000 SP – Partner gains 1 health block when rescued
Take It Easy – Level 1 – 20,000 SP – Recover health twice as fast in cover
Natural Healing – Level 1 – 15,000 SP – Health and combat gauge recover 25% faster
Lock-On – Level 2 – Level 1: 2,800 SP / Level 2: 31,000 SP (Total: 33,800 SP) – Steadies aim while shooting
Rock Steady – Level 2 – Level 1: 2,800 SP / Level 2: 31,000 SP (Total: 33,800 SP) – Reduces recoil after firing
Eagle Eye – Level 1 – 3,000 SP – Adds extra scope magnification
Quick Reload – Level 1 – 10,000 SP – Reload weapons faster
Breakout – Level 1 – 2,800 SP – Escape enemy grabs faster
Blitz Play – Level 1 – 5,000 SP – Attack immediately after another player for +50% damage
Power Counter – Level 1 – 8,000 SP – Counter attacks deal 25% more damage
Second Wind – Level 1 – 6,000 SP – Deal 10% more damage at low health
Last Stand – Level 1 – 30,000 SP – Deal +30% damage, take +300% damage
Pre-emptive Strike – Level 1 – 7,000 SP – Back attacks deal 25% more damage
Dying Breath – Level 1 – 15,000 SP – 300% more damage while dying; recovery shortened
Pharmacist – Level 1 – 17,000 SP – Herb tablets restore 2 health blocks
Medic – Level 1 – 12,000 SP – Heal 1 health block to teammate at any range
First Responder – Level 1 – 15,000 SP – Partner gains 1 health block when rescued
Take It Easy – Level 1 – 20,000 SP – Recover health twice as fast in cover
Natural Healing – Level 1 – 15,000 SP – Health and combat gauge recover 25% faster
You can equip 3 skills in Campaign and 1 skill in every other mode.
Completing one campaign will unlock seven new sets of skill, with eight being the total. Sets can be changed and equipped at any moment by accessing the character's COMs Device.
You can’t use skills at all in No Hope difficulty.
Natural Healing – Level 1 – 15,000 SP – Health and combat gauge recover 25% faster
Survivors Skills
Raw Total (Before Removing Duplicates)346,950 SP. The only unique skills(NOT duplicates) are: Stealth Movement and Revenge. 346,950 SP– 338,600 SP = new total 8,350 SP.Lock-On – Level 2 – Level 1: 2,800 SP / Level 2: 31,000 SP (Total: 33,800 SP) – Steadies aim while shooting
Rock Steady – Level 2 – Level 1: 2,800 SP / Level 2: 31,000 SP (Total: 33,800 SP) – Reduces recoil after firing
Stealth Movement – Level 1 – 350 SP – Move without making noise
Eagle Eye – Level 1 – 3,000 SP – Adds extra scope magnification
Quick Reload – Level 1 – 10,000 SP – Reload weapons faster
Shooting Wild – Level 1 – 65,000 SP – Removes targeting sight but increases firepower by 50%
Blitz Play – Level 1 – 5,000 SP – Attack immediately after another player for +50% damage
Quick Shot Damage – Level 1 – 15,000 SP – Quick Shot deals 50% more damage
Power Counter – Level 1 – 8,000 SP – Counter attacks deal 25% more damage
Second Wind – Level 1 – 6,000 SP – Deal 10% more damage at 2 health bars or lower
Martial Arts Master – Level 1 – 25,000 SP – Melee +25%, firearm -50%
Target Master – Level 1 – 25,000 SP – Firearm +25%, melee -50%
Last Stand – Level 1 – 30,000 SP – Deal +30% damage, take +300% damage
Revenge – Level 1 – 8,000 SP – Increased damage against players who defeated you
Dying Breath – Level 1 – 15,000 SP – 300% more damage while dying; recovery shortened
Pharmacist – Level 1 – 17,000 SP – Herb tablets restore 2 health blocks
Medic – Level 1 – 12,000 SP – Heal 1 health block to teammate at any range
First Responder – Level 1 – 15,000 SP – Partner gains 1 health block when rescued
Take It Easy – Level 1 – 20,000 SP – Recover health twice as fast in cover
Natural Healing – Level 1 – 15,000 SP – Health and combat gauge recover 25% faster
Onslaught Skills
Raw Total (Before Removing Duplicates)397,700 SP. No Unique Skills in This List.Lock-On – Level 2 – Level 1: 2,800 SP / Level 2: 31,000 SP (Total: 33,800 SP) – Steadies aim while shooting
Rock Steady – Level 2 – Level 1: 2,800 SP / Level 2: 31,000 SP (Total: 33,800 SP) – Reduces recoil after firing
Eagle Eye – Level 1 – 3,000 SP – Adds extra scope magnification
Quick Reload – Level 1 – 10,000 SP – Reload weapons faster
Shooting Wild – Level 1 – 65,000 SP – Removes targeting sight but increases firepower by 50%
Breakout – Level 1 – 2,800 SP – Escape enemy grabs faster
Item Drop Increase – Level 1 – 3,500 SP – Increases item drop rate by 40%
Limit Breaker – Level 1 – 60,000 SP – After 50 combo, kills grant +50 extra points
Quick Shot Damage – Level 1 – 15,000 SP – Quick Shot deals 50% more damage
Power Counter – Level 1 – 8,000 SP – Counter attacks deal 25% more damage
Second Wind – Level 1 – 6,000 SP – Deal 10% more damage at low health
Martial Arts Master – Level 1 – 25,000 SP – Melee +25%, firearm -50%
Target Master – Level 1 – 25,000 SP – Firearm +25%, melee -50%
Last Stand – Level 1 – 30,000 SP – Deal +30% damage, take +300% damage
Dying Breath – Level 1 – 15,000 SP – 300% more damage while dying; recovery shortened
Pharmacist – Level 1 – 17,000 SP – Herb tablets restore 2 health blocks
Medic – Level 1 – 12,000 SP – Heal 1 health block to teammate at any range
First Responder – Level 1 – 15,000 SP – Partner gains 1 health block when rescued
Take It Easy – Level 1 – 20,000 SP – Recover health twice as fast in cover
Natural Healing – Level 1 – 15,000 SP – Health and combat gauge recover 25% faster
Predator Skills
Raw Total (Before Removing Duplicates)487,600 SP. No Unique Skills in This List.Lock-On – Level 2 – Level 1: 2,800 SP / Level 2: 31,000 SP (Total: 33,800 SP) – Steadies aim while shooting
Rock Steady – Level 2 – Level 1: 2,800 SP / Level 2: 31,000 SP (Total: 33,800 SP) – Reduces recoil after firing
Eagle Eye – Level 1 – 3,000 SP – Adds extra scope magnification
Quick Reload – Level 1 – 10,000 SP – Reload weapons faster
Shooting Wild – Level 1 – 65,000 SP – Removes targeting sight but increases firepower by 50%
Combat Gauge Boost – Level 2 – Level 1: 70,000 SP / Level 2: 90,000 SP (Total: 160,000 SP) – Increases Combat Gauge by 3 / 5 blocks
Quick Shot Damage – Level 1 – 15,000 SP – Quick Shot deals 50% more damage
Second Wind – Level 1 – 6,000 SP – Deal 10% more damage at low health
Martial Arts Master – Level 1 – 25,000 SP – Melee +25%, firearm -50%
Target Master – Level 1 – 25,000 SP – Firearm +25%, melee -50%
Last Stand – Level 1 – 30,000 SP – Deal +30% damage, take +300% damage
Dying Breath – Level 1 – 15,000 SP – 300% more damage while dying; recovery shortened
Pharmacist – Level 1 – 17,000 SP – Herb tablets restore 2 health blocks
Medic – Level 1 – 12,000 SP – Heal 1 health block to teammate at any range
First Responder – Level 1 – 15,000 SP – Partner gains 1 health block when rescued
Take It Easy – Level 1 – 20,000 SP – Recover health twice as fast in cover
Natural Healing – Level 1 – 15,000 SP – Health and combat gauge recover 25% faster
Siege Skills
Raw Total (Before Removing Duplicates)219,400 SP. No Unique Skills in This List.Lock-On – Level 2 – Level 1: 2,800 SP / Level 2: 31,000 SP (Total: 33,800 SP) – Steadies aim while shooting
Rock Steady – Level 2 – Level 1: 2,800 SP / Level 2: 31,000 SP (Total: 33,800 SP) – Reduces recoil after firing
Eagle Eye – Level 1 – 3,000 SP – Adds extra scope magnification
Quick Reload – Level 1 – 10,000 SP – Reload weapons faster
Breakout – Level 1 – 2,800 SP – Escape enemy grabs faster
Blitz Play – Level 1 – 5,000 SP – Attack immediately after another player for +50% damage
Power Counter – Level 1 – 8,000 SP – Counter attacks deal 25% more damage
Second Wind – Level 1 – 6,000 SP – Deal 10% more damage at low health
Last Stand – Level 1 – 30,000 SP – Deal +30% damage, take +300% damage
Pre-emptive Strike – Level 1 – 7,000 SP – Back attacks deal 25% more damage
Dying Breath – Level 1 – 15,000 SP – 300% more damage while dying; recovery shortened
Pharmacist – Level 1 – 17,000 SP – Herb tablets restore 2 health blocks
Medic – Level 1 – 12,000 SP – Heal 1 health block to teammate at any range
First Responder – Level 1 – 15,000 SP – Partner gains 1 health block when rescued
Take It Easy – Level 1 – 20,000 SP – Recover health twice as fast in cover
Natural Healing – Level 1 – 15,000 SP – Health and combat gauge recover 25% faster
Total
2,635,850 SP total is the true amount needed to unlock every unique skill in the game and max their respective levels once.You can equip 3 skills in Campaign and 1 skill in every other mode.
Completing one campaign will unlock seven new sets of skill, with eight being the total. Sets can be changed and equipped at any moment by accessing the character's COMs Device.
You can’t use skills at all in No Hope difficulty.
Skill Point Values and Pieces
All Skill Points
Name
Value
Appearance
Name
Value
Appearance
Name
Value
Appearance
Pawn
50 points
Queen Bronze
1,000 points

Rook Gold
3,000 points

Knight
100 points

Rook Silver
1,500 points

King Silver
4,000 points
Bishop
300 points
King Bronze
2,000 points

Queen Gold
5,000 points
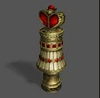
Rook Bronze
500 points

Queen Silver
2,500 points

King Gold
10,000 points
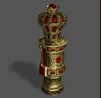
Skill points that are worth more appear more in harder difficulties.
Best Skill point Farm
In Jake Chapter 4-2, Poisowan Entrance, there are a lot of points in the chests that you can grab. After you grab it and head through the loading door (you must do this, look for the {=}Saving… icon) you can leave via return to main menu, go to chapter select and select the same chapter 3-4 and repeat for infinite skill points. Don’t do this during an S rank run. Chapter selecting this will override your current checkpoint and every time you reset it will reset your accuracy, deaths, kills, and clear time for that current playthrough.
About Campaigns -
This a Guide/Resource, not a walkthrough so keep that in mind. Any campaign qte or related deaths such as failing a qte or something similar will be documented as well as all items, and that’s all you will likely need. If you want more info, just ask and I’ll add it in. In the future I might entertain adding an actual campaign walkthrough.
Amateur: 50% damage taken. Apparently Deborah doesn't appear for her fight on the mining cart in Leon's campaign in some cases, Chapter 2. Brzak is much slower, allowing more time for Helena to save Leon in the cave, Chapter 3.
Normal: 100% damage taken.
Veteran: 150% damage taken give or take.
Professional: 250% damage taken give or take.
No Hope: ?% damage taken. No skills can be used at all, stamina regenerates slowly, enemies attacks become more frequent with certain attacks like grabs being more common,
Warning, these might be spoilers depending on how you look at it.
Leon's Campaign
• Chapter 2-7 → Ada 2-2 — Altar CorridorDeborah Fight
• Chapter 4-2 → Jake 4-5 — Airplane Crash SiteUstanak Fight
• Chapter 4-4 → Chris 3-5 — Medical Research CenterBefore finding Carla, race and explosive drones
• Chapter 5-3 → Ada 5-2 — Quad Tower EntranceSimmons Dino fight
• Chapter 5-4 → Ada 5-4 — Quad TowerRight after the Simmons Dino fight while on the elevators
Chris's Campaign
• Chapter 2-3 → Jake 1-4 — In Front of City HallDuring the 2nd big Ogroman fight
• Chapter 3-2 → Jake 4-2 — Poisawan CourtyardDuring both of the helicopter fights
• Chapter 3-5 → Leon 4-4 — Medical Research CenterBefore finding Carla and before driving, race and explosive drones
• Chapter 5-2 → Jake 5-2 — Underwater Facility – Lower LevelsAfter the main thoroughfare when you ride the lifts up before HAOS
Jake's Campaign
• Chapter 1-4 → Chris 2-3 — In Front of City HallDuring the big Ogroman fight before entering the helicopter
• Chapter 4-2 → Chris 3-2 — Poisawan CourtyardDuring both of the helicopter fights after the motorcycle segment
• Chapter 4-5 → Leon 4-2 — Airplane Crash SiteUstanak Fight
• Chapter 4-6 → Ada 3-4 — Stilt Housing AreaDuring the final Chainsaw zombie fight when you pilot the raft
• Chapter 5-2 → Chris 5-2 — Underwater Facility – Lower LevelsAfter the main thoroughfare when you ride the lifts up before Ustanak
Ada's Campaign
• Chapter 2-2 → Leon 2-7 — Altar CorridorDeborah Fight
• Chapter 3-4 → Jake 4-6 — Stilt Housing AreaDuring the final Chainsaw zombie fight when you are on the rooftops after taking the stairs
• Chapter 5-2 → Leon 5-3 — Quad Tower EntranceSimmons Dino fight
• Chapter 5-4 → Leon 5-4 — Quad Tower Right after Simmons Dino fight during the final fight
To get into an intersection with a friend, make sure you set your settings to; Same Difficulty - Online - Allow Partner Join - Worldwide or unrestricted location - Attack Reaction same - Agent Hunt same
When forcing a connection with a friend, do not start the game at the “exact” same time and instead give it a 1.5 minimum -- 3 maximum second delay between players and you may have to play with who starts first or who progresses first to get it to connect. This is likely due to how network communication works with this game as it sends out multiple signals simultaneously rather than instantaneously and at the same time.
The end of each chapter is unlocked in chapter select of your highest completed chapter and the very next chapter by default. You can play the end of each chapter from chapter select by pressing right all the way to the end segment and playing it to get all weapons fast, and if you do that with every campaign and chapter you can easily unlock Infinite Ammo
In the Specific Campaigns, I will notify you if you are forced to take a rescued by partner stat in records. If I don't notify you that means that even if you think it counts as a rescue, it doesn't. Example: Helana Chapter 2 might make you take a rescue, but Chris Chapter 5 doesn't make you take a rescue.
When wondering when you can quit during a chapter and you can’t remember where the chapter numbers are, watch the top left of the screen. If it says {=}Saving…, you can quit to main menu and pick up where you left off next time. If it says Checkpoint…, that means it will put you back here if you die or restart from checkpoint, as it will not save and if you quit you will have to restart the chapter. If you join a game online with your save point / continue active, it will dump it for whatever save point you get in the online game, regardless of what campaign. It saves at the start of the chapter too so be careful. You can manipulate your saved data to counter this if you want to keep your old save point and still be able to play with someone.
Regardless of what Character you choose, some events and things in Campaigns happen to someone in 3 possible circumstances in many areas and not their partner. Here are they and a couple of the many examples, not all of which are listed here:
1.Triggering it or being too close. If you get too close to the event trigger, things can affect you and not your partner. This happens in Leon Chapter 3 and in Jake Chapter 1.
(Insert image here)
2.(kinda similar to 1)Being ahead of your Partner / being first. If you are too far ahead in the path of the mission, things can happen to you. This happens in Leon Chapter 1 and Chris Chapter 1.
(Insert image here)
3. Being behind your partner / being last. If your partner gets to the objective or farther on the path than you. This happens in Chris Chapter 1 and Leon Chapter 1 or even in Chris(or more accurately, Piers) Chapter 5 when running away from the boss in the long corridors, Piers can hold the door open for Chris if Chris is last(even though Piers is a lightweight).
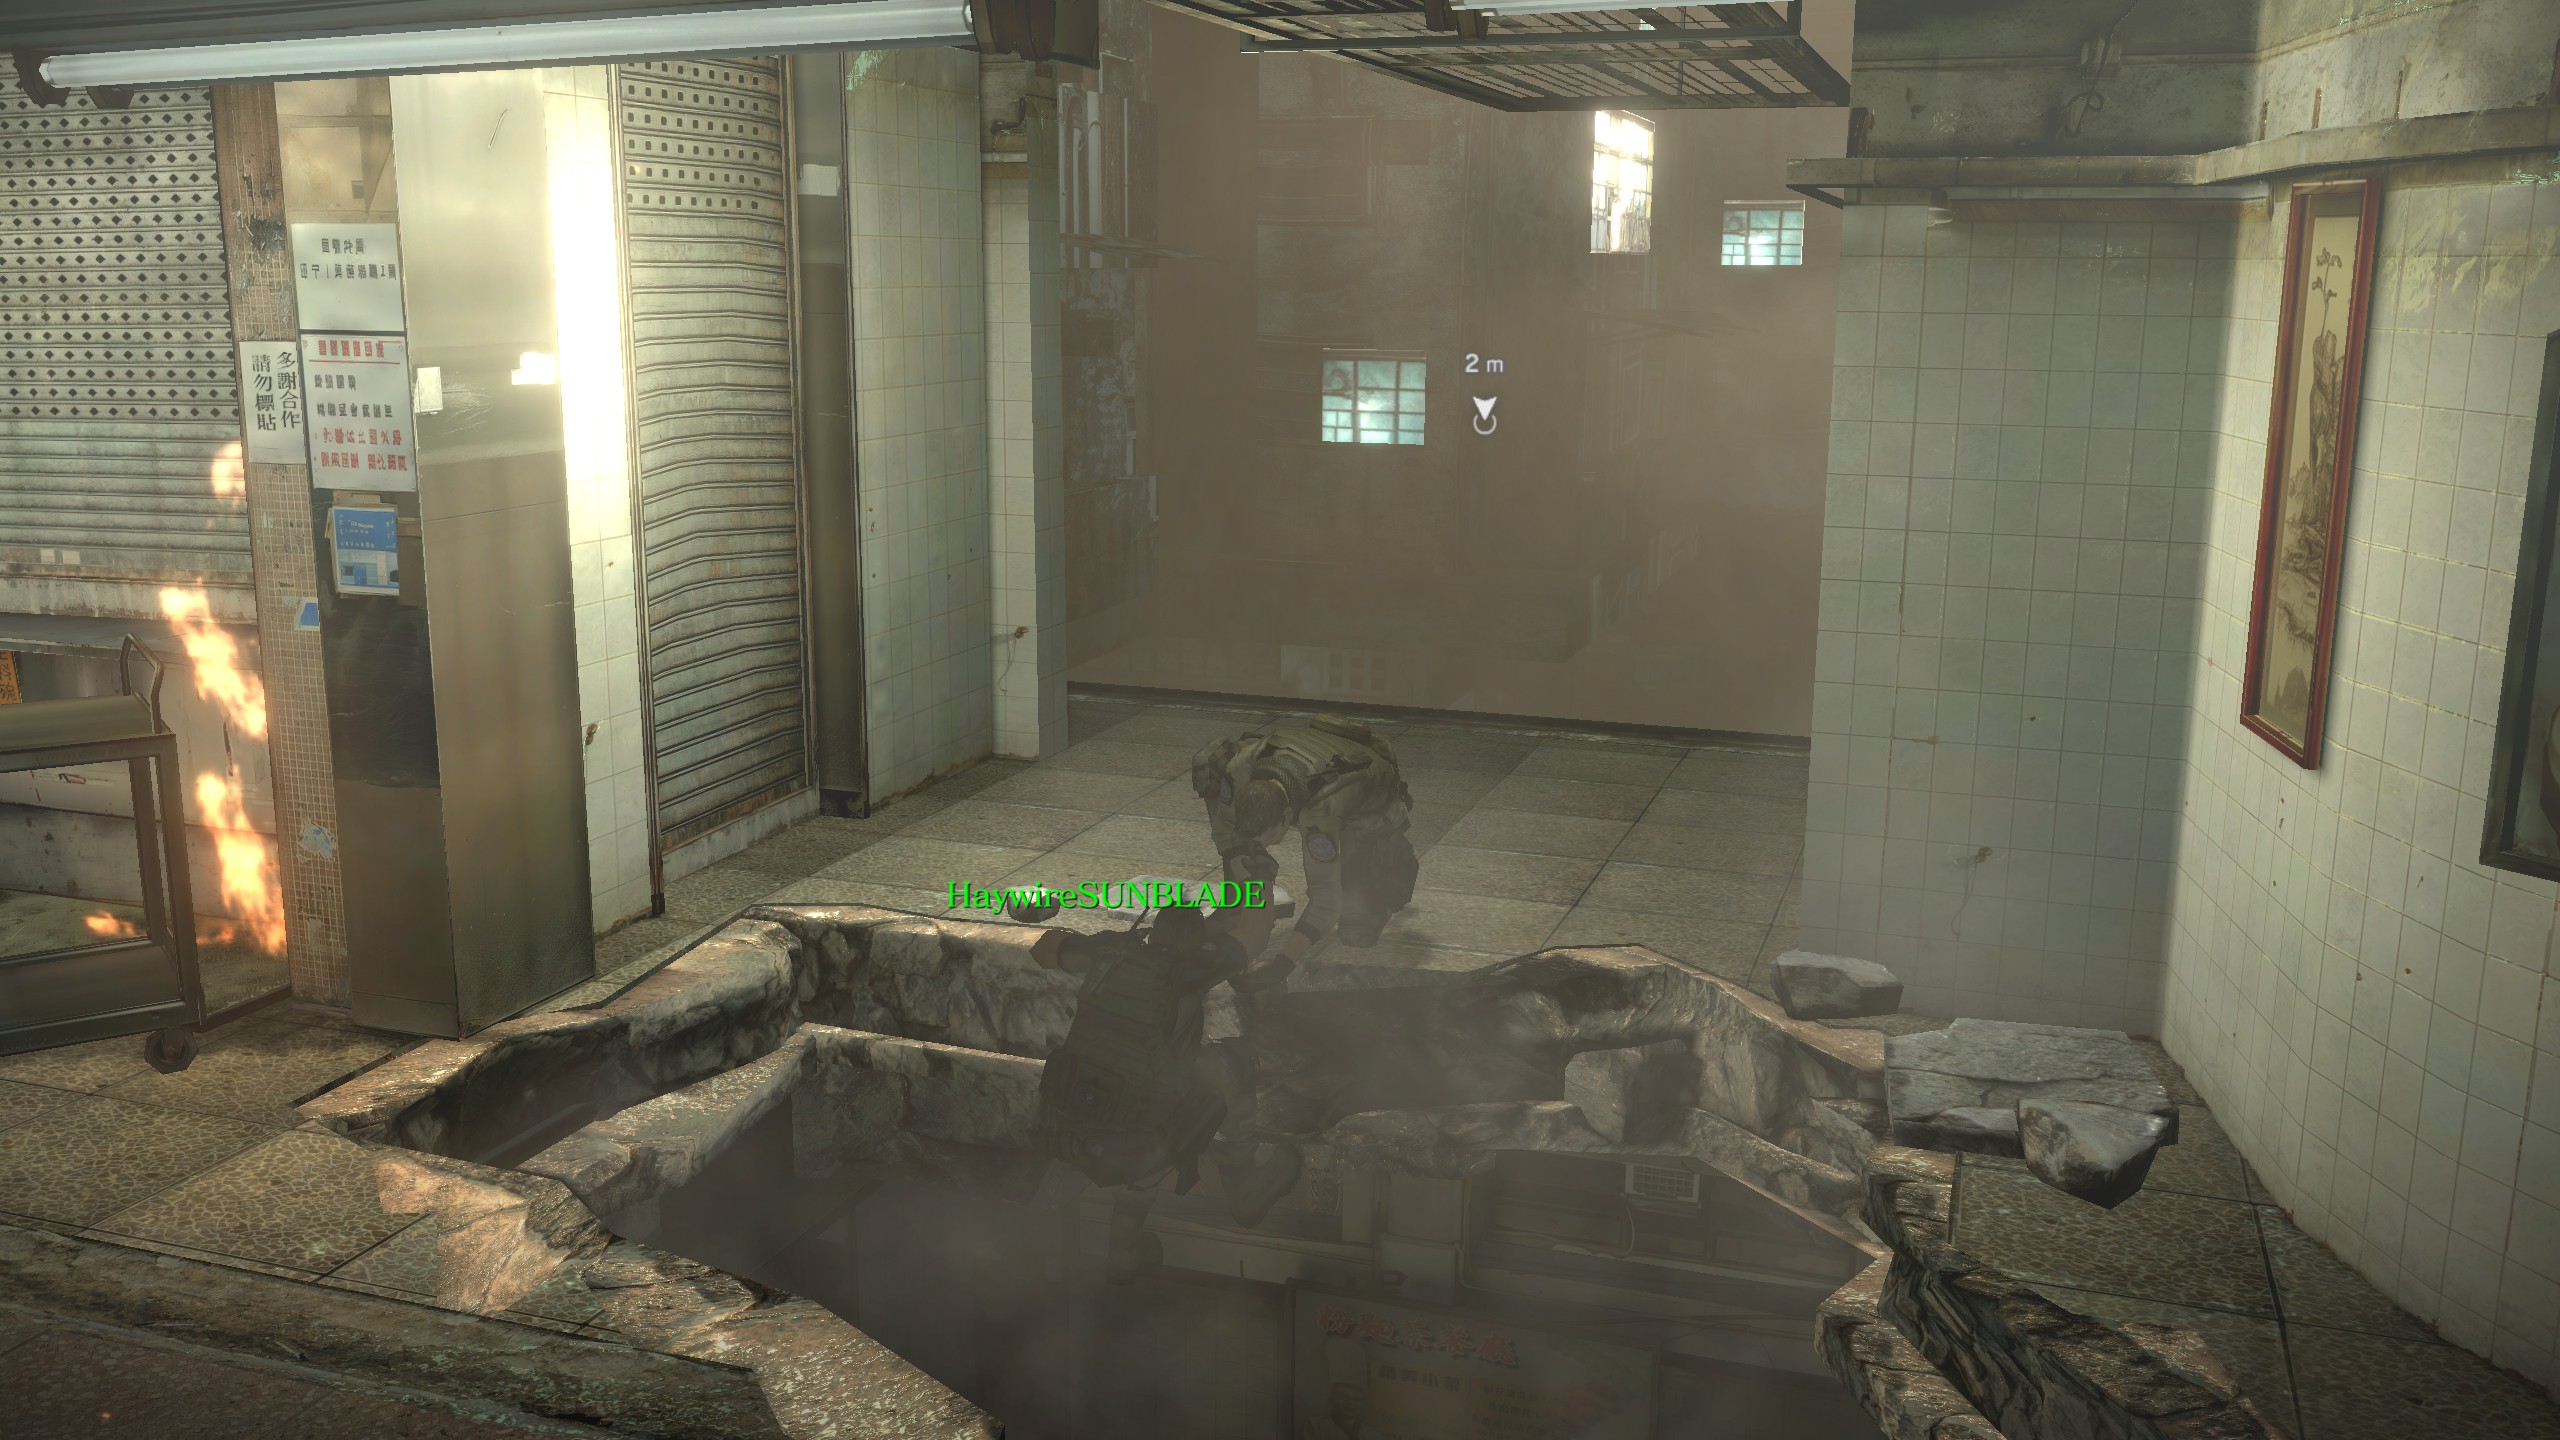
Difficulties
Amateur: 50% damage taken. Apparently Deborah doesn't appear for her fight on the mining cart in Leon's campaign in some cases, Chapter 2. Brzak is much slower, allowing more time for Helena to save Leon in the cave, Chapter 3.
Normal: 100% damage taken.
Veteran: 150% damage taken give or take.
Professional: 250% damage taken give or take.
No Hope: ?% damage taken. No skills can be used at all, stamina regenerates slowly, enemies attacks become more frequent with certain attacks like grabs being more common,
Enemies, Bosses, Creatures in Campaigns
Each campaign has different enemy types.Leon’s is just zombies. Chris’ and Jake’s is just J’avo. Ada’s is a combination—Ch_1 J’avo, Ch_2 Zombies, Ch_3 J’avo, Ch_4 J’avo, Ch_5 J’avo. It is sort of a mixture even when one enemy type dominates for Ada’s campaign.You can equip the correct skills per enemy type. It is best to complete one campaign so you can unlock more skill sets allowing you to change sets while in game. It is recommended to do Ada’s campaign last due to this. Recommend; one set with zombie hunter, defense lvl3(get to lvl3 asap it is op), and either firearms/melee or the combat gauge skill. Make another exactly the same way but with J’avo.Campaign Intersections
Campaign Characters will cross paths with each other. You can likely abuse this to abstain from receiving any rescues in the records section.Warning, these might be spoilers depending on how you look at it.
Leon's Campaign
• Chapter 2-7 → Ada 2-2 — Altar CorridorDeborah Fight
• Chapter 4-2 → Jake 4-5 — Airplane Crash SiteUstanak Fight
• Chapter 4-4 → Chris 3-5 — Medical Research CenterBefore finding Carla, race and explosive drones
• Chapter 5-3 → Ada 5-2 — Quad Tower EntranceSimmons Dino fight
• Chapter 5-4 → Ada 5-4 — Quad TowerRight after the Simmons Dino fight while on the elevators
Chris's Campaign
• Chapter 2-3 → Jake 1-4 — In Front of City HallDuring the 2nd big Ogroman fight
• Chapter 3-2 → Jake 4-2 — Poisawan CourtyardDuring both of the helicopter fights
• Chapter 3-5 → Leon 4-4 — Medical Research CenterBefore finding Carla and before driving, race and explosive drones
• Chapter 5-2 → Jake 5-2 — Underwater Facility – Lower LevelsAfter the main thoroughfare when you ride the lifts up before HAOS
Jake's Campaign
• Chapter 1-4 → Chris 2-3 — In Front of City HallDuring the big Ogroman fight before entering the helicopter
• Chapter 4-2 → Chris 3-2 — Poisawan CourtyardDuring both of the helicopter fights after the motorcycle segment
• Chapter 4-5 → Leon 4-2 — Airplane Crash SiteUstanak Fight
• Chapter 4-6 → Ada 3-4 — Stilt Housing AreaDuring the final Chainsaw zombie fight when you pilot the raft
• Chapter 5-2 → Chris 5-2 — Underwater Facility – Lower LevelsAfter the main thoroughfare when you ride the lifts up before Ustanak
Ada's Campaign
• Chapter 2-2 → Leon 2-7 — Altar CorridorDeborah Fight
• Chapter 3-4 → Jake 4-6 — Stilt Housing AreaDuring the final Chainsaw zombie fight when you are on the rooftops after taking the stairs
• Chapter 5-2 → Leon 5-3 — Quad Tower EntranceSimmons Dino fight
• Chapter 5-4 → Leon 5-4 — Quad Tower Right after Simmons Dino fight during the final fight
To get into an intersection with a friend, make sure you set your settings to; Same Difficulty - Online - Allow Partner Join - Worldwide or unrestricted location - Attack Reaction same - Agent Hunt same
When forcing a connection with a friend, do not start the game at the “exact” same time and instead give it a 1.5 minimum -- 3 maximum second delay between players and you may have to play with who starts first or who progresses first to get it to connect. This is likely due to how network communication works with this game as it sends out multiple signals simultaneously rather than instantaneously and at the same time.
More info
Weapons not found will appear later on in the chapter that they are found in, giving you multiple opportunities to get it. You will be rewarded with the weapon anyway if you conplete the chapter it is in. Beating a chapter will unlock the next chapter in chapter select.The end of each chapter is unlocked in chapter select of your highest completed chapter and the very next chapter by default. You can play the end of each chapter from chapter select by pressing right all the way to the end segment and playing it to get all weapons fast, and if you do that with every campaign and chapter you can easily unlock Infinite Ammo
In the Specific Campaigns, I will notify you if you are forced to take a rescued by partner stat in records. If I don't notify you that means that even if you think it counts as a rescue, it doesn't. Example: Helana Chapter 2 might make you take a rescue, but Chris Chapter 5 doesn't make you take a rescue.
When wondering when you can quit during a chapter and you can’t remember where the chapter numbers are, watch the top left of the screen. If it says {=}Saving…, you can quit to main menu and pick up where you left off next time. If it says Checkpoint…, that means it will put you back here if you die or restart from checkpoint, as it will not save and if you quit you will have to restart the chapter. If you join a game online with your save point / continue active, it will dump it for whatever save point you get in the online game, regardless of what campaign. It saves at the start of the chapter too so be careful. You can manipulate your saved data to counter this if you want to keep your old save point and still be able to play with someone.
Regardless of what Character you choose, some events and things in Campaigns happen to someone in 3 possible circumstances in many areas and not their partner. Here are they and a couple of the many examples, not all of which are listed here:
1.Triggering it or being too close. If you get too close to the event trigger, things can affect you and not your partner. This happens in Leon Chapter 3 and in Jake Chapter 1.
(Insert image here)
2.(kinda similar to 1)Being ahead of your Partner / being first. If you are too far ahead in the path of the mission, things can happen to you. This happens in Leon Chapter 1 and Chris Chapter 1.
(Insert image here)
3. Being behind your partner / being last. If your partner gets to the objective or farther on the path than you. This happens in Chris Chapter 1 and Leon Chapter 1 or even in Chris(or more accurately, Piers) Chapter 5 when running away from the boss in the long corridors, Piers can hold the door open for Chris if Chris is last(even though Piers is a lightweight).
Campaign Weapon locations
(Slight WIP as I do not have every 2nd location mapped out but I will at some point I promise you that.)
In every Campaign there are about 4 weapons to collect. In the chapter that contains a specific weapon, there are 3 opportunities to collect it; the first is where the weapon is and is meant to be collected from, the second is if you miss the first opportunity it will appear later on in the chapter as long as you aren’t too far in the chapter depending on where the weapons show up in that chapter, and the third opportunity is that it is simply given to you for completing the chapter. There will be a weapon indicator showing you where as long as it is in an accessible area.
Semi-Auto Sniper - Located in chapter 2 in the bell tower and is hard to miss.
Assault Rifle RN - Located in Chapter 3 in a coffin towards the start of the chapter before you meet the boss of the area, the best thing to do is to open every coffin you see. Appears later at the end of chapter 3 when you are separated from your partner (this is a guess because I don’t remember but I will fix it).
Lightning Hawk - Located in Chapter 4 on a table by the wall in the front of the plane in the cockpit.
Grenade Launcher - Located in Chapter 3 where you fight the Chopper for the second time, the weapon is in a small corridor along with some ammo.
Semi-Auto Sniper - In the very beginning of Chapter 4 in a facility storeroom just to the left of where you start.
Sniper Rifle - In the beginning of Chapter 2, the gun is located near the bench with the tarp after you drop down twice at the very start before finding any data.
Bear Commander - In Chapter 3 when you put the medallions in the coin slot and the final door opens, if you find even more adding up to 16 total instead of the usual amount required, another way will open up with the gun inside.
Shotgun - In Chapter 4 on the rooftop before the first chainsaw fight and before falling down and hurting your back, look around carefully before progressing and you will find the shotgun. There is a locker right next to it that you can jump inside serving no purpose.
Sniper Rifle - In Chapter 2 In the room locked by the Amber Key, the room where you need to shoot down the corpse. If missed it can be found in Chapter 3, it will be sitting right beside the spot that you first use your grappling hook - basically the start.
In every Campaign there are about 4 weapons to collect. In the chapter that contains a specific weapon, there are 3 opportunities to collect it; the first is where the weapon is and is meant to be collected from, the second is if you miss the first opportunity it will appear later on in the chapter as long as you aren’t too far in the chapter depending on where the weapons show up in that chapter, and the third opportunity is that it is simply given to you for completing the chapter. There will be a weapon indicator showing you where as long as it is in an accessible area.
Leon/Helana
Shotgun - Located in chapter 1 on a dead soldier during the section that you find the key in before your first Shrieker encounter. If you missed it the weapon appears at the end of the chapter in the gun shop on the first floor.Semi-Auto Sniper - Located in chapter 2 in the bell tower and is hard to miss.
Assault Rifle RN - Located in Chapter 3 in a coffin towards the start of the chapter before you meet the boss of the area, the best thing to do is to open every coffin you see. Appears later at the end of chapter 3 when you are separated from your partner (this is a guess because I don’t remember but I will fix it).
Lightning Hawk - Located in Chapter 4 on a table by the wall in the front of the plane in the cockpit.
Chris/Piers
Assault Shotgun - Located in Chapter 2 in the first encounter with an ogroman inside the room that triggers the encounter, after you deal with the ogroman, go back to that door and the gun will be inside. Appears later in the city hall inside a room that a J’avo jumps out from just after you see a mysterious figure.Grenade Launcher - Located in Chapter 3 where you fight the Chopper for the second time, the weapon is in a small corridor along with some ammo.
Semi-Auto Sniper - In the very beginning of Chapter 4 in a facility storeroom just to the left of where you start.
Jake/Sherry
Magnum - In Chapter 1 just after running away from Ustanak and diving through the window and again just before fighting him with the explosive barrels all around, go upstairs and it is in the room to the right next to an unsuspecting J’avo.Sniper Rifle - In the beginning of Chapter 2, the gun is located near the bench with the tarp after you drop down twice at the very start before finding any data.
Bear Commander - In Chapter 3 when you put the medallions in the coin slot and the final door opens, if you find even more adding up to 16 total instead of the usual amount required, another way will open up with the gun inside.
Shotgun - In Chapter 4 on the rooftop before the first chainsaw fight and before falling down and hurting your back, look around carefully before progressing and you will find the shotgun. There is a locker right next to it that you can jump inside serving no purpose.
Ada/Agent
Assault Shotgun - In chapter 1 on a workbench about halfway through the chapter after Ada looks at her map unprompted for the first time talking about not liking playing other people’s games.Sniper Rifle - In Chapter 2 In the room locked by the Amber Key, the room where you need to shoot down the corpse. If missed it can be found in Chapter 3, it will be sitting right beside the spot that you first use your grappling hook - basically the start.
Tips/Tidbits Leon/Helena Campaign
In Chapter 1-5, if you protect the asian dude in blue he will open a door for you containing some grenades.
In Chapter 2, you can kill the Lepotitsa fast enough to save one or more survivors in the cathedral which earns a medal.
In Chapter 2 as Helana, you will always gain +1 rescued stat when subdued byDeborahno matter what, and this is true if you get grabbed in the same way as any character. May be avoidable if nobody shoots at the boss but that requires 3 players intersection and is not tested.
In Chapter 2, you can break the duckable obstacles in the minecart by shooting them.
In Chapter 2 when riding the cart fighting Deborah you can back dodge and hold aim to not only duck all obstacles, but remain completely invulnerable to her attacks.
In Chapter 2, you can counter Deborahwhen she jumps at you during her main fight. It opens her up for a melee context. Shooting explosive barrels will do the same thing.
In Chapter 3, you can avoid having to send Helana up to crawl around the big wall of fire if you aim a well placed grenade killing the zombie controlling it. This will earn you a medal.
In Chapter 3, when Helana falls and had to crawl up a slope away from zombies, if you turn attack reaction on before the game is started and shoot her with the magnum or use a grenade you can boost her up all the way to the end of the crawl quickly. Useful if being attacked by a player creature. Thanks GuitarrConn for your many contributions.
In Chapter 4, you can farm loads of magnum ammo by staring the chapter, grabbing the ammo, getting a save point and repeating.
In Chapter 4 during the fight withUstanak, after Leon andSherry use the bus(by the way hitting the enemy with the boss doesn't do anything besides damage him slightly, with no cutscene or dialogue), you can actually climb on top of the bus and jump around for some items that you must get before the fight is over. Then after you get those, go around to the other side that was opened and look for a movable object with ladders on it with red security markings on it. You must have all 4 Characters move this to get access to the rest of the items, and make sure you hop across and open the case full of grenades and a first aid.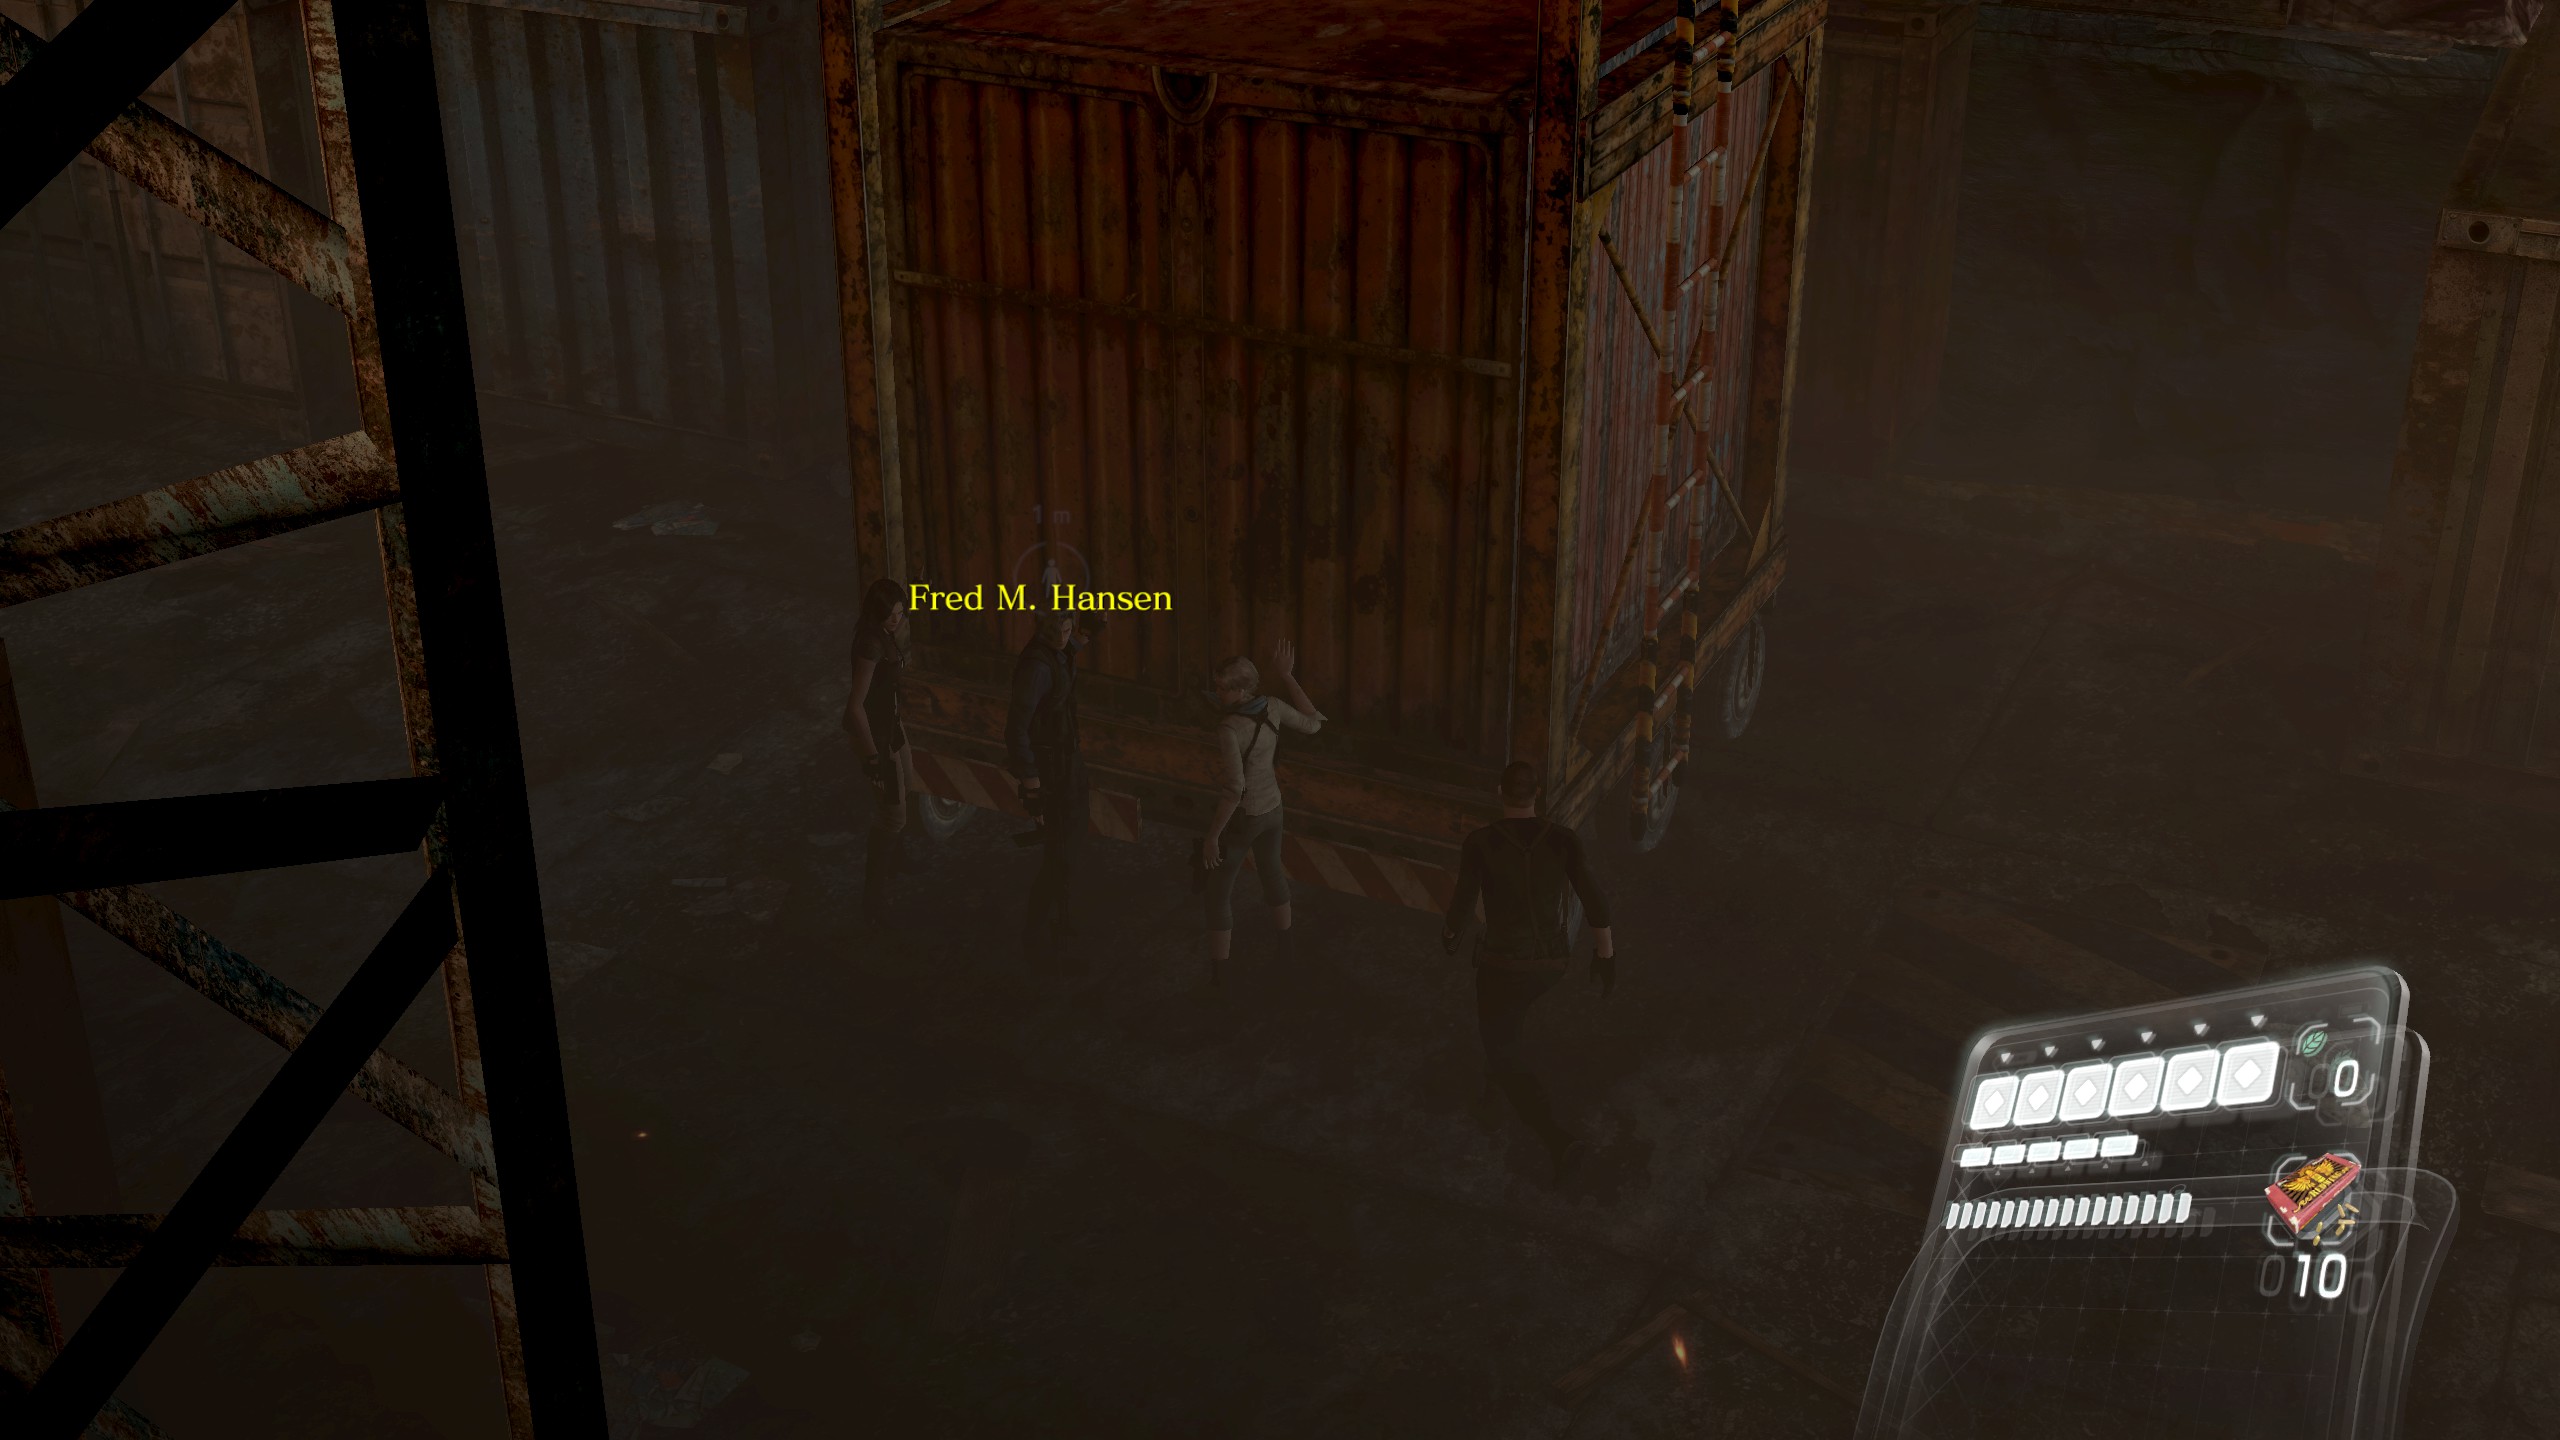 Note: You must loot all items because once the fight ends you cannot get back.
In Chapter 4, after unlocking the door and entering the meat grinder scene, the player not fighting the blue zombie should carefully shoot the zombie to help the partner.
In Chapter 4 when you arrive at a long corridor before the Leon and Chris find “Ada” scene and they go their separate ways(pun intended)you must race to the end where the elevator is and shoot both glowing bars to get to the elevator in order to get some loot. If you fail you will take the stairs and all the loot will be gone depending on who won. Same thing with the explosive drone room, you need to open the door faster than the people on the other side of the glass. Based on the cutscene, Chris/Piers are the canonical winners of the drone room.
In Leon/Helana Chapter 4 at the start of the train fight, when he first turns into the creature and you put him down one time a tiny cutscene will play of you walking past him after he falls flat on his back and then he will wake up again, then he will pursue you inside the cars now, do not shoot him at all because it is a waste of ammo and it does no damage until he busts open the side of the car to get back up top. Fyi there is a bunch of loot on top as well as a first aid spray.
In Chapter 2, you can kill the Lepotitsa fast enough to save one or more survivors in the cathedral which earns a medal.
In Chapter 2 as Helana, you will always gain +1 rescued stat when subdued byDeborahno matter what, and this is true if you get grabbed in the same way as any character. May be avoidable if nobody shoots at the boss but that requires 3 players intersection and is not tested.
In Chapter 2, you can break the duckable obstacles in the minecart by shooting them.
In Chapter 2 when riding the cart fighting Deborah you can back dodge and hold aim to not only duck all obstacles, but remain completely invulnerable to her attacks.
In Chapter 2, you can counter Deborahwhen she jumps at you during her main fight. It opens her up for a melee context. Shooting explosive barrels will do the same thing.
In Chapter 3, you can avoid having to send Helana up to crawl around the big wall of fire if you aim a well placed grenade killing the zombie controlling it. This will earn you a medal.
In Chapter 3, when Helana falls and had to crawl up a slope away from zombies, if you turn attack reaction on before the game is started and shoot her with the magnum or use a grenade you can boost her up all the way to the end of the crawl quickly. Useful if being attacked by a player creature. Thanks GuitarrConn for your many contributions.
In Chapter 4, you can farm loads of magnum ammo by staring the chapter, grabbing the ammo, getting a save point and repeating.
In Chapter 4 during the fight withUstanak, after Leon andSherry use the bus(by the way hitting the enemy with the boss doesn't do anything besides damage him slightly, with no cutscene or dialogue), you can actually climb on top of the bus and jump around for some items that you must get before the fight is over. Then after you get those, go around to the other side that was opened and look for a movable object with ladders on it with red security markings on it. You must have all 4 Characters move this to get access to the rest of the items, and make sure you hop across and open the case full of grenades and a first aid.
Note: You must loot all items because once the fight ends you cannot get back.In Chapter 4, after unlocking the door and entering the meat grinder scene, the player not fighting the blue zombie should carefully shoot the zombie to help the partner.
In Chapter 4 when you arrive at a long corridor before the Leon and Chris find “Ada” scene and they go their separate ways(pun intended)you must race to the end where the elevator is and shoot both glowing bars to get to the elevator in order to get some loot. If you fail you will take the stairs and all the loot will be gone depending on who won. Same thing with the explosive drone room, you need to open the door faster than the people on the other side of the glass. Based on the cutscene, Chris/Piers are the canonical winners of the drone room.
In Leon/Helana Chapter 4 at the start of the train fight, when he first turns into the creature and you put him down one time a tiny cutscene will play of you walking past him after he falls flat on his back and then he will wake up again, then he will pursue you inside the cars now, do not shoot him at all because it is a waste of ammo and it does no damage until he busts open the side of the car to get back up top. Fyi there is a bunch of loot on top as well as a first aid spray.
Serpent Emblems (Leon/Helana)
Break emblems with any attack to unlock things in special features in the main menu.
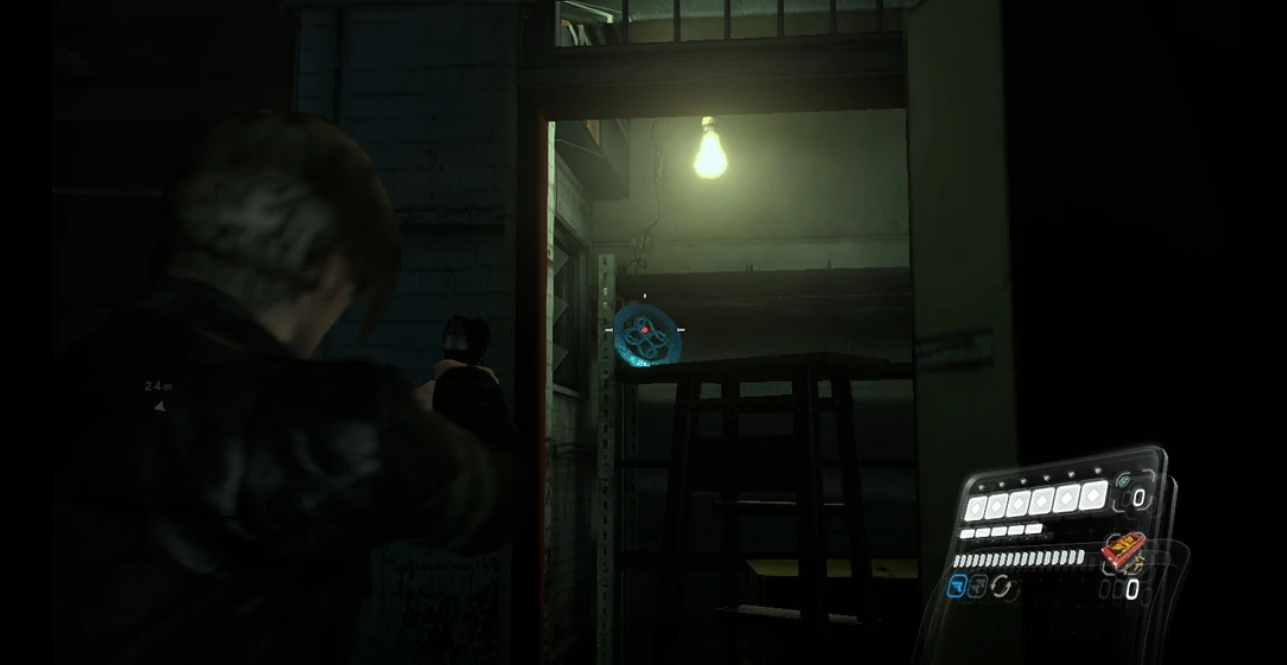
Emblem #2: IN LEON 1-2, While on the hunt for the Campus Keycard, you will come across a room with two desks that can be opened. While one will only contain 9mm Ammo, the other will contain the second Emblem. This will unlock the Leon and Adam file.
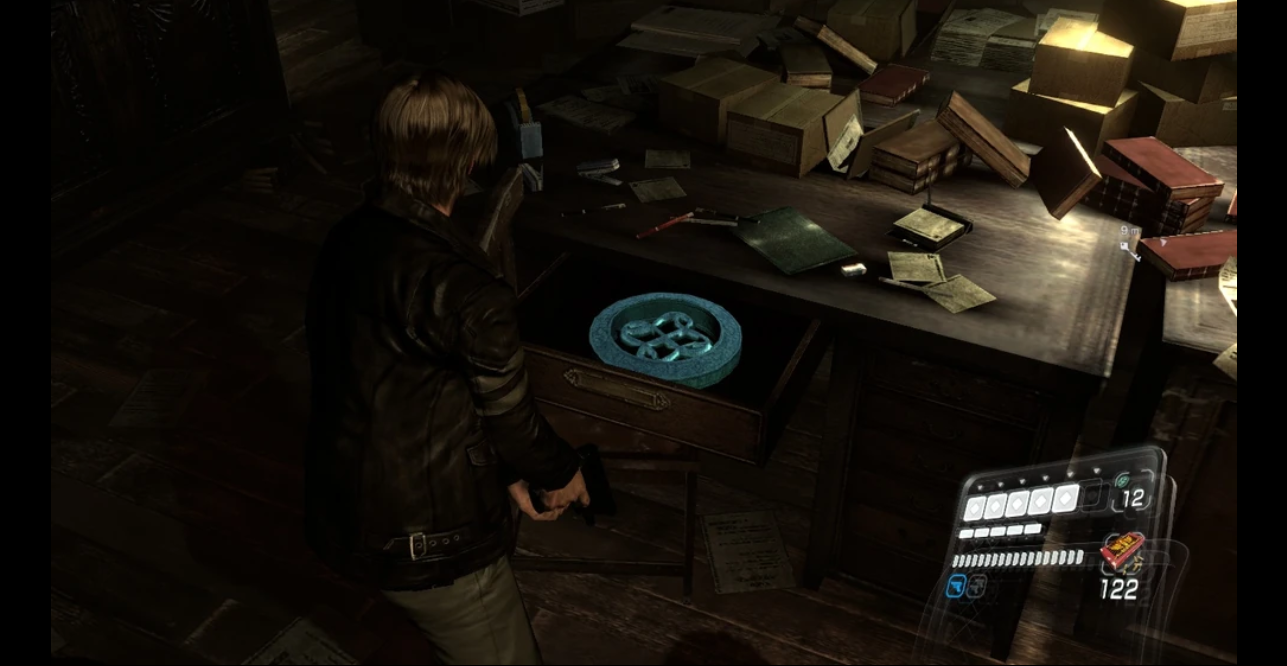
Emblem #3: IN LEON 1-3, In the subway, after exiting the series of train cars and jumping back into the tunnel, turn around. This Emblem can easily be spotted under the right side of the train car you just exited. Just look right after every door until you find it. It is during the 1st half of the sewers. This will unlock the Field Operations Support file.
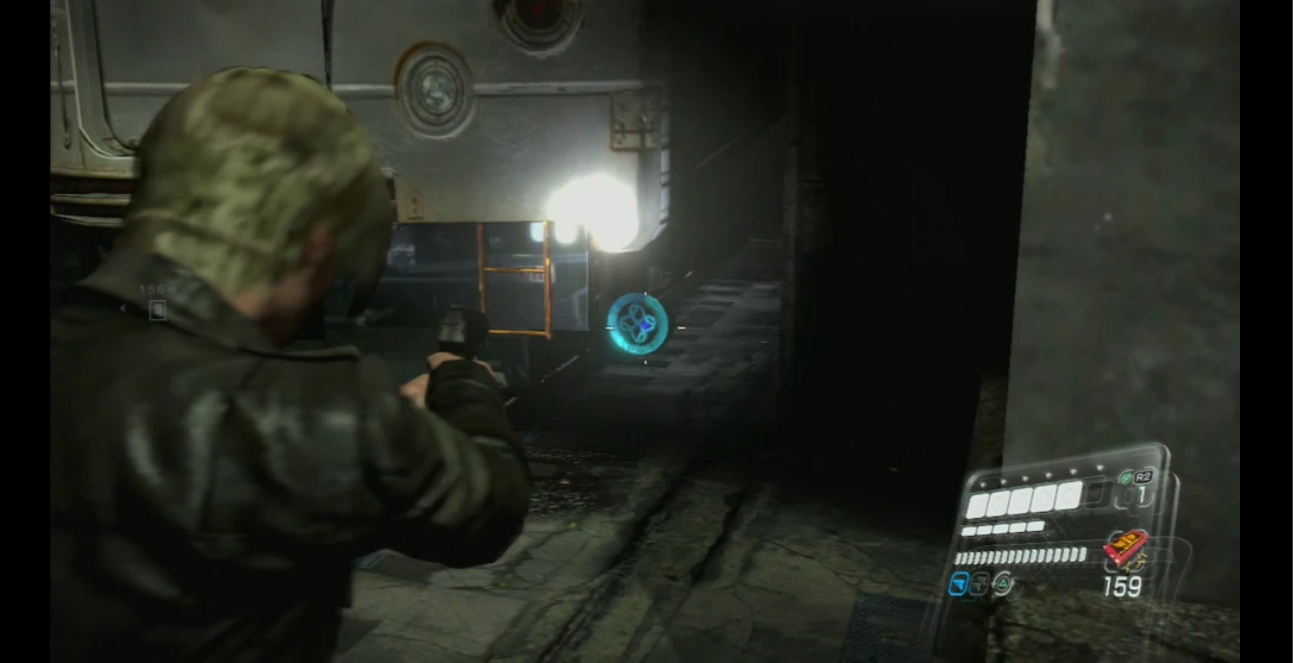
Emblem #4: IN LEON 1-4, When you enter in through the rear of a bar after youget the shotgun and before youmeet the survivorsyou will be aiming to leave this one out the front doors - if you see a great deal of fire just outside the windows, you're in the right building, look to the left before exiting. This will unlock the Zombies file.
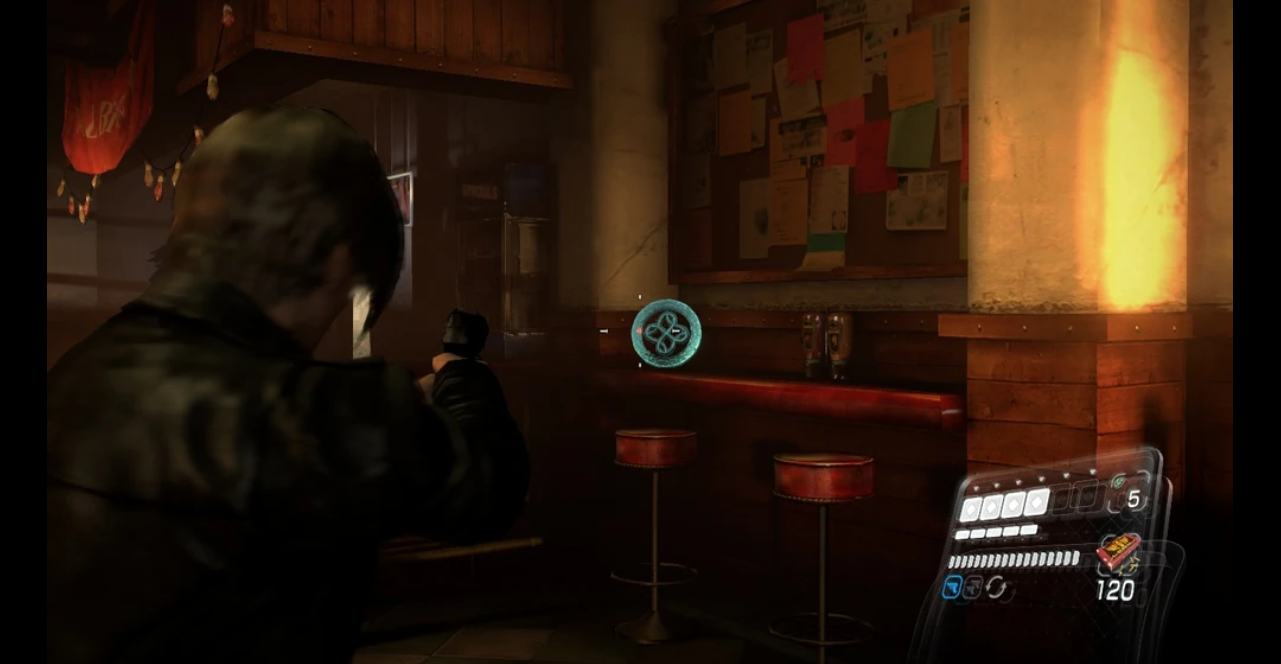
If you obtained all four emblems in this chapter, you will unlock the Leon S. Kennedy figures.
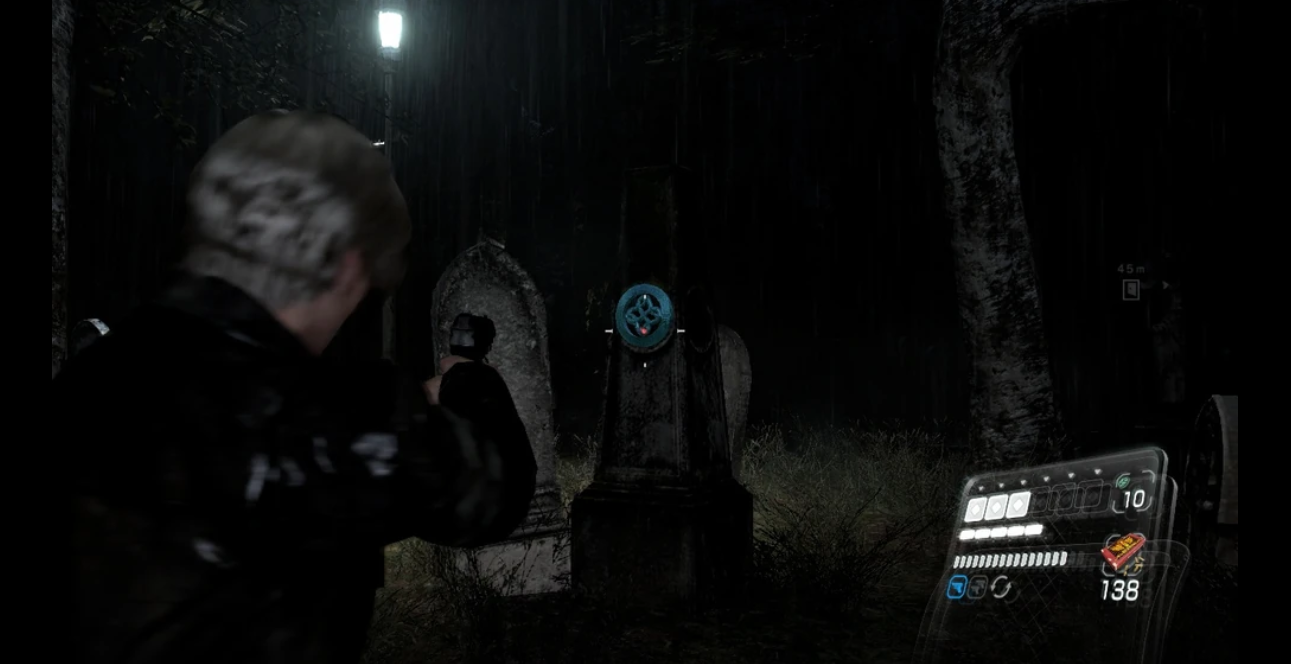
Emblem #2 IN LEON 2-3, Inside the Cathedral, in the window above the front door really high up. You can shoot it now or wait until you go up there to place the last 2 key items. This will unlock the Leon and the Raccoon City Incident file.
Emblem #3] IN LEON 2-4, In the Underground Lab area, after you get through the second set of rooms requiring passcodeswhen Helena is looking for her sister in a bathroom in a sink by a mirror on the wall is full of crappy water. Drain it and it will reveal the Emblem. This will unlock the Tall Oaks Cathedral and the Underground Lab file.
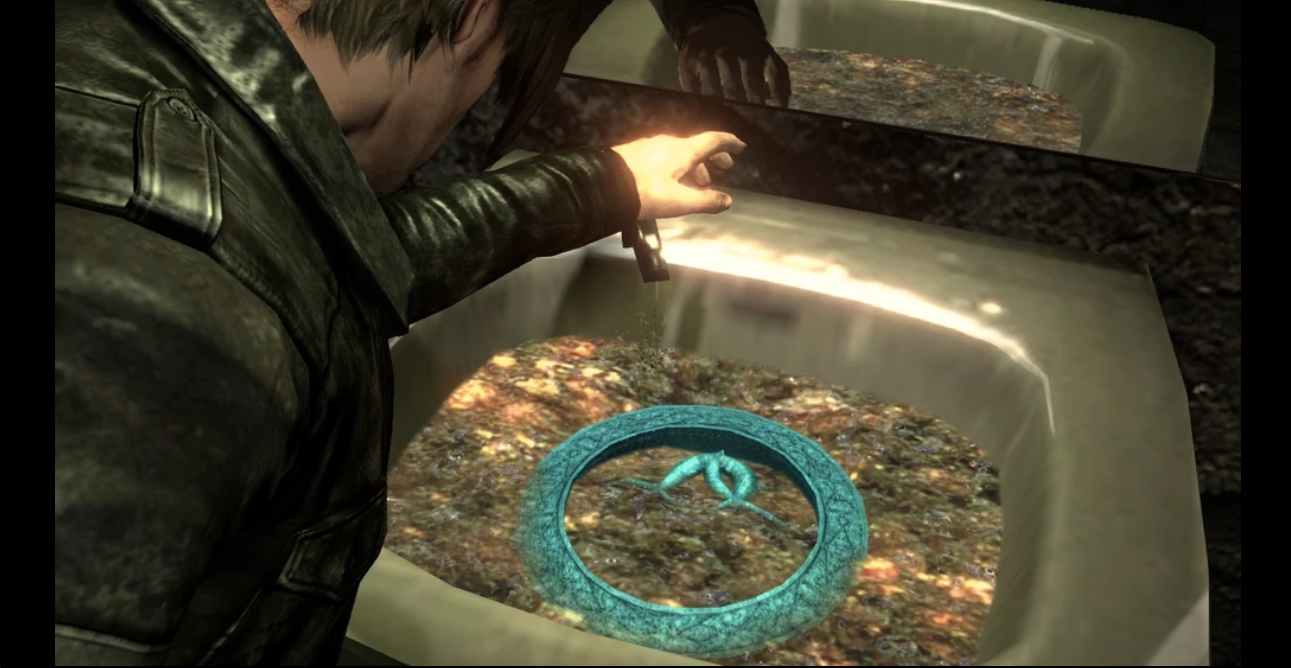
Emblem #4 IN LEON 2-5, After you slide down the cavern slide, keep left and look out of bounds where you can just barely break a pot with melee. You should be able to see the Emblem just beyond the barrier in front of you. This will unlock the Lepotitsa file.
If you obtained all four Emblems in this chapter, you will unlock the Helena Harper figures.
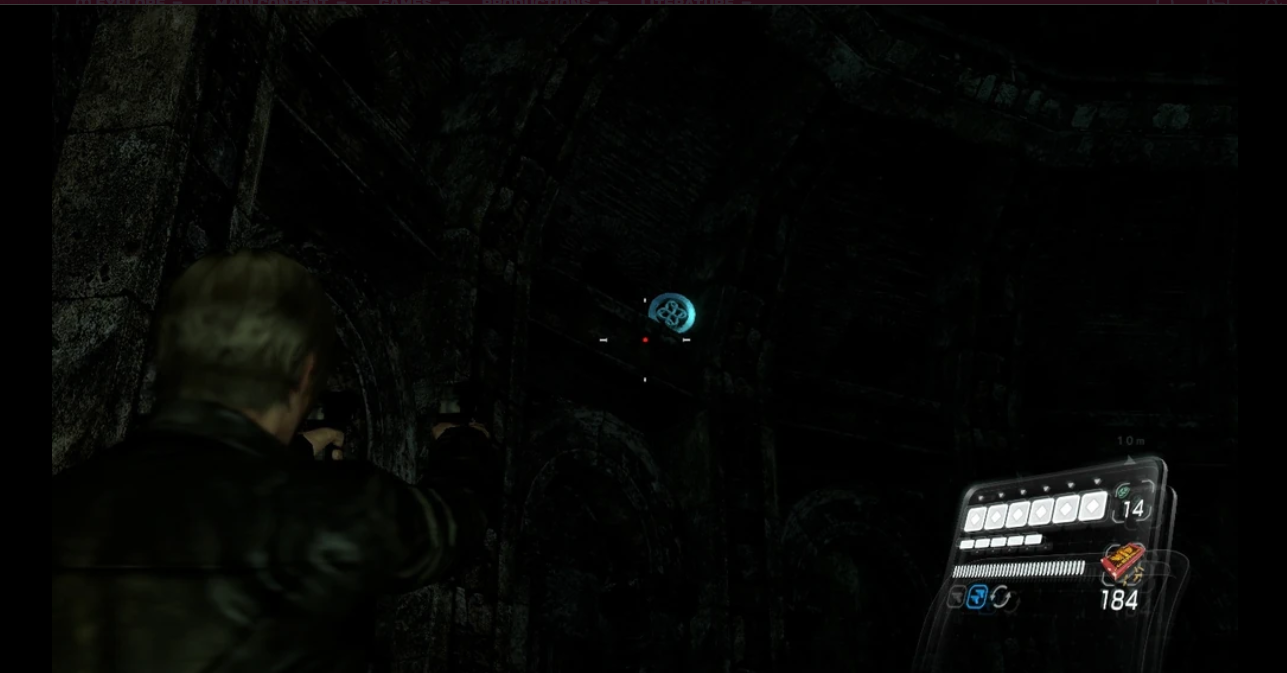
Emblem #2: IN LEON 3-2, While wading through the water in The Catacombs and making your way to the waypoint, you'll find a path that leads up out of the water. Open the lid of the coffin. This will unlock the Helena Harper 2 file.
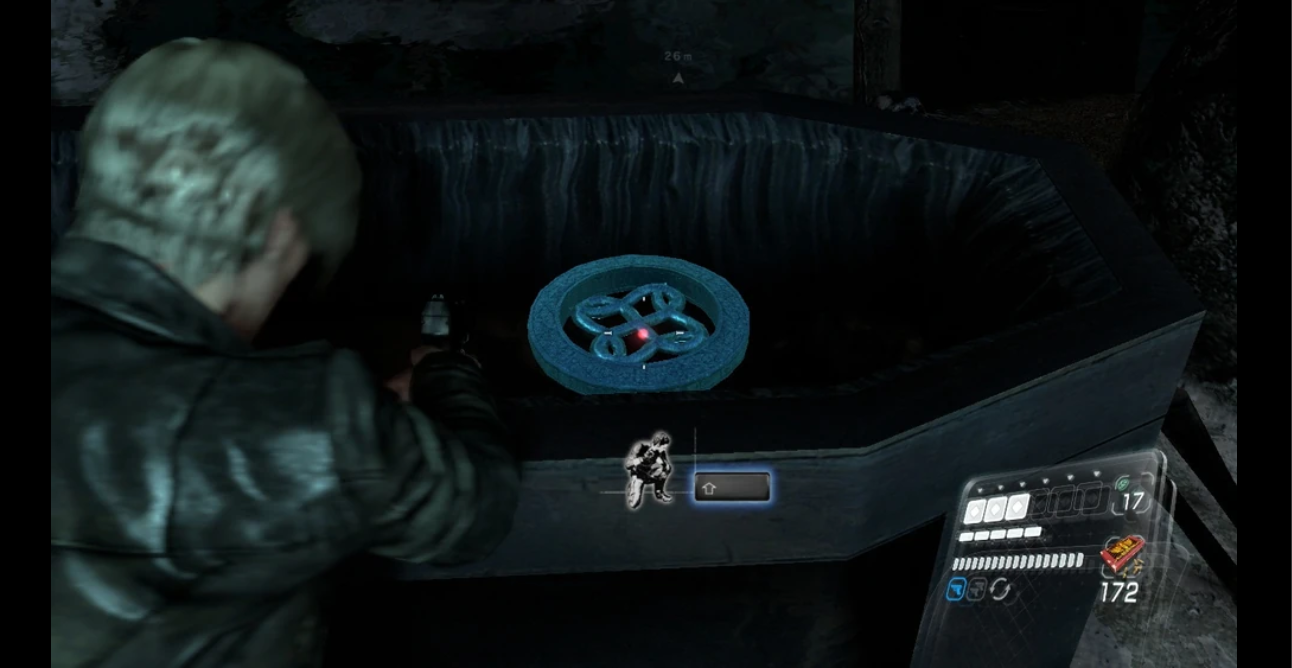
Emblem #3: IN LEON 3-3, when you and your partner are forced to split up, if you look around you will find the emblem no matter what character you are. You can also find this emblem before that. This will unlock the The Catacombs file.
Emblem #4: IN LEON 3-4, where Helana ends up, in the corridor where some items are inside a bucket. This will unlock the Deborah Harper file.
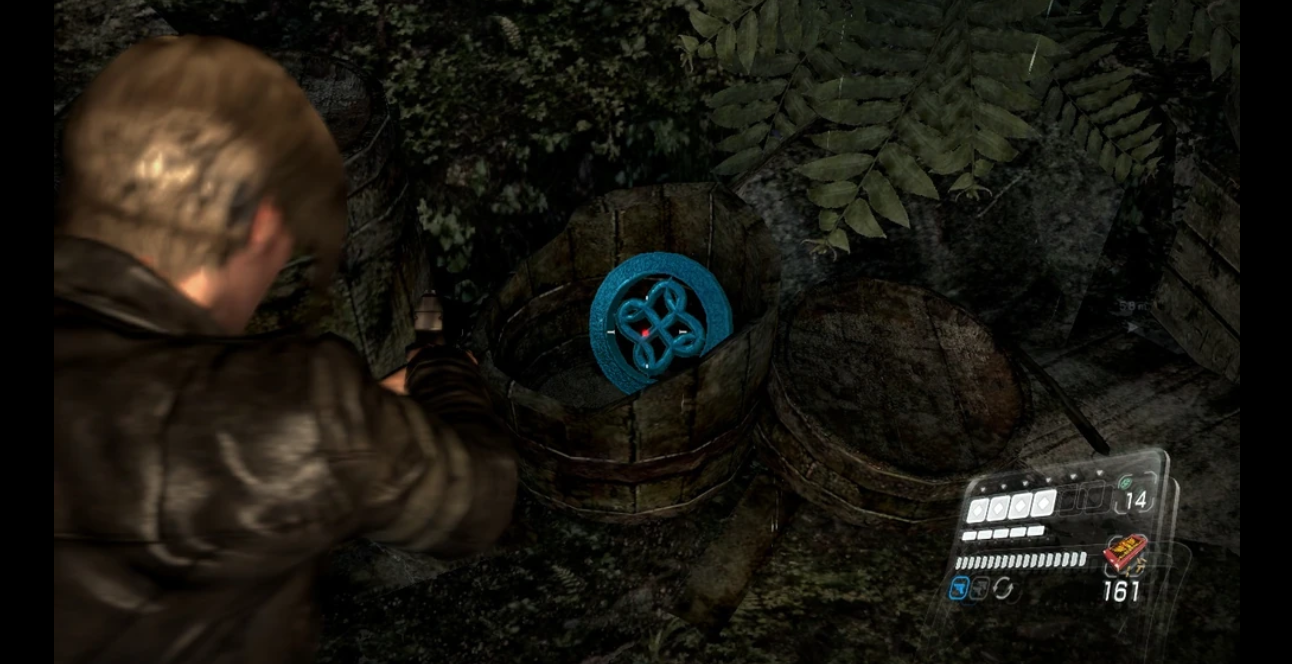
If you obtained all four emblems in this chapter, you will unlock the Derek C. Simmons figures.
insert image here
Emblem #2: Continue down the next stairs. On your right is a row of glass display cabinets with bottles and boxes. The Serpent Emblem is inside one of them. This will unlock the Helena's Crime file.
insert image here
Emblem #3: In the market after the Ustanak fight, when your character turns the corner, take the first right then the next right. The Serpent Emblem is on a desk to the left of the doorway.
insert image here
Emblem #4: On the market rooftops while searching for keys, near the prompt where Leon throws Helena across the gap, look up and right between the buildings. The Serpent Emblem is on wires beside a red neon sign with a green outline. This will unlock the Brzak file.
insert image here
If you obtained all four emblems in this chapter, you will unlock the Adam Benford figures.
insert image here
If you obtained all five emblems in this column (the first in every chapter), you will unlock the Whopper and Whopper Supreme figures.
Emblem #2: In the Prelude herb area, defeat the B.S.A.A. zombie near the truck and check inside the truck bed to the left. The Serpent Emblem is inside. This will unlock the Derek's 1st Transformation file.
insert image here
If you obtained all five Emblems in this column (the second in every chapter), you will unlock the Bloodshot figure.
Emblem #3: After crashing the helicopter into the Quad Tower, look right of the doors you must enter. The Serpent Emblem is in a cubby behind golden bars. This will unlock the Derek's 2nd Transformation file.
insert image here
If you obtained all five Emblems in this column (the third in every chapter), you will unlock the Shrieker figure.
Emblem #4: Before going up the stairs after briefly fighting Simmons, go behind the staircase and look through the bars. The Serpent Emblem is on a bench and can be shot through the bars. This will unlock the Derek's 3rd Transformation file.
insert image here
If you obtained all four emblems in this chapter, you will unlock the Lepotica figure.
If you obtained all five emblems in this column (the last in every chapter), you will unlock the Brzak figure.
If you have obtained all twenty emblems in Leon's campaign, you will unlock the Deborah Harper figures.
Leon's Campaign
Chapter 1
Emblem #1: IN LEON 1-1, After chasing the guy you see in the very beginning, a cutscene will play of finding Liz's father. After it is over, in the same room you re in, move around the table with the computer to find a small janitorial closet at the other side, with the emblem. This will unlock the Leon S. Kennedy file.Emblem #2: IN LEON 1-2, While on the hunt for the Campus Keycard, you will come across a room with two desks that can be opened. While one will only contain 9mm Ammo, the other will contain the second Emblem. This will unlock the Leon and Adam file.
Emblem #3: IN LEON 1-3, In the subway, after exiting the series of train cars and jumping back into the tunnel, turn around. This Emblem can easily be spotted under the right side of the train car you just exited. Just look right after every door until you find it. It is during the 1st half of the sewers. This will unlock the Field Operations Support file.
Emblem #4: IN LEON 1-4, When you enter in through the rear of a bar after youget the shotgun and before youmeet the survivorsyou will be aiming to leave this one out the front doors - if you see a great deal of fire just outside the windows, you're in the right building, look to the left before exiting. This will unlock the Zombies file.
If you obtained all four emblems in this chapter, you will unlock the Leon S. Kennedy figures.
Chapter 2
Emblem #1: IN LEON 2-2, In the graveyard this can be found on the back of a small obelisk amongst a mass of smaller graves. It is to the left if you are coming up from the spawn point, just under the overpass. This will unlock the Ingrid Hunnigan file.Emblem #2 IN LEON 2-3, Inside the Cathedral, in the window above the front door really high up. You can shoot it now or wait until you go up there to place the last 2 key items. This will unlock the Leon and the Raccoon City Incident file.
Emblem #3] IN LEON 2-4, In the Underground Lab area, after you get through the second set of rooms requiring passcodeswhen Helena is looking for her sister in a bathroom in a sink by a mirror on the wall is full of crappy water. Drain it and it will reveal the Emblem. This will unlock the Tall Oaks Cathedral and the Underground Lab file.
Emblem #4 IN LEON 2-5, After you slide down the cavern slide, keep left and look out of bounds where you can just barely break a pot with melee. You should be able to see the Emblem just beyond the barrier in front of you. This will unlock the Lepotitsa file.
If you obtained all four Emblems in this chapter, you will unlock the Helena Harper figures.
Chapter 3
Emblem #1: IN LEON 3-1, right at the start before opening the door via the switches, turn around and look to one of the small openings just above and to the right of the entryway you came through. This will unlock the Helena Harper 1 file.Emblem #2: IN LEON 3-2, While wading through the water in The Catacombs and making your way to the waypoint, you'll find a path that leads up out of the water. Open the lid of the coffin. This will unlock the Helena Harper 2 file.
Emblem #3: IN LEON 3-3, when you and your partner are forced to split up, if you look around you will find the emblem no matter what character you are. You can also find this emblem before that. This will unlock the The Catacombs file.
Emblem #4: IN LEON 3-4, where Helana ends up, in the corridor where some items are inside a bucket. This will unlock the Deborah Harper file.
If you obtained all four emblems in this chapter, you will unlock the Derek C. Simmons figures.
Chapter 4
Emblem #1: After the Lepotitsa flees from the cockpit, head back down the stairs and turn right. Look for a partially open shutter with suitcases behind it. The Serpent Emblem is in the bottom-right corner by the luggage. This will unlock the Leon and Ada file.insert image here
Emblem #2: Continue down the next stairs. On your right is a row of glass display cabinets with bottles and boxes. The Serpent Emblem is inside one of them. This will unlock the Helena's Crime file.
insert image here
Emblem #3: In the market after the Ustanak fight, when your character turns the corner, take the first right then the next right. The Serpent Emblem is on a desk to the left of the doorway.
insert image here
Emblem #4: On the market rooftops while searching for keys, near the prompt where Leon throws Helena across the gap, look up and right between the buildings. The Serpent Emblem is on wires beside a red neon sign with a green outline. This will unlock the Brzak file.
insert image here
If you obtained all four emblems in this chapter, you will unlock the Adam Benford figures.
Chapter 5
Emblem #1: While escaping the blue fog, Leon and Helena enter a clothing store. Check the right wall shelves for the Serpent Emblem. Shoot it quickly if you plan to head upstairs right away. This will unlock the Derek C. Simmons file.insert image here
If you obtained all five emblems in this column (the first in every chapter), you will unlock the Whopper and Whopper Supreme figures.
Emblem #2: In the Prelude herb area, defeat the B.S.A.A. zombie near the truck and check inside the truck bed to the left. The Serpent Emblem is inside. This will unlock the Derek's 1st Transformation file.
insert image here
If you obtained all five Emblems in this column (the second in every chapter), you will unlock the Bloodshot figure.
Emblem #3: After crashing the helicopter into the Quad Tower, look right of the doors you must enter. The Serpent Emblem is in a cubby behind golden bars. This will unlock the Derek's 2nd Transformation file.
insert image here
If you obtained all five Emblems in this column (the third in every chapter), you will unlock the Shrieker figure.
Emblem #4: Before going up the stairs after briefly fighting Simmons, go behind the staircase and look through the bars. The Serpent Emblem is on a bench and can be shot through the bars. This will unlock the Derek's 3rd Transformation file.
insert image here
If you obtained all four emblems in this chapter, you will unlock the Lepotica figure.
If you obtained all five emblems in this column (the last in every chapter), you will unlock the Brzak figure.
If you have obtained all twenty emblems in Leon's campaign, you will unlock the Deborah Harper figures.
Tips/Tidbits Chris/Piers Campaign
In Chapter 1 very early on before the first J'avo, you can save the civilian about to be executed by shooting at the J'avo but you have to be quick (you can't actually hit him and it will bring down accuracy so only shoot once or twice). The J'avo will get away but the Civie will be saved. This will earn a medal.
In Chapter 1, sometimes a J’avo can get stuck right before the section where Chris has to pull himself along some scaffolding. You can throw a grenade in the hole by standing on the platform if you want to kill him.
In Chapter 2 during the very first Ogroman encounter whilst on the bridge right before the shotgun, do not shoot at the enemy unless you are trying to raise your accuracy rating as damaging the enemy here does nothing and the same thing happens regardless. Just stay all the way to one side of the bridge(and stay there, you won't get hit) to avoid its attacks and just wait for the bridge to be destroyed.
In Chapter 2 when you first meet the Ogroman when you want that weapon behind the door, the enemy will push you off, making you think that you can’t get the weapon. You can, go back the way you came and grab it after you make him remember that he left the oven on.
In Chapter 2 while Finn takes you through the underground while the Ogroman is quaking outside, there are 2 doors you can unlock. The first is up a ladder to the left of where Finn goes, the second is where the last anti-air gun is located, there is tunnel leading down to the other door.
In Chapter 2 where you meet Jake and Sherry, You can actually kill that final Giant BOW that was at the previous location. You may know that it isn't vulnerable until it walks though a wire. Well did you know that there is actually 3 WIRES in that map? You can take it down before you even go inside the waterway. Your teammates might not wait for you so hurry or this segment will end. When he spawns (after the second AA gun) go back to where the first ogroman spawned by the first AA gun and look around. In a side street to the left of the doorway with the stairs leading to the AA gun, there is a wire. Stand on the other side and he will be zapped and you can pull his flesh out. Go up the stairs from before and the harrrd left. The second Wire is close to the first one. Where the first accessible gun emplacement is directly across from the center building entrance, go to the right of it where the ladder is in the street end and look around. You know what to do. You won't likely have enough time for the 3rd wire and may not even have enough time to kill and and hit the 2nd wire. Play it carefully and you get some inconsequential dialogue from Overlord(please get that reference).
In Chapter 2 still in the AA gun part, be careful when surfacing from the underground, as on the second story building, the ogroman has a high likelihood of throwing a bus at you. Just kick the ladder down and leave asap. Oh, and if you use the turrets, he will come and destroy them.
In Chapter 2 where all the Chrysalids wake up and you are told to retreat, you can stay and fight all the Napads if you wish.
In Chapter 3 when you arrive at a long corridor before the Chris and Leon find “Ada” scene and they go their separate waysyou must race to the elevator and shoot the glowing bars to proceed and win in order to get some loot. If you fail you will take the stairs and all the loot will be gone depending on who won. Same thing with the explosive drone room, you need to open the door faster than the people on the other side of the glass. Based on the cutscene, Chris/Piers are the canonical winners of the drone room.
In Chapter 4, you can kill the J'avo shooting at you from the stational aircraft. Aim for his head or use the grenade launcher.
In Chapter 4, when you are searching for the keys, lure a zombie hand to a bathroom with a toilet inside. If you do the contextual melee action on it (the same one that has the character pick up and throw it) you will flush it down the toilet. No I'm not kidding.
In Chapter 5 when the J'avo pull the levers, it is extremely hard, but you can prevent them from pulling the levers. The trick is to watch for gold-headed green-eyed J'avo(only they can pull levers except the one regular one at the beginning cutscene) and eliminate them first quickly. It is helpful to save grenades and launcher ammo for this. It can be hard. I recommend to watch the levers and just leave all the big and unimportant enemies for after the timer and Gold-head spawning is over and just not engage so you don't have to reload or run out of ammo. If alone, it might help to be up top to kill snipers, but it makes it harder to deal with the levers and you will have to jump off away from Napads anyway, wasting time. If playing with a friend, have them take care of the snipers first, THEN the big enemies while you watch for Gold-heads. Watch the levers that have not yet been pulled(they have a green light) and watch the ladders like a hawk. They favor the left ladder only, if you are facing away from the pressure door and look left. The good news is if you don't let them pull any levers, no hard enemies spawn except for the 2 Napads and the fight becomes easy. You can also pull the levers yourself to either speed up the fight, or fight them after the fact.
In Chapter 5, you can go with another partner from the opposite campaign if you pull the lever next to that person. For example: Sherry-Chris and Jake-Piers. They have different dialogue depending on the choice.
In Chapter 5, when running away from the boss in the long corridors, after you open the partner help door after the first phase of running and after holding the door open for partner(there is a serpent emblem inside this room btw), GO LEFT, not right!
In Chapter 5 at the end fight, when you break the boss's cocoon, his legs come out do knock you out. You can destroy it if you use a charge attack with piers and actually hit it or use the launcher with Chris. If singleplayer, you can also hide behind Chris if you do it just right.
At the Very very end of Chapter 5 when you need to break the barriers, there is a slide under obstacle, as Piers, do a forward dodge instead. You're welcome.
In Chapter 1, sometimes a J’avo can get stuck right before the section where Chris has to pull himself along some scaffolding. You can throw a grenade in the hole by standing on the platform if you want to kill him.
In Chapter 2 during the very first Ogroman encounter whilst on the bridge right before the shotgun, do not shoot at the enemy unless you are trying to raise your accuracy rating as damaging the enemy here does nothing and the same thing happens regardless. Just stay all the way to one side of the bridge(and stay there, you won't get hit) to avoid its attacks and just wait for the bridge to be destroyed.
In Chapter 2 when you first meet the Ogroman when you want that weapon behind the door, the enemy will push you off, making you think that you can’t get the weapon. You can, go back the way you came and grab it after you make him remember that he left the oven on.
In Chapter 2 while Finn takes you through the underground while the Ogroman is quaking outside, there are 2 doors you can unlock. The first is up a ladder to the left of where Finn goes, the second is where the last anti-air gun is located, there is tunnel leading down to the other door.
In Chapter 2 where you meet Jake and Sherry, You can actually kill that final Giant BOW that was at the previous location. You may know that it isn't vulnerable until it walks though a wire. Well did you know that there is actually 3 WIRES in that map? You can take it down before you even go inside the waterway. Your teammates might not wait for you so hurry or this segment will end. When he spawns (after the second AA gun) go back to where the first ogroman spawned by the first AA gun and look around. In a side street to the left of the doorway with the stairs leading to the AA gun, there is a wire. Stand on the other side and he will be zapped and you can pull his flesh out. Go up the stairs from before and the harrrd left. The second Wire is close to the first one. Where the first accessible gun emplacement is directly across from the center building entrance, go to the right of it where the ladder is in the street end and look around. You know what to do. You won't likely have enough time for the 3rd wire and may not even have enough time to kill and and hit the 2nd wire. Play it carefully and you get some inconsequential dialogue from Overlord(please get that reference).
In Chapter 2 still in the AA gun part, be careful when surfacing from the underground, as on the second story building, the ogroman has a high likelihood of throwing a bus at you. Just kick the ladder down and leave asap. Oh, and if you use the turrets, he will come and destroy them.
In Chapter 2 where all the Chrysalids wake up and you are told to retreat, you can stay and fight all the Napads if you wish.
In Chapter 3 when you arrive at a long corridor before the Chris and Leon find “Ada” scene and they go their separate waysyou must race to the elevator and shoot the glowing bars to proceed and win in order to get some loot. If you fail you will take the stairs and all the loot will be gone depending on who won. Same thing with the explosive drone room, you need to open the door faster than the people on the other side of the glass. Based on the cutscene, Chris/Piers are the canonical winners of the drone room.
In Chapter 4, you can kill the J'avo shooting at you from the stational aircraft. Aim for his head or use the grenade launcher.
In Chapter 4, when you are searching for the keys, lure a zombie hand to a bathroom with a toilet inside. If you do the contextual melee action on it (the same one that has the character pick up and throw it) you will flush it down the toilet. No I'm not kidding.
In Chapter 5 when the J'avo pull the levers, it is extremely hard, but you can prevent them from pulling the levers. The trick is to watch for gold-headed green-eyed J'avo(only they can pull levers except the one regular one at the beginning cutscene) and eliminate them first quickly. It is helpful to save grenades and launcher ammo for this. It can be hard. I recommend to watch the levers and just leave all the big and unimportant enemies for after the timer and Gold-head spawning is over and just not engage so you don't have to reload or run out of ammo. If alone, it might help to be up top to kill snipers, but it makes it harder to deal with the levers and you will have to jump off away from Napads anyway, wasting time. If playing with a friend, have them take care of the snipers first, THEN the big enemies while you watch for Gold-heads. Watch the levers that have not yet been pulled(they have a green light) and watch the ladders like a hawk. They favor the left ladder only, if you are facing away from the pressure door and look left. The good news is if you don't let them pull any levers, no hard enemies spawn except for the 2 Napads and the fight becomes easy. You can also pull the levers yourself to either speed up the fight, or fight them after the fact.
In Chapter 5, you can go with another partner from the opposite campaign if you pull the lever next to that person. For example: Sherry-Chris and Jake-Piers. They have different dialogue depending on the choice.
In Chapter 5, when running away from the boss in the long corridors, after you open the partner help door after the first phase of running and after holding the door open for partner(there is a serpent emblem inside this room btw), GO LEFT, not right!
In Chapter 5 at the end fight, when you break the boss's cocoon, his legs come out do knock you out. You can destroy it if you use a charge attack with piers and actually hit it or use the launcher with Chris. If singleplayer, you can also hide behind Chris if you do it just right.
At the Very very end of Chapter 5 when you need to break the barriers, there is a slide under obstacle, as Piers, do a forward dodge instead. You're welcome.
Serpent Emblems 2 (Chris/Piers)
Break emblems with any attack to unlock things in special features in the main menu.
insert image here
Emblem #2: In a room hidden by an item crate near two large bookshelves. This will unlock The BSAA file.
insert image here
Emblem #3: On the rooftop after the tenement cutscene, turn around. The Emblem is on top of a pole. It’s tricky to shoot from here—best to use the Sniper Rifle in Chapter 5 and return if needed. This will unlock the J'avo file.
insert image here
Emblem #4: On the sixth floor butchery, look behind the counter along the center aisle. This will unlock the J'avo Mutations file.
insert image here
If you obtained all four emblems in this chapter, you will unlock the Chris Redfield figures.
insert image here
Emblem #2: After destroying the tank on the bridge as Piers, look right above the bridge’s lower beam. Can also be destroyed as Chris after climbing the ladder. This will unlock the Ogroman file.
insert image here
Emblem #3: In the room full of Chrysalids, run to the far side and find a hidden corridor under the stairs. The Emblem hangs on the wall between two paintings. This will unlock The C-Virus file.
insert image here
Emblem #4: After meeting Carla Radames, instead of following her through the red door, locate a hidden half-room to the right. The Emblem rests atop a locker. This will unlock the Napad file.
insert image here
If you obtained all four emblems in this chapter, you will unlock the Piers Nivans figures.
insert image here
Emblem #2: Inside a tenement building during the snake pursuit, find the Emblem in a small sleeping room behind a mahjong table. This will unlock the Chris' Amnesia file.
insert image here
Emblem #3: While being pursued by a helicopter across boats and floats, spot the scaffolding with the Emblem on top when two Noga-Skakanje block your way. Shoot it immediately before reaching safety. This will unlock the Bosawan file.
insert image here
Emblem #4: During the high-speed chase of Carla Radames, cornered by J'avo in a parking lot, the Emblem is on the bus behind them. This will unlock the Iluzija file.
insert image here
If you obtained all four emblems in this chapter, you will unlock the Ogroman figure.
insert image here
Emblem #2: Outside the ship, spot two patrol boats. The Emblem is atop the right one. This will unlock the Chris and Leon file.
insert image here
Emblem #3: After Piers covers Chris to extend a ladder, climb the staircase in the room behind which the Emblem sits. This will unlock the Neo-Umbrella file.
insert image here
Emblem #4: Only with Piers, sprint through the aircraft carrier while demolishing obstacles. The Emblem is inside a tire just past the first obstacle. This will unlock From the Files of Neo-Umbrella file.
insert image here
If you obtained all four emblems in this chapter, you will unlock the Gnezdo figure.
insert image here
Emblem #2: In the Underwater Facility, the Emblem is in the upper-right corner of the room. This will unlock the Chris and Albert file.
insert image here
Emblem #3: In the Upper Levels, spot the Emblem down a pipe. Destroy it to unlock the Underwater Facility file.
insert image here
Emblem #4: At the end of the level, check the right wall to find the Emblem. Destroy as Chris or Piers (trickier). This will unlock the Haos file.
insert image here
If you obtained all four emblems in this chapter, you will unlock the Chris & Leon figure.
Chris' Campaign
Chapter 1
Emblem #1: In the butcher block, after looting both the Green and Red herbs, check the shelf leaning against the wall. This will unlock the Chris Redfield file.insert image here
Emblem #2: In a room hidden by an item crate near two large bookshelves. This will unlock The BSAA file.
insert image here
Emblem #3: On the rooftop after the tenement cutscene, turn around. The Emblem is on top of a pole. It’s tricky to shoot from here—best to use the Sniper Rifle in Chapter 5 and return if needed. This will unlock the J'avo file.
insert image here
Emblem #4: On the sixth floor butchery, look behind the counter along the center aisle. This will unlock the J'avo Mutations file.
insert image here
If you obtained all four emblems in this chapter, you will unlock the Chris Redfield figures.
Chapter 2
Emblem #1: While defending Finn as he sets charges, go to the far end where J'avo spawn and look through the window to find the Emblem. This will unlock the Piers Nivans file.insert image here
Emblem #2: After destroying the tank on the bridge as Piers, look right above the bridge’s lower beam. Can also be destroyed as Chris after climbing the ladder. This will unlock the Ogroman file.
insert image here
Emblem #3: In the room full of Chrysalids, run to the far side and find a hidden corridor under the stairs. The Emblem hangs on the wall between two paintings. This will unlock The C-Virus file.
insert image here
Emblem #4: After meeting Carla Radames, instead of following her through the red door, locate a hidden half-room to the right. The Emblem rests atop a locker. This will unlock the Napad file.
insert image here
If you obtained all four emblems in this chapter, you will unlock the Piers Nivans figures.
Chapter 3
Emblem #1: While pursuing the giant snake B.O.W., pass the playground to your left and go through a gate into a closed-off street section. The Emblem is in the far-left corner. This will unlock the Finn Macauley file.insert image here
Emblem #2: Inside a tenement building during the snake pursuit, find the Emblem in a small sleeping room behind a mahjong table. This will unlock the Chris' Amnesia file.
insert image here
Emblem #3: While being pursued by a helicopter across boats and floats, spot the scaffolding with the Emblem on top when two Noga-Skakanje block your way. Shoot it immediately before reaching safety. This will unlock the Bosawan file.
insert image here
Emblem #4: During the high-speed chase of Carla Radames, cornered by J'avo in a parking lot, the Emblem is on the bus behind them. This will unlock the Iluzija file.
insert image here
If you obtained all four emblems in this chapter, you will unlock the Ogroman figure.
Chapter 4
Emblem #1: Inside the cockpit of the helicopter at the start. This will unlock the Chris' file.insert image here
Emblem #2: Outside the ship, spot two patrol boats. The Emblem is atop the right one. This will unlock the Chris and Leon file.
insert image here
Emblem #3: After Piers covers Chris to extend a ladder, climb the staircase in the room behind which the Emblem sits. This will unlock the Neo-Umbrella file.
insert image here
Emblem #4: Only with Piers, sprint through the aircraft carrier while demolishing obstacles. The Emblem is inside a tire just past the first obstacle. This will unlock From the Files of Neo-Umbrella file.
insert image here
If you obtained all four emblems in this chapter, you will unlock the Gnezdo figure.
Chapter 5
Emblem #1: While Chris crawls through vents and Piers disables the fans, destroy the Emblem either as Chris or through a floor grate as Piers. This will unlock the Piers' file.insert image here
Emblem #2: In the Underwater Facility, the Emblem is in the upper-right corner of the room. This will unlock the Chris and Albert file.
insert image here
Emblem #3: In the Upper Levels, spot the Emblem down a pipe. Destroy it to unlock the Underwater Facility file.
insert image here
Emblem #4: At the end of the level, check the right wall to find the Emblem. Destroy as Chris or Piers (trickier). This will unlock the Haos file.
insert image here
If you obtained all four emblems in this chapter, you will unlock the Chris & Leon figure.
Tips/Tidbits Jake/Sherry Campaigns
In Chapter 1 where you meet Chris and Piers , You can actually kill that final Giant BOW that was at the previous location in Chris's Campaign that they lost. You may know that it isn't vulnerable until it walks though a wire. Well did you know that there is actually 3 WIRES in that map? You can take it down before you even go inside the waterway. Your teammates might not wait for you so hurry or this segment will end. When he spawns (after the second AA gun) go back to where the first ogroman spawned by the first AA gun and look around. In a side street to the left of the doorway with the stairs leading to the AA gun, there is a wire. Stand on the other side and he will be zapped and you can pull his flesh out. Go up the stairs from before and the harrrd left. The second Wire is close to the first one. Where the first accessible gun emplacement is directly across from the center building entrance, go to the right of it where the ladder is in the street end and look around. You know what to do. You won't likely have enough time for the 3rd wire and may not even have enough time to kill and and hit the 2nd wire. Play it carefully and you get some inconsequential dialogue from Overlord(please get that reference).
In Chapter 1 still in the AA gun part, be careful when surfacing from the underground, as on the second story building, the ogroman has a high likelihood of throwing a bus at you. Just kick the ladder down and leave asap. Oh, and if you use the turrets, he will come and destroy them.
In Chapter 1 while Finn takes you through the underground while the Ogroman is quaking outside, there are 2 doors you can unlock. The first is up a ladder to the left of where Finn goes, the second is where the last anti-air gun is located, there is tunnel leading down to the other door.
In Chapter 2-3, during the bug/hiding segment where the big icicle walls are separating you and Ustanak after you drop down once, if you are detected twice without dying by hiding in the bin, he will leave and you can access the treasure on the other side hassle free as long as you remain undetected. I recommend using your pistol to shoot once in order to be detected so you can get inside the trash faster.
In Chapter 2, you don't need to use remote bombs to help Sherry. Actually not doing so will earn a medal.(need to check)
In Chapter 3, as Jake where you need to watch Sherry input the code, you may miss it and that can pose a huge problem and halt all progress, especially if playing with randoms. If you miss it, YOU ARE SOL! The code is random and you cannot brute-force these quickly. 6 inputs even for a 3 character code means 216 possible combos. If I figure out a method that works I will update it here. If you still can't get it in a public lobby, shoot continuously at the keypad with the serpent emblem in it until your partner realizes. I'm very sorry, this is the only way. Thankfully it is by the start of the chapter and imo it isn't hard to get by the cams as Jake. If you forget where to go, stealthily hug the right wall until you get to the vent, killing enemies from behind on the way. I recommend just loading checkpoint or the level. If you aren't the host you can leave and rejoin and the AI will input the right code as Jake and get you through. There might be a way to see the values of the current session with Cheat Engine but I’m not sure how exactly. Please lmk if you figure that out before I do:
Also in Chapter 3, after you meet back up you will need to find all ID medallions. Here is all of them. Make sure you get them all and insert them before going into the 1st floor final back room that is opened after a certain amount I think 8 or so. Try to get all the (enemy) dropped ones first because they won't spawn if you get the static ones first. If you didn't do that, try running around and going into old rooms and back out, that always works for me. Your reward for getting all of them is a new weapon and some loot behind the barred room.
In Chapter 4 AS JAKE ONLY, after the motorcycle segment, you fight the chopper with help from the BSAA twice. Once right after the motorcycle part, and once right after. The second time, as soon as the fight starts, there is a ladder to the right. Run up, climb that, jump across, climb another ladder and wait. After a moment, the chopper will come around and bring some enemies on a rope, as soon as that happens, stand under the rope and press the button that appears. You can climb to the top and either press the button it says or do the "Hard Choice" achievement by shooting the enemy with the magnum.
In Chapter 4 if you don’t have the Bear Commander, you can hold out and eventually your allies will take out the chopper for you if you can’t get to the chopper yourself.
In Chapter 4 during the fight withUstanak, after Sherry andLeon use the bus(by the way hitting the enemy with the boss doesn't do anything besides damage him slightly, with no cutscene or dialogue), you can actually climb on top of the bus and jump around for some items that you must get before the fight is over. Then after you get those, go around to the other side that was opened and look for a movable object with ladders on it with red security markings on it. You must have all 4 Characters move this to get access to the rest of the items, and make sure you hop across and open the case full of grenades and a first aid.
  Note: You must loot all items because once the fight ends you cannot get back.
In Chapter 5 as Jake there is a room only he can get to that has a glass cabinet in it with magnum ammo inside. It is on the second story of the center lift in the first part.
In Chapter 5, you can go with another partner from the opposite campaign if you pull the lever next to that person. For example: Sherry-Chris and Jake-Piers. They have different dialogue depending on the choice.
In Chapter 5 as Jake in the barehanded fight with Ustanak, if he picks you up and throws you behind him, you can spam the attack button for a free counter when he charges at you, because you can't possibly mis-time it, you can only ‘not do it’ by not pressing it, meaning you can spam it and not be penalized. Also, in singleplayer, tell Sherry to move in and she will launch the crate at Ustanak.
In Chapter 1 still in the AA gun part, be careful when surfacing from the underground, as on the second story building, the ogroman has a high likelihood of throwing a bus at you. Just kick the ladder down and leave asap. Oh, and if you use the turrets, he will come and destroy them.
In Chapter 1 while Finn takes you through the underground while the Ogroman is quaking outside, there are 2 doors you can unlock. The first is up a ladder to the left of where Finn goes, the second is where the last anti-air gun is located, there is tunnel leading down to the other door.
In Chapter 2-3, during the bug/hiding segment where the big icicle walls are separating you and Ustanak after you drop down once, if you are detected twice without dying by hiding in the bin, he will leave and you can access the treasure on the other side hassle free as long as you remain undetected. I recommend using your pistol to shoot once in order to be detected so you can get inside the trash faster.
In Chapter 2, you don't need to use remote bombs to help Sherry. Actually not doing so will earn a medal.(need to check)
In Chapter 3, as Jake where you need to watch Sherry input the code, you may miss it and that can pose a huge problem and halt all progress, especially if playing with randoms. If you miss it, YOU ARE SOL! The code is random and you cannot brute-force these quickly. 6 inputs even for a 3 character code means 216 possible combos. If I figure out a method that works I will update it here. If you still can't get it in a public lobby, shoot continuously at the keypad with the serpent emblem in it until your partner realizes. I'm very sorry, this is the only way. Thankfully it is by the start of the chapter and imo it isn't hard to get by the cams as Jake. If you forget where to go, stealthily hug the right wall until you get to the vent, killing enemies from behind on the way. I recommend just loading checkpoint or the level. If you aren't the host you can leave and rejoin and the AI will input the right code as Jake and get you through. There might be a way to see the values of the current session with Cheat Engine but I’m not sure how exactly. Please lmk if you figure that out before I do:
Also in Chapter 3, after you meet back up you will need to find all ID medallions. Here is all of them. Make sure you get them all and insert them before going into the 1st floor final back room that is opened after a certain amount I think 8 or so. Try to get all the (enemy) dropped ones first because they won't spawn if you get the static ones first. If you didn't do that, try running around and going into old rooms and back out, that always works for me. Your reward for getting all of them is a new weapon and some loot behind the barred room.
- (enemy) Enemy who attacks you at the stairs outside the locker room (if you didn't get any preset medallions) Just kill everybody here before you progress
- (enemy) Second enemy near the starting stairs by the locker room (if you didn't get any preset medallions) Just kill everybody here before you progress
- (static) Bedroom dresser (Locker Room area)
- (enemy) Enemy who attacks you inside the library
- (static) Library, second floor stacks
- (enemy) Enemy who attacks you in the hallway leading to the big statue room
- (enemy) Enemy who attacks you in the big statue room when you first approach the double doors
- (enemy) Enemy who attacks you in the study (or nightclub or pool, depending on your route)
- (enemy) Enemy who attacks you in the nightclub bar (or pool or study, depending on your route)
- (enemy) Enemy near the starting stairs by the locker room (if you didn't get any preset medallions)
- (static) Under table in the smoking lounge (table destroyed by explosives)
- (static) Nightclub piano
- (static) Study fireplace mantle
- (static) Small punch bowl in hall leading to large purple pool
- (static) Large purple pool, crawlspace under hindquarters of the statue
- (static) Large pool room, push junk blocking smoking lounge door
In Chapter 4 AS JAKE ONLY, after the motorcycle segment, you fight the chopper with help from the BSAA twice. Once right after the motorcycle part, and once right after. The second time, as soon as the fight starts, there is a ladder to the right. Run up, climb that, jump across, climb another ladder and wait. After a moment, the chopper will come around and bring some enemies on a rope, as soon as that happens, stand under the rope and press the button that appears. You can climb to the top and either press the button it says or do the "Hard Choice" achievement by shooting the enemy with the magnum.
In Chapter 4 if you don’t have the Bear Commander, you can hold out and eventually your allies will take out the chopper for you if you can’t get to the chopper yourself.
In Chapter 4 during the fight withUstanak, after Sherry andLeon use the bus(by the way hitting the enemy with the boss doesn't do anything besides damage him slightly, with no cutscene or dialogue), you can actually climb on top of the bus and jump around for some items that you must get before the fight is over.
Then after you get those, go around to the other side that was opened and look for a movable object with ladders on it with red security markings on it. You must have all 4 Characters move this to get access to the rest of the items, and make sure you hop across and open the case full of grenades and a first aid. Note: You must loot all items because once the fight ends you cannot get back. In Chapter 5 as Jake there is a room only he can get to that has a glass cabinet in it with magnum ammo inside. It is on the second story of the center lift in the first part.
In Chapter 5, you can go with another partner from the opposite campaign if you pull the lever next to that person. For example: Sherry-Chris and Jake-Piers. They have different dialogue depending on the choice.
In Chapter 5 as Jake in the barehanded fight with Ustanak, if he picks you up and throws you behind him, you can spam the attack button for a free counter when he charges at you, because you can't possibly mis-time it, you can only ‘not do it’ by not pressing it, meaning you can spam it and not be penalized. Also, in singleplayer, tell Sherry to move in and she will launch the crate at Ustanak.
Serpent Emblems 3 (Jake/Sherry)
Jake's Campaign
Chapter 1
Emblem #1: Early on, while fleeing from the BSAA and B.O.W.s alike, you'll emerge from a building into a street. Turning left, you'll see the emblem above the doorway. This will unlock the Jake Muller file.
Emblem #2: While navigating a stone building on the side of a cliff, you'll see the emblem atop a metal beam in the distance, behind a swing bar that Jake will use to leap across a chasm. This will unlock the BSAA Operations file.
Emblem #3: Easily obtainable as Sherry, the emblem is located on the second floor of a bathroom you'll come across after evading the Ustanak for the first time. Jake will need to boost Sherry up to the second floor of the bathroom. Jake can acquire this emblem from the bottom floor of the bathroom with any type of grenade. The emblem is located, from Jake's point of view, opposite the broken ladder (where he boosts Sherry), to the right side of the hole above him. This will unlock the Ustanak Pursuit file.
Emblem #4: After walking through dark corridors as Jake reminisces about his mercenary experiences and expresses his convictions, you'll come out to daylight again and spot the emblem on the roof of a weathered building on the other side of the small square. This will unlock the Mercenary Memories file.
If you obtained all four emblems in this chapter, you will unlock the Jake Muller figures.
Chapter 2
Emblem #1: In the caterpillar crane near the second FOS drive, inside the cabin. Unlocks the FOS Operations file.
Emblem #2: Atop the radiomast during snowfield. Best shot from the supply shack near the third FOS drive. Unlocks the Snowfield Recon file.
Emblem #3: During the snowmobile avalanche, about 50 meters before the tunnel waypoint on a small precipice. Unlocks the Avalanche Pursuit file.
Emblem #4: At the exit of the bat-maze on the water tank facing the door. Both players should be near the door, turn the valve, shoot the emblem, then team-use the door to escape. Unlocks the Bat-Maze Exit file.
Chapter 3
Emblem #1: Jake only. After escaping the white rooms, you control gun cameras. One camera that zooms in for the door code can see an emblem on a shelf in the same room.Emblem #2: After getting decently dressed, find a large stone bas-relief near some stairs outside the locker room. Under the stairs is a storage closet; the emblem is on the shelves.
Emblem #3: Large room with the Buddha statue. After the tank destroys the statue, the emblem is among the debris.
Emblem #4: After the tank chases you into the Chinese garden (second encounter), the emblem is behind the staircase on ground level.
Chapter 4
Emblem #1: Sherry only. During the bike ride, slide under a gasoline tanker. When prompted to shoot the tanker, there is an emblem on a neon sign to the left.Emblem #2: After defeating the chopper, on a debris-strewn side street. After vaulting the second barricade, a car with headlamps appears; the emblem is on the hood.
Emblem #3: After falling from the balcony to street level, check the dark dead-end to the left for this emblem at face level.
Emblem #4: After falling from the balcony and fighting through the streets, the emblem is at the bottom of a ladder, between a box and the wall.
Chapter 5
Emblem #1: Inside the chamber where you start. After Sherry retrieves weapons and reunites with Jake, check the corner of the room near the airduct.Emblem #2: After activating the second reserve battery, follow the objective marker. In a brightly lit pharmaceutical room with supply cabinets before the moving platform, the emblem is inside a cabinet.
Emblem #3: After escaping the Haos cocoon using lifts, go through a door into a lava-filled chamber. The emblem is at the base of a large column behind (and slightly to the left of) the Ustanak’s starting position.
Emblem #4: Defeat the Ustanak and head for the next area. At the start, there is an emblem at the end of the train car where you enter this map section.
Tips/Tidbits Ada/Agent Campaign
You can only play as Agent if you are player 2 or you join someone who is hosting a session. I don't yet know if it is possible to play as agent if the host leaves as I'm pretty sure it just boots you or switched to SHada. Agent cannot interact with anything nor use grappling hook.
You can One-Shot the bees with the crossbow. I recommend using a quickshot (aim and shoot together)
In Chapter 1, when sneaking around you may see some J'avo that "can't" be stealth killed without them detecting you. Challenge accepted. In the beginning, before the J'avo changes into the web spewing one, throw a grenade by him while avoiding line of sight of him and the J'avo on the other side of the fence and he will die before changing. Next part, look for a movable structure revealing a crawlspace where a patrolling J'avo stops just before the 3 "unpassable" J'avo. Finally, sneak past the first two J'avo to the left and get down near the window. Watch the J'avo inside turn away, and then jump through and hide behind the boxes in from of you and crawl to the right side to where he is looking but stay behind the boxes and/or out of his direct line of sight, and when he moves, get up immediately and stealth kill, quickly jump back through the window and watch the two in the hall. Time it just right to stealth kill one and duck back in the room for cover, then pick off the last one. Way later just after getting the shotgunthere is some stealth-able J'avo. Use the green grenade on the pincer J'avo and any grenade on the next J'avo, the third can be stealthed from behind. That's all stealth for this chapter.
In Chapter 1, the puzzle room is completely random and needs to be solved each time.
At the end of Chapter 1 there are some crossbow bolts and a first aid spray in the swimmable area.
In Chapter 2, there is a room where you need to shoot a hanging Zombie onto a switch. If you shoot the other zombies you can crossbow bolts. 1 per zombie so use your 9mm gun.
In Chapter 2 where you find armored zombies and you need to jump on the trapdoor they’re on but can’t, you need to stick them to the wall with regular bolts by shooting them in the butt or the no no square.
In Chapter 2 when riding the cart fighting Deborah you can back dodge and hold aim to not only duck all obstacles, but remain completely invulnerable to her attacks.
In Chapter 2 when Helana needs help and Ada is hanging on a ledge, you will be forced to take a rescue unless a real player is controlling Leon and doesn't help you up. I just did this with a second console and I forced an online intersection, just don't let Helana die because it will end the session. As long as Agent is absent, this counts for the "Lone Wolf" title.
In Chapter 2 in the underground lab, when inside the room with all the Chrysalids, you can actually destroy them all before walking out of the area to prevent having to fight them all and also Ada will not say what she usually does and just won't speak at all. You can do it with physical or weapon attacks but it takes a long time. Bombs work best. Get someone who join you and help.
In Chapter 4, when you are searching for the keys, lure a zombie hand to a bathroom with a toilet inside. If you do the contextual melee action on it (the same one that has the character pick up and throw it) you will flush it down the toilet. No I'm not kidding.
In Chapter 4, you are intended to be able to stealth most of it, (remember, most of this doesn't matter for the achievement, see achievements for details) here is how: ALWAYS SLOW OPEN DOORS. Stealth the first enemy, and when you go through the door ahead, open slowly. Wait for the guy to turn his back as usual. The next guy, you need to wait until he walks right, not left, as he will spot you through the wall if he is left to the hallway, so just get close enough for jogging distance then close in when he stops right. After looking at the passcode door, duck left where you came and you can get the next guy from behind. Now, you can stealth everyone in the next rooms if you either use only grenades and crossbow on the zombie, or lure the zombie to the beginning and kill it. Grenades and crossbow bolts are silent. Then just avoid all blue zombies and stealth your way through the section. There is 2 roaming back and forth that you need to wait on the stairs for, and get the guy on the right first. Use your corners. Go for the second guy but halfway there is a third guy you need to deal with first that roams that hall with the fancy room, after that get the other guy and unlock the door on the far end. DO NOT STAND IN FRONT OF DOORS or you will be detected. You can see the second keycard guy though the wall, when he goes left, get the guy in his hall immediately. Again when he goes left, go in slow door open. You need to get one blue zombie, it will be marked, you can avoid the rest as they will be killed when the fire starts. Once the fire happens stealth is over, although you can stealth the last keycard guy if you lure everyone away. Wait where the fire happened and watch him though the wall, good luck with that one. After that, no stealth until the searchlights. Make sure you save your grenades btw, you need about 5 or 3 if you are lucky(at least 1 green one no matter what) for the next parts. For the searchlights, duck right and wait for the light to go right and when it does run towards it until you can go behind the wall. There is one guy in a room but he is easy and the wasp monster you can kill any method. This time open comms to duck, then follow the light to the 2nd barrier and wait, after it passes you from left top right, run all the way to the end and grapple. Next is why you have the green grenade, snipe that guy outside with it and move on. You will have to crawl in a tight space and you can use crossbow or grenades to kill 2 or 4 J'avo based on RNG or player coordinates (my advice, go straight, not right). There is one more enemy stealth-able after the cutscene, just watch your corners. That's all the stealth.
You can One-Shot the bees with the crossbow. I recommend using a quickshot (aim and shoot together)
In Chapter 1, when sneaking around you may see some J'avo that "can't" be stealth killed without them detecting you. Challenge accepted. In the beginning, before the J'avo changes into the web spewing one, throw a grenade by him while avoiding line of sight of him and the J'avo on the other side of the fence and he will die before changing. Next part, look for a movable structure revealing a crawlspace where a patrolling J'avo stops just before the 3 "unpassable" J'avo. Finally, sneak past the first two J'avo to the left and get down near the window. Watch the J'avo inside turn away, and then jump through and hide behind the boxes in from of you and crawl to the right side to where he is looking but stay behind the boxes and/or out of his direct line of sight, and when he moves, get up immediately and stealth kill, quickly jump back through the window and watch the two in the hall. Time it just right to stealth kill one and duck back in the room for cover, then pick off the last one. Way later just after getting the shotgunthere is some stealth-able J'avo. Use the green grenade on the pincer J'avo and any grenade on the next J'avo, the third can be stealthed from behind. That's all stealth for this chapter.
In Chapter 1, the puzzle room is completely random and needs to be solved each time.
At the end of Chapter 1 there are some crossbow bolts and a first aid spray in the swimmable area.
In Chapter 2, there is a room where you need to shoot a hanging Zombie onto a switch. If you shoot the other zombies you can crossbow bolts. 1 per zombie so use your 9mm gun.
In Chapter 2 where you find armored zombies and you need to jump on the trapdoor they’re on but can’t, you need to stick them to the wall with regular bolts by shooting them in the butt or the no no square.
In Chapter 2 when riding the cart fighting Deborah you can back dodge and hold aim to not only duck all obstacles, but remain completely invulnerable to her attacks.
In Chapter 2 when Helana needs help and Ada is hanging on a ledge, you will be forced to take a rescue unless a real player is controlling Leon and doesn't help you up. I just did this with a second console and I forced an online intersection, just don't let Helana die because it will end the session. As long as Agent is absent, this counts for the "Lone Wolf" title.
In Chapter 2 in the underground lab, when inside the room with all the Chrysalids, you can actually destroy them all before walking out of the area to prevent having to fight them all and also Ada will not say what she usually does and just won't speak at all. You can do it with physical or weapon attacks but it takes a long time. Bombs work best. Get someone who join you and help.
In Chapter 4, when you are searching for the keys, lure a zombie hand to a bathroom with a toilet inside. If you do the contextual melee action on it (the same one that has the character pick up and throw it) you will flush it down the toilet. No I'm not kidding.
In Chapter 4, you are intended to be able to stealth most of it, (remember, most of this doesn't matter for the achievement, see achievements for details) here is how: ALWAYS SLOW OPEN DOORS. Stealth the first enemy, and when you go through the door ahead, open slowly. Wait for the guy to turn his back as usual. The next guy, you need to wait until he walks right, not left, as he will spot you through the wall if he is left to the hallway, so just get close enough for jogging distance then close in when he stops right. After looking at the passcode door, duck left where you came and you can get the next guy from behind. Now, you can stealth everyone in the next rooms if you either use only grenades and crossbow on the zombie, or lure the zombie to the beginning and kill it. Grenades and crossbow bolts are silent. Then just avoid all blue zombies and stealth your way through the section. There is 2 roaming back and forth that you need to wait on the stairs for, and get the guy on the right first. Use your corners. Go for the second guy but halfway there is a third guy you need to deal with first that roams that hall with the fancy room, after that get the other guy and unlock the door on the far end. DO NOT STAND IN FRONT OF DOORS or you will be detected. You can see the second keycard guy though the wall, when he goes left, get the guy in his hall immediately. Again when he goes left, go in slow door open. You need to get one blue zombie, it will be marked, you can avoid the rest as they will be killed when the fire starts. Once the fire happens stealth is over, although you can stealth the last keycard guy if you lure everyone away. Wait where the fire happened and watch him though the wall, good luck with that one. After that, no stealth until the searchlights. Make sure you save your grenades btw, you need about 5 or 3 if you are lucky(at least 1 green one no matter what) for the next parts. For the searchlights, duck right and wait for the light to go right and when it does run towards it until you can go behind the wall. There is one guy in a room but he is easy and the wasp monster you can kill any method. This time open comms to duck, then follow the light to the 2nd barrier and wait, after it passes you from left top right, run all the way to the end and grapple. Next is why you have the green grenade, snipe that guy outside with it and move on. You will have to crawl in a tight space and you can use crossbow or grenades to kill 2 or 4 J'avo based on RNG or player coordinates (my advice, go straight, not right). There is one more enemy stealth-able after the cutscene, just watch your corners. That's all the stealth.
Serpent Emblems 4 (Ada/Agent)
Ada's Campaign
Chapter 1
Emblem #1: Past the room with the alarm cut-scene, there is a small bunkroom atop the short stairs. The emblem is in plain sight of those tiny living quarters.Emblem #2: At the start of the section where Ada needs to reach the rescue sub, there is a square concrete column before she drops down the first hatch. The emblem is on this column (check all sides). If you picked up the Assault Shotgun, you can climb the ladder back to reach it.
Emblem #3: During the flooding sequence, Ada must use a valve to stop fast-flowing water. The ladder leading to the valve has this emblem next to it.
Emblem #4: During the sinking sub, where you first meet the bee B.O.W., there is an emblem in the dead-end (don’t go up the ladder).
Chapter 2
Emblem #1: At the start, check the stone plinth before dropping into the cemetery.Emblem #2: Assemble Simmons’ family crest and enter the locked crypt door. Before ending the section, turn around and look up; the emblem is in the corner of the crypt’s room.
Emblem #3: After the battle with Deborah, Ada goes into a prison block with fat zombies. The emblem is near the square pool with floating crates.
Emblem #4: In the sewer area, after battling two Nepad who break through walls, the emblem is behind Ada as soon as she jumps down.
Chapter 3
Emblem #1: In the first half of Night Market, instead of following the nav-guide, proceed to the roadblock near the third stall on the left. The emblem is on the wall of the third stall.Emblem #2: In the second half of Night Market, after passing the mahjong club and civilians’ cut-scene, the emblem is in a plastic roadblock near a fiery storefront.
Emblem #3: While on the bus rooftop fighting the chainsaw B.O.W., at the first stop, the emblem is on scaffolding at one end of the bus.
Emblem #4: After jumping off the train, Ada starts in a stairwell of a tenement. The emblem is at the bottom of the stairwell past a box, best angle in the lower right corner of the wooden container.
Chapter 4
Emblem #1: Pass through the carrier to the outer gangplank with the searchlight. Past the first searchlight, the emblem is on the balcony where Ada lands.Emblem #2: After locating Carla’s secret information but before taking the elevator down, a short hall with a single J’avo soldier contains the emblem inside an open locker.
Emblem #3: After the “Ada meets Carla” cut-scene, inside the vessel before heading down the hatch, the emblem is on the left side.
Emblem #4: During Ada’s escape from Carla’s super slime, there is a pause in the large room where the exit requires freezing a “Carla Face.” Slide under the first attack, then turn and shoot the emblem.
Chapter 5
Emblem #1: At the first gunride protecting Leon and Helena, check the cargo truck on the left side of the street.Emblem #2: During the enemy gunship fight at the tenement, lower altitude and search the side of the building. The emblem is on the bottom-right corner of the shooting gallery atop a signboard.
Emblem #3: After battling Simmons’ “dinosaur” form, on the second rooftop with the dynamite zombie, the emblem is to the left of the shooting gallery on an adjacent rooftop.
Emblem #4: Once Ada lands on the rooftop and ziplines to a girder, look towards the incomplete building with blue tarp. The emblem is visible from the girder.
Campaign Related Deaths, QTEs, and Death Avoidance/knowledge
Leon
Chapter 1: In the Elevator, you need to shake off the zombie or shoot it off your partner.
Every Campaign Item pt1
Extra Modes Score Calculation
Mercenaries
WIPEnemy Type
Points
Zombie Dog
100
Zombie
300
J'avo
300
J'avo with 1 Mutation
500
Bloodshot
600
Shrieker
800
Whopper
1000
Napad
1500
Strelats
1500
Gnezdo
3000
Agent Hunt -
Agent Hunt places players in the role of creatures found in Resident Evil 6 and puts them with other AI-controlled creatures to fight against human players. While playing Agent Hunt, players will be put into the role of all lesser creatures featured in the game, meaning that playing as bosses or mini-bosses such as an Ogroman is not possible. Upon death, the player will respawn as another creature and be allowed to continue menacing their enemies. When playing the main campaign, an option is present which dictates if an Agent Hunter player is able to join or not, once a creature is joining a match, the Agent player (meaning the main character such as Leon, Helena, etc.) will see a notification on the top right of their screen with the Agent Hunt's player Dog Tag being displayed.
The Partner Action Button can be used in this mode when there are two player-controlled creatures in a match, however, it's only used to find the location of the other player as no commands can be assigned.
The strength, speed and stamina of the creatures that hunters control vary depending on the current campaign's selected difficulty; For instance, players inflict more damage on the agents if the agent players have selected Veteran or Professional difficulty, there are also Skills that are exclusive to this mode which can toughen up the creature's stats.
Playable Stages
Leon 1-5 Gun Shop
Leon 2-2 Forest Cemetery
Leon 3-3 Cavern
Leon 4-3 Market
Chris 3-4 Stilt Housing Area
Chris 4-1 Aircraft Carrier - Rear Hanger
Chris 4-3 Aircraft Carrier - Forward Hanger
Chris 5-1 Underwater Facility
Jake 2-1 Mountain Path
Jake 3-2 Research Facility - Living Quarters
Jake 4-4 Shopping District
Jake 5-1 Underwater Facility 1
Upon playing on every stage once, players will unlock the "Rasklapanje" icon on RE.NET.
Neo-Umbrella J'avo - With this J'avo you can get up-close and personal with your targets by running up to agents and stunning them with your wrist blades, or even killing them when they are wounded or are incapacitated on the floor.
Ruka-Khvatanje - Once a J'avo sustains enough damage to its arm, it has the potential to mutate into this. Players under this mutation will be able to utilize the newly-grown arm to reach out and grab their enemies and slam them into the ground.
Ruka-Srp - When a J'avo has received enough damage to the arm they will mutate their arm in to a scythe-like protrusion. With this you are able to slash your enemies with the arm to deal heavy damage.
Ruka-Bedem - When a J'avo has taken enough damage to the arm it will grow a shield-like arm to protect the J'avo's front body from incoming fire.
Strelac - If a J'avo is close to death, they may begin mutation into a Chrysalid. Just the same as an AI-enemy, they will enter a pod-like stasis that they will eventually burst from. This variation is a four-legged creature with extending frills that is capable of knocking enemies down easily.
Gnezdo - Is a swarm of creatures that hatch from a Chrysalid and act like a colony of insects, protecting their queen. Using this you can attack an enemy with a swarm of insects causing them great damage.
Glava-Sluz - If a J'avo has taken a severe amount of damage to the head it will trigger a mutation. Using this you are able to cover your enemy in a sticky substance akin to webbing leaving your enemy helpless and vulnerable, trying to free themselves while in danger of being attacked.
Glava-Smech - When the head of a J'avo has taken enough damage it will mutate into a beetle-like form. This enables you to pick up your enemies up and crush or devour your victims like an insect does to its prey.
Telo-Eksplozija - Once a J'avo has sustained a certain amount of damage to its torso it will mutate into a cocoon-like form. This mutation gives you the ability to explode, dealing massive damage to enemies when taking damage to the legs or knees.
Mesec - A J'avo in the mountains of Edonia may mutate into one of these when near death. These flying bird-like creatures can swoop down and grab a target, then stab them with multiple talons before throwing them off onto the ground.
Napad - Another playable Chrysalid mutation. Slow, but fiendishly strong melee attacks. They are also capable of unleashing a fast, charging attack to knock over their targets.
Zombie - As an unarmed Zombie, players can swipe at targets with their hands or grab and bite. Zombies holding weapons can use them to attack their targets.
Bloodshot - Once a Zombie takes enough damage, it may randomly mutate into a Bloodshot. Players controlling these crimson Zombies can move much faster and hit harder with their close-range attacks. Unlike normal Zombies, players can now run and leap at their targets.
Zombie Dog - Players controlling Zombie Dogs can pounce on their victims and tear at their throat, as well as dodge bullets by jumping sideways.
Shrieker - Shriekers can either punch or hide to fill up their lungs with air in preparation for a scream attack, which inflicts damage depending on proximity to the targets.
Rasklapanje - These creatures have extremely dangerous attacks that can cause instant-death if they are not shaken off. They are also nigh-invulnerable to conventional firearms, as they can simply reattach dismembered limbs or regenerate them.
Upon playing on as every creature once, players will unlock the "Ustanak 2" icon on RE.NET.
A player’s moveset is very slightly different from an npc enemy. You can spot the player controlling the enemy by watching for quick or enhanced movement, long distance weapon throws, intentional dying, no roar when trying to leap as a regular zombie or other shorter animations.
The Partner Action Button can be used in this mode when there are two player-controlled creatures in a match, however, it's only used to find the location of the other player as no commands can be assigned.
The strength, speed and stamina of the creatures that hunters control vary depending on the current campaign's selected difficulty; For instance, players inflict more damage on the agents if the agent players have selected Veteran or Professional difficulty, there are also Skills that are exclusive to this mode which can toughen up the creature's stats.
Playable Stages
Leon 1-5 Gun Shop
Leon 2-2 Forest Cemetery
Leon 3-3 Cavern
Leon 4-3 Market
Chris 3-4 Stilt Housing Area
Chris 4-1 Aircraft Carrier - Rear Hanger
Chris 4-3 Aircraft Carrier - Forward Hanger
Chris 5-1 Underwater Facility
Jake 2-1 Mountain Path
Jake 3-2 Research Facility - Living Quarters
Jake 4-4 Shopping District
Jake 5-1 Underwater Facility 1
Upon playing on every stage once, players will unlock the "Rasklapanje" icon on RE.NET.
Playable Creatures
Machete J’avo - As a machete-wielding J'avo, players will have to get up-close and personal with their targets, utilizing the same basic moveset found in the same AI-controlled enemy. They are able to utilize a simple slash attack that can make small combos, as well as a heavily orchestrated spinning machete attack.Neo-Umbrella J'avo - With this J'avo you can get up-close and personal with your targets by running up to agents and stunning them with your wrist blades, or even killing them when they are wounded or are incapacitated on the floor.
Ruka-Khvatanje - Once a J'avo sustains enough damage to its arm, it has the potential to mutate into this. Players under this mutation will be able to utilize the newly-grown arm to reach out and grab their enemies and slam them into the ground.
Ruka-Srp - When a J'avo has received enough damage to the arm they will mutate their arm in to a scythe-like protrusion. With this you are able to slash your enemies with the arm to deal heavy damage.
Ruka-Bedem - When a J'avo has taken enough damage to the arm it will grow a shield-like arm to protect the J'avo's front body from incoming fire.
Strelac - If a J'avo is close to death, they may begin mutation into a Chrysalid. Just the same as an AI-enemy, they will enter a pod-like stasis that they will eventually burst from. This variation is a four-legged creature with extending frills that is capable of knocking enemies down easily.
Gnezdo - Is a swarm of creatures that hatch from a Chrysalid and act like a colony of insects, protecting their queen. Using this you can attack an enemy with a swarm of insects causing them great damage.
Glava-Sluz - If a J'avo has taken a severe amount of damage to the head it will trigger a mutation. Using this you are able to cover your enemy in a sticky substance akin to webbing leaving your enemy helpless and vulnerable, trying to free themselves while in danger of being attacked.
Glava-Smech - When the head of a J'avo has taken enough damage it will mutate into a beetle-like form. This enables you to pick up your enemies up and crush or devour your victims like an insect does to its prey.
Telo-Eksplozija - Once a J'avo has sustained a certain amount of damage to its torso it will mutate into a cocoon-like form. This mutation gives you the ability to explode, dealing massive damage to enemies when taking damage to the legs or knees.
Mesec - A J'avo in the mountains of Edonia may mutate into one of these when near death. These flying bird-like creatures can swoop down and grab a target, then stab them with multiple talons before throwing them off onto the ground.
Napad - Another playable Chrysalid mutation. Slow, but fiendishly strong melee attacks. They are also capable of unleashing a fast, charging attack to knock over their targets.
Zombie - As an unarmed Zombie, players can swipe at targets with their hands or grab and bite. Zombies holding weapons can use them to attack their targets.
Bloodshot - Once a Zombie takes enough damage, it may randomly mutate into a Bloodshot. Players controlling these crimson Zombies can move much faster and hit harder with their close-range attacks. Unlike normal Zombies, players can now run and leap at their targets.
Zombie Dog - Players controlling Zombie Dogs can pounce on their victims and tear at their throat, as well as dodge bullets by jumping sideways.
Shrieker - Shriekers can either punch or hide to fill up their lungs with air in preparation for a scream attack, which inflicts damage depending on proximity to the targets.
Rasklapanje - These creatures have extremely dangerous attacks that can cause instant-death if they are not shaken off. They are also nigh-invulnerable to conventional firearms, as they can simply reattach dismembered limbs or regenerate them.
Upon playing on as every creature once, players will unlock the "Ustanak 2" icon on RE.NET.
A player’s moveset is very slightly different from an npc enemy. You can spot the player controlling the enemy by watching for quick or enhanced movement, long distance weapon throws, intentional dying, no roar when trying to leap as a regular zombie or other shorter animations.
Mercenaries and No mercy -
The Mercenaries is an Extra Content mode in Resident Evil 6, available from the start. Your objective is simple: score as many points as possible before time runs out — and don’t die.
You begin with 2:00 on the clock. Time can be extended by smashing Time Crystals (30, 60, or 90 seconds) using melee attacks or explosive damage. Equipped skills can increase the time gained as well. Time Bonus + Increases Time Bonuses collected by 10 seconds. Combo Bonus + makes Combo Bonuses collected add 10 seconds longer than normal Combo Bonuses.
Combo Bonuses:
Melee kill: +5 seconds
Coup de grâce: +7 seconds In the glitches and tricks part of this guide there is a really useful move you can do using grenades.
Counter-attack: +10 seconds
Multi-kills stack the time bonus
Chaining kills builds a Combo, increasing your score multiplier. Stop killing for too long and the combo resets. Green Combo Crystals boost combo scoring by adding +1,000 points per kill while active.
Each stage caps at 150 enemies, and 300 for No Mercy, with spawns tied to player performance. Certain enemies and hidden bosses only appear after reaching specific combo counts, scores, or other conditions.
Stages: 10
Urban Chaos — Zombie Stage -default unlock-
Steel Beast — J’avo Stage -default unlock-
Mining the Depths — Zombie Stage -default unlock-
Rail Yard — J’avo Stage
High Seas Fortress — J’avo Stage
The Catacombs — Zombie Stage
Requiem for War — J’avo Stage
Liquid Fire — J’avo Stage
Rooftop Mission — Zombie Stage
Creature Workshop — J’avo Stage
Players: Up to 2 without a More Players mod
Characters:
Starting Characters: Leon, Chris, Jake
Added via Update: Agent
Unlock Requirements:
Helena — Get B Rank on Urban Chaos
Piers — Get B Rank on Steel Beast
Sherry — Get B Rank on Mining the Depths
Ada — Complete her campaign
Carla — Unlock all characters + all EX1 outfits
Extra costumes — S rank with target character for EX1(may using require regular mercenaries mode), Special for EX2 and 3 (see unlockables section in this guide)
PC Only Left 4 Dead pack (No Mercy only): Rochelle, Ellis, Nick, Coach
Or for any character, play survivors and unlock all (except for Carla because of the unlock requirement of EX1’s)characters that way.
Default
Wing Shooter
Shotgun
4 Remote Bomb
50 9mm ammo
8 Shotgun Shells
Costume 1
Assault Rifle RN
Sniper Rifle
Grenade Launcher
60 5.56 ammo
30 7.62 ammo
Default
Assault Rifle for Special Tactics
Lightning Hawk
Combat Knife
3x Hand Grenades
60 5.56 ammo
7 magnum ammo
Costume 1
909 Handgun
Shotgun
Rocket Launcher
50 9mm ammo
20 Shotgun Shells
Default
909 Handgun
Elephant Killer (.500 S&W)
Hand-to-Hand Combat
2x Flash Grenades
10 magnum ammo
50 9mm ammo
Costume 1
Survival Knife
Semi-Auto Sniper Rifle
Grenade Launcher (Acid Rounds)
1 First Aid Spray
12 Acid Rounds
20 7.62 ammo
Default
Picador
Hydra
Grenade Launcher
50 9mm ammo
30 10-gauge shells
Costume 1
Ammo Box 50
Sniper Rifle
3x Incendiary Grenades
1First Aid Spray
1 Red Herb
50 9 mm ammo
20 7.62 ammo
Default
MP-AF
Anti-Materiel Rifle
3 Remote Bombs
1 First Aid Spray
50 9mm ammo
20 anti-materiel rounds
Costume 1
Ammo Box 50
Semi-Auto Sniper Rifle
Assault Shotgun
30 9mm ammo
15 7.62 ammo
10 shotgun shells
Default
Triple Shot
Lightning Hawk
Stun Rod
2x Red Herbs
1 First Aid Spray
10 magnum ammo\
30 9mm ammo
Costume 1
Bear Commander
Assault Shotgun
2x Red Herbs
1 First Aid Spray
2x Flash Grenades
60 5.56 ammo
20 shotgun shells
3 launcher rounds
Default
Crossbow (Normal Arrows & Pipe Bomb Arrows)
3 Incendiary Grenades
Ammo Box 50
30 9mm ammo
60 crossbow bolts
30 explosive bolts
Costume 1
MP-AF
Sniper Rifle
2x Red Herbs
3x Hand Grenades
2x Flash Grenades
30 9mm ammo
6 7.62 ammo
This is a spoiler
Default
Picador
Grenade Launcher (Acid & Nitrogen Rounds)
50 9mm ammo
12 acid rounds
6 nitrogen rounds
Default
909 Handgun
Semi-Auto Sniper Rifle
Survival Knife
5x Remote Bombs
2x First Aid Sprays
50 9mm ammo
20 7.62 ammo
Assault Rifle RN
Grenade Launcher (6 Explosive Rounds loaded)
40mm Nitrogen Rounds x12
5.56mm NATO Ammo x50
3x First Aid Sprays
Ellis – Loadout
Nine-Oh-Nine
Semi-Auto Sniper Rifle
Anti-Materiel Rifle
9mm Ammo x30
7.62mm NATO Ammo x20
12.7mm Ammo x5
Rochelle – Loadout
Ammo Box 50
Elephant Killer
9mm Ammo x50
.500 S&W Ammo x12
3x Flash Grenades
3x Hand Grenades
3x Incendiary Grenades
Coach – Loadout
Shotgun
Lightning Hawk
Rocket Launcher
12 Gauge Shells x30
.50 Action Express x6
2x Hand Grenades
For map Specifics, see each map in the guide.
You begin with 2:00 on the clock. Time can be extended by smashing Time Crystals (30, 60, or 90 seconds) using melee attacks or explosive damage. Equipped skills can increase the time gained as well. Time Bonus + Increases Time Bonuses collected by 10 seconds. Combo Bonus + makes Combo Bonuses collected add 10 seconds longer than normal Combo Bonuses.
Combo Bonuses:
Melee kill: +5 seconds
Coup de grâce: +7 seconds In the glitches and tricks part of this guide there is a really useful move you can do using grenades.
Counter-attack: +10 seconds
Multi-kills stack the time bonus
Chaining kills builds a Combo, increasing your score multiplier. Stop killing for too long and the combo resets. Green Combo Crystals boost combo scoring by adding +1,000 points per kill while active.
Each stage caps at 150 enemies, and 300 for No Mercy, with spawns tied to player performance. Certain enemies and hidden bosses only appear after reaching specific combo counts, scores, or other conditions.
Stages: 10
Urban Chaos — Zombie Stage -default unlock-
Steel Beast — J’avo Stage -default unlock-
Mining the Depths — Zombie Stage -default unlock-
Rail Yard — J’avo Stage
High Seas Fortress — J’avo Stage
The Catacombs — Zombie Stage
Requiem for War — J’avo Stage
Liquid Fire — J’avo Stage
Rooftop Mission — Zombie Stage
Creature Workshop — J’avo Stage
Players: Up to 2 without a More Players mod
Characters:
Starting Characters: Leon, Chris, Jake
Added via Update: Agent
Unlock Requirements:
Helena — Get B Rank on Urban Chaos
Piers — Get B Rank on Steel Beast
Sherry — Get B Rank on Mining the Depths
Ada — Complete her campaign
Carla — Unlock all characters + all EX1 outfits
Extra costumes — S rank with target character for EX1(may using require regular mercenaries mode), Special for EX2 and 3 (see unlockables section in this guide)
PC Only Left 4 Dead pack (No Mercy only): Rochelle, Ellis, Nick, Coach
Or for any character, play survivors and unlock all (except for Carla because of the unlock requirement of EX1’s)characters that way.
Loadouts
All extra costumes share the same loadout.Leon S. Kennedy
Default
Wing Shooter
Shotgun
4 Remote Bomb
50 9mm ammo
8 Shotgun Shells
Costume 1
Assault Rifle RN
Sniper Rifle
Grenade Launcher
60 5.56 ammo
30 7.62 ammo
Chris Redfield
Default
Assault Rifle for Special Tactics
Lightning Hawk
Combat Knife
3x Hand Grenades
60 5.56 ammo
7 magnum ammo
Costume 1
909 Handgun
Shotgun
Rocket Launcher
50 9mm ammo
20 Shotgun Shells
Jake Muller
Default
909 Handgun
Elephant Killer (.500 S&W)
Hand-to-Hand Combat
2x Flash Grenades
10 magnum ammo
50 9mm ammo
Costume 1
Survival Knife
Semi-Auto Sniper Rifle
Grenade Launcher (Acid Rounds)
1 First Aid Spray
12 Acid Rounds
20 7.62 ammo
Helena Harper
Default
Picador
Hydra
Grenade Launcher
50 9mm ammo
30 10-gauge shells
Costume 1
Ammo Box 50
Sniper Rifle
3x Incendiary Grenades
1First Aid Spray
1 Red Herb
50 9 mm ammo
20 7.62 ammo
Piers Nivans
Default
MP-AF
Anti-Materiel Rifle
3 Remote Bombs
1 First Aid Spray
50 9mm ammo
20 anti-materiel rounds
Costume 1
Ammo Box 50
Semi-Auto Sniper Rifle
Assault Shotgun
30 9mm ammo
15 7.62 ammo
10 shotgun shells
Sherry Birkin
Default
Triple Shot
Lightning Hawk
Stun Rod
2x Red Herbs
1 First Aid Spray
10 magnum ammo\
30 9mm ammo
Costume 1
Bear Commander
Assault Shotgun
2x Red Herbs
1 First Aid Spray
2x Flash Grenades
60 5.56 ammo
20 shotgun shells
3 launcher rounds
Ada Wong
Default
Crossbow (Normal Arrows & Pipe Bomb Arrows)
3 Incendiary Grenades
Ammo Box 50
30 9mm ammo
60 crossbow bolts
30 explosive bolts
Costume 1
MP-AF
Sniper Rifle
2x Red Herbs
3x Hand Grenades
2x Flash Grenades
30 9mm ammo
6 7.62 ammo
This is a spoiler
Carla Radames
This is a spoilerDefault
Picador
Grenade Launcher (Acid & Nitrogen Rounds)
50 9mm ammo
12 acid rounds
6 nitrogen rounds
Agent
Default
909 Handgun
Semi-Auto Sniper Rifle
Survival Knife
5x Remote Bombs
2x First Aid Sprays
50 9mm ammo
20 7.62 ammo
L4D
Nick – LoadoutAssault Rifle RN
Grenade Launcher (6 Explosive Rounds loaded)
40mm Nitrogen Rounds x12
5.56mm NATO Ammo x50
3x First Aid Sprays
Ellis – Loadout
Nine-Oh-Nine
Semi-Auto Sniper Rifle
Anti-Materiel Rifle
9mm Ammo x30
7.62mm NATO Ammo x20
12.7mm Ammo x5
Rochelle – Loadout
Ammo Box 50
Elephant Killer
9mm Ammo x50
.500 S&W Ammo x12
3x Flash Grenades
3x Hand Grenades
3x Incendiary Grenades
Coach – Loadout
Shotgun
Lightning Hawk
Rocket Launcher
12 Gauge Shells x30
.50 Action Express x6
2x Hand Grenades
For map Specifics, see each map in the guide.
Survivors -
In Survivors, players are pitted against each other similar to a deathmatch with limited time. Although characters have their own starting weapon, they can find weapons scattered throughout the stage.
Human characters who are killed become zombies or J'avo depending on the stage and must kill another human character to play as the human character again. The game ends when the last man is alive, or the timer has run out, with the player having the highest score winning the game.
There are two modes, Deathmatch mode free for all and Team mode(requires an even number of players).
Default
Wing Shooter
Shotgun
Remote Bomb x1
Costume 1
Wing Shooter
Semi-Auto SR
7.62mm NATO Ammo x5
Incendiary Grenade x1
Default
Hydra
Assault Rifle RN
Hand Grenade x1
Costume 1
Hydra
Stun Rod
10 Gauge Shells x6
Flash Grenade x1
Default
Combat Knife
AR for Special Tactics
Hand Grenade x1
Costume 1
Combat Knife
Assault Shotgun
Flash Grenade x1
Default
Anti-Materiel Rifle
MP-AF
Remote Bomb x1
Costume 1
Anti-Materiel Rifle
Picador
Incendiary Grenade x1
Default
Hand to Hand
MP-AF
Incendiary Grenade x1
Costume 1
Hand to Hand
Sniper Rifle
Hand Grenade x1
Default
Stun Rod
Bear Commander
Flash Grenade x1
Costume 1
Stun Rod
Crossbow
Normal Arrows x4
Pipe Bomb Arrow x2
Hand Grenade x1
Default
Crossbow
Ammo Box 50
Normal Arrows x5
Remote Bomb x1
Costume 1
Crossbow
Triple Shot
Normal Arrows x3
Incendiary Grenade x1
This is a spoiler
Default
Sniper Rifle
Assault Shotgun
Flash Grenade x1
Default
Survival Knife
Lightning Hawk
Remote Bomb x1
Human characters who are killed become zombies or J'avo depending on the stage and must kill another human character to play as the human character again. The game ends when the last man is alive, or the timer has run out, with the player having the highest score winning the game.
There are two modes, Deathmatch mode free for all and Team mode(requires an even number of players).
Loadouts
All extra costumes share the same loadout.Leon S. Kennedy
Default
Wing Shooter
Shotgun
Remote Bomb x1
Costume 1
Wing Shooter
Semi-Auto SR
7.62mm NATO Ammo x5
Incendiary Grenade x1
Helena Harper
Default
Hydra
Assault Rifle RN
Hand Grenade x1
Costume 1
Hydra
Stun Rod
10 Gauge Shells x6
Flash Grenade x1
Chris Redfield
Default
Combat Knife
AR for Special Tactics
Hand Grenade x1
Costume 1
Combat Knife
Assault Shotgun
Flash Grenade x1
Piers Nivans
Default
Anti-Materiel Rifle
MP-AF
Remote Bomb x1
Costume 1
Anti-Materiel Rifle
Picador
Incendiary Grenade x1
Jake Muller
Default
Hand to Hand
MP-AF
Incendiary Grenade x1
Costume 1
Hand to Hand
Sniper Rifle
Hand Grenade x1
Sherry Birkin
Default
Stun Rod
Bear Commander
Flash Grenade x1
Costume 1
Stun Rod
Crossbow
Normal Arrows x4
Pipe Bomb Arrow x2
Hand Grenade x1
Ada Wong
Default
Crossbow
Ammo Box 50
Normal Arrows x5
Remote Bomb x1
Costume 1
Crossbow
Triple Shot
Normal Arrows x3
Incendiary Grenade x1
This is a spoiler
Carla Radames
This is a spoilerDefault
Sniper Rifle
Assault Shotgun
Flash Grenade x1
Agent
Default
Survival Knife
Lightning Hawk
Remote Bomb x1
Onslaught -
In Onslaught, two players try to survive waves of enemies sent by each other. Though in the same stage, the players are isolated from each other. The player can stack up the combo up to 30 and if done successfully, this will send all 30 the enemies that have been killed to the opponent.
An "Offense" mechanic which is unique to this mode can be used to power up the character, killing enemies with a melee attack and sending enemies to the opponent early via the use of a taunt will increase this Offense number, which stacks to up to 300%. Taking damage will decrease the Offense, and completing a full 30 combo will reset it completely. At 300%, players will be able to kill enemies, including bosses, very quickly with any weapon type.
Enemies in Onslaught by default are aggressive and spawn in great numbers. Mutated enemies such as the Glava-Begunats tend to spawn quickly. Sub-bosses such as the Ubistvo can be sent to your opponent to further worsen their situation and also decrease their chances of survival.
Enemies that are sent to you are noticed by their grosteque slime covering them. In addition to pressurize the player, J'avo that have been killed in a mutated state will stay that way when sent by the opponent. The match ends when one of the players has been overwhelmed with the last man standing being the victor. If both of the player survived, the person with the highest score wins the match.
Default Onslaught
Wing Shooter
Shotgun
50 9mm ammo
20 Shotgun Shells
Grenade x2
Costume 1 Alternate Onslaught
Assault Rifle RN
Sniper Rifle
Flash Grenade x2
60 5.56mm ammo
30 7.62mm ammo
Default Onslaught
Picador
Hydra
50 9mm ammo
20 10 Gauge Shells
Hand Grenade x2
Costume 1 Alternate Onslaught
Ammo Box 50
Sniper Rifle
Stun Rod
Incendiary Grenade x3
50 9mm ammo
20 7.62mm ammo
Default Onslaught
Assault Rifle for Special Tactics
Combat Knife
Flash Grenade x2
60 5.56mm ammo
Costume 1 Alternate Onslaught
Combat Knife
Assault Shotgun
Hand Grenade x2
20 Shotgun Shells
Default Onslaught
Nine‑Oh‑Nine (909)
Anti‑Materiel Rifle
Remote Bomb x3
50 9mm ammo
30 Anti‑Materiel rounds
Costume 1 Alternate Onslaught
Ammo Box 50
Semi‑Auto Sniper Rifle
Assault Shotgun
Incendiary Grenade x1
30 9mm ammo
15 7.62mm ammo
10 Shotgun Shells
Default Onslaught
Nine‑Oh‑Nine (909)
Desert Eagle (Lightning Hawk)
Hand‑to‑Hand
50 9mm ammo
Costume 1 Alternate Onslaught
Survival Knife
Semi‑Auto Sniper Rifle
Grenade Launcher
Flash Grenade x1
Incendiary Grenade x3
20 7.62mm ammo
Default Onslaught
Triple Shot
Desert Eagle (Lightning Hawk)
Stun Rod
Flash Grenade x1
30 9mm ammo
Costume 1 Alternate Onslaught
Bear Commander
Assault Shotgun
60 5.56mm ammo
20 Shotgun Shells
Hand Grenade x2
Default Onslaught
Ammo Box 50
Crossbow
Incendiary Grenade x3
30 9mm ammo
50 Normal Arrows
10 Explosive Bolts
Costume 1 Alternate Onslaught
SMG (Ammo Box‑style)
Sniper Rifle
Stun Rod
Grenade x3
30 9mm ammo
6 7.62mm ammo
This is a spoiler
Default Onslaught
Picador
Semi‑Auto Sniper Rifle
Grenade x3
50 9mm ammo
20 7.62mm ammo
Default Onslaught
Nine‑Oh‑Nine (909)
Semi‑Auto Sniper Rifle
Survival Knife
Grenade x3
50 9mm ammo
20 7.62mm ammo
An "Offense" mechanic which is unique to this mode can be used to power up the character, killing enemies with a melee attack and sending enemies to the opponent early via the use of a taunt will increase this Offense number, which stacks to up to 300%. Taking damage will decrease the Offense, and completing a full 30 combo will reset it completely. At 300%, players will be able to kill enemies, including bosses, very quickly with any weapon type.
Enemies in Onslaught by default are aggressive and spawn in great numbers. Mutated enemies such as the Glava-Begunats tend to spawn quickly. Sub-bosses such as the Ubistvo can be sent to your opponent to further worsen their situation and also decrease their chances of survival.
Enemies that are sent to you are noticed by their grosteque slime covering them. In addition to pressurize the player, J'avo that have been killed in a mutated state will stay that way when sent by the opponent. The match ends when one of the players has been overwhelmed with the last man standing being the victor. If both of the player survived, the person with the highest score wins the match.
Loadouts
All extra costumes share the same loadout.Leon S. Kennedy
Default Onslaught
Wing Shooter
Shotgun
50 9mm ammo
20 Shotgun Shells
Grenade x2
Costume 1 Alternate Onslaught
Assault Rifle RN
Sniper Rifle
Flash Grenade x2
60 5.56mm ammo
30 7.62mm ammo
Helena Harper
Default Onslaught
Picador
Hydra
50 9mm ammo
20 10 Gauge Shells
Hand Grenade x2
Costume 1 Alternate Onslaught
Ammo Box 50
Sniper Rifle
Stun Rod
Incendiary Grenade x3
50 9mm ammo
20 7.62mm ammo
Chris Redfield
Default Onslaught
Assault Rifle for Special Tactics
Combat Knife
Flash Grenade x2
60 5.56mm ammo
Costume 1 Alternate Onslaught
Combat Knife
Assault Shotgun
Hand Grenade x2
20 Shotgun Shells
Piers Nivans
Default Onslaught
Nine‑Oh‑Nine (909)
Anti‑Materiel Rifle
Remote Bomb x3
50 9mm ammo
30 Anti‑Materiel rounds
Costume 1 Alternate Onslaught
Ammo Box 50
Semi‑Auto Sniper Rifle
Assault Shotgun
Incendiary Grenade x1
30 9mm ammo
15 7.62mm ammo
10 Shotgun Shells
Jake Muller
Default Onslaught
Nine‑Oh‑Nine (909)
Desert Eagle (Lightning Hawk)
Hand‑to‑Hand
50 9mm ammo
Costume 1 Alternate Onslaught
Survival Knife
Semi‑Auto Sniper Rifle
Grenade Launcher
Flash Grenade x1
Incendiary Grenade x3
20 7.62mm ammo
Sherry Birkin
Default Onslaught
Triple Shot
Desert Eagle (Lightning Hawk)
Stun Rod
Flash Grenade x1
30 9mm ammo
Costume 1 Alternate Onslaught
Bear Commander
Assault Shotgun
60 5.56mm ammo
20 Shotgun Shells
Hand Grenade x2
Ada Wong
Default Onslaught
Ammo Box 50
Crossbow
Incendiary Grenade x3
30 9mm ammo
50 Normal Arrows
10 Explosive Bolts
Costume 1 Alternate Onslaught
SMG (Ammo Box‑style)
Sniper Rifle
Stun Rod
Grenade x3
30 9mm ammo
6 7.62mm ammo
This is a spoiler
Carla Radames
This is a spoilerDefault Onslaught
Picador
Semi‑Auto Sniper Rifle
Grenade x3
50 9mm ammo
20 7.62mm ammo
Agent
Default Onslaught
Nine‑Oh‑Nine (909)
Semi‑Auto Sniper Rifle
Survival Knife
Grenade x3
50 9mm ammo
20 7.62mm ammo
Predator -
In this mode, 5 or less players are pitted against a player that becomes the Ustanak. This mode contains 6 rounds. The objective of the characters are to eliminate the Ustanak or survive until the round ends, while the Ustanak's objective is to eliminate all human characters.
After each round has ended, a player is picked randomly to become the Ustanak. When playing as a human character, their weapon's ammo will be limited however, weapons are dropped throughout the stage for the player to pick up. While playing as the Ustanak, he can change his weapon when it is dropped throughout the stage although limited to only the grabbing claw and the shotgun cannon. The Ustanak can also destroy weapons that are dropped for the human characters further decreasing their chance to survive. Ustanak is also assisted by the Oko, which informs the Ustanak about the human character's whereabouts. The game ends when the final round has ended with the player with the highest score being the victor.
Ustanak’s grab will bring the target to 1 health (downed state / zero health blocks state).
Shooting Wild is probably the best skill to use as it increases damage by alot, combine this with Leon’s shotgun and the fast shooting trick and you are golden.
Version differences
PS4, Xbox One, Nintendo Switch: Ustanak's "Grab" attack has a bigger delay during its animation.
Nintendo Switch: Ustanak sprints faster, the controls list at the bottom of the screen for the Ustanak player has more actions listed.
Default
Wing Shooter
Shotgun
Costume 1
Wing Shooter
Semi-Auto SR
7.62mm NATO Ammo x5
Default
Hydra
Assault Rifle RN
Costume 1
Hydra
10 Gauge Shells x3
Stun Rod
Default
Combat Knife
AR for Special Tactics
Costume 1
Combat Knife
Assault Shotgun
Default
Anti-Materiel Rifle
MP-AF
Costume 1
Anti-Materiel Rifle
Picador
Default
Hand to Hand
MP-AF
Costume 1
Hand to Hand
Sniper Rifle
Default
Stun Rod
Bear Commander
Costume 1
Stun Rod
Crossbow
Normal Arrows x5
Pipe Bomb Arrows x5
Default
Crossbow
Ammo Box 50
Normal Arrows x5
Costume 1
Crossbow
Triple Shot
Normal Arrows x5
Pipe Bomb Arrows x5
This is a spoiler
Default
Sniper Rifle
Assault Shotgun
Default
Survival Knife
Lightning Hawk
After each round has ended, a player is picked randomly to become the Ustanak. When playing as a human character, their weapon's ammo will be limited however, weapons are dropped throughout the stage for the player to pick up. While playing as the Ustanak, he can change his weapon when it is dropped throughout the stage although limited to only the grabbing claw and the shotgun cannon. The Ustanak can also destroy weapons that are dropped for the human characters further decreasing their chance to survive. Ustanak is also assisted by the Oko, which informs the Ustanak about the human character's whereabouts. The game ends when the final round has ended with the player with the highest score being the victor.
Ustanak’s grab will bring the target to 1 health (downed state / zero health blocks state).
Shooting Wild is probably the best skill to use as it increases damage by alot, combine this with Leon’s shotgun and the fast shooting trick and you are golden.
Version differences
PS4, Xbox One, Nintendo Switch: Ustanak's "Grab" attack has a bigger delay during its animation.
Nintendo Switch: Ustanak sprints faster, the controls list at the bottom of the screen for the Ustanak player has more actions listed.
Loadouts
Leon S. Kennedy
Default
Wing Shooter
Shotgun
Costume 1
Wing Shooter
Semi-Auto SR
7.62mm NATO Ammo x5
Helena Harper
Default
Hydra
Assault Rifle RN
Costume 1
Hydra
10 Gauge Shells x3
Stun Rod
Chris Redfield
Default
Combat Knife
AR for Special Tactics
Costume 1
Combat Knife
Assault Shotgun
Piers Nivans
Default
Anti-Materiel Rifle
MP-AF
Costume 1
Anti-Materiel Rifle
Picador
Jake Muller
Default
Hand to Hand
MP-AF
Costume 1
Hand to Hand
Sniper Rifle
Sherry Birkin
Default
Stun Rod
Bear Commander
Costume 1
Stun Rod
Crossbow
Normal Arrows x5
Pipe Bomb Arrows x5
Ada Wong
Default
Crossbow
Ammo Box 50
Normal Arrows x5
Costume 1
Crossbow
Triple Shot
Normal Arrows x5
Pipe Bomb Arrows x5
This is a spoiler
Carla Radames
This is a spoilerDefault
Sniper Rifle
Assault Shotgun
Agent
Default
Survival Knife
Lightning Hawk
Siege - need to fix slightly
In Siege, six or less players are split into two teams, with one team being Agents and the other team being Enemies. The Agents play as human characters, whose objective is to protect the AI controlled rookie BSAA agent - while the Enemies play as various creatures whose objective is to kill the rookie. The game consists of two rounds, with teams switching between the roles of humans and enemies. The human team wins a round if the BSAA agent survives, while the enemy team wins if they succeed in killing the agent.
Throughout the stage, agents can find powerful weapons as well as time-reduction bonuses to aid them, though the bonuses have timers that limit their time staying on the stage, and can disappear. Agents can also give commands to the rookie in order to guide him to safety. The enemies, on the other hand, can make situations more complicated for the Agents by breaking large crystals containing more dangerous enemies.
Default
Wing Shooter
Shotgun
Costume 1
Assault Rifle RN
Survival Knife
12.7mm Rifle Ammunition
Default
Picador
9mm Ammo x30
Hand Grenade x3
Costume 1
Stun Rod
MP-AF
Hydra
10 Gauge Shells
9mm Handgun Ammunition
Default
Bear Commander
5.56mm NATO Ammo
Costume 1
Combat Knife
Assault Shotgun
Shotgun Shell (RE6)
Default
Anti-Materiel Rifle
Triple Shot
Costume 1
[No loadout data provided] oops
Default
Hand to Hand
Nine‑Oh‑Nine (909)
Costume 1
AR for Special Tactics
Remote Bomb x1
Default
[No loadout data provided]
Costume 1
[No loadout data provided]
Default
Sniper Rifle (RE6)
5.56mm NATO Machine Gun Ammunition
Red Herb
Costume 1
Crossbow
Incendiary Grenade x3
Pipe Bomb Arrows x5
This is a spoiler
Default
Semi-Auto SR
Hydra
Shotgun Ammunition
Costume 1
[No loadout data provided]
Default
Ammo Box 50
9mm Ammo x3
Throughout the stage, agents can find powerful weapons as well as time-reduction bonuses to aid them, though the bonuses have timers that limit their time staying on the stage, and can disappear. Agents can also give commands to the rookie in order to guide him to safety. The enemies, on the other hand, can make situations more complicated for the Agents by breaking large crystals containing more dangerous enemies.
Loadouts
Leon S. Kennedy
Default
Wing Shooter
Shotgun
Costume 1
Assault Rifle RN
Survival Knife
12.7mm Rifle Ammunition
Helena Harper
Default
Picador
9mm Ammo x30
Hand Grenade x3
Costume 1
Stun Rod
MP-AF
Hydra
10 Gauge Shells
9mm Handgun Ammunition
Chris Redfield
Default
Bear Commander
5.56mm NATO Ammo
Costume 1
Combat Knife
Assault Shotgun
Shotgun Shell (RE6)
Piers Nivans
Default
Anti-Materiel Rifle
Triple Shot
Costume 1
[No loadout data provided] oops
Jake Muller
Default
Hand to Hand
Nine‑Oh‑Nine (909)
Costume 1
AR for Special Tactics
Remote Bomb x1
Sherry Birkin
Default
[No loadout data provided]
Costume 1
[No loadout data provided]
Ada Wong
Default
Sniper Rifle (RE6)
5.56mm NATO Machine Gun Ammunition
Red Herb
Costume 1
Crossbow
Incendiary Grenade x3
Pipe Bomb Arrows x5
This is a spoiler
Carla Radames
This is a spoilerDefault
Semi-Auto SR
Hydra
Shotgun Ammunition
Costume 1
[No loadout data provided]
Agent
Default
Ammo Box 50
9mm Ammo x3
Urban Chaos
Mercenaries
Zombie Stage with, C-Virus Zombies, Zombie Dog C, Whopper/WhopperSupreme, Bloodshot, Hidden Boss: NapadTo bring out the hidden boss for this stage; get 15 Counter Kills before 80 total kills
This map contains six time bonuses, each being 60(fact_check) seconds on their own, and three combo bonuses.
Images From Fandom - will improve later(click to enlarge):

Grabbable Items are as follows: WIP
Steel Beast
Mercenaries
J'avo Stage with J'avo, Ruka-Srp, Noga-Let, Telo-Eksplozija, Noga-Skakanje, Napad, Hidden Boss: GnezdoTo bring out the hidden boss for this stage; perform 25 Coup de grâce attacks before 80 kills
Grabbable Items are as follows: WIP
Mining the Depths
Mercenaries
Zombie Stage with, C-Virus Zombies, Shrieker, Zombie Dog C, Bloodshot, Hidden Boss: StrelacTo bring out the hidden boss for this stage; Kill 70 enemies before 300 seconds or 5 minutes
Grabbable Items are as follows: WIP
Rail Yard
Mercenaries
J'avo Stage with J'avo, Ruka-Bedem, Ruka-Khvatanje, Noga-Trchanje, Telo, Eksplozija, Glava-Dim, Glava-Smech, Noga-Oklop, Strelac, Hidden Boss: UbistvoTo bring out the hidden boss for this stage; Kill 25 enemies with quick-shots before 80 total kills
Grabbable Items are as follows: WIP
High Seas Fortress
Mercenaries
J'avo Stage with J'avo, Glava-Smech, Noga-Trchanje, Telo-Eksplozija, Noga, Oklop, Noga-Let, Noga-Skakanje, Ruka-Bedem, Glava-Begunats, Hidden Boss: GnezdoTo bring out the hidden boss for this stage; Kill 40 enemies with any melee attacks before 80 total kills (melee kills always award 5 bonus seconds) the knife counts for this.
Grabbable Items are as follows: WIP
The Catacombs
In this map there are spinning blades in almost every mode. Players can lay down under it and roll side to side to avoid zombies and rack up kills. Most useful in Onslaught.
To bring out the hidden boss for this stage; get 20 Quick Shot Kills before 80 total kills
Grabbable Items are as follows: WIP
Mercenaries
Zombie Stage with C-Virus Zombie, Bloodshot, Whopper, Lepotica, Hidden Boss: StrelacTo bring out the hidden boss for this stage; get 20 Quick Shot Kills before 80 total kills
Grabbable Items are as follows: WIP
Requiem for War
Mercenaries
J'avo Stage with J'avo, Glava-Begunats, Ruka-Srp, Ruka-Khvatanje, Noga-Let, Noga-Skakanje, Telo-Eksplozija, Ogroman, Hidden Boss: GnezdoTo bring out the hidden boss for this stage; Kill 40 enemies with any melee attacks before 80 total kills (DO NOT KILL THE REGULAR OGROMAN BOSS BEFORE COMPLETING THE HIDDEN BOSS REQUIREMENTS OR THE HIDDEN BOSS WON'T TRIGGER - focus on the regular enemies first until radio subtitles tell you that something is heating up. There are 2 Ogroman that can spawn - The one that always spawns, and the hidden boss one.)
Grabbable Items are as follows: WIP
Liquid Fire
Mercenaries
J'avo Stage with Neo-Umbrella J'avo, Mesec, Rasklapanje, Hidden Boss: NapadTo bring out the hidden boss for this stage; Perform 25 Coup de Grace attacks before your 80 total kills.
Grabbable Items are as follows: WIP
Rooftop Mission
Mercenaries
Zombie Stage with C-Virus Zombies, Zombie Dog C, Whopper/Whopper Supreme, Ubistvo, Bloodshot, Hidden Boss: NapadTo bring out the hidden boss for this stage; Kill 20 enemies with counter-attacks before your killcount reaches 80.
Grabbable Items are as follows: WIP
Creature Workshop
Mercenaries
J'avo Stage with Neo-Umbrella J'avo, Glava-Begunats, Glava-Dim, Ruka-Bedem, Noga-Let, Telo-Eksplozija, Napad, Hidden Boss: UbistvoTo bring out the hidden boss for this stage; Kill 40 enemies with any melee attacks before your killcount reaches 80.
Grabbable Items are as follows: WIP
Rankings Guide for All Modes -
Starting with Campaigns.
Current chapter rank resets every time you quit unless you "continue" from main menu. Beware of overwriting the current continue by playing online.
Chapter Ranking System
Each category is individually ranked, with D being the Lowest and A being the Highest and the requirements change every chapter every campaign. These four categories are then combined to determine your **overall chapter rank**: - Accuracy (per shot)
- Death count of the player
- Clear time of the chapter
- Total amount of enemies killed in the chapter
Points Received Per Rank
A
B
C
D
25 points
20 points
15 points
10 points
Total Rank Points for Final Score
S
A
B
C
D
E
100 points
90 points
75 points
55 points
45 points
44 points or less
Example Calculation
For instance: 15 + 25 + 25 + 20 = 85 → **B Rank**Current chapter rank resets every time you quit unless you "continue" from main menu. Beware of overwriting the current continue by playing online.
Leon's Campaign
Chapter 1 Criteria
Rank
Accuracy
Deaths
Clear Time
Enemies Killed
A
70%+
≤2
≤85 min
≥80
B
60%
5
110 min
60
C
50%
7
130 min
40
D
≤49%
≥8
≥131 min
≤39
Chapter 2 Criteria
Rank
Accuracy
Deaths
Clear Time
Enemies Killed
A
70%+
≤2
≤80 min
≥80
B
60%
5
110 min
60
C
50%
7
120 min
40
D
≤49%
≥8
≥121 min
≤39
Chapter 3 Criteria
Rank
Accuracy
Deaths
Clear Time
Enemies Killed
A
70%+
≤2
≤55 min
≥70
B
60%
5
80 min
60
C
50%
9
100 min
40
D
≤49%
≥10
≥101 min
≤39
Chapter 4 Criteria
Rank
Accuracy
Deaths
Clear Time
Enemies Killed
A
70%+
≤2
≤75 min
≥7
B
60%
5
90 min
5
C
50%
9
110 min
3
D
≤49%
≥10
≥111 min
≤2
Chapter 5 Criteria
Rank
Accuracy
Deaths
Clear Time
Enemies Killed
A
70%+
≤2
≤65 min
≥60
B
60%
4
80 min
50
C
50%
5
120 min
20
D
≤49%
≥6
≥121 min
≤19
Chris's Campaign
Chapter 1 Criteria
Rank
Accuracy
Deaths
Clear Time
Enemies Killed
A
70%+
≤2
≤80 min
≥70
B
60%
3
90 min
50
C
50%
5
100 min
40
D
≤49%
≥6
≥101 min
≤39
Chapter 2 Criteria
Rank
Accuracy
Deaths
Clear Time
Enemies Killed
A
70%+
≤2
≤90 min
≥70
B
60%
5
110 min
60
C
50%
7
120 min
40
D
≤49%
≥8
≥121 min
≤39
Chapter 3 Criteria
Rank
Accuracy
Deaths
Clear Time
Enemies Killed
A
70%+
≤2
≤85 min
≥55
B
60%
4
105 min
40
C
50%
7
130 min
25
D
≤49%
≥8
≥131 min
≤24
Chapter 4 Criteria
Rank
Accuracy
Deaths
Clear Time
Enemies Killed
A
70%+
≤2
≤75 min
≥55
B
60%
4
90 min
45
C
50%
7
120 min
35
D
≤49%
≥8
≥121 min
≤34
Chapter 5 Criteria
Rank
Accuracy
Deaths
Clear Time
Enemies Killed
A
70%+
≤3
≤80 min
≥40
B
60%
5
110 min
30
C
50%
9
120 min
25
D
≤49%
≥10
≥121 min
≤24
Jake's Campaign
Chapter 1 Criteria
Rank
Accuracy
Deaths
Clear Time
Enemies Killed
A
70%+
≤2
≤60 min
≥40
B
60%
5
85 min
30
C
50%
7
105 min
20
D
≤49%
≥8
≥106 min
≤19
Chapter 2 Criteria
Rank
Accuracy
Deaths
Clear Time
Enemies Killed
A
70%+
≤5
≤60 min
≥50
B
60%
7
80 min
40
C
50%
9
110 min
20
D
≤49%
≥10
≥111 min
≤19
Chapter 3 Criteria
Rank
Accuracy
Deaths
Clear Time
Enemies Killed
A
70%+
≤2
≤60 min
≥55
B
60%
3
80 min
40
C
50%
5
110 min
30
D
≤49%
≥6
≥111 min
≤29
Chapter 4 Criteria
Rank
Accuracy
Deaths
Clear Time
Enemies Killed
A
70%+
≤5
≤60 min
≥40
B
60%
7
110 min
30
C
50%
9
140 min
20
D
≤49%
≥10
≥141 min
≤19
Rankings Continued
Chapter 5 Criteria
need to fix this chapter, disregardRank
Accuracy
Deaths
Clear Time
Enemies Killed
A
70%+
≤5
≤60 min
≥40
B
60%
7
110 min
30
C
50%
9
140 min
20
D
≤49%
≥10
≥141 min
≤19
Ada's Campaign
I think Agent and Ada share their rank, meaning only one play through as either character is required.Chapter 1 Criteria
Rank
Accuracy
Deaths
Clear Time
Enemies Killed
A
70%+
≤2
≤50 min
≥45
B
60%
3
90 min
40
C
50%
5
110 min
30
D
≤49%
≥6
≥111 min
≤29
Chapter 2 Criteria
Rank
Accuracy
Deaths
Clear Time
Enemies Killed
A
70%+
≤2
≤45 min
≥30
B
60%
3
70 min
20
C
50%
5
90 min
10
D
≤49%
≥6
≥91 min
≤9
Chapter 3 Criteria
Rank
Accuracy
Deaths
Clear Time
Enemies Killed
A
70%+
≤2
≤45 min
≥40
B
60%
5
70 min
30
C
50%
9
100 min
20
D
≤49%
≥10
≥101 min
≤19
Chapter 4 Criteria
Rank
Accuracy
Deaths
Clear Time
Enemies Killed
A
70%+
≤2
≤50 min
≥15
B
60%
3
65 min
10
C
50%
5
84 min
5
D
≤49%
≥6
≥85 min
≤4
Chapter 5 Criteria
Rank
Accuracy
Deaths
Clear Time
Enemies Killed
A
70%+
≤2
≤55 min
≥40
B
60%
3
70 min
30
C
50%
5
90 min
20
D
≤49%
≥6
≥91 min
≤19
Important
You can’t just quit at any checkpoint and keep your current session stats. This is due to how the “continue” works in the main menu. The game must save. Only then can you pick up where you left off and keep your current rank progress. The game saves af any moment that you reach a loadable location from chapter select. Look for the {=}Saving… icon in the top left. Checkpoints don’t count and are only for if you die or reload a checkpoint via the comms device and need to respawn. Make sure you don’t accidentally overwrite your current one by playing with someone else or playing another chapter.A Rank Surety
Accuracy - On any enemy that has armor or a sheild, you can shoot the armored part, dealing minimal damage. Every shot that hits even the armored or any part of the enemy will bring up your accuracy. Find an armored enemy and unload to ensure high accuracy for the chapter. Stun the enemies first if having a tough time, and if your partner does a takedown on a stunned armored enemy, tell your partner to back off first using the command to give you extra time. After you are certain that your accuracy is up, use mostly melee attacks from here on out. 1 miss + 1 hit = nullification.Kill Count - Play the entire chapter. Kill everything you see by any means necessary. Sometimes you can get away with starting at the halfway point, like Leon 1-3. Note: Some far away enemies that die in one shot are "background" and even though it will bring up accuracy, it does not count as a kill.
Death Count - Stay away from your enemies. Try to use the environment to your advantage. Send your partner at your enemies as a sheild by (xbox controls) holding the assist partner button and pressing d-up, saying move in. They might not say yes. Either way, use them as cover. Remember, if your partner dies it does not affect the ranking. Only if you die. Always stay reloaded unless you are over half a magazine left. If you do die, either forcequit the game, or press no, and reload from checkpoint/continue.
Clear Time - They always give you plenty of time. If you are still having a hard time, here is a couple rules to help. If you split the chapter in fives, each part should take a maximum of 20 minutes with a lot of wiggle room. Always sprint. If accuracy% is the problem and it takes a long time to aim, get closer to your enemy or don’t shoot so much. It may help to do a sprinting or sliding attack at the enemy, then shoot when they are stunned. If you think you can and are having trouble with all this, you can go to chapter selecting and start further in the chapter, as long as you meet the requirements of the other medals, you can get S rank this way.
Overall - Use the max level Defense skill, either the J'avo killer or Zombie killer skill, and a good third skill. Or use infinite ammo. You can’t use them on No Hope so, use easier difficulties to stock up on supplies.
Mercenaries Ranking
Solely base on score. Same for Regular and No Mercy.Mode
E Rank
D Rank
C Rank
B Rank
A Rank
S Rank
Solo
0 - 39,999
40,000 - 59,999
60,000 - 79,999
80,000 - 99,999
100,000 - 139,999
140,000+
Duo
0 - 59,999
60,000 - 89,999
90,000 - 119,999
120,000 - 179,999
180,000 - 219,999
220,000+
Achievements Guide -
I'm only going to further explain the ones that need explaining.
Complete the tutorial/prologue.
Rarity: 99.77%
Gone to Hell [Achievement Image Here]
Complete Chapter 1 in Leon's campaign.
Rarity: 72.78%
Buried Secrets [Achievement Image Here]
Complete Chapter 2 in Leon's campaign.
Rarity: 63.91%
Get on the Plane [Achievement Image Here]
Complete Chapter 3 in Leon's campaign.
Rarity: 60.01%
Big Trouble in China [Achievement Image Here]
Complete Chapter 4 in Leon's campaign.
Rarity: 56.87%
The Trouble with Women [Achievement Image Here]
Complete Chapter 5 in Leon's campaign.
Rarity: 54.27%
Rescue the Hostages [Achievement Image Here]
Complete Chapter 1 in Chris' campaign.
Rarity: 53.22%
Tragedy in Europe [Achievement Image Here]
Complete Chapter 2 in Chris' campaign.
Rarity: 47.24%
After Her! [Achievement Image Here]
Complete Chapter 3 in Chris' campaign.
Rarity: 42.69%
There's Always Hope [Achievement Image Here]
Complete Chapter 4 in Chris' campaign.
Rarity: 41.54%
Duty Calls [Achievement Image Here]
Complete Chapter 5 in Chris' campaign.
Rarity: 39.00%
Money Talks [Achievement Image Here]
Complete Chapter 1 in Jake's campaign.
Rarity: 44.69%
A Revolting Development [Achievement Image Here]
Complete Chapter 2 in Jake's campaign.
Rarity: 41.48%
Let's Blow This Joint [Achievement Image Here]
Complete Chapter 3 in Jake's campaign.
Rarity: 39.49%
Still on the Run [Achievement Image Here]
Complete Chapter 4 in Jake's campaign.
Rarity: 37.85%
See You Around [Achievement Image Here]
Complete Chapter 5 in Jake's campaign.
Rarity: 36.92%
I Spy [Achievement Image Here]
Complete Chapter 1 in Ada's campaign.
Rarity: 36.12%
Counterintelligence [Achievement Image Here]
Complete Chapter 2 in Ada's campaign.
Rarity: 32.80%
This Takes Me Back [Achievement Image Here]
Complete Chapter 3 in Ada's campaign.
Rarity: 31.38%
Ada's Demise [Achievement Image Here]
Complete Chapter 4 in Ada's campaign.
Rarity: 30.75%
What's Next? [Achievement Image Here]
Complete Chapter 5 in Ada's campaign.
Rarity: 30.12%
Green around the Ears [Achievement Image Here]
Complete the entire game on Amateur or higher.
Rarity: 26.01%
Normal Is Good [Achievement Image Here]
Complete the entire game on Normal or higher.
Rarity: 21.88%
Back in My Day [Achievement Image Here]
Complete the entire game on Veteran or higher.
Rarity: 9.60%
Leave It to the Pro [Achievement Image Here]
Complete the entire game on Professional or higher.
Rarity: 6.76%
Check Out My Dogs [Achievement Image Here]
Customize your dog tag in the main menu inside of, Play Game, Dog Tags.
Rarity: 47.74%
Titular Achievement [Achievement Image Here]
Earn 10 different titles, which can be found in Dog Tags, Titles.
Rarity: 52.48%
One Is Better Than None [Achievement Image Here]
Purchase one skill in any game mode.
Rarity: 77.52%
Mad Skillz [Achievement Image Here]
Max out all the skills that allow you to level up the skill. Any skill that has a little LVL Icon after you first purchase it. These Skills are
Firearm Lv. 3 | 12,000 | 29,000 | 75,000
Melee Lv. 3 | 10,000 | 25,000 | 75,000
Defense Lv. 3 | 3,200 | 28,000 | 80,000
Lock-On Lv. 2 | 2,800 | 31,000
Rock Steady Lv. 2 | 3,500 | 33,000
Critical Hit Lv. 3 | 3,500 | 13,000 | 32,000
Piercing Lv. 3 | 12,000 | 28,000 | 55,000
J’avo Killer Lv. 2 | 3,000 | 25,000
Zombie Hunter Lv. 2 | 3,000 | 25,000
Combat Gauge Boost Lv. 2 | 70,000 | 90,000
Recovery Lv. 2 | 10,000 | 70,000
Field Medic Lv. 2 | 12,000 | 95,000
Rarity: 8.16%
Silent Killer [Achievement Image Here]
Use a stealth attack to take down five enemies. Stealth attacks can happen exclusively in the Campaign where an enemy does not react to you when you are either behind it or it doesn't notice you, and you execute a takedown move. You must not to stun the enemy first, the takedown prompt will simply appear when close and that's how you know.
Rarity: 53.52%
Finish What You Start [Achievement Image Here]
Perform a coup de grâce on ten enemies. To perform a coup de grâce on an enemy you must stun them, and then stun them again. The best way to do this is to do a quick shot or a headshot on a zombie, then do a slide kick, then a takedown from the front only. Each Character has a special coup de grâce move that they do and that/s how you know you did it. Jake's move is an axe kick straight down.
Rarity: 43.11%
Bob and Weave [Achievement Image Here]
Counter an enemy's attack three times in a row. You may need to kill with the counter attack for it to count. To counter, and press attack when prompted during an enemy's attack.
Rarity: 15.62%
Down, Not Out [Achievement Image Here]
Defeat an enemy while dying, then recover without any help by letting the bar at the bottom of the screen fill up, picking you back up with no health blocks. You may find it useful to buy and equip the Lone Wolf skill to prevent the computer player from reviving you.
Rarity: 45.71%
Lifesaver [Achievement Image Here]
Help or rescue your partner ten times. Save them when they are being grabbed by an enemy or when they are hanging onto a ledge.
Rarity: 63.69%
Weapons Master [Achievement Image Here]
Use all the weapons in the game and kill ten enemies with each of them. You can do this by playing all Campaigns with all characters and unlocking all weapons, and/or by utilizing mercenaries and no mercy mode as well as any other mode. Keep track of this in the records menu under weapons and look for enemies defeated.
Campaign weapons:
Nine-Oh-Nine (Chris, Jake)
Picador (Helena)
Wing Shooter (Leon)
Shotgun (Leon, Helena, Jake, Sherry)
Assault Shotgun (Chris, Piers, Ada)
Hydra (Helena)
Lightning Hawk (Leon, Helena)
Elephant Killer (Jake, Sherry)
Sniper Rifle (Jake, Sherry, Ada)
Semi-Automatic Sniper Rifle (Leon, Helena, Chris, Piers)
Anti-Materiel Rifle (Piers)
Ammo Box 50 (Ada)
Triple Shot (Sherry)
MP-AF (Piers)
Assault Rifle For Special Tactics (Chris)
Bear Commander (Jake, Sherry, Ada)
Assault Rifle RN (Leon, Helena)
Grenade Launcher (Chris, Piers)
Crossbow (Ada)
Survival Knife (Leon)
Combat Knife (Chris)
Stun Rod (Sherry)
Rarity: 5.51%
Give a Little Push [Achievement Image Here]
Knock ten enemies off a high place via a takedown with an attack button prompt. You can do this by going to select locations and stunning the enemy by a ledge, then performing the move.
Rarity: 13.05%
Rising Up [Achievement Image Here]
Earn a level-four title. You an see titles in the Dogtags menu. All you have to do is level any title that has stars by completing its task in the description, to level 4.
Rarity: 33.32%
They're ACTION Figures! [Achievement Image Here]
Collect 3 figures. You can do this by shooting all 4 serpent emblems in 3 different chapters on any campaign or by shooting different serpent emblems and getting lucky. You can see by going to special features in the main menu.
Rarity: 14.53%
Stuntman [Achievement Image Here]
Defeat 20 enemies with the Hydra using a quick shot and having the quick shot reduce the target's health to 0.
Rarity: 8.64%
Bring the Heat [Achievement Image Here]
Take down an enemy from 50 meters away with a headshot using the thermal scope. The gun you need for this is the Anti-Material Rifle. This is the starting sniper rifle for Piers. An easy place to get this is at the very beginning of Chris’ Chapter 2 Campaign. As soon as you crawl out of the overturned vehicle, turn around and run back as far as possible. Equip the Anti-Material rifle, aim and press weapon toggle to switch to the thermal scope.
Rarity: 11.32%
Main
The Longest Night [Achievement Image Here]Complete the tutorial/prologue.
Rarity: 99.77%
Gone to Hell [Achievement Image Here]
Complete Chapter 1 in Leon's campaign.
Rarity: 72.78%
Buried Secrets [Achievement Image Here]
Complete Chapter 2 in Leon's campaign.
Rarity: 63.91%
Get on the Plane [Achievement Image Here]
Complete Chapter 3 in Leon's campaign.
Rarity: 60.01%
Big Trouble in China [Achievement Image Here]
Complete Chapter 4 in Leon's campaign.
Rarity: 56.87%
The Trouble with Women [Achievement Image Here]
Complete Chapter 5 in Leon's campaign.
Rarity: 54.27%
Rescue the Hostages [Achievement Image Here]
Complete Chapter 1 in Chris' campaign.
Rarity: 53.22%
Tragedy in Europe [Achievement Image Here]
Complete Chapter 2 in Chris' campaign.
Rarity: 47.24%
After Her! [Achievement Image Here]
Complete Chapter 3 in Chris' campaign.
Rarity: 42.69%
There's Always Hope [Achievement Image Here]
Complete Chapter 4 in Chris' campaign.
Rarity: 41.54%
Duty Calls [Achievement Image Here]
Complete Chapter 5 in Chris' campaign.
Rarity: 39.00%
Money Talks [Achievement Image Here]
Complete Chapter 1 in Jake's campaign.
Rarity: 44.69%
A Revolting Development [Achievement Image Here]
Complete Chapter 2 in Jake's campaign.
Rarity: 41.48%
Let's Blow This Joint [Achievement Image Here]
Complete Chapter 3 in Jake's campaign.
Rarity: 39.49%
Still on the Run [Achievement Image Here]
Complete Chapter 4 in Jake's campaign.
Rarity: 37.85%
See You Around [Achievement Image Here]
Complete Chapter 5 in Jake's campaign.
Rarity: 36.92%
I Spy [Achievement Image Here]
Complete Chapter 1 in Ada's campaign.
Rarity: 36.12%
Counterintelligence [Achievement Image Here]
Complete Chapter 2 in Ada's campaign.
Rarity: 32.80%
This Takes Me Back [Achievement Image Here]
Complete Chapter 3 in Ada's campaign.
Rarity: 31.38%
Ada's Demise [Achievement Image Here]
Complete Chapter 4 in Ada's campaign.
Rarity: 30.75%
What's Next? [Achievement Image Here]
Complete Chapter 5 in Ada's campaign.
Rarity: 30.12%
Green around the Ears [Achievement Image Here]
Complete the entire game on Amateur or higher.
Rarity: 26.01%
Normal Is Good [Achievement Image Here]
Complete the entire game on Normal or higher.
Rarity: 21.88%
Back in My Day [Achievement Image Here]
Complete the entire game on Veteran or higher.
Rarity: 9.60%
Leave It to the Pro [Achievement Image Here]
Complete the entire game on Professional or higher.
Rarity: 6.76%
Check Out My Dogs [Achievement Image Here]
Customize your dog tag in the main menu inside of, Play Game, Dog Tags.
Rarity: 47.74%
Titular Achievement [Achievement Image Here]
Earn 10 different titles, which can be found in Dog Tags, Titles.
Rarity: 52.48%
One Is Better Than None [Achievement Image Here]
Purchase one skill in any game mode.
Rarity: 77.52%
Mad Skillz [Achievement Image Here]
Max out all the skills that allow you to level up the skill. Any skill that has a little LVL Icon after you first purchase it. These Skills are
Firearm Lv. 3 | 12,000 | 29,000 | 75,000
Melee Lv. 3 | 10,000 | 25,000 | 75,000
Defense Lv. 3 | 3,200 | 28,000 | 80,000
Lock-On Lv. 2 | 2,800 | 31,000
Rock Steady Lv. 2 | 3,500 | 33,000
Critical Hit Lv. 3 | 3,500 | 13,000 | 32,000
Piercing Lv. 3 | 12,000 | 28,000 | 55,000
J’avo Killer Lv. 2 | 3,000 | 25,000
Zombie Hunter Lv. 2 | 3,000 | 25,000
Combat Gauge Boost Lv. 2 | 70,000 | 90,000
Recovery Lv. 2 | 10,000 | 70,000
Field Medic Lv. 2 | 12,000 | 95,000
Rarity: 8.16%
Silent Killer [Achievement Image Here]
Use a stealth attack to take down five enemies. Stealth attacks can happen exclusively in the Campaign where an enemy does not react to you when you are either behind it or it doesn't notice you, and you execute a takedown move. You must not to stun the enemy first, the takedown prompt will simply appear when close and that's how you know.
Rarity: 53.52%
Finish What You Start [Achievement Image Here]
Perform a coup de grâce on ten enemies. To perform a coup de grâce on an enemy you must stun them, and then stun them again. The best way to do this is to do a quick shot or a headshot on a zombie, then do a slide kick, then a takedown from the front only. Each Character has a special coup de grâce move that they do and that/s how you know you did it. Jake's move is an axe kick straight down.
Rarity: 43.11%
Bob and Weave [Achievement Image Here]
Counter an enemy's attack three times in a row. You may need to kill with the counter attack for it to count. To counter, and press attack when prompted during an enemy's attack.
Rarity: 15.62%
Down, Not Out [Achievement Image Here]
Defeat an enemy while dying, then recover without any help by letting the bar at the bottom of the screen fill up, picking you back up with no health blocks. You may find it useful to buy and equip the Lone Wolf skill to prevent the computer player from reviving you.
Rarity: 45.71%
Lifesaver [Achievement Image Here]
Help or rescue your partner ten times. Save them when they are being grabbed by an enemy or when they are hanging onto a ledge.
Rarity: 63.69%
Weapons Master [Achievement Image Here]
Use all the weapons in the game and kill ten enemies with each of them. You can do this by playing all Campaigns with all characters and unlocking all weapons, and/or by utilizing mercenaries and no mercy mode as well as any other mode. Keep track of this in the records menu under weapons and look for enemies defeated.
Campaign weapons:
Nine-Oh-Nine (Chris, Jake)
Picador (Helena)
Wing Shooter (Leon)
Shotgun (Leon, Helena, Jake, Sherry)
Assault Shotgun (Chris, Piers, Ada)
Hydra (Helena)
Lightning Hawk (Leon, Helena)
Elephant Killer (Jake, Sherry)
Sniper Rifle (Jake, Sherry, Ada)
Semi-Automatic Sniper Rifle (Leon, Helena, Chris, Piers)
Anti-Materiel Rifle (Piers)
Ammo Box 50 (Ada)
Triple Shot (Sherry)
MP-AF (Piers)
Assault Rifle For Special Tactics (Chris)
Bear Commander (Jake, Sherry, Ada)
Assault Rifle RN (Leon, Helena)
Grenade Launcher (Chris, Piers)
Crossbow (Ada)
Survival Knife (Leon)
Combat Knife (Chris)
Stun Rod (Sherry)
Rarity: 5.51%
Give a Little Push [Achievement Image Here]
Knock ten enemies off a high place via a takedown with an attack button prompt. You can do this by going to select locations and stunning the enemy by a ledge, then performing the move.
Rarity: 13.05%
Rising Up [Achievement Image Here]
Earn a level-four title. You an see titles in the Dogtags menu. All you have to do is level any title that has stars by completing its task in the description, to level 4.
Rarity: 33.32%
They're ACTION Figures! [Achievement Image Here]
Collect 3 figures. You can do this by shooting all 4 serpent emblems in 3 different chapters on any campaign or by shooting different serpent emblems and getting lucky. You can see by going to special features in the main menu.
Rarity: 14.53%
Stuntman [Achievement Image Here]
Defeat 20 enemies with the Hydra using a quick shot and having the quick shot reduce the target's health to 0.
Rarity: 8.64%
Bring the Heat [Achievement Image Here]
Take down an enemy from 50 meters away with a headshot using the thermal scope. The gun you need for this is the Anti-Material Rifle. This is the starting sniper rifle for Piers. An easy place to get this is at the very beginning of Chris’ Chapter 2 Campaign. As soon as you crawl out of the overturned vehicle, turn around and run back as far as possible. Equip the Anti-Material rifle, aim and press weapon toggle to switch to the thermal scope.
Rarity: 11.32%
Achievements Guide Continued
High Voltage [Achievement Image Here]
Defeat ten enemies with a stun rod charge attack. To charge attack, hold the attack button while aiming until you hear the stun rod spark, then let it go on an enemy. Best spot is the beginning of Chapter 3 when playing as Sherry.
Rarity: 7.20%
Zombie Massacre [Achievement Image Here]
Defeat 500 zombies.
Rarity: 56.11%
J'avo Genocide [Achievement Image Here]
Defeat 500 J'avo.
Rarity: 38.79%
B.O.W.s Are Ugly [Achievement Image Here]
Defeat 100 enemies that usually come out of a chrysalid. Strelats, Napads, Mesets and Gnezdos. Look at the creatures tab in records to see that and refer to the filling the creature list category in this guide.
Rarity: 12.95%
I Prefer Them Alive [Achievement Image Here]
Rescue two female survivors at the cathedral in Leon chapter 2 after you get the 2 statues and are fighting the Lepotitsa. Kill it quickly and you will have no problem. This is my favorite achievement.
Rarity: 25.72%
Flying Ace [Achievement Image Here]
Pilot the VTOL without getting a scratch on it. Stay high and evade all missles as Chris.
Rarity: 15.11%
Hard Choice [Achievement Image Here]
Shoot the helicopter pilot with a Magnum at point-blank range. This achievement is Jake only. In Chapter 4 of Jake’s Campaign, after the motorcycle section, and after Chris/Piers help you defeat all enemies, you’ll enter an area with the grasshopper J’avo and your objective will change to shoot down the helicopter. Climb the ladders on the right from the start to the top of this area. Wait patiently for the helicopter to come around to drop off some enemies. Stand near the rope and hit ‘A’ to grab on. Spam 'X' to climb the rope. At the end, don't press the button it says, instead aim and shoot.
Rarity: 7.74%
Sneaking Around [Achievement Image Here]
Get through the aircraft carrier's bridge area without being noticed. When playing as Ada in chapter 4 you need to avoid detection starting at the point where you cross paths with Chris and Piers. If at any point you’re spotted by an enemy, quickly restart checkpoint to continue from that section without penalty as long as you didn't die.
Rarity: 5.59%
Covered in Brass [Achievement Image Here]
Earn 150 different medals.
Rarity: 11.24%
Heirlooms [Achievement Image Here]
Collect all the serpent emblems.
Rarity: 5.21%
Send 2,000 enemies to your opponent's map. See this in extras in records in the main menu in onslaught.
Rarity: 3.13%
Take the Stage [Achievement Image Here]
Defeat your opponent in onslaught and achieve victory in 3 DIFFERENT stages.
Rarity: 3.53%
Killer Combo [Achievement Image Here]
Achieve a 30-combo chain only in onslaught mode.
Rarity: 4.92%
You Are S.O.L. [Achievement Image Here]
Defeat your opponent 10 times with enemies you sent. Your opponent must be finished off AFTER they are downed by a zombie you sent, which are covered in green slime.
Rarity: 3.18%
Kill or Be Killed [Achievement Image Here]
Win while in the dying state. Easiest way is for you to be downed and for your opponent to be killed before you die, or the timer ends and you have more points.
Rarity: 3.46%
Win five times in a row without losing. You may have to be in the same match.
Rarity: 3.69%
Take 'Em All Down [Achievement Image Here]
Defeat 100 agents/other players. You must land the kill shot.
Rarity: 3.08%
Kung Fu Fighting [Achievement Image Here]
Survive to the end only using physical attacks. Do not shoot, only melee. Do not be killed.
Rarity: 3.74%
Staying Alive [Achievement Image Here]
Return to the game as a human character. Only possible with 3 players or more. You must be killed without the round ending and come back as a creature, then kill someone. You will come back as a human and get the achievement.
Rarity: 4.08%
Team Effort [Achievement Image Here]
Win without any members of your team being killed. Only possible with 3 players or more and you must have at least 1 team member and nobody on your team can die.
Rarity: 4.03%
Defeat Ustanak 20 times. You must deal the kill shot.
Rarity: 3.25%
Invincible [Achievement Image Here]
Defeat Ustanak without anyone on your team being captured. Ustanak can use his arm to grab people. Don't let it happen.
Rarity: 4.14%
Easy Pickings [Achievement Image Here]
Eliminate all players as Ustanak in less than a minute. You can just grab the final character but kill the rest.
Rarity: 5.28%
One Is Never Enough [Achievement Image Here]
As Ustanak, capture a total of 50 humans. You only need to grab them.
Rarity: 3.24%
Held Captive [Achievement Image Here]
Anyone on your team defeat Ustanak with only one Agent remaining and/or not captured.
Rarity: 3.99%
Defeat 100 player-controlled agents and 100 player-controlled creatures.
Rarity: 2.85%
Civilian Casualties [Achievement Image Here]
Defeat a BSAA NPC 100 times.
Rarity: 2.82%
Murder Spree [Achievement Image Here]
Defeat the BSAA NPC as a creature without dying once.
Rarity: 3.79%
Two Sides of the Same Coin [Achievement Image Here]
Win 10 times.
Rarity: 3.21%
Protect and Serve [Achievement Image Here]
Protect the BSAA NPC without any of them getting hurt.
Rarity: 3.40%
Console players will have to use a friend/2ndconsole and/or a second controller.
Defeat ten enemies with a stun rod charge attack. To charge attack, hold the attack button while aiming until you hear the stun rod spark, then let it go on an enemy. Best spot is the beginning of Chapter 3 when playing as Sherry.
Rarity: 7.20%
Zombie Massacre [Achievement Image Here]
Defeat 500 zombies.
Rarity: 56.11%
J'avo Genocide [Achievement Image Here]
Defeat 500 J'avo.
Rarity: 38.79%
B.O.W.s Are Ugly [Achievement Image Here]
Defeat 100 enemies that usually come out of a chrysalid. Strelats, Napads, Mesets and Gnezdos. Look at the creatures tab in records to see that and refer to the filling the creature list category in this guide.
Rarity: 12.95%
I Prefer Them Alive [Achievement Image Here]
Rescue two female survivors at the cathedral in Leon chapter 2 after you get the 2 statues and are fighting the Lepotitsa. Kill it quickly and you will have no problem. This is my favorite achievement.
Rarity: 25.72%
Flying Ace [Achievement Image Here]
Pilot the VTOL without getting a scratch on it. Stay high and evade all missles as Chris.
Rarity: 15.11%
Hard Choice [Achievement Image Here]
Shoot the helicopter pilot with a Magnum at point-blank range. This achievement is Jake only. In Chapter 4 of Jake’s Campaign, after the motorcycle section, and after Chris/Piers help you defeat all enemies, you’ll enter an area with the grasshopper J’avo and your objective will change to shoot down the helicopter. Climb the ladders on the right from the start to the top of this area. Wait patiently for the helicopter to come around to drop off some enemies. Stand near the rope and hit ‘A’ to grab on. Spam 'X' to climb the rope. At the end, don't press the button it says, instead aim and shoot.
Rarity: 7.74%
Sneaking Around [Achievement Image Here]
Get through the aircraft carrier's bridge area without being noticed. When playing as Ada in chapter 4 you need to avoid detection starting at the point where you cross paths with Chris and Piers. If at any point you’re spotted by an enemy, quickly restart checkpoint to continue from that section without penalty as long as you didn't die.
Rarity: 5.59%
Covered in Brass [Achievement Image Here]
Earn 150 different medals.
Rarity: 11.24%
Heirlooms [Achievement Image Here]
Collect all the serpent emblems.
Rarity: 5.21%
DLC: Onslaught
Surrounded on All Sides [Achievement Image Here]Send 2,000 enemies to your opponent's map. See this in extras in records in the main menu in onslaught.
Rarity: 3.13%
Take the Stage [Achievement Image Here]
Defeat your opponent in onslaught and achieve victory in 3 DIFFERENT stages.
Rarity: 3.53%
Killer Combo [Achievement Image Here]
Achieve a 30-combo chain only in onslaught mode.
Rarity: 4.92%
You Are S.O.L. [Achievement Image Here]
Defeat your opponent 10 times with enemies you sent. Your opponent must be finished off AFTER they are downed by a zombie you sent, which are covered in green slime.
Rarity: 3.18%
Kill or Be Killed [Achievement Image Here]
Win while in the dying state. Easiest way is for you to be downed and for your opponent to be killed before you die, or the timer ends and you have more points.
Rarity: 3.46%
DLC: Survivors
Last Man Standing--Again [Achievement Image Here]Win five times in a row without losing. You may have to be in the same match.
Rarity: 3.69%
Take 'Em All Down [Achievement Image Here]
Defeat 100 agents/other players. You must land the kill shot.
Rarity: 3.08%
Kung Fu Fighting [Achievement Image Here]
Survive to the end only using physical attacks. Do not shoot, only melee. Do not be killed.
Rarity: 3.74%
Staying Alive [Achievement Image Here]
Return to the game as a human character. Only possible with 3 players or more. You must be killed without the round ending and come back as a creature, then kill someone. You will come back as a human and get the achievement.
Rarity: 4.08%
Team Effort [Achievement Image Here]
Win without any members of your team being killed. Only possible with 3 players or more and you must have at least 1 team member and nobody on your team can die.
Rarity: 4.03%
DLC: Predator
Not without a Fight [Achievement Image Here]Defeat Ustanak 20 times. You must deal the kill shot.
Rarity: 3.25%
Invincible [Achievement Image Here]
Defeat Ustanak without anyone on your team being captured. Ustanak can use his arm to grab people. Don't let it happen.
Rarity: 4.14%
Easy Pickings [Achievement Image Here]
Eliminate all players as Ustanak in less than a minute. You can just grab the final character but kill the rest.
Rarity: 5.28%
One Is Never Enough [Achievement Image Here]
As Ustanak, capture a total of 50 humans. You only need to grab them.
Rarity: 3.24%
Held Captive [Achievement Image Here]
Anyone on your team defeat Ustanak with only one Agent remaining and/or not captured.
Rarity: 3.99%
DLC: Siege
Everybody Dies [Achievement Image Here]Defeat 100 player-controlled agents and 100 player-controlled creatures.
Rarity: 2.85%
Civilian Casualties [Achievement Image Here]
Defeat a BSAA NPC 100 times.
Rarity: 2.82%
Murder Spree [Achievement Image Here]
Defeat the BSAA NPC as a creature without dying once.
Rarity: 3.79%
Two Sides of the Same Coin [Achievement Image Here]
Win 10 times.
Rarity: 3.21%
Protect and Serve [Achievement Image Here]
Protect the BSAA NPC without any of them getting hurt.
Rarity: 3.40%
Bugged?
Some people have problems with certain achievements not unlocking due to a bug. It might just need an application restart. If that doesn’t work, back up your current saved data and then delete your current data, play the game and try only that achievement, after you get it, restore your backup save data to the current. I detailed how to do this in the getting started category. Sometimes all it takes is just launching the game with no data, backing out, restoring backup data, and the achievement will happen if attempted again. Be very careful when doing this. Think about what you are doing exactly.No Players Online?
You can actually play any game mode with bots using the trainer: https://www.nexusmods.com/residentevil6/mods/12?tab=files&file_id=457 but good luck and make sure you get the correct version.Console players will have to use a friend/2ndconsole and/or a second controller.
Interactable Easter Eggs & Dialogue
Always be on the lookout for a magnifying glass prompt. The characters will always say something about whatever it is. They are all over every campaign.
In Jake Chapter 5, you can interact with almost all windows facing the lift after certain events.
When you injure an evil hand (AKA Blue zombies) enough by shooting their arm they will detach a hand and it will grab your character forcing you to struggle but if you can get it to jump at you or you pick it up near a microwave, toilet, boiling drum of oil, big flaming oven, rock grinder, or a meat grinder you will throw them inside, permanently killing the hand.
In Poisowan China in anyone's campaign where you go there, there is a playground. You can plAY ON THE PLAYSET! Only Chris can ride the animal though...
Jake is really good at the Piano and Sherry SUCKS!
Sherry's Room where she gets captured is full of interactables while waiting for Jake to do what he gotta do. The bed, raido, tv...
In Leon's campaign in Chapter 1 when Leon wants to "take a break", you can actually play pool if you shoot the balls. You can also do this in Jake chapter 3 in the lounge.
In the underground lab where the code doors are, you can look inside all of them through the peephole and one will scare Leon or Helana.
In Chris Chapter 1, you will get different dialogue depending on if you save/let die the first npc about to be executed before the very first shootable J'avo.
In Piers Chapter 4 when you search for the keys, if Piers grabs the first key, Chris will say Piers' usual dialogue WITH PIERS'S VOICE! "At least he had a key on him".
In every campaign, the Dialogue changes depending on who is closer to the objective. This also affects events in game like falling and who gets blown up.
In Leon/Helana Chapter 4 at the start of the train fight, when he first turns into the creature and you put him down one time a tiny cutscene will play of you walking past him after he falls flat on his back and then he will wake up again, then he will pursue you inside the cars now, do not shoot him at all because it is a waste of ammo and it does no damage until he busts open the side of the car to get back up top. Now, during this, if you go all the way back to the first car and try to use the door they will say something.
In Jake Chapter 5, you can interact with almost all windows facing the lift after certain events.
When you injure an evil hand (AKA Blue zombies) enough by shooting their arm they will detach a hand and it will grab your character forcing you to struggle but if you can get it to jump at you or you pick it up near a microwave, toilet, boiling drum of oil, big flaming oven, rock grinder, or a meat grinder you will throw them inside, permanently killing the hand.
In Poisowan China in anyone's campaign where you go there, there is a playground. You can plAY ON THE PLAYSET! Only Chris can ride the animal though...
Jake is really good at the Piano and Sherry SUCKS!
Sherry's Room where she gets captured is full of interactables while waiting for Jake to do what he gotta do. The bed, raido, tv...
In Leon's campaign in Chapter 1 when Leon wants to "take a break", you can actually play pool if you shoot the balls. You can also do this in Jake chapter 3 in the lounge.
In the underground lab where the code doors are, you can look inside all of them through the peephole and one will scare Leon or Helana.
In Chris Chapter 1, you will get different dialogue depending on if you save/let die the first npc about to be executed before the very first shootable J'avo.
In Piers Chapter 4 when you search for the keys, if Piers grabs the first key, Chris will say Piers' usual dialogue WITH PIERS'S VOICE! "At least he had a key on him".
In every campaign, the Dialogue changes depending on who is closer to the objective. This also affects events in game like falling and who gets blown up.
In Leon/Helana Chapter 4 at the start of the train fight, when he first turns into the creature and you put him down one time a tiny cutscene will play of you walking past him after he falls flat on his back and then he will wake up again, then he will pursue you inside the cars now, do not shoot him at all because it is a waste of ammo and it does no damage until he busts open the side of the car to get back up top. Now, during this, if you go all the way back to the first car and try to use the door they will say something.
Medals -
Campaign medals
Some of these change based on the Chapter but they have to do with ranking. See the Rankings category in the Guide.Copper
- Accuracy - D Rank-Copper Any
- Deaths - D Rank-Copper Any
- Clear Time - D Rank-Copper Any
- Enemies Routed - D Rank-Copper Any
- Rescued partner-Copper Any
- Recovered from dying-Copper Any
- Killed an enemy with a physical attack-Copper Any
- Killed an enemy with a quick shot-Copper Any
- Killed an enemy with a stealth attack-Copper Any
- Killed an enemy while sliding-Copper Any
- Destroyed an item box while sliding-Copper Any
- Successfully inputted commands at the exact moment-Copper Any
- Correctly executed all revolving-action command prompts-Copper Any
- Saved a partner from falling off a high ledge-Copper Any
- Praised a partner's actions 3 times-Copper Any
- Killed by an Agent Hunt player-Copper Any
- Matched online in a story intersection-Copper Any
- Executed a headshot-Copper Any
- Killed an enemy using the environment-Copper Any
- Used an enemy's attack to kill another enemy-Copper Any
- Killed an animal-Copper Any
- Tripped a running enemy-Copper Any
- Escaped a zombie-infested campus-Copper Leon CH.1
- Made it to the surface-Copper Leon CH.1
- Cooperated with survivors to fend off zombies-Copper Leon CH.1
- Made it to the cathedral-Copper Leon CH.2
- Solved the mysteries of the cathedral-Copper Leon CH.2
- Relieved Deborah of her suffering-Copper Leon CH.2
- Acquired the Simmons Family ring-Copper Leon CH.3
- Discovered the exit of the underground caves-Copper Leon CH.3
- Defeated the B.O.W. lurking in the water-Copper Leon CH.3
- Piloted the aircraft-Copper Leon CH.4
- Provided Sherry and Jake backup-Copper Leon CH.4
- Agreed to fight towards a common goal-Copper Leon CH.4
- Made it to Quad Tower-Copper Leon CH.5
- Parted ways with Ada once again-Copper Leon CH.5
- Returned to the fight after 6 months-Copper Chris CH.1
- Escaped from a building being bombed-Copper Chris CH.1
- Provided cover while Finn set the bombs-Copper Chris CH.2
- Gained control over the bridge-Copper Chris CH.2
- Neutralized 3 anti-aircraft guns-Copper Chris CH.2
- Shot down the helicopter-Copper Chris CH.3
- Avenged your fallen comrades-Copper Chris CH.3
- Infiltrated the aircraft carrier-Copper Chris CH.4
- Witnessed Ada's end-Copper Chris CH.4
- Saw an unavoidable nightmare-Copper Chris CH.4
- Saved Sherry and Jake-Copper Chris CH.5
- Escaped from the giant B.O.W.-Copper Chris CH.5
- Made a promise with your partner-Copper Jake CH.1
- Escaped from a collapsing building-Copper Jake CH.1
- Teamed up with the BSAA in the square-Copper Jake CH.1
- Recovered all the lost data-Copper Jake CH.2
- Escaped the avalanche on snowmobile-Copper Jake CH.2
- Defeated Ustanak with the drill-Copper Jake CH.2
- Successfully escaped captivity-Copper Jake CH.3
- Reunited with your partner-Copper Jake CH.3
- Evaded the tank's attacks-Copper Jake CH.3
- Avoided the helicopter's attacks-Copper Jake CH.4
- Lit the approaching B.O.W. on fire-Copper Jake CH.4
- Defeated Ustanak with Leon and Helena-Copper Jake CH.4
- Escaped from the underwater facility-Copper Jake CH.5
- Landed the finishing blow to Ustanak-Copper Jake CH.5
- Acquired information about Jake-Copper Ada CH.1
- Outran the incoming flood of water-Copper Ada CH.1
- Escaped from the sinking submarine-Copper Ada CH.1
- Acquired Simmons' ring-Copper Ada CH.2
- Gave Simmons' ring to Leon-Copper Ada CH.2
- Obtained information about your doppelganger-Copper Ada CH.2
- Experienced a little taste of China-Copper Ada CH.3
- Witnessed an airplane crash-Copper Ada CH.3
- Saved Sherry from the attacking B.O.W.-Copper Ada CH.3
- Shook off the BSAA tail-Copper Ada CH.4
- Witnessed your own death-Copper Ada CH.4
- Faced your own destiny-Copper Ada CH.4
- Approached Quad Tower from the outside-Copper Ada CH.5
- Jumped off the 80th floor-Copper Ada CH.5
Bronze
- Accuracy - C Rank-Bronze Any
- Deaths - C Rank-Bronze Any
- Clear Time - C Rank-Bronze Any
- Enemies Routed - C Rank-Bronze Any
- Saved a partner from dying-Bronze Any
- Rescued by partner 10 times-Bronze Any
- Beat the chapter without entering the dying state-Bronze Any
- Killed 10 or more enemies with physical attacks-Bronze Any
- Killed an enemy with a coup de grâce-Bronze Any
- Used a weapon lodged in a zombie to kill it-Bronze Any
- Successfully executed a counterattack-Bronze Any
- Killed an Agent Hunt player-Bronze Any
- Killed 5 enemies with explosive drums-Bronze Any
- Executed 10 headshots-Bronze Any
- Executed 5 consecutive headshots-Bronze Any
- Killed 10 enemies with grenades-Bronze Any
- Burned 10 enemies with incendiary grenades-Bronze Any
- Killed an enemy using the environment-Bronze Any
- Knocked an enemy off a high ledge-Bronze Any
- Kill an enemy with a flash grenade-Bronze Any
- Blinded 10 enemies with flash grenades-Bronze Any
- Shot an enemy-thrown object in mid air-Bronze Any
- Killed an enemy mid-jump-Bronze Any
- Beat the chapter without the use of physical attacks-Bronze Any
- Beat the chapter without the use of grenades-Bronze Any
- Beat the chapter without using health items-Bronze Any
- Beat the chapter without equipping any skills-Bronze Any
- Killed 3 zombies hiding on the rooftop-Bronze Leon CH.1
- Killed all enemies in front of the cathedral-Bronze Leon CH.2
- Saved one or more survivors in the cathedral-Bronze Leon CH.2
- Stopped the flames without your partner's help-Bronze Leon CH.3
- Blew up all the fuel tanks at the crash site-Bronze Leon CH.4 / Jake CH.4
- Put a B.O.W.'s hand into the microwave-Bronze Leon CH.4
- Beat the chapter without using a rocket launcher-Bronze Leon CH.5
- Rescued a hostage from certain death-Bronze Chris CH.1
- Defeated a flying B.O.W. with the snowmobile-Bronze Jake CH.2
- Defeated the giant B.O.W. through its weakspot-Bronze Chris CH.2 / Jake CH.1
- Killed a paratrooper enemy in mid-air-Bronze Chris CH.2
- Slid down the slide-Bronze Chris CH.3 / Ada CH.3
- Beat Leon and Helena in the race-Bronze Chris CH.3
- Cleared the stage without opening the one-way doors-Bronze Chris CH.4
- Reached the missile in 3 minutes or less-Bronze Chris CH.4
- Killed 3 enemies armed with gatling guns-Bronze Chris CH.5
- Killed more enemies than Jake and Sherry (1)-Bronze Chris CH.5
- Discovered the hidden storage room-Bronze Jake CH.1
- Wiped out all enemies around the cabin-Bronze Jake CH.2
- Beat the cave area without killing any enemies (excluding Ustanak)-Bronze Jake CH.2
- Destroyed 5 or more enemies using the turret-mounted cameras-Bronze Jake CH.3
- Found all ID medals-Bronze Jake CH.3
- Personally finished off the helicopter pilot-Bronze Jake CH.4
- Beat Chris and Piers in the race-Bronze Leon CH.4
- Ground a B.O.W.‘s hand-Bronze Jake CH.5
- Killed more enemies than Chris and Piers-Bronze Jake CH.5
- Discovered a shortcut-Bronze Ada CH.1
- Killed 5 zombies while in the minecart-Bronze Leon CH.2 / Ada CH.2
More Medals
- Had 10 walls broken down by enemies-Bronze Ada CH.2
- Used a B.O.W.'s attacks to kill all zombies in the area-Bronze Ada CH.3
- Killed more enemies than Jake and Sherry (2)-Bronze Ada CH.3
- Killed off your imperfect doppelganger-Bronze Ada CH.4
- Cleared the chapter without being spotted by the enemy-Bronze Ada CH.4
- Protected Leon and Helena-Bronze Ada CH.5
- Rescued Leon from becoming B.O.W. chow-Bronze Ada CH.5
Silver
- Accuracy - B Rank-Silver Any
- Deaths - B Rank-Silver Any
- Clear Time - B Rank-Silver Any
- Enemies Routed - B Rank-Silver Any
- Aided a partner in need during a story intersection-Silver Any
- Killed an enemy while dying-Silver Any
- Killed an enemy with a counterattack-Silver Any
- Successfully countered one of Ustanak's attacks-Silver Jake CH.5
- Killed an enemy by chaining a physical attack with your partner-Silver Any
- Knocked down an enemy-thrown object with your knife-Silver Any
- Killed an enemy mid-jump with a headshot-Silver Any
- Beat the chapter using only a handgun-Silver Any
- Beat the chapter using only a shotgun-Silver Any
- Beat the chapter using only a Magnum-Silver Any
- Beat the chapter using only a sniper rifle-Silver Any
- Beat the chapter using only a MP-AF-Silver Any
- Beat the chapter using only an assault rifle-Silver Any
- Beat the chapter using only a grenade launcher-Silver Any
- Beat the chapter using only physical attacks-Silver Any
- Beat the chapter without reloading-Silver Any
- Beat the chapter using only grenades-Silver Any
- Beat a chapter without picking up any ammo or health items-Silver Any
- Destroyed 3 helicopters with the VTOL's barrel gun-Silver Chris CH.4
- Shot 10 J'avo off of their motorcycles-Silver Jake CH.4
- Beat the chapter without getting knocked down-Silver Any
- Beat the chapter without the use of physical attacks-Silver Any
- Beat the chapter using only grenades-Silver Any
- Beat the chapter without reloading-Silver Any
- Beat the chapter using only a handgun-Silver Any
- Beat the chapter using only a shotgun-Silver Any
- Beat the chapter using only a Magnum-Silver Any
- Beat the chapter using only a sniper rifle-Silver Any
- Beat the chapter using only a MP-AF-Silver Any
- Beat the chapter using only an assault rifle-Silver Any
Gold
- Accuracy - A Rank-Gold Any
- Deaths - A Rank-Gold Any
- Clear Time - A Rank-Gold Any
- Enemies Routed - A Rank-Gold Any
- Beat the chapter without taking any damage-Gold Any
- Kill 50 enemies with a knife-Gold Any
- Beat the chapter without taking any damage-Gold Any
Agent Hunt Medals
Copper
- Hunt Failed-Copper Any
- Played as a zombie-Copper Any
- Played as a J'avo-Copper Any
- Travelled over 1,000 meters in one season-Copper Any
- Killed by an agent in a single hit-Copper Any
- Attacked an agent being held by another creature-Copper Any
- Killed by physical attacks-Copper Any
- Killed a creature as a creature-Copper Any
- Killed by an explosion-Copper Any
- Played for less than 1 minute-Copper Any
- Played for 10 minutes-Copper Any
- Did not inflict any damage to agents-Copper Any
- Finished a game without dying once-Copper Any
- Killed by an agent 10 times-Copper Any
Bronze
- Attacked and inflicted damage upon an agent-Bronze Any
- Played as a Rasklapanje-Bronze Any
- Played as a Shrieker-Bronze Any
- Played as a zombie dog-Bronze Any
- Played as a Bloodshot-Bronze Any
- Mutated into a Strelats-Bronze Any
- Played as Mesets-Bronze Any
- Mutated into a Napad-Bronze Any
- Mutated into a Gnezdo-Bronze Any
- Played as a Glava-Sluz-Bronze Any
- Played as a Glava-Smech-Bronze Any
- Played as a Ruka-Srp-Bronze Any
- Played as a Ruka-Khvatanje-Bronze Any
- Played as Ruka-Bedem-Bronze Any
- Played as a Telo-Eksplozija-Bronze Any
Silver
- Put an agent in dying status-Silver Any
- Hit an agent with a throw object-Silver Any
- Perform a successful dynamite punch-Silver Any
- Sprayed acid on an agent-Silver Any
- Assembled 5 zombies by shrieking-Silver Any
- Mutated two different body regions as a J'avo-Silver Any
- Hid behind cover as a J'avo-Silver Any
- Bit and lifted up an agent-Silver Any
- Immobilized an agent with a sticky substance-Silver Any
- Attacked an agent with a mutated scythe arm-Silver Any
- Grabbed an agent with an extended arm-Silver Any
- Blocked an agent's attack with a shield-Silver Any
- Stomped on an agent-Silver Any
- Killed by an agent's coup de grâce-Silver Any
Gold
- Hunt Successful-Gold Any
- Finished off an agent-Gold Any
Mercenaries Medals
Copper
- Cleared Urban Chaos-Copper Any
- Cleared the Steel Beast-Copper Any
- Cleared Mining the Depths-Copper Any
- Cleared Rail Yard-Copper Any
- Cleared the High Seas Fortress-Copper Any
- Cleared the Catacombs-Copper Any
- Cleared Requiem for War-Copper Any
- Cleared Liquid Fire-Copper Any
- Cleared the Rooftop Mission-Copper Any
- Cleared the Creature Workshop-Copper Any
- Killed 40-Copper Any
- Executed a 20-hit combo-Copper Any
- Survived for 30 seconds-Copper Any
- Killed an enemy with a physical attack-Copper Any
- Destroyed a time bonus while sliding-Copper Any
- Found a time bonus-Copper Any
- Found a combo bonus-Copper Any
- Cleared the stage with a partner-Copper Any
- Killed an enemy using the stage surroundings-Copper Any
Bronze
- Killed 70-Bronze Any
- Executed a 50-hit combo-Bronze Any
- Survived for 60 seconds-Bronze Any
- Killed an enemy with a counterattack-Bronze Any
- Found all time bonuses-Bronze Any
- Found all combo bonuses-Bronze Any
- Caused the hidden boss to appear-Bronze Any
- Killed 150 enemies with a partner-Bronze Any
- Cleared the stage without the use of any health items-Bronze Any
Silver
- Killed 100-Silver Any
- Executed a 100-hit combo-Silver Any
- Survived for 90 seconds-Silver Any
- Killed an enemy with a quick shot-Silver Any
- Defeated the hidden boss-Silver Any
- Finished off the hidden boss with a physical attack-Silver Any
- Assembled 150-hit chain combo with your partner-Silver Any
- Cleared the stage with a partner with over 150 seconds left-Silver Any
- Cleared the stage without the use of any skills-Silver Any
- Killed an enemy using the stage surroundings-Silver Any
Gold
- Killed 120-Gold Any
- Executed a 120-hit combo-Gold Any
- Survived for 120 seconds-Gold Any
- Killed an enemy with a coup de grâce-Gold Any
- Defeated the hidden boss during a combo chain-Gold Any
- Executed a 150-hit chain combo with your partner-Gold Any
- Cleared a stage without taking any damage-Gold Any
- Cleared a stage with 100% accuracy-Gold Any
- Cleared a stage without taking any damage-Gold Any
Onslaught Medals
Copper
- Lost to your opponent-Copper Any
Loads of Medals
- Played Urban Chaos-Copper Any
- Played the Steel Beast-Copper Any
- Played Mining the Depths-Copper Any
- Played the Rail Yard-Copper Any
- Played the High Seas Fortress-Copper Any
- Played The Catacombs-Copper Any
- Played Requiem for War-Copper Any
- Played Liquid Fire-Copper Any
- Played the Rooftop Mission-Copper Any
- Played the Creature Workshop-Copper Any
- Sent 30 creatures over to your opponent's area-Copper Any
- Killed an enemy with a physical attack-Copper Any
- Sent a zombie over to your opponent's area-Copper Any
- Sent a zombie dog over to your opponent's area-Copper Any
- Sent a J'avo over to your opponent's area-Copper Any
- Defeated by your opponent within 1 minute-Copper Any
- Killed an enemy with the stage surroundings-Copper Any
Bronze
- Lost to your opponent by running out of time-Bronze Any
- Sent 50 creatures over to your opponent's area-Bronze Any
- Killed an enemy with a coup de grace-Bronze Any
- Killed an enemy with a quick shot-Bronze Any
- Sent a Whopper over to your opponent's area-Bronze Any
- Sent a Napad over to your opponent's area-Bronze Any
- Sent a Strelats over to your opponent's area-Bronze Any
- Creatures you sent over killed your opponent-Bronze Any
- Killed an enemy with a coup de grace-Bronze Any
Silver
- Draw-Silver Any
- Put an agent in dying status-Silver Any
- Killed an enemy with a counterattack-Silver Any
- Sent a Bloodshot over to your opponent's area-Silver Any
- Sent a Ubistvo over to your opponent's area-Silver Any
- Defeat your opponent within 1 minute-Silver Any
- Defeated your opponent without the use of any skills-Silver Any
- Killed an enemy with a counterattack-Silver Any
Gold
- Defeated your opponent-Gold Any
- Defeated your opponent by running out of time-Gold Any
- Sent 100 creatures over to your opponent's area-Gold Any
- Got 30 combos-Gold Any
- Defeated your opponent without taking any damage-Gold Any
- Defeated your opponent without the use of any skills-Gold Any
- Defeated your opponent with 100 % accuracy-Gold Any
Survivors Medals
WIP
RE NET Badges
RE NET Web Badges
This is kind of just to look at to help keep track of a few things.Note: You can find any medals in the medals section of this guide.
Need an account to see, https://game.capcom.com/residentevil/six/en/windows/webbadge.html
General
Welcome – Login to RE NET for the first time.
Marathoner – Walk 42195 meters.
Sink or Swim – Swim 380 meters.
Rough Rider – Travel 30 km with a vehicle.
Ironman – Walk 42195 m / Swim 380 m / Travel 30 km.
Headshots
Headshot Pro – Make a headshot 100 times.
Headshot Virtuoso – Make a headshot 1000 times.
Lose Ya Head – Make a headshot 3000 times.
Physical Attacks
White Belt – Kill 10 enemies with physical attacks.
Eye of the Tiger – Kill 300 enemies with physical attacks.
King of the Ring – Kill 1000 enemies with physical attacks.
Inhuman – Kill 3000 enemies with physical attacks.
Pill Popper – Consume 100 health tablets.
Between Life and Death – Recover from dying 100 times.
Zombie Killer
Novice – Kill 100 Zombies.
Apprentice – Kill 1000 Zombies.
Pro – Kill 2000 Zombies.
Master – Kill 10000 Zombies.
Tall Oaks Survivor – Kill 70000 Zombies.
Explosives / Weapons
Fire in the Hole – Kill 100 enemies with hand grenades.
Feel the Heat – Kill 50 enemies with incendiary grenades.
Say Cheese – Kill 50 enemies with remote bombs.
Knives Out – Kill 50 enemies with the knife.
Serpent Emblems
Snake Charmer – Find 1 Serpent Emblem.
Emblem Seeker – Find 40 Serpent Emblems.
They Belong in a Museum – Find all Serpent Emblems.
Campaign Completion
Leon All Clear – Complete all chapters in Leon's campaign.
Chris All Clear – Complete all chapters in Chris' campaign.
Jake All Clear – Complete all chapters in Jake's campaign.
Ada All Clear – Complete all chapters in Ada's campaign.
Gold Medals
10 – Earn 10 Gold Medals.
50 – Earn 50 Gold Medals.
100 – Earn 100 Gold Medals.
300 – Earn 300 Gold Medals.
500 – Earn 500 Gold Medals.
700 – Earn 700 Gold Medals.
1000 – Earn 1000 Gold Medals.
Silver Medals
10 – Earn 10 Silver Medals.
50 – Earn 50 Silver Medals.
100 – Earn 100 Silver Medals.
300 – Earn 300 Silver Medals.
500 – Earn 500 Silver Medals.
700 – Earn 700 Silver Medals.
1000 – Earn 1000 Silver Medals.
Bronze Medals
10 – Earn 10 Bronze Medals.
50 – Earn 50 Bronze Medals.
100 – Earn 100 Bronze Medals.
300 – Earn 300 Bronze Medals.
500 – Earn 500 Bronze Medals.
700 – Earn 700 Bronze Medals.
1000 – Earn 1000 Bronze Medals.
Rusty Medals
10 – Earn 10 Rusty Medals.
50 – Earn 50 Rusty Medals.
100 – Earn 100 Rusty Medals.
300 – Earn 300 Rusty Medals.
500 – Earn 500 Rusty Medals.
700 – Earn 700 Rusty Medals.
1000 – Earn 1000 Rusty Medals.
Total Medal Count
Kilomedallist – Earn 1000 medals (any type).
Myriad Medals – Earn 10000 medals (any type).
Site Buddies
Partners in Crime – Make a Site Buddy.
Dirty Dozen – Make 10 Site Buddies.
Nifty Fifty – Make 50 Site Buddies.
Conscript – Join a team event.
Login Streak
Welcome – Login to ResidentEvil.net for the first time.
Seven Day Wonder – Login to ResidentEvil.net 7 days in a row.
Employee of the Month – Login to ResidentEvil.net 30 days in a row.
Quarterly Dedication – Login to ResidentEvil.net 100 days in a row.
Summary Files
Sleuth – Acquire a "Summary" file on ResidentEvil.net.
Private Eye – Acquire 10 "Summary" files on ResidentEvil.net.
Top Secret – Acquire all "Summary" files on ResidentEvil.net.
The Art Director’s Notebook
Apprentice Librarian – Unlock one part of The Art Director's Notebook.
Librarian – Unlock fifty parts of The Art Director's Notebook.
Master Librarian – Unlock one-hundred parts of The Art Director's Notebook.
Icons
Icon Aficionado – Unlock an Icon using RE Points.
Icon Addict – Unlock 8 Icons using RE Points.
Wallpapers
Wallpaper Aficionado – Unlock a Wallpaper using RE Points.
Wallpaper Collector – Unlock 5 Wallpapers using RE Points.
Wallpaper Addict – Unlock 10 Wallpapers using RE Points.
Costumes
Sharp Dresser – Unlock a Costume on ResidentEvil.net.
Pret-a-porter – Unlock 8 Costumes on ResidentEvil.net.
Haute couture – Unlock all Costumes on ResidentEvil.net.
Enemy Lists
Undergraduate – Unlock an Enemy List on ResidentEvil.net.
Researcher – Unlock 10 Enemy Lists on ResidentEvil.net.
Professor – Unlock 30 Enemy Lists on ResidentEvil.net.
Rector – Unlock all Enemy Lists on ResidentEvil.net.
Agent Level
Rookie Agent – Reach Agent LV 5.
Agent LV 10 – Reach Agent LV 10.
Agent LV 20 – Reach Agent LV 20.
Agent LV 30 – Reach Agent LV 30.
Agent LV 40 – Reach Agent LV 40.
Professional Agent – Reach Agent LV 50.
Agent LV 60 – Reach Agent LV 60.
Agent LV 70 – Reach Agent LV 70.
Agent LV 80 – Reach Agent LV 80.
Agent LV 90 – Reach Agent LV 90.
Man in Black – Reach Agent LV 100.
Creature Level
Fledgling – Reach Creature LV 5.
Creature LV 10 – Reach Creature LV 10.
Creature LV 20 – Reach Creature LV 20.
Creature LV 30 – Reach Creature LV 30.
Creature LV 40 – Reach Creature LV 40.
Agent Hunter – Reach Creature LV 50.
Creature LV 60 – Reach Creature LV 60.
Creature LV 70 – Reach Creature LV 70.
Creature LV 80 – Reach Creature LV 80.
Creature LV 90 – Reach Creature LV 90.
Carnivore – Reach Creature LV 100.
Web Badge Totals
10 – Earn 10 Web badges.
30 – Earn 30 Web badges.
50 – Earn 50 Web badges.
80 – Earn 80 Web badges.
100 – Earn 100 Web badges.
RE NET Badges 2
Web Medals for Campaigns
Start Leon's campaign as Leon.
Start Chris's campaign as Chris.
Start Jake's campaign as Jake.
Start Ada's campaign as Ada.
Amateur
Leon – Chapter 1 – Complete Chapter 1 in Leon's campaign on Amateur difficulty.
Leon – Chapter 2 – Complete Chapter 2 in Leon's campaign on Amateur difficulty.
Leon – Chapter 3 – Complete Chapter 3 in Leon's campaign on Amateur difficulty.
Leon – Chapter 4 – Complete Chapter 4 in Leon's campaign on Amateur difficulty.
Leon – Chapter 5 – Complete Chapter 5 in Leon's campaign on Amateur difficulty.
Chris – Chapter 1 – Complete Chapter 1 in Chris' campaign on Amateur difficulty.
Chris – Chapter 2 – Complete Chapter 2 in Chris' campaign on Amateur difficulty.
Chris – Chapter 3 – Complete Chapter 3 in Chris' campaign on Amateur difficulty.
Chris – Chapter 4 – Complete Chapter 4 in Chris' campaign on Amateur difficulty.
Chris – Chapter 5 – Complete Chapter 5 in Chris' campaign on Amateur difficulty.
Jake – Chapter 1 – Complete Chapter 1 in Jake's campaign on Amateur difficulty.
Jake – Chapter 2 – Complete Chapter 2 in Jake's campaign on Amateur difficulty.
Jake – Chapter 3 – Complete Chapter 3 in Jake's campaign on Amateur difficulty.
Jake – Chapter 4 – Complete Chapter 4 in Jake's campaign on Amateur difficulty.
Jake – Chapter 5 – Complete Chapter 5 in Jake's campaign on Amateur difficulty.
Ada – Chapter 1 – Complete Chapter 1 in Ada's campaign on Amateur difficulty.
Ada – Chapter 2 – Complete Chapter 2 in Ada's campaign on Amateur difficulty.
Ada – Chapter 3 – Complete Chapter 3 in Ada's campaign on Amateur difficulty.
Ada – Chapter 4 – Complete Chapter 4 in Ada's campaign on Amateur difficulty.
Ada – Chapter 5 – Complete Chapter 5 in Ada's campaign on Amateur difficulty.
Normal
Leon – Chapter 1 – Complete Chapter 1 in Leon's campaign on Normal difficulty.
Leon – Chapter 2 – Complete Chapter 2 in Leon's campaign on Normal difficulty.
Leon – Chapter 3 – Complete Chapter 3 in Leon's campaign on Normal difficulty.
Leon – Chapter 4 – Complete Chapter 4 in Leon's campaign on Normal difficulty.
Leon – Chapter 5 – Complete Chapter 5 in Leon's campaign on Normal difficulty.
Chris – Chapter 1 – Complete Chapter 1 in Chris' campaign on Normal difficulty.
Chris – Chapter 2 – Complete Chapter 2 in Chris' campaign on Normal difficulty.
Chris – Chapter 3 – Complete Chapter 3 in Chris' campaign on Normal difficulty.
Chris – Chapter 4 – Complete Chapter 4 in Chris' campaign on Normal difficulty.
Chris – Chapter 5 – Complete Chapter 5 in Chris' campaign on Normal difficulty.
Jake – Chapter 1 – Complete Chapter 1 in Jake's campaign on Normal difficulty.
Jake – Chapter 2 – Complete Chapter 2 in Jake's campaign on Normal difficulty.
Jake – Chapter 3 – Complete Chapter 3 in Jake's campaign on Normal difficulty.
Jake – Chapter 4 – Complete Chapter 4 in Jake's campaign on Normal difficulty.
Jake – Chapter 5 – Complete Chapter 5 in Jake's campaign on Normal difficulty.
Ada – Chapter 1 – Complete Chapter 1 in Ada's campaign on Normal difficulty.
Ada – Chapter 2 – Complete Chapter 2 in Ada's campaign on Normal difficulty.
Ada – Chapter 3 – Complete Chapter 3 in Ada's campaign on Normal difficulty.
Ada – Chapter 4 – Complete Chapter 4 in Ada's campaign on Normal difficulty.
Ada – Chapter 5 – Complete Chapter 5 in Ada's campaign on Normal difficulty.
Veteran
Leon – Chapter 1 – Complete Chapter 1 in Leon's campaign on Veteran difficulty.
Leon – Chapter 2 – Complete Chapter 2 in Leon's campaign on Veteran difficulty.
Leon – Chapter 3 – Complete Chapter 3 in Leon's campaign on Veteran difficulty.
Leon – Chapter 4 – Complete Chapter 4 in Leon's campaign on Veteran difficulty.
Leon – Chapter 5 – Complete Chapter 5 in Leon's campaign on Veteran difficulty.
Chris – Chapter 1 – Complete Chapter 1 in Chris' campaign on Veteran difficulty.
Chris – Chapter 2 – Complete Chapter 2 in Chris' campaign on Veteran difficulty.
Chris – Chapter 3 – Complete Chapter 3 in Chris' campaign on Veteran difficulty.
Chris – Chapter 4 – Complete Chapter 4 in Chris' campaign on Veteran difficulty.
Chris – Chapter 5 – Complete Chapter 5 in Chris' campaign on Veteran difficulty.
Jake – Chapter 1 – Complete Chapter 1 in Jake's campaign on Veteran difficulty.
Jake – Chapter 2 – Complete Chapter 2 in Jake's campaign on Veteran difficulty.
Jake – Chapter 3 – Complete Chapter 3 in Jake's campaign on Veteran difficulty.
Jake – Chapter 4 – Complete Chapter 4 in Jake's campaign on Veteran difficulty.
Jake – Chapter 5 – Complete Chapter 5 in Jake's campaign on Veteran difficulty.
Ada – Chapter 1 – Complete Chapter 1 in Ada's campaign on Veteran difficulty.
Ada – Chapter 2 – Complete Chapter 2 in Ada's campaign on Veteran difficulty.
Ada – Chapter 3 – Complete Chapter 3 in Ada's campaign on Veteran difficulty.
Ada – Chapter 4 – Complete Chapter 4 in Ada's campaign on Veteran difficulty.
Ada – Chapter 5 – Complete Chapter 5 in Ada's campaign on Veteran difficulty.
Professional
Leon – Chapter 1 – Complete Chapter 1 in Leon's campaign on Professional difficulty.
Leon – Chapter 2 – Complete Chapter 2 in Leon's campaign on Professional difficulty.
Leon – Chapter 3 – Complete Chapter 3 in Leon's campaign on Professional difficulty.
Leon – Chapter 4 – Complete Chapter 4 in Leon's campaign on Professional difficulty.
Leon – Chapter 5 – Complete Chapter 5 in Leon's campaign on Professional difficulty.
Chris – Chapter 1 – Complete Chapter 1 in Chris' campaign on Professional difficulty.
Chris – Chapter 2 – Complete Chapter 2 in Chris' campaign on Professional difficulty.
Chris – Chapter 3 – Complete Chapter 3 in Chris' campaign on Professional difficulty.
Chris – Chapter 4 – Complete Chapter 4 in Chris' campaign on Professional difficulty.
Chris – Chapter 5 – Complete Chapter 5 in Chris' campaign on Professional difficulty.
Jake – Chapter 1 – Complete Chapter 1 in Jake's campaign on Professional difficulty.
Jake – Chapter 2 – Complete Chapter 2 in Jake's campaign on Professional difficulty.
Jake – Chapter 3 – Complete Chapter 3 in Jake's campaign on Professional difficulty.
Jake – Chapter 4 – Complete Chapter 4 in Jake's campaign on Professional difficulty.
Jake – Chapter 5 – Complete Chapter 5 in Jake's campaign on Professional difficulty.
Ada – Chapter 1 – Complete Chapter 1 in Ada's campaign on Professional difficulty.
Ada – Chapter 2 – Complete Chapter 2 in Ada's campaign on Professional difficulty.
Ada – Chapter 3 – Complete Chapter 3 in Ada's campaign on Professional difficulty.
Ada – Chapter 4 – Complete Chapter 4 in Ada's campaign on Professional difficulty.
Ada – Chapter 5 – Complete Chapter 5 in Ada's campaign on Professional difficulty.
No Hope
Leon – Chapter 1 – Complete Chapter 1 in Leon's campaign on No Hope difficulty.
Leon – Chapter 2 – Complete Chapter 2 in Leon's campaign on No Hope difficulty.
Leon – Chapter 3 – Complete Chapter 3 in Leon's campaign on No Hope difficulty.
Leon – Chapter 4 – Complete Chapter 4 in Leon's campaign on No Hope difficulty.
Leon – Chapter 5 – Complete Chapter 5 in Leon's campaign on No Hope difficulty.
Chris – Chapter 1 – Complete Chapter 1 in Chris' campaign on No Hope difficulty.
Chris – Chapter 2 – Complete Chapter 2 in Chris' campaign on No Hope difficulty.
Chris – Chapter 3 – Complete Chapter 3 in Chris' campaign on No Hope difficulty.
Chris – Chapter 4 – Complete Chapter 4 in Chris' campaign on No Hope difficulty.
Chris – Chapter 5 – Complete Chapter 5 in Chris' campaign on No Hope difficulty.
Jake – Chapter 1 – Complete Chapter 1 in Jake's campaign on No Hope difficulty.
Jake – Chapter 2 – Complete Chapter 2 in Jake's campaign on No Hope difficulty.
Jake – Chapter 3 – Complete Chapter 3 in Jake's campaign on No Hope difficulty.
Jake – Chapter 4 – Complete Chapter 4 in Jake's campaign on No Hope difficulty.
Jake – Chapter 5 – Complete Chapter 5 in Jake's campaign on No Hope difficulty.
RE NET Badges 3
Ada – Chapter 1 – Complete Chapter 1 in Ada's campaign on No Hope difficulty.
Ada – Chapter 2 – Complete Chapter 2 in Ada's campaign on No Hope difficulty.
Ada – Chapter 3 – Complete Chapter 3 in Ada's campaign on No Hope difficulty.
Ada – Chapter 4 – Complete Chapter 4 in Ada's campaign on No Hope difficulty.
Ada – Chapter 5 – Complete Chapter 5 in Ada's campaign on No Hope difficulty.
Kill 50 enemies with grenades.
Kill 150 enemies with grenades.
Kill 250 enemies with grenades.
Kill 500 enemies with grenades.
Kill 800 enemies with grenades.
Kill 1200 enemies with grenades.
Kill 1600 enemies with grenades.
Kill 2000 enemies with grenades.
Kill 3000 enemies with grenades.
Kill 6000 enemies with grenades.
Kill 100 enemies with handguns.
Kill 300 enemies with handguns.
Kill 500 enemies with handguns.
Kill 1000 enemies with handguns.
Kill 1500 enemies with handguns.
Kill 2000 enemies with handguns.
Kill 3000 enemies with handguns.
Kill 4000 enemies with handguns.
Kill 6000 enemies with handguns.
Kill 12000 enemies with handguns.
Kill 80 enemies with shotguns.
Kill 160 enemies with shotguns.
Kill 300 enemies with shotguns.
Kill 600 enemies with shotguns.
Kill 1000 enemies with shotguns.
Kill 1500 enemies with shotguns.
Kill 2000 enemies with shotguns.
Kill 2800 enemies with shotguns.
Kill 4000 enemies with shotguns.
Kill 8000 enemies with shotguns.
Kill 50 enemies with magnums.
Kill 150 enemies with magnums.
Kill 250 enemies with magnums.
Kill 500 enemies with magnums.
Kill 800 enemies with magnums.
Kill 1200 enemies with magnums.
Kill 1600 enemies with magnums.
Kill 2500 enemies with magnums.
Kill 3500 enemies with magnums.
Kill 6500 enemies with magnums.
Kill 80 enemies with sniper rifles.
Kill 160 enemies with sniper rifles.
Kill 300 enemies with sniper rifles.
Kill 600 enemies with sniper rifles.
Kill 1000 enemies with sniper rifles.
Kill 1500 enemies with sniper rifles.
Kill 2000 enemies with sniper rifles.
Kill 2800 enemies with sniper rifles.
Kill 4000 enemies with sniper rifles.
Kill 8000 enemies with sniper rifles.
Kill 100 enemies with machineguns.
Kill 300 enemies with machineguns.
Kill 500 enemies with machineguns.
Kill 1000 enemies with machineguns.
Kill 1500 enemies with machineguns.
Kill 2000 enemies with machineguns.
Kill 3000 enemies with machineguns.
Kill 4000 enemies with machineguns.
Kill 6000 enemies with machineguns.
Kill 12000 enemies with machineguns.
Kill 100 enemies with assault rifles.
Kill 300 enemies with assault rifles.
Kill 500 enemies with assault rifles.
Kill 1000 enemies with assault rifles.
Kill 1500 enemies with assault rifles.
Kill 2000 enemies with assault rifles.
Kill 3000 enemies with assault rifles.
Kill 4000 enemies with assault rifles.
Kill 6000 enemies with assault rifles.
Kill 12000 enemies with assault rifles.
Kill 50 enemies with grenade launchers.
Kill 150 enemies with grenade launchers.
Kill 250 enemies with grenade launchers.
Kill 500 enemies with grenade launchers.
Kill 800 enemies with grenade launchers.
Kill 1200 enemies with grenade launchers.
Kill 1600 enemies with grenade launchers.
Kill 2500 enemies with grenade launchers.
Kill 3500 enemies with grenade launchers.
Kill 6500 enemies with grenade launchers.
Kill 50 enemies with bowgun.
Kill 150 enemies with bowgun.
Kill 250 enemies with bowgun.
Kill 500 enemies with bowgun.
Kill 800 enemies with bowgun.
Kill 1200 enemies with bowgun.
Kill 1600 enemies with bowgun.
Kill 2500 enemies with bowgun.
Kill 3500 enemies with bowgun.
Kill 6500 enemies with bowgun.
Kill 100 enemies with melee skills.
Kill 300 enemies with melee skills.
Kill 500 enemies with melee skills.
Kill 1000 enemies with melee skills.
Kill 1500 enemies with melee skills.
Kill 2000 enemies with melee skills.
Kill 3000 enemies with melee skills.
Kill 4000 enemies with melee skills.
Kill 6000 enemies with melee skills.
Kill 12000 enemies with melee skills.
Kill 100 enemies with each weapon / attack type.
Kill 300 enemies with each weapon / attack type.
Kill 500 enemies with each weapon / attack type.
Kill 1000 enemies with each weapon / attack type.
Kill 1500 enemies with each weapon / attack type.
Kill 2000 enemies with each weapon / attack type.
Kill 3000 enemies with each weapon / attack type.
Kill 4000 enemies with each weapon / attack type.
Kill 6000 enemies with each weapon / attack type.
Kill 12000 enemies with each weapon / attack type.
Ada – Chapter 2 – Complete Chapter 2 in Ada's campaign on No Hope difficulty.
Ada – Chapter 3 – Complete Chapter 3 in Ada's campaign on No Hope difficulty.
Ada – Chapter 4 – Complete Chapter 4 in Ada's campaign on No Hope difficulty.
Ada – Chapter 5 – Complete Chapter 5 in Ada's campaign on No Hope difficulty.
Web Medals for Kills
Kill 50 enemies with grenades.
Kill 150 enemies with grenades.
Kill 250 enemies with grenades.
Kill 500 enemies with grenades.
Kill 800 enemies with grenades.
Kill 1200 enemies with grenades.
Kill 1600 enemies with grenades.
Kill 2000 enemies with grenades.
Kill 3000 enemies with grenades.
Kill 6000 enemies with grenades.
Kill 100 enemies with handguns.
Kill 300 enemies with handguns.
Kill 500 enemies with handguns.
Kill 1000 enemies with handguns.
Kill 1500 enemies with handguns.
Kill 2000 enemies with handguns.
Kill 3000 enemies with handguns.
Kill 4000 enemies with handguns.
Kill 6000 enemies with handguns.
Kill 12000 enemies with handguns.
Kill 80 enemies with shotguns.
Kill 160 enemies with shotguns.
Kill 300 enemies with shotguns.
Kill 600 enemies with shotguns.
Kill 1000 enemies with shotguns.
Kill 1500 enemies with shotguns.
Kill 2000 enemies with shotguns.
Kill 2800 enemies with shotguns.
Kill 4000 enemies with shotguns.
Kill 8000 enemies with shotguns.
Kill 50 enemies with magnums.
Kill 150 enemies with magnums.
Kill 250 enemies with magnums.
Kill 500 enemies with magnums.
Kill 800 enemies with magnums.
Kill 1200 enemies with magnums.
Kill 1600 enemies with magnums.
Kill 2500 enemies with magnums.
Kill 3500 enemies with magnums.
Kill 6500 enemies with magnums.
Kill 80 enemies with sniper rifles.
Kill 160 enemies with sniper rifles.
Kill 300 enemies with sniper rifles.
Kill 600 enemies with sniper rifles.
Kill 1000 enemies with sniper rifles.
Kill 1500 enemies with sniper rifles.
Kill 2000 enemies with sniper rifles.
Kill 2800 enemies with sniper rifles.
Kill 4000 enemies with sniper rifles.
Kill 8000 enemies with sniper rifles.
Kill 100 enemies with machineguns.
Kill 300 enemies with machineguns.
Kill 500 enemies with machineguns.
Kill 1000 enemies with machineguns.
Kill 1500 enemies with machineguns.
Kill 2000 enemies with machineguns.
Kill 3000 enemies with machineguns.
Kill 4000 enemies with machineguns.
Kill 6000 enemies with machineguns.
Kill 12000 enemies with machineguns.
Kill 100 enemies with assault rifles.
Kill 300 enemies with assault rifles.
Kill 500 enemies with assault rifles.
Kill 1000 enemies with assault rifles.
Kill 1500 enemies with assault rifles.
Kill 2000 enemies with assault rifles.
Kill 3000 enemies with assault rifles.
Kill 4000 enemies with assault rifles.
Kill 6000 enemies with assault rifles.
Kill 12000 enemies with assault rifles.
Kill 50 enemies with grenade launchers.
Kill 150 enemies with grenade launchers.
Kill 250 enemies with grenade launchers.
Kill 500 enemies with grenade launchers.
Kill 800 enemies with grenade launchers.
Kill 1200 enemies with grenade launchers.
Kill 1600 enemies with grenade launchers.
Kill 2500 enemies with grenade launchers.
Kill 3500 enemies with grenade launchers.
Kill 6500 enemies with grenade launchers.
Kill 50 enemies with bowgun.
Kill 150 enemies with bowgun.
Kill 250 enemies with bowgun.
Kill 500 enemies with bowgun.
Kill 800 enemies with bowgun.
Kill 1200 enemies with bowgun.
Kill 1600 enemies with bowgun.
Kill 2500 enemies with bowgun.
Kill 3500 enemies with bowgun.
Kill 6500 enemies with bowgun.
Kill 100 enemies with melee skills.
Kill 300 enemies with melee skills.
Kill 500 enemies with melee skills.
Kill 1000 enemies with melee skills.
Kill 1500 enemies with melee skills.
Kill 2000 enemies with melee skills.
Kill 3000 enemies with melee skills.
Kill 4000 enemies with melee skills.
Kill 6000 enemies with melee skills.
Kill 12000 enemies with melee skills.
Kill 100 enemies with each weapon / attack type.
Kill 300 enemies with each weapon / attack type.
Kill 500 enemies with each weapon / attack type.
Kill 1000 enemies with each weapon / attack type.
Kill 1500 enemies with each weapon / attack type.
Kill 2000 enemies with each weapon / attack type.
Kill 3000 enemies with each weapon / attack type.
Kill 4000 enemies with each weapon / attack type.
Kill 6000 enemies with each weapon / attack type.
Kill 12000 enemies with each weapon / attack type.
Dog Tags / Titles
Templates
To get templates, complete the chapter it says.
Emblems
To get Emblems, you just complete achievements. Look for Achievements in this guide. There are no dlc based emblems.
Titles
Long list is this:
Resident Evil — Campaign Title (001/165)
Requirement: Default title
Ranking: 1 Star Rank = N/A, 2 Star Rank = N/A, 3 Star Rank = N/A, 4 Star Rank = N/A
Extra Info: A player starts with this title
Total Titles (001/195)
Curious Fan — Campaign Title (002/165)
Requirement: Finished playing Resident Evil 5 campaign
Ranking: 1 Star Rank = 1 time, 2 Star Rank = N/A, 3 Star Rank = N/A, 4 Star Rank = N/A
Extra Info: Your PS3 or Xbox 360 must have a Resident Evil 5 save file on it and that file must be complete
Total Titles (002/195)
Hardcore Player — Campaign Title (003/165)
Requirement: Play Resident Evil 6 for 100 hours
Ranking: 1 Star Rank = 5 hours (Newbie Player), 2 Star Rank = 15 hours, 3 Star Rank = 50 hours, 4 Star Rank = 100 hours (Hardcore Player)
Extra Info: The title name changes depending on rank
Total Titles (003/195)
Global Player — Campaign Title (004/165)
Requirement: Play with 300 other players online
Ranking: 1 Star Rank = 10 people, 2 Star Rank = 50 people, 3 Star Rank = 100 people, 4 Star Rank = 300 people
Extra Info: Play co-op in any mode
Total Titles (004/195)
Rollin' with the Homies — Campaign Title (005/165)
Requirement: Play online with a friend 300 times
Ranking: 1 Star Rank = 5 times, 2 Star Rank = 30 times, 3 Star Rank = 100 times, 4 Star Rank = 300 times
Extra Info: Must be friends list players
Total Titles (005/195)
My Skills — Campaign Title (006/165)
Requirement: Earn 200000 skill points
Ranking: 1 Star Rank = 10000 points, 2 Star Rank = 50000 points, 3 Star Rank = 10000 points, 4 Star Rank = 20000 points
Extra Info: Best farm is Mercenaries (duo recommended) or Chris Chapter 5 pressurization room farming
Total Titles (006/195)
Skill Collector — Campaign Title (007/165)
Requirement: Purchase 80 skills
Ranking: 1 Star Rank = 10 skills, 2 Star Rank = 20 skills, 3 Star Rank = 40 skills, 4 Star Rank = 80 skills
Extra Info: Counts across all modes
Total Titles (007/195)
File Collector — Campaign Title (008/165)
Requirement: Read all files
Ranking: 1 Star Rank = 10 files, 2 Star Rank = 30 files, 3 Star Rank = 50 files, 4 Star Rank = 80 files
Extra Info: Unlock by shooting serpent emblems and reading them in Collections
Total Titles (008/195)
Figure Collector — Campaign Title (009/165)
Requirement: Collect all figures
Ranking: 1 Star Rank = 20 figures, 2 Star Rank = 40 figures, 3 Star Rank = 60 figures, 4 Star Rank = 78 figures
Extra Info: Mix of serpent emblems, outfits, and resident evil net rewards
Total Titles (009/195)
Earning Them Medals — Campaign Title (010/165)
Requirement: Earn 2000 medals
Ranking: 1 Star Rank = 100 medals, 2 Star Rank = 300 medals, 3 Star Rank = 1000 medals, 4 Star Rank = 2000 medals
Extra Info: Earned across all modes
Total Titles (010/195)
Title Collector — Campaign Title (011/165)
Requirement: Earn 200 titles
Ranking: 1 Star Rank = 20 titles, 2 Star Rank = 50 titles, 3 Star Rank = 100 titles, 4 Star Rank = 200 titles
Extra Info: Unlock by earning titles
Total Titles (011/195)
People Eater — Campaign Title (012/165)
Requirement: Play as a zombie 300 times
Ranking: 1 Star Rank = 10 times, 2 Star Rank = 30 times, 3 Star Rank = 100 times, 4 Star Rank = 300 times
Extra Info: Agent Hunt mode
Total Titles (012/195)
J'avo Juice — Campaign Title (013/165)
Requirement: Play as a J'avo 300 times
Ranking: 1 Star Rank = 10 times, 2 Star Rank = 30 times, 3 Star Rank = 100 times, 4 Star Rank = 300 times
Extra Info: Agent Hunt mode
Total Titles (013/195)
Left My Mark — Campaign Title (014/165)
Requirement: Tag 300 enemies
Ranking: 1 Star Rank = 10, 2 Star Rank = 30, 3 Star Rank = 100, 4 Star Rank = 300
Extra Info: Use partner assist button to tag while aiming
Total Titles (014/195)
Tag Master — Campaign Title (015/165)
Requirement: Tagged enemies killed by others 300 times
Ranking: 1 Star Rank = 10, 2 Star Rank = 30, 3 Star Rank = 100, 4 Star Rank = 300
Extra Info: Requires co-op
Total Titles (015/195)
Enjoying the Scenery — Campaign Title (016/165)
Requirement: Walk 5000 meters
Ranking: 1 Star Rank = 300, 2 Star Rank = 1000, 3 Star Rank = 3000, 4 Star Rank = 5000
Extra Info: Must walk (not run)
Total Titles (016/195)
Running My Shoes Off — Campaign Title (017/165)
Requirement: Run 100000 meters
Ranking: 1 Star Rank = 10000, 2 Star Rank = 30000, 3 Star Rank = 50000, 4 Star Rank = 100000
Extra Info: Do not dash
Total Titles (017/195)
Mad Dasher — Campaign Title (018/165)
Requirement: Dash 5000 meters
Ranking: 1 Star Rank = 300, 2 Star Rank = 1000, 3 Star Rank = 3000, 4 Star Rank = 5000
Extra Info: Hold sprint button
Total Titles (018/195)
Rock-Hard Buns — Campaign Title (019/165)
Requirement: Move 500 meters on back
Ranking: 1 Star Rank = 50, 2 Star Rank = 100, 3 Star Rank = 300, 4 Star Rank = 500
Extra Info: Crawl on back using L1/LT
Total Titles (019/195)
Big Baby — Campaign Title (020/165)
Requirement: Crawl 300 meters
Ranking: 1 Star Rank = 20, 2 Star Rank = 50, 3 Star Rank = 100, 4 Star Rank = 300
Extra Info: Air ducts recommended (Chris Chapter 3)
Total Titles (020/195)
Like a Duck to Water — Campaign Title (021/165)
Requirement: Swim 1000 meters
Ranking: 1 Star Rank = 100, 2 Star Rank = 300, 3 Star Rank = 500, 4 Star Rank = 1000
Extra Info: Leon Chapter 3, Ada Chapter 1
Total Titles (021/195)
Joyrider — Campaign Title (022/165)
Requirement: Travel 500 km in vehicles
Ranking: 1 Star Rank = 50, 2 Star Rank = 100, 3 Star Rank = 200, 4 Star Rank = 500
Extra Info: Vehicles in Chris, Jake campaigns
Total Titles (022/195)
Easy Target — Campaign Title (023/165)
Requirement: Require help 300 times
Ranking: 1 Star Rank = 10 times, 2 Star Rank = 30 times, 3 Star Rank = 100 times, 4 Star Rank = 300 times
Extra Info: Enter dying status or get grabbed and press partner assist
Total Titles (023/195)
Rescue Me — Campaign Title (024/165)
Requirement: Receive help 300 times
Ranking: 1 Star Rank = 10 times, 2 Star Rank = 30 times, 3 Star Rank = 100 times, 4 Star Rank = 300 times
Extra Info: Get grabbed and call for help; partner frees you (Leon chapters recommended)
Total Titles (024/195)
Hero — Campaign Title (025/165)
Requirement: Rescue another player 300 times
Ranking: 1 Star Rank = 10 times, 2 Star Rank = 30 times, 3 Star Rank = 100 times, 4 Star Rank = 300 times
Extra Info: Save partner from grabs using partner assist melee
Total Titles (025/195)
Death Wish — Campaign Title (026/165)
Requirement: Require saving 100 times
Ranking: 1 Star Rank = 10 times, 2 Star Rank = 30 times, 3 Star Rank = 50 times, 4 Star Rank = 100 times
Extra Info: Enter dying status
Total Titles (026/195)
Resuscitated Agent — Campaign Title (027/165)
Requirement: Saved from dying 100 times
Ranking: 1 Star Rank = 10 times, 2 Star Rank = 30 times, 3 Star Rank = 50 times, 4 Star Rank = 100 times
Extra Info: Partner revives you from dying state
Total Titles (027/195)
Phoenix — Campaign Title (028/165)
Requirement: Recover on your own from dying 100 times
Ranking: 1 Star Rank = 10 times, 2 Star Rank = 30 times, 3 Star Rank = 100 times, 4 Star Rank = 200 times
Extra Info: Let recovery bar fully fill to self-revive
Total Titles (028/195)
Last Hurrah — Campaign Title (029/165)
Requirement: Defeat 100 enemies while dying
Ranking: 1 Star Rank = 1 time, 2 Star Rank = 3 times, 3 Star Rank = 10 times, 4 Star Rank = 100 times
Extra Info: Kill enemies while in dying state
Total Titles (029/195)
Lifesaver — Campaign Title (030/165)
Requirement: Save other players from dying 100 times
Ranking: 1 Star Rank = 10 times, 2 Star Rank = 30 times, 3 Star Rank = 50 times, 4 Star Rank = 100 times
Extra Info: Revive partner from dying state
Total Titles (030/195)
To get templates, complete the chapter it says.
Emblems
To get Emblems, you just complete achievements. Look for Achievements in this guide. There are no dlc based emblems.
Titles
Long list is this:
Resident Evil — Campaign Title (001/165)
Requirement: Default title
Ranking: 1 Star Rank = N/A, 2 Star Rank = N/A, 3 Star Rank = N/A, 4 Star Rank = N/A
Extra Info: A player starts with this title
Total Titles (001/195)
Curious Fan — Campaign Title (002/165)
Requirement: Finished playing Resident Evil 5 campaign
Ranking: 1 Star Rank = 1 time, 2 Star Rank = N/A, 3 Star Rank = N/A, 4 Star Rank = N/A
Extra Info: Your PS3 or Xbox 360 must have a Resident Evil 5 save file on it and that file must be complete
Total Titles (002/195)
Hardcore Player — Campaign Title (003/165)
Requirement: Play Resident Evil 6 for 100 hours
Ranking: 1 Star Rank = 5 hours (Newbie Player), 2 Star Rank = 15 hours, 3 Star Rank = 50 hours, 4 Star Rank = 100 hours (Hardcore Player)
Extra Info: The title name changes depending on rank
Total Titles (003/195)
Global Player — Campaign Title (004/165)
Requirement: Play with 300 other players online
Ranking: 1 Star Rank = 10 people, 2 Star Rank = 50 people, 3 Star Rank = 100 people, 4 Star Rank = 300 people
Extra Info: Play co-op in any mode
Total Titles (004/195)
Rollin' with the Homies — Campaign Title (005/165)
Requirement: Play online with a friend 300 times
Ranking: 1 Star Rank = 5 times, 2 Star Rank = 30 times, 3 Star Rank = 100 times, 4 Star Rank = 300 times
Extra Info: Must be friends list players
Total Titles (005/195)
My Skills — Campaign Title (006/165)
Requirement: Earn 200000 skill points
Ranking: 1 Star Rank = 10000 points, 2 Star Rank = 50000 points, 3 Star Rank = 10000 points, 4 Star Rank = 20000 points
Extra Info: Best farm is Mercenaries (duo recommended) or Chris Chapter 5 pressurization room farming
Total Titles (006/195)
Skill Collector — Campaign Title (007/165)
Requirement: Purchase 80 skills
Ranking: 1 Star Rank = 10 skills, 2 Star Rank = 20 skills, 3 Star Rank = 40 skills, 4 Star Rank = 80 skills
Extra Info: Counts across all modes
Total Titles (007/195)
File Collector — Campaign Title (008/165)
Requirement: Read all files
Ranking: 1 Star Rank = 10 files, 2 Star Rank = 30 files, 3 Star Rank = 50 files, 4 Star Rank = 80 files
Extra Info: Unlock by shooting serpent emblems and reading them in Collections
Total Titles (008/195)
Figure Collector — Campaign Title (009/165)
Requirement: Collect all figures
Ranking: 1 Star Rank = 20 figures, 2 Star Rank = 40 figures, 3 Star Rank = 60 figures, 4 Star Rank = 78 figures
Extra Info: Mix of serpent emblems, outfits, and resident evil net rewards
Total Titles (009/195)
Earning Them Medals — Campaign Title (010/165)
Requirement: Earn 2000 medals
Ranking: 1 Star Rank = 100 medals, 2 Star Rank = 300 medals, 3 Star Rank = 1000 medals, 4 Star Rank = 2000 medals
Extra Info: Earned across all modes
Total Titles (010/195)
Title Collector — Campaign Title (011/165)
Requirement: Earn 200 titles
Ranking: 1 Star Rank = 20 titles, 2 Star Rank = 50 titles, 3 Star Rank = 100 titles, 4 Star Rank = 200 titles
Extra Info: Unlock by earning titles
Total Titles (011/195)
People Eater — Campaign Title (012/165)
Requirement: Play as a zombie 300 times
Ranking: 1 Star Rank = 10 times, 2 Star Rank = 30 times, 3 Star Rank = 100 times, 4 Star Rank = 300 times
Extra Info: Agent Hunt mode
Total Titles (012/195)
J'avo Juice — Campaign Title (013/165)
Requirement: Play as a J'avo 300 times
Ranking: 1 Star Rank = 10 times, 2 Star Rank = 30 times, 3 Star Rank = 100 times, 4 Star Rank = 300 times
Extra Info: Agent Hunt mode
Total Titles (013/195)
Left My Mark — Campaign Title (014/165)
Requirement: Tag 300 enemies
Ranking: 1 Star Rank = 10, 2 Star Rank = 30, 3 Star Rank = 100, 4 Star Rank = 300
Extra Info: Use partner assist button to tag while aiming
Total Titles (014/195)
Tag Master — Campaign Title (015/165)
Requirement: Tagged enemies killed by others 300 times
Ranking: 1 Star Rank = 10, 2 Star Rank = 30, 3 Star Rank = 100, 4 Star Rank = 300
Extra Info: Requires co-op
Total Titles (015/195)
Enjoying the Scenery — Campaign Title (016/165)
Requirement: Walk 5000 meters
Ranking: 1 Star Rank = 300, 2 Star Rank = 1000, 3 Star Rank = 3000, 4 Star Rank = 5000
Extra Info: Must walk (not run)
Total Titles (016/195)
Running My Shoes Off — Campaign Title (017/165)
Requirement: Run 100000 meters
Ranking: 1 Star Rank = 10000, 2 Star Rank = 30000, 3 Star Rank = 50000, 4 Star Rank = 100000
Extra Info: Do not dash
Total Titles (017/195)
Mad Dasher — Campaign Title (018/165)
Requirement: Dash 5000 meters
Ranking: 1 Star Rank = 300, 2 Star Rank = 1000, 3 Star Rank = 3000, 4 Star Rank = 5000
Extra Info: Hold sprint button
Total Titles (018/195)
Rock-Hard Buns — Campaign Title (019/165)
Requirement: Move 500 meters on back
Ranking: 1 Star Rank = 50, 2 Star Rank = 100, 3 Star Rank = 300, 4 Star Rank = 500
Extra Info: Crawl on back using L1/LT
Total Titles (019/195)
Big Baby — Campaign Title (020/165)
Requirement: Crawl 300 meters
Ranking: 1 Star Rank = 20, 2 Star Rank = 50, 3 Star Rank = 100, 4 Star Rank = 300
Extra Info: Air ducts recommended (Chris Chapter 3)
Total Titles (020/195)
Like a Duck to Water — Campaign Title (021/165)
Requirement: Swim 1000 meters
Ranking: 1 Star Rank = 100, 2 Star Rank = 300, 3 Star Rank = 500, 4 Star Rank = 1000
Extra Info: Leon Chapter 3, Ada Chapter 1
Total Titles (021/195)
Joyrider — Campaign Title (022/165)
Requirement: Travel 500 km in vehicles
Ranking: 1 Star Rank = 50, 2 Star Rank = 100, 3 Star Rank = 200, 4 Star Rank = 500
Extra Info: Vehicles in Chris, Jake campaigns
Total Titles (022/195)
Easy Target — Campaign Title (023/165)
Requirement: Require help 300 times
Ranking: 1 Star Rank = 10 times, 2 Star Rank = 30 times, 3 Star Rank = 100 times, 4 Star Rank = 300 times
Extra Info: Enter dying status or get grabbed and press partner assist
Total Titles (023/195)
Rescue Me — Campaign Title (024/165)
Requirement: Receive help 300 times
Ranking: 1 Star Rank = 10 times, 2 Star Rank = 30 times, 3 Star Rank = 100 times, 4 Star Rank = 300 times
Extra Info: Get grabbed and call for help; partner frees you (Leon chapters recommended)
Total Titles (024/195)
Hero — Campaign Title (025/165)
Requirement: Rescue another player 300 times
Ranking: 1 Star Rank = 10 times, 2 Star Rank = 30 times, 3 Star Rank = 100 times, 4 Star Rank = 300 times
Extra Info: Save partner from grabs using partner assist melee
Total Titles (025/195)
Death Wish — Campaign Title (026/165)
Requirement: Require saving 100 times
Ranking: 1 Star Rank = 10 times, 2 Star Rank = 30 times, 3 Star Rank = 50 times, 4 Star Rank = 100 times
Extra Info: Enter dying status
Total Titles (026/195)
Resuscitated Agent — Campaign Title (027/165)
Requirement: Saved from dying 100 times
Ranking: 1 Star Rank = 10 times, 2 Star Rank = 30 times, 3 Star Rank = 50 times, 4 Star Rank = 100 times
Extra Info: Partner revives you from dying state
Total Titles (027/195)
Phoenix — Campaign Title (028/165)
Requirement: Recover on your own from dying 100 times
Ranking: 1 Star Rank = 10 times, 2 Star Rank = 30 times, 3 Star Rank = 100 times, 4 Star Rank = 200 times
Extra Info: Let recovery bar fully fill to self-revive
Total Titles (028/195)
Last Hurrah — Campaign Title (029/165)
Requirement: Defeat 100 enemies while dying
Ranking: 1 Star Rank = 1 time, 2 Star Rank = 3 times, 3 Star Rank = 10 times, 4 Star Rank = 100 times
Extra Info: Kill enemies while in dying state
Total Titles (029/195)
Lifesaver — Campaign Title (030/165)
Requirement: Save other players from dying 100 times
Ranking: 1 Star Rank = 10 times, 2 Star Rank = 30 times, 3 Star Rank = 50 times, 4 Star Rank = 100 times
Extra Info: Revive partner from dying state
Total Titles (030/195)
More Titles
Dead Ringer — Campaign Title (031/165)
Requirement: Be killed 200 times
Ranking: 1 Star Rank = 10 times, 2 Star Rank = 50 times, 3 Star Rank = 100 times, 4 Star Rank = 200 times
Extra Info: Die in any mode
Total Titles (031/195)
Going Out in Style — Campaign Title (032/165)
Requirement: Be killed awesomely 50 times
Ranking: 1 Star Rank = 5 times, 2 Star Rank = 10 times, 3 Star Rank = 30 times, 4 Star Rank = 50 times
Extra Info: Die via cutscenes or instant-kill attacks, Ubistvo chainsaw slice, hit by car.
Total Titles (032/195)
Headshot Master — Campaign Title (033/165)
Requirement: Land 1000 headshots
Ranking: 1 Star Rank = 30 times, 2 Star Rank = 100 times, 3 Star Rank = 300 times, 4 Star Rank = 1000 times
Extra Info: Shoot enemies in the head
Total Titles (033/195)
Gunslinger — Campaign Title (034/165)
Requirement: Hit enemies with quick shot 1000 times
Ranking: 1 Star Rank = 30 times, 2 Star Rank = 100 times, 3 Star Rank = 300 times, 4 Star Rank = 1000 times
Extra Info: Use aim + fire together
Total Titles (034/195)
Potent Pugilist — Campaign Title (035/165)
Requirement: Land 1000 melee attacks
Ranking: 1 Star Rank = 30 times, 2 Star Rank = 100 times, 3 Star Rank = 300 times, 4 Star Rank = 1000 times
Extra Info: Use melee attacks repeatedly
Total Titles (035/195)
Relentless Attacker — Campaign Title (036/165)
Requirement: Perform 300 follow-up attacks
Ranking: 1 Star Rank = 10 times, 2 Star Rank = 30 times, 3 Star Rank = 100 times, 4 Star Rank = 300 times
Extra Info: Stun enemies then melee
Total Titles (036/195)
Combat Master — Campaign Title (037/165)
Requirement: Perform 300 unique physical attacks
Ranking: 1 Star Rank = 10 times, 2 Star Rank = 30 times, 3 Star Rank = 100 times, 4 Star Rank = 300 times
Extra Info: Perform coup de grace attacks
Total Titles (037/195)
By Any Means — Campaign Title (038/165)
Requirement: Use enemy weapon 100 times
Ranking: 1 Star Rank = 5 times, 2 Star Rank = 10 times, 3 Star Rank = 30 times, 4 Star Rank = 100 times
Extra Info: Use enemy weapons via melee
Total Titles (038/195)
Badass — Campaign Title (039/165)
Requirement: Attack 100 times with zero stamina
Ranking: 1 Star Rank = 5 times, 2 Star Rank = 10 times, 3 Star Rank = 30 times, 4 Star Rank = 100 times
Extra Info: Attack while stamina is depleted
Total Titles (039/195)
Executioner — Campaign Title (040/165)
Requirement: Perform 300 coup de grace kills
Ranking: 1 Star Rank = 10 times, 2 Star Rank = 30 times, 3 Star Rank = 100 times, 4 Star Rank = 300 times
Extra Info: Kill enemies with melee finishers
Total Titles (040/195)
Counter Attacker — Campaign Title (041/165)
Requirement: Perform 300 counters
Ranking: 1 Star Rank = 10 times, 2 Star Rank = 30 times, 3 Star Rank = 100 times, 4 Star Rank = 300 times
Extra Info: Counter attacks from the front
Total Titles (041/195)
Stealth Killer — Campaign Title (042/165)
Requirement: Perform 300 stealth kills
Ranking: 1 Star Rank = 10 times, 2 Star Rank = 30 times, 3 Star Rank = 100 times, 4 Star Rank = 300 times
Extra Info: Attack enemies unseen from behind
Total Titles (042/195)
Slip Slider — Campaign Title (043/165)
Requirement: Slide 500 times
Ranking: 1 Star Rank = 50 times, 2 Star Rank = 100 times, 3 Star Rank = 300 times, 4 Star Rank = 500 times
Extra Info: Dash then slide
Total Titles (043/195)
Slide 'n' Smash — Campaign Title (044/165)
Requirement: Destroy 300 objects while sliding
Ranking: 1 Star Rank = 10 times, 2 Star Rank = 50 times, 3 Star Rank = 100 times, 4 Star Rank = 300 times
Extra Info: Break objects while sliding
Total Titles (044/195)
Bone Breaker — Campaign Title (045/165)
Requirement: Kill 100 enemies while sliding
Ranking: 1 Star Rank = 5 times, 2 Star Rank = 10 times, 3 Star Rank = 50 times, 4 Star Rank = 100 times
Extra Info: Weaken enemies then finish with slide
Total Titles (045/195)
Nine-Oh-Nine Expert — Campaign Title (046/165)
Requirement: Kill 1000 enemies with Nine-Oh-Nine
Ranking: 1 Star Rank = 30 times, 2 Star Rank = 100 times, 3 Star Rank = 300 times, 4 Star Rank = 1000 times
Extra Info: Used by Chris and Jake
Total Titles (046/195)
Picador Expert — Campaign Title (047/165)
Requirement: Kill 1000 enemies with Picador
Ranking: 1 Star Rank = 30 times, 2 Star Rank = 100 times, 3 Star Rank = 300 times, 4 Star Rank = 1000 times
Extra Info: Used by Helena
Total Titles (047/195)
Wing Shooter Expert — Campaign Title (048/165)
Requirement: Kill 1000 enemies with Wing Shooter
Ranking: 1 Star Rank = 30 times, 2 Star Rank = 100 times, 3 Star Rank = 300 times, 4 Star Rank = 1000 times
Extra Info: Used by Leon
Total Titles (048/195)
Shotgun Expert — Campaign Title (049/165)
Requirement: Kill 1000 enemies with shotgun
Ranking: 1 Star Rank = 30 times, 2 Star Rank = 100 times, 3 Star Rank = 300 times, 4 Star Rank = 1000 times
Extra Info: Found in multiple campaigns
Total Titles (049/195)
Assault Shotgun Expert — Campaign Title (050/165)
Requirement: Kill 1000 enemies with assault shotgun
Ranking: 1 Star Rank = 30 times, 2 Star Rank = 100 times, 3 Star Rank = 300 times, 4 Star Rank = 1000 times
Extra Info: Found in Chris campaign
Total Titles (050/195)
Hydra Expert — Campaign Title (051/165)
Requirement: Kill 1000 enemies with Hydra
Ranking: 1 Star Rank = 30 times, 2 Star Rank = 100 times, 3 Star Rank = 300 times, 4 Star Rank = 1000 times
Extra Info: Helena weapon
Total Titles (051/195)
Lightning Hawk Expert — Campaign Title (052/165)
Requirement: Kill 1000 enemies with Lightning Hawk
Ranking: 1 Star Rank = 30 times, 2 Star Rank = 100 times, 3 Star Rank = 300 times, 4 Star Rank = 1000 times
Extra Info: Magnum weapon
Total Titles (052/195)
Elephant Killer Expert — Campaign Title (053/165)
Requirement: Kill 1000 enemies with Elephant Killer
Ranking: 1 Star Rank = 30 times, 2 Star Rank = 100 times, 3 Star Rank = 300 times, 4 Star Rank = 1000 times
Extra Info: Jake weapon
Total Titles (053/195)
Sniper Rifle Expert — Campaign Title (054/165)
Requirement: Kill 1000 enemies with sniper rifle
Ranking: 1 Star Rank = 30 times, 2 Star Rank = 100 times, 3 Star Rank = 300 times, 4 Star Rank = 1000 times
Extra Info: Available in multiple modes
Total Titles (054/195)
Semi-Auto Sniper Rifle Expert — Campaign Title (055/165)
Requirement: Kill 1000 enemies with semi-auto sniper
Ranking: 1 Star Rank = 30 times, 2 Star Rank = 100 times, 3 Star Rank = 300 times, 4 Star Rank = 1000 times
Extra Info: Leon and Chris campaigns
Total Titles (055/195)
Anti-Materiel Rifle Expert — Campaign Title (056/165)
Requirement: Kill 1000 enemies with anti-materiel rifle
Ranking: 1 Star Rank = 30 times, 2 Star Rank = 100 times, 3 Star Rank = 300 times, 4 Star Rank = 1000 times
Extra Info: Piers weapon
Total Titles (056/195)
Ammo Box 50 Expert — Campaign Title (057/165)
Requirement: Kill 1000 enemies with Ammo Box 50
Ranking: 1 Star Rank = 30 times, 2 Star Rank = 100 times, 3 Star Rank = 300 times, 4 Star Rank = 1000 times
Extra Info: Ada weapon
Total Titles (057/195)
Triple Shot Expert — Campaign Title (058/165)
Requirement: Kill 1000 enemies with Triple Shot
Ranking: 1 Star Rank = 30 times, 2 Star Rank = 100 times, 3 Star Rank = 300 times, 4 Star Rank = 1000 times
Extra Info: Sherry weapon
Total Titles (058/195)
MP-AF Expert — Campaign Title (059/165)
Requirement: Kill 1000 enemies with MP-AF
Ranking: 1 Star Rank = 30 times, 2 Star Rank = 100 times, 3 Star Rank = 300 times, 4 Star Rank = 1000 times
Extra Info: Piers weapon
Total Titles (059/195)
A.R. for Special Tactics Expert — Campaign Title (060/165)
Requirement: Kill 1000 enemies with Assault Rifle for Special Tactics
Ranking: 1 Star Rank = 30 times, 2 Star Rank = 100 times, 3 Star Rank = 300 times, 4 Star Rank = 1000 times
Extra Info: Chris weapon
Total Titles (060/195)
Bear Commander Expert — Campaign Title (061/165)
Requirement: Kill 1000 enemies with Bear Commander
Ranking: 1 Star Rank = 30 times, 2 Star Rank = 100 times, 3 Star Rank = 300 times, 4 Star Rank = 1000 times
Extra Info: Unlock via medals in Jake Chapter 3
Total Titles (061/195)
Requirement: Be killed 200 times
Ranking: 1 Star Rank = 10 times, 2 Star Rank = 50 times, 3 Star Rank = 100 times, 4 Star Rank = 200 times
Extra Info: Die in any mode
Total Titles (031/195)
Going Out in Style — Campaign Title (032/165)
Requirement: Be killed awesomely 50 times
Ranking: 1 Star Rank = 5 times, 2 Star Rank = 10 times, 3 Star Rank = 30 times, 4 Star Rank = 50 times
Extra Info: Die via cutscenes or instant-kill attacks, Ubistvo chainsaw slice, hit by car.
Total Titles (032/195)
Headshot Master — Campaign Title (033/165)
Requirement: Land 1000 headshots
Ranking: 1 Star Rank = 30 times, 2 Star Rank = 100 times, 3 Star Rank = 300 times, 4 Star Rank = 1000 times
Extra Info: Shoot enemies in the head
Total Titles (033/195)
Gunslinger — Campaign Title (034/165)
Requirement: Hit enemies with quick shot 1000 times
Ranking: 1 Star Rank = 30 times, 2 Star Rank = 100 times, 3 Star Rank = 300 times, 4 Star Rank = 1000 times
Extra Info: Use aim + fire together
Total Titles (034/195)
Potent Pugilist — Campaign Title (035/165)
Requirement: Land 1000 melee attacks
Ranking: 1 Star Rank = 30 times, 2 Star Rank = 100 times, 3 Star Rank = 300 times, 4 Star Rank = 1000 times
Extra Info: Use melee attacks repeatedly
Total Titles (035/195)
Relentless Attacker — Campaign Title (036/165)
Requirement: Perform 300 follow-up attacks
Ranking: 1 Star Rank = 10 times, 2 Star Rank = 30 times, 3 Star Rank = 100 times, 4 Star Rank = 300 times
Extra Info: Stun enemies then melee
Total Titles (036/195)
Combat Master — Campaign Title (037/165)
Requirement: Perform 300 unique physical attacks
Ranking: 1 Star Rank = 10 times, 2 Star Rank = 30 times, 3 Star Rank = 100 times, 4 Star Rank = 300 times
Extra Info: Perform coup de grace attacks
Total Titles (037/195)
By Any Means — Campaign Title (038/165)
Requirement: Use enemy weapon 100 times
Ranking: 1 Star Rank = 5 times, 2 Star Rank = 10 times, 3 Star Rank = 30 times, 4 Star Rank = 100 times
Extra Info: Use enemy weapons via melee
Total Titles (038/195)
Badass — Campaign Title (039/165)
Requirement: Attack 100 times with zero stamina
Ranking: 1 Star Rank = 5 times, 2 Star Rank = 10 times, 3 Star Rank = 30 times, 4 Star Rank = 100 times
Extra Info: Attack while stamina is depleted
Total Titles (039/195)
Executioner — Campaign Title (040/165)
Requirement: Perform 300 coup de grace kills
Ranking: 1 Star Rank = 10 times, 2 Star Rank = 30 times, 3 Star Rank = 100 times, 4 Star Rank = 300 times
Extra Info: Kill enemies with melee finishers
Total Titles (040/195)
Counter Attacker — Campaign Title (041/165)
Requirement: Perform 300 counters
Ranking: 1 Star Rank = 10 times, 2 Star Rank = 30 times, 3 Star Rank = 100 times, 4 Star Rank = 300 times
Extra Info: Counter attacks from the front
Total Titles (041/195)
Stealth Killer — Campaign Title (042/165)
Requirement: Perform 300 stealth kills
Ranking: 1 Star Rank = 10 times, 2 Star Rank = 30 times, 3 Star Rank = 100 times, 4 Star Rank = 300 times
Extra Info: Attack enemies unseen from behind
Total Titles (042/195)
Slip Slider — Campaign Title (043/165)
Requirement: Slide 500 times
Ranking: 1 Star Rank = 50 times, 2 Star Rank = 100 times, 3 Star Rank = 300 times, 4 Star Rank = 500 times
Extra Info: Dash then slide
Total Titles (043/195)
Slide 'n' Smash — Campaign Title (044/165)
Requirement: Destroy 300 objects while sliding
Ranking: 1 Star Rank = 10 times, 2 Star Rank = 50 times, 3 Star Rank = 100 times, 4 Star Rank = 300 times
Extra Info: Break objects while sliding
Total Titles (044/195)
Bone Breaker — Campaign Title (045/165)
Requirement: Kill 100 enemies while sliding
Ranking: 1 Star Rank = 5 times, 2 Star Rank = 10 times, 3 Star Rank = 50 times, 4 Star Rank = 100 times
Extra Info: Weaken enemies then finish with slide
Total Titles (045/195)
Nine-Oh-Nine Expert — Campaign Title (046/165)
Requirement: Kill 1000 enemies with Nine-Oh-Nine
Ranking: 1 Star Rank = 30 times, 2 Star Rank = 100 times, 3 Star Rank = 300 times, 4 Star Rank = 1000 times
Extra Info: Used by Chris and Jake
Total Titles (046/195)
Picador Expert — Campaign Title (047/165)
Requirement: Kill 1000 enemies with Picador
Ranking: 1 Star Rank = 30 times, 2 Star Rank = 100 times, 3 Star Rank = 300 times, 4 Star Rank = 1000 times
Extra Info: Used by Helena
Total Titles (047/195)
Wing Shooter Expert — Campaign Title (048/165)
Requirement: Kill 1000 enemies with Wing Shooter
Ranking: 1 Star Rank = 30 times, 2 Star Rank = 100 times, 3 Star Rank = 300 times, 4 Star Rank = 1000 times
Extra Info: Used by Leon
Total Titles (048/195)
Shotgun Expert — Campaign Title (049/165)
Requirement: Kill 1000 enemies with shotgun
Ranking: 1 Star Rank = 30 times, 2 Star Rank = 100 times, 3 Star Rank = 300 times, 4 Star Rank = 1000 times
Extra Info: Found in multiple campaigns
Total Titles (049/195)
Assault Shotgun Expert — Campaign Title (050/165)
Requirement: Kill 1000 enemies with assault shotgun
Ranking: 1 Star Rank = 30 times, 2 Star Rank = 100 times, 3 Star Rank = 300 times, 4 Star Rank = 1000 times
Extra Info: Found in Chris campaign
Total Titles (050/195)
Hydra Expert — Campaign Title (051/165)
Requirement: Kill 1000 enemies with Hydra
Ranking: 1 Star Rank = 30 times, 2 Star Rank = 100 times, 3 Star Rank = 300 times, 4 Star Rank = 1000 times
Extra Info: Helena weapon
Total Titles (051/195)
Lightning Hawk Expert — Campaign Title (052/165)
Requirement: Kill 1000 enemies with Lightning Hawk
Ranking: 1 Star Rank = 30 times, 2 Star Rank = 100 times, 3 Star Rank = 300 times, 4 Star Rank = 1000 times
Extra Info: Magnum weapon
Total Titles (052/195)
Elephant Killer Expert — Campaign Title (053/165)
Requirement: Kill 1000 enemies with Elephant Killer
Ranking: 1 Star Rank = 30 times, 2 Star Rank = 100 times, 3 Star Rank = 300 times, 4 Star Rank = 1000 times
Extra Info: Jake weapon
Total Titles (053/195)
Sniper Rifle Expert — Campaign Title (054/165)
Requirement: Kill 1000 enemies with sniper rifle
Ranking: 1 Star Rank = 30 times, 2 Star Rank = 100 times, 3 Star Rank = 300 times, 4 Star Rank = 1000 times
Extra Info: Available in multiple modes
Total Titles (054/195)
Semi-Auto Sniper Rifle Expert — Campaign Title (055/165)
Requirement: Kill 1000 enemies with semi-auto sniper
Ranking: 1 Star Rank = 30 times, 2 Star Rank = 100 times, 3 Star Rank = 300 times, 4 Star Rank = 1000 times
Extra Info: Leon and Chris campaigns
Total Titles (055/195)
Anti-Materiel Rifle Expert — Campaign Title (056/165)
Requirement: Kill 1000 enemies with anti-materiel rifle
Ranking: 1 Star Rank = 30 times, 2 Star Rank = 100 times, 3 Star Rank = 300 times, 4 Star Rank = 1000 times
Extra Info: Piers weapon
Total Titles (056/195)
Ammo Box 50 Expert — Campaign Title (057/165)
Requirement: Kill 1000 enemies with Ammo Box 50
Ranking: 1 Star Rank = 30 times, 2 Star Rank = 100 times, 3 Star Rank = 300 times, 4 Star Rank = 1000 times
Extra Info: Ada weapon
Total Titles (057/195)
Triple Shot Expert — Campaign Title (058/165)
Requirement: Kill 1000 enemies with Triple Shot
Ranking: 1 Star Rank = 30 times, 2 Star Rank = 100 times, 3 Star Rank = 300 times, 4 Star Rank = 1000 times
Extra Info: Sherry weapon
Total Titles (058/195)
MP-AF Expert — Campaign Title (059/165)
Requirement: Kill 1000 enemies with MP-AF
Ranking: 1 Star Rank = 30 times, 2 Star Rank = 100 times, 3 Star Rank = 300 times, 4 Star Rank = 1000 times
Extra Info: Piers weapon
Total Titles (059/195)
A.R. for Special Tactics Expert — Campaign Title (060/165)
Requirement: Kill 1000 enemies with Assault Rifle for Special Tactics
Ranking: 1 Star Rank = 30 times, 2 Star Rank = 100 times, 3 Star Rank = 300 times, 4 Star Rank = 1000 times
Extra Info: Chris weapon
Total Titles (060/195)
Bear Commander Expert — Campaign Title (061/165)
Requirement: Kill 1000 enemies with Bear Commander
Ranking: 1 Star Rank = 30 times, 2 Star Rank = 100 times, 3 Star Rank = 300 times, 4 Star Rank = 1000 times
Extra Info: Unlock via medals in Jake Chapter 3
Total Titles (061/195)
Titles Continued
Assault Rifle RN Expert — Campaign Title (062/165)
Requirement: Kill 1000 enemies with Assault Rifle RN
Ranking: 1 Star Rank = 30 times, 2 Star Rank = 100 times, 3 Star Rank = 300 times, 4 Star Rank = 1000 times
Extra Info: Found in Leon campaign
Total Titles (062/195)
Explosive Round Expert — Campaign Title (063/165)
Requirement: Kill 1000 enemies with explosive rounds
Ranking: 1 Star Rank = 30 times, 2 Star Rank = 100 times, 3 Star Rank = 300 times, 4 Star Rank = 1000 times
Extra Info: Grenade launcher or Bear Commander alt fire
Total Titles (063/195)
Acid Round Expert — Campaign Title (064/165)
Requirement: Kill 1000 enemies with acid rounds
Ranking: 1 Star Rank = 30 times, 2 Star Rank = 100 times, 3 Star Rank = 300 times, 4 Star Rank = 1000 times
Extra Info: Grenade launcher
Total Titles (064/195)
Nitrogen Round Expert — Campaign Title (065/165)
Requirement: Kill 1000 enemies with nitrogen rounds
Ranking: 1 Star Rank = 30 times, 2 Star Rank = 100 times, 3 Star Rank = 300 times, 4 Star Rank = 1000 times
Extra Info: Grenade launcher
Total Titles (065/195)
Rocket Launcher Expert — Campaign Title (066/165)
Requirement: Kill 100 enemies with rocket launcher
Ranking: 1 Star Rank = 3 times, 2 Star Rank = 10 times, 3 Star Rank = 30 times, 4 Star Rank = 100 times
Extra Info: Best farm in Mercenaries with Chris
Total Titles (066/195)
Crossbow Expert — Campaign Title (067/165)
Requirement: Kill 1000 enemies with crossbow
Ranking: 1 Star Rank = 30 times, 2 Star Rank = 100 times, 3 Star Rank = 300 times, 4 Star Rank = 1000 times
Extra Info: Must kill with bolt, not melee
Total Titles (067/195)
Crossbow Master — Campaign Title (068/165)
Requirement: Pin 1000 enemies to surfaces with crossbow
Ranking: 1 Star Rank = 30 times, 2 Star Rank = 100 times, 3 Star Rank = 300 times, 4 Star Rank = 1000 times
Extra Info: Must impale enemies into surfaces
Total Titles (068/195)
Survival Knife Expert — Campaign Title (069/165)
Requirement: Kill 1000 enemies with the survival knife
Ranking: 1 Star Rank = 30 times, 2 Star Rank = 100 times, 3 Star Rank = 300 times, 4 Star Rank = 1000 times
Extra Info: Leon’s default weapon; also used by Jake EX variants
Total Titles (069/195)
Combat Knife Expert — Campaign Title (070/165)
Requirement: Kill 1000 enemies with the combat knife
Ranking: 1 Star Rank = 30 times, 2 Star Rank = 100 times, 3 Star Rank = 300 times, 4 Star Rank = 1000 times
Extra Info: Chris’s default weapon
Total Titles (070/195)
Stun Rod Expert — Campaign Title (071/165)
Requirement: Kill 1000 enemies with the stun rod
Ranking: 1 Star Rank = 30 times, 2 Star Rank = 100 times, 3 Star Rank = 300 times, 4 Star Rank = 1000 times
Extra Info: Sherry’s default weapon
Total Titles (071/195)
Hand-To-Hand Expert — Campaign Title (072/165)
Requirement: Kill 1000 enemies with bare hands
Ranking: 1 Star Rank = 30 times, 2 Star Rank = 100 times, 3 Star Rank = 300 times, 4 Star Rank = 1000 times
Extra Info: Jake’s default combat style
Total Titles (072/195)
Gatling Gun Expert — Campaign Title (073/165)
Requirement: Kill 300 enemies with a gun turret
Ranking: 1 Star Rank = 10 times, 2 Star Rank = 30 times, 3 Star Rank = 100 times, 4 Star Rank = 300 times
Extra Info: Found in Chris and Jake campaign segments
Total Titles (073/195)
I Spy — Campaign Title (074/165)
Requirement: Kill 300 enemies with a camera gun turret
Ranking: 1 Star Rank = 10 times, 2 Star Rank = 30 times, 3 Star Rank = 100 times, 4 Star Rank = 300 times
Extra Info: Surveillance cameras in Jake Chapter 3
Total Titles (074/195)
ATV Gun Expert — Campaign Title (075/165)
Requirement: Kill 300 enemies with vehicle-mounted gun
Ranking: 1 Star Rank = 10 times, 2 Star Rank = 30 times, 3 Star Rank = 100 times, 4 Star Rank = 300 times
Extra Info: Military vehicle turret in Chris Chapter 3
Total Titles (075/195)
I Got Hand — Campaign Title (076/165)
Requirement: Kill 100 enemies with Piers’ mutated arm
Ranking: 1 Star Rank = 3 times, 2 Star Rank = 10 times, 3 Star Rank = 30 times, 4 Star Rank = 100 times
Extra Info: Only available in Chris Chapter 5 boss section; best farm via Napads
Total Titles (076/195)
Hand Grenade Expert — Campaign Title (077/165)
Requirement: Kill 1000 enemies with hand grenades
Ranking: 1 Star Rank = 30 times, 2 Star Rank = 100 times, 3 Star Rank = 300 times, 4 Star Rank = 1000 times
Extra Info: Common in Chris and Ada campaigns
Total Titles (077/195)
Incendiary Grenade Expert — Campaign Title (078/165)
Requirement: Kill 1000 enemies with incendiary grenades
Ranking: 1 Star Rank = 30 times, 2 Star Rank = 100 times, 3 Star Rank = 300 times, 4 Star Rank = 1000 times
Extra Info: Found in Leon and Ada campaigns
Total Titles (078/195)
Flash Grenade Expert — Campaign Title (079/165)
Requirement: Kill 100 enemies with flash grenades
Ranking: 1 Star Rank = 3 times, 2 Star Rank = 10 times, 3 Star Rank = 50 times, 4 Star Rank = 100 times
Extra Info: Best done on weak enemies like Mesets or bats
Total Titles (079/195)
Flash Grenade Master — Campaign Title (080/165)
Requirement: Blind 1000 enemies with flash grenades
Ranking: 1 Star Rank = 30 times, 2 Star Rank = 100 times, 3 Star Rank = 300 times, 4 Star Rank = 1000 times
Extra Info: Must blind enemies, not kill
Total Titles (080/195)
Demolitions Expert — Campaign Title (081/165)
Requirement: Kill 1000 enemies with environmental explosives
Ranking: 1 Star Rank = 30 times, 2 Star Rank = 100 times, 3 Star Rank = 300 times, 4 Star Rank = 1000 times
Extra Info: Includes barrels, canisters, extinguishers
Total Titles (081/195)
Pipe Bomb Expert — Campaign Title (082/165)
Requirement: Kill 1000 enemies with pipe bombs
Ranking: 1 Star Rank = 30 times, 2 Star Rank = 100 times, 3 Star Rank = 300 times, 4 Star Rank = 1000 times
Extra Info: Must die from explosion, not arrow impact
Total Titles (082/195)
Remote Bomb Expert — Campaign Title (083/165)
Requirement: Kill 1000 enemies with remote bombs
Ranking: 1 Star Rank = 30 times, 2 Star Rank = 100 times, 3 Star Rank = 300 times, 4 Star Rank = 1000 times
Extra Info: Available in Leon and Jake campaigns
Total Titles (083/195)
Manipulator — Campaign Title (084/165)
Requirement: Use enemy attacks to kill 300 enemies
Ranking: 1 Star Rank = 10 times, 2 Star Rank = 30 times, 3 Star Rank = 100 times, 4 Star Rank = 300 times
Extra Info: Indirect kills (enemy attacks, explosions, chaos)
Total Titles (084/195)
Need a Pick-Me-Up — Campaign Title (085/165)
Requirement: Consume 2000 health tablets
Ranking: 1 Star Rank = 100 times, 2 Star Rank = 300 times, 3 Star Rank = 1000 times, 4 Star Rank = 2000 times
Extra Info: Use herb tablets
Total Titles (085/195)
The Chemist — Campaign Title (086/165)
Requirement: Combine herbs 1000 times
Ranking: 1 Star Rank = 30 times, 2 Star Rank = 100 times, 3 Star Rank = 300 times, 4 Star Rank = 1000 times
Extra Info: Combine green/red herbs
Total Titles (086/195)
Need My Meds — Campaign Title (087/165)
Requirement: Use first aid spray 100 times
Ranking: 1 Star Rank = 3 times, 2 Star Rank = 10 times, 3 Star Rank = 30 times, 4 Star Rank = 100 times
Extra Info: Equip and use spray to heal
Total Titles (087/195)
Not an Acrobat — Campaign Title (088/165)
Requirement: Use zip-line 300 times
Ranking: 1 Star Rank = 10 times, 2 Star Rank = 30 times, 3 Star Rank = 100 times, 4 Star Rank = 300 times
Extra Info: Ada grappling hook segments
Total Titles (088/195)
Undercover — Campaign Title (089/165)
Requirement: Stay in cover for 100 minutes
Ranking: 1 Star Rank = 5 minutes, 2 Star Rank = 10 minutes, 3 Star Rank = 30 minutes, 4 Star Rank = 100 minutes
Extra Info: Time accumulates across gameplay
Total Titles (089/195)
Reloader — Campaign Title (090/165)
Requirement: Reload 5000 times
Ranking: 1 Star Rank = 500 times, 2 Star Rank = 1000 times, 3 Star Rank = 3000 times, 4 Star Rank = 5000 times
Extra Info: Cumulative across all modes
Total Titles (090/195)
Requirement: Kill 1000 enemies with Assault Rifle RN
Ranking: 1 Star Rank = 30 times, 2 Star Rank = 100 times, 3 Star Rank = 300 times, 4 Star Rank = 1000 times
Extra Info: Found in Leon campaign
Total Titles (062/195)
Explosive Round Expert — Campaign Title (063/165)
Requirement: Kill 1000 enemies with explosive rounds
Ranking: 1 Star Rank = 30 times, 2 Star Rank = 100 times, 3 Star Rank = 300 times, 4 Star Rank = 1000 times
Extra Info: Grenade launcher or Bear Commander alt fire
Total Titles (063/195)
Acid Round Expert — Campaign Title (064/165)
Requirement: Kill 1000 enemies with acid rounds
Ranking: 1 Star Rank = 30 times, 2 Star Rank = 100 times, 3 Star Rank = 300 times, 4 Star Rank = 1000 times
Extra Info: Grenade launcher
Total Titles (064/195)
Nitrogen Round Expert — Campaign Title (065/165)
Requirement: Kill 1000 enemies with nitrogen rounds
Ranking: 1 Star Rank = 30 times, 2 Star Rank = 100 times, 3 Star Rank = 300 times, 4 Star Rank = 1000 times
Extra Info: Grenade launcher
Total Titles (065/195)
Rocket Launcher Expert — Campaign Title (066/165)
Requirement: Kill 100 enemies with rocket launcher
Ranking: 1 Star Rank = 3 times, 2 Star Rank = 10 times, 3 Star Rank = 30 times, 4 Star Rank = 100 times
Extra Info: Best farm in Mercenaries with Chris
Total Titles (066/195)
Crossbow Expert — Campaign Title (067/165)
Requirement: Kill 1000 enemies with crossbow
Ranking: 1 Star Rank = 30 times, 2 Star Rank = 100 times, 3 Star Rank = 300 times, 4 Star Rank = 1000 times
Extra Info: Must kill with bolt, not melee
Total Titles (067/195)
Crossbow Master — Campaign Title (068/165)
Requirement: Pin 1000 enemies to surfaces with crossbow
Ranking: 1 Star Rank = 30 times, 2 Star Rank = 100 times, 3 Star Rank = 300 times, 4 Star Rank = 1000 times
Extra Info: Must impale enemies into surfaces
Total Titles (068/195)
Survival Knife Expert — Campaign Title (069/165)
Requirement: Kill 1000 enemies with the survival knife
Ranking: 1 Star Rank = 30 times, 2 Star Rank = 100 times, 3 Star Rank = 300 times, 4 Star Rank = 1000 times
Extra Info: Leon’s default weapon; also used by Jake EX variants
Total Titles (069/195)
Combat Knife Expert — Campaign Title (070/165)
Requirement: Kill 1000 enemies with the combat knife
Ranking: 1 Star Rank = 30 times, 2 Star Rank = 100 times, 3 Star Rank = 300 times, 4 Star Rank = 1000 times
Extra Info: Chris’s default weapon
Total Titles (070/195)
Stun Rod Expert — Campaign Title (071/165)
Requirement: Kill 1000 enemies with the stun rod
Ranking: 1 Star Rank = 30 times, 2 Star Rank = 100 times, 3 Star Rank = 300 times, 4 Star Rank = 1000 times
Extra Info: Sherry’s default weapon
Total Titles (071/195)
Hand-To-Hand Expert — Campaign Title (072/165)
Requirement: Kill 1000 enemies with bare hands
Ranking: 1 Star Rank = 30 times, 2 Star Rank = 100 times, 3 Star Rank = 300 times, 4 Star Rank = 1000 times
Extra Info: Jake’s default combat style
Total Titles (072/195)
Gatling Gun Expert — Campaign Title (073/165)
Requirement: Kill 300 enemies with a gun turret
Ranking: 1 Star Rank = 10 times, 2 Star Rank = 30 times, 3 Star Rank = 100 times, 4 Star Rank = 300 times
Extra Info: Found in Chris and Jake campaign segments
Total Titles (073/195)
I Spy — Campaign Title (074/165)
Requirement: Kill 300 enemies with a camera gun turret
Ranking: 1 Star Rank = 10 times, 2 Star Rank = 30 times, 3 Star Rank = 100 times, 4 Star Rank = 300 times
Extra Info: Surveillance cameras in Jake Chapter 3
Total Titles (074/195)
ATV Gun Expert — Campaign Title (075/165)
Requirement: Kill 300 enemies with vehicle-mounted gun
Ranking: 1 Star Rank = 10 times, 2 Star Rank = 30 times, 3 Star Rank = 100 times, 4 Star Rank = 300 times
Extra Info: Military vehicle turret in Chris Chapter 3
Total Titles (075/195)
I Got Hand — Campaign Title (076/165)
Requirement: Kill 100 enemies with Piers’ mutated arm
Ranking: 1 Star Rank = 3 times, 2 Star Rank = 10 times, 3 Star Rank = 30 times, 4 Star Rank = 100 times
Extra Info: Only available in Chris Chapter 5 boss section; best farm via Napads
Total Titles (076/195)
Hand Grenade Expert — Campaign Title (077/165)
Requirement: Kill 1000 enemies with hand grenades
Ranking: 1 Star Rank = 30 times, 2 Star Rank = 100 times, 3 Star Rank = 300 times, 4 Star Rank = 1000 times
Extra Info: Common in Chris and Ada campaigns
Total Titles (077/195)
Incendiary Grenade Expert — Campaign Title (078/165)
Requirement: Kill 1000 enemies with incendiary grenades
Ranking: 1 Star Rank = 30 times, 2 Star Rank = 100 times, 3 Star Rank = 300 times, 4 Star Rank = 1000 times
Extra Info: Found in Leon and Ada campaigns
Total Titles (078/195)
Flash Grenade Expert — Campaign Title (079/165)
Requirement: Kill 100 enemies with flash grenades
Ranking: 1 Star Rank = 3 times, 2 Star Rank = 10 times, 3 Star Rank = 50 times, 4 Star Rank = 100 times
Extra Info: Best done on weak enemies like Mesets or bats
Total Titles (079/195)
Flash Grenade Master — Campaign Title (080/165)
Requirement: Blind 1000 enemies with flash grenades
Ranking: 1 Star Rank = 30 times, 2 Star Rank = 100 times, 3 Star Rank = 300 times, 4 Star Rank = 1000 times
Extra Info: Must blind enemies, not kill
Total Titles (080/195)
Demolitions Expert — Campaign Title (081/165)
Requirement: Kill 1000 enemies with environmental explosives
Ranking: 1 Star Rank = 30 times, 2 Star Rank = 100 times, 3 Star Rank = 300 times, 4 Star Rank = 1000 times
Extra Info: Includes barrels, canisters, extinguishers
Total Titles (081/195)
Pipe Bomb Expert — Campaign Title (082/165)
Requirement: Kill 1000 enemies with pipe bombs
Ranking: 1 Star Rank = 30 times, 2 Star Rank = 100 times, 3 Star Rank = 300 times, 4 Star Rank = 1000 times
Extra Info: Must die from explosion, not arrow impact
Total Titles (082/195)
Remote Bomb Expert — Campaign Title (083/165)
Requirement: Kill 1000 enemies with remote bombs
Ranking: 1 Star Rank = 30 times, 2 Star Rank = 100 times, 3 Star Rank = 300 times, 4 Star Rank = 1000 times
Extra Info: Available in Leon and Jake campaigns
Total Titles (083/195)
Manipulator — Campaign Title (084/165)
Requirement: Use enemy attacks to kill 300 enemies
Ranking: 1 Star Rank = 10 times, 2 Star Rank = 30 times, 3 Star Rank = 100 times, 4 Star Rank = 300 times
Extra Info: Indirect kills (enemy attacks, explosions, chaos)
Total Titles (084/195)
Need a Pick-Me-Up — Campaign Title (085/165)
Requirement: Consume 2000 health tablets
Ranking: 1 Star Rank = 100 times, 2 Star Rank = 300 times, 3 Star Rank = 1000 times, 4 Star Rank = 2000 times
Extra Info: Use herb tablets
Total Titles (085/195)
The Chemist — Campaign Title (086/165)
Requirement: Combine herbs 1000 times
Ranking: 1 Star Rank = 30 times, 2 Star Rank = 100 times, 3 Star Rank = 300 times, 4 Star Rank = 1000 times
Extra Info: Combine green/red herbs
Total Titles (086/195)
Need My Meds — Campaign Title (087/165)
Requirement: Use first aid spray 100 times
Ranking: 1 Star Rank = 3 times, 2 Star Rank = 10 times, 3 Star Rank = 30 times, 4 Star Rank = 100 times
Extra Info: Equip and use spray to heal
Total Titles (087/195)
Not an Acrobat — Campaign Title (088/165)
Requirement: Use zip-line 300 times
Ranking: 1 Star Rank = 10 times, 2 Star Rank = 30 times, 3 Star Rank = 100 times, 4 Star Rank = 300 times
Extra Info: Ada grappling hook segments
Total Titles (088/195)
Undercover — Campaign Title (089/165)
Requirement: Stay in cover for 100 minutes
Ranking: 1 Star Rank = 5 minutes, 2 Star Rank = 10 minutes, 3 Star Rank = 30 minutes, 4 Star Rank = 100 minutes
Extra Info: Time accumulates across gameplay
Total Titles (089/195)
Reloader — Campaign Title (090/165)
Requirement: Reload 5000 times
Ranking: 1 Star Rank = 500 times, 2 Star Rank = 1000 times, 3 Star Rank = 3000 times, 4 Star Rank = 5000 times
Extra Info: Cumulative across all modes
Total Titles (090/195)
A few more Titles
Zombie Hunter — Campaign Title (091/165)
Requirement: Kill 3000 zombies
Ranking: 1 Star Rank = 100 times, 2 Star Rank = 300 times, 3 Star Rank = 1000 times, 4 Star Rank = 3000 times
Extra Info: Zombies are fought in all of Leon’s campaign chapters and also in Ada Chapter 2 and Chapter 5
Total Titles (091/195)
Shrieker Hunter — Campaign Title (092/165)
Requirement: Kill 500 Shriekers
Ranking: 1 Star Rank = 20 times, 2 Star Rank = 50 times, 3 Star Rank = 200 times, 4 Star Rank = 500 times
Extra Info: A Shrieker is a zombie that inflates its chest and screams, damaging and alerting other zombies
Locations: Leon Chapter 1 (Wine Area), Leon Chapter 2 (Crypt Maze, Cathedral Front, Lab Room 102), Leon Chapter 3 (Cavern), The Mercenaries (Mining the Depths)
Total Titles (092/195)
Whopper Hunter — Campaign Title (093/165)
Requirement: Kill 500 Whoppers
Ranking: 1 Star Rank = 20 times, 2 Star Rank = 50 times, 3 Star Rank = 200 times, 4 Star Rank = 500 times
Extra Info: Whoppers are large bloated zombies in both big and small variants
Locations: Leon Chapter 1 (Gun Shop), Leon Chapter 3 (Cavern), Ada Chapter 5 (Rooftop), The Mercenaries (Urban Chaos, The Catacombs)
Total Titles (093/195)
Zombie Dog Hunter — Campaign Title (094/165)
Requirement: Kill 500 zombie dogs
Ranking: 1 Star Rank = 20 times, 2 Star Rank = 50 times, 3 Star Rank = 200 times, 4 Star Rank = 500 times
Extra Info: Zombie dogs are C-virus infected dogs
Locations: Leon Chapter 1 (Tunnels), Leon Chapter 2 (Crypt Maze, Lab Cage), The Mercenaries (Urban Chaos, Mining the Depths)
Total Titles (094/195)
Bloodshot Hunter — Campaign Title (095/165)
Requirement: Kill 500 Bloodshots
Ranking: 1 Star Rank = 20 times, 2 Star Rank = 50 times, 3 Star Rank = 200 times, 4 Star Rank = 500 times
Extra Info: Bloodshots are heavily mutated red zombies with exposed muscle tissue
Locations: Leon Chapter 1 (Gun Shop), Leon Chapter 2 (Cathedral Front), Leon Chapter 3 (Catacombs, Cavern), The Mercenaries (Urban Chaos, Mining the Depths, Catacombs)
Total Titles (095/195)
J’avo Hunter — Campaign Title (096/165)
Requirement: Kill 3000 J’avo
Ranking: 1 Star Rank = 100 times, 2 Star Rank = 300 times, 3 Star Rank = 1000 times, 4 Star Rank = 3000 times
Extra Info: J’avo appear throughout Chris, Jake, and Ada campaigns across multiple chapters
Locations: Machine Pistol, Sniper Rifle, Heavy Machine Gun, Rocket Launcher, Stun Rod, Machete, Knife, Wrist Blade, Parachute variants across campaigns
Total Titles (096/195)
Cocoon Hunter — Campaign Title (097/165)
Requirement: Destroy 300 Chrysalids
Ranking: 1 Star Rank = 10 times, 2 Star Rank = 30 times, 3 Star Rank = 100 times, 4 Star Rank = 300 times
Extra Info: Chrysalids form after J’avo mutation or death and are weak to electricity
Locations: Chris Chapter 3–4, Jake Chapter 2–4, Mercenaries Liquid Fire
Total Titles (097/195)
Glava-Sluz Hunter — Campaign Title (098/165)
Requirement: Kill 1000 Glava-Sluzes
Ranking: 1 Star Rank = 30 times, 2 Star Rank = 100 times, 3 Star Rank = 300 times, 4 Star Rank = 1000 times
Extra Info: Head mutation that fires sticky webbing
Locations: Chris Chapter 3, Jake Chapter 3, Ada Chapter 1
Total Titles (098/195)
Glava-Smech Hunter — Campaign Title (099/165)
Requirement: Kill 1000 Glava-Smeches
Ranking: 1 Star Rank = 30 times, 2 Star Rank = 100 times, 3 Star Rank = 300 times, 4 Star Rank = 1000 times
Extra Info: Pincher head mutation with orange core
Locations: Chris Chapter 4–5, Ada Chapter 1, Mercenaries stages
Total Titles (099/195)
Glava-Begunats Hunter — Campaign Title (100/165)
Requirement: Kill 1000 Glava-Begunatses
Ranking: 1 Star Rank = 30 times, 2 Star Rank = 100 times, 3 Star Rank = 300 times, 4 Star Rank = 1000 times
Extra Info: Berserk multi-head mutation that attacks aggressively
Locations: Chris Chapter 4, Jake Chapter 2, Ada Chapter 3, Mercenaries
Total Titles (100/195)
Glava-Dim Hunter — Campaign Title (101/165)
Requirement: Kill 1000 Glava-Dims
Ranking: 1 Star Rank = 30 times, 2 Star Rank = 100 times, 3 Star Rank = 300 times, 4 Star Rank = 1000 times
Extra Info: Glava-Dim is a J'avo head mutation where the head mutates into an insect head with stingers. This J'avo can shoot out poisonous gas.
Locations: Jake Chapter 3 (Living Quarters), Jake Chapter 4 (Stilt Housing Area), Ada Chapter 3 (Stilt Housing Area), The Mercenaries (Rail Yard, Liquid Fire)
Total Titles (101/195)
Ruka-Srp Hunter — Campaign Title (102/165)
Requirement: Kill 1000 Ruka-Srps
Ranking: 1 Star Rank = 30 times, 2 Star Rank = 100 times, 3 Star Rank = 300 times, 4 Star Rank = 1000 times
Extra Info: Ruka-Srp is a J'avo arm mutation where an arm (or both) mutate into a blade arm.
Locations: Chris Chapter 1 (Rooftops), Chris Chapter 3 (Poisawan Entrance, Courtyard), Chris Chapter 4 (Bridge), Chris Chapter 5 (Underwater Facility, Pressurization Chamber), Jake Chapter 3 (Living Quarters), Jake Chapter 4 (Stilt Housing Area), Ada Chapter 3 (Poisawan Market, Stilt Housing Area), The Mercenaries (Steel Beast, Requiem for War, Liquid Fire)
Total Titles (102/195)
Ruka-Khvatanje Hunter — Campaign Title (103/165)
Requirement: Kill 1000 Ruka-Khvatanjes
Ranking: 1 Star Rank = 30 times, 2 Star Rank = 100 times, 3 Star Rank = 300 times, 4 Star Rank = 1000 times
Extra Info: Ruka-Khvatanje is a J'avo arm mutation where an arm mutates into an insect-like arm that can stretch.
Locations: Chris Chapter 2 (City in Eastern Europe [starting]), Chris Chapter 4 (Hangar), Jake Chapter 4 (Market), Ada Chapter 1 (Submarine Reactor), Ada Chapter 3 (Poisawan Market), The Mercenaries (Rail Yard, High Seas Fortress, Requiem for War)
Total Titles (103/195)
Ruka-Bedem Hunter — Campaign Title (104/165)
Requirement: Kill 1000 Ruka-Bedems
Ranking: 1 Star Rank = 30 times, 2 Star Rank = 100 times, 3 Star Rank = 300 times, 4 Star Rank = 1000 times
Extra Info: Ruka-Bedem is a J'avo arm mutation where an arm mutates into an armored shield.
Locations: Chris Chapter 2 (City in Eastern Europe [starting]), Chris Chapter 4 (Hangar), Chris Chapter 5 (Underwater Facility, Pressurization Chamber), The Mercenaries (Steel Beast, Rail Yard, High Seas Fortress)
Total Titles (104/195)
Noga-Trchanje Hunter — Campaign Title (105/165)
Requirement: Kill 1000 Noga-Trchanjes
Ranking: 1 Star Rank = 30 times, 2 Star Rank = 100 times, 3 Star Rank = 300 times, 4 Star Rank = 1000 times
Extra Info: Noga-Trchanje is a J'avo leg mutation where the legs mutate into spider legs.
Locations: Chris Chapter 1 (Tenement Building), Chris Chapter 4 (Bridge), Jake Chapter 3 (Living Quarters), The Mercenaries (Rail Yard, High Seas Fortress)
Total Titles (105/195)
Noga-Let Hunter — Campaign Title (106/165)
Requirement: Kill 1000 Noga-Lets
Ranking: 1 Star Rank = 30 times, 2 Star Rank = 100 times, 3 Star Rank = 300 times, 4 Star Rank = 1000 times
Extra Info: Noga-Let is a J'avo leg mutation where the legs mutate into wings that can fly while the body hangs below.
Locations: Chris Chapter 1 (Rooftops), Chris Chapter 5 (Lifts), Jake Chapter 1 (Mountain Trail), Jake Chapter 4 (Stilt Housing Area), Jake Chapter 5 (Lifts), Ada Chapter 3 (Stilt Housing Area), The Mercenaries (Steel Beast, High Seas Fortress, Requiem for War)
Total Titles (106/195)
Noga-Skakanje Hunter — Campaign Title (107/165)
Requirement: Kill 1000 Noga-Skakanjes
Ranking: 1 Star Rank = 30 times, 2 Star Rank = 100 times, 3 Star Rank = 300 times, 4 Star Rank = 1000 times
Extra Info: Noga-Skakanje is a J'avo leg mutation where the legs stretch into grasshopper-like legs.
Locations: Chris Chapter 3 (Courtyard), Jake Chapter 4 (Courtyard), The Mercenaries (Steel Beast, High Seas Fortress, Requiem for War)
Total Titles (107/195)
Requirement: Kill 3000 zombies
Ranking: 1 Star Rank = 100 times, 2 Star Rank = 300 times, 3 Star Rank = 1000 times, 4 Star Rank = 3000 times
Extra Info: Zombies are fought in all of Leon’s campaign chapters and also in Ada Chapter 2 and Chapter 5
Total Titles (091/195)
Shrieker Hunter — Campaign Title (092/165)
Requirement: Kill 500 Shriekers
Ranking: 1 Star Rank = 20 times, 2 Star Rank = 50 times, 3 Star Rank = 200 times, 4 Star Rank = 500 times
Extra Info: A Shrieker is a zombie that inflates its chest and screams, damaging and alerting other zombies
Locations: Leon Chapter 1 (Wine Area), Leon Chapter 2 (Crypt Maze, Cathedral Front, Lab Room 102), Leon Chapter 3 (Cavern), The Mercenaries (Mining the Depths)
Total Titles (092/195)
Whopper Hunter — Campaign Title (093/165)
Requirement: Kill 500 Whoppers
Ranking: 1 Star Rank = 20 times, 2 Star Rank = 50 times, 3 Star Rank = 200 times, 4 Star Rank = 500 times
Extra Info: Whoppers are large bloated zombies in both big and small variants
Locations: Leon Chapter 1 (Gun Shop), Leon Chapter 3 (Cavern), Ada Chapter 5 (Rooftop), The Mercenaries (Urban Chaos, The Catacombs)
Total Titles (093/195)
Zombie Dog Hunter — Campaign Title (094/165)
Requirement: Kill 500 zombie dogs
Ranking: 1 Star Rank = 20 times, 2 Star Rank = 50 times, 3 Star Rank = 200 times, 4 Star Rank = 500 times
Extra Info: Zombie dogs are C-virus infected dogs
Locations: Leon Chapter 1 (Tunnels), Leon Chapter 2 (Crypt Maze, Lab Cage), The Mercenaries (Urban Chaos, Mining the Depths)
Total Titles (094/195)
Bloodshot Hunter — Campaign Title (095/165)
Requirement: Kill 500 Bloodshots
Ranking: 1 Star Rank = 20 times, 2 Star Rank = 50 times, 3 Star Rank = 200 times, 4 Star Rank = 500 times
Extra Info: Bloodshots are heavily mutated red zombies with exposed muscle tissue
Locations: Leon Chapter 1 (Gun Shop), Leon Chapter 2 (Cathedral Front), Leon Chapter 3 (Catacombs, Cavern), The Mercenaries (Urban Chaos, Mining the Depths, Catacombs)
Total Titles (095/195)
J’avo Hunter — Campaign Title (096/165)
Requirement: Kill 3000 J’avo
Ranking: 1 Star Rank = 100 times, 2 Star Rank = 300 times, 3 Star Rank = 1000 times, 4 Star Rank = 3000 times
Extra Info: J’avo appear throughout Chris, Jake, and Ada campaigns across multiple chapters
Locations: Machine Pistol, Sniper Rifle, Heavy Machine Gun, Rocket Launcher, Stun Rod, Machete, Knife, Wrist Blade, Parachute variants across campaigns
Total Titles (096/195)
Cocoon Hunter — Campaign Title (097/165)
Requirement: Destroy 300 Chrysalids
Ranking: 1 Star Rank = 10 times, 2 Star Rank = 30 times, 3 Star Rank = 100 times, 4 Star Rank = 300 times
Extra Info: Chrysalids form after J’avo mutation or death and are weak to electricity
Locations: Chris Chapter 3–4, Jake Chapter 2–4, Mercenaries Liquid Fire
Total Titles (097/195)
Glava-Sluz Hunter — Campaign Title (098/165)
Requirement: Kill 1000 Glava-Sluzes
Ranking: 1 Star Rank = 30 times, 2 Star Rank = 100 times, 3 Star Rank = 300 times, 4 Star Rank = 1000 times
Extra Info: Head mutation that fires sticky webbing
Locations: Chris Chapter 3, Jake Chapter 3, Ada Chapter 1
Total Titles (098/195)
Glava-Smech Hunter — Campaign Title (099/165)
Requirement: Kill 1000 Glava-Smeches
Ranking: 1 Star Rank = 30 times, 2 Star Rank = 100 times, 3 Star Rank = 300 times, 4 Star Rank = 1000 times
Extra Info: Pincher head mutation with orange core
Locations: Chris Chapter 4–5, Ada Chapter 1, Mercenaries stages
Total Titles (099/195)
Glava-Begunats Hunter — Campaign Title (100/165)
Requirement: Kill 1000 Glava-Begunatses
Ranking: 1 Star Rank = 30 times, 2 Star Rank = 100 times, 3 Star Rank = 300 times, 4 Star Rank = 1000 times
Extra Info: Berserk multi-head mutation that attacks aggressively
Locations: Chris Chapter 4, Jake Chapter 2, Ada Chapter 3, Mercenaries
Total Titles (100/195)
Glava-Dim Hunter — Campaign Title (101/165)
Requirement: Kill 1000 Glava-Dims
Ranking: 1 Star Rank = 30 times, 2 Star Rank = 100 times, 3 Star Rank = 300 times, 4 Star Rank = 1000 times
Extra Info: Glava-Dim is a J'avo head mutation where the head mutates into an insect head with stingers. This J'avo can shoot out poisonous gas.
Locations: Jake Chapter 3 (Living Quarters), Jake Chapter 4 (Stilt Housing Area), Ada Chapter 3 (Stilt Housing Area), The Mercenaries (Rail Yard, Liquid Fire)
Total Titles (101/195)
Ruka-Srp Hunter — Campaign Title (102/165)
Requirement: Kill 1000 Ruka-Srps
Ranking: 1 Star Rank = 30 times, 2 Star Rank = 100 times, 3 Star Rank = 300 times, 4 Star Rank = 1000 times
Extra Info: Ruka-Srp is a J'avo arm mutation where an arm (or both) mutate into a blade arm.
Locations: Chris Chapter 1 (Rooftops), Chris Chapter 3 (Poisawan Entrance, Courtyard), Chris Chapter 4 (Bridge), Chris Chapter 5 (Underwater Facility, Pressurization Chamber), Jake Chapter 3 (Living Quarters), Jake Chapter 4 (Stilt Housing Area), Ada Chapter 3 (Poisawan Market, Stilt Housing Area), The Mercenaries (Steel Beast, Requiem for War, Liquid Fire)
Total Titles (102/195)
Ruka-Khvatanje Hunter — Campaign Title (103/165)
Requirement: Kill 1000 Ruka-Khvatanjes
Ranking: 1 Star Rank = 30 times, 2 Star Rank = 100 times, 3 Star Rank = 300 times, 4 Star Rank = 1000 times
Extra Info: Ruka-Khvatanje is a J'avo arm mutation where an arm mutates into an insect-like arm that can stretch.
Locations: Chris Chapter 2 (City in Eastern Europe [starting]), Chris Chapter 4 (Hangar), Jake Chapter 4 (Market), Ada Chapter 1 (Submarine Reactor), Ada Chapter 3 (Poisawan Market), The Mercenaries (Rail Yard, High Seas Fortress, Requiem for War)
Total Titles (103/195)
Ruka-Bedem Hunter — Campaign Title (104/165)
Requirement: Kill 1000 Ruka-Bedems
Ranking: 1 Star Rank = 30 times, 2 Star Rank = 100 times, 3 Star Rank = 300 times, 4 Star Rank = 1000 times
Extra Info: Ruka-Bedem is a J'avo arm mutation where an arm mutates into an armored shield.
Locations: Chris Chapter 2 (City in Eastern Europe [starting]), Chris Chapter 4 (Hangar), Chris Chapter 5 (Underwater Facility, Pressurization Chamber), The Mercenaries (Steel Beast, Rail Yard, High Seas Fortress)
Total Titles (104/195)
Noga-Trchanje Hunter — Campaign Title (105/165)
Requirement: Kill 1000 Noga-Trchanjes
Ranking: 1 Star Rank = 30 times, 2 Star Rank = 100 times, 3 Star Rank = 300 times, 4 Star Rank = 1000 times
Extra Info: Noga-Trchanje is a J'avo leg mutation where the legs mutate into spider legs.
Locations: Chris Chapter 1 (Tenement Building), Chris Chapter 4 (Bridge), Jake Chapter 3 (Living Quarters), The Mercenaries (Rail Yard, High Seas Fortress)
Total Titles (105/195)
Noga-Let Hunter — Campaign Title (106/165)
Requirement: Kill 1000 Noga-Lets
Ranking: 1 Star Rank = 30 times, 2 Star Rank = 100 times, 3 Star Rank = 300 times, 4 Star Rank = 1000 times
Extra Info: Noga-Let is a J'avo leg mutation where the legs mutate into wings that can fly while the body hangs below.
Locations: Chris Chapter 1 (Rooftops), Chris Chapter 5 (Lifts), Jake Chapter 1 (Mountain Trail), Jake Chapter 4 (Stilt Housing Area), Jake Chapter 5 (Lifts), Ada Chapter 3 (Stilt Housing Area), The Mercenaries (Steel Beast, High Seas Fortress, Requiem for War)
Total Titles (106/195)
Noga-Skakanje Hunter — Campaign Title (107/165)
Requirement: Kill 1000 Noga-Skakanjes
Ranking: 1 Star Rank = 30 times, 2 Star Rank = 100 times, 3 Star Rank = 300 times, 4 Star Rank = 1000 times
Extra Info: Noga-Skakanje is a J'avo leg mutation where the legs stretch into grasshopper-like legs.
Locations: Chris Chapter 3 (Courtyard), Jake Chapter 4 (Courtyard), The Mercenaries (Steel Beast, High Seas Fortress, Requiem for War)
Total Titles (107/195)
Titles
Noga-Oklops Hunter — Campaign Title (108/165)
Requirement: Kill 1000 Noga-Oklops
Ranking: 1 Star Rank = 30 times, 2 Star Rank = 100 times, 3 Star Rank = 300 times, 4 Star Rank = 1000 times
Extra Info: Noga-Oklop is a J'avo leg mutation where the legs form armored shells.
Locations: Chris Chapter 2 (Bridge), The Mercenaries (Steel Beast, Rail Yard, High Seas Fortress, Requiem for War)
Total Titles (108/195)
Telo-Eksplozija Hunter — Campaign Title (109/165)
Requirement: Kill 1000 Telo-Eksplozija
Ranking: 1 Star Rank = 30 times, 2 Star Rank = 100 times, 3 Star Rank = 300 times, 4 Star Rank = 1000 times
Extra Info: Body mutation that becomes a cocoon and explodes.
Locations: Chris Chapter 4 (Hangar), Chris Chapter 5 (Underwater Facility, Pressurization Chamber), The Mercenaries (Steel Beast, Rail Yard, High Seas Fortress, Requiem for War, Liquid Fire)
Total Titles (109/195)
Telo-Krljusht Hunter — Campaign Title (110/165)
Requirement: Kill 1000 Telo-Krljushts
Ranking: 1 Star Rank = 30 times, 2 Star Rank = 100 times, 3 Star Rank = 300 times, 4 Star Rank = 1000 times
Extra Info: Body mutation forms armored shell around itself.
Locations: Jake Chapter 1 (Mountain Trail), Jake Chapter 2 (Snowy Mountain Trail)
Total Titles (110/195)
Telo-Magla Hunter — Campaign Title (111/165)
Requirement: Kill 1000 Telo-Maglas
Ranking: 1 Star Rank = 30 times, 2 Star Rank = 100 times, 3 Star Rank = 300 times, 4 Star Rank = 1000 times
Extra Info: Chest opens and sprays gas with wing-like appendages.
Locations: Chris Chapter 2 (City in Eastern Europe, Bridge), Chris Chapter 5 (Lifts), Jake Chapter 5 (Lifts), Ada Chapter 3 (Poisawan Market), Ada Chapter 4 (Forward Hangar), The Mercenaries (Rail Yard)
Total Titles (111/195)
Strelats Hunter — Campaign Title (112/165)
Requirement: Kill 500 Strelatses
Ranking: 1 Star Rank = 20 times, 2 Star Rank = 50 times, 3 Star Rank = 200 times, 4 Star Rank = 500 times
Extra Info: Strelats is a J'avo Chrysalid mutation that is reptilian.
Locations: Chris Chapter 2 (City Hall), Jake Chapter 3 (Living Quarters), Jake Chapter 4 (Market), Ada Chapter 3 (Poisawan Market), The Mercenaries (Mining the Depths, Rail Yard, The Catacombs)
Total Titles (112/195)
Mesets Hunter — Campaign Title (113/165)
Requirement: Kill 300 Mesetses
Ranking: 1 Star Rank = 10 times, 2 Star Rank = 30 times, 3 Star Rank = 100 times, 4 Star Rank = 300 times
Extra Info: Mesets is a J'avo Chrysalid mutation that looks like a bird.
Locations: Jake Chapter 2 (Snowy Mountain Trail), Chris Chapter 4 (Hangar - very rare), The Mercenaries (Liquid Fire)
Total Titles (113/195)
Napad Hunter — Campaign Title (114/165)
Requirement: Kill 500 Napads
Ranking: 1 Star Rank = 20 times, 2 Star Rank = 50 times, 3 Star Rank = 200 times, 4 Star Rank = 500 times
Extra Info: Napad is a J'avo Chrysalid mutation with an armored shell.
Locations: Chris Chapter 2 (City Hall), Chris Chapter 3 (Stilt Housing Area), Chris Chapter 4 (Stilt Housing Area), Chris Chapter 5 (Pressurization Chamber), Ada Chapter 2 (Lab), The Mercenaries (Urban Chaos, Steel Beast, Liquid Fire)
Total Titles (114/195)
Gnezdo Hunter — Campaign Title (115/165)
Requirement: Kill 300 Gnezdos
Ranking: 1 Star Rank = 10 times, 2 Star Rank = 30 times, 3 Star Rank = 100 times, 4 Star Rank = 300 times
Extra Info: Gnezdo is a J'avo Chrysalid mutation composed of flying insects.
Locations: Chris Chapter 3 (Poisawan Inner Area), Chris Chapter 4 (Bridge), Chris Chapter 5 (Pressurization Chamber), Ada Chapter 1 (Submarine Torpedo Room), Ada Chapter 4 (Bridge), The Mercenaries (Steel Beast, High Seas Fortress, Requiem for War)
Total Titles (115/195)
Lepotitsa Hunter — Campaign Title (116/165)
Requirement: Kill 200 Lepotitsas
Ranking: 1 Star Rank = 5 times, 2 Star Rank = 20 times, 3 Star Rank = 50 times, 4 Star Rank = 200 times
Extra Info: Found in Leon Chapter 2 Cathedral and Leon Chapter 4 Airplane. Also Mercenaries Catacombs boss.
Locations: Leon Chapter 2 (Cathedral Lobby), Leon Chapter 4 (Airplane Cockpit), The Mercenaries (The Catacombs)
Total Titles (116/195)
Brzak Hunter — Campaign Title (117/165)
Requirement: Kill 50 Brzaks
Ranking: 1 Star Rank = 2 times, 2 Star Rank = 5 times, 3 Star Rank = 20 times, 4 Star Rank = 50 times
Extra Info: Fish boss fought in Leon Chapter 3 water area of the Catacombs.
Total Titles (117/195)
Ubistvo Hunter — Campaign Title (118/165)
Requirement: Kill 200 Ubistvos
Ranking: 1 Star Rank = 5 times, 2 Star Rank = 20 times, 3 Star Rank = 50 times, 4 Star Rank = 200 times
Extra Info: Chainsaw arm enemy found in Jake Chapter 4 and Ada Chapter 3, also Mercenaries Rail Yard boss.
Total Titles (118/195)
Iluzija Hunter — Campaign Title (119/165)
Requirement: Kill 50 Iluzijas
Ranking: 1 Star Rank = 2 times, 2 Star Rank = 5 times, 3 Star Rank = 20 times, 4 Star Rank = 50 times
Extra Info: Snake boss fought in Chris Chapter 3 after helicopter battle.
Total Titles (119/195)
Deborah Hunter — Campaign Title (120/165)
Requirement: Kill 100 Deborahs
Ranking: 1 Star Rank = 3 times, 2 Star Rank = 10 times, 3 Star Rank = 30 times, 4 Star Rank = 100 times
Extra Info: Mutated Deborah fought in Leon Chapter 2 Primitive Altar area.
Total Titles (120/195)
Rasklapanje Hunter — Campaign Title (121/165)
Requirement: Kill 200 Rasklapanjes
Ranking: 1 Star Rank = 5 times, 2 Star Rank = 20 times, 3 Star Rank = 50 times, 4 Star Rank = 200 times
Extra Info: B.O.W. with separable body parts that attack independently.
Locations: Chris Chapter 4 (Forward Hangar), Jake Chapter 5 (Underwater Facility), Leon Chapter 4 (Market), Ada Chapter 4 (Forward Hangar), The Mercenaries (Liquid Fire)
Total Titles (121/195)
Ogroman Hunter — Campaign Title (122/165)
Requirement: Kill 200 Ogromans
Ranking: 1 Star Rank = 5 times, 2 Star Rank = 20 times, 3 Star Rank = 50 times, 4 Star Rank = 200 times
Extra Info: Giant B.O.W. with a red growth on its back.
Locations: Chris Chapter 2 (In Front of City Hall), Chris Chapter 4 (Airspace above Aircraft Carrier), Jake Chapter 2 (In Front of City Hall), The Mercenaries (Requiem for War)
Total Titles (122/195)
Ustanak Hunter — Campaign Title (123/165)
Requirement: Kill 200 Ustanaks
Ranking: 1 Star Rank = 5 times, 2 Star Rank = 20 times, 3 Star Rank = 50 times, 4 Star Rank = 200 times
Extra Info: Major boss encountered in Jake and Leon campaigns across multiple chapters.
Total Titles (123/195)
Oko Hunter — Campaign Title (124/165)
Requirement: Kill 300 Okos
Ranking: 1 Star Rank = 10 times, 2 Star Rank = 30 times, 3 Star Rank = 100 times, 4 Star Rank = 300 times
Extra Info: Bug sentries used by Ustanak in Jake Chapter 2 snowy cave section.
Total Titles (124/195)
Derek Hunter — Campaign Title (125/165)
Requirement: Kill 200 Dereks
Ranking: 1 Star Rank = 5 times, 2 Star Rank = 20 times, 3 Star Rank = 50 times, 4 Star Rank = 200 times
Extra Info: Mutated Derek appears multiple times in Leon Chapter 5.
Total Titles (125/195)
Carla Spore Hunter — Campaign Title (126/165)
Requirement: Kill 300 Carla Spores
Ranking: 1 Star Rank = 10 times, 2 Star Rank = 30 times, 3 Star Rank = 100 times, 4 Star Rank = 300 times
Extra Info: Found in Ada Chapter 4 aircraft carrier; stun and melee to kill.
Total Titles (126/195)
Haos Hunter — Campaign Title (127/165)
Requirement: Kill 100 Haoses
Ranking: 1 Star Rank = 3 times, 2 Star Rank = 10 times, 3 Star Rank = 30 times, 4 Star Rank = 100 times
Extra Info: Final boss of Chris campaign Chapter 5.
Total Titles (127/195)
Road Rage — Campaign Title (128/165)
Requirement: Kill 300 enemies using vehicles
Ranking: 1 Star Rank = 10 times, 2 Star Rank = 30 times, 3 Star Rank = 100 times, 4 Star Rank = 300 times
Extra Info: Best done on Jake Chapter 2 snowmobile section.
Total Titles (128/195)
Open Season — Campaign Title (129/165)
Requirement: Kill 300 animals
Ranking: 1 Star Rank = 10 times, 2 Star Rank = 30 times, 3 Star Rank = 100 times, 4 Star Rank = 300 times
Extra Info: Includes rats, crows, spiders, roosters, snakes, and bats across various chapters.
Total Titles (129/195)
Requirement: Kill 1000 Noga-Oklops
Ranking: 1 Star Rank = 30 times, 2 Star Rank = 100 times, 3 Star Rank = 300 times, 4 Star Rank = 1000 times
Extra Info: Noga-Oklop is a J'avo leg mutation where the legs form armored shells.
Locations: Chris Chapter 2 (Bridge), The Mercenaries (Steel Beast, Rail Yard, High Seas Fortress, Requiem for War)
Total Titles (108/195)
Telo-Eksplozija Hunter — Campaign Title (109/165)
Requirement: Kill 1000 Telo-Eksplozija
Ranking: 1 Star Rank = 30 times, 2 Star Rank = 100 times, 3 Star Rank = 300 times, 4 Star Rank = 1000 times
Extra Info: Body mutation that becomes a cocoon and explodes.
Locations: Chris Chapter 4 (Hangar), Chris Chapter 5 (Underwater Facility, Pressurization Chamber), The Mercenaries (Steel Beast, Rail Yard, High Seas Fortress, Requiem for War, Liquid Fire)
Total Titles (109/195)
Telo-Krljusht Hunter — Campaign Title (110/165)
Requirement: Kill 1000 Telo-Krljushts
Ranking: 1 Star Rank = 30 times, 2 Star Rank = 100 times, 3 Star Rank = 300 times, 4 Star Rank = 1000 times
Extra Info: Body mutation forms armored shell around itself.
Locations: Jake Chapter 1 (Mountain Trail), Jake Chapter 2 (Snowy Mountain Trail)
Total Titles (110/195)
Telo-Magla Hunter — Campaign Title (111/165)
Requirement: Kill 1000 Telo-Maglas
Ranking: 1 Star Rank = 30 times, 2 Star Rank = 100 times, 3 Star Rank = 300 times, 4 Star Rank = 1000 times
Extra Info: Chest opens and sprays gas with wing-like appendages.
Locations: Chris Chapter 2 (City in Eastern Europe, Bridge), Chris Chapter 5 (Lifts), Jake Chapter 5 (Lifts), Ada Chapter 3 (Poisawan Market), Ada Chapter 4 (Forward Hangar), The Mercenaries (Rail Yard)
Total Titles (111/195)
Strelats Hunter — Campaign Title (112/165)
Requirement: Kill 500 Strelatses
Ranking: 1 Star Rank = 20 times, 2 Star Rank = 50 times, 3 Star Rank = 200 times, 4 Star Rank = 500 times
Extra Info: Strelats is a J'avo Chrysalid mutation that is reptilian.
Locations: Chris Chapter 2 (City Hall), Jake Chapter 3 (Living Quarters), Jake Chapter 4 (Market), Ada Chapter 3 (Poisawan Market), The Mercenaries (Mining the Depths, Rail Yard, The Catacombs)
Total Titles (112/195)
Mesets Hunter — Campaign Title (113/165)
Requirement: Kill 300 Mesetses
Ranking: 1 Star Rank = 10 times, 2 Star Rank = 30 times, 3 Star Rank = 100 times, 4 Star Rank = 300 times
Extra Info: Mesets is a J'avo Chrysalid mutation that looks like a bird.
Locations: Jake Chapter 2 (Snowy Mountain Trail), Chris Chapter 4 (Hangar - very rare), The Mercenaries (Liquid Fire)
Total Titles (113/195)
Napad Hunter — Campaign Title (114/165)
Requirement: Kill 500 Napads
Ranking: 1 Star Rank = 20 times, 2 Star Rank = 50 times, 3 Star Rank = 200 times, 4 Star Rank = 500 times
Extra Info: Napad is a J'avo Chrysalid mutation with an armored shell.
Locations: Chris Chapter 2 (City Hall), Chris Chapter 3 (Stilt Housing Area), Chris Chapter 4 (Stilt Housing Area), Chris Chapter 5 (Pressurization Chamber), Ada Chapter 2 (Lab), The Mercenaries (Urban Chaos, Steel Beast, Liquid Fire)
Total Titles (114/195)
Gnezdo Hunter — Campaign Title (115/165)
Requirement: Kill 300 Gnezdos
Ranking: 1 Star Rank = 10 times, 2 Star Rank = 30 times, 3 Star Rank = 100 times, 4 Star Rank = 300 times
Extra Info: Gnezdo is a J'avo Chrysalid mutation composed of flying insects.
Locations: Chris Chapter 3 (Poisawan Inner Area), Chris Chapter 4 (Bridge), Chris Chapter 5 (Pressurization Chamber), Ada Chapter 1 (Submarine Torpedo Room), Ada Chapter 4 (Bridge), The Mercenaries (Steel Beast, High Seas Fortress, Requiem for War)
Total Titles (115/195)
Lepotitsa Hunter — Campaign Title (116/165)
Requirement: Kill 200 Lepotitsas
Ranking: 1 Star Rank = 5 times, 2 Star Rank = 20 times, 3 Star Rank = 50 times, 4 Star Rank = 200 times
Extra Info: Found in Leon Chapter 2 Cathedral and Leon Chapter 4 Airplane. Also Mercenaries Catacombs boss.
Locations: Leon Chapter 2 (Cathedral Lobby), Leon Chapter 4 (Airplane Cockpit), The Mercenaries (The Catacombs)
Total Titles (116/195)
Brzak Hunter — Campaign Title (117/165)
Requirement: Kill 50 Brzaks
Ranking: 1 Star Rank = 2 times, 2 Star Rank = 5 times, 3 Star Rank = 20 times, 4 Star Rank = 50 times
Extra Info: Fish boss fought in Leon Chapter 3 water area of the Catacombs.
Total Titles (117/195)
Ubistvo Hunter — Campaign Title (118/165)
Requirement: Kill 200 Ubistvos
Ranking: 1 Star Rank = 5 times, 2 Star Rank = 20 times, 3 Star Rank = 50 times, 4 Star Rank = 200 times
Extra Info: Chainsaw arm enemy found in Jake Chapter 4 and Ada Chapter 3, also Mercenaries Rail Yard boss.
Total Titles (118/195)
Iluzija Hunter — Campaign Title (119/165)
Requirement: Kill 50 Iluzijas
Ranking: 1 Star Rank = 2 times, 2 Star Rank = 5 times, 3 Star Rank = 20 times, 4 Star Rank = 50 times
Extra Info: Snake boss fought in Chris Chapter 3 after helicopter battle.
Total Titles (119/195)
Deborah Hunter — Campaign Title (120/165)
Requirement: Kill 100 Deborahs
Ranking: 1 Star Rank = 3 times, 2 Star Rank = 10 times, 3 Star Rank = 30 times, 4 Star Rank = 100 times
Extra Info: Mutated Deborah fought in Leon Chapter 2 Primitive Altar area.
Total Titles (120/195)
Rasklapanje Hunter — Campaign Title (121/165)
Requirement: Kill 200 Rasklapanjes
Ranking: 1 Star Rank = 5 times, 2 Star Rank = 20 times, 3 Star Rank = 50 times, 4 Star Rank = 200 times
Extra Info: B.O.W. with separable body parts that attack independently.
Locations: Chris Chapter 4 (Forward Hangar), Jake Chapter 5 (Underwater Facility), Leon Chapter 4 (Market), Ada Chapter 4 (Forward Hangar), The Mercenaries (Liquid Fire)
Total Titles (121/195)
Ogroman Hunter — Campaign Title (122/165)
Requirement: Kill 200 Ogromans
Ranking: 1 Star Rank = 5 times, 2 Star Rank = 20 times, 3 Star Rank = 50 times, 4 Star Rank = 200 times
Extra Info: Giant B.O.W. with a red growth on its back.
Locations: Chris Chapter 2 (In Front of City Hall), Chris Chapter 4 (Airspace above Aircraft Carrier), Jake Chapter 2 (In Front of City Hall), The Mercenaries (Requiem for War)
Total Titles (122/195)
Ustanak Hunter — Campaign Title (123/165)
Requirement: Kill 200 Ustanaks
Ranking: 1 Star Rank = 5 times, 2 Star Rank = 20 times, 3 Star Rank = 50 times, 4 Star Rank = 200 times
Extra Info: Major boss encountered in Jake and Leon campaigns across multiple chapters.
Total Titles (123/195)
Oko Hunter — Campaign Title (124/165)
Requirement: Kill 300 Okos
Ranking: 1 Star Rank = 10 times, 2 Star Rank = 30 times, 3 Star Rank = 100 times, 4 Star Rank = 300 times
Extra Info: Bug sentries used by Ustanak in Jake Chapter 2 snowy cave section.
Total Titles (124/195)
Derek Hunter — Campaign Title (125/165)
Requirement: Kill 200 Dereks
Ranking: 1 Star Rank = 5 times, 2 Star Rank = 20 times, 3 Star Rank = 50 times, 4 Star Rank = 200 times
Extra Info: Mutated Derek appears multiple times in Leon Chapter 5.
Total Titles (125/195)
Carla Spore Hunter — Campaign Title (126/165)
Requirement: Kill 300 Carla Spores
Ranking: 1 Star Rank = 10 times, 2 Star Rank = 30 times, 3 Star Rank = 100 times, 4 Star Rank = 300 times
Extra Info: Found in Ada Chapter 4 aircraft carrier; stun and melee to kill.
Total Titles (126/195)
Haos Hunter — Campaign Title (127/165)
Requirement: Kill 100 Haoses
Ranking: 1 Star Rank = 3 times, 2 Star Rank = 10 times, 3 Star Rank = 30 times, 4 Star Rank = 100 times
Extra Info: Final boss of Chris campaign Chapter 5.
Total Titles (127/195)
Road Rage — Campaign Title (128/165)
Requirement: Kill 300 enemies using vehicles
Ranking: 1 Star Rank = 10 times, 2 Star Rank = 30 times, 3 Star Rank = 100 times, 4 Star Rank = 300 times
Extra Info: Best done on Jake Chapter 2 snowmobile section.
Total Titles (128/195)
Open Season — Campaign Title (129/165)
Requirement: Kill 300 animals
Ranking: 1 Star Rank = 10 times, 2 Star Rank = 30 times, 3 Star Rank = 100 times, 4 Star Rank = 300 times
Extra Info: Includes rats, crows, spiders, roosters, snakes, and bats across various chapters.
Total Titles (129/195)
Some more Titles
Metal Muncher — Campaign Title (130/165)
Requirement: Destroy 300 helicopters or tanks
Ranking: 1 Star Rank = 10 times, 2 Star Rank = 30 times, 3 Star Rank = 100 times, 4 Star Rank = 300 times
Extra Info: Best farmed in Ada Chapter 5 helicopter segments.
Total Titles (130/195)
Kickin' Ass & Takin' Names — Campaign Title (131/165)
Requirement: Defeat 10000 enemies
Ranking: 1 Star Rank = 1000 enemies, 2 Star Rank = 3000 enemies, 3 Star Rank = 5000 enemies, 4 Star Rank = 10000 enemies
Extra Info: Defeat several enemies of any type.
Total Titles (131/195)
Fire Hazard — Campaign Title (132/165)
Requirement: Set 1000 zombies on fire
Ranking: 1 Star Rank = 30 times, 2 Star Rank = 100 times, 3 Star Rank = 300 times, 4 Star Rank = 1000 times
Extra Info: Have a zombie catch on fire through an incendiary grenade toss or allow it to catch on fire through a burning 2x4 that you use to kill another zombie or a zombie with a lantern that drops the lantern after being attacked. The best way to get this is by throwing incendiary grenades into groups of zombies. Both Leon and Ada have access to incendiary grenades in their campaign. This can also be gotten in The Mercenaries minigame.
Total Titles (132/195)
Face Smasher — Campaign Title (133/165)
Requirement: Destroy 1000 J'avo masks
Ranking: 1 Star Rank = 30 times, 2 Star Rank = 100 times, 3 Star Rank = 300 times, 4 Star Rank = 1000 times
Extra Info: Kill several J'avo that wear mask in CHRIS' or JAKE'S campaign. The majority of J'avo wear masks, so defeating almost any J'avo will give a player credit for this title.
Total Titles (133/195)
Any Port in a Storm — Campaign Title (134/165)
Requirement: Use Chrysalids for cover for 20 minutes
Ranking: 1 Star Rank = 1 minutes, 2 Star Rank = 3 minutes, 3 Star Rank = 10 minutes, 4 Star Rank = 20 minutes
Extra Info: Stand near a Chrysalid (hard shell J'avo cocoon) and take cover behind it by pressing the L1/LT button while standing near it. Many of these can be found in JAKE, CHAPTER 4 while on the streets. Characters can only take cover behind Chrysalids that are leaning over.
Total Titles (134/195)
Chuter Shooter — Campaign Title (135/165)
Requirement: Kill 100 parachuting enemies
Ranking: 1 Star Rank = 3 times, 2 Star Rank = 10 times, 3 Star Rank = 30 times, 4 Star Rank = 100 times
Extra Info: Paratroopers are only found at the end of the Steel Beast bridge portion of CHRIS, CHAPTER 2. They will parachute out of a helicopter above the bridge while Finn brings the injured soldier up to Chris and Piers. Shoot the parachutes of the J'avo to kill the paratroopers and rack up kills for this title.
Total Titles (135/195)
Getting Good Grades — Campaign Title (136/165)
Requirement: Complete all chapters in the campaign with an S-rank (20)
Ranking: 1 Star Rank = 5 chapters, 2 Star Rank = 10 chapters, 3 Star Rank = 15 chapters, 4 Star Rank = 20 chapters
Extra Info: Get an S-rank in all chapters on one difficulty from LEON'S, CHRIS', JAKE'S and ADA'S CAMPAIGN to get this title.
Total Titles (136/195)
Decorated Agent — Campaign Title (137/165)
Requirement: Earn all the different (unique) medals in the campaign
Ranking: 1 Star Rank = 50 medals, 2 Star Rank = 100 medals, 3 Star Rank = 150 medals, 4 Star Rank = 193 medals
Extra Info: Medals are tasks that give you a different color medal for each mode. They can be found under the "Records" menu under the main menu. Earn several different unique medals throughout the game to get credit for this. These can be medals from any mode. The medals that counter toward this title are different medals that you HAVE NOT received before.
Total Titles (137/195)
Medal Agent — Campaign Title (138/165)
Requirement: Earn 1500 medals in the campaign
Ranking: 1 Star Rank = 200 medals, 2 Star Rank = 500 medals, 3 Star Rank = 1000 medals, 4 Star Rank = 1500 medals
Extra Info: Get a total of 1500 medals. These can be 1500 of the same medal or different medals. This medal title only demands a certain number of medals of any type.
Total Titles (138/195)
Amateur — Campaign Title (139/165)
Requirement: Complete all campaign chapters on Amateur (20)
Ranking: 1 Star Rank = 5 chapters, 2 Star Rank = 10 chapters, 3 Star Rank = 15 chapters, 4 Star Rank = 20 chapters
Extra Info: Finish all chapters from LEON'S, CHRIS', JAKE'S and ADA'S CAMPAIGN on Amateur difficulty to get this title.
Total Titles (139/195)
Got Some Experience — Campaign Title (140/165)
Requirement: Complete all campaign chapters on Normal (20)
Ranking: 1 Star Rank = 5 chapters, 2 Star Rank = 10 chapters, 3 Star Rank = 15 chapters, 4 Star Rank = 20 chapters
Extra Info: Finish all chapters from LEON'S, CHRIS', JAKE'S and ADA'S CAMPAIGN on Normal difficulty to get this title.
Total Titles (140/195)
I Know What I'm Doing — Campaign Title (141/165)
Requirement: Complete all campaign chapters on Veteran (20)
Ranking: 1 Star Rank = 5 chapters, 2 Star Rank = 10 chapters, 3 Star Rank = 15 chapters, 4 Star Rank = 20 chapters
Extra Info: Finish all chapters from LEON'S, CHRIS', JAKE'S and ADA'S CAMPAIGN on Veteran difficulty to get this title.
Total Titles (141/195)
Professional — Campaign Title (142/165)
Requirement: Complete all campaign chapters on Professional (20)
Ranking: 1 Star Rank = 5 chapters, 2 Star Rank = 10 chapters, 3 Star Rank = 15 chapters, 4 Star Rank = 20 chapters
Extra Info: Finish all chapters from LEON'S, CHRIS', JAKE'S and ADA'S CAMPAIGN on Professional difficulty to get this title.
Total Titles (142/195)
Dare To Hope — Campaign Title (143/165)
Requirement:
Ranking: 1 Star Rank = 5 chapters, 2 Star Rank = 10 chapters, 3 Star Rank = 15 chapters, 4 Star Rank = 20 chapters
Extra Info: Finish all chapters from LEON'S, CHRIS', JAKE'S and ADA'S CAMPAIGN on No Hope Left difficulty to get this title.
Total Titles (143/195)
Action Junkie — Campaign Title (144/165)
Requirement: Complete 200 campaign chapters
Ranking: 1 Star Rank = 35 times, 2 Star Rank = 70 times, 3 Star Rank = 100 times, 4 Star Rank = 200 times
Extra Info: Finish any of the chapters from LEON'S, CHRIS', JAKE'S and ADA'S CAMPAIGN on any difficulty several times to get this title.
Total Titles (144/195)
Respect the Skills — Campaign Title (145/165)
Requirement: Complete all campaign chapters without seeing the game over screen
Ranking: 1 Star Rank = 5 chapters, 2 Star Rank = 10 chapters, 3 Star Rank = 15 chapters, 4 Star Rank = 20 chapters
Extra Info: Finish all chapters from LEON'S, CHRIS', JAKE'S and ADA'S CAMPAIGN without dying in a chapter to get this title. Basically all you have to do is get through each chapter at a time without dying - not the whole campaign.
Total Titles (145/195)
Lone Wolf — Campaign Title (146/165)
Requirement: Complete all campaign chapters by yourself
Ranking: 1 Star Rank = 5 chapters, 2 Star Rank = 10 chapters, 3 Star Rank = 15 chapters, 4 Star Rank = 20 chapters
Extra Info: Finish all chapters from LEON'S, CHRIS', JAKE'S and ADA'S CAMPAIGN without a co-op partner over PlayStation Network or Xbox LIVE to get this title.
Total Titles (146/195)
Amazon — Campaign Title (147/165)
Requirement: Complete 15 campaign chapters with female characters
Ranking: 1 Star Rank = 15 chapters, 2 Star Rank = N/A, 3 Star Rank = N/A, 4 Star Rank = N/A
Extra Info: Finish chapters from LEON'S, JAKE'S and ADA'S CAMPAIGN with Helena, Sherry or Ada to get this title.
Total Titles (147/195)
Party Time! — Campaign Title (148/165)
Requirement: Play with 3 other players 30 times during a story intersection
Ranking: 1 Star Rank = 1 times, 2 Star Rank = 3 times, 3 Star Rank = 10 times, 4 Star Rank = 30 times
Extra Info: Play with 3 other co-op partners over PlayStation Network or Xbox LIVE during any of the crossover segments in the campaign mode. Here is a list: CHRIS CHAPTER 3 - LEON CHAPTER 4 = Medical Research Facility JAKE CHAPTER 1 - CHRIS CHAPTER 2 = In Front of City Hall JAKE CHAPTER 4 - CHRIS CHAPTER 3 = Poisawan Courtyard JAKE CHAPTER 4 - LEON CHAPTER 4 = Airplane Crash Site
Total Titles (148/195)
Requirement: Destroy 300 helicopters or tanks
Ranking: 1 Star Rank = 10 times, 2 Star Rank = 30 times, 3 Star Rank = 100 times, 4 Star Rank = 300 times
Extra Info: Best farmed in Ada Chapter 5 helicopter segments.
Total Titles (130/195)
Kickin' Ass & Takin' Names — Campaign Title (131/165)
Requirement: Defeat 10000 enemies
Ranking: 1 Star Rank = 1000 enemies, 2 Star Rank = 3000 enemies, 3 Star Rank = 5000 enemies, 4 Star Rank = 10000 enemies
Extra Info: Defeat several enemies of any type.
Total Titles (131/195)
Fire Hazard — Campaign Title (132/165)
Requirement: Set 1000 zombies on fire
Ranking: 1 Star Rank = 30 times, 2 Star Rank = 100 times, 3 Star Rank = 300 times, 4 Star Rank = 1000 times
Extra Info: Have a zombie catch on fire through an incendiary grenade toss or allow it to catch on fire through a burning 2x4 that you use to kill another zombie or a zombie with a lantern that drops the lantern after being attacked. The best way to get this is by throwing incendiary grenades into groups of zombies. Both Leon and Ada have access to incendiary grenades in their campaign. This can also be gotten in The Mercenaries minigame.
Total Titles (132/195)
Face Smasher — Campaign Title (133/165)
Requirement: Destroy 1000 J'avo masks
Ranking: 1 Star Rank = 30 times, 2 Star Rank = 100 times, 3 Star Rank = 300 times, 4 Star Rank = 1000 times
Extra Info: Kill several J'avo that wear mask in CHRIS' or JAKE'S campaign. The majority of J'avo wear masks, so defeating almost any J'avo will give a player credit for this title.
Total Titles (133/195)
Any Port in a Storm — Campaign Title (134/165)
Requirement: Use Chrysalids for cover for 20 minutes
Ranking: 1 Star Rank = 1 minutes, 2 Star Rank = 3 minutes, 3 Star Rank = 10 minutes, 4 Star Rank = 20 minutes
Extra Info: Stand near a Chrysalid (hard shell J'avo cocoon) and take cover behind it by pressing the L1/LT button while standing near it. Many of these can be found in JAKE, CHAPTER 4 while on the streets. Characters can only take cover behind Chrysalids that are leaning over.
Total Titles (134/195)
Chuter Shooter — Campaign Title (135/165)
Requirement: Kill 100 parachuting enemies
Ranking: 1 Star Rank = 3 times, 2 Star Rank = 10 times, 3 Star Rank = 30 times, 4 Star Rank = 100 times
Extra Info: Paratroopers are only found at the end of the Steel Beast bridge portion of CHRIS, CHAPTER 2. They will parachute out of a helicopter above the bridge while Finn brings the injured soldier up to Chris and Piers. Shoot the parachutes of the J'avo to kill the paratroopers and rack up kills for this title.
Total Titles (135/195)
Getting Good Grades — Campaign Title (136/165)
Requirement: Complete all chapters in the campaign with an S-rank (20)
Ranking: 1 Star Rank = 5 chapters, 2 Star Rank = 10 chapters, 3 Star Rank = 15 chapters, 4 Star Rank = 20 chapters
Extra Info: Get an S-rank in all chapters on one difficulty from LEON'S, CHRIS', JAKE'S and ADA'S CAMPAIGN to get this title.
Total Titles (136/195)
Decorated Agent — Campaign Title (137/165)
Requirement: Earn all the different (unique) medals in the campaign
Ranking: 1 Star Rank = 50 medals, 2 Star Rank = 100 medals, 3 Star Rank = 150 medals, 4 Star Rank = 193 medals
Extra Info: Medals are tasks that give you a different color medal for each mode. They can be found under the "Records" menu under the main menu. Earn several different unique medals throughout the game to get credit for this. These can be medals from any mode. The medals that counter toward this title are different medals that you HAVE NOT received before.
Total Titles (137/195)
Medal Agent — Campaign Title (138/165)
Requirement: Earn 1500 medals in the campaign
Ranking: 1 Star Rank = 200 medals, 2 Star Rank = 500 medals, 3 Star Rank = 1000 medals, 4 Star Rank = 1500 medals
Extra Info: Get a total of 1500 medals. These can be 1500 of the same medal or different medals. This medal title only demands a certain number of medals of any type.
Total Titles (138/195)
Amateur — Campaign Title (139/165)
Requirement: Complete all campaign chapters on Amateur (20)
Ranking: 1 Star Rank = 5 chapters, 2 Star Rank = 10 chapters, 3 Star Rank = 15 chapters, 4 Star Rank = 20 chapters
Extra Info: Finish all chapters from LEON'S, CHRIS', JAKE'S and ADA'S CAMPAIGN on Amateur difficulty to get this title.
Total Titles (139/195)
Got Some Experience — Campaign Title (140/165)
Requirement: Complete all campaign chapters on Normal (20)
Ranking: 1 Star Rank = 5 chapters, 2 Star Rank = 10 chapters, 3 Star Rank = 15 chapters, 4 Star Rank = 20 chapters
Extra Info: Finish all chapters from LEON'S, CHRIS', JAKE'S and ADA'S CAMPAIGN on Normal difficulty to get this title.
Total Titles (140/195)
I Know What I'm Doing — Campaign Title (141/165)
Requirement: Complete all campaign chapters on Veteran (20)
Ranking: 1 Star Rank = 5 chapters, 2 Star Rank = 10 chapters, 3 Star Rank = 15 chapters, 4 Star Rank = 20 chapters
Extra Info: Finish all chapters from LEON'S, CHRIS', JAKE'S and ADA'S CAMPAIGN on Veteran difficulty to get this title.
Total Titles (141/195)
Professional — Campaign Title (142/165)
Requirement: Complete all campaign chapters on Professional (20)
Ranking: 1 Star Rank = 5 chapters, 2 Star Rank = 10 chapters, 3 Star Rank = 15 chapters, 4 Star Rank = 20 chapters
Extra Info: Finish all chapters from LEON'S, CHRIS', JAKE'S and ADA'S CAMPAIGN on Professional difficulty to get this title.
Total Titles (142/195)
Dare To Hope — Campaign Title (143/165)
Requirement:
Ranking: 1 Star Rank = 5 chapters, 2 Star Rank = 10 chapters, 3 Star Rank = 15 chapters, 4 Star Rank = 20 chapters
Extra Info: Finish all chapters from LEON'S, CHRIS', JAKE'S and ADA'S CAMPAIGN on No Hope Left difficulty to get this title.
Total Titles (143/195)
Action Junkie — Campaign Title (144/165)
Requirement: Complete 200 campaign chapters
Ranking: 1 Star Rank = 35 times, 2 Star Rank = 70 times, 3 Star Rank = 100 times, 4 Star Rank = 200 times
Extra Info: Finish any of the chapters from LEON'S, CHRIS', JAKE'S and ADA'S CAMPAIGN on any difficulty several times to get this title.
Total Titles (144/195)
Respect the Skills — Campaign Title (145/165)
Requirement: Complete all campaign chapters without seeing the game over screen
Ranking: 1 Star Rank = 5 chapters, 2 Star Rank = 10 chapters, 3 Star Rank = 15 chapters, 4 Star Rank = 20 chapters
Extra Info: Finish all chapters from LEON'S, CHRIS', JAKE'S and ADA'S CAMPAIGN without dying in a chapter to get this title. Basically all you have to do is get through each chapter at a time without dying - not the whole campaign.
Total Titles (145/195)
Lone Wolf — Campaign Title (146/165)
Requirement: Complete all campaign chapters by yourself
Ranking: 1 Star Rank = 5 chapters, 2 Star Rank = 10 chapters, 3 Star Rank = 15 chapters, 4 Star Rank = 20 chapters
Extra Info: Finish all chapters from LEON'S, CHRIS', JAKE'S and ADA'S CAMPAIGN without a co-op partner over PlayStation Network or Xbox LIVE to get this title.
Total Titles (146/195)
Amazon — Campaign Title (147/165)
Requirement: Complete 15 campaign chapters with female characters
Ranking: 1 Star Rank = 15 chapters, 2 Star Rank = N/A, 3 Star Rank = N/A, 4 Star Rank = N/A
Extra Info: Finish chapters from LEON'S, JAKE'S and ADA'S CAMPAIGN with Helena, Sherry or Ada to get this title.
Total Titles (147/195)
Party Time! — Campaign Title (148/165)
Requirement: Play with 3 other players 30 times during a story intersection
Ranking: 1 Star Rank = 1 times, 2 Star Rank = 3 times, 3 Star Rank = 10 times, 4 Star Rank = 30 times
Extra Info: Play with 3 other co-op partners over PlayStation Network or Xbox LIVE during any of the crossover segments in the campaign mode. Here is a list: CHRIS CHAPTER 3 - LEON CHAPTER 4 = Medical Research Facility JAKE CHAPTER 1 - CHRIS CHAPTER 2 = In Front of City Hall JAKE CHAPTER 4 - CHRIS CHAPTER 3 = Poisawan Courtyard JAKE CHAPTER 4 - LEON CHAPTER 4 = Airplane Crash Site
Total Titles (148/195)
Yep Titles
Props to You — Campaign Title (149/165)
Requirement: Praise your partner 100 times during the campaign
Ranking: 1 Star Rank = 10 times, 2 Star Rank = 20 times, 3 Star Rank = 50 times, 4 Star Rank = 100 times
Extra Info: Praise a co-op partner during an online gaming session in campaign mode several times to get this title. To praise a player, hold the partner assist button (O/B) then tap the L2/LB button. This can probably be done in single player since I have it completed and I don't even play online campaign much - and yes, I do praise my AI partner often.
Total Titles (149/195)
Herb Sharer — Campaign Title (150/165)
Requirement: Feed your partner 200 health tablets during the campaign
Ranking: 1 Star Rank = 10 times, 2 Star Rank = 30 times, 3 Star Rank = 100 times, 4 Star Rank = 200 times
Extra Info: This can only be done in campaign mode while playing in co-op play over PlayStation Network or Xbox LIVE since the AI partner never goes into dying status. Allow the co-op partner to go into dying status then move toward the player and revive the player by pressing the R2/RB button to give the player a healing tablet. You can press the R2/RB button multiple times to give the partner more than one healing tablet.
Total Titles (150/195)
Emblem Finder — Campaign Title (151/165)
Requirement: Find all the serpent emblems during the campaign (80)
Ranking: 1 Star Rank = 20 emblems, 2 Star Rank = 40 emblems, 3 Star Rank = 60 emblems, 4 Star Rank = 80 emblems
Extra Info: Find all the serpent emblems in all campaigns. Use the Serpent Emblem section in my campaign guide to help with this one.
Total Titles (151/195)
Treasure Hunter — Campaign Title (152/165)
Requirement: Open 100 treasure chests during the campaign
Ranking: 1 Star Rank = 10 times, 2 Star Rank = 30 times, 3 Star Rank = 50 times, 4 Star Rank = 100 times
Extra Info: Treasure chests are any chest or suitcase that is locked in any of the campaigns. Find these and open them to gain credit toward this medal. I have them all listed in my campaign guide.
Total Titles (152/195)
Exterminator — Campaign Title (153/165)
Requirement: Kill an Agent Hunt player 200 times during the campaign
Ranking: 1 Star Rank = 10 times, 2 Star Rank = 30 times, 3 Star Rank = 100 times, 4 Star Rank = 200 times
Extra Info: Agent Hunt mode must be allowed before starting an online campaign game in order to get this title. When a player joins your game as a creature, kill off all creatures in the area and you'll likely kill that Agent Hunt player... unless the player stays in a spawn point the entire time.
Total Titles (153/195)
Still in Training — Campaign Title (154/165)
Requirement: Continue 100 times during the campaign
Ranking: 1 Star Rank = 10 times, 2 Star Rank = 30 times, 3 Star Rank = 50 times, 4 Star Rank = 100 times
Extra Info: Die and choose "Yes" to continue several times during a campaign. With how random RE6 deaths can be, you should get this no sweat!
Total Titles (154/195)
Survivalist — Campaign Title (155/165)
Requirement: Complete 1 chapter in Leon's campaign with just the survival knife
Ranking: 1 Star Rank = 1 time, 2 Star Rank = N/A, 3 Star Rank = N/A, 4 Star Rank = N/A
Extra Info: Leon carries the Survival Knife so play as Leon and make it through chapter 1 while using only the Survival Knife on any difficulty.
Total Titles (155/195)
Hydra Tamer — Campaign Title (156/165)
Requirement: Complete 1 chapter in Leon's campaign with just the Hydra
Ranking: 1 Star Rank = 1 time, 2 Star Rank = N/A, 3 Star Rank = N/A, 4 Star Rank = N/A
Extra Info: Helena carries the Hydra shotgun so play as Helena and make it through chapter 1 while using only the Hydra shotgun on any difficulty.
Total Titles (156/195)
Combat Specialist — Campaign Title (157/165)
Requirement: Complete 1 chapter in Chris' campaign with just the combat knife
Ranking: 1 Star Rank = 1 time, 2 Star Rank = N/A, 3 Star Rank = N/A, 4 Star Rank = N/A
Extra Info: Chris carries the Combat Knife so play as Chris and make it through chapter 1 while using only the Combat Knife on any difficulty.
Total Titles (157/195)
Snipe This! — Campaign Title (158/165)
Requirement: Complete 1 chapter in Chris' campaign with the anti-materiel rifle
Ranking: 1 Star Rank = 1 time, 2 Star Rank = N/A, 3 Star Rank = N/A, 4 Star Rank = N/A
Extra Info: Piers carries the Anti-Materiel Rifle so play as Piers and make it through chapter 1 while using only the Anti-Materiel Rifle on any difficulty.
Total Titles (158/195)
Martial Artist — Campaign Title (159/165)
Requirement: Complete 1 chapter in Jake's campaign with just hand-to-hand combat
Ranking: 1 Star Rank = 1 time, 2 Star Rank = N/A, 3 Star Rank = N/A, 4 Star Rank = N/A
Extra Info: Jake carries the Bare Hands weapon so play as Jake and make it through chapter 1 while using only the Bare Hands weapon on any difficulty.
Total Titles (159/195)
Beat-Down King — Campaign Title (160/165)
Requirement: Complete 1 chapter in Jake's campaign with just the stun rod
Ranking: 1 Star Rank = 1 time, 2 Star Rank = N/A, 3 Star Rank = N/A, 4 Star Rank = N/A
Extra Info: Sherry carries the Stun Rod so play as Sherry and make it through chapter 1 while using only the Stun Rod on any difficulty.
Total Titles (160/195)
Eagle Eyed — Campaign Title (161/165)
Requirement: Complete 1 chapter in Ada's campaign with just the crossbow
Ranking: 1 Star Rank = 1 time, 2 Star Rank = N/A, 3 Star Rank = N/A, 4 Star Rank = N/A
Extra Info: Ada carries the Crossbow so play as Ada and make it through chapter 1 while using only the Crossbow on any difficulty.
Total Titles (161/195)
Trigger Happy — Campaign Title (162/165)
Requirement: Use all the ammo in your weapon 1000 times during the campaign
Ranking: 1 Star Rank = 50 times, 2 Star Rank = 100 times, 3 Star Rank = 300 times, 4 Star Rank = 1000 times
Extra Info: In any campaign, use all of your ammo for a single weapon several times to get this title.
Total Titles (162/195)
Button Masher — Campaign Title (163/165)
Requirement: Press an action button 10000 times during the campaign
Ranking: 1 Star Rank = 1000 times, 2 Star Rank = 3000 times, 3 Star Rank = 5000 times, 4 Star Rank = 10000 times
Extra Info: Press the displayed button during a QTE button tapping sequence several times. These are all over the game. One example is when Sherry is hanging from the helicopter during the bike segment in JAKE'S CHAPTER 4 campaign.
Total Titles (163/195)
Spin Doctor — Campaign Title (164/165)
Requirement: Perform a rotation action 200 times during the campaign
Ranking: 1 Star Rank = 10 times, 2 Star Rank = 30 times, 3 Star Rank = 100 times, 4 Star Rank = 200 times
Extra Info: Rotate the left thumbstick during a QTE button rotation action event several times. Examples of this are getting grabbed by a J'avo and opening doors with valve handles.
Total Titles (164/195)
The Right Touch — Campaign Title (165/165)
Requirement: Press an action button at the exact time 200 times
Ranking: 1 Star Rank = 10 times, 2 Star Rank = 30 times, 3 Star Rank = 100 times, 4 Star Rank = 200 times
Extra Info: Press the displayed button during a QTE button sequence with the timed indicator needle several times as it reaches the green portion of the gauge. Examples of this are a Lepotitsa's grab and a Glava-Smech (pincher head) grab sequence.
Total Titles (165/195)
Hired Killer — The Mercenaries Title (01/15)
Requirement: Play the Mercenaries.
Ranking: 1 Star Rank = 10 times, 2 Star Rank = 30 times, 3 Star Rank = 100 times, 4 Star Rank = 200 times
Total Titles (166/195)
Decorated Mercenary — The Mercenaries Title (02/15)
Requirement: Earn all the different medals in The Mercenaries.
Ranking: 1 Star Rank = 10 medals, 2 Star Rank = 20 medals, 3 Star Rank = 30 medals, 4 Star Rank = 50 medals
Total Titles (167/195)
Requirement: Praise your partner 100 times during the campaign
Ranking: 1 Star Rank = 10 times, 2 Star Rank = 20 times, 3 Star Rank = 50 times, 4 Star Rank = 100 times
Extra Info: Praise a co-op partner during an online gaming session in campaign mode several times to get this title. To praise a player, hold the partner assist button (O/B) then tap the L2/LB button. This can probably be done in single player since I have it completed and I don't even play online campaign much - and yes, I do praise my AI partner often.
Total Titles (149/195)
Herb Sharer — Campaign Title (150/165)
Requirement: Feed your partner 200 health tablets during the campaign
Ranking: 1 Star Rank = 10 times, 2 Star Rank = 30 times, 3 Star Rank = 100 times, 4 Star Rank = 200 times
Extra Info: This can only be done in campaign mode while playing in co-op play over PlayStation Network or Xbox LIVE since the AI partner never goes into dying status. Allow the co-op partner to go into dying status then move toward the player and revive the player by pressing the R2/RB button to give the player a healing tablet. You can press the R2/RB button multiple times to give the partner more than one healing tablet.
Total Titles (150/195)
Emblem Finder — Campaign Title (151/165)
Requirement: Find all the serpent emblems during the campaign (80)
Ranking: 1 Star Rank = 20 emblems, 2 Star Rank = 40 emblems, 3 Star Rank = 60 emblems, 4 Star Rank = 80 emblems
Extra Info: Find all the serpent emblems in all campaigns. Use the Serpent Emblem section in my campaign guide to help with this one.
Total Titles (151/195)
Treasure Hunter — Campaign Title (152/165)
Requirement: Open 100 treasure chests during the campaign
Ranking: 1 Star Rank = 10 times, 2 Star Rank = 30 times, 3 Star Rank = 50 times, 4 Star Rank = 100 times
Extra Info: Treasure chests are any chest or suitcase that is locked in any of the campaigns. Find these and open them to gain credit toward this medal. I have them all listed in my campaign guide.
Total Titles (152/195)
Exterminator — Campaign Title (153/165)
Requirement: Kill an Agent Hunt player 200 times during the campaign
Ranking: 1 Star Rank = 10 times, 2 Star Rank = 30 times, 3 Star Rank = 100 times, 4 Star Rank = 200 times
Extra Info: Agent Hunt mode must be allowed before starting an online campaign game in order to get this title. When a player joins your game as a creature, kill off all creatures in the area and you'll likely kill that Agent Hunt player... unless the player stays in a spawn point the entire time.
Total Titles (153/195)
Still in Training — Campaign Title (154/165)
Requirement: Continue 100 times during the campaign
Ranking: 1 Star Rank = 10 times, 2 Star Rank = 30 times, 3 Star Rank = 50 times, 4 Star Rank = 100 times
Extra Info: Die and choose "Yes" to continue several times during a campaign. With how random RE6 deaths can be, you should get this no sweat!
Total Titles (154/195)
Survivalist — Campaign Title (155/165)
Requirement: Complete 1 chapter in Leon's campaign with just the survival knife
Ranking: 1 Star Rank = 1 time, 2 Star Rank = N/A, 3 Star Rank = N/A, 4 Star Rank = N/A
Extra Info: Leon carries the Survival Knife so play as Leon and make it through chapter 1 while using only the Survival Knife on any difficulty.
Total Titles (155/195)
Hydra Tamer — Campaign Title (156/165)
Requirement: Complete 1 chapter in Leon's campaign with just the Hydra
Ranking: 1 Star Rank = 1 time, 2 Star Rank = N/A, 3 Star Rank = N/A, 4 Star Rank = N/A
Extra Info: Helena carries the Hydra shotgun so play as Helena and make it through chapter 1 while using only the Hydra shotgun on any difficulty.
Total Titles (156/195)
Combat Specialist — Campaign Title (157/165)
Requirement: Complete 1 chapter in Chris' campaign with just the combat knife
Ranking: 1 Star Rank = 1 time, 2 Star Rank = N/A, 3 Star Rank = N/A, 4 Star Rank = N/A
Extra Info: Chris carries the Combat Knife so play as Chris and make it through chapter 1 while using only the Combat Knife on any difficulty.
Total Titles (157/195)
Snipe This! — Campaign Title (158/165)
Requirement: Complete 1 chapter in Chris' campaign with the anti-materiel rifle
Ranking: 1 Star Rank = 1 time, 2 Star Rank = N/A, 3 Star Rank = N/A, 4 Star Rank = N/A
Extra Info: Piers carries the Anti-Materiel Rifle so play as Piers and make it through chapter 1 while using only the Anti-Materiel Rifle on any difficulty.
Total Titles (158/195)
Martial Artist — Campaign Title (159/165)
Requirement: Complete 1 chapter in Jake's campaign with just hand-to-hand combat
Ranking: 1 Star Rank = 1 time, 2 Star Rank = N/A, 3 Star Rank = N/A, 4 Star Rank = N/A
Extra Info: Jake carries the Bare Hands weapon so play as Jake and make it through chapter 1 while using only the Bare Hands weapon on any difficulty.
Total Titles (159/195)
Beat-Down King — Campaign Title (160/165)
Requirement: Complete 1 chapter in Jake's campaign with just the stun rod
Ranking: 1 Star Rank = 1 time, 2 Star Rank = N/A, 3 Star Rank = N/A, 4 Star Rank = N/A
Extra Info: Sherry carries the Stun Rod so play as Sherry and make it through chapter 1 while using only the Stun Rod on any difficulty.
Total Titles (160/195)
Eagle Eyed — Campaign Title (161/165)
Requirement: Complete 1 chapter in Ada's campaign with just the crossbow
Ranking: 1 Star Rank = 1 time, 2 Star Rank = N/A, 3 Star Rank = N/A, 4 Star Rank = N/A
Extra Info: Ada carries the Crossbow so play as Ada and make it through chapter 1 while using only the Crossbow on any difficulty.
Total Titles (161/195)
Trigger Happy — Campaign Title (162/165)
Requirement: Use all the ammo in your weapon 1000 times during the campaign
Ranking: 1 Star Rank = 50 times, 2 Star Rank = 100 times, 3 Star Rank = 300 times, 4 Star Rank = 1000 times
Extra Info: In any campaign, use all of your ammo for a single weapon several times to get this title.
Total Titles (162/195)
Button Masher — Campaign Title (163/165)
Requirement: Press an action button 10000 times during the campaign
Ranking: 1 Star Rank = 1000 times, 2 Star Rank = 3000 times, 3 Star Rank = 5000 times, 4 Star Rank = 10000 times
Extra Info: Press the displayed button during a QTE button tapping sequence several times. These are all over the game. One example is when Sherry is hanging from the helicopter during the bike segment in JAKE'S CHAPTER 4 campaign.
Total Titles (163/195)
Spin Doctor — Campaign Title (164/165)
Requirement: Perform a rotation action 200 times during the campaign
Ranking: 1 Star Rank = 10 times, 2 Star Rank = 30 times, 3 Star Rank = 100 times, 4 Star Rank = 200 times
Extra Info: Rotate the left thumbstick during a QTE button rotation action event several times. Examples of this are getting grabbed by a J'avo and opening doors with valve handles.
Total Titles (164/195)
The Right Touch — Campaign Title (165/165)
Requirement: Press an action button at the exact time 200 times
Ranking: 1 Star Rank = 10 times, 2 Star Rank = 30 times, 3 Star Rank = 100 times, 4 Star Rank = 200 times
Extra Info: Press the displayed button during a QTE button sequence with the timed indicator needle several times as it reaches the green portion of the gauge. Examples of this are a Lepotitsa's grab and a Glava-Smech (pincher head) grab sequence.
Total Titles (165/195)
Hired Killer — The Mercenaries Title (01/15)
Requirement: Play the Mercenaries.
Ranking: 1 Star Rank = 10 times, 2 Star Rank = 30 times, 3 Star Rank = 100 times, 4 Star Rank = 200 times
Total Titles (166/195)
Decorated Mercenary — The Mercenaries Title (02/15)
Requirement: Earn all the different medals in The Mercenaries.
Ranking: 1 Star Rank = 10 medals, 2 Star Rank = 20 medals, 3 Star Rank = 30 medals, 4 Star Rank = 50 medals
Total Titles (167/195)
Couple more Titles
Medal Mercenary — The Mercenaries Title (03/15)
Requirement: Earn many medals in The Mercenaries.
Ranking: 1 Star Rank = 30 medals, 2 Star Rank = 100 medals, 3 Star Rank = 200 medals, 4 Star Rank = 300 medals
Total Titles (168/195)
S.T.A.R.S. Trainee — The Mercenaries Title (04/15)
REQUIRMENT: Get an S-rank in different stages of The Mercenaries
Ranking: 1 Star Rank = 3 stages, 2 Star Rank = 5 stages, 3 Star Rank = 7 stages, 4 Star Rank = 9 stages
Total Titles (169/195)
Professional Mercenary — The Mercenaries Title (05/15)
Requirement: Get an A-rank in different stages of The Mercenaries
Ranking: 1 Star Rank = 3 stages, 2 Star Rank = 5 stages, 3 Star Rank = 7 stages, 4 Star Rank = 9 stages
Total Titles (170/195)
Soldier of Fortune — The Mercenaries Title (06/15)
Requirement: Complete different stages of The Mercenaries
Ranking: 1 Star Rank = 3 stages, 2 Star Rank = 5 stages, 3 Star Rank = 7 stages, 4 Star Rank = 9 stages
Total Titles (171/195)
A Cut above the Rest — The Mercenaries Title (07/15)
Requirement: Get an S-rank with different characters in The Mercenaries
Ranking: 1 Star Rank = 3 characters, 2 Star Rank = 7 characters, 3 Star Rank = 14 characters, 4 Star Rank = All characters
Total Titles (172/195)
Killing's What I Do — The Mercenaries Title (08/15)
Requirement: Kill many enemies in the Mercenaries
Ranking: 1 Star Rank = 300 enemies, 2 Star Rank = 1000 enemies, 3 Star Rank = 3000 enemies, 4 Star Rank = 5000 enemies
Total Titles (173/195)
Gettin' My Hands Dirty — The Mercenaries Title (09/15)
Requirement: Kill enemies with physical attacks in The Mercenaries
Ranking: 1 Star Rank = 100 enemies, 2 Star Rank = 500 enemies, 3 Star Rank = 1000 enemies, 4 Star Rank = 3000 enemies
Total Titles (174/195)
Combo Master — The Mercenaries Title (10/15)
Requirement: Get high kill combos in The Mercenaries
Ranking: 1 Star Rank = 40 combo, 2 Star Rank = 80 combo, 3 Star Rank = 120 combo, 4 Star Rank = 150 combo
Total Titles (175/195)
Man of the Hour — The Mercenaries Title (11/15)
Requirement: Get time from time bonuses in The Mercenaries
Ranking: 1 Star Rank = 100 times, 2 Star Rank = 200 times, 3 Star Rank = 300 times, 4 Star Rank = 500 times
Total Titles (176/195)
Under the Wire — The Mercenaries Title (12/15)
Requirement: Clear a stage in The Mercenaries with time left over
Ranking: 1 Star Rank = 1 minute, 2 Star Rank = 2 minutes, 3 Star Rank = 3 minutes, 4 Star Rank = 5 minutes or over
Total Titles (177/195)
Killin' Like a Boss — The Mercenaries Title (13/15)
Requirement: Unlock and kill the hidden boss in a stage in The Mercenaries
Ranking: 1 Star Rank = 10 times, 2 Star Rank = 30 times, 3 Star Rank = 100 times, 4 Star Rank = 200 times
Total Titles (178/195)
Let's Work Together! — The Mercenaries Title (14/15)
Requirement: Chain physical attacks with your partner in The Mercenaries
Ranking: 1 Star Rank = 10 times, 2 Star Rank = 50 times, 3 Star Rank = 100 times, 4 Star Rank = 200 times
Extra Info: Can only be performed in DUO play.
Total Titles (179/195)
Team Player — The Mercenaries Title (15/15)
Requirement: Rescue a partner from dying status in The Mercenaries
Ranking: 1 Star Rank = 5 times, 2 Star Rank = 10 times, 3 Star Rank = 20 times, 4 Star Rank = 30 times
Extra Info: Can only be performed in DUO play.
Total Titles (180/195)
Agent Hunter — Agent Hunt Title (01/15)
Requirement: Play Agent Hunt.
Ranking: 1 Star Rank = 10 times, 2 Star Rank = 30 times, 3 Star Rank = 100 times, 4 Star Rank = 200 times
Total Titles (181/195)
Brutal Hunter — Agent Hunt Title (02/15)
Requirement: Kill an Agent while playing Agent Hunt.
Ranking: 1 Star Rank = 10 times, 2 Star Rank = 30 times, 3 Star Rank = 100 times, 4 Star Rank = 200 times
Total Titles (182/195)
Decorated Hunter — Agent Hunt Title (03/15)
Requirement: Collect unique medals in Agent Hunt.
Ranking: 1 Star Rank = 10 medals, 2 Star Rank = 20 medals, 3 Star Rank = 30 medals, 4 Star Rank = 50 medals
Total Titles (183/195)
Medal Hunter — Agent Hunt Title (04/15)
Requirement: Cumulatively collect medals in Agent Hunt.
Ranking: 1 Star Rank = 50 medals, 2 Star Rank = 100 medals, 3 Star Rank = 200 medals, 4 Star Rank = 300 medals
Total Titles (184/195)
Assassin — Agent Hunt Title (05/15)
Requirement: Perform a coup de grace on an Agent in Agent Hunt.
Ranking: 1 Star Rank = 1 times, 2 Star Rank = 3 times, 3 Star Rank = 10 times, 4 Star Rank = 30 times
NOTE: Coup De Grace in Agent Hunt is the same as a kill.
Total Titles (185/195)
Stay Outta My Turf! — Agent Hunt Title (06/15)
Requirement: Stay on the same stage with the same Agent for a long time in Agent Hunt.
Ranking: 1 Star Rank = 1 hour, 2 Star Rank = N/A, 3 Star Rank = N/A, 4 Star Rank = N/A
Total Titles (186/195)
Mutant — Agent Hunt Title (07/15)
Requirement: Mutate a body part as a J'avo in Agent Hunt.
Ranking: 1 Star Rank = 30 times, 2 Star Rank = 100 times, 3 Star Rank = 200 times, 4 Star Rank = 300 times
Total Titles (187/195)
Metamorph — Agent Hunt Title (08/15)
Requirement: Transform from a J'avo into a different creature in Agent Hunt.
Ranking: 1 Star Rank = 10 times, 2 Star Rank = 30 times, 3 Star Rank = 100 times, 4 Star Rank = 200 times
Total Titles (188/195)
Vagabond — Agent Hunt Title (09/15)
Requirement: Play different stages in Agent Hunt.
Ranking: 1 Star Rank = 30 times, 2 Star Rank = 100 times, 3 Star Rank = 200 times, 4 Star Rank = 300 times
Total Titles (189/195)
Mad Dog — Agent Hunt Title (10/15)
Requirement: Play as a zombie dog in Agent Hunt.
Ranking: 1 Star Rank = 5 times, 2 Star Rank = 20 times, 3 Star Rank = 100 times, 4 Star Rank = 200 times
Total Titles (190/195)
Blood on my Hands — Agent Hunt Title (11/15)
Requirement: Play as a Bloodshot in Agent Hunt.
Ranking: 1 Star Rank = 5 times, 2 Star Rank = 20 times, 3 Star Rank = 100 times, 4 Star Rank = 200 times
Total Titles (191/195)
Shrieking Awesome — Agent Hunt Title (12/15)
Requirement: Play as a Shrieker in Agent Hunt.
Ranking: 1 Star Rank = 5 times, 2 Star Rank = 20 times, 3 Star Rank = 100 times, 4 Star Rank = 200 times
Total Titles (192/195)
Disjointed — Agent Hunt Title (13/15)
Requirement: Play as a Rasklapanje in Agent Hunt.
Ranking: 1 Star Rank = 5 times, 2 Star Rank = 20 times, 3 Star Rank = 100 times, 4 Star Rank = 200 times
Total Titles (193/195)
Ultimate Hunter — Agent Hunt Title (14/15)
Requirement: Play as all enemy characters in Agent Hunt.
Ranking: 1 Star Rank = 1 time, 2 Star Rank = N/A, 3 Star Rank = N/A, 4 Star Rank = N/A
Extra Info: There are a total of nine creatures that count toward this: J'avo, Napad, Strelats, Mesets, Gnezdo, Zombie, Zombie Dog, Shrieker, Rasklapanje A Bloodshot is considered a "zombie mutation" and not an actual creature, much like the J'avo appendage mutations.
Total Titles (194/195)
Cannon Fodder — Agent Hunt Title (15/15)
Requirement: Die in Agent Hunt without harming an Agent.
Ranking: 1 Star Rank = 10 times, 2 Star Rank = 30 times, 3 Star Rank = 100 times, 4 Star Rank = 300 times
Total Titles (195/195)
Requirement: Earn many medals in The Mercenaries.
Ranking: 1 Star Rank = 30 medals, 2 Star Rank = 100 medals, 3 Star Rank = 200 medals, 4 Star Rank = 300 medals
Total Titles (168/195)
S.T.A.R.S. Trainee — The Mercenaries Title (04/15)
REQUIRMENT: Get an S-rank in different stages of The Mercenaries
Ranking: 1 Star Rank = 3 stages, 2 Star Rank = 5 stages, 3 Star Rank = 7 stages, 4 Star Rank = 9 stages
Total Titles (169/195)
Professional Mercenary — The Mercenaries Title (05/15)
Requirement: Get an A-rank in different stages of The Mercenaries
Ranking: 1 Star Rank = 3 stages, 2 Star Rank = 5 stages, 3 Star Rank = 7 stages, 4 Star Rank = 9 stages
Total Titles (170/195)
Soldier of Fortune — The Mercenaries Title (06/15)
Requirement: Complete different stages of The Mercenaries
Ranking: 1 Star Rank = 3 stages, 2 Star Rank = 5 stages, 3 Star Rank = 7 stages, 4 Star Rank = 9 stages
Total Titles (171/195)
A Cut above the Rest — The Mercenaries Title (07/15)
Requirement: Get an S-rank with different characters in The Mercenaries
Ranking: 1 Star Rank = 3 characters, 2 Star Rank = 7 characters, 3 Star Rank = 14 characters, 4 Star Rank = All characters
Total Titles (172/195)
Killing's What I Do — The Mercenaries Title (08/15)
Requirement: Kill many enemies in the Mercenaries
Ranking: 1 Star Rank = 300 enemies, 2 Star Rank = 1000 enemies, 3 Star Rank = 3000 enemies, 4 Star Rank = 5000 enemies
Total Titles (173/195)
Gettin' My Hands Dirty — The Mercenaries Title (09/15)
Requirement: Kill enemies with physical attacks in The Mercenaries
Ranking: 1 Star Rank = 100 enemies, 2 Star Rank = 500 enemies, 3 Star Rank = 1000 enemies, 4 Star Rank = 3000 enemies
Total Titles (174/195)
Combo Master — The Mercenaries Title (10/15)
Requirement: Get high kill combos in The Mercenaries
Ranking: 1 Star Rank = 40 combo, 2 Star Rank = 80 combo, 3 Star Rank = 120 combo, 4 Star Rank = 150 combo
Total Titles (175/195)
Man of the Hour — The Mercenaries Title (11/15)
Requirement: Get time from time bonuses in The Mercenaries
Ranking: 1 Star Rank = 100 times, 2 Star Rank = 200 times, 3 Star Rank = 300 times, 4 Star Rank = 500 times
Total Titles (176/195)
Under the Wire — The Mercenaries Title (12/15)
Requirement: Clear a stage in The Mercenaries with time left over
Ranking: 1 Star Rank = 1 minute, 2 Star Rank = 2 minutes, 3 Star Rank = 3 minutes, 4 Star Rank = 5 minutes or over
Total Titles (177/195)
Killin' Like a Boss — The Mercenaries Title (13/15)
Requirement: Unlock and kill the hidden boss in a stage in The Mercenaries
Ranking: 1 Star Rank = 10 times, 2 Star Rank = 30 times, 3 Star Rank = 100 times, 4 Star Rank = 200 times
Total Titles (178/195)
Let's Work Together! — The Mercenaries Title (14/15)
Requirement: Chain physical attacks with your partner in The Mercenaries
Ranking: 1 Star Rank = 10 times, 2 Star Rank = 50 times, 3 Star Rank = 100 times, 4 Star Rank = 200 times
Extra Info: Can only be performed in DUO play.
Total Titles (179/195)
Team Player — The Mercenaries Title (15/15)
Requirement: Rescue a partner from dying status in The Mercenaries
Ranking: 1 Star Rank = 5 times, 2 Star Rank = 10 times, 3 Star Rank = 20 times, 4 Star Rank = 30 times
Extra Info: Can only be performed in DUO play.
Total Titles (180/195)
Agent Hunter — Agent Hunt Title (01/15)
Requirement: Play Agent Hunt.
Ranking: 1 Star Rank = 10 times, 2 Star Rank = 30 times, 3 Star Rank = 100 times, 4 Star Rank = 200 times
Total Titles (181/195)
Brutal Hunter — Agent Hunt Title (02/15)
Requirement: Kill an Agent while playing Agent Hunt.
Ranking: 1 Star Rank = 10 times, 2 Star Rank = 30 times, 3 Star Rank = 100 times, 4 Star Rank = 200 times
Total Titles (182/195)
Decorated Hunter — Agent Hunt Title (03/15)
Requirement: Collect unique medals in Agent Hunt.
Ranking: 1 Star Rank = 10 medals, 2 Star Rank = 20 medals, 3 Star Rank = 30 medals, 4 Star Rank = 50 medals
Total Titles (183/195)
Medal Hunter — Agent Hunt Title (04/15)
Requirement: Cumulatively collect medals in Agent Hunt.
Ranking: 1 Star Rank = 50 medals, 2 Star Rank = 100 medals, 3 Star Rank = 200 medals, 4 Star Rank = 300 medals
Total Titles (184/195)
Assassin — Agent Hunt Title (05/15)
Requirement: Perform a coup de grace on an Agent in Agent Hunt.
Ranking: 1 Star Rank = 1 times, 2 Star Rank = 3 times, 3 Star Rank = 10 times, 4 Star Rank = 30 times
NOTE: Coup De Grace in Agent Hunt is the same as a kill.
Total Titles (185/195)
Stay Outta My Turf! — Agent Hunt Title (06/15)
Requirement: Stay on the same stage with the same Agent for a long time in Agent Hunt.
Ranking: 1 Star Rank = 1 hour, 2 Star Rank = N/A, 3 Star Rank = N/A, 4 Star Rank = N/A
Total Titles (186/195)
Mutant — Agent Hunt Title (07/15)
Requirement: Mutate a body part as a J'avo in Agent Hunt.
Ranking: 1 Star Rank = 30 times, 2 Star Rank = 100 times, 3 Star Rank = 200 times, 4 Star Rank = 300 times
Total Titles (187/195)
Metamorph — Agent Hunt Title (08/15)
Requirement: Transform from a J'avo into a different creature in Agent Hunt.
Ranking: 1 Star Rank = 10 times, 2 Star Rank = 30 times, 3 Star Rank = 100 times, 4 Star Rank = 200 times
Total Titles (188/195)
Vagabond — Agent Hunt Title (09/15)
Requirement: Play different stages in Agent Hunt.
Ranking: 1 Star Rank = 30 times, 2 Star Rank = 100 times, 3 Star Rank = 200 times, 4 Star Rank = 300 times
Total Titles (189/195)
Mad Dog — Agent Hunt Title (10/15)
Requirement: Play as a zombie dog in Agent Hunt.
Ranking: 1 Star Rank = 5 times, 2 Star Rank = 20 times, 3 Star Rank = 100 times, 4 Star Rank = 200 times
Total Titles (190/195)
Blood on my Hands — Agent Hunt Title (11/15)
Requirement: Play as a Bloodshot in Agent Hunt.
Ranking: 1 Star Rank = 5 times, 2 Star Rank = 20 times, 3 Star Rank = 100 times, 4 Star Rank = 200 times
Total Titles (191/195)
Shrieking Awesome — Agent Hunt Title (12/15)
Requirement: Play as a Shrieker in Agent Hunt.
Ranking: 1 Star Rank = 5 times, 2 Star Rank = 20 times, 3 Star Rank = 100 times, 4 Star Rank = 200 times
Total Titles (192/195)
Disjointed — Agent Hunt Title (13/15)
Requirement: Play as a Rasklapanje in Agent Hunt.
Ranking: 1 Star Rank = 5 times, 2 Star Rank = 20 times, 3 Star Rank = 100 times, 4 Star Rank = 200 times
Total Titles (193/195)
Ultimate Hunter — Agent Hunt Title (14/15)
Requirement: Play as all enemy characters in Agent Hunt.
Ranking: 1 Star Rank = 1 time, 2 Star Rank = N/A, 3 Star Rank = N/A, 4 Star Rank = N/A
Extra Info: There are a total of nine creatures that count toward this: J'avo, Napad, Strelats, Mesets, Gnezdo, Zombie, Zombie Dog, Shrieker, Rasklapanje A Bloodshot is considered a "zombie mutation" and not an actual creature, much like the J'avo appendage mutations.
Total Titles (194/195)
Cannon Fodder — Agent Hunt Title (15/15)
Requirement: Die in Agent Hunt without harming an Agent.
Ranking: 1 Star Rank = 10 times, 2 Star Rank = 30 times, 3 Star Rank = 100 times, 4 Star Rank = 300 times
Total Titles (195/195)
Modding Guide -
You want mods, don't you Squidward? ;)))
Hey, no problemo.
I wanna start off by saying that I genuinely hate Mod Managers. Why? They always install as a program/app and they usually write useless crap to your appdata folder. They always treat it like you want the program forever. The Mod Manager for this game (and all games associated with this specific Mod Manager) is different. It is probably one of the best I have ever used. This Manager is completely Portable with the only thing you need to do being to tell it where your game folder is and feed it mods. I'm of course talking about FluffyModManager. You can either use that or do it manually, continue reading below.
First thing's first. Download the Mods. If you aren't going to touch costume/cosmetic mods, you don't need this. But you are,

so go download Model Swap, because a lot of mods won't work without it. https://www.mediafire.com/file/etwu5sov05cr9na/Model_Swap_Patch_%252B_Ultimate_Shader_Pack_combined.rar/file
Don't worry, it is safe, but let me teach you a thing or two about downloading files from the internet. This is the golden rule for downloading files: Download file to downloads folder, Scan the file with microsoft defender or mcafee or whatever anti-virus you have by left clicking the file then right clicking, show more options, scan. Then after it is scanned, left then right click again, properties, unblock file and hit ok/apply.
PS, Good "IT" practice is to unblock files before unpacking them because otherwise they might have problems.
Don't extract/unpack it yet.
Next, download the Mods you want. Scan them.
This is Nexus: https://www.nexusmods.com/games/residentevil6
Game Banana: https://gamebanana.com/games/6990
RE6 Modding: https://residentevilmodding.boards.net/board/9/re6-modification-releases
*Note: Fluffy Mod Manager comes with some mods in it's dedicated downloads section.
Some Recommendations that are SFW:
https://www.nexusmods.com/residentevil6/mods/145 ,
(removed) Deborah properly nude - was more for realism than anything but not SFW my bad, https://www.nexusmods.com/residentevil6/mods/39 (personal Fav) , https://www.nexusmods.com/residentevil6/mods/181 , https://www.nexusmods.com/residentevil6/mods/64 , https://www.nexusmods.com/residentevil6/mods/77 , https://www.nexusmods.com/residentevil6/mods/396 .
edit: Due to steam's guidelines I had to remove all these links. You have to be logged into nexus to even see them but it doesn't matter. Besides, do you even need these lol? A quick google search and you will find what you are looking for.
Now decide if you want to use a Mod Manager, or install things manually. Either is fine, but know that if you go the manual route, unless you back up the game files, which is what Fluffy does anyway, you cannot go back to default unless you uninstall/reinstall the game.
Just do the scan and unblock and extract this file. Then, Put this wherever you want. On your desktop is fine or even in your steam games next to all of them in steamapps/common or wherever. Don't run as admin unless it asks, but run the Mod Manager .exe. Go to Choose game and pick RE6. Then at the top it wants to know where you have the game installed, pick where the game is installed. Now in the Fluffy Folder that the exe was inside, Navigate to games/RE6/mods and put ALL your mods in there. Make sure they are all still zipped. I didn't tell you do extract them for a reason. Close and reopen Fluffy, you are set, now skip past the manual method paragraph to Now for Manual and Mod Manager methods Both to continue, or read it if you wish. I included a couple tricks you may find useful outside of games.
(uh wait. here is a tip btw, if you wanna unblock all files at once, and you are on windows, in the windows search bar search; windows powershell and use the following command. You will have to ad-lib for your setup, like replace Username with your username.
You can use this again quickly as long as you don't use powershell again for a different command in the future by opening powershell and just typing up arrow and enter on your keyboard.)
Anyway as I was saying, after you unblock all files and have already scanned them, extract every file so you can look inside and mess around. (Delete the original zipped folders).
(Another tip; Get 7zip - https://www.7-zip.org/ to unpack a bunch of files at once. Again it is safe, but when you install it, decline/skip all offers or it will install bloatware on your system. Be careful when using it, but it is a pretty standard program most people use.)
Now this is pretty simple, go to your game's install folder where you will see nativePC. READ THIS NEXT BIT BUT DON'T DO ANY OF IT YET:
All you need to do is drag and drop the nativePC that is in the MOD folder, TO the game folder and just play match up. No need to open either nativePC folder, just match the names and you should be good, just replace the files it asks. For other mods it may be more than just the nativePC folder but just play match up and read the description of the mod in the site you downloaded from and they will tell you how.
STOP THOUGH, do not try to put 2 mods for the same character in there or everything will not look right in game! Using Mod Manager will eliminate that problem but just be warned.
Any problems, let me or the mod author(s) know and I'll try to help.
Nice job. That's it. Don't worry, you will not be banned on steam or on the game for anything listed above because this game is old. Doubly so if you are only using cosmetic mods and not gameplay mods as you can get away with cosmetic only mods on most games including online only games (but be very very very very very careful).
Hey, no problemo.
I wanna start off by saying that I genuinely hate Mod Managers. Why? They always install as a program/app and they usually write useless crap to your appdata folder. They always treat it like you want the program forever. The Mod Manager for this game (and all games associated with this specific Mod Manager) is different. It is probably one of the best I have ever used. This Manager is completely Portable with the only thing you need to do being to tell it where your game folder is and feed it mods. I'm of course talking about FluffyModManager. You can either use that or do it manually, continue reading below.
First thing's first. Download the Mods. If you aren't going to touch costume/cosmetic mods, you don't need this. But you are,
so go download Model Swap, because a lot of mods won't work without it. https://www.mediafire.com/file/etwu5sov05cr9na/Model_Swap_Patch_%252B_Ultimate_Shader_Pack_combined.rar/file
Don't worry, it is safe, but let me teach you a thing or two about downloading files from the internet. This is the golden rule for downloading files: Download file to downloads folder, Scan the file with microsoft defender or mcafee or whatever anti-virus you have by left clicking the file then right clicking, show more options, scan. Then after it is scanned, left then right click again, properties, unblock file and hit ok/apply.
PS, Good "IT" practice is to unblock files before unpacking them because otherwise they might have problems.
Don't extract/unpack it yet.
Next, download the Mods you want. Scan them.
This is Nexus: https://www.nexusmods.com/games/residentevil6
Game Banana: https://gamebanana.com/games/6990
RE6 Modding: https://residentevilmodding.boards.net/board/9/re6-modification-releases
*Note: Fluffy Mod Manager comes with some mods in it's dedicated downloads section.
Some Recommendations that are SFW:
https://www.nexusmods.com/residentevil6/mods/145 ,
(removed) Deborah properly nude - was more for realism than anything but not SFW my bad, https://www.nexusmods.com/residentevil6/mods/39 (personal Fav) , https://www.nexusmods.com/residentevil6/mods/181 , https://www.nexusmods.com/residentevil6/mods/64 , https://www.nexusmods.com/residentevil6/mods/77 , https://www.nexusmods.com/residentevil6/mods/396 .
Warning: (removed) MODS - NSFW (You have been warned)
edit: Due to steam's guidelines I had to remove all these links. You have to be logged into nexus to even see them but it doesn't matter. Besides, do you even need these lol? A quick google search and you will find what you are looking for.
Warning: (removed) MODS - NSFW (You have been warned)
Now decide if you want to use a Mod Manager, or install things manually. Either is fine, but know that if you go the manual route, unless you back up the game files, which is what Fluffy does anyway, you cannot go back to default unless you uninstall/reinstall the game.
MOD MANAGER
DOWNLOAD: https://fluffyquack.com/tools/modmanager.zipJust do the scan and unblock and extract this file. Then, Put this wherever you want. On your desktop is fine or even in your steam games next to all of them in steamapps/common or wherever. Don't run as admin unless it asks, but run the Mod Manager .exe. Go to Choose game and pick RE6. Then at the top it wants to know where you have the game installed, pick where the game is installed. Now in the Fluffy Folder that the exe was inside, Navigate to games/RE6/mods and put ALL your mods in there. Make sure they are all still zipped. I didn't tell you do extract them for a reason. Close and reopen Fluffy, you are set, now skip past the manual method paragraph to Now for Manual and Mod Manager methods Both to continue, or read it if you wish. I included a couple tricks you may find useful outside of games.
Manual Method
After you have unblocked every zipped file,(uh wait. here is a tip btw, if you wanna unblock all files at once, and you are on windows, in the windows search bar search; windows powershell and use the following command. You will have to ad-lib for your setup, like replace Username with your username.
dir "C:\Users\Username\Downloads" -Recurse -File | Unblock-File
You can use this again quickly as long as you don't use powershell again for a different command in the future by opening powershell and just typing up arrow and enter on your keyboard.)
Anyway as I was saying, after you unblock all files and have already scanned them, extract every file so you can look inside and mess around. (Delete the original zipped folders).
(Another tip; Get 7zip - https://www.7-zip.org/ to unpack a bunch of files at once. Again it is safe, but when you install it, decline/skip all offers or it will install bloatware on your system. Be careful when using it, but it is a pretty standard program most people use.)
Now this is pretty simple, go to your game's install folder where you will see nativePC. READ THIS NEXT BIT BUT DON'T DO ANY OF IT YET:
All you need to do is drag and drop the nativePC that is in the MOD folder, TO the game folder and just play match up. No need to open either nativePC folder, just match the names and you should be good, just replace the files it asks. For other mods it may be more than just the nativePC folder but just play match up and read the description of the mod in the site you downloaded from and they will tell you how.
STOP THOUGH, do not try to put 2 mods for the same character in there or everything will not look right in game! Using Mod Manager will eliminate that problem but just be warned.
Now for Manual and Mod Manager methods Both
You can start turning on / installing the mods into the folder but pay attention. You must do it in order.- Start with Model Swap!
- Next, your mods that alter the video, like the Resident Evil 6 - QHD Upscaled Pre-Rendered Cutscenes.
- Then mods that alter the sound.
- After that, do strictly texture mods like 4K Texture Pack AI-Enhanced, not costume mods yet because they have to do with the model as well.
- Now you can do your costume / Character mods. Be careful here.
- Finally, any other mods like that of which alters gameplay.
Any problems, let me or the mod author(s) know and I'll try to help.
Trainer
You may want to use this; https://www.nexusmods.com/residentevil6/mods/12?tab=files&file_id=457 , to swap characters/costumes on the fly but I have zero experience with it. Yes I know this is a guide. I will update when I figure it out. If you didn't know, it is a trainer. You need to launch the game, then launch the trainer's exe. You then attach it to the game process and you are good to go. You won't get vac-banned. You can do some pretty cool stuff like play with bots in the online modes! There is a way to use the trainer through FluffyModManager. I just tried it and I can't for the life of me figure out how to play online modes with bots. I have heard that the x32 version actually works, however my antivirus doesn't like it and so neither do I.Nice job. That's it. Don't worry, you will not be banned on steam or on the game for anything listed above because this game is old. Doubly so if you are only using cosmetic mods and not gameplay mods as you can get away with cosmetic only mods on most games including online only games (but be very very very very very careful).
Console Modding info
Console modding for Resident Evil 6 depends entirely on whether the system can be jailbroken or hardware-modified. If you can gain file system access, you can modify the game. The difficulty and risk level varies heavily by platform. This is a rough guide, you will need to research based on what you see here. Why did I make the guide this way? Because there is little to no modding for consoles, so it is a moot point. I am sorry though. Emulation is a little bit of a different story but I won't touch that here unless I make an emulation guide. Honestly modding the emulator is probably not that hard as long as you figure out the console’s filepaths and archiving system for it’s models and textures you could likely just use PC mods(maybe). You may be interested in this site: https://consolemods.org/wiki/Main_Page
PlayStation 3
Is it possible?
Yes. Fully possible if the PS3 is running Custom Firmware (CFW) or HEN.
What you need:
A CFW-compatible PS3 model or PS3 with HEN
Custom Firmware installed (Rebug, Evilnat, etc.)
Homebrew file manager
USB drive or FTP access
Common console tools / managers:
multiMAN
webMAN MOD
IrisMAN
Apollo Save Tool
What you have to do:
Install CFW or HEN.
Install a homebrew manager like multiMAN.
Access the game files directly from the internal HDD.
Replace or modify files manually.
Launch the game through CFW.
Risks:
PSN ban - DO NOT USE THE CONSOLE WHILE ON THE INTERNET EVER AGAIN
Console ban
Possible system brick if firmware is installed incorrectly
What you can mod:
Save files
Stats
Textures
Character swaps
File replacements
Offline gameplay tweaks
Xbox 360
Is it possible?
Yes, if the console is JTAG or RGH modified.
What you need:
A JTAG or RGH Xbox 360
Custom dashboard installed
USB or FTP file access
Common console tools / managers:
Aurora Dashboard
Freestyle Dash
XEXMenu
Horizon (PC-side save editor)
What you have to do:
Install RGH or JTAG hardware modification.
Boot into Aurora or Freestyle Dash.
Access the game directory.
Replace or inject modified files.
Run the game offline.
Risks:
Permanent Xbox Live ban - STAY OFFLINE FOREVER WITH 0 INTERNET TO AVOID BAN
Console ban
Hardware damage during RGH install
What you can mod:
Save files
Stats
Some file replacements
Offline cheats
Limited asset swaps
PlayStation 4
Is it possible?
Yes, but only on specific exploitable firmware versions. A stock, fully updated PS4 cannot be modded.
What you need:
PS4 on exploitable firmware
Webkit/kernel exploit
Homebrew enabler
Common tools / managers:
GoldHEN (probably the best one)
PS4 Package Installer
Apollo Save Tool (PS4 version)
Orbis Toolbox
What you have to do:
Run the jailbreak exploit.
Enable GoldHEN.
Install or modify game packages.
Repackage modified content if needed.
Risks:
PSN ban - STAY OFFLINE AND NO INTERNET TO AVOID BAN
Firmware updates permanently blocking jailbreak
System instability or crashes
What you can mod:
Save edits
Some file replacements
Modded PKG installs
Offline tweaks
PlayStation 3
Is it possible?
Yes. Fully possible if the PS3 is running Custom Firmware (CFW) or HEN.
What you need:
A CFW-compatible PS3 model or PS3 with HEN
Custom Firmware installed (Rebug, Evilnat, etc.)
Homebrew file manager
USB drive or FTP access
Common console tools / managers:
multiMAN
webMAN MOD
IrisMAN
Apollo Save Tool
What you have to do:
Install CFW or HEN.
Install a homebrew manager like multiMAN.
Access the game files directly from the internal HDD.
Replace or modify files manually.
Launch the game through CFW.
Risks:
PSN ban - DO NOT USE THE CONSOLE WHILE ON THE INTERNET EVER AGAIN
Console ban
Possible system brick if firmware is installed incorrectly
What you can mod:
Save files
Stats
Textures
Character swaps
File replacements
Offline gameplay tweaks
Xbox 360
Is it possible?
Yes, if the console is JTAG or RGH modified.
What you need:
A JTAG or RGH Xbox 360
Custom dashboard installed
USB or FTP file access
Common console tools / managers:
Aurora Dashboard
Freestyle Dash
XEXMenu
Horizon (PC-side save editor)
What you have to do:
Install RGH or JTAG hardware modification.
Boot into Aurora or Freestyle Dash.
Access the game directory.
Replace or inject modified files.
Run the game offline.
Risks:
Permanent Xbox Live ban - STAY OFFLINE FOREVER WITH 0 INTERNET TO AVOID BAN
Console ban
Hardware damage during RGH install
What you can mod:
Save files
Stats
Some file replacements
Offline cheats
Limited asset swaps
PlayStation 4
Is it possible?
Yes, but only on specific exploitable firmware versions. A stock, fully updated PS4 cannot be modded.
What you need:
PS4 on exploitable firmware
Webkit/kernel exploit
Homebrew enabler
Common tools / managers:
GoldHEN (probably the best one)
PS4 Package Installer
Apollo Save Tool (PS4 version)
Orbis Toolbox
What you have to do:
Run the jailbreak exploit.
Enable GoldHEN.
Install or modify game packages.
Repackage modified content if needed.
Risks:
PSN ban - STAY OFFLINE AND NO INTERNET TO AVOID BAN
Firmware updates permanently blocking jailbreak
System instability or crashes
What you can mod:
Save edits
Some file replacements
Modded PKG installs
Offline tweaks
Glitches and Tricks
You can get a lot of time in mercenaries (mostly just no mercy) by throwing any lethal grenade and getting kills while doing a coup de grâce. To set this up, make sure the enemy is away from any walls or ledges, do either a head or quick shot with a low damage weapon to stun them, then do a slide attack to stun further. You can do that part in either order, slide first or shot first. Or instead do a behind attack with a character that doesn't kick when they do it. OR throw a flash grenade. Or even just slide twice into them. Regardless of which of the 3 methods you choose, the enemy should be "double stunned". Then, throw a grenade by a group of enemies and immediately press the attack button in FRONT of the enemy you just stunned prior, not behind. You have to do this quick but not so quick that you beat the grenade explosion. Much harder to do with an incendiary grenade. Each kill counts as a coup de grâce and earns 7 seconds per kill you just got. You can easily get 1 minute and a half or more. If you practice this it is an easy S rank if you can do it even once in tandem with your regular gameplay. Not as useful in regular mercenaries because of the low enemy count until you get past 100 enemies killed.
Enemies can’t do a lot (including bosses) if you just stand behind them. Dark Souls.
An easy way to combine herbs really fast is to simply memorize an input; Y, X, X, A, A. That is the xbox/PC controls so remap it in your head and use as necessary. Or just spam A. You can also use RB+X in inventory. Thanks Jackie B. Goode.
With any weapon that requires a rechambering action in between shots (anti-materiel rifle, sniper rifle, pump shotgun, even the cooldown of the grenade launcher shots, ect, ect), you can skip the animation and immediately fire again by first selecting any different weapon or item and then switching back to the target weapon. Does not work with quick-shots. With a controller, the input combo would look like this: While holding LT and aiming the whole time, shoot RT, left D pad, Right D pad, repeat. You don't have to shoot after and you can actually use this to reload at a quicker interval. You can also use this to cancel the remaining reload animation after the magazine is full or when you need to shoot but can't stop reloading. You can even throw grenades fast by aiming the entire time, throwing grenade, press weapon cycle down, repeat.
You can spam the regular straight sweep knife attack by holding Aim and Attack, then pressing change sholder (Right stick in on controller) just as the knife makes contact with the target while still holding both Aim and Attack. You can do this repeatedly if you keep holding Aim and Attack while pressing change sholder every half second or so. Quick Melee (aim, walk backwards and attack together) is faster but does slightly less damage.
In Urban Chaos only in Mercenaries + No mercy, you can get out of bounds easily by going to where the big grey bus is at the end of the map and vaulting over the railing to push you inside of the bus allowing you to walk through it.
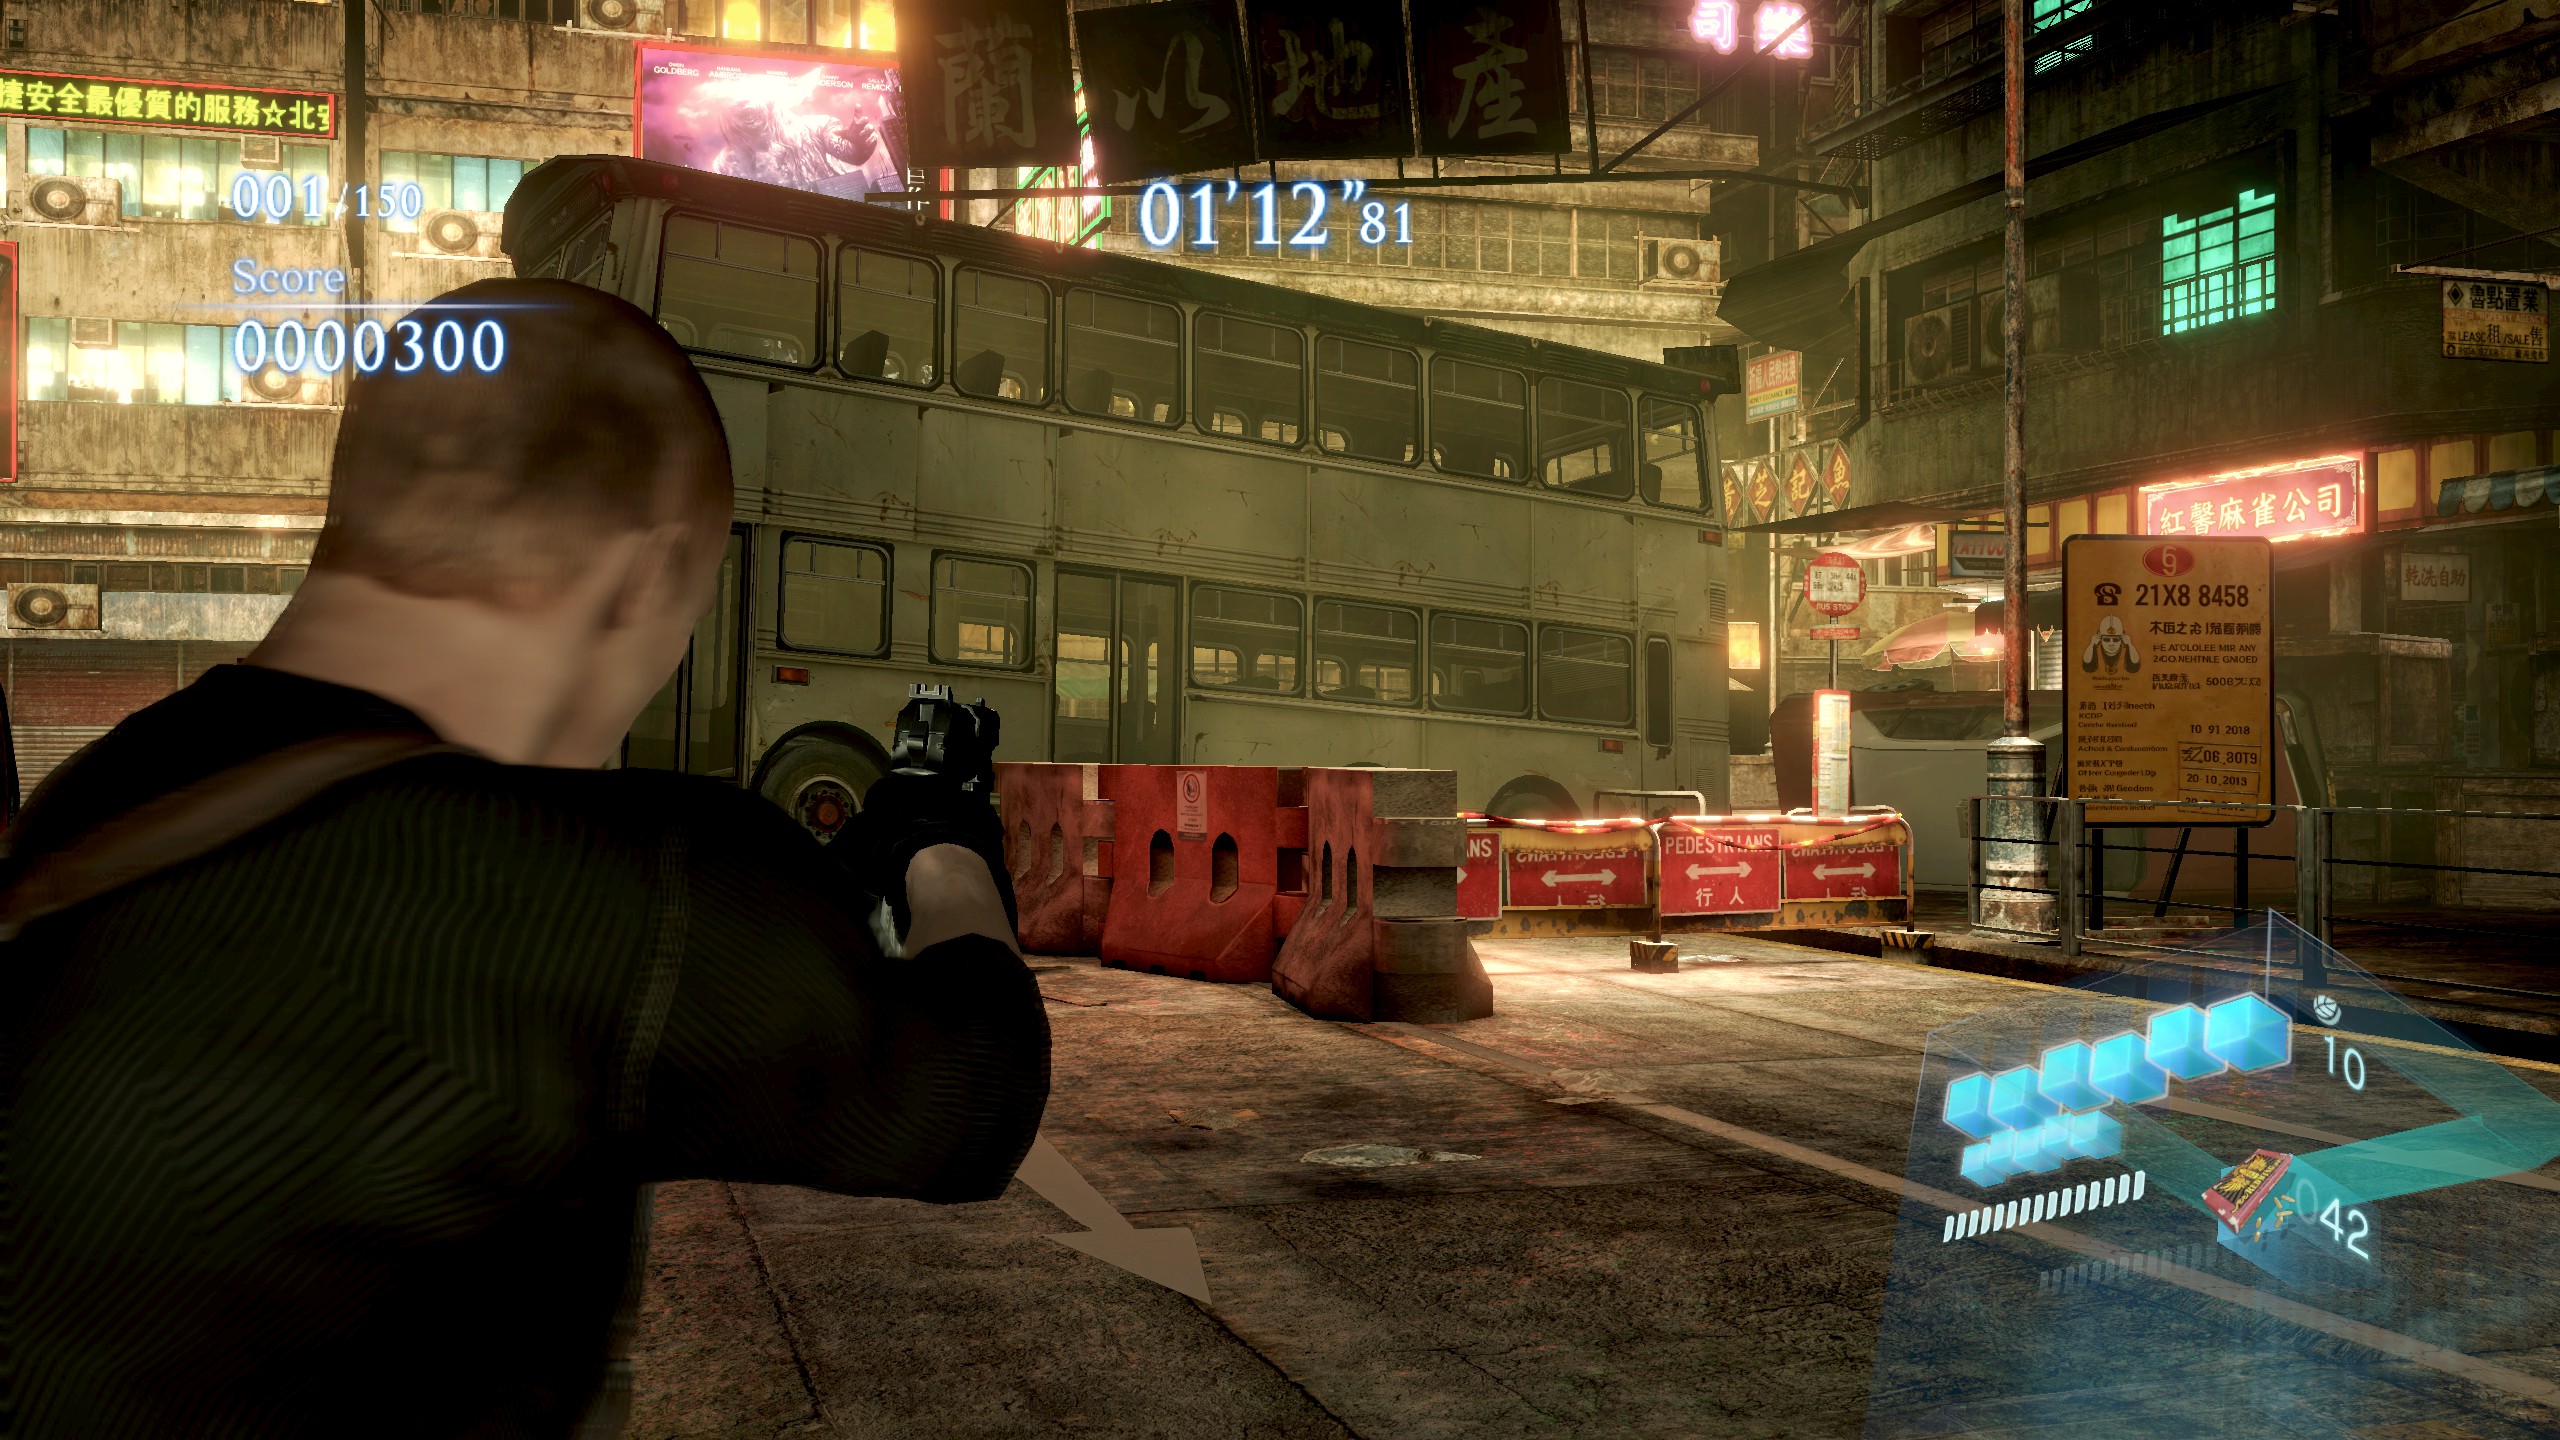
You will run out of ammo. You can farm self revives here by getting knocked out behind the bus with a grenade or something(make sure you heal once if you get back up because you can only go down without dying if you have more that 0 health blocks.
Very useful tip; if an enemy is in an animation like transforming or something specific, you cannot kill them no matter how much damage you do unless you either use an explosive item or get clean headshots, and 9mm doesn’t usually work for that. This is very specific and often not following logic so the best thing you can do is just wait until the animation finishes unless you need to kill them immediately like if your combo is going to time out. Thus, this is more important when considering bosses, as when they are in a transitional animation (kneeling down after taking specific damage, unmorphing, being knocked down, ect) the damage done won’t have any effect at all and is just a waste. Or I’m just crazy but test it for yourself.
Most people already know this but you can destroy Chrysalids by attacking them. They have a lot of health though.
When aiming, your red dot will move, to reset the aim back to center, just re-aim or aim again. Highly spamable.
You can use a heal to get back lost stamina in some cases.
You can use health tablets even when you are full health by doing a slide cancel. You slide from stationary, then let go of the movement stick, then spam heal. This can help heal partners. You don’t NEED to “slide cancel”, you can just do a slide and spam heal to heal your stamina.
To get better accuracy with scoped weapons, do a back dodge(aim, movebackwards, press action button) and aim on your back. This helps in Chris CH.4.
If you have attack reaction on in campaign, you can shoot your partner with something strong to boost them forward / knock them down. This can be useful if you want to save them from getting grabbed/hit or to knock them into places they can't usually get to. A good example of this is in Leon Chapter 3, where Helana falls and needs to crawl away from zombies, Leon can shoot her and she will be boosted far forward and get out faster. Be careful because this can do a lot of damage to your online partner potentially.
You can send your AI partner at enemies to shield you from their attacks, as AI partners do not take real damage and will never go down. “Move in!”
You can easily take down Strelats with only melee with any character (easier with Jake obviously). All you need to do is dodge the spikes it sometimes shoots at you. Here is how: Sprint towards the enemy at any range, but it is more efficient at close range considering you won’t have to close distance and dodge projectiles, and after sprinting do a sprint melee. Scoring a hit will leave it open, do a melee context and as soon as it gets back up, do another sprint melee as soon as it’s animation is about to finish (this is the important part as if they get away it kind of ruins this tip). You can repeat this about 3 times to kill it.
Enemies can’t do a lot (including bosses) if you just stand behind them. Dark Souls.
An easy way to combine herbs really fast is to simply memorize an input; Y, X, X, A, A. That is the xbox/PC controls so remap it in your head and use as necessary. Or just spam A. You can also use RB+X in inventory. Thanks Jackie B. Goode.
With any weapon that requires a rechambering action in between shots (anti-materiel rifle, sniper rifle, pump shotgun, even the cooldown of the grenade launcher shots, ect, ect), you can skip the animation and immediately fire again by first selecting any different weapon or item and then switching back to the target weapon. Does not work with quick-shots. With a controller, the input combo would look like this: While holding LT and aiming the whole time, shoot RT, left D pad, Right D pad, repeat. You don't have to shoot after and you can actually use this to reload at a quicker interval. You can also use this to cancel the remaining reload animation after the magazine is full or when you need to shoot but can't stop reloading. You can even throw grenades fast by aiming the entire time, throwing grenade, press weapon cycle down, repeat.
You can spam the regular straight sweep knife attack by holding Aim and Attack, then pressing change sholder (Right stick in on controller) just as the knife makes contact with the target while still holding both Aim and Attack. You can do this repeatedly if you keep holding Aim and Attack while pressing change sholder every half second or so. Quick Melee (aim, walk backwards and attack together) is faster but does slightly less damage.
In Urban Chaos only in Mercenaries + No mercy, you can get out of bounds easily by going to where the big grey bus is at the end of the map and vaulting over the railing to push you inside of the bus allowing you to walk through it.
You will run out of ammo. You can farm self revives here by getting knocked out behind the bus with a grenade or something(make sure you heal once if you get back up because you can only go down without dying if you have more that 0 health blocks.
Very useful tip; if an enemy is in an animation like transforming or something specific, you cannot kill them no matter how much damage you do unless you either use an explosive item or get clean headshots, and 9mm doesn’t usually work for that. This is very specific and often not following logic so the best thing you can do is just wait until the animation finishes unless you need to kill them immediately like if your combo is going to time out. Thus, this is more important when considering bosses, as when they are in a transitional animation (kneeling down after taking specific damage, unmorphing, being knocked down, ect) the damage done won’t have any effect at all and is just a waste. Or I’m just crazy but test it for yourself.
Most people already know this but you can destroy Chrysalids by attacking them. They have a lot of health though.
When aiming, your red dot will move, to reset the aim back to center, just re-aim or aim again. Highly spamable.
You can use a heal to get back lost stamina in some cases.
You can use health tablets even when you are full health by doing a slide cancel. You slide from stationary, then let go of the movement stick, then spam heal. This can help heal partners. You don’t NEED to “slide cancel”, you can just do a slide and spam heal to heal your stamina.
To get better accuracy with scoped weapons, do a back dodge(aim, movebackwards, press action button) and aim on your back. This helps in Chris CH.4.
If you have attack reaction on in campaign, you can shoot your partner with something strong to boost them forward / knock them down. This can be useful if you want to save them from getting grabbed/hit or to knock them into places they can't usually get to. A good example of this is in Leon Chapter 3, where Helana falls and needs to crawl away from zombies, Leon can shoot her and she will be boosted far forward and get out faster. Be careful because this can do a lot of damage to your online partner potentially.
You can send your AI partner at enemies to shield you from their attacks, as AI partners do not take real damage and will never go down. “Move in!”
You can easily take down Strelats with only melee with any character (easier with Jake obviously). All you need to do is dodge the spikes it sometimes shoots at you. Here is how: Sprint towards the enemy at any range, but it is more efficient at close range considering you won’t have to close distance and dodge projectiles, and after sprinting do a sprint melee. Scoring a hit will leave it open, do a melee context and as soon as it gets back up, do another sprint melee as soon as it’s animation is about to finish (this is the important part as if they get away it kind of ruins this tip). You can repeat this about 3 times to kill it.
Co-Op and Multiplayer
Cop-Op Campaign difficulty - Online
In co-op, difficulty is tracked separately for the host and the joining player. When you join someone else's session, the game does not automatically match the host’s difficulty. Instead, you keep the last Campaign difficulty you personally selected. This only applies when the host is already playing the chapter.This means the host can be playing on one difficulty (for example, Professional), while you are playing on another (for example, Amateur) — even though you’re in the same session.
There are two ways to control your difficulty when joining:
• Quick Match – The difficulty you select before searching determines the difficulty you will personally play on, regardless of the host’s setting. However, selecting No Hope will only search for No Hope sessions due to its special restrictions.
• Custom Match – Selecting a difficulty filters the session list to only show games of that difficulty, and that difficulty will also apply to you when you join.
Exception:
If you choose “ANY” in Custom Match, the game may lock you to Amateur difficulty, no matter what session you join. It’s best to avoid this setting if you don’t want to default to Amateur.
In short:
The host’s difficulty and the client’s difficulty are independent, and they do not automatically sync.
Voice Chat
You cannot turn off in game voice chat but there is way around it.To mute all other players, you need to go into the options menu in the title screen or in game via comms device. Go to audio settings and turn microphone/voice volume to zero. To mute yourself you can either set push to talk, mute your actual microphone, or,
Press Alt+Tab to minimize your RE:6
Open your Windows soundsettings, go to input devices (where it shows your active microphone)
Right Click on your Microphone and press deactivate
Right Click on your Microphone again and press activate
RE:6´s ingame VOIP will now be off, until you open a new lobby, if you do just rince and repeat
Tid Bits
No one will be able to see what mods you have except you.BE CAREFUL WHEN USING FLASH GRENADES WITH ATTACK REACTION TURNED ON! If your partner is down and you throw a flash trying to stun the enemies you can kill your partner. The flash grenade explosion deals 1 damage on its own.
If you are having trouble playing with a friend due to disconnects, try altering who is hosting the session. Thanks emmyondro.
Local Co-Op on Two Separate Screens (PC)
This method makes RE6 stretch across two monitors so each player gets a full screen instead of split-screen.Requirements:
Two monitors
Same resolution recommended
Windows display mode set to “Extend”
You do NOT have to stack the monitors vertically in Windows, but it helps. If you place one monitor above the other in Display Settings, the split between players lines up more cleanly. If they are side-by-side, it can still work, but cutscenes may appear cut across screens.
Step 1 – Set Windows Display Mode - Right-click Desktop → Display Settings. Set Multiple Displays to: Extend these displays. Make sure both monitors use the same resolution and use 100% scaling.
Step 2 – Edit the Config File - (windows) Go to: C:\Users[Your_Username]\Documents\CAPCOM\RESIDENT EVIL 6\
Open: config.ini and Change: Resolution=1920x2160 FullScreen=OFF. Save the file. You can set the file to Read-Only afterward if the game keeps changing it. I suppose you can also set the fullscreen setting to windowed in game using the in game settings.
How to Choose the Correct Resolution - The rule is simple: Keep the width the same. Double the height.
Example 1 – Two 1920x1080 monitors (most common)
Each monitor: 1920x1080 - Use: 1920x2160
Example 2 – Two 2560x1080 ultrawides
Each monitor: 2560x1080 - Use: 2560x2160
Example 3 – One ultrawide + one regular monitor
Both monitors must run the same resolution for this to work cleanly.
Best option:
Set both monitors to 1920x1080 temporarily. Then use: 1920x2160
If both monitors support 2560x1080, you can use: 2560x2160
The game will open in windowed mode, so drag the window where it best fits both screens the way you want it.
Important Notes:
Cutscenes will be split in half between monitors.
Small black borders on the sides are normal.
If the image looks stretched, the resolution is incorrect.
If the game only appears on one screen, check that Windows is set to Extend.
Cheat Engine and Ethical Cheating Pt:1
### What Cheat Engine Is
Cheat Engine is a **memory scanning and editing tool** for Windows. It lets you look at and modify the data that a running program (usually a game) stores in RAM.
Games keep important values in memory while running, such as:
* Health
* Ammo
* Money
* Score
* Player coordinates
* Timers
Cheat Engine can **search through that memory to find those values** and then allow you to change them. This is why people use it to create things like unlimited health or infinite money in single-player games.
It was created by Eric Heijnen (also known as Dark Byte)
---
### How It Works (Basic Idea)
1. **Attach to a program**
You start Cheat Engine and select the process for the game or application you want to examine.
2. **Scan for a value**
Suppose your game shows you have **100 gold**.
You search memory for the number **100**.
The program scans millions of memory addresses and returns all addresses containing that value.
3. **Narrow the results**
Since many memory locations might contain 100, you change the value in-game (for example spend gold so it becomes 85).
Then you scan again for **85**.
This removes most incorrect results.
4. **Find the correct address**
After a few scans you may end up with one or a few addresses that control the real value.
5. **Edit or freeze it**
You can:
* Change the value (85 → 9999)
* Freeze it so the game cannot change it
The game immediately behaves differently because the value in memory changed.
---
### More Advanced Features
Cheat Engine can do much more than simple value editing:
* **Pointer scanning** – Finds stable paths to memory addresses that change every time the game launches.
* **Code injection / assembly editing** – Lets you modify the game’s machine code to change behavior (like disabling damage for one or all entities, set percentages, S ranks, 100% camo, step by step scripts, you name it).
* **Speedhack** – Changes how fast the game runs.
* **Memory viewer/debugger** – Shows the raw instructions the program is executing.
Because of these features, it’s also used by people learning **reverse engineering**.
---
### Precautions When Using It
**1. Don’t use it in online multiplayer games.**
Most multiplayer games have anti-cheat systems. If they detect Cheat Engine you can get:
* Permanent account bans
* Hardware bans
* Loss of your game account(and all games purchased)
Only use it in **offline or single-player games**.
**2. Download it from the official site only.**
There are fake versions bundled with malware.
**3. Be careful with cheat tables (.CT files).**
These are scripts made by other users. Poorly written ones can crash the game or do unexpected things.
**4. Back up save files.**
Changing values can break game logic or corrupt saves.
**5. Close it before launching protected games.**
Some anti-cheat systems flag it even if you aren’t using it.
Cheat Engine doesn’t actually “hack” the game files. It **changes values in RAM while the program is running**. Once the game closes, those memory changes disappear unless you build a script or mod to reproduce them.
It is recommended to backup your saved data before you mess with stuff you don’t understand. You can do things like set a value over the maximum, like in RE Revelations, you can make your stockpile of bullets larger than the current bullet upgrade, which can cause problems potentially. Or mabe you can give yourself collectibles that don’t go away in game, and you are left with it just sitting there and you can’t pick it up.
Cheat Engine is a **memory scanning and editing tool** for Windows. It lets you look at and modify the data that a running program (usually a game) stores in RAM.
Games keep important values in memory while running, such as:
* Health
* Ammo
* Money
* Score
* Player coordinates
* Timers
Cheat Engine can **search through that memory to find those values** and then allow you to change them. This is why people use it to create things like unlimited health or infinite money in single-player games.
It was created by Eric Heijnen (also known as Dark Byte)
---
### How It Works (Basic Idea)
1. **Attach to a program**
You start Cheat Engine and select the process for the game or application you want to examine.
2. **Scan for a value**
Suppose your game shows you have **100 gold**.
You search memory for the number **100**.
The program scans millions of memory addresses and returns all addresses containing that value.
3. **Narrow the results**
Since many memory locations might contain 100, you change the value in-game (for example spend gold so it becomes 85).
Then you scan again for **85**.
This removes most incorrect results.
4. **Find the correct address**
After a few scans you may end up with one or a few addresses that control the real value.
5. **Edit or freeze it**
You can:
* Change the value (85 → 9999)
* Freeze it so the game cannot change it
The game immediately behaves differently because the value in memory changed.
---
### More Advanced Features
Cheat Engine can do much more than simple value editing:
* **Pointer scanning** – Finds stable paths to memory addresses that change every time the game launches.
* **Code injection / assembly editing** – Lets you modify the game’s machine code to change behavior (like disabling damage for one or all entities, set percentages, S ranks, 100% camo, step by step scripts, you name it).
* **Speedhack** – Changes how fast the game runs.
* **Memory viewer/debugger** – Shows the raw instructions the program is executing.
Because of these features, it’s also used by people learning **reverse engineering**.
---
### Precautions When Using It
**1. Don’t use it in online multiplayer games.**
Most multiplayer games have anti-cheat systems. If they detect Cheat Engine you can get:
* Permanent account bans
* Hardware bans
* Loss of your game account(and all games purchased)
Only use it in **offline or single-player games**.
**2. Download it from the official site only.**
There are fake versions bundled with malware.
**3. Be careful with cheat tables (.CT files).**
These are scripts made by other users. Poorly written ones can crash the game or do unexpected things.
**4. Back up save files.**
Changing values can break game logic or corrupt saves.
**5. Close it before launching protected games.**
Some anti-cheat systems flag it even if you aren’t using it.
Cheat Engine doesn’t actually “hack” the game files. It **changes values in RAM while the program is running**. Once the game closes, those memory changes disappear unless you build a script or mod to reproduce them.
It is recommended to backup your saved data before you mess with stuff you don’t understand. You can do things like set a value over the maximum, like in RE Revelations, you can make your stockpile of bullets larger than the current bullet upgrade, which can cause problems potentially. Or mabe you can give yourself collectibles that don’t go away in game, and you are left with it just sitting there and you can’t pick it up.
Cheat Engine and Ethical Cheating Pt:2
Make sure you read everything! I am not responsible if anything happens to you! You knowingly accept the risks(not much tbh) and you need to know what you’re doing.
First off, disclaimer
Do your research on which games you can get away with using cheat engine on or you will be sorry! Resident Evil 6 is fine I promise you. Listen though, you don’t have to be scared and you can trust me. “You’re dealing with pros here.” This is coming from someone that genuinely cares if you get banned or not. Just do what I say and you will be ok.
To see what games have VAC enabled, in steam go to help, support, games, search for Valve Anti-Cheat, what games are vac enabled, click "here", search for target game. If it shows up, it has VAC. If it doesn’t, it’s probably fine to cheat on. You may also want to look up on google to see if anyone got banned for cheating, usually the answer is always no. RE6 is VAC enabled but this is the exception I PROMISE you. RE6 IS FINE TO CHEAT ON. It is pier to pier connection, not really server.
if you have questions AT ALL, please comment on the guide. In fact please please ask questions, I can help you. Check the comments to see if your questions have been answered already.
If you wanna be extra extra sure, look up on google to see if people are getting banned just from having cheat engine open while steam is open (this is super highly unlikely but what if they updated steam to detect this? Again, probably not in a million years.) Every time steam updates, just do some research online and see. I’ll just delete this whole category if anything changes. Again, you should be fine, just do the research. Be aware of other anticheat detection services like easyanticheat.
As a final layer of protection(really not necessary especially for old games) you can make another Steam account and only cheat on that, then transfer saved data between accounts.
Make sure that you unblock and scan as usual. Read about unblocking and scanning in the mod part of this guide. This program is safe though so don’t worry. When you install it, MAKE SURE YOU DECLINE ALL OFFERS THAT COME WITH THE APP. It will try to get you to download some stuff like an antivirus and stuff. THESE ARE JUST ADVERTISEMENTS. Just decline and skip all and you’ll be fine. Next, download these cheat tables (or just make your own, good luck unless you know python):
You don’t need to launch the actual cheat engine app unless you want to. You can open the cheat table files directly which you can download here.
This one - http://redirect.viglink.com/?key=71fe2139a887ad501313cd8cce3053c5&subId=5490376&u=https%3A/drive.google.com/file/d/1fZV2bMHfh5QMRJiMEe-wYVDW0FCcRY5q/view%3Fusp%3Dsharing
Then this one - https://fearlessrevolution.com/download/file.php?id=5802&sid=29432c6bc4e96e4fc71e7c9d1ab5faf8
Then this one - https://opencheattables.com/download/file.php?id=292
Or pick just one of them. Or even just open cheat engine and make your own cheats but that requires some skill and knowledge on how to use cheat engine. If you’re interested there are a lot of videos online to help.
You can then combine all 3 downloaded cheat tables into 1 file if you want. Open all 3 of them. Control+click all the cheats inside one of them, control+c, close that one. Then go to another one that you opened, and click underneath the last cheat in that table and then press control+v. You successfully merged two together. Merge the last one and voila, you got one massive cheat table. Go to file, Save or Save as to name it. You can delete the old ones. Just make sure you don’t delete the one you just saved. You can open them and look inside if you forgot which one.
Now even if you don’t merge them, you need to know how to use a cheat table. To use it, launch the game, then launch the cheat table or cheat engine itself. (If you launched cheat engine itself, go to file, load, and choose where the cheat table file is.) Now click the glowing button in the top left and choose the game process. Now you can turn on cheats and really mess with stuff.
Cheat Engine will take some practice so be patient.
Don’t cheat against other players please.
I think you should have an idea now. Most offline games, even some that have online functionality are fine to cheat on with some specifics. The bottom line is, you need to research the game before you do it, then you're fine. I used to be pretty scared of it but now it’s like this:

I've learned a lot, including Python, in fact I have been learning ever since I got my PC but Cheat Engine and the desire to make mods got me into learning how to code (albeit rudimentarily) and even make 3d models in blender. Just treat it with respect and it will treat you, by helping you not waste your free time and get ahead. Achievements anyone? You see what I mean.
Now if you do somehow end up getting your RE account banned (doesn’t affect steam or online play) it isn't a big deal if you just want costumes because you can use the save editor I linked in this guide and just give yourself the costumes. Use control+f and search save editor. Or go to I think it was the modding category and find there. It is also in the Unlockables section.
First off, disclaimer
DO NOT USE CHEAT ENGINE IN NEW GAMES OR GAMES WITH “VAC” (valve anti-cheat) OR YOU WILL BE BANNED FROM STEAM!!!
Treat your Steam account like your life! If it feels sketch, don’t do it and skip this part of the guide.Do your research on which games you can get away with using cheat engine on or you will be sorry! Resident Evil 6 is fine I promise you. Listen though, you don’t have to be scared and you can trust me. “You’re dealing with pros here.” This is coming from someone that genuinely cares if you get banned or not. Just do what I say and you will be ok.
To see what games have VAC enabled, in steam go to help, support, games, search for Valve Anti-Cheat, what games are vac enabled, click "here", search for target game. If it shows up, it has VAC. If it doesn’t, it’s probably fine to cheat on. You may also want to look up on google to see if anyone got banned for cheating, usually the answer is always no. RE6 is VAC enabled but this is the exception I PROMISE you. RE6 IS FINE TO CHEAT ON. It is pier to pier connection, not really server.
Optional Precautions
If you are really worried, only play single player and just launch steam in offline mode before you cheat as a protective layer. Trust me you will be fine, just do what I say and,if you have questions AT ALL, please comment on the guide. In fact please please ask questions, I can help you. Check the comments to see if your questions have been answered already.
If you wanna be extra extra sure, look up on google to see if people are getting banned just from having cheat engine open while steam is open (this is super highly unlikely but what if they updated steam to detect this? Again, probably not in a million years.) Every time steam updates, just do some research online and see. I’ll just delete this whole category if anything changes. Again, you should be fine, just do the research. Be aware of other anticheat detection services like easyanticheat.
As a final layer of protection(really not necessary especially for old games) you can make another Steam account and only cheat on that, then transfer saved data between accounts.
Download
Here is Cheat Engine download page: https://www.cheatengine.org/downloads.phpMake sure that you unblock and scan as usual. Read about unblocking and scanning in the mod part of this guide. This program is safe though so don’t worry. When you install it, MAKE SURE YOU DECLINE ALL OFFERS THAT COME WITH THE APP. It will try to get you to download some stuff like an antivirus and stuff. THESE ARE JUST ADVERTISEMENTS. Just decline and skip all and you’ll be fine. Next, download these cheat tables (or just make your own, good luck unless you know python):
You don’t need to launch the actual cheat engine app unless you want to. You can open the cheat table files directly which you can download here.
This one - http://redirect.viglink.com/?key=71fe2139a887ad501313cd8cce3053c5&subId=5490376&u=https%3A/drive.google.com/file/d/1fZV2bMHfh5QMRJiMEe-wYVDW0FCcRY5q/view%3Fusp%3Dsharing
Then this one - https://fearlessrevolution.com/download/file.php?id=5802&sid=29432c6bc4e96e4fc71e7c9d1ab5faf8
Then this one - https://opencheattables.com/download/file.php?id=292
Or pick just one of them. Or even just open cheat engine and make your own cheats but that requires some skill and knowledge on how to use cheat engine. If you’re interested there are a lot of videos online to help.
You can then combine all 3 downloaded cheat tables into 1 file if you want. Open all 3 of them. Control+click all the cheats inside one of them, control+c, close that one. Then go to another one that you opened, and click underneath the last cheat in that table and then press control+v. You successfully merged two together. Merge the last one and voila, you got one massive cheat table. Go to file, Save or Save as to name it. You can delete the old ones. Just make sure you don’t delete the one you just saved. You can open them and look inside if you forgot which one.
Now even if you don’t merge them, you need to know how to use a cheat table. To use it, launch the game, then launch the cheat table or cheat engine itself. (If you launched cheat engine itself, go to file, load, and choose where the cheat table file is.) Now click the glowing button in the top left and choose the game process. Now you can turn on cheats and really mess with stuff.
Cheat Engine will take some practice so be patient.
Don’t cheat against other players please.
Games that I know is fine to use Cheat Engine on and have been tested with 0 bans or issues
FYI, There are more games you can use CE on but these are the ones I know have been tested and can assure you that you will be fine.- Resident Evil 0-9. The remakes should be fine. You can get banned from RE.NET though apparently, or so I heard one time. Nobody I know has, so probably not.
- Final Fantasy PR collection and 3D Remakes and any other Singleplayer titles like X, XII Zodiac, ect.
- Dragon Quest hd remakes
- Ninja Gaiden Master Collection & Black II
- Metal Gear Master Collection Vol 1-2
- Castlevania Lords of Shadow Ultimate
- Hollow Knight
- Bayonetta
- Elder Scrolls: I-V
- Fallout 1-4 and tactics, NOT Fallout 76!
- All 4 Batman Arkham Games
- Nioh: Complete Edition or Nioh 1
- Shadow of Mordor/War
- The Witcher 1,2,3
- Final Fantasy VII Remake & Rebirth (notice how I kept it seperate from the mainlines because it is still a newer game right now but still fine)
- Devil May Cry HD Collection and 4 and 5
- Transformers War for / Fall of Cybertron and Rise of the Dark Spark
- Assassin's Creed Games
- BioShock 1, 2, Infinite
- Borderlands 1, 2, 3 When in Singleplayer but a little tiny bit risky, just play offline.
- Doom 2016 and Eternal Singleplayer
- Most if not all Lego games
- Stardew Valley
- Onimusha Warlords 1 and 2
- All if not most Telltale Games like Walking Dead
Games that YOU WILL GET BANNED IF YOU CHEAT ON that I know of
- Fallout 76, Elder Scrolls Online, ect Bethesda online
- Dying Light, DL2, DL The Beast(terrible game btw) Note:with this game even if you cheat offline and go back online with the same save data there is a chance I think.
- Final Fantasy XI because it is an online game
- Any COD game and Halo
- Marvel Rivals
- MGSdelta FOXhunt. I wanna say, you can actually use Cheats for the Campaign. Just be careful.
- Death Stranding 1-2
- L4D 1-2
I think you should have an idea now. Most offline games, even some that have online functionality are fine to cheat on with some specifics. The bottom line is, you need to research the game before you do it, then you're fine. I used to be pretty scared of it but now it’s like this:
I've learned a lot, including Python, in fact I have been learning ever since I got my PC but Cheat Engine and the desire to make mods got me into learning how to code (albeit rudimentarily) and even make 3d models in blender. Just treat it with respect and it will treat you, by helping you not waste your free time and get ahead. Achievements anyone? You see what I mean.
Now if you do somehow end up getting your RE account banned (doesn’t affect steam or online play) it isn't a big deal if you just want costumes because you can use the save editor I linked in this guide and just give yourself the costumes. Use control+f and search save editor. Or go to I think it was the modding category and find there. It is also in the Unlockables section.
Final Rule - NEVER TELL ANYONE YOU USE CE OR YOU CAN GET REPORTED AND THEN BANNED
Notice how I actually never said that I use CE. I never said.
End of Guide
TOBOG
Top or bottom of guide
for CTRL+F
Top or bottom of guide
for CTRL+F
More Resident Evil 6 guides
- Unlockable Costumes & Collectables★ 5 (782)53k views805 ♥1 minUpdated Jul 4, 2023
- Resident Evil 6 100% Achievement Guide★ 5 (1k)32k views2.1k ♥26 min
- UNLOCK CHARACTERS & COSTUMES: Mercenaries gamemode★ 5 (465)31k views542 ♥3 minUpdated Aug 24, 2016
- Fastest way to earn skill points [24500pts in 5 min] RU/EN★ 5 (400)22k views531 ♥1 minUpdated Aug 8, 2013
- The best order to play the campaings following the narrative★ 5 (460)22k views747 ♥1 minUpdated Jun 18, 2025
- SKILLS & GUNS: Exact numbers, Explanations★ 5 (450)20k views627 ♥10 minUpdated Jan 30, 2021





This guide was created by its original author on the Steam Community. Are you the author and want it removed? Request removal.