Siege Assault: Ultimate Guide xIAMxTHATxGUYx
Introduction
I do not know where to start, but with 2000+ hours on the game and almost all my online matches are sieges, I decided to write a guide. I have a short story to tell you first though.
One day, I was in the lobby, casually searching for an open siege room. One on one or a group siege did not matter, I just wanted to play, but the rooms were either in session, full, or had a password. Except for one. Even though that one room was an open field match, I decided to change air a little bit and play it. I chose Parthia and my opponent, Armenia. The first time we played he destroyed me, the second time though, I caused some considerable damage considering that I rarely play open field. We talked during and after the fight about tactics and whatnot, including the fact that I only play sieges and rarely open field. He said that he liked open field because sieges had no tactics, oh but he was so wrong.
I requested that he changes the game mode to city or port assault, but he did not want to play in my back yard, so he asked to play an unfortified town assault on the map Rhaga that way the match can be half open field and half siege satisfying both of us. I accepted. I chose Antony's Rome while he chose Parthia. Despite the little experience I have in open field, I know for a fact that Parthia can annihilate a Roman army from a distance. The match starts and like I expected, my opponent’s roster contained horse archers upon archers upon cataphracts. The town had multiple ways inside, with one of them being on a hill that leads to a very narrow road that goes down into the town. I rushed all my army to the hill before his units can reach me, and divided my units into two sections at both ends of the road.
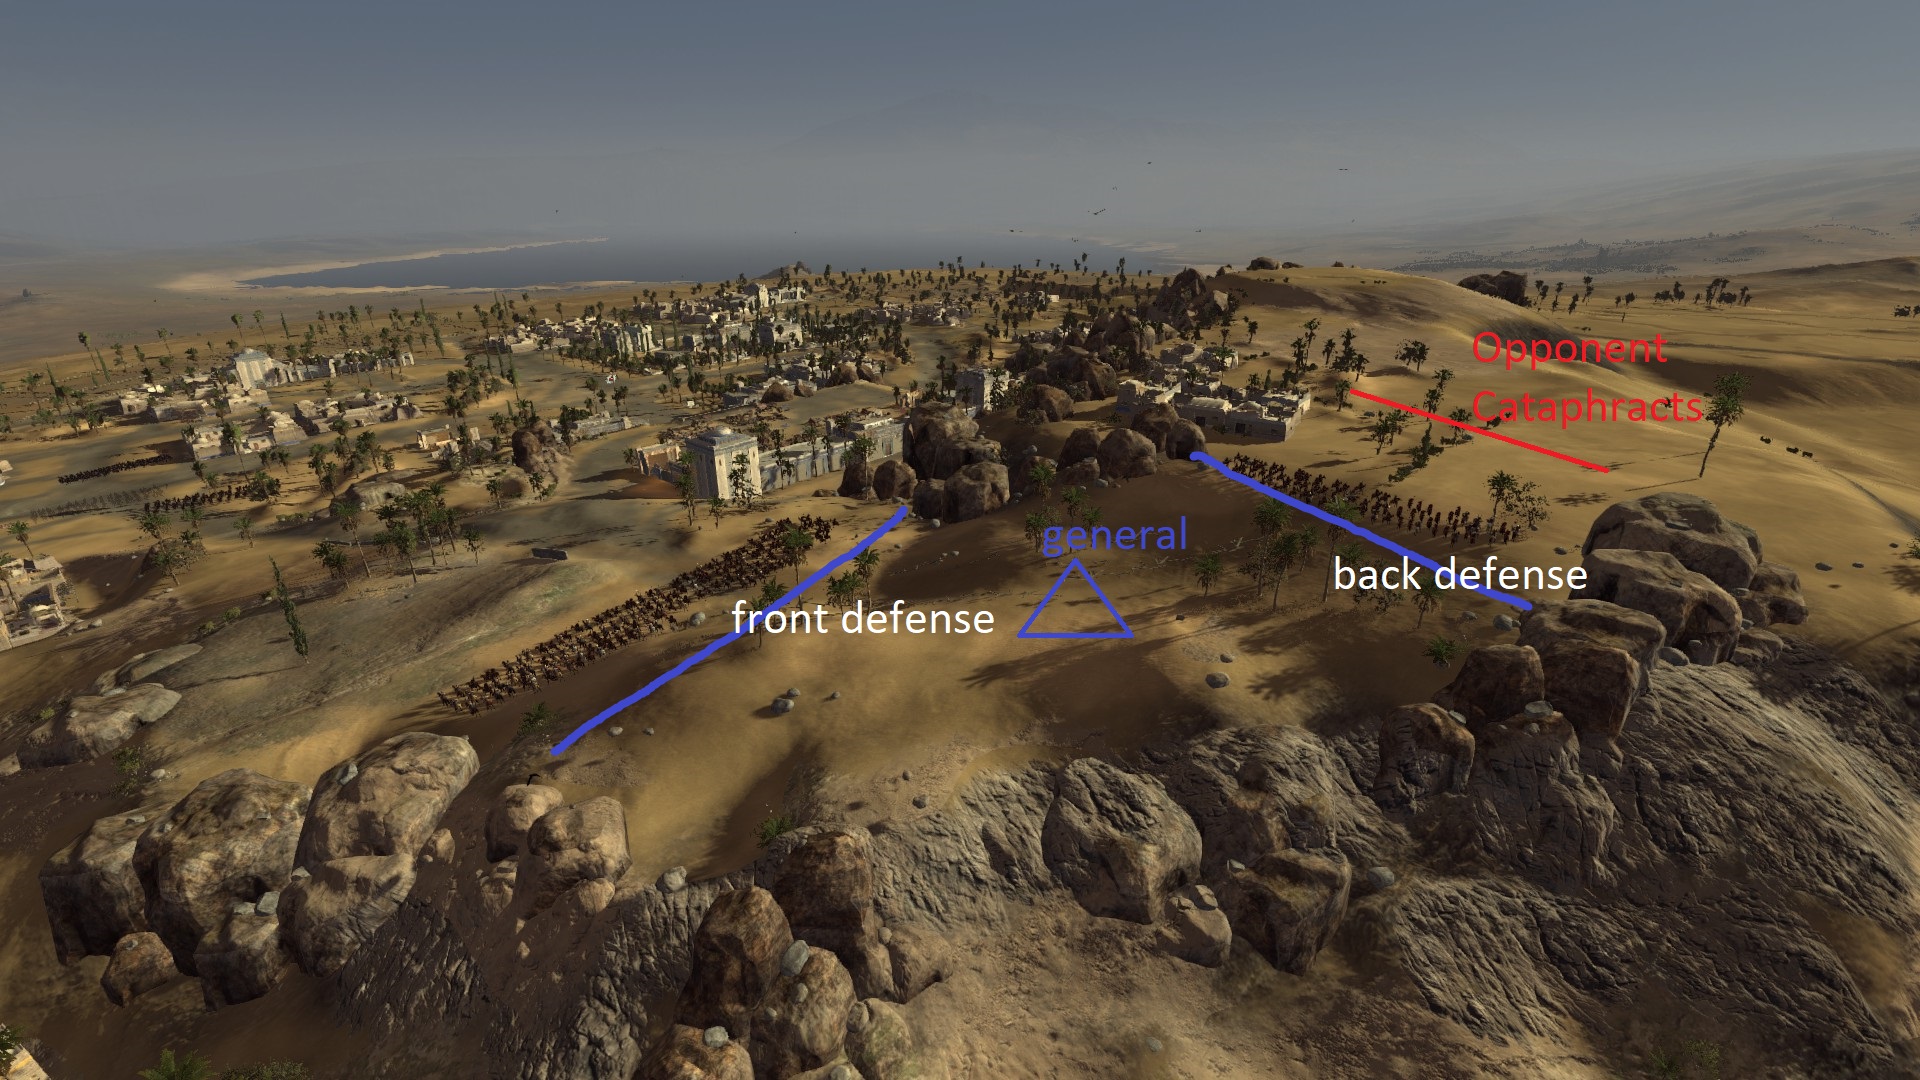 I protected my back with six Evocati cohorts and three Auxiliary Cretan archers, while the front had six veteran legionnaires and three Auxiliary Syrian archers.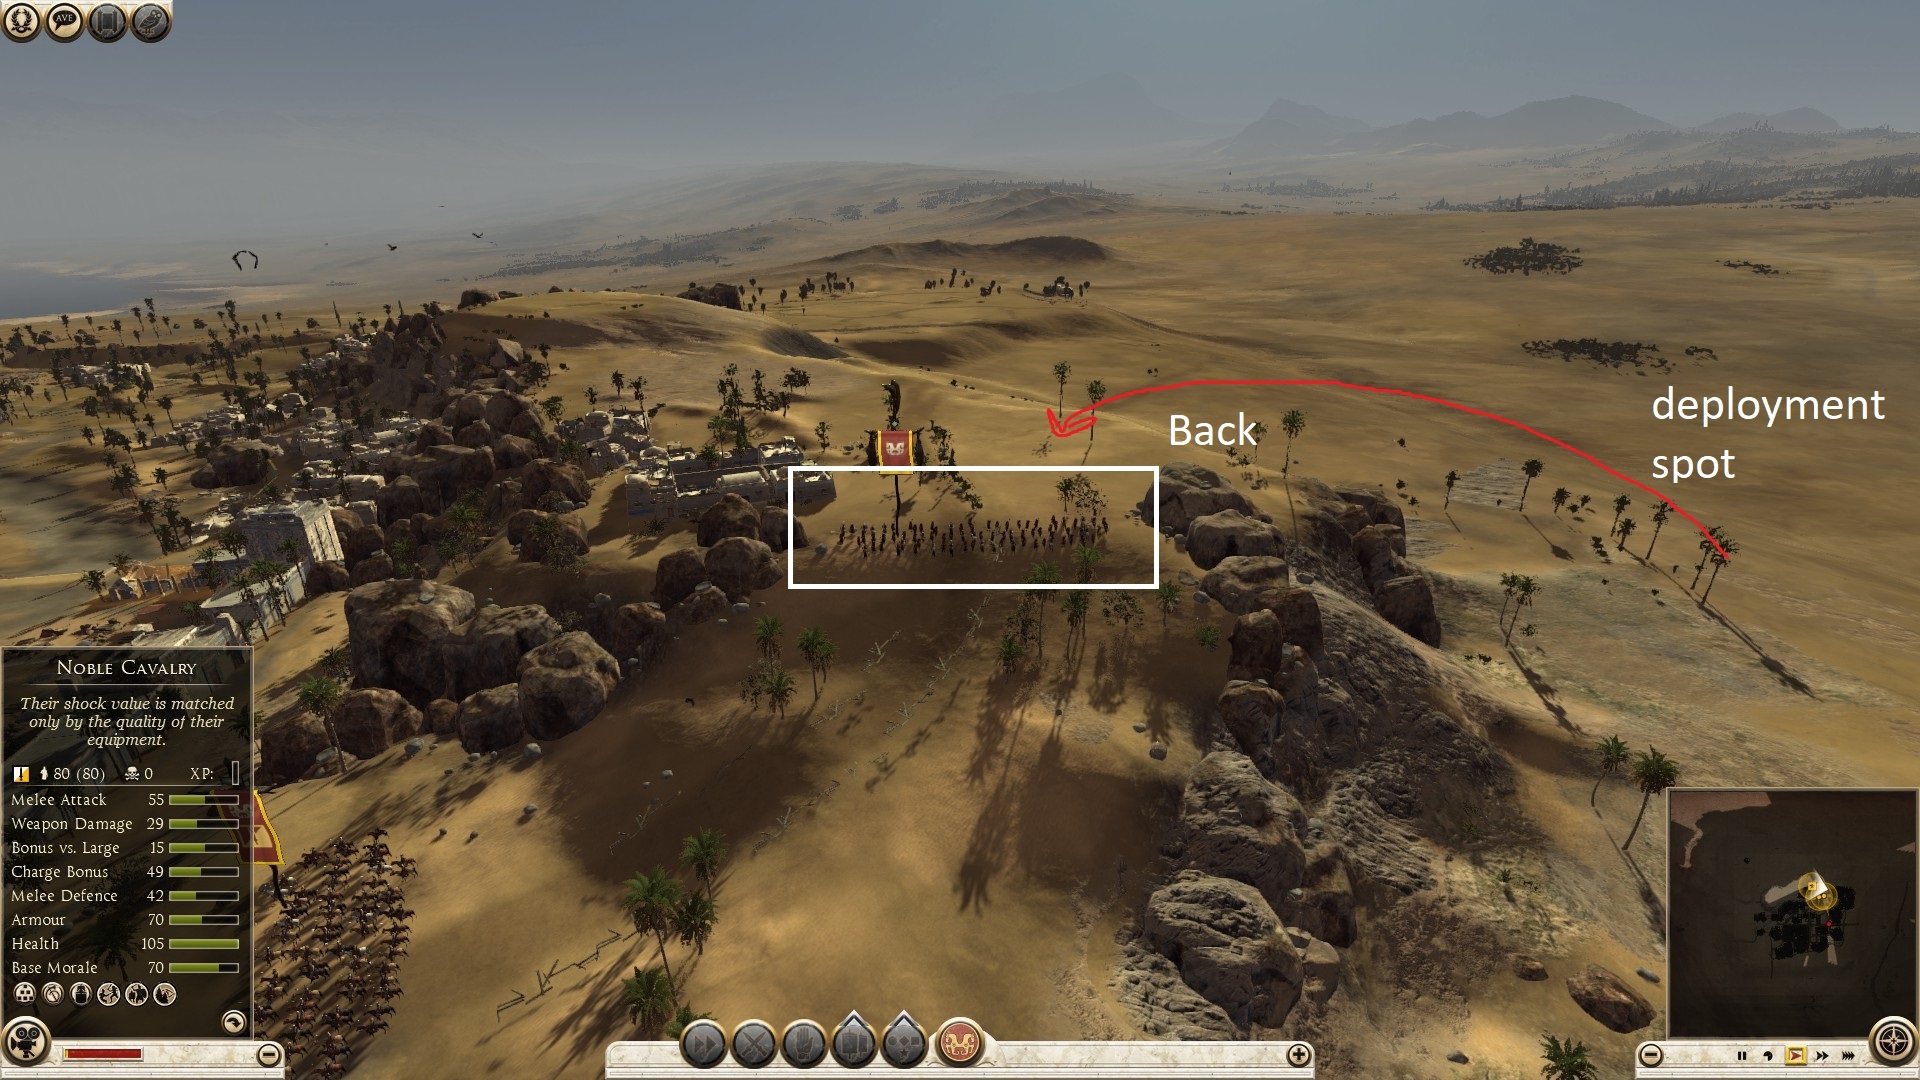
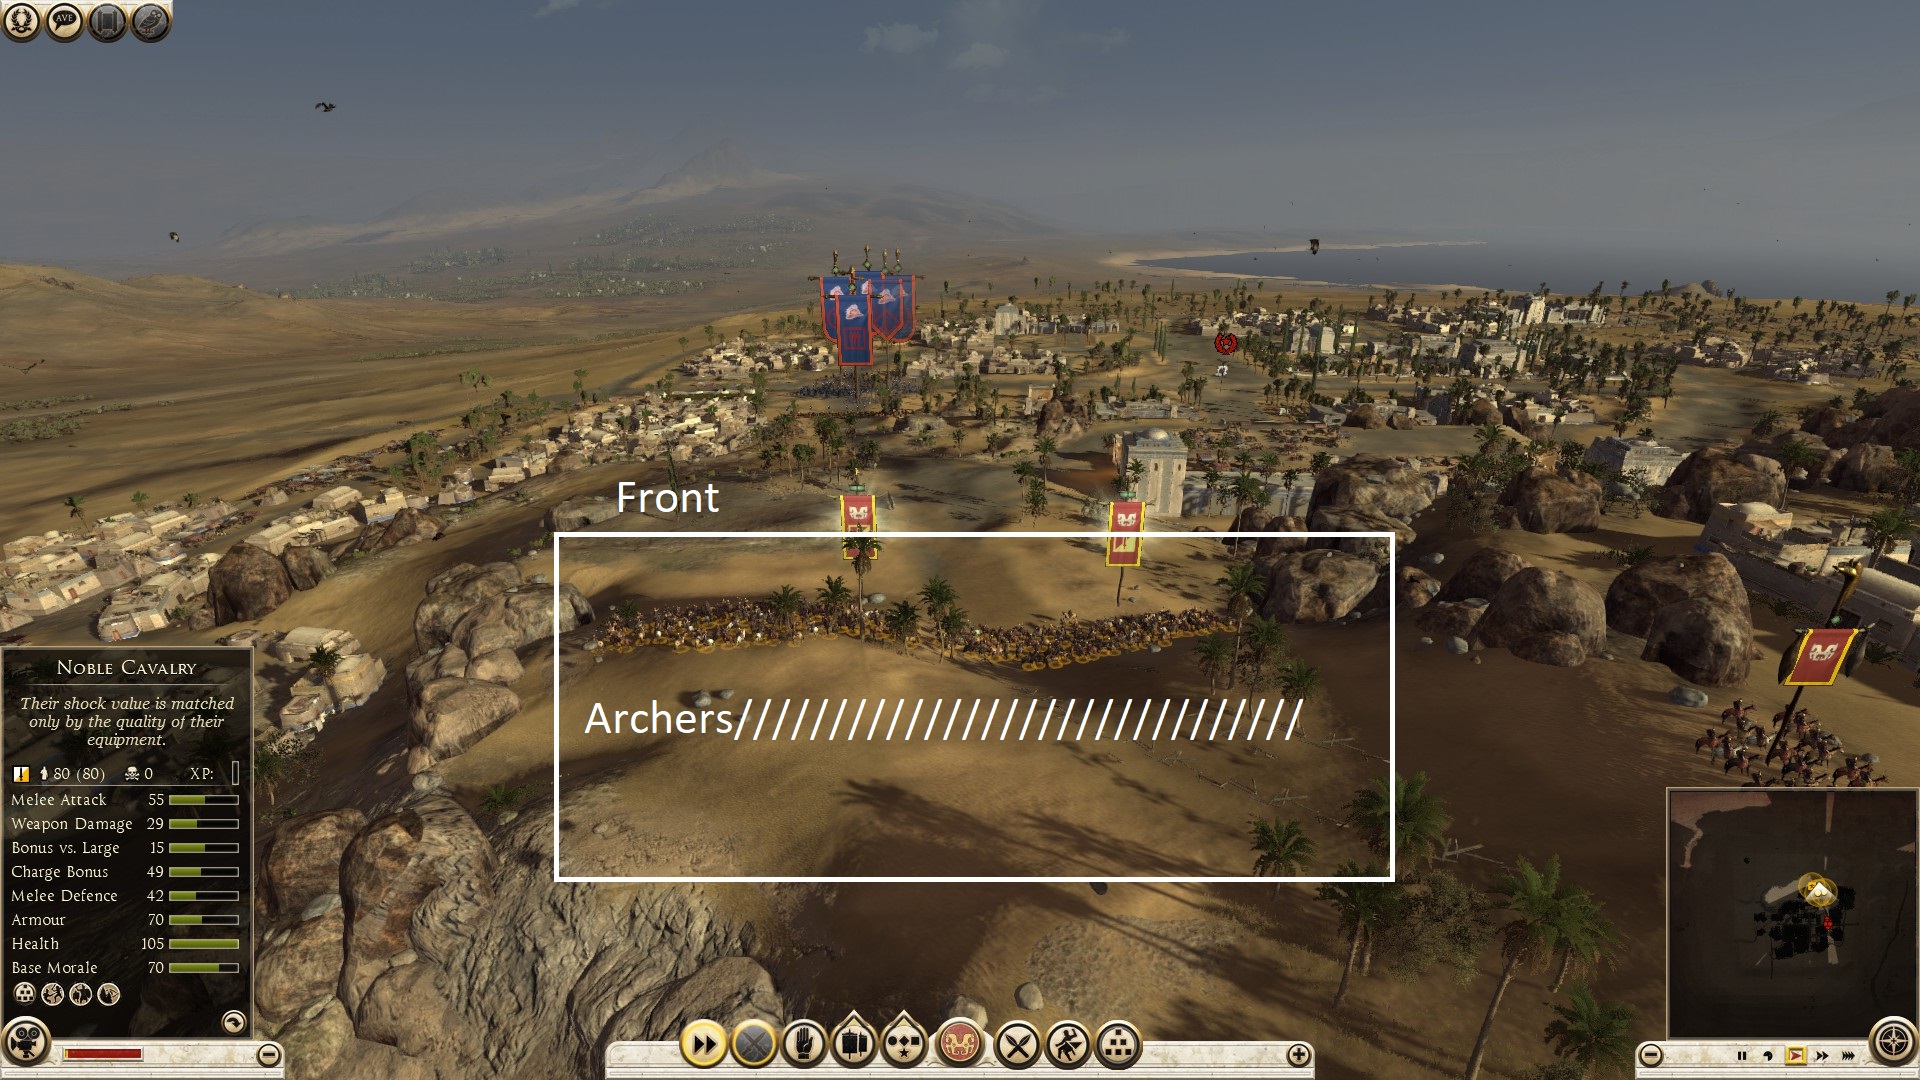 My position forced him to attack me from two sides only, and with my units in testudo, I did not take as many losses as I would have if I attacked through the open roads. His horse and foot archers were raining arrows on me non-stop. I did not want to be a sitting duck, so I advanced my frontlines to the forked end of the road. The pathway to the right was protected by Parthian swords men, the other contained his range units. I sent two veteran legionnaires to fight his swordsmen on the right, and kept four veterans in front of my archers who were skirmishing his range units.
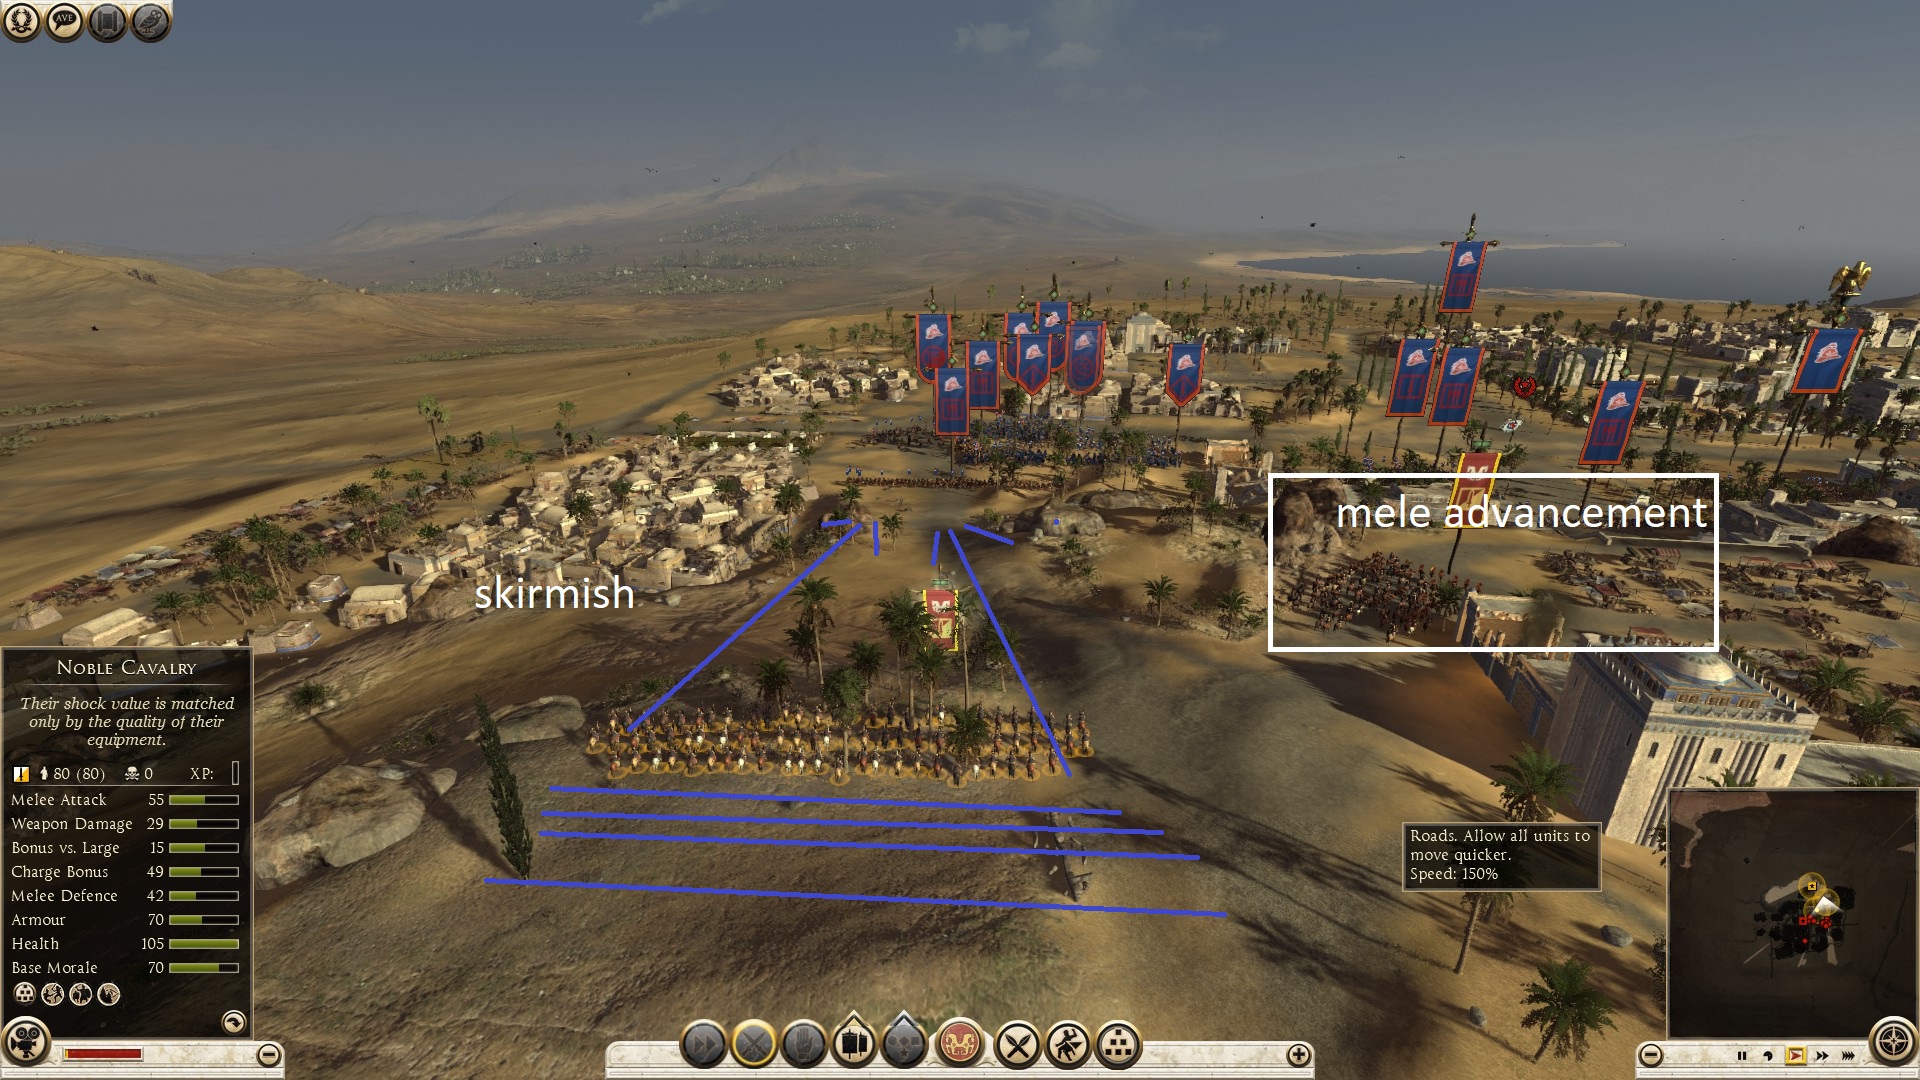 We skirmished for a long time, but with his units in a blob and my units spread out on higher ground, many of his units were forced to back off or route. He knew, if what was happening continued, he would lose his range department leaving him with cataphracts only against my heavy infantry that carry pila’s (javelins that some melee and spear units throw before engaging in close quarter combat). He decided to do what the only thing he could do at that situation, try to break through my front with his horses, to put my archers out of the picture. I made a mistake on my part and did not line up my four veteran legionnaires correctly, he exploited that, and charged through. Some horses were stopped, some continued and killed some of my archers.
My Six Evocati were face to face with his Cataphracts who were out of my pila range, but close enough to charge me when I get out of position. I rushed one Evocati to the front to take care of the horses that broke through and when I did, he charged his Cataphracts. To counter him, I put my remaining Evocati out of testudo formation and charged the incoming horses, throwing a few pila’s at them before they hit me. I broke through his front, then later through the back. Moral of the story? to be found in the upcoming lines
We skirmished for a long time, but with his units in a blob and my units spread out on higher ground, many of his units were forced to back off or route. He knew, if what was happening continued, he would lose his range department leaving him with cataphracts only against my heavy infantry that carry pila’s (javelins that some melee and spear units throw before engaging in close quarter combat). He decided to do what the only thing he could do at that situation, try to break through my front with his horses, to put my archers out of the picture. I made a mistake on my part and did not line up my four veteran legionnaires correctly, he exploited that, and charged through. Some horses were stopped, some continued and killed some of my archers.
My Six Evocati were face to face with his Cataphracts who were out of my pila range, but close enough to charge me when I get out of position. I rushed one Evocati to the front to take care of the horses that broke through and when I did, he charged his Cataphracts. To counter him, I put my remaining Evocati out of testudo formation and charged the incoming horses, throwing a few pila’s at them before they hit me. I broke through his front, then later through the back. Moral of the story? to be found in the upcoming lines-----------------------------------------------------------------------------------------------------------------------------------
There are four types of siege game modes:
- City Assault: Requires at least two (or more) players with one being an attacker and the other a defender. All cities have walls, and some have a port. Attackers can ONLY attack from land even though there is a port. Has a victory point.
- Port Assault: Requires at least two (or more) players with one being an attacker and the other a defender. All cities have walls, and some have a port. Attackers can attack from land AS WELL AS SEA using ships. Has a victory point.
- Unfortified Town Assault: Requires at least two (or more) players with one being an attacker and the other a defender. All towns have NO walls, and some have a port. Attackers can ONLY attack from land even though there is a port. NO victory point (annihilate enemy to win).
- Unfortified Port Assault: Requires at least two (or more) players with one being an attacker and the other a defender. All towns have NO walls, and some have a port. Attackers can attack from land AS WELL AS SEA using ships. NO victory point (annihilate enemy to win).
Medium and smaller sized cities do not have wall artillery stations, stations that can carry artillery pieces. Cities sized large and bigger do. Look below and compare, the same city (alexandria) in medium and large size.
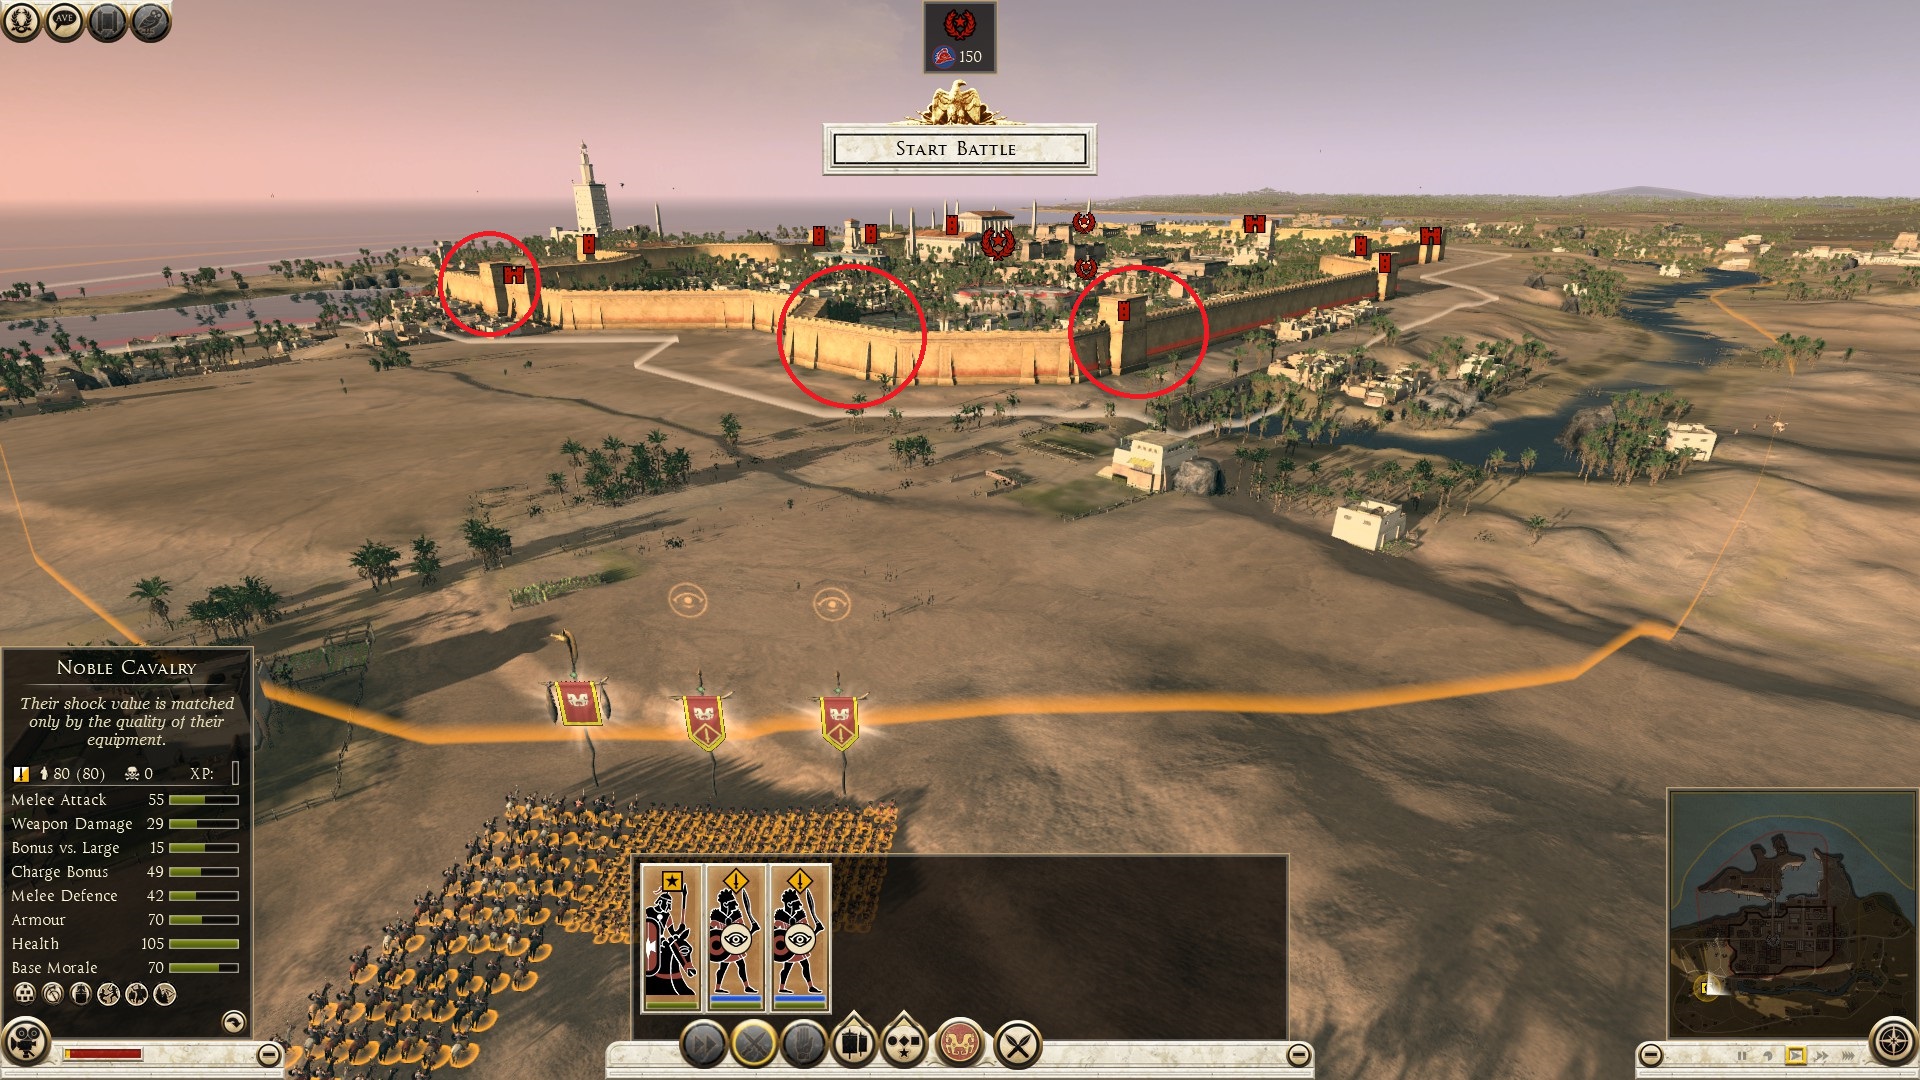
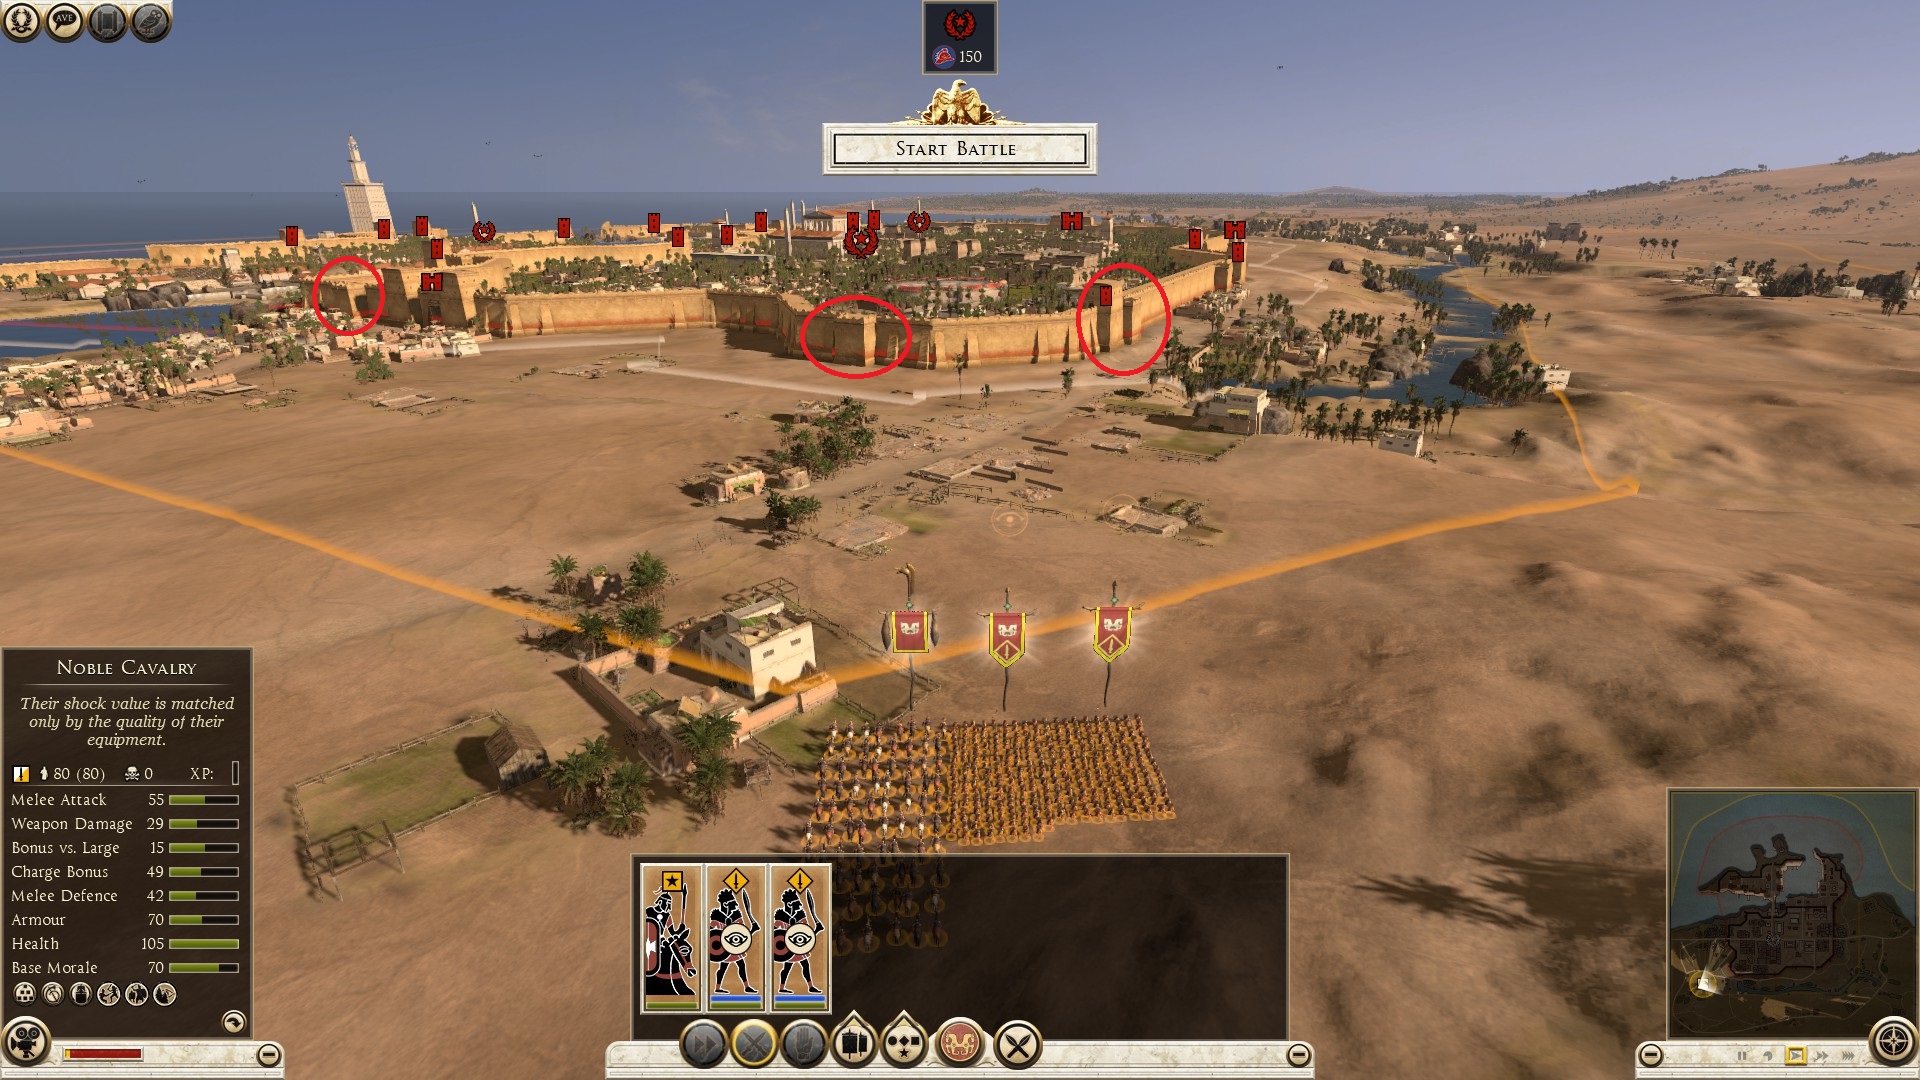
-----------------------------------------------------------------------------------------------------------------------------------
Before selecting a faction and building an army, you need to find out the: Funds, season, time of day, weather, and the settlement size. The last thing you want, is to be in situations where your army routes in a very short amount of time against barbarians, because they are cold resistant, and your units aren’t. The information can be found on the right side of the screen, under the settings tab, except for the settlement size which you can find out by asking the host. Know the capabilities of your army compared to your opponent(s).
Study the factions, find out their weaknesses and strengths. I do not pick a faction and or build an army, until I have found out what faction my opponent is bringing, so I can have an idea of what types of units my opponent(s) will bring. I would love to give a detailed comparison between the factions, but I would like to keep this guide siege related, and (assuming) there are probably guides out there already on faction cons and pros. I will give you a few examples you can apply to other factions.
For example, regardless if I am the defender or attacker, if my opponent(s) faction is Grand Campaign Rome (G.C.R), I know the faction is limited in the range and pike department. G.C.R is limited to three Auxiliary Syrian Archers, three Auxiliary Balearic Slingers, and zero pikes. Let's say my opponent (s) choose a “barbarian" faction. Again, whether I am attacking or defending, I know that "barbarian" archers are powerful but lack armor just like many of their melee units. Even though a lot of “barbarian” melee units are not heavily armored, their high melee defense makes up for it like the Berserkers. That doesn't mean your opponent wont deploy heavily armored units with very high melee defense like Sword Masters or Oathsworn that can go head to head with Praetorians, pay attention to the funds and try to guess what the elite units your opponent might bring.
==========================================================================
Introduction continued
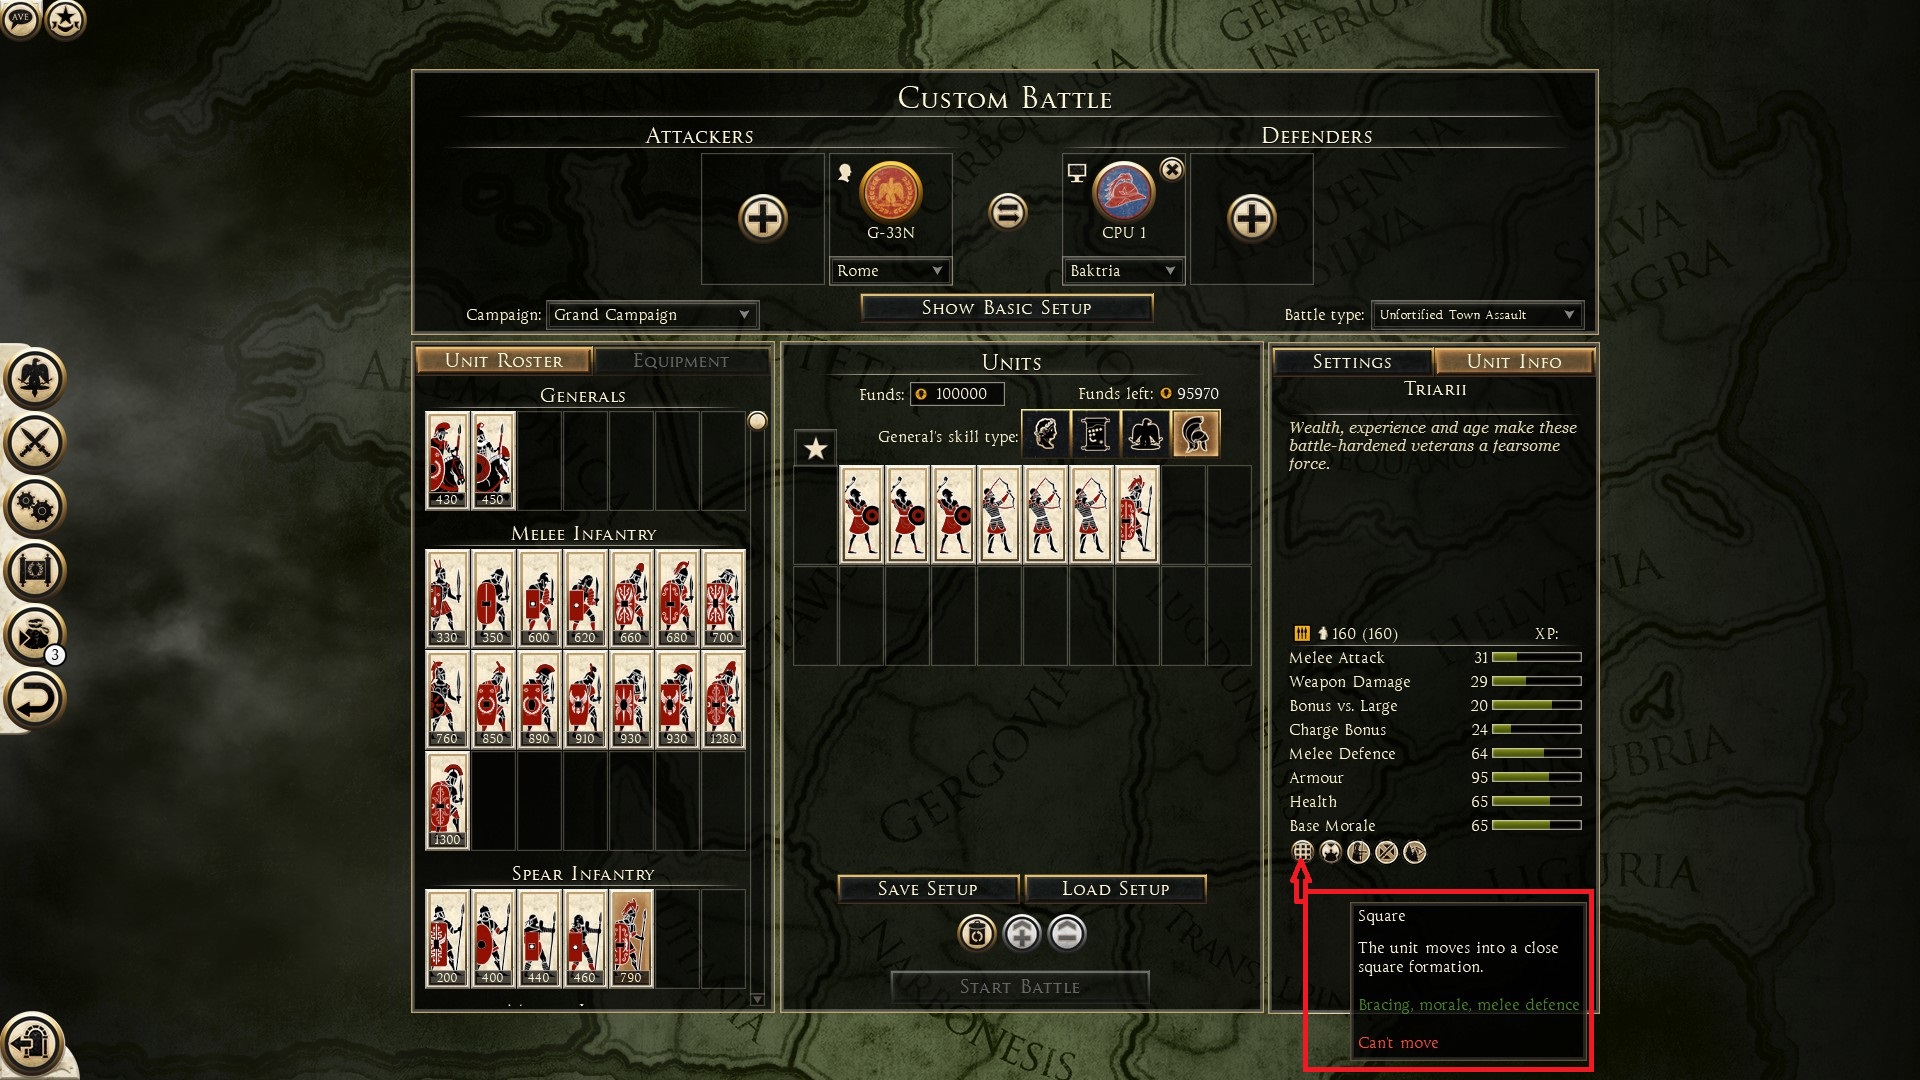
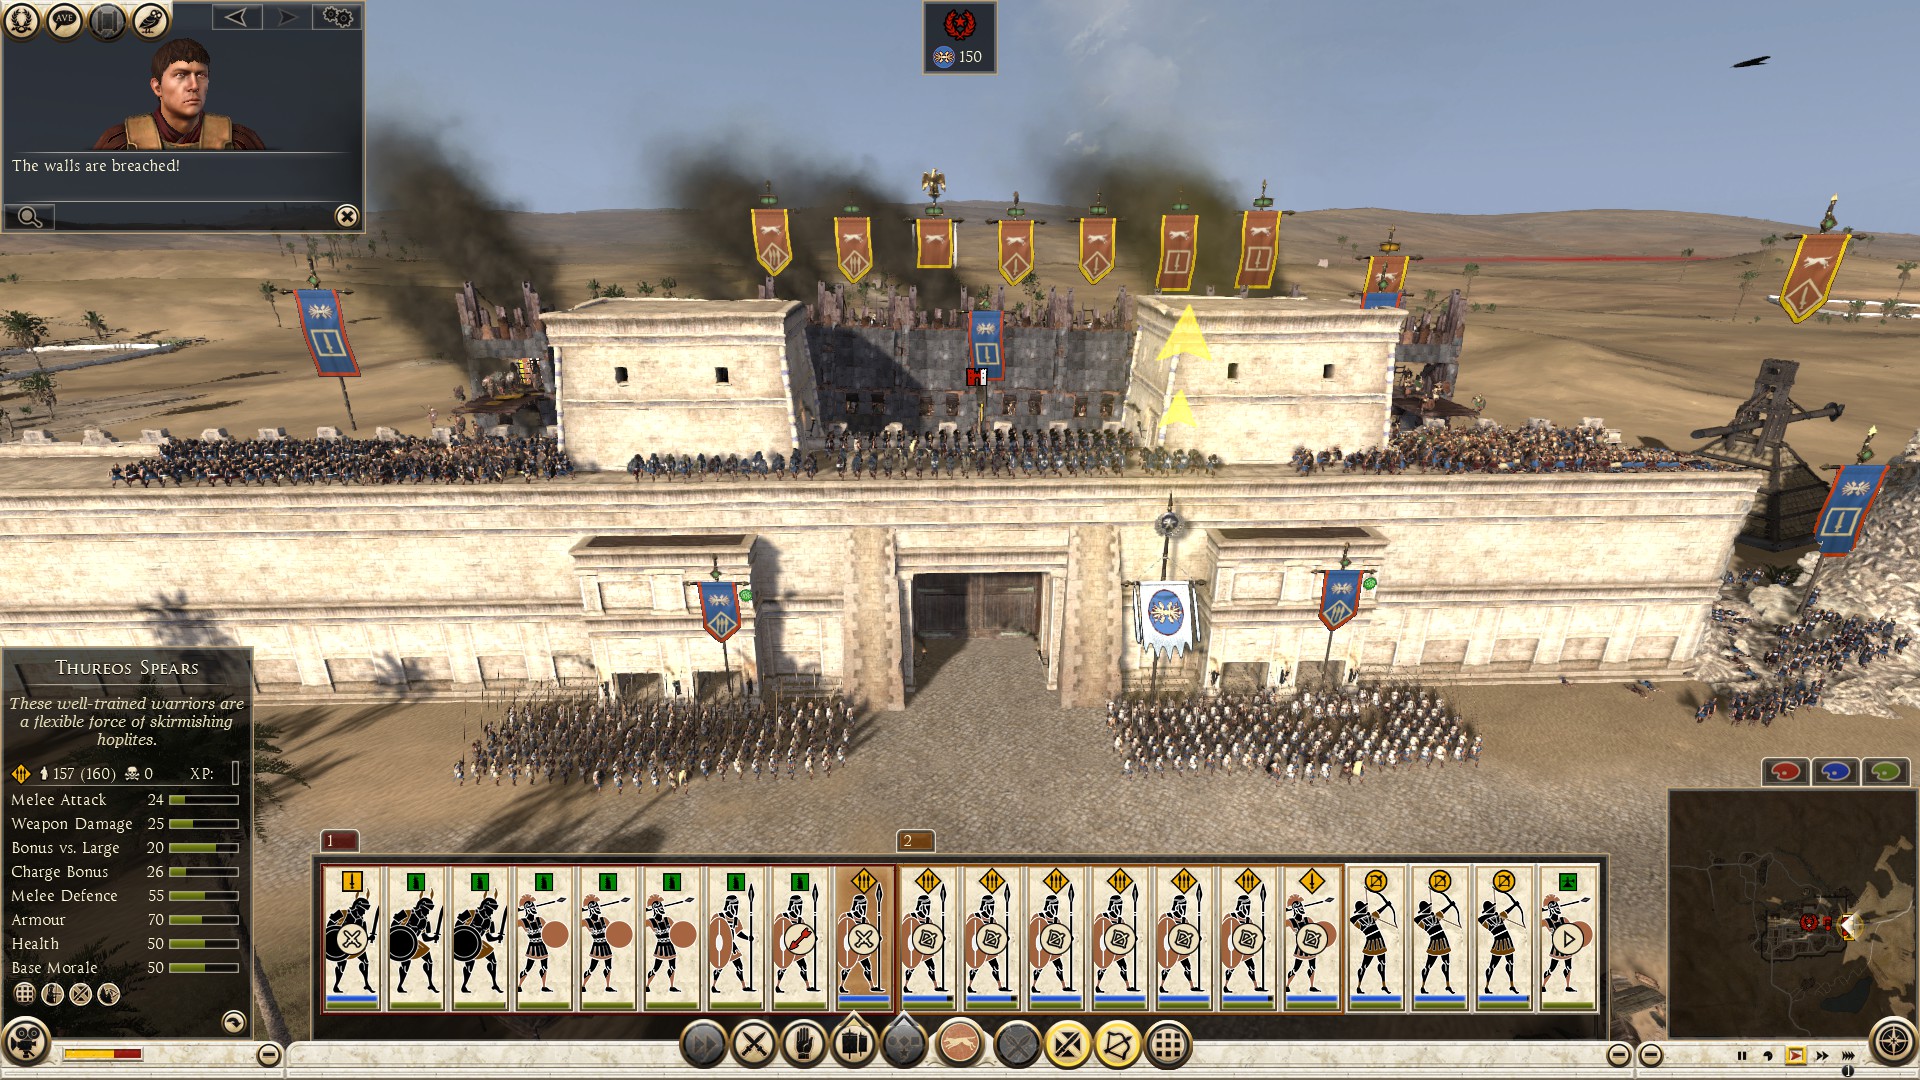
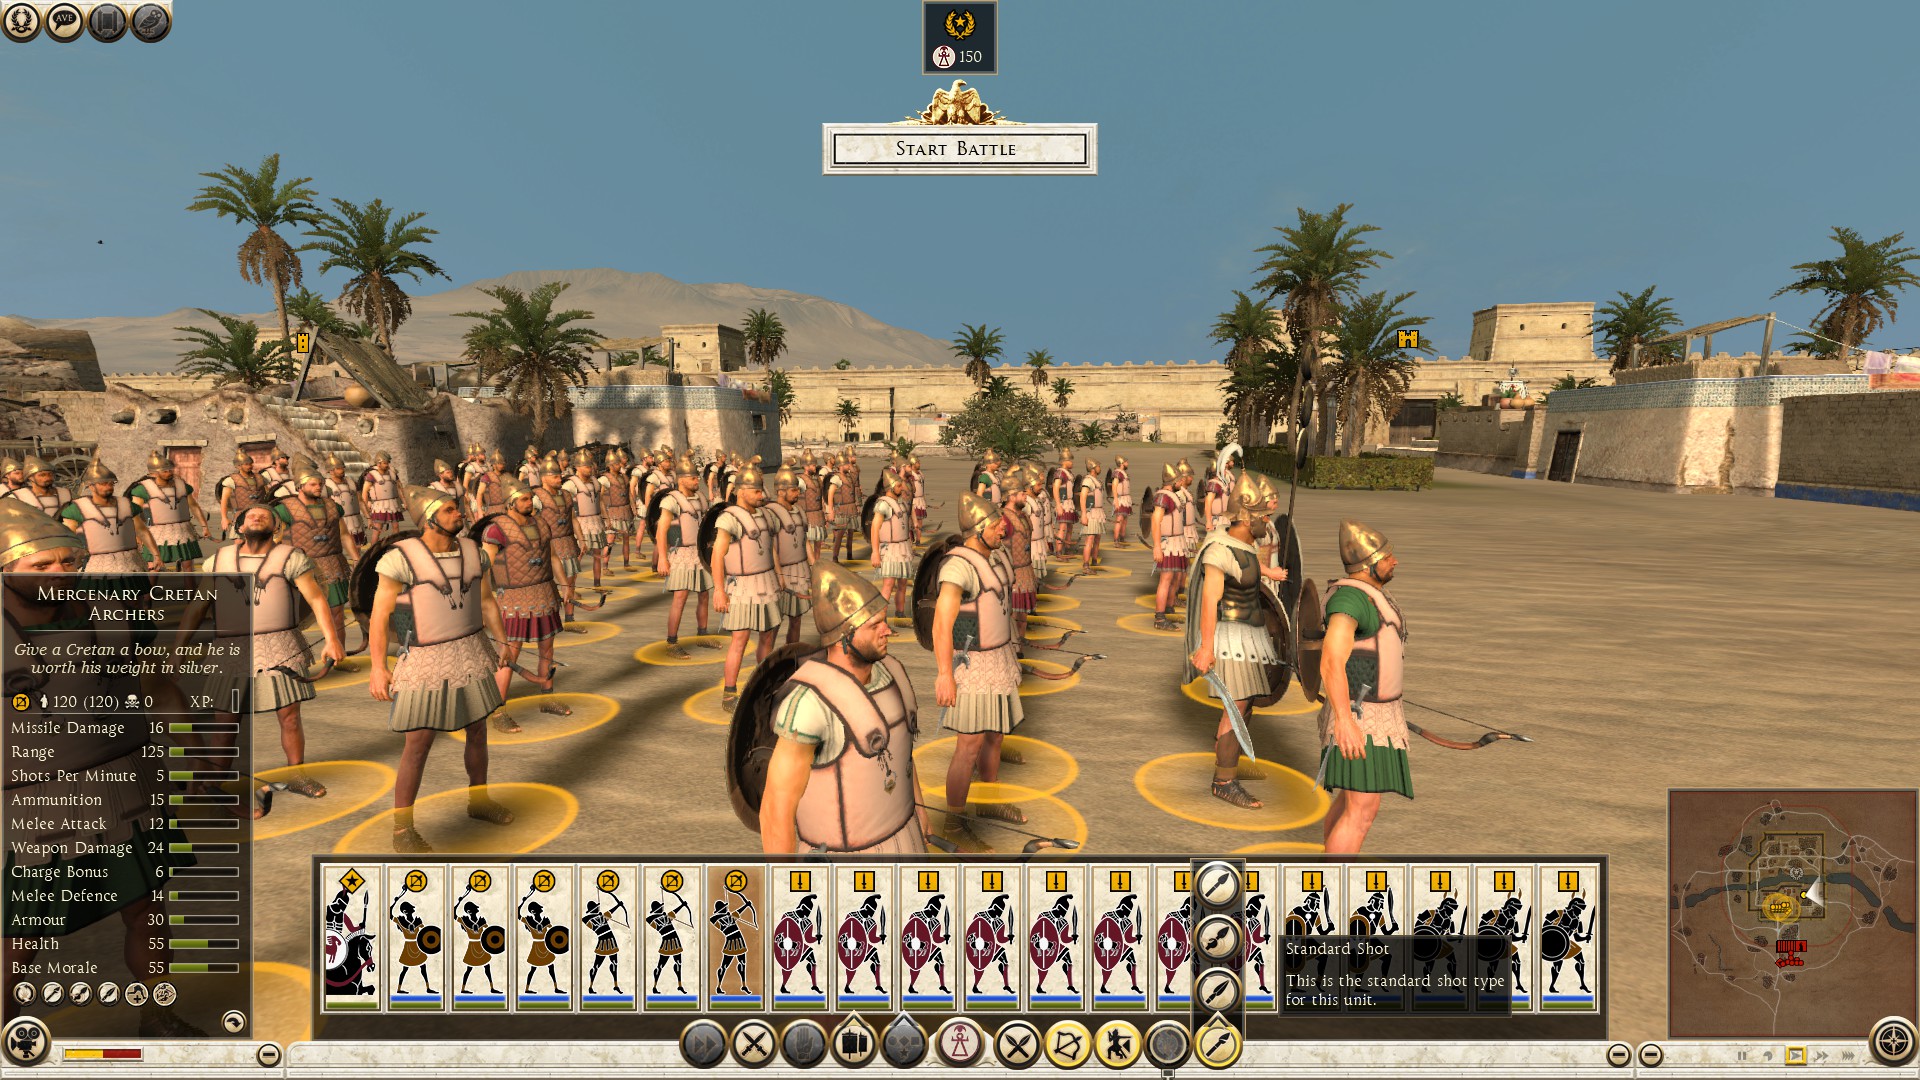
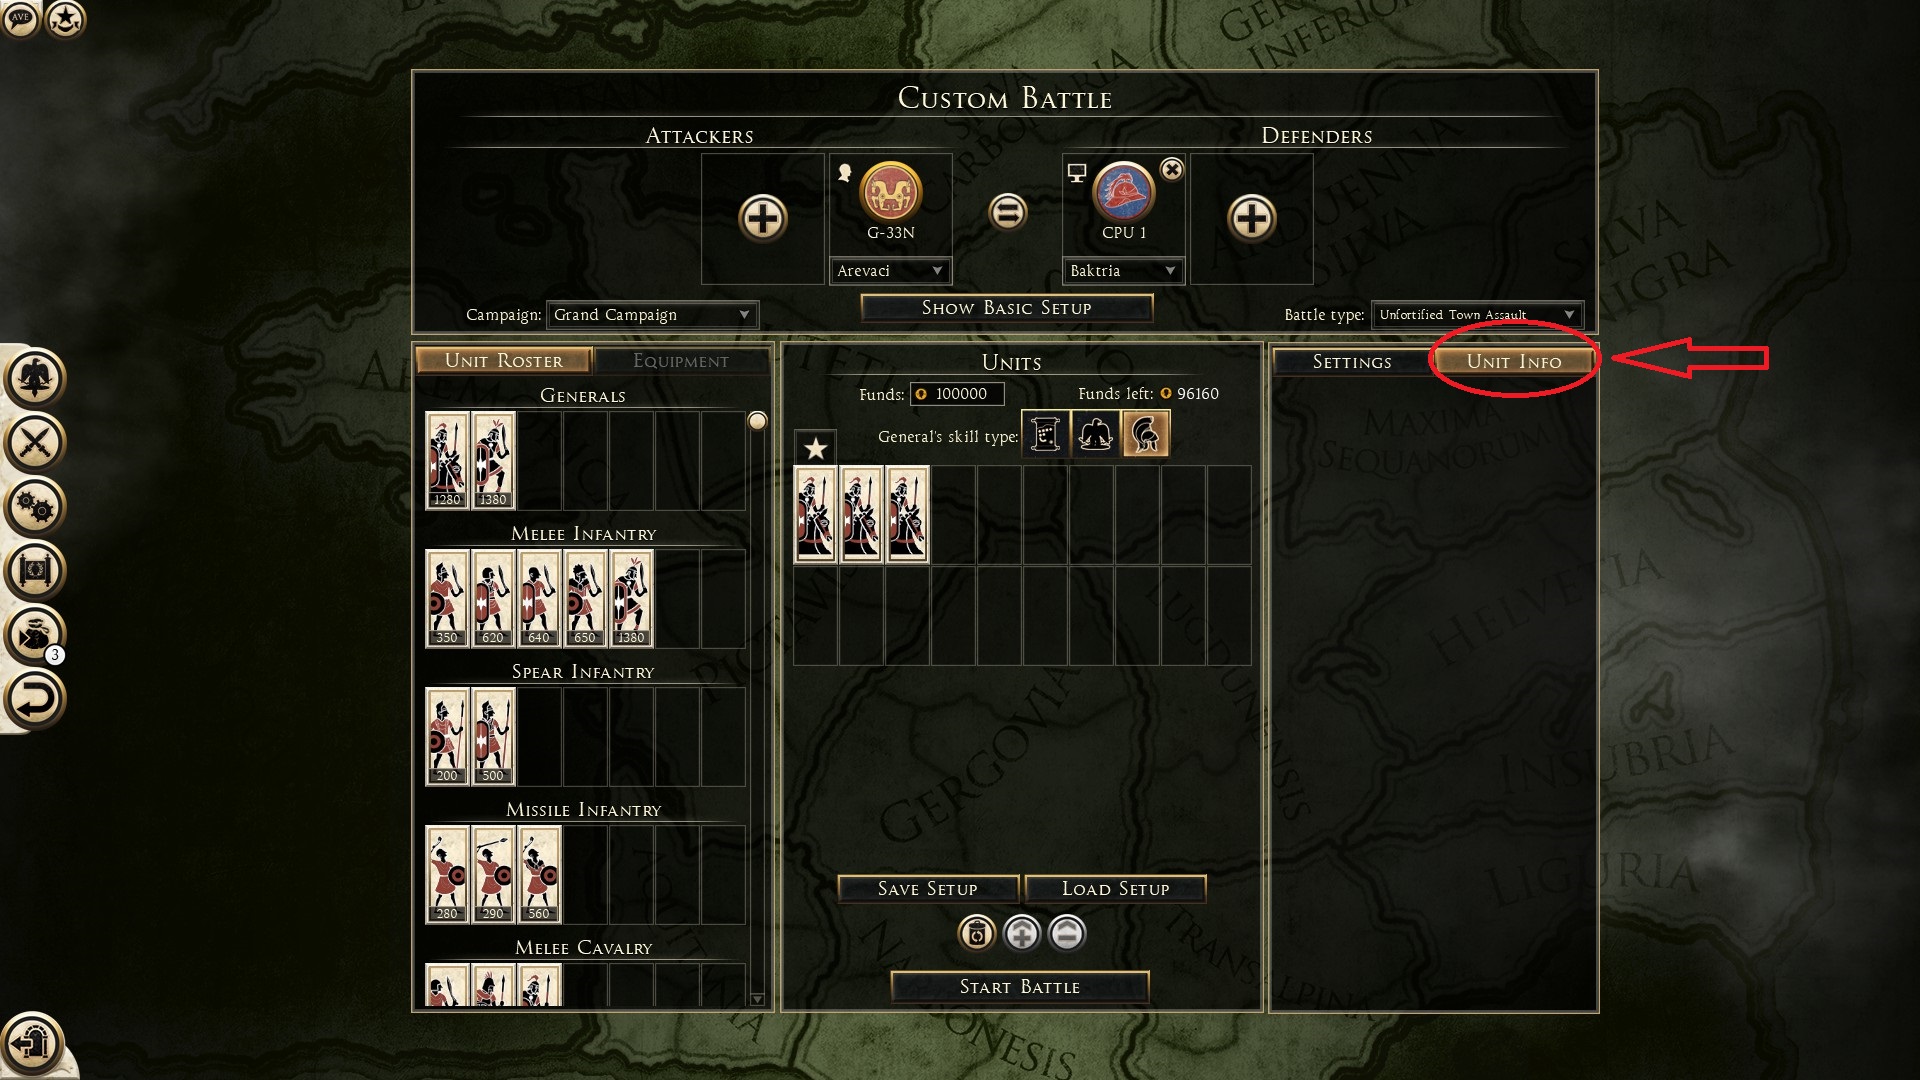 Find the unit of your choice and either left click or just simply put your cursor (mouse) over it, and when you do, the information will appear under the unit info tab as shown in the following image:
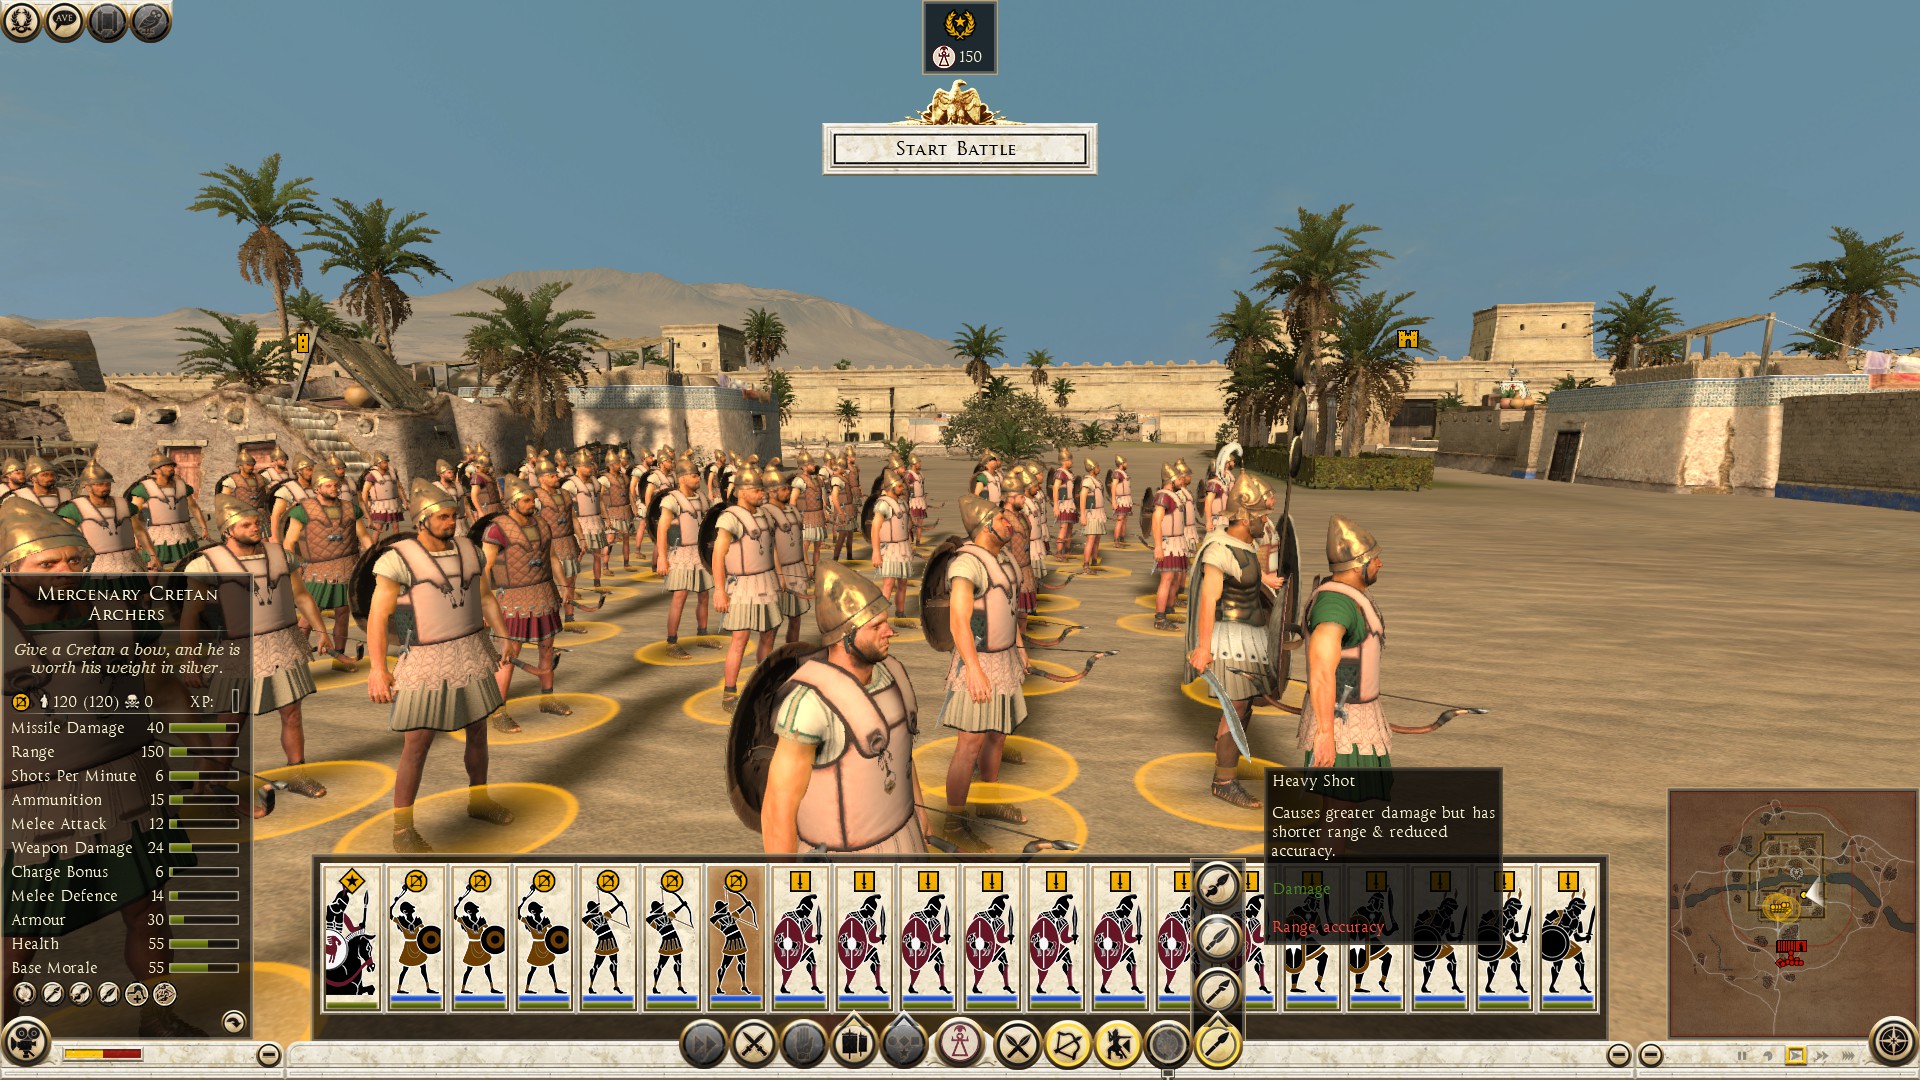
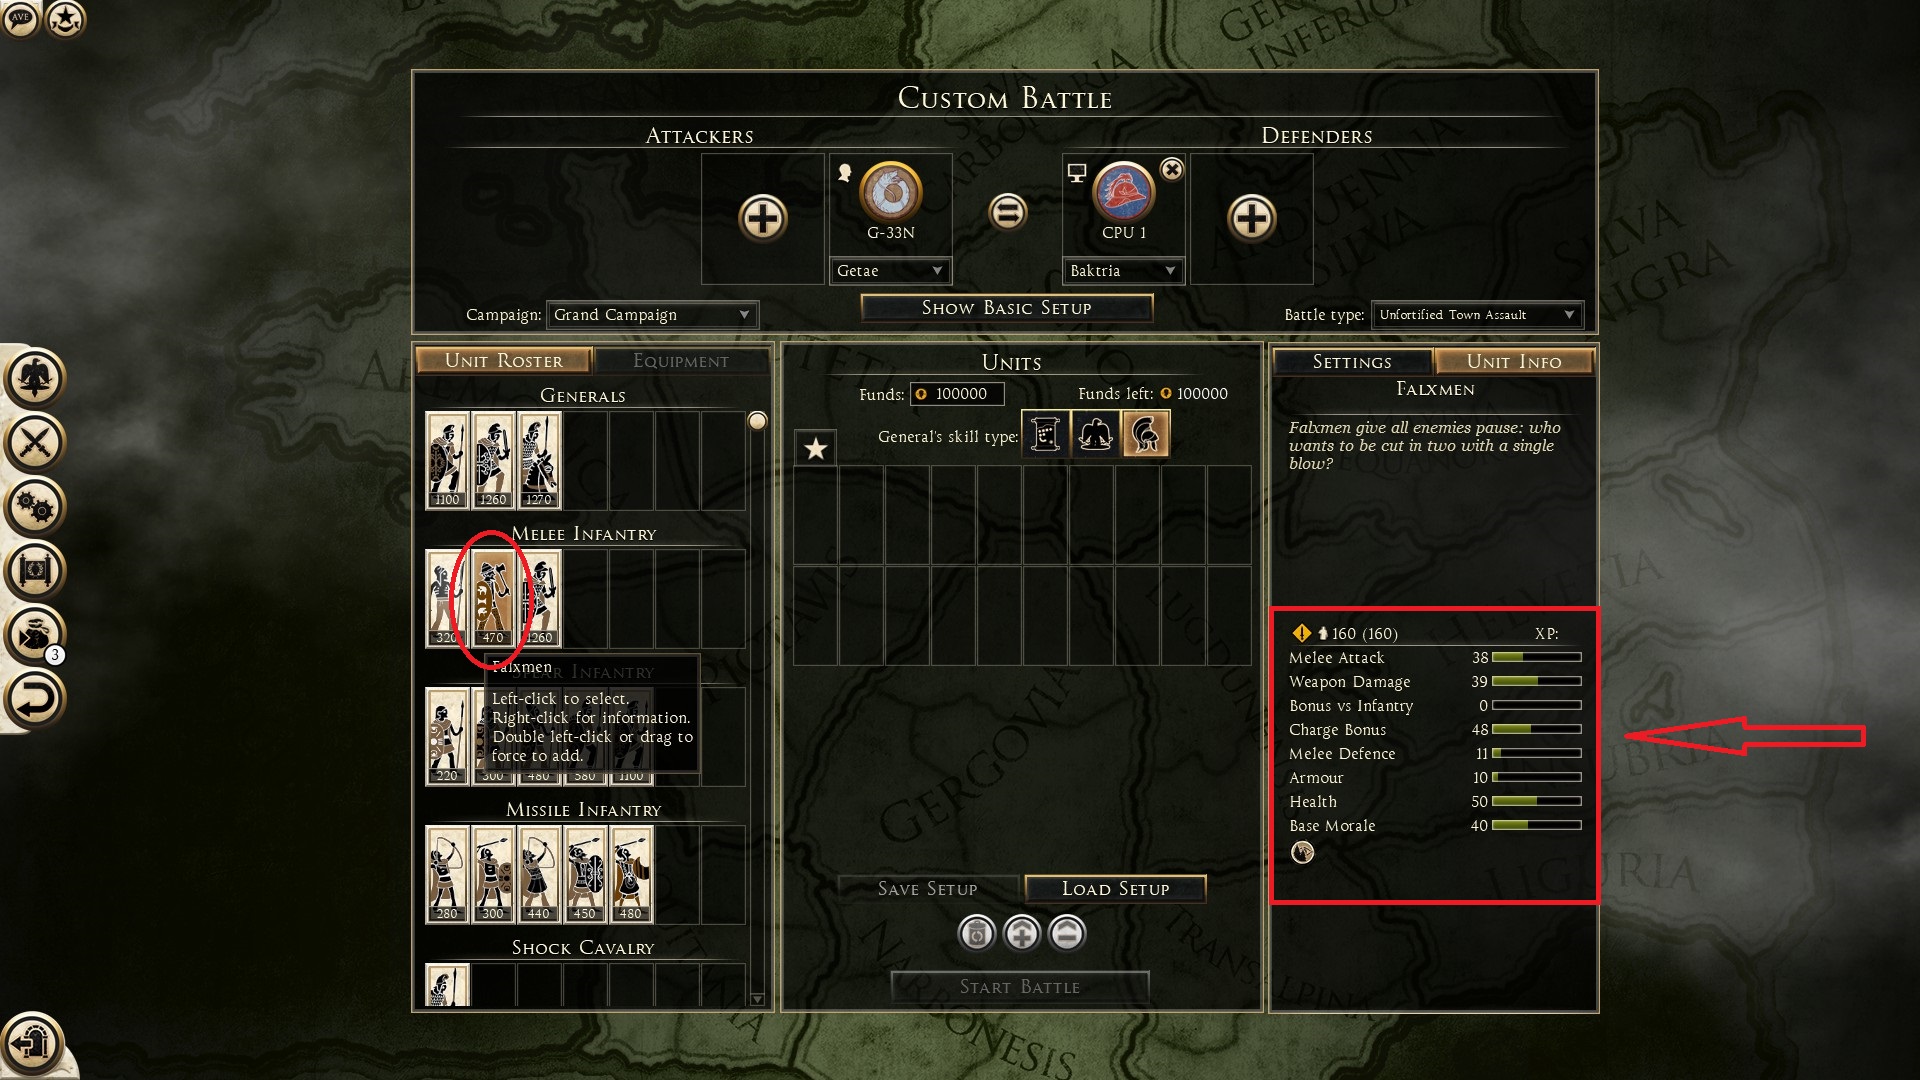 this tab is rich with all the information you need to prepare for the fight you are going to engage in. This tab not only contains unit information such as morale and weapon damage, but it also contains special ability information! To read the special ability information, click the unit (select it) of your choice, that way the information is locked in the unit info. The move your mouse to the bottom of the unit morale, on one of the special abilities. Wait a few seconds, and a box will appear with the information as shown below:
 Read the unit information, compare it to another unit from another faction, find out the ammunition of a specific range unit, armor, morale, etc. By guessing what top tier units your opponent(s) might bring to a fight with the given number of denarii (funds), you might not necessarily need elite units as a counter. You can bring units that can go head to head with your opponent(s) elite units, and spend the remaining funds elsewhere, such as the department that your opponent(s) lacks in. For example, if your opponent selects a faction that can only field light archers, you want to capitalize on that by bringing the most heavily armored range units. That way you not only take the opponents range units out, but also use the left-over arrows on the opponent(s) melee units. Now that THAT's out of the way, let's get down to business.
==========================================================================
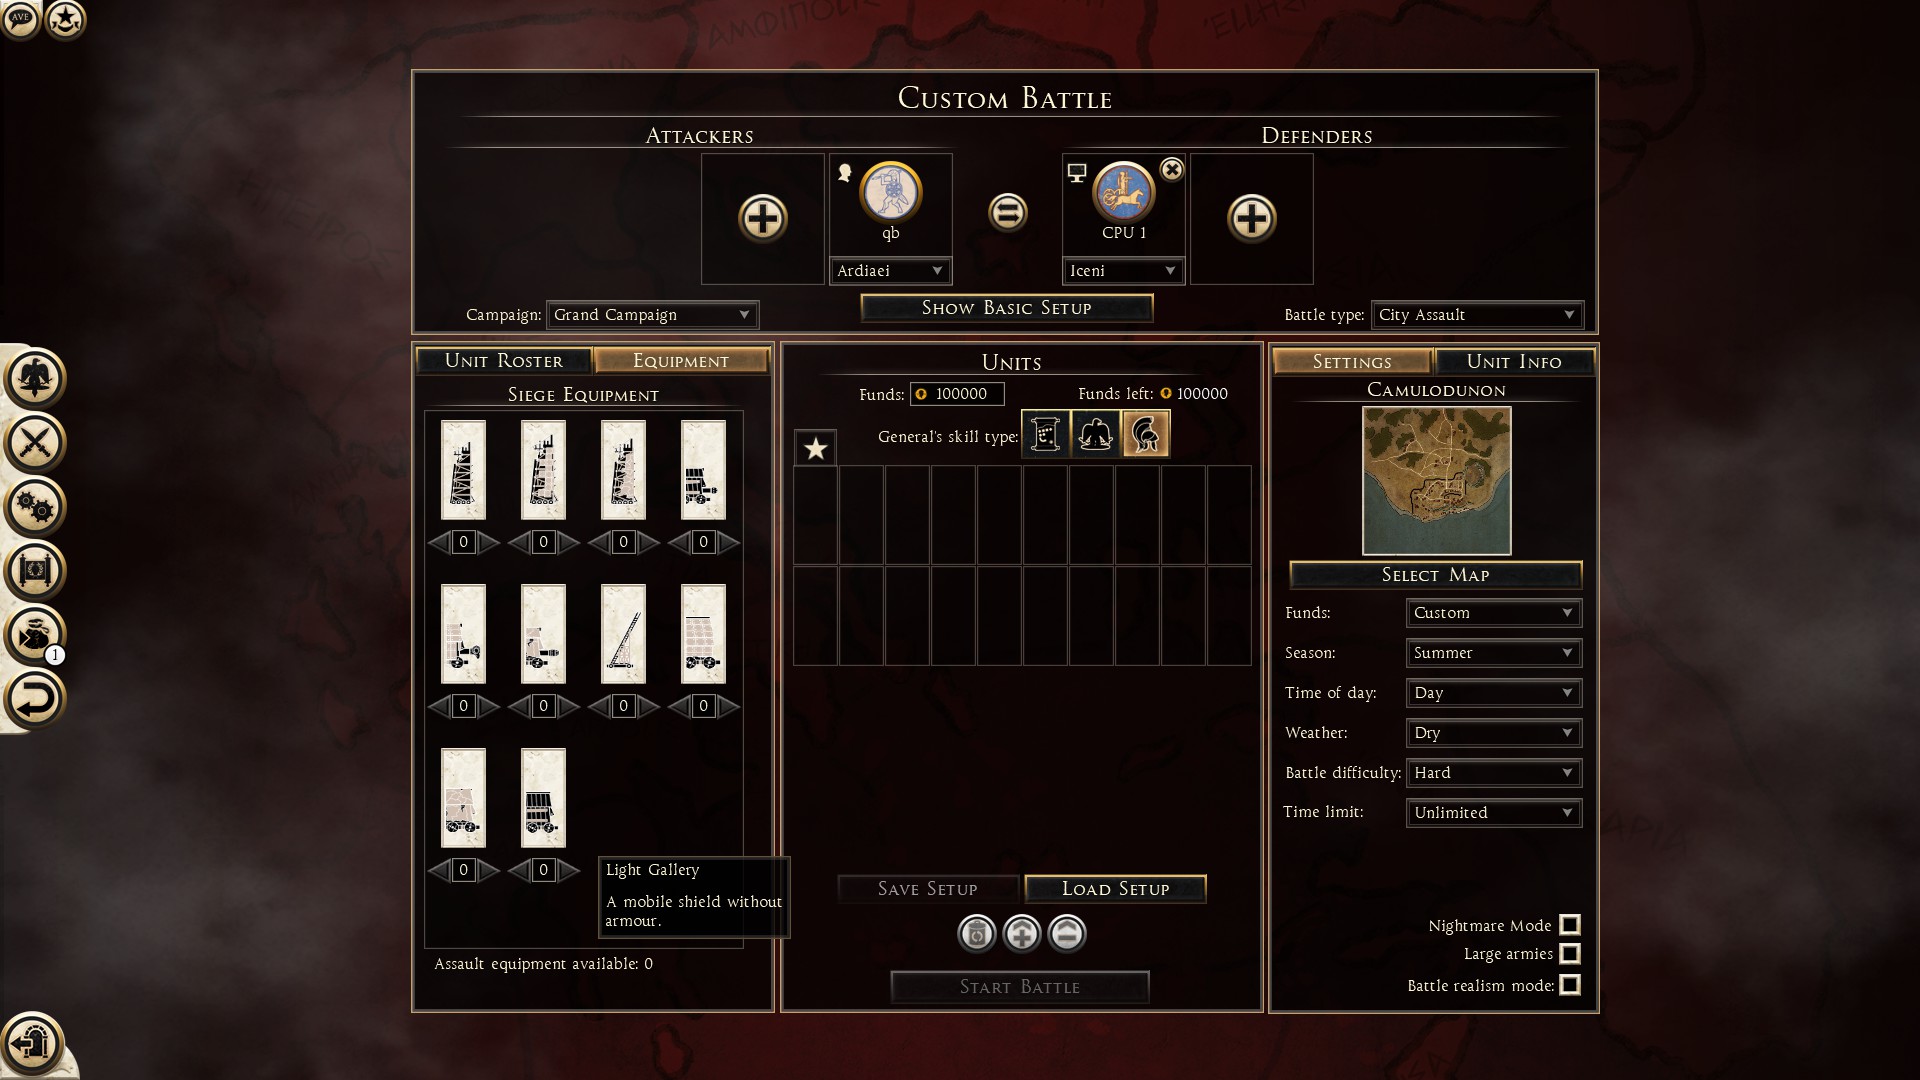
Attacking: Equipment
 ============================================================================
Army Set Up
The range department is divided into three different unit types:
- Archers: Units that have the medium amount of ammunition out of every other range unit, (15) and the ability to shoot arrows on top and across walls, as well as buildings. Some have two and or more different ammunition types: Regular arrows, whistling arrows, heavy arrows, poisonous arrows, and fire arrows.
- Slingers: Units that have the most ammunition (25) out of every other range unit and can only shoot units that are in the open, in front of them, in their range (not hiding behind structures).
- Javelin Men: Units that have the least amount of ammunition (typically 7 some units 10) out of every other range unit, but are very lethal especially against pike and or spear units.
The melee department, unlike the range, is divided into many different unit types:
- Sword: The building blocks of all armies and factions.
- Peltasts: Mele units that always carry javelins (pila’s) that can be thrown at their opponents before engaging in close combat.
- Axe: There is not a variety of axe men, but they are very cost effective low tier units. Only a few factions have them.
- Falx: Falxmen are very devastating but are vulnerable to range units due to their lack of armor, except for their armored Falxmen counter parts.
The melee department is divided into two different unit types, short and long spears called pikes.
- Spear: Units that are very effective against cavalry, and can hold on their own against other melee units.
- Pikes: Very weak in hand to hand combat, but in formation, they can be an impenetrable wall with their lengthy spears (pikes).
Now that you know your units and how they function, you need to build an army. it's the first important step to achieving victory.
-----------------------------------------------------------------------------------------------------------------------------------
Army building: Steps
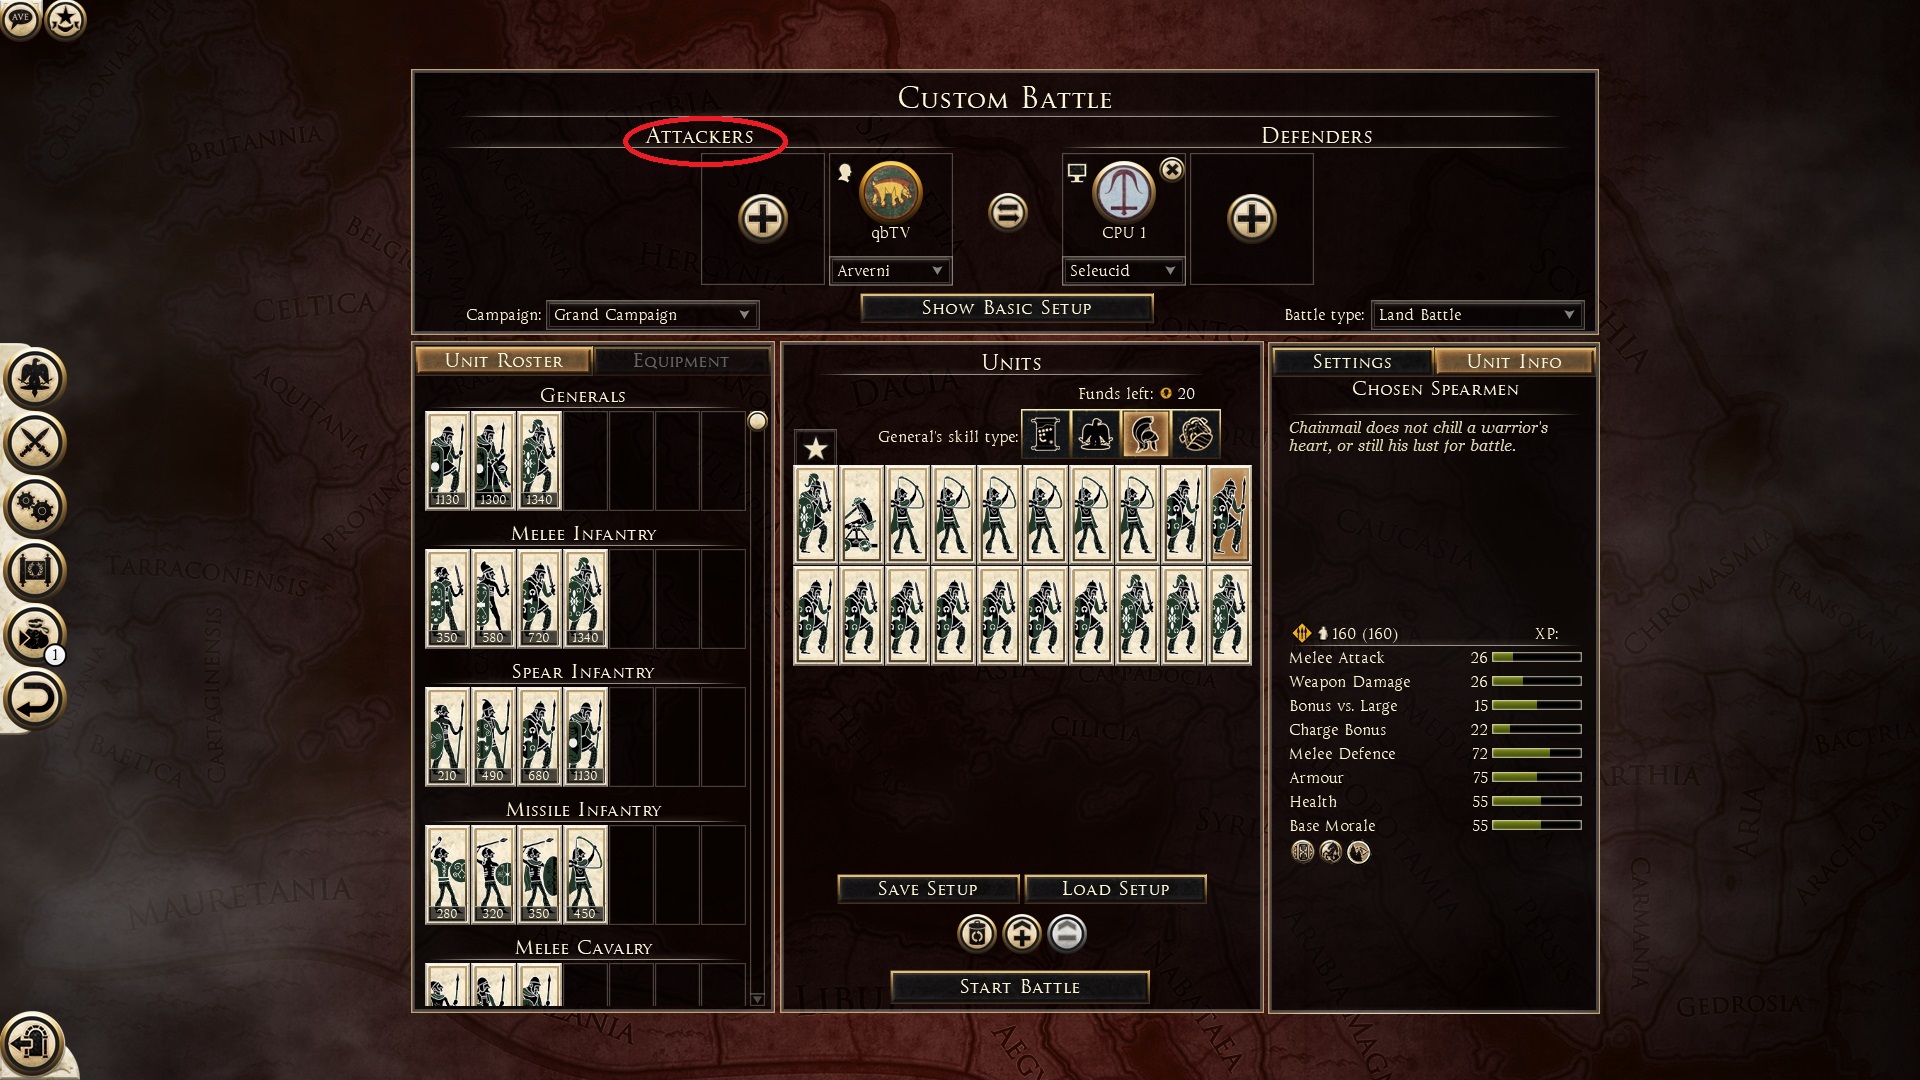
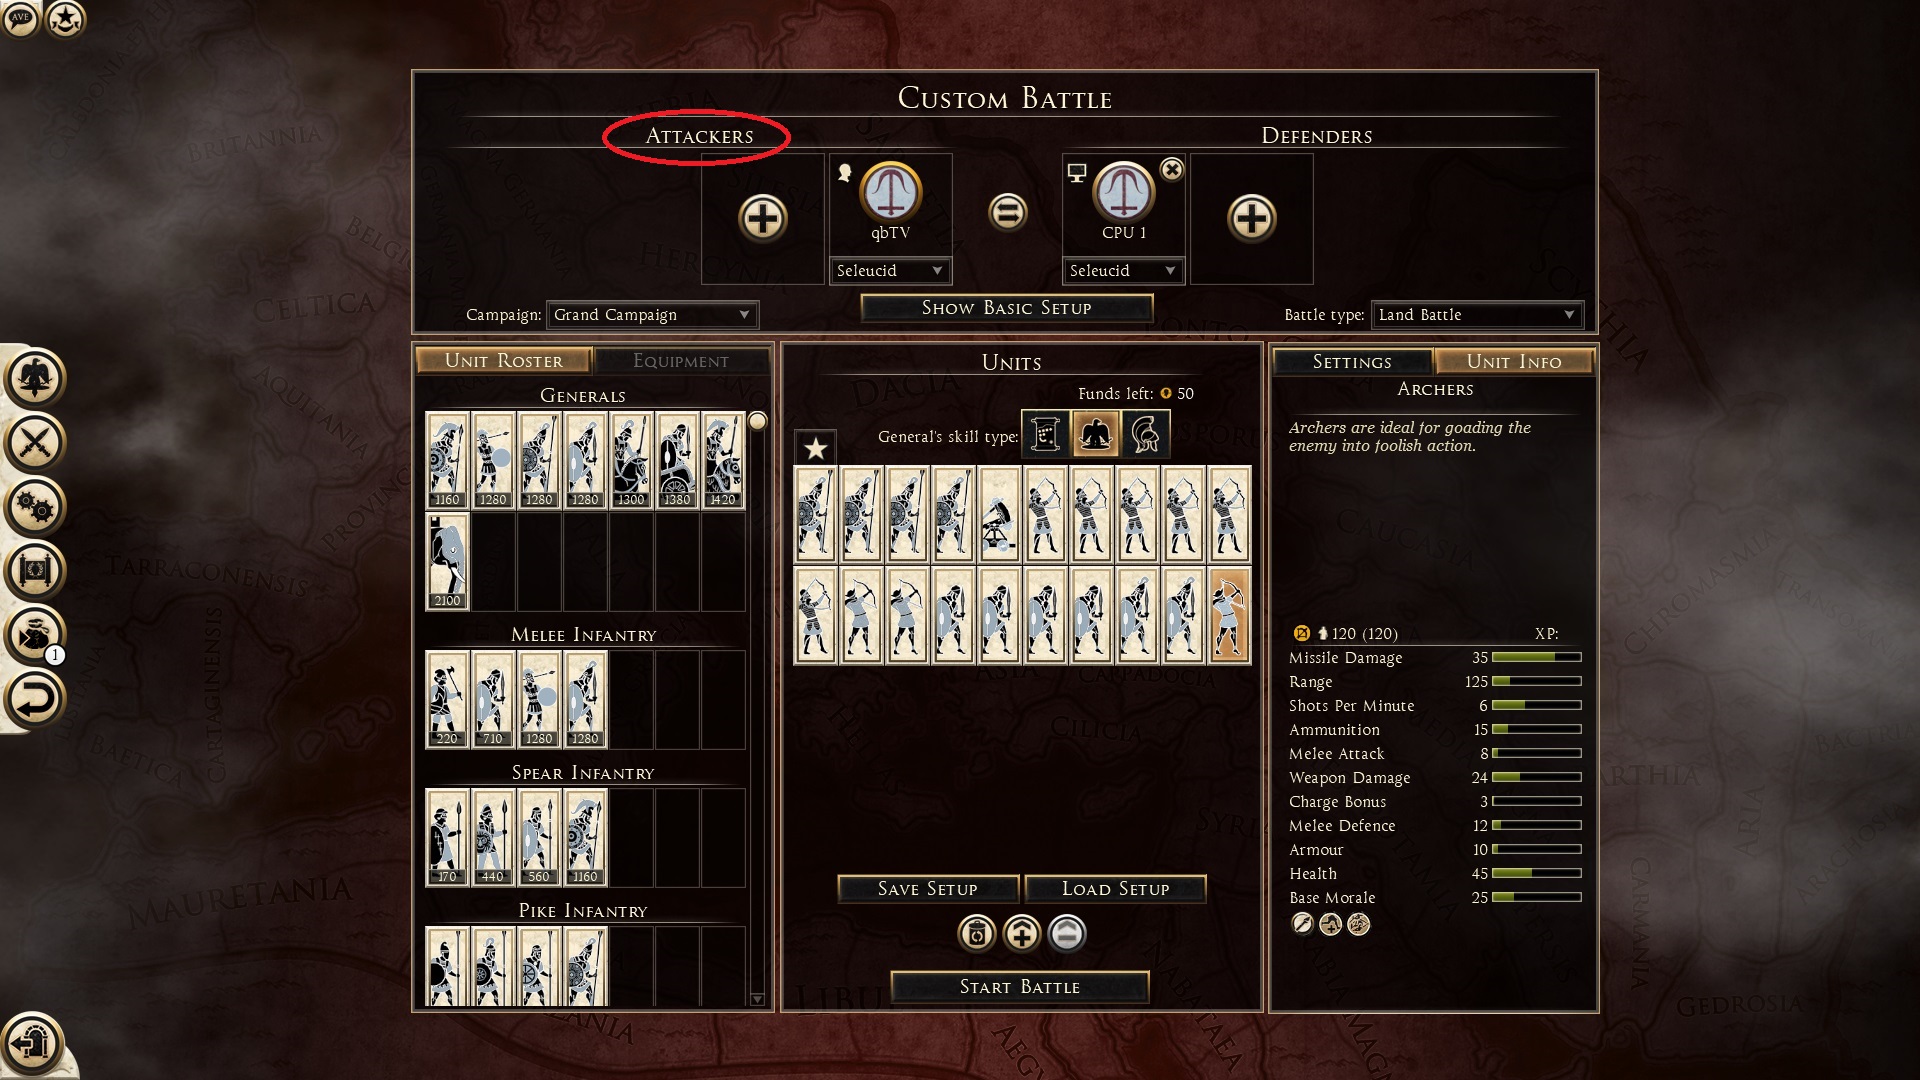
- Fill up the unit slots. Typically, players play normal sized army which is made up of 20 units, get 20 units.
- Have enough and the best range units your faction can offer. For me, six is a good number.
- Defensive or Offensive unit builds. I will get into that in the attacking and defending sections.
- upgrades. If you end up with left over denarii, THEN you can upgrade units. Do not upgrade range units, because the only thing that will level up is their: melee attack, melee defense, shots per minute, and morale. Considering that range units are not meant for melee, it’s not worth leveling them up. Level up your melee units.
==========================================================================
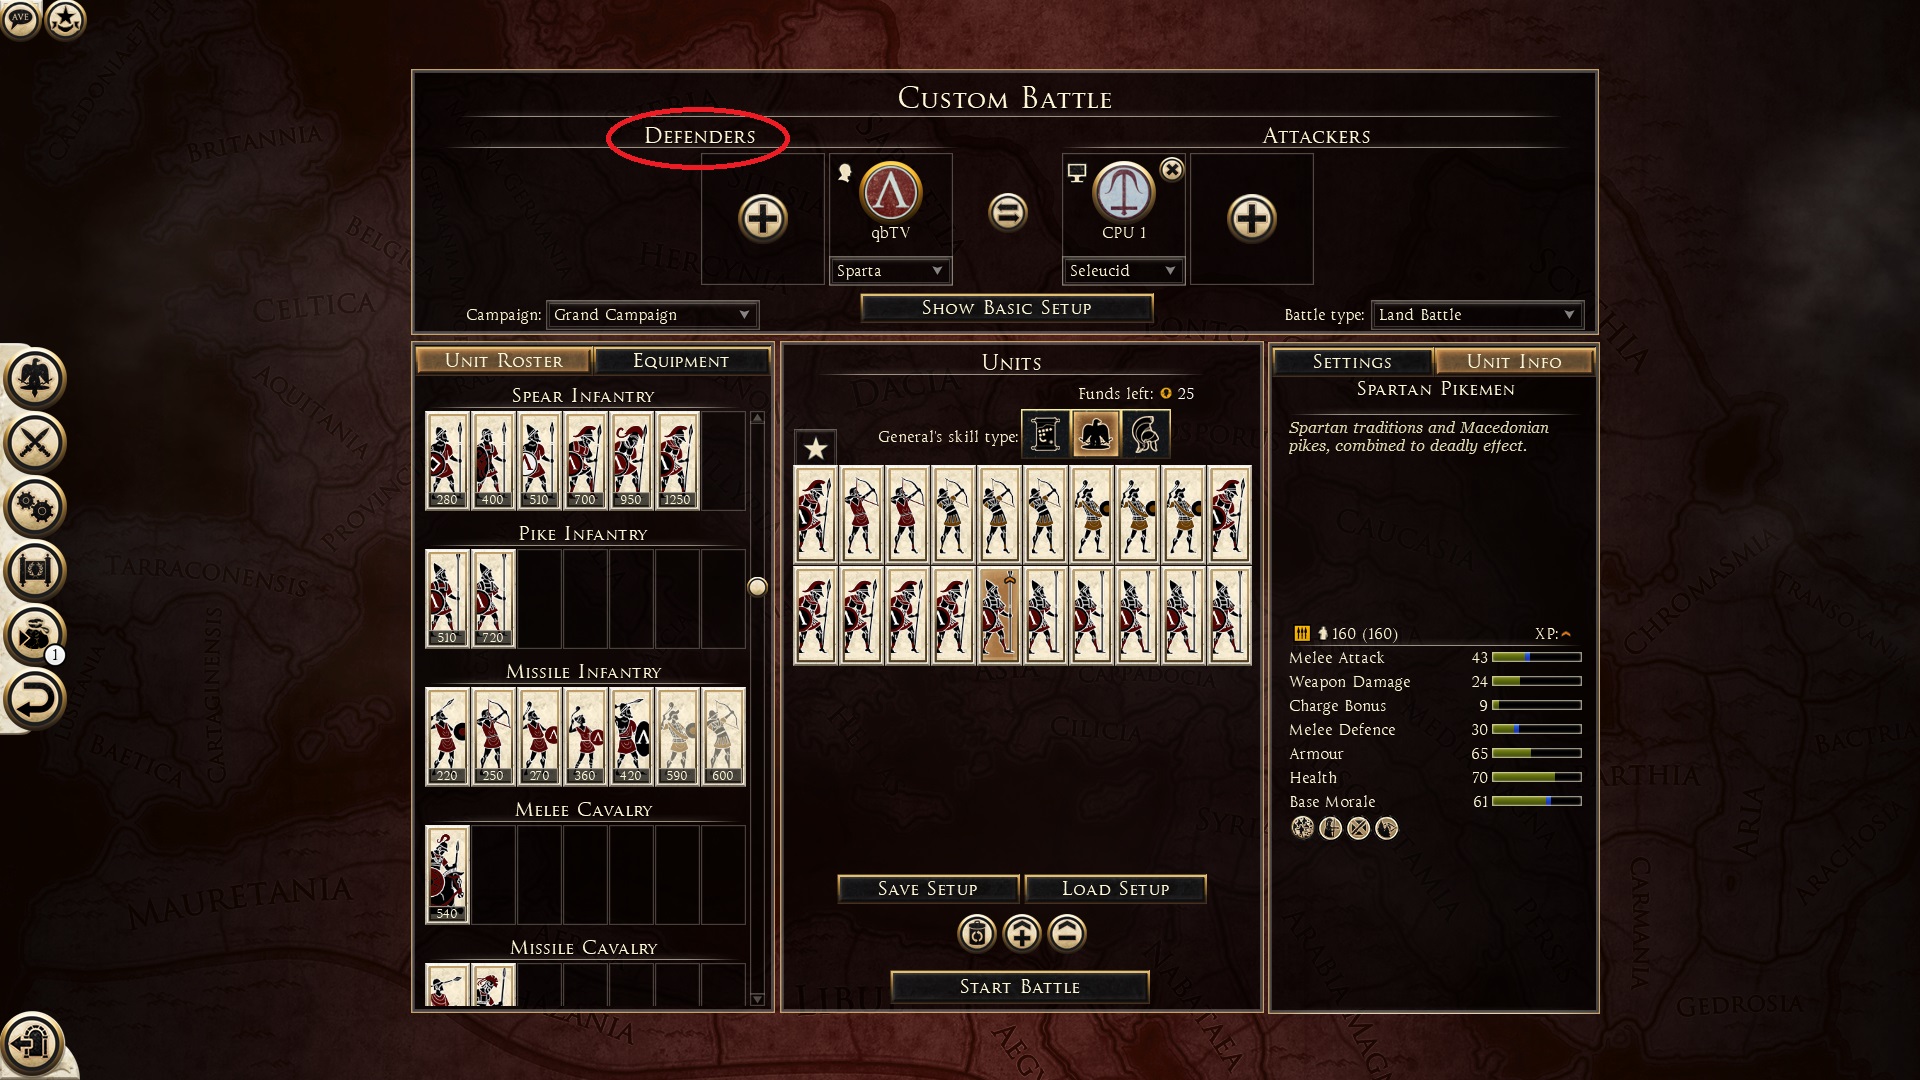
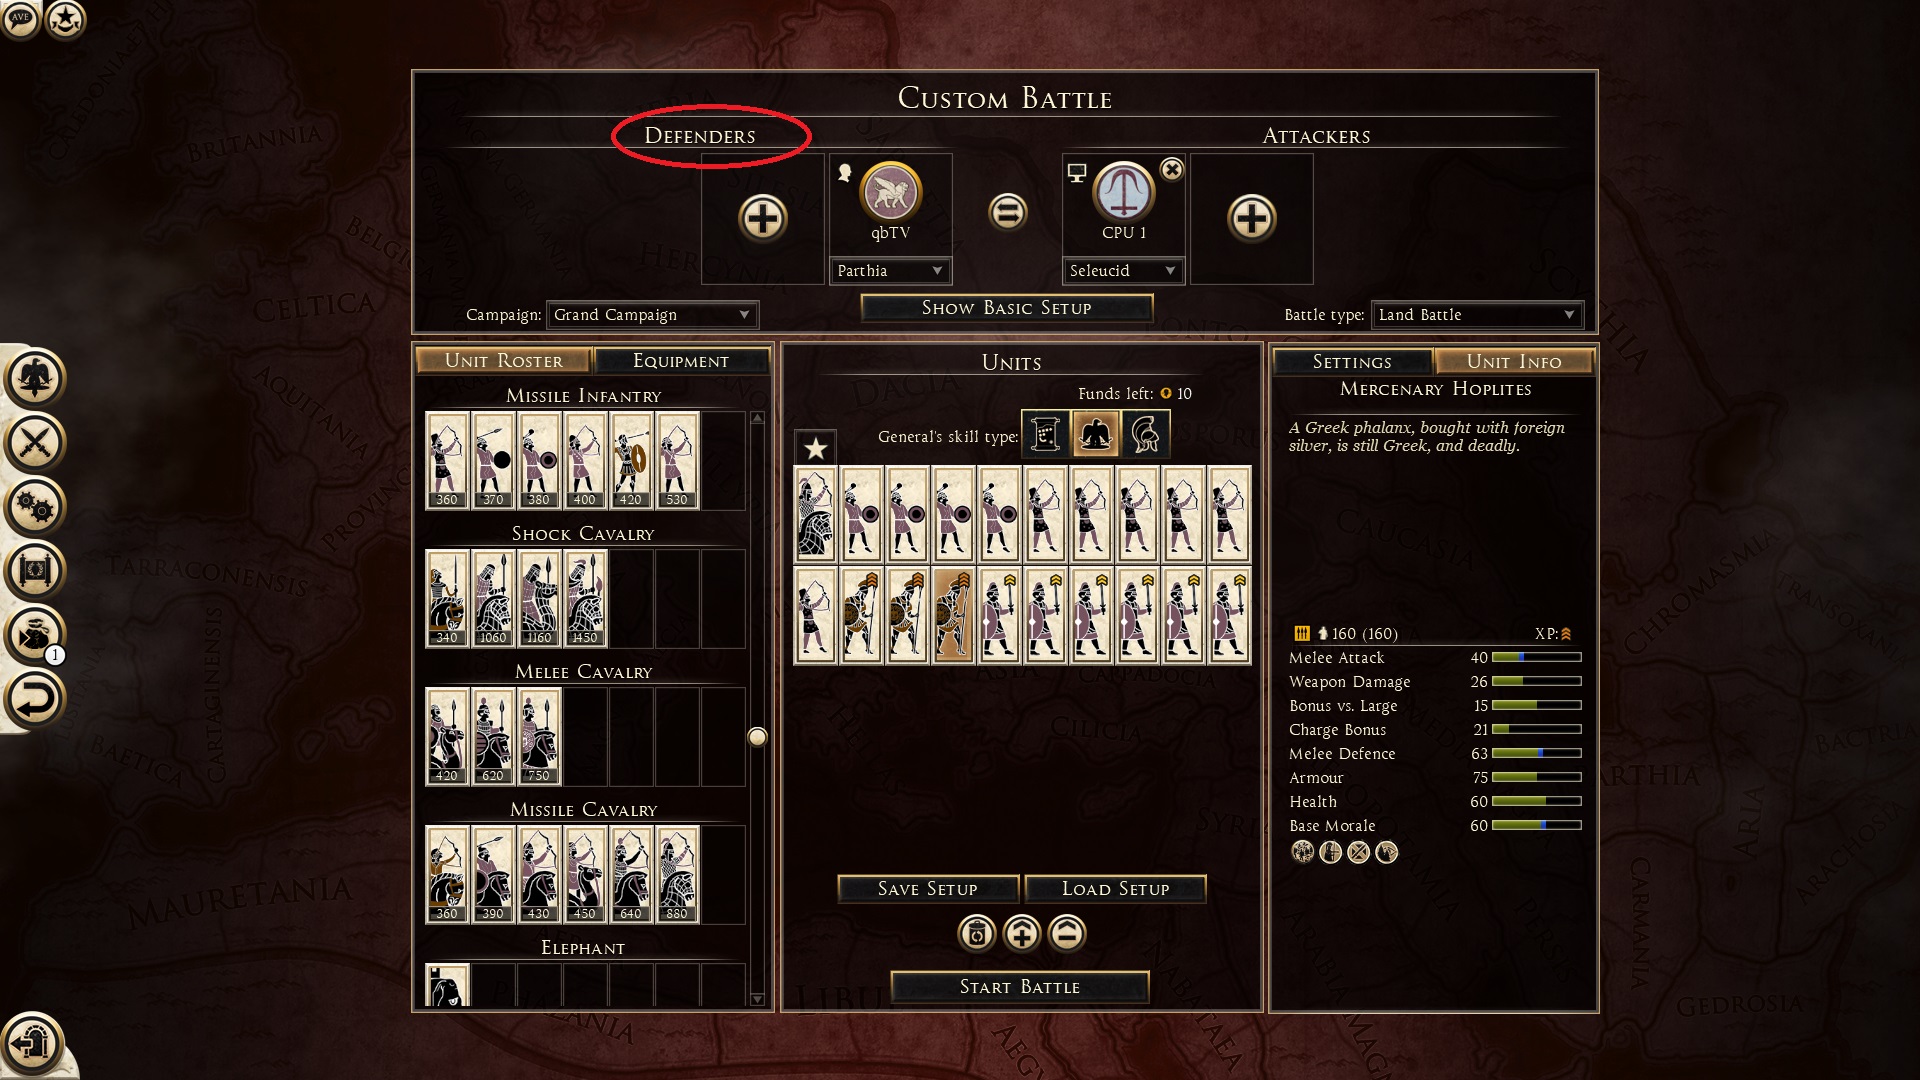
Attacking: City and Port Assault First Stage
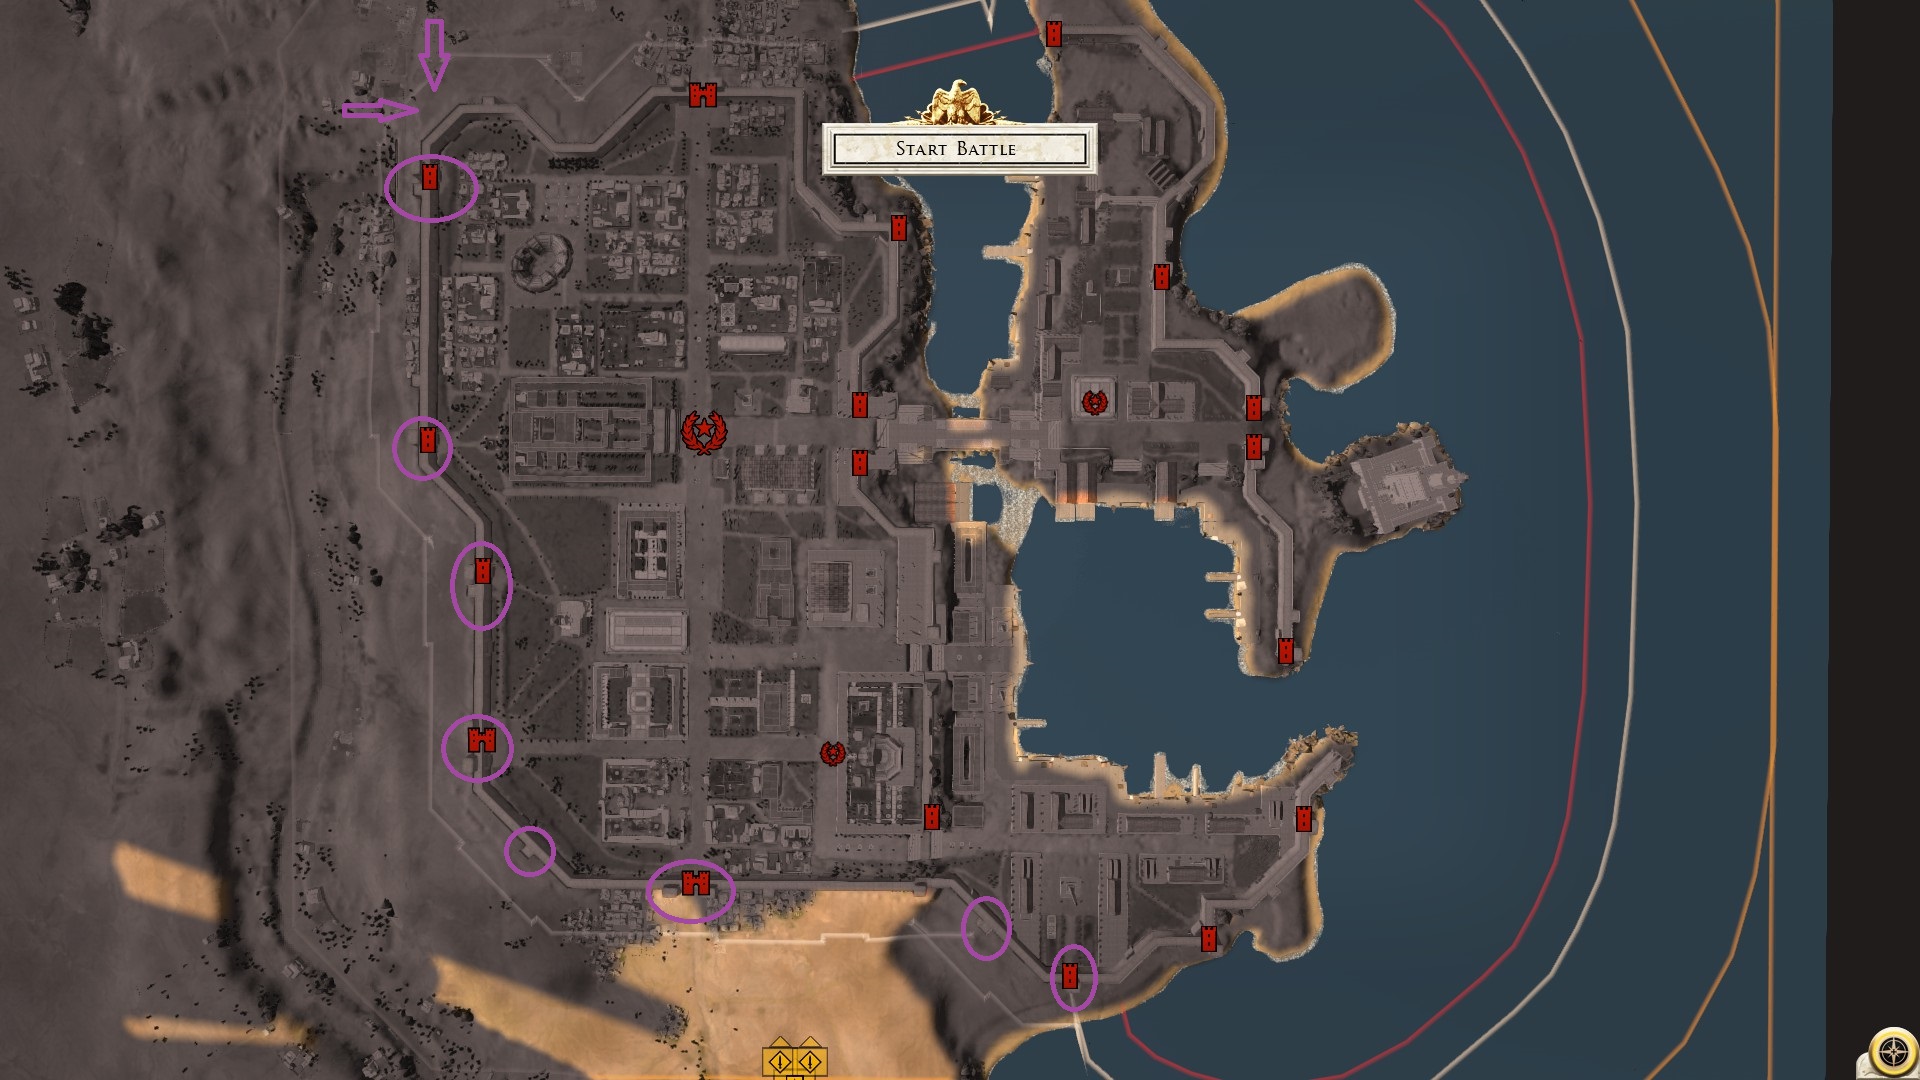
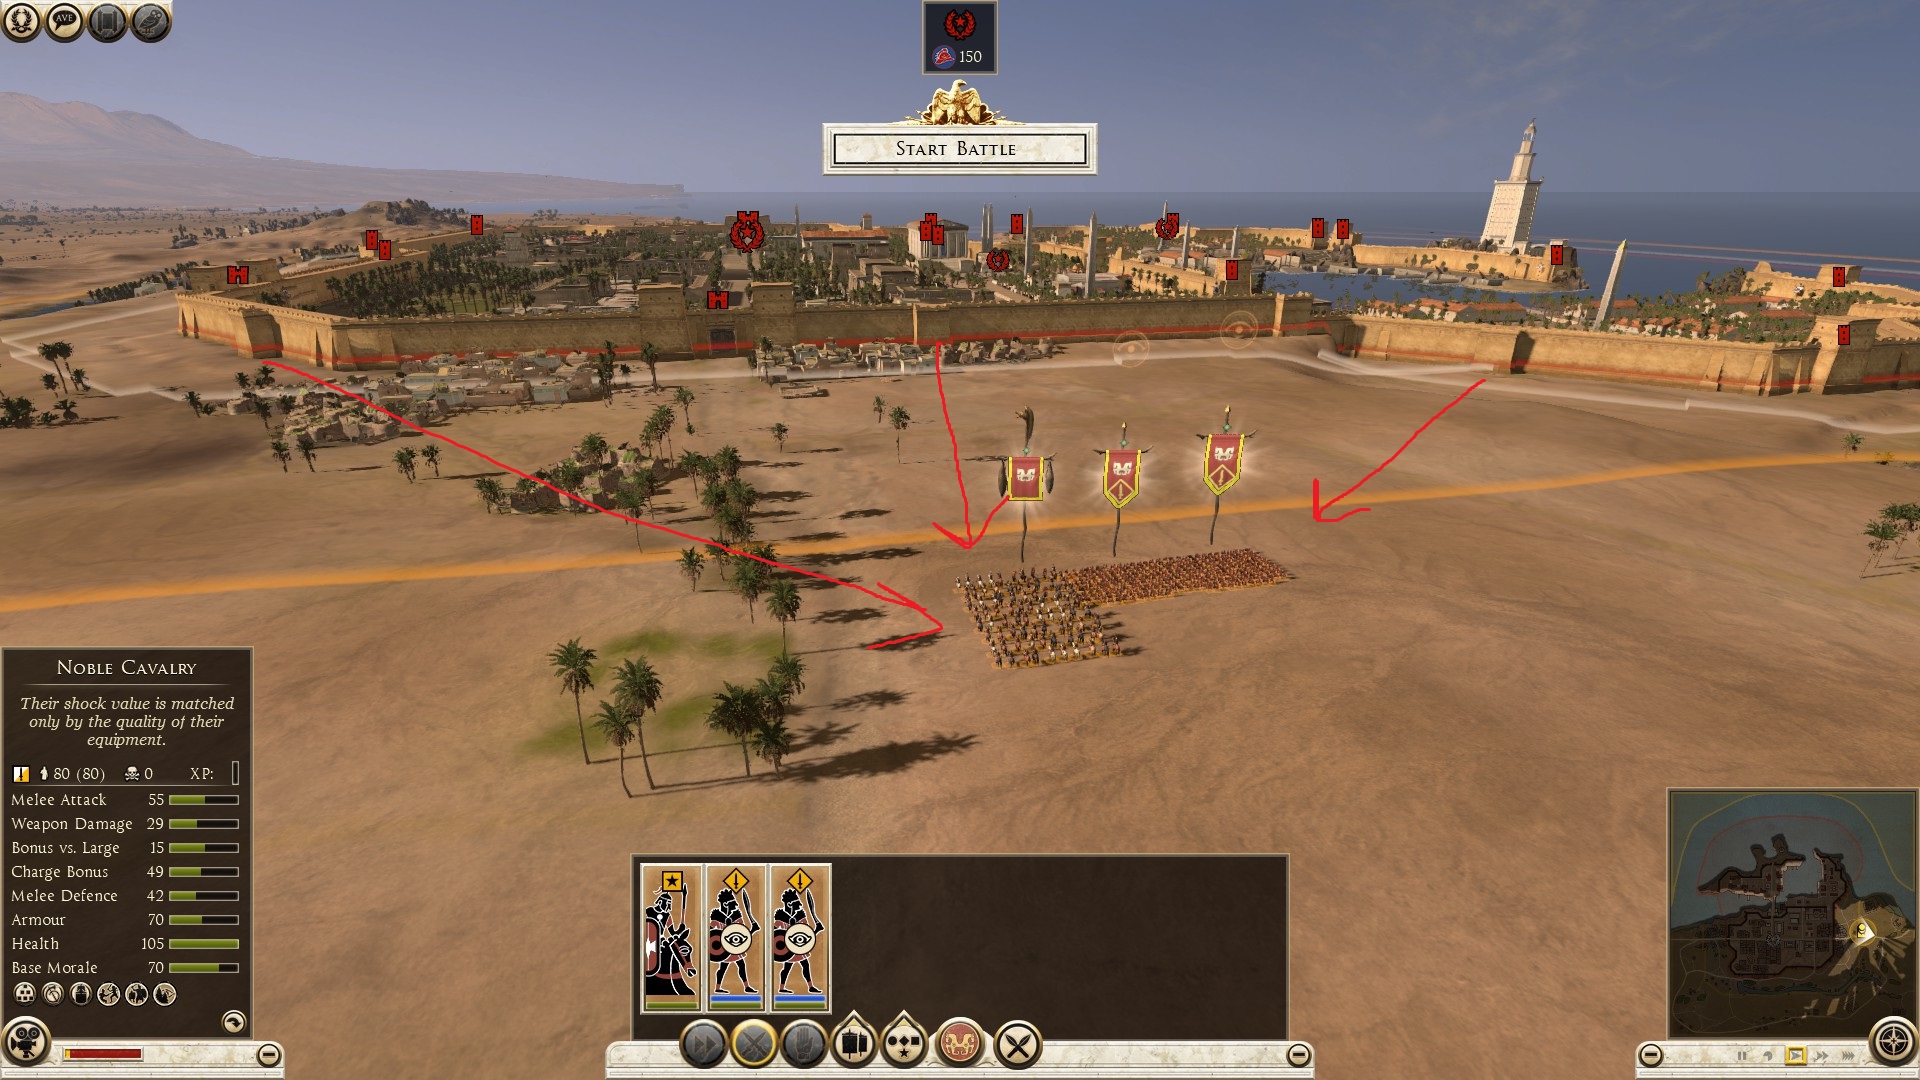
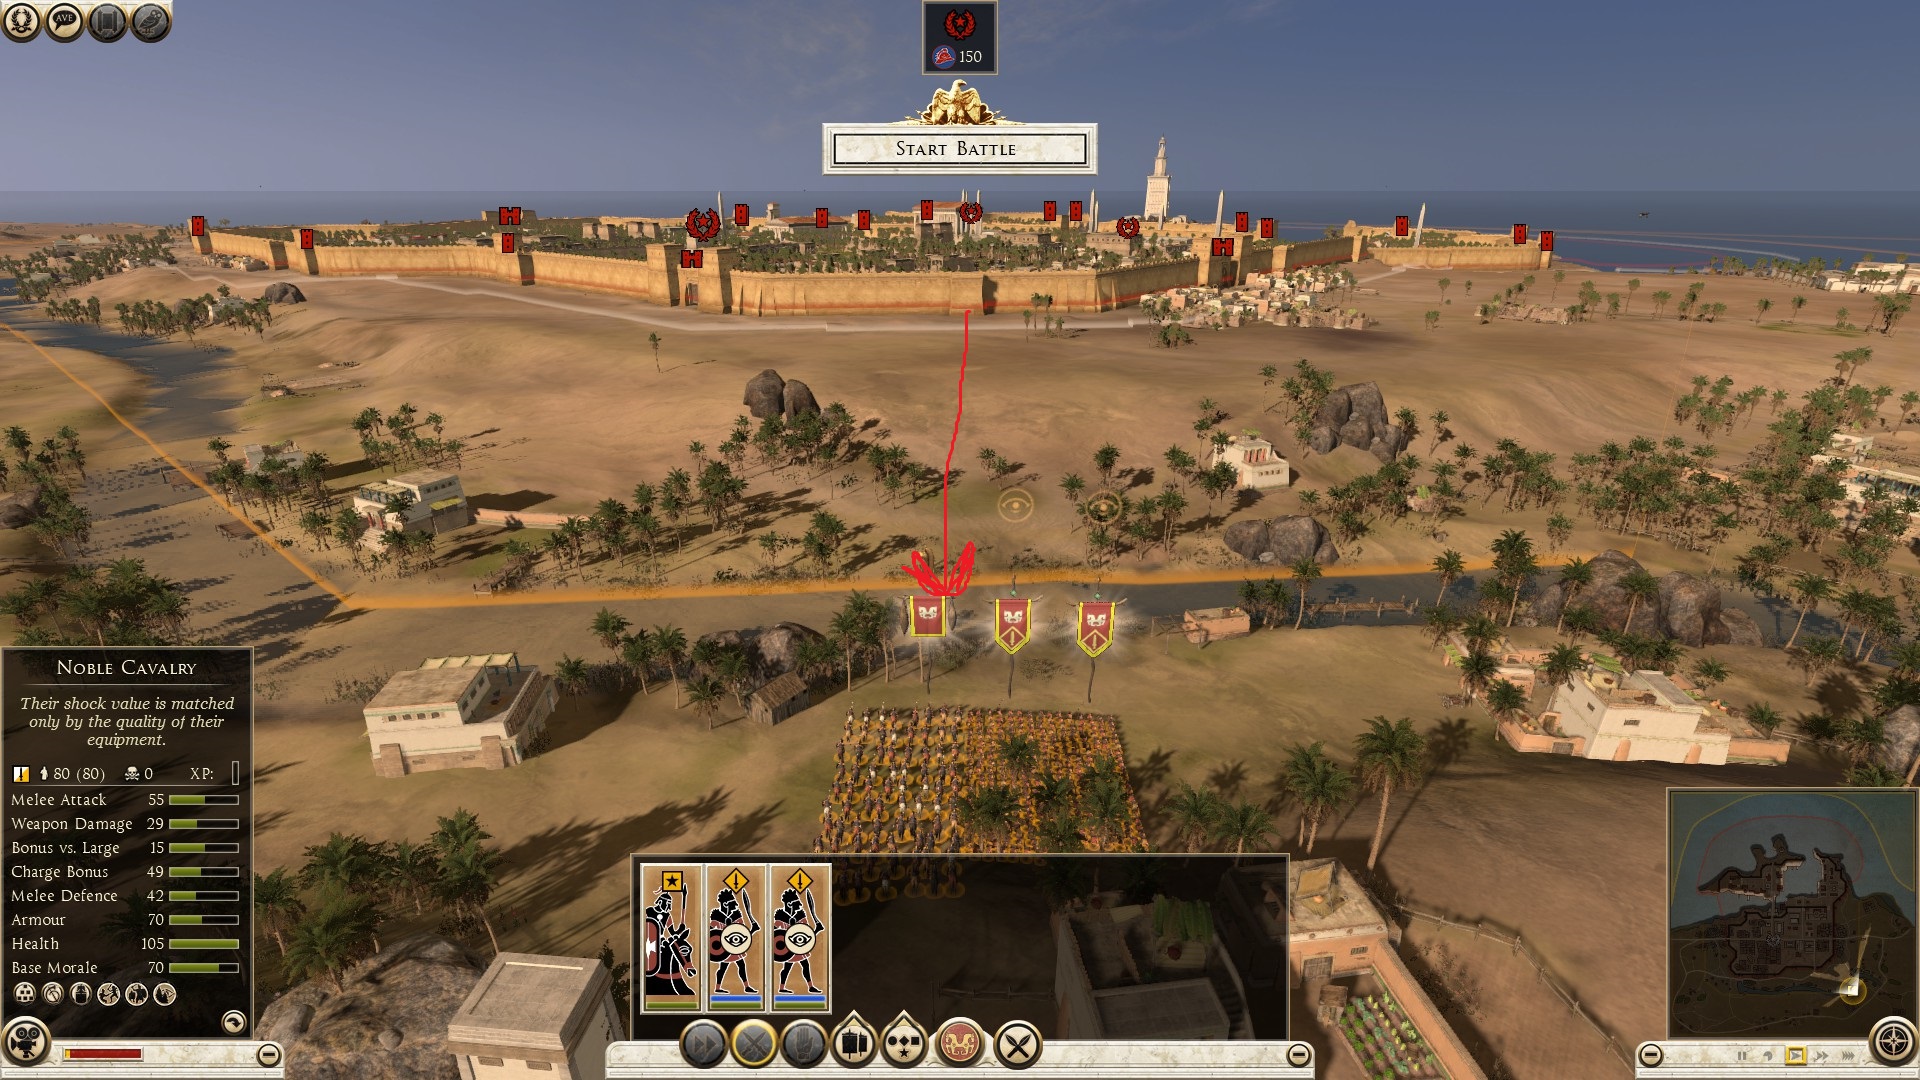
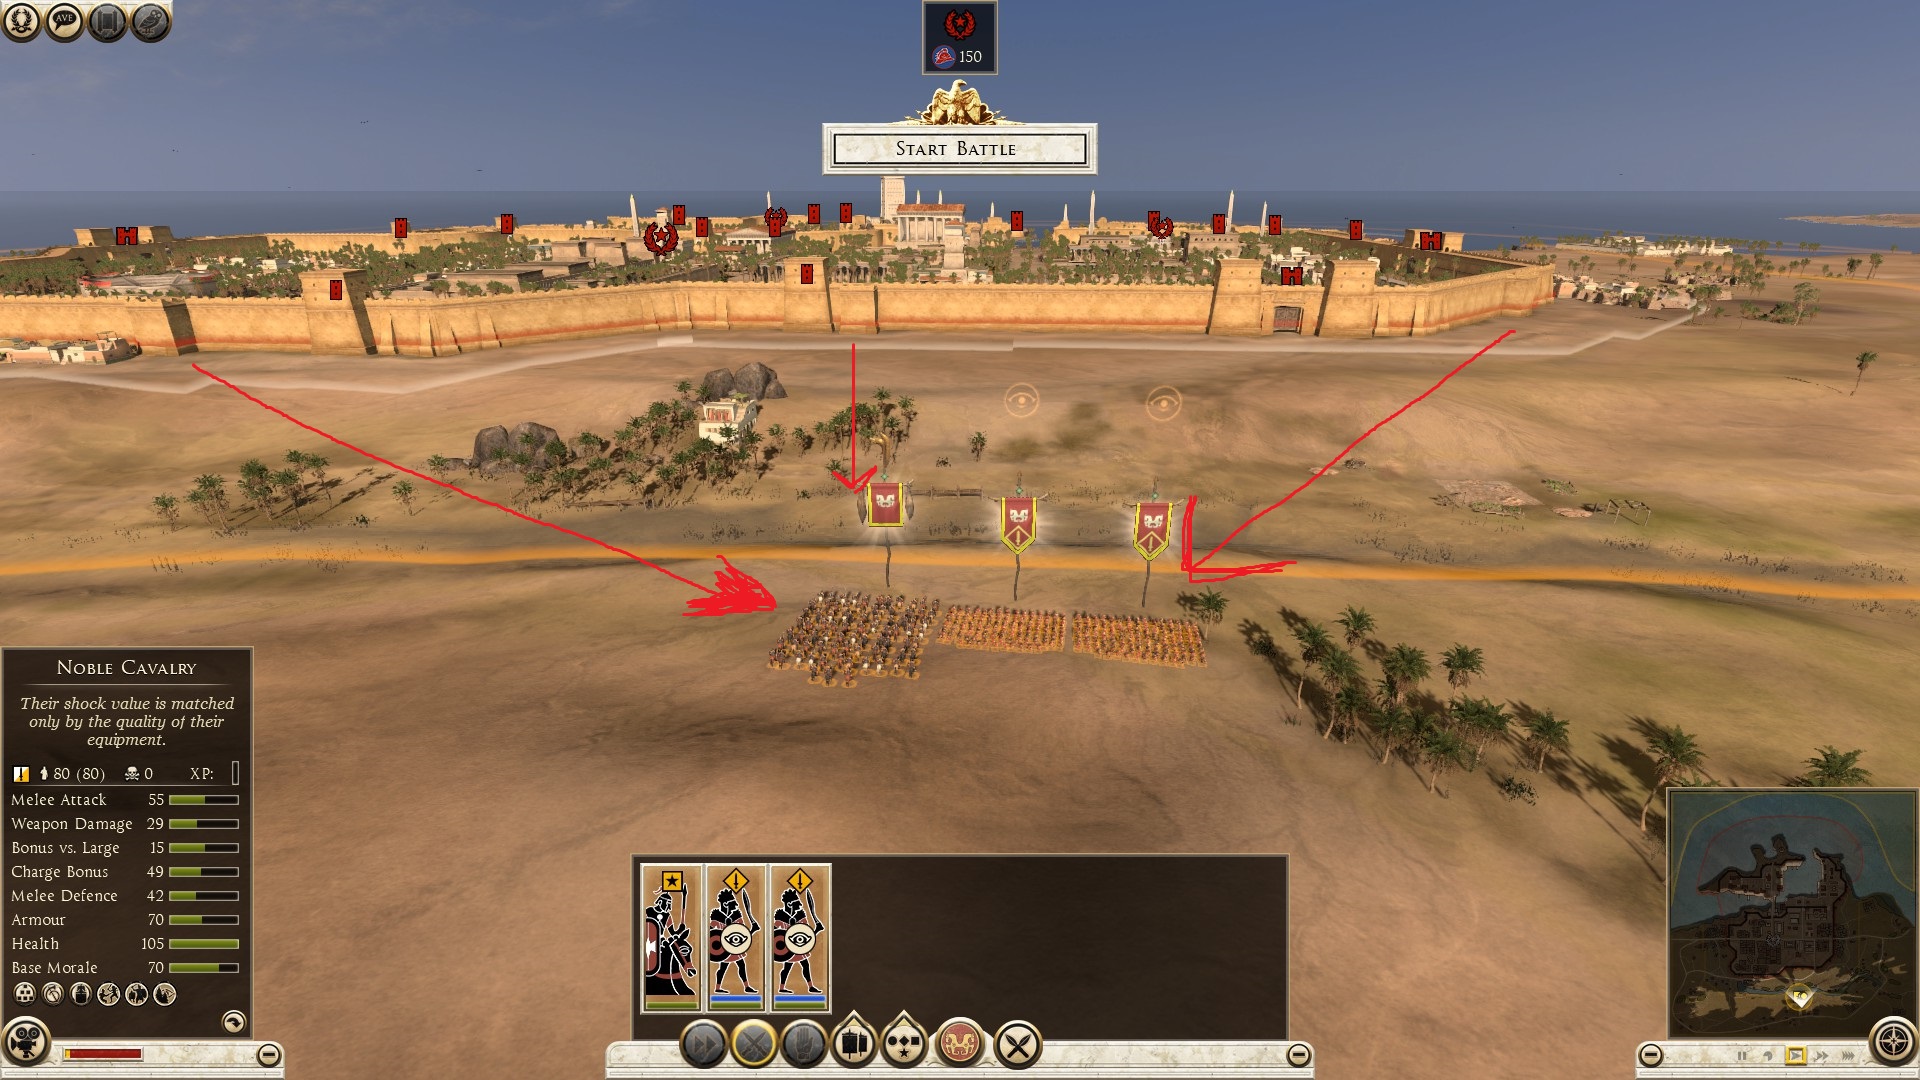
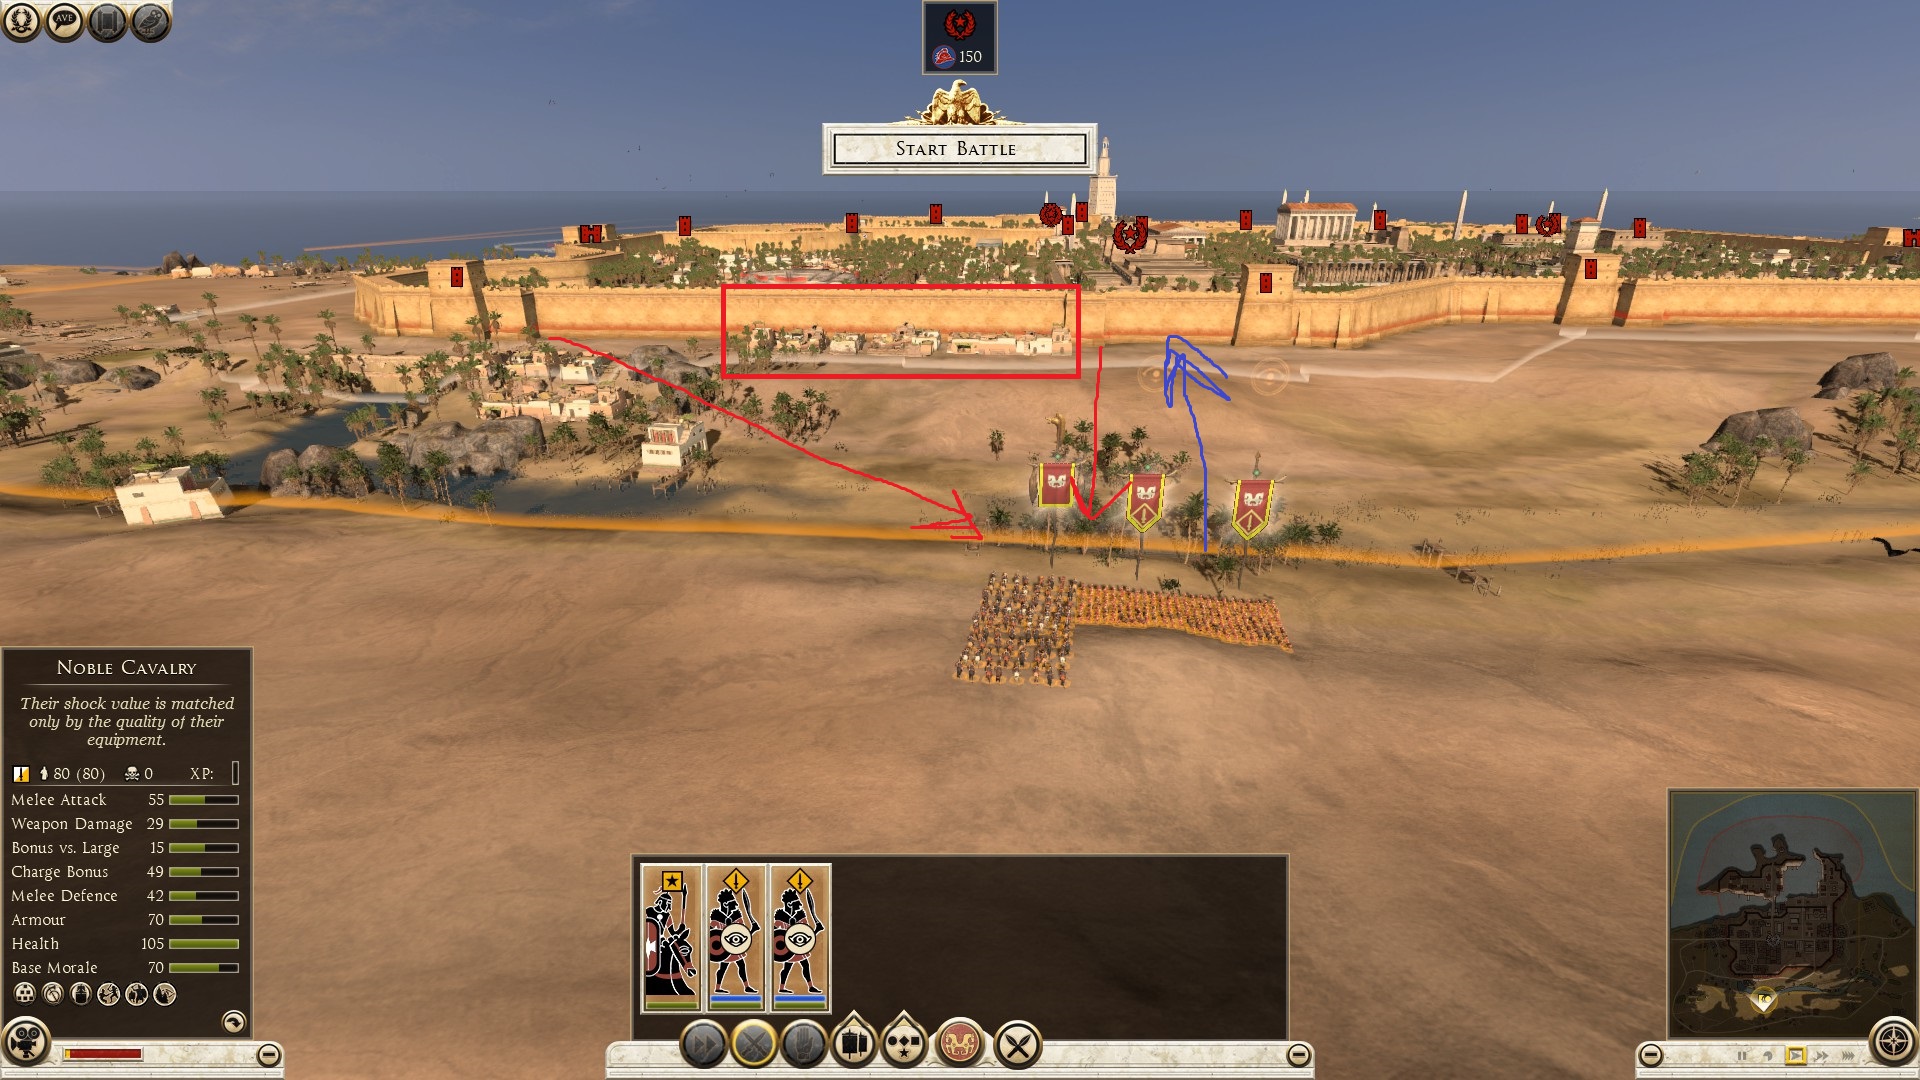 Almost all sides are under the range of wall artillery which can cause serious damage before you get close to the walls. If you do make it to the walls, you are welcomed by the wall towers which makes things even worse. Except for one promising side.
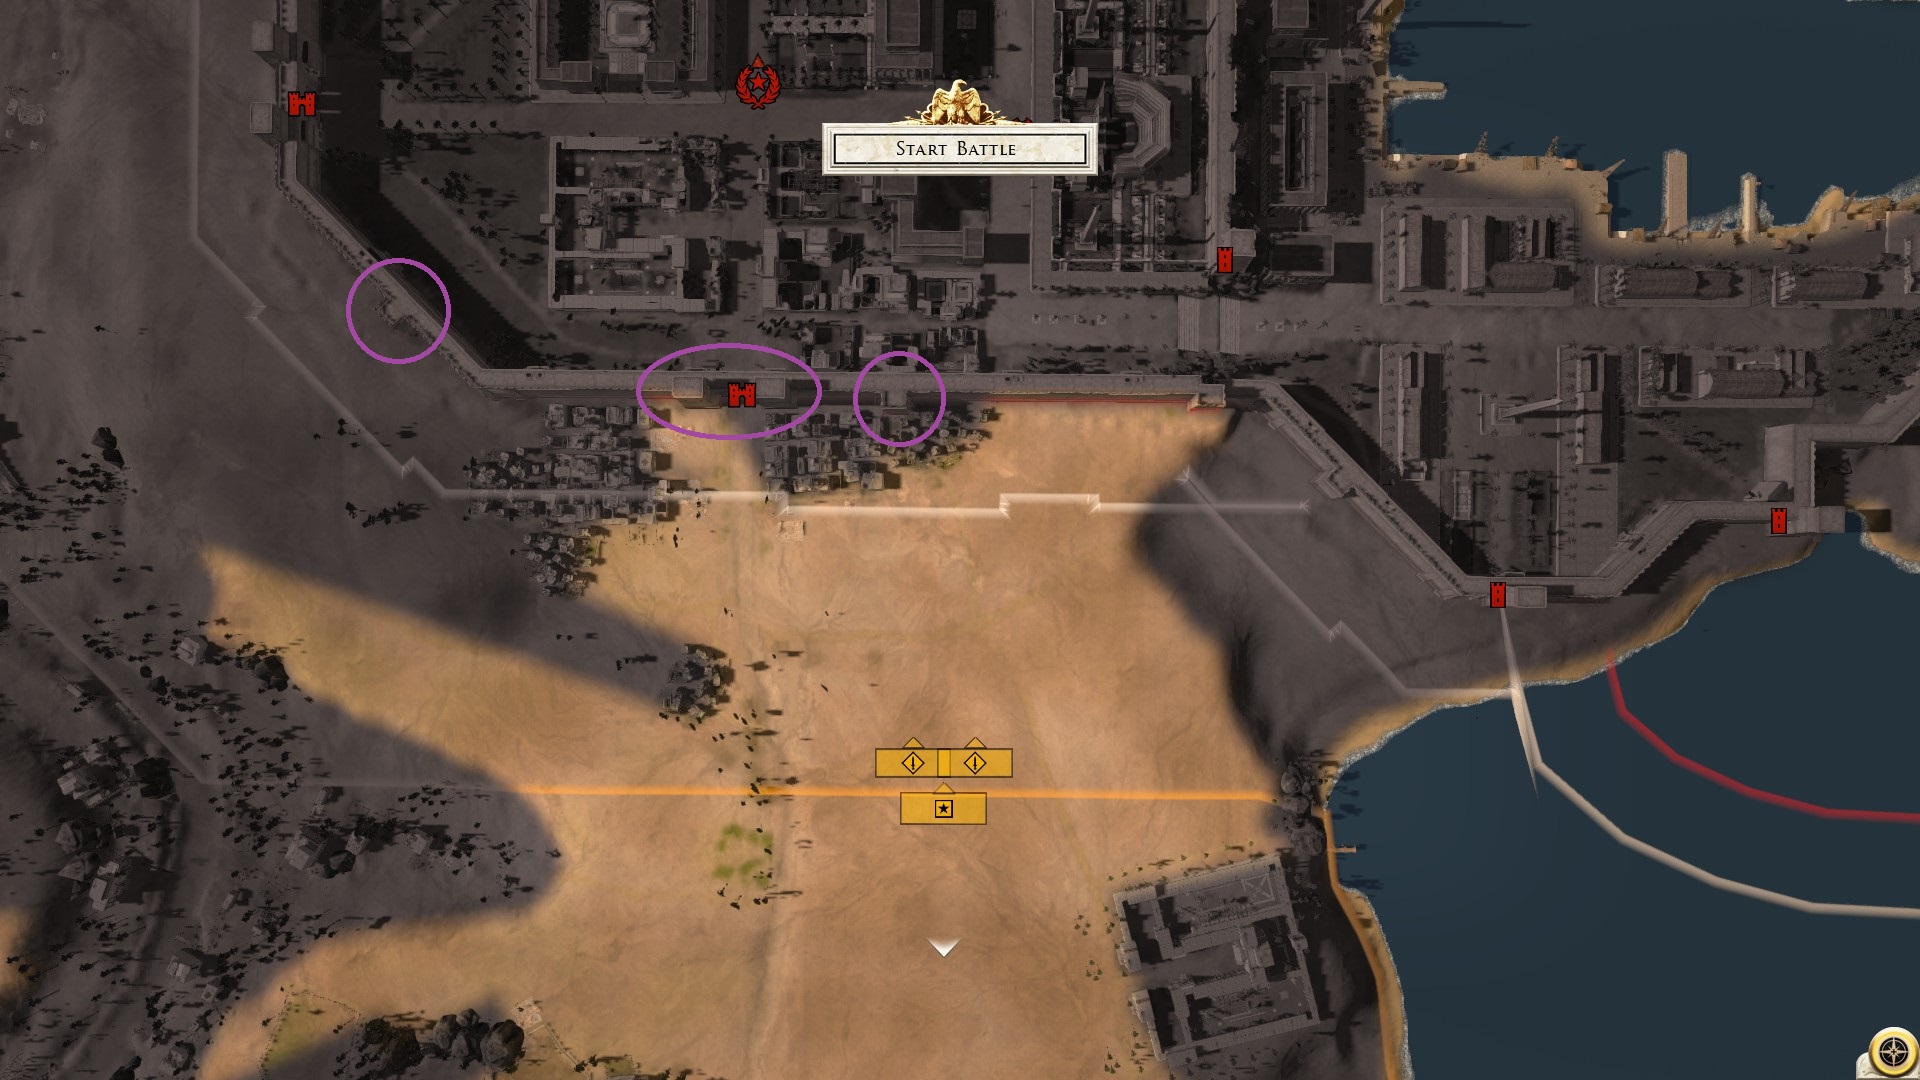
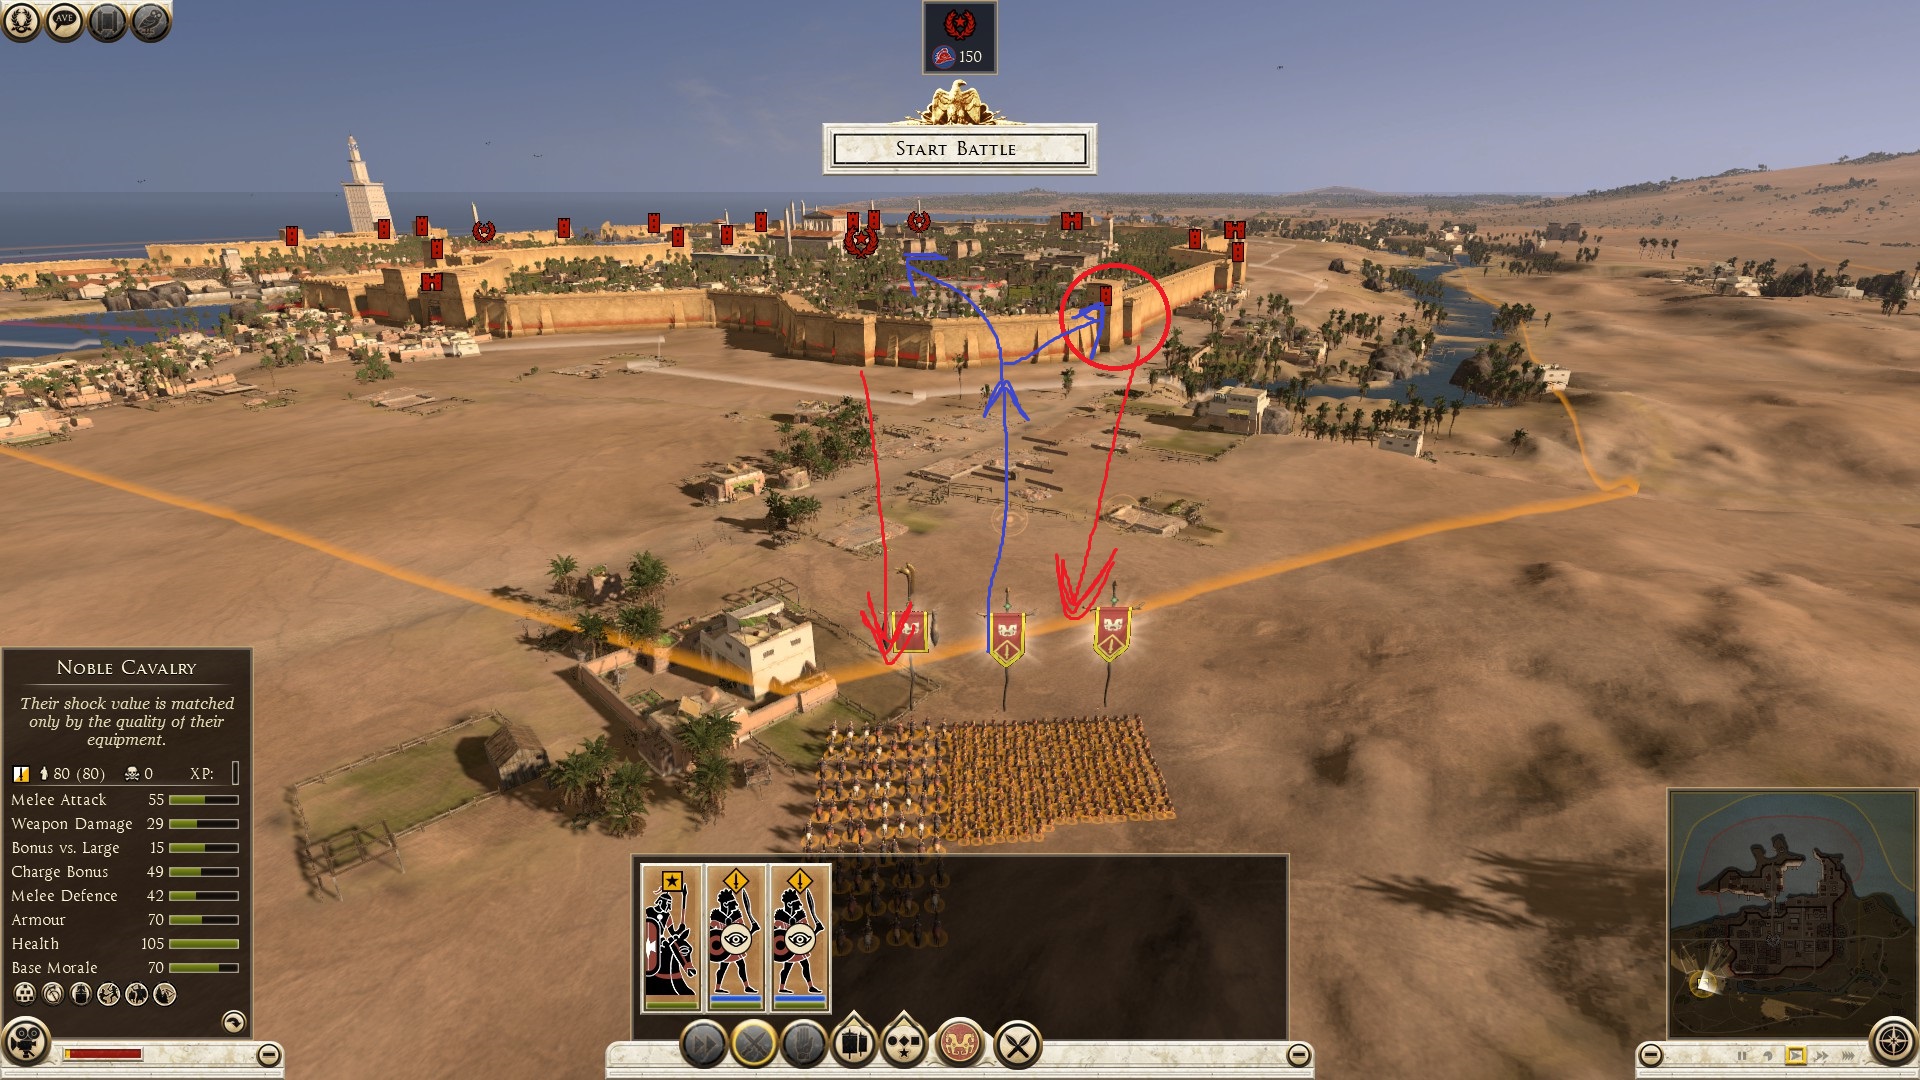 This side is the only side that will cause you less headaches than the rest because there is only ONE wall tower, and one artillery station. Depending on the map infrastructure, sometimes it is better to assault the side that is hardest to defend regardless of defenses, such as the following image: (inset image)
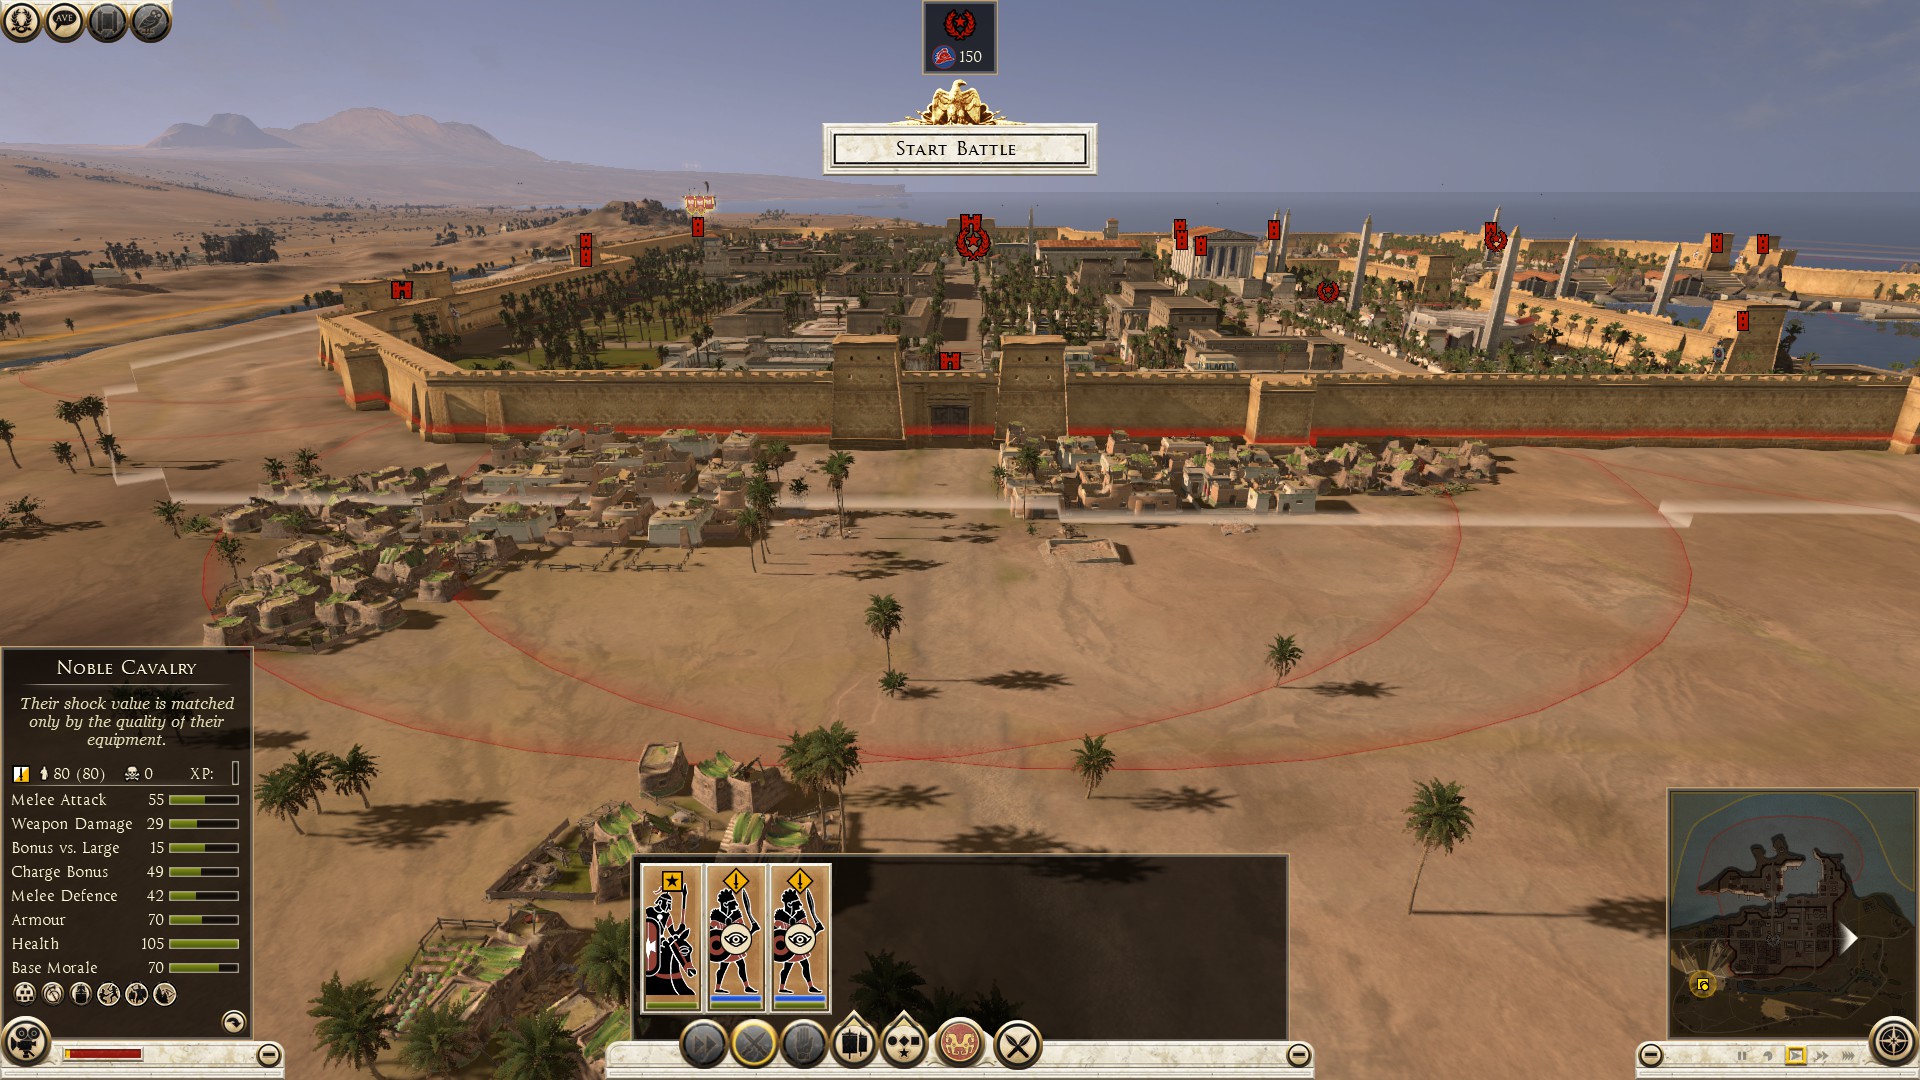
As you can see past the walls, the perfect place to invade is the long road stretching from the gates to the corner tower. I tend to break the wall at two points, one hole where the wall connects to the gate tower, the other is the stairs that leads up to the walls near the corner tower. Doing so, the defenders won’t be able to man the walls with their archers to barrage me. If they do have archers up there, they will be stuck for the remainder of the match. Following that, I use my towers to block off the corner tower, then either skirmish their range units (if they have any at the front) or advance inside on that long road because the civilian buildings past the street my army is on, limits the range and melee units of the defenders, forcing them to attack me from two places only, the space behind the gates and behind the corner tower where it is narrow. The narrowness of the road allows me in emergencies, to hold multiple advancing enemy units with one unit, buying me time and more than one option on how to deal with the situation, like bringing in more melee units through the wall holes to surround the enemy units or barrage them with my archers. With the addition of neutralizing the corner and gate towers to at least stop firing at me. You can hold the tab button and move with WASD to look around the city from the sky, or you can manually look around which is better. Another handy trick you can do is hold spacebar to view the range of the wall towers, sometimes that does not work under certain circumstances such as nightmare mode, or other host, set, options. As you can see, those red circles are the range of the wall towers,
This side is the only side that will cause you less headaches than the rest because there is only ONE wall tower, and one artillery station. Depending on the map infrastructure, sometimes it is better to assault the side that is hardest to defend regardless of defenses, such as the following image: (inset image)
As you can see past the walls, the perfect place to invade is the long road stretching from the gates to the corner tower. I tend to break the wall at two points, one hole where the wall connects to the gate tower, the other is the stairs that leads up to the walls near the corner tower. Doing so, the defenders won’t be able to man the walls with their archers to barrage me. If they do have archers up there, they will be stuck for the remainder of the match. Following that, I use my towers to block off the corner tower, then either skirmish their range units (if they have any at the front) or advance inside on that long road because the civilian buildings past the street my army is on, limits the range and melee units of the defenders, forcing them to attack me from two places only, the space behind the gates and behind the corner tower where it is narrow. The narrowness of the road allows me in emergencies, to hold multiple advancing enemy units with one unit, buying me time and more than one option on how to deal with the situation, like bringing in more melee units through the wall holes to surround the enemy units or barrage them with my archers. With the addition of neutralizing the corner and gate towers to at least stop firing at me. You can hold the tab button and move with WASD to look around the city from the sky, or you can manually look around which is better. Another handy trick you can do is hold spacebar to view the range of the wall towers, sometimes that does not work under certain circumstances such as nightmare mode, or other host, set, options. As you can see, those red circles are the range of the wall towers,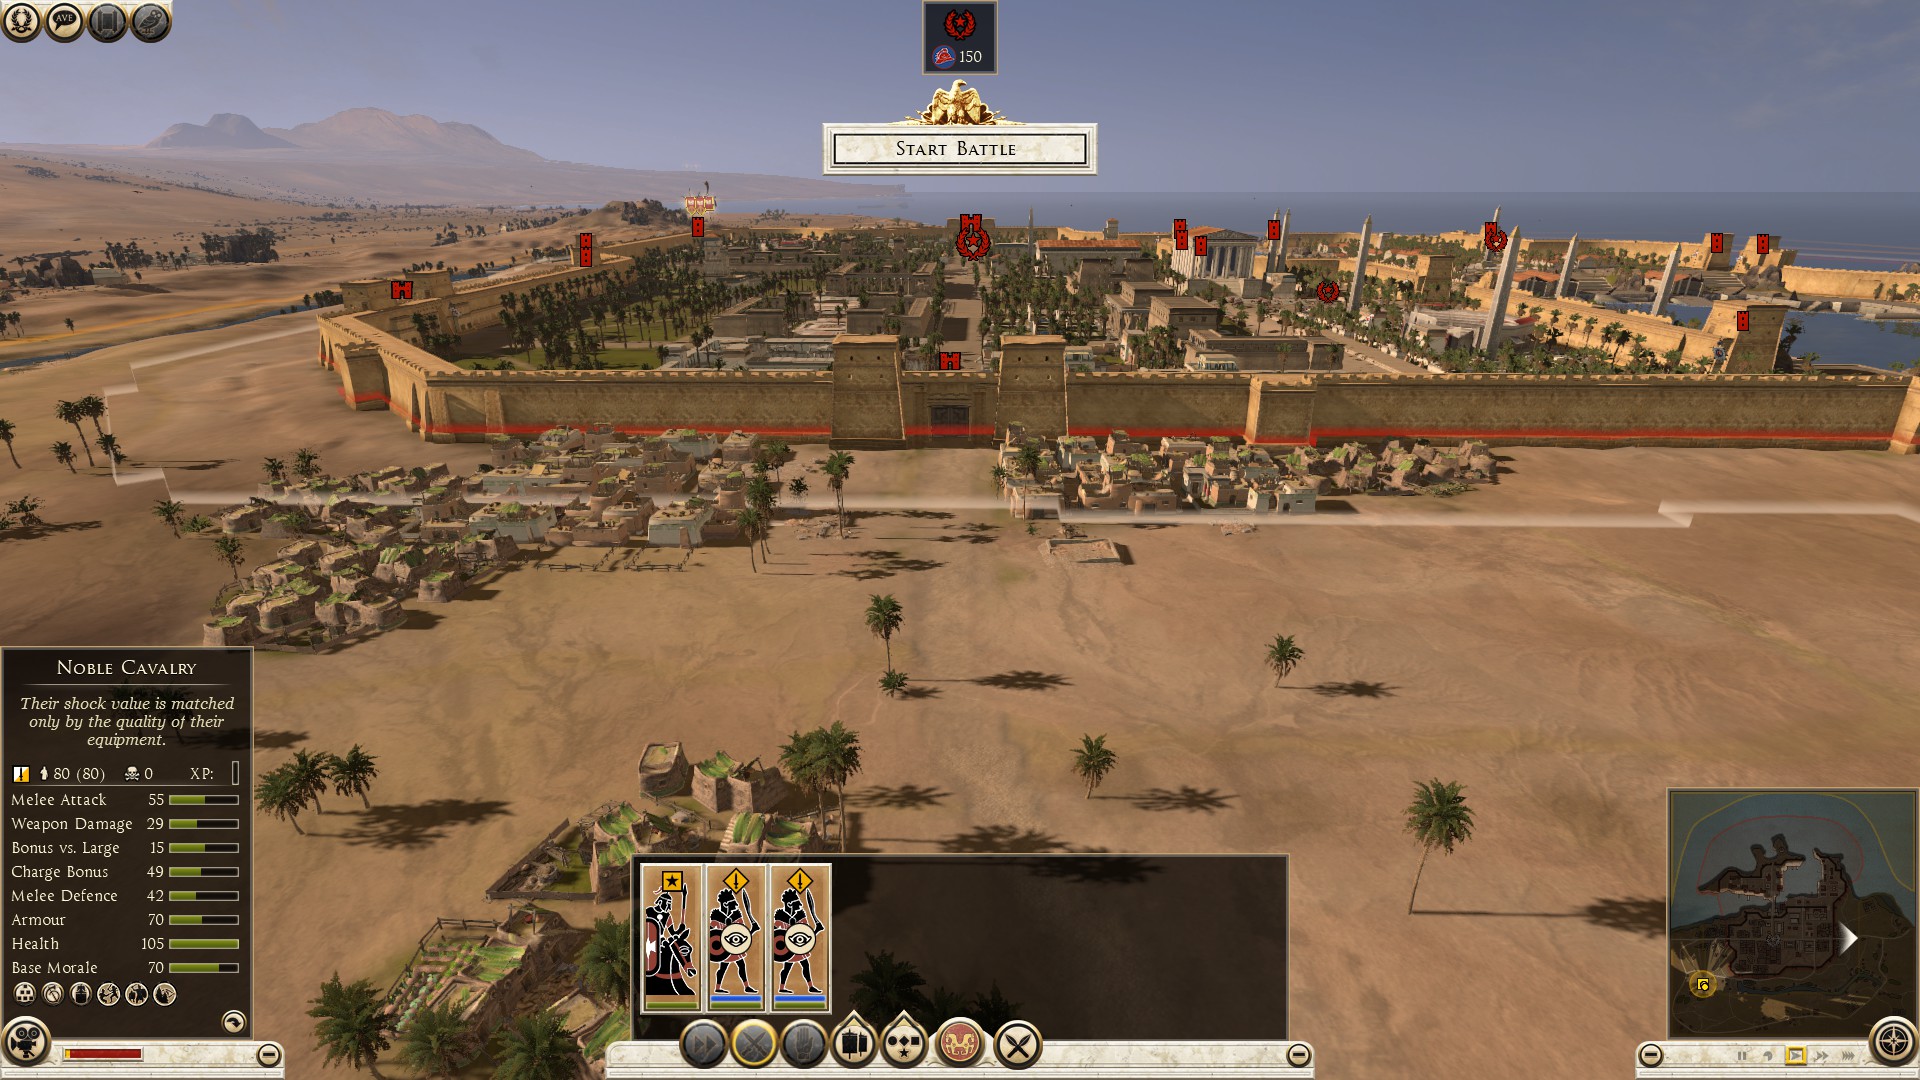
 ------------------------------ ----------------------------------------------------------------------------------------------------
What’s after scouting? Most of the time, multiplayer sieges are fought on large scale maps containing cities that have wall artillery. I hate losing one man before I get past the walls. Bearing in mind that there are players who are very good at manually controlling wall artillery, I needed a counter tactic, so I invented the tower wall.
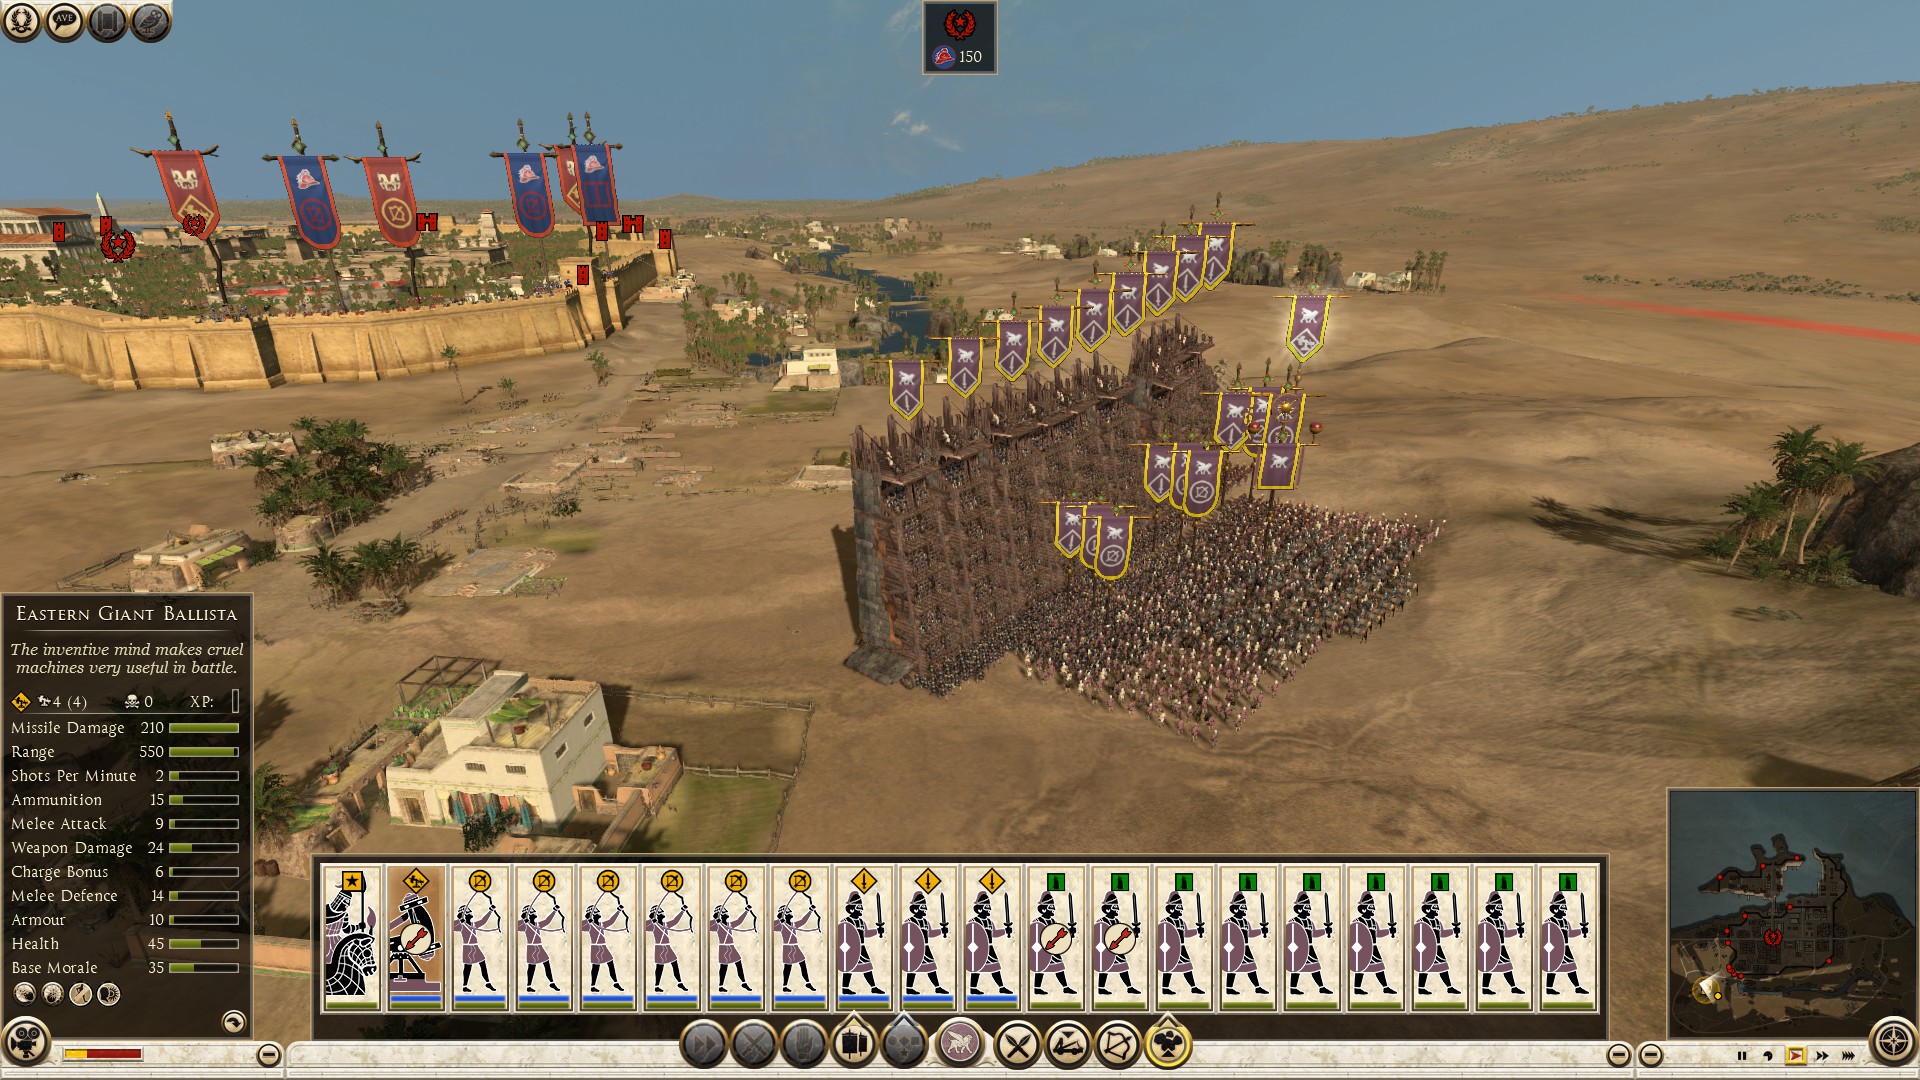
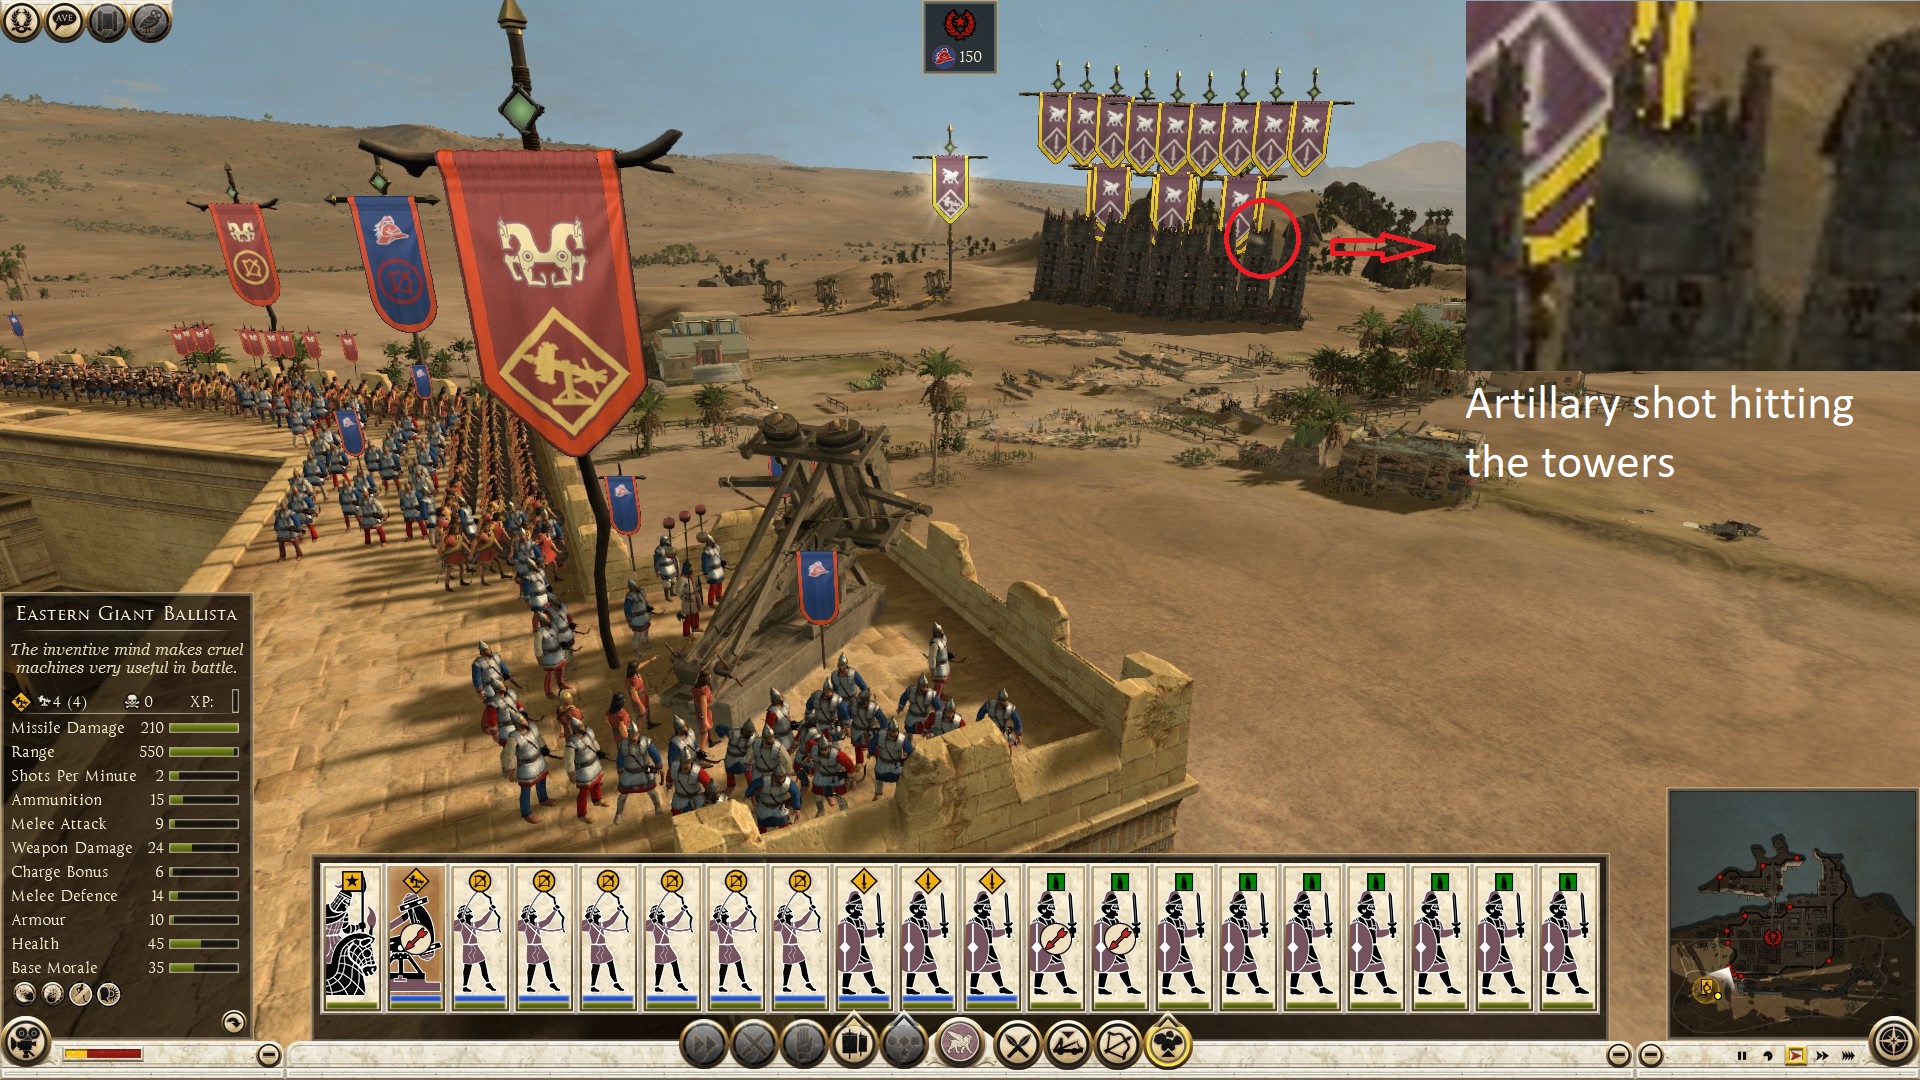
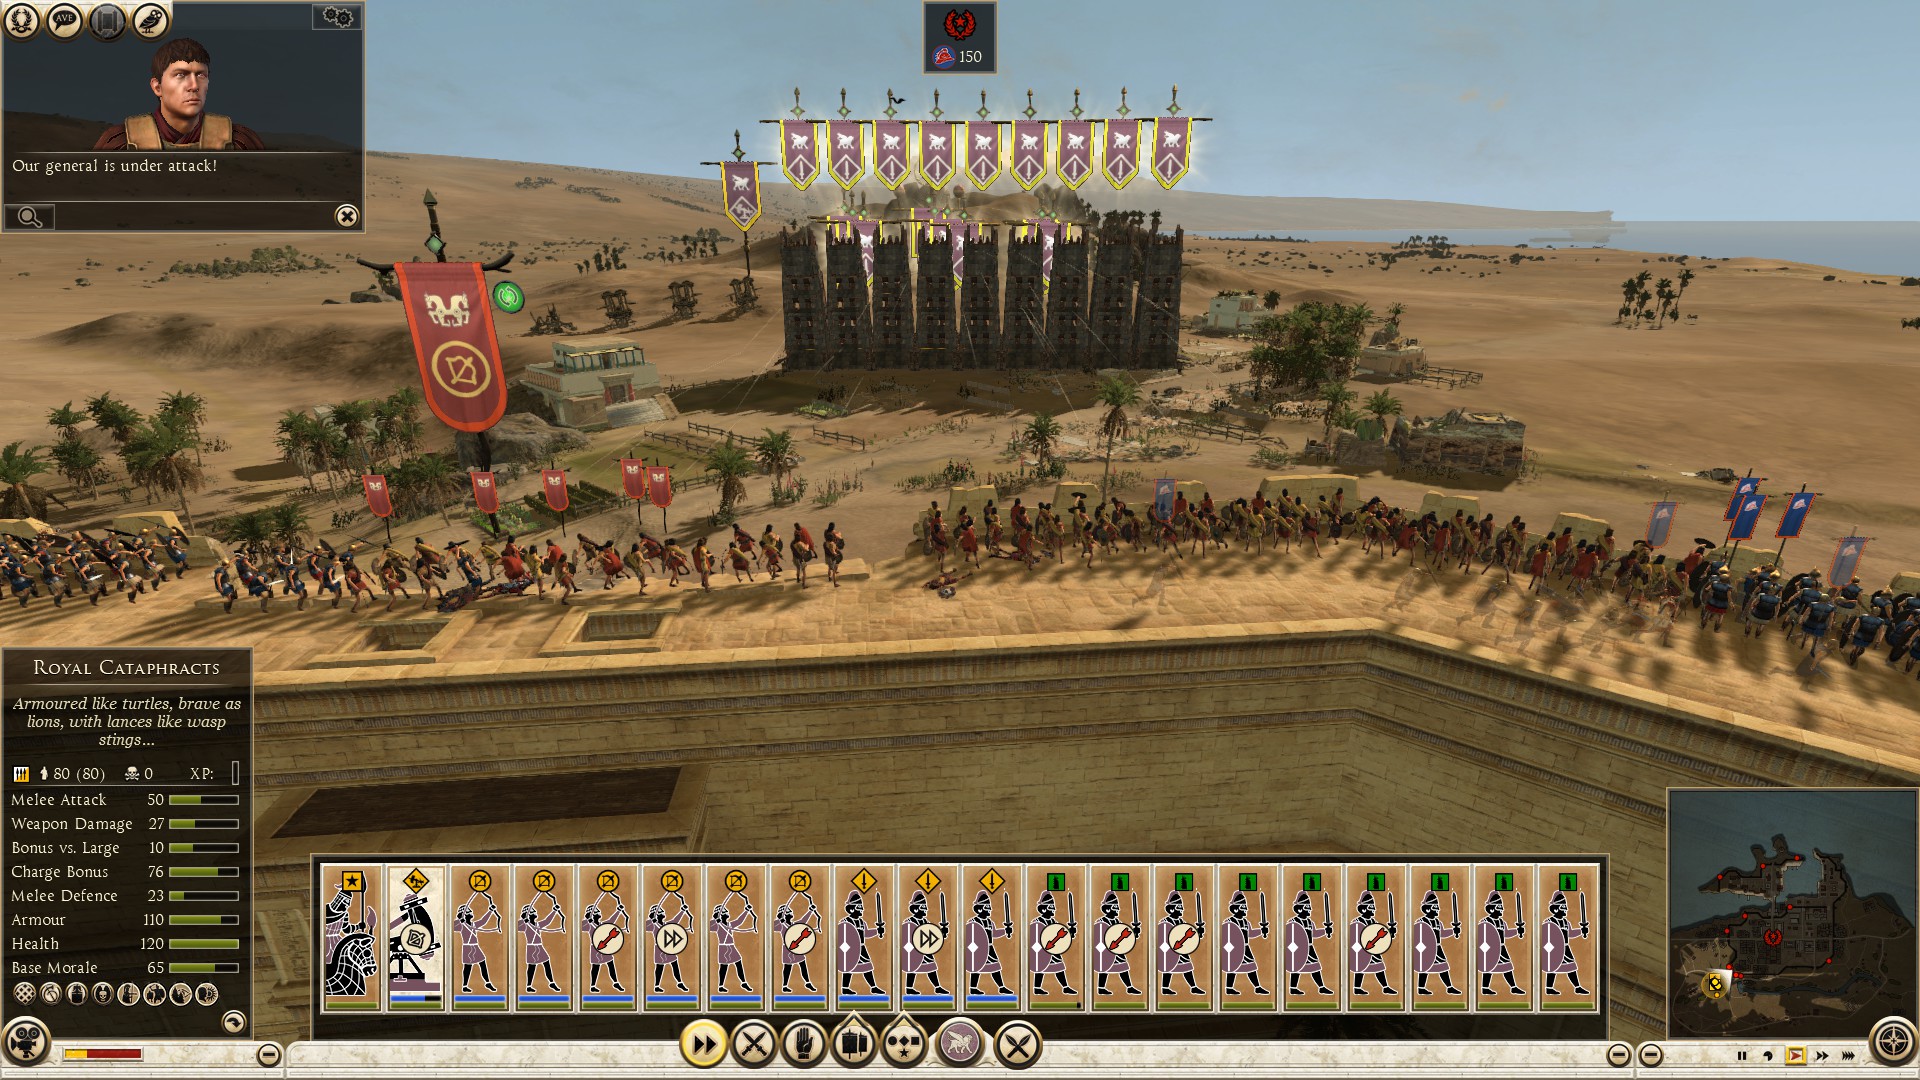
The wall protects my army from enemy artillery and range units. To prevent enemy projectiles from leaking onto your army, keep the towers and your men in formation with no gaps. To advance forward, select the units hiding behind the towers, in addition to the units manning the towers. Tab the up-arrow key once to move everything and keep it in formation, your units will walk a few steps forward then stop. If you hold the up-arrow key, your units will move faster but the infantry will outrun the towers, exposing them to enemy projectiles, hence why you should move slowly.
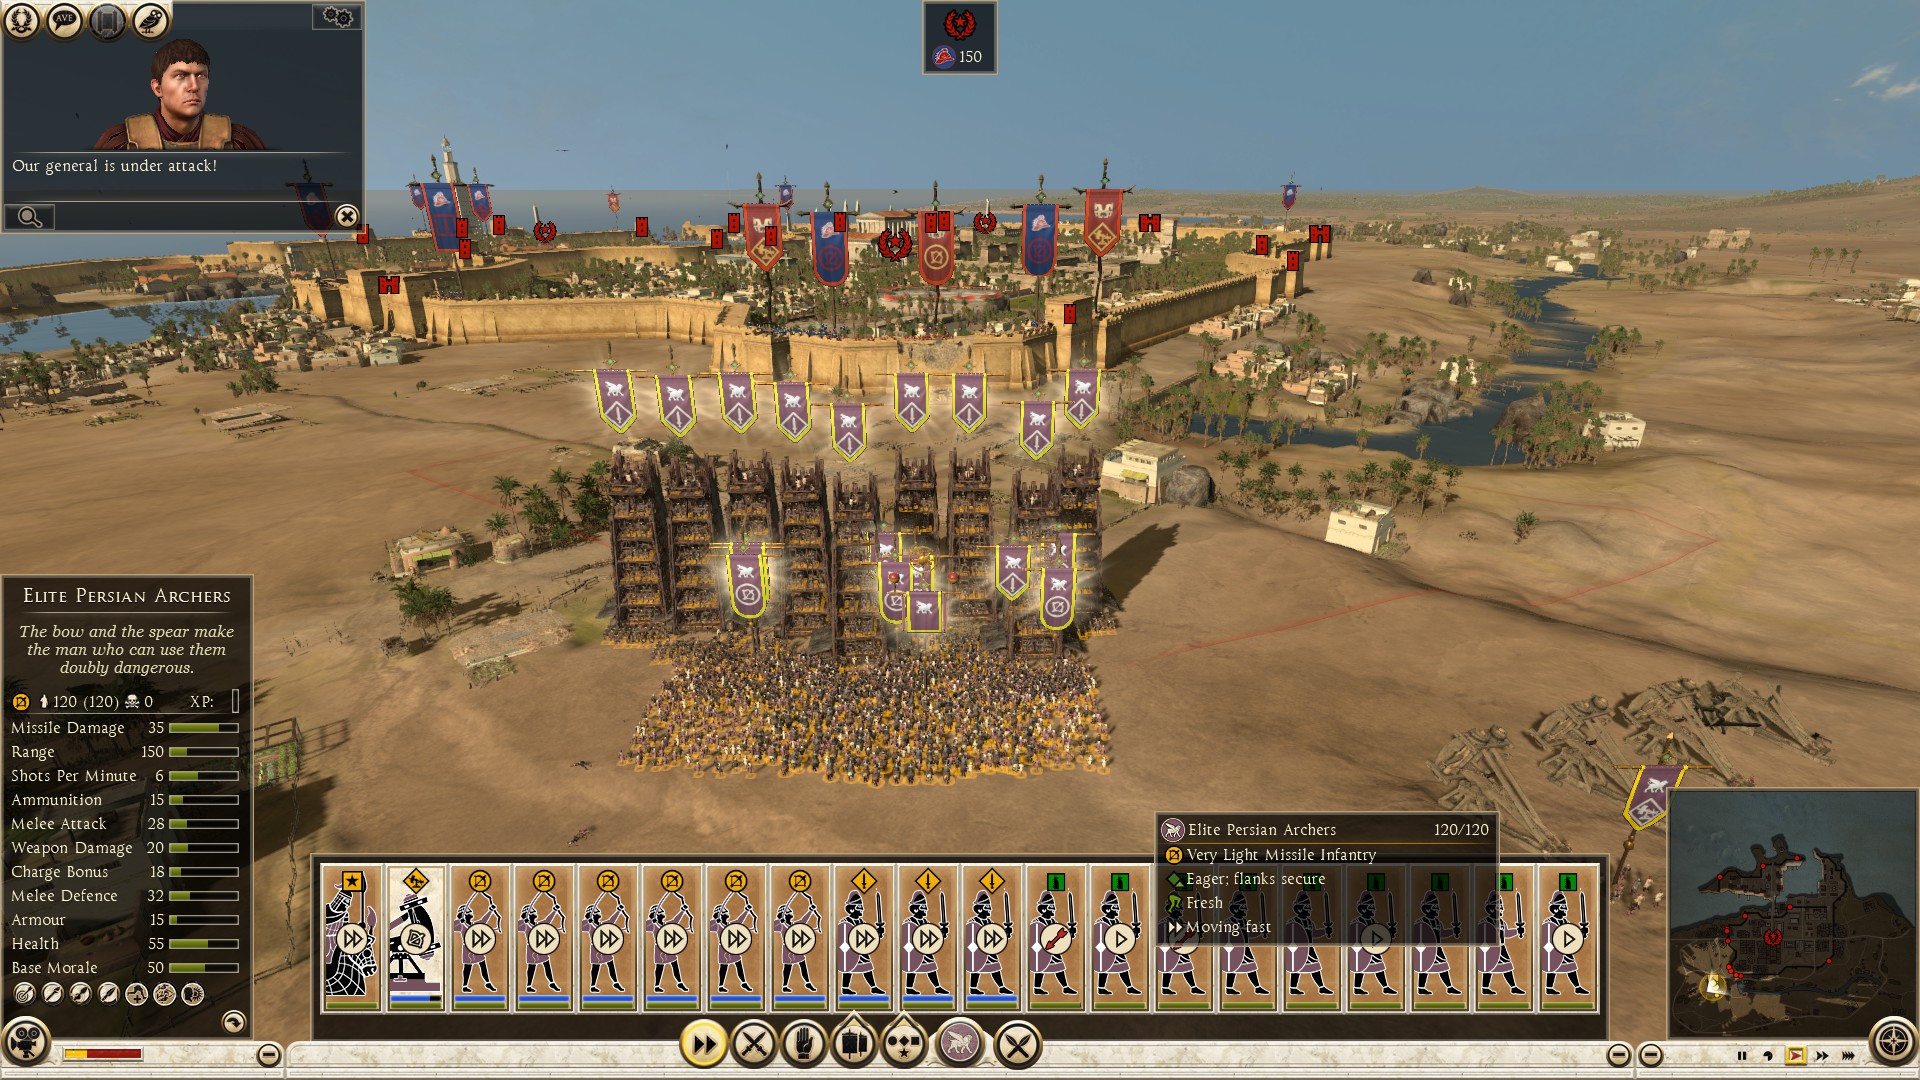
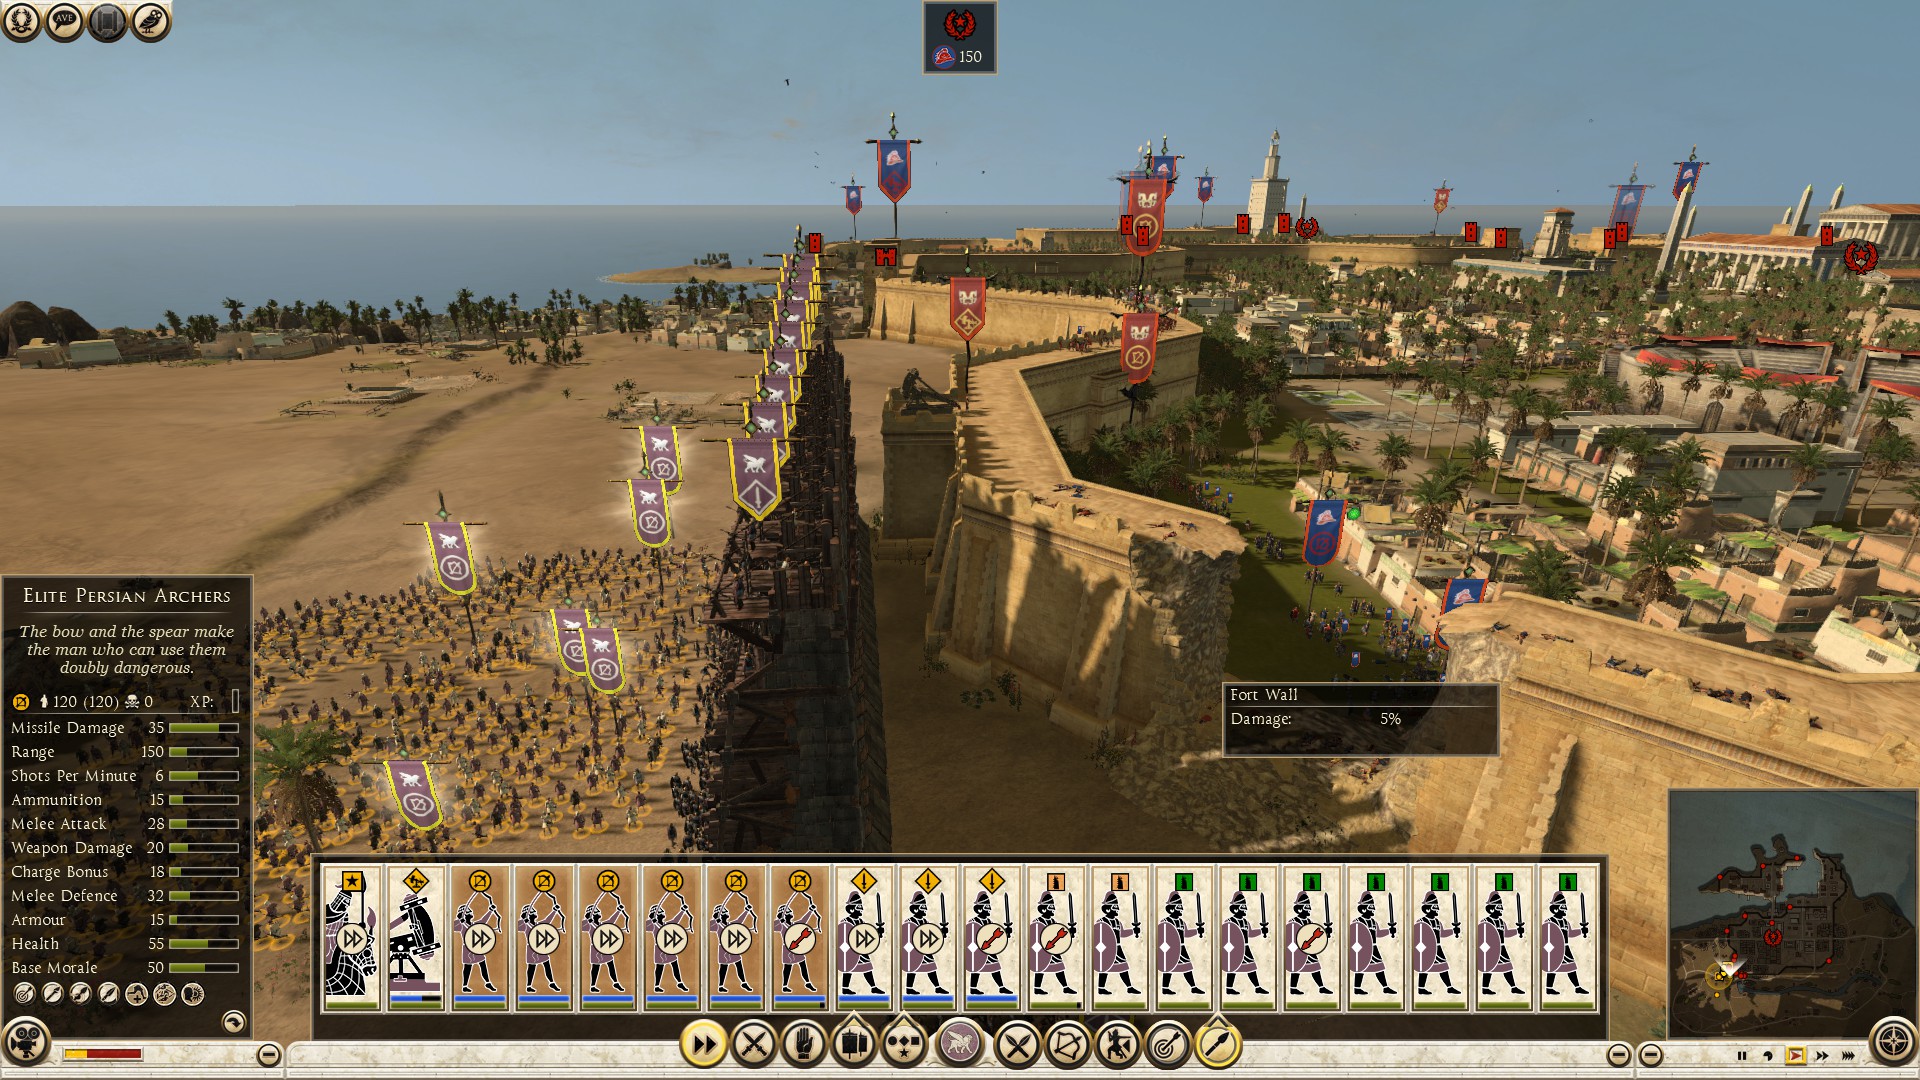
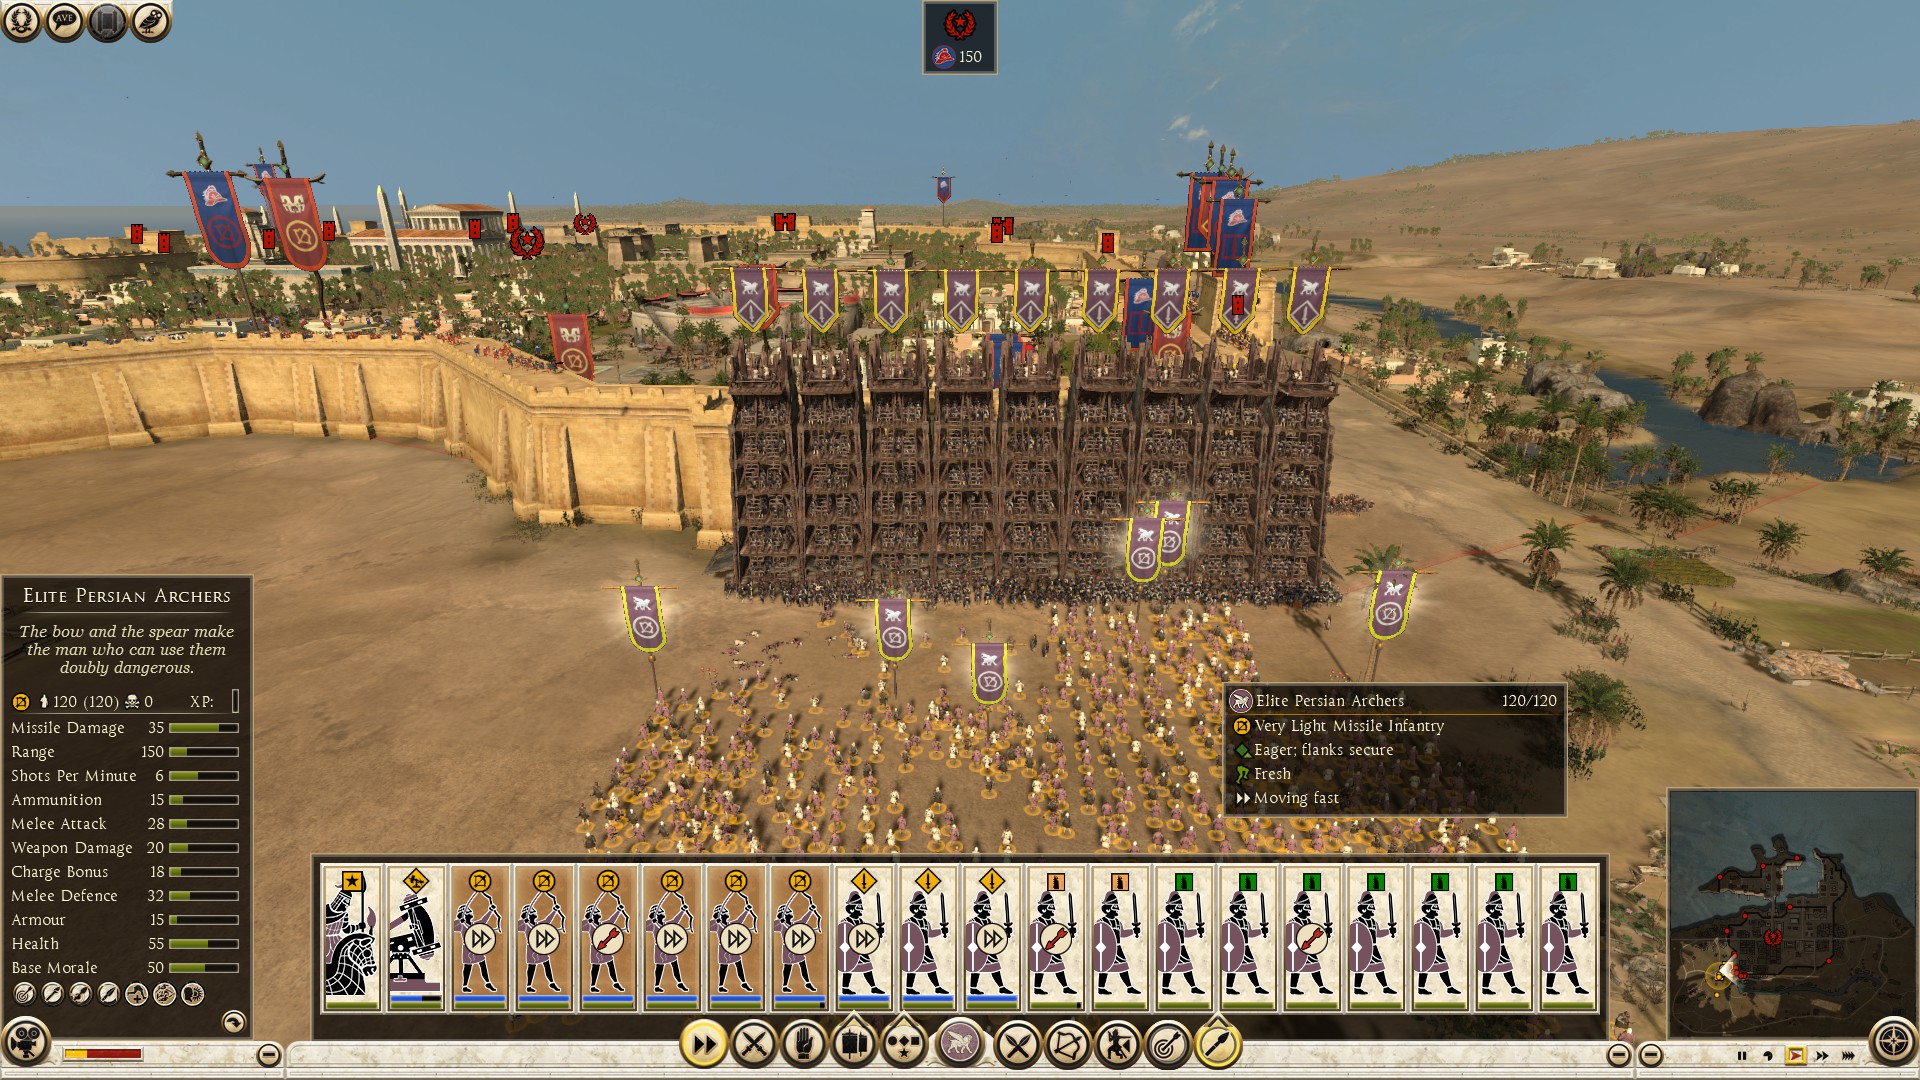
In this instance, I formed a wall facing the opponents wall artillery, preventing it and the enemy archers past the walls on the ground from shooting my units. Though I was still vulnerable on the sides. To solve this issue, I lined up my archers behind the towers and skirmished the wall archers.
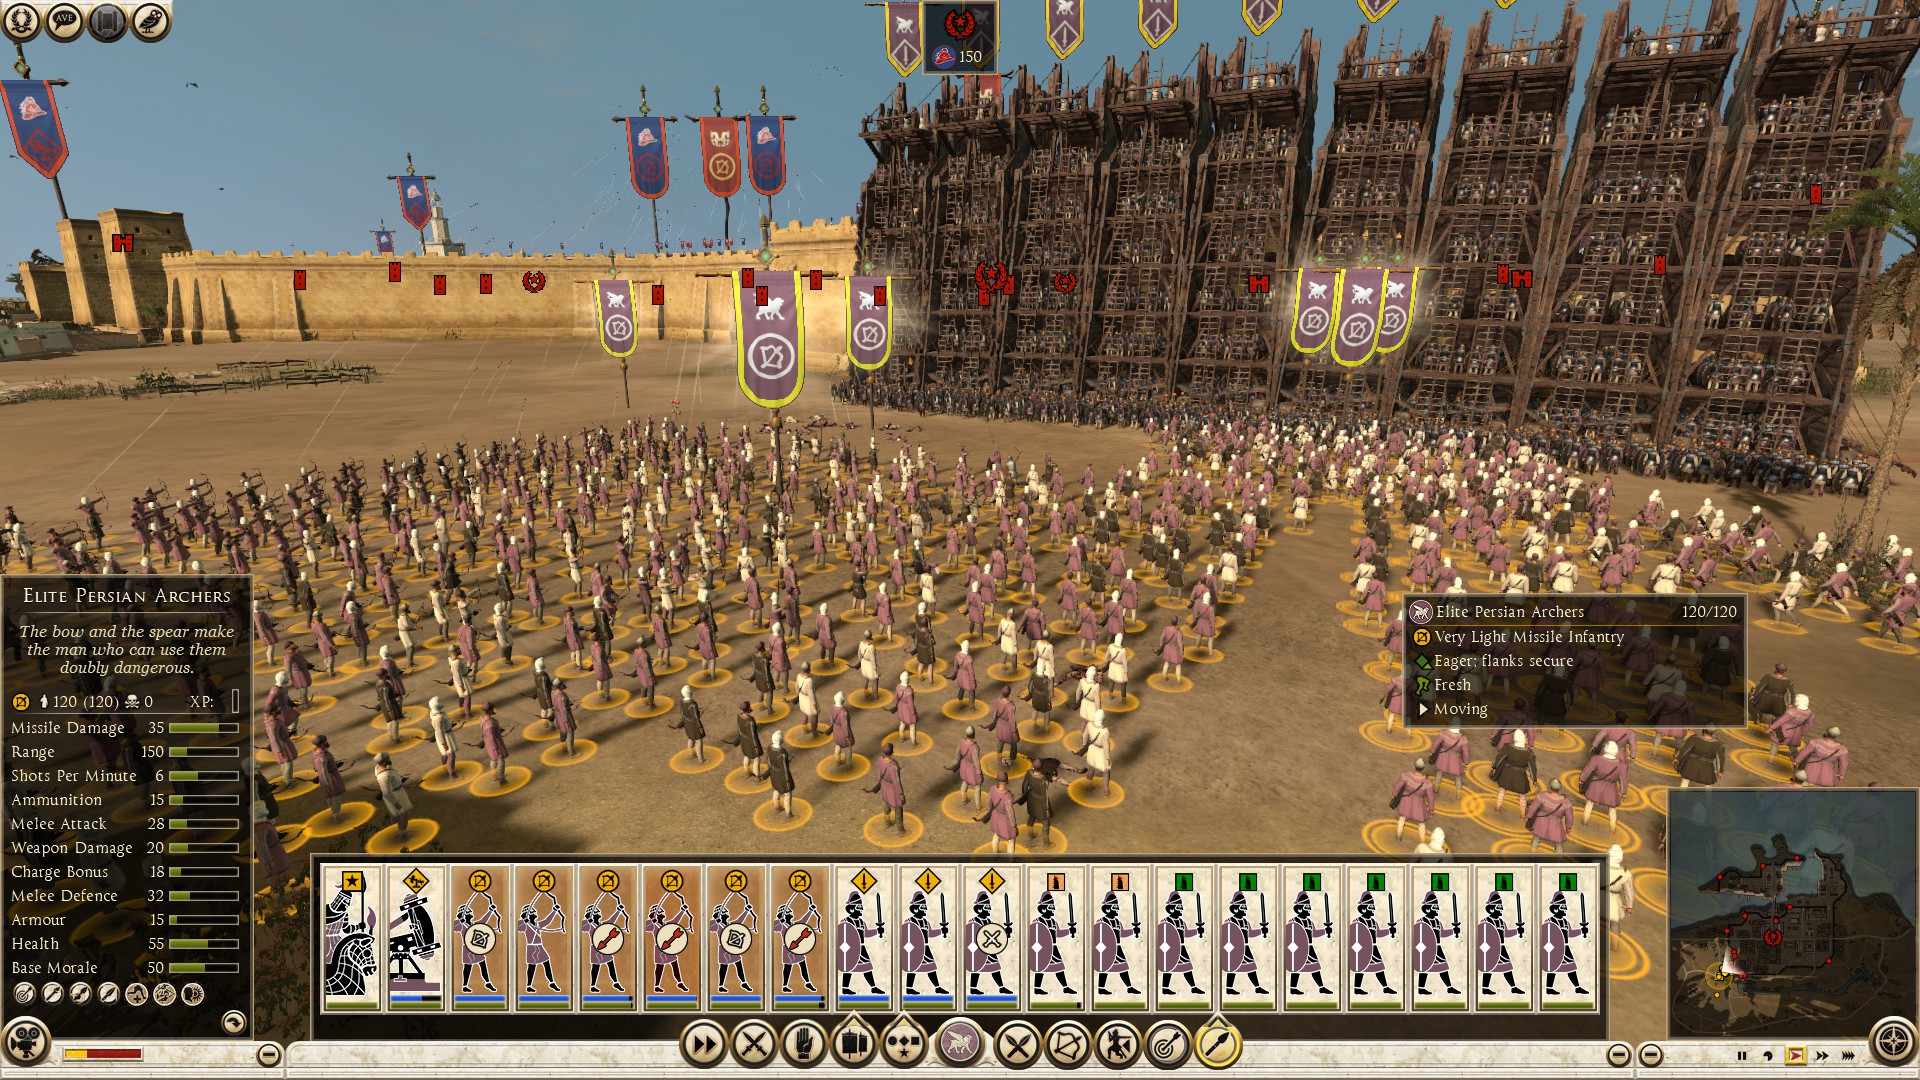
Beware, infantry units can walk and run through the towers. In other words, if the enemy charges your men from the front, don’t expect the towers to hold them back, they will charge through the towers and engage your army in melee fighting. So, it’s not a bad idea to put one or more melee units at the front, behind your towers.
You can get creative with the towers. These are other tactics I use when assaulting corner towers and or main gates...
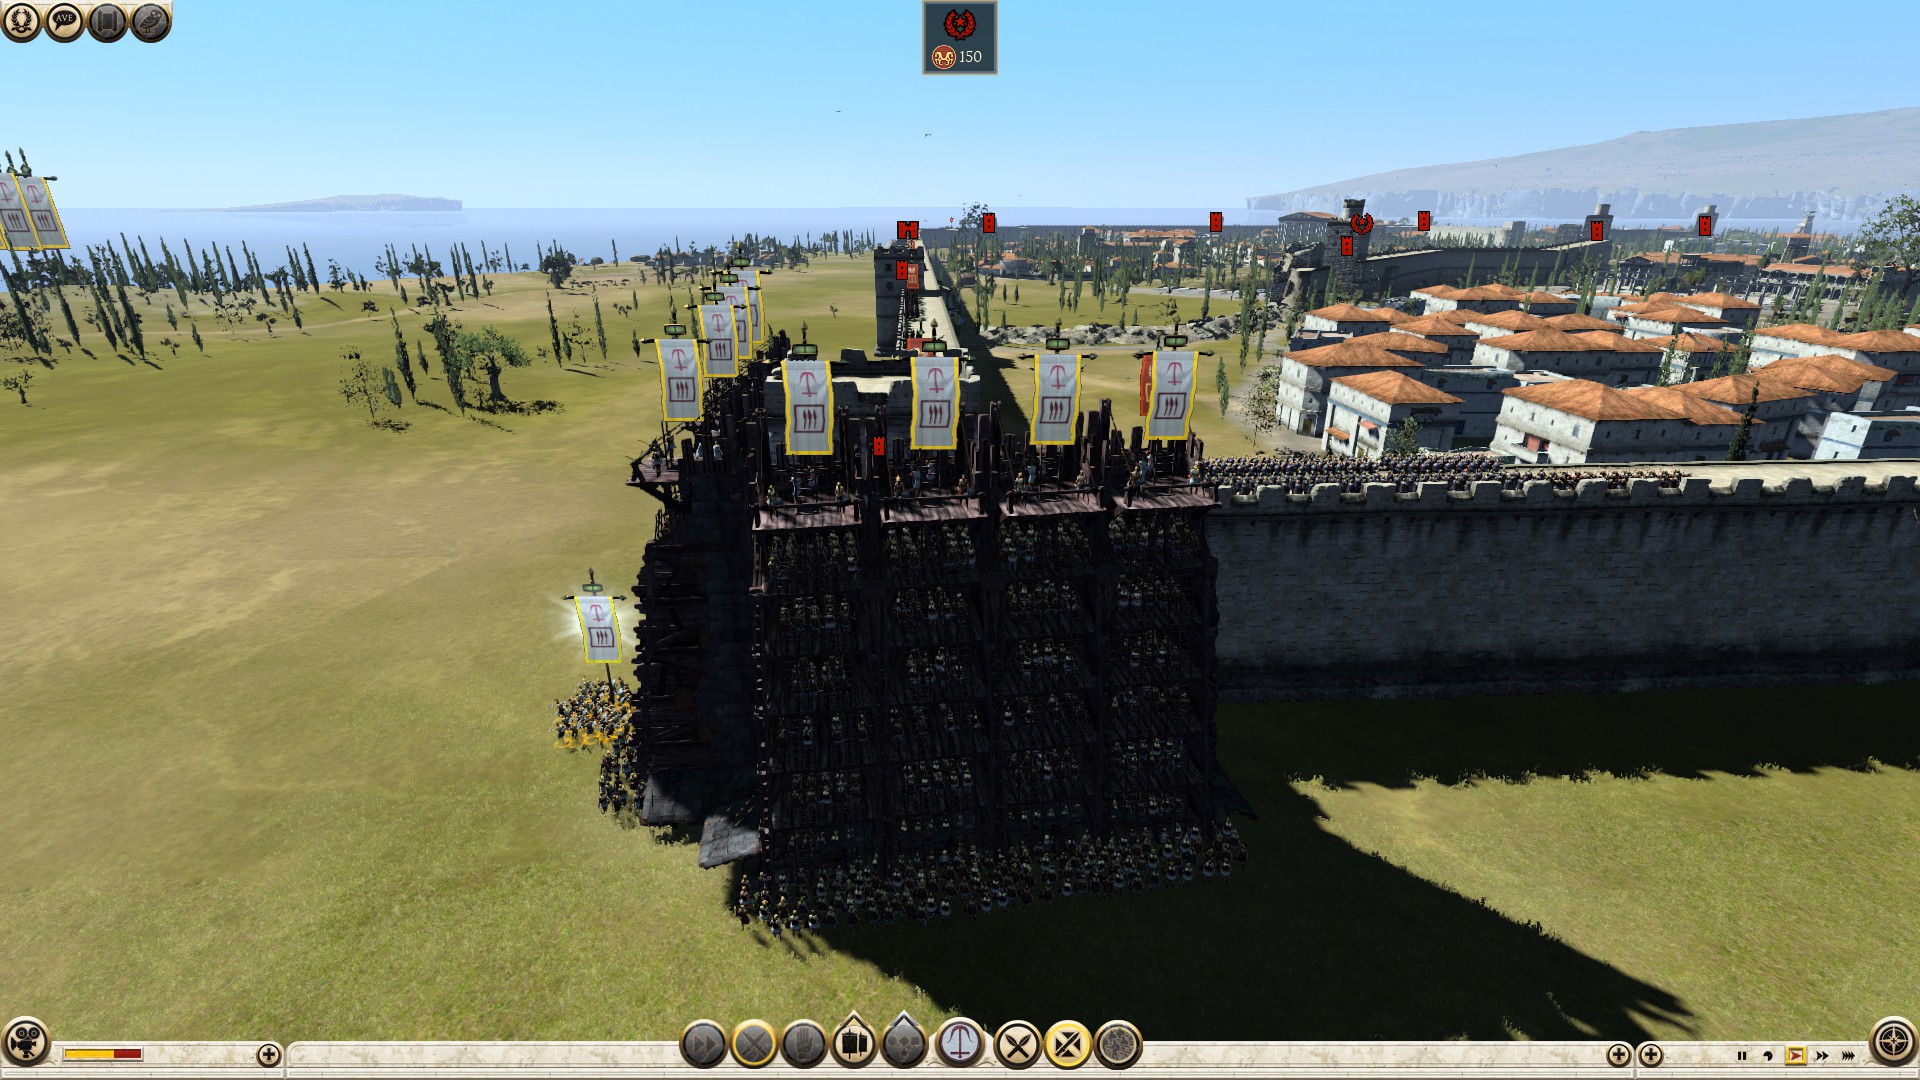
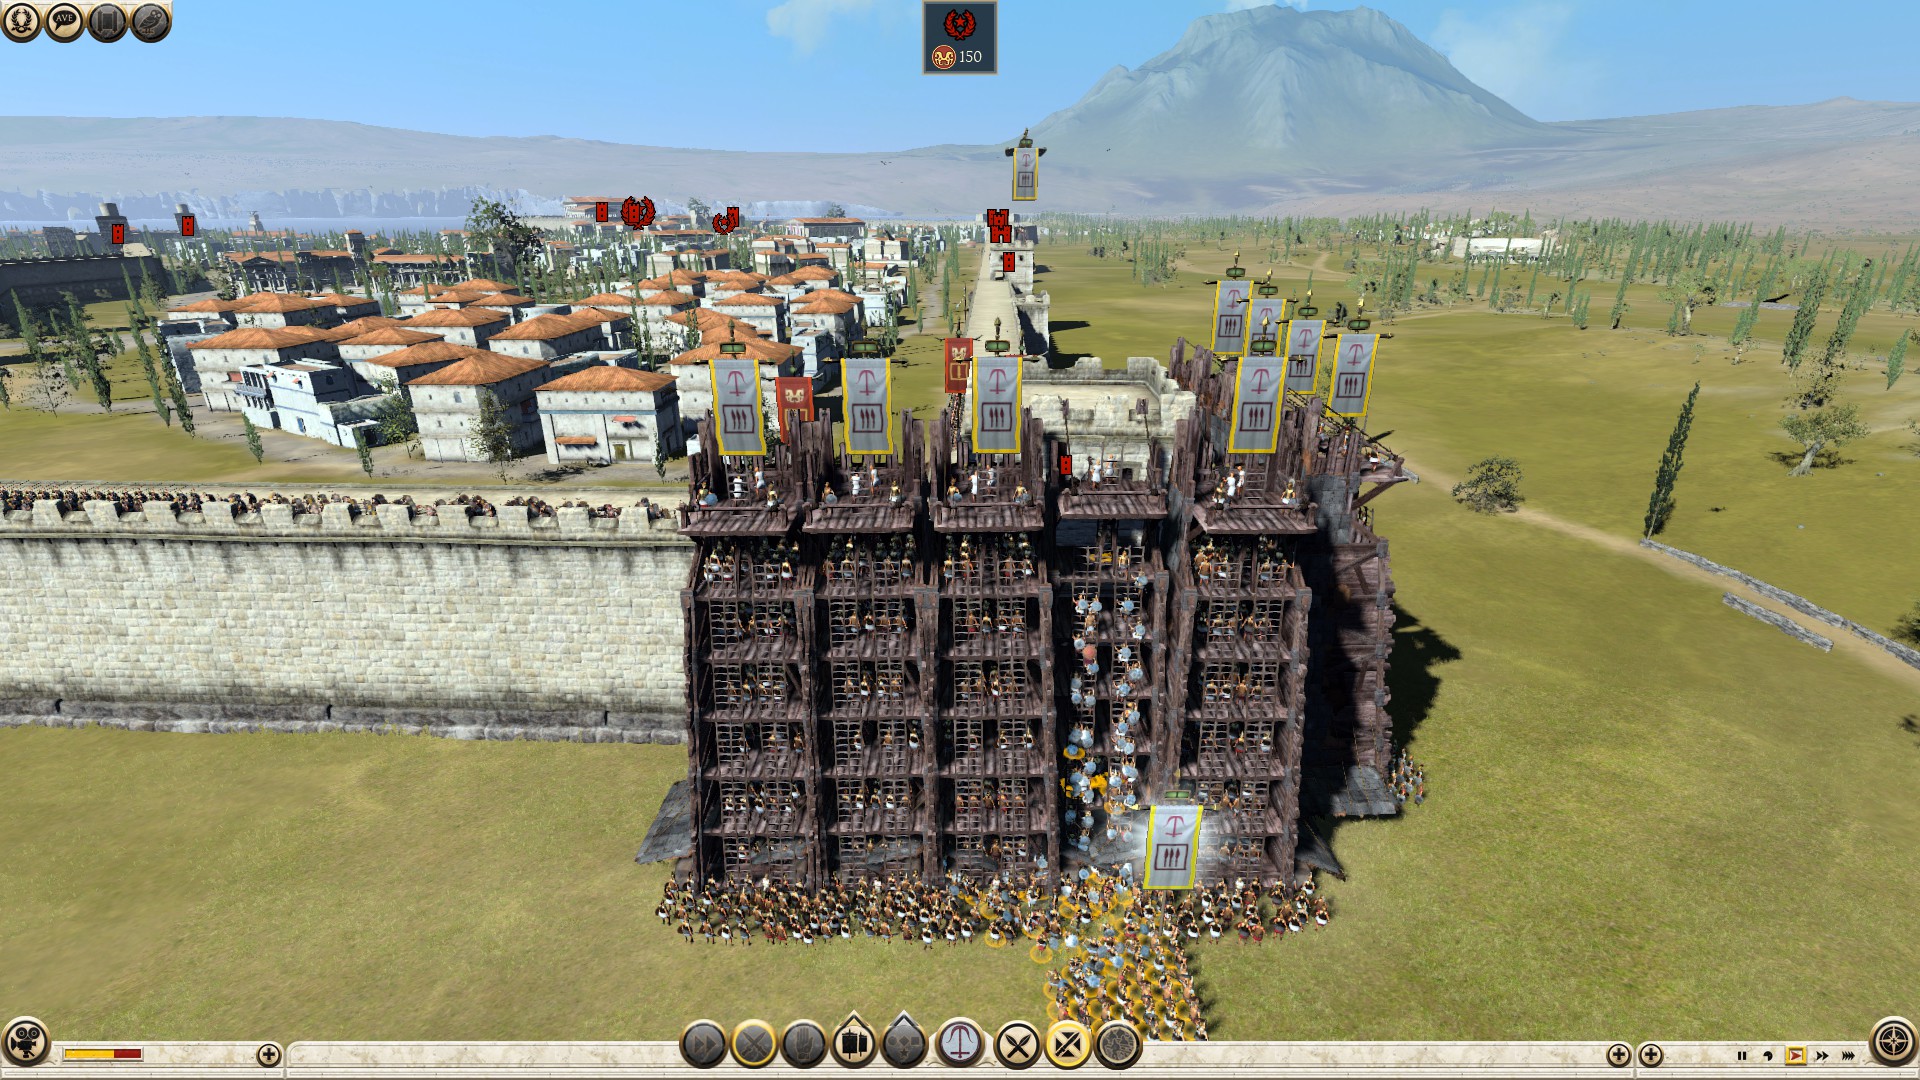
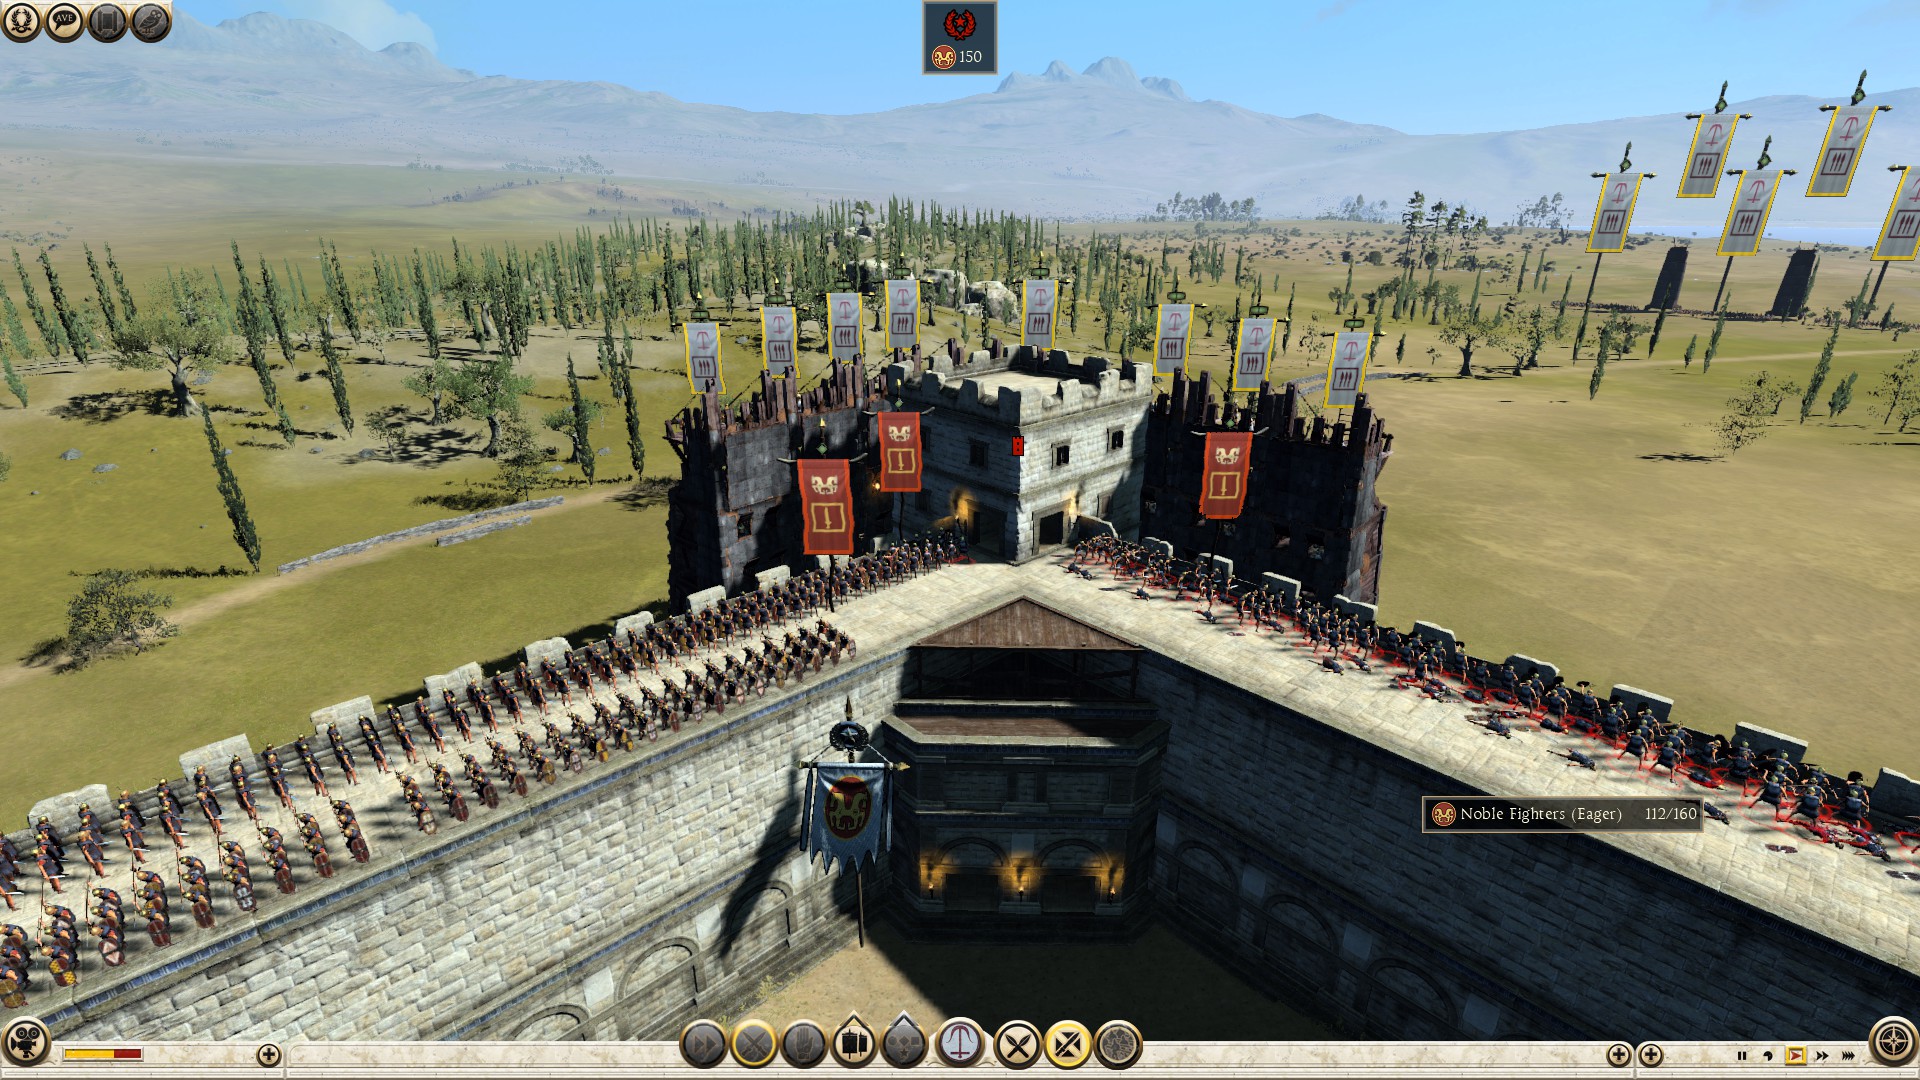
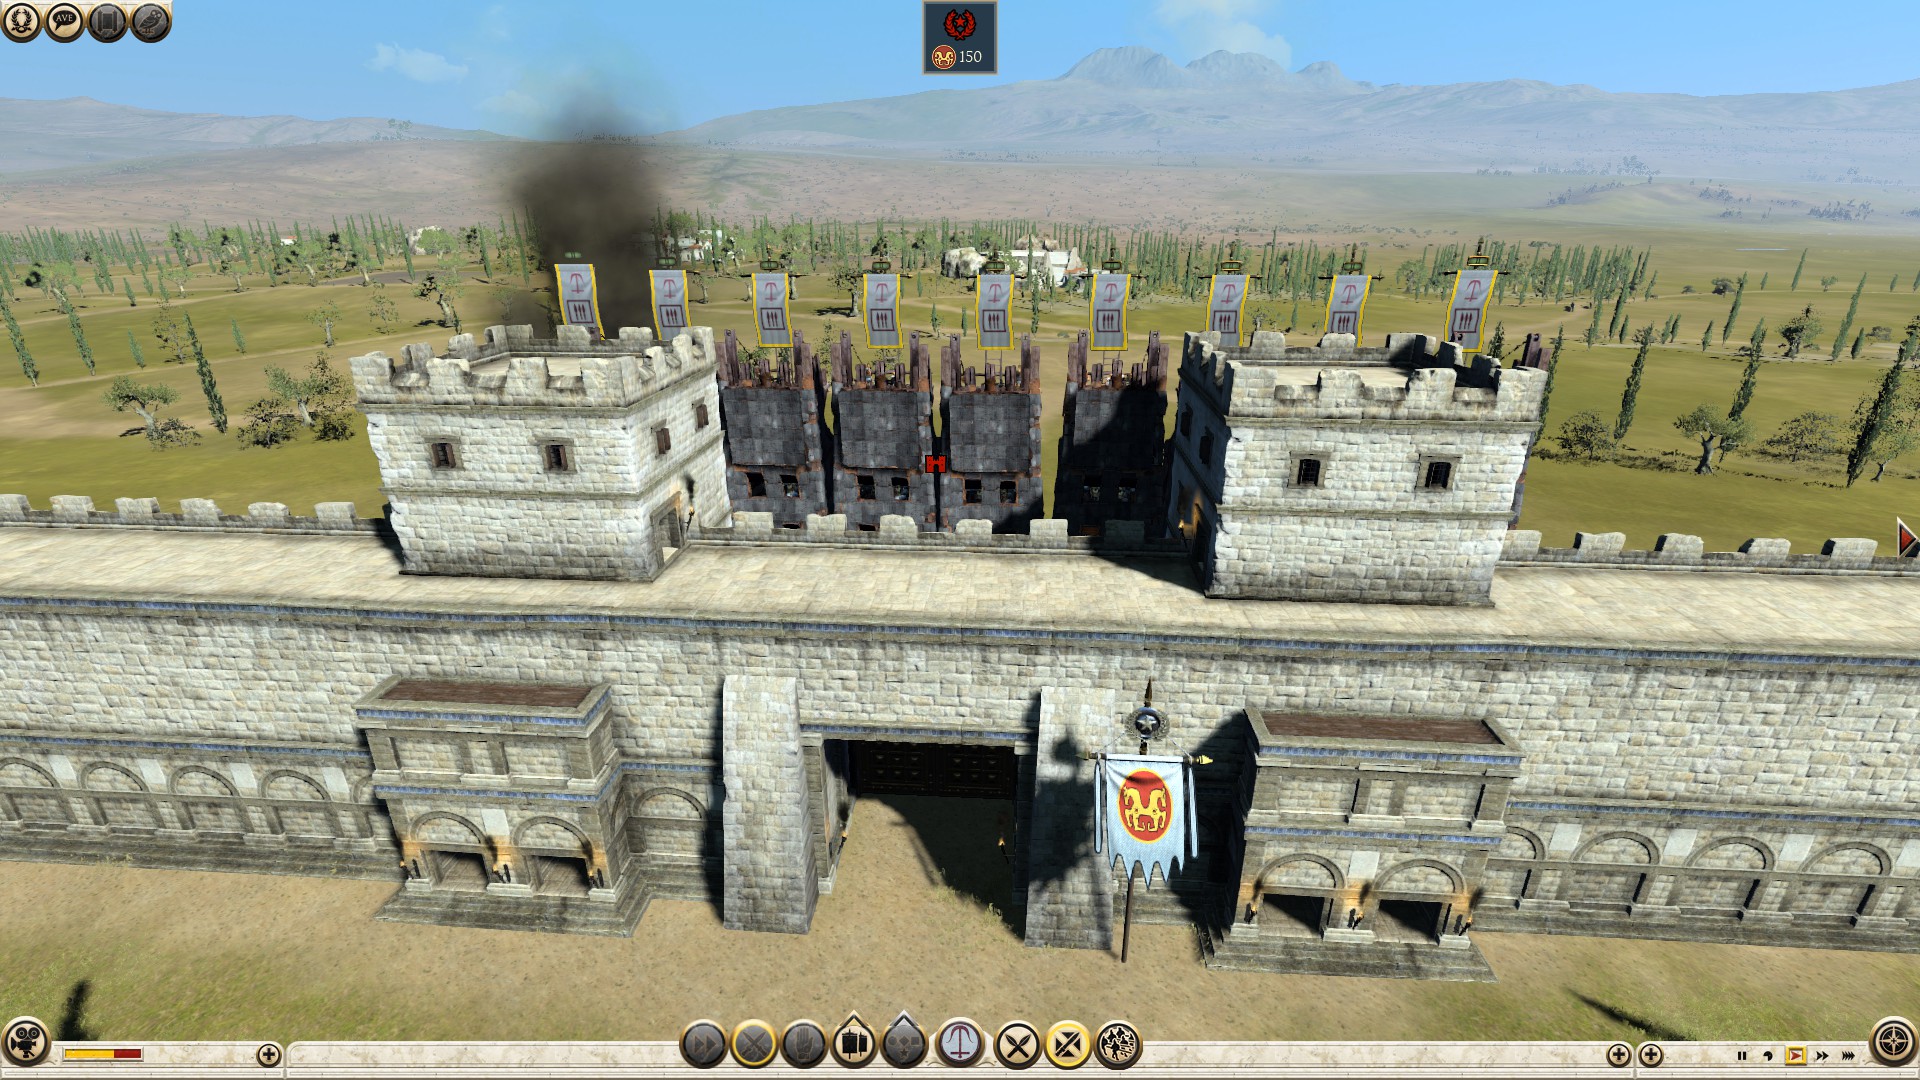
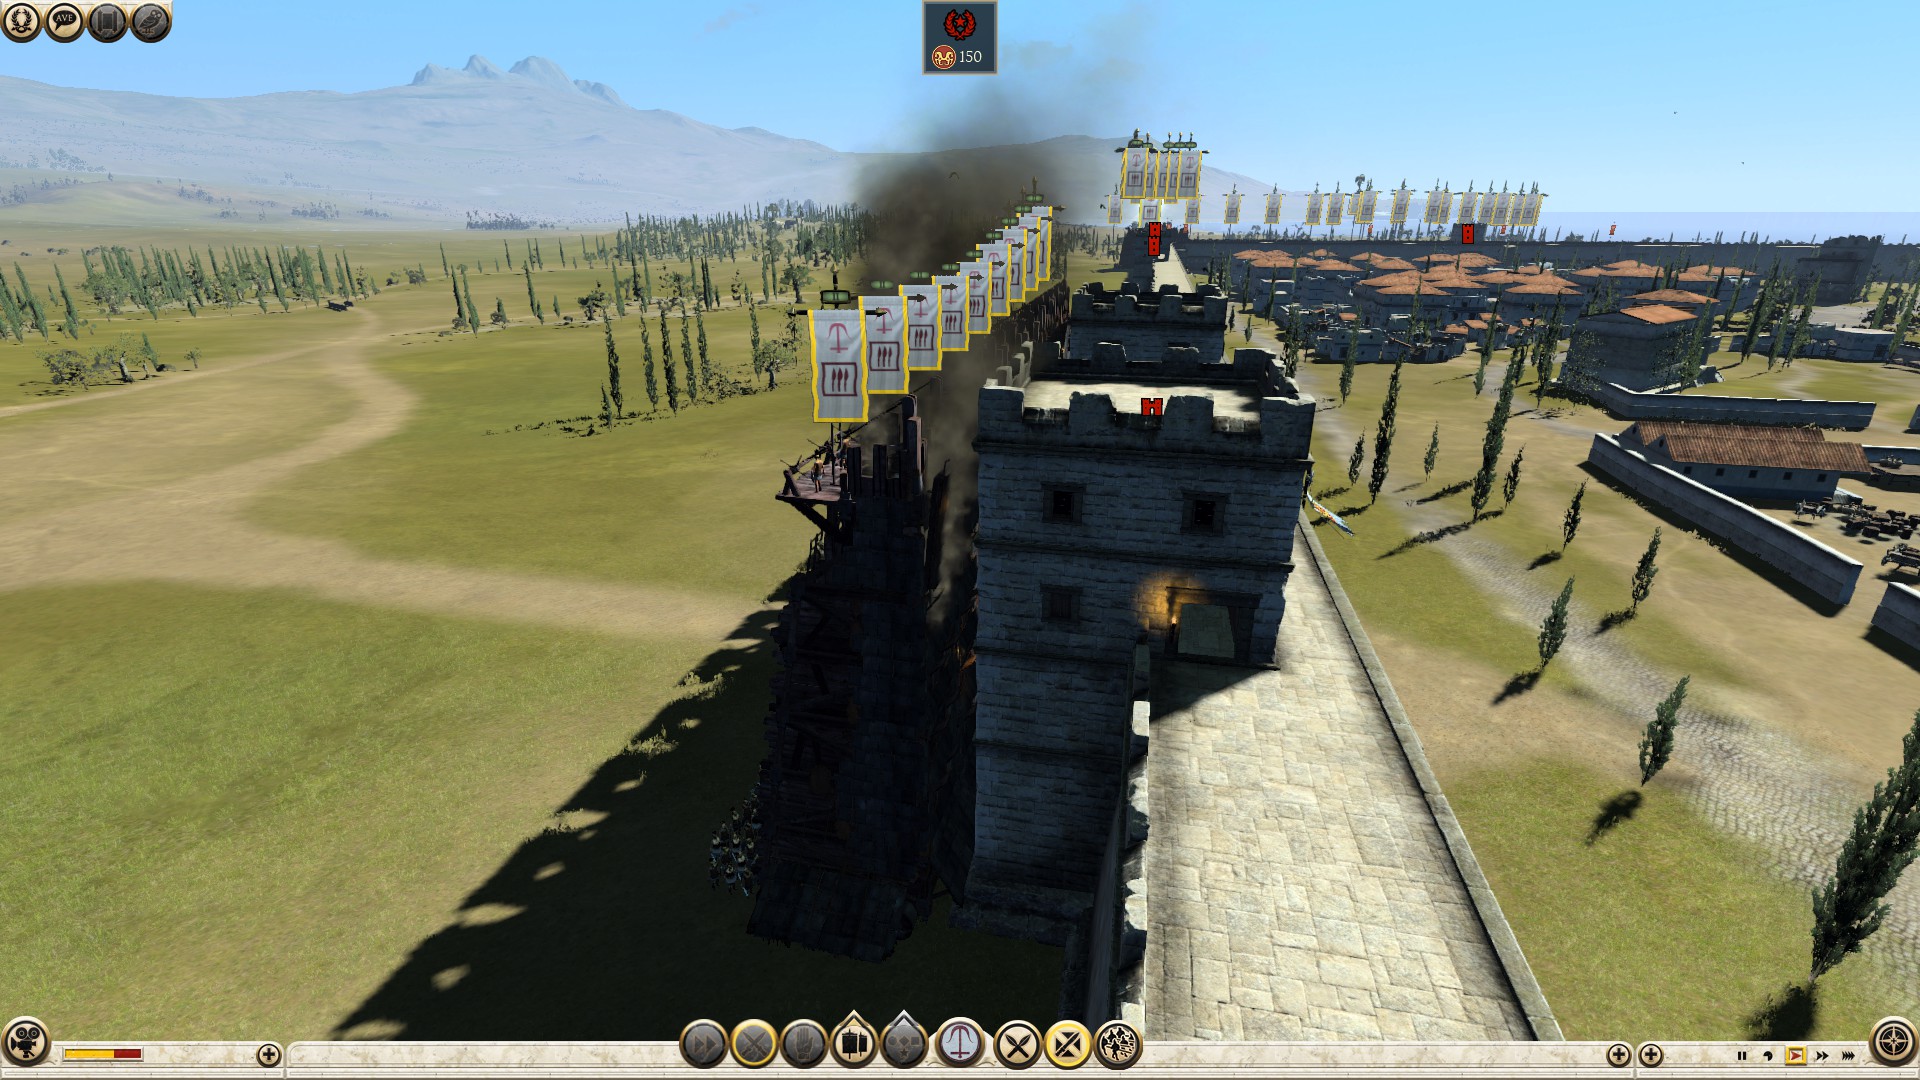
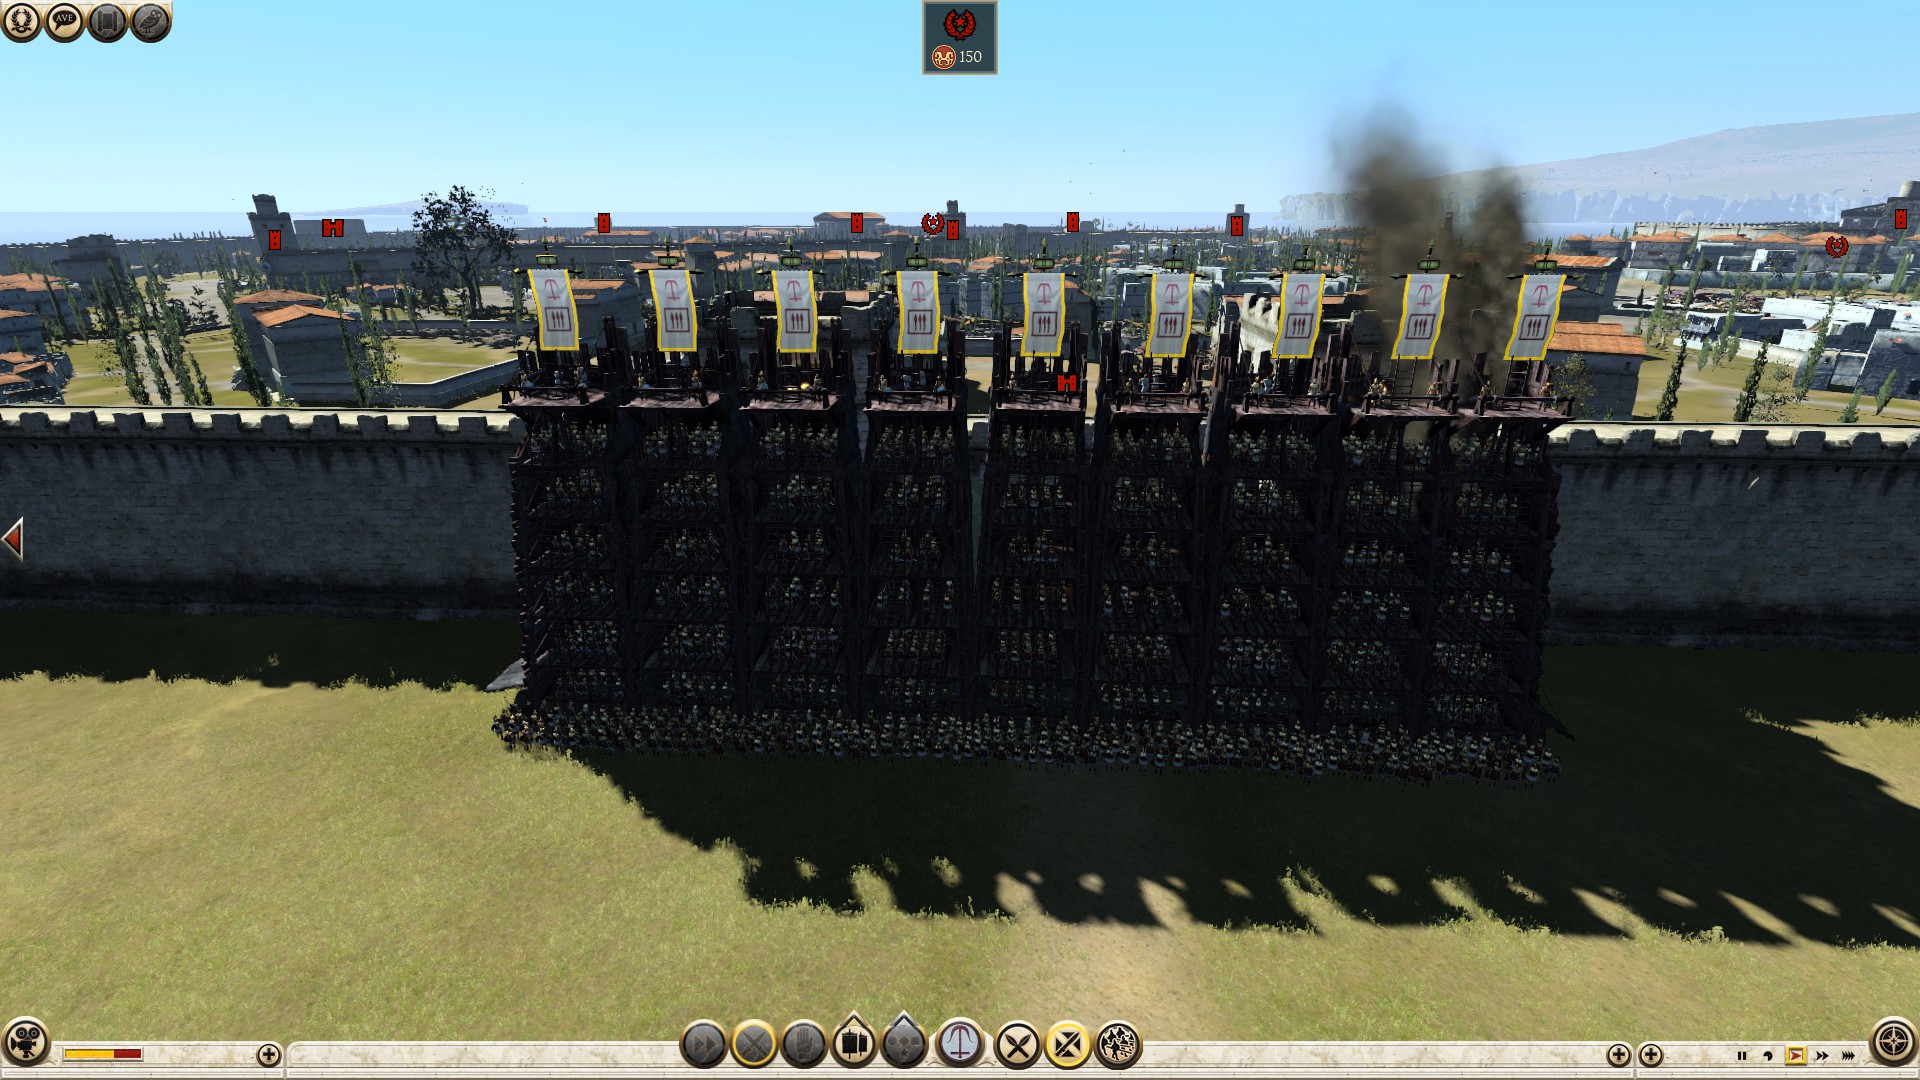
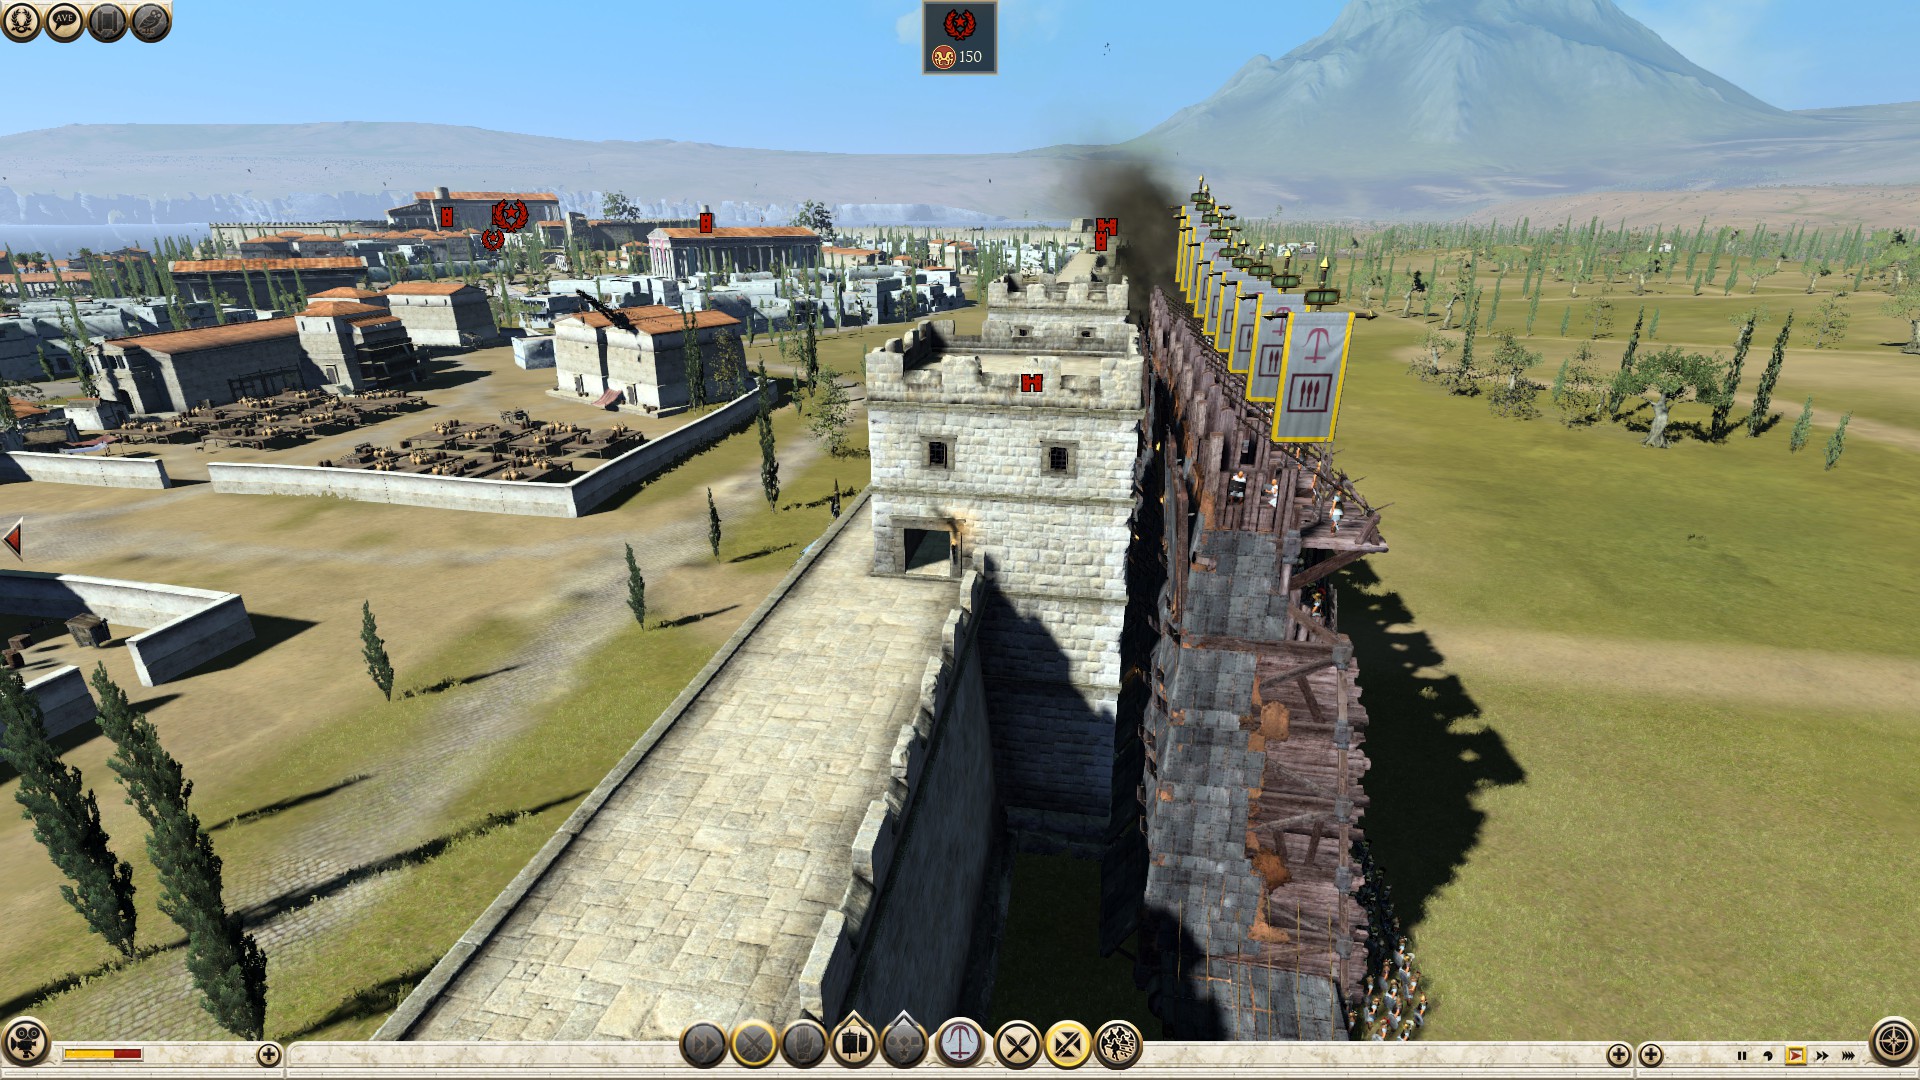
You need to make at least one hole in the wall, making hole after advancing with your towers or before, depends on the situation you are in and or how you want it to play out. The siege department capabilities of your faction can have a considerable impact on your funds. One option is fielding one or more free wall tortoise(s), that can potentially cost you the lives of some soldiers, by exposing them to enemy range units as they batter down the walls. The other option is bringing an artillery piece, that will cost you denarii impacting the power of your army set up, skipping the option of breaking down the walls exposed. If you decide to bring artillery, bring the cheapest stationary unit that costs 730 denarii (Giant Ballista), unless you want to use the artillery for other purposes. In which case, bring a more expensive, mobile artillery. Again, it all depends on what you want, I am just giving you examples that work for me.
==========================================================================
Attacking: City and Port Assault First Stage Continued
==========================================================================
Attacking: City and Port Assault Second Stage
In this stage, your goal is to punch through the first wall defenses and move inside, that way your units can comfortably form their formations without a disturbance. The stage is divided into two phases. The first stage consists of skirmishing the enemy range units with yours, causing them to route or run out of ammo, so your elite units including pikes (if you have some) won’t be targeted before they enter combat. When skirmishing range units, you need to position your archers in a location, that allows you to land as much arrows on your target as possible. These are some counter archer tactics that you can effectively use against defending archers behind buildings, on walls, and behind walls on the ground.
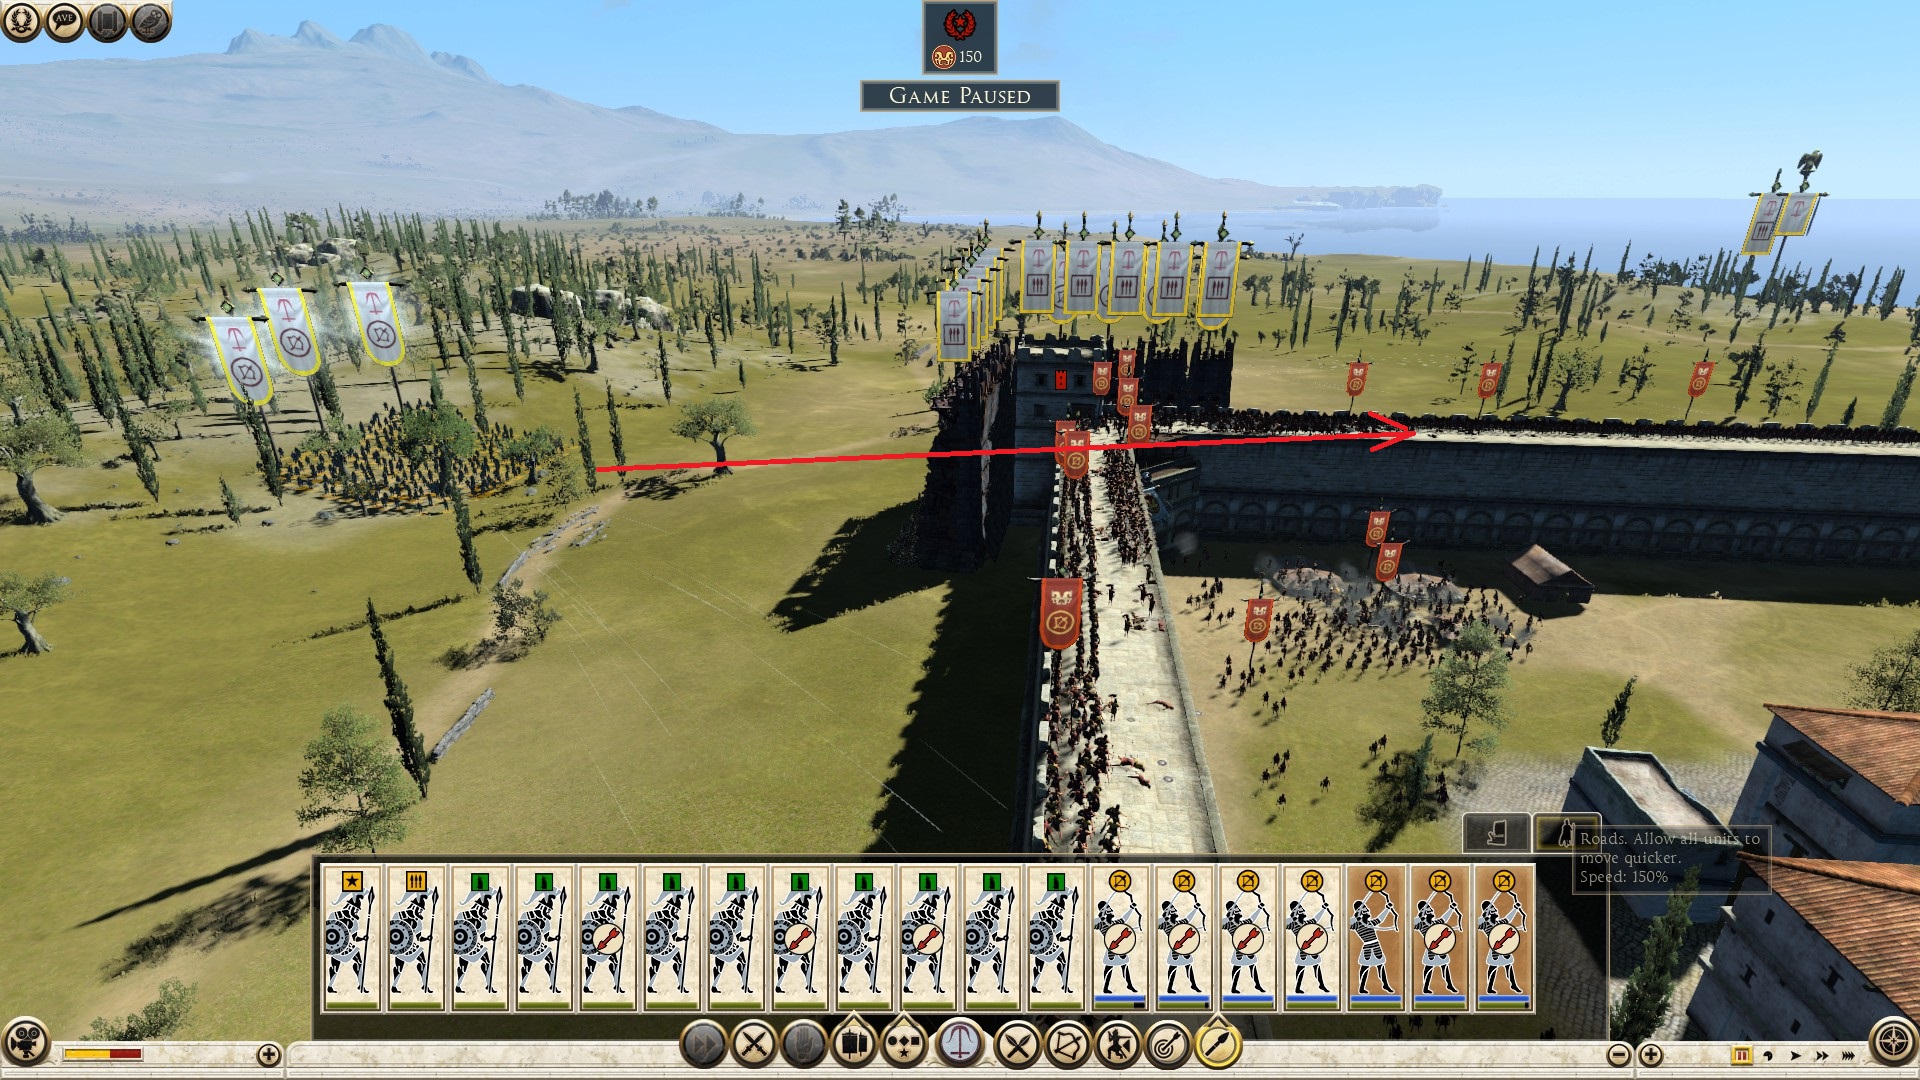
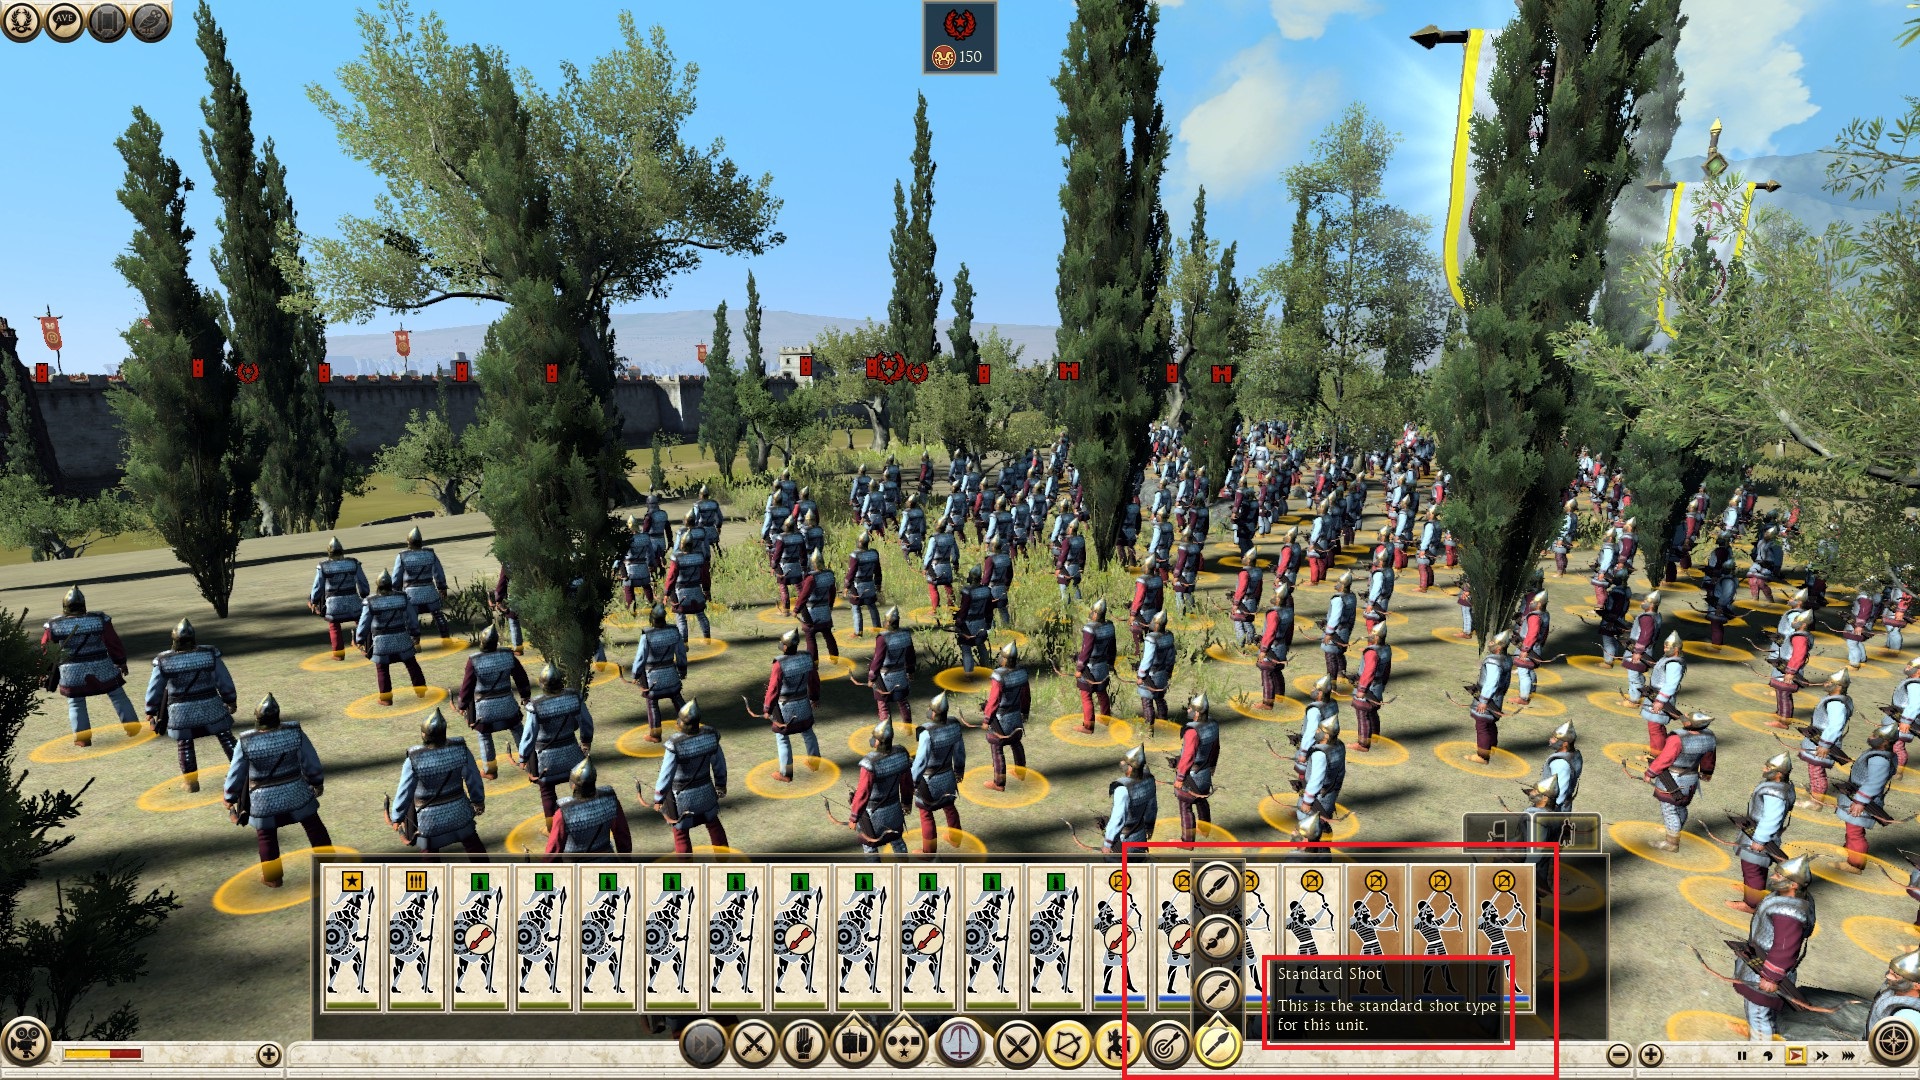
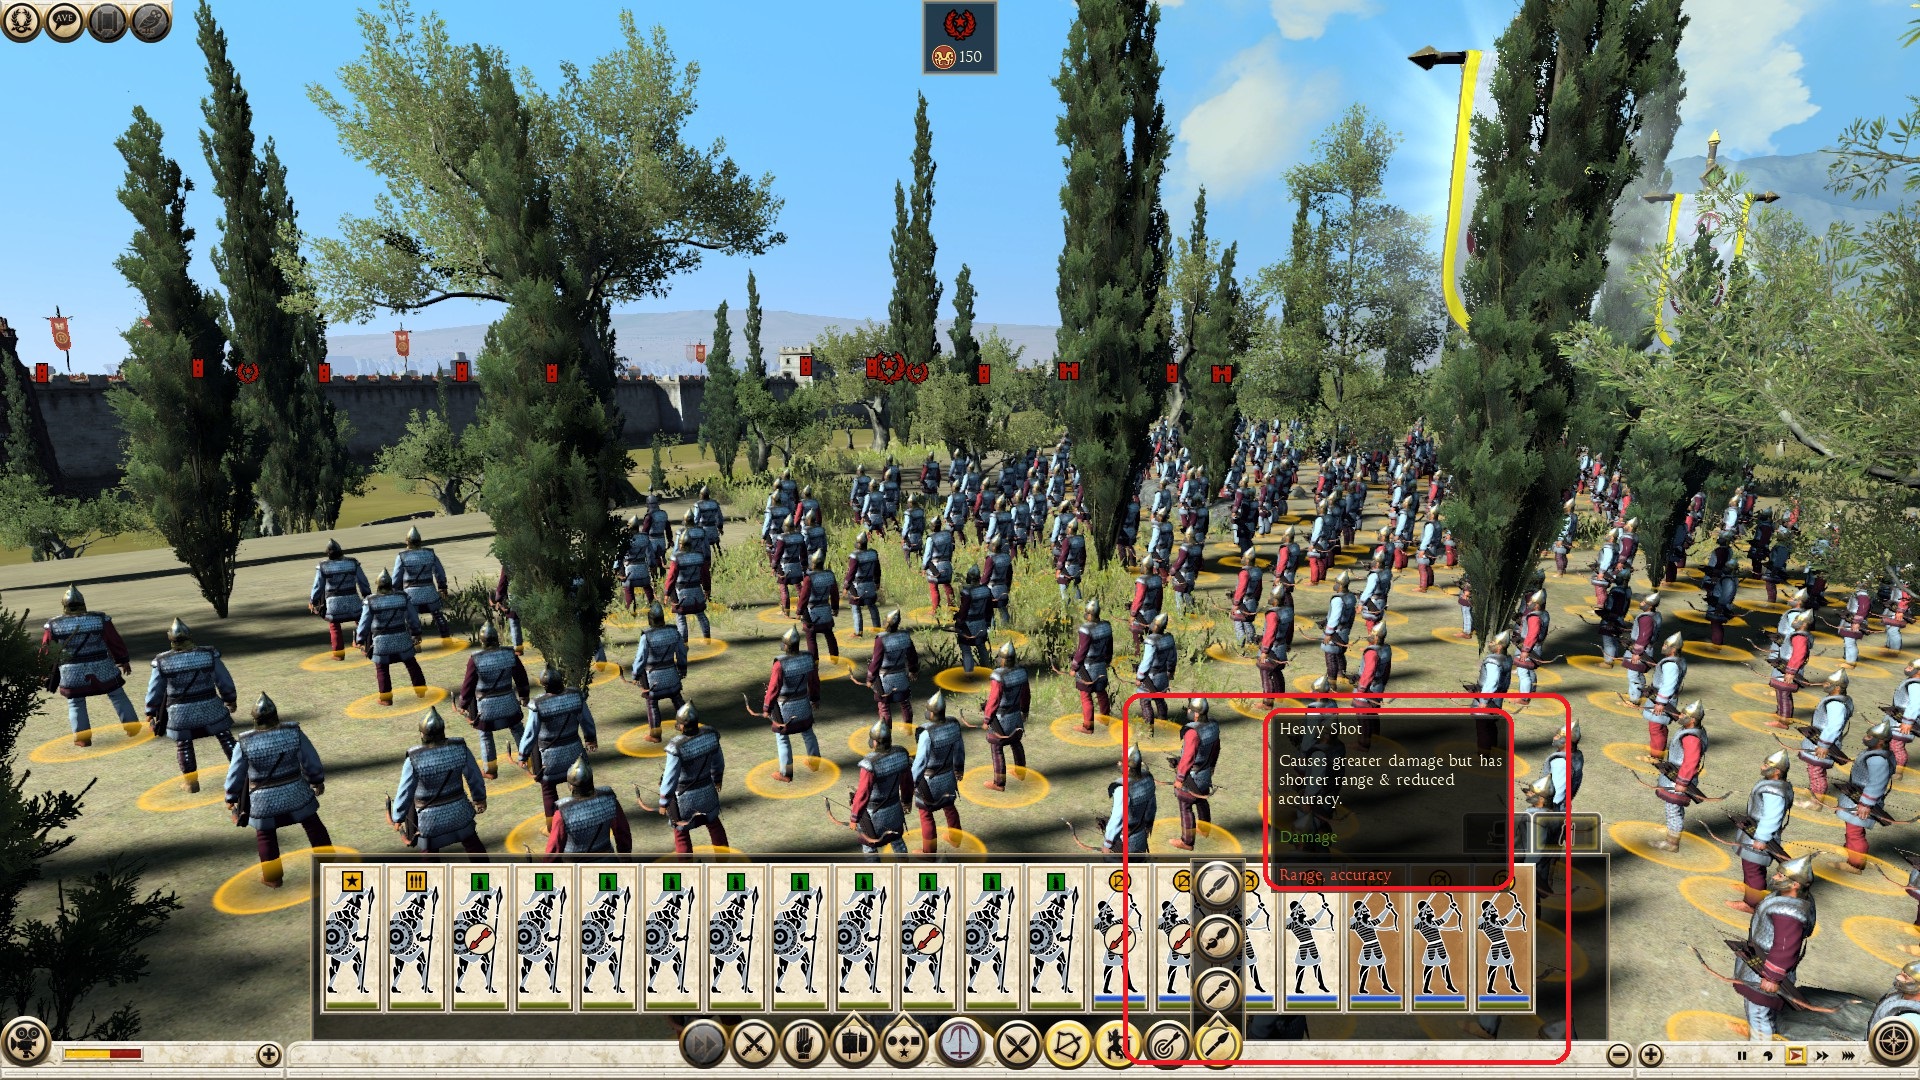
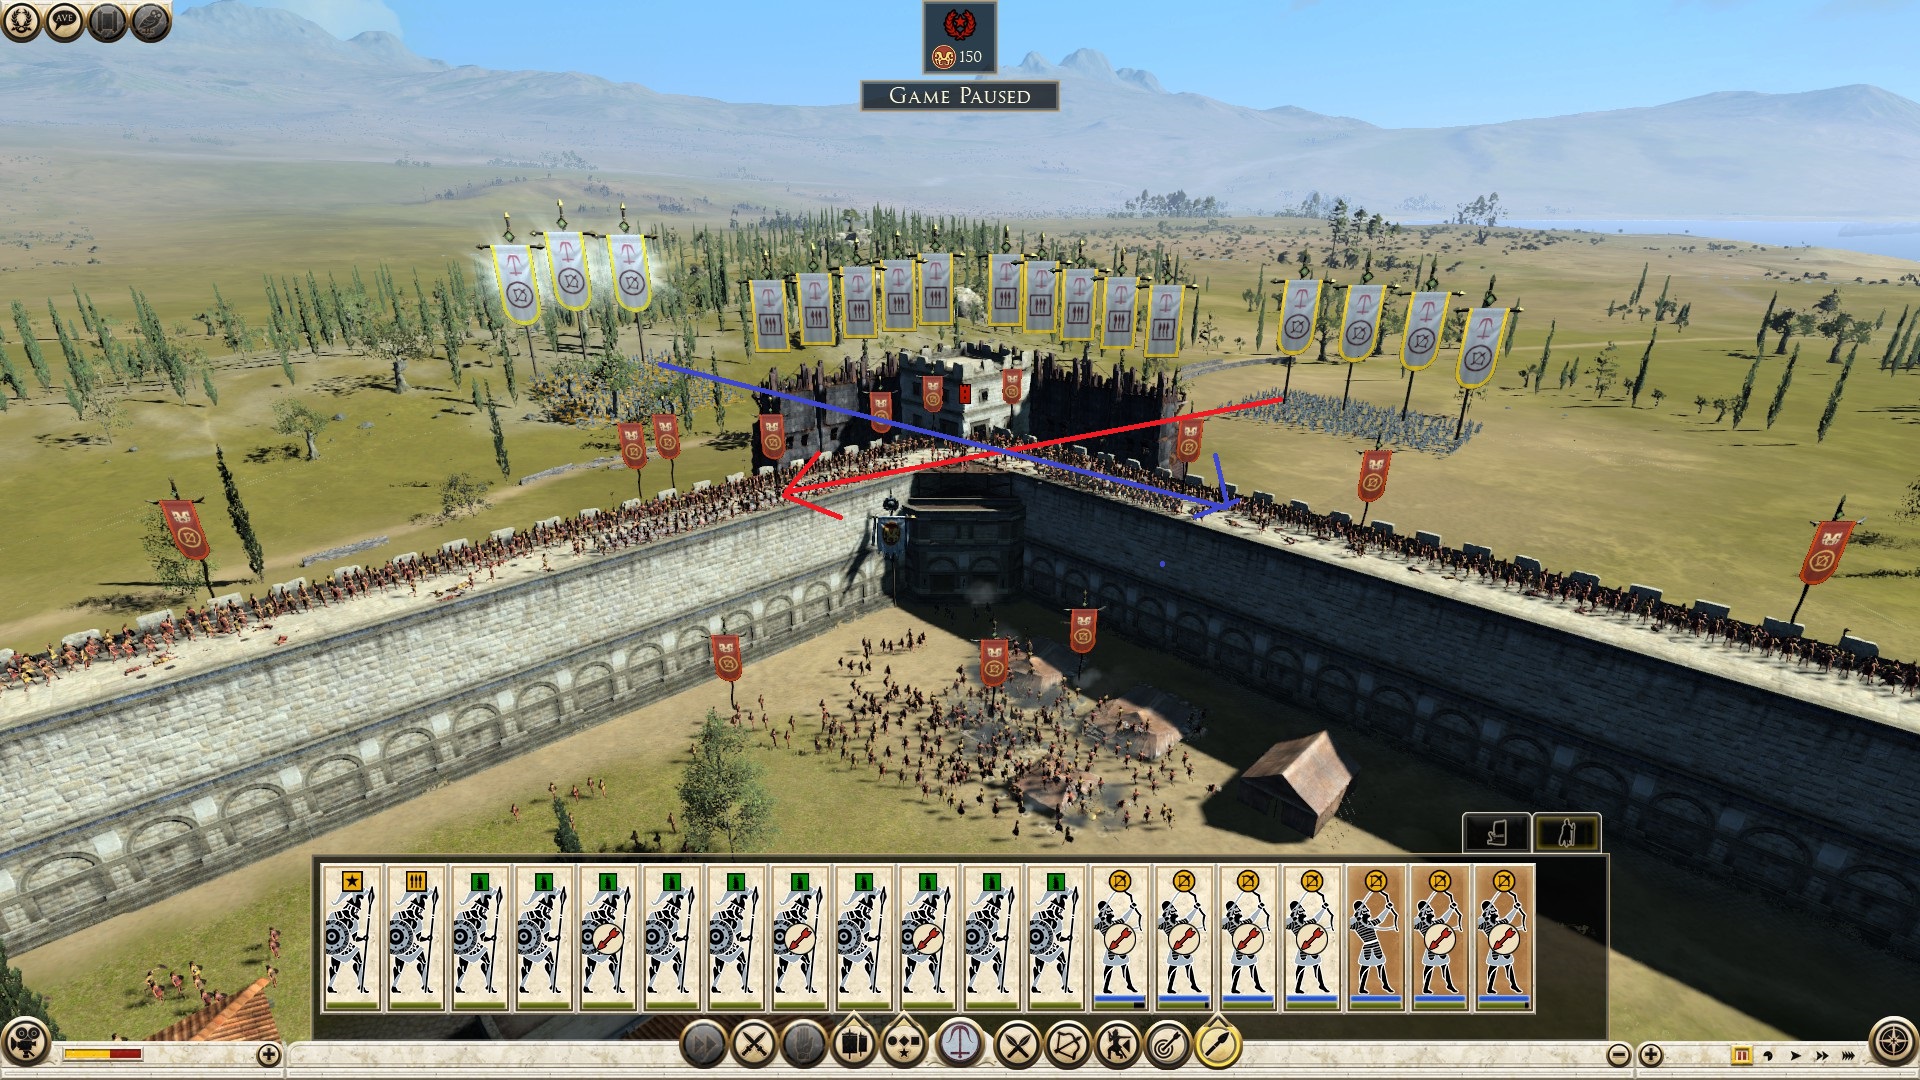
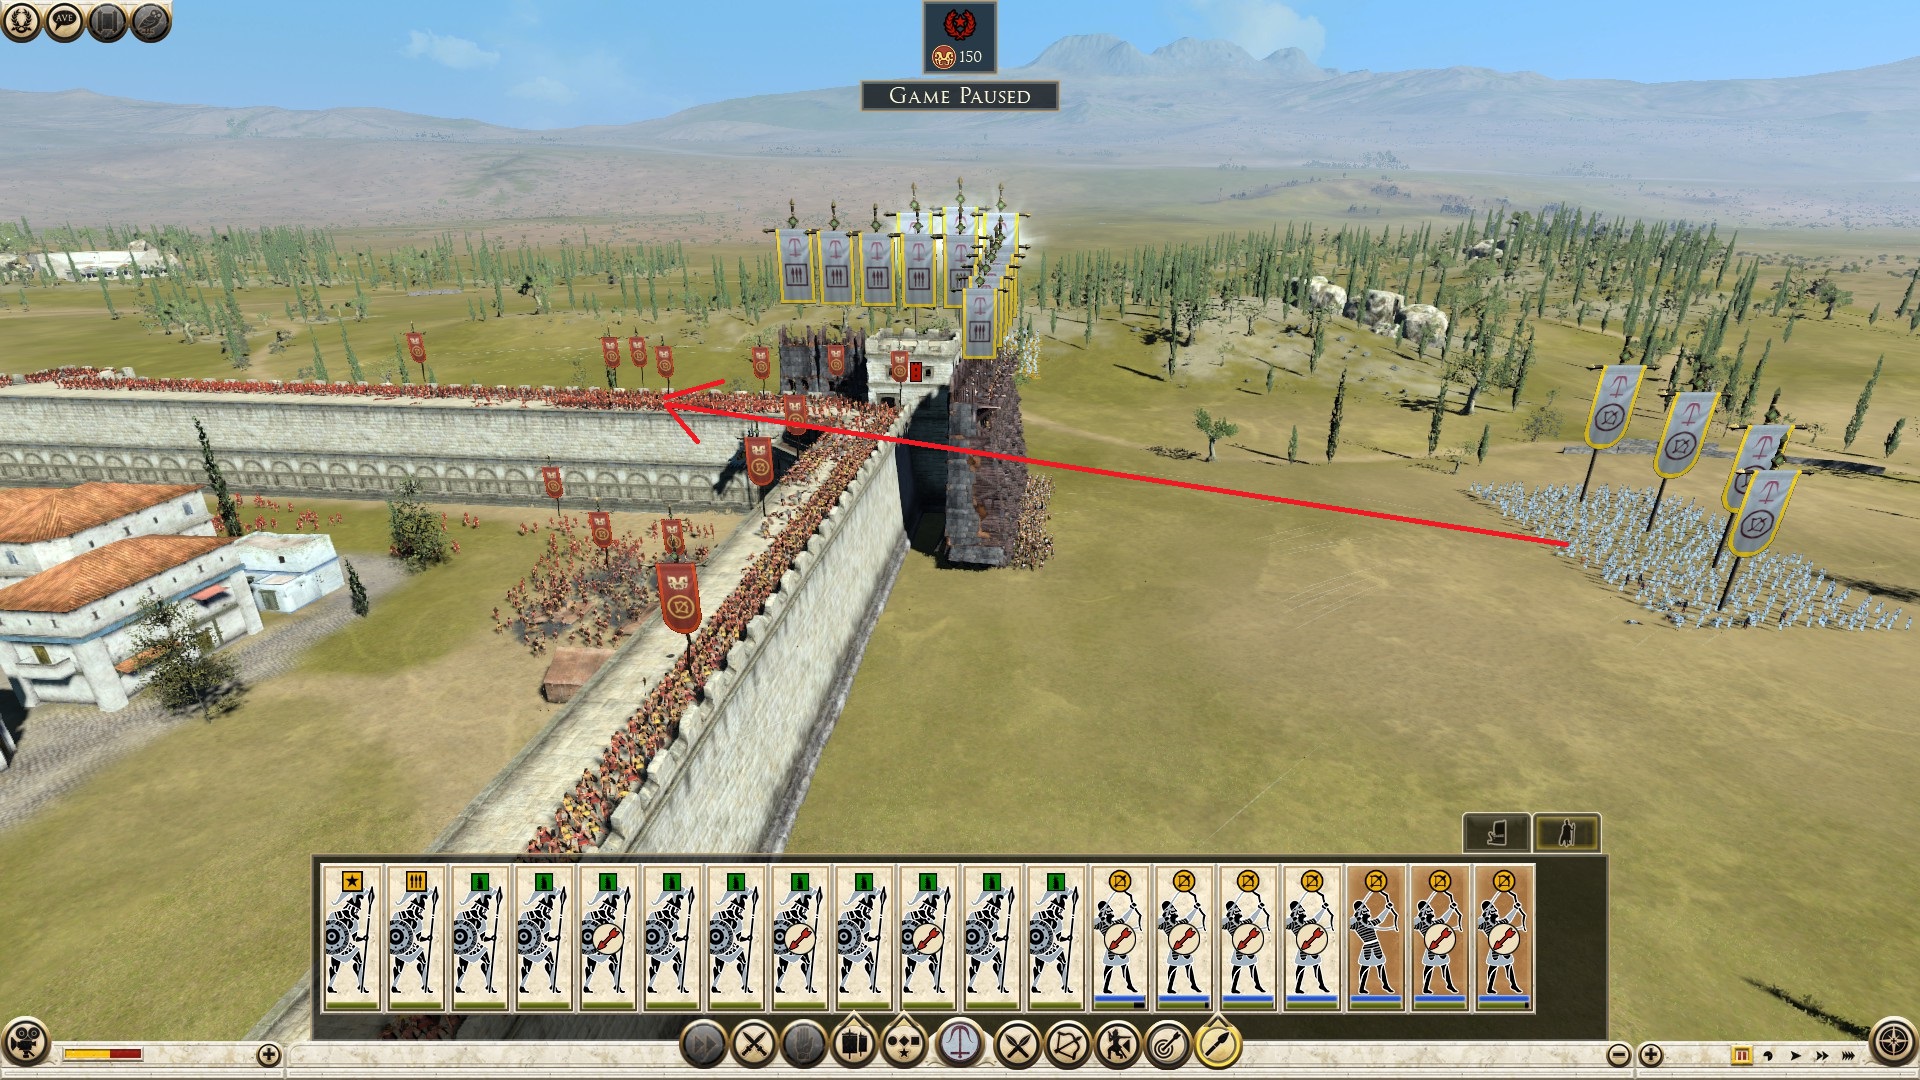
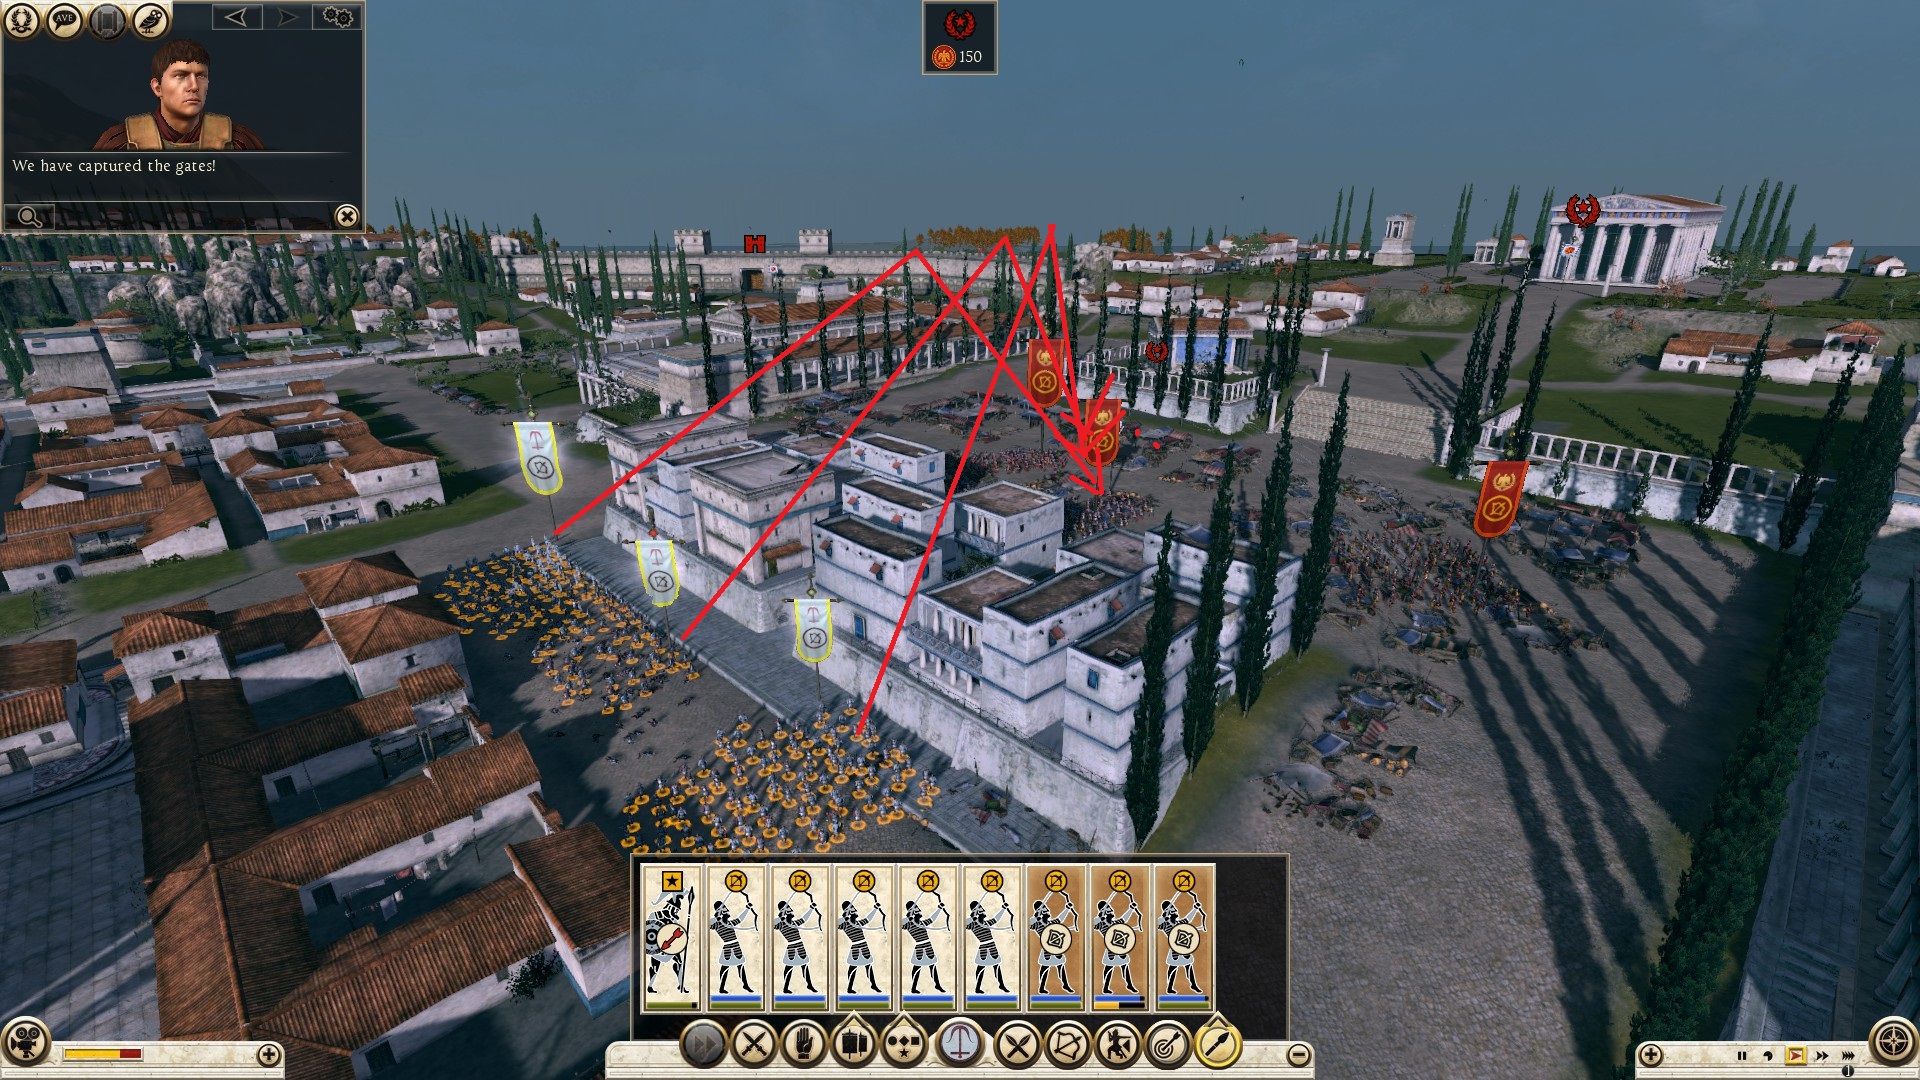
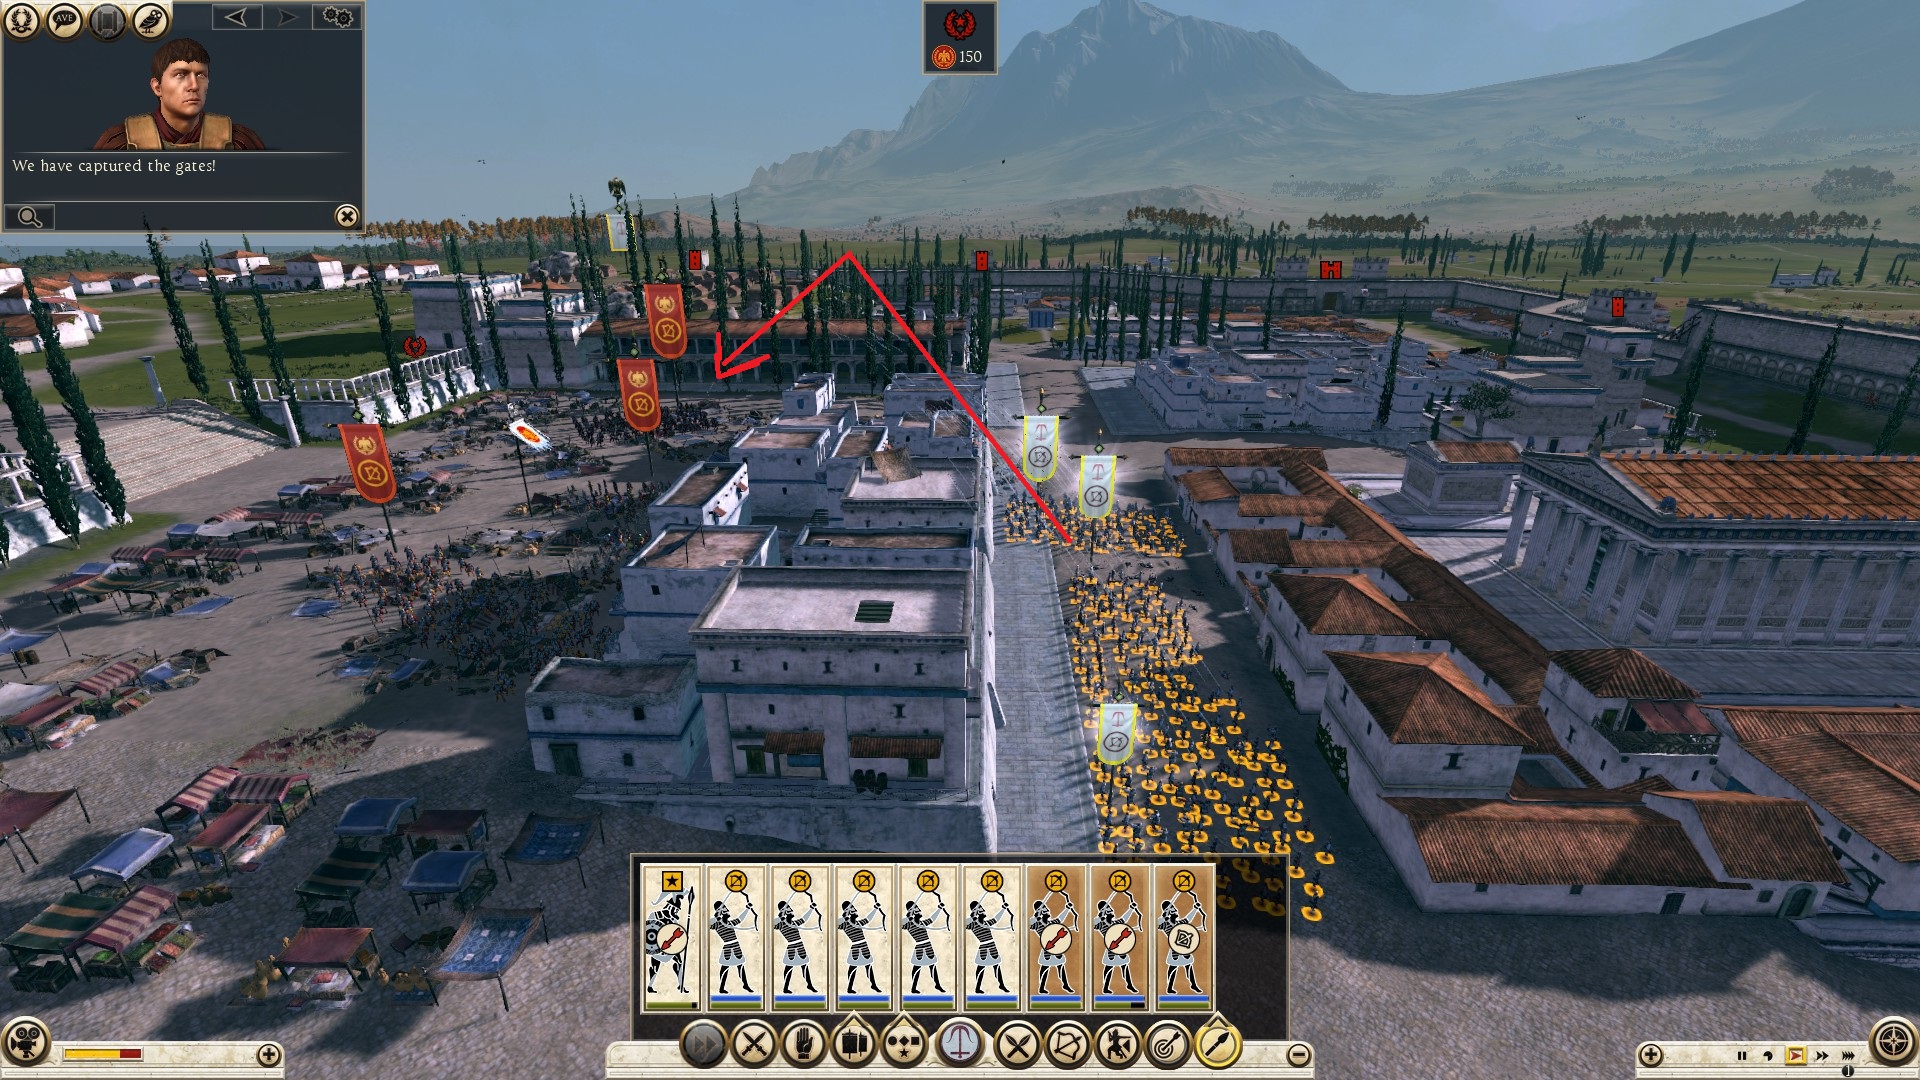
I advise you not to attack archers on walls face to face, because they have cover and yours don't.
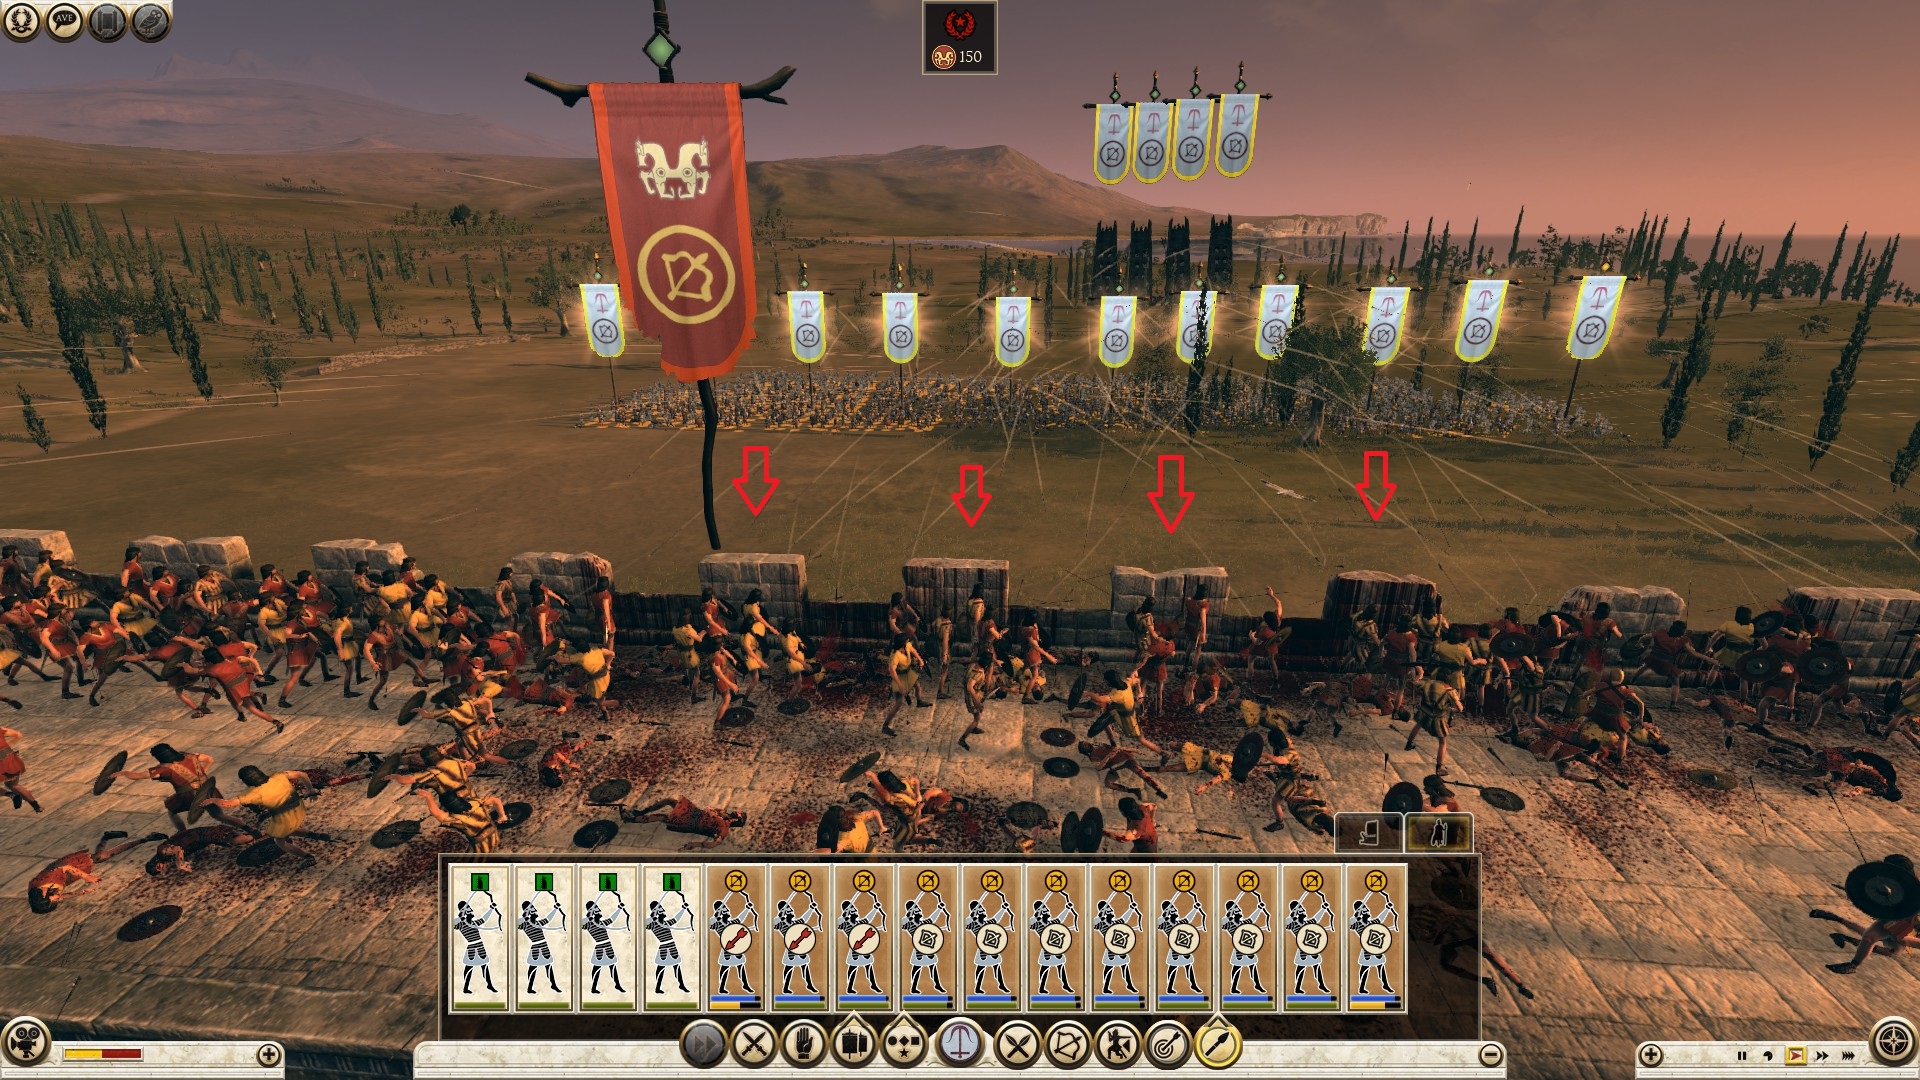
use regular arrows against archers, and heavy arrows against infantry for maximum casualties and damage.
-----------------------------------------------------------------------------------------------------------------------------------
The second phase in this stage is neutralizing the defensive wall towers so they do not fire at your men, causing unnecessary losses. You can do this plethora of ways. One way, by using one or more towers to get on the walls and make your way there. Another way, by punching through the units that are defending the hole that you made in the wall. It really depends on the type of defense the opponent is putting up. Let's go over a few common scenarios. 1)Pikes facing wall hole horizontally: Line up a melee unit right in front of the pikes. Move your range units behind your melee unit, if they survived the skirmish phase OR if they never engaged in a skirmish at all. Unleash your pila’s (if your units are carrying) and arrows (heavy arrows preferred) at the pikes. The defender will respond in three ways: (a) keep them still to absorb the ammunition (b) pull them back inside (c) the opponent will charge your melee that are facing them, which rarely happens.
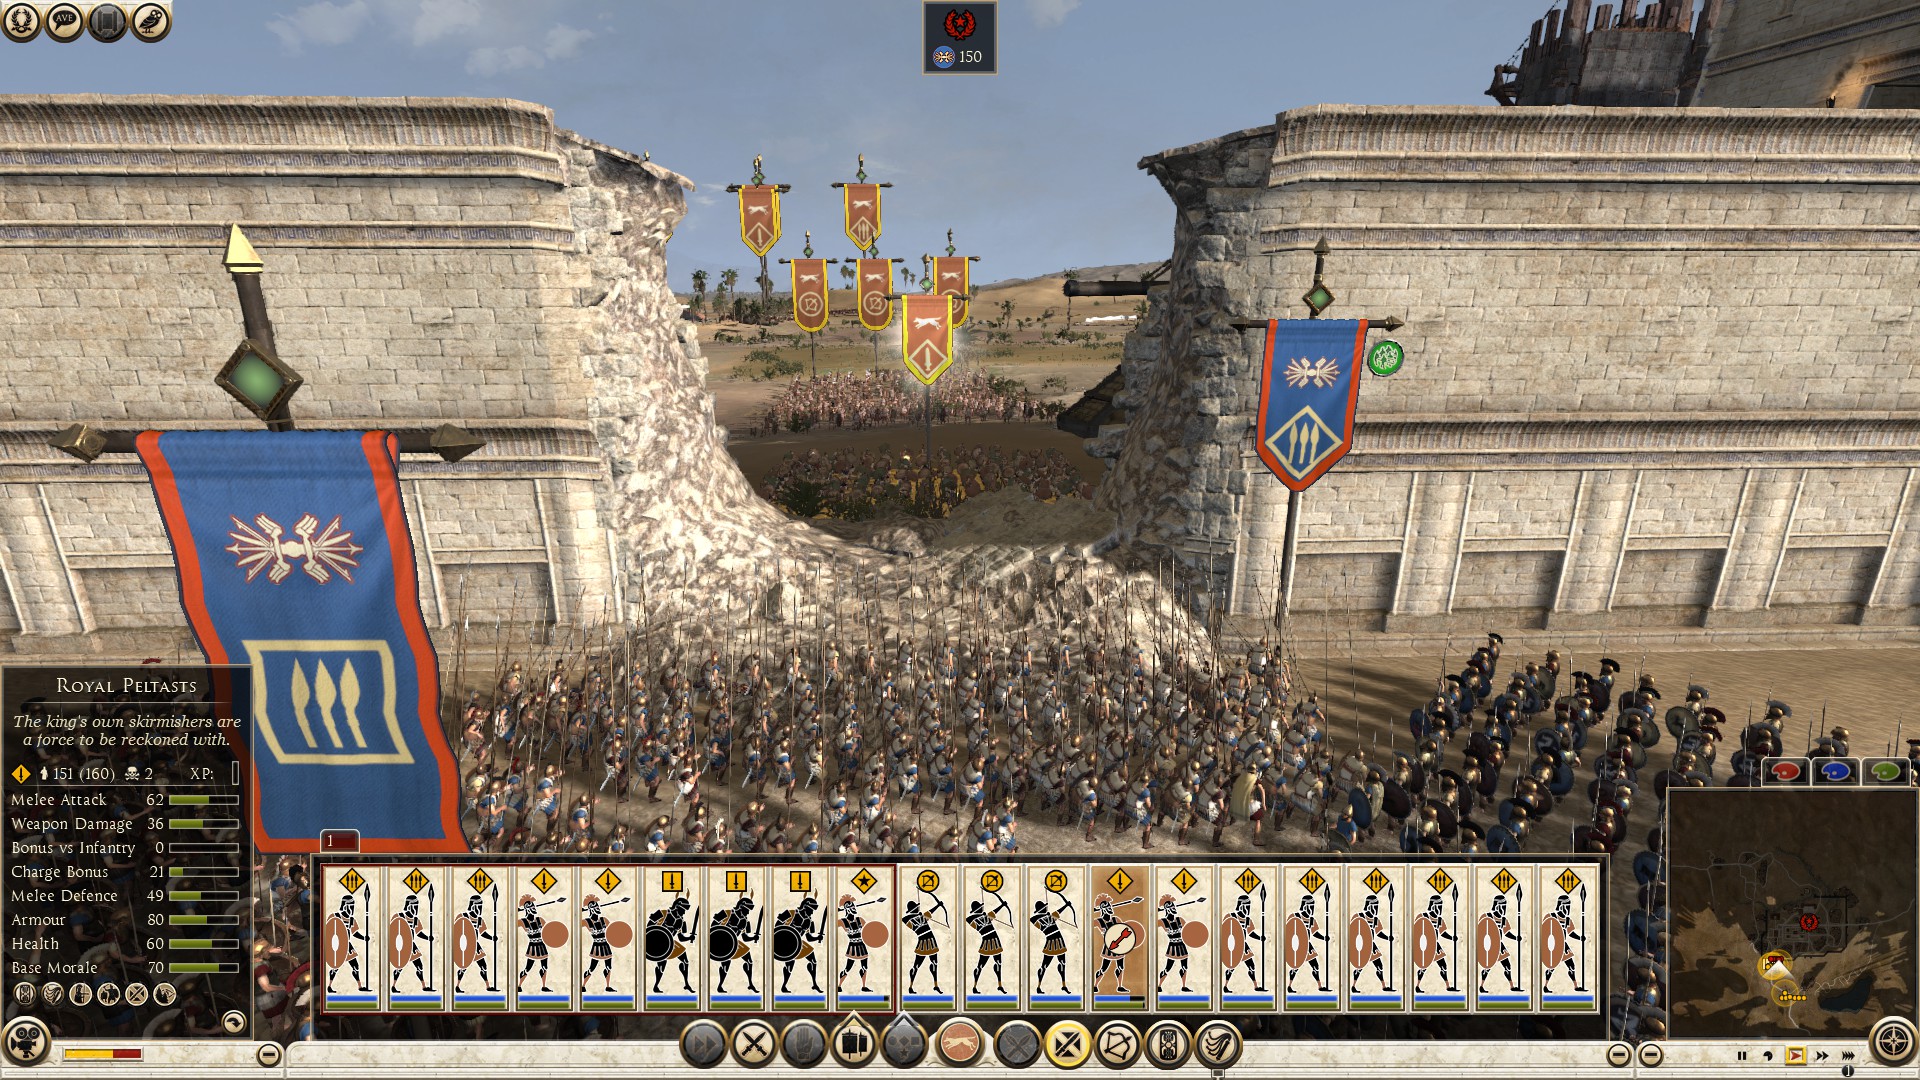
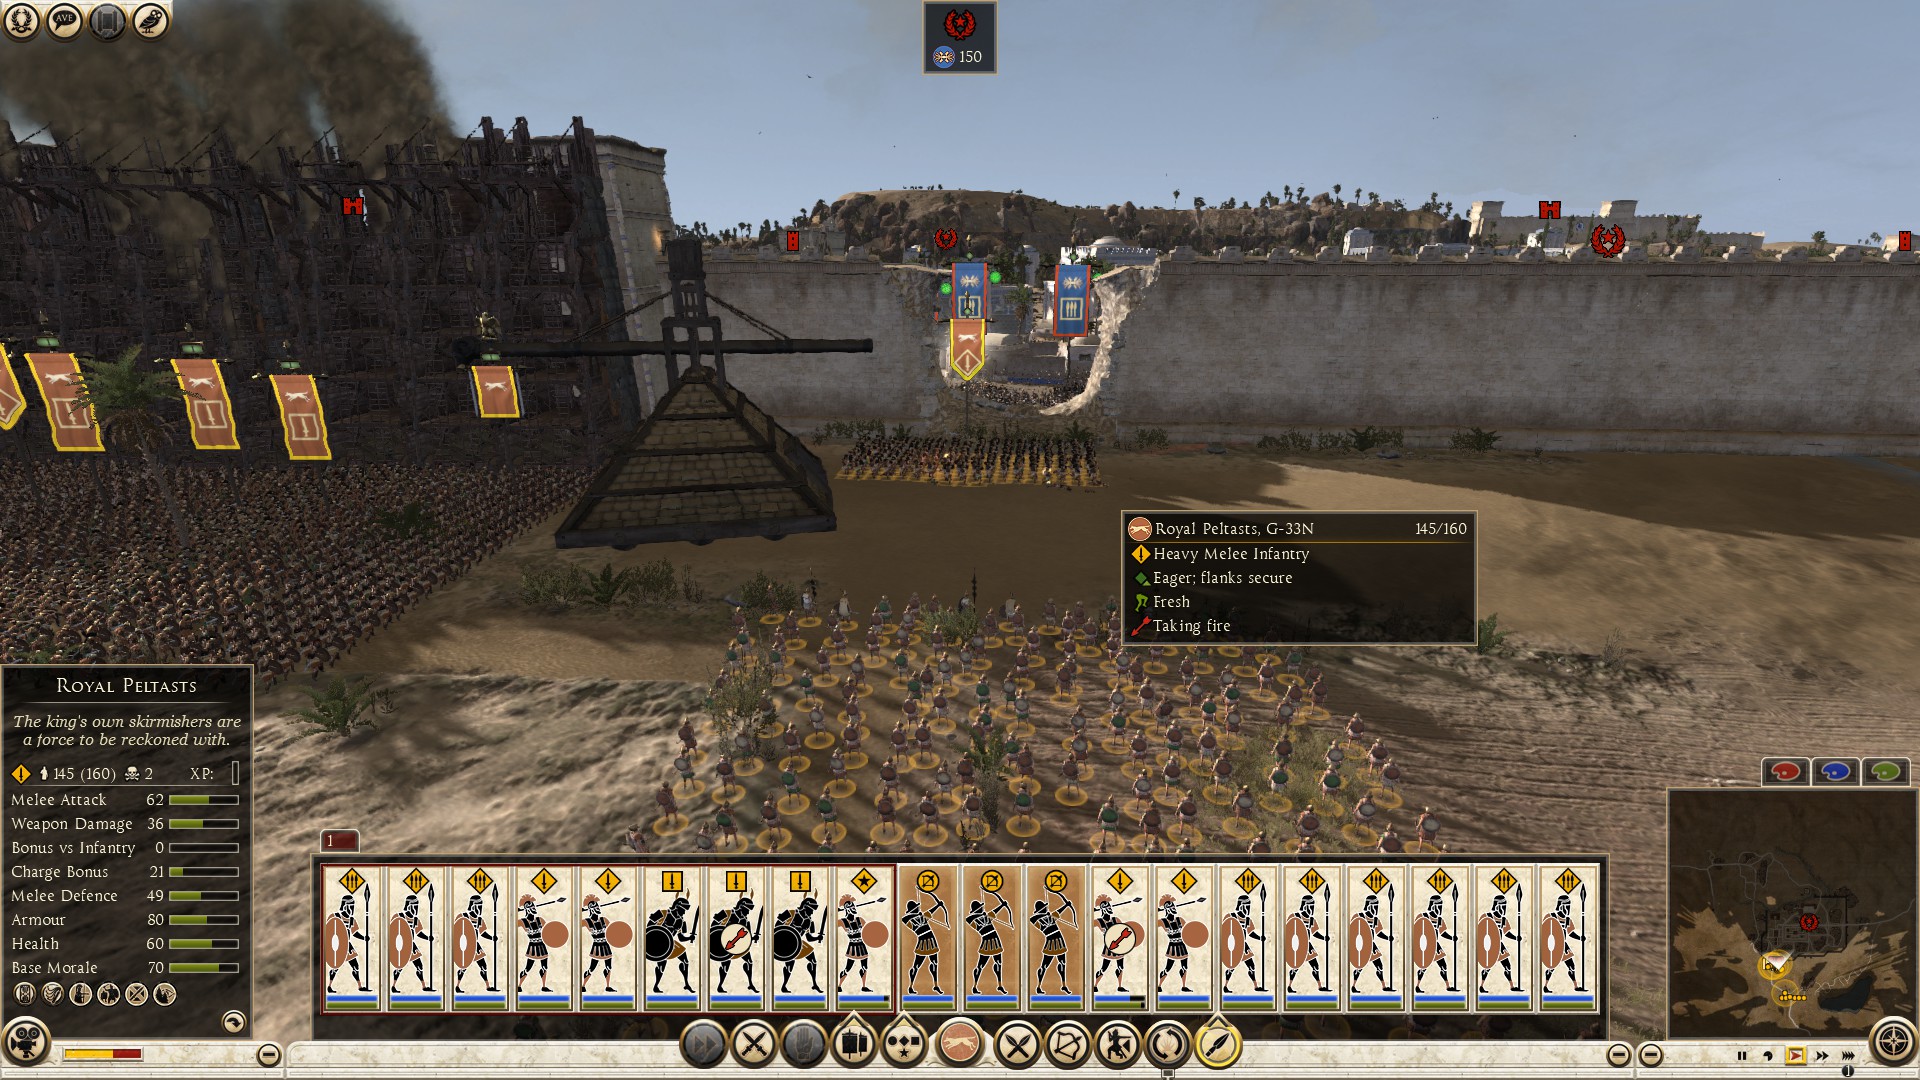
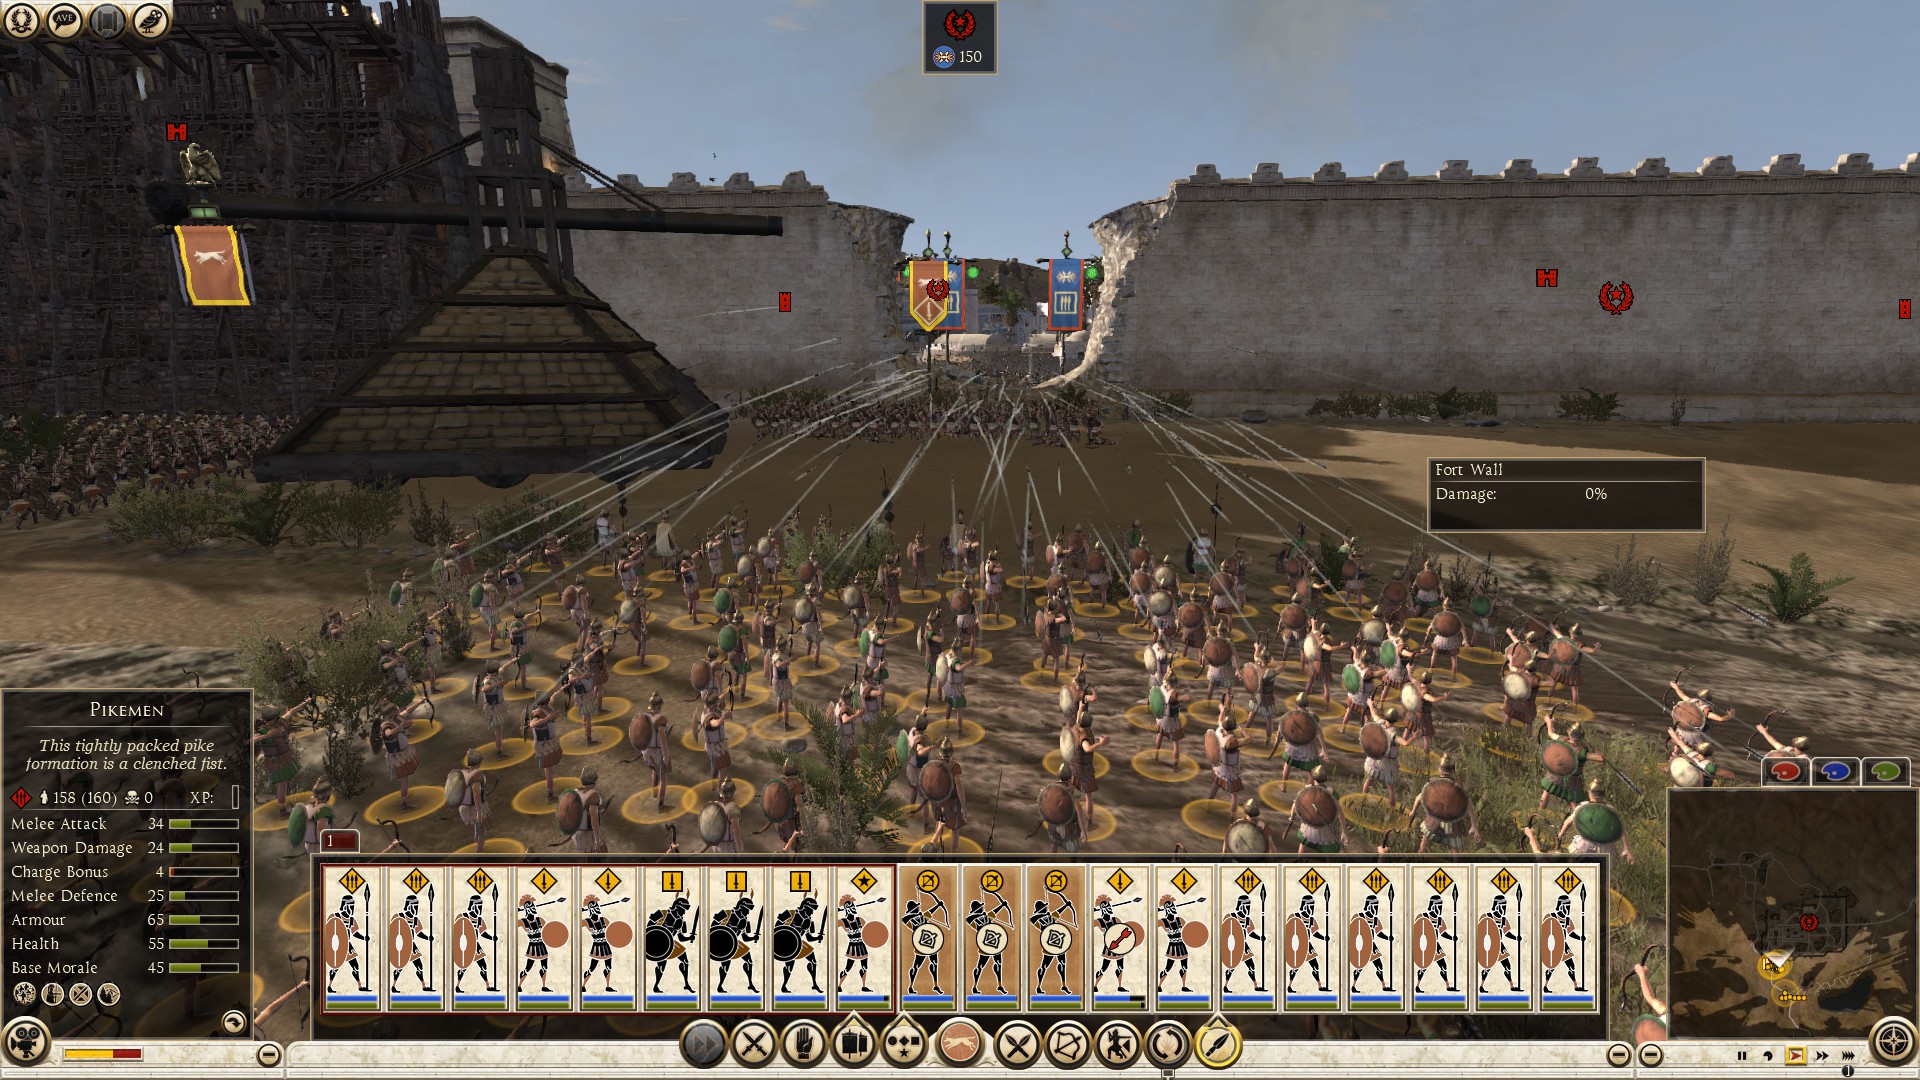
If the opponent decided to pull them back inside (b), charge the back of the pikes with the melee units that you lined up in front of them to get as many kills as you can, that’s reason you positioned them there in the first place. If the defenders send reinforcements to repel your charge, pull your men back.
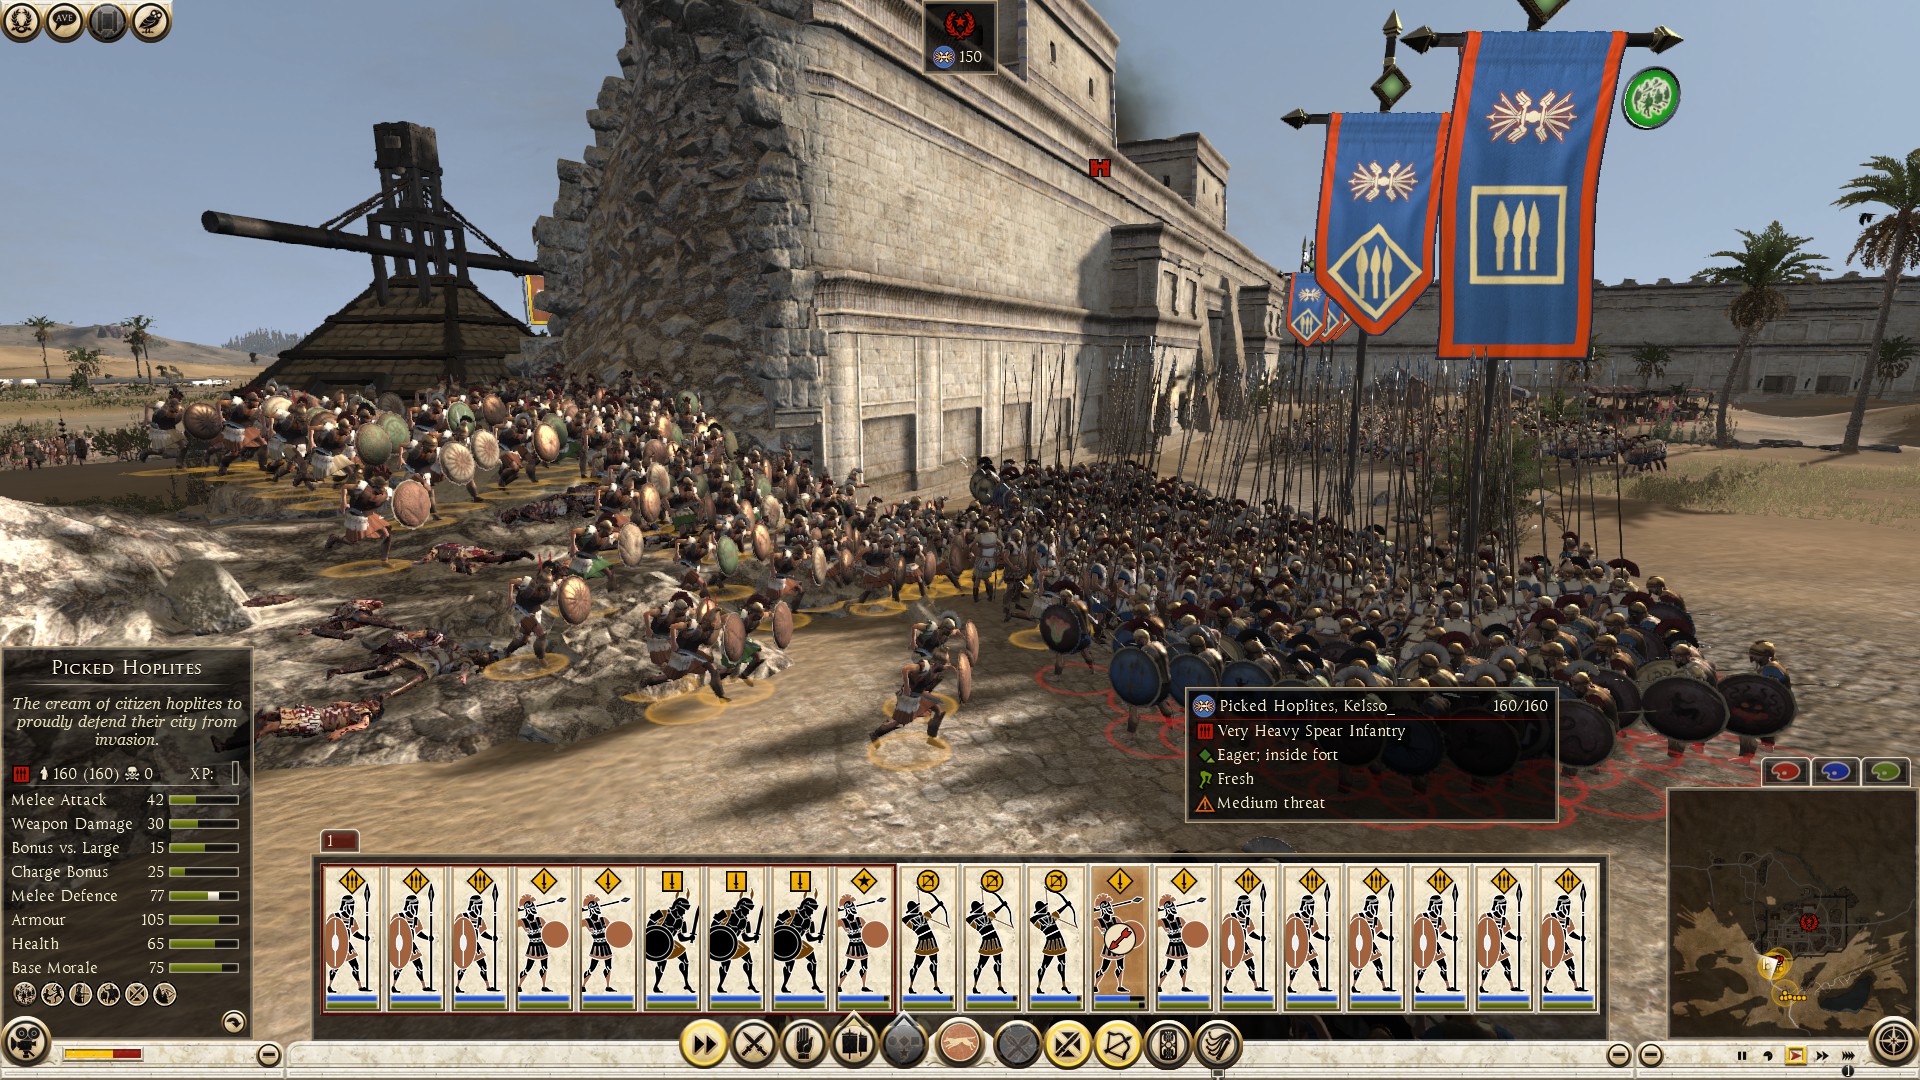
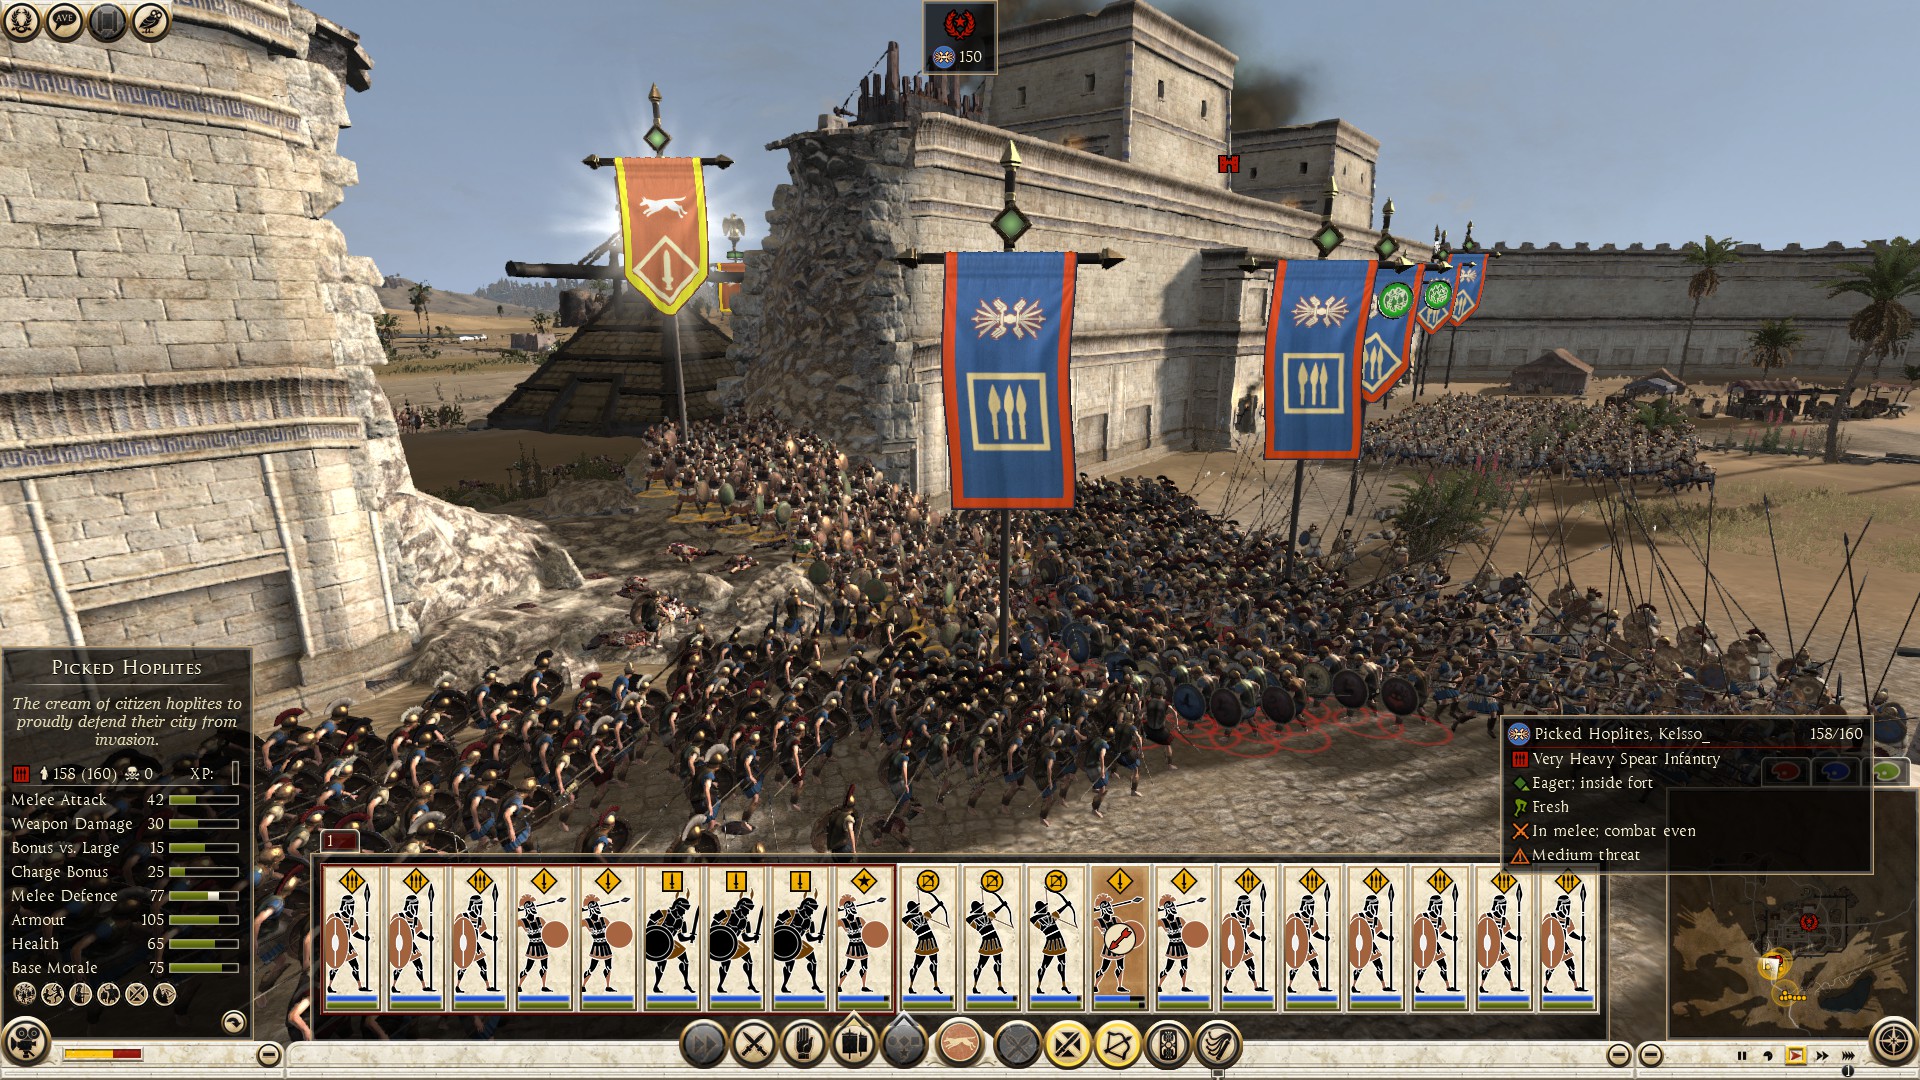
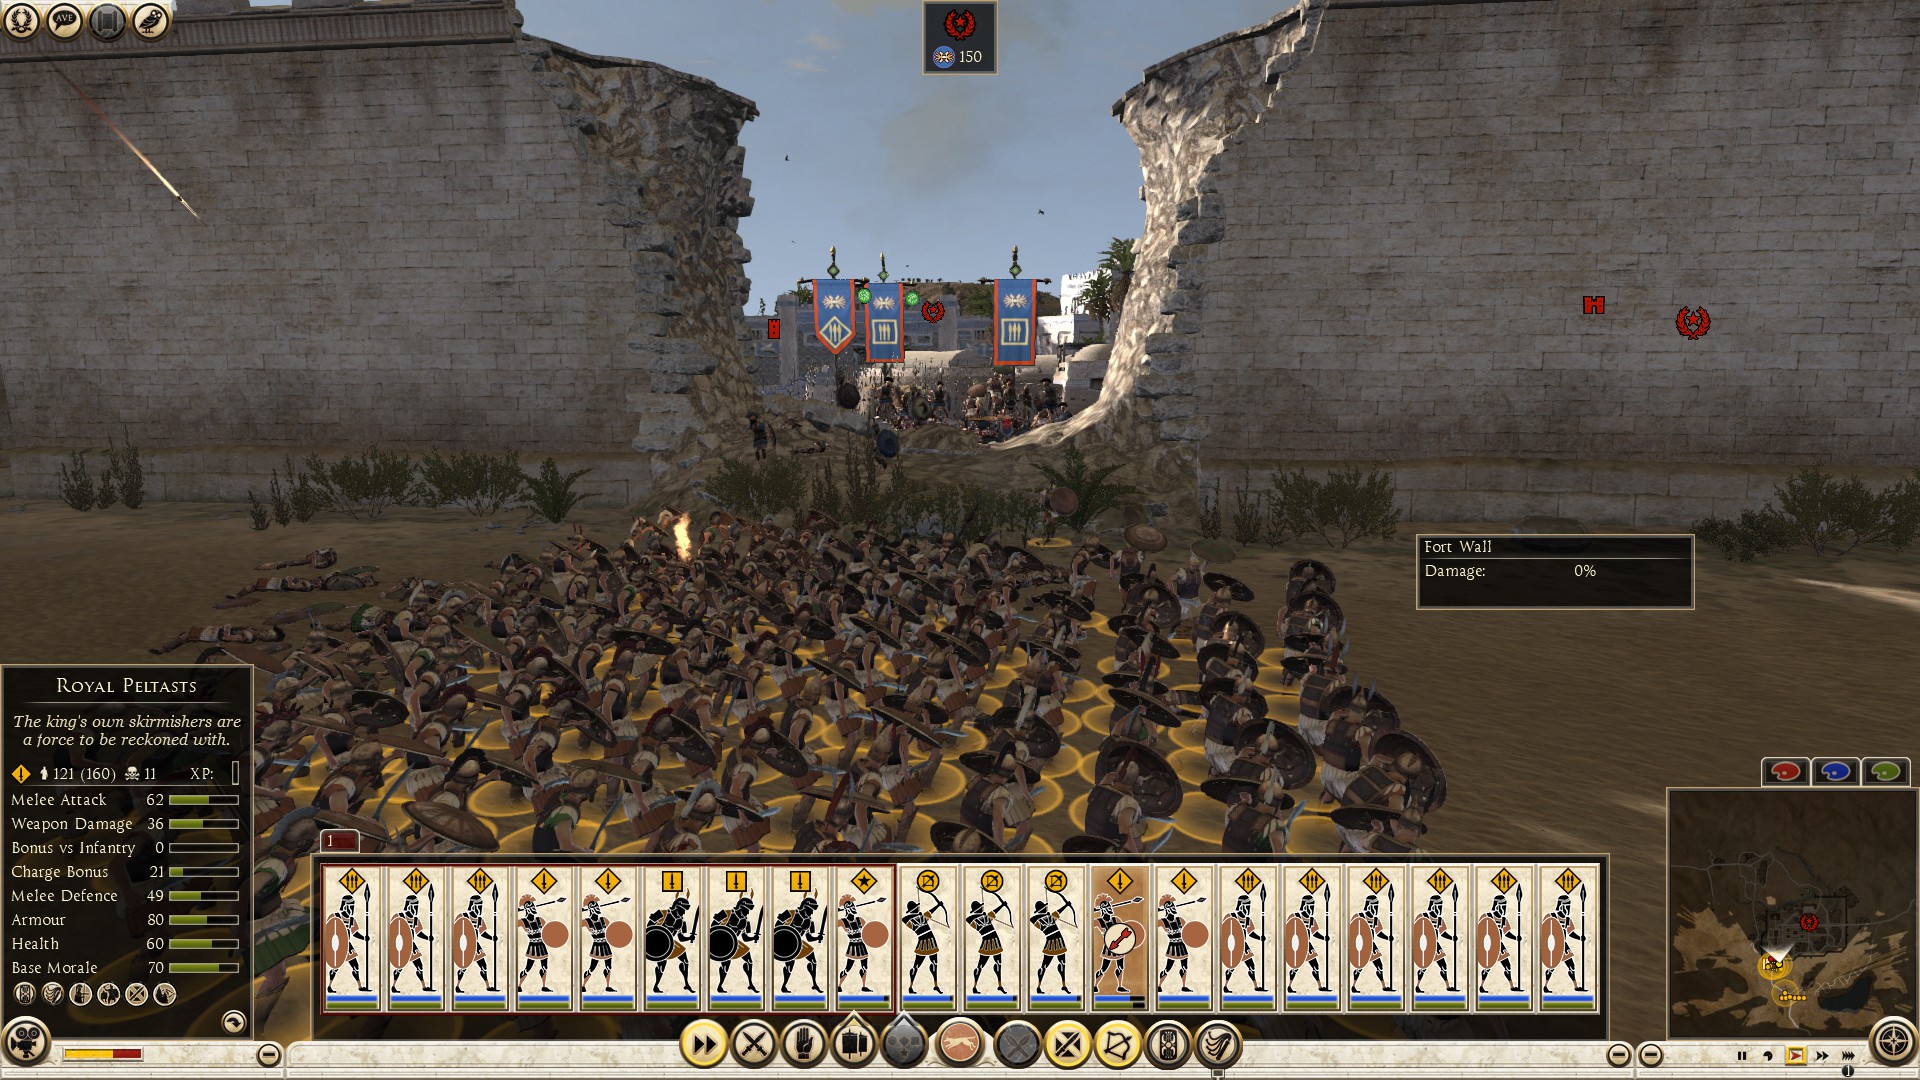
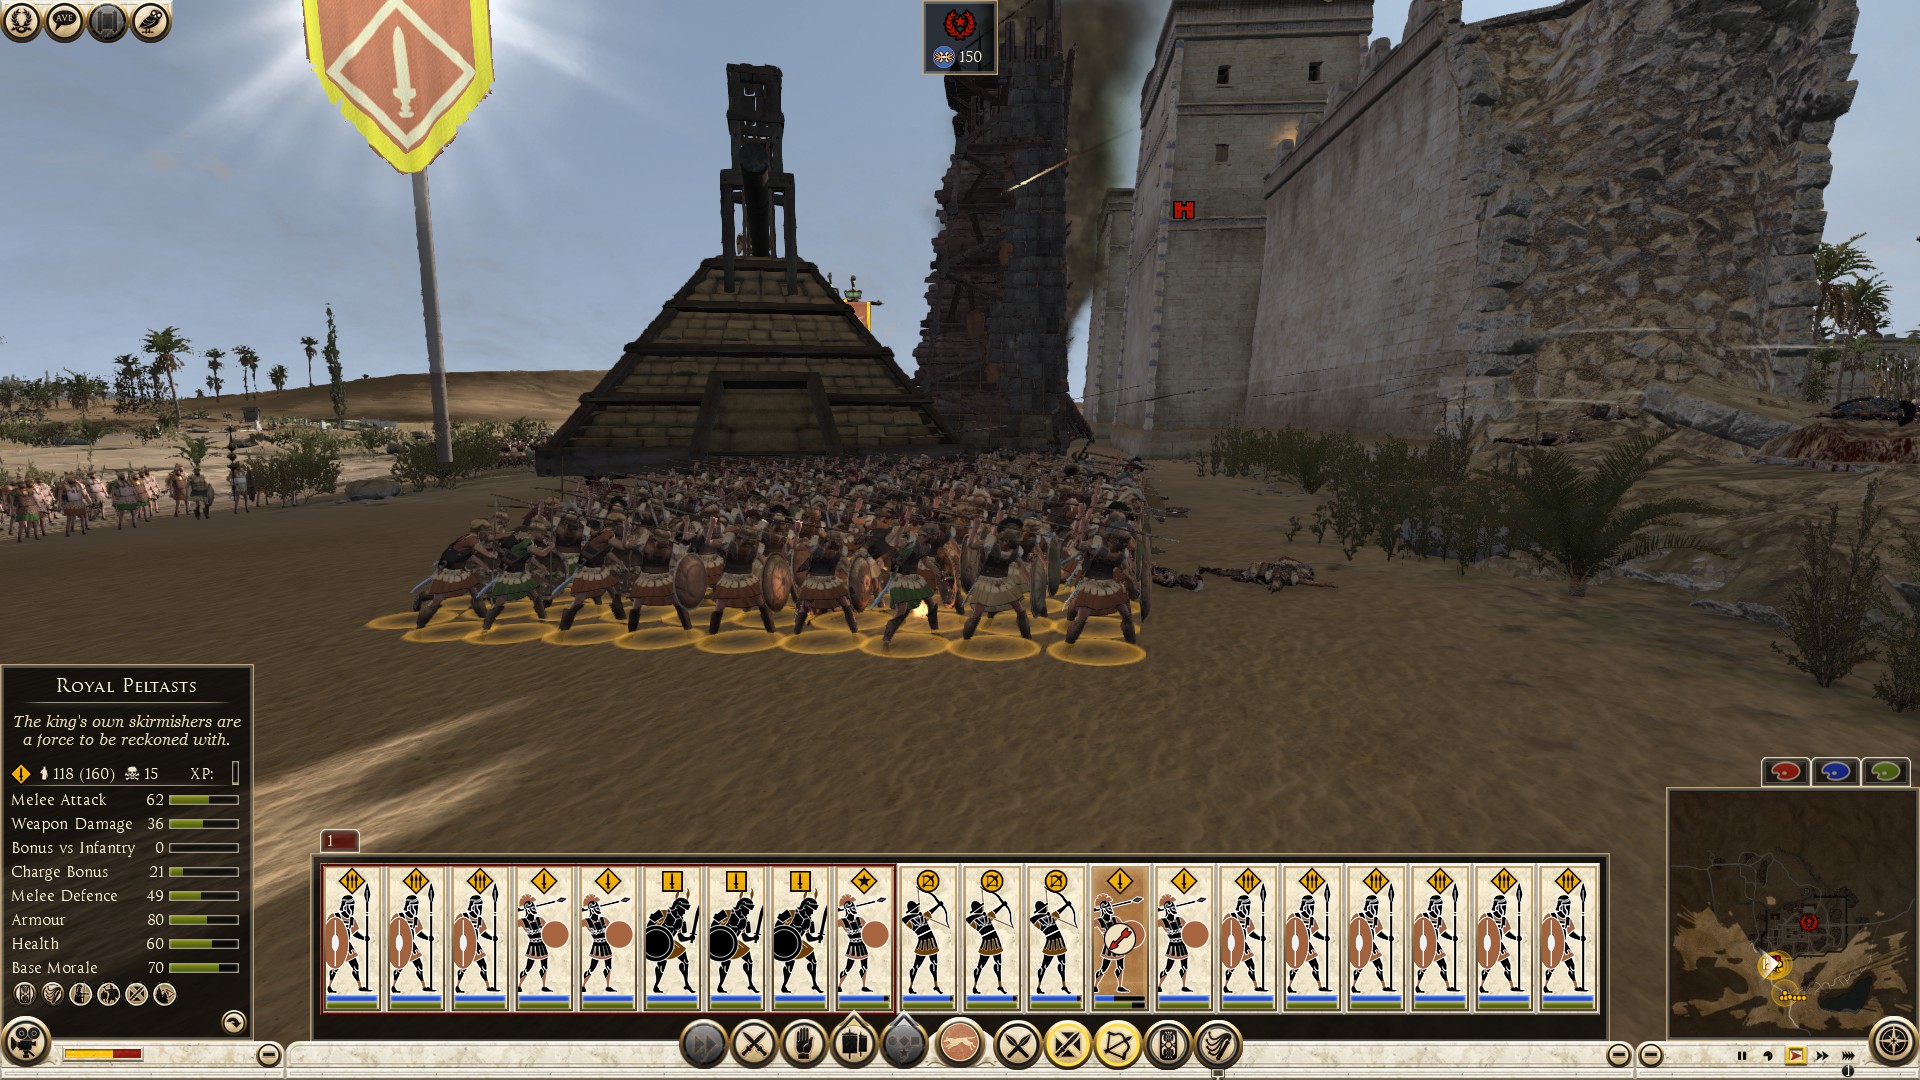
If your opponent sally’s out his pikes in desperation to get a few kills (c), pull your melee back before the pikes can engage them, but keep the range units firing until he either pulls back his pikes or they route. If the opponent attempts to retreat, have the melee unit that ran away from the pikes turn around, and charge them before they get back inside the city while shooting them with range units or pila’s. Chase them all the way inside until the defenders send support, pull out repeat like I stated in the previous paragraph. If they decide to keep their pikes still (a), this is what you want, to eliminate the opponent(s) pikes. Noticing their pikes being heavily targeted, your opponent(s) will: (1) Pull their whole army including pikes to the victory point, giving you an easy entrance to the city (2) Have two pikes line up vertically at the entrance with nearby support (3) hide their pikes. If the opponent carries out plan (2), just change the position of your melee and range units to an angle that gives you a clear view, then shoot them.
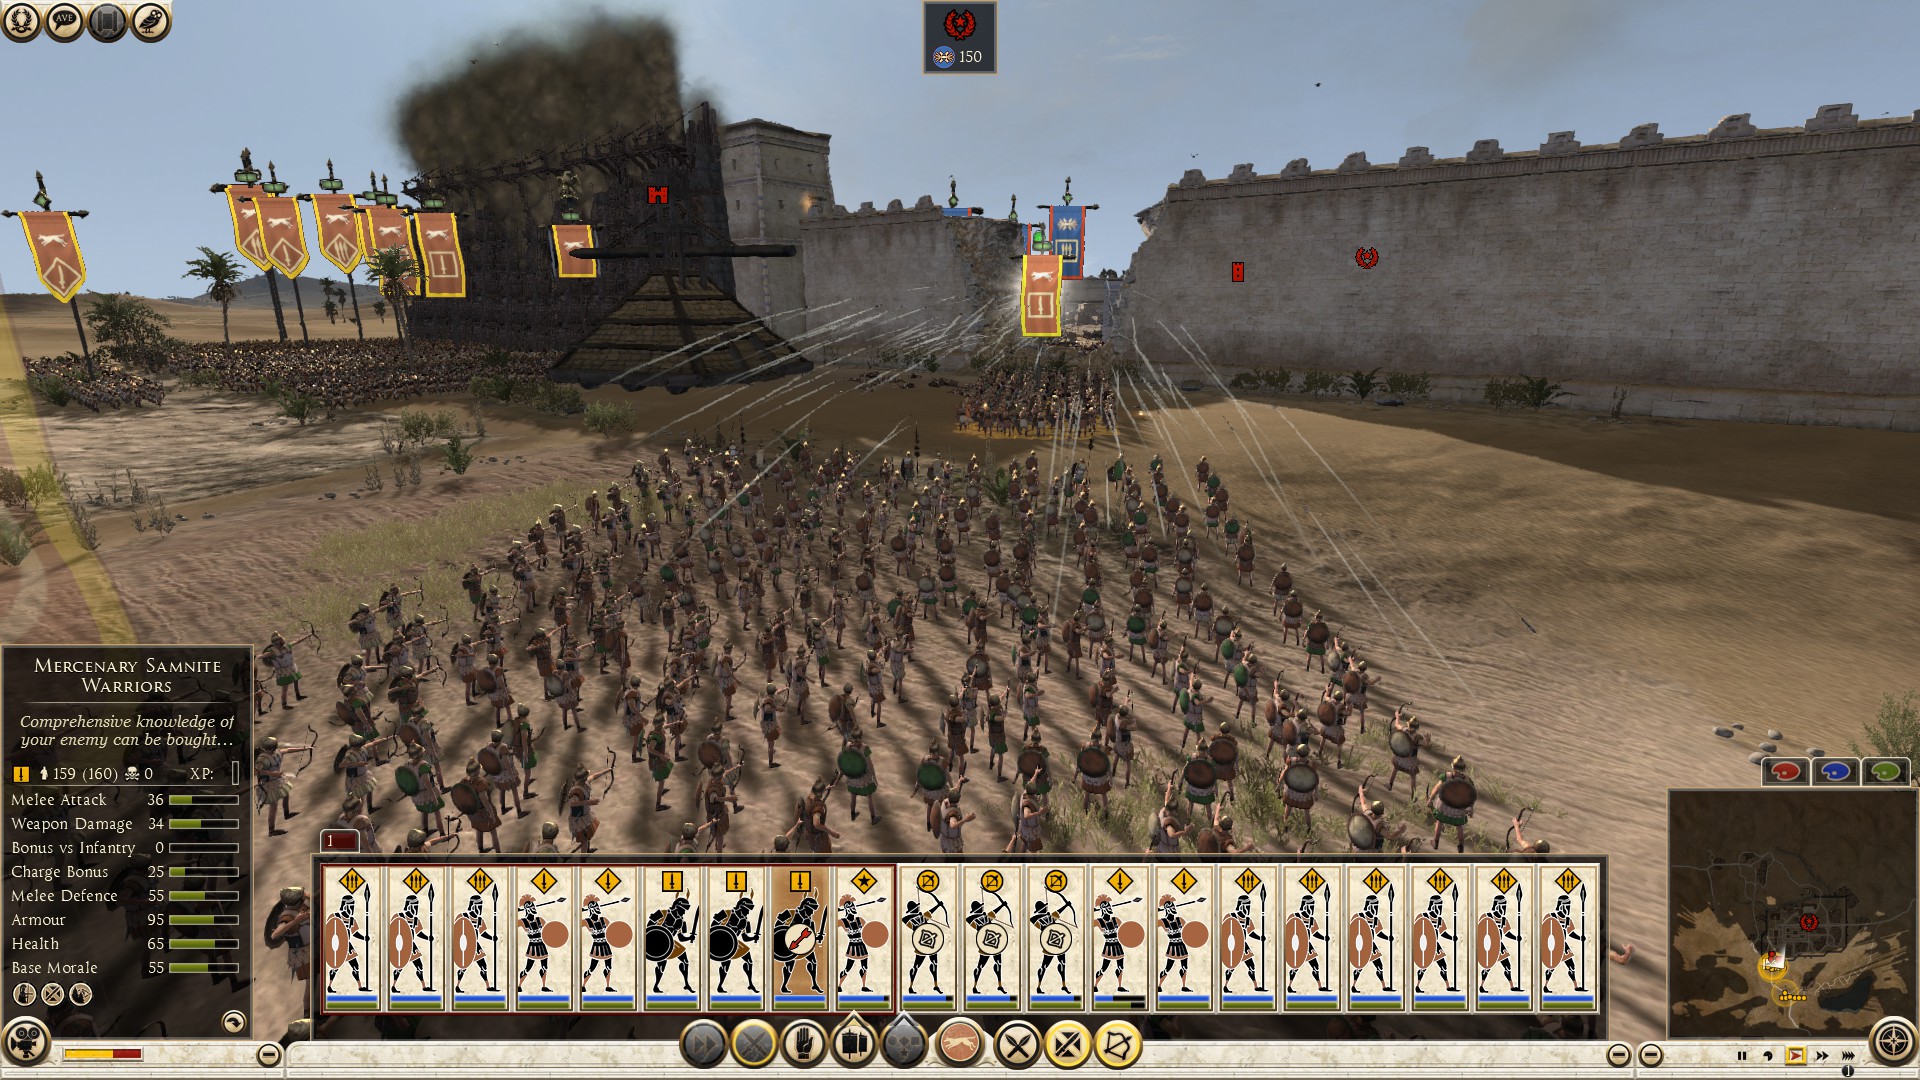
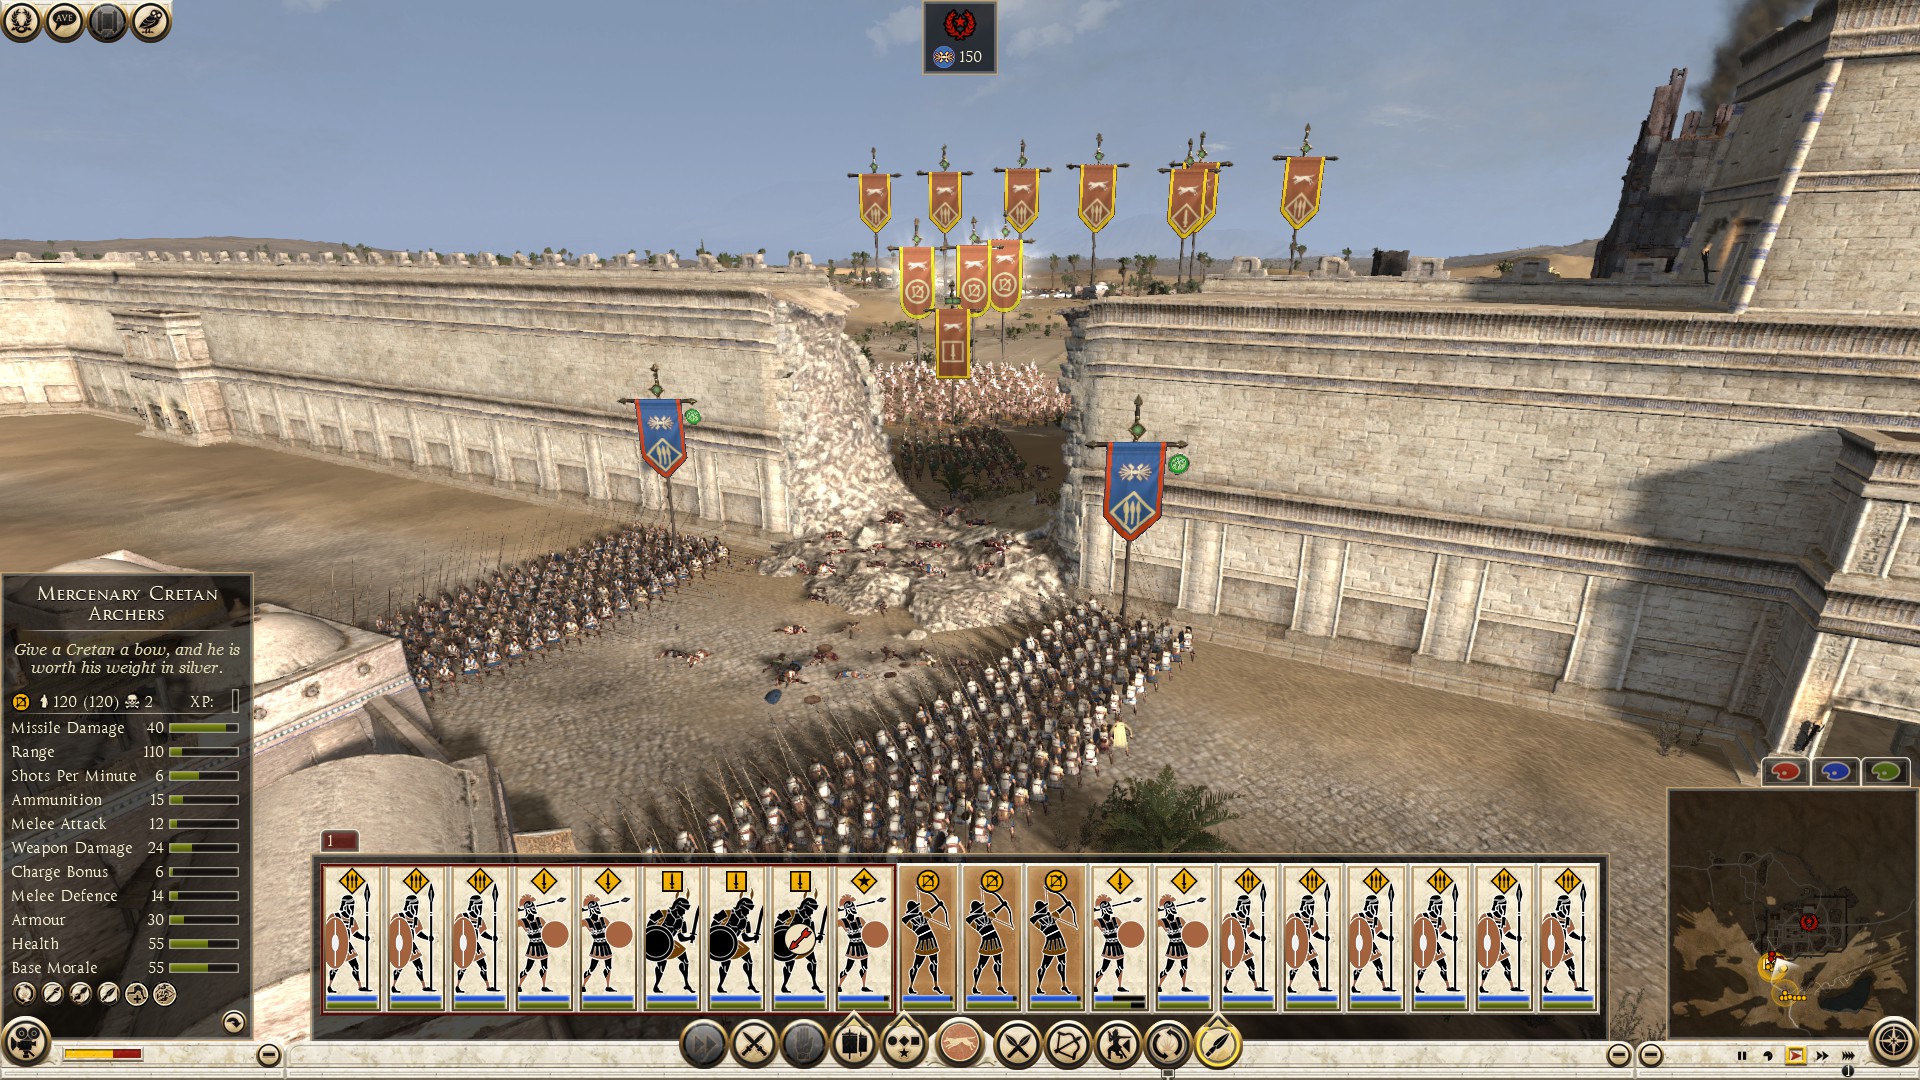
A few situations can arise when the opponent(s) hide their pikes. The first, keeping pikes facing the wall tower stairs, with melee units protecting the wall hole. Attack their melee unit with one of your least best melee units preferably, because you don't want your elites ripped by the towers while they fight. Seeing how things are progressing, the opponent will either fall back to the victory point, leaving a unit behind to slow your advance so their units can get in position. Or move their pikes from hiding to confront your breaching units. Experienced defenders tend to do that early on.
Pull out the moment you see their pikes get close enough to engaging your units. When the pikes are exposed through the wall hole, target them with pila’s and other projectiles.
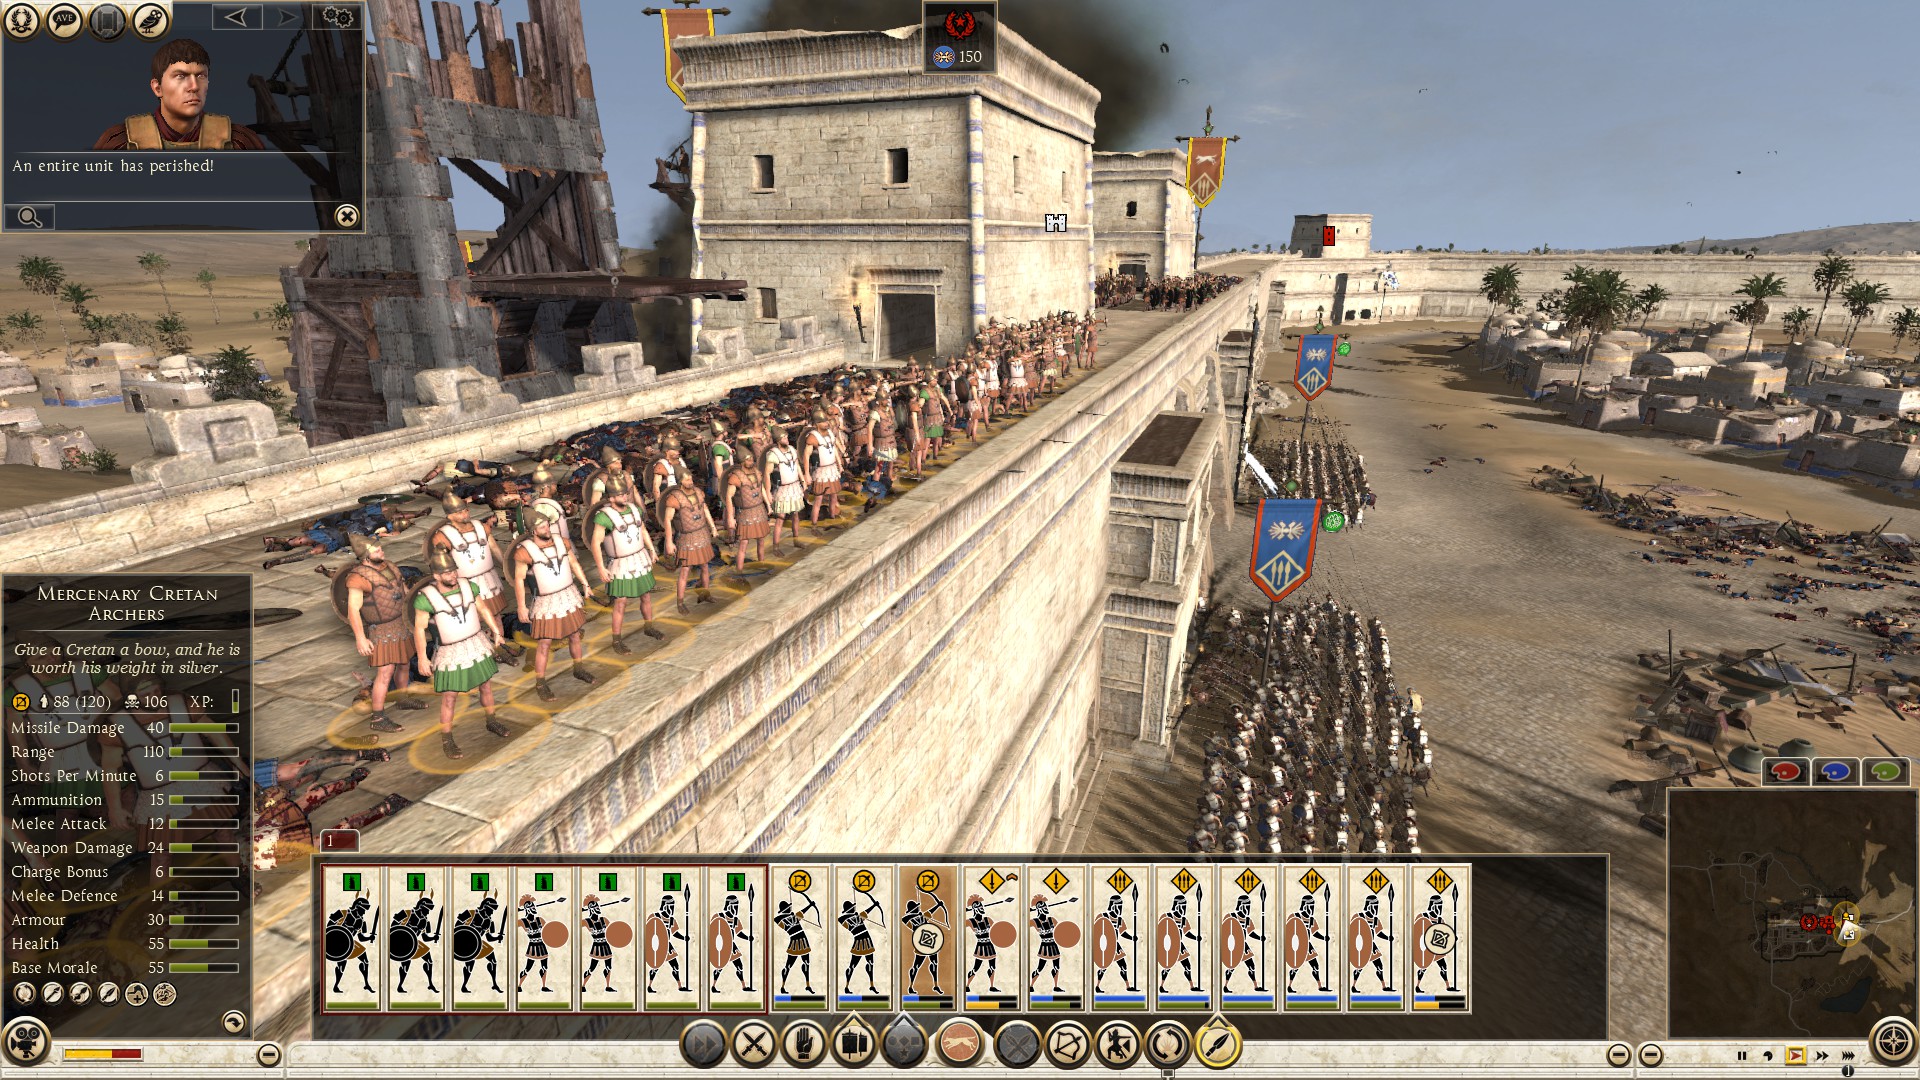
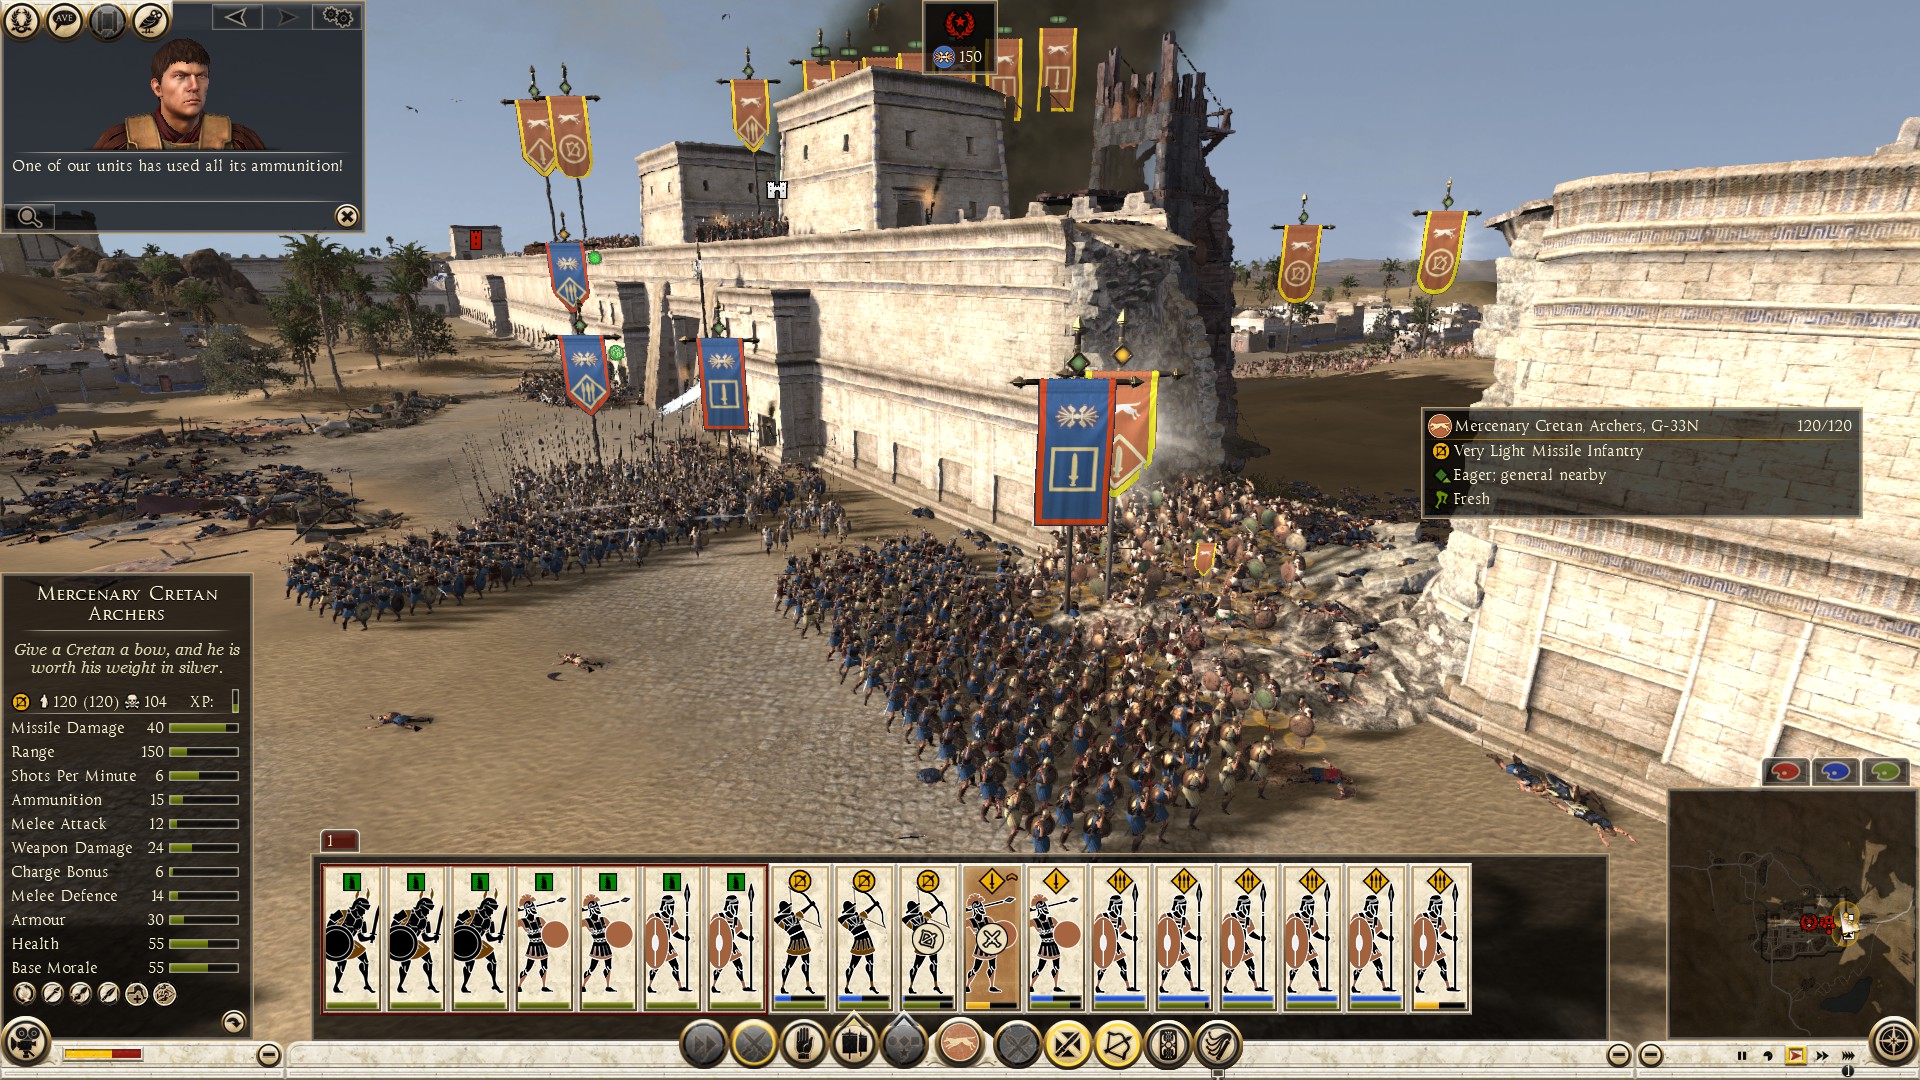
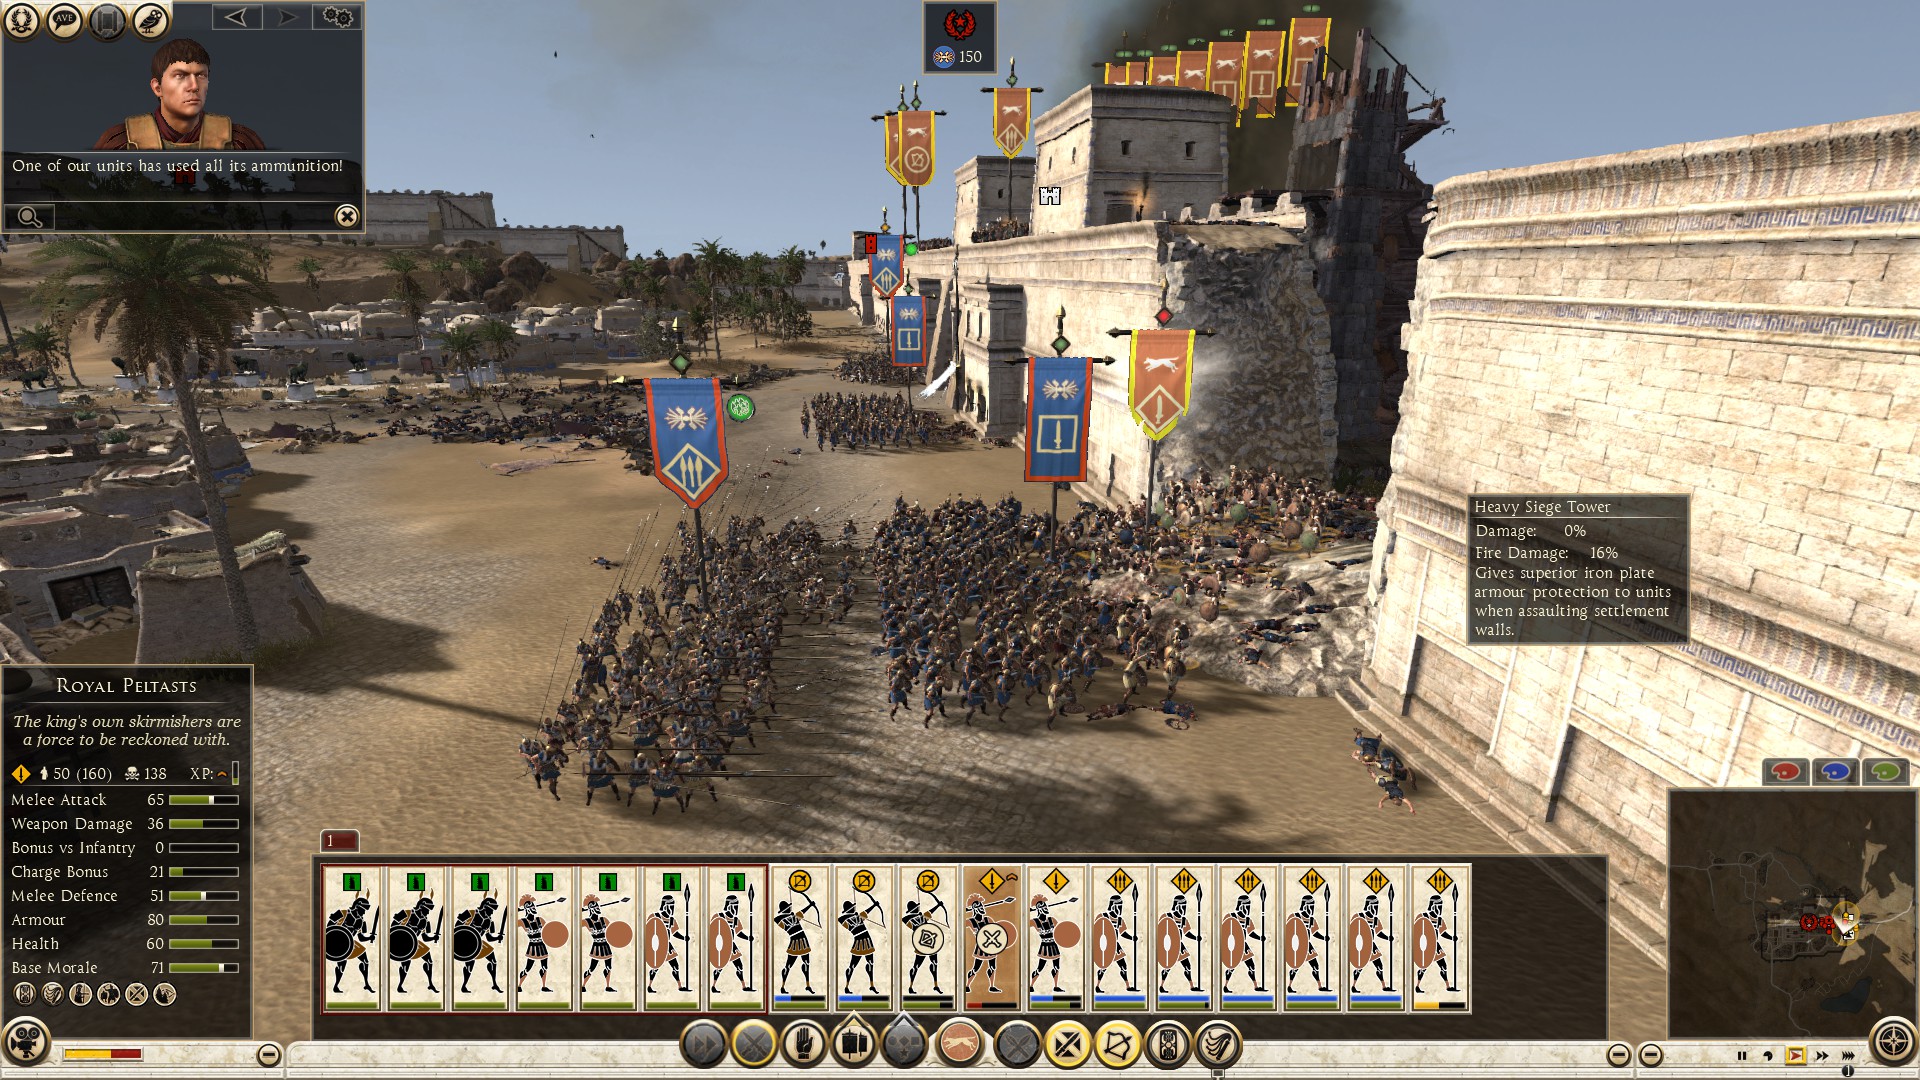
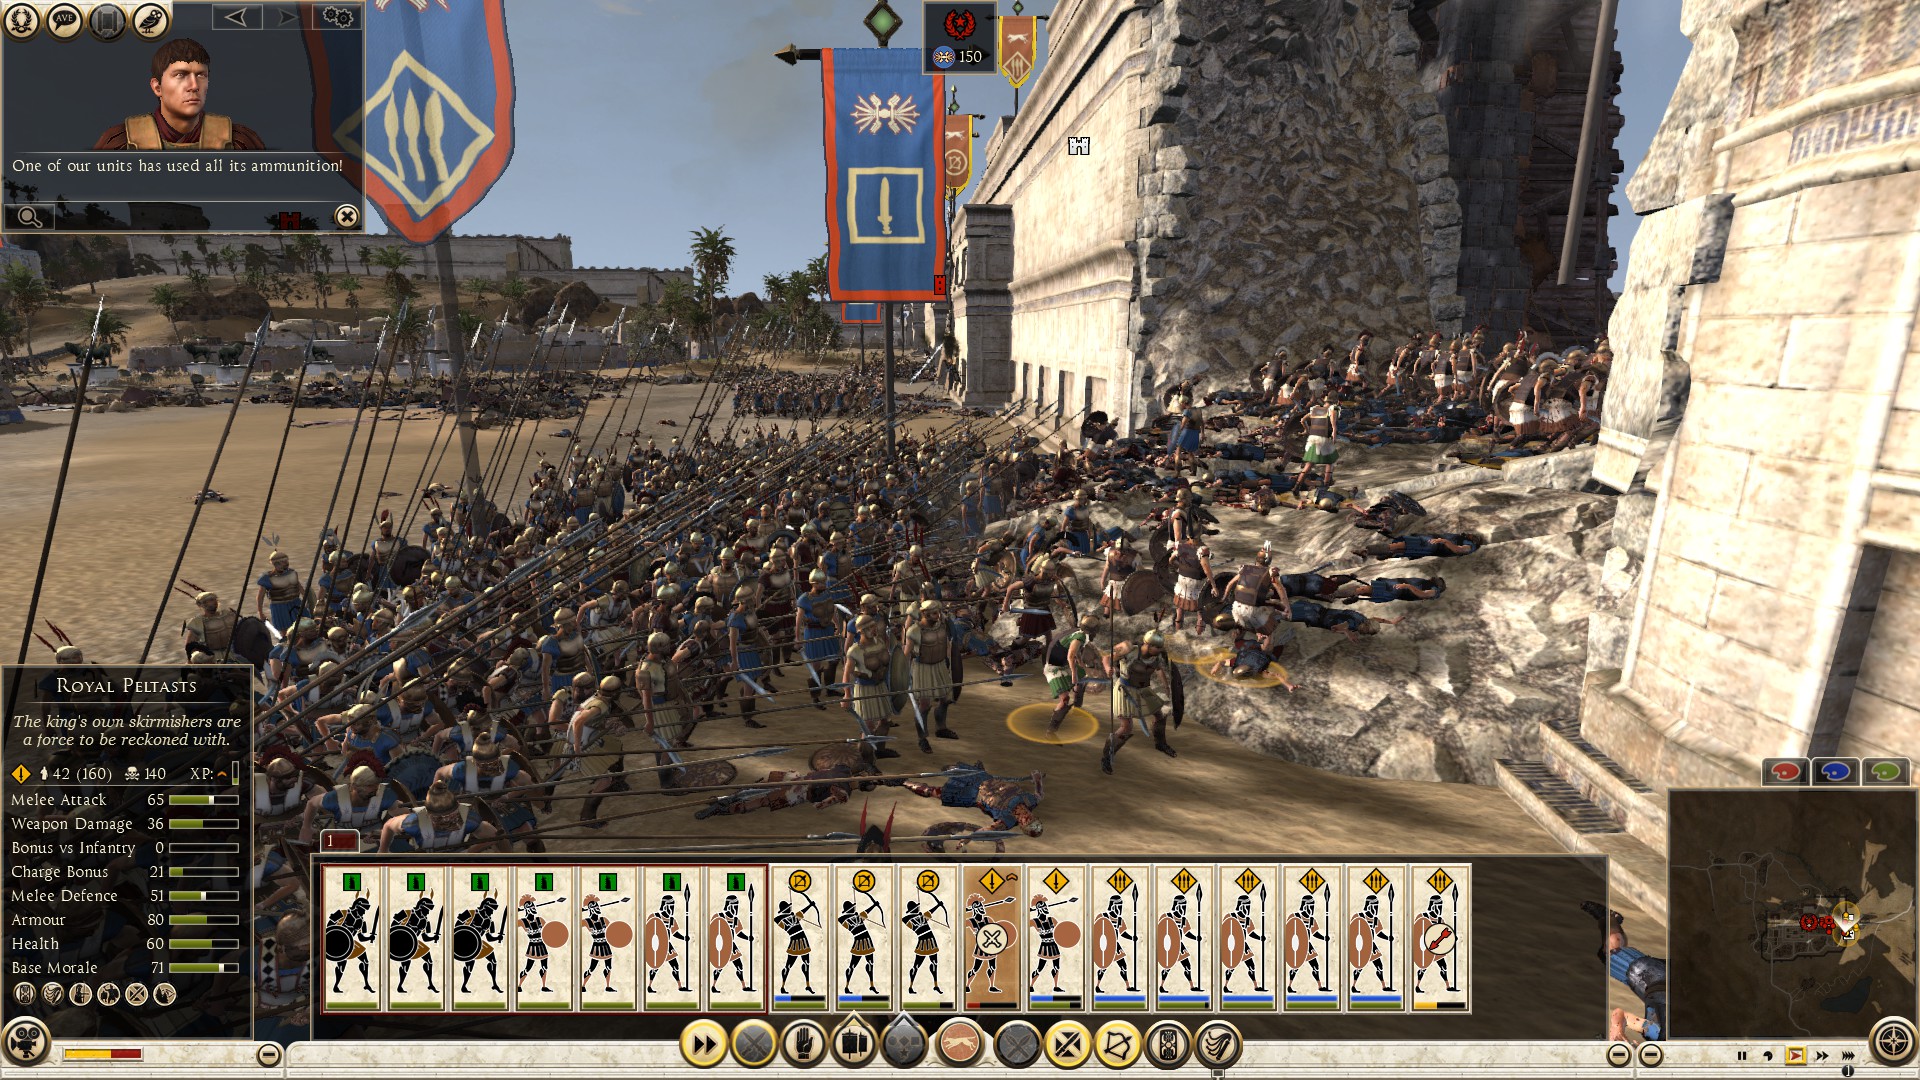
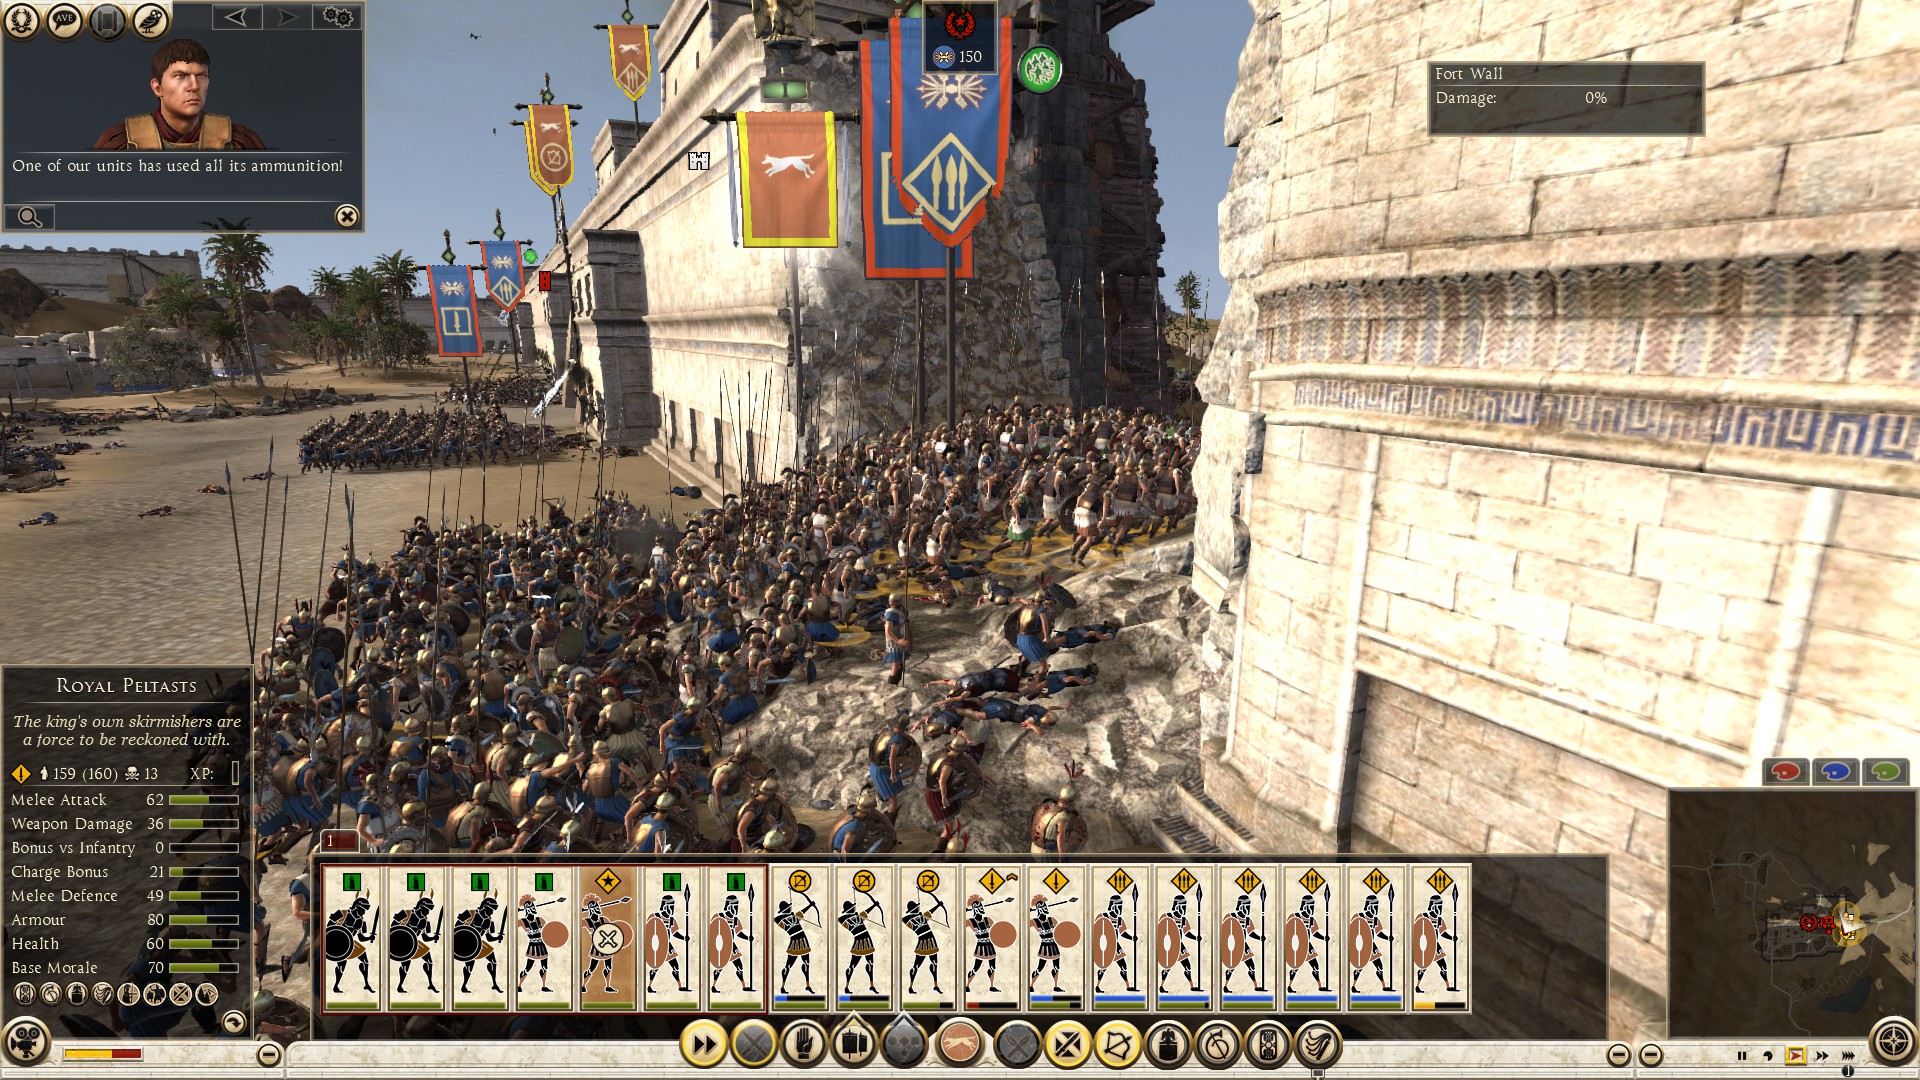
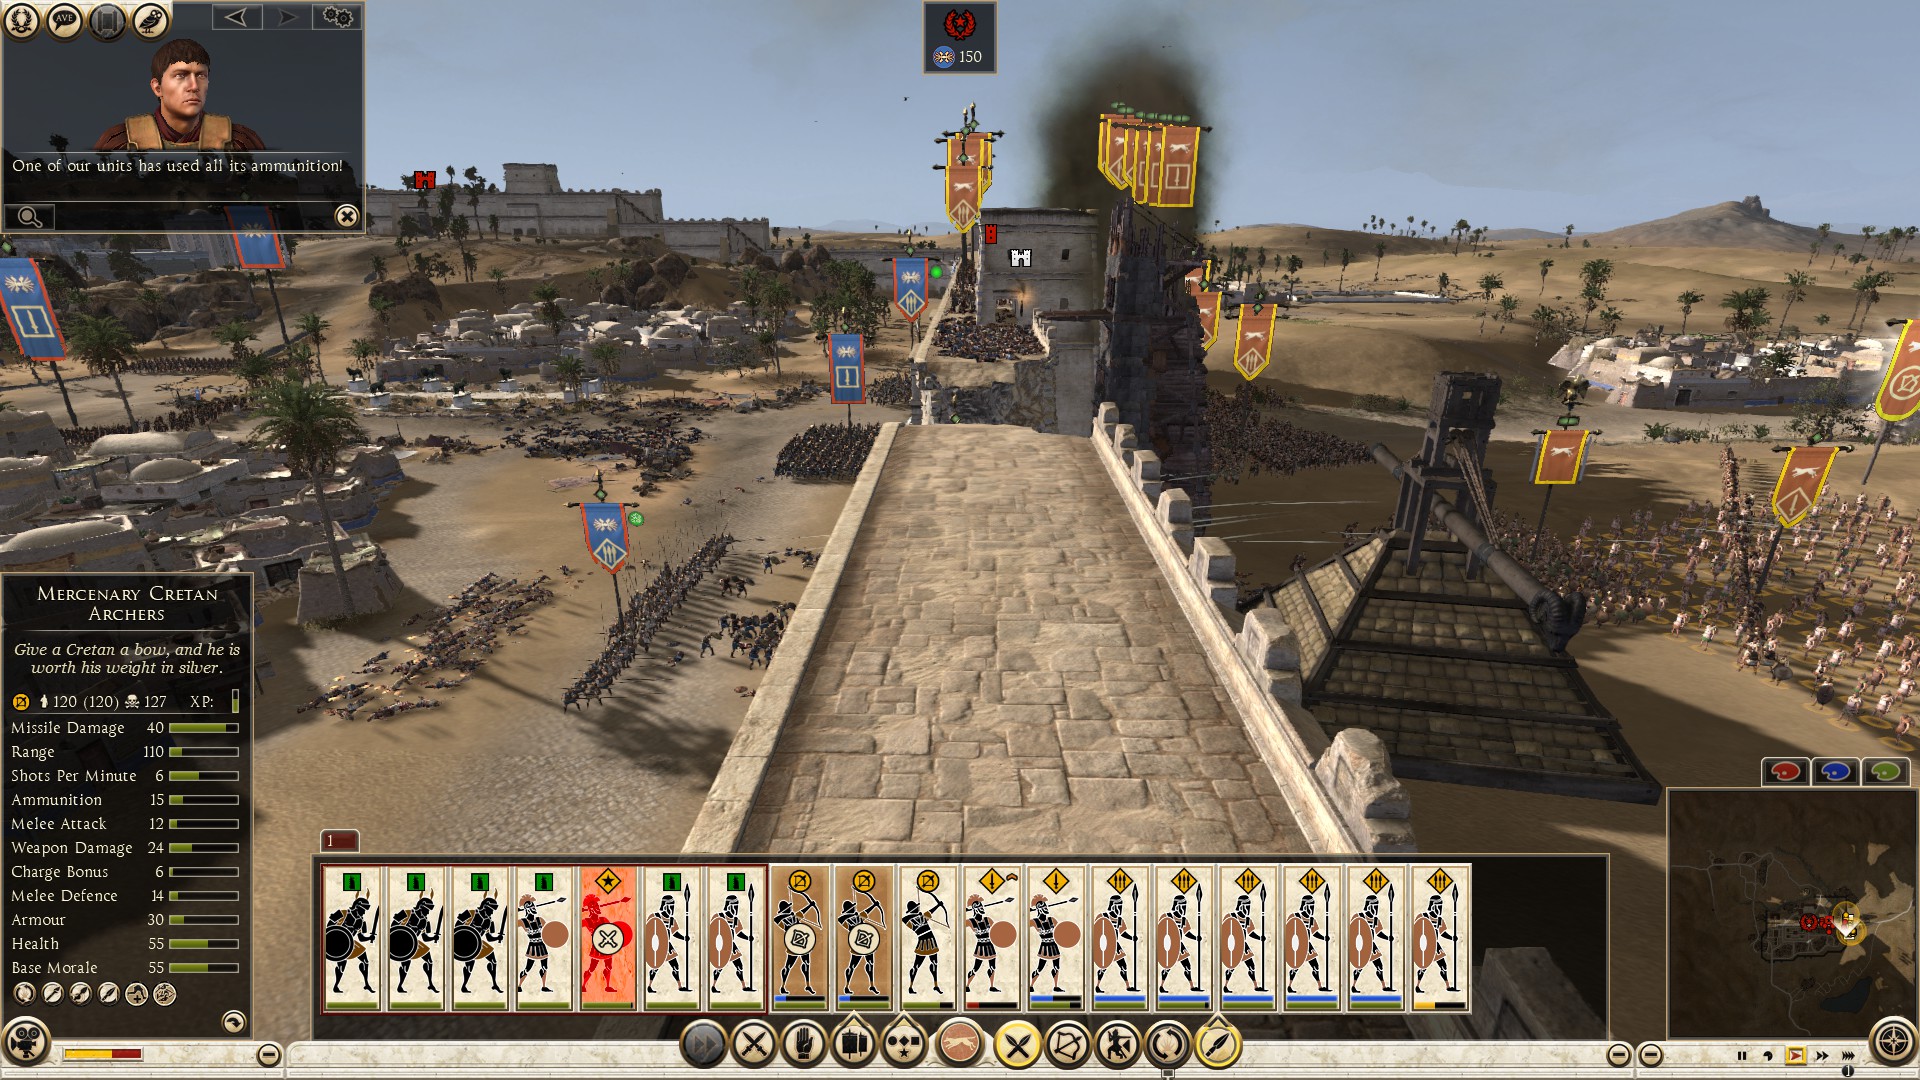
Though a veteran defender will order their pikes to face the wall when you pull away from the melee fight, in which case re-charge the melee units at the wall hole that you were engaged with earlier on. The opponent will try again and again and again until you make a mistake that they can capitalize on, but remember, as soon as you see the pikes get close, pull back and repeat. You will lose a few men in the process of pulling back, which is nothing, compared to the damage the defending pikes can inflict if you stay. Repeat the process until the opponent(s) melee units are depleted, face their pikes through the wall hole, or pull back to center. Put some units on the walls while that is going on not only to neutralize and take over the wall towers, but to use that as a leverage in eliminating the enemy pikes, by throwing projectiles down on them.
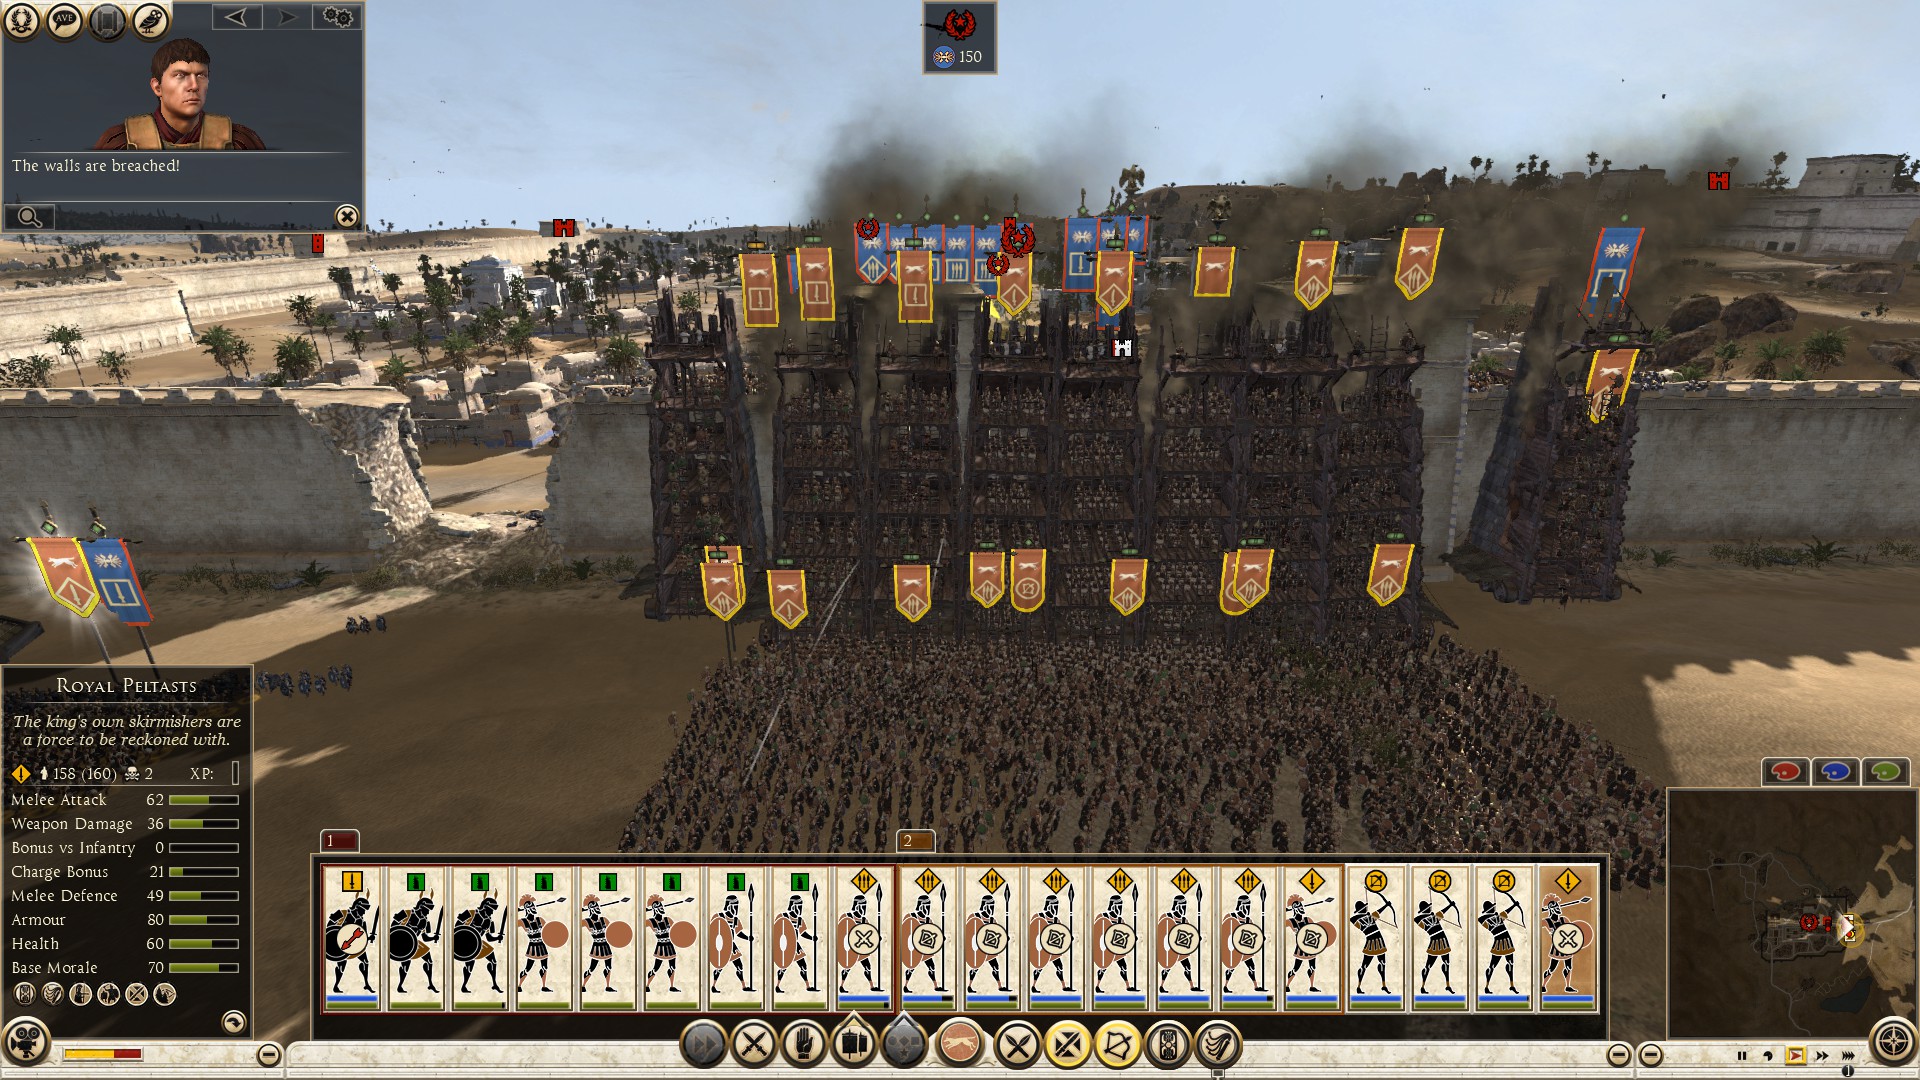
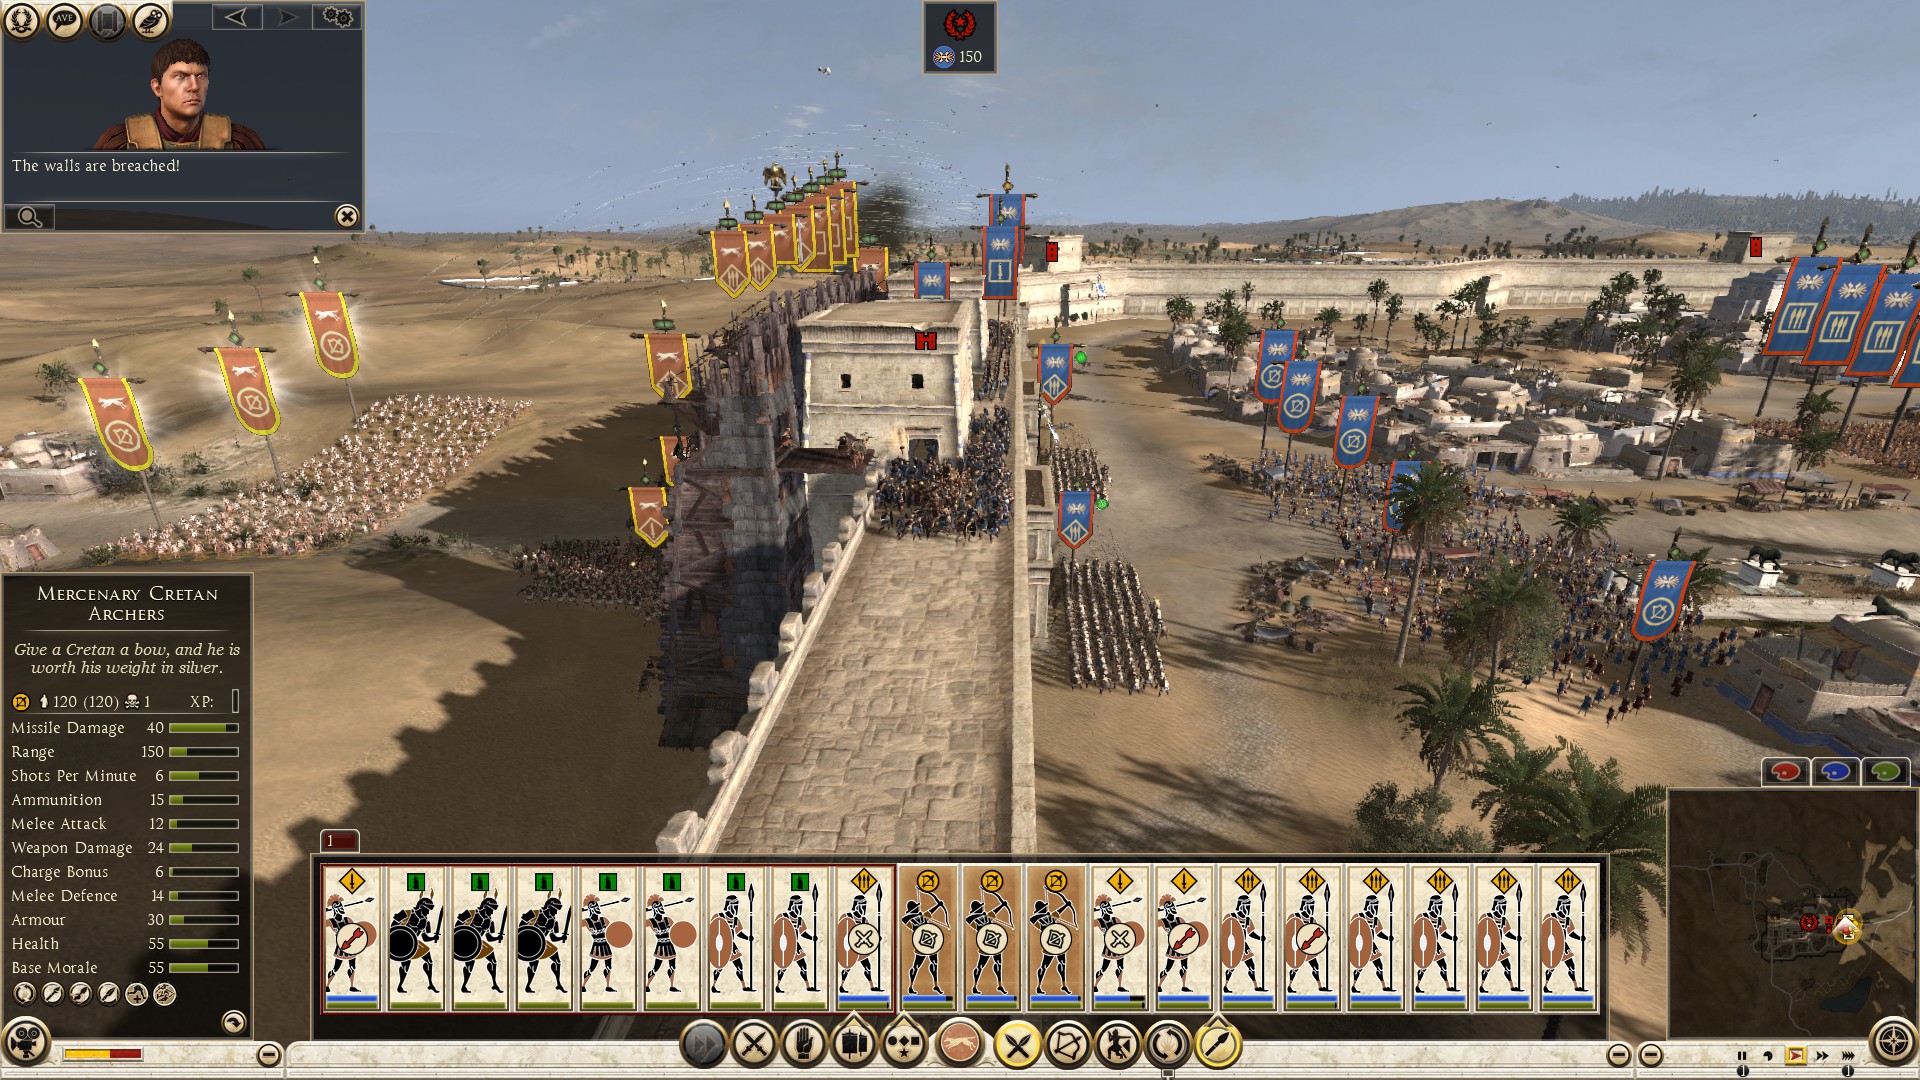
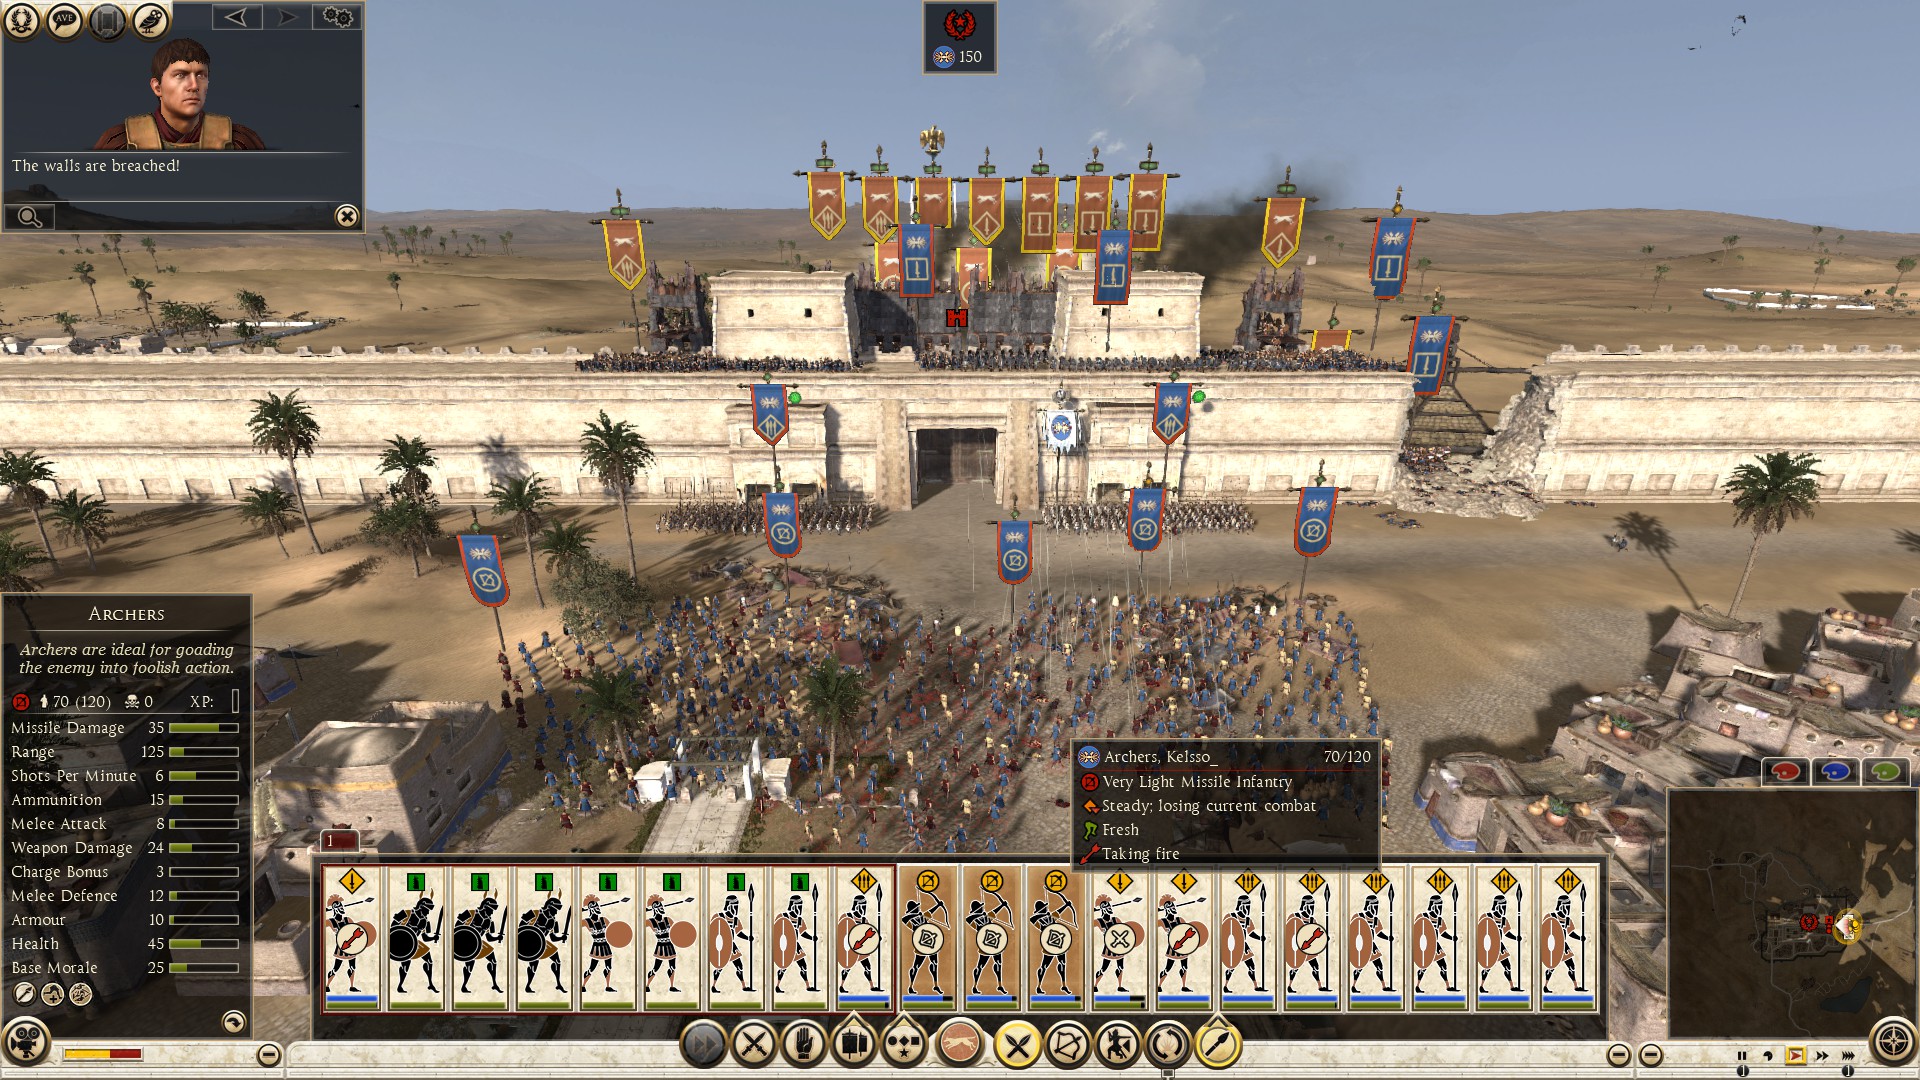
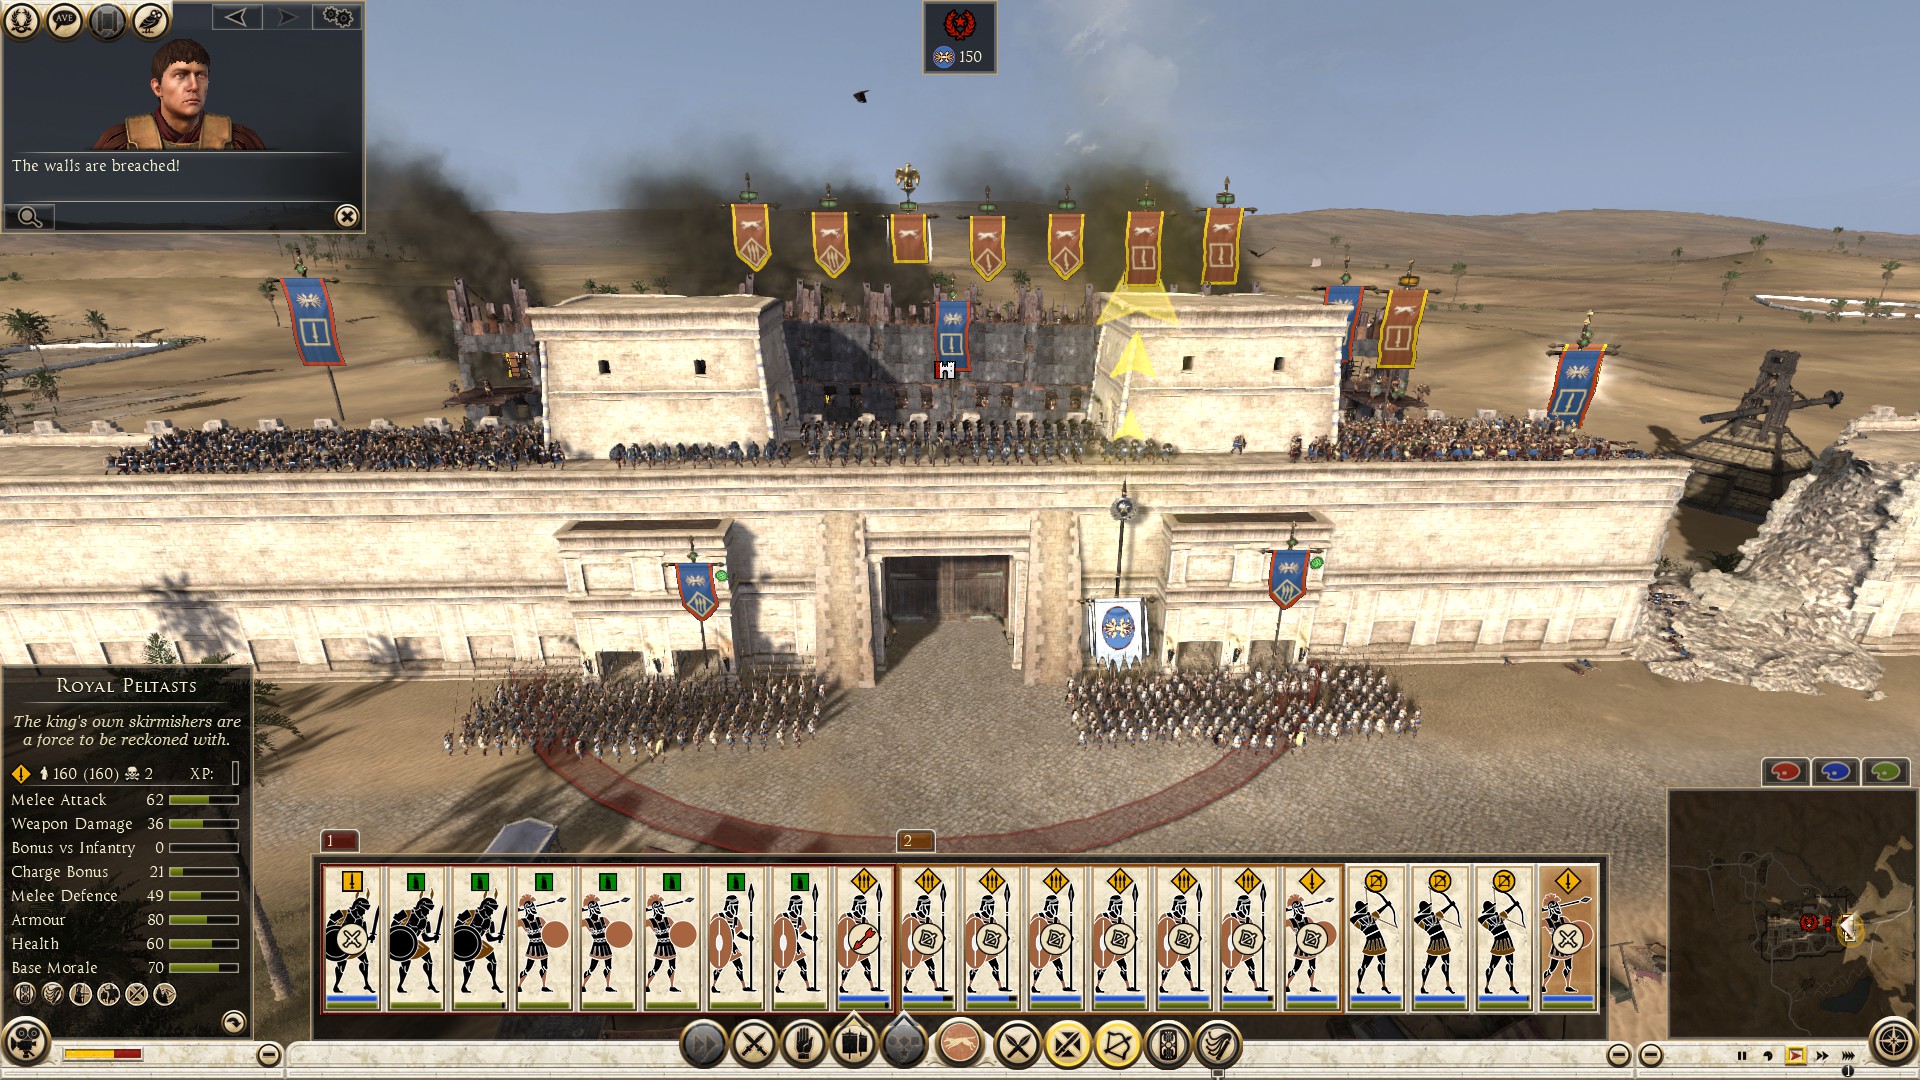
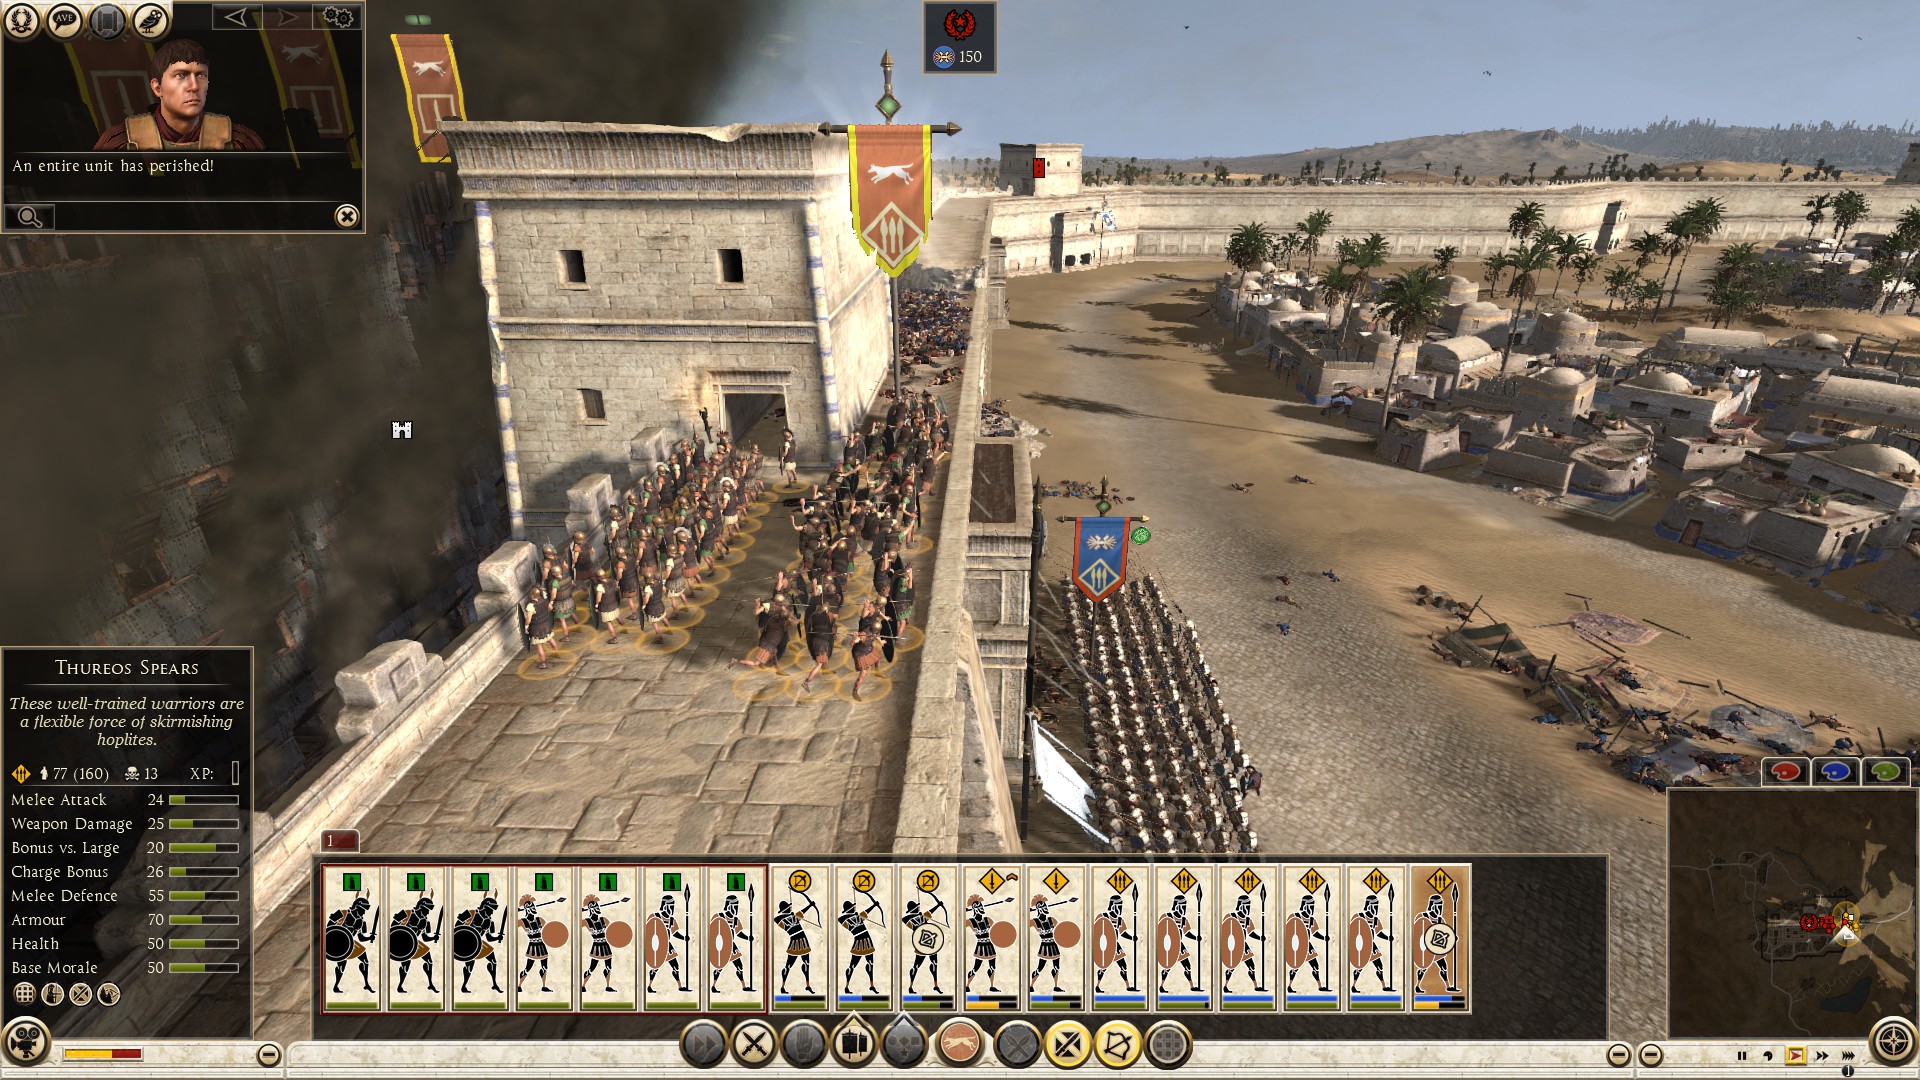
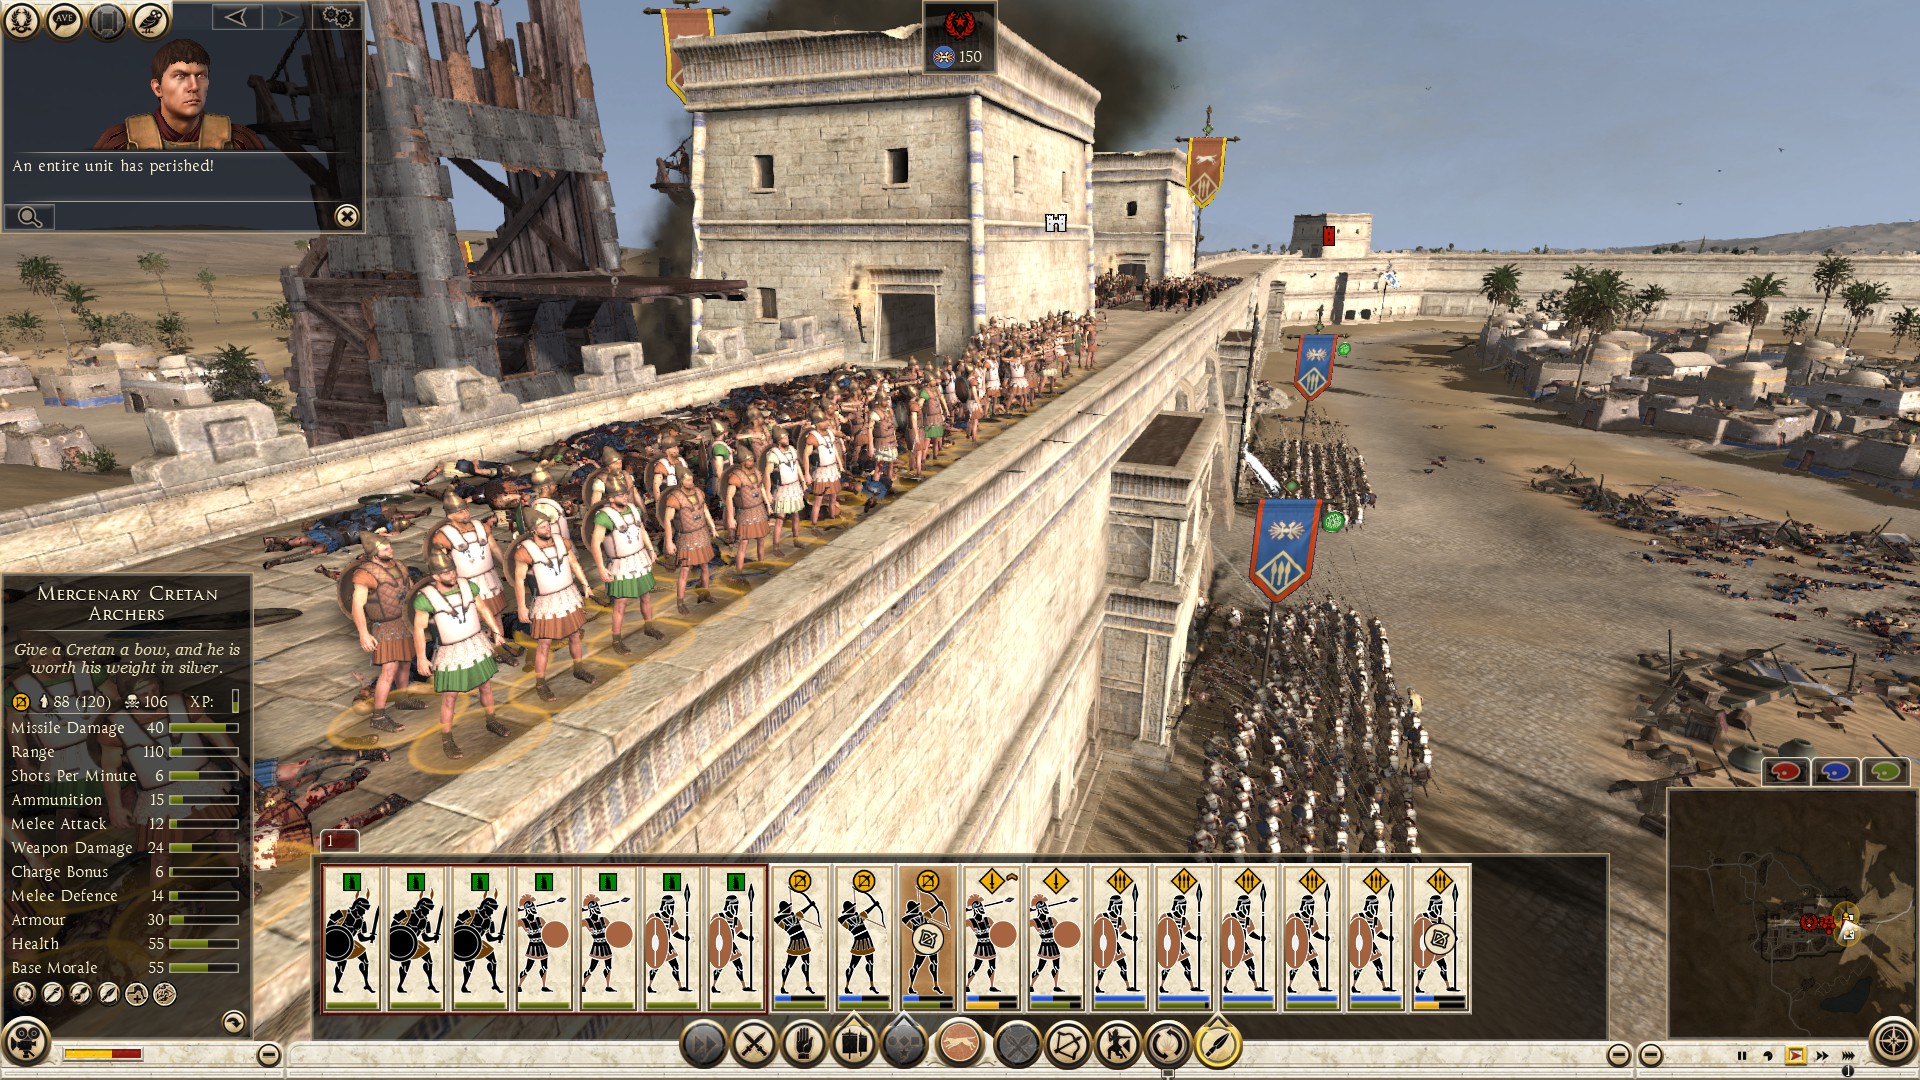
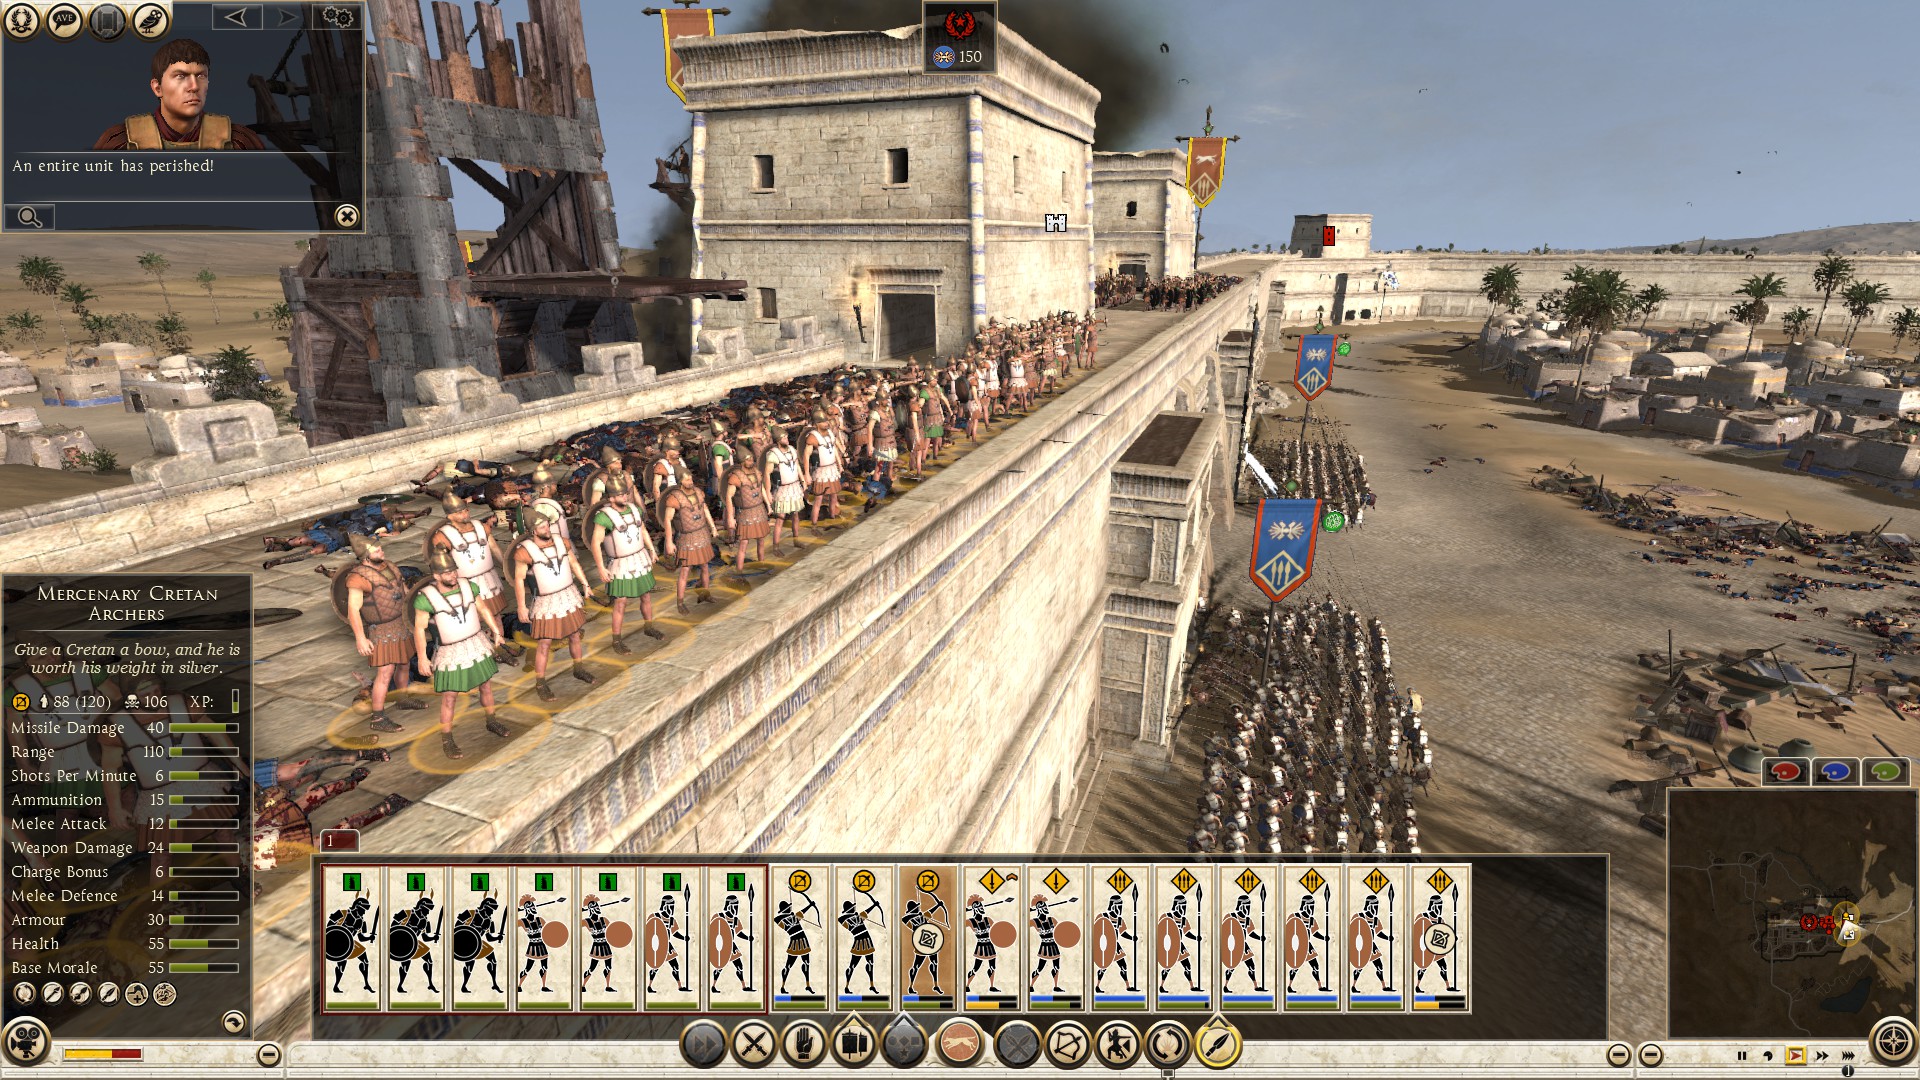
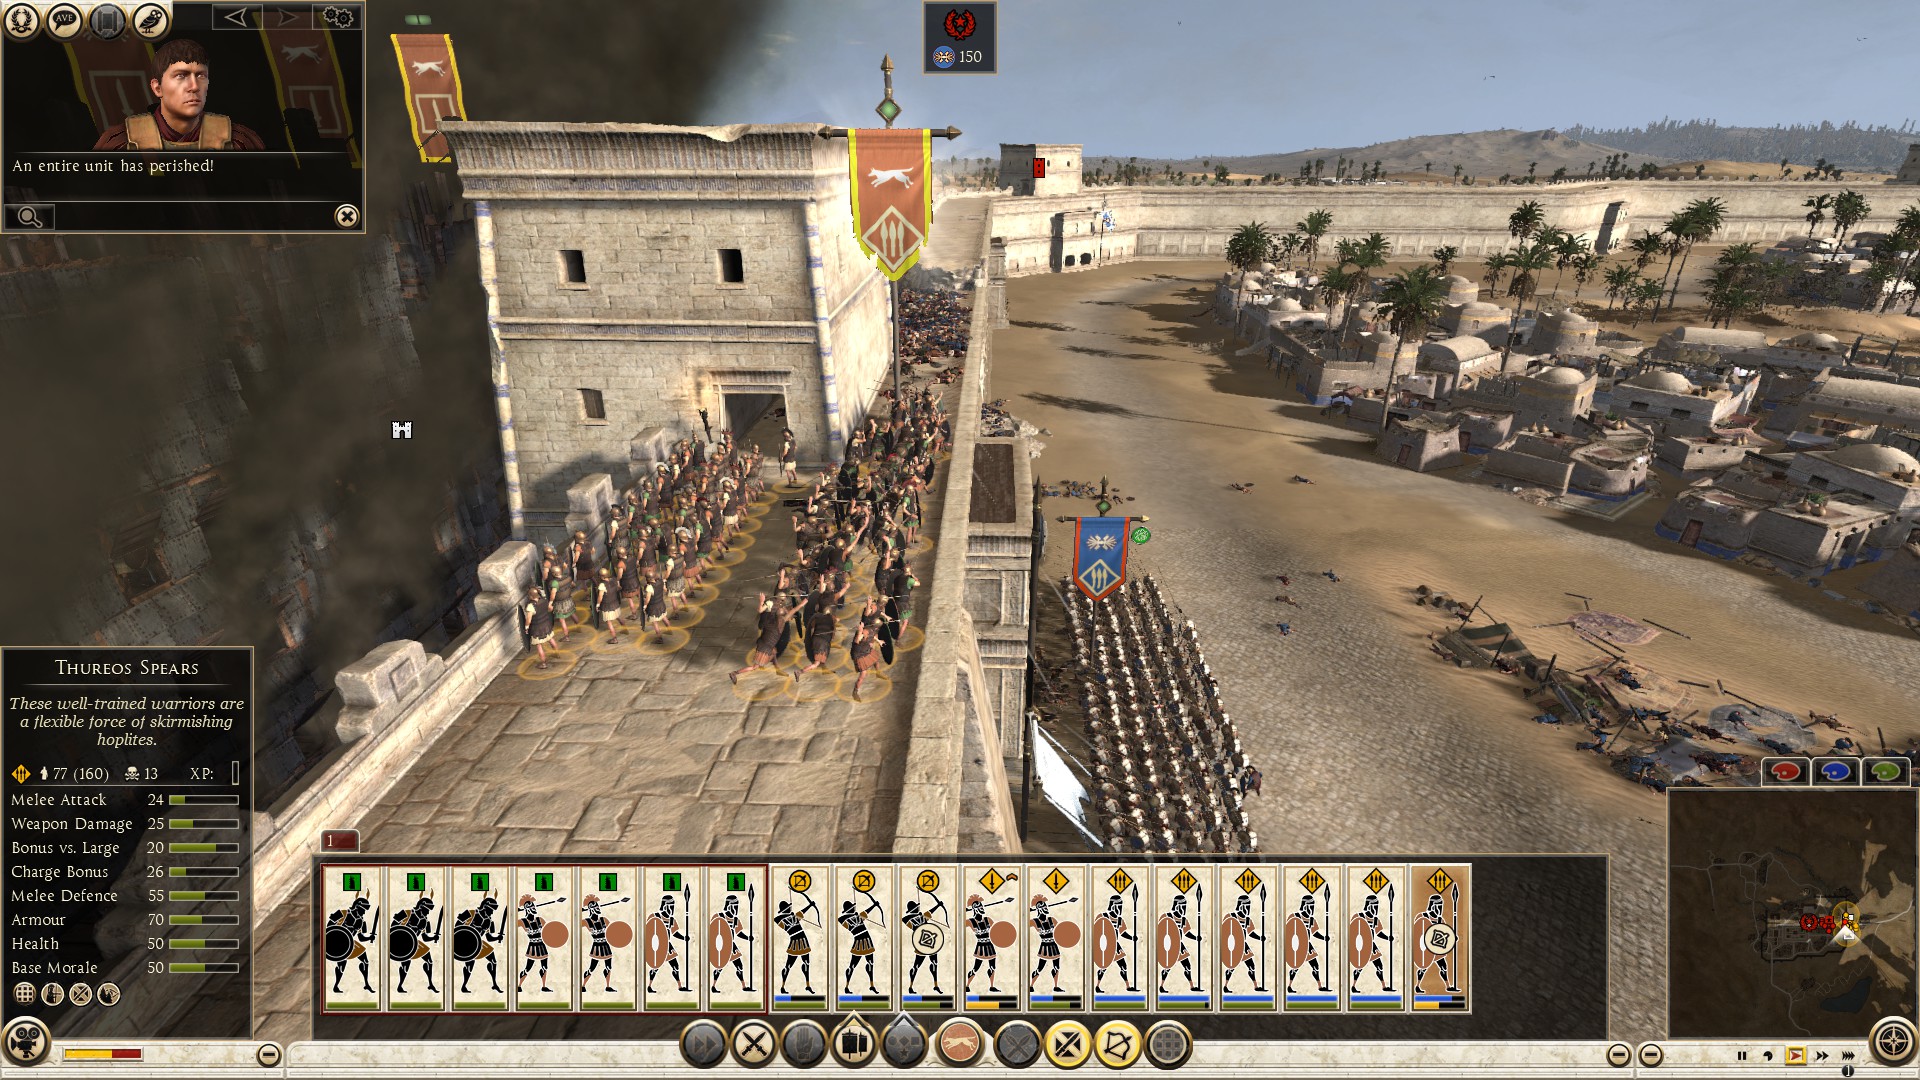
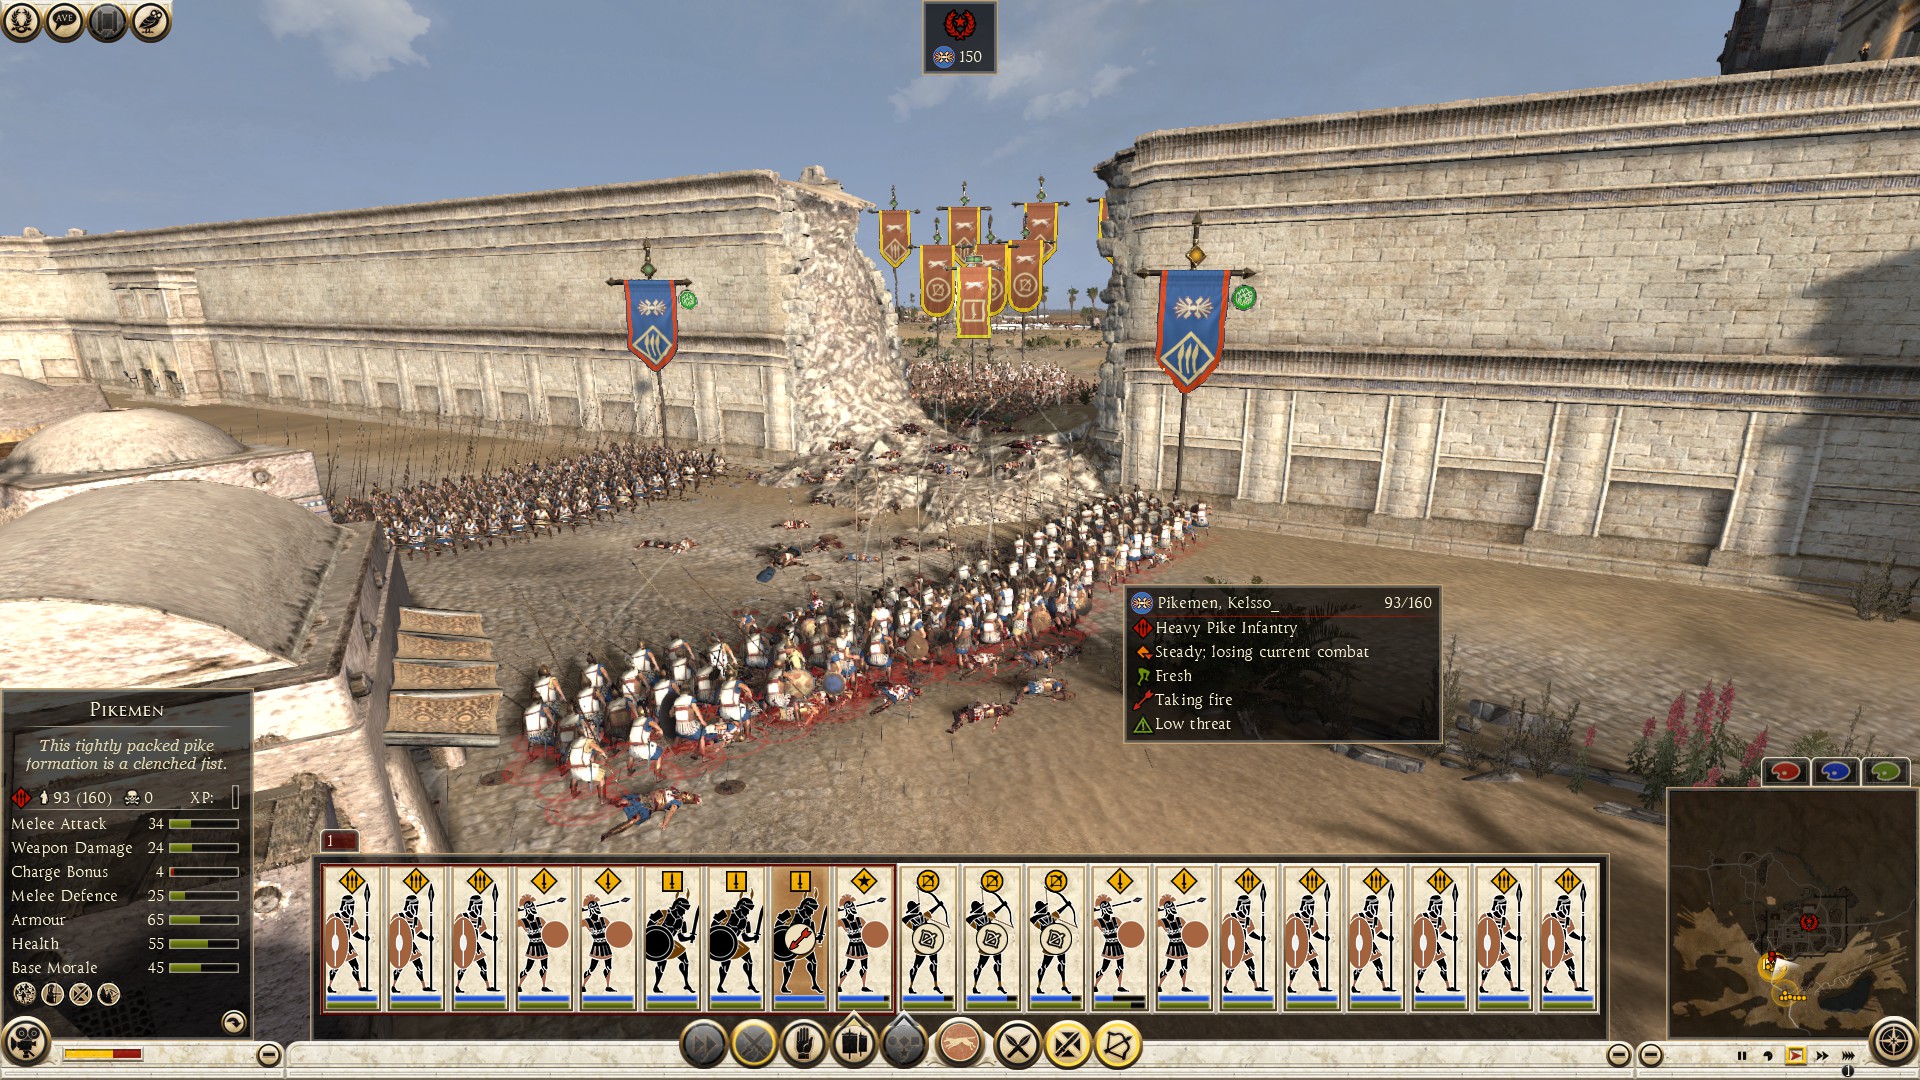
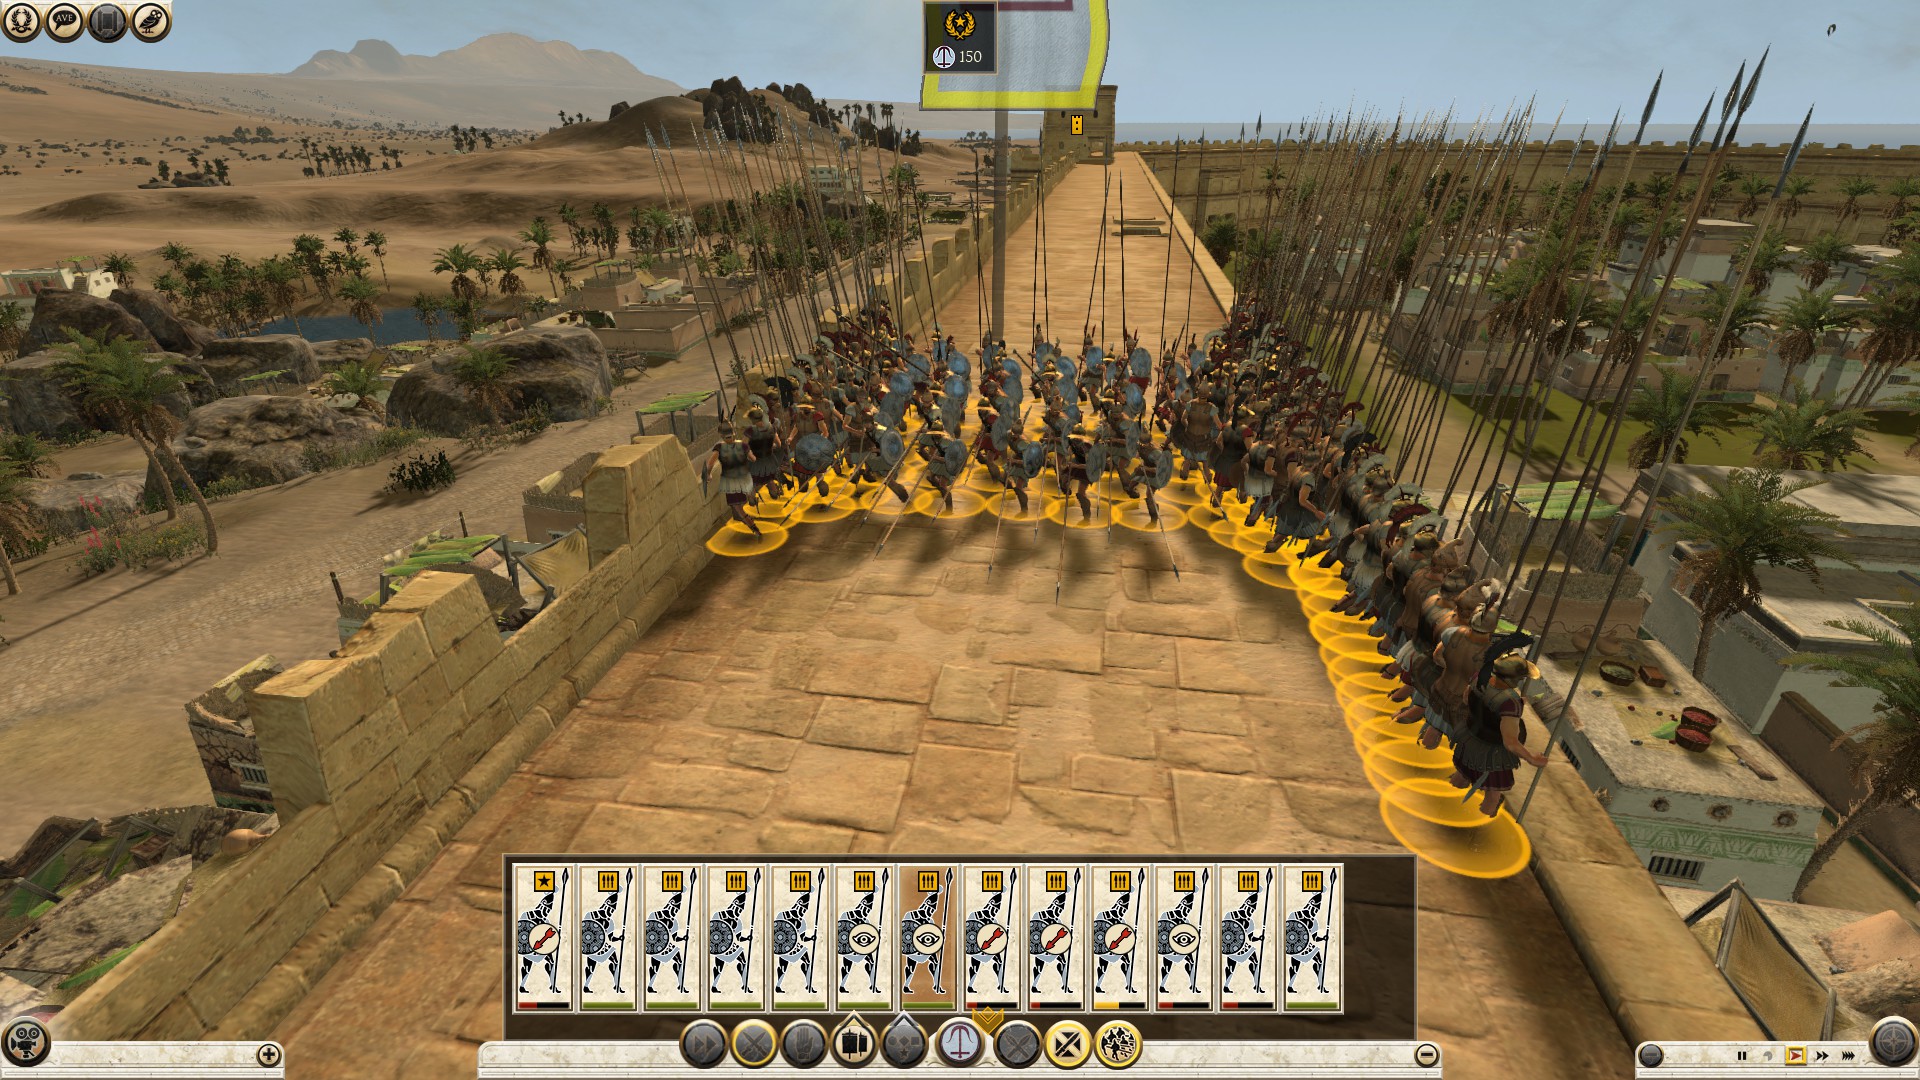
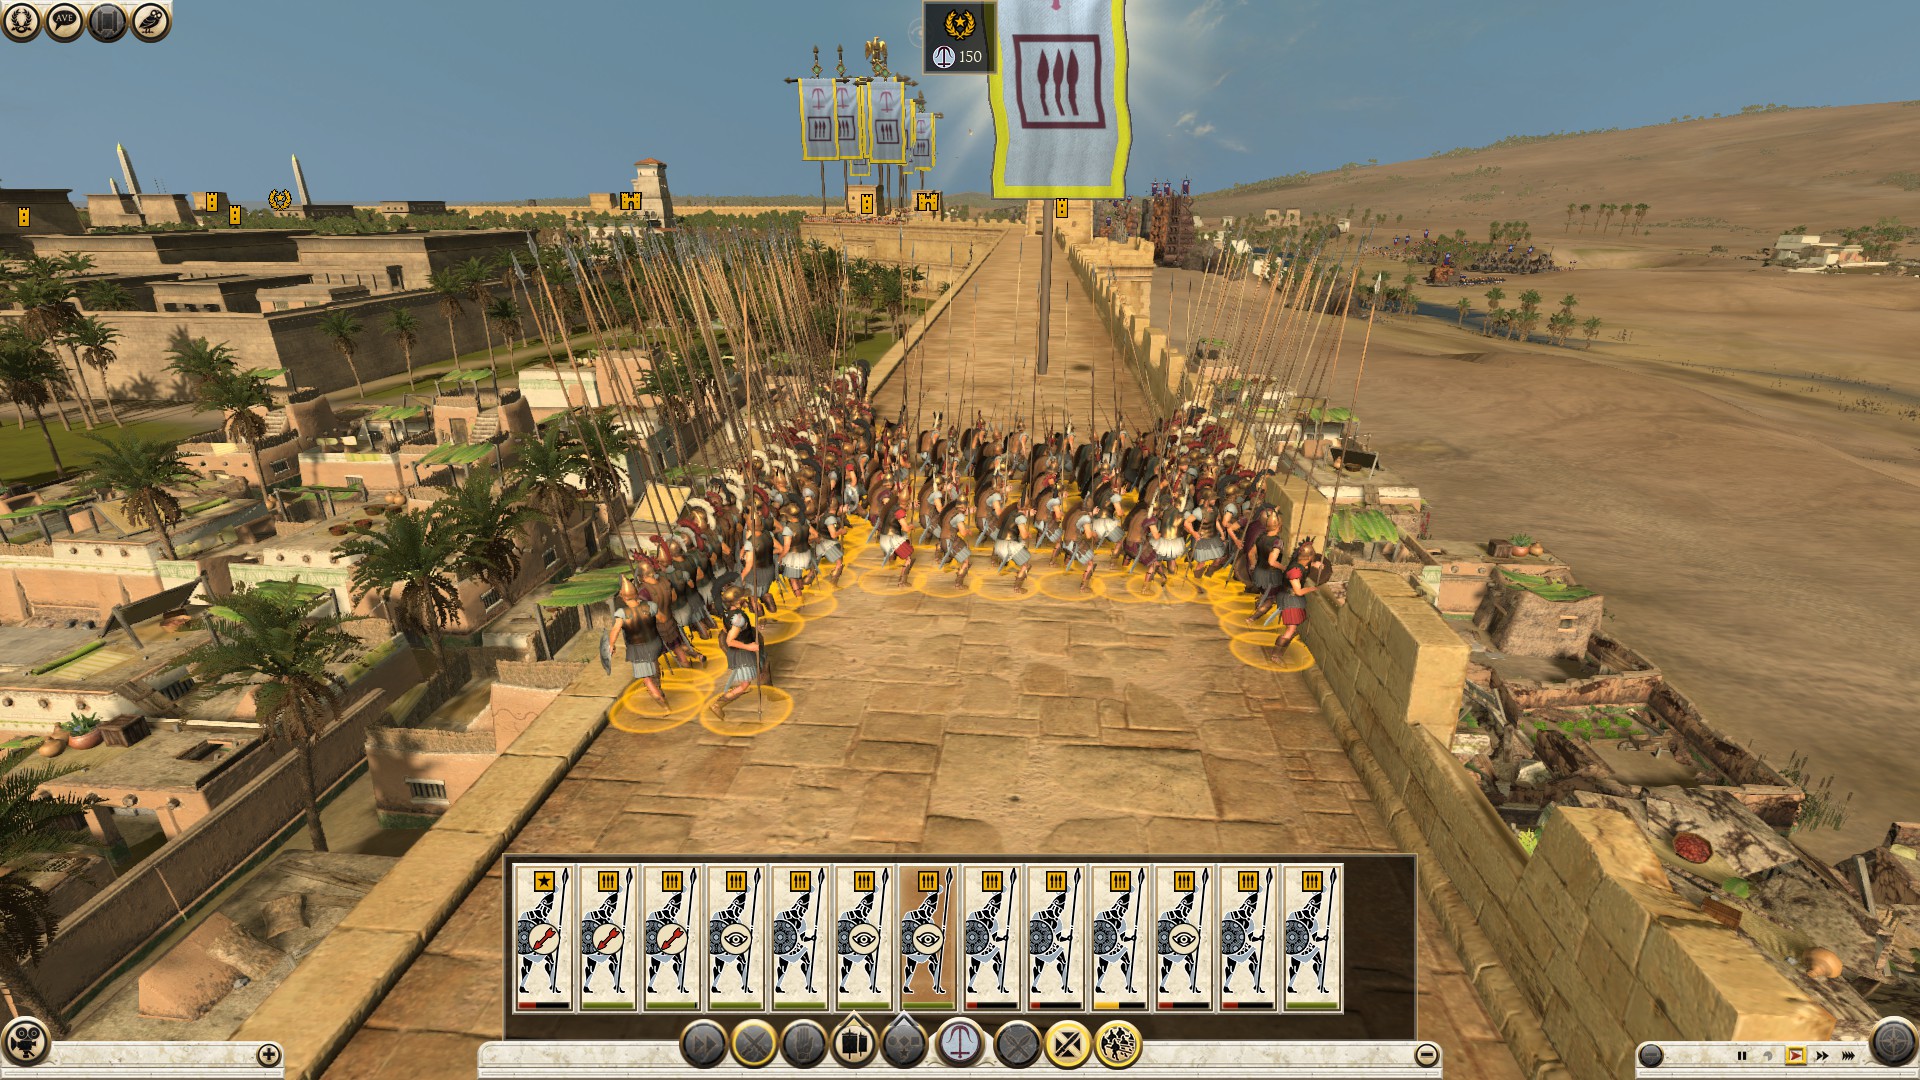
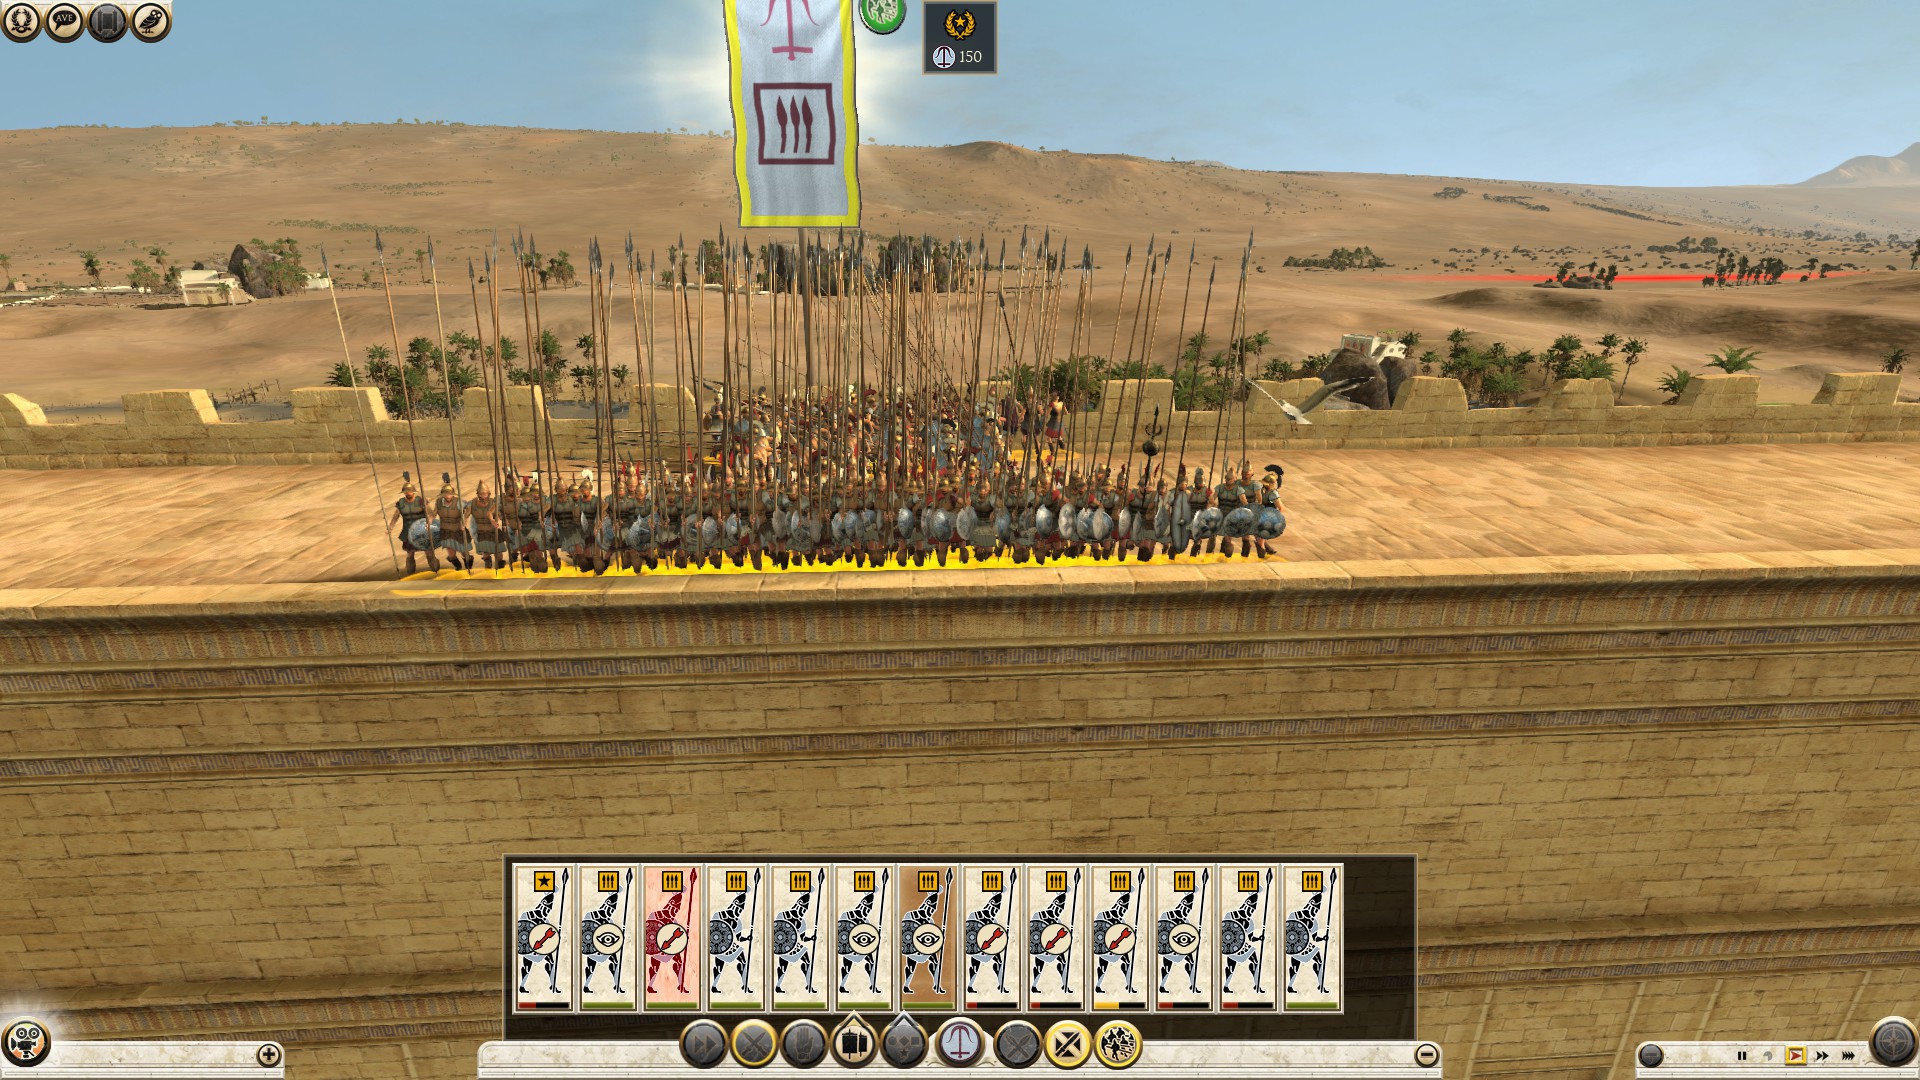
If the defenders decided to send their pike men up on the walls to stop you, have no fear, for they will be ripped by your melee units. Pikes cannot form the phalanx formation correctly on wall as shown in the following image, when out of formation, they will be destroyed by the lowest tier melee units. Except for plebs. Phalanx men are meant to make a wall of pikes that can hold hordes, not melee engagement.
Attacking: City and Port Assault Third Stage
If the opponents move their whole army to the victory point (1), consider your chances of victory very high. It’s easier to fight on the streets inside the city, than fighting for the walls where you are limited in your combat and formation space, in addition to being constantly shot by wall towers and range units. The opponent can do that right at the start of battle, leaving you the walls for free. Players using this tactic believe that their best chance of survival, lies upon building a very dense defense, supplemented with defensive traps at the center of the city. They block the entrances to the victory point using pikes, with melee units either among behind or nearby, and range units in the middle.
The first step in solving this issue, is taking over the wall towers closest to the center. Secondly, skirmish the amassed defending range units, according to their variety. If the opponent fielded archers only and or with velites, you can skirmish them in two ways. One way by traditionally standing in front of them and firing as soon as you are in range, preferably out of the range of velites (if the enemy brought some). The second and most effective way, is by spreading your archers around and outside the victory point, that way you can rain arrows on the enemy from more than one side. Target their archers first then velites, because velites have a very short range and low ammunition in addition to the inability to shoot above and across buildings, making their threat level very low. If the enemy only has slingers or a mixture of slingers and archers, shoot the archers first because their slingers are disabled, they can only target units that are clearly in front of their sight and not behind buildings, giving your archers the edge.
If you decide to surround the enemy’s victory point with your archers, make sure you escort them with melee in case the defender(s) attempt to interrupt or worse, kill your archers. The defender might shoot your melee with their rangers during the process, which is okay, because your rangers will route them by inflicting devastating losses. You can also charge their first defensive melee line only if they do not have pikes or you forced them back with your archers, blocking the defending rangers from shooting your units, because their melee front line is between your units and their archers (if they shoot, most of their projectiles will land on the backs of their front line). Do the same thing,
If the enemy has any other type of range unit left. Save some ammo for the pikes if you can. After putting the enemy(s) range department out of business, stand your archers and melee in front of the enemy pikes and fire ‘heavy shot’ arrows as well as pilas. The defender will test the damage inflicted on their pikes, then respond by keeping them still or pulling them back. Experienced defenders will hide their pikes as soon as they see your range department get an edge over theirs, they know once their range units are killed, their pikes are next. Do not engage in melee combat until all your archers and pila’s run out unless it’s necessary. If the opponent tries stopping your archers from firing by charging out, have one or two melee units in the front holding them back, as you keep firing. Focus your fire on the pikes. Therefore, you should never cheap out on the best archers your faction can offer as an attacker. After their pikes are eliminated, the rest should be easy, route their melee units and call it a victory.
One last thing, what if the defender(s) spam pikes and try blocking the wall hole(s) and stairs? This is why you need towers, deploy your units on the walls and run around taking over the towers for reasons I explained earlier, and to come down from them. The defenders will either race you to the next stairs and block it off making sure you don't come down, or pike box at victory point. If the defenders try to prevent you from coming down the stairs, their units will be separated and have less support, keep running a unit to the next stairs and I guarantee at some point you will be able to get a unit down, and from there, help your other units on the walls by attacking the pike unit from the ground and through the stairs. If the defender(s) pike box the victory point, take over the towers closest to the victory point to tear them up slowly, and surround them with all your melee so if they try to push out after getting sick of being shot by the towers, you can put them to the sword. Aka eliminate them.
==========================================================================
Attacking: Unfortified Town and Port Assault
(SHIPS)
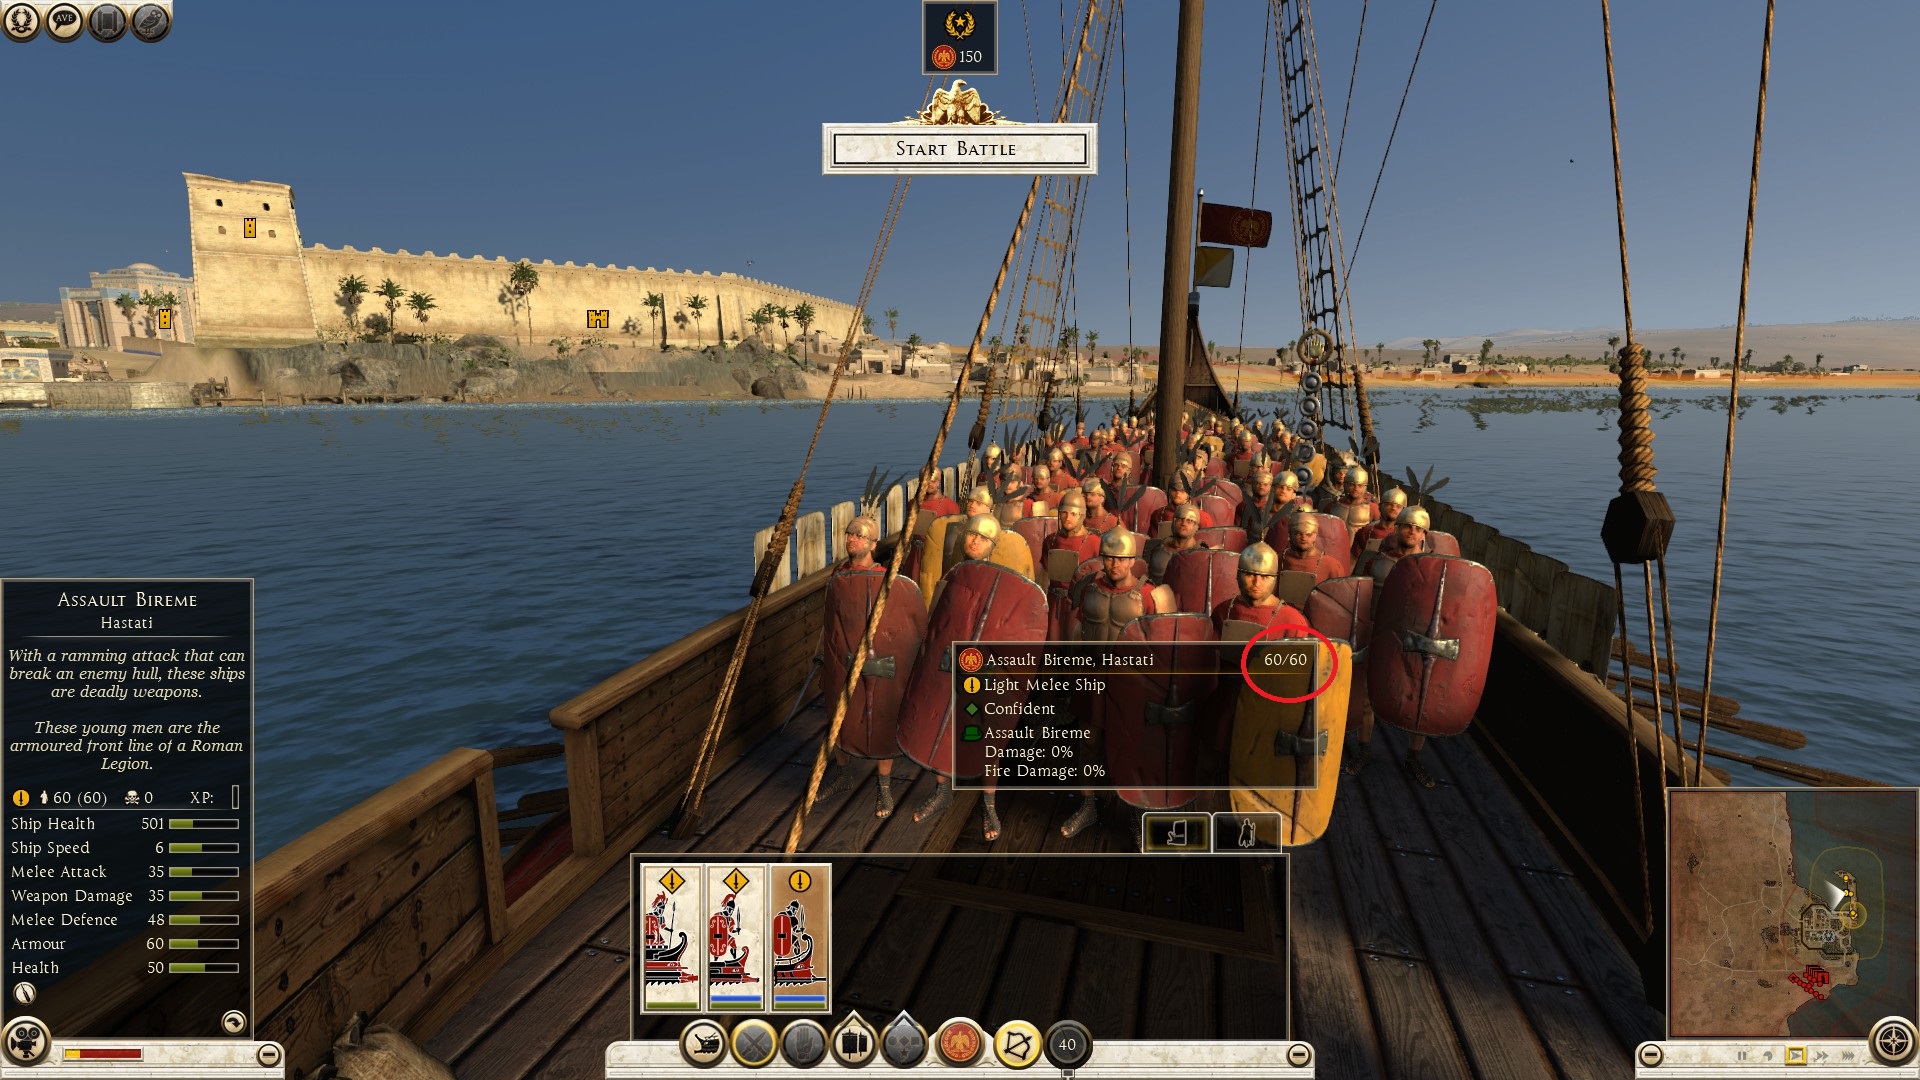
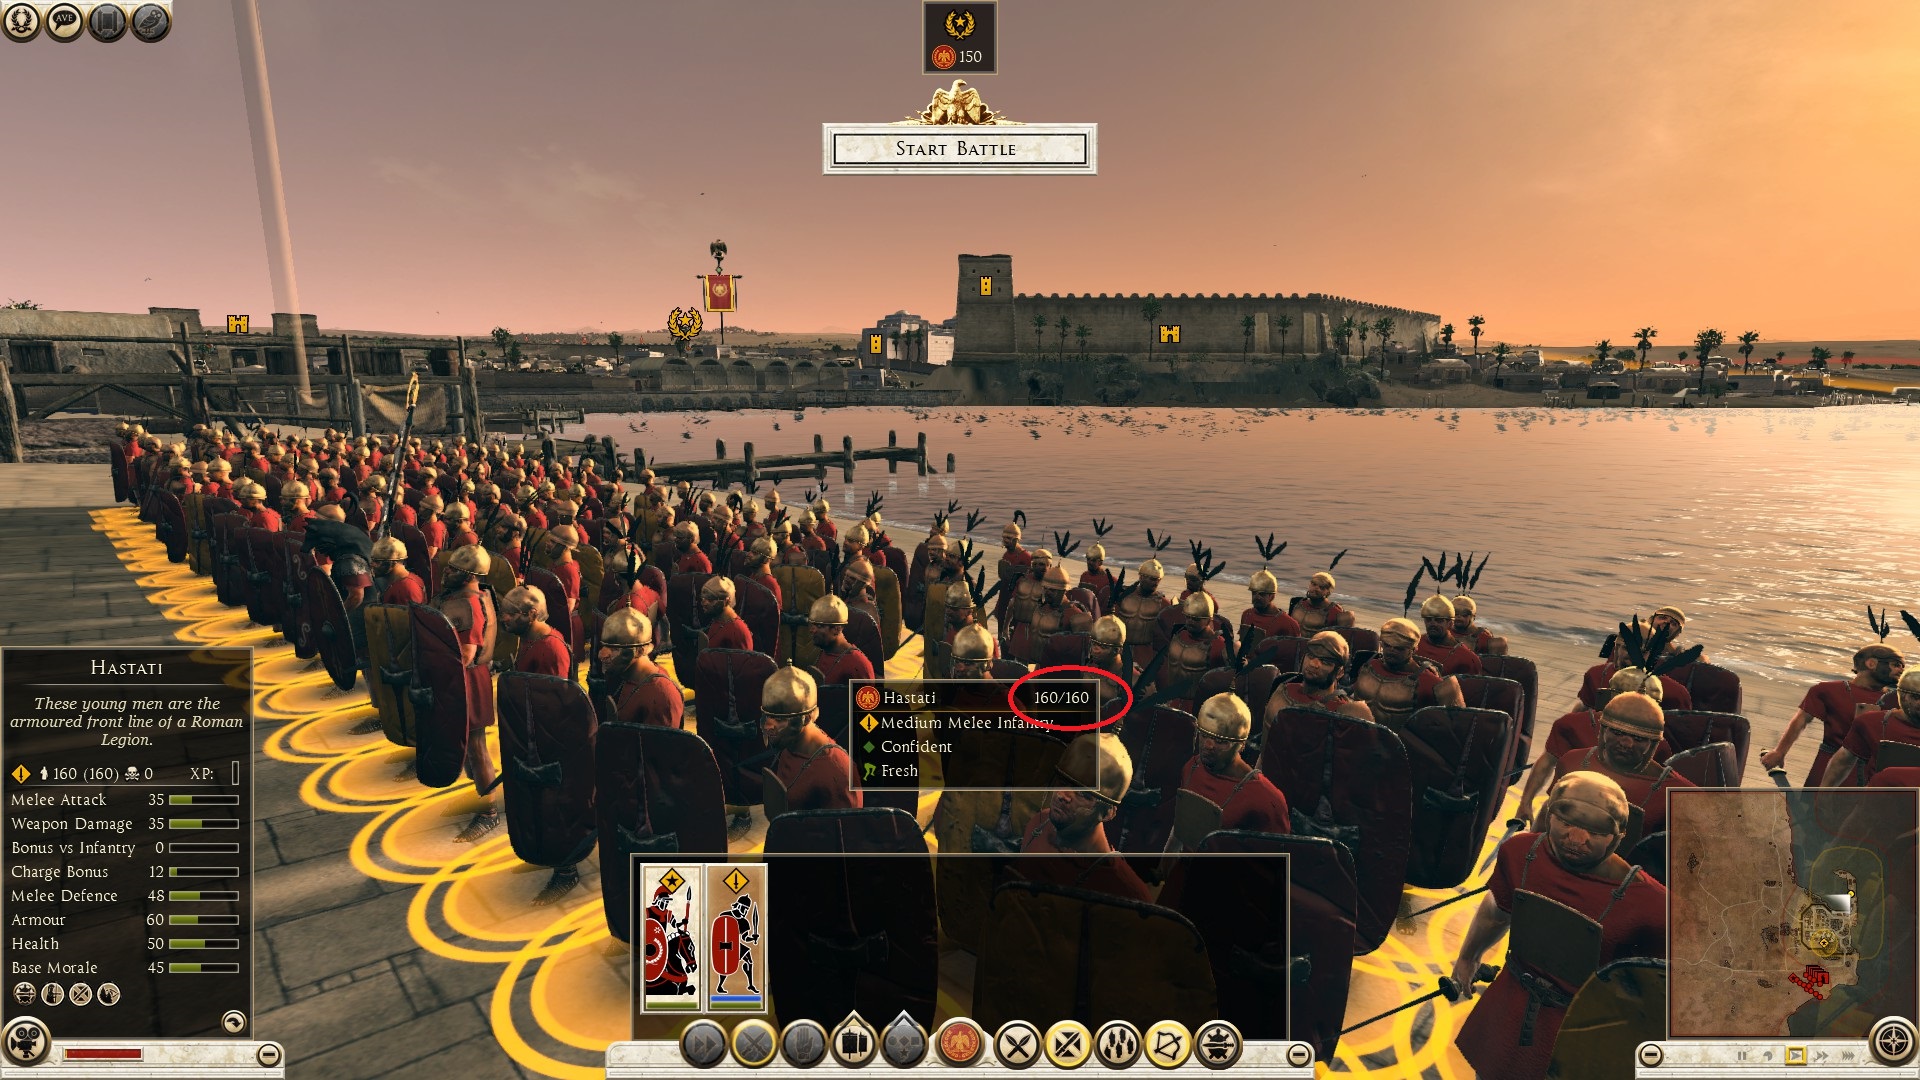
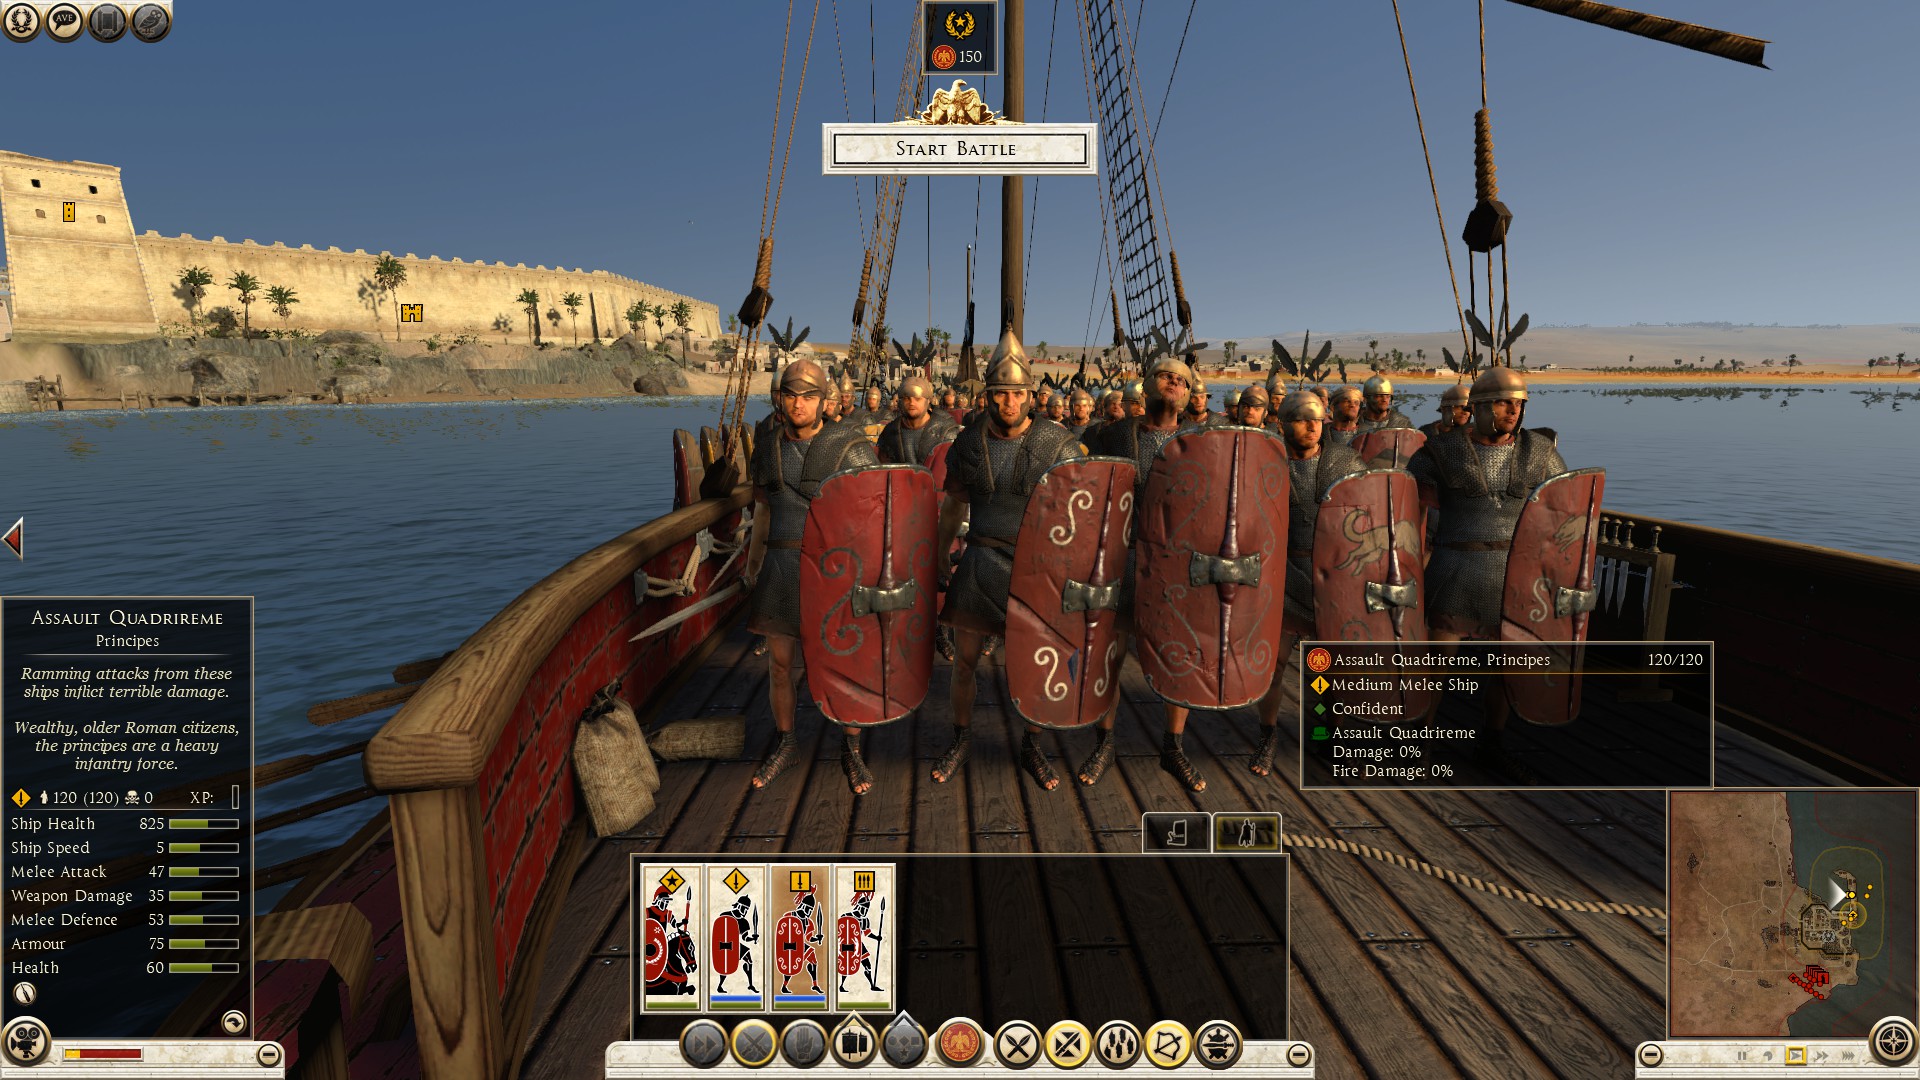
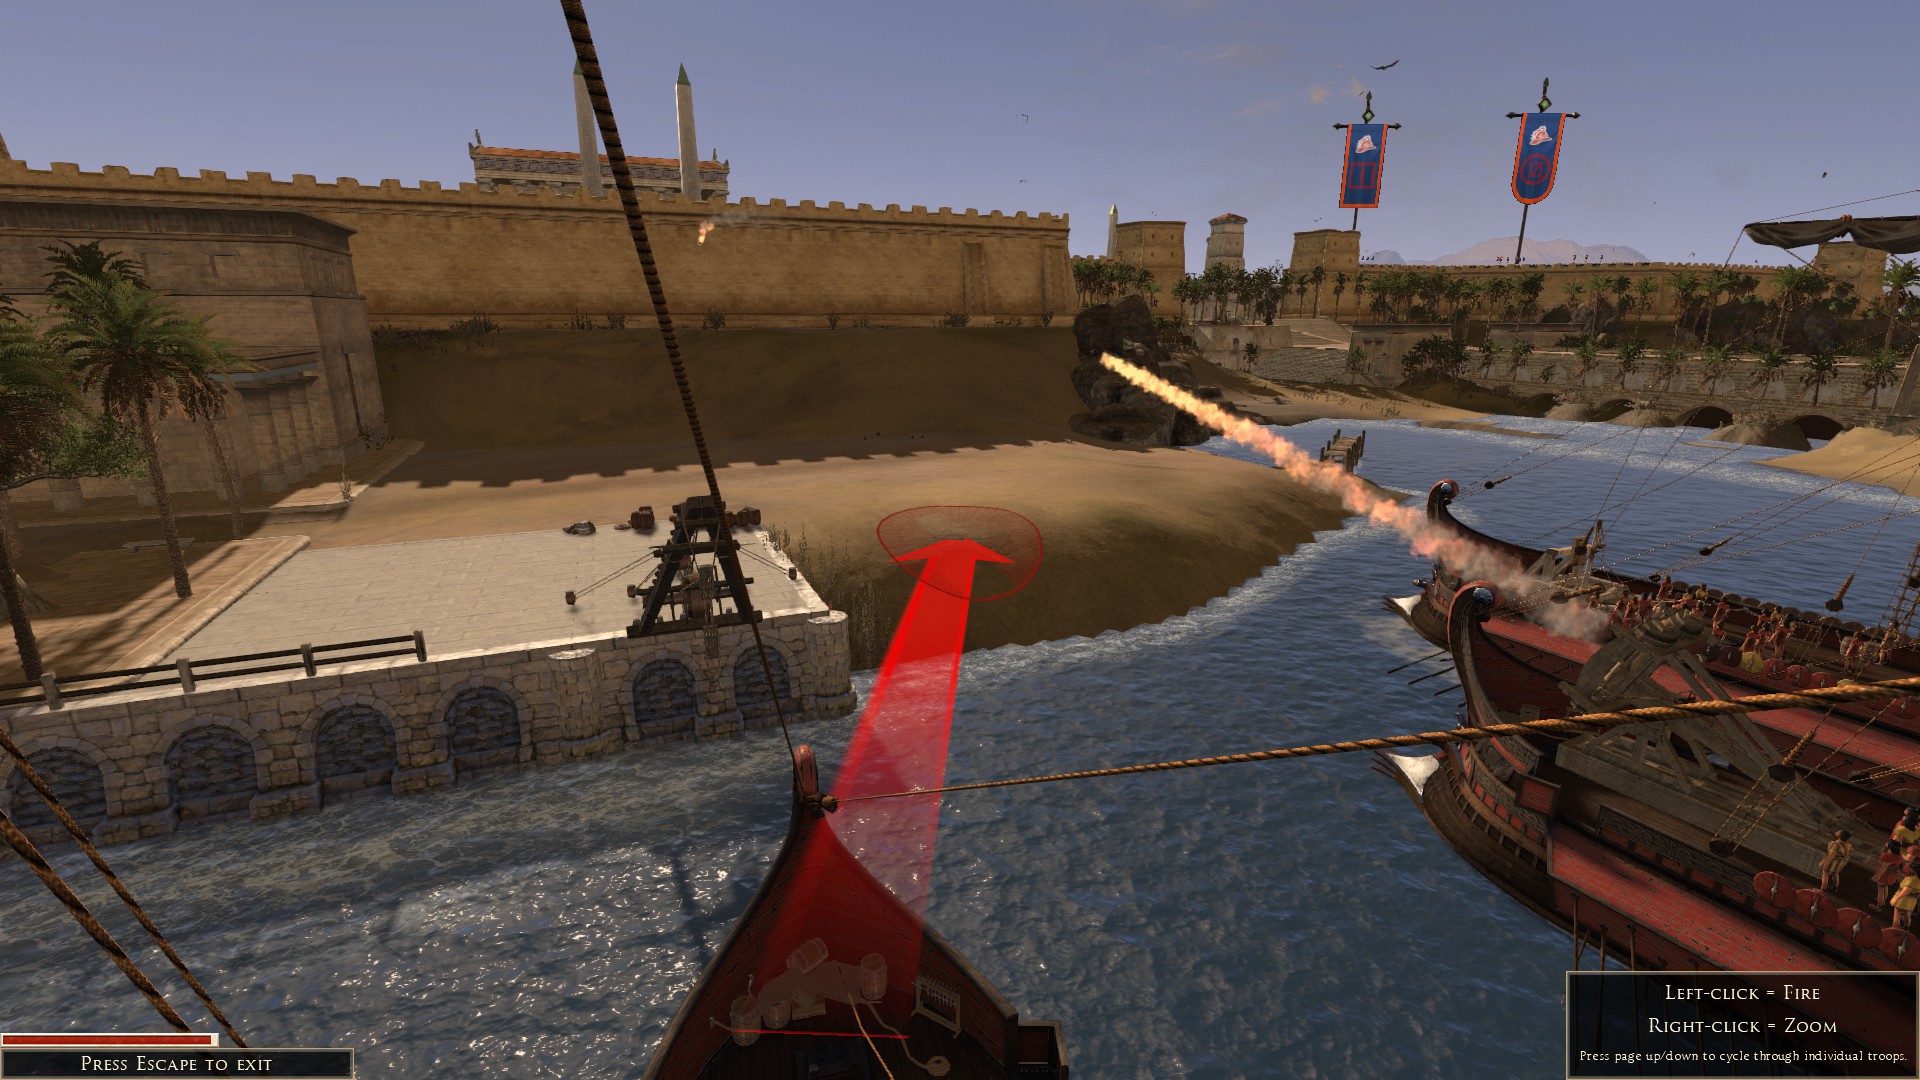
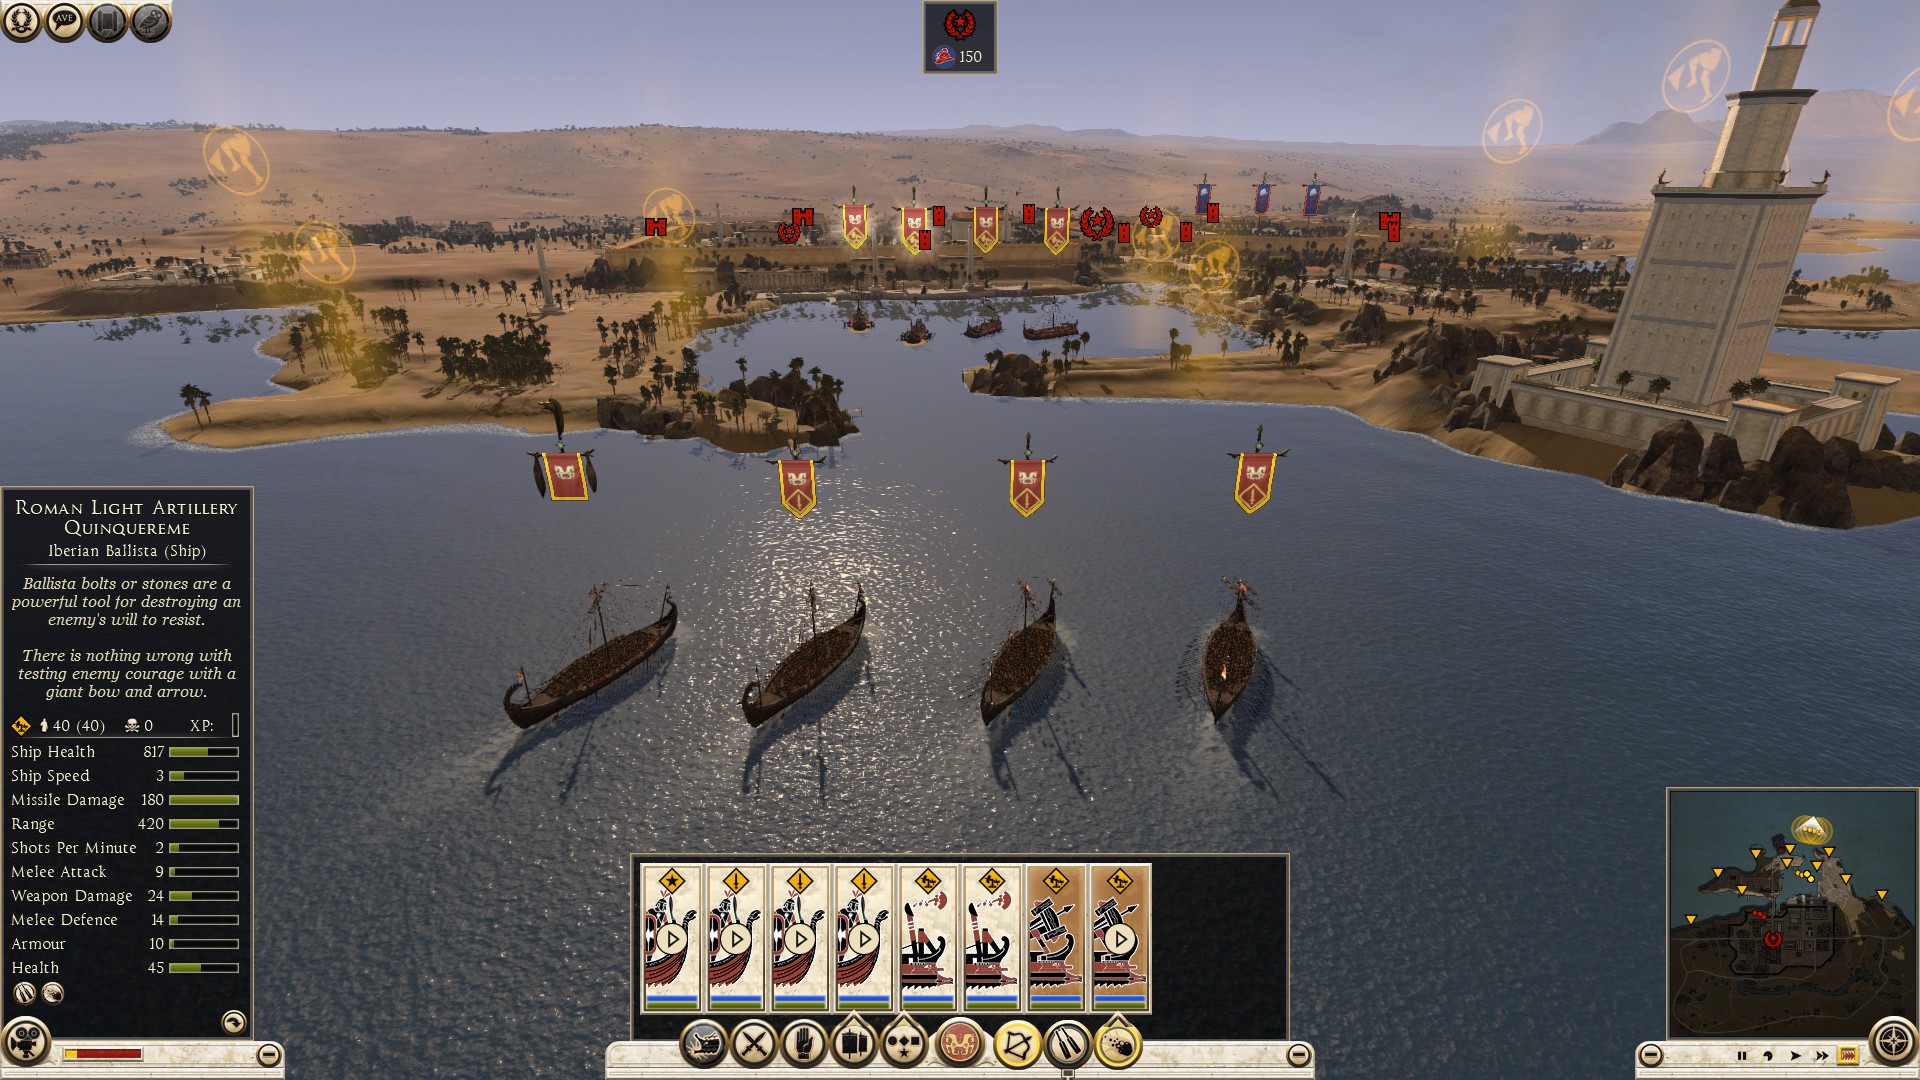
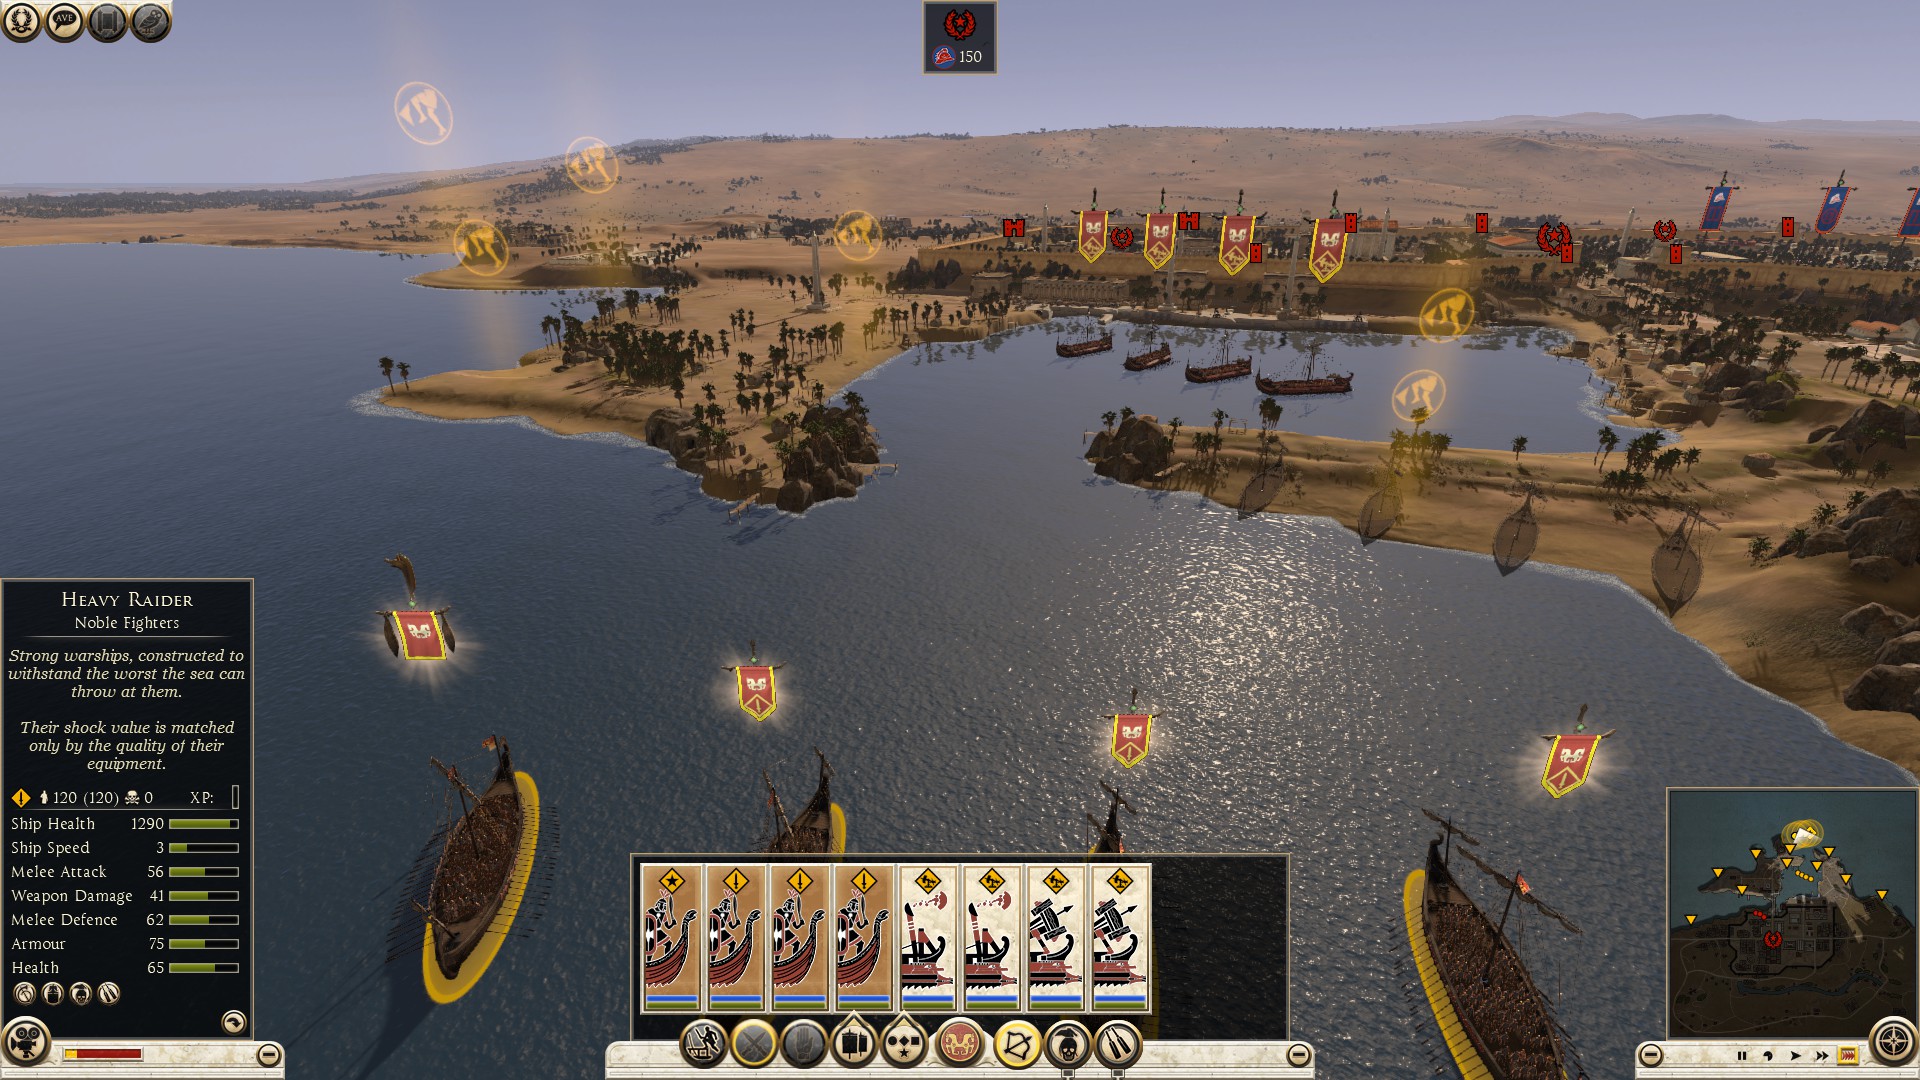
I have left this topic for last because I have used ships in an assault to invad a city a very few times, and I do not recommend using them for a few reasons.First reason is dependant on the ship size, instead of a full unit, sometimes you get half a unit. Sometimes you get a ship unit with 40 men less than the same unit on land. Rarely, you get a full unit on a ship like you do on land. the same unit is more expensive on a ship compared to without.
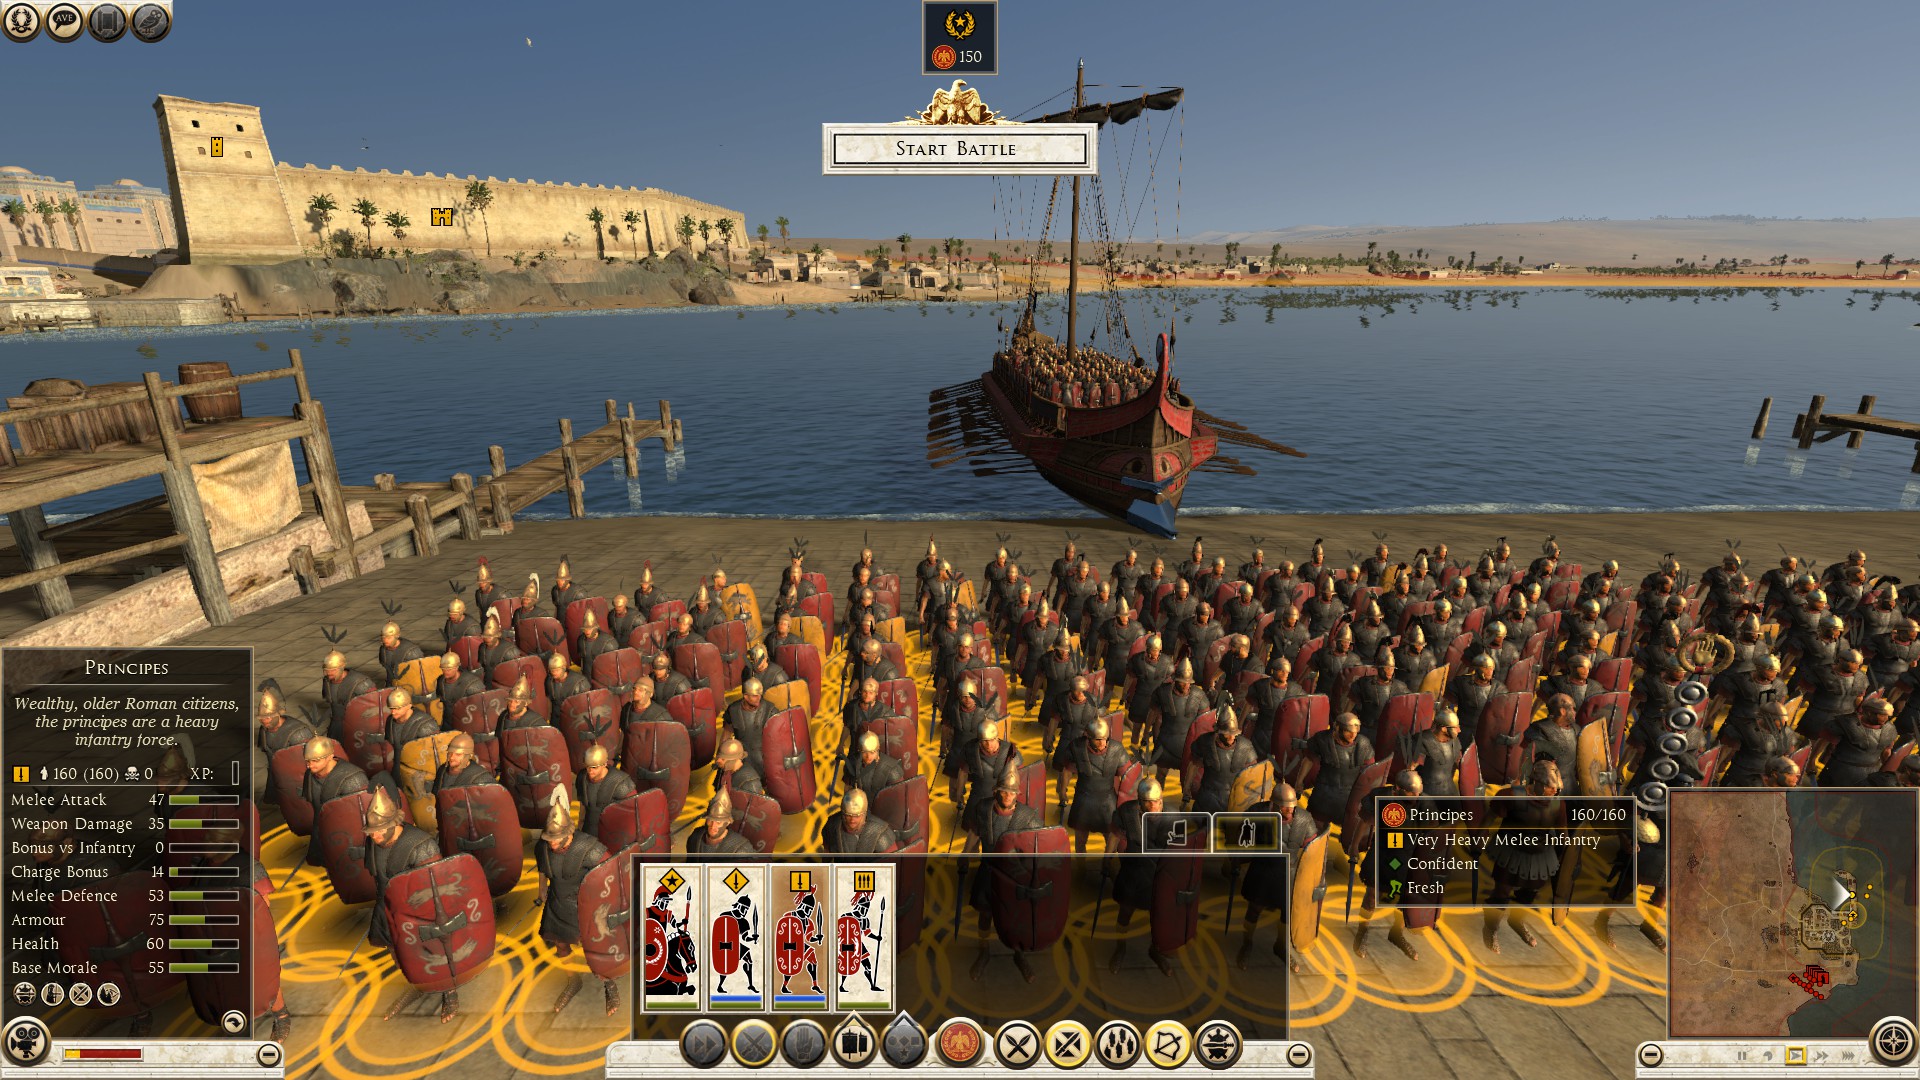
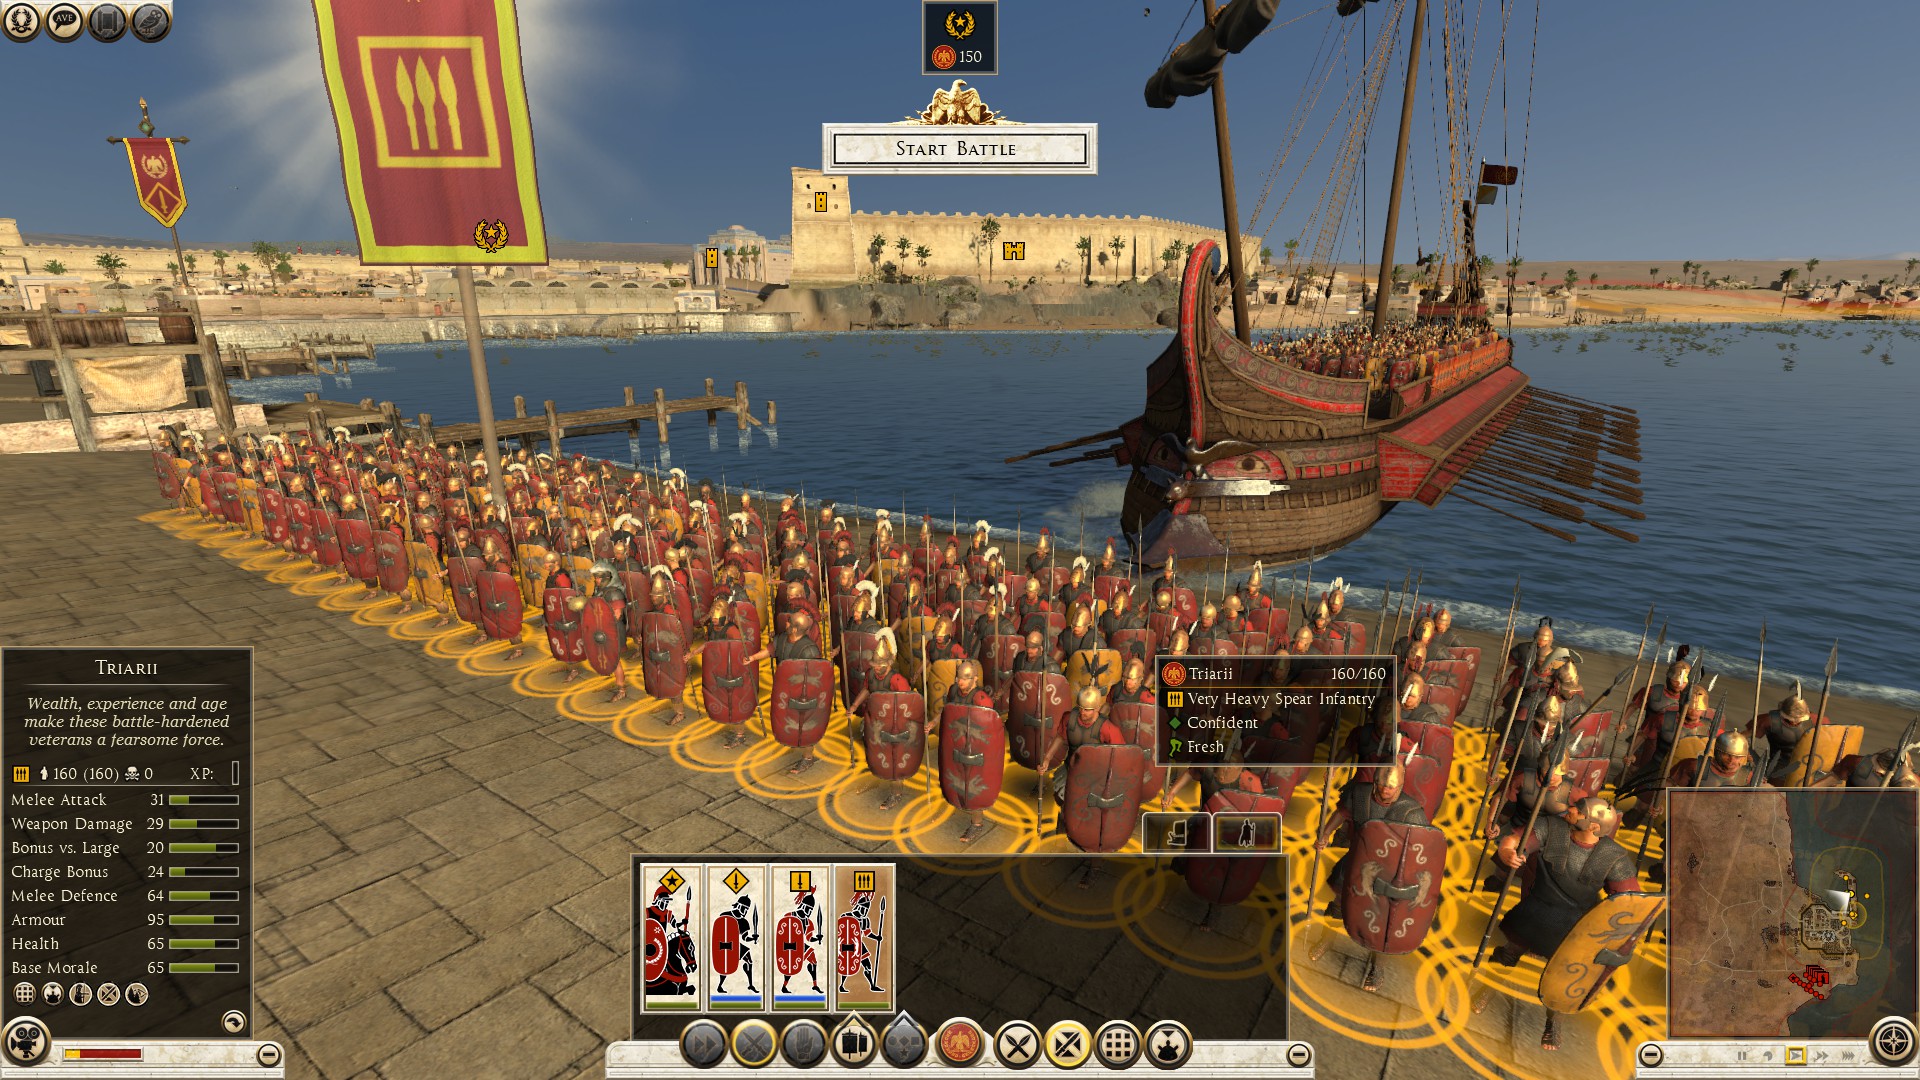
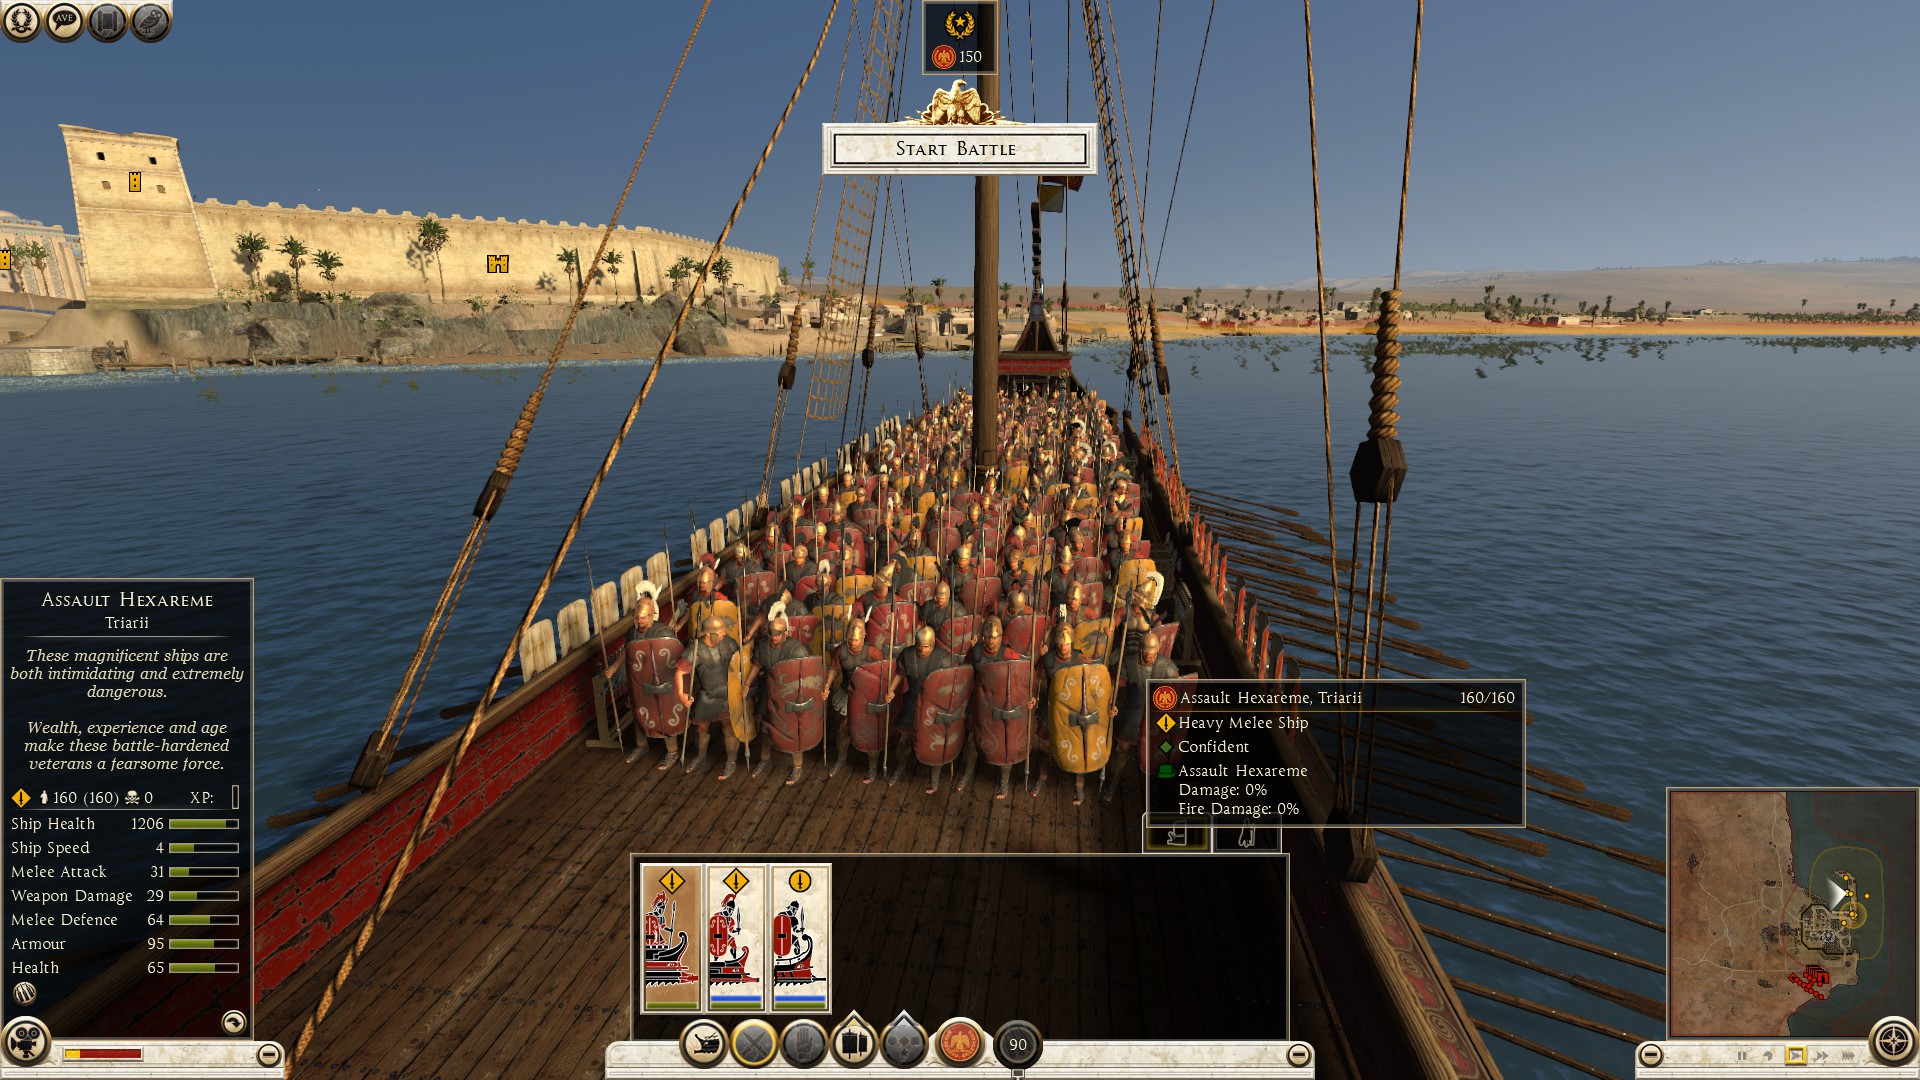
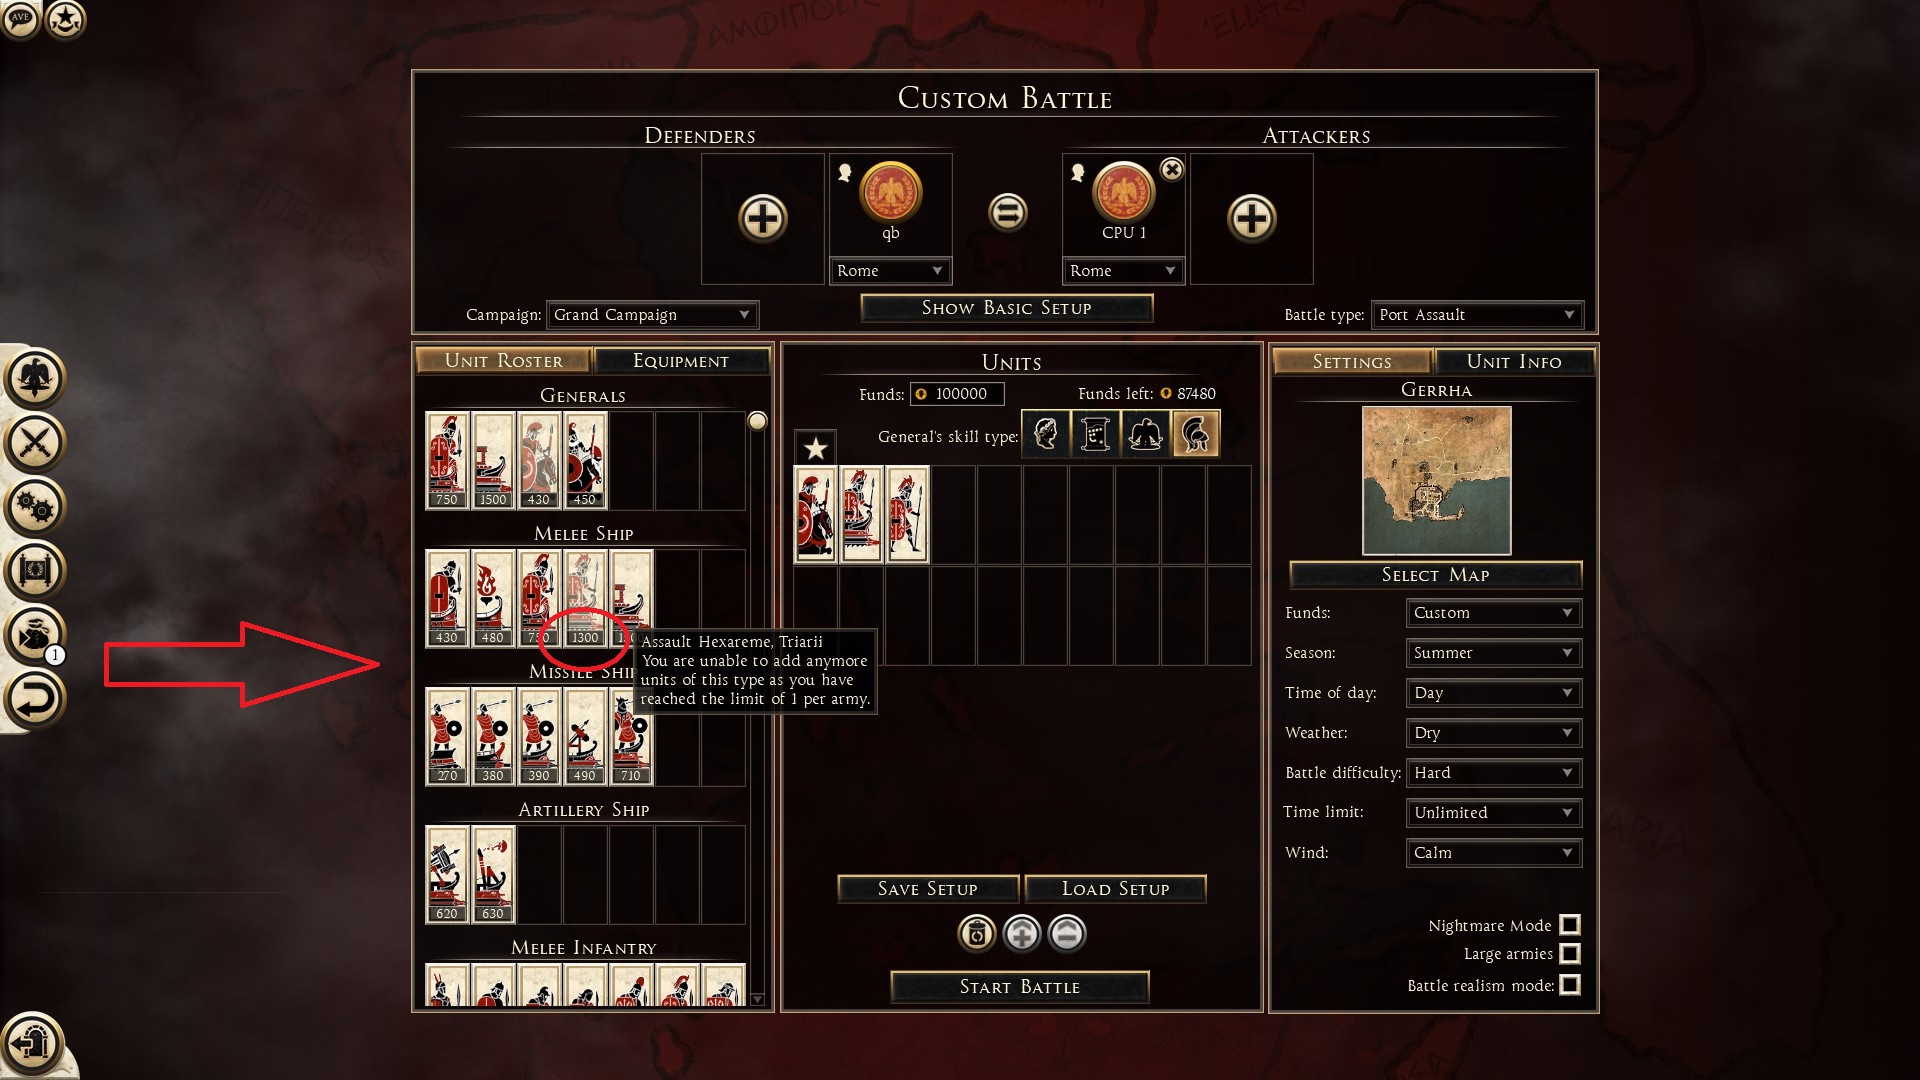
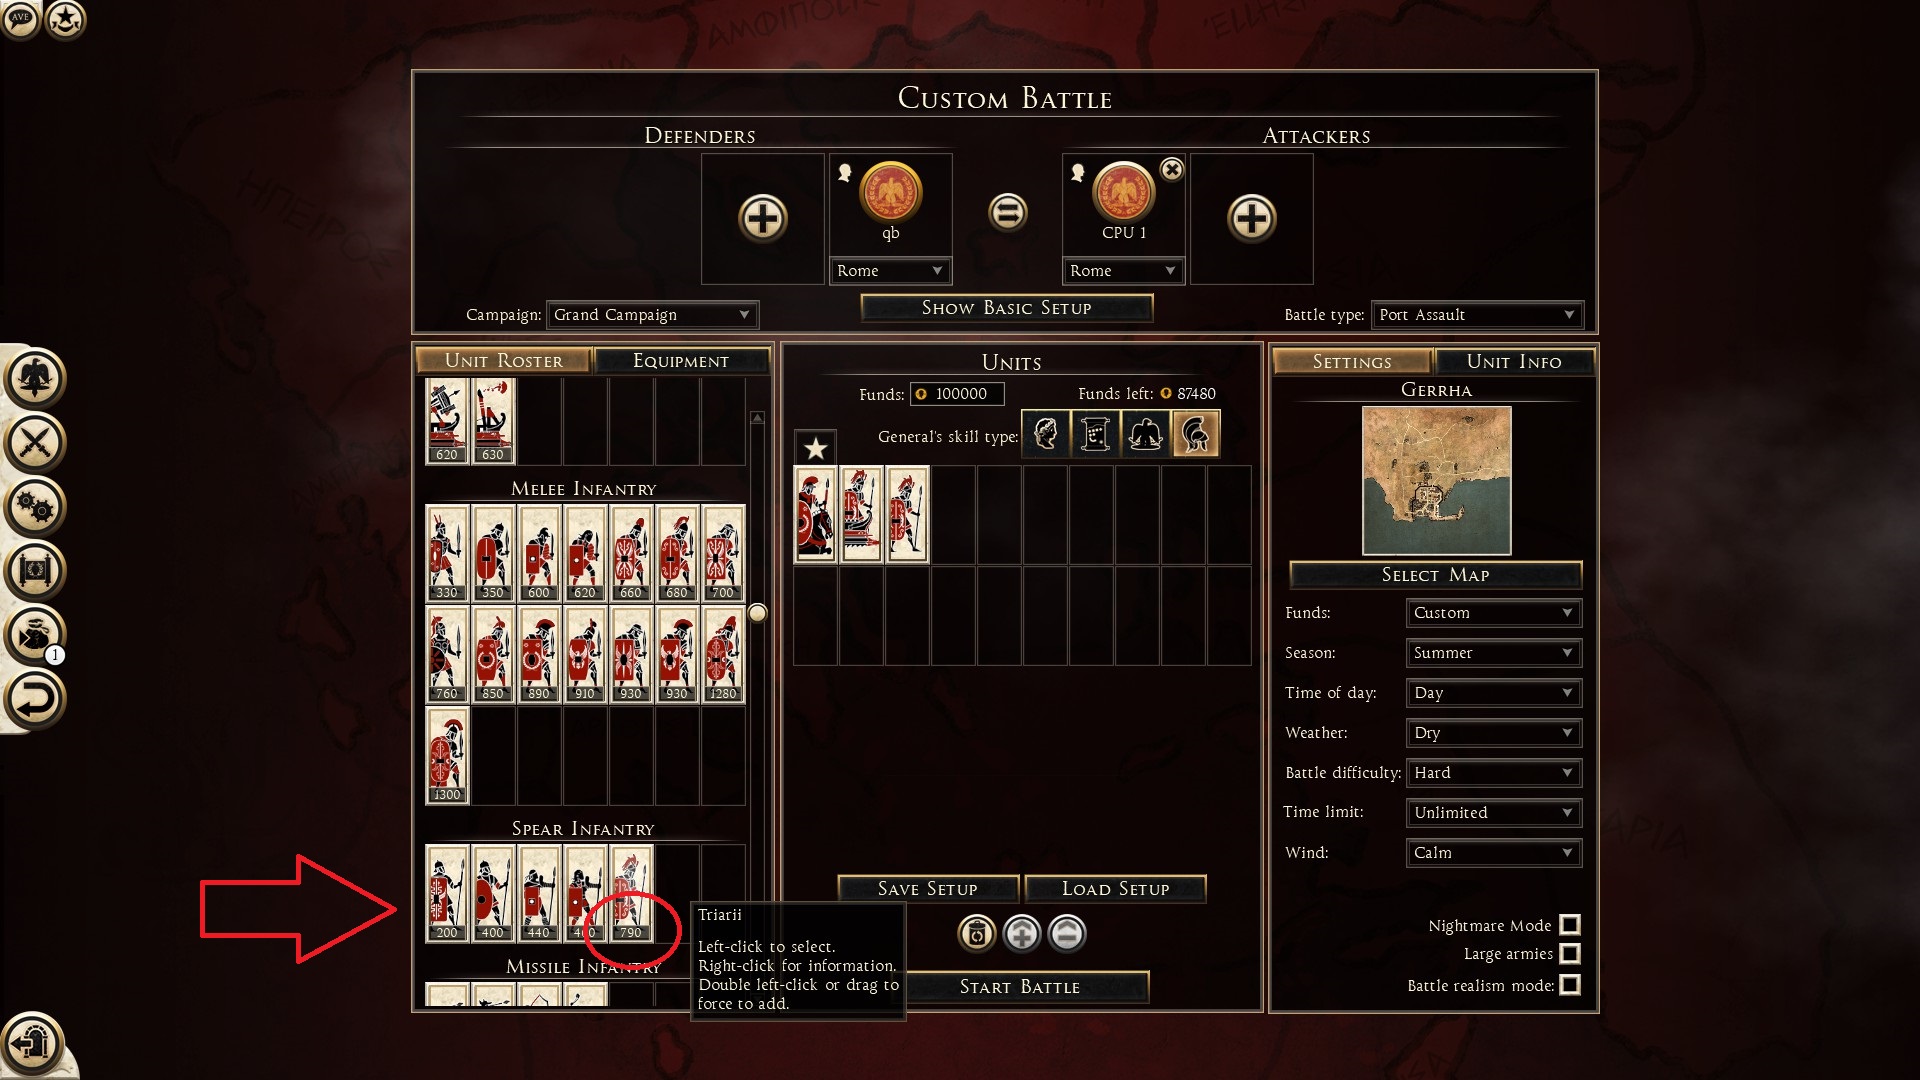
Also if the defenders defend the beach with archers, you will be barraged until your
ship docks, your units come off, and charge their mele. But by then, your untis are either routed or dead. Though I have seen some players use artillary ships which can destroy walls and or barrage defending units. Artillary ships can be super effective when brought to unfortified port assault.
 ==========================================================================
Attacking: Surrounding The Enemy
In open field battles, melee units have the support of cavalry, archers, reserve units, including enough space to maneuver in all directions. In sieges however, melee units are alone, and limited to only two directions in urban fighting most of the time, forwards and backwards. As an attacker, you can surround defending units at two places only: The walls, and streets. It can be very devastating if done correctly at the right place and time, yet risky, because the defender can counter surround.
Walls have stairs that lead up to them, you want the enemy to be between the wall stairs, with your units on either end blocking them from escaping and reinforcements. That way, only the ends of the defending wall units engaged in combat, making the units in the middle sitting ducks since they can’t fight or move. A defender can put more men on the wall to counter surround and to prevent that, break one part of the wall (preferably stairs) to disconnect the next farthest stairs from where your units are fighting, securing one side from being reinforced. Next, line up your archers outside the walls to counter the defending rangers, keeping them off your wall units and eliminating them early on if you can. This can be done on any wall, if you calculate the possibility of the outcome and execute the moves correctly.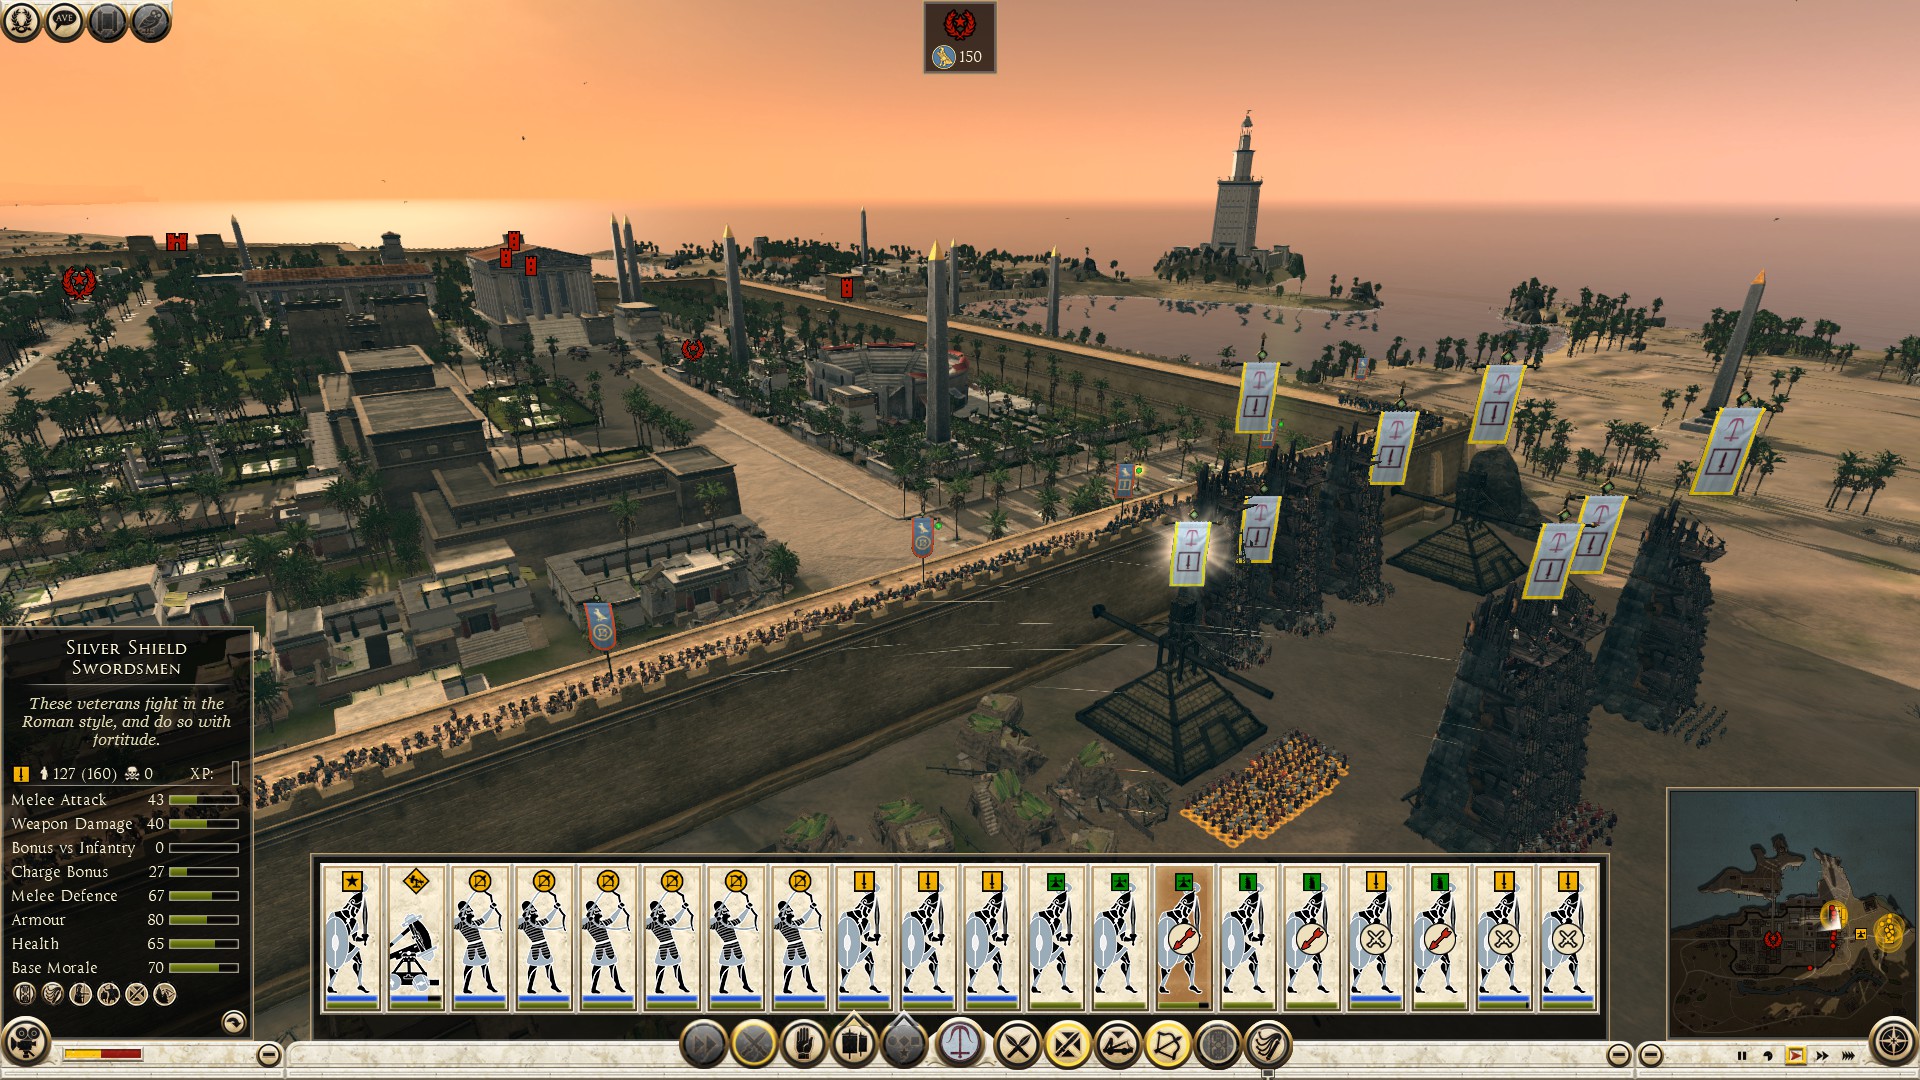
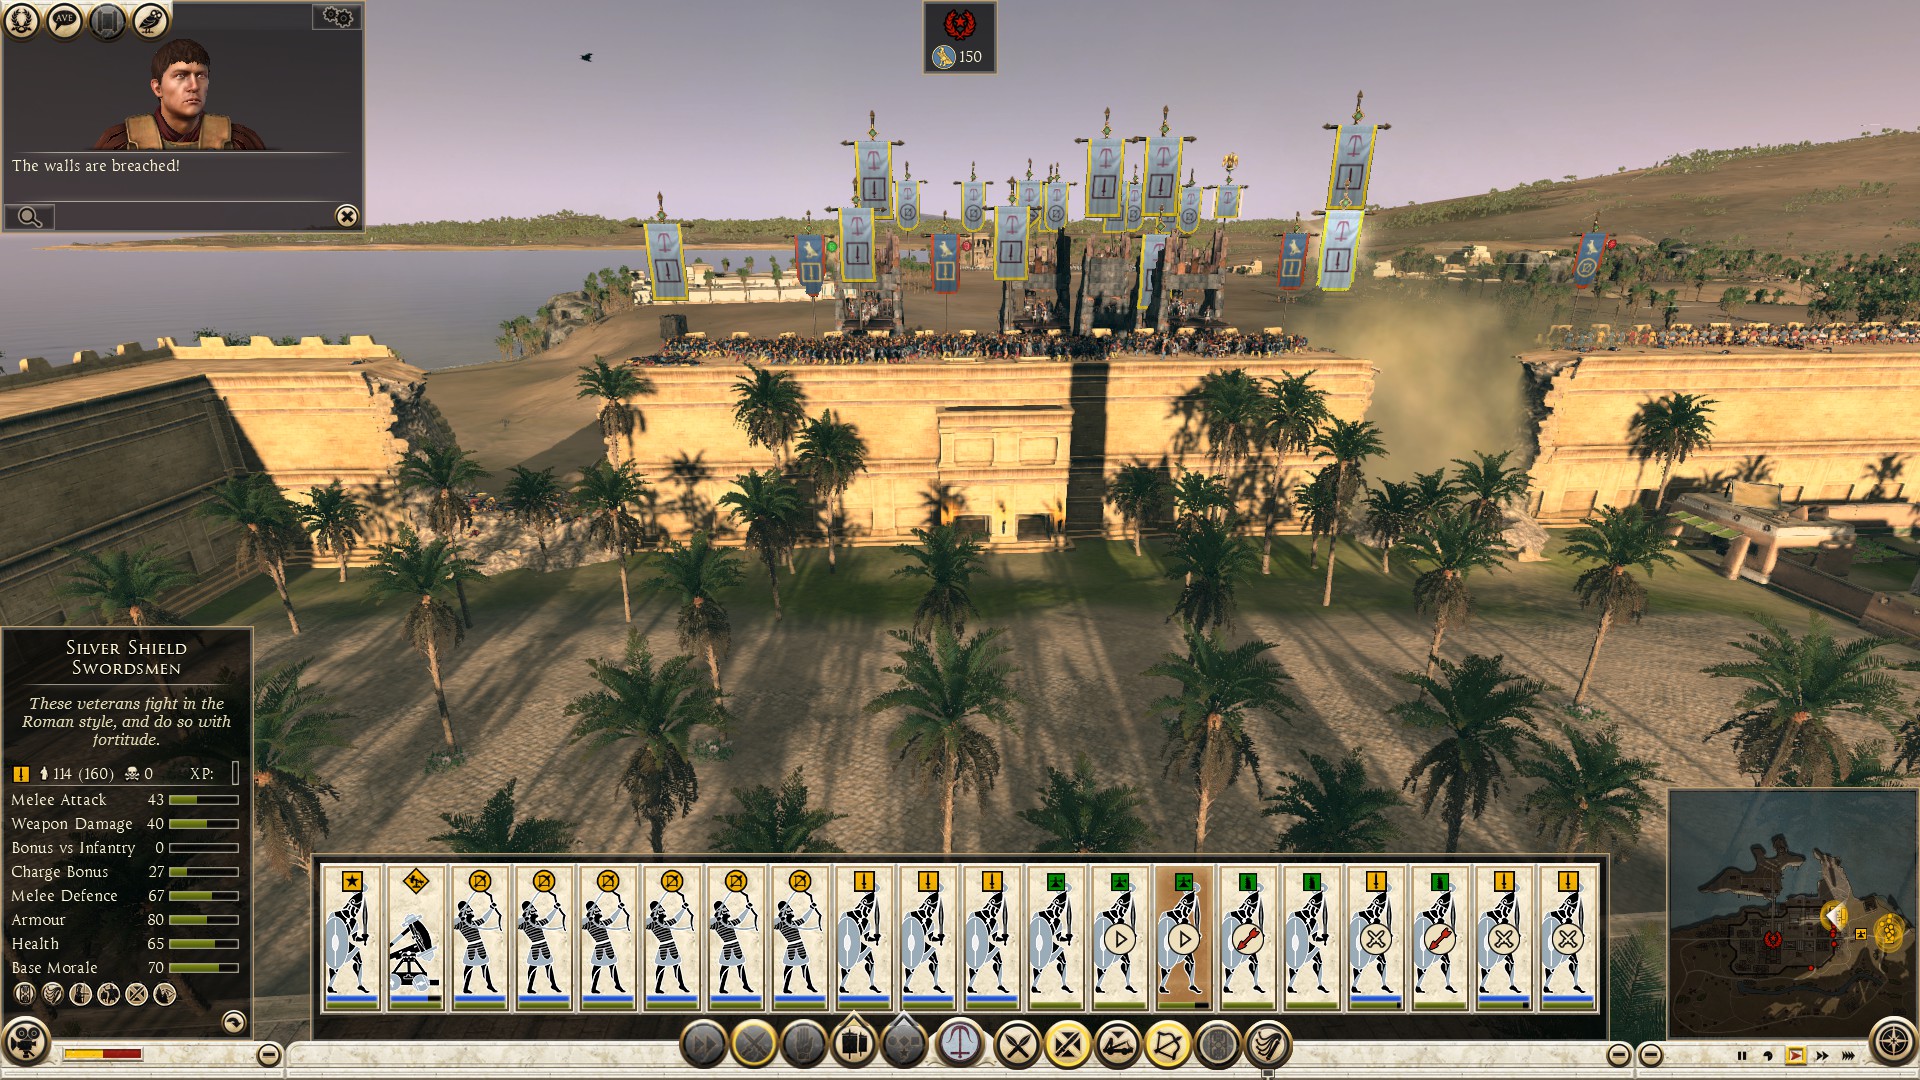
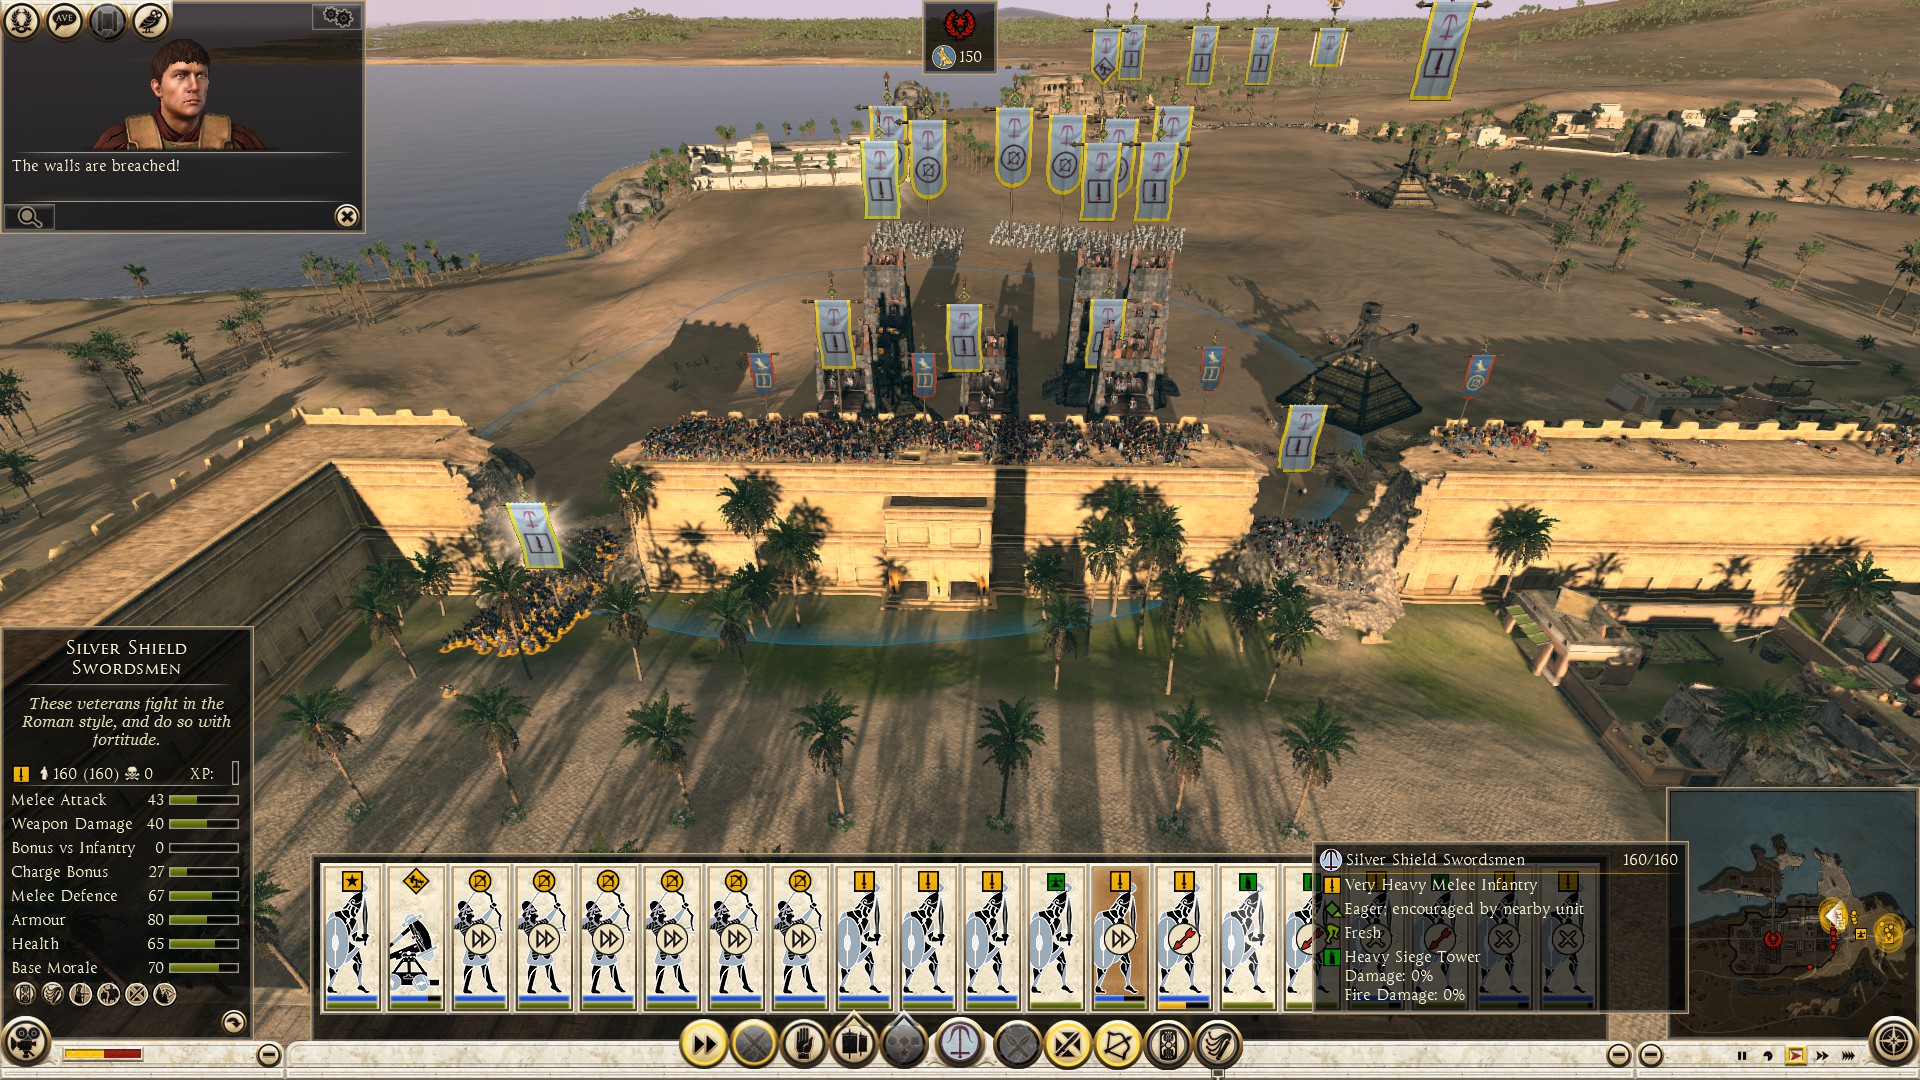
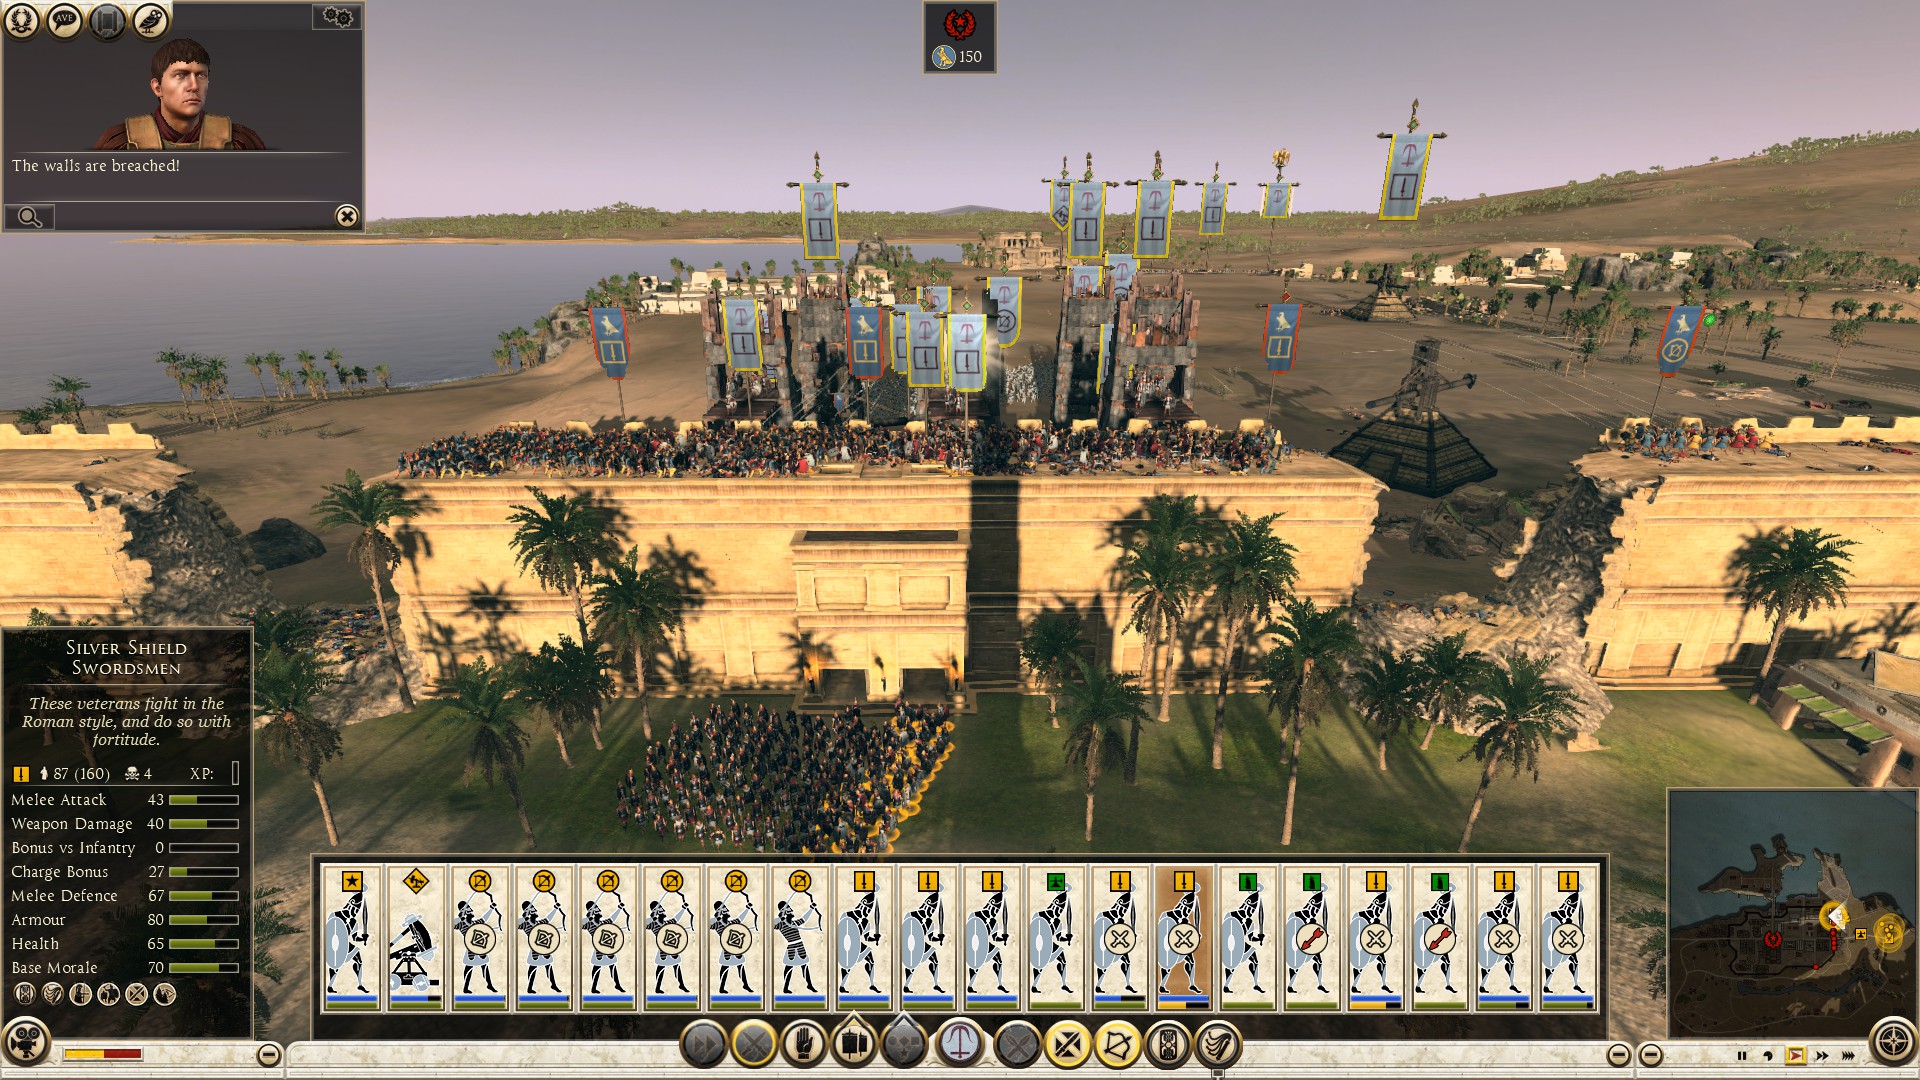
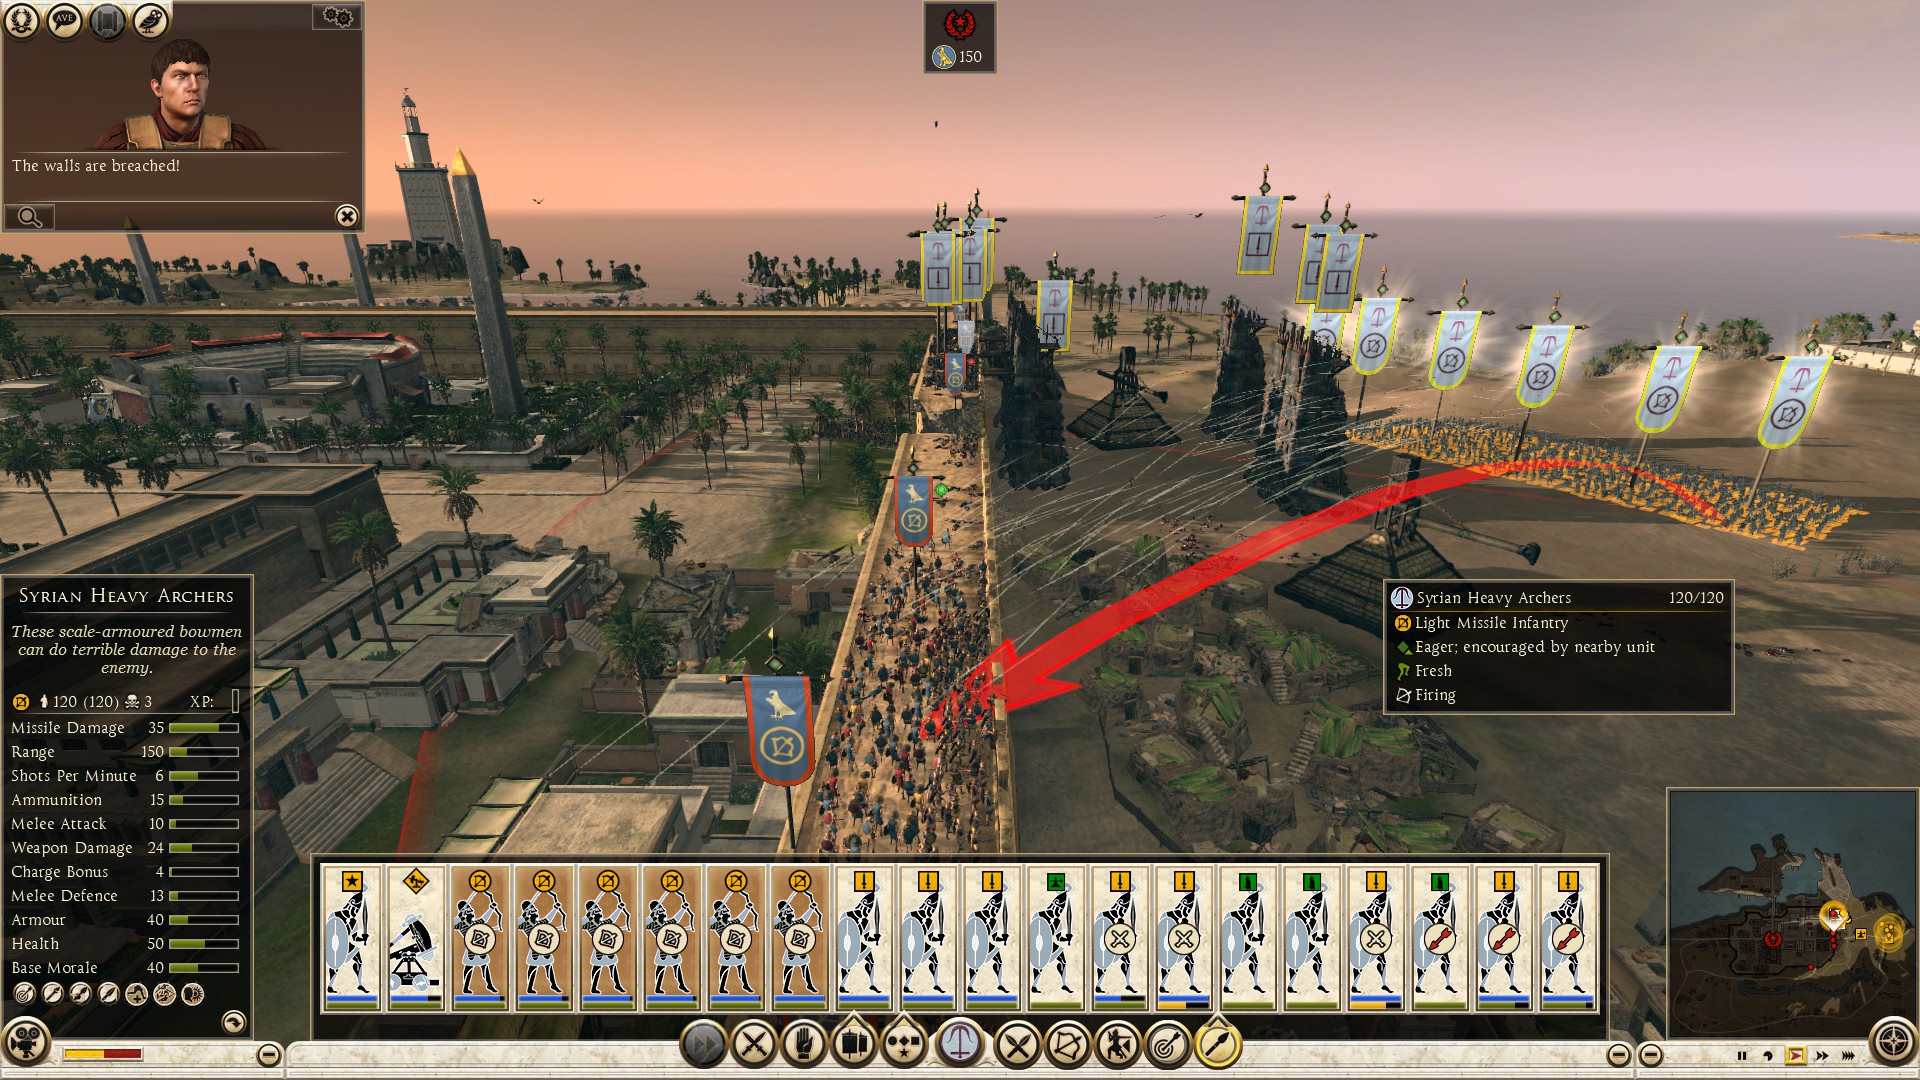
Now that you are inside the city, your units can successfully perform their formations without a disturbance. The second way you can surround troops, is on the streets, in urban combat. Some opponents who leave the walls go directly to the victory point and defend it, others, like to defend the streets leading to the victory point. On the streets, you can only move forwards or backwards. Urban fighting is the longest fighting in a siege, it is dead locked until one unit routes or fight to the death. Look around the area to see if you can run some units through another street and surround the opponent. Line up your archers preferably behind buildings and shoot the enemy rangers if the opponent has some left. If they decide to leave the streets and run to the victory point for a last stand, chase them and kill as many units as you can while they are running with their backs turned to you.
Seasoned defenders will leave a unit(s) behind to slow your advancement to get in formation, you need to surround the unit(s) left behind and route it before it inflicts a lot of casualties
If the opponent decided to fight to the death on the street, send a few units to capture the victory point either via the ground or along walls to pressure them off the defensive to reclaim their center. If the opponents have most units at the victory point but some on the streets, try to punch through preferably by surrounding if you can. While the fighting is happening on the streets, stay alert and look around the fighting for incoming hostile units that are trying to surround you or worse, units that sally (come out) from the other side of the city to flank you from the hole you made in the wall. So it is not a bad idea to leave a unit or two resting at the wall hole and around the streets to block the enemy from surrounding you and buying yourself time to react. Street melee fighting is simple, all I will say about it is that, it comes down to the unit stats. The best trained and equipped units out of the two obviously win.
==========================================================================
Attacking: Being Sallied
The second thing you can do is stand your ground. If there is high ground closer to you, move there. Line up your archers so they are readily availble when needed, and cover your front along with sides. Your front should have one to two units, followed by two units on each side, with the rest of your melee untis as reserve reinforcements behind. Stretch your infantry long enough but not too thin that the enemy can run right through to your reserve and archer units. If the opponent's sally contains cavalry and chariots, double right click their horses when they are close enough to throw pilas at them, inflicting a lot of damage so their charge is distrubed. That way you take less losses when the remaining horses continue their charge, and route faster. If your melee do not carry javelins, shoot the cavalry with your rangers.
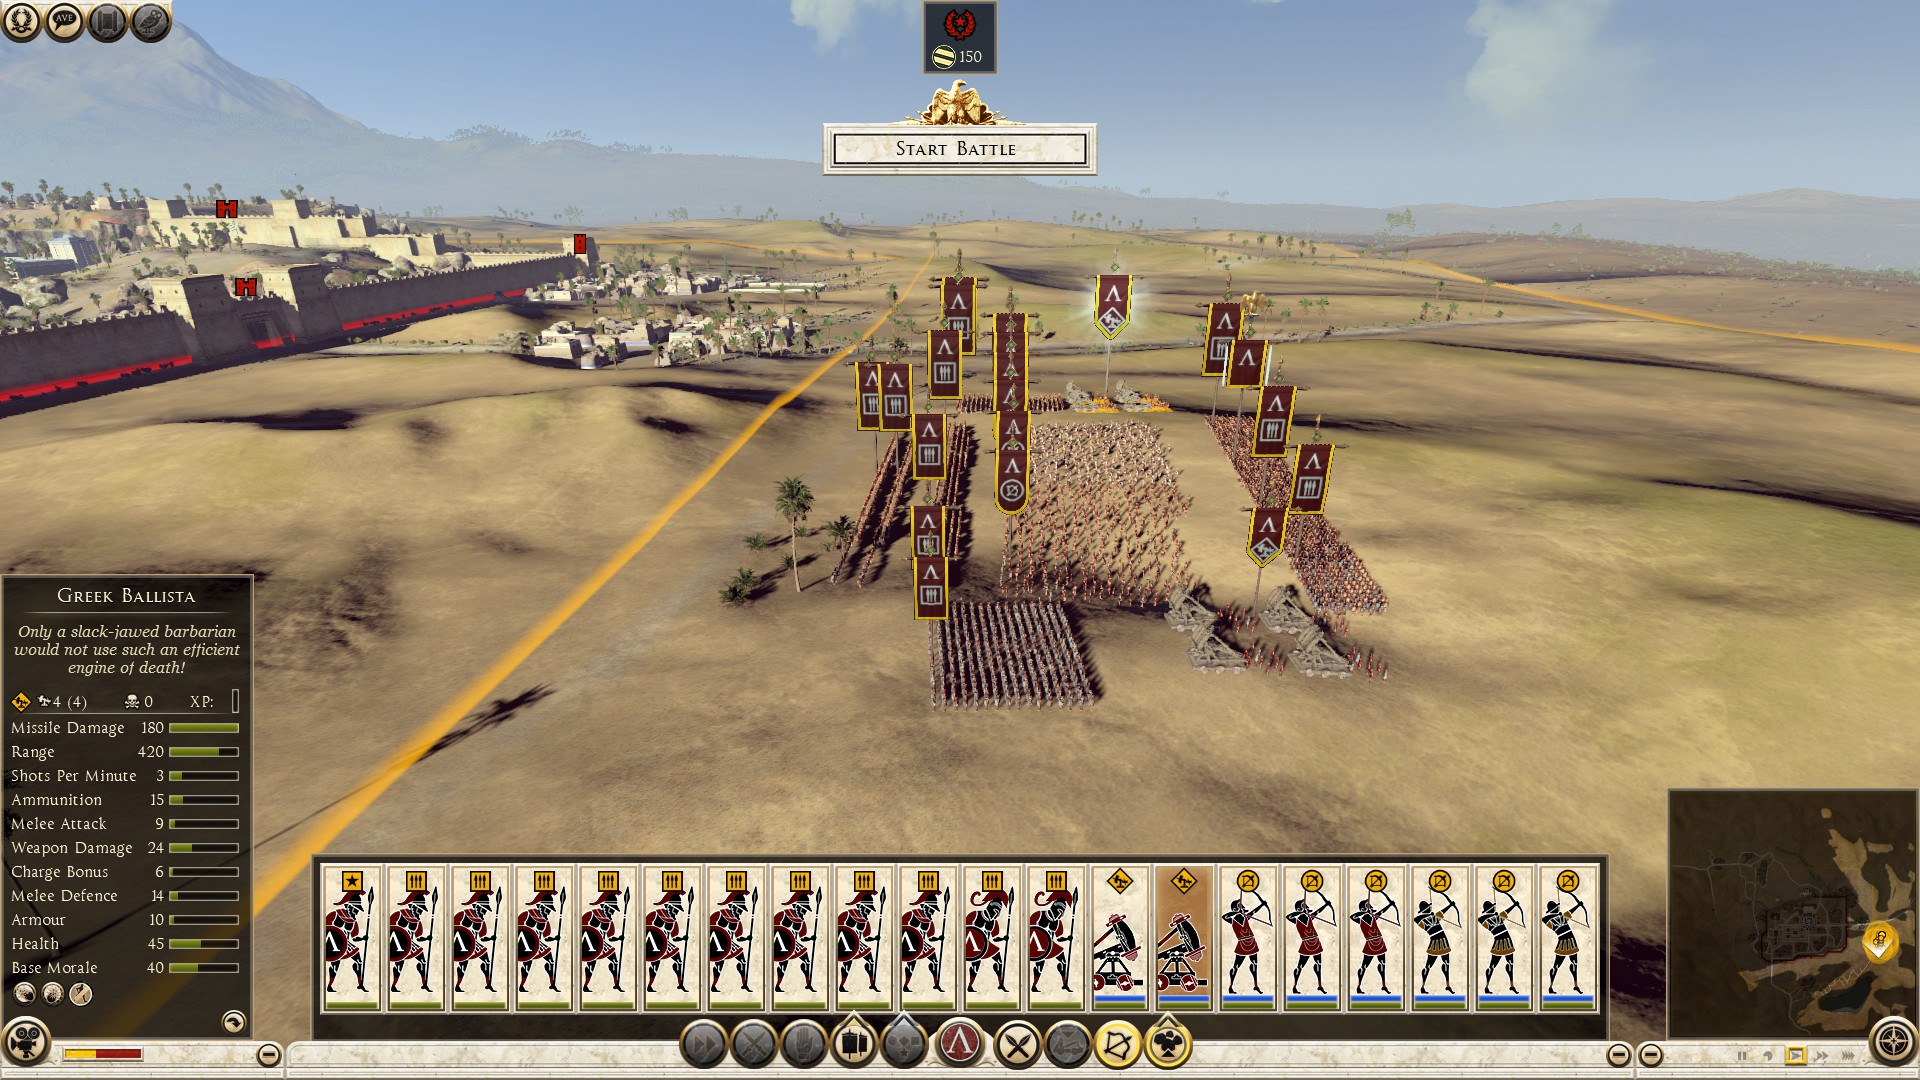
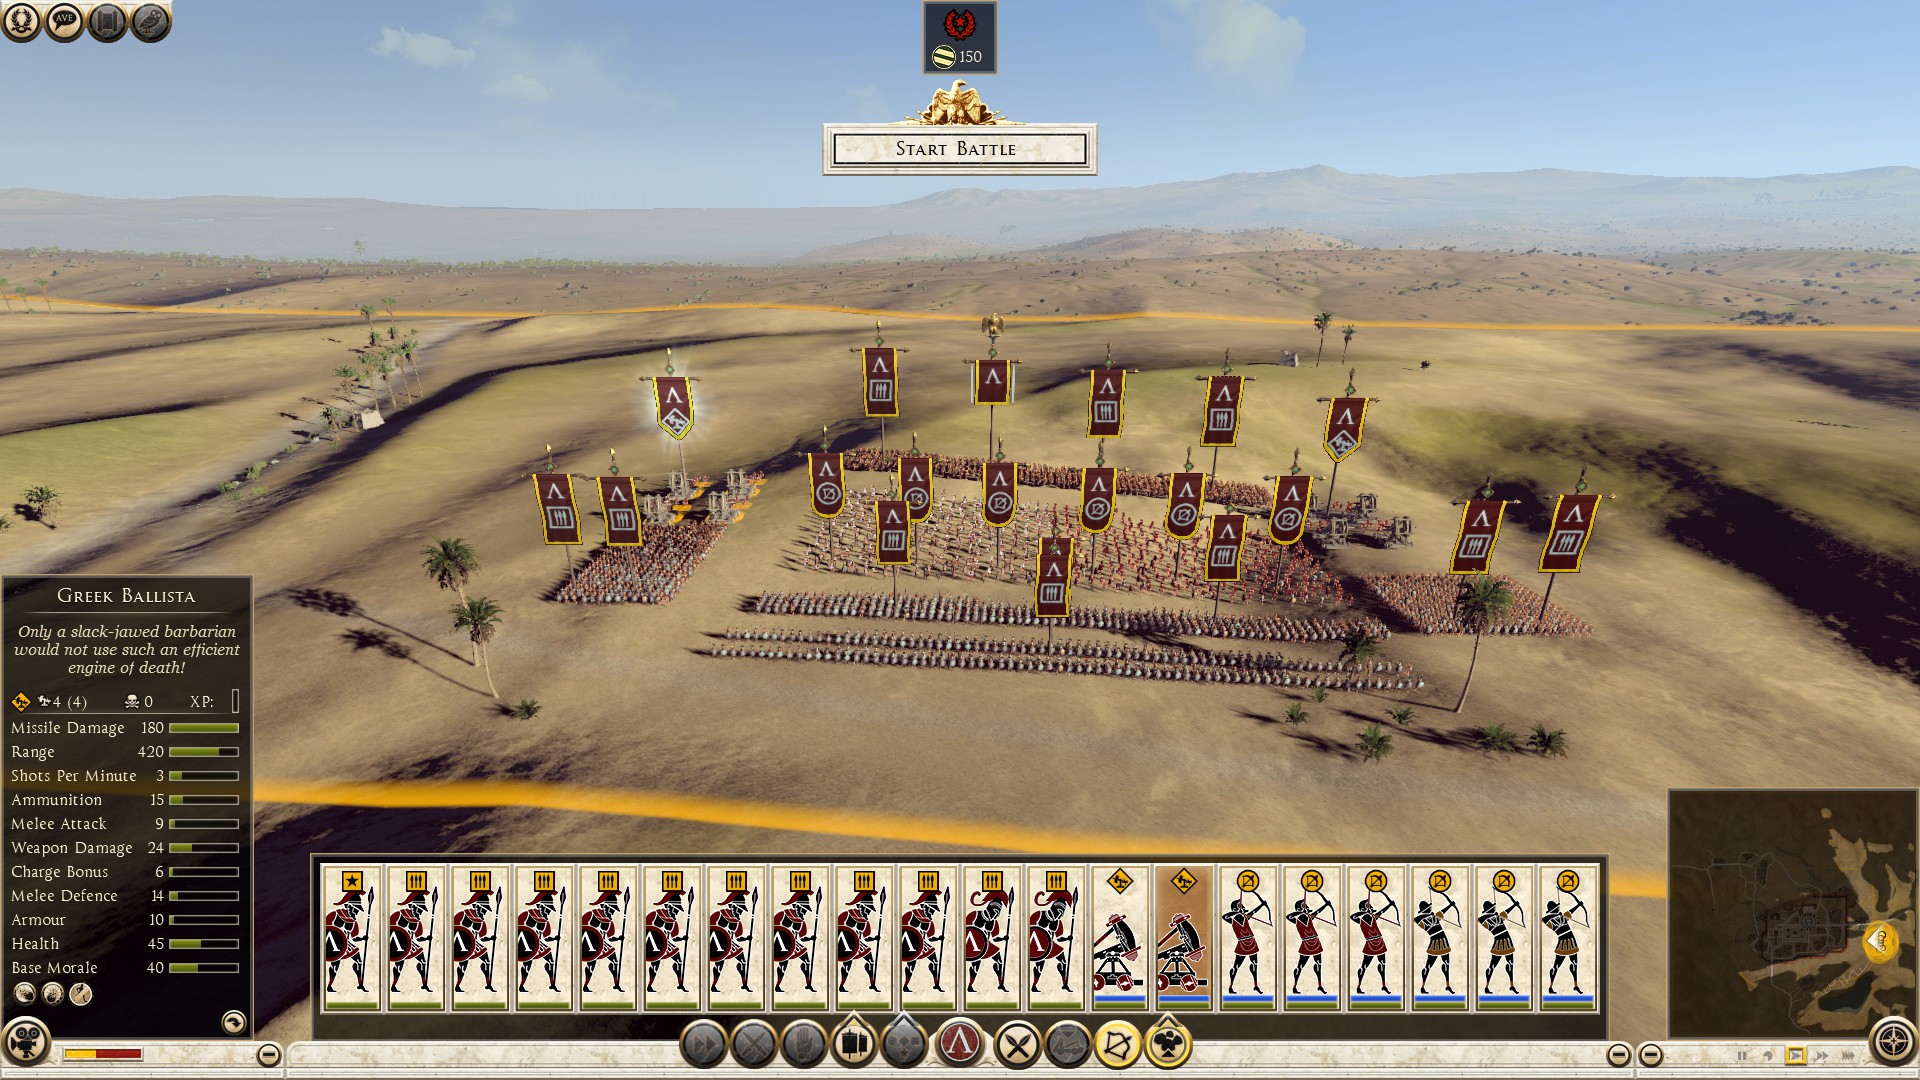
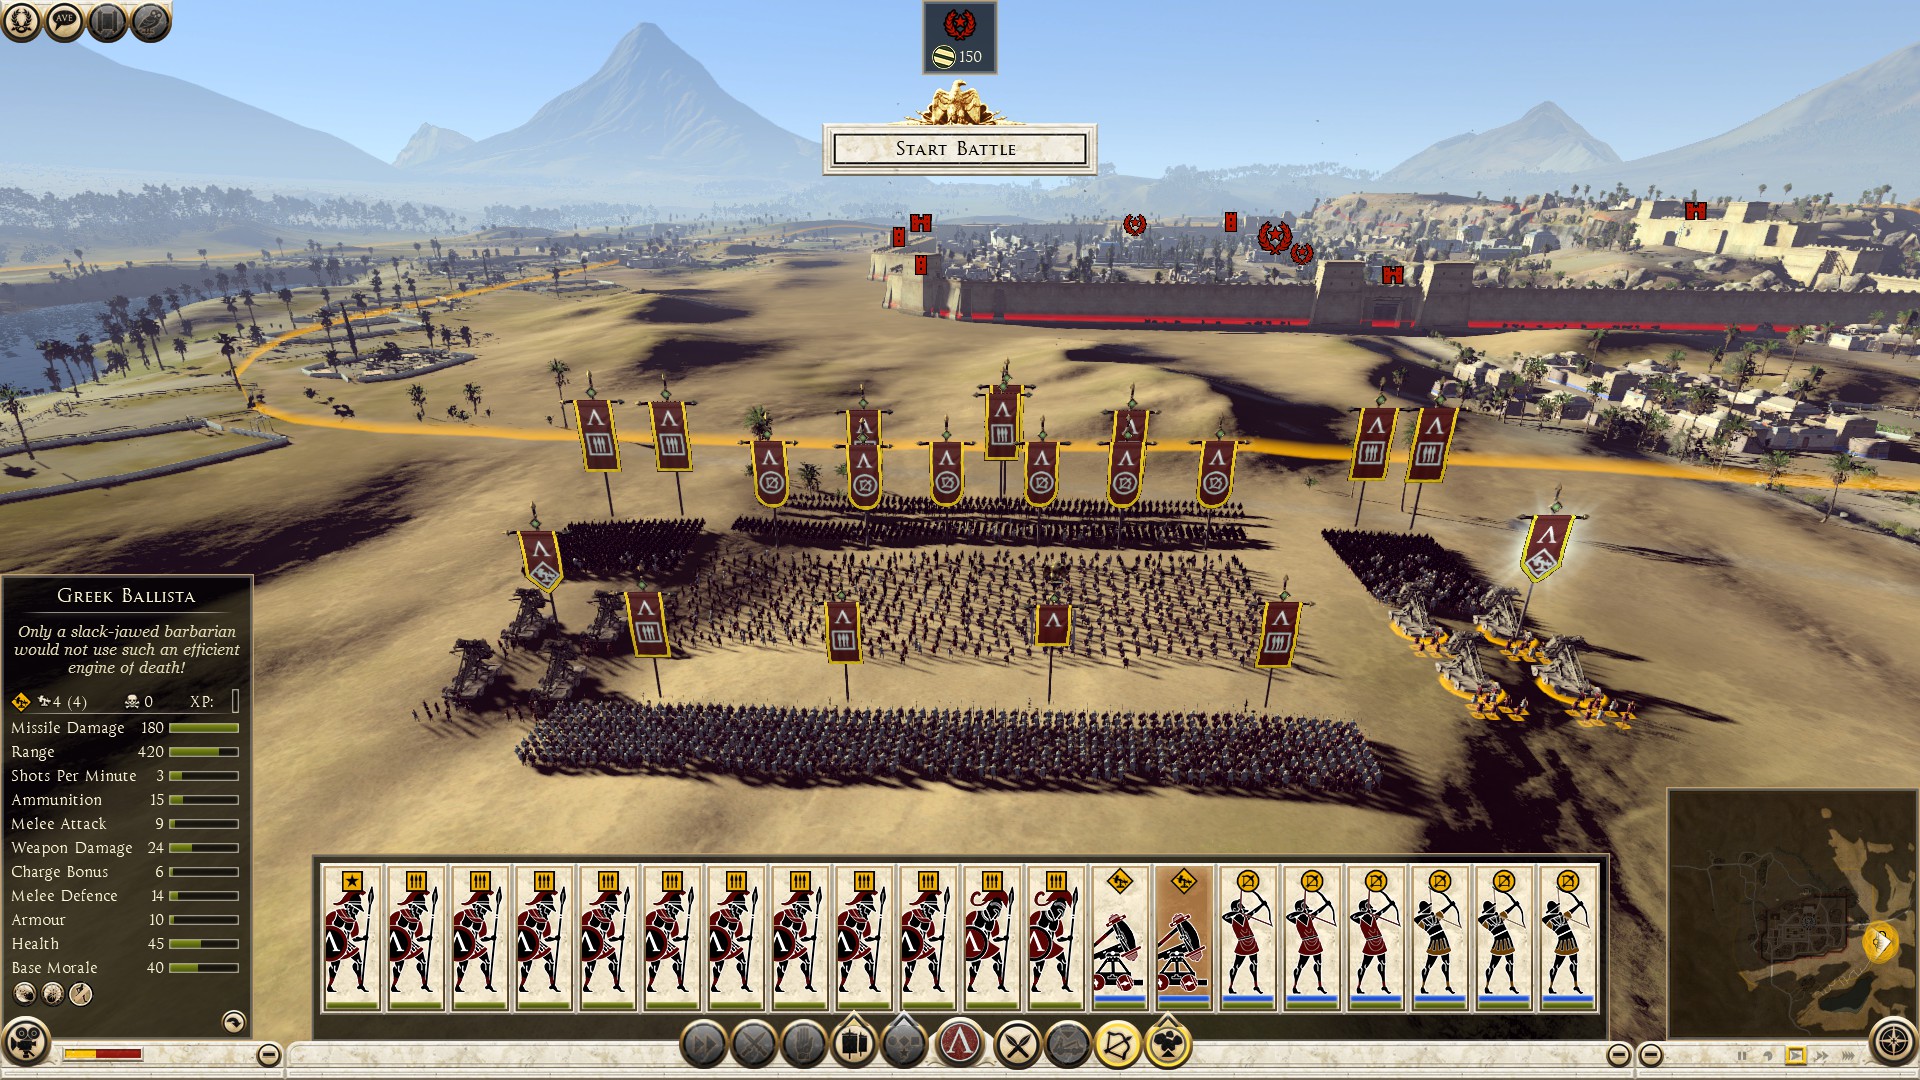
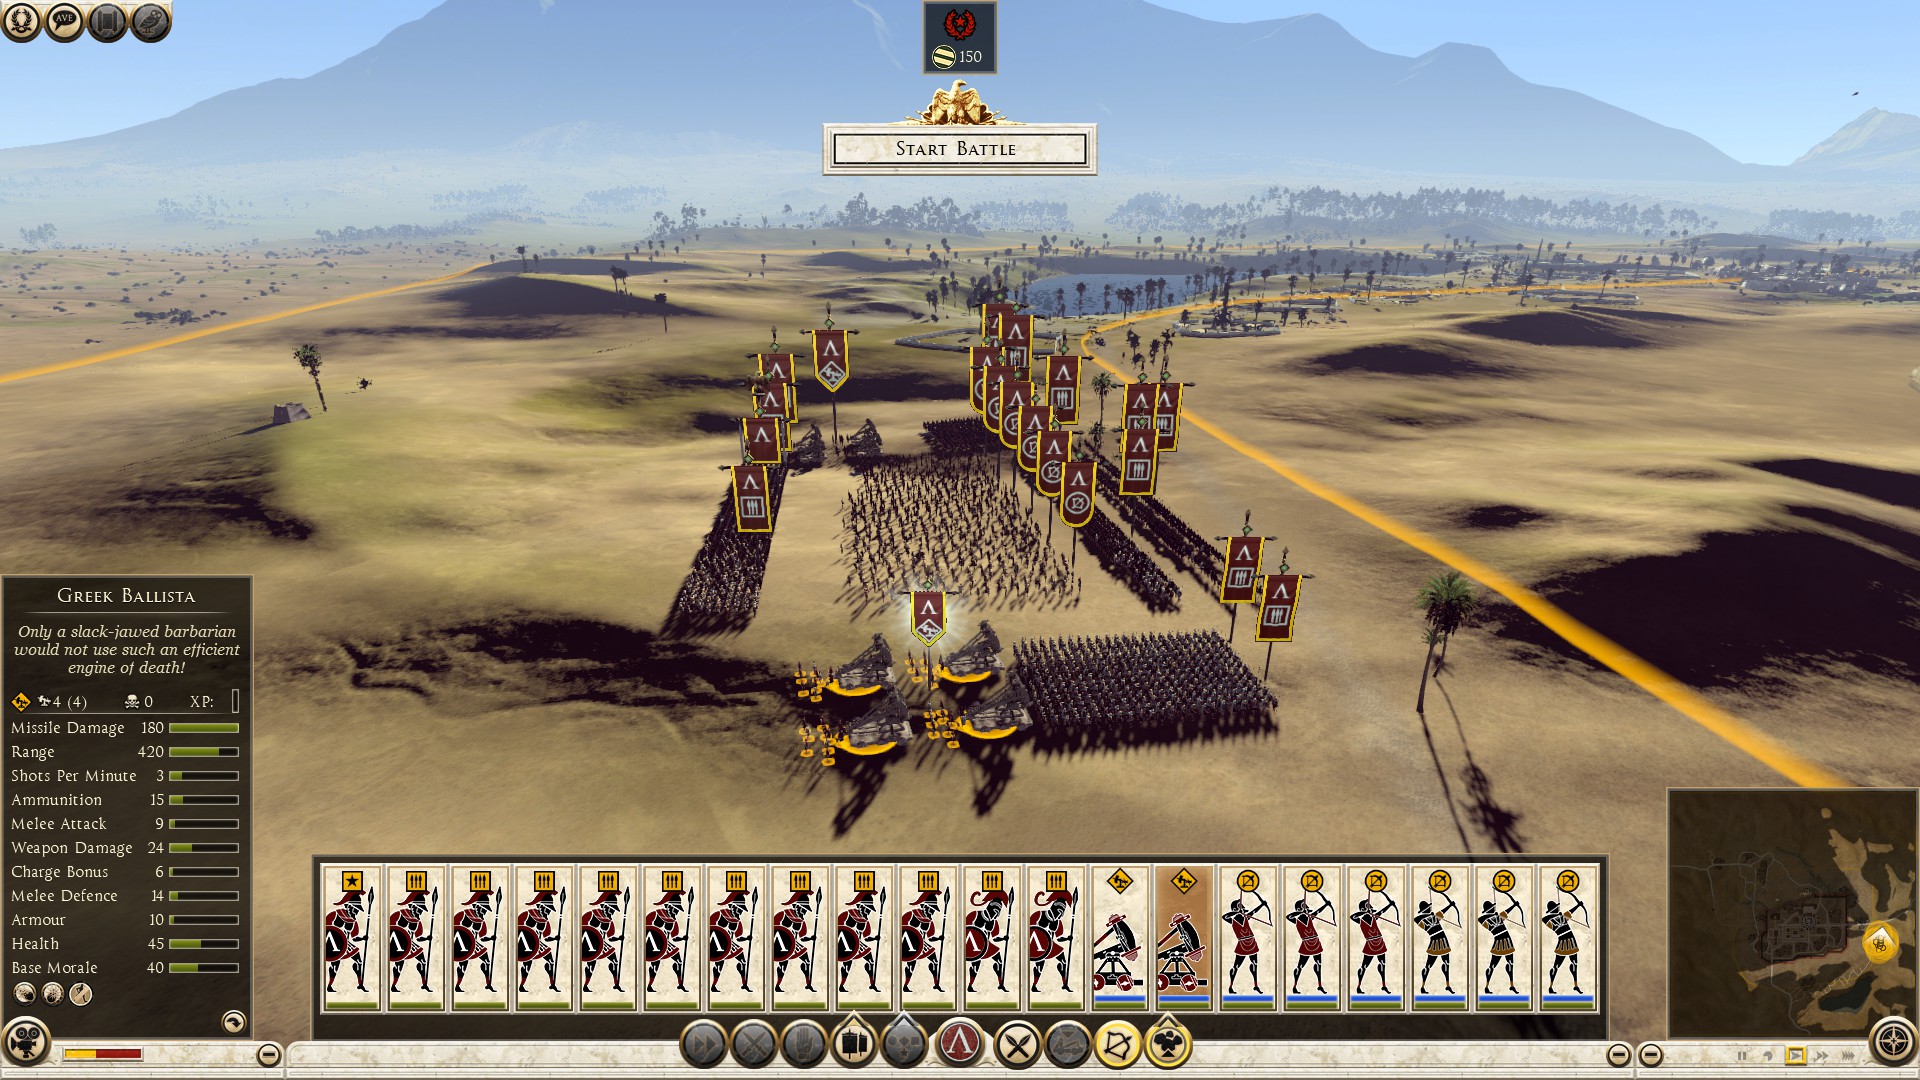
After your front lines and or sides clash with the opponents, test to see if the enemy will break through. If you need support or just to double sure, stretch out one reserve unti and send it supporting the front line.
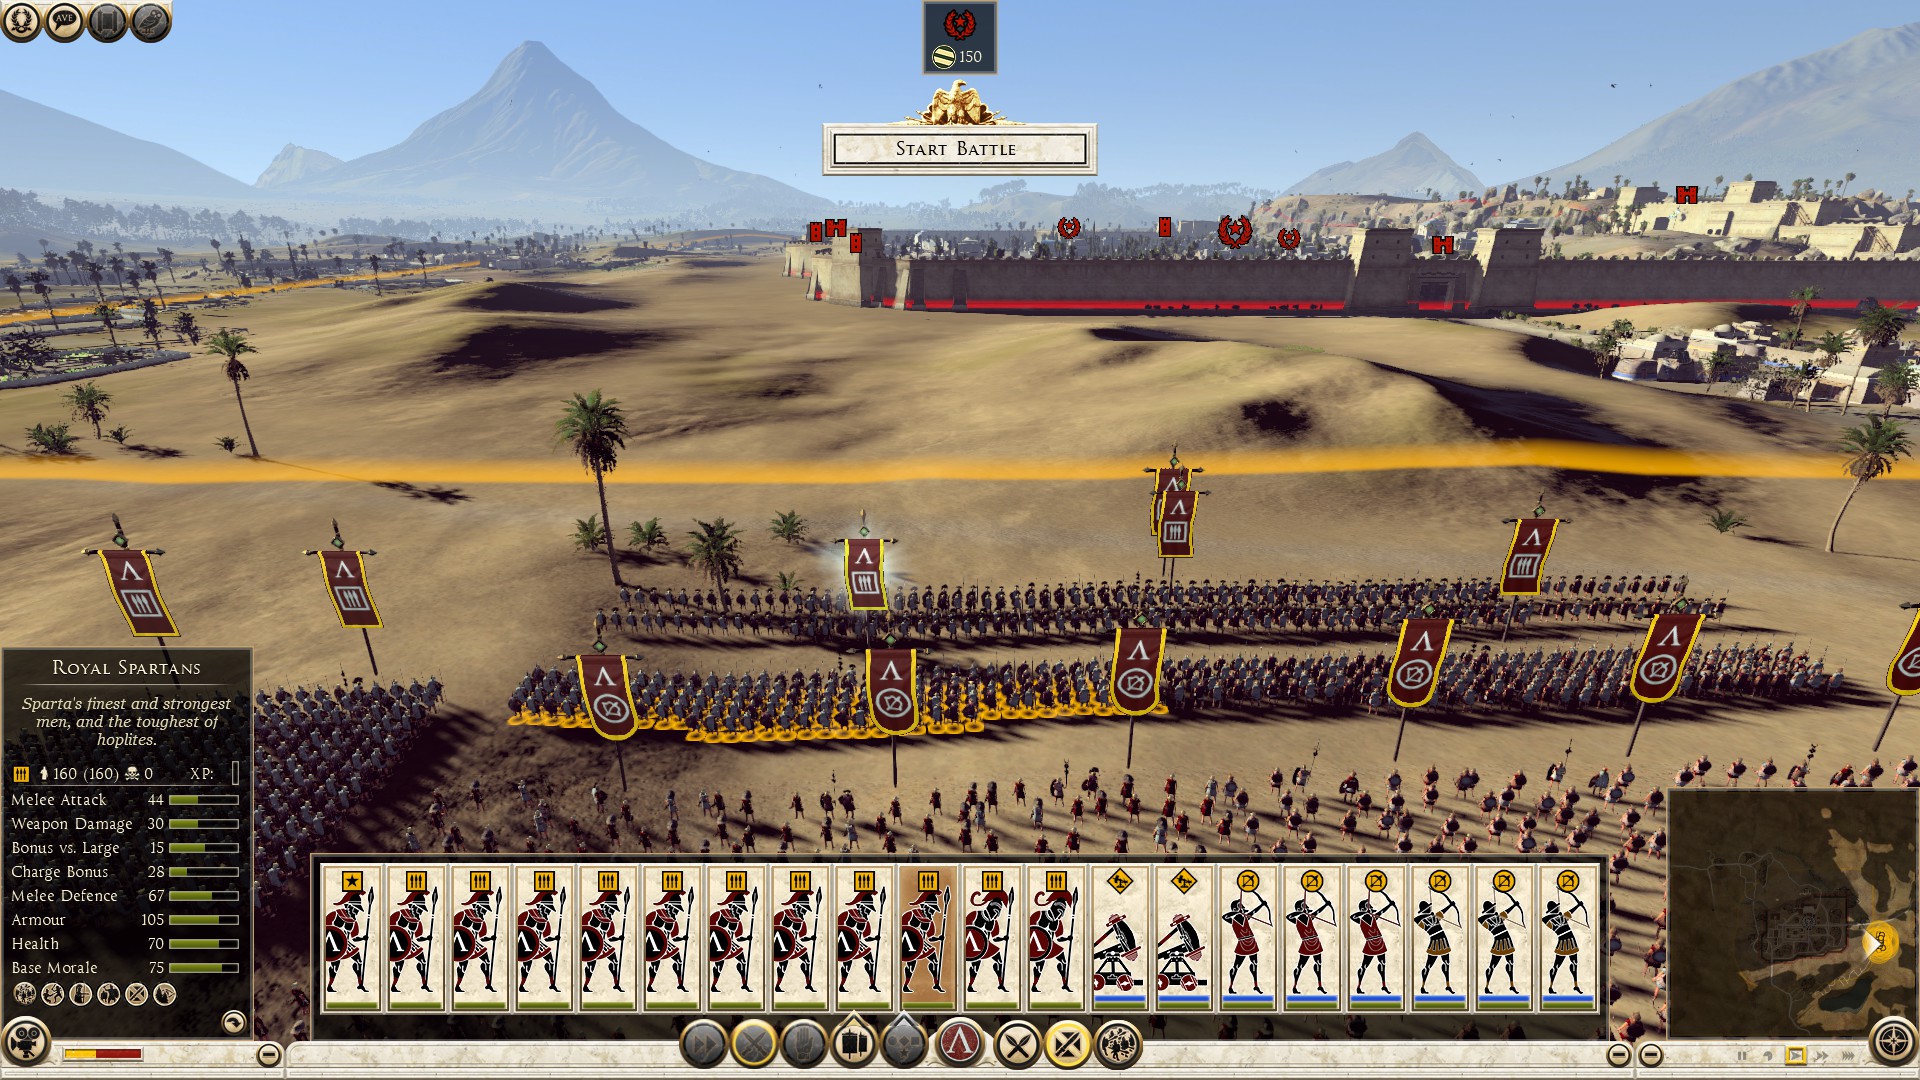
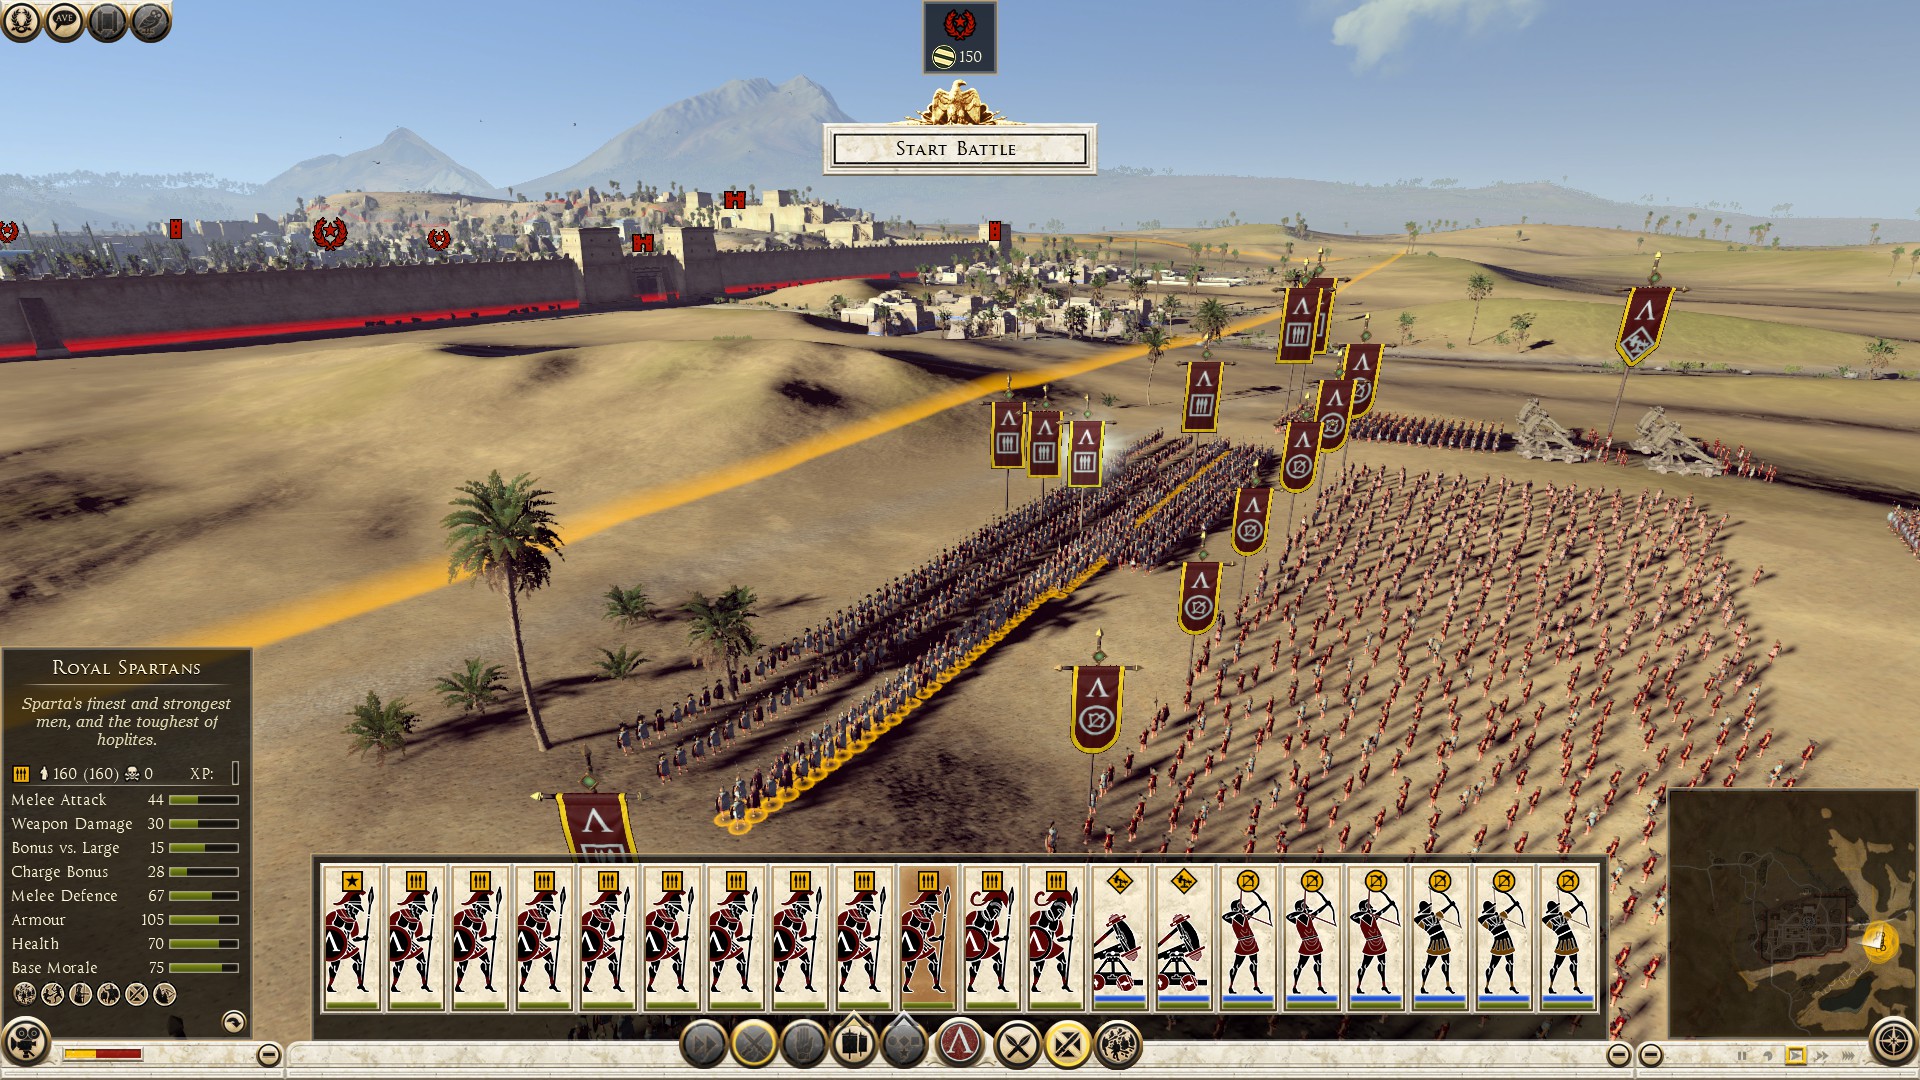
If your lines are holding well, send one of your side units or two (if you are safe from being flanked) to surround the front. Send the other side to flank even better if you can and send the defenders back inside. Your rangers, like I explained before, skirmish their rangers. Counter the defending sally away from the walls, where the defenders have towers and high ground that they can line their rangers on, and pound you to death.
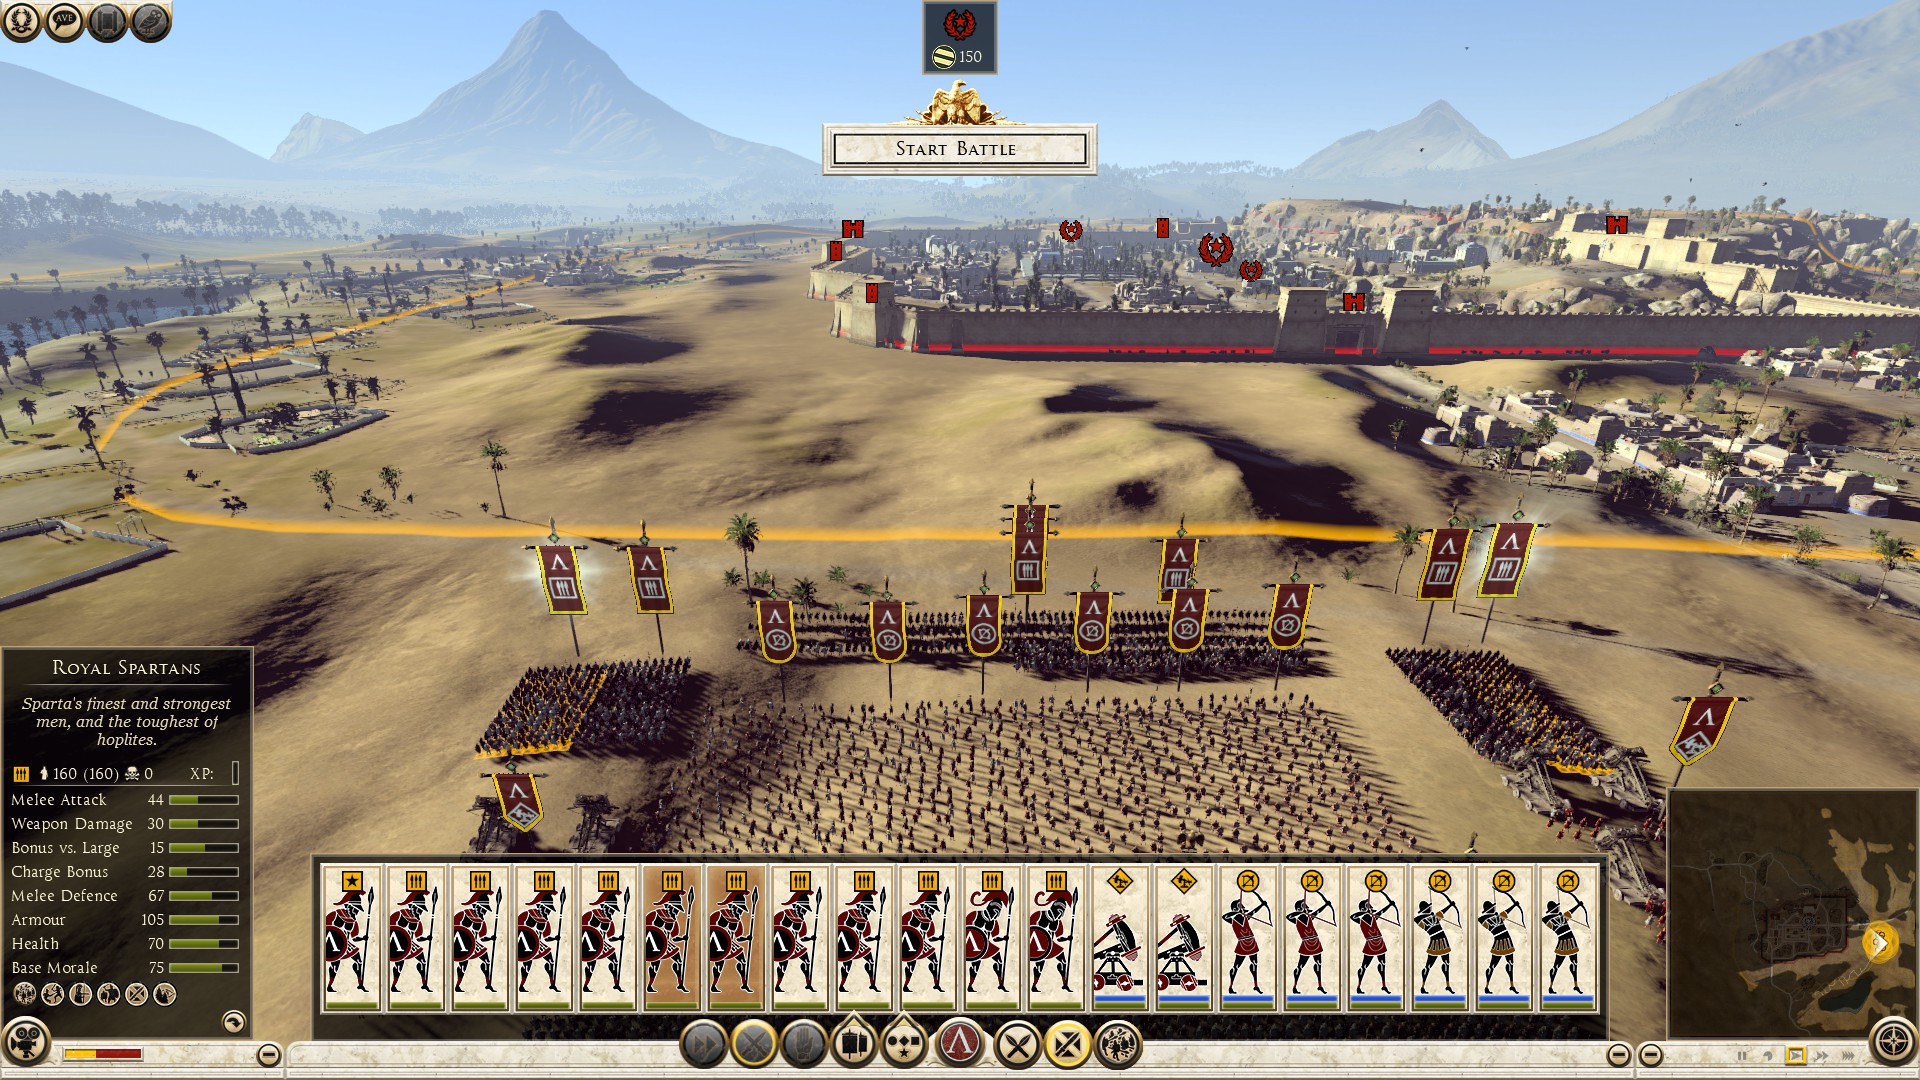
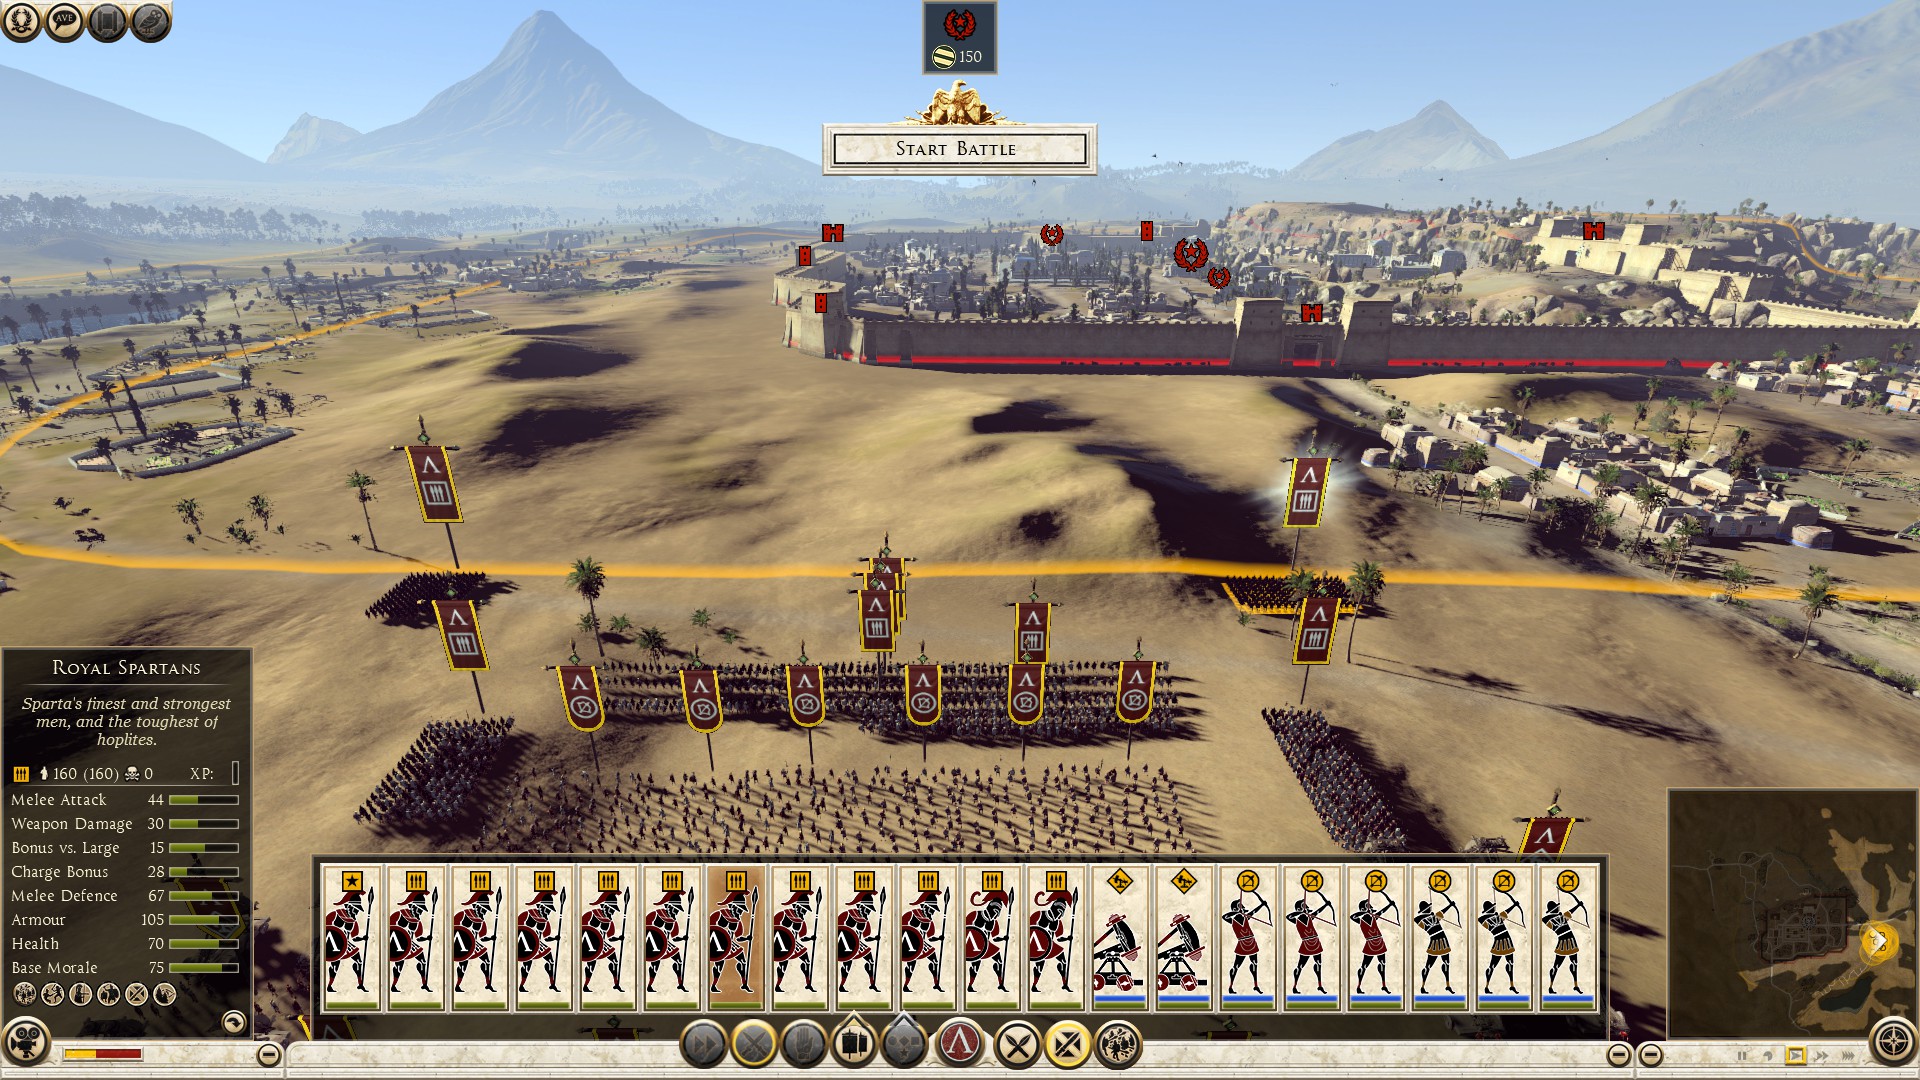
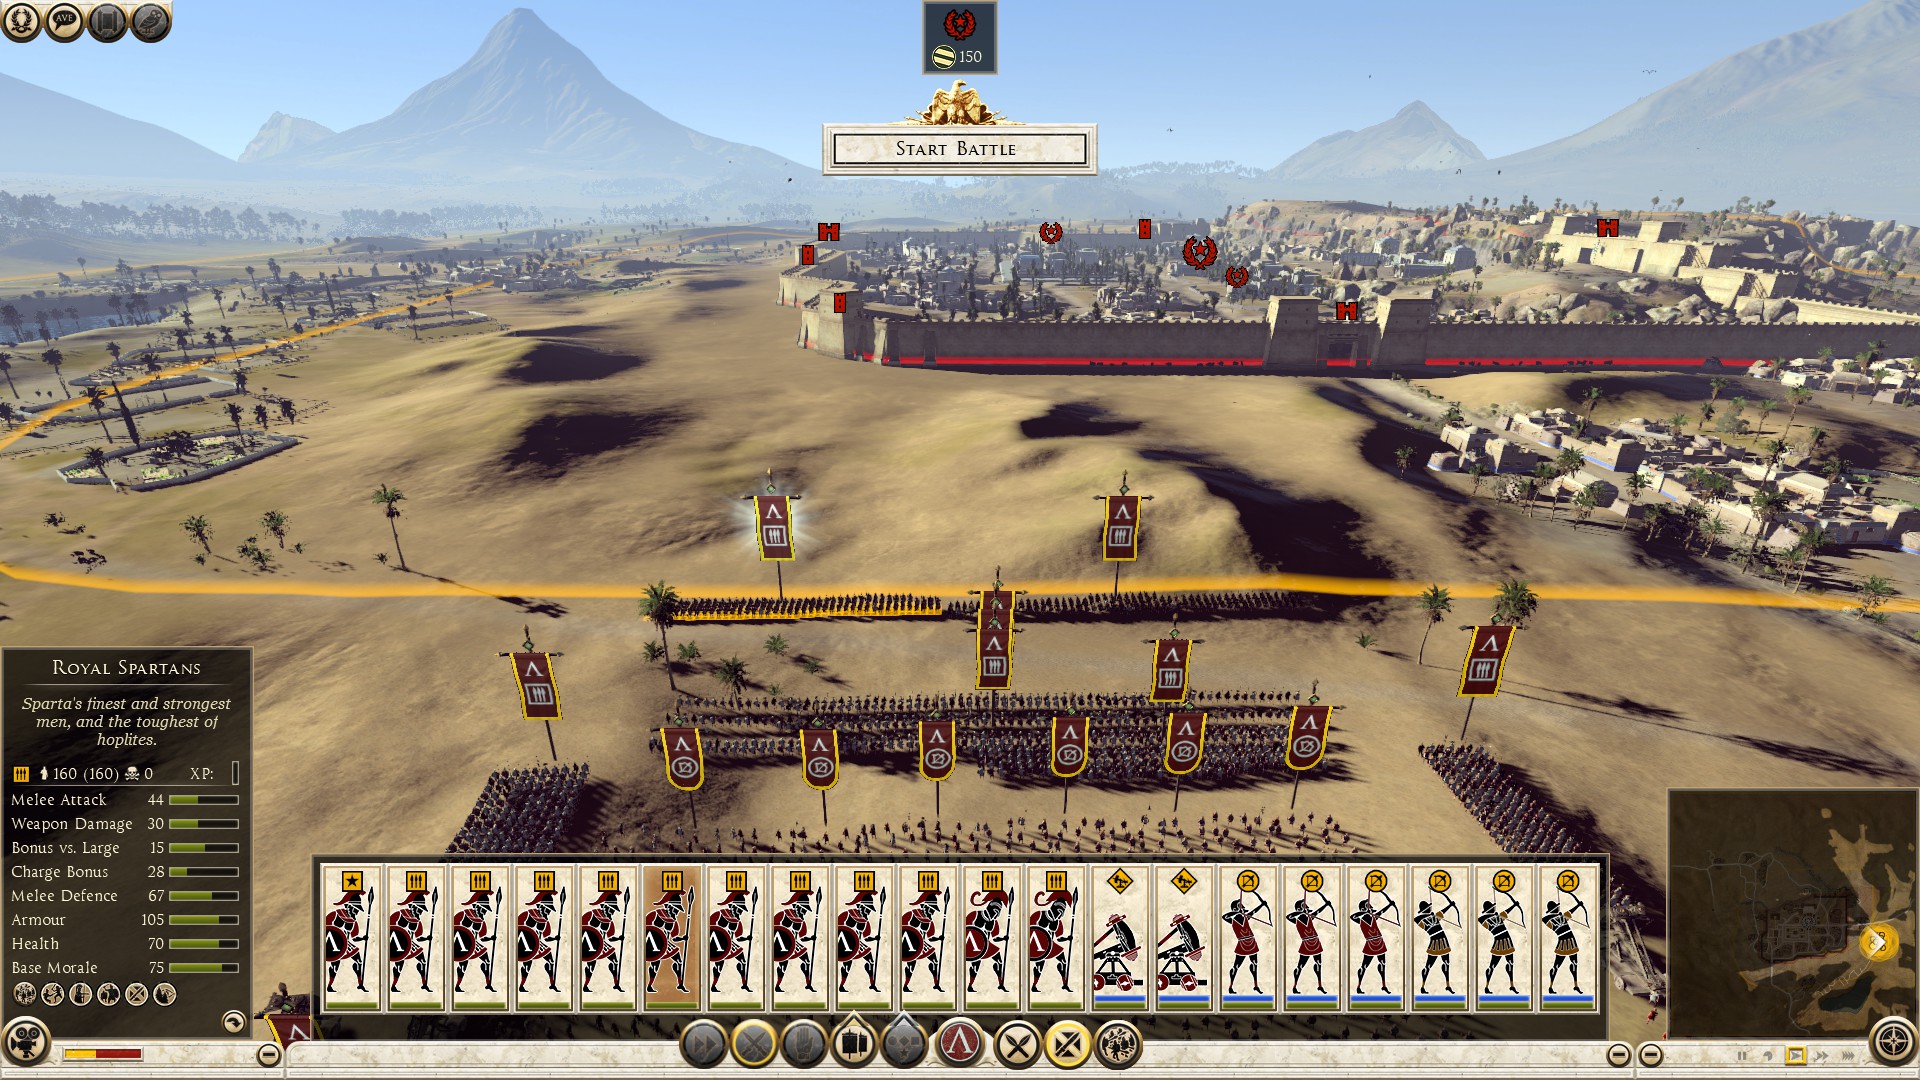
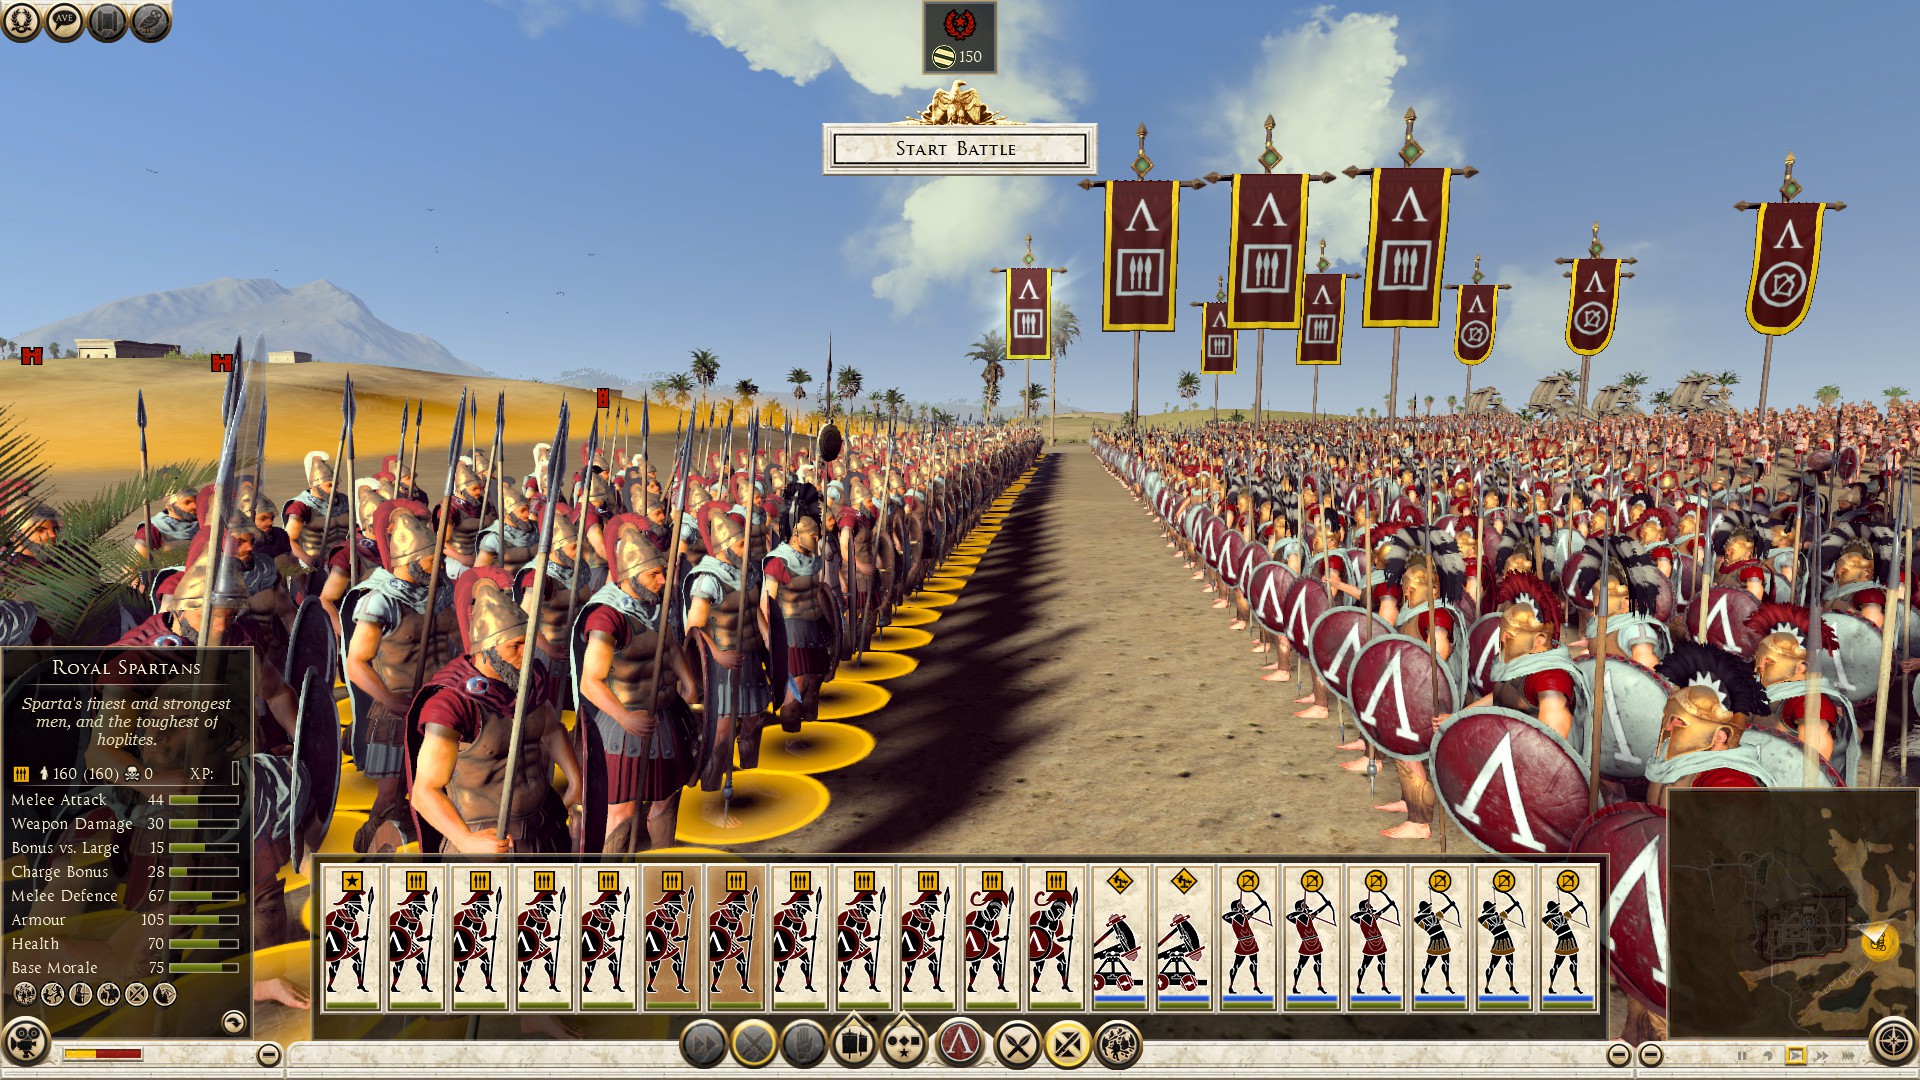
If you are being sallied by more than one player, well, your chances of surviving is very low so you better inflict as much damage as you can. That includes shooting their melee units with your archers and running out of ammo before they get killed, better lose empty archers fighting melee than archers with ammo no?
==========================================================================
Defending: City and Port Assault First Stage
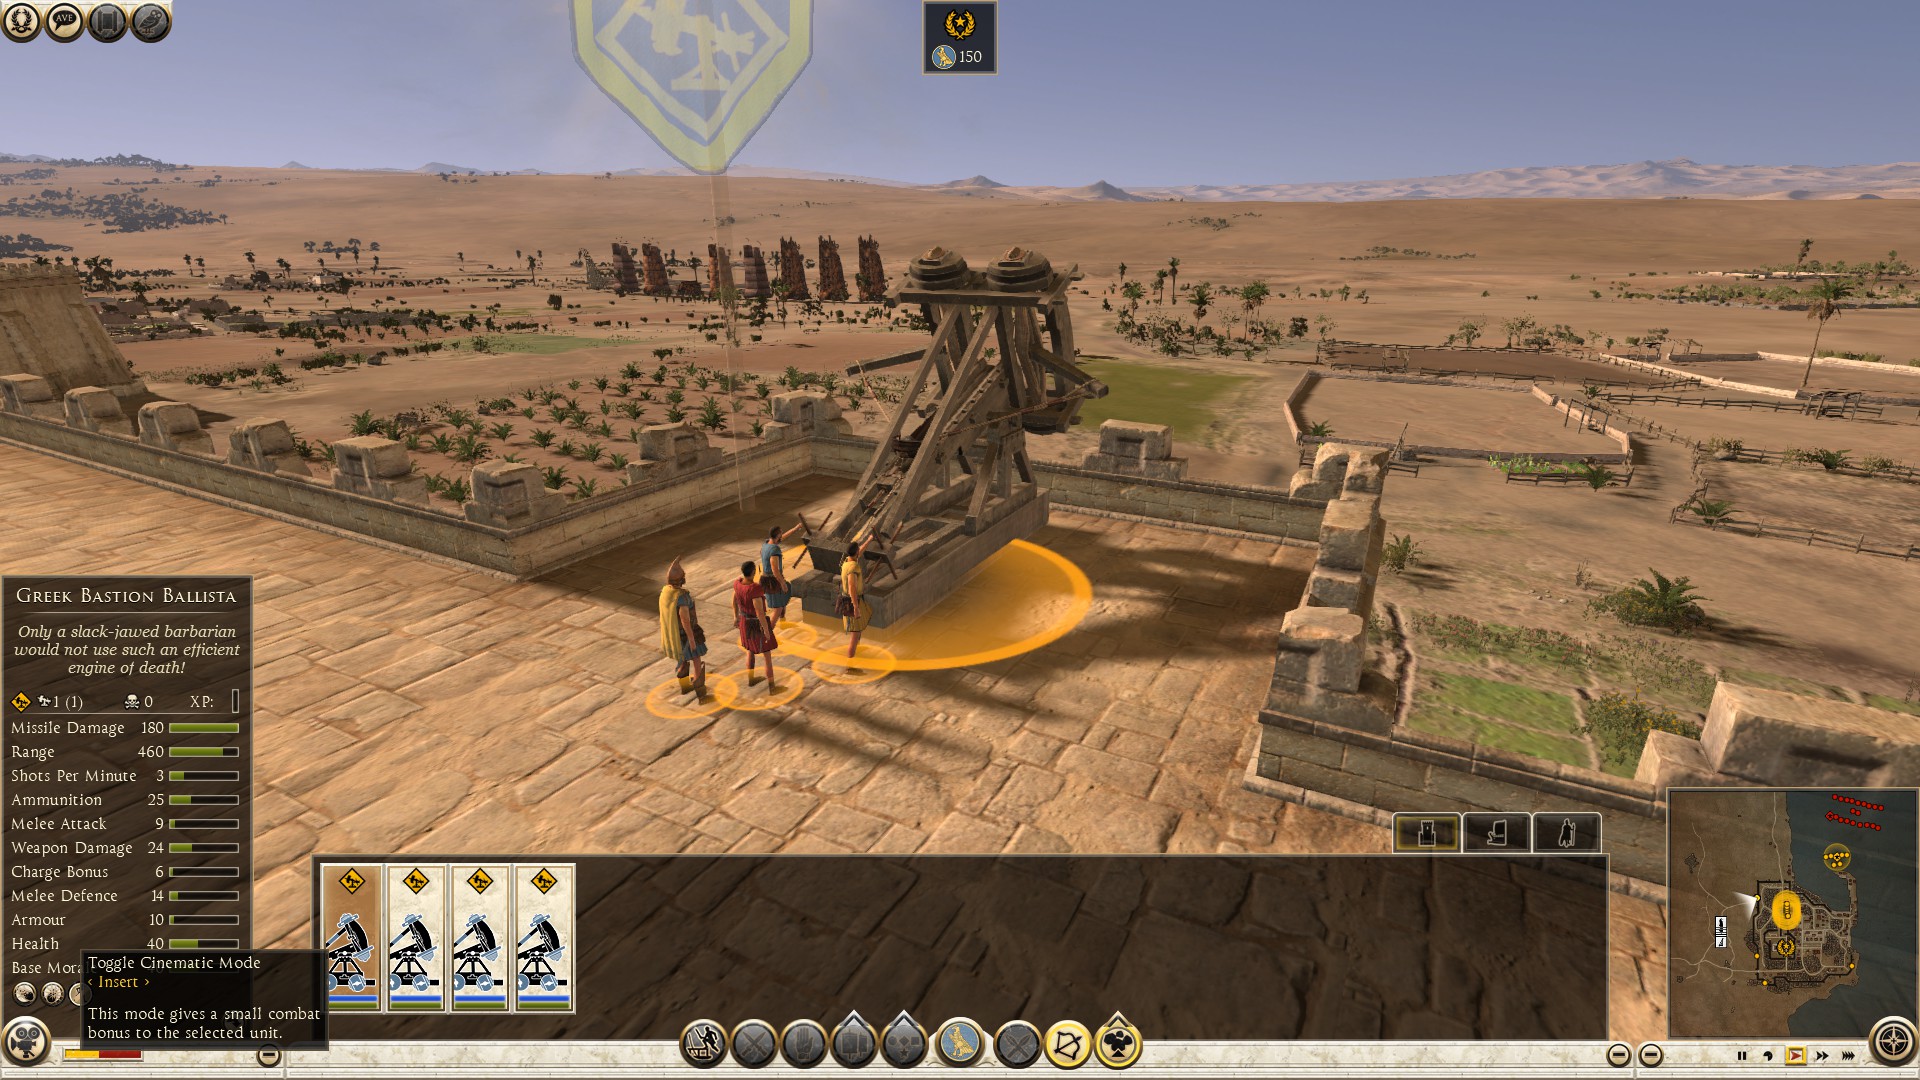
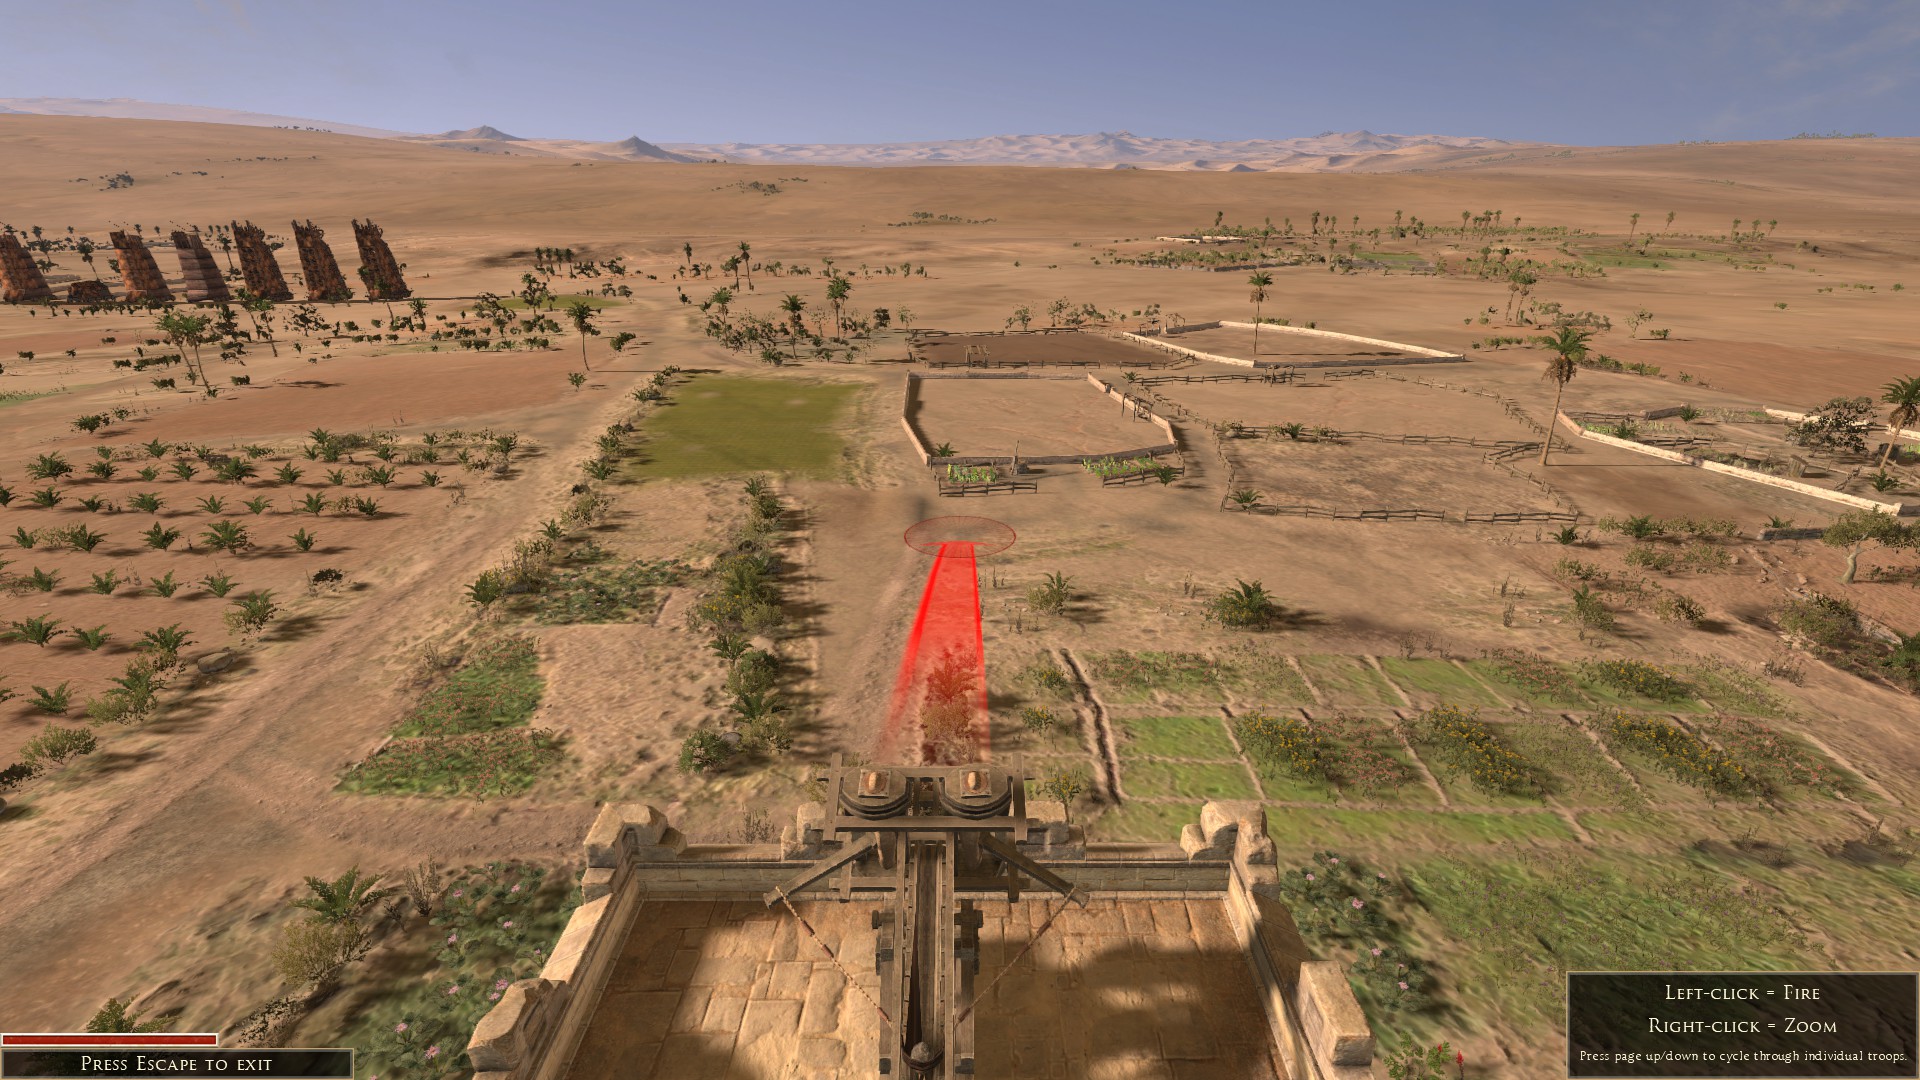
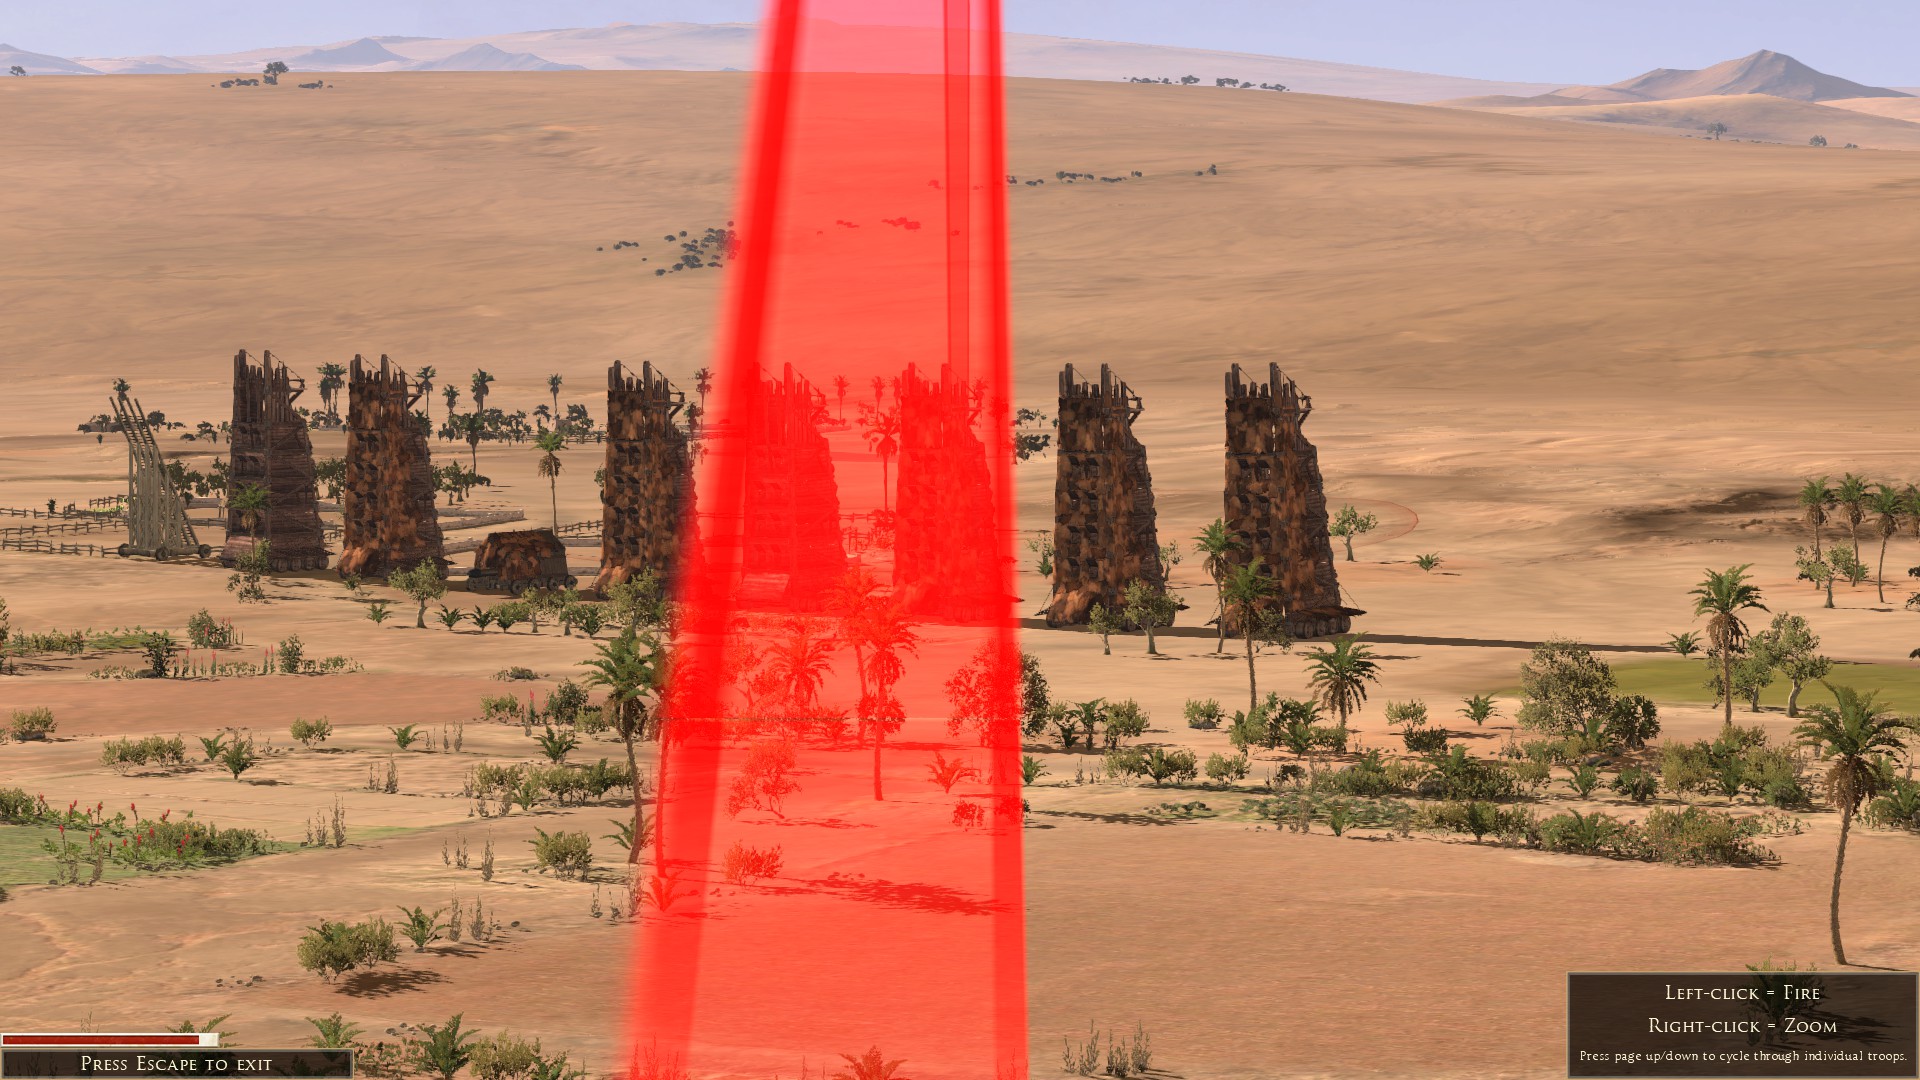
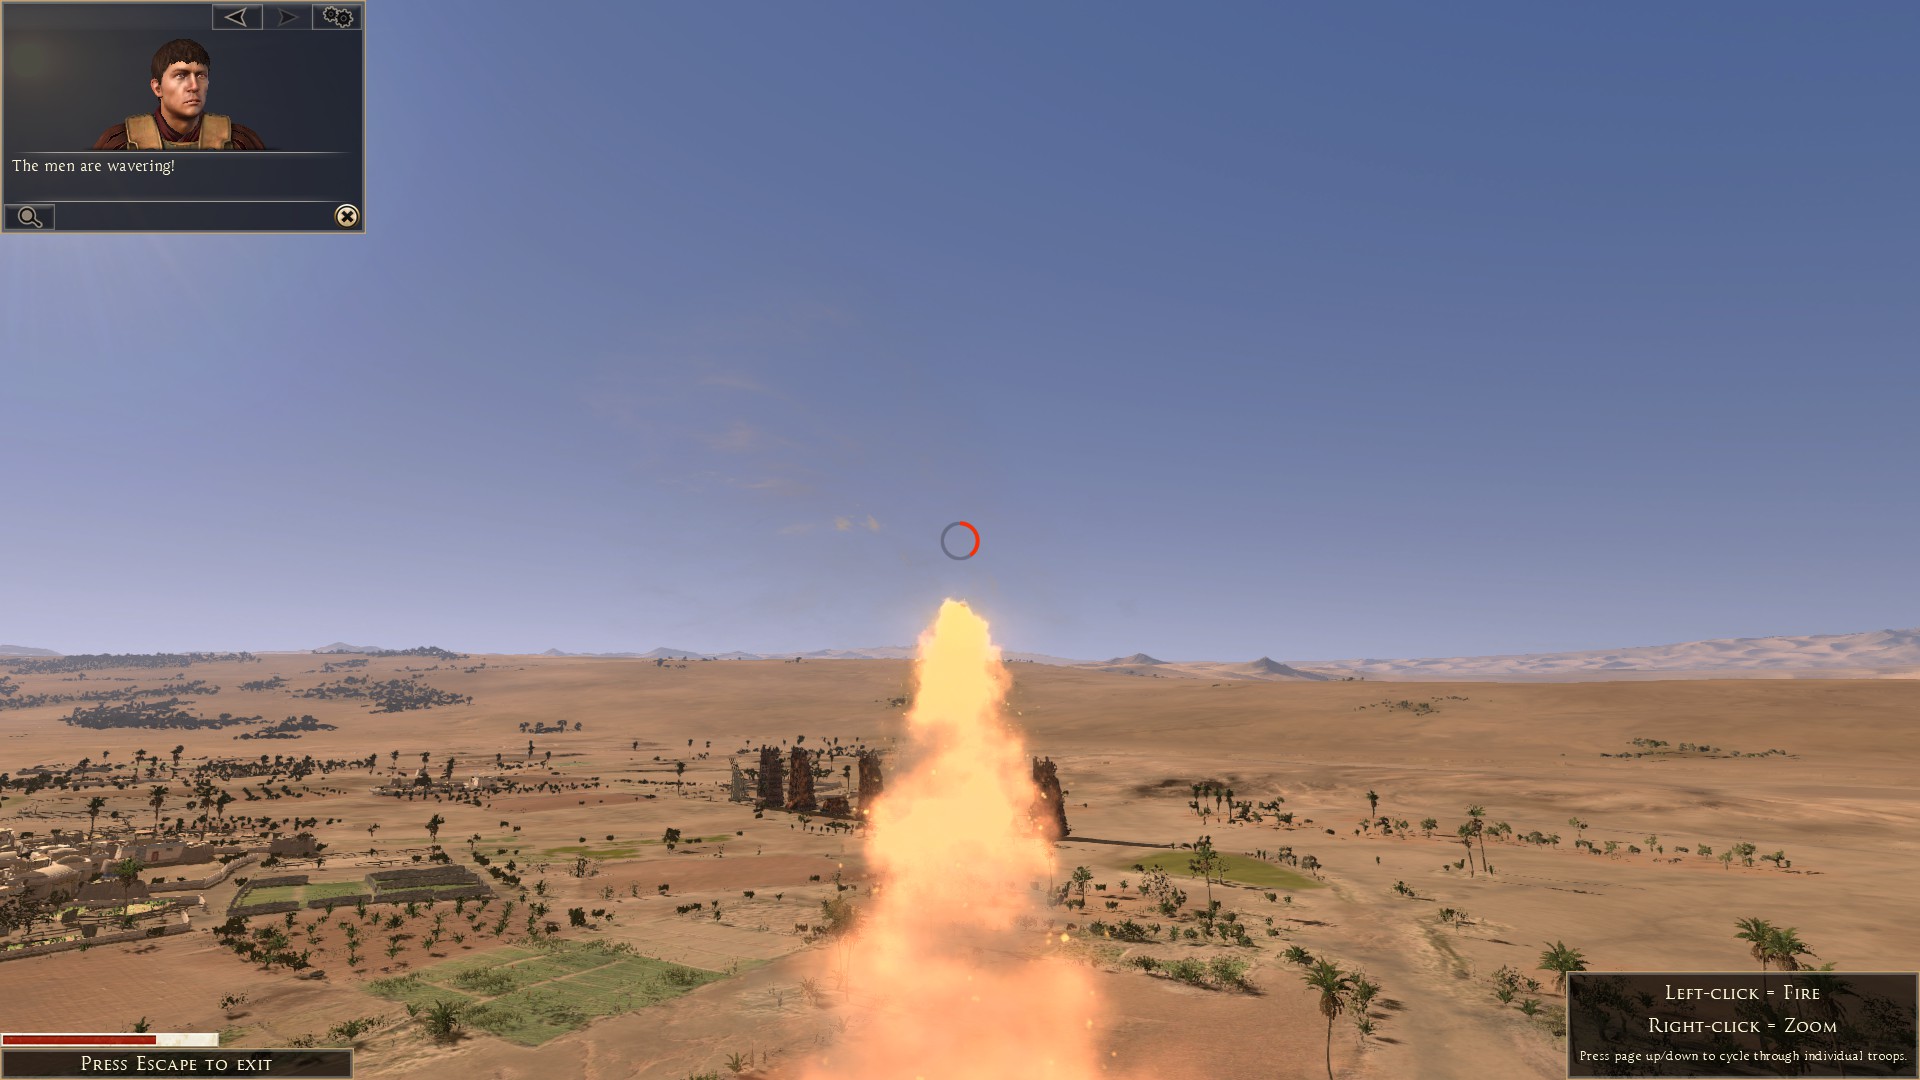
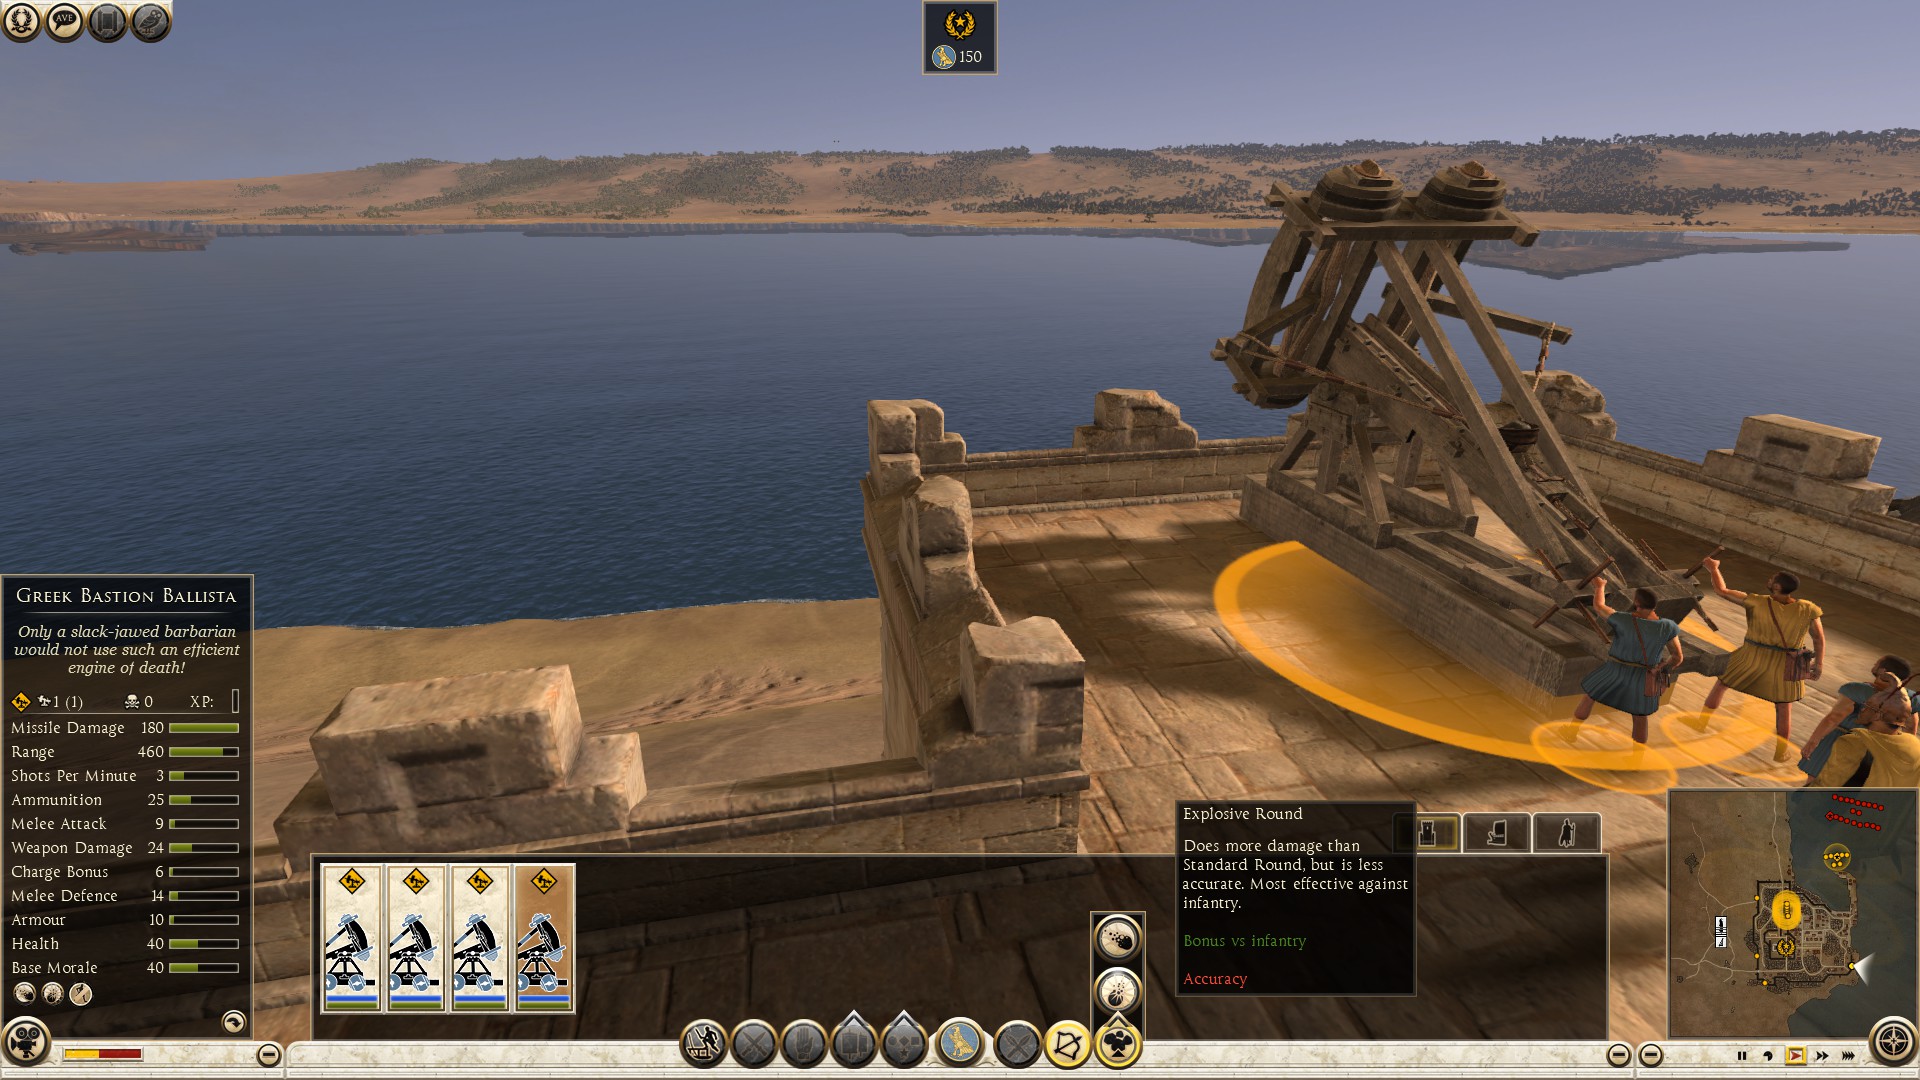
In the deployment stage, you want to prepare a temporary defense against the attacker(s) current temporary assault formation. The attacker can do two things at the deployment phase, set up their units for a combined assault on one area, or separate their men to attack you at multiple points. Before you respond to their movements, take advantage of the fifth bonus, being able to see the attacking troops while they can’t see yours. The units your opponent cannot see will have an eye icon on top of them. Study their army build, find out their elite and non-elite units, find out their rangers, spears, pikes, etc. Know which units the opponent has on the towers (if they brought any) and which are on the ground, look at the unit proximity to each other, how close are they? how fast can a certain unit run to the aid of the other? With all that in mind, then you can start building a defense. Your chances of defeating the invaders depends on the wall fight, never let the enemy past the walls, because it is harder for the attacker to fight outside trying to break inside, than fighting inside on even ground.
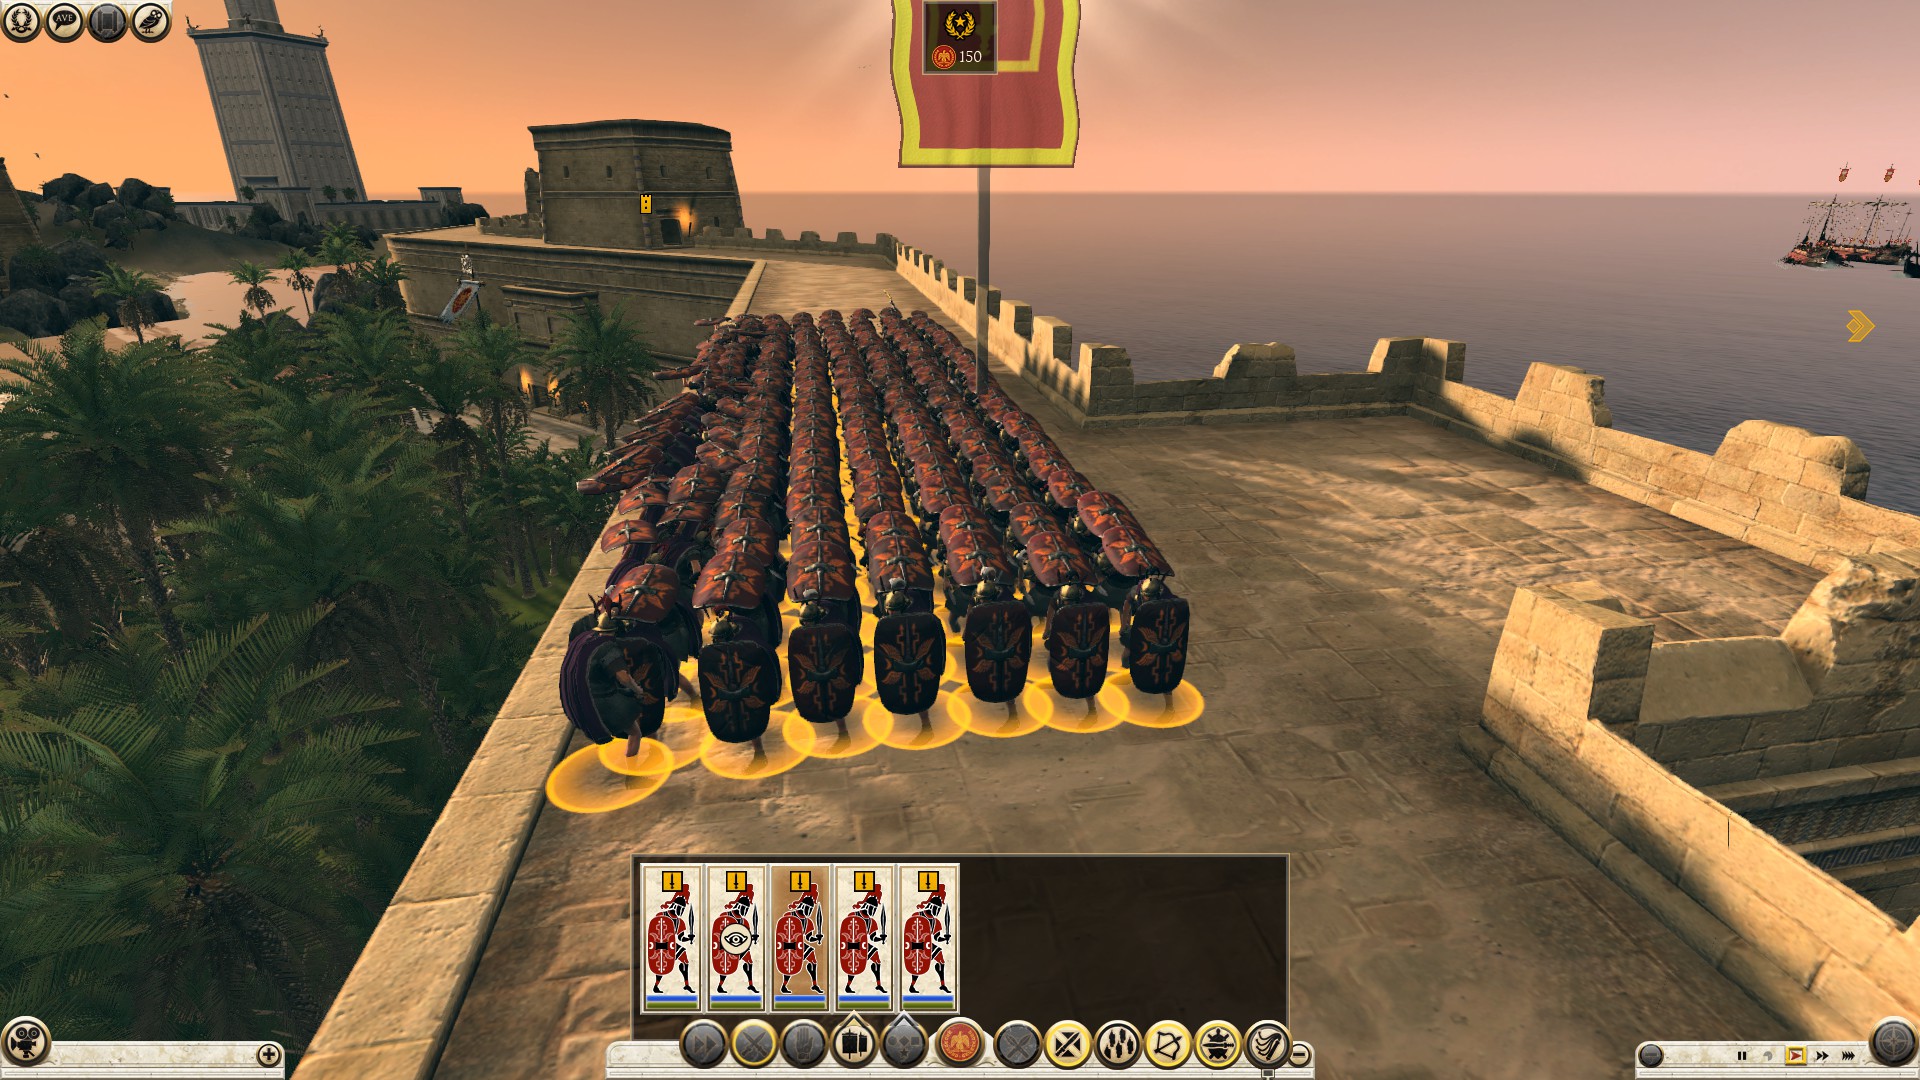
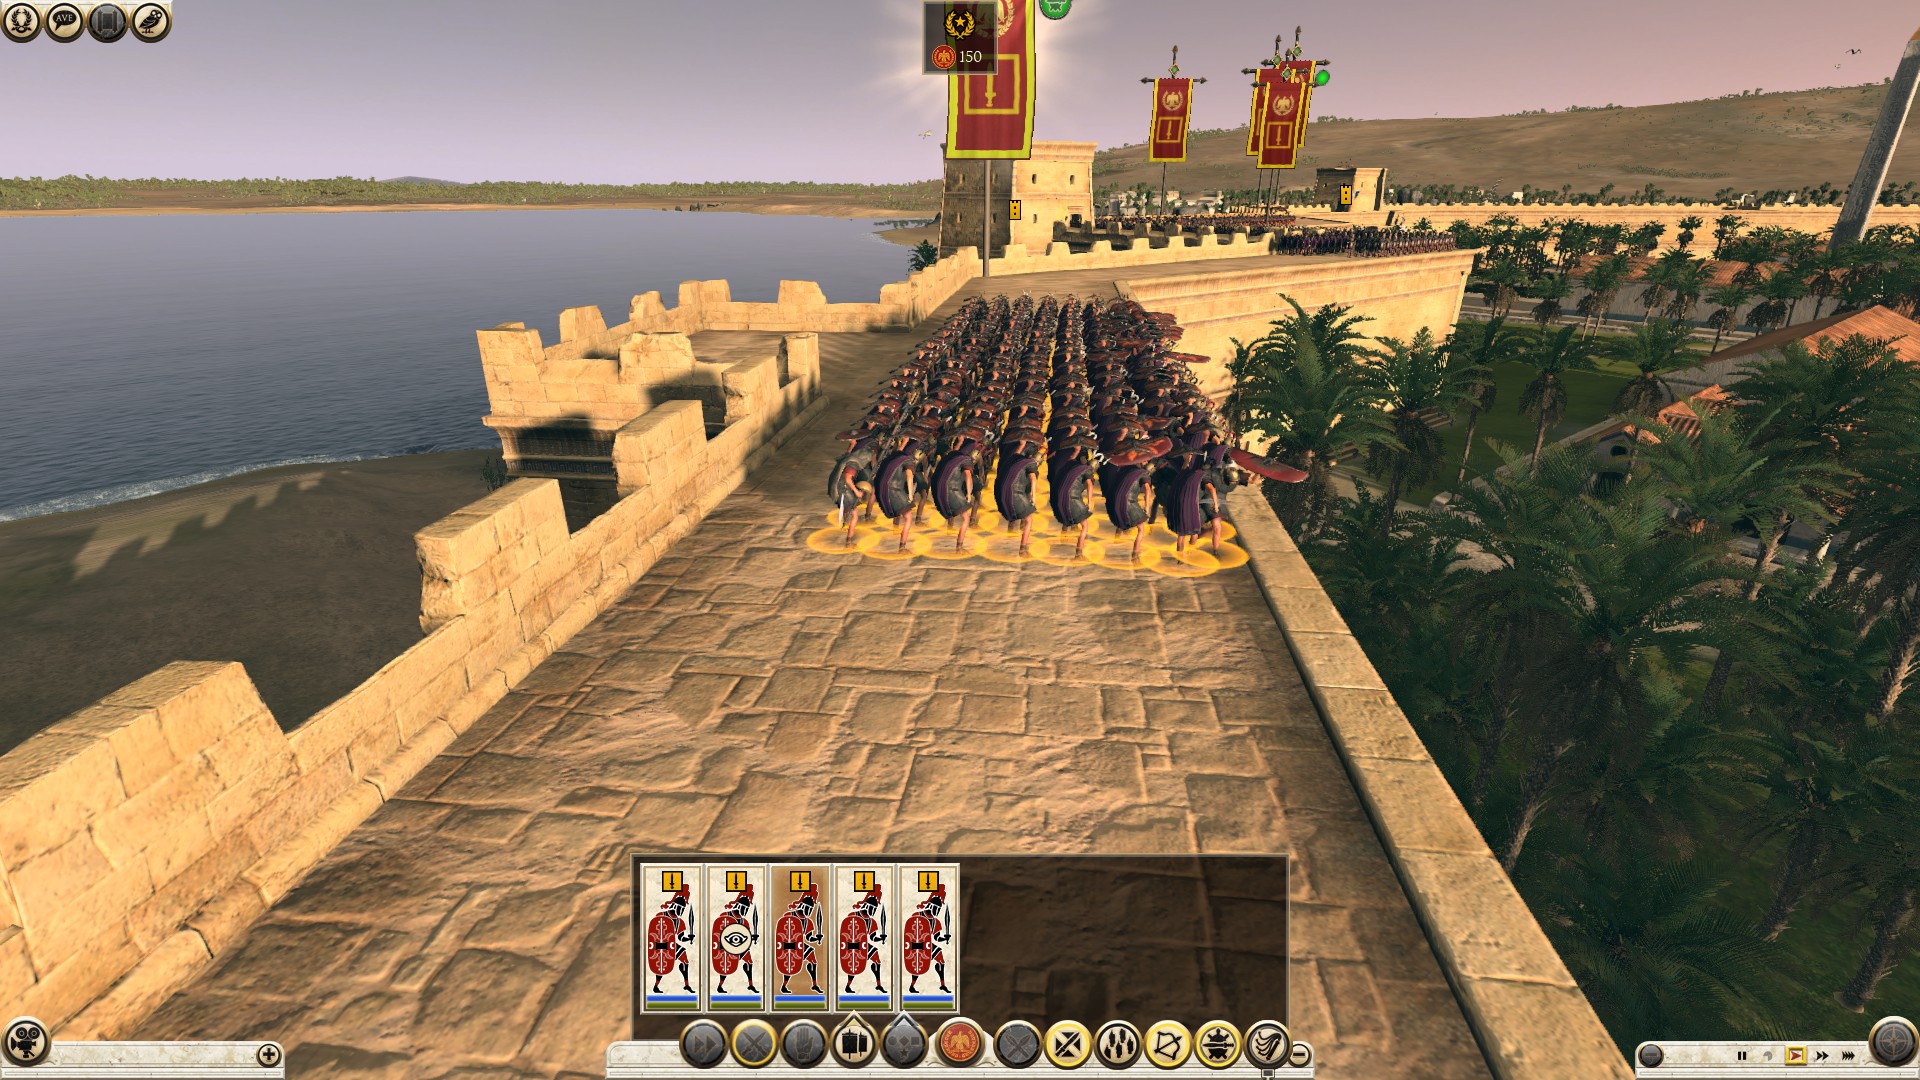
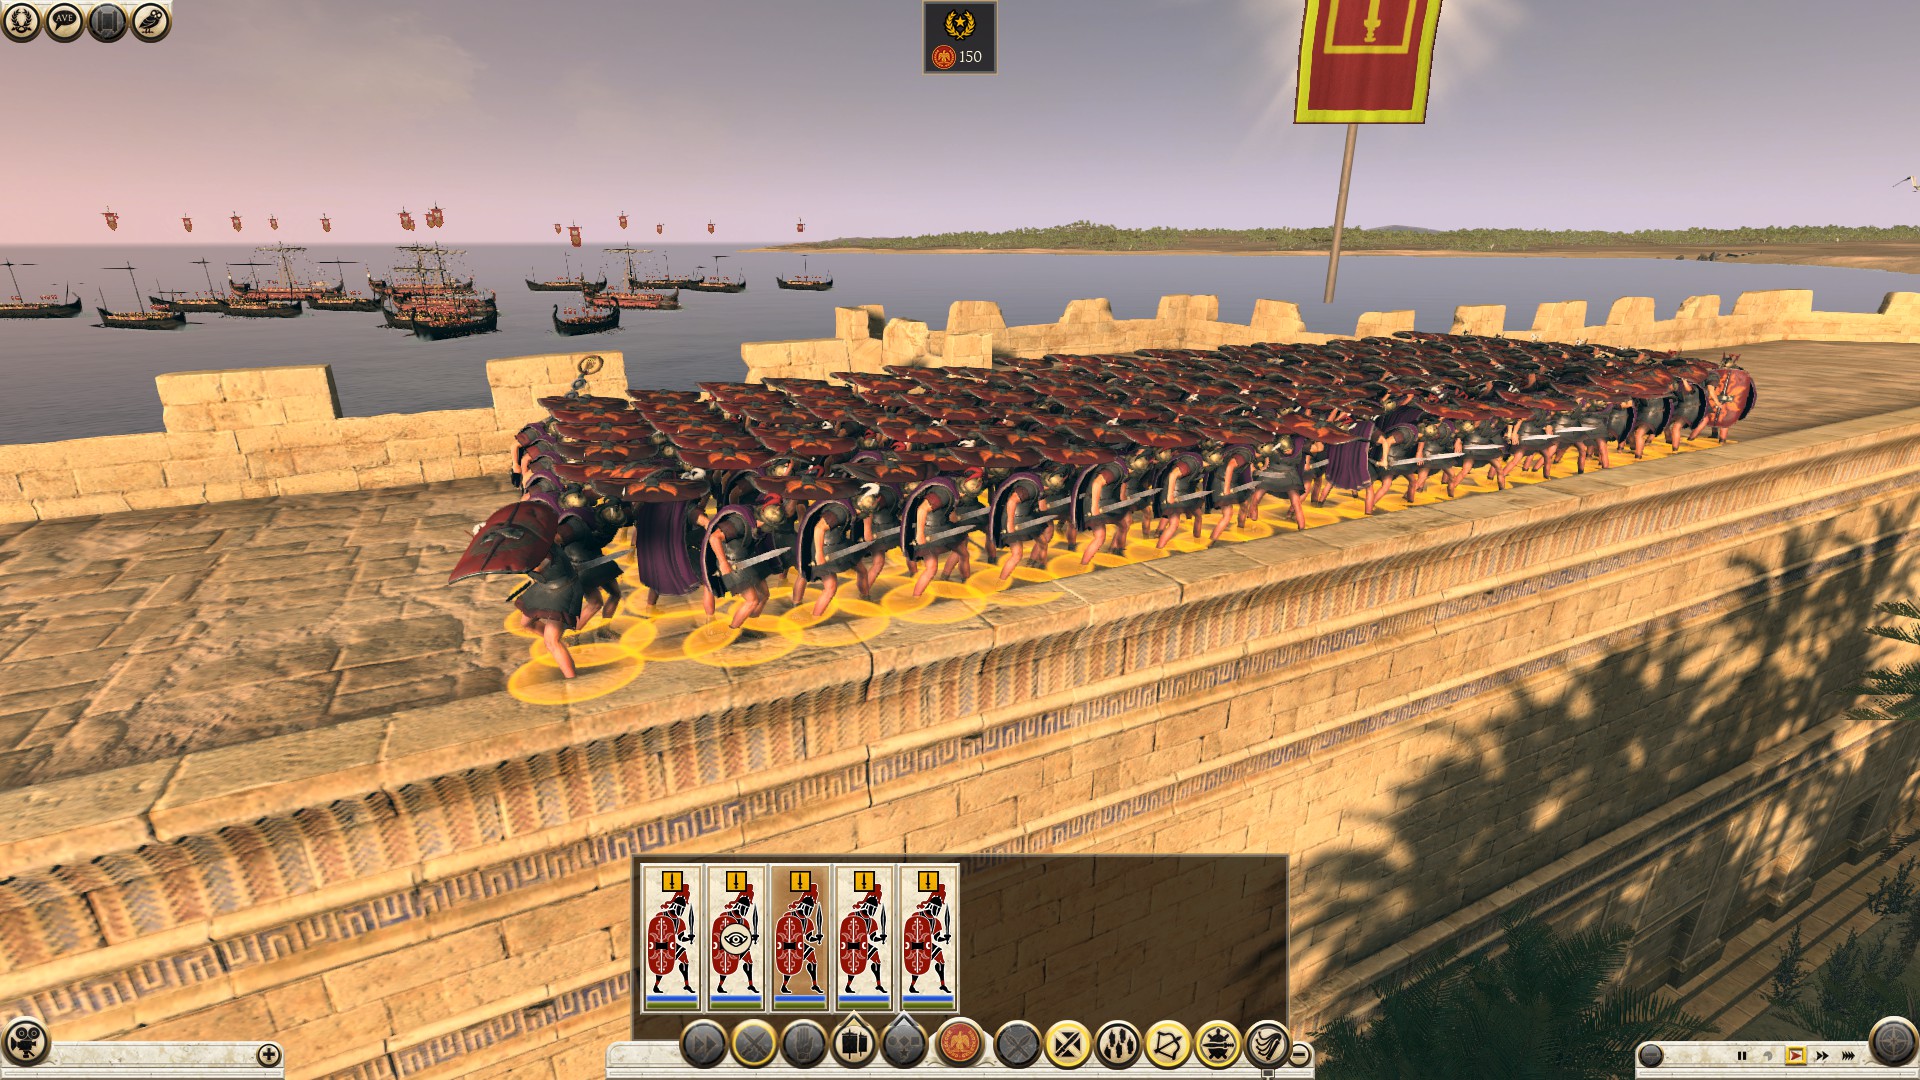
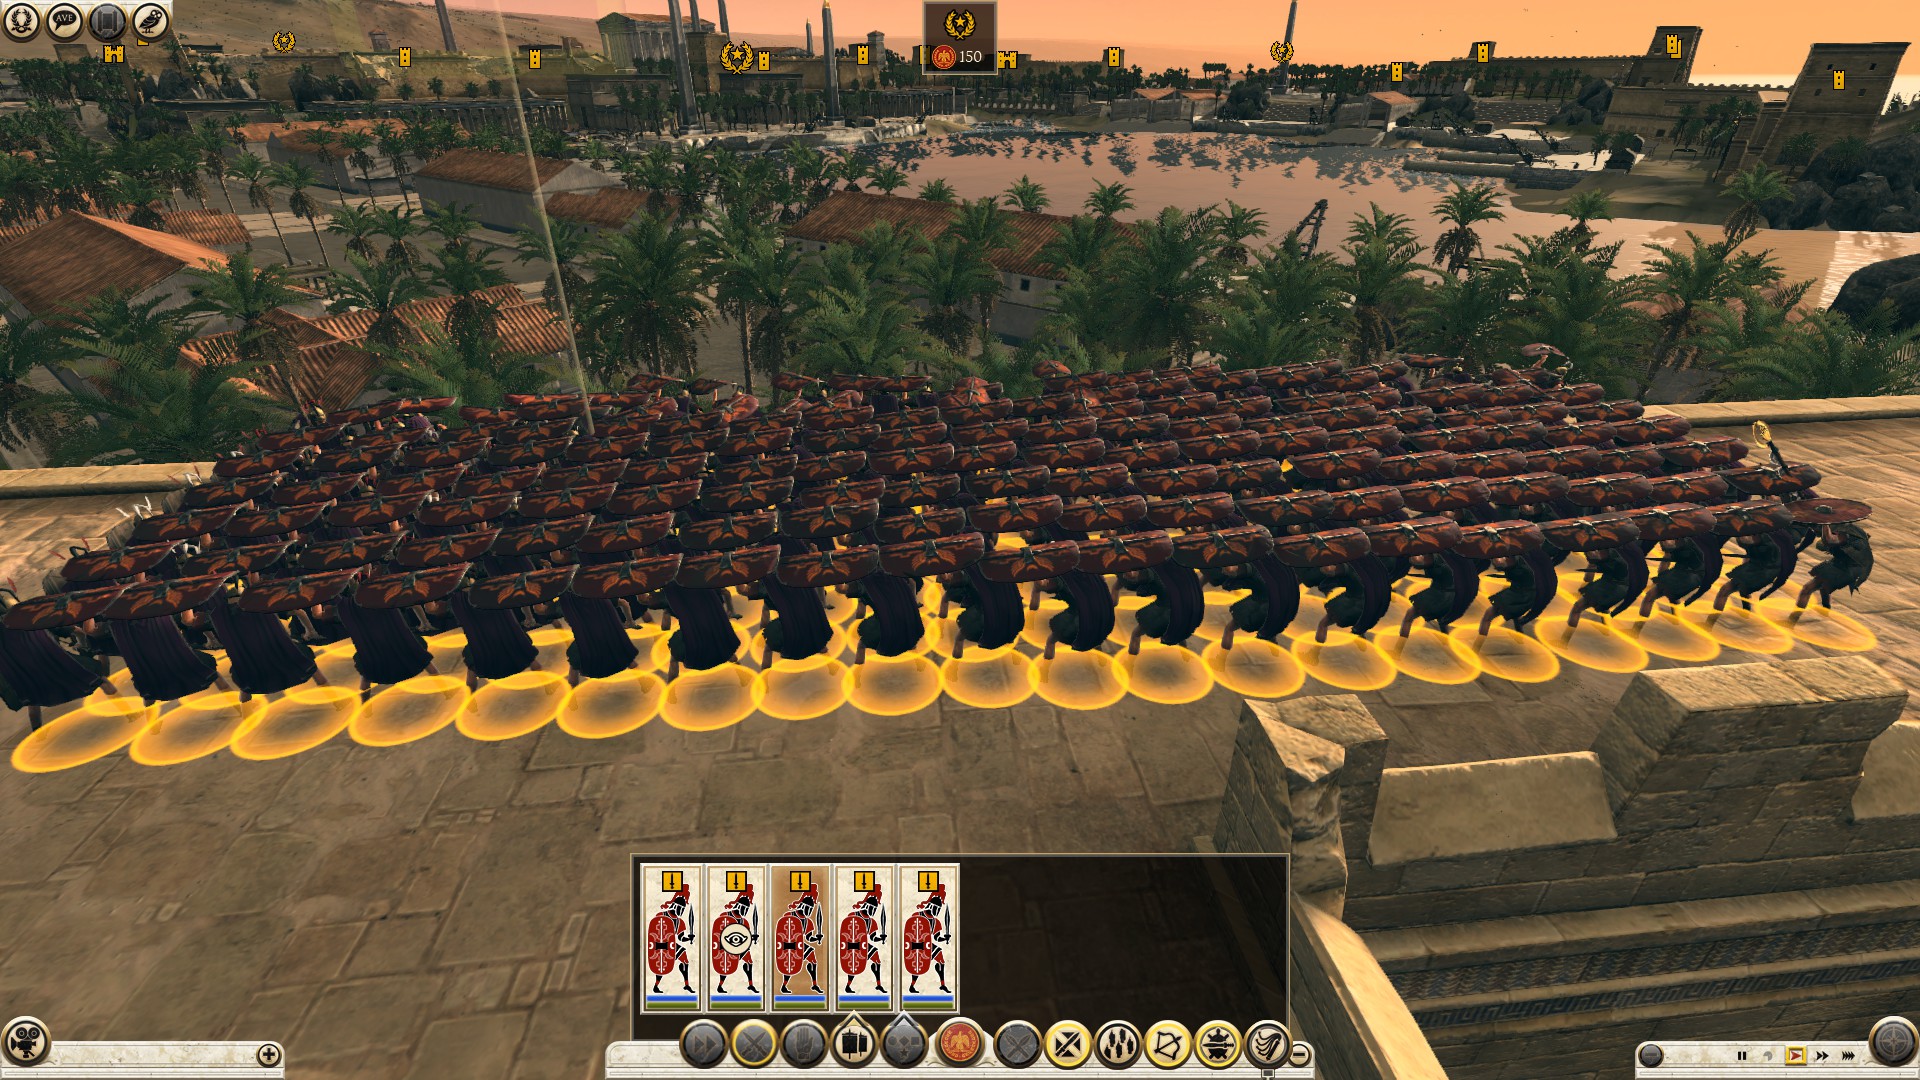
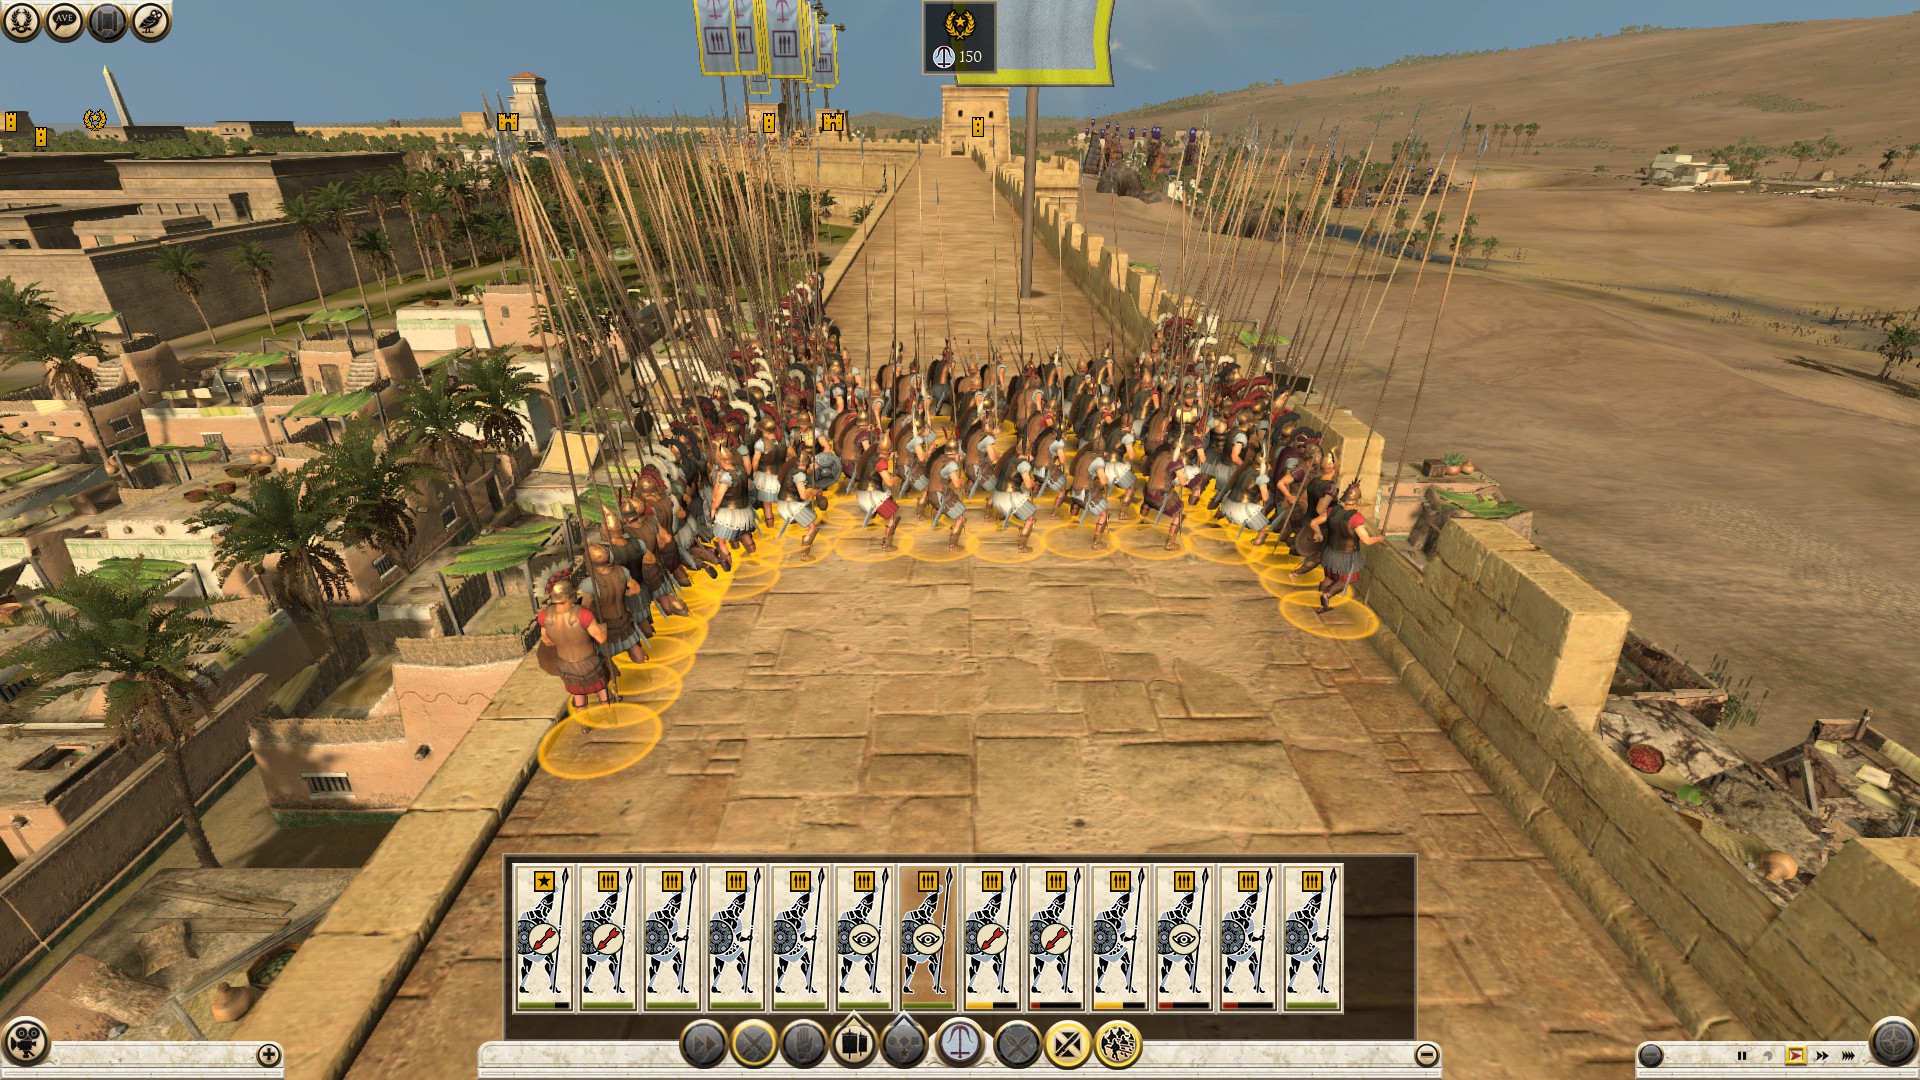
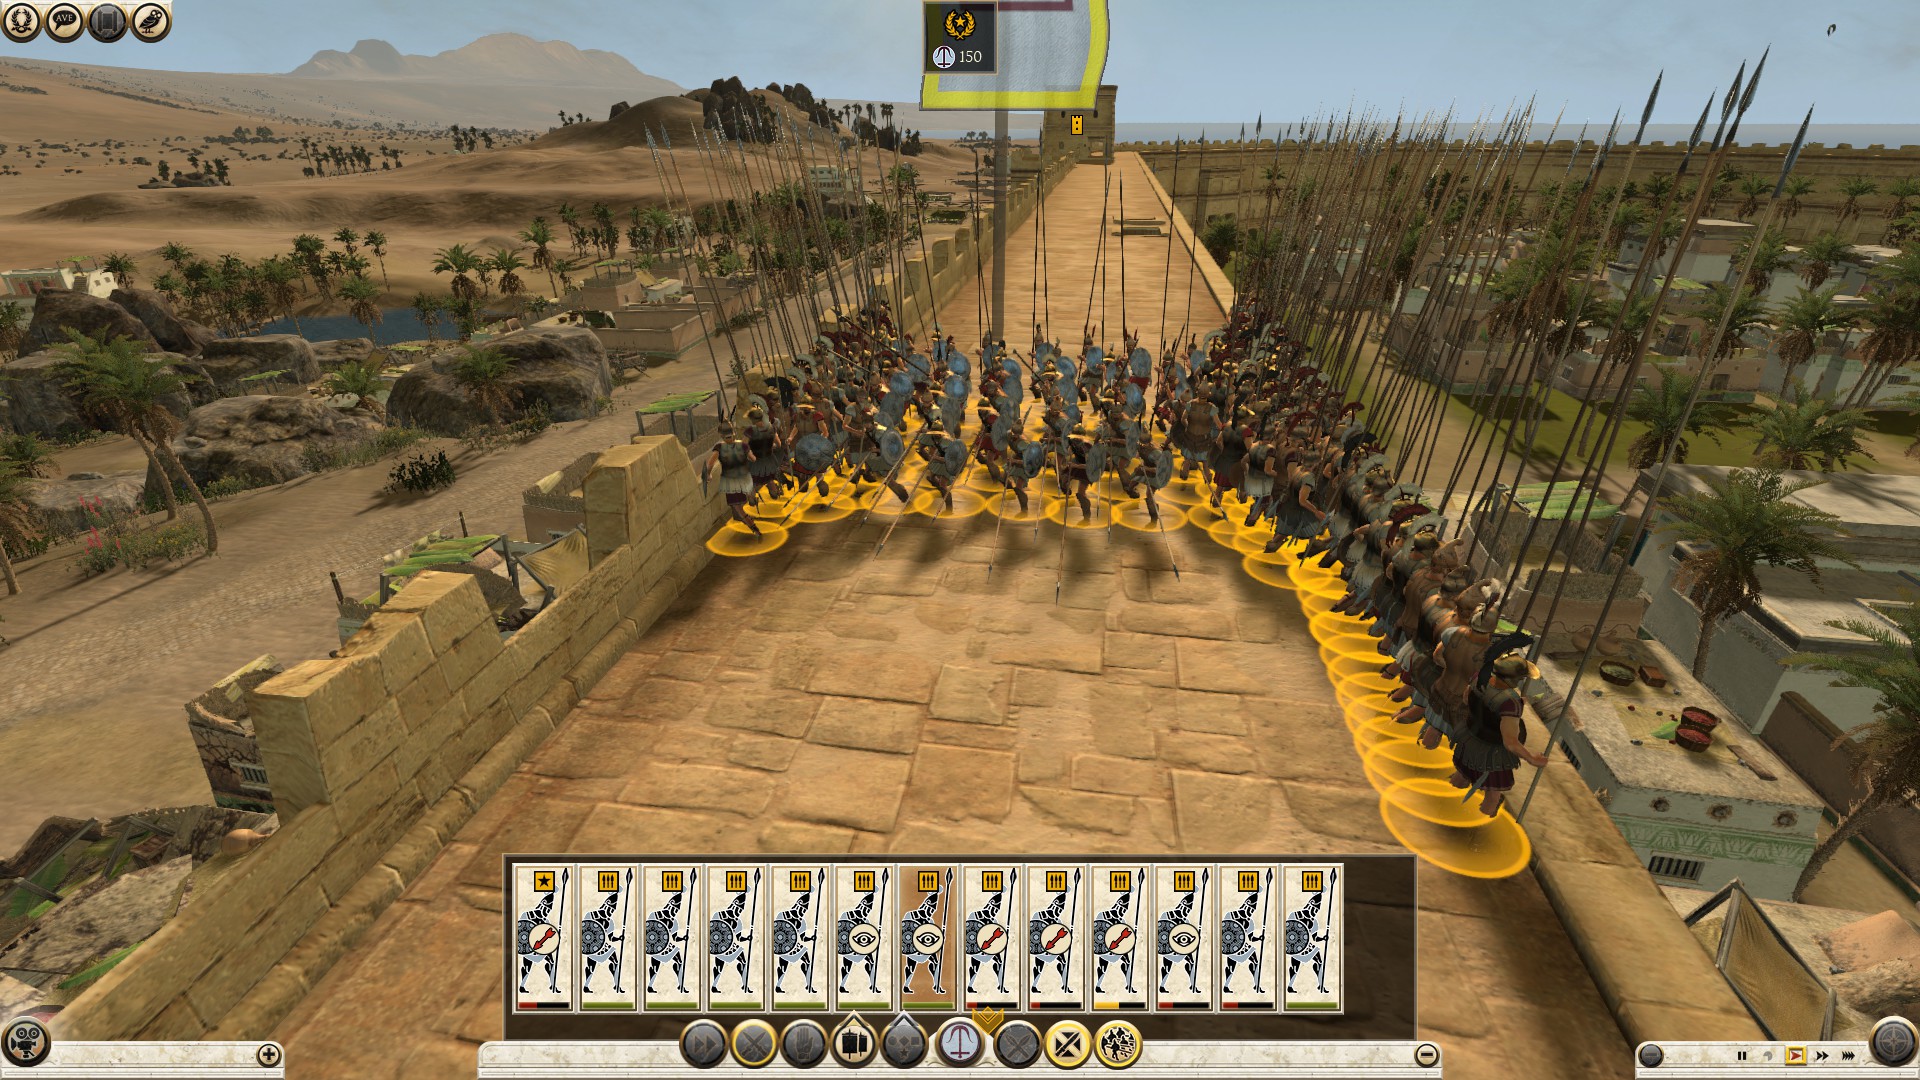
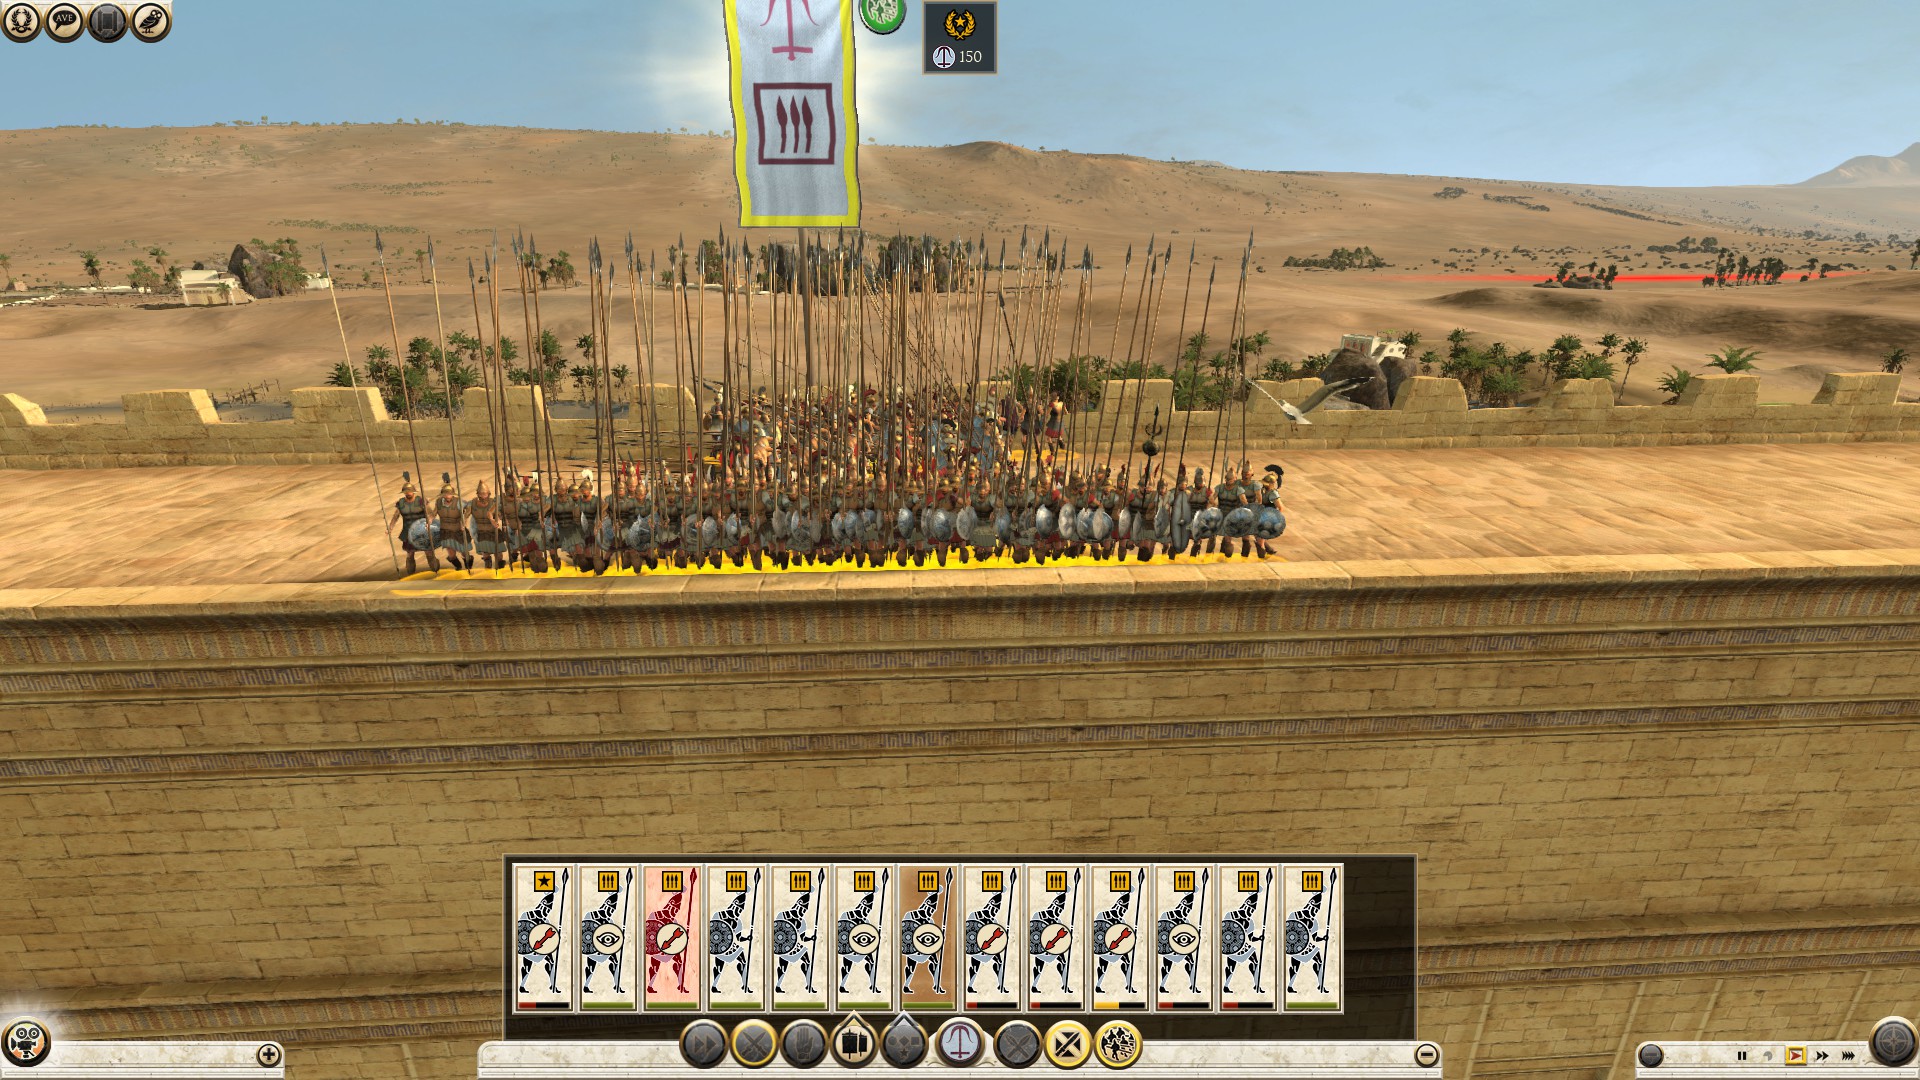
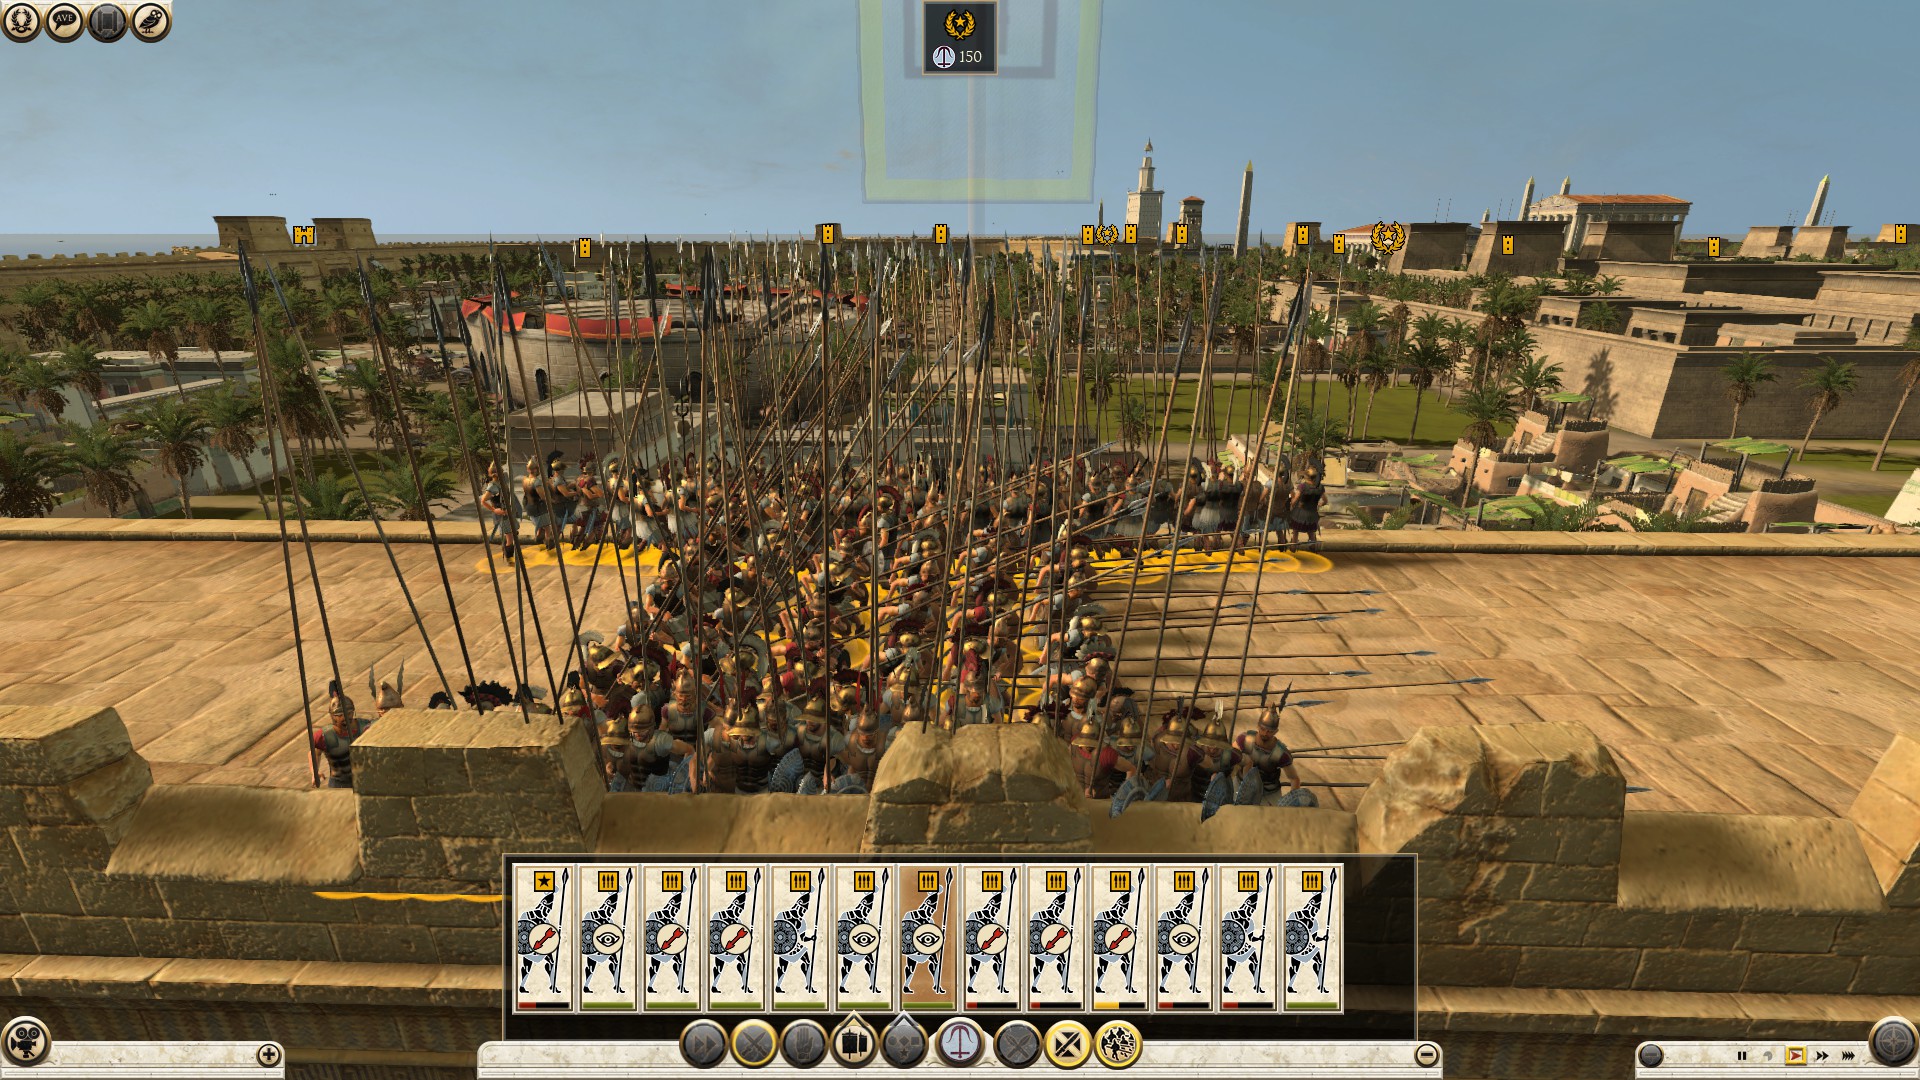
The testudo and pike phalanx formations are useless when it comes to wall fighting. The testudo will leave the legions immobile and exposed from all sides to rangers, except the front, while the phalanx is not in full formation and can easily be killed (even when attacked from the side the few pike men are facing).
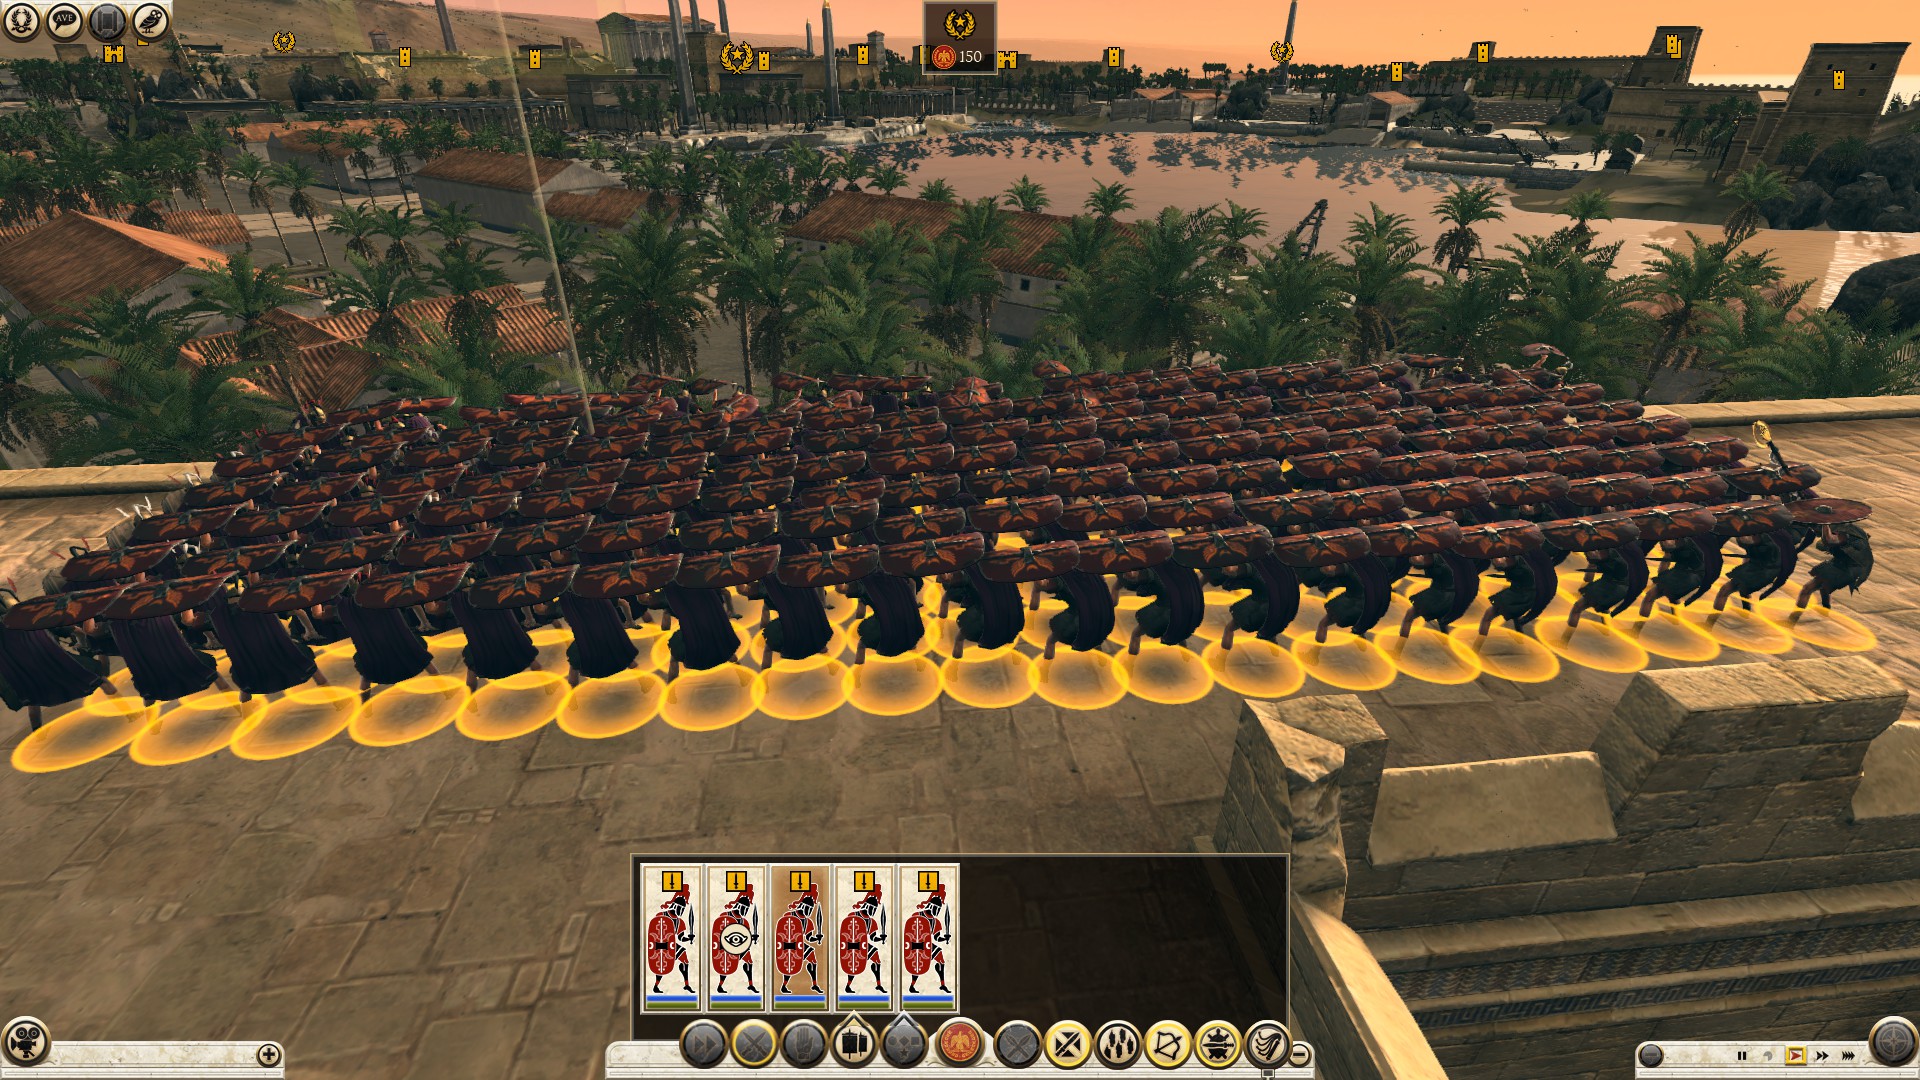
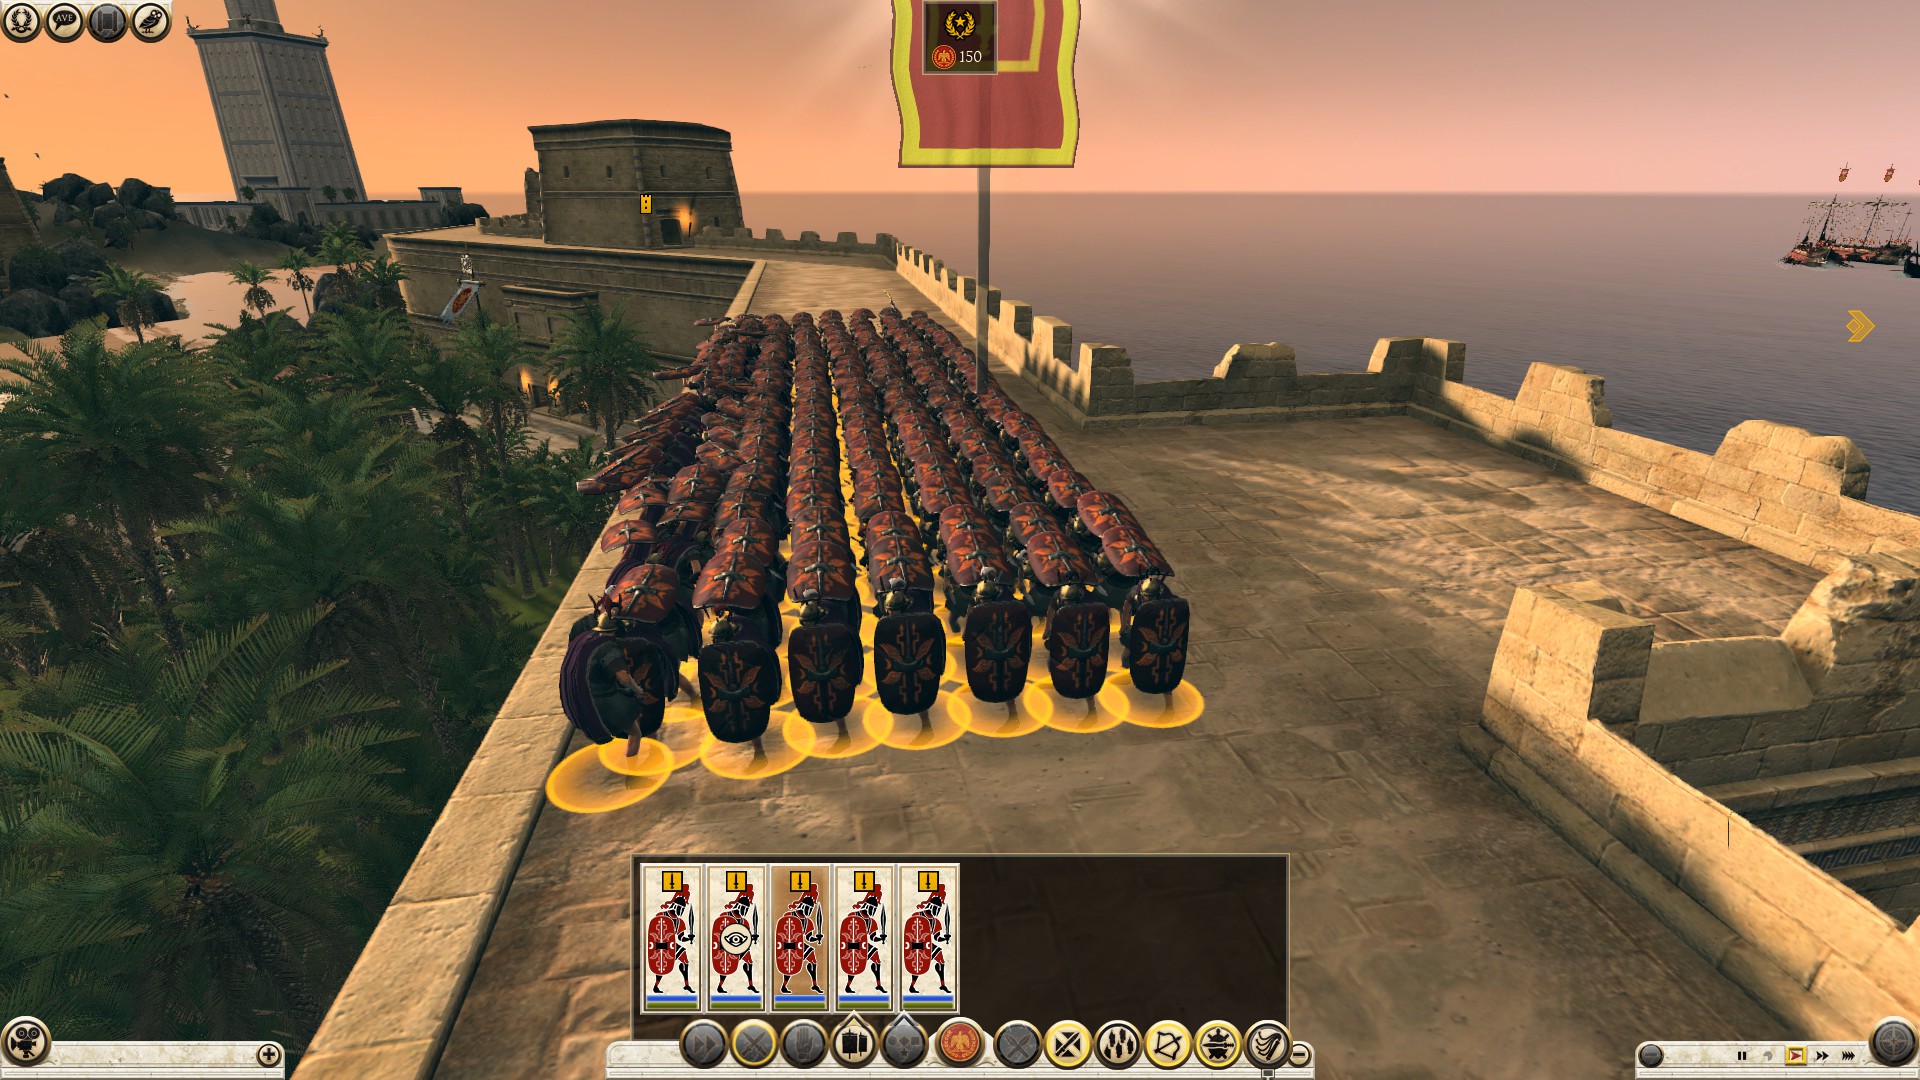
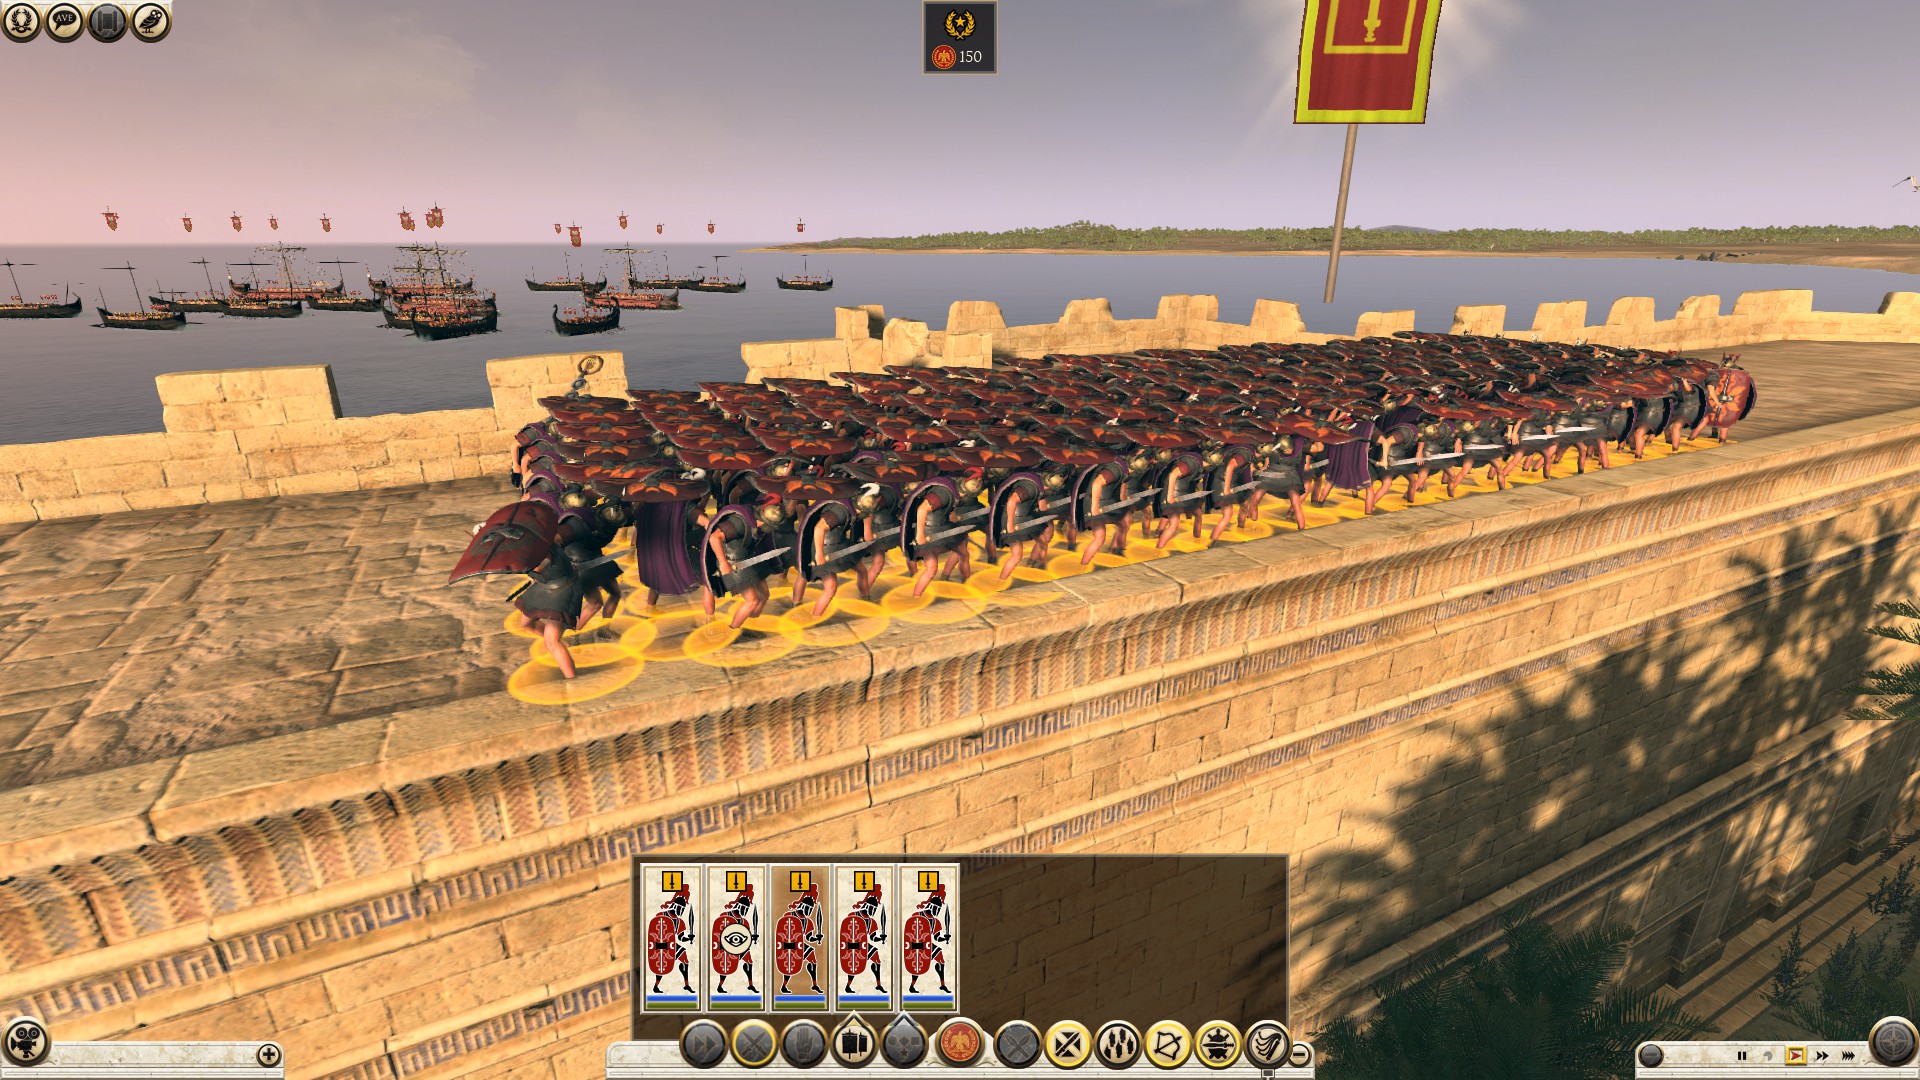
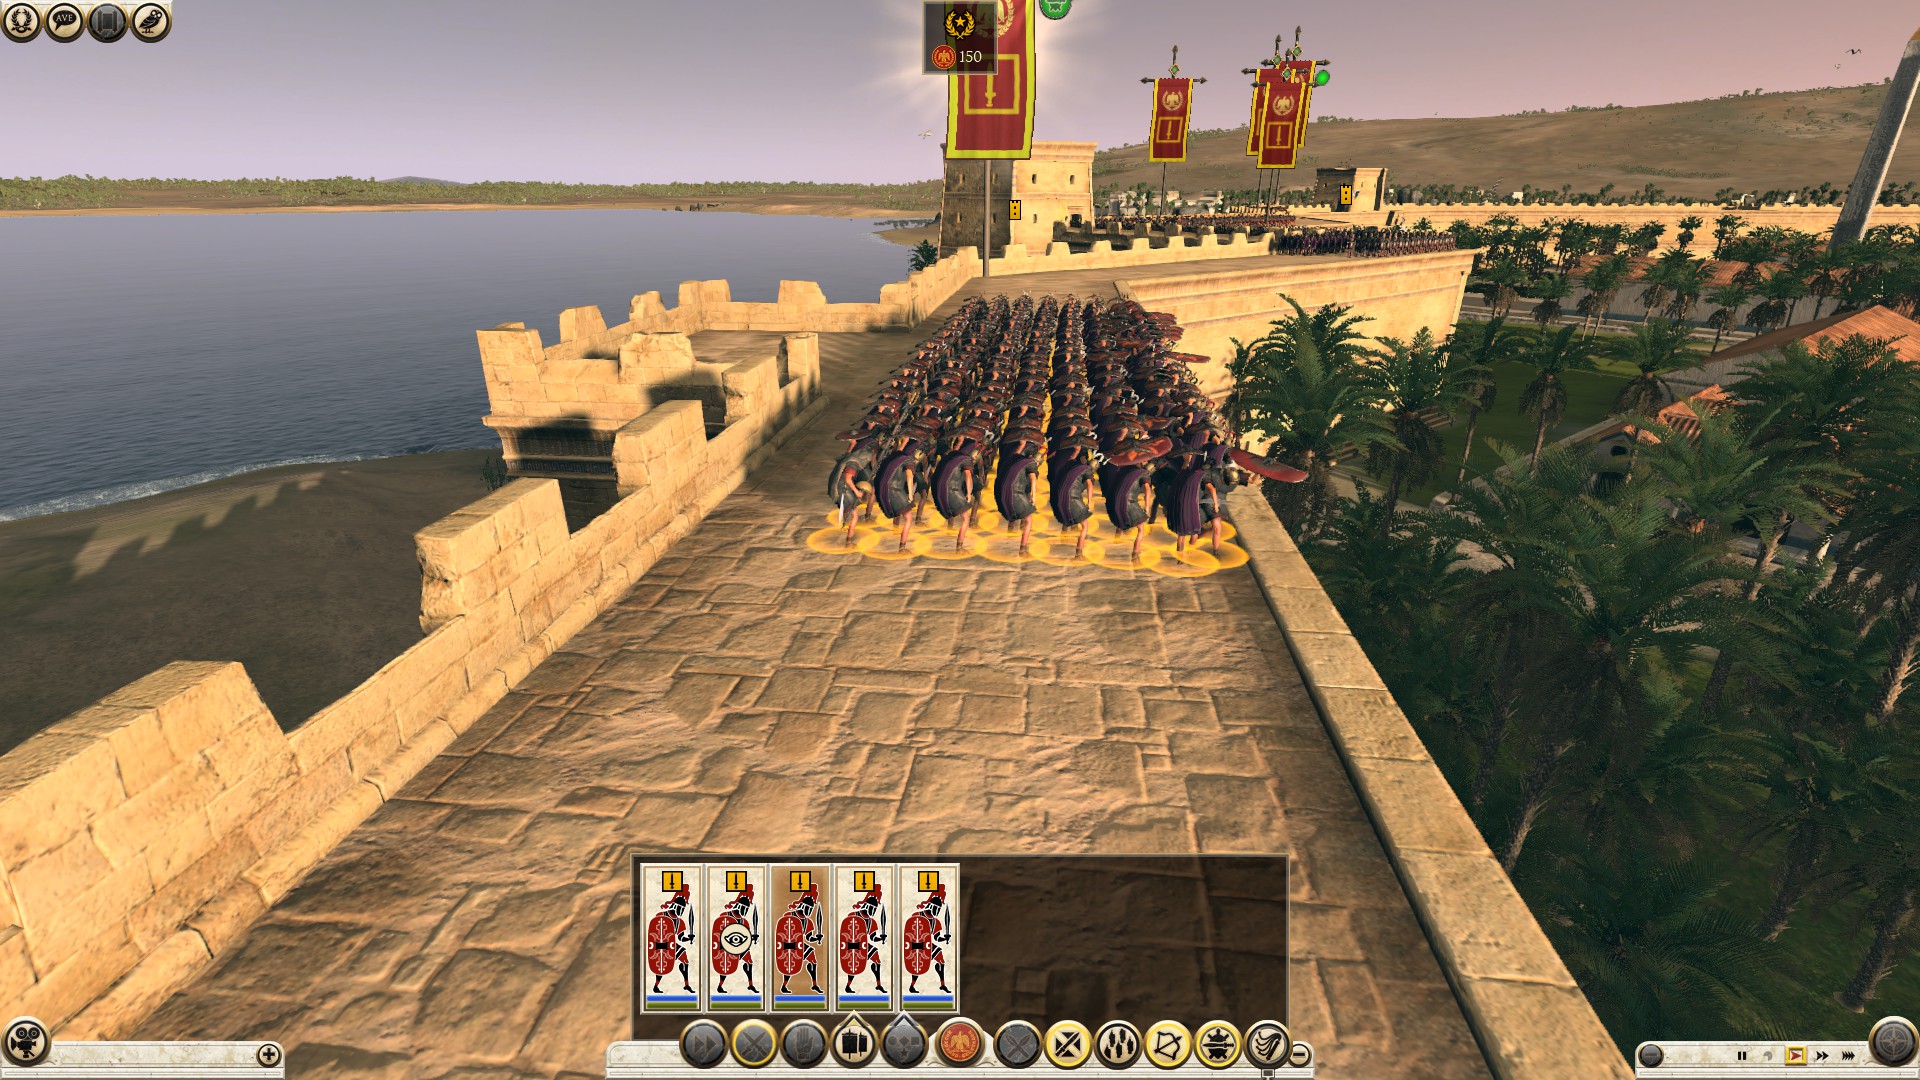
Study the advancement of the opponent like chess, try to see where they might want to be in the future based on their current moves. If the opponent brought a lot of towers that carry scorpions, do not put your units on the walls, the scorpions will rip you open. Line them up on the bottom of the wall in thin lines near the stairs so you can have the options of going on the wall or running elsewhere depending on the situation. It is not a bad idea to deploy units a little away from the action, so if you fail to hold the attacking wall units in place and they try to run to the other side of the wall, you have units that can stop them. Line up your rangers behind on the bottom of the wall, facing the incoming towers, so when and if the opponent lands on the walls, barrage them while they are being held in place by your melee units. Do not give up the walls.
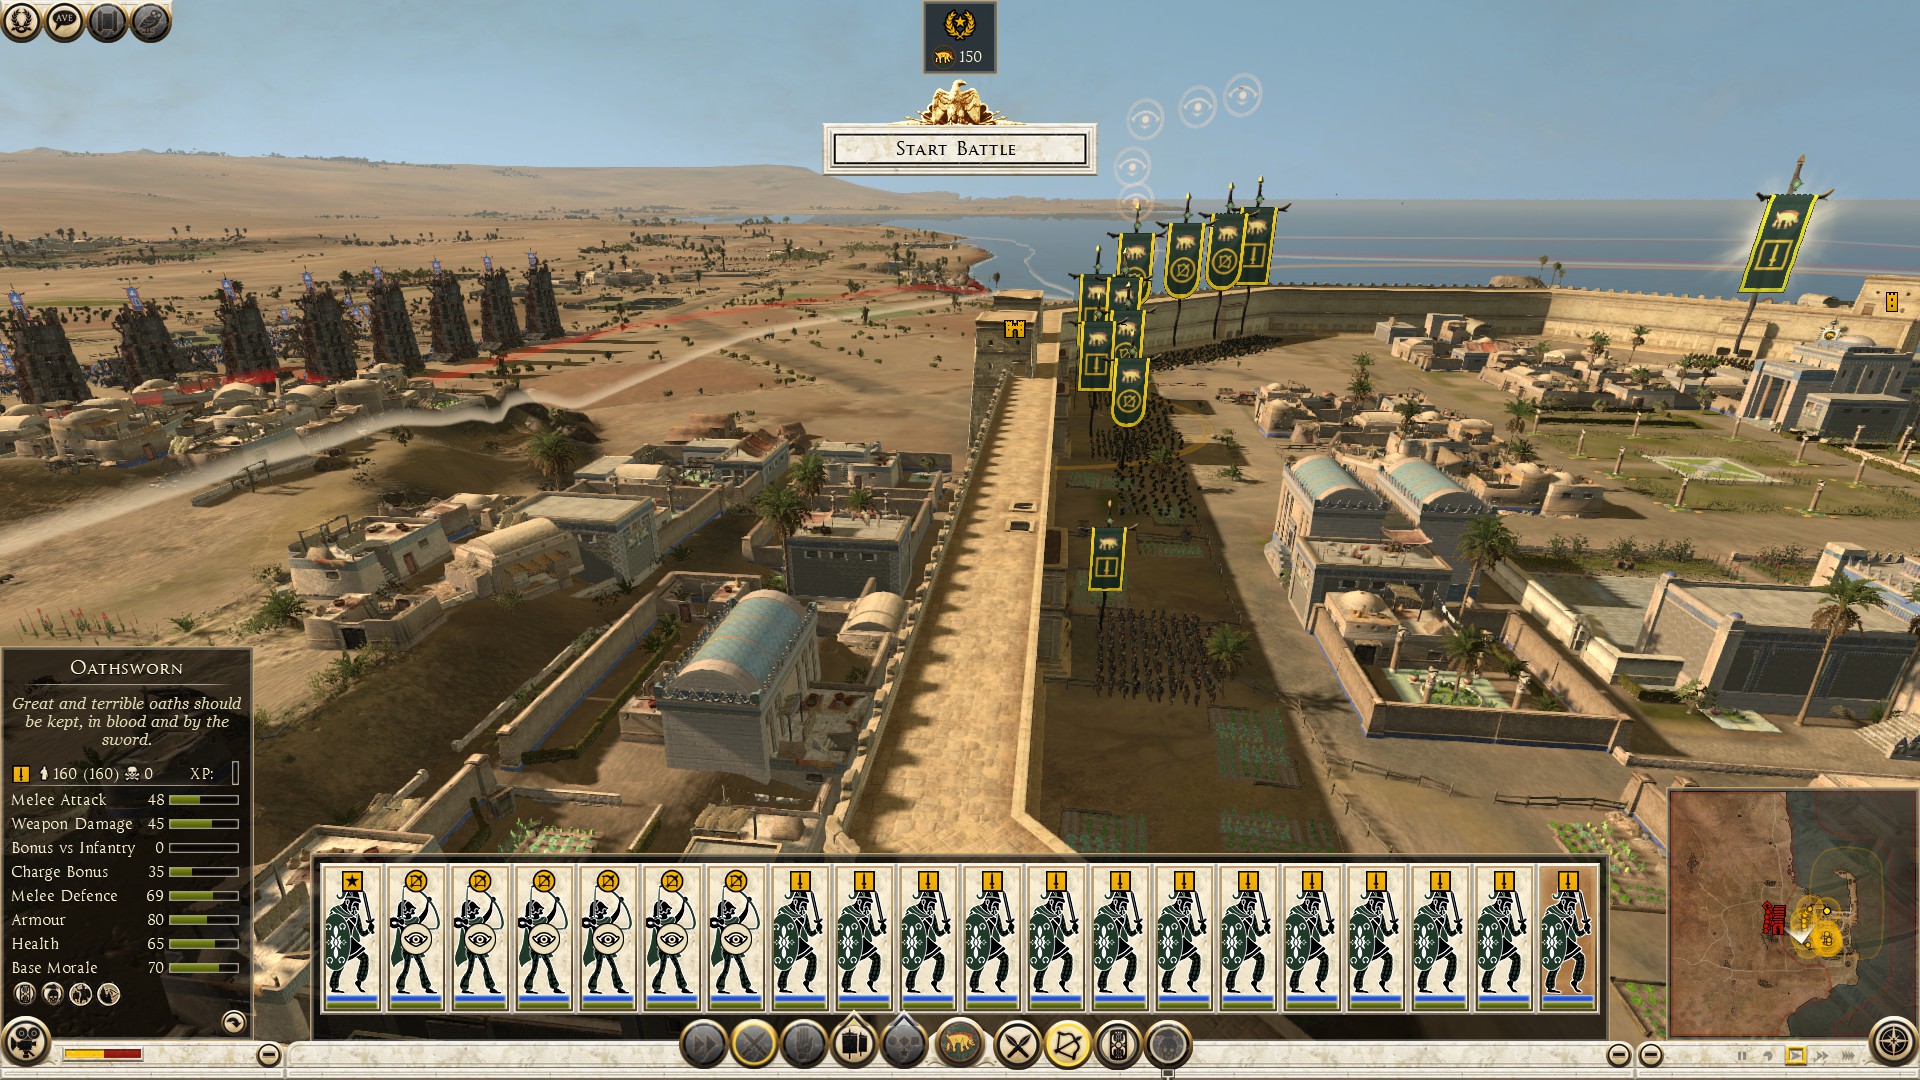
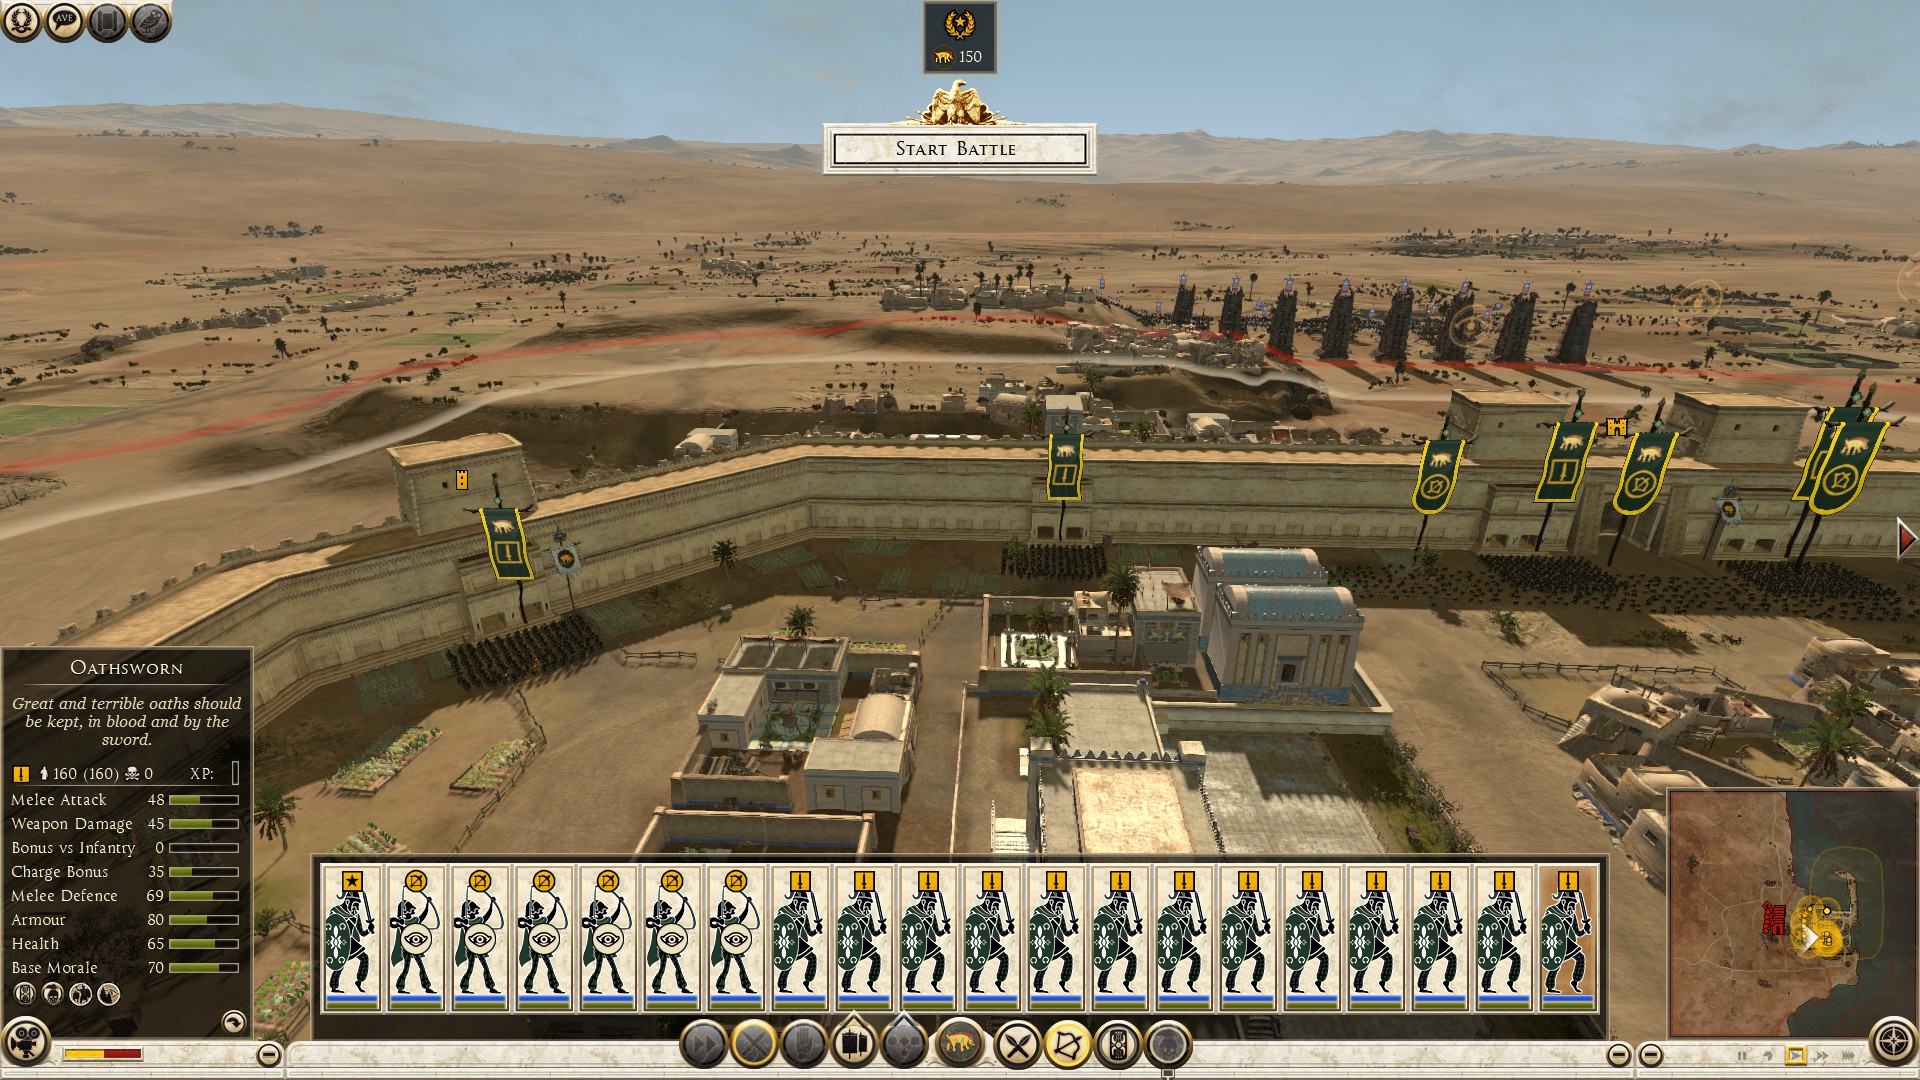
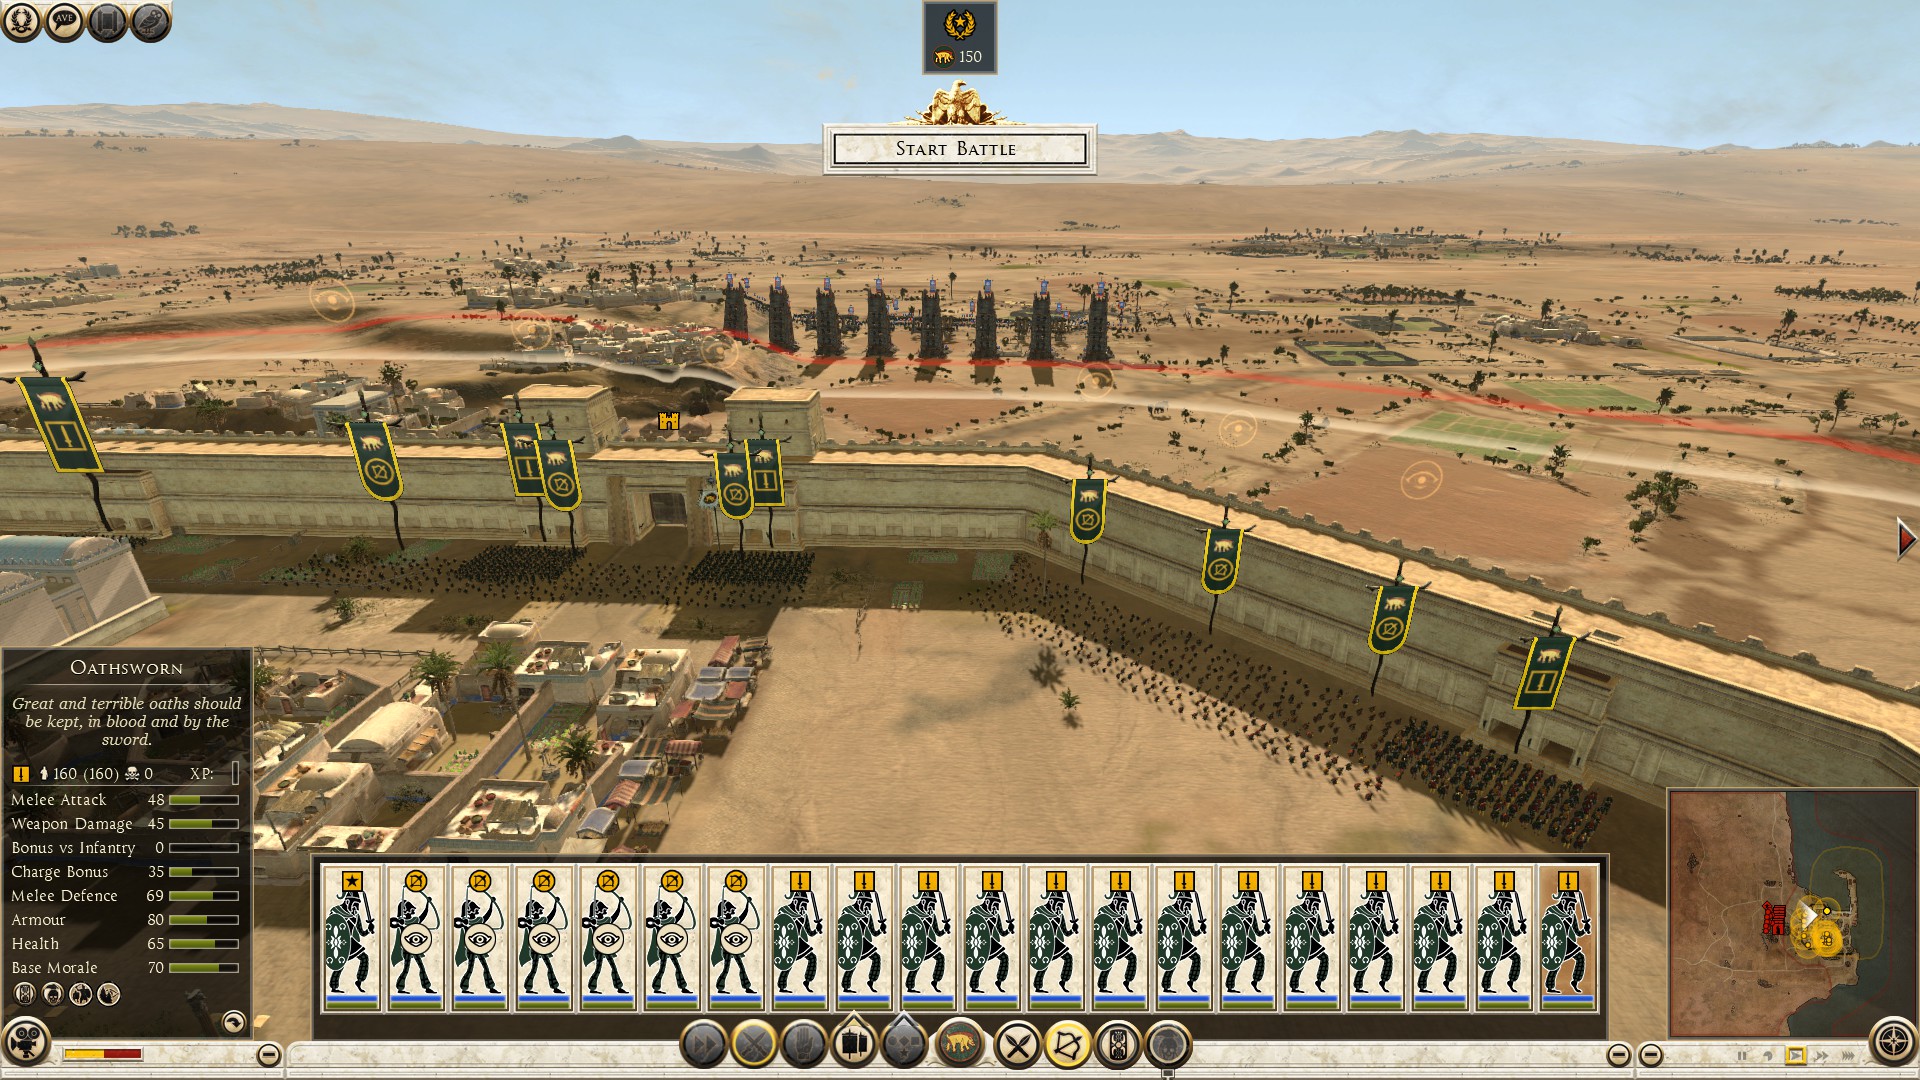
The opponent can prevent this from happening by engaging your rangers with theirs. In this instance, you need to take them out, by the element of surprise preferably if you can. Keep your rangers concealed and strike the opponent(s) first, the first strike will devastate the attacking archers and by the time they respond, you have the upper hand. Experienced attackers move their towers very close to the wall to reveal hiding units first before they go on a full assault, which is fine. Defenders have the upper hand in skirmish since the attackers must move their archers into range, reload, and fire, unlike the defending rangers who are in position only needing to draw and fire which is faster. Skirmish the opponent’s archers while your melee engages the enemy on walls. (Tip: never shoot attacking towers because it's a waste of ammunition).
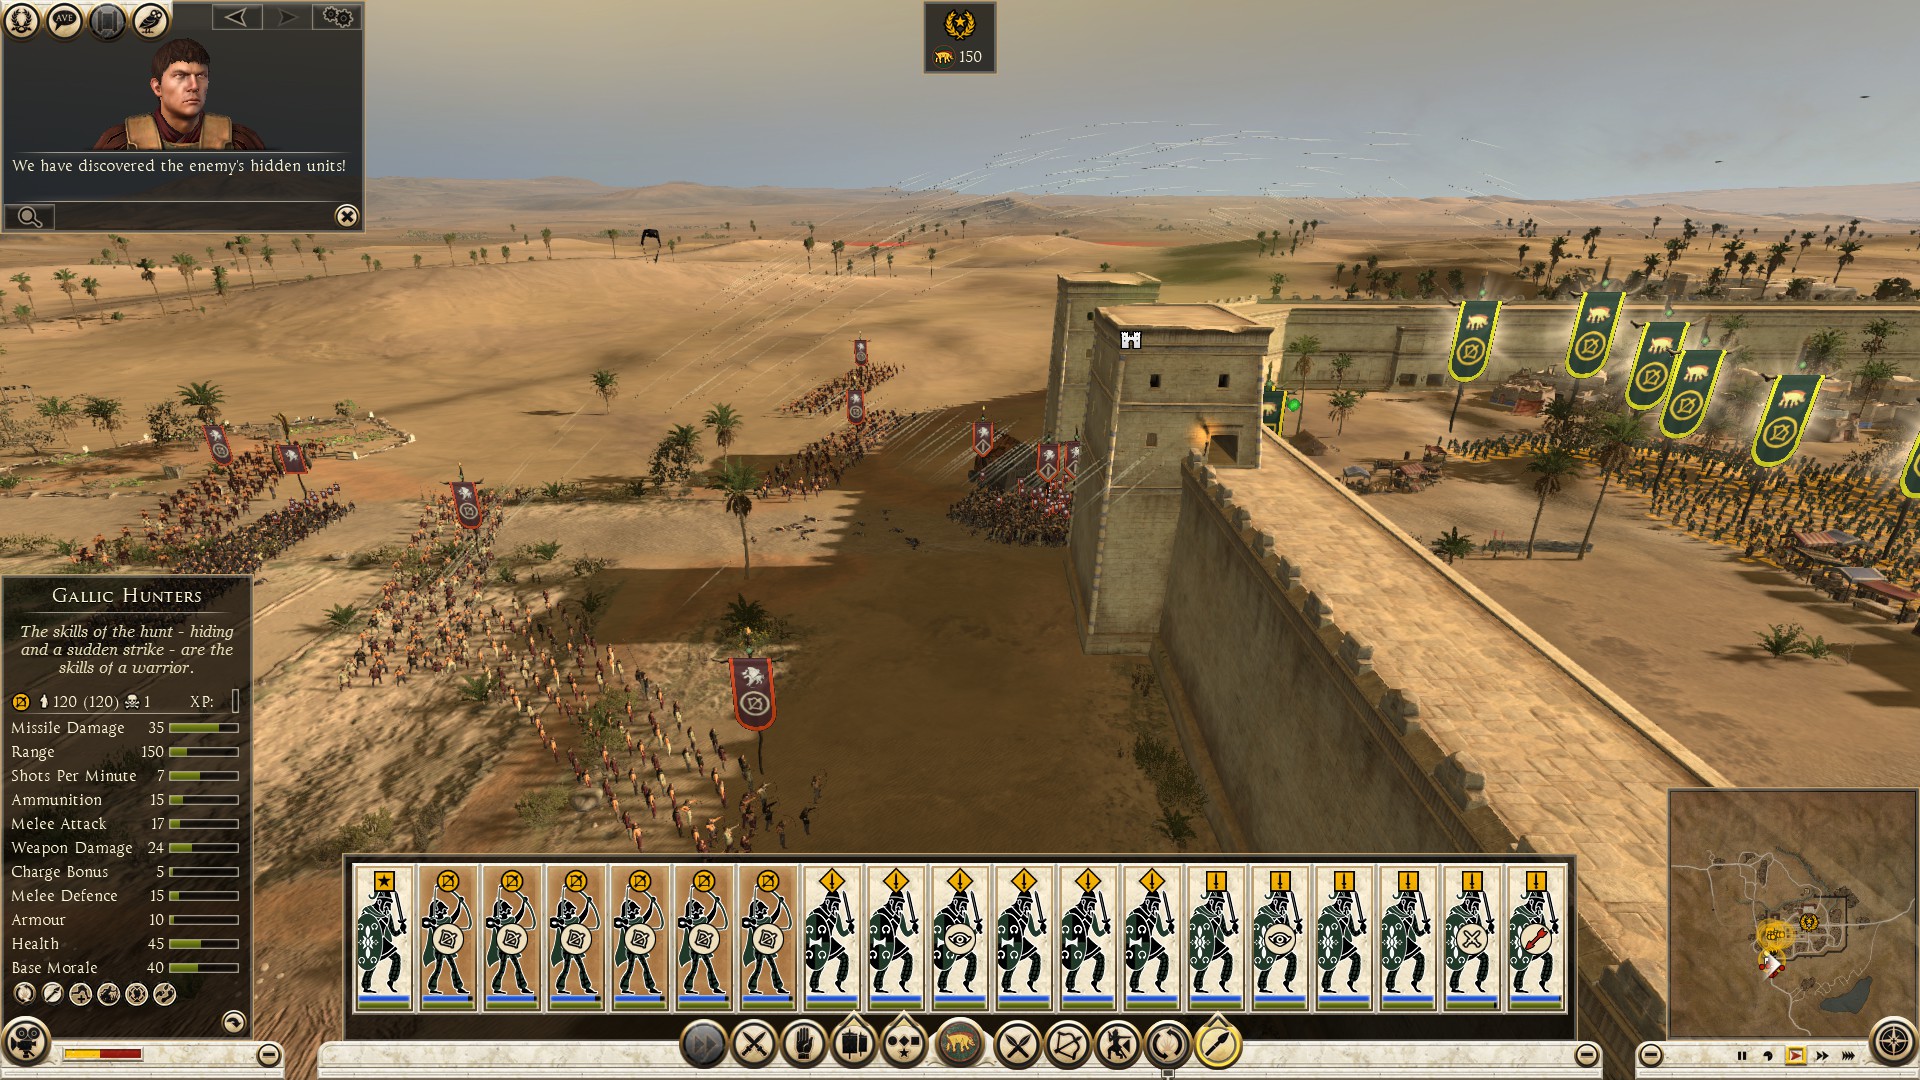
The opponents won’t have many options to choose from except to try spreading their units and attack you at multiple points (we will go into later), burn down the gates, or keep sending men to the same area hoping they can break through. If the opponent tries to burn down the gate and rush through, maintain control over the gates so it drops hot oil on the invaders, and have at least two units preventing the enemy from punching through that small space. If the opponent keeps sending reinforcements to the wall units, do the same, keep the enemy surrounded.
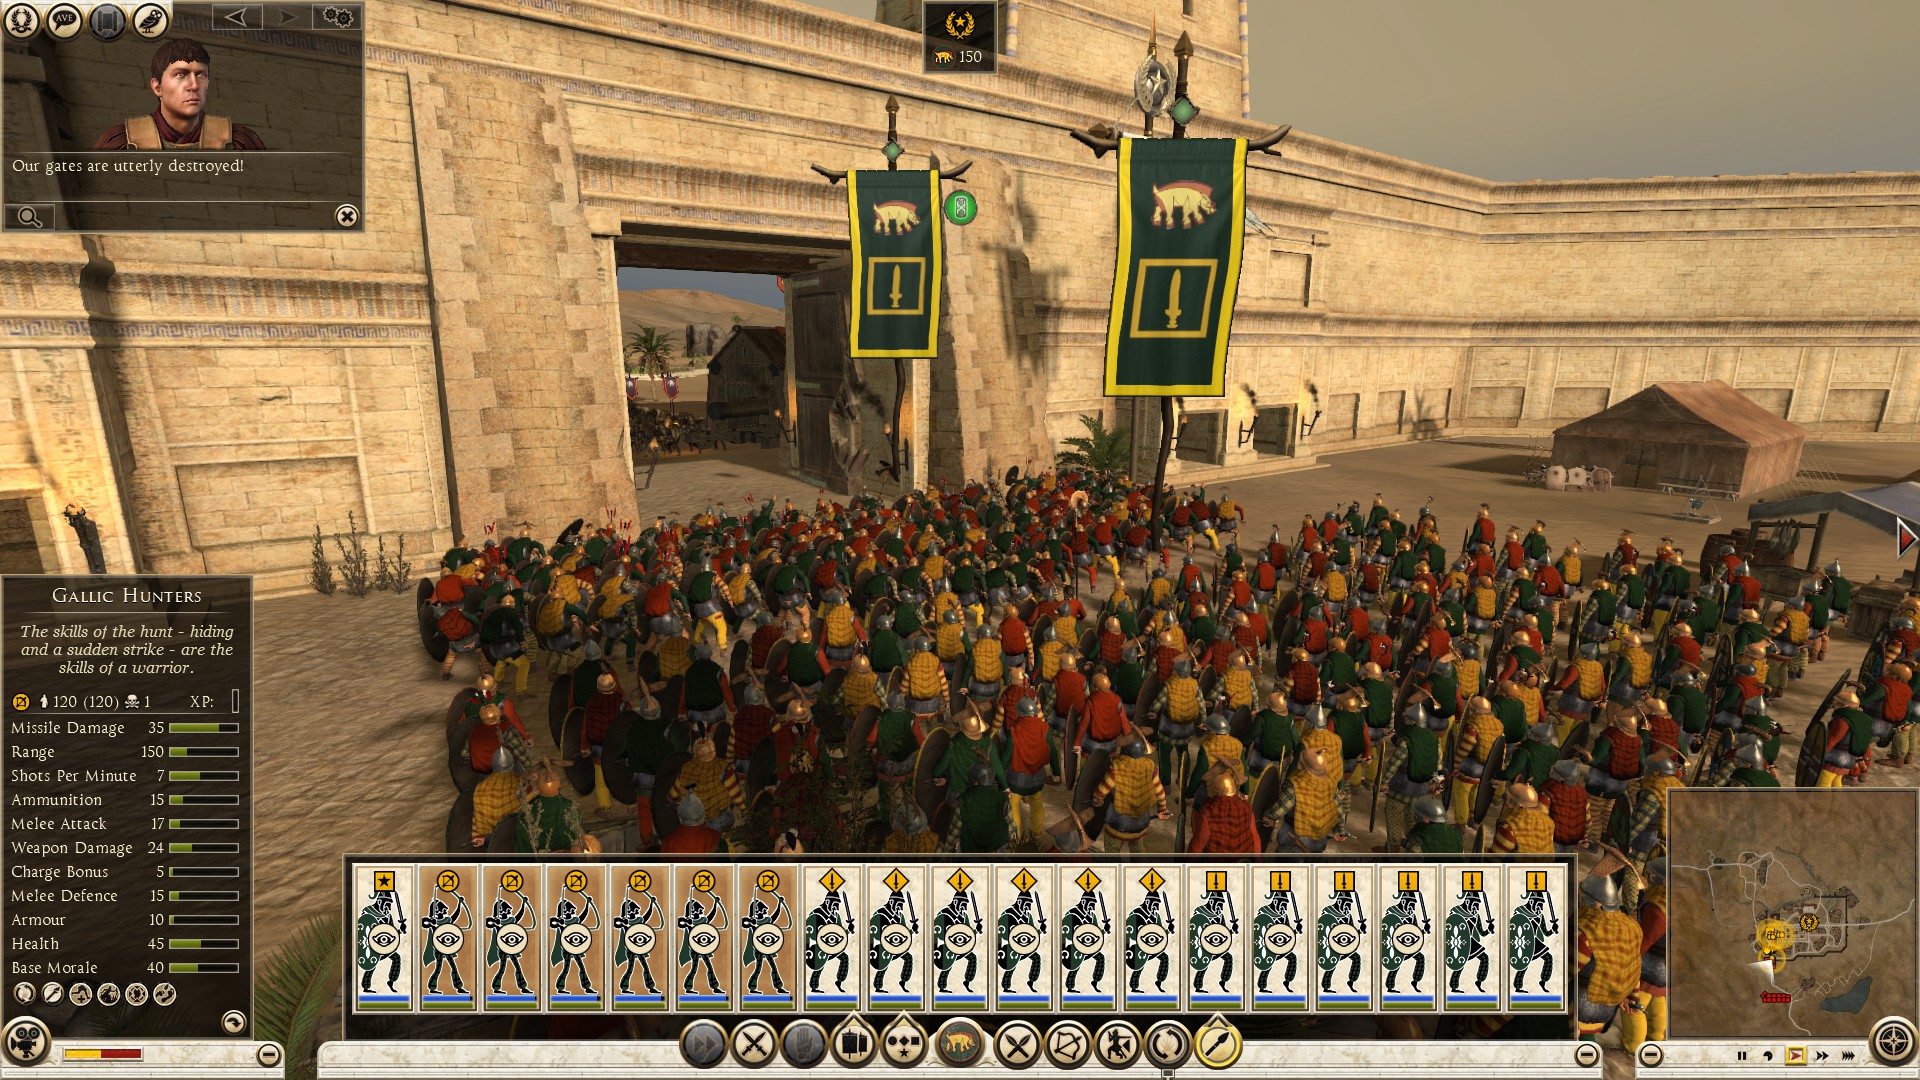
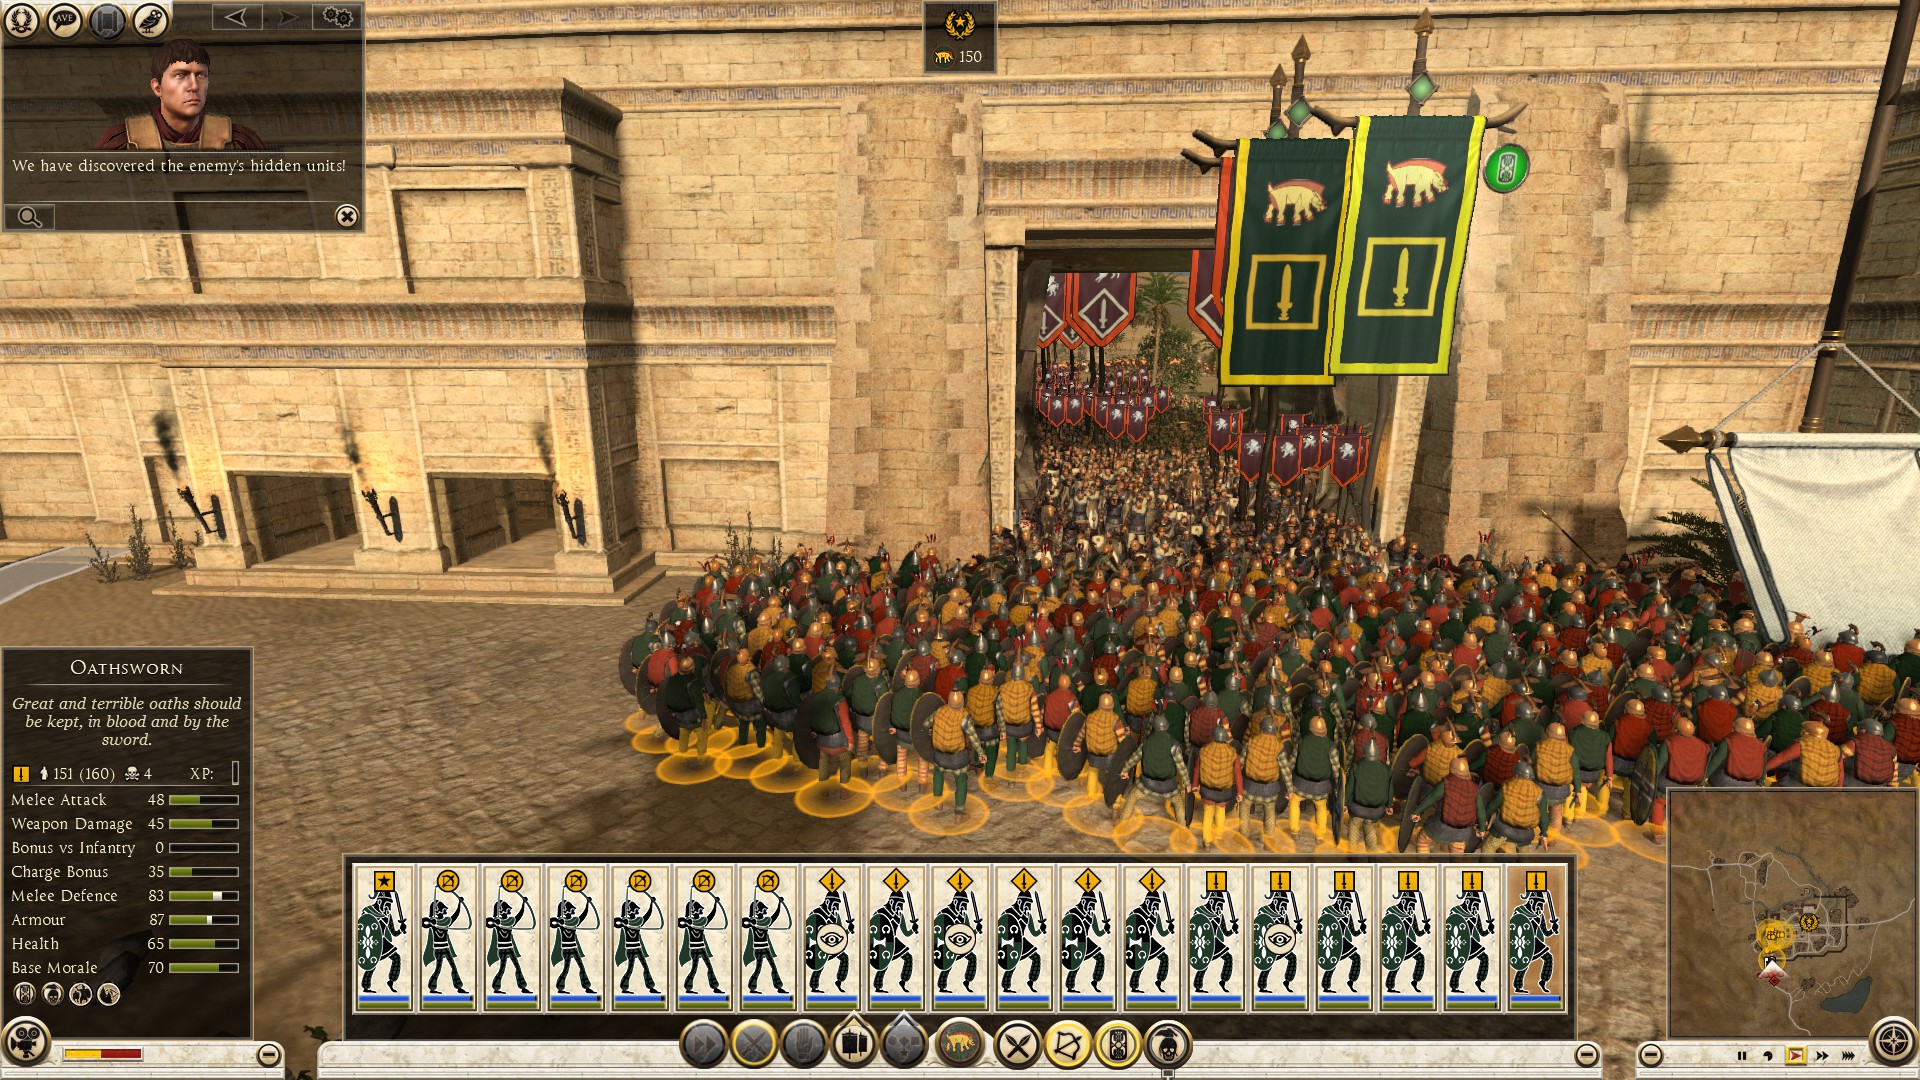
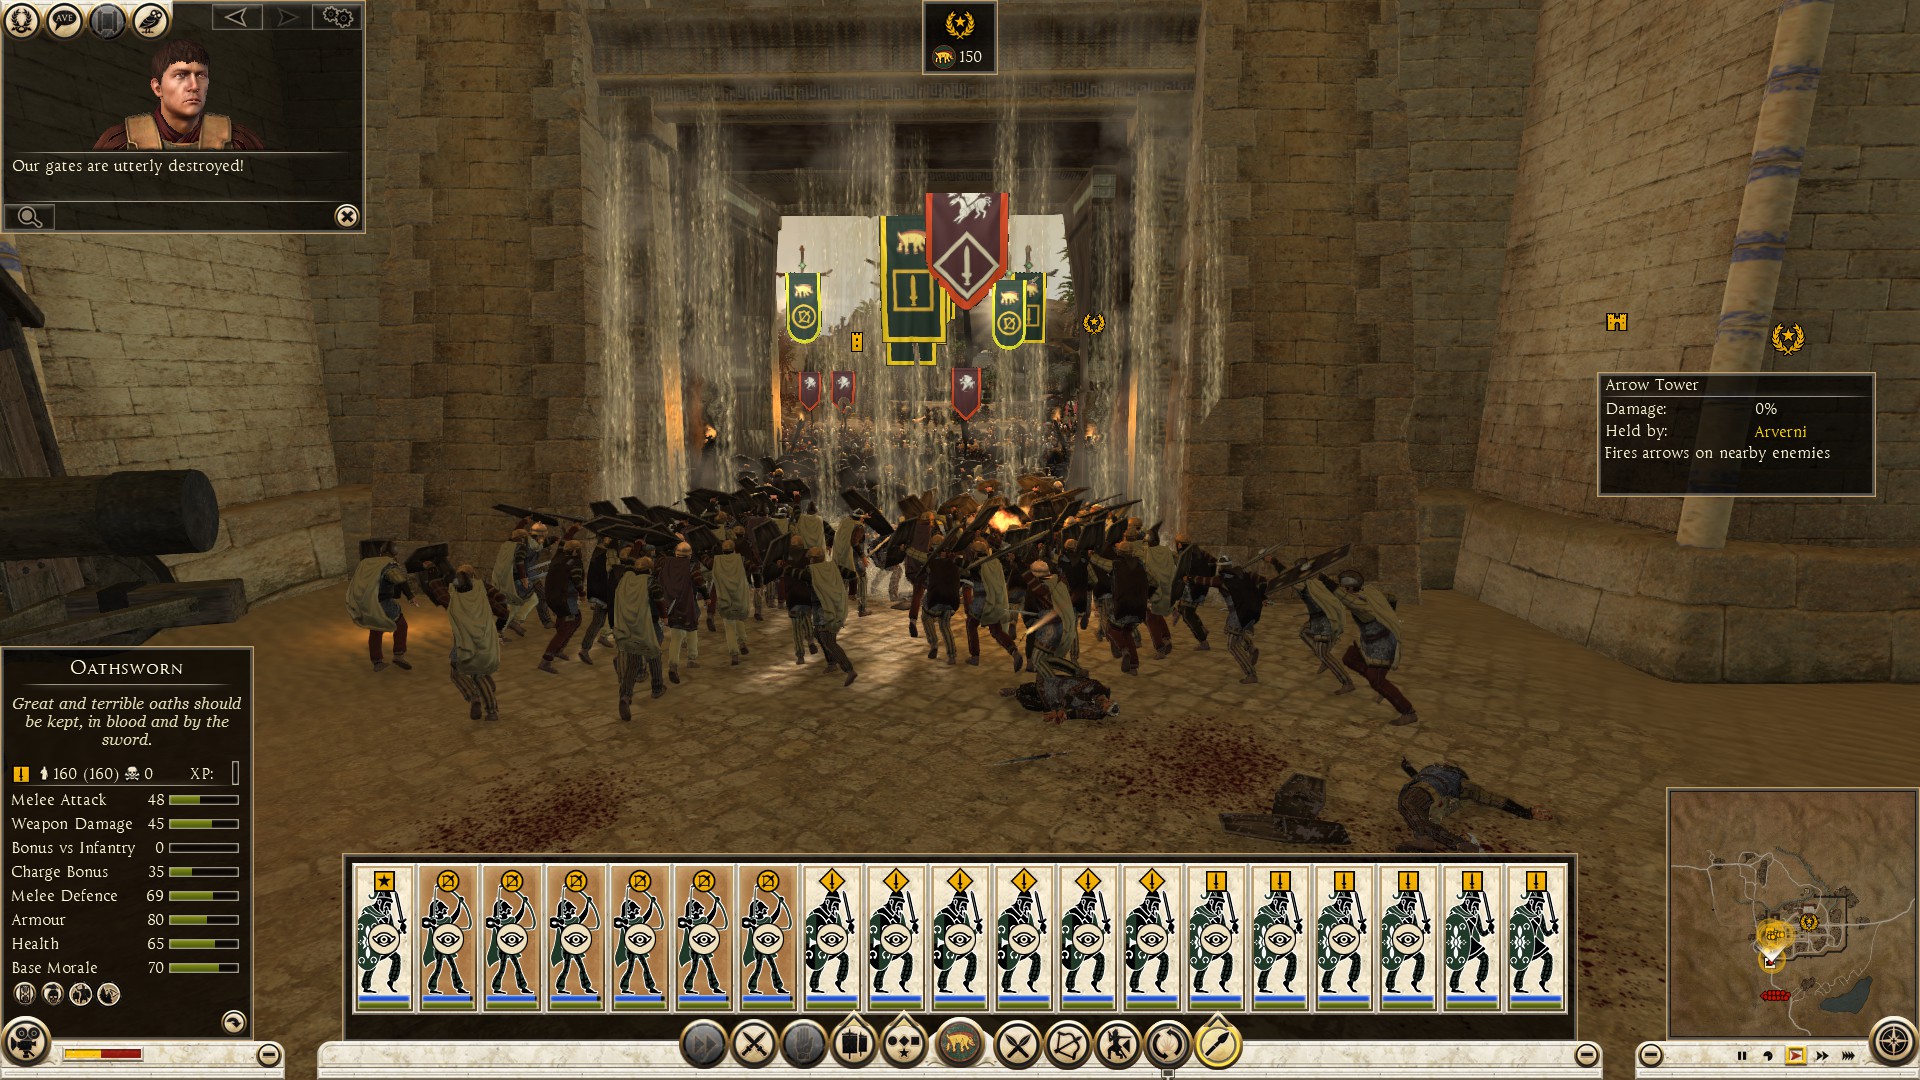
What happens if the attacker wins the skirmish fight? Archers have 15 arrows in their arsenal, your goal is to eliminate them by either: (a) depleting their ammo (b) route. By the time they take out your archers, they should have less arrows and soldiers than they started with, still problematic but better than full ammo archer units. In other words, they won’t deal the same damage they would deal if they had full units and ammo, hence why you should never cheap out on range units. Range units for me, is the most important unit in the army, they can eliminate enemy rangers and shoot the enemy units from afar, while your melee rest in full numbers until being charged. As a defender though, you don't have to bring archers. You can have a mix of archers and slingers, or if you know what you are doing, all slingers. Slingers can also shoot units at the walls, can be placed on the walls to take out enemy archers, and other uses.
==========================================================================
Defending: City and Port Assault Second Stage
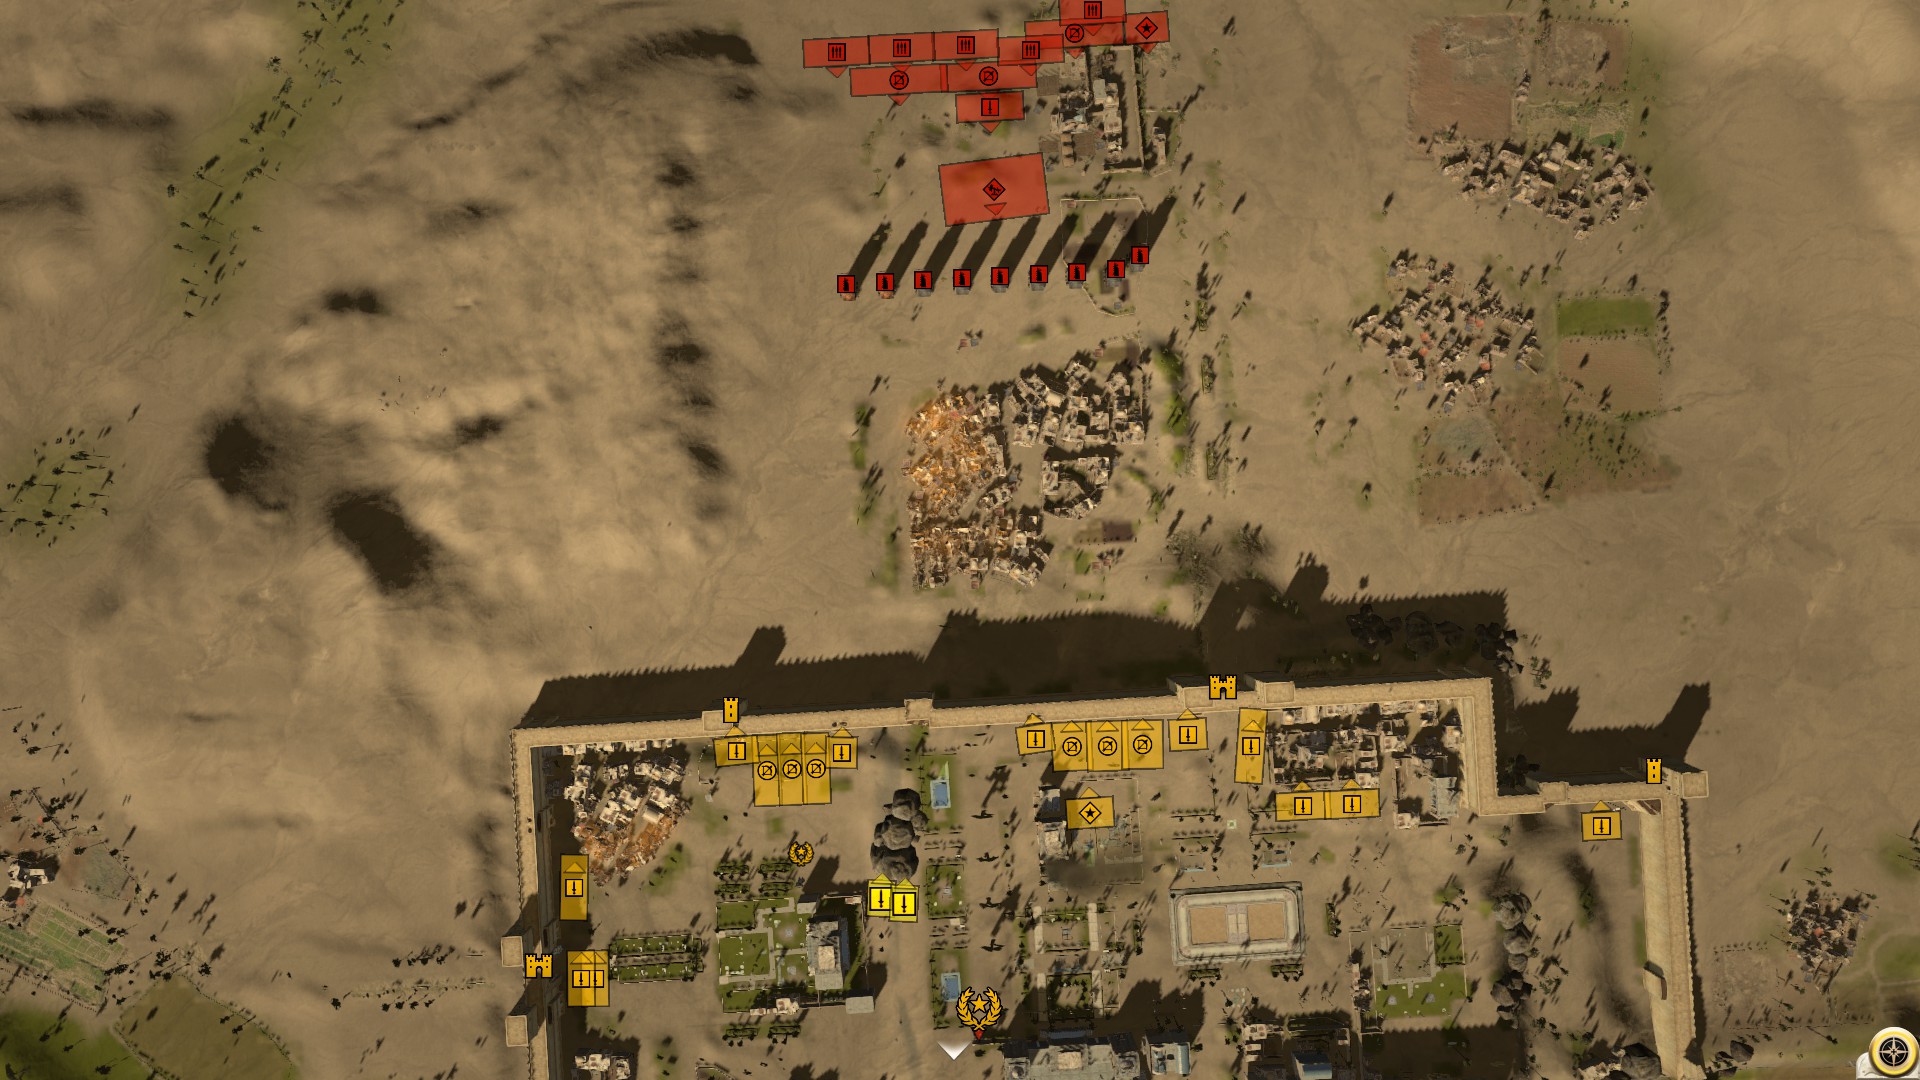
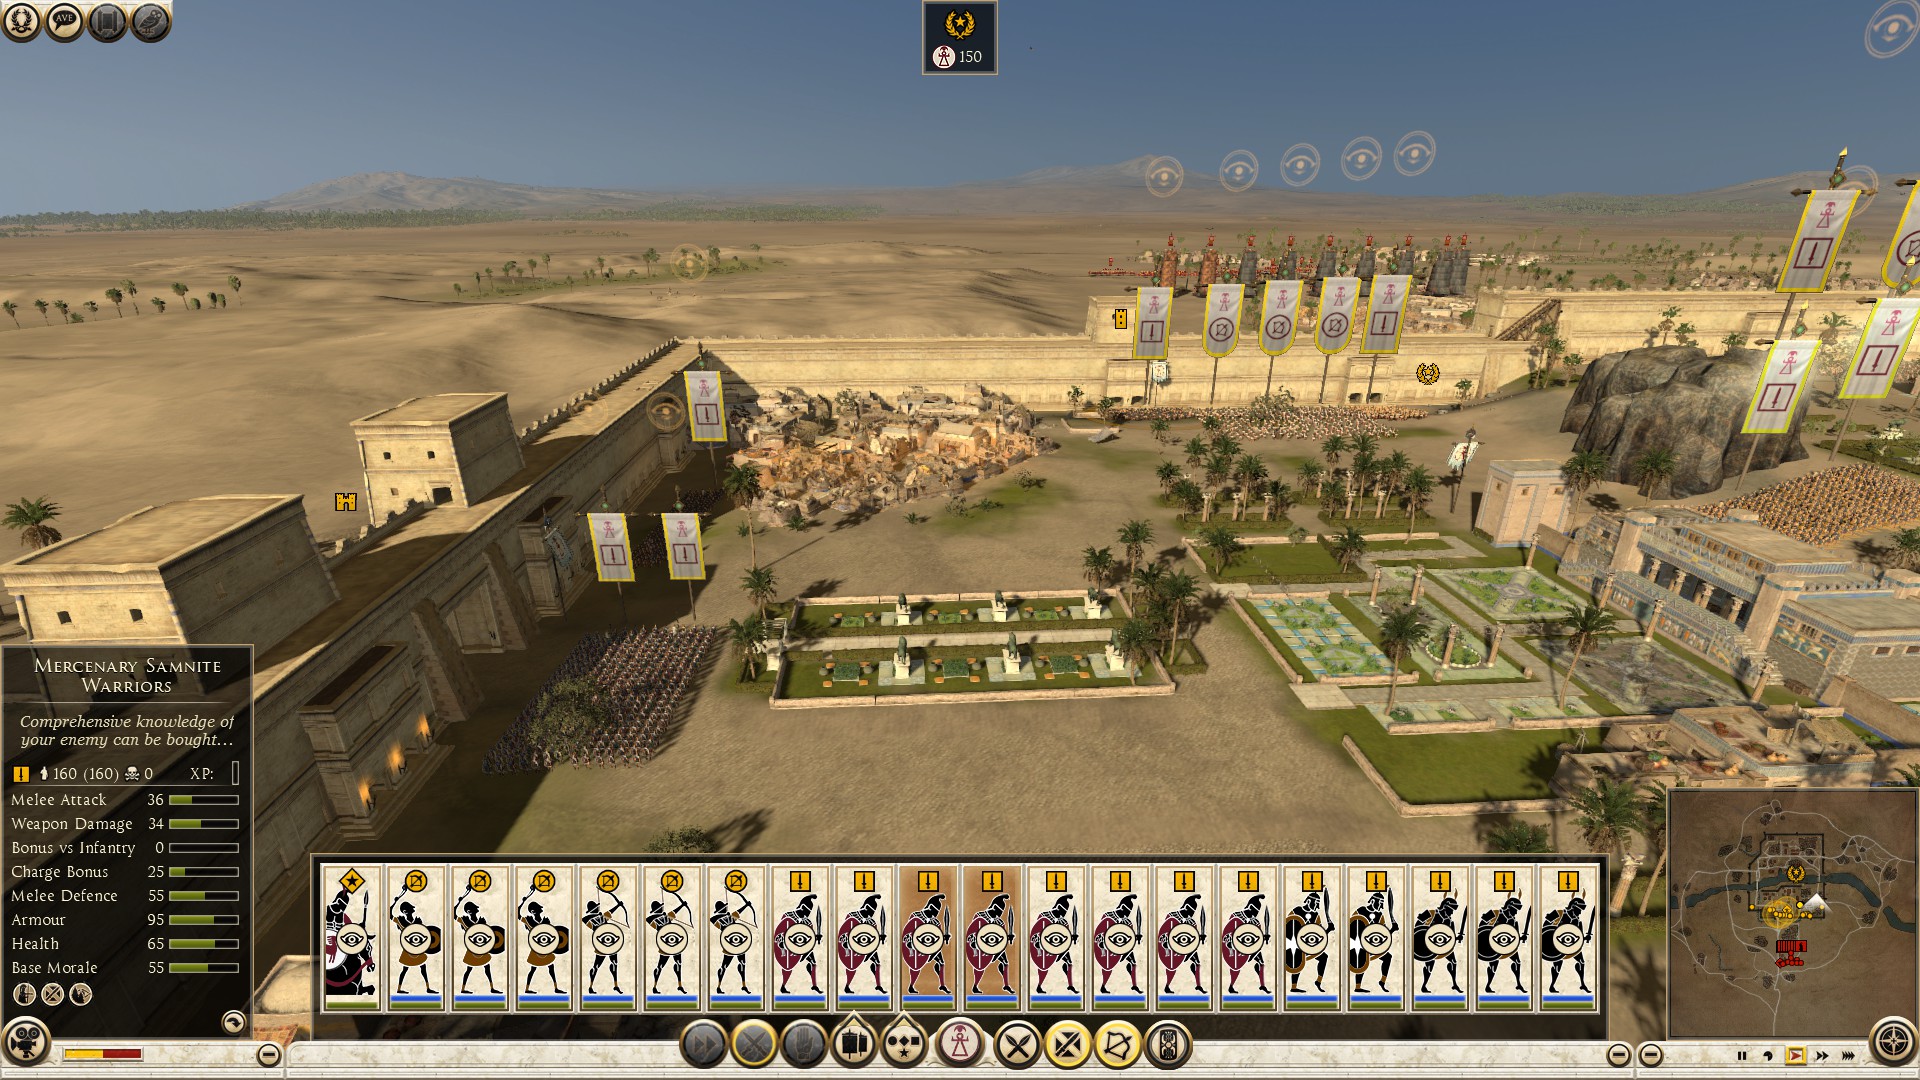
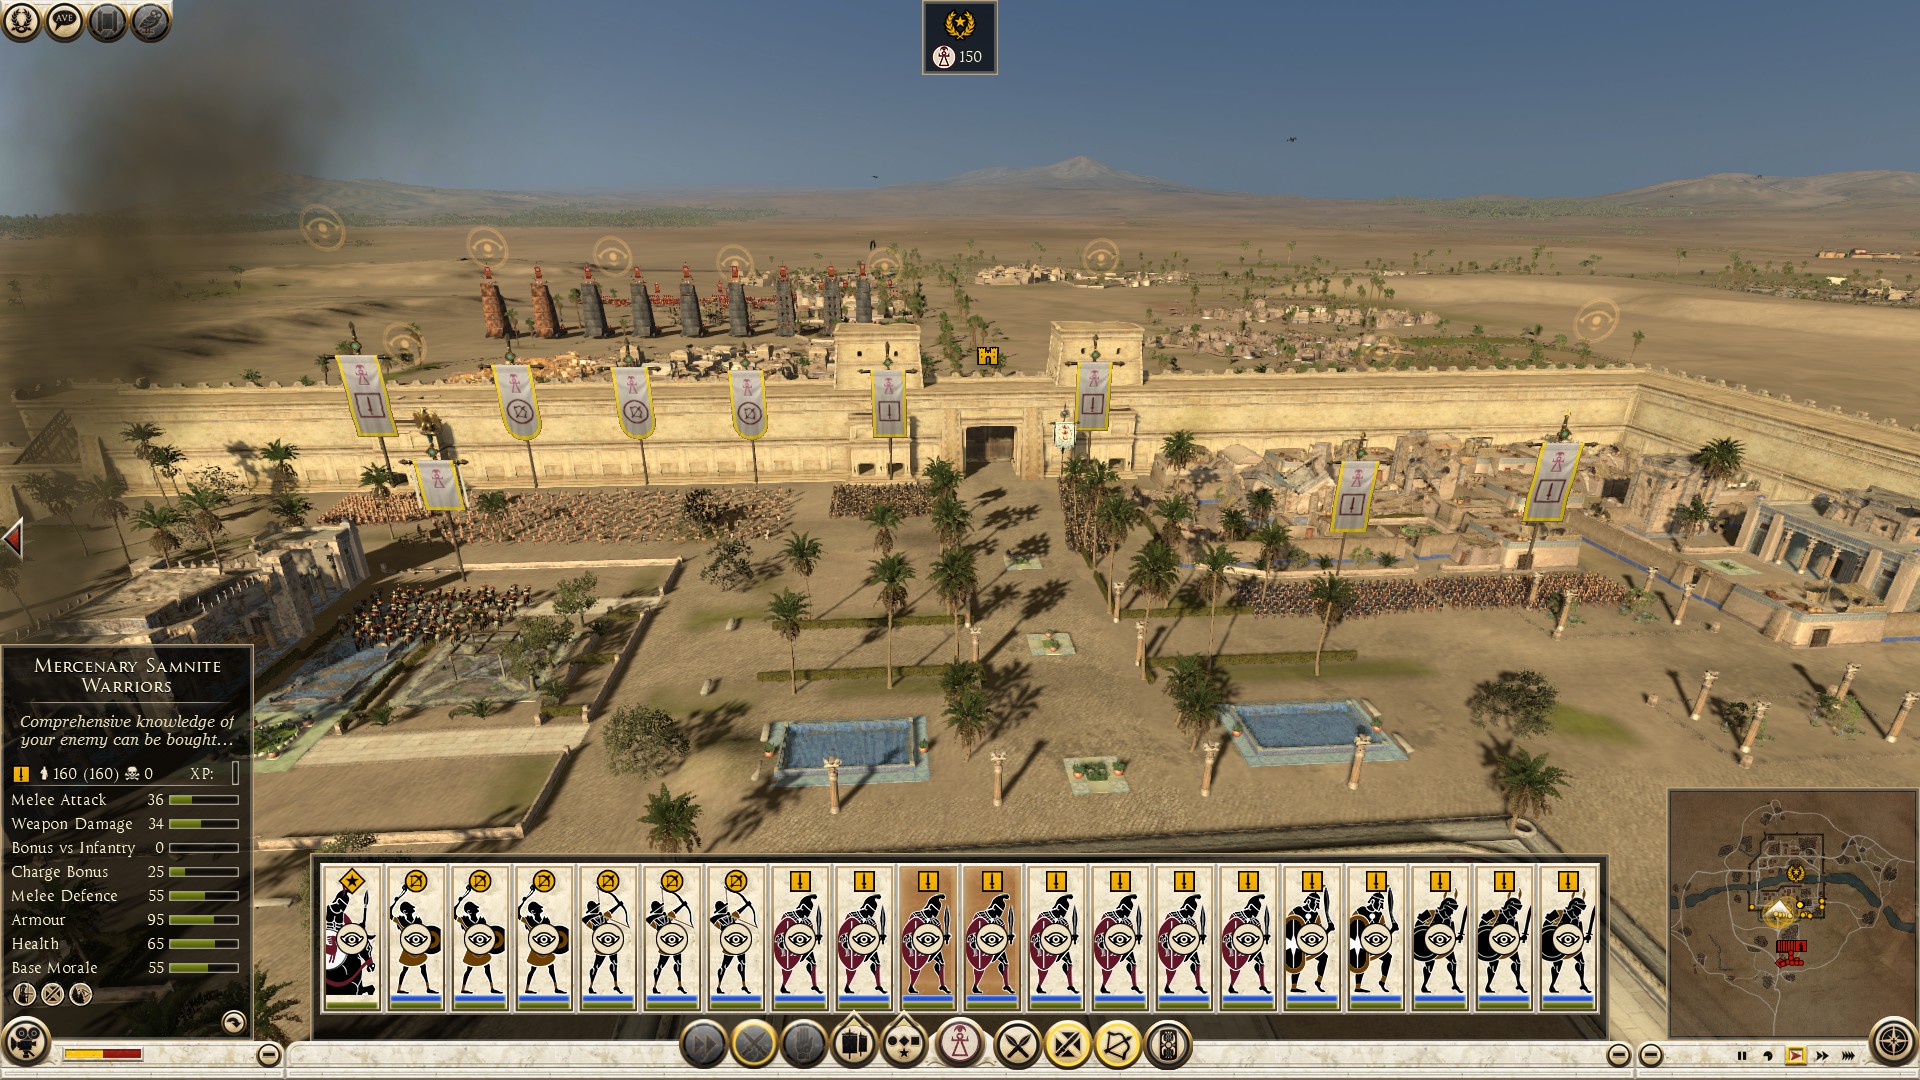
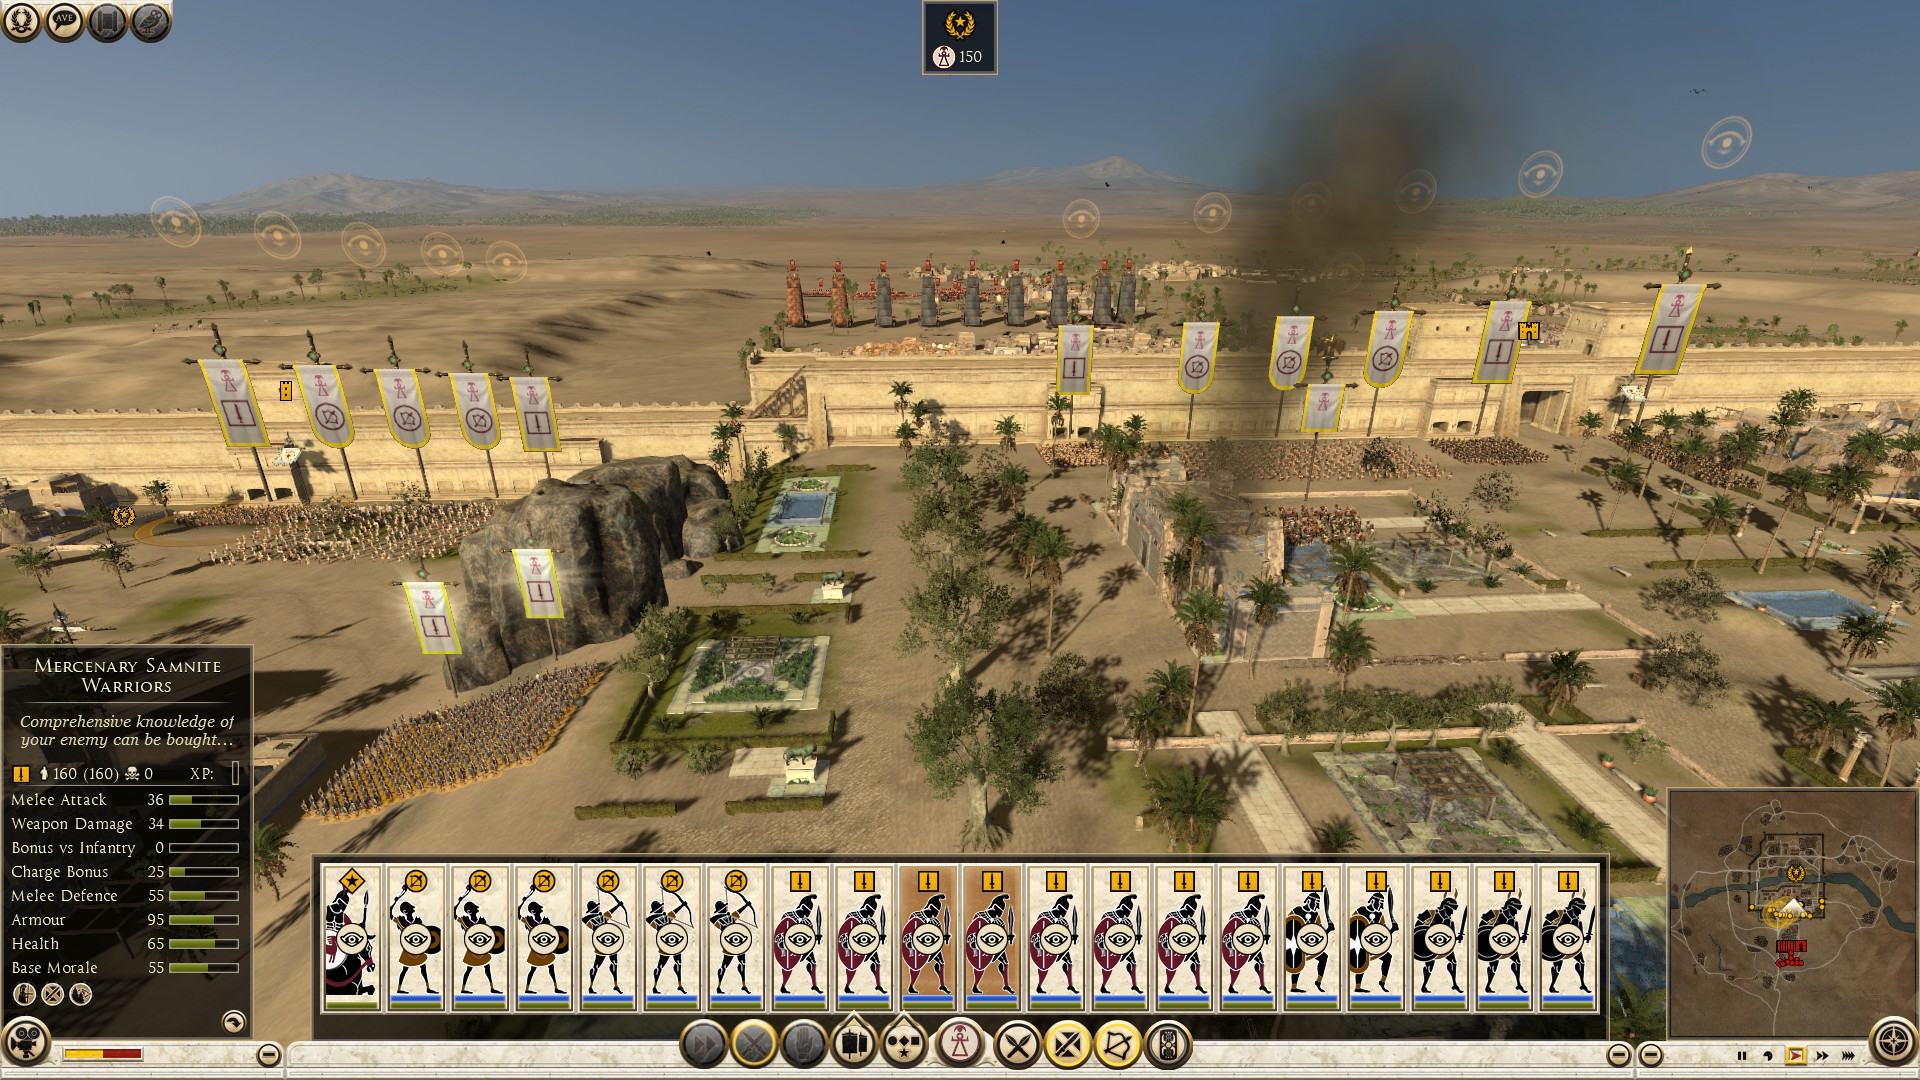
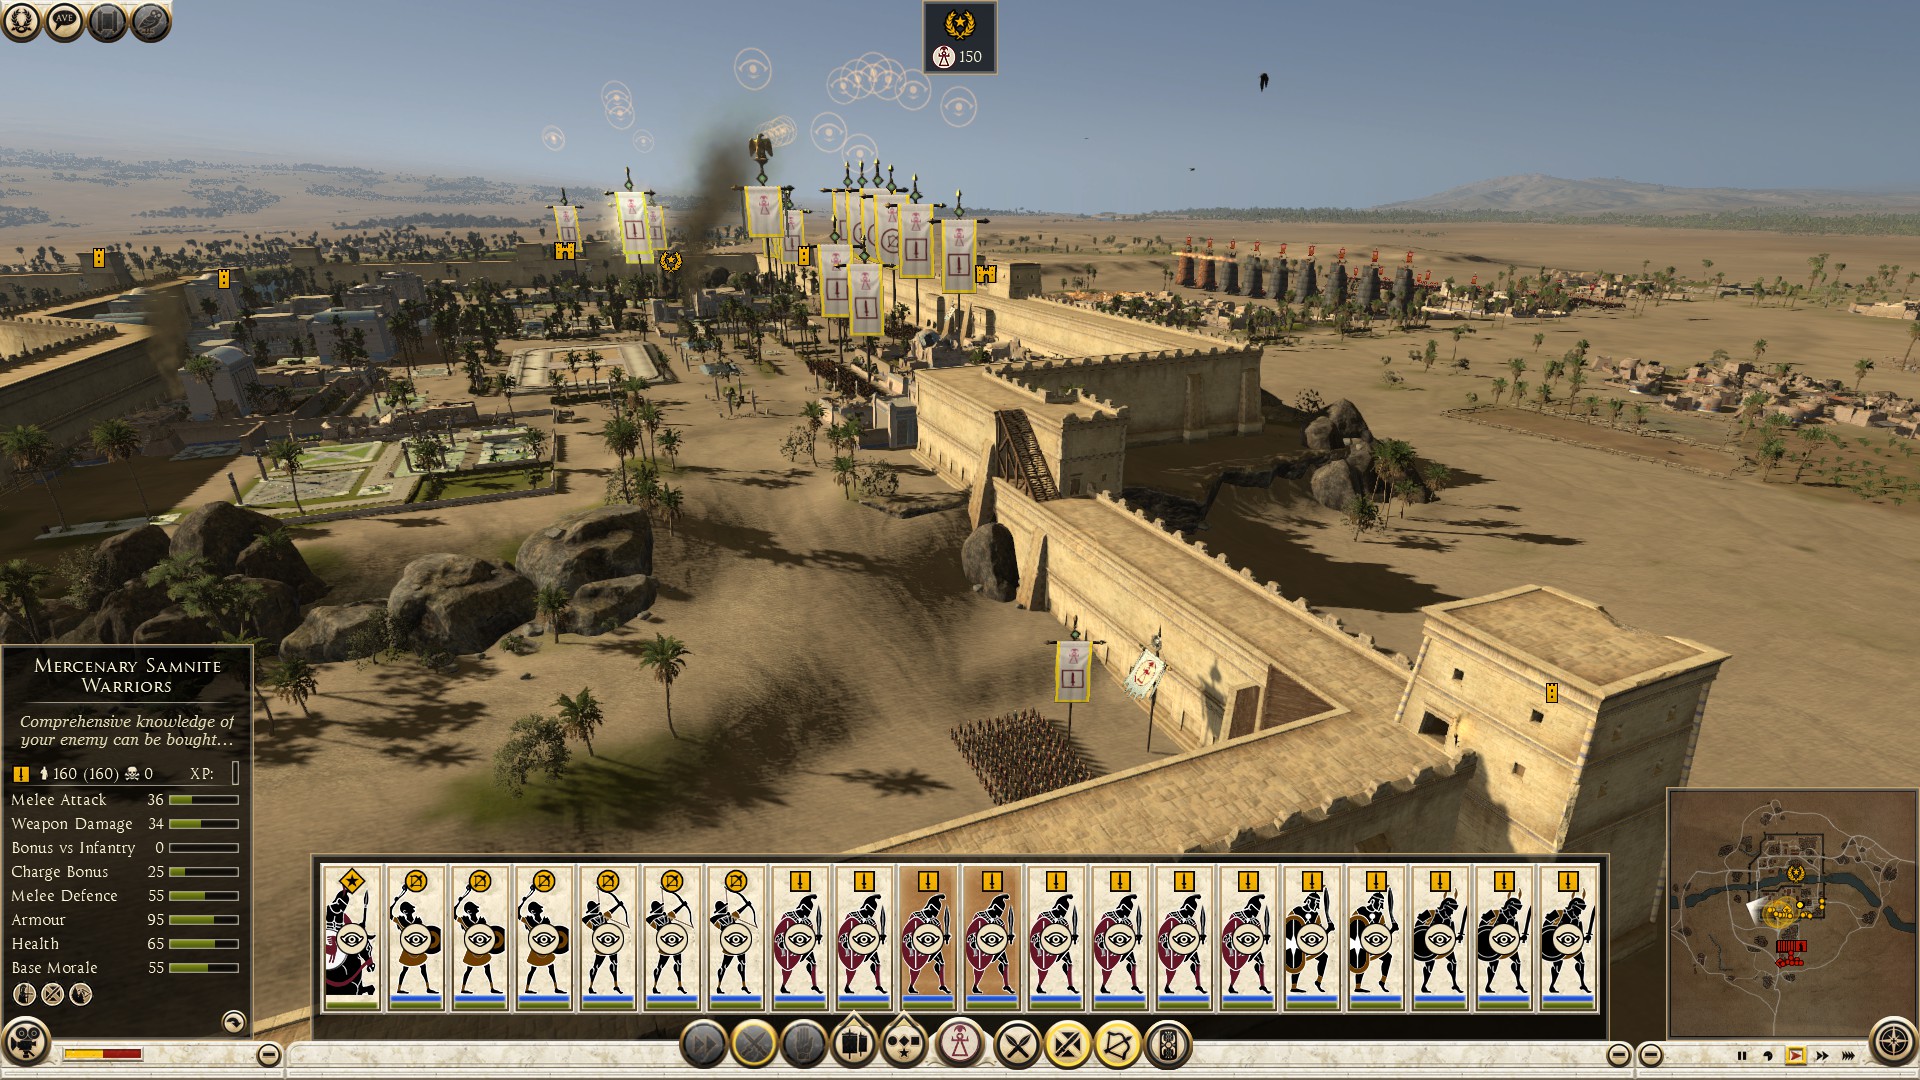
Depending on where most of the enemy army is located, move reserve units blocking off the other stairs up on the wall and start surrounding like I explained before, but on a larger scale. If you can, move reserves to where support is needed. You always need reserves and a backup plan. Don't hesitate to shoot them. Heavy shot infantry, regular shot range units, if your archers have more than one ammo type.
Offense is the best defense sometimes. The second thing you should do if you can, sally out (come out of the castle to meet the enemy in open field) with a handful of units and overwhelm the side with the least supported enemy units. The opponents can respond in a few ways. One way includes de-manning the tower units closest to where you sallied their troops, sending them for reinforcements. Another way they can respond is by leaving the sallied units behind, de-manning their towers and regrouping the army into one concentrated force. The third way they can respond is by sending the whole army to repel your sally. No matter how the attackers respond, pull your units back to the city even if you take some losses, the damage you dealt compared to the losses that you took coming back to the city is greater.
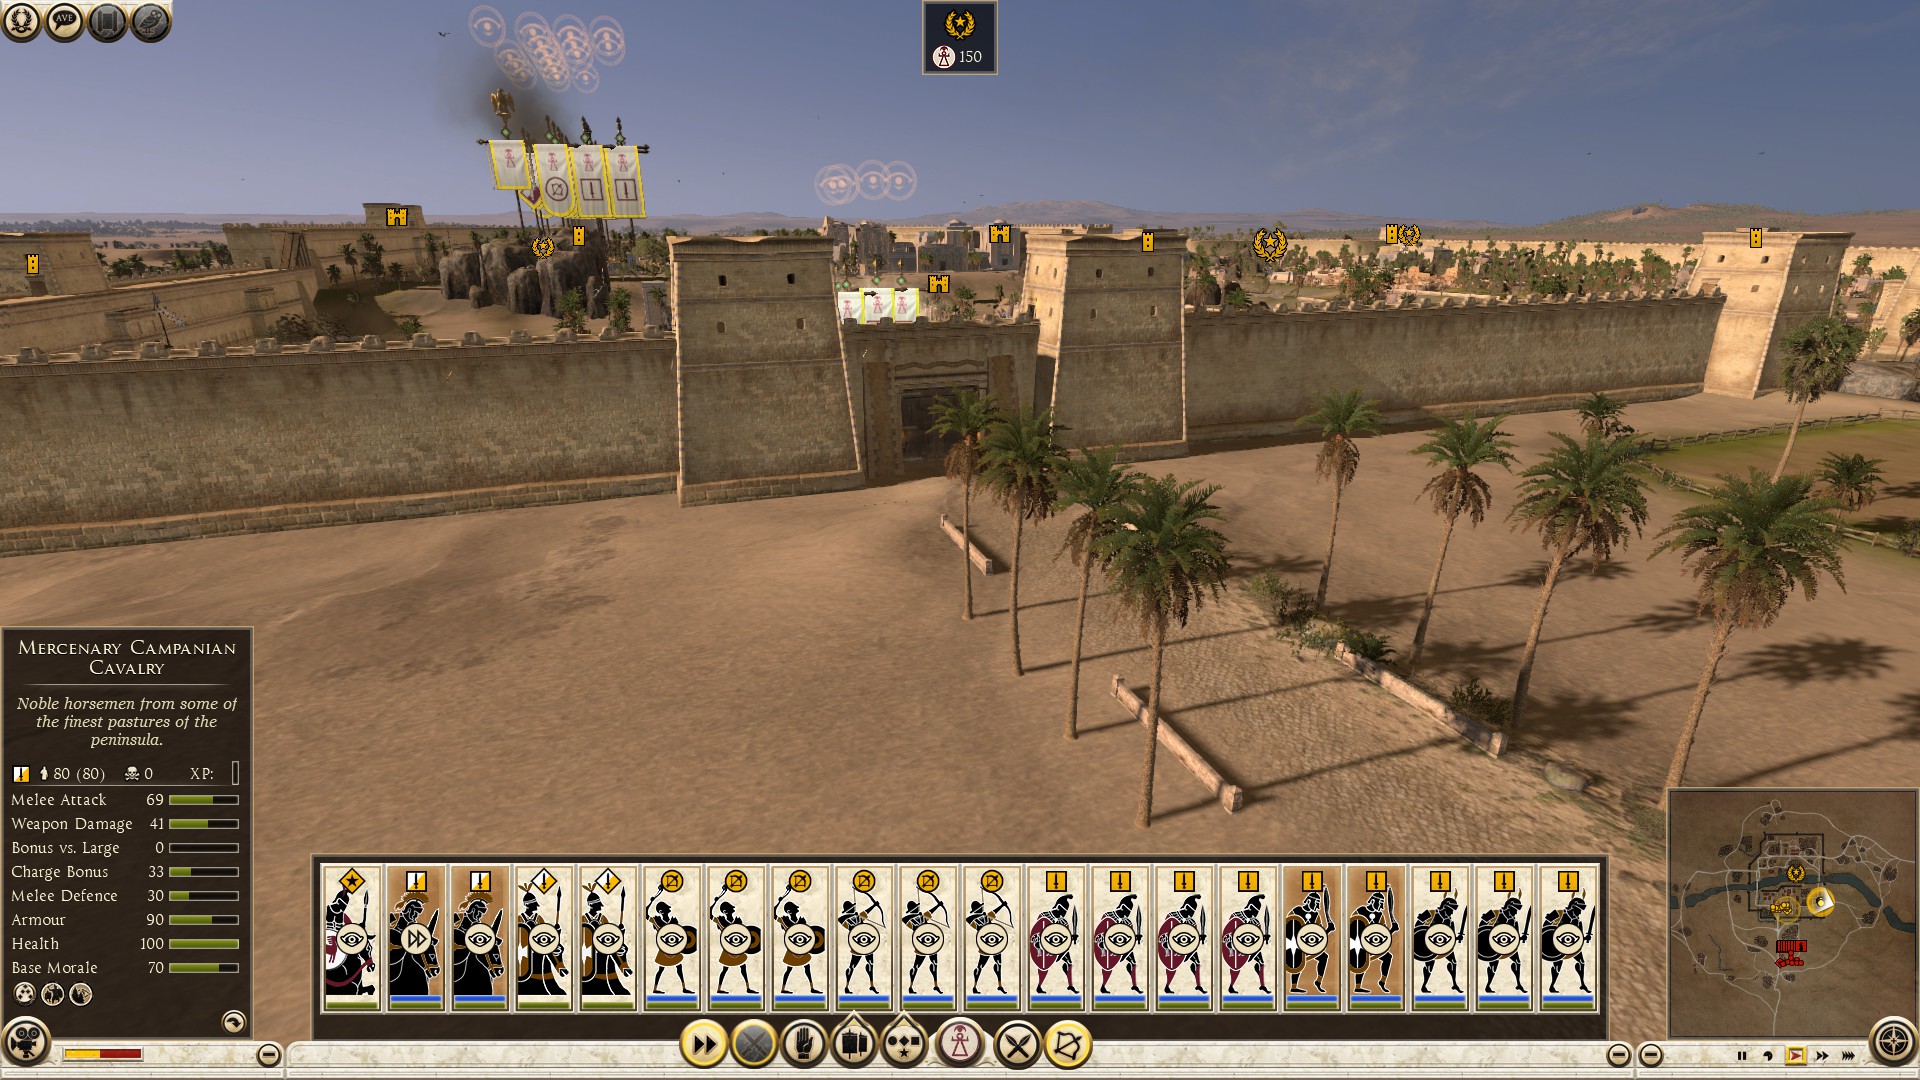
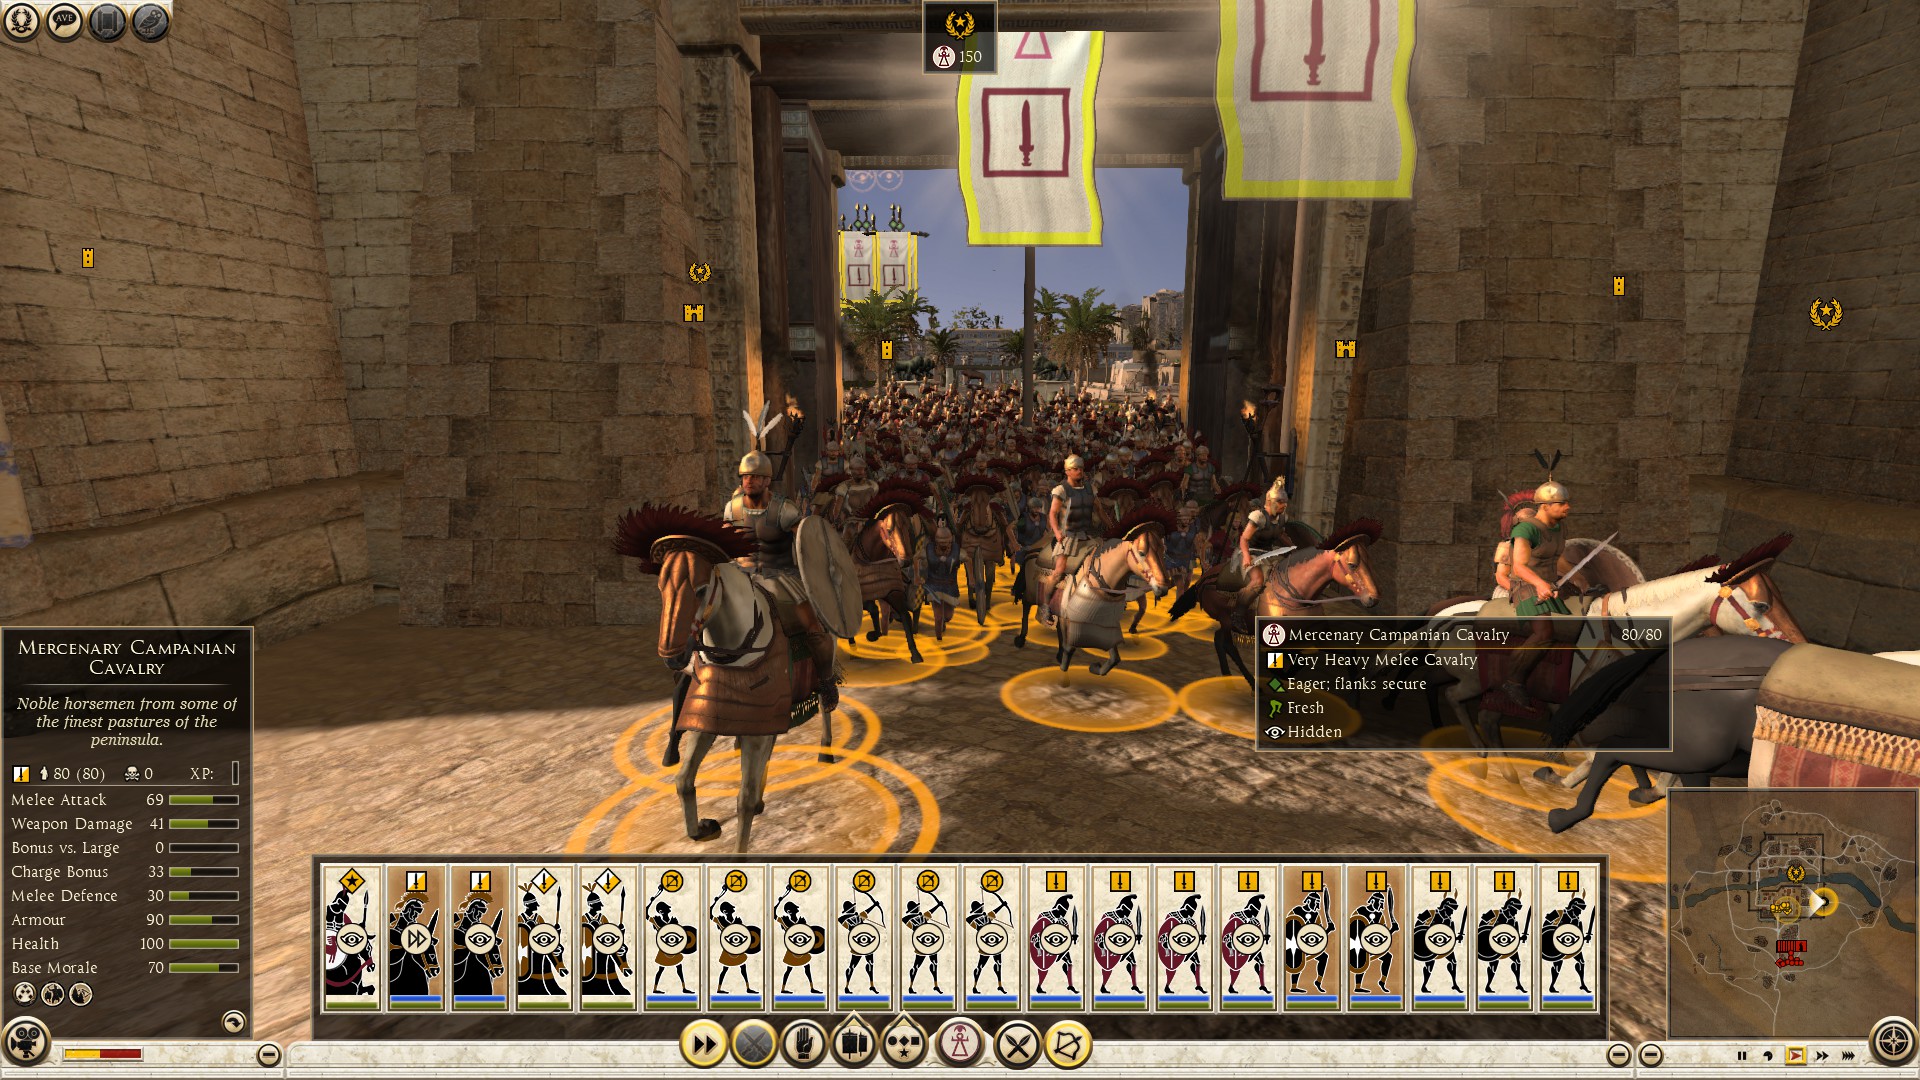
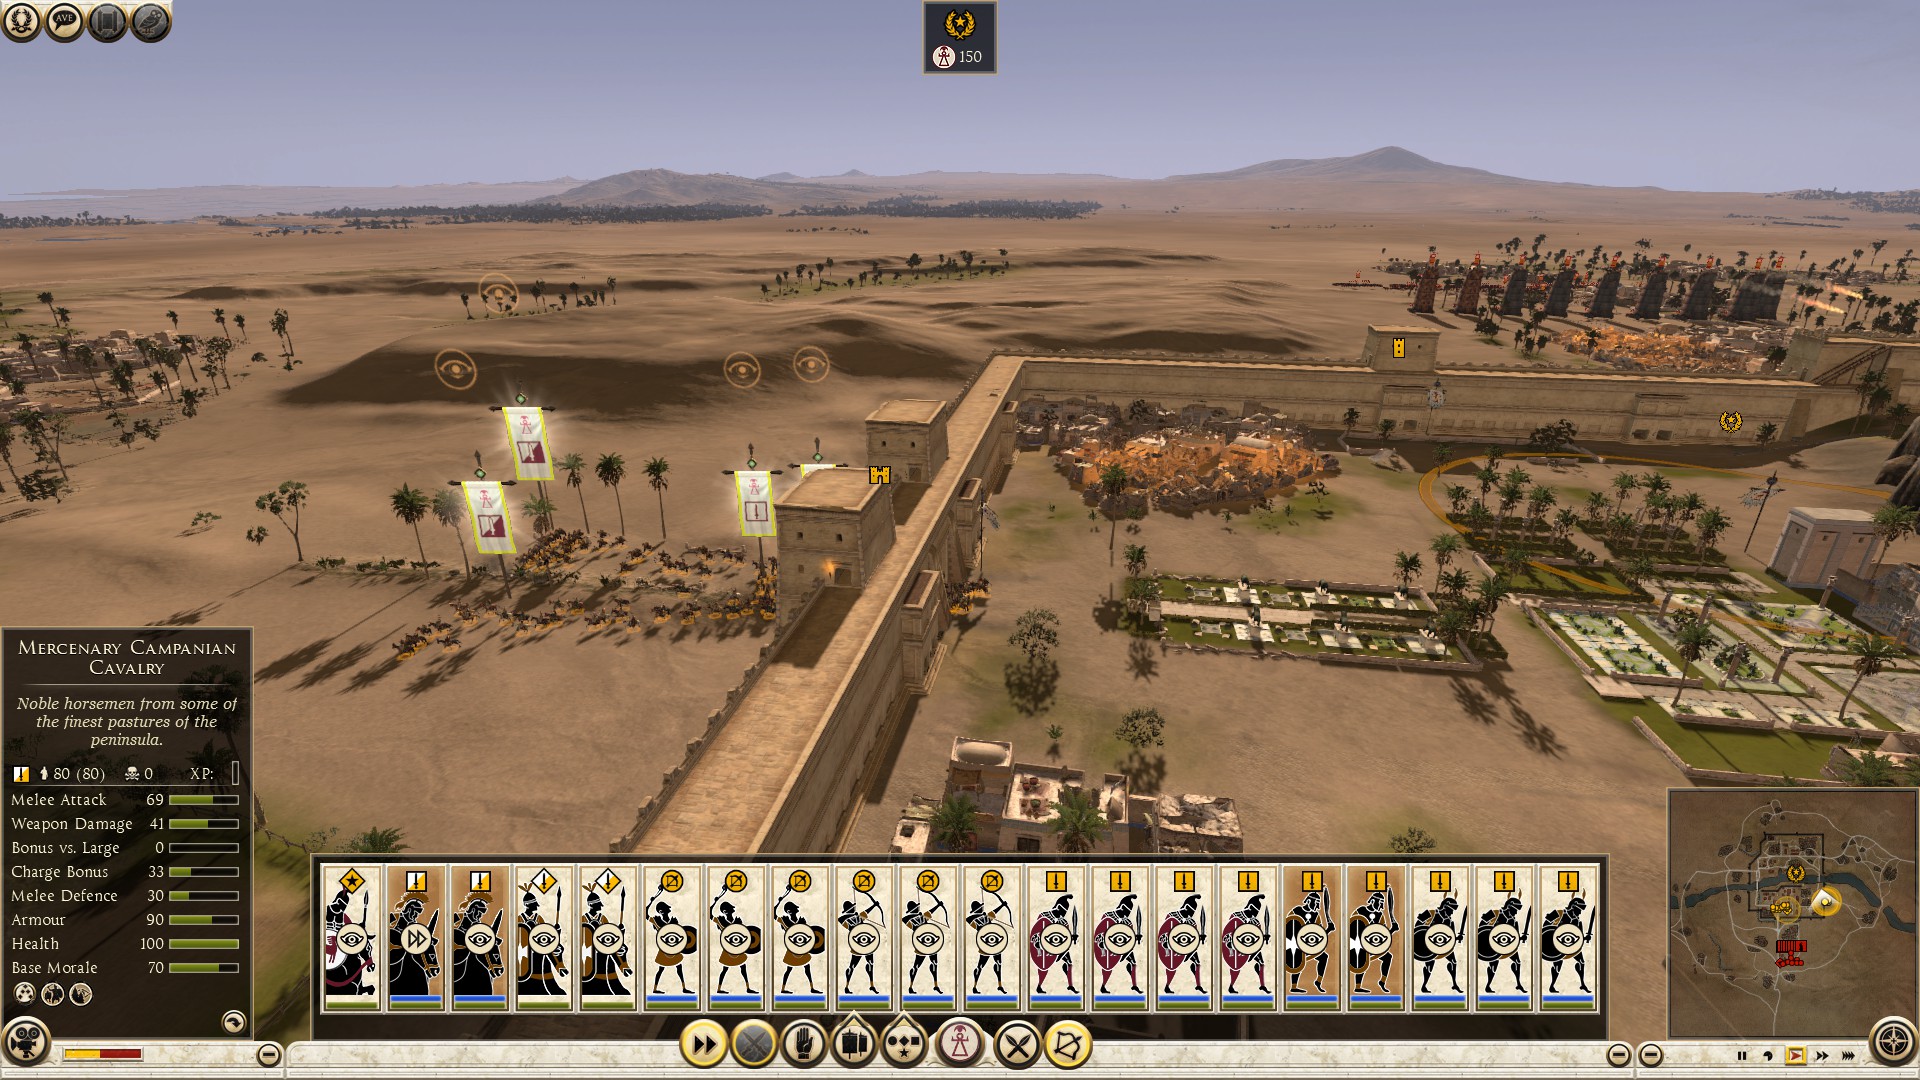
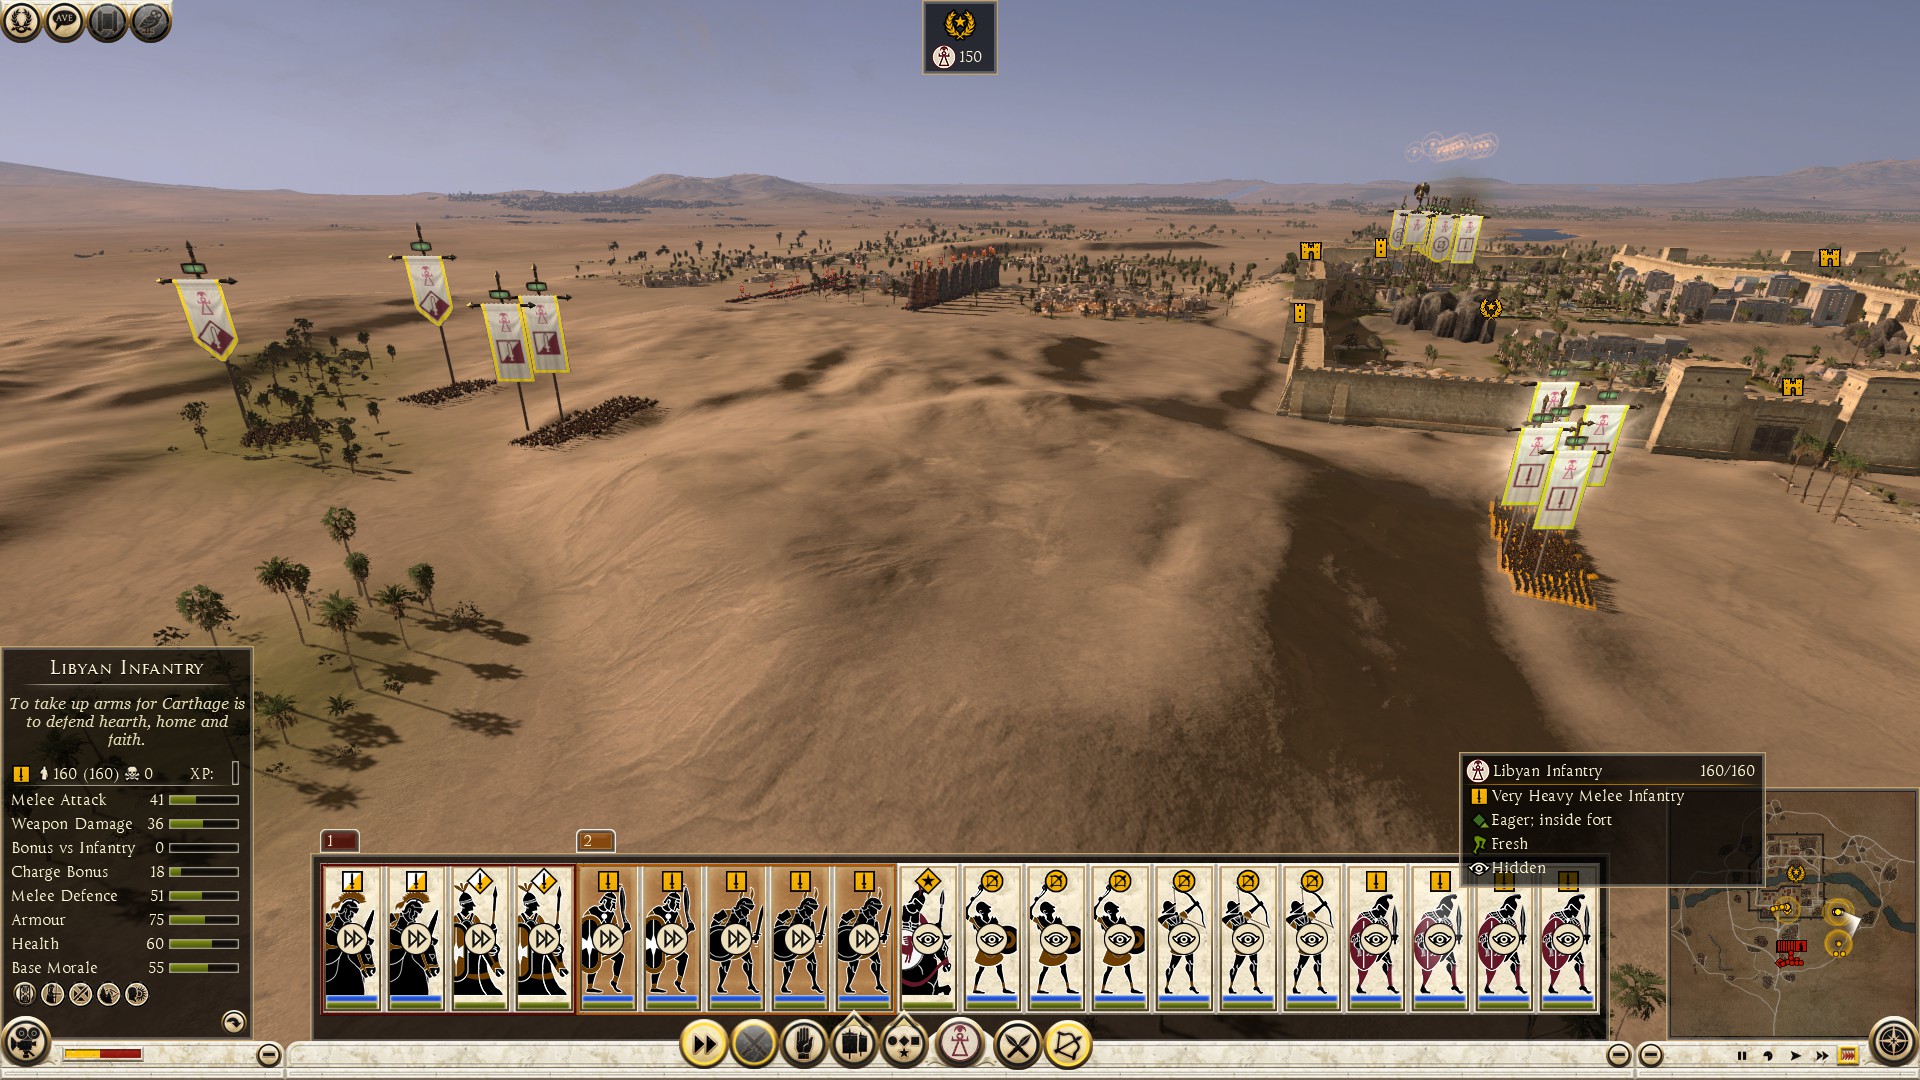
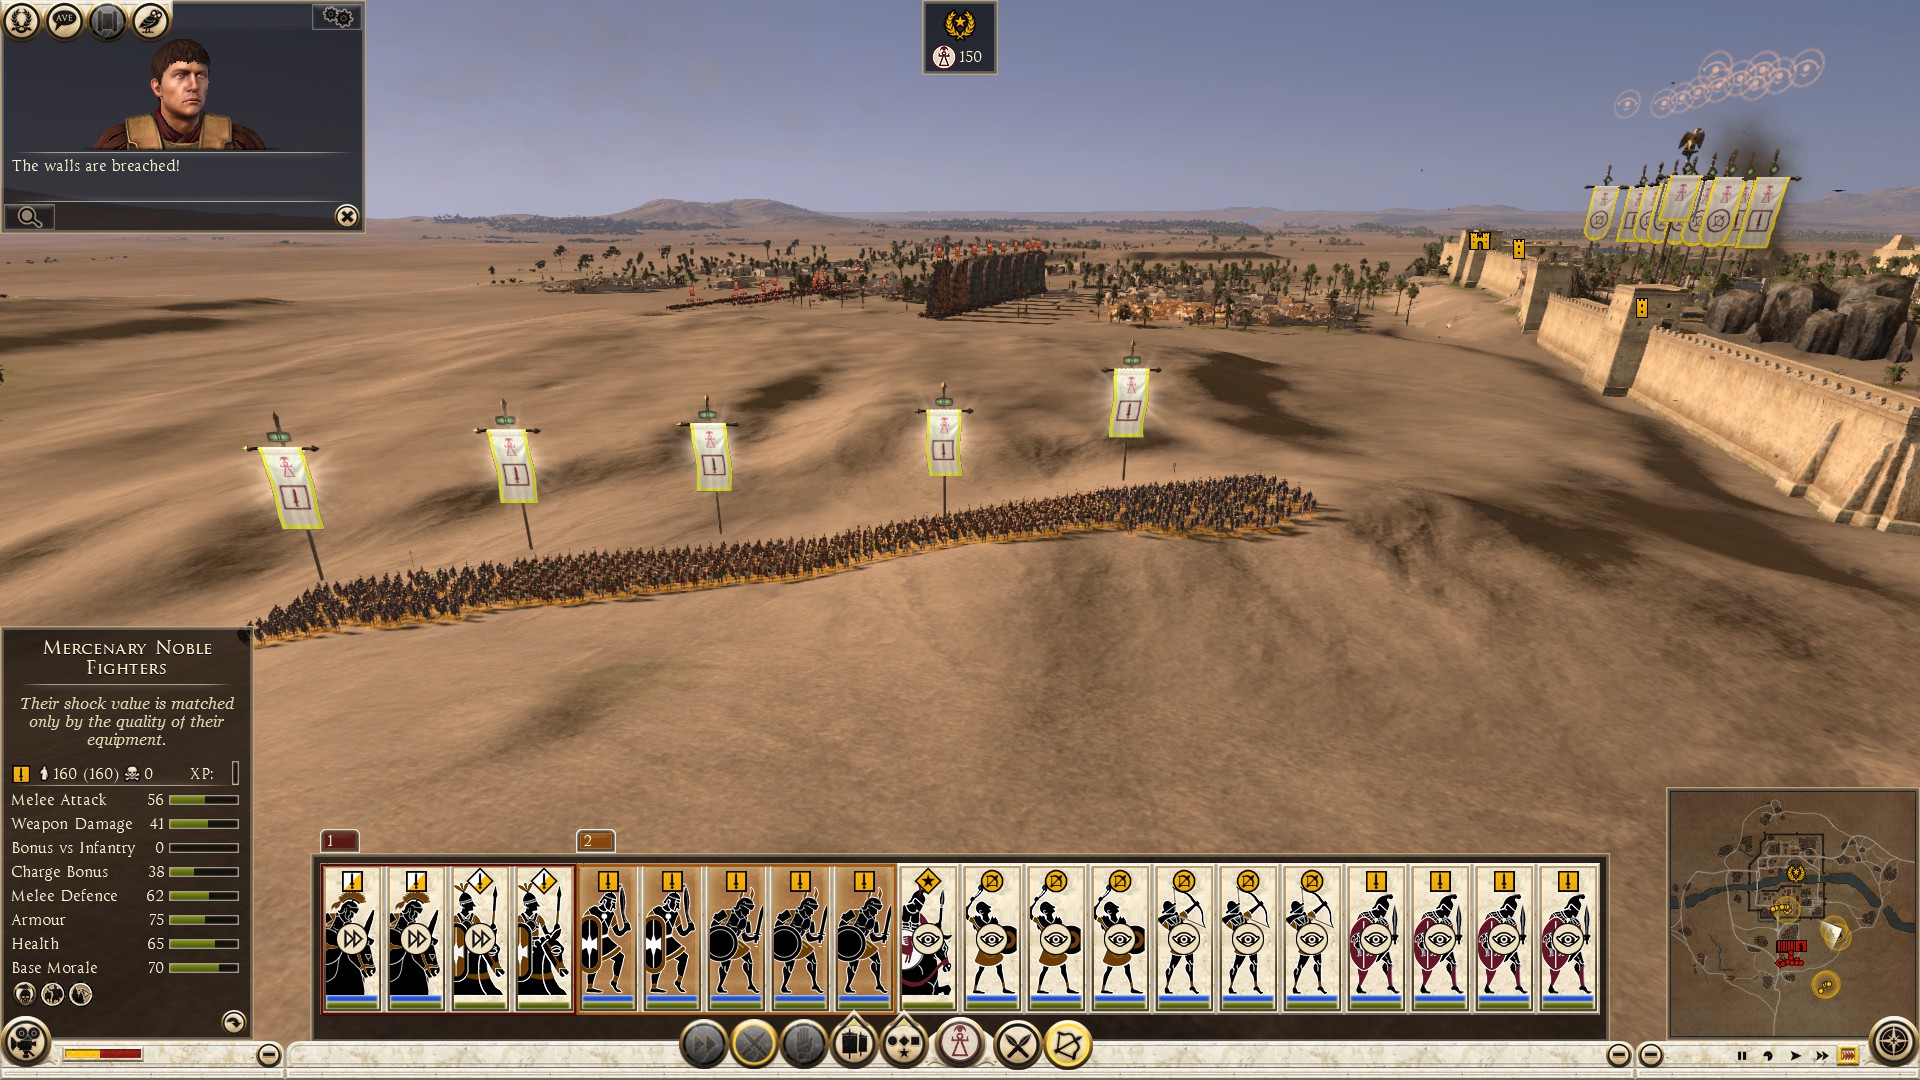
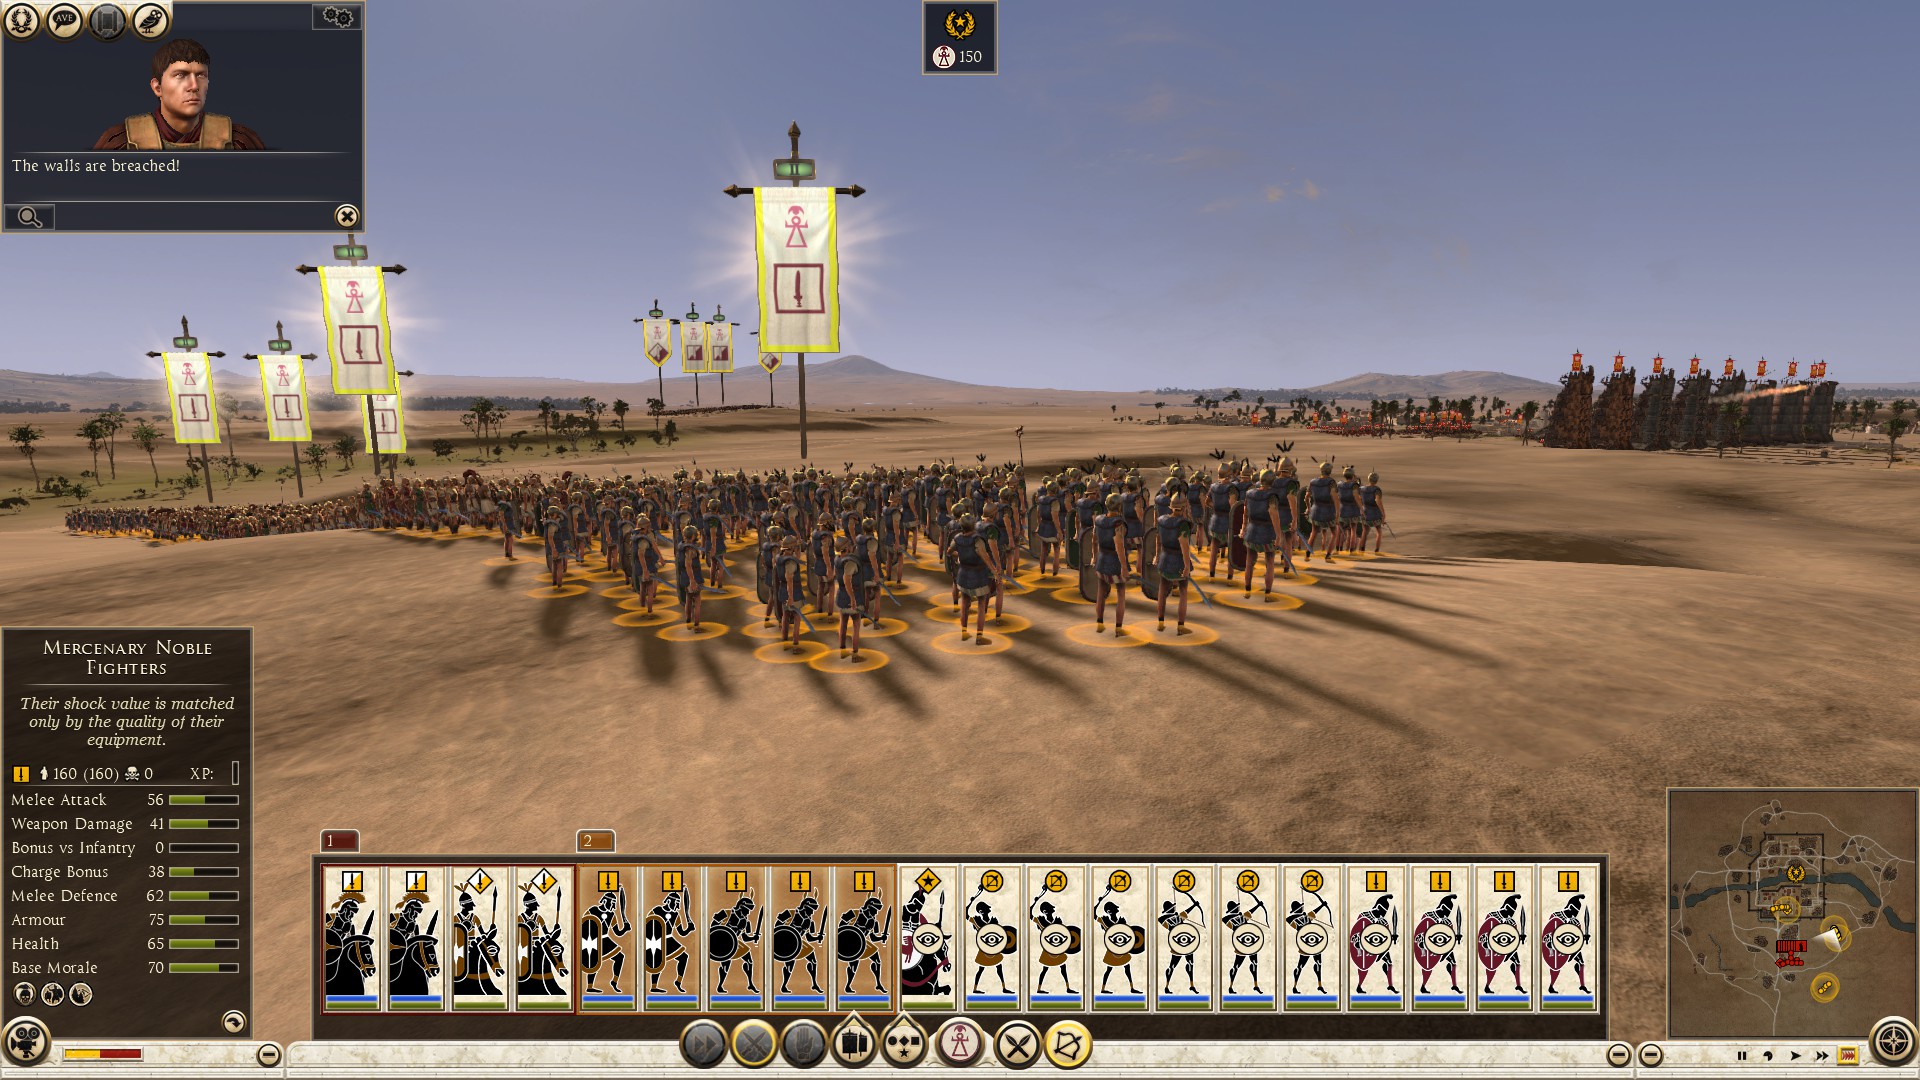
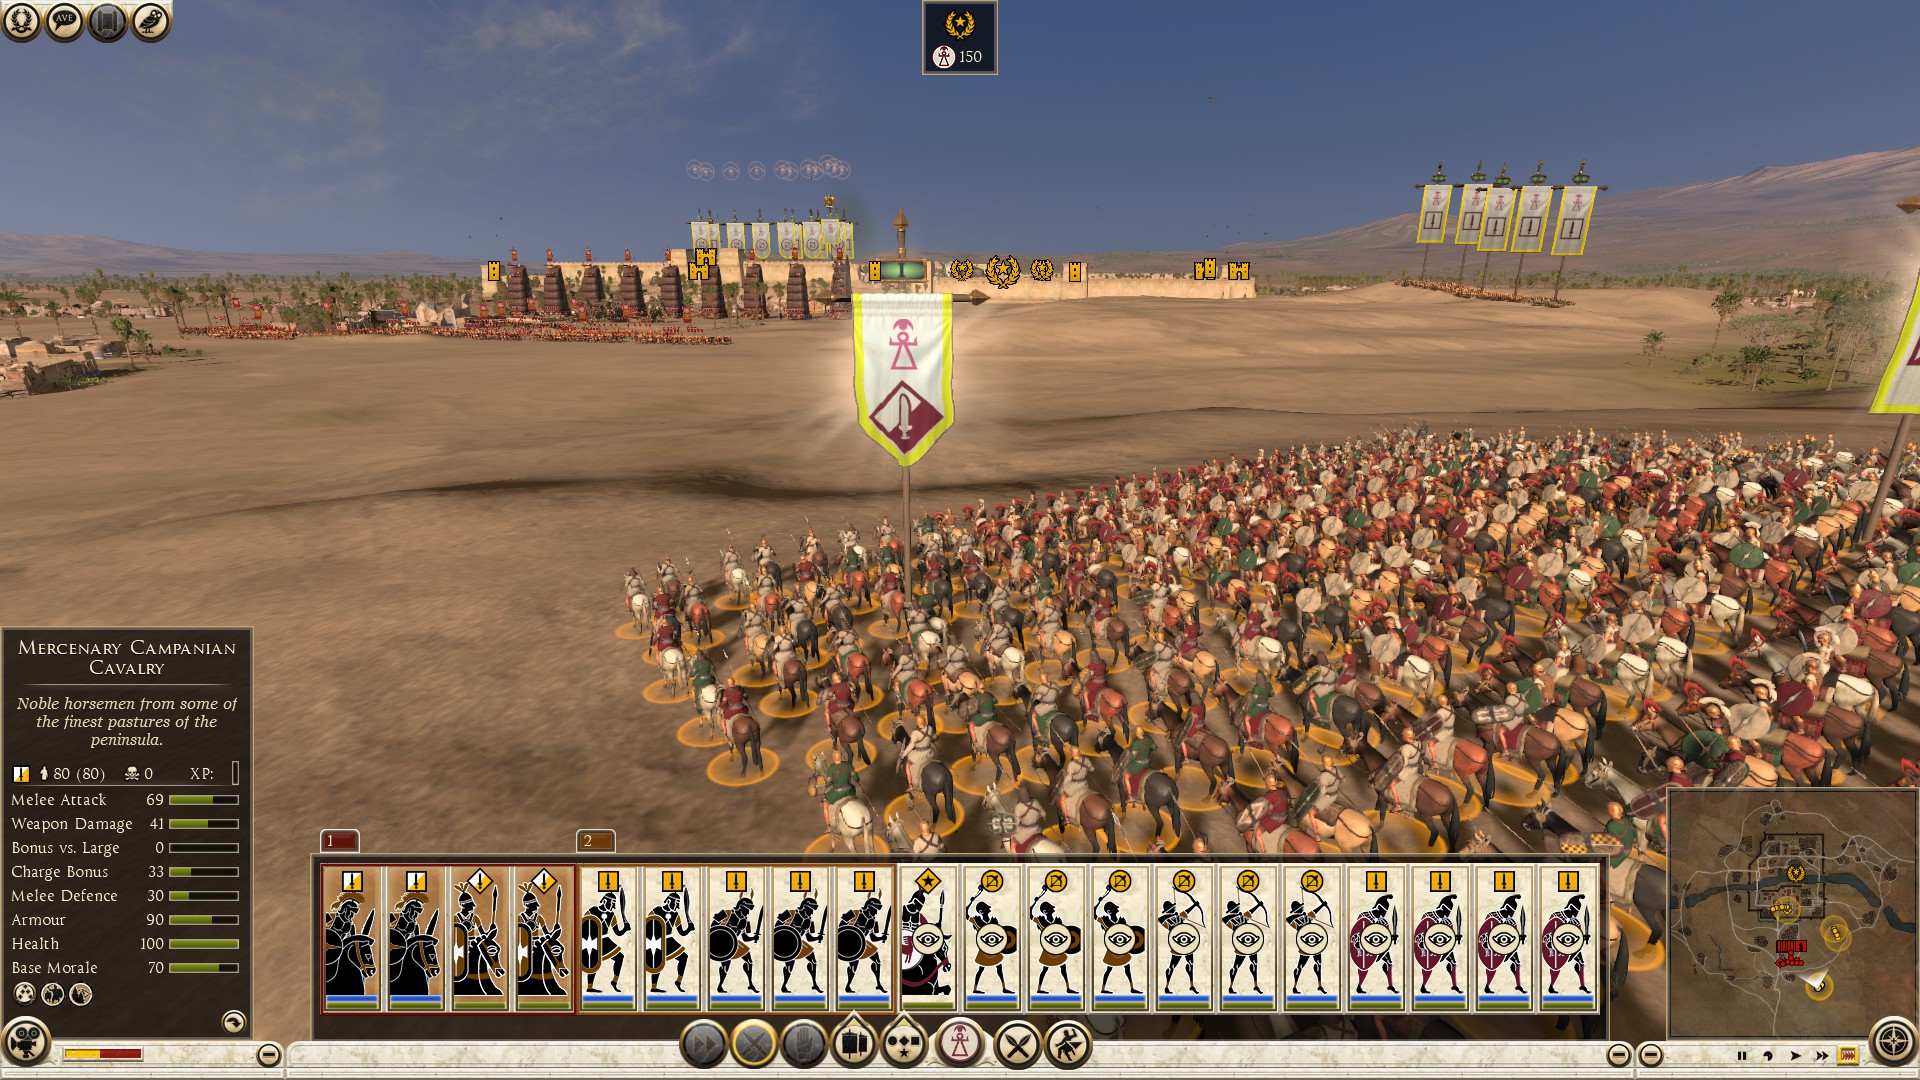
If the attackers continue attacking on multiple areas, put your units on the bottom of the walls facing the stairs like I explained earlier in the beginning of the post. If the opponents did not bring towers but had artillery, wall tortoise and or battering rams, put some archers on the walls to have a leverage against the enemy rangers before they get in range. Be careful, even though the gate walls are indestructible, most of the wall can be broken, which means you need to move your archers when the wall part they’re standing on is about to break.
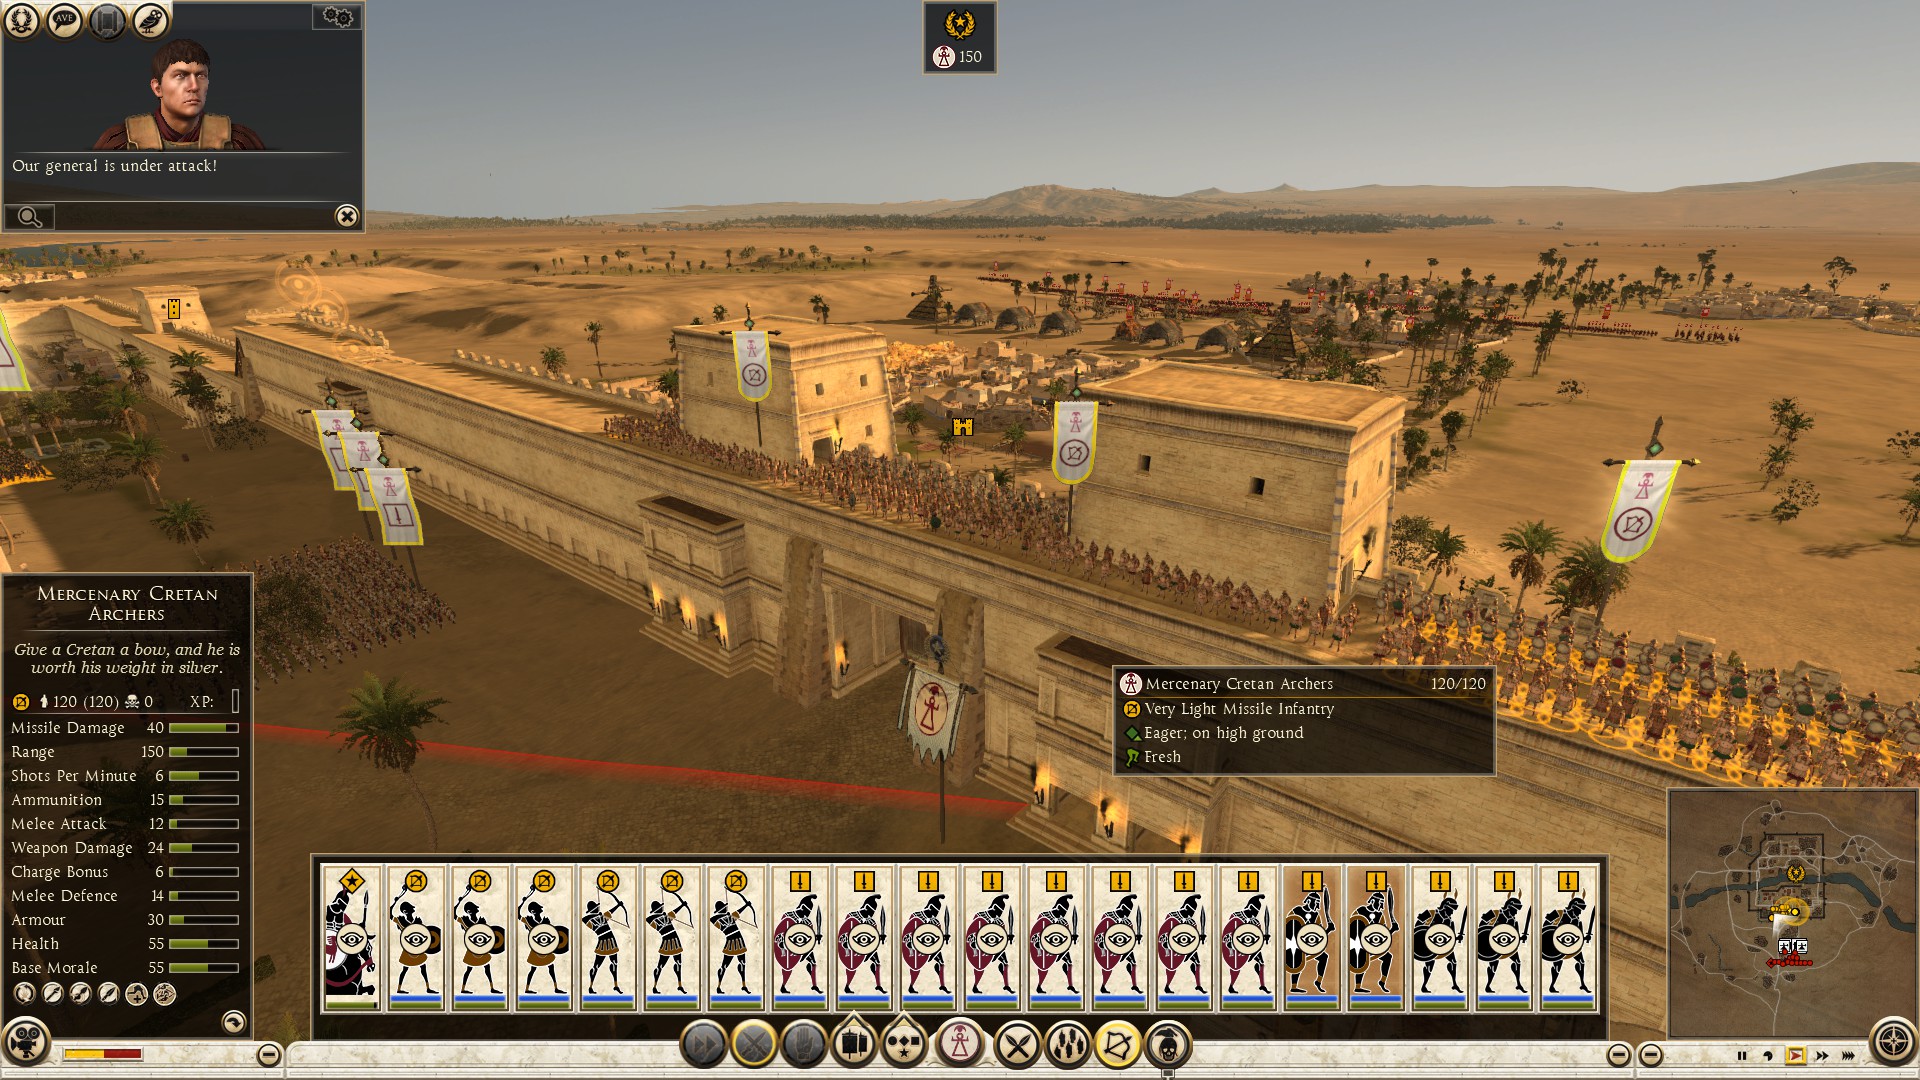
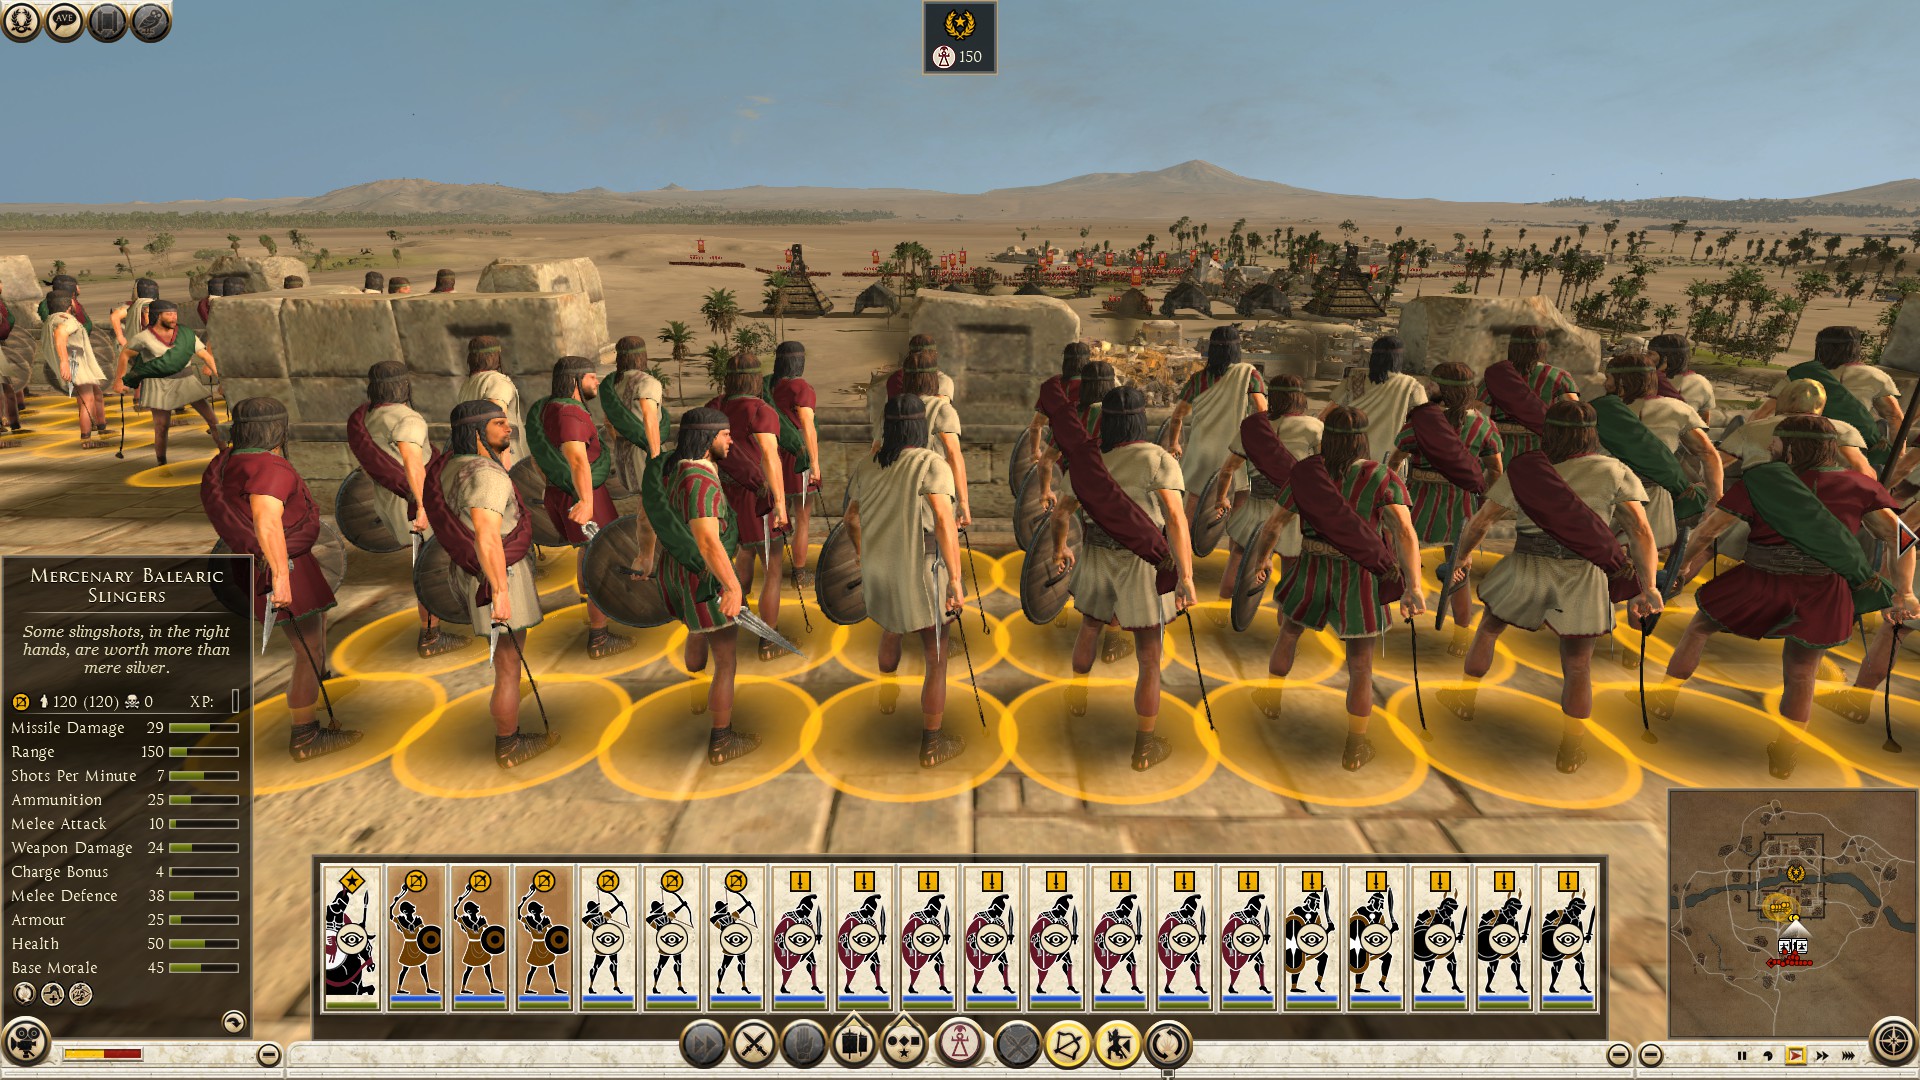
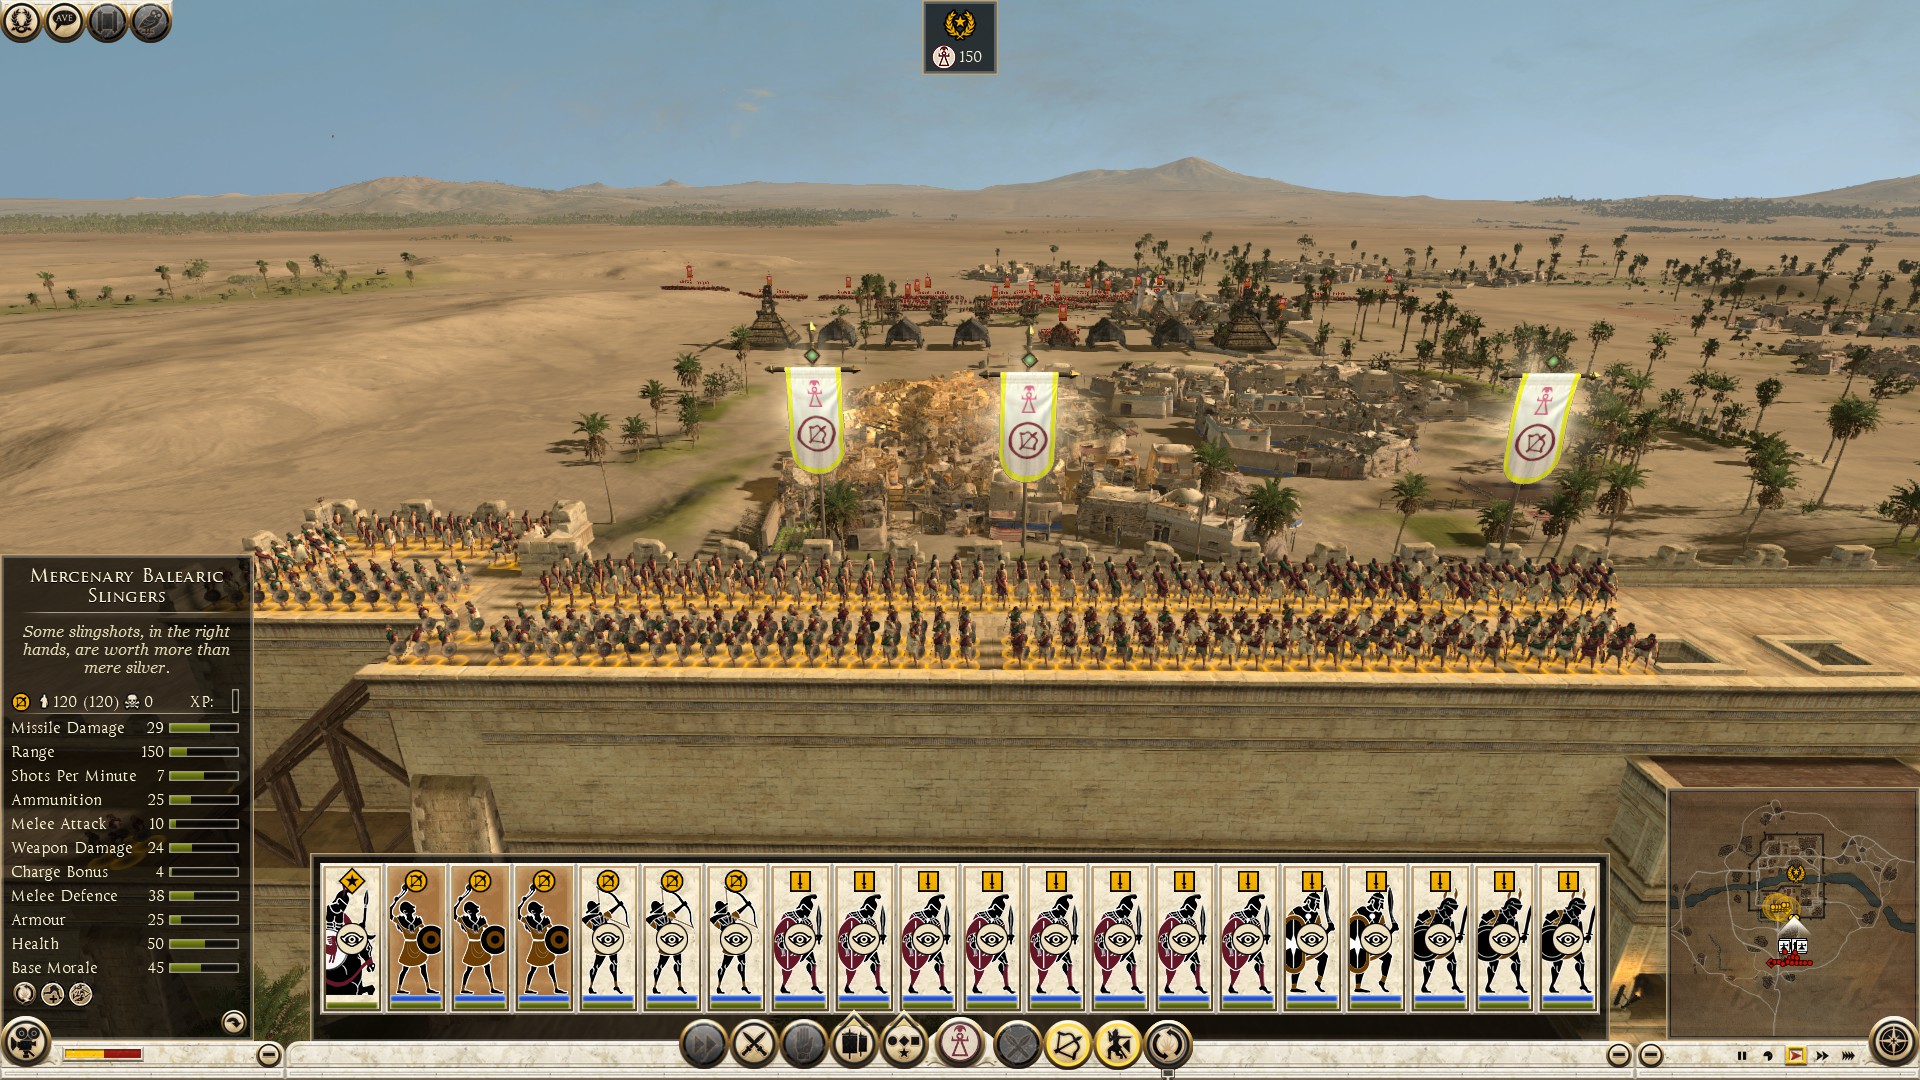
When the enemy assaults through the hole they made in the wall, have two units stand vertically near the wall hole to surround the incoming assaulters.
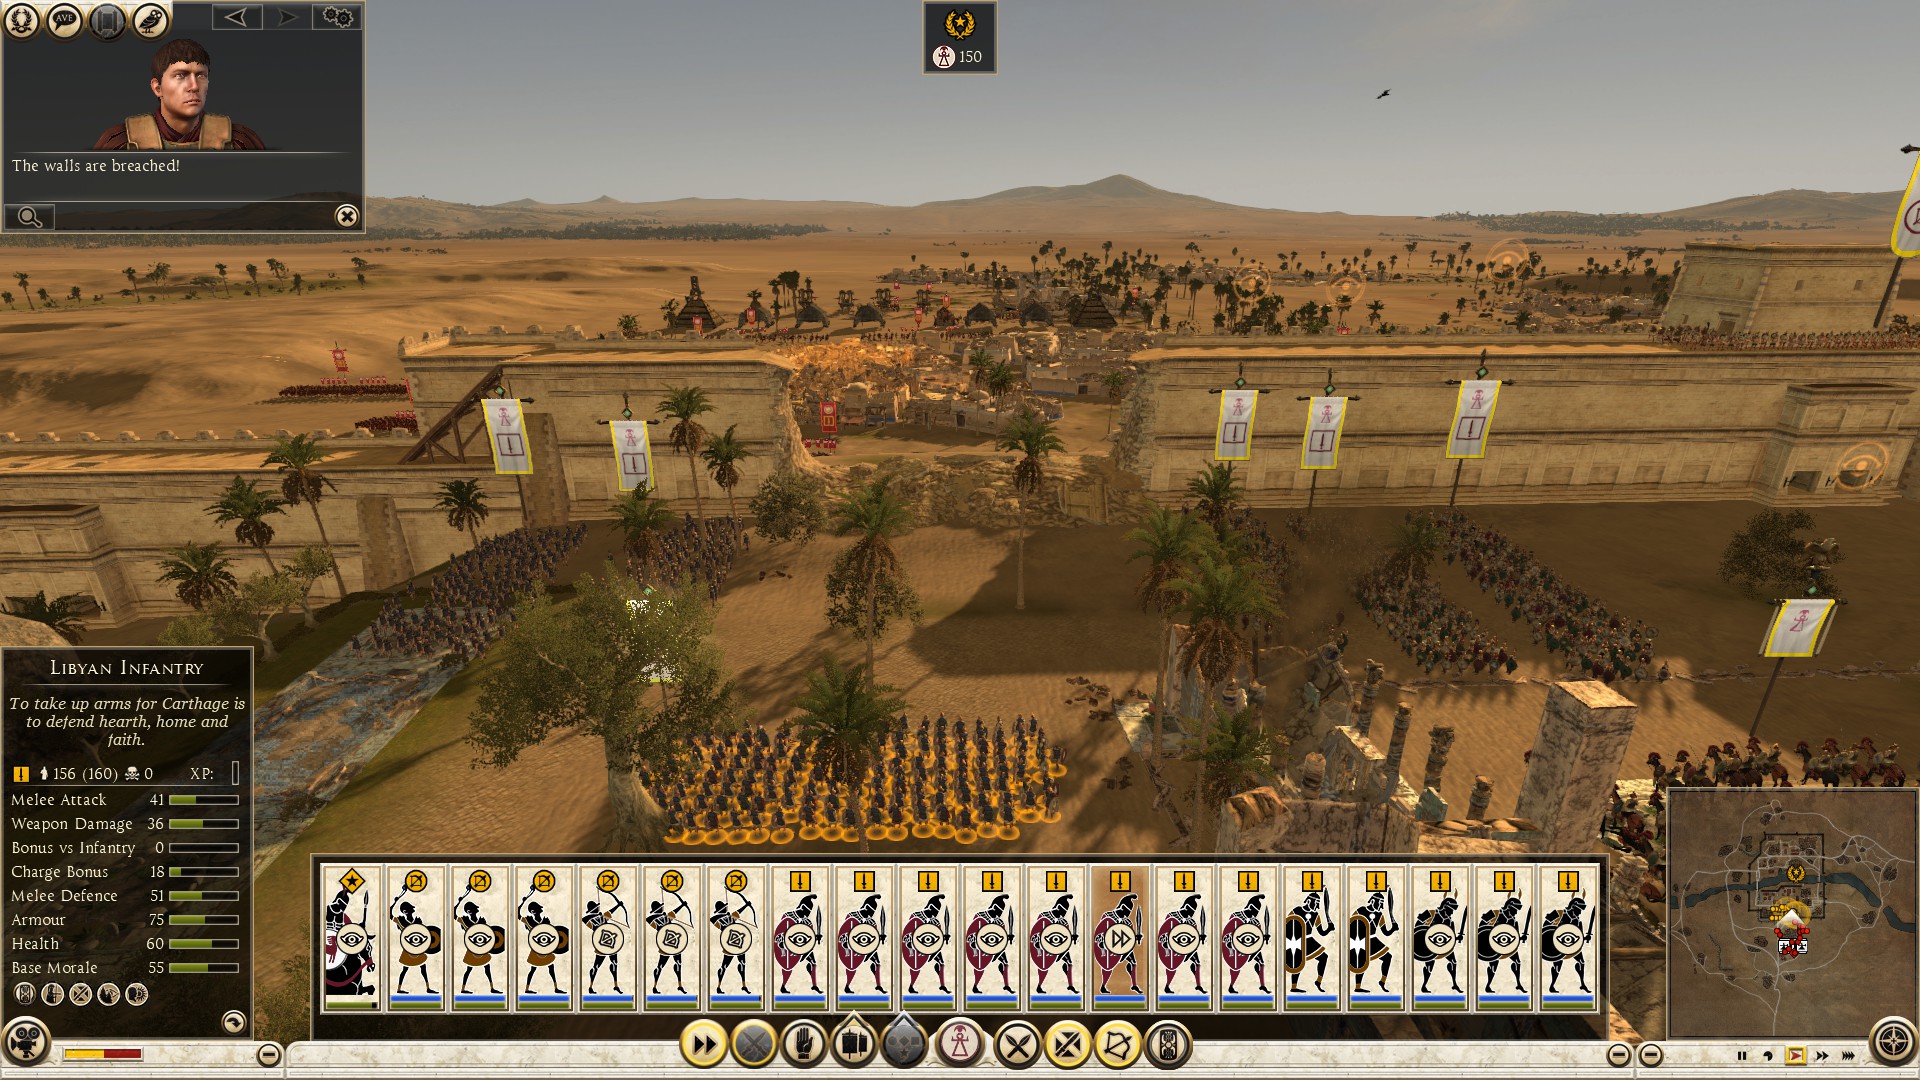
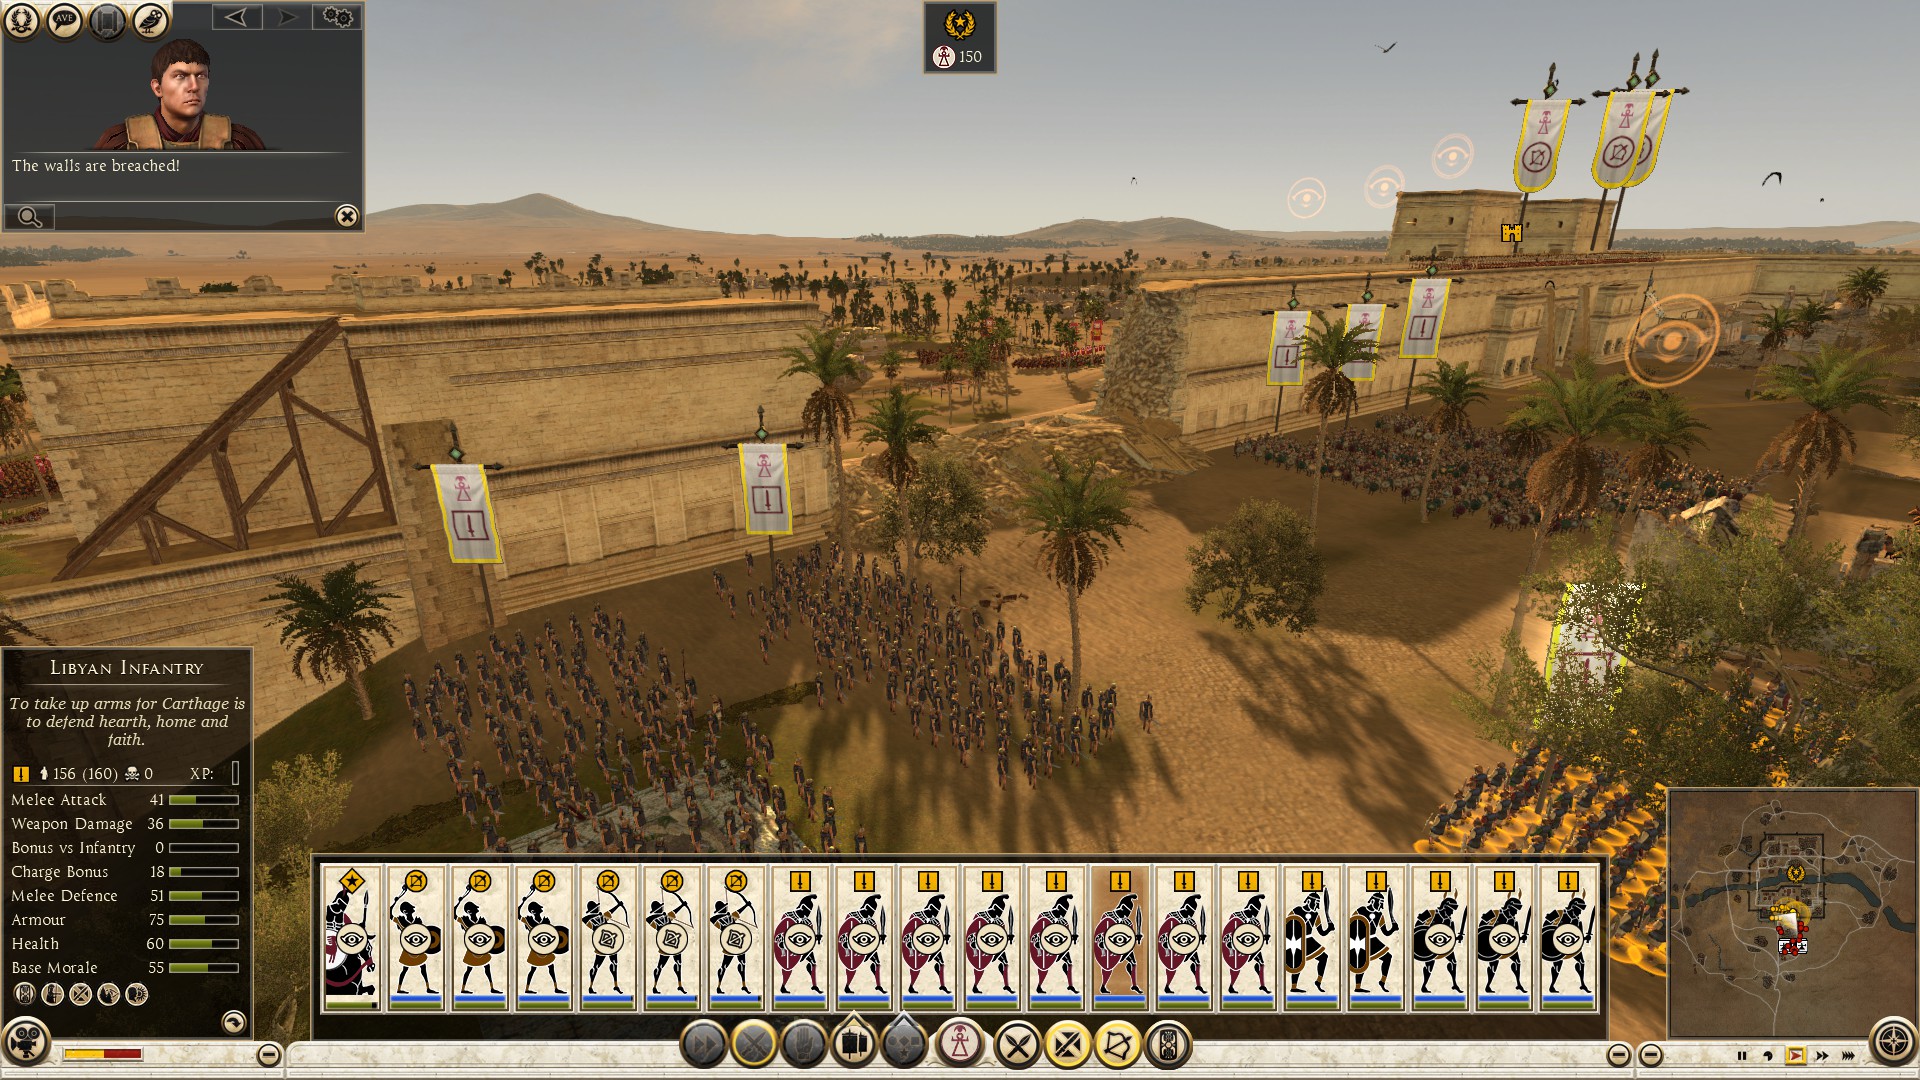
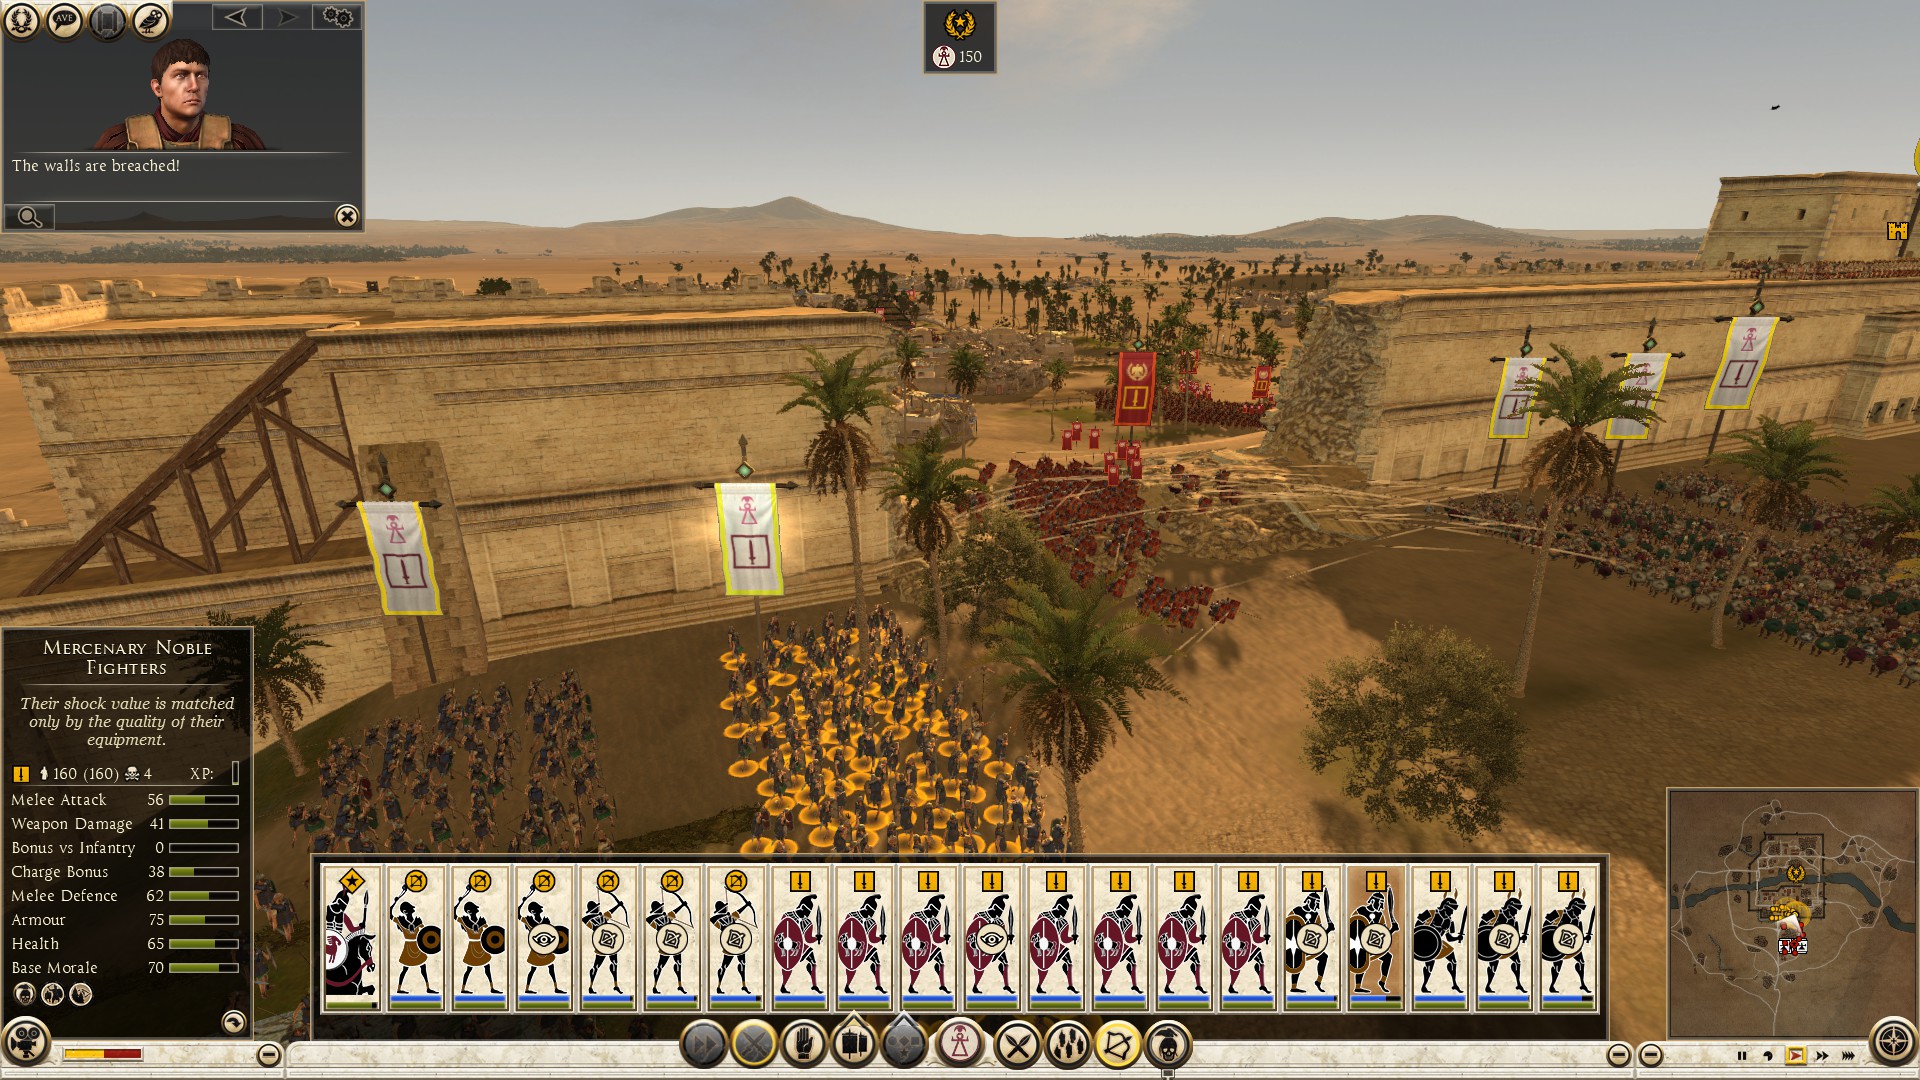
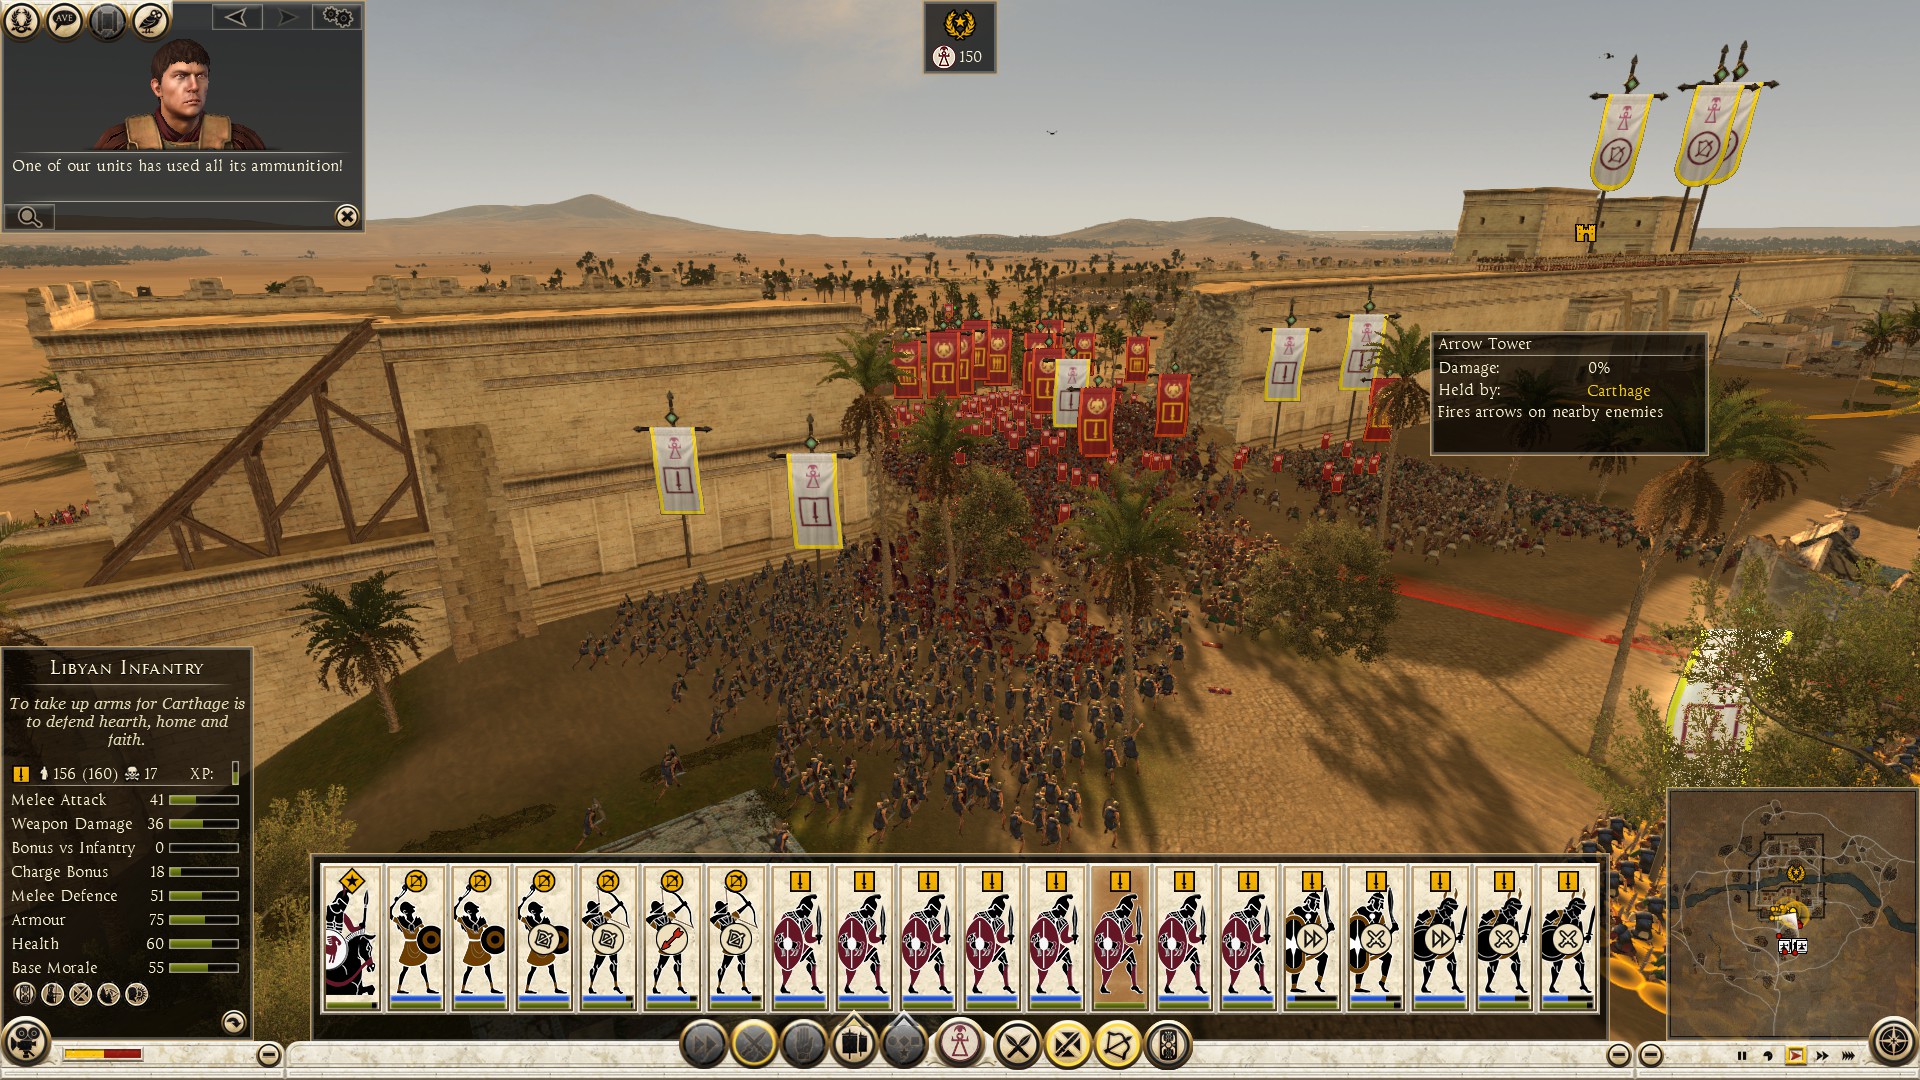
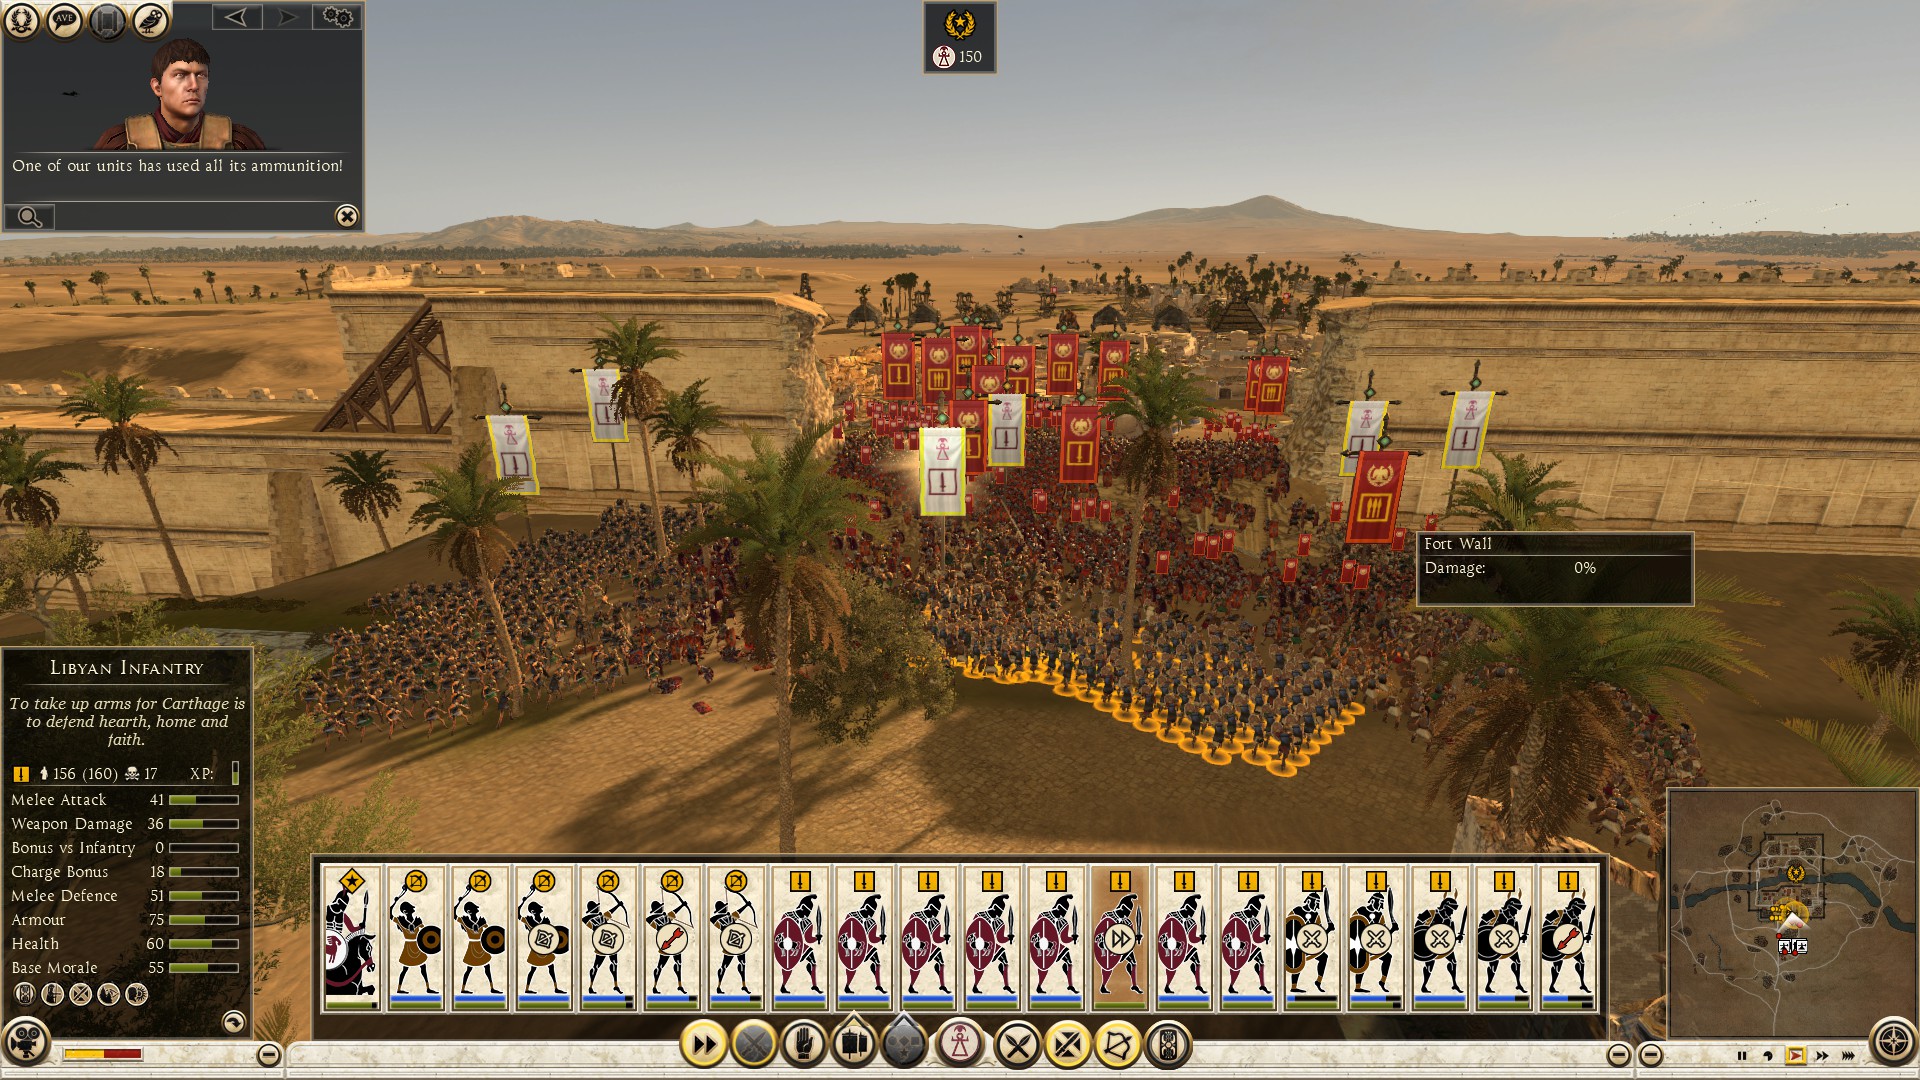
Fire at their range units with yours, you should have no problems taking them out with minimal losses, due to the wall fortification that your men are hiding behind. If the opponent attacks with a mixture of towers and wall breaking mechanisms, always keep your men on the bottom of the walls, so the tower scorpions do not rip your units up. Depending on the amount of artillery your opponent fields, don’t put your men close to the walls that is being bombarded, when it breaks, your men will take huge losses. Veterans try to push through both, the wall and the hole. They also use their remaining artillery ammunition to break your towers, preventing them from shooting their units. Don’t be troubled, your units are your defenses, towers and whatnot are just bonuses. Again, try to surround the enemy on the walls and hole, and fire at their archers. You can have one or two range units firing at the enemy units on the walls, while the rest of your range units skirmish the enemy rangers.
Use your pikes when the enemy cannot pila and or shoot them with range units. You can prevent an enemy from throwing pila at your pikes by keeping a melee unit in front or among the pikes, as a meat shield. If they try to target your pikes by charge throwing (when you double right click an enemy unit, your unit runs and throws javelins), prevent them by charging them with a melee unit. While your melee is engaged, try to pike the enemy units, and as soon as the pikes touch the enemy units, move your melee back but among your pikes. Veteran siege opponents will pull their units back before you pike them and try to pila you again, or they already have a support line behind their front line ready to pila your pikes as soon as their comrades fall back and giving them space to throw. Don't let that happen, as soon as you see the enemy front line fall back, even if they don’t have reserves, pull your pikes back and charge them with your melee units. Repeat.
Regardless, even if the settlement is has barbarian engineering, do the same thing.
==========================================================================
Defending: Unfortified Town and Port Assault First Stage
--------------------------------------------------------------------------------------------------------------------------------------
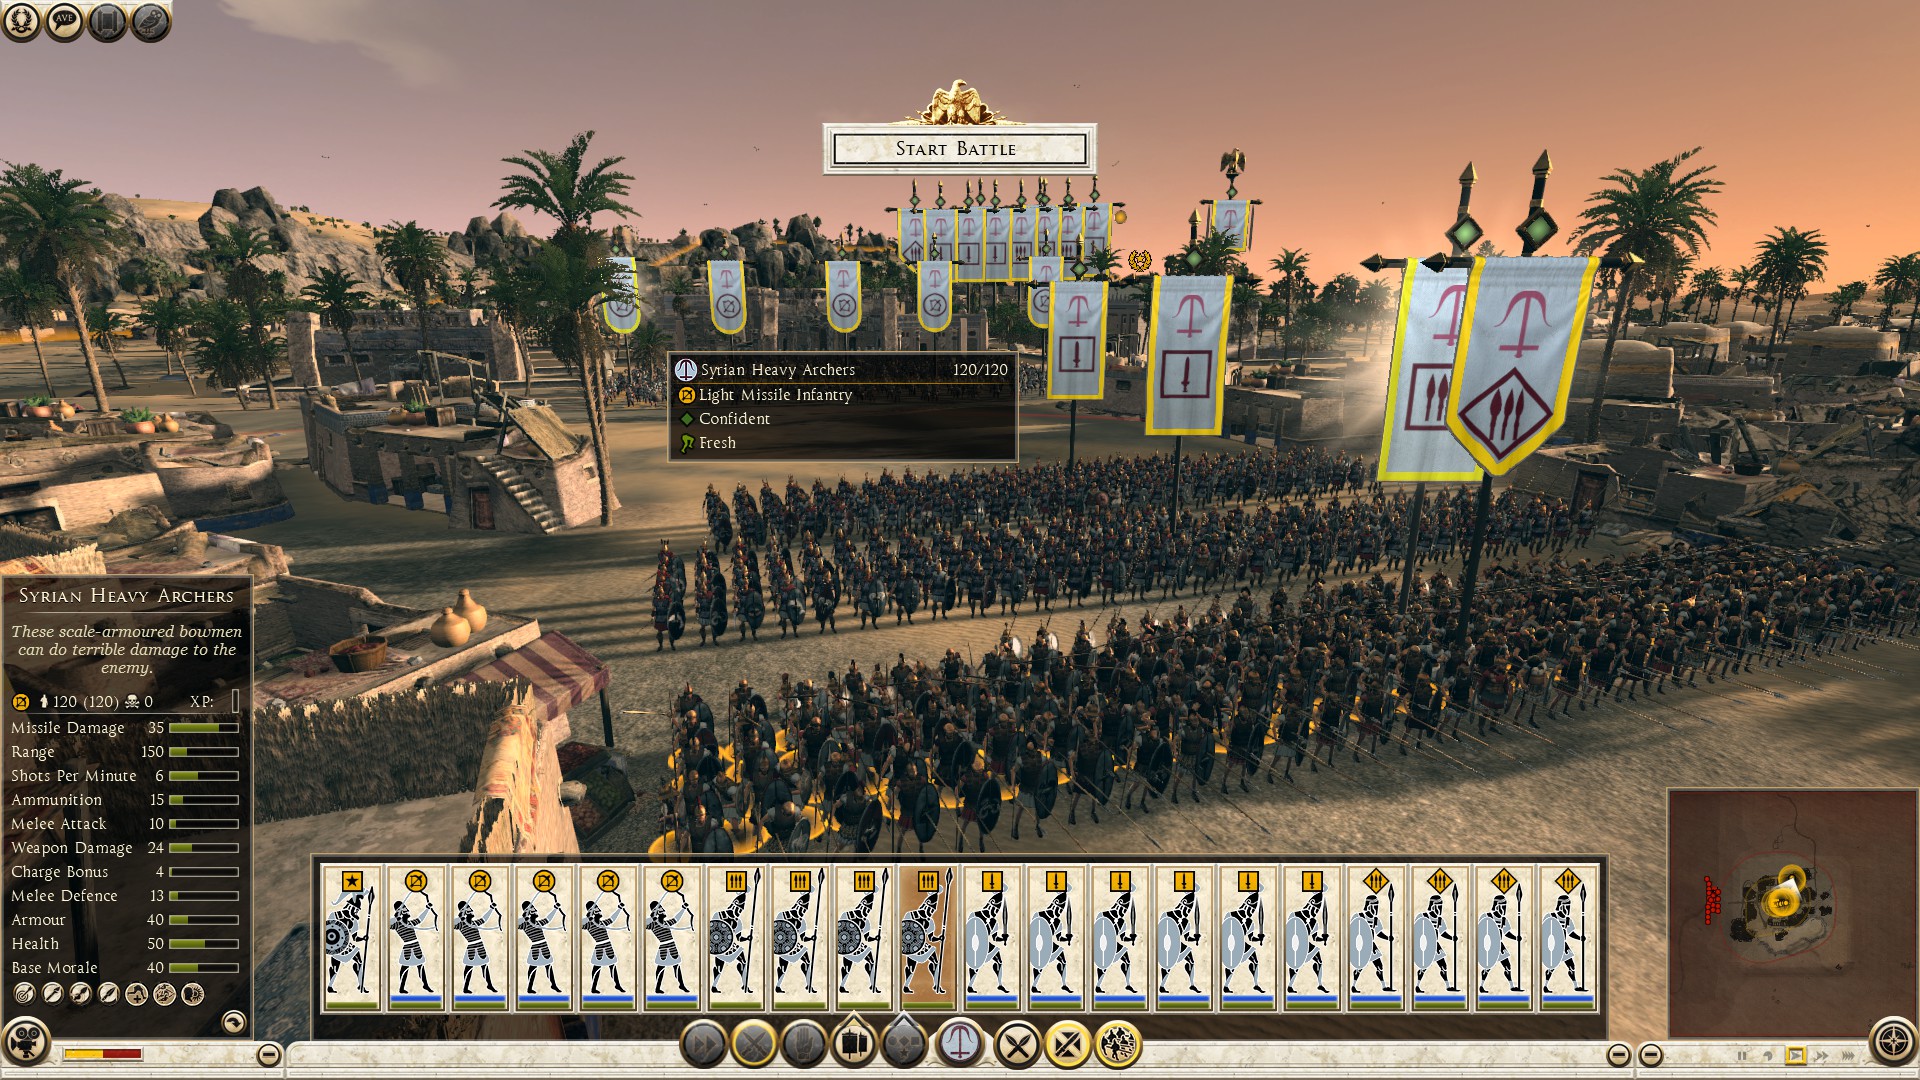
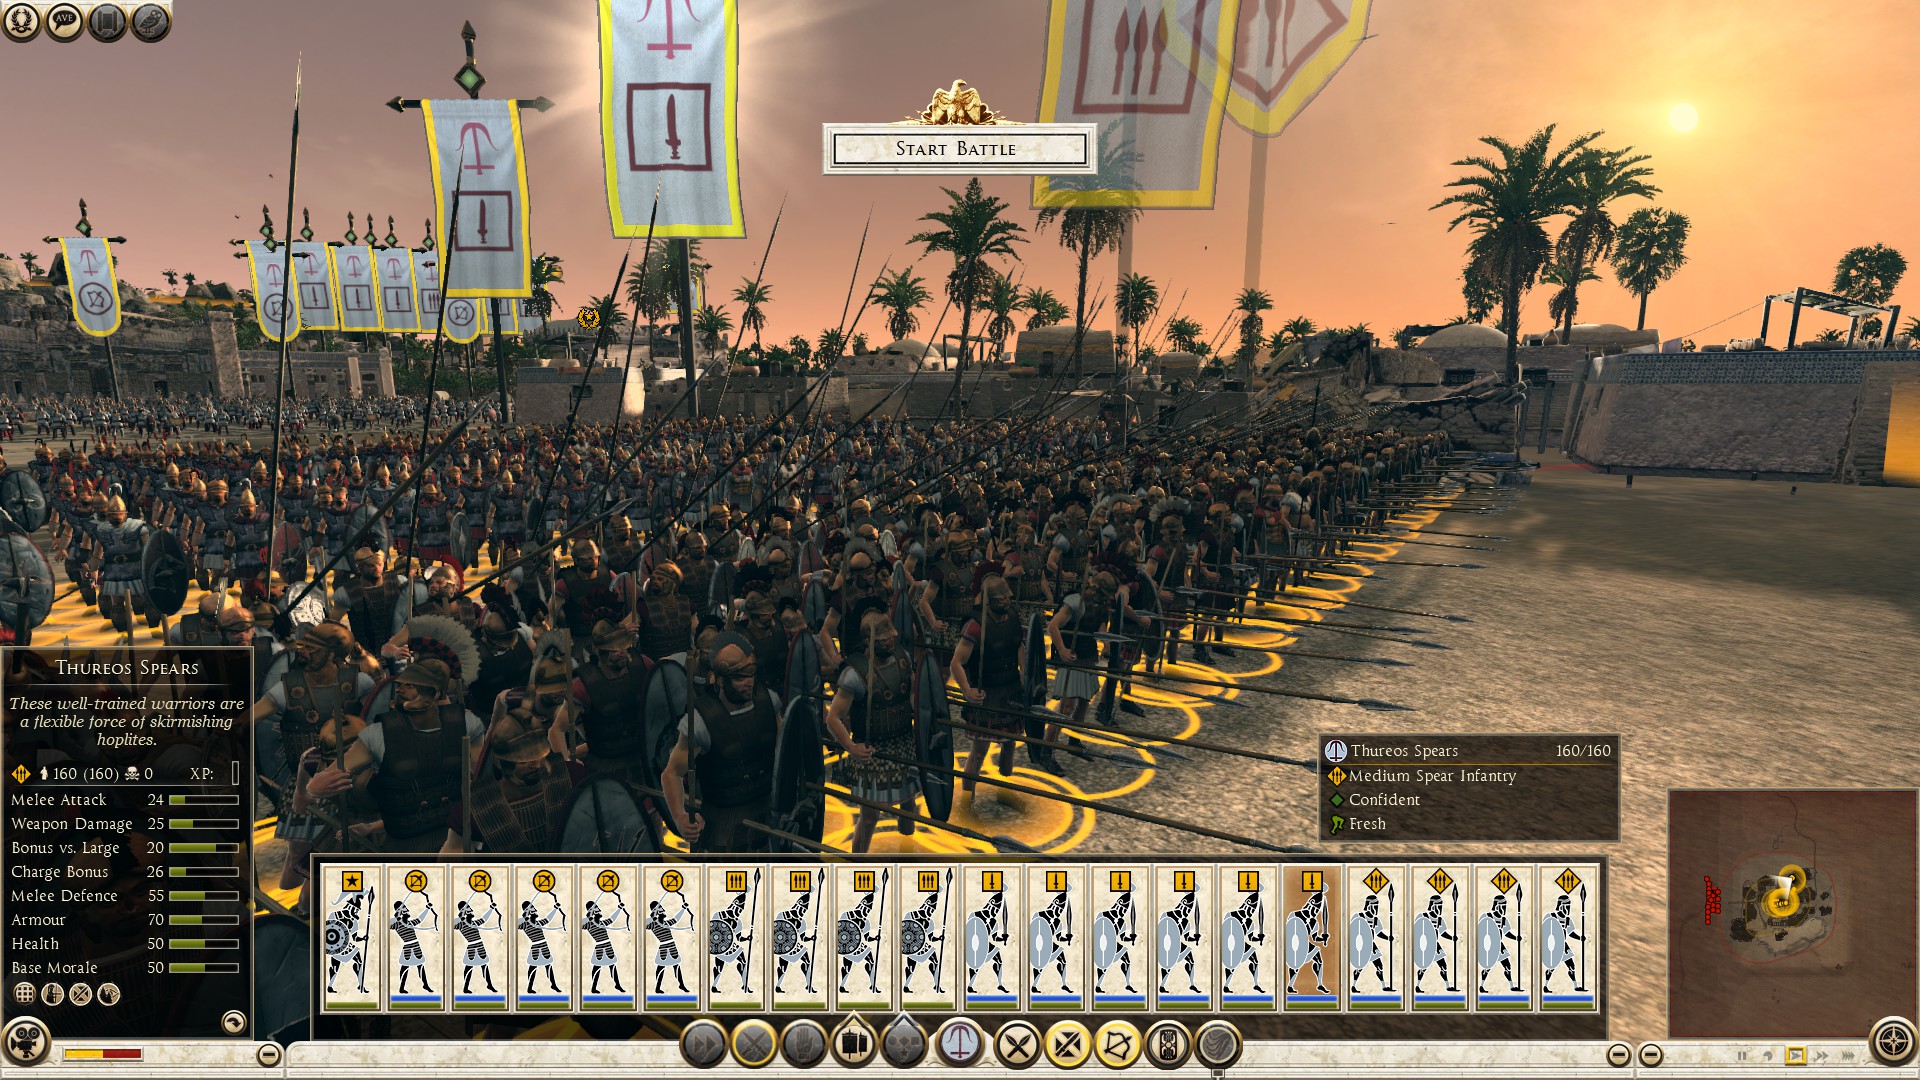
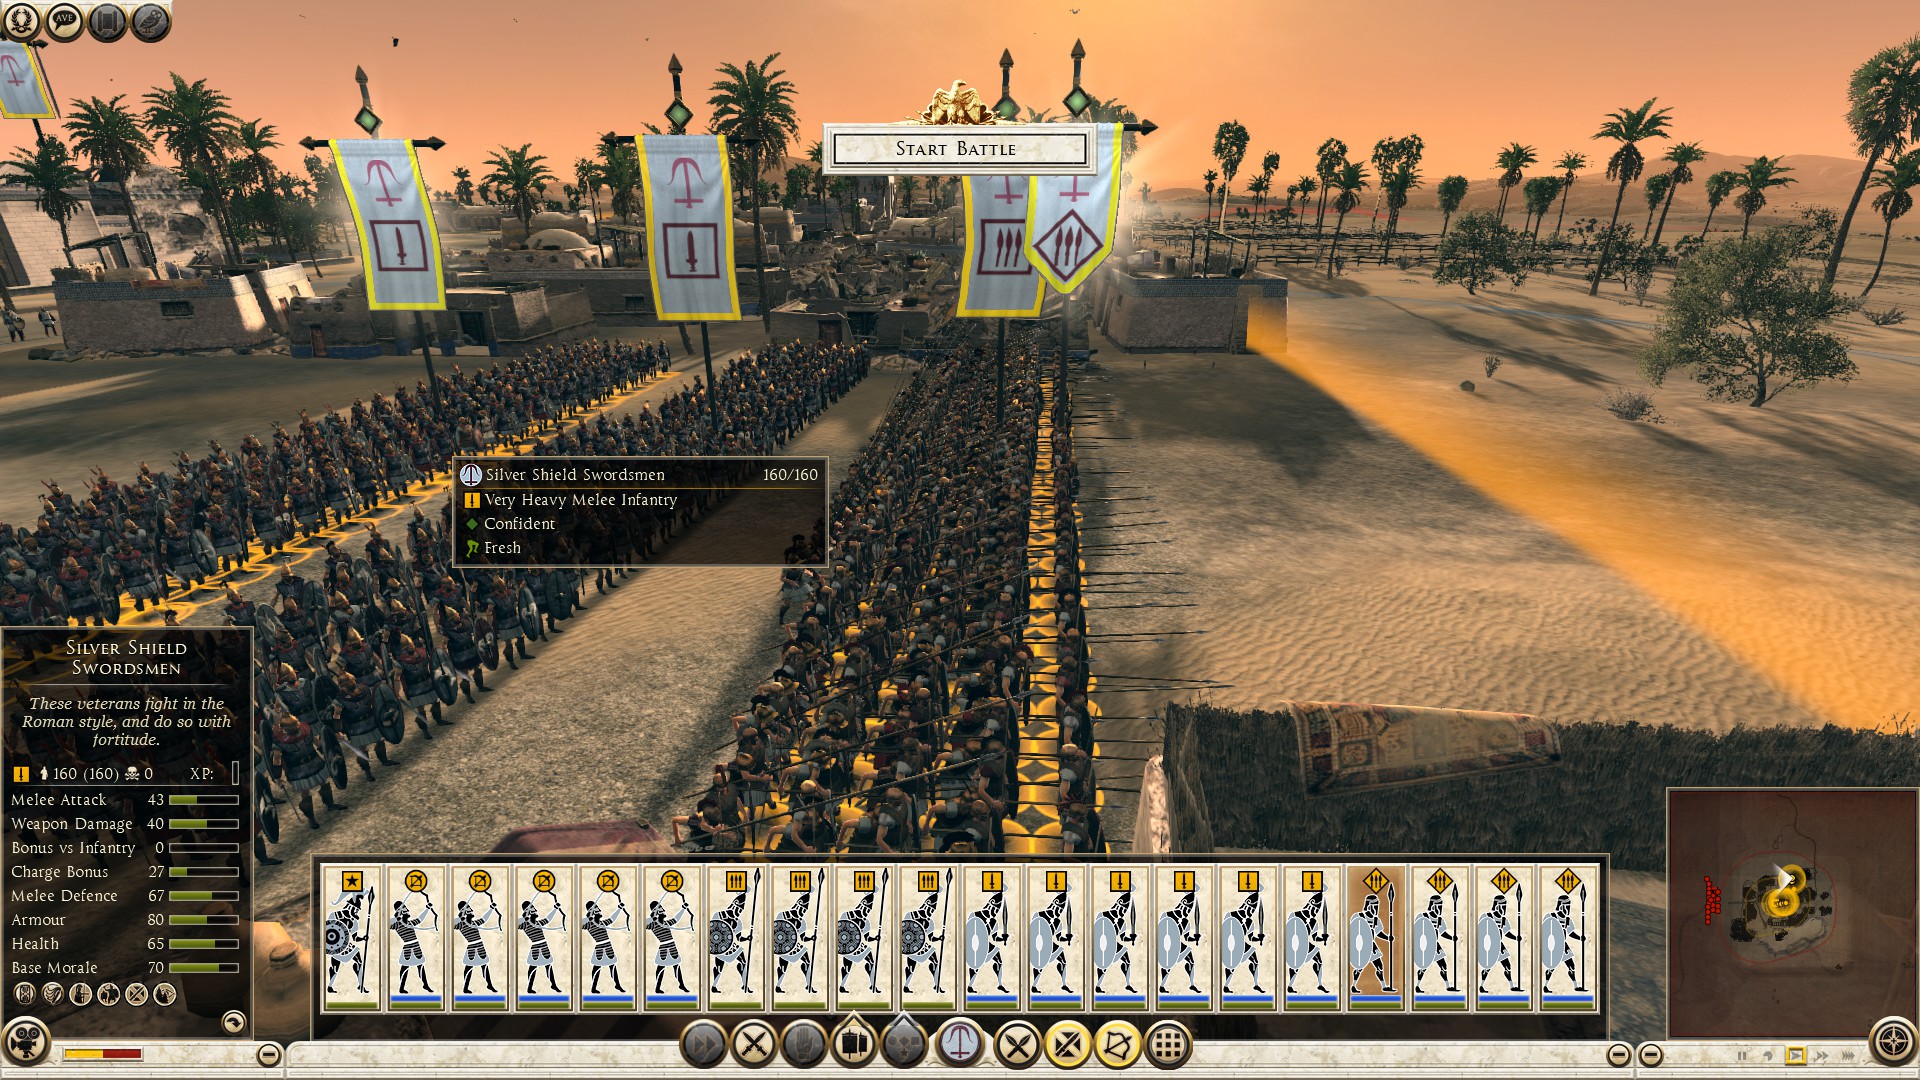
If the enemy brought heavy shock and or melee cavalry, put a unit in shield wall at the front (preferably spears), with a reserve sword or spear unit behind it and range units all the way in the back. The shield wall will literally be the shield that takes the cavalry charge, while the unit behind will be the sword, throwing pila's (javelin) at the cavalry and routing them. As soon as the shield wall is charged, get out of formation and fight the cavalry, cavalry can not win in a prolonged melee combat, they are meant to charge.
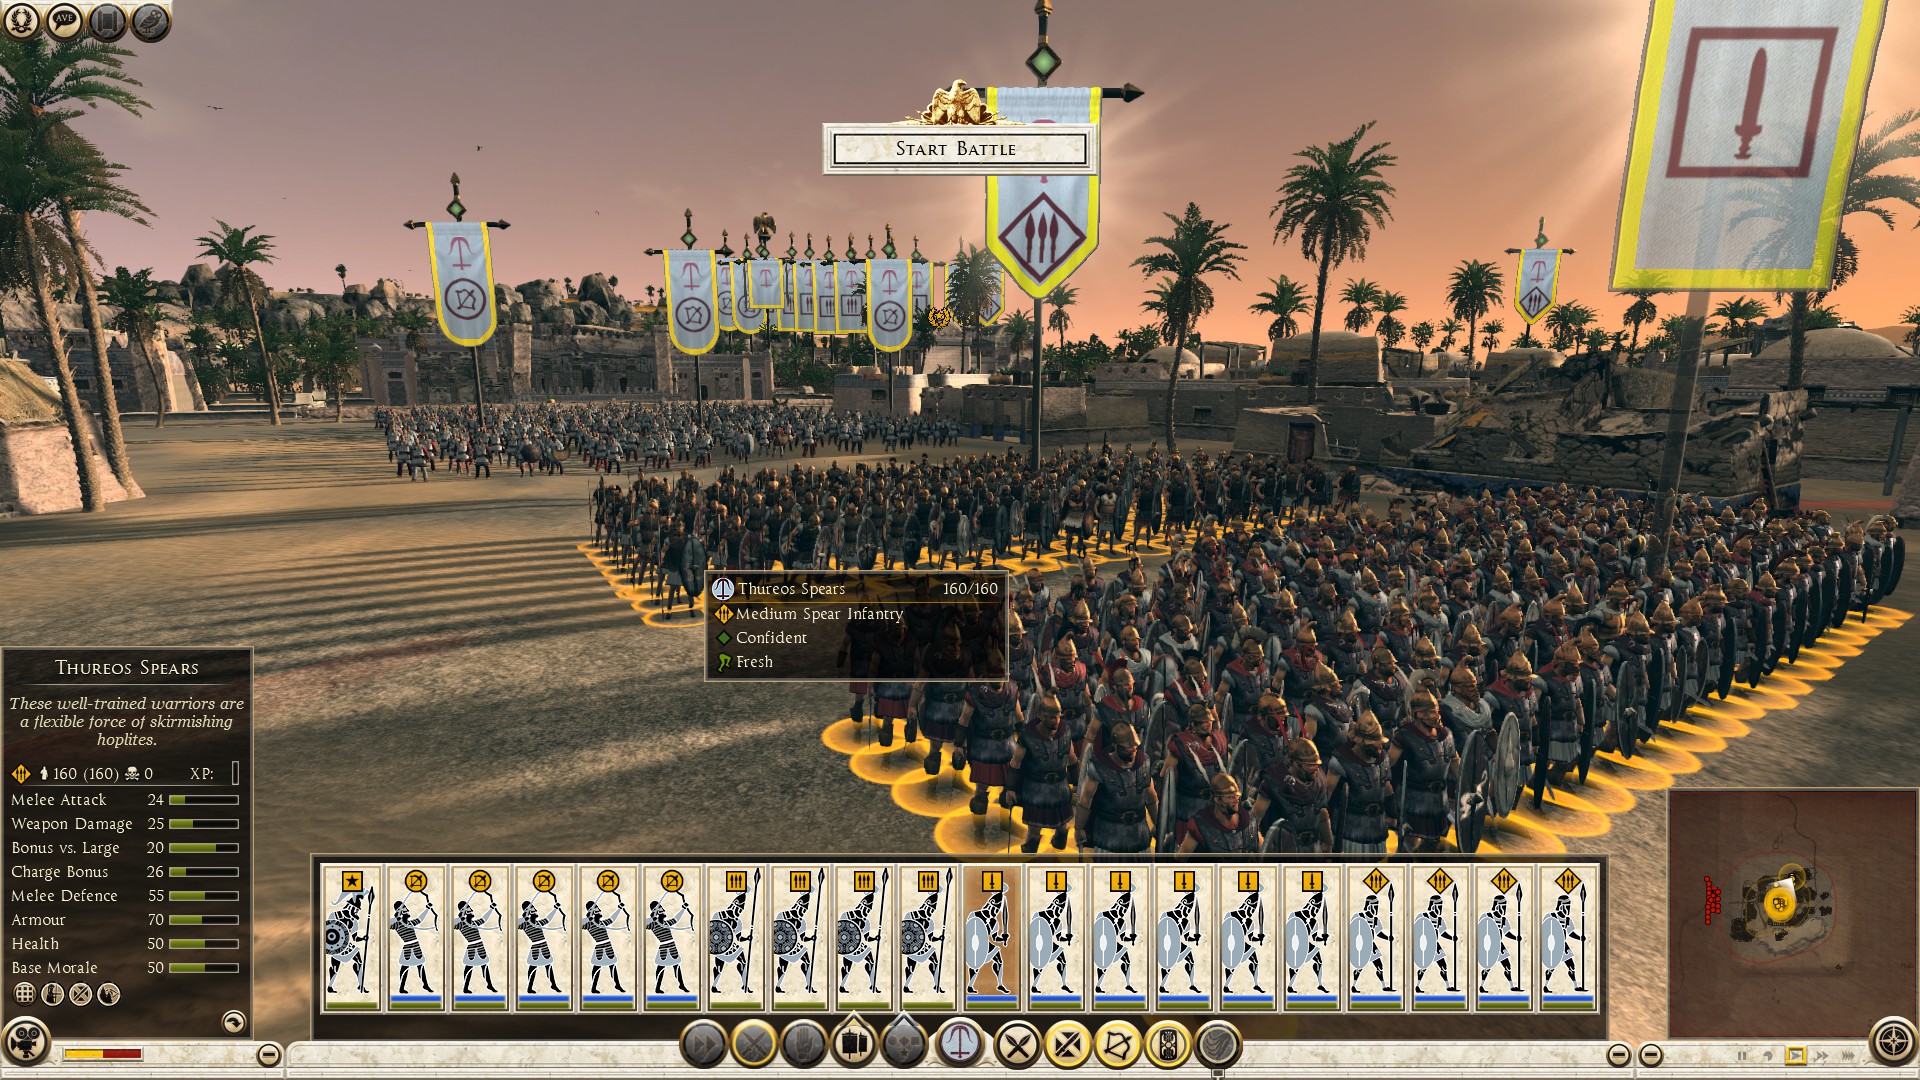
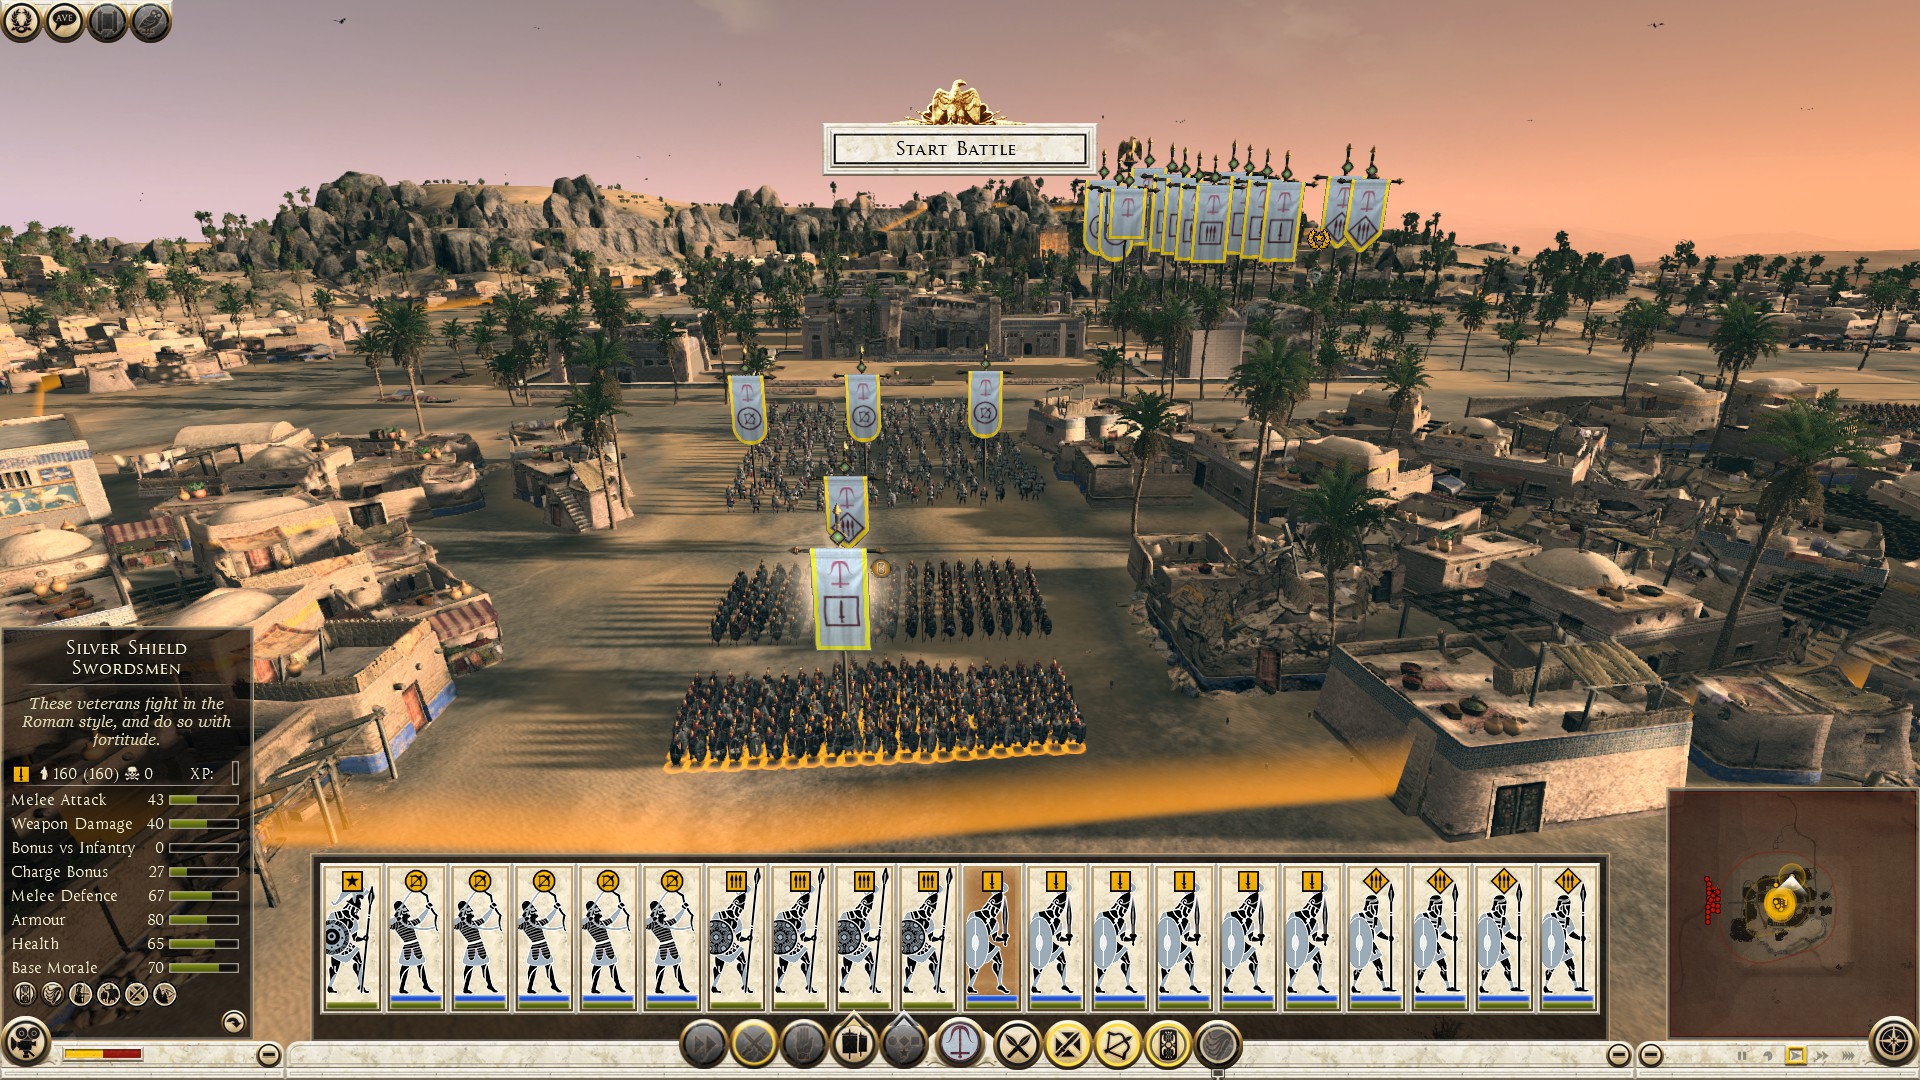
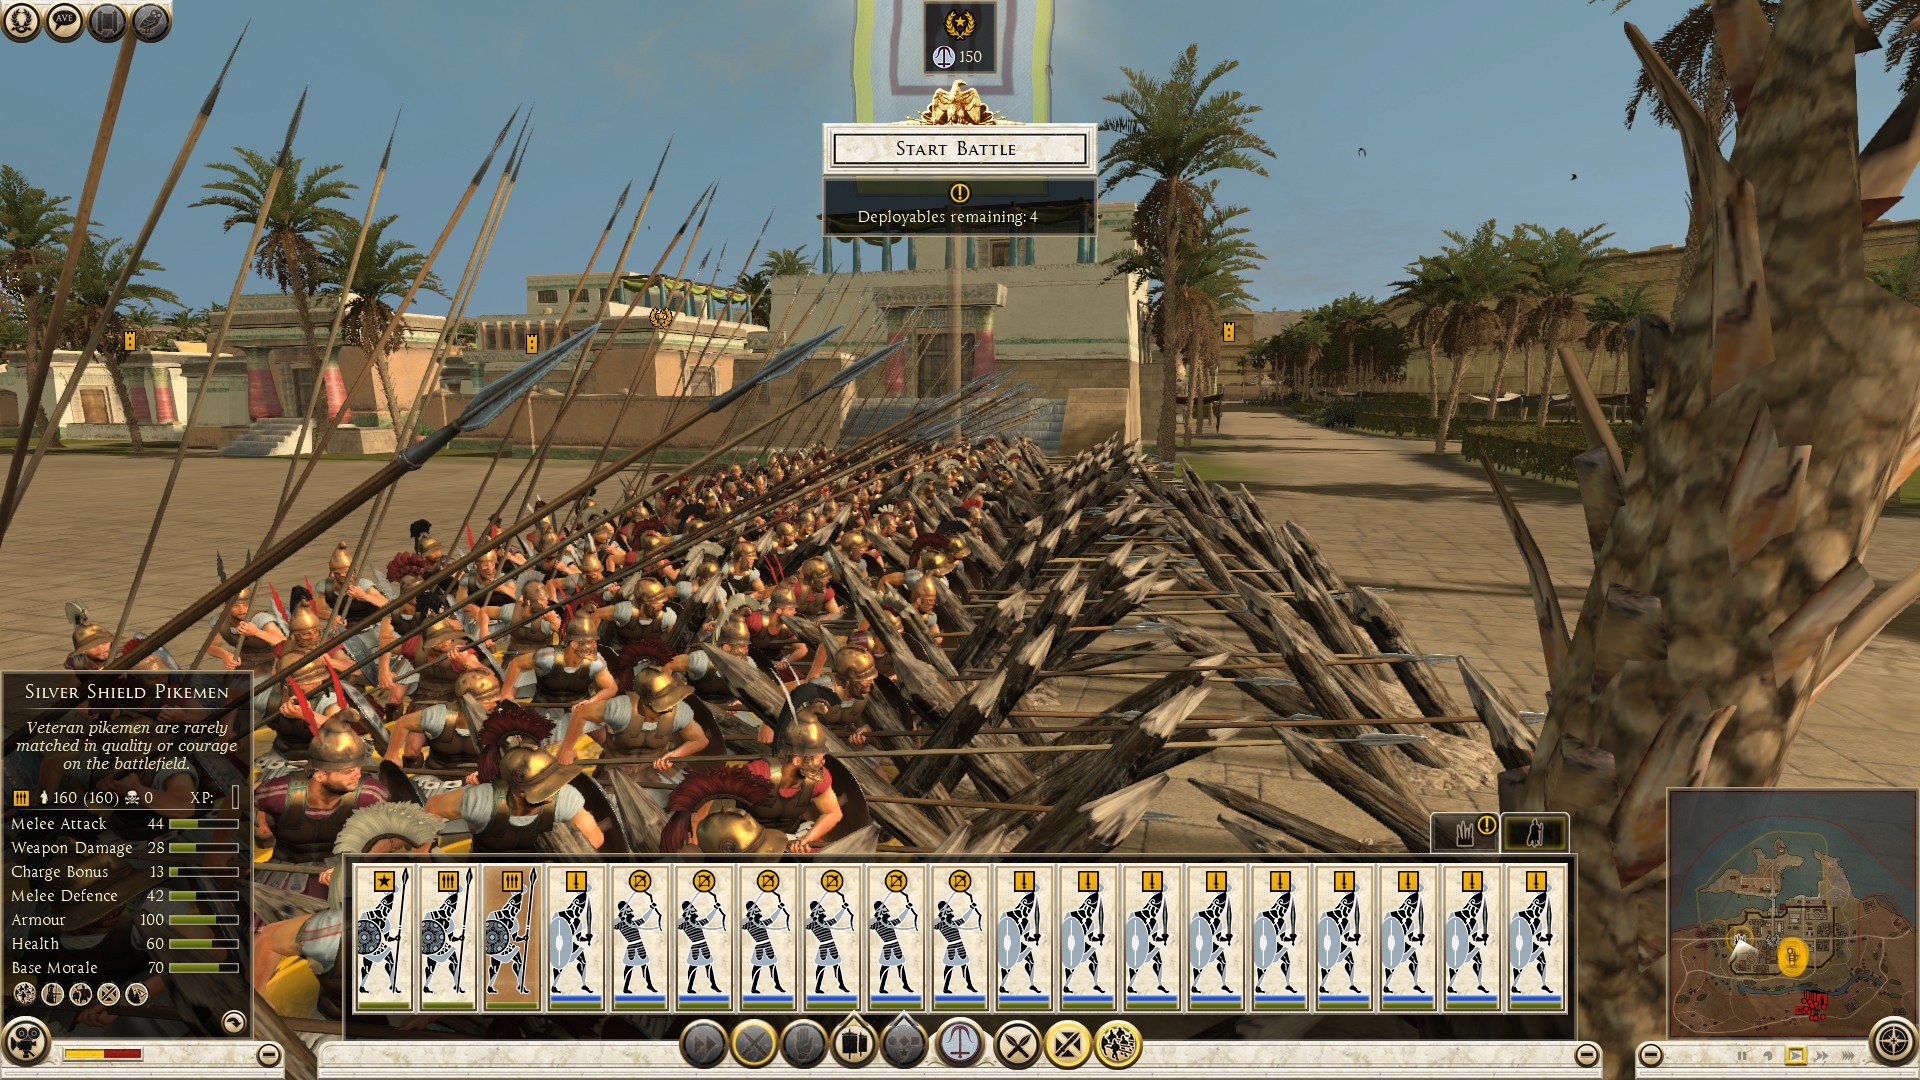
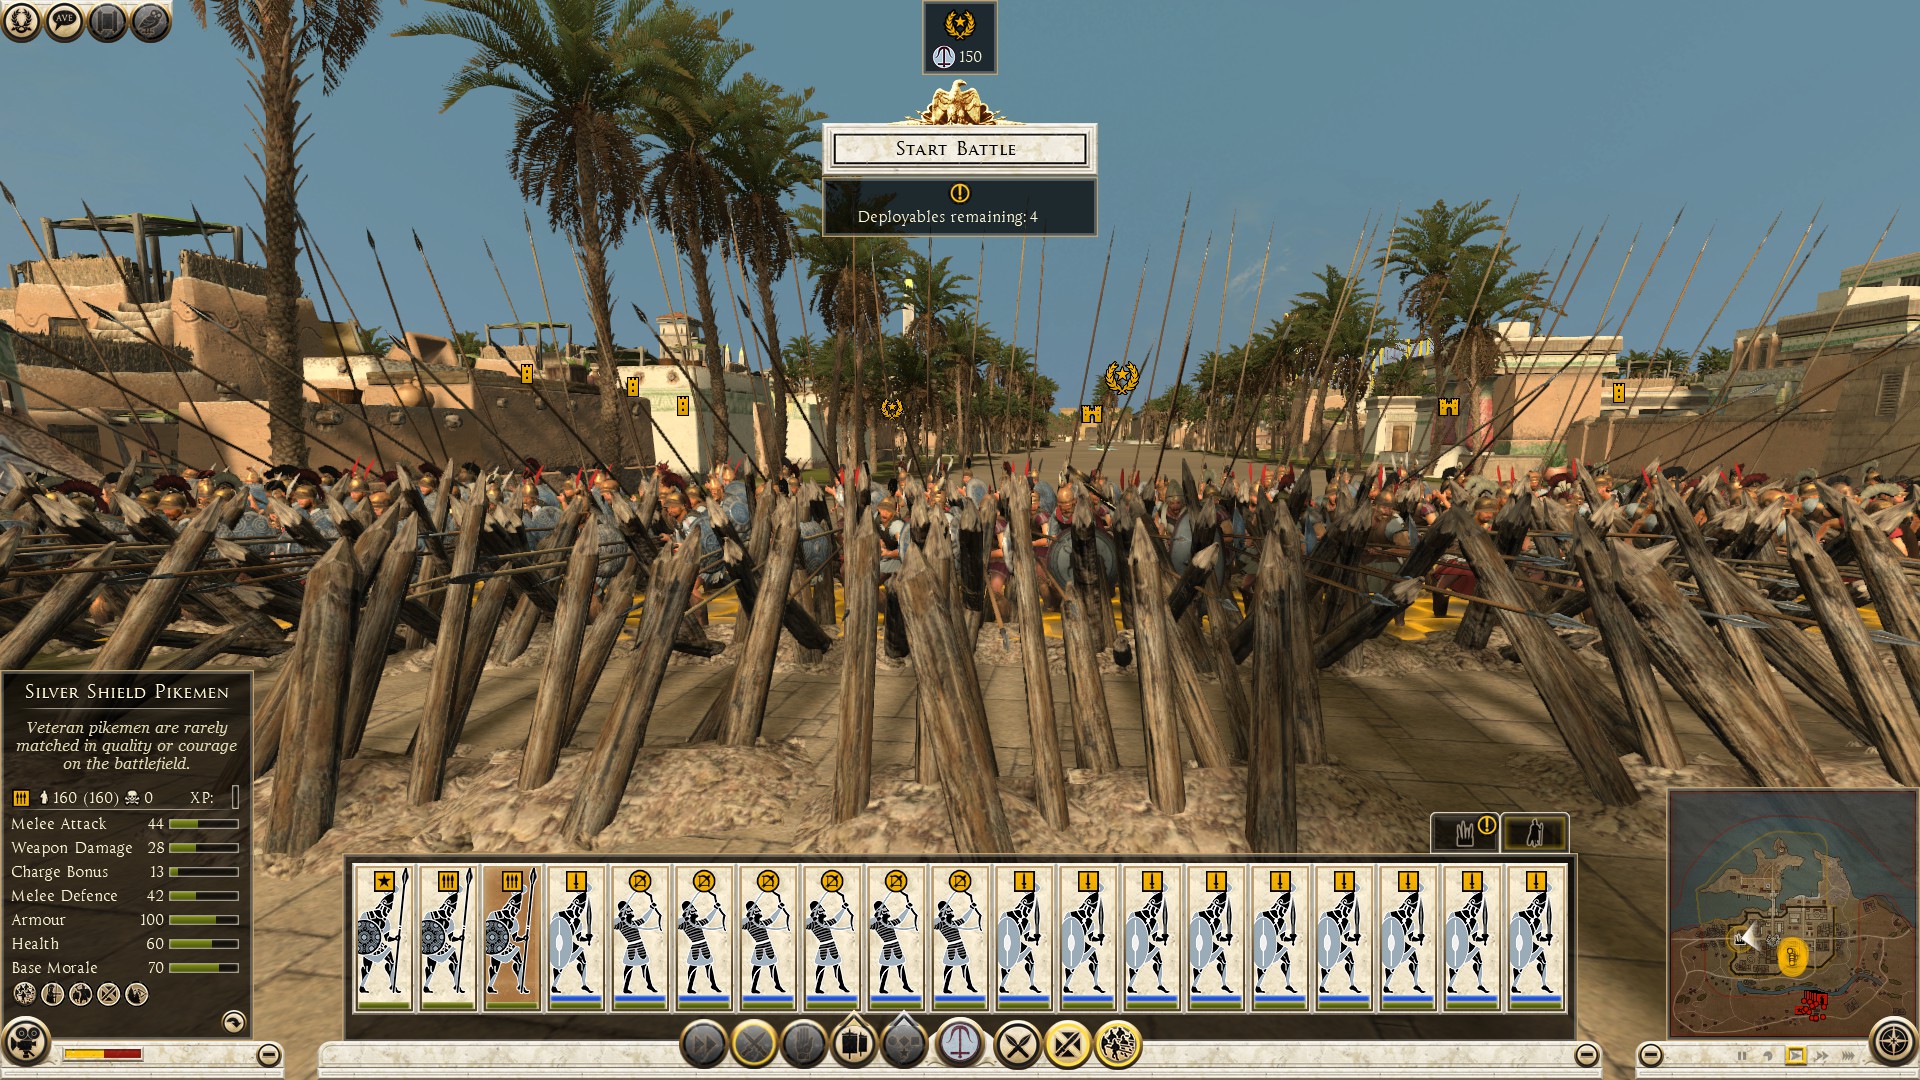
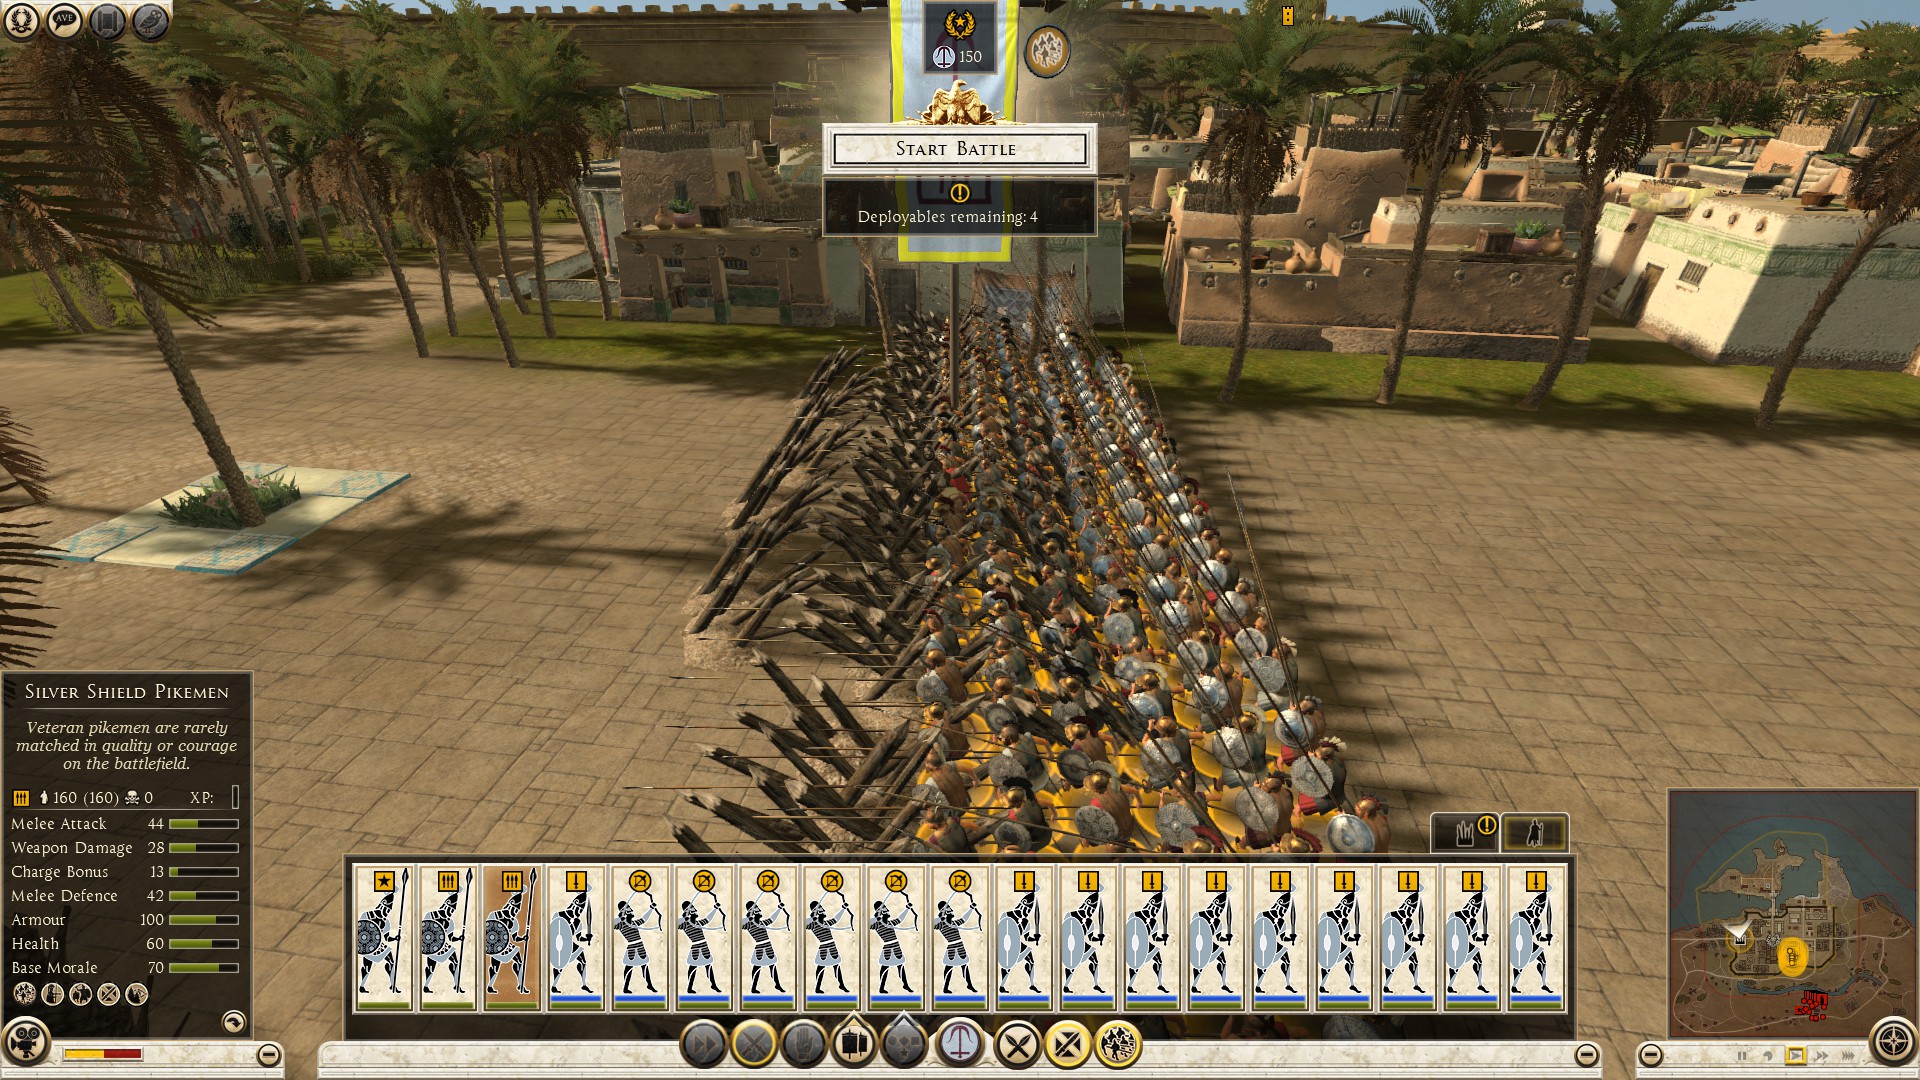
If the enemy brought elephants, your front line should be pikes with a melee unit (preferably pears) among the pikes, that way you have short and long spears fighting the elephants at the same time. It is okay to put the spears a little bit ahead of the pikes, but they have to be behind the tip of the pikes like you will see shortly. That is not enough though, put another spear and or sword unit that is able to throw javelins behind, with your range units pounding those elephants before they get close to your front lines. Doing so, you will inflict damage on the elephants and possibly cause them to panic.
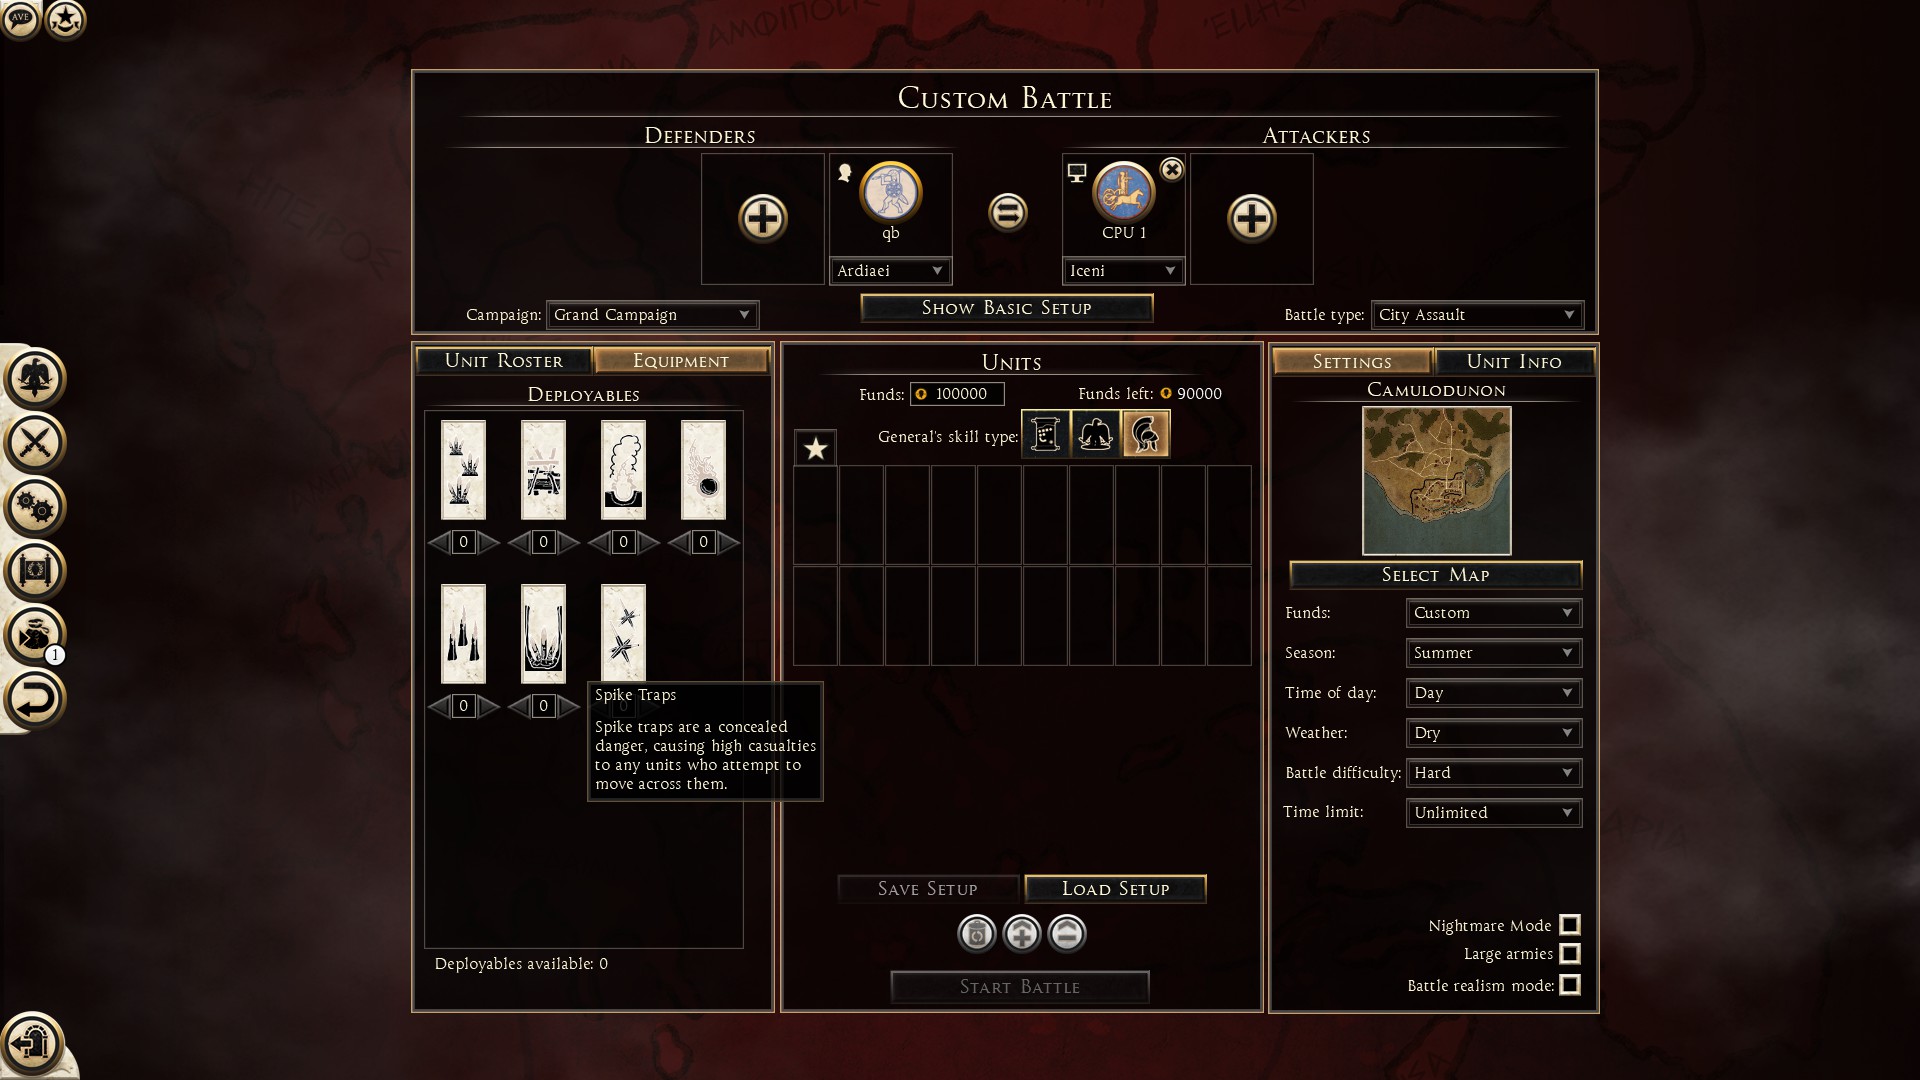
Traps play a huge role in defending unfortified town assaults, I will talk about them in the following post.
 ============================================================================
Defending: Equipment
============================================================================
Conclusion
Thank you for reading this long Guide that I put a very long time and effort into so you (the reader) can become a better total war siege player. Good luck and FORWARDDDDDD!!!!!!
============================================================================
- The Noob's Guide To: Taking A City Without Going Into "Total War"★ 5 (758)57k views667 ♥4 minUpdated Aug 15, 2021
- Rome 2: Formations (unit control tips)★ 5 (1k)49k views1.5k ♥5 minUpdated Sep 21, 2013
- ROME 2... EMPEROR EDITION. Easy public order and money income guide★ 5 (1.4k)47k views2.9k ♥33 minUpdated Feb 1, 2019
- A Comprehensive Guide to the Power & Politics System★ 5 (575)45k views1.1k ♥13 minUpdated Jul 5, 2018
- The one and only mod list for Rome II★ 5 (649)44k views1.6k ♥7 minUpdated Oct 19, 2023
- Ancient Roman Battle Formations★ 5 (650)34k views1.1k ♥38 minUpdated Mar 31, 2015



- Upgrading to PremiumTeam Fortress 2★ 5 (20k)1441k views11k ♥6 minUpdated May 11, 2022
- No More Room in Hell Official ManualNo More Room in Hell★ 5 (2.8k)569k views2.1k ♥29 minUpdated Apr 22, 2019
- NMRiH Community Hosting GuidesNo More Room in Hell★ 5 (526)351k views653 ♥1 minUpdated Aug 10, 2022
- ULTIMATE GUIDE FOR GAME DEV TYCOONGame Dev Tycoon★ 5 (5.8k)326k views10k ♥4 minUpdated 23 Jan, 2014
- How to 'Git Gud' Soon™MORDHAU★ 5 (2k)318k views3k ♥68 minUpdated Nov 16, 2024
- Лучшие кооперативные игры SteamPAYDAY 2★ 5 (1.5k)315k views2.1k ♥56 minRussianUpdated Apr 27, 2025






This guide was created by its original author on the Steam Community. Are you the author and want it removed? Request removal.