Tactics and Statistic on every map in PD:TH
Tactics on First World Bank
 The FWB is one of the easier heists to complete. Remember: On Ovk 145+ there are always 4 Bulldozers in the vault.
Info:
1) Killing the bank manager will make cops more aggressive and 2 bulldozers will spawn
2)The most used loadout for this map is: Bronco/M308/GL40/Medic bag(Ammo bag)/Extra Start-Out Ammo/Big game hunters(BGH)
3)If you are playing with 4 players, 2 players go get the thermite and pour it, the other two players should stay to camp in the manager's room.
4)Watch out! Between pillars in the vault hallway there is sometimes a cloaker spawn.
5)If you are playing on OVK 145+ in the vault as I already said there will be 4 Dozers waiting for you...so rushing in ISN'T a good idea.
6)When you place C4 and get ready to escape there will be 4 tasers and some heavy swats waiting for you on the stairs leading to the escape (on 145+) and sometimes some heavy swats at the elevator near to the top of the stairs.
Tactics:
Easier tactic:
When you start the heist, get the bank manager, set up the drill, then you will move to the manager's office as I said already. If you are playing with 4 players place one ammo and one med there. You should use Runner tactic (Baiting). That means one guy will fix the drill and others camp in the manager's office. When the drill is done (it takes 4 minutes) 2 guys with thermite should go to the vault hallway and pour it. Other two just keep camping in the manager's room. There's cookies in the desk if you get hungry. After the thermite is done all 4 players go to the vault, and if you are playing on 145+ there are 4 dozers so go in together or send someone confident in their ability to dodge their shots. (someone with mines can take out dozers pretty easily). When you've taken the money then place your other 2 bags in the vault. Camp there for some time, when it's getting clearer just run. When you get back to the manager's office med up and ammo up (if you lack it) and place C4. By placing the C4 you will trigger the never ending assault. (endless assault) Kill the heavy swats and specials and get moving to escape. (sometimes as you turn the corner through the escape bathroom to enter the office building there is a shield blocking your path, flanked by a tazer and heavies, and with a cloaker hiding to the left. Further into the office building there is usually either a bulldozer further back near the big desk, or two tazers in the middle of the room. Cops will abseil through all the office windows)
Harder tactic:
Same start just this time you wont hold out at manager's office, you will hold out at drill area (use this if you have exp and skill and a good team) .One guys should cover others from balcony (above the drill) and others camp at the down drill area. When the drill is done you should take thermite as I said, pour it (all four players go) and camp between the pillars. After it's done push cops, kill dozers take money and escape.
Cams:
If you destroy cams it makes specials have bigger spawn delay. And in the vault halfway, if you destroy the cams it will stop some of the elevator spawns (sometimes all elevator spawns stop).
Secret part(Overdrill)
Same start. Okay for this DON'T destroy cams in vault halfway until you have triggered the red light. But first you have to take positions and they look like this:
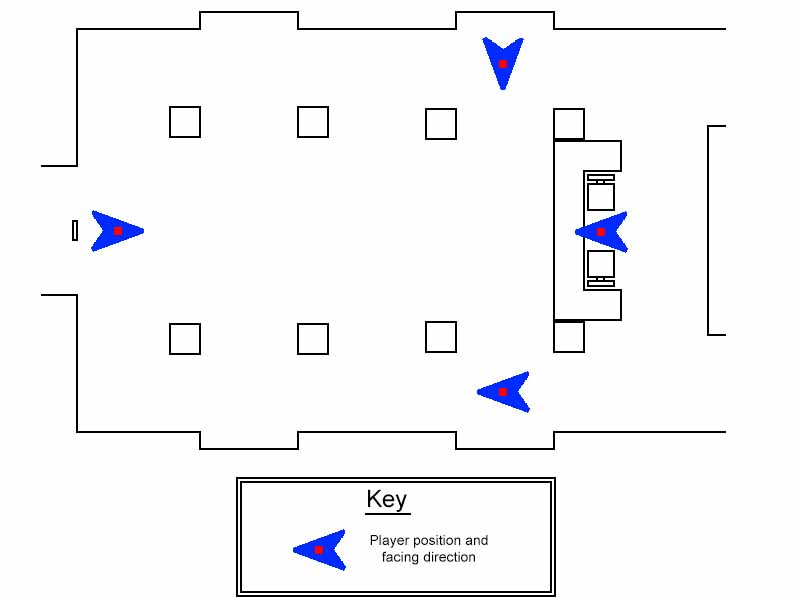 then after that you need to wait for (33 minutes if you are playing below 145+, if you are playing on 145+ you will need to wait for 2 hours!) Then you choose your camp spot, usually the manager's office or thew entrance pillars in the vault hallway. After the secret drill is done you will get to enter the secret vault but first you need to do the code, it looks like this: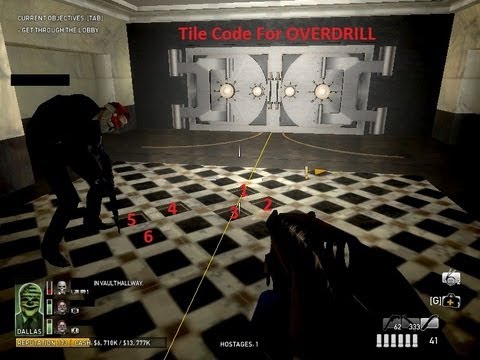
When the secret vault opens you will see so much gold in it (It will level you up very fast).Then after that, finish the heist normally. Oh I forgot , if you do the 2 hour overdrill with everybody in the team wearing golden masks, and send the video to Overkill, you can be invited to the secret group and get the secret masks!
And looping:
Loop means to avoid cops people use it when they are doing heist solo or in duo(its possible to do it with four players too). On bank loop route goes like this:
first spot:
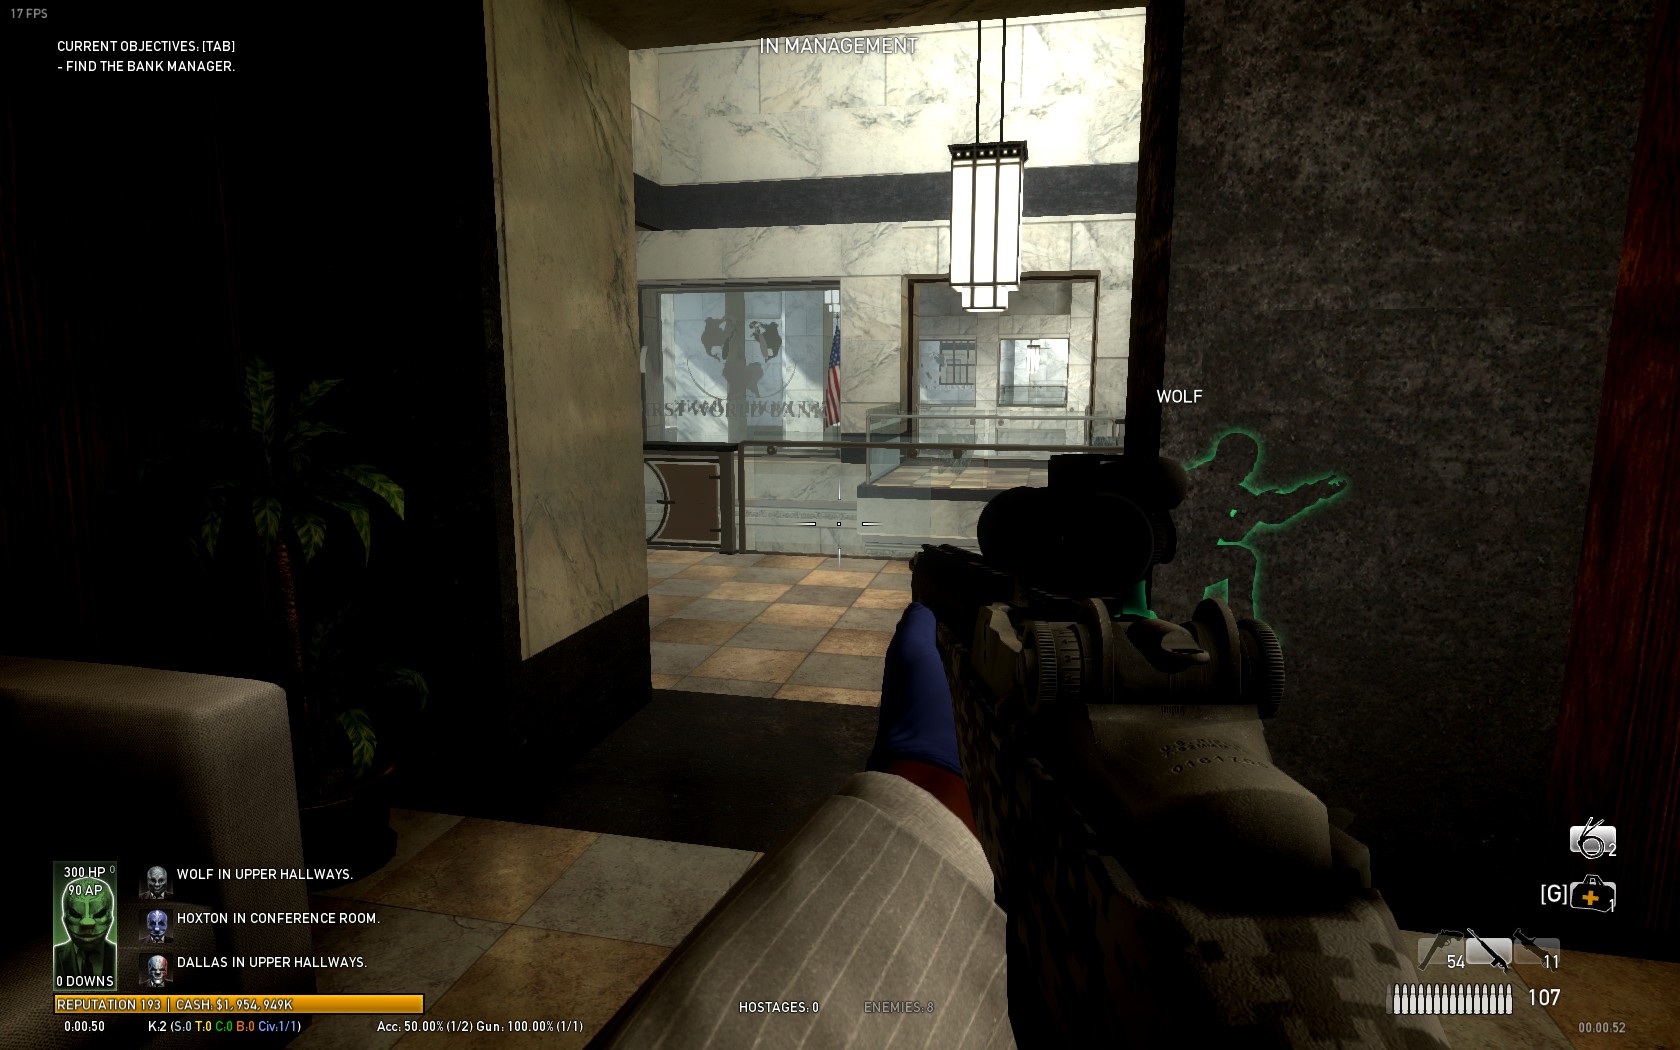
second spot:
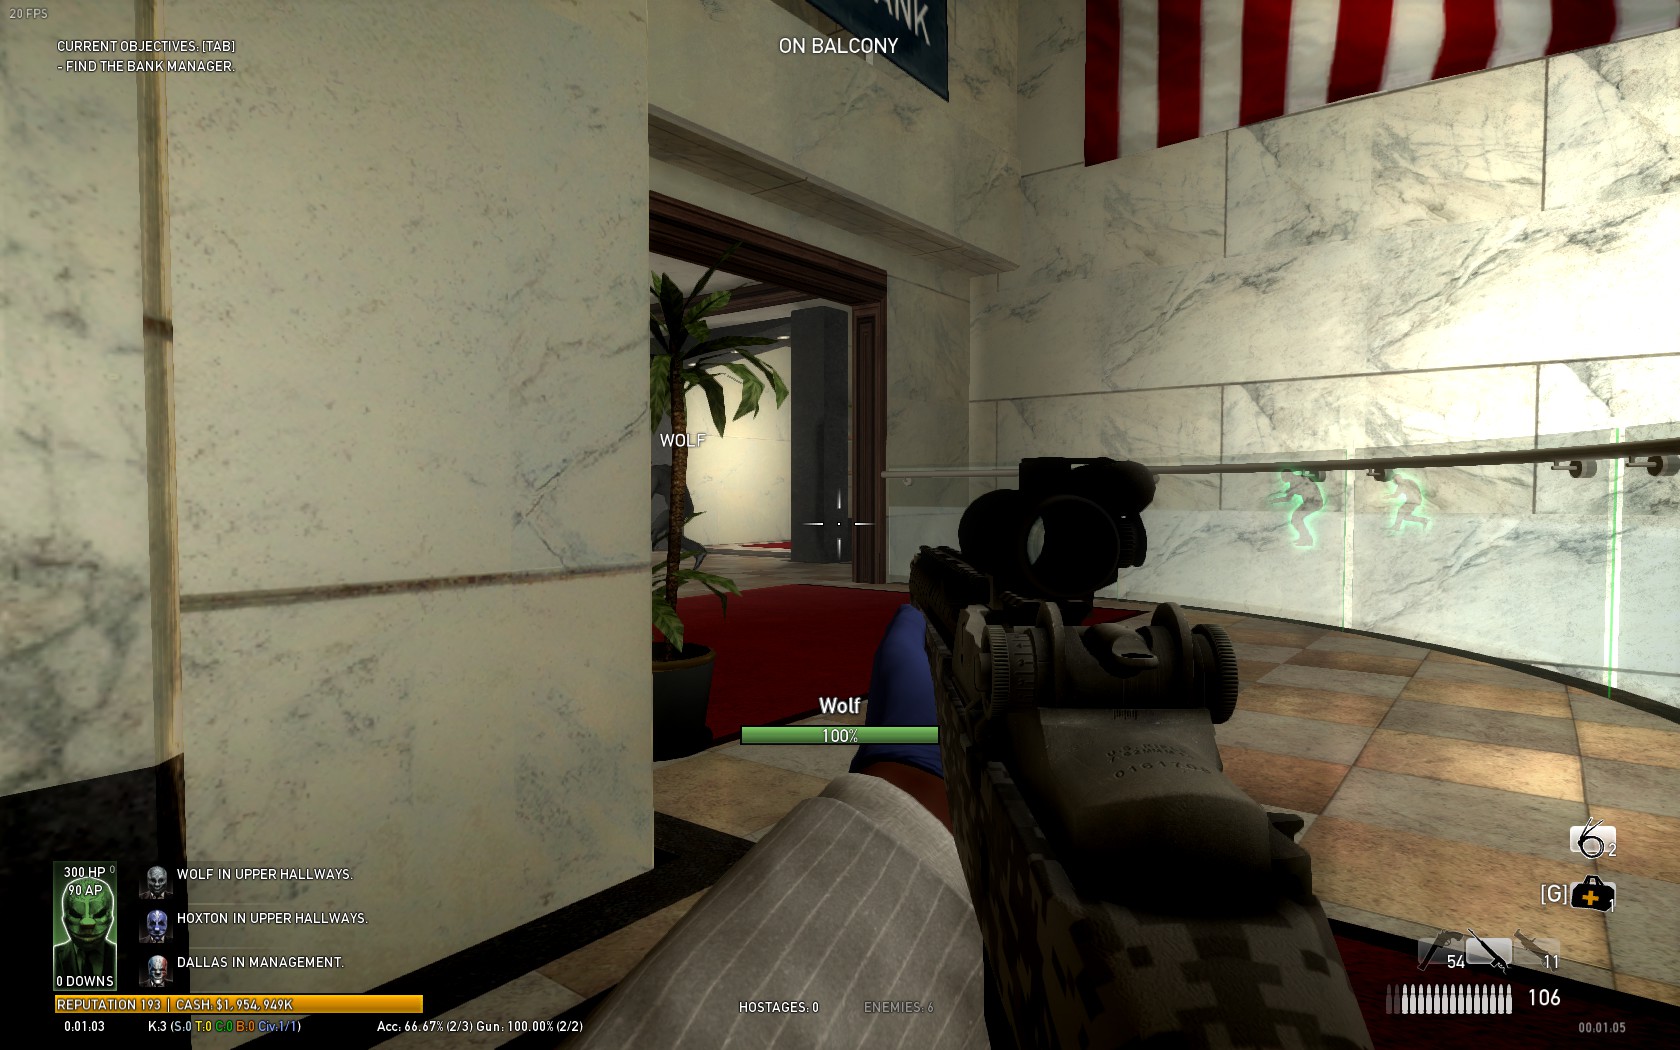
third spot:
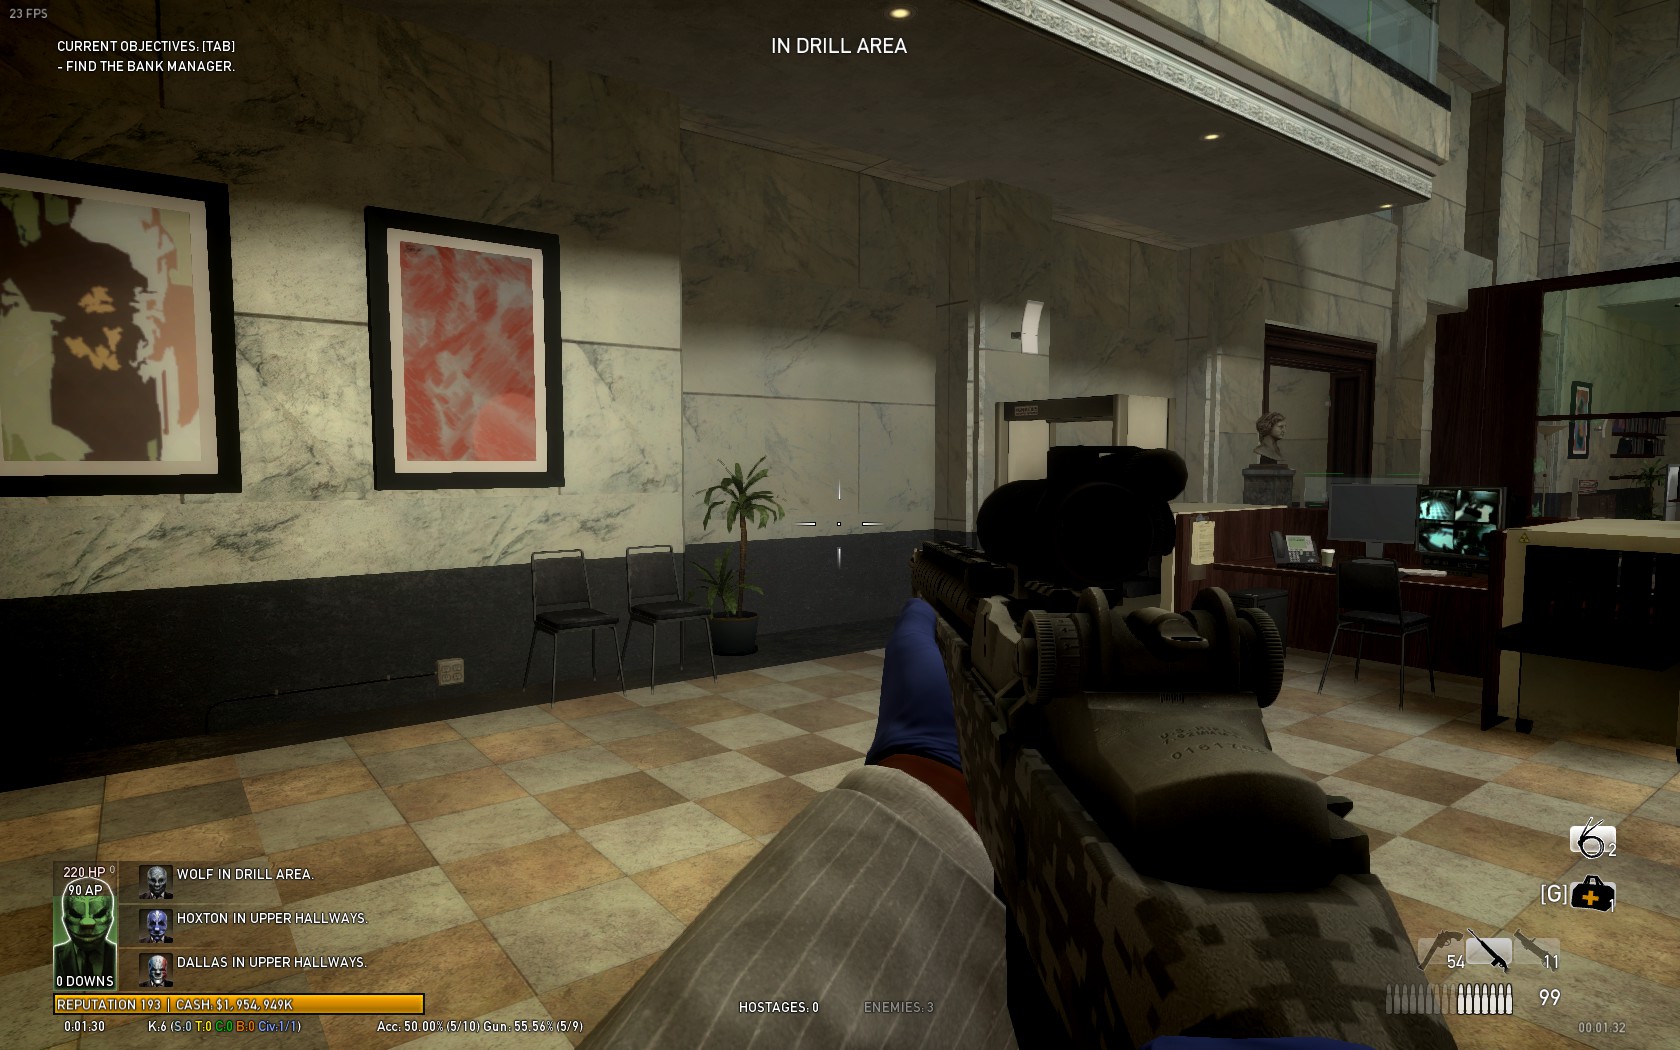
fourth spot:
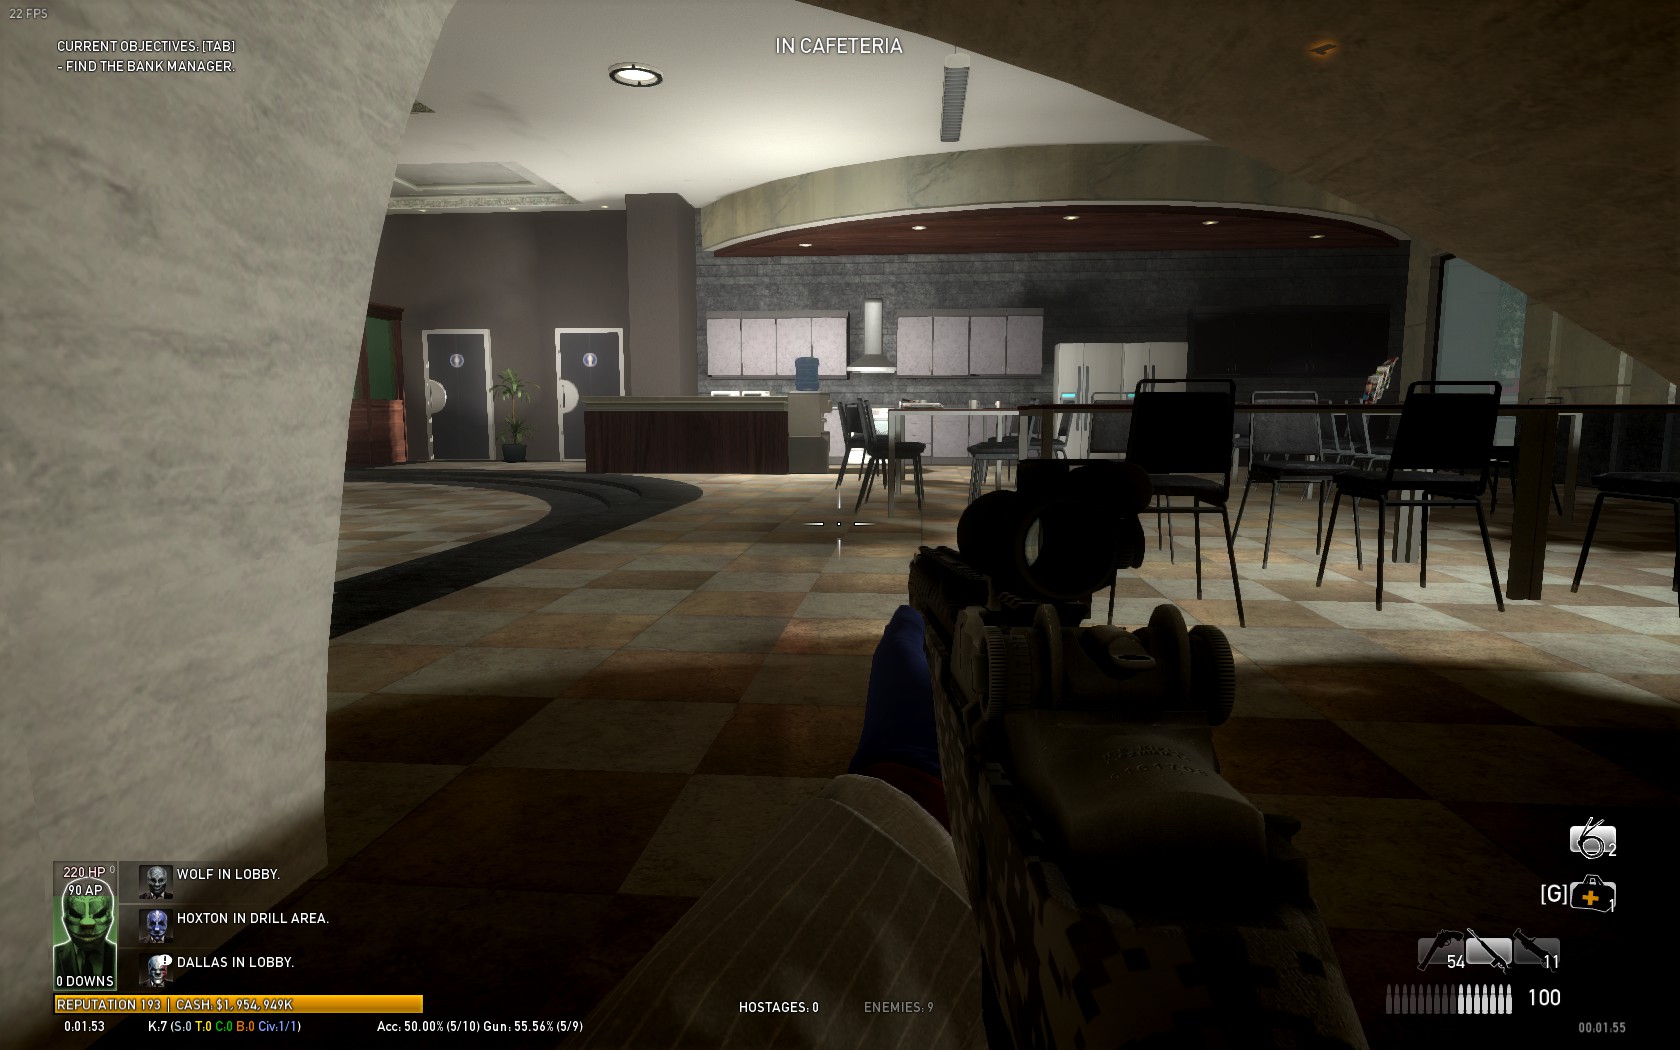
fifth spot:
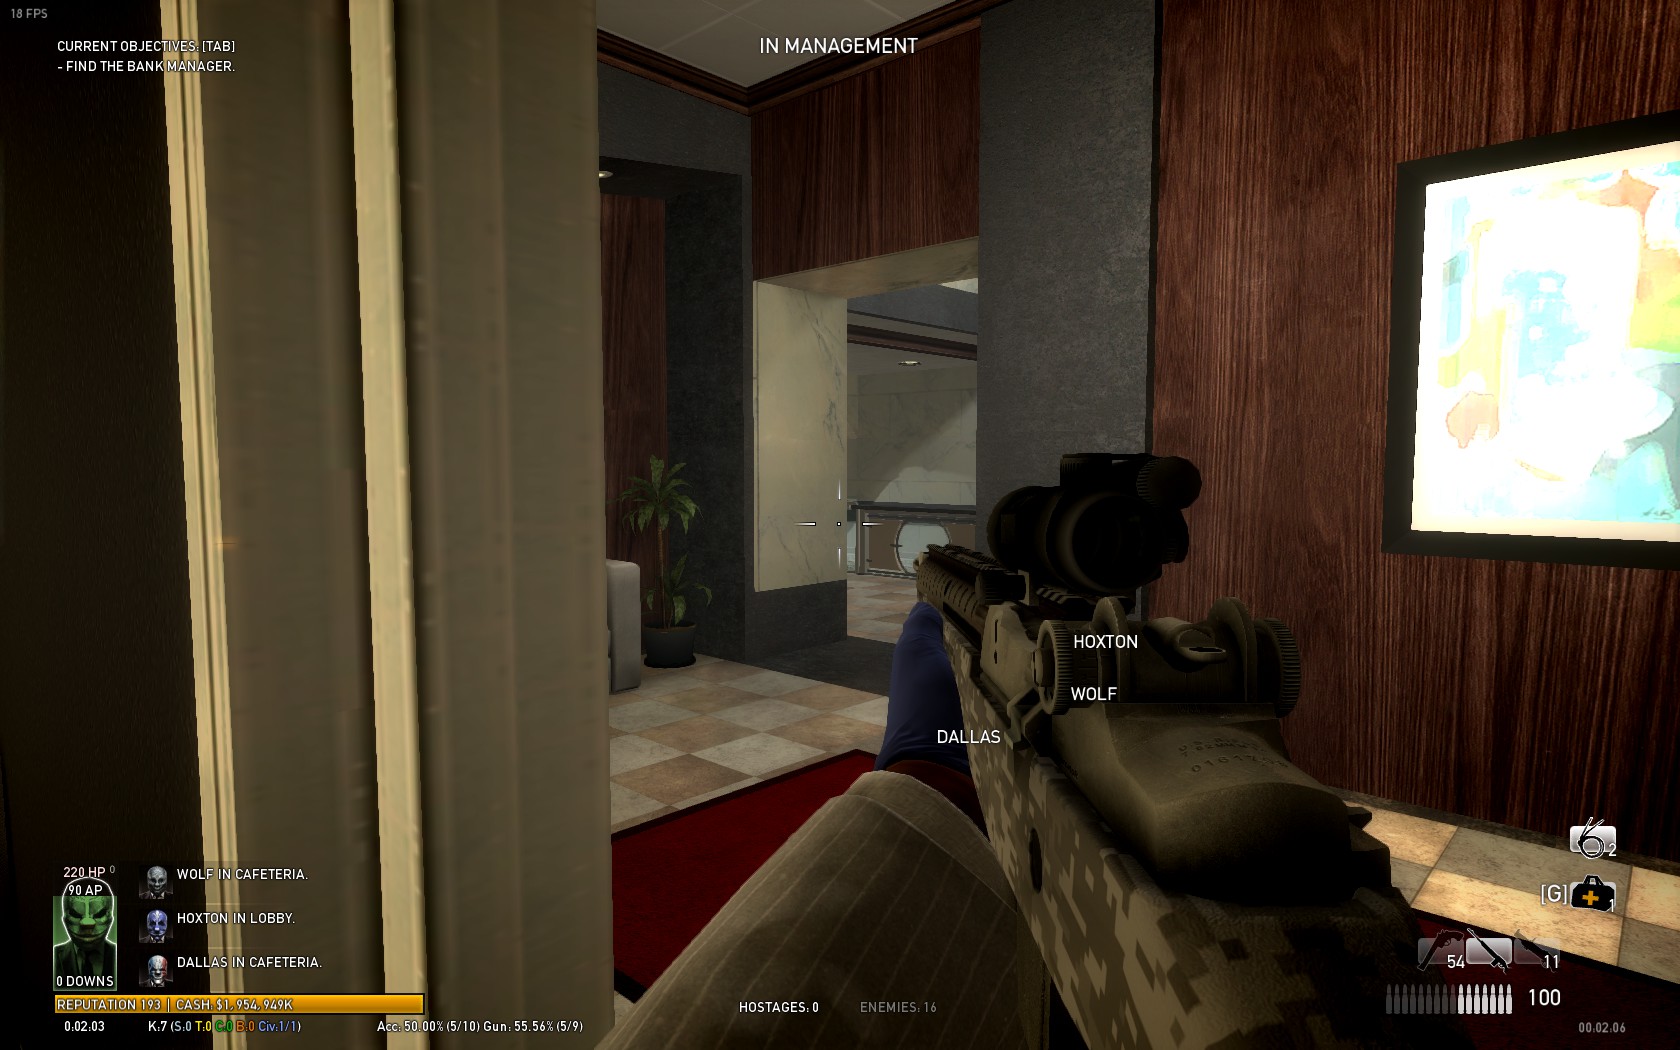 At this last one you get back to the first spot so you made one lap. It's really important to not just run to one spot quickly after another. You camp at one spot for a little, then when you think it's too hot move to another. That is the rule for loop on every map.
Tactics on Heat Street
 This map is the most hated map in the whole game, because of the difficulty of the map. I can say I love it for the same reason.
Info:
1)At the start after you open the door to chase down Matt there will sometimes be a police blockade of two cars each with 2 blue cops. When you move up you will see some more cops, plus swats/heavy swats and shield depending on the difficulty
2)The heist won't start spawning cops until you pass the first black car. screenshot=1226707896;sizeThumb,floatLeft;https://steamuserimages-a.akamaihd.net/ugc/870748729156566694/A2D08F21694D892482166EA3D9E350B74A898DE7/][/screenshot]
3)When you reach Matt you might need to burn 2 to 5 cans, it depends on the RNG.
4)When you push Matt up the last hill, don't push him past the barricades at the wrong time I will explain that later.
5)The common loadout is the same as in FWB:Bronco/M308/GL40/med(ammo) bag/Extra start-up ammo bonus (crew bonus)/BGH
Onto the tactics part:
Easier tactic:
Okay on start kill cops and DON'T cross black car. This tactic is called Rush. In this game host is the main target of the cops so he will run first(meat shield). Run at right side, to the stairs.Host have to run next to stairs (other players run on stairs) to save other players. In this tactic you run without helping at all. When you reach crash site trade dead teammates. I forgot to say its very important to die before easy street, becuase if everybody is alive, cops will start to spawn from their trucks and start damaging everyone. Okay now you choose your camp spot there is two of them: behind container
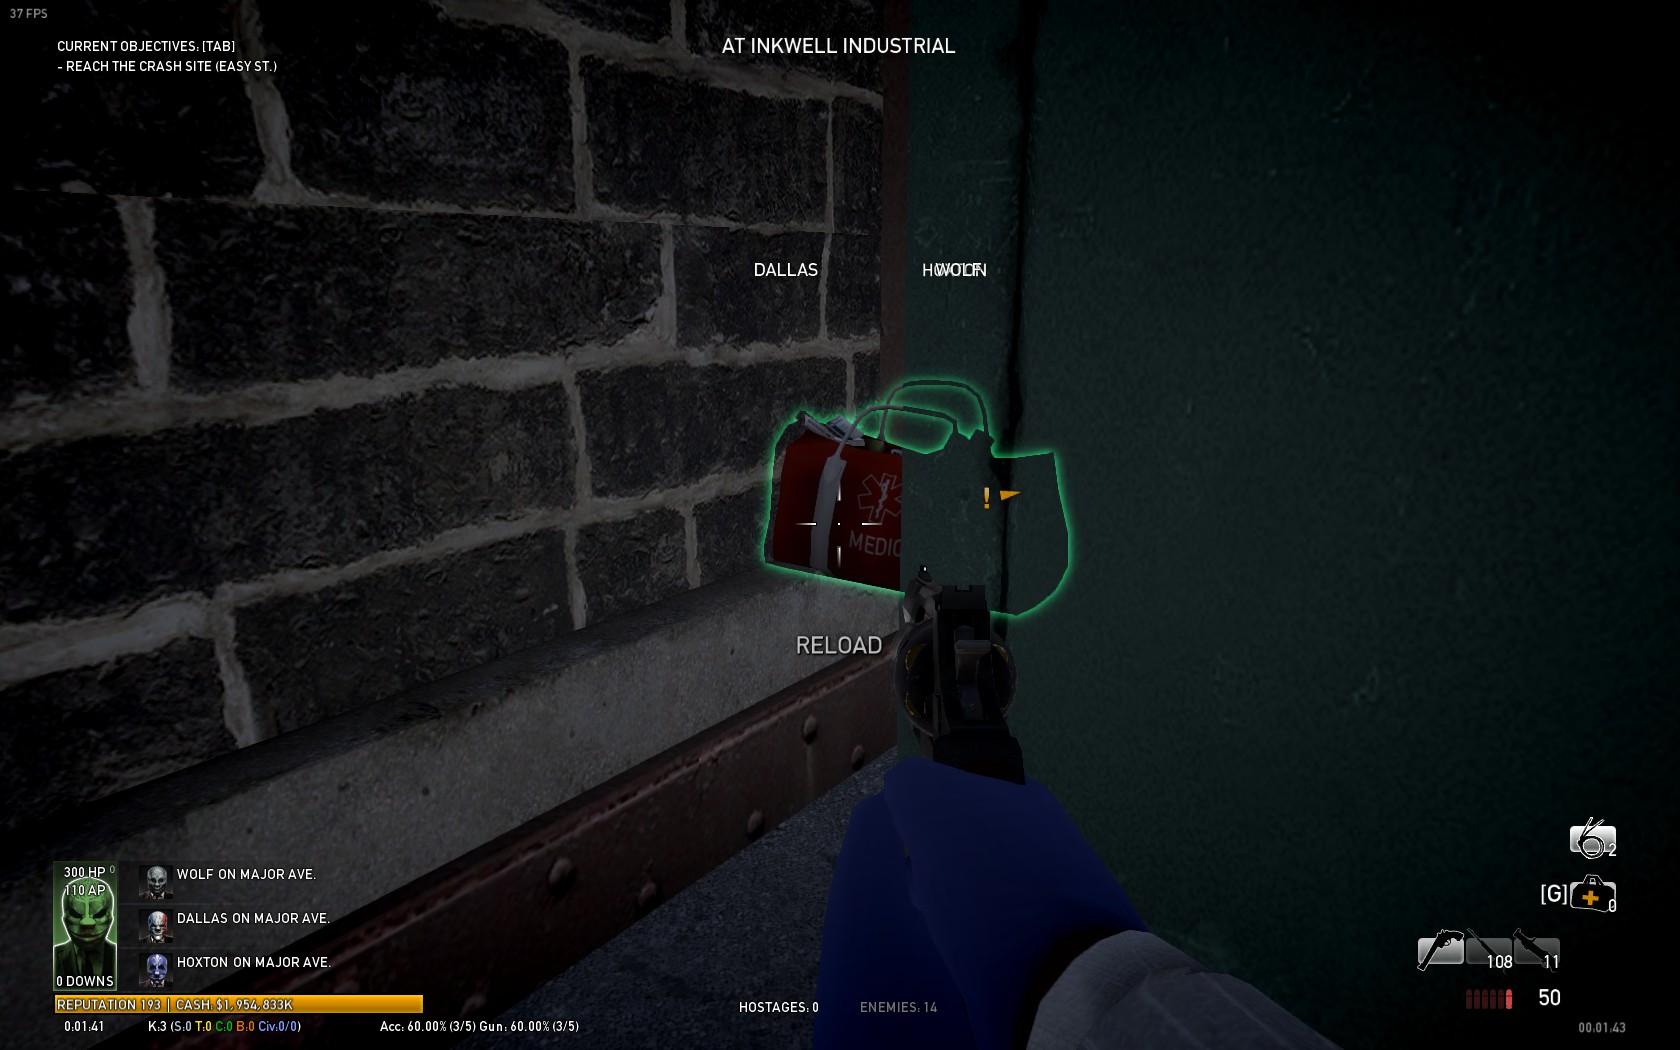 or here: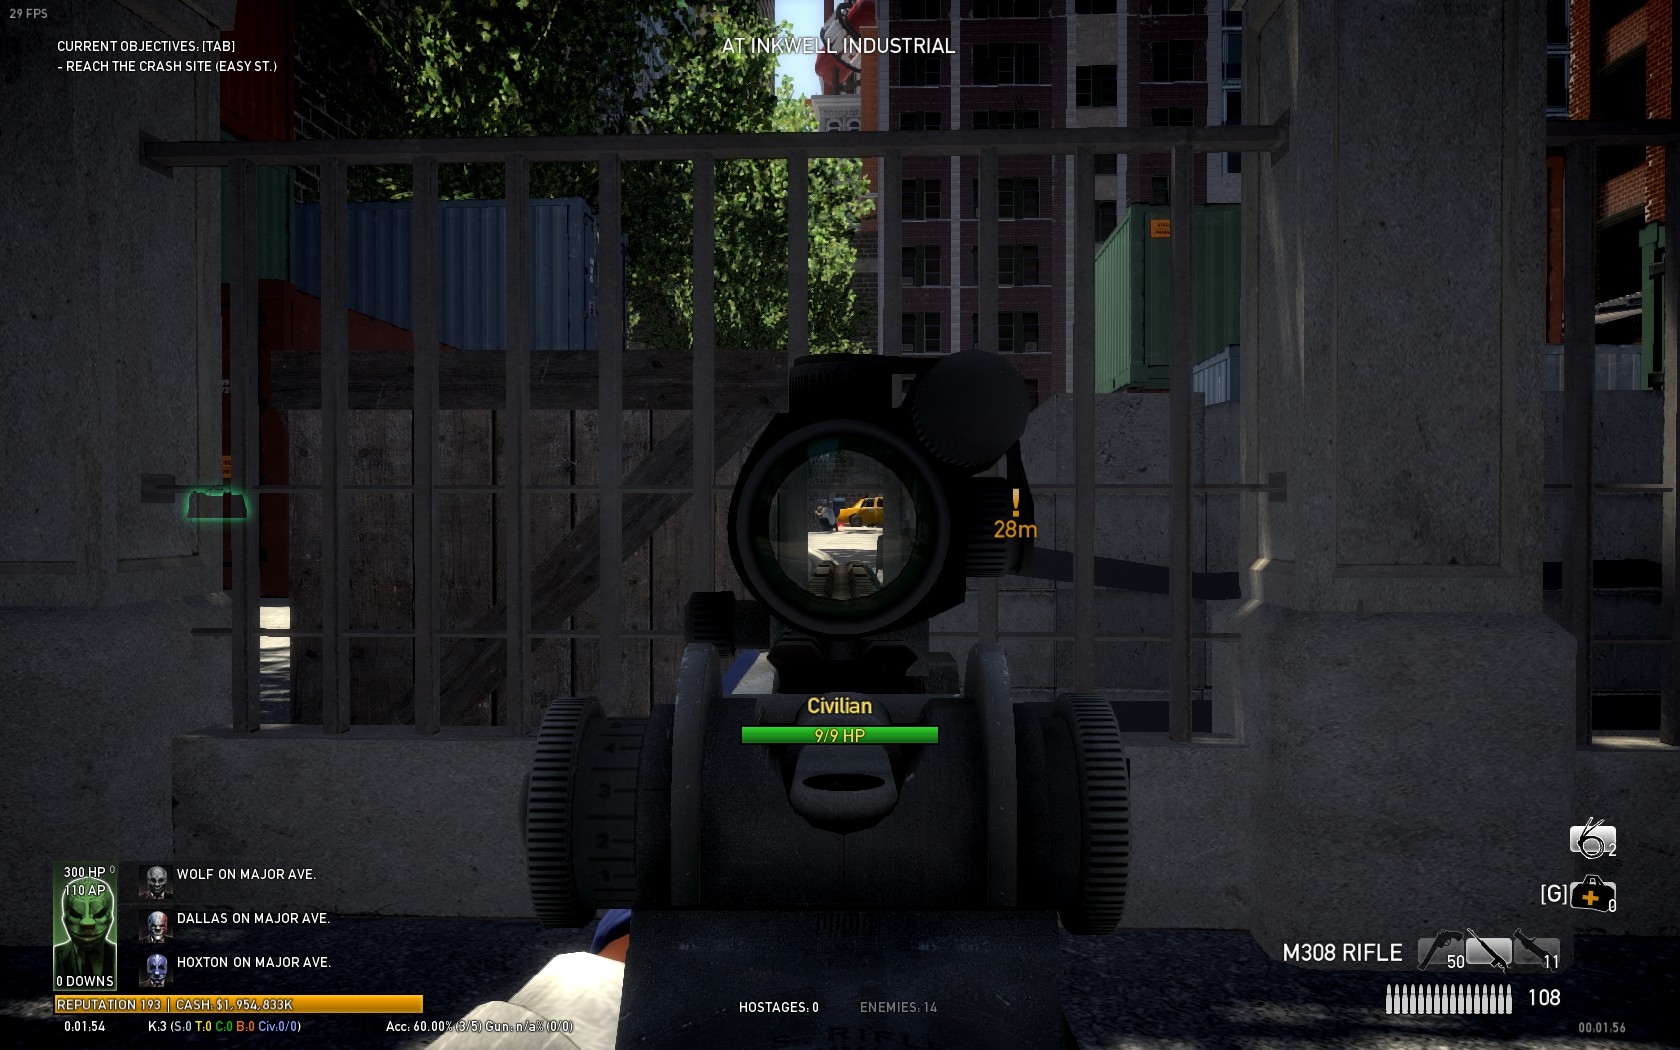
When Matt is out start pushing him, but push him when assault is almost over (on ovk 145 assault takes 3-4 mins). After you reached the parking some specials and heavy swats can come out of garage.
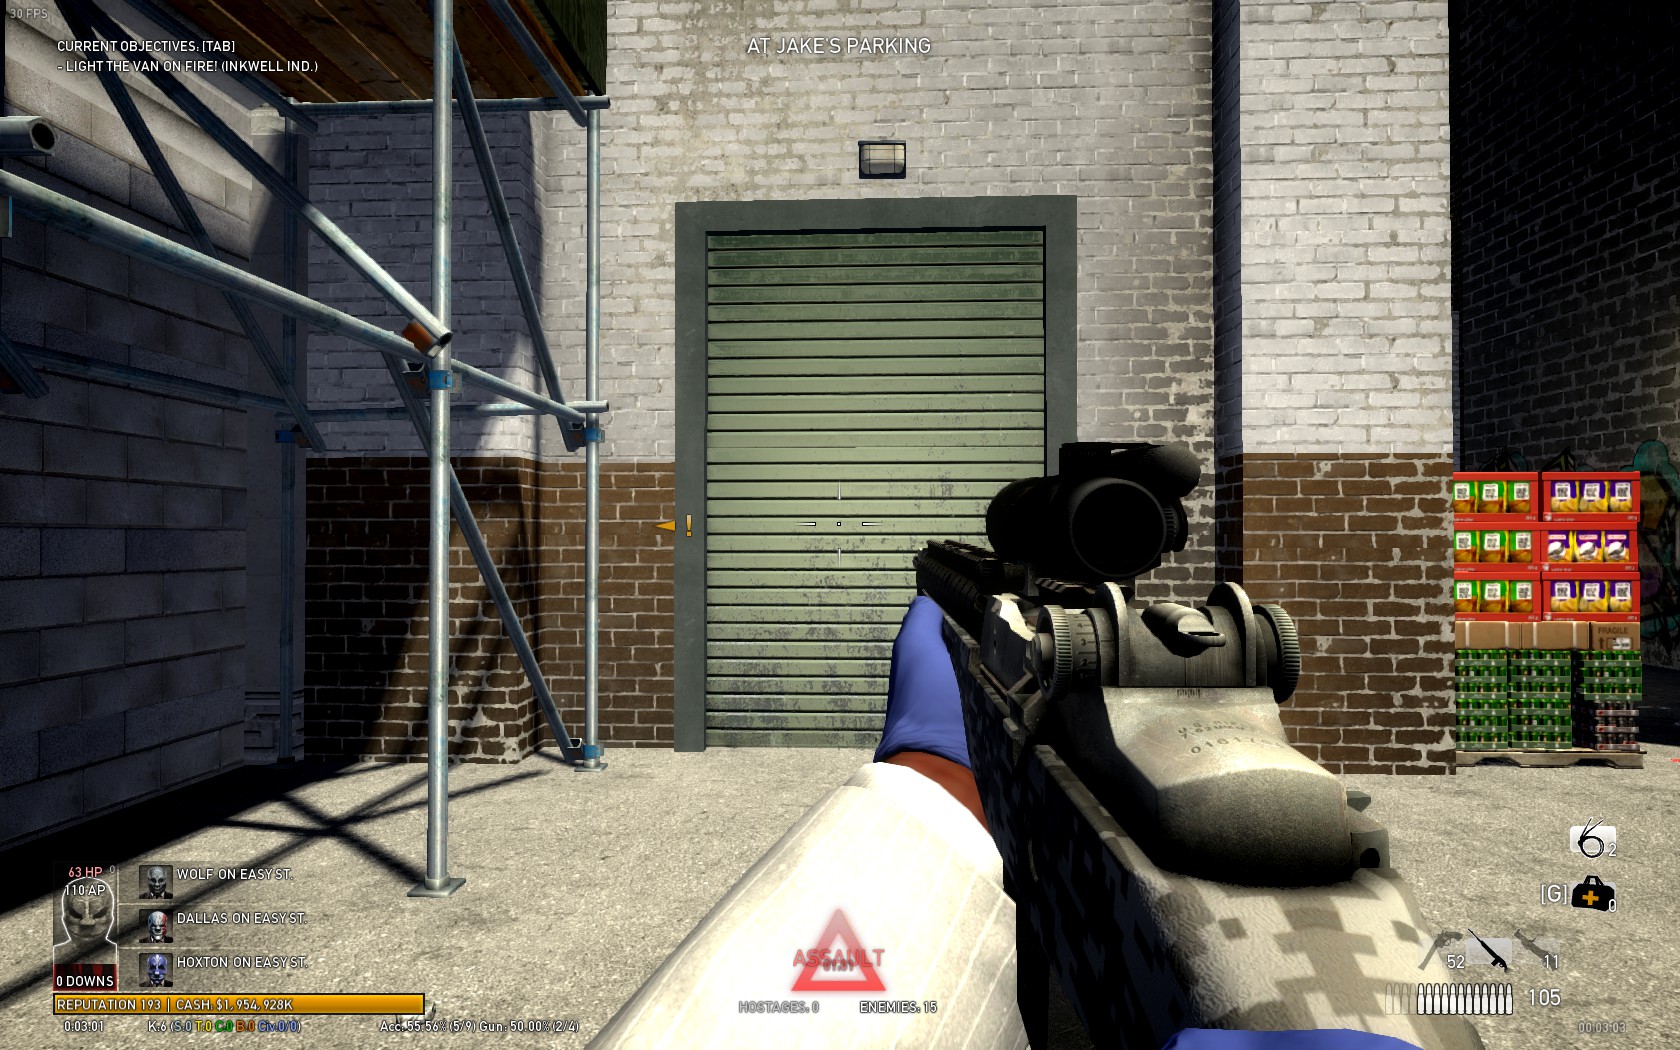 . Then just keep pushing him up. After you reached the uphill, heli can come in (at top of the hill) only (on ovk 145) 4 dozers will spawn from it. So better to find some cover at police trucks at back. Most of people at that point think: "Yay i almost done it!", but that isnt true at all. At Info part, section four i said don't push him at wrong time. Its's time to explain that. When you push him after assault you will probably fail, because there will be cops spawns at litteraly every spot and you will die in blink of eye. Here is the right way to do it.First you need to push him only to barricades near where alex comes in but not too much.Then get back at police trucks and shoot cops with your m308. That last assault takes 3~3:30 mins(on ovk 145). Start pushing him 40 sec before assault ends. Then you will get assault break and everything will be fine.
 Baiting tactic:
It's very similar to rush tactic and again host run first and etc. But one guy in this tactic stay at major ave. That spot is here:
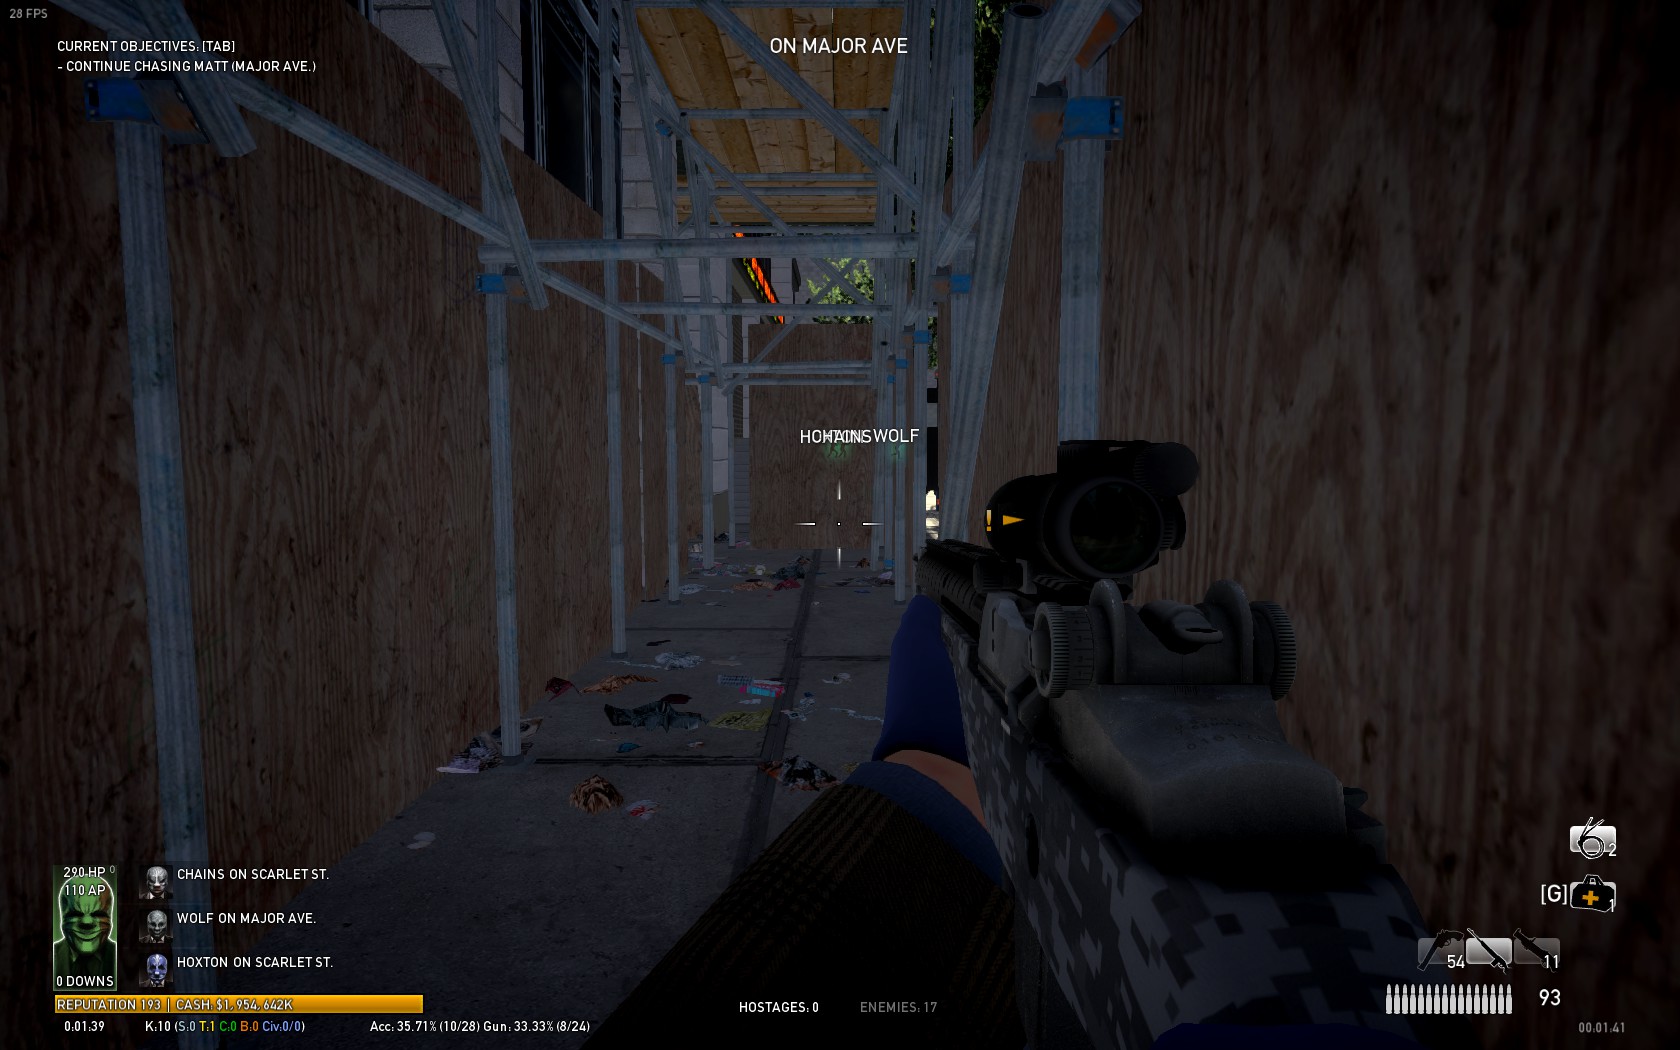 . Cops will target him, he will not take too much damage from cops, because cop are gonna shoot at wall. BUT sometimes they can come in from both sides that includes specials like taser, cloakers and even Dozers. Other part of crew won't have much problems, at crash site cops will still spawn, but in less amount. When crew reaches parking baiter can join them and then finish heist like I already described.
Harder tactic:
Okay at harder tactic like in last two you stop at black car. Everybody reload their weapons and don't rush, because you will use tactic called Push. Teammates have to split, 2 guys go to right side, other two go to left side and kill cops. This tactic usually use experienced and skilled players I don't recommend using it if you are new on ovk 145.
Then rest of heist is pretty much same, but you will push matt to parking during assault which isn't easy at all. Then move uphill, push, stop him at barricade and escape.
Tactics on Panic Room
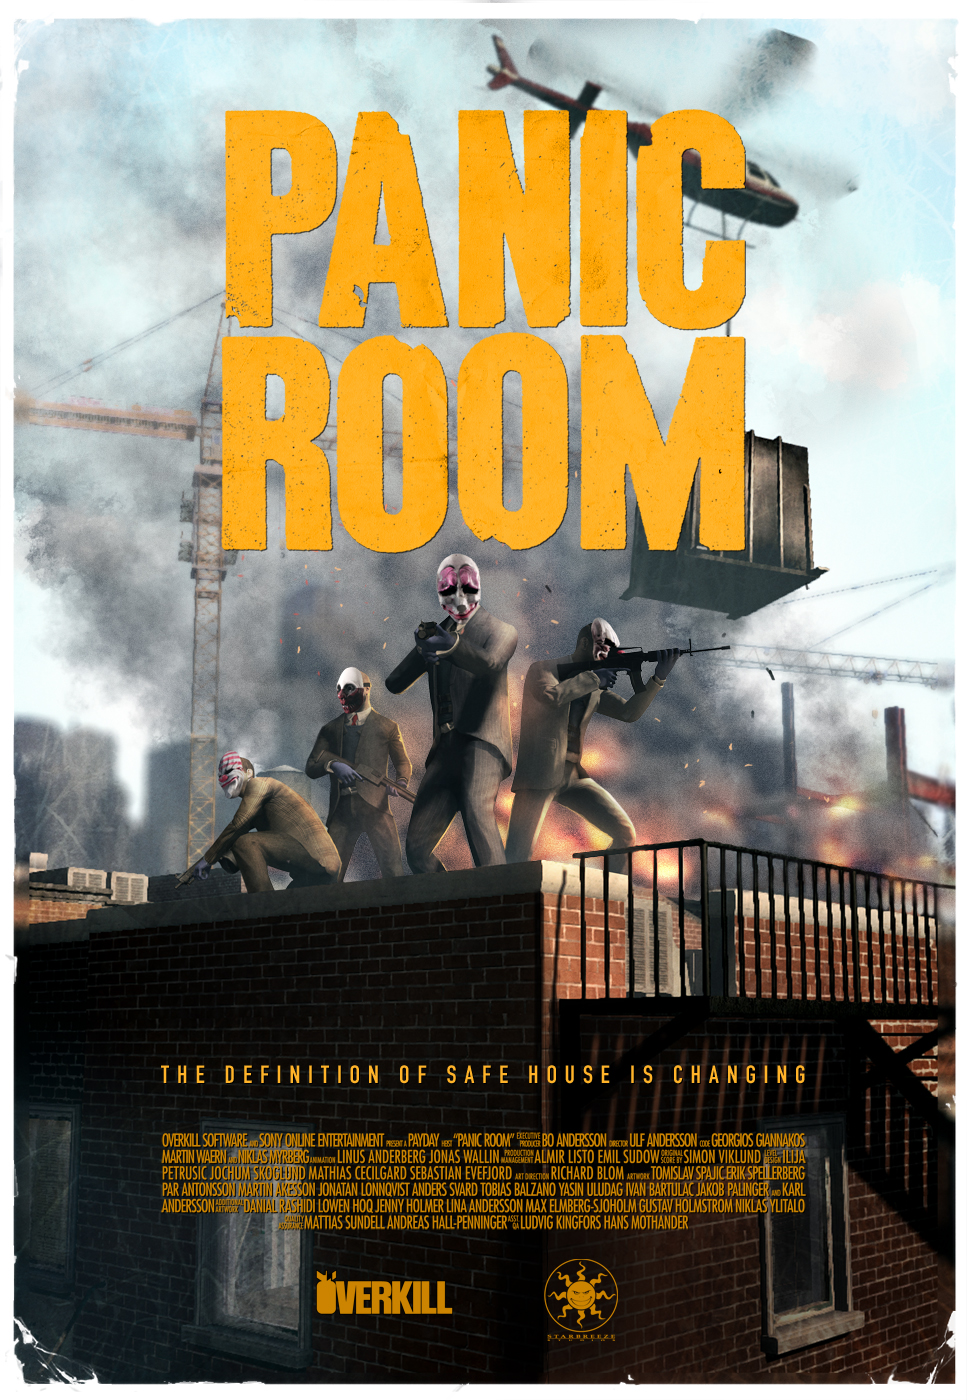 In this heist there isn't a big change between difficulties.
Info:
1)If gangster are in line, that means you are walking in ambush. Be prepared.
2)At start of heist try to not to lose too much damage with thugs their mk11 deals a LOT of damage if you are not in cover.
3)The assault won't start, until you open panic room doors.
4)After you get in panic room, outside of the building, if you are playing on ovk 145, there will spawn some heavy swats with shotgun. Here is that 2 spots:
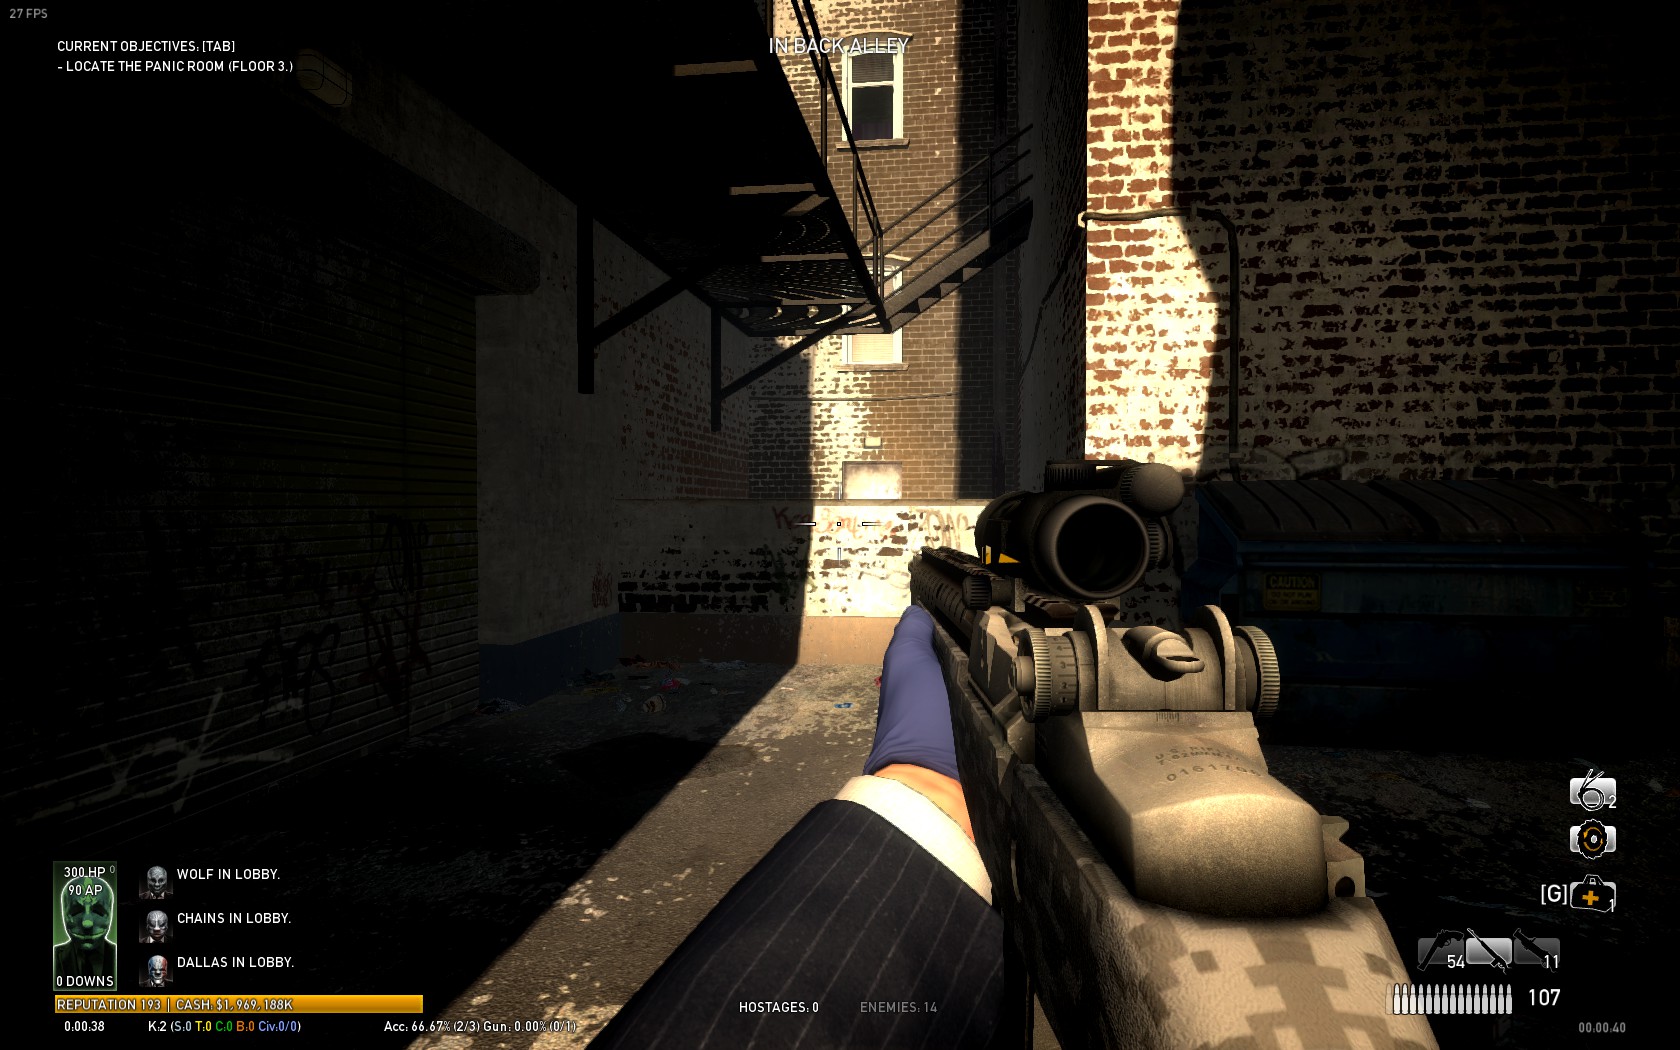
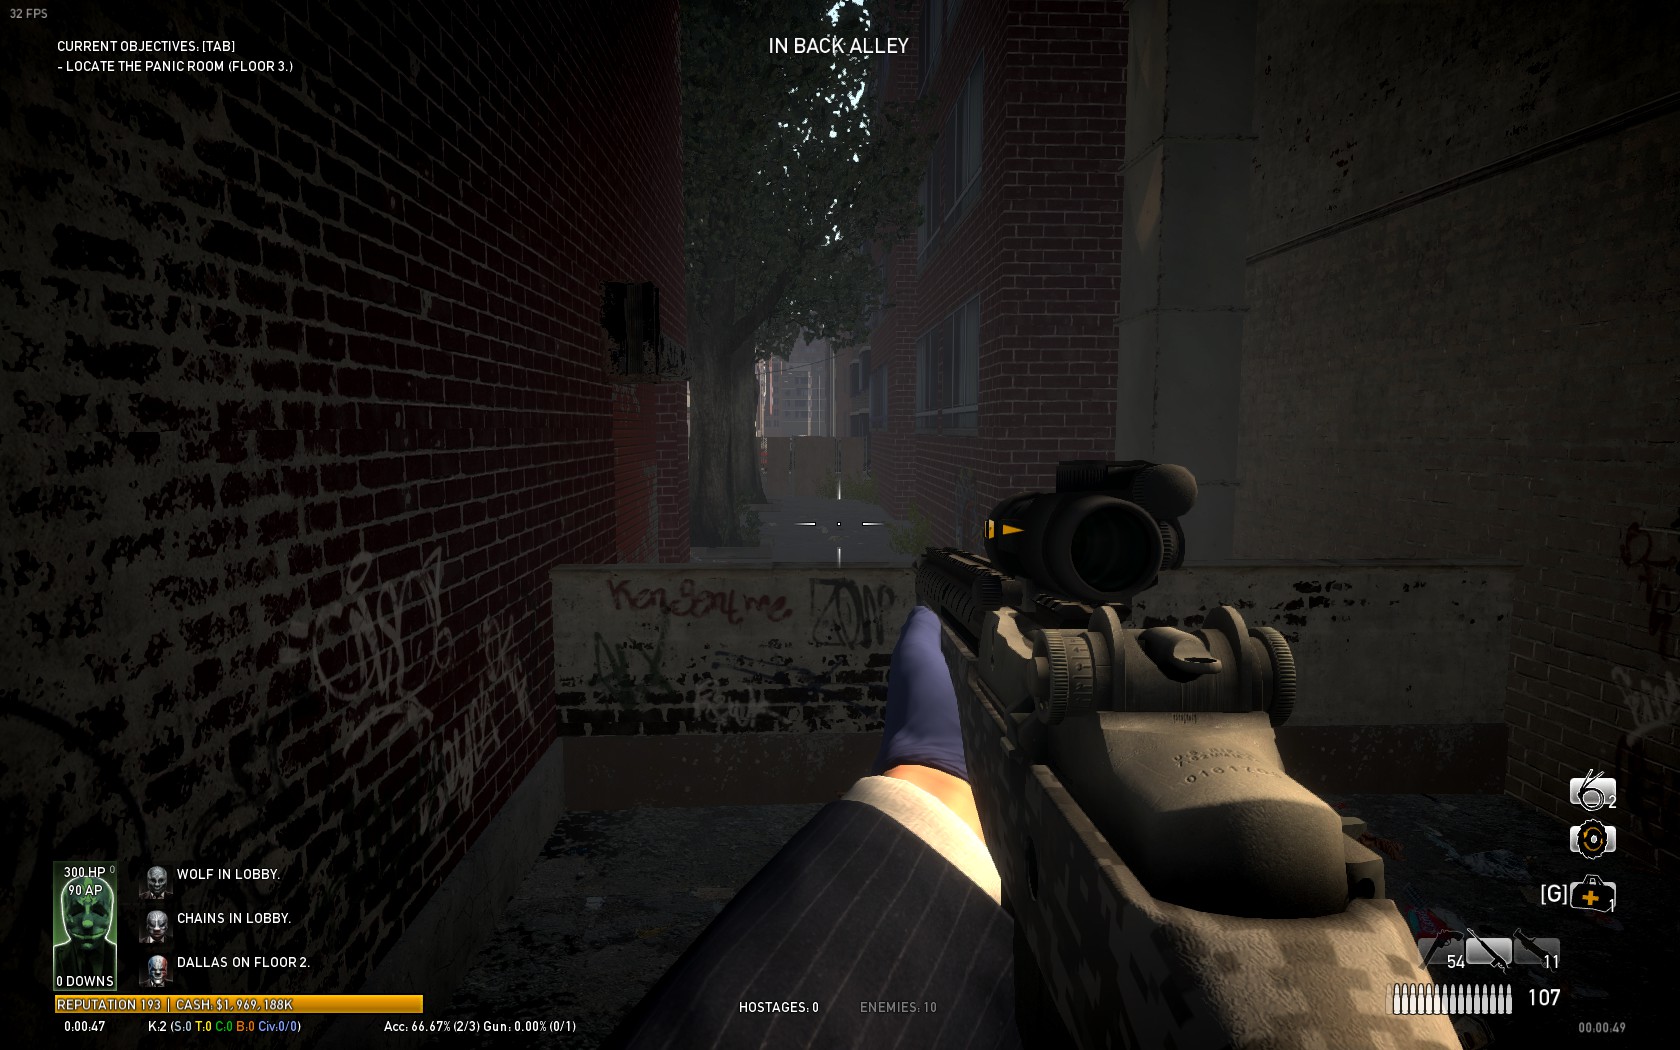
5)All fours saws takes 4 mins.
6)Roof access doors can be opened or closed depending on the RNG, if doors are closed then you are forced to use the stairs at the front to get to the roof. Kills cops outside the building before you try to get to the roof.
7)For objective clear the roof, you don't have every time to get up on roof, you can safely clear the roof from floor 5. But sometimes swats are hidden and you have to get on roof.
8)You can attach the magnet safely from panic room.
9)Use windows to avoid to get killed by ton of cops.
10)Loadout is same like in two last heists.
Tactics:
In this map you have 3 tactics:
Camping:
After you killed all gangsters, set up saws and start the heist. You will hold out on floor 2 and 3 until saw are done. When saws are done go to floor 4. That spot is here:
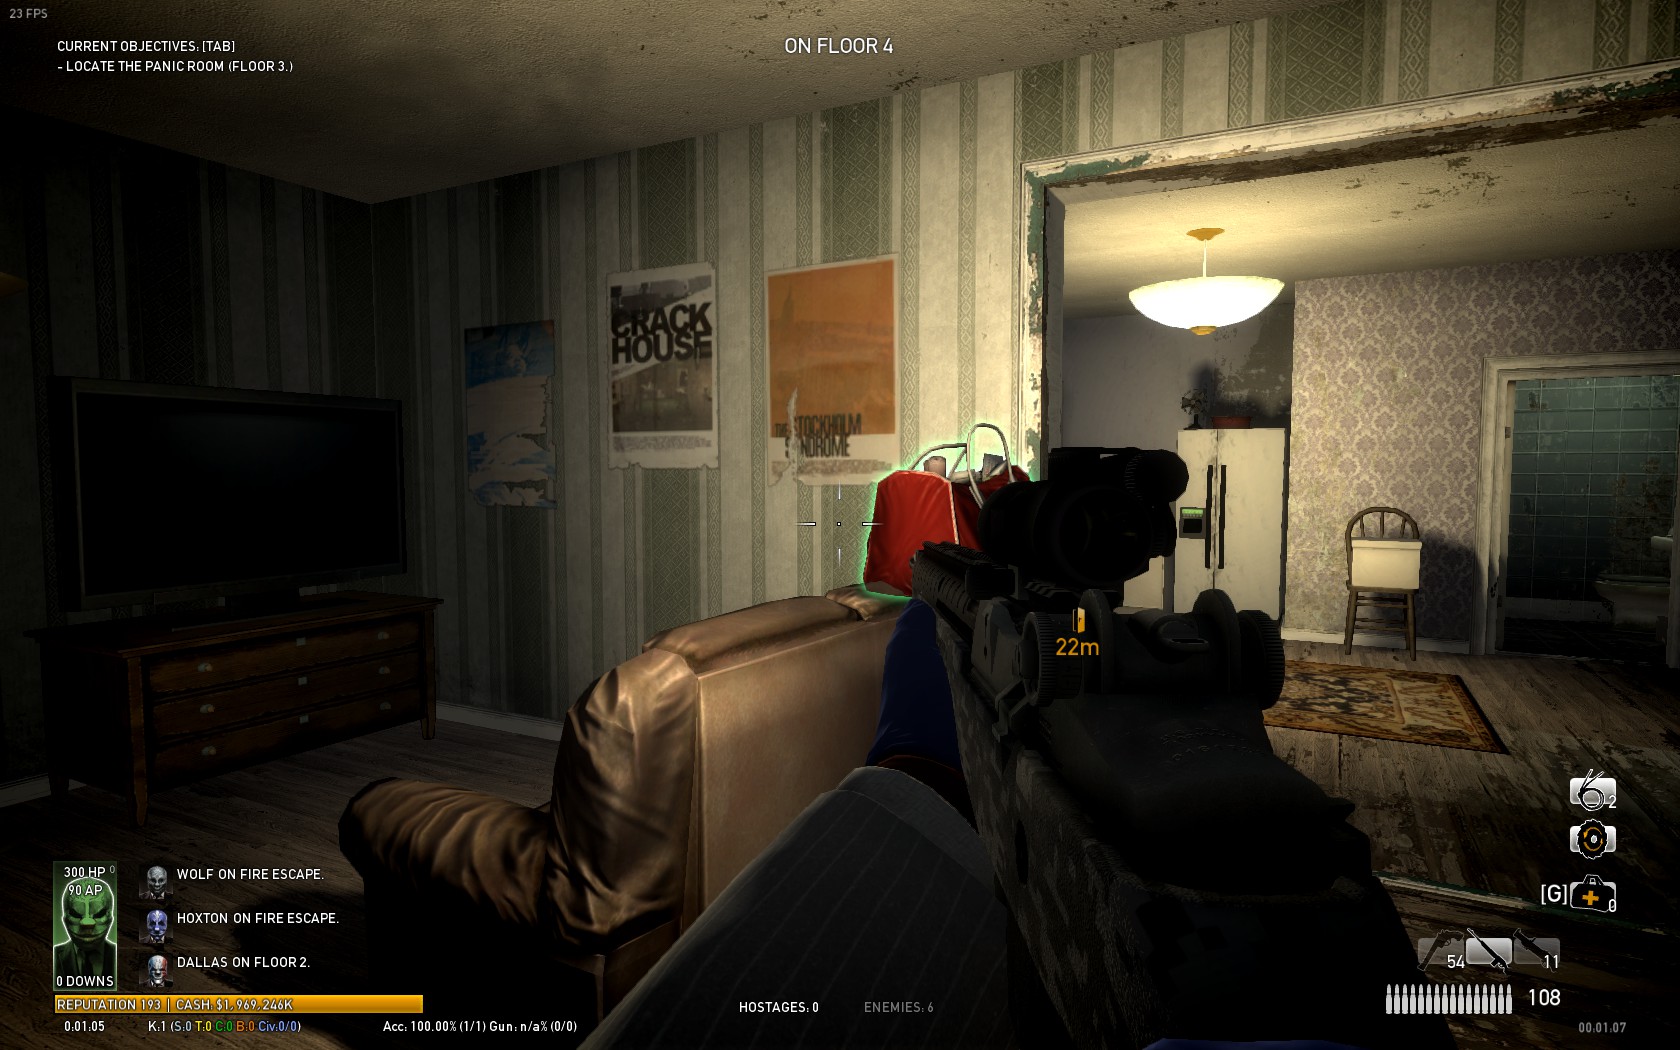
Whole crew will camp there. When objective "kill the snipers" is activated one guy with m308 goes on roof, he is called runner (he will do all objectives). When you killed all snipers, Alex will drop bag with c4 (it can be on balcony or in back alley) whole crew will go to take it. Then other guys set up c4 in building, but only runner goes on roof and set up that other 3 c4s. Then move to floor 2 (just use windows its simple left -right) to activate the explosion. Then everybody get back to camp spot. Whole crew will camp there until the escape its triggered, expect runner. When you need to clear the roof as I said you can safely do it from floor 5. You can attach the magnet from panic room. When escape is triggered, just get to the basement and plant a c4.
Looping:
My friend and I decided to show you how to loop:
Me and my friend showed you one lap,you will just repeat this during whole heist.
Then the "harder" tactic
This tactic is very similar to camping tactic. The difference is you will camp at floor 2 during whole heist. Runner will do objectives during the heist.
Tactics on Green Bridge
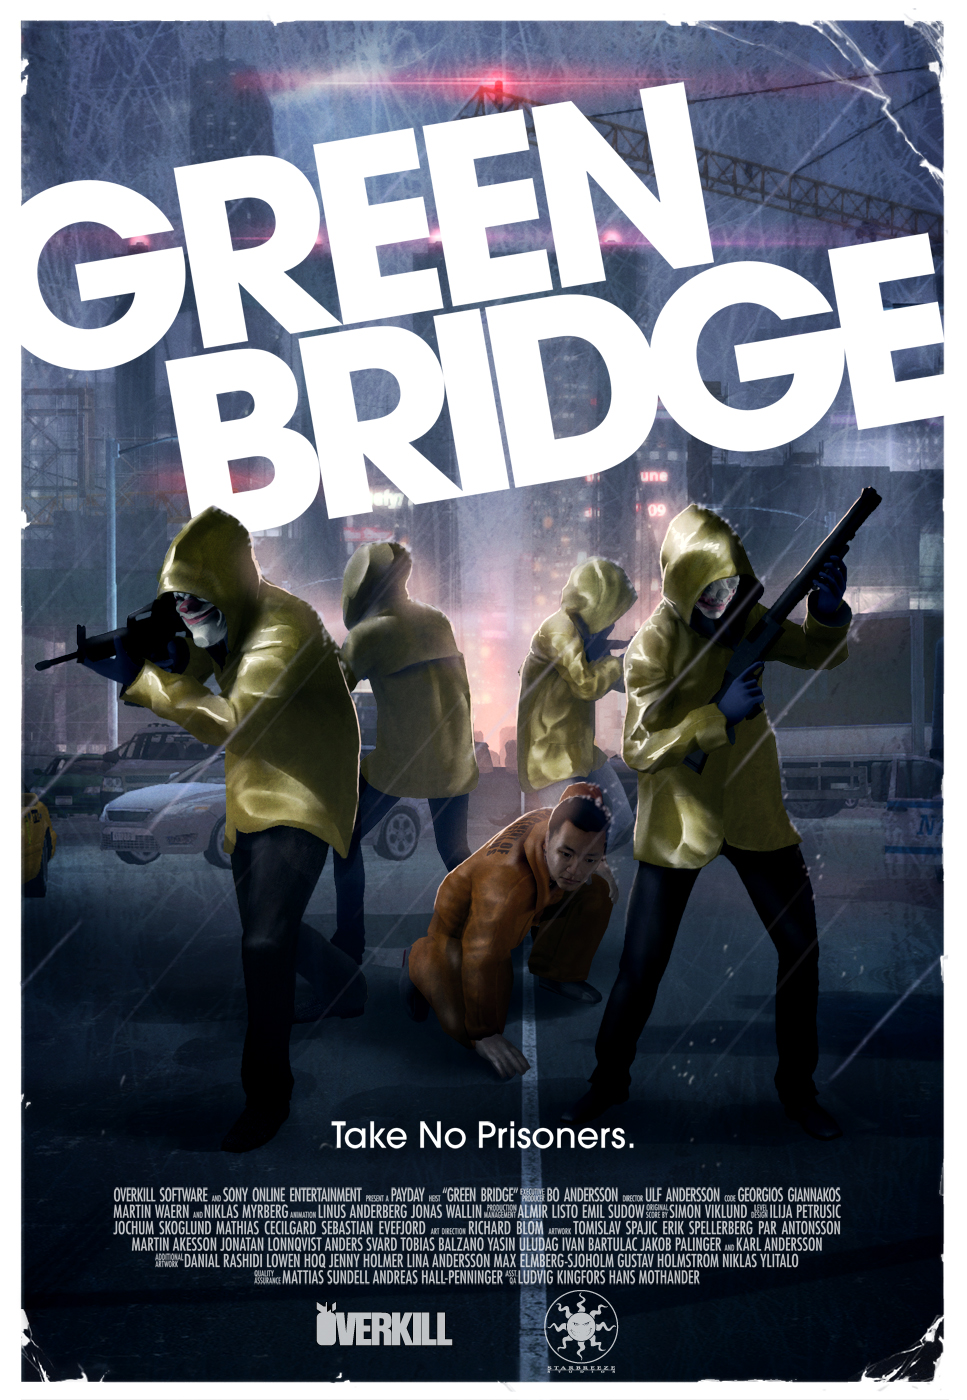 This is the one of most hated maps in PD:TH, same like heat street.
Info:
1)When you spawn, there will be 4 trucks. If the last one slides off, escort wont be there.
2)From helis can spawn the following: heavy swats, swats, tasers, cloakers. If one heli comes to ground it will spawn 1 or 2 Bulldozers (still depending of RNG :/)
3)When escort is out of van, you will have to push him to the tower. The assault wont start before you reach the red container.
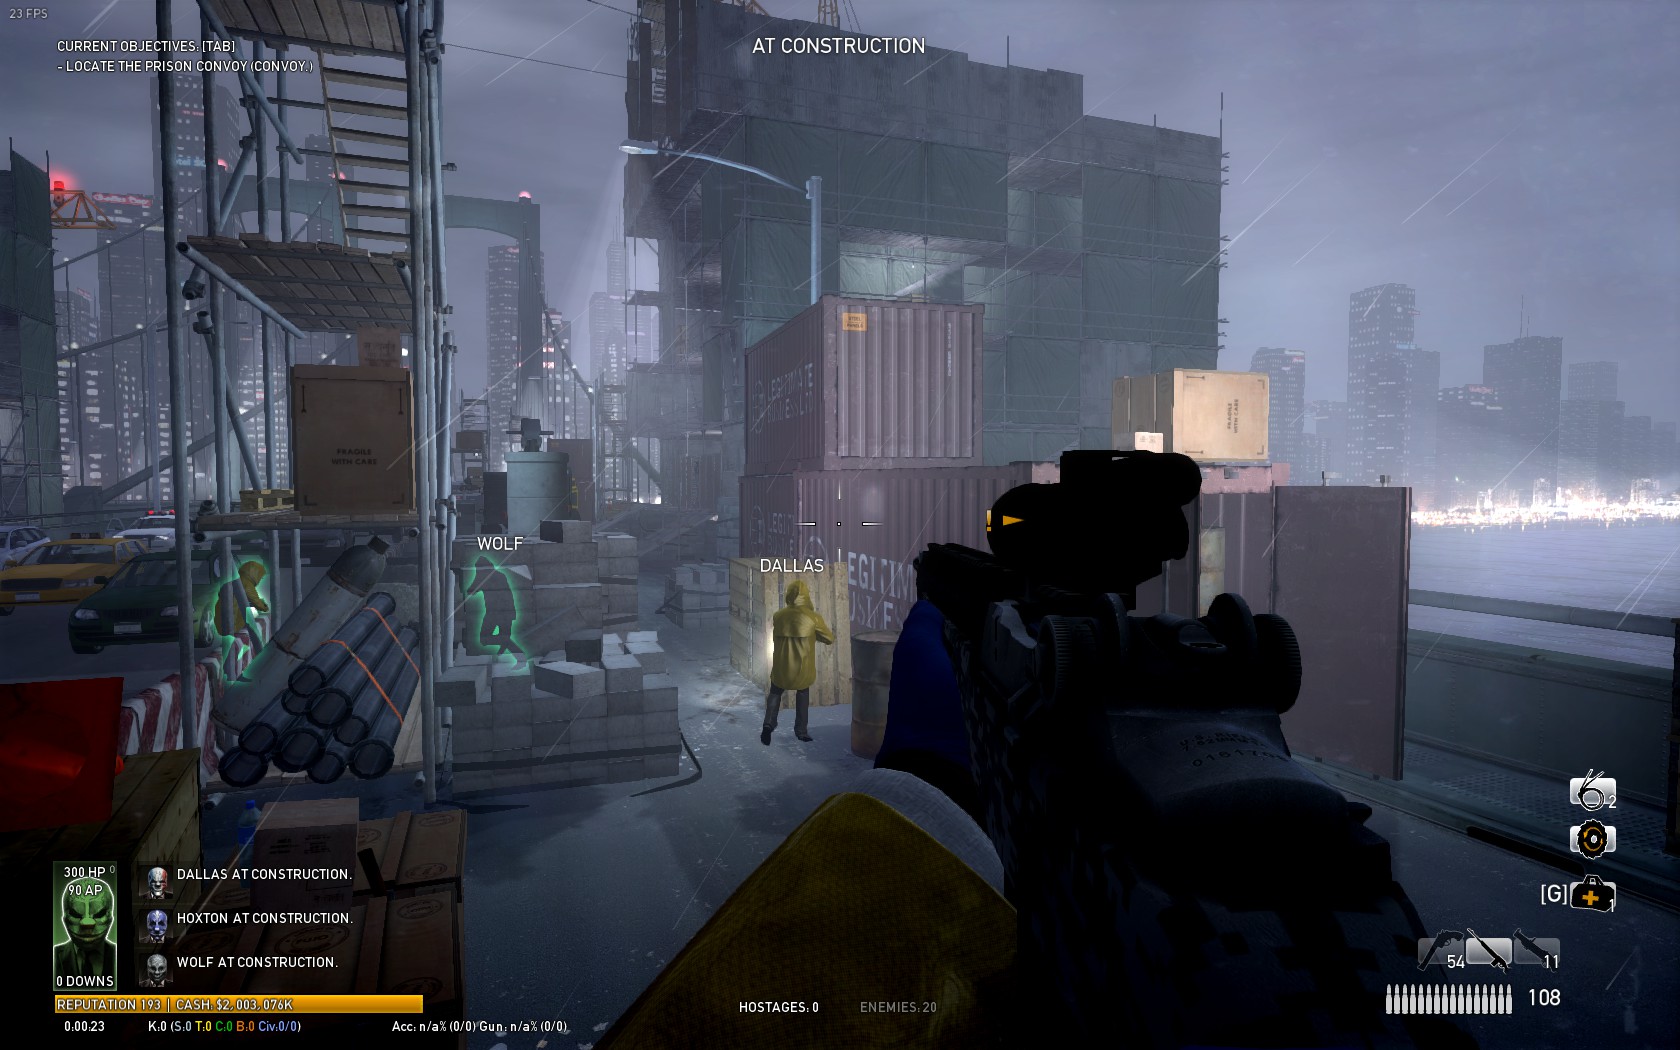
4)After you push him to the tower, set him in chair and wait George. But there is something you must know. When George comes he can miss the balloon, if he doesn't then great, all teammates run to escape. If he miss the balloon then one player stays to set up the balloon, other just run. When the baiter set up the balloon he can (at least) try to get back to his mates.
Tactics:
-Defend the trucks:
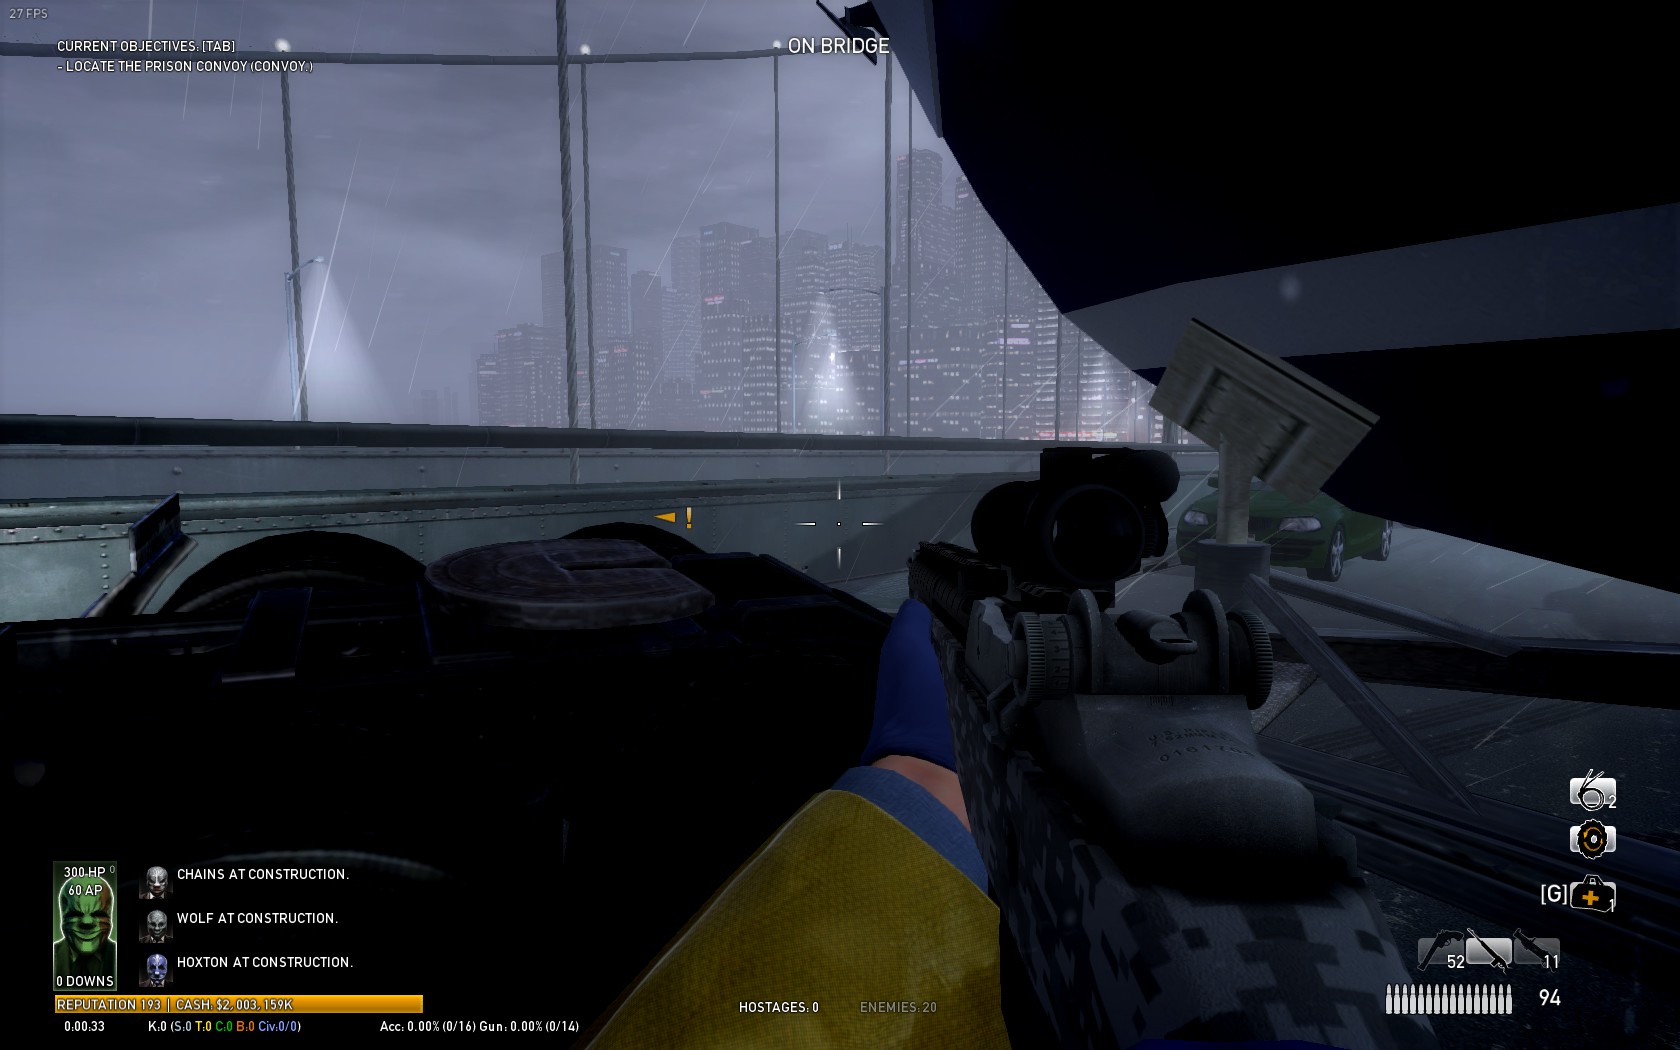
In this this tactic you start normally, kill weak cops and set up saws. Then players split, every teammate have to camp at different truck. This is the easiest way to do the heist, because you can fix saws very quickly and speedrunners usually use this tactic. When second tour of helis comes in get back and kill cops from helis and cops which spawn on side of the bridge. When you finish that get back to old camp spots. Then when escort is out of van DON'T mark him too early. You are probably asking why. The reason for that is the following: if you mark him too early cops spawn at tower. After that 3 guys go to tower one will not go (he will push the escort). When runner marked the guy other 3 players can easily kill cops at tower. When runner managed to push the escort to tower (on roof), set up him on chair and you can camp in tunnel (its in middle of roof and use it if you low on ammo or health) or just camp on roof. Be aware of snipers (they will spawn on other side) and make you keep zip line in check (some bulldozer can use it to get to you). Then finish the heist normally. You can avoid shields here:
-Camping behind last truck (i don't like this tactic but i i will write about it):
Same like first tactic,but in this one you will camp behind last trucks until saws are done (whole crew), BUT you can get saws only after assault. In my opinion this takes too long and you will eat all your ammo and hp so for me this tactic isn't good. Rest of heist is same like in 1st strategy.
-Camping behind red container:
One guy will sit near trucks and others will camp behind red container until saws are done. You need a really experienced and good player at saws (runner).
Here you go,you have done green bridge. :)
Tactics on Diamond Heist
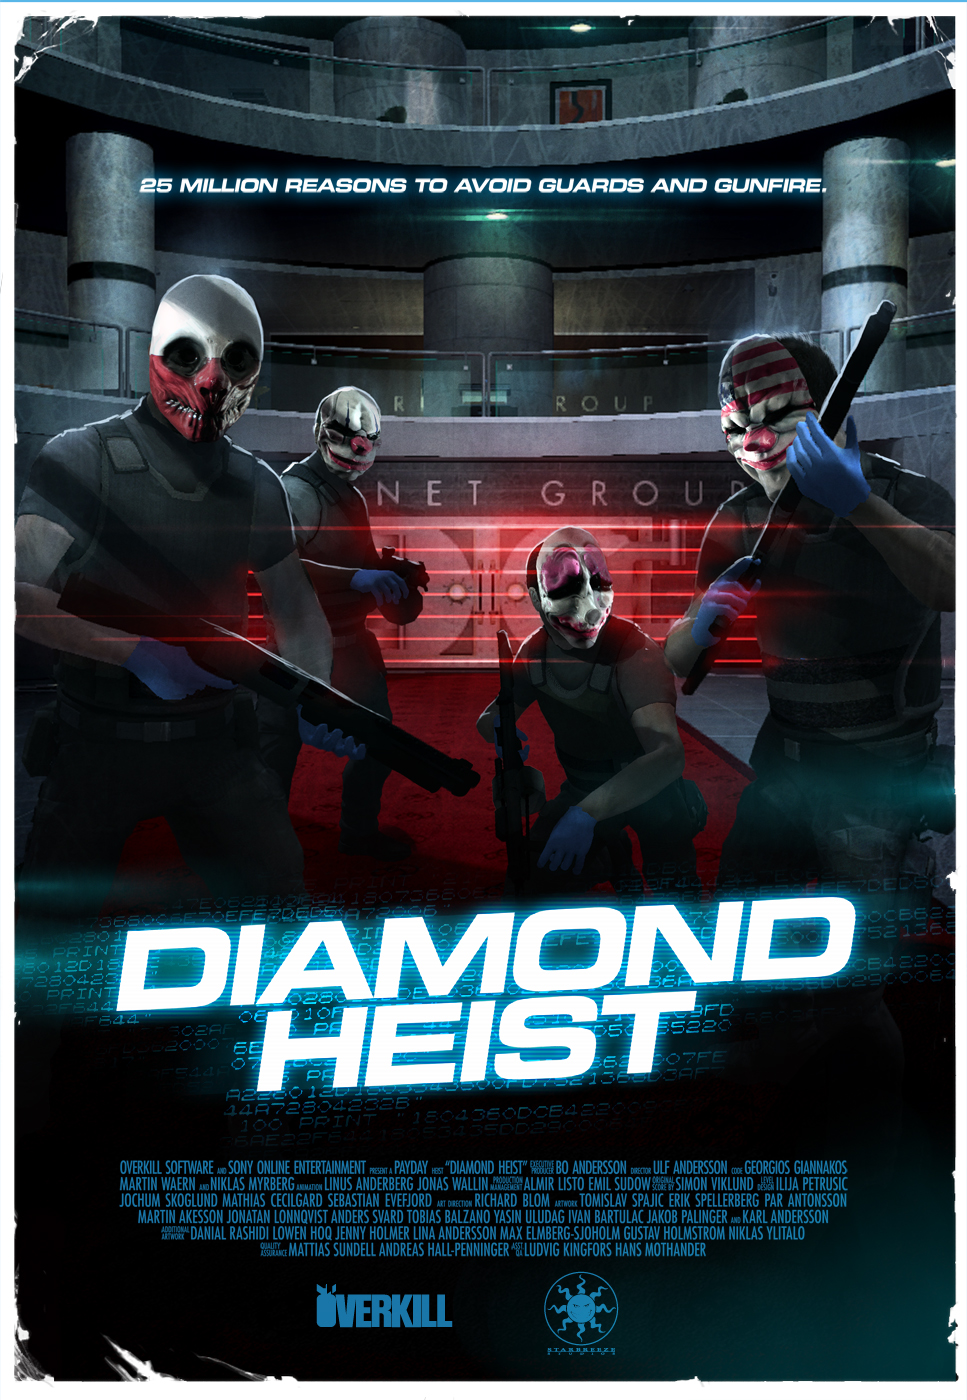 Diamond heist is the 2nd easiest heist to complete. info:
1) You start heist as normal you just hack the alarm boxes,but watch out if you get spotted you must hack the alarm boxes but it will be alot longer. So i recommend stealthy way :)
2) If you did hack the alarm boxes,Head down to the bottom of the dome,the vault is down the dome and you must enter the codes to open the vault, the codes will not work on ovk 145+ but on ovk there's a medium/small chance that the vault will open.
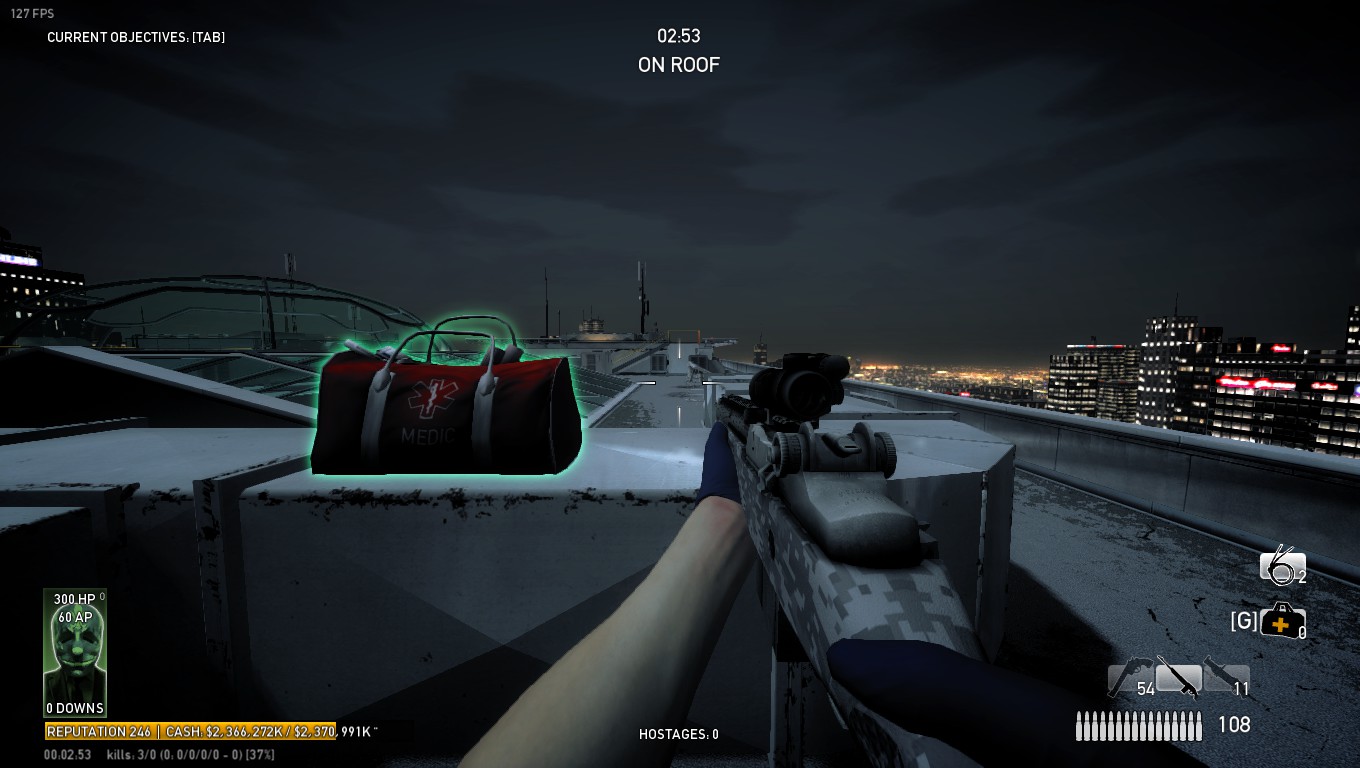
3) If the codes don't work, head to the roof and put down your meds,ammo like shown on the screenshot
4) Bain will tell you to find the CFO,i will show you 2 locations of where you can find him,
Here
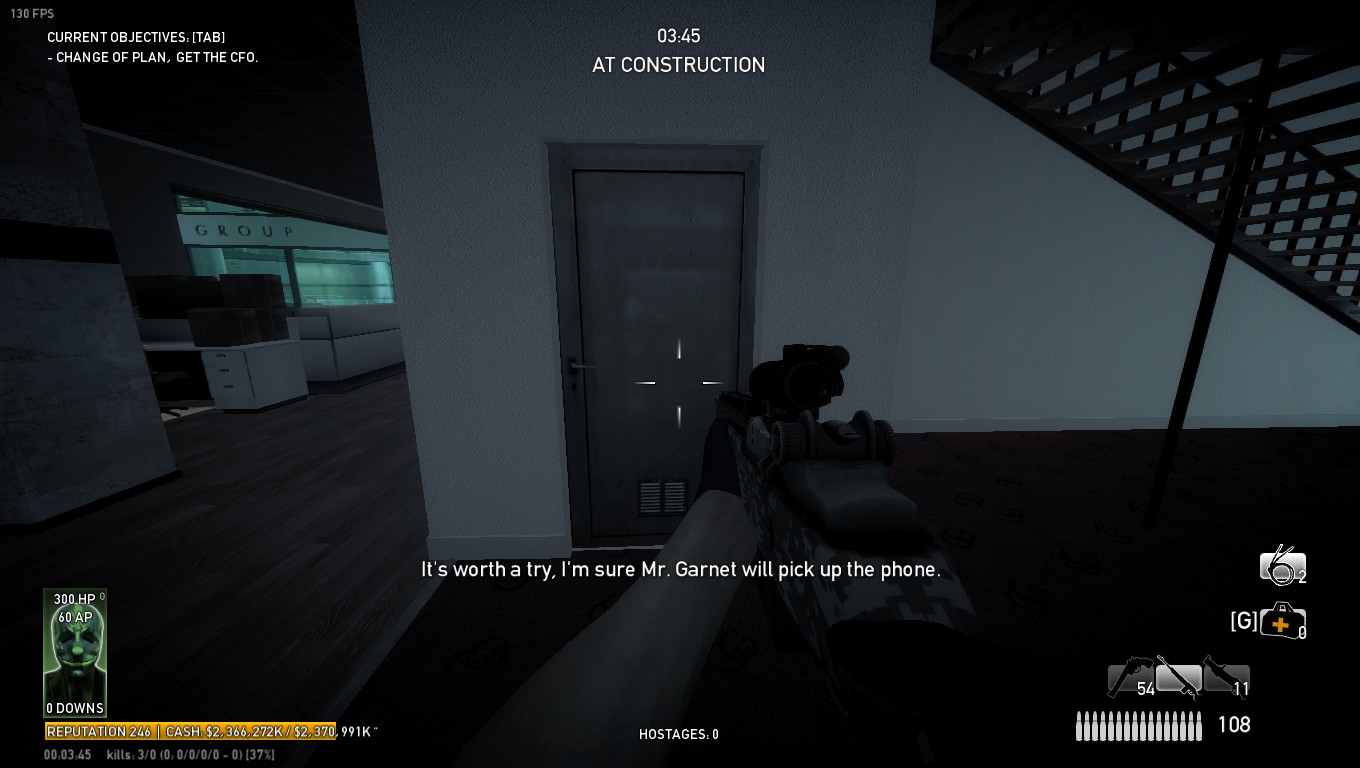
or here

if you found the CFO push him to the roof,The helicopter will come by and take the CFO and Bain will negotiate for the codes.
5) When you pushed CFO to the roof get behind the vent units where you placed the ammo and med. and defend yourself.
6) Loop tactic:Now i will show you the loop tactic, the loop on this map is fairly easy just look:if you get swarmed thats the time to drop down to the gym and do the loop
7) If Bain negotiated with the CFO the vault will open etc. But that is a small chance, if bain says he did not suceed,you must get Mr.Garnet Son Ralph, he will be at those locations,
Here
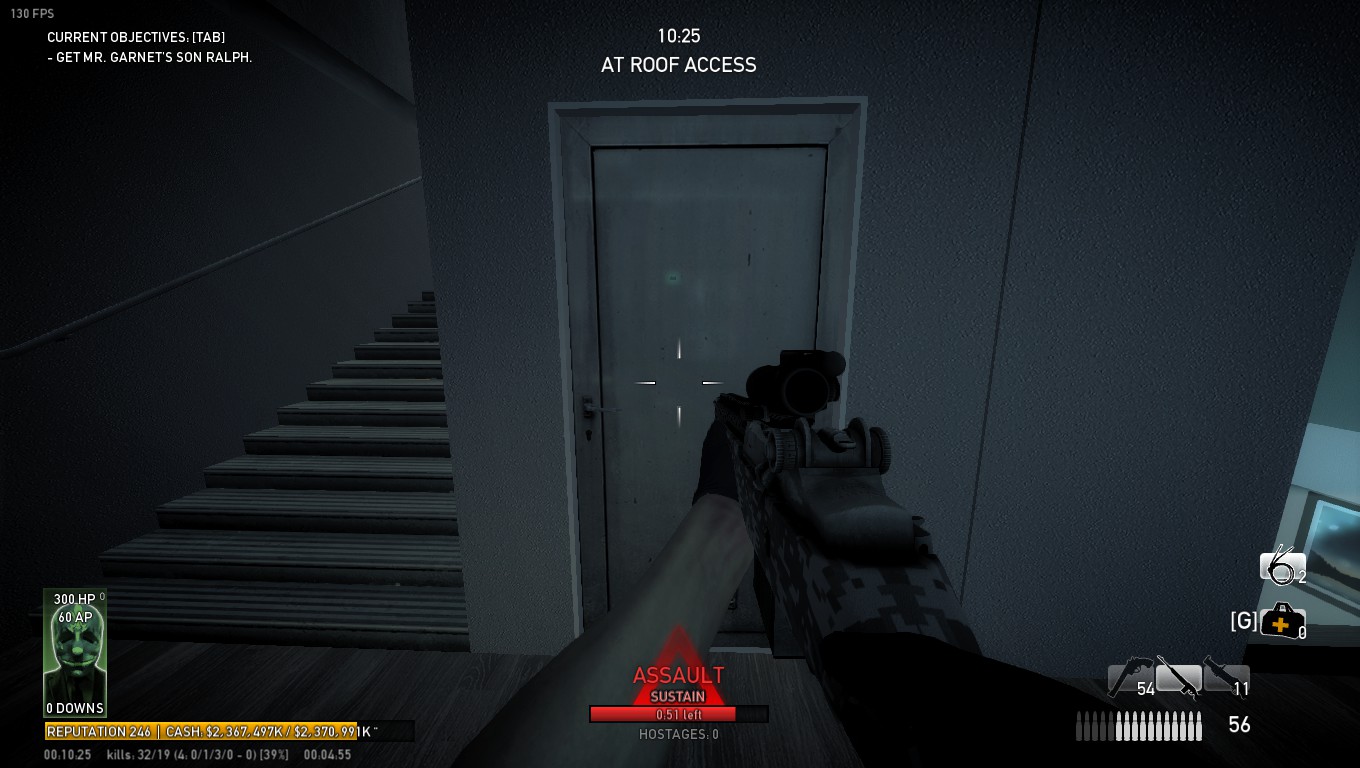
or here
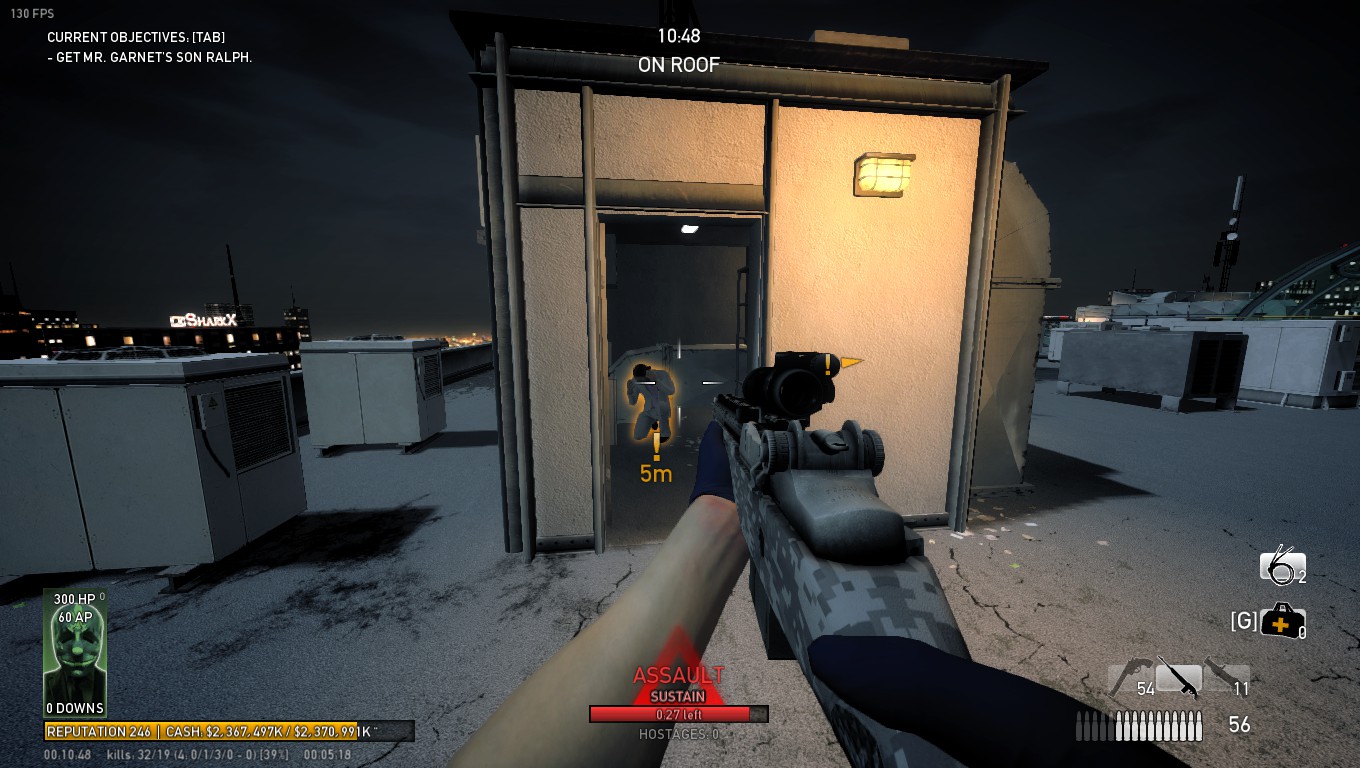
8) If you did push him to the helipad on the roof, the Helicopter will come by again and Ralph will enter the Heli and Bain will try to negotiate again, So just take cover behind the cover where you placed the meds,ammo.This time the negotiation will work and the vault will open but you need to wait some time cuz the vault has a timelock.The timelock time can range from: 1 minute to 3 minutes
9) If the Vault has opened get down there, take the diamonds and escape.
10)There is 4 possible escape 3 are on roof.
And congratulations you just passed the Diamond heist on ovk 145+
Tactics on Slaughterhouse
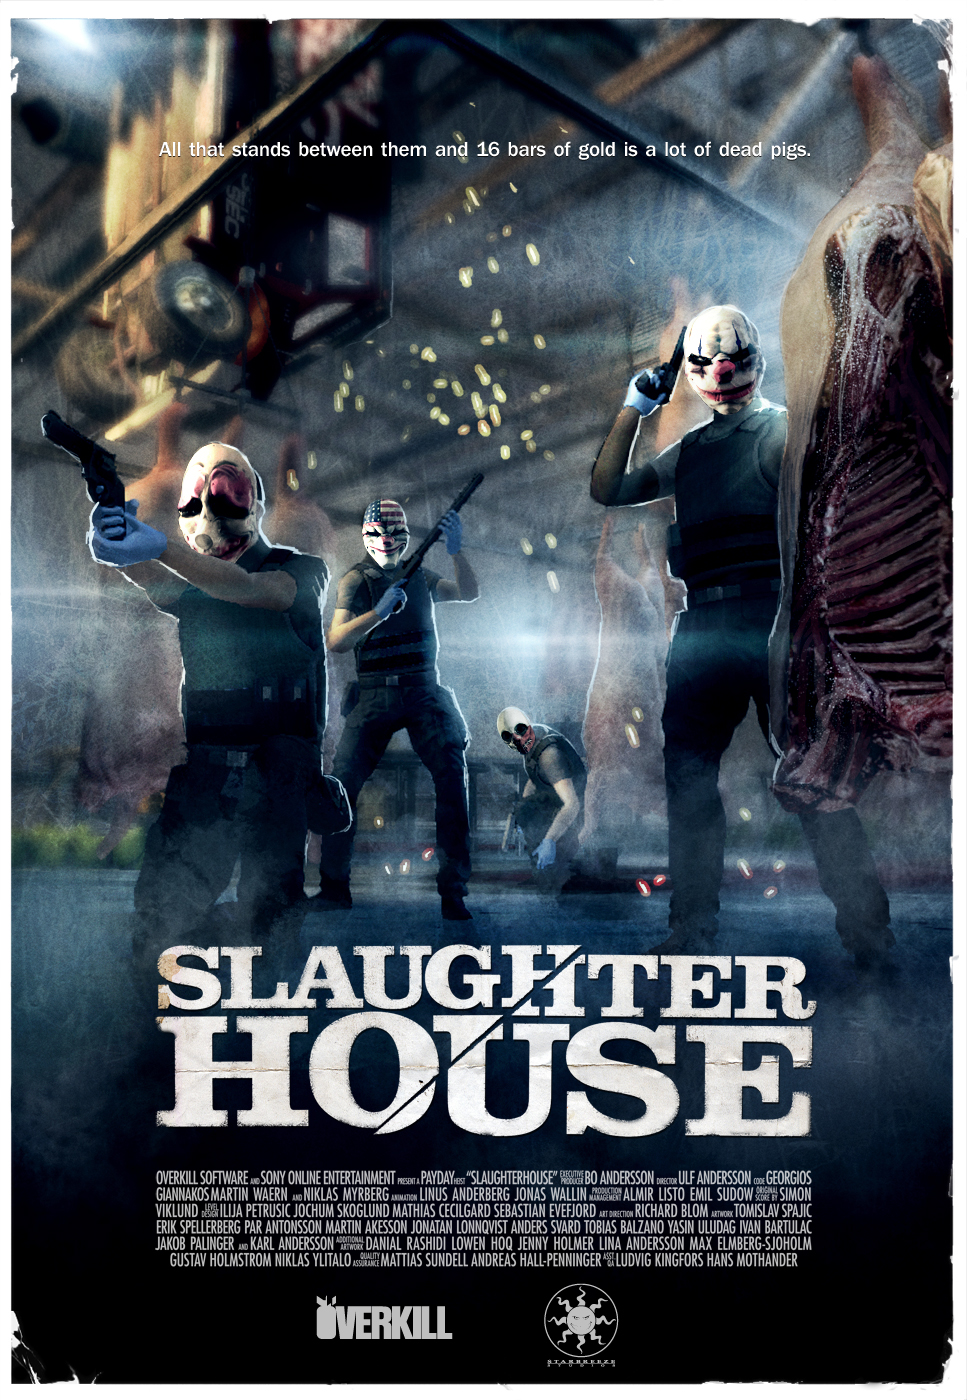 On this heist random events can force on totally different strategy.
Info:
1)There will be 4 murky-cars 2 in front of transporter and behind it.Shoot all cars(at glass) to make them crash.
2)You can kill murkies safely from spawn.Be caferuel try to keep your health bar in good condition.
3)When you place c4 on van ,bulldozer can spawn from that doors,be caferuel.
4)Cops will spawn at doors,and at garage doors,and from roof.
5)When you taking gold to 61 container watchout behind(outside)you can spawn sniper.
6)At escape there can be 4 dozers just run pass them.
7)This heist is very good for reinbeck(close range).
8)I forgot to say on start i said:"On this heist random events can force on totally different strategy.".By that i mean on four scenarios that can happend:-first one:there can meat hanging(or no meat)
-second one:kitchen can be closed -third one:there can be kitchen closed and no meat and(worst one) -fourth one:kitchen open and meat(best one).Of course there is maybe a little more combination that can happend.
Tactics:
-Spawnpoint kill strategy(yo ucan use this when kitchen is closed and no meat, but it works with all
4 scenarios):
You kill murkies, get to the van set up saw and crew splits.One guy guard the doors,Second and third guy guard the garage doors and fourth one stay at van to fx the saw and to kill murkies(the ones which come from roof).They come from theese spots:
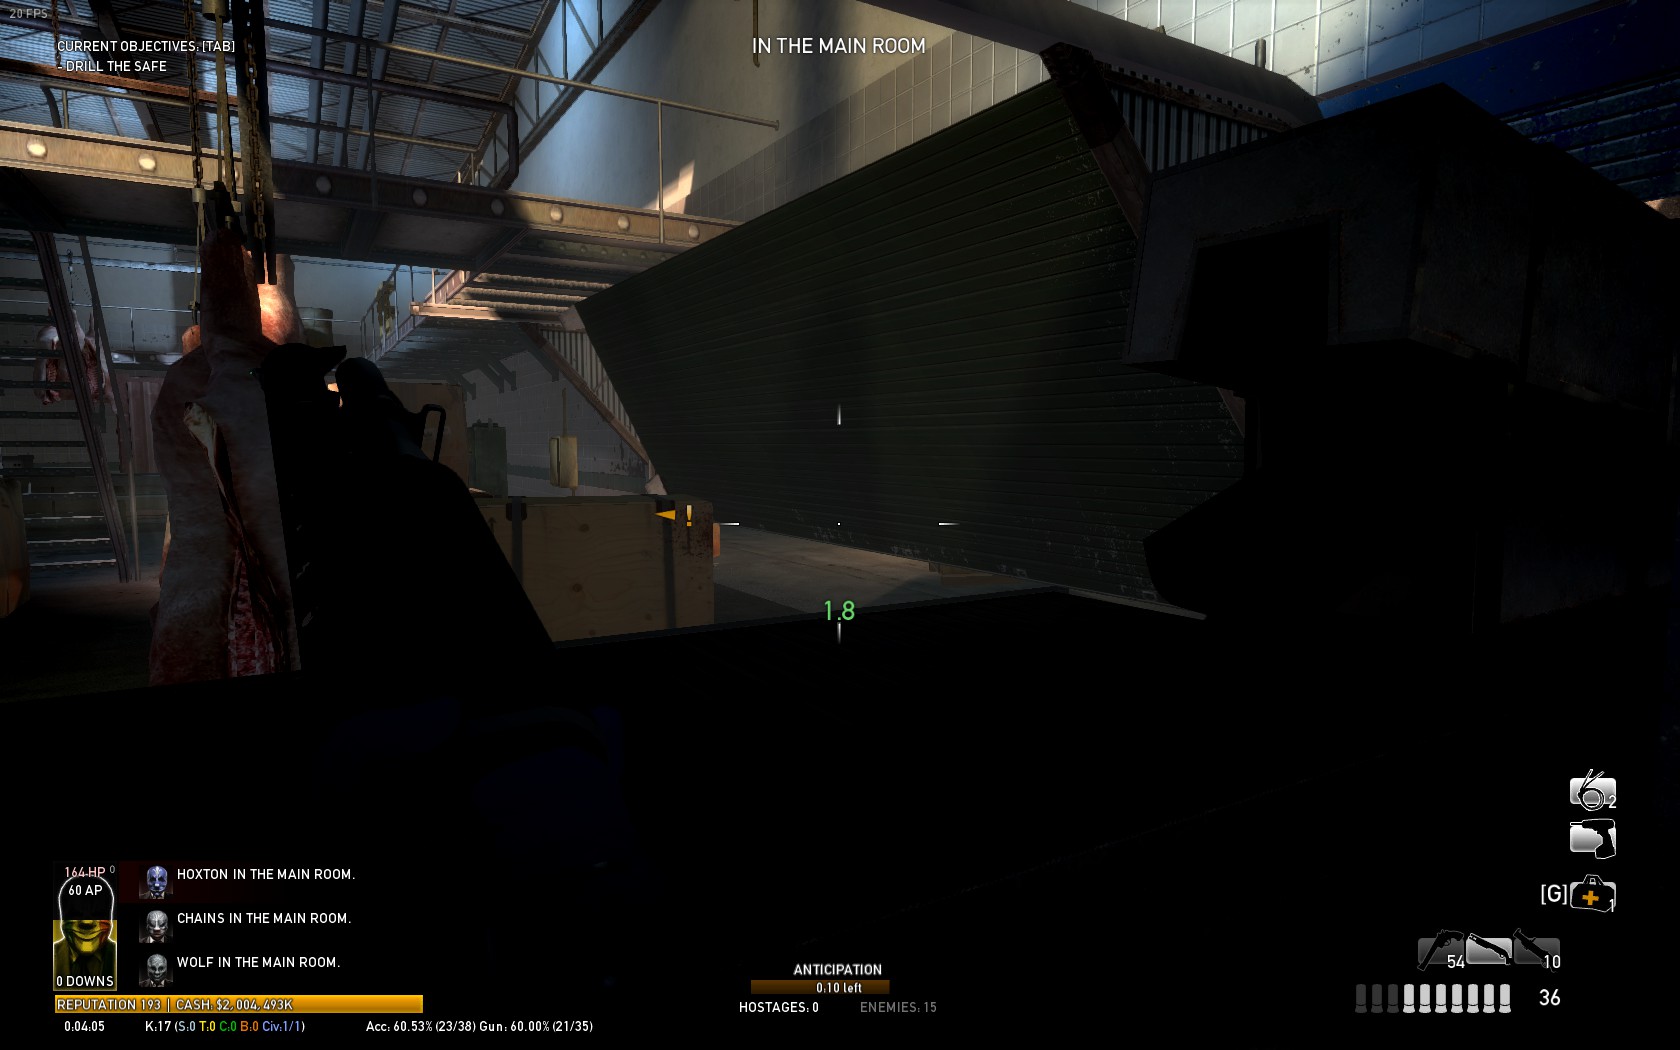
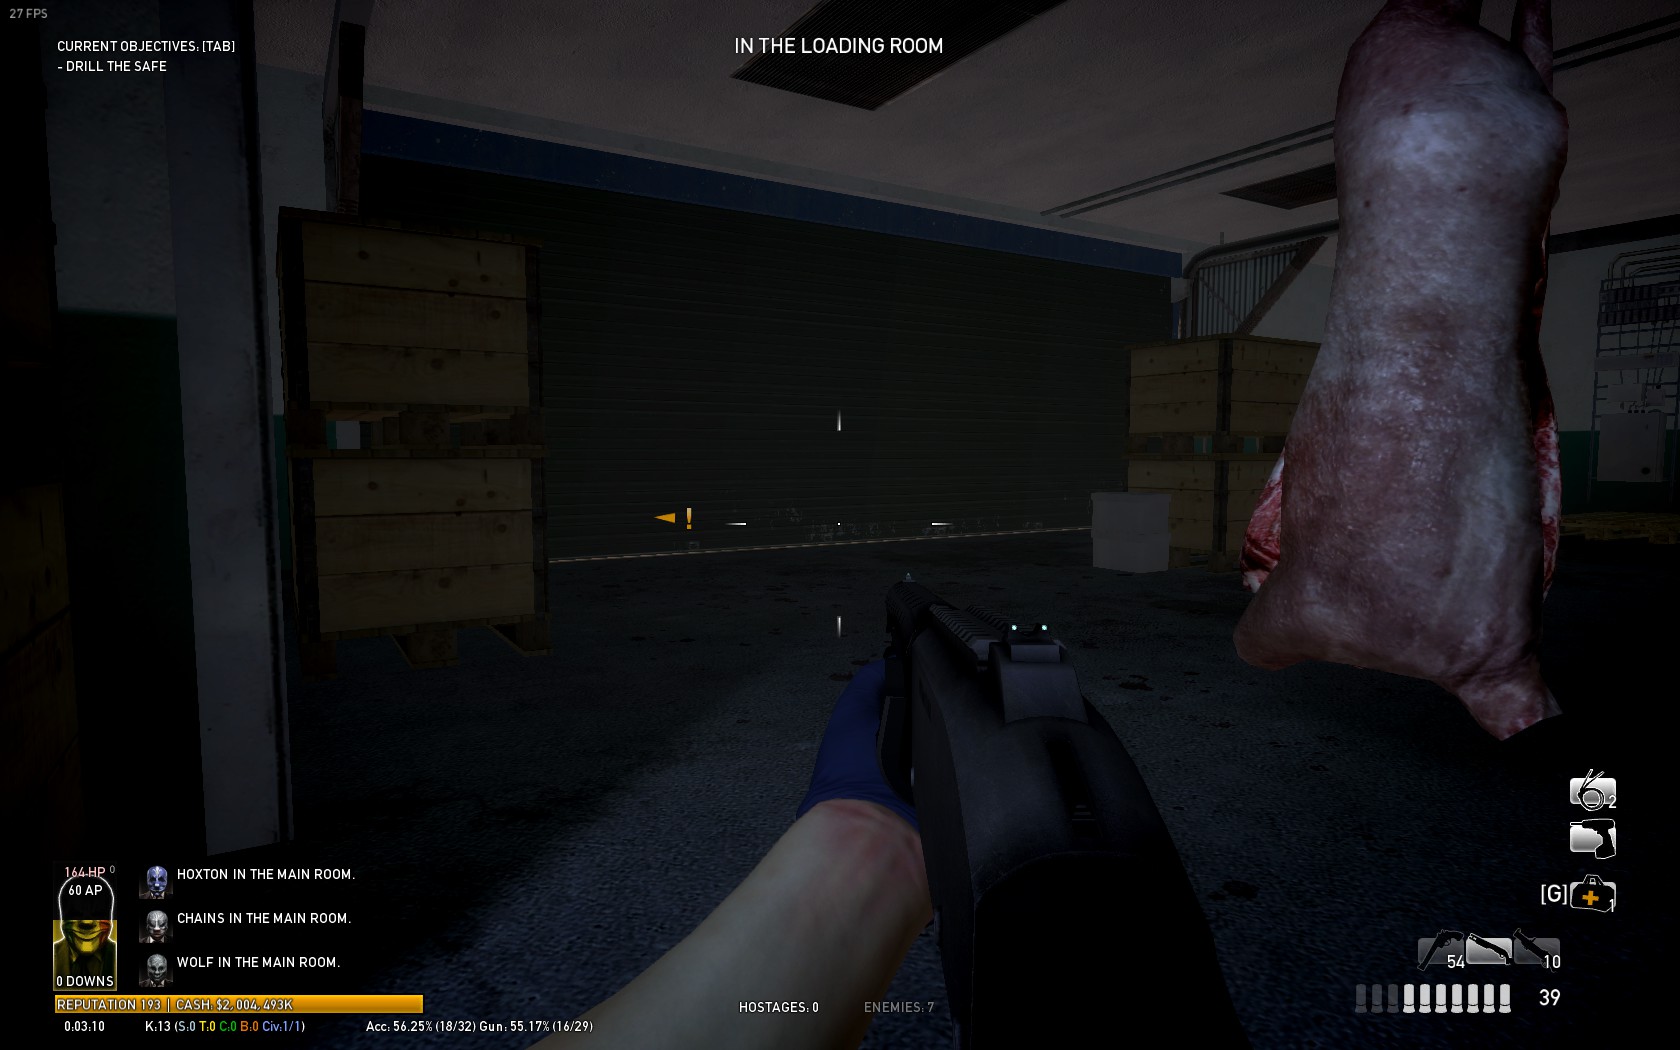
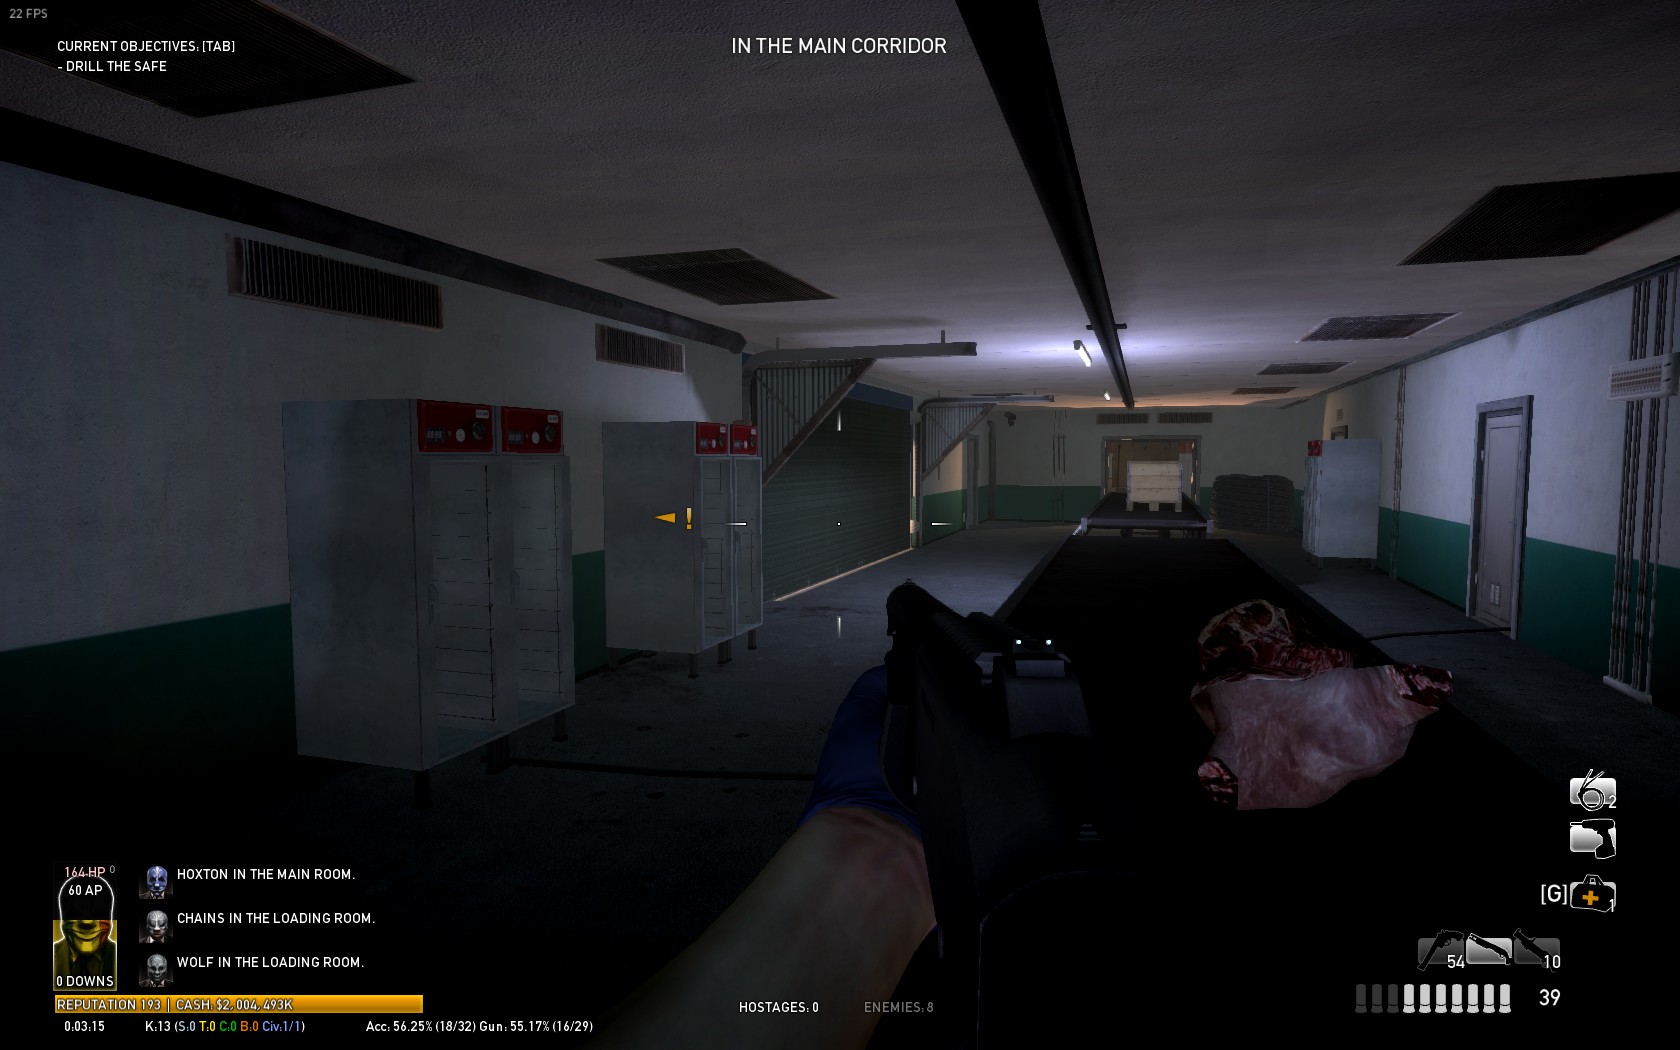
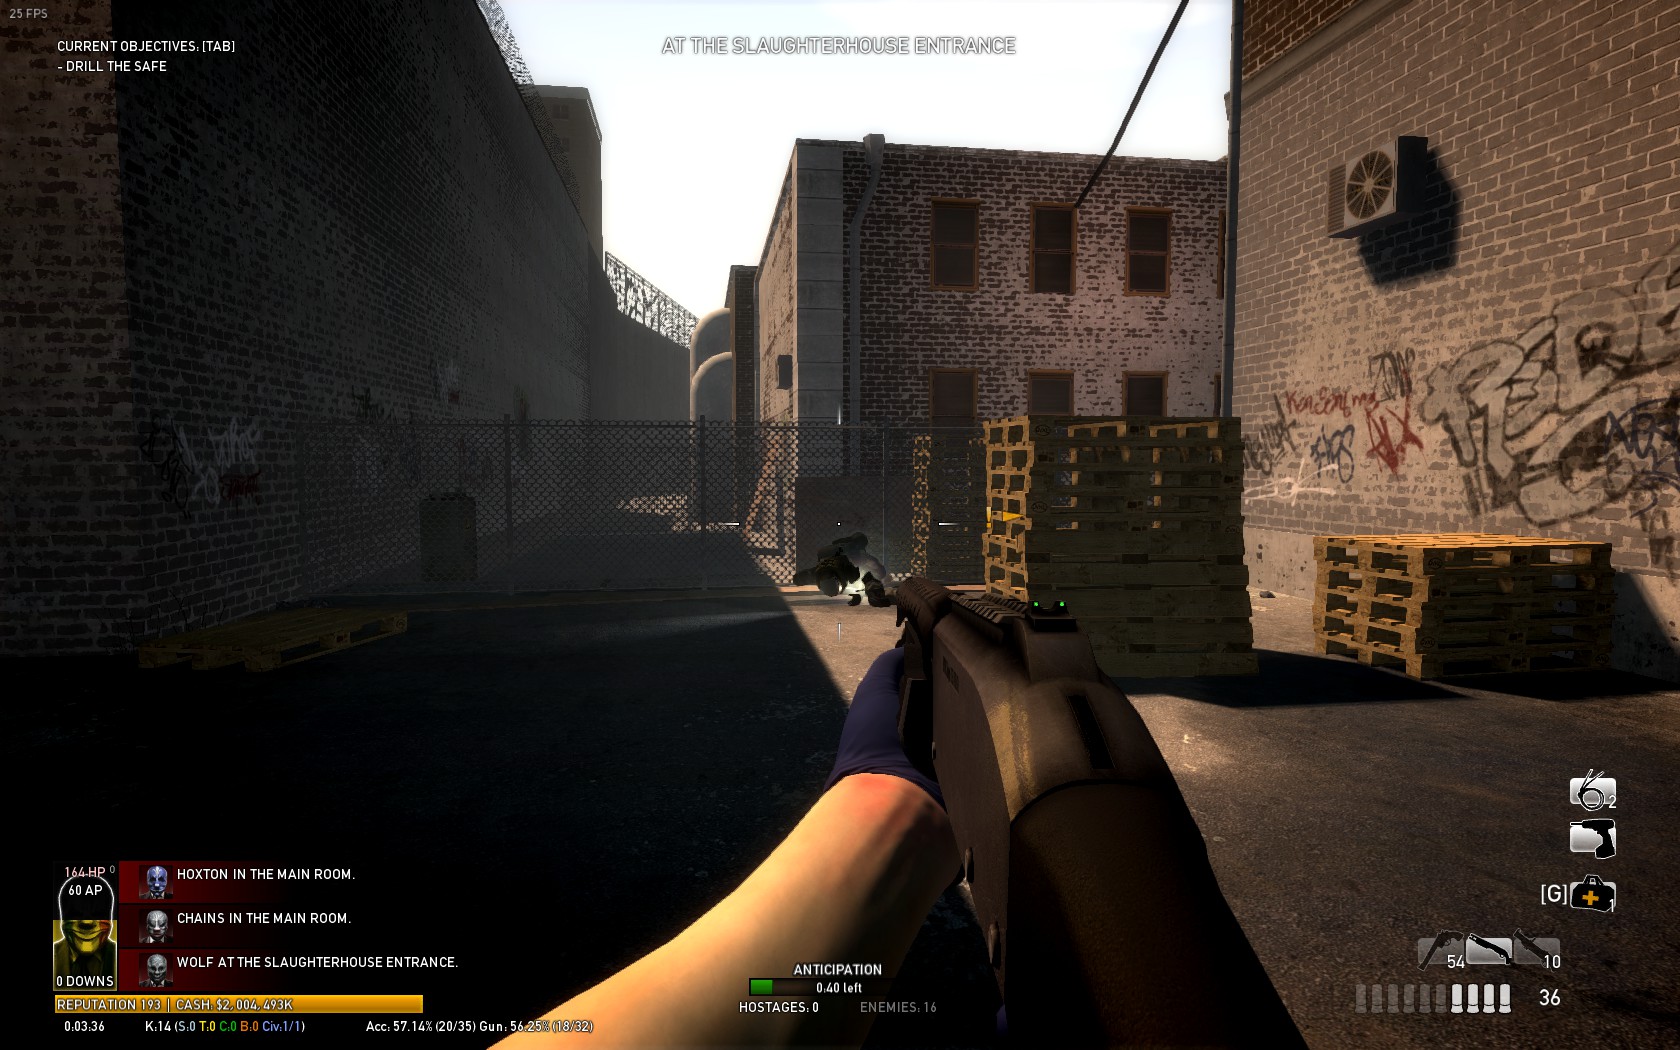 .After drill is done take gold and move to 61.You now have two options to loop or to camp.You can camp here:
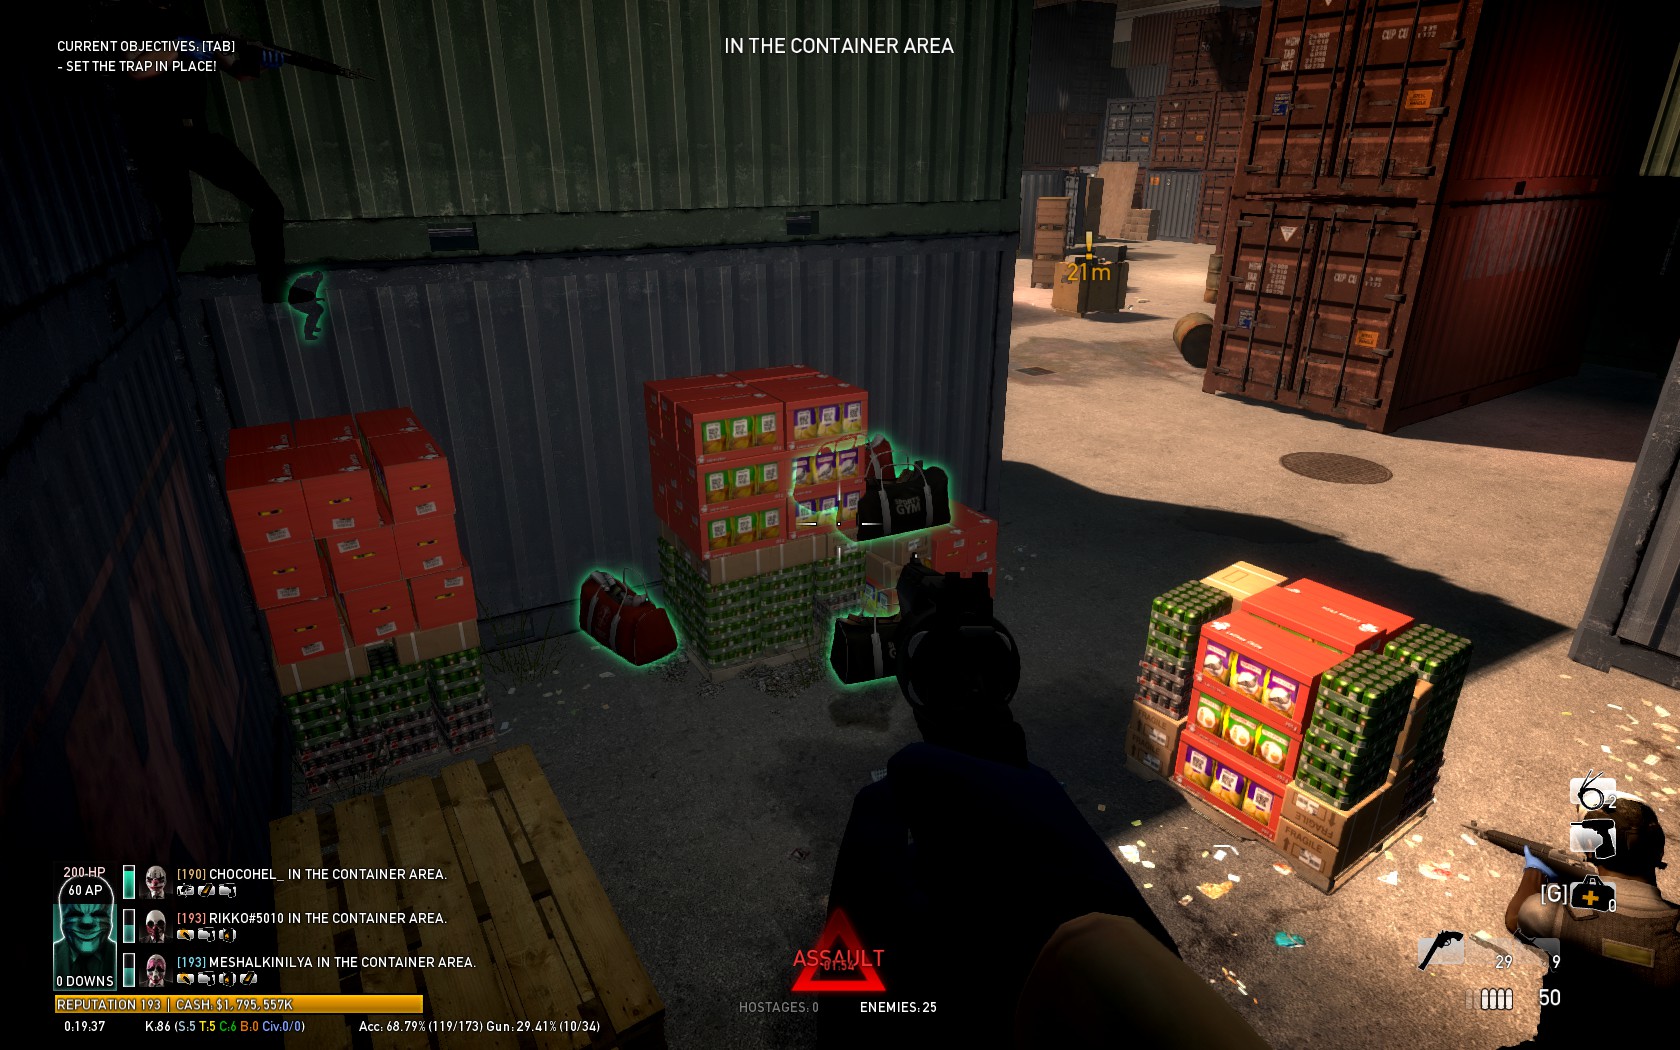 (dont place there all bags xD)Okay other options is to loop(i prefer to loop cause its a LOT easier).In that option you will camp a little on that camp spot i showed then just go foward make a lap around(litterally a circle)and then go back to van and camp near van,when its get too hot move back.Just keep going until you finish all objectives.
-Camp behind belt or in kitchen(if kitchen is closed but there is meat)
here is that camp spot:
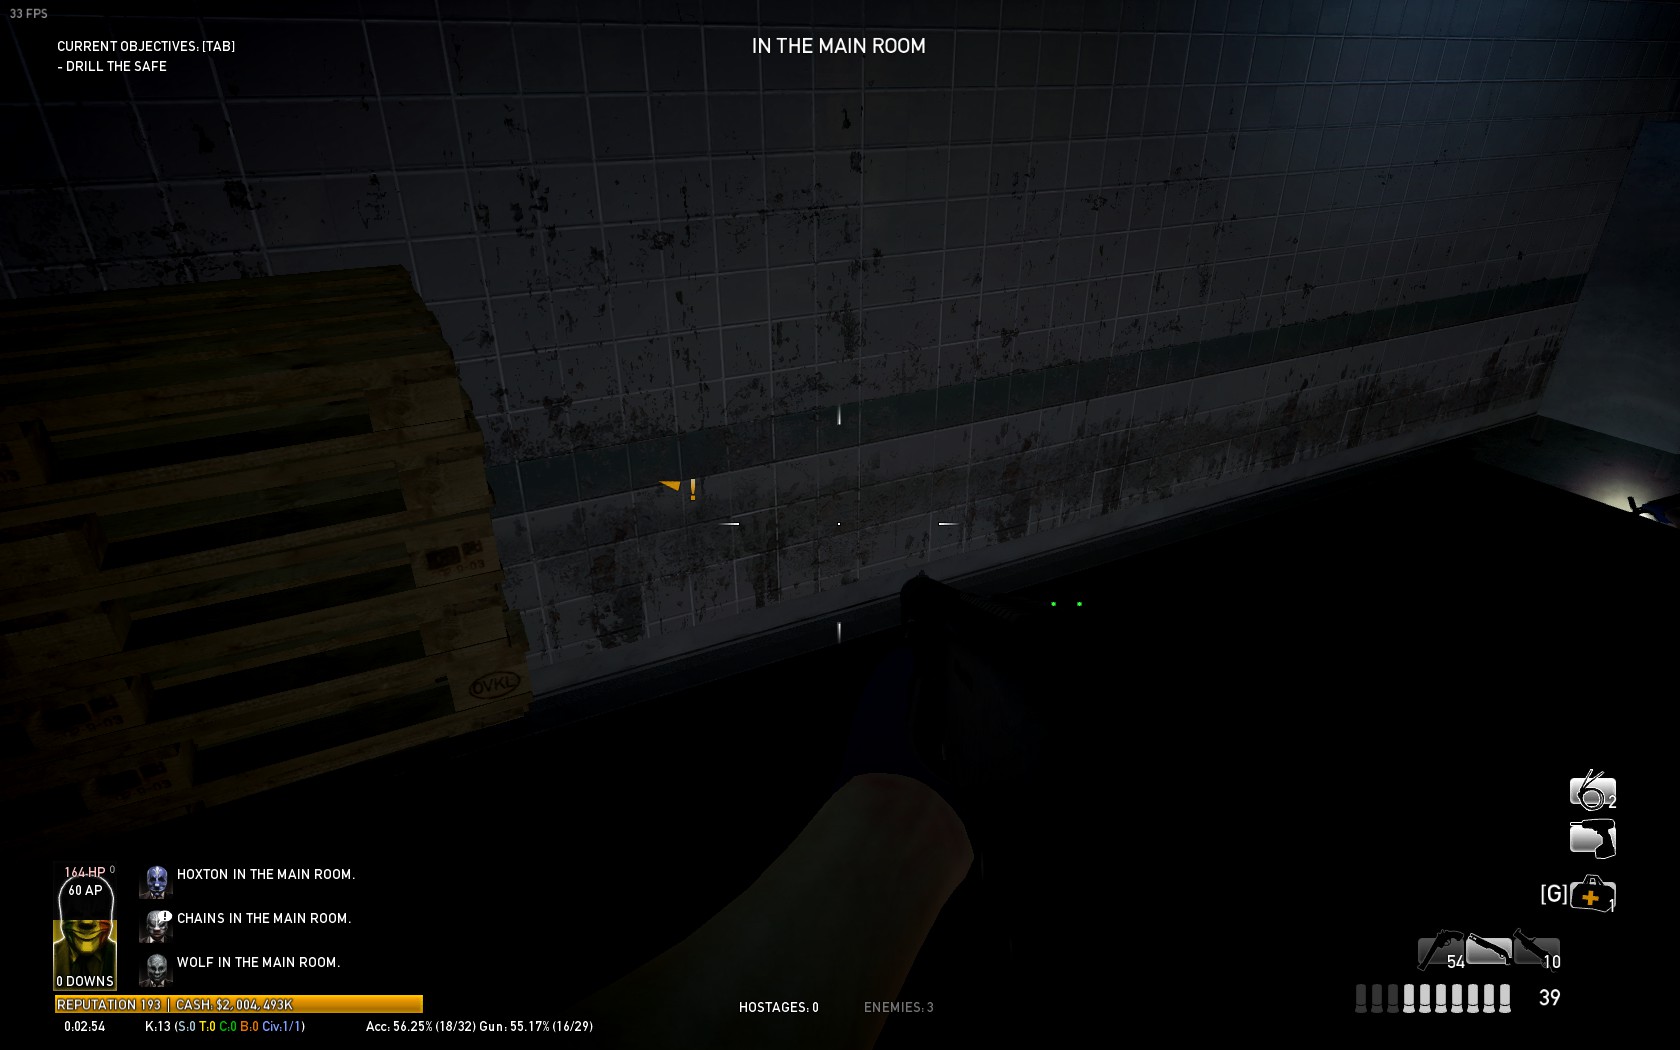 .Just keep camping there place bags and one guy should fix drill.Then whe nyou done with drill you have again to choose the options loop or camp.And if you camp in kitchen one guy should stay near drill cops will focus other 3 ,the runner wont have problems.
I forgot to say you can safely fix the drill from here:
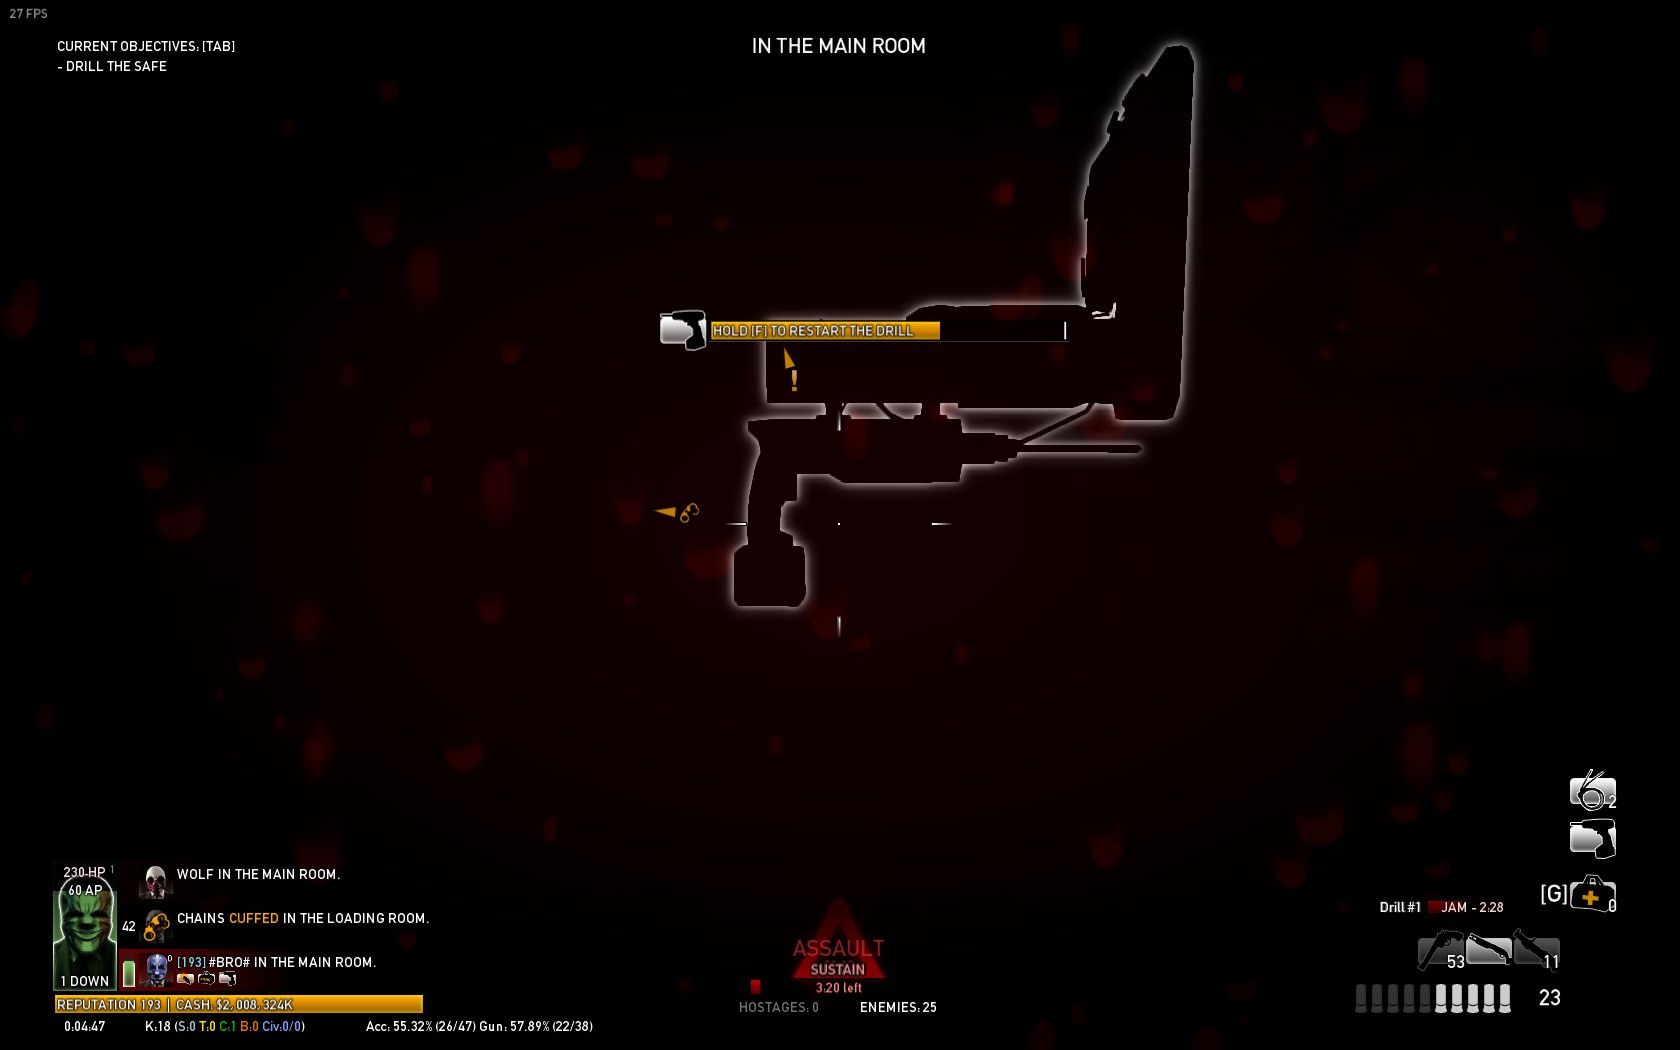
My friend and I have decided to show you how to loop here:
Tactics on Counterfeit
 One of them most funniest map to play(at least for me).
Info:
1)Dont take cable ties,just kill civs it will make your life easier.If you are client,you can shoot without alarm.
2)All 2 boxes takes 4 mins to be done.
3)Let the cops inside, if its possible to get downstairs(it will buy more time in stealth).
4)You cant pick up phone.
5)On this map its very important to know where is everything , on start check where is crowbar and hose.
6)Bulldozers will will ♥♥♥♥ up same power boxes.Dont kill them(if its possible try to avoid) cause if you kill it will make them to get down power more often.
7)When the vault has 5 beams water is almost done.
8)When you place c4 endless assault starts.
9)Shields are guarding the right escape,use that as your adventage.BUT before you take all loot clear escape first.
10)In sewer there can be cloakers- taser ambush(and some heavy swats).
11)Taking a toolkit isnt bad idea.
Tactics:
-Camping:
This is tactic can call runner tactic also.One guy has to do objectives,other 3 will camp at mitchell's house.There isnt too much anything to say,litterally.Info for runner:Bulldozers will ♥♥♥♥ up same water pump everytime and if you kill him it doesnt makes to ♥♥♥♥ up water more often,so feel freely to kill him.
-Looping
My friend and I decided to show you how to loop,we did this on start of heist,you will do objectives by the way + you can only see c4 if you are client:
Tactics on Undercover
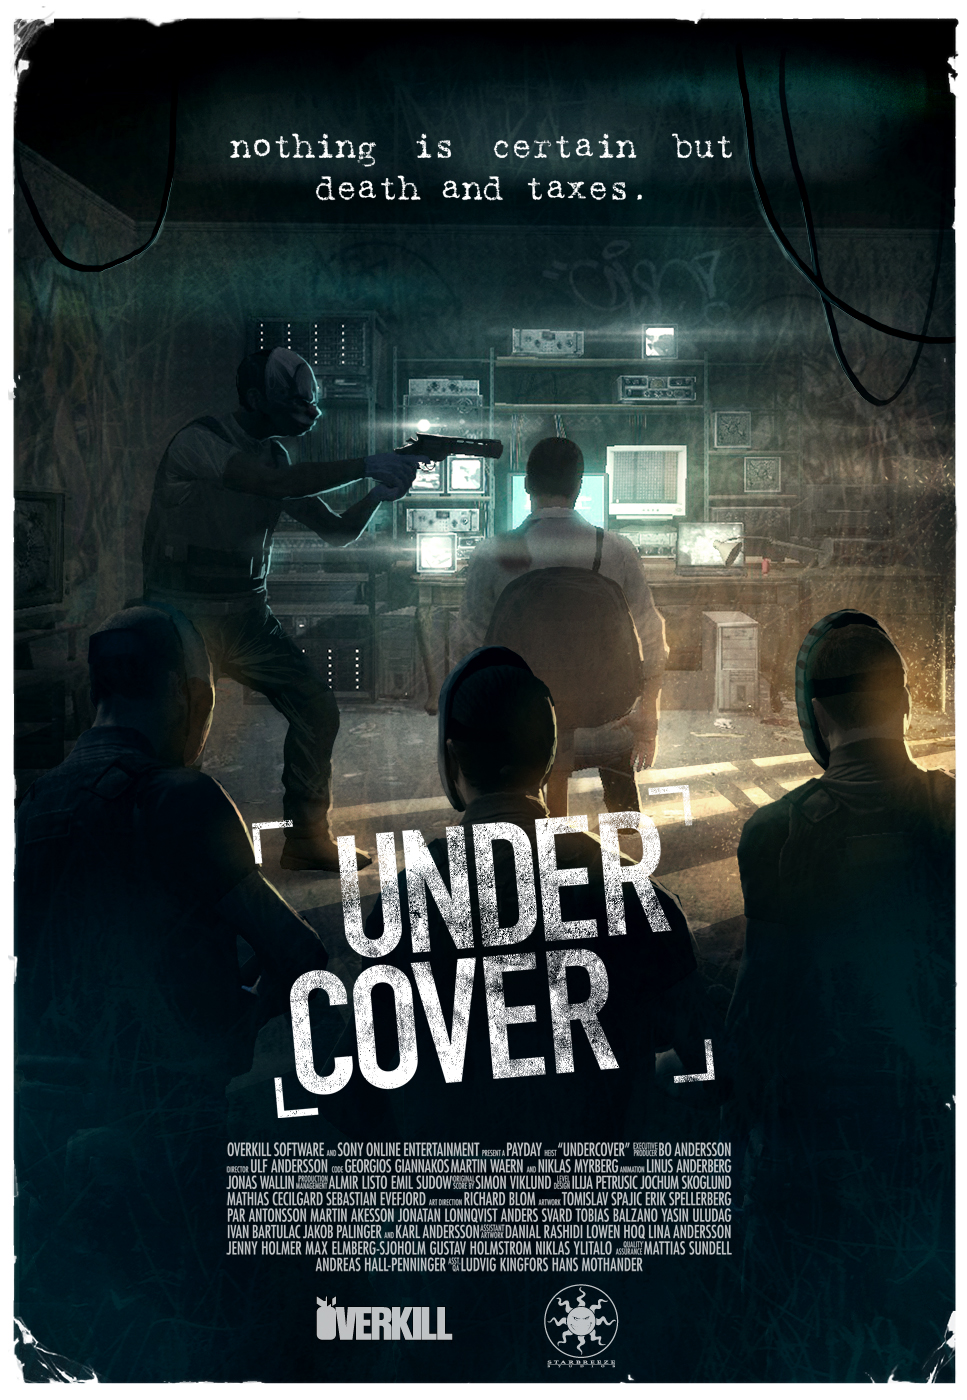 This is map known for amount of specials,where cloakers,taser and bulldozers can spawn in pairs.
Info:
1)Where your spawn is,there you will push Taxman.
2)Plank the roof(never forgot escape zone) and places near power boxes.
3)Limo can fall on roof or on balcony,you can predict where is going to fall,by just runnig to invisible object(when you get on roof and run on place where limo falls,if you cant pass that trough(invisible object) that means limo will fall there.
4)If limo falls on roof and not fall through roof that means it will be a LOT harder for you,cuz of the amount of snipers.
5)On this map 20 snipers can spawn ,that even includes building from back.
6)When Bain says:"Vents,Vents, check the vents",cloakers will spawn from it.If you near vent in that time you will down in no time.
7)Power boxes can be on roof ,2nd and ground floor.
8)There is bug which triggers HUGE spawn of dozers(dorhud "fixes" that,the mod just make heist easier which is pretty lame.)
9)Roof can be open or closed,by that i mean on this place:

10)Cops spawn from back of building and from downstairs
11)When you trigger last step,be sure everyone is ready and snipers are down.Why I said on "9)Roof can be open or closed"?If its open that is great,if not the RNG forces you to go through middle of roof exposed to 20 snipers,so be sure you kill them before you trigger last step.
12)Snipers respawn when you hear voice line about them.
13)You can destroy wall with your gl40.
Tactics:
Here we have 2 tactics:Camping and Kite around or loop,call it as you wish.
-Camping:
Okay when you start this tactic,first as you always do plank roof and i said what stuff to plank.Then after that whole crew go to shower(bath),that spot is here:
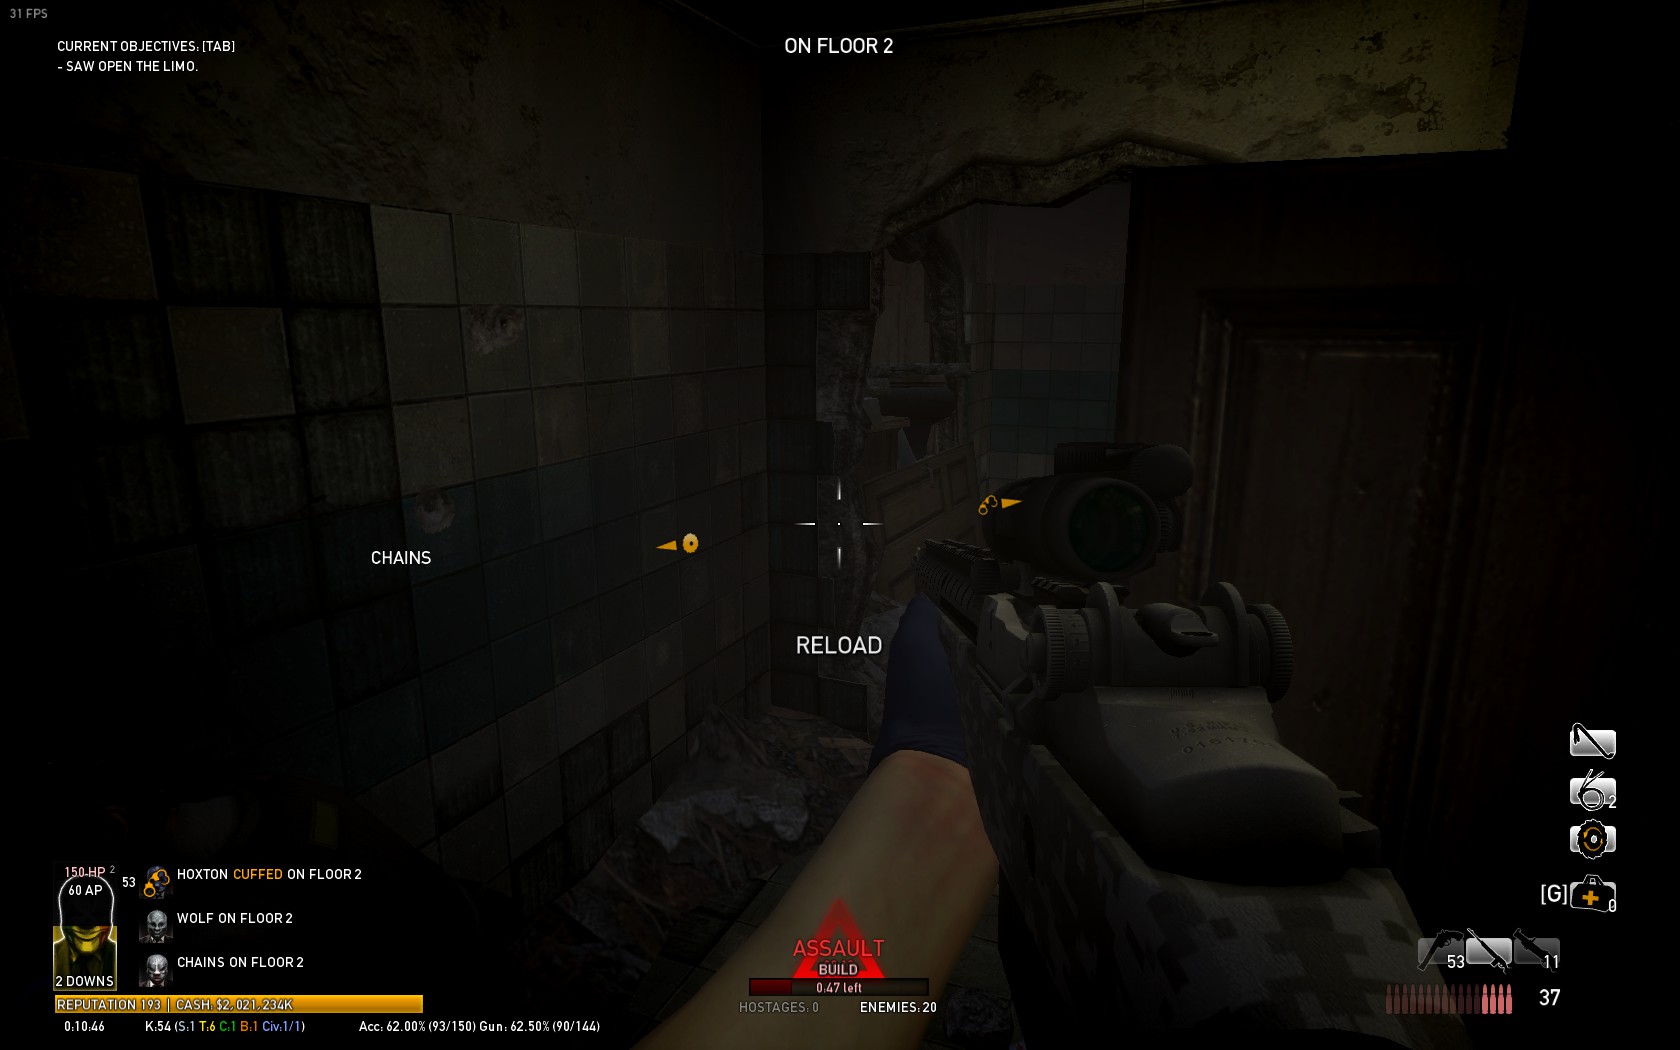 and place your bags.After 20-30 sec have passed of assualt one guy(runner) get out of that room(try at least),then he go to limo and restart the saw and he will not come back to his mates(assault focus the mayority of players and host).He will sit in ground floor and he should place his bag here(medic always):
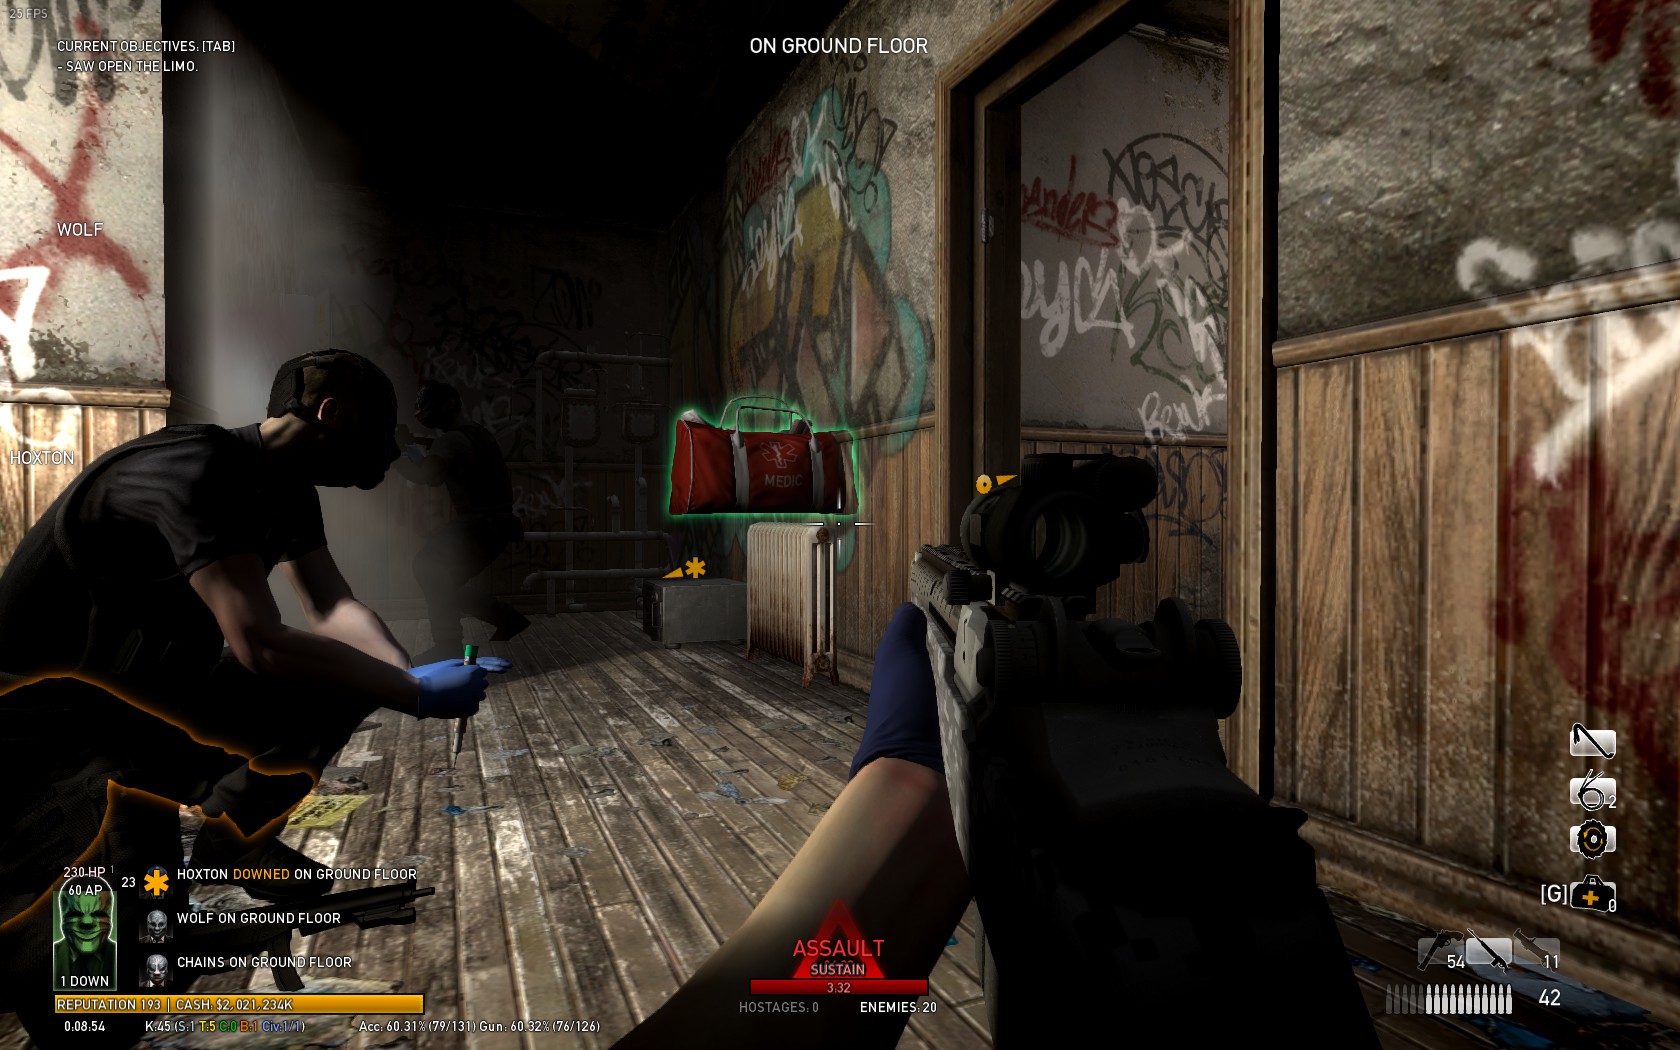 .Then when snipers respawn he killes them and do objectives.Others will just camp in bath.IMPORTANT:Runner should kill snipers before escape(specially when roof is closed).
-Looping:
In this tactic you camp at one stairs,then when gets hot move here(when you camp at right stairs for example camp in on 2nd floor level,when gets too hot move trough 3rd floor to this spot):
And do objectives by the way.And rest of heist is pretty same like first tactic just whole crew is looping.
Here you go you done Undercover. :)
Tactics on No mercy
 This is the map with heaviest assaults,where shields can push you through wall :/.
Info:
1)You have 2 options on start to stealth(plan A) or to go loud(plan B).
2)The number of cameras depends of number of players:1 player=3 cams,2 players=6 cams,3 and 4 players=9 cams.
3)On this map you have 3 alarm buttons:
First one:

Second one:
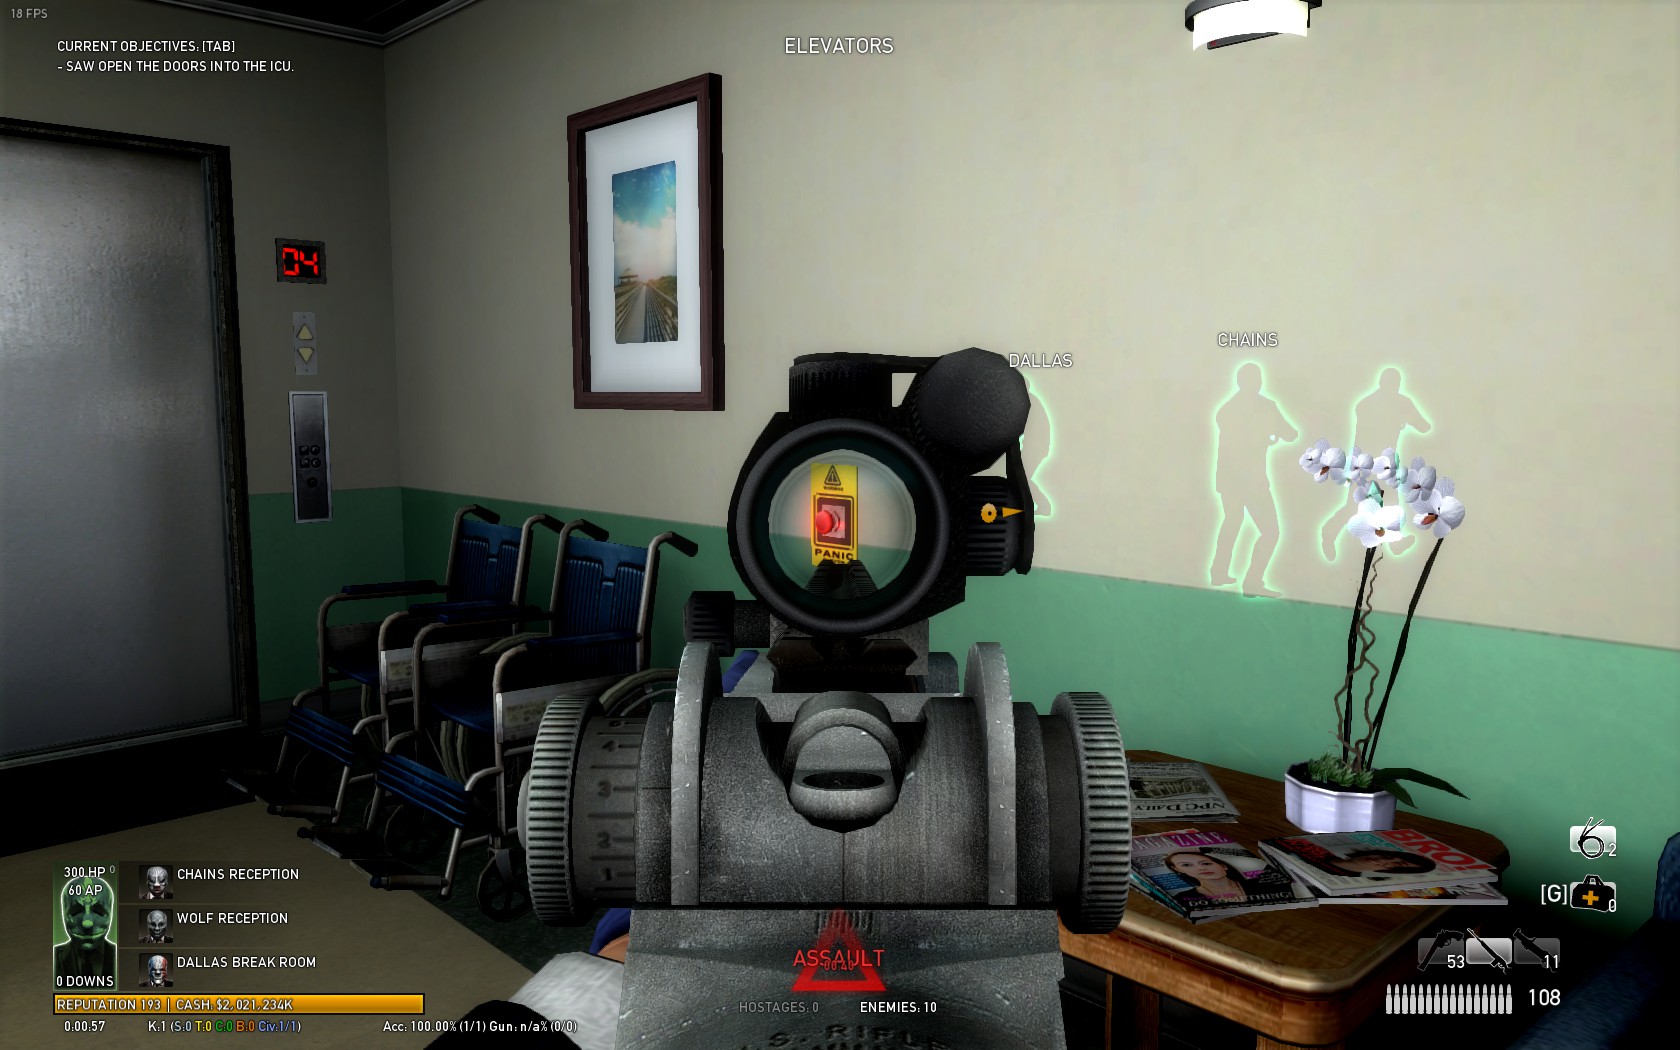
Third one:

4)Dont take cable tie and silent weapons you cant meele cams and shout on civs.(if you are client you can shoot with loud gun without triggering alarm)
5)Guard will come, and sometimes repairman(Bain can tell you repairman is coming,but sometimes he dont so keep sure you are checking stairs)
6)When you get to doctor you're searching for green flue,but if you listen 2nd tour(just come to that nurse again) you will be pretty sure which one is.Then you see the wire and cut the right one.
7)Cops will later turn off power.(that happends when you activate the elevator button(ofc before escape))
8)When you get in elevator,and you're ready to get hell out cops can attack you.From top of the elevator game can spawn cloakers(in pairs) couple of times.If you're reached the top of roof from that elevator door,2-1 dozers can spawn,so be caferuel.
Tactics:
-Camping:
I described the start now lets get to the part with ICU doors.If you failed stealth you will have to set up drill on it and wait for 4 -5 mins(WTFBM shows time :) ).You can choose 2 spots to camp at :
-Office:
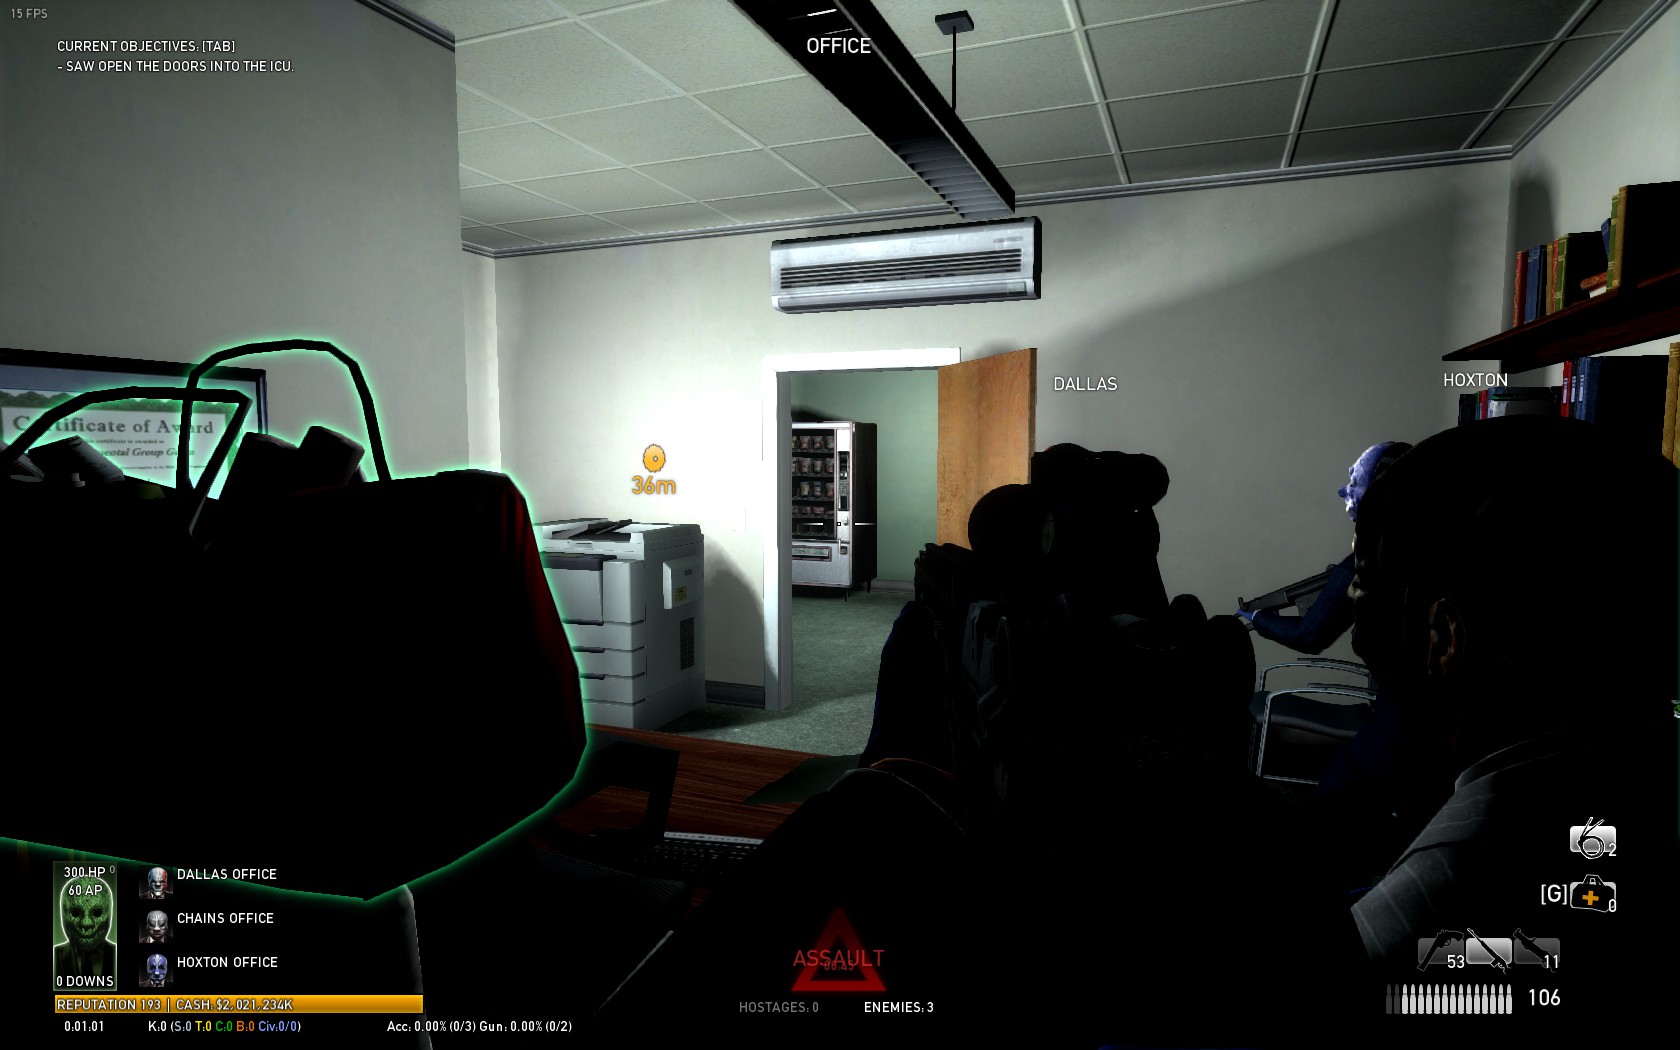
-North corridor:

I prefer north corridor cause its easier for drill.If you look that spot you have 2 exits left one and the right one.Runner will use the right one to get the drill cause its a LOT clearer there then in left exit.You want to all players camp near that left exits.Why?Cause if you go a little on other side then other cops will split and it will be so hard to make through.If you're camping in office its harder for drill cause you have one exit,you will probably be forced to fix drill after assaults.(sometimes its possible to make through but its a lot harder).I forgot to say cops will spawn from vents during heist(including even dozers,cloakers,tasers and shields.Then after all that,take blood,keep power going and escape.
Here you go the last map,well done Overkill salutes you! :)
Specials,Enemies
Ok so now lets move on to Enemies,Specials shall we?
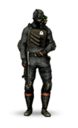 Cloaker
Health: 300 on ovk 145+,225 on normal ovk
Weapon: Silenced MP5K
The Cloaker is a special unit who has great agility and can instantly incapacitate a player with his melee attack. He wields a Compact-5 sub-machine gun and wears dark blue attire, night vision goggles and a gas mask.His vulnerability is distance cuz he will not kick you,he will just shoot at you.
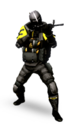 Taser
Taser
Health: 400 on ovk 145+,300 on normal ovk
Weapon: Assault Rifle with built in Taser module
The Taser is a special unit whose role is to immobilize and take down players who have separated from their accomplices. Armed with an AMCAR-4 and a taser, he is distinguishable by his ballistic face mask and yellow shoulder pads with black stripes.To kill taser fast you need to shoot fast, cuz he will tase you and if he tases you better take m308 bcuz this weapon is good for accuracy
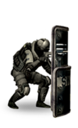 Shield
Health: 200 on ovk 145+,150 on normal ovk
Weapon: Automatic B9-S
The Shield is a special unit whose role is supporting other law enforcement and dealing out suppressing fire. He wears a set of medium armor and a ballistic face mask like the Taser. He is armed with a fully-automatic B9-S pistol and carries a large riot shield, making him invulnerable to bullets from the front.So you better get behind him before he can do it and quickly kill him with a weapon,Fastest way to kill a shield is to get GL40 Grenade Launcher and shoot at his shield, he will die instantly if shot correctly.
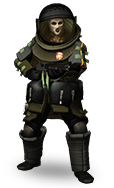 Bulldozer
Health: 2000 on ovk 145+,1500 on normal ovk
Weapon: Shotgun
The Bulldozer is a type of special unit, designed to attack and overpower players through a combination of high defense and firepower. He wields a powerful Reinbeck shotgun and dons a suit of heavy armor, which visually resembles a bomb disposal suit. The front of his head is protected by an orange bullet-resistant glass shield through which his face can be seen covered by a white balaclava.
Its visor has a static, never changing 20 health that must be broken to inflict headshot damage.To destroy his visor faster use gl40 or AK.
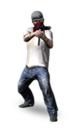 Gangster
Health: 40 on ovk 145+,30 on normal ovk
Weapon: Suppresed Mark 11
The gangster is armed with a Mark 11. They're found in the beginning stages of Panic Room and Undercover. Gangsters do not count as cops, and can't be taken hostage, however Chavez counts (as he is a civilian.)
Gangsters tend to deal very high damage due to their weapons having a monstrous fire rate, even at longer ranges, meaning players should be very cautious of them at all times. They are not targeted by and cannot be harmed by law enforcement units on the scene and vice versa.
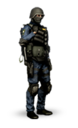 Blue Swat
Health: 60 on ovk 145+,45 on normal ovk
Weapon: Assault Rifle,Shotgun,MP5
The blue SWAT is armed with an AMCAR-4 assault rifle, Compact-5 submachine gun, or Reinbeck shotgun. He is present around the first assault to the end of the heist, and is the most common enemy on Normal difficulty. On higher difficulties, they are usually only seen around the start of a heist. They tend to quickly deplete armor and health with their weapons.
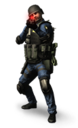 Sniper
Health: 40 on ovk 145+,30 on normal ovk
Weapon: Sniper Rifle
The Sniper is found at preset locations on all heists except No Mercy, usually in high places. He visually resembles blue SWAT, is counted as one for the challenges, but has slightly lower health, at least on 145+. One shot from their rifle, which leaves a yellow-red trail for a few seconds, can instantly deplete the player's armor except on lower difficulty levels. Though the sniper is more likely to miss his first shot if the player is moving, he will almost always land the second if his target does not take cover or kill him quickly. On the other hand, players sometimes must deliberately get out of cover and draw their attack in order to use the trail to distinguish their location, they are also often considered as the most dangerous non-special enemies.
Unlike most other special units, Snipers cannot be marked and team members will not vocally announce their elimination, though spotted snipers and their active field of view will be notified by nearby players.
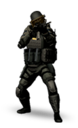 Heavy Swat
Health: 140 on ovk 145+,105 on normal ovk
Weapon: Assault Rifle,Shotgun
The heavy SWAT is a heavily armored unit armed with an AMCAR-4 assault rifle or Reinbeck shotgun. He appears from the first assault to the end of the heist, and spawns more frequently on higher difficulty levels. On Hard difficulty and above, he is the most common enemy the player will face. Because of his relatively large health pool, the heavy SWAT's head is often targeted. When killed by a headshot, his visor will shatter and create a distinct sound.
Players can earn the achievement "Intimidating" by forcing a Heavy SWAT to cuff himself.
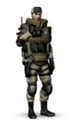 Murkywater Merc.
Health: 160 on ovk 145+,120 on normal ovk
Weapon: Assault Rifle
The Murkywater combatant, also known as the "Murky", is armed with an AMCAR-4 assault rifle and is only fought in the early stages of the Slaughterhouse heist. They bear a resemblance to heavy SWAT (the armors of Murkies are basically retextured Heavy SWAT armors, sans helmet) but have better accuracy and reaction time. However, their unarmored heads gives them the vitality of other lightly armored units, so long as they are shot in the head.
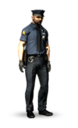 Cop
Cop
Health: 40 on ovk 145+,30 on normal ovk
Weapon: Pistol,Shotgun
The cop, also known as the police officer, is armed with a Crosskill .45 pistol or Reinbeck shotgun. In each heist, he is encountered between the beginning of the heist and the end of the first assault.
Typically their firepower is weak when alone, but their Reinbeck can quickly take off all of the players armor on higher difficulties, allowing other cops to whittle players' health down on the spot.
 Gensec Security Guard
Health: 40 on ovk 145+,30 on normal ovk
Weapon: Pistol,Compact 5
The security guard is the weakest enemy, usually armed only with a Crosskill .45 pistol. He has the lowest accuracy, lowest firepower and lowest endurance of all the enemies. Security guards appear in First World Bank as the bank guards, Green Bridge as the prison transport drivers, Slaughterhouse as the armored vehicle drivers and in No Mercy as the ICU guards.
In Diamond Heist, each security guard carries a Compact-5 and wears a red shirt for higher patrols. This variant also appears in No Mercy as the guard who is sent to check on the malfunctioning cameras, and must be silently eliminated before he can set off any alarms. Red-shirted security guards are also much more difficult to make surrender than regular security guards.
When immediately behind an unmoving (once a guard has yelled for him to stop) and passive player, the security guard can cuff them, preventing them from moving or attacking for up to 60 seconds. Within that time, a crewmate may uncuff the player; if the 60 seconds pass first, then the cuffed player may uncuff themselves by holding down the interact button. The process of uncuffing only takes about a second. There is virtually no cooldown for this ability, so a single security guard can cuff several players in quick succession.
Despite not technically being law enforcers, security guards are treated as such for the game's challenges. As the weakest enemy, the security guard is a primary target for players who wish to progress in the "Saving bullets" and "Owning the law" challenges.
 Fbi Agent
Health: 60 on ovk 145+,45 on normal ovk
Weapon: B9-S,Crosskil
The Federal Bureau of Investigation agent is armed with a Crosskill .45 pistol or B9-S, and is about as strong as blue SWAT. between each assault wave, but ironically he can easily be taken hostage because of his low endurance. Despite being somewhat weak and only appear in low numbers, FBI agents can be somewhat of a nuisance to players between assaults, though they are only armed with handguns, they are extremely accurate even when firing upon players at a distance.
CloakerHealth: 300 on ovk 145+,225 on normal ovk
Weapon: Silenced MP5K
The Cloaker is a special unit who has great agility and can instantly incapacitate a player with his melee attack. He wields a Compact-5 sub-machine gun and wears dark blue attire, night vision goggles and a gas mask.His vulnerability is distance cuz he will not kick you,he will just shoot at you.
Taser Health: 400 on ovk 145+,300 on normal ovk
Weapon: Assault Rifle with built in Taser module
The Taser is a special unit whose role is to immobilize and take down players who have separated from their accomplices. Armed with an AMCAR-4 and a taser, he is distinguishable by his ballistic face mask and yellow shoulder pads with black stripes.To kill taser fast you need to shoot fast, cuz he will tase you and if he tases you better take m308 bcuz this weapon is good for accuracy
Shield Health: 200 on ovk 145+,150 on normal ovk
Weapon: Automatic B9-S
The Shield is a special unit whose role is supporting other law enforcement and dealing out suppressing fire. He wears a set of medium armor and a ballistic face mask like the Taser. He is armed with a fully-automatic B9-S pistol and carries a large riot shield, making him invulnerable to bullets from the front.So you better get behind him before he can do it and quickly kill him with a weapon,Fastest way to kill a shield is to get GL40 Grenade Launcher and shoot at his shield, he will die instantly if shot correctly.
BulldozerHealth: 2000 on ovk 145+,1500 on normal ovk
Weapon: Shotgun
The Bulldozer is a type of special unit, designed to attack and overpower players through a combination of high defense and firepower. He wields a powerful Reinbeck shotgun and dons a suit of heavy armor, which visually resembles a bomb disposal suit. The front of his head is protected by an orange bullet-resistant glass shield through which his face can be seen covered by a white balaclava.
Its visor has a static, never changing 20 health that must be broken to inflict headshot damage.To destroy his visor faster use gl40 or AK.
Gangster Health: 40 on ovk 145+,30 on normal ovk
Weapon: Suppresed Mark 11
The gangster is armed with a Mark 11. They're found in the beginning stages of Panic Room and Undercover. Gangsters do not count as cops, and can't be taken hostage, however Chavez counts (as he is a civilian.)
Gangsters tend to deal very high damage due to their weapons having a monstrous fire rate, even at longer ranges, meaning players should be very cautious of them at all times. They are not targeted by and cannot be harmed by law enforcement units on the scene and vice versa.
Blue SwatHealth: 60 on ovk 145+,45 on normal ovk
Weapon: Assault Rifle,Shotgun,MP5
The blue SWAT is armed with an AMCAR-4 assault rifle, Compact-5 submachine gun, or Reinbeck shotgun. He is present around the first assault to the end of the heist, and is the most common enemy on Normal difficulty. On higher difficulties, they are usually only seen around the start of a heist. They tend to quickly deplete armor and health with their weapons.
SniperHealth: 40 on ovk 145+,30 on normal ovk
Weapon: Sniper Rifle
The Sniper is found at preset locations on all heists except No Mercy, usually in high places. He visually resembles blue SWAT, is counted as one for the challenges, but has slightly lower health, at least on 145+. One shot from their rifle, which leaves a yellow-red trail for a few seconds, can instantly deplete the player's armor except on lower difficulty levels. Though the sniper is more likely to miss his first shot if the player is moving, he will almost always land the second if his target does not take cover or kill him quickly. On the other hand, players sometimes must deliberately get out of cover and draw their attack in order to use the trail to distinguish their location, they are also often considered as the most dangerous non-special enemies.
Unlike most other special units, Snipers cannot be marked and team members will not vocally announce their elimination, though spotted snipers and their active field of view will be notified by nearby players.
Heavy SwatHealth: 140 on ovk 145+,105 on normal ovk
Weapon: Assault Rifle,Shotgun
The heavy SWAT is a heavily armored unit armed with an AMCAR-4 assault rifle or Reinbeck shotgun. He appears from the first assault to the end of the heist, and spawns more frequently on higher difficulty levels. On Hard difficulty and above, he is the most common enemy the player will face. Because of his relatively large health pool, the heavy SWAT's head is often targeted. When killed by a headshot, his visor will shatter and create a distinct sound.
Players can earn the achievement "Intimidating" by forcing a Heavy SWAT to cuff himself.
Murkywater Merc.Health: 160 on ovk 145+,120 on normal ovk
Weapon: Assault Rifle
The Murkywater combatant, also known as the "Murky", is armed with an AMCAR-4 assault rifle and is only fought in the early stages of the Slaughterhouse heist. They bear a resemblance to heavy SWAT (the armors of Murkies are basically retextured Heavy SWAT armors, sans helmet) but have better accuracy and reaction time. However, their unarmored heads gives them the vitality of other lightly armored units, so long as they are shot in the head.
CopHealth: 40 on ovk 145+,30 on normal ovk
Weapon: Pistol,Shotgun
The cop, also known as the police officer, is armed with a Crosskill .45 pistol or Reinbeck shotgun. In each heist, he is encountered between the beginning of the heist and the end of the first assault.
Typically their firepower is weak when alone, but their Reinbeck can quickly take off all of the players armor on higher difficulties, allowing other cops to whittle players' health down on the spot.
Gensec Security GuardHealth: 40 on ovk 145+,30 on normal ovk
Weapon: Pistol,Compact 5
The security guard is the weakest enemy, usually armed only with a Crosskill .45 pistol. He has the lowest accuracy, lowest firepower and lowest endurance of all the enemies. Security guards appear in First World Bank as the bank guards, Green Bridge as the prison transport drivers, Slaughterhouse as the armored vehicle drivers and in No Mercy as the ICU guards.
In Diamond Heist, each security guard carries a Compact-5 and wears a red shirt for higher patrols. This variant also appears in No Mercy as the guard who is sent to check on the malfunctioning cameras, and must be silently eliminated before he can set off any alarms. Red-shirted security guards are also much more difficult to make surrender than regular security guards.
When immediately behind an unmoving (once a guard has yelled for him to stop) and passive player, the security guard can cuff them, preventing them from moving or attacking for up to 60 seconds. Within that time, a crewmate may uncuff the player; if the 60 seconds pass first, then the cuffed player may uncuff themselves by holding down the interact button. The process of uncuffing only takes about a second. There is virtually no cooldown for this ability, so a single security guard can cuff several players in quick succession.
Despite not technically being law enforcers, security guards are treated as such for the game's challenges. As the weakest enemy, the security guard is a primary target for players who wish to progress in the "Saving bullets" and "Owning the law" challenges.
Fbi AgentHealth: 60 on ovk 145+,45 on normal ovk
Weapon: B9-S,Crosskil
The Federal Bureau of Investigation agent is armed with a Crosskill .45 pistol or B9-S, and is about as strong as blue SWAT. between each assault wave, but ironically he can easily be taken hostage because of his low endurance. Despite being somewhat weak and only appear in low numbers, FBI agents can be somewhat of a nuisance to players between assaults, though they are only armed with handguns, they are extremely accurate even when firing upon players at a distance.
Assaults
Okay its time to say few words about most important thing in game the assault.I'm going to talk about mods,types of assaults and some tips and tricks.
Okay on unstreet maps(everything expect green bridge and heat street) assault ussually takes 6-7 mins(on ovk 145).On street maps(heat street and green bridge) it takes 3-4 mins(on ovk 145).
Facts:
1)If you kill more cops,assault wont end any sooner it will just spawn more cops.
2)Assault have ability to focus on some part of map.That depend from 1)where host is -2)where mayority of player is
3)Every assault have his spawn rate on ovk 145 its 25.If you let blue cops(weak ones) alive it will be less spawn of specials and some heavy swats.(its useful when doing challenge like locoverkill 145 and etc.)
4)There 2 great mods who shows assault time :1)WTFBM and 2)Dorhud
WTFBM is showing time for the assualt to end(timer goes like this:2:04 left 2:03 ...)
Dorhud goes like this(2:30 2:31..)its useful if you know assault intervals.
WTFBM is a LOT better then dorhud it shows: drill timers,yourhp and ap(300hp and 66 ap-armor),hp of enemies.A lot of people says this is cheat mod but they aren't right they just supporting the DorentuZ(the creator of dorhud)
Dorhud-In this mod Dorentuz "fixes"the bug on undercover(dozer bug),by the way most of peple like that bug.So if you look theese 2 mods WTFBM holds 1st place,DorHud is such a cheap mod.
5)Types of assualt we have :normal ones,endless and assault that are short(i will explain).
Endless is type of assualt which will never stop ,it will go for ever.
"Short" ones is type of assault that litterally takes 1 min.For example on heat street when my mates are all dead(and we were pushing uphill) i get back to crash site and assault stops very soon.
6)Every assault have delay for specials(on maps where cams exits,if you destoy it you make delay spawn bigger).
That is what i have to say.
Okay on unstreet maps(everything expect green bridge and heat street) assault ussually takes 6-7 mins(on ovk 145).On street maps(heat street and green bridge) it takes 3-4 mins(on ovk 145).
Facts:
1)If you kill more cops,assault wont end any sooner it will just spawn more cops.
2)Assault have ability to focus on some part of map.That depend from 1)where host is -2)where mayority of player is
3)Every assault have his spawn rate on ovk 145 its 25.If you let blue cops(weak ones) alive it will be less spawn of specials and some heavy swats.(its useful when doing challenge like locoverkill 145 and etc.)
4)There 2 great mods who shows assault time :1)WTFBM and 2)Dorhud
WTFBM is showing time for the assualt to end(timer goes like this:2:04 left 2:03 ...)
Dorhud goes like this(2:30 2:31..)its useful if you know assault intervals.
WTFBM is a LOT better then dorhud it shows: drill timers,yourhp and ap(300hp and 66 ap-armor),hp of enemies.A lot of people says this is cheat mod but they aren't right they just supporting the DorentuZ(the creator of dorhud)
Dorhud-In this mod Dorentuz "fixes"the bug on undercover(dozer bug),by the way most of peple like that bug.So if you look theese 2 mods WTFBM holds 1st place,DorHud is such a cheap mod.
5)Types of assualt we have :normal ones,endless and assault that are short(i will explain).
Endless is type of assualt which will never stop ,it will go for ever.
"Short" ones is type of assault that litterally takes 1 min.For example on heat street when my mates are all dead(and we were pushing uphill) i get back to crash site and assault stops very soon.
6)Every assault have delay for specials(on maps where cams exits,if you destoy it you make delay spawn bigger).
That is what i have to say.
Achievements
Here we go the achievements part(i will just explain achi which are harder):
 Diplomatic-Perform a hostage trade.
 Cheney?-Defeat a Bulldozer with a shotgun.
 Intimidating-Shoot heavy swat in stomach or leg 2 times and spam F.
 -A bridge too far!-I already explained how to do Green bridge on overkill 145,you can do it on hard or overkill.
 Dogde this-Beat a heist on normal difficulty or above, having killed a Bulldozer without taking damage from any Bulldozer. To complete this challenge, you will have to have played the heist from the start.I really dont need to explain this.
 But how?-Camp at slaughterhouse without shooting at car's wires and after 3 assault car will drop.
 Last man standing-Beat a heist after having been the only one alive. (4 teammates).
 Windowcliker-Place mine outside bank on this spot: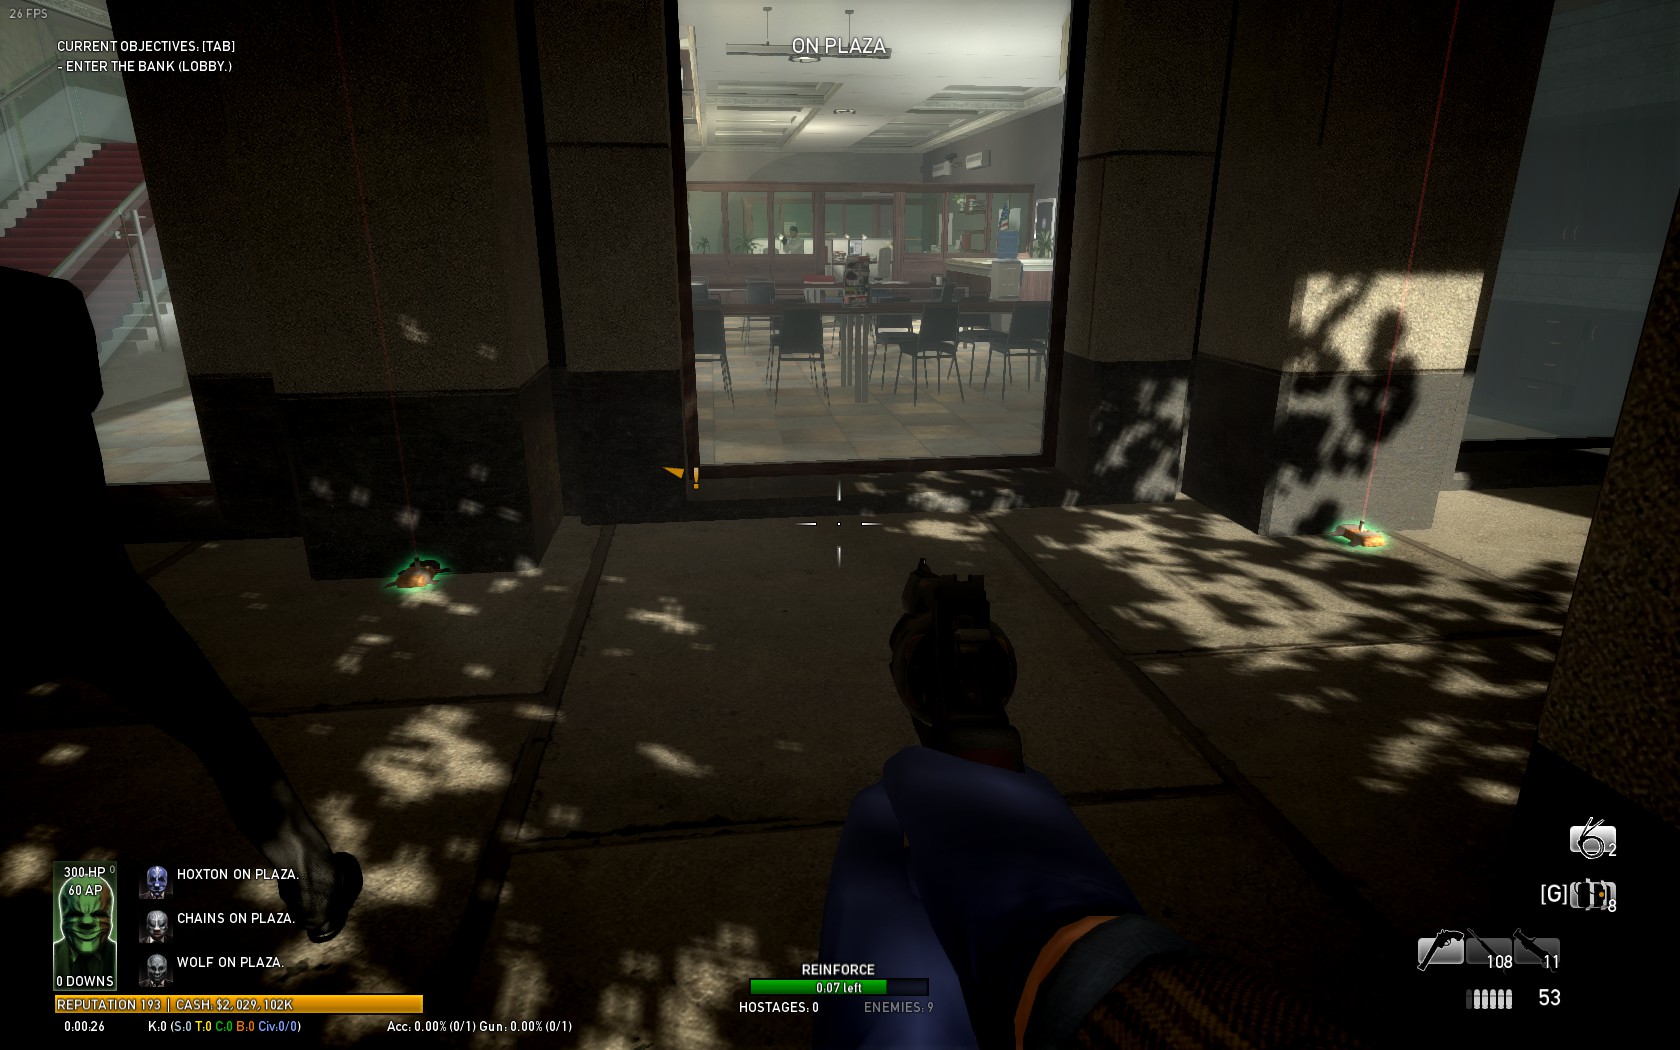
 Civil disobedience-Defeat 100 law enforcers in a single heist.
 Are there more than two?-Here me and my friend showed you how to get it:
 You can run but you cant hide-
In PANIC ROOM, take the key from Chavez within the first 45 seconds of starting the mission. To complete this challenge, you will have to have played the heist from the start.Litteraly there is nothing to explain here.
 Shinobi-Bypassing all 3 consoles before raising the alarm, beat DIAMOND HEIST on hard or OVERKILL difficulty. To complete this challenge, you will have to have played the heist from the start.
 Are those the blue ones-Steal all the sapphires in DIAMOND HEIST on hard or OVERKILL difficulty. To complete this challenge, you will have to have played the heist from the start.
 Bomb man-In DIAMOND HEIST, defeat all twelve Patrol Guards using only trip mines. To complete this challenge, you will have to have played the heist from the start.
 Are you ready yet-In DIAMOND HEIST, get Bain to come back for you at least 7 times on hard or OVERKILL difficulty. To complete this challenge, you will have to have played the heist from the start.
 Payday-Aquire one billion dollars in total cash. One. BILLION. Dollars.Just by playing you will done this achievement.
 I pushed the button and lived!-For this one you need to play on ovk difficulty and after you done stealthy part,you will see doors(in vault) at your right.When you open doors you will see glass.Then you need to get back to spawn for cutter.You will get assault mark,but dont worry that its a bug.If yo usomehow triggered the real assault DONT camp there,go to roof,cause if you shoot the cutter or cops shoot it will just dispear and you dont want that.
 Dont lose face-Beat all heists on OVERKILL difficulty without anyone getting traded from custody. To complete this challenge, you will have to have played the heist from the start.
 Eagle eyes-Point out a special enemy using the "shout out" command.Just press F.
 I ain't afraid no more-Gain a level in the Assault tree during an assault.
 Crack-bang-Gain a level in the Sharpshooter tree with your last kill being a Sniper.
 Last Christmas-There is a secret present on every map.You can find it in overdrill vault too.Here is one spot of it: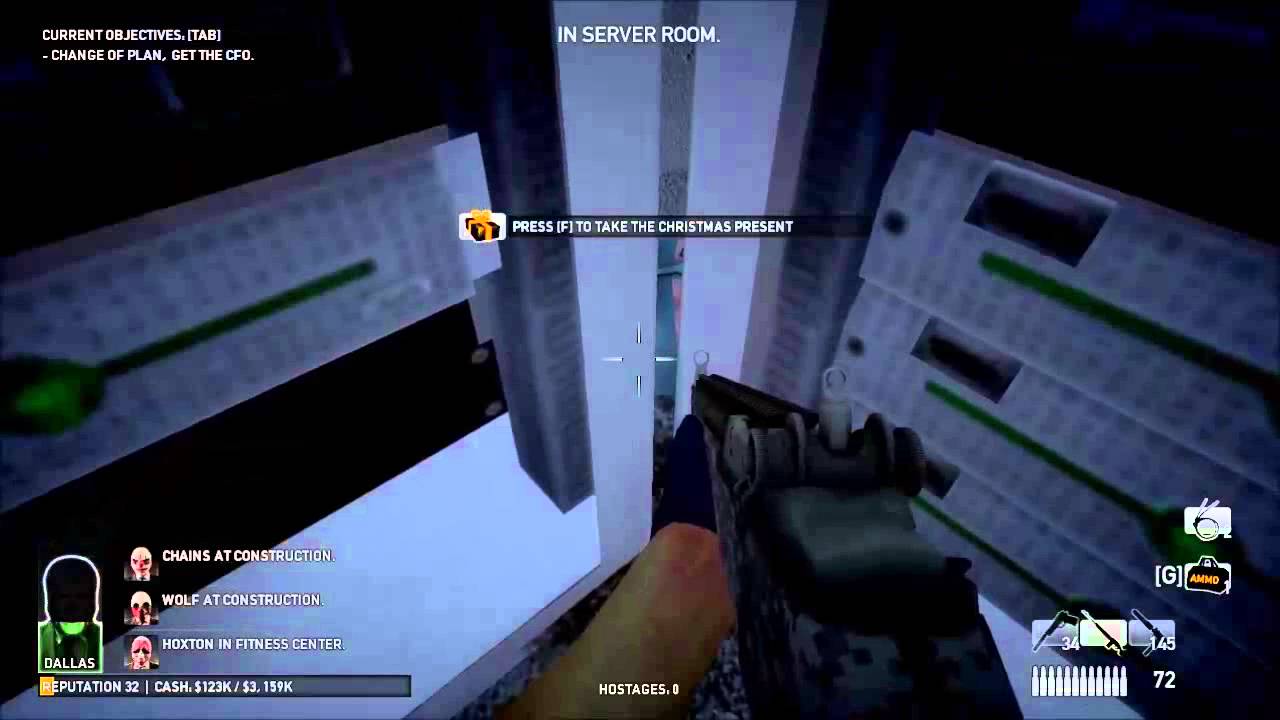
 -You're golden!Overkill salutes you!-Do all heists on ovk 145(originally heist there is six of them,that means everything expect counterfeit.undercover and no mercy.
 -Four more years-Reach level 145. This gives you the presidential masks for further campaigning(Here you get president masks).


 All of theese achievemnets i explain in tactics part.
 Quick hands- I recommend using toolkit and to have team of four players.C4 spotes: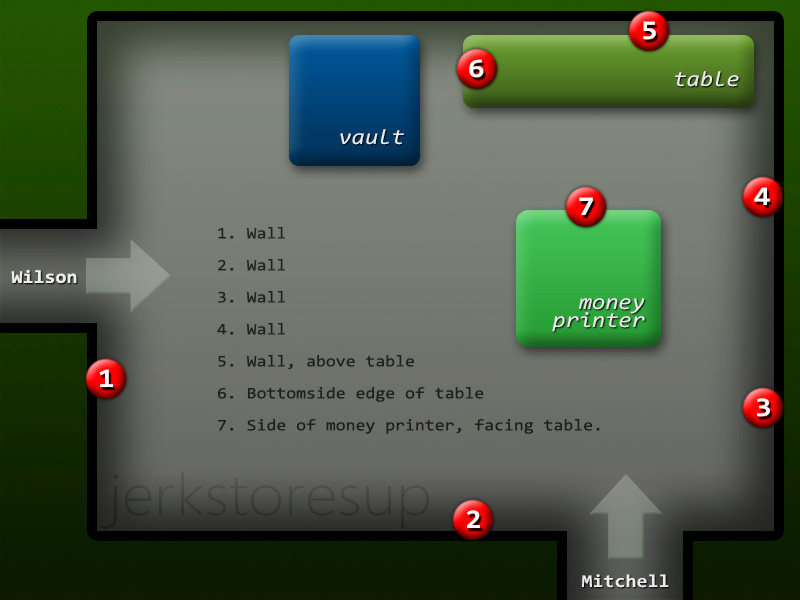
 Blow-out-All your teammates and you have to use gl40(I recommend using looping strategy)
 -Detective Gadget-Beat any heist using the STRYK Pistol, AK Rifle, GL40 Grenade Launcher, Toolkit upgrade, Sentry Gun equipment and Big Game Hunters crew bonus. To complete this challenge, you will have to have played the heist from the start.
 ..Or was it the blue one-In NO MERCY, cut the correct wire opening the ICU door security system. To complete this challenge, you will have to have played the heist from the start.
 -Overdrill-I explained in FWB tactics part.
 Left for dead-Finish a heist in custody while all your team mates are alive. (4 teammates).
 Blood in blood out-Trade all the butchers in SLAUGHTERHOUSE. To complete this challenge, you will have to have played the heist from the start.
 -Gold digger
Beat SLAUGHTERHOUSE within 15 min.
Diplomatic-Perform a hostage trade.Cheney?-Defeat a Bulldozer with a shotgun.Intimidating-Shoot heavy swat in stomach or leg 2 times and spam F.-A bridge too far!-I already explained how to do Green bridge on overkill 145,you can do it on hard or overkill.Dogde this-Beat a heist on normal difficulty or above, having killed a Bulldozer without taking damage from any Bulldozer. To complete this challenge, you will have to have played the heist from the start.I really dont need to explain this.But how?-Camp at slaughterhouse without shooting at car's wires and after 3 assault car will drop.Last man standing-Beat a heist after having been the only one alive. (4 teammates).Windowcliker-Place mine outside bank on this spot:Civil disobedience-Defeat 100 law enforcers in a single heist.Are there more than two?-Here me and my friend showed you how to get it:You can run but you cant hide-In PANIC ROOM, take the key from Chavez within the first 45 seconds of starting the mission. To complete this challenge, you will have to have played the heist from the start.Litteraly there is nothing to explain here.
Shinobi-Bypassing all 3 consoles before raising the alarm, beat DIAMOND HEIST on hard or OVERKILL difficulty. To complete this challenge, you will have to have played the heist from the start.Are those the blue ones-Steal all the sapphires in DIAMOND HEIST on hard or OVERKILL difficulty. To complete this challenge, you will have to have played the heist from the start.Bomb man-In DIAMOND HEIST, defeat all twelve Patrol Guards using only trip mines. To complete this challenge, you will have to have played the heist from the start.Are you ready yet-In DIAMOND HEIST, get Bain to come back for you at least 7 times on hard or OVERKILL difficulty. To complete this challenge, you will have to have played the heist from the start.Payday-Aquire one billion dollars in total cash. One. BILLION. Dollars.Just by playing you will done this achievement.I pushed the button and lived!-For this one you need to play on ovk difficulty and after you done stealthy part,you will see doors(in vault) at your right.When you open doors you will see glass.Then you need to get back to spawn for cutter.You will get assault mark,but dont worry that its a bug.If yo usomehow triggered the real assault DONT camp there,go to roof,cause if you shoot the cutter or cops shoot it will just dispear and you dont want that.Dont lose face-Beat all heists on OVERKILL difficulty without anyone getting traded from custody. To complete this challenge, you will have to have played the heist from the start.Eagle eyes-Point out a special enemy using the "shout out" command.Just press F.I ain't afraid no more-Gain a level in the Assault tree during an assault.Crack-bang-Gain a level in the Sharpshooter tree with your last kill being a Sniper.Last Christmas-There is a secret present on every map.You can find it in overdrill vault too.Here is one spot of it:-You're golden!Overkill salutes you!-Do all heists on ovk 145(originally heist there is six of them,that means everything expect counterfeit.undercover and no mercy.-Four more years-Reach level 145. This gives you the presidential masks for further campaigning(Here you get president masks).All of theese achievemnets i explain in tactics part.Quick hands- I recommend using toolkit and to have team of four players.C4 spotes:Blow-out-All your teammates and you have to use gl40(I recommend using looping strategy)-Detective Gadget-Beat any heist using the STRYK Pistol, AK Rifle, GL40 Grenade Launcher, Toolkit upgrade, Sentry Gun equipment and Big Game Hunters crew bonus. To complete this challenge, you will have to have played the heist from the start...Or was it the blue one-In NO MERCY, cut the correct wire opening the ICU door security system. To complete this challenge, you will have to have played the heist from the start.-Overdrill-I explained in FWB tactics part.Left for dead-Finish a heist in custody while all your team mates are alive. (4 teammates).Blood in blood out-Trade all the butchers in SLAUGHTERHOUSE. To complete this challenge, you will have to have played the heist from the start.-Gold diggerBeat SLAUGHTERHOUSE within 15 min.
Achievements part II
 Stand together-Beat HEAT STREET on normal difficulty or above without anyone getting downed. To complete this challenge, you will have to have played the heist from the start.
 -Quick draw-In PANIC ROOM, kill all armed thugs in and around the apartment building within 60 seconds of you and your crew drawing your weapons. To complete this challenge, you need to play heist from start.
 No photos-Destroy all the cameras in FIRST WORLD BANK within 10 seconds of drawing your weapons. To complete this challenge, you will have to have played the heist from the start.
 Hot lava- Dont let any cop to reach the graffiti(on center of roof).For this sometimes its good to take a sentry a well skilled guy with m308(if others are camping on floor 4) can do this alone.
 -Federal crime-FBI agents spawns between assaults.(most of them)
 One shot,one kill,repeat-I recommend to kill all gangsters(without missing) at panic room to get this achievement.
 Easy street-eat HEAT STREET on OVERKILL difficulty, with your group accuracy being at 60% or higher. To complete this challenge, everyone in your crew will have to play heist from start.(you need headshoots recommended m308)
 Noob herder-Beat any heist on OVERKILL difficulty with three other players who are all using the Noob Lube perk. To complete this challenge, you will have to have played the heist from the start.
(you will have lube perk 0-5 lvl)In this achievement just click clear progress button finish heist on ovk with your mates(who also have to clear progress) and quit game.When the game asks you do you want to save progress say no.After you join game again game will ask another question and there you need to answer yes.You will save your rep and stats and achievement too :).
 -Lay on hands-Gain a level in the Support tree while reviving a teammate.
 -Darkness-Everyone can destroy light bugs -_-.
 Crowd control-Just take a cable ties a Counterfeit tie all civs and finish heist.
 Pacifist-You musnt kill no civs and no cops on counterfeit.You need to loop in this one so i put i will put link below to show you: https://www.youtube.com/watch?v=leWMgHuFStg
 The Saviour
On UNDERCOVER, place 20 planks by yourself on windows, vents or fences.
 Dont panic-You just need to finish stealth part on No mercy i explained in tactics part.
 That's wrong door again!-I recommend to do stealth .Then when you see where is the right doors,you will break stealth(without cutting wires) and place saw first on wrong doors then at last point you will place saw on the right doors.
 Afraid of the dark-Beat NO MERCY on hard or above, getting the power back up within 5 seconds of it being shut down. To complete this challenge, you will have to have played the heist from start.
Loadouts part
Let's get to the loadouts part ,shall we?
Pistols:
Stryk full auto pistol:
Low damage
Extremely high rate of fire
Short distances
Bad accuracy and extremely high recoil
Total ammo of 56
This weapon is relatively good at cleaning small rooms filled with non-special units. Can be used to finish off glassless bulldozers.
Bronco .44 revolver:
High damage
Medium rate of fire
All distances
High accuracy and high recoil
Total ammo of 36
This is a great pistol to use on any difficulties. It is great against all types of enemies. Personally I recommend you to learn how to shoot from the hip because I believe that it's more accurate than shooting with aiming.
Crosskill .45 pistol:
Low damage
Medium rate of fire
All distances
High accuracy and low recoil
Total ammo of 50
This is a good pistol for killing most enemies except bulldozers. Pretty mediocre pistol that doesn't have any outstanding stats.
B9-S pistol:
Low damage
High rate of fire
All distances
Very high accuracy and low recoil
Total ammo of 56
This is a silenced pistol that can be used in stealth. Pretty good at killing snipers and non-special units. Very bad against specials.
Primary weapons:
Brenner 21 machinegun:
Medium damage
Medium rate of fire
Low-mid distances
Very bad accuracy and high recoil
Total ammo of 240 bullets
This weapon is good at crowd control and cleaning small rooms. It is not recommended to try this weapon against bulldozers and snipers.
Reinbeck shotgun:
Very high damage
Low rate of fire
Low-mid distances
Total ammo of 30
This weapon is great against all enemies except bulldozers and snipers.
M308 rifle:
High damage
High rate of fire
All distances
Very high accuracy and very low recoil
Total ammo of 72
This is obviously the best weapon in the game. It is great against all enemies at all distances.
AK rifle:
Medium damage
Very high rate of fire
Low-mid distances
Medium accuracy and medium recoil
Total ammo of 125
This weapon is good against all enemies except very distant snipers. One of the best weapons for dealing with dozers.
Amcar-4 carbine:
Low damage
High rate of fire
All distances
Good accuracy and low recoil
Total ammo of 120
This weapon is good against non-special units and not bad against specials.
Secondaries:
- Mark 11:
1)This weapons has high fire rate and eats a LOT of ammo,so if you doing missions like overdrill i really dont recommend it.
2)It can break glass of Dozer pretty fast.
3)It's unaccurate weapon,its just for low-mid distance.
4)It has 150 bullets.(without any bonuses)
5)Damage is low but as i said its useful with specials especially dozers.
- Compact-5
1)This weapons is really a disappointment, cause low damage, its accurate but its only usefull with blue cops on start.
2)Its useless on high difficulties,so you can use it at easy- hard difficulty.
3)It has 221 bullets.(without bonuses)
- GL40
1)This weapons its just amazing.When you shoot at shield you will kill him instantly with this one.It breaks glass of dozer with one shoot.
2)It's pretty useful to stun a lot of specials heavy swats and etc.So I recommend it when you do speedruns or something like that.
3)It has 7 bullets(without any bonus).
4)I forgot to say its low- high range weapon(only if you know how to shoot with it) and its hogh damage one.
-Locomotive 12G
1)Unfortunately,this weapon is low damage,unaccurate, its just for low range and i didnt see any experienced player using it at high difficulties.
2)It has 24 bullets.(without any bonus)
Deployables:
-Ammo bag
For ammo bags its really important to understand how it works,cause that is the key to victory.
Okay one,fully upragaded ammo bag has 1000% pool of ammunition.That number doesnt seem anything to you right lets explain.When you start the heist you have fully loaded weapons,in each you cary 100% of ammo,so that means that all free weapons are 300%.When you empty one weapon and take ammo,your bag has 900% of ammo.So this isnt the bag with number of charges it all depends from how much ammo you spent.Let's look at ammo again but from strategic way.When you place it in good spots it can cover you(i think i mention earlier that bags stop bullets).Like couch in Panic room or on railing on No mercy and etc.
-Sentry gun
Sentry gun is a deployable that can help or just dont help at all, it all depends from you.When you place sentry at open spot it will be taken down less than a minute,but if you place it on strategic spot like this one:
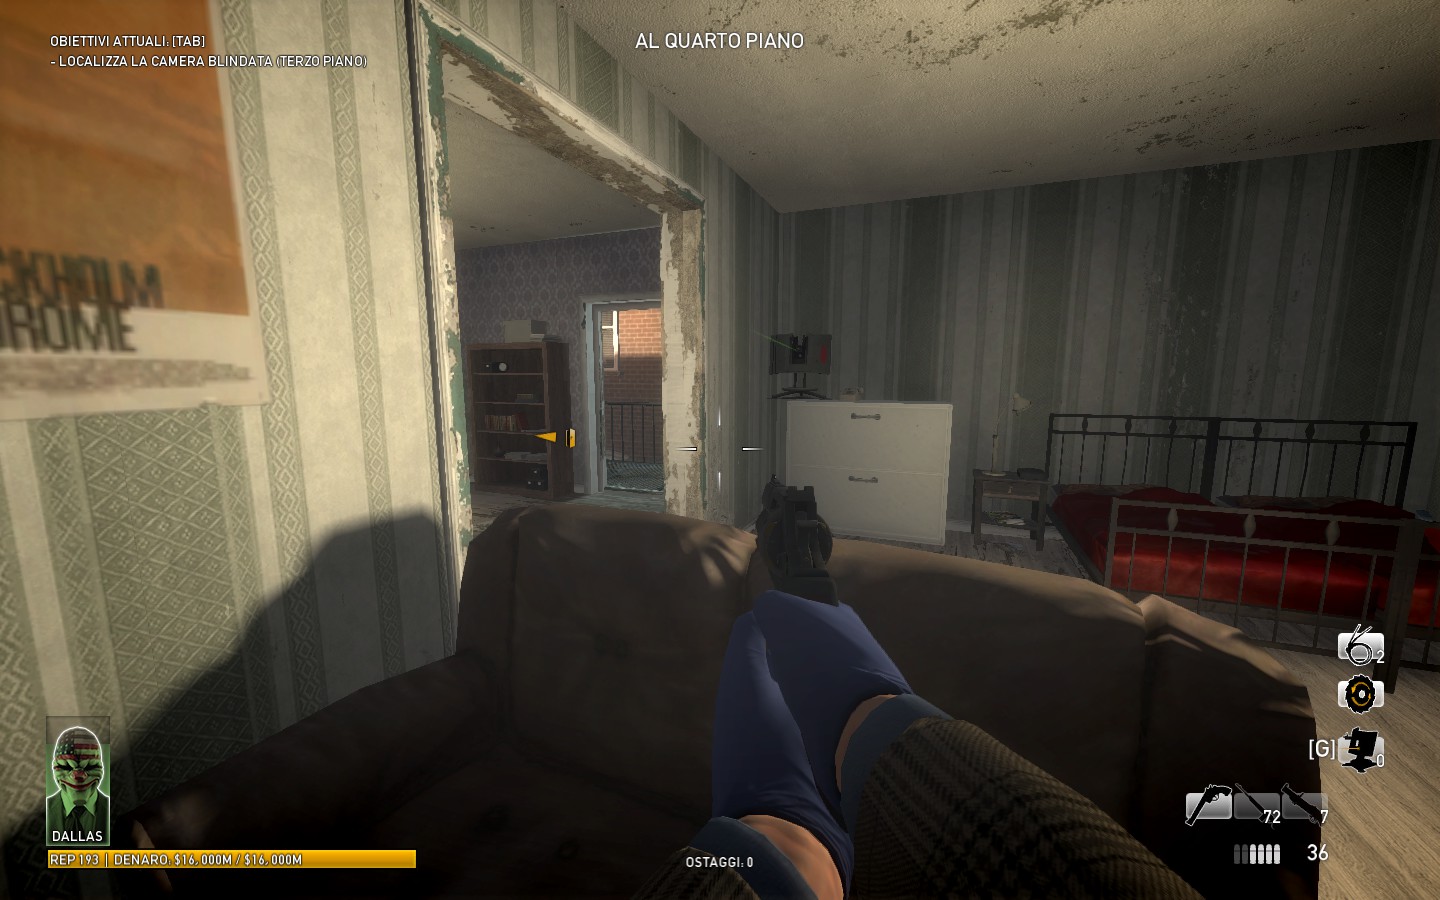
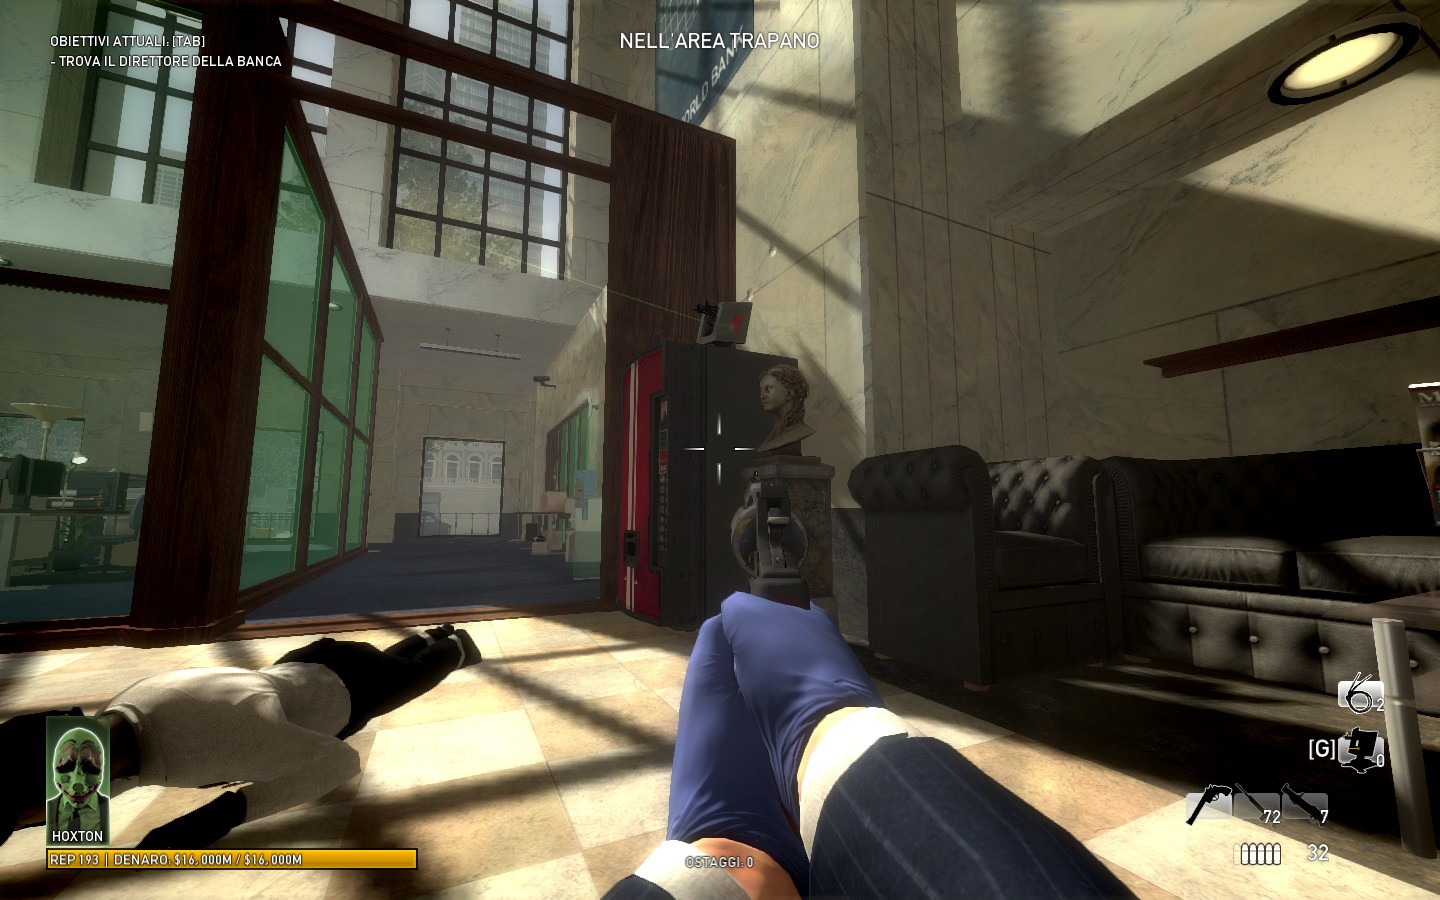 It will survive a lot more longer and it can be helpful at finishing some objectives.I forgot to say,when you place sentry will be main target of cops.
-Trip mines:
Trips mines are my favorite deployable and it so fun to use it.If you place a mine otside bank,near window,(you can see that screenshoot at fwb tactics) it will kill windowcliker pretty easily.If you place mine at dozer's height(this is the highest special and you should place mine at height of his head) you will kill him so easily.They're pretty usefull at bank(vault part).
-Doctor bag:
Same as ammo bag you need to understand how doctor bag works too.Okay this bag have 5 charges in total,so using it at right time its really important.It stops bullets too and you have to make sure you placed it in right spot.Okay at ovk 145 healing after second down isnt a bad idea at all, cause after first down you have 30 sec,after second 15 sec and after third down you have only 1 second.At ovk after first down you have 30 sec,after second 20 sec and after third you have 10 seconds so i mostly med up after third down at ovk difficulty.But the time when you gonna to use medic bag isnt just depending of downs it depends of situation.For example all your teammates are dead and you have to heal.In PD:TH sometimes random events force you to change tactic,changing the tactic means you have to change litterally everything.
Equipments:
-Thick skin:
A lot of people say that thick skin is useless on OVK 145+ , but that isnt true.It gives you more health.For example if you're using WTFBM mod you will see that when you dont have thick skin you have 300hp,when you have it you have 320 hp.So it's pretty usefull im using it at rushing tactics.
-Extra start-out ammo:
This gives you more ammo by 50% on start.It's pretty usefull with ammo lacking weapons.
-Toolkit:
With this bonus you can interact with everything 20% faster it's usefull when doing speedruns.
-Extra cable ties:
For me it's useless ,cause you can just spam F on no mercy and on counterfeit just kill all civs.Its only good when you are doing crew control.
I will write about crew bonuses in next section cause of limited number of words :/
Pistols:
Stryk full auto pistol:
Low damage
Extremely high rate of fire
Short distances
Bad accuracy and extremely high recoil
Total ammo of 56
This weapon is relatively good at cleaning small rooms filled with non-special units. Can be used to finish off glassless bulldozers.
Bronco .44 revolver:
High damage
Medium rate of fire
All distances
High accuracy and high recoil
Total ammo of 36
This is a great pistol to use on any difficulties. It is great against all types of enemies. Personally I recommend you to learn how to shoot from the hip because I believe that it's more accurate than shooting with aiming.
Crosskill .45 pistol:
Low damage
Medium rate of fire
All distances
High accuracy and low recoil
Total ammo of 50
This is a good pistol for killing most enemies except bulldozers. Pretty mediocre pistol that doesn't have any outstanding stats.
B9-S pistol:
Low damage
High rate of fire
All distances
Very high accuracy and low recoil
Total ammo of 56
This is a silenced pistol that can be used in stealth. Pretty good at killing snipers and non-special units. Very bad against specials.
Primary weapons:
Brenner 21 machinegun:
Medium damage
Medium rate of fire
Low-mid distances
Very bad accuracy and high recoil
Total ammo of 240 bullets
This weapon is good at crowd control and cleaning small rooms. It is not recommended to try this weapon against bulldozers and snipers.
Reinbeck shotgun:
Very high damage
Low rate of fire
Low-mid distances
Total ammo of 30
This weapon is great against all enemies except bulldozers and snipers.
M308 rifle:
High damage
High rate of fire
All distances
Very high accuracy and very low recoil
Total ammo of 72
This is obviously the best weapon in the game. It is great against all enemies at all distances.
AK rifle:
Medium damage
Very high rate of fire
Low-mid distances
Medium accuracy and medium recoil
Total ammo of 125
This weapon is good against all enemies except very distant snipers. One of the best weapons for dealing with dozers.
Amcar-4 carbine:
Low damage
High rate of fire
All distances
Good accuracy and low recoil
Total ammo of 120
This weapon is good against non-special units and not bad against specials.
Secondaries:
- Mark 11:
1)This weapons has high fire rate and eats a LOT of ammo,so if you doing missions like overdrill i really dont recommend it.
2)It can break glass of Dozer pretty fast.
3)It's unaccurate weapon,its just for low-mid distance.
4)It has 150 bullets.(without any bonuses)
5)Damage is low but as i said its useful with specials especially dozers.
- Compact-5
1)This weapons is really a disappointment, cause low damage, its accurate but its only usefull with blue cops on start.
2)Its useless on high difficulties,so you can use it at easy- hard difficulty.
3)It has 221 bullets.(without bonuses)
- GL40
1)This weapons its just amazing.When you shoot at shield you will kill him instantly with this one.It breaks glass of dozer with one shoot.
2)It's pretty useful to stun a lot of specials heavy swats and etc.So I recommend it when you do speedruns or something like that.
3)It has 7 bullets(without any bonus).
4)I forgot to say its low- high range weapon(only if you know how to shoot with it) and its hogh damage one.
-Locomotive 12G
1)Unfortunately,this weapon is low damage,unaccurate, its just for low range and i didnt see any experienced player using it at high difficulties.
2)It has 24 bullets.(without any bonus)
Deployables:
-Ammo bag
For ammo bags its really important to understand how it works,cause that is the key to victory.
Okay one,fully upragaded ammo bag has 1000% pool of ammunition.That number doesnt seem anything to you right lets explain.When you start the heist you have fully loaded weapons,in each you cary 100% of ammo,so that means that all free weapons are 300%.When you empty one weapon and take ammo,your bag has 900% of ammo.So this isnt the bag with number of charges it all depends from how much ammo you spent.Let's look at ammo again but from strategic way.When you place it in good spots it can cover you(i think i mention earlier that bags stop bullets).Like couch in Panic room or on railing on No mercy and etc.
-Sentry gun
Sentry gun is a deployable that can help or just dont help at all, it all depends from you.When you place sentry at open spot it will be taken down less than a minute,but if you place it on strategic spot like this one:
It will survive a lot more longer and it can be helpful at finishing some objectives.I forgot to say,when you place sentry will be main target of cops.-Trip mines:
Trips mines are my favorite deployable and it so fun to use it.If you place a mine otside bank,near window,(you can see that screenshoot at fwb tactics) it will kill windowcliker pretty easily.If you place mine at dozer's height(this is the highest special and you should place mine at height of his head) you will kill him so easily.They're pretty usefull at bank(vault part).
-Doctor bag:
Same as ammo bag you need to understand how doctor bag works too.Okay this bag have 5 charges in total,so using it at right time its really important.It stops bullets too and you have to make sure you placed it in right spot.Okay at ovk 145 healing after second down isnt a bad idea at all, cause after first down you have 30 sec,after second 15 sec and after third down you have only 1 second.At ovk after first down you have 30 sec,after second 20 sec and after third you have 10 seconds so i mostly med up after third down at ovk difficulty.But the time when you gonna to use medic bag isnt just depending of downs it depends of situation.For example all your teammates are dead and you have to heal.In PD:TH sometimes random events force you to change tactic,changing the tactic means you have to change litterally everything.
Equipments:
-Thick skin:
A lot of people say that thick skin is useless on OVK 145+ , but that isnt true.It gives you more health.For example if you're using WTFBM mod you will see that when you dont have thick skin you have 300hp,when you have it you have 320 hp.So it's pretty usefull im using it at rushing tactics.
-Extra start-out ammo:
This gives you more ammo by 50% on start.It's pretty usefull with ammo lacking weapons.
-Toolkit:
With this bonus you can interact with everything 20% faster it's usefull when doing speedruns.
-Extra cable ties:
For me it's useless ,cause you can just spam F on no mercy and on counterfeit just kill all civs.Its only good when you are doing crew control.
I will write about crew bonuses in next section cause of limited number of words :/
Crew bonuses
Crew bonuses:
-Agressor:
This is the one of most used crew bonuses.With you have +10% damage with each weapon you're holding.For example without this crew bonus you will kill a cloaker with 3 shoots,with this agressor you will kill him with 2 shoots.
-Big game hunters(BGH):
It is like Extra Start-out ammo, but it is a crew bonus and it only gives you 15% more ammo based on the current amount you already have.It's one of the most used.
-Protector:
It gives you +10% armor in every difficulty and its not useless like many people say -_-.
-More blood to bleed:
It gives you +5 seconds on each down at any difficulty.
-Sharpshooters:
This is a crew bonus that decreases your weapon spread by 9%. I find it useful with the Brenner, Compact 5 and the MK11.
-Speed reloaders:
A crew bonus that increases the reloading speed by 10%.Its pretty usefull with weapons that takes a long time to reload,like reinbeck and bronco.
-Noob lube/Mr. nice guy
These 2 crew bonuses have the same effect, which is a 20% boost of the earned money. Just you've noob lube at 0-5 lvl, but mr. nice guy you have only at max level.
-Agressor:
This is the one of most used crew bonuses.With you have +10% damage with each weapon you're holding.For example without this crew bonus you will kill a cloaker with 3 shoots,with this agressor you will kill him with 2 shoots.
-Big game hunters(BGH):
It is like Extra Start-out ammo, but it is a crew bonus and it only gives you 15% more ammo based on the current amount you already have.It's one of the most used.
-Protector:
It gives you +10% armor in every difficulty and its not useless like many people say -_-.
-More blood to bleed:
It gives you +5 seconds on each down at any difficulty.
-Sharpshooters:
This is a crew bonus that decreases your weapon spread by 9%. I find it useful with the Brenner, Compact 5 and the MK11.
-Speed reloaders:
A crew bonus that increases the reloading speed by 10%.Its pretty usefull with weapons that takes a long time to reload,like reinbeck and bronco.
-Noob lube/Mr. nice guy
These 2 crew bonuses have the same effect, which is a 20% boost of the earned money. Just you've noob lube at 0-5 lvl, but mr. nice guy you have only at max level.
Credits
Its time to say something about creators:
-Steve Djorleone:For writing tactics on every map expect diamond heist,assaults and achievements part.
-DruCJ:Thanks for writing Loadouts part.
-Huxleythecat:Thanks for awesome tips,help and grammar fixes :P.
-#BrO#:Thanks for writing Tactics on Diamond Heist and All enemies part and for recording awesome videos.
-Steve Djorleone:For writing tactics on every map expect diamond heist,assaults and achievements part.
-DruCJ:Thanks for writing Loadouts part.
-Huxleythecat:Thanks for awesome tips,help and grammar fixes :P.
-#BrO#:Thanks for writing Tactics on Diamond Heist and All enemies part and for recording awesome videos.
More PAYDAY: The Heist guides
- OVERDRILL Guide★ 5 (1.3k)68k views1.6k ♥6 minUpdated Feb 26, 2014
- Payday: The Heist: Weapon Unlocks★ 5 (437)27k views370 ♥11 minUpdated Feb 8, 2025
- Русификатор текста от ZoG★ 5 (1.1k)24k views904 ♥1 minRussianUpdated Mar 3, 2024
- Quick & Clean 1-145+ Guide★ 5 (817)23k views1k ♥59 minUpdated Aug 11, 2017
- OVERDRILL Guide (Russian)/Руководство по выполнению OVERDRILL★ 5 (1.2k)22k views963 ♥5 minRussianUpdated Sep 25, 2016
- Выполнение достижений, советы, ЧАВО★ 5 (1.8k)19k views2k ♥16 minRussianUpdated Jan 27, 2024



This guide was created by its original author on the Steam Community. Are you the author and want it removed? Request removal.