The Guide for Almost Everything
The TDLR review of Elite: Dangerous
 Elite: Dangerous is the fourth, newest installment of Frontier's Developments "ELITE" series that was the first in gaming history to create an entire galaxy and the spaceship simulator genre with it in 1984. Elite: Dangerous recreates and expands and the idea of it's predecessors in a quality that matches and raises the bar of what we expect from a spaceship piloting experience.
What you'll get for your money
Elite: Dangerous is the fourth, newest installment of Frontier's Developments "ELITE" series that was the first in gaming history to create an entire galaxy and the spaceship simulator genre with it in 1984. Elite: Dangerous recreates and expands and the idea of it's predecessors in a quality that matches and raises the bar of what we expect from a spaceship piloting experience.
What you'll get for your money- Immersive, top quality spaceship piloting experience with heavy development focus on real physics, piloting profiles and realism.
- A 1:1 scale modeling of our Milky Way galaxy, scientificly accurate as much as it is possible. The real, known parts of our galaxy are in the game, for some that's already a reason to go to places knowing it's not all random generated like some other games, but handcrafted.
- A first person perspective simulator game with detailed features for each type of activity. If we look at the traditional meaning of 4X, Elite is far from it: it's more like living in the world of a 4X on a single person's level. Still: explore: speaks of itself, headline selling feature. Exploit: in every meaning. Expand: questionable, applies to your ship and wallet really, but exists in form of Powerplay with many players in control of decision making. Exterminate: a whole lot of this, oh you'll see.
- A sandbox that won't hold your hand. To put it into perspective, this is the ArmA of the space pilot genre.
- A community driven global storyline, unfolding through real weeks, months and years, supported by and resaulting in various community goals.
- A background simulation to interact with, that drives the galaxy and the people in it, including political, social, agricultural, industrial mechanisms that players can manipulate on a level of a single man, achievening goals together or even alone. If you want to cause a station to lock down for everyone or start a civil war among it's inhabitants, it will take effort but you can.
- The best roleplaying material on the market for sci-fi theme. This is also a negative though.*
- An ever changing love/hate relationship with the game with a bonus massive time sink.
- Steep learning curve, where exploring the game, trying and failing is at the same time the best part of the experience.
What you won't get for your money
- Casual, quick play experience. Elite is the type of game you sit down for long hours of playsessions if you want to do something.
- A system that holds your hand and won't let go no matter if you want it or not.
- An enjoyable personal storyline
- Scripted "Holy****DidYouSeeThat" events. These still happen, just unscripted, so it may take a while to encounter something you'd like to see.
- Reliable frequency of online interactions: the galaxy is vast, even the tiny dot of civilized space is incredibly massive - players spread out, so get friends on board or join existing communities and visit social chokepoints.
- The right to demand future updates for free. You DO get everything with the base game that is included in the base game, and also everything from a paid season pass without spending a single dollar aswell, if these are related to the open world experience. Such as new cities to visit, offering some new services and so on, but there are naturally season pass exclusive features.
- The game at the moment, severly lacks social features. There is private, local public and party chat, but that's it, and matchmaking for coop flying (with Horizons). No option to create different chat channels for many people. See the Community section for more info!
- See the shining light of the official trailers through the sunglasses of doubt. They have little to do with the actual game's pacing, showing you a more arcade and fast paced, action packed gameplay. What Elite offers is mindblowing on it's own, but fanmade trailers represent it a thousand times better, much like a certain series where people Battle (on) Field(s).
If you have more general questions about what to expect from the game possibly compared to other similar titles, I advise you read the wikia FAQ[elite-dangerous.wikia.com], or feel free to ask away in the comments below! Also keep track of the content board on the right (---->) this is a rather long guide. You'll find an overview of Season Pass "Horizons" there too.
Frontier's business model
 The Elite: Dangerous base game experience considered done, however additional features are available with Season Pass "Horizons" that also adds a lot new improvements to the base game for free. Regarding Horizons, you should look at Horizons now as a whole expansion pack, because ran it's 1,5 year lifespan of exclusive content released with rather long breaks in between them, but today it is a complete package.
http://store.steampowered.com/app/441340/Elite_Dangerous_Horizons_Season_Pass/
https://www.frontierstore.net/usd/games/elite-dangerous-cat.html
(Yes, it's a dangerous cat under the link).
NOTE: The game is usually on sale in both stores at the same time with the same discount. Other 3rd party store prices are independent for each store.
For more information on microtransactions, visit:
https://www.frontierstore.net/eur/game-extras/elite-dangerous-game-extras.html
There are "starter kit" type of bundles on steam that include various visual extras for the early ships, but it is Frontier Store where everything is accessible.
Personally I'd advise against buying any kind of starter kit. They include skins for the most early, starter ships only that you'll quickly leave behind possibly day one. Once you have a ship you really like or plan to have for a long time, check out Frontier Store! In case you did so a long time ago, a permanent 50% price cut on most skins took effect since that you might not be aware of.
Tools and Resources to work with: From players, For players
 This section includes a collection of links to various 3rd party sites that offer tons of different tools and information for you to use, regarding Elite. The game while is definitly playable without these, having them at your disposal will proove itself handy.
Some minor tools are linked only at their respective section or embedded as an image.
If you are completely new to the game, for now, just scroll through this section. The more you understand about the game, the deeper you dig yourself to this guide, the more useful you'll find some of these that doesn't really mean anything to you now.
The Inara Hub is the baseline "everything" at one place website where you'll want to go for news and detailed information on whatever ingame item you are looking for. It has many useful tools for overall coverage, though most of them are done better and updated more frequently on more specialized sites on links below.
EDDB is a trader's best friend. While it has status updates on various star systems, stations, commodities etc. much like the Inara Hub, it also offers you optimal trade route planning based on criteria and filters you like - you can create single hop, loop, chain trading routes, with your preferred distances and best profit calculated. It is very frequently updated.
Nothing else I can add to this section really, a wikia site is a wikia site. I advise you NOT to rely on it's locational or numerical informations becaues these can be really outdated, but it is a good source for FAQ. Many pages are now severely outdated and some features even hanving a blank page.
The most up to date, easy to use and extremely well polished ship planner site to date. Think of it as a character creator that helps you plan ahead. Includes every detail you'll ever need for ship planning, and most importantly, some details you may not be able to see in the game. You can create, save, load and share builds from here.
You'll be very thankful to have this if you decide to become a miner. Check the mining section for more info, and you'll understand what I'm talking about.
This is a simulation / teaching tool that helps you identifying the sounds and wave signals of various surface point of interests such as materials, crashed ships and so on. [Horizons only]
A massive database of our galaxy. EDSM organizes and keeps track of Expeditions, when a large number of players form a convoy and head out to the unknown exploring together. The fastest routes to distant targets are also being recorded here, just like a map of distant explorers who update their own position for the rest of the explorer community to follow.
The Pilots Federation

NOTE: When targeting other ships - players or NPCs alike - it's always combat rank shown to give an idea of how dangerous it's pilot may be. Prejudgement and avoidance is I belive a severe social issue in this game's community, so don't be afraid of people in combat ships, unless they refuse to communicate but still close in on you.
Progression through these ranks ends with reaching the rank Elite in each, though you'll still be offered missions from even the lowest ranks depending on where you are. Lower ranked pilots however, may not see missions offered to them that are recommended for ranks much higher than theirs. This is important to remember for later sections of the guide.
Now it's time for you to learn about the 3 galactic superpowers that inhabit the Milky Way: the Federation, the Empire, and the Alliance.
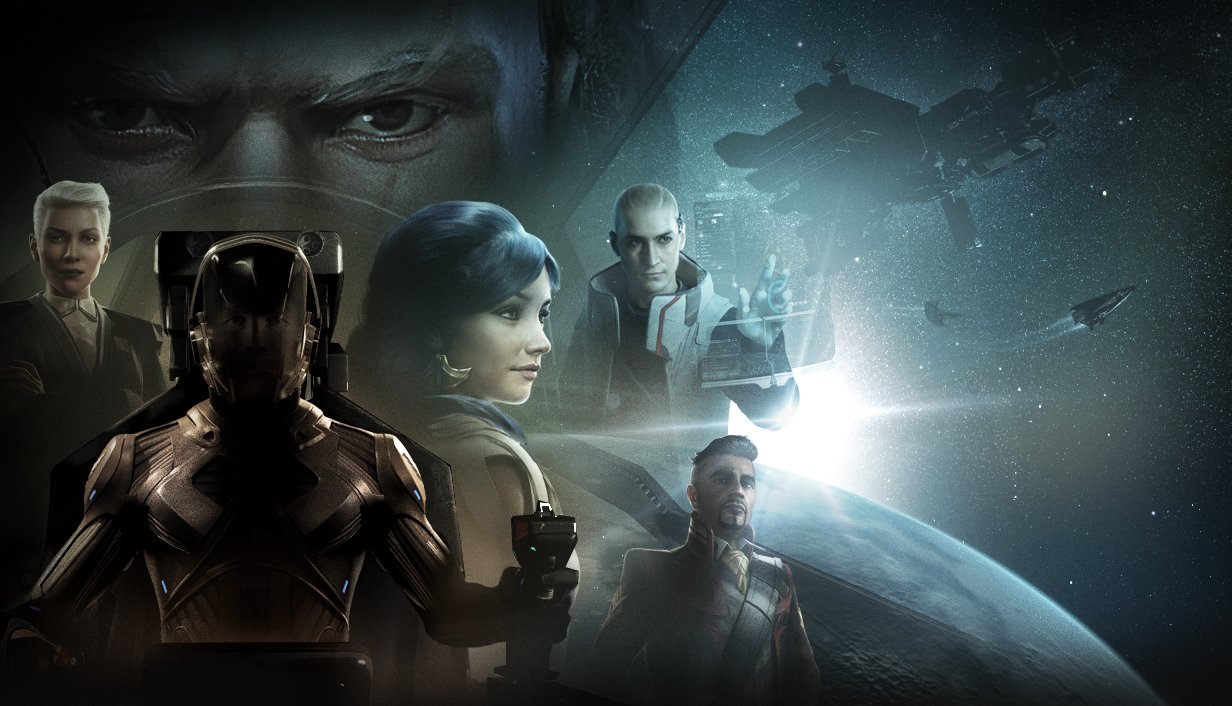 Official art by Xavier Henry
SUPERPOWER: Federation

The Federation's home is the cradle of the human race - Sol. It's profile constists of private corporations growing over gorvernments, and forming their own laws and private authority forces, eventually forming a new nation. The network of these corporations created the Federation with it's own politics, after the human race colonized other worlds and nations on Earth became unimportant once humanity was thinking on interstellar levels. Regardless of the local laws of federal parties, the global Federation forbids slavery. Internal fights over control of systems and it's resources are while seen, the Federation stands united against the Empire - some encourage peaceful interactions, others would start a war. To sum it up, the Federation is a combination of our nations on Earth, with it's corporations having the real political power, with various companies expanding to new worlds to exploit it's resources for the well being of it's citizens, while others are tasked as peacekeeper force or local governments, all bound together under the Federation's flag. Representative Galactic Powers:

 (Left to Right)
Zachary Hudson
President of the Galactic Federation, Republican
Felicia Winters
Shadow President, Liberalist
SUPERPOWER: Empire

The Empire started as a rogue settlement - a distant colony that had enough of the federal burocracy and control of corporate people hundreds of lightyears away. Achenar, the starsystem that later became their capital world, fought for it's freedom and independency when the Federation wanted to restore their control with military forces arriving using a political excuse, that scientists found out human presence brought bacteria to Achenar wiping out unknown microscopic alien life. The people of Achenar wanted a different way of life and many other systems joined them to free from the megacorporations, and through the centuries grew to be matching the Federation in size and force known as the Empire. Currently there is an uneasy peace, or rather cold war between the two with sparkling conflicts. Like the Federation, the Empire also forbids slavery and protects human rights, but also estabilished a social system called "Imperial Slavery". Imperial Slavery is a safety net for the Empire's citizens in debt, allowing them to pay their debts with work wherever and whenever the Empire needs it, with strict imperial laws binding their employers or the Empire itself take care of them in the meantime: home, food, and so on. The Empire fought and paid for it's freedom heavily, and despite it's often misunderstood profile, for many it stands as a symbol of freedom. Representative Galactic Powers:




.(Left to Right)
Arissa-Lavingy Duval - Emperor
Denton Patreus - Admiral of the Fleet, Senator
Aisling Duval - Princess, Senator
Zemina Torval - Senator
SUPERPOWER: Alliance, and unrelated Independent Powers

If it's name did not give it away, the Alliance is a network of systems that are independent from both the Federation and the Empire. These systems don't want anyone else but their local leaders to govern it's cities and laws - there is no alliance-wide law, they don't enforce their way of life on each other, democracy, dictatorship and everything in between is present inside the Alliance. Each on their own would stand no chance if the Federation or the Empire would want to expand to their worlds, but their combined fleets each wearing the Alliance symbol in addition to their own, stand together to protect each other's independency. While the Alliance has no capital world, it was founded in Alioth, a world they hold as the representation of true democracy. Representative Galactic Power:
 Edmund Mahon Alliance Prime Minister
(Below: Left to Right)
Simguru Pravnav Antal - Utopian Leader
Li Yong-Rui - CEO of Sirius Corporation and Sirius Gov.
Archon Delaine - Pirate King
Yuri Grom - Dictator, Leader of the EG Pilots




Galactic Powers part1: Meet the Empire!
 Arissa Lavingy-Duval
 Emperor, Empire of Achenar
"Together we are stronger than those who wish to seek to tear us down."
Arissa was the illegitimate daughter born outside of the of the late-Emperor Hengist Duval' marriage. He was assassinated by a treacherous high ranking officer right before he could legally marry his beloved Florance Lavingy, mother of Arissa. With the Emperor's son unfit to take his father's place due to his mental illness, the empty throne with no heir created a political war fought with speeches and protests. Ultimately (through player dictated competitive community goals), the Imperial Senate declared Hengist's marriage succesful, allowing Arissa to at last pick up her father's last name and become the now respected and beloved Emperor Arissa Lavingy-Duval. Her political platform is built around the idea of honor, rooting out corruption from the Empire. She also kept the title "Emperor" instead of changing it to "Empress" as a show of respect to tradition, being the first female ruler of the Empire, a title that was traditionally inherited by the eldest son before.
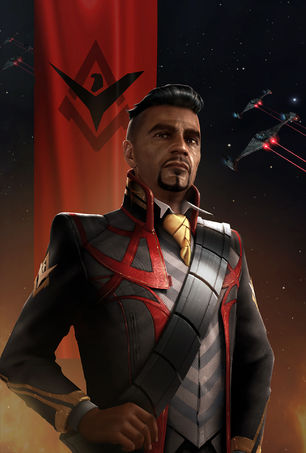 Denton Patreus
Admiral of the Imperial Fleet, Senator
"Honour and honesty are vital attributes in our modern society."
Patreus is one of the more powerful senators in the Imperial Senate. After the first assassination attempt on late-Emperor Hengist Duval, he stood steadfast next to him providing every support he could to reveal the identity of the forces behind poisoning, and his forces played a cruical part in hunting down the Emperor's Dawn party who were later found guilty of organizing the second, successful assassination too. At the time, he was romantically involved with Princess Aisling Duval, grand-daughter of Hengist, and supported her in opposition to Arissa during the political debate about inheriting the throne. The relationship did not last long, but still some conspiracy theorists suspect Patreus to be the mastermind behind the assassination, trying to rise to more power with Aisling and her royality on his side. However he keeps prooving himself and his loyality both through his words and actions, being a loyal supporter of the new Emperor, Arissa Lavingy-Duval.
 Aisling Duval
Princess of the Empire of Achenar, Senator
"Progress is what the Empire needs to remain as the beacon of civilisation."
Despite her untraditional views of the Empire, opposing Imperial Slavery, she is widely supported and loved for her fight in the Imperial Senate against narcotics, an agendy that comes from personal tragedy: an overdose took her mother. Because of her father's mental illness, she was next heir in the Duval bloodline to inherit the throne after the death of her grandfather, the late-Emperor Hengist Duval. However when Arissa was revealed to be the daughter of the Emperor himself, she started to lose political ground to her claim and the best way to come out from the situation was to choose to support her aunt. There were some quickly disappearing audio leaks of her cursing Arissa during the debate, but still she stands behind her ever since. Aisling remains a populist, and is also known as the "People's Princess", regularly appearing in the media, pushing her agenda to make narotics illegal in imperial space. She also started the Stop Slavery Stupid movement to lobby against the traditional estabilishment of Imperial Slavery. Being (or despite being) unusually young at the age of 25, she enjoys wide public support and even some from those who's interest is shaking up the deeprooted traditions of the Empire. While pushing her agendas the best she can, she operates between her limits, posing no threat to Arissa's rule.
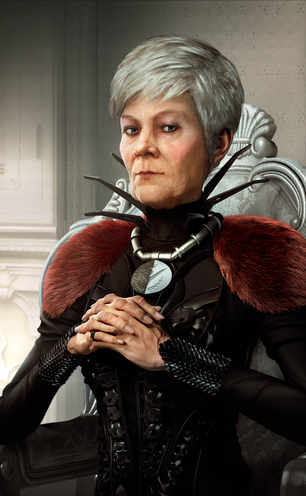 Zemina Torval
Senator in the Imperial Senate.
"Those who treat their slaves badly should receive the same."
Being a major shareholder in Mastropolos Mining, a megacorporation that mines resources from entire planets Zemina Torval is also a supporter of tradition, imperial slavery among them. With the resources behind her back, she is dedicated to take good care of all the imperial slaves and also possess a slowly expanding fleet she used to support Denton Patreus in his war against the Emperor's Dawn group, hunting down all who played a part in the murder of late-Emperor Hengist Duval. Her traditional beliefs met Aisling's revolutionist ideals in a challange (again, in the form of a community goal) from Aisling - a challange Torval gladly accepted, to find out who the people of the Empire really support. Both were hiring pilots to find as many victims of illegal slavery as they could through the galaxy and transport them to either Aisling to be set free (and likely penniless), or to Zemina to be part of the imperial slavery system, properly cared for in exchange for their work. Torval collected nearly 2,5 million slaves she employs in Mastropolos Mining ever since, while Aisling could free barely over 1 million. According to the challange Aisling is now responsible for the well-being of a slavery contigent for a year.
Galactic Powers part2: Meet the Federation!
 Zachary Hudson
President of the Galactic Federation, Republican
We may not fire the first shot, but we will fire the last.
In 3300, Jasmina Halsey liberalist president of the Federation at the time organized a secret war on the independent starsystem inside federal space, Lugh. The local government, Crimson State Group asked for the help of Edmund Mahon - Alliance Prime Minister - in resisting federal agression. Mahon refused to lend aid, arguing Lugh technically belongs to the Federation based on territorial claims. Federation forces nearly overwhelmed Lugh, when leaked news suggested the Crimson State Group leadership is fleeing among the civilian refugee starships. Jasmina ordered the destruction of the convoys, massacring nearly 10.000 innocent federal civilians, among CSG refugees and found out the CSG leadership never left the system's home starport. Halsey's support immedately ceased to exist, pilots from all over the galaxy came to aid Crimson State Group who managed to stand their ground against the federal fleet weakened by doubt and even some of their own pilots turning their weapons around. Federal Congress held a vote of no confidence against the suddenly went missing Jasmina, thus former Shadow President republican Zachary Hudson came to power who immediately pulled back the federal fleet from Lugh and promised an investigation of the matter, along with sending out search teams to find Halsey and bring her to justice. A (real) year later Jasmina's Starship One was found by Hudson's explorer forces as a wreckage, with her being the sole survivor in one of the stasis pods, sleeping in coma. After being released from the Clearwater psychiatric centre she claimed to have met highly intelligent beings and seen a beautiful new world. To this day, she manged to dodge being held responsible for the events at Lugh, and launched multiple exploration missions determined to find the paradise she claims to have seen, while Hudson remains the leader of the Federation, pushing his heavily millitary focused politics further and further.
 Felicia Winters
Shadow President of the Galactic Federation, Liberalist
"The mistakes of our past cannot be allowed to cloud our future."
The lead position of the liberalist party fell on Felicia after Jasmina Halsey's disappearance. Her job was no less than restoring trust and faith in the liberal party that was behind Halsey at the time of killing thousands of their own citizens in the aforementioned Lugh Incident. Winters was Secretary of State before she took the title of Shadow President when Hudson became president, and she is approaching federal politics in a more peaceful way: her main goals are providing wellfare, raising those on bottom of society and is known to be a charismatic person who always aims to do what is right, not what is easy or popular. However, this includes doing what she belives to be the right thing even at the expense of her own people or herself - making her a controversial character some admire and some refuse. Regardless, in polls she stands as an equal power to Hudson, gaining a lot support from those afraid of possible consequences the agressive millitary politics of the president bringing down upon the Federation.
Galactic Powers part3: Independents
 Edmund Mahon
Alliance Prime Minister
Sorry but I don't have anything about Mahon. There is literally nothing on this guy. I've read through 28 pages of community goal listing on inara, looked him up on wiki, browsed through the related subreddit, there is literally nothing on Mahon.
Not even noteworthy minor factions launch some explorer missions here, some small base building teams there, and he is like nodding his had like "OK", and that's it. Nothing about who he is, what kind of a person he is, where he came from, what are his goals personally or as president, nothing. Nobody cares about him, not even the developers seem to. Hi Frontier! You could do something about this you know!
If you happen to have any info on him at least generally related to the perspectives listed above, please leave it here in comments WITH some official source (CG descriptions, GalNet news, whatever). For the time being, click on the Alliance section in the bookmarks on the right for some general Alliance info.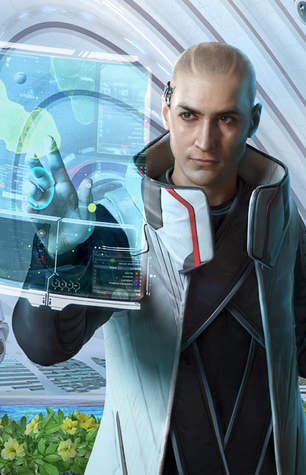 Simguru Pravnav Antal
Utopian leader
"Peace and prosperity through the advancement of ethically aligned technology."
After the death of his father Rishi, his dream was expected to die with him: it was his charismatic character that united people into the Utopian Commune, and nobody expected his son to be able to fill his shoes. Antal prooved them wrong: he shares the same ideals as his father did and chases the dream of transcending the human race and the universe with it to a higher, better state of being with the help of technology. His passionate speeches keep convincing more and more people to join his cause, resaulting in the Utopian Commune's spread through the stars on a much more grand scale than Rishi could have ever hoped. Antal seeks to perfect both mind and body, according to him if Utopia is to succeed, it must be driven by righteous desires, not by base ones. He defines the reason of his existance to help humanity reach this point of peace and prosperity, after all, it is only through mastering ourselves that we can hope to master the worlds around us.
 Li Yong-Rui
CEO of Sirius Corporations and Sirius Gov
"We must seize this new golden age of expansion to expand the bottom line.
Yong-Rui is the youngest of the Li dynasty, a family that's deeply involved in Sirius Corporations: records show that 800 years back, the Li dynasty was among the founding members. Yong-Rui prooved himself to be a highly skilled physician with extensive economical knowledge, that helped him skyrocket his career to the top of Sirius Corporation, opening up political possibilities. Under his leadership, Sirius Corp. rapidly expanded it's territorial control not by millitary agression but simply purchasing entire starsystems with small, independent factions inhabiting them - often buying areas based on speculation of expected resources, future scientific value or simply undermining his competitor's potential growth by acquiring systems seemingly worthless to him.
He is trying to push the boundaries of interplanetary traveling through highly advanced experimental drives, but the recent failures did some serious damage to Sirius Corp.'s reputation that he is aiming to restore, relentlessly working towards making the new drive technology successful that could revolutionize the way we travel across space as we know it.

Archon Delaine
Pirate King of the Cumo Crew
Yarr!*cough* If you're not part of the Kumo Crew then you are nobody.
Archon became the leader of a small pirate crew known as Cumo Crew at the very young age of 15, by beating the previous leader to death with his bare hands. Decades flew by, and Cumo Crew grew to be a terrorizing drug cartel, threat to all nearby systems. Many tried to challange Delaine through these years to take his "throne", and each one of them ended up dead at the hands of the cruel warlord. Tired of breaking down one uprising after another, Delaine reorganized the now massive network of pirates to be part of a strict criminal syndicate that's influence became a threat on galactic level, spreading his influence across the underworlds of many systems. Archon Delaine's only mistake was not knowing when to stop - his power grew to a point where galactic powers, sometimes even swore enemies put their differences aside to work together on taking down the Cumo Crew syndicate. Today, Delaine is forced back to a small corner of space, choked by imperial and federal forces alike, fighting for survival.
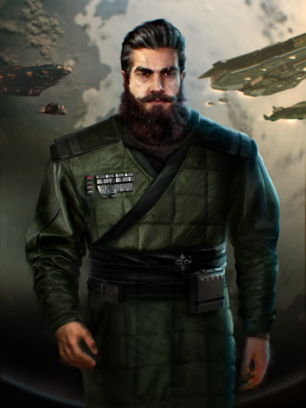 Yuri Grom
Dictator of Euryale
"Freedom does not mean Anarchy. Unyielding, lawful rule is crucial to the principle that one man’s freedom ends where another man's freedom begins."
Yuri Grom is the last in the galaxy to grow his power enough to become a Galactic Power. He rules through dictatorship, but provides for his people: according to him, narcotics aren't the problem, but the fact that people choose to use it for any reason, commonly those on the bottom level of society. Severly punishing smuggling for causing damage to the State indirectly causes damage to the people the State exists for. Grom greatly improved the lives of people under his iron rule, and for that his people and government are deeply loyal to him. While sharing the idea of purging the state of slavery from the galaxy as much as every other power on the galactic playground of politics, he respects the tradition of Imperial Slavery, saying those who choose to live their lives that way choose to do so freely and their choice should be respected as much as any other free man's.
Reputation, Naval Ranks, Politics - How do they work?
This part of the guide aims to teach you how major and minor factions relate to each other and where you are and can be in that picture.
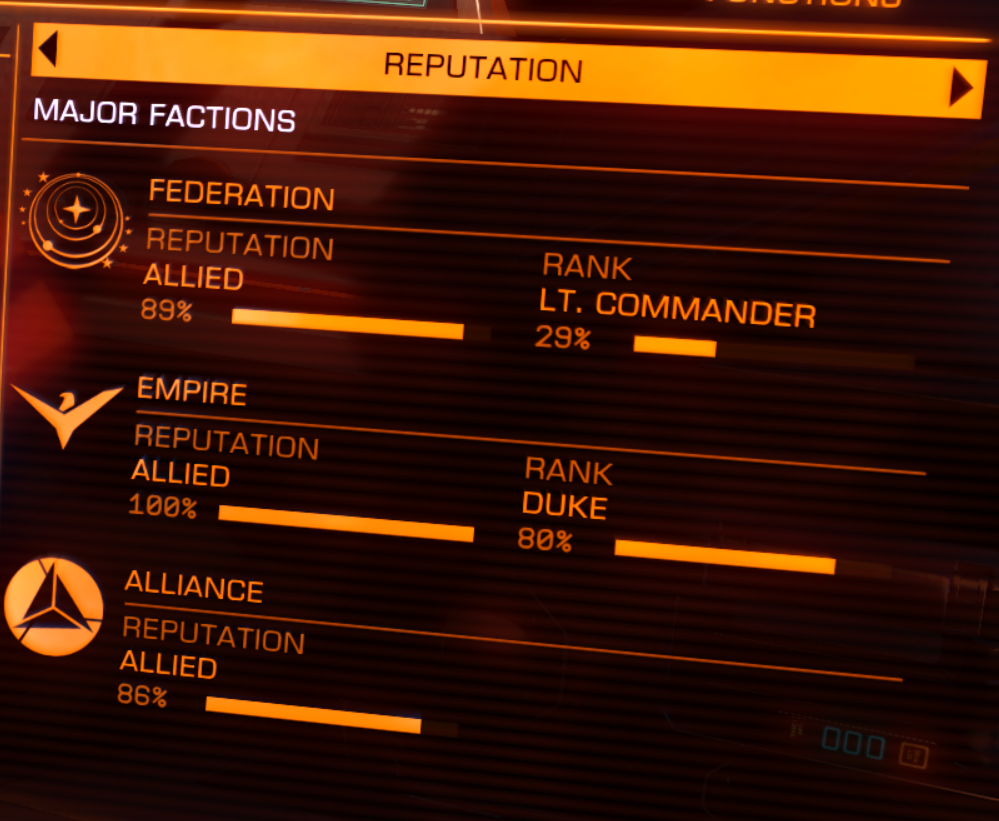 You can see your reputation status with each superpower on the right panel [hotkey 4]. You can navigate between tabs with [Q] and [E], but you can also navigate inside each panel with [W][A][S][D] to see your reputation with minor factions at any time while inside their systems, not only on the mission board.
Completition of missions at any minor faction aligned to a superpower, will also increase your naval rank, seen on the right side of this panel (Lt. Commander and Duke in the Federation and the Empire on this example). Increasing these to 100% will allow the game to eventually generate Naval Ascension missions for you, that allow you to rank up in the federal or imperial navy, and gain access to new ships and permits to restricted worlds. The Alliance, given it's nature, has no strictly organized naval force.
Gameplaywise, sigining up to wear a colors of a Power gives you access to Powerplay (not in the guide yet, it's a gigantic an overcomplicated system I don't want to do a poor job about) that provides you passive bonuses and with higher rank, access to a unique ship module (shield or weaponary), but it also paints a target on your back for hostile Powers. You can access the Powers menu and the ingame newspaper GalNet on the left panel.
Traveling part1: Around the the Milky Way
Hyperspace Jump , Supercruise , Normal Flight.. Think of them as traveling methods for different distances: a plane, a car, and a bycicle, each you use for different distances.
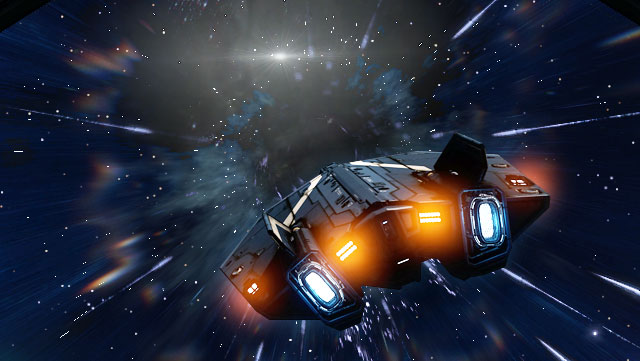
This is how you travel around the galaxy. Your jump range is determined by the quality of your FSD module and your ship's weight relatively to your FSD's performance capabilities. The better your FSD is and the lighter your ship is, your jump range increases with them.
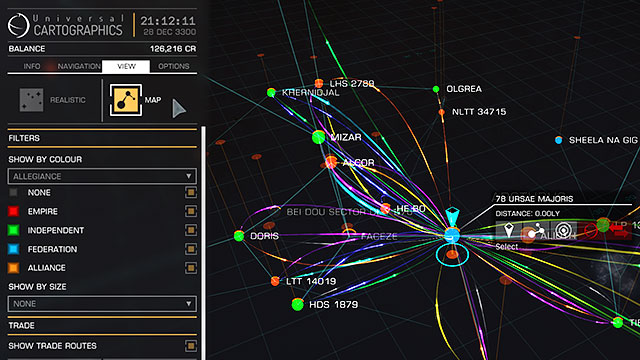
Use the galaxy map to target what system you want to travel to. Be sure to scroll down in the galaxy map menu to set route planning to Fastest, because the route planner is on Economic routes by default, planning you a route that touches every system that has landable station in it. You can change this on the Galactic Map's menu, near the bottom! Fastest route however, is planning your route with your maximum jump range in mind, optimizing your route with the least possible jumps between you and your target destination. Once you planned your route, leave the galaxy map. Your interface has the next waypoint system (step in your route) targeted, simply face it's direction, and make the jump with J. Your navigating computer will target the next system automatically, and you can see how many jumps are left on the left navel (Navigation) until your desired location.
FUEL usage and using the Fuel ScoopYou have 2 fuel bars on your front panel's right side. The bottom, thicker one is your fuel tank, the thinner on the top is your engine, which you don't really have to care about now. If you run out of fuel, you won't be able to jump, and you may get stuck in the middle of nothing until your modules use up the small fuel you have left, and you freeze to death after the Life Support Systems run out of oxigen.
 To avoid this, always have a Fuel Scoop installed on your ship. You can do this docked inside a station, in Outfitting / Optional Internal. What a Fuel Scoop does, is scooping hydrogen gas from a nearby star to refill your Fuel Tank with. To do this, you have to be in Supercruise, flying extremely close to a star - be careful to keep outside it's yellow circle range indicator, because if you cross this the star's gravity will effect you, instantly dropping you from Supercruise, just like planets. Once you are close enough, your Fuel Scoop will automatically activate and start to refill your Fuel Tank. While close to a star, your ship starts to heat up. Heating rate is different based on the type of the star, just like scooping rate. Find your ideal distance from it when your ship is not heating up or does so extremely slowly, and press [X] to slow down to the minimum possible Supercruise speed. You can safely stay here and refuel.
  Oh Be A Fine Girl Kiss Me
A widespread idea of how to remember the following letters: O B A F G K M. These are the type of stars you can scoop hydrogen from, O being the hottest, and M being the coolest, least dangerous star. You can filter the galaxy map to show only these type of stars, so anytime on a longer journey you can look up how far the next refueling point is. The straight line on the galaxy map shows that you have fuel up to a point, while the dashed line shows you that your current fuel won't be enough after a certain point. If you see no scoopable star on your planned route and your fuel isn't enough for your goal, consider altering your route to the closest scoopable star to refuel your ship before continuing your trip.
 For more on how to use your Galaxy Map, check this out[nosuchwebpage.com]! It's a series of pictures with detailed Galaxy Map interface explanation.
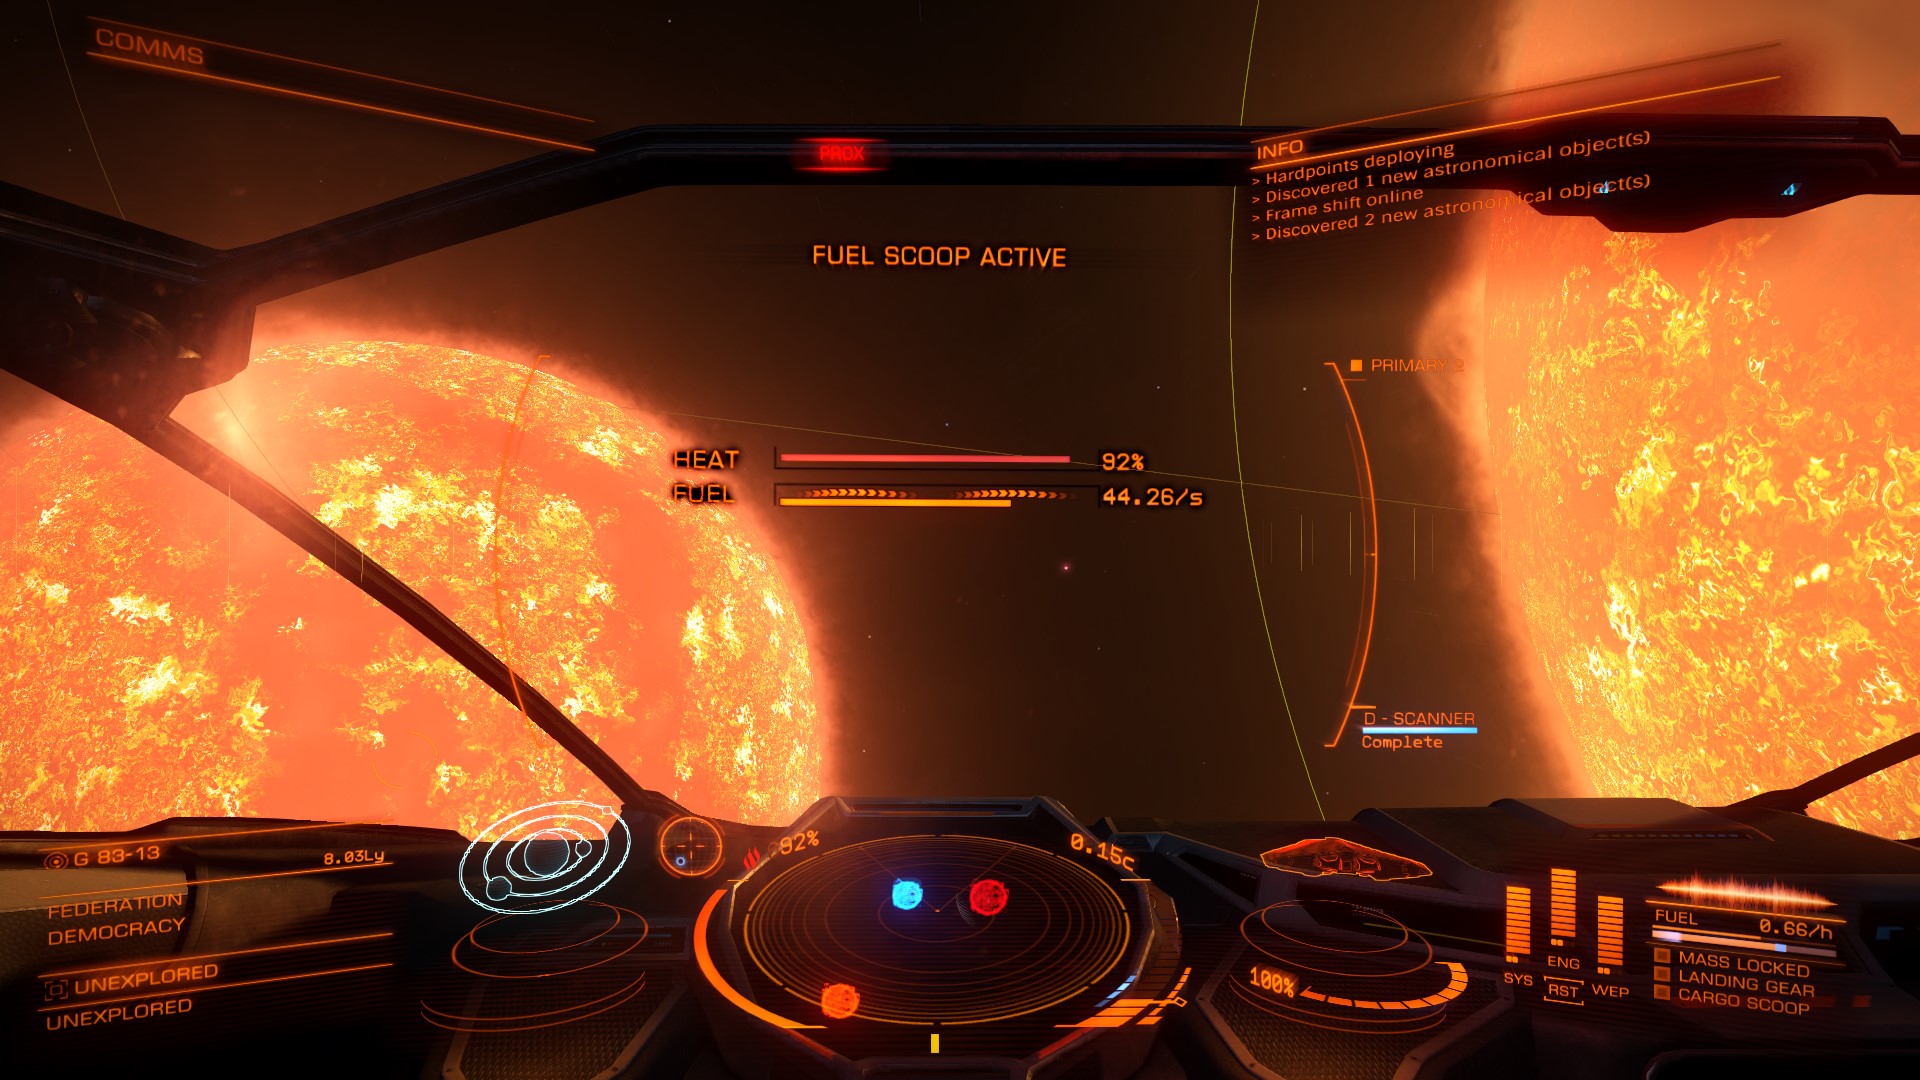
You are in supercruise mode when you are flying in open space of a starsystem - from star to star, from planet to planet, from whatever to whatever, but inside the same starsystem. Every ship has roughly the same supercruise flying profile - some turn faster, but speed is equal. You can use your Fuel Scoop in Supercruise mode - see more about this in Hyperspace Jump section.
In Supercruise, due to your speed you cannot deploy hardpoints that require precision, such as weapons or your cargo scoop. You can still use heat sinks, some scanners, fuel scoop, shield cell banks, your internal modules. The only way to attack others or be attacked by others, is by forcing them out of Supercruise with a Frame Shift Drive Interdictor (see more on this in the Trading / Smuggling section!).
Struggling with being too slow or overshooting your target in supercruise? Try this: just go full speed. Don't care about anything. When the ETA timer is precisely at 0,7 seconds, slow down to 75% of your speed bar (you can set a hotkey for it too!). Flight assist will slow you down to arrive precisely at your target with the right speed!

Traveling part2: Our dangerous friends - Neuton Stars, White Dwarves
These ancient marvels are as deadly as they are beautiful - treat them bad and they'll crush your ship and you with it, but approach knowing what you are doing and what you are dealing with, Neutron Stars - and their less dangerous little bros, White Dwarves - can be your best friend.
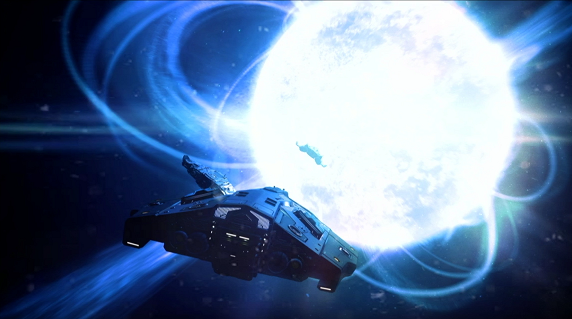 These two star types can supercharge your FSD, giving you a one time massive jump range boost. White Dwarves can give you a solid 50% range boost, while the much more rarer Neutron Stars will boost you out of your boots with their 300% range increase. But,should you fly into their cone the wrong way, their pushed out matter and force can easily trap your ship in a swirl of gravitational forces, ripping your ship apart. Instead of me trying to explain it in a long and difficult to understand way, check this:
https://www.youtube.com/watch?v=maoj1XFGddg
Remember how to do this, it can cost you your ship should you not listen to these warnings!
Neutron Star: 300% FSD range boost
The kind of star that you want to stare into until you get yourself blind. Just make sure to not fly close to it the wrong way!
White Dwaf: 50% FSD range boost
Honestly, not worth bothering with it, it takes more time and risk to do this once than simply doing one more safe jump)
ACTIVITY TYPE: COMBAT
Pilot Federation rank: Combat is a summary of all combat related activity. This rank increases with destroying ships - you gain more progression by destroying ships with higher combat ranked pilots than yourself, and slower progression by killing pilots with lower combat ranks.
Requirement: Kill Warrant Scanner.
Advised: Empty Cargo Hold
Perhaps the most popular of all combat acitivities. You'll need to equip a Kill Warrant Scanner, and find a Resource Extraction Site, referred to as "RES" by the community. RES are always inside planet's rings / asteroid belts, and mining NPCs extract resources from the asteroids floating here, with pirates preying on them. Your targets will be these pirates, because they always have WANTED status on them. Target your default scanners on ships with [T], and wait for the scan to show if they are CLEAN or WANTED. If they are wanted, you can use your Kill Warrant Scanner to scan every bounty your target has on it's head, not just the local ones you see without the KWScan.
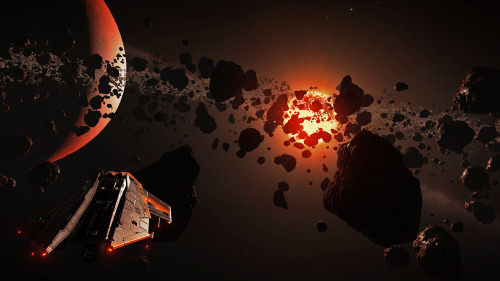
After you finished the scan, there is a low chance the pirate will shoot at you, so try to position yourself behind, above or below it to to not allow them having the opening shot, and to have a good position that can cause serious damage to them. After destroying your target, you'll get it's worth in Bounty Vouchers, tha you can exchange for credits at the location factions in the Office. Some bounties may have been placed on him in other worlds, some are local, and some are superpower-wide. You can always pick up the local credits at the local station, the superpower-wide bounty on any station controlled by that superpower. The smallest portion, bounty gained elsewhere, is usually ignored by players because it's not worth bothering finding the faction / system. You'll be able to cash in on every bounty voucher in patch 2.2 Guardians, from anywhere in exchange for a small percentage of the cash taken as service fee. Having a Kill Warrant Scanner is not "required", but simply silly not to gain all the money you can from all the bounties on a single pilot.
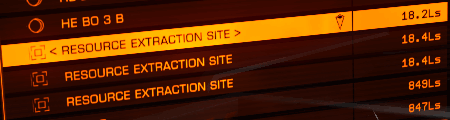 Resource Extraction Sites have different difficulty levels:
 - Low (LRES): lower challange, smaller, lower ranked pirate ships, strong local authorities.
- Normal (no specific name) (RES): the normal difficulty, with a mixed bunch of ship sizes and pilot ranks. Local authorities are still strong, though can't always be everywhere they are needed.
- High (HRES): Offensive behaviour towards you is still being reported through local channels (that is, if you did not deactive it in the Functions tab), but local authorities are rare if even there at all. Pirates are high ranked pilots, flying in dangerous combat oriented ships, sometimes even in Wing with a partner or two.
- Hazardous (HazRES): The no-go zones of space - local authorities won't dare to help you out here, and the local pirates jam your crime reports that won't even reach the authorities. These sites are the most rich for miners, thus attract the most ambitious pirates. You'll find heavily combat equipped pirate ships, often flying with Wing partners who are no longer Eagles, but potentially Vultures or even Gunships, making them an extremely dangerous, but well paying prize to hunt. Be sure to not have anything in your cargo when going to a HazRES - this is true to all the other RES instances aswell, but you definitly don't want these guys to open fire at you after a brief scan. Pick your targets carefully, and position yourself for a devastating opening strike - it can decide if you'll be forced to run or take them down quite fast.
Requirement: Survive ^_^.
Advised: Shield Cell Banks, Chaff
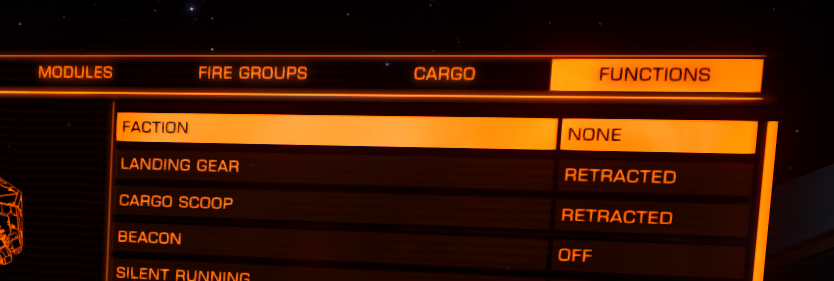 In systems that have a faction in it with the status "War", you'll find Conflict Zones. These, just like other signal sources, are listed on the left panel [hotkey 1]. Dropping in these instances you'll see a massive battle of 2 groups - they won't be hostile to you unless you move too close or have a bad reputation with them. Your first job is to make it perfectly clear to all of them who can count on you and who can count on you burning through their ships. Go to the right panel [hotkey 4], Functions tab, and you'll see a new menu on the top of the list, where you can choose a faction to join the conflict in. This isn't a permanent choice and lasts as long as you don't leave the instance.
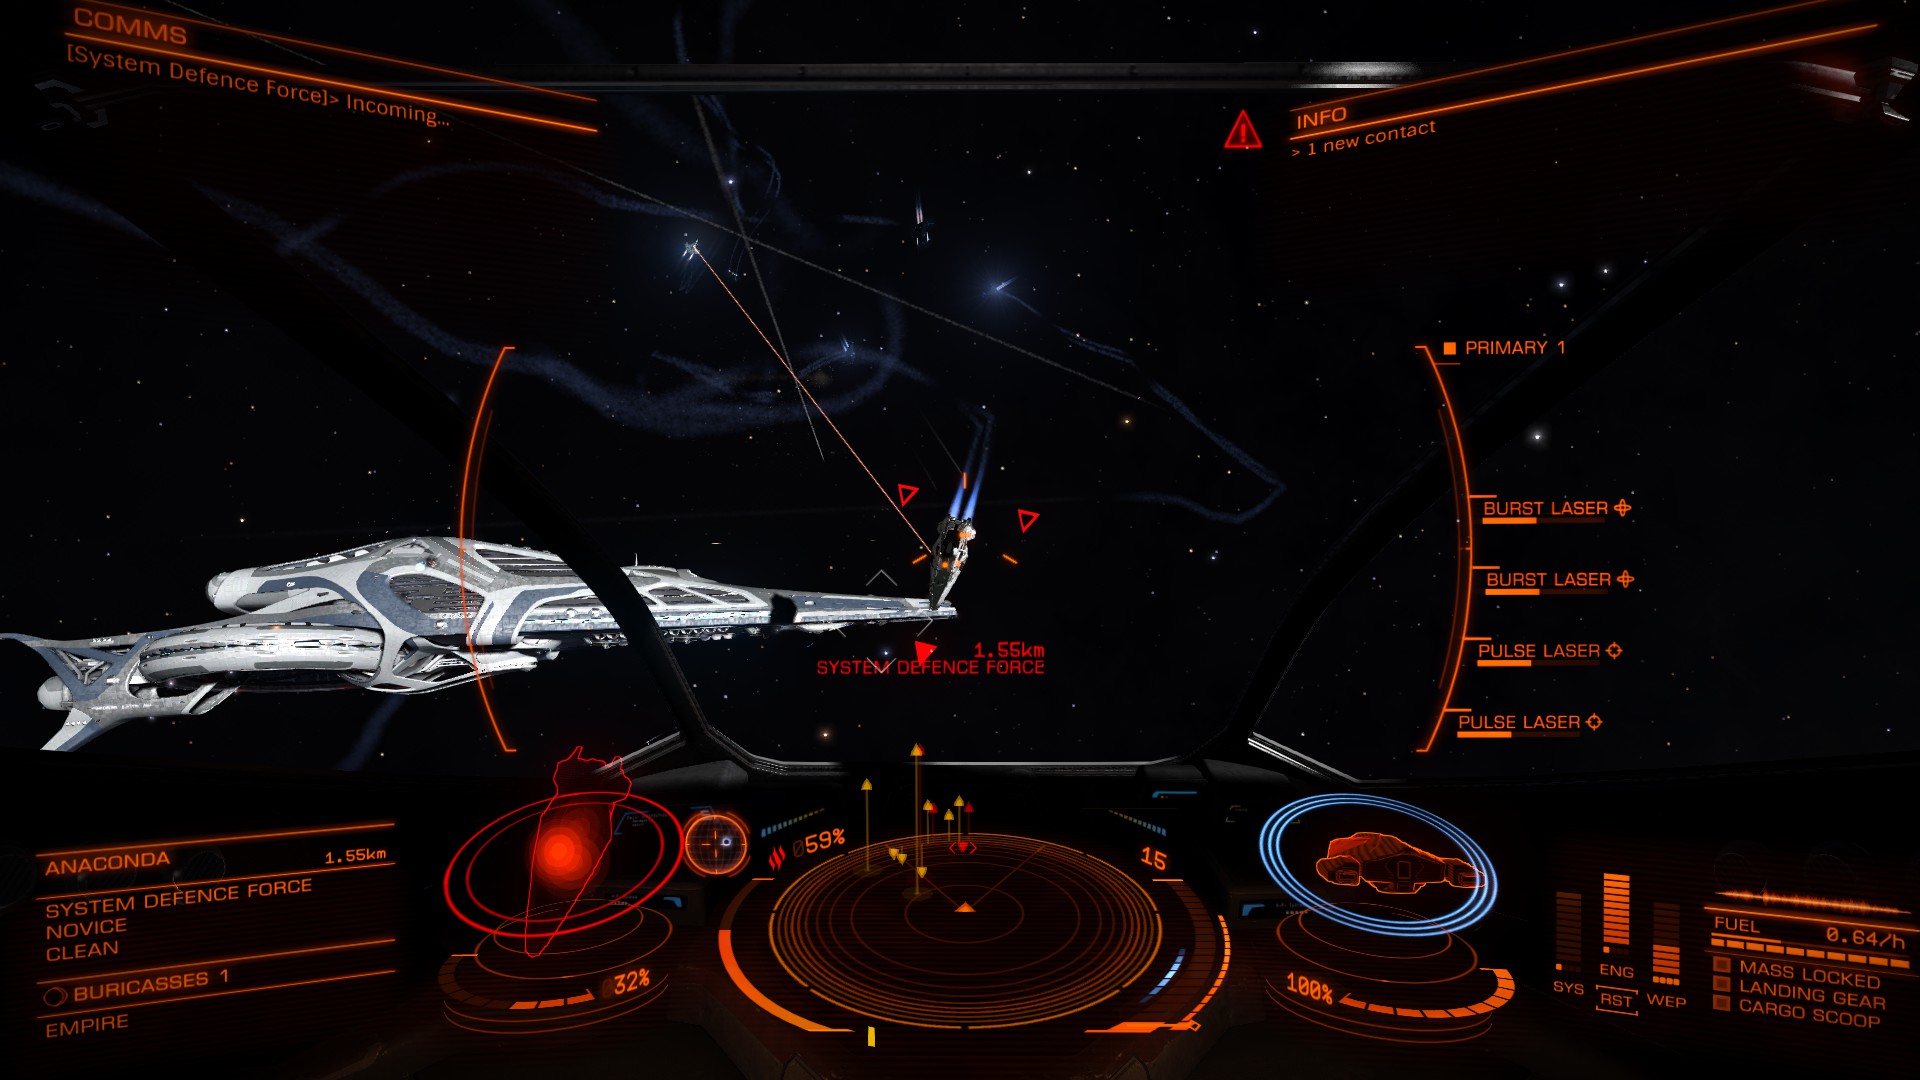 Once you pledge to a side, all ships of that faction will instantly turn green on your radar, and the opposing ships red. From this point on, every red ship is hostile to you, be extremely aware of what is happening around you - stick with your group, allow the numbers to protect you. If you see 2 or more enemy ships flashing white on your radar, be prepared to use a shield cell bank (and heat sink cell with it if you need to) and rush back to the protection of your new allies. There will be times when even these won't be enough, you'll learn through experience when to run. An effective way of escaping is instantly retracting your hardpoints [ U ], start to charge up your Frame Shift Drive [J], and change power distribution to full power on engines, half power on shields (or the other way around, depending on how damaged your shields are), and Boost away to the direction where there is nobody or is swarming with allies.
 Each ship type, regardless of it's combat rank or installed equipment, is worth a set in stone value as Combat Vouchers. Conflict Zones are always in open space.
Requirement: Pledge to a Power, Frame Shift Drive Interdictor
Advised: Shield Cell Banks, Large Sized Ship to provide to disturbing mass for target's FSD, Prepare to have no life at all this week
Joining any political Power will make you agent of him / her, you can do this on the Galactic Powers menu on the left panel [1], highlighted yellow. Being pledged to a Power means you'll have enemies and allies, wherever you go - being an Agent of the Empire will likely attract Federal Agents to you, or vica versa. You can help undermining opposing Powers by going deep into their territories and intercepting their supply ships. To pull them out of supercruise with your FSD Interdictor, position yourself behind them and get inside the minimum distance your FSD Interdictor module requires. Chase down and destroy your target, move back to supercruise, and look for a new target. Transport ships in Wing are great targets! Their Wing partners will drop to your location after you pull your target, who you should be able to destroy before it's partners arrive, making the escort ships alone an even easier target. Crime Sweeps, identical to Combat Zones are also an alternative, but you collect Merits, not Combat Vouchers.
BEWARE: Powerplay is a weekly cycle territorial control game. Merits you did not cash in before the end of the cycle will be lost.
ACTIVITY TYPE: TRADING
Advised: "Okay" for new players making money from nothing, but ineffective without large cargo space.
To be honest, I could start to explain what kind of econmical information you can find and where in the game, but honestly it's a waste of time and a pain to rely on ingame information for trading. Use EDDB (check the tools section above, you've seen this tool there!). Set your current location, maximum cargo capability, your preferred maximum jump distance, what type of route you want to plan (loop, one way, etc.), and start to play Space Trucking Simulator!
How profitable trading is, largely depends on your available cargo space. Below 100T of cargo I'd advise you not to try to make a living with trading just yet. If you are flying a multipurpose or hauling ship with a decent jump range and acceptable cargo space, go for rare trading. Once you have enough cargo space, you can fill it up with lower value but higher amount of commodities, that together will yield you more profit than transporting around a low number of high value commodities. What to buy, where to sell it? EDDB is your friend!
Advised: Great for new players. Drop it when you feel you have more space than rare commodities to pick up (~100T+)
Now this is a bit more interesting. Special stations in the game are able to produce Rare Commodities, that are unique to that station in the entire galaxy, thus have a massively increased price the futher away you transport it from it's source where you can pick it up relatively cheap. 120-150Ly distance seems to be the sweet spot. If you can think of an ideal circular route from one Rare Commody source to the other, you can create lucrative trading roads. This is primarily profitable for lower cargo capacity ships, newer players. Here[elite-dangerous.wikia.com] is a list the the Rare Commodities and where to find them. Here are a few rare trading routes mapped out for you! Click for Higher Resolution!
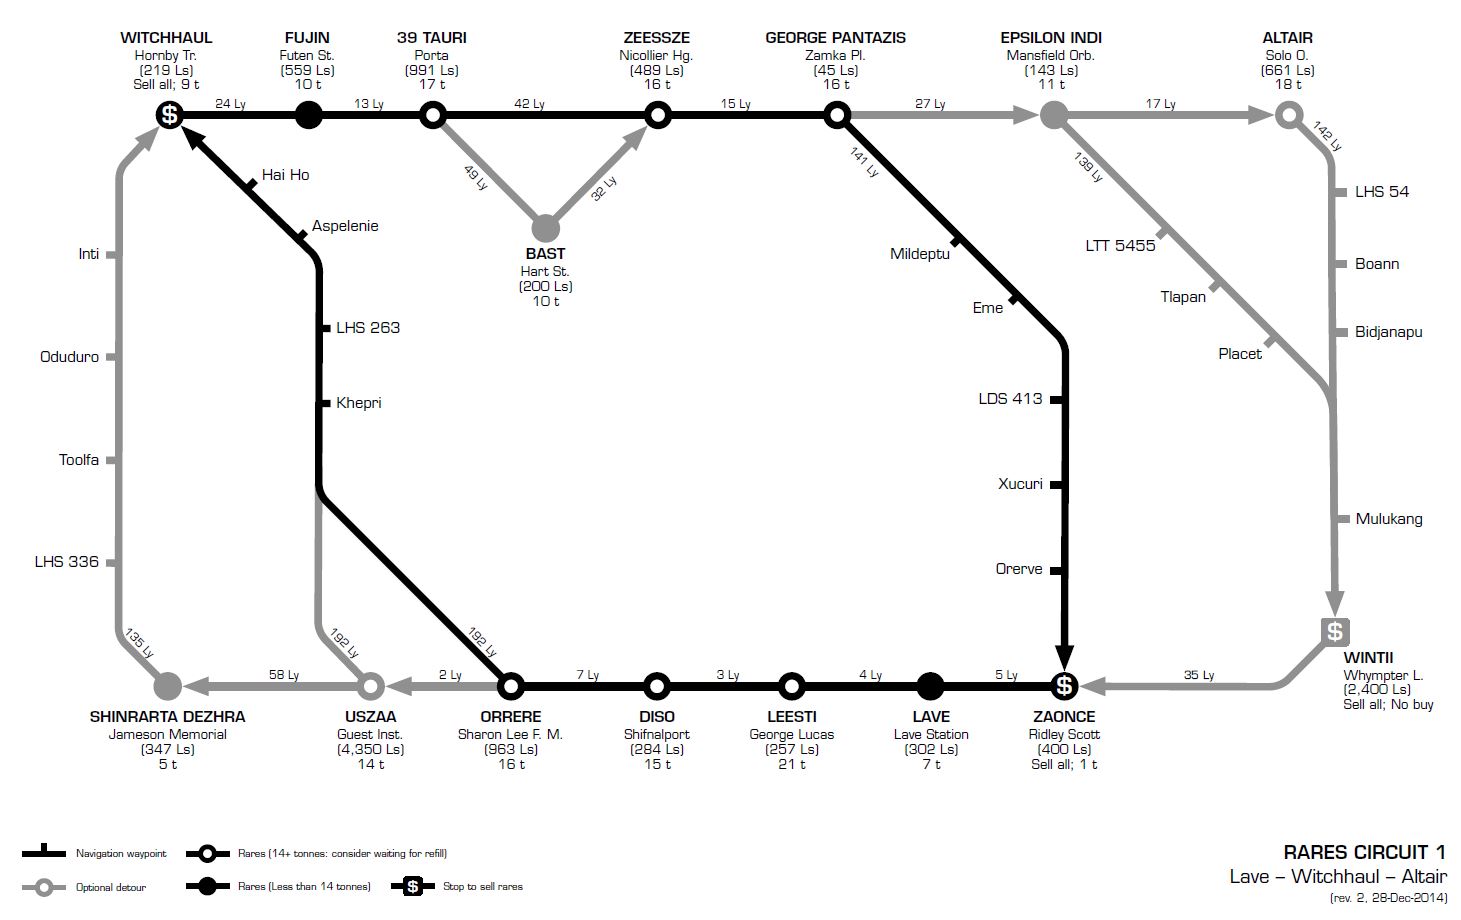
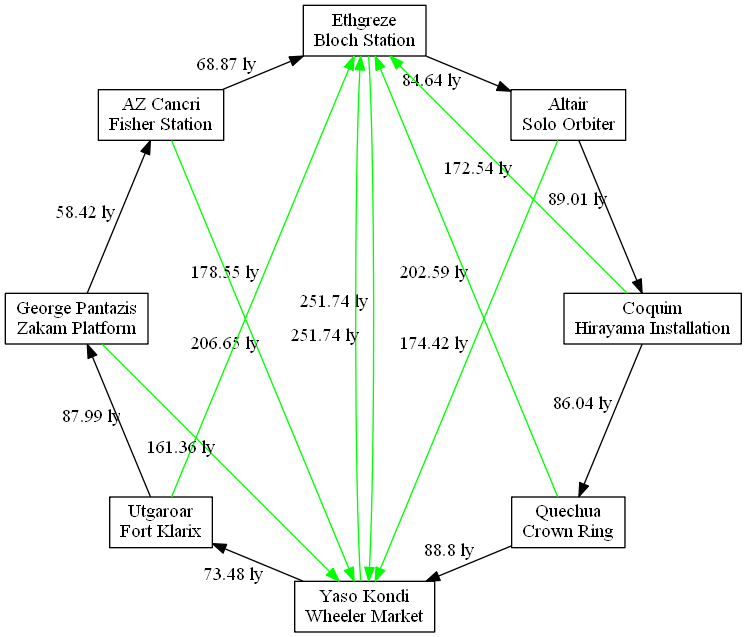
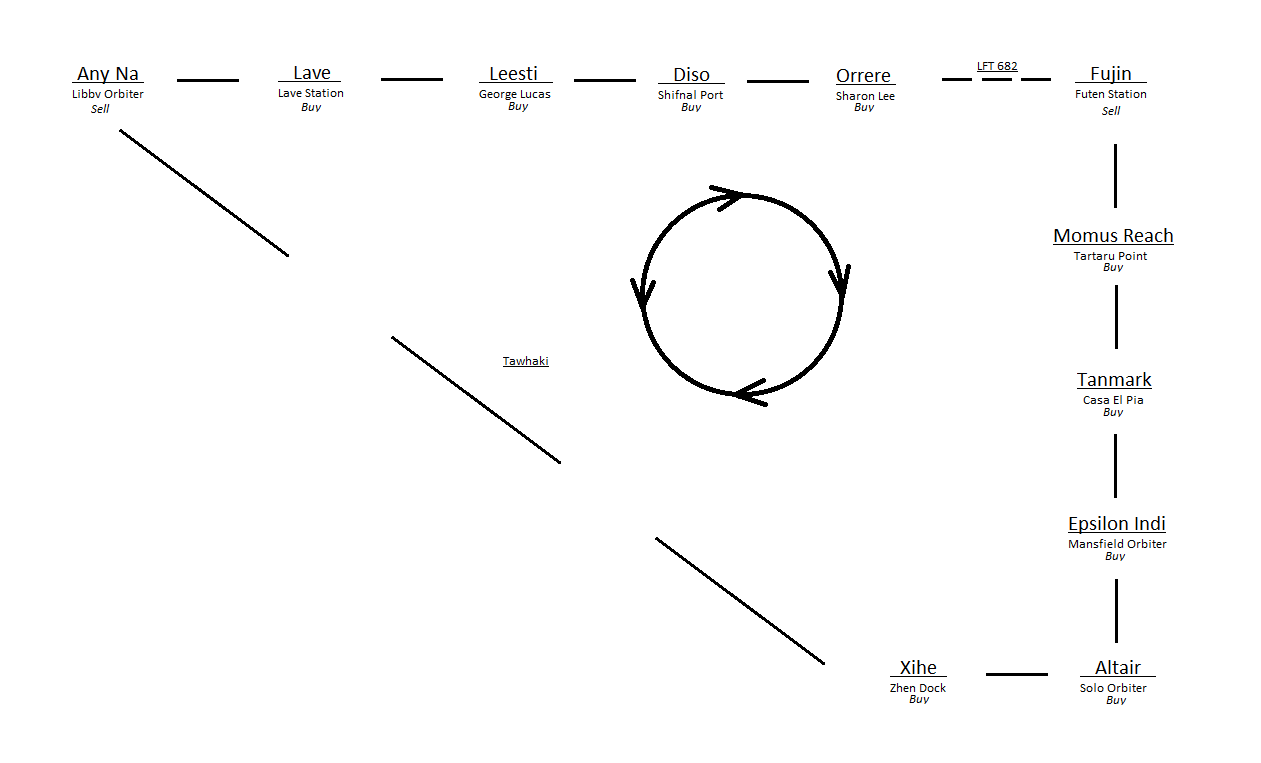
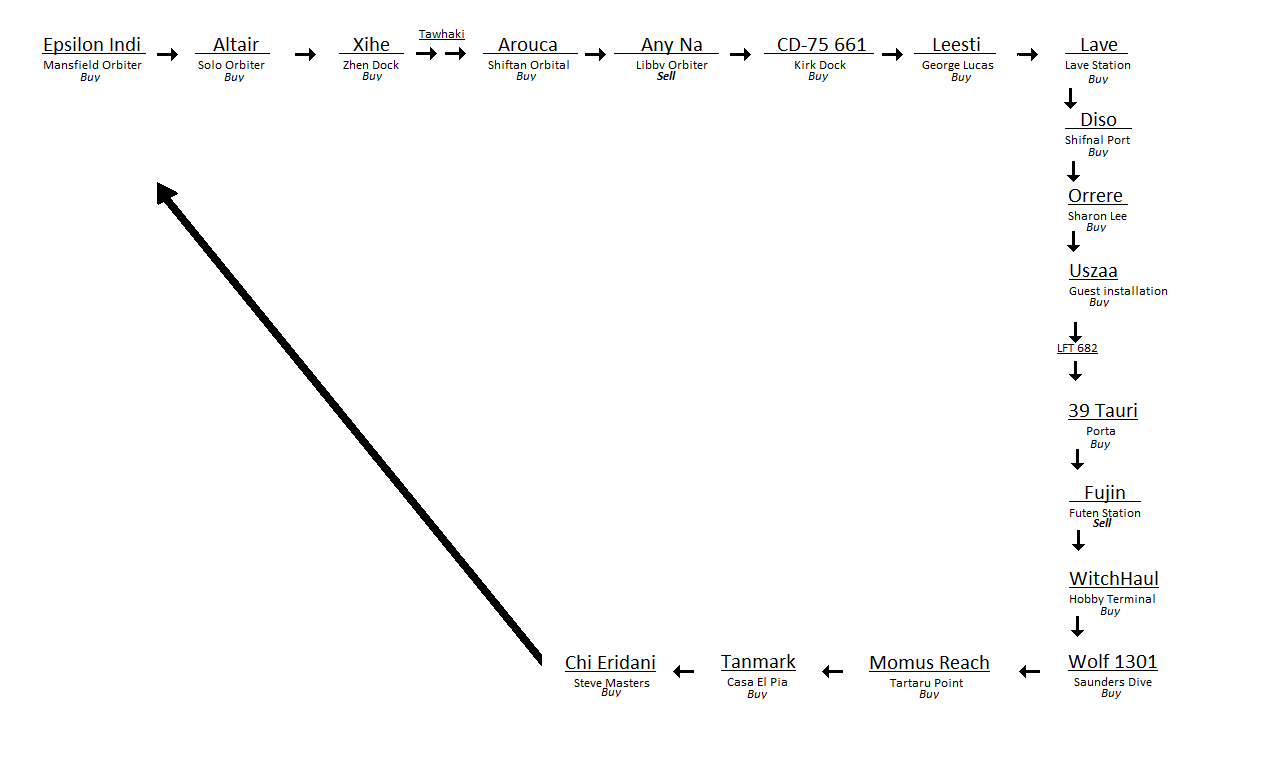
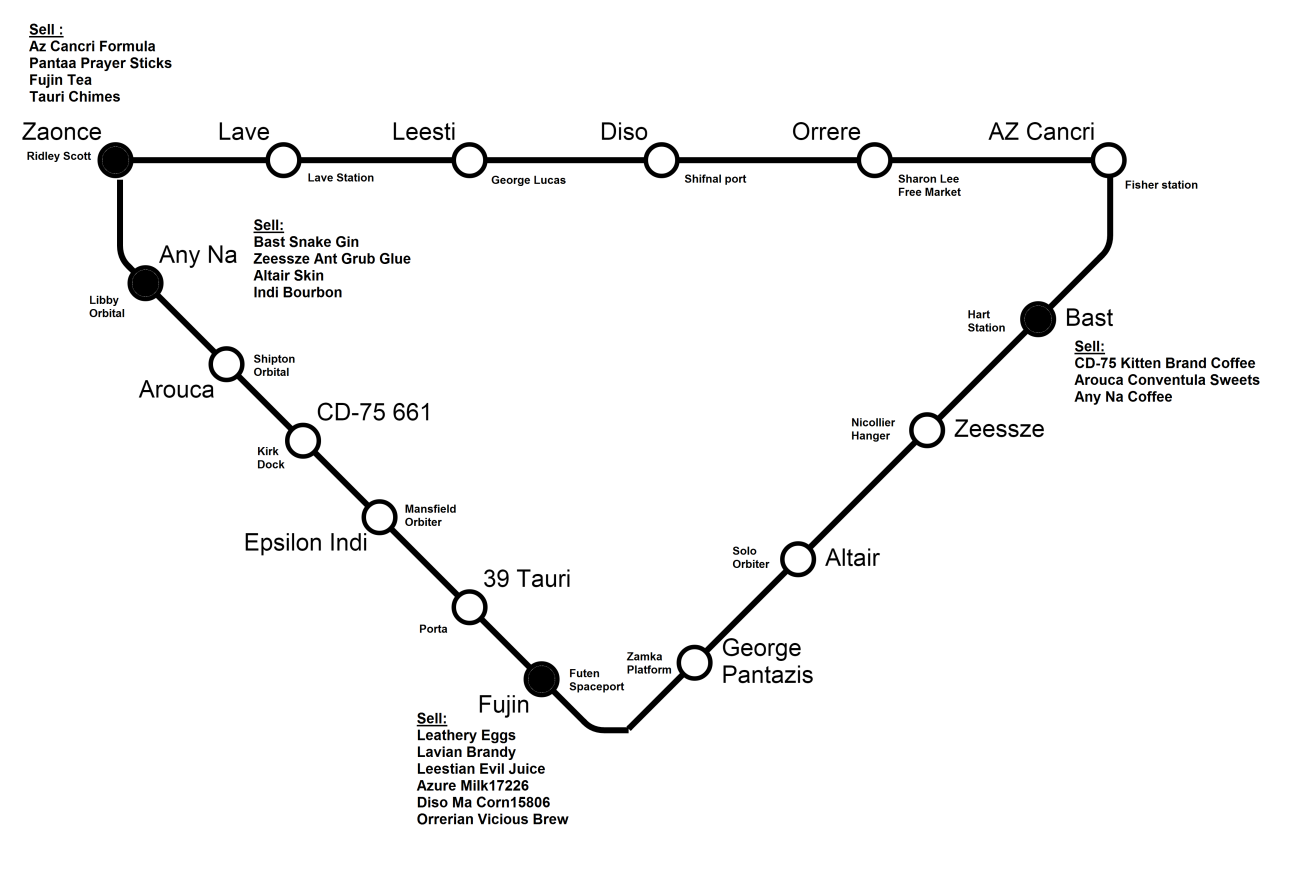
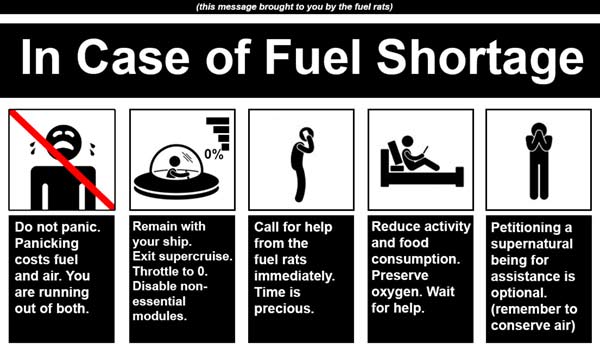
What makes this dangerous is the hundreds of lightyears you'll have to travel out in the wild, with no station anywhere near to refuel or repair your ship. If you get attacked out here, you are own your own. If you feel like you are running out of fuel, you have to find a scoopable star before your generator and engines eat up all of it and you freeze to death.
Filter the galaxy map. Try to find the edge of the civilization bubble from each direction, and look for life outside the bubble. The most commonly used systems are 17 Draconis, Ceos, Sothis and Maia. These systems, given their vulnerability that comes from being separated, are often unstable and go on lockdown, civil unrest etc. states, thus their purpose for the player often changes. Be sure to check their status on the galaxy map before making a trip out there, and check the wikia for what each status means and how to change them (such as Famine, Boom, etc.).
 The Black Market
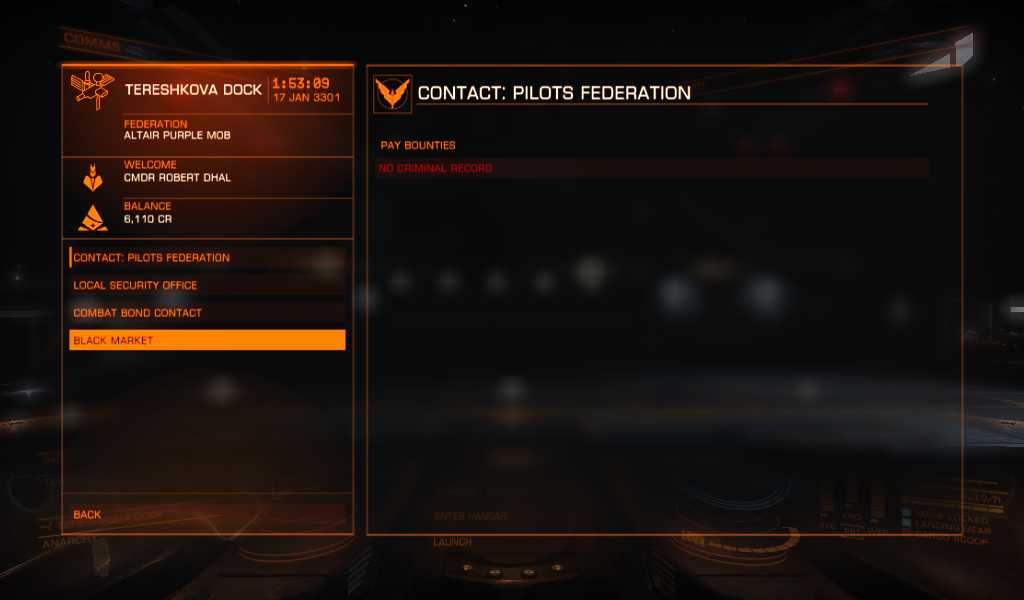
Smuggling is an illegal activity. It can be long range or along a normal trading route. Smuggling is a type of delivery that does not involve using the market to purchase anything - you either do it for missions, or found something in space that belonged to someone else but you stole it. In case you stole something, for example commodities from a ship wreckage that belonged to it's late pilot and will be picked up later on by NPCs, or you simply bought something like alchohol or tabacco, that is prohibited in a different system you are headed to. You cannot sell these type of cargo (marked as illegal / stolen in your inventory) on the market, you must find a space station that has a black market. Independent starsystems / stations are more likely to have one: it is listed on the galaxy map when you select a station and read it's services. Alternatively, you can use Inara to find Black Markets.
Smuggling Missions
These are high payout missions, for with the greater reward comes greater risk. These missions usually require you to avoid any kind of scan, and go completely undercover until you are done with your task. There are 2 main things you need to watch out for:
- Being scanned by ships.
- Being scanned by station gates.
- Avoid being scanned by ships. With an active smuggling mission on you, there will be people trying to find you, scan you, and attempt to take your cargo. After a succesful scan mean failure of the mission, so feel free to drop the now worthless cargo after.
* Do not allow NPCs to pull you out of supercruise.
* If you are about to lose an interdiction minigame, give up, handbreak [X] ! Your FSD will recharge much quicker if you slow down and stop, than if you allow your attacker to cause a malfuntion at 100% usage. Boost away from your attacker as fast and often as you can. Target your attacker behind you by selecting him on the left panel [1] Contacts tab, and deploy hardpoints [ U ] .This will stop whatever scan they attempted to do and pull their weapons out instead. If you could put 3km distance between you and him, you are safe from their weapons. Giving up the interdiction minigame is usually the "meta" players do, not even trying to beat it. - Avoid being scanned by station gates, simply slip though them as fast as you can without turning your ship into a wreckage on the other wall. BEWARE: The scanning range starts a minimal distance away from the station gate "cage", not at the blue forcefield. Having your landing gear deployed will limit your speed to a maximum of 100km/h (it's also a good "handbreak" mechanism), that is enogh to slip through undetected. Align your ship with the station gate from a good 7-10km away, so you won't need to worry about high speed turns, just boost forward. General advice: try to enter a station at the green lights side of the gate: that's where ships go in, and red is where they leave the station (it's obviously swapped once you are inside).
ACTIVITY TYPE: EXPLORATION

Exploring in Elite is also rewarded: not only it is a great achievement to explore a stellar body for the first time in the entire galaxy and get your name written on it for players to see for eternity that you were the first to visit here, but you are also collecting stellar data as you are burning your way through the dark.
 There are various type of scanners in the game - for exploring, the following are relevant, along with other must have modules for this playstyle.
- [REQUIRED] Advanced Discovery Scanner - infinite range in your current system
- Intermediate Discovery Scanner - a somewhat better ranged than core scanner, obsolete
- Basic Discovery Scanner - the core scanner every ship is equipped with obsolete
- [REQUIRED] Detailed Surface Scanner - just equip one and keep reading.
- [REQUIRED] Fuel Scoop - The biggest one your ship can possibly handle - you won't fight people out there, so the biggest module space usually reserved for Shield Generator is where you want to fit your fuel scoop. Of course if the biggest scoop you find is not filling up your biggest internal slot, don't waste the slot on it - find one that perfectly fits.
- [RECOMMENDED] Heat Sink - This is a consumable, fire and forget module to throw out heat. Being too close to stars, or jumping to rare sights of binary (or even more!) stars can test your ship under extremely hot conditions. Too much heat will eventually start to damage your hull, your modules, or even couse malfunctions - none are something you want to face thousands of lightyears from civilization and it's charming repair bays. Heat Sink is where you redirect your ship's heat, and throw it out to space to melt before you do.
- [RECOMMENDED] Auto Field-Maintenance Unit - Or AMFU, short. As it's name suggets, this allows you to repair your ship. It can repair individual damaged modules - but cannot bring back broken ones. Since Horizons launched, you can fix cracks on your canopy (windows) with it, but it's main use is repairing whatever recieves heat damage. This module is using ammunition, refillable only at stations and with certain minerals from planet surfaces. In an extreme case where one of your modules are broken (0%), you use Repair/Reboot on the right panel's Funcitons tab. It will repair it, bring it back online with an extremely low integrity, at the cost of heavily cannibalizing your other modules - things you can then repair with AMFU.
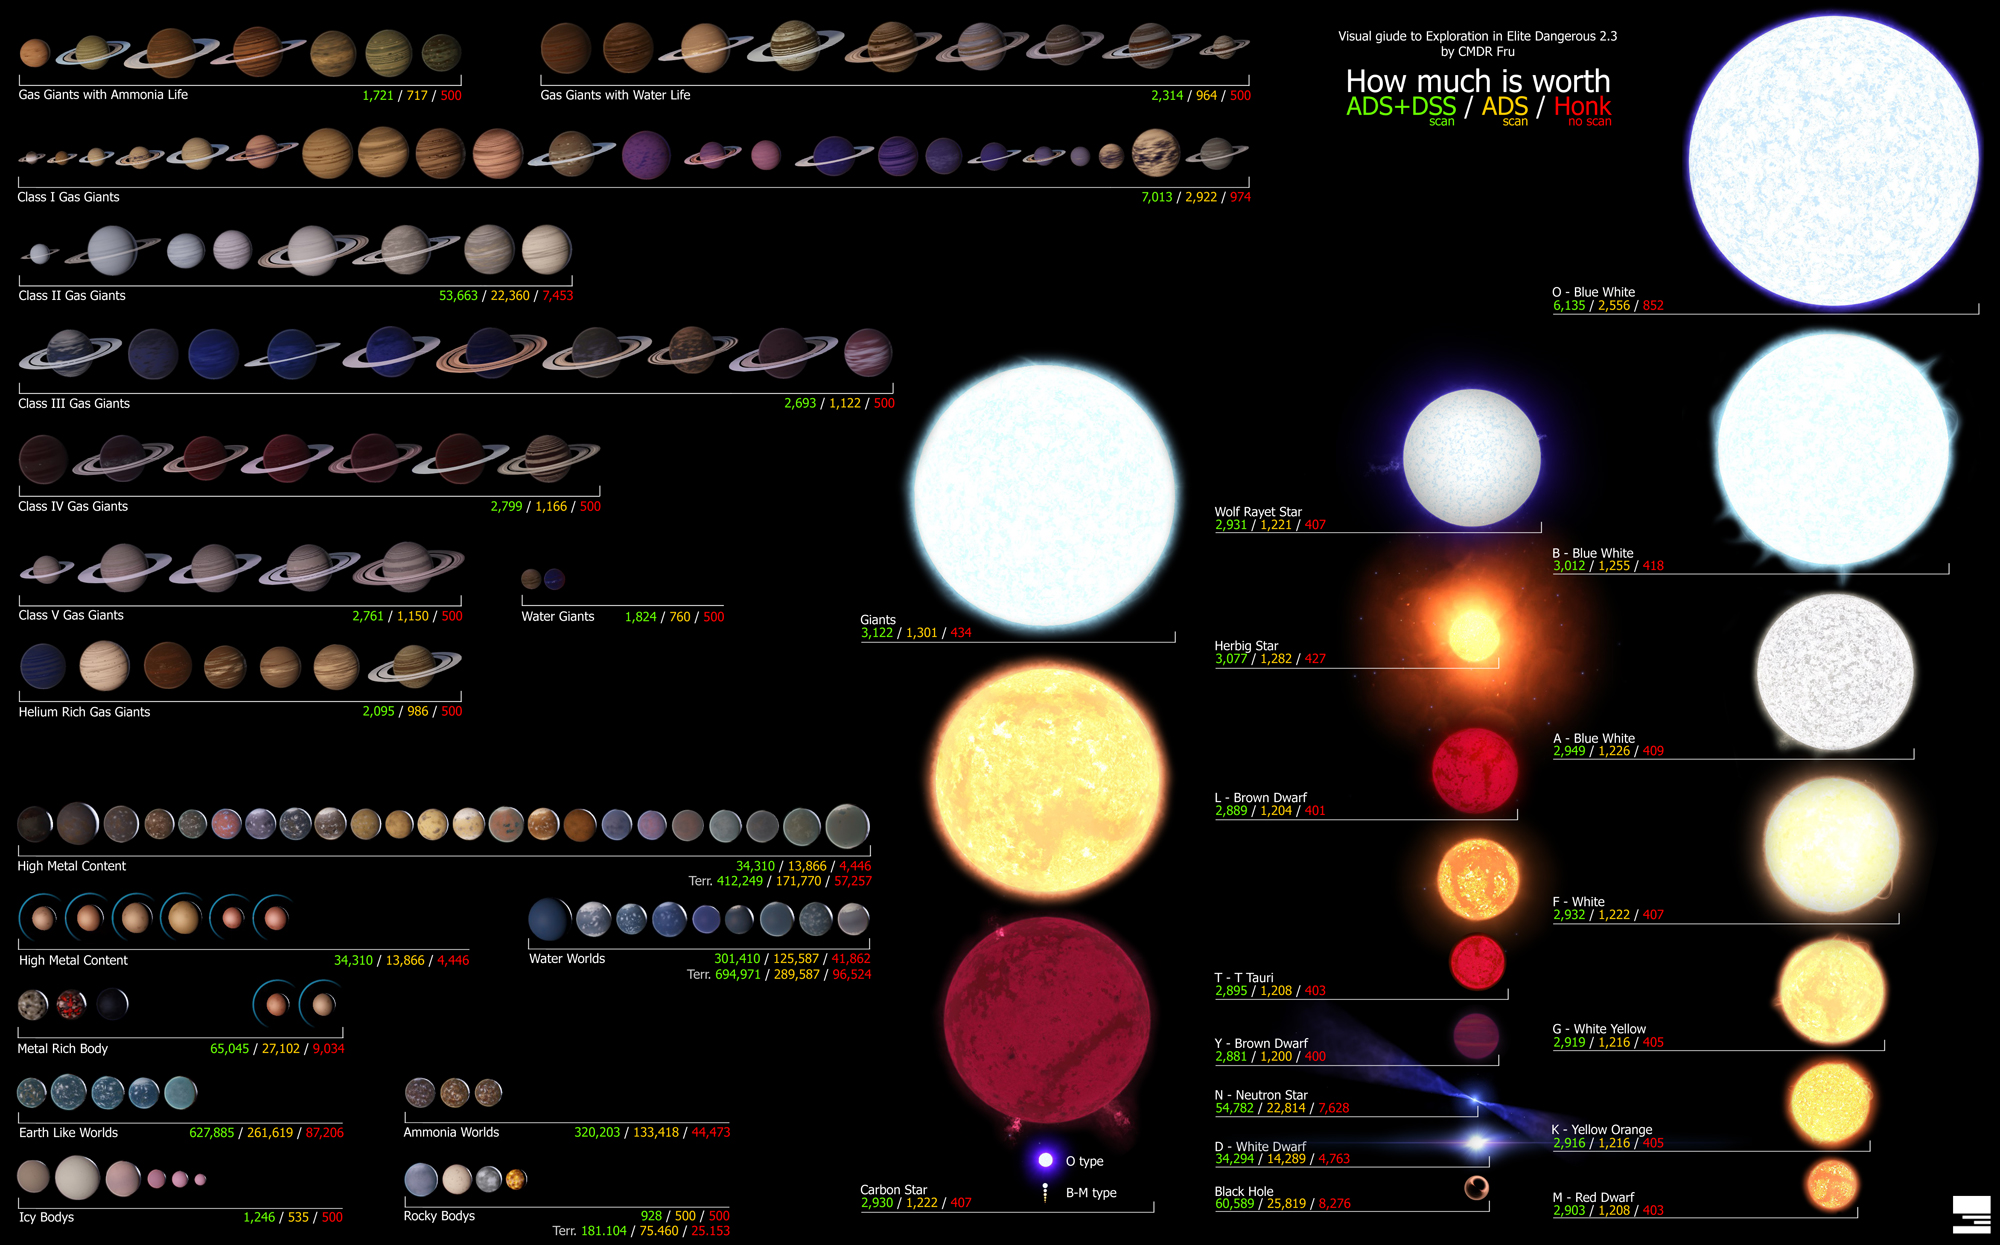
 Each scan you make has a worth measured in credits
By discovering stellar objects, just the fact that they are there and exist, or if already known, their updated position, is worth money, these are called Stellar or System Data. Detailed scans of stellar objects are also worth money, these are called Detailed Data. System Data's worth changes based on where you sell it - if you are in the neightbour system, trying to sell information of a close system, it's obviously worth less for the locals, however if you are selling information about a system from really far away, it's worth is multiplied.
Detailed Data on the other hand, always costs the same - it's worth depends on what you scanned. Rare type of planets, metal rich planets, earthlikes? A random gas giant or a neutron star? All have different values. Use the picture below to see incomes what to expect (click for higher resolution!), and to identify planet types simply based on their updated (2.3) holograms.
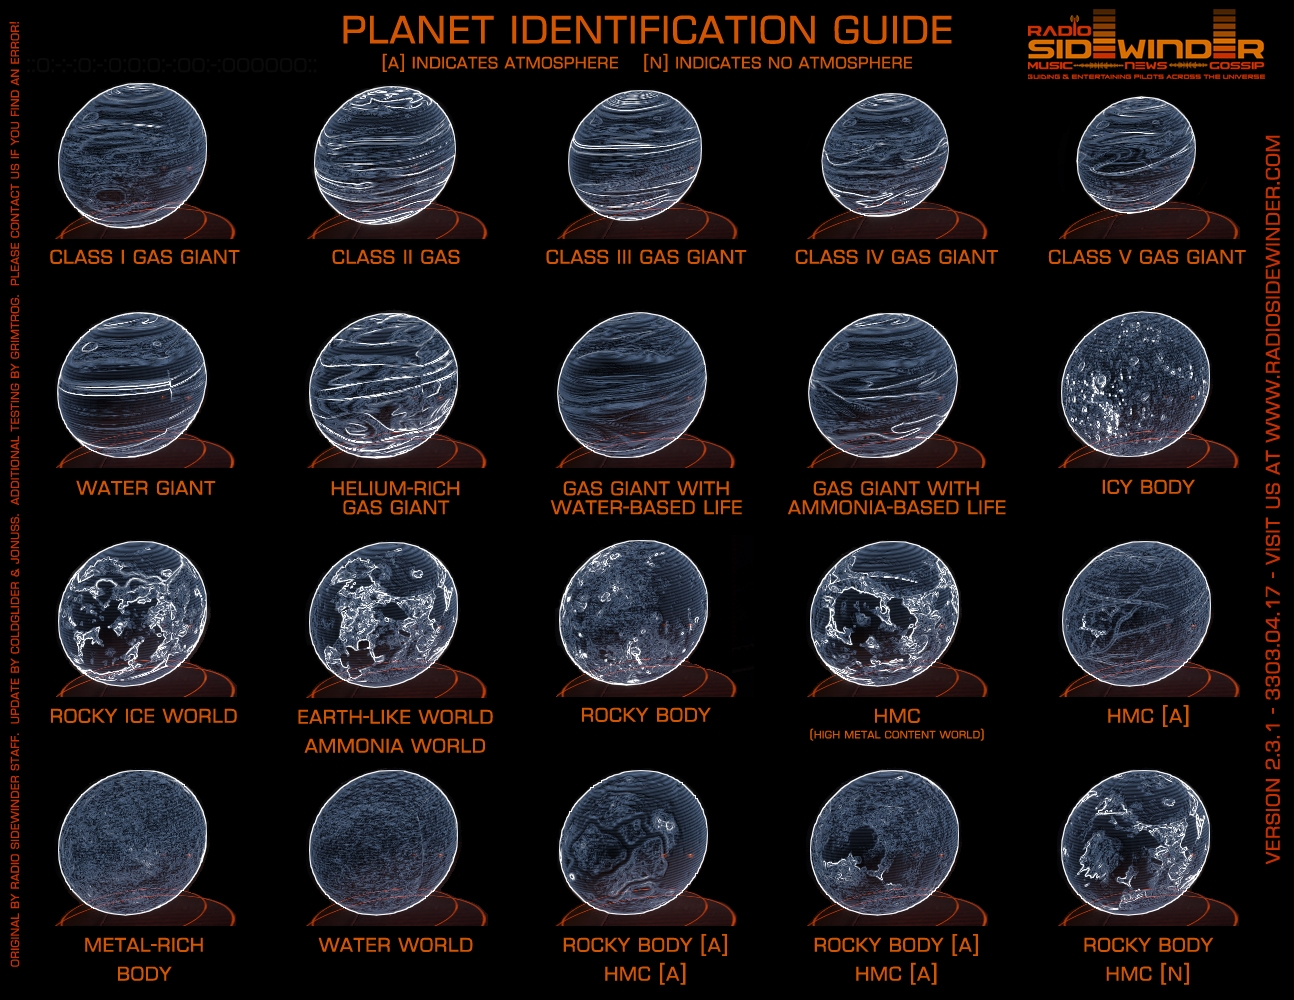 Keep in mind, you'll have hundreds or thousands of these from a long range exploration trip, each likely futher away from the civilization bubble than the previous, making it more expensive.
 When planning an Exploration Ship, you want to look out for the following:
The core ship model. Some ships have massively higher jump range than others. The most commonly used, recommended for exploration ship models are:
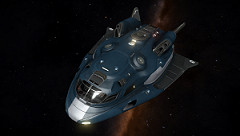 Adder ( Zorgon Peterson )
The smallest of explorers, the Adder is like A Bug's Life - it's small, it's irrelevant, but it can still accomplish wonders. Being one of the first and cheapest multipurpose ships, it's obviously not designed by the manufacturer to allow it being a great explorer - but it still is, a good explorer. This is the absolute bareback option, while many explorers enjoy it, I'd recommend something more specialized.
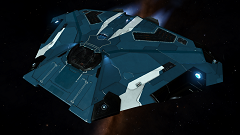 Cobra Mark III ( Faulcon DeLacy )
One of the early game ships, getting one is considered the baseline of starting the game. However, it is also an excellent lategame ship even for the super rich because of it's stunning jump range that can easy go up to ~30Ly, without Enginner modifictions.
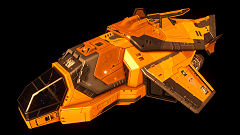 Diamondback Explorer ( Lakon Spaceways )
Similar to the Cobra MKIII, but as it's name suggests, it's a dedicated explorer ship. The Cobra can be used for rare trading, hunting pirates or joining conflict zones, and while the DBE just like any other ship, can do the same, it is advised not to use it for these type of activities especially since you have better alternatives at your disposal.
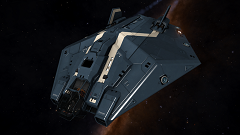 Asp Explorer ( Lakon Spaceways )
The "go to" explorer ship. It's core 5 million price is demanding for those still being relatively early in the game, and outfitted properly it is easily 15 million. But for this money you aren't only getting much bigger and more versatile modules allowing you to comfortibly pack in everything you need and more than you need of them, you are also getting an excellent medium sized long range trader and smuggler ship with arguably the best windows to look through.
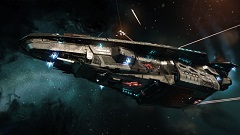 Anaconda ( Faulcon DeLacy )
 The Anaconda was long considered "The" endgame ship. Before the Federal Corvette and the Imperial Cutter got added to the game, the Anaconda was the single biggest and most expensive ship in the game, being a multirole ship at that. It is a massive mothership type of vessel that can be outfitted for massive combat encounters, transporting huge amount of cargo, or making it an extremely self-sufficing exploration ship - or a mix of the above, with some serious cutbacks from one or the other aspect. Regarding exploration, the Anaconda has the most space to use for fuel, storing materials for self repair, have a giant fuel scoop and way more utilities installed than you need for exploration, but can be a comfortable addition with little to nothing sacrifice - as expected for it's price.
ACTIVITY TYPE: PIRACY
Piracy is primarily considered a Player vs Player activity. As of now, Elite does not offer a way to communicate with NPC ships, so you cannot declare piracy, make demands, and give them a chance to cooperate after threatened. This obviously works with players, and the following is a short guide about how to be a pirate. This is the troublesome and the most time consuming way of making the least amount of money, but many follow the way of piracy for the sheer fun of roleplaying.
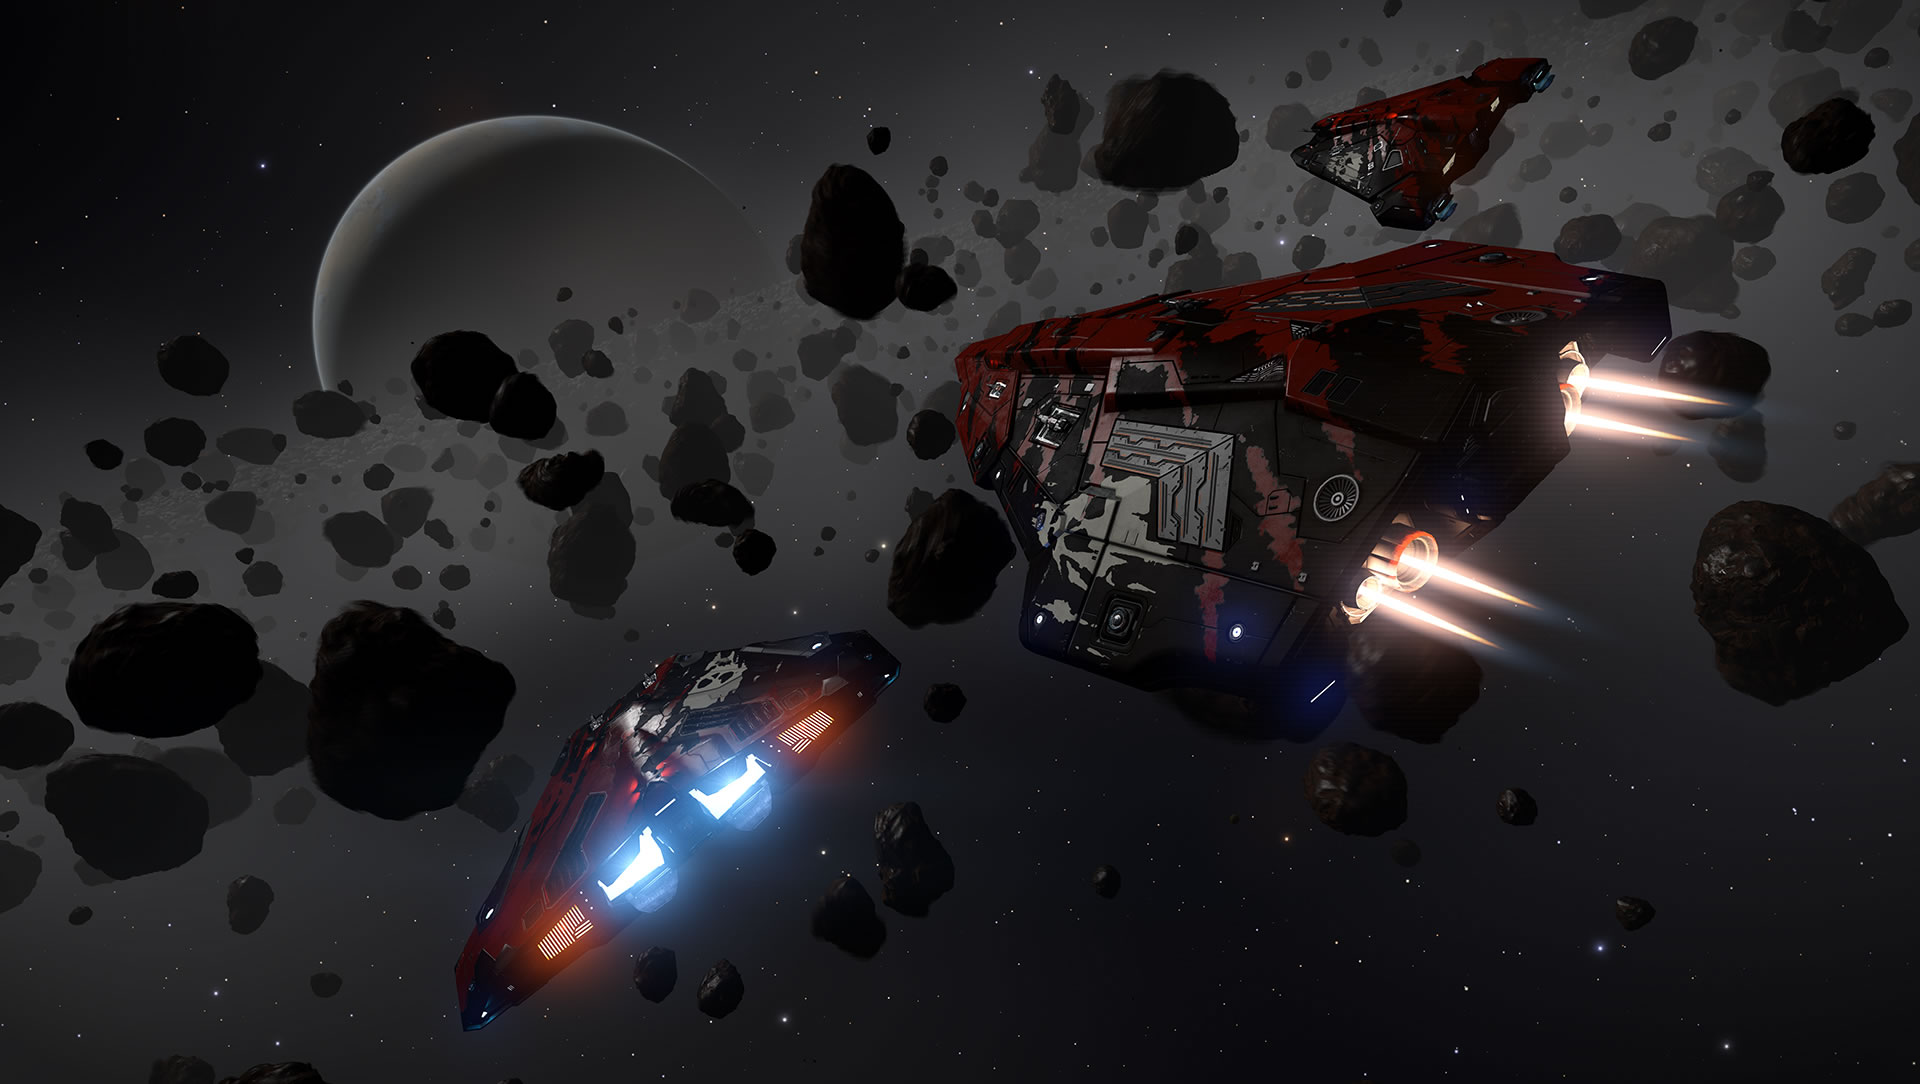 NPC pirates are often wearing their black sails proudly - the paintjob on the picture above is exclusively used by pirate NPCs. The skull logo is a decal that was aviable with the Mercenary Edition of the game (pre-order). If you know you have cargo, be sure to keep your distance - there is no honor among thieves in Elite. Not among NPC thieves at least.
- First off, you'll obviously need a threatening force, that is your outfitted for combat ship. You are going to need some cargo space aswell obviously, to store the cargo you aim to steal.
- Install a Frame Shift Drive Interdictor, Hatch Breaker Limpets, and Collector Limpets.
.
- Wander the galaxy looking for a target. You can increase your chances of finding a fat transport by going to rich systems with a likely higher security, or hanging out near extraction stations. Resource Extraction Sites are also a great place to find miners.
- Always check before attacking somebody, what level of security system you are in. These can be High-, Medium-, Low Security or Anarchy. Every ship has an automated distress call system installed that alerts local authorities if somebody is illegally attacking you, and they'll eventually show up. As a pirate likely having bounty on your head, it is advised to swich off your distress call system, you can do this on the right panel's Functions tab: Disable reporting Illegal Activity against me. Anarchy systems have no local authority forces, these are the blinds spots of their forces where you can do whatever you want - nobody hears the screaming for help.
H/M/L security systems determine how fast help arrives, and what kind of force you can expect to meet if you are not fast enough. - Interdict your target. See how the pilot reacts - some are scared sh*tless and drop cargo on sight, some do so after a few shots. Problems start when you meet those that are willing to fight and die for their cargo, be it biowaste (literally crap) or valuable rare minerals, and than there are the runners. Shoot them enough to disable their shields first, then do no more harm - if the ship is destroyed, majority of it's cargo goes with it.
Once without shields, you can use your Hatch Breaker Limpets to try to break open their cargo hatch and force the precious cargo out midflight (note: as of patch 2.1., this is kind of difficult. In patch 2.2., Hatch Breaker Limpets will move much faster and be able to bypass shields). You may also try to disable the Engines or the Power Plant of your target, by targeting specificly these modules in the SubSystems menu (or going through all of them with hotkey [Z], possibly [Y] if you are using a non-hungarian keyboard.)
Once you got the cargo dropped, simply collect it. You can open your Cargo Hatch with [Home], position yourself in line with the cargo and swim towards it nice and slow - if the short range radar on the left turns red, it means you are going too fast and will destroy the cargo on contact. If you don't plan to retire right after you are done with this in case of getting anything more than 4-8 cargo canisters, you might want to speed up by using Collector Limpets you can target and fire at cargo canisters. They'll launch from your ship, grab the canister, and bring it back - sadly, they are expandable and can be used only once, so pack a few. Each weights 1 ton, replaced on use by the 1 ton of cargo collected by it.
- Your collected cargo will be marked - you can see it in your Inventory on the right panel, that the cargo you just acquired is mared Illegal or Stolen, likely Stolen. You cannot sell Stolen and Illegal cargo on any market - Illegal cargo may be legal elsewhere, such as slaves, alcohol, tabacco, personal weapons and whatever can be prohibited somewhere, while not at all somewhere else. Stolen cargo however, is punished everywhere, with the exception of Pirate Stations. These are always small stations, you can identify them by the piracy skull logo holograms, and they are almost always found in Anarchy systems. At any station that has a Black Market, you can sell both Illegal or Stolen cargo. To find a Black Market, you can use the Galaxy Map, EDDB.IO, or Inara. See the resources and trading section, latter regarding black markets.
- Hauler, Adder, Asp, Cobra, Diamondback Explorer,
Imperial Clipper, Federal Gunship, Python,
Type-6 Transporter, Type-7 Transport, Type-9 Heavy
ACTIVITY TYPE: MINING part1
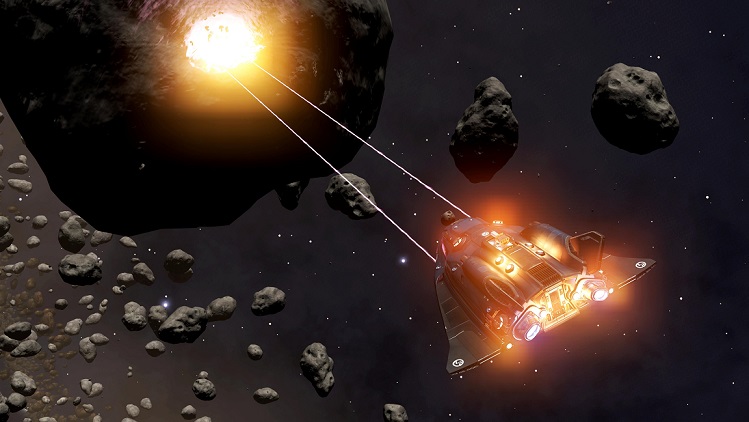
RequirementsMining laser, Refinery
Advised Prospector limpet controller, Collector limpet controller. The largest cargo space you can afford safely. Despite being in the advised category, but really, don't even think about starting mining without these.
Mining it's a rather easy activity type that can yield tons of money for new players and is useful for material collecting at any stage of the game. But, let's not get ahead of ourselves, first let's make clear the difference between Materials, Minerals, and Cargo.
- Materials are used exclusively for engineering your ship [Horizons exclusive feature!], and have a separate 1000 unit inventory space that carries with you regardless of what ship you fly with what kind of cargo capabilities. Materials are not lost on death.
- Cargo / Commodities is what takes 1 ton of space in your cargo hold. This is what you can trade with, this is what transport missions give you to carry from A to B. Cargo is lost on ship destruction, and unlike materials, attracts the attention of pirates!
- Minerals are raw ore that you can refine into a commodity for trading purposes. You get these by mining in asteroid fields, planetary rings, and you need a Refinery module to - you guessed - refine them.
Now with this out the way, let's move on to limpet controllers. There are 3 type of limpet controllers: cargo hatch breakers (used for piracy without destroying the target ship), collector and prospecting - we'll need the latter two.
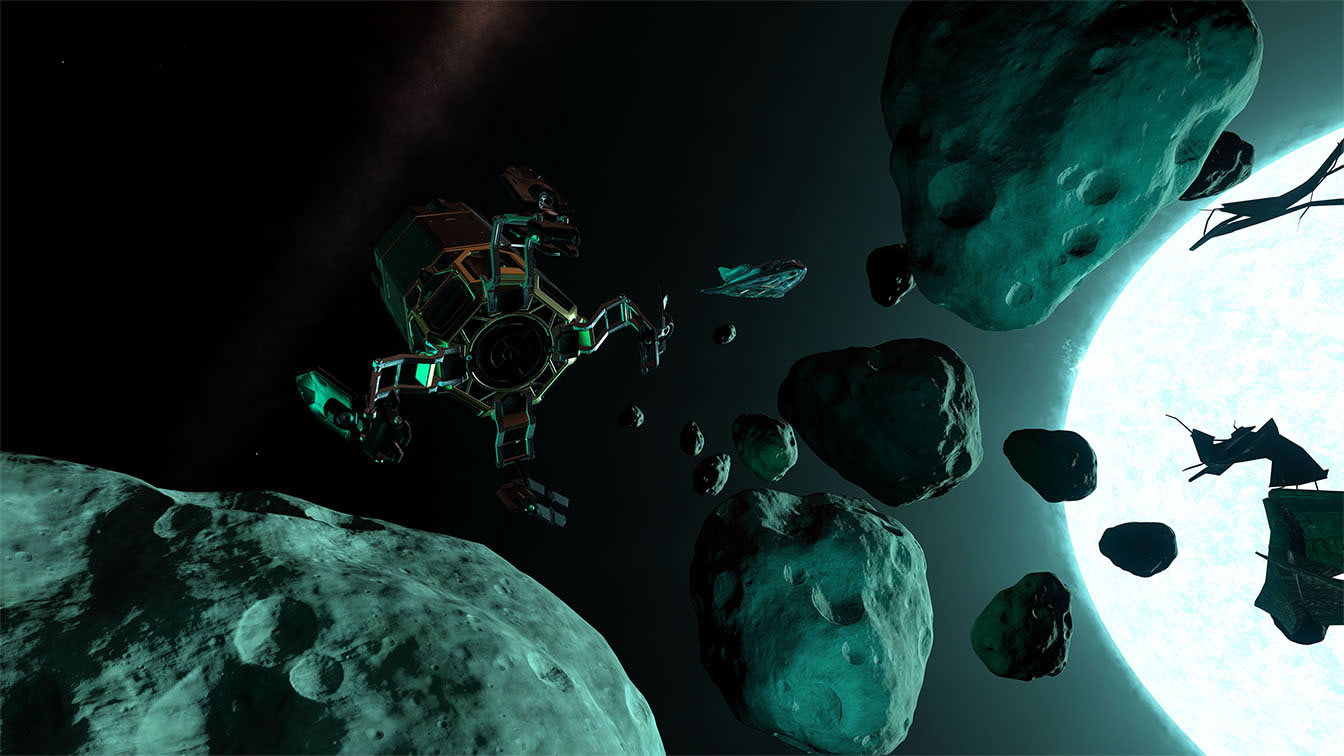
- Limpets are universal programmable drones. They act as consumable cargo: unlike weapon ammo, these are stored in your cargo space, each are usable only once and have 720s lifespan after which it runs out of power and self destructs.
- Prospector Limpet Controller is an optional internal module that programs your limpet drones in a few moments before their launch for scanning: they'll seek out the closest asteroid you target by simply looking at it, attach themselves to it and scan what minerals and materials are in it: so you can decide if it's worth your time and drones to mine it's contents or go for another. Without prospector drones, you'd do mining blindly.
- Collector Limpet Controller
is also an optional internal module, and can quickly collect cargo / commodities, minerals and materials. A collector limpet controller, depending on what type you equipped your ship with may control more or less drones at a time. If you can afford the internal module slots, it is advised to install more than one of this module to your ship, so you can collect and move to the next asteroid much, much faster. For example, mining Anaconda can easily operate even 12 collector drones at the same time. IMPORTANT: Do NOT target any floating collectable item when launching these! Given command for specific target collection, the drone will expire with it's job done, however if you launch them without targeting anything, they'll float at your cargo hatch, following you around and automatically detecting and collecting floating collectables for you. Of course you can target anything after the drones are out, just don't have anything targeted when launching them.
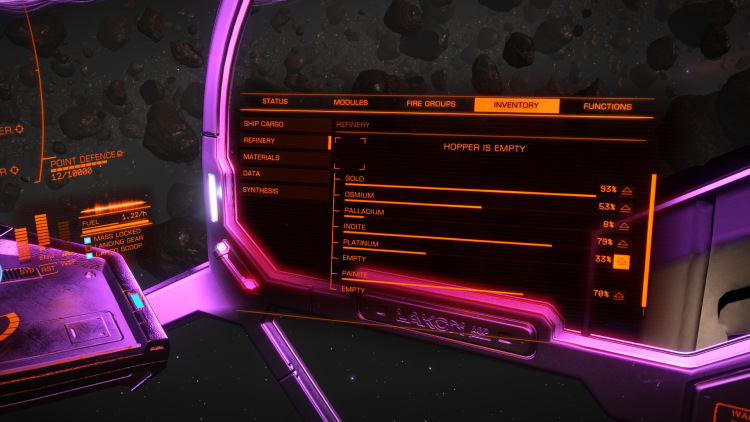 Refinery
is what it is: a refinery. This will convert your raw chunks or mined minerals to cargo you can sell. Depending on how good your refinery is, it has it's own inventory for a number of different types of minerals - it can work with everything, just limited by how many empty cargo canisters it can work with at a time. The Refinery consists of 2 parts: the hopper, and the refinery itself. The hopper is best described as a "lobby" - the last chunk of collected items wait here until there is a cargo canister available for it to be loaded into. The refinery is working on the collected chunks: the more you collect from the same type, the higher it's percentage (%) goes: upon reaching 100%, the refinery slot becomes empty, the refined material becomes cargo, taking up 1 ton of cargo space, and the next type of ore automatically being loaded up in the refinery in case there is anything waiting in the hopper. You can eject any partially done ore at any time with the small arrow icon to free up space. This way you can manage your refinery slots, because if there are too many type of ores floating around - and your collectors will get them all - the whole refinery process can stop if the drone cannot load in it's carried ore to the hopper, because the hopper is full due to not being able to drop it's content to the refinery because that's full of other type of ores. The whole process goes on automatically, all you need to look out for is managing your refinery and hopper in case it gets overloaded.
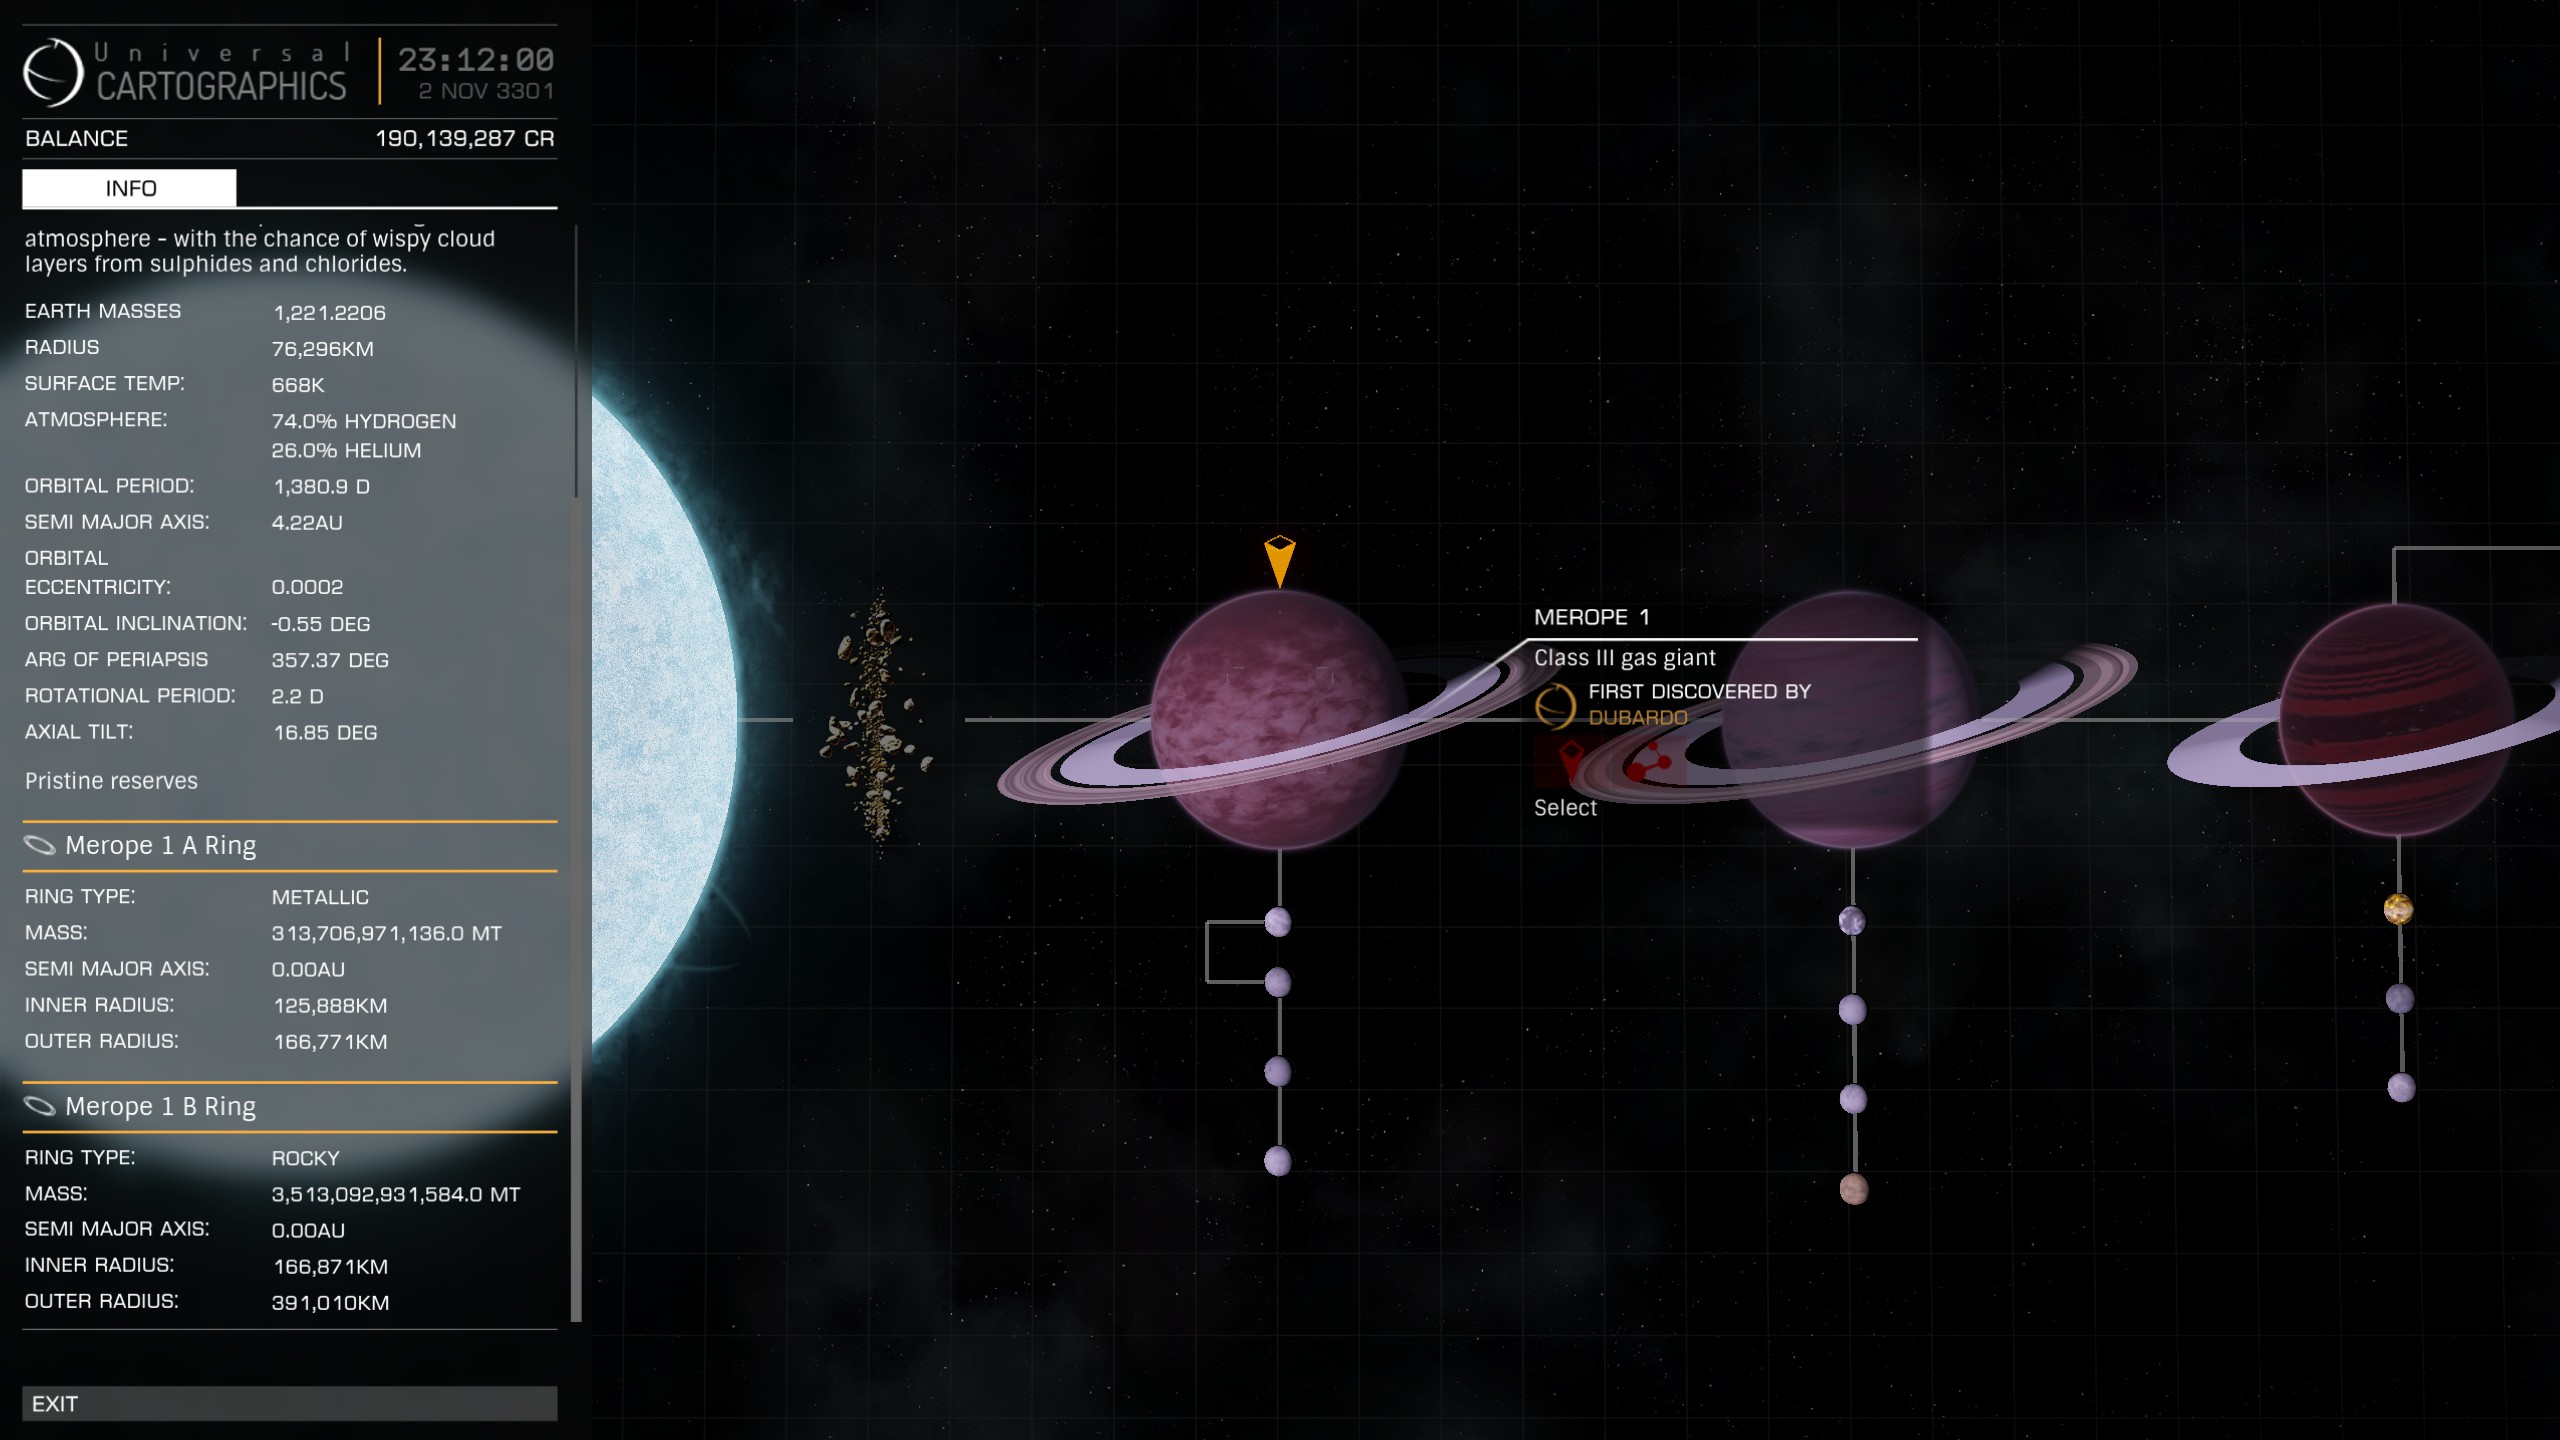 ///////// EXAMPLE SCREENSHOT: THERE ARE THOUSANDS LIKE THIS FOR YOU TO GO TO! /////////
First, you'll need to find where you want to do mining. This is the most important decision of them all! The security level of the system determines how frequently - if at all - pirates will harass you for your cargo. Given how much internal module space mining requires, especially smaller and medium sized ships are likely unable to protect themselves alone, and pirates are rarely satisfied with a few tons of dropped cargo, but I bet you don't want to drop that anyway. You are almost never getting bothered in High Security systems, anything below - try at your own risk.
You don't want to waste your time on scraps: extract what is worth extracting
Most of space naturally contains common, low priced minerals: things everyone has tons of and despite the mass consumption of industrial worlds, each ton separtely are worth very little. You want the best value for your used up cargo space: the rarer, the better.
Find yourself a Prestine Reserves planet with a Metallic ring!
Planets, rings and asteroid fields can be either depleted, low, common, major, or prestine, with the last being the best both in terms of quality and quantity of possible resources. "Prestine resources" is written at the end of the planet's descripton on the System Map. The second layer are the rings / asteroid fields themselves: they can be icy, rocky, high metal content and metallic. Icy plays in it's own league with resources you can find only there, but the rest acts like the planet tiers: rocky is the worst, containing mostly common resources, and metallic is the best, containing high quality and quantity resources.
And this is when you want to scroll up (or click on right) the Tools and Resources section again, and check out PMDC, and see the magic working! *sigh* Okay, here is the link again. You know I love you all.[edtools.ddns.net]
ACTIVITY TYPE: MINING part2: The mining sequence
- Equip your ship with the modules you'll need.
- Use PMDC to find your ideal location for mining: the closest High Security system with Prestine Reserves. Once you are there, look for the planet with Prestine Reserves AND a Metallic ring.
- Fly there, drop from supercruise at any random point of the ring. If a planet has more than one ring, you'll want to check on the System Map which one is Metallic, and drop at that. Ring order (A, B, C, more?) starts from the inner ring (A).
- Send out a prospector limpet. Target it with [T]: once it attaches itself to an asteroid, it's description will change to list it's contents. The asteroid "health" % goes down as you keep firing your mining laser on it, while each ore's individual % shows how many chunks the asteroid will give you until it's health % drops to 0 - depleted.
- Launch your collector limpets and open your cargo hatch with [Home] or from panel 4. You can use the external camera to see them working, quite relaxing :).
- Manage your refinery in case your collectors are stopped at your cargo hatch, waiting in line.
- Once you run out of limpet drones, head back to wherever you want to sell them, and repeat from point 3.
ACITIVITY TYPE: Community Goals
 Community Goals
As it's name may already gave it away, these are missions a massive amount of players share. Each and every mission is randomly generated in the game based on the current System and Faction statuses in the background simulation, and your personal Pilot's Federation ranks and reputation towards the local and superpower factions. Community Goals are, an exception.
Community Goals are not generated, but manually created by Frontier Developments and partially through these, the story of Elite evolves. These missions are shared between every player and visible all the time even on the galaxy map, and are a week or two week long missions usually.
Based on if a Community Goal is successful or not, Frontier is writing the story based on the outcome - and that depends on us, players. Since Community Goals come with a nice bonus payout, usually all of them succeeds so you may think, it's easy to give the players such power (manipulating the galaxy's story), but you should know that at the really important story events at least two or even more Community Goals are made and players work towards one or the other - whichever gets progressed futher before closing (or gets closed sooner because of maximum progress reached), wins, and it can decide control over a starsystem, an outcome of war, supervising alien ruins found on some planet surface, and so on.
Let's take a look at a random community goal: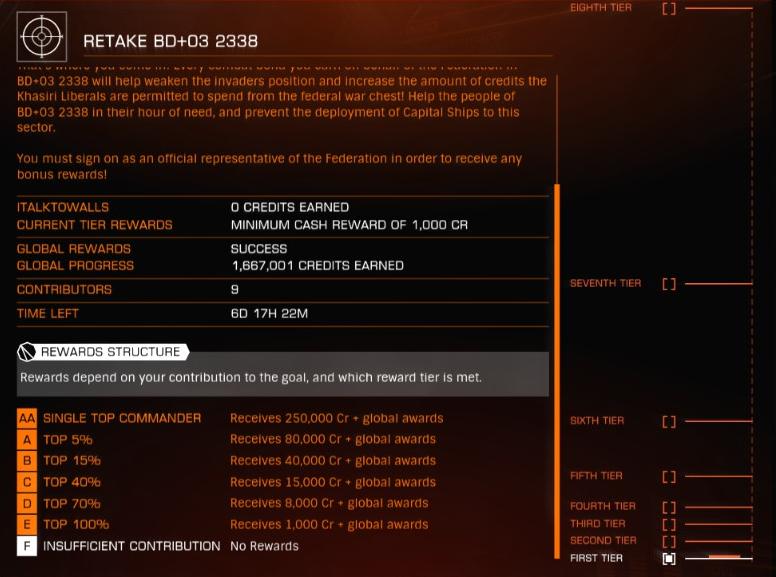
If you are done reading the story, you want to look at the Summary (written in white), Rewards Structure and the ever growing graph on the right side. Community Goals can be anything from delivering exploration data, delivering cargo, or giving in bounty vouchers or combat bonds.
- Contributing the bare minimum 1 tons of cargo gets you to top100% tier, meaning you'll get rewards out of the CG. This is extremely useful for new players, because as the CG tiers are progressing higher and higher, each Player Tier's rewards also become higher and higher, meaning even 1 ton of cargo can get you ~100.000 to ~500.0000 payouts when the CG ends.
You can pick up your reward from the mission board of the station hosting the CG. You don't need to hurry if you have no time to play when the CG ends, once done, it stays there until you pick it up. - You can see the currently active Community Goals' yellow star icon on the galaxy map.
- Once you signed up for a Community Goal, you can keep track of all the info above on yout left panel, transactions tab, where you see currently active normal missions aswell.
- Signing up and not contributing towards a CG has no penality like normal mission goals, but obviously won't get you any rewards.
- Global Rewards apply to everonye regardless how much the pilot particupated, if at all. There isn't a Global Reward for every CG, and these are not direct payouts, but discounts at a certain station's outfitting hangars, increased payouts for combat bonds / bounty vouchers for targets killed in the local system for the next week or two, and so on. Global Rewards effect the galaxy, not the player.
Your ship!
This section is a sort of bookmark listing for the upcoming 3 other sections named Ship Configuration, to give you an overview of how things relate to each other in a quick glimpse, before we go into detail. Of course it's a very rough, overly simplified view this way, but combining these together: this is your ship!

Responsible for keeping your ship online and preventing meltdown to a reasonable extent

Responsible for altering the flying characteristics, effective time of your weapons and alters shield strenght

Section is dedicated for explaining Firing Groups and how to use pretty much every module you can pull the trigger on and makes you more than a floating brick.
It may sound too complex and scary at first, but it will build into your reflexes to use them so easily, you won't even notice. On top of me trying to do my best here to present it in the most visually easily processable, well structured way. To make a comparsion: essentiallyall this is the equivalent of moving your character in any game from point A to point B, equipping Y to destroy X. You can do that all by a few left clicks in ARPGs, for example. Here, you must make sure your character has legs to walk on, those legs work, and you won't die on your way to B from internal bleeding.
Part of Elite's charm, that gets you places like this!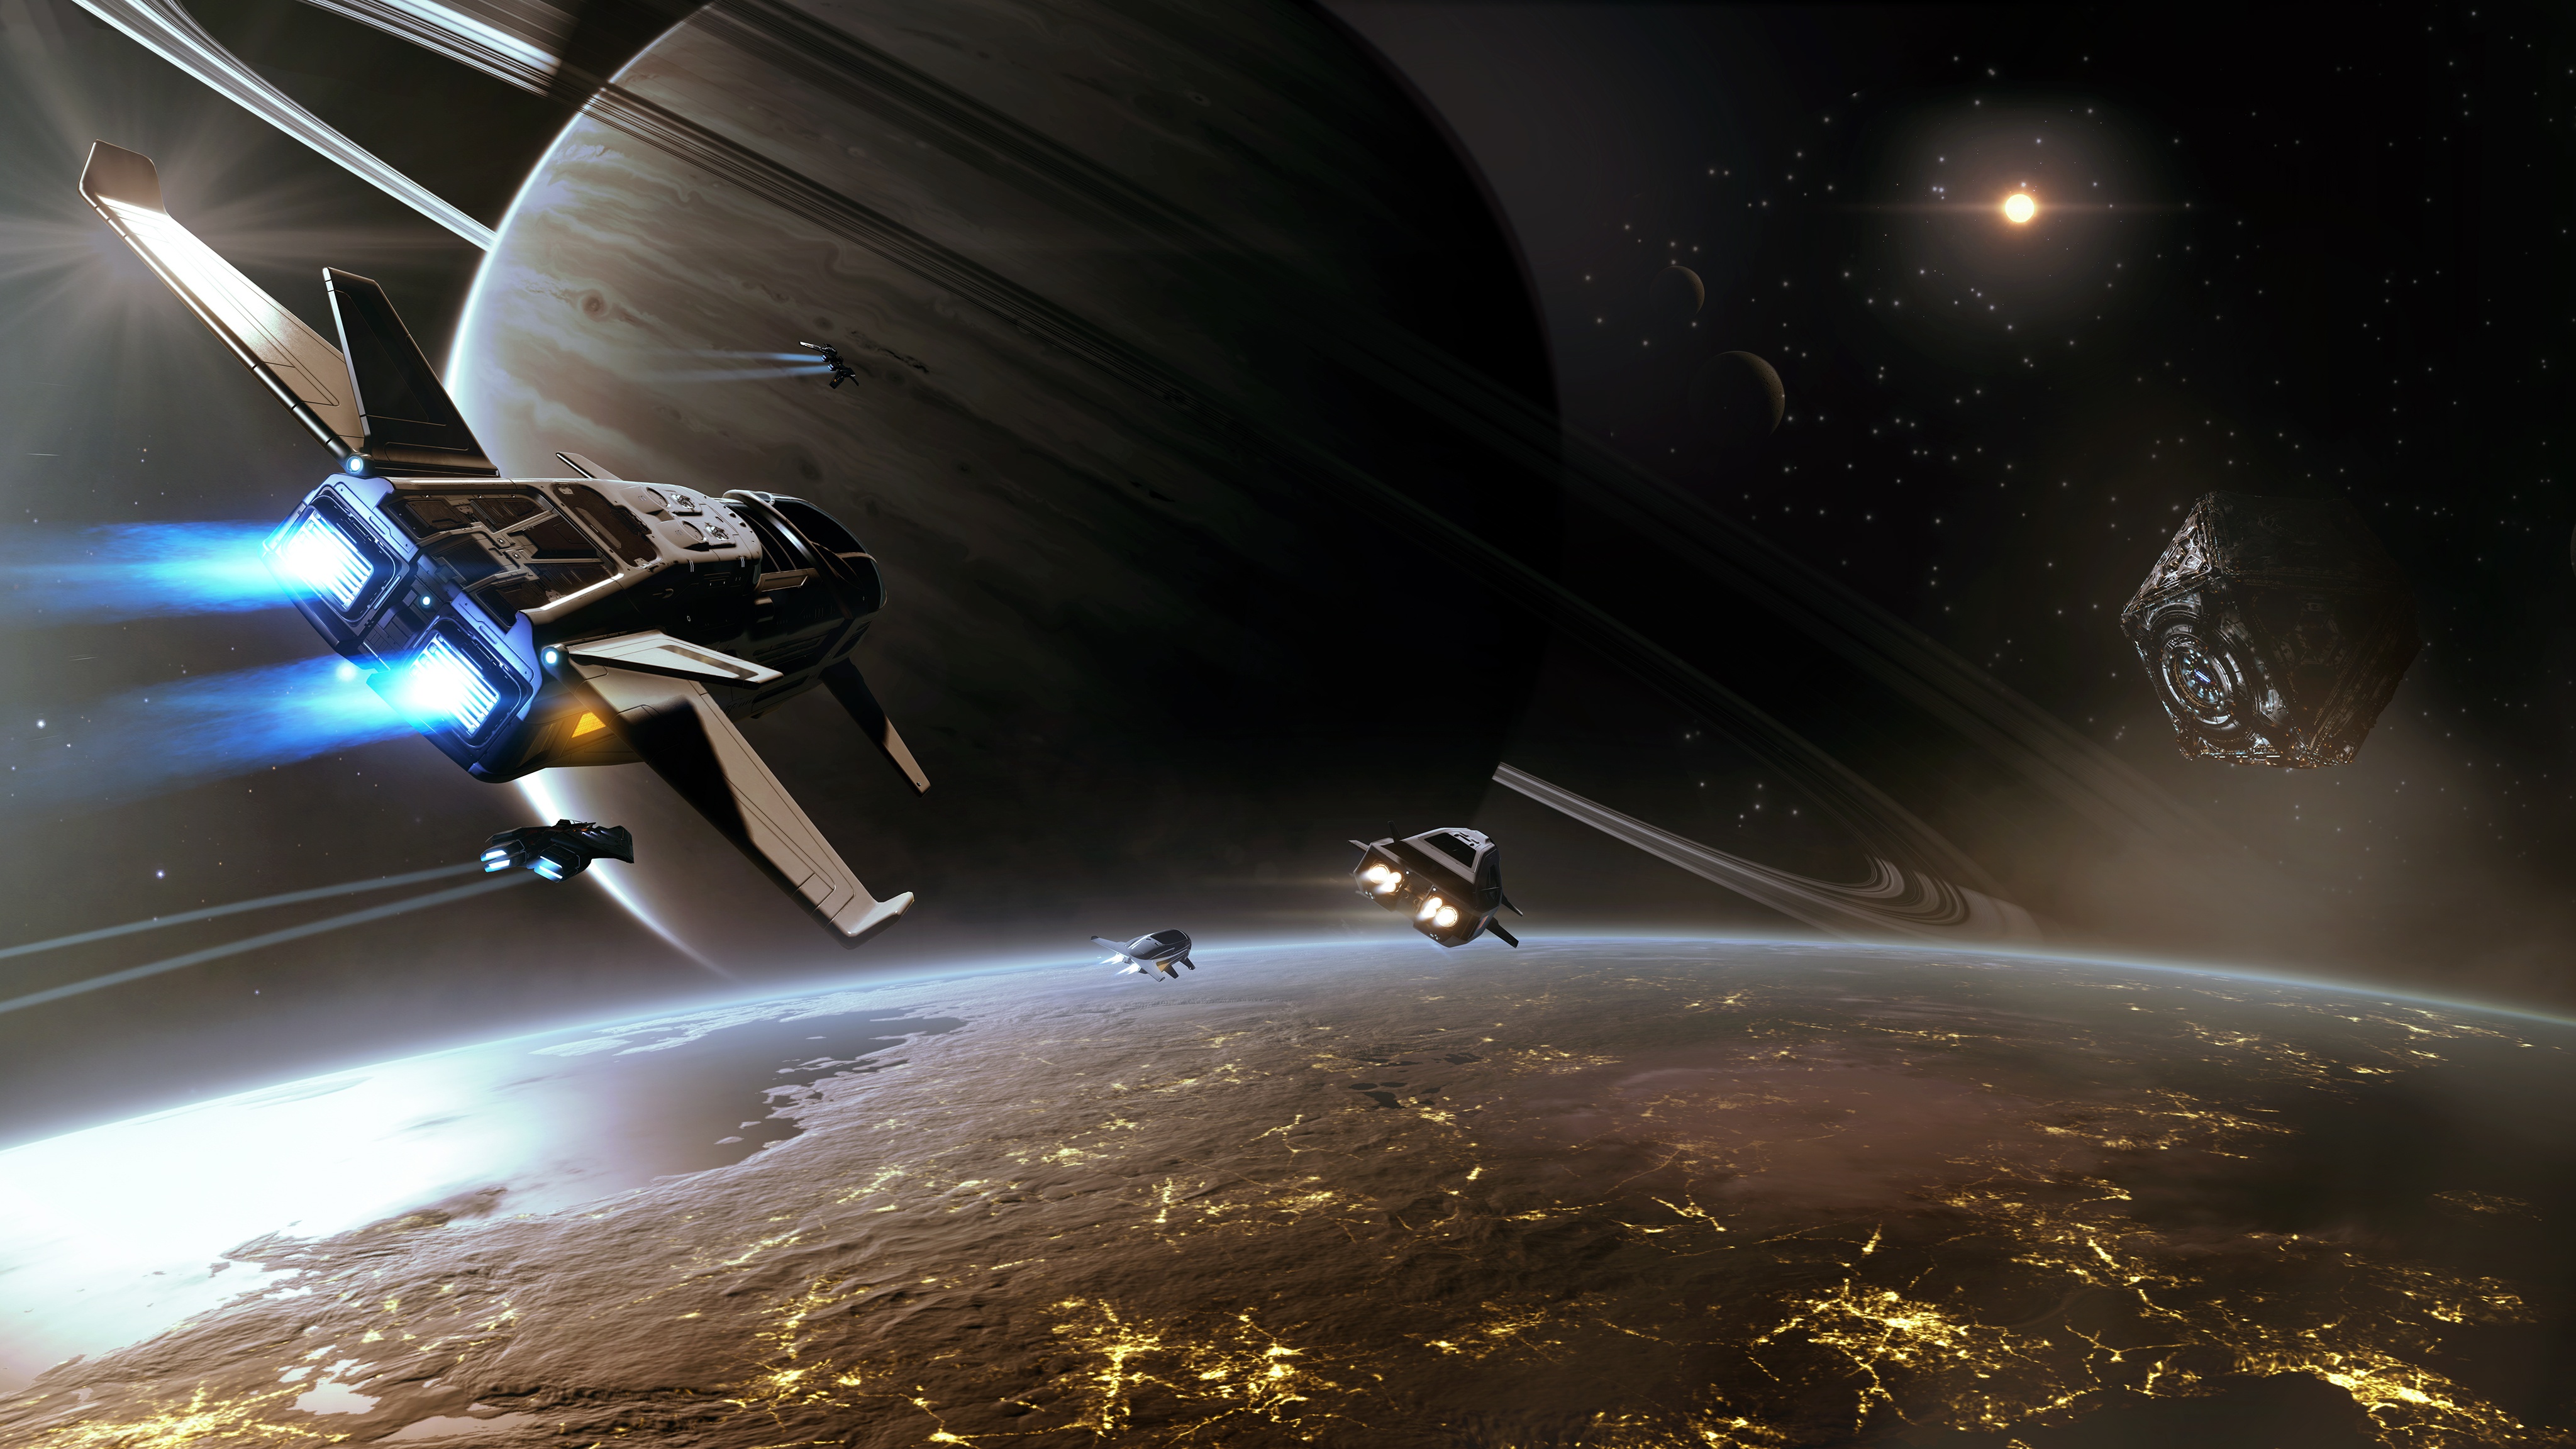
Ship Configuration: Power Management through Powerplant
Your ship is a complex machine. Even the Sidewinder you get on start have every option we are going to discuss here, although some are less important until you jump into something that has more optional internal module slots. Later on on when you'll pilot bigger ships such as the Imperial Clipper or it's Federation equivalents, or even smaller but more specialized ships like the Vulture, their characteristics are really showing themselves and you'll need to know how to work with them. All of this is possible, because you have power.
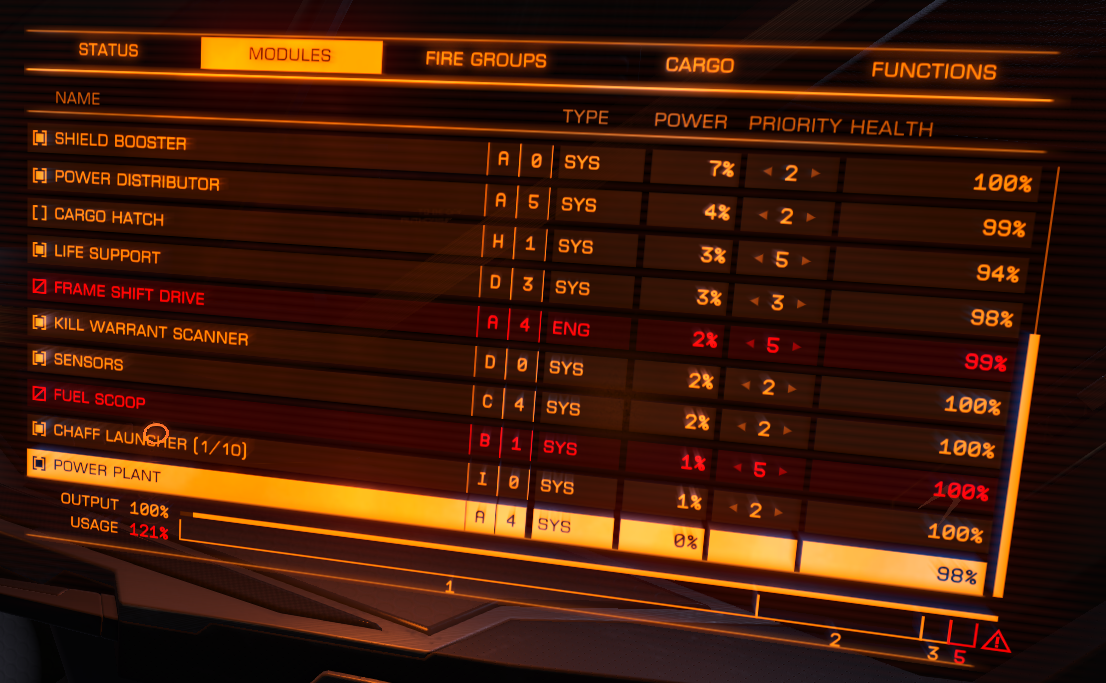 MODULES panel on your side side
Each and every module has it's power requirement given in %, based on your powerplant. Megawatts numbers can be seen on the outfitting screen of a station. If your modules combined require more power than what your powerplant can provide, things go downhills real fast. The priority number allows you to create a hierarchy between your modules.
The goal is to keep your power usage at any given moment at 100% maximum.
If you want to use up more power than you have available by firing a weapon that's % falls above the 100% you have, the powerplant gets overcharged and automatically shuts down itself along with every module to prevent sending you all over the station walls. However if you set up various priorities, it will shut down the least important (5) modules first, keeping the most important (1) operational. Sticking to the example above, the 5th (red) layer is disabled by the ship itself, because it's been configured to shut down those modules first, to keep the rest operational. If you are still above 100% and fire your weapons that only require power when used, the next (4th) will shut down too, freeing up power that's now used by your weapons. If the 4th layer was a group of small modules that eat up (for example) 2MW of power and your weapons require more than 2MW, we move to the next layer, and the 3rd priority modules shut down too. Retract your weapons, and all the layers that require energy that just became free for use charge up and become operational automatically in an instant or in a few seconds (e.g. shield cell banks require some chargeup time). You propably figured out by now that if you have everything set on the same priority level and you overcharge your powerplant, everything shuts down, and you have a limited oxigen (based on your life support module) to come up with a configuration that makes the modules you want back operational again.
With good management, you can install modules on your ship that combined require way more power than what you have and still use everything, not having to worry about accidentual shutdowns. Your configuration, if done right, keeps power usage at or below 100%, shutting down and recharing various modules automatically based on what you are doing at the moment.
Make sure to experiment with optimizing your config!
- 1: Frame Shift Drive In the absolute unlikely worst case of 0% Powerplant (provides 50% of the MegaWatts it should AND malfunctions happening that also take down another 20%. In the unlikely situation where this is happening to you in combat and you are still alive, you'll want your FSD operational to jump the hell out from there.
- 2: Drives You need a certain speed to enter witchspace with your FSD. You can add this to priority1 and still be okay as long as there are no malfunctions kicking in and your powerplant is not on 0% "health", I've put it in priority 2 for you, only to suggest the safest way, but honestly I don't care to use it myself, I rely on not reaching this point in the first place.
- 3: Shield Generator and your weapons Quite important if you want to defend yourself And if your shields are gone, you won't be able to regenerate it before you either die or kill what is trying to kill you. The worst case where your powerplant is damaged enough to drop even this layer off, you won't need your shield generator or your weapons anymore, you are extremely likely dead unless you manage to jump away. Thus, see priority 1 and 2.
- 4: Whatever you feel you can sacrifice templorarly, to save everythingHonestly, it doesn't really matter what's in here. Pirority 5 is about turning off everything you don't need at the moment, priority 4 is no different, only you get another layer to make things more comfortable
- 5: Whatever you won't use. For example, you don't need a Discovery Scanner, a Fuel Scoop in combat, do you? A cargo hatch or an SRV hangar? What the hell for? These can shut down first, and anything you only want to use in very specific situations like a Wake Scanner you can shut down manually and the automatic management, regardles of priorities, won't touch it.
You can disable modules manually by unchecking the box on the left with (SPACE).
This priority listing is near complete bullsh.t.
Why? While it gives a general idea of how to think regarding setting up your personal configuration (which is my goal here), different playstyles of course have different priorities.
Explorers for example, don't carry around shield cell banks, shield boosters, or some even use a shield generator in the first place, however, module repairing and heat sink are high priroity for them. You don't need to bother with making 5 different priority layers if you don't want to, especially if you have enough MegaWatts to keep things running even with everything on priority 1, though it still doesn't hurt to set up at least two layers to keep the essential bare minimum and everything else you can fit in to the first 50%, separated from the rest.
Personally, I manage my combat oriented Federal Corvette with only 3 priority layers, and I'm doing fine with shield generator grouped together with shield boosters and weapons, because they are all equally important for me in every situation. Your judgement, and more importantly, available power resources, may vary.
Make sure to experiment with optimizing your config!
Ship Configuration: Heat management through Passive / Active cooling
Passive Cooling a.k.a. Heat Efficiency: Every active module in your ship also generates heat, which the Powerplant is trying to lower through passive cooling. Passive cooling is known as "Heat Efficiency", rated from F to A. Important note: this is not your Powerplant's rating! While many matches in module rating and heat efficency rating, a 7A Powerplant for example has B rated Heat Efficiency. A better rated Heat Efficiency Powerplant means lower base temperature for your ship.
 Heat dispersion concept art...
Active Cooling and indirect cooling
There are many different factors that play their part in the current temperature of your ship. Being close to a star builds up heat extremely fast, energy based weapons, typically lasers also generate heat slowly, while plasma weapons for example generate a massive heatspike just like using a shield cell bank that is a strong fire and forget power injection to your shield generator. You can fight overheating simply moving away from the cause of the problem: stop firing, move away from the star, simple as that, however in middle of combat you often cannot afford not using a shield cell bank or not taking your window of opportunity to deal damage. Another example would be arriving between binary stars close together after an FSD jump, which is scary if you are thousands of lightyears away from the civilization bubble. These are the situations you'll be glad you have a Heat Sink Launcher
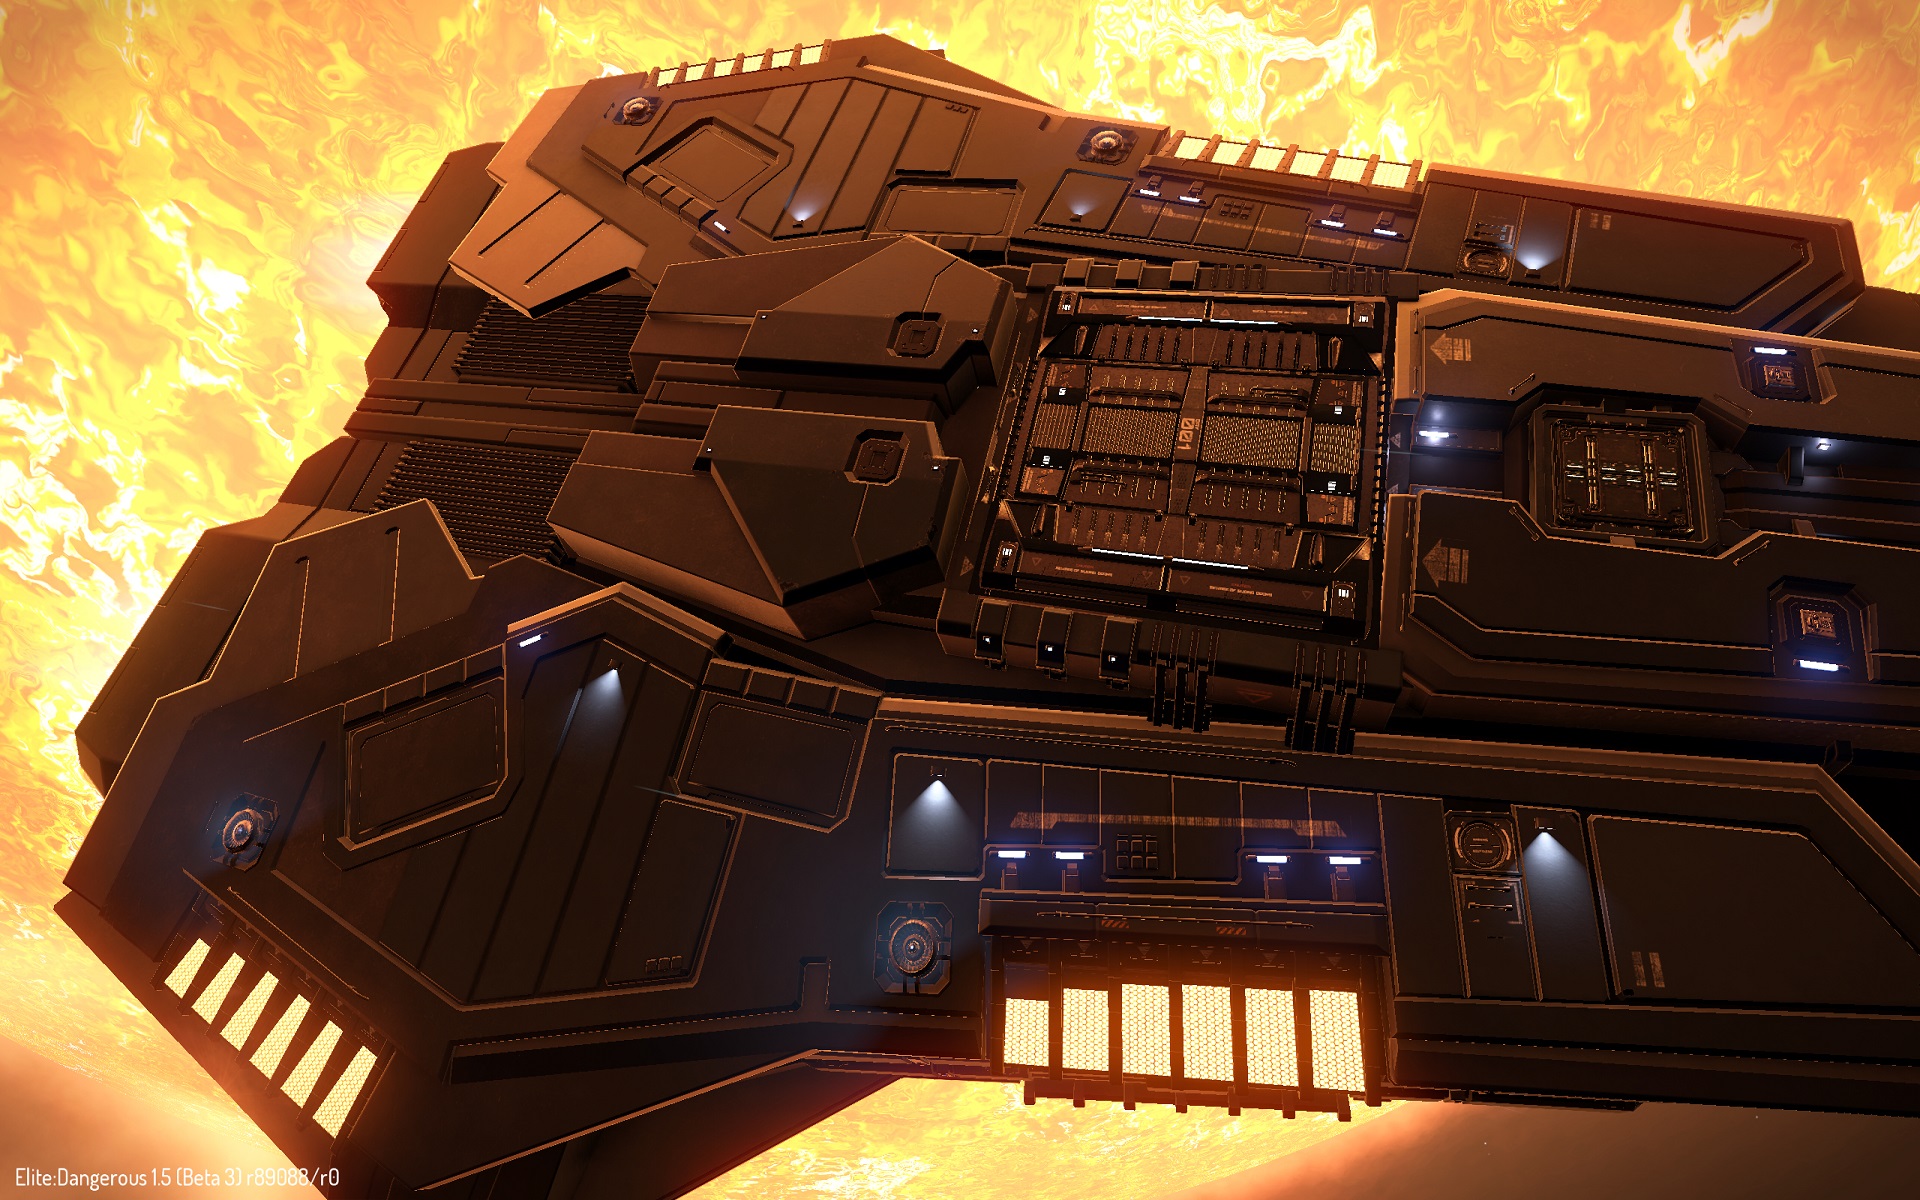
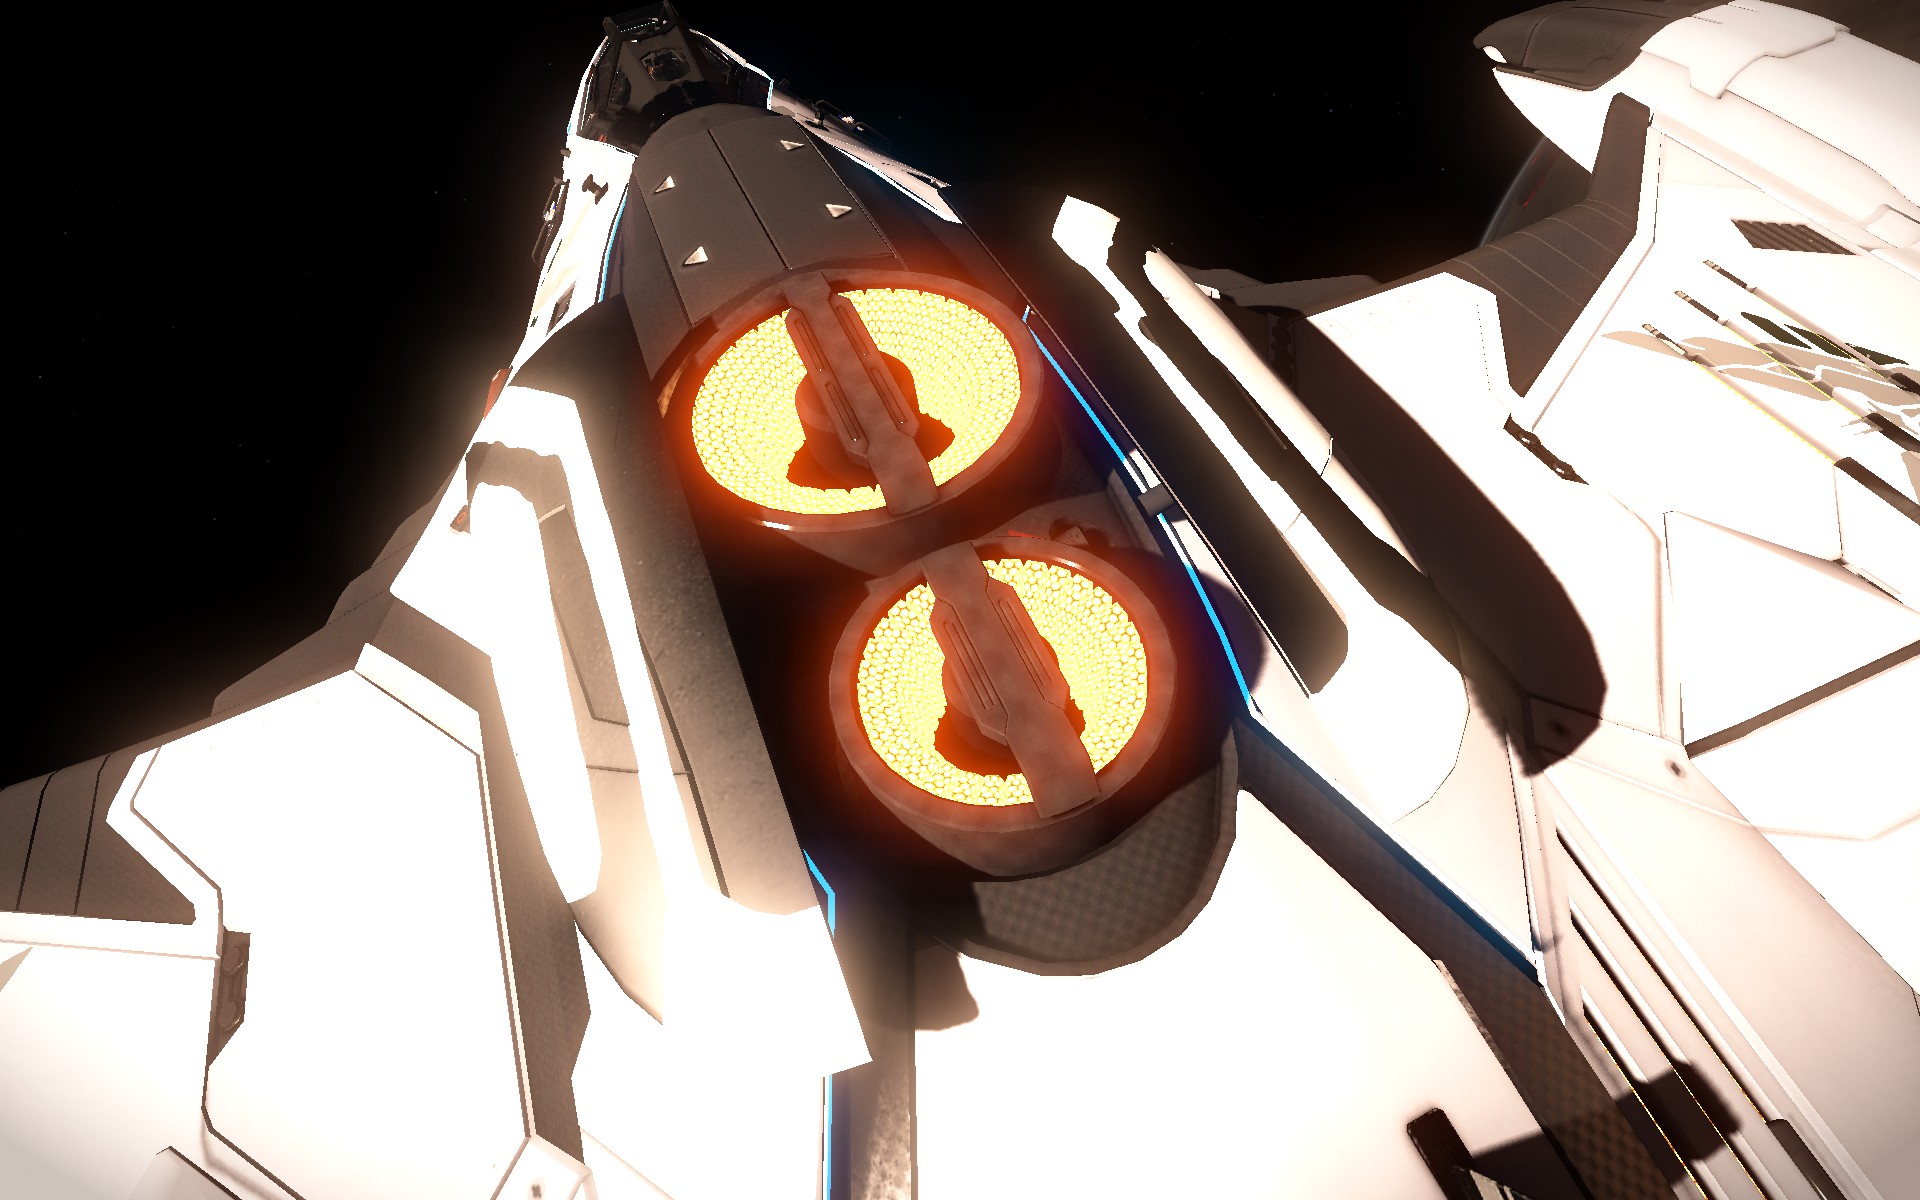 ... Passive cooling through heat dispersion examples on Federal Corvette (left) and Imperial Eagle (right)
 This module is found in the utility mounts, and it contains a number of metal(?) blocks capable of absorbing extreme heat without melting. What the module does is redirecting all the generated heat from your passive cooling to this block for a few seconds, cooling down your ship extremely fast, and ejecting the block out to space. Each launcher module contains only a limited number of such blocks, so make sure to not waste them! Heating up your ship to 100-120% in a relatively safe enviroment e.g. being in Supercruise with nobody trying to hunt you down is NOT a situation you want to waste these on.
Arriving between binary stars as an explorer, or being in combat with a safe but high temperatury (~70-90%) knowing you'll need to pull off a heat spike generating trick like firing your plasma cannons or a shield cell bank, boosting your heat way above 120% is when you want to use these.
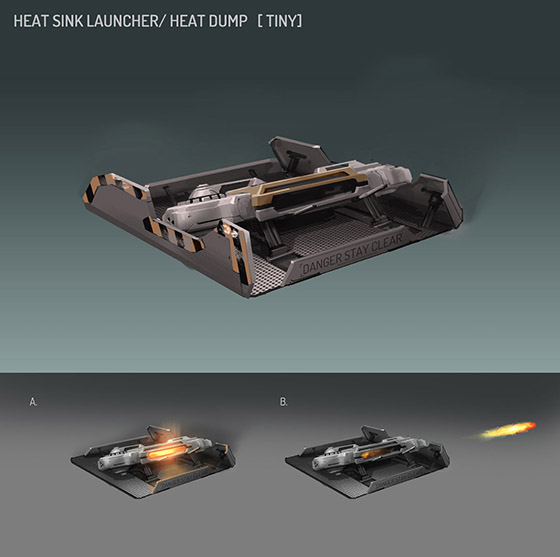 There are only 2 milestones to care about: the rest is only marked on your heat indicator for easier readability.
100% This is the point where your modules will start to take damage. At 100%, we are only speaking about 0.x % damage per second, so nothing to worry about. This damage per second increases with temperature however. It sounds scary, your control panel is on fire, tiny explosion sparks jump to your face, smoke leaks from inside your front panel, all kinds of warning lights and sounds go crazy, but in reality you can get away with 1 or 2% damage to your modules after several fuel scooping attempts that made your heat go above 100%, so nothing to worry about if you can go back below 100% within a reasonable time.
160% Something really went wrong if you reached this point. Other than your modules taking a much, much higher damage per second, it is at this point where your very hull starts to melt down. Translating this to the game's language, your hull health % (displayed on the right below your ship's hologram) starts to decrease at a dangerous rate. Needless to explain what happens when it reaches 0.
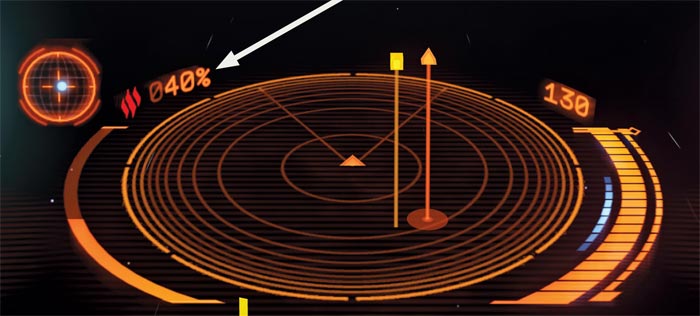 Heat indicator left from your radar
 Silent Running
What Silent Running does is closing the plates that open up for your passive heat dispersion. Since your modules passively generate heat over time that the powerplant is passively cooling down through these heat sinking surfaces outside your ship, you can maintain a passive heat level. With Silent Running toggled on, these doors close, meaning the heat that was supposed to be thrown out to space stays inside your ship, leading to extremely fast raising internal heat but complete invisibility for sensors of other ships. This is useful if you are in a situation when any ship wants to scan you for any reason: pirates for cargo, authorities for bounty, whatever, but your smuggling mission fails on a succesful scan attempt on you.
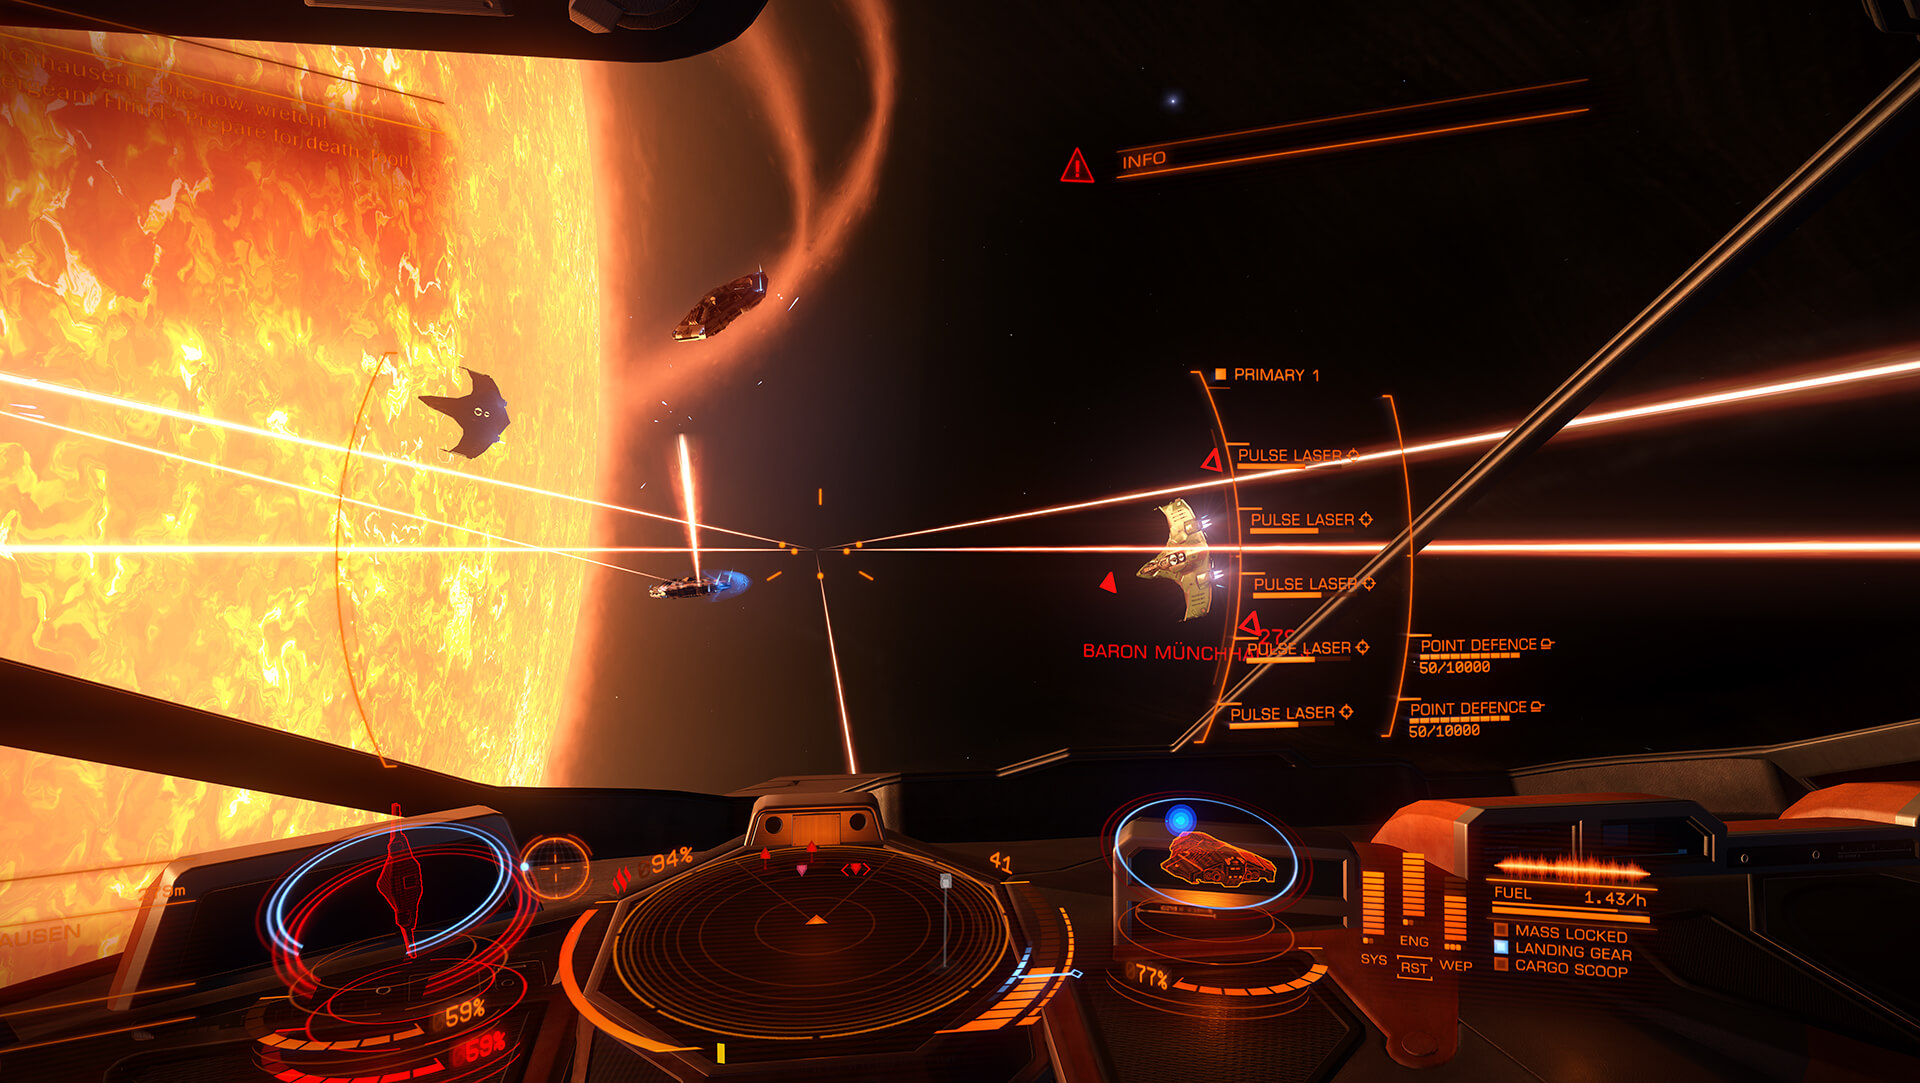 A screenshot of a Python firing 5 pulse lasers, increasing it's own signature considerabily (right side, above fuel). Unknown signal sources that are marked as "weak" or "strong" in Supercruise means there are a low number of smaller ships (or barely detectable leftover heat from shipwrecks) while a strong signature likely means a group of ships. These come from the combination of individual ship's own signature strenght!
BE WARNED! Silent Running cannot be sustained too long, and your shields also completely drop off too! I'd advise you to unbind the Silent Running hotkey in options, and use it only from the right (4) panel's Functions tab.
Ship Configuration: Characteristics Management through Power Distributor
 This is your distributor: it is present in every ship as a core internal module. You can configure it by using the cursor / arrow keys on your keyboard, and distribute "PIPs", the small squares below the charge meters.
Controlling your distributor
This is your distributor: it is present in every ship as a core internal module. You can configure it by using the cursor / arrow keys on your keyboard, and distribute "PIPs", the small squares below the charge meters.
Controlling your distributor- (Left) adds a PIP to Systems (SYS)
- (Up) adds a PIP to Engines (ENG)
- (Right) adds a PIP to Weapons (WEP)
- (Down) resets (RST) everything back to a balanced, 2/2/2 configuration.
Engines get increased maximum speed and better turning speed inside the "blue zone" that marks the ideal speed for manouvering, in addition to regenerating the charge stored for boosting. Weapons capacitor regenerates faster allowing you to fire your energy based weapons for a longer time without having to wait for recharging
Systems and add to your shields's effective strenght through increased passive regeneration.
The better your power distributor module is, the higher recharge rates it has per PIP, and the higher maximum charge stored. The maximum charge will always look the same on your interface (the columns are same height), but there are drastic numerical differences you can check out in the outfitting screen, looking at the detailed module information.
Ship Configuration: Firing Groups and controlling active modules through them
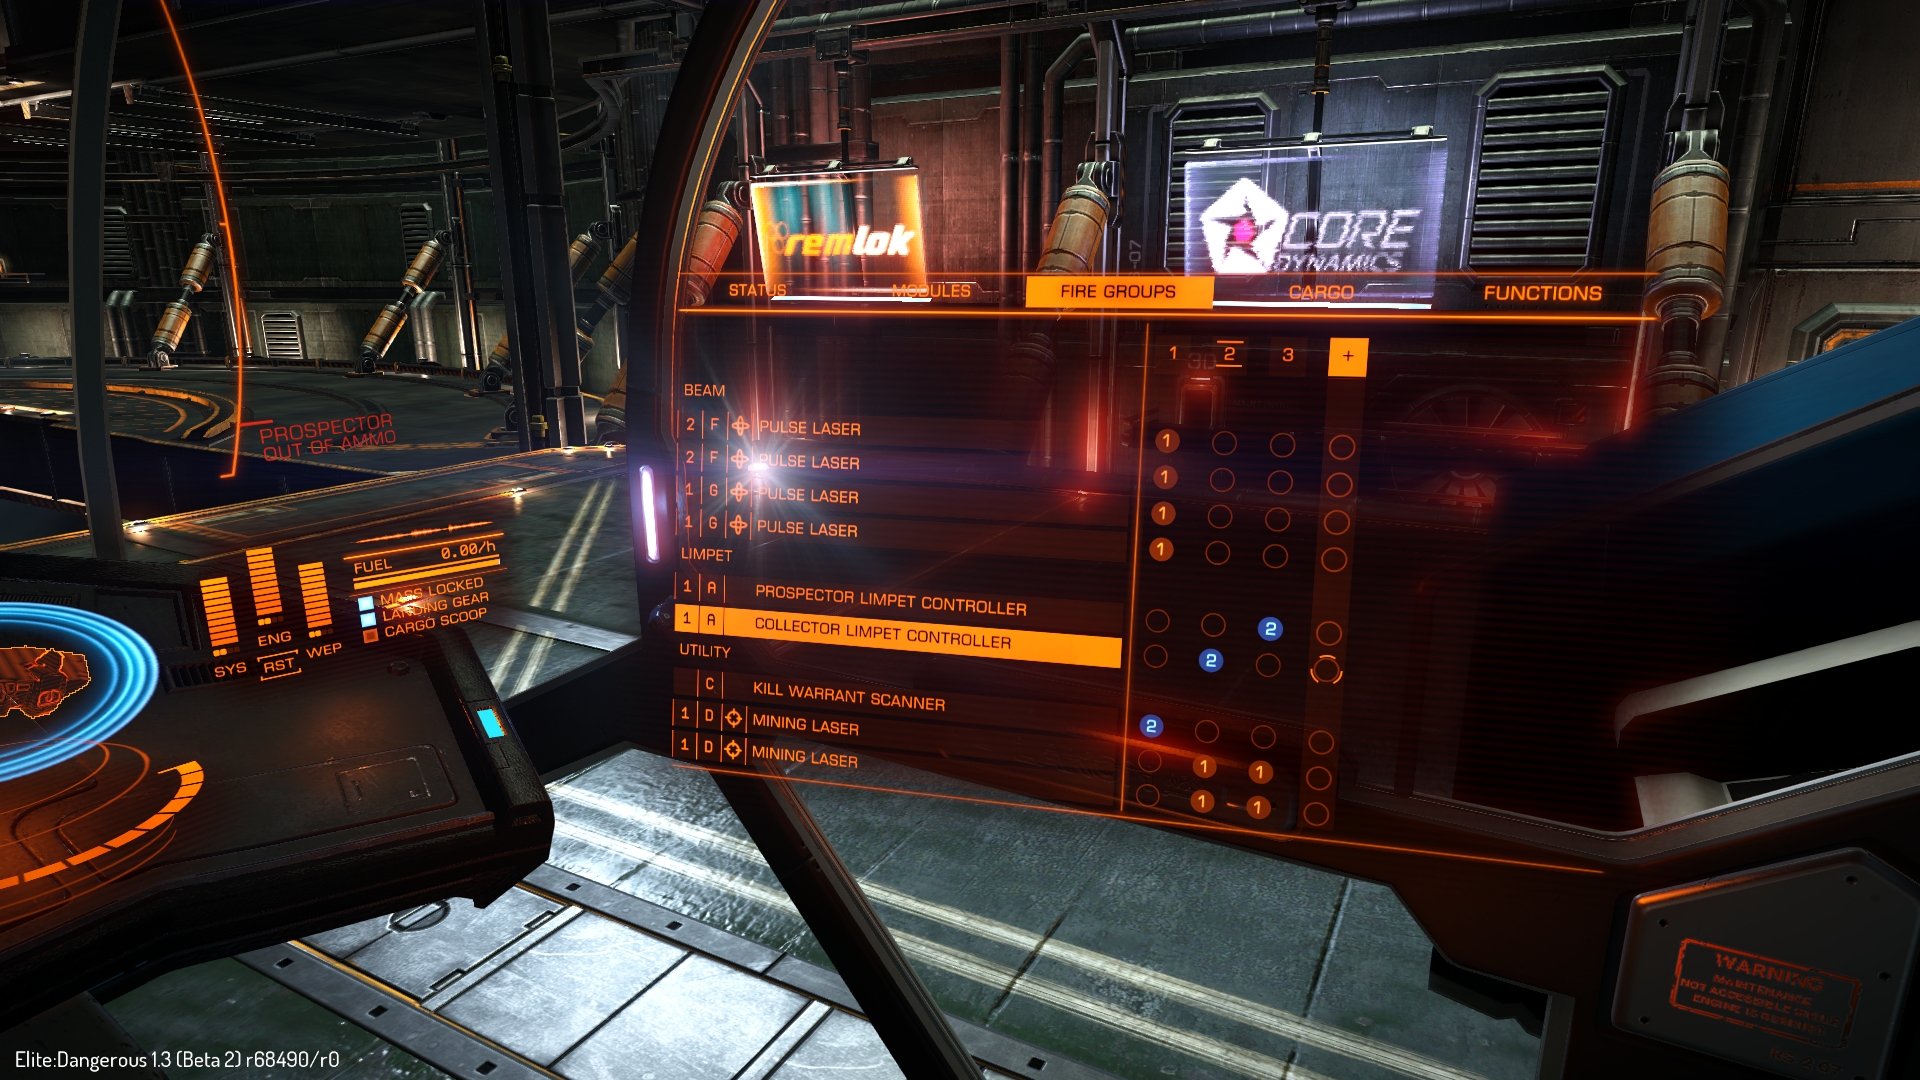 What you are looking at right above, is the Fire Groups screen present in every ship. Active (trigger required) modules are listed here. Click on it for HD resolution, you'll need it for the explanation!
Group 1: Four pulse lasers on LMB and a kill warrant scanner on RMB.
Group 2: Two mining lasers on LMB and a prospector limpet controller on RMB
Group 3: The same two mining lasers on LMB and a collector limpet controller on RMB.
+ Group: A new empty group is always offered and activates (becomes Fire Group 4 in this case) if you place any button binding (Orange 1 / Blue 2) in it's Column.
DELETION: A Fire Group is automatically deleted once you remove every button binding from it (leaving it's entire column empty). If you have 3 groups like on the image and delete the 2nd group, the 3rd simply becomes the 2nd, always keeping your groups compact and easy to use!
The curvy hologram lines in front of you on the main screen's sides represent LMB and RMB groups. LMB is on the right, and RMB is on the left, if you find it confusing simply swap your blue and orange numbers.
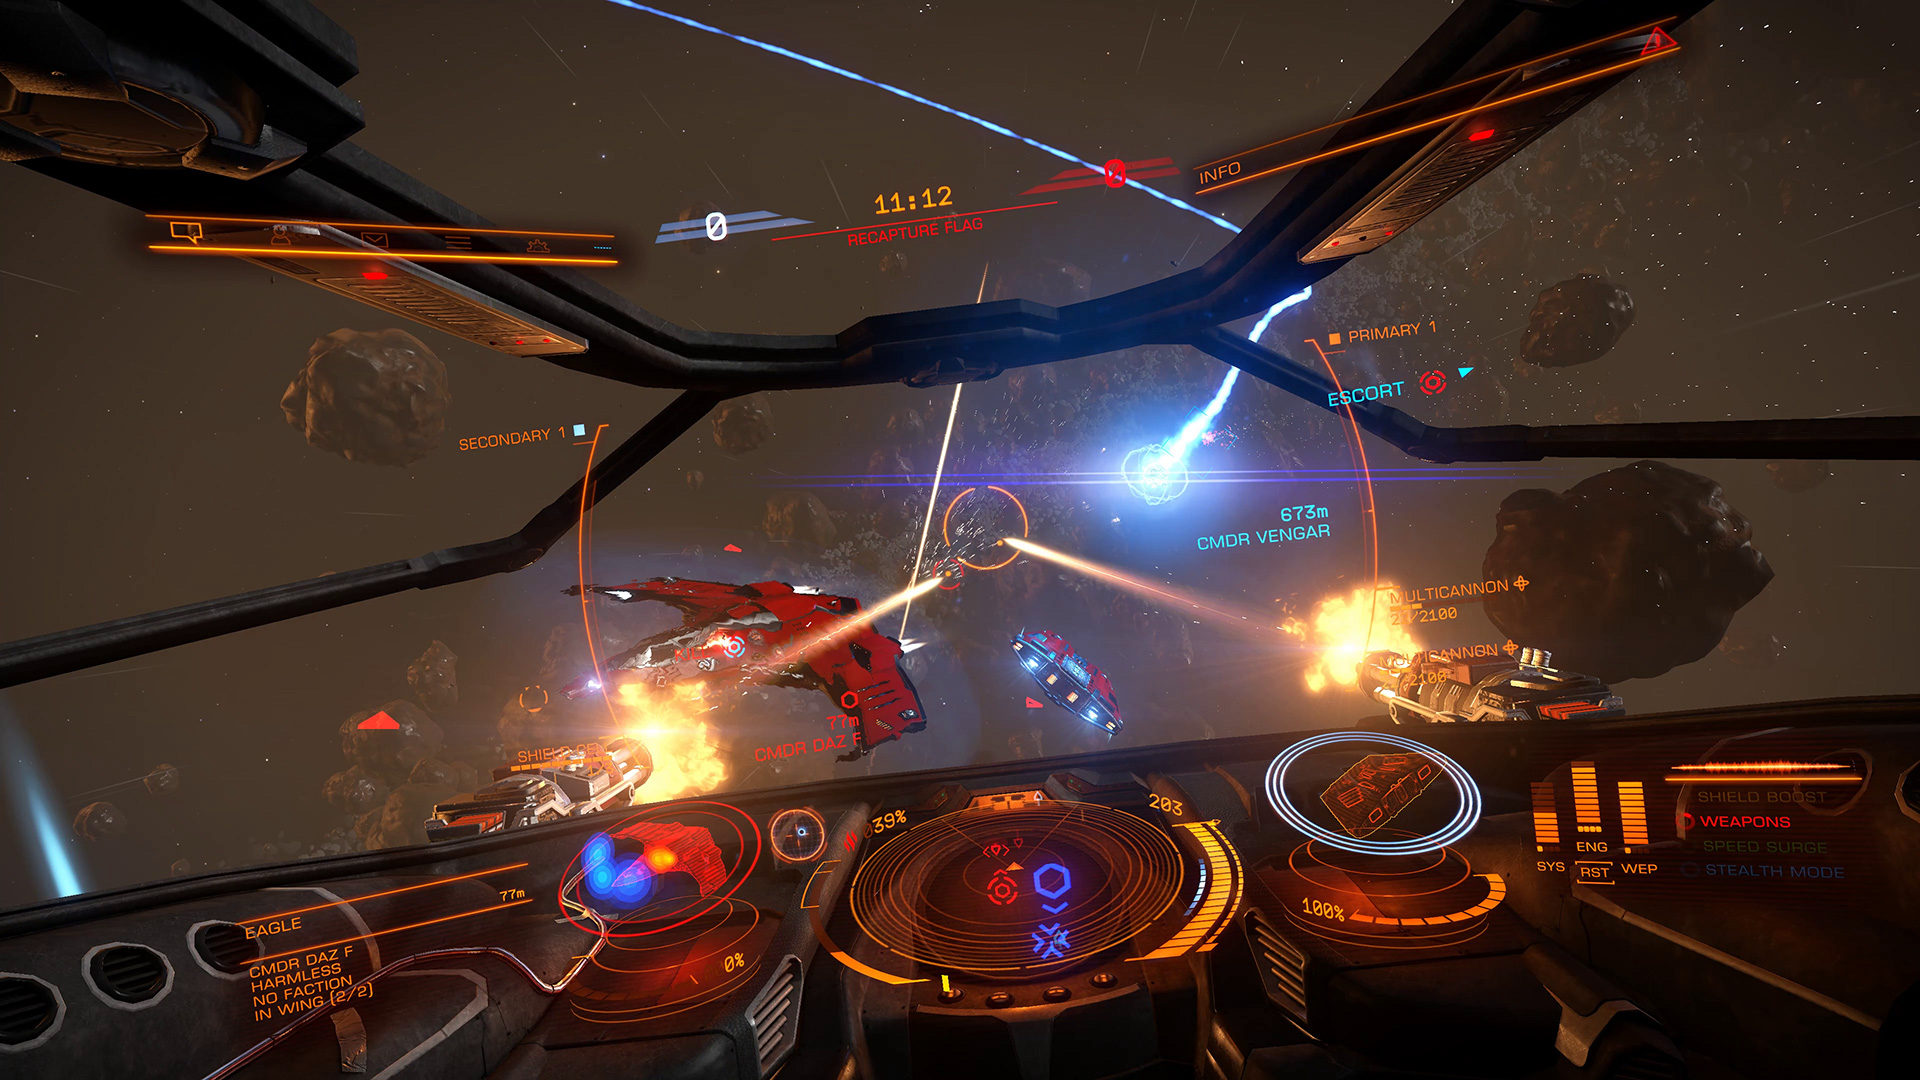 Screenshot example of a Sidewinder equipped with 2 multicannons in and shield call bank in the same firing group, former bound to LMB (Orange 1), latter bound to RMB (Blue 2). The colors are also displayed on top of the curvy lines as "Primary 1" and "Secondary 1", if you still have trouble identifying them!
Some specific modules can be set to their own hotkey, like Chaff, Heat Sink Launcher, Shield Cell Bank etc., so you can set up new buttons for these and simply don't set them in any Fire Groups, simplifying your Fire Group management greatly. Many players also bind Kill Warrant Scanner to same button they fire their weapon with, so after the automatic scan reveals a ship's WANTED status, they can open fire safely now and also scan for additional bounties during the fight, instead of before the fight, buying time, paid for with confidence
Community and GalNET
 Where to go if you want to join a player group? Since the game serverly lacks support of social interactions, player groups communicate and organize themselves almost entirely outside of the game.
A place to hang out for the news:
https://www.reddit.com/r/EliteDangerous/
Also look for various subreddits such as:
Wings, Traders, Explorers, Powerplay Subs , Outfitters, Community Goals.
The Inara Hub:
http://inara.cz/galaxy
General Elite: Dangerous Discord:
https://discordapp.com/invite/0V5hfT4eO8gB0nIz
Within minutes you'll be able to find more specialized discord servers from here, find people to fly with or ask for help on a livechat.
 There is also an ingame "newspaper" called GalNET. Among others, this is where Frontier is giving context and story for the events of our galaxy. You can keep track of community goals and history here through hundreds of entries in the archive, including status periodic status reports about ongoing conflicts, the need to help out those in trouble or hunger, and so on. GalNET also has localized channels, where you can read local news, traffic record etc. for the station and system you landed at. Localized news are accessible only while docked, from the station's main menu, while galactic news are accessible from anywhere at any time on the left panel [hotkey 1].
A less pretty version of it can be found on the official community site too: https://community.elitedangerous.com/galnet
Multiplayer: Game Modes
 Elite requires always online connection for a good reason - while you can play in solo mode to be the only player in the entire galaxy, said galaxy and it's background simulation is running on Frontier's servers. You have, however, a choice about what kind of instances you want to join to.
http://store.steampowered.com/app/443080/
(INCLUDED IN ELITE: DANGEROUS FOR FREE)
UPDATE: As of 2017 february, Elite: Dangerous Arena is no longer available as a separate product. It is still however, of course included in the base game.
Elite: Dangerous Arena, also called CQC - Close Quarters Championship, from the real CQC: Close Quarters Combat codename. This is an entirely separated game mode - you don't have to worry about dying here, consequences end with the game. This a more traditional Deathmatch / Team Deathmatch / Capture the Flag type of multiplayer in a small enviroment (around stations in asteroid fields) with multiple stages, premade ship setups of small fighters. You can earn money here that you can use in the main game, but rewards being laughibly small for middle / late game players, this game mode is usually really hard to find enough to play with. It is also aviable a separate game in Frontier Store or on Steam, and it's price counts towards Elite: Dangerous if you decide to upgrade because you like what you see, although the main game is played very differently.
Multiplayer: Wings and Communications
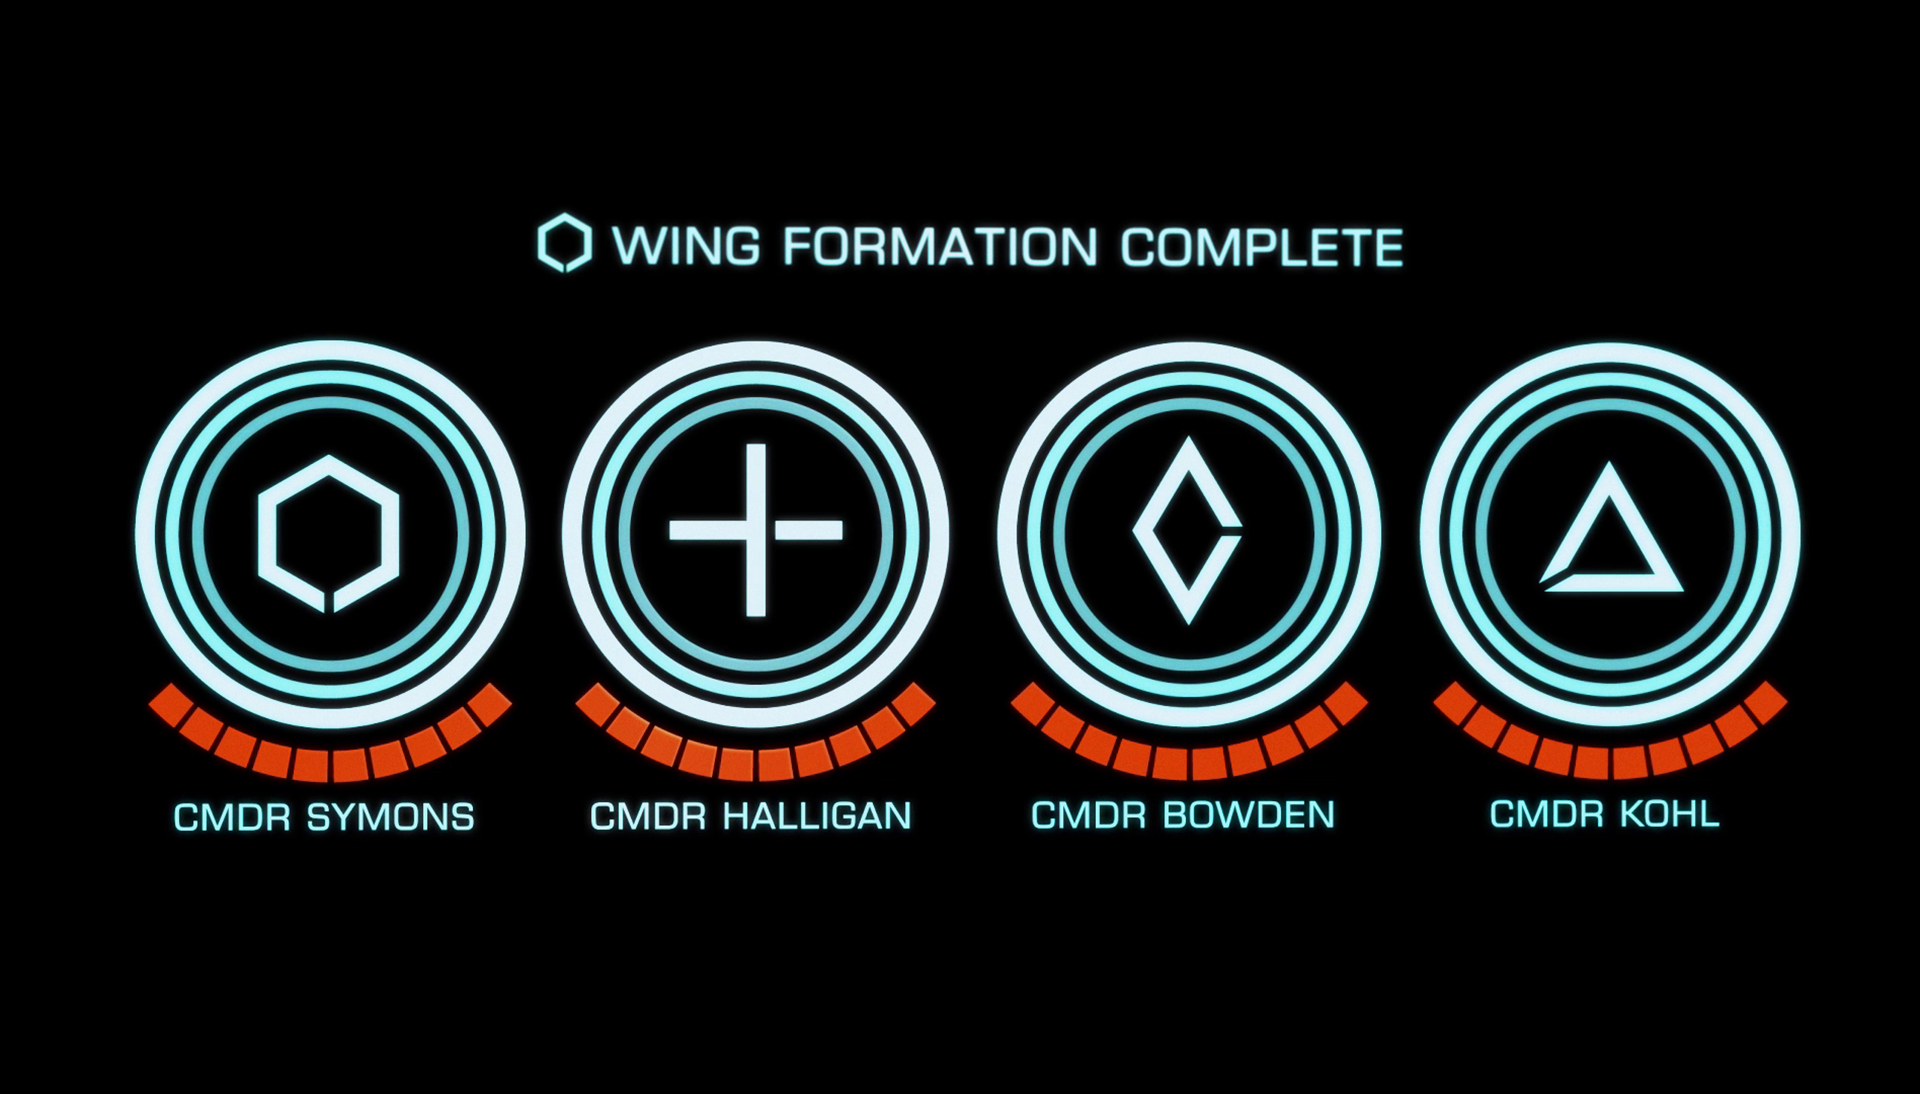 Elite's only grouping feature currently is Wings. A wing is the equivalent of a party in other multiplayer games. The picture above shows you a full wing with the maximum number of players in it.
Wing invitations can be sent through the communications panel [2], and will send an invitation to your invited player's inbox. You can leave the wing on the same panel, turn your beacon on/off (later on this), or mute team members. Every player in the same instance as you, be it normal flight or supercruise, is listed on the communications panel's second tab, and your friends are also listed here regardless of where they are in the galaxy.
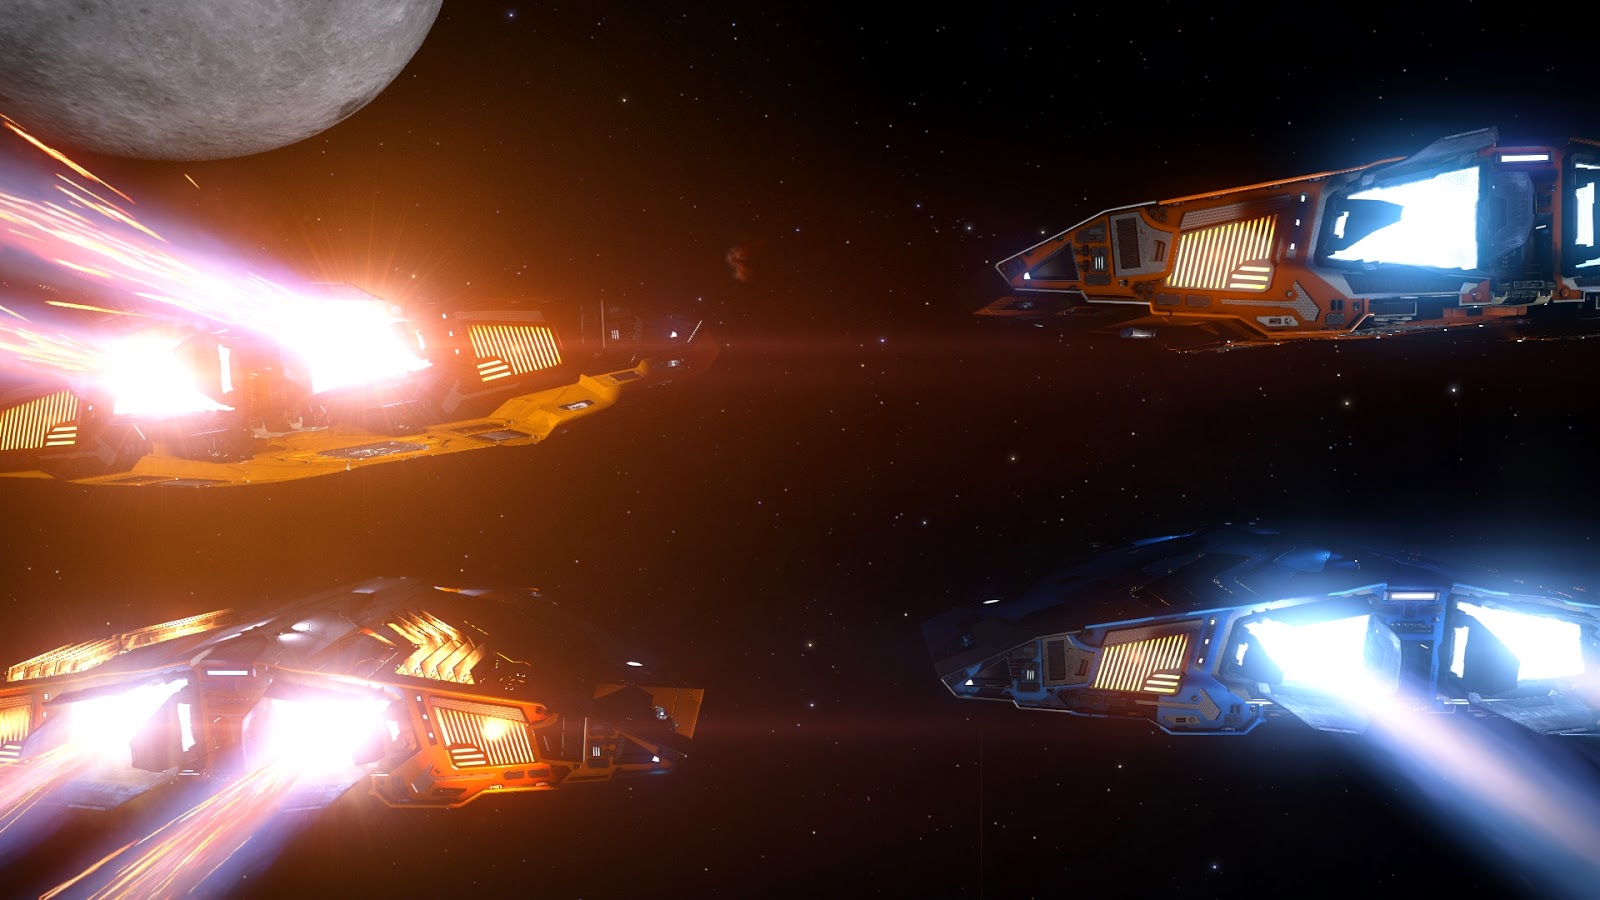
- You can see each other on the galaxy map, even if you are not friends.
- There is a voice chat option for wing members.
- Every wing member gets a 5% of other members' trading profit. This does not take away profit from the player selling it's cargo, simply gives 5% of it's value to all wing members out of thin air to encourage creating trading convoys and is also a nice tool to help out a poor player with effectively 0% cost.
- Bounties and Combat Bonds are DUPLICATED among players. With patch 2.3 bounty and combat bond payouts aren't divided between the players, but everyone gets the same full payout for that ship. This means anyone who shot at a ship gets the full payout for that ship, regardless how many players are in the wing (previously it was divided 50:50 for 2 players, and so on up to 4 players). This means cooperative playing is finally encouraged by the system!
- Powerplay merits are also DUPLICATED Powerplay by it's nature is supposed to encourage group play, and merits, currency of all Powerplay acitivities, are fully paid to every wing member who landed at least a single shot at the target. It is advised to go undermining behind enemy lines or join crime sweeps with other players on your side, because it can greatly boost your merit income.
- Exploration data is automatically shared with wing members in the same system, meaning everyone can reap full profits for it. Exploring together with a wing member can greatly speedy up detailed scanning entire starsystems, though a partner for exploration is advised to counter space madness primarily.
- Wings allow you to use your Beacon Signal. More on this below.
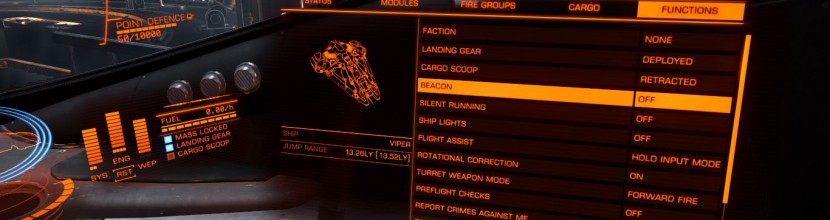
Using the beacon also allows easy convoy coordination - getting near a beacon signal is not only used to drop from supercruise, but also to follow each other's FSD jumps. Pick a leading player, everyone lock on it's beacon, and you can move together easily (jump range restrictions still apply).
You can turn on your beacon signal on the right panel [4], functions tab, or the communications panel [2] on the top left. To lock on a wing member's beacon, simply select the player from the communications panel [2], go to the player of your choice and select lock on him. You'll see a visual square lock around your ally on the wing interface, top of the screen.
- [ORANGE] Simply press [Enter] and type the story of your life.
Untargeted (local) comms will be broadcast to all nearby ships in the same instance. Despite looking like the "open chat", there is no global chat in Elite, and your local message is limited to current instance. As of 2.3, station flight controls are no longer red but has been moved to the orange palette. The difference is, ships and players show a pilot face or at least a helm, while station flight control does not. - [YELLOW] Use /t to send comms as a private message.
This is the "whisper" 's equivalent, and new players often try to use /w or /r , and not understand why they cannot send a direct message. If you see somebody broadcasting it's communications publicly (offering help, looking for a wing, whatever), use /t [playername] or select the player on the communication's tab [2] 's second panel. Private message has no range limit. - [LIGHTBLUE] Use /w to send comms to your Wing.
This is equals to "party chat". Wing messages have no range limit. - Use [TAB] to cycle through all possible communications targets.
This includes wing chat if you are in a wing, and players you recently been messaged by privately. You can't use this to select local players and private message them, but this is also a common mistake new players try to do.
MODDING: change your interface colors or break though Field of View limits.
Once you are here, look for the following file:
<?xml version="1.0" encoding="UTF-8" ?>
<GraphicsConfig>
<GUIColour>
<Default>
<LocalisationName>Standard</LocalisationName>
<MatrixRed> 1, 0, 0 </MatrixRed>
<MatrixGreen> 0, 1, 0 </MatrixGreen>
<MatrixBlue> 0, 0, 1 </MatrixBlue>
</Default>
</GUIColour>
</GraphicsConfig>
If the world isn't upside down, this should be it's default content, slightly differently formatted but steam pulls the empty space to the left here. You can either manually change the color code numbers in the 3 "Matrix" lines, or use this website:
http://arkku.com/elite/hud_editor/
Where you can do the same with RGB sliders, and get a code out of it. Once you are done, simply replace the code's matching lines with the new ones. You can also find the default content of this file here, in case you want to change it back but forgot to made a safety copy.
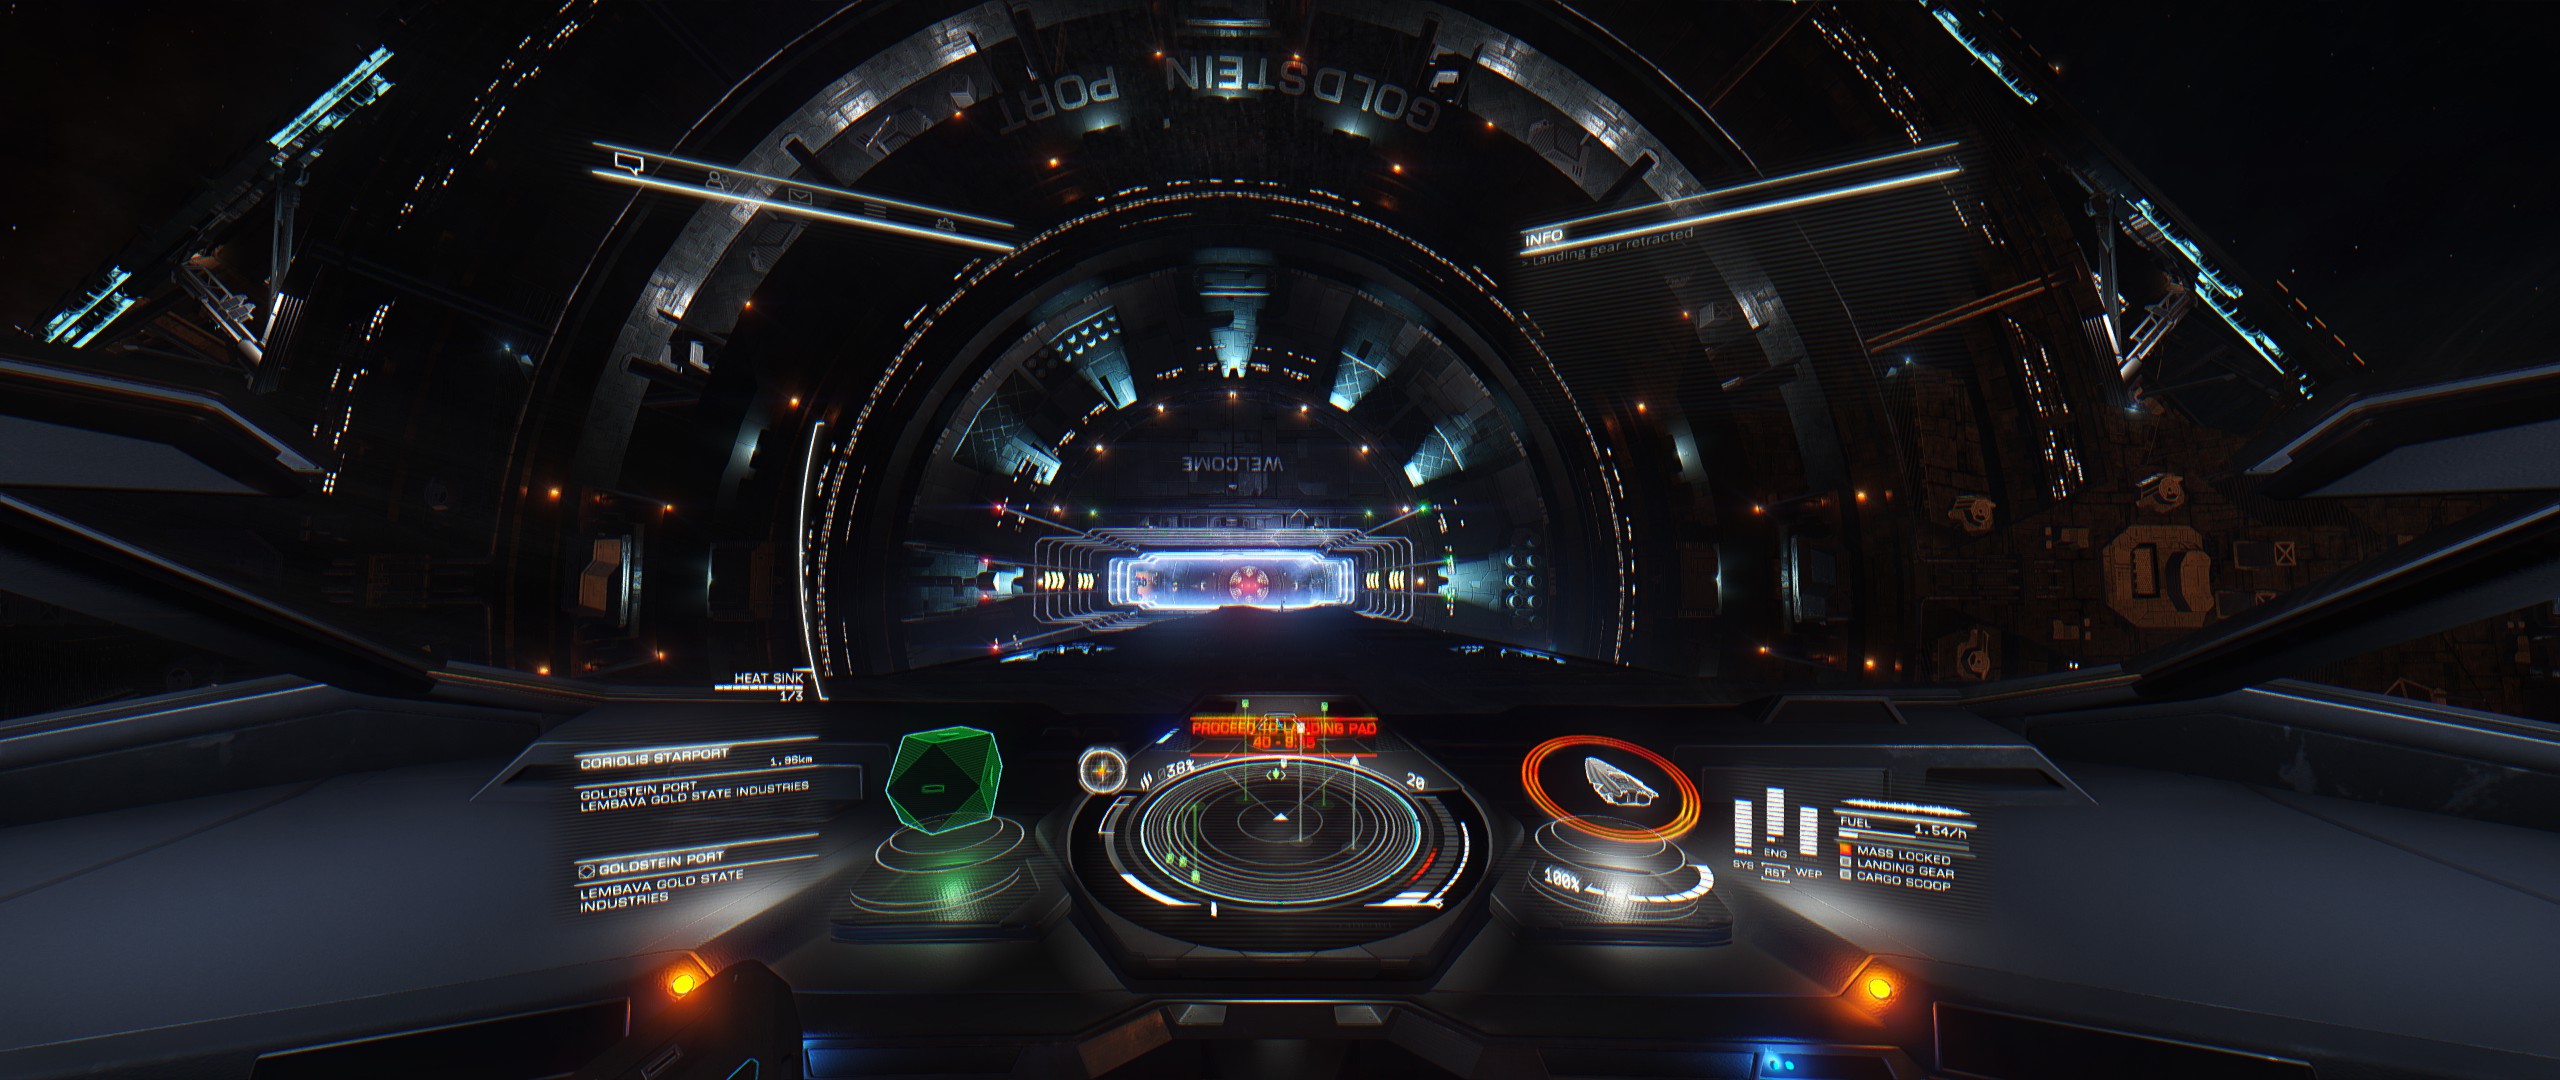
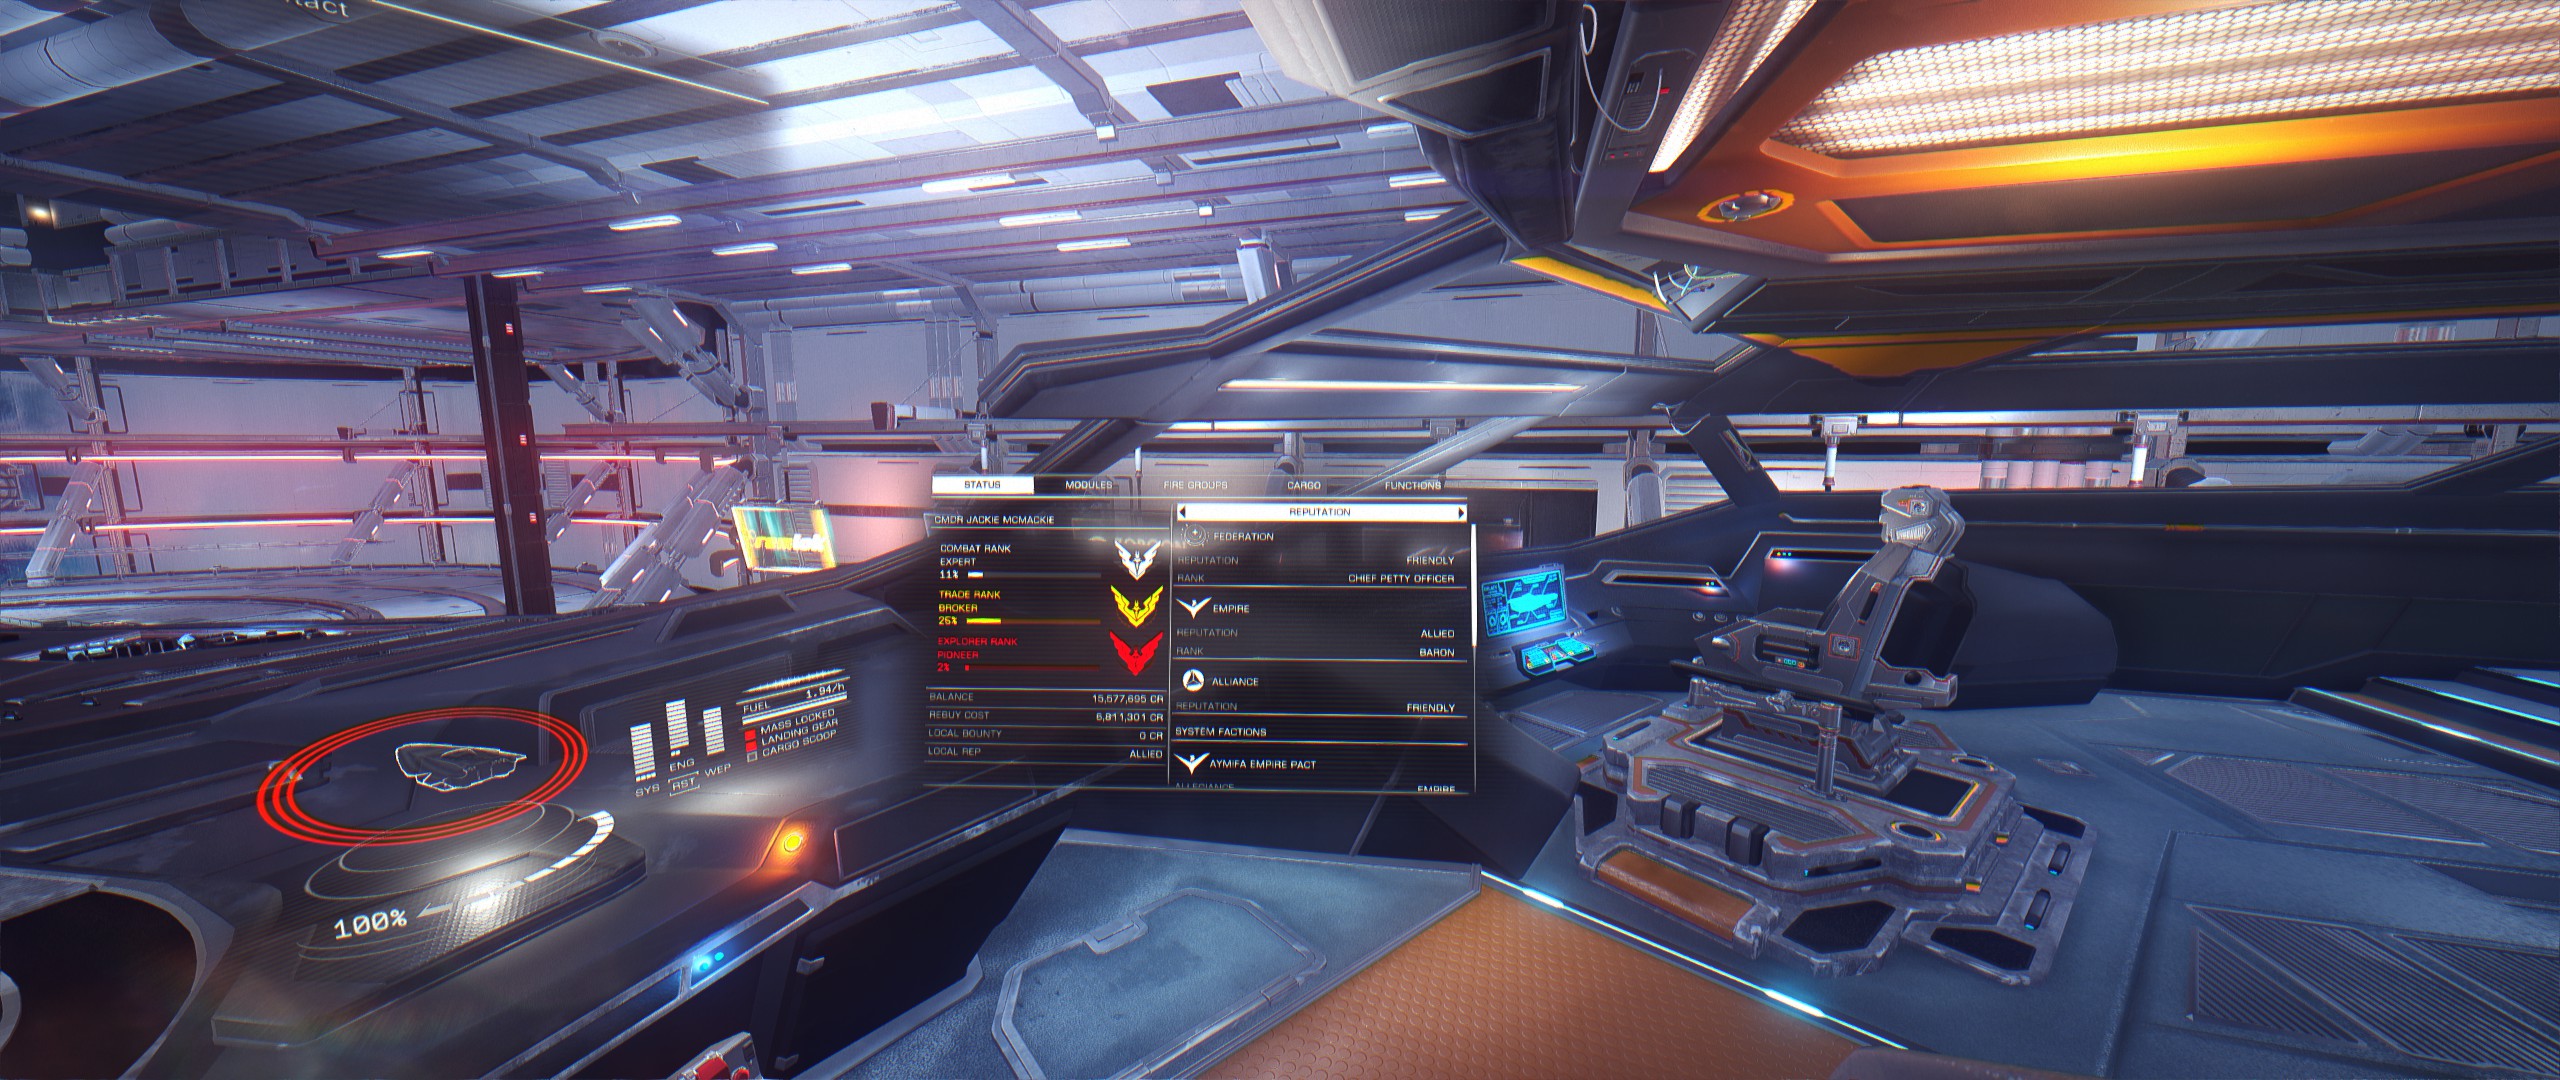
Needless to say, Elite must NOT be running.
- Every new patch will set this file back to default values
- IMPORTANT: These mods while do an overhaul, meaning every holographic interface is included from city interfaces to outfitting, it also includes your Radar. It is possible your choosen configuration changed the green/red coloring on your radar, that is vital information in combat. Be sure to test there with a friendly station, and a raiding pirate (just pick up some delivery mission, they'll come) or by attacking something.
link1[forums.frontier.co.uk] link2 link3 - definitly check these out! and link4 - and these too![imgur.com]
For formatting issues reasons, I won't copy my entire here, but it's barely longer than the other one so you won't get lost. Look for the following line:
Simply change the highlighted number, save and close the file, and you are good to go! The piloting experience is drasticly different for the better with a higher Field of View. To get the idea, here is a comparsion:
Default Maximum 60 FOV: _________________________________________Modded 90 FOV
At 90 FOV, some texts may be slightly difficult to read, that's why I'd recommend 80 or 85. I'd argue that higher FOV greatly improoves the feeling of immersion and sitting in your own spaceship!
Elite: Dangerous Horizons (Season Pass) Overview ///////////////////////////////////////////
- 2.0. Planetary landings
Allows you to land anywhere on non-atmoshperic rocky and icy planets, including vulcanic activity. Atmospheric planets are going to be in future expansions. - 2.1. Engineers
Engineers are unique NPCs - or rather, highly unique ground bases - marked on the galactic map. You can find famous engineers here each with their own personality and backstory that you can build trust with, so they will make unique modifications to your modules such as highly increased FSD jump range. Most of the modifications have backlashes with benefits, but you can fine-tune every module of your ship to min-max it and futher specify it. - 2.2. Crew and Ship Launched Fighters
You can hire a secondary pilot to take control of a small fighter jet you can launch from your own ship. Alternatively, they can take control of your ship while you fly in the fighter jet! - 2.2. Passangers
Elite is full of unique historical places - each has one or even half a dozen beacon floating around it, telling you the history of that place. You can visit these without Horizons, however with it, you can take passangers with you who pay you nicely for some sightseeing, while constantly b*tching (clearly wrote "batching") about how they changed their mind about where they want to go. - 2.3 Multicrew and Commander Creator
Multicrew allows you to invite other players to your ship if you have a secondary or even a third set for them. These players can take control of ship launched fighters, turret mounted weapons and various utility modules of the ship, and earn somewhat reduced (due to having nothing to lose) rewards from it. - A small number of exclusive ships: the Beluga Liner which is an additional luxury transport ship for passangers, and the Cobra Mark IV (pre-order bonus), a slower but slightly more variable version of one of the earlygame ships. Obviously, ship launched fighter jets are also exclusive (sharing through Multicrew is unclear at the moment).PLAYERS ARE NOT SEPARATED AND PLAY IN THE SAME GALAXY AND INSTANCES. Meaning just because your friend has Horizons and you don't, you can still play together in the same world.
Horizons is available for purchase on steam and in Frontier Store. Dangerous cat incoming![www.frontierstore.net] http://store.steampowered.com/app/441340/
Regardless where you buy it, it will build into your copy of Elite: Dangerous. If you registrered your copy of Elite: Dangerous on steam, you'll be launching the same game from your library, then offered a choice if you want to launch the base game or the Horizons version.
You may find outdated information about Horizons being a separate title in your steam library, the launch was - to be honest - a huge mess, but that was at 2015 December, long fixed.Remember - a certain Battle on various Fields have similarly overpacked and scripted trailers to build hype, but still represent what you can actually find in the game.
Patch 2.0. Trailer: Horizons Launch
https://www.youtube.com/watch?v=VKWIJ-H-WxI
Patch 2.1. Trailer: Engineers
https://www.youtube.com/watch?v=8rSC0lNuNyw
Patch 2.2. Trailer: Guardians
https://www.youtube.com/watch?v=iojsbuOzEuQ
[Horizons] Engineers
You can guess the endless possibilities of combinations here, since every modification has a negative sideeffect, and you can math together an ideal combination to modify your ship to be far superior compared to it's equal variants made of stock modules.
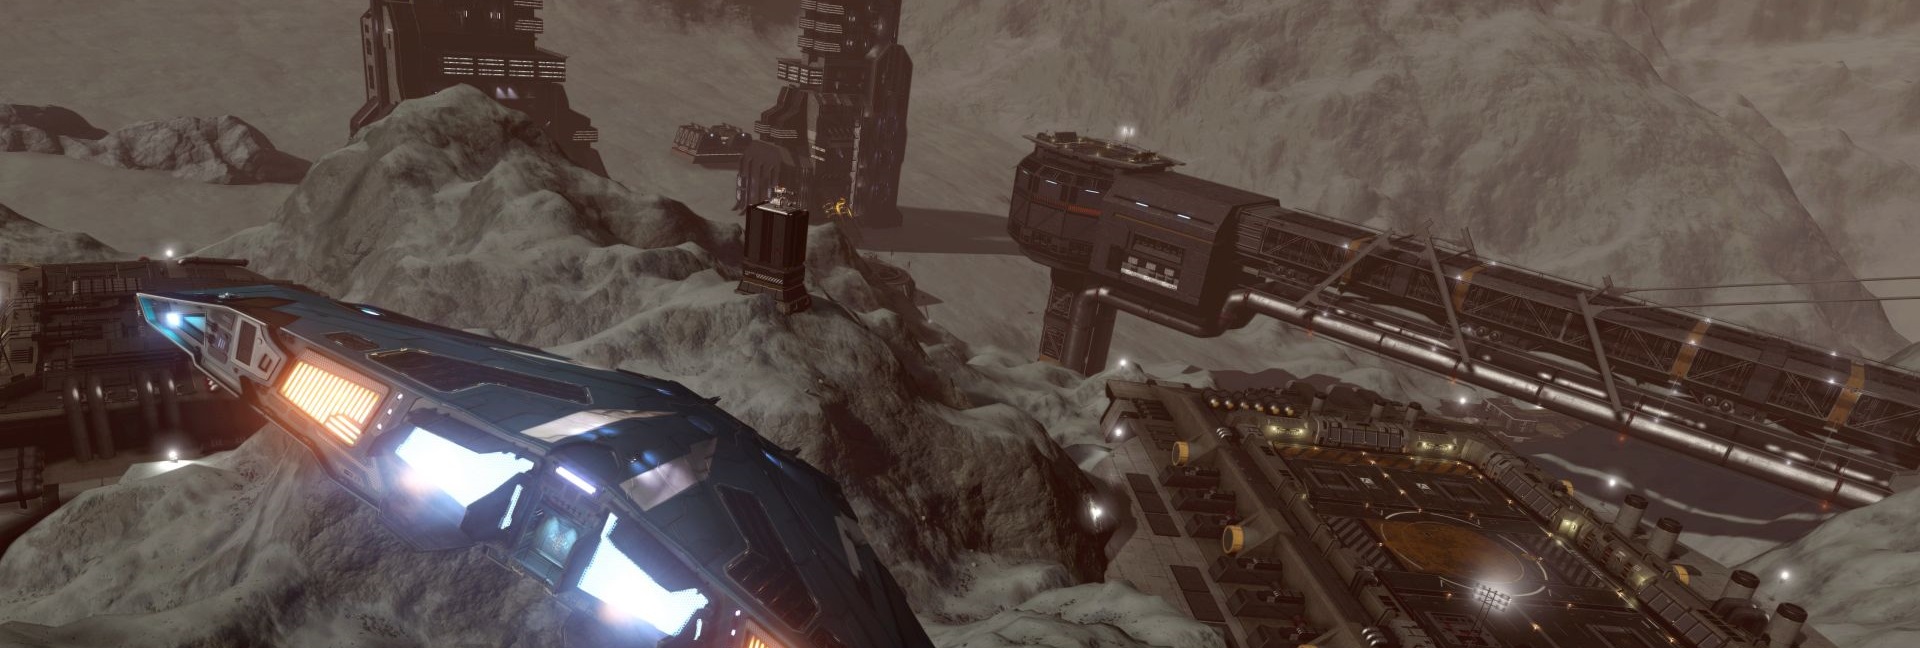
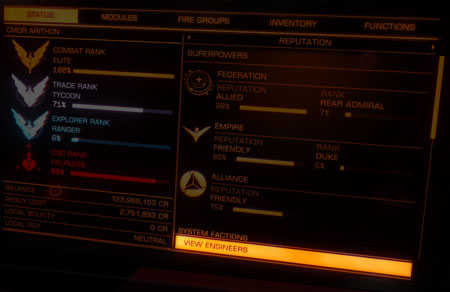 The engineers you know about are automatically marked on your galaxy map, and their bases on the left panel [1], system information (list of objects) are marked with a hexagon with a small circle in it. Known engineers are all listed in their unique menu accessible from the right panel [4], where you can see their unlock requirements. These can range from delivering rare commodities (producted only at a single station in the galaxy), to selling exploration data to them, giving in bounty vouchers at their station or showing your mining skills by refining a certain number of anything with your refinery (see mining section)
Every engineer has a maximum grade of 5 for their modifications, but some may can do modifications up to grade 3 for certain modules, while another engineer can do grade 5 for that but only 3 for what the other offers as 5. There is quite a bit of overlapping here in the essential upgrades category such as increased FSD range, to offer the player an alternative way of getting what they want. Your reputation can be increased with every engineer in 2 ways:
- Give them work to do, make them craft anything.
- Give them what they want. This is unique to each of them, usually related to their backstory. the retired explorer Felicity Farseer for example is unlocked through selling exploration data to her, and your reputation with her can be futher increased by selling more exploration data here.
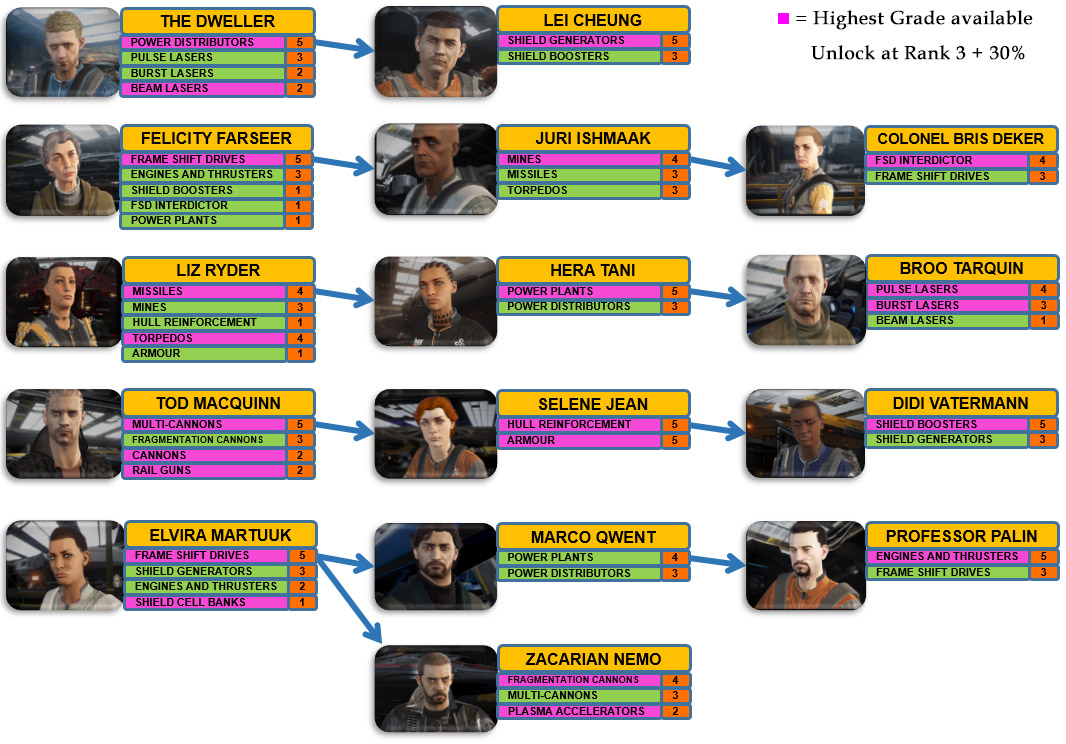 Credit: CMDR Bad Koala. Click for higher resolution!
You can find the unlock path and the list of their modification offers on the unlock tree above!
- Decide what you want, and aim for the best solution, no less. There is no point in wasting time by investing it to an engineer who can do only second best - go for tier 5.
- Use the list above or for a different overview: http://inara.cz/galaxy-engineers
- Plan ahead. You'll want to get that sweet grade 5 FSD range upgrade first to reduce the number of jumps you need for anything you travel for, saving a lot time of your real life. Felicity Farseer buys exploration data from you, so save everything to sell at her station, even if you don't even own Horizons yet.
- Get information on crafting material whereabouts. Every material on the engineering panel is highlightable if you move your cursor over it or highlight it with your WASD menu movements. Highlighting a material will give extensive information on it, including a hint where to find them. The local news nobody ever reads also often contain information about the nearest planet that has Arsenic or other high grade, rare materials. The link above to inara also offers extensive information about material sources.
- Collect everything. As of patch 2.2.03 engineer modifications no longer require commodities, only materials that do not take place in your cargo hold, but instead are in a separate micromaterial holder that isn't lost on ship destruction. This container has 1000 units of space for all kinds of materials and data and you'll likely play months before even having to consider making some space. Collect everything you can, you'll really be thankful for them later!
[Horizons] Crew and Ship Launched Fighters
Size 6 maximum: Federal Gunship, Beluga Liner
Size 5 maximum: Keelback
Size refers to the size of the optional internal module slot the Fighter Hangar will take. There are only 3 type size of them (5,6,7), meaning you'll need at least one free size 5 optional internal slot to install the Fighter Hangar. Different sized modules support more or less fighters:
Size 6: Can carry 2 type of fighters and hold 8 more as replacement
Size 5: Can carry 1 type of fighter and hold 6 more as replacement
You may change which type of fighter you carry (in case of size 6 and 7) you prefer to launch, however there can be no more than 1 active fighter jet at the time for game balancing reasons.
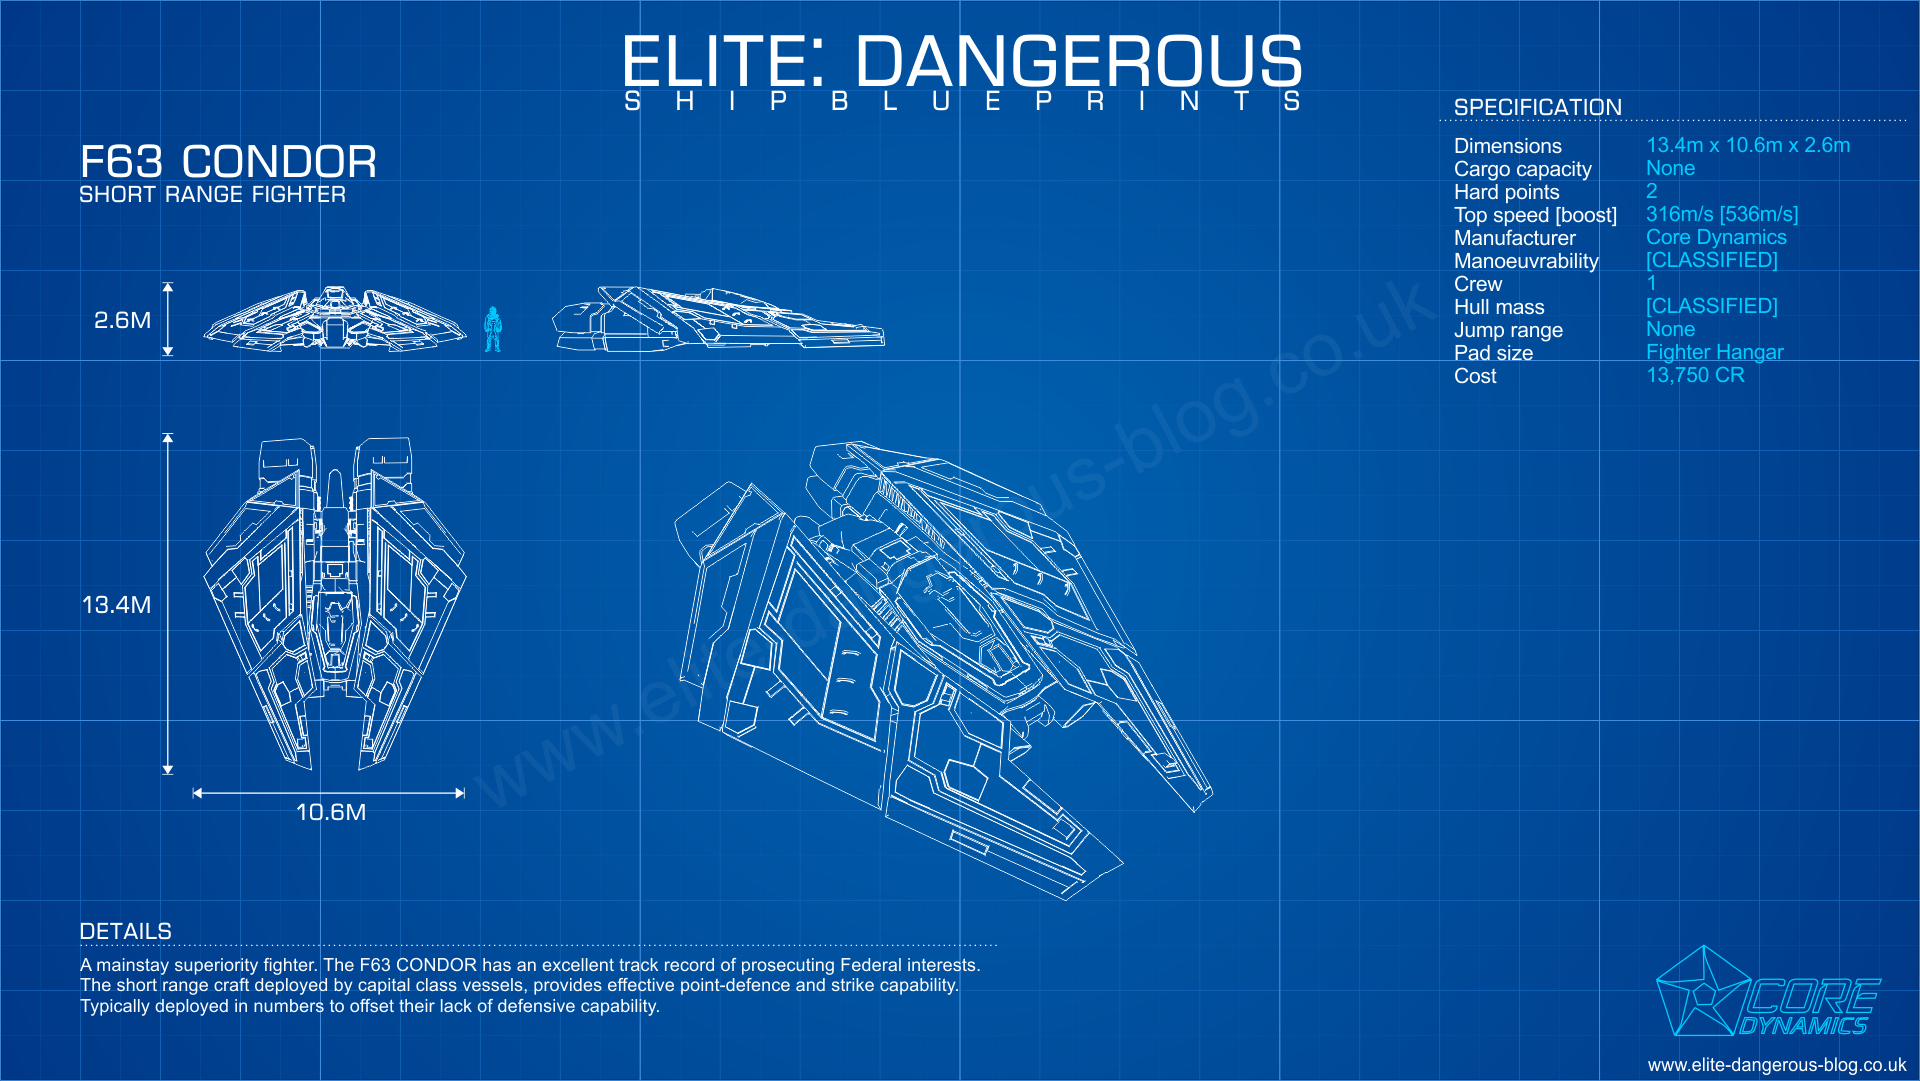 F63 Condor
This fighter strikes the balance between speed, manouverability and durability: not the best in any, but the most versatile for being at least "halfway there" in all. These ships are the Federation's primary short ranged fighters and is manufactured for them by Core Dynamics, who produce the signature ships of the Federation, such as the Federal Corvette, - Gunship, Assault Ship.
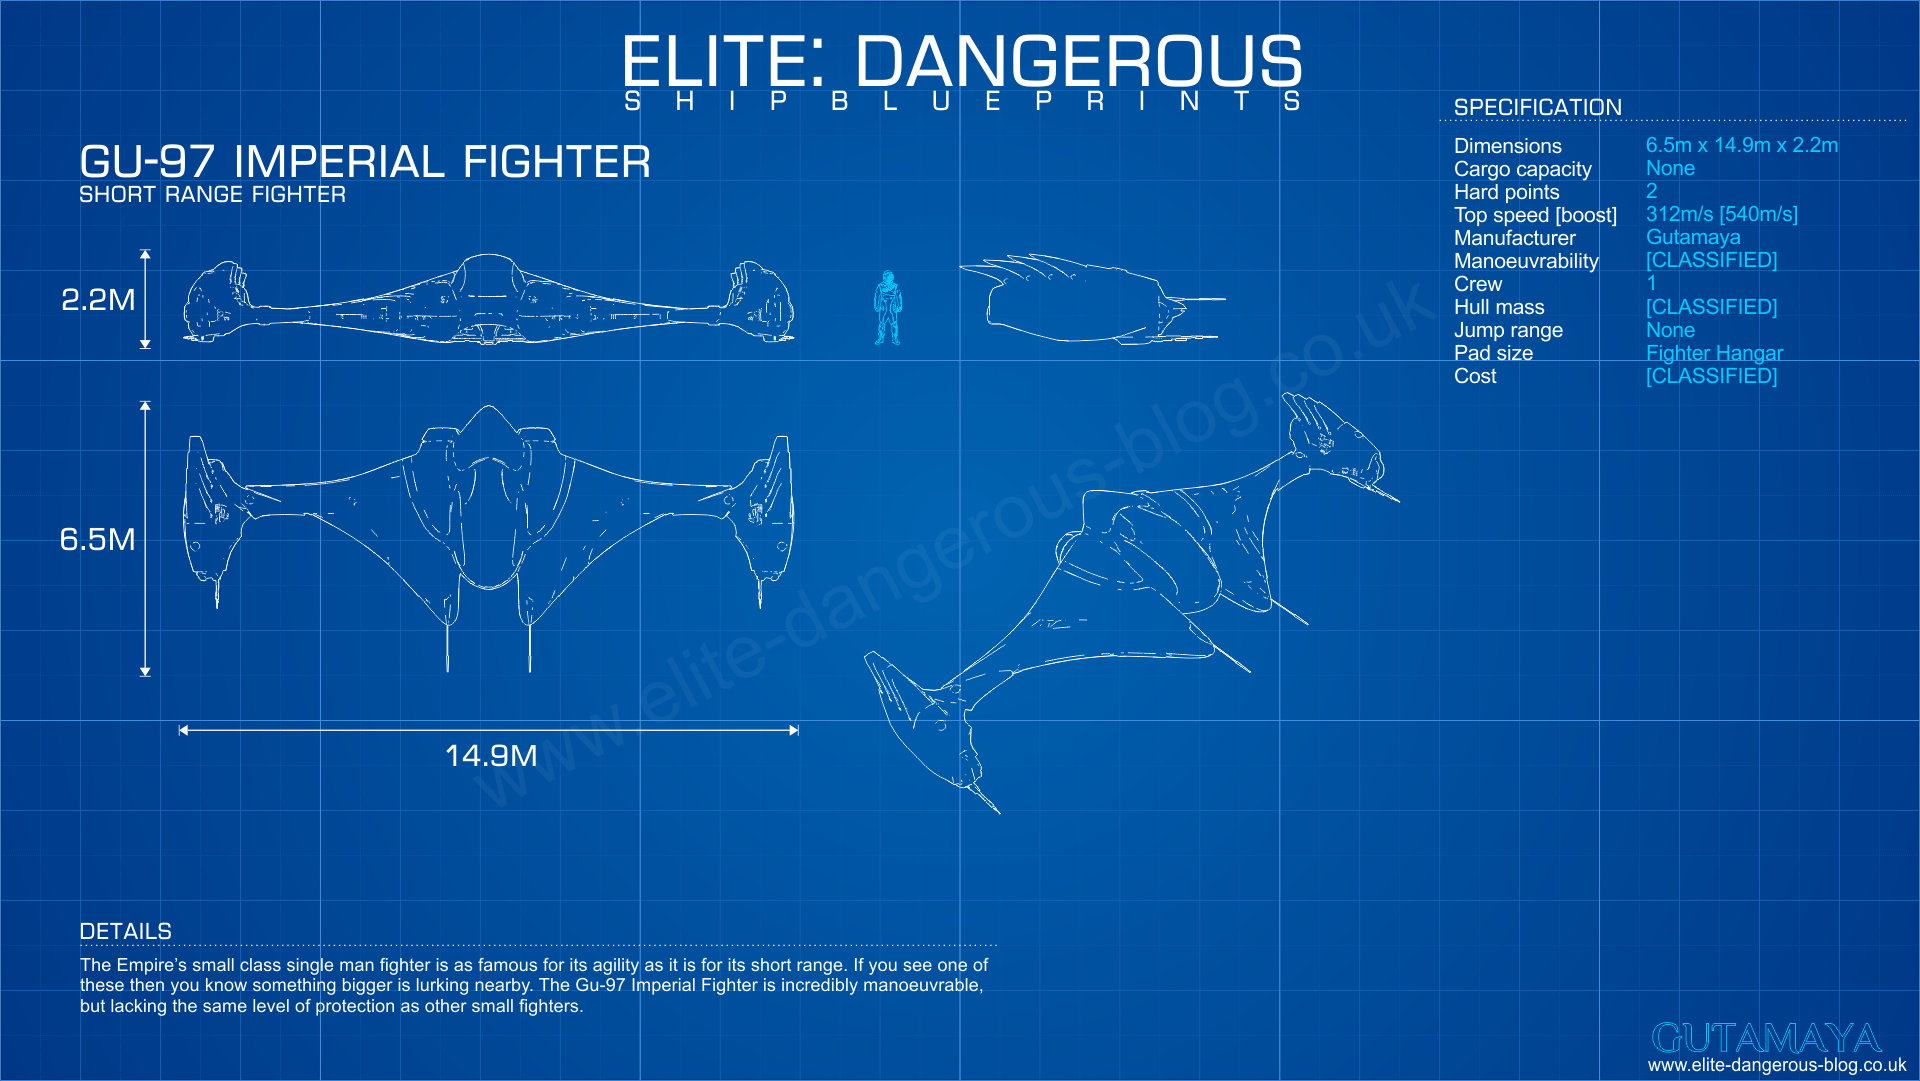 Imperial Fighter
This short ranged fighter carries the signature elements of Gutamaya: a clean white, sleek and curvy design makes the Imperial Fighter the fastest and most manouverable short ranged fighter at the cost of following the Gutamaya tradition: speed and style in exchange for durability, much like the manufacturer's other designs, the Imperial Courier, -Clipper and -Cutter.
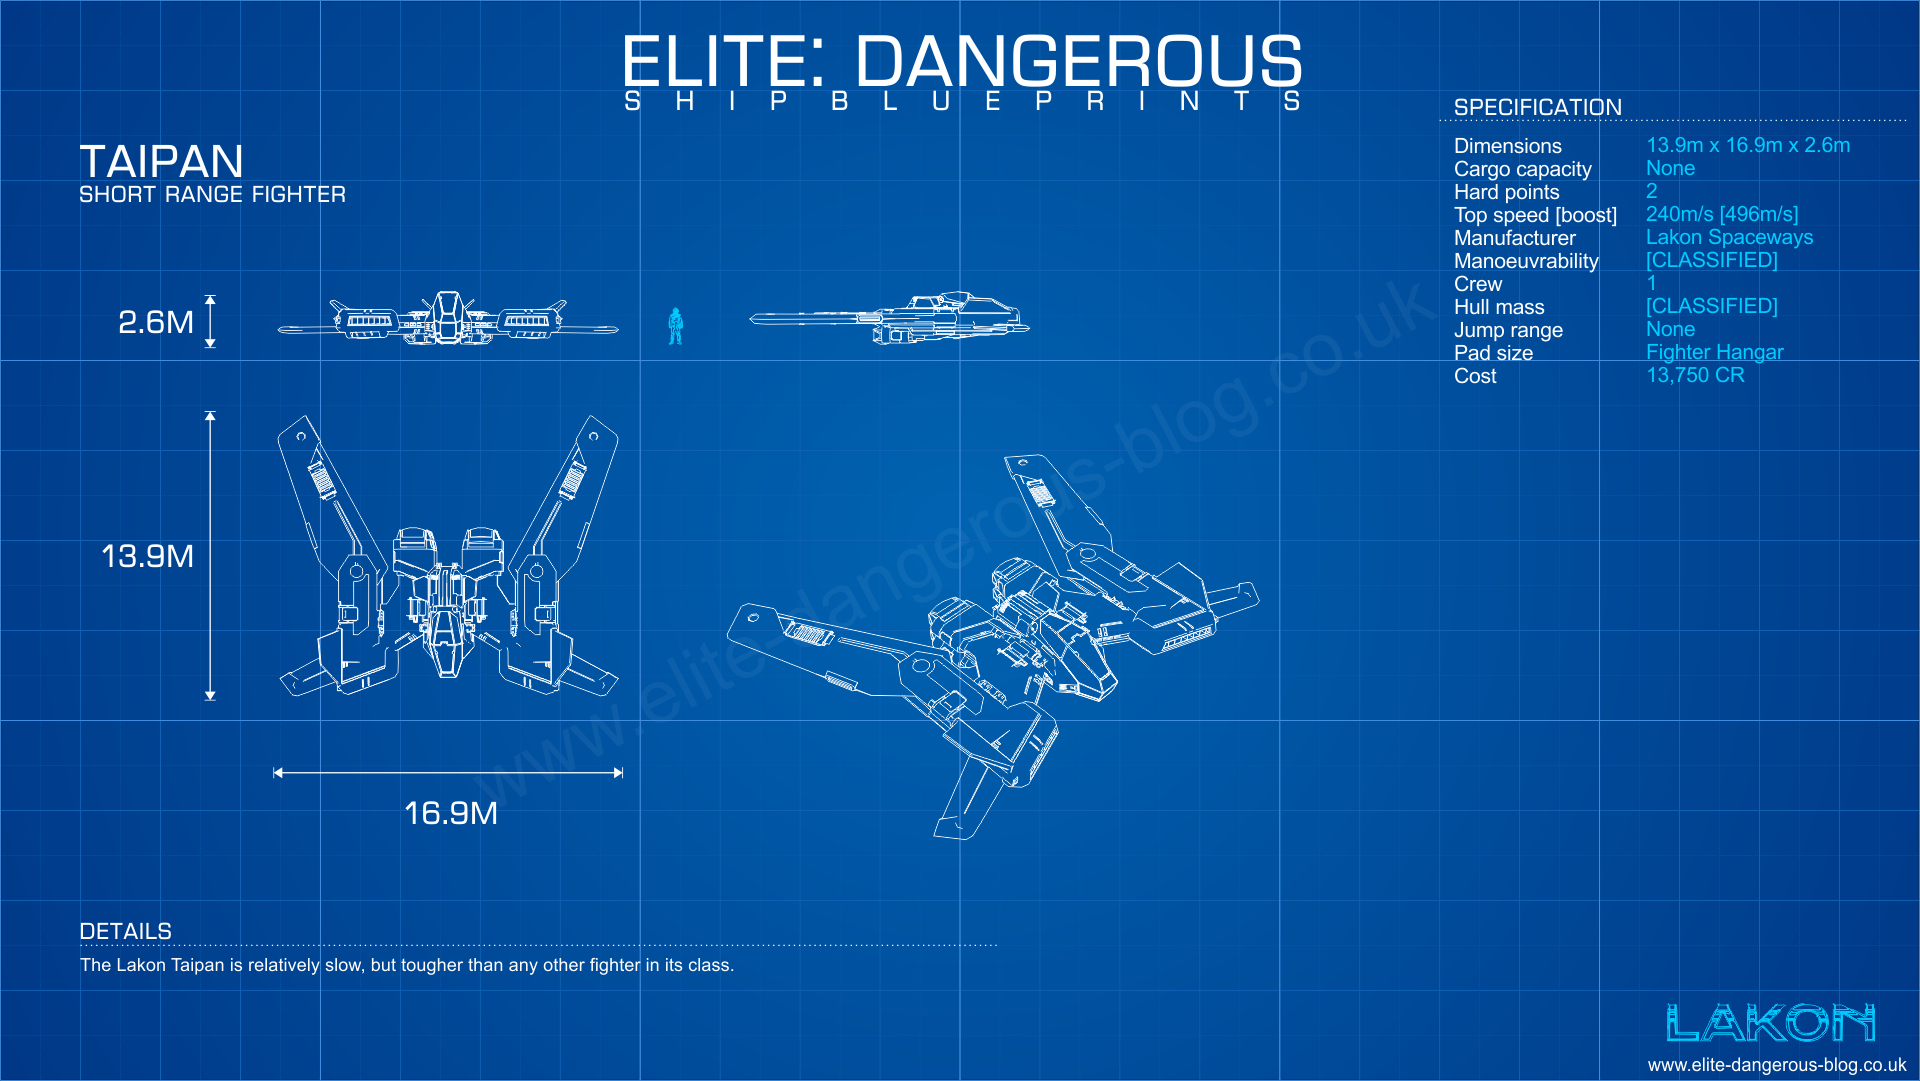 Taipan Fighter
The Taipan is one of the very few combat designed ships of Lakon Spaceways - a company famous for providing almost exclusively bulky transport or explorer ships. Taipan being their only ship designed exclusively combat, is still has the Lakon keystone: it's heavy, slow, but sure can take a hit or two. Lakon Spaceways transport recommends the Taipan to defend your Keelback and Type9 Heavy for safer transporting!
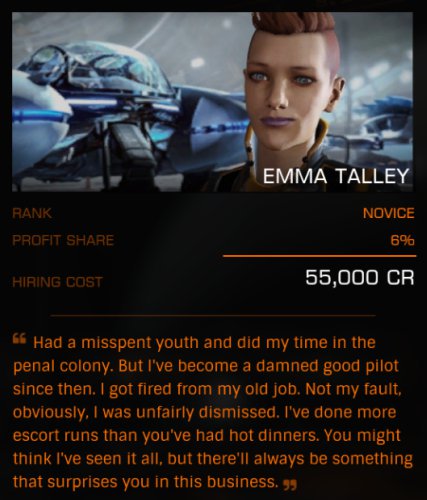 Crew members are people too and need to make a living somehow, so hiring them can be taken quite literally: they are not a buy once, keep in backpocket like cargo thing. Each pilot you can hire have a Pilot Federation Combat rank - the higher, obviously the better they'll perform when piloting your fighter jets, but the more experienced they are, the more they ask for: the active - and only the active - crew member will take her / his cut from bounties and combat bond payouts. This cut ranges from 2% up to even 15%. The more they fight alongside you, their combat rank will raise just like yours, and their cut increases aswell. However, low ranked pilots who became a master of their trade alongside you will ask for significantly less than pilots you hired at higher rank to begin with! A Harmless pilot who took only 2% before takes only 10% at Elite rank, while another who were hired as an already Expert pilot can take 15% after reaching Elite.
You can hire 3 crew members, but only one can be active at a time.
[Horizons] SRV : Surface Recon Vehicle
Funtionally, the SRV's interface is almost equal to ships: the same hotkeys work for turret control you use to deploy hardpoints (U), opening cargo hatch for collection with (Home), and so on. The same left, right, and bottom panels are available with identical functions. You'll propably notice a huge difference though:
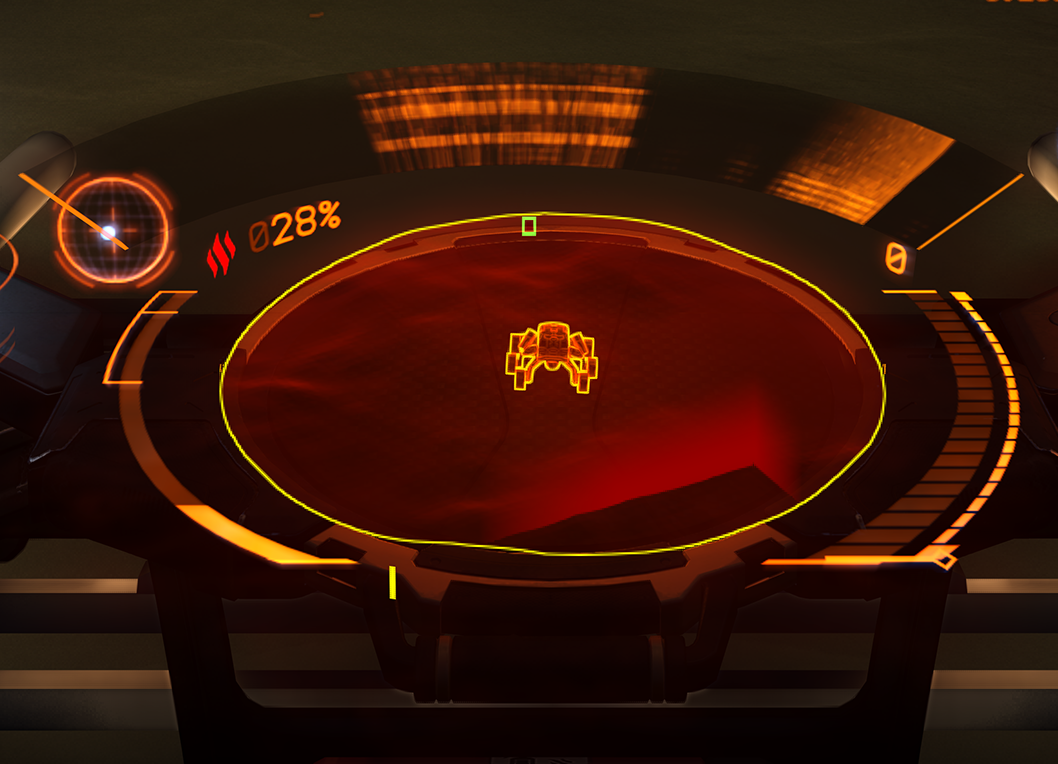
On the website link above, you'll find a checkable box and a play button. Clicking the box will add your selected object type's visual signal to the radar, while toggling the play button will add the sound of it.
This way, you can learn to identify what you are looking for.
Whatever "reasonable time" means is according to Frontier Developments. From personal experience I can tell you, finding a planet and getting there is usually the hard part, not finding the source I want.
[Horizons] Multicrew and Holo-Me
With 2.4, we can have up to 9 different pilots saved instead of having 1 slot overwritten every time!
Camera Suite
Just to mention it, 2.3 also replaced the debug camera with a new camera suite Frontier has been using for a while internally to make trailers among other things. You can access it by pressing Ctrl+Shift+Space, and use the numerous prefix positions with the NumPad, or simply go free mode that allows you to zoom out hundreds of meters while you can still control you ship. It's important to note that this doesn't make Elite a third persion view game, and while it is technically possible to play to a limited extent this way, it's more of a vanity thing than something you can use for gameplay. YouTubers, rejoyce!
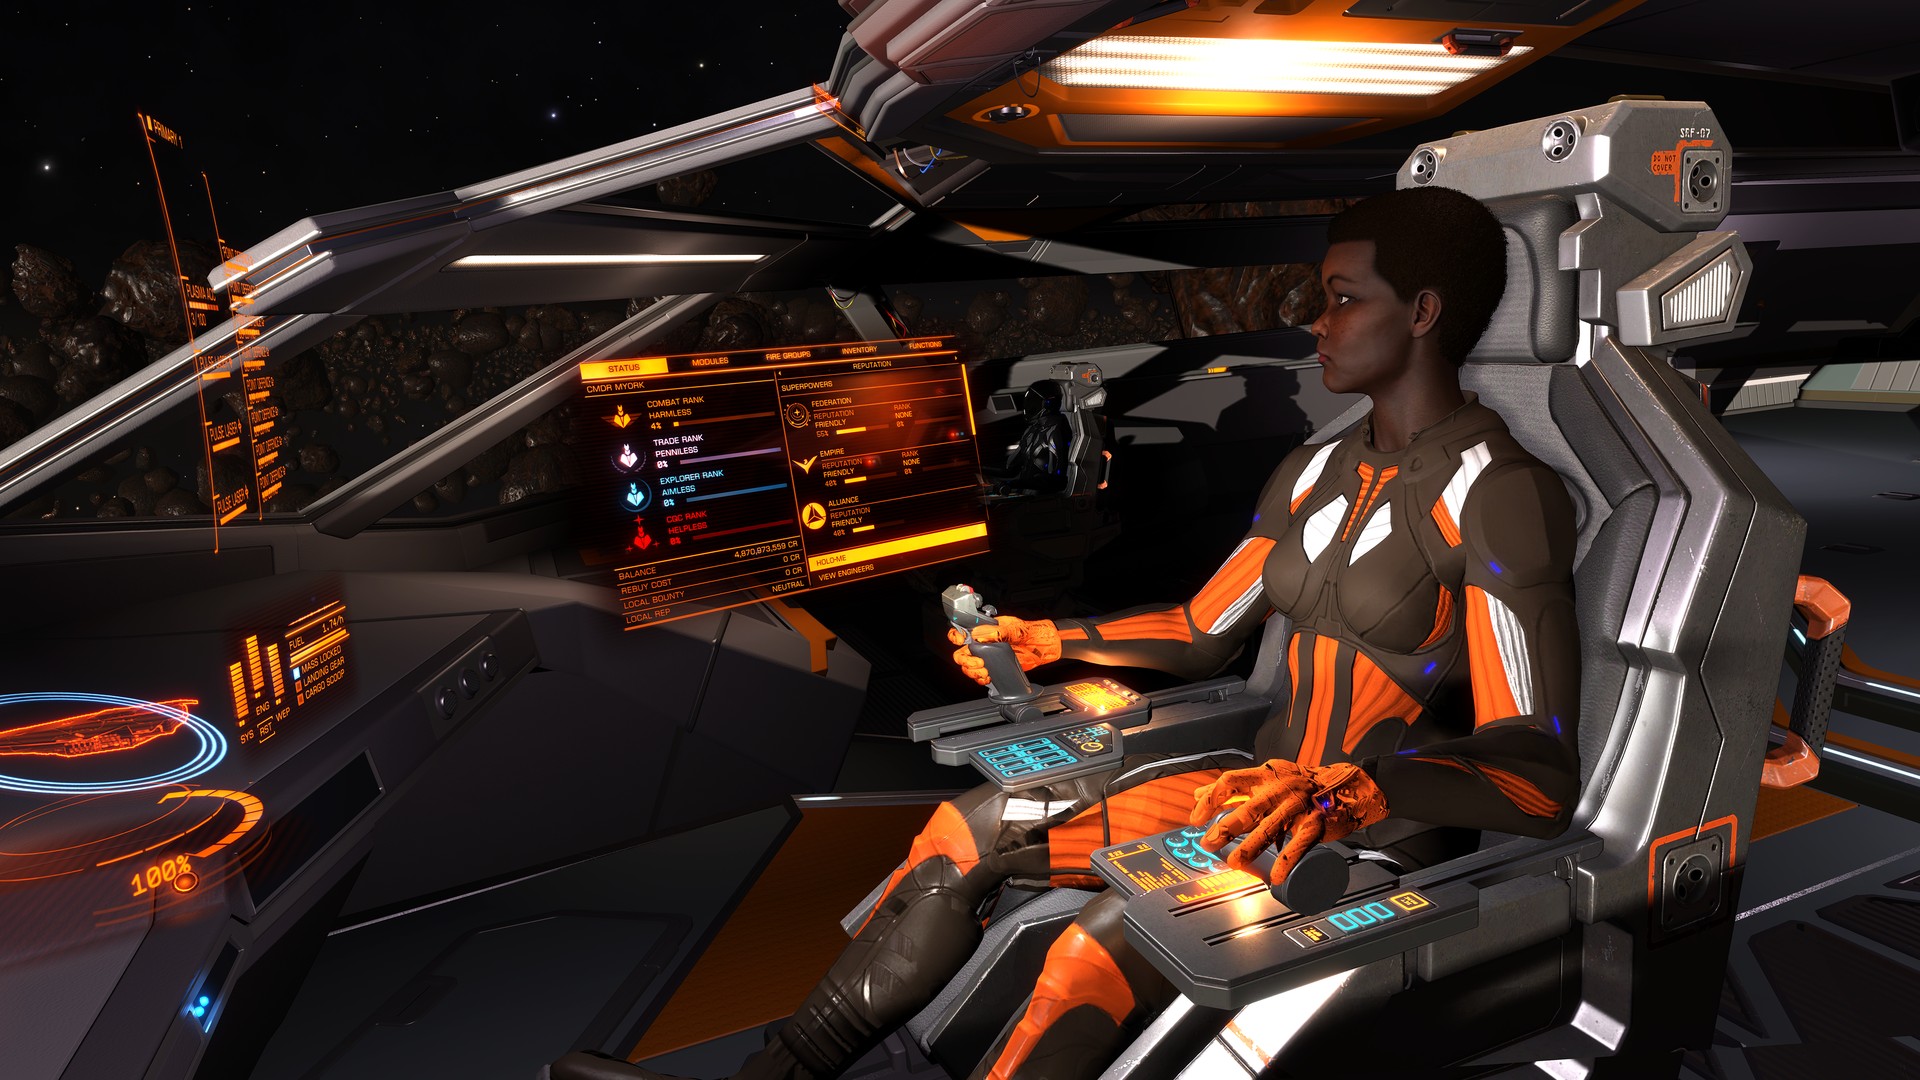 A screenshot example of multicrew in the Anaconda - on the Helm's right there is another pilot in a black suit and breathe mask, because this guest pilot didn't create a custom look yet.
Currently, multicrew supports only combat acitivities, meaning sadly you can't use 2 SRVs to collect things from the surface, share mining module management. Even for combat, the guest pilot gets no rank increase after kills and the bounty / combat bond payouts are signifantly reduced. According to Frontier, this is in place to prevent new players skipping earlier ships and important parts of the learning curve of the game, however it is brutally punishing for all players, and it is likely today we are the start of the usual 2 month to 2 year time period it will take them to change things.
In the meantime, multicrew is exactly what they wanted to avoid: little more than free money for new players, and a waste of time for everyone else, maybe with the exception of explorers who can now quickly jump back for some combat activities to help themselves about space madness.
If you are still interested, here is how it works:
Once you decide to activate multicrew, players on the ship will get their own role:- HELMThis is the ship's owner, the host, commander of the deck. This role cannot be given to anyone else, because if the ship explodes, the owner pays for the insurance. However, to compensate for the potential human mistakes out of your control, the insurance (a.k.a. "rebuy cost") is reduced for the Helm by 25% for each player. Most ships can host one additional player, while the biggest ships can host 2 additional players, meaning a meaningful 50% insurance cut for the Helm. When your Corvette insurance is 20 million, belive me it matters.
- GUNNERAs it's name may gave it away already, this role is about handling weapons. Since fixed and gimballed type of weapon aiming systems are extremely dependant on the ship's movement, these remain under control of the Helm, however the Gunner can take control of all the turrets on the ship, if it has any installed, and use them with an exterior, 3rd person camera in 360 degree with vital HUD information still visible on the screen. Certain utility modules can also be controlled by the Gunner.
- FIGHTER PILOTThis role is identical with the NPC Crew pilot role, with payment of course being the exception - the Helm gets full rewards, and the player crew members get the same amount of money but reduced by a certain % based on their combat rank.
Things I wish I knew at Multicrew release as the Helm
- If your ship can host 2 different fighter jets, you can still have only one NPC pilot with you to control one of them. With Multicrew, you can mix things up: have 1 NPC and 1 player controlling 2 fighters. Have only one fighter controlled by either NPC or player, and have a Gunner too, with the second player slot locked if you chose to have an NPC pilot, or have 2 fighter pilot players and an NPC crew siphon away some part of your money for sitting in the hangar, and so on.
- The Helm sadly has little to no control over what other player crew members can do. Be sure to communicate with them! A ship that has no turrets is almost just sightseeing to a Gunner with the possibility to mess with some of your modules including but not limited to: Shield Cell Banks, Heat Sinks, etc. Needless to say, unless you absolutely trust your Gunner, you don't want strangers to mess with these. Since there is absolutely zero restriction options for the Helm to set, prepare your crewmates through chat about how you want to play.
- Once you open your ship to matchmaking, it essentially becomes a multiplayer lobby with you being the host. This is okay with ships that have 1 additional seats, however those that have 2 more seats always open both. The only way to lock down one of them is to cancel searching in the same Comms menu (hotkey 2) you started the search in, once you have one player already in the joining process.
Author Notes
Thank you for everyone who has reached this point to even read this! I've put a lot effort into making this guide, and I hope it will be as helpful to you as much I enjoyed working on it. The guide is planned to be expanded and kept up to date in the future, I just want to push it out of the door now. Suggestions, corrections are of course always welcome in the comments sections.
Also I'd like to thank David Braben for relentlessly chasing his dreams through a lifetime, without him and the team behind him, I wouldn't be here to write a guide about it.
O Seven
CMDR David Winter, captain of Arissa's Widowbird.
(Pointless picking on others and arguments going to personal levels in the comments, needless to say are subject to moderation.)
____________________________________________________________________________
2017.03.23.
I'm aware the guide is full of spelling errors, somewhere even entire sentences that don't make any sense. The thing is, I type and read really, REALLY fast and don't look at what I wrote, it's just in my head, I look at the whole picture to keep the formatting as perfect as I belive it can be - for my taste anyway - that I hope keeps the reader engaged and interested, purely on a visual level. That feeling of "it's good to look at it" if you'd like to put it that way. This is the reason I make so many mistakes. I try to fix them later on, but if you know what you are reading it's incredibly easy to skip these especially if you are doing it for the 5th time. I really want to sit down and just dedicate a day to fix it all. But that day is a day I can see happening when I'm on a longer vacation. Until then, I hope you can still enjoy it, find it useful, and belive the small fixes here and there are really happening from time to time :).
DOCUMENTATION
- 2016. October 2: Worked on it 8 hours straight. Basic info, structure, picture resources / resizing / editing.
Sections: TLDR review, Resources, Activities: Combat, Trading + formatting - 2016. October 3: 2 hours, resource collecting,
Sections: Community and Galnet + formatting. Damn 17 Draconis is still under lockdown, 4 days in a row. I need 24% more until I can buy a Corvette :'(. - 2016. October 8: 9 hours straight. Activity sections (Combat, Trading, Exploring, Piracy) are done. Formatting, more resource collecting, expanding and minor fixes on existing sections. The main sections are considered to be done. Several secondary sections purged from the guide to be published later. These are mostly covered in basic informations and Activities anyway, system specific tips and tricks are extremely like to change with the arrival of patch 2.2. Guardians sometime this month. I'd prefer not to waste days working on something that becomes outdated a few days later, so these are delayed. The guide is structured for easy expansions later on, or restructured if need be.
- 2016. October 8 PUBLISHED THE GUIDE Okay, and this to be out there. Worked too much on it and it's weight started to become a bit too much as more and more planned content came to mind. Don't know how you guys at Frontier do this with millions looking at you, hell only I look at my own work now.
- 2016. October 9 Reformatted Multiplayer: Game Modes to make it more easier to identfy as the multiplayer section by a glipse. Removed "Game Mechanics" from title, it was an accidentally left behind title. Wings are getting added in it's own section to bypass character limit, possibly merged back to Multiplayer: Game Modes, depending on lenght.
- 2016. October 15 Added Wings, Communications, and Modding your game sections.
- 2016. October 16 Added Community Goals
- 2016. October 28 The guide already contains many if not all the vital information to get started in Elite, and is now considered "1.0". Future updates, mostly Horizons related, will increase the version number from there, but this is now considered baseline done.
- Tiny fix, appearantly I had no idea Mobius has 29.000+ players now, not 14.000+.
- 2017. January 15 Worked 7 hours on it with a lunch break
* Added mining activity in 2 parts due to character limitation.
* Added new links to Tools and Resources
* Added 2.2 Neutron Stars / White Dwarves, split traveling section into 2 (character limitation)
* Added Horizons overview
* Added Ship Launched Fighters and Crew
* No idea how exactly but I messed around with the leaders section and now formatting works as it should even from Google Chrome (previously some lines / pictures were really out of place but only in that browser). - 2017. february 19 Added engineers, 2 hours of work on writing and formatting. I decided to go with a rather simplistic approach on this topic, given how impossibly huge it would be to cover each engineer on their own, and how needless it is with a site like Inara around. I'm aware SRV guide is still missing that is strongly related to the engineers, I ask for your patiance.
- 2017. february 26 Added the SRV section. Roughly 2 of work on writing and formatting it. Just like the engineers, the SRV usage is something expected to be changing and expanding over time as the game's development is progressing, so I took the way of explaining it in general and providing resources and explanation to those to teach the player how to use these effectively, instead of wasting time on specific listings.
- 2017. march 4 7 hours, including random time wasting on reddit / youtube completely unrelated stuff, maybe 8 or 9 hours work. A bigger update I wanted to do for a while and some parts of it was requested / asked about in comments, I just didn't want to include them until I have the time to include everything related for a good overview.
* Added "Your ship" small section for bookmarking / explaning upcoming sections.
* Added ship configuration: power management
* Added ship configuration: heat management
* Added ship configuration: power distribution management
* Added ship configuration: fire group management
Likely full of typos for now.
* Removed the guide's version number from title, became pointless long ago. Changed the name to the now final "The Guide to Almost Everything", after that it's always added short news on updates. - 2017. march 4 night 2 hours:
* fixes and very slight formatting changes through the new sections.
* Added short info on how to change between economic / fastest route planning [request]
* Added templorary "Other Powers" section after SUPERPOWERs to include Archon and Yuri and have a full roster of Powers listed. [request, and overlooked before]
* Decided to remove and rework all the Power related stuff for much longer lore info on every leader, formatting is not finalized yet, content research comes after. - 2017. march 5 About 10 hours of work with some breaks.
* Reformatted and shortened 3 SUPERPOWERs sections. Shorter only in format, not content.
* Added 3 new factions of Galactic Powers, going to deeper background lore on the leaders of the galaxy. This is something I wanted to do for a very long time and was often requested to be added, but only now I found my way of putting it into the guide while preserving the superpowers part to keep things clear and easy to understand instead of a flood of chaotic information, but also wanted both type of sections (superpowers and galactic powers) to have their own unique look and feel, so both earn their right to exist. I believe I found this sweet spot now, let me know :).
* Small formatting tweaks across the guide to make the bookmark titles seem more unified, part of a whole.
* Removed some of the outdated parts of Documentation (future plans and scrapped ideas from way back, that later all were added to the guide). Still, character limit is closing in on me! :(. - 2017. march 8 Added a small "tips and tricks" galaxy icon thingy to Supercruise section. If you don't like supercruising too much, you'll like this one ;).
- 2017. april 17 Roughly 3-4 hours: Dangerous Commanders update (2.3).
* Added HoloMe
* Added Multicrew
* Updated Wings and Communications (full rewards earned by all participating players, changes to chat coloring)
* Updated Exploration (massively buffed scan values, new visual guide with updated values, additional visual guide for holographic identification).
NOTE: 2.3 has been out for a few days only and it was recieved mixed by the community. Things might change around multicrew payouts and holome character slots, so the new guide content should be taken as a draft I'll polish up later if needed. - 2017. july 17 5 hours
* Updated wording in almost every section. A few lines here and there were referring to outdated information, tiny typos fixed, changed wording in the more "storytelling" parts. - 2017. october 5
* Tiny update for Holo-Me with the arrival of 2.4. Not much got added or changed with this patch for me to list here. Thargoid content is far from being fully explored or even released as Frontier will release 2.4 in waves.
- 2018. april 11
* The guide is discontinued for personal reasons. I have no power to stop you from it, but I ask you to don't steal my work for a few minor changes.
- Efficient Keyboard and Mouse Controls★ 5 (817)48k views1.8k ♥13 minUpdated 10 Oct, 2024
- Все об Elite Dangerous (гайд и справочник)★ 5 (1.1k)26k views2.6k ♥218 minRussianUpdated 15 Nov, 2020
- ~How to Adjust your HUD Colors~★ 5 (361)23k views645 ♥2 minUpdated 25 Dec, 2017
- ШАХТЕРСТВО★ 5 (735)17k views1.3k ♥11 minRussianUpdated 15 Feb, 2021
- Помощь новичкам - как получить ускоритель Стражей★ 5 (716)13k views1k ♥7 minRussianUpdated 25 Aug, 2021
- Соединение с серверами Frontier невозможно как исправить?★ 4 (173)12k views78 ♥1 minRussianUpdated 5 Jun


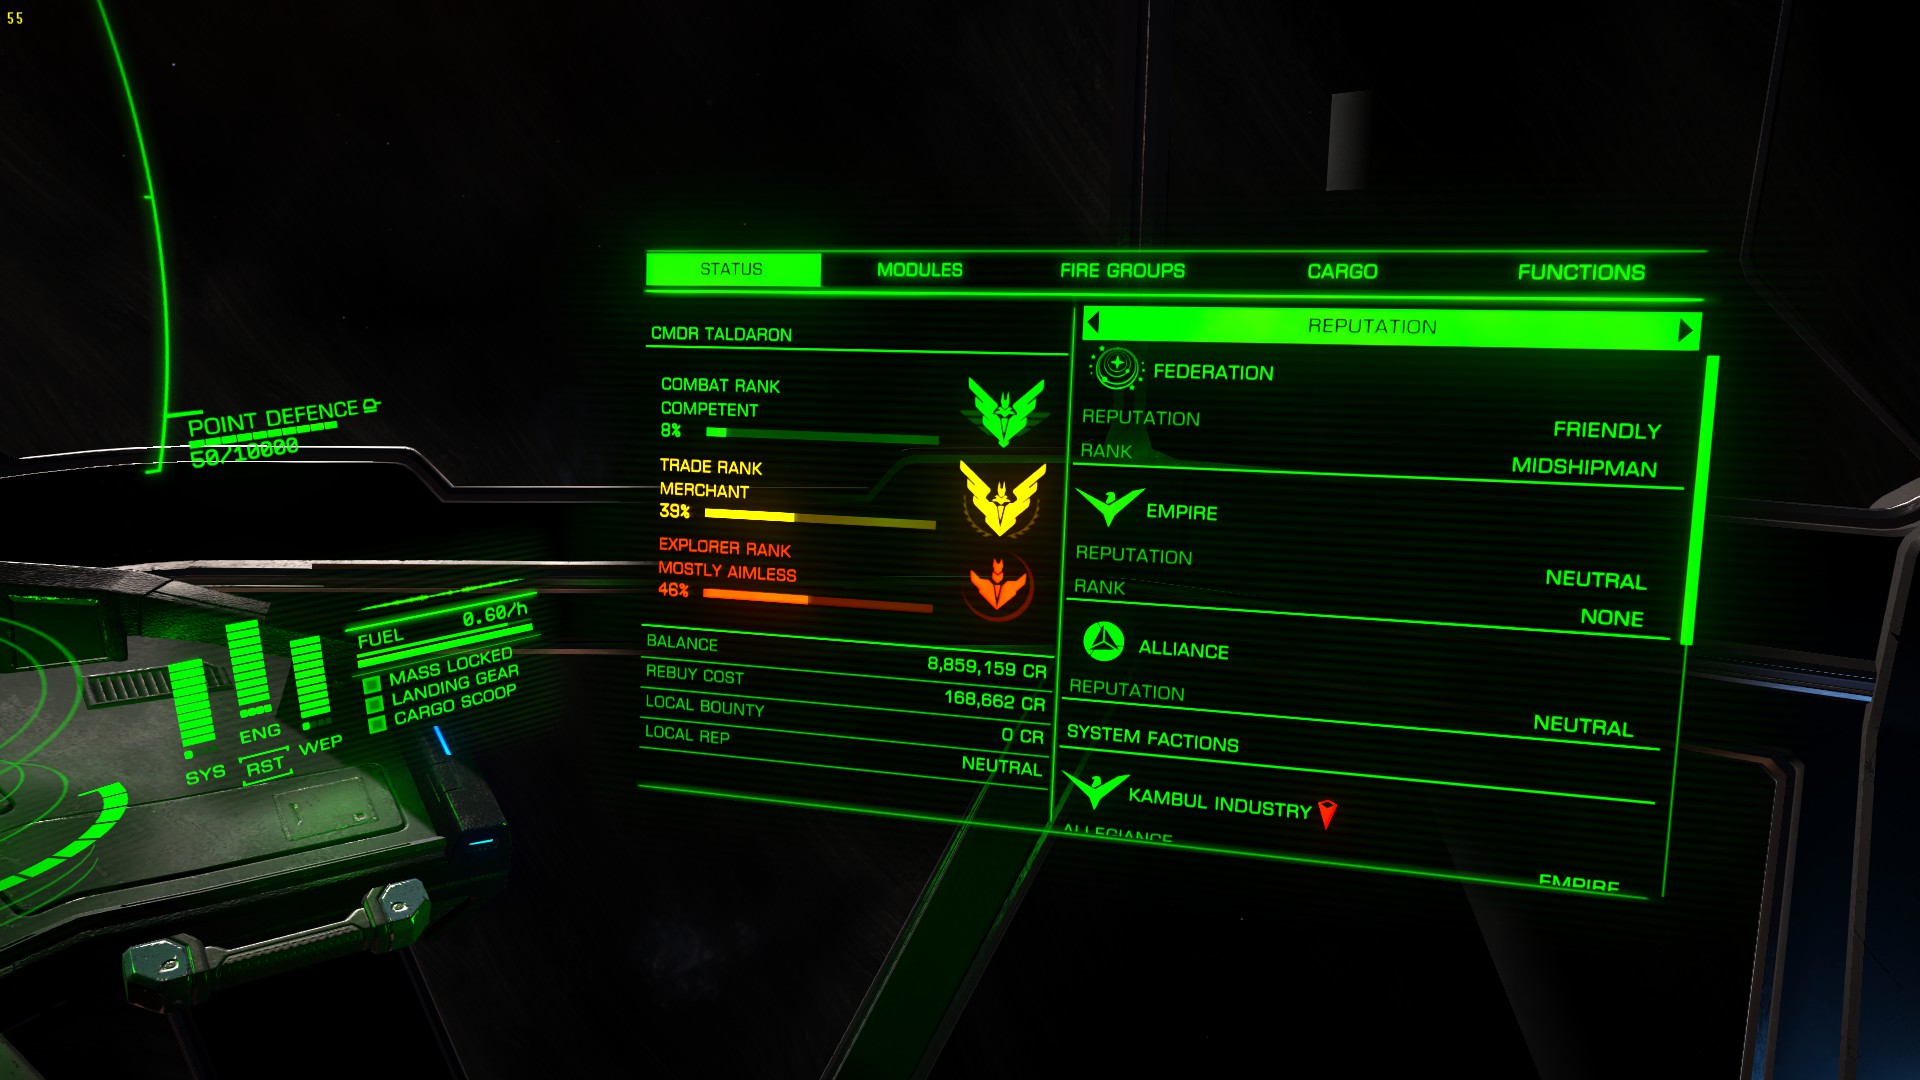



- Upgrading to PremiumTeam Fortress 2★ 5 (20k)1441k views11k ♥6 minUpdated May 11, 2022
- No More Room in Hell Official ManualNo More Room in Hell★ 5 (2.8k)569k views2.1k ♥29 minUpdated Apr 22, 2019
- NMRiH Community Hosting GuidesNo More Room in Hell★ 5 (526)351k views653 ♥1 minUpdated Aug 10, 2022
- Лучшие кооперативные игры SteamPAYDAY 2★ 5 (1.5k)315k views2.1k ♥56 minRussianUpdated Apr 27, 2025
- Desert Eagle Heat Treated | Blue GemCounter-Strike 2★ 5 (1.6k)292k views1.5k ♥2 minUpdated Jan 16
- Treasure Hunt Puzzle SolutionsTotal War: WARHAMMER II★ 5 (6.9k)281k views15k ♥3 minUpdated Aug 19, 2021






This guide was created by its original author on the Steam Community. Are you the author and want it removed? Request removal.