The Sims 3 Steam Deck Setup Guide
Introduction
Hello!
Welcome to my guide for The Sims 3 and how to set up modding frameworks and tools for the game on Steam Deck. Every step that I have listed are the steps I personally use to make my game on Steam Deck run with these modding frameworks.
If you have any questions feel free to look at the F.A.Q Section or leave a comment.
Happy Simming!!
This guide is intended to be used with game version 1.67 Steam on the Steam Deck and Steam Deck Oled Models. Versions of the game installed through EA App are not supported.
Versions obtained without purchase are not supported at all!
LIKE ANY TYPE OF GAME GUIDE THAT MAKES YOU EDIT THE GAME FILES ALWAYS, ALWAYS BACK-UP YOUR FILES BEFORE STARTING!

Welcome to my guide for The Sims 3 and how to set up modding frameworks and tools for the game on Steam Deck. Every step that I have listed are the steps I personally use to make my game on Steam Deck run with these modding frameworks.
If you have any questions feel free to look at the F.A.Q Section or leave a comment.
Happy Simming!!
This guide is intended to be used with game version 1.67 Steam on the Steam Deck and Steam Deck Oled Models. Versions of the game installed through EA App are not supported.
Versions obtained without purchase are not supported at all!
LIKE ANY TYPE OF GAME GUIDE THAT MAKES YOU EDIT THE GAME FILES ALWAYS, ALWAYS BACK-UP YOUR FILES BEFORE STARTING!
Step 1 - Steam Deck Desktop Mode
This guide will be done in desktop mode!
Step 1 - Press the "Steam" Button on your steam deck to bring up the Steam Deck Menu.
Once it has appeared scroll down to "Power" and select it.
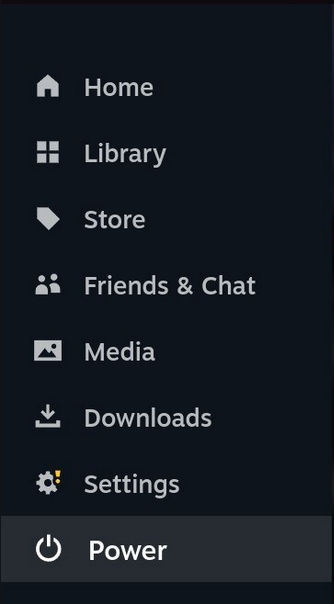
Once selected a new window will appear, scroll down to the option "Switch to Desktop"
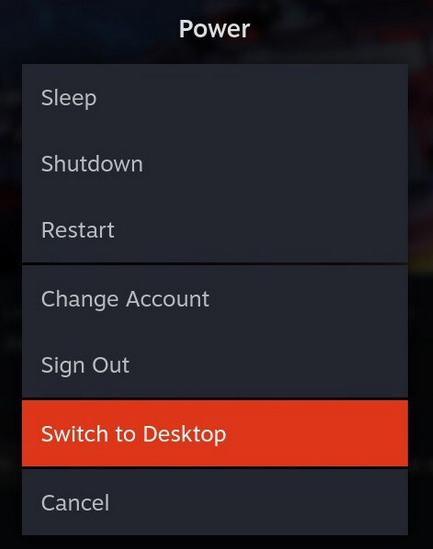
Step 2 - You are now in Steam Deck Desktop Mode.
Step 2 - Installing The Mods Folder
For new users to The Sims 3 Modding this will show you how to install the Mods Folder into your game so your game will be able to read and use ".Package" file mods.
The "Mods" Folder is for .package files, .sims3pack Files need to be installed through the games launcher. I recommend this depth video by @SimMattically for more information about the different package types can be found HERE!
Step 1 - Download the mods folder using the download button from ModTheSims HERE![modthesims.info]
Once on the download page scroll down a little until you see a "Download" button, once found click on this link and it will download the file.
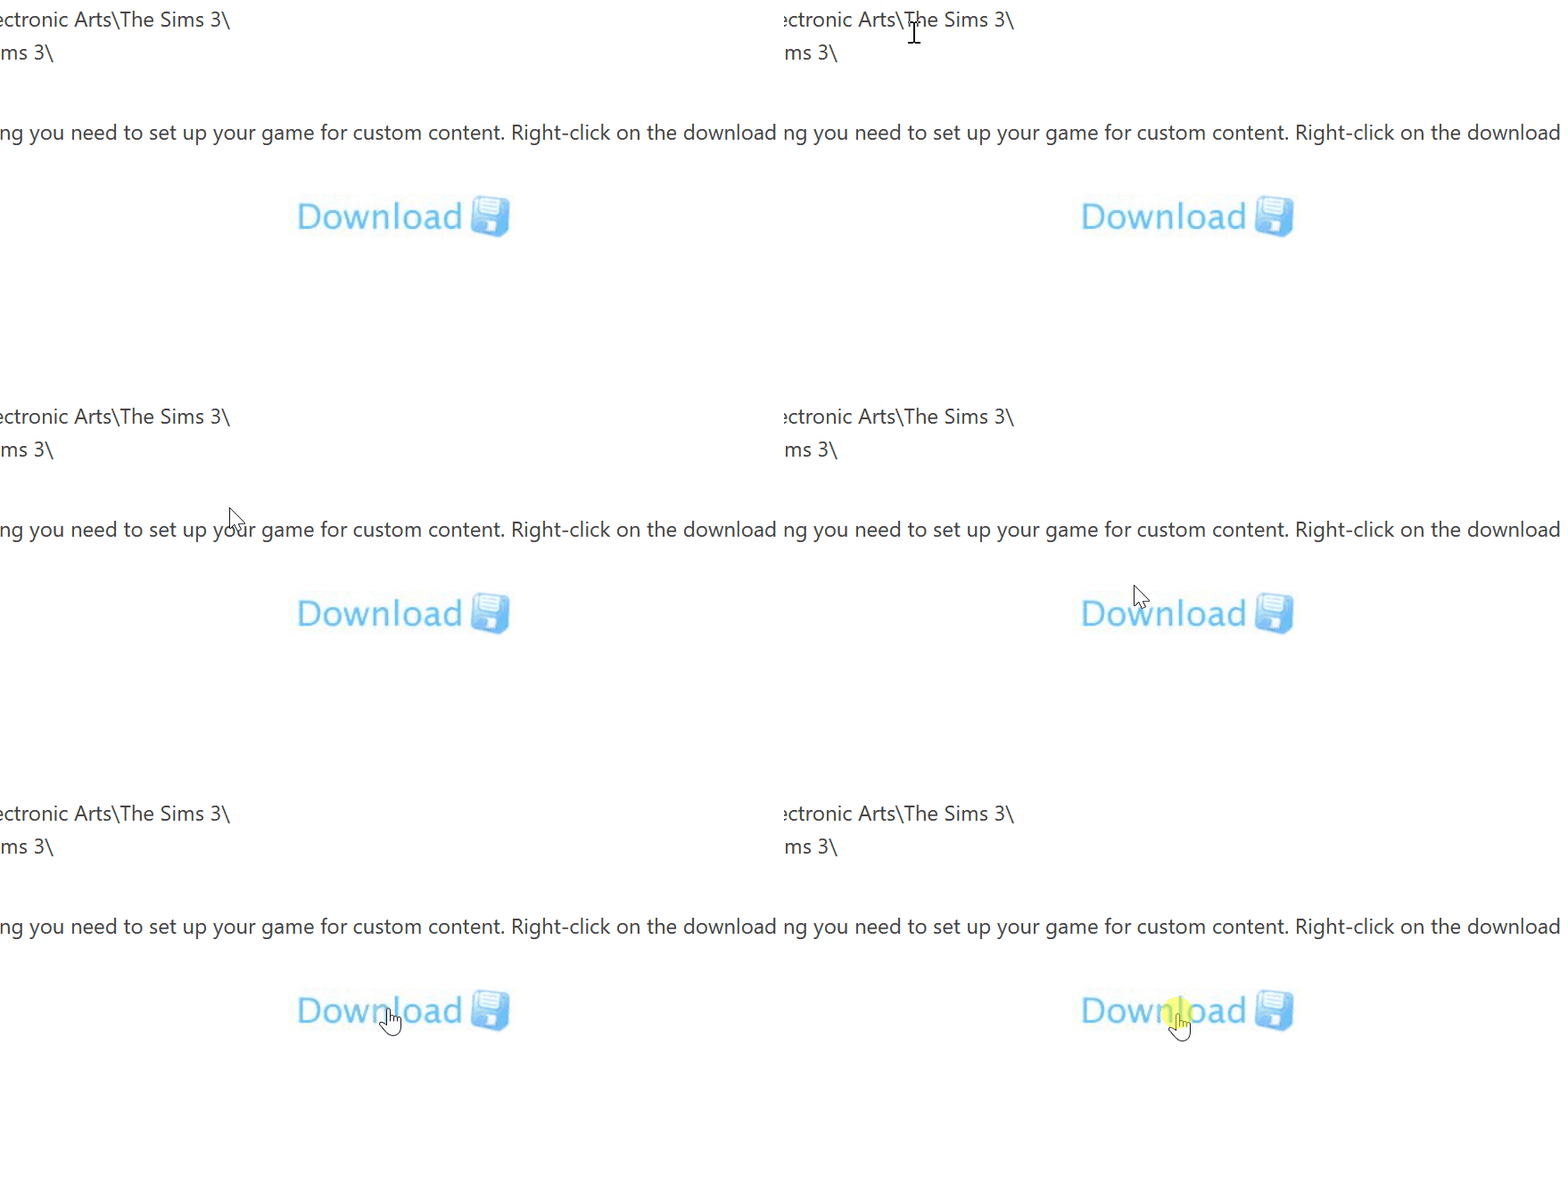
After the download is complete place the file somewhere easy to find like the desktop.
Step 2 - Once downloaded go to...
"/home/deck/.local/share/steamapps/compatdata/47890/pfx/drive_c/users/steamuser/Documents/Electronic Arts/The Sims 3/"
Note: If you can't get to this location make sure you have "Show Hidden Files" turned on! It can be turned on in the top right hand corner of the Dolphin File Manager window.
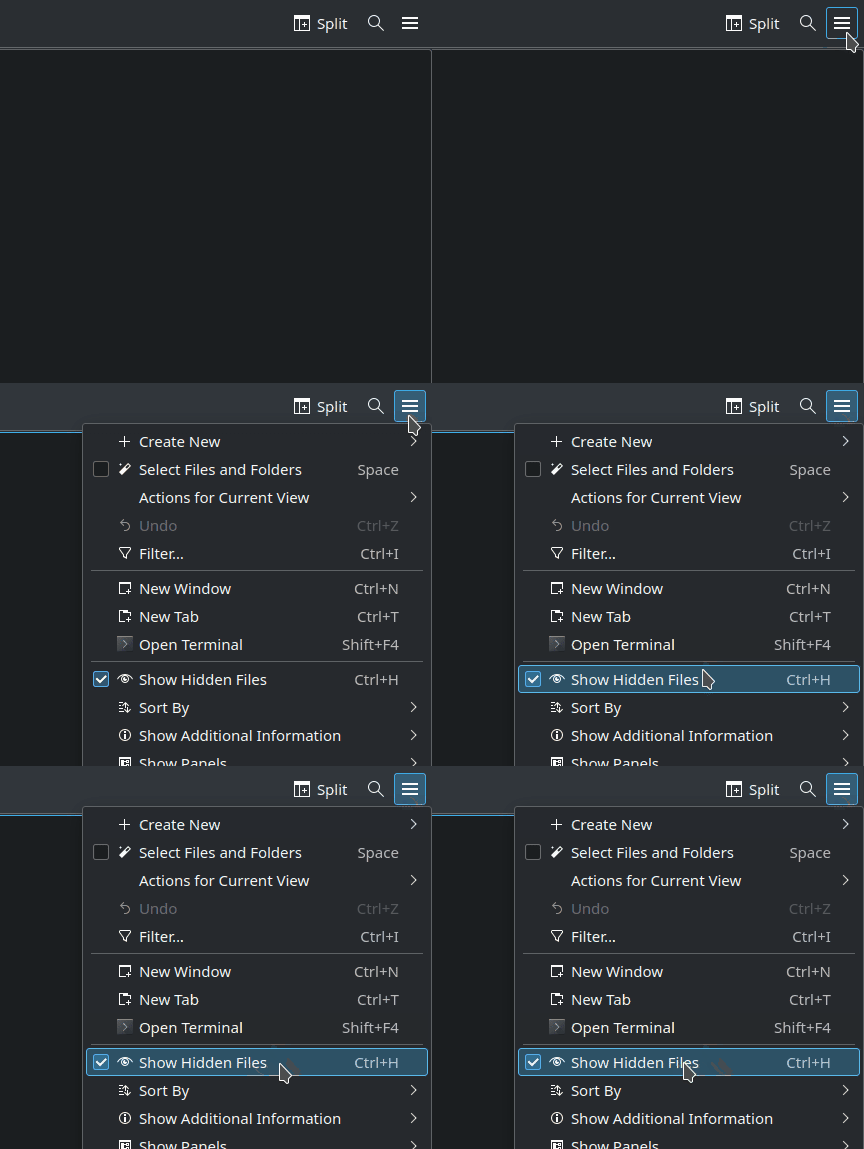
Once there, open up the downloaded mods folder file and extract its contents right into The Sims 3 documents folder.

Step 4 - Just to make sure open up the mods folder and make sure the contents inside looks like this image below!
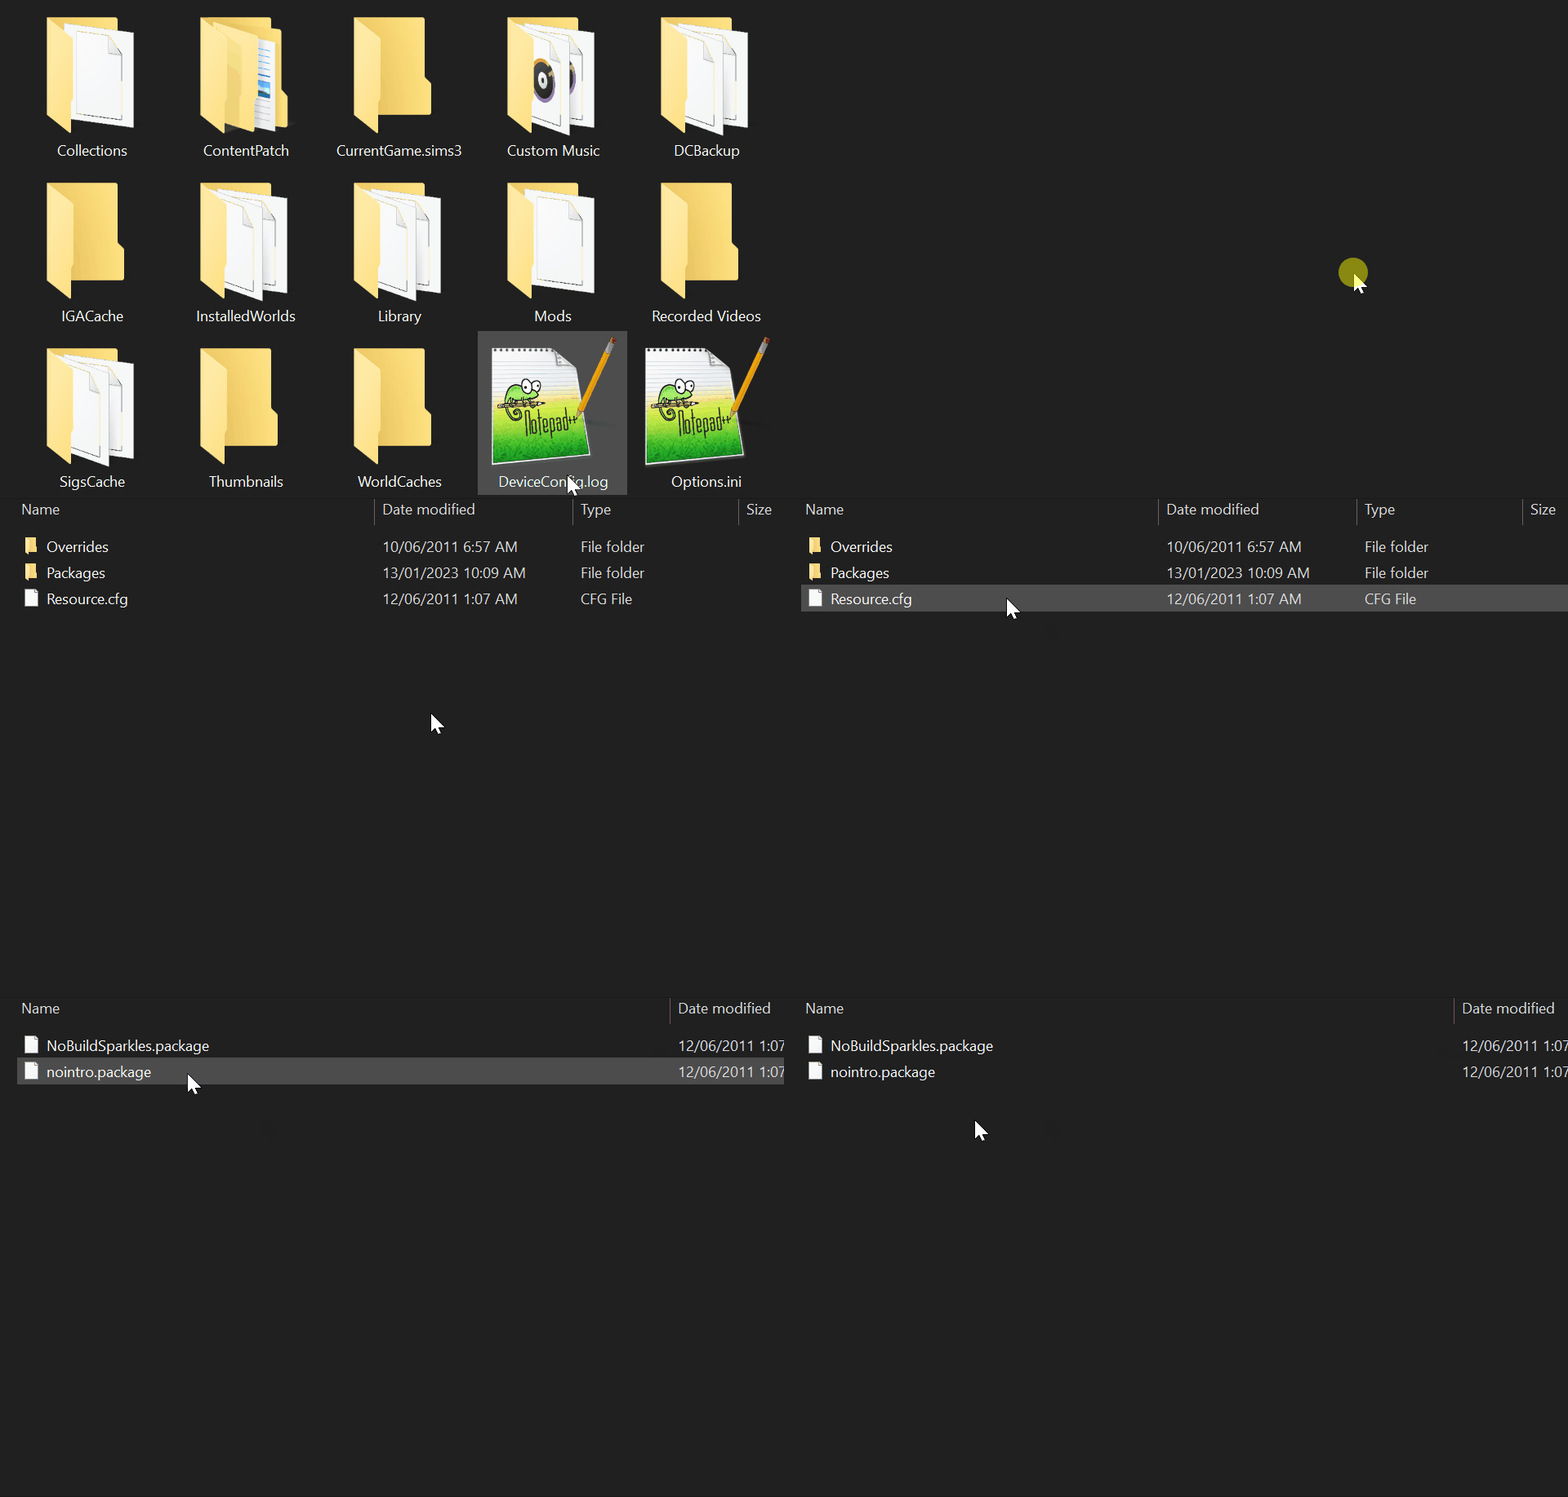
Files that should be present and that are needed are...
The two package files that come inside the packages folder called...
If the maxis logo is still showing up on startup even with the "nointro.package" present in the mods folder for testing this is normal since the "nointro.package" was made before that intro screen was added in a later patch and uses a different file path to the other intro videos.
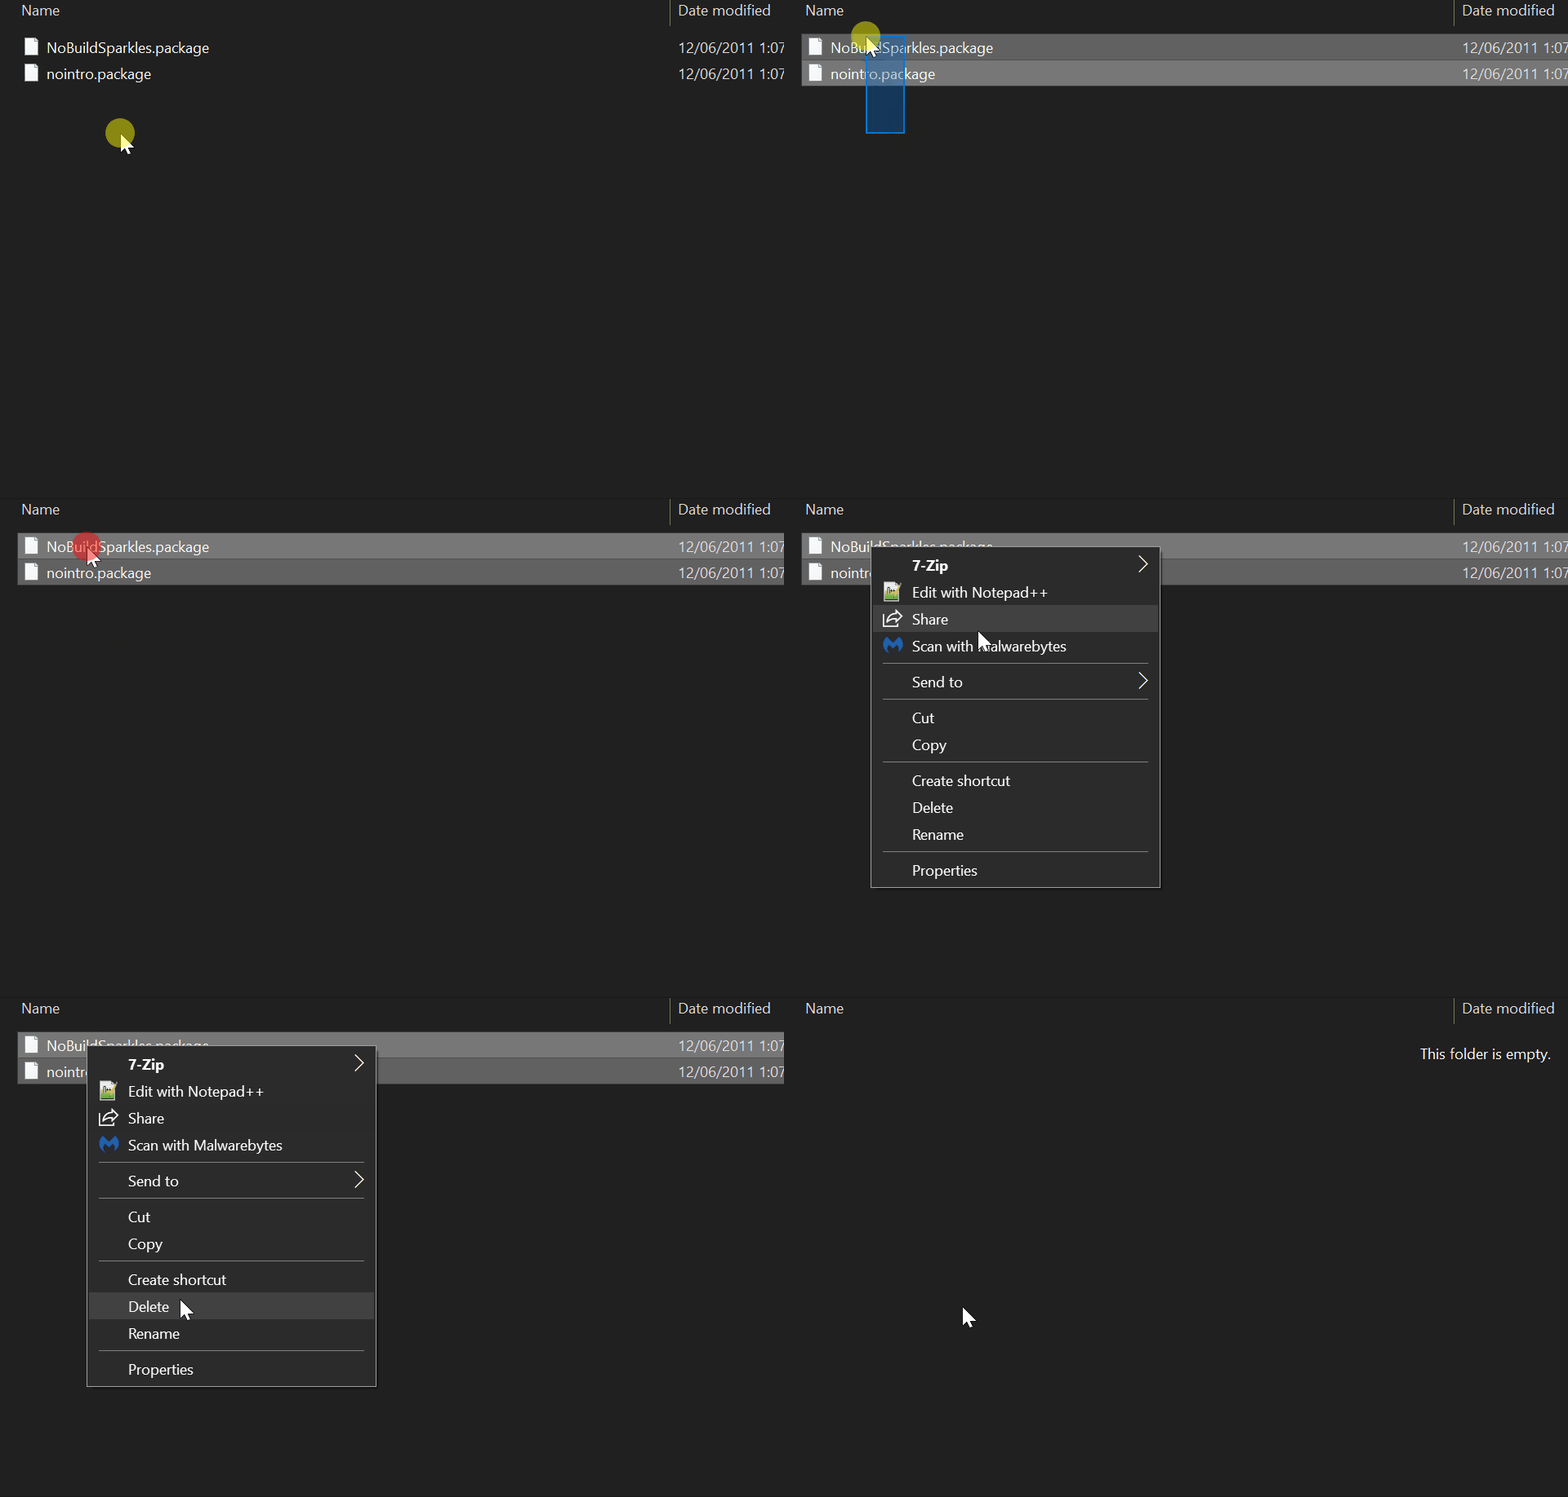
If you want to keep "nointro.package" to disable the intros and want the Maxis Logo Intro gone as well, you can download a mod for it HERE[modthesims.info] to be used along side "nointro.package".
The "Mods" Folder is for .package files, .sims3pack Files need to be installed through the games launcher. I recommend this depth video by @SimMattically for more information about the different package types can be found HERE!
Step 1 - Download the mods folder using the download button from ModTheSims HERE![modthesims.info]
Once on the download page scroll down a little until you see a "Download" button, once found click on this link and it will download the file.
After the download is complete place the file somewhere easy to find like the desktop.
Step 2 - Once downloaded go to...
"/home/deck/.local/share/steamapps/compatdata/47890/pfx/drive_c/users/steamuser/Documents/Electronic Arts/The Sims 3/"
Note: If you can't get to this location make sure you have "Show Hidden Files" turned on! It can be turned on in the top right hand corner of the Dolphin File Manager window.
Once there, open up the downloaded mods folder file and extract its contents right into The Sims 3 documents folder.
Step 4 - Just to make sure open up the mods folder and make sure the contents inside looks like this image below!
Files that should be present and that are needed are...
- Resource.cfg File
- Packages Folder
- Overrides Folder
The two package files that come inside the packages folder called...
- NoBuildSparkles.package
- nointro.package
If the maxis logo is still showing up on startup even with the "nointro.package" present in the mods folder for testing this is normal since the "nointro.package" was made before that intro screen was added in a later patch and uses a different file path to the other intro videos.
If you want to keep "nointro.package" to disable the intros and want the Maxis Logo Intro gone as well, you can download a mod for it HERE[modthesims.info] to be used along side "nointro.package".
The Mods folder is now installed!
Step 3 - Mono Patcher
Mono Patcher is a library that allows Script Modders to replace Sims 3 methods with as much compatibility as possible - No need to create core mods anymore to replace game functions.
Step 1: Download Mono Patcher Library from...
Mod The Sims - HERE![modthesims.info]
Github - HERE![github.com]
Step 2: Once downloaded go to your games mods folder located at...
"/home/deck/.local/share/steamapps/compatdata/47890/pfx/drive_c/users/steamuser/Documents/Electronic Arts/The Sims 3/""
Once inside the Mods folder open up the "Packages" folder and create a new folder.
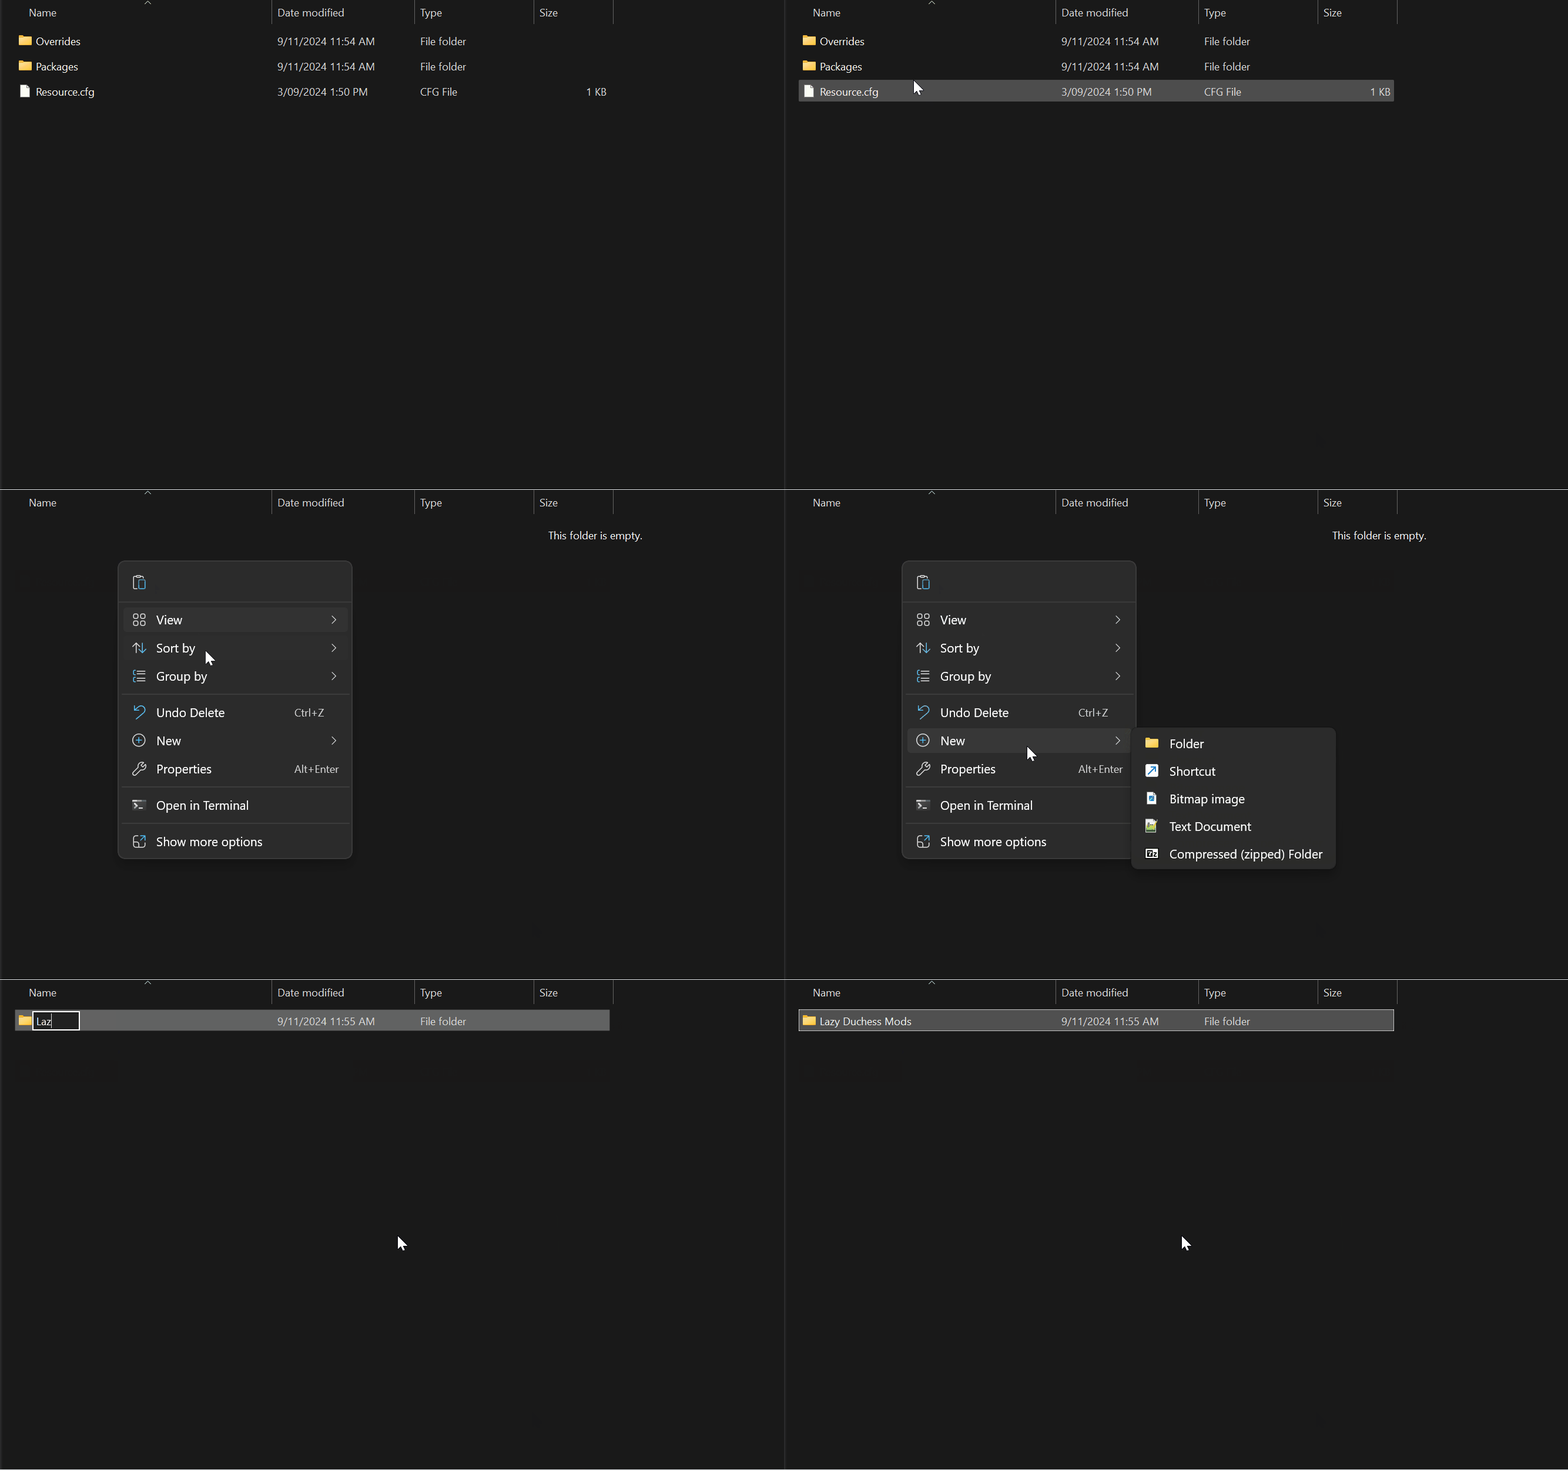
After creating the new folder place the "ld_MonoPatcher.package" file inside the newly created folder.
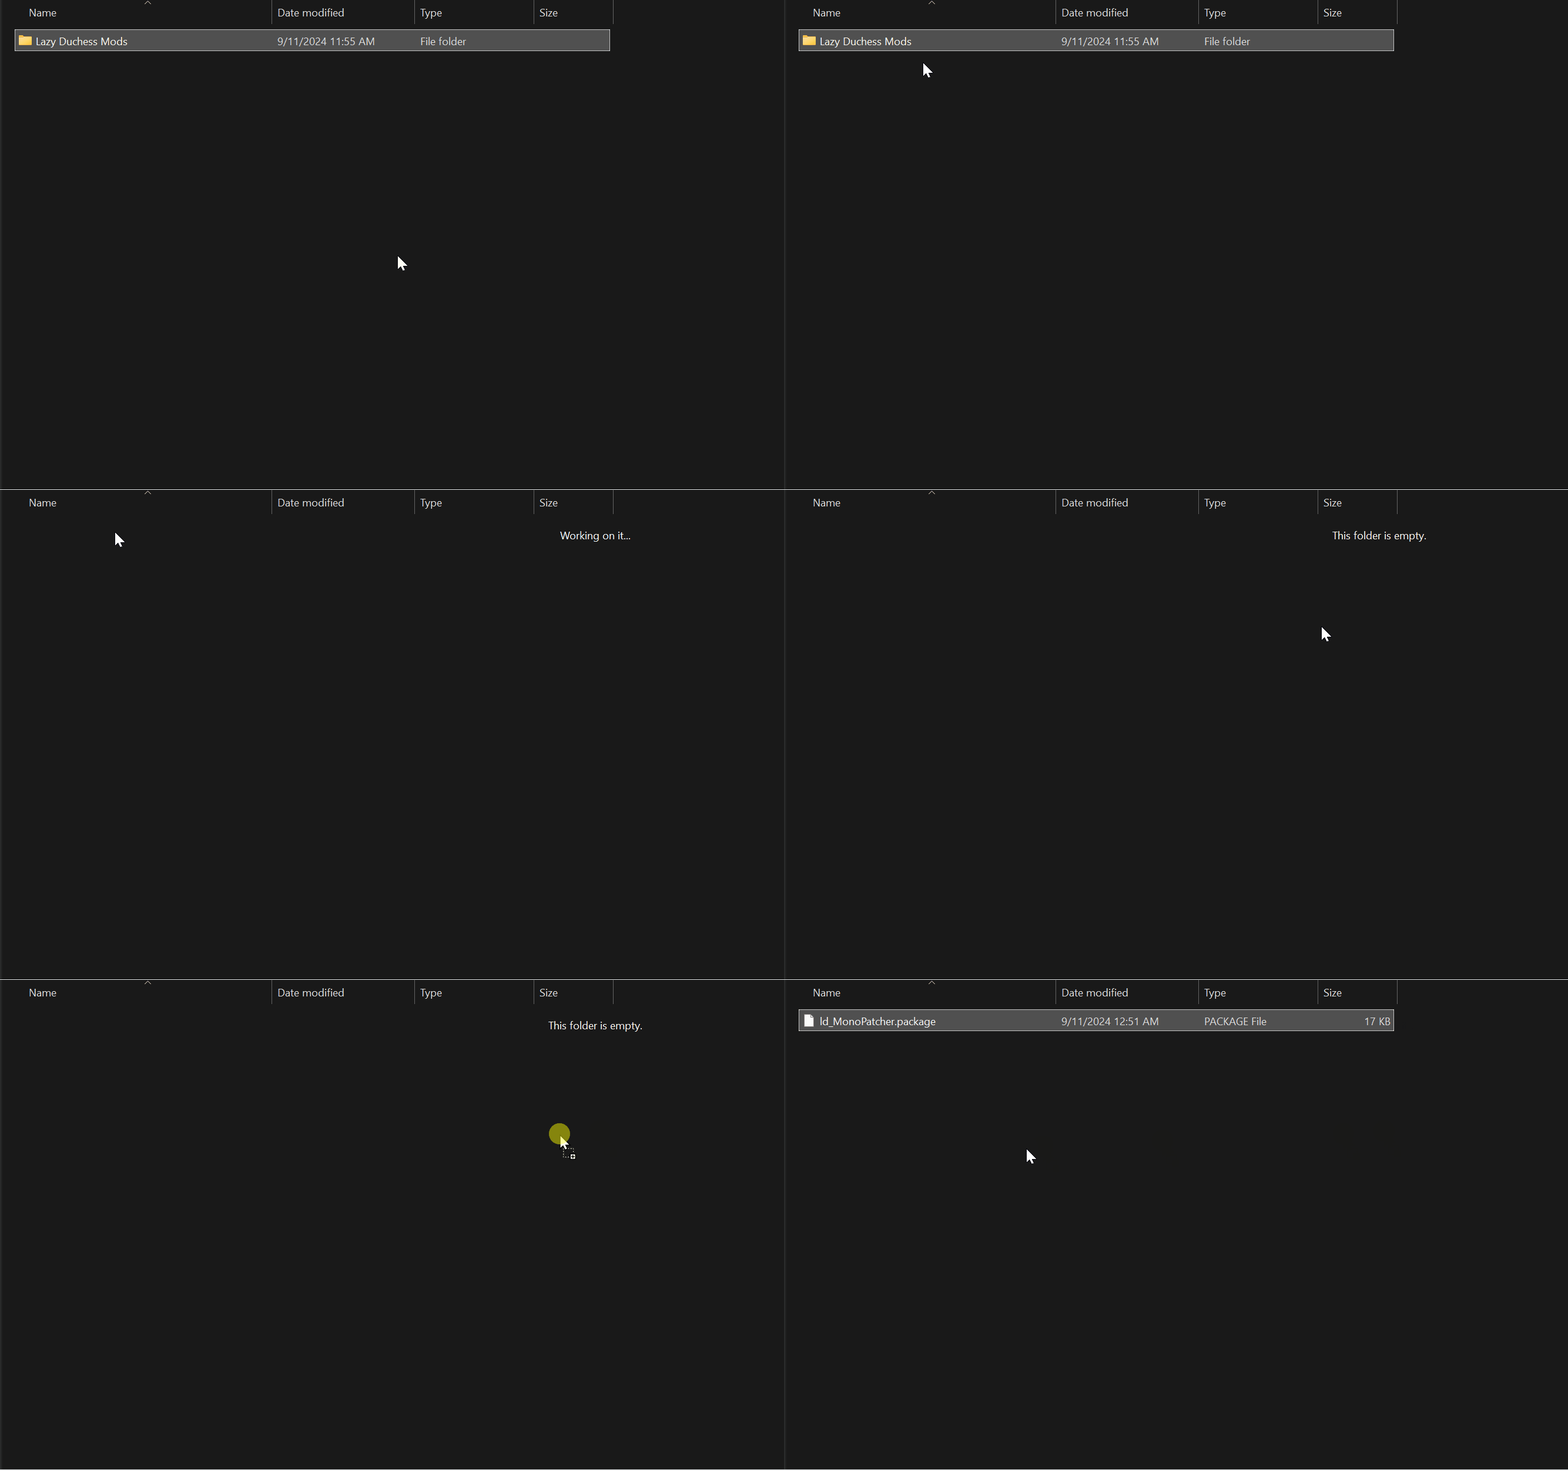
Step 3: Once that is done you will need to go to the games "Bin" Folder in the games install directory, it can be found at...
Steam 1.67 - "/Home/.local/share/Steam/steamapps/common/The Sims 3/Game/Bin/"
Once there place the file "MonoPatcher.asi" & "wininet.dll" into the "Bin" folder in the games directory.
"wininet.dll" from Mono Patcher will be used instead of Ultimate ASI Loader as Ultimate ASI Loader seems to have some loading issues on Steam Deck.
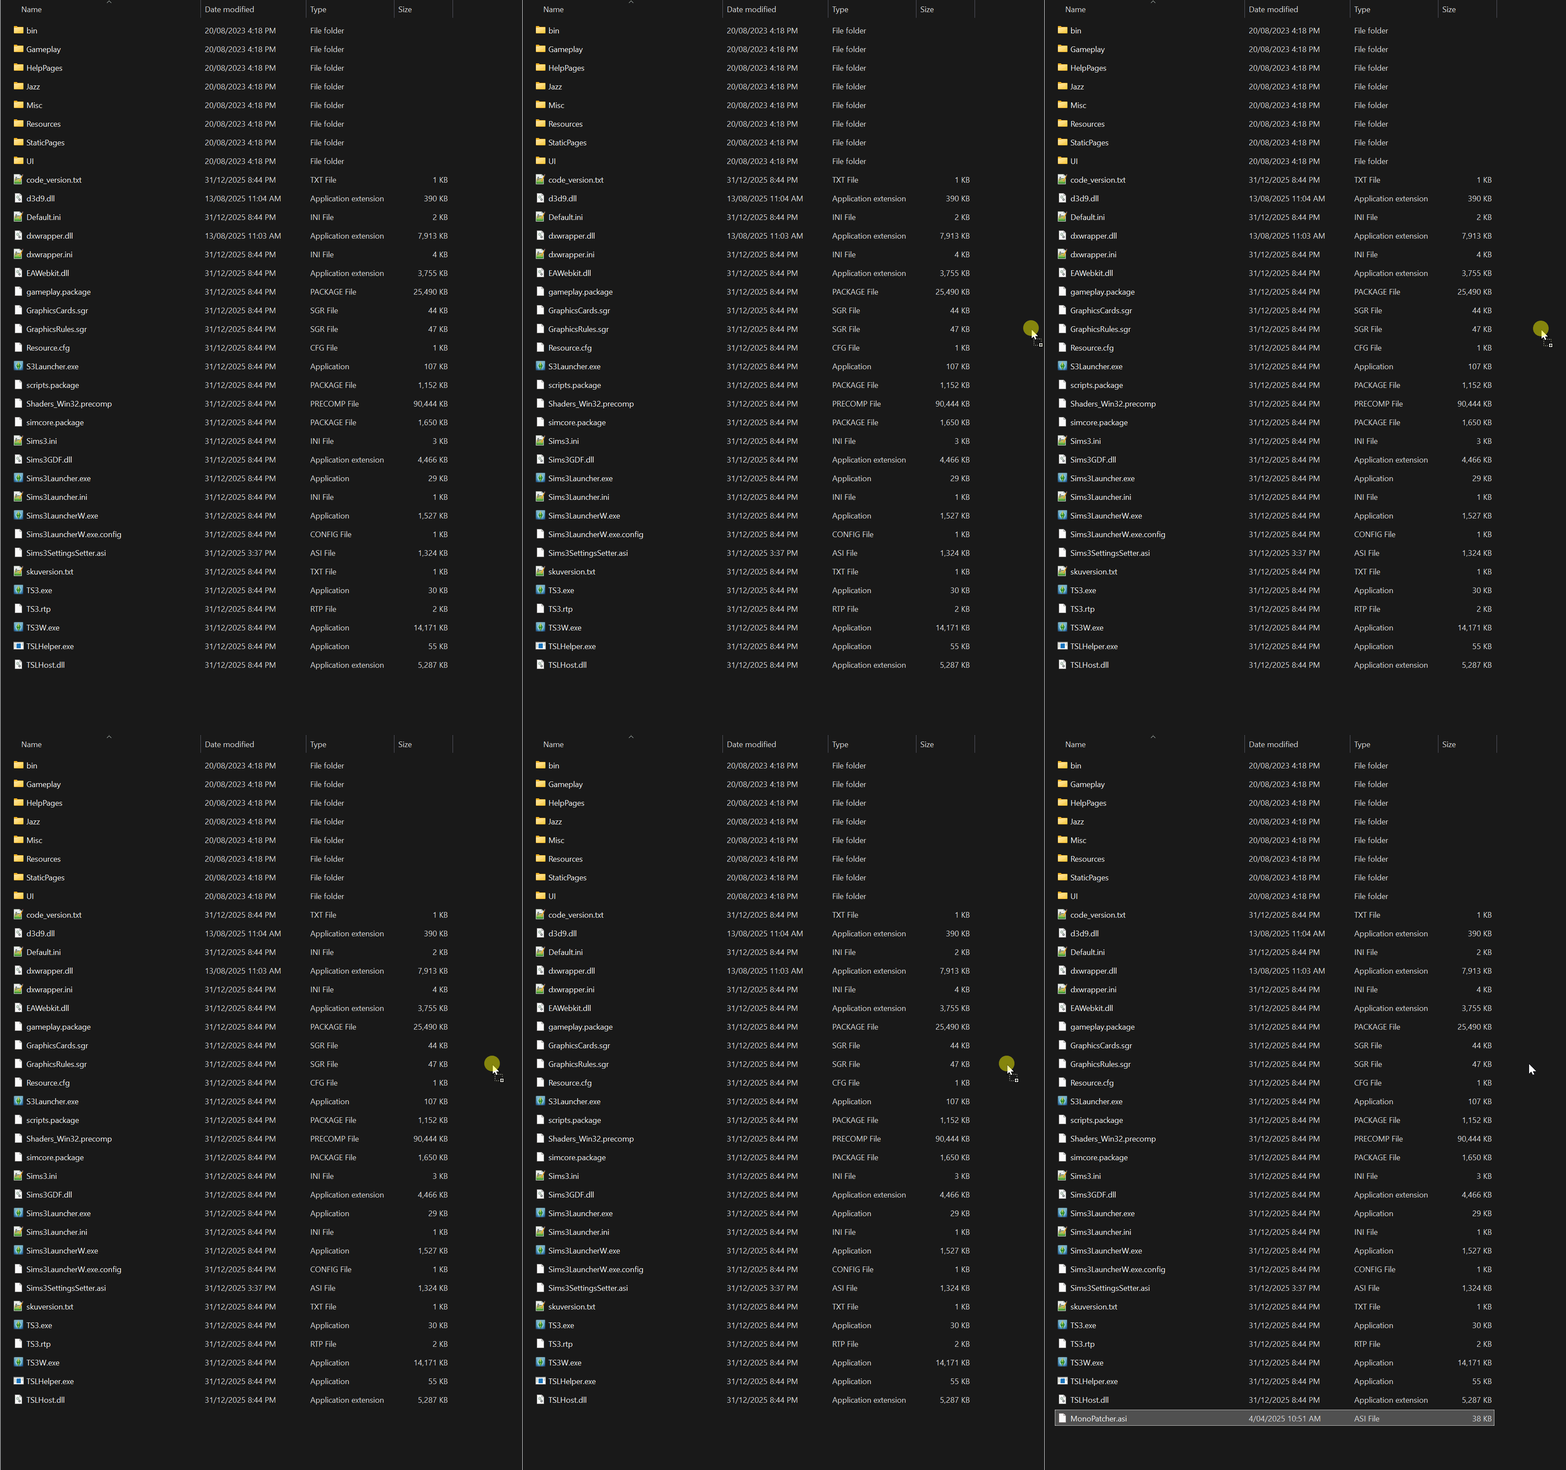
Step 4: Mono Patcher Library is now installed.
Consider supporting Lazy Duchess for all their amazing work? You can HERE![www.patreon.com]
Step 1: Download Mono Patcher Library from...
Mod The Sims - HERE![modthesims.info]
Github - HERE![github.com]
Step 2: Once downloaded go to your games mods folder located at...
"/home/deck/.local/share/steamapps/compatdata/47890/pfx/drive_c/users/steamuser/Documents/Electronic Arts/The Sims 3/""
Once inside the Mods folder open up the "Packages" folder and create a new folder.
After creating the new folder place the "ld_MonoPatcher.package" file inside the newly created folder.
Step 3: Once that is done you will need to go to the games "Bin" Folder in the games install directory, it can be found at...
Steam 1.67 - "/Home/.local/share/Steam/steamapps/common/The Sims 3/Game/Bin/"
Once there place the file "MonoPatcher.asi" & "wininet.dll" into the "Bin" folder in the games directory.
"wininet.dll" from Mono Patcher will be used instead of Ultimate ASI Loader as Ultimate ASI Loader seems to have some loading issues on Steam Deck.
Step 4: Mono Patcher Library is now installed.
Consider supporting Lazy Duchess for all their amazing work? You can HERE![www.patreon.com]
Step 4 - Game Command Arguments
This command will allow the game to load .ASI mods using the .ASI loader from Monopatcher.
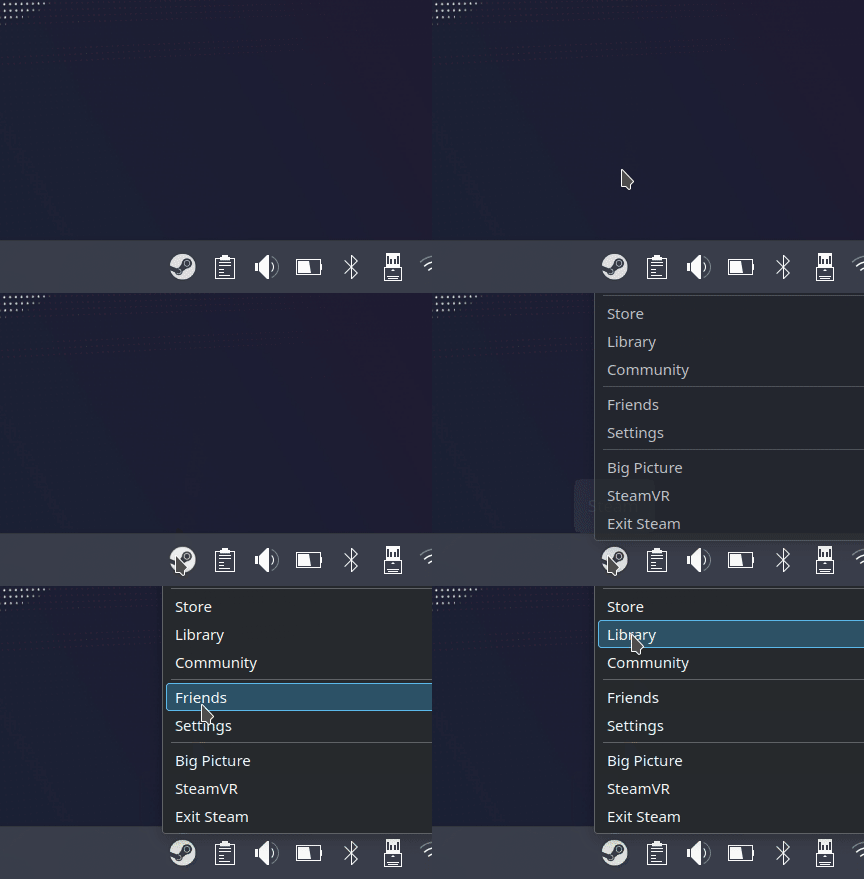
Step 1 - When in Desktop Mode go to the bottom right of the screen and open steam by pressing right click then library on the icon in the task bar tray.
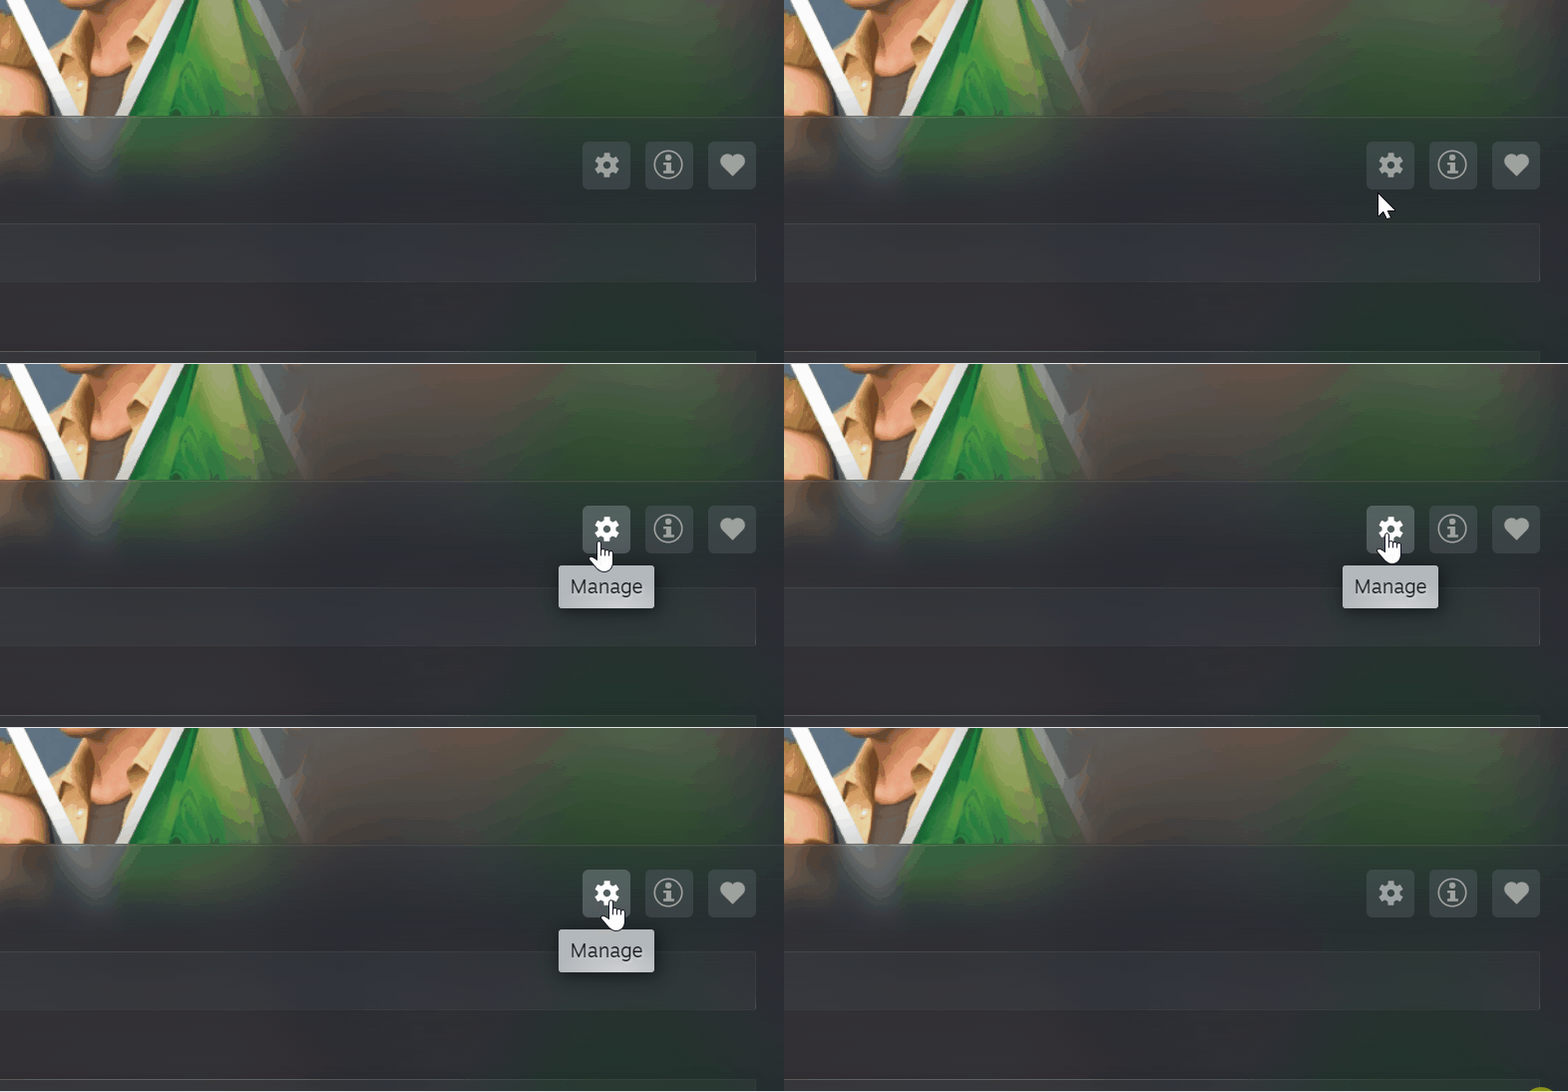
Once steam opens locate your Sims 3 game in your library, when found click on the game then click the "Manage" button on the right of the screen.
Step 2 - Next a new small window should open.
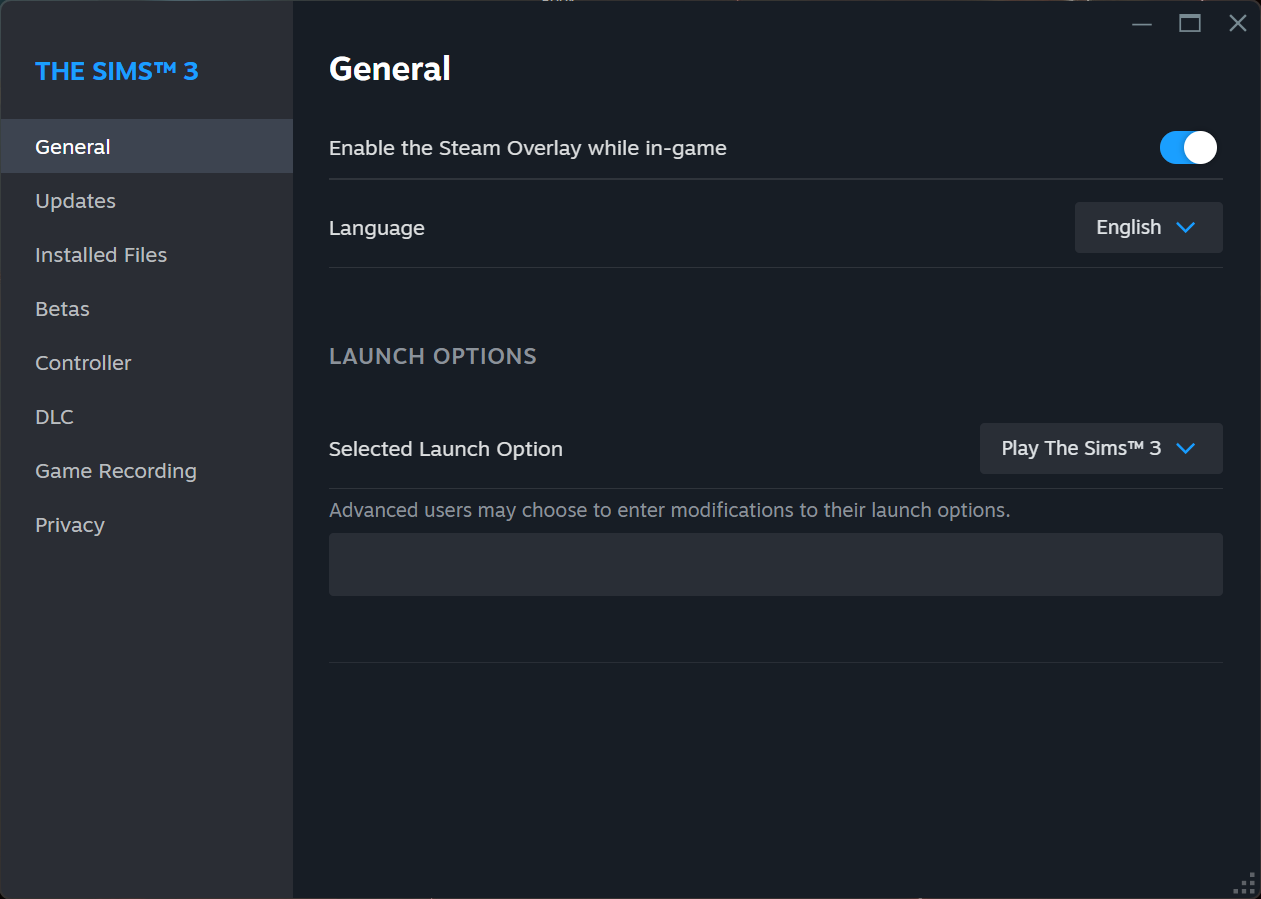
There should be a launch options section in the "General Tab" in the new window. Left click on it and paste the following command into it
It should look like this...

If you get crashes using this command you can try this one and see if it helps.
Step 3 - The game now should load the .ASI loader that comes with Monopatcher.
Step 1 - When in Desktop Mode go to the bottom right of the screen and open steam by pressing right click then library on the icon in the task bar tray.
Once steam opens locate your Sims 3 game in your library, when found click on the game then click the "Manage" button on the right of the screen.
Step 2 - Next a new small window should open.
There should be a launch options section in the "General Tab" in the new window. Left click on it and paste the following command into it
WINEDLLOVERRIDES="wininet=n,b" %command%
It should look like this...
If you get crashes using this command you can try this one and see if it helps.
PROTON_USE_WINED3D=1 WINEDLLOVERRIDES="wininet=n,b" %command%
Step 3 - The game now should load the .ASI loader that comes with Monopatcher.
Step 5 - Making The Game Recognise Steam Decks GPU
Step 1 - Download this file as it contains the files needed for the Steam Deck's GPU to be recognised, download them HERE![drive.google.com]
Step 2 - At the bottom on the screen press the Steam Icon in the tray. Once selected a new menu will appear then select the option "Library" and you steam library will appear.
Next find the game in your library and press "R2" a menu will appear next go to "manage" then "browse local files".
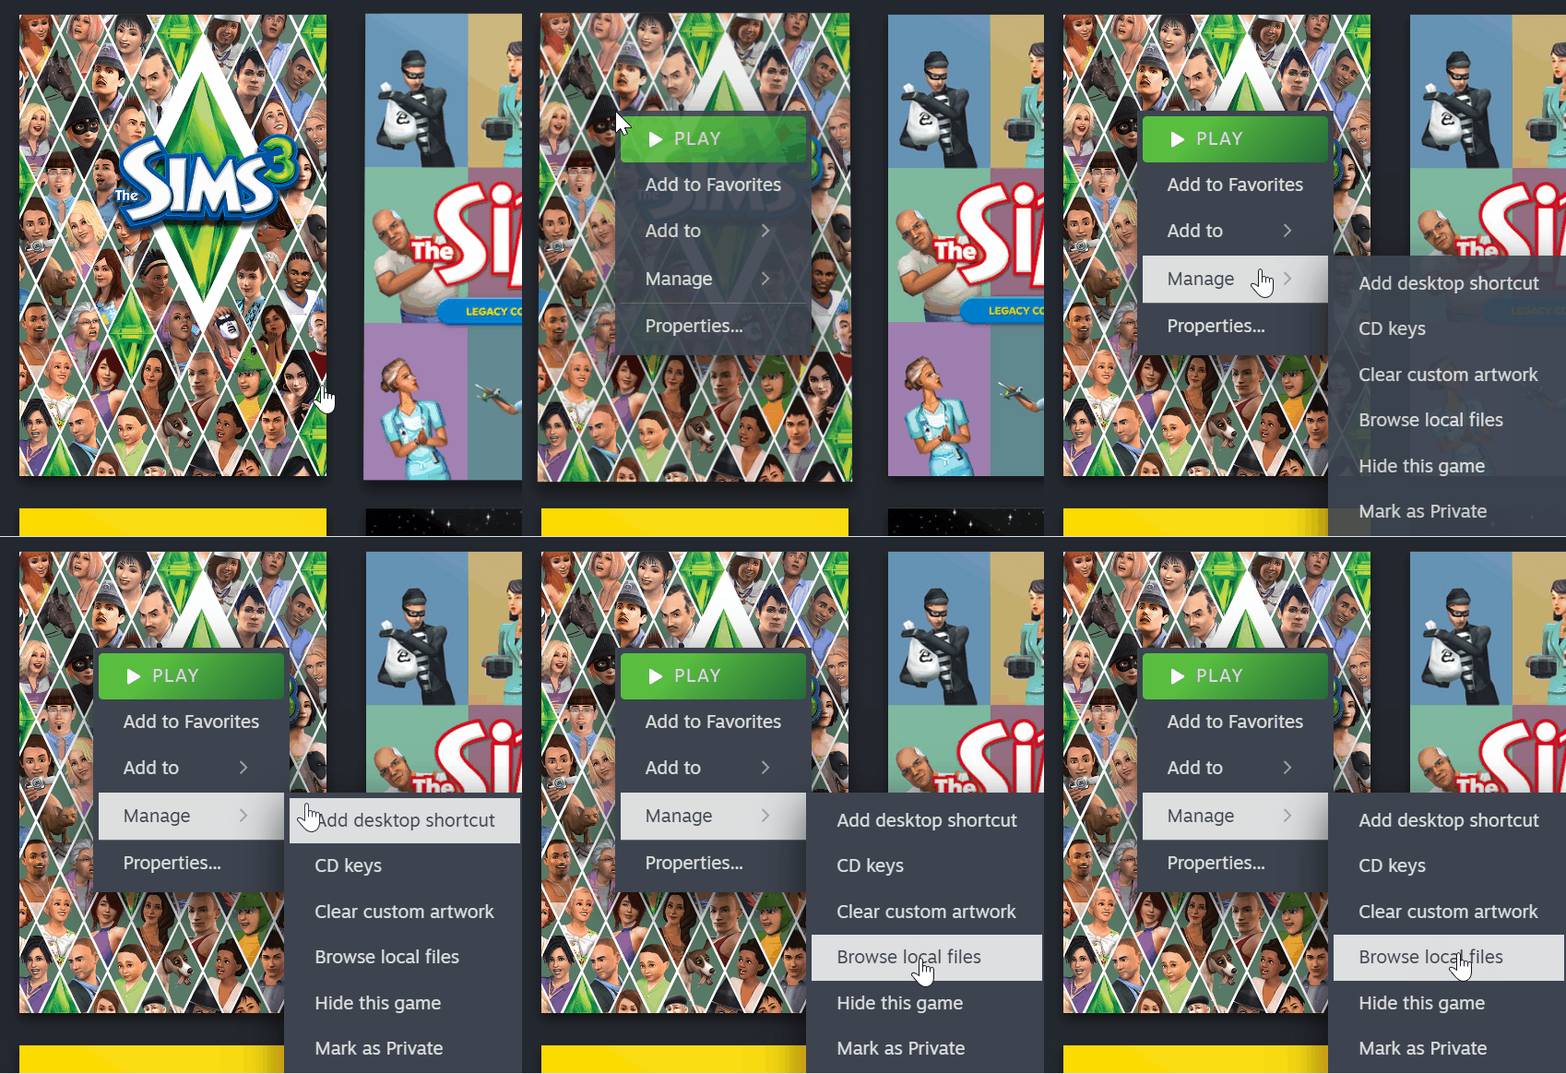
Step 3 - A new window will appear, you will need to extract the files from "GraphicsCardSteamDeck.7z" into the games bin folder located at...
"/Home/.local/share/Steam/steamapps/common/The Sims 3/Game/Bin/"
Step 3 - When placing these two items in the bin folder...
Step 4 - The game will now recognise the Steam Deck GPU.
Step 2 - At the bottom on the screen press the Steam Icon in the tray. Once selected a new menu will appear then select the option "Library" and you steam library will appear.
Next find the game in your library and press "R2" a menu will appear next go to "manage" then "browse local files".
Step 3 - A new window will appear, you will need to extract the files from "GraphicsCardSteamDeck.7z" into the games bin folder located at...
"/Home/.local/share/Steam/steamapps/common/The Sims 3/Game/Bin/"
Step 3 - When placing these two items in the bin folder...
- GraphicsRules.sgr
- GraphicsCards.sgr
Step 4 - The game will now recognise the Steam Deck GPU.
Step 6 - Bug Fixing Mods
This is a guide on how to make The Sims 3 run smoother, use mods to fix un-patched bugs and fix some compatibility issues on newer gaming PC hardware and systems.
https://steamcommunity.com/sharedfiles/filedetails/?id=1131162350
Just remember to Skip Step 1 and Step 3 as DXVK is not needed for Steam Deck and Ultimate ASI loader has issues with Steam Deck, using the .ASI loader from Mono Patcher is better for Steam Deck.
https://steamcommunity.com/sharedfiles/filedetails/?id=1131162350
Just remember to Skip Step 1 and Step 3 as DXVK is not needed for Steam Deck and Ultimate ASI loader has issues with Steam Deck, using the .ASI loader from Mono Patcher is better for Steam Deck.
F.A.Q. Section
Q: Sims 3 Setting Setters Mimalloc Allocator setting is crashing my game on Steam Deck!
A: Set the game to use "Proton 11" in the compatability tab in steam game properties.Q: An older version of the guide had DXVK as a requirement should I now remove it?
A: Yes! I was informed by steam user Merc Fredis that Steam Deck which uses proton has DXVK built in so installing it yourself is not needed. To unistall if simply remove the "d3d9.dll" and if its there the "dxvk.conf" file from here.../home/deck/.local/share/steamapps/compatdata/47890/pfx/drive_c/users/steamuser/Documents/Electronic Arts/The Sims 3/"
Change Log Section
2025
- 15/03/2025 - Published the guide.
- 24/03/2025 - Made "Step 3 - Making The Game Recognise Steam Decks GPU" easier to follow thanks to @ButterflyCrimeScene for the idea.
- 18/05/2025 - Fixed shadows not being rendered in game downloading the latest version of "GraphicsCards.sgr" and "GraphicsRules.sgr" from Step 3 to have shadows again.
- 31/12/2025 - Made changes to "Step 2 - Making The Game Able To load .ASI Mods" as "wininet.dll" is no longer being used to load ".asi" mods into the game on the main guide "dxwrapper" is now being used. Before updating to use "dxwrapper" make sure to remove "wininet.dll" from the games bin folder located at...
"/Home/.local/share/Steam/steamapps/common/The Sims 3/Game/Bin/"
and update the launch arguments for the game as shown in "Step 2 - Making The Game Able To load .ASI Mods".2026 - 26/01/2025 - Updated the FAQ Section about wininet.dll.
- 01/02/2026 - Updated "Step 2 - Making The Game Able To load .ASI Mods" to include Ultimate ASI Loader as one of the ASI loaders.
- 11/04/2026 - Made the guide a little more clear on how to get the game to load up dxvk and Ultimate ASI loader.
- 29/05/2026 - Made lots of changes to the guide as some steps were not needed or needed to be changed thanks to steam user Merc Fredis for letting me know!
More The Sims™ 3 guides
- The Sims 3 Performance & Bug Fix Guide 2026★ 5 (2.6k)108k views7.1k ♥41 minUpdated Jul 17
- Very Basic & Useful Mods★ 5 (612)46k views1.2k ♥7 minUpdated Jan 17, 2021
- The Sims(TM) 3 Cheats★ 5 (921)39k views1.8k ♥4 minUpdated Jun 5, 2016
- Toubleshooting for The Sims 3★ 5 (457)29k views983 ♥45 minUpdated Jan 2, 2022
- How to make Mac & Cheese According to the Sims 3★ 5 (1.2k)26k views671 ♥5 minUpdated Aug 28, 2016
- The Sims 3 Enhanced Vanilla Graphics★ 5 (235)24k views696 ♥10 minUpdated Jun 3




This guide was created by its original author on the Steam Community. Are you the author and want it removed? Request removal.