XCOM 2 Voicepack Creation Definitive Guide
Information Section
For voice mods in particular, the size of the mod can be reduced as much as 90% when comparing to an uncooked version of the same mod. This is extremely helpful since before this development, sound files were kept in uncompressed WAVs within the asset packages, leading to some voice mods being hundreds of megabytes in size, even if they don't actually add that much content.
Only thing is, you have to set up the mod in a very specific way or it won't work. And there are still parts of the process that can be confusing even with the current documentation, or just haven't been documented at all. Part of the purpose of this guide is to provide a set method that anyone can use to easily cook their voice mod, so long as they can read a step-by-step process.
If you want to know more about cooking in this game, you can follow
>this link<.
A 'voice event' is a trigger that allows dialogue to play. If a happening within the game does not have a voice event assigned to it, you cannot set dialogue to play during it. The vanilla game is somewhat lacking in its voice events, but having Voice Patcher will allow you to assign dialogue to almost anything you might want to.
It should be noted that the mod is only supported if you're using the 'War of the Chosen' expansion pack. If a user of your mod does not have that DLC, they can still use your voice mod, they just won't be able to subscribe to Voice Patcher to hear the additional dialogue supported by it.
Additional note:
You don't actually need to have the mod installed during the mod creation process. All voice events are included in the copy of Robojumper's script that is talked about later.
Implementing this feature will allow a user of your mod to configure the volume of the voice however they see fit within a config file located in your mods directory. This also makes it easier on you, the mod creator, because you won't have to adjust the volume of each sound cue one at a time.
Installing the SDK
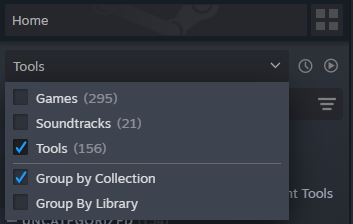

Notes:
For the purpose of making a voice mod, the 'XCOM 2 War of the Chosen Development Tools' should not be used. Using the WotC tools to make a voicepack will mean the mod won't work if you don't have WotC installed. I have tested this personally.
If you absolutely need to use the WotC SDK, make sure you have the first-time fixes applied. Without those, you will not be able to cook any type of mod in WotC SDK.
Other note:
Please, please, do not install the SDK onto Onedrive. These tools are finicky enough as it is without being on the Cloud.
..\steamapps\common\XCOM 2 SDK\Binaries\Redist
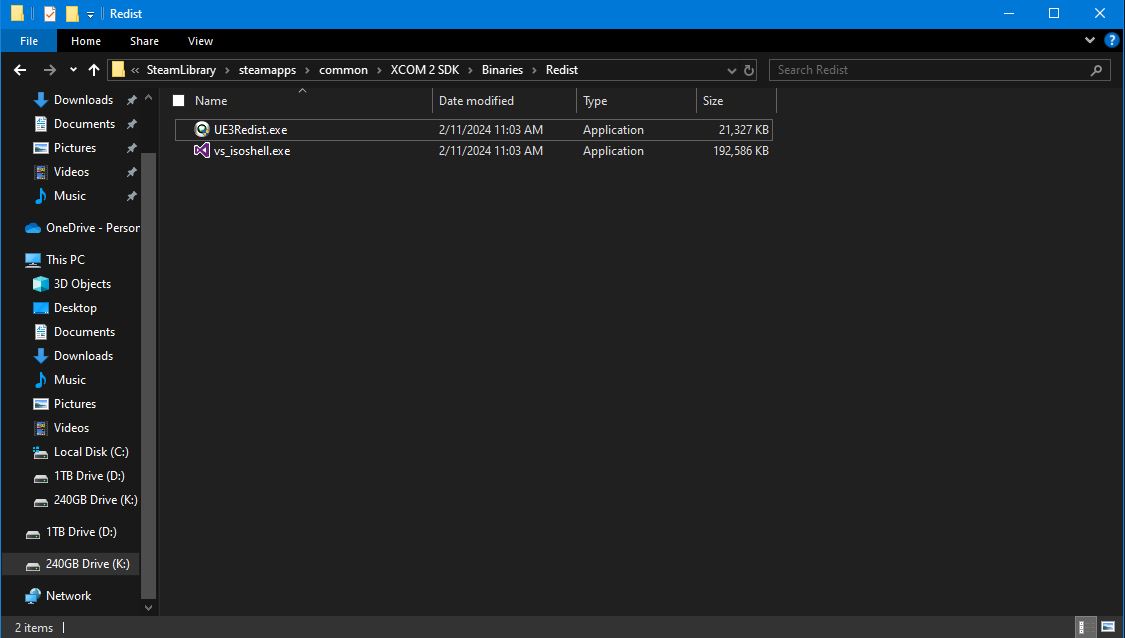 It will prompt you to restart once they're done installing. Do so.
SDK Setup
..\steamapps\common\XCOM 2 SDK\Binaries\Win32\ModBuddy2. Make a shortcut of 'XCOM Modbuddy.exe' and move it to your desktop.
..\steamapps\common\XCOM 2 SDK\Binaries\Win642. Make a shortcut of 'XComGame.exe' and move it to your desktop.
- Rename the shortcut to 'UnrealEditor.exe', since that's essentially what it is.
- Right click the shortcut and edit properties.
editor -noscriptcompile -nogadwarning
Make sure there's a space between the quotation mark and 'editor'. Example:
"..\steamapps\common\XCOM 2 SDK\Binaries\Win64\XComGame.exe" editor -noscriptcompile -nogadwarning
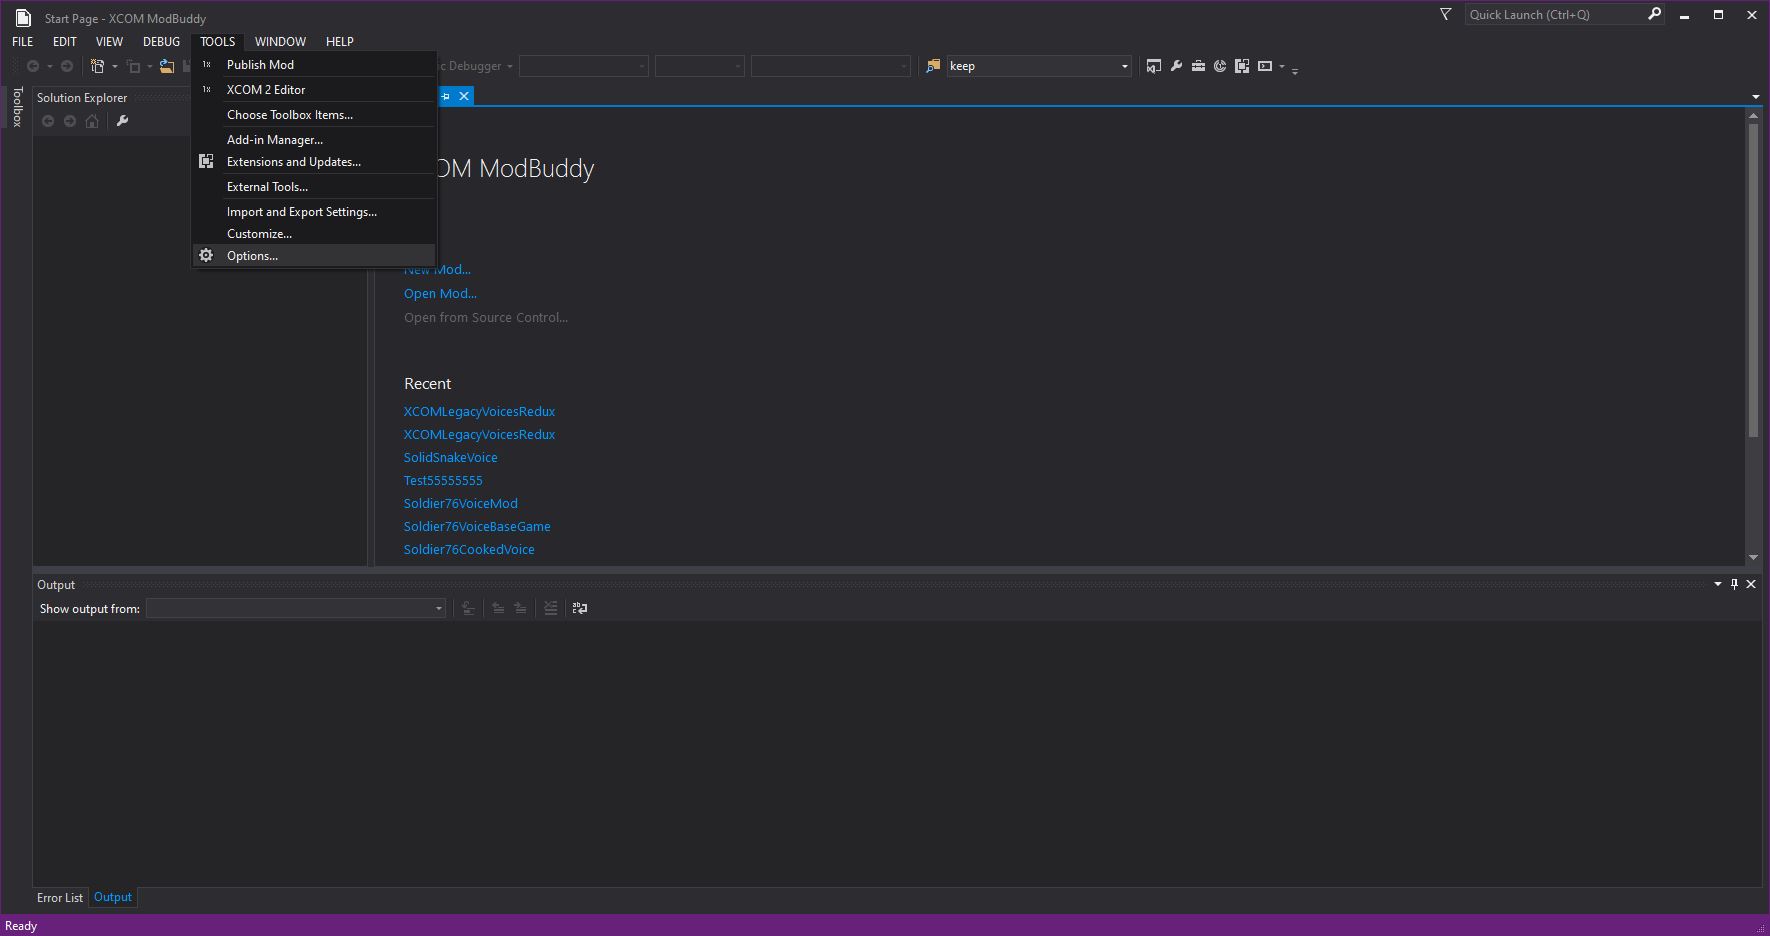 2. At the bottom of the new window, expand 'XCOM 2' and set the install path and the user path.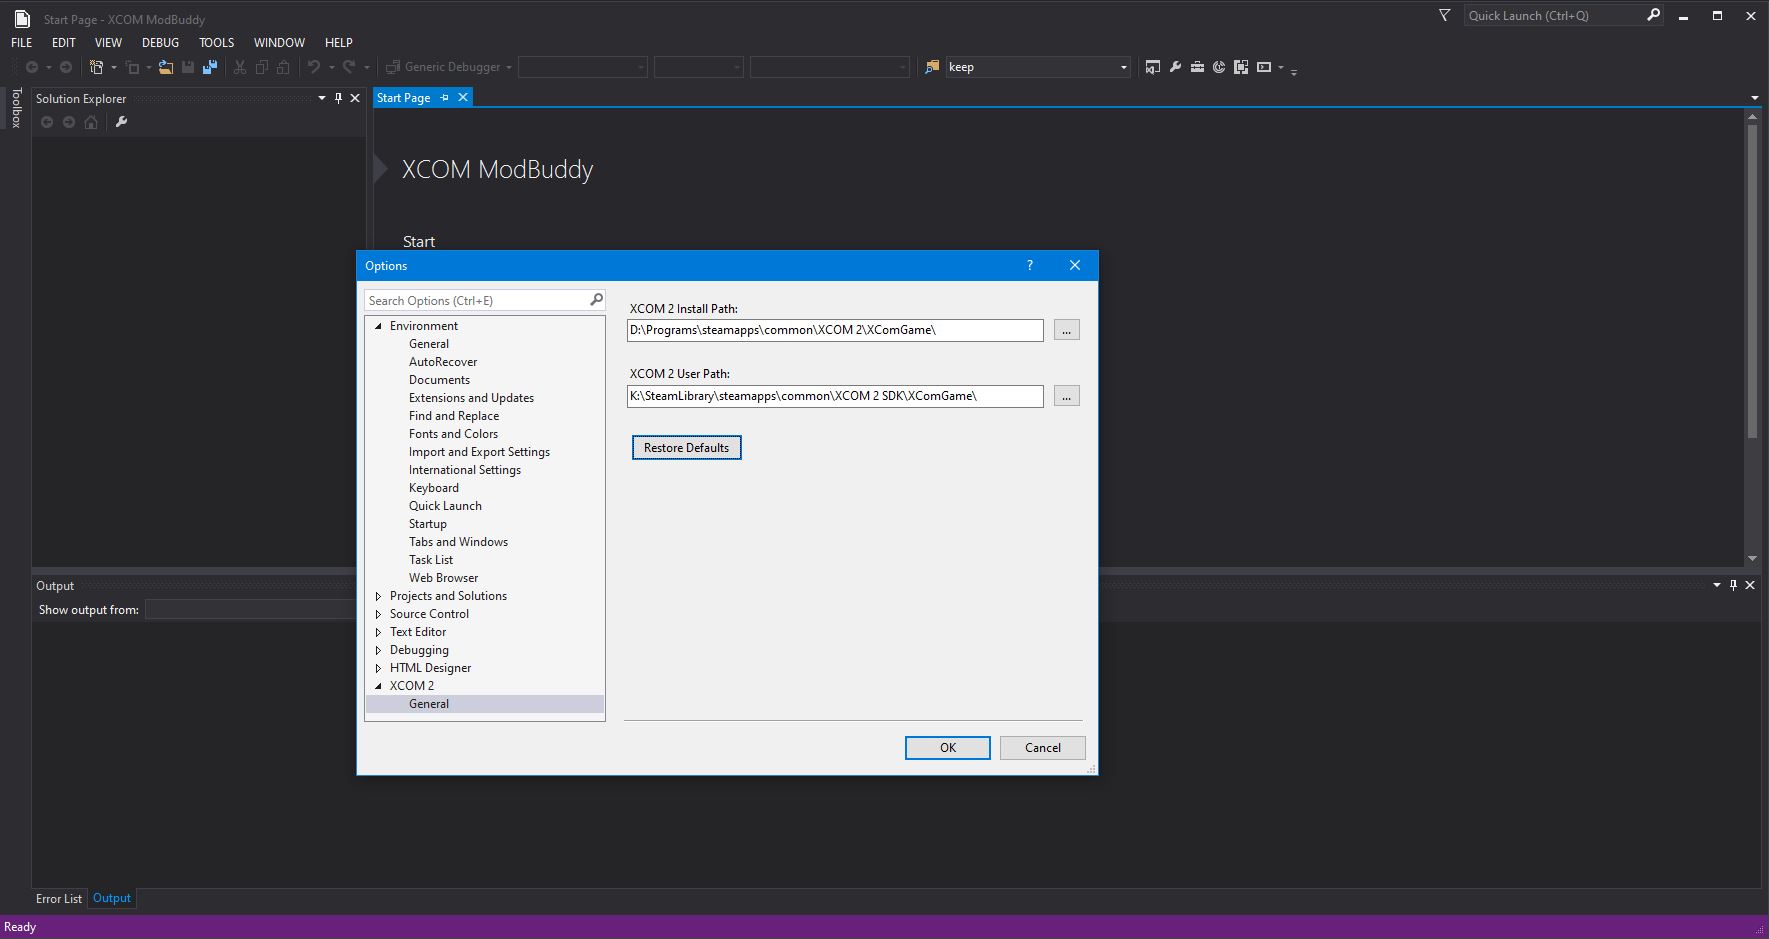
The install path should be set to the 'XComGame' folder in your regular game directory.
..\steamapps\common\XCOM 2\XComGame\
The user path should be set to the 'XComGame' folder in your SDK directory.
..\steamapps\common\XCOM 2 SDK\XComGame\
Additional Tools & Setup
- Download the 'EnhancedModProjectTemplate.zip' from >this link<[github.com].
..\steamapps\common\XCOM 2 SDK\Binaries\Win32\ModBuddy\Extensions\Application\ProjectTemplates\XCOM2Mod\1033\
- You don't have to download anything for now, just keep track of >this link<[pastebin.com] for later. It is a version of the script that has all possible voice events already listed, and also allows support for volume adjustment via a config file. I would, however, look through the comments of each voice event to know exactly what in-game instances can have dialogue assigned, and what the event for it is named.
- Download it by subscribing to its workshop item >here<.
..\steamapps\workshop\content\268500\1134322341\Copy the 'Binaries' folder here. 3. Paste that folder at:
..\steamapps\common\XCOM 2 SDK\Binaries\
- Create a shortcut of 'Firaxis.SteamWorkshop.exe' and put it on your desktop. We'll use this later when you're about to upload your mod.
- Download the Audacity installer from >this link<[www.audacityteam.org].
- Install it.
Sound File Editing
This section covers how the voice lines you collect can be processed through Audacity.
This guide will not cover how to actually obtain all the voice lines you'll be using. That will be entirely up to you, whether it be from a game resource website, spliced from a Youtube video, or extracted directly from the files of a game.
Once you have all your lines, you should organize them by naming them according to the action you plan to have them play on. This will likely take a considerable amount of time, depending on how meticulous you want to be. You can reference Robojumper's script from earlier if you need to know exactly what can have dialogue assigned.
The file names cannot have spaces, special characters, or non-Latin scripts characters in them like Cyrillic or Kanji.
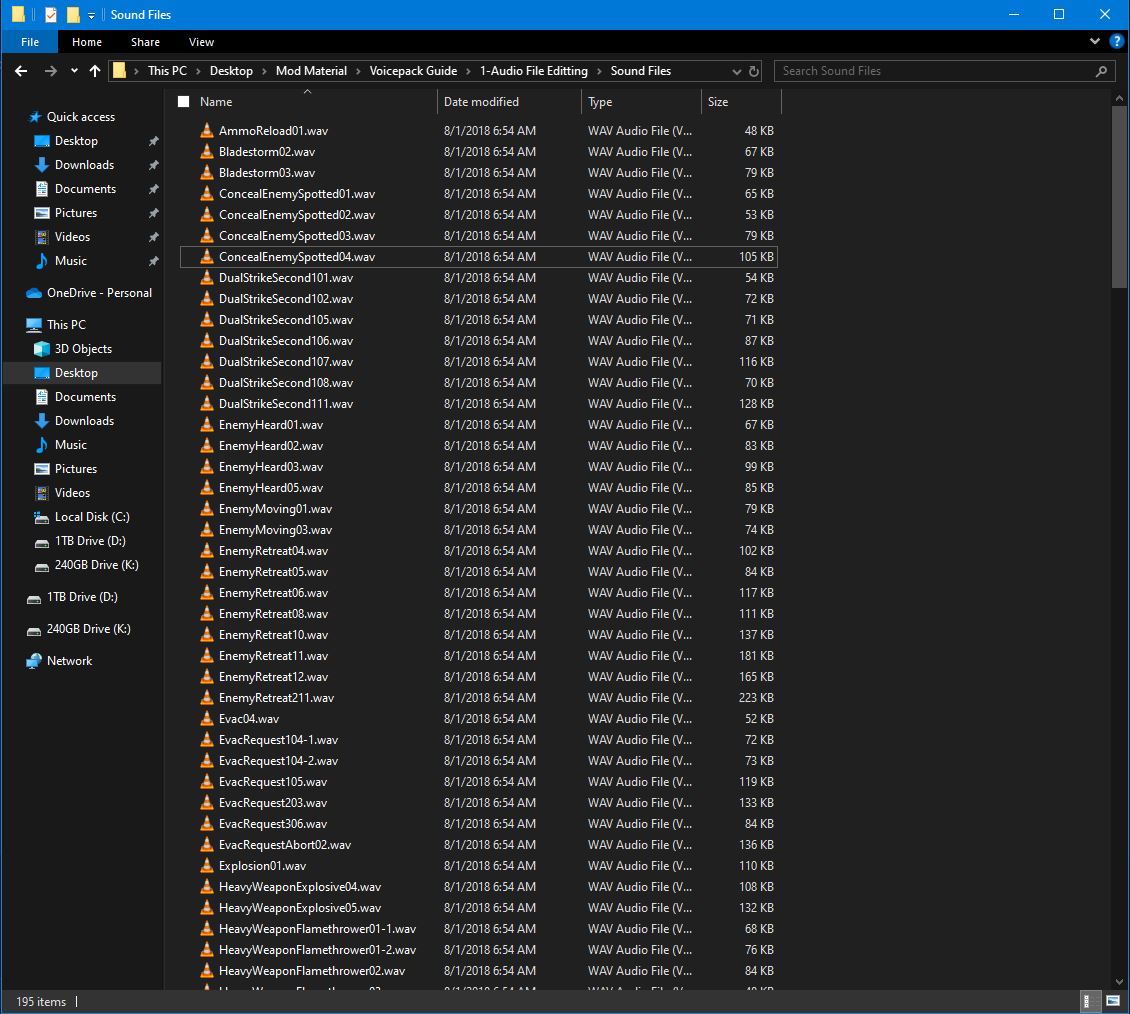
For reference, this is how XCOM: Enemy Within labeled the voice lines: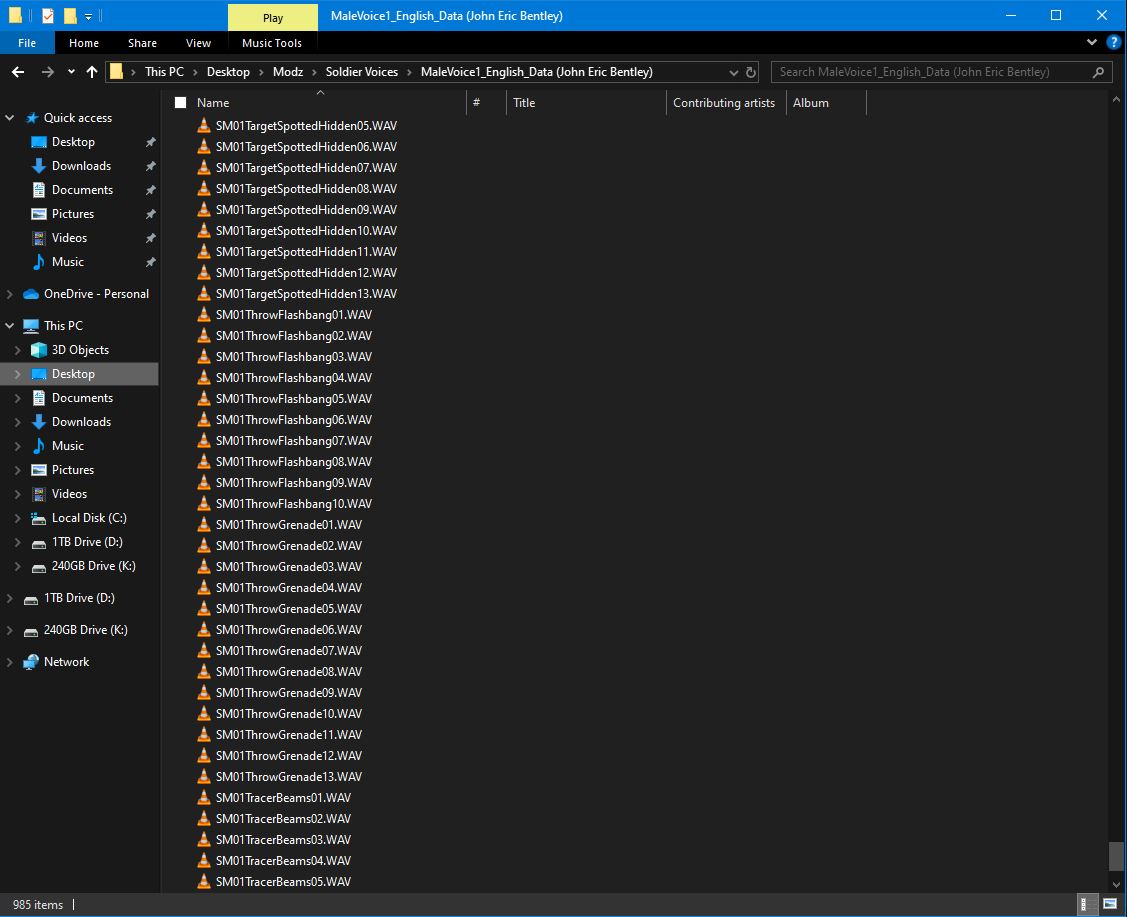 I've personally labelled all the lines I'm using as shown below:
 Open Audacity.
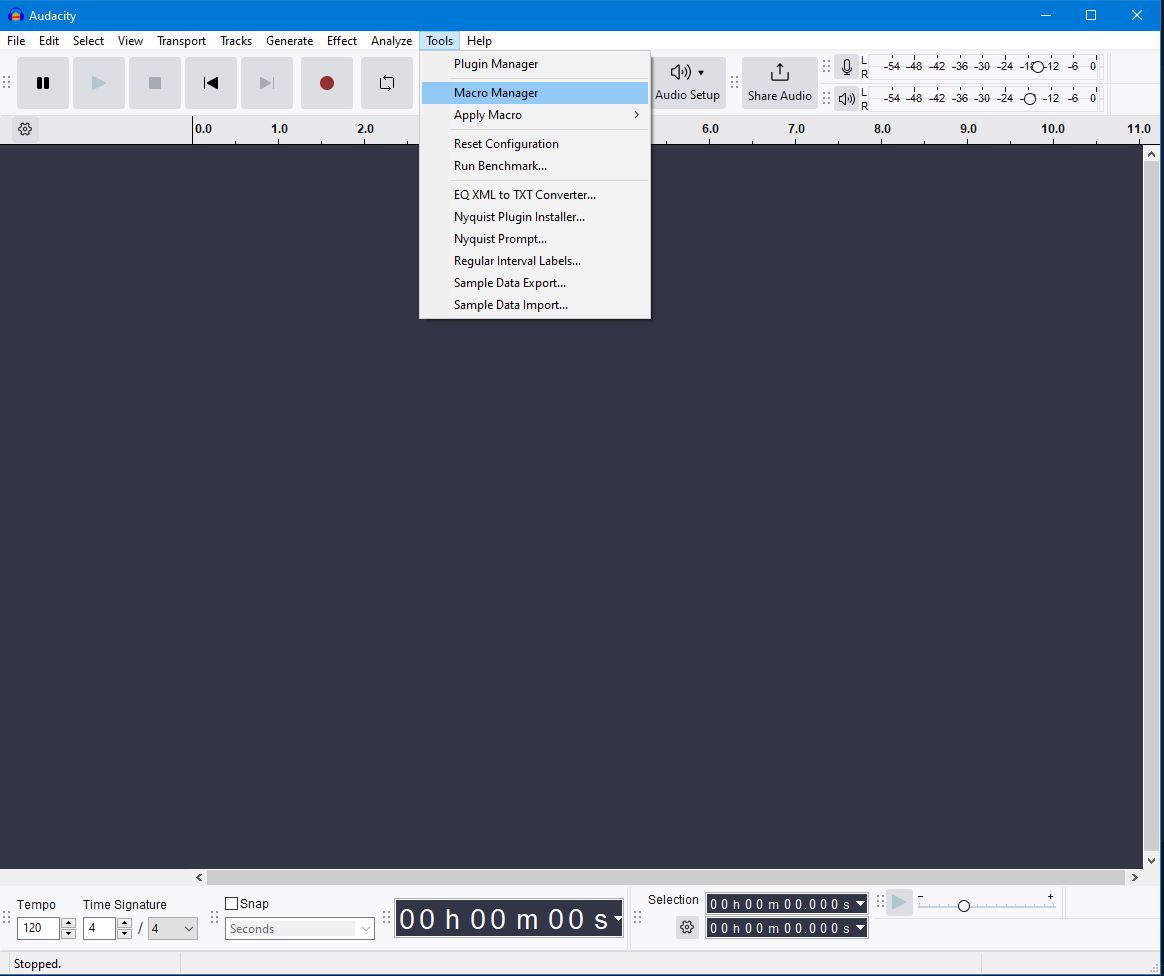
What we'll be doing is creating a macro we can use to easily process all the voice lines in bulk with minimal user input.
At the top, click 'Tools > Macro Manager'.
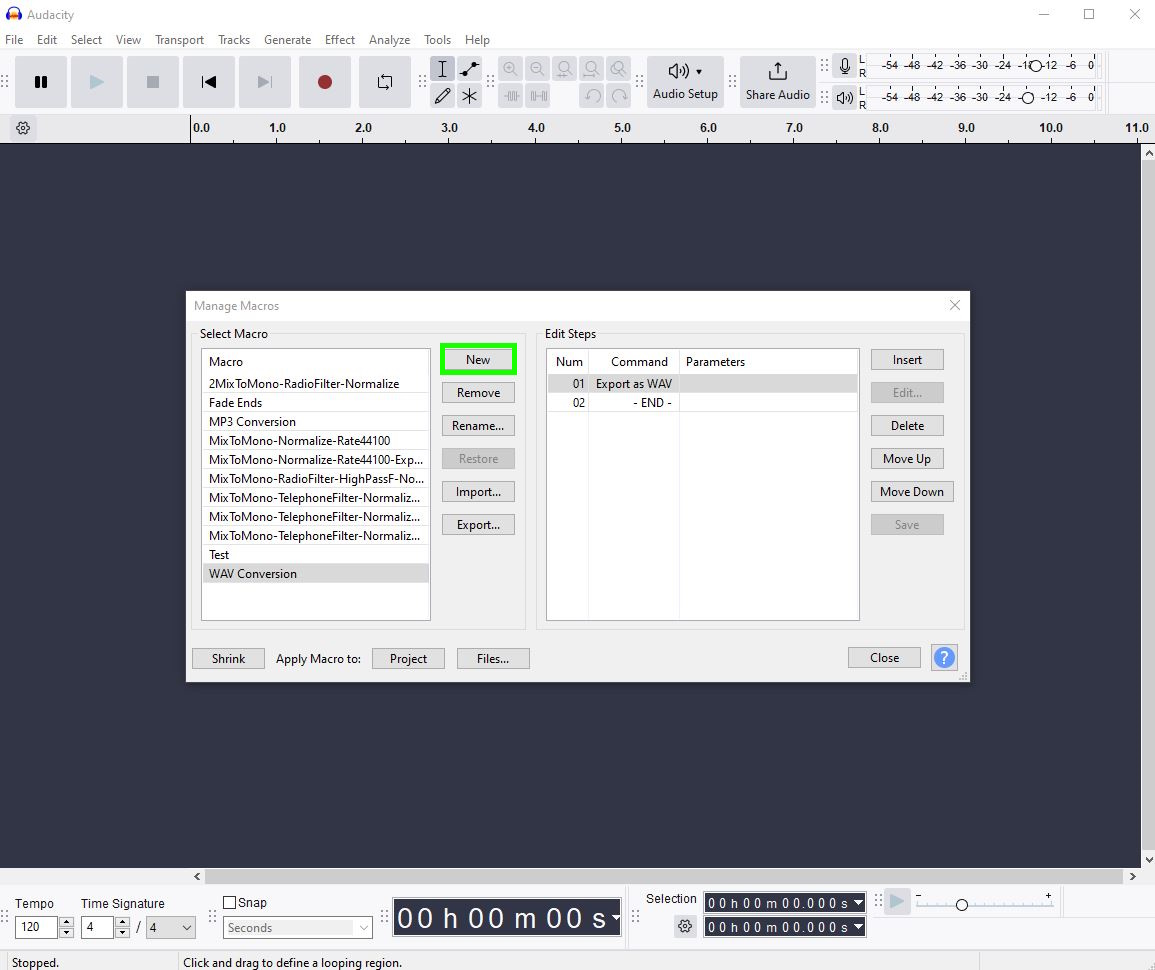
 It will open the list of macros you have saved. Ignore the clutter.
Click 'New'.
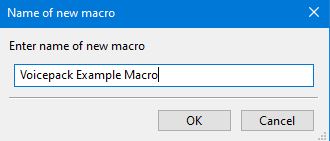
 It will prompt you for a name. Enter one.
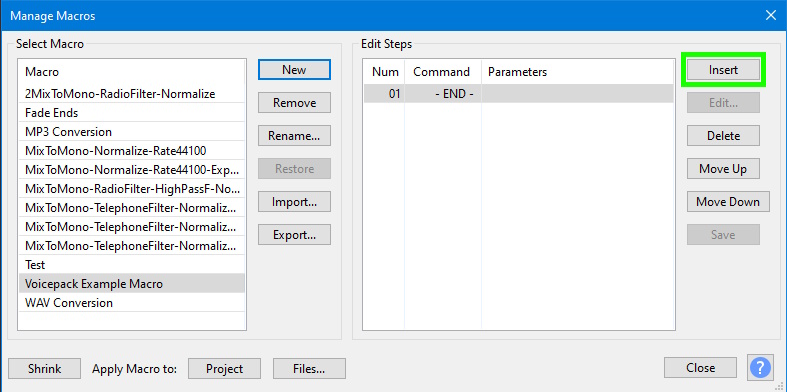
 Click the 'Insert' button on the right so we can begin inserting commands into the macro.
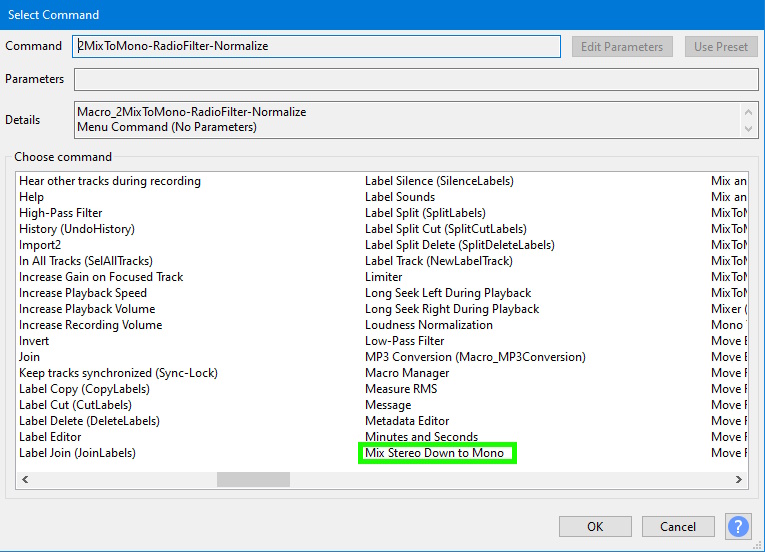
 First command you should apply is 'Mix Stereo down to Mono'. All sound files used in the game must be in mono format, or they won't work.
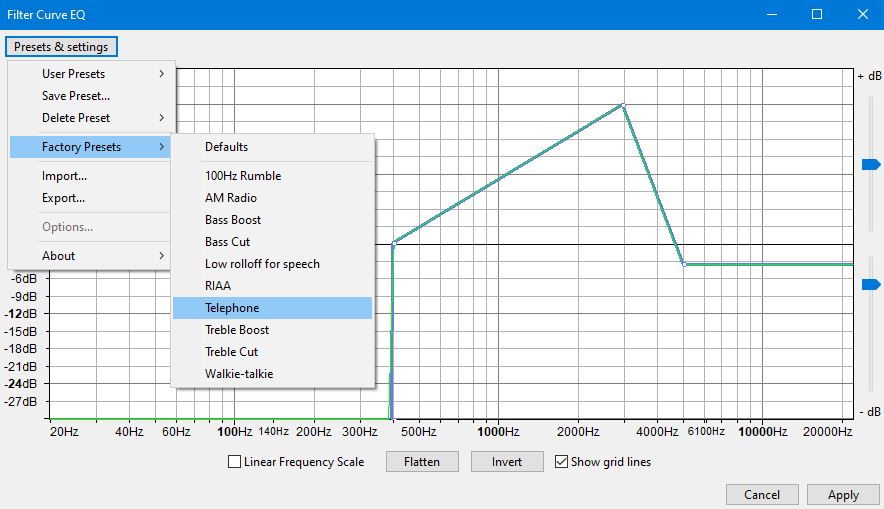
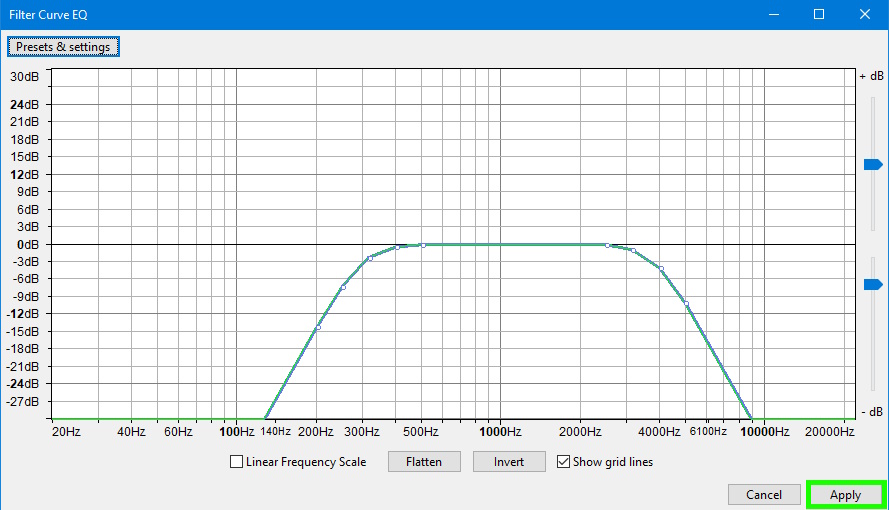
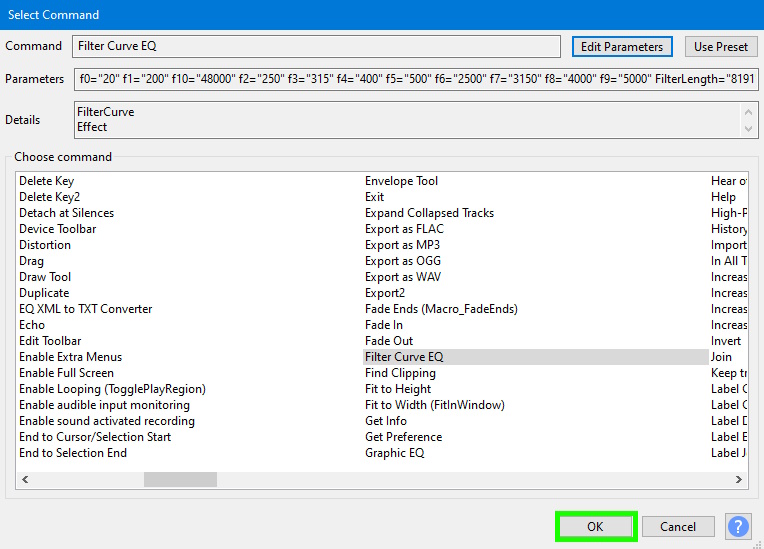
 If you intent to apply a radio filter to your voice lines, insert the 'Filter Curve EQ' command in the macro. You should adjust the parameters until you get. You can also use one of the many presets available. In this case, I'm using the 'Telephone' preset.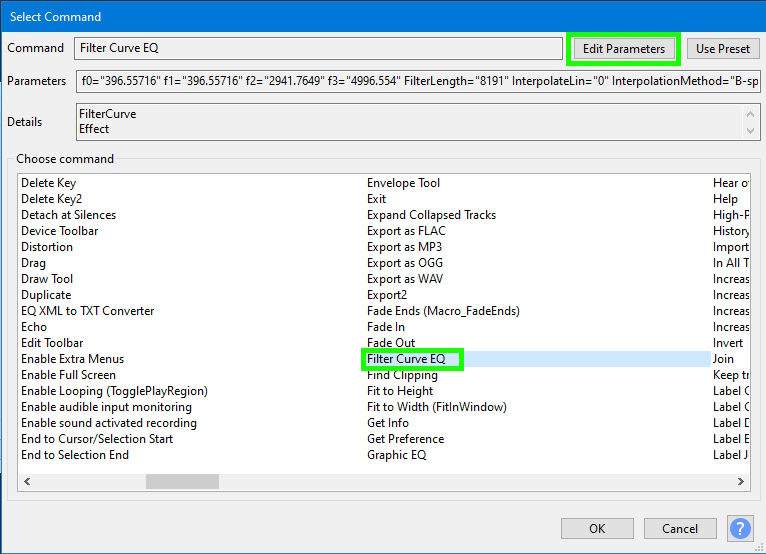
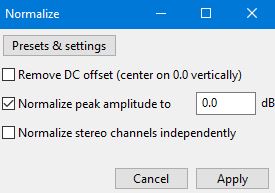
 Now, you should insert the 'Normalize' command. This will do one of two things, either make the sound louder, or do nothing if the waveform already reaches peak at some point. This should be applied after the radio filtering because it slightly lessens the sounds amplification, and normalizing will fix that.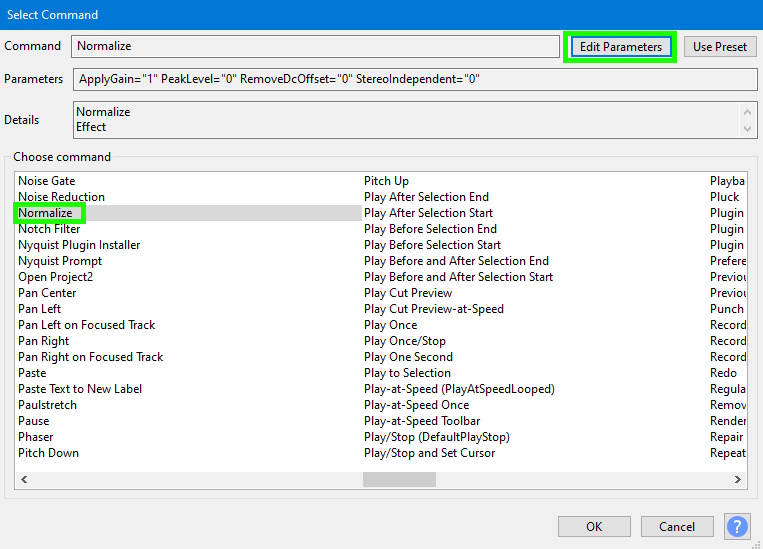
 Second to last at the end, the sample rate for the sound should be set to either 22050Hz or 44100Hz. If the sounds sample rate deviates from these, it will not work in-game.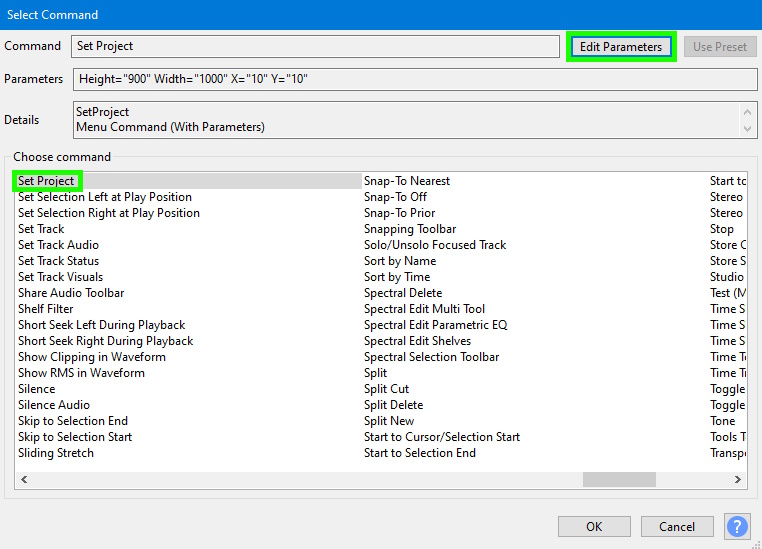
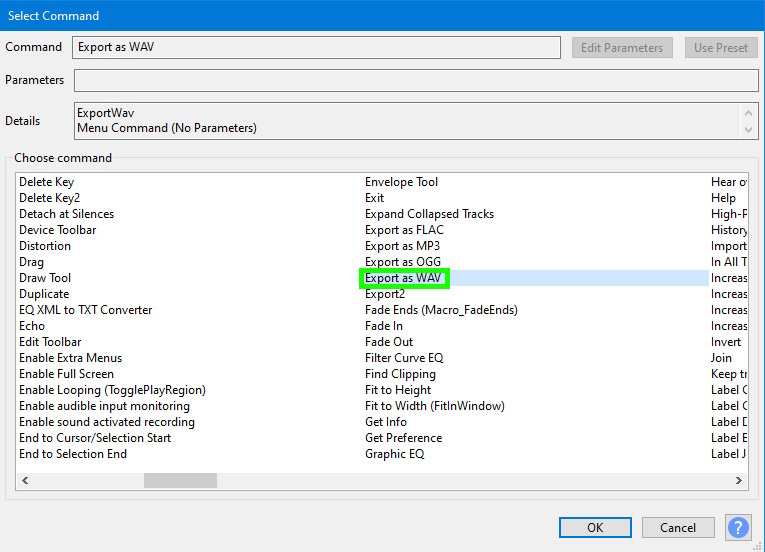
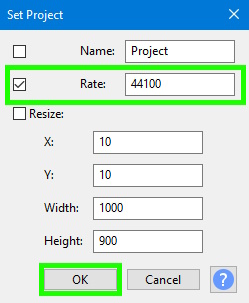 Final command in the process should be 'Export as WAV'. All sounds used in voicepacks must be in 16-bit WAV format.
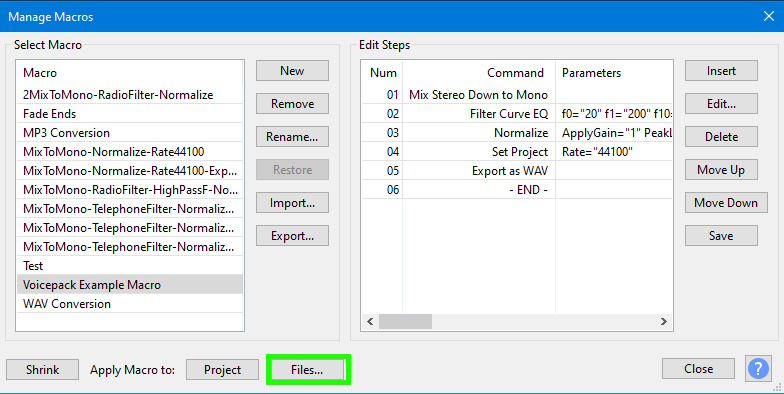
 If you are knowledgeable about sound editing, you are more than free to further modify the macro to whatever extent you wish. For me, the final macro is shown below.
Click 'Files..' at the bottom.
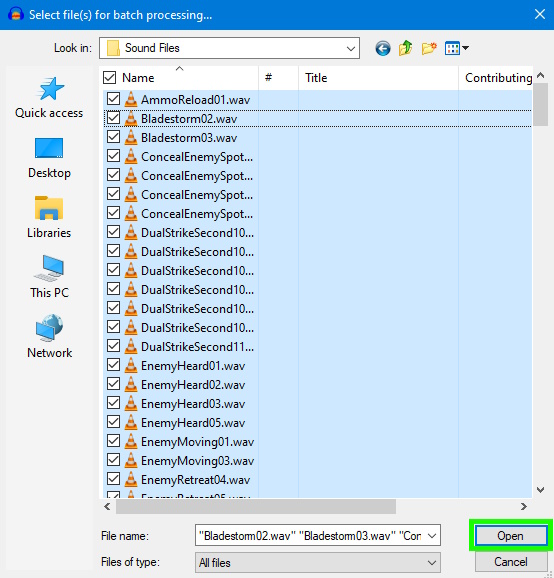
 It will open a Windows Explorer instance. Navigate to where you stored all your voice lines. Ctrl + A to select them all. Click 'Open'
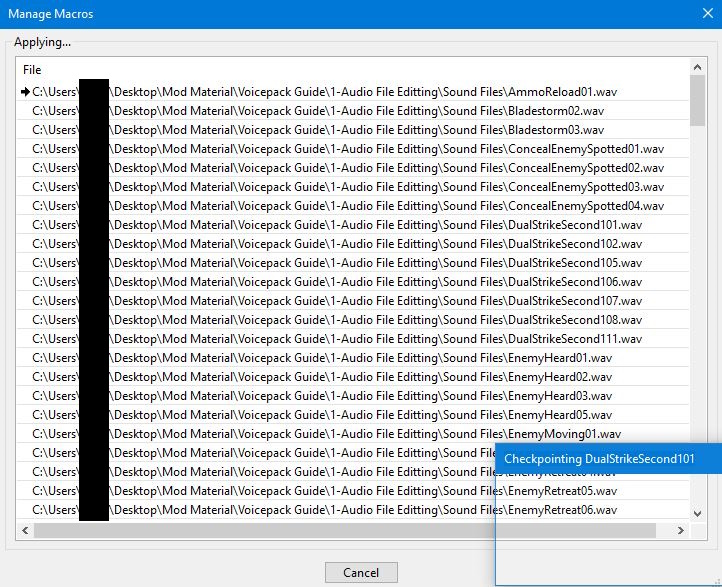
 It will begin processing all your lines. This could take some time, depending on how many lines there are, and how powerful your PC is.
 You will find all the newly filtered voice lines in the following directory:
..\Documents\Audacity\macro-output\
You are now free to begin the process of actually making the mod using the SDK.
Creating the Mod Project
This marks the beginning of the process for creating the actual mod. Follow the instructions in this section to the letter, as ModBuddy can be very picky about the mods contents when compiling. Especially if you're going to cook it.
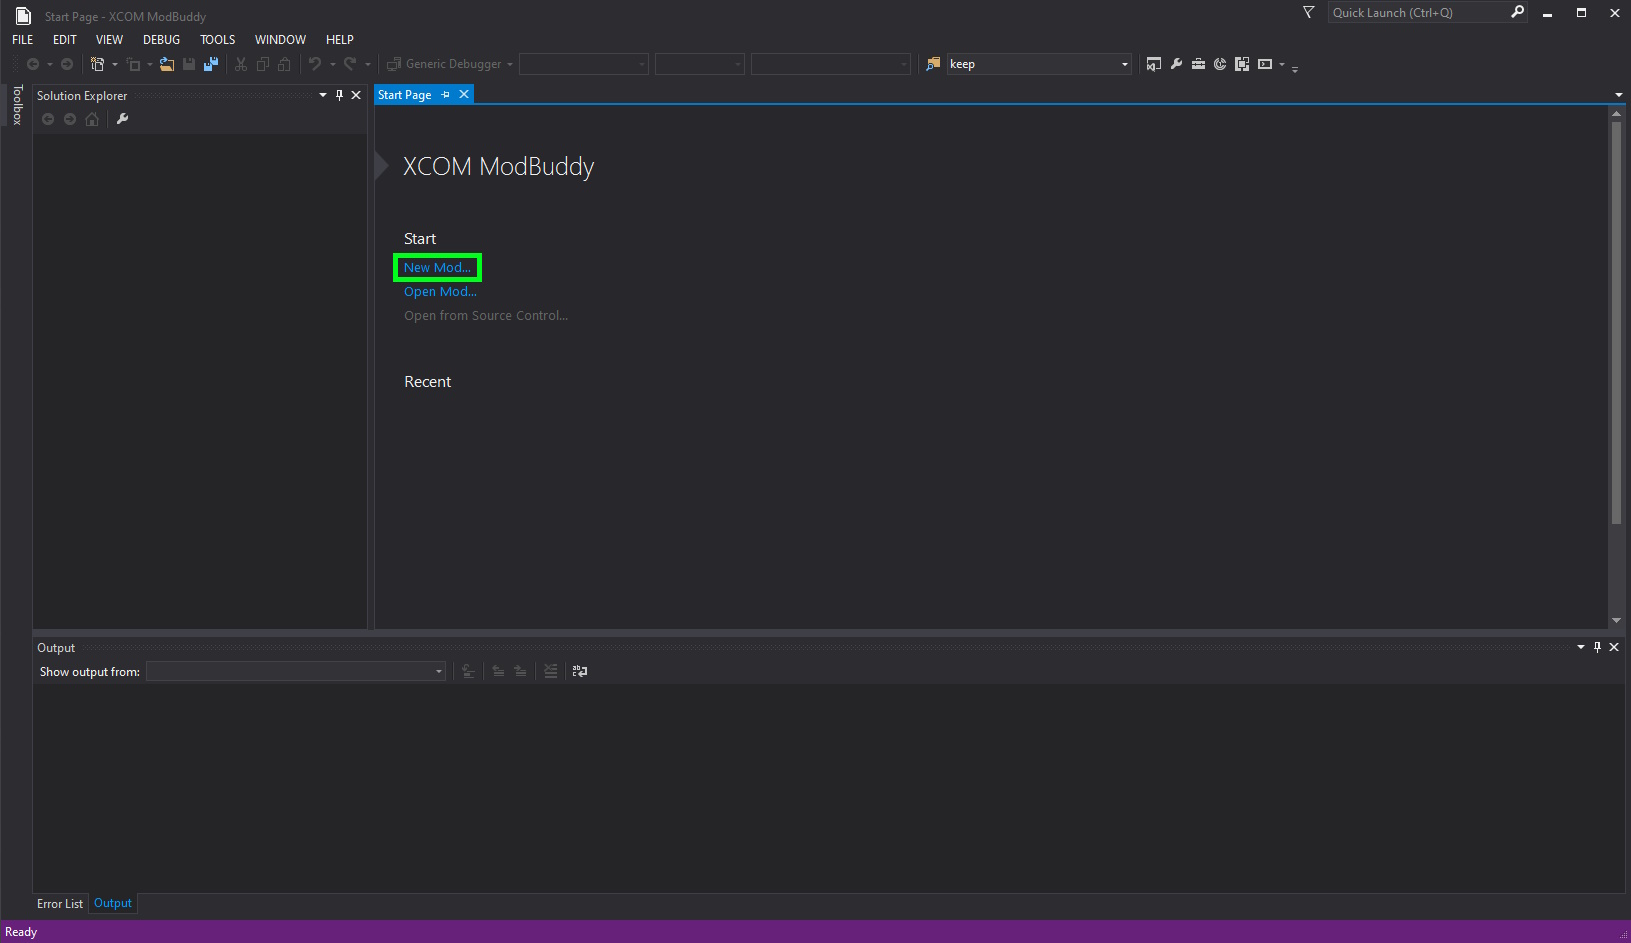
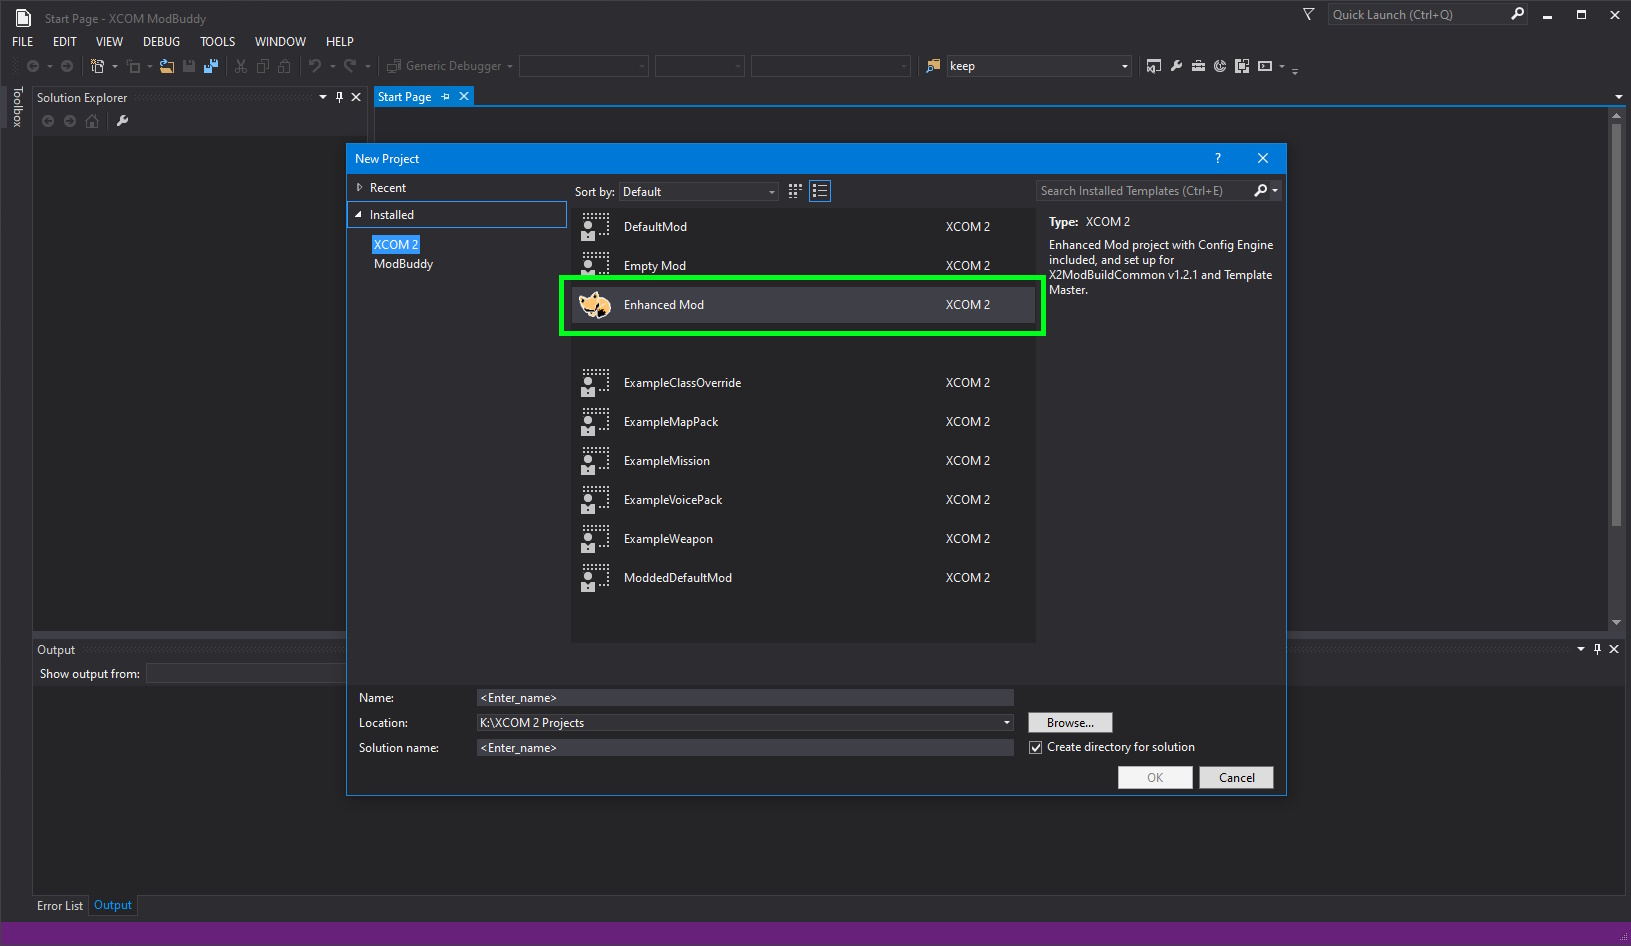


Once you've decided the name, click 'OK'.
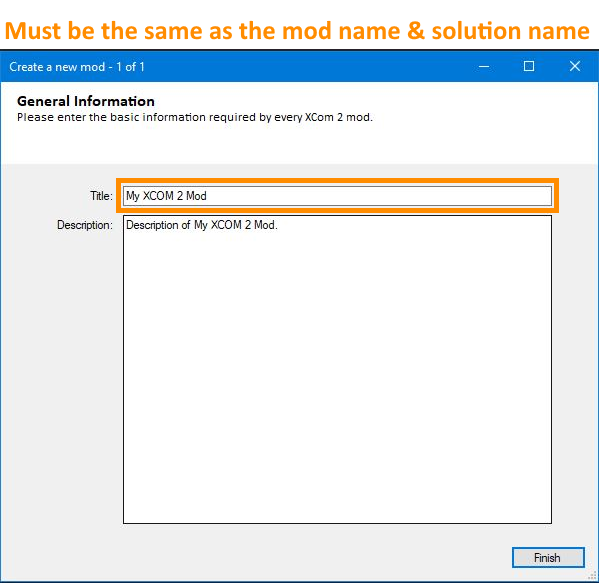
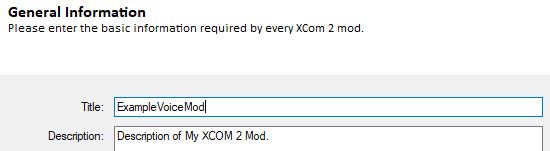
Once it's done, click 'Finish' at the bottom.
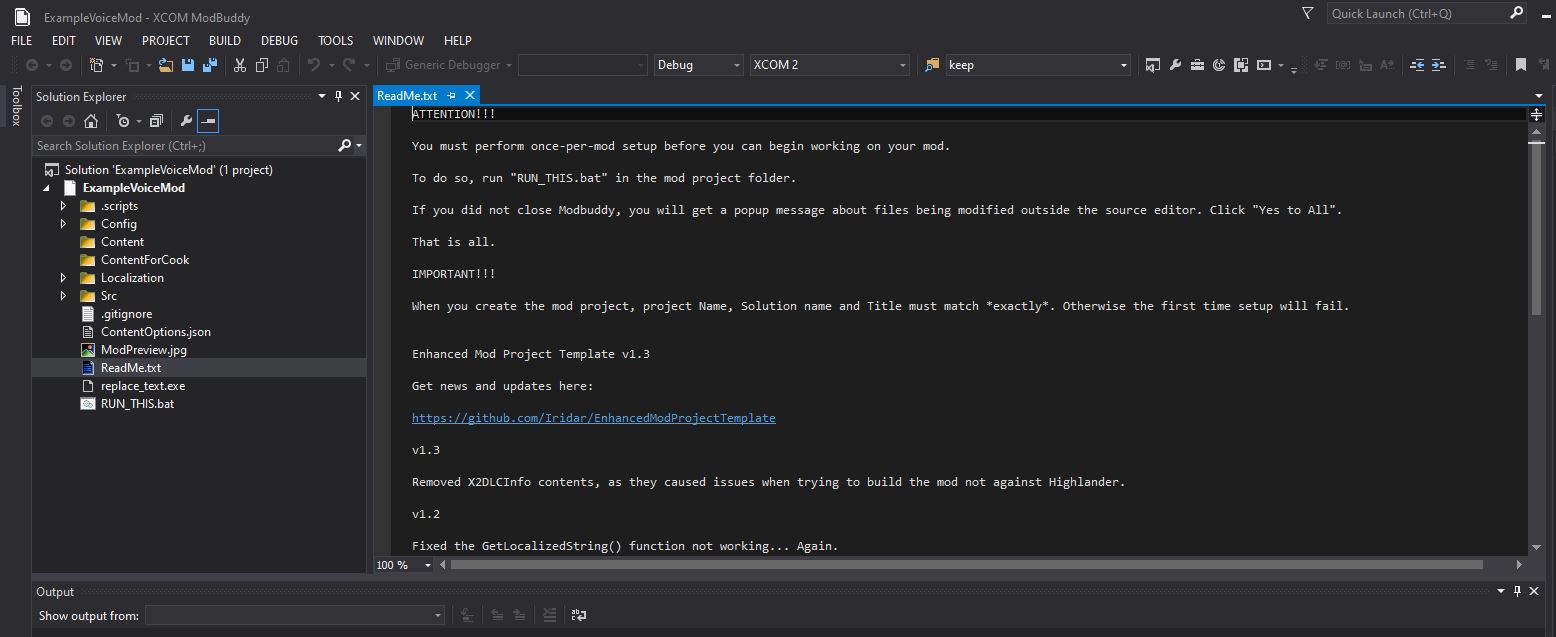 Immediately close ModBuddy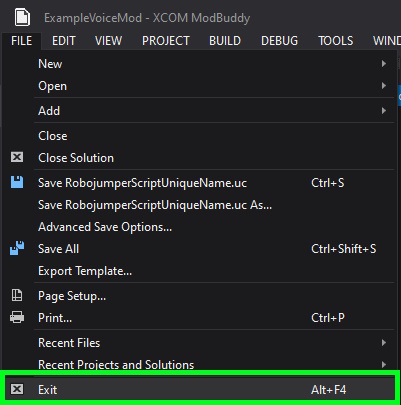
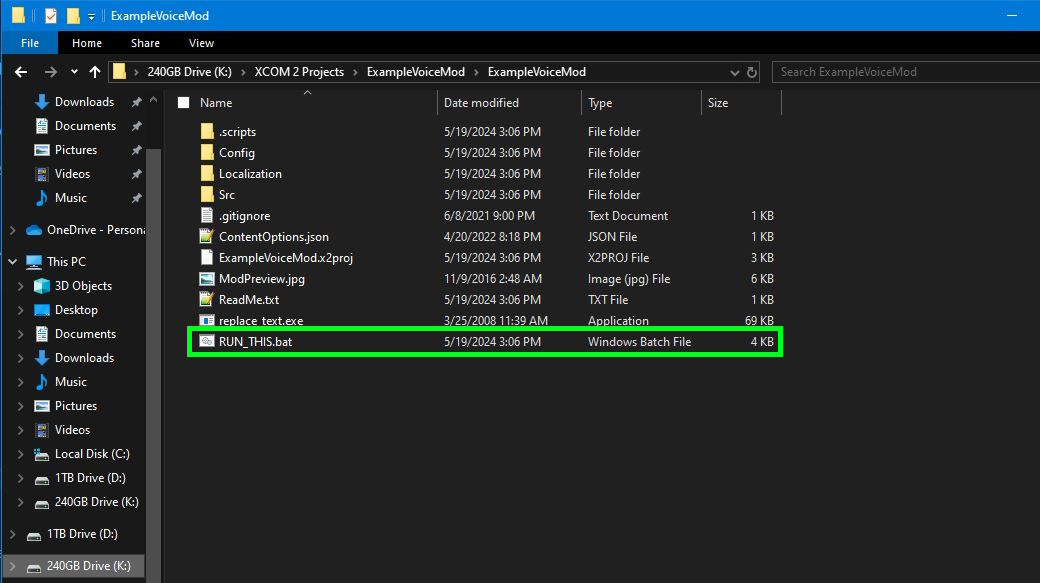 After running it, the directory should now look something like this: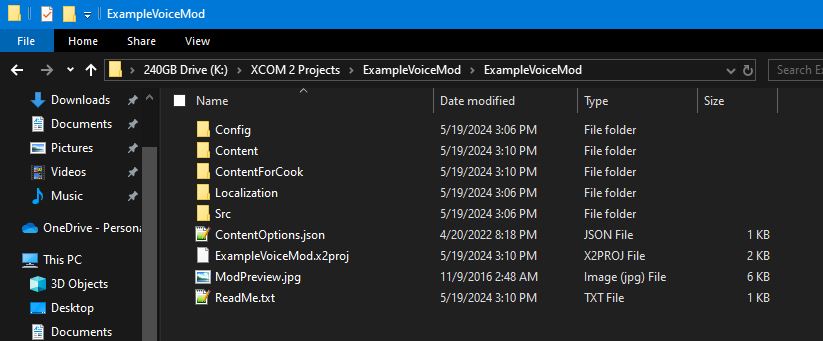
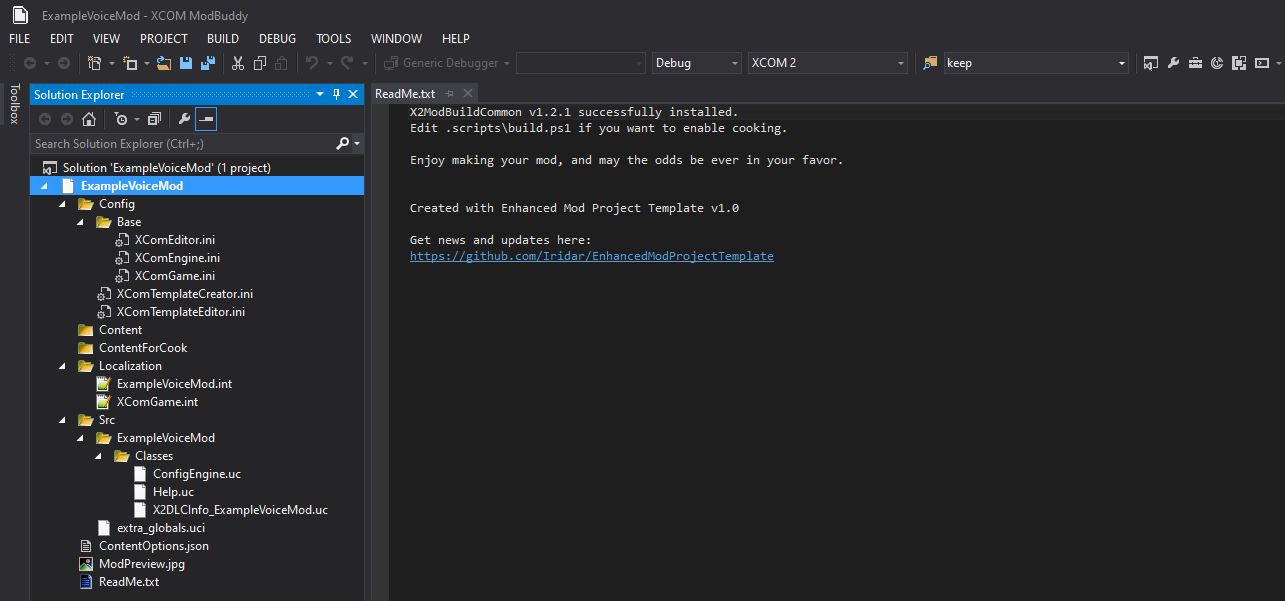
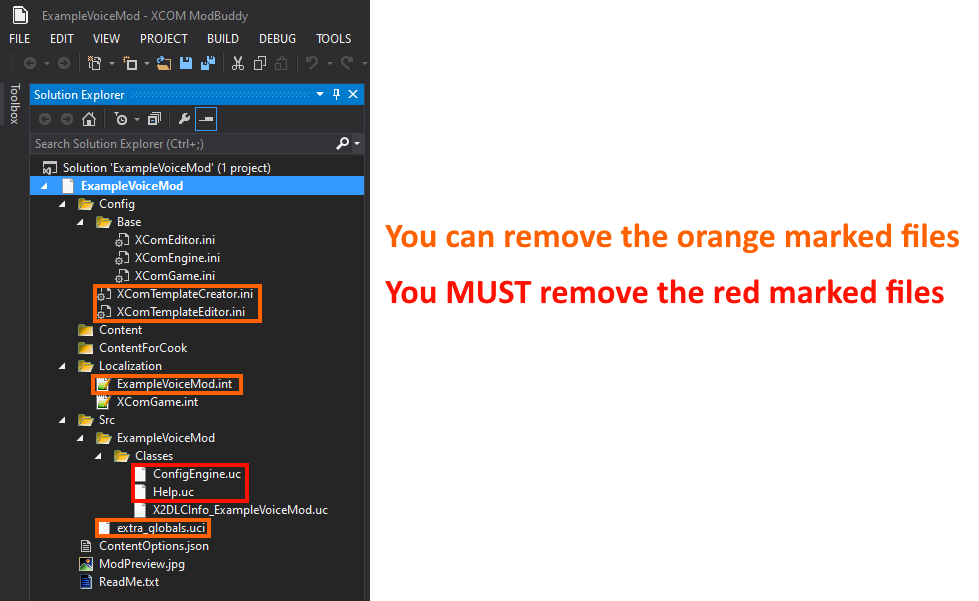
Note:
You might want to check in Windows Explorer if the files were actually deleted, since ModBuddy can be kinda iffy when deleting files.
Other Note:
You can probably delete 'X2DLCInfo_ExampleMod.uc' too, but I didn't for this guide.
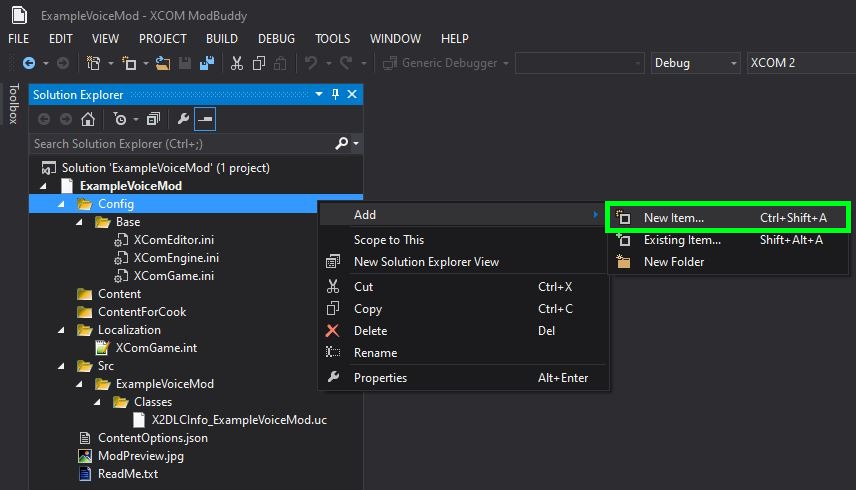
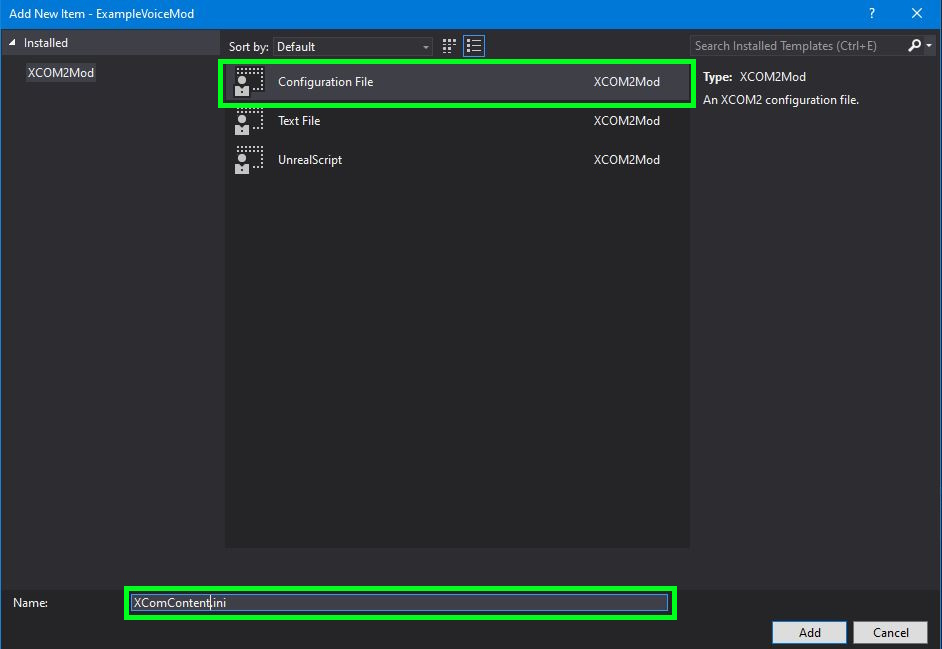
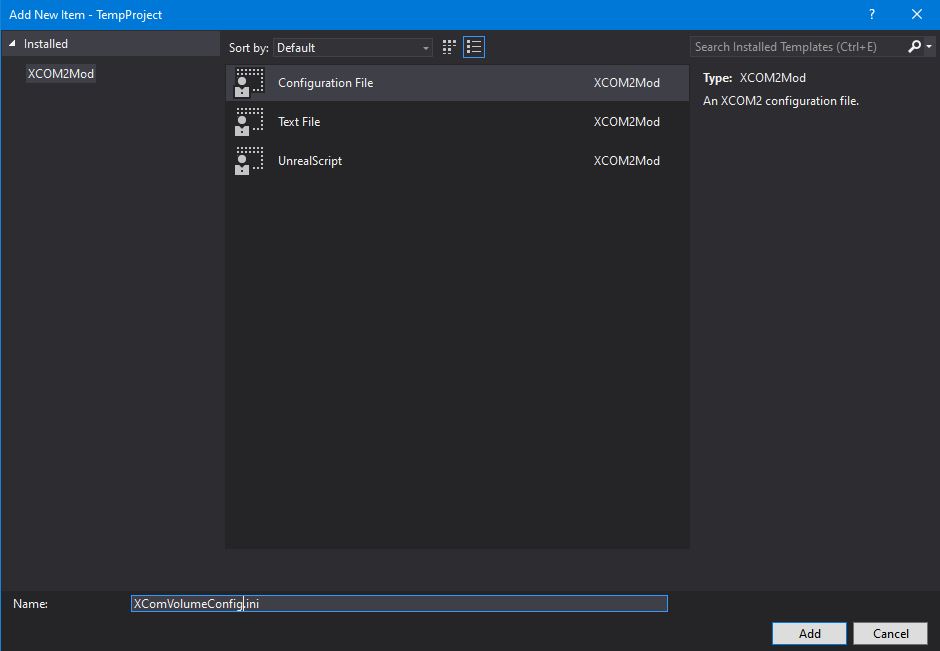
Click the 'Add' button at the bottom when you're done. We will edit this file at a later point.
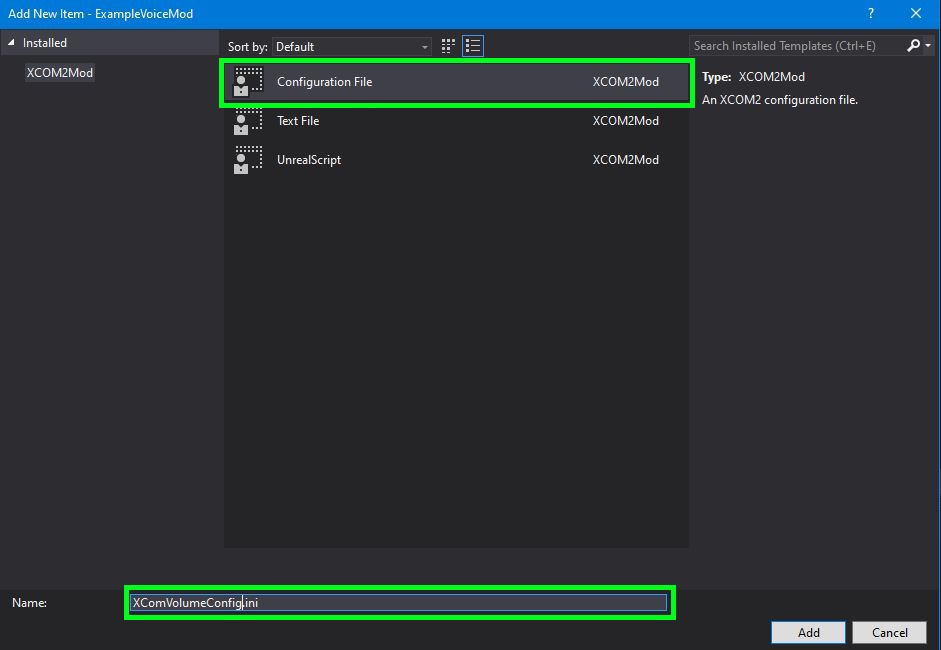
Click the 'Add' button at the bottom when you're done. We will edit this file at a later point.
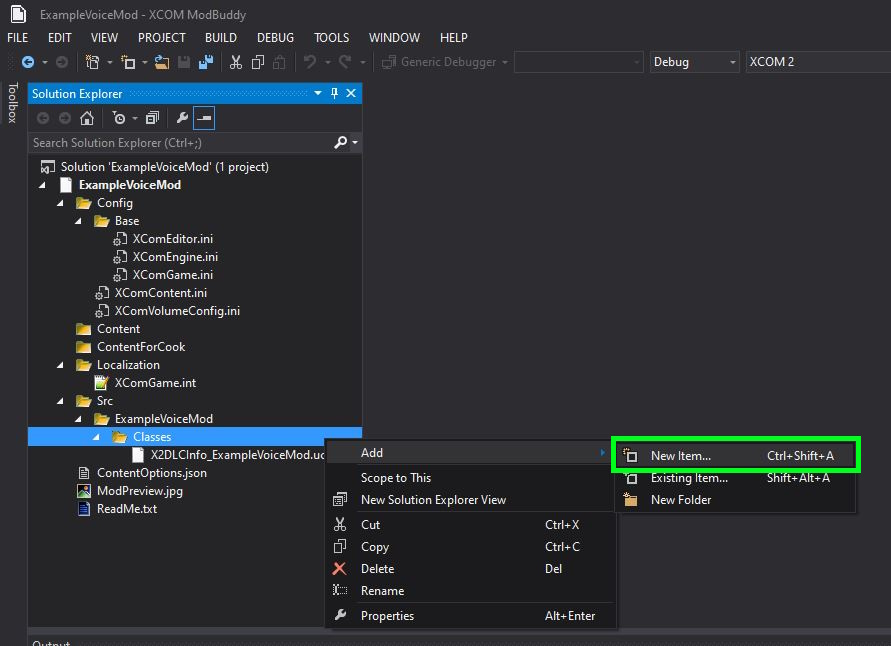
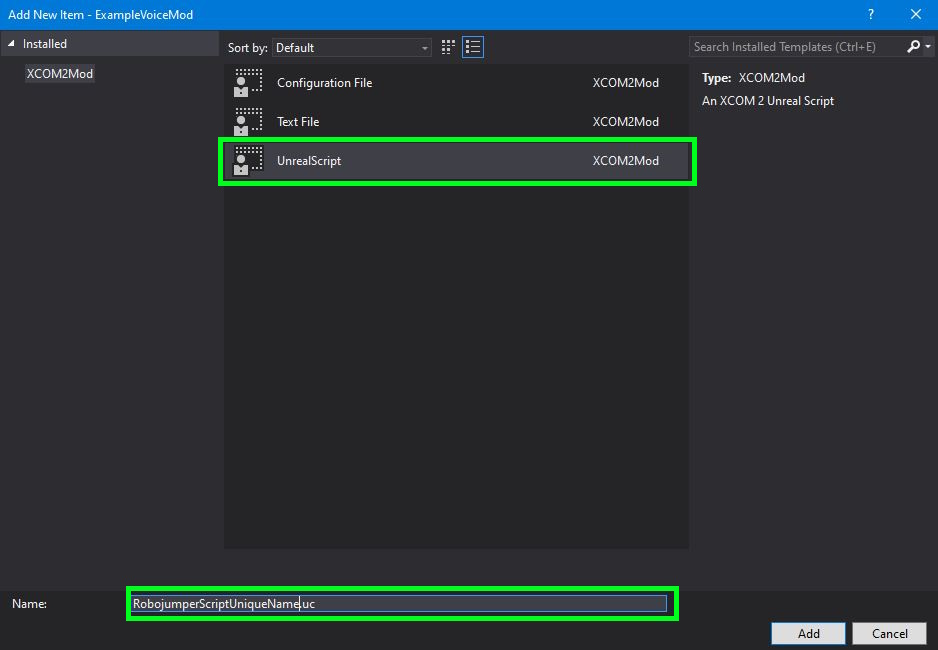
Click the 'Add' button at the bottom when you're done.
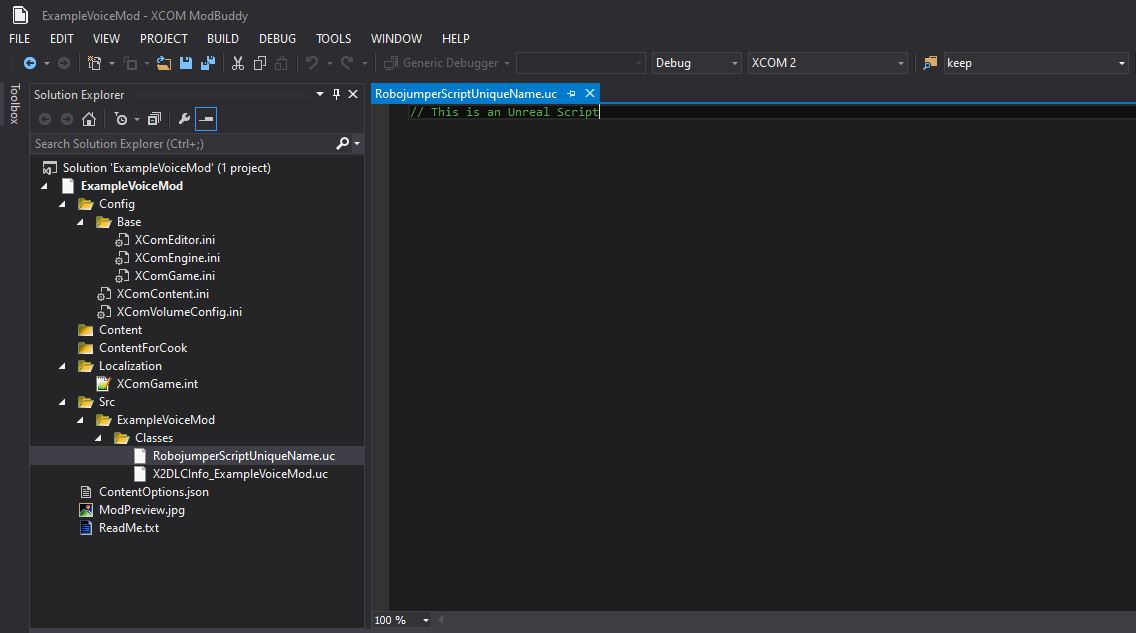 Open the pastebin link from before that had the copy of Robojumper's voice script. Copy the script.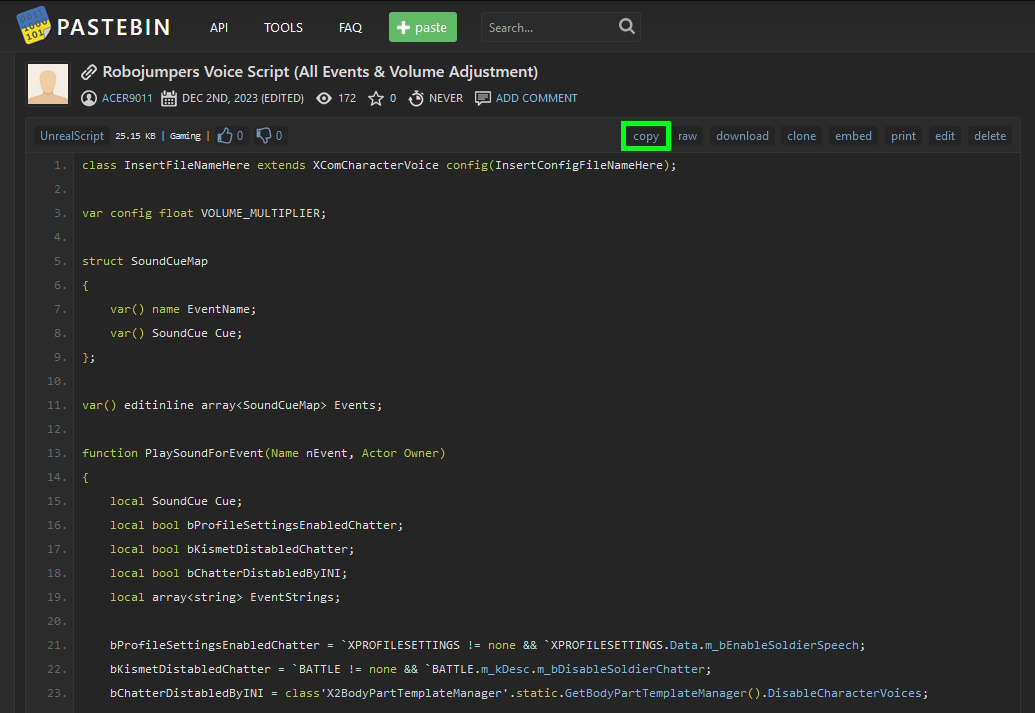
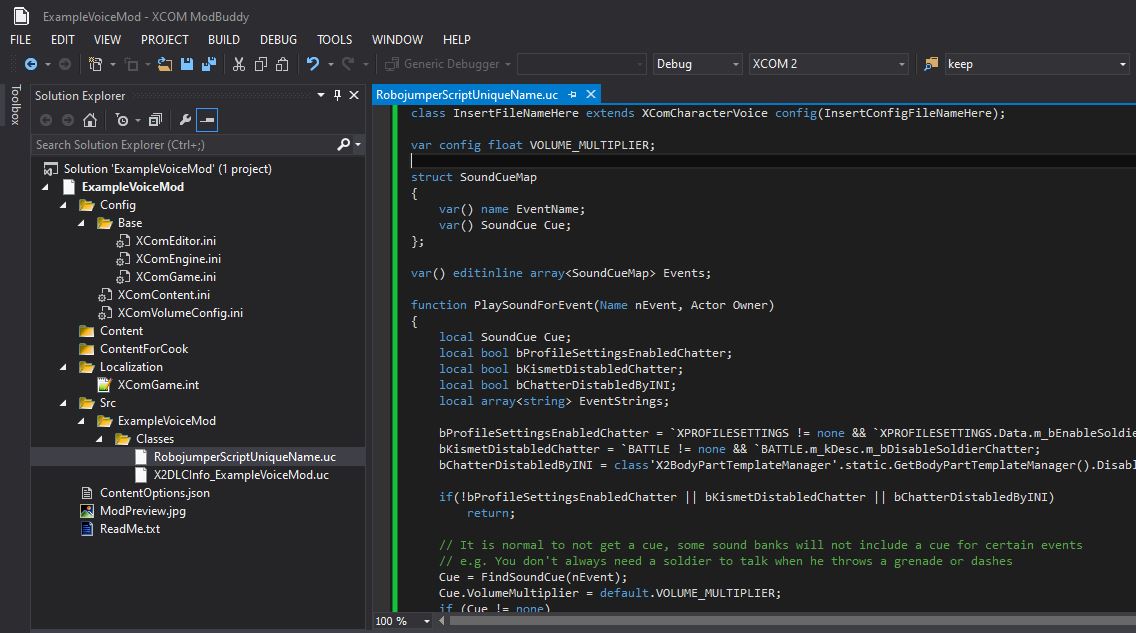
Change 'InsertConfigFileNameHere' to the name of the volume config file we made earlier, but without the 'XCom' at the beginning.
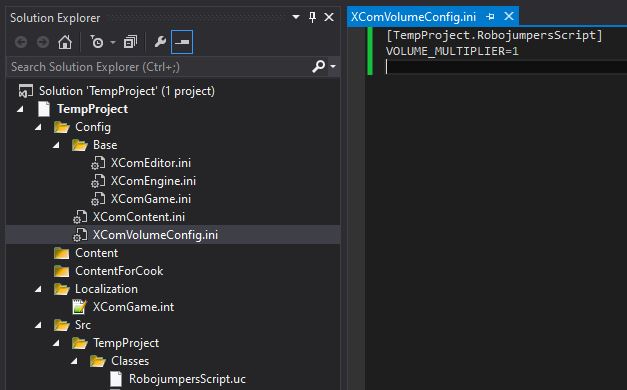
 It should now look something like this:
Save changes once you're done.
[InsertModNameHere.InsertScriptFileNameHere] VOLUME_MULTIPLIER=1
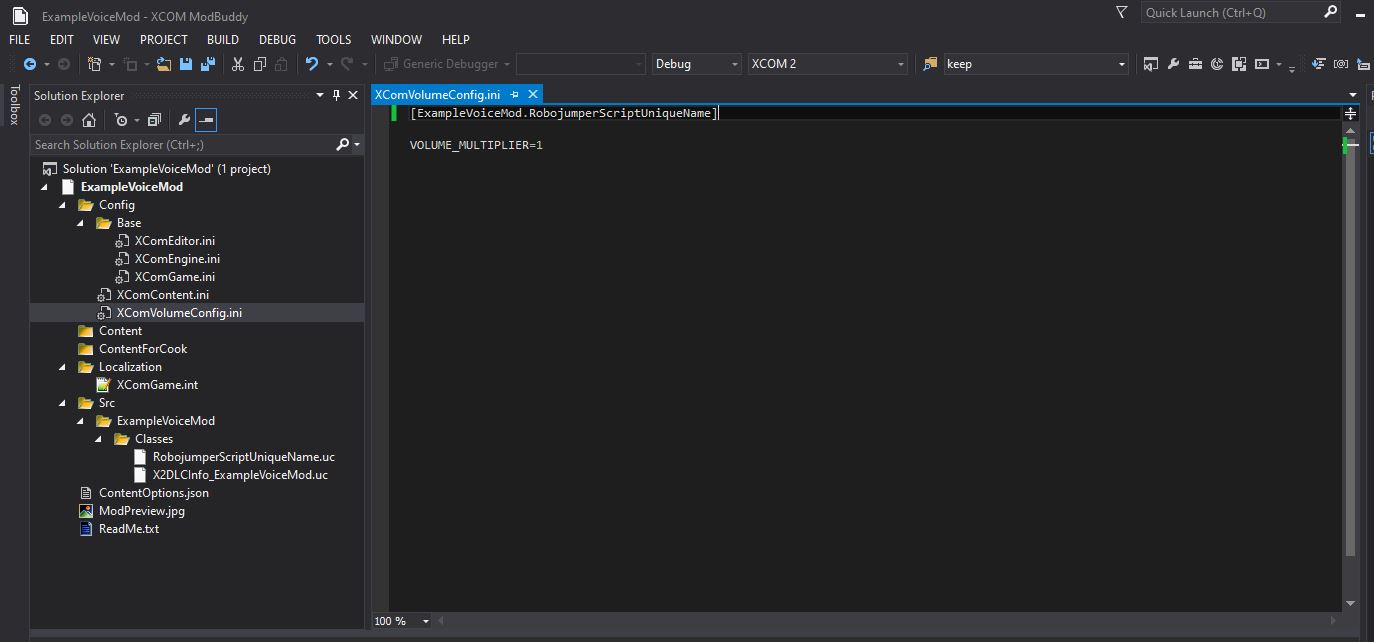
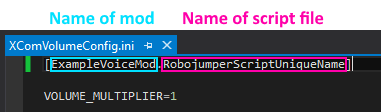
Save changes once you're done.
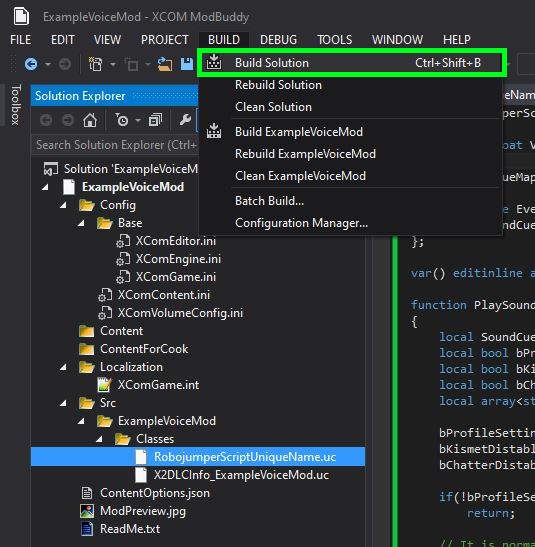
If it doesn't give you an error, then you did everything up to this point correctly.
IMPORTANT NOTE:
If you do not build solution at this step, you will not see the script in Unreal Editor once we start using it. Building solution is necessary every time you make changes to the script file so those changes are reflected in the Unreal Editor.
Creating the Voice Package Pt.1
We will now be creating a package that contains all the assets for the voice, those being:
- The sound cues.
- The voice archetype.
- The sound files themselves.
If your mod will have more than one voice in it, go through this section again after finishing each.
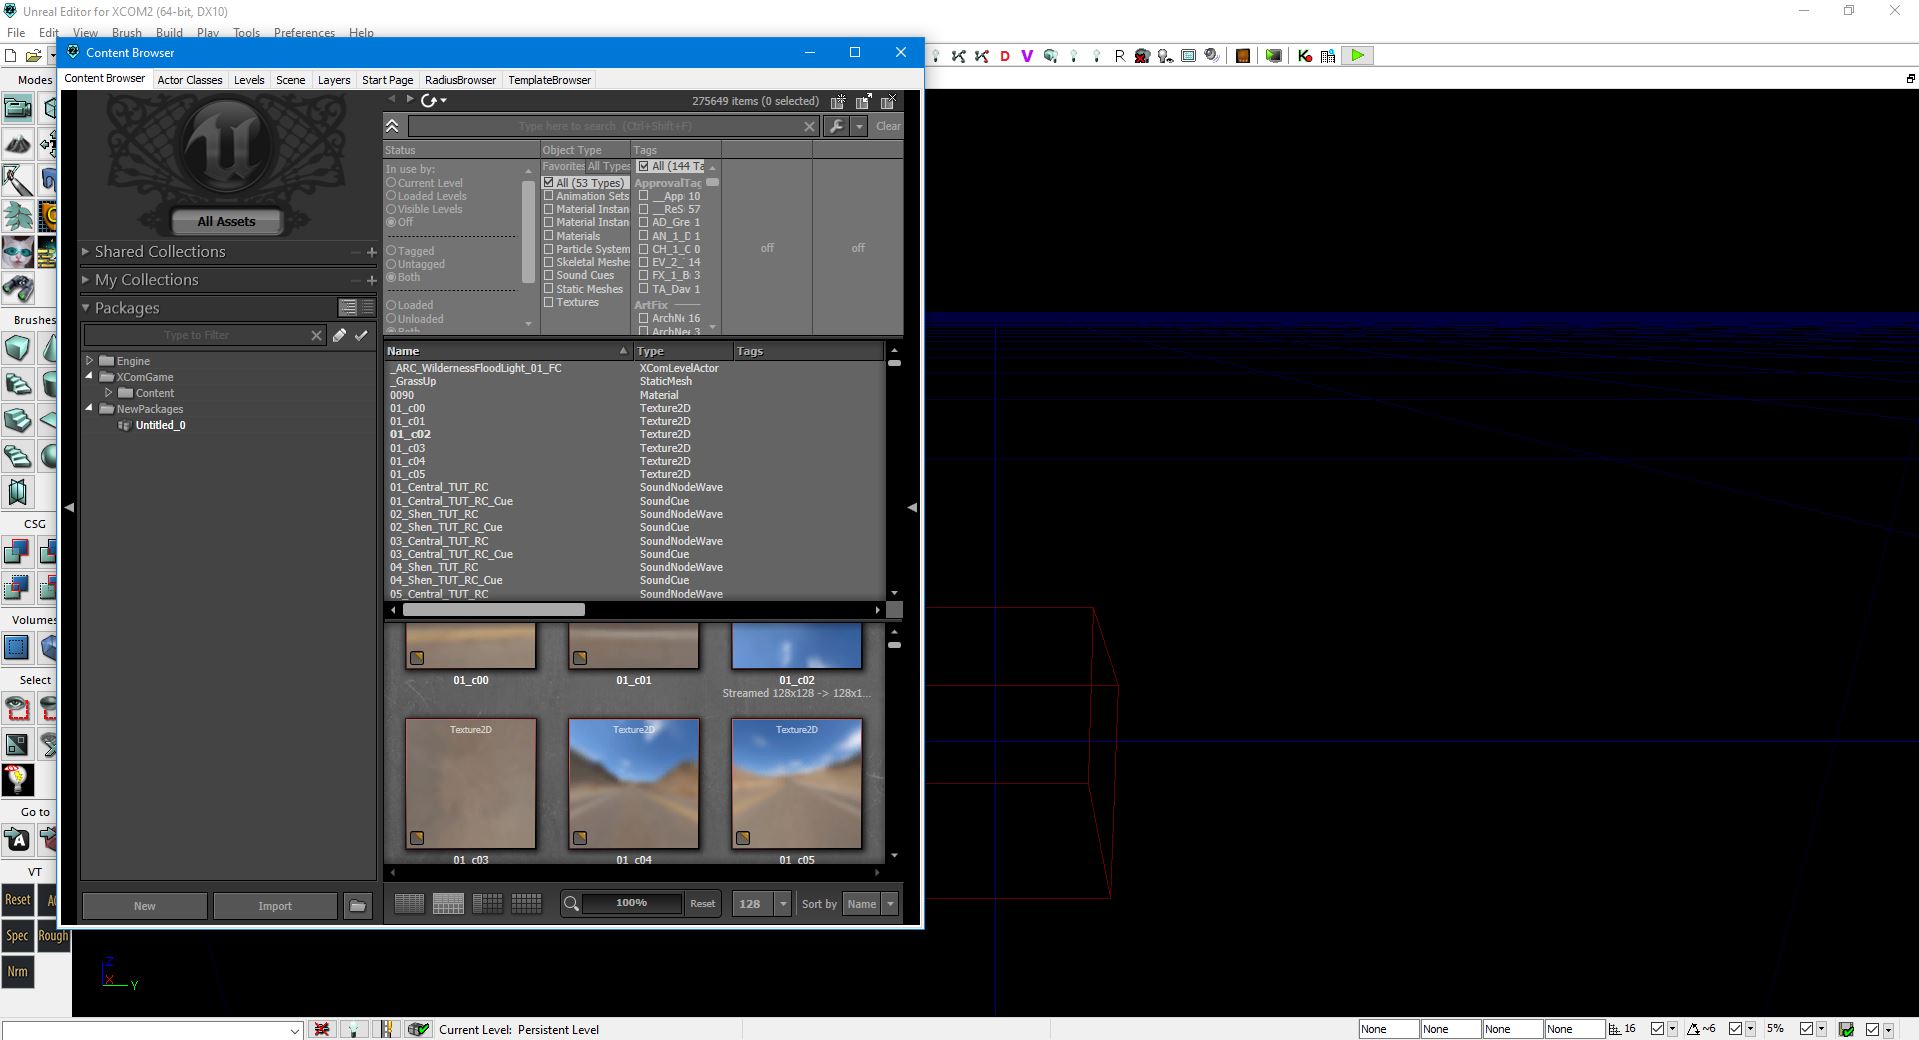 We are only concerned with the 'Content Browser' window for this whole process. Ignore the actual Unreal Editor in the back.
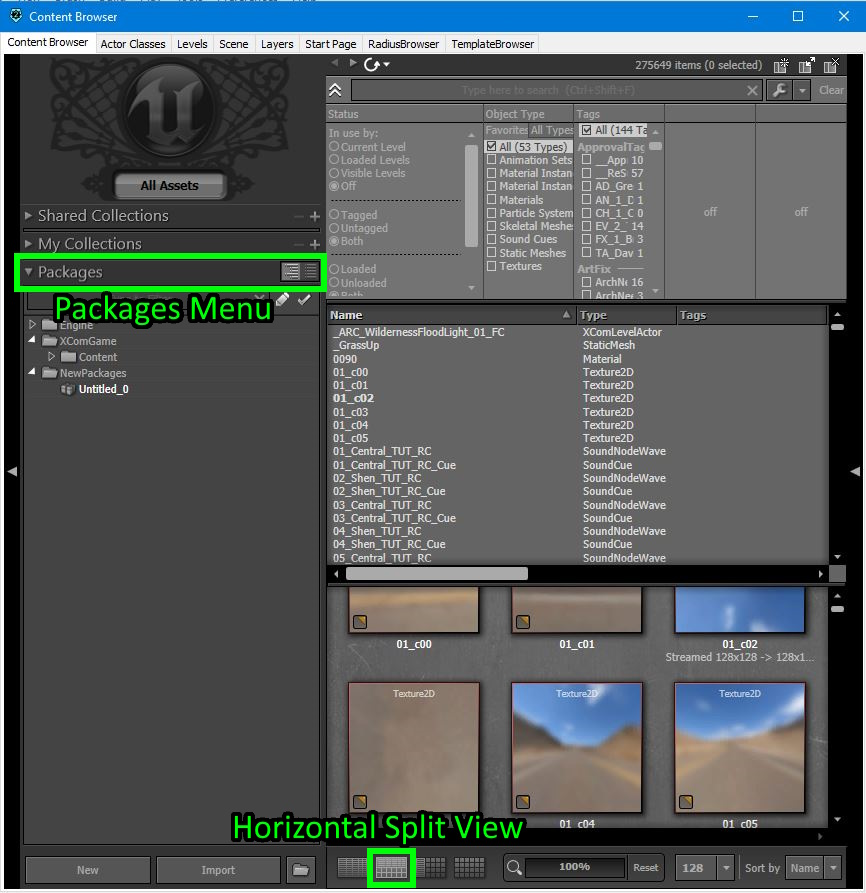
Your Content Browser will ikely look a bit different from mine at first. Click 'Packages' at the top left to expand that menu. Then click the icon at the bottom to switch to Horizontal Split View if you wish to follow along with what I do as closely as possible.
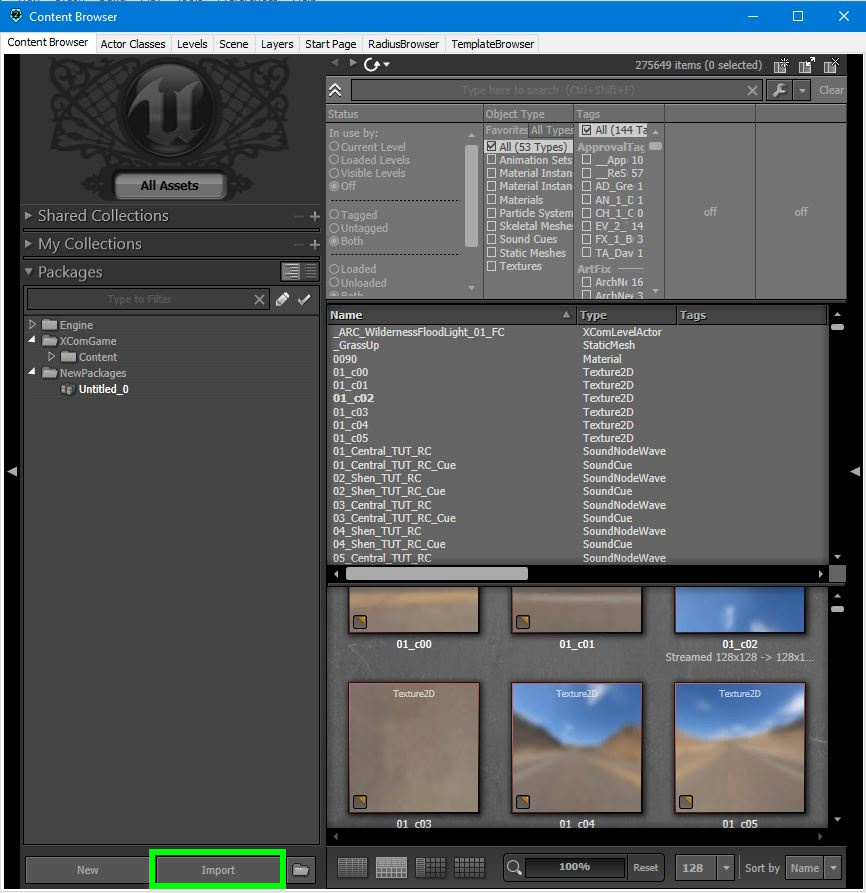
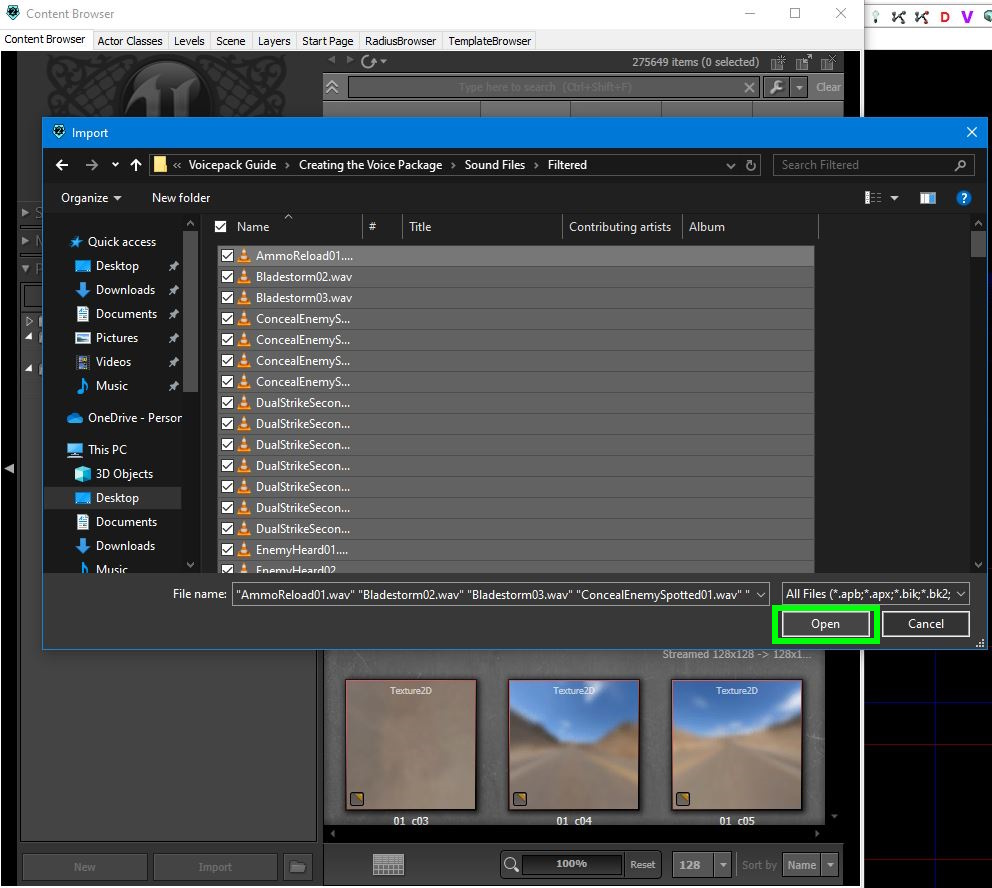
Once you've selected them, click 'Open'.
Important Note:
Do not import the lines anywhere in the package but its root directory. If you import them into a sub-directory, you will not be able to cook the mod later.
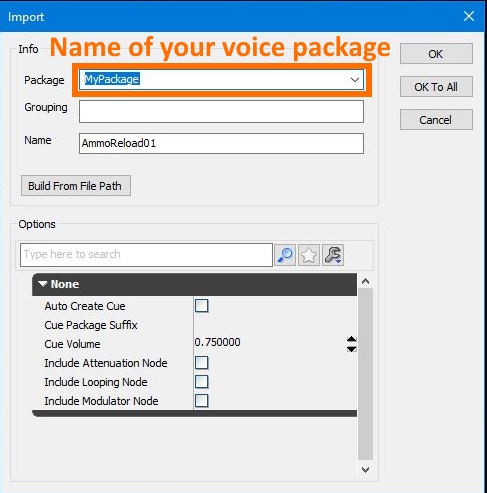 You will enter the name of the package that the files will go into. If the package name does not exist, it will create a new one. The actual name of the package doesn't need to be specific, but you shouldn't use special characters or alternate scripts. Click 'OK To All' once you've named it.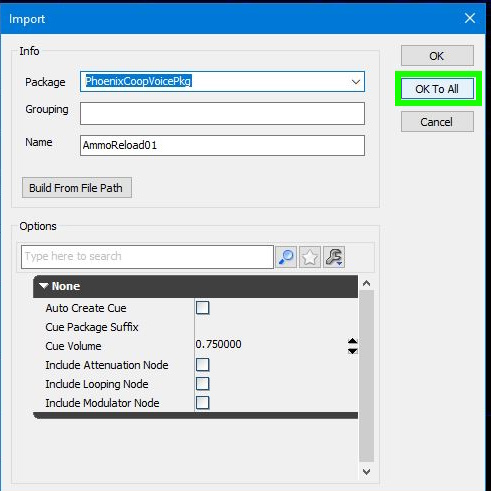
Important Note:
Do not give the content package the same name as your mod. They must use different names.
Immediately save the package to a backup location.
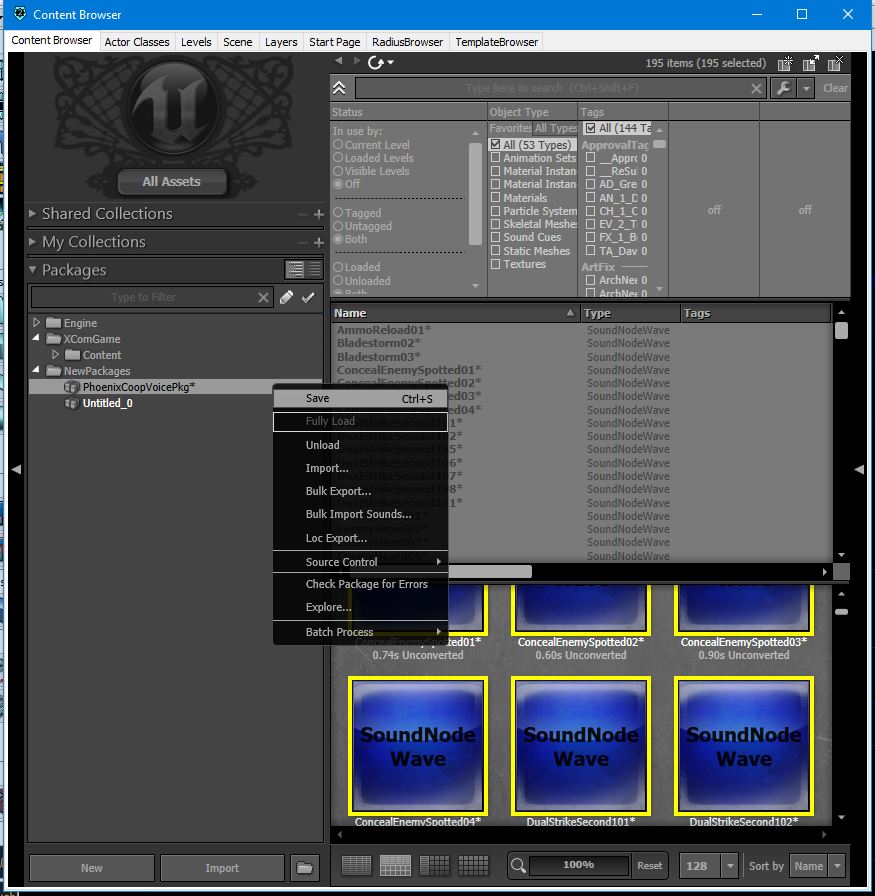
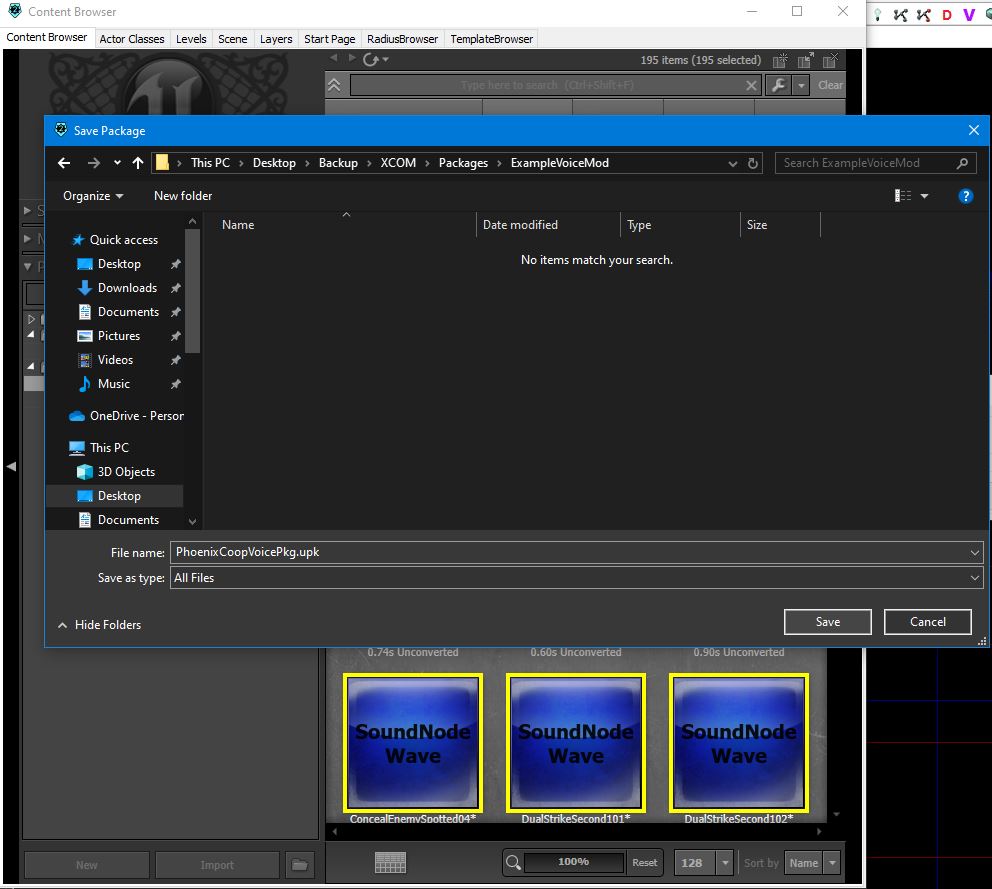 Note:
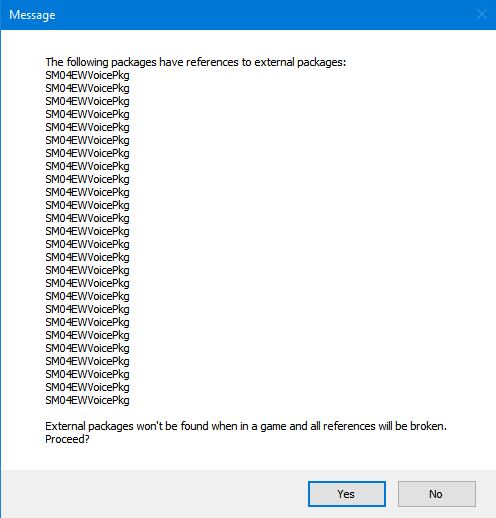
Note:When you save the package again after editing the files within, it will prompt you with a message that says "The following packages have references to external packages". This is completely normal. Just click 'Yes' at this prompt to finish saving.
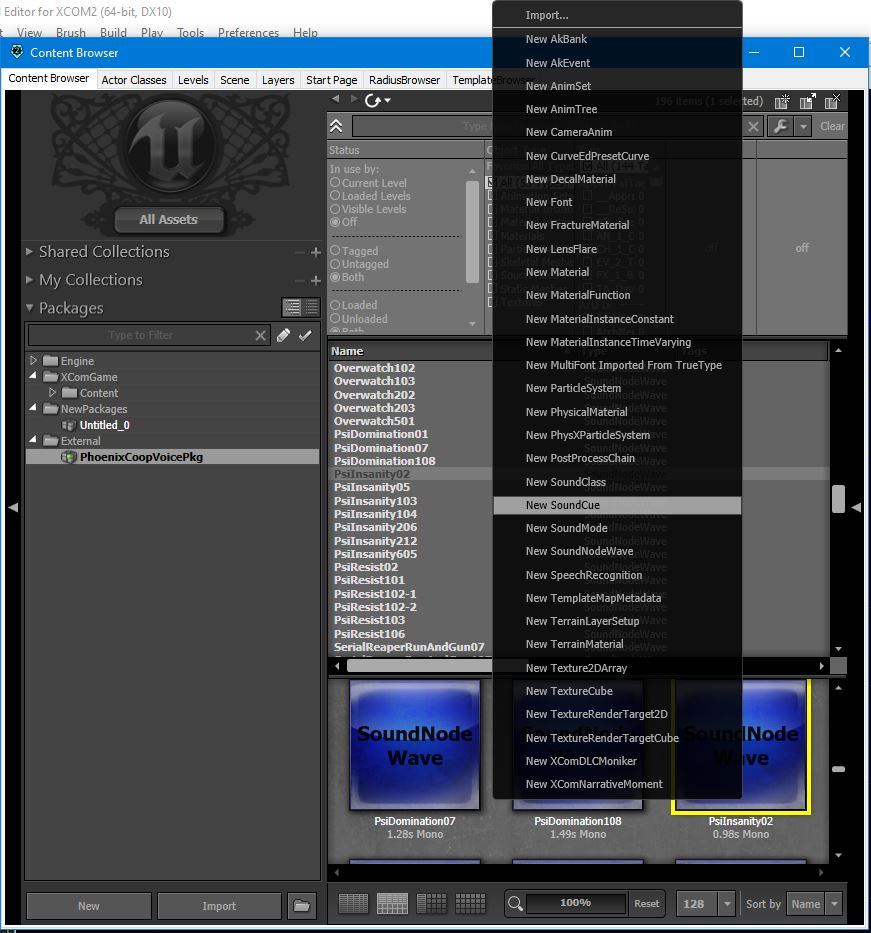
Important Note:
Do not copy sound cues from other packages in the Unreal Editor. If the sound cue was already set up to play lines, it will still be pointing to the old location for those files, and the cue won't work. You should create all sound cues within the package they will stay in.
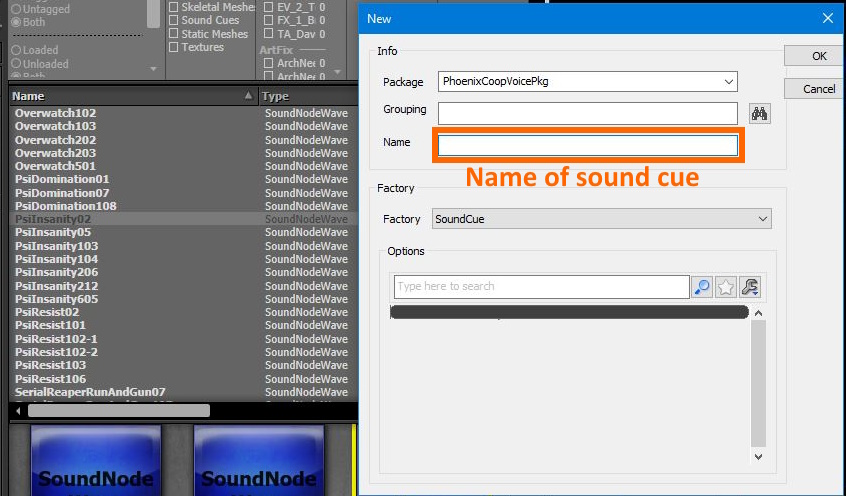 The name should reflect the action you're planning to use the cue for. In this case, I'm making one for Psi Insanity.
Click 'OK' once you've named it.
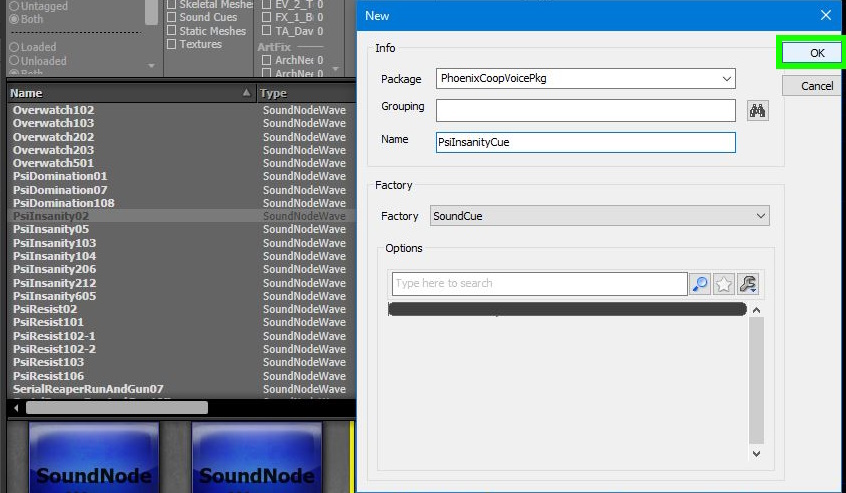
Note:
Like everything else contained in the package, the cue name cannot have spaces or special characters. It also cannot use non-Latin script characters like Cyrillic or Kanji.
Use the Shift + Click hotkey shortcut to select a grouping of voice lines. You can also use Ctrl + Click to select lines individually.


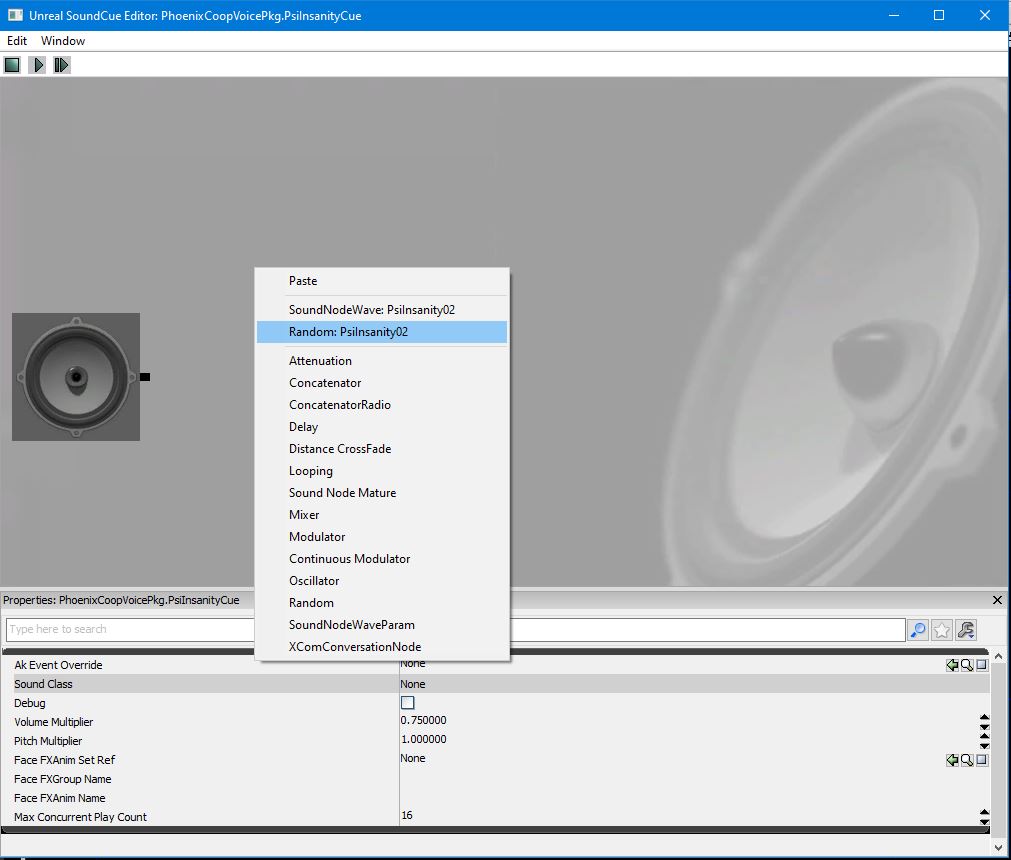 This will automatically place all the sounds in the editor and connect them to a random node.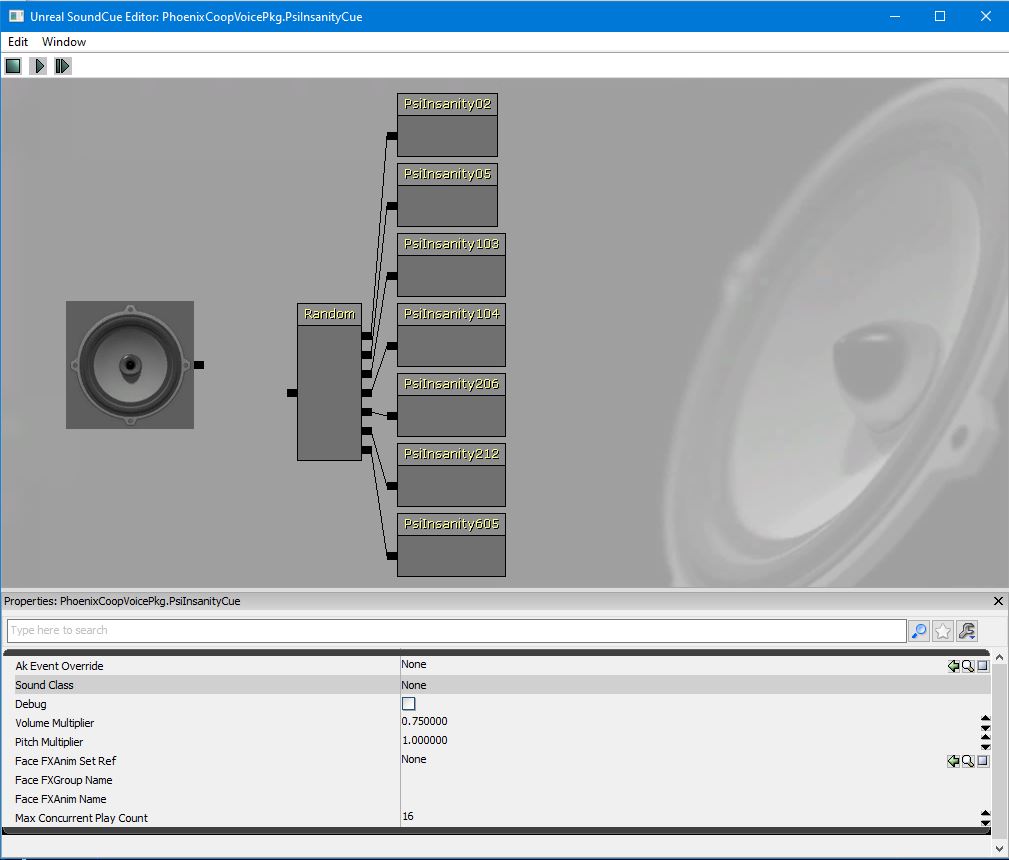
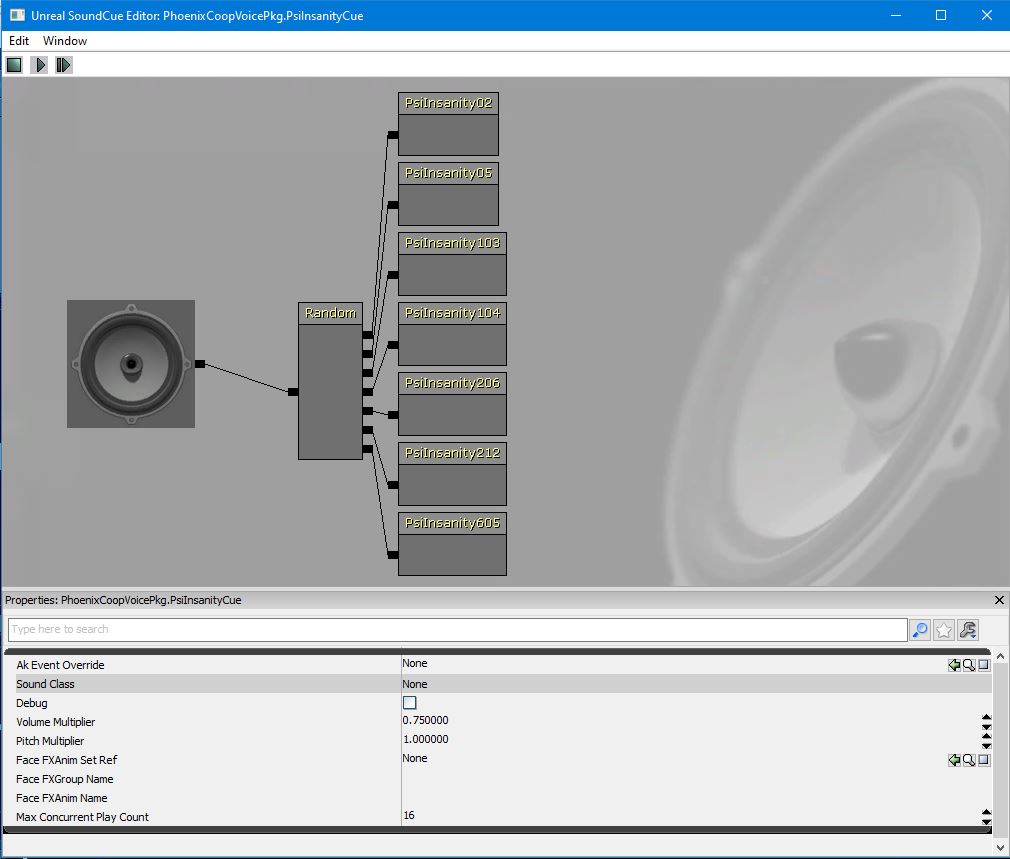
You can now close the sound cue editor. Repeat steps 7-11 for every single sound cue you wish to make. This will take some time.
Note:
You can use Ctrl + Click to physically move nodes around within the editor.
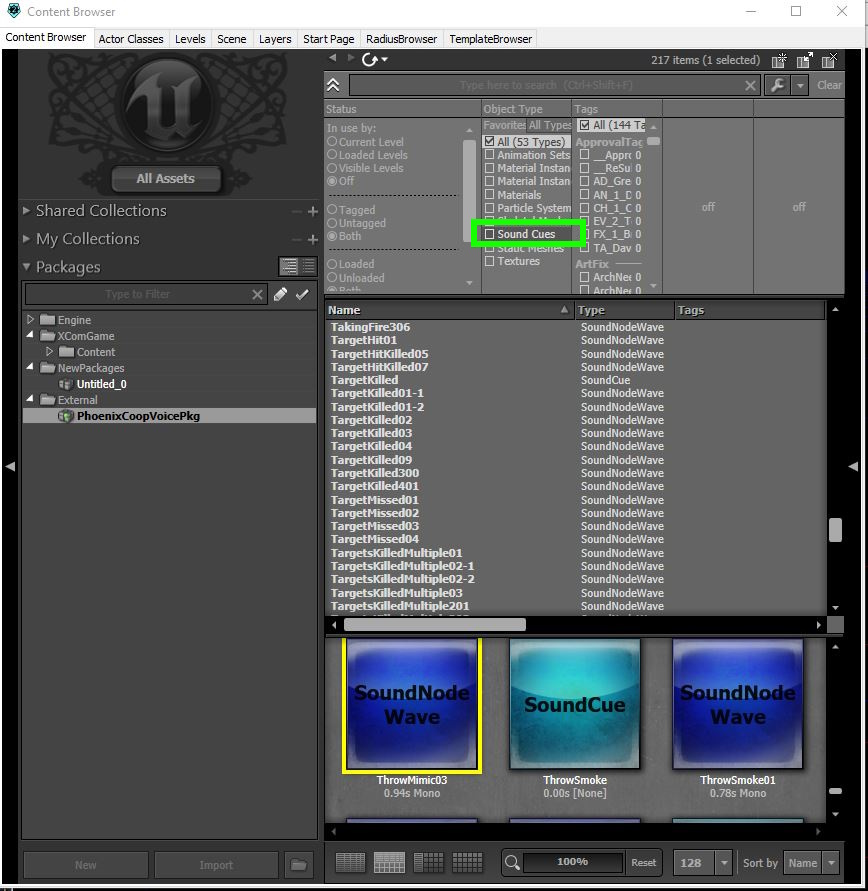
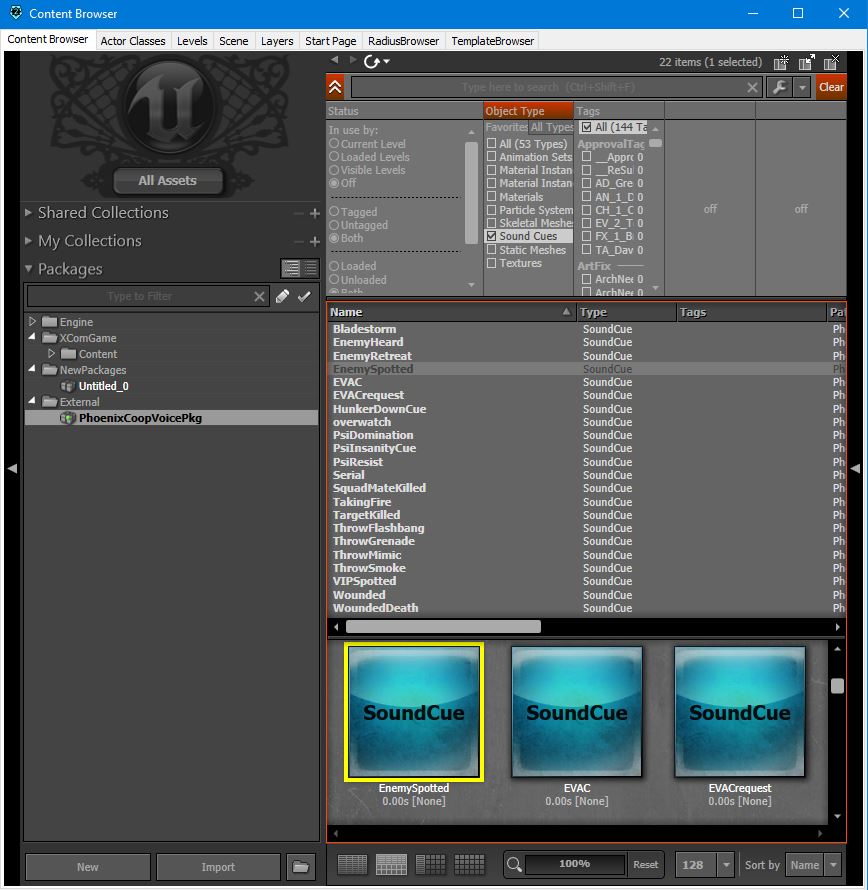
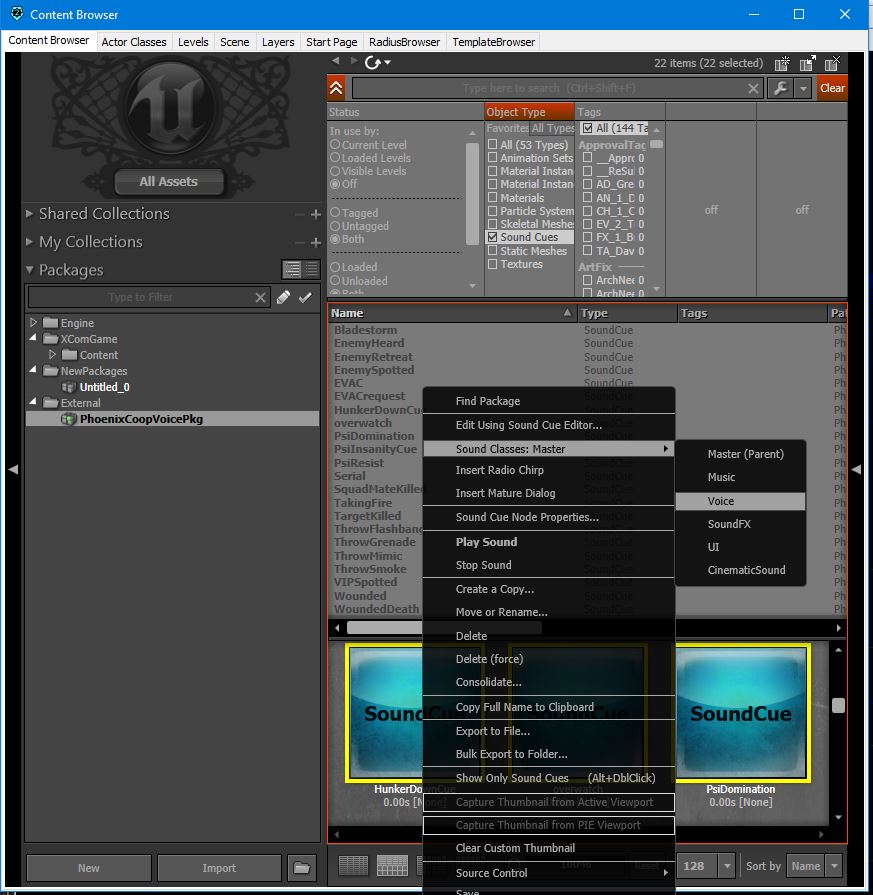
Save the package.
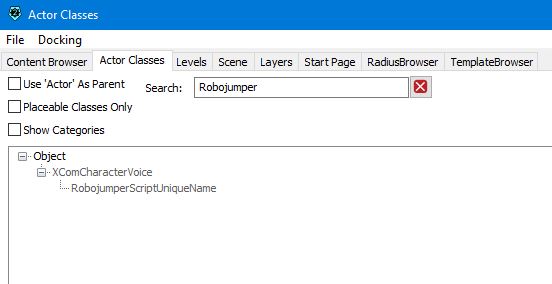
 It should look like this: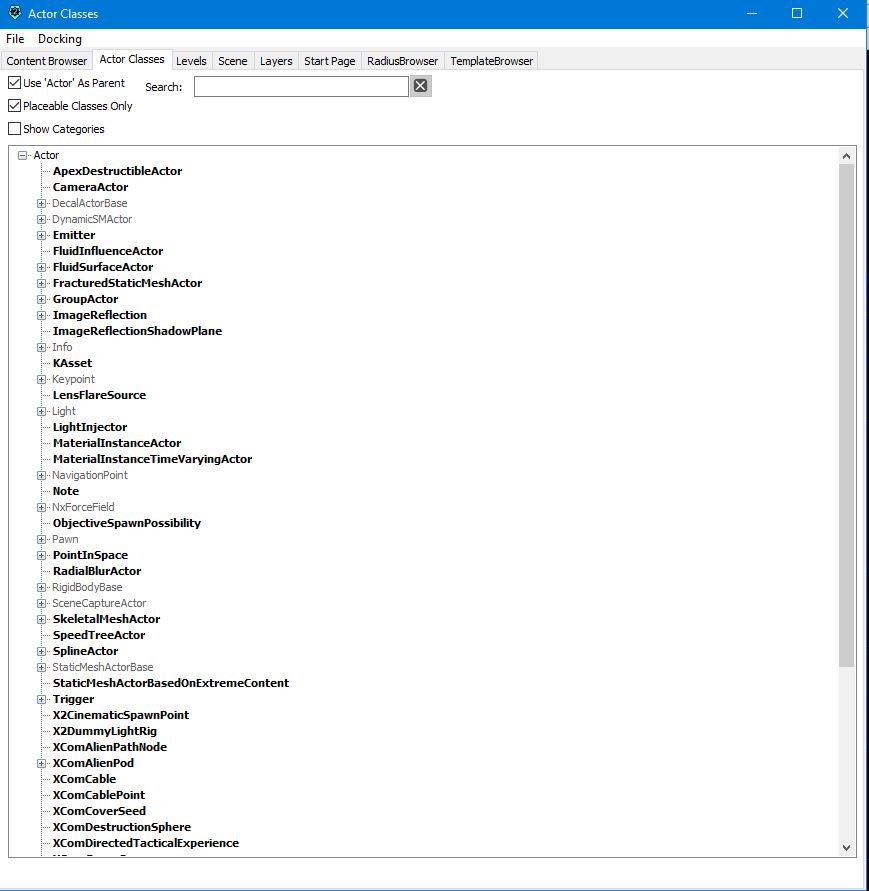
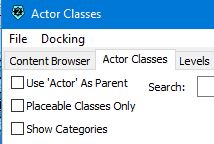
Note:
If you do not find your script after searching its name, close the editor, build solution again in ModBuddy, then search for it again.
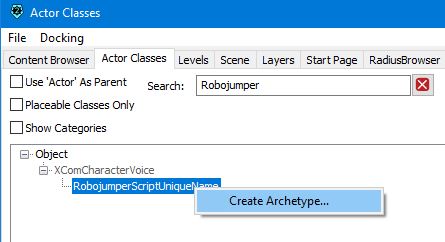
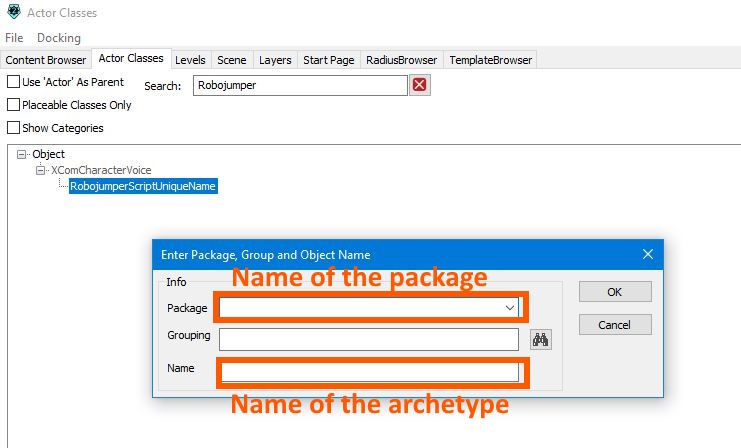 Click 'OK' when you're done.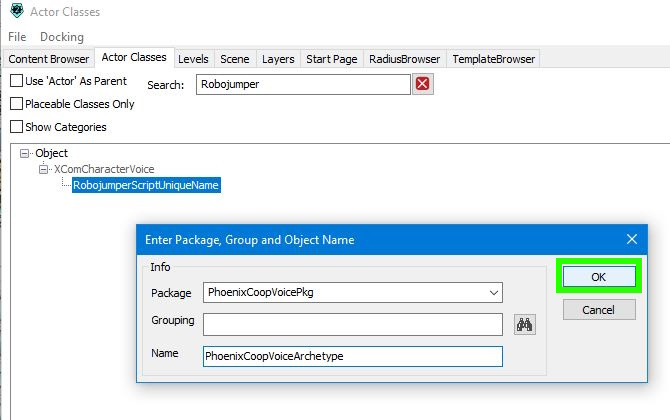
Note:
You cannot specify your package name if you have not saved your package yet.
Other Note:
You also cannot specify your package name if it is not open in the Content Browser tab.
Creating the Voice Package Pt.2
Alternate section necessary because of section specific character limits. We are almost done with this part anyway.
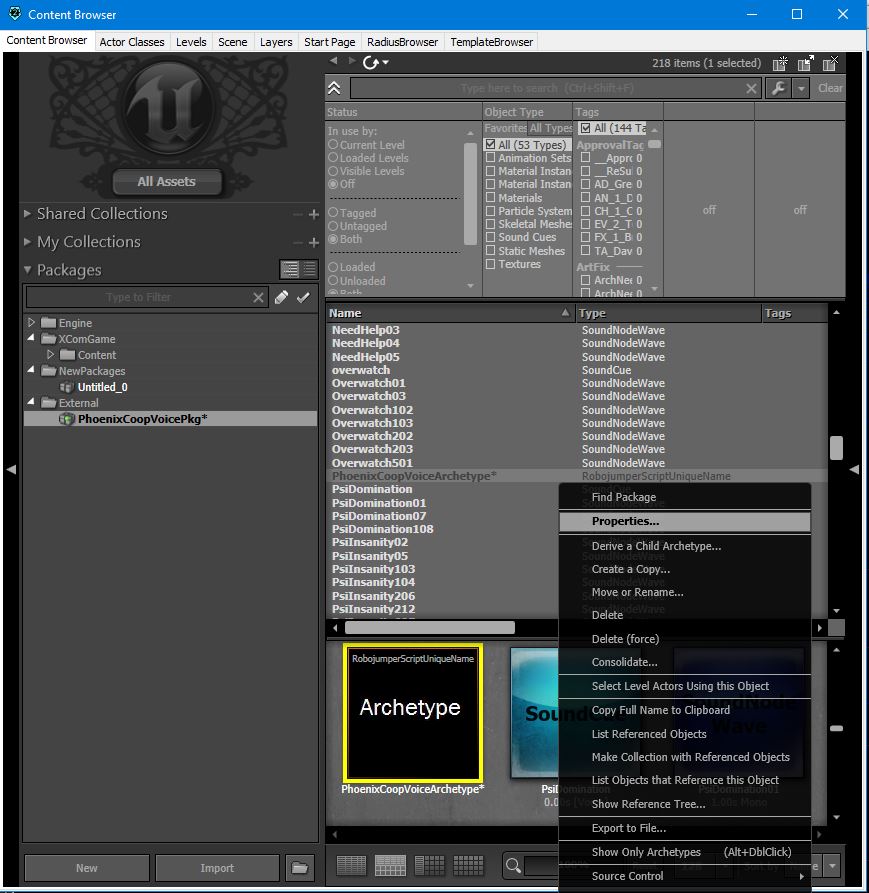
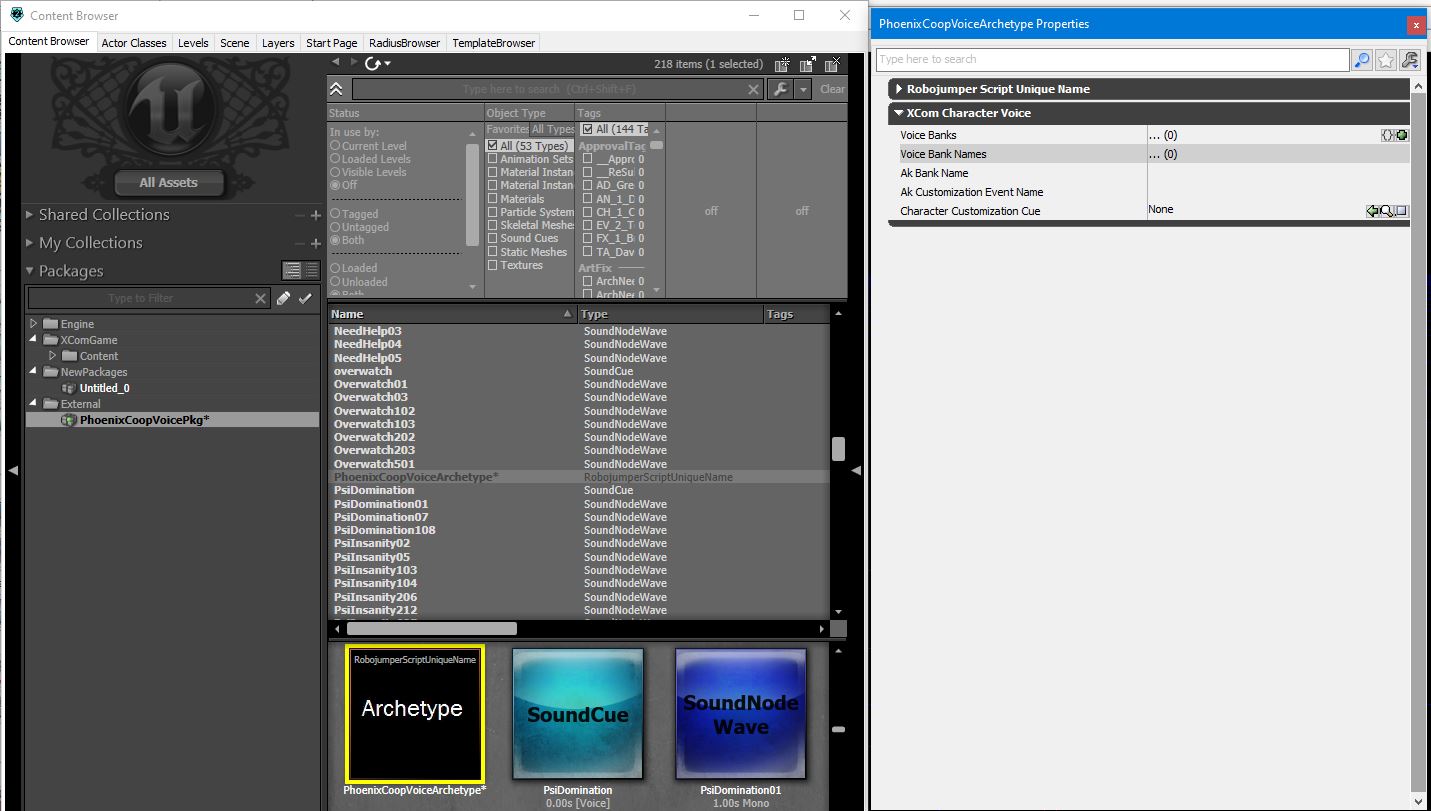 Collapse 'XComCharacterVoice' and expand the Robojumper script name directly above it.
Click the wrench icon in the top right and click 'Expand All Categories'.
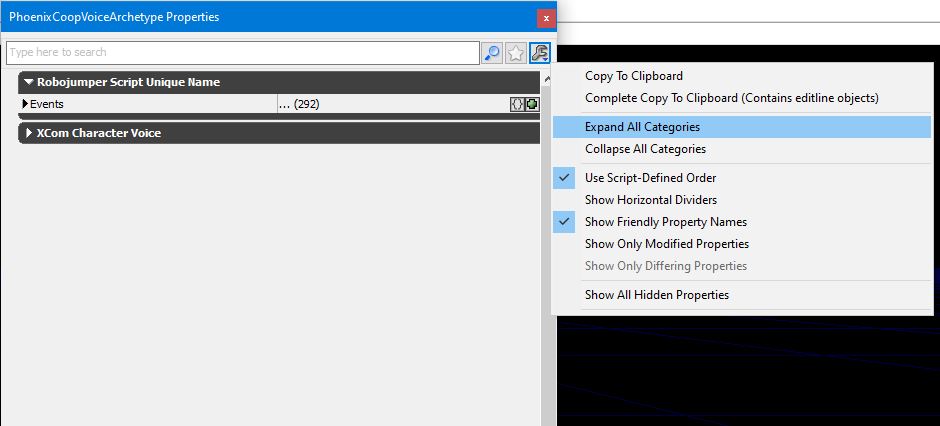 The window should now look like this: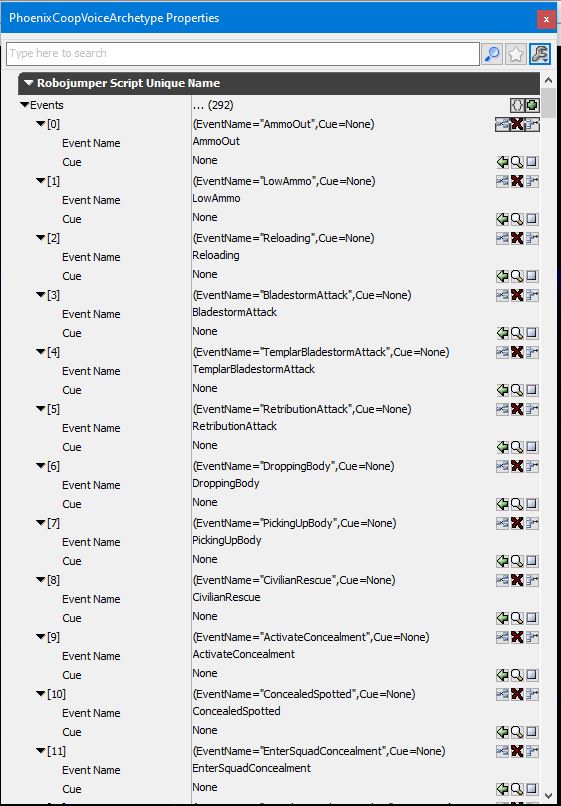
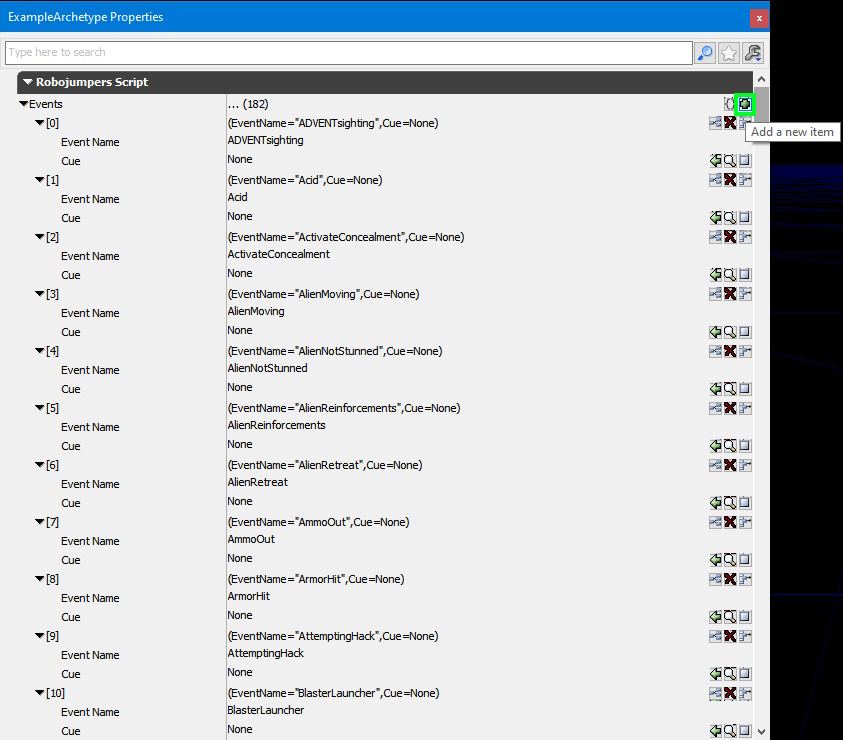
This is the list of voice events in Robojumper's voice script.
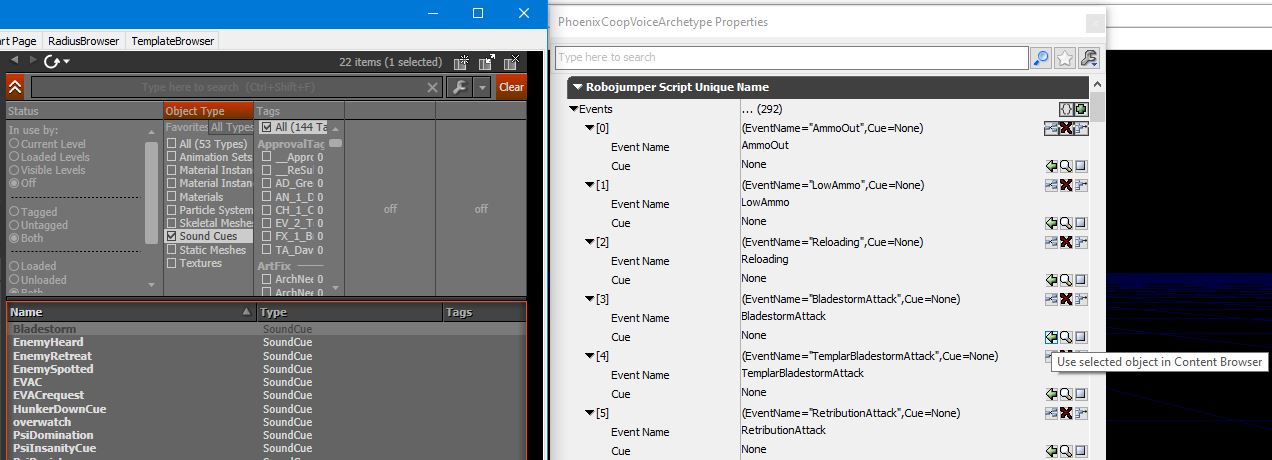
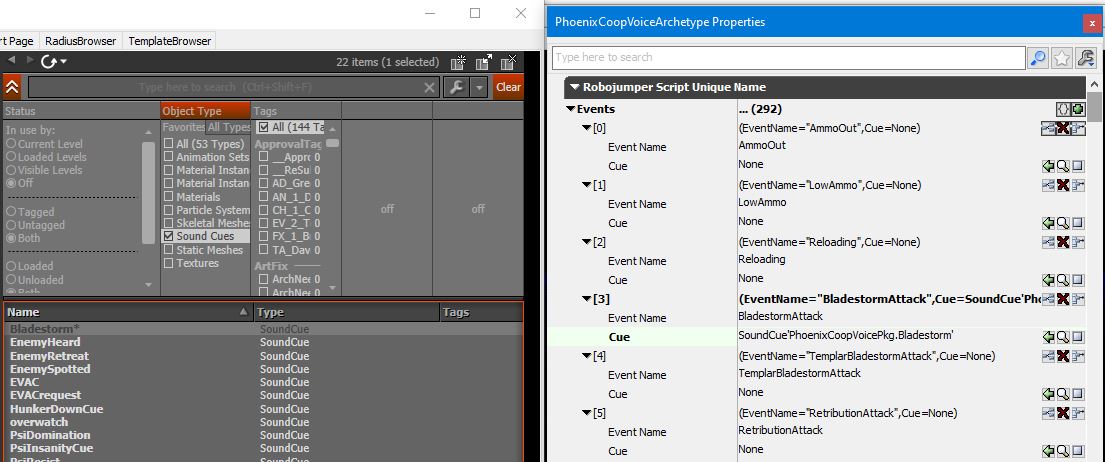
Repeat this step for every single voice event you wish to assign dialogue to.
Note:
You do not need to assign a cue to every single voice event in the archetype. Leaving them unassigned simply means dialogue won't play during them. With how many voice events there are, some will naturally have to remain silent.
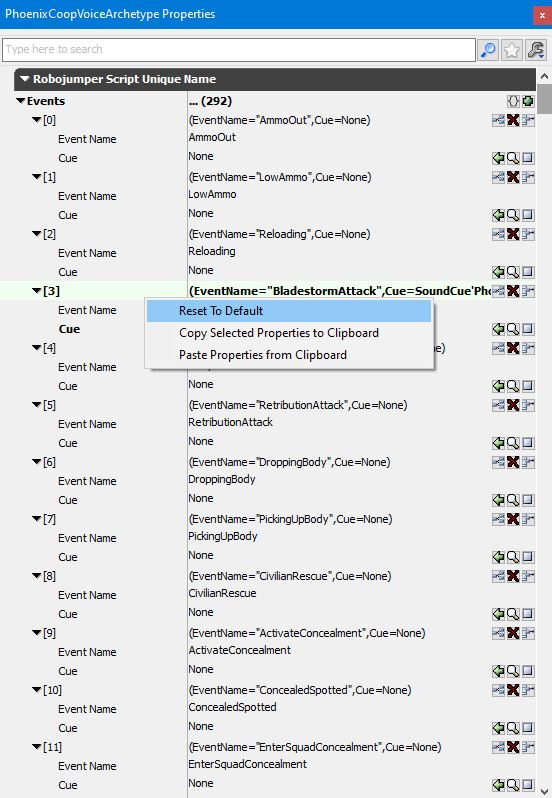
If you mistakenly assign something to a voice event that you didn't mean to, you can right click it and click 'Reset to Default' to unnassign the voice event.
Other other Note:
If you add a voice event to your script in ModBuddy and build solution, you'll notice that it won't show up automatically in the Archetype you already made. To add the new event, you can use the green plus sign in the top right of the Archetype properties window to add it manually. Otherwise, you'd have to create a whole new Archetype.
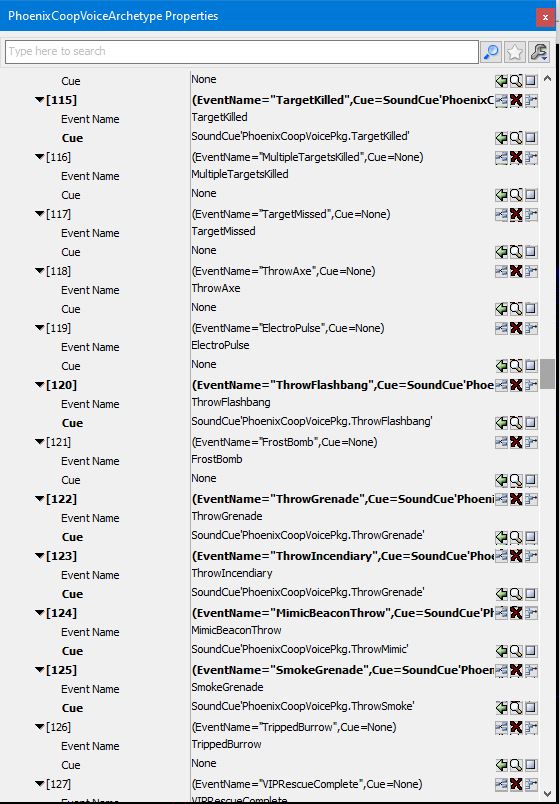
Note:
If you ever want to make changes to the archetype after closing the editor, Build Solution in ModBuddy to ensure it detects the script.
Other Note:
One disadvantage of using Robojumper's voice script is that if you move the package to another mod project, you must remake the archetype from scratch. Keep this in mind if you ever decide to merge multiple voice mods into one.
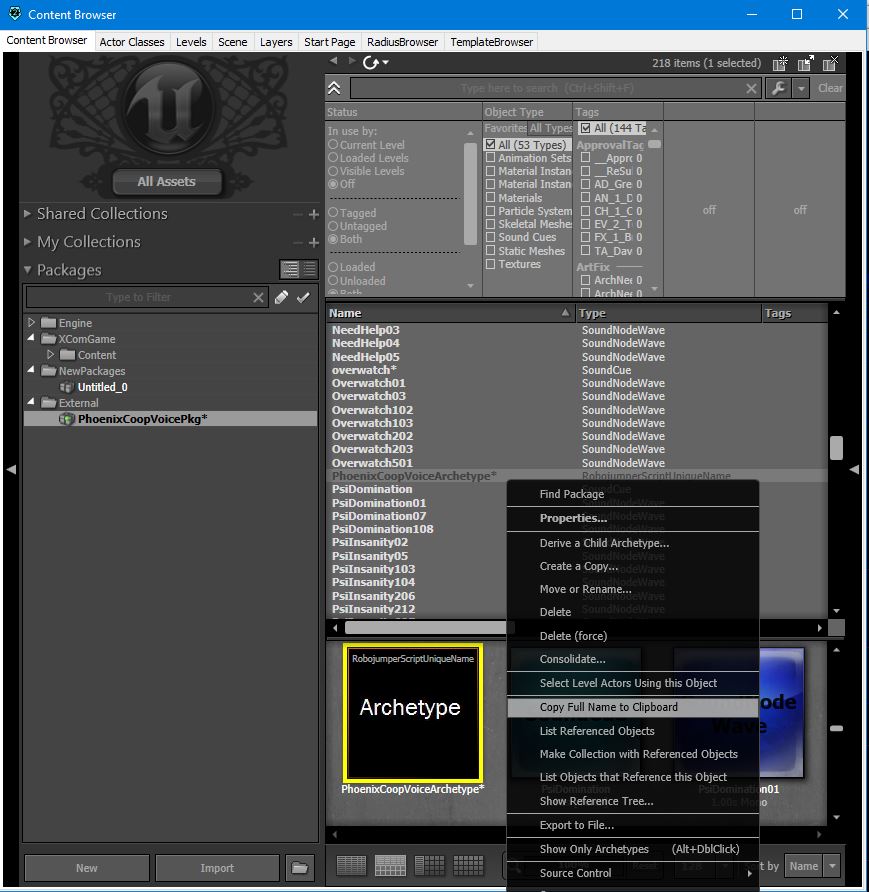 Paste in somewhere you won't lose it, such as a text editor. We will need it later.
If your mod will have more than one voice, repeat this section (both Pt.1 and Pt.2) for each voice.
Voice Event Notes
This section is dedicated to providing information on specific voice events.
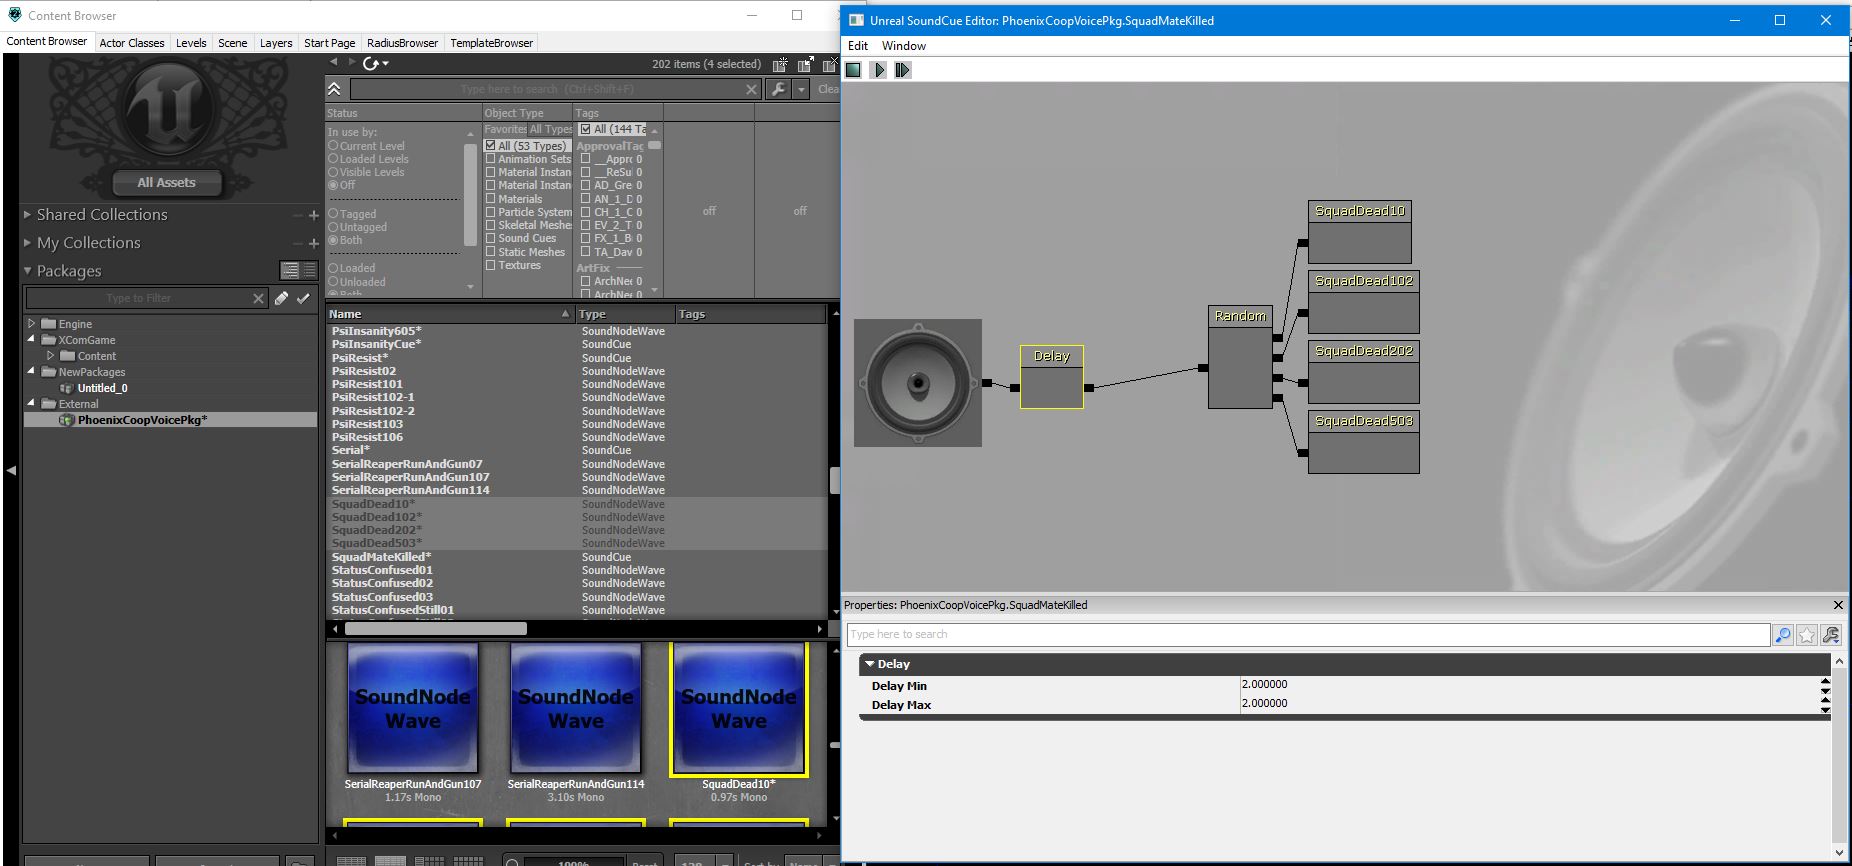
https://www.youtube.com/watch?v=cuDbRZzruTY
So what does this mean? You should probably leave the 'HackTurret', 'AttemptingHack', and 'HaywireProtocol' events unassigned, lest they risk doubling up dialogue at certain points in-game. Do note that it is only a chance to double up, so there is still some incentive to providing dialogue for them if you really wanted to.
In XCOM 2, these events trigger the very instant that the soldier begins hearing the sound. In XCOM: Enemy Unknown, there is a roughly 1.5 second delay before the line plays after the visual cue. You could use a delay module to mimic the EU behavior for the event.
Config Edits & Localization
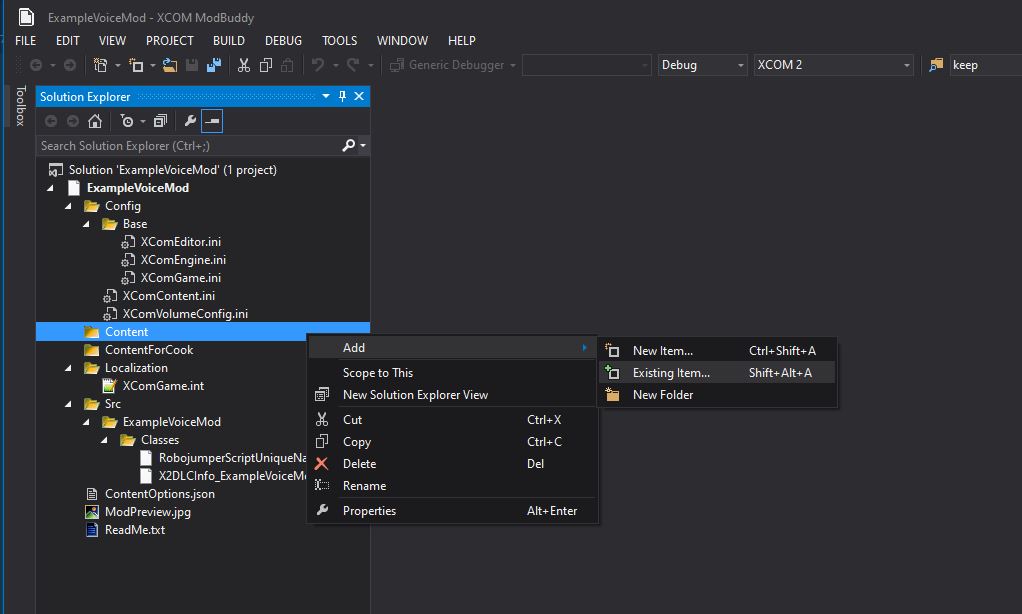
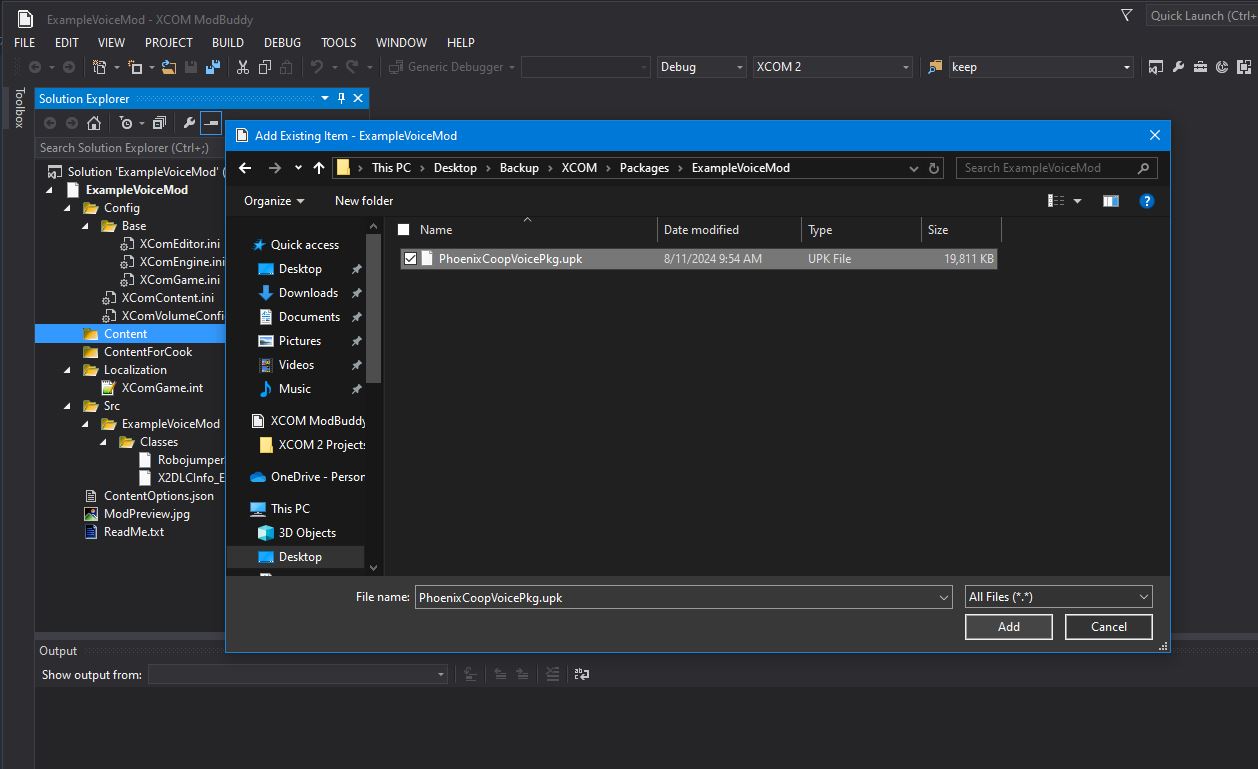
Click 'Add' once you've selected it.
It should now look like this: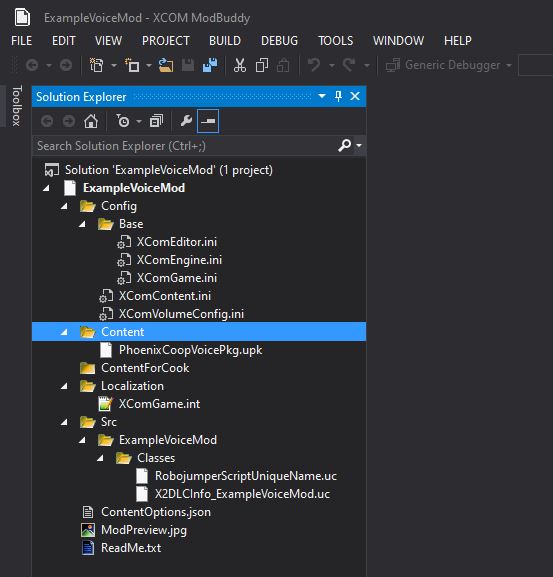
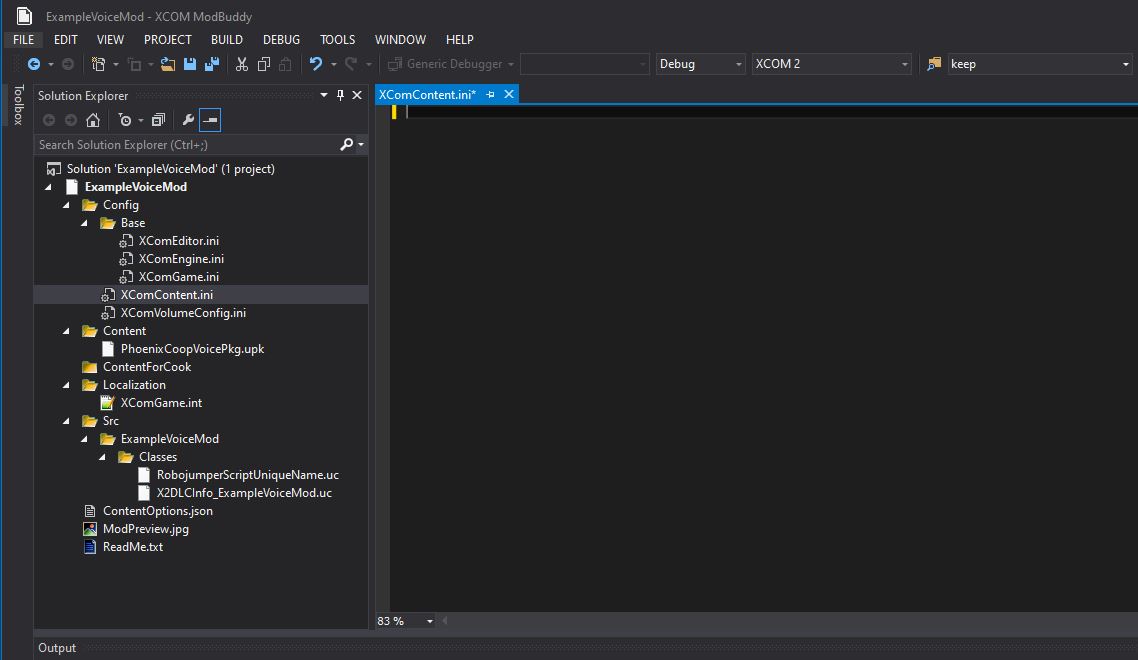 We will now begin editing it to add the voice entries. At the top, there should be the following text:
[XComGame.X2BodyPartTemplateManager]
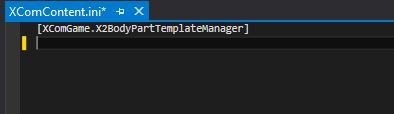 Now on a new line below that, insert the following text:
+BodyPartTemplateConfig=(PartType="Voice", Language="none", Gender=eGender_Male, TemplateName="UniqueTemplateName", ArchetypeName="PackageName.ArchetypeName", bCanUseOnCivilian=false)Once both lines are pasted, the file should look like this:

Language="none"Note:
No soldier will get the voice at random. You can still assign it to them manually in-game.Language="english"
Soldiers with their nationality set to 'United States' will get assigned the voice at random.Language="englishUK"
Soldiers with their nationality set to 'United Kingdom' or 'Scotland' will get assigned the voice at random.Language="englishAUS"
Soldiers with their nationality set to 'Australia' will get assigned the voice at random.Language="french"
Soldiers with their nationality set to 'France' will get assigned the voice at random.Language="spanish"
Soldiers with their nationality set to 'Spain' or 'Mexico' will get assigned the voice at random.Language="german"
Soldiers with their nationality set to 'Germany' will get assigned the voice at random.Language="italian"
Soldiers with their nationality set to 'Italy' will get assigned the voice at random.
If the 'Match soldiers language to nationality' option in your game settings is turned off, then all soldiers will only use voices for whatever your games language is set to.
Gender=eGender_MaleNote:
The voice can be assigned to male soldiers.Gender=eGender_Female
The voice can be assigned to female soldiers.
If you want the voice to be available for both genders, you will have to make a separate entry in the config with a different template name.
TemplateName="Ay_TestVoice"
 In my case, it would be:
ArchetypeName="PhoenixCoopVoicePkg.PhoenixCoopVoiceArchetype"
Repeat this process for however many voices you're doing.
Save changes once you're done.

For the information I've entered, the voice:
- Will not randomly appear on any soldiers.
- Is available for male soldiers.
- Will not randomly appear on civilians.
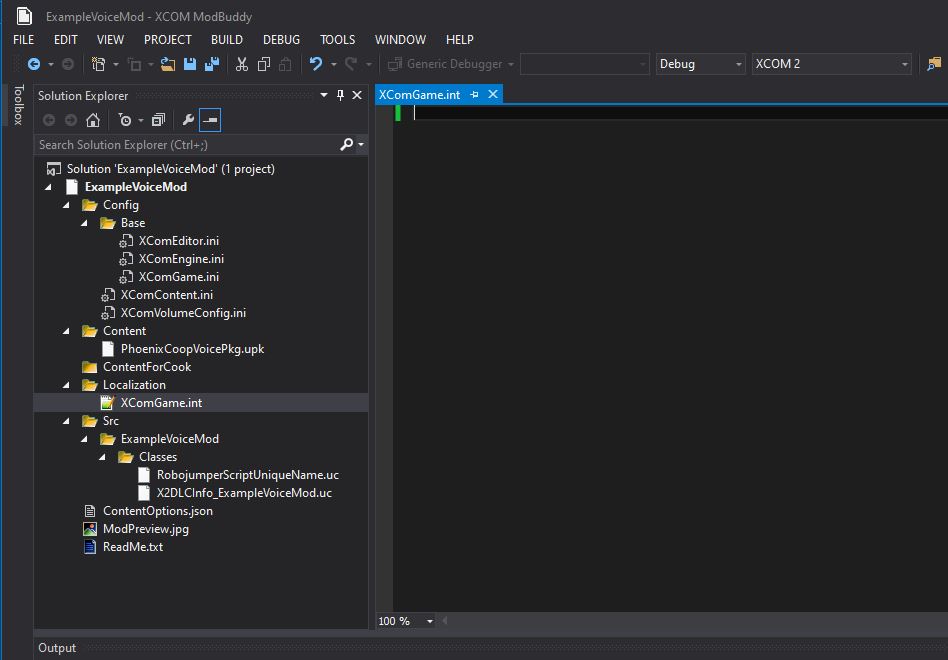
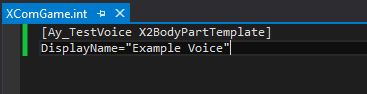
[TemplateNameHere X2BodyPartTemplate]Replace 'TemplateNameHere' with the template name you made earlier. In my case, it's 'Ay_TestVoice'.

DisplayName="In-Game Display Name"Replace 'In-Game Display Name' with whatever you want the voice to appear as in the customization menu in-game. In my case, I'm making it 'Example Voice'
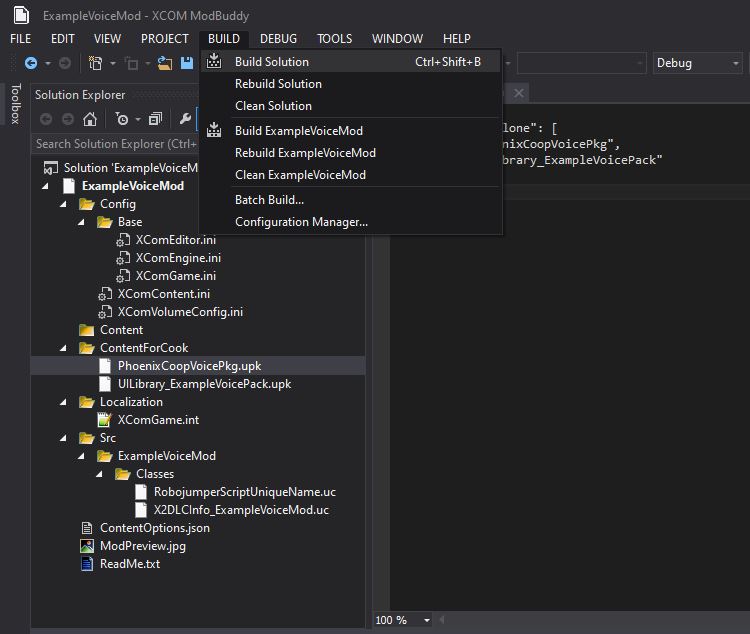
If there are no build errors, the mod should now be in a playable state.
Important Note:
Make sure Unreal Editor is closed when building solution. Building always fails if the Editor has not been closed.

Menu Icon (Optional)
Some mods you'll notice have a little icon that is displayed in the customization menu next to the name of the item. Example below.

This section will detail exactly how to do this. This is entirely optional and otherwise has no bearing on the functionality of the mod. You can skip this section if you're not interested.
There are two methods to inserting UI into the customization menu:
- The localization method.
- The screen listener method.
This guide will show how to use the localization method as it's newer, easier to implement, and uses slightly less system resources in-game.
If, for some reason, you want to use the alternate screen listener method of icon injection for this, follow >this guide<.
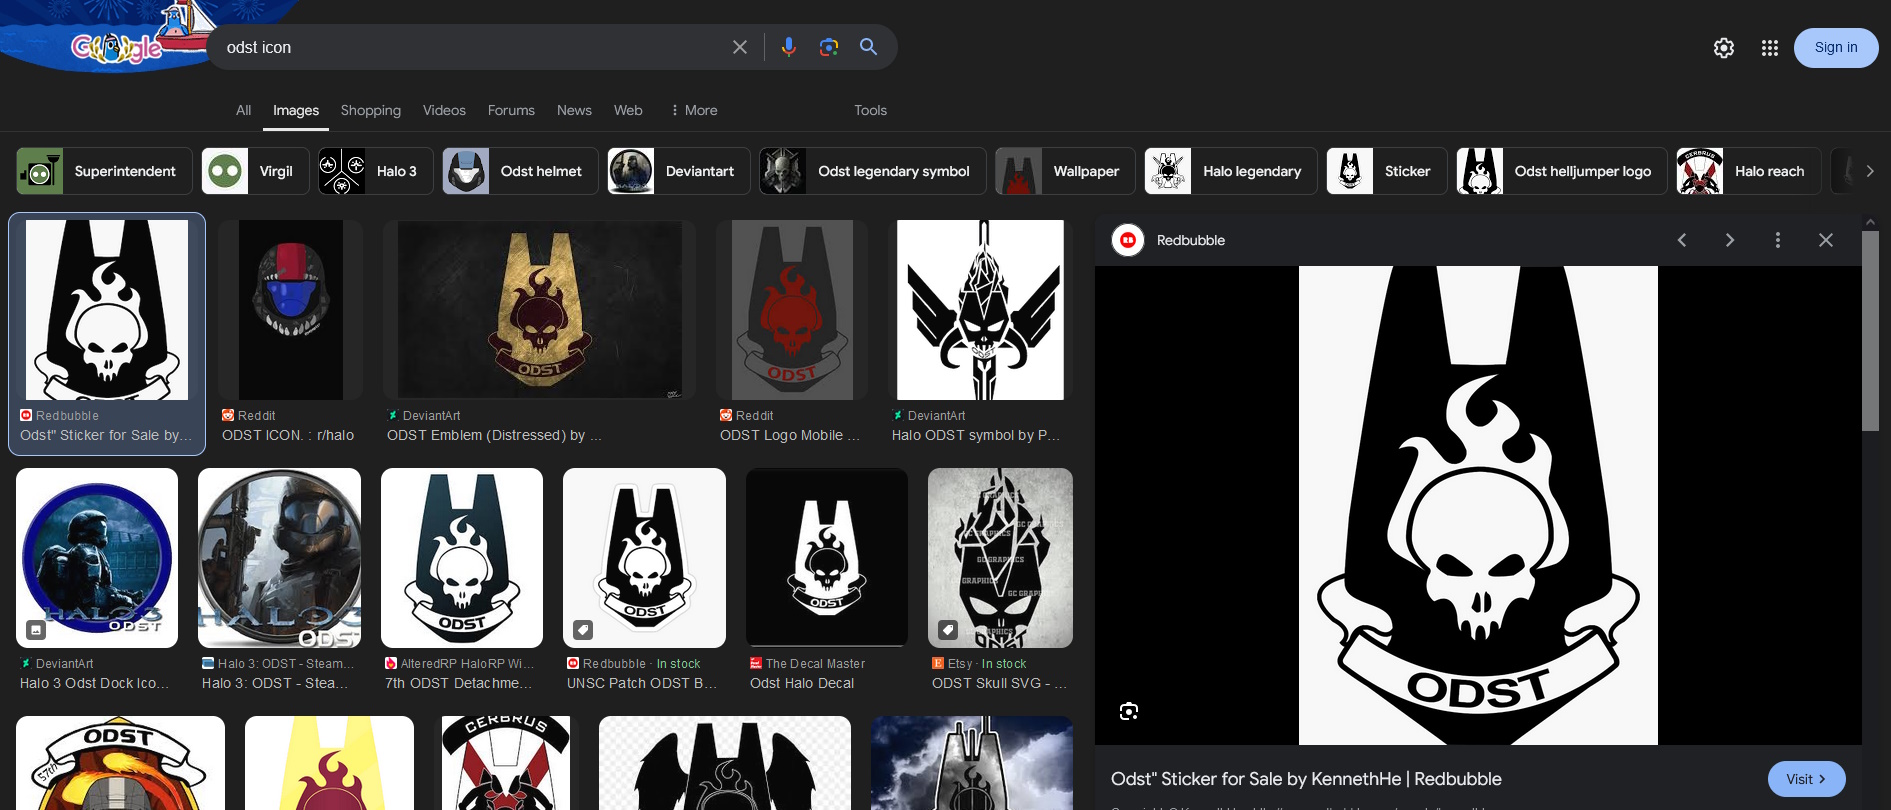
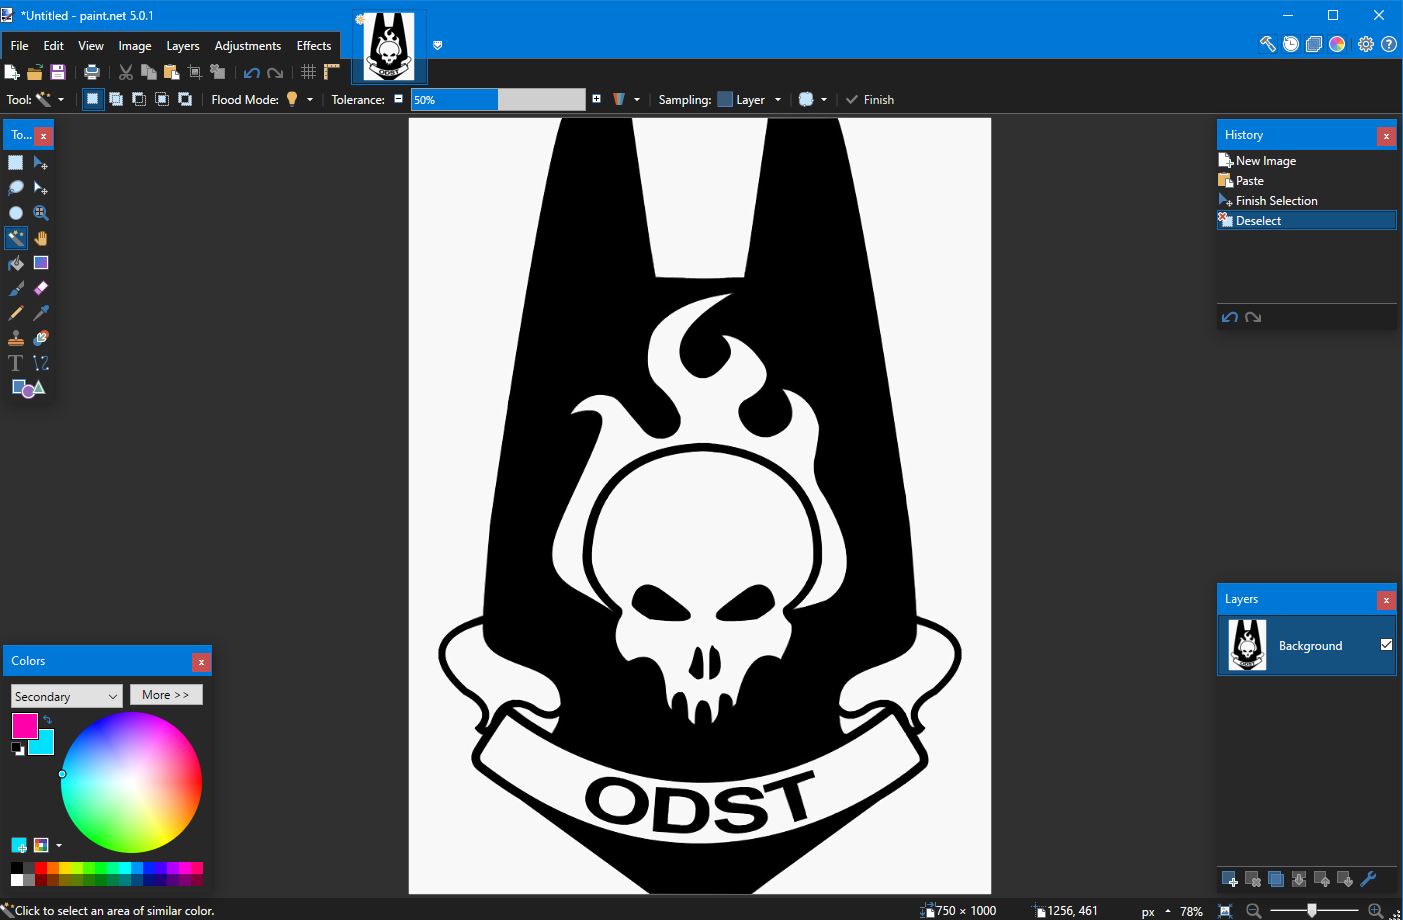
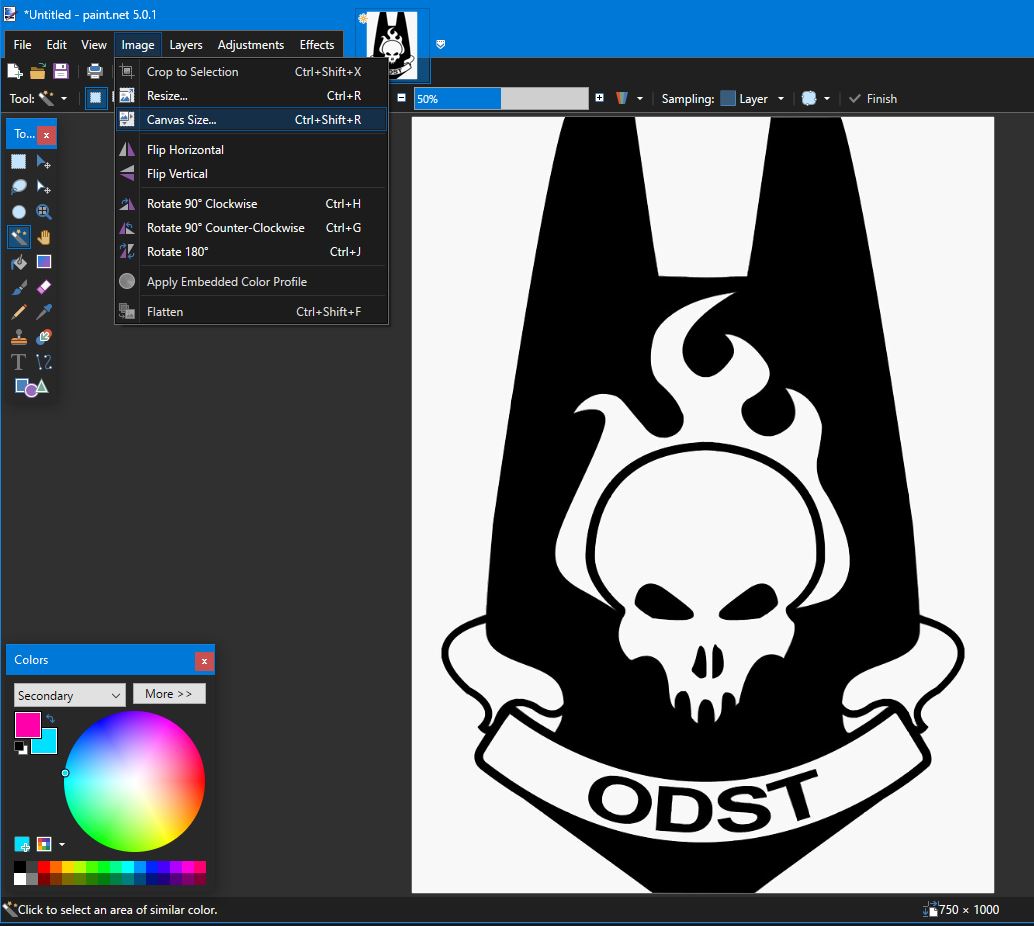
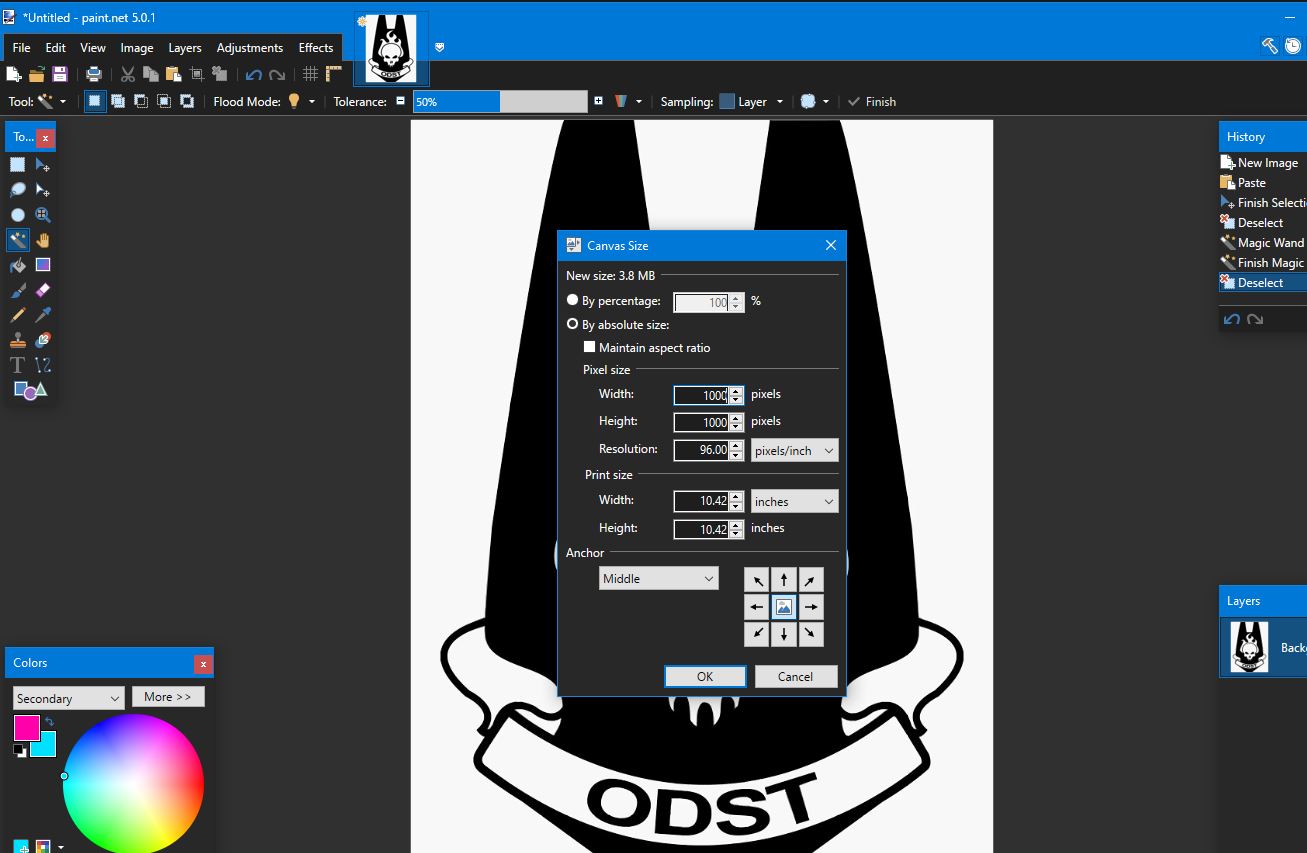
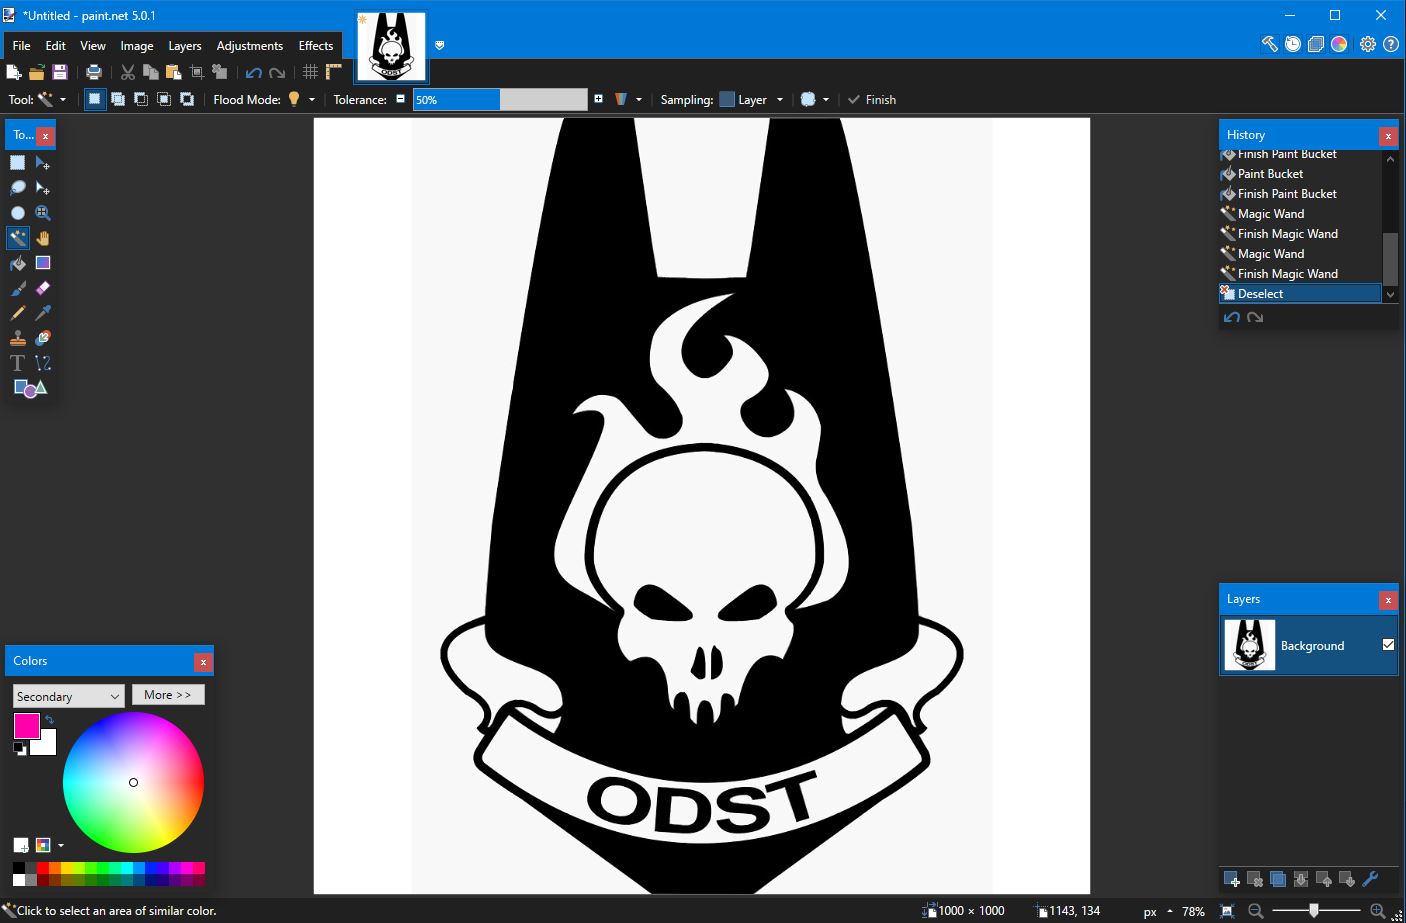
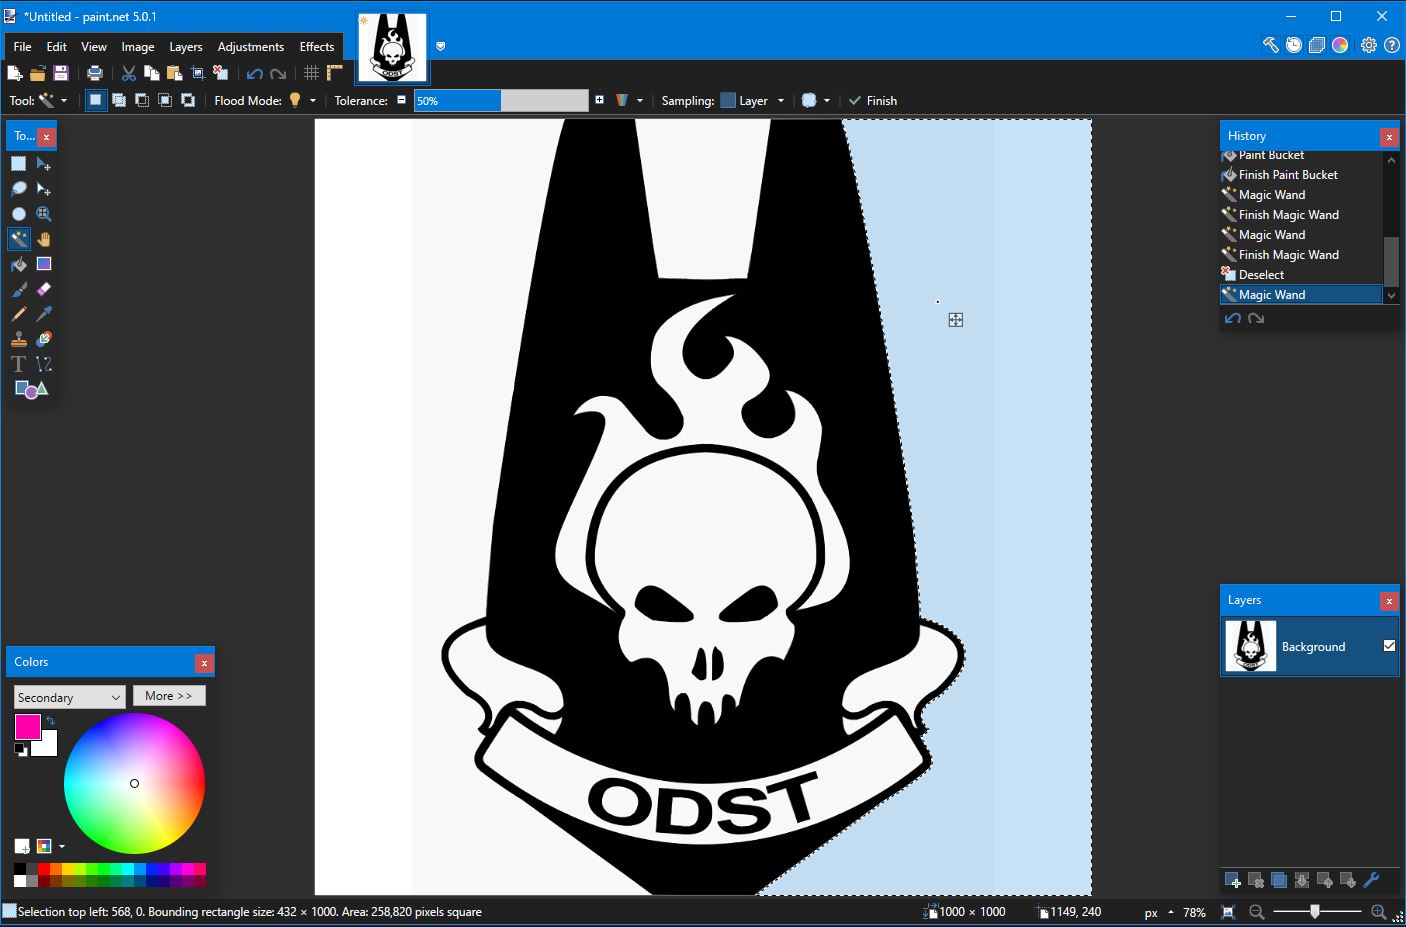
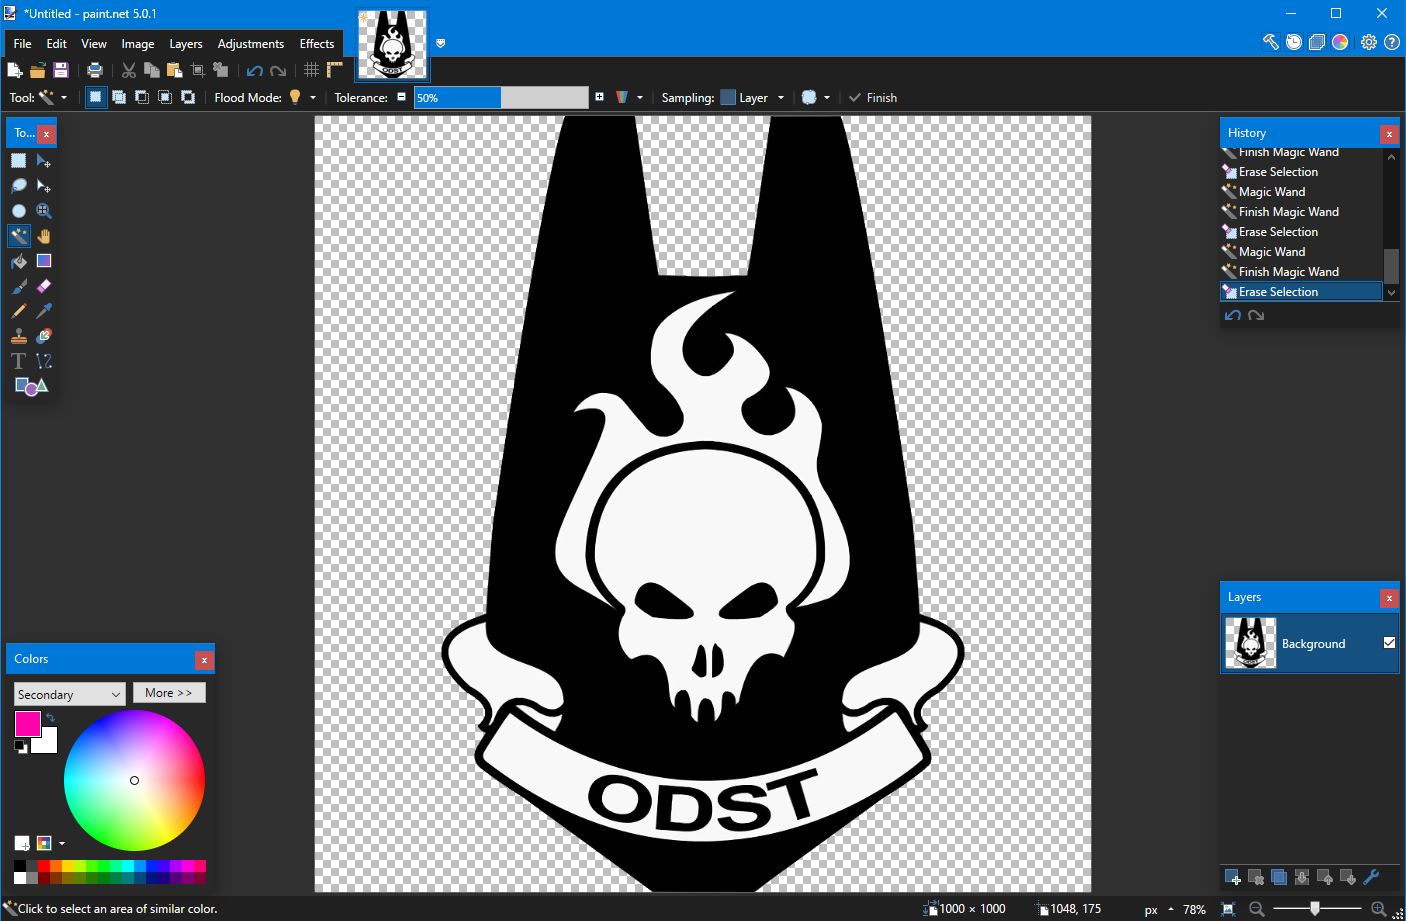
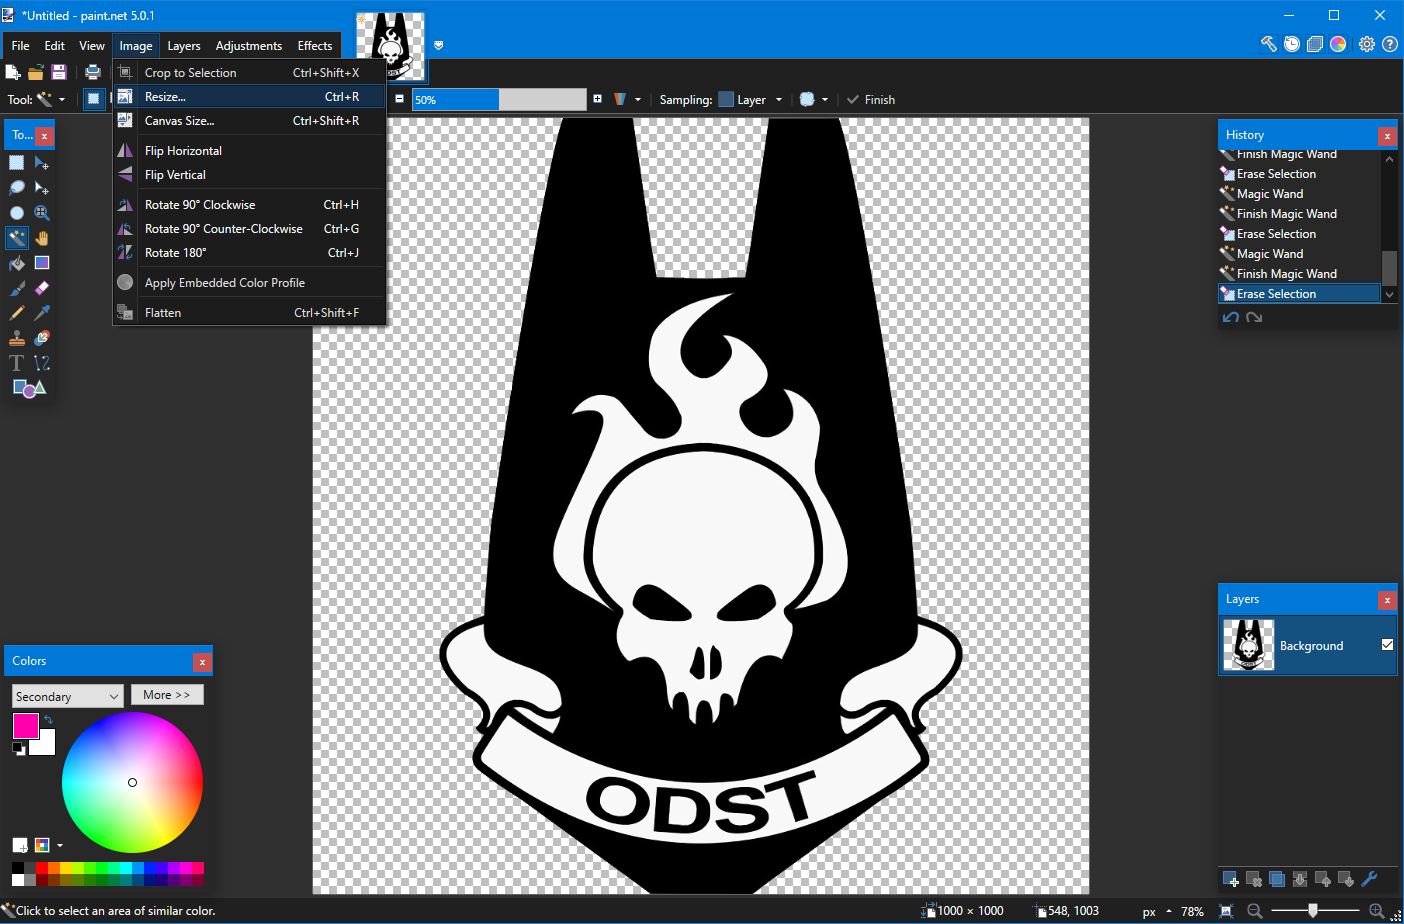
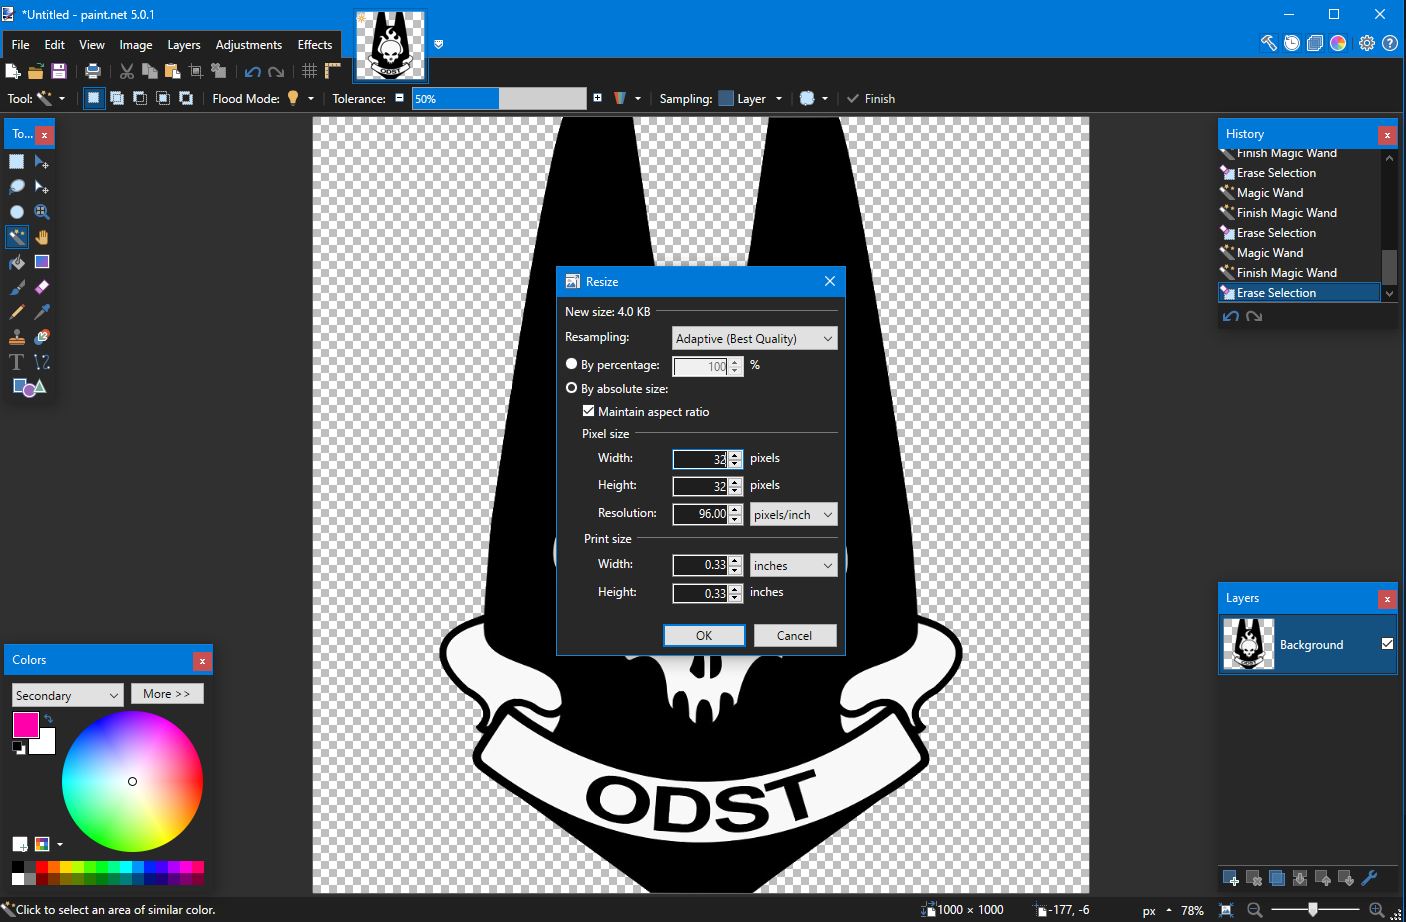
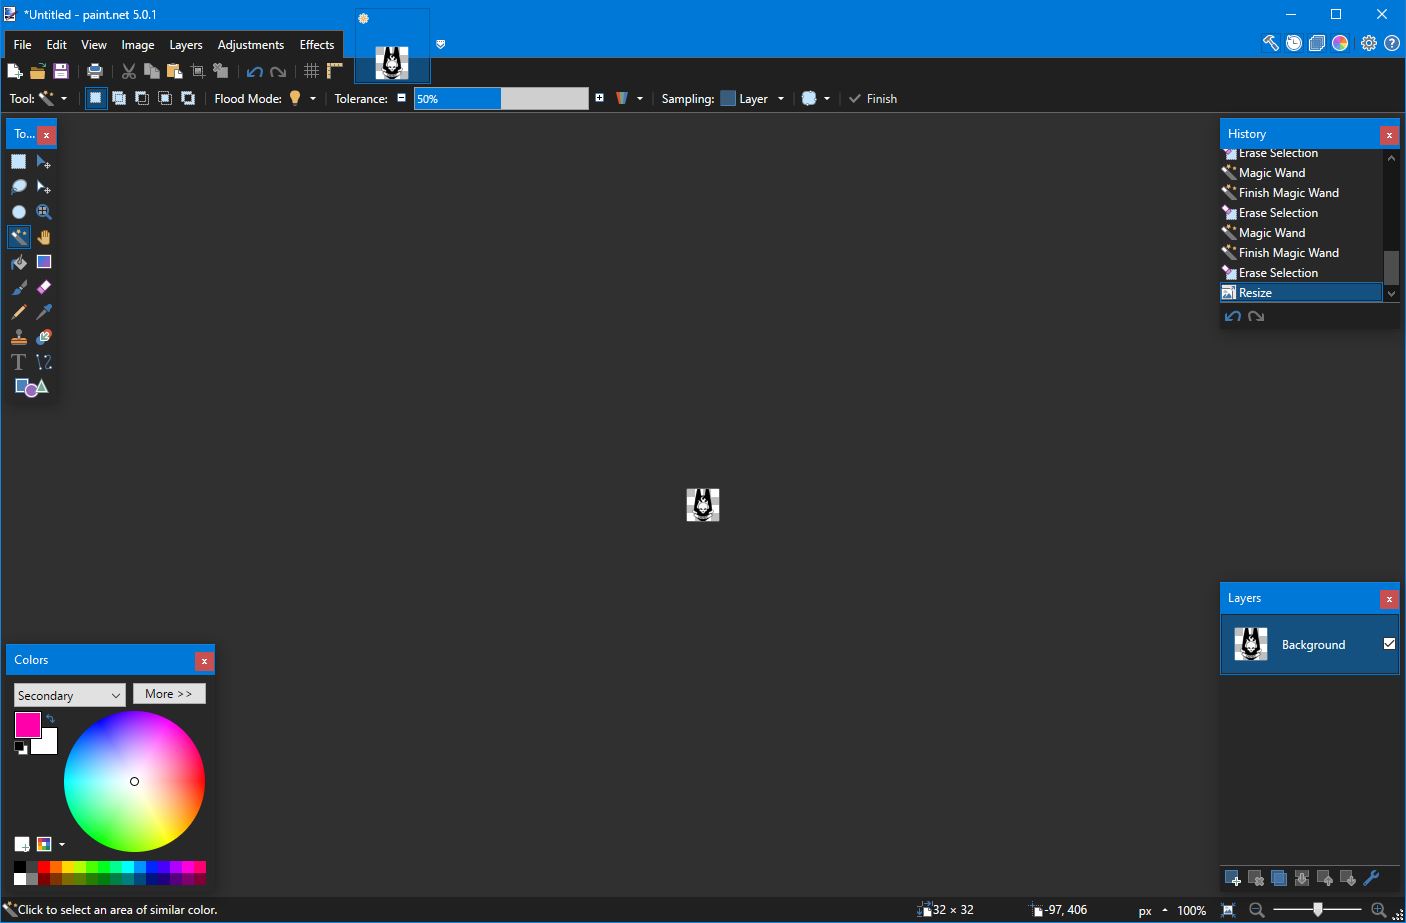
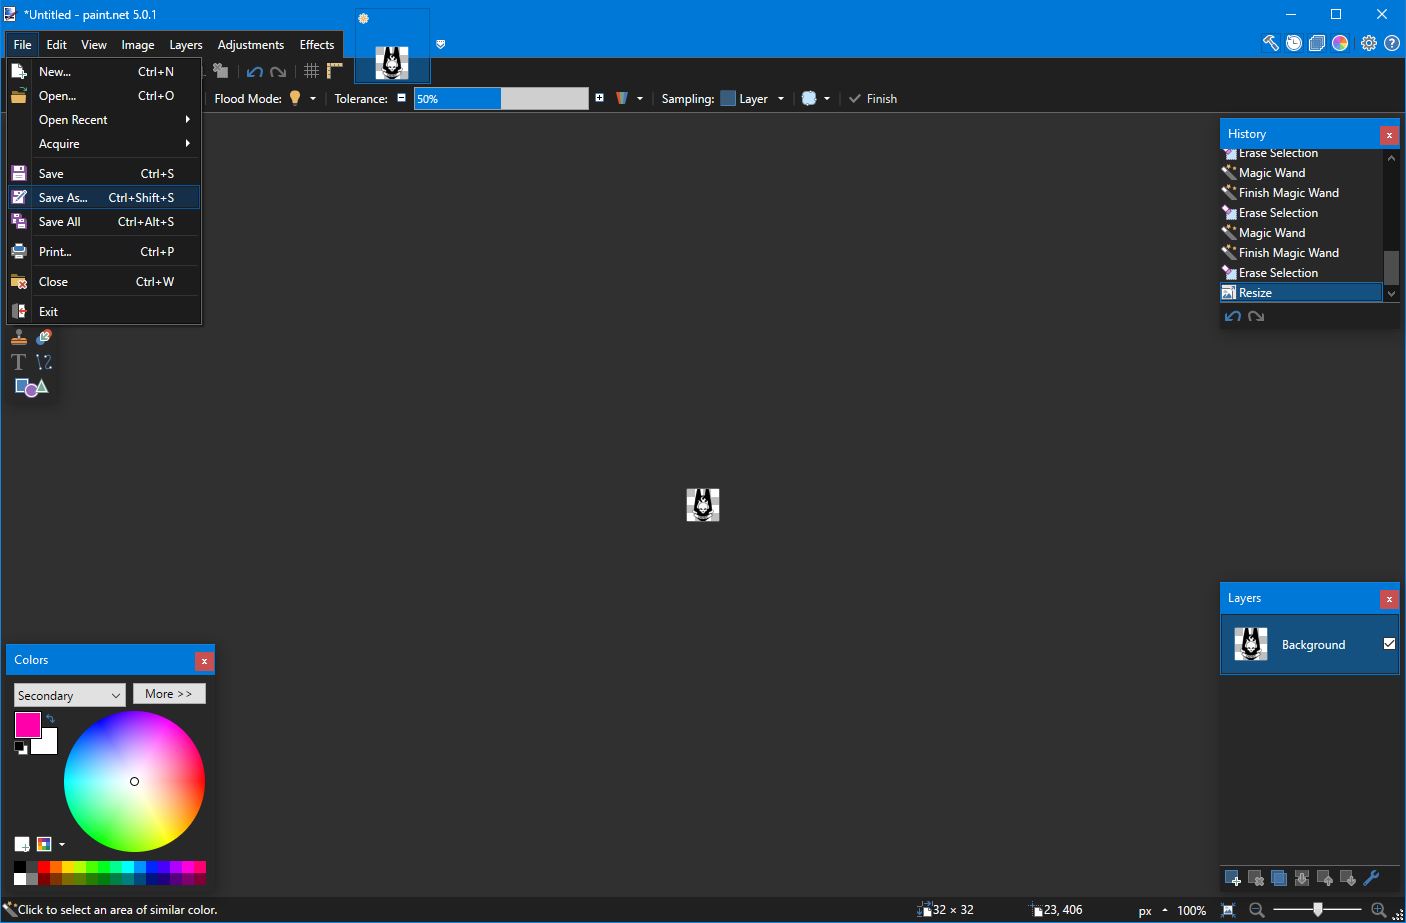
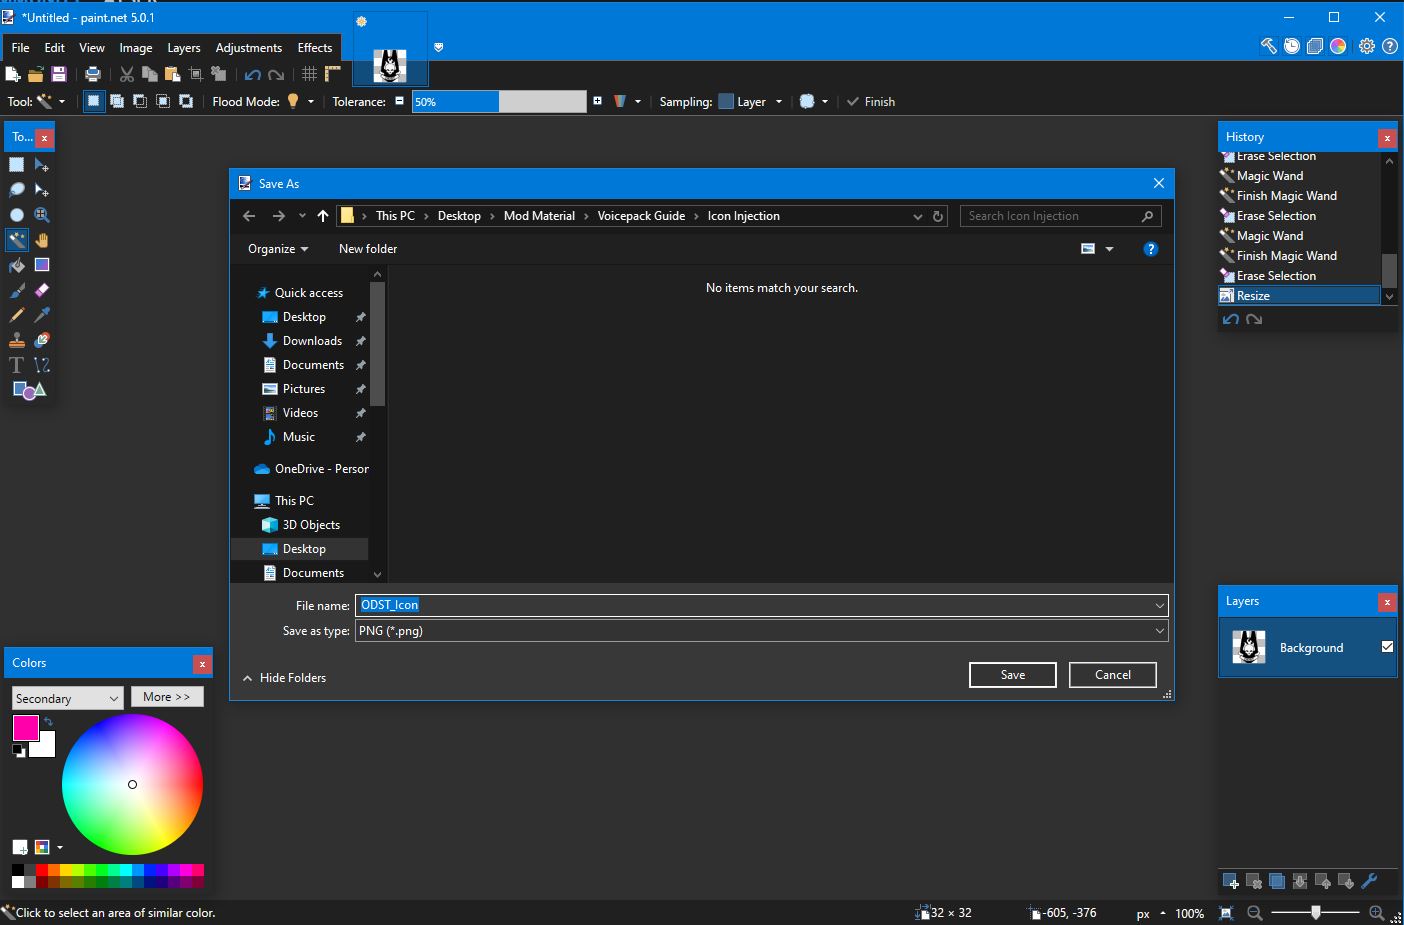
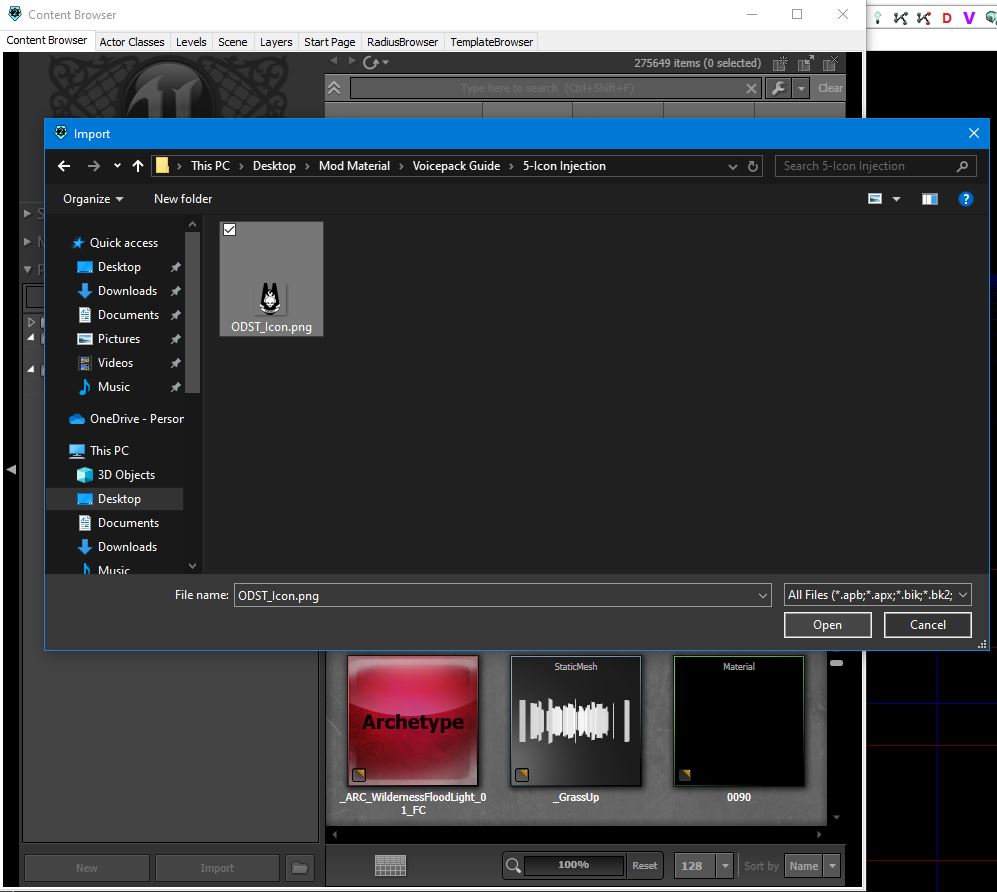
Import the image into a package with the naming format 'UILibrary_[ModName]'.
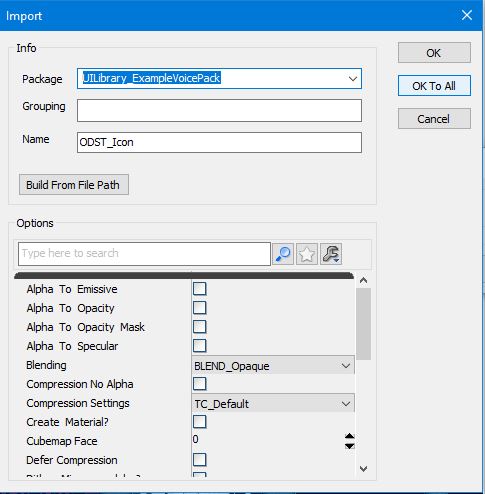
Click 'OK To All'.
Important Note:
Same as with the sound files, do not import the image files anywhere in the package but its root directory. If you import them into a sub-directory, you will not be able to cook the mod later.
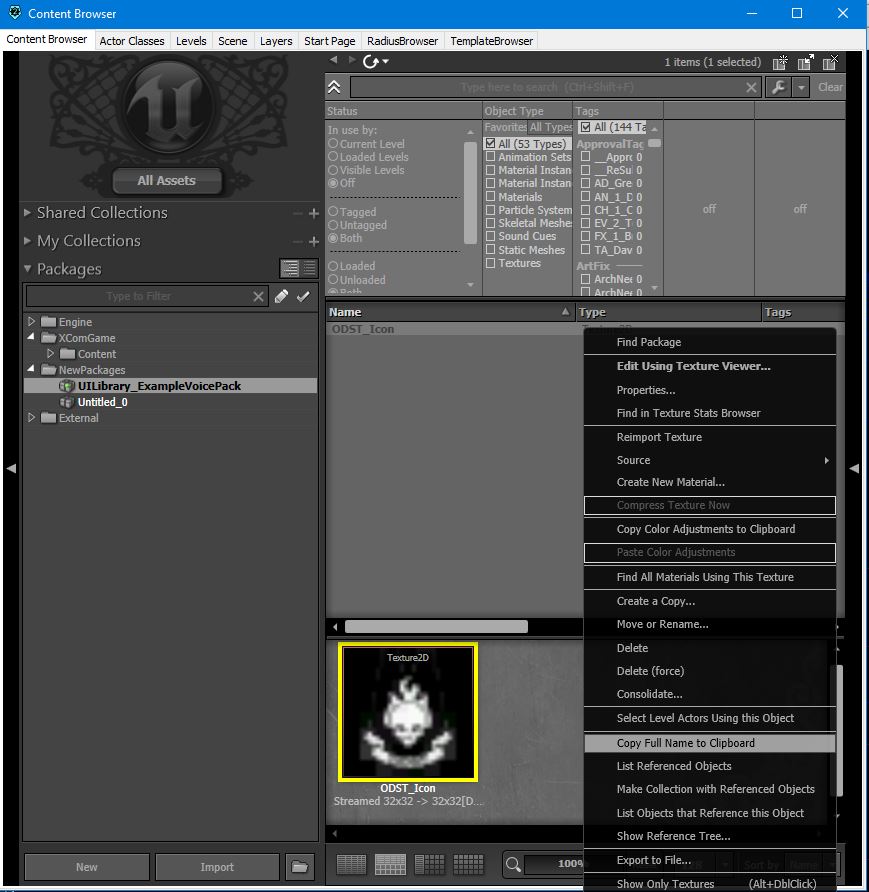

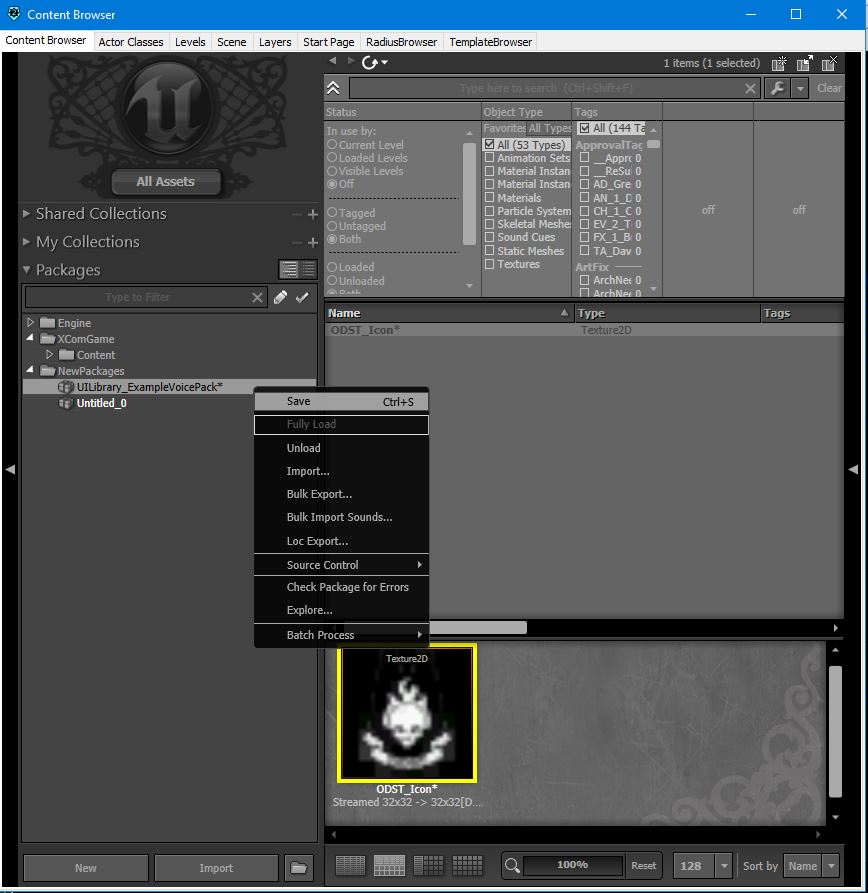
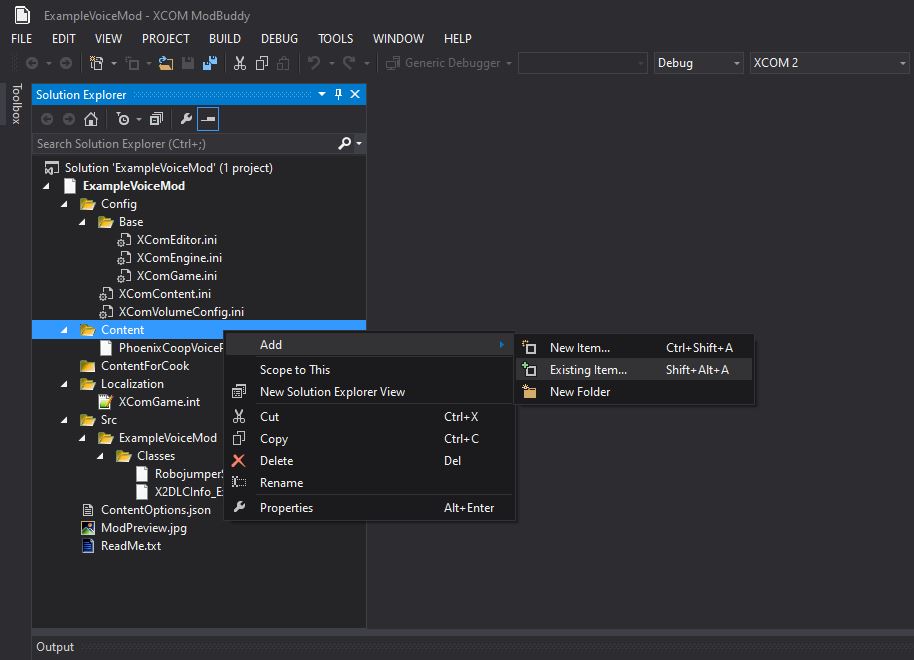
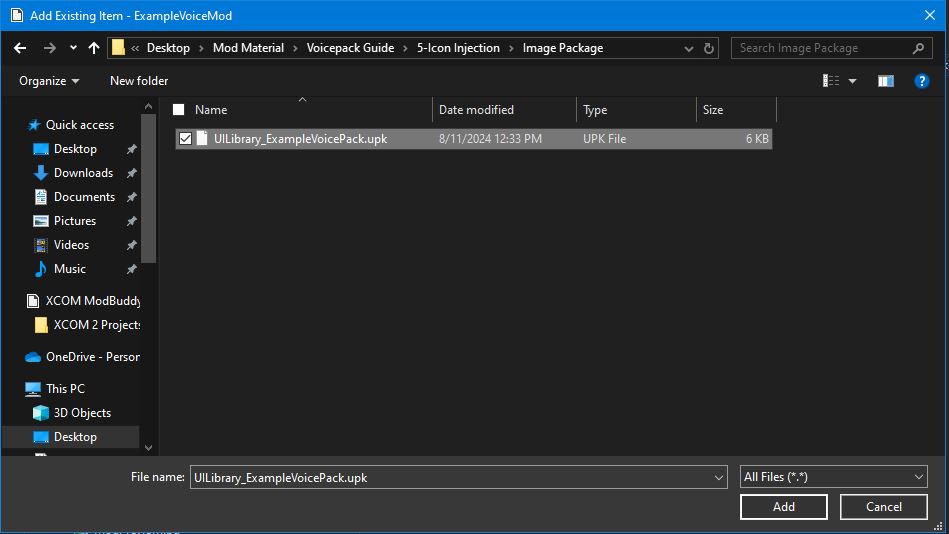
<img src='img:///PackageName.ImageName' width='26' height='26' vspace='-4'>
 Replace 'PackageName.ImageName' with the name you copied earlier. In my case, it's 'UILibrary_ExampleVoicePack.ODST_Icon'.


Save changes.

Cooking (Optional)
This section is technically considered optional because you could feasibly skip right to uploading the mod as it currently is and it would be fully functional. If you're not interested in cooking, just skip right to the 'Uploading' section.
Firstly, before attempting to fiddle with anything necessary to start cooking the mod:
Make. A. Backup.
Your entire project directory should be copied and placed somewhere safe.
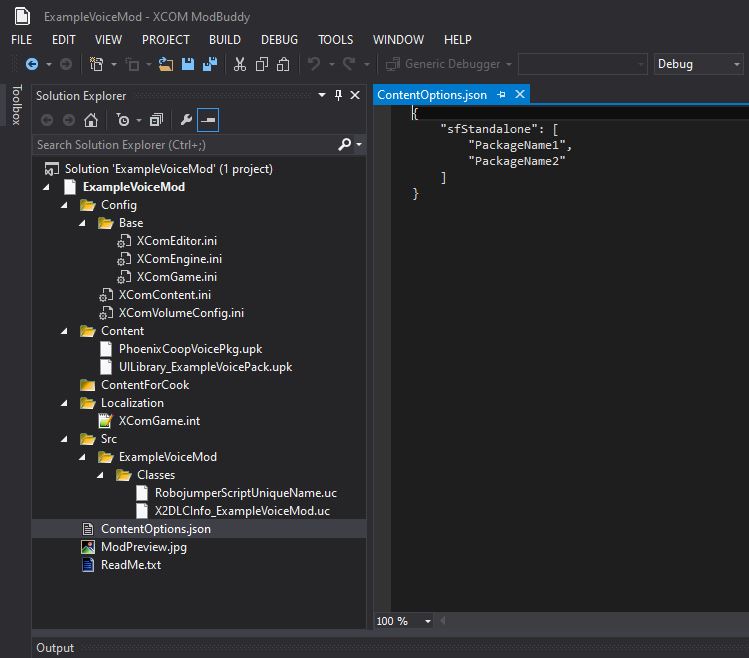
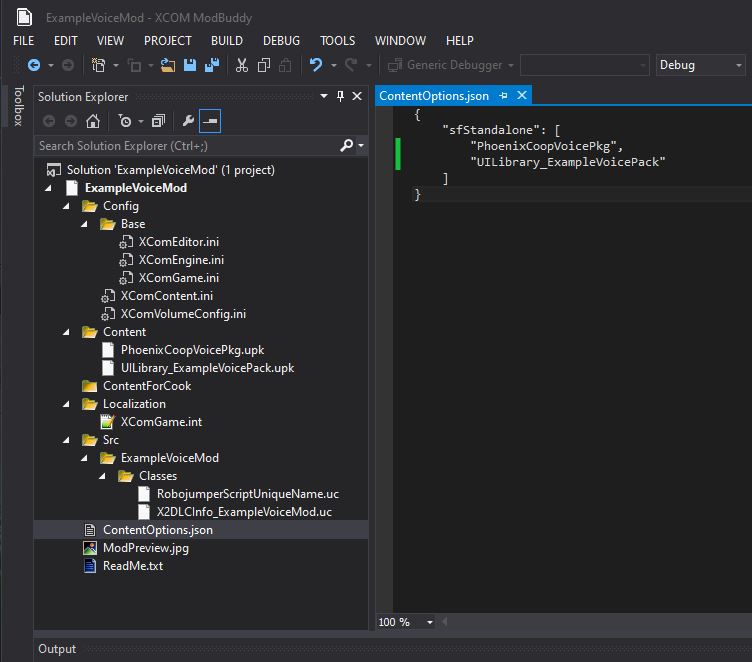
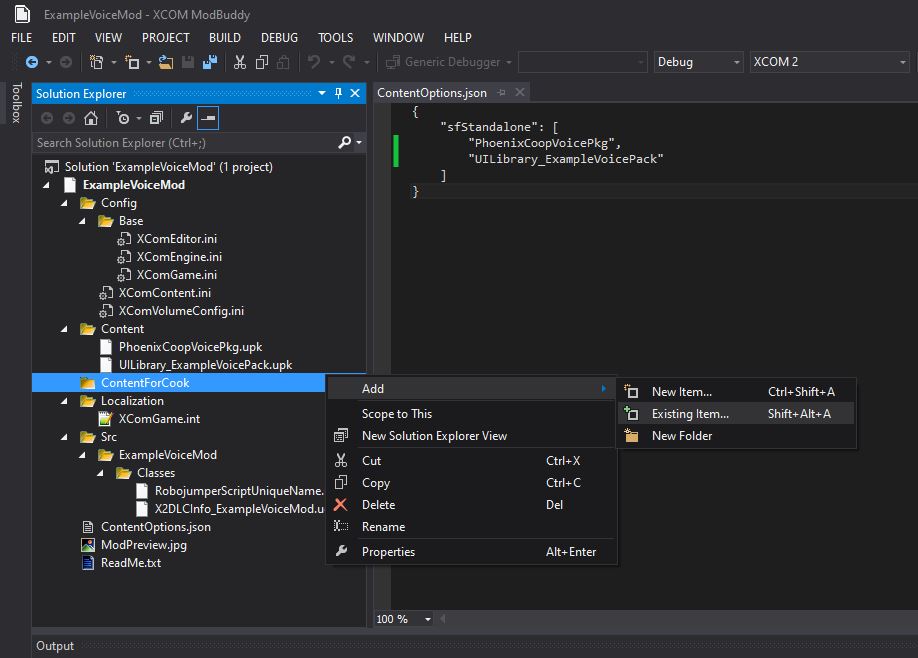
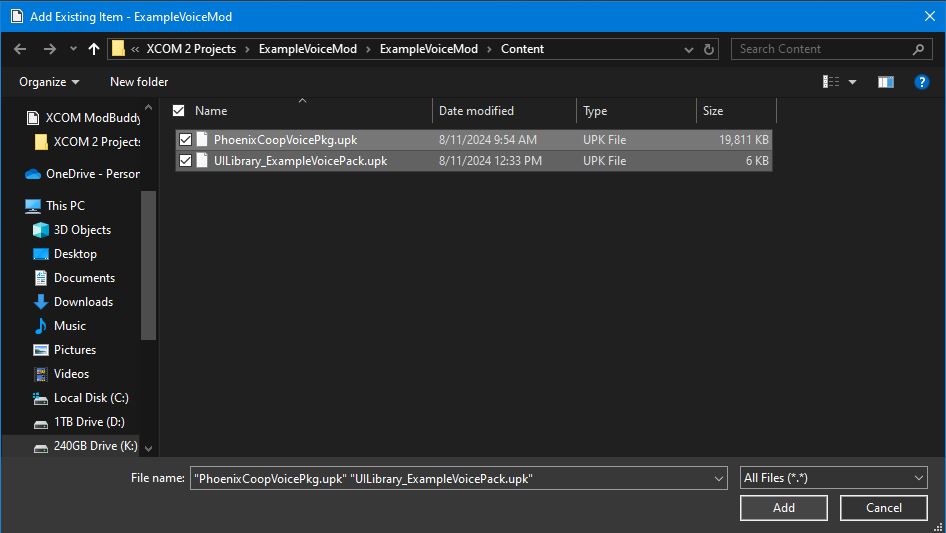
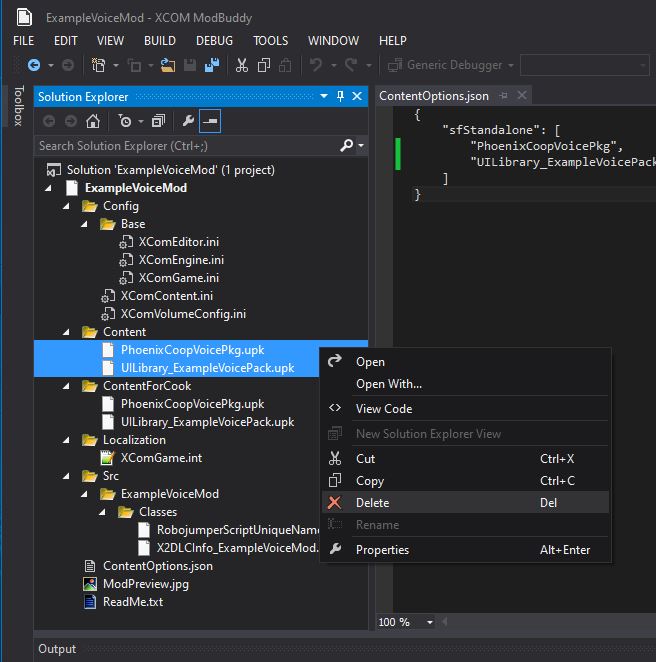
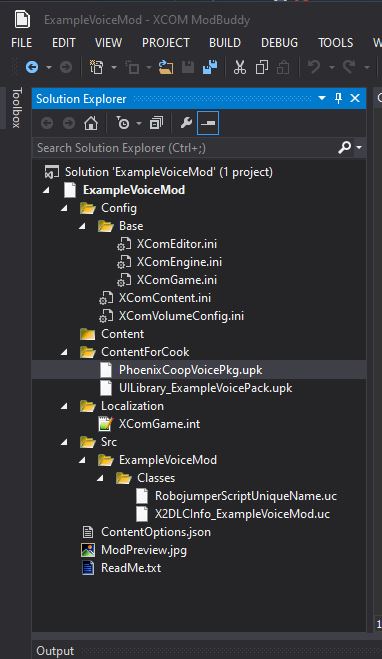
Add the existing packages to the 'ContentForCook' folder in ModBuddy.
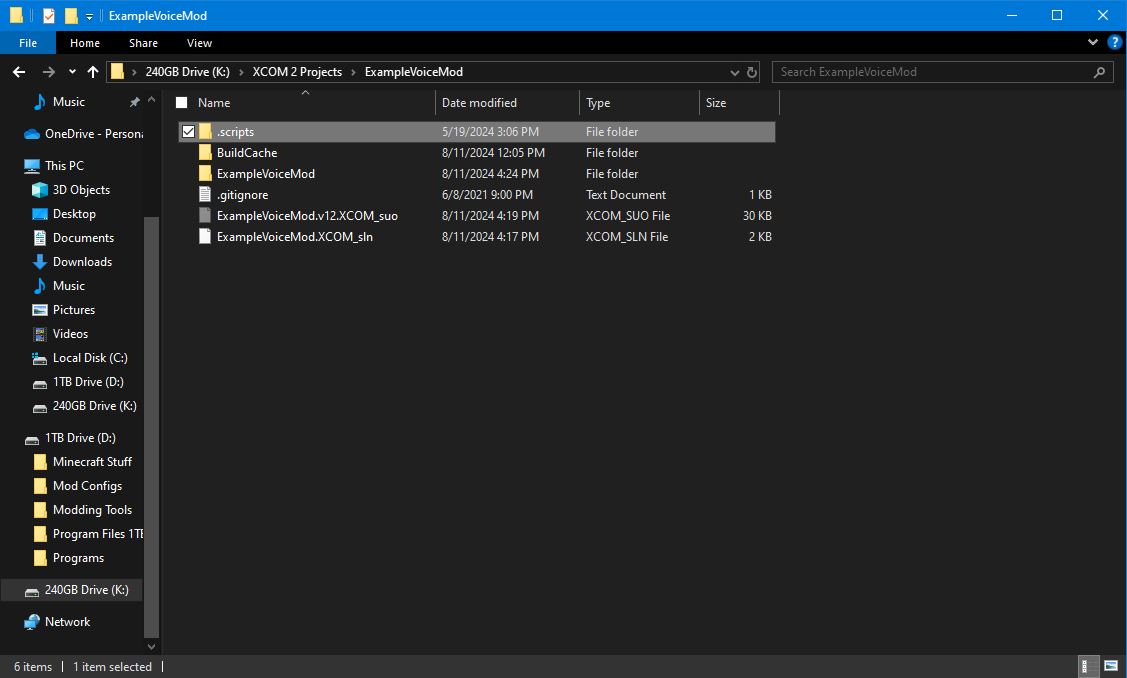 Use a notepad program to edit 'build.ps1'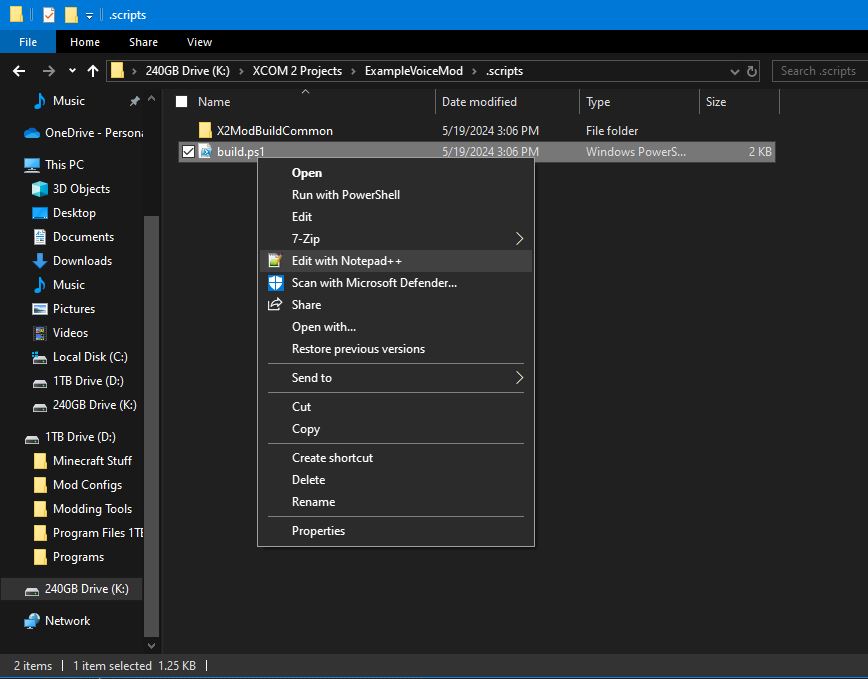
# $builder.SetContentOptionsJsonFilename("ContentOptions.json")
 Remove the # and space directly proceeding it, so the line should now be:
$builder.SetContentOptionsJsonFilename("ContentOptions.json")

Save changes.
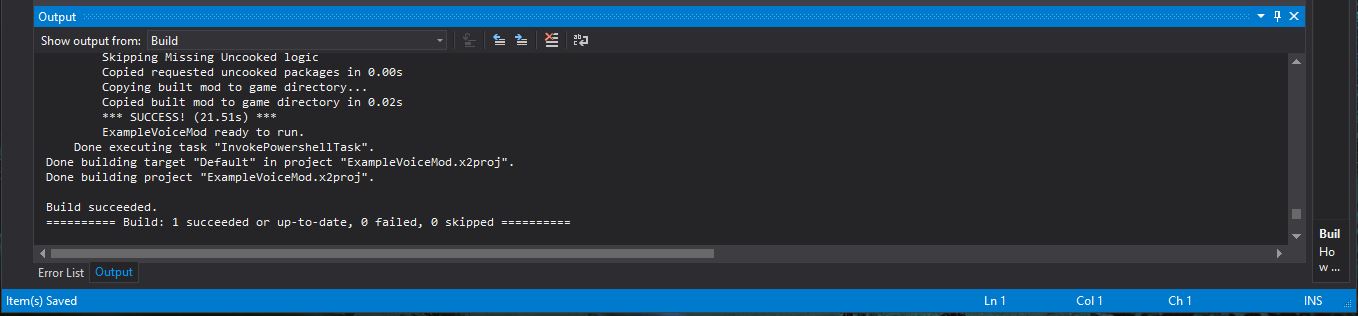
Uploading
Now for the process of actually uploading the mod to the steam workshop.
You may want to have a thumbnail image prepared at this point. The thumbnails used by XCOM 2 mods are 512x512 in resolution and use the jpg image format.
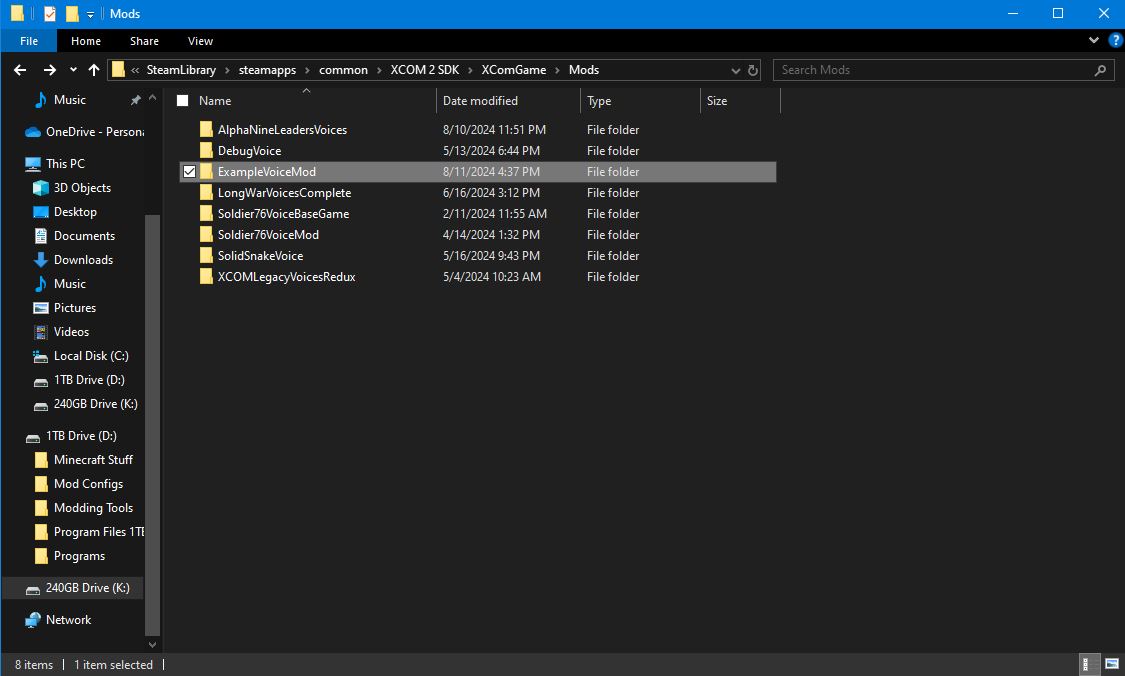
..\steamapps\common\XCOM 2 SDK\XComGame\Mods
The whole mod is placed here after you build solution for the first time.
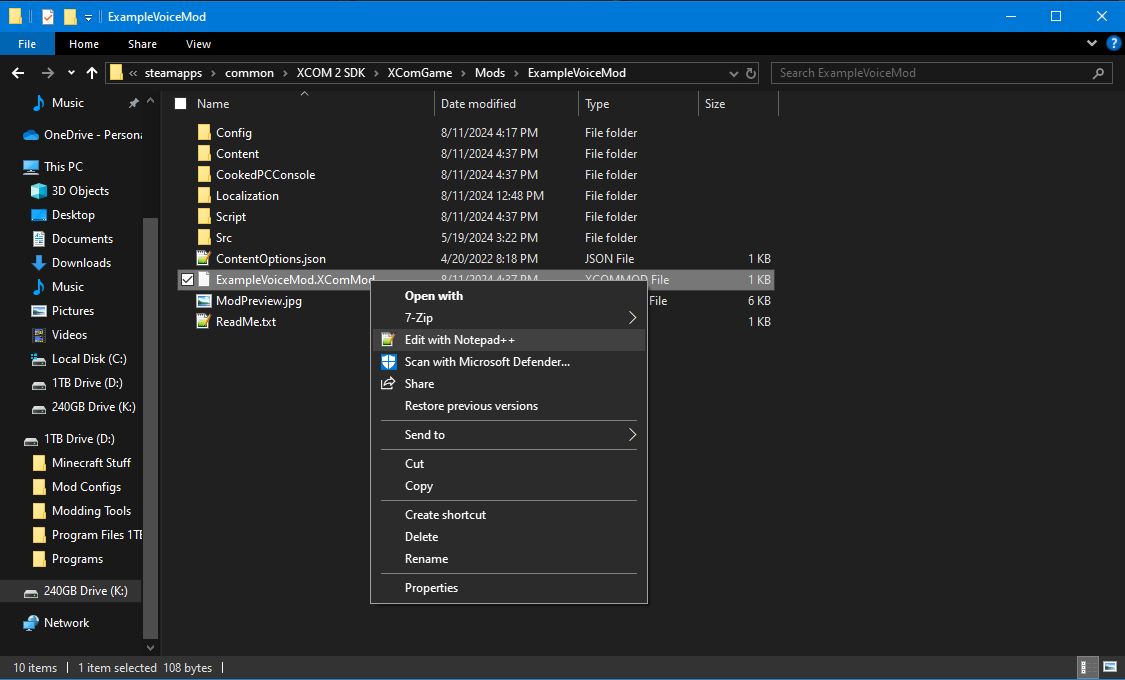
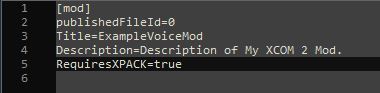
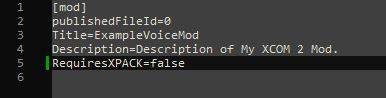
If you plan on updating your mod in the future, every time you build solution in ModBuddy, you will have to set this back to false again.
- XComEditor.ini
- XComEngine.ini
- XComGame.ini
These files are only relevant when building the mod, and aren't needed in the actual compiled directory, as they're just providing unneeded bloat.
WARNING:
This next part of the step is only valid for people that cooked their mod. If you didn't cook, go straight to step 5.
If you cooked the mod, you can also remove:
- RobojumperScriptUniqueName.uc (Won't be the same for you)
Do not remove this file if you did not cook the mod.
This file is built into the packages of your mod after it's been cooked, and isn't needed in the actual compiled directory, as it's just providing unneeded bloat.
Click the 'Upload' button in the top right.
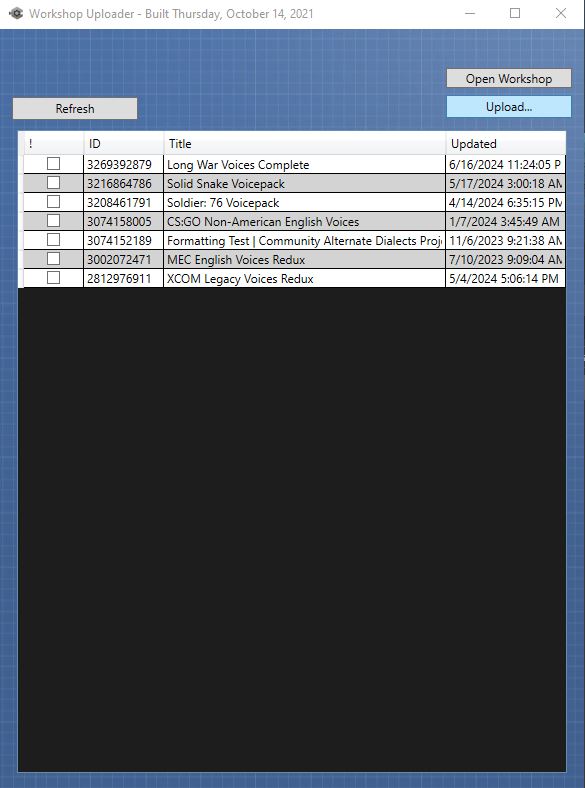
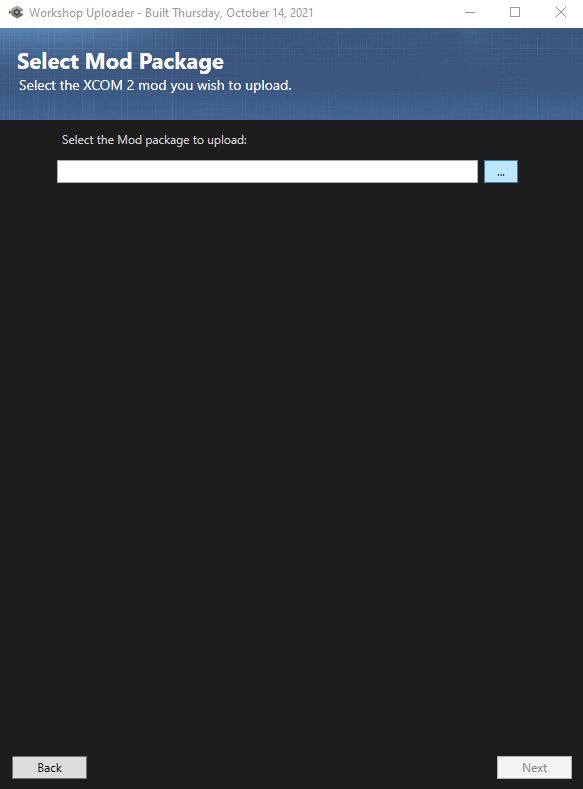
..\steamapps\common\XCOM 2 SDK\XComGame\ModsThen select the 'XComMod' item again.
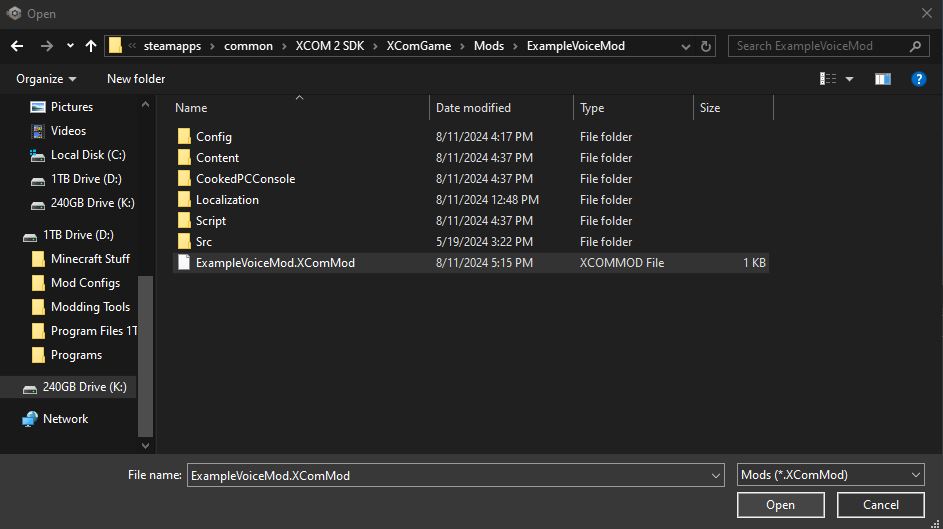
Click 'Open' once you've selected it.
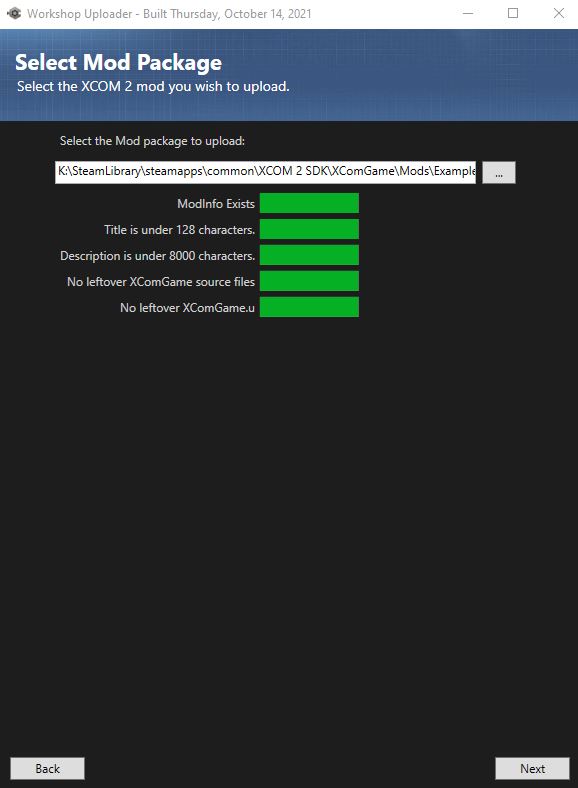
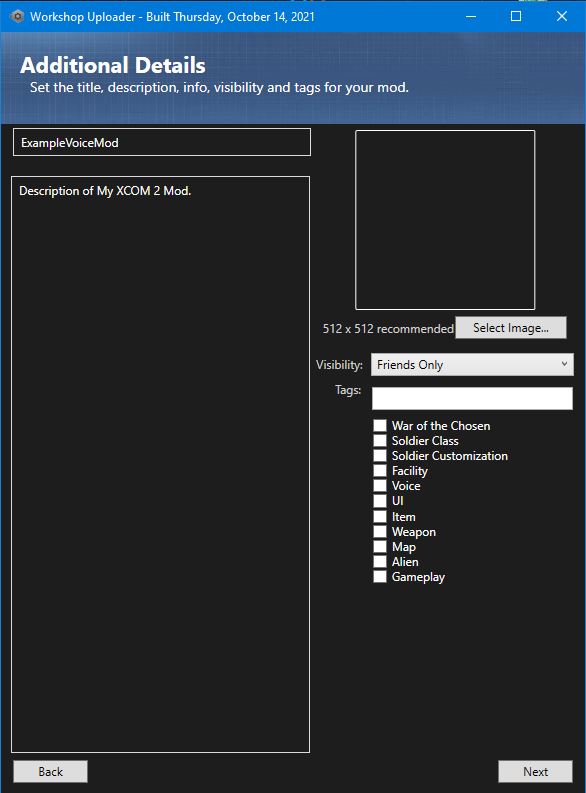
The title at the top does not change the internal name of your mod, it's just what your mod shows as in the Steam Workshop. This means you can have as many spaces and special characters as you want.
The description has a character limit and will give you a very unhelpful error if you surpass it. Be aware.
If you have a thumbnail prepared, you can upload it here. I do not.
Visibility is self-explanatory. Look at the options and you'll know.
Tags are separated by a comma and space.
The checkboxes directly under the tags are the set categories in the workshop search. For voice mods, they should probably be set to 'Voice' and 'Soldier Customization'.
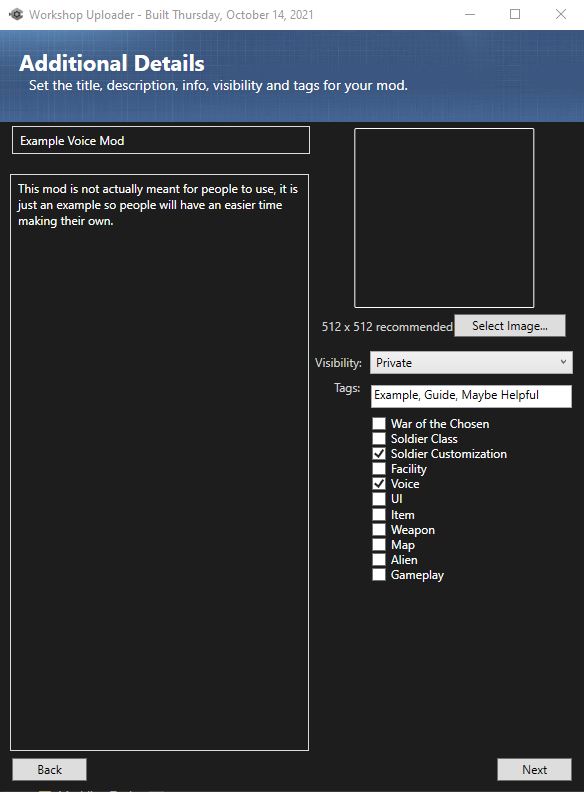
Click 'Next' at the bottom when you're ready to proceed.
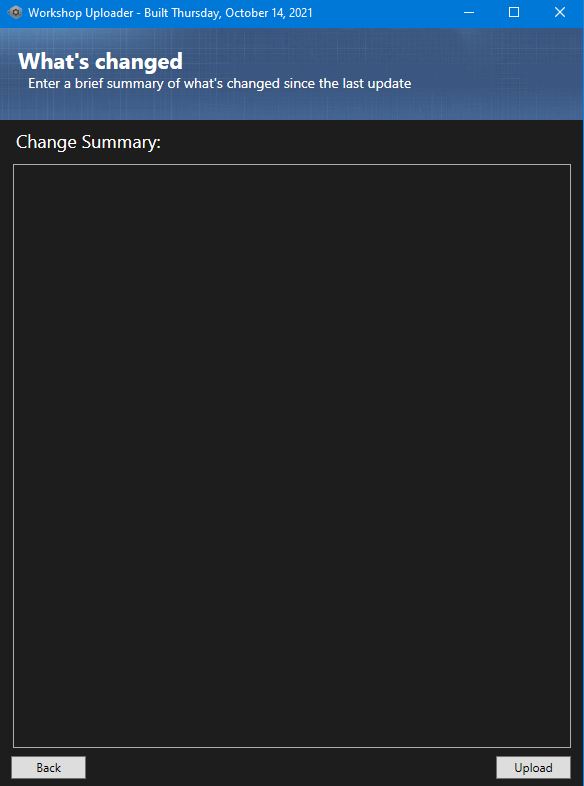
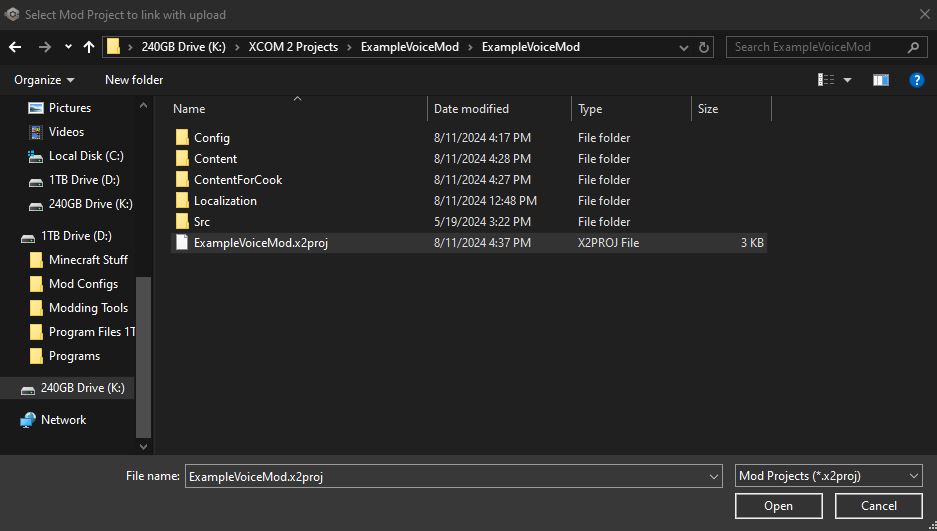
Click 'Open' after selecting it.
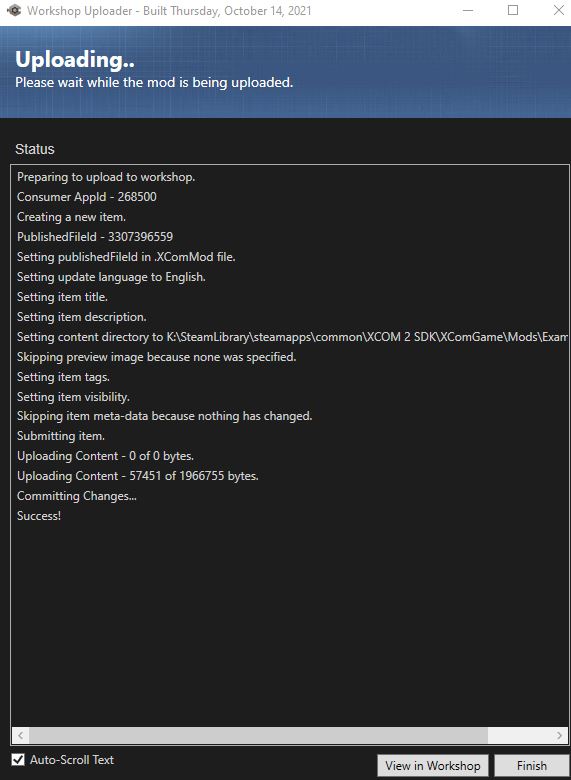
Congradulations. Your mod is now fully finished and uploaded. You can go to its Steam Workshop page to edit the description, title, preview images and videos to your hearts content.
Note:
If you ever want to change the thumbnail, you must update the mod through the Alternative Mod Uploader. You cannot change it through the Steam Workshop.
Retroactive Implementation
This section is only for people that wish to update one of their old mods to use the newer features mentioned earlier.
Good news is that this is extremely easy to implement. You don't even need to open the Unreal Editor.
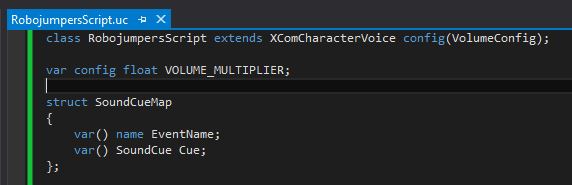
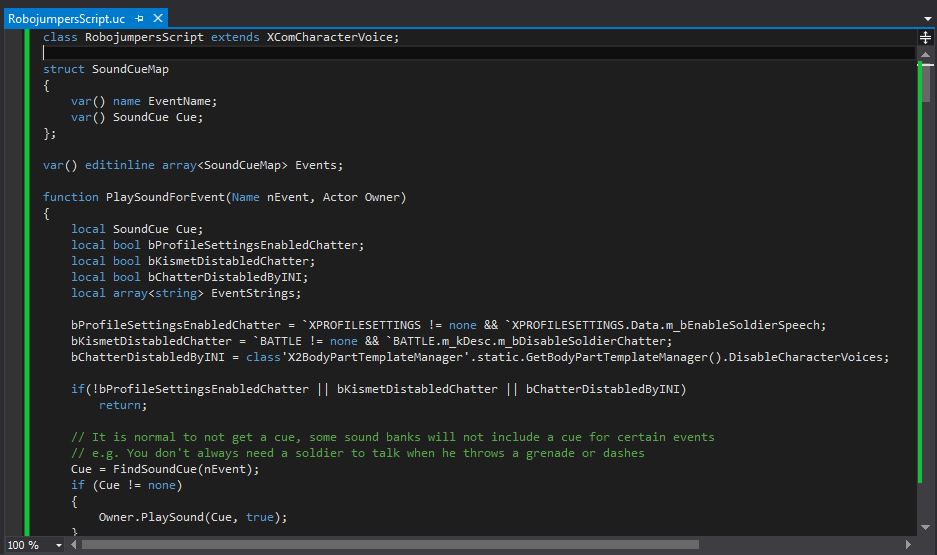 On the very first line, add the following text after 'XComCharacterVoice'
config(VolumeConfig)The semicolon will directly proceed this text. This establishes the name of the config file that will be used to provide values to any unspecified variables in the script. It should look like below.
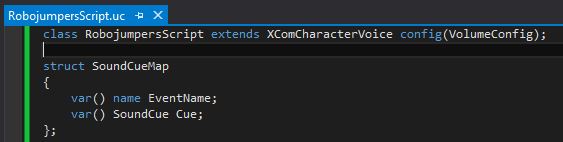
var config float VOLUME_MULTIPLIER;This establishes the variable we will use to change the volume of the cues in the voice package. It should not look like this:
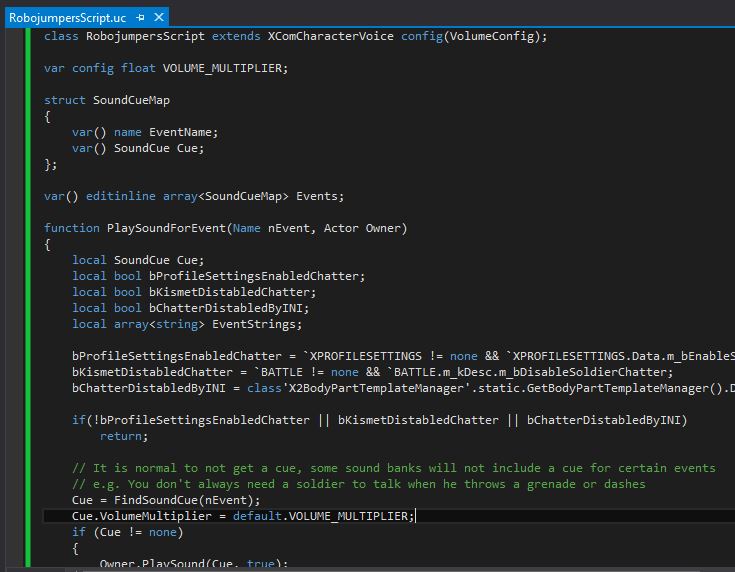
Cue.VolumeMultiplier = default.VOLUME_MULTIPLIER;This will make the archetype use this variable for the volume of the cues that are assigned to it, regardless of the actual value they were set to in the Unreal Editor. The script should now look like this:
Save changes
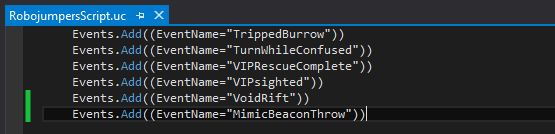


Repeat steps 5-7 for each voice event you are trying to add.
- What I Wish I Knew When I First Played Xcom 2★ 5 (1.6k)85k views3k ♥27 minUpdated 1 Nov, 2021
- XCOM 2 with great visuals and high FPS★ 5 (902)60k views1.8k ♥7 minUpdated 11 May, 2022
- Xcom 2 CHEATS & TWEAKS★ 5 (1.1k)54k views2.7k ♥3 minUpdated 15 Feb, 2016
- XCOM 2:All console commands and IDs [WOTC]★ 5 (713)49k views2.1k ♥18 minUpdated 20 Jan, 2023
- [WOTC] Workshop Mods Not Working [FIX]★ 5 (651)35k views1.1k ♥1 minUpdated 8 Apr, 2021
- Vel's Guide To XCom 2 (Formerly "Stuff that works for me")★ 5 (592)34k views1.5k ♥135 minUpdated 24 Mar, 2018





- Upgrading to PremiumTeam Fortress 2★ 5 (20k)1441k views11k ♥6 minUpdated May 11, 2022
- No More Room in Hell Official ManualNo More Room in Hell★ 5 (2.8k)569k views2.1k ♥29 minUpdated Apr 22, 2019
- NMRiH Community Hosting GuidesNo More Room in Hell★ 5 (526)351k views653 ♥1 minUpdated Aug 10, 2022
- How to 'Git Gud' Soon™MORDHAU★ 5 (2k)318k views3k ♥68 minUpdated Nov 16, 2024
- Лучшие кооперативные игры SteamPAYDAY 2★ 5 (1.5k)315k views2.1k ♥56 minRussianUpdated Apr 27, 2025
- Desert Eagle Heat Treated | Blue GemCounter-Strike 2★ 5 (1.6k)293k views1.5k ♥2 minUpdated Jan 16





This guide was created by its original author on the Steam Community. Are you the author and want it removed? Request removal.