Advanced Gameplay Guide
Introduction
This guide is based on my in game expereinces as of patch 2.56. A group of us play almost every day. Our games are organized on Grizzlies Teamspeak server (ts.game-com.de). Everyone is welcome to join us. We will help new guys learn the game and discuss tactics pregame.
As of 2.54 we are able to beat Aetriden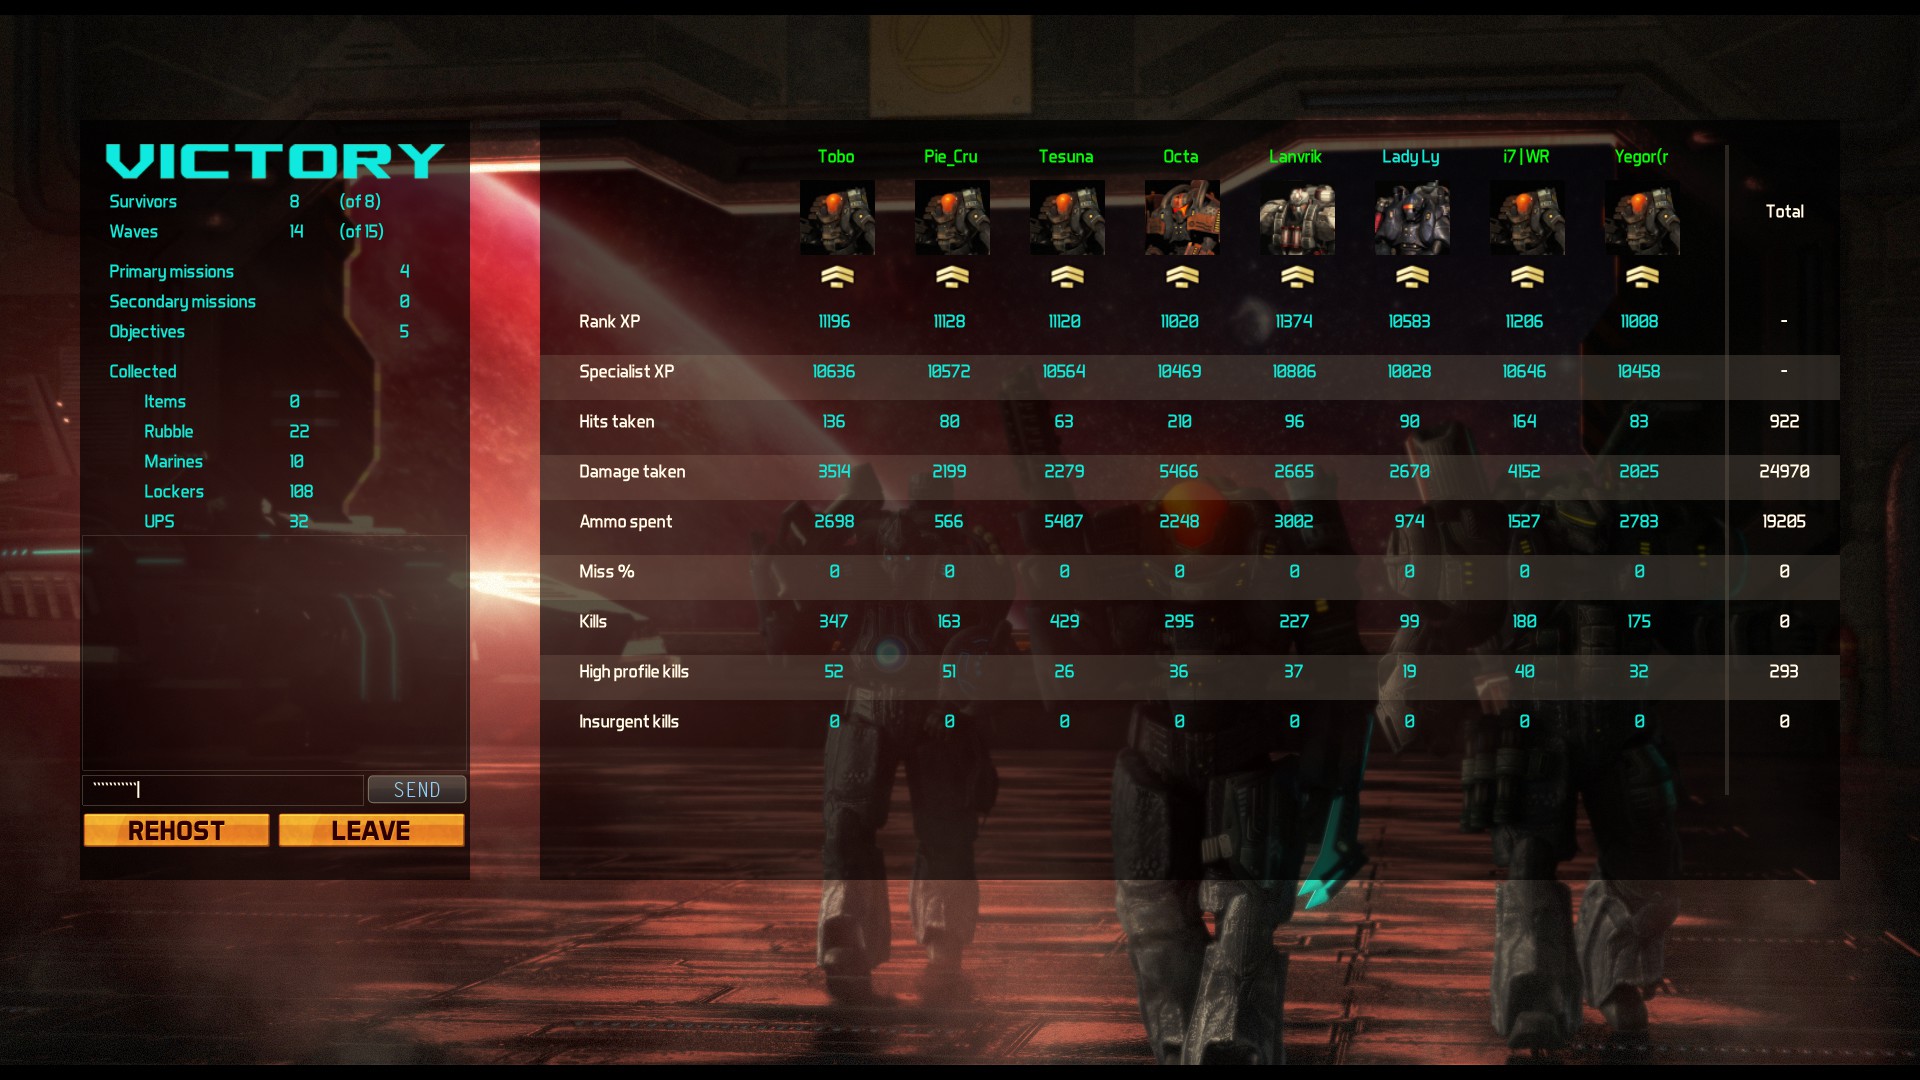
I will comment more on the newest bosses once i figure out the best way to kill them.
Gameplan
The first 4 waves of the game should played as 3 teams to maximize map coverage as follows:
CoreAssault, Assault, recon, and medic
- Responsible for looting the large "hospital" building in the center of the map
- Looting every locker in that one building will give enough supplies for the game
- Missions
Group 1
Marksman and terminator - Gives high single target damage and crowd control
- Repsonsible for map coverage
- Power station, strol, marines, vets, ammo boxes on the ground, and upgrades
- Should NOT loot lockers (map coverage is more valuable
- Missions
Group 2
Hellfire and Heavy support
- Repsonsible for map coverage
- Power station, strol, marines, vets, ammo boxes on the ground, and upgrades
- Should NOT loot lockers (map coverage is more valuable
- Missions
Around the end of wave 3, group 1 & 2 should meet up for more firepower.
Around the end of wave 4, Core, 1 & 2 should be together.
Missions are highest priority, group 1 & 2 should get missions unless it shows up extremely close to the core group. Having the missions done early takes a lot of the stress off the team late game.
Notes: Skilled hellfire, GAR assault and terminators can drop pod and solo the first 3 waves on veteran.
Ive found demos to be the most expendable class. As long as you loot enough explosives to take out the levi and 1 of the 2 wave 15 hellspawns you shouldnt miss him. What you gain is higher consisent damage to deal with late game dogs that are in your face. *Been rethinking a demo. Demos can be very valuable but it takes a very skilled and aggressive demo player for aet level play*
Assault Build
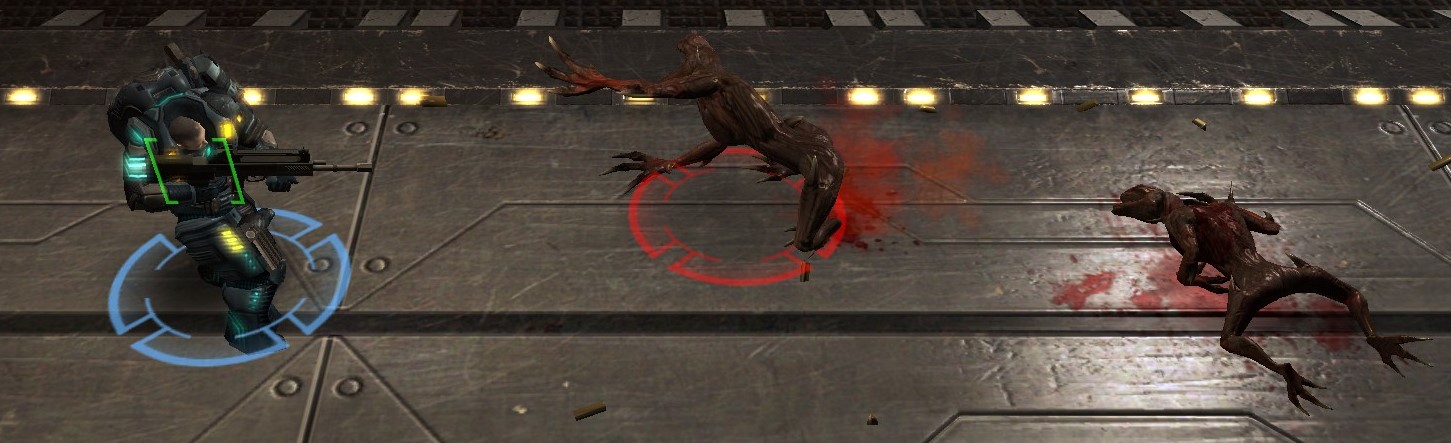
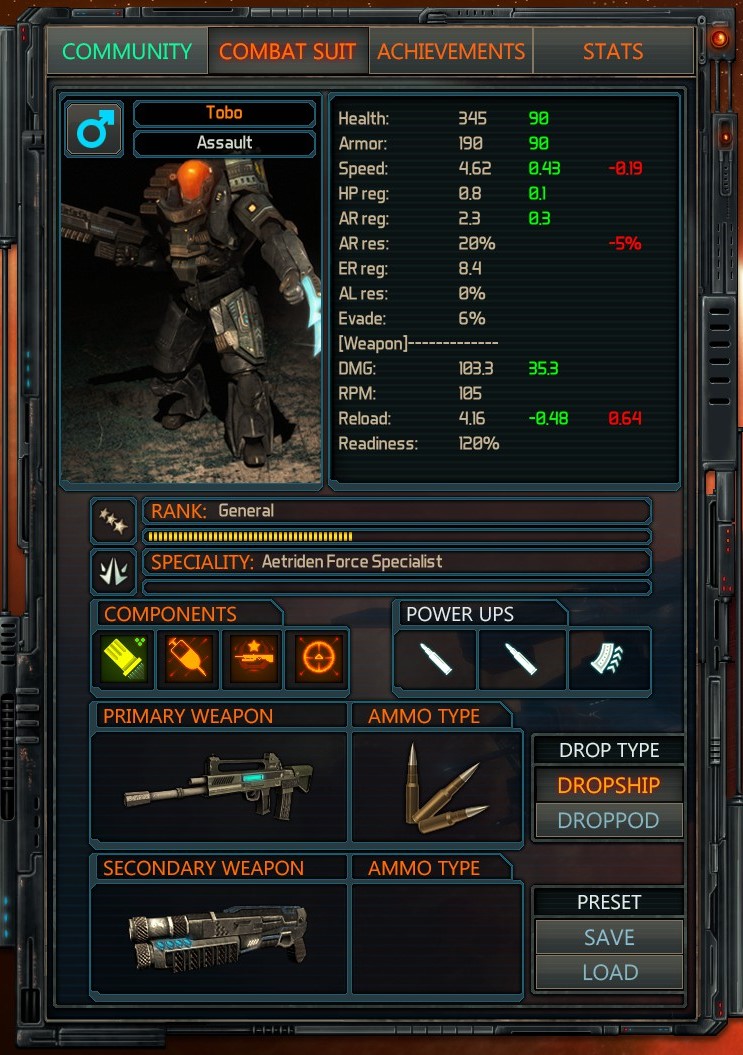 Strike V Assault
Weapon: Strike V with FMJ
Secondary FAS - 18
Components:
Critical Strike - 1st point early, max late
Light weapon targeting system - max first
Shotgun module - 1st point early, removed late game
Combat Stim module - max second
Powerups
2 x ammunition booster
1 x reload booster
Gameplay
You are kinda weak early game but shine late game once you start putting more points into crit. Take ebats for the core group as you will be the highest damage dealer. Late game you will be criting for 700-800 damage and stims will be shooting very quickly.
notes:
1 reload booster is taken to offset the ammo boosters, you will be reloading a lot with stims.
Use stims whenever its ready and there is something to shoot (after you get arid of the degen).
Manual fire when possible, but autofire is better than not firing if your scouting, looting, etc.
Gar Assault
Weapon: Gar with FMJ,
Secondary M1GL
Components:
Critical Strike
Light weapon targeting system
Ammonite
Grenade module
Powerups
2 x ammunition booster
1 x reload booster or 1 x ammuntion booster
Gameplay
Solid dps all game. Grenades becomes much better on Aet because a shotgun no longer 1 hits zombies.
Medic Build
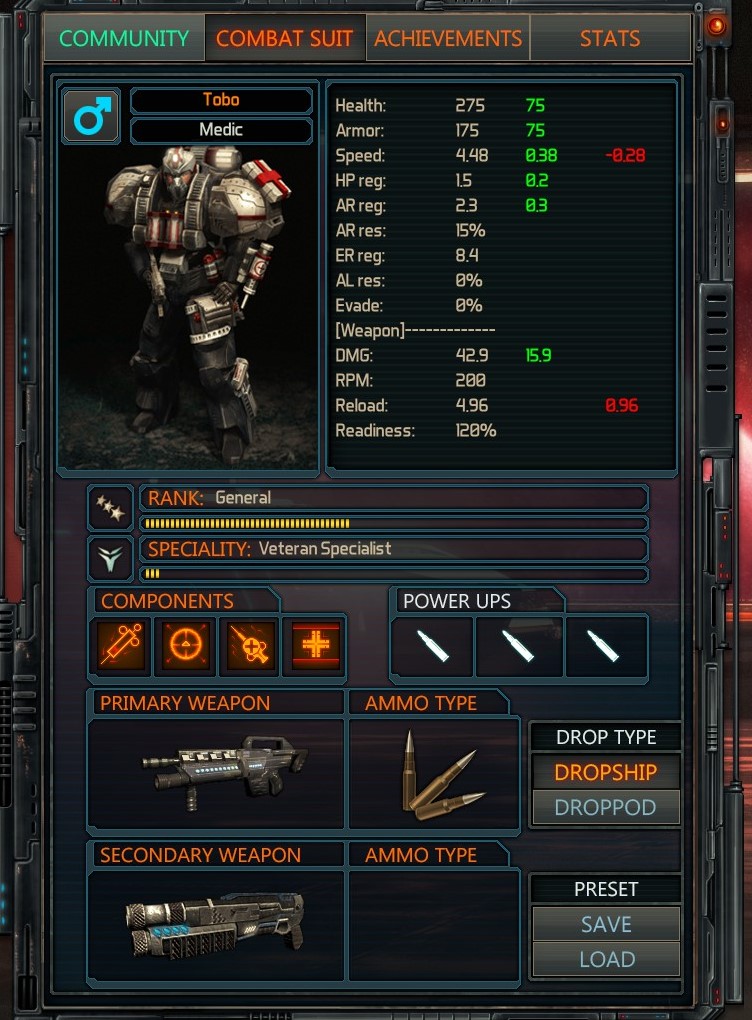
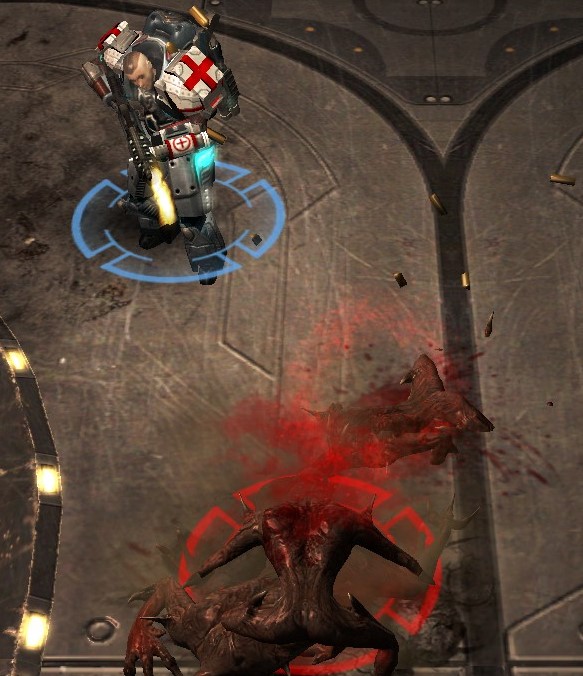
Medic
Weapon: Gar with FMJ or SMG
Components:
First Aid Module
Healing Device/Heal Gun
Last two are debatable
Chemical Bomb - saves lots of ammo if you clear corpses
Lifedrone - very hard to use because stopping is death in most locations
liquid steal - might be more useful against all the new bosses
Steroids - Everyone loves stims
Crit - more dps is always good.
Powerups:
Ammunition Booster x 3
Gameplay
Dont die!!!!! Call for the team to stack when your cooldowns are ready. You should be shooting too, dont think you're just there to heal.
Notes: SMG is useful to apply a debuff to the enemy. The medics damage wont be very good but it will help the team.
Recon Build
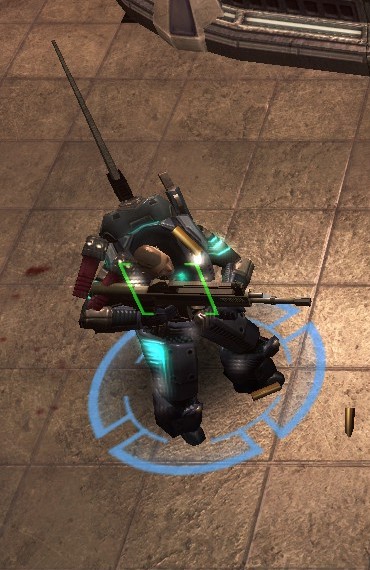
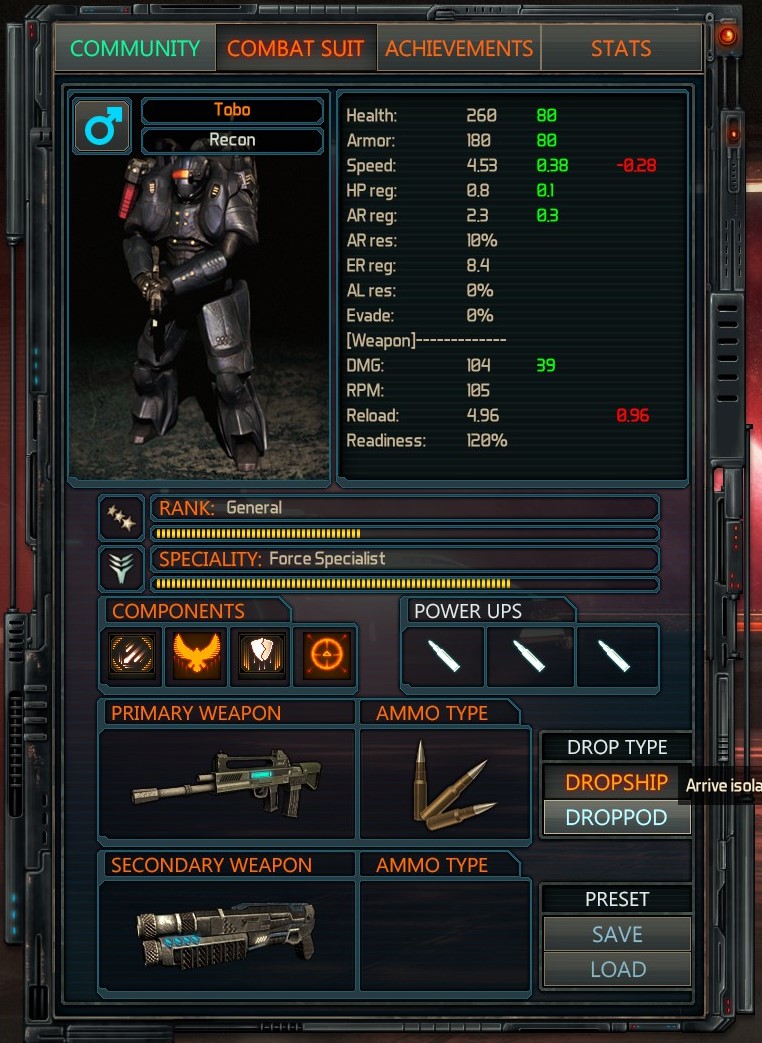
Recon
Weapon: User choice
SMG - Low damage but the debuff helps the team
Gar - Good consistent damage
Strike V - Slightly higher damage but can be dangerous if your looting slightly away from group
Components
Crit
Air Recon
Designate
Orbital Targeting or Ground Recon
Powerups
3x ammunition boosters
Gameplay
The recon will be moving skills around a lot as cooldowns are available. Drop supplies should be used any time it is ready. The supply pod is amazing for getting power cells and seeker bombs. All seek bombs should be horded if the insurgents mission is present to deal with Nyx.
Designate should be maxed and used on any big enemy. Its armor debuff is extremely strong and works with explosives (seekers).
Loot things when possible and drop them off for the team. However your primary job is killing stuff not looting. A loot focused recon (avoidance and speed boosters) is not recommended on Vet and Aet because the team cant afford the dps lost.
Notes:
4th component is debatable. Pick what you like between orbital targeting and ground recon.
Heavy SUPPORT
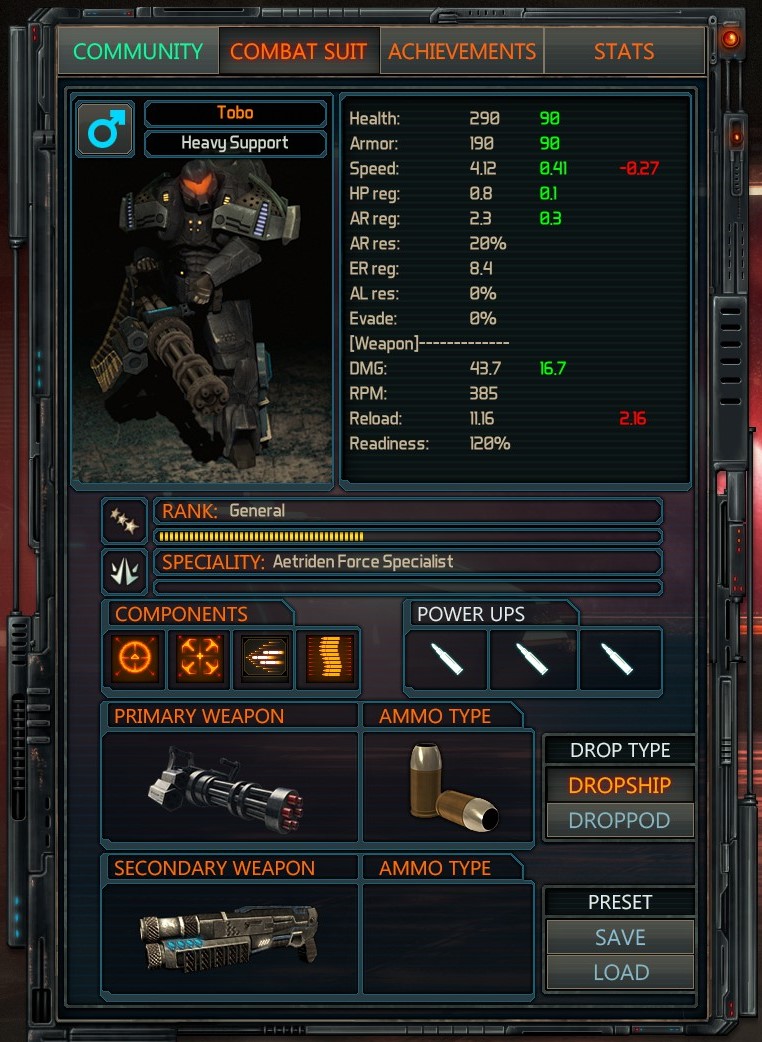
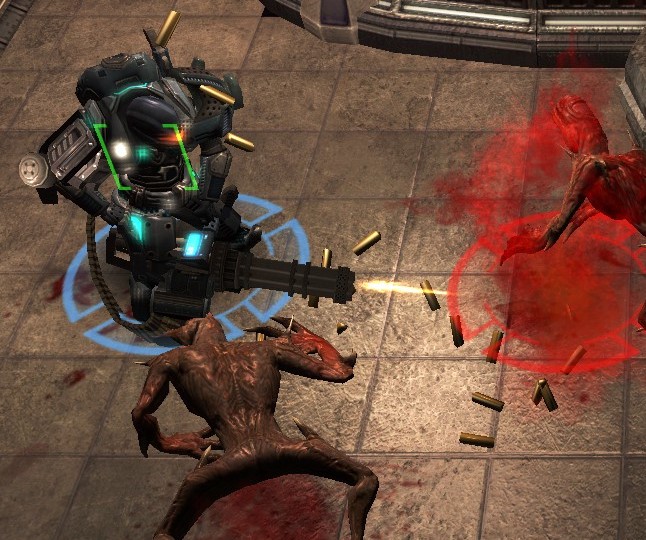
Heavy SUPPORT
Weapon: Minigun with hollow points
Components:
Targeting system (5 points)
Crit (2)
Suppress Target Device (5)
Ammunition link (3)
Powerups
3x Ammo boosters (as rank and speed allows)
Gameplay
The HS's job is exactly what his name says, Support. Yes he can deal a lot of damage but a trigger happy, dps focused, HS will leave your team stranded with no ammo on wave 15.
His most important role is slowing enemies down mid game and later. His Suppress Target Device not only slows their movement but it slows their attack speed! A good heavy is able to slow mobs in multiple directions with minimal ammo use. Non-stop firing is not necessary to maintain the slow.
The HS should start with hollow points and have 3 points into ammunition link when dogs start to show up so he can swap to FMJ. This will save a lot of ammo early game.
Notes:
The HS only gets his cone of fire when he manual fires (shift + left click) so he should not be autoaiming or left clicking on individual targets. The only exception is a pesky parasite on top of him because sometimes the cone misses them if they are standing on the same spot.
Hellfire
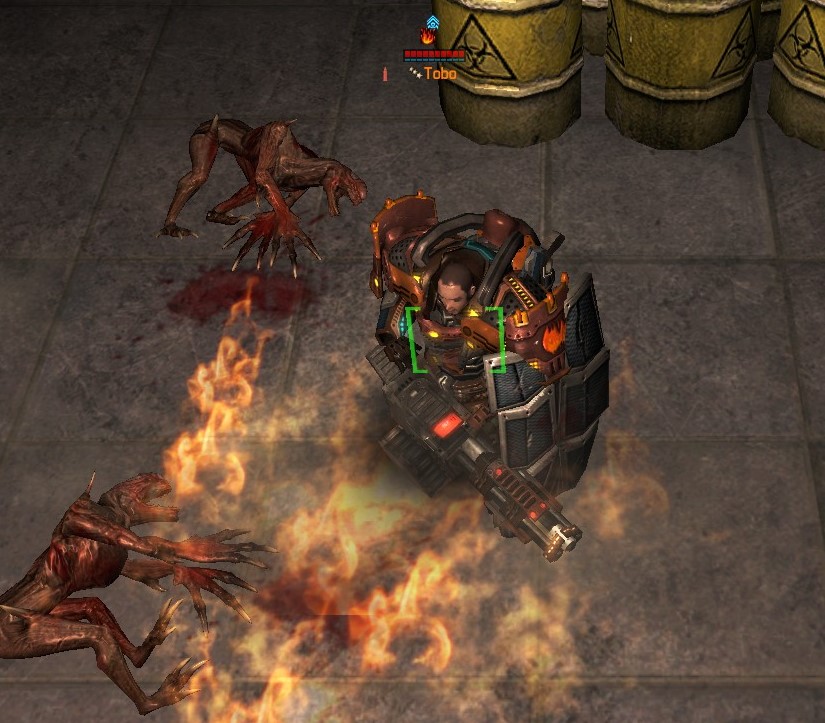
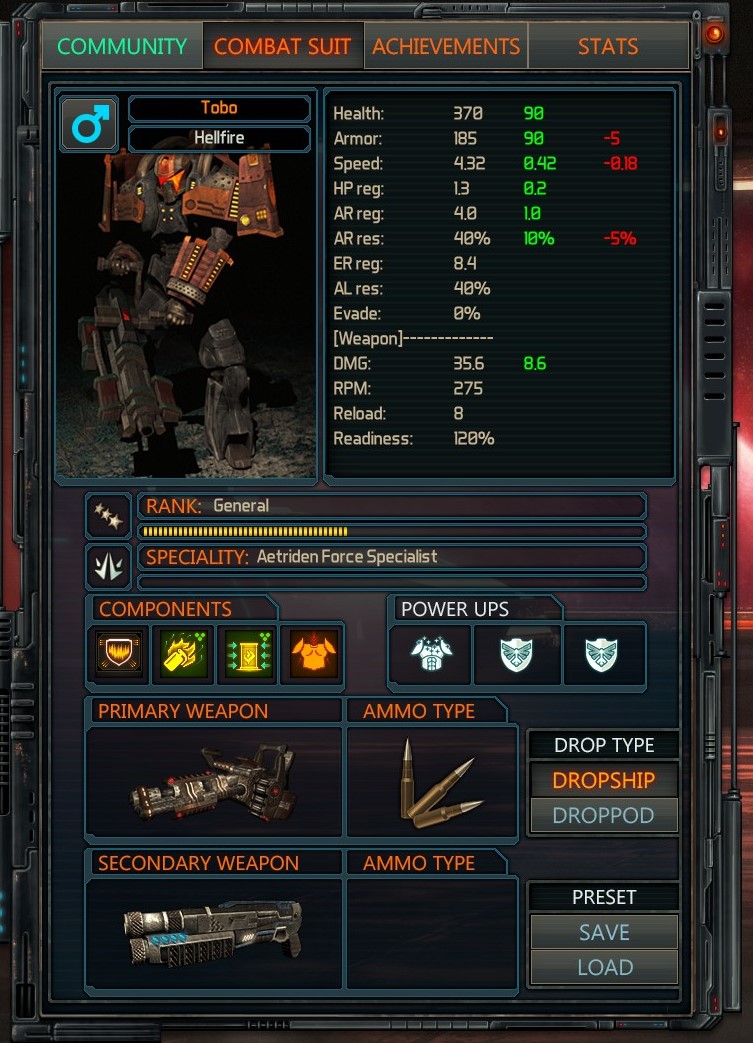
Helfire
Weapon: GAR with FMJ or ACE with FMJ
Components:
Napalm Grenade (5)
Weapon Equalizer (2)
Vanguard System (4)
Combat Armor (4)
Powerups:
2x armor boosters
Armor regeneration booster
Gameplay:
Max napalm grenade early while soloing. Try to time wave starts so you can toss the grenade into a choke point and thin most mobs out while you continue searching the map. Later waves you should stand in the napalm grenade until the initial wave rush is dead. If your on the move use it on choke points.
Put 2 points into WE so you can eat gas cylinders for extra ammo and damage.
Split points between vanguard and combat armor later game. It is critical that the Hellfire and terminator coordinate their cooldowns. The dog rushes on wave 15 can be dealt with by alternating energizer, energy shield and vanguard cooldowns. Only one of those three should be needed per dog rush which will allow one CD to always be available.
The Hellfire should travel in the back of the pack most of the time. This will allow you to use the autocannon mode more often and take damage for your team. Travel to the front of the group as the map dictates to push the team out of a corner.
The Hellfire should always have powercells on him to instantly regain full armor. Late game you will reach the 80% armor resistance cap but even then you are vulnerable on higher difficulties.
Must have the armor plate and health boosters. Only one of each as the ailment resistance is the best part and should be spread thru the team.
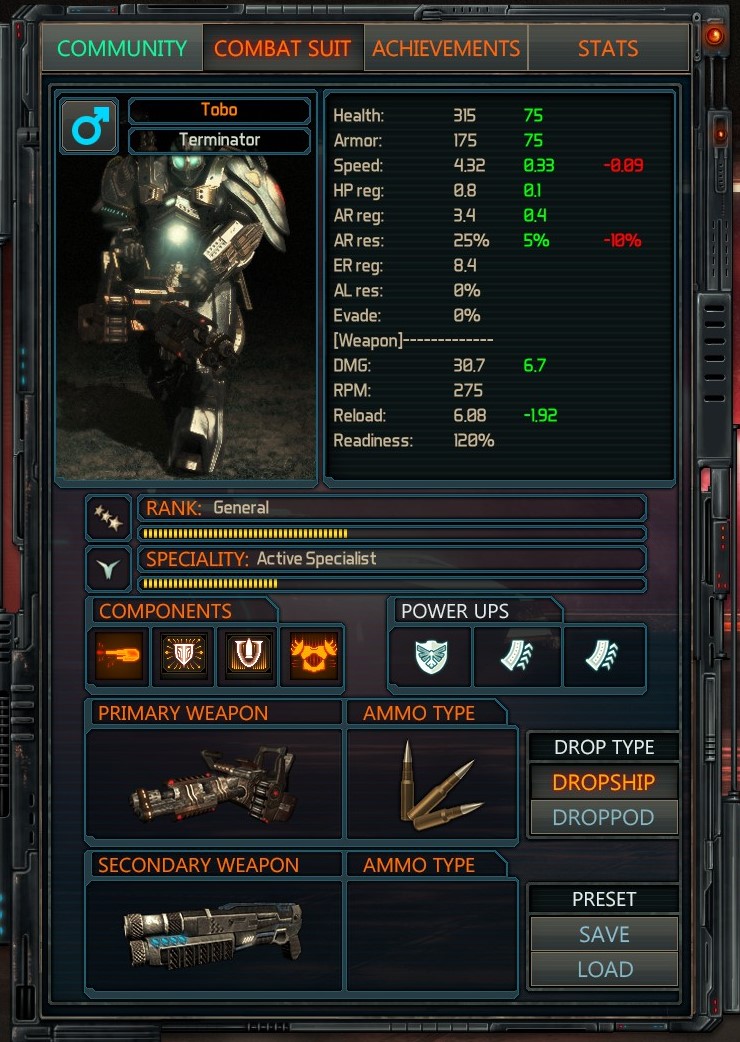
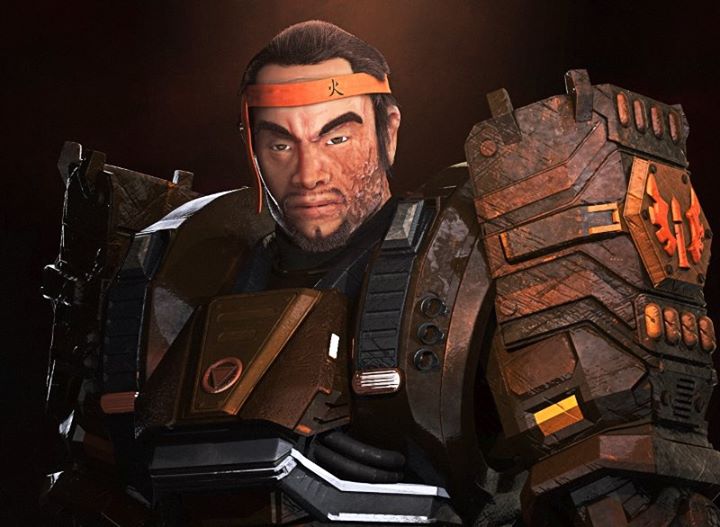
Terminator
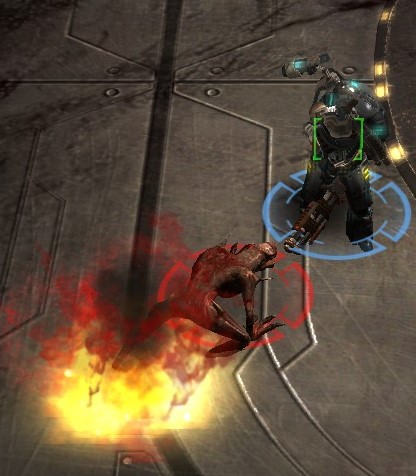
Terminator
Weapon: ACE with FMJ
Components
Energizer (required)
Energy Shield (required)
Crit
Autocannon Load System
ICS Module
DIO Striker
Powerups
This one is really up to the player
reload x 2, armor booster - good for people that use auto fire more mode often
3 x health boosters - lowers attack speed therefore more AC attacks before overheat. good for people that cant manage overheat well
Gameplay
Use AC mode early game and as much as possible late game without hurting your allies. Shield + autocannon overload are great against dogs on top of you mid game.
The 1 man teleport can be useful late game to run into a building or dead end as the team goes the long way. Great for grabing important items late game without putting the team in a bad position.
Notes: Energize and energy shield are required on the terminator, but the other 4 are up to the user. Autocannon load + crit can you give you 800 damage explosions but that also means a single misfired AC can be instant death. I generally play with autocannon load system and ICS module.
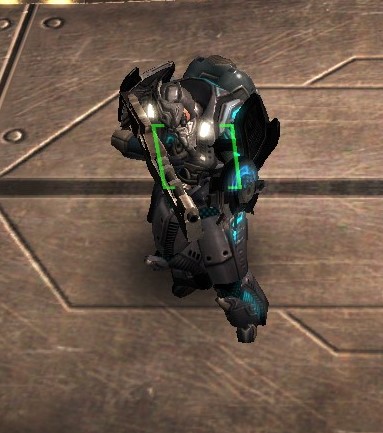
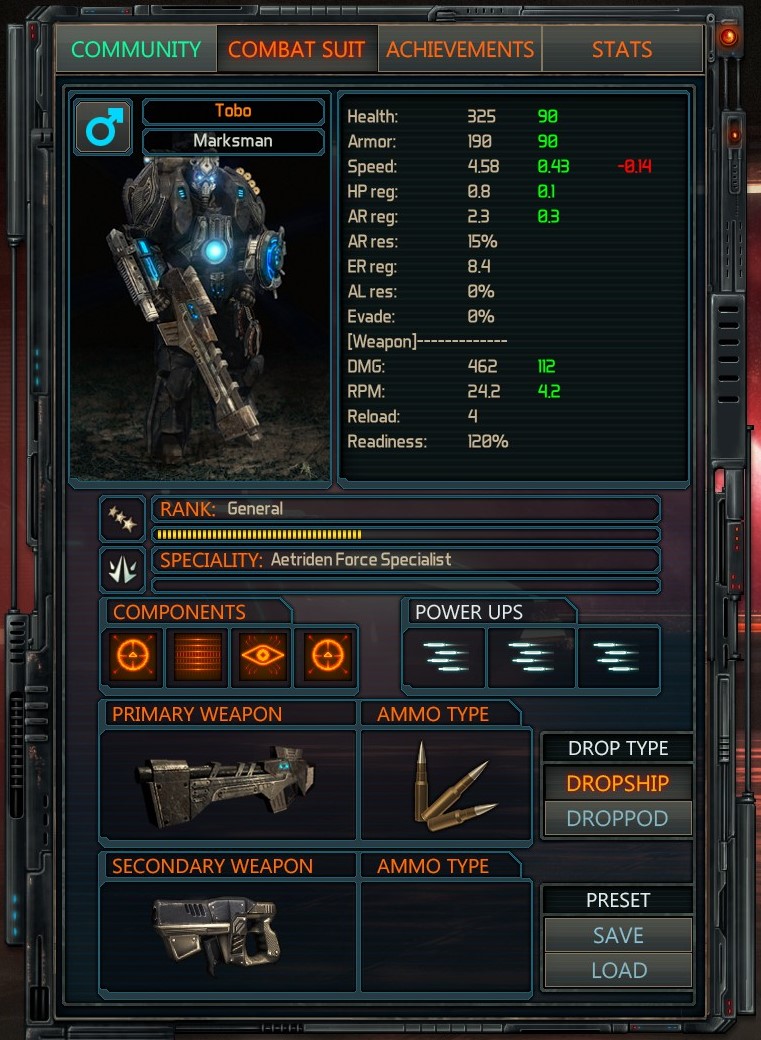
Marksman
Marksman
Weapon: Stinger with FMJ
Secondary: Shotgun or Pistol -
Components
Critical shot system
Occular implant
Tac net device
Vital spot targeting (recommended)
Advanced targeting critical shot (optional)
Powerups
3x attack speed boosters
Fairly simple class. If you dont know how to play it go back to a basic guide.
Skilled players should be able to:
- Line up enemies for maximum death with manual fire
- switch to energizer to last shot marijajuan (SP) dog and large bloopers so they dont respawn.
- Use tac net device to group up enemies.
- Use tac net to buy an extra second on claymores that arent ready
- Use tac net to save a demos missed rocket attack (tacnet is instant while rockets are visible and slow)
- Use tac net to save your slow ass heavy that cant run around a behemoth
- Scout, move and shoot at max range. Your attack is slow. You can either readjust your movement direction or scout one direction between shots.
Notes:
Ammunition boosters seem like the obvious choice but are overkill. The marksman can still 1 shot slashers (with crit) without the ammuntion boosters. The attack speed boosters are only a few more shots a minute but also help with your reload. Rail mode seems to shoot faster so it gains even more from the attack speed boosters. There is no point in having more damage then what it takes to kill a slasher.
Shotgun for lower ranks to make up for bad movement speed. Shotgun for higher ranks that can manage about 4.45 with the pistol and 3x attack speed boosters. Im starting to prefer pistol because the stinger is stronger than a shotgun even at close range and the mm is almost always firing even on the run. 4.45 should keep you with your group even while shooting. Pistol is also nice for taking out parasites wave 2-3.
*WIP* - no energy batteries on Vet - trying to test to find the minimum needed to still 1 shot a slasher wave 15 on vet and aet.
Demo
Weapon - GAR-GL and LAW (slower ~4.5 but much greater damage output)
Alternate - SMG and M1G1 (faster movement but loss of law - not my prefered build)
Powerups-
1 Ammo booster - If using SMG you can take 3x health boosters
Components
SES (3 points)
Explosive Modulator system (5)
Rocket Component (5)
Directional Primer (2)
Gameplay - Early Game demo should only use directionals and enough claymores/chains to kill the levies. He should be producing and finding as many claymore, chains, grenades, and rockets as possible.
Mid game - Start picking off the larger dogs with rocket component and grenades
Late game - Prove your worth - Demo should be in the back of the pack and playing claymore + 1 chain at any choke points/enemy paths. Time the wave 15 dog spawns and have 3-4 traps setup to take out any slashers/fluffies from the back. Watch the sides of the group for opportunites to use the LAW/Rocket components. You dont have to kill stuff but you should be heavily wounding most dogs approaching from the rear and a couple from the sides.
Bosses - Hellspawns are easy targets for the demo. Start scouting once you hear the scream and once located lay a trap in his direction and BOOM. The other bosses are very hard to do much against. Ripjaw leaps too much to reliably blow up without a terminator willing to stand on your explosves and shield. Sargon doesnt take explosive damage while burrowed but adding a resonator to your trap and blowing it first may be effective (need to test but i never carry resonators because my inv is full of explosives). Ker, her legs, and her first 1-2 shells can be hurt by explosives but getting that close is dangerous. Her higher shells can be blown by laying a linear trap and having her slam the ground on top of them. Once she is laying on the ground they can be detonated to blow the higher shells. This again takes a terminator with shield as the person being slammed is likely stunned.
Notes: I prefer only 2 points in directional primer. Any more and the range gets too far. Directionals must be used with caution as you will destroy a lot of needed supplies if your not careful. Never directional into a dark and unexplored area/building as you might be destroying upgrades. Remove points from directional as needed to shorten your range. As dangerous as they are to use they are worth it as they clear a lot of trash early game.
Rocket spawns were recently increased making the LAW a much more viable weapon. You should be able to get 12+ rockets a game which is a significant amount of damage against bosses or several waves of dead slashes/fluffies. The LAW + Law upgrade + 5 points in Rocket component + 5 explosive modulator will make the wave 13 boss die quickly.
Legendary Items
Nyx Vindicator Module
Every 5th shot also has a 400 damage plasma cannon attack.
- Nyx does not work with manual firing.
- I would give it to the GAR Assault. Althought the Term and HF have higher rpm with the ACE they have terrible reload times and should be using AC when possible.
Savage's Burners
Increases critical strike chance by 10%.
Increases damage by 20%
Bullets deal fire damage.
- I think this items is overkill on the sniper. I would give it to the Strike V DPS Assault.
- Possibly given to the HS if there is lots of extra ammo late game. If so the HS should move 2-3 more points into his crit.
Tokugawa Overload System
50% reduced skill cooldown duration.
- Can be given to the medic for more heals.
- Also works very well on the terminator for more shields and more energize.
Good Habits
- Communication - I wouldnt even attempt Aetriden unless the entire team is on teamspeak (or other voice service) and most of them have mics.
- Coordination - The 3 seperate groups need to have a general plan on when and where to meet back up. Dont be running away from a group trying to meet up with you.
- Sharing loot - Passing loot to maxmize stack size
- High threat target location - Having one person use autofire to scan a screen away when a hellspawn is coming in will save lives. Spot it and call a direction so the team and move accordingly
- Stack on the medic - Heals are valuable and always on cooldown so wounded should stack on the medic
- Stand your ground - Your going to take a beating. Keep running in the same direction and keep shooting whatever is attacking you.
- Covering fire - See above ^ your buddy is taking it in the face so you dont have to. Heavy should be slowing the enemy. Once a tiny bit of space is created a danger close grenade will be much appreciated.
- Following waypoints - Your leader has a plan. It might not be what you would of done but your going to follow it anyways. If he was wrong you can change leaders next game or learn as a group from the mistake. Lead a group sometime, its not easy and gets much much harder if your fighting your own team.
Bad Habits to Break/Things I Hate
- Running backwards - If your the last person in a group then never ever ever ever run towards the enemy. First off there is likely grenades and rockets flying over head that will kill you. Secondly it slows the entire group down. The Hellfire is most likely the last guy and hes only firing when things get really close to him so he can take agro. The people in the front should be shooting backwards to cover them while they catch up.
- Panic - It seems that people stop firing when things start to get really hard. I realize sometimes it can get hard to see when people and mobs are on top of each other but keep firing anyways. If you cant figure out what your shooting at then turn autoaim on for a second while you get your bearing back. Ive lost track of my char in the jumble before, dont panic, keep moving with the group, and keep shooting.
- Locker diving - Quit running into the far dead end of a building just for a single locker. Its not worth the time. People get way too loot focused on this game. If your running by a doorway and your at the front of the pack you might grab the first locker thats right next to the doorway but thats it. Dont go for more. If your in the back of the group dont loot anything. Your slowing down the entire group. If its wave 10 or later you shouldnt be looting anything! Any supplies needed at this point should come from safety zones.
- Movement boosters - I hate them. You dont need to be that fast. You need to be able to kill things before they get close. Your also losing your armor resistance which means your going to die quickly and by yourself because you thought you were fast enough to run into the next building alone for single basic locker. Movement booster are used by people that cant think 5 seconds into the future and plan their movements out. Improve your situational and map awareness and stop wasting time running back and forth and you will never need a movement booster.
- Hero complex - This game requires teamwork not heros. Dont run away from the group because you see the last marine and want to be the hero. Tell the group and move together to it so no one dies. Same applies for running off to nuke something.
Assault
- Ti Sensor - sure you get a helmet but the skill is useless. You should be manual firing which doesnt miss targets in the dark. The +damage to burrowed things is also worthless because only 0.1% of enemies burrow.
- Minigun - if you want a minigun play the HS so you get a cone of fire. On the assault its just a low dps ammo suck
- ACE - if you want an ACE play the terminator or HF.
- Precise fire - Aet and Vet is almost all on the run so the negative damage while running is terrible. Sure its toggable but why waste points on a skill that doesnt help you most of the time
Recon
- 3x movement boosters and avoidance - your team can not afford to have a person that isnt firing their weapon. You're also negative armor so your going to die a quick and painful death.
- Sprint device - too many options that are way better. Damage is your focus not running.
Heavy Support
- Suppress fire device - It might be huge dps but its also a huge amount of wasted bullets. Your already the slowest person on the team you cant be slowed down even more by SFD. Your other skills are much more valuable.
Hellfire
- Arclite - It requires napalm and optimized consumption to be half decent dps. Your other components are too valuable to waste the points required to make the arclite usable.
- Health regen/boosters - Your tankablitiy comes from your armor resistance. Your health should not be getting hit at all. When your out of armor you pop a power cell.
Bosses and Missions
Tyler Hunt
- The person caring for tyler should be in the front of the group so tyler stays in the middle. The HF should always be behind tyler to protect him.
- You should make tyler stop firing his weapon so that he will move faster. Currently CTRL + right clicking on yourself makes him stop firing and just follow you. When he autoattaches to a random person he is not controlable. He has to be unattached then reattached.
Terra
- The easiest of the storylines
- If tyler hunt dies. 4 hellspawns will immediatly appear to finish you.
Insurgents
- Nyx becomes very dangerous at higher difficulites. She hits much harder and the nuke drops faster.
- The best way to deal with nyx is recon's designate and seekers. 3 stacks of seekers is recommended as some might miss as she teleports.
- Stack the entire team on top of tyler hunt and designate + seeker nyx as soon as she appears. Make sure no dogs are closer so the seekers only target nyx. Stay stacked on tyler and group energy shield when the nuke drops. Watch for fire and enviromental harzards. Heal/medkit tyler if hes on fire/hazard.
Leviathon
- Good place to use up claymores. Place 20+ claymores about 2-3 seconds a head of the leviathon. For maximum damage dont wait for them to activate. Use a grenade launcher to blow them when the levi is centered on them.
- Energize and gun down what little health he will have left.
Fatties
- Easiest wave 9 to deal with.
- Go get shiva, run the fatties to the middle of map so they are all collected and then nuke them.
- Nuking near the southern side of the "hospital" building is adviced so the hazards from the reactors have disappeared by the time you are back there wave 15. (will keep the HS from burrowing)
Hellspawn
- 2nd easiest to deal with.
- Without a demo its easiest to HF taunt, energize and gun him down.
- Does a ranged spine attack when approaching the group that will detonate any unprotected explosives.
- There is 2 hellspawn on wave 15 start. One should be blown up and the other taunted/gunned down.
- For fun and more exp the 4 hellspawn on evac can be killed. General plan is to blow up the closest one. Terminator shield once the next starts attacking someone. Once shield is down the remaining 3 should be within range to HF taunt. Energize and gun them down. HF should have powercells to restore armor to buy the group a couple more seconds.
Ker
- At least one team member must be within range of ker at all times or she will burrow and pop up under someone swallowing them (they are alive but out of the fight)
- Starts with high resistance which can be decreased by destroying her shells.
- Explosives placed on her will destroy the bottom shell
- Explosives placed further away can be used to destoy higher shells by waiting for Ker to slam the ground on top of them.
- Swarms and parasites spawn out of the ground under Ker. These can all be taken out by a lvl 5 napalm grenade making the fight much easier.
- Ker's legs do drill attacks so keep moving to avoid them. Legs can be ignored.
- Communicate which shell to attack first.
- Much of the team can fire their weapon safely outside Ker's range. Leaving the hellfire/terminator/medic to worry about keeping her agro.
- Dont forget about the trash mobs. Make sure the marksman can focus Ker while others take care of trash as it appears.
Ripjaw
- "Spoilers" -River Song
Sargon
- "No, don't tell, you mustn't tell! " - CAL
Updates
* 11/25/14 Added demo build
- The Everything Guide(V. 1.013)★ 5 (306)9.4k views418 ♥84 minUpdated Dec 25, 2021
- [RUS] База знаний по игре + гайды★ 5 (317)6.1k views275 ♥60 minRussianUpdated Aug 24, 2015
- Information you need to know, you noob. Updated 10-Jul-15★ 4 (133)4.2k views65 ♥26 minUpdated Jul 10, 2015
- SinglePlayer Upgrade item locations (Finished)★ 4 (119)3k views170 ♥4 minUpdated Sep 11, 2015
- Basic Informations very detailed [Out of Date]★ 4 (31)1.6k views25 ♥18 minUpdated Oct 4, 2016
- The Hellfire Guide (Builds / Tactics / Gameplay) (V. 1.26)1.1k views22 ♥16 minUpdated Oct 17, 2015


- Upgrading to PremiumTeam Fortress 2★ 5 (20k)1441k views11k ♥6 minUpdated May 11, 2022
- No More Room in Hell Official ManualNo More Room in Hell★ 5 (2.8k)569k views2.1k ♥29 minUpdated Apr 22, 2019
- NMRiH Community Hosting GuidesNo More Room in Hell★ 5 (526)351k views653 ♥1 minUpdated Aug 10, 2022
- ULTIMATE GUIDE FOR GAME DEV TYCOONGame Dev Tycoon★ 5 (5.8k)326k views10k ♥4 minUpdated 23 Jan, 2014
- How to 'Git Gud' Soon™MORDHAU★ 5 (2k)318k views3k ♥68 minUpdated Nov 16, 2024
- Лучшие кооперативные игры SteamPAYDAY 2★ 5 (1.5k)315k views2.1k ♥56 minRussianUpdated Apr 27, 2025






This guide was created by its original author on the Steam Community. Are you the author and want it removed? Request removal.