The Hellfire Guide (Builds / Tactics / Gameplay) (V. 1.26)
Introduction
"Heaviest combat suit specialized for mass control and close combat, focuses on boosting the strenght of flamethrower weapon and control of flames. Due to his armor he can be usefull against certain bosses in combination with medic."
- In-Game Description
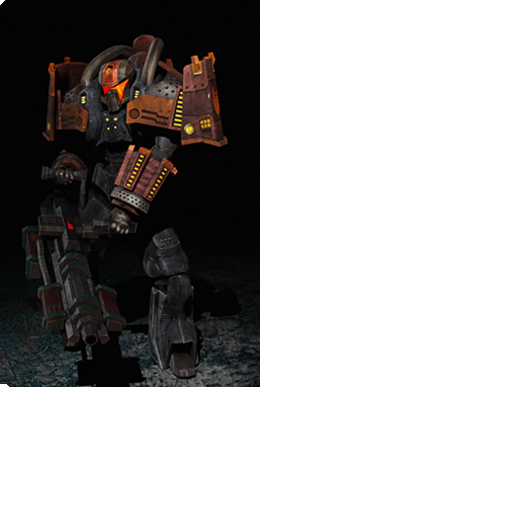 The Hellfire is one of the most powerful characters in "The Red Solstice" you can choose, when it comes to direct damage output and armor.
As the Hellfire has not such an big variety of components your role in combat is always the same:
The Hellfire is one of the most powerful characters in "The Red Solstice" you can choose, when it comes to direct damage output and armor.
As the Hellfire has not such an big variety of components your role in combat is always the same:- Map cover and soloing
- Damage dealer
- Crowd control
- Tank
Therefore you have an big number of skills that increase your damage over time and your armor and ailment resistance.
What type of player is the Hellfire-player?
Easy to learn, hard to master.
The hellfire is for players that already have gathered some experience as he is made to solo the first waves and is realy slow without the Veteran-Buff.
He combines the abilities to deal an average amount of damage, to tank, to solo and to protect the group.
Singularity of the Hellfire Combat Suit
- The Hellfire combat suit has an high Armor on costs of its (low) Speed.
- He is totally immune to all types of fire damage (not explosion! Exploding Oil Barrels will harm you!)
Your primary Weapon
The first you have to think of is the weapon you want to take.
You have two (real) options:
- The Arc(lite)(default)
- Pros:
- Skills to buff weapon damage (permanent)
- AoE
- Huge damage output
- Skills to buff weapon damage (permanent)
- Cons:
- Small Range
- Pros:
- The ACE-43
- Pros:
- Skills to buff weapon damage (non-permanent)
- Small AoE
- Higher range
- Skills to buff weapon damage (non-permanent)
- Cons:
- No critical hits
- Friendly Fire
- No critical hits
- Pros:
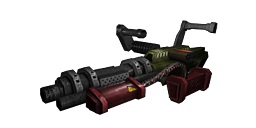
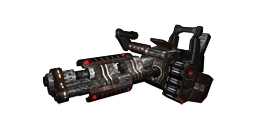
Personal comment: I highly recommand the Arc(lite) over the ACE-43. You have an much higher damage output and the Hellfire is needed for the crowdcontrol.
The weapon you choose will particular affect what components you have to take or which tactics you use.
(Don´t forget that ACE-43 Autofire mode will harm you and your team)
About the Arc(lite) and Fire damage
- Weapon Damage (Type: Fire Damage)
- Damage over time (Burning) (Type: Fire Damage)
- Immolation (Counter) (Does no damage on its own)
This is the damage you deal with your weapon and can be seen at your weapon stats.
Does damage over time. Can be increased with the Napalm System Device.
Each bullet of the Arc adds one immolation-counter on the creature.
Each 10 counters increase the (normal) damage dealt by 1.
The Fire burst and the Fiery Shockwave add (on level 5) 100 counters on each creature.
The stack of counters will be capped at 1200.
If you stop adding counters (by stop shooting or not using devices) all counters will be removed within 1-2 seconds.
Don´t forget, that the Arc has an overheating counter. You will hardly manage to overheat it if you are not using "The Optimized consumption system" (Tier 5) as you have to reload before.
Your secondary Weapon
You have three (real) options here:
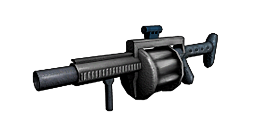
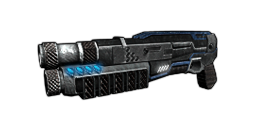
- Grenade Launcher M1GLOn Easy and normal this weapon can be very usefull. One-hit-kill Letuce or do an big amount of damage to dogs when they aren´t in the range of your Arc is always a "nice to have".
- Pros:
- Huge damage
- Huge range
- Huge damage
- Cons:
- Friendly fire
- Pros:
- Shotgun FAS-18On the higher difficulties the FAS is your one and only as also swarms of low threats can become dangerous during your reloadtime or when its getting hectic. It is also your last resort for bunches of dogs.
- Pros:
- Huge damage
- Best "last resort"-weapon
- Huge damage
- Cons:
- Small range
- Pros:
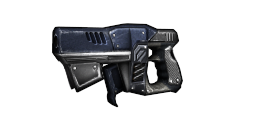
- PistolIf you are new and don´t have any buffs and bonuses as "low rank" you might choose this weapon as you might be to slow using another weapon (see "movement speed" for more infos)
- Pros:
- Speed boost
- Cons:
- Lack of damage
- Pros:
Weapon boost Components

- Passive:
- Increases you magazine size (+15 per level).
- Decreases the reload time (0.5 per level).
Works only with the Arc(lite)!
You can not remove points out of this system! - Increases you magazine size (+15 per level).
- Pros
- Increased damage output
- Cons
- Higher ammo consumption per minute
- Tactics
- It grants you the ability to handle a big stream of enemies without reloading every few seconds.
- But you don´t have to invest more than 2 (maybe 3) points in this component.
- It grants you the ability to handle a big stream of enemies without reloading every few seconds.

- Passive:
- Increases Napalm Strenght by 5/10/15/20/25%
- Increases burn DPS by 2/3/4/5/6
- Increase burn duration by 1/1.5/2/2.5/3 seconds
Works with Napalm Grenade and Oil device (Napalm Wall System) - Increases Napalm Strenght by 5/10/15/20/25%
- Pros
- Increased damage output (DoT)
- Cons
- None
- Tactics
- If you are using the Arc(lite) you want to max this component ASAP.

- Active:
- Consumes barrels:
- Increases the normal damage of every weapon you take for an short duration. It also might change the type of damage you deal from "fire" to "toxic".
- Level 1: Use flame barrel adds 10% damage, damage type change to fire
- Level 2: Use fuel cylinder adds 15% damage, damage type change to fire
- Level 3: Use toxic barrel adds 15% damage, damage type change to toxic
- Level 4: Grants additional flame barrel effect: Cause small burning that deal 48 damage per second and last for 15 sec per target hit
- Level 5: Grants additional toxic barrel effect: Cause small toxic clouds that hurt creatures for 88 damage per second.
- Level 1: Use flame barrel adds 10% damage, damage type change to fire
- Adds some ammo per use. (Level 4 and Level 5 grants resupply 15/30 ammo from barrel.)
- Increases the normal damage of every weapon you take for an short duration. It also might change the type of damage you deal from "fire" to "toxic".
- Consumes barrels:

- Pros
- Increased damage output
- Works with all weapons
- Adds ammo
- Increased damage output
- Cons
- Short duration
- During higher waves you may not have the time to consume barrels
- Short duration
- Tactics
- Use it as often as you can.
Armor components

- Passive Radius:
- Increases Armor resistance. (3/6/9/12/15 %)
- Increases resistance to ailments. (10/15/20/25/30%)
- Increases Armor resistance. (3/6/9/12/15 %)
- Benefit:
- Great protection against ailments
- Small AR Res buff
- Teambuff
- Great protection against ailments
- Cons:
- If you have an good medic you might drop this component for another one
- No "taunt"-ability
- If you have an good medic you might drop this component for another one
- Tactics:
- Great on tanky builds and as team buff
- Always watch the buff area
- Biggest use on higher difficulties where your role is the most tanky
- Great on tanky builds and as team buff


- Passive:
- Increases the Armor. (10/20/30/40/50)
- Gives you the ability "Tactical Defence":
- Activate:
- Taunt enemies (2/4/6/8/10 m)
- Boost your damage (20/25/30/35/40 %)
- Reduces movement speed (-80%)
- Grants immunity to physical damage (1/2/3/4/6 seconds)
- Taunt enemies (2/4/6/8/10 m)
- Activate:
- Benefit:
- Temporarily immunity to damage
- Temporarily damage boost
- Small Armor boost
- Temporarily immunity to damage
- Cons:
- Higher chance of getting ailments (compared to Combat Armor System)
- Only an single taunt per use
- Higher chance of getting ailments (compared to Combat Armor System)
- Tactics:
- Fighting dogs / fast enemies and bosses:
- Everytime enemies seem to overrun you or deal damage to an nearly dead teammate you can protect the whole group by taunting the enemy. This grants time for the medic to heal marines and your Allies can regroup and help you with higher threats.
- Make the most of this component by using it in the right moment. This needs some practice.
- Don´t use it on single high threats (dogs).
- Don´t use it outside your team / group.
- Don´t use it on single high threats (dogs).
- Works great with
- Phasereaper device
- Fire burst device
- Phasereaper device
- Fighting dogs / fast enemies and bosses:


- Activate Radius:
- Increases your and your teammates Armor regeneration depending on the number of teammates around you (0.4 / 0.8 / 1.2 / 1.6 / 2.0 per marine) for 7 / 9 / 11 / 13 / 15 seconds
- Taunt enemies in an huge range. (10 / 13 / 16 / 19 / 22m)
- Increases your and your teammates Armor regeneration depending on the number of teammates around you (0.4 / 0.8 / 1.2 / 1.6 / 2.0 per marine) for 7 / 9 / 11 / 13 / 15 seconds
- Benefit:
- Awesome AR Reg boost
- Huge AoE
- Several "taunt" waves while active (Makes it more easy to use)
- Awesome AR Reg boost
- Cons:
- Higher chance of getting ailments (compared to Combat Armor System)
- No damage immunity (compared to Hellfire Vanguard Device)
- AR Reg boost won´t prevent you from taking damage.
- Suicide Skill on higher difficulties!
- AR Reg boost won´t prevent you from taking damage.
- No damage boost (compared to Hellfire Vanguard Device)
- Higher chance of getting ailments (compared to Combat Armor System)
- Tactics:
- Working similar like the Vanguard Component.
- Better on higher difficulties as your always moving as team.
- Works great with
- Phasereaper device
- Fire burst device
- Phasereaper device
- Working similar like the Vanguard Component.
Aggressive components

- Active:
-
Throws an grenade:
- That deals explosion damage (300/400/500/600/700)
- Releases an burning circle (3.5/4/4.5/5/5.5 m radius) on the floor that deals massive damage to passing enemies. (Duration 40/50/60/80/100 seconds)
- That deals explosion damage (300/400/500/600/700)
-
- Pros
- Huge damage
- Huge AoE
- Long duration
- Huge damage
- Cons
- Long Cooldown
- Tactics:
- On the move
- Hold choke points or place it near corners so all enemy following you have to pass it. This will kill all crawlers and parasites and also do a lot of damage to all other enemies.
- Killing High Threats
- You can also kill Behemoths and other higher (slow) threats with it without using / wasting ammo. Place it and start running (you might use Stims) around the Enemy (which should be above the fire). Now you only have to wait and keep running. If the enemy looses interest on you taunt him or get closer and attack him.
It is also very useful against KER.
- You can also kill Behemoths and other higher (slow) threats with it without using / wasting ammo. Place it and start running (you might use Stims) around the Enemy (which should be above the fire). Now you only have to wait and keep running. If the enemy looses interest on you taunt him or get closer and attack him.
- Holding the ground and bunkering
- Place the Grenade at an entrance or choke point and position yourself within the fire (you won´t be harmed) now let the enemy attack you and watch him burn. This will grant you that respawning enemies will "awake" in this fire storm...and die.
- On the move

- Active:
- This component exhausts an radial fire burst dealing damage (200/275/350/425/500) damage to all enemies around.
- Adds 100 Immolation (on Tier 5)
- This component exhausts an radial fire burst dealing damage (200/275/350/425/500) damage to all enemies around.

- Pros
- Radial AoE
- Adds immolation
- Short cooldown
- Radial AoE
- Cons
- Short Duration
- Little damage
- Short Duration
- Tactics:
- Protect yourself (Works great with Ace-43)
- Use it in combination with "taunt"-skills
- Usefull to kill dogs and other big threats faster.
- Protect yourself (Works great with Ace-43)

- Active:
- Adds burning buff that is 3 times napalm systems damage
- Deals high damage (300/400/500/600/700 Damage) in an small cone.
- Adds 100 Immolation (Tier 5).
- Adds burning buff that is 3 times napalm systems damage

- Pros
- Adds immolation
- Average damage
- Shortest cooldown
- Adds immolation
- Cons
- smallest AoE
- Short Duration
- smallest AoE
- Tactics:
- Usefull to kill dogs and other big threats faster.

- Active:
- Deals low damage (10/13/16/19/22 DPS) on your path using ammo and reducing your movement speed. (Duration: 20/25/30/35/40 seconds)

- Pros
- None
- Cons
- Small damage
- Wastes Ammo
- Reduces Speed
- Small damage
- Tactics:
- None.

- Active:
- Deals all damage as fire damage.
- Uppercut: Dealing one Sword damage (350-550 on level 5) and reduces enemies attack damage by (20-40% on level 5)
- Phasecut: Deals two Sword damage at once (700-1100 on level 5)
- Uppercut: Dealing one Sword damage (350-550 on level 5) and reduces enemies attack damage by (20-40% on level 5)
- Pros
- Will save a lot of ammo
- Deals an insane amount of damage in no time
- Short cooldown
- Will save a lot of ammo
- Cons:
- You need to stop moving to use it (needs experience)
- Tactics:
- Collect enemies enemies before using it
- Use it in combination with "taunt"-skills!
- When using with vanguard use first phasecut (as long as your immune to damage) then uppercut to decrease your suffered damage.
- Collect enemies enemies before using it
Fiery Shockwave Device vs Burst Fire Device
- Both stack Immolation on target
- both should be used at start of an combat
- Fiery Shockwave Device
- Bigger AoE
- Burst Fire Device
- Higher damage
- Shorter cooldown
- Higher damage
But i´ll always recommend the "Napalm Grenade" over both Devices as you´ll kill much more trash with it.
Your Movement Speed
It is realy simple:
NEVER FALL BELOW 4.0 !!!
Something between 4.1 and 4.3 is fine. If you have to run use Stims.
Better leave out an power up (or use the pistol as secondary weapon).
Power ups
- Health booster
- If your health takes damage your doing something wrong as Tank.
- Movement booster
- Decreases Armor and damage for speed
- You want both!
- Decreases Armor and damage for speed
- Ailment booster
- You better use the "Combat Armor Component"
- You better use medical items
- You better make use of your medic
- You better use Armor- and Health Booster items found on the map
- You better use the "Combat Armor Component"
- Evasion booster
- You should better bring up your armor than decreasing it and your health
- Energy Transfer booster
- You won´t change much
- Attack speed booster
- You will deal enough damage to low threats as you have to reload a lot anyway increasing your ammo output is not an good idea
- Reload booster
- You better use the "Optimized consumption system"
- Energy Booster
- One level won´t change the game and with more then one you´ll hardly reach level 15
- Heath regeneration booster
- Will make you less susceptible against "open wounds", "poison" et. al.
- You better use medical items
- You better make use of your medic
- You better use Armor- and Health Booster items found on the map
- Will make you less susceptible against "open wounds", "poison" et. al.
- Ammonition booster
- As it adds an good amount of damage
- This will allow you to solo longer.
- As it adds an good amount of damage
- Armor and AR regeneration booster
- I recommend an build with 2 x Armor and 1 x Armor Regeneration boosters for your first games and higher difficulties especially if you have to protect your team.
Early Game Tactics (Combat)
- Droppod
- The Hellfire is one of the two classes (Terminator is the other one) that is able to droppod on all difficulties.
- If you don´t want to Droppod split from the group and solo in an range that you might be able to regroup fast.
- The Hellfire is one of the two classes (Terminator is the other one) that is able to droppod on all difficulties.
- Map cover
- Destroy Strols
- Search for Marines / Veterans
- Destroy Strols
- Regroup (Wave +-1)
- Central: Rookies Wave 5 and Veterans: Wave 9
- Science: Rookies Wave 5 and Veterans: Wave 9
- Industrial: Rookies Wave 4 and Veterans: Wave 7
- Docks: Rookies Wave 4 and Veterans: Wave 7
- Transport: Rookies Wave 3 and Veterans: Wave 6
- Military: Veterans Wave 3
- Central: Rookies Wave 5 and Veterans: Wave 9
Your Inventory - Stuff you need.


- The Armor, Health (!) and your weapon up.
- Power cells (High threats might get through your armor. Use it to get it back online)
- Incendary Explosives (Place them and when they blew up, position yourself on the fire [but never steal expos from your demo!]) (For further tactics watch Napalm Grenade Device)
- Medical stuff (especially during solo runs)
- Seeker Mines (to get snatchers down fast or as last resort!)
- Steroids (Stims) (as you are slow and need to increase your speed)


The Hellfire Starter Build (Default)
- Easy to play
- Good damage output
- Starter friendly
- Might lack of armor / protection
- Primary: Arc(lite)
- Secondary: Pistol (for starter) or FAS-18 (for higher ranked players) (see movement speed)
Recommended levels: 2 : 3 : 5 : 5
- None (for new players)
- 2 x Armor ups
- 1 x Armor Reg up
(for higher ranked players) (see movement speed)
- 3 x Ammonition Booster
(If you want to play an more aggressive role) (for higher ranked players) (see movement speed)
With higher ranks you should replace your "napalm burst device" for the "napalm grenade".
The Annihilation Hellfire
This is one of my personal favorite builds for the Hellfire.
- It handles with every kind of enemies (especially swarms)
- Easily survives Aetriden difficulty
- Has an nice damage / armor balance.
- Primary: Arc(lite)
- Secondary: FAS-18
Recommended level: 2 : 5 : 5 : 3
- 2 x Armor boost
- 1 x AR regeneration booster
- 3 x Ammunition boosters
- Leveling Skills
- Start with one point in "Napalm System" and "Optimized Consumption System"
- 3rd point goes into "Napam Grenade" (Now spam it as often as you can)
- Max. "Napalm System"
- When regrouping or after Max "Napalm System" put one point into "Vanguard"
- If you lack of damage or after you putted one point into "Vanguard" put an 2nd point into "Optimized Consumption System"
- Max. "Napalm Grenade"
- All remaining points (2) into "Vanguard"
- Start with one point in "Napalm System" and "Optimized Consumption System"
- Use your active skills as often as you can!
The Bulwark
- Ultimative tank
- Might lack of damage
- Team-supporting-build
- Primary: Arc(lite)
- Secondary: FAS-18
Recommended level: 3:5:5:2
- 2 x Armor boosters
- 1 x Armor regeneration booster
With the "Tokugawa Overload" you´ll be able to taunt enemies nonstop! Even without it it drasticly increase the surviability of your team.
The Guardian
- Combines the most tanky components
- Protecting the group
- Primary: Arc(lite)
- Secondary: FAS-18
or
- 3 x Ammunition Booster
- 2 AR Res booster
- 1 AR Reg booster
- Increase your damage by using "Reaper Blades"
- Later when you have re-grouped max out the Guardian device and Vanguard device.
The Burning Samurai
- Saves a lot of ammo
- Dealing high damage
- Difficult to play
- Primary: Arc(lite)
- Secondary: FAS-18
Recommended level: 2 : 5 : 5 : 3
- 3 x Ammunition boosters
- 2 x Armor and 1 x AR Reg booster
- High threats (dogs!)
- Taunt
- Use the double sword first
- If the enemie is still up when vanguard stops use the single sword to reduce incomming damage
- Taunt
- Small threats (Letuce, Blood dogs):
- Use the double sword first as you have an wider range with the sword and have a few milliseconds before enemy hits
- Then single sword
- Use the double sword first as you have an wider range with the sword and have a few milliseconds before enemy hits
- Crawlers and similiar:
- An wellplaced single cut
Stay always in the back of the team but not that far away that taunt doesn´t protect your team anymore.
NOTE: You realy need Armor and Helthbooster ups or a lot of medical stuff or an awesome medic to be effectiv!
The ACE-43 Hellfire Build
I have to say that i personally don´t like this build. But many Veteran use(d) it so i mention it.
- Primary: ACE-43
- Secondary: FAS-18
- 3 x Ammonition booster
The Tactic is the same as with the Terminator or an ACE-43-Assault.
Droppod, kill and don´t kill your team.
If you get surrounded use the Shockwave.
Use the equalizer to increase your damage.
Conclusion
Always Remember:
- Soloing character!
- Taunt Skills are your best friends and makes you the best friend of your team.
- You are the only that stands between your team and your enemy!
- The Hellfire does most its damage with the Arc(lite). Less with his components but they are very mighty!
Epilog
But I tried to present you the pros and contras of Devices, power-ups, loadouts and tactics.
At the end there is only one thing left to say:
Updates
17th October 2015
Reworked "Armor Components" Section
Reworked "Guardian" Build
4th August 2015
Added "pros" and "cons" and several tactics
Polishing
27th July 2015
Added several "tactics" and polished some descriptions
1st Jun 2015
Added Guardian build
17th May 2015
Cosmetic stuff, cleared out several descriptions
13th April 2015
Updated Version, added Guardian Device, reworked most components and boosters
3rd April 2015
Updated Version and corrected some miss spellings
7th Feb 2015
Reworked "Secondary Weapon"
1st Feb 2015
Overworked Power ups, added descriptions, added builds, added game behavior
- The Everything Guide(V. 1.013)★ 5 (306)9.4k views418 ♥84 minUpdated Dec 25, 2021
- [RUS] База знаний по игре + гайды★ 5 (317)6.1k views275 ♥60 minRussianUpdated Aug 24, 2015
- Information you need to know, you noob. Updated 10-Jul-15★ 4 (133)4.2k views65 ♥26 minUpdated Jul 10, 2015
- SinglePlayer Upgrade item locations (Finished)★ 4 (119)3k views170 ♥4 minUpdated Sep 11, 2015
- Basic Informations very detailed [Out of Date]★ 4 (31)1.6k views25 ♥18 minUpdated Oct 4, 2016
- Advanced Gameplay Guide★ 4 (33)1.3k views30 ♥20 minUpdated Dec 2, 2014


- Upgrading to PremiumTeam Fortress 2★ 5 (20k)1441k views11k ♥6 minUpdated May 11, 2022
- No More Room in Hell Official ManualNo More Room in Hell★ 5 (2.8k)569k views2.1k ♥29 minUpdated Apr 22, 2019
- NMRiH Community Hosting GuidesNo More Room in Hell★ 5 (526)351k views653 ♥1 minUpdated Aug 10, 2022
- ULTIMATE GUIDE FOR GAME DEV TYCOONGame Dev Tycoon★ 5 (5.8k)326k views10k ♥4 minUpdated 23 Jan, 2014
- How to 'Git Gud' Soon™MORDHAU★ 5 (2k)318k views3k ♥68 minUpdated Nov 16, 2024
- Лучшие кооперативные игры SteamPAYDAY 2★ 5 (1.5k)315k views2.1k ♥56 minRussianUpdated Apr 27, 2025






This guide was created by its original author on the Steam Community. Are you the author and want it removed? Request removal.