Factorio Compact Designs
Foreword
This guide began with a single furnace setup I wished to share but then I refined a few other ideas to be presentable. Now that Factorio 1.0 has released I felt it's time to get back in the game to fix the old designs and maybe make something new.
Have a browse through the images for design ideas or download the designs from the blueprint book section at the end.
Have a browse through the images for design ideas or download the designs from the blueprint book section at the end.
Furnace starting setup
A simple, compact smelting block suitable for the beginning of the game. It will smelt 15 ore per second or one full yellow belt into plates. Ore and coal are input on the belts on the bottom right.
This design is easilly upgradeable to double the capacity to 30/s once red belts and steel furnaces are available
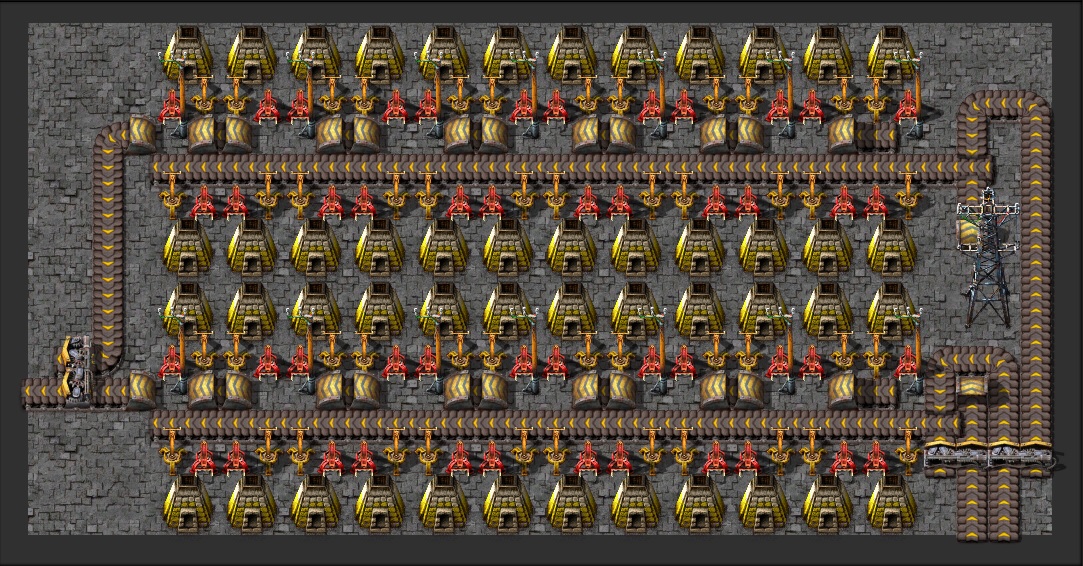
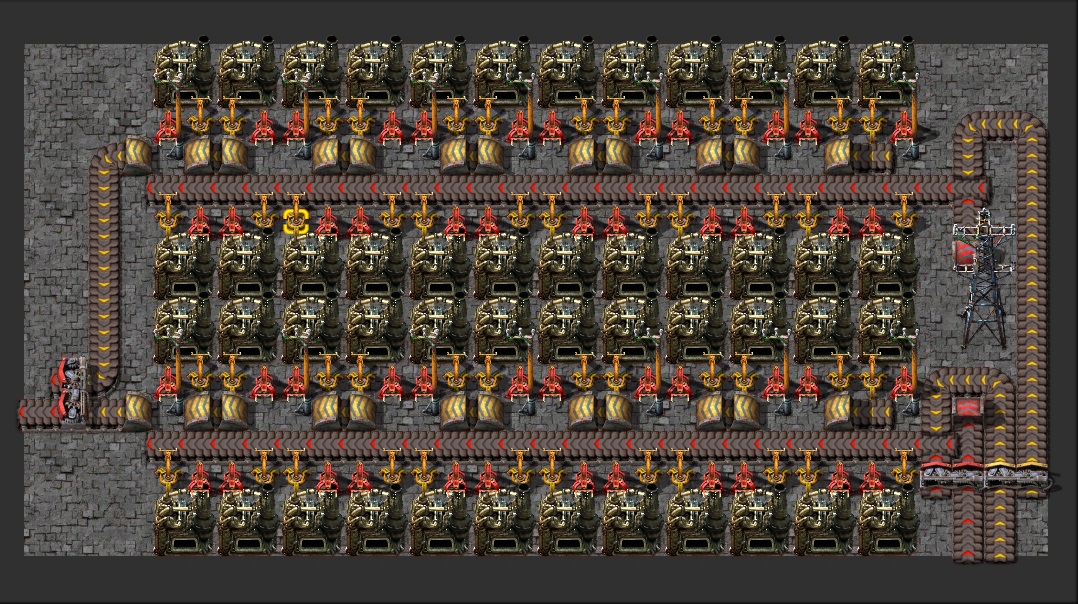
This design is easilly upgradeable to double the capacity to 30/s once red belts and steel furnaces are available
Furnace endgame customizeable block
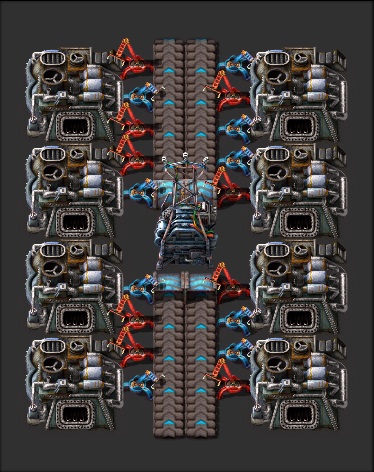
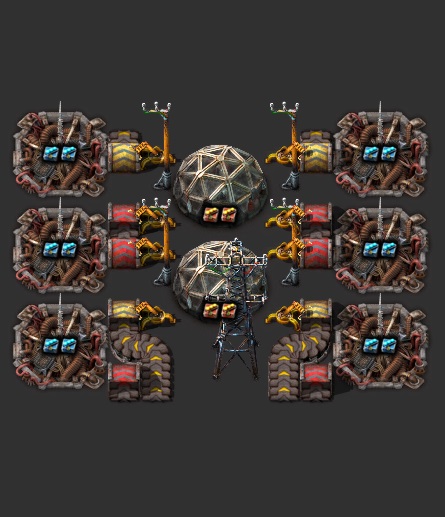
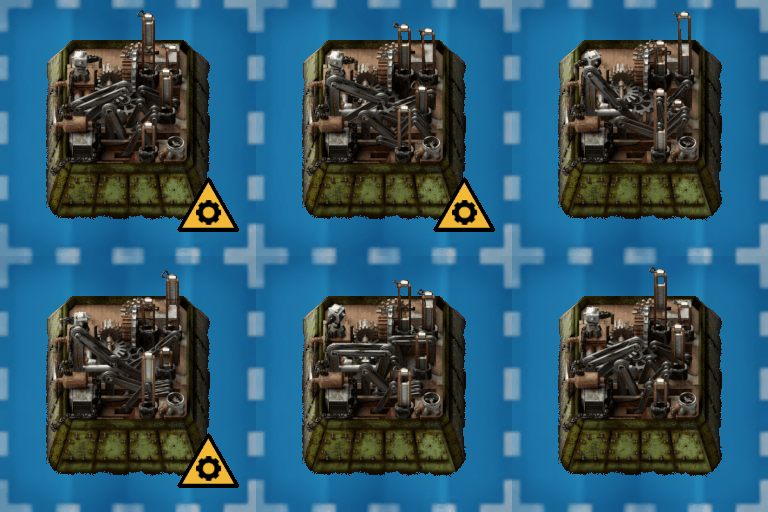
For late game large scale smelting, I present to you a neat, space-efficient, tileable, and module customizeable electric smelting block.
The block is centered around a substation that powers the 8 electric furnaces and can fit 10 beacons around it to improve efficiency.
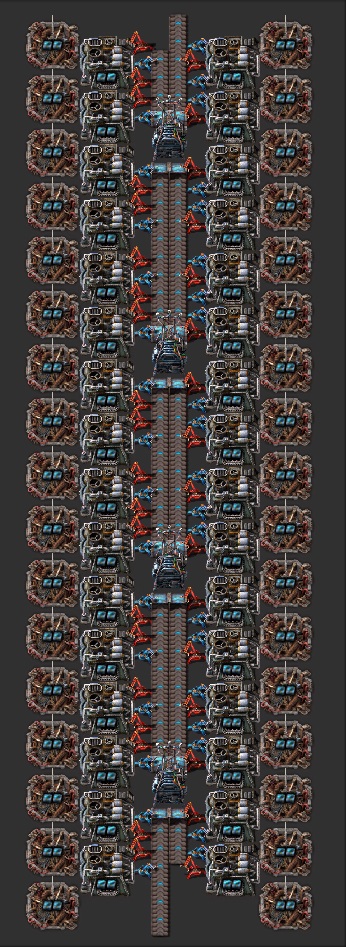
Included in the blueprints are two ready made end game setups: one with speed modules, one with production modules. Both will output a full 45 plates per second but it will take a few minutes for them to ramp up and reach 100%
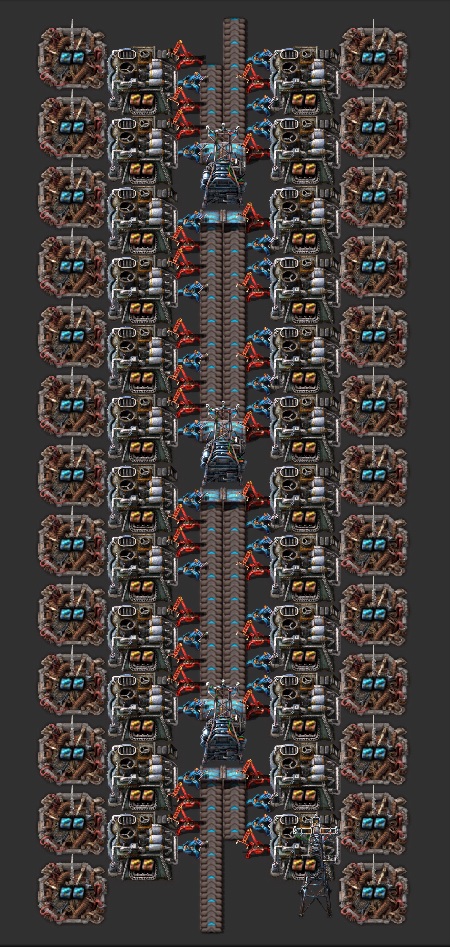
Mining
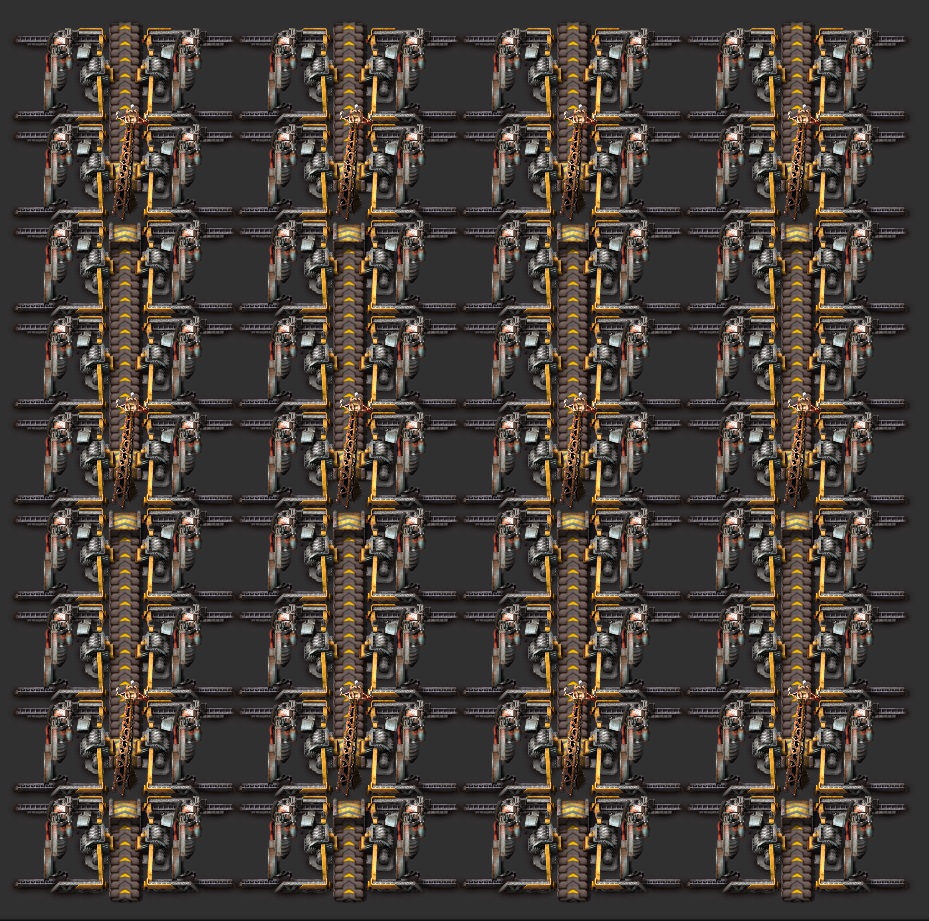 To get ore into your furnaces you of course need miners. There is nothing special about this mining setup but it's still handy to have something to quickly drop down on an ore patch. Includes 2 later game setups using efficiency or speed modules.
Oil Refinery
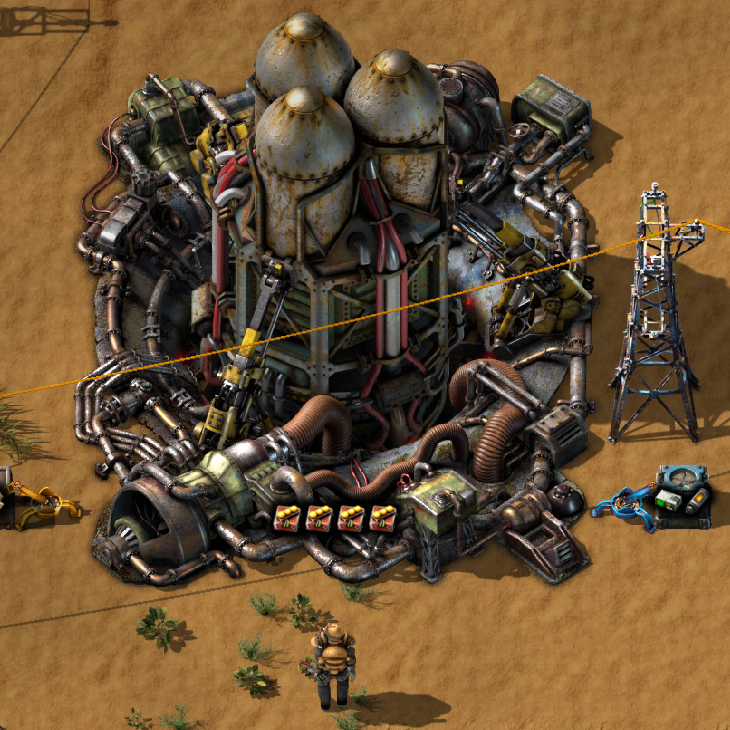
A starter oil refinery takes 100 crude oil and turns it into almost same amount of petroleum. Naturally heavy and light oil can also be drawn from the refinery if needed. The output can be doubled and efficiency improved by almost 50% by adding modules and beacons later on.
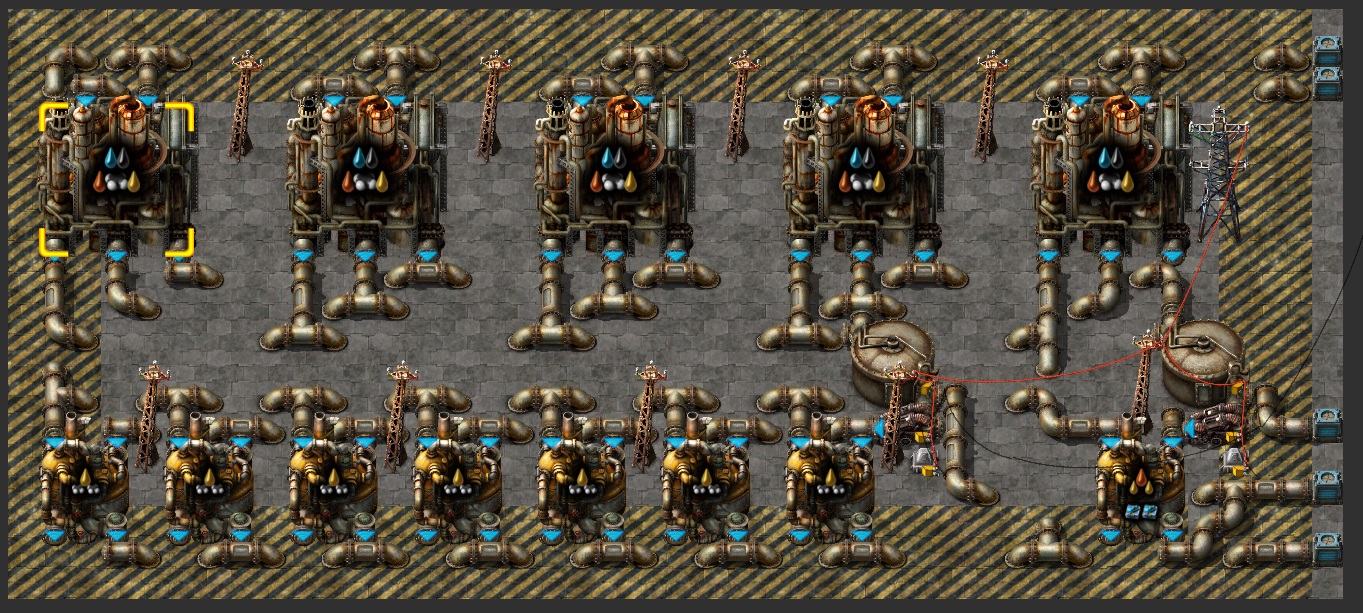
![]()
Coal Liquefaction
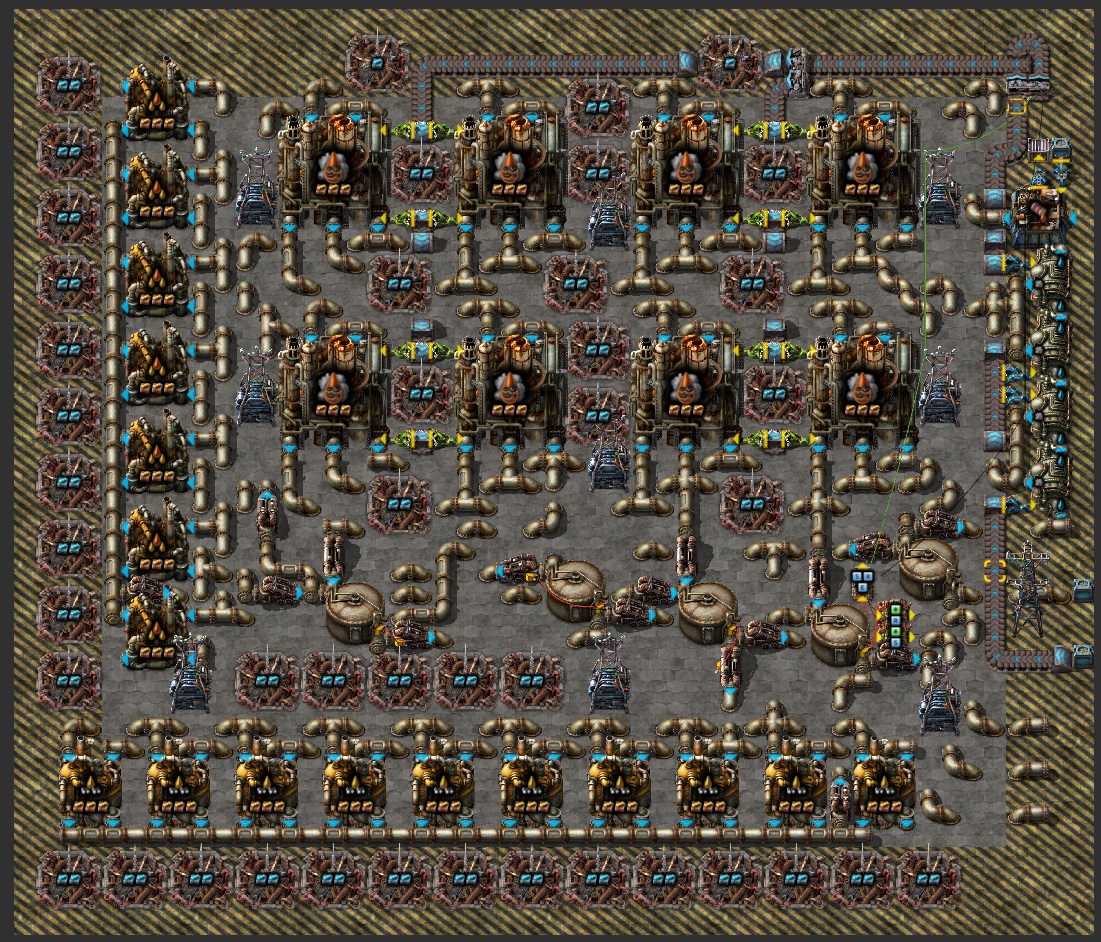
If you need loads and loads of petroleum, this is the build for you. It has a bit more pipe mess that i would like but it works wonderfully. 40/s coal, some water and we get over 425/s petroleum. And if that is not enough, you can rotate, overlap the beacons and build a huge cloverleaf of gas.
Of course you can draw heavy and light oil from this design if needed.
Note: this needs to be primed with some heavy oil to get started, assembler for unbarreling is included.
Of course you can draw heavy and light oil from this design if needed.
Note: this needs to be primed with some heavy oil to get started, assembler for unbarreling is included.
Electronic circuits
The very first neat circuit build for a new factory to get you started. Copper to the splitter, iron up to the middle belt, circuits exit from the top. The design can be copy-pasted upwards to increase production but a blueprint for a finished design for 15 circuits / second is included.
For late game when green circuits are in huge demand and modules pose no problem, this circuit production setup can't be beat! 45/s circuits out, only 34.5 copper and 32.2 iron in. The design can be easilly tiled by overlapping the beacons side-to-side and end-to-end in order to create 2 row circuit producing monster and maximizing the effect of the beacons.
Advanced Circuits
Simple first build for advanced circuits will only give couple chips per second but it will get you started. Circuits and plastic come in on the red belt, copper on the yellow.
Can be easily tiled sideways by overlapping the yellow belt at the side. Later a few beacons can be added to the gaps left by the yellow underground belts to boost production to acceptable midgame levels.
For endgame production the gloves come off and this monster design eats full 45 iron, plastic and copper each per second, delivering 31.5 advanced circuits. Can be tiled sideways by overlapping beacons, of course.
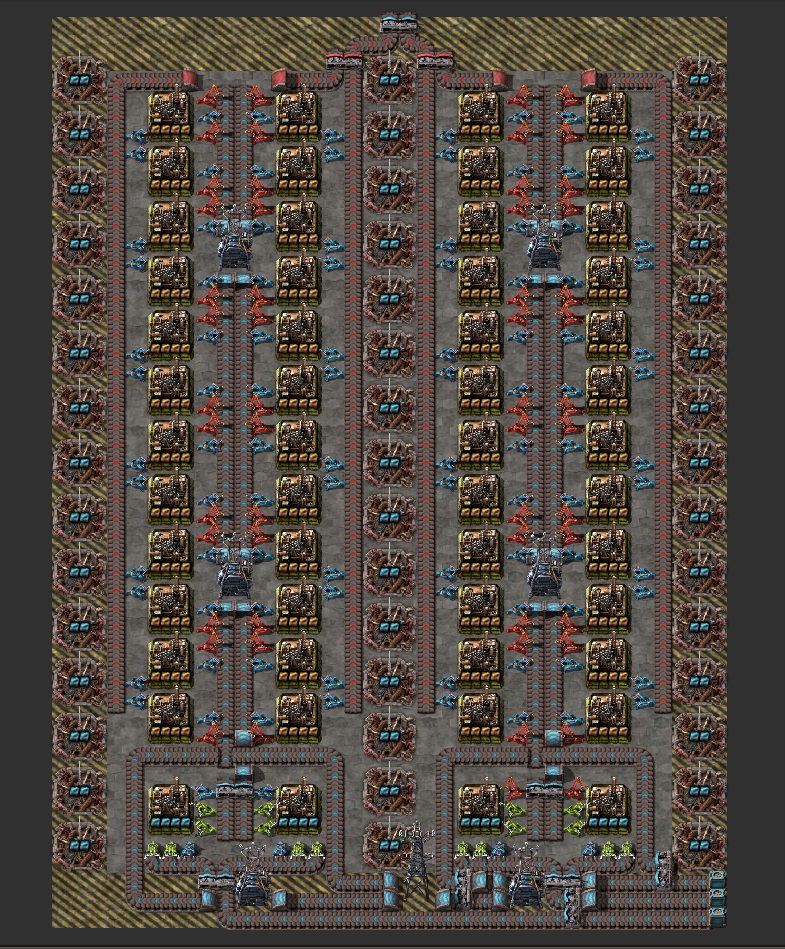
Processing Units
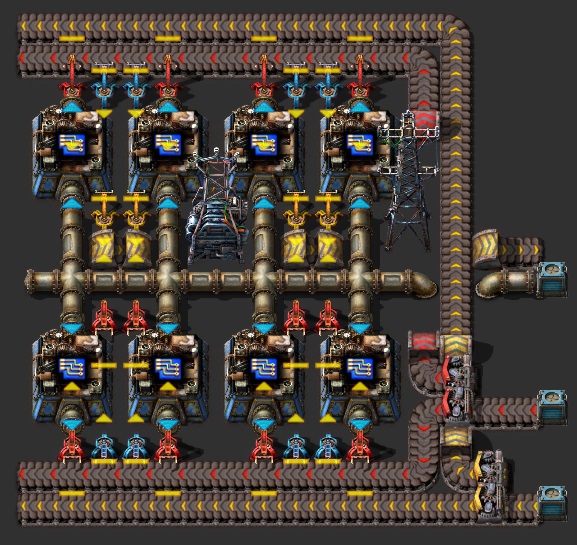
Processing Units mark the start of mid-game for me. They will consume a LOT of green circuits. the initial setup will give you enough for your personal equipment upgrades and is copu-paste extendable as well.
For serious end game production this setup will consume a full blue belt of circuits, therefore it is not an accident that the setup can be tiled with the circuit production setup by overlapping beacons to minimize the transportation requirements for the circuits.
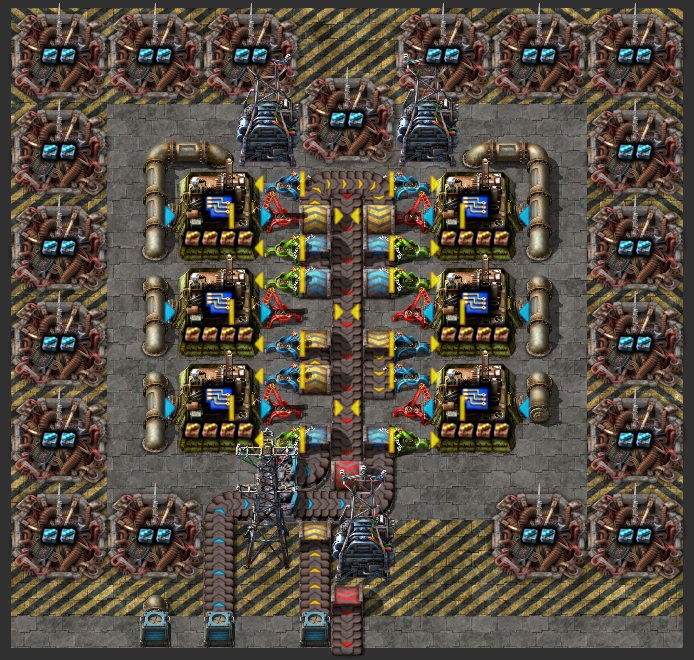
Belt complex with drone delivery and obsolete belt upgrading
This is a design for a compact conveyor belt factory. It can be built without modules for slower production. At full speed this complex will annihilate two blue belts of iron plates to make all the belts you need.
Thanks to the buffer chests, low grade belts that are sent to trash will be brought back to the complex and upgraded, while still allowing you to have logistics keep you stocked with all belt colors.
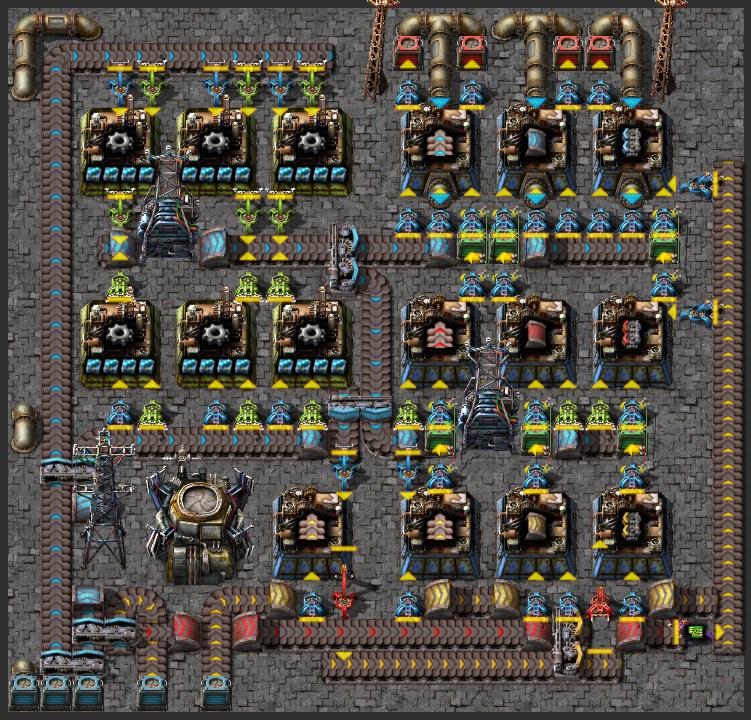
Thanks to the buffer chests, low grade belts that are sent to trash will be brought back to the complex and upgraded, while still allowing you to have logistics keep you stocked with all belt colors.
Ammunition Manufactory
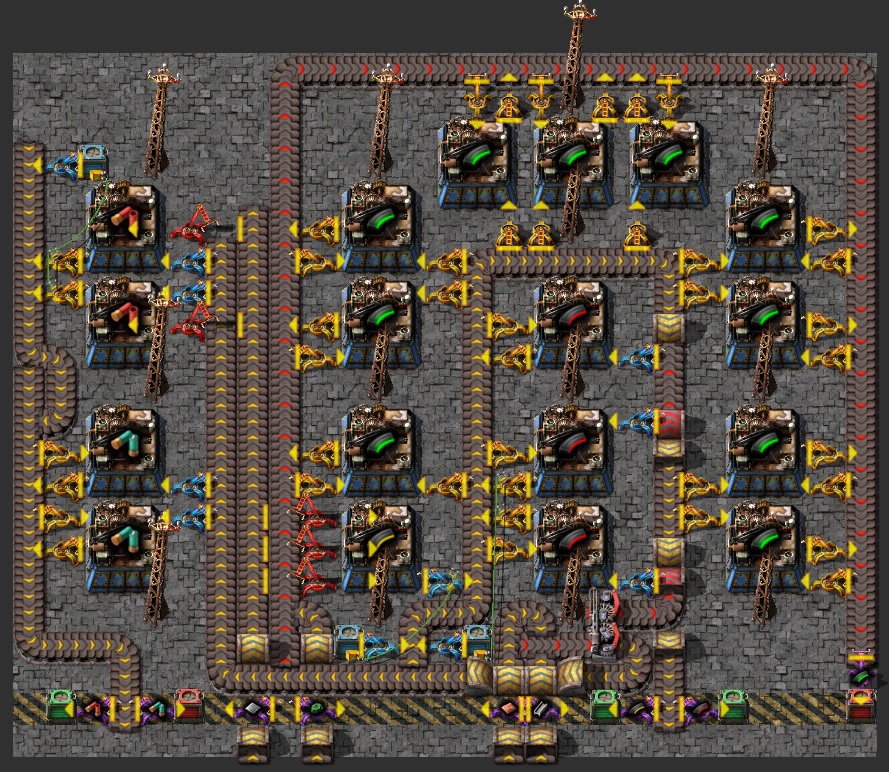 This is an all in one stop for bullet needs: shotguns, smg, turrets. It uses logistics chests to gather and upgrade trashed low tier ammunition. If logistics chests are not yet researched, just replace the buffer and provider chests and manually pick up the ammo you need.
Destroyer Capsules
Science
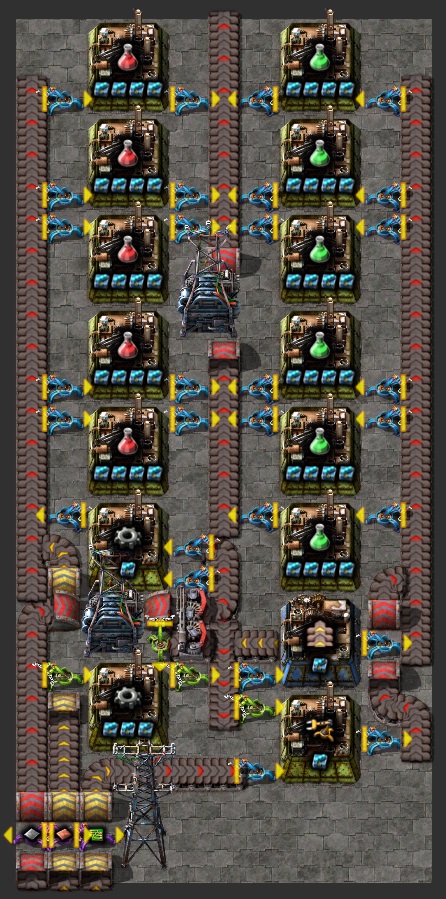
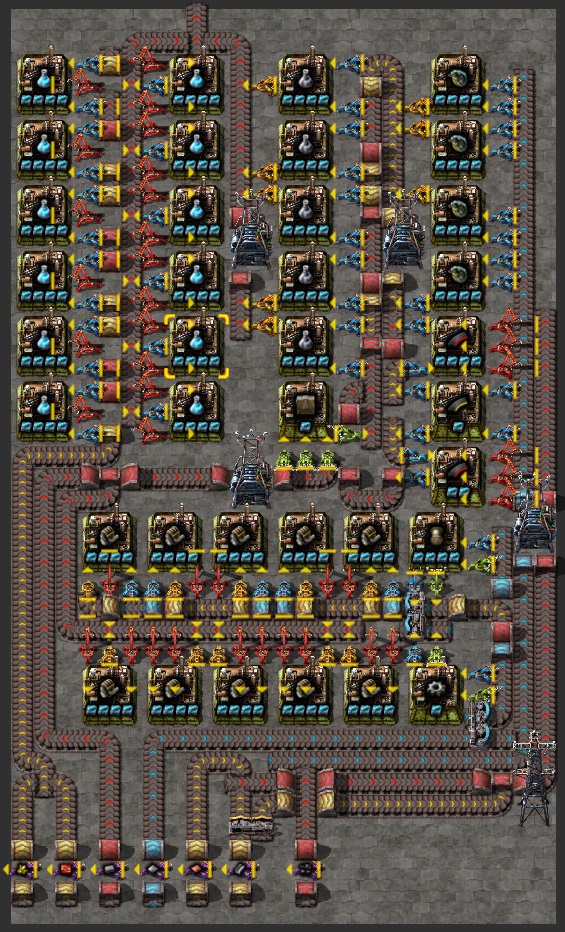
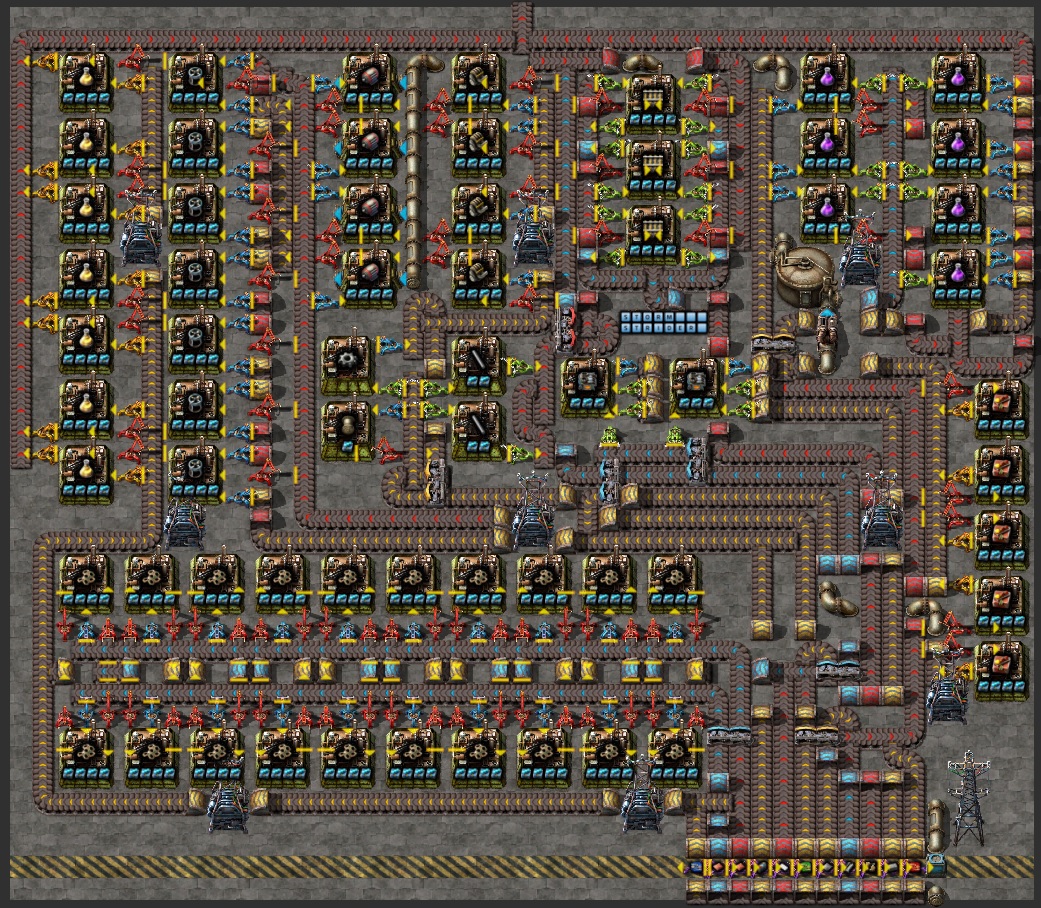
Science production is what gets you forward. Here are neat setups for Red+Green and Black+Blue and Purple+Yellow science packs.
I'm showcasing setups using speed modules that raise production to 3.75 packs per second but the blueprints include downgraded versions usable in early/mid game producing 0.75 per second.
These designs especially raise the interesting question of what should be used as input materials for builds. For example should I bring in engines in on a conveyor or build them on site for the blue science packs?
My view is that I bring in materials that come from a miner or a furnace and all types of circuits (green, red, blue) because these types of items I produce in huge amounts in specific manufacturing areas. Items like grenades and engines are produced elsewhere but in significantly smaller quantities, so they will be built on site here as well.
Laboratory block
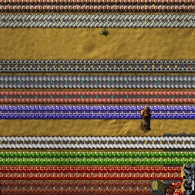
 Since there are so many science packs and so little space around a single lab, a technique known as belt weaving is needed. It means passing different coloured underground belts under each other, which sounds kind of suspect but does work. 4 belts = 8 lanes means there is even one lane free. Modules and beacons as an late game option.
Two labs high portion can easily be copy-pasted to extend the design.
Uranium Kovarex Enrichment
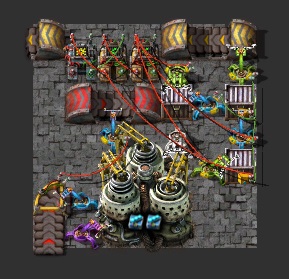 I was very pleasantly surprised to find out my old Kovarex Uranium setup still works.
The design can be tiled to the left by overlapping the up underground yellow belt. Prime the rightmost unit by inserting 40 glowing uranium-235 nuggets into the bottom chest. Once the centrifuge cycle is complete the three chests and combinators automagically move 40 glowing nuggets back into the centrifuge and pass the surplus along the yellow belt where it will start priming the next centrifuge in line. Once all centrifuges are primed, produced U-235 will come out on the yellow belt to the left.
Note that this design requires stack inserter capacity of 10 to work perfectly
Nuclear Reactors
Design Under Review
Railroad Builder
Rail Builder Blueprint Book[justpaste.it]
Blueprint book of railroad building components for right hand drive, Including
Blueprint book of railroad building components for right hand drive, Including
- Straight segment
- 90 degree curve
- T - Junction
- + - Crossing
- Loop style unloading station for 2 loco + 8 wagon train
- Loop style loading station for 2 loco + 8 wagon train
- Loop style drive-through loading station for 2 loco + 8 wagon train
Complete Blueprint Book
Adding separate pastebin links for each design is too much work, both for me and to you. So to simplify this, All design blueprints organized into books and since books can now go inside another book... here is the import string link for the complete guide book!
For some reason pastebin is not working at the moment so fortunately there are other text sharing sites.
Justpaste it link for the Newest Stormstriders Complete Blueprint Book[justpaste.it].
For some reason pastebin is not working at the moment so fortunately there are other text sharing sites.
Justpaste it link for the Newest Stormstriders Complete Blueprint Book[justpaste.it].
More Factorio guides
- Factorio: How to Build a Main Bus★ 5 (6k)231k views15k ♥15 minUpdated Aug 31, 2025
- Factorio: Observations, Tips, Tricks, & Efficiency★ 5 (3.2k)111k views7.1k ♥85 minUpdated Aug 4, 2020
- Blueprints for early, mid and lategame (updated)★ 5 (757)83k views2.4k ♥3 minUpdated Sep 3, 2022
- Factorio - Everything To Do With Smelting: Belt & Bot Based★ 5 (629)80k views1.6k ♥16 min
- Factorio Builds★ 5 (1.1k)63k views2.7k ♥5 minUpdated Jun 7, 2021
- High-Level Strategy for New Players★ 5 (880)62k views2.8k ♥43 minUpdated Oct 15, 2025

This guide was created by its original author on the Steam Community. Are you the author and want it removed? Request removal.