Gameplay Guide - Weapons and Ambition Mode
Spoiler Warning
This guide contains spoilers (although not much) for the ambition mode, whilst it is completely irrelevant to the story mode, some people may find that the content in this guide may affect their enjoyment of playing through the ambition mode. You have been warned!
That being said, I would appreciate any comments and feedback as this is my first Steam Community guide. Enjoy!
:)
- Patch 1.02 - Updated weapons section, unique (star) weapons can now be customized through weapon fusion and temper.
§ => Section 1 - Ambition Mode
- Bodygaurds and Leadership Exp
- Part 1 - Tongquetai Completion
- Part 2 - Subjugation
- Gold Farming
- Unique Animals
Bodyguards and Leadership Exp
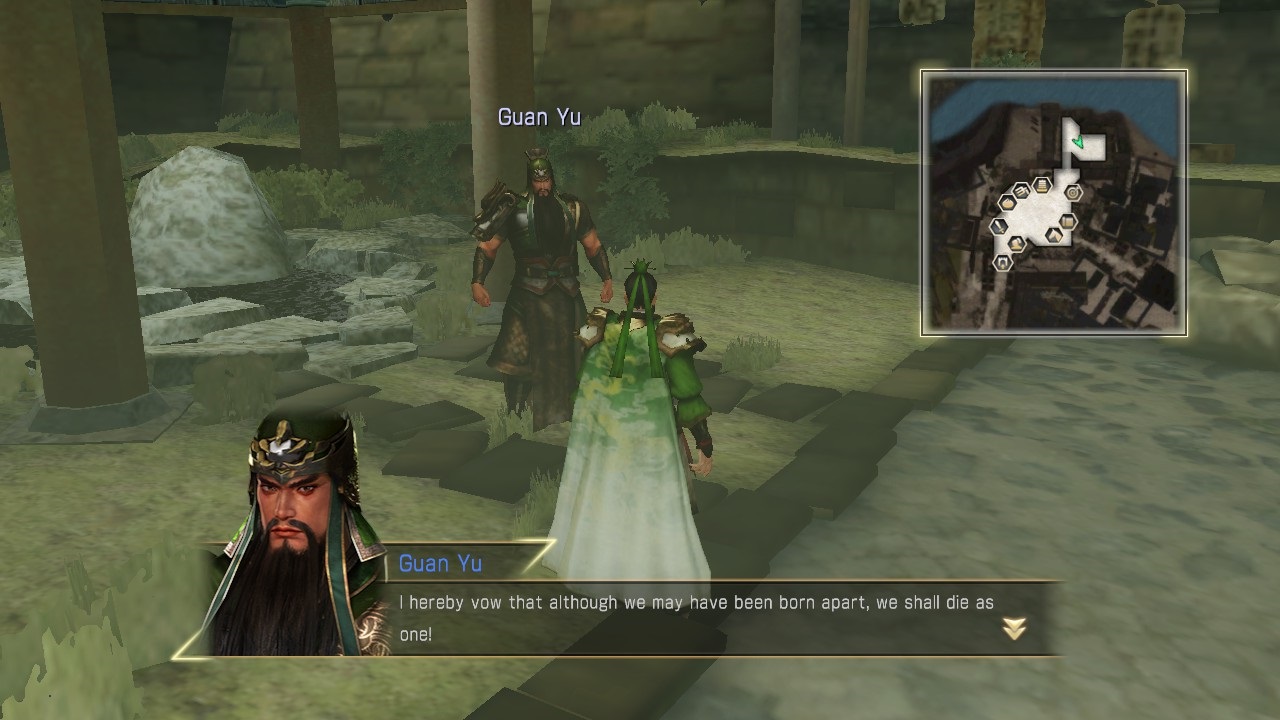
Ambition mode gives you the chance to find allies that you can use as your bodyguards. When you command them during battle, you will gain leadership exp (from feats accomplished) for the officer you are currently playing as. You can also gain leadership exp from feats accomplished and objectives achieved during battles in free mode.
Additionally, you can increase the bonds you have with your bodyguards when fighting with them in ambition mode. As your bonds with your bodyguards increase, you may get summoned by them and receive 100 gems from them each time they talk to you. When your bonds with them is maxed out, they will call you for a third (and final) time and additionally unlock their second support skill.
Part 1 - Tongquetai Completion
- Getting 300 allies.
- Getting 5000 fame.
- Getting the Blacksmith, Teahouse, Barracks and Merchant to level 50.
By far the most tedious task is maximising the levels of your facilities, so it is very likely that you'll get the required number of allies and fame along the way. You'll need 1100 (correct me if I'm wrong) facility materials to get these 4 facilities to level 50. It is highly recommended that you keep your Merchant less than level 50 until you have all the facility materials you need. You should also assign an officer (I use Xu Zhu) to the Farmer as he/she will sometimes give you materials after a battle. To get the facility materials quickly, follow these steps:
- Go to the Barracks (collecting rewards from latest search if any) and dispatch some troops.
- Go to the Guard and select a skirmish battle (on beginner difficulty)
- Fight all enemy officers and break any crates and pots along the way to collect the materials.
- Return to camp
- Talk to the Farmer (for some gold) and the officer assigned to the Farmer (for a chance of getting materials).
- Go to the Stables and feed your animals until you get some materials as a reward.
- Go back to step 1.
Once you've had enough (of grinding), go to the Merchant and exchange all your weapon materials for twice the number of facility materials. This is not possible if your Merchant is level 50, you will only get 1 facility material for each weapon material.
When you finish the Tongquetai, you need to fight one more battle before the emporer comes to visit and reward you with the Emperor's Blade. You also unlock mock battles accessible via the Guard and part 2 is available to unlock. Note that you will lose a huge portion of your allies to unlock part 2.
Part 2 - Subjugation
- Capture as many key locations as quickly as possible without losing them! This will increase the subjugation percentage gained in that battlefield.
- You will lose any of your officers should they be defeated during battle. You'll have to find and defeat them again if you want them back. (This doesn't include bodyguards.)
- You must select any one of your allies as the commander before going into battle.
- You can only assign up to 8 playable officers to go into battle with you. (This doesn't include bodyguards.)
- The 2 important locations to capture are the supply depot (to weaken the enemy) and messenger post (for reinforcements).
Once you have subjugated the entire land, you will have access to the final battle. This final battle will prove to be Xtremely difficult. You'll find that you will need all your allies with you in order to fight all 10 Eunuchs at the same time. When you win the final battle, you will be rewarded the Treasure Fan from the emporer.
Gold Farming
- Barracks with a high enough level (not sure which) to unlock Yan Province.
- A high level Farmer (preferably level 50).
And follow these steps:
- Go to the Barracks and dispatch some troops to Yan Province for 1000 gold.
- Go to the Guard and select a skirmish battle (on beginner difficulty).
- Directly kill the enemy commander.
- Return to camp.
- Talk to the Farmer and (optionally) talk to the officer assigned to the Farmer for some free materials if they found some.
- Go back to step 1 to receive a War Elephant worth about 15000 gold.
Once you've had enough, go to the Merchant and sell all the War Elephants and you'll find that you've just made some quick gold!
Unique Animals
- Shadow Runner (Riding)
Unlocked by completing 30 consecutive battles. - Hex Mark (Riding)
Unlocked by completing another 30 consecutive battles having unlocked the Shadow Runner. - Red Hare (Riding)
Unlocked by completing yet another 30 consecutive battles having unlocked the Hex Mark. - War Elephant (Riding)
Unlocked by completing 100 consecutive battles. - Golden Panda (Companion)
Given by the emporer after the completion of the Tongquetai. - Harrier (Companion)
Given by the emporer after getting all 8 facilities to level 50.
§ => Section 2 - Weapons
- Choosing Your Weapons
- Weapon Farming
- Weapon Tempering
- Weapon Fusion
- Gem Farming
- Preferable Elements
- Examples of an Ultimate Weapon
Choosing Your Weapons
Weapon Farming
- Stage - Recapture of Chang'an, Lu Bu's Forces (Other)
- Clear time in beginner difficulty - 18-20 minutes
- Number of weapons acquired - About 60
- This stage is also a high level stage so you are sure to get good rank weapons. (Equip the Fortune Hunter skill!)
Weapon Tempering
- You need a level 30 blacksmith in ambition mode.
- The elements added to your base weapon is randomly chosen from the added weapon.
- Your weapon can only have up to 6 elements.
- Weapon tempering will not replace any existing elements on your base weapon.
- Weapon tempering will use the levels in the elements of the added weapon and add them to the elements of your base weapon, giving priority to elements of the same name (unless they are already maxed at 10).
Weapon Fusion
- Increase the attack stat of your weapon. (Costs 500 gems and any weapon.)
- Change the weapon affinity. (Costs 50 gems and any weapon.)
- Change an existing element to something else. (Requires a weapon containing the desired element.)
- Upgrade an existing element to a higher level. (Requires a weapon containing the desired element. The increase in level is equal to the level of the same element in the sacrificed weapon, with a limit of level 10.)
Each weapon type with a certain rank will have a specific attack stat cap for the weapon, with the unique rank 6 weapons having the highest attack stat caps. Remember that gems are difficult to obtain, so it is recommended that you should use gems for changes that are not possible with weapon temper.
Gem Farming
- Stage - Battle of Puyang, Lu Bu's Forces (Wei)
- Gems obtained in ultimate difficulty - 300
- Clear Time - Around 1 minute 30 seconds
- Requirements - A bodyguard with the battle skill poison trap. An officer with a good wave clearing musou attack (and the weapon element roar is also useful). When the battle starts, go to the east side of the map to Juan Castle and defeat Xun Yu. Then quickly go to the west side of the map to Puyang Castle and defeat Xiahou Dun. Trigger poison trap at the Puyang Castle Main Camp and defeat Cao Cao. Make sure you defeat 150 enemies with musou attacks along the way.
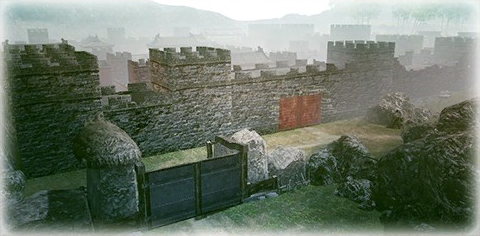
- Stage - Battle of Yan Province, Xu Zhu's Forces (Wei)
- Gems obtained in ultimate difficulty - 300
- Clear Time - Around 2 minutes
- Requirements - A bodyguard with the battle skill ambush. An officer with a good wave clearing musou attack (and the weapon element roar is also useful). As soon as the battle starts, trigger ambush with your bodyguard and finish the battle as quickly as you can using musou attacks.
Preferable Elements
- Jubilation (Must have!)
It recovers a small amount of your HP upon getting +1 KO count. This is an absolute necessity without exception as it can proc using any method of attack (including musou/rage) as long as your KO count goes up. - Slash
It allows you to deal extra damage and may 1HKO enemies not including officers. - Cyclone
Allows your charge attacks to deal damage through guard. This is especially helpful in higher difficulties since the enemies guard themselves very often and this makes them less frustrating to deal with. - Explosive
This adds some nice splash damage to some of your attacks which makes clearing waves of enemies easier. I also like the satisfying "bang" that you hear from this. - Velocity
Gives you extra attack speed which makes your attack combo happen faster so there is less risk of your combo being disrupted by an enemy attack. You will lose count of how many times your attacks are disrupted especially with a slow attacking weapon. I would even say that this is a must on hard-hitting weapons that are slow. - Flash
This element is very good on weapons that land multiple hits rapidly on the same target and pairs well with explosive. - Induction
Add extra damage to some of your hits. - Roar
Recovers some of your musou gauge upon getting +1 KO count (with any attack including musou/rage). This is useful for longer rage attacks, allowing you to clean up huge numbers of enemies quickly and safely.
Other notable elements include:
- Frenzy and Barricade
Increases attack and defence. - Morass
Allows your attacks to slow down the enemy. - Thunder
Adds some area of effect damage. May stun enemies. - Thorns
Inflicts some recoil damage upon taking damage, the recoil damage may disrupt the enemy. - Flurry
This is good on weapons/officers that can easily rack up a big chain number. - Gale
Increases your attack depending on how big your KO count is. (Becomes more noticeable at 500+.) - Recovery
Recovers a tiny portion of your HP bar when attacking your enemies.
There are many elements that are good in many different combinations, so feel free to experiment with weapon fusion! It is also important to note that element effects from attacks do not activate whilst doing your musou/rage attack!
Examples of an Ultimate Weapon
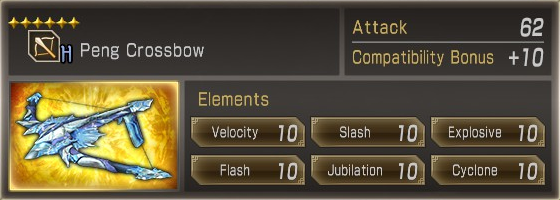
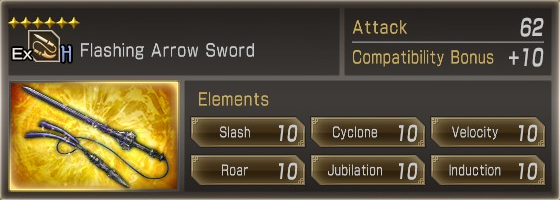
§ => Section 3 - Ultimate Difficulty
The hardest difficulty in the game. Challenging but not impossible. Most enemy officers are capable on killing you in 1 combo or if they happen to touch you during their musou attack. Here are some tips and tricks to getting through the ultimate difficulty.
- Jubilation (massively trumps Recovery)
- Cyclone
- Slash
Each musou attack is a life-saver for when you made a little mistake and you let an enemy officer begin to attack you when you're not guarding, or if the enemy officer is about to use their musou attack and you couldn't get out of the way in time. Sometimes I even end up playing most of a stage with my musou completely filled and unused if I was lucky enough not to be in many life-threatening situations.
Maybe you were lucky enough to survive a hit or 2, now you're on red health and one enemy's sneeze away from death. Your bodyguard will come and give you a big instant recovery, giving you some breathing room in an attempt to get some more HP back by either using the Jubilation weapon element or finding some HP recovery items.
Successfully completing these strategems given will help boost your forces' morale, they can defeat enemies more easily so there is less for you to deal with. Going along with your allied officers helps since they can help disrupt the enemy so you can survive more easily. (Your allied officers and bodyguards are able to survive hits from enemies much better than you. They also deal much more damage if they get a few hits in.)
This is a given but it is incredibly helpful if your character is level 150 with 1000 health, 1500 attack and 1500 defense. Use the Academy in ambition mode to maximize these stats.
Example Setup for Ultimate
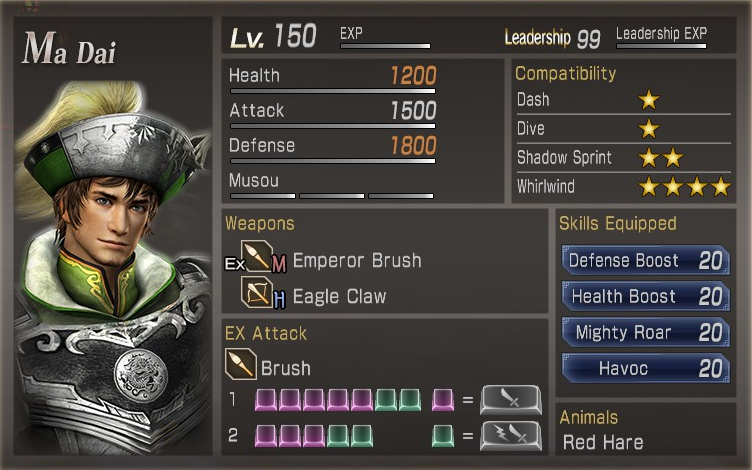
- Officer - Ma Dai
Why? Because I like him, his favourite weapon is the Brush which gives a unique/cool play style with the ink blobs exploding into creatures. He also has a full compatibility bonus with the Crossbow, which is a powerful weapon. His musou attacks don't have the most reliable wave clear or utility but I don't mind. - Skills Equipped - Defense Boost, Health Boost, Mighty Roar and Havoc
The defense and health boost means more survivability against hits that otherwise would've been 1HKOs so accidentally taking a few hits is a little more forgivable. (The reason why I don't take Steely Heart is because it's not level 20 lol.) Mighty Roar gives you the damage you need against enemy officers, it's unlikely that you will focus other enemies when there are enemy officers around so you won't need the attack boost. Havoc just gives you more room to play with when wanting to hit enemies, it's a personal preference.
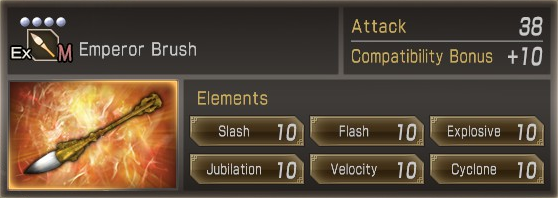
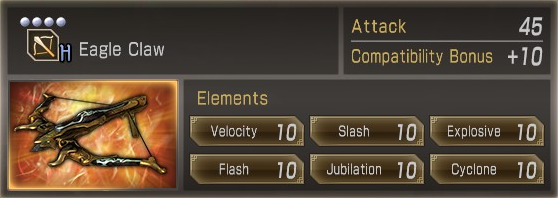
- Weapons - Brush and Crossbow
The EX attacks with the Brush have good area of effect damage and can deal significant damage quickly if set up properly with the charge attack. The Crossbow is an incredibly strong weapon, just use the charge attack after the third normal attack (referred to as C4) and you will see why.
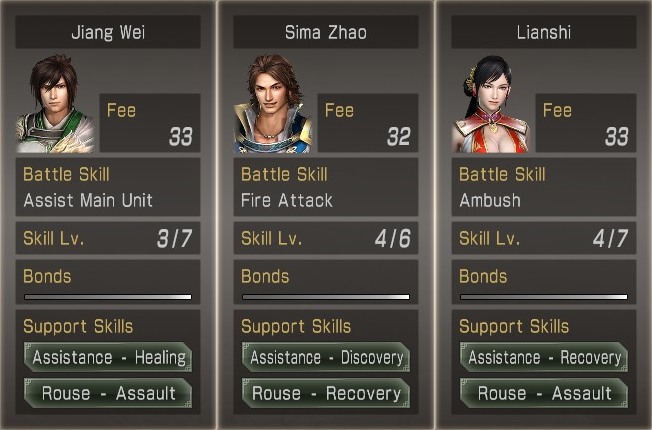
- Bodyguards - Jiang Wei, Sima Zhao and Lianshi
These are 3 likeable people (at least in how they are portrayed in the game), with useful battle and support skills (Lianshi is particularly useful as her musou attack 2 has a healing effect!): - Assist Main Unit - Useful when your commander goes in a pinch through unforeseen circumstances.
- Fire Attack - It's great when you're going into an area with tons of enemies and you just want kill all of them easily.
- Ambush - Acts as a form of crowd control in the targeted area, allows you to hit the enemies easily without retaliation.
- Assistance - Healing, Discovery and Recovery
Healing and Recovery are there for obvious reasons. Discovery is useful in that sometimes enemies can drop items that can prove to be life-saving in some desperate situations. - Rouse - Recovery and Assault
Keeps your bodyguards alive and increases their attack when they're in a pinch.
- Configuring your Gamepad to work with Dynasty Warriors 8 and follow console layouts★ 5 (332)28k views426 ♥2 minUpdated 7 Nov, 2022
- 6th Weapon guide and attributes in general★ 5 (1.1k)23k views1.9k ♥11 minUpdated 12 Mar, 2019
- Gameplay Tips and FAQs★ 5 (497)19k views642 ♥23 minUpdated 13 Oct, 2014
- 真三国无双7猛将传全成就指南(附全dlc介绍)★ 5 (743)18k views1.2k ♥1 minSimplified ChineseUpdated 7 Jun, 2025
- Dynasty Warriors 8: The Ultimate Controller Guide★ 4 (121)15k views199 ♥2 min
- 《真・三国无双7本传with猛将传》史上最详细快速白金(全成就)全流程指北攻略★ 5 (381)14k views1.1k ♥3 minSimplified ChineseUpdated 27 Oct, 2024




- Upgrading to PremiumTeam Fortress 2★ 5 (20k)1441k views11k ♥6 minUpdated May 11, 2022
- No More Room in Hell Official ManualNo More Room in Hell★ 5 (2.8k)569k views2.1k ♥29 minUpdated Apr 22, 2019
- NMRiH Community Hosting GuidesNo More Room in Hell★ 5 (526)351k views653 ♥1 minUpdated Aug 10, 2022
- ULTIMATE GUIDE FOR GAME DEV TYCOONGame Dev Tycoon★ 5 (5.8k)326k views10k ♥4 minUpdated 23 Jan, 2014
- How to 'Git Gud' Soon™MORDHAU★ 5 (2k)318k views3k ♥68 minUpdated Nov 16, 2024
- Лучшие кооперативные игры SteamPAYDAY 2★ 5 (1.5k)315k views2.1k ♥56 minRussianUpdated Apr 27, 2025






This guide was created by its original author on the Steam Community. Are you the author and want it removed? Request removal.