How to Dive 1.06
Important Note
- Part IV: Weaponry in regards to bleed and toxic changes and inability to start with toxic/bleed on SPP-1 up to date
- Part VI: Know Your Enemy in regards to bleed and toxic changes
Introduction
From this point on I'll be retiring as the guidesmith and the rights to update the guide go to Flishster so How to Dive can still serve Depth's community. I'll be just providing support when it comes to images and datamining when needed.~Ray G. Quit
This guide is a counterpart to another guide about Depth, so if you are looking for a similar guide about sharks, here it is:
http://steamcommunity.com/sharedfiles/filedetails/?id=483522020
But back to "How to Dive." At some point after "How to Shark" I've decided to make guide for divers, covering mechanics as well as basic and advanced strategies. I have my motives for creating this. First is simply lack of a big diver's guide that is up to date in this community and the second, as silly as it sounds: I am a perfectionist so I can't just leave out the diving half of the game while covering only the shark part.
This is a long lecture and intended to be a very detailed one, so it’s only for people dedicated to mastering the ways of diving-jutsu. The guide will explain many nuances of gameplay, but the knowledge gained will amount to nothing, unless you practice enough to forge it into skill. Depth is a game with a high skill ceiling for both divers and sharks. So if you want to get good, you will have to invest your time to account for the large learning curve.
Most of this guide is very accurate, but you may find some information that is just an opinion. There are aspects of game that can work for you in a different way (better/worse) and that is fine. You have the right to disagree and play the way you want. What you will do with all that information in this guide is up to you.
I worked hard to make this guide the best I could, and I would appreciate any feedback that you guys may provide. So without further ado I present to you …
Legend
These icons will show up across the guide. From left there is great white, hammerhead, bull, tiger, mako and thresher. Be sure to know that.


Also some basic abbreviations and terms that will be showing up:
GW – great white
HH – hammerhead
WT – whitetip
Thrashing - the moment when you are in shark's jaw losing health
Dart – short shark's grabbing attack
Lunge – long shark's grabbing attack
Cooldown – the period of time immediately after using an attack or ability during which it can’t be used again; the period of time the ability spends “recharging”.
Hit and run - tactic where shark attacks one target (sometimes two) and then runs away to hide and regenerate before next attack, saving its own tickets and health points
All out aggression - tactic where shark tries to take as many targets down as possible, until it's dead
Terms for groups of sharks that may show up here, on the forums or in-game:
Tank sharks – great white, hammerhead, bull
Speed type sharks – tiger, mako and thresher
Big sharks - great white and hammerhead
Medium sharks - bull, whitetip, and tiger
Small sharks - mako, goblin, and thresher
PART I: Diving basics
Before you start reading this it would be great that you've completed the tutorial and played a few matches - around 20 at least, that would be perfect for begginer's experience.
Let us start with the absolute basics. There are 3 core skills that new players should focus on to begin improving their skills:- Gold collection
- Detecting and shooting the sharks
- Life preservation (not losing the tickets)
Now some math. S.T.E.V.E.'s health is 200. Damage done by sharks by hitting the robot (doesn't matter if it was lunge, dart, or sprint charge) looks like this:
Mako = 7
Thresher = 7
Tiger = 10
Bull = 11
Great White = 12
Hammerhead = 14
PART II: Tips and strategies
Time for some tips and strategies. These tips are everything we could come up with. They apply to all sharks in general. You can find how to counter specific sharks in part VI. I hope you'll find them useful.
First of all: If you don't feel comfortable in the open, don't force yourself until you feel you are ready. Until that, when sharks are dead you can make quick jump out of the room, grab some gold and get back inside when you hear heartbeat closing on you. Try to do your part for the team.
When you will want to test yourself, be sure that you won’t bleed out the tickets too much. If it’s not working, stop trying the same thing over and over again. Be sure that you are not fighting against sharks with much greater experience than yours, because that will end up badly. Open water is shark’s territory and usually they dominate there. Makos, threshers and tigers are very fast and will pick you up if you won’t react fast. Sometimes random dodging when hearing rapid heartbeat is a better option that trying to save your stamina for the moment when you see shark. Hammerheads and great whites are much slower, more visible due to their size and a bit limited in open water fights, so those are opponents that are taken care of easier in open water, yet their defense is not a joke, you need some good fire power and dodging to take them down.
Let’s say that you have chosen to play more in the open or you’re forced to go outside due to transition between safes. Aside from hearing, you can see sharks coming. They are not invisible (while most of them believe they are). Even from a far distance you can see their shadow swimming towards you. With more practice you will be able to spot shark better. It is worth saying that the lighting is different on different parts (levels) of the map, so moving to a brighter area makes seeing sharks easier. There are even some areas where you can see them better in the dark. You will have to figure that on your own.
Contrary to popular belief, setting game’s brightness to maximum won’t help, because visibility is based on a fog-like mechanic. Plus if you make your game too bright it will backfire on maps like Temple, Stash and Galleon where you can be blinded by light.
This technique can also be used to pool gold. At the beginning of the match (preferable 1st safe) you, or someone with a DPV, can travel far away for gold and instead of going all the way back to S.T.E.V.E. every time he has 20 gold, you can toss your gold down next to a safe that you will pass in the future.
Tips and strategies (2)
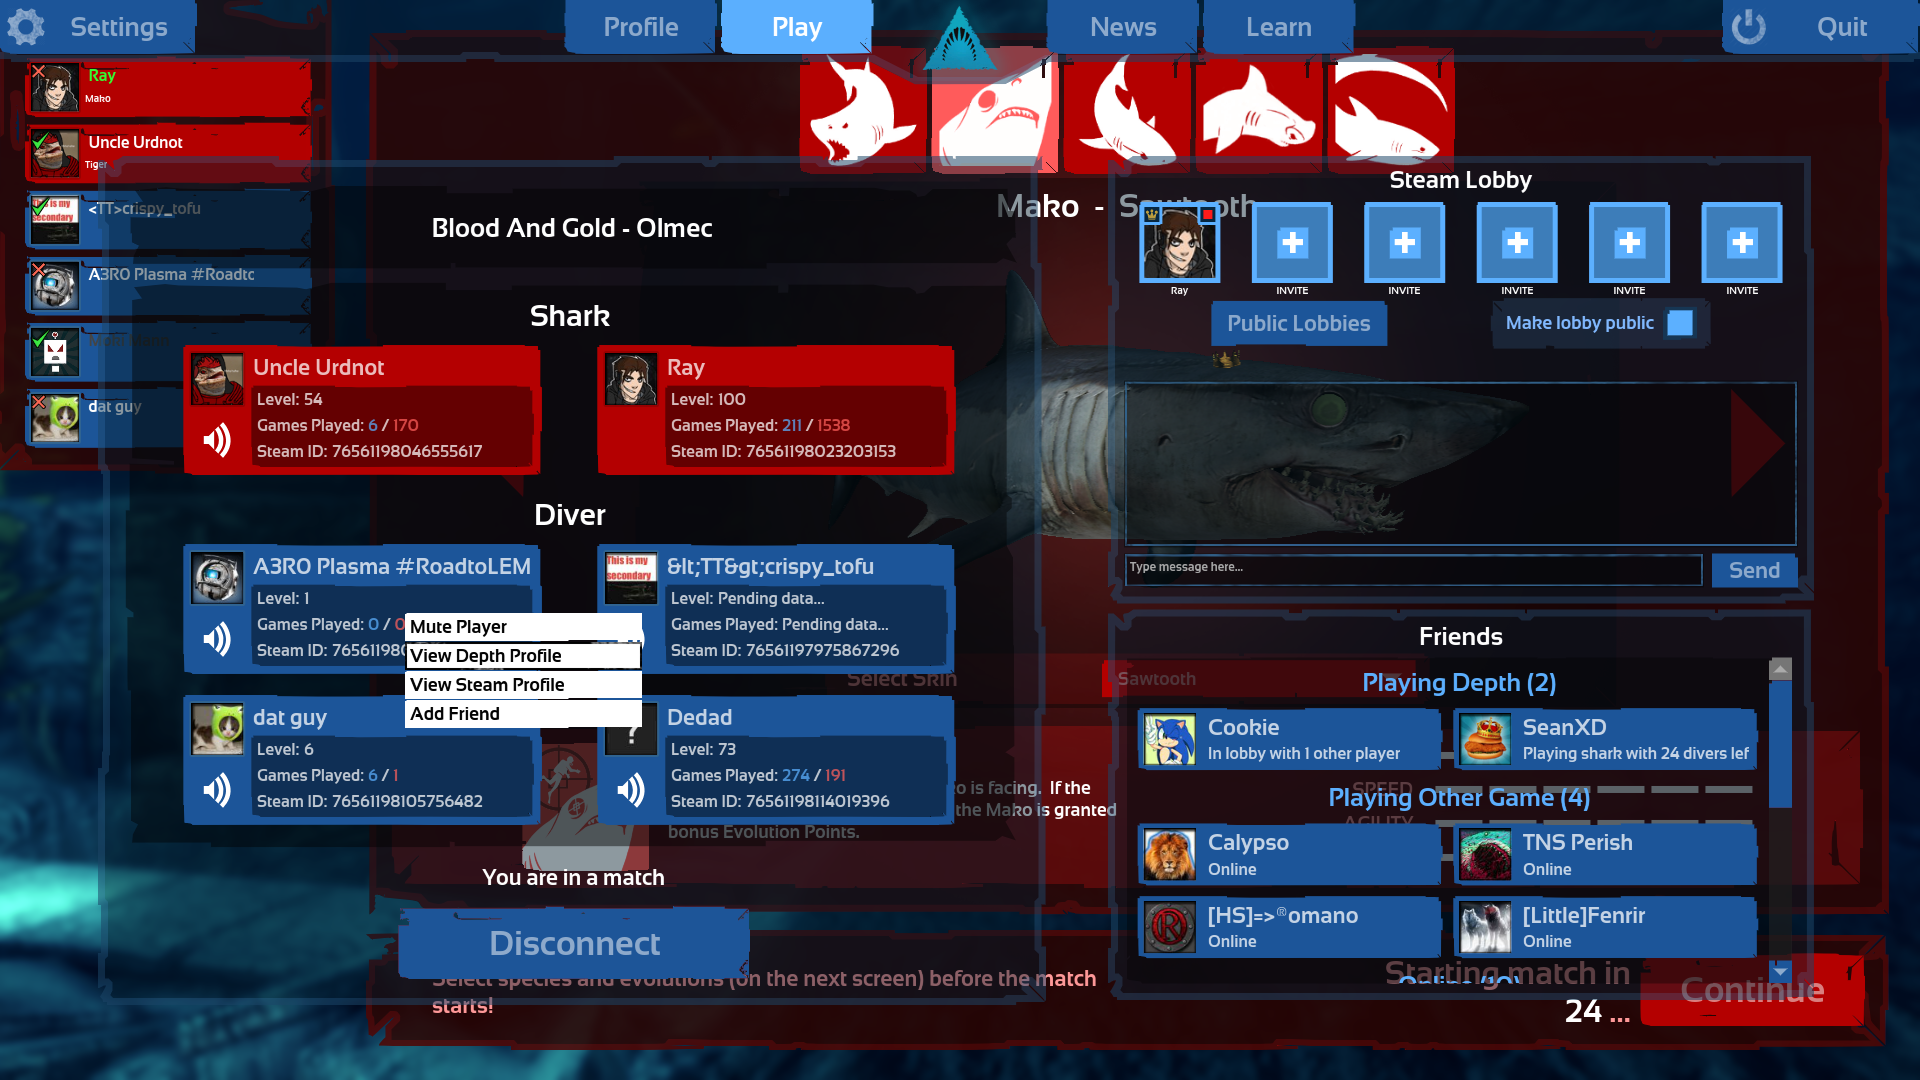
- Settings > Game > UI > Show Diver Stamina Status
- Settings > Game > Crosshair
- Settings > Game > Misc > Field of View
- Settings > Video > Lighting > Brightness
- Settings > Video > Advanced > Ambient Creatures
PART III: Modifiers
In case you are wondering why this guide goes with modifiers before weapons – those will be a part of next section, where we can talk which mod is good with which weapon, so I figured we could get those down first. Most weapons have ammo types that can be purchased for an additional cost. This is how they work and when they should be used. You will notice that I added little icons representing certain shark species around every modifier. The meaning behind the four colors:
not very effective
somewhat effective and/or can be troublesome
very effective against this type of shark
doesn't affect shark
 Toxic – this will drain shark’s health over time. Sharks can get rid of it when they eat a seal, so they’ll either run for it or desperately try to score one last kill. It deals 3.5% health damage per second to all sharks equally. The effect lasts 20 seconds. Every bullet and spear applies the effect if shark is shot. Need to be applied only once to start ticking, the effect does not stack. Shark have two evolution that prevents damage from it: Hemogenesis grants extra regeneration and Placoid Scales which halves the damage. There’s also Ignore Pain evolution that can prevent toxic from being applied to shark until its stamina didn’t drop to 0. Unfortunately you have no way of telling which defensive evolutions shark is using, but toxic is still extra damage nonetheless. Remember that tank sharks due to limits to their speed may have a harder time in reaching seals before their time is up, but in the end toxic effects all sharks in a similar way.
 Bleed – bleeding rounds will deplete a shark’s health while moving. The faster they move (especially while lunging) the more life bleeds out of them. To drop this effect shark will have to remain in place for 1 second, so it’s most likely that it will try to hide somewhere out of sight and wait it out. Chasing bleeding shark’s is a good idea as long as you don’t end up in its jaws (or the other shark’s). Every bullet and spear applies the effect if shark is shot. Need to be applied only once to start ticking, the effect does not stack. Shark have two evolution that prevents damage from it: Hemogenesis grants extra regeneration and Placoid Scales which halves the damage. There’s also Ignore Pain evolution that can prevent bleed from being applied to shark until its stamina didn’t drop to 0. Unfortunately you have no way of telling which defensive evolutions shark is using, but bleed is still extra damage nonetheless. Remember that speed sharks due to their speed, being the lunge maniac types and low health may have a hard time dealing with this modifier.
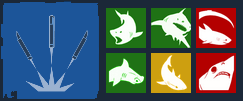 Splitting - this ammo type is more likely to hit a target even if the aim is off, but with lowered damage. The ammunition splits into 3 bullets and hits for 70% of weapon's base damage, but hits only once per shot – those 3 bullets are not stacking. This modifier is effective against makos due to their speed, and very effective against threshers due to their wild hitbox while thrashing.
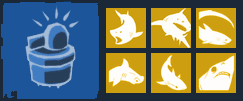 Tagging – you can’t go wrong with those bullets. It's not very deadly by itself, but they will keep shark detected from even a far distance for the whole diving team. Because of it shark loses its element of surprise, so that will force it to run and wait this out – which will give divers more time to collect gold and it also helps your team to know where to shoot. Of course being tagged inside the room full of divers (or even in shooting range) will greatly decrease its chances to survive. Tag lasts 10 seconds from last bullet taken and it can be reapplied (but it does not stack).
 Tranquilizing – this kind of ammo will deplete small amount of shark’s stamina (10 stamina per bullet), which is not dangerous at all by itself, but will also force 1 second cooldown on stamina regeneration from last hit (the same way it happens after a dart/lunge/sprint). If shark was already low on stamina, tranquilizers can get it below zero, so the regeneration may take few seconds, which can make escape impossible. Tranquilizers are a good pick for starter weapons especially against Great White, but they can be countered very easily later. Once shark gets Adrenal Glands or Blood Rage evolution (which are very favored among many sharks despite the use of tranquilizers), this ammo type can be laughed off - both evolutions make up for it far more than this kind of modifier can take from them. So it’s not a good idea to pick this for late game weapons.
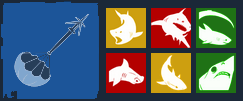 Drag - can be used only on spear gun and spear pistol. It can be backed up with toxin, tag or bleed effect for extra damage. Drag will slow down shark for 3 seconds and it’s very effective against bull and HH. By slowing down hammerhead diver can decrease the amount of damage dealt by slamming into wall. It's even somewhat effective against GW despite its ability it will still kill its momentum since both drag and ability last 3 seconds and it's very unlikely to time them together. There is no real reason to use it against mako and thresher, they are more likely to nearly die because of the damage from those weapons than be slowed down.
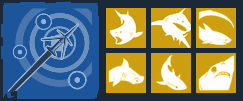 Sonar – spear pistol, spear gun and harpoon projectiles will be able to outline shark for a second, revealing its position to the whole team. This will happen, when you miss and spear will fly near the shark. It can be also used against sharks that are swimming just outside the door (waiting for an opportunity) to check their position. This won’t tag shark like tagging rounds or sensor, most of sharks won’t even assume they were detected. Long range snipers that can shoot from a far distance will find this very useful. If you miss with your shot a bit, shark will be outlined for a second, so you will be able to predict where it can be in a moment. Another good strategy to shoot around corners/through windows with it to see if there is a shark waiting around the corner. It really ruins their surprise attack. Just count your ammunition.
Modifiers (2)
 Extra Mags – increases magazines for ADS and APS rifles to 180 (up from 120) and for Bangstich to 7 (up from 3). While not affecting sharks in any way, this modifier is pretty convenient. Thanks to it you won’t be forced to visit ammunition boxes so often which can save tickets. It’s a good pick especially when you’re able to stay alive longer than other teammates.
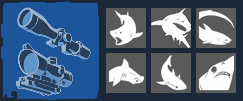 Scope and Night Vision Scope – both scopes allow divers to zoom in and give more accurate aiming. They also reduce weapon spread for ADS and APS. Night vision scope will help diver to see further on dark parts of the map. They help against every kind of shark, but none in particular. Scopes won’t be of much help from close, when sharks are mingling among divers, but it can help you to see them a bit earlier if you know from which entrance they can come. It’s worth saying that Night Vision Scope won’t work well in well-lit places such as in the open water or near the surface.
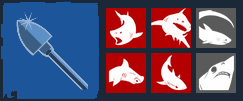 Penetrating - this is a harpoon-exclusive modifier that adds 120 damage to the base 300 damage. It's expensive - the base harpoon costs $4500, and the penetrating addon costs another $1500. Without this addon, the harpoon can still critically wound the HH and GW, but the penetrating harpoon can one-shot those sharks (Great White's ability, if active, can take up to two penetrating spears). It will also one-shot the Mako, Thresher, and Tiger, but the base harpoon can do that without modifiers. Penetrating spears also ensure a one-hit kill on the Tiger if hit on the tail - unlike the base harpoon. It's worth taking against bull shark because it can one shot even fully enraged shark with ability active.
 Explosive - this is a harpoon-exclusive modifier. It makes spears explode on impact (with any shark or solid object). Skilled divers often avoid this type of ammo. It makes the harpoon's projectile speed slower than the netgun, and considerably lowers the ammo pool of the harpoon. The explosions from the harpoon (just like the seamine) can also obstruct the diver's view and deafen them for a short time. The modifier can also damage or even kill the wielder if he is too close to the explosion, as well as indirectly kill other divers when they are in a shark's mouth (rarely does it actually save a teammate rather than kill them). The explosive harpoon can also destroy breakable walls, which can be useful for getting treasure or taking shortcuts, but can also give sharks easier ways to get in and out of the rooms. When the explosion is too close to a sonar buoy, seamine, or shark shield, it will break them/set them off. Thankfully explosive harpoon does not damage S.T.E.V.E., unlike seamines. Direct hits with the explosive harpoon deals the same damage as the base harpoon (300 damage). Indirect hits deal a percentage of that damage. The explosion can be dangerous to sharks with small health pools or low health status.
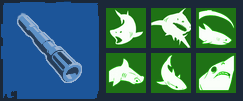 Heavy Barrel - This APS Rifle exclusive mod adds more damage per shot to the APS while lowering the rate of fire between each shot. Very effective at killing all shark types, but comes at a high price of $2300, nearly as much as the rifle itself. Care should be exercised to keep in mind the lower rate of fire while engaging speed-type sharks (Mako, Thresher).
PART IV: Weaponry
- You start with 800$.
- When you want to sell a weapon or modifier it gives you back 50% of the original cost. This applies to weapons which you've already spawned with. If you just made a mistake without leaving the weapons menu, you can get 100% refund and chose something else.
- You can carry 2 weapons, even the same ones. Nothing stops you from carrying 2 bangsticks or 2 sensors for whatever reason you could have.
- You can only pick one modifier from each category (one upgrade per row).
MC1-3 - MC stands here for modifier category and as said before, you can pick only one modifier from each category.
DPS - maximal damage per second including both fire rate and reload time - given that circumstances were perfect.
Burst power - maximal damage with one magazine clip over a short amount of time - given that circumstances were perfect.
Magazine size and max ammo - just a note: your real total ammo is both magazine size + max ammo.

Weapons - tier 1
Tier 1 weapons are all weapons that are available for you at start of the game.
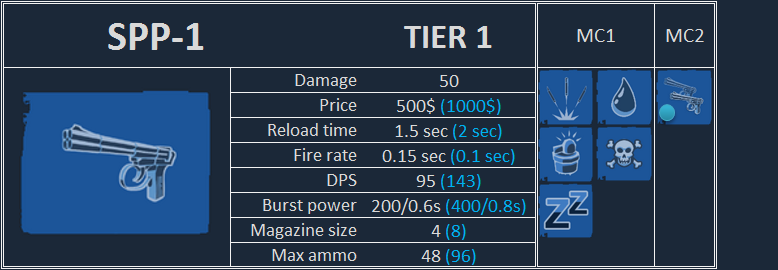
SPP-1 - cheapest and most basic of offensive weapons. This pistol will be able to take down all speed type sharks with just one magazine, given you landed with all shots on their body. So it's not that weak for a starting weapon. You can turn it into dual-wield for double the cost, which will help you to take down even bigger sharks. There are also 3 other divers so you probably can imagine how much firepower your team possesses just at start - but that applies only if you can actually aim, lead the bullets, predict shark's attack and react fast. And you probably already know how easy is to miss a speeding shark.
Modifiers for SPP-1 - the best modifier for SPP-1 is of course Twins, which gives you another pistol - you can't go wrong here. Bleed and Toxic ammo modifiers no longer reduce damage, so while bleed still does a fine job dealing with speed sharks, toxic is now a great way to force sharks to retreat and heal or risk dying, allowing extra time for divers to gather gold early on. Tagging will help your team to focus and shoot down a shark much easier and can force a shark to retreat and wait tag out, which will give you some valuable time. Tranquilizers can stop sharks with 100 stamina dead on their tracks, leaving them unable to escape for a few seconds. And there is no better moment to use tranqulizers than at the beginning, where sharks have no means to counter it. Splitting will lower your damage by 30% which can be a problem, if there is even one tank shark, but it could be useful against any mix of threshers and makos if you can't aim well.
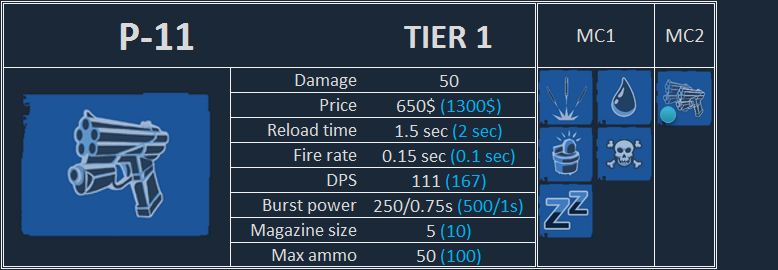
PP-1 - this is practically SPP-1 with 1 extra bullet in magazine, before you are forced to reload. Not much to add that haven't been said already.
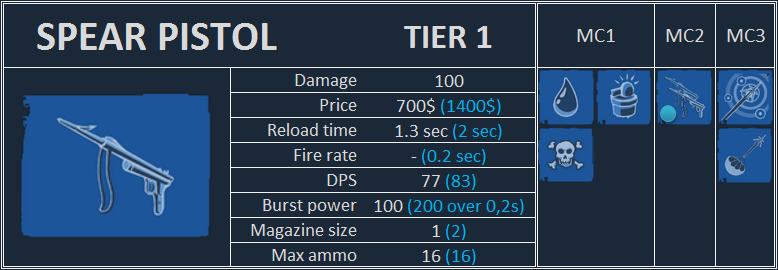
Spear Pistol - this one, while not high on DPS, has slightly bigger burst power compared to other pistols, especially while dual-wielding. But you should use this weapon only when you are good with aiming and leading your bullets, since you have to reload after every shot, and that takes up valuable time. Dual spear pistols also suffer from bullet spread, which means that second spear never hits the same spot that first one did.
Modifiers for Spear Pistol - while pistol seems a bit underpowered it has some good modifiers to balance things out. Bleeding and toxin doesn't suffer from damage reduction so you basically adding more damage to weapon. Drag can be used to slow down big sharks and sonar spears can be very useful to reveal sharks, especially when they are running to hide in the darkness of the ocean. Drag-n-Tag is probably the most useful combo for dual spear pistols, since it slows sharks down, it does a decent amount of damage, and allows your teammates more time to shoot them.
AAP-8 - The AAP-8 is a fast-firing weapon ideal for hitting targets, though its low damage can mean it's not the most effective weapon against tankier sharks. This is probably the best starting weapon after the SPP-1 because its rate of fire and clip size mean you can use it easily to at least get some damage or a modifier on it. The biggest downside to the AAP-8 is how much ammo it has. You have to frequently replenish ammunition with this weapon, which of course makes you vulnerable.
Modifiers for the AAP-8 - The AAP-8 gets all the same modifiers as the PP-1 and the SPP-1, except it can't be duel-wielded. This means you can apply tags, toxic, and bleed, or use splitting and tranq rounds. Because of its high-rate of fire, splitting and bleed are particularly effective on the AAP-8, but really any of the modifiers are an excellent choice for this weapon. It's great at applying them, and can be used particularly well for tranqs as well because it can hit a large shark so many times so quickly they will simply run out of stamina before they get a chance to escape.
Heavyjet Revolver - This weapon is the most difficult of the starter weapons to use. It has a decent rate of fire and clip size, but its accuracy lowers significantly if shots are not given a second or so of time between them and traveltime for the bullets is very low, meaning this weapon is not good against faster sharks. Its damage scales up with range, doing amounts comparable to about two knife stabs at point-blank. Additionally, it lacks any modifiers and will leave you with no money if bought at the very start. Because of this and its difficulty of use, the SPP-1 or AAP-8 are better options typically. If you need to deal with heavy sharks and have good aim, even the spear pistols are a better option. This weapon is really only a good potential option on very open maps if you have good aim and are good at spotting sharks from a distance and leading shots, and it may be better to simply stick with the spear pistols even then.
UPR-12 Gyro Pistol- This weapon is basically the revolver but better in almost every way. Its only downside is that it has moderately lower damage at point blank, but it is much faster firing and much more accurate, plus can be upgraded, unlike the revolver. It even has a bigger clip-size. It functions similarly, doing more damage at range, and even has the same max damage, which becomes higher when using penetrating rounds. While this weapon is a fine side-grade to the other pistols, its inability to apply any status conditions, not even tags, makes it generally a worse option than picking up the SPP1 or AAP-8. It can be useful on more open maps, however, if you are confident you can spot the sharks from a distance.
Modifiers for the UPR-12 Gyro Pistol- This pistol has only two upgrades: Penetrating and extended magazine. Its clip size and backup ammo is already pretty good, so extended magazine isn't entirely necessary, but penetrating is extremely useful if you intend to use this weapon for more than a few lives. If you are only picking this up as a starting weapon, you can probably ignore it and save your cash for later weapons.
Weapons - tier 1 cont.
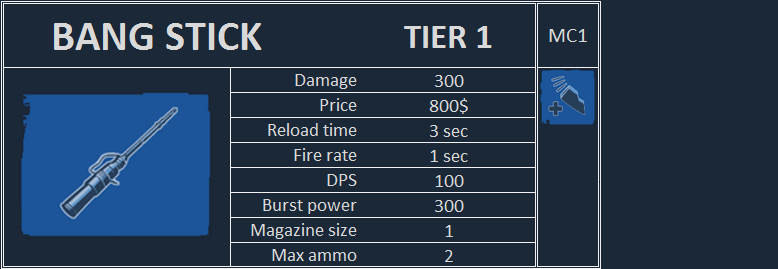
Bang Stick - the only reliable melee weapon against sharks. Dealing 300 damage kills all speed type shark and critically wounds tank sharks - unless great white had its ability turned on. Bull shark can be one shotted too unless its ability was active and loaded to at least 50%. With the right timing you can bang the shark while lunging directly at you and deal damage. It's a hard weapon to master, it requires a lot of practice, good timing, good skills to locate sharks and relatively low ping. This weapon won't be of much use with ping over 100. While all other weapons will deal only 50% of base damage to shark's tail, Bang Stick delivers full 100% blast on it. You can combo it with Net Gun to make sharks more obedient to banging, DPV to chase them or ... another Bang Stick if you don't want to suffer from 3 second reload. Of course its weakness is being forced to fight shark in melee. You also need to remember that good sharks will be able to recognize a diver who wields Bang Stick and will either avoid you or try to take you from a side. It has only one modifier which is Extra Ammo that will increase your ammo capacity from 3 to 7.
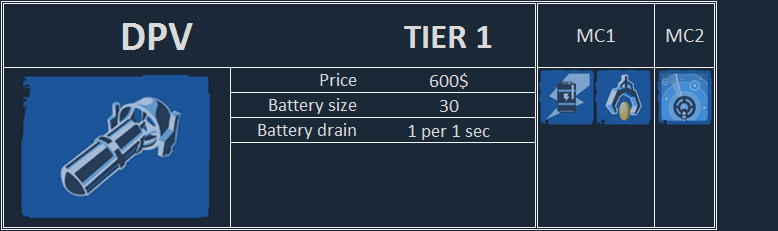 DPV - it stands for diver propulsion vehicle or simply underwater scooter. This is not a weapon, but a tool that can insanely boost diver’s mobility and let you get tons of gold to solve most of your financial problems. Starting with DPV will require some good eye to seek for gold, since you can't make it highlight all the treasure until you die for the first time. Knowledge of the map comes very handy because you can swim away far from your team and gather gold in more safe environment, because most of the sharks will be probably too busy with trying to dispatch remaining three divers. Most of the sharks - some might be able to spot you and a lone diver is always an easy prey. The fact that shark will probably realize that you're a DPV user that carry gold, makes you much more attractive target. When heartbeat is closing on you - run like hell and try to maneuver like a mad man, running in straight line usually ends badly. In the open, you are much more vulnerable. Use any construction to make wild turns there, use any closed space to slow the shark down. You are able to do a shift-dodge while using the DPV. You have to let go of the trigger to do it, but if you know how to use it properly, then your chances of escaping a chasing shark greatly increase. Also do you remember "Quick Deposit" tip? This can be useful during the chase.
DPV can be also used to chase sharks or force them to follow you. If you chose to chase a shark with DPV, you have to remember, that good shark will be able to hear its sound and will realize that it is followed - this may end badly if you don't keep a safe distance or lose shark out of sight. If you chose to use DPV to make shark follow you, there are few fun tactics to use here. One of the most known ones is to quickly put a mine in door, which can be a very unpleasant surprise for chasing shark. Another one is to start swimming towards surface at an angle and when near it, switch to some good offensive weapon (possibly tier 3 weapon), turn around, dodge backwards (towards surface) and you should have a clear shot. Don't miss it. But if you do, you should still have one more dodge. If that dodge was successful - shot again or get back on your DPV.
Modifiers for DPV - Treasure Detector is a great and cheap modifier that highlight all gold around. Electromagnetism, while expensive, it will help you farm gold like crazy, simply by swimming by it (in grabbing range). There's also OverCharged, but while it does make you much faster, it will allow you to use it with only 10 charges (10 seconds), so I wouldn't recommend it.
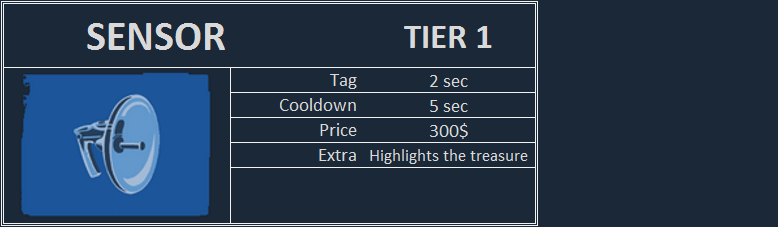 Sensor- also known as sonar gun. It will help you locate gold better. It's the newbie best friend and very good starting combo with SPP-1. While it's great for new players it unlocks at level 22. It can also shot a detection ring every 5 seconds. If aimed properly or with some luck – it will reveal a shark and discover its position by tagging for 2 seconds. Remember sound localization tip? This can often confirm your hearing skills. Every time shark will be tagged, its position will be revealed for the entire team and this will force it to try another route - giving you time. Unless you're facing a shark that does not care for it, then at least you know from where it will come.
Weapons - tier 2
Tier 2 weapons are all those weapons that aren't available for you at start and are below cost of 3000$. Tier 2 weapons are very often overlooked, because people prefer to go for tier 3 weapons straight from upgraded tier 1 weapons. Let's have a look regardless.
SCR-UMP - The SCRUMP is the cheapest tier-2 weapon and is similar to the APS and ADS. It does the same damage, has the same fire-rate, and has the same accuracy as the APS, but has a few key differences. Mainly, it costs $350 less than the APS, and has five less bullets per clip, but more bullets overall. In general, the SCRUMP's only purpose is to be a stronger weapon available even at earlier portions of the game, but once modifiers for the APS are available, it becomes outclassed quickly.
Modifiers for the SCRUMP - The biggest difference between the SCRUMP and the APS is it lacks several modifiers that the APS has. It does not have the heavy barrel modifier, and cannot have a scope attached, which makes it more difficult to snipe sharks with.
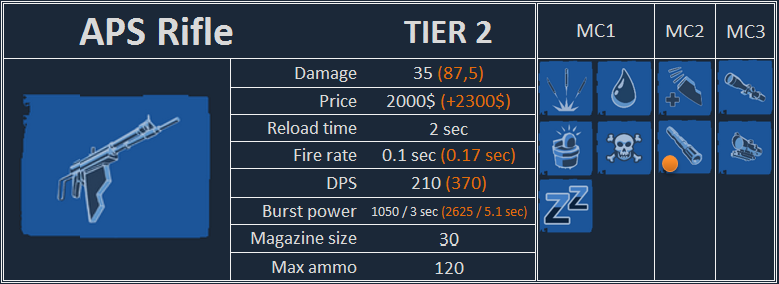 APS - one of the four rifles, while cheaper than its better model (ADS), it deals the exact same damage per bullet, have the same ammunition capacity and the same modifiers available. The only thing that is different is its fire rate. APS is slower, therefore its DPS and burst power is inferior to the ones of ADS. And since its burst power is lower it may not be the best choice against tank sharks. But it does have a good side. Both rifles suffers from spread, but APS guarantees more accurate shooting. It will do good on long ranged fights, especially while chasing sharks. One other benefit to the APS is that is has a long sustained fire time. Due to its slower fire rate, each clip lasts longer, so you can technically spray-and-pray longer than the ADS. It's worth noticing that modifiers for this weapon are much more cheaper than those of ADS. So in case your team have problems affording tier 3 weapons, you can always consider picking up APS. Overall, it's a good weapon, but when shark is right next to you, especially when it's thrashing your teammate, you would wish that you had that fire rate of an ADS rifle.
Modifiers for APS - Extra Mags are increasing your ammo capacity from 120 to 180, so you won't be forced to risk your life swimming to ammo box so often. Both rifles are able to spray sharks with bleed and toxin like crazy and there's no better weapons to do that than those. Splitting ammo type will also be able to land more shots on a shark, of course with a 30% damage reduction. Tagging can be useful for already obvious reasons. Tranquilizers could do some good, but there is a high chance that sharks might already have Adrenal Glands or Blood Rage evolutions, which will make your money you've put for this modifier absolutely worthless. Both scopes are very useful for rifles, those will significantly reduce weapon spread, as long as you can use them on fast moving sharks.
UPR-17 Gyro Rifle - The Gyro Rifle is probably the trickiest of the tier-2 weapons to use. It has a rate of fire comparable to the APS, but is similar to the heavyjet revolver in that it does more damage over distance doing less than half of what the ADS does at point-blank, and is less accurate if fired too quickly. Luckily, its accuracy even when fired rapidly is still better than the revolver, meaning this weapon is still viable at closer ranges.
Modifiers for the Gyro Rifle - The Gyro Rifle, being designed for sniping, has scopes in its first modifier slot. Its secondary slot contains piercing ammunition, which works like the harpoon's version, dealing extra damage when shot. The third slot contains extra ammunition.
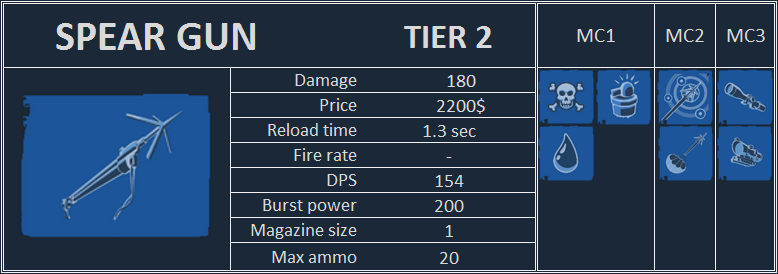 Spear Gun - this gun once overlooked, overtime became quite useful (with some buffs). It can be compared to dual Spear Pistols. While damage of two Spear Pistols is 200 for 1400$ and Spear gun's is also 200 but for 2000$ and both have the same modifiers, it really makes you think why should you bother with it. Spear Gun is superior when it comes to reload time (1,3 second compared to dual's long 2 seconds). This will come with much better DPS and dual Spear Pistols suffers from a slight weapon spread between the two shots. Spear Gun is definitely useful, especially against tiger shark, mako and thresher (this weapon can one-shot them). With this weapon there's little reason reason to bother with harpoon if tank sharks are not present as the spear gun is cheaper, reloads quicker, and carries more ammo.
Modifiers for Spear Gun - almost the same as for Spear Pistol. Drag can be used to slow down big sharks and sonar spears can be very useful to reveal sharks, especially when they are running to hide in the darkness of the ocean. Combining drag with either bleed or toxic is an extremely effective way to deal with tigers, as the damage from the shot combined with the damage over time and inability to escape will leave them for dead. You can also add a scope to it, which spear pistols don't have.
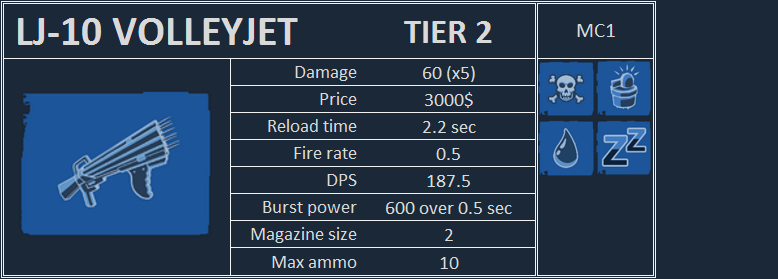 LJ-10 Volleyjet - a weapon with high burst power, an underwater version of a shotgun. It shots 5 spears in a circle, each spear will deal 60 damage on contact. So when then trigger goes off it has the potential of dealing 300 damage. There are 2 rounds of those spears so you can shoot another 5 spears before reloading. The weapon suffers from bullet spread - form a point blank you'll be able to land all spears on shark, but the further the distance, the more your spears will spread in a shape of a circle. Sometimes you will have to purposely aim a little bit off, because spears never hit at the center of your crosshair. Mako going straight at you may be left unscratched if your crosshair was spot on, but if you would aim a bit off, you could land enough spears to kill it. This weapon works great in close quarters and you can think of it as a mid-range Bang Stick.
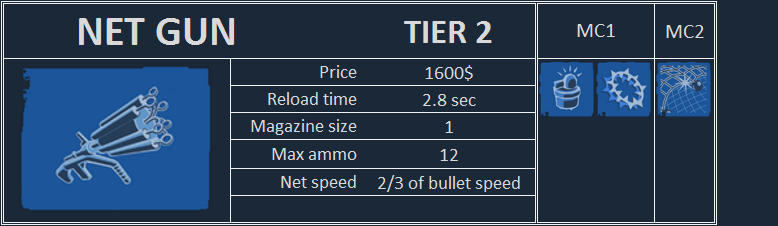 Net Gun - hammerhead's and bull's bane. Any shark that will end up immobile in a net, will be forced to shake it off of its body - if you had any offensive weapon with you, you should be able to easily finish it off. It's not an easy weapon to wield, you need to get used to leading the net on a shark, because it's 33% slower than normal bullets and have a long reload. Sometimes if you miss, it's better to just switch to offensive weapon and reload Net Gun when everything calmed down. You will find that tank sharks are easier to put into net. That's very true when you'll be facing a hammerhead or bull shark. With their size and slower movements, it's much easier to stop them. Notice that Great White, if its ability is not yet evolved to level 3, will greatly suffer from nets too. But if GW had its ability leveled, it can ignore net for 3 seconds. It's the only known counter to nets, other than not to get caught by it (which involves killing the netter too). Good sharks may want to prioritize killing you first.
Modifiers for Net Gun - tagging is cheap and relatively good option. It makes sense when shark breaks off quickly and it's forced to retreat because of tag or when you want to show your team that they have completely free to shoot shark nearby, especially if you don't have the fire power or aim to bring it down alone. But you should try to kill a netted shark straight away - that's why you should always have an offensive weapon in second slot, even dual pistols should do. Another option is barbed modifier which puts a constant damage over time on shark. The longer it stays there, the more wounded it will be. The final modifier - reinforced will trap shark for longer, which should guarantee, that once shark is netted, it won't run away alive.
Weapons - tier 3
In tier 3 we have two "ultimate" weapons for which most of the divers are aiming.
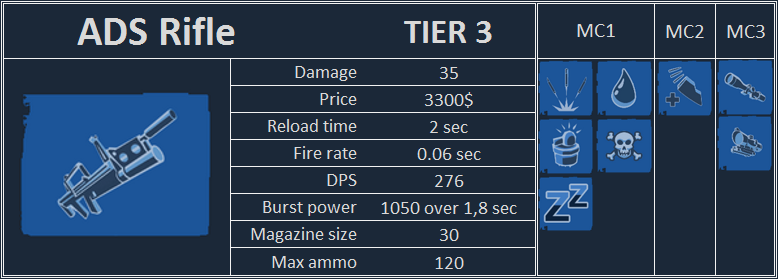 ADS - if you've read the information about APS, you know what to expect. ADS is more expensive version of APS. It's an automatic rifle with highest fire rate in the game. It has amazing burst power, but suffers from weapon spread, so it may not be very accurate on long range fights. Full magazine can easily overkill even great white with its ability active. This weapon is really universal and fit for both newbies and pros. With this weapon you can't go wrong against any combo of sharks and you may favor it over harpoon, if you're facing any mix of speed type sharks.
Modifiers for ADS - Extra Mags are increasing your ammo capacity from 120 to 180, so you won't be forced to risk your life swimming to ammo box so often. Rifles are able to spray sharks with bleed and toxin like crazy and there's no better weapons to do that than those. Splitting ammo type will also be able to land more shots on a shark, of course with a 30% damage reduction. Tagging can be useful for already obvious reasons. Tranquilizers could do some good, but there is a high chance that sharks might already have Adrenal Glands or Blood Rage evolutions, which will make your money you've put for this modifier absolutely worthless. Both scopes are very useful for rifles, those will significantly reduce weapon spread, as long as you can use them on fast moving sharks.
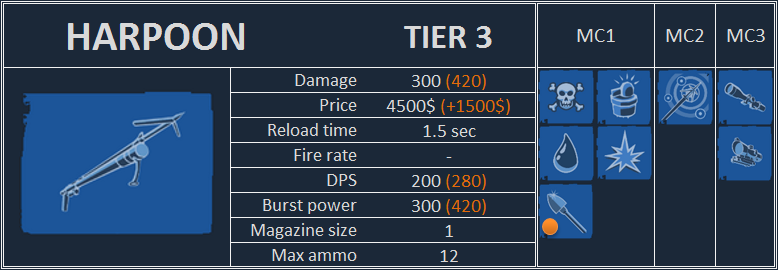 Harpoon- "one shot, one kill" type of weapon. But that's not always the truth. It's the most expensive weapon and you pay for being able to deliver 300 damage with just one spear. For harpoon leading your bullets, reaction time, aiming, locating sharks - are of those are extremely crucial. This is where your diver skills are put to test. It overkills mako, thresher, tiger (unless you score a 50% tail shot), bull (without ability active and same as tiger unless you hit the tail) and critically wounds hammerhead and great white (unless its ability was activate). But there is more to it when you apply some modifiers.
Modifiers for Harpoon - if you are already good with handling harpoon, penetrating modifier will make you even more deadly, but there is no sense to go into it with details, all have been said in modifiers section. Same goes for explosive modifier. Go back there, if you need. So what else do we have? Bleed, toxin and tagging. While penetrating harpoon is objectively the best ammo modifier for the harpoon, if you are tight on cash bleed and toxic can pretty much guarantee you a kill against a Hammerhead or an unaware Great White. Next is sonar, which will allow you to re-aim a shark if you missed and it's getting out of your vision. This one should be always taken as it's the only one in this category. Scopes will allow you to see a bit further if you're trying to spot incoming sharks.
PART V: Consumables
The third slot is saved for consumables. You can only have one type of consumables with you at spawn. Contrary to weapons, you can always sell consumables for a full refund even after spawning and dying.
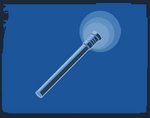 Flare - you can carry 3 flares for a price of 50$ each. It's a cheap and indestructible form of shark detection. It slowly sinks or stays on the ground if that's where you've put it. It last for 30 seconds and has a decent range of detection (2/3 of buoy's range). Every shark that will be in radius of flare will be shown to the whole team. Since it is indestructible, you can put it somewhere where you wouldn't put a destructible buoy. Most reasonable place is to throw it outside the room through the door, window or corridor which will "block" this entrance for sharks. If you can have a whole diving team spamming flares, you can make it quite hard on sharks to get inside undetected for a very reasonable price.
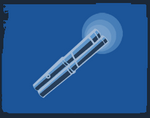 Sonar Buoy - you can carry 3 sonar buoys for a price of 100$ each. They stay up for 5 minutes and they are destructible by sharks or seamines. Every shark that will be in range of buoy's range will be highlighted, the buoy will turn it red and will give out an alarming sound. The best places to put it is inside the room, somewhere where sharks have no business swimming by - that means not in doors and windows.
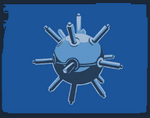 Seamine - you can carry 3 mines for a price of 200$ each. It deals 500 damage on contact. Seamine activates instantly when shark touches them or with a second of delay when it swims by it. Mines are ... not really that great. Yes, they can give you easy kills against bad sharks. Yes, they can give you kills on good sharks if they were placed wisely. And yes, they can harm or blow you up, blow up your team, mess up S.T.E.V.E., break walls and windows giving sharks better access to the room, deafen you, obstruct your view, destroy buoys, they can be accidentally set off while shooting sharks or sharks themselves can set them off to clear the way or blow you up. So that's quite a lot of reasons to limit the use of mines.
If you're going with them regardless, then make sure that you know where to place them. And let me say this first as it's the most important secret to placing mines:
Seamine - you can carry 3 mines for a price of 200$ each. It deals 500 damage on contact. Seamine activates instantly when shark touches them or with a second of delay when it swims by it. Mines are ... not really that great. Yes, they can give you easy kills against bad sharks. Yes, they can give you kills on good sharks if they were placed wisely. And yes, they can harm or blow you up, blow up your team, mess up S.T.E.V.E., break walls and windows giving sharks better access to the room, deafen you, obstruct your view, destroy buoys, they can be accidentally set off while shooting sharks or sharks themselves can set them off to clear the way or blow you up. So that's quite a lot of reasons to limit the use of mines.
If you're going with them regardless, then make sure that you know where to place them. And let me say this first as it's the most important secret to placing mines:Don't place mines out in the open or randomly in the middle of the room. Those in the open does nothing and those in the middle of the room tends to kill indiscriminately sharks and divers alike.Now when I have that out of my system, let's continue. You need to be aware of the fact that good sharks will be able to see them even without their minesweeper evolution. Not only see, they can hear the sound of mine being placed, which will alarm them. Falling to one will make them more cautious for next seamines. You can place them in doors, corridors and windows, and don't try to put them exactly in the center, put it somewhere lower or a bit to the side - this will make them less visible to the sharks. You should rather avoid mining places where divers are swimming near often and not near S.T.E.V.E., unless you want to trap shark this way and you intend to repair it later with welder. Putting seamines next to each other will just end up in a big chain explosion that will more likely kill your more team members than sharks. You should never swim near them when sharks are around. Clever sharks will set them off just to clear the way, but they wouldn't mind if a diver got accidentally caught in explosion. Another trick is to put it behind a breakable wall. But you shouldn't be doing that at the exact moment when shark is trying to break it. Sharks can hear mines, remember? But some sharks tends to leave not fully broken wall for next engage and this is when you can prepare a surprise. Once you will know the maps, you will realize that there are some walls that have very high chances to be broken by a shark anyway, so you can safely assume that this is a good place to set a trap. In the end you shouldn't be spamming them everywhere - 3 for one room should be the limit for entire team.
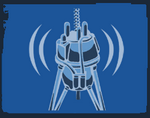 Shark shield - this generator will produce a dome-like zone that disrupts shark senses. It last 20 seconds, costs 500$ and you can carry only one of those. Thanks to it sharks can't see your outlined silhouette when you are under its protection. To prevent this shark have to either wait this out or get inside and destroy the generator. The best places to put the generator are tight and well-guarded (by you and your team) corners. So contrary to mines – don’t put them in windows, doors and corridors. Another good idea is to put it to S.T.E.V.E.’s side. Thanks to it shark shield will be protected from one side, because shark will bump into robot instead of generator. And whenever shark tries to get in to destroy it, gun it down. Also for obvious reasons – never sit on a generator. Owner of shark shield may deactivate and activate it. So if there is no heartbeat, you can turn it off to preserve its duration.
Good sharks know there’s another option to deal with it and that is catching divers by estimating their position thanks to their flashlight. Flashlight is very visible under shark shield so turn it down. Especially if you want to go outside to hunt down sharks. As long as you’re in shark shield’s borders you can swim out outside and look for sharks that should be swimming nearby. If you’re doing that, then try to stick to a wall or ground. From shark’s perspective your silhouette will be visible under some angles and on water’s light background. Once shark shield is off get back inside immediately. Last tip: thresher will have no problem with putting generator down, while great white with its speed and size will be easily gunned down if it tries to do it.
Consumables (2)
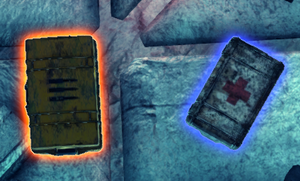
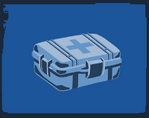 Medkit - it does what you’re expecting it to do. It heals you over 3 second (which makes you unable to shoot). There is not much sense of picking it up (there are medkits randomly placed around the map near ammo boxes), unless you are facing thresher which can wound and soften you up for second shark or next engage.
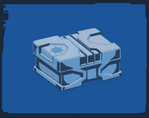 Supply Kit - costs 600$ and contains 3 buoys, 3 flares and 1 mine of total worth 650$. Pretty good deal, considering that normally you can take only one type of those consumables. It’s a good thing to pick up when you’ve got your weapon of choosing upgraded and ready for the end game, while you have nothing to do with money. Once you put it down you will pick up randomly one of the three sets. It will light with purple glow, which will attract your teammates, who can also use it. And this is where it’s weakness comes in. If you’re playing with good and competent teammates – go for it, they will know what how to use it. But if you’re playing with newbies, they will be attracted to the purple glow, they will take those consumables and there’s the risk that they will place it very poorly or “save it” for later – which means not using at all.
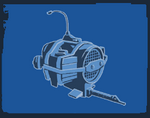 P.A.T. - Portable Aquatic Turret is something that can be the downfall of many shark. This little device is equipped with a motion sensor, tag detector, and automatic rifle which basically means it’s a portable aimbot which will shoot and kill sharks. It costs 700$ and it’s really fragile, sharks can take it down with a single lunge. Its reaction time is really fast and detection range quite impressive. It has battery which lasts 80 seconds. You can set it to follow you, but while doing this it’s unarmed. You better don’t do it when there’s a rapid heartbeat around. Follow mode doesn’t save battery.
Positioning it well is crucial. Remember that sharks can see it through walls. It can be placed mid-water so you have many spots to pick. You should put P.A.T. as far as possible from obvious shark entrances like breakable walls, doors or windows. Best places are where sharks have no interest to swim around like for example corners (of course don’t do it if you have corner campers in your team) or in close proximity to S.T.E.V.E. where it can be protected from one side as long as S.T.E.V.E. doesn’t obstructs too much of turret’s line of fire. You can see its field of vision every time you set it or reactivate after follow mode. Sharks who enter this field will be locked on and P.A.T. will rotate in order to take the them down. Try to aim it at as many entrances as possible and covering as many divers as possible. Good sharks can make them disappear really quick and they will be on their priority list so it would be good to have them in your sight so you could at least finish off the shark. Adding another P.A.T. or shark shield will help in protecting the first P.A.T. – for that you need cooperation from your team, because you can pick only one per death.
P.A.T. is a way to contribute to your team if you’re not so good yet and trying to improve at aiming, but don’t trust it to win the game for you. It can deal with newbie sharks pretty well, but experienced sharks can make your 700$ spending worthless.
PART VI: Know Your Enemy
All sharks have their strengths and weaknesses. In this part we will talk about how you can counter certain shark species and for what you should look out for. At the start of the game you should focus on recognizing what sharks your opponents are playing. Ask your teammates if you are not sure. That will help you apply a certain style that might be able to help you win.
I won’t go into shark combos, I will just point out weaknesses and strengths of every species, it will be up to you to find which ones may fit for both sharks. Also - do you remember “stalk your enemies” tip? You may want to prioritize exploiting weaknesses of the more experienced shark.
A certain rule applies: the bigger the shark, the harder it will be for you to fight it at beginning, but you will be able to catch up as your weaponry “evolves”. The smaller the shark the easier it will be to take it down at start, but it will evolve and become much stronger (faster actually) from mid-game to endgame. Tiger as a medium shark is in between but we can talk about it later. Bull shark is another medium shark that is able to keep the stable pressure on your team. Great white and hammerhead are build to overwhelm you at start, but once you get decent weapons you can deal with them much better - big and slow shark means that they are easier to shoot at. We'll start with the big ones, but just before that - here are some useful tips about each shark to know:
High HP pool and defense. The latter is coming from its ability. Juggernaut ability reduces damage taken by 30/40/50% depending on level for 3 seconds. It also reduces tranquilizer’s effectiveness by the same amount as damage reduction. Level 3 will also ignore nets and drag effect. Divers can actually recognize when it’s activated – you can hear a “rawr” sound when it begins and every form of attack sounds like you’re hitting a metal. It can literally take a mine to the face and survive. Same goes for taking penetrating harpoon or regular one. Yet it requires good reflexes and skill to make a good use of it for only 3 seconds against all possible sources, so don’t think of it as unstoppable force. It runs out and can be easily wasted.
Depending on shark player – this shark can be maneuvered very well, because of the fact that this shark is mainly sprinting to move. Sometimes even dodging may not help, because some sharks won’t attack until you’re at its jaws and then simply dart at you. Great white is also known as vacuum mouth because of large hitbox of its jaws – which means sometimes you’ll miraculously end up eaten even when you felt like you should dodge that.
Great white can apply both all out aggression tactic and thanks to its defense hit and run tactic as well.
Weaknesses:- Low speed and huge size – more visible and easier to shoot
- Shark shields – exactly because of the above reason
- Harpoon – slower and bigger sharks are easier to shoot with spear type weapons
- Drag – even when its ability is evolved, it still lasts for only 3 seconds and most shark players will use the ability to block incoming damage and counter nets as priority
- Bleed in big doses, preferably from ADS
- Toxin – it scales quite nice on sharks with large HP pool
- DPV – great white is slightly slower than other sharks and his attacks are expensive, so it will have problems catching a DPV user
- Early tranquilizers – especially on starter weapons can make it immobile for a while
- Loud - if you are rely on your sound localization skills, then you can hear this shark miles away
Hammerhead’s biggest strength is its nearly instant killing passive ability to slam diver to the ground, wall or anything solid for extra damage. Of course diver has to be in shark’s jaws. The damage depends on speed of charging attack (both lunging and sprinting works) and angle (perpendicular angle is the best one, any lower will lower the damage as well). Hugging the wall is a really bad idea against hammerhead shark, especially corner camping.
It’s ability – Relentless Force, will generate extra stamina for hammerhead every time when it hits anything solid. So this shark can be lunging around the room for some time. Level 3 of its ability can also give it small amounts of health back.
Hammerhead’s playstyle is mostly all out aggression and tendencies to be suicidal (due to low health regeneration from seals). So it’s vital to stop the shark as soon as possible before it wipes out the whole team and not get caught by it.
Weaknesses:- Fighting in the open - I just said that slamming divers to anything solid is HH’s strength. It’s also its weakness and that’s because of low thrashing damage. If there is nothing solid around shark will have trouble eating you without being stabbed multiple times or shot by your teammates
- Nets – due to HH’s size and to a point predictable movements (lunging straight at its victim trying to smash diver to the wall), this shark is the easiest one to put inside a net
- Big size – bigger sharks are easier to hit
- Harpoon – harpoon nearly kills it, penetrating harpoon overkills it
- Drag – the slower HH the more problems catching a diver will it have and his slam to the wall passive ability will deal less damage because it depends on speed of impact
- Bleed in big doses, preferably from ADS
- Toxin – it scales better for shark’s with large HP pool
- DPV – this shark will try to slam the DPV user to anything solid, so it will have problems catching a DPV user at some angles and open water
- Early tranquilizers – especially on starter weapons can make it immobile for a while
Know your enemy (2)
Bull shark is defined by its ability to temporarily become literally overpowered. For 4 to 6 seconds it can double its health and stamina and boost its thrashing damage to the highest in game. This shark is really good at surviving encounters and preserving shark’s tickets. Bull executes opportunistic playstyle that will rather enter the room after the first shark is done and that’s because it needs to stick around to build up rage for its ability. The more rage the higher boost it will gain once its ability is activated. Rage is built up by diver’s activities. Shooting will generate a lot of rage, setting consumables, moving, dodging (and even existing) will also anger this shark as long as it stays within range of even slightest heartbeat.
Fortunately for you bull is really hard to play and most players will have problems with it and there is a lot of weaknesses that you can exploit to fight it off. You should expect mostly hit and run tactics that will aim for 1 to 2 kills. Late game it can switch to all out aggression and be successful at it if not interrupted.
Weaknesses:- Low speed and large size – its big and bulky so it’s easier to shoot it and it suffers from 1,5 second cooldown between lunges typical for tank sharks. This is a major weakness that makes room for the three following weaknesses:
- Drag – it’s easy to slow down this guy as long as you’re accurate with spear weapons
- Nets – slightly harder to catch with nets than HH, but definitely second place in easiest to put in net
- Automatic and spear weapons – all tier 2 and tier 3 weapons works against it pretty well
- Slow paced – bull needs time to gain rage to attack with full potential, it’s unlikely that it will charge straight away unless someone plays the lone diver away from the group
- Needs to “stick around” – it needs to be close to gain rage so if you’re good with locating sharks you can try to kill it or expect from which entrance it can come, check “Locating sharks with heartbeat” and “Sound localization” tips in Part II
- Depends on second shark's performance – bull is a great follow-up shark and will generate a lot of rage when divers are shooting the other shark, but if that shark is too shy to enter alone bull shark will have to wait longer for rage to generate or be forced to come in faster with not fully loaded ability
- Weak when ability is on cooldown or not charged – it’s mostly dangerous when ability is ready to be activated, but if you can get it when bull’s ability is on cooldown you can deal with it easier. Without ability its thrashing damage is lower.
- Toxin – it applies quite well and due to its not so great speed it may have problems reaching seals
The biggest strength of tiger shark is its balanced stats. Medium health, medium size, great speed but with limited stamina. Another strength of tiger is the simple fact, that it really doesn’t have any major weaknesses. Of course anything that would kill any other shark will also kill tiger, so good aim and damage are the best counters.
Tiger’s ability – Adaptive Hide can make it transparent or translucent for a short amount of time and for that short while it’s immune to all detection. It can disappear even while tagged. Of course it’s only for 2/3/5 seconds (depends on level), after that any detection works just fine, so don’t ignore importance of detection completely because of tiger. Transparent doesn’t mean invisible. When sharks are thrashing divers they are outlined by red curve. Without its ability tiger is no exception here, but when ability is active shark’s body is not outlined but diver in its jaws is – and by that you can estimate where to shoot. In dark rooms with adaptive hide tiger will be invisible in darkness unless it will be in range of diver’s flashlight, which makes tiger somewhat visible.
Tiger playstyle can be both hit and run and all out aggression. Adaptive Hide often gives it first kill, then it’s up to shark player what to do next.
Weaknesses:- Everything somewhat works – while there is no direct damaging modifier like bleed or toxin that can hurt tiger badly, but damage from it still will work to a certain degree. Same goes for tagging, splitting and bunch of others modifiers.
- Prioritize second shark - because of the above reason you can use hard counters against the other shark and use them with effect against tiger.
- Runs out of stamina – of all the speed type sharks tiger has the least amount a stamina, it dries after 3 lunges (unless it has Blood Rage or Adrenal Glands evolutions).
- Early tranquilizers – this is actually a good counter against tiger with starter weapons - they can make tiger unable to lunge.
- Spear gun and dual spear pistols – tiger is the biggest one of speed type sharks and with limited stamina it’s easiest speed shark to counter with spear type weapons. Both weapons are relatively cheap and easy to get early in game.
Know your enemy (3)
Extremely fast shark with biggest stamina pool. Mako can lunge many times before running out of stamina. To some point it does favor spamming lunges, but the most dangerous are players who can control that and feint their attacks purposely.
It’s really deadly in open waters and the best sharks to hunt DPV users. While weak at the start, if you let it feed on divers it will evolve at alarming pace. Thanks to its ability – Mark the Prey, mako can boost its evolution points even to 25 per kill. So with time and right evolutions it becomes really hard to deal with.
This shark will use mainly hit and run tactic.
Weaknesses:- Low health - its biggest weakness, as long as you can hit it with anything, it will be very bad for this shark to take any damage.
- Evolution points denial - mako is very weak at start. It doesn't need much to become deadly fast - around 60 points, but only if player will go for Poweful Tail and Nimble Finned straight away which is not always the case. The point is: the more you prolong the moment before mako player will get those two evolutions by not dying and protecting your teammates, the bigger is the chance to outrun it in armaments race.
- Bleed – with this you can stop all those lunging maniacs and bleed them out the more they maintain that
- Splitting – if you having problem with leading your bullets on a speeding mako, you may want to improve your chances to hit with this modifier.
- Rifles – anything with high fire rate can be devastating for mako’s low health.
Speed type shark, similar to mako. It has slightly less stamina, but still can lunge enough to be all over the room. This shark is definitely one of a kind. Its main strength is to deal AoE damage (area of effect) – which means that diver stacking close together will get punished heavily.
Tail Lash is an instant damaging ability that takes 40-60% of diver’s health (depends on level) to all enemies in ability’s range (few meters in front of thresher) including diver held in jaws. It will also turn off flashlights of affected divers. With level 2 it can break breakable obstacles, but most notable is level 3 which will allow thresher to break buoys, shark shields and explode mines. Have in mind that range of shockwave that damages consumables is much bigger than the one that damages divers. So basically these 3 types of consumables are not very effective against this shark and I would suggest switching to medkits and flares. Tail Lash is the first source of thresher’s AoE.
Second source of AoE is threshing while thrashing – let’s try not to confuse those two words. Have you seen how wiggly is thresher while thrashing? That’s threshing and just being near this will slowly take your health. This also makes this shark harder to hit, so spear type weapons (except volleyjet) can miss and be force you to reload. Rifles and pistols can do much better.
Thresher’s playstyle is mainly hit and run but you may find that some players have tendencies to be suicidal just to soften you up for next engage and that’s thanks to its AoE damage. When you’re wounded, this shark will score multi-kills on your team with ease, not to mention the other shark.
Weaknesses:- Low health - Its biggest weakness, as long as you can hit it with anything you’re golden.
- Bleed – while thresher is not really a lunging maniac like mako, it comes pretty close to it, so bleeding will do some harm.
- Splitting – if you having problem landing your bullets on this shark while threshing on lunging around, you may want to improve your chances to hit with this modifier.
- Rifles – anything with high fire rate can be devastating for thresher’s low health.
- Medkits – this shark loves to wound divers and get them down with its next attack, medkits will make it much harder to accomplish.
- Low thrashing damage – when thresher’s ability is on cooldown, its options are limited. Thrashing will take enough time to be gunned down easily if there’s any other diver in range.
- Accidental grabs – because of the above reason all accidental divers that will end up in thresher’s jaws will be able to take half of its health just by stabbing. I’m not telling you to purposely jump in front of it and try to block it, just pointing out a weakness.
Know your enemy (4)

Goblin is a weird shark in that it is medium health like tiger, low stamina like great white, and fast like mako. This makes it a shark that is usually quite cautious with its lunges, but at the same time very difficult to punish. It also produces decoy "ghosts" that are harmless, but look and sound like real sharks and can tank hits like real sharks, including nets. Goblins are extremely powerful in open water, not just because of their speed, but also because their decoys make your hearing much less reliable, since their decoy will likely be swimming nearby. Goblin is very good at making you waste ammo and can be especially frustrating vs. bangsticks, as unlike missing, the decoy does take your ammo when hit.
Goblin also never really changes in power throughout the match. Its strength really relies moreso on how the divers play than what evolutions or equipment everyone has. It is weak even to early game weapons, but a good goblin won't give you the opportunity to shoot it, using its speed and decoys to throw you off of what direction it's coming from.
Goblin has the highest sprint speed of all the sharks, which can make it quite silent and very, very fast and agile. It also has a very slow stamina drain rate, so it can sprint for a very long time.
Weaknesses- Goblin has the lowest stamina of any shark- it has 70 stamina instead of 100 like every other medium-size or larger shark. This means, early game, tranqs can be effective vs. a goblin. Do note that while it only takes a few shots to fully drain a goblin's stamina, you will kill it in less than that if it's at full health, so this is not as effective as vs. great white.
- Because of its cautious nature and medium health, you can usually simply focus on countering the other shark and still do just fine vs. Goblin.
- Goblins do not like tight spaces, as they rely heavily on their speed and ability to disappear into the gloom. Staying in the room is a very helpful tool vs. goblins, particularly because their decoys are a lot more obvious when they try to make turns.
- Drag heavily cripples Goblin, as while it has a very high sprint speed, its actual base speed is lower than other sharks.
- Spear-type weapons can pierce straight through the goblin's decoy and hit the goblin behind it, negating their use as a defensive tool.

Oceanic Whitetip is another medium health shark, and statistically is almost identical to tiger. Its only differences are a slightly higher health pool, a slightly lower stamina drain while sprinting, and a lower base thrash damage (about the same as the bull's). Its ability is very different from other sharks, however, and makes it even more versatile than the tiger.
Whitetip has a "protect mode" and an "attack mode". In its protect mode, it takes 30/40/50% less damage from weapons. This does not include status effects like bleed, poison, tranq, etc., or stabs from divers in their mouth. In attack mode, the Whitetip does 32/40/48 additional damage per second to the diver, regardless of if they are thrashing or not.
Whitetip can be hard to counter because of its versatility. Some sharks might prefer leaning into a more defensive playstyle, using electroreception and razor fins to keep their damage reduction up as much as possible. Other whitetips may prefer going for a hit and run playstyle, or an all-out aggression playstyle, or anything in-between.
Weaknesses- Because it is taking damage reduction, just like the great white, tranqs are pretty good vs. Whitetip early on.
- Because of its low base damage when in protect mode and mediocre health when in attack mode, sticking together can force whitetips into taking far more damage than they probably want to.
- Because things like toxic and bleed bypass its damage reduction in protect mode, these modifiers can be much stonger vs. whitetip than other medium sharks.
- Despite its versatility, whitetip is much easier to spot than other medium sharks, as it is slightly larger and has a big school of pilot fish following it around, as well as being an off-yellowy brown color that doesn't blend in on a lot of bluer maps.
Know your Enemy (5)

Blue is the most similar to its base class of all the kindred species, being almost identical to the mako. It has slightly higher health and its ability causes the killer of whoever it marks to instantly gain health back instead of giving the player evo points. This means it has pretty much the exact same playstyle and weaknesses as mako. It does have one notable strength over mako, however. Its naturally higher health and ability to heal from kills early game makes it a lot stronger early-on. It won't snowball as hard late-game as the mako, since it doesn't get the bonus evo points, but it will still often get quite fast and dangerous since it can play so much more aggressively early on. Unique Weaknesses:
- Sticking together is slightly stronger vs. Blue since it can't just sit back and farm evo points like mako can early game.
- If something works vs. mako, it will also work vs. blue. They play so similarly there is really not much different in the way you should treat them.

Lemon is the most distinct of the kindred species from its base species, this time being the tiger. Like the tiger, it can cloak, which functions very much the same. However, instead of only cloaking for a brief period of time, it can cloak indefinitely, so long as it doesn't attack or take damage. It also does an additional 10/20/30% thrash damage when it grabs a diver out of cloak. This makes it kill quite quickly, and also can make it quite challenging to see coming. It also has a much lower stamina usage while sprinting than tiger, meaning it can move quickly without lunging.
It can completely ignore sonar buoys, flares, or PATs to grab a diver that otherwise would be protected, so a good lemon can easily get the jump on you.
Unique Weaknesses:- Lemon is much frailer than Tiger, with health more similar to speed sharks than medium sharks. This means it's a lot easier to shut down than tiger if you can spot it.
- It cannot re-enter cloak if it is taking damage, meaning toxic or bleed can prevent the lemon from entering cloak, making it easier to chase down.
- It has a slower dart and lunge cooldown than tiger, meaning it's a lot worse at chain kills and can struggle to get away after a kill.
- It cannot cloak while thrashing. Look out for your teammates, the lemon will always be outlined when thrashing, unlike tiger.

Copper is the bull's kindred, and gains rage just like the bull. However, instead of gaining health, stamina, and attack upon activating its rage, it becomes invincible, with the length of time it is invincible dependent on the amount of rage it built up. It is still capable of being slowed, having statuses applied, netted, or disoriented, it just cannot die in those few seconds.
It also has the normal thrash damage no matter what, unlike bull. this means copper can play a lot more aggressively than bull, almost like a slow, cloakless tiger.
Unique Weaknesses:- Tranqs are very effective vs. Copper, as while its invulnerability is active, it can still loose stamina, and its stamina is not the best as-is.
- It is not able to activate its ability without at least 25% of its rage. Because of this, powerful weapons that outright one-shot it before it has the chance to attack can often be very strong.
- Toxic can often guarantee a copper won't survive after becoming invincible.
- While it is not as large as bull, nets and drag are still very powerful vs. it, as it's still rather slow. This can prevent it from escaping to heal back up after using its ability.

The bigeye thresher is, unsurprisingly, the kindred for the common thresher. The main differences are that it is a bit frailer, and its passive and active abilities do slightly different things.
When it uses its active ability, it flings divers in whatever direction it's looking in a rather large radius, doing good damage if they hit a wall. Its passive ability is that, like the thresher, divers in a radius around its threshing flings divers around in a vortex around it. If they hit walls, they take a chunk of damage. This is usually not as strong as the common thresher's threshing, but it's far more disorienting, and its stronger tail whip more than makes up for it.
While it relies on surfaces to do damage with its active, note that it flings divers in the direction the bigeye is looking, not necessarily the direction the shark is facing. This means a bigeye can simply flick the camera down as it tailwhips and smack you or your teammates into the floor.
Its base thrash damage is also higher than the common thresher's, being more like the whitetip or bull's rather than the common thresher or hammerhead's. This means it can do decent damage even if you are at full health just from thrashing.
Unique Weaknesses:- It is even more frail than the common thresher. If something works well vs. the common thresher, it hurts the bigeye even more.
- It relies on players being near surfaces to do serious damage. This means going into open water can often be a very strong counter vs. this shark.
- The only deployables it can destroy with its tail are mines, so shark shields, pats, and sonar buoys are more effective vs. the bigeye than they are vs. the common thresher.
- Detection of all kinds including tagging modifier, sonar spears, sensor, buoys and flares. Yes, even against tiger and lemon.
- Good aim, leading your shots, weapons with high damage.
- Dodging, not getting caught.
- Predicting where sharks are with sound localization, heartbeat localization or mentioned already detection.
Useful links
This is a link to video collection from Depth. Lots of great players posted their gameplay there and those are much better in terms of skill, than randomly found gameplay on youtube, full of people who sells their overreaction while being eaten by shark.
http://steamcommunity.com/sharedfiles/filedetails/?id=509523241
Here's already mentioned counterpart guide about sharks:
Conclusion
The end. So comment, like, share, favorite, spread the word about this guide. I do plan on updating this guide as the time goes and new content is presented.
Updates
-Weapons added since Gyro Rifle and on. Modifiers showing which sharks they are useful for coming soon!
Guide updated to:
Coldblood
Guide updated to:
Tails from the East
Zapped Hotfix #1, Zapped Hotfix #2, Terror Nights and Terror Nights Hotfix
Guide updated to:
Tails from the East
Guide updated to:
Bull Sh*** Hotfix II
Bull Sh*** Hotfix III
Sharks with Frickin' Laser Beams
Crash Course Added:
- P.A.T.'s price changed to 700$
- Welder is always available so some information needed adjusting
- Updated the "S.T.E.V.E.’s health and repairing it" with numbers about S.T.E.V.E.'s health and shark's damage to it
Guide updated to:
Bull Sh*** Update and Bull Sh*** Hotfix Added:
- Bull shark added to Know your Enemy (Part V) and everywhere else where it was needed
- P.A.T. added to Consumables
- few minor changes not worth mentioning
- How to Shark 1.14★ 5 (1k)22k views1.4k ♥119 minUpdated Apr 17, 2023
- Depth - Ultimate Skin Guide [Operation Seafog]★ 5 (432)12k views355 ♥6 minUpdated Oct 19, 2021
- The Ultimate Depth Shark Guide (updated 10/17/15)★ 5 (220)11k views224 ♥24 minUpdated Oct 23, 2015
- Достижения Depth 100%★ 5 (394)8.6k views226 ♥7 minRussianUpdated Jun 8, 2025
- Achievement guide★ 4 (175)7.4k views151 ♥14 minUpdated Jun 1, 2017
- Sharks in each Map★ 5 (327)7.3k views429 ♥12 minUpdated Jan 20, 2016



- Upgrading to PremiumTeam Fortress 2★ 5 (20k)1441k views11k ♥6 minUpdated May 11, 2022
- No More Room in Hell Official ManualNo More Room in Hell★ 5 (2.8k)569k views2.1k ♥29 minUpdated Apr 22, 2019
- NMRiH Community Hosting GuidesNo More Room in Hell★ 5 (526)351k views653 ♥1 minUpdated Aug 10, 2022
- ULTIMATE GUIDE FOR GAME DEV TYCOONGame Dev Tycoon★ 5 (5.8k)326k views10k ♥4 minUpdated 23 Jan, 2014
- How to 'Git Gud' Soon™MORDHAU★ 5 (2k)318k views3k ♥68 minUpdated Nov 16, 2024
- Лучшие кооперативные игры SteamPAYDAY 2★ 5 (1.5k)315k views2.1k ♥56 minRussianUpdated Apr 27, 2025






This guide was created by its original author on the Steam Community. Are you the author and want it removed? Request removal.