How to Shark 1.14
Introduction
From this point on I'll be retiring as the guidesmith and the rights to update the guide go to Flishster so How to Shark can still serve Depth's community. I'll be just providing support when it comes to images and datamining when needed.~Ray G. Quit
I’ve decided to create this guide for other shark enthusiasts, covering mechanics as well as basic and advanced strategies for underwater predators. Something as simple as movement or attack can sound trivial, but I will go into it with the most important details that many newbies can easily miss, especially when it comes to thrashing which is misunderstood by a lot of players. Even experienced sharks might find some valuable information here, because this guide covers almost all of my knowledge of the game (but only the sharks’ part). This is a long lecture and intended to be a very detailed one, so it’s only for people dedicated to mastering the ways of shark-jutsu. How to Shark will explain many nuances of gameplay, but the knowledge you gain will amount to nothing, unless you practice enough to forge it into skill. Depth is a game with a high skill cap for both divers and sharks. So if you want to get good, you will have to invest your time to account for the steep learning curve.
TL;DR: I am aware how long this guide is and there will be people that can’t handle this amount of information. So if you want a shorter version then you can skip the sharks you are not interested in from part I (but don’t skip the thrashing section!). You can easily skip part IV and part V if you are not interested in them. Reassuming: thrashing and your chosen sharks from part I, part II and part III - those are pretty important, so be sure to read them.
This guide is a counterpart to my other guide about Depth, so if you are looking for a similar guide about divers, here it is:
http://steamcommunity.com/sharedfiles/filedetails/?id=532137970
All of this is based on my over 1000 hours of experience and over 3000 matches as a shark. That includes testing, researching, data mining and consulting how the game works. Most of this is very accurate, but some information is based solely on my opinion. There are aspects of game that can work for you in a different way (better/worse) and that is fine. You have the right to disagree and play the way you want. What you will do with all the information in this guide is up to you.
I worked hard to make this guide the best I could, and I would appreciate any feedback that you guys may provide. So without further ado I present to you …
Legend
These icons will be used across the guide. From the left there is great white, hammerhead, bull, tiger, mako, thresher, and goblin. Be sure to know that.


Some basic abbreviations and terms you will see:
GW – great white
HH – hammerhead
WT – Whitetip
Dart – shorter left mouse button attack
Lunge – longer right mouse button attack
Cooldown – the period of time immediately after using an attack or ability during which it can’t be used again; the period of time the ability spends “recharging”.
Hit and run - tactic where shark attacks one target (sometimes two) and then runs away to hide and regenerate before next attack
All out aggression - tactic where shark tries to take as many targets down as possible, until it's dead or diving team is wiped out
Terms for groups of sharks you might see:
Tank sharks – great white, hammerhead, bull
Speed type sharks – tiger, mako and thresher
Big sharks - great white and hammerhead
Medium sharks - bull, tiger, and white tip
Small sharks - mako, goblin, and thresher
PART I: Know your shark
Thrashing - damage dealing
Let’s start with the most important thing. The act of thrashing was the main reason why this guide came into existence. It was supposed to be only about it, but somehow it expanded to this huge wall of text. So why is it such a big deal? Thrashing is the act of killing divers one by one and by doing so you are progressing towards victory. So thrashing is a pretty big deal if you do it wrong. And trust me, a lot of people don't understand exactly how it works. So let’s get myths out of the way:
It does NOT deal more damage the harder/faster you shake your mouse.
It does NOT deal more damage the more pixels the diver travels (water resistance has nothing to do with it).
It does NOT require full swings.
It does NOT deal damage only with left and right movements.
Basically moving your mouse the hardest you can will deal maximum damage, there is no doubt there. But you will pay the price for it in vision and suffer from disorientation. The fun fact here is that shaking your mouse like a madman will end up in a pain in your arm or even in your back (trust me, I’ve been there). A lot of people overdo it because they want that kill so badly. Who needs a gym anyway? But let’s get to the point.
The secret to thrashing is nothing else than keeping your mouse on the move. That’s it! You can go home now.
Ok, let’s go deeper into it. You can deal a certain maximal amount of damage (depending on shark species) in intervals of every 1/4 of a second (0.25sec) and you can't exceed that. That limit is easily accessible simply by moving your mouse in ANY direction as long as your mouse is on the move. And by any I actually mean any direction. You can move your mouse in circles, up-down, you can even go only to the right across you whole desk with your mouse and you will still deal maximum damage possible. By easily accessible I mean it can be performed with every reasonable mouse sensitivity. If you can move your camera freely and do an easy turn around with your shark then you will have no problem with achieving maximum damage. There is no right sensitivity – even the best players have their own setting, some of them have it really low and some of them have it ridiculously high. You should set your mouse sensitivity to your preference so you can easily turn your shark in the right direction, not to thrash the hardest you can. The main concern here is your comfort. If you are thrashing to a point where you use your muscles, you should adjust your mouse sensitivity – lower or higher. Find your own way.
Great white, tiger and mako are able to shred divers with thrashing in 1.4 seconds, no less. Thresher and hammerhead can finish a diver off with just trashing (without Tail Lash ability and slaming diver on the wall) in 2.8 seconds at best. Bull shark's thrashing damage depends on its ability and build-up on it. Without ability it can devour its victim in 1.9 seconds, with ability activated at 50% build-up it’s 1.4 seconds and with full build-up it’s 1.1 seconds. Those are the limits and yes, those are easily accessible and you are probably reaching them already, it just feels much longer in game.
The best way of thrashing (for me) is half-swing left-right-left-right. There are some videos from best shark players down this link, so you can check how they are doing it, if you want.
http://steamcommunity.com/sharedfiles/filedetails/?id=509523241
Another matter is sprint thrashing that will be mentioned a few times in this guide. Let me explain it here. All sharks can do it with the exception of thresher. It is simply holding your shift down, while having a diver in your jaws. This will give you much needed speed in hit and run strategies until you get Powerful Tail evolution, unless your build doesn't include Powerful Tail - then you should use sprint thrashing the whole match. Remember that your stamina won’t regenerate when you’re using sprint, so don’t overdo it. Sometimes is better to thrash a diver and move with WSAD and get some stamina back instead of wasting it. That’s up to you.
The last piece of advice I can give in this matter: there is a way to test your thrashing. Simply start a match alone from a Private Match tab as a shark and put bots on passive. It will allow you to thrash divers to your heart's content without worry that divers will try to defend themselves.
Great white
 Basics:
Great white is the “tankiest” of all sharks, because of its large health pool and ability that can ignore a percentage of incoming damage. A good GW player will be able to easily devour a diver, even while under fire. Depending on the situation, the best great whites can wipe the whole diver team, without ever having to leave the room - given the divers are average at best. It shines in teamwork – GW can focus most of the diver’s attention, while faster sharks can pick them up from behind. Yet it is a shark that depends on teamwork and simultaneous attacks more than quick mako, elusive tiger or suicidal hammerhead.
It is considered as the slowest shark, but trust me, with some practice and the right evolutions, it can still become more than fast enough to dispatch your opponents. You should also be aware of its size. GW is the biggest of all the sharks, and as such it is the easiest target to spot and shoot and you may find difficulty maneuvering in tight spaces.
There is also a noticeable cooldown between darting/lunging which is also a minor weakness, so make sure you land with your jaws on the diver as they may not give you another chance if you miss. Shark shields are another of its weaknesses - because of its size and speed, you have a much greater chance to be gunned down than any other shark while trying to destroy shield generator. This is why it's good to have a good teammate for this task.
Movement:
First fact you need to face: GW pays the price of its defense in speed. Great white can be played very wrong if you try to move with it just as you would any other shark. Your primary method of movement should be sprinting (holding shift). GW is unique in that it is one of the three sharks which consume much less stamina by sprinting. Sprinting also includes getting your shark from spawn point to S.T.E.V.E.
Double-Time evolution is made for this shark and should be picked early in game to improve your speed even more. Hangry evolution will not be very effective. But why not use lunge to get to S.T.E.V.E. like every other shark? To answer this question let’s move to …
Attacking:
Darting and lunging are the only two ways of grabbing a diver before you can shred him to bits. Unfortunately for GW lunge has much higher cost (about 70% of total stamina) and using it can end up with running out of energy too soon. It shares this trait with the Goblin shark, and seems to be intended to force a different playstyle on both sharks.
You should use darting as your main attack while sprinting, which will give you much needed speed. Lunge should be used only in some situations like escaping from the room or when you are able to safely grab a lone diver with no worries that his friends will gun you down or when you have a "clear shot" to get a diver with one lunge and keep sprinting straight in the deep ocean, away from his party.
Another very important tip: you can use sprint while thrashing which will make you harder to hit, but remember that there will be no stamina regeneration while doing so. Once you get Adrenaline Glands (the most important evolution for GW that gives you stamina after being hit) you should be using sprint thrashing all the time – you will get a lot of stamina from a diver that is stabbing you.
Ability:Juggernaut is the great white’s innate ability. It reduces damage taken by 30/40/50% depending on level for 3 seconds. It also reduces tranquilizer’s effectiveness by the same amount as damage reduction. Level 3 will also ignore nets and drag effect. The ability is pretty self-explanatory but here are some tips on how to use it:
- Higher levels of this ability should be picked up in mid-game when divers can afford better weapons, especially when nets come into play, because without level 3 Juggernaut, nets are your weakness.
- It lasts only 3 seconds so it is very important to use it wisely. I would suggest to use it when you hear first shots. If divers are using nets, bang sticks or harpoons you should use it a bit faster (before you hear shots), because those weapons can do a lot of harm. If there is a shark shield in the room it is best to activate your ability the moment it is destroyed (by you/your team mate).
- In normal circumstances if you would be hit by net while thrashing a diver - you will drop him. If you had juggernaut on, then he will stay in your jaws. However, if you have a diver in your jaws and you don't activate Juggernaught before another diver shoots a net at you, you will drop the diver before finishing him and remain trapped in the net. So the best approach will be to activate your ability immediately after you grab your victim if there is a net gun user. Even if you activate Juggernaut to ignore the net, you should try to shake it off. If you don’t, it will reapply it's effect after your abilities affect wears off.
Hammerhead
 Basics:
 Hammerhead is a tank shark with a large health pool and it's stamina pool is comparable to that of tiger’s and great white’s. But let’s go straight to the bad news: hammerhead is heavily handicapped in a few categories. Low health regeneration from eating a seal or using Blood Feast evolution, long cooldown between lunges and low thrashing damage are the most noticeable.
What makes it stand out the most is its passive ability to slam divers to the ground, walls or anything solid in general for extra damage while holding them in your jaws. At best you can deal 75% of the diver's health. Add some thrashing to it and you can nearly instant kill him. You should remember that this necessity to smash divers is both its advantage and disadvantage. HH can be an easy target if you deal less than maximum damage. If there is no wall around it will take forever to kill your victim solely by thrashing, giving the diver a chance to stab you many times while also soaking up damage from nearby fellow divers. Also because of this sharks size and fairly predictable movements, he can be stopped by nets – which is his known weakness.
Movement:
For hammerhead lunge is the primary way of moving and the fastest way to get from spawn point to S.T.E.V.E. Darting should be avoided and sprint shouldn’t be used to move around. Hangry evolution will shorten your way to divers, because of the initial stamina regeneration, but you should also use Nimble Finned evolution to improve its speed. HH has a long cooldown between lunges and Nimble Finned will shorten it. You can also keep sprinting for the duration of Hangry (8 seconds after spawn) for slight speed boost.
Attacking:
I’ve already covered basics of attack at the beginning, but there are few tricks that should be considered. Even though slamming divers to the wall is a primary source of damage with hammerhead you can’t ignore thrashing just because it does little damage.
Try to thrash with moderate speed, so you won’t lose your vision while aiming for hard spaces. Powerful Tail evolution will allow you to perform another lunge with your victim in jaws, so this is very important evolution to pick up early. The damage that you will be able to deal by smashing divers can be up to 75%, but if done wrong it can barely dent their health bar. Two important factors here are angle and speed. The best angle to hit a solid object is perpendicular. You can gain speed simply by lunging at the diver.
Remember – that speed must be actually “in use” (you need to travel some distance with it), lunging with diver in your jaws and trying to hit wall that is literally next to your face will not do much damage. This is very important for powerful tail evolution, because you can’t finish off diver by trying to slam him in the same spot after you just did that – simply pick another solid surface.
Before you get powerful tail and if you fail to deal damage with your initial ram, you can always try to gain a bit of speed with sprint and try to aim at another hard surface. Last trick about attacking: what to do if the diver is too far from a wall for a single lunge? You can prolong your lunge with sprint to go straight forward until you hit an object. It will do as much damage as lunge would. Of course there might be no need for that once you have Powerful Tail evolution. Prolonging your lunge is a good way to deal with divers in the open waters.
Ability:
Relentless Force is a very useful ability. It generates additional stamina for hammerhead while hitting hard surfaces (with and without diver). You’ll gain more stamina with the proper angle and speed – the same rules apply as with dealing maximum damage. You should activate it at the very moment you grab a diver with your lunge.
The stamina it gives you can be used for your next attack which could end in a multi-kill if executed properly. Level 3 also gives a minor health gain after headbutt, which is good for getting your health back. If needed you can activate it in an isolated room and go wild for 6 seconds. You will get much more HP back as opposed to chasing seals. Cooldown on this ability isn’t very long so you won’t lose much time having to wait for it.
Mako
 Basics:
Mako is a pretty straightforward shark. It is the fastest of sharks and he pays the price for it in lowest health pool. Its stamina regeneration may look sluggish, but that is only because mako has the largest stamina pool, that will allow it to lunge about five times in a row, before the stamina pool is drained. With the right evolutions it's really hard to hit this shark because it can bounce around the room like a madman. The most preferable tactic is hit and run. Attacking divers who can see you in a straight line tends to end poorly. Surprise attacks and planning your way out is crucial.
Movement:
Because of its large stamina pool and speed, lunging is the best way to move around. Hangry will greatly increase your initial regeneration for the way from spawn point to S.T.E.V.E., so it should be picked up early.
Attacking:
Get in, grab a diver, kill him and then run – pretty simplistic idea of hit and run tactic and mako is the master of it. In some cases you may stay in the room if there is not much danger and an easy kill is just one lunge away.
Sprint thrashing should be used after each attack to run away quickly, until you get Powerful Tail evolution, after that there is no need for sprint. Once you have Powerful Tail the real fun begins, because you can quickly perform another lunge with victim in your jaws. Huge amount of stamina will allow you to bounce around the room, but beware bleeding rounds, a lone bleeding bullet can do a lot of harm, because the more you lunge, the more you will be damaged.
The best use for said evolution is get in, grab a diver, turn and lunge through nearest exit or out of enemy’s vision (behind a wall) and then finish the job. Of course remember to thrash while trying to escape, mako's HP won't stand too many stabs from dagger. Powerful tail coupled with Nimble Finned is an excellent combo, as it reduces the already short cooldown between lunges (1 second) to 0,5 second.
If you have enough health – attack again, if not - eat a seal. When you are running away thrashing should be moderate while aiming, but it should be done to some point. The obvious escape route is always through the largest door or hole, because it is easy to aim for, even while shaking your mouse. Narrow door can be hard to aim for while thrashing, so sometimes you can miss. Thankfully with such big stamina pool you can take few more tries if you miss the door and if divers would be so kind to not react too fast.
Against decent divers when you can't surprise them (they are aware of your position and aiming at you) you should feint your attacks and that is mako's highend play. By feint I mean lunging slightly off target, re-aiming and grabbing diver from the side. With feinting lunges you should land out of diver’s sight, so it would take time for him to aim at you again. Lunging straight forward at diver who is facing you may end up very badly.
Ability:
Mako’s ability – Mark Prey allows to mark a target in front and by eating that target you are granted extra 5 evolution points per level, so you can get 15/20/25 points per marked kill. Level 2 and level 3 will also increase mark duration. Thanks to this ability mako can get much more evolution points than any other shark and much faster.
It has the tendency to mark the wrong target from time to time, but you should never go for the mark at all cost if it is too risky. It is better to get 10 points, than risk getting 25 and die trying. You main goal is elimination, not evolving (even when it helps to achieve that goal).
Blue
 Basics:
Blue is the kindred species of the mako- that means it is very similar to the mako, but with a few twist to make it unique. Blue is the most similar of the kindred species to its base class, having nearly identical stats to the mako, just having a slightly different ability and 10 extra health. It is notably also slightly smaller, which makes it a bit tougher to hit, and its blue pelt can make it harder to spot on many of the more open maps.
Movement:
Blue has the exact same movement stats as Mako. It has a ton of stamina and a short lunge cooldown. This means you can dart around and lunge many times just like Mako.
Attacking:
Blue's ability lets it play a bit more aggressively early on than mako. As such, you can usually grab a marked diver, get away, finish them off, and quickly get back in for a second attack. This means blue is better early game than mako, who usually struggles to get kills its first few lives, but late game it does get outperformed in aggression by mako.
Ability:
Its ability allows it to mark divers that, when killed, give the killing shark 30/60/90 health back. The levels each have the same mark timers and cooldown as the mako's marking ability. This ability has some support use to it to heal up a teammate, but typically the amount of health healed is not necessarily significant enough to make this effective for most teammates. However, for blue, it is quite a decent chunk of its health, and at max ability, you basically always get back up to full health after an attack unless you were very low health.
At level 1, the ability allows the blue to heal off three knife stabs, so if you don't take any bullet damage, you can basically kill a diver without taking any damage, unlike most other sharks. This allows you to play a lot more aggressively than mako or other low-health sharks, since you can easily top off your health whenever needed.
Tiger
 Basics:
Tiger is a fast shark with medium health and stamina pool. The most balanced of sharks, but definitely a speed type shark. Because of its limited stamina pool you need to play it smart and you can’t go crazy like with mako.
It will require a lot of practice to master management of tiger’s stamina, but it will reward you greatly. With balanced stats, tiger at the beginning of a match is a pretty deadly opponent for divers and with evolutions like Powerful Tail and Blood Rage, it can be turned into a real shredding machine.
Tthere is no hard counter for this shark, other than bullets and good aim. Its cloaking ability also makes this shark hard to see and ignore detection by flares or buoys for a short duration. Tiger’s only weakness is lower health regeneration from seals (one will heal about 25% health).
You can't go wrong with tiger on any map or in any shark setup. Even with another tiger. It will do well everywhere.
Movement:
Lunge is the best way to move around. Hangry evolution will greatly increase your initial regeneration for your way from spawn point to S.T.E.V.E., so it should be picked up early.
Attacking:
Tiger’s best tactic is to hit and run, but it can also go all out and try to take as many divers down as possible. Medium HP won’t do well under heavy fire from divers, but its Adaptive Hide ability can give you a good head start with your first kill. Lunging is the best way of attack, but from time to time using dart and saving some stamina may be a smart move if you are aiming for a multi-kill. Sprint thrashing should be used to run away before you get Powerful Tail, so you can lunge with diver in your jaws.
Once you have that evolution (Powerful Tail) you can execute hit and run pretty well, if you will remember to pair it with your cloaking ability, but because of limited stamina, you have to do it almost without a flaw. You may run out of stamina if you miss the exit or bump into a wall. Always pick the biggest holes and doors to ensure your escape. But if you chose all out aggression instead of hit and run, then I can’t give you any good tips for it – doing that effectively comes with practice and skill to assess the situation: how the divers are positioned and where are they looking. Or you can always count on your luck. That works too from time to time.
Ability:
Let’s get this out of the way: Adaptive Hide doesn’t make you invisible. Transparent or translucent is more accurate. You need to have in mind that trained eyes will be able to pick you up, just with some delay. Also lunging with this ability active will make you harder to follow. The darker the room is, the harder you are to spot. Remember - the room may not be dark for you, but it can be for divers. This is something that you can realize only by playing diver and remembering which room is dark. When should you use your ability? If there is a flare or buoy you should use it just before you will get in range of it.
If there is none, you should use it the moment you enter the room or after grabbing your victim if you are certain that no one had a chance to see you entering. Remember that it will last only 2/3/5 seconds, but during that time you won’t have a red outline while thrashing your target like any other shark would, however the diver you are chewing on will be. Good divers will be able to estimate where to shoot based on that.
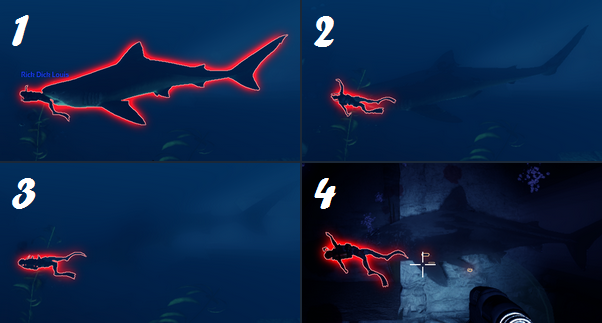
As you can see on screens above only diver is outlined while using Adaptive Hide. There is also one second transition of fading (image 2) before you become really hard to see (image 3). Screenshots 1 to 3 are taken in the open water. Inside a room it will be practically invisible in the dark, unless it will be in range of diver’s flashlight, which makes tiger somewhat visible (image 4). Those screenshot were made while tiger is stationary. It’s a whole different story when it uses sprint thrashing or Powerful Tail - body will be even harder to see, but red outline of diver flying around can bring some unwanted attention.
Lemon
 Basics:
Lemon is Tiger's kindred, but plays quite differently. Instead of being forced to lunge everywhere and having a medium health pool allowing it to tank a few hits, Lemon is quite a fragile shark, especially for its size, and relies far more on stealth than tiger to get kills. It likes to grab a diver, kill them quickly, and then get out well before anyone even knows it was there, rather than taking any hits.
Movement:
Lemon has the long lunge cooldown of goblin and the tank sharks, making lunging quite hard for it, especially because it is rather frail. Luckily, lemon uses very little stamina to sprint, so it can still move quite quickly around the map with double time.
Attacking:
Lemon wants to grab divers and sprint away- this is the most stamina efficient and effective way to get kills with lemon. It can pick up powerful tail if it wants, but it will likely kill the diver before it even gets the chance to use powerful tail, so this is not actually all that helpful. Lemon really does not want to be fired at, as its ability deactivates when it takes damage, so it's best to take things slow when divers are in the room and only go for divers that put themselves in a bad spot. When they come out into the open, you can play a lot more aggressively thanks to your ability and speed.
Because you want to play somewhat cautiously and can't really use powerful tail anyways, blindside is a good ability to pick up for lemon if you can afford it. This lets you make sure you get the grab on the diver in one lunge.
Ability:
Lemon's ability cloaks it like tiger, but kind of in the exact opposite way. Instead of getting guaranteed cloak for several seconds, Lemon can keep its cloak up infinitely- so long as it doesn't attack or take damage. Note, you can actually cloak with someone in your mouth, but as soon as they stab you, they will instantly break your cloak.
Note that you cannot activate your ability if you are under the effect of bleed or toxic- this is to prevent you from wasting your cloak.
Additionally, if you grab a diver out of cloak, for about two seconds, you do bonus damage equal to 10/20/30% of your normal thrash damage. Lemon has the same thrash damage as tiger, so this is actually quite a sizable amount, and your damage ends up equal to a fully enraged bull at level 3 ability.
Vitalized Frenzy is extremely strong on Lemon because the cooldown on its ability is quite long- plus, you're becoming much harder to spot and also gain your bonus damage back if you manage to grab out of cloak again. You can begin playing lemon much more aggressively with VF, but remember, you are still squishy, and still cannot cloak when bleeding or poisoned.
Thresher
 Basics:
Thresher is a speed shark, in some ways similar to mako, but it is far from being as straightforward. There is a lot to say about this one. Low health, big stamina pool, great speed and short cooldown between attacks. It is the only shark with AoE damage (area of effect). Thresher’s ability can smack multiple targets, critically wound them and turn off the flashlights of divers at even further a distance. It can also destroy equipment like mines, buoys, shark shields – once it's upgraded. That makes thresher the best support shark in game.
It’s a hard shark to get into. You have to wisely spend your evolution points, because with thresher you will most probably feel like you never have enough points as you would want to, and that's ok. There are a lot of ways to play thresher because of how versatile its ability makes it, and finding which evolutions you use the best is really the key to using the thresher. Thresher’s weaknesses are splitting and bleed ammo type because of its frailty. Also this is the only shark that can’t use sprint thrashing. You don't really want all guns being pointed at you while thrashing just a few meters from diver, the more distraction for them the better. This is another shark that will depend on teamwork and simultaneous attacks more than independent mako, tiger and hammerhead. Its should execute opportunistic playstyle, attack lone divers for easy kills, rush in when divers are stacking, hurt them as much as you can then run (or die and respawn) and get them down with your next engage.
Movement:
Because of its large stamina pool and speed, lunge is the best way to move around. Sprinting can also be used to do "drive-by" tailslaps with a bit more precision aiming, though it's only really effective with double time, and that's 20 evolution points that can be used elsewhere. Hangry will greatly increase your regeneration for the way from spawn point to S.T.E.V.E., so it should be picked up early.
Attacking:
Let’s follow the process of mass murder step by step here.
First: Grabbing a diver. The best way to attack is lunging, but dart may be good if you don’t want to overshot another diver for AoE damage. You would want to thrash and use your ability next to another diver. Best position to do that is under, above or behind him, so he won’t be able to shoot you instantly – and this is while you have another diver in your jaws, have that in mind.
Second: You have a diver in your jaws. Time to finish him off. Your ability – Tail Lash will deal 40/50/60% (depending on level) of damage to that diver AND to all nearby divers. That is why you should try to land somewhere near another diver with your grabbing lunge or dart. Your AoE damage does not end here. While threshing (not to be mistaken with thrashing) you will deal damage to every nearby diver by slashing them with your tail. This is its passive ability and damage to nearby divers is equal to damage dealt with thrashing. So if you have 2-4 divers (including the one in your jaws) in range of both your ability and threshing they will die at the same time.
Third: Hard to hit. Your shark while thrashing will end up in wriggling like a worm on a hook, which will make thresher’s hitbox hard to aim for. Harpooners may have a hard time to hit you, but weapons with high fire rate can kill you (with some occasional misses). Splitting rounds will do a lot of harm – this ammo modifier will make bullets less damaging, but in exchange there will be 3 bullets with each shot, so there is a higher chance to be shot by it.
Fourth: Planning your attacks. Thresher is a shark that requires picking your targets carefully, especially early game, based not only on divers position, but their health as well. Electroreception evolution will show you health of your soon to be victims and it is crucial for your planning. So why is it so important? Your ability suffers from cooldown after use. It is not too long but you can’t use it on two divers in rapid succession without Vitalized Frenzy. Note that even with Vitalized Frenzy, there is about a half second delay for the tailwhip animation to play before it will actually do damage.
If you grab a diver, finish him off with Tail Lash and then grab another diver, it will take a long time to kill the second diver, because of low thrashing damage. That will allow him to stab you multiple times and will give a lot of time for other divers to shot you. So the best tactic here will be starting on a 100% HP diver and jump to next wounded one (remember that you can be the source of those wounds because of your AoE). If diver is below 50% you can get him down fast only by thrashing. After that you can get another 100% HP diver because your ability should be ready to use again. Of course you can choose to run out of the room at any time. So either that or you can always use hit and run tactic - works pretty well too.
Fifth: Optionally forget all the steps. Actually no, don't forget them, mix those with this one. You don't need to grab divers to play well with thresher, sometimes you can just land with your lunge or dart near them, turn to face them (ability works on targets in front of you), then smack divers with Tail Lash and run away. Repeat for profit. I would suggest having at least level 2 ability for this, which can take 50% of diver's health. You will also need Electroreception evolution to keep track of wounded divers for this. Note that Vitalized Frency is not activated by kills unless you kill a diver in your mouth, so if you want to use Vitalized Frenzy with this method, make sure you grab divers you plan on killing.
Ability:
Tail Lash – most of it has been already explained. Each level will increase your damage by 10 starting at 40, level 2 allows you to break walls and level 3 will also destroy divers equipment. It’s a great ability to destroy shark shields. It will also destroy buoys and mines that are quite far from you. Unfortunately it doesn't damage S.T.E.V.E. It appears that area of damaging divers with Tail Lash is very limited compared to shockwave that can reach and destroy diver’s consumables. There is also the amazing side effect of this ability – turning flashlights off. In open and well lit spaces it is meaningless, but in dark rooms without flares and buoys it will leave affected divers in darkness. So you and your teammate can have some easy target pick-ups. This is an ability that greatly increase your damage so it should be evolved to at least level 2 early in the game.
Bigeye Thresher
 Basics:
Bigeye Thresher is the regular (or Common) thresher kindred. It is much squishier, having the same health as the blue shark, and the same thrash damage as whitetip in its defense mode, but otherwise is quite similar statistically. It differs in its two abilities, both its e ability and its passive ability.
Its e ability instead pushes divers away, causing them to take damage when they hit a surface. Their passive ability flings divers around in a vortex around the bigeye rather than just doing aoe damage, and does decent damage when they hit a wall being swung around.
Movement: Bigeye has good stamina and the quick lunge and dart cooldown, meaning it can be quite quick. It's similar in size to the common thresher and thus can be pretty tough to hit.
Bigeye is all about hit-and-running, so abilities like hangry, nimble finned, and even sometimes double time can be helpful for making sure bigeye stays on the move.
Attacking:
With bigeye, you have two main attack methods you likely want to swap between: tailwhips and grabs. Unlike common thresher, bigeye can't damage the diver in its mouth with its tailwhip. However, its tailwhip has much more range and thus can hit other divers much more easily.
Your other method is to grab a diver and thrash like a normal shark. Generally, because you have low health and don't do very good damage, it's better to grab only injured divers, but you won't take as much damage as the regular thresher. It's not very effective to try and use your thrash for aoe damage, as unless you're in a corner, you'll probably only hit the other diver once or twice into a wall. It's better to just avoid grabbing divers when other divers are around unless you know you can kill them quickly.
Importantly, bigeye thresher's tailwhip flings divers in the direction the camera is looking, not the direction the shark is going. As such, you can use this to smack divers into the floor or ceiling while you lunge past.
Ability:
Bigeye thresher's ability sounds intimidating, but it's pretty similar to the base thresher tailwhip. Each level has a "push force" of 1200/1400/1600 and does 5% damage scaling. This basically means if a diver is sitting still and you hit them into a surface, they will do the same damage as a normal thresher. Because divers are almost never stationary, they will usually take slightly more or less than this. If a diver darts or is using a dpv and you hit them, they will be one-shot, making this the quickest way to kill a diver in the game.
Your tailwhip, despite nothing in the description stating it, does do damage to destructables and deployables (divers who hit destructable will also do a small amount of damage to it) but it has a much lower range, except vs. mines, which it has a similar range to the common thresher. It does not, however, turn off the flashlight of hit divers.
Note that while normal thresher can use vitalized frenzy to get tons of quick kills, bigeye's tailwhip has a cooldown on how often it can hit a diver. You can still used vitalized frenzy to hit other divers quickly after a thrash kill, but you won't do anything to the divers you already hit.
Bull
 Basics:
Bull is a medium shark with stats very similar to the ones of the tiger. Medium health and stamina pools make it another somewhat balanced shark, but it needs to be played much differently. While its statistics are similar to “hard to counter” tiger, this shark suffers from numerous of weaknesses. It’s absolutely not a shark for new players, definitely hard to master and it will be heavily punished for not playing wise. Same as great white and thresher it relies heavily on teamwork much more than the rest. It’s better to play this shark with someone who you can rely on and then it can reward you back.
Bull is a really slow shark for two reasons. First one is the fact that bull shark has 1,5 second cooldown between lunges (1 second with Nimble Finned evolution) which makes him as slow as GW and HH and second reason – it requires to be enraged which takes time because of its ability, but we’ll talk about that in a moment. Size is bull's weakness, which combined with not so great speed makes it even harder to not be shot and because of that both automatic and spear weapons works well against it. Nets works pretty good on it too. It also has lowered thrashing damage.
I know it doesn’t look good but let’s jump to the good news. So what’s good about this shark? If you can play this shark smart, then in exchange it will give you killing ability unmatched by any other shark. Another thing is keeping the pressure of heartbeat on divers (also thanks to survivability). That’s because this shark needs to stick around for the build-up for its ability and the ability is the best thing about it. This is the shark that is defined by its ability the most compared to others. So let’s jump right into it.
Ability:
Usually I go with movement and attacking subsections after basics, but we can’t continue without this. As mentioned Enrage (because that’s the ability’s name) is extremely important part of bull shark’s playstyle.
Enrage is an ability that needs to build up its power (rage). Rage is generated when you are near divers - at least in range of slightly increased heartbeat which is pretty safe distance for bull, but nonetheless divers will be aware of nearby lurking shark. The bright side of it is the fact that most divers will stop gathering gold and be on guard which also means it will be harder to surprise them and it will give them time to try to locate you. Build-up is generated by divers and their activities – that includes moving, setting consumables and especially shooting. For example: shark shield alone can generate a lot of rage. Another great source of your rage is your shark teammate … while being shoot at. One last tip for build-up: while waiting for it I would recommend breaking some walls and leave them with one tick for next engage as long as you are not going to boost in from the last one you touched – decent divers will know where you will be coming from because of the noise you’ve made.
So you have a build-up. Now you can activate your ability for 4 seconds and make some good use of it. You will gain extra health, stamina and thrashing damage. Health can be doubled (from 250 to 500), stamina can be doubled (from 100 to 200), and damage can be higher up to 166% (more exact data in a moment). Those are of course maximal values when your build-up reached 100%, and have its ability maxed out. It's important to note that the thrash damage buff never changes, meaning bull will always do 166% higher thrash damage at max rage regardless of its ability level. However, stamina and health are only increased 150% at level 1, and 170% at level 2. For 50% of your rage you get respectively half of the extra boosts to all stats (including thrash damage), and so on. the 150% extra health is usually not enough to kill a diver without taking some damage to your actual health pool, so you want to prioritize leveling it up early in game. Early game, it is usually best to pick off divers who are on their own or to clean up after your teammate ravages the room. This is especially effective with a thresher or tank shark as a teamate, allowing the bull to make some quick kills that don't damage its actual health bar.
Bull shark’s time to fully devour a diver:
Without ability ≈ 1,9 sec
Ability with 10% rage ≈ 1,8 sec
Ability with 50% rage ≈ 1,4 sec
Ability with 100% rage ≈ 1,1 sec
Other sharks for comparison:
Great white, tiger, mako, goblin ≈ 1,4 sec
Thresher (without tail lash ability) ≈ 2,8 sec
Hammerhead (without smashing) ≈ 2,8 sec
When the ability is active your extra health or stamina generated will not deplete the original one which means if you weren’t injured below the level of your extra health pool you will return to the health you were at before the ability was activated. This can save you in critical times, when you have to run away while bleeding or you’re trying to catch a seal and toxic will kill you in a moment.
Enrage lasts only for a 4 seconds, and the cooldown is relatively short, allowing you to leave a room and lure a diver to chase you for an easy kill after you re-activate your ability, or to quickly re-activate it to grab a seal and save you from bleed or toxic. The best moment to activate it is just before grabbing a diver (and having some decent build-up for it). Even with ability on level 3 when your ability is on cooldown you don’t want to be in the room with divers. Bull is a hit and run shark and should run immediately when ability is off. Optionally (and very much recommended) you can use Vitalized Frenzy evolution which should be included in your build at some point. It will refresh the cooldown instantly after killing a diver. But even with that, leveling up your ability should be prioritized because of higher health and stamina gain, which makes you capable of sustaining heavier injuries. When you have Vitalized Frenzy you have the possibility to use all out aggression tactic. Mind you – with that evolution you can’t reactivate your ability until the first 4 seconds runs out. Remember that while your ability is active, you don't gain rage, so take this into consideration when you chain kills with Vitalized Frenzy. You may gain a very small percentage of rage between activations, even with Vitalized Frenzy, but usually not enough to truly matter. If you can get Vitalized Frenzy early enough, you can usually get more than one kill easily, though do not prioritize it over your ability as your level 1 and level 2 abilities usually don't give you enough health and stamina to properly survive mid-game weapons very easily.
It's best to escape if you can rather than to let yourself die whenever possible, as you have to regain rage every life and without rage, you are an easy target for divers to hunt down and kill in open water. Against lower level divers, this usually is not a problem, but even divers around level 50 will quickly learn to go after bulls in open water before they can gain rage. A good teammate can usually help prevent this to some degree, but it's best to avoid relying on your teammate since them getting shot at is usually your main source of rage.
Last thing you need to know is the fact that your breakable damage (breaking walls and obstacles) will be boosted up with the ability active and it also scales with the rage you had. With nearly full rage you can one-shot all walls.
Bull (2)
Movement:
Early game it's best to move around as bull by lunging because once you get to the diver safe, you have to wait for your rage to gain anyways, and it's actually faster than sprinting. However, if you choose to obtain the Double Time ability, sprinting becomes significantly more efficient stamina and time-wise. It's best not to prioritize Double Time over Vitalized Frenzy or your ability, because it does not really effect your killing ability so much as your ability to move around the map. That said, do not forget you do take only a small amount of stamina from sprinting, which can allow you to exit a room more easily than a shark can by lunging.
Attacking:
There are multiple ways to attack as bull shark. This is truly an opportunist shark. While you’re waiting for rage to build up you have some time to look around and spot some good opportunities. When your ability is level 1 or 2, you should aim only for safe kills. Lone divers are the easiest prey and you usually don't even need to activate your ability on them. Another strategy is to use “drive-by” tactic to generate rage which means that you should lunge across the room with divers just to show yourself. This will force them to try to shoot you which will generate some amount of rage. Just be sure to not get shot, this is a strategy to just get in and out without attacking and with sole purpose to pump you up. Third strategy is to simply use your teammate as a shark that comes in first, makes a ruckus and hopefully runs away safely. You being around (in a safe place) should gather enough rage to be a follow-up shark and enter the moment when he left. That of course will require a decent teammate that doesn’t slack too much and can get at least 1 kill each encounter. If he can’t handle that then … use him as a rage generator and take more tickets from divers than your teammate can lose. Unfortunately if he realize that he is being used he won’t be happy about it. Nobody likes that. The worst kind of teammates are shy sharks that are afraid of coming in first, opportunists that tries to use you as a shield or another bull shark.
You attack divers with lunges and due to reduced sprinting cost you should keep sprinting after each grab to maneuver and aim for next victim or to run away. Double-Time evolution could help you build up some extra speed for it. Powerful Tail is not necessary with this tactic which will save you some extra evolution points to spend somewhere else, but this evolution may come in handy later in game. Some players take Powerful Tail + Nimble Finned and don't use sprinting on bull which is also an option. You may want to try both strategies and see which one works better for you.
Copper
 Basics:
Copper is bull's kindred and shares similar base stats but its ability works very differently. It has the same above average health pool, but has normal thrash damage. It also gains rage like bull, but unlike bull, its ability gives it invincibility instead, with its rage determining how long it is invincible, up to four seconds. This makes copper a surprisingly well-rounded shark, but it has some serious drawbacks that can make it not the best shark for newer players.
Copper is a good shark if you want a shark that can tank hits but still get around- Bull does this better, but bull also struggles a lot more with nets because of its larger size, and relies on its ability much more. Note that Copper is hit heavy bit tranqs, as they can still take stamina even if you have no health left, however, if you pick up adrenal glands, this can negate the tranqs, and since you are tanking stuff anyways, this ability is an absolute must-have.
Movement:
Copper has the same movement stats as bull: it can sprint for a good amount of time, has the same stamina pool, and the long lunge cooldown. Because of its sprint time, double time is very powerful on this shark. It also can benefit from picking up nimble finned more than bull would, since it doesn't get bonus thrash damage or stamina, but it can certainly play fine without it.
Attacking:
A lot of newer copper players will see that they have a rage meter and assume they should play a cautious waiting game like Bull. However, truthfully, this is not really a good idea, as you have no penalties for being out of rage, besides not having invincibility. In fact, you can't even grab divers with your ability active, so if you have an opportunity to grab a diver, it can often be the better choice than waiting. Getting shot at increases your rage, anyways, so by the time you need to pop it, you'll have gained enough to get out of there. Generally, Copper wants to play hit and run simply because if you take enough damage to pop your invincibility, you can't grab divers anyways.
Ability:
Copper's ability is its biggest weakness, but can be its biggest strength if used properly. This might sound backwards, but it's true. Whenever Copper pops its ability, it cannot die. Its health will hit a cap at 10% and won't go any lower than that. If your health is already below 10%, you can still pop your ability, but you won't gain health, your health just won't drop. Copper's ability is largely detrimental to it in most circumstances, because it prevents you from grabbing divers and forces you to drop divers whenever you hit that 10% health. What this means is that Copper can really only use this ability in one situation- escaping. You can't use it offensively because you physically can't grab divers. Additionally, because the time your ability is active for is based on rage, it can be challenging to know exactly how long your ability will keep you alive at times. You can speed up the speed at which you gain rage by upgrading the ability, which is at 100%/120%/130% speed for each level, which can make it much easier to guarantee you get your maximum amount of invincibility.
There is one "way around" dropping divers, in razor fin and serrated teeth. Divers will still bleed out if you drop them even if you escape, so you can use serrated teeth to get a little extra damage off while you escape. Razor fin lets you still damage divers with your ability, meaning you can sometimes still kill a diver after you drop them, or potentially slice up some divers as you make a lunge through. Combining these is most effective, but gimmicky, as you are relying on nearly dying to use these, and on top of that, it's fifty evolution points, and copper can use those in plenty of other places.
Another thing about Copper's ability is that tanking hits at 10% health puts you in a very dangerous spot if any diver is using toxic. It's basically a guaranteed death if you don't work to fix this ASAP. As such, Hemogenesis and Placoid scales are basically a must on copper.
Copper's ability does have one beneficial and unique quirk to it: It technically has no cooldown. It cannot be activated unless you have 25% rage minimum, but with the entire diver team shooting at you, it's fully possible to pop this ability more than once in a row. The downside to this is that vitalized frenzy flat out does not work on copper, but that's ok, as you usually don't want to chain rages together since you can't grab divers.
Goblin
 Basics:
Goblin is similar to the Tiger shark in that it has medium health and uses its ability to help avoid getting shot. However, that is about where the similarities end. While the tiger is a very easy shark to get into, goblin takes a lot more practice and caution in comparison because it is a much easier target. Not only can the goblin not cloak, its stamina is not as good as the tiger's, it's a bigger target, and it has slightly less health which all make the goblin a shark that has to play very cautiously. However, if you are careful with goblin, it can be used rather well as a hit and run shark.
The most important thing to remember about the goblin is that, while similar to the tiger, its lower health, larger size, and pink coloration make it an easy target and it has many counters that can be dangerous for it that you must be vigilant for. Fortunately, the goblin has a few tricks up its sleeve that allow it to not be countered as easily as some other sharks.
Movement:
The Goblin is a sprinter shark, exactly like the GW, but it is not as slow when sprinting, making up for its much lower health. It also has a dart and lunge cooldown time of 1.5 seconds, like the tank sharks, meaning it can't zip around very well. Because of goblin's increased sprint speed, it is able to move around the map relatively quietly and quickly compared to smaller sharks.
Attacking:
Goblin really cannot do anything but hit and run. Its health is only a little higher than the thresher shark's, meaning that it can't take many bullets, but its high stamina usage also means it can't dart around the room like the thresher and mako. This means goblin has to rush in, grab a diver, and, preferably, sprint out with them in their jaws. It's best to grab divers using your dart, since it uses less stamina, and then to sprint out, however if you are confident that you can make it out with the stamina left over from one lunge, it is possible to risk entering.
Because of this reliance on sprinting, double time is absolutely mandatory to use the goblin effectively. Nimble Finned is also helpful in case you miss your first dart, but is not really as effective on goblin as on other sharks because it can't afford to stick around very long.
Never forget to make use of Goblin's ability to create decoys that go for divers- this is goblin's best line of defense and confusion, and especially helps against bangstickers, netters, and divers using rifle weapons. However, if you see spear weapons, be especially cautious when entering a room, as Goblin is frail and most spear weapons will kill it pretty easily and can go right through your decoys to hit you as well.
Also, remember that the Goblin is not only a frail shark, but a rather easy shark to hit- meaning it's effected easily by all sorts of modifiers and weapons. Bleed, volleyjets, and nets in particular are something to look out for. Goblin does not make much use out of most of the evolutions, meaning you can usually play around with Placoid Scales if you need it to prevent bleed, toxic, or tagging, and your decoy can usually help a little against volleyjet and nets.
Ability:
As stated before, Goblin's ability is to create a decoy. This decoy will be a goblin shark like you, and will target the nearest diver. When it targets them, it will swim to them similarly to a bot shark, taking sharp turns and breaks in between sprinting. Once it reaches its target, it will attempt to lunge at them. When it would normally grab the diver, however, it disappears with a sound effect. Alternatively, if it takes enough damage, it will disappear in the same way. The decoy has 1/60/120 health depending on its level, and can take damage accordingly. It takes damage from modifiers such as toxic and bleed, blocks bullets, can get trapped in nets, and can be banged by a bangstick just like a real shark.
While your decoy can do a lot for you, there are a few downsides to it. The biggest downside is probably that it has a very long cooldown, so if you use it and none of the divers even notice it, You're stuck waiting for a new one for several seconds. Secondly, it also will only target one diver in its lifetime. That means if the diver gets killed by you or another shark, the goblin will disappear. Furthermore, it means that it almost always will target the diver in your jaws if you spawn one while you are thrashing someone.
One plus side to remember is that the decoys themselves will last forever until they reach their target. This means you use them to track divers across the map, or spawn them in when you spawn in, and then spawn a second one once you get to the safe. Some goblins will take this a step further and use Vitalized Frenzy to spawn a new decoy after every kill, or combine Vitalized Frenzy with Killer Instinct to spam decoys. However, Vitalized Frenzy is 50 points on its own, and Killer Instinct is 20, meaning that this is fairly expensive, and because Goblin is not capable of killing quickly like bull or thresher, this can be difficult if your teammate knows what they're doing or the divers are skilled.
Decoys also make noise like real sharks. This can be especially useful vs. divers in open water, because the decoy's noises can help mask your own as well. In general, open water is where Goblin works the best. Blindside can be further combined with decoys to make your attack even less predictable.
Really, the best way to use the decoy is to use it in all sorts of ways and to use it as often as possible. The more decoys the divers shoot down, the less likely they are to think it's actually you- until it's too late.
Oceanic Whitetip
 Basics:
The Oceanic Whitetip is very similar to the tiger in stats and playstyle, but it differs heavily in two important aspects: how visible it is, and its ability. The Oceanic Whitetip is also slightly tankier with a slightly better sprint (and technically has a worse thrash- we'll get into this later), but that is really where the stat differences end. The Oceanic whitetip has the same stamina usage, same lunge and dart cooldowns, and is similar in size. These factors make the two sharks play very similarly, and if you're good in one, you're probably good at the other.
The Whitetip differs from the Tiger primarily in its ability, which allows it to switch between an attack mode and a defense mode. This versatility compensates for it not being able to cloak, and being a bigger target.
Ability:
Like the bull shark, the Whitetip's ability is a much larger part of it than the other sharks and needs talked about before anything else. Whitetip's ability swaps between two active abilities rather than activating something- it has a defense mode, which does thrash damage comparable to an unenraged bull but provides 30/40/50% damage reduction, or attack mode, where its pilotfish companions join in on your thrashing to deal 32/40/48 damage per second. Yes, that's per second- you do not have to thrash to get this additional damage. Alongside thrash damage, the level one attack mode thrash is comparable to the tiger's thrash damage.
Early game, its defense mode is especially potent because the divers are spawned in only with weaker weapons, but it is important to note, while this ability works very similar to the Great White's defense bonus, it does not protect against bleed/toxic damage, or knife damage. This means even if you are in defense mode, you can't just tank knife stabs- you will loose a lot of health, meaning knowing when to switch between the two abilities is important. luckily, because of its increased bulk over the tiger shark from the defense mode and higher base health, it has an easier time in the beginning of the match.
The Whitetip's ability, while its greatest strength, is also its biggest weakness. Being unable to have both effects at once makes the whitetip an easy target if the ability switches are not timed properly, and while thrashing faster than other sharks and only taking half damage is very powerful, it is also 40 points to max out the ability. Because of the shark's medium stats all around, however, you have a lot of different options to choose from in how to balance leveling the ability and grabbing helpful evolutions.
Movement:
While the Whitetip does have lowered stamina cost to sprint, this lowered cost is negligible to the point Thresher can sprint for longer than this shark, and thus it's best to grab hangry rather than double time on this shark. It has the same lunge and dart cooldowns as the tiger, mako, and thresher, which means Nimble Finned is excellent for the Whitetip.
Attacking:
While Whitetip is bulky in defense mode, it only makes sense to use attack mode when you're attacking. In most situations, you will want to enter a room with defense mode on and switch to attack mode once you have the diver in your jaws. Think of defense mode as your "cloak", except instead of shielding you from view like the tiger, it's shielding you from damage. Once you enter attack mode, you loose a lot of bulk, making it important that you get away as fast as possible, forcing you into a hit and run playstyle.
The Whitetip, with the right abilities, can become a decent tank shark, but it never really is as effective in the role as the GW or Bull, so it's best to stick to hit and run as you will find this the most effective, just as with the tiger. Like the tiger, your stamina is fairly low, but regains quickly, meaning you may want to dart instead of lunge at times, but more often than not, you'll find lunging is more useful, at least until you get Nimble Finned and Powerful Tail. These abilities are pretty much required for Whitetip, as without them it dies very quickly once it enters attack mode. Do remember this low stamina does mean you have a very limited amount of times you can attempt to lunge, so if you miss, it's best to try and get out of there before anyone has the chance to do heavy damage to you.
PART II: Evolutions and Builds
Second part of this guide is about shark evolutions. Most of my opinions here are based mostly on my own observations, testing and experience with those. Be aware that different players may find some evolutions more or less useful to them or prioritize them in different order when it comes to builds. It won’t be completely different, but for example someone can see Ignore Pain as something to pick up, while I think it’s absolute garbage as it is now. Remember - there is no best build, same as there is no best shark and I encourage you to test all evolutions and don’t stick to my or someone else build if you feel like something works better for you. It all depends on your playstyle and current skill.
As you will see below I added small icons showing shark species in three colors. Their meaning:
very useful and beneficial for this shark
somewhat useful, but not a priority for this shark
useless or doesn't affect this shark's gamaplay in any beneficial way
Evolutions
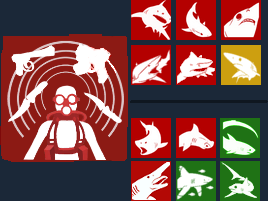 Electroreception – shows current diver’s health. Good for planning to finish off wounded divers, which is great for thresher. It can slightly improve visibility of your targets because of big red health bars over their heads. It does help newbies a bit, but generally you should avoid it if you are not playing as thresher or whitetip. Whitetip makes good use of it, as it can decide whether to stay in defense mode or not. An injured diver is usually best killed in defense mode. Blue can also get some use out of it, since killing a diver without taking any damage is a good source of heallth, but it's usually not a priority.
 Hydroacoustics – this one is very situational. It helps locate far away divers, useful only against DPV users. If there are no divers with such equipment or you can locate them by hearing, then there is no point in taking it.
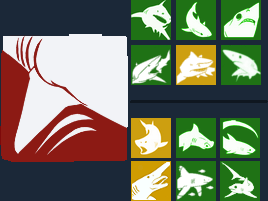 Nimble Finned - reduces cooldown between darts/lunges by 0.5 second down to 1 second for tank sharks and 0.5 second for speed-type sharks. Good choice for every shark, but you may want to prioritize some evolutions over it. Nimble Finned should be picked up between early and mid-game.
 Double-time – increases shark’s speed while sprinting. Absolutely mandatory for great white, lemon, and goblin, but tiger, HH, and mako will get little to no use out of this ability. Thresher can use it to more accurately hit-and-run divers, and bull can use it to move more quickly but it doesn't require this like goblin, lemon, and GW.
 Hangry – gives initial stamina regeneration boost for 8 seconds or so it looks like. The truth is - there is a cooldown before your stamina regeneration can kick in (1 second for every shark) after performing an action that depletes stamina. Hangry simply ignores the existence of this cooldown for its duration.Thanks to it you can get much faster to S.T.E.V.E. and in most cases you will be ready to jump into action immediately once you are there with full stamina. Good for every shark with the exception of great white, goblin, lemon, and bull.
 Hemogenesis – constant but minor health regeneration. It gives you 2% regeneration per second. For 20 points it's decent, but the best it can do is prevent some of the bleed/toxic damage, especially while running away. Combined with Placoid Scales it render bleed and toxic nearly useless against you, but that's 50 evolution points worth combo. Most sharks won't get much use out of this they wouldn't get from another ability, but this ability is practically mandatory on Copper, who otherwise dies very quickly to toxic. Bigeye can also get some use from it since it is usually hit and running without every actually grabbing a diver anyways.
 Razor Fins – deals 20% damage to diver’s health if you slash him with your fins and deals 30% more damage to nets. The part about the nets is obvious, it's a good counter against those pesky netters. The fin slash damage on the other hand is not something to aim for. Thresher can benefit from it to a point as it is the only shark that is trying to get close to as many targets as possible. It does not affect thresher’s tail damage while threshing, but if your fins will come into contact while doing so it will deal some additional damage. This ability is absolutely a solid pick on Bigeye Thresher, however. Because Bigeye's threshing swirls divers around the Bigeye, they end up taking a ton of hits from Razor Fin, and because its E ability does so much damage, just one or two hits from Razor Fins can put the diver into killing range anyways. Whitetip also gets some use out of it, as an injured diver can be killed relatively well with defense mode activated, but it still will take 2-3 slashes for this to matter. Really, Whitetip shouldn't pick up this evolution unless their teammate isn't leaving any injured divers for them to pick off. There's a reasonable limit to how many times you can slash, so trying to go near a diver and twerk on his position will rather get you killed than slash him more than 1 or 2 times.
 Killer Instinct - treats a seal the same way as a diver with evolutions activated “on kill”. Shouldn’t be picked up on maps where seals are hard to get and that mostly means Devil’s Head and Quarry. There are three evolutions that can come in combo with this.
Blood Rage combo is the best one, you can eat a seal before entering the room with divers and have a regeneration of your stamina already in place. Blood Feast combo will make a seal heal you for double the amount it should (some comes over time as a Blood Feast would). Third combo is with Vitalized Frenzy. It refreshes cooldown on your ability after eating a seal. There are very few situations in game where this could be useful, because most of the cooldown on abilities are quite short. Can be used on some transitions between safes, where you are able to bounce between seals and divers, especially if you are trying to keep S.T.E.V.E. in the open waters by smashing it with your head. Tiger can benefit from it in situations like that one, but beside that, those two evolutions should not be paired.
Evolutions
 Minesweeper – it helps you see sea mines. Should be picked up only if there is a dedicated bomber in diver’s team that keeps exploding you and your teammate. In general you should try to learn how to see mines without minesweeper. If you pick it up, then use it to clear the mines so the other shark could safely attack.
 Headstrong – increases time to recover for S.T.E.V.E. after being struck by a shark and doubles your damage done to S.T.E.V.E. and breakable environment like walls. It has some potential. Thanks to it big sharks can one shot regular walls (instead of two hits) and grab divers instantly without giving them time to react to the sound of walls crumbling. Small and medium sharks will be able to get wall down in 2 hits, instead of 3. When a shark with Headstrong evolution hits S.T.E.V.E., it repairs itself twice as long and takes double damage. This is a great evolution if your team is aiming for destroying S.T.E.V.E., stopping it in transition between safes or when you need more time to deal with divers when they are trying to escape after 4th safe.
 Placoid Scales – decreases time of being tagged to 5 seconds (from 10) and halves the damage from toxic, bleed and tranquilizer. That's a good defensive evolution, but should be picked only if there is a lot of mentioned ammo modifiers. It is definitely a good evolution and if you have already all others from your build taken, I'd recommend to go for this one - just to be “safe”.
 Serrated Teeth - this evolution will leave a deep wound in your “almost” victim. I said almost because this ability only kicks in when you died with diver in your jaws. Literally vengeance from the grave. The mark of serrated teeth is applied once you grab a diver, but the damage starts once he is released from you due to your death, so it does not improve your damage while thrashing. Diver will be bleeding until he reaches medkit or death. Of course if you had him almost dead, then he will die in matter of few seconds which is beyond help. Even if he has time to swim to medkit (which is outside next to ammunition boxes), there is still second shark that will find desperate player very appealing. Serrated Teeth does not improve your survivability at all so I would not recommend it until you have all your major evolutions from your build. If you are having match where you can make a 1 for 1 trade with tickets most of the time or you are going with all out aggression tactic (going wild in the room with divers until you die), this can be useful, that’s why I deem it situational. Copper does get some use from this ability beyond trading kills, since it is the only shark that can drop divers, but because it doesn't actually have control of when it drops divers, this ability is still situationally useful at best.
 [/previewimg]Blindside – gives your shark better control over your lunges. You can pretty much make curves while lunging just by moving your mouse. Takes some time to get used to it, but it has some uses especially against dodging divers. I'd suggest trying it out against bot divers to test if it fits your playstyle. Goblin and Lemon really like this ability because it allows them to further hone in on their "ambushing" role. They can't really spam lunges to begin with, so making use of some well aimed and timed blindside lunges is often the best they can do. Mako can get some use out of it as well because of is speed and extra evo points, but it is not really effective enough to be worth spending 30 points on until the mako has several other more expensive evolutions chosen.
Evolutions - high tier
 Powerful Tail – allows you to lunge with diver (or seal) in jaws. Amazing ability that improves your unpredictability and avoidance. Significantly influences your playstyle with every shark you use it on. However, it does require stamina to use, so GW and Goblin don't make the best use of it. Lemon also doesn't make much use of it, since it has a long lunge cooldown and kills so fast anyways that you rarely even have a chance to use Powerful Tail before you or the diver is already dead.
 Blood Feast – gives you health regeneration after eating a diver. It takes few seconds before it will kick in and you can't be harmed while waiting for it. The amount of health gained is 60 health points for bull, tiger, mako and thresher, while GW and HH has a 3x and 1,7x multiplier on it respectively. So for great white it heals you for 51%, for hammerhead 31%, for bull and tiger 30%, for goblin 33%, for mako 55%, and for thresher 40%. You can also stack the healing gained - if you kill 2 divers it will heal you for twice as much.
 Ignore Pain – evolution that boosts your defenses in exchange for your stamina. When your shark takes damage that would normally kill it, it instead drops you to one HP and drains stamina to compensate. Bleed and toxic bypass this and will still kill you regardless of your stamina. Because of the stamina drain from this ability, it's best to use it only on sharks that have high stamina, meaning only mako, thresher, and bull (when enraged) make good use of it, but it's best to prioritize other abilities over this because of its reliance on stamina.
 Vitalized Frenzy – every time you kill a diver, cooldown on your ability will reset instantly. After the duration of ability it has to be activated again manually, active effect can’t be queued one after another. In my experience you shouldn’t prioritize it over avoidance, movement improving and stamina building evolutions. It makes for a fine late game evolution for most of the sharks and it helps you carry a game, if your shark teammate is doing poorly.
For great white it means nearly constant damage reduction from Juggernaut with pauses between activation. You can be affected by nets in those pauses even with level 3 (for a short while which will make you lose your speed and drop a diver in your jaws if you had one) if you don’t shake them off.
Hammerhead will be able to keep Relentless Force up nearly all the time. But if you think of it as source of infinite stamina, then you may be disappointed, because Adrenal Glands and Blood Rage are far superior in that matter. Then again the health ticks from constant Relentless Force level 3 can be really helpful.
Bull shark's existence is defined by its ability so this evolution is a must for it early on especially because cooldown on it is quite long.
Tiger will be able to cloak itself more often, which makes for an alternative way of investing in its ability - instead of spending evolution points on level 2 and 3 for longer duration, you can go for a short stealth after each kill.
Thresher and Bigeye Thresher will be able to refresh its damaging ability, but only when diver dies because of thrashing, not the Tail Lash ability itself. It takes lot of self-control, good reaction time and practice to be able to refresh every cooldown on Tail Lash.
Goblin can create a new decoy right away, allowing you to quickly spam many decoys if paired with Killer Instinct, or to use the decoy as a meat shield after you kill a diver.
Whitetip can swap abilities immediately after killing a diver. This is potentially good, but takes a lot of self control, and you still have to wait for the cooldown to switch back afterwards, meaning it typically is better just to go with other abilities over Vitalized Frenzy.
Lemon can immediately re-enter cloak, allowing it to keep its bonus thrash damage up at all times.
Mako and Blue don't get much use out of Vitalized Frenzy. Their cooldown is fairly long, but it's best used at a distance and you don't need to mark every diver to be effective, anyways. As such, these sharks don't really get much use out of it.
Copper is the only shark that flat out can't use Vitalized Frenzy at all. Its ability technically has no cooldown at all, and instead is only activateable after having a certain amount of rage. You will typically be able to re-activate the ability pretty quickly after it ends, anyways, so it's not a huge loss.
 Blood Rage – improves stamina regeneration instantly after kill and lasts for 10 seconds. It works exactly like hangry, but let me repeat that: there is a cooldown before your normal stamina regeneration can kick in (1 second for every shark) after performing an action that depletes stamina like lunging or sprinting. Blood rage simply ignores the existence of this cooldown for its duration. So you get full stamina regeneration with no pauses which is pretty awesome for every shark.
 Adrenal Glands - regenerates stamina instantly after taking damage, that also includes stabbing from diver that is currently in shark’s jaws. Tank sharks will benefit greatly from it, because they are able to take a lot of damage. Copper in particular can get good use of this ability.
Builds
Here are my current builds for every shark. I was always changing something in those, but this version can be considered as final. I would recommend it for both newbies and more experienced sharks, but I would also encourage to experiment with order of those, try other evolutions and find your own build in time. These builds are optimal for me, but they may be different for you depending on your playstyle.
Here is the table. Note, I unlock ever ability in that tier in whatever order I see fit before moving onto the next tier. My tiers also don't necessarily mean I expect to unlock all of those abilities, they just dictate the order in which I unlock them. I typically don't expect to unlock everything in Tier III, usually just one or two abilities. the Situational or Bonus tier I take if I either have finished my build and have bonus evolution points, or if I'm struggling with something specific in that match, like bleed, tags, or open water divers.
Level II Ability
Level III AbilityPlacoid Scales
Blood FeastLevel III Ability
Double TimeBlood Feast
Nimble FinnedPlacoid Scales
Powerful TailLevel III Ability
Nimble FinnedPowerful Tail
Razor Fins
Placoid ScalesHemogenesis
Placoid ScalesLevel II Ability
Level III AbilityLevel II Ability
Level III AbilityAbility Level II
Ability Level IIIRazor Fins
Vitalized Frenzy
Nimble FinnedPowerful Tail
Double TimeAbility Level II
Ability Level IIIDouble Time
Powerful TailPowerful Tail
HangryIgnore Pain
BlindsidePowerful Tail
HangryPlacoid Scales
Ignore PainVitalized Frenzy
Nimble FinnedNimble Finned
Level II Ability
Level III AbilityDouble Time
Placoid Scales
PART III: Tips and Strategies
Basic
Of course it is not that easy, there is a thin line between being aggressive and being reckless. That’s something you will have to figure out and learn by yourself. In time you will be able to assess the situation better and you will know when you can get in for a sure kill. But remember, you shouldn't be too cautious - waiting for an opportunity, hanging outside the room for 10 seconds is a waste, just … DO IT!
About gold denial – the more gold divers can gather, the better weapons they’ll have. Aggression will help a lot with solving this problem. The more you stress them the less gold they will pick up. You should also observe all 4 divers. If one is getting away from the group to pick up gold, you can get an easy kill and you will not let them collect that (they get money only if the gold is brought to S.T.E.V.E.).
- Go into Settings > Game > Misc and set your Field of View to max. It will set camera a further behind you, which will greatly improve how much you can see around you.
- Settings > Video > Lighting > Light Shafts and turn it off. Light shafts may be a bit blinding on some maps near the surface which can blind you especially during seal hunting.
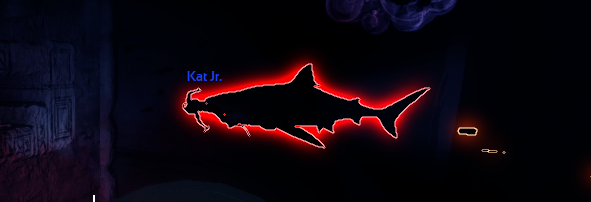
Advanced
With their levels known, you can see their experience (but you can’t see their skill, you can estimate it at best) and go with your best shark if they can provide a challenge. But if you think they can’t, then train yourself with other sharks – “handicapping” yourself like that, will provide a good challenge for you and not too much pressure for less skilled divers, so both parties can have some experience out of it. Win-win situation, but it is up to you, if you want to take that road or just stomp them hard.
If you are being followed by DPV user (remember that you can hear it) it can be played out differently depending on your current health and on being tagged or not. Of course if you are left with very low health - run away from him, but if I you have enough HP and even when you’re tagged, you can instantly turn back and just lunge at him, not many has the reflex to react to that. But if needed, you could also feint with lunge to land somewhere out of his sights and finish him with next lunge, while he trying to assess the situation – if he stops. In situation where he doesn’t stop and tries to run away with DPV, chaser becomes the chased. Another strategy against DPV when you’re not tagged, you can just hide behind anything solid and jump out at him, before he can get visual and switch weapons. Free kill.
Advanced (2)
First: watch where divers are pointing their gun. If you can analyze where all present divers are looking, you increase your chances for a kill without being damaged too much. Don’t treat them like a dot that can be taken from any side you want, because if you rush a lone but experienced diver from his front it tends to end badly. You have lots of options to sides from which you could attack, but you have to take other divers vision into equation.
Second is remembering divers position. Once you attack and thrash diver, you should already know where to lunge next. Exit or next diver – at this point you should know how far and what angle you should take for your next move. If you’ll slack a moment longer you can waste stamina or health if divers will react fast.
Last one is thinking vertically alongside horizontally. That’s something that you need to get used to as both diver and shark. You always have to remember that there may be enemy above or below you and running away is possible in all directions. This is hard to explain, but if you attack from above misses and you can instantly reposition yourself to diver that now is above you and grab him with your second attack – you’re getting it. It’s worth noticing that most divers can’t think vertically so it’s easy to get them off guard with your skills.
All this skills, once mastered, should come naturally, without even thinking about it and that is something that you can always improve on, skill cap to how fast your brain can process information is basically limitless and extremely crucial in becoming a pro.
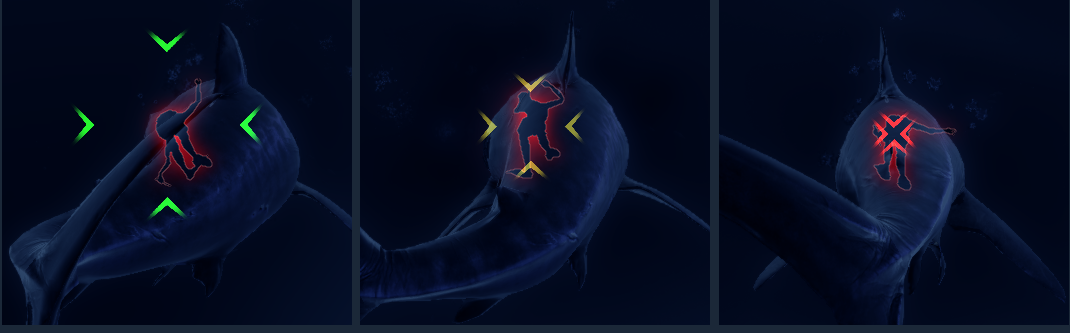
Mako - 5
Thresher - 5
Tiger - 6
Bull - 7
Hammerhead - 7
Great White - 8
This damage can be doubled with Headstrong evolution. It doesn't matter if you will deal damage with lunge, dart or sprint into it - it always deals the same damage per hit. For damage to be registered, S.T.E.V.E has to be strucked - it will stop moving or opening the safe. I'm saying this because sometimes shark can "slide off" the robot - there is a sound of hit but S.T.E.V.E. carries on. It can happen if you didn't hit it directly or you tried to charge it with sprint with not enough speed force, this tends to happen more often to small sharks.
There's another thing worth mentioning even if you are not aiming for victory by destroying the robot. S.T.E.V.E. will move slower depending on how much gold it collected from safes. Its speed decreases by 30% after each safe is broken. And here comes the fun thing - the percentage of damage taken reduces it's current speed by the same percentage. So for example if you bring it down to 50% after 4th safe it will move ridiculously slow.
Eating a seal gives you 30% health. 15% comes instantly and the other 15% gets added to a bonus regeneration pool (BRS for short). Bloodfeast regenerates 33% - all of it goes to BRS. The 3 second without damage rule applies also to BRS. If interrupted it will give you remaining part of the pool after another 3 seconds without damage. BRS rate is 15 health points per second - it's not percentage based this time, which means that sharks with bigger health pool will regenerate longer.
PART IV: Know Your Enemy
Weapons
I won’t go deep into every weapon, there is no reason for it. Instead I will review briefly those weapons that can affect shark’s gameplay greatly.
 Sensor – or sonar gun. A cheap and not harmful weapon. It will help divers locate gold better. It can also shot a detection ring from time to time. If aimed properly or with some luck – it will hit you and discover your position by tagging you for 2 seconds. Divers will often expect you to attack from the direction where you were “caught”, so try to take a different route.
 Bang Stick – is a melee weapon that can one shot speed sharks and critically wound (down to 15%) tank sharks. The best way to deal with bangstickers is to eat them first, before they will have a chance to get to you, while thrashing another diver or just avoid them. Bang Stick can be easily spotted if you can come close to the room. Be aware, they can stab you while lunging at them in straight line, so try to take them by surprise. If they are aware of your position, you can try to feint your lunge and get them with second one from different direction.
 Net Gun – hammerhead’s bane. If a good diver get you inside a net, you are pretty much dead. In last effort you can try to get out by moving your mouse (just like thrashing) and then get the hell away from there. Netting a shark will also force you to drop your victim from your jaws which is very unwanted. The only way to deal with those is to be fast, be on the move or attack netters first. Same as with bang stick, net gun can be recognized, if you can come close enough to the room.
 Harpoon – this is a very dangerous weapon. It can one shot speed-type shark and critically wound tank shark (down to about 15% HP). It can shot only once before reload, so only experienced divers with great aim will be carrying it. Counter is the same as with Net Gun - be fast, be on the move or attack harpooners first if possible (but if they shoot you while lunging straight at them, you are pretty much done for). HH in full health can take a shot and kill harpooner, if he deals maximum damage instantly. GW can take up to 2 regular harpoons with Juggernaut active and eat a diver if ability was evolved – if you’re lucky. Harpooners with penetrating rounds will not be so merciful for tank sharks.
 DPV – this little devil was mentioned few times across the guide. It stands for diver propulsion vehicle or simply underwater scooter. This is not a weapon, but a tool that can insanely boost diver’s mobility and let him get tons of gold thanks to it (there is a gold detector and gold magnet upgrade for it). It is possible to catch DPV users and that should be done, before they can bring collected gold to S.T.E.V.E. There are very skilled DPV users in Depth, that can pretty much avoid chasing sharks and lure them away from their teammates. You will have to either learn how to deal with them with practice or simply ignore them and thin opposite team’s tickets instead. You can invest in Hydroacoustics evolution to see them better, if they like to swim far away from the group or learn to locate them by sound localization (with headphones).
Consumables
 Shark shields - if you can see a huge dome that disrupt the sharks' senses, then you are facing a shark shield. There are few options how to deal with it. Destroying its source is the obvious one. But you must know that diver will expect you to do that and they will know where to aim exactly. You must be fast with it. You can always wait for it to end, but that is always a bad option, unless you have only a few tickets left. There is a way to grab divers when they are under Shark shield’s dome. Take advantage of your third person camera and try to position yourself so you can see black figure of a diver. Not only this, their flashlight will give away their position, as you can see the light of it pretty easily. It takes some practice to spot players that way, but you can play on that false feeling of safety.
 Buoy and flares – both can detect you and give away your position. If you are not a tiger (using its ability), this can alert divers, which will not end well if they did notice you. You should try to always come from a way where there is no flare or where buoy will detect you too late for players to react. You shouldn’t care too much about destroying buoys, they can be easily replaced and going after them can cost you a ticket.
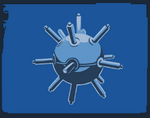 Sea Mines – those explosive consumables can easily kill a shark, but it can also be turned against divers. With some practice you will be able to see mines even without minesweeper. There is a lot of fun to be had with mines. You can easily activate them just by swimming by with either sprint or lunge. You can also do it by lunging past them to set them off safely, but that takes some practice. Be very aware of your hitbox (body), because if you just nudge the mine with your fin it will end badly. You can also fail when you will touch a wall or anything solid with your shark – which can lead to bouncing off of it a bit, enough to nudge the mine. So as you see, lunging past mines is a delicate task if those are placed by a good diver.
Explosion can heavily injure or even kill a nearby diver or damage S.T.E.V.E. Mine will deafen diver and dust from explosion will obstruct their view so it is a good idea to come through that dust after the explosion for a kill. If there is a dedicated bomber in the opposite team, take minesweeper evolution and try to blow all mines so the other shark can safely get in. Speed sharks are best suited to be minesweepers.
 P.A.T. - Portable Aquatic Turret is something that can be a downfall of many shark. This little device is equipped with a motion sensor, tag detector, and automatic rifle which basically means it’s a portable aimbot which will shoot and kill you. It will be highlighted, but it can be hard to spot right away, but thankfully you can easily hear its presence, because it's quite noisy. It’s also really fragile and you can easily take it down with a dart or lunge, the same as you would take down shark shield. It has battery which lasts 60 seconds. Turret can be placed mid-water. Once it enters the game it should move to your high priority list of things to destroy – especially if your shark teammate may not be able to avoid its fire and waste tickets. Diver can set it to follow him to reposition, but while doing this it’s unarmed. I don’t have to add that’s a great moment to safely take it down, right? Follow mode doesn’t save battery. Once it’s armed it can be aimed at any direction which you as a shark can recognize by a laser line that comes straight out of it. Remember that’s just a general direction of where P.A.T. is aiming, it will rotate and try to gun you down once you’re in its field of vision. Its reaction time is really fast and once you get spotted you better keep on moving, because thankfully it can’t lead its shots. It has a decent detection range so you would want to take it down fast and with a single lunge and if possible from behind, sides, below or above. Be wary - it has unlimited range on tagged shark.
Waiting it out is an option but I wouldn't recommend it unless S.T.E.V.E. is nearly done and will be moving to next safe soon. If you give divers too much time they will just gather more gold to buy another one. Best tactic so far is to get in, destroy it and get out before divers can shoot you. Reposition yourself and continue the game. Thresher should have no problem to take it down with its level 3 ability. Tiger and mako with their speed should also be able to get it down fast as long as it’s not a frontal attack. In addition tiger shark should attack them with their ability activated since P.A.T. (same as AI divers) have 50% reduced detection range while this shark is cloaked. Frontal attack would be really bad for slower sharks, at best you can depend on bull and GW’s ability to soak some damage. The only problem in destroying P.A.T. is the fact that there are also 4 divers that can shoot you or … another turret. That’s why it’s so important to get out immediately after destroying it if you can’t handle what will happen next.
Ammo modifiers
Most weapons have an ammo type, that can be bought for additional cost. This is how they work and how you should deal with them. You will notice that I added little icons around every modifier. The meaning behind the four colors:
danger is minimal and in most cases modifier won't do much harm by itself to this shark
somewhat effective and can be troublesome
dangerous, very effective against this type of shark
doesn't affect the shark
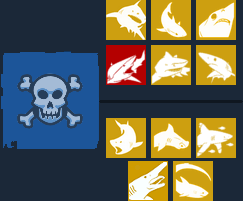 Toxic – this will start draining your health and make your health bar green. To get rid of this effect completely you need to eat a seal. It deals 3.5% health damage per second to all sharks equally. Every bullet and spear applies the effect if shark is shot. Needs to be applied only once to start ticking, the effect does not stack. Once you’ve been toxicated you may want to consider two option: go with all out aggression and try to kill as many as you can or run away and chase a seal. Optionally Hemogenesis and Placoid Scales are a decent counter against toxic and those two combined make it nearly useless against you (but for a cost of 50 evolution points). The effect lasts 20 seconds, so if toxic hasn’t been reapplied it will just wear off if you can outheal it with other means than eating a seal. The copper shark is the only shark that has a serious problem with toxic, because once its ability wears off, it will instantly die if toxic was applied to it.
 Bleed – bleeding rounds will deplete your HP while lunging, darting, moving with WASD and sprinting – the faster you go, the more damage is applied. During the effect your health bar will be bright red. The best way to deal with it is to run out with a single lunge, hide out of diver’s vision and wait for the bleeding to stop. It stops after being still for 1 second which will be confirmed by a sound cue. Every bullet and spear applies the effect if shark is shot. Need to be applied only once to start ticking, the effect does not stack. Optionally Hemogenesis and Placoid Scales are a decent counter against bleed and those two combined make it nearly useless against you (but for a cost of 50 evolution points). Since the damage is not percentage based, bleeding is especially dangerous to speed sharks.
 Splitting - this ammo type is more likely to hit a target even if the aim was off, but with lowered damage. The ammunition splits into 3 bullets and hits for 70% of weapon's base damage, but hits only once per shot – those 3 bullets are not stacking. This modifier is effective against makos due to their speed, and very effective against threshers due to their wild hitbox while thrashing.
 Drag - can be used only on spear gun, volleyjet, and spear pistol. It can be backed up with toxic, tag or bleed effect for extra damage. Drag will slow down shark for 3 seconds and is very dangerous for every shark. While using it on spear pistols and spearguns it is merely a helpful addition to the weapon's arsenal, on volleyjet, it can easily decimate any shark. The volleyjet's damage is already very good, and combined with the drag's ability to slow down a shark can turn even a mako or thresher into a slow and easy target. If a diver is using a volleyjet with drag, you have let the divers get too much gold and it will be very difficult to counter.
 [/previewimg]Sonar – spear pistol, spear gun and harpoon projectiles will be able to outline you, revealing you to the whole diving team. This will happen when they miss you and spear will fly near your shark. It can be also used against sharks that are swimming just outside the door (waiting for an opportunity) to check their position – so don’t hang there for long. This won’t tag you like tagging rounds or sensor, but there will be a text “you have been detected” on the bottom of your screen for about 1 second, so it is easy to miss that. Long range snipers that can shot you from a far distance will find this very useful. If they miss with their shot a bit, your shark will be outlined for a second, so they will be able to predict where can you be in a moment. To counter this, simply don’t run away in a straight line and hide yourself behind anything solid.
 Tagging – the most irritating of bullets, but not very deadly by itself. Tag lasts 10 seconds from last bullet taken. You will be outlined from even a far distance and because of it you will lose element of surprise. You will have to wait this out – which will give divers more time to collect gold. Of course being tagged inside the room full of divers will greatly increase chances to be gunned down. The best way to deal with it is hide behind obstacles, so you won’t be sniped or tagged again (it can be reapplied). You can also take that time to eat a seal or two. Be aware of divers positions and chasers. Also you shouldn’t come from the same entrance where tag dropped off you. Divers will expect you to come from that direction.
 Tranquilizing –this kind of ammo will deplete small amount of your stamina (10 stamina per bullet), which is not dangerous at all by itself, but will also stop your stamina regeneration and start a 1 second cooldown from last hit (the same way that happens 1 second after dart/lunge/sprint). Same as with lunging - tranquilizers can get you below 0 stamina so the regeneration may take a few seconds, which can make your escape harder or impossible. Tranquilizers are a nuisance with starter weapons, but once you get Adrenal Glands or Blood Rage, they can be laughed off, both evolutions make up for it far more than this kind of modifier can take from you. So once you get a hold on those evolutions you are secured - even as Great White that is weak against them.
Ammo modifiers (2)
 Penetrating - this modifier is only available on the harpoon and Gyro Rifle. On the harpoon, it adds 120 damage to the base 300 damage, and boosts all damage from the Gyro Rifle relative to distance. If divers managed to get this upgrade, then you have let them gather way too much gold. Without it harpoon is only able to critically wound HH and GW. Penetrating harpoons will one shot those sharks (great white’s ability will allow you to take one harpoon). Of course it will also one shot small and medium sharks, but harpoon can do that even without penetrating ammo. On the gyro rifle, Penetrating makes the weapon deal significantly more damage at a distance, but at close-range does not deal enough bonus damage to significantly effect any of the sharks.
 Explosive - this is a harpoon-exclusive modifier. It makes projectile explode on hit (on shark or on anything solid). Skilled divers avoid this kind of ammo, because it makes harpoon's trajectory slower. Explosive modifier can also obstruct their view (just like a sea mine would), deafen them and damage the wielder if he is too close to explosion. If a diver pick this up, you have let them get way too much gold and he probably has no idea what he just bought. It’s very rare to see explosive harpoon in use. Direct hit deals the same damage as normal harpoon, indirect hit by explosion deal a percentage of original damage. That explosion can be dangerous to sharks with small health pool or with already low health status if you happen to be near one.
 Extra Ammo – increases magazines for ADS, APS and Bangstick. There is nothing you can do to prevent this modifier and it doesn’t affect any shark in any way, with the exception that those divers will less likely visit ammunition boxes.
 Scope and Night Vision Scope – both scopes allow divers to zoom in and give more accurate aiming. They also reduce weapon spread. Night vision scope will help diver to see further on dark parts of the map. They help against every kind of shark, but none in particular. Scopes won’t be of much help from close, when sharks are mingling among divers. You can’t know if diver is using one of those, but counters are obvious and should be (already) implemented to your gameplay. Getting close to divers is the obvious one, so they can’t use it well. Especially when they are being eaten. Try not to charge straight at the entrance to the room from far away and use obstacles to hide yourself to avoid being sniped. Be unpredictable and attack from places where they are not looking, surprise them by destroying walls - namely "basics for shark gameplay" despite scopes, just one more good reason to do that.
 Heavy Barrel - APS exclusive mod that will greatly increase the damage of the weapon and lower its firerate a bit, overall making it quite dangerous for all kinds of sharks, especially because of the fact that it can be equipped together with other mods like toxic and splitting. Due to lower fire rate speed sharks may be able to outmaneuver a diver with heavy barrel APS, but even 2 bullets that will land on those sharks may kill or critically wound them. As shark you can't really do anything about it, but Heavy Barrel due to its high cost for divers is an good example why you should deny gold as much as you can.
PART V: Shark Statistics
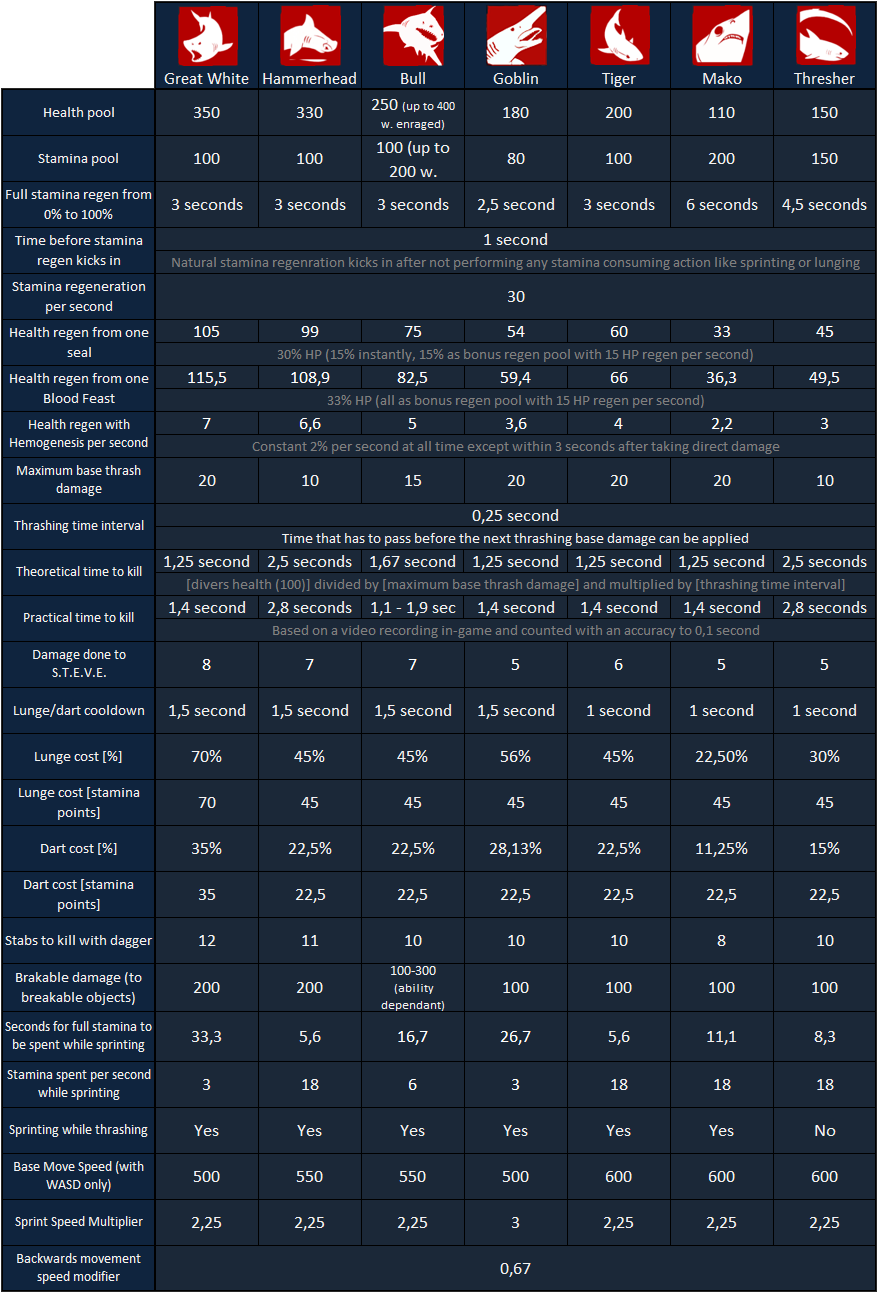
PART VI: Know The Map
Depth currently has a total of Twelve maps currently available for Blood and Gold. Each map is a very different layout and experience, and knowing the ins and outs of each map is an important learning curve for any shark. While I find it's best to learn the map by playing it, certain sharks do better and will perform better on certain maps than others, and Some maps may have important details that can be explained in text.
For this section, each shark will listed from best to worst shark for each map.
Antiguo
This Map is the first map alphabetically, and also a really great map for beginning sharks and divers alike. With varied situations to encounter on both sides, Antiguo's most defining features are its large, dark rooms, and many whale remains scattered about in various states of decay. This is probably the most balanced map in the game. Pretty much any shark can be used on this map to some extent, though because of its open areas, Mako, Goblin, and Tiger do a little better than the other sharks. The only shark I don't recommend for this map is Thresher, because Divers can and will spread out pretty easily on this map. That said, Thresher can still do pretty well if played a little more hit-and-run style.
- Mako
- Tiger
- Goblin
- Whitetip
- Bull
- Hammerhead
- Great White
- Thresher
Cove
This is probably the most shark-sided map. It's darkness and lack of tight spaces really puts a dent in the Diver's viability, and the numerous cave walls and tunnels make it difficult to chase sharks on this map, except at the second safe. The second safe is practically a different map from the other three safes here, so it might be tougher at first than the other ones, but with good timing and aim, you can do just as well here as at the other safes.
- Tiger
- Whitetip
- Mako
- Goblin
- Great White
- Bull
- Hammerhead
- Thresher
Breach
This is a very tight map with lots of narrow passages and small, dark rooms. These two factors make it a really good map for Thresher, and, to a lesser extent, Hammerhead. Do not expect to play this map without getting stuck on something every so often. There are a lot of jagged corals and wreck pieces that make moving around often difficult if you're lunging and darting. This map was designed with leaping from the water to move around and ambush in mind, and there are a few sections you can make use of this, but it's a little hard and can be risky if you don't know exactly where you'll land.
- Thresher
- Hammerhead
- Tiger
- Whitetip
- Great White
- Bull
- Goblin
- Mako
Crude
This map is interesting because the safe rooms are mostly fairly small, but the rest of the map is incredibly open. The way back from the last safe in particular is where the Goblin and Mako shine the most, being dark and completely open water for the most part. While both sharks are otherwise rather average on this map, the open areas work very well for them. While this map isn't especially bad for any shark, the brightness on the first two safes can make it a little harder for the slower or tankier sharks because they don't get the nice early game stomping grounds they do on Cove or Antiguo.
- Goblin
- Mako
- Thresher
- Tiger
- Whitetip
- Hammerhead
- Great White
- Bull
Devil's Head
This is an interesting map because it is almost entirely pitch black for divers, but because of the many narrow mineshafts, it can end up being almost a shooting gallery at times. Because of the narrowness of this map, along with the darkness, Thresher is an excellent choice here. Goblin also does surprisingly well because of its speed and decoys are very easily able to throw divers off. Mako usually struggles on this map because it's very easy to shoot it down a narrow tunnel, especially with night vision, and really there is nowhere for it to lunge to once it has a diver in most maps.
- Thresher
- Tiger
- Goblin
- Great White
- Whitetip
- Bull
- Hammerhead
- Mako
Fractured
This is another dark and open map. Though these two features would make it sound like shark heaven, The two options for the third safe can make or break this game for small sharks. The first option is a safe room that is very short and wide, making it a great place for tigers and other sharks who can zip about. The other safe is very tall with the only openings either being at an awkward angle to grab from, or difficult to get into. While this map usually works in the shark's favor, this possible difference each game can cause some trouble depending on your shark choice.
- Tiger
- Goblin
- Mako
- Whitetip
- Bull
- Hammerhead
- Great White
- Thresher
Galleon
This map is Thresher's playground. The rooms are almost all tiny or have tight spaces that divers like to bunch up in, plenty of breakables that can leave divers exposed, and the open sections of this map are mostly dark and short, allowing the thresher to easily do a hit and run if it really wants to. This map really favors just about any shark who does better in small spaces. Mako and Goblin are the worst picks for this map, as one slipup can end with them caught on a windowframe and killed.
- Thresher
- Great White
- Hammerhead
- Tiger
- Bull
- Whitetip
- Mako
- Goblin
Hillside
This map is a little different from most of the other maps in that while the rooms are mostly open, the map isn't ever particularly dark, which makes it a little harder for faster sharks who like to get in and get out without being noticed. The open sections have lots of obstacles to shield sharks, however, which means that this map isn't necessarily an instawin for divers, though it certainly favors them. The open rooms, yet many walls make this an excellent map for the bull.
- Bull
- Great White
- Tiger
- Whitetip
- Hammerhead
- Goblin
- Mako
- Thresher
Olmec
This map is a great map for the beginning shark because many of the safes are actually fairly exposed. This map has a mix of smaller and larger rooms, and likewise it has both very dark sections and more well-lit sections. This variety of conditions make this a good map for just about any shark.
- Tiger
- Bull
- Goblin
- Hammerhead
- Great White
- Thresher
- Whitetip
- Mako
Stash
This map is characterized by very large and open rooms and plenty of corners for sharks to hide. After the first safe, this map is also crazy dark which further makes it difficult for divers to deal with. This map is an excellent map for Mako and Goblin, and both sharks do significantly better here than on just about any other map.
- Mako
- Goblin
- Tiger
- Whitetip
- Bull
- Thresher
- Hammerhead
- Great White
Station
This map is a sheep in wolf's clothing. You would expect it to be an excellent map for Thresher and Hammerhead because of the many small rooms, but this map is incredibly well-lit, making this the most diver-sided map in the game. The best sharks for this map are those who can keep divers from doing well early on so they don't get powerful weapons that can take you out at range later on.
- Great White
- Hammerhead
- Tiger
- Thresher
- Mako
- Goblin
- Bull
- Whitetip
Temple
We go from the most diver sided map to the most shark sided map. Temple is a great map for sharks because it's incredibly open, but the water is pretty murky and there are lots of places a shark can simply disappear around a corner. This map is actually an excellent map for Whitetip and Great White because of this, but it's a little too open for the Bull to do especially well.
- Whitetip
- Great White
- Tiger
- Goblin
- Mako
- Hammerhead
- Bull
- Thresher
Useful links
This is a link to video collection from Depth. Lots of great players posted their gameplay there and those are much better in terms of skill, than randomly found gameplay on youtube, full of people who sells their overreaction while being eaten by shark.
http://steamcommunity.com/sharedfiles/filedetails/?id=509523241
Here's already mentioned counterpart guide about divers:
http://steamcommunity.com/sharedfiles/filedetails/?id=532137970
CONCLUSION
So comment, like, share, favorite, spread the word about this guide. I do plan on updating this guide as the time goes and new content is presented. Now I can finally go back to actually playing the game. See you there!
Updates
Guide updated to:
Coldblood
Guide updated to:
Zapped Hotfix #1, Zapped Hotfix #2, Terror Nights and Terror Nights Hotfix
- New tip: Shark's regeneration
Guide updated to:
Tails from the East
Guide updated to:
Bull Sh*** Hotfix II
Bull Sh*** Hotfix III
Sharks with Frickin' Laser Beams
Crash Course Changes:
- Headstrong - corrected the mistake where it said that this evolution gives boosted damage done to S.T.E.V.E.
- Added warning about P.A.T.'s range on tagged sharks
- Added "Down with S.T.E.V.E." tip explaining S.T.E.V.E.'s health and damage done to it
- Damage done to S.T.E.V.E. also added to statistics in part V
Guide updated to:
Bull Sh*** Update and Bull Sh*** Hotfix Added:
- Bull shark everywhere where it was needed
- P.A.T. to Consumables
- updated builds
- more stats to Part V
- tag lasts 10 seconds
- tranqulizers takes 10 stamina per bullet
- updated the bleed modifier due to nerf from Spoopy Bones Mini-update
Updated Blood Feast evolution. It heals for 60 instead of the same as seal (50) Part V: Shark Statistics
- more exact numbers on sprint cost
- added Blood Feast regen to be distinct from seal regen
- added breakable damage
Full list of changes here: Old Bones Update
Added:
New evolution: Serrated Teeth
New tips: Settings, Surprise Rush and Information Processing
Updated builds to my current ones
Full list of changes here: Fresh Blood Update and here Fresh Blood Hotfix
Added:
New evolutions: Vitalized Frenzy and Killer Instinct
New ammo modifiers: Extra Ammo, Scope and Night Vision Scope, Sonar
New tip: Diver’s health indicator for sharks
New builds including new evolutions
Changes:
Change on Blindside evolution brought with hotfix
More detailed data on Tranquilizing modifier
Explosive modifier actually taken seriously
Mako and GW ability changes
- seal and Blood Feast regeneration values and thrashing damage analysis to Part V
- feinting to Mako's attacking section
- titles to all tips
- how to deal with DPV chaser to the "Dealing with the chase" tip
- new tip "Walls and Poorman’s Headstrong"
- minor changes in text
- Blood Feast evolution explained better and more accurately
- slightly changed description on Hemogenesis evolution
- Depth - Ultimate Skin Guide [Operation Seafog]★ 5 (432)12k views355 ♥6 minUpdated Oct 19, 2021
- How to Dive 1.06★ 5 (491)12k views658 ♥83 minUpdated Mar 9, 2023
- The Ultimate Depth Shark Guide (updated 10/17/15)★ 5 (220)11k views224 ♥24 minUpdated Oct 23, 2015
- Достижения Depth 100%★ 5 (394)8.6k views226 ♥7 minRussianUpdated Jun 8, 2025
- Achievement guide★ 4 (175)7.4k views151 ♥14 minUpdated Jun 1, 2017
- Sharks in each Map★ 5 (327)7.3k views429 ♥12 minUpdated Jan 20, 2016



- Upgrading to PremiumTeam Fortress 2★ 5 (20k)1441k views11k ♥6 minUpdated May 11, 2022
- No More Room in Hell Official ManualNo More Room in Hell★ 5 (2.8k)569k views2.1k ♥29 minUpdated Apr 22, 2019
- NMRiH Community Hosting GuidesNo More Room in Hell★ 5 (526)351k views653 ♥1 minUpdated Aug 10, 2022
- ULTIMATE GUIDE FOR GAME DEV TYCOONGame Dev Tycoon★ 5 (5.8k)326k views10k ♥4 minUpdated 23 Jan, 2014
- How to 'Git Gud' Soon™MORDHAU★ 5 (2k)318k views3k ♥68 minUpdated Nov 16, 2024
- Лучшие кооперативные игры SteamPAYDAY 2★ 5 (1.5k)315k views2.1k ♥56 minRussianUpdated Apr 27, 2025






This guide was created by its original author on the Steam Community. Are you the author and want it removed? Request removal.