The Ultimate Depth Shark Guide (updated 10/17/15)
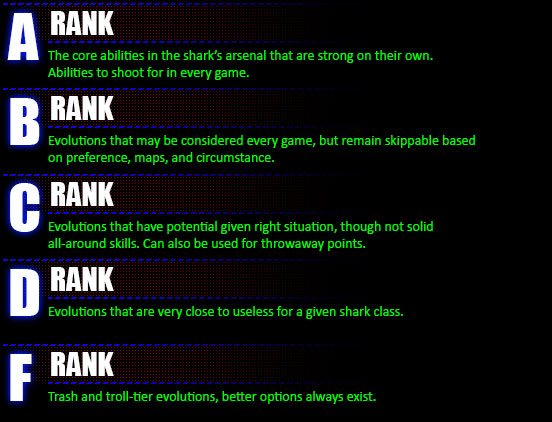
Rank Legend
Evolutions - Class

 Adaptive Hide (20) - This ability is amazing, and perhaps the best active ability. It alone brings the Tiger shark to the next level. Adaptive Hide is what Placoid Scales should've been and more as it completely dwarfs the ability. Not only are you visually harder to see for divers, but you become IMMUNE to all forms of tagging; tagging guns, bouys, and even flares. Effective as both an initiate and escape ability. The second level raises the duration to 3 seconds and the third raises it to 5.

 Tail Lash (20) - A small AOE attack that hits any divers in range for 40/50/60 damage. At level 2, it also breaks walls. At level 3 it breaks consumables. The utility add-ons are a nice bonus, but overall negligible in lieu of its primary purpose of dealing damage - it's essentially half your burst DPS and has a massive cooldown. Level 2 is a prime stopping point as divers have 100 health and at 3 you still only two-shot them; the extra 10 damage has merit, but I don't think it's worth it in a tight game. Note that you CAN use this ability while thrashing a diver; who will take lash damage.

 Relentless Force (20) - Increases duration by two seconds at level 2 and adds a health restoration effect at level 3. Solid class skill that does a lot. Not much to say, other than it complements the Hammerhead's playstyle well while remaining an inexpensive but effective skill to max. A mini Blood Rage and Blood Feast in one. Note that you do not need to have a diver in your mouth to proc the stamina and health restoration effect!

 Juggernaut (20) - Levels 2/3 increases the GW's damage reduction and tranq reduction from 30% to 40%/50% for 3 seconds. Additionally, level 3 causes the GW to ignore nets and drag when active. With the recent addition of Vitalized Frenzy, this skill has indirectly gotten much better because of the clear synergy between the two; it gives Adaptive Hide a run for its money. A strong ability primarily held back by its short duration, though you're still dying when you get shot at or run out of stamina, you take longer to, and the shots matter less. The net immunity is an invaluable part of maxing this skill as good netter can shut you down.

 Mark Prey (20) - Level 2/3 increases duration to 12s/18s and point bonus to 10/15. The base ability has a duration of 6 seconds, which is usually long enough to get the bonus, I rarely find myself activating this ability 12 or 18 seconds before I go in for a kill. At level two, four kills pay for itself, but you forego a lot too much to invest to level 3.
Evolutions - 10/20 points


 Hydroacoustics (10) - One of the two skills that you can purchase at the start. Increases the frequency of the sonar pulses, that detect divers and seals, by 50%. It only costs one point, but is entirely skippable - it tends to be more useful for the seals, but near useless on Devil's Head; due to there being like five seals on the entire map and unless there is a DPV, divers aren't very mobile. A cheap skill, mostly inconsequential.


 Electroreception (10) - This once pretty garbage ability was stealth buffed at some point and now shows diver health with making it a decent pickup, specifically on the Thresher. The low range on weapon detection is still extremely bad, not to mention its redundancy - you can actually just SEE what the diver is holding. but the cheap cost and intel on diver health give this skill some utility.


 Nimble Finned (20) - You know that delay that exists in between dashes? This reduces it by 0.5 seconds (after the nerf), letting you lunge and dart faster than before, making missed lunges far less punishing IF you have enough stamina left. Clearing Bouys and Shark Shields also become easier. A solid first pick-up and an amazing option on any shark.
 Hangry (20) - Darting and lunging causes no loss of stamina regen (as it normally does) for 8 seconds after spawning. This ability feels necessary sometimes as it greatly reduces downtime after a death, has a relatively cheap cost, and keeps your stamina reserves high when getting back to the divers. Given how important it is to deny gold, this is a great early pickup, but loses value as the game progresses. It's skippable for experienced players on maps with close spawns (Fractured) to the divers and even on bigger maps if your ally is good.

 Killer Instinct (20) - Evolutions that would be activated on diver kills are also be activated by seals. Sort of a weird skill, it doesn't do anything on its own and the only skills you want to combo this with are going to be Blood Rage or Blood Feast. Yet getting seals to proc Blood Feast turns out to be redundant on all sharks except the HH (and to a lesser extent the Tiger); but Blood Feast is an underwhelming option on the HH because Relentless Force exists! Leaving just the Blood Rage combo to be considered. In a world where there are so many good shark options, it's hard to justify the 20 points, especially for a skill that does not stand on its own.


 Double Time (20) - Increases sprint speed by 33%, which is near irrelevant on the Mako/Thresher and below average on the Tiger because their lunges are generally more efficient. Very useful on the Great White as dashing destroys his stamina bar and sprinting is the more viable method of long distance mobility.
 Hemogenesis (20) - A poor man's Blood Feast that heals the GW for 9 hp/sec, HH for 5 hp/sec, and the rest for 3 hp/sec. Although this passive ability lets you continue to stalk the divers without having to hunt for seals, it is often more efficient and free to just kill seals. With the addition of so many new shark options, this skill has become too slow despite its low cost.

 Razor Fins (20) - A small hitbox near the sides of the shark that does 20 damage to divers (divers have 100 health) and consumables. Mostly useless ability as its the only skill outside of your bite attack that deals damage with its small hitrange. However, it's not entirely bad on the GW or HH, their large health pools and hitboxes help make this skill not entirely useless.
Evolutions - 30 points

 Minesweeper (30) - The cost is too high for such a redundant ability, aside from the fact that you can SEE mines. However, this ability can be quite relevant if you are in a life battle and there are one or two good, dedicated mine layers. It's much easier to die to the AOE of a mine for sharks than it is for divers meaning they have to be standing RIGHT BY the mine to die from full health, often causing mines to kill you for free if you don't see them in time.
 Headstrong (30) - An under utilized upgrade, but very useful in situations where you NEED the extra time to kill the divers - not so much in the extra damage dealt to STEVE, but the doubled stall time added upon STEVE hits. However it can also be used to stall STEVE in between safes, though it is especially useful if you're in a time battle on some maps like Crude, Cove, Fractured, or Galleon, where the long final stretch is a lot of open water.
 Placoid Scales (30) - Reduces tagging time by 50% and the Drag/Bleed/Poison effects by 30%. The problem is the the skill relies on the divers buying and keeping the effects that this skill only soft-counters making this a mostly reactionary skill. Even then, it's only decent at best, the tagging reduction is the best part of it, the modifiers are mostly negligible. If you haven't escaped by the time the divers are done shooting at you, you're probably dead anyways. In the case you're tagged before you want to engage, running away and healing can be done for free.
 Blindside (30) - Increases the twisting movement of long lunges to the left or right; though it feels quite insignificant relative to the cost of this ability and underwhelming at best; I don't feel myself dying any less or being any harder to shoot with this ability as much as the points I just wasted.
 Serrated Teeth (30) - If you're killed while thrashing a diver, this ability procs a bleeding effect that begins to sap the life of a diver until he dies or reaches a first aid kit. Sometimes this will give you that extra little "oomphf" to kill a diver; most times he'll be able to reach a medkit, but this also makes them vulnerable to the other shark. With its relatively low cost, this is a fine mid to late-game skill just for the extra reach it gives you.
Evolutions - 40/50 points
 Powerful Tail (40) - Allows you to dash while thrashing a diver, but it becomes redundant if you were to escape off the momentum from the initial dart or lunge anyways and you will take an extra knife shot if not paired with Nimble Finned. This ability is top tier, but getting it too early can slow down getting stronger skills and I find it too weak on its own as an early pickup; aside from on the Hammerhead.

 Vitalized Frenzy (50) - Refreshes the shark's innate ability on diver kill. After you kill a diver, you either escape or go after another diver. Keeping this in mind, the utility varies based on the class ability. It's amazing on the Tiger and GW, because both of their abilities can be used to initiate or escape. Also works well with the Thresher's ability, which is about one-half his burst DPS (kills from the tail whip WILL refresh the skill). Decent on the HH, it's not too impressive activating his ability twice in a single encounter; and quite bad on the Mako.

 Blood Feast (50) - After killing a diver, Blood Feast will heal the Mako, Tiger, and Thresher for a total of 60 health; Hammerhead for 90, and GW for 180. The heal effect stacks for each diver killed, however there is a 4-second delay from the last time you took damage before the health regen kicks in. Blood Feast helps survivability and kills downtime on maps like Devil's Head or Stash where seals are relatively scarce, but the problem is that it does nothing to help you in terms of maneuverability or combat for this very expensive skill.
Evolutions - 60 points

 Blood Rage (60) - Boosts stamina regeneration after a kill for 10 seconds. One of the better non-class abilities in my opinion, as it is viable on any sharks at any point in the game, you can't go wrong with the exception of the Hammerhead and Thresher where it is a bit weaker. Relentless Force tends to be enough regen for the HH and the Thresher's reduced bite damage means unless Tail Whip hits multiple targets, the potential for chain kills is low. Stamina is often more important than Health and more lunging means more kills, more room for error, and more survivability. This is only one of two evolutions that boost stamina.
 Adrenal Glands (60) - This ability is just so expensive, it will convert damage taken to stamina at a 1:1 ratio. An ability that relies on taking damage feels too counter-intuitive to me. Note that it can combo with Ignore Pain, but you still take health damage before you get the stamina. I like it best on the GW and HH due to the large health pools, though harpoons and nets will still destroy you, it does work against automatics.
 Ignore Pain (60) - Reduces damage taken at the expense of stamina. You will not take health damage until all your stamina is gone. Gives increased survivability to the Mako and Thresher versus automatics and weaker guns, but the Harpoon will still one-shot them. A great substitution for Blood Feast on the smaller sharks, but not before Blood Rage. It is best paired with Adrenal on the meaty sharks like GW and Hammerhead.
Tips
These should be thought of as guidelines, more than strict rules to follow, I find that there are a lot of nuances to playing shark depending on circumstance and the ability to adapt is often a great asset, as some diver teams will just camp a room all day where others will actively chase you - so I tried to keep the concepts as broad as possible. However, things like gold denial and timing is always important, but sometimes you have to prioritize. Early on, you want to deny as much gold as possible; as the game progresses, you want to be conscious of the diver vs shark life ratio, then as STEVE gets closer to home, you're now fighting against time.
- Patience - This is imperative at the start of most maps because of the early gold denial. The biggest mistake for a lot of new sharks is that they like to rush rush rush, but it's good to know when to wait and when to go ham. If the divers are established in a room and all four of them are corner camping, it's generally not a good idea to go in unless there is an in-and-out dash path. Knowing when to go in and when to back off to eat some seals comes with time and experience, but reflecting speeds this up. Died for free = Bad. Traded one-for-one with a diver = Good. Killed a diver and escaped = Great.
I HATE it when my partner shark goes in and dies right before STEVE moves. There are exceptions, like in the first room on Antiguo or the second one on Fractured, it's big enough that if the divers aren't butt hugging each other, you can kill and get away. Stamina is a resource and often more important than your actual health, conserve it when possible and ensure your initial dash is done with full stamina when possible.
- Gold denial - This sort of goes hand in hand with the last point, when you're near the divers, they hear a heartbeat which freaks them out and makes them paranoid about running off and farming gold. If both Sharks rush in and die at the same time, this is a bad scenario if the divers know what's up. There won't be a heartbeat and the divers will farm gold like it's Christmas. So if your ally dies before you can help him, sometimes its best to just creep nearby, bust some walls to red; if there isn't a clear line of attack, while your ally revives.
- Detection - Divers have multiple forms of detection, the most primitive one is by looking at you! As a rule of thumb, you just don't want to be seen until necessary. There is a limited FOV that divers can see and it differs from map to map and area to area, another finer point of Shark knowledge. So to circumvent this, divers may use bouys, flares, and/or tagging weapons - you should kill the bouys and avoid the flares as much as possible, they eventually die out.
When you get tagged or are in bouy range you will die very very fast while in the LOS (line of sight) of the divers; barring any potato aim. You basically have a big fat bulls-eye on you, which means most, if not all, of the divers will be looking at you. Running and eating seals is a fine option OR you can stick around behind a wall or something to distract them if you think the other shark can take advantage of it.
- Attacking - When attacking, don't go into the crowd of three divers standing still, get that guy swimming around the room off on his own. Get that DPV kid who thinks he's being sly or the stray diver you can somehow isolate. Remember that while divers can abuse the terrain and walls, so can you! The attacks don't always have to be in one door and out another, if you can drag a diver into an area that obscures the LOS from the rest for just a few seconds, that is often enough time to escape or line up the next attack. Experiment a little, this will help open up new lines of attack that aren't initially obvious. 1 diver killed = 10 evolution points (+5 with the Mako ability)
- Versatility/Predictability - When possible, attack from different angles, attack from weird angles, attack vertically; come through the roof and out the door, go through the window and out the bottom. This throws the divers off because most of the time you're attacking horizontally and that becomes their assumption. It's a harder technique, but it gets easier as you learn the maps and learn to aim the momentum from your long dashes. If you're chasing a DPV who is trying to fight you, you should only ever lunge from behind when you can get him in that lunge, a lot of divers like to turn around and bring out the harpoon. Take advantage of their low LOS, your long lunge, and that fact that you can see which way they're facing. You ALWAYS have the advantage in open water if you aren't predictable. When you get the Nimble Fins + Blood Rage combo going, you can TEAR through divers in open water.
- Movement - Mako and Tigers are impartial to lunging and darting to get around, while the Great White should be sprinting because it's so much cheaper. You can also sprint when you have a diver in your mouth! After a kill, some divers just like to swim after you - punish that if you can, but know when to keep running as well. It's surprisingly not uncommon to rack up triple or quadra kills when overzealous divers form a congo line out of the room and gift you kills. Spacebar and C, respectively, the default hotkeys for float up and float down. Neither are fast, but they're VERY useful to help maneuver and fine tuning a lunge, which can mean the difference between escape and death. One of the finer nuances to playing a shark.
- S.T.E.V.E. - This little guy will travel a random route to set rooms, after the fourth, he begins making the trek back to the boat, if he gets there before he or the divers are dead, sharks lose! Hitting STEVE is a great way to stall him in open waters (6 seconds, 12 with Hammerhead), but be careful when you do it, as it can cause NEW gold to be dropped from him. He has 300 health and takes double damage from each consecutive hit starting at 1; then 2, 4, 8, and maxing out at 16 (3 second window). STEVE will also heal himself if he drops under 50 HP. Note that there are different routes/rooms STEVE can take, except on Antiguo. You can tell ahead of time which route he takes by looking at the safes, if they're open, he will not go that route.
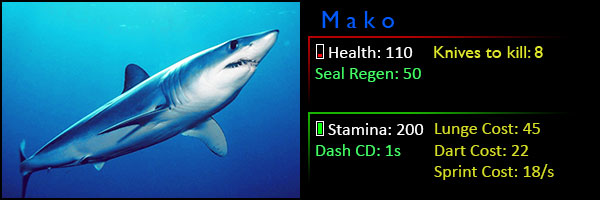
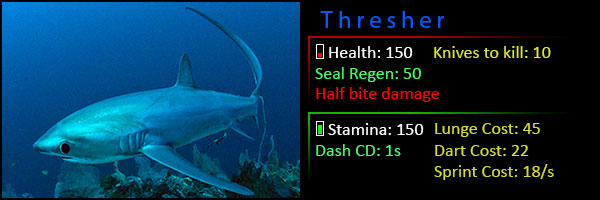
Shark Stats
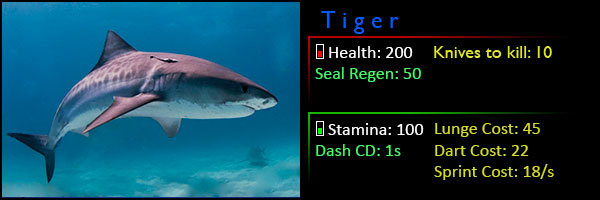
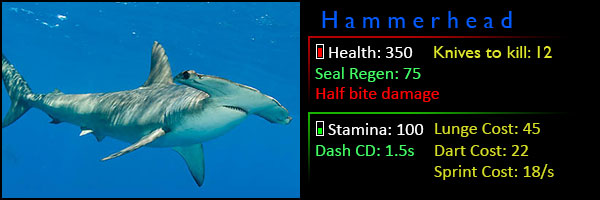
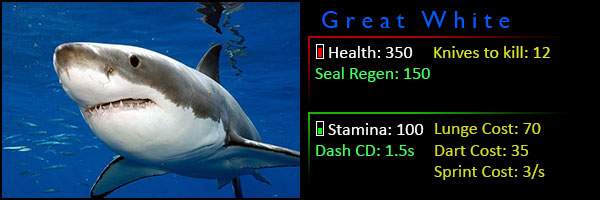
Maps
Shark/Diver
 ANTIGUO - 45/55
A mostly balanced map, if the divers aren't greedy at the start and sharks go top they can cleanly get into the first room, at least one shark should go through the temple. The first room is well lit and the divers have a distant FOV. There is an opening in both far corners of this room that can also be utilized, one of them has breakable debris. The second room is a bit tricky, but there are breakable walls on either side of STEVE in addition to the roof. The third and fourth rooms can be tough, if the divers position well, there's no non-obvious routes to really take. The first portion of the ending stretch (on the stairs) is when the divers will be most vulnerable.
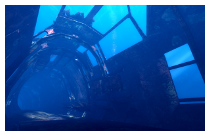 COVE - 70/30
After you open, dash to the start to get maybe one or two pick offs (sometimes divers like to farm the starting area), then destroy the second area tubey thing before STEVE starts to move out. For this reason, you really don't need to attack them in the first room; I am usually happy with one or two kills. Even after the nerf, the second area is basically the rape spot... and the third room (somewhat)... and the fourth room... and then they have to travel back through all of it again. It's hard for sharks to lose anything but a life battle on this map.
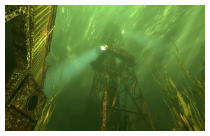 CRUDE - 60/40
May seem like a diver favored map, but I think it is actually Shark favored. The first stretch guarantees you one or two kills depending on how greedy the divers want to be and the last stretch is basically open season and one of the hardest stretches divers face; it's not uncommon to take ten or more lives here. Although the map is long string of campable rooms, there are a lot of cute things you can do and restricting gold is more important than early kills. The damage comes from the travel points between rooms and the last stretch. It's important you're alive and healed when STEVE moves.
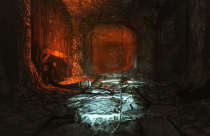 DEVIL'S HEAD - 40/60
Somehwat simlar to Fractured, the map is composed of long corridors and a few vertical ones separating STEVEs travel points with medium size rooms with so much breakable debris and structures that get in your way, it's easy to get stuck and die. The long corridors are easy to cover for divers and make for mostly predictable attacks; if they see you, you're swimming down hall as four people shoot at you. To make it worse, seals are only found outside the complex, making this the hardest map to heal on as it's a time-consuming chore to heal and get back into the fray - but suicide is always an option if you aren't worried about lives.
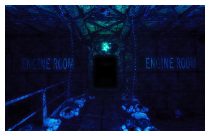 FRACTURED - 45/55
Few venues of open water, mostly composed of medium-big sized rooms and corridors. This map can be tough against organized divers because of the limited points of entrance. However, I found the second room has the potential to rack up the kills using the stacks to hide yourself after a kill. Having Blood Feast or Blood Rage researched for it is really good, and it's a bit easier to rush it as an early Hangry honestly isn't that great early on because of how close the first two rooms are to spawn. The travel path to the third room is the only significant stretch of open water (that isn't even that long if you don't hit STEVE), making this my most disliked map.
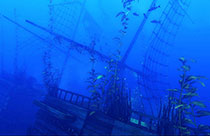 GALLEON - 55/45
Made up of close quarters and claustraphobic ship interiors, this map was made for the meatier sharks, especially the Hammerhead. The Mako and Thresher can have problems here as its much harder to escape a room once you enter it. Nearly all off the entrances must be broken, really lending itself to the Hammerhead's playstyle.
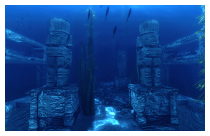 OLMEC - 50/50
Dashing to the start usually lets you pick off a diver or two, the first room is random (left/right side), but the divers are mostly untouchable if they corner camp, so it may be better to sit back and pick off stragglers unless you have a clear shot or they're unorganized. On the side with the top room, I usually lurk the bottom room, because there's a bunch of gold there that divers will try to farm, denying it will help a lot in the next room. In the second room, there are actually 6 openings into the room, if a diver gets just a little out of position, you can usually get a clean kill.
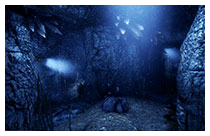 QUARRY - 55/45
Open stretches of waters, gold few and far between; this map is a vertical Cove 2.0 with a hint of a claustrophobic Fractured added in. The gold spawns seem to be more spread out and sparse than most other maps, sometimes just plain out of the way. In the rooms it's easy to get lost and separated in the labyrinth-like hallways or stuck in the rough terrain just trying to get gold, the linear pathways and dead-ends make this is a bad map for the DPV. As shark, the map was surprisingly playable as any class. Divers don't seem to have a lot of options here, but one of the maps where the sensor is a great early pickup.
Gameplay Videos
The skill upgrade images MAY NOT display correctly in Chrome. Switch to Firefox to see them.


Random Facts
- Diver knife hits do 10% max hp with a minimum of 15 damage and max of 30 (Ignore Pain is taken into account)
- Sharks take 50% damage when hit on the tail, except from the Bangstick.
- The Megalodon shark is equipped with the Electroreception, Hangry, Adrenal Glands, and Powerful Tail evolutions
- Bleed and Drag effects last for 3 seconds, poison lasts 10; Tranquilizer modifier adds 10 stamina damage
------------------------- - S.T.E.V.E. drops a shark shield at safes if the divers are more than 8 tickets behind.
- Sharks get 20 evo points when dying if they are more than 8 tickets behind.
Balance Notes
- Halved the amount of free medkits that spawn near ammo boxes
- Harpoon reload time from 1.3s to 1.5s
- VolleyJet reload time from 2.66s to 2.3s
- ADS Price from $3000 to $3300
- Bleed from Weapons: Clears ten times faster when not moving
10/9/15 - Old Bones Updat
- Medkits now spawn near ammo boxes
- The Sensor and DPV sensor no longer highlight ammo boxes
- Gold drops are now random (diver nerf)
- Spear Gun, Spear Pistol and Harpoon no longer have a damage reduction when using the bleed or toxic modifier
- Spear Gun damage increased from 150 to 170
- Volley Jet now fires 10 spears up from 8
9/3/15- Fresh Blood Hotfix
- Sensor price reduced from $400 to $300
- LJ-10 Volleyjet price decreased from $3000 to $2800
- Explosive Harpoon price reduced from $2500 to $2000
- Sonar modifier reveal range reduced by 25%
- Scope & Night Vision Scope: Increased clarity and zoom when scoping
- Great White Active no longer ignores tranquilizing effects at Level 2 or greater; now reduces tranquilizing effects by the same percentage as damage reduction at all levels
- Blindside cost reduced from 40 to 30; swerves 50% further; increased lunge duration
9/1/15 - Fresh Blood Update
- Mako Active: Duration rescale from 5/10/15 to 6/12/18 seconds; level 3 no longer reduces cooldown by 6 seconds; Evolution point bonus now increases with level from 5/5/5 to 5/10/15
- Sensor Price increased from $200 to $400
- Harpoon Bleed and Toxic price reduced from $500 to $300
- Speargun Bleed and Toxic price reduced from $300 to $200
- LJ-10 Volleyjet Bleed, Tag, and Toxic price reduced from $1500 to $1000
- LJ-10 Volleyjet Tranq price reduced from $1000 to $500
- DPV Over-Charge price reduced from $1500 to $1000
5/1/15
- Tiger's active ability duration reduced to 2/3/5 seconds from 2/4/6 seconds
- Med Kits no longer take area of effect damage which causes them to be destroyed
- Seals die in the same amount of time from any shark
- S.T.E.V.E drops less treasure on getting hit by sharks
- Tiger shark active ability no longer hides the silhouette of divers in its jaw
- Tiger shark active ability cooldown changed to 13s from 10s
- Most Weapon Projectiles now move at 6000 units (up from 4000 units) except Net Guns
- Explosive Harpoon's velocity down to 3000 units from 4000 units
- Knife now does a minimum of 15 Damage
- Knife now takes Ignore Pain into account for calculating damage
- Mako acceleration reduced to 50% when thrashing prey
- Tiger acceleration reduced to 80% when thrashing prey
- Knife now deals 10% of Max Health as damage with a cap of 30 damage
- ADS damage increased to 35 from 29
- APS damage increased to 35 from 34
- Nimble Finned now removes 0.5 seconds from lunge/dart cooldowns, instead of halving the cooldown
- Great White, now breaks breakables in one less hit
- Minesweeper no longer reveals Sonar Buoys
- Blood Rage no longer gives stamina past the maximum
- Powerful Tail ninja nerfed to cost 4 instead of 3 points.
- Sea Mines trigger 50% faster at 0.5s and deal 500 damage up from 400
- Sea Mines do significantly less damage to divers
- Flares fall 60% slower
- How to Shark 1.14★ 5 (1k)22k views1.4k ♥119 minUpdated Apr 17, 2023
- Depth - Ultimate Skin Guide [Operation Seafog]★ 5 (432)12k views355 ♥6 minUpdated Oct 19, 2021
- How to Dive 1.06★ 5 (491)12k views658 ♥83 minUpdated Mar 9, 2023
- Достижения Depth 100%★ 5 (394)8.6k views226 ♥7 minRussianUpdated Jun 8, 2025
- Achievement guide★ 4 (175)7.4k views151 ♥14 minUpdated Jun 1, 2017
- Sharks in each Map★ 5 (327)7.3k views429 ♥12 minUpdated Jan 20, 2016



- Upgrading to PremiumTeam Fortress 2★ 5 (20k)1441k views11k ♥6 minUpdated May 11, 2022
- No More Room in Hell Official ManualNo More Room in Hell★ 5 (2.8k)569k views2.1k ♥29 minUpdated Apr 22, 2019
- NMRiH Community Hosting GuidesNo More Room in Hell★ 5 (526)351k views653 ♥1 minUpdated Aug 10, 2022
- ULTIMATE GUIDE FOR GAME DEV TYCOONGame Dev Tycoon★ 5 (5.8k)326k views10k ♥4 minUpdated 23 Jan, 2014
- How to 'Git Gud' Soon™MORDHAU★ 5 (2k)318k views3k ♥68 minUpdated Nov 16, 2024
- Лучшие кооперативные игры SteamPAYDAY 2★ 5 (1.5k)315k views2.1k ♥56 minRussianUpdated Apr 27, 2025






This guide was created by its original author on the Steam Community. Are you the author and want it removed? Request removal.