How to Play as Aria
Introduction
- To unlock Aria, you must first complete the game as Cadence and Melody. Aria is a difficult character to handle, given her limited health and weaponry.
- Aria starts in Zone 4, and has creatures from various zones in Zones 3 through 1, instead of zone-specific ones. Check out the "Zones" section for more info. In addition, each miniboss room has a coffin spawner, instead of just being in Zone 4 for the other characters. However, the minibosses from Zone 4 will only appear there (Mummy & Ogre).
- The Zone 1 boss will always be Golden Lute. Other main bosses are randomized, as far as I can tell (you will face Coral Riff, Death Metal, Deep Blues, or King Conga for Zones 4 through 2).
- Your success will depend on how well you know the monsters and their attack patterns in the game (knowing how many hits you can get in before they move to attack).
Comes with plain shovel, plain dagger, the Nazar charm (to ward off ghostly enemies), a potion, and exactly one bomb.
You can still find a potion during runs, but it will not stack - you must pick it up after using your original one.
Karate Gi and Glass Jaw are ideal equipment for Aria, since she will lose a life no matter how much damage is dealt to her.
Glass Armor, Charm of Frost, Ring of Shielding, and Shield Spell effectively increase your number of lives, as they block damage.
Pacemaker is worth blasting open a locked shop to buy. Save Pacemaker for boss fights.
It's best to aim for the boss room and not explore too much, as the coffin spawner in miniboss rooms will overwhelm you (especially when the miniboss is one that can dig through walls.
Always open dark grey chests, get a map or glass torch from the shopkeeper, and bust open some shrines for essential pickups.
In-Game Option Suggestions
I'm not used to the metal tracks meant for Aria, so I just change the soundtrack to Danny B's version.
Zones
Ooze Golems are another problem mainly for Aria, as she cannot equip ranged weapons to avoid the trap tiles created by this creature (although you *can* throw your dagger, the ooze will appear on whichever tile you attacked from).
Don't use pitfall traps - they reset your coin multiplier and the game considers that a missed beat.
Bosses and Minibosses
Zone Bosses:
Zone Bosses are the same version as with other characters - the variation just depends on which zone you encounter them in. You will likely see different versions because you start in Zone 4, instead of Zone 1. If you are having trouble with the alternate versions, practice Zones 2-4 as a different character (for a little extra freedom), and only Zone 1 as Aria.
- The boss goals are the same, though you may want to use shortcuts - such as bombing King Conga's throne.
- Death Metal is very fast-paced compared to the other bosses, so beware you might roll him on an All-Zones run.
- Coral Riff is easier if you turn the water tiles back into regular ones by stepping on them.
- Take out the Knights on Deep Blues ASAP, since they can really sneak up on you while eliminating the Pawns.













NOT Recommended Equipment
- Food - Useless with Aria, as she only has 1/2 point of HP.
- War Drum - Although it can be very helpful, button combos invite the chance to miss a beat.
- Miner's Cap - You will often need to pass a beat by digging a wall....unless you also equip Pickaxe, there will be no valid walls left to pass a beat.
- Most Scrolls and Spells - Unless you are confident you can pull off a button combo without missing a beat, avoid these. If you do opt for them, Earthquake Scroll, Scroll of Need, Bomb Spell and Shield Spell are handy.
Recommended Equipment
The Golden Lute
Aria has a unique boss, like Cadence and Melody. You can train against it in the lobby after encountering the Golden Lute in Zone 1, even if you don't defeat it there. Although I can give a few pointers here, it's best to watch a video tutorial on Youtube - such as those linked below - since the fight gets a bit messy (especially if you are going for the All Zones Low % Aria challenge, where she cannot pick up items).
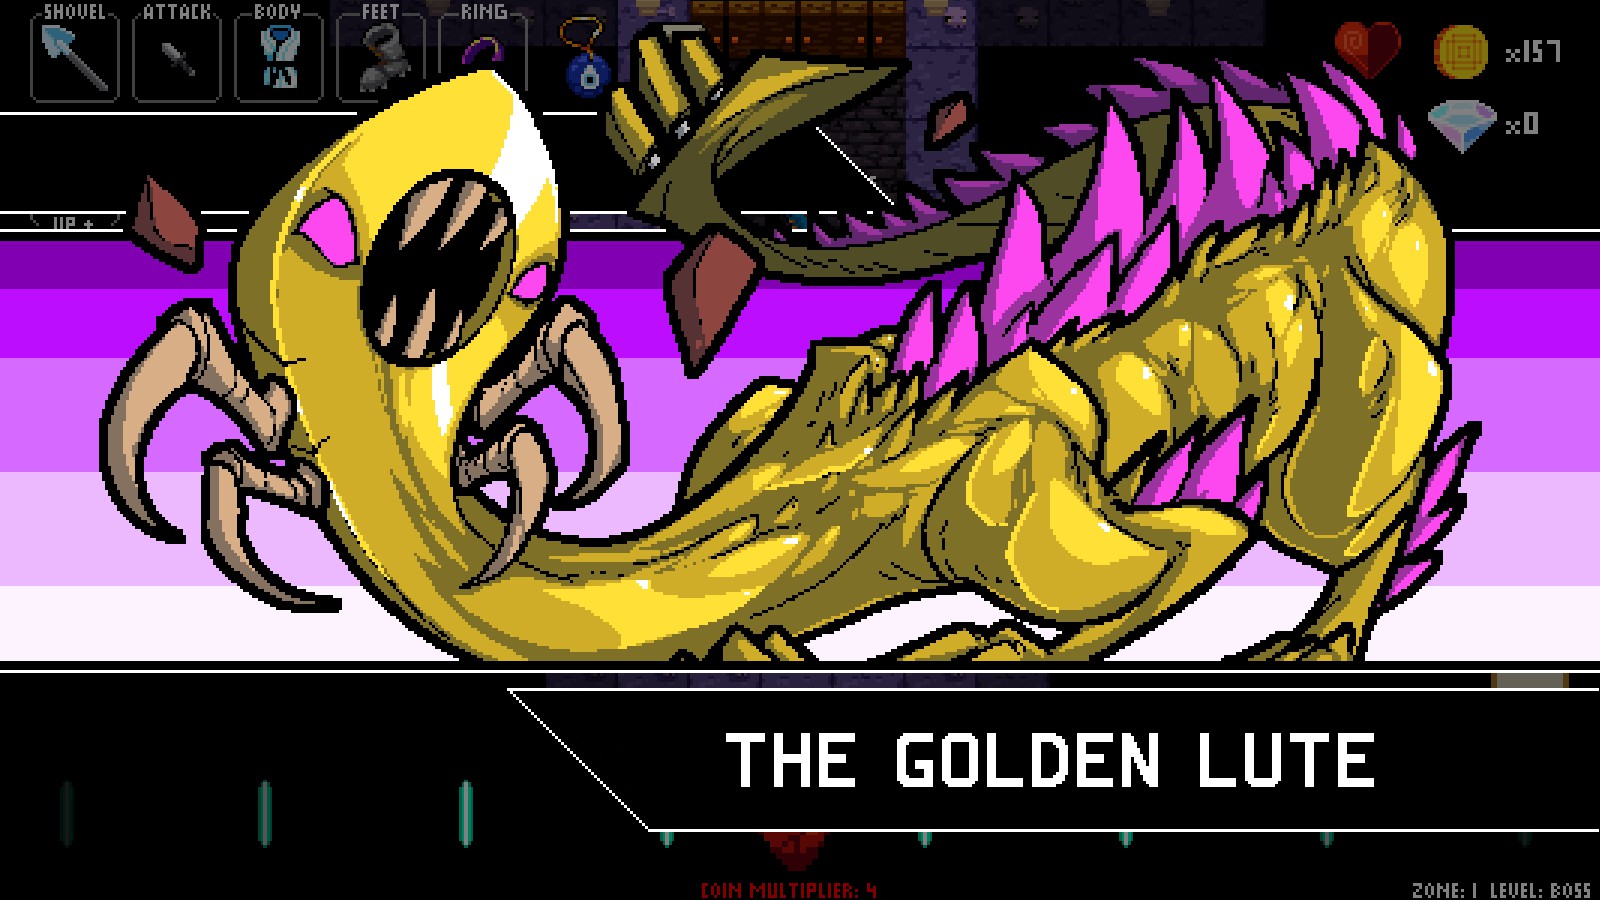
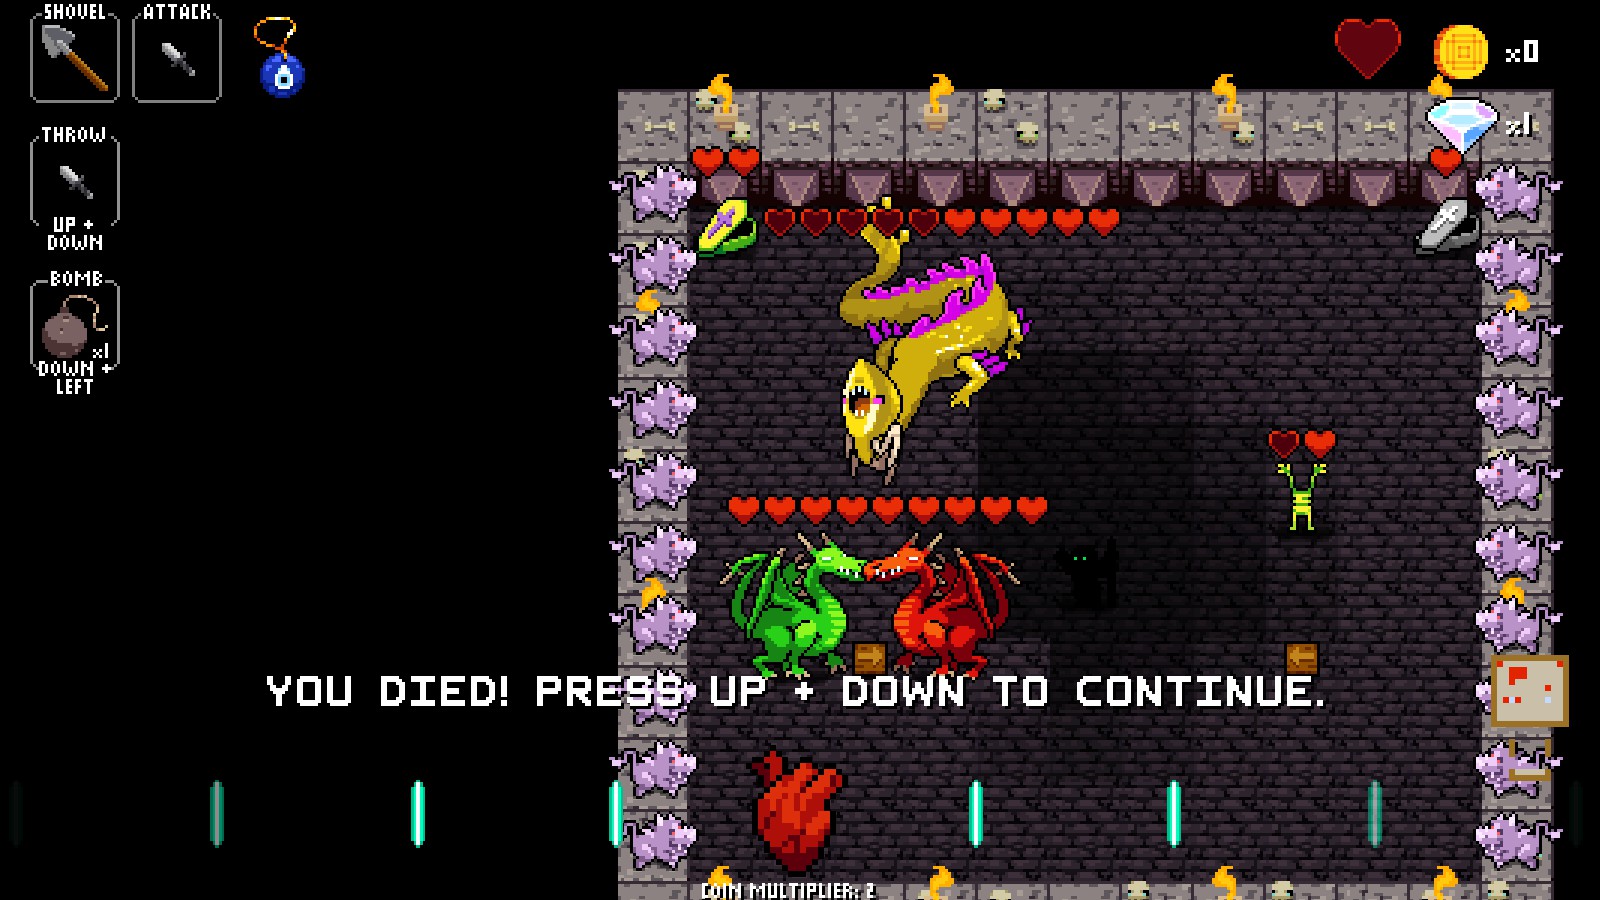
Can only be damaged in the head.
Will become confused when hit.
If you land a hit while the Golden Lute is confused (golden), you deal 3 damage instead.
As soon as it recovers from confusion it will launch an attack - confuse you, summon two dragons - always one red, one green or blue - or trigger the fireball traps in the wall. These attack events cycle as you continue to damage the Golden Lute.
Can shoot fireballs when you are on the side of it.
Will set off an occasional wall trap while not attacking or being attacked.
Don't mind the spawners, they are destroyed when the Golden Lute sets off a barrage of fireballs (always top to bottom) from the walls.
The trick is to wait until a fireball is launched just above you and then move upward in the arena.
While most players will drop a bomb to deal with the red and blue dragons, you'll have to save your original one if you decide to go for a Low % Aria run.
Sometimes the Golden Lute will step on a dragon it spawns, saving you some effort.
Handy resources from other players!
[2] (Take down the Golden Lute in less than 30 seconds)
https://www.youtube.com/watch?v=RZuMq0D83o8
[3] (Safe way to take down the Golden Lute)
https://www.youtube.com/watch?v=TqbAqaoi3DE
[4] (Monster tutorials by Elad Difficult)
https://www.youtube.com/playlist?list=PL9iW5uQiFAyBXJhRQ_pkdHUE0-92_f2nl
Special Thanks
Mission Statement
If you want more, go to my guides section and “follow”!
I have written dozens of --> guides on Steam games. <--
I enjoy helping people play games, but I can’t do it alone!
Encourage your friends to write guides…for games!
-Catherine
- Top Tips to improve your play★ 5 (584)35k views416 ♥2 min
- How to get killed by a Green Slime (Mostly Harmless achievement)★ 5 (281)33k views156 ♥5 minUpdated Jul 27, 2022
- Wikrypt: Know Your Enemy★ 5 (379)17k views555 ♥17 minBulgarianUpdated Dec 18, 2016
- How to die quick as coda★ 4 (178)12k views21 ♥1 minBulgarianUpdated Oct 5, 2016
- 节奏地牢中文百科全书【大坑正式完工!】★ 5 (824)9.8k views1.1k ♥15 minUpdated Aug 19, 2022
- MP3ファイルを取り込んで遊ぶ方法★ 5 (180)5.6k views131 ♥1 minJapanese


- Upgrading to PremiumTeam Fortress 2★ 5 (20k)1441k views11k ♥6 minUpdated May 11, 2022
- No More Room in Hell Official ManualNo More Room in Hell★ 5 (2.8k)569k views2.1k ♥29 minUpdated Apr 22, 2019
- NMRiH Community Hosting GuidesNo More Room in Hell★ 5 (526)351k views653 ♥1 minUpdated Aug 10, 2022
- Лучшие кооперативные игры SteamPAYDAY 2★ 5 (1.5k)315k views2.1k ♥56 minRussianUpdated Apr 27, 2025
- Desert Eagle Heat Treated | Blue GemCounter-Strike 2★ 5 (1.6k)292k views1.5k ♥2 minUpdated Jan 16
- Treasure Hunt Puzzle SolutionsTotal War: WARHAMMER II★ 5 (6.9k)281k views15k ♥3 minUpdated Aug 19, 2021






This guide was created by its original author on the Steam Community. Are you the author and want it removed? Request removal.