RAFT 100% Achievements
𝐈𝐍𝐓𝐑𝐎𝐃𝐔𝐂𝐓𝐈𝐎𝐍
𝐄𝐧𝐣𝐨𝐲 𝐑𝐞𝐚𝐝𝐢𝐧𝐠
Please be aware there are SPOILERS of the story line. So click on the guide index to what section you would like to see. <3
!!!PLEASE NOTE!!!: the 𝘾𝙊𝘿𝙀𝙎 for the story locations in Raft are 𝙍𝘼𝙉𝘿𝙊𝙈𝙇𝙔 𝙂𝙀𝙉𝙀𝙍𝘼𝙏𝙀𝘿 𝙒𝙃𝙀𝙉 𝙏𝙃𝙀 𝙒𝙊𝙍𝙇𝘿 𝙄𝙎 𝘾𝙍𝙀𝘼𝙏𝙀𝘿, meaning they will be different for each play-through.
𝐒𝐓𝐎𝐑𝐘
~~~~~~~~~ 𝐅𝐈𝐑𝐒𝐓 𝐂𝐇𝐀𝐏𝐓𝐄𝐑 ~~~~~~~~~
𝙍𝘼𝘿𝙄𝙊 𝙏𝙊𝙒𝙀𝙍
The RADIO TOWER, also called the Abandoned Sea Facility, is the FIRST Story Location. It can only be reached using a Receiver.
To begin the story, you'll need a receiver, 3 antennas and one simple battery. For the first time using a receiver, you will be automatically given the 4 digit code for the Radio Tower on your journal. Enter these numbers into the receiver and follow the blue marker that appears on the receiver's radar.
Every note and quest items you collect will go to your journal, this way you cant lose them if you die.
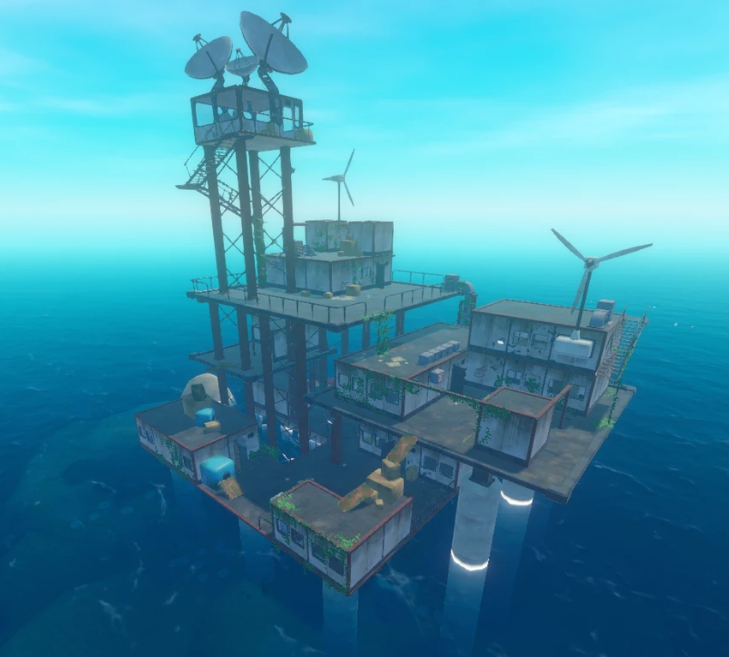
Upon your arrival, you'll see it's partially submerged in the ocean and has multiple levels containing a variety of rooms in which an assortment of materials and loot boxes can be found. In the submerged parts, the shark cannot follow you into the rooms, but drowning is also dangerous. The entire tower can be climbed, so look for barrels, platforms, and other objects that can be used to climb onto the levels.
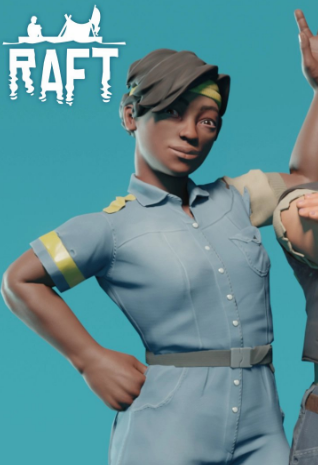
UNLOCKABLE CHARACTER: At the top of the tower, you'll find a billboard that contains clues to the game's lore, Utopia and a playable character, Tala, sitting at the table.
 You'll find 5 notes, including 4 optionals and 2 blueprints, one for the Head Light and one for the Recycler.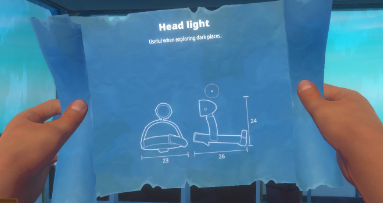
 Radio Tower Historian!
Find All Notes On The Radio Tower!
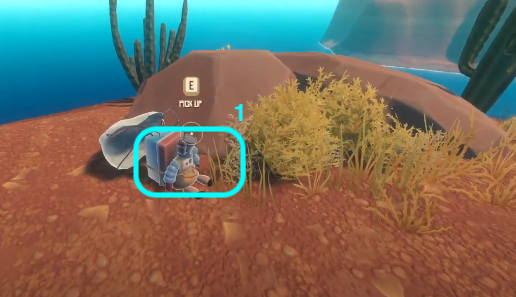
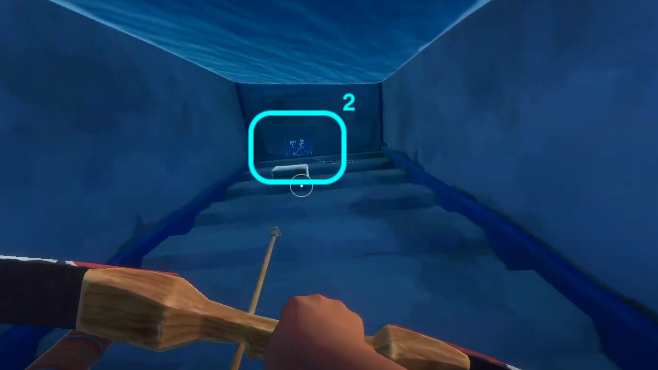
- 𝙁𝙄𝙍𝙎𝙏 𝙉𝙊𝙏𝙀: in the submerged level, inside a suitcase, in front of the door of the building A-2
[Cuckoo - "December 12th: We stopped for the night...]
- 𝙎𝙀𝘾𝙊𝙉𝘿 𝙉𝙊𝙏𝙀: on the ground floor, on the desk in the back room, inside the building of B-1
[Cuckoo - "January: It's been weeks....]
- 𝙏𝙃𝙄𝙍𝘿 𝙉𝙊𝙏𝙀& 𝙁𝙄𝙍𝙎𝙏 𝘽𝙇𝙐𝙀𝙋𝙋𝙍𝙄𝙉𝙏: on the second floor, blueprint on the desk and note is on the billboard, inside the building of C-1
[OWL - "Owl's Radio Notes: 22 Dec ~Distress call...]
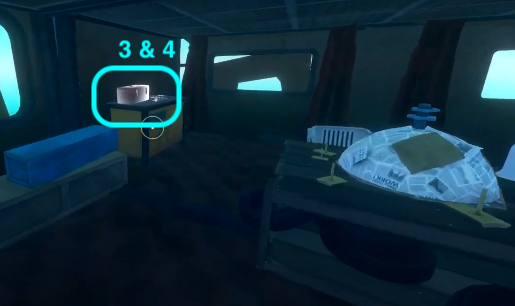
- 𝙁𝙊𝙐𝙍𝙏𝙃 𝙉𝙊𝙏𝙀: on the third floor, on the counter, inside the building of D-1
[Cuckoo - "Errm...February(?) We've picked up a lot of signals...]
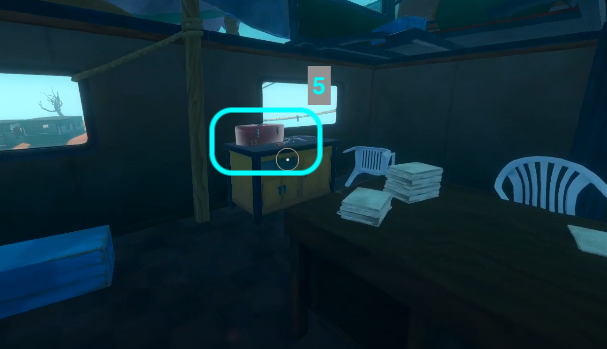
- 𝙁𝙄𝙁𝙏𝙃 𝙉𝙊𝙏𝙀 & 𝙎𝙀𝘾𝙊𝙉𝘿 𝘽𝙇𝙐𝙀𝙋𝙍𝙄𝙉𝙏: on the fourth/top floor, on the white board, inside the building E-1
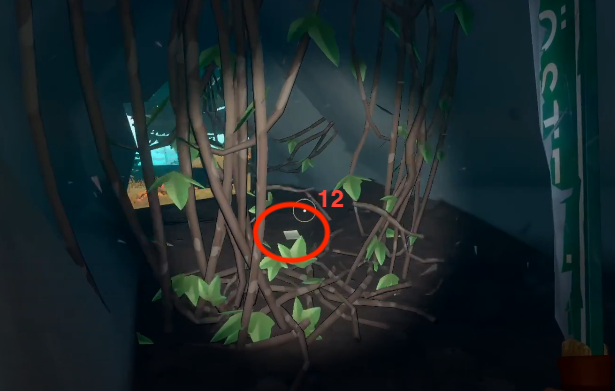
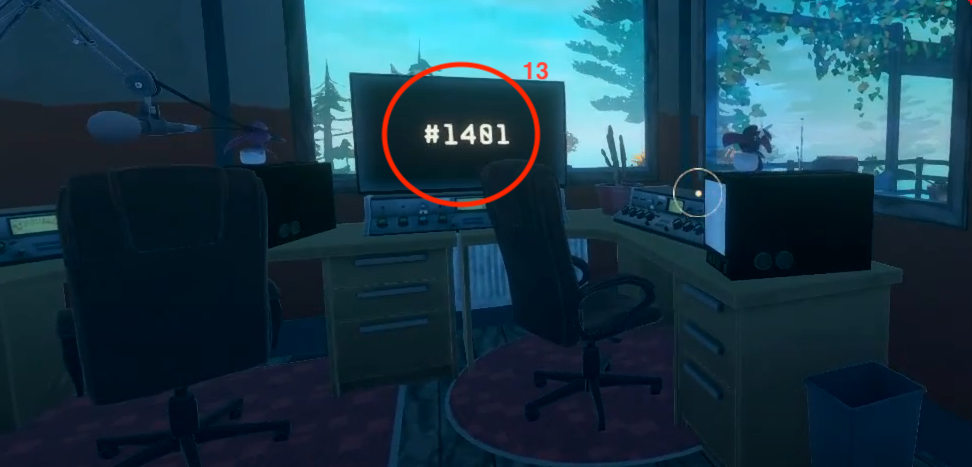
[Post-it: People? → #....]
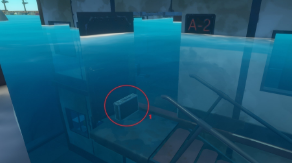
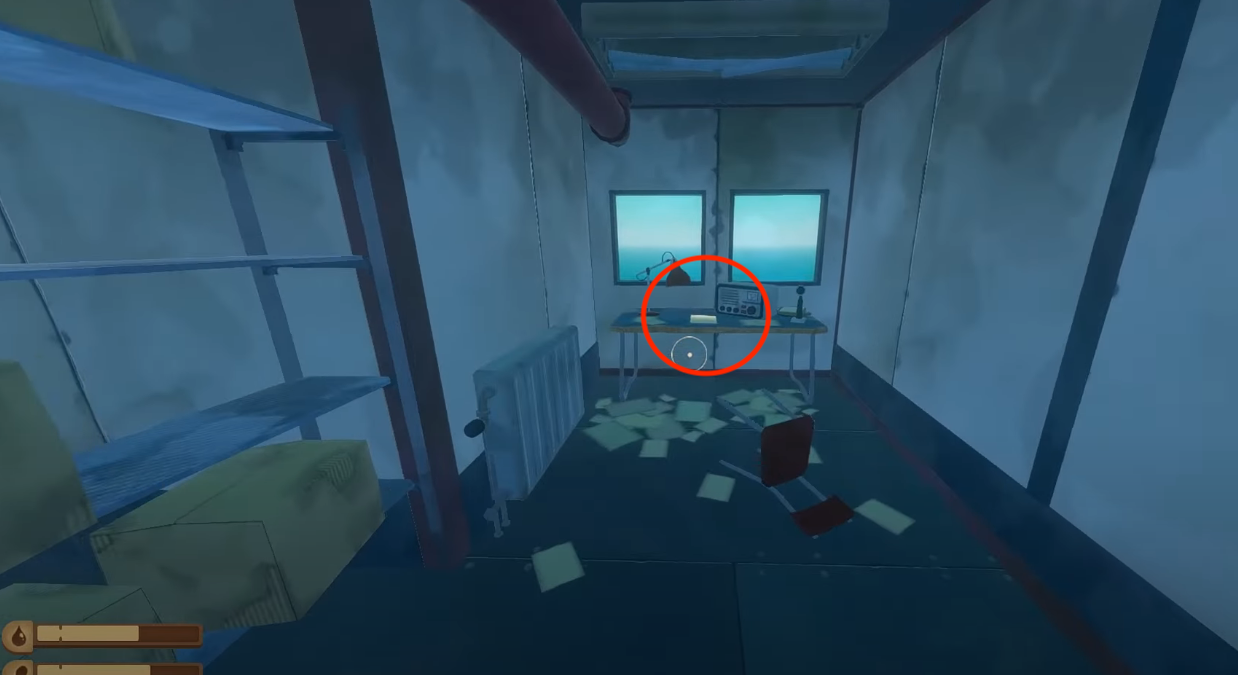
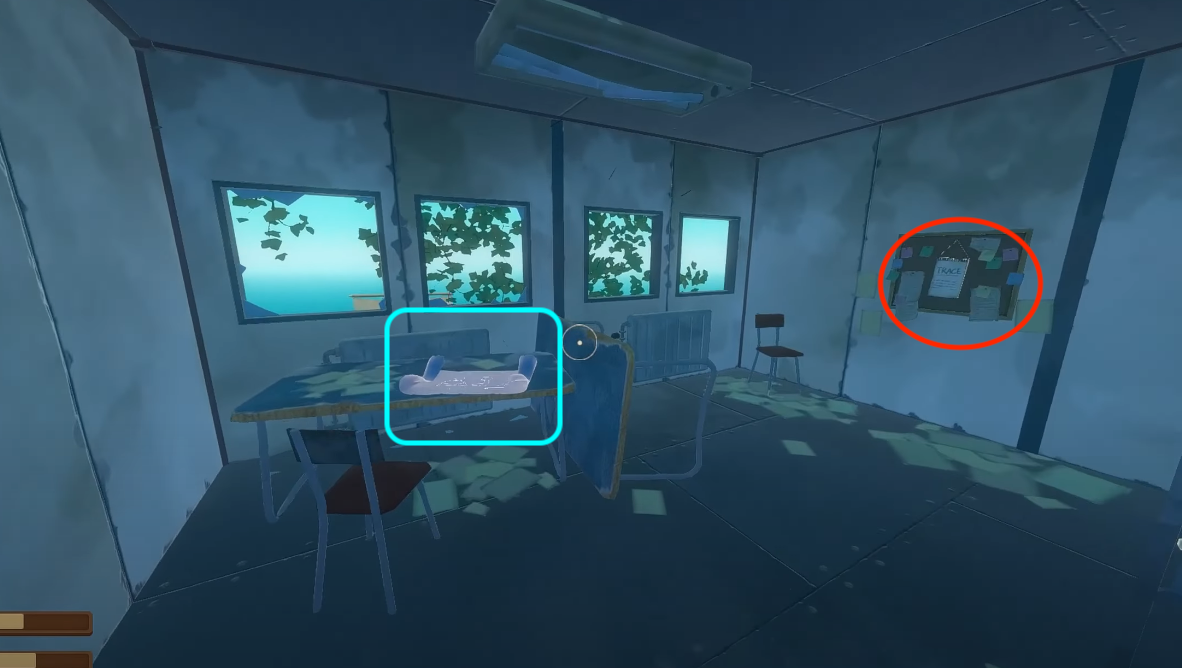
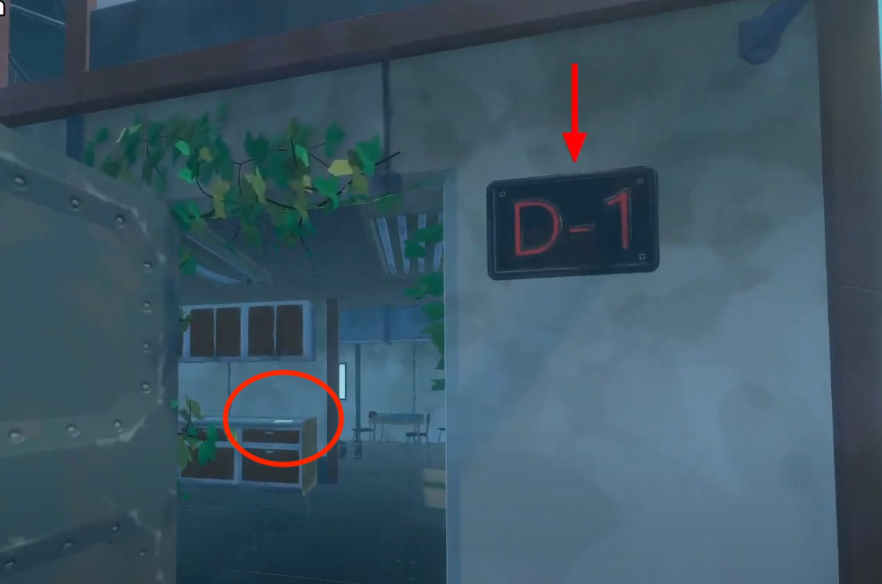
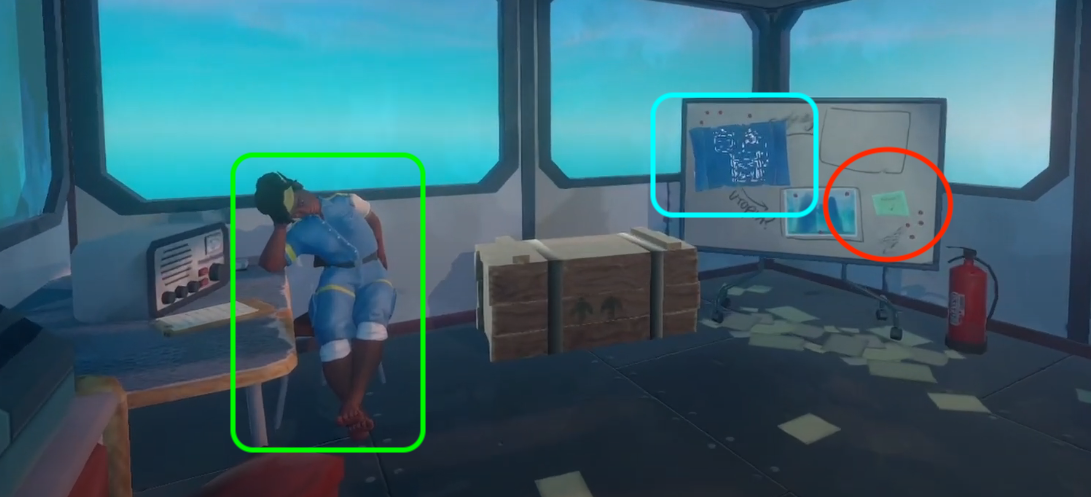
Once retrieving all the notes and blueprints, you'll obtain this achievement.
There is a secret achievement in this story location as well!!!!. Keep a look out once you reach the whiteboard.
This video by KirkoKola is a very detailed guide on the Radio Tower that includes every note, blueprint and loot you can find.
𝙑𝘼𝙎𝘼𝙂𝘼𝙏𝘼𝙉
VASAGATAN, a yacht that's crashed into a small lagoon, is the SECOND Story Location. It can only be reached using a Receiver.
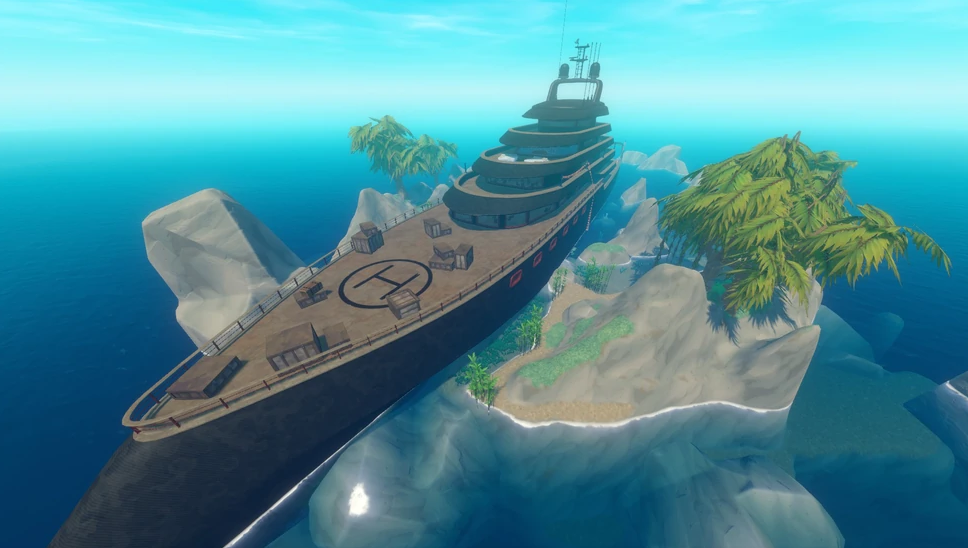
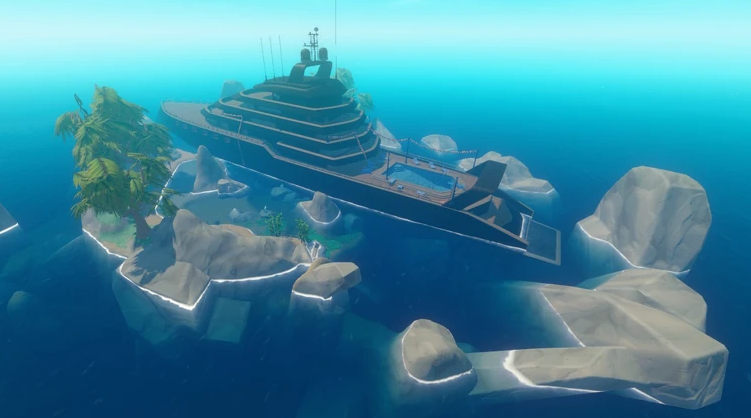
Access to the interior of the ship is via the rear under the pool. Inside of the yacht is very dark, so bring a couple headlights, water, food and WEAPONS. This is home to several Lurkers, which is the main location for the Lurker achievements.
The interior is composed of many rooms, most containing supplies. Additionally, you'll find unique items to unlock specific locked rooms to progress through the story.
There are 11 notes and 2 blueprints, one for the Engine and one for the Steering Wheel. Keep an eye out for the hidden achievement as well!!
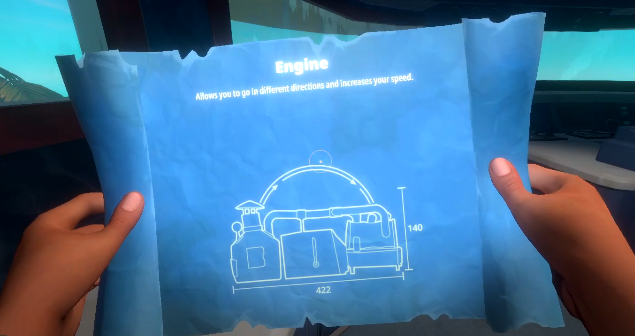
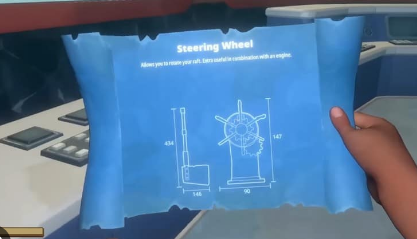
 Vasagatan Historian!
Find All Notes On Vasagatan!
- 𝙁𝙄𝙍𝙎𝙏 𝙉𝙊𝙏𝙀: inside the yacht's engine room on a table
[Hanne - "I head from the captain...]
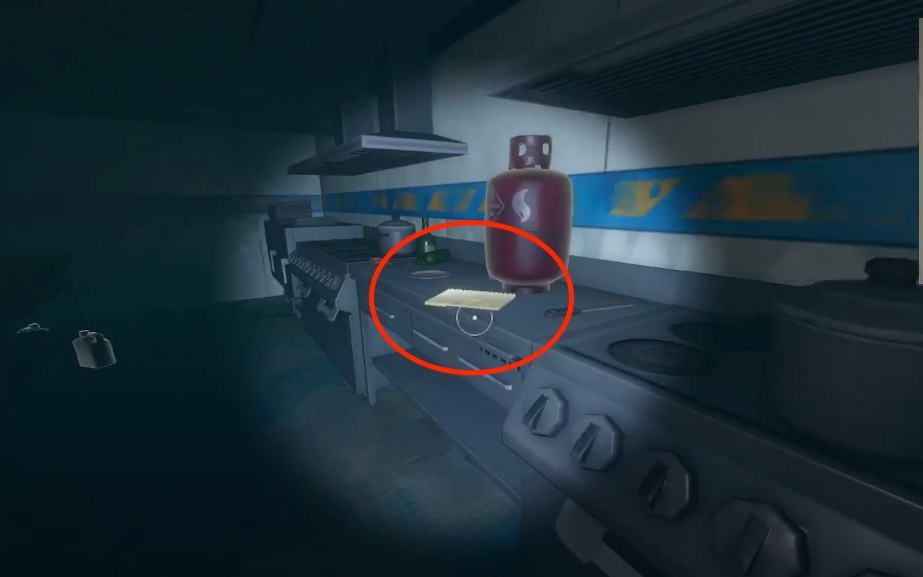
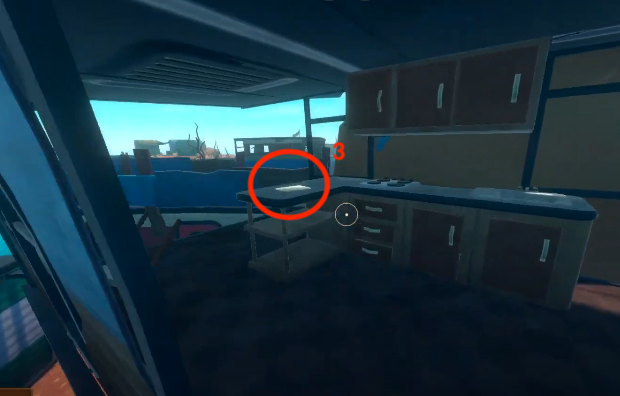
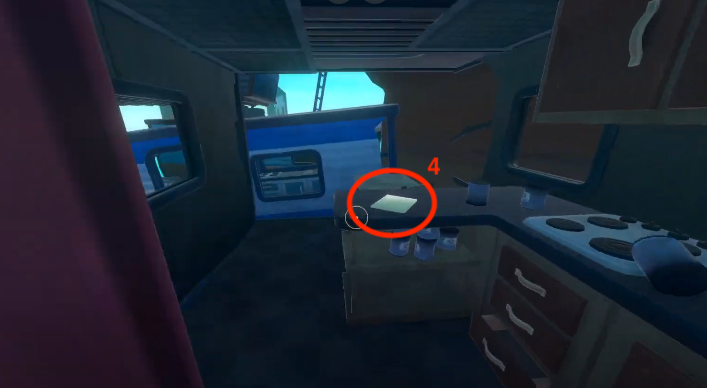
- 𝙎𝙀𝘾𝙊𝙉𝘿 𝙉𝙊𝙏𝙀: inside the yacht's kitchen on a counter
[Hanne - "Ruben, The yacht is ill prepared...]
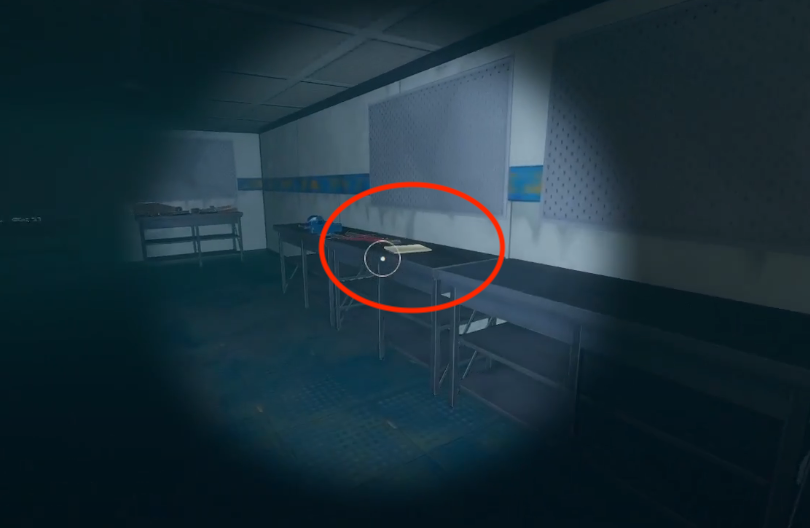
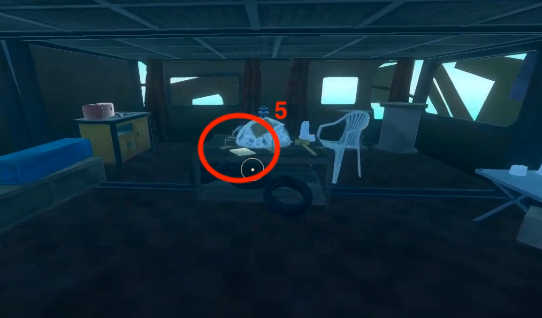
- 𝙏𝙃𝙄𝙍𝘿 𝙉𝙊𝙏𝙀: inside the back room of the corridor, the workshop, on the table
[Hanne - "I saw a large rat last night...]
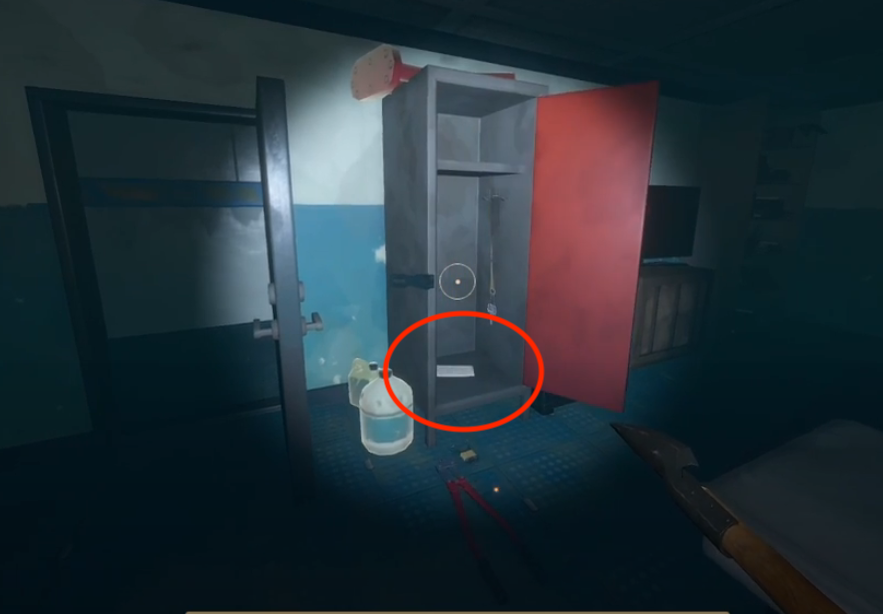
- 𝙁𝙊𝙐𝙍𝙏𝙃 𝙉𝙊𝙏𝙀: in the staff room inside a locked locker (find the bolt cutter to open it)
[TRAVEL LOG Olaf - "The captain keeps complaining...]
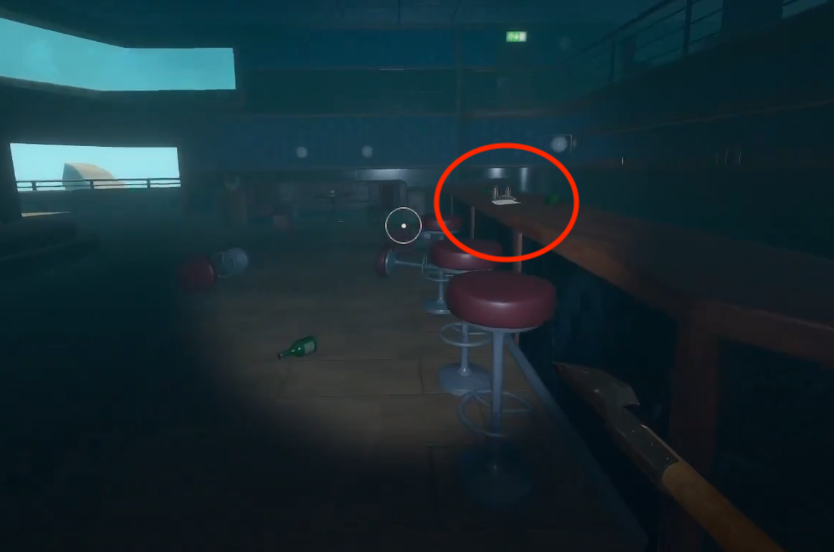
- 𝙁𝙄𝙁𝙏𝙃 𝙉𝙊𝙏𝙀: in the yacht's First Floor dance room on the bar counter next to the bullets.
[TRAVEL LOG Olaf - "As I've suspected the crew...]
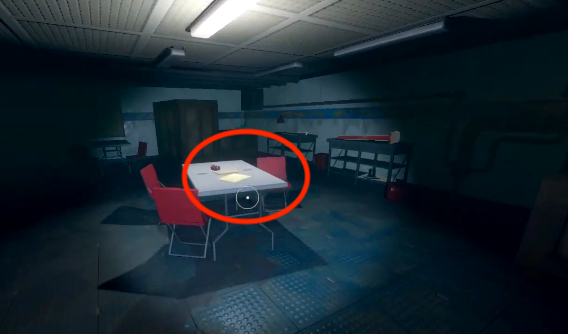
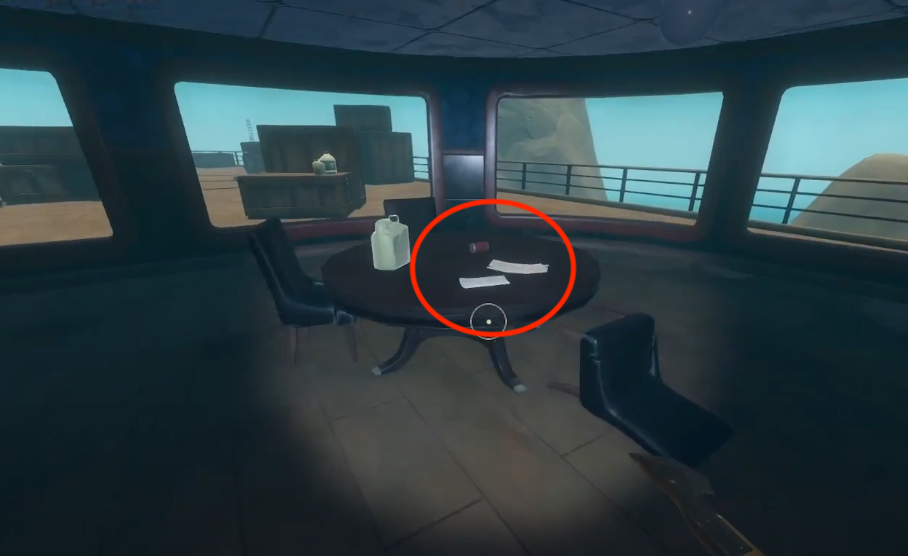
- 𝙎𝙄𝙓𝙏𝙃 𝙉𝙊𝙏𝙀: on the Second Floor dining room on the table next to the 4 digit code
[TRAVEL LOG Olaf - "These 'lurkers' have potential...]
- 𝙎𝙀𝙑𝙀𝙉𝙏𝙃 𝙉𝙊𝙏𝙀: on the Fourth Floor on the bed behind the bookshelf
[(Transcribed) [The ship's hull grinding against solid rock.]...]
- 𝙀𝙄𝙂𝙃𝙏𝙃 𝙉𝙊𝙏𝙀: on a desk in Cabin 2 on the First Floor
[(Transcribed) Hanne - "But what does that mean? You can't just fire them...]
- 𝙉𝙄𝙉𝙀𝙏𝙃 𝙉𝙊𝙏𝙀: inside a locked chest in Cabin 3 on the First Floor (open the chest with 4 digit code you found on Second Floor)
[(Transcribed) Captain - *Knocking* "Wilkstrom, it's urgent...]
- 𝙏𝙀𝙉𝙏𝙃 𝙉𝙊𝙏𝙀: on a desk in a room blocked by a fridge on the Third Floor (craft car jack by combining 5 mechanical parts you've collected around the yacht)
[(Transcribed) Narrator - CITIES IN THE BLUE...]
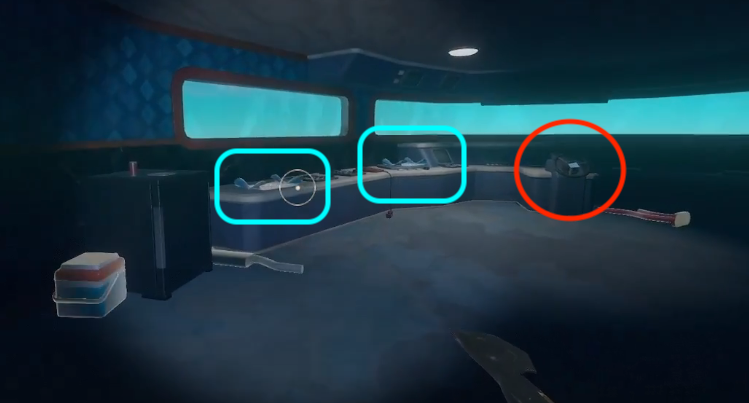
- 𝙀𝙇𝙀𝙑𝙀𝙉𝙏𝙃 𝙉𝙊𝙏𝙀: on the steering wheel on the Fifth Floor (unlock floor by exploding the locked door with a crafted bomb)
[Post-it: Balboa?! #....]
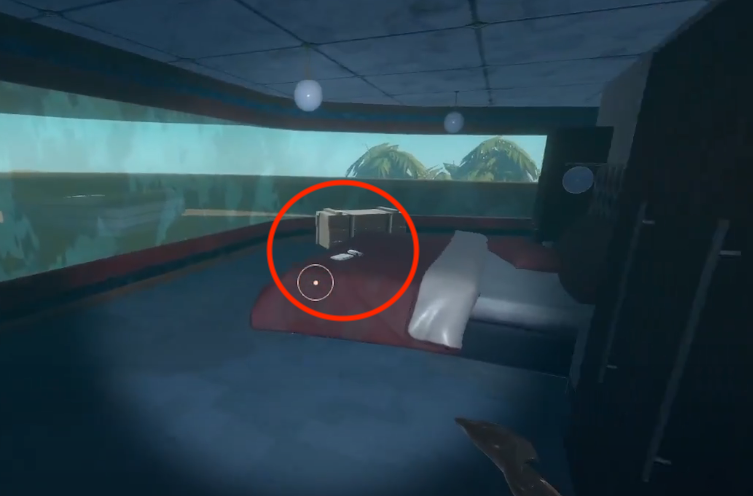
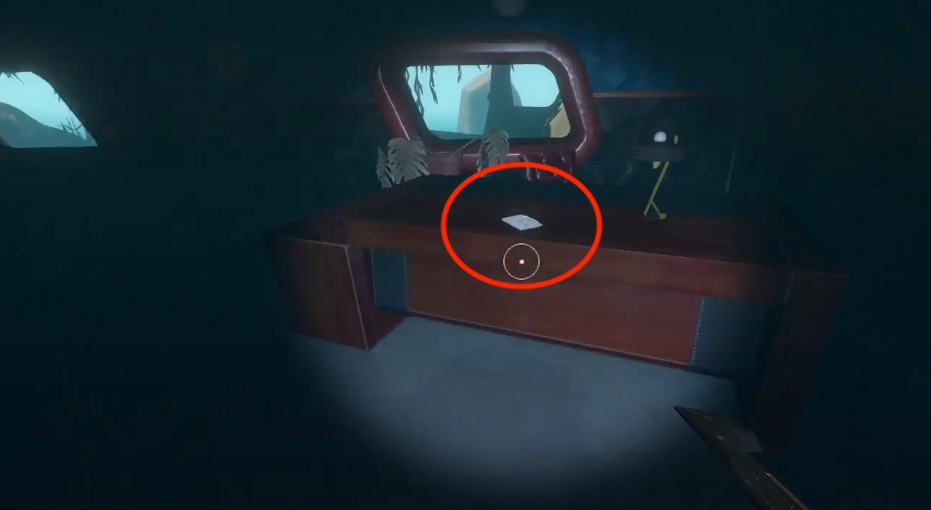
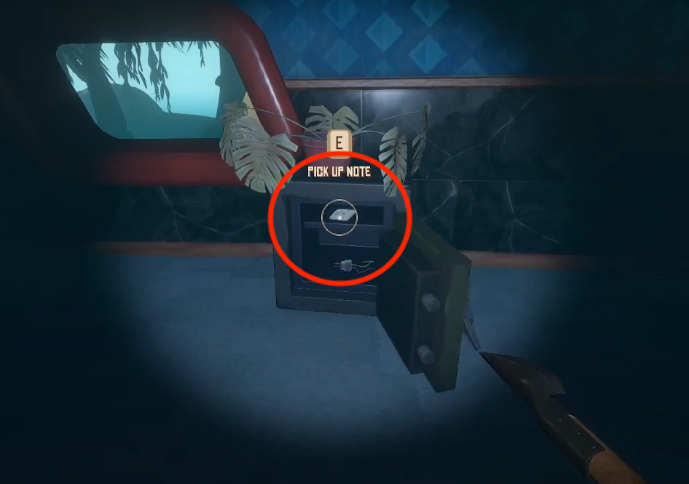
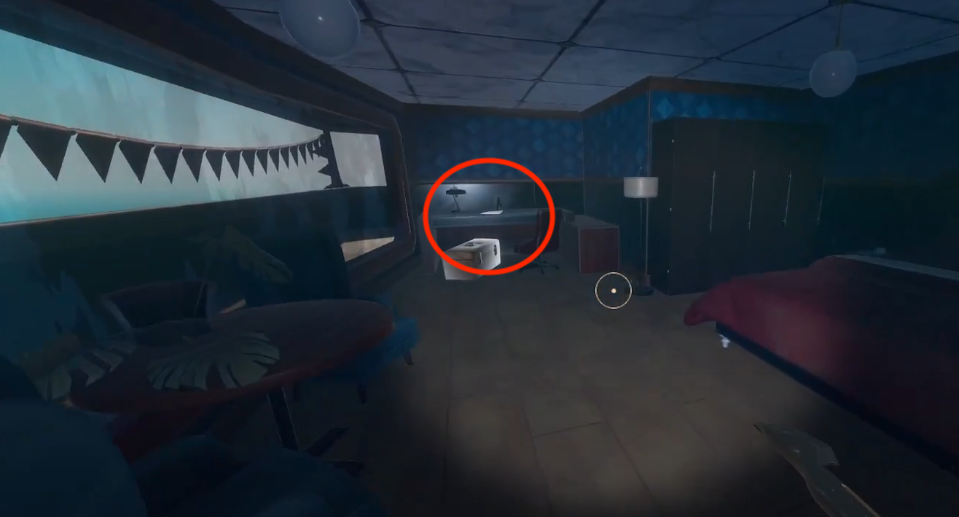
𝘽𝘼𝙇𝘽𝙊𝘼 𝙄𝙎𝙇𝘼𝙉𝘿
BALBOA ISLAND, last location of the First Chapter, is the THIRD Story Location. It can only be reached using a Receiver.
Unlike the other islands, Balboa Island is an Evergreen island, home to BEARS and the first boss-level enemy; MAMA BEAR. This makes the island the most challenging of the three locations in the first chapter.
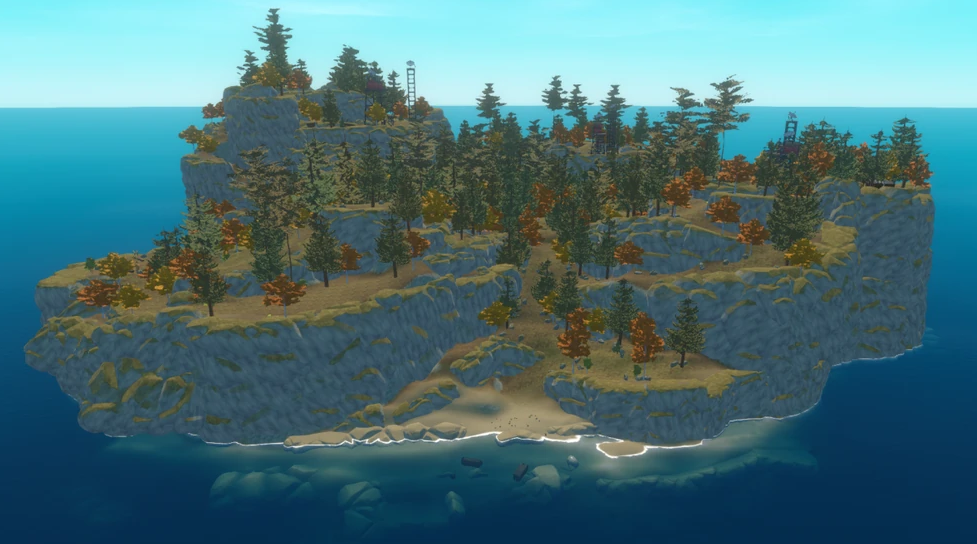
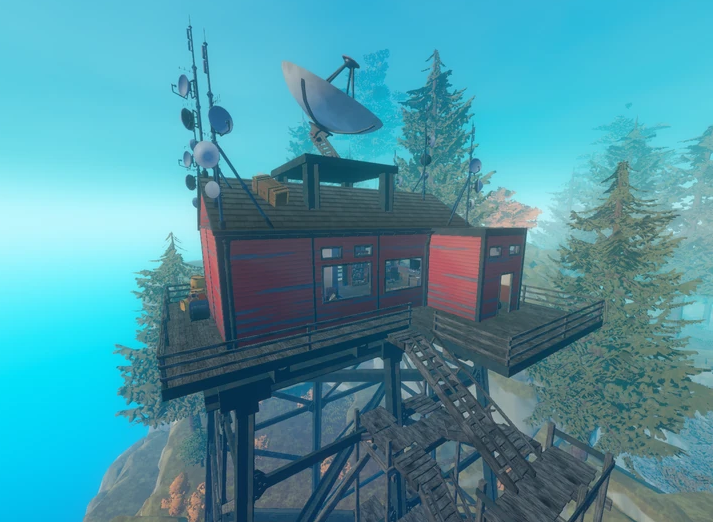
This is the main island for the story-line, which contains the most HIDDEN achievements of all the story locations so keep a look out!!! There are 4 main areas on the island you will have to explore; the RANGER STATION, Relay Station 2, Relay Station 4 and Relay Station 6.
𝙍𝘼𝙉𝙂𝙀𝙍 𝙎𝙏𝘼𝙏𝙄𝙊𝙉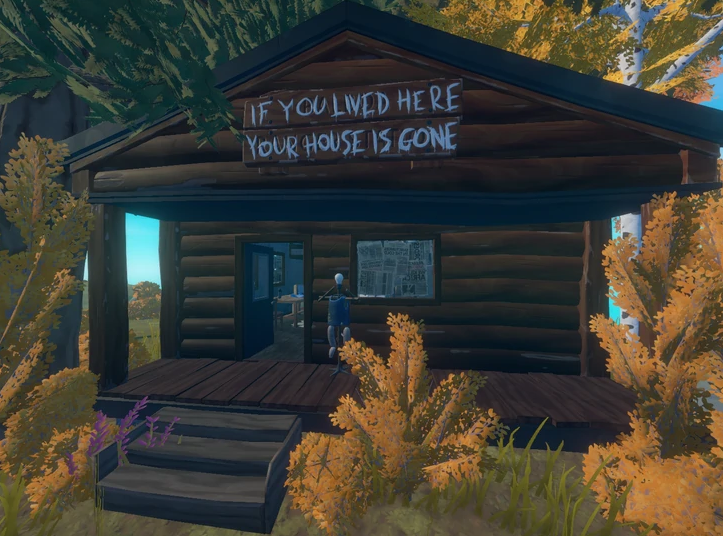 𝙍𝙀𝙇𝘼𝙔 𝙎𝙏𝘼𝙏𝙄𝙊𝙉
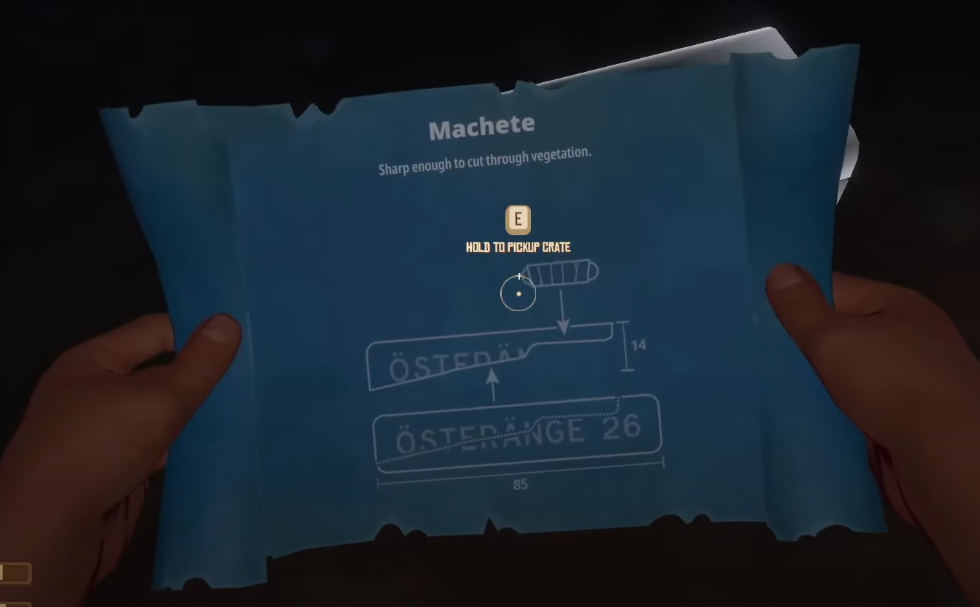
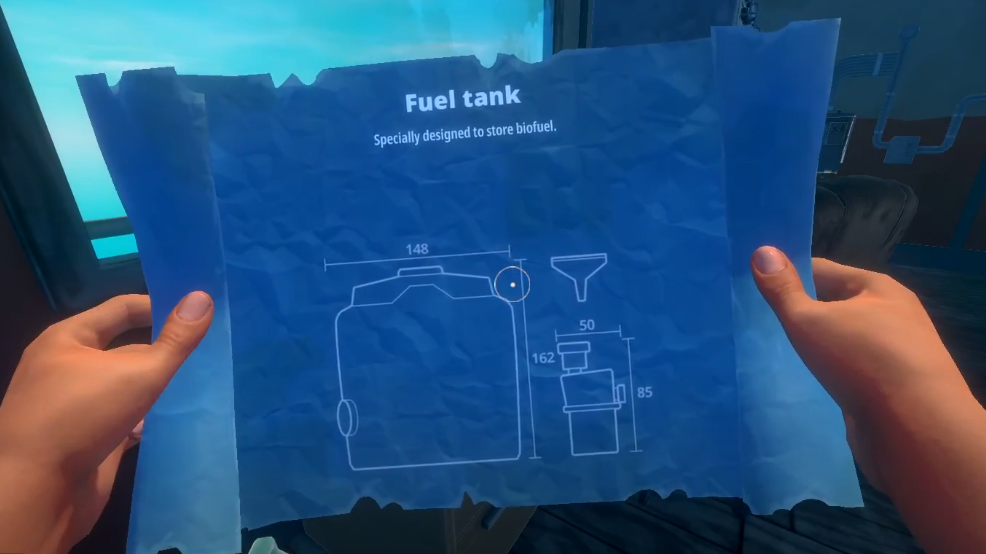
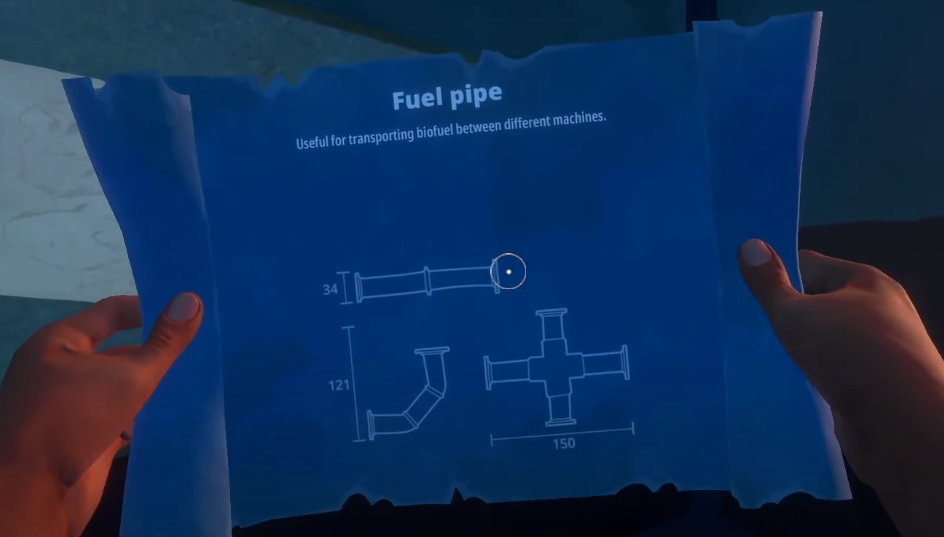
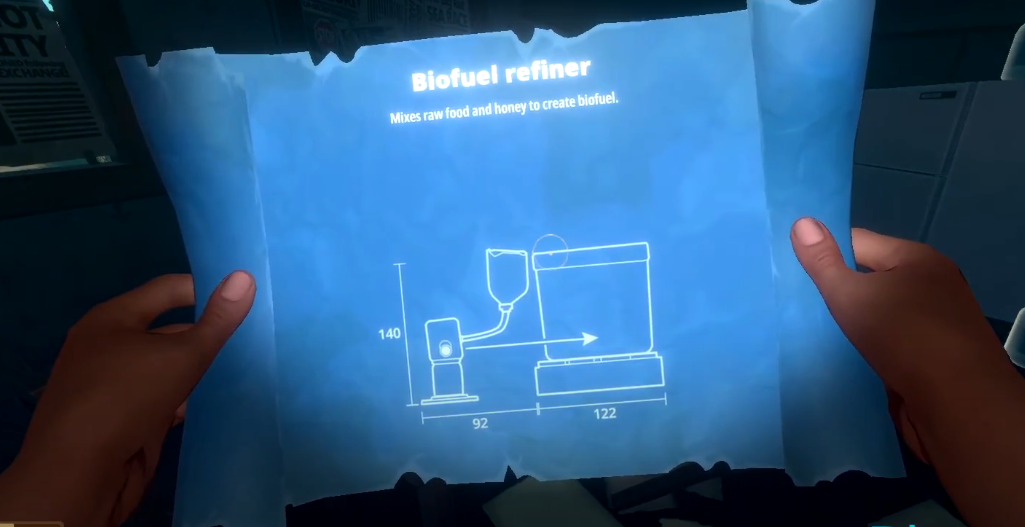
 There are 13 notes (including the coordinates of the next location), 5 quest items and 4 blueprints; one for the Machete, one for the Fuel Tank, one for the Fuel Pipe and one for the Biofuel Refiner.
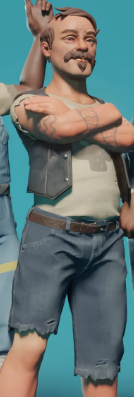
UNLOCKABLE CHARACTER: sitting on a mattress in Relay Station 6
There are several Bears and the Mama Bear so be sure to bring a lot of Food, Water, Headlight, Armour and WEAPONS. There are SEVERAL hidden achievements on this island!!
↓↓↓↓↓↓↓Use this map as a guide on the locations of the unique items.↓↓↓↓↓↓↓
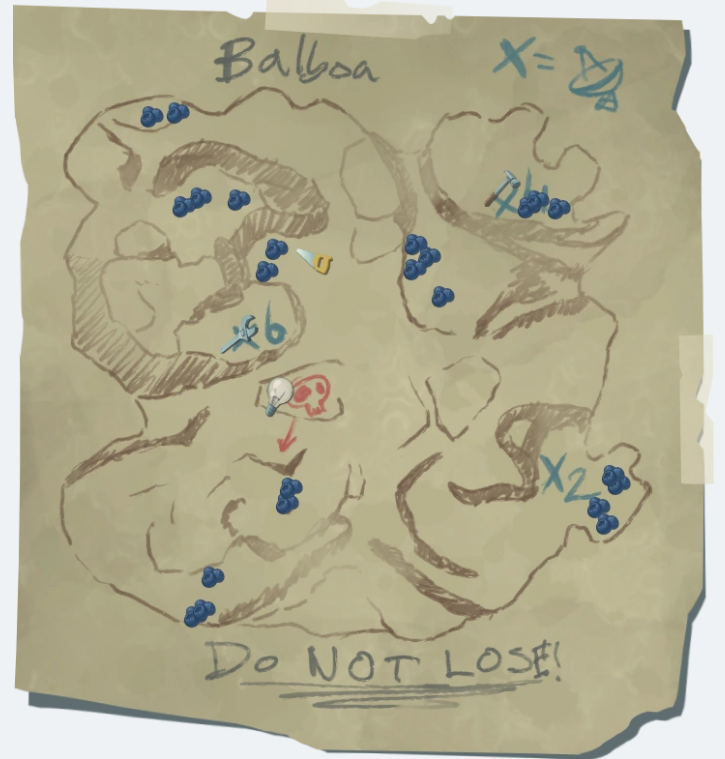 Balboa Historian!
Find All Notes On Balboa!
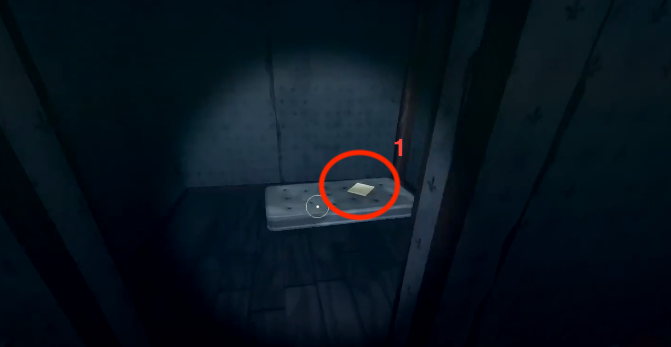
- 𝙁𝙄𝙍𝙎𝙏 𝙉𝙊𝙏𝙀: inside the Ranger Station in a dark room on a mattress
[SCHEDULE - 6 June-6 Sep J. CARERA & G. GALLO...]
- 𝙎𝙀𝘾𝙊𝙉𝘿 𝙉𝙊𝙏𝙀: postcard (quest reward/hidden achievement)
[THE CORREA TWINS - MERRY CHRISTMAS FROM NOWHERE]
- 𝙏𝙃𝙄𝙍𝘿 𝙉𝙊𝙏𝙀: inside an opened locker at Relay Station 2
[BRUNO - "Three months ago my sister Astrid...]
- 𝙁𝙊𝙐𝙍𝙏𝙃 𝙉𝙊𝙏𝙀: inside Relay Station 4 on top of a stool between a bookcase and a desk
[BRUNO - "The kids are fighting...]
- 𝙁𝙄𝙁𝙏𝙃 𝙉𝙊𝙏𝙀: under the stairs of Relay Station 6
[BRUNO - "I haven't seen ERROL all night...]
- 𝙎𝙄𝙓𝙏𝙃 𝙉𝙊𝙏𝙀: inside Relay Station 6 on a wall
[MAP - Balboa DO NOT LOSE!]
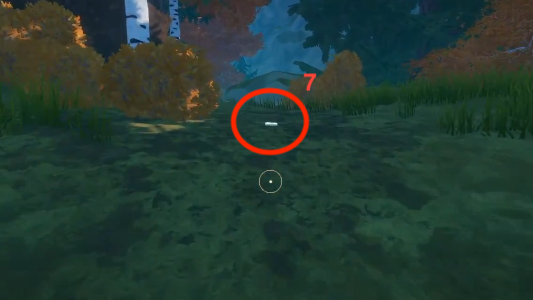
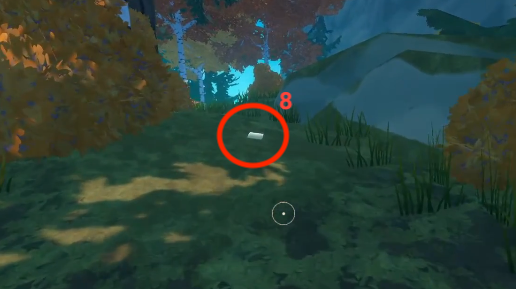
- 𝙎𝙀𝙑𝙀𝙉𝙏𝙃 & 𝙀𝙄𝙂𝙃𝙏𝙃 𝙉𝙊𝙏𝙀: on a hill path facing MAMA BEAR
[BOBBY - "BETRAYAL FATHER TRUSTS THE MURDERERS"]
[N&D&L - "HE WOULD LEAVE US BEHIND. WE CANT HAVE THAT"]
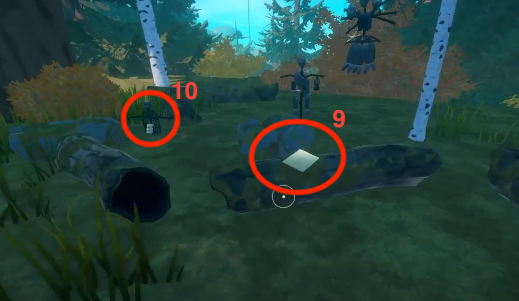
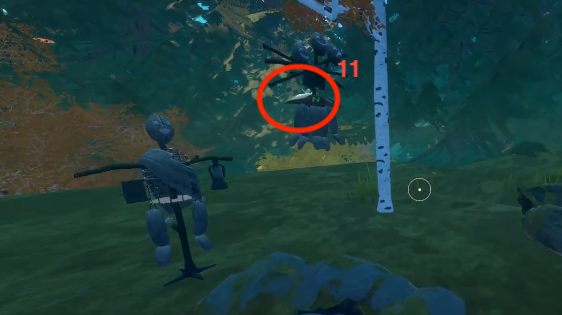
- 𝙉𝙄𝙉𝙏𝙃, 𝙏𝙀𝙉𝙏𝙃 & 𝙀𝙇𝙀𝙑𝙀𝙉𝙏𝙃 𝙉𝙊𝙏𝙀: at the top of the hill with tree stumps on the ground, a mannequin and a hanged mannequin
[BOBBY - "FATHER HAS TO MAKE A DECISION..."]
[MIRANDA - "NOT ENOUGH BOAT FOR ALL OF US. IM SORRY, ERROL"]
[BOBBY - "THE GUILTY LAY RESTLESS..."]
- 𝙏𝙒𝙀𝙇𝙁𝙏𝙃 𝙉𝙊𝙏𝙀: at the end of the tunnel on the way to Relay Station 6
[HENRY - "Papa MADE UP HIS MIND...']
- 𝙏𝙃𝙄𝙍𝙏𝙀𝙀𝙉𝙏𝙃 𝙉𝙊𝙏𝙀: will be revealed on the computer screen once you activated all the Relay Stations (no note to represent it compared to the other story locations)
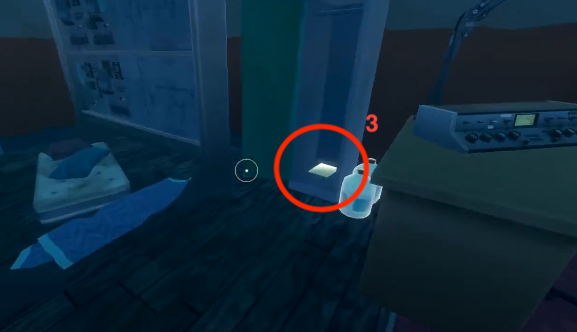
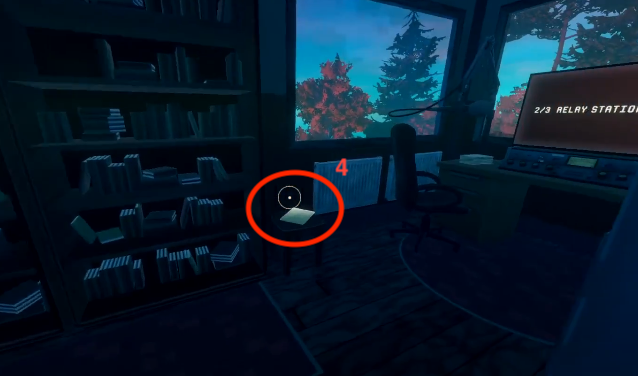
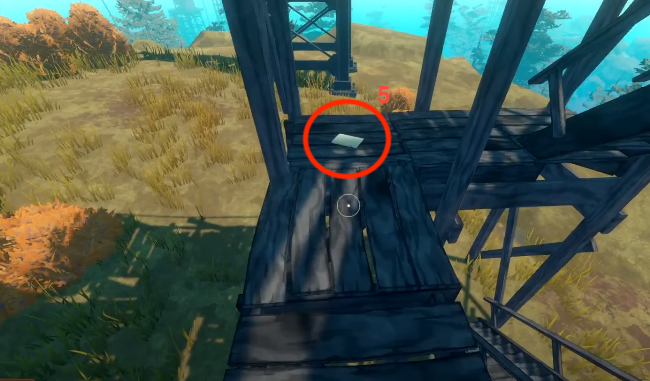
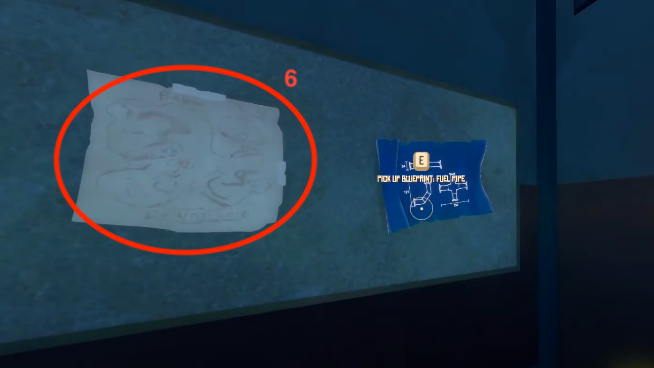
 𝘽𝙇𝙐𝙀𝙋𝙍𝙄𝙉𝙏𝙎
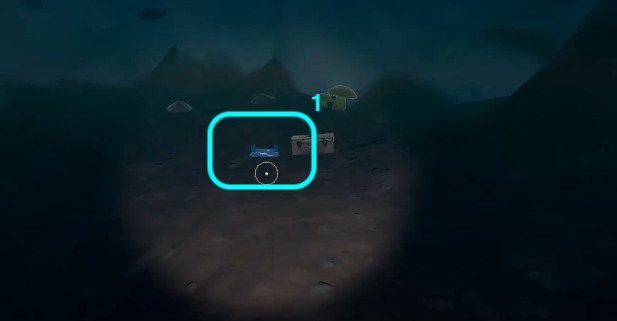
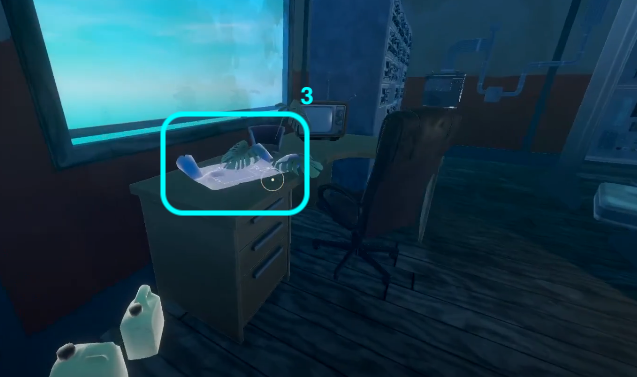
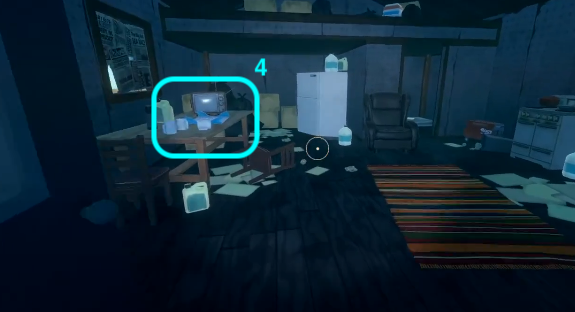
- 𝙁𝙄𝙍𝙎𝙏 𝘽𝙇𝙐𝙀𝙋𝙍𝙄𝙉𝙏: inside the Mama Bear's cave
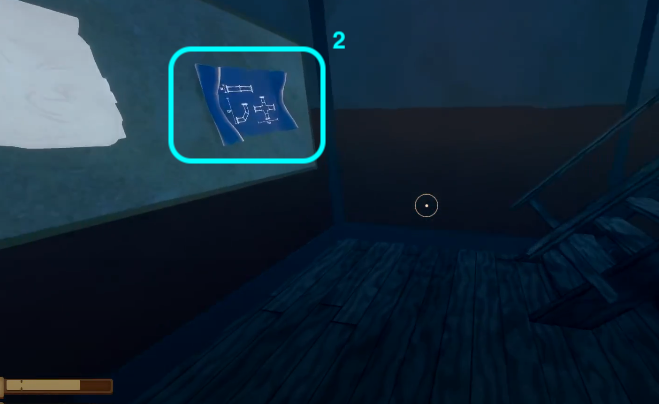
- 𝙎𝙀𝘾𝙊𝙉𝘿 𝘽𝙇𝙐𝙀𝙋𝙍𝙄𝙉𝙏: on a wall of Relay Station 4
- 𝙏𝙃𝙄𝙍𝘿 𝘽𝙇𝙐𝙀𝙋𝙍𝙄𝙉𝙏:on a desk in Relay Station 6
- 𝙁𝙊𝙐𝙍𝙏𝙃 𝘽𝙇𝙐𝙀𝙋𝙍𝙄𝙉𝙏: on the desk in the Ranger Station
 Mother Lode!
Slay The Mama Bear
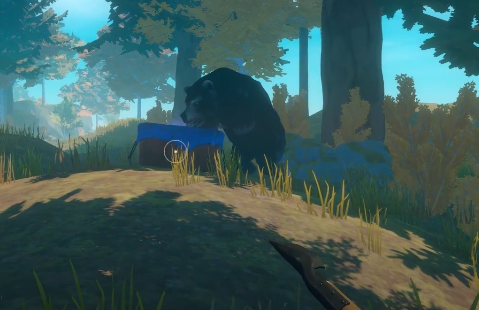 The Mama Bear has 750 hp and she does 50 damage per attack. Simply put berries collected around the island and place into the berry basket. She will get distracted and you'll be able to land a couple hits before she runs after you again. Bring a bow and approximately 30-60 arrows depending on the quality. Another method would be to use a metal spear or a machete. Repeat the process using the berries and eventually she'll die.
~~~~~~~~ 𝐒𝐄𝐂𝐎𝐍𝐃 𝐂𝐇𝐀𝐏𝐓𝐄𝐑 ~~~~~~~~
𝘾𝘼𝙍𝘼𝙑𝘼𝙉 𝙏𝙊𝙒𝙉
CARAVAN TOWN, the FIRST Story Location of the Second Chapter. It can only be reached using a Receiver.
The Island spreads out over three pinnacles with a tower built of containers in the middle. Ziplines and suspension bridges connect the pinnacles, allowing the previous residents quick access to different areas of the island.
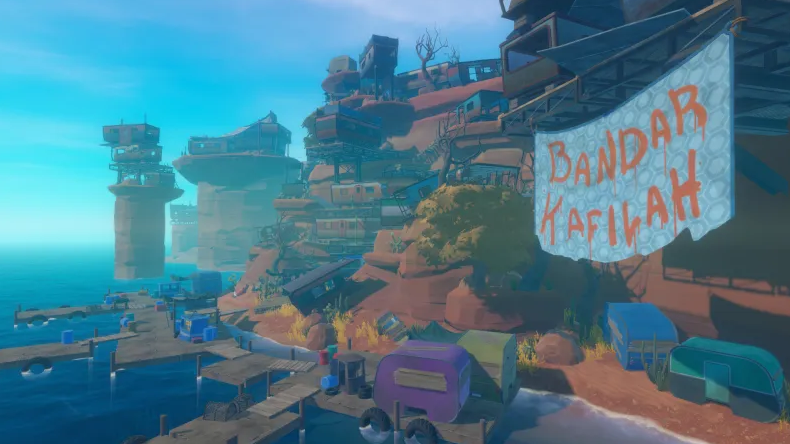
Goats and cluckers can be found on the island so be sure to bring a net launcher and cannister. This is home to two enemies on this island so bring weapons; the WHITE SCREECHER (much smaller compared to the red and blue Screecher, only on Caravan Town) and MUDHOGS (experimented Mudhog, that doesn't drop raw meat/animal head, only on Caravan Town).
There are 10 notes, including 7 quest items and 6 notes, one for the Battery Charger, one for the Engine Controls, one for the Firework, one for the Metal Detector, one for the Zipline Tool and one for the Zipline.
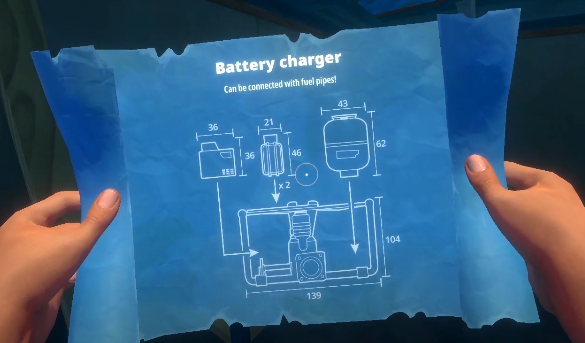
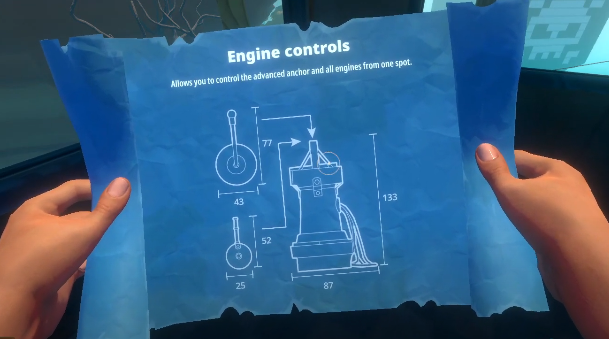
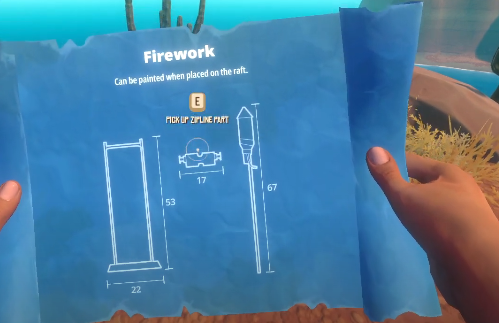
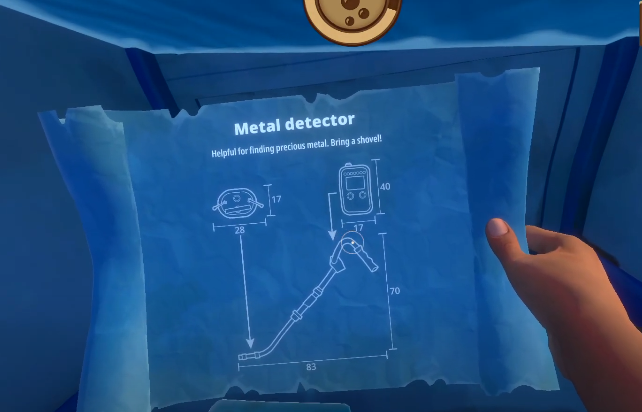
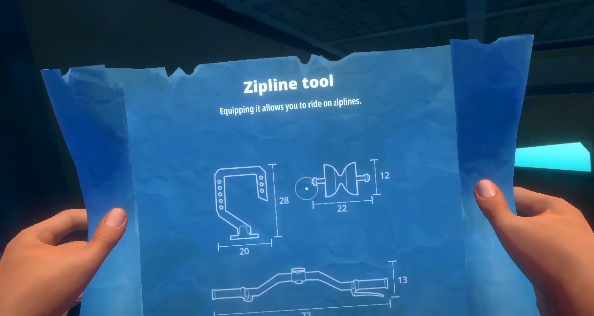
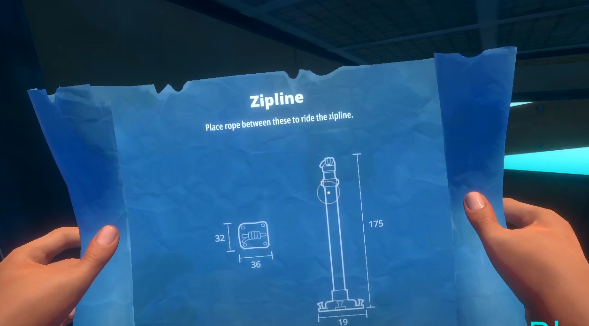
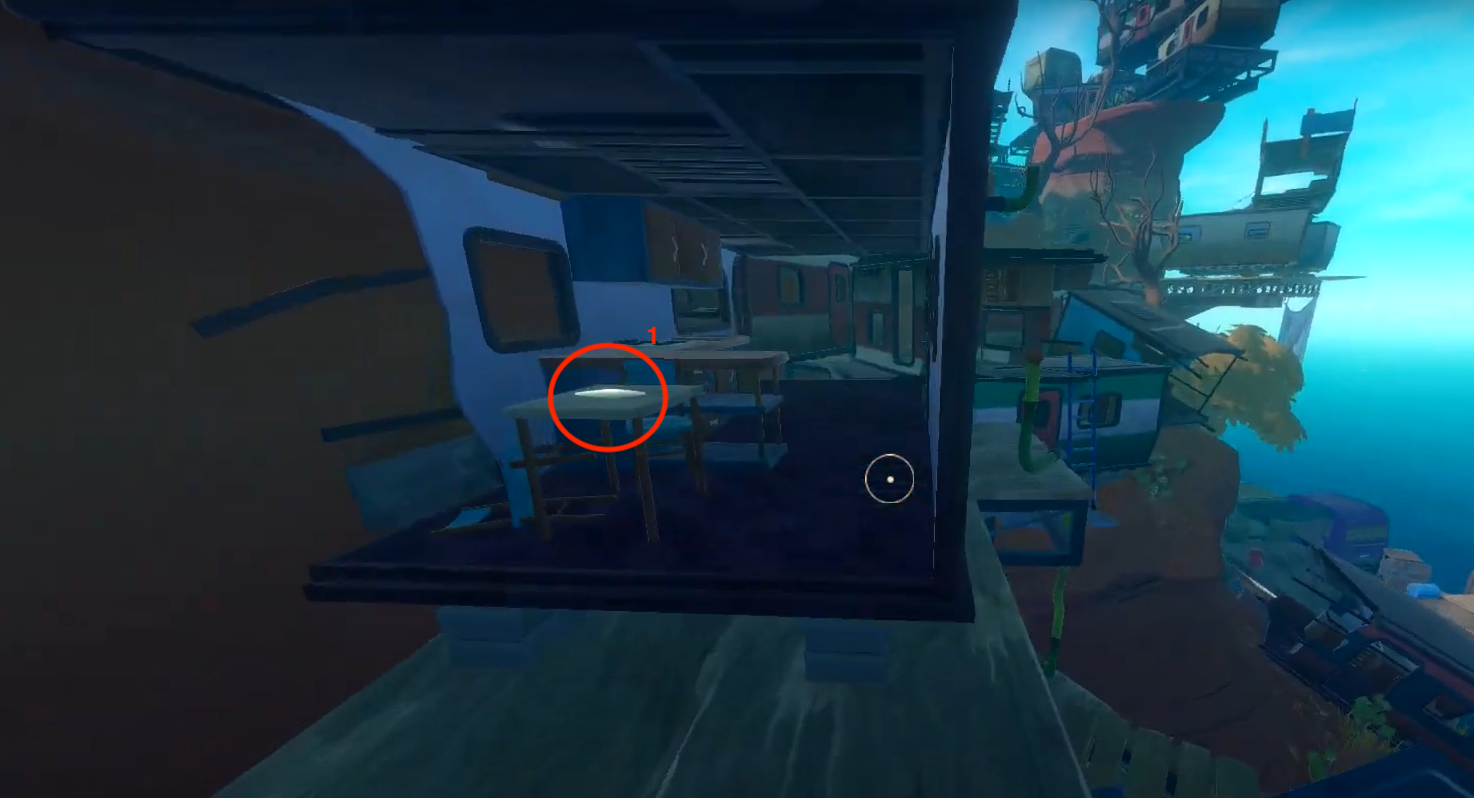
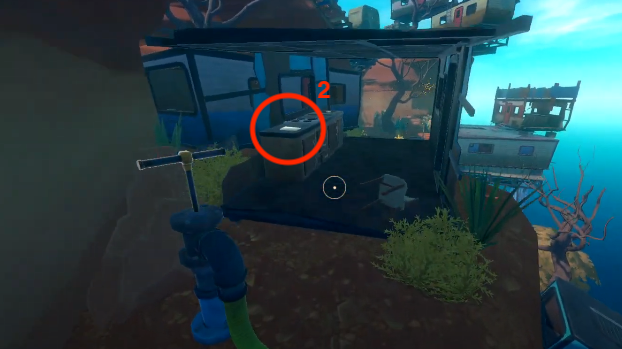
There are a number of tasks on the island that require finding parts all around the island: finding 3 battery charger parts to make a battery charger, finding 3 zipline parts to make a zipline tool and finding a number of keys to unlock the Infirmary and the Mayor's house.
Caravan Town Historian!Find All Notes On Caravan Town!
- 𝙁𝙄𝙍𝙎𝙏 𝙉𝙊𝙏𝙀: on a table in a container as you go up the stairs and ladder
[DETTO'S SCIENTIFIC JOURNAL - CLASSIFIED: DETTO - "Ma says I should...]
- 𝙎𝙀𝘾𝙊𝙉𝘿 𝙉𝙊𝙏𝙀: on the kitchen counter in a container beside the water pump
[DETTO'S SCIENTIFIC JOURNAL - TOP TOP SECRET: DETTO - "Sanjay says the water...]
- 𝙏𝙃𝙄𝙍𝘿 𝙉𝙊𝙏𝙀: on the kitchen counter in a container near the top of the town
[DETTO'S ADVENTURE JOURNAL: DETTO - "Pa says we have to go...]
- 𝙁𝙊𝙐𝙍𝙏𝙃 𝙉𝙊𝙏𝙀: on the kitchen counter inside the container with the 'CANNED GOODS' sign
[TRANSCRIBED: NARRATOR - "The Raft Towns of Indonesia...]
- 𝙁𝙄𝙁𝙏𝙃 𝙉𝙊𝙏𝙀: on the table in the container on top of the tower
[SPEECH TO THE RAFTERS, 17th of may FITFH DRAFT: OLAF - "why do you - Why do...]
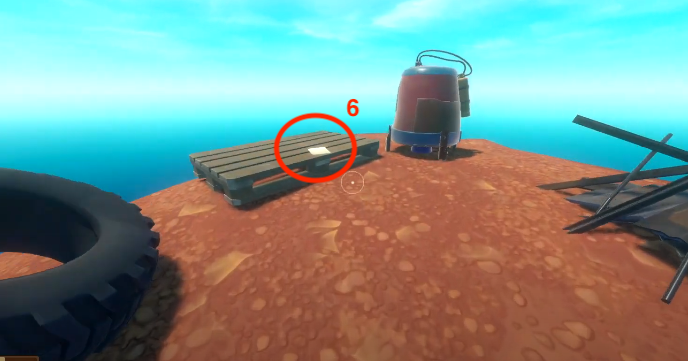
- 𝙎𝙄𝙓𝙏𝙃 𝙉𝙊𝙏𝙀: next to the rocket on a small island
[DETTO'S EXPERIMENTAL JOURNAL - ATTEMPT #733: DETTO - "Pa helped me weld...]
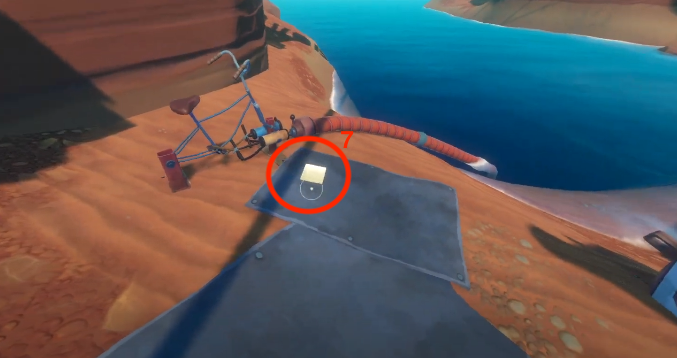
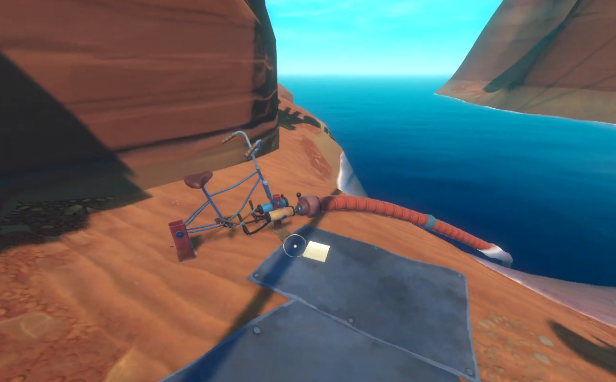
- 𝙎𝙀𝙑𝙀𝙉𝙏𝙃 𝙉𝙊𝙏𝙀: on a metal sheet at the bottom of the tower, next to a bicycle
[DETTO/SANJAY - "My name is Sanjay. I think...]
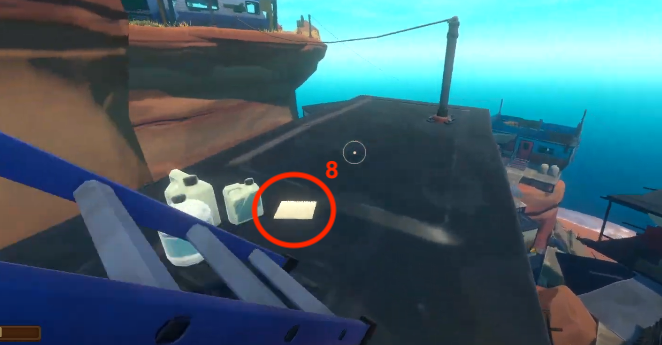
- 𝙀𝙄𝙂𝙃𝙏𝙃 𝙉𝙊𝙏𝙀: on top of a caravan next to a ladder
[DETTO'S SCIENTIFIC JOURNAL - MONSTER INVESTIGATION: DETTO - "There's a stranger...]
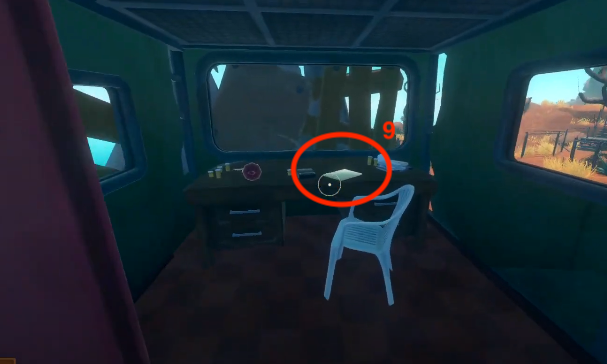
- 𝙉𝙄𝙉𝙀𝙏𝙃 𝙉𝙊𝙏𝙀: on a desk inside a container inside the Infirmary
[HENRIK - "It's been three days. Stuck in this shack, sick as a dog...]
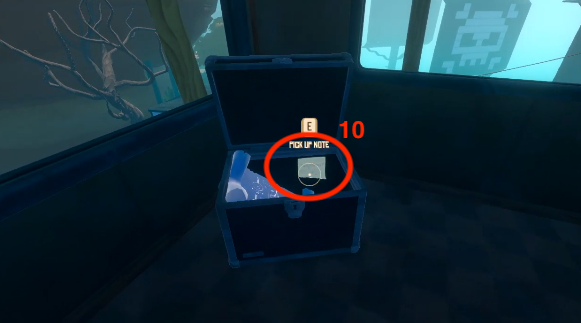
- 𝙏𝙀𝙉𝙏𝙃 𝙉𝙊𝙏𝙀: inside a locked chest at the Mayor's House (get key inside the Infirmary)
[Post-it - Tangaroa? → #....]
 𝘽𝙇𝙐𝙀𝙋𝙍𝙄𝙉𝙏𝙎
- 𝙁𝙄𝙍𝙎𝙏 𝘽𝙇𝙐𝙀𝙋𝙍𝙄𝙉𝙏: on the small island where the red rocket launched to
- 𝙎𝙀𝘾𝙊𝙉𝘿 𝘽𝙇𝙐𝙀𝙋𝙍𝙄𝙉𝙏: follow a pipe connected to the bicycle at the bottom of the tower and it's found underwater
- 𝙏𝙃𝙄𝙍𝘿 & 𝙁𝙊𝙐𝙍𝙏𝙃 𝘽𝙇𝙐𝙀𝙋𝙍𝙄𝙉𝙏: inside a toolbox on a worktable on top of the tower
- 𝙁𝙄𝙁𝙏𝙃 𝘽𝙇𝙐𝙀𝙋𝙍𝙄𝙉𝙏: inside a toolbox on a worktable inside the Mayor's House
- 𝙎𝙄𝙓𝙏𝙃 𝘽𝙇𝙐𝙀𝙋𝙍𝙄𝙉𝙏: inside the locked chest inside the Mayor's House
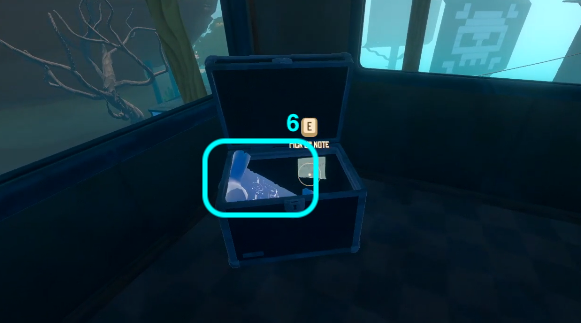
𝙏𝘼𝙉𝙂𝘼𝙍𝙊𝘼
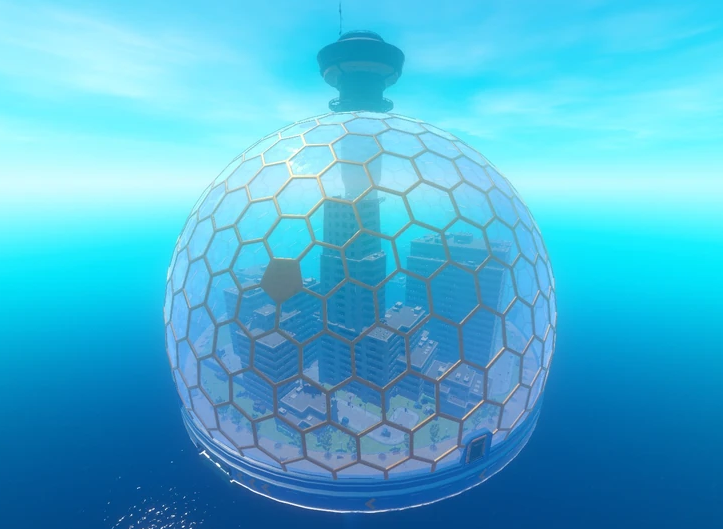
TANGAROA, also called Tangaroa City, is the SECOND and FINAL Story Location of the Second Chapter. It can only be reached using a Receiver.
Tangaroa is a massive location that consists of a metallic, circular dome topped by a hexagonal-patterned glass. The city is the most complex location by far, both in terms of the amount of intricate places to explore and puzzles to solve.
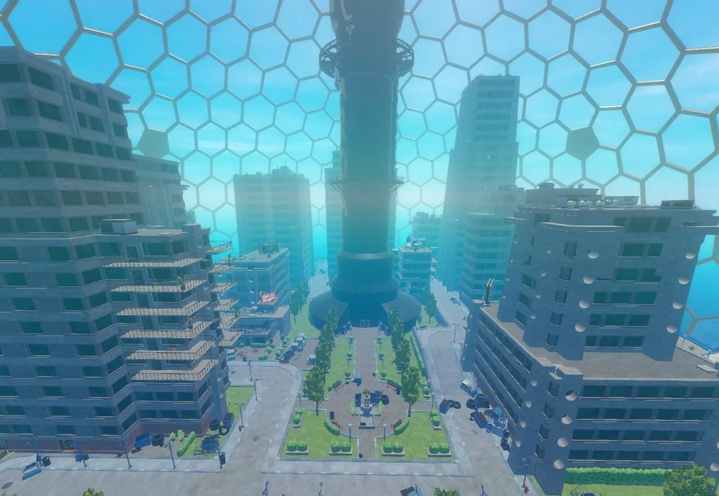
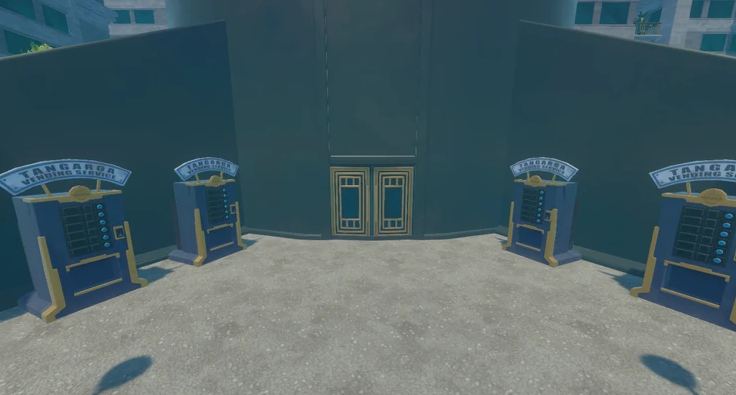
Many achievements are available in this story location, including the Spending Tokens achievement, Disruptor achievement and 4 hidden achievements.
To complete this location, the city is required to be explored fully, as well as backtracking to previously visited areas with newfound supplies. Additionally, unlike the previous story locations, there are possibilities to restock on food and water, without having to go back to your raft, via the VENDING MACHINES that uses Vending Machine Tokens. Inside the city there are apartment buildings that can be explored and shops.
There are 10 notes, including 4 quest items, 4 unique items and 4 blueprints; one for the Water Pipe, one for the Electric Purifier, one for the Large Storage and one for the Water Tank.Upon completion, the FIFTH PLAYABLE CHARACTER, Elaine, unlocked in the final area outside of the city.

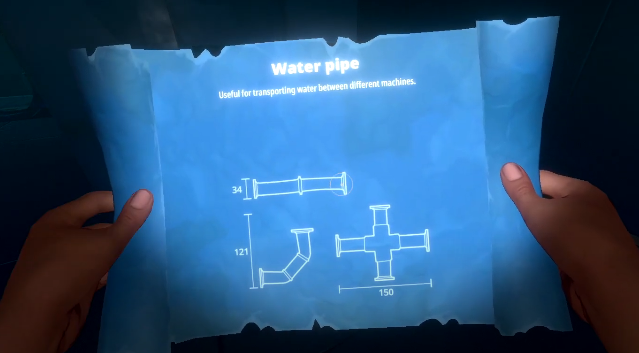
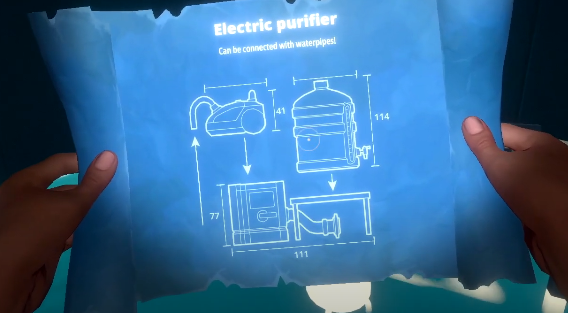
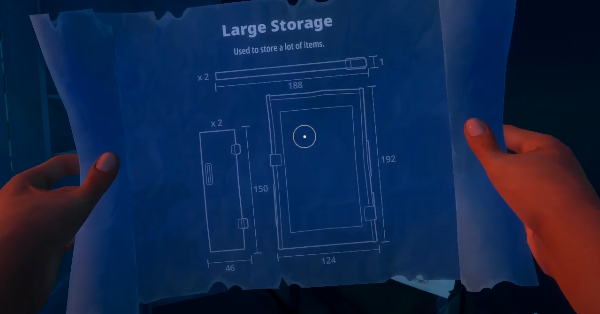
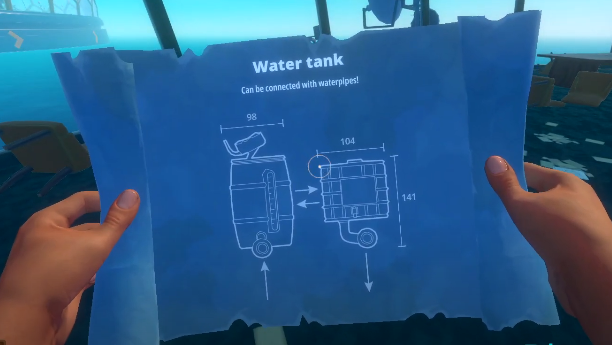 This is home to two types of enemies:
 - The BUTLER BOT - equipped with a taser, can only be temporarily deactivated for 60 secs and has the Tangaroa Keycard in its head that's only acquired once deactivated
- STRONGER LURKER - slightly bigger and stronger, does 20 HP more damage than the standard lurker.
Bring a couple headlights, food and water, machete or bow and arrow.
Upon arrival, there is ONE MAIN ENTRANCE. However, there are 5 HUGE locked emergency doors that can be opened on the inside of the dome. We start the story in the underground section of the city and work our way up to the surface to the apartment buildings and the main tower.
Tangaroa Historian!Find All Notes In Tangaroa!
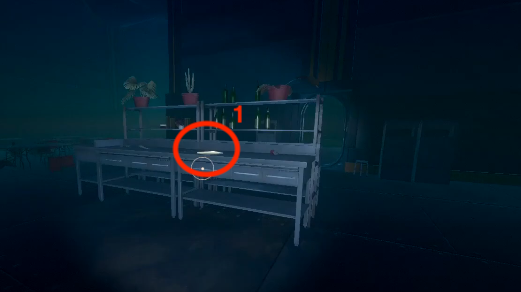
- 𝙁𝙄𝙍𝙎𝙏 𝙉𝙊𝙏𝙀: in the underground area, on the counter inside the Cafeteria
[RUBEN - "Captain Tulley ordered us to push the engines...]
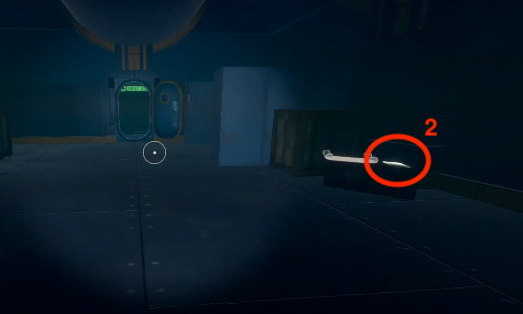
- 𝙎𝙀𝘾𝙊𝙉𝘿 𝙉𝙊𝙏𝙀: in the underground area, in the room right after the container puzzle, on a box next to a blueprint
[RUBEN - "The engines are done. People upstairs are already upset...]
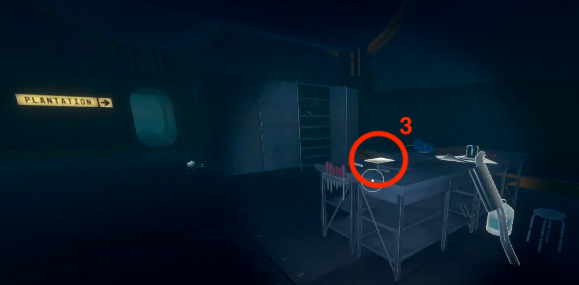
- 𝙏𝙃𝙄𝙍𝘿 𝙉𝙊𝙏𝙀: in the underground area, in the plantation room on a counter
[RUBEN - "There's screaming upstairs. After the Captain opened...]
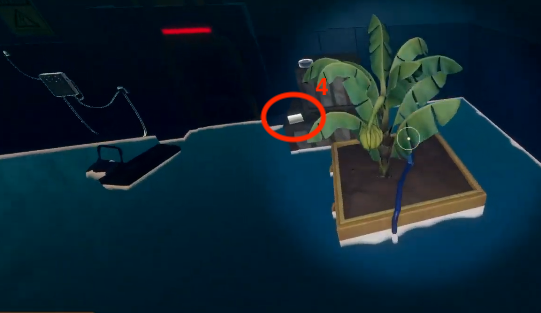
- 𝙁𝙊𝙐𝙍𝙏𝙃 𝙉𝙊𝙏𝙀: in the underground area, in the plantation room next to the first locked door
[JOHAN - "Oh no, no, no. The entire ecosystem is ruined!...]
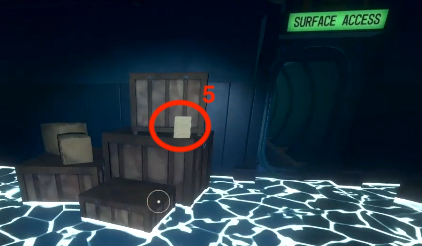
- 𝙁𝙄𝙁𝙏𝙃 𝙉𝙊𝙏𝙀: in the underground area, inside the plantation room, next to the door with "SURFACE ACCESS" written
[RUBEN - "Things have gone quiet. Security teams still go on patrols...]
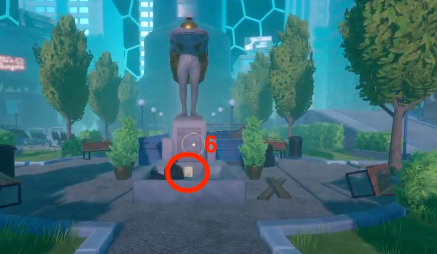
- 𝙎𝙄𝙓𝙏𝙃 𝙉𝙊𝙏𝙀: on the surface, leaning on the big man's statue, in front of the underground exit
[RUBEN - "The kid's name is Detto. How someone his age was able to...]
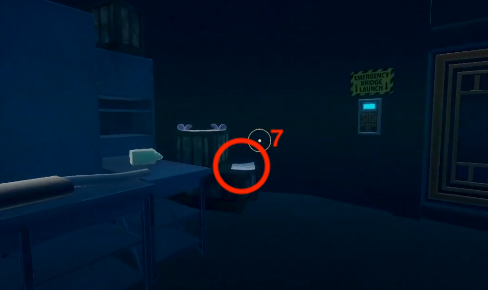
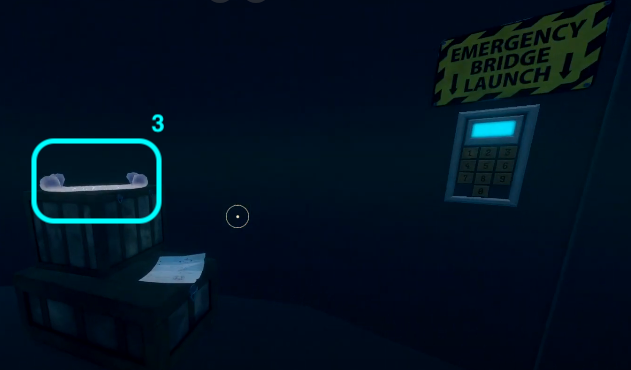
- 𝙎𝙀𝙑𝙀𝙉𝙏𝙃 𝙉𝙊𝙏𝙀: 2nd floor of the MAIN TOWER, next to the keypad panel
[the code for emergency bridge launch on the panel] (hidden achievement)
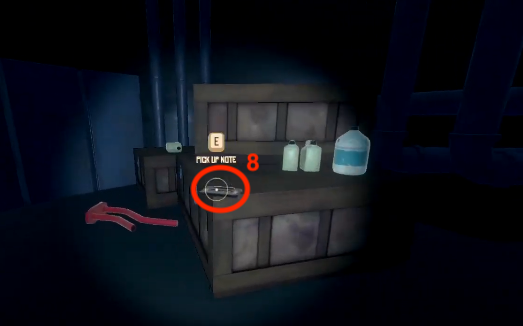
- 𝙀𝙄𝙂𝙏𝙃𝙏𝙃 𝙉𝙊𝙏𝙀: Floor 0 of the MAIN TOWER
[(TRANSCRIBED) SECURITY - "No sir, they haven't done anything hostile...]
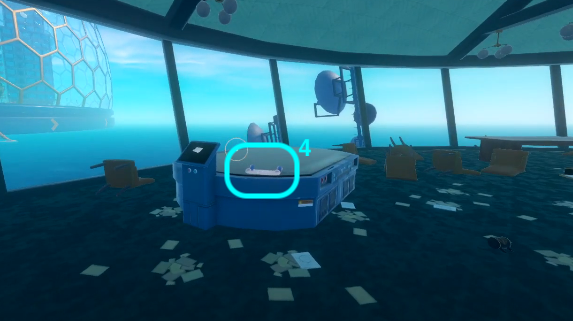
- 𝙉𝙄𝙉𝙀𝙏𝙃 𝙉𝙊𝙏𝙀: on the detached tower top, on a control panel
[TULLEY - "My name is James Tulley. This is my final message...]
- 𝙏𝙀𝙉𝙏𝙃 𝙉𝙊𝙏𝙀: on the detached tower top, on a console beside a blueprint
[Post-it: Varuna? → #....]
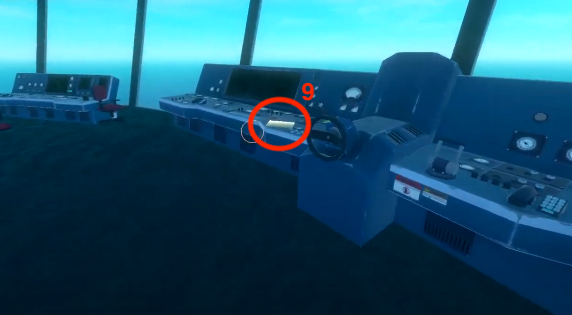
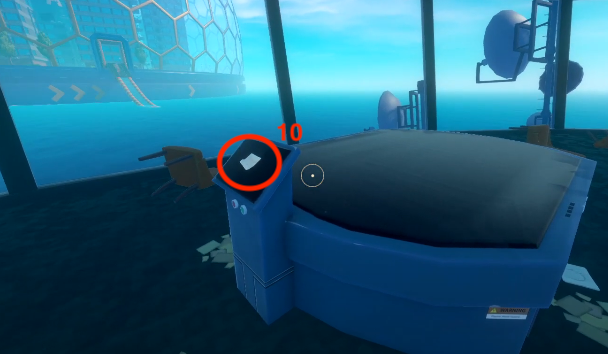 𝘽𝙇𝙐𝙀𝙋𝙍𝙄𝙉𝙏𝙎
- 𝙁𝙄𝙍𝙎𝙏 𝘽𝙇𝙐𝙀𝙋𝙍𝙄𝙉𝙏: room after the container puzzle beside a note
- 𝙎𝙀𝘾𝙊𝙉𝘿 𝘽𝙇𝙐𝙀𝙋𝙍𝙄𝙉𝙏: room after fixing all the broken wires in plantation room
- 𝙏𝙃𝙄𝙍𝘿 𝘽𝙇𝙐𝙀𝙋𝙍𝙄𝙉𝙏: 2nd floor of main tower next to the keypad panel
- 𝙁𝙊𝙐𝙍𝙏𝙃 𝘽𝙇𝙐𝙀𝙋𝙍𝙄𝙉𝙏: on top of console inside the detached tower top
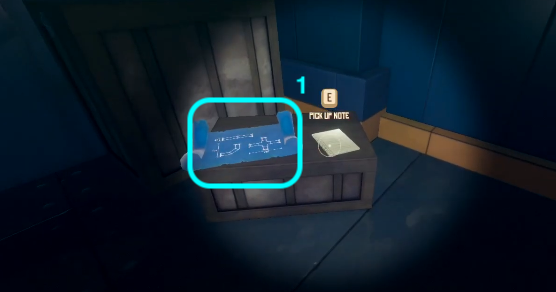
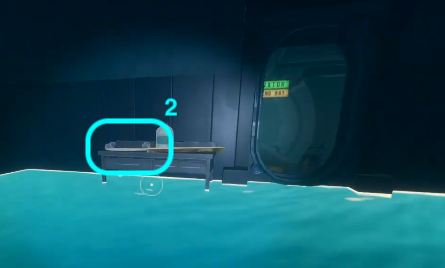
~~~~~~~~ 𝐓𝐇𝐈𝐑𝐃 𝐂𝐇𝐀𝐏𝐓𝐄𝐑 ~~~~~~~~~
𝙑𝘼𝙍𝙐𝙉𝘼 𝙋𝙊𝙄𝙉𝙏
VARUNA POINT is the FIRST Story Location in the Third and Final Chapter. It can only be reached using a Receiver.
Varuna Point are two submerged tall buildings under construction that aren't finished due to flooding and The GRABBER stealing stuff. Over time, the ruins of the building became inhabited by various jellyfish species and Anglerfish, while on the surface, Lurkers appeared. Deep inside the foundations one of the buildings is the RHINO SHARK, which is the SECOND BOSS ENEMY. It's the first boss that you cannot skip.
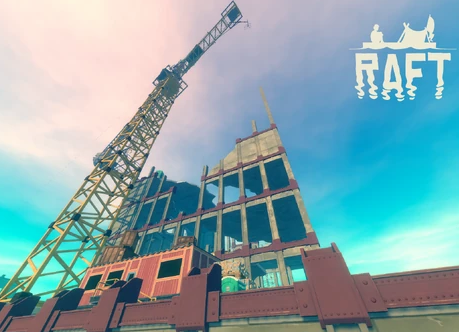
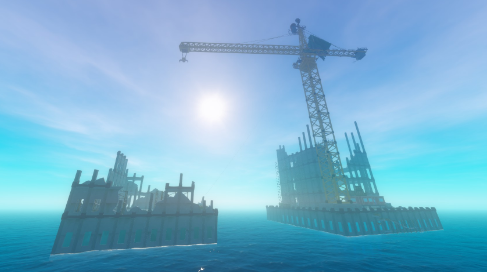
Varuna Point is full of parkour. An Oxygen Bottle and Flippers are highly recommended as the majority of the exploration will be done underwater.
In the water there are various oxygen vents that emit bubbles where you can replenish oxygen WITHOUT resurfacing.
There are 7 notes, including 3 unique items and 4 blueprints, one for the Advanced Battery, one for the Electric Grill, one for the Wind Turbine and one for the Advanced Head Light.
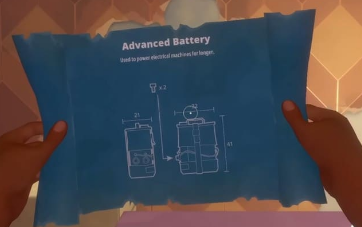
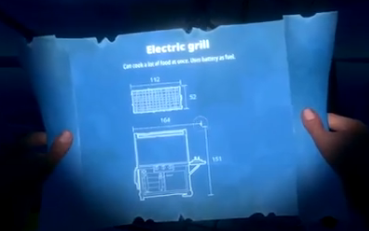
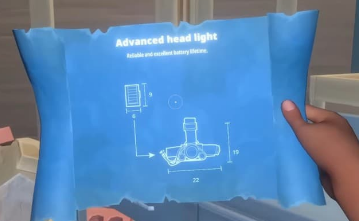
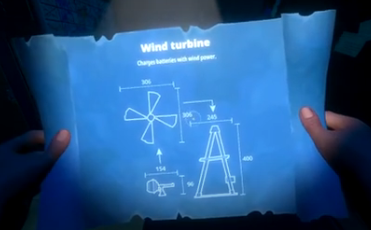
The 'Zip Zap!', 'Anglerfish Hunter!' and the 'Cache Collector!' achievements can be done here.
A HIDDEN ACHIEVEMENT is also found here!!
Varuna Point Historian!Find All Notes In Varuna Point
- 𝙁𝙄𝙍𝙎𝙏 𝙉𝙊𝙏𝙀: building with the crane inside, in the room where the jellyfish is guarding the hole
[GRABBER - "Varuna Point has all too many holes...]
- 𝙎𝙀𝘾𝙊𝙉𝘿 𝙉𝙊𝙏𝙀: building with the crane inside, up the elevator shaft and in a room at the end of the corridor, on a table to the right
[GRABBER - "I heard them talking about me this morning...]
- 𝙏𝙃𝙄𝙍𝘿 𝙉𝙊𝙏𝙀: building with the crane inside, through the tunnel, next to the G cache with the piles of junk
[GRABBER - "We don't work on new floor anymore...]
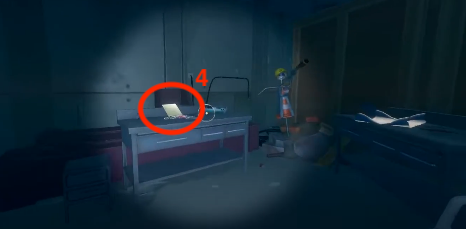
- 𝙁𝙊𝙐𝙍𝙏𝙃 𝙉𝙊𝙏𝙀: building with the crane inside, at the end past all the traps, on a workstation beside a key, blueprint and a makeshift doll
[GRABBER - "I would be bored these days...]
- 𝙁𝙄𝙁𝙏𝙃 𝙉𝙊𝙏𝙀: on the surface on the building with a crane, in front of the excavator
[GRABBER - "A man talking to dolls arrived yesterday...]
- 𝙎𝙄𝙓𝙏𝙃 𝙉𝙊𝙏𝙀: on the arm at the top of the crane machine
[GRABBER - "when people come by they don't stay for long...]
- 𝙎𝙀𝙑𝙀𝙉𝙏𝙃 𝙉𝙊𝙏𝙀: after dropping the bricks onto a small building, creating a hole, it's on a table next to a blueprint
[Post-it: Temperance #....]
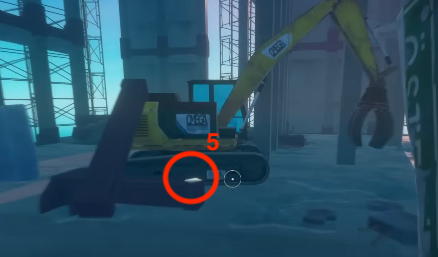
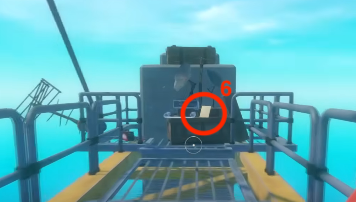
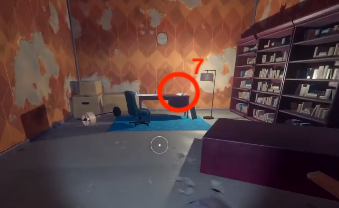 𝘽𝙇𝙐𝙀𝙋𝙍𝙄𝙉𝙏𝙎
- 𝙁𝙄𝙍𝙎𝙏 𝘽𝙇𝙐𝙀𝙋𝙍𝙄𝙉𝙏: past all of the traps after the tunnel, on a workbench next to a note and a makeshift doll
- 𝙎𝙀𝘾𝙊𝙉𝘿 𝘽𝙇𝙐𝙀𝙋𝙍𝙄𝙉𝙏: in a room after defeating the boss, on a desk next to the crane key
- 𝙏𝙃𝙄𝙍𝘿 𝘽𝙇𝙐𝙀𝙋𝙍𝙄𝙉𝙏: at the top of the crane machine next to a note
- 𝙁𝙊𝙐𝙍𝙏𝙃 𝘽𝙇𝙐𝙀𝙋𝙍𝙄𝙉𝙏: in the small building that you dropped bricks on, on a table next to a note
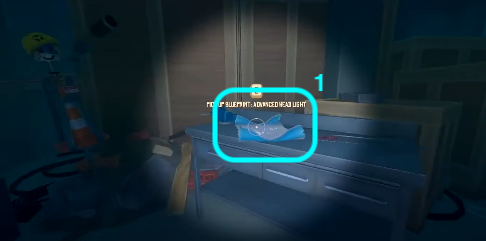
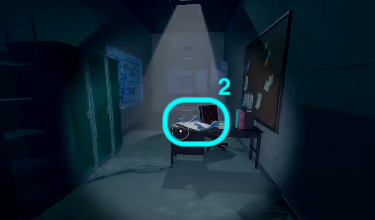
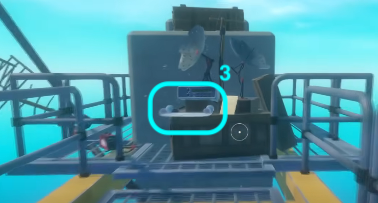
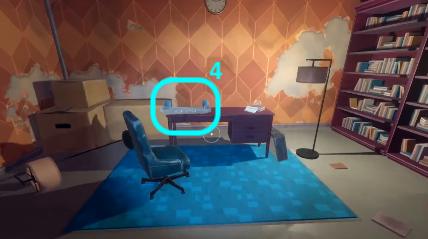
𝙑𝘼𝙍𝙐𝙉𝘼 𝙋𝙊𝙄𝙉𝙏 𝙋𝙏.2
 Cache Collector!
Locate All Grabber Caches On Varuna Point
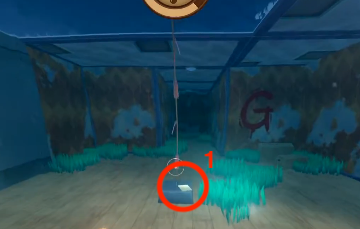
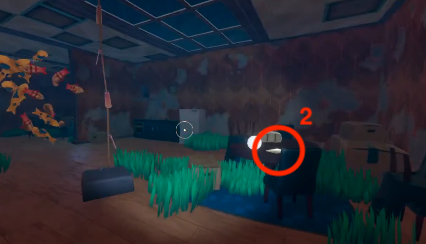
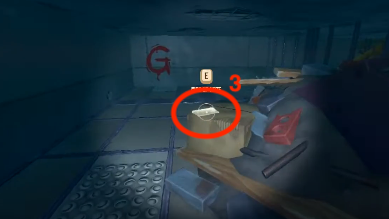
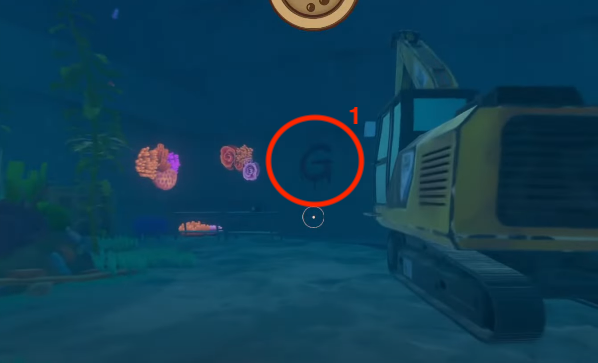
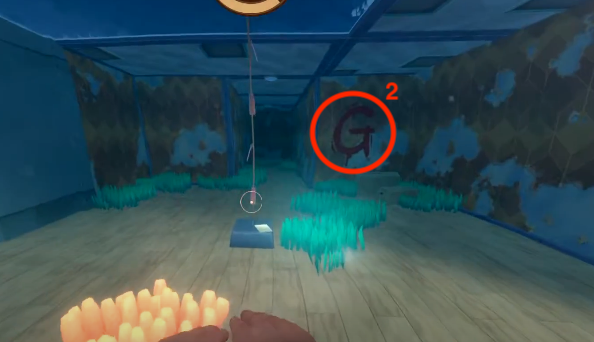
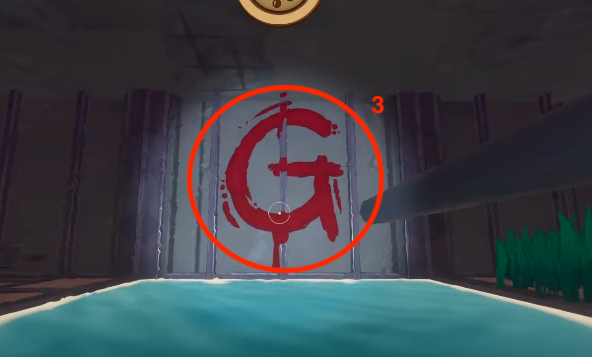
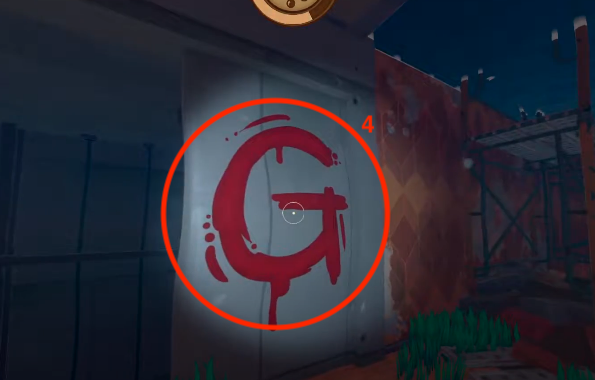
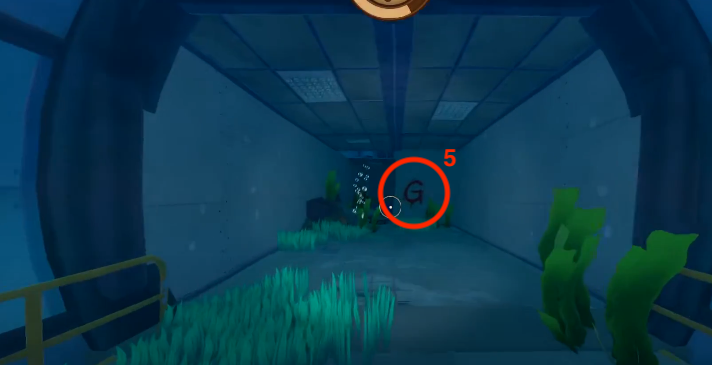
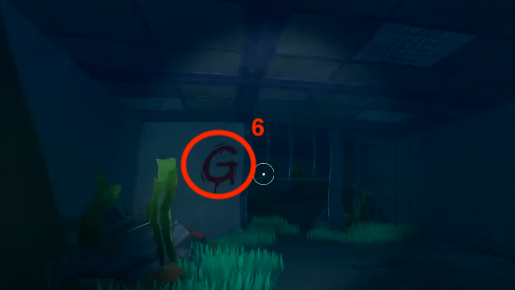
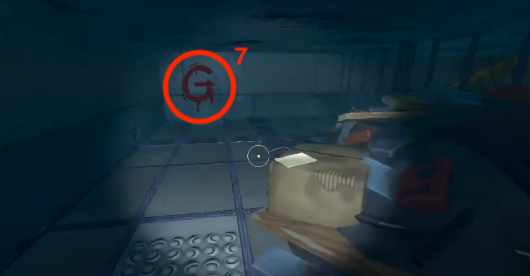
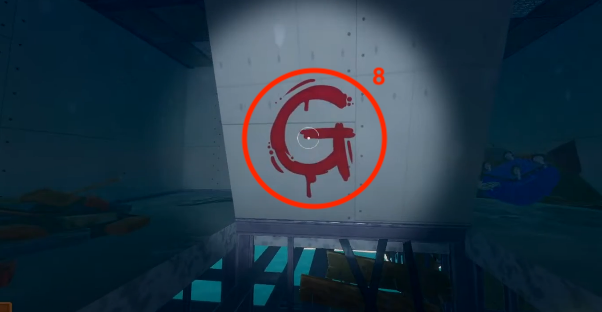
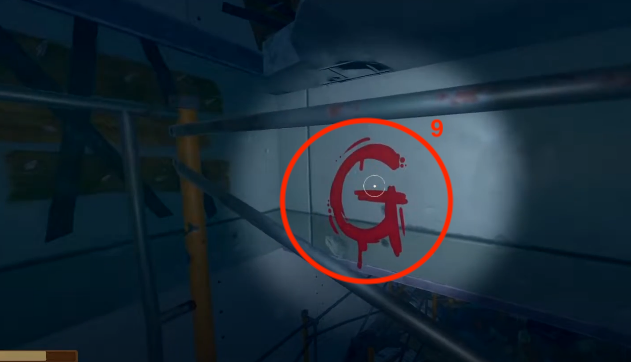
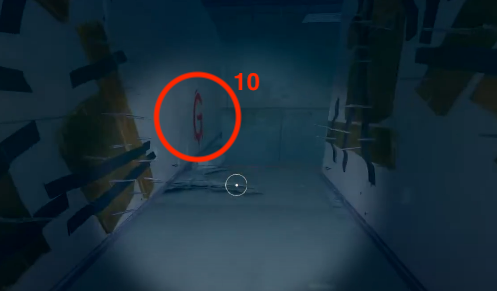
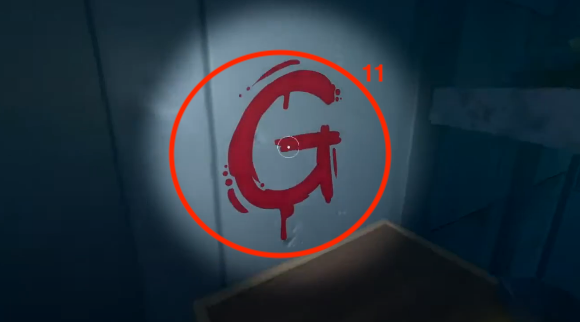
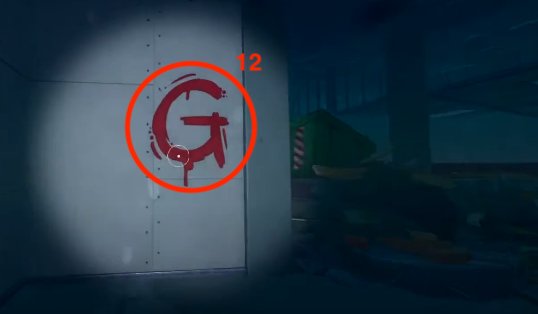
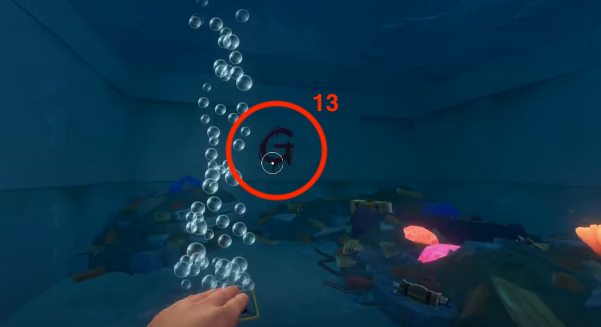
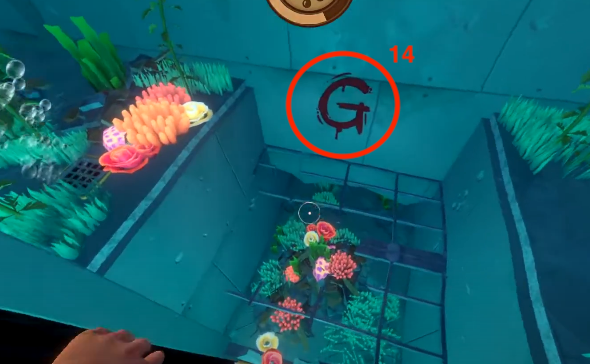
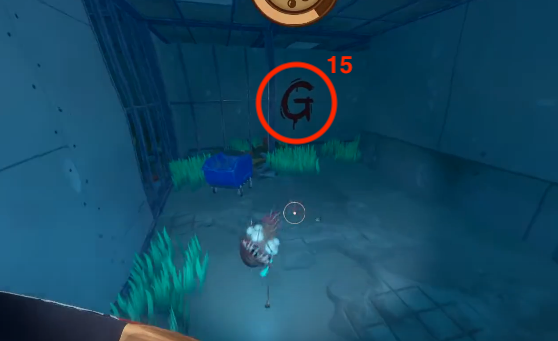
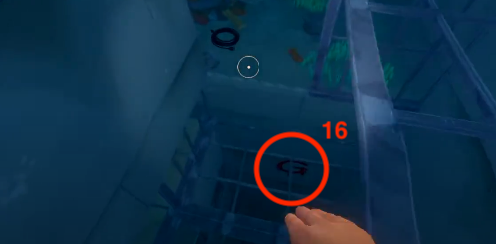
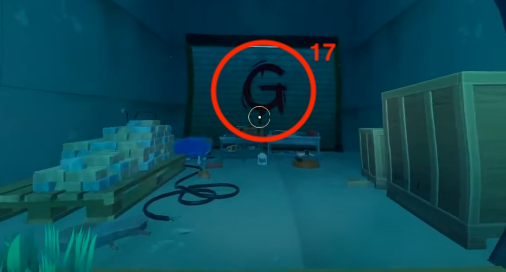
You are required to find 17 RED 'G's painted on the wall. They're all in the submerged parts of the buildings. Make sure to look at the G's properly to make sure they're counted!!
- 𝙁𝙄𝙍𝙎𝙏 𝘾𝘼𝘾𝙃𝙀: big hole just above the tunnel with the jellyfish in front and a big crane inside
- 𝙎𝙀𝘾𝙊𝙉𝘿 𝘾𝘼𝘾𝙃𝙀: in the hole with the jellyfish guarding it (wait for light to turn on to enter)
- 𝙏𝙃𝙄𝙍𝘿 𝘾𝘼𝘾𝙃𝙀: in the same area as the second cache and take the door to the left. There's a buoy that floats up to the ceiling and the cache is just above
- 𝙁𝙊𝙐𝙍𝙏𝙃 𝘾𝘼𝘾𝙃𝙀: same area as the second cache and go up the elevator shaft. "G" will be on the left wall as you enter
- 𝙁𝙄𝙁𝙏𝙃 𝘾𝘼𝘾𝙃𝙀: at the end of the tunnel guarded by the jellyfish
- 𝙎𝙄𝙓𝙏𝙃 𝘾𝘼𝘾𝙃𝙀: further inside the building after the tunnel
- 𝙎𝙀𝙑𝙀𝙉𝙏𝙃 𝘾𝘼𝘾𝙃𝙀: more further in the building after the tunnel, above the water next to piles of junk and a note
- 𝙀𝙄𝙂𝙃𝙏𝙃 𝘾𝘼𝘾𝙃𝙀: further in the building after the tunnel, after getting out out of the water, go past the traps and climb up. There is a cache on a slanted wall adjacent to the metal pillar
- 𝙉𝙄𝙉𝙀𝙏𝙃 𝘾𝘼𝘾𝙃𝙀: further in the building after the tunnel, go past all the traps and piles of junk until you reach a ramp with scaffolding. You'll see it on the wall halfway on the ramp as you turn to climb
- 𝙏𝙀𝙉𝙏𝙃 𝘾𝘼𝘾𝙃𝙀: further in the building after the tunnel, on the left side of the wall, further inside the building after continuing through the corridors of traps until you see a big hole.
- 𝙀𝙇𝙀𝙑𝙀𝙉𝙏𝙃 𝘾𝘼𝘾𝙃𝙀: further in the building after the tunnel, on top of all the boxes stacked on one another in the room with the blueprint and the note
- 𝙏𝙒𝙀𝙇𝙁𝙏𝙃 𝘾𝘼𝘾𝙃𝙀: further in the building after the tunnel, in the room above the two big green trash crates
- 𝙏𝙃𝙄𝙍𝙏𝙀𝙀𝙉𝙏𝙃 𝘾𝘼𝘾𝙃𝙀: in a building without the crane inside, you'll see a crack on the bottom right of the top tunnel, there's a path of coral
- 𝙁𝙊𝙐𝙍𝙏𝙃𝙀𝙀𝙉𝙏𝙃 𝘾𝘼𝘾𝙃𝙀: in the building without the crane inside, you'll see blue jellyfish coming from a big hole, the cache is right above these jellyfish and coral
- 𝙁𝙄𝙁𝙏𝙀𝙀𝙉𝙏𝙃 𝘾𝘼𝘾𝙃𝙀: inside the building without the crane inside, follow the path and there will be an anglerfish guarding the cache
- 𝙎𝙄𝙓𝙏𝙀𝙀𝙉𝙏𝙃 𝘾𝘼𝘾𝙃𝙀: inside the building without the crane inside, follow the path going down
- 𝙎𝙀𝙑𝙀𝙉𝙏𝙀𝙀𝙉𝙏𝙃 𝘾𝘼𝘾𝙃𝙀: on the door at the end of the tunnel, just before the boss battle
𝙏𝙀𝙈𝙋𝙀𝙍𝘼𝙉𝘾𝙀
TEMPERANCE is the SECOND Story Location of the Third Chapter. It can only be reached using a Receiver.
It's a massive island located in the polar biome with large icebergs and ice caps surrounding the area. This is home of the Polar Bears. Since this is in the polar climate, there are NO natural resources, meaning no friendly animals, bees and no treasure hunting.
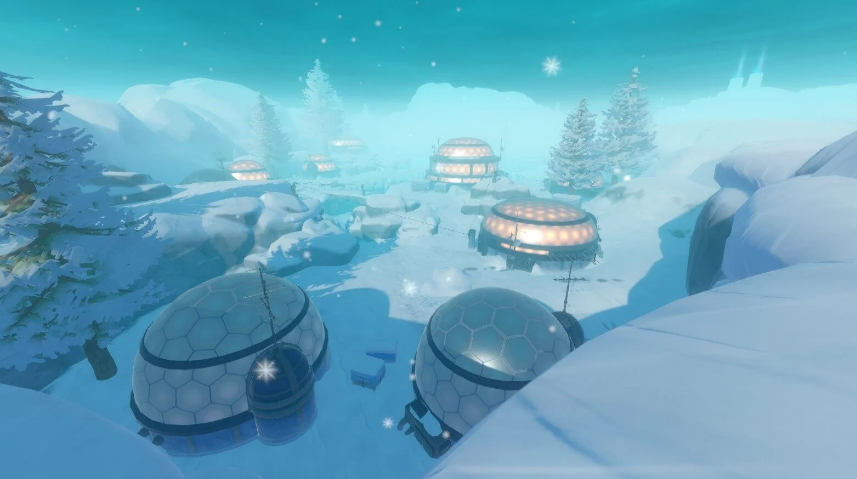
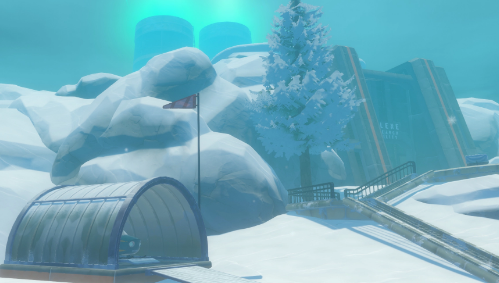
There are multiple snowmobiles parked around the island, which makes it easier to travel around.
It has several notable locations, such as Snowmobile Garages, the Radio Towers, the Glass Igloo Village (Moontown), the Weather Station Observatory, two underground bunkers and the Selene Research Facility.
There are 12 notes, including 7 unique items and 3 blueprints; one for the Advanced Biofuel Refiner, one for the Electric Smelter and one for the Advanced Stationary Anchor.
There is the SIXTH and FINAL UNLOCKABLE character, Shogo, upon completion.
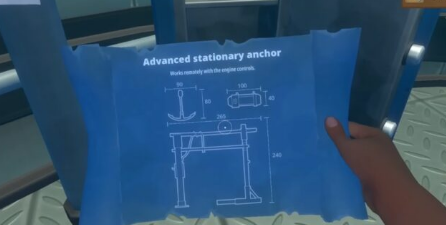
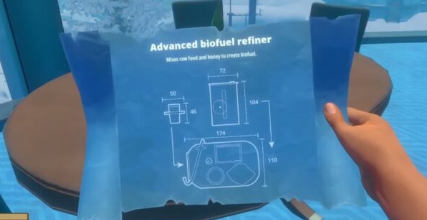
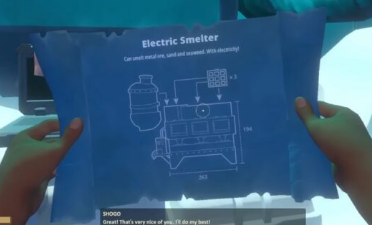
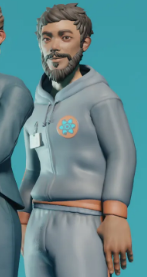
(Small note: snowmobiles can only be driven on this island, meaning you cannot take it on your raft. It will despawn when you reach a certain distance away from the island.)
There is also a very simple achievement that can be done only on this island:
 That's Not A Boat!
Drive A Snowmobile Into The Sea
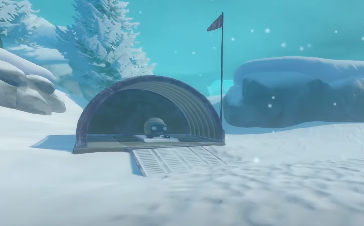
Take a snowmobile from one of the garages and drive it off into the ocean
Temperance Historian!Find All Notes In Temperance
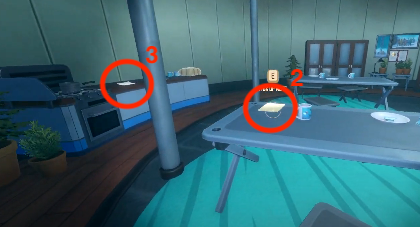
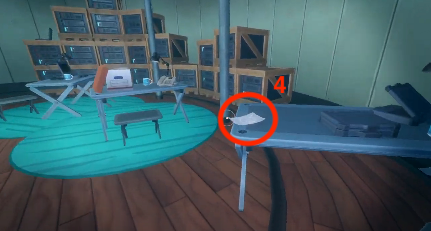
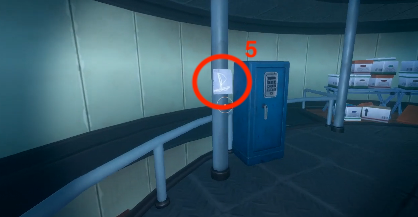
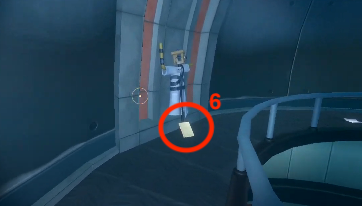
- 𝙁𝙄𝙍𝙎𝙏 𝙉𝙊𝙏𝙀: on the fence in front of the Observatory
[BRUNO - "I've already lost MIRANDA...]
- 𝙎𝙀𝘾𝙊𝙉𝘿 & 𝙏𝙃𝙄𝙍𝘿 𝙉𝙊𝙏𝙀: on a table and a kitchen counter in the Observatory
[BRUNO - "There's bears all over this frozen island!...]
[Blue Drawing: HOOK 3/4]
- 𝙁𝙊𝙐𝙍𝙏𝙃 𝙉𝙊𝙏𝙀: on a desk on the first floor of the Observatory
[Blue Drawing: PUFFERFISH 2/4]
- 𝙁𝙄𝙁𝙏𝙃 𝙉𝙊𝙏𝙀: on a pole on the second floor of the Observatory
[Blue Drawing: BOAT 4/4]
- 𝙎𝙄𝙓𝙏𝙃 & 𝙎𝙀𝙑𝙀𝙉𝙏𝙃 𝙉𝙊𝙏𝙀: on the "4th floor" of the Observatory by climbing the ladder on the third floor
[BRUNO - "The boat is ready to go. Detto is ready...]
[Blue Drawing: CLUCKER 1/4]
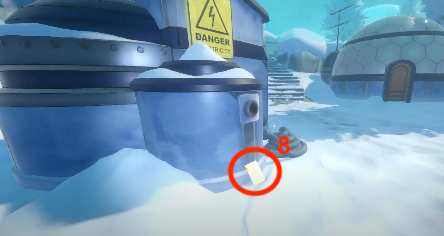
- 𝙀𝙄𝙂𝙃𝙏𝙃 𝙉𝙊𝙏𝙀: leaning on a huge electrical box near the entrance of Moontown
[BRUNO - "Detto showed me and HENRY some abandoned igloos...]
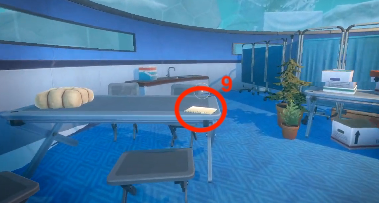
- 𝙉𝙄𝙉𝙀𝙏𝙃 𝙉𝙊𝙏𝙀: on a table inside the Infirmary igloo
[BRUNO - That kid Detto is really smart. Using material we salvaged...]
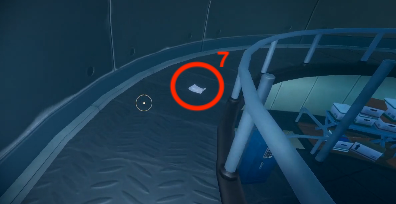
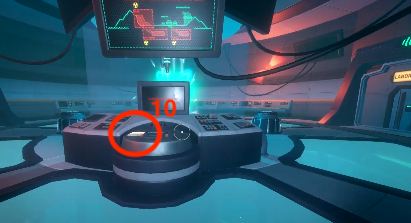
- 𝙏𝙀𝙉𝙏𝙃 𝙉𝙊𝙏𝙀: on the middle console inside the control room of the Selene Research Facility
- 𝙀𝙇𝙀𝙑𝙀𝙉𝙏𝙃 𝙉𝙊𝙏𝙀: on a box beside the Control Rod after the laser puzzle
[SPARROW - "The Selene facility was build for one purpose: master and perfect...]
- 𝙏𝙒𝙀𝙇𝙑𝙀𝙏𝙃 𝙉𝙊𝙏𝙀: at the cryo-chamber on top of a laptop
[Colourful Post-it: UTOPIA #....]
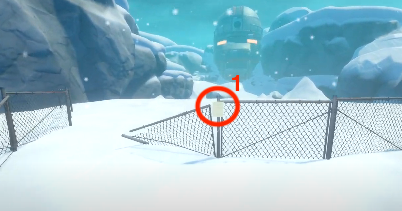
 𝘽𝙇𝙐𝙀𝙋𝙍𝙄𝙉𝙏𝙎
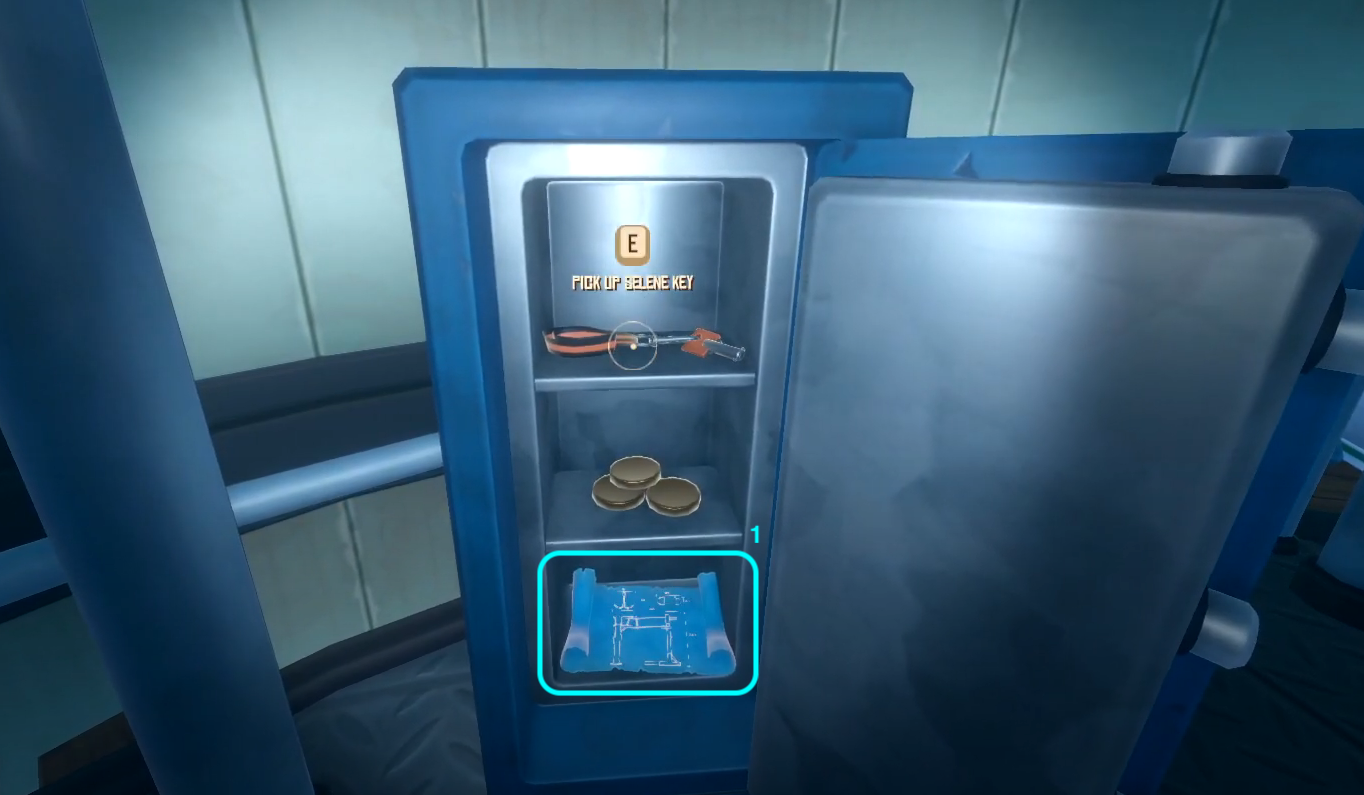
- 𝙁𝙄𝙍𝙎𝙏 𝘽𝙇𝙐𝙀𝙋𝙍𝙄𝙉𝙏: inside a locked locker on the second floor of the Observatory. Unlocked by matching the 4 blue drawings with constellations on the telescope and counting the number of stars on these 4 constellations found on the telescope.
- 𝙎𝙀𝘾𝙊𝙉𝘿 𝘽𝙇𝙐𝙀𝙋𝙍𝙄𝙉𝙏: on a table next to the blowtorch inside an igloo at the centre of the village
- 𝙏𝙃𝙄𝙍𝘿 𝘽𝙇𝙐𝙀𝙋𝙍𝙄𝙉𝙏: in the cryo-chamber next to the last note
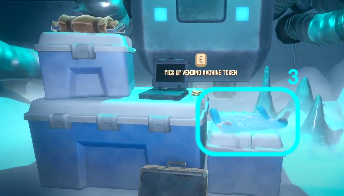
𝙐𝙏𝙊𝙋𝙄𝘼
UTOPIA is the THIRD and FINAL Story Location of the Third Chapter. It can only be reached using a Receiver.
Utopia is a floating town in the middle of submerged skyscrapers. It has its own power, water purifier and farms. There are several notable locations in this island; Harbour, Detto's House, Farm, Warehouse, the Marketplace and the Postgame Market.
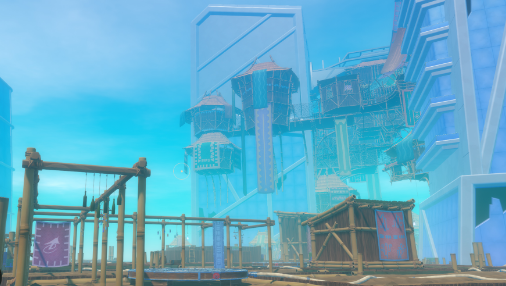
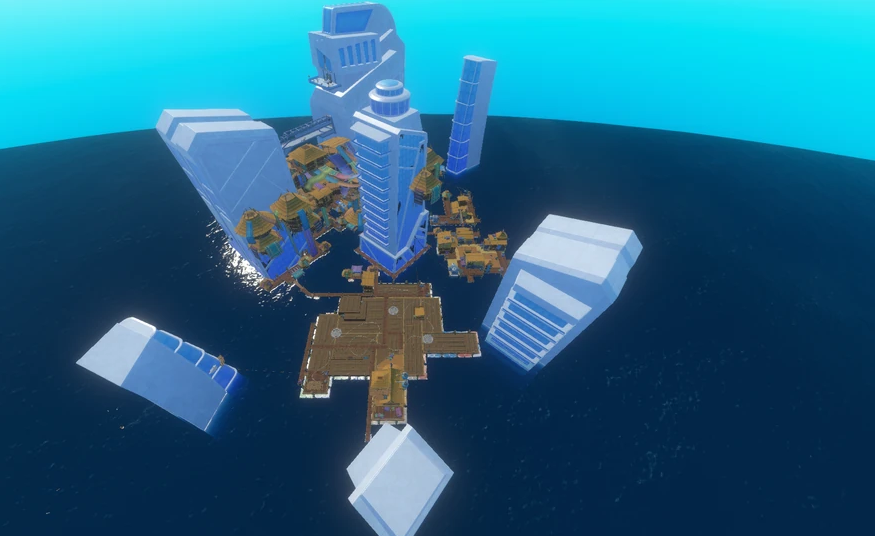
There are 2 main characters in Utopia; Detto and Olaf Wilkstrom. Detto is a young child who has been helpful throughout the story and gives useful clues scattered all over the city. Olaf is a tyrannical dictator who attacks with fire bombs when confronted and owns hyenas who are lead by the Alpha (mutant hyena boss). The rest of the population are locked up in a big house by Olaf and can be freed by defeating Olaf.
There are 3 notes, including 9 unique items and 3 blueprints; one for the Big Backpack, one for the Electric Zipline Tool and one for the Titanium Tools.
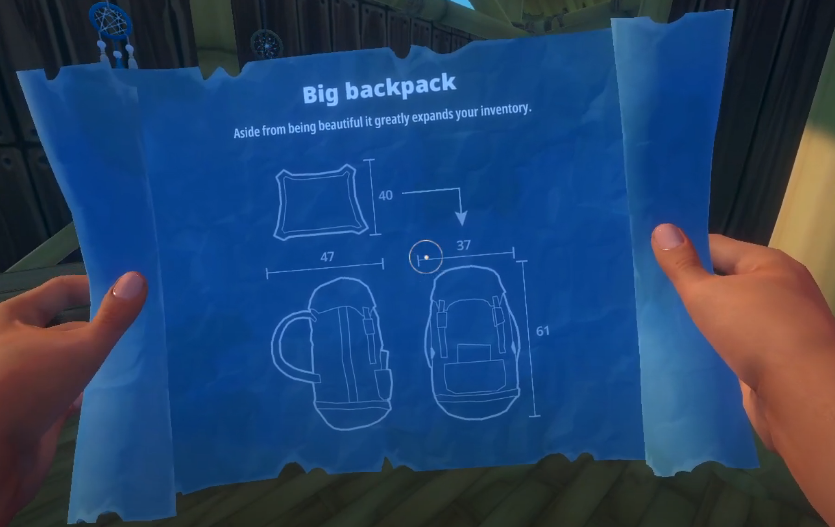
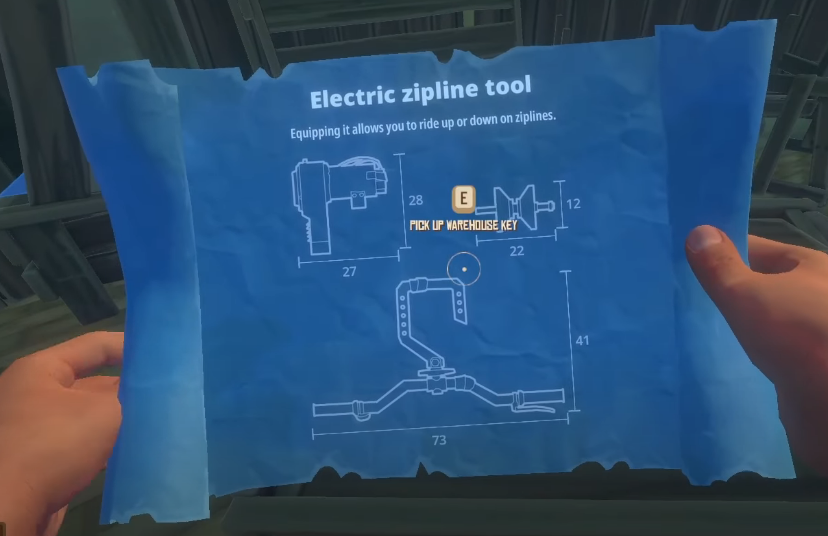
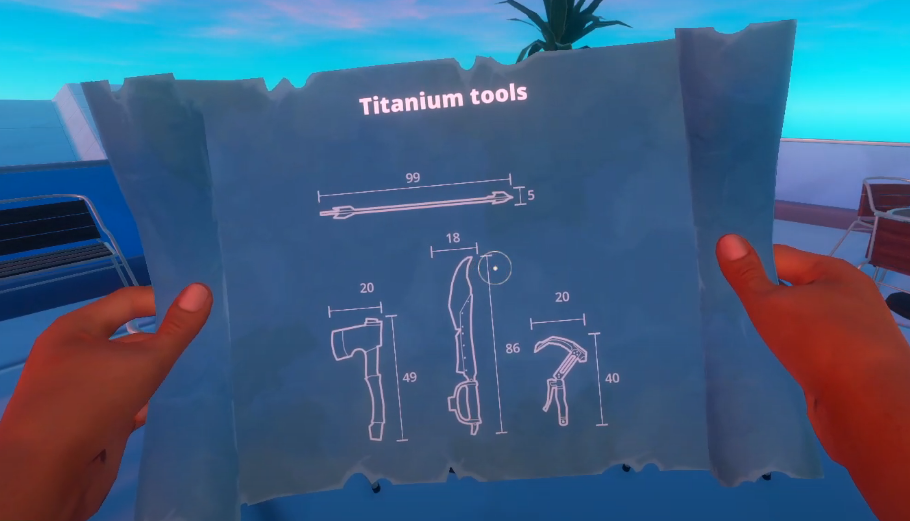
There are tokens scattered all around the island so be sure to keep an eye out. Upon completion, there is a market with many free items and several vending machines you can use to cashout your vending machine tokens.
There is only ONE Story Achievement that can be unlocked in Utopia and it is a HIDDEN Achievement.
To complete this last location, you are required to solve 6 puzzles; ONE for the Electrical cables, ONE for the water pipes, ONE for Detto's map clues, ONE for Jumping through moving fans and nets and TWO for the weights.
Throughout your journey you will encounter Olaf Wilkstrom, initially he poses no danger, and allows you to traverse upward through Utopia. However, he eventually begins to attack you with a variety of methods starting with the first weight puzzle on the 26th floor.
This is THE MOST difficult location of all as it has 3 BOSS FIGHTS.
𝙁𝙄𝙍𝙎𝙏 𝙀𝙉𝘾𝙊𝙐𝙉𝙏𝙀𝙍: Olaf throws fire bombs towards you as you try to reach Olaf by collecting boxes and making a staircase up to him. He'll stop once you reach Olaf.
𝙎𝙀𝘾𝙊𝙉𝘿 𝙀𝙉𝘾𝙊𝙐𝙉𝙏𝙀𝙍: Olaf forces you into his pit with HYENAS. Just like the first fight, you need to make a staircase of boxes to climb out of the pit while Olaf throws fire bombs at you. However, you need to fight hyenas at the same time.
𝙏𝙃𝙄𝙍𝘿 𝙀𝙉𝘾𝙊𝙐𝙉𝙏𝙀𝙍: the Arena where the Alpha Hyena awaits with Olaf. The Alpha Hyena is a special and much bigger hyena. It's been imbued with poison which leaves a trail of poison puddles as you try to attack him and throws poisonous rocks.
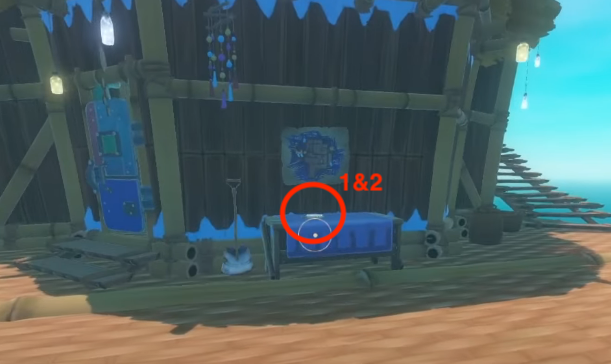
- 𝙁𝙄𝙍𝙎𝙏 & 𝙎𝙀𝘾𝙊𝙉𝘿 𝙉𝙊𝙏𝙀: on a table in front of Detto's House
[DETTO'S UTOPIA JOURNAL - SUPER SECRET: DETTO - "I have my own raft!...]
[Map of the farm with Detto's clues for his code]
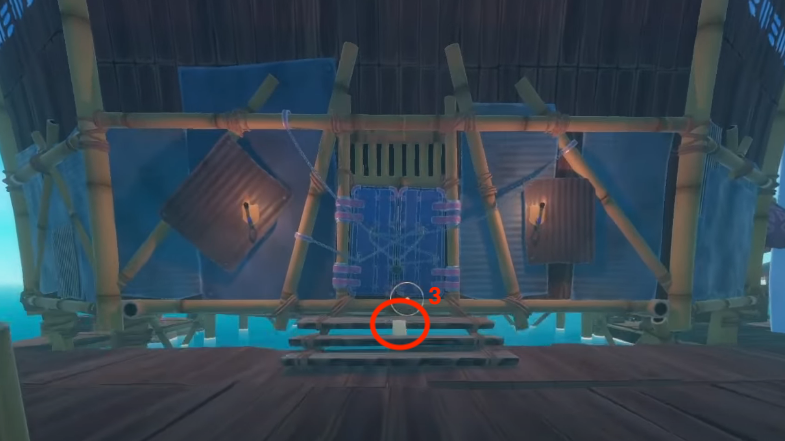
- 𝙏𝙃𝙄𝙍𝘿 𝙉𝙊𝙏𝙀: on the staircase in front of the big house with the chained doors
[HANNE - "FROM THE PEOPLE OF UTOPIA. Do NOT trust Olof Wilkstrom...]
 𝘽𝙇𝙐𝙀𝙋𝙍𝙄𝙉𝙏𝙎
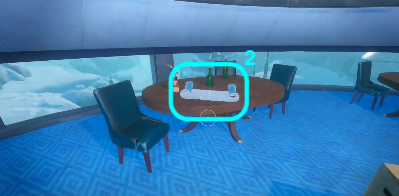
- 𝙁𝙄𝙍𝙎𝙏 𝘽𝙇𝙐𝙀𝙋𝙍𝙄𝙉𝙏: after unlocking the Detto's code, it'll be inside his house on a desk
- 𝙎𝙀𝘾𝙊𝙉𝘿 𝘽𝙇𝙐𝙀𝙋𝙍𝙄𝙉𝙏: in the room after first fight with Olaf
- 𝙏𝙃𝙄𝙍𝘿 𝘽𝙇𝙐𝙀𝙋𝙍𝙄𝙉𝙏: at the end where Olaf falls and gets stuck
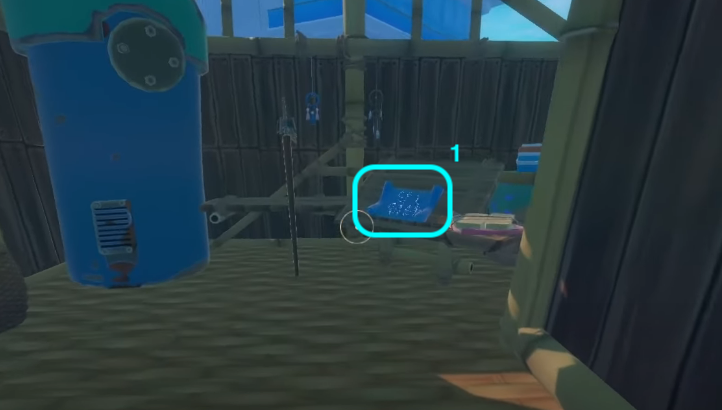
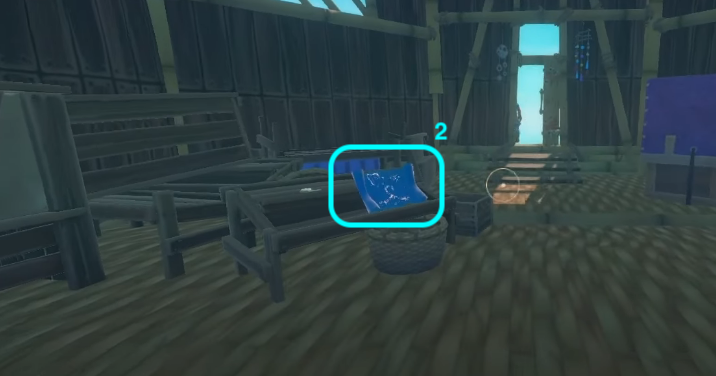
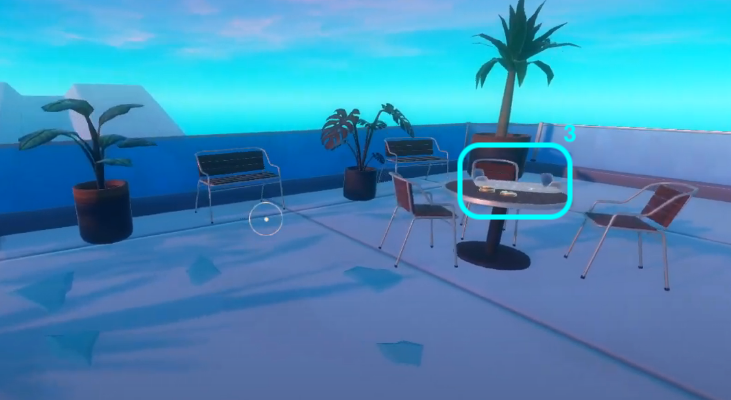
~~~~~~~~~~~~~~~~~~~~~~~~~~~~~~~
𝘼𝙘𝙝𝙞𝙚𝙫𝙚𝙢𝙚𝙣𝙩 𝙛𝙤𝙧 𝙎𝙪𝙧𝙫𝙞𝙫𝙞𝙣𝙜
Getting these "survivor" achievements is done with simple AFK.
 Beginner Survivor!
Survive for 1 day
- 20 mins
 Intermediate survivor
Survive for 7 days
- 2 hrs 20 mins
 Expert Survivor
Survive for 30 days
- 10 hrs
 Master Survivor
Survive for 365 days
- 121 hours 40 mins
One of THE EASIEST to get in the game. This has to be done in ONE WORLD on ONE RAFT.
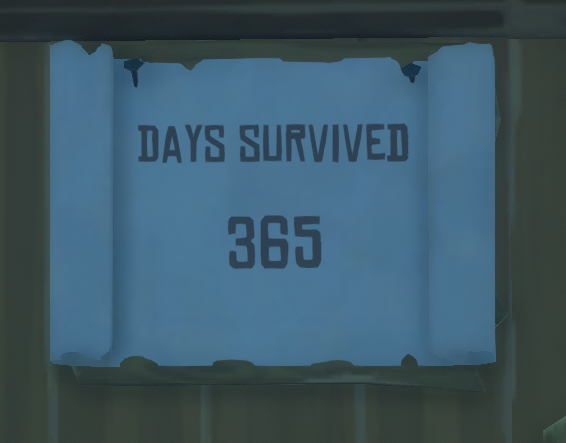
You can keep track of the days using the calendar you can unlock by collecting decoration packages from loot boxes and loot crates. Which can then be crafted using 2 nails and 2 planks.
How long does it usually take?
The day/night cycles in Raft lasts 15-20 mins IRL. Which means getting the 'MASTER SURVIVOR' achievement will take you 122 hours without sleeping in to complete. Of course this can be shortened if you go to sleep at 8pm every single day. It will then take about 91 real time hours.
𝘼𝙘𝙝𝙞𝙚𝙫𝙚𝙢𝙚𝙣𝙩 𝙛𝙤𝙧 𝙄𝙩𝙚𝙢 𝙎𝙩𝙖𝙜𝙞𝙣𝙜
Earned through basic gameplay
 Dinnertime!
Craft and place a simple grill
Can be made with 6 planks, 1 scrap and 3 rope
 It's Better Without The Salt!
Craft and place a simple purifier
Can be made with 6 planks, 4 plastic and 6 leaves
 Aye Aye Captain!
Place a sail and a stationary anchor on the same raft
The sail can be made with 3 scrap, 20 leaves and 10 planks.
Stationary anchor can be made with 10 planks, 6 rope, 3 metal ingots and 1 hinge.
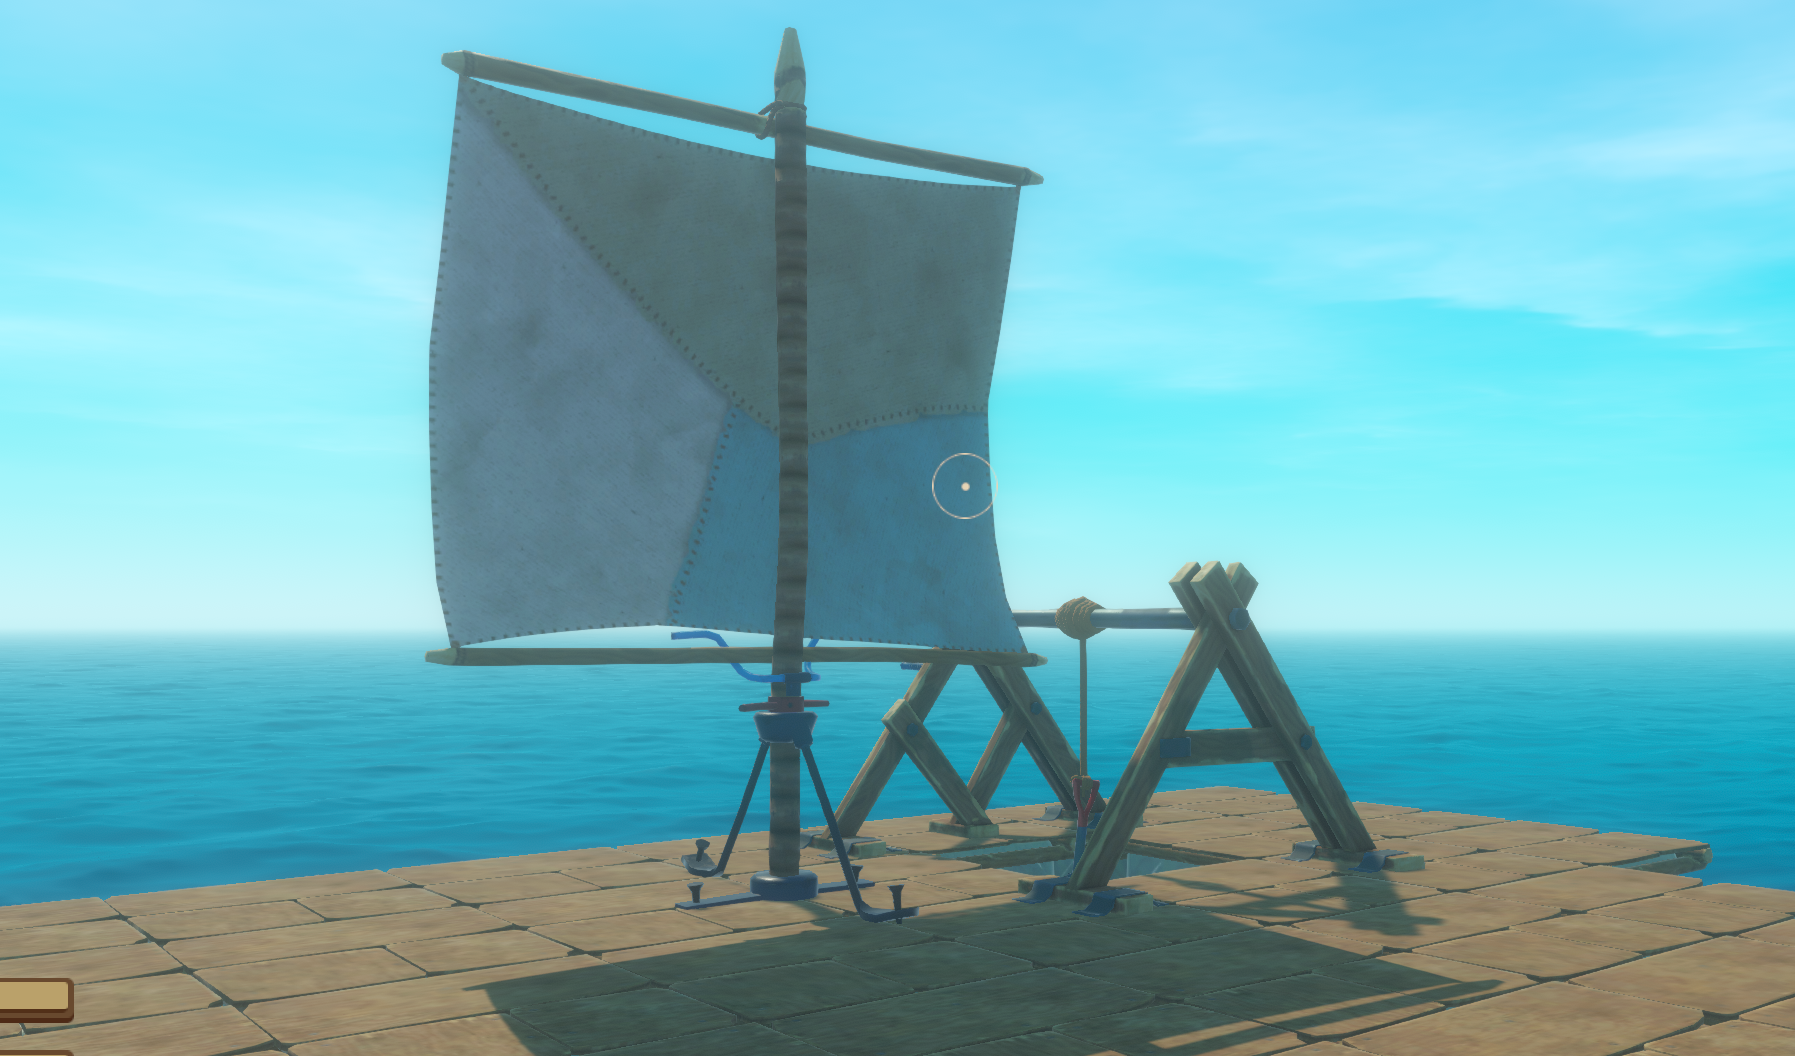 Once you place the sail, you can control your raft and steer to islands. In favour with the wind, your raft will move more quickly.
The stationary anchor will take longer to achieve as it requires metal ingots and a hinge, which you can unlock by collecting from a barrel/loot crate/loot box or craft by mining a metal ore.
Please note that the THROWABLE anchor DOES NOT INCLUDE in the achievement.
Once you have placed both the sail and the stationary anchor, you will get the achievement.
 Hoarder!
Have 20 storages on the same raft
 Farmer!
Have 20 cropplots on the same raft
 Plumber Power!
Have 30 pipes placed at once
𝘼𝙘𝙝𝙞𝙚𝙫𝙚𝙢𝙚𝙣𝙩 𝙛𝙤𝙧 𝘽𝙪𝙞𝙡𝙙𝙞𝙣𝙜
Using a mallet and building our Raft bigger
 Beginner Builder!
Build 10 foundations
 Intermediate Builder!
Build 100 foundations
 Expert Builder!
Build 1000 foundations
𝘼𝙘𝙝𝙞𝙚𝙫𝙚𝙢𝙚𝙣𝙩 𝙖𝙩 𝙏𝙧𝙖𝙙𝙞𝙣𝙜 𝙋𝙤𝙨𝙩𝙨
For these achievements you'll need to find a big island with a trading post
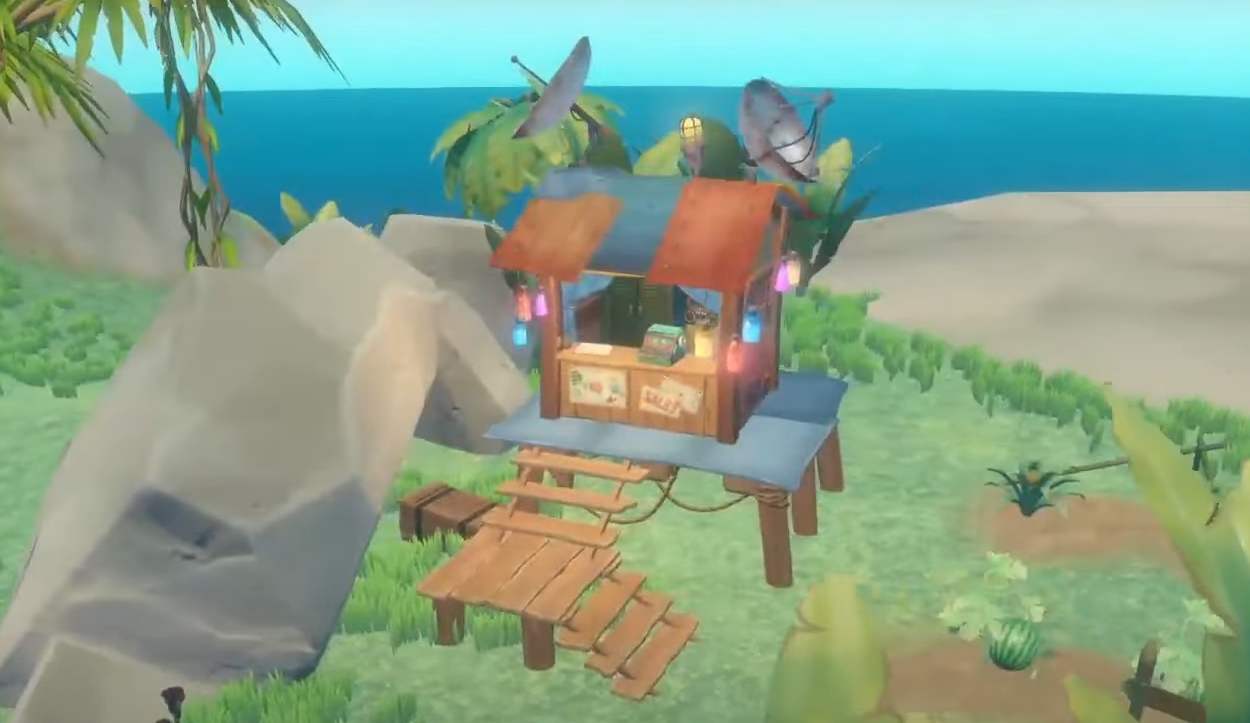
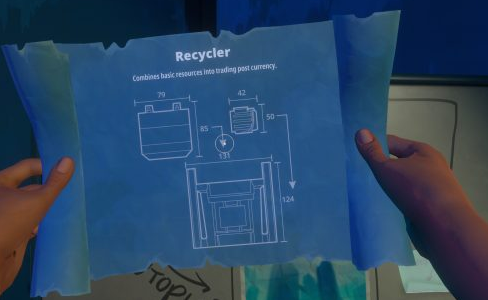
After completing the first story location, you'll receive a blueprint for a RECYCLER. Its only purpose is to take all your trash/excess materials you don't need and turns them into TRASH CUBES. To craft the recycler you'd need 6 plastic, 4 metal ingots, 2 bolts/hinges and 1 circuit board. Once you place it on your raft, it will need to be powered with one battery. Then once you place 30 items into the basin, it will crush and compress these items into a TRASH CUBE.
You use these trash cubes to trade-in to get stuff from the trading posts.
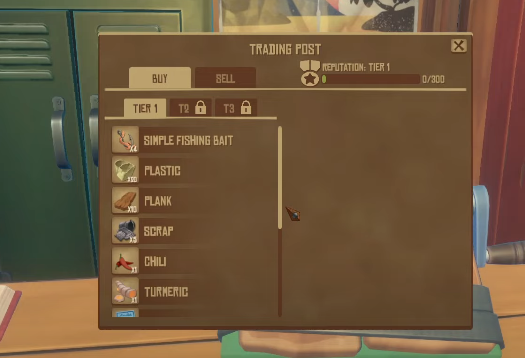
On the top of the trading manual, you'll see 2 main features. In the upper right corner there's a "REPUTATION: TIER", which starts at the bottom of Tier 1 and tracks your current reputation every time you purchase an item. Your reputation level is correlated to what trades you can unlock, so if you're visiting a trading post for the first time then you only have the minimal items available.
There is also a "SELL" tab which is how you'll be able to increase your reputation level and eventually unlock the other tiers and trades.
To start increasing your reputation level, you buy a simple fishing bait to catch Tier 1 fish that you can trade-in for TRADE COINS. With the simple bait, you can catch 3 different fish: Glowshrimp, Netnibbler and the Sharp Carp. When you trade in these fish, you'll receive 1 Trading Coin and 10 Reputation Points. You'll need to trade atleast 30 fish to unlock Tier 2.
In Tier 2, it requires 3000 reputation points to reach Tier 3. Once you've unlocked Tier 3/3000 Reputation points, you have the opportunity to purchase advanced items and 2 blueprints.
 Beginner Merchant!
Purchase An Item At A Trading Post
 Intermediate Merchant!
Reach Tier 2 In The Trading Post
 Expert Merchant!
Reach Tier 3 In The Trading Post
𝘼𝙘𝙝𝙞𝙚𝙫𝙚𝙢𝙚𝙣𝙩 𝙛𝙤𝙧 𝙂𝙖𝙩𝙝𝙚𝙧𝙞𝙣𝙜
Take your hook
 Beginner Gatherer!
Hook 100 items
 Intermediate Gatherer!
Hook 500 items
 Expert Gatherer!
Hook 5000 items
These achievements will come very quickly as you progress through the game. However, hooking 5000 items is quite grindy and will take quite a long time.
Hooking barrels, loot crates and loot boxes only count as ONE ITEM for the achievement. The use of collection nets and picking up items from the ocean DOES NOT count in the achievement.
This will indeed take a lot of patience to do.
𝘼𝙘𝙝𝙞𝙚𝙫𝙚𝙢𝙚𝙣𝙩 𝙖𝙩 𝘾𝙖𝙩𝙘𝙝𝙞𝙣𝙜 𝘽𝙚𝙚𝙨
Get a NET and dont get stung!!
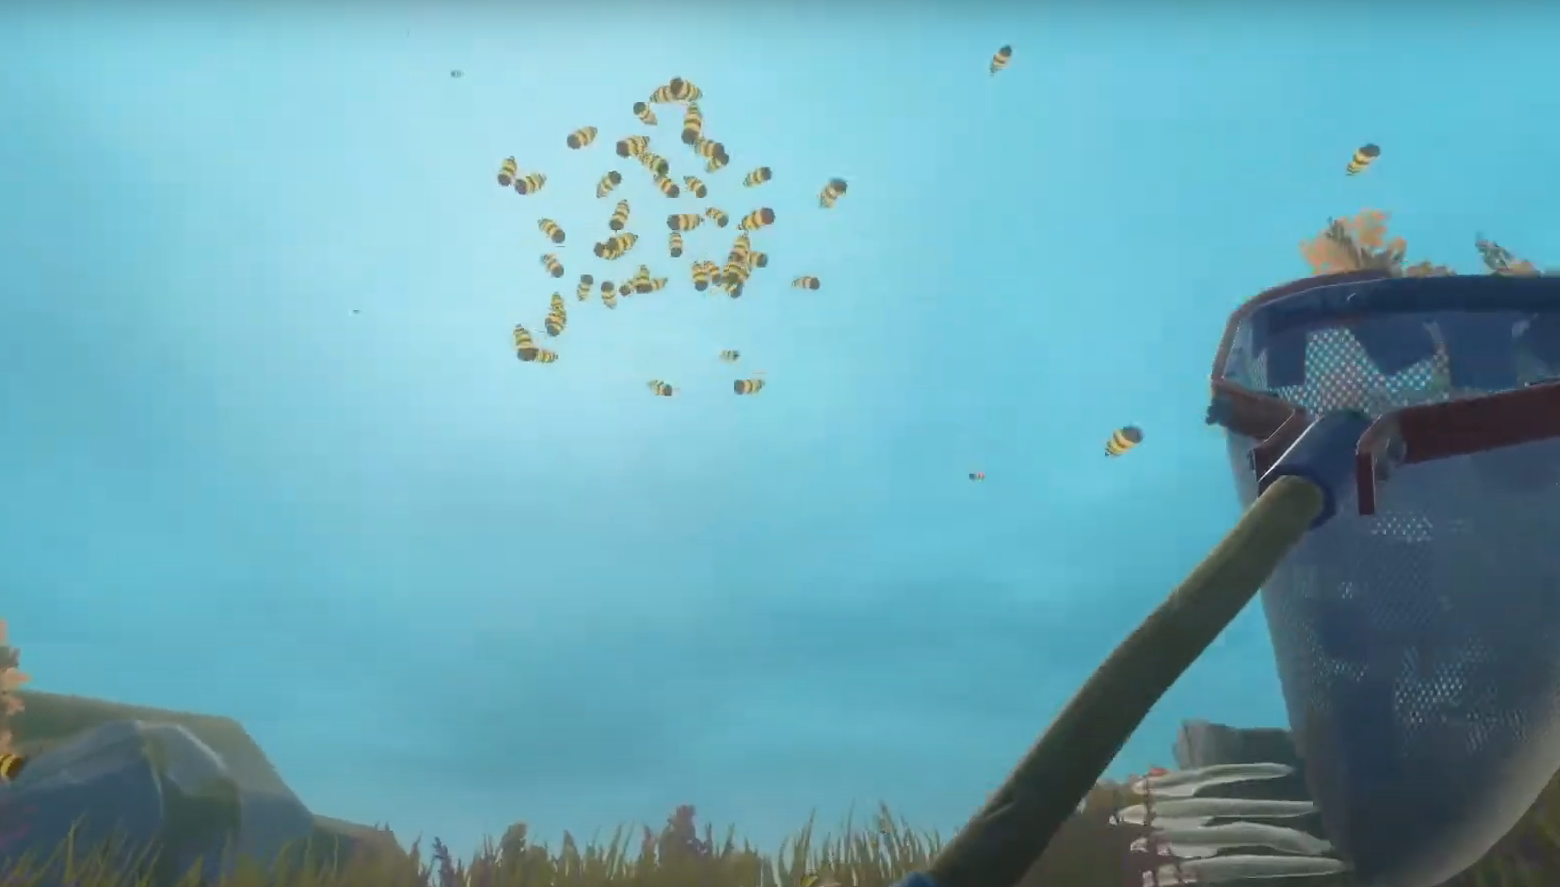
If you need biofuel to make your engines run, you're going to need BEEHIVES. And if you need beehives, you're going to need a lot of BEES.
Fortunately you can catch them using a SWEEP NET at either the 3rd or 4th story location islands. But if you need more bees, you can find them reliably on a few large islands.
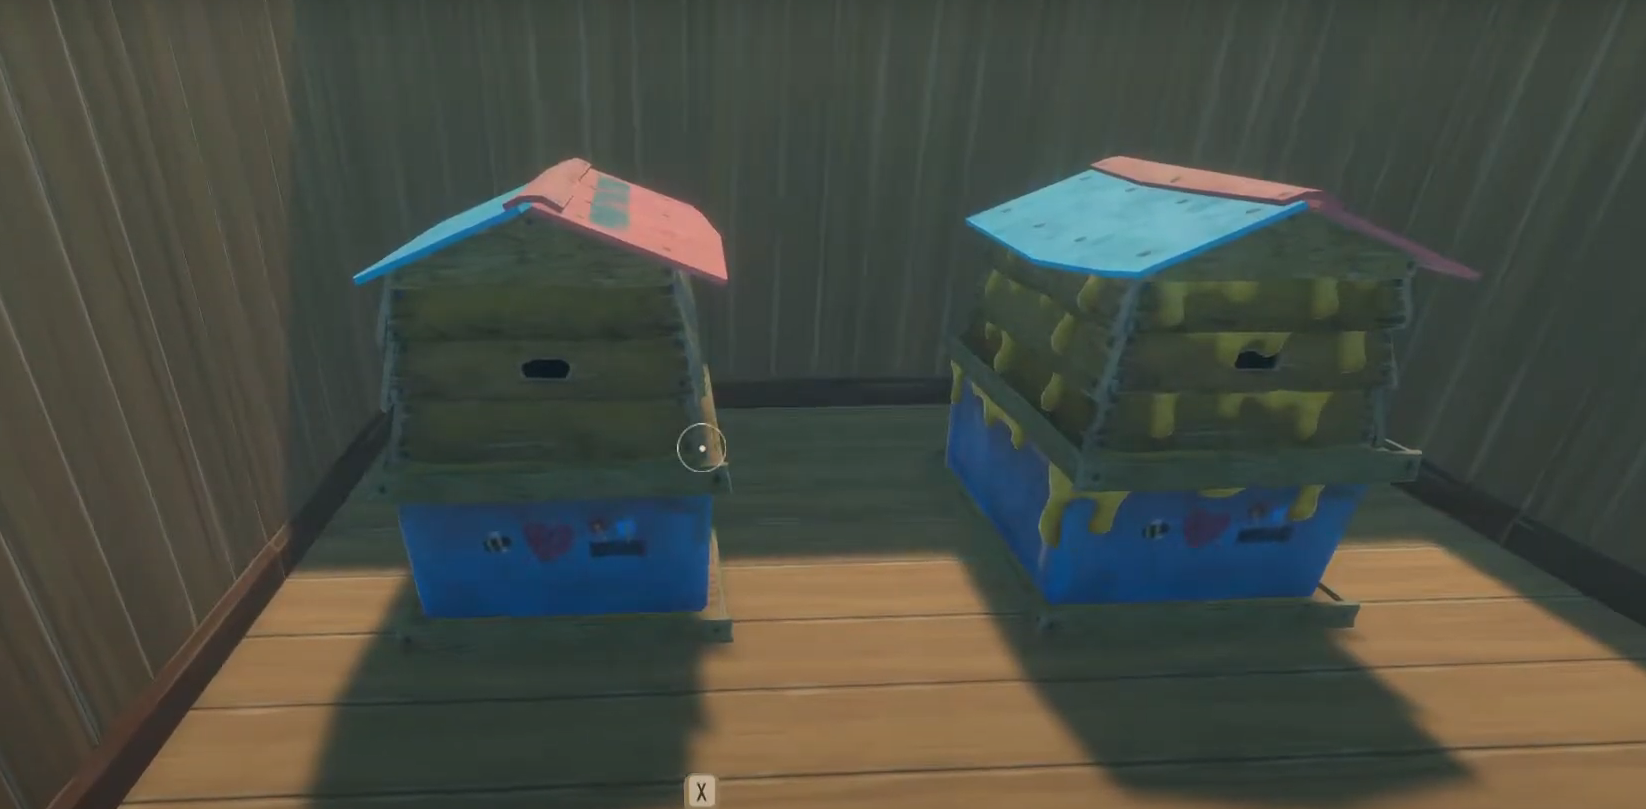
To craft a Sweep Net: you'll need 15 planks, 6 rope, 2 vine goo and 1 bolt.
To craft a Beehive: you'll need 20 planks, 8 plastic, 4 clay, 2 hinges and 15 bee jars.
By putting the code either of the aforementioned story locations into your receiver, when they new large islands spawn which are the green dots on the receiver, they'll be of a similar biome type to those of the two story locations. They'll have up to 4 swarms per island, each of which grants up to 5 bee jars per swarm. Then take them back to your raft and craft all of your domesticated honey needs.
 Beginner Bee-nevolent!
Capture 1 bee
 Intermediate Bee-nevolent!
Capture 10 Bees
 Expert Bee-nevolent!
Capture 25 Bees
 Bee Keeper!
Have 10 Beehives Placed At Once
𝘼𝙘𝙝𝙞𝙚𝙫𝙚𝙢𝙚𝙣𝙩 𝙛𝙤𝙧 𝘾𝙖𝙩𝙘𝙝𝙞𝙣𝙜 𝘼𝙣𝙞𝙢𝙖𝙡𝙨
Grab the Net Launcher and CATCH EM ALL!
To craft a Net Launcher you'll need: 2 scrap, 4 plastic, 1 metal ingot and 2 bolts.
The respective Net Canister you'll need: 1 explosive powder, 1 stone and 4 ropes.
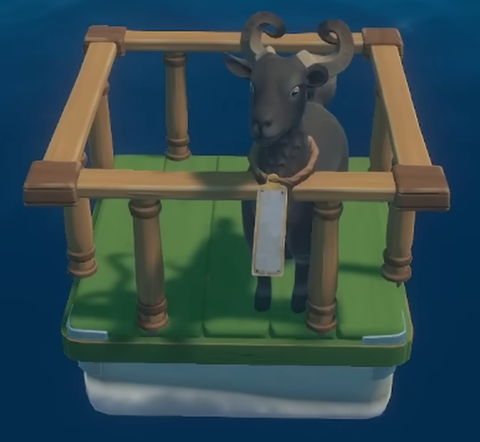
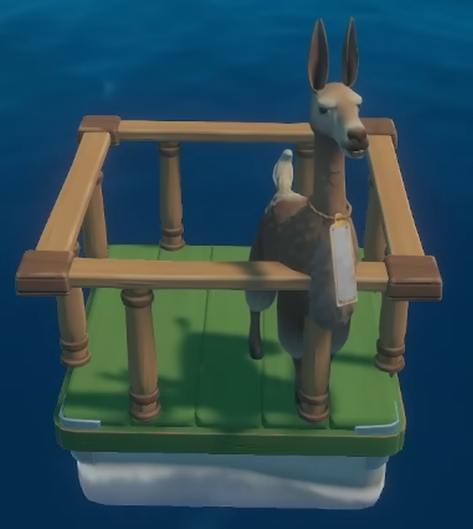
There are 3 varieties of animals you can capture to bring on board you raft to keep you company and provide some reliable utility. There's the CLUCKER, the GOAT and the LLAMA.
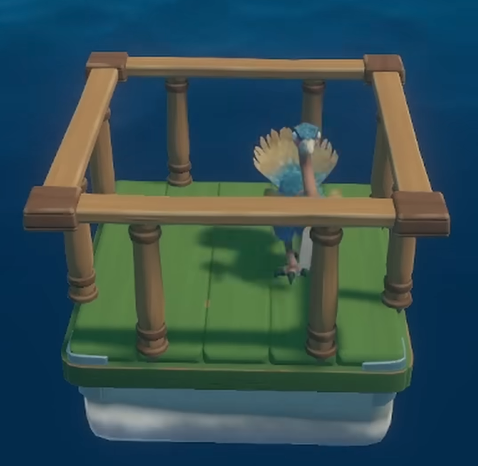
The Clucker drops eggs, which are useful for biofuel and some cooking recipes.
The Goat give milk for cooking and juicing recipes.
The Llama can be sheared for wool which can be used for making armour and backpacks.
Aim very carefully as these animals tend to move in random directions and the net canister is a slow projectile that CANNOT BE RETRIEVED. Once you've caught an animal, you can pick them up and carry them back to your raft. Additionally, YOU CAN NAME THESE ANIMALS.
These animals eat grass from grass plots and you will need to replenish whatever resource they provide. One grass plot per animal will provide enough food to sustain that animal with time to regrow between the next time an animal needs to eat so they can live a peaceful life as your companion.
REMINDER: water your grass plots!!!
 Beginner Wrangler!
Capture 1 Animal
 Intermediate Wrangler!
Capture 10 Animals
 Expert Wrangler!
Capture 50 Animals
 Some Look Different!
Capture A Rare Animal
Rare animals are like Shiny Pokemon. They appear randomly and have a different colour than the normal varieties. Be sure to keep an eye out!
𝘼𝙘𝙝𝙞𝙚𝙫𝙚𝙢𝙚𝙣𝙩 𝙛𝙤𝙧 𝙆𝙞𝙡𝙡𝙞𝙣𝙜 𝙀𝙣𝙚𝙢𝙞𝙚𝙨
 Beginner Shark Hunter!
Kill 1 Shark
 Intermediate Shark Hunter!
Kill 10 Sharks
 Expert Shark Hunter!
Kill 50 Sharks
These achievements are easily achieved on Easy difficulty. On easy mode, no matter how much times the shark will attack you, it'll be on the least amount of damage and if you end of dying you can easily respawn without losing your inventory.
You can avoid the shark in many different ways:
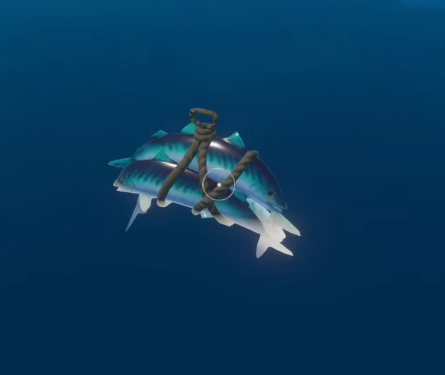
- Shark bait - lasts about a minute
- Stabbing the shark with a spear - if you time the attacks just as the shark's opening their mouth, you can mitigate any of the damage you would normally take from his attacks
- Where you loot the shark once their dead - Do Not Loot the head from his body. Only loot after collecting 4 shark meats. STOP AFTER THAT!! This will increase the respawn time to 8 mins (body despawn time + shark respawn time) instead of the base time of 5 mins.
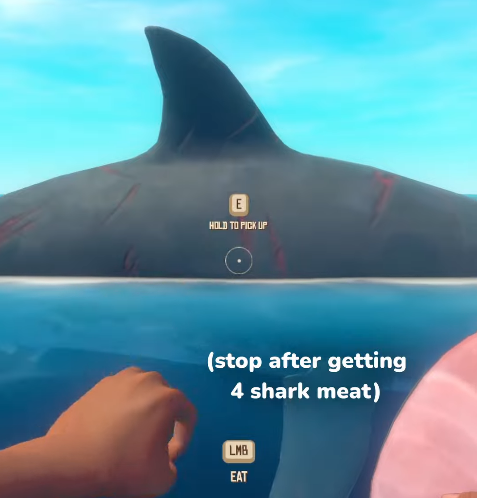
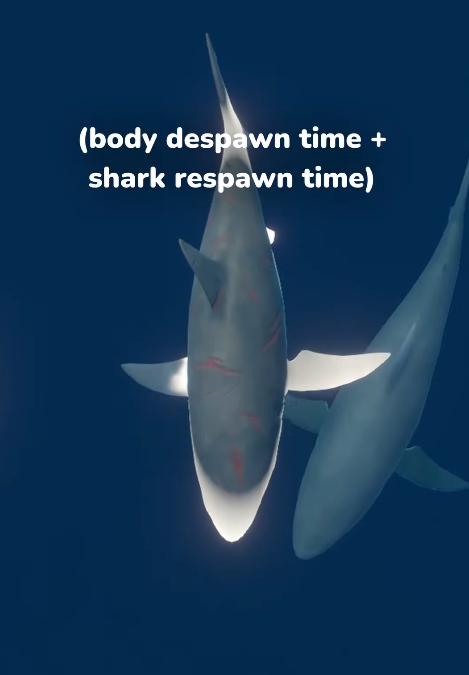
- Swim towards the shark - You are able to dodge his bites more easier while being at a closer range
 Beginner Bird Hunter!
Kill 1 Bird
 Intermediate Bird Hunter!
Kill 10 Birds
 Expert Bird Hunter!
Kill 50 Birds Killing birds can be done in several ways:
- Shooting them with arrows as they pass your raft
- Stab them when they are pecking on your farms
- Shoot them while they're pecking at your scarecrow - crafting this requires: 5 planks, 3 palm leaves, 3 nails and 3 plastic
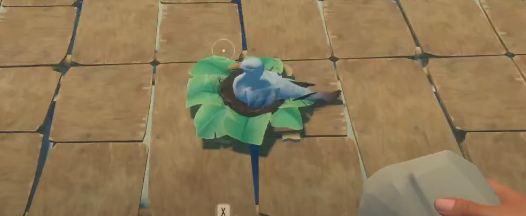
- Craft and place a bird's nest - requires 6 palm leaves, 6 planks and 1 giant clam. While the bird is sitting on the nest, you can rush and hit them with a spear or shoot with one arrow or one stone
 Beginner Screecher Hunter!
Kill 1 Screecher
 Intermediate Screecher Hunter!
Kill 10 Screechers
 Expert Screecher Hunter!
Kill 50 Screechers
Screechers are giant, red and black birds that are found on large islands and drop rocks on your head.
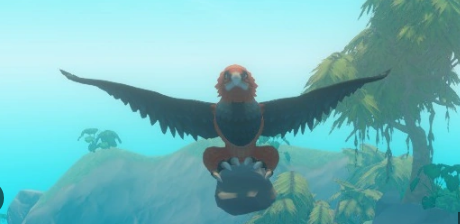
The easiest way to kill these birds are with a bow and arrow as it approaches to drop a rock on your head. Attacking from high ground makes patterns consistent and makes it easier to hit. Aim slightly in front of the bird to account for the arrow's travel time.
It takes 10 stone arrows, 7 metal arrows or 5 titanium arrows to kill a screecher.
It is also possible to stab the screecher while its picking up a rock boulder from the ground before it flies off again. Attacking this way may be dangerous as it could drop the rock as soon as it takes off from the ground.
 Beginner Poison-Puffer Hunter!
Kill 1 Poison-Puffer
 Intermediate Poison-Puffer Hunter!
Kill 10 Poison-Puffers
 Expert Poison-Puffer Hunter!
Kill 50 Poison-Puffers
Poison-puffers are small, yellow fish that are found around large islands that will explode if you swim too close to them for too long. They act just like Creepers from Minecraft so their poison does a lot of damage.
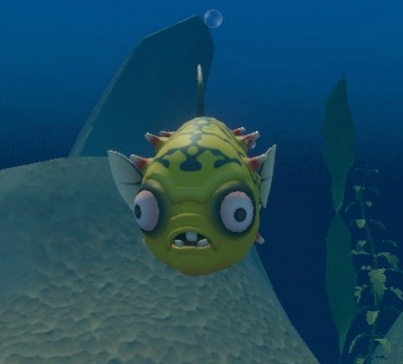 They are the only natural source of explosive goo, which you can dry into explosive powder to use for fireworks or net cannisters.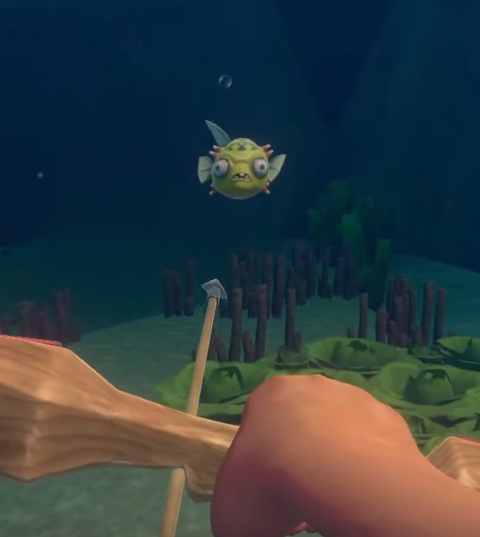
The best way to kill these are with a bow and arrow. It will take 4 stone arrows, 3 metal arrows or 2 titanium arrows.
Once unalived, these poison-puffers will drop atleast 1 explosive goo and 1 poison-puffer head. Additionally, there is a 33% chance they will drop 2 explosive goo.
You can use the head as biofuel or a funny hat or even in a soup.
 Beginner Warthog Hunter!
Kill 1 Warthog
 Intermediate Warthog Hunter!
Kill 10 Warthogs
 Expert Warthog Hunter!
Kill 50 Warthogs
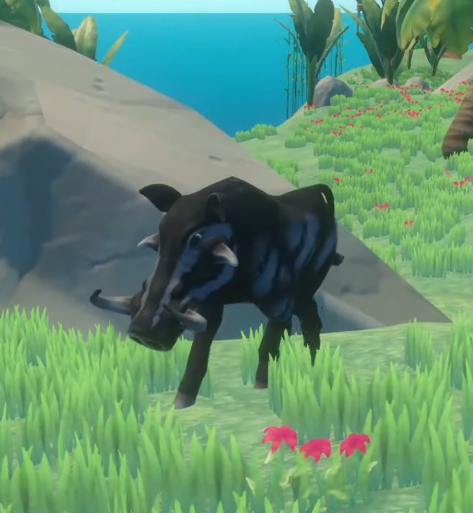
Boars or Warthogs are commonly found on large islands. They are a great source of leather, meat and biofuel. Their normal charging animation can be inconsistent and can be hard to dodge and their knockback is certainly annoying. You can avoid all these by luring them to attack you at the edge of the island and into the water. Once they're on the beach, just stand below the actual coastline and you can kill them with any weapon of choice while standing out of reach of the warthog's attacks. It will take about 10 stabs with a metal spear to unalive them.
𝘼𝙘𝙝𝙞𝙚𝙫𝙚𝙢𝙚𝙣𝙩 𝙛𝙤𝙧 𝙆𝙞𝙡𝙡𝙞𝙣𝙜 𝙀𝙣𝙚𝙢𝙞𝙚𝙨 𝙋𝙏.2
 Beginner Lurker Hunter!
Kill 1 Lurker
 Intermediate Lurker Hunter!
Kill 10 Lurkers
 Expert Lurker Hunter!
Kill 50 Lurkers Lurkers are mutated rats that are only found at the Vasagatan and Tangaroa story islands.
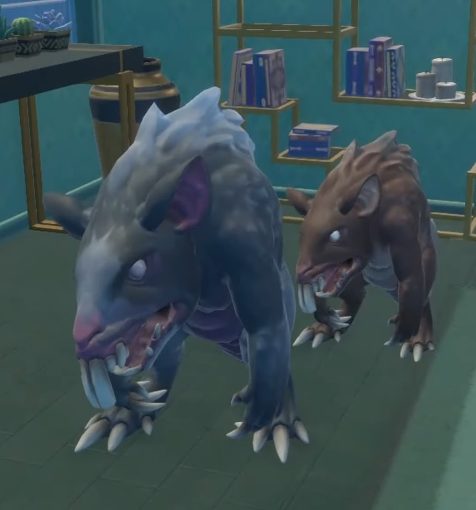
They come in two varieties:
- Small Brown Lurker - more common and only has 30 health which deals 10-14 damage per attack. Requires 6 hits with a wooden spear, 3 hits with a metal spear or 2 hits with a machete or a titanium sword.
- Large Gray Lurker - less common, found beyond the 5th story location and have 50 health which deals slightly more damage per attack
Vasagatan is the easiest story island to farm these lurkers as they respawn faster than it will typically take to clear out the population. Meaning you can have infinite lurker battles to quickly farm.
 Beginner Bear Hunter!
Kill 1 Bear
 Intermediate Bear Hunter!
Kill 10 Bears
 Expert Bear Hunter!
Kill 50 Bears
Bears are special terrestrial enemies that can only be found on two island families. Those on Evergreeen islands and those on Polar islands.
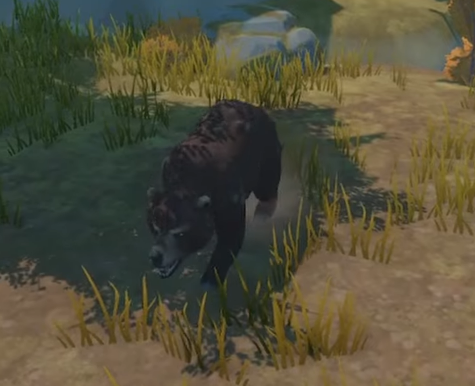
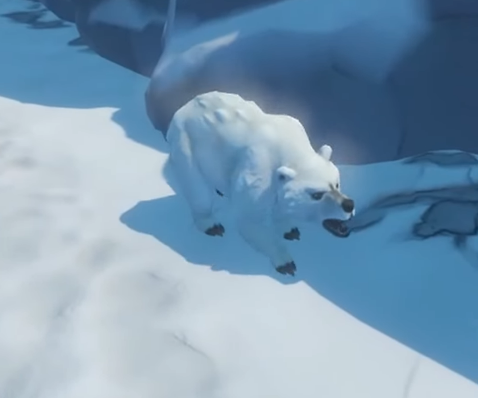
These bears also come in two respective varieties of the standard brown bear and the polar bear that belong on those kinds of islands.
Standard bears can be found on and around the 3rd story location (Balboa) and on large Evergreen islands. They deal about 20 damage per attack. They have 3 unique animations that deal different damages; the lunge attack for 20 damage, the pound attack for 20 damage and the swipe attack for 15 damage.
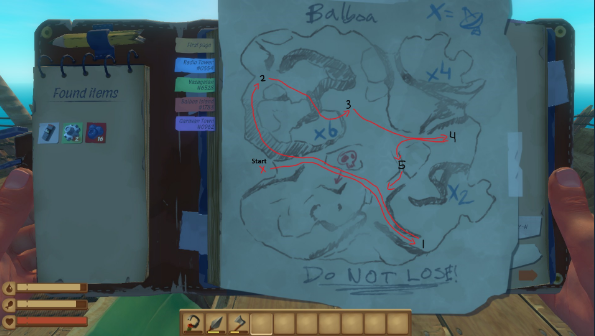
↑↑↑↑ Use this map to guide as a route to kill 5 bears every time you loop around the island. The bears will respawn once you've reached a specific distance from their spawn locations. ↑↑↑↑
Polar Bears operate in the same way but do 24 damage per lunge attack and other two attacks are the same as the standard bear. These bears can be found on and around the seventh story location, Temperance.
The easiest way to attacks these are with a bow and arrow or with a spear/machete.
 Beginner Disruptor!
Disrupt 1 Butler-Bot
 Intermediate Disruptor!
Disrupt 10 Butler-Bots
 Expert Disruptor!
Disrupt 20 Butler-Bots
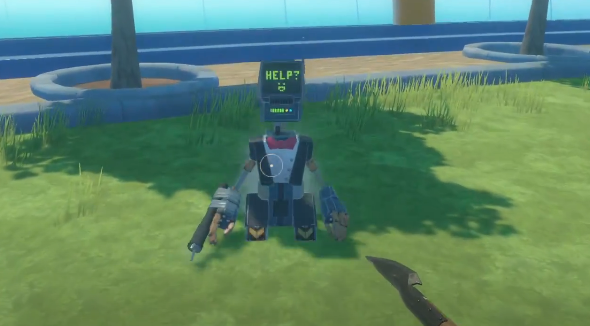
These are an exclusive enemy to Tangaroa so you will need to have progressed quite far in the game to start chipping away on these disruptor line of achievements. You'll be able to temporarily disable these robots with a few well-played shots from bow and arrow or a spear or machete.
They require 6 shots from a stone arrow, 4 from a metal arrow, 6 from a spear or 6 from a machete.
 Beginner Anglerfish Hunter!
Kill 1 Anglerfish
 Intermediate Anglerfish Hunter!
Kill 10 Anglerfish
 Expert Anglerfish Hunter!
Kill 50 Anglerfish
Anglerfish are subject to Raft's rarest achievements: Expert Anglerfish Hunter. These critters can only be found in the 6th and 7th story locations, Varuna Point and Temperance. They drop 1 raw meat, 1 vine goo and 1 anglerfish head. There are only a few that spawn on both these locations so this achievement is quite challenging.
If you dont want to waste your time travelling back and forth from these islands, there's one consistent method you can use.
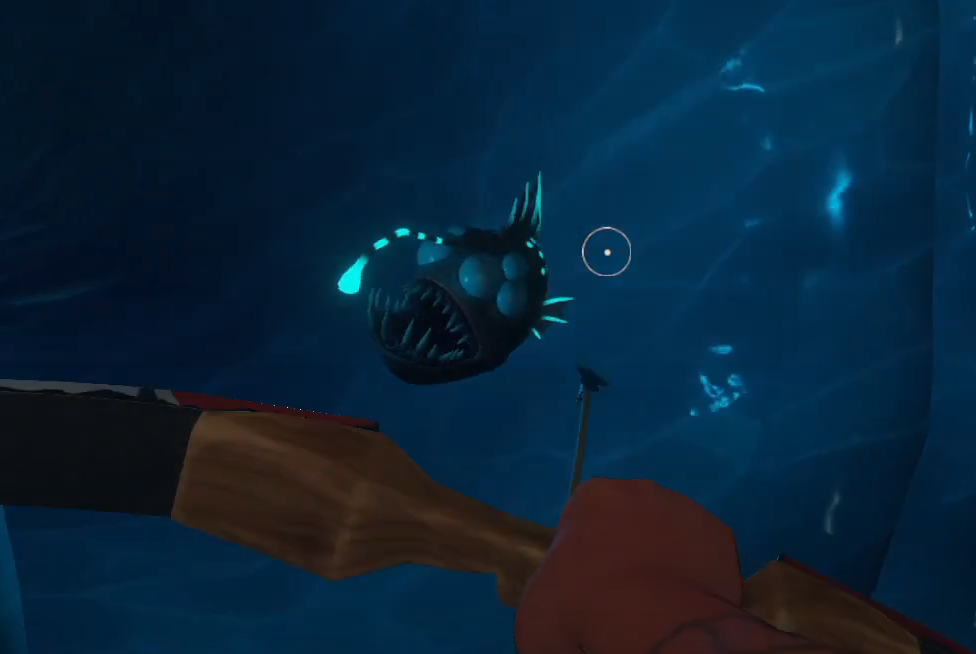
The ice tunnel under the observatory at Temperance has two dedicated anglerfish in a small area. If you unalive these two anglerfish, you can simply reload the save and the fish will instantly respawn. Reload your world and repeat until you reach 50.
𝘼𝙘𝙝𝙞𝙚𝙫𝙚𝙢𝙚𝙣𝙩 𝙛𝙤𝙧 𝙋𝙖𝙞𝙣𝙩𝙞𝙣𝙜
Use a brush and start painting!
 Beginner Painter!
Paint 50 blocks
 Intermediate Painter!
Paint 200 blocks
 Expert Painter!
Paint 1000 blocks
Craft a paint brush using 3 feathers, 4 planks and 2 rope. Then craft a paint mill 6 planks, 6 scraps, 3 rope and 2 stone.
The paint mill CANNOT BE PLACED on the middle of your raft without access to water. The mill needs to be able to "snap" to your raft. In order for it to work, your raft needs to be moving.
You can make paint from flower seeds in the paint mill and using the paint brush with the paint dye on blocks of your raft. Base colours are red, yellow, blue, white and black. You can also erase the paint on the blocks using the erase feature of the brush. Erasing the paint on a painted block will count towards the achievement.
Equip your paintbrush and right click on the paint mill to open up the colour swatches and it will show how much paint dye of each colour you will need to craft a new colour.
𝘼𝙘𝙝𝙞𝙚𝙫𝙚𝙢𝙚𝙣𝙩 𝙛𝙤𝙧 𝙎𝙥𝙚𝙣𝙙𝙞𝙣𝙜 𝙏𝙤𝙠𝙚𝙣𝙨

Collect a minimum of 30 tokens to obtain these achievements
 Small Spender!
Spend 10 Tokens
 Medium Spender!
Spend 20 Tokens
 Big Spender!
Spend 30 Tokens
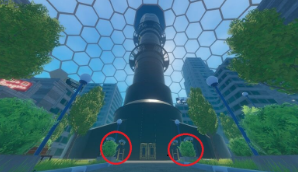
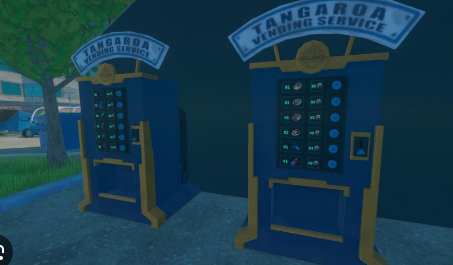
3 of the 8 story island locations have specialised Vending Machines that sell goods specific to that location. For example, Tangaroa includes the grand piano, spices and herbs from Utopia or the penguin mug from Temperance.
The vending tokens appear on the "FOUND ITEMS" tab on the left side of your journal after you pick them up, which is very handy for space in your inventory.
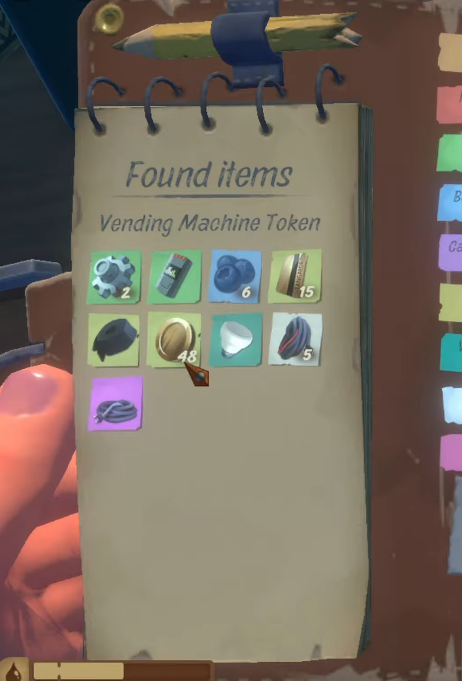
There are a total of 101 tokens scattered all over the 3 story islands. TANGAROA has 33 tokens, TEMPERANCE has 33 tokens and UTOPIA has 35 tokens. If you have spent all of the 101 tokens on these islands, you are able to respawn the tokens on each of these islands by sailing at least 2000 metres away from one of the story islands and then going back.
𝘼𝙘𝙝𝙞𝙚𝙫𝙚𝙢𝙚𝙣𝙩 𝙛𝙤𝙧 𝙕𝙞𝙥𝙡𝙞𝙣𝙞𝙣𝙜
Getting these achievements will require the zipline tool
 Beginner Ziponaut!
Travel 100 metres with the zipline tool
 Intermediate Ziponaut!
Travel 500 metres with the zipline tool
 Expert Ziponaut!
Travel 1500 metres with the zipline tool
 Zip Zap!
Travel 50 metres on a zipline without disjointing
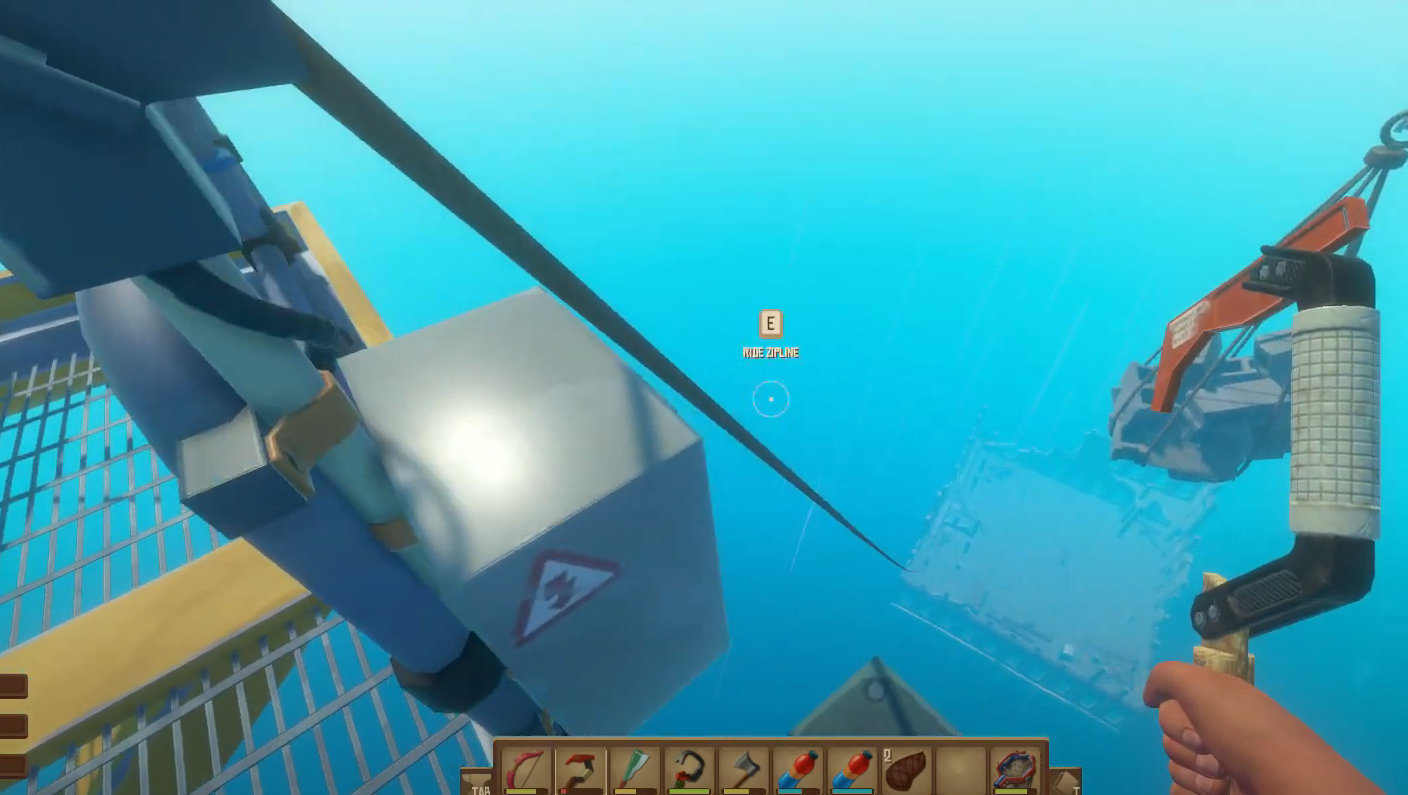
If you don't want to make a zipline platform on your raft, this can easily be done in Varuna Point. FInd the highest building and you'll find a zipline going all the way to the smallest one.
𝘼𝙘𝙝𝙞𝙚𝙫𝙚𝙢𝙚𝙣𝙩 𝙛𝙤𝙧 𝙏𝙧𝙚𝙖𝙨𝙪𝙧𝙚 𝙃𝙪𝙣𝙩𝙞𝙣𝙜
Get A Metal Detector And A Shovel!!
 Beginner Excavator!
Dig Up A Treasure
 Intermediate Excavator!
Dig Up 20 Treasure
 Expert Excavator!
Dig Up 50 Treasure
These achievements require a metal detector, which requires 12 plastic, 6 scrap and 1 simple battery.
Additionally, you need a shovel to dig up these treasure; crafting you need 6 planks, 1 bolt and 1 metal ingot.
Using the metal detector, you'll need to walk around any large island or story location to get an initial reading. The closer you get to a buried treasure, the greener the lights on your meter will turn and the faster the beeping will go. Once the meter is fully green, use a shovel to dig up the treasure.
There are 3 types of treasure you can dig up; Junk piles, Briefcases and Safes. There's a very small chance you could get cassette tapes, developer paintings
𝙊𝙩𝙝𝙚𝙧 𝘼𝙘𝙝𝙞𝙚𝙫𝙚𝙢𝙚𝙣𝙩𝙨
 Large Landmass Ahoy!
Discover A Large Island
 Teamplay!
Team Up With A Friend In Multiplayer
 A More Complex Concoction!
Cook A Meal By Following A Recipe
 Bookworm!
Research Everything In The Research Table
 Real Fireworks!
Witness 50 Firework Explosions
 All Aboard!
Unlock All Playable Characters
 Powered Up!
Have All Buffs From Meals And Drinks Active On You At The Same Time
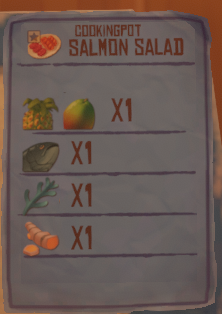 Meal 1: SALMON SALAD
Ingredients
- Mango or Pineapple
- Salmon
- Silver Algae (from deep sea)
- Tumeric (bought from trading post)
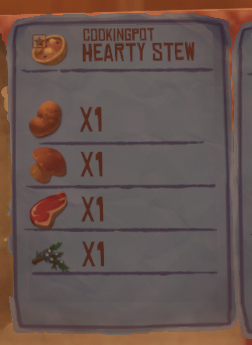 Meal 2: HEARTY STEW
Ingredients
- Potato
- Mushroom
- Raw Meat
- Juniper (bought from trading post)
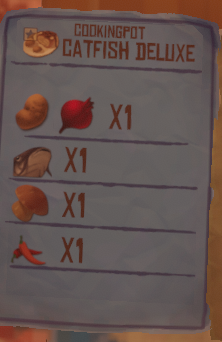 Meal 3: CATFISH DELUXE
Ingredients
- Potato or Raw Beet
- Catfish
- Mushroom
- Chili (bought from trading post)
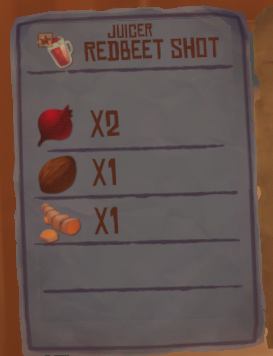 Drink 1: REDBEET SHOT
Ingredients
- 2 Beetroots
- Coconut
- Tumeric (bought from trading post)
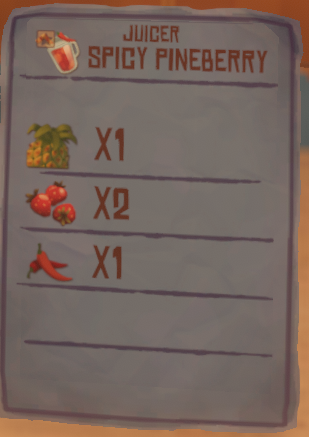 Drink 2: SPICY PINEBERRY
- Pineapple
- 2 Strawberries (found on Tangaroa)
- Chili (bought from trading post)
𝙃𝙞𝙙𝙙𝙚𝙣 𝘼𝙘𝙝𝙞𝙚𝙫𝙚𝙢𝙚𝙣𝙩𝙨 (𝙎𝙥𝙤𝙞𝙡𝙚𝙧𝙨!)
 This Goes Here!
Break or pick up 100 blocks
 An Ocean Cemetary!
Die 25 times
 Exploring The Depths!
Reach a depth of 100 metres below the surface This can be easily done by following the pipe next to the bike at the bottom of Caravan Town.
 Is There A Utopia?
Find The White Board In The Radio Station
Once you've figured out how to use the receiver, in your journal you'll find a tab saying 'RADIO TOWER #....'. Insert the code into the receiver and follow the blue marker on the screen, which represents the radio tower (story location). Use the receiver and sail towards the blue marker.
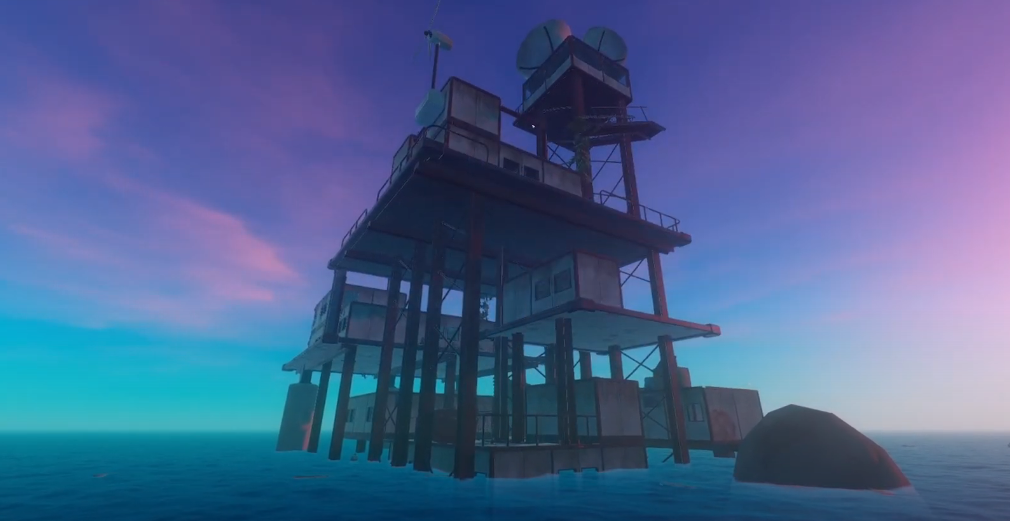
This will take 15 mins to fully clear all the 5 notes, loot, 2 blueprints and 1 unlockable character. Getting through each floor will require parkour and climbing on top of each building. At the top floor you'll find a room "E-1" which has a white board with the final note, the second blueprint and the first unlockable character sitting at the table.
 Not A Great Landing!
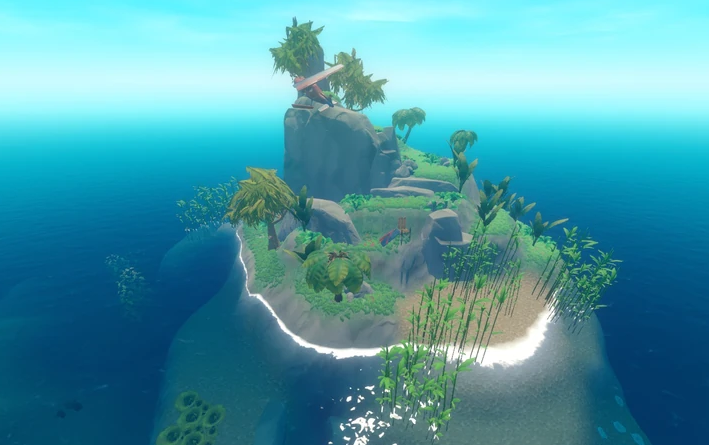
Discover a crashed plane Finding this island is very rare with a chance of 2%. This cant be found on the receiver and isn't connected to the story locations.
This island has a red and blue plane crashed on top of the island with a fancy pilot's helmet and a loot crate stashed in the back of the plane.
 O Captain! My Captain?
Reach Captain's Island
Finding this island is very rare with a chance of 2%. This also cannot be found on the receiver and isn't connected to the story locations.
The boat crash island has a giant flag that reads "HELP" waving in the wind as well as a small boat crashed into the island, hence the name "Boat Crash Island". Inside the boat, you'll find the only naturally spawning radio and also the rare captain's hat, which is only obtainable on this island. Additionally, there is a wooden loot crate which are normally limited to large islands.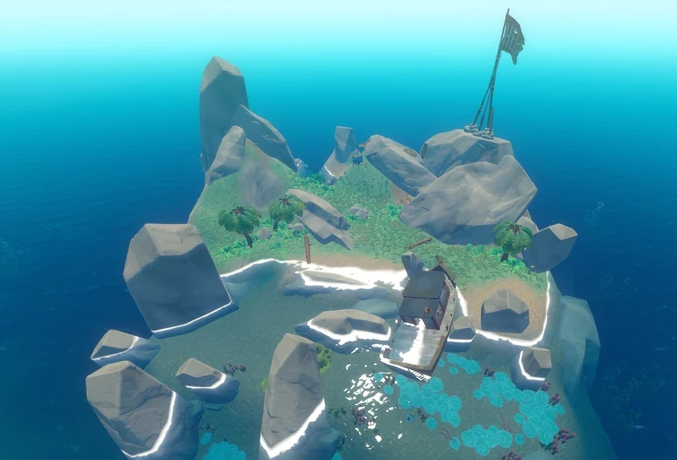
 Bootleg Fireworks!
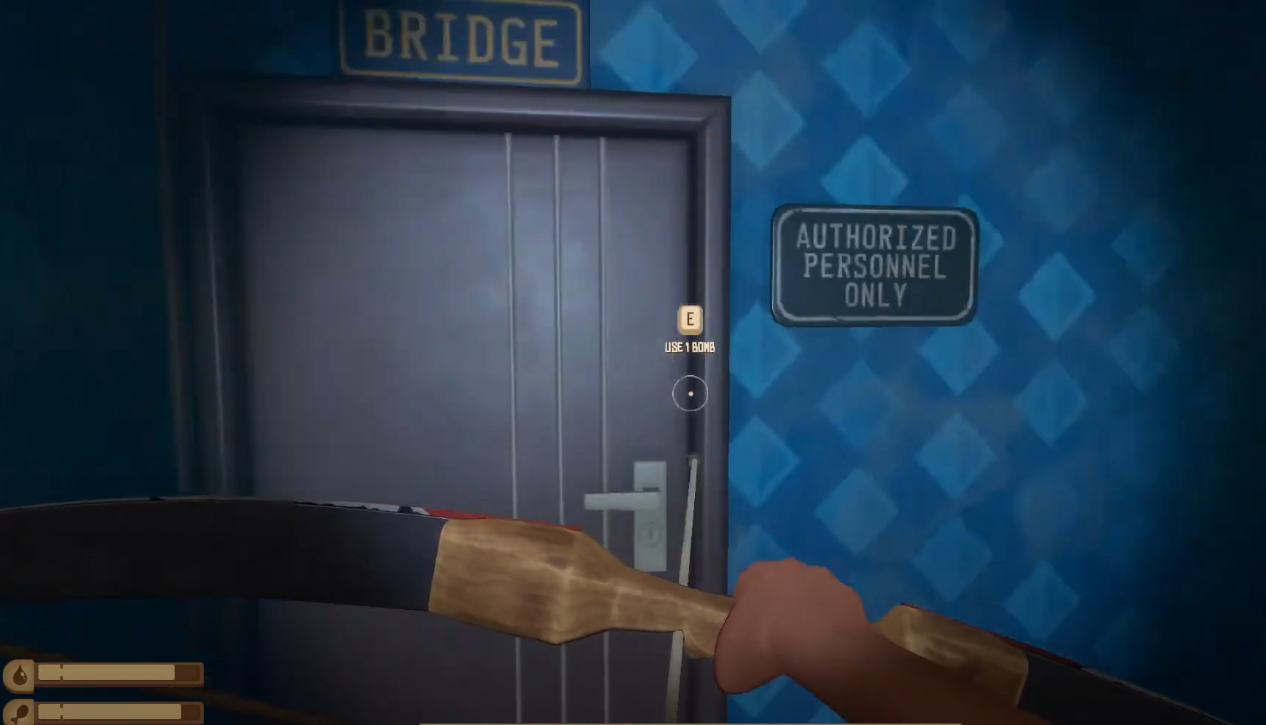
Breach The Cockpit Of Vasagatan
While clearing out the levels of the yacht on Vasagatan Island, you'll have to collect parts all over the yacht to create a bomb. Once you've collected 1 electrical wire, 1 lighter, 1 gas tank and 1 bullet, you'll be able to make the bomb. Make your way back up to the fifth floor to use the bomb to explode the Captain's Cabin.
 Pling!
Can Bears Use Bicycle Bells?
This is achieved on Balboa Island. Once you've landed on Balboa island, TURN UP YOUR VOLUME. This will make it easier to hear the ringing of the bicycle bell. When you see a sign, go towards the ranger station. Use the ringing as a guide as it's a directional sound.
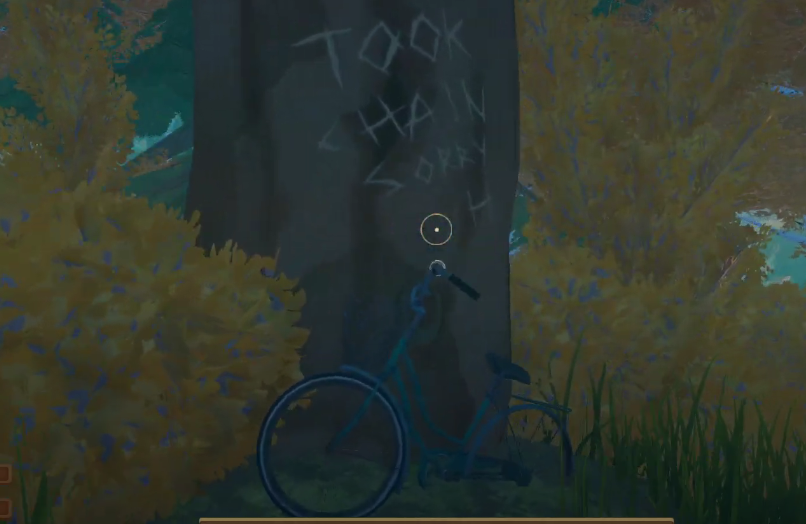
You'll see a TREE with a bike leaning on it with a message reading "TOOK CHAIN SORRY - H". Stand near the bike and you'll be granted the achievement.
 Tiny Little Murder!
It's All So Obvious Now...
Interact with the scarecrow on a hill facing Mama Bear's cave on Balboa Island.
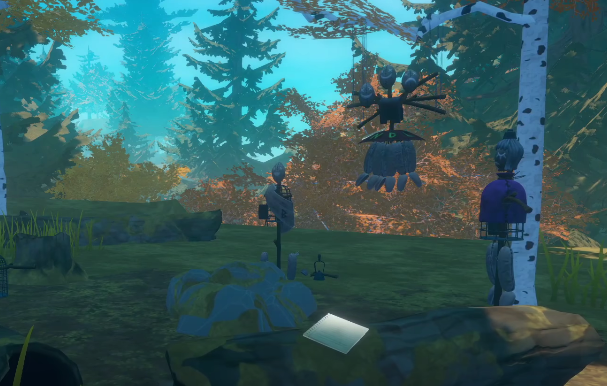
 Fix Errol!
There You Go, Errol
Take the lightbulb you took from the mannequinn and insert it onto the dummy in front of the Ranger Cabin on Balboa Island.
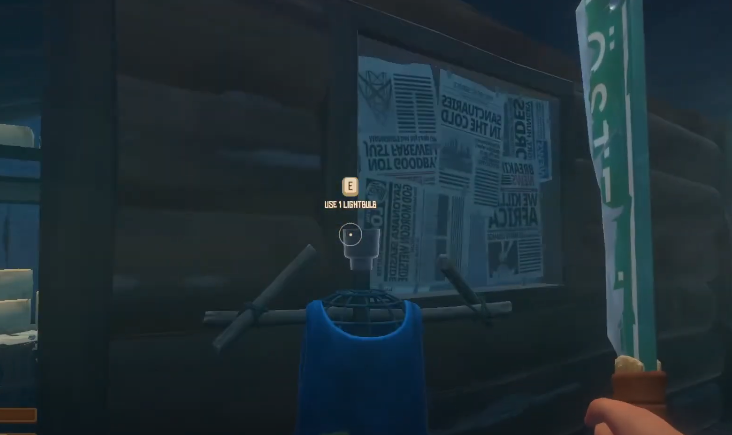
 A Revelation!
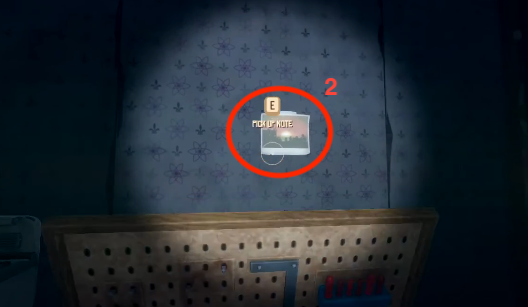
Why Is There A Photo Behind The Toolboard??
Once you've completed the story and collected all the tools around Balboa Island, you'll see a Toolboard on the right side of the Ranger's Cabin. Place all the collected tools on the toolboard and it will drop and show a note taped on the wall.
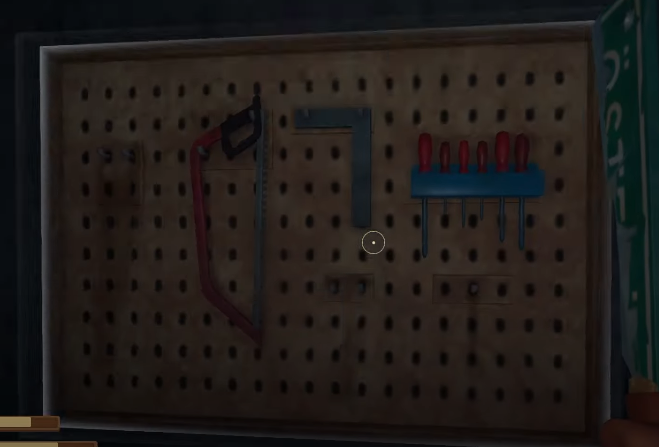
 Instrumentalist!
Play a note on an instrument
This can be achieved by purchasing the grand piano for 8 tokens at a vending machine on the island of Tangaroa. Place the piano on your raft and play at least 1 note.
 Boxed In!
Find the Secret Behind The Boxes On Tangaroa Island, you will encounter a container puzzle inside underground section of the island that has a secret room A LOT of loot.
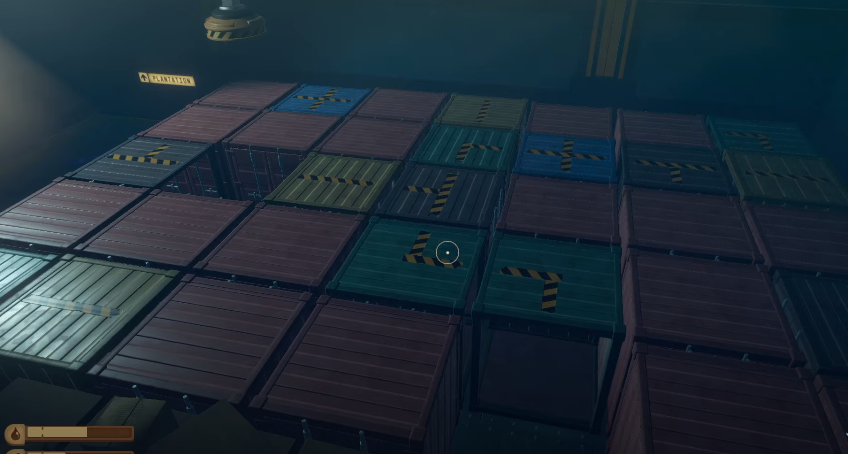 This is one possible route you could use to get to the secret room.
 You Should Not Be Here!
Twenty Floors Down
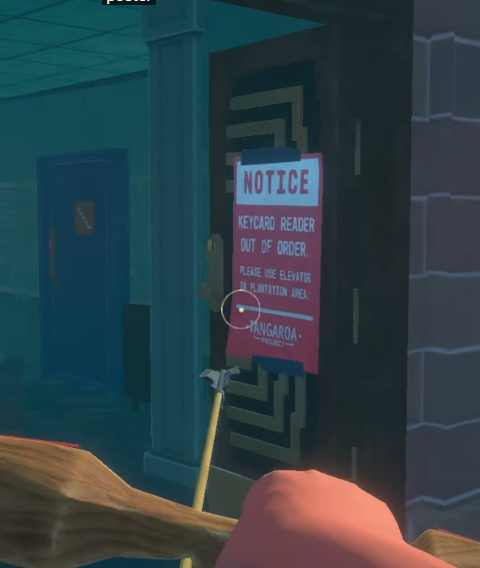 There is a building on Tangaroa island that has a red and white notice poster taped on the door reading; "NOTICE: Keycard reader OUT OF ORDER" . Once you're inside the elevator, there is a hidden button on the top left of the elevator door frame that will take you to 20 levels below ground to a secret hideout with lots of loot and an elevator cassette.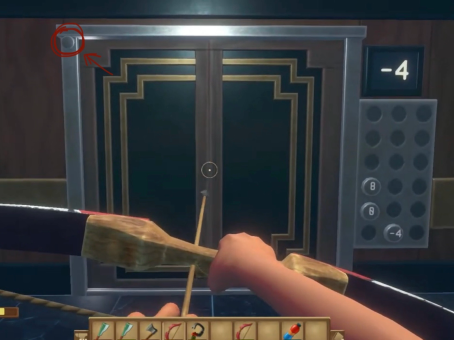
𝙃𝙞𝙙𝙙𝙚𝙣 𝘼𝙘𝙝𝙞𝙚𝙫𝙚𝙢𝙚𝙣𝙩𝙨 (𝙎𝙥𝙤𝙞𝙡𝙚𝙧𝙨!) 𝙋𝙏.2
 Launch Initiated!
A Backup Emergency System? On Tangaroa Island, you'll find a note with a launch puzzle. There are 4 pictures on the note with 4 street names. Each image depicts a representation of one of the buildings in the city. Go to each building according to the street name on the note and take note of the number on the building for the 4 buildings.
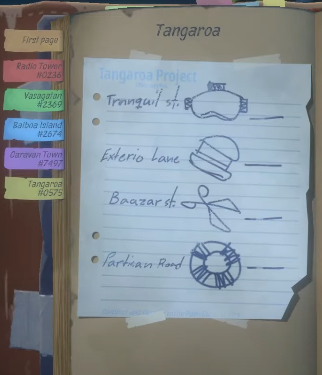
Find the keypad and the computer terminal at the top floor of the Main Tower and insert the 4 digit code you've solved from the building numbers.
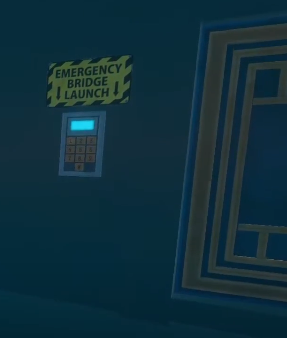
Insert Emergency Bridge Launch Code: 4-8-1-3 into the keypad. You'll hear an explosion and everything will start shaking. Go outside and watch where the top part of the island's dome flies off to outside of the island. Use your raft and drive to the it.
 Artistic Collector!
Find And Place All Developer Paintings There are a total of 8 developer paintings you could collect from treasure hunting.
Names of Paintings: After the Rain, What Even Is?, Neighbour's Dog, The Pot, Foul Fogs, Man and Moon, Octohenge and Real Self Portrait.
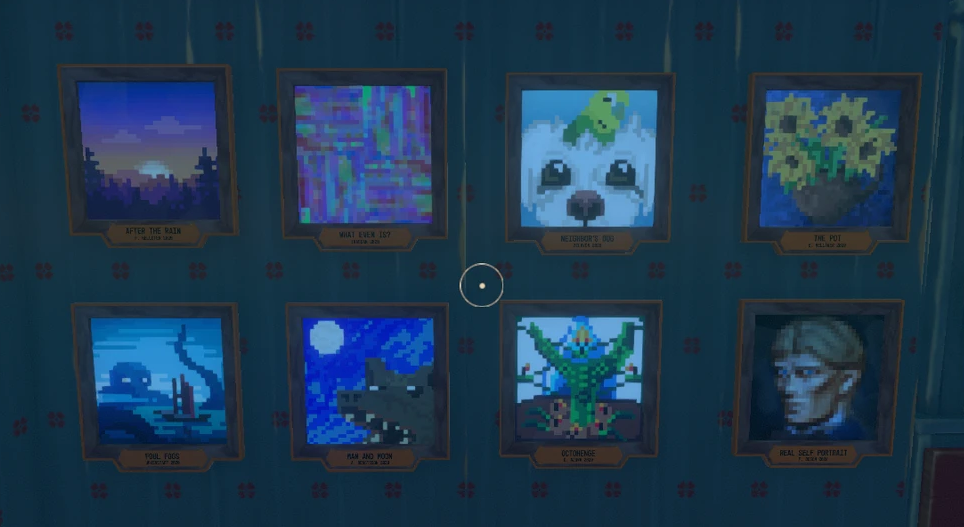
 Former Glory!
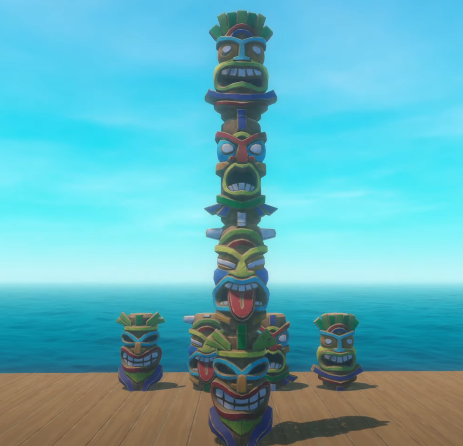
Four Pieces Of Wood Restored
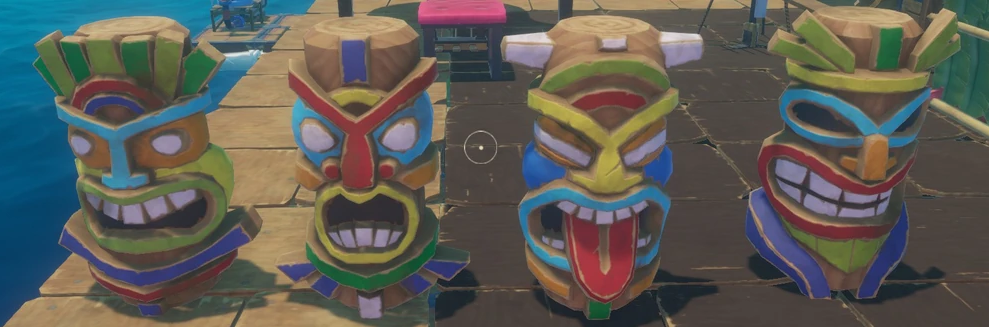
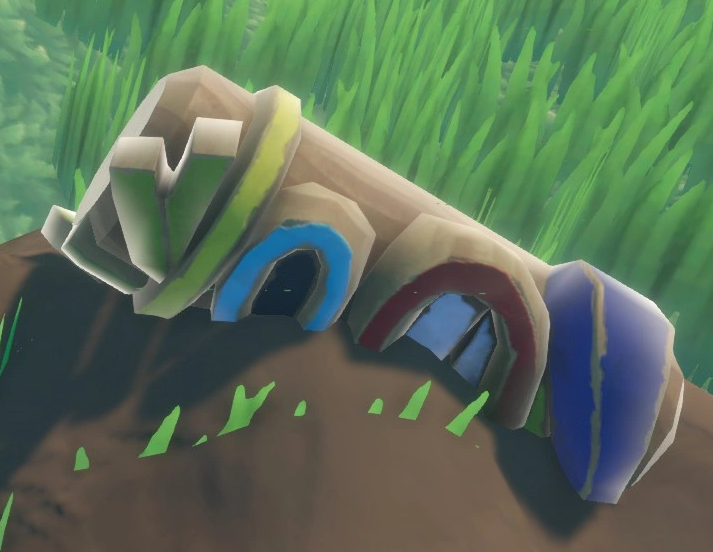
Complete a set of four Tiki Pieces from Treasure Hunting. Must be placed on top of one another in the correct order to create a Tiki Pole. Once done, a tiki mask will spawn on the back and unlock the achievement.
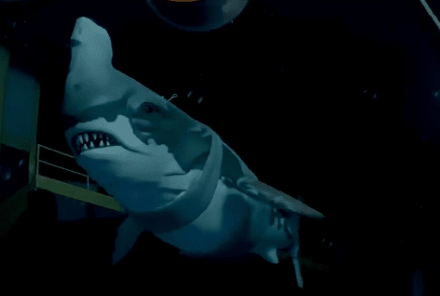
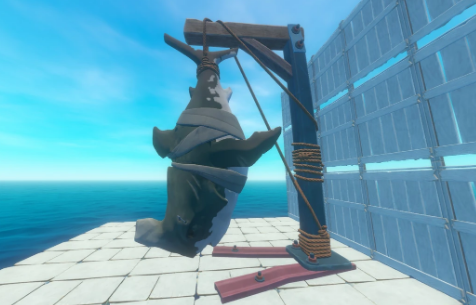
 Explosive Force!
Slay The Boss At Varuna Point Defeat the Rhinoshark in Varuna Point. Once defeated, loot its corpse and you'll also receive a trophy. It's able to be placed on your raft either on the floor, wall or ceiling.
 There Is A Utopia!
Finish The Story
Complete the last island, Utopia, to complete the story.
Beat Raft's 100% run?
Flex it — let your friends know you pulled it off.
- Raft - Complete Guide★ 5 (2.3k)126k views4.3k ♥208 minUpdated 14 Nov, 2025
- Советы по развитию и полному прохождению Raft [RU]★ 5 (627)43k views762 ♥29 minRussianUpdated 15 Oct, 2020
- Raft - All in one GUIDE★ 5 (370)32k views588 ♥33 minUpdated 25 Jul, 2022
- Master Achiever - 100% Achievement Guide (Update 11)★ 5 (459)29k views1k ♥32 minUpdated 29 Aug, 2020
- Raft 100% achievement★ 5 (399)27k views760 ♥8 minUpdated 28 Jun, 2022
- 【RAFT木筏】标准100%全成就攻略、食谱大全、常见联机问题★ 5 (598)24k views1.2k ♥6 minSimplified ChineseUpdated 11 Apr


- Upgrading to PremiumTeam Fortress 2★ 5 (20k)1441k views11k ♥6 minUpdated May 11, 2022
- No More Room in Hell Official ManualNo More Room in Hell★ 5 (2.8k)569k views2.1k ♥29 minUpdated Apr 22, 2019
- NMRiH Community Hosting GuidesNo More Room in Hell★ 5 (526)351k views653 ♥1 minUpdated Aug 10, 2022
- How to 'Git Gud' Soon™MORDHAU★ 5 (2k)318k views3k ♥68 minUpdated Nov 16, 2024
- Лучшие кооперативные игры SteamPAYDAY 2★ 5 (1.5k)315k views2.1k ♥56 minRussianUpdated Apr 27, 2025
- Desert Eagle Heat Treated | Blue GemCounter-Strike 2★ 5 (1.6k)293k views1.5k ♥2 minUpdated Jan 16





This guide was created by its original author on the Steam Community. Are you the author and want it removed? Request removal.