Resident Evil 2 | All Achievements Guide
Intro
Welcome to the Resident Evil 2 all achievement guide.
Difficulty level of achievements: Medium
Total achievements: 44
Estimated time to complete all achievements: 20 ~ 30 hours
Missable Achievements: Yes, all the achievements marked with an ❌ are missable.
Required DLCs for 100% achievements: Yes, but the DLCs are free.
Resident Evil 2(2019) is a full remake of the classic 1998 survival-horror game, rebuilt with modern graphics, reimagined environments, and updated gameplay while preserving the tense atmosphere of the original. The story follows Leon S. Kennedy and Claire Redfield as they arrive in Raccoon City, only to find the town overrun by horrifying creatures.
This guide is not a walkthrough. Each achievement is explained individually.You can find puzzle solutions and additional tips in the Extras section at the end of the guide.
Welcome to the City of the Dead
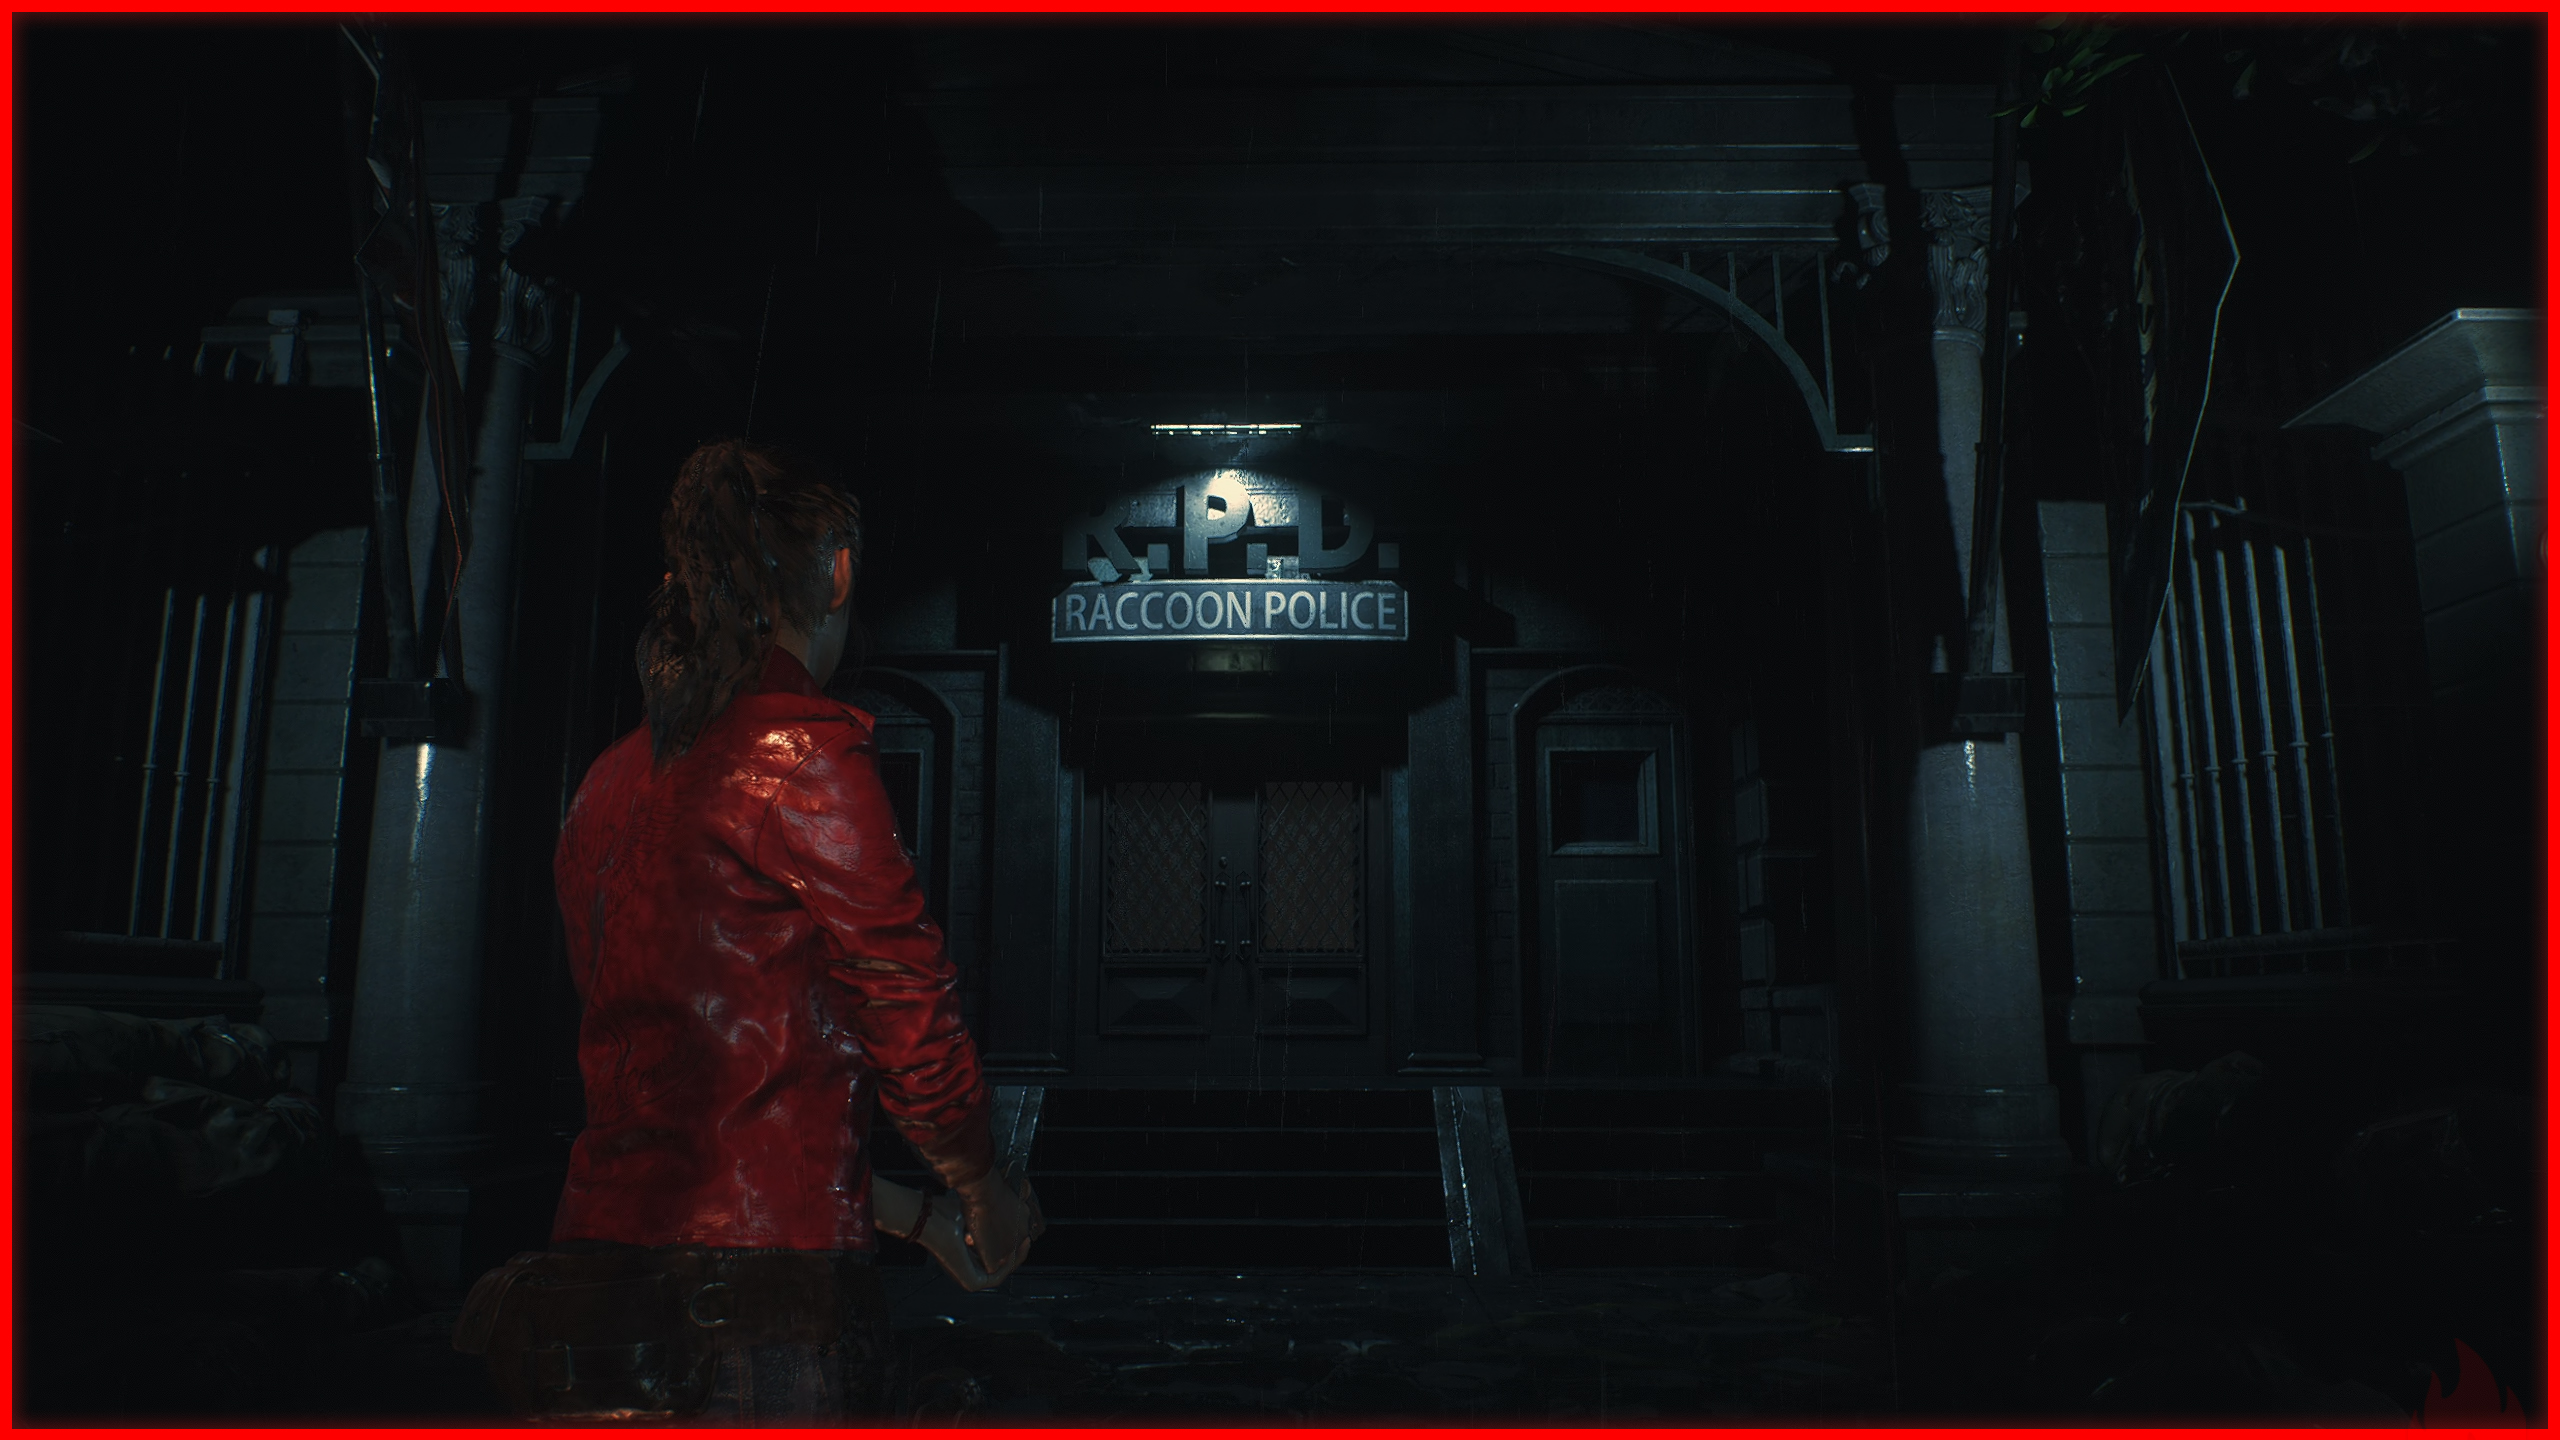
At the beginning of the game, after arriving at the R.P.D. station.
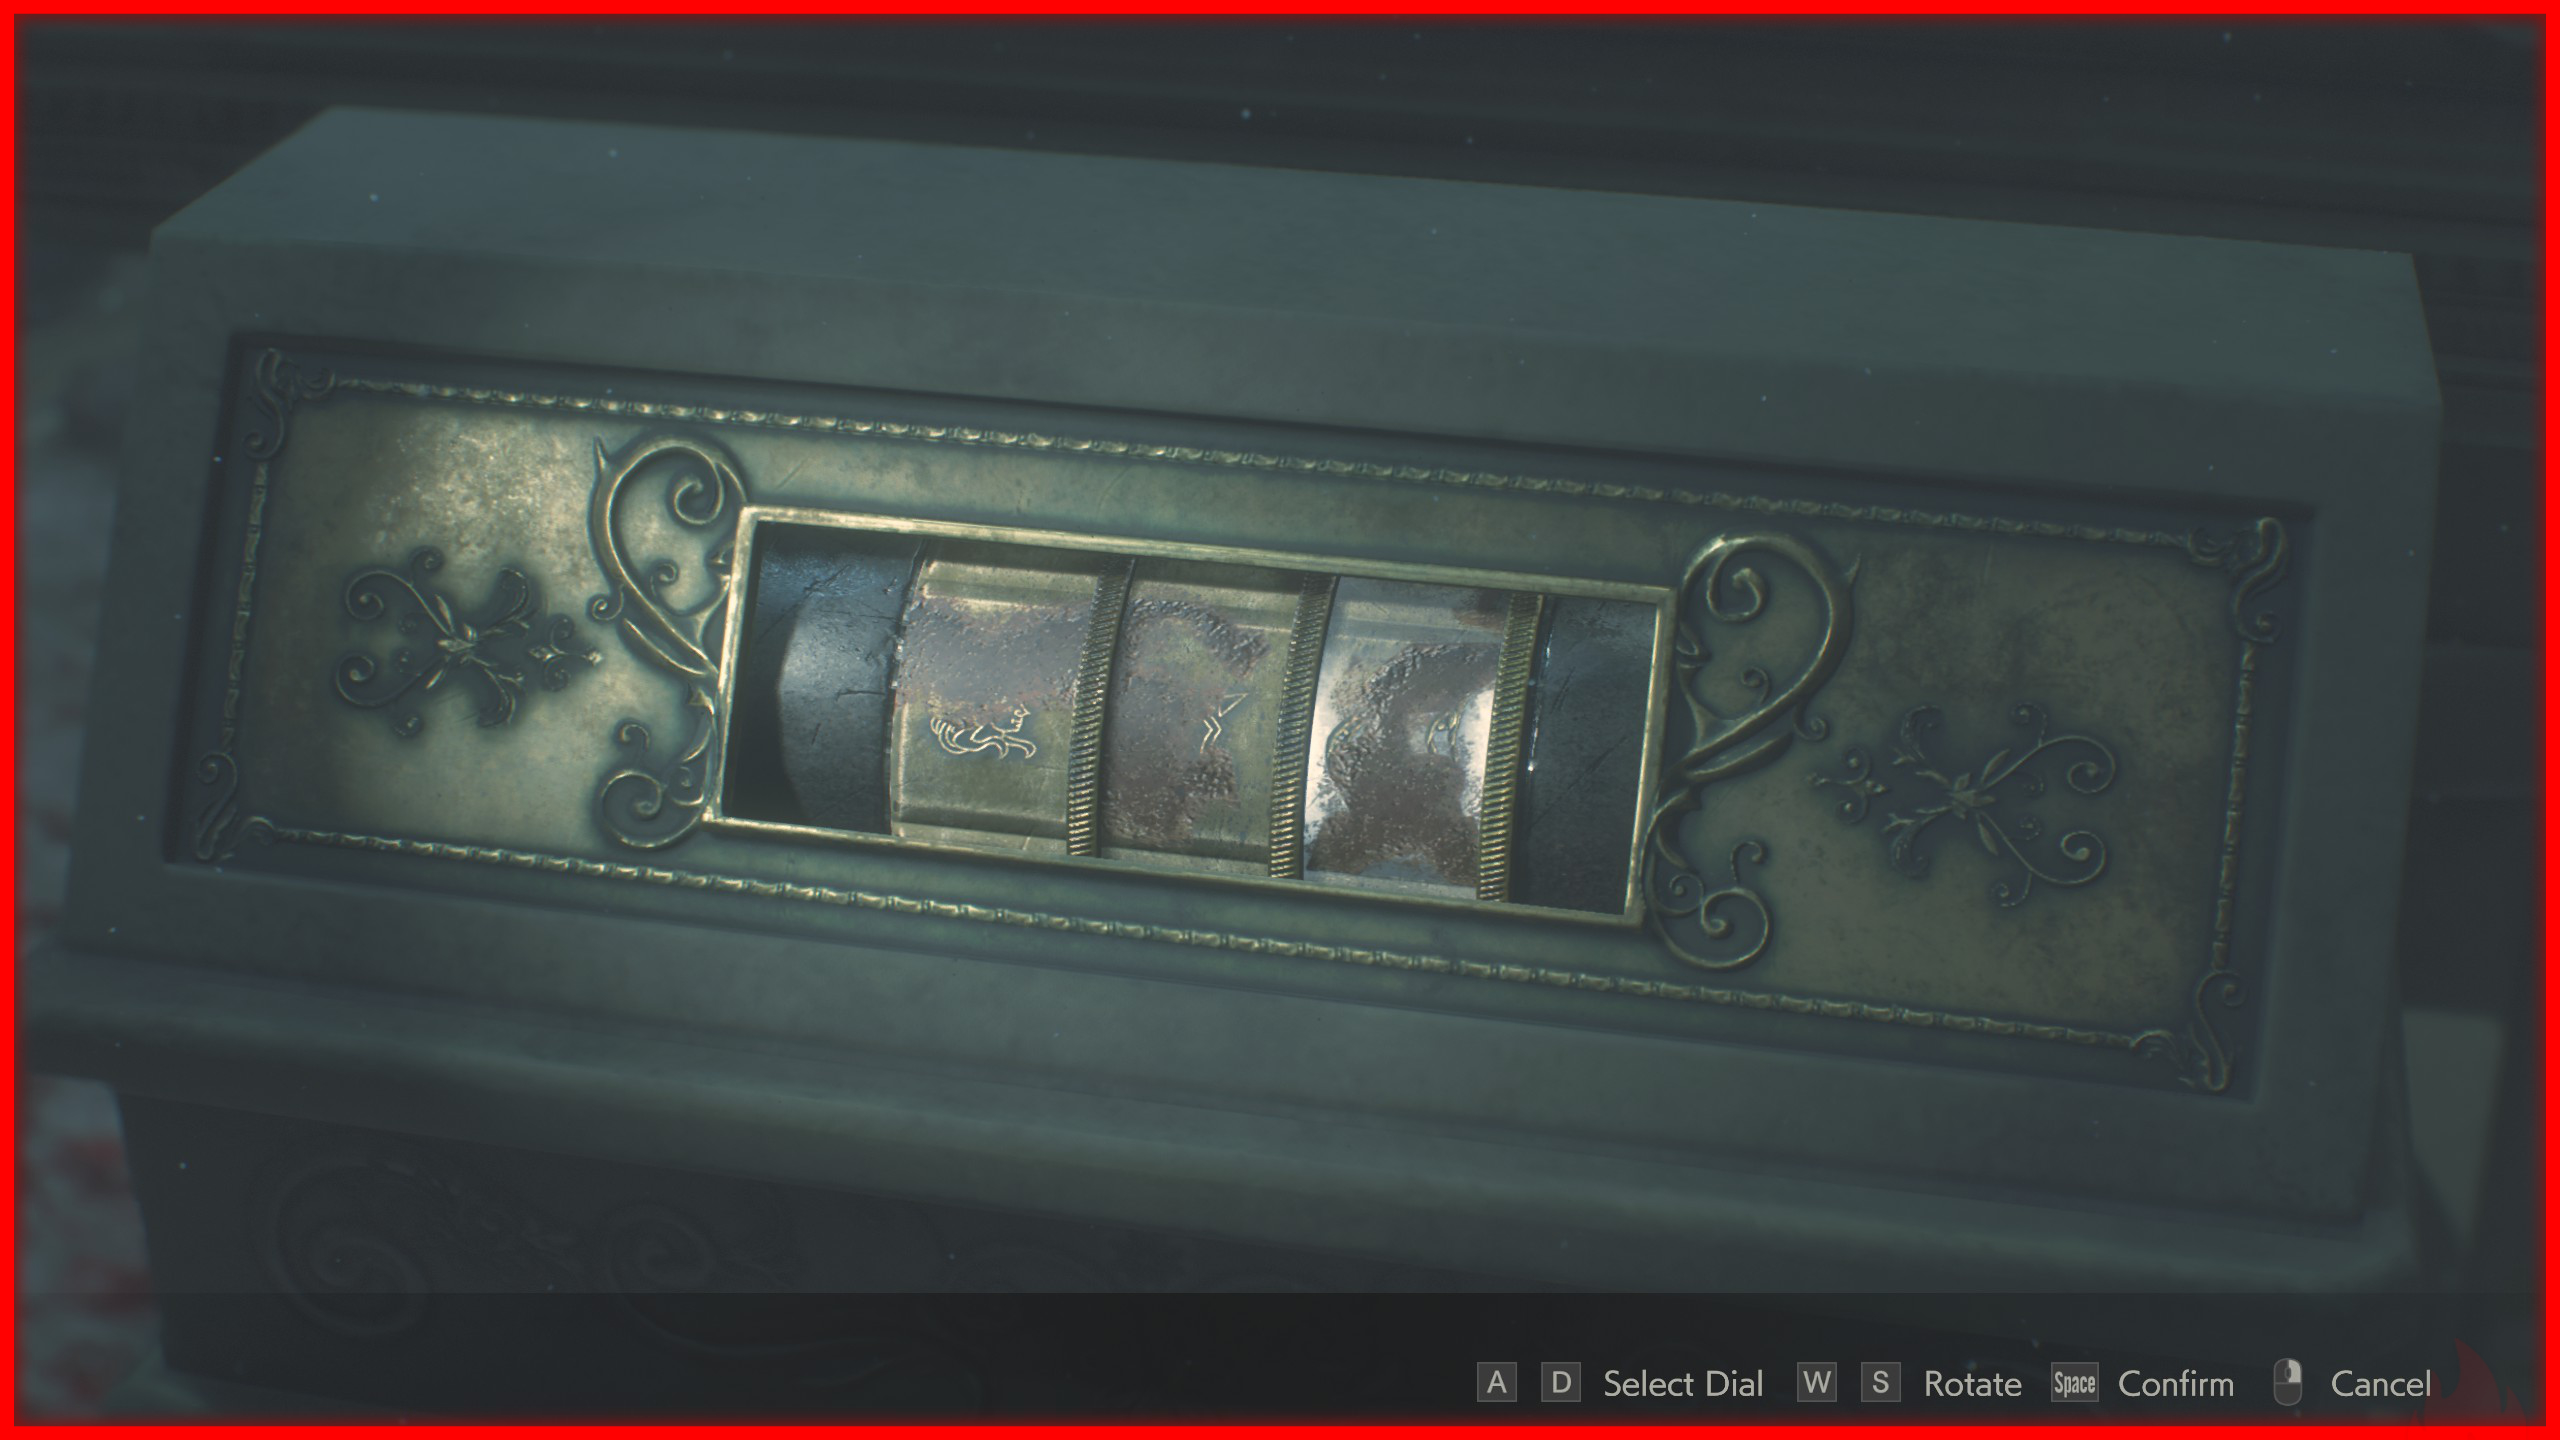
Path to the Goddess
 Obtained by finding and placing all three medallions into the Goddess Statue in the Main Hall.
Lion Medallion:
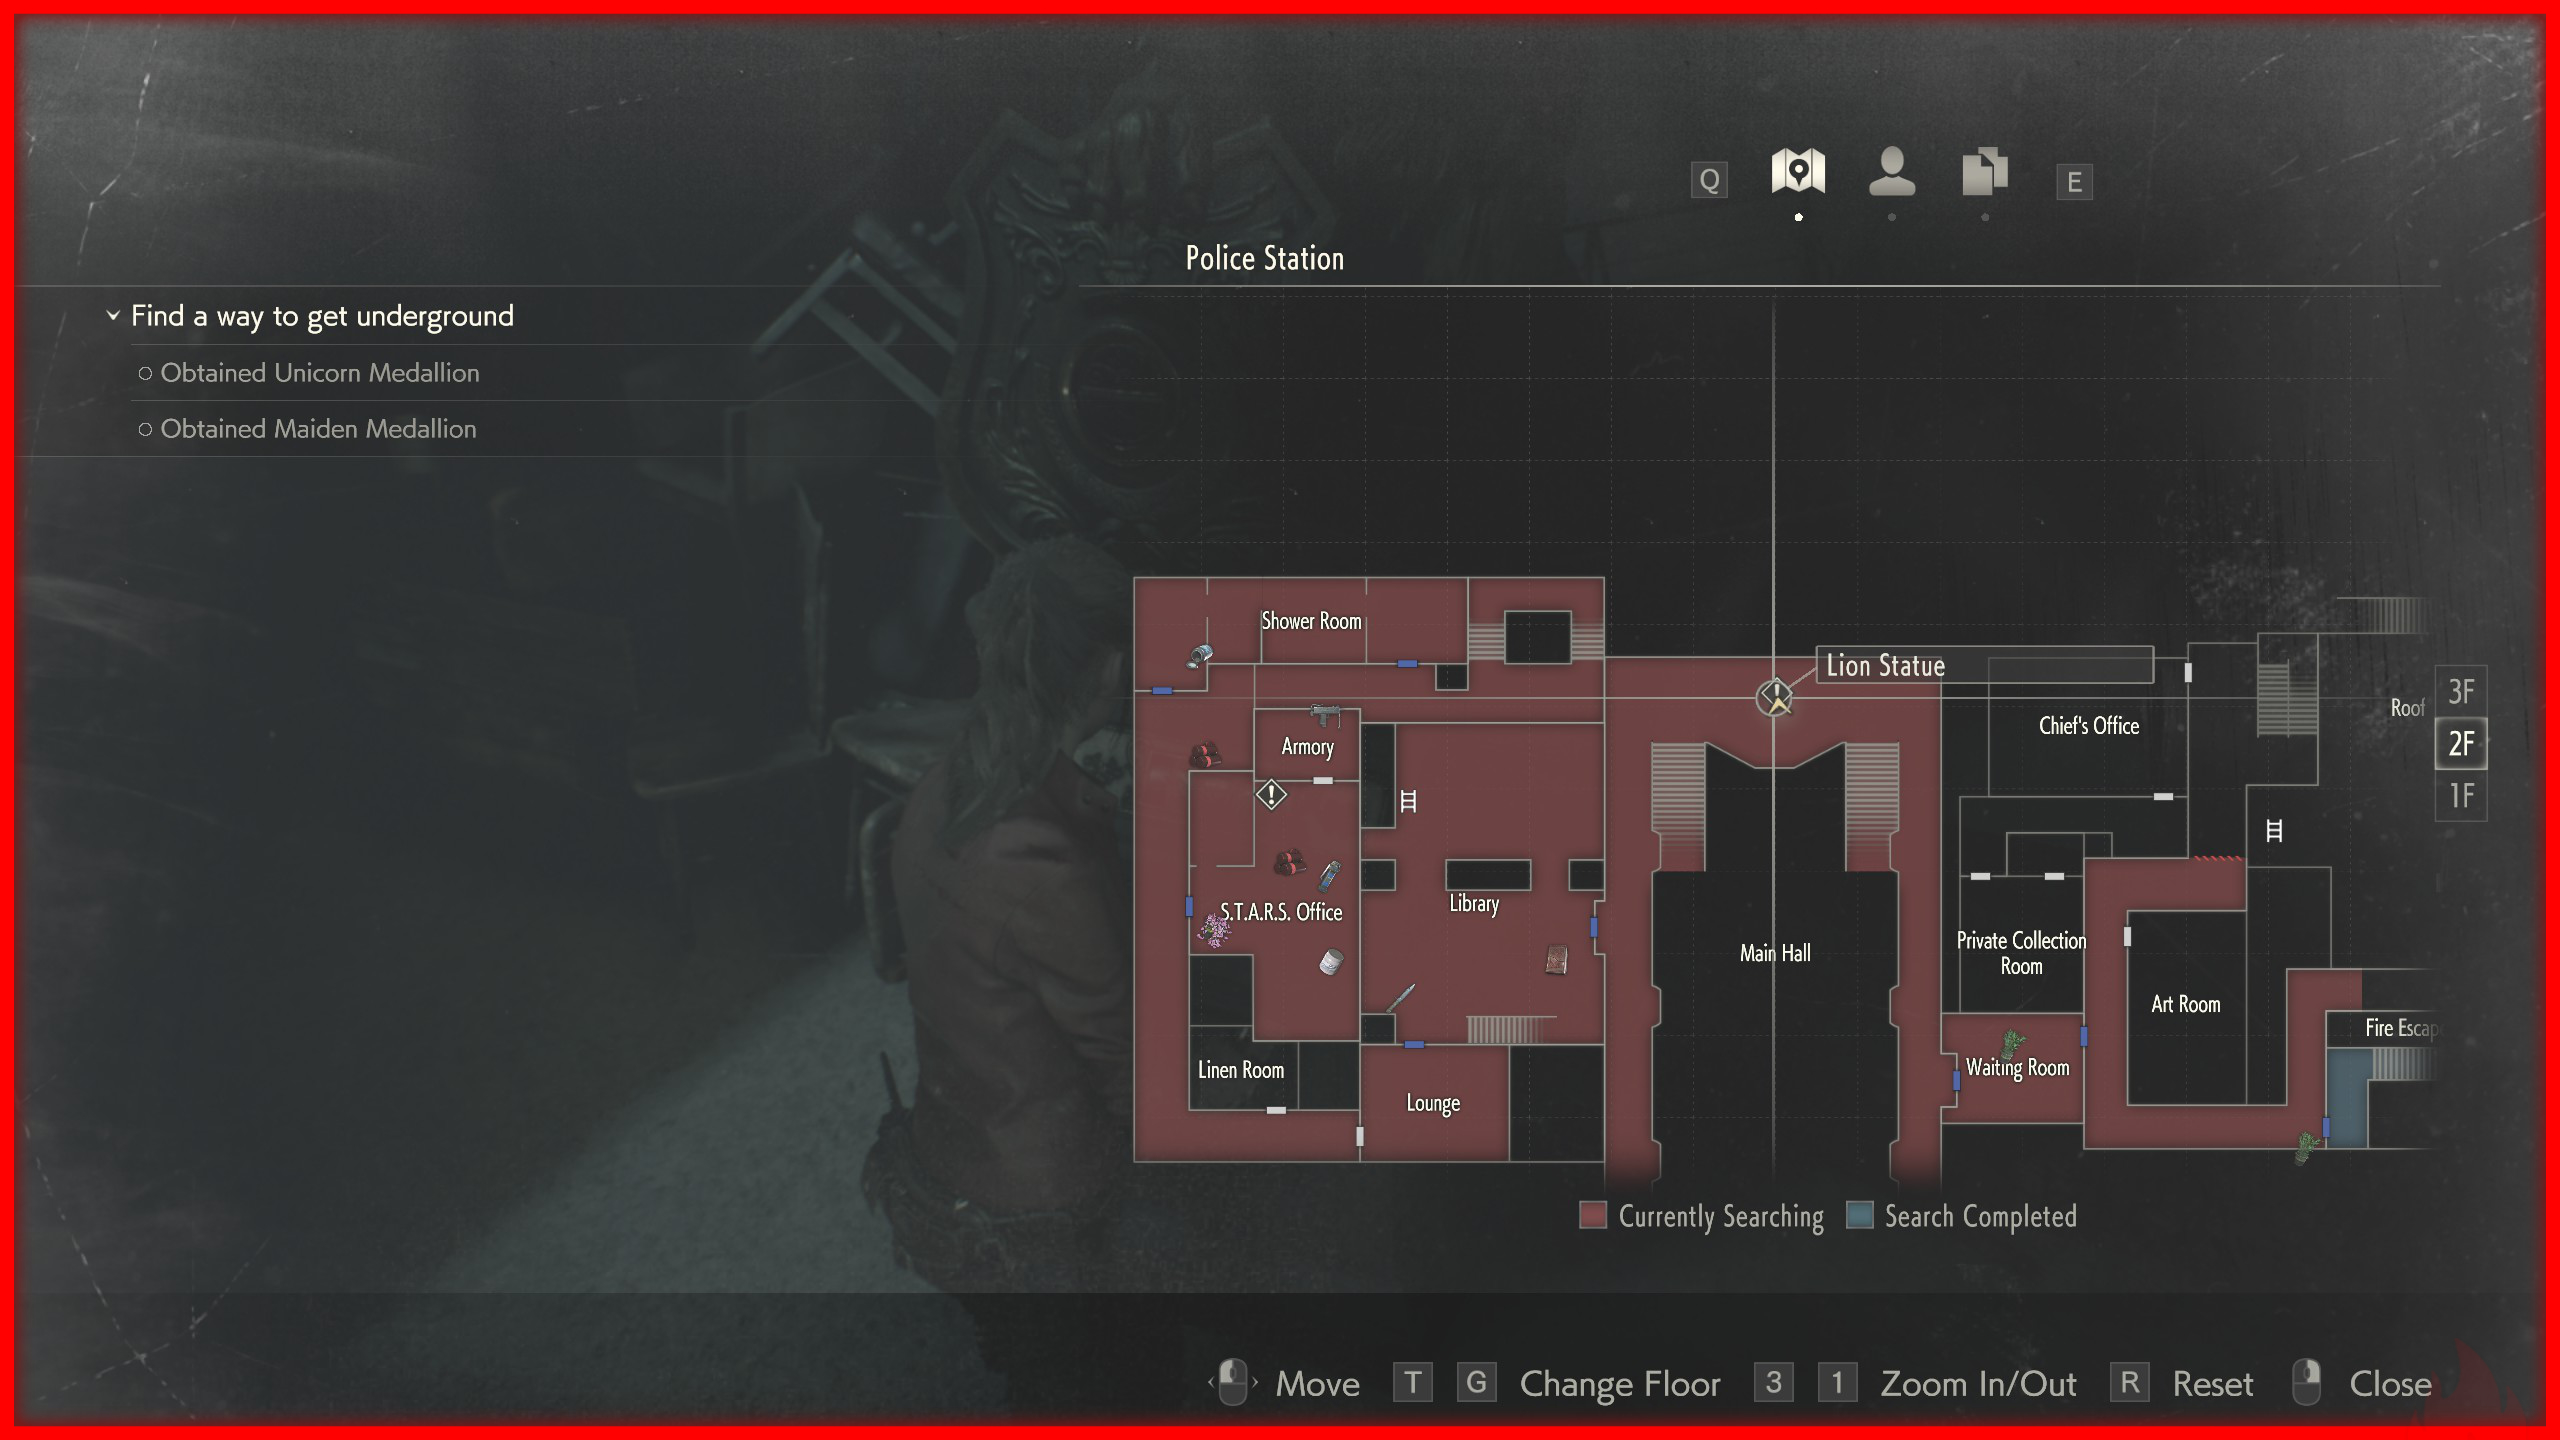
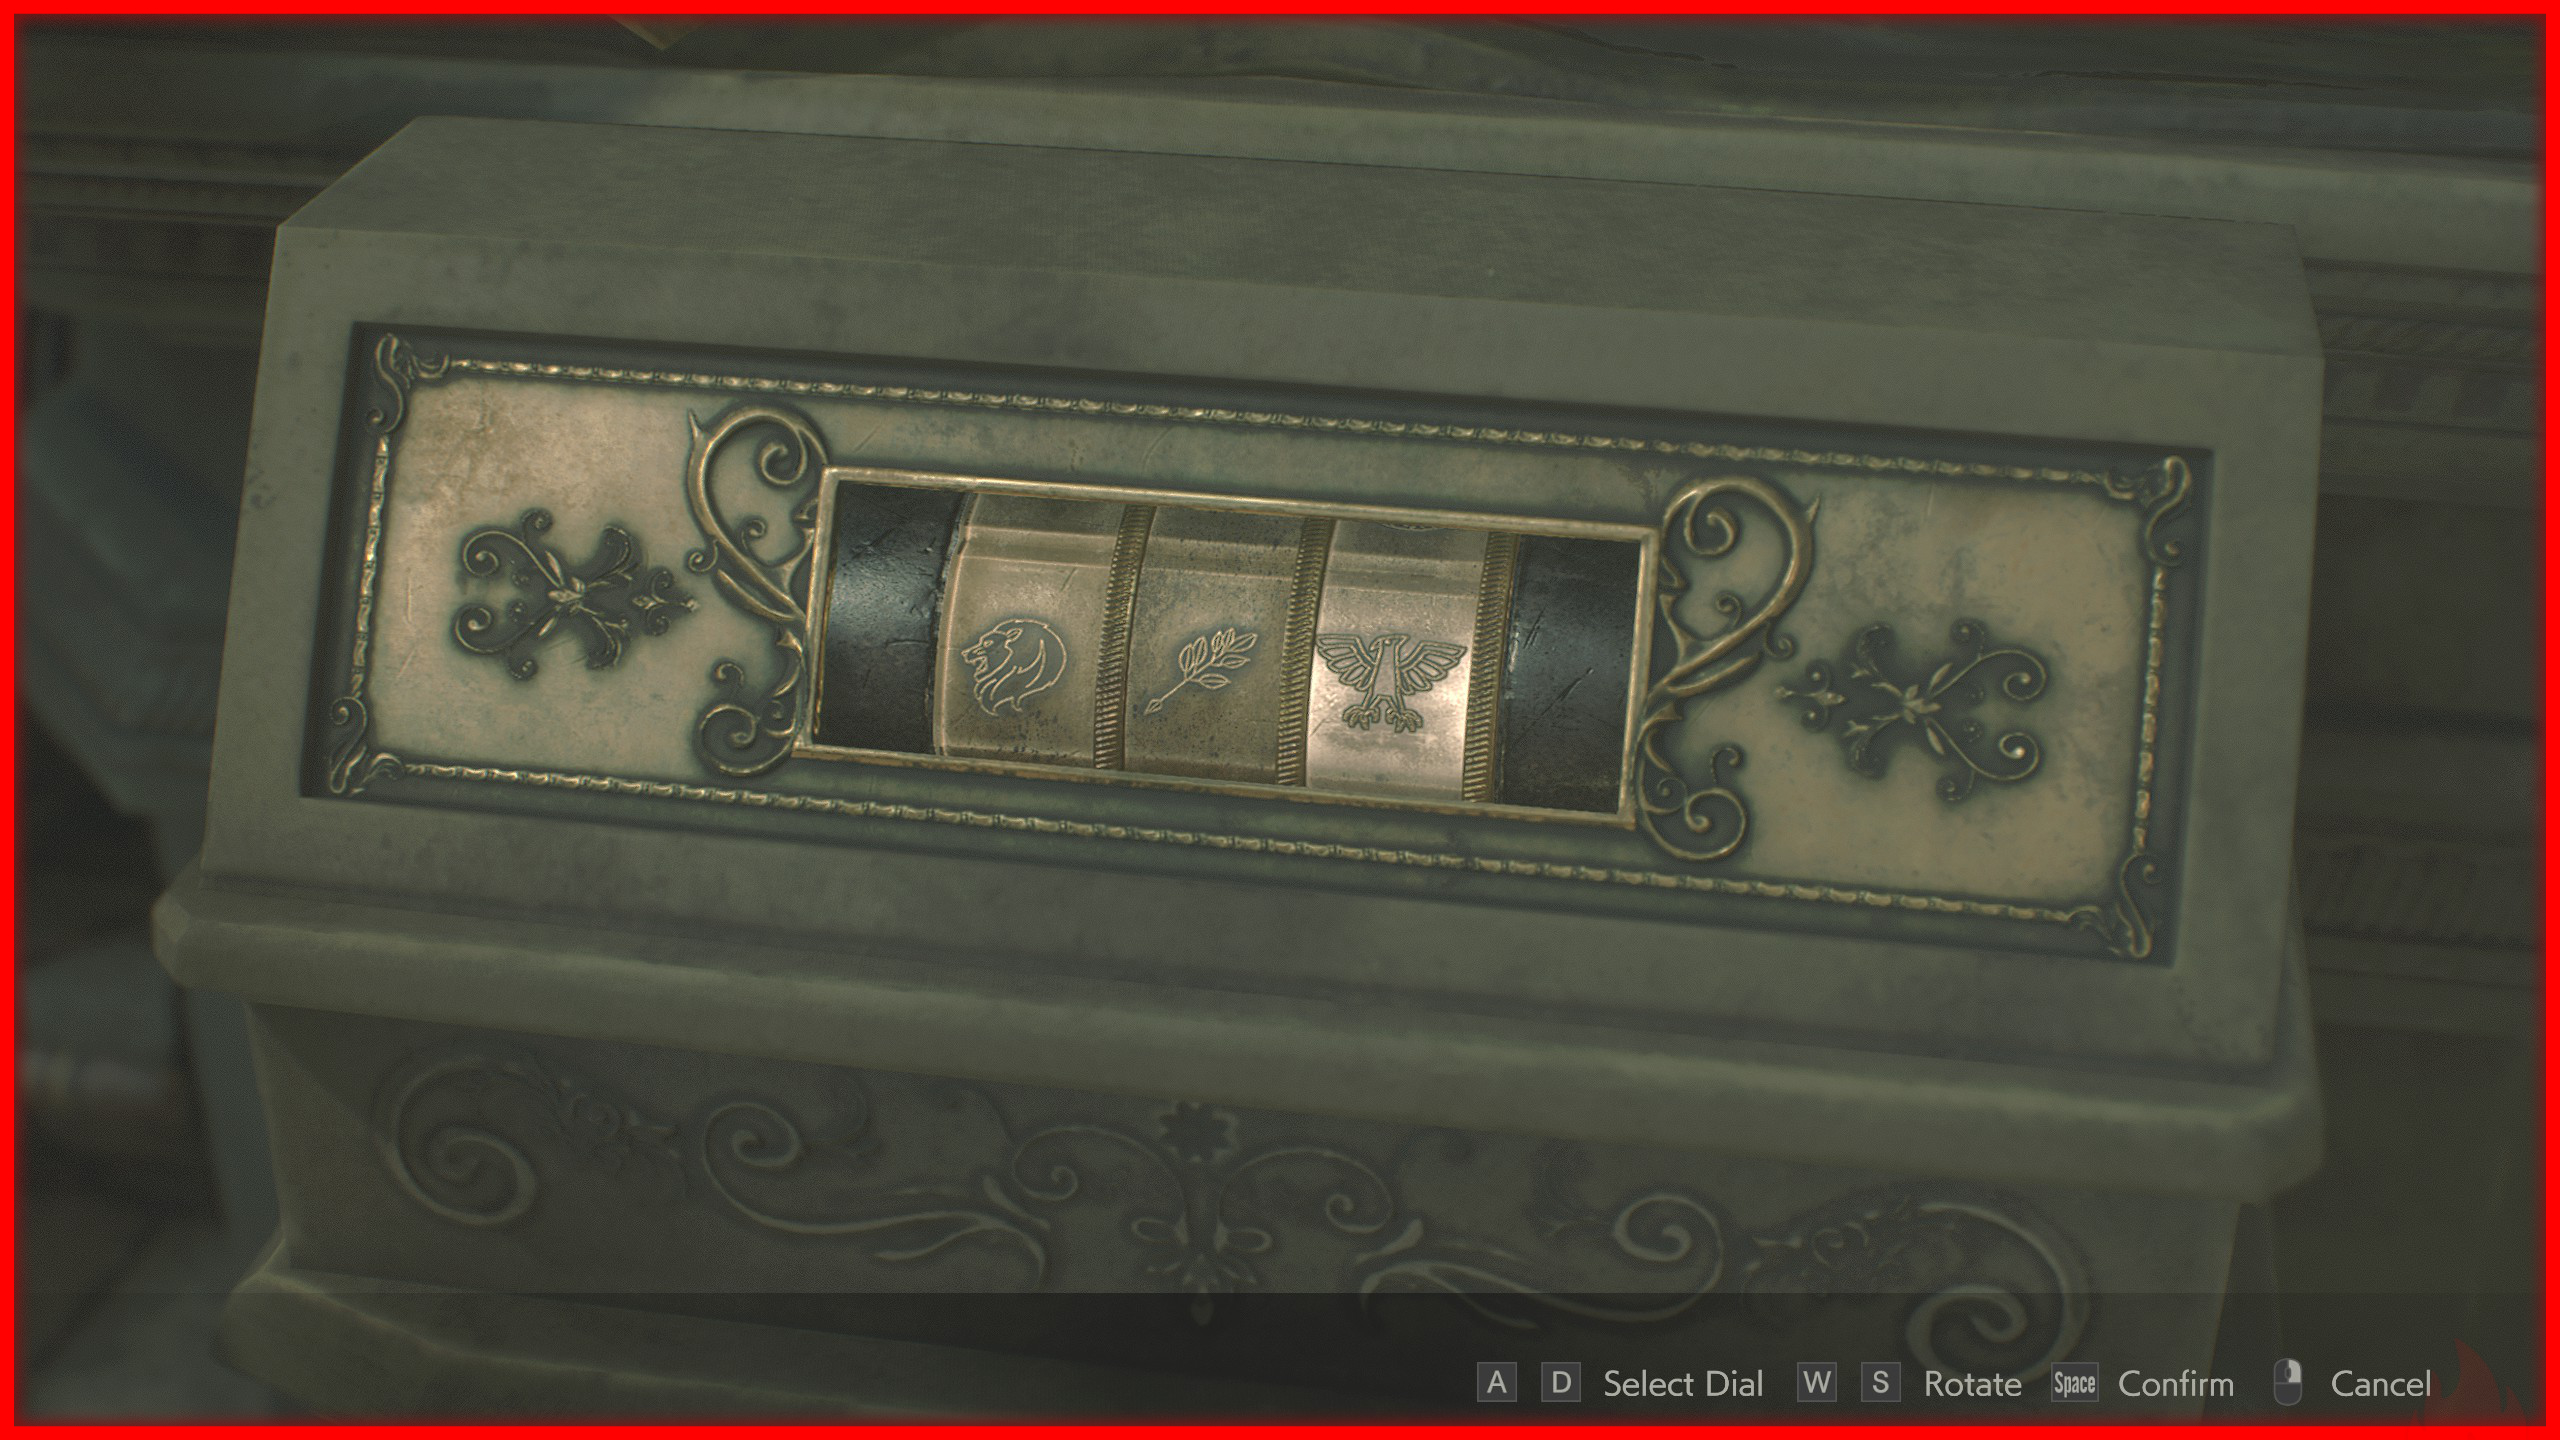 Unicorn Medallion: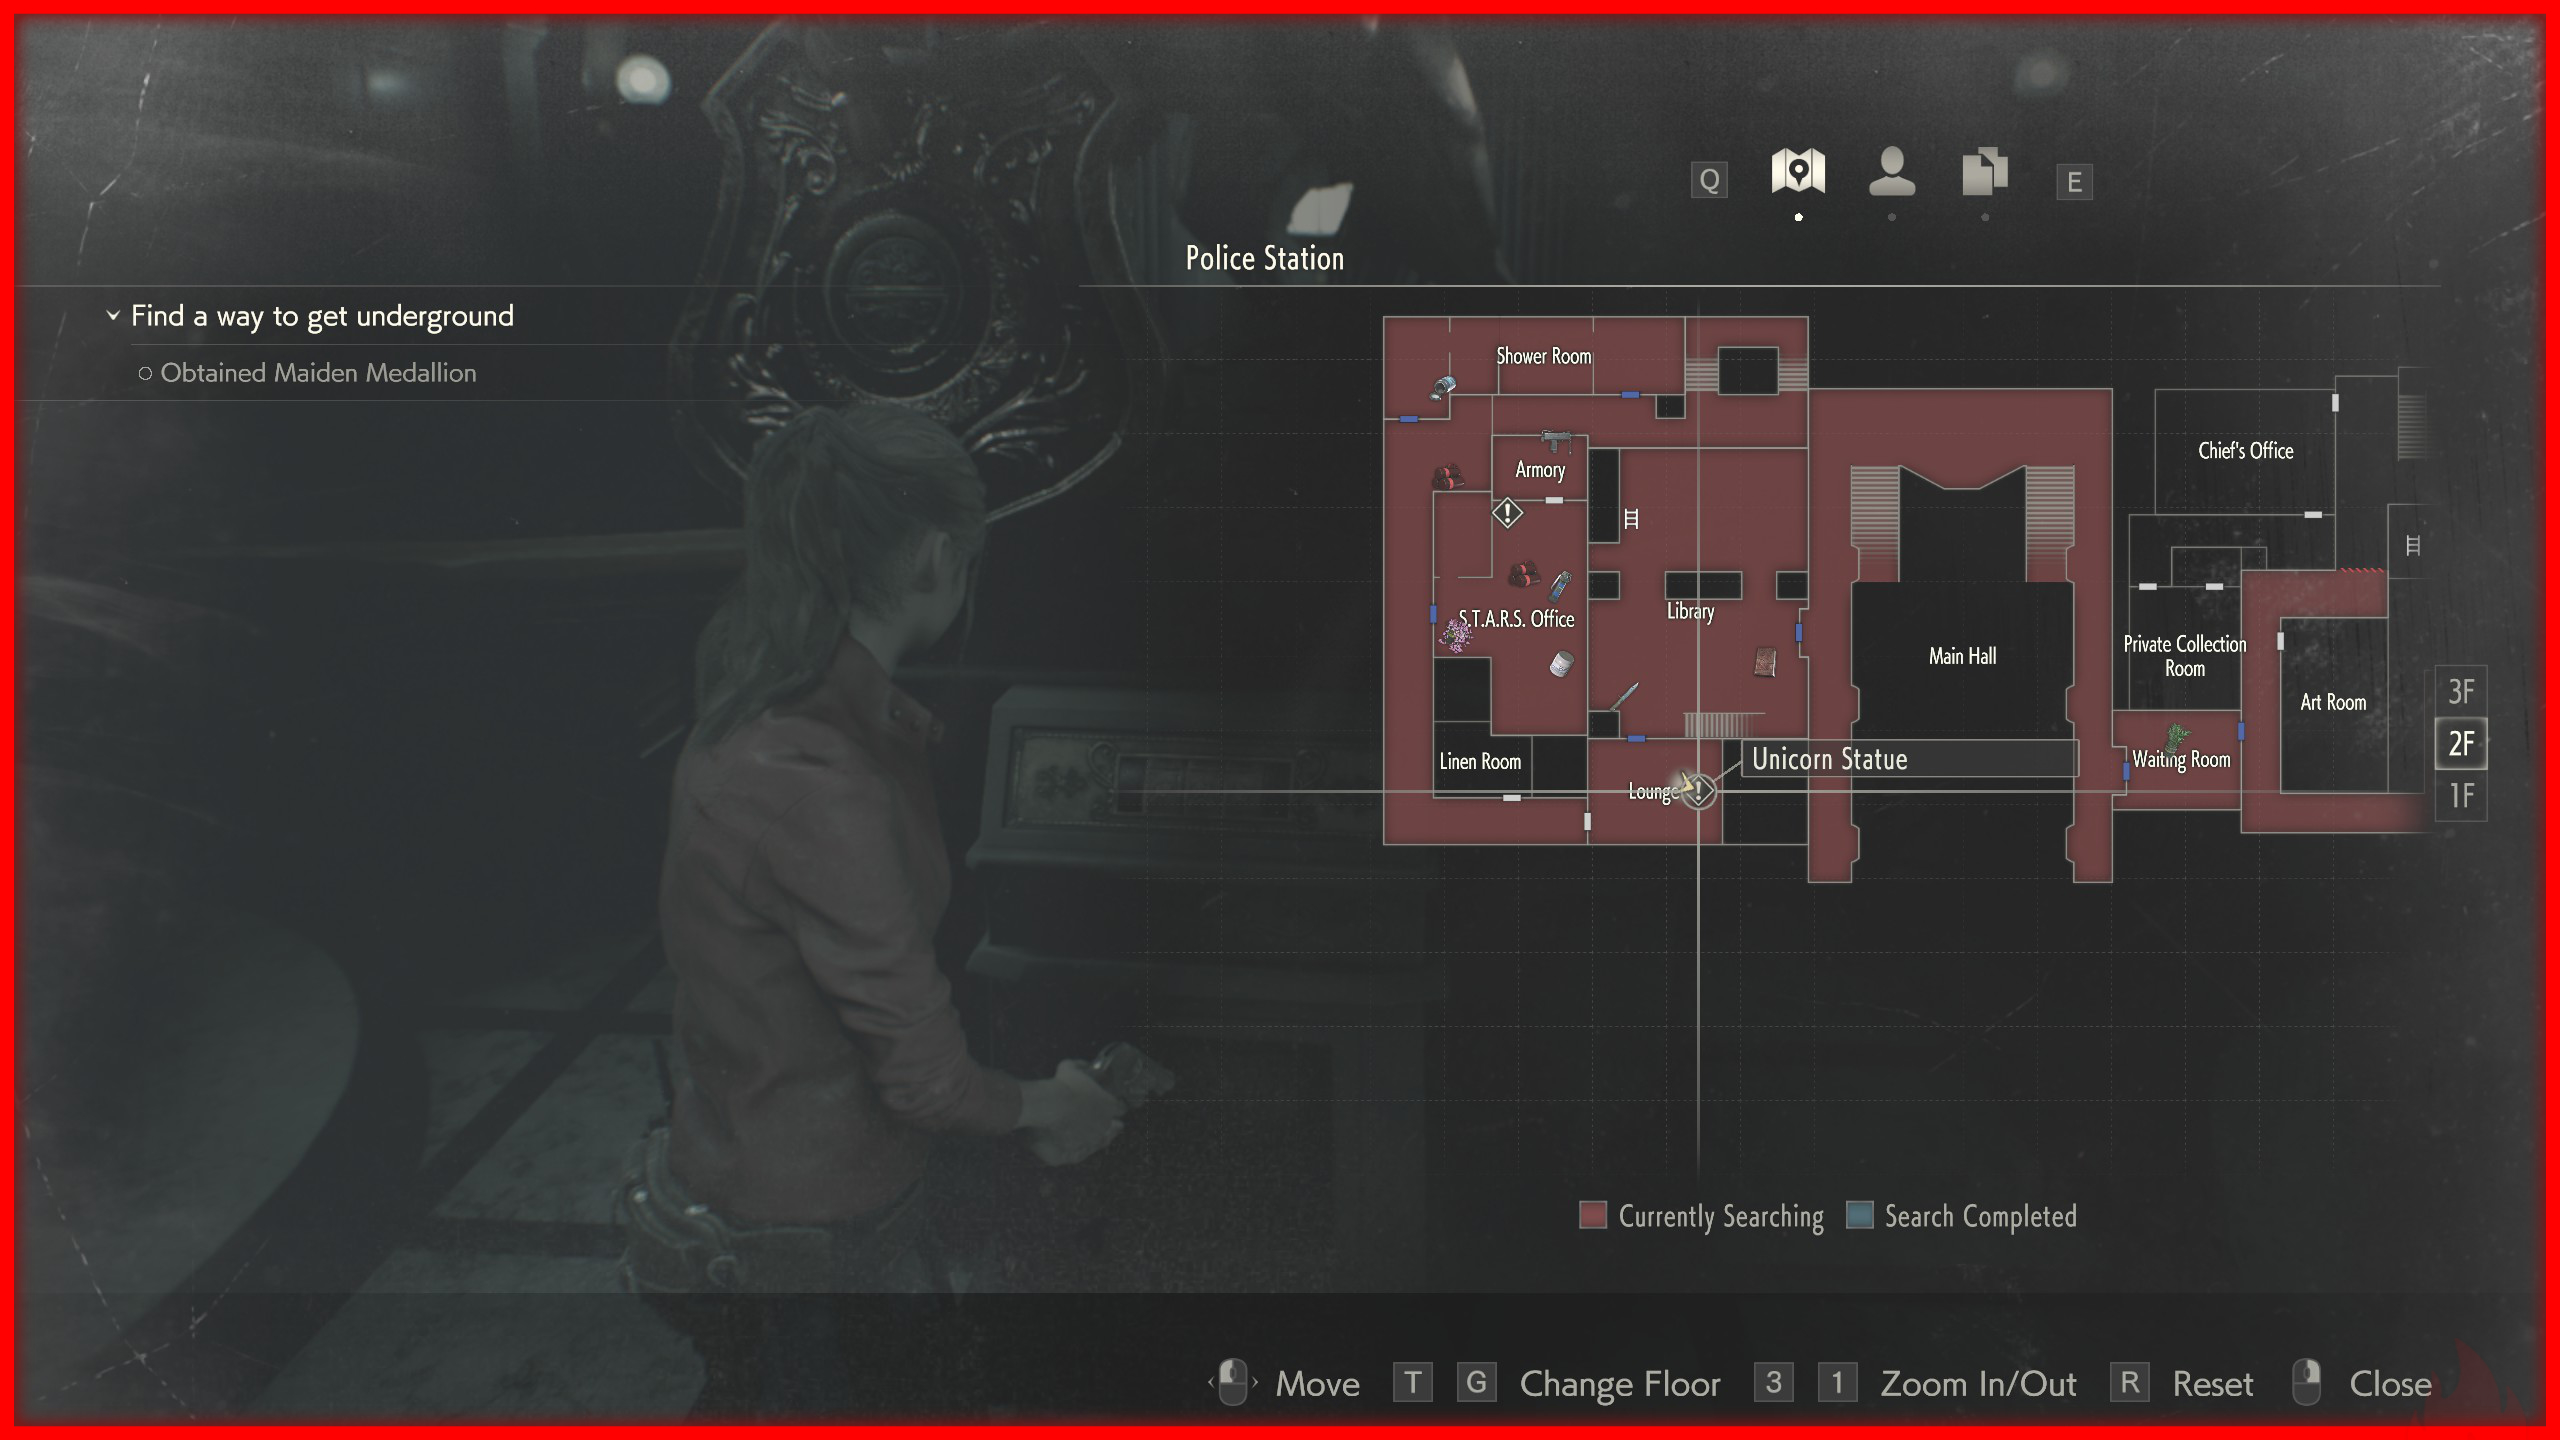
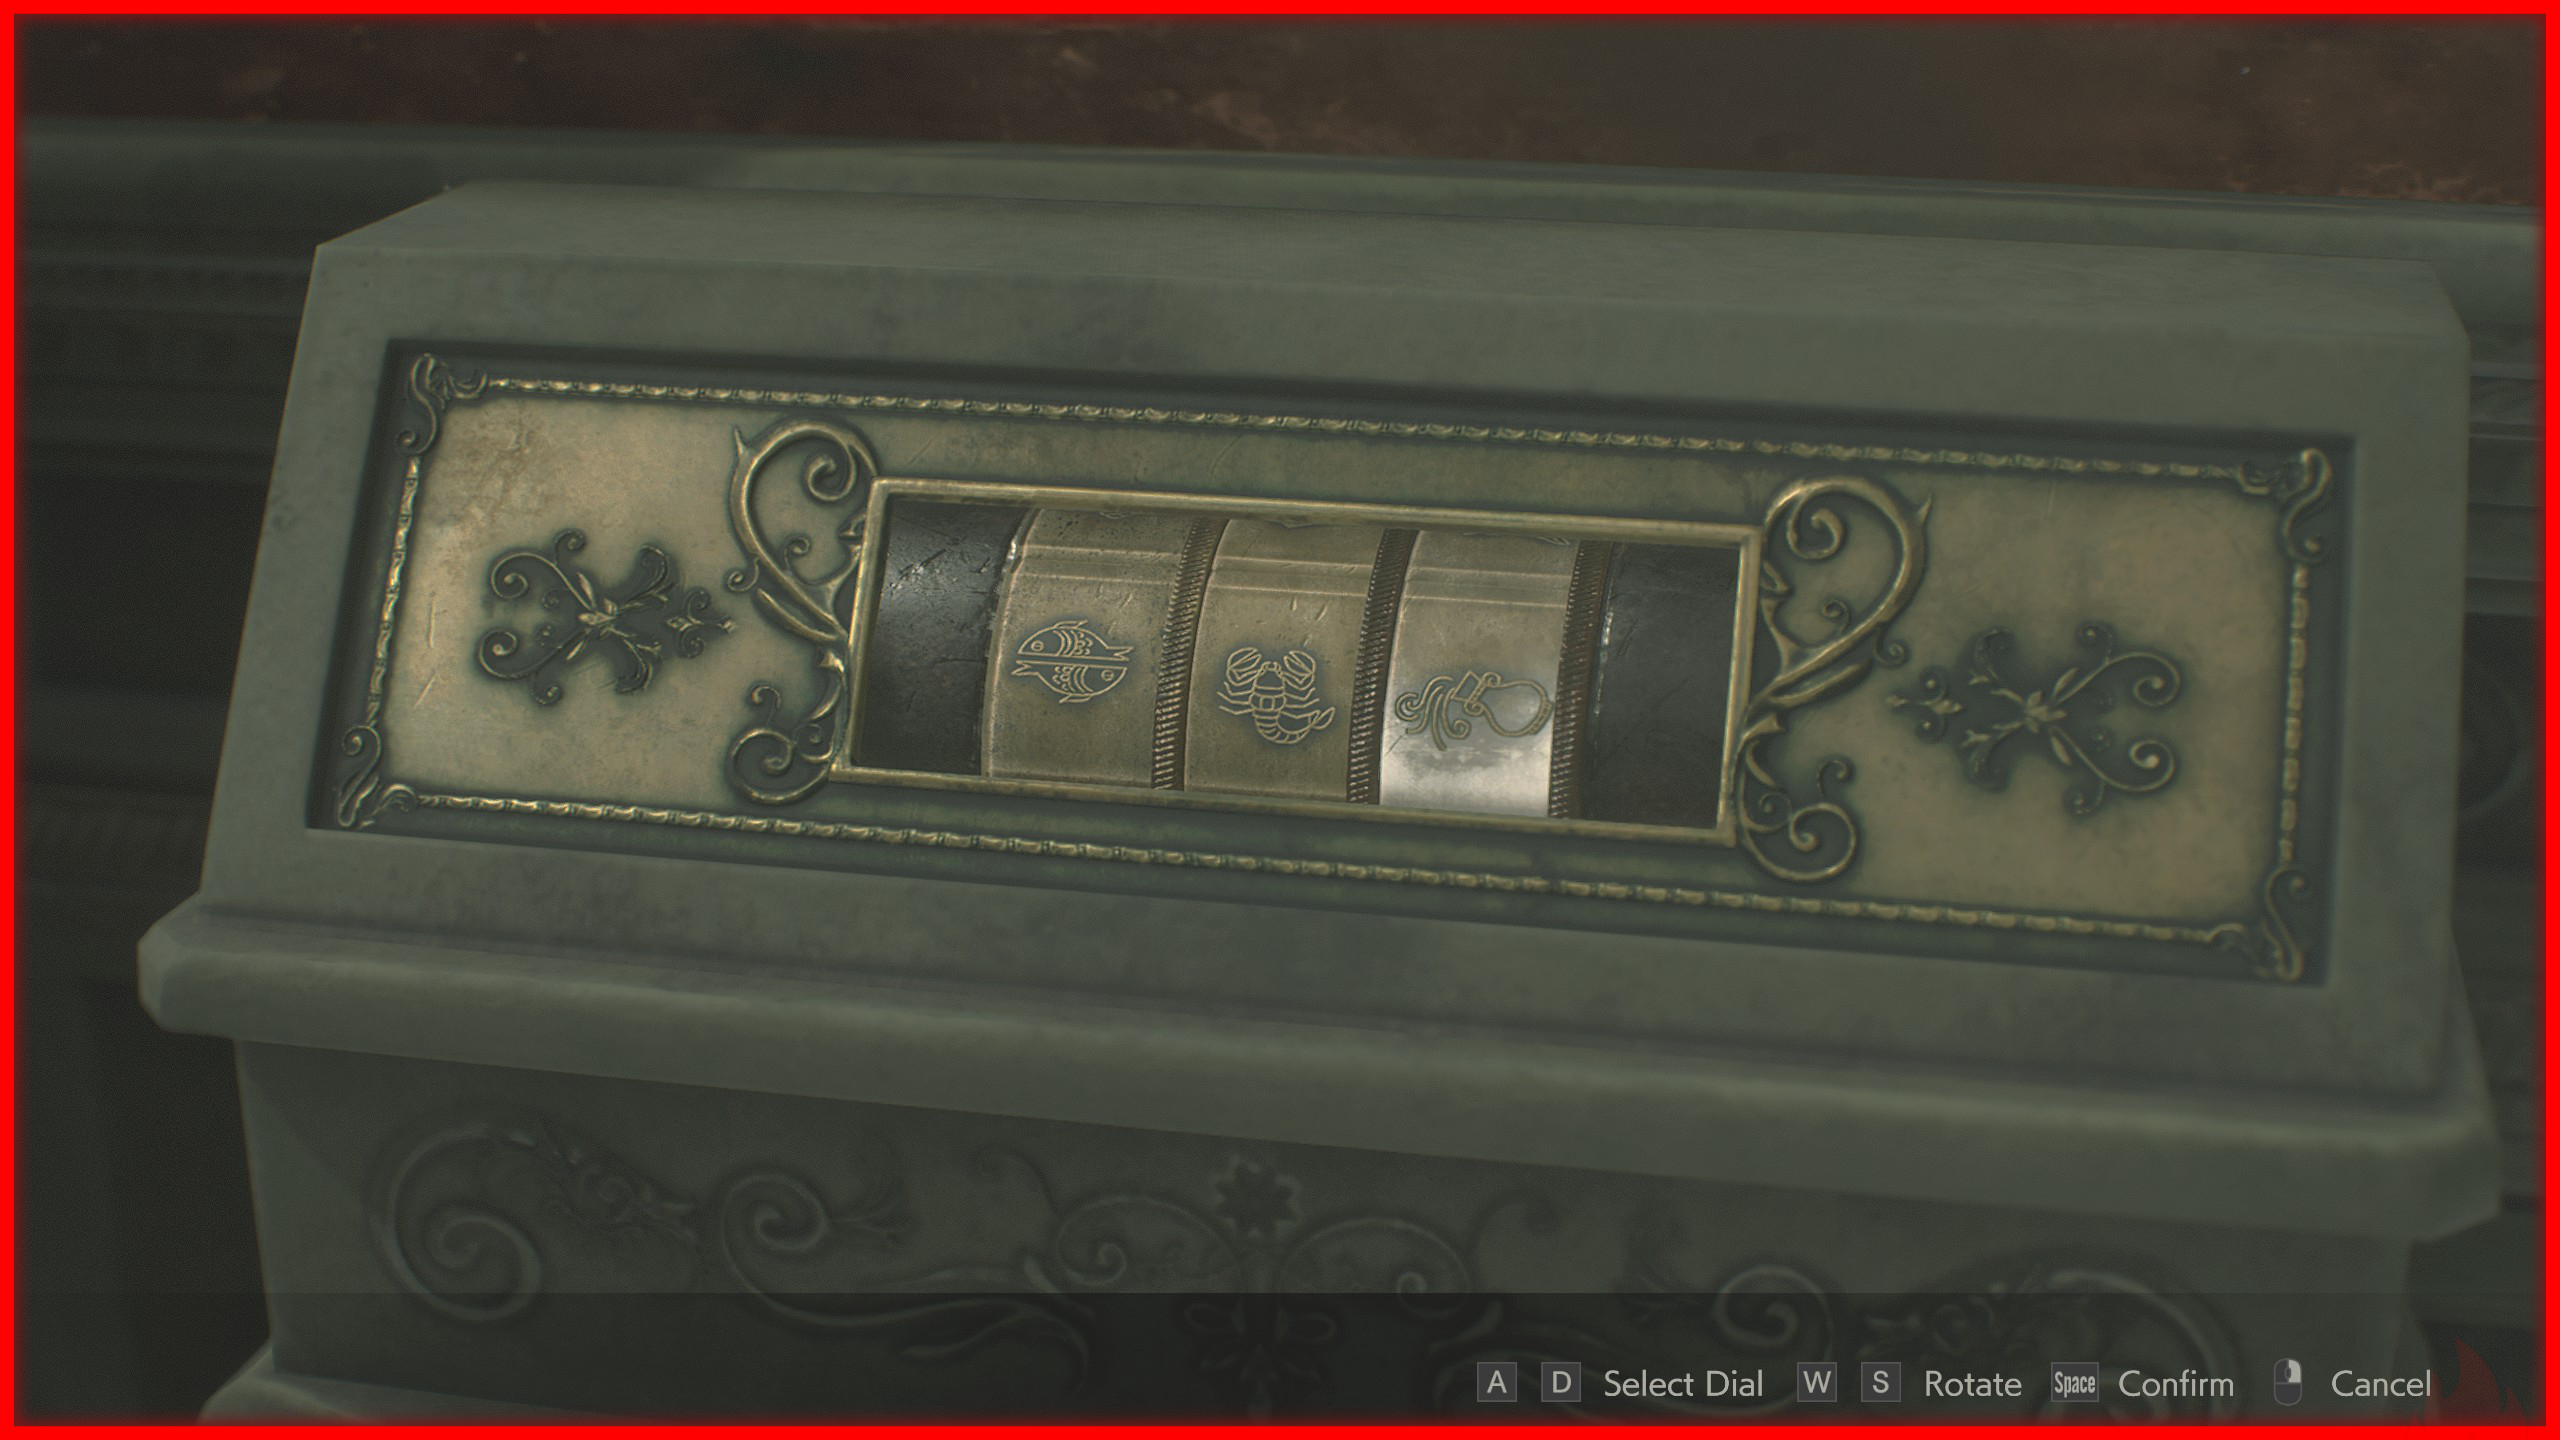 Maiden Medallion: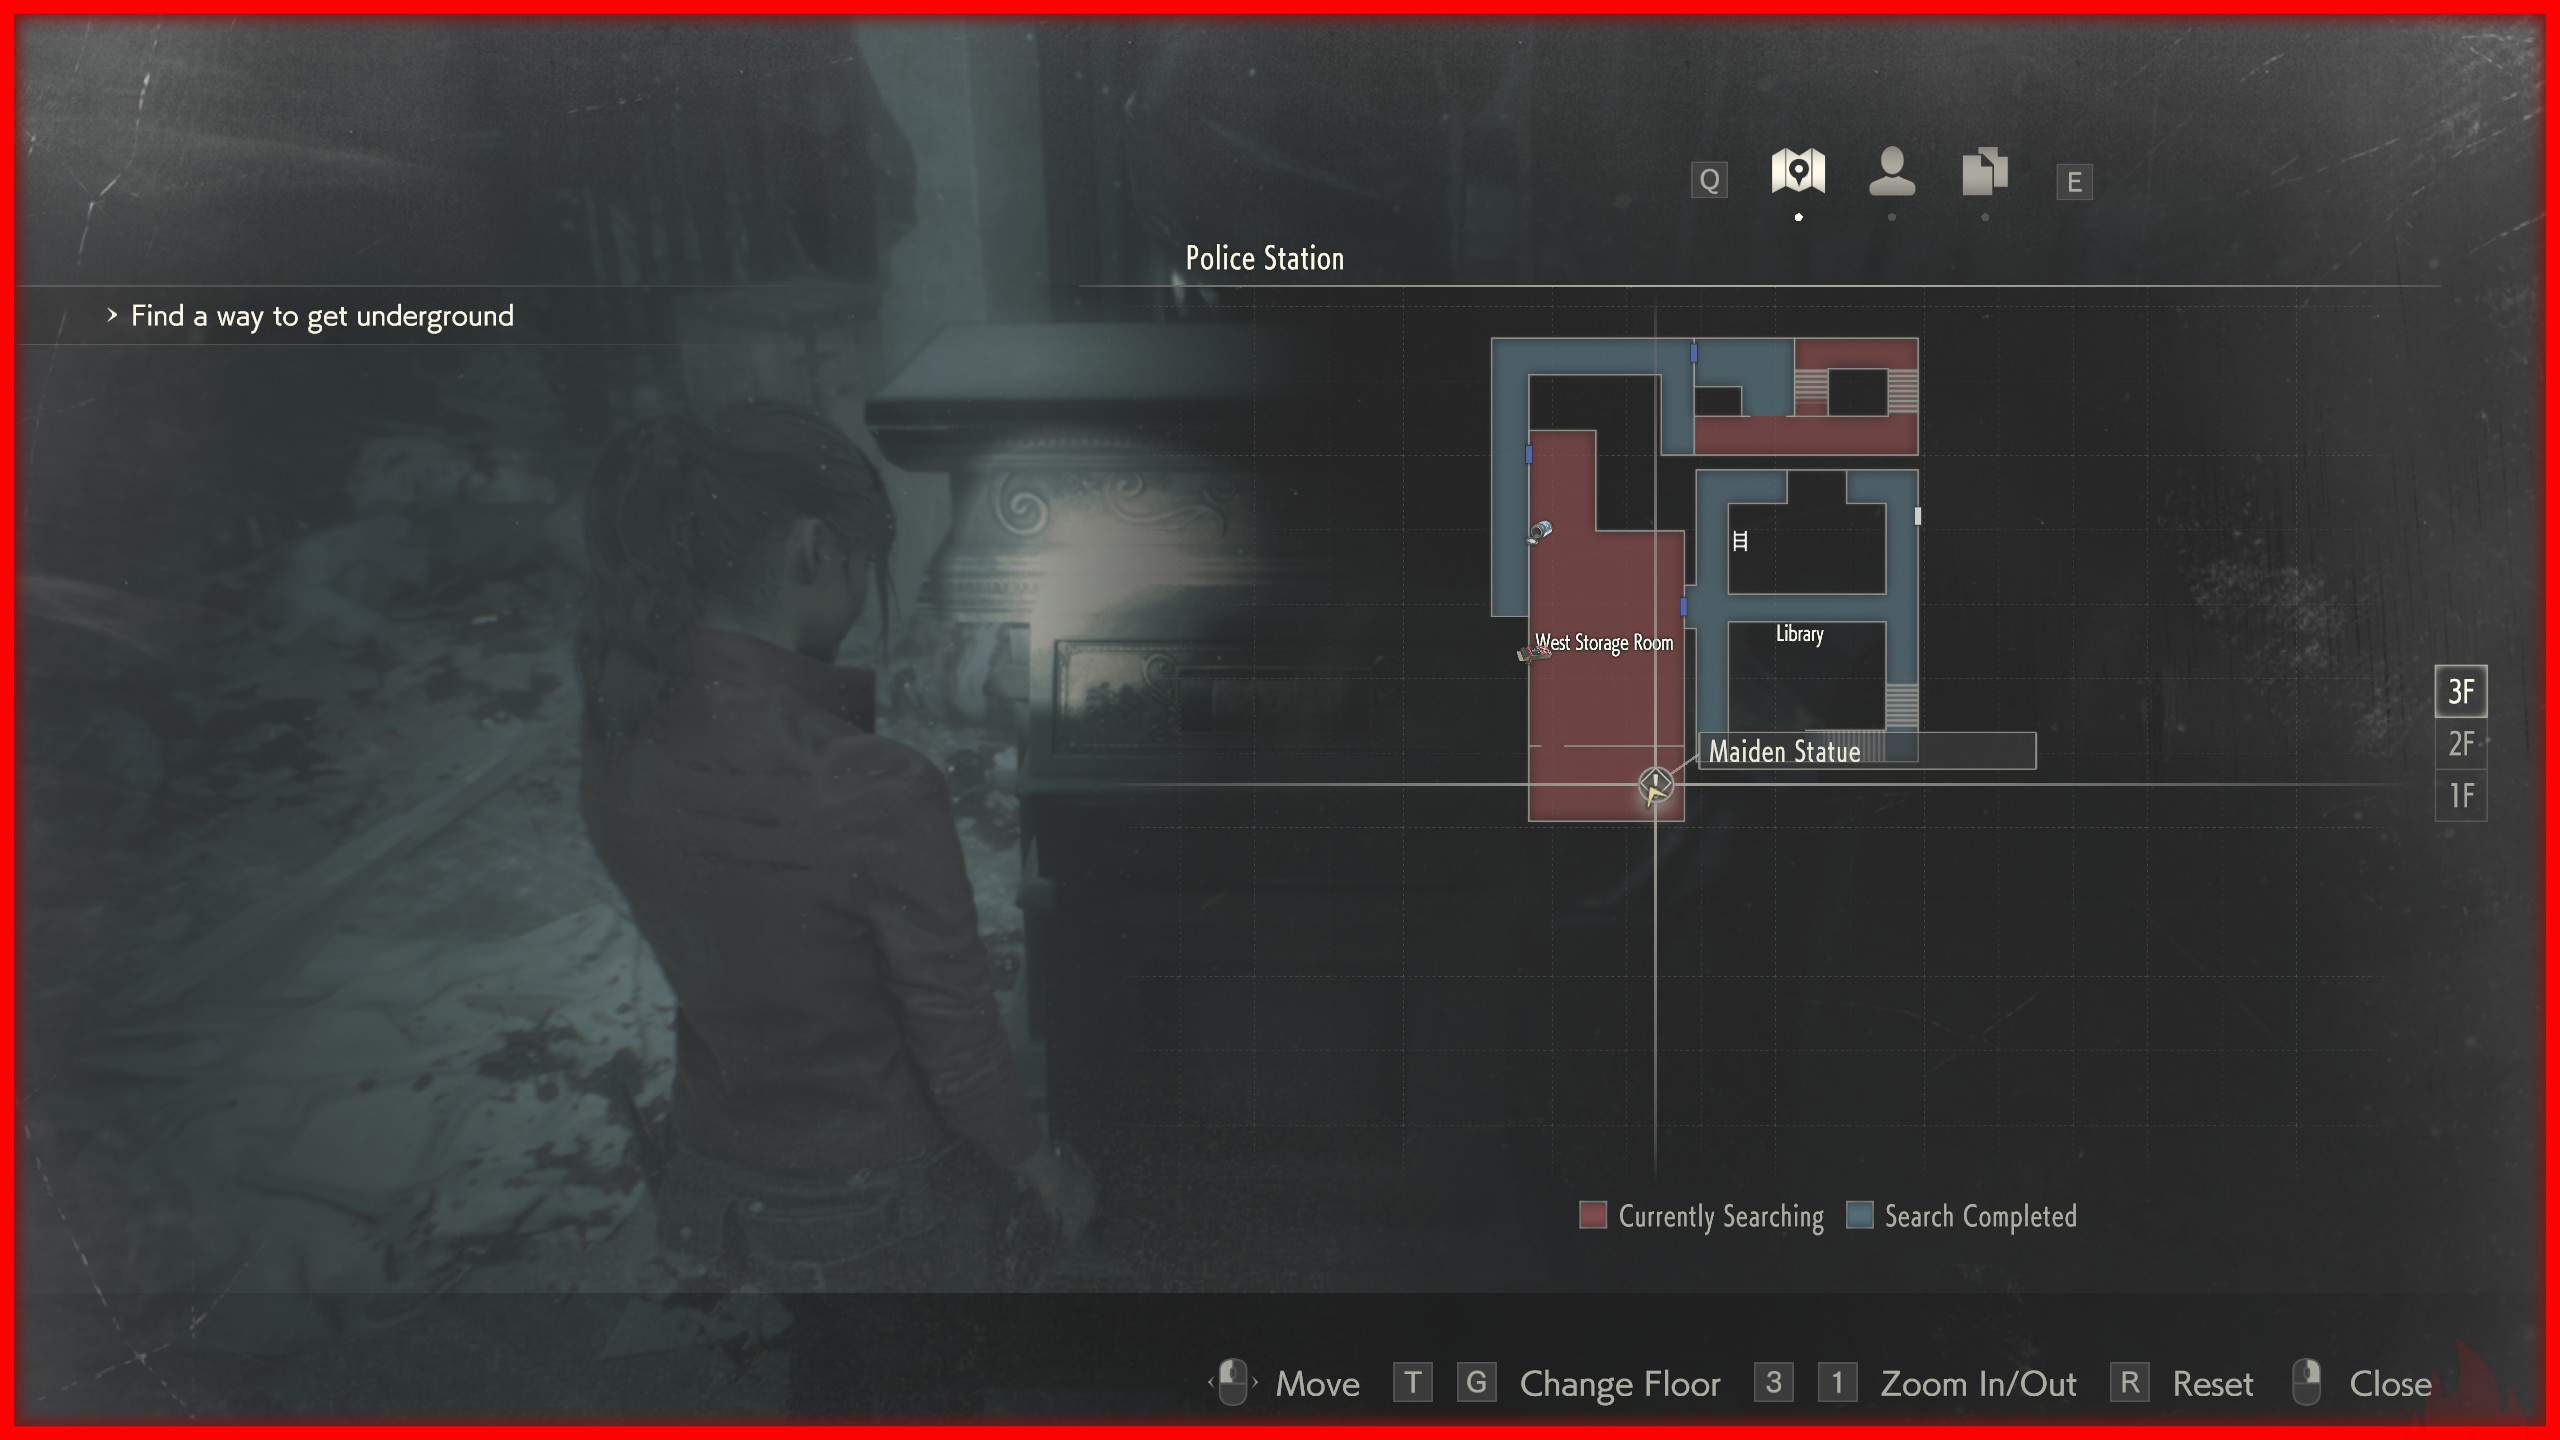
Never-Ending Rain
 Earned once you use the Parking Garage Security Key to leave the Police Station through the parking garage.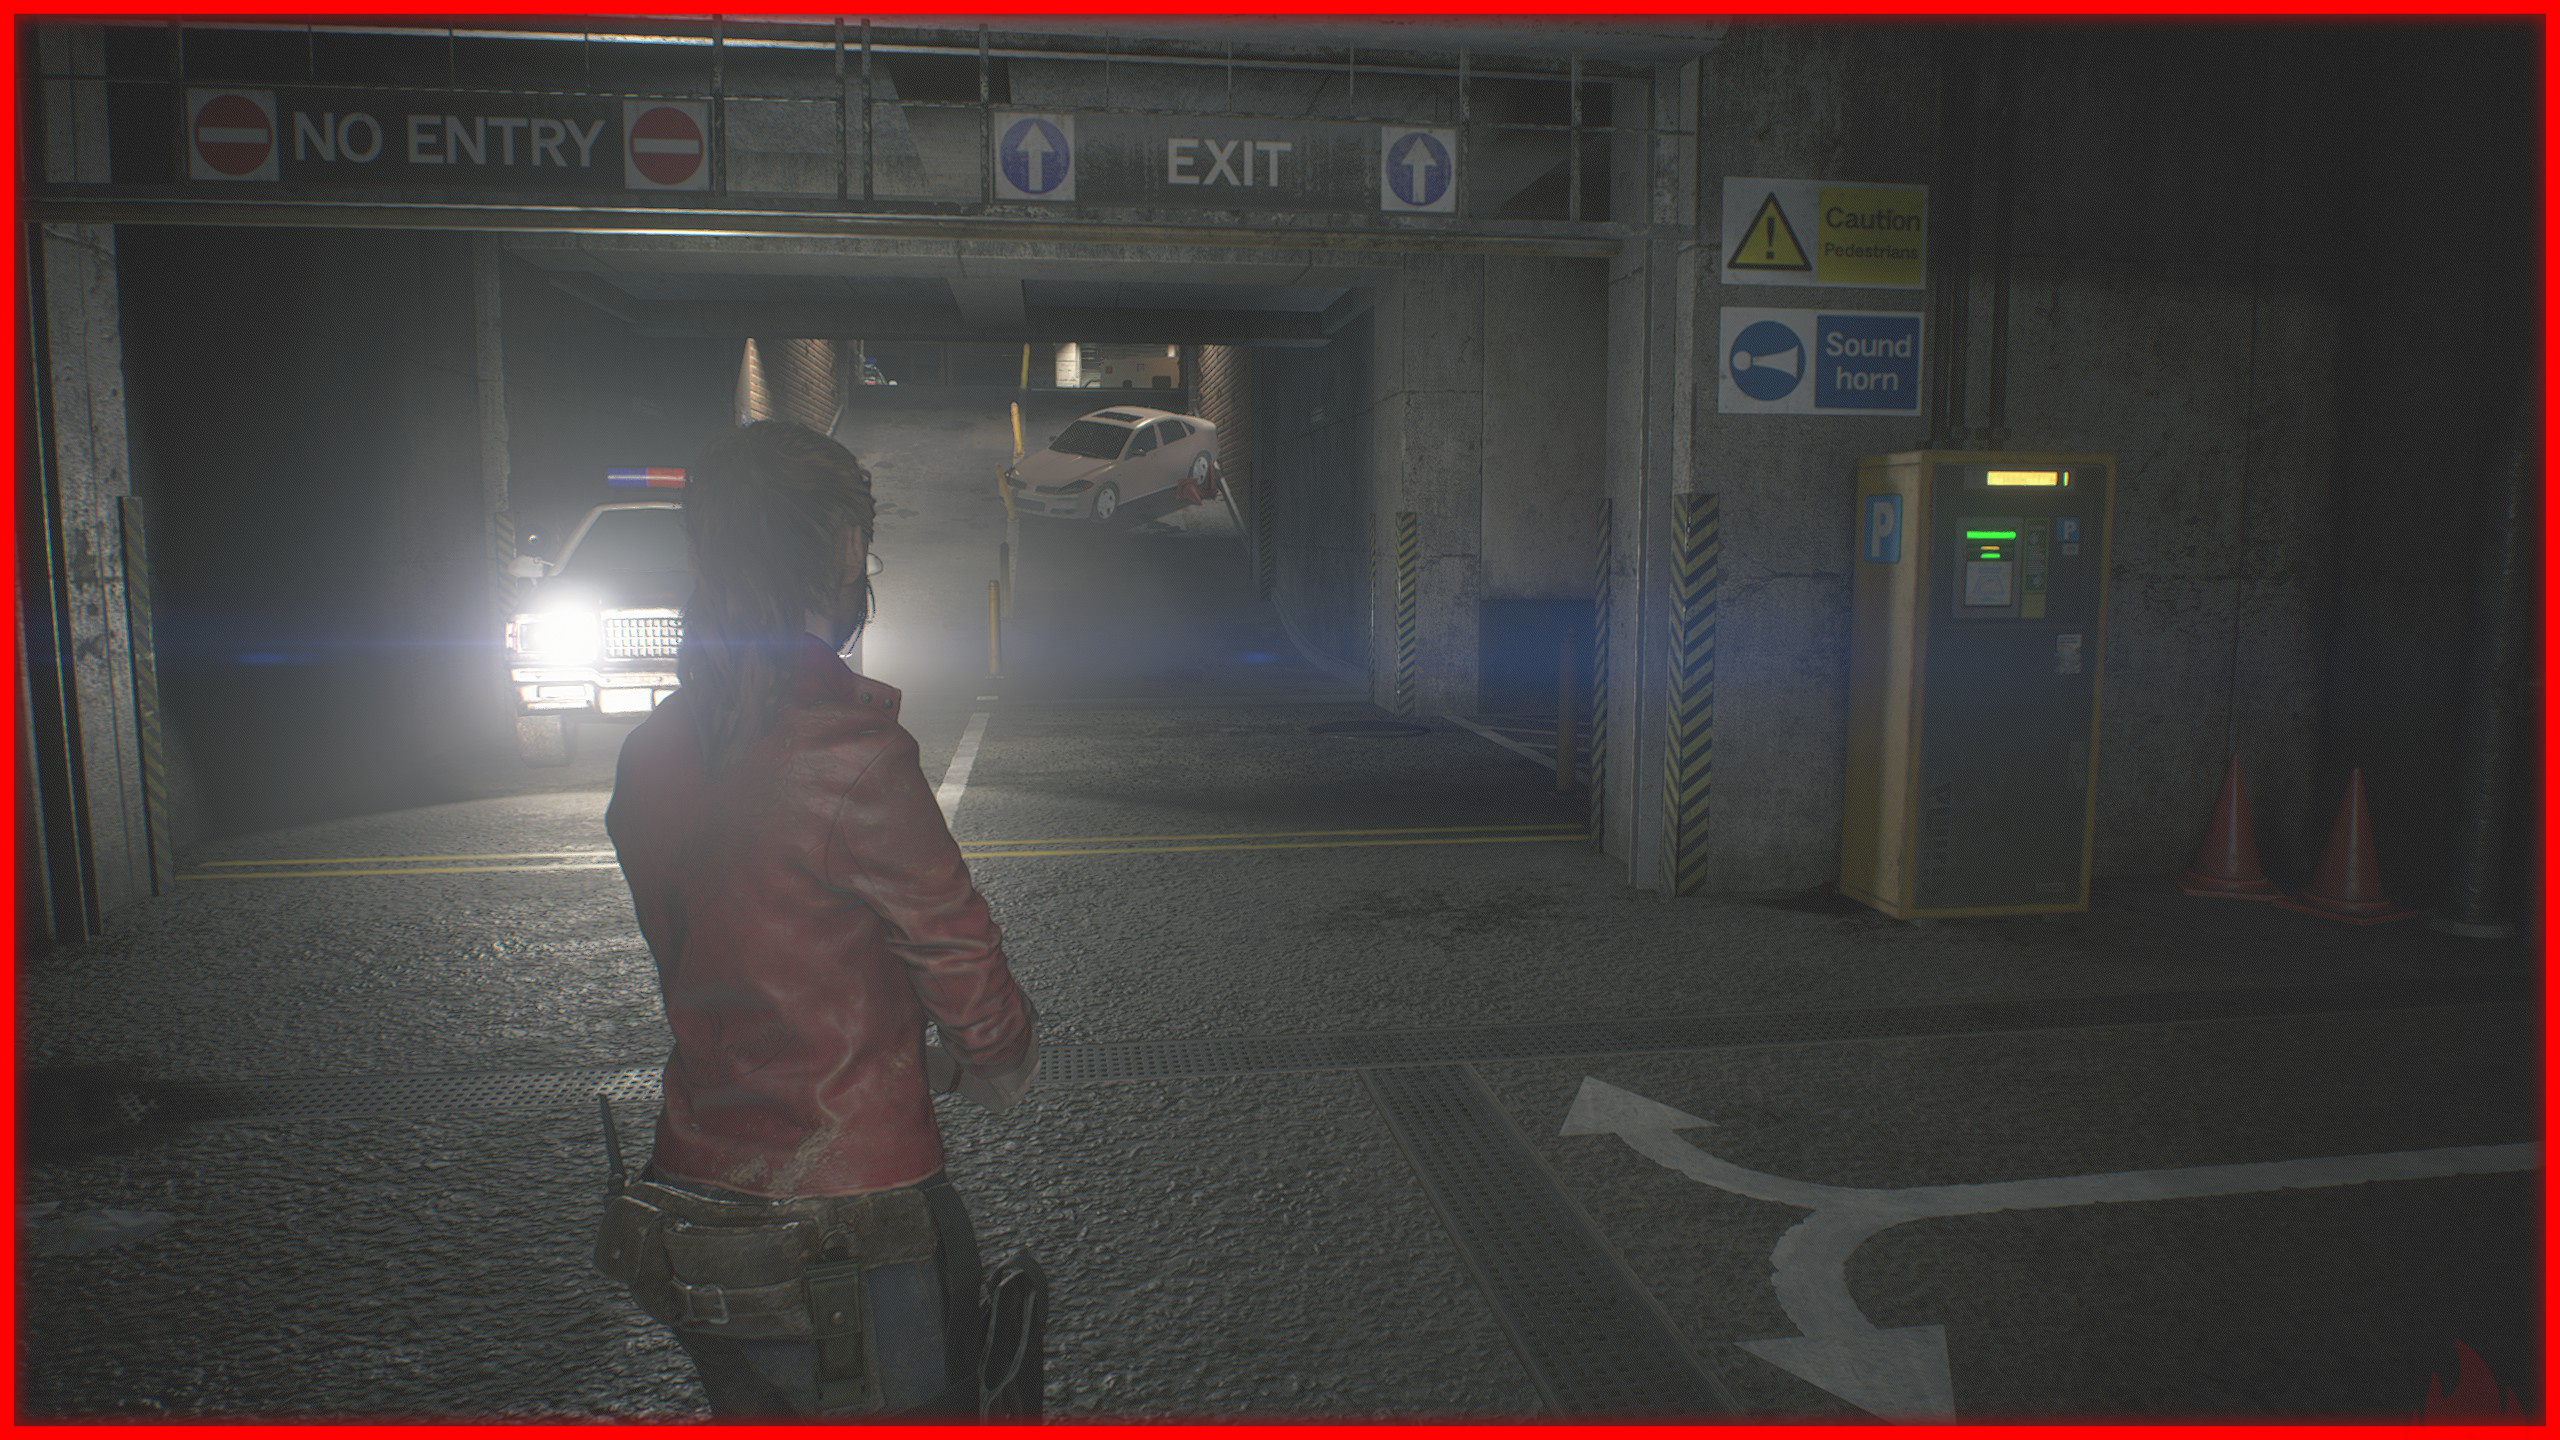
Hack Complete
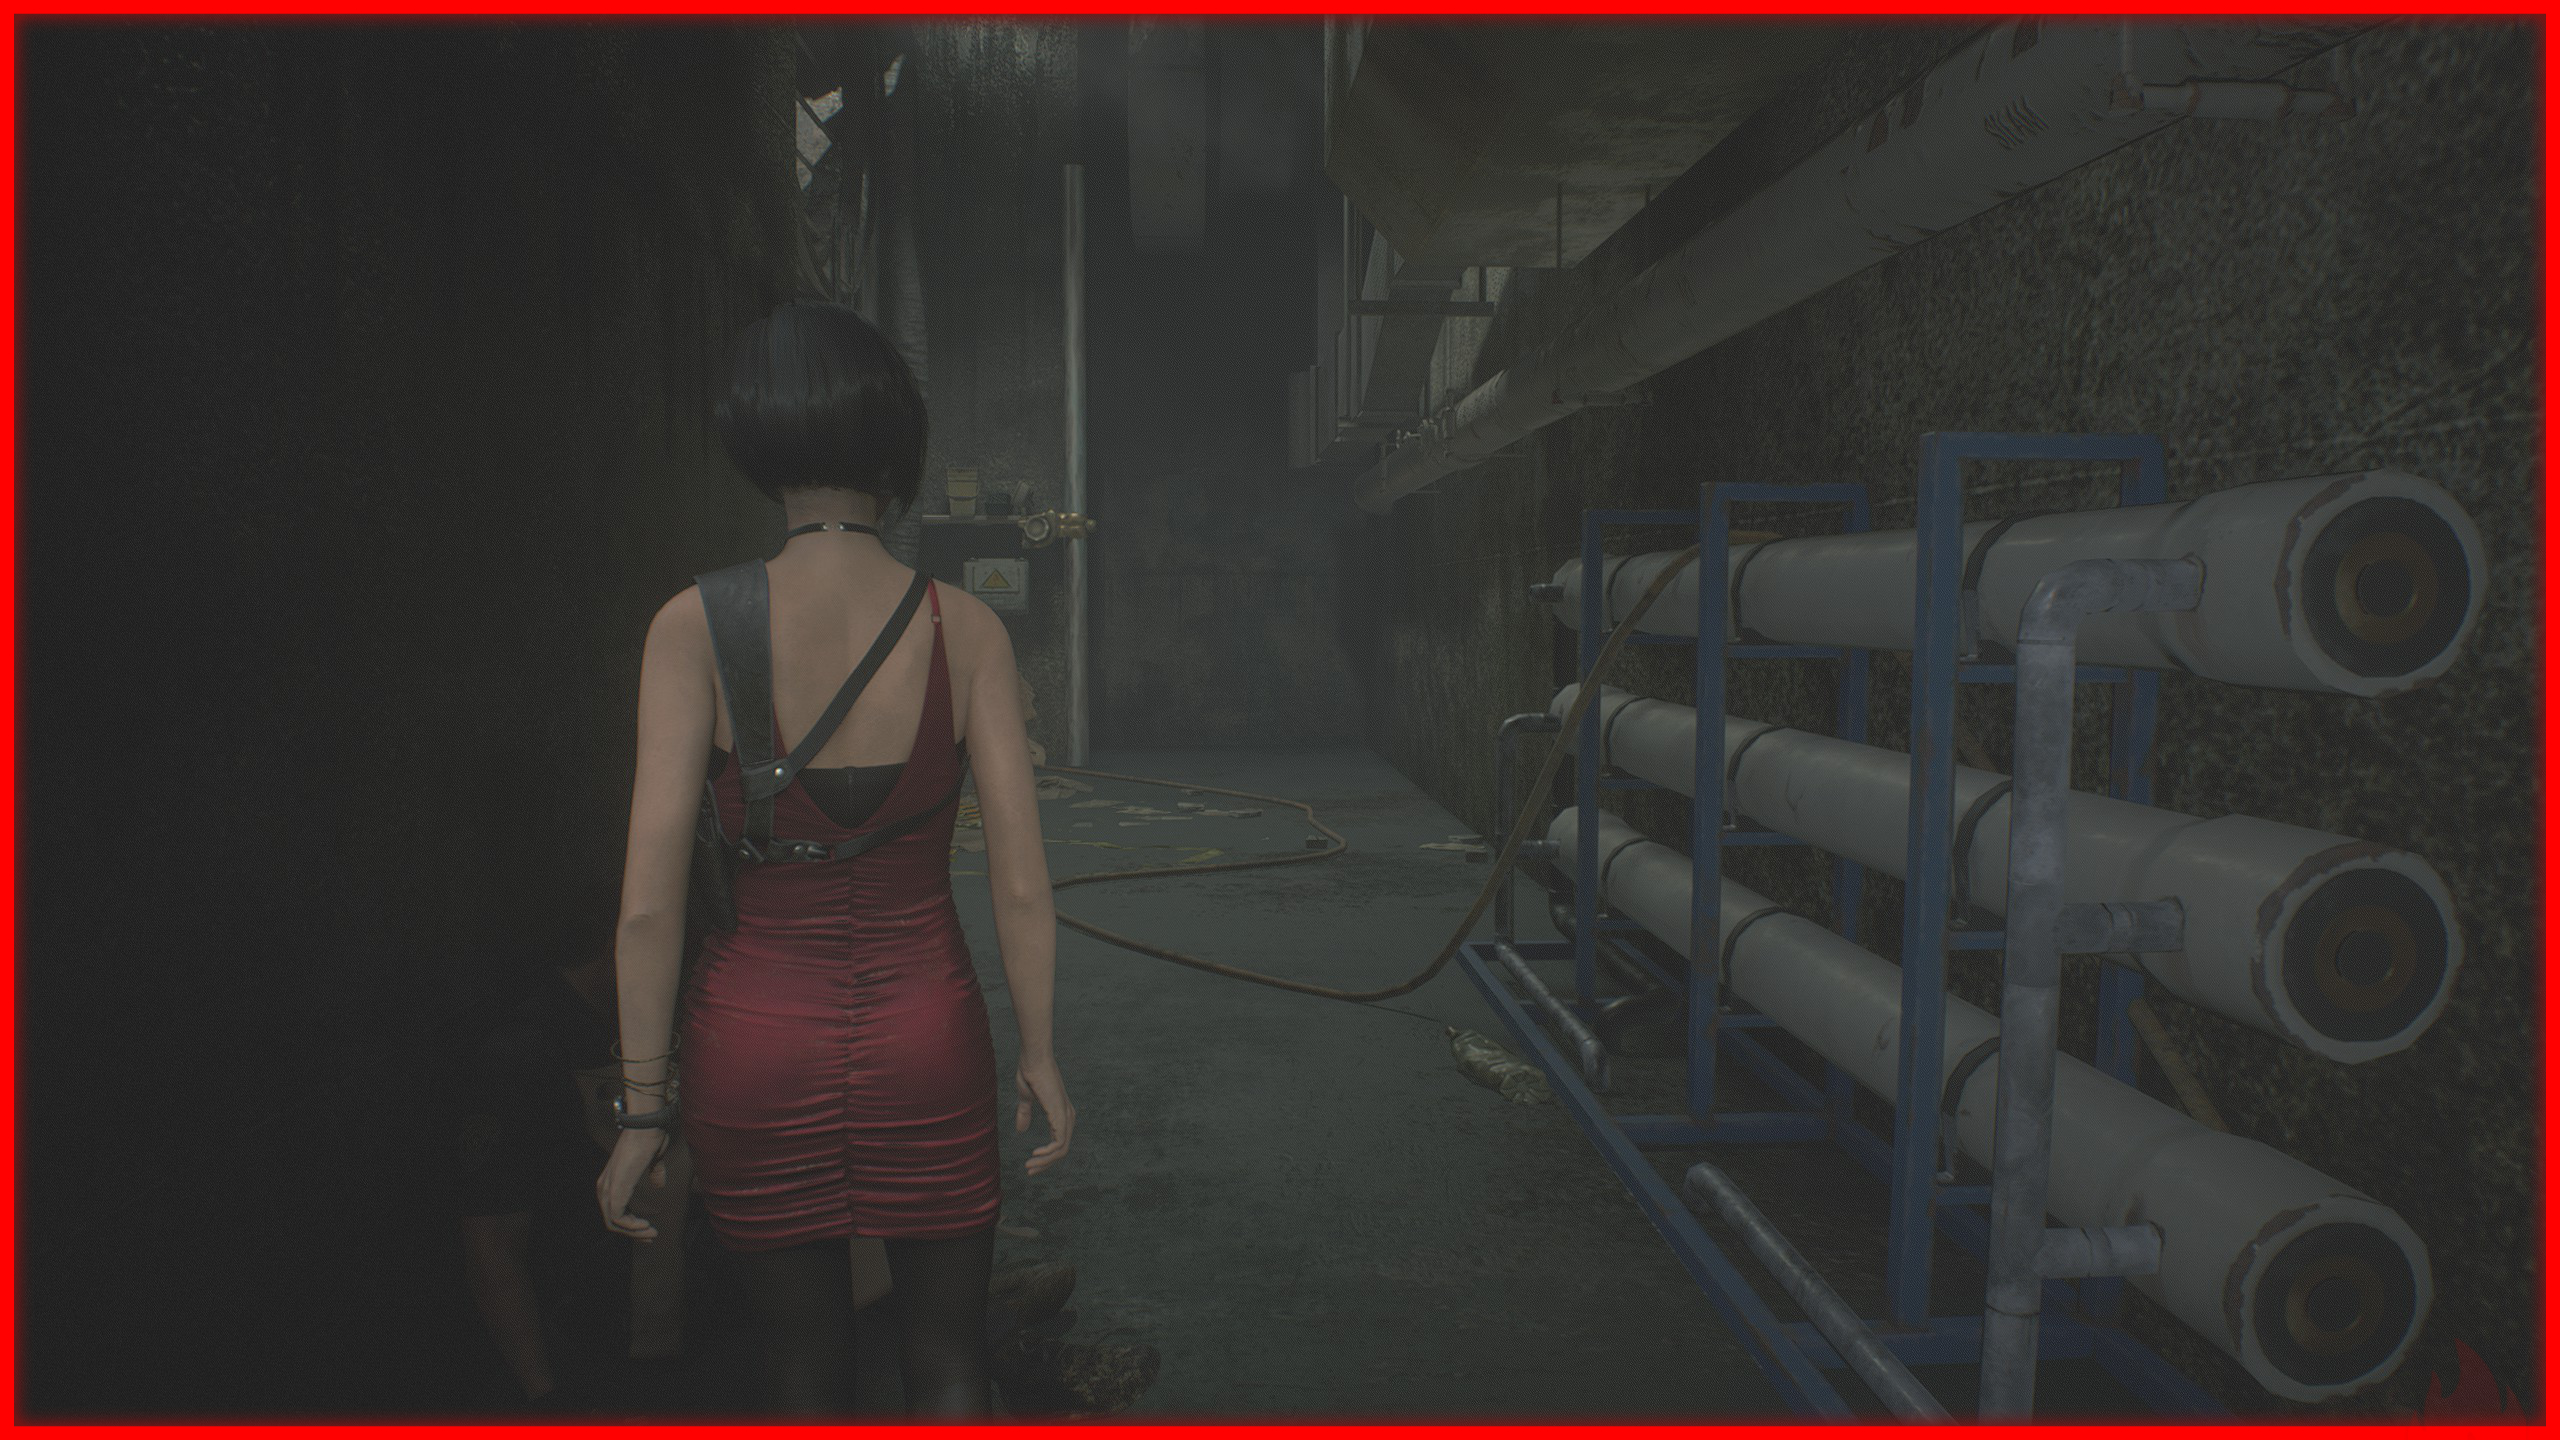
 Obtained after completing the section where you play as Ada during Leon’s campaign.
Note: During this section, there’s a missable achievement ❌ that requires you to clear Ada's segment using only the EMF Visualizer. See the details in the achievement “One Slick Super-spy.”
Hide and Seek
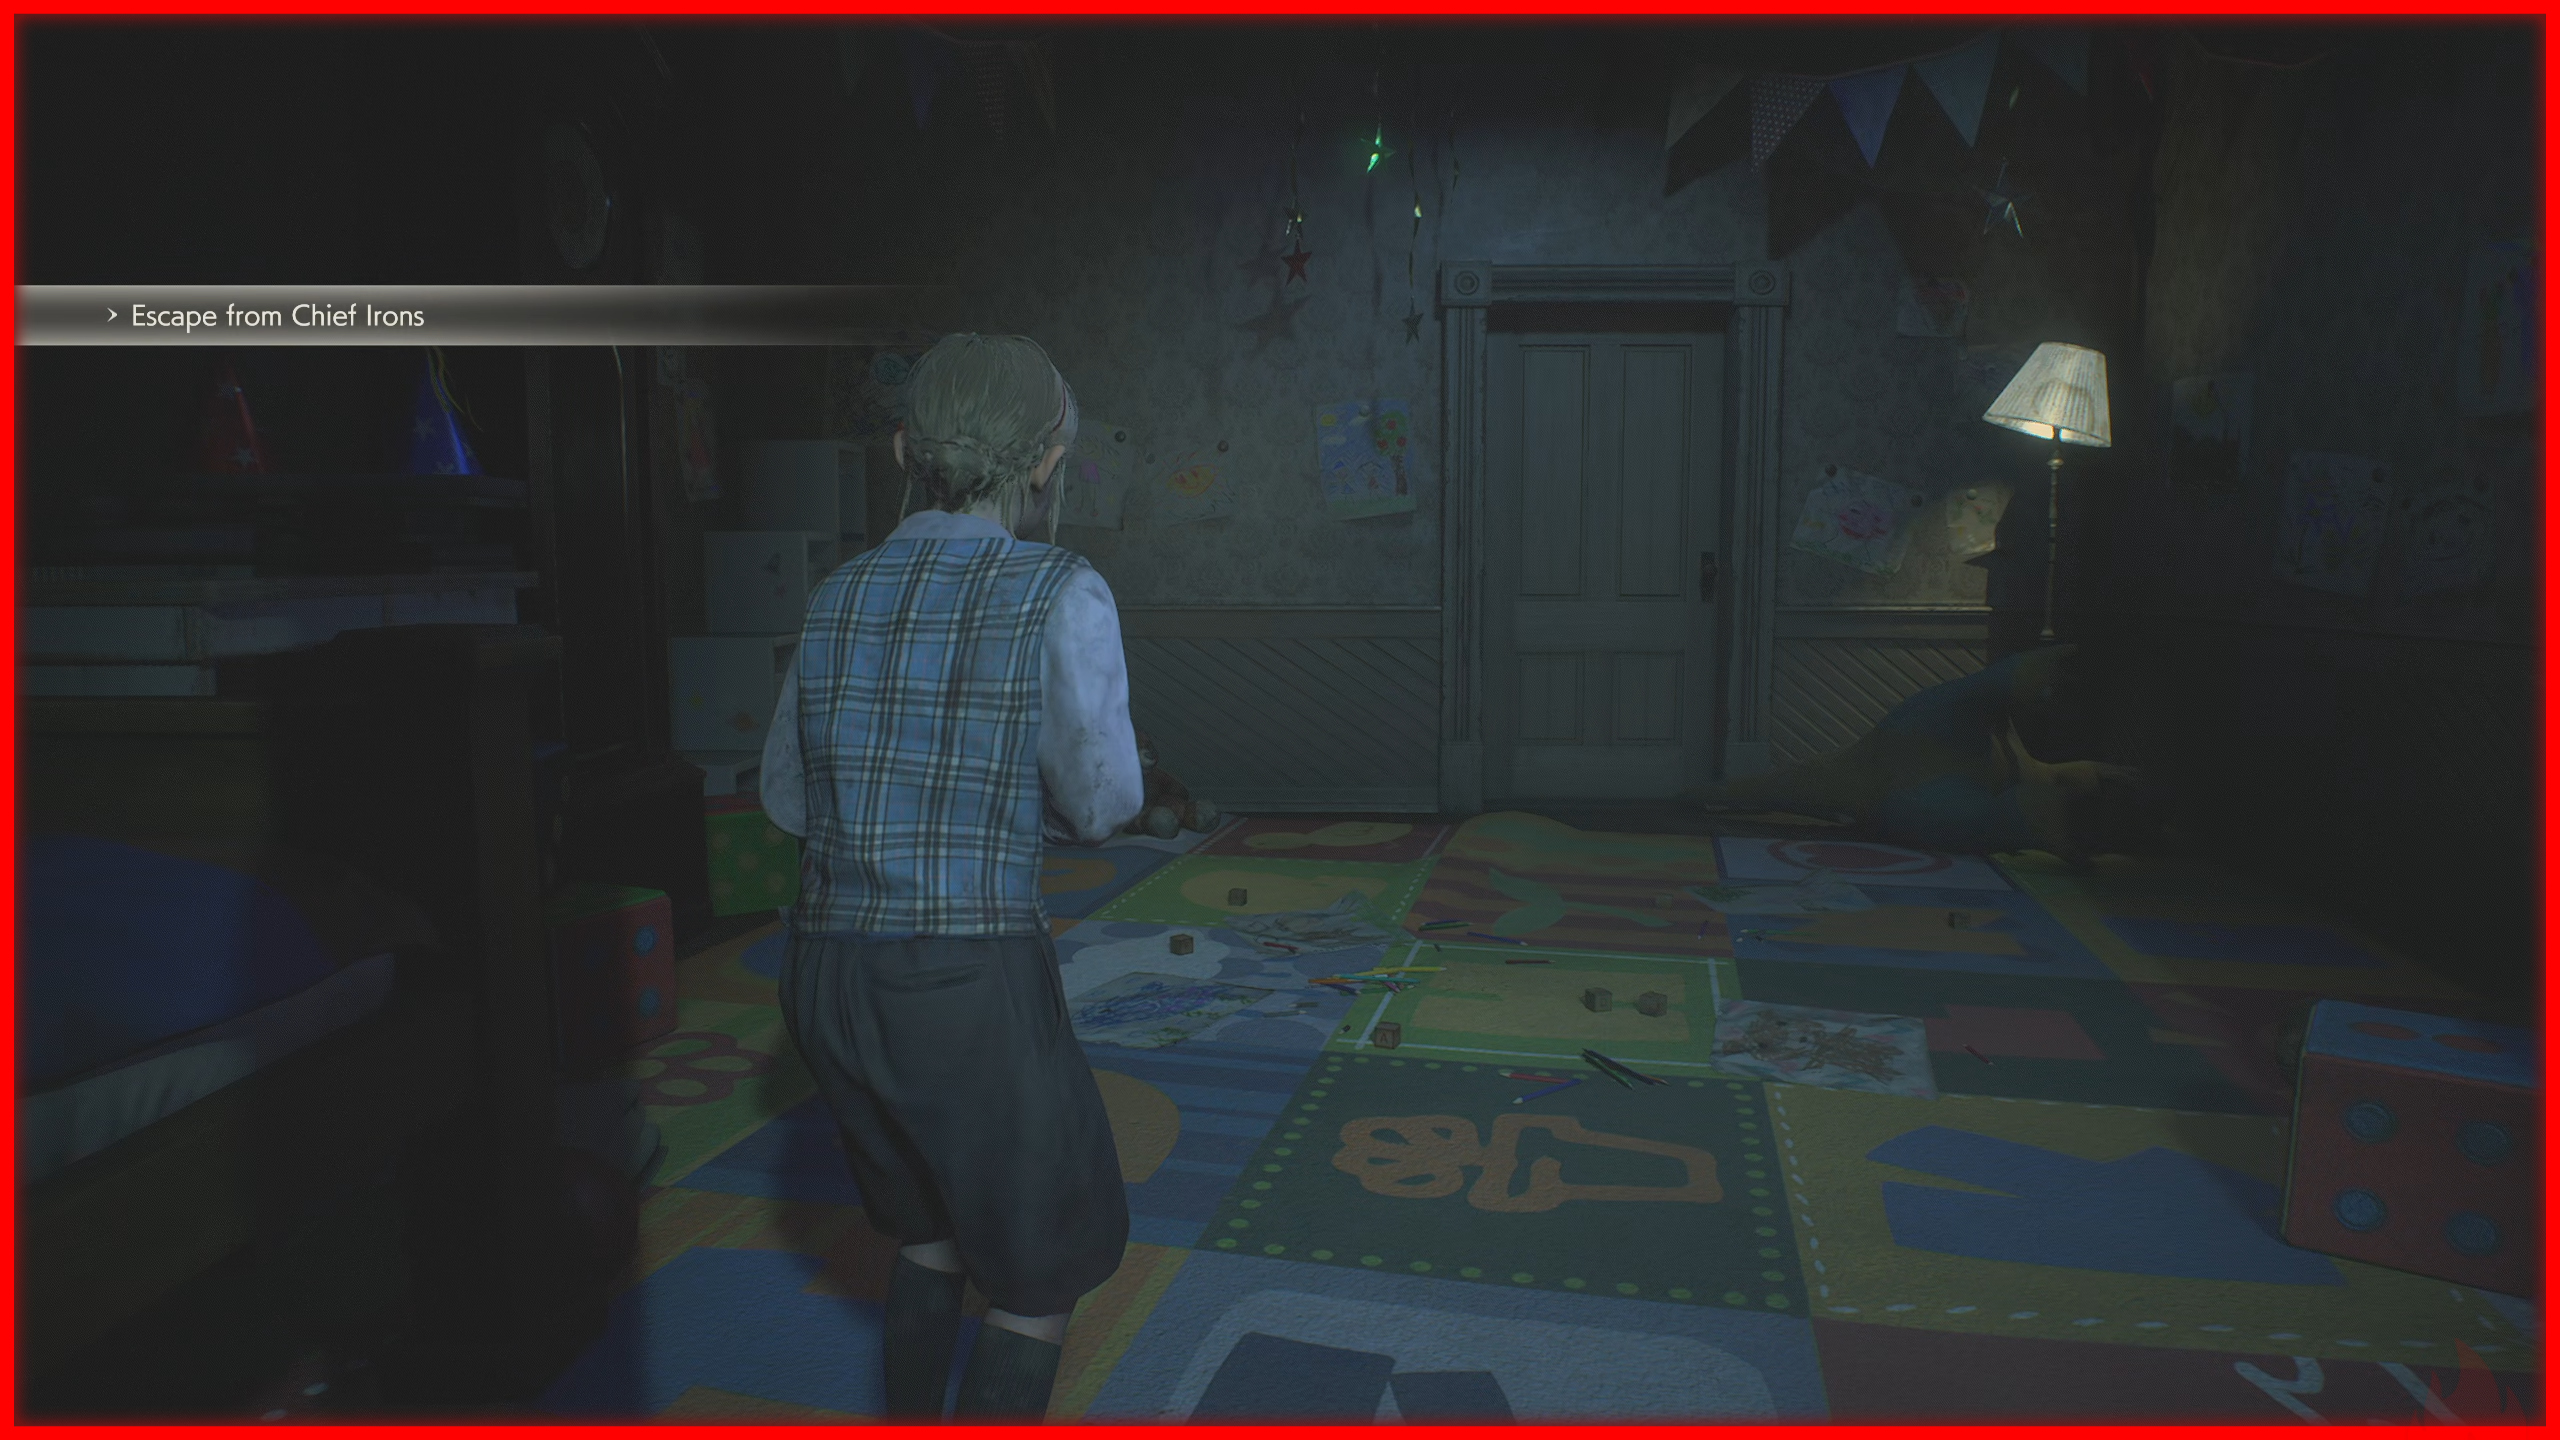
 Obtained after completing the section where you play as Sherry during Claire’s campaign.
Note: During this section, there’s a missable achievement ❌ that requires you to leave the bedroom in under one minute. See the details in the achievement “Young Escapee.”
A Great Need for a Shower
 Obtained after using the cable car to leave the Sewers.
Note: From this point on, you won’t have access to the Sewers or the Police Station anymore, so make sure to create a save before taking the cable car.
A Hero Emerges
 Obtained by finishing Leon’s A or B campaign.
A Heroine Emerges
 Obtained by finishing Claire’s A or B campaign.
Broken Umbrella
 Obtained by completing Scenario B (2nd Run) with Leon or Claire.
The Basics of Survival
 You just need to combine two items. You’ll naturally earn this achievement while playing, as combining items is required to progress through the story.
Eat This! ❌
 If you have a knife, grenade, or flash grenade in your inventory, you’ll be able to counter enemies with L1/ RB/ SPACE.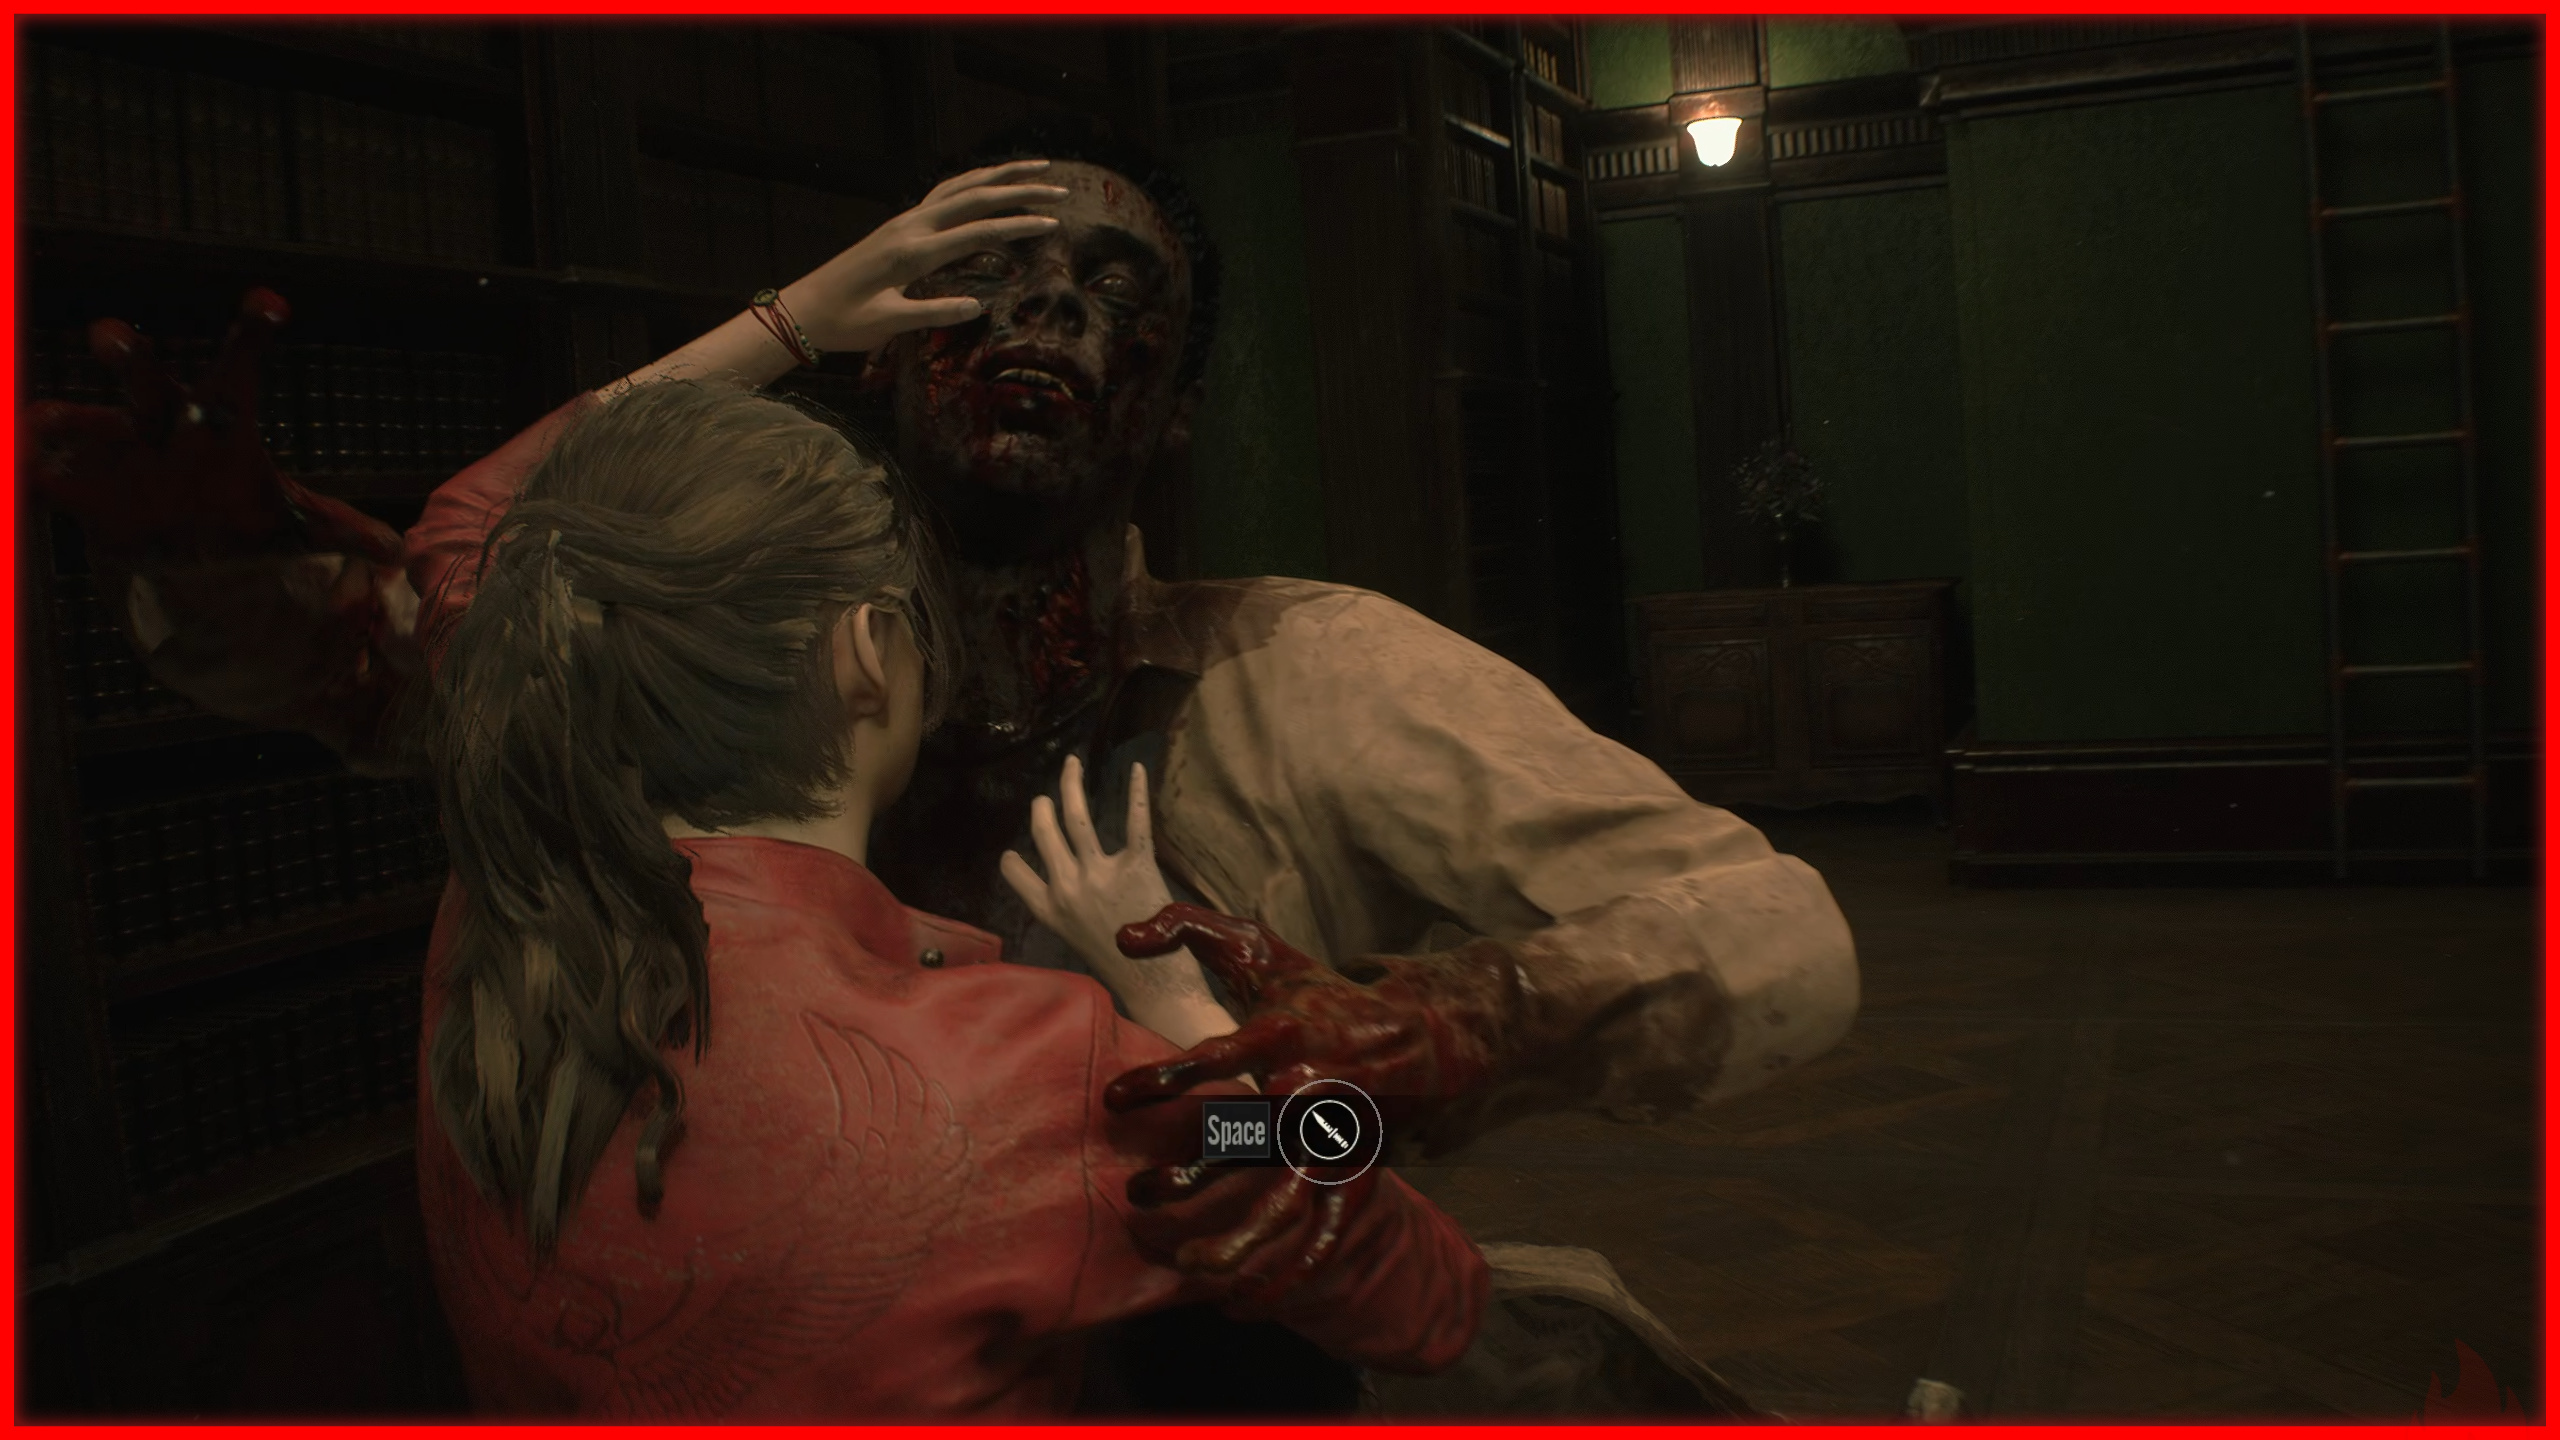
That'll Hold 'Em ❌

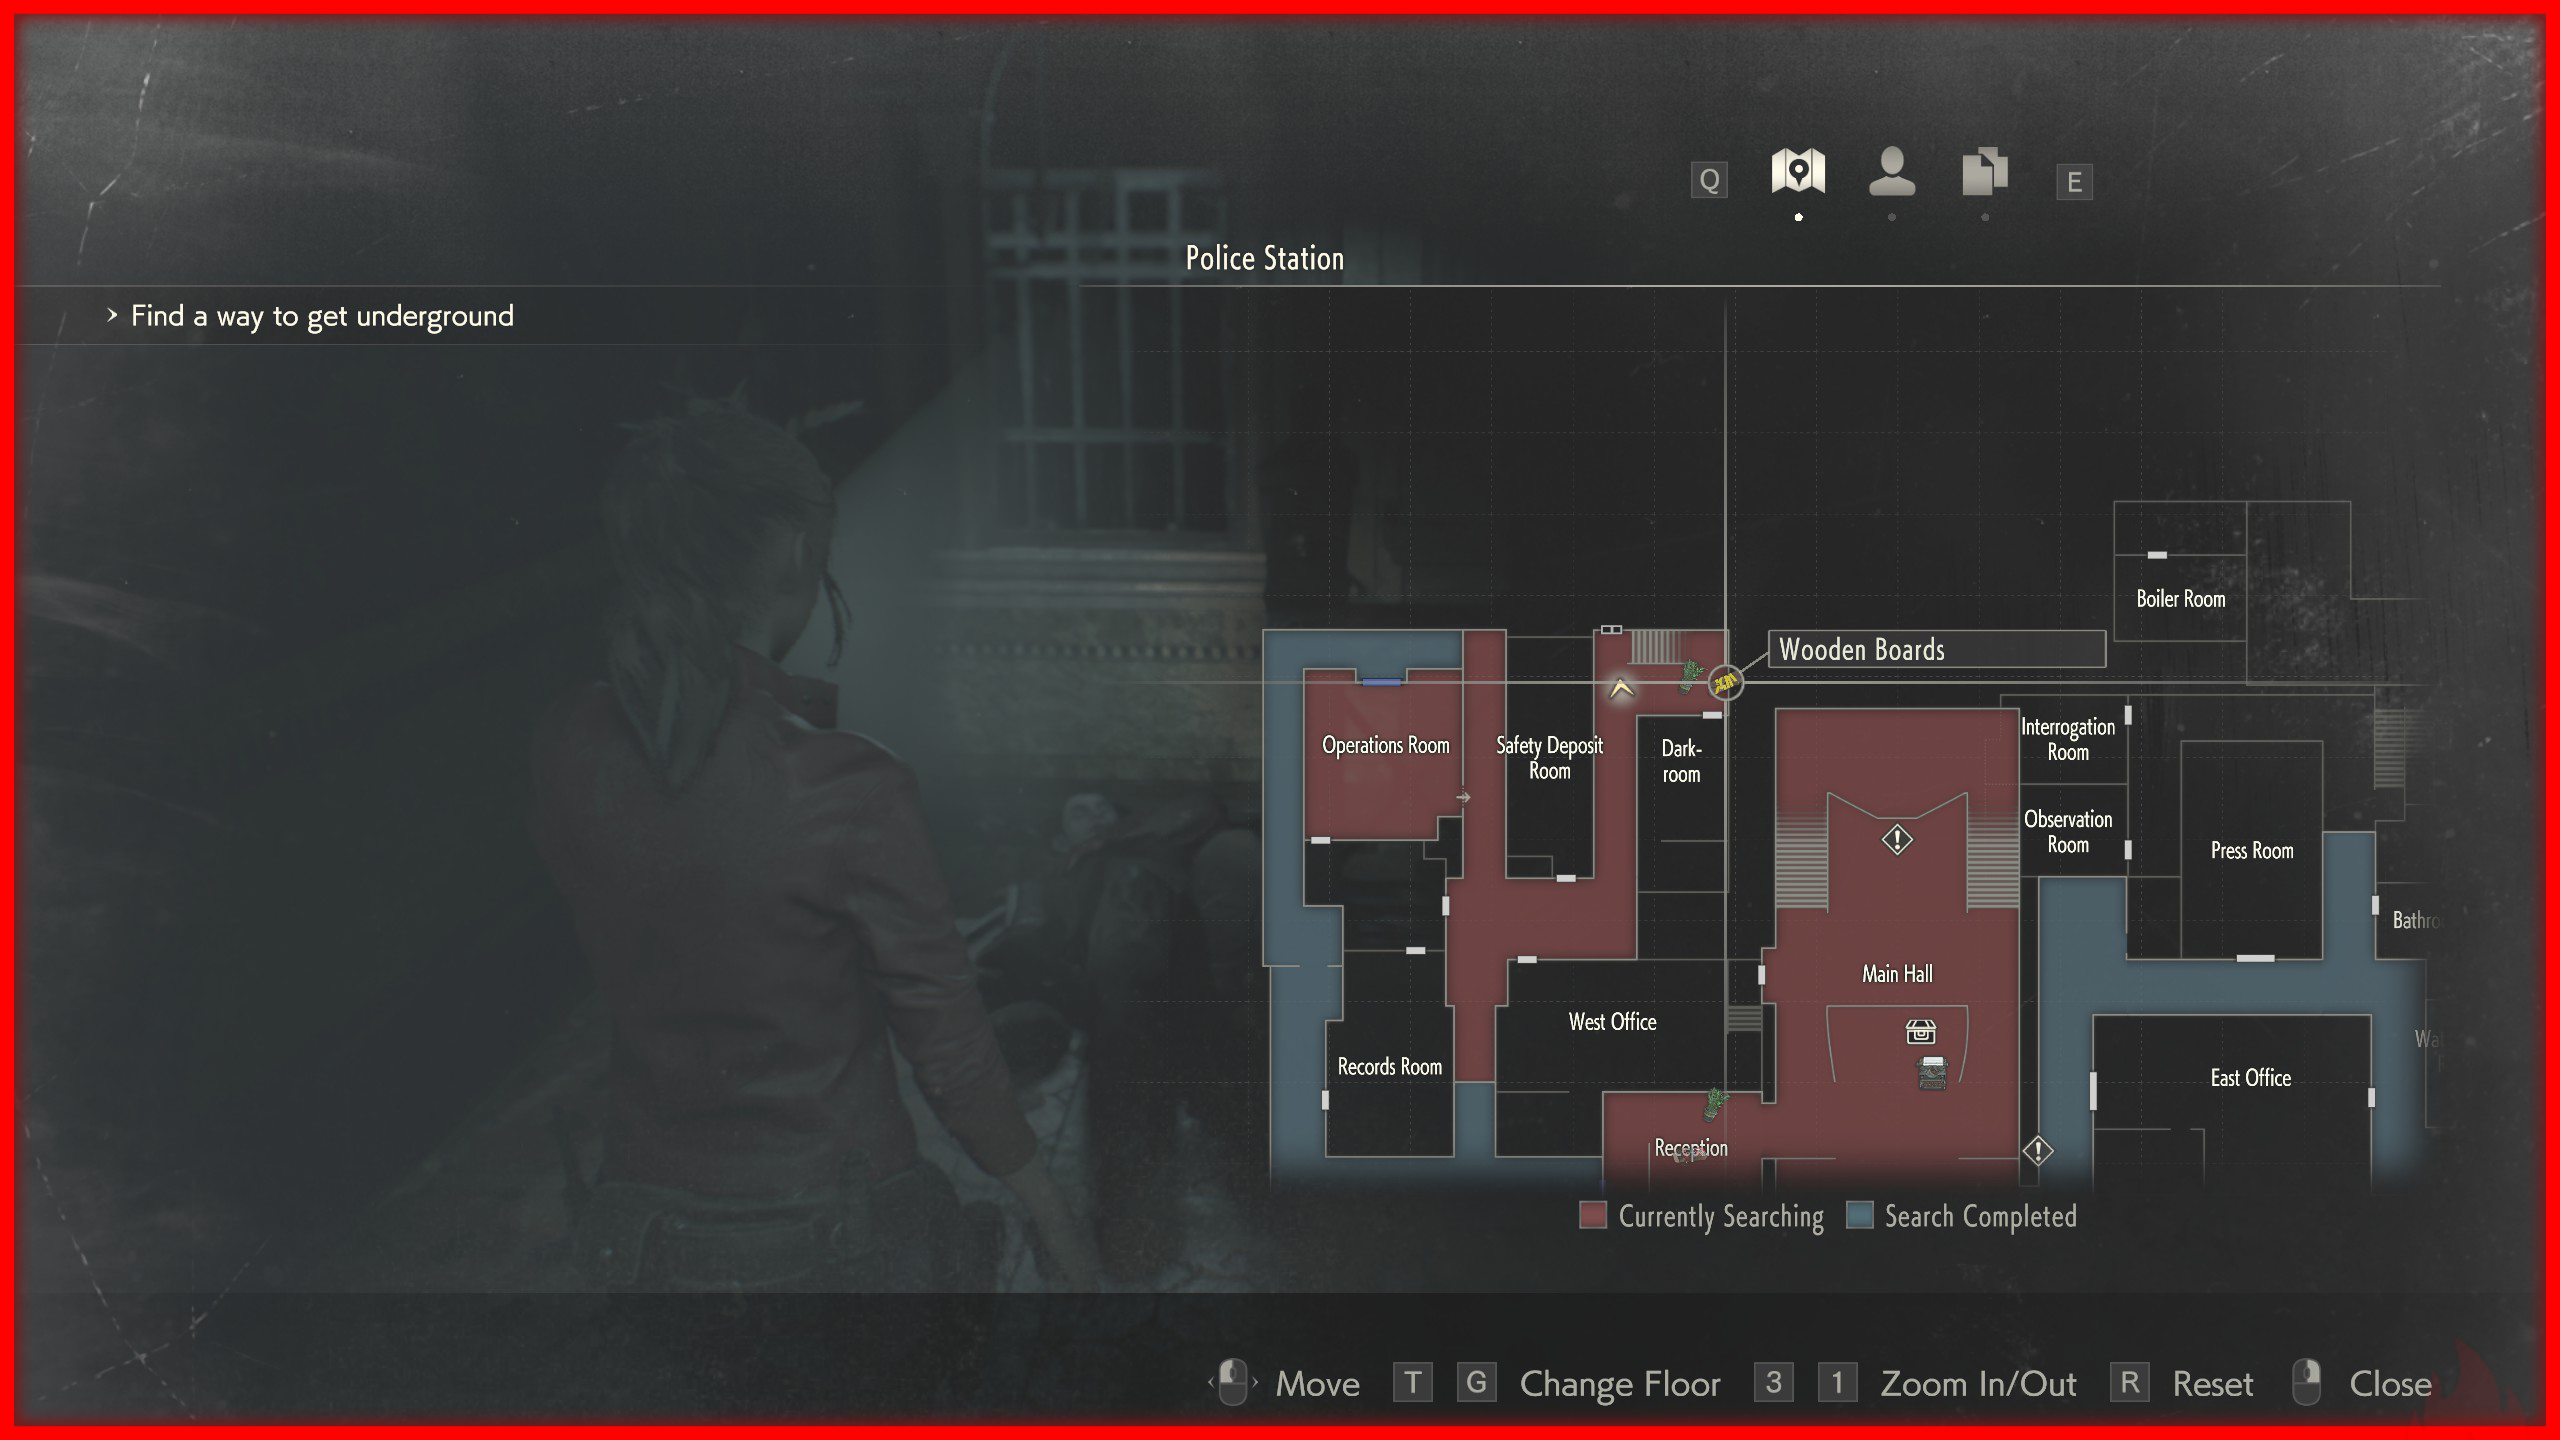
In the police station, there are some Wooden Boards that can be used to barricade broken windows. In the West Stairway, you can find one Wooden Board and a window. Once the zombie breaks the window, repair it to earn the achievement.
Bon Appétit ❌
 With any grenade in your inventory, let a zombie grab you and press L1 / RB / Space to perform a counterattack and shove the grenade into its mouth. Then, shoot the grenade before it explodes.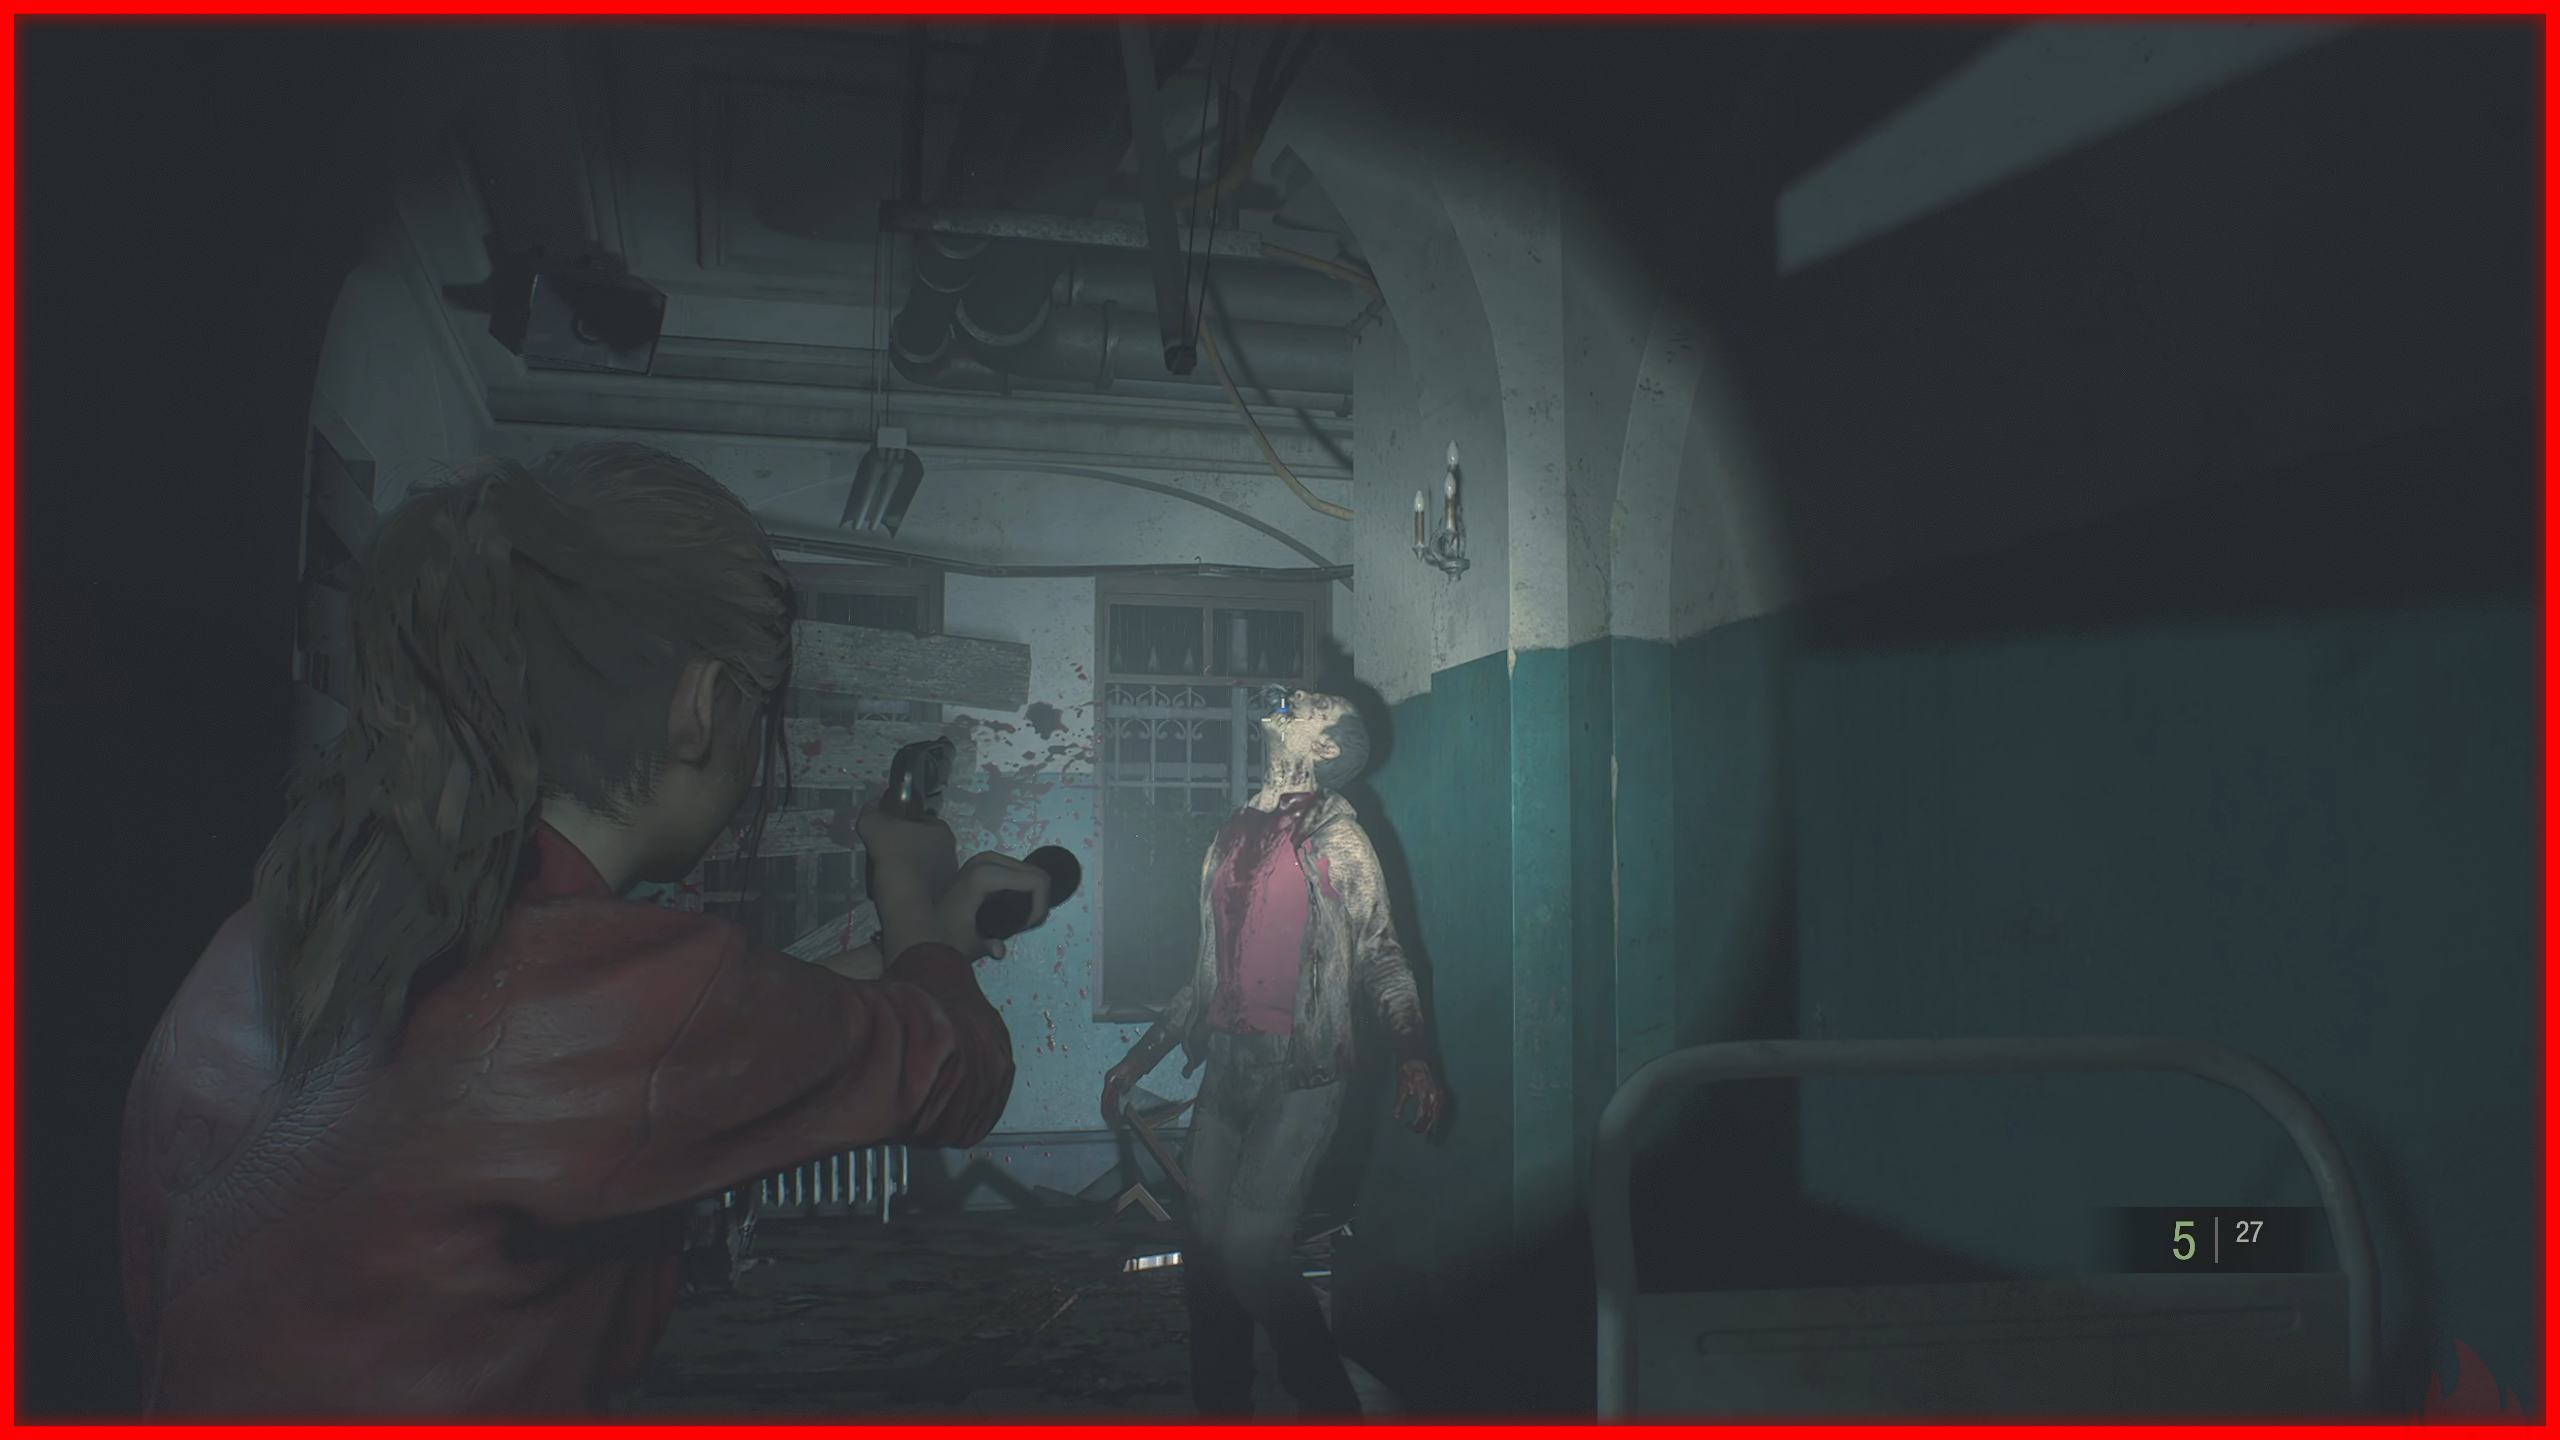
Hats Off! ❌
 After you extinguish the rooftop fire in the Police Station,the Tyrant will appear and hunt you through the station. Shoot off his hat to get the achievement.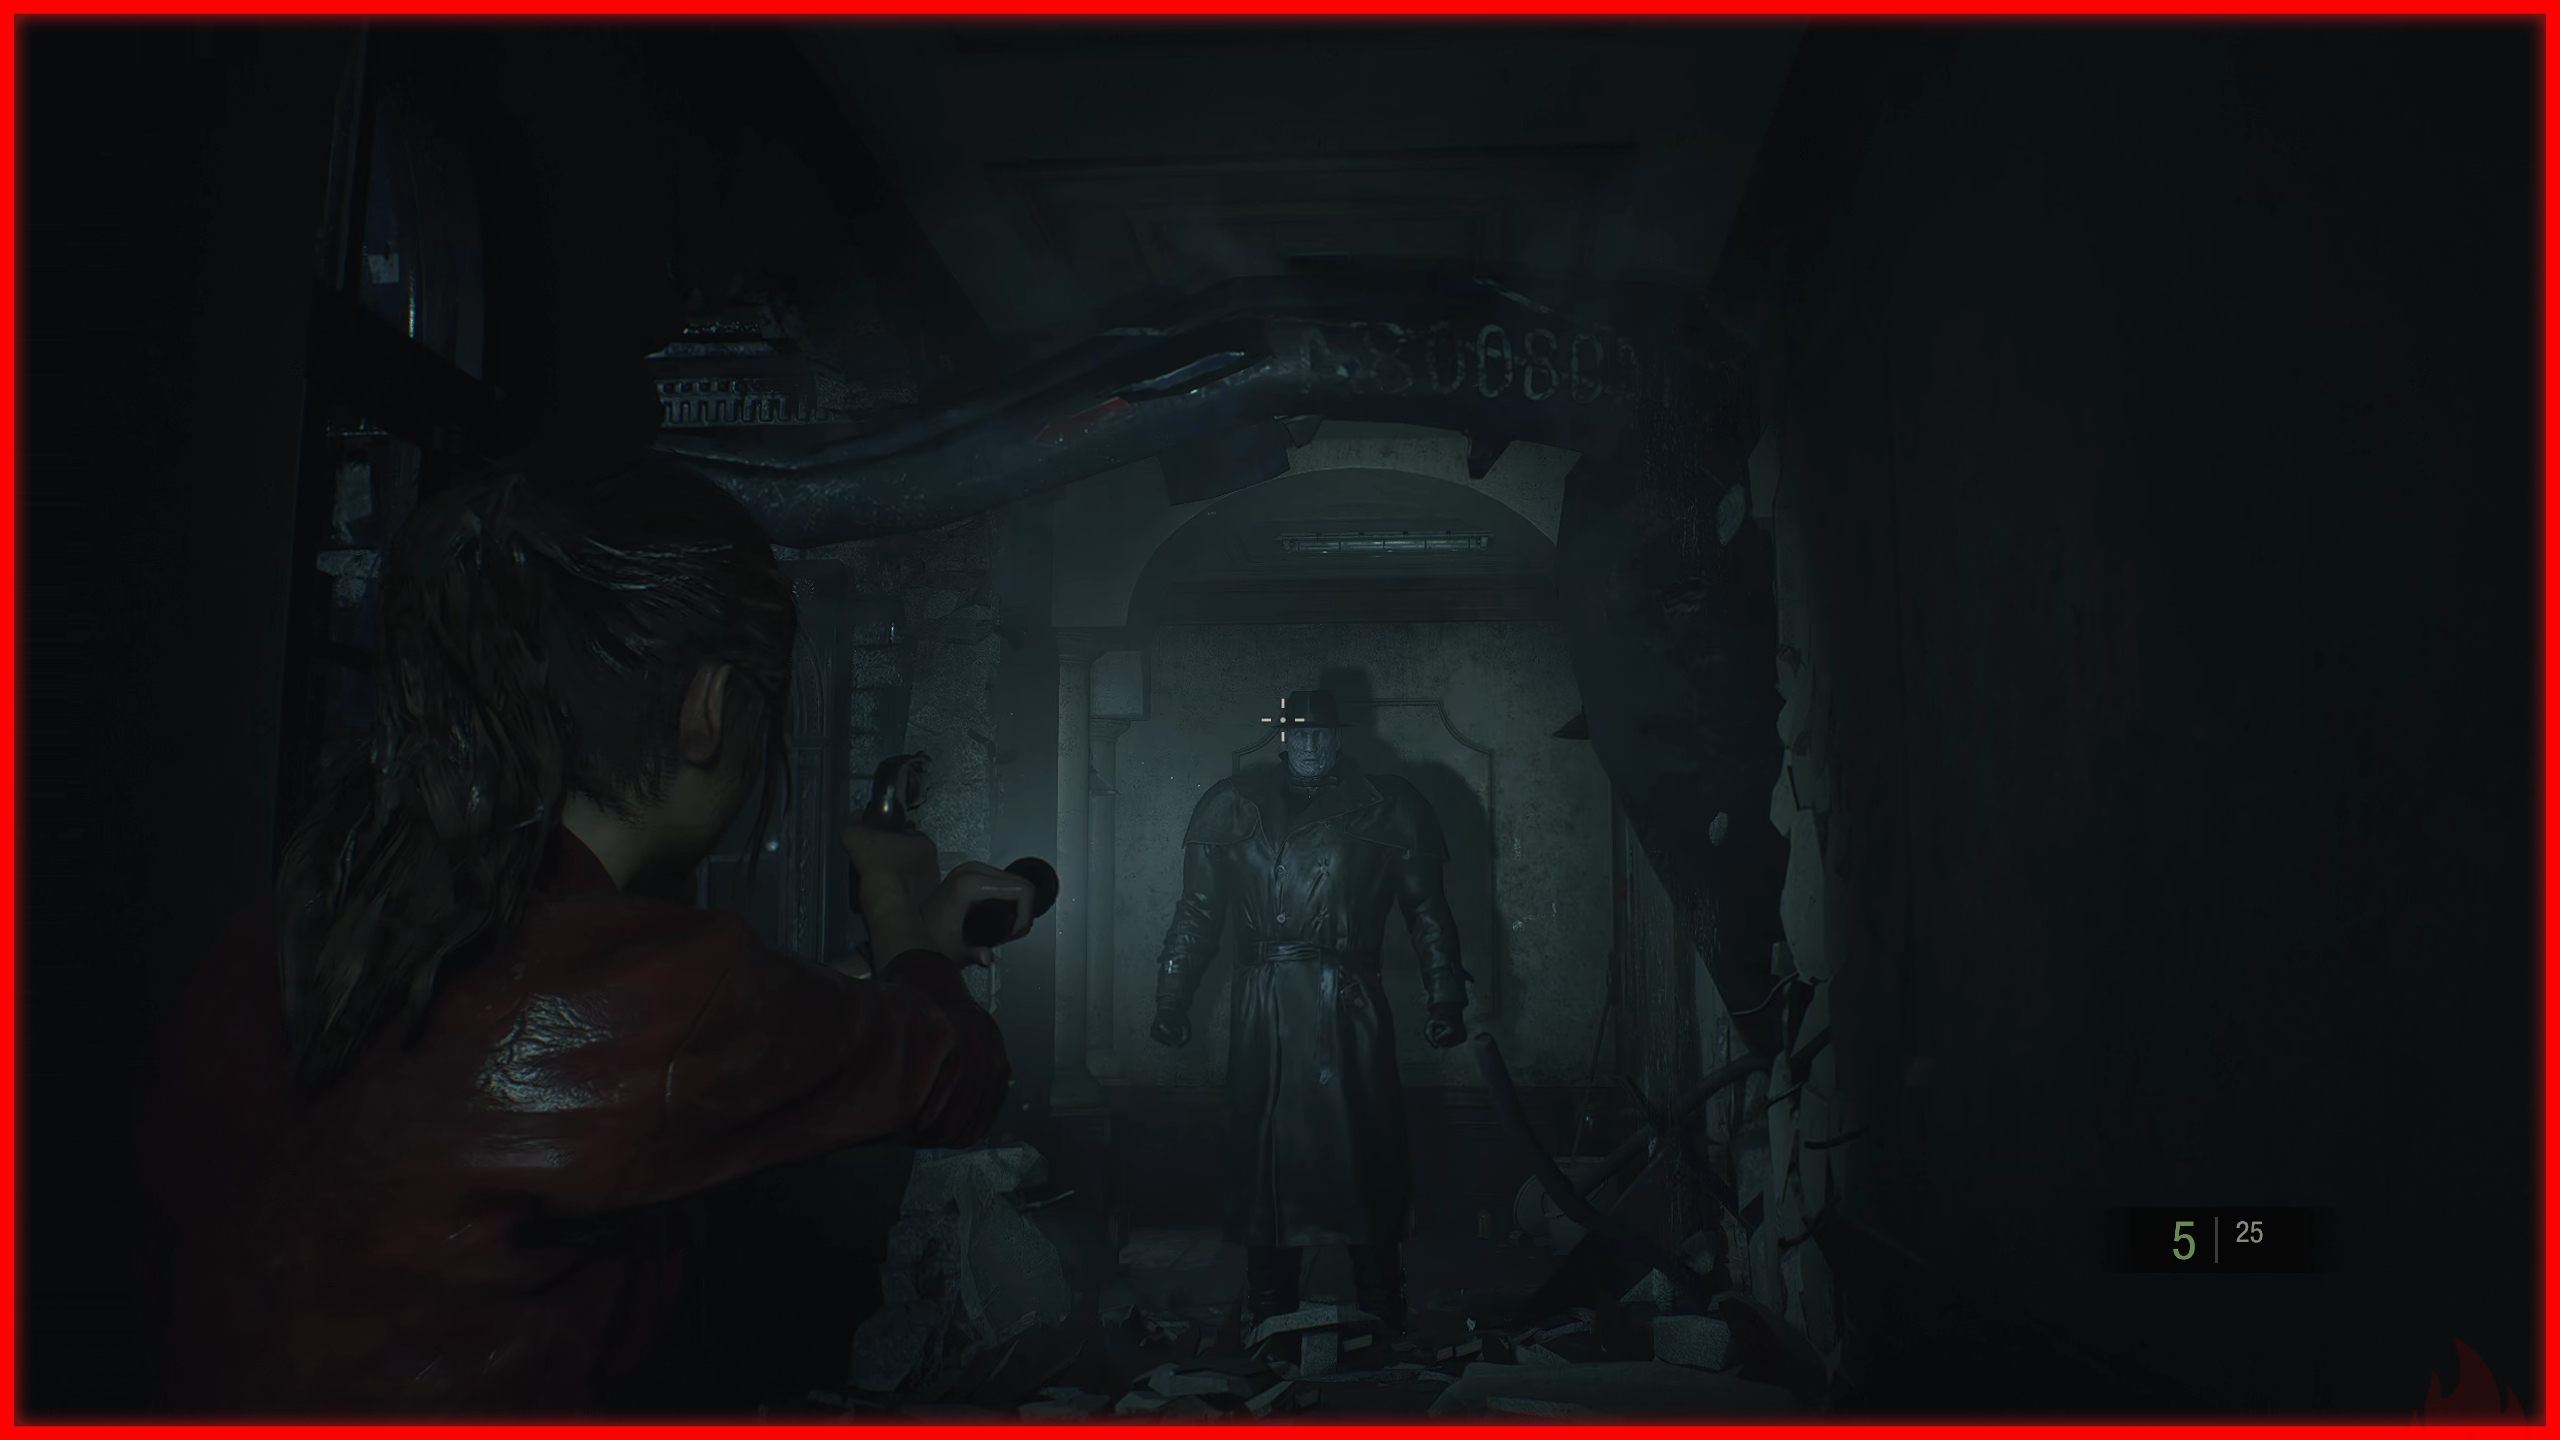
Don't Need No Stinkin' Gun ❌
 At the beginning of the game, after the cutscene where Marvin saves you, you’ll obtain a combat knife. Unequip your firearm and head toward the hallway leading to the Operations Room. Hold L1 / LB / Space to ready the knife and slash the zombie that tries to break through the window. Take advantage of the falling animation and finish it off before it gets back up.
Keep Their Heads Ringin' ❌
 Just throw a flash grenade at a licker.
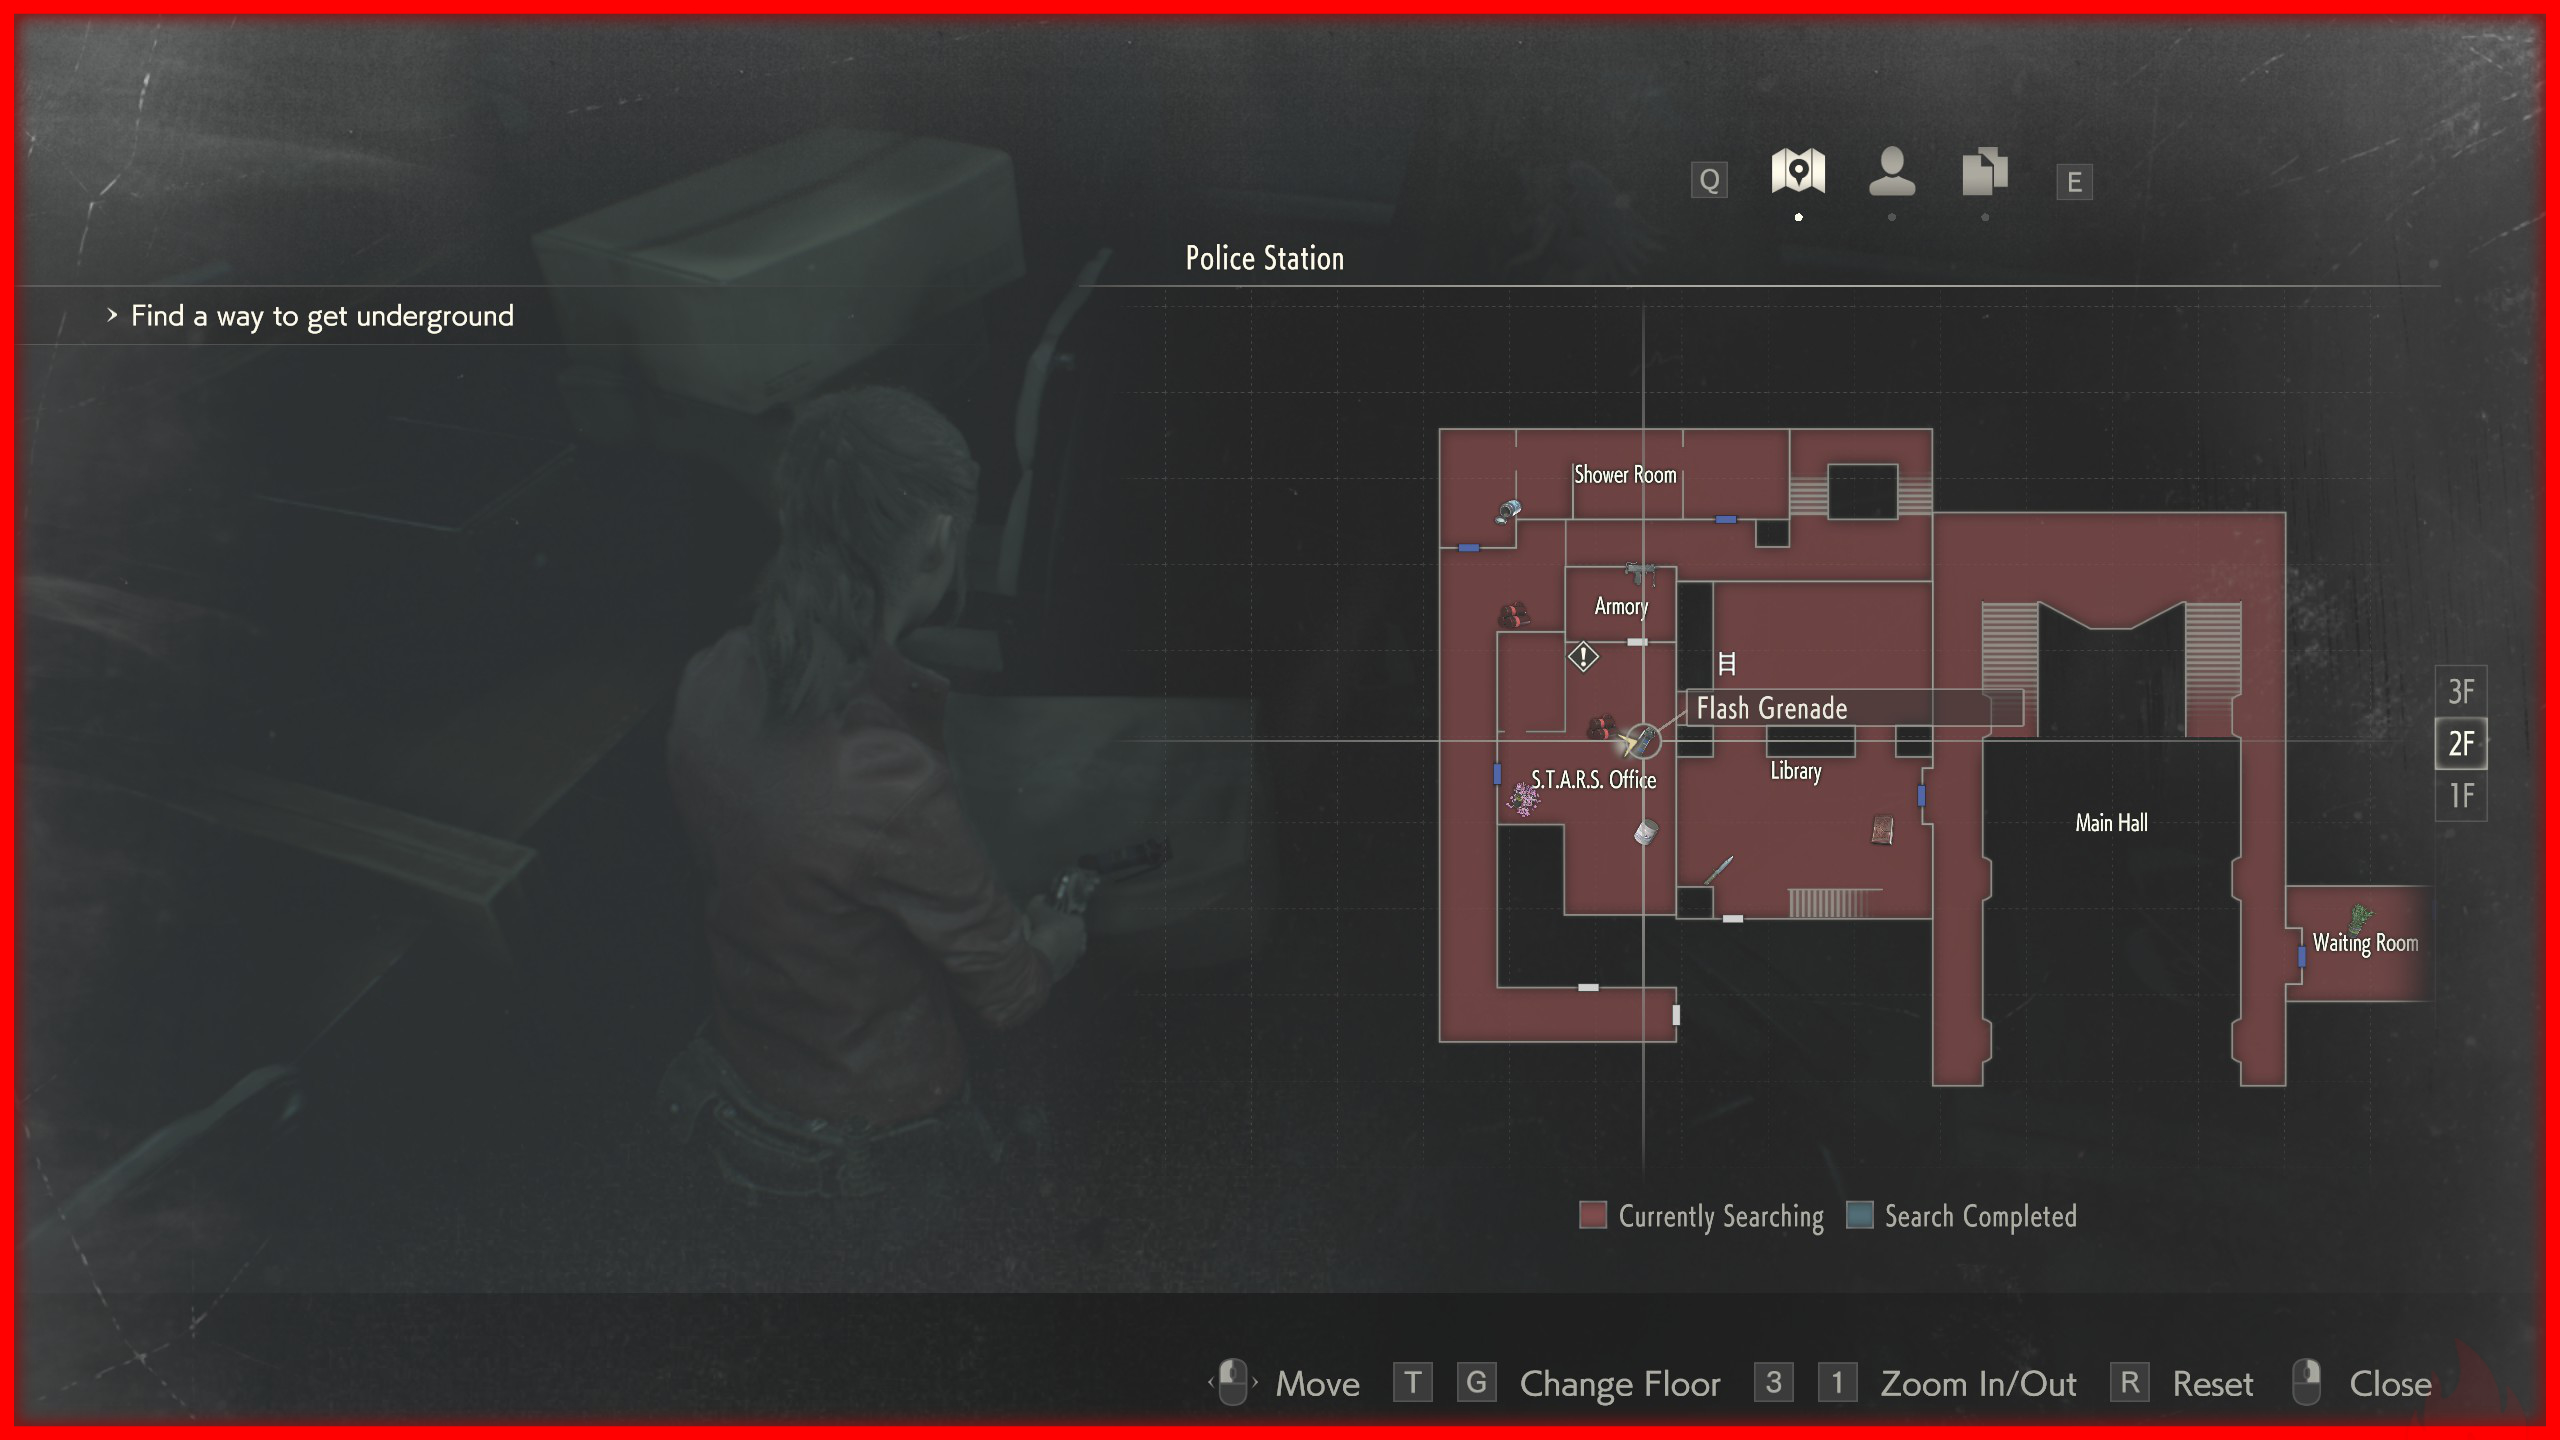
The first time you visit the STARS Office, there will be a Licker in the hallway. Ignore it and grab a Flash Grenade inside, then return to the hallway and throw it at the Licker.
Zombie Roundup ❌
 If you’ve already completed the game but missed this achievement, the fastest and easiest way to get it is to start a new game in Scenario B (2nd Run).
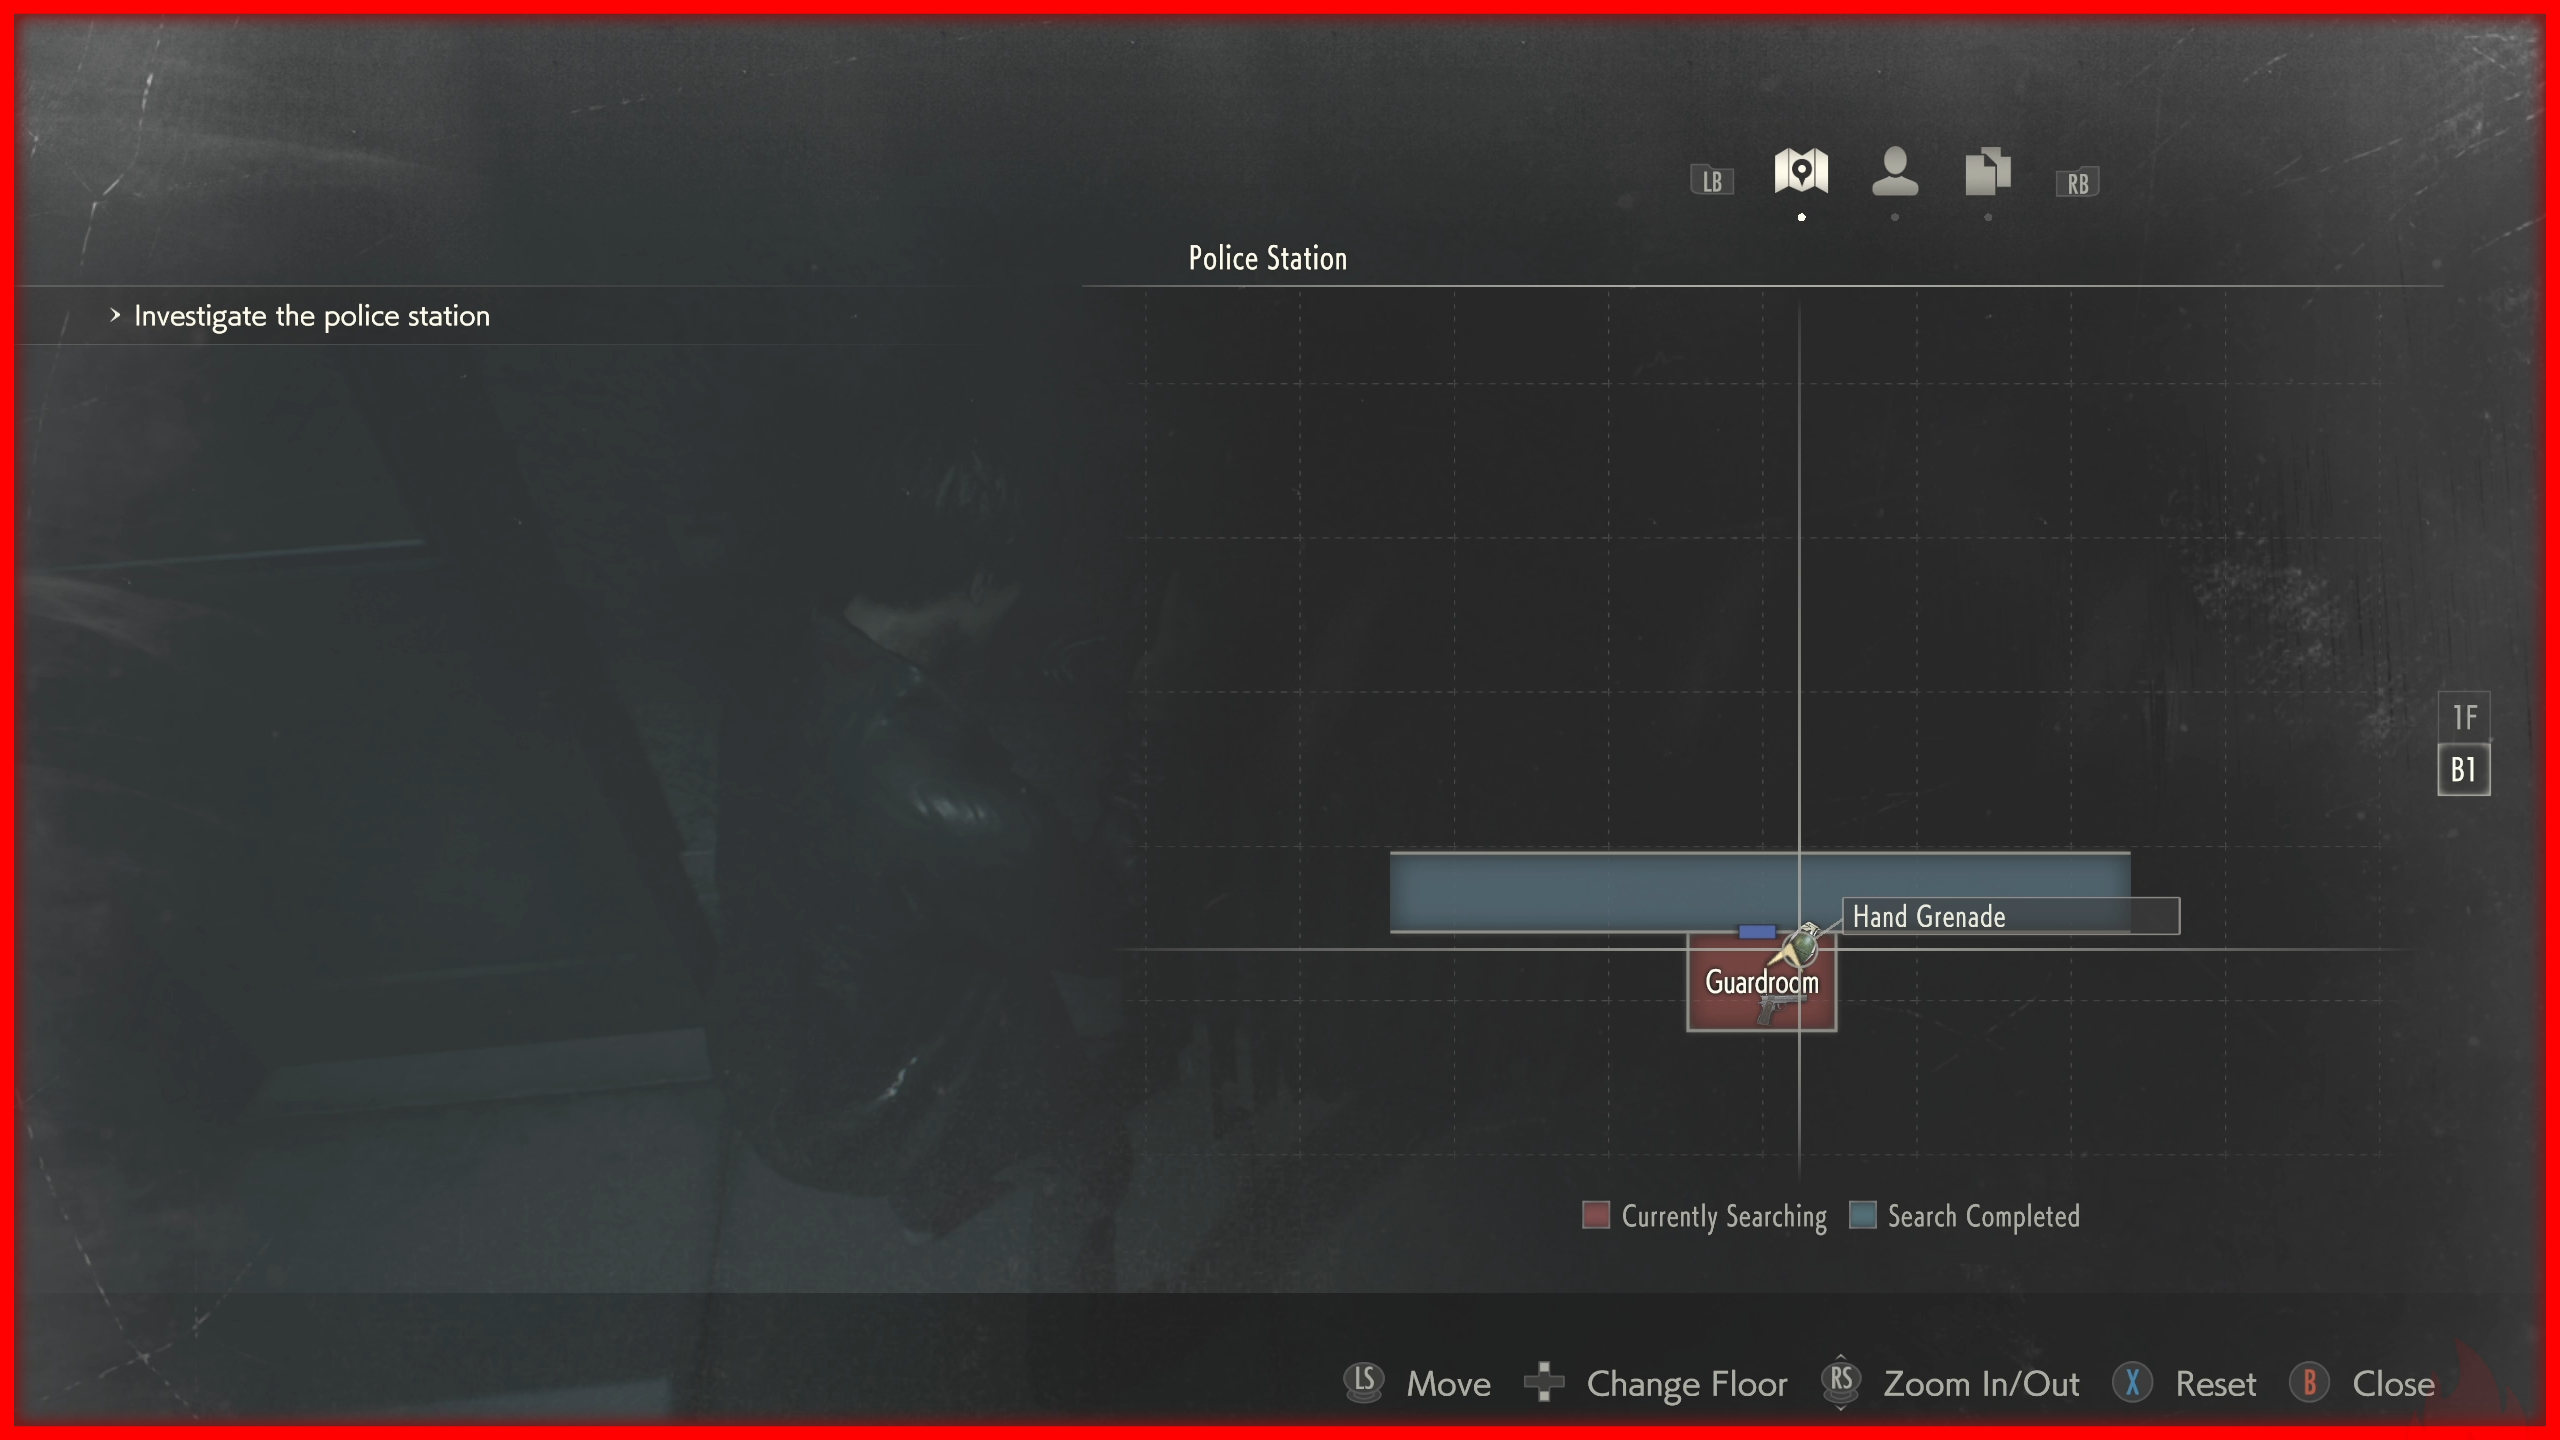
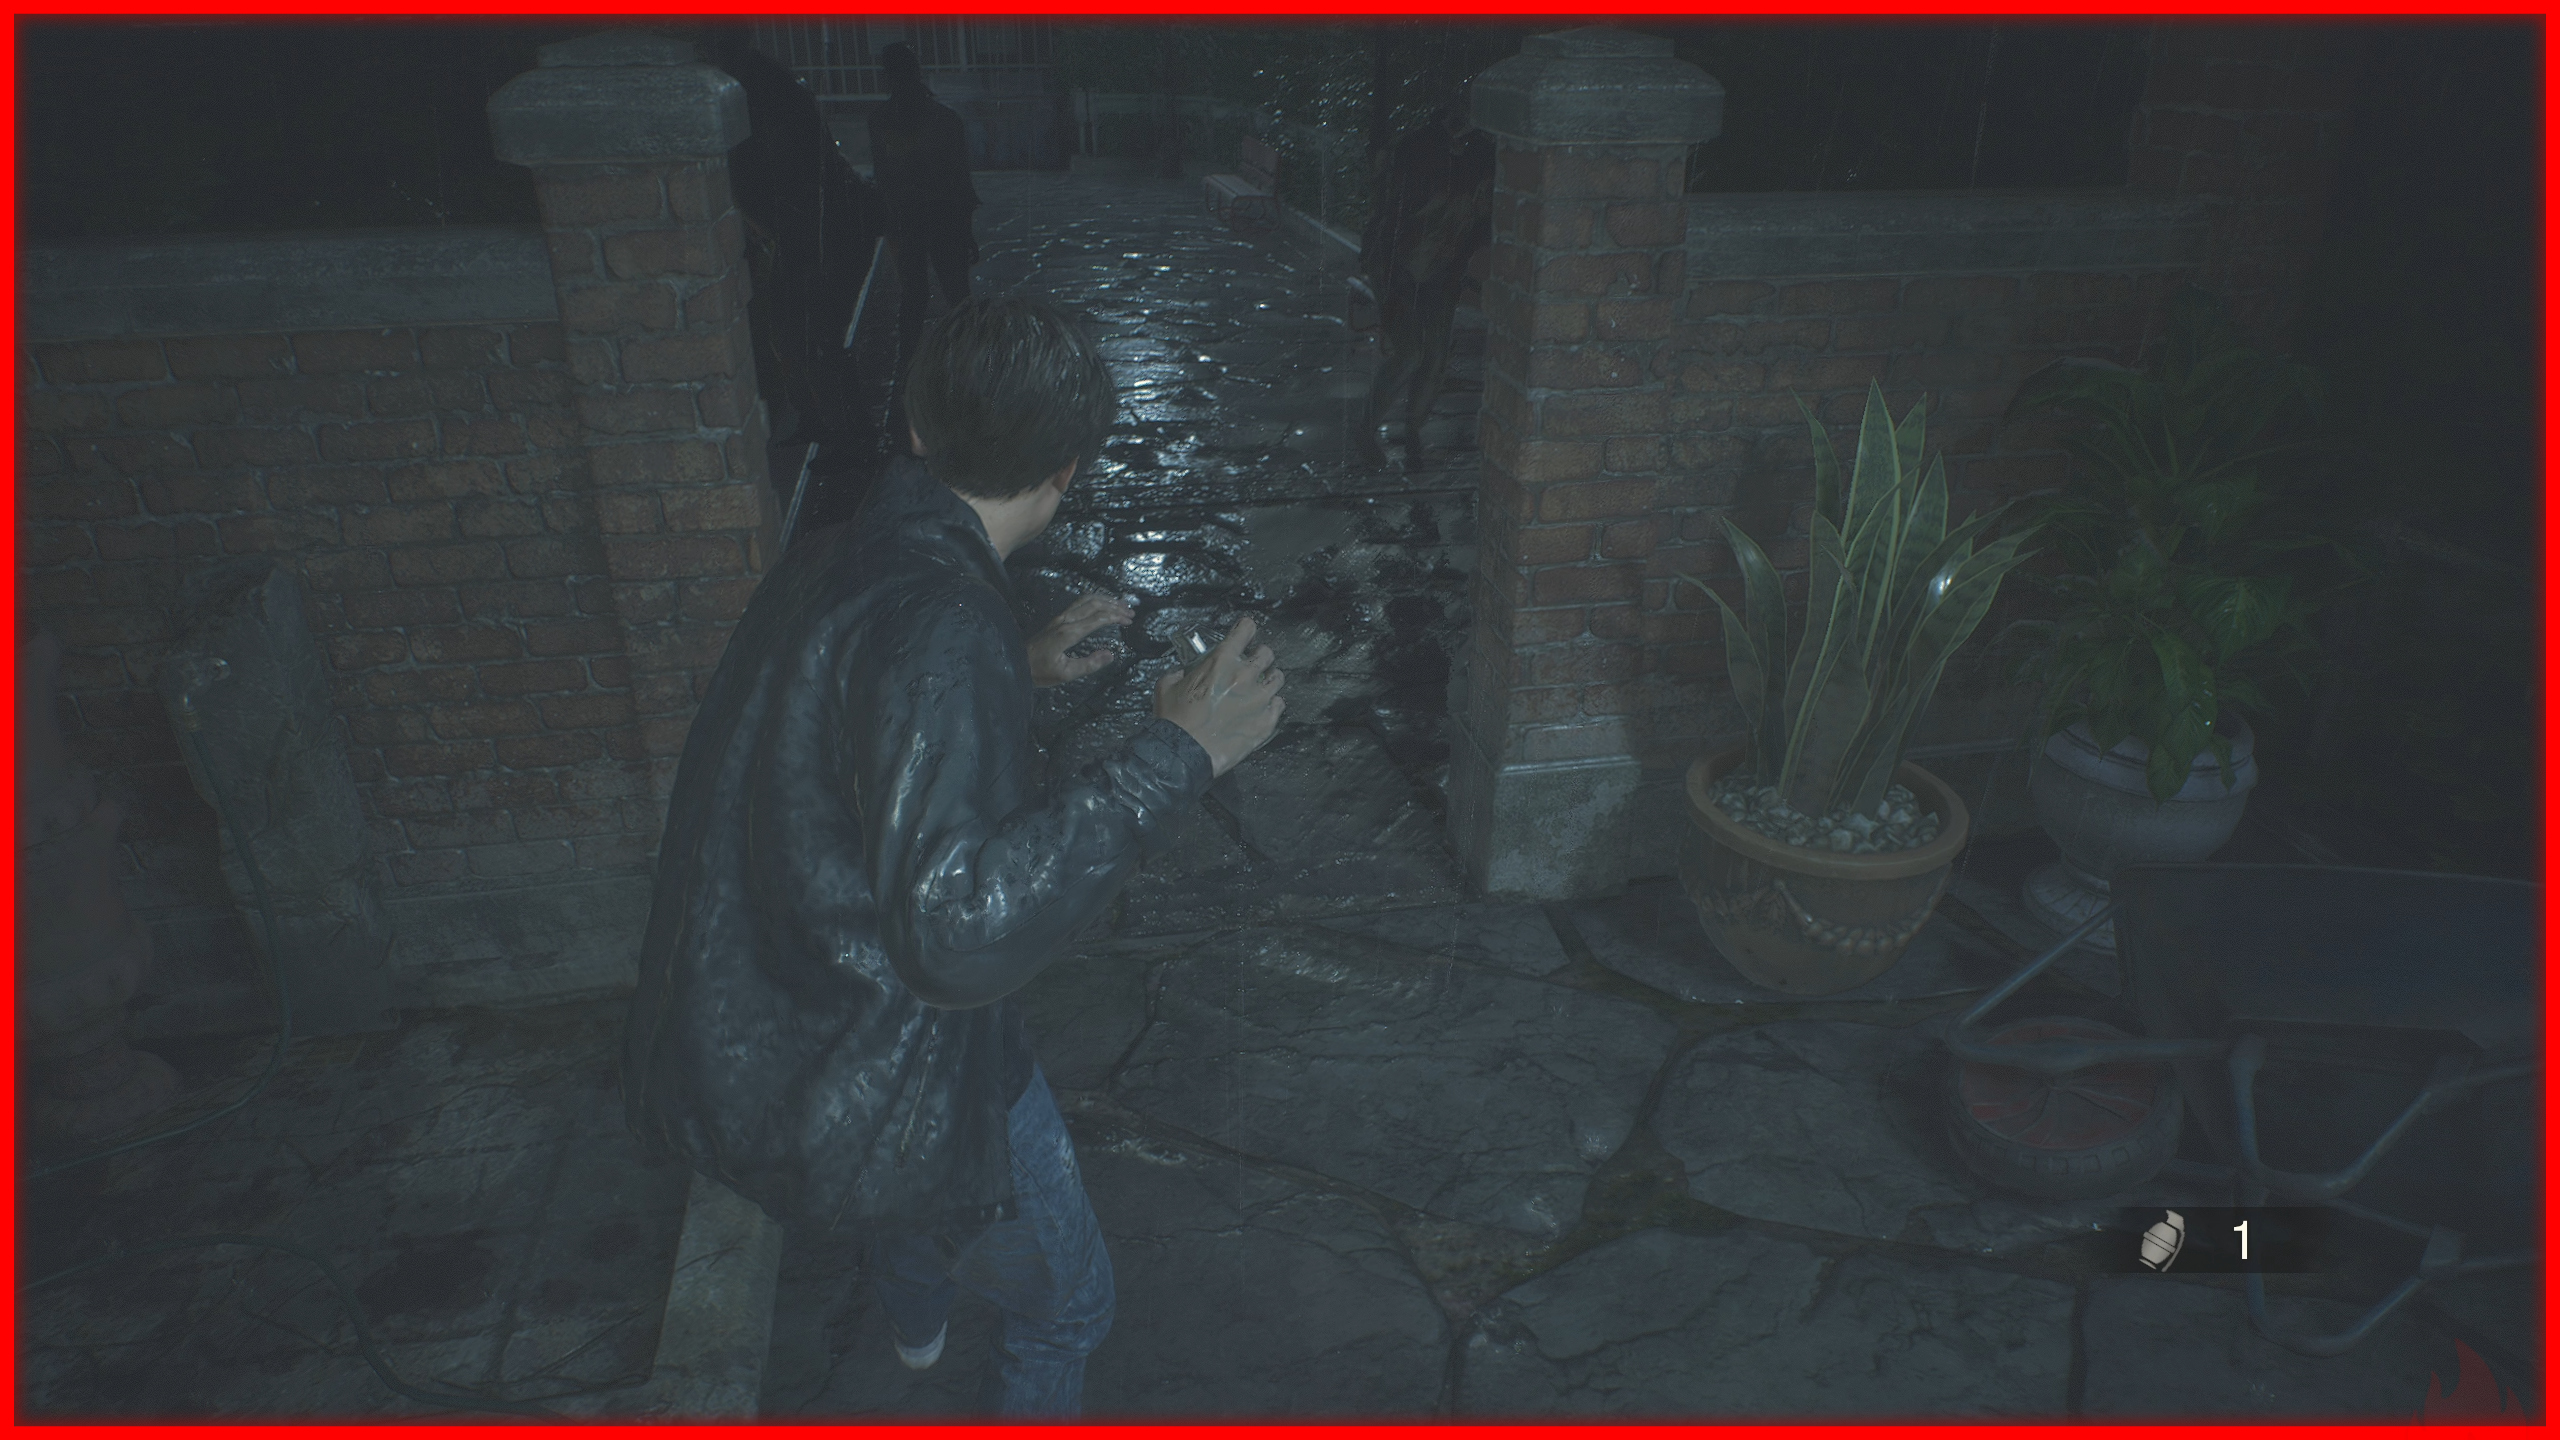
Early on, after using the Cutting Tool, you’ll find a Hand Grenade inside the room. Throw it at the zombies after climbing the stairs.
Like Skeet Shooting ❌
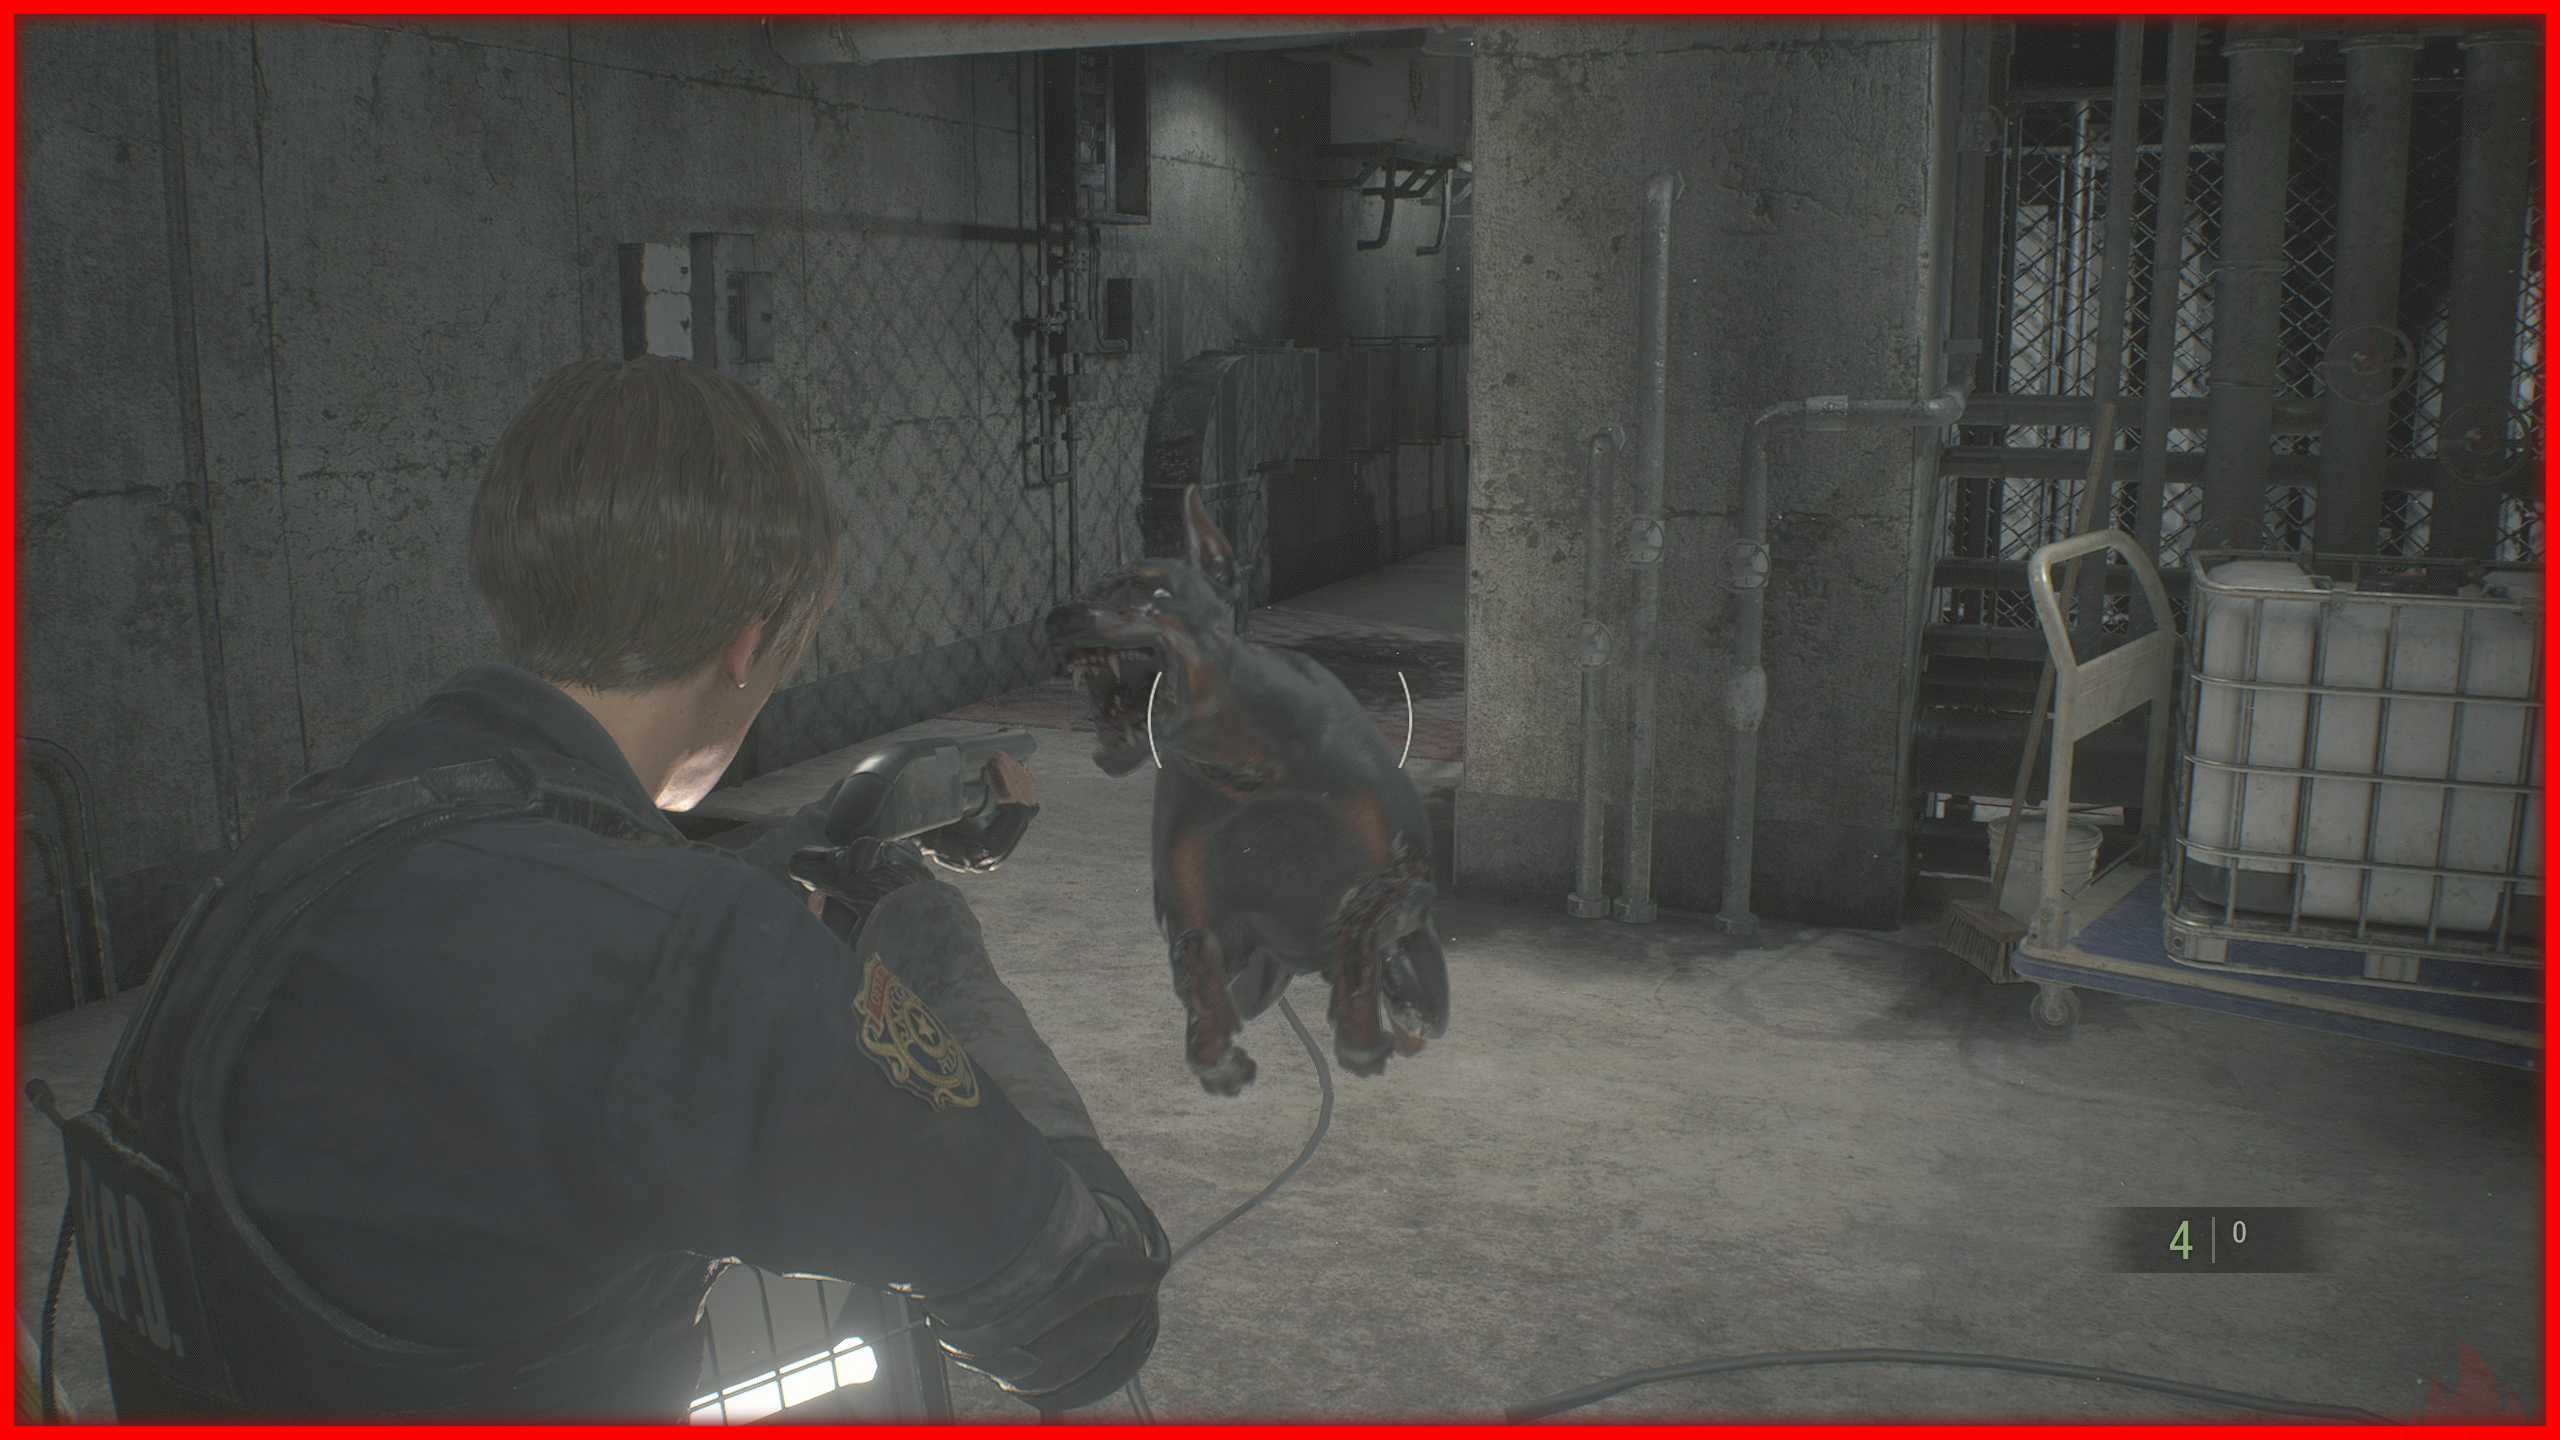
 The easiest way to earn this is during Leon’s campaign on Assisted or Standard difficulty. In the Generator Room (in the parking garage area), after restoring the power, a zombie dog will attack you.
Position yourself behind the floodlight and shoot the dog as it leaps toward you.
If you miss or run out of ammo, return to the main menu and select Continue, you’ll restart in the same room.
One Slick Super-spy ❌
 This achievement is only available in Leon’s campaign.
After escaping the Police Station and reaching the Sewers, there will be a section where you play as Ada and must use only her special weapon, the EMF Visualizer.
Once the segment begins, unequip your handgun and proceed using only the EMF Visualizer.
After the final cutscene, when control switches back to Leon, you’ll earn the achievement.
Young Escapee ❌
 This achievement is only available in Claire’s campaign.
After obtaining both power panel parts, make a manual save in chief's office room, now you need to solve the puzzle and escape the bedroom in under 1 minute.
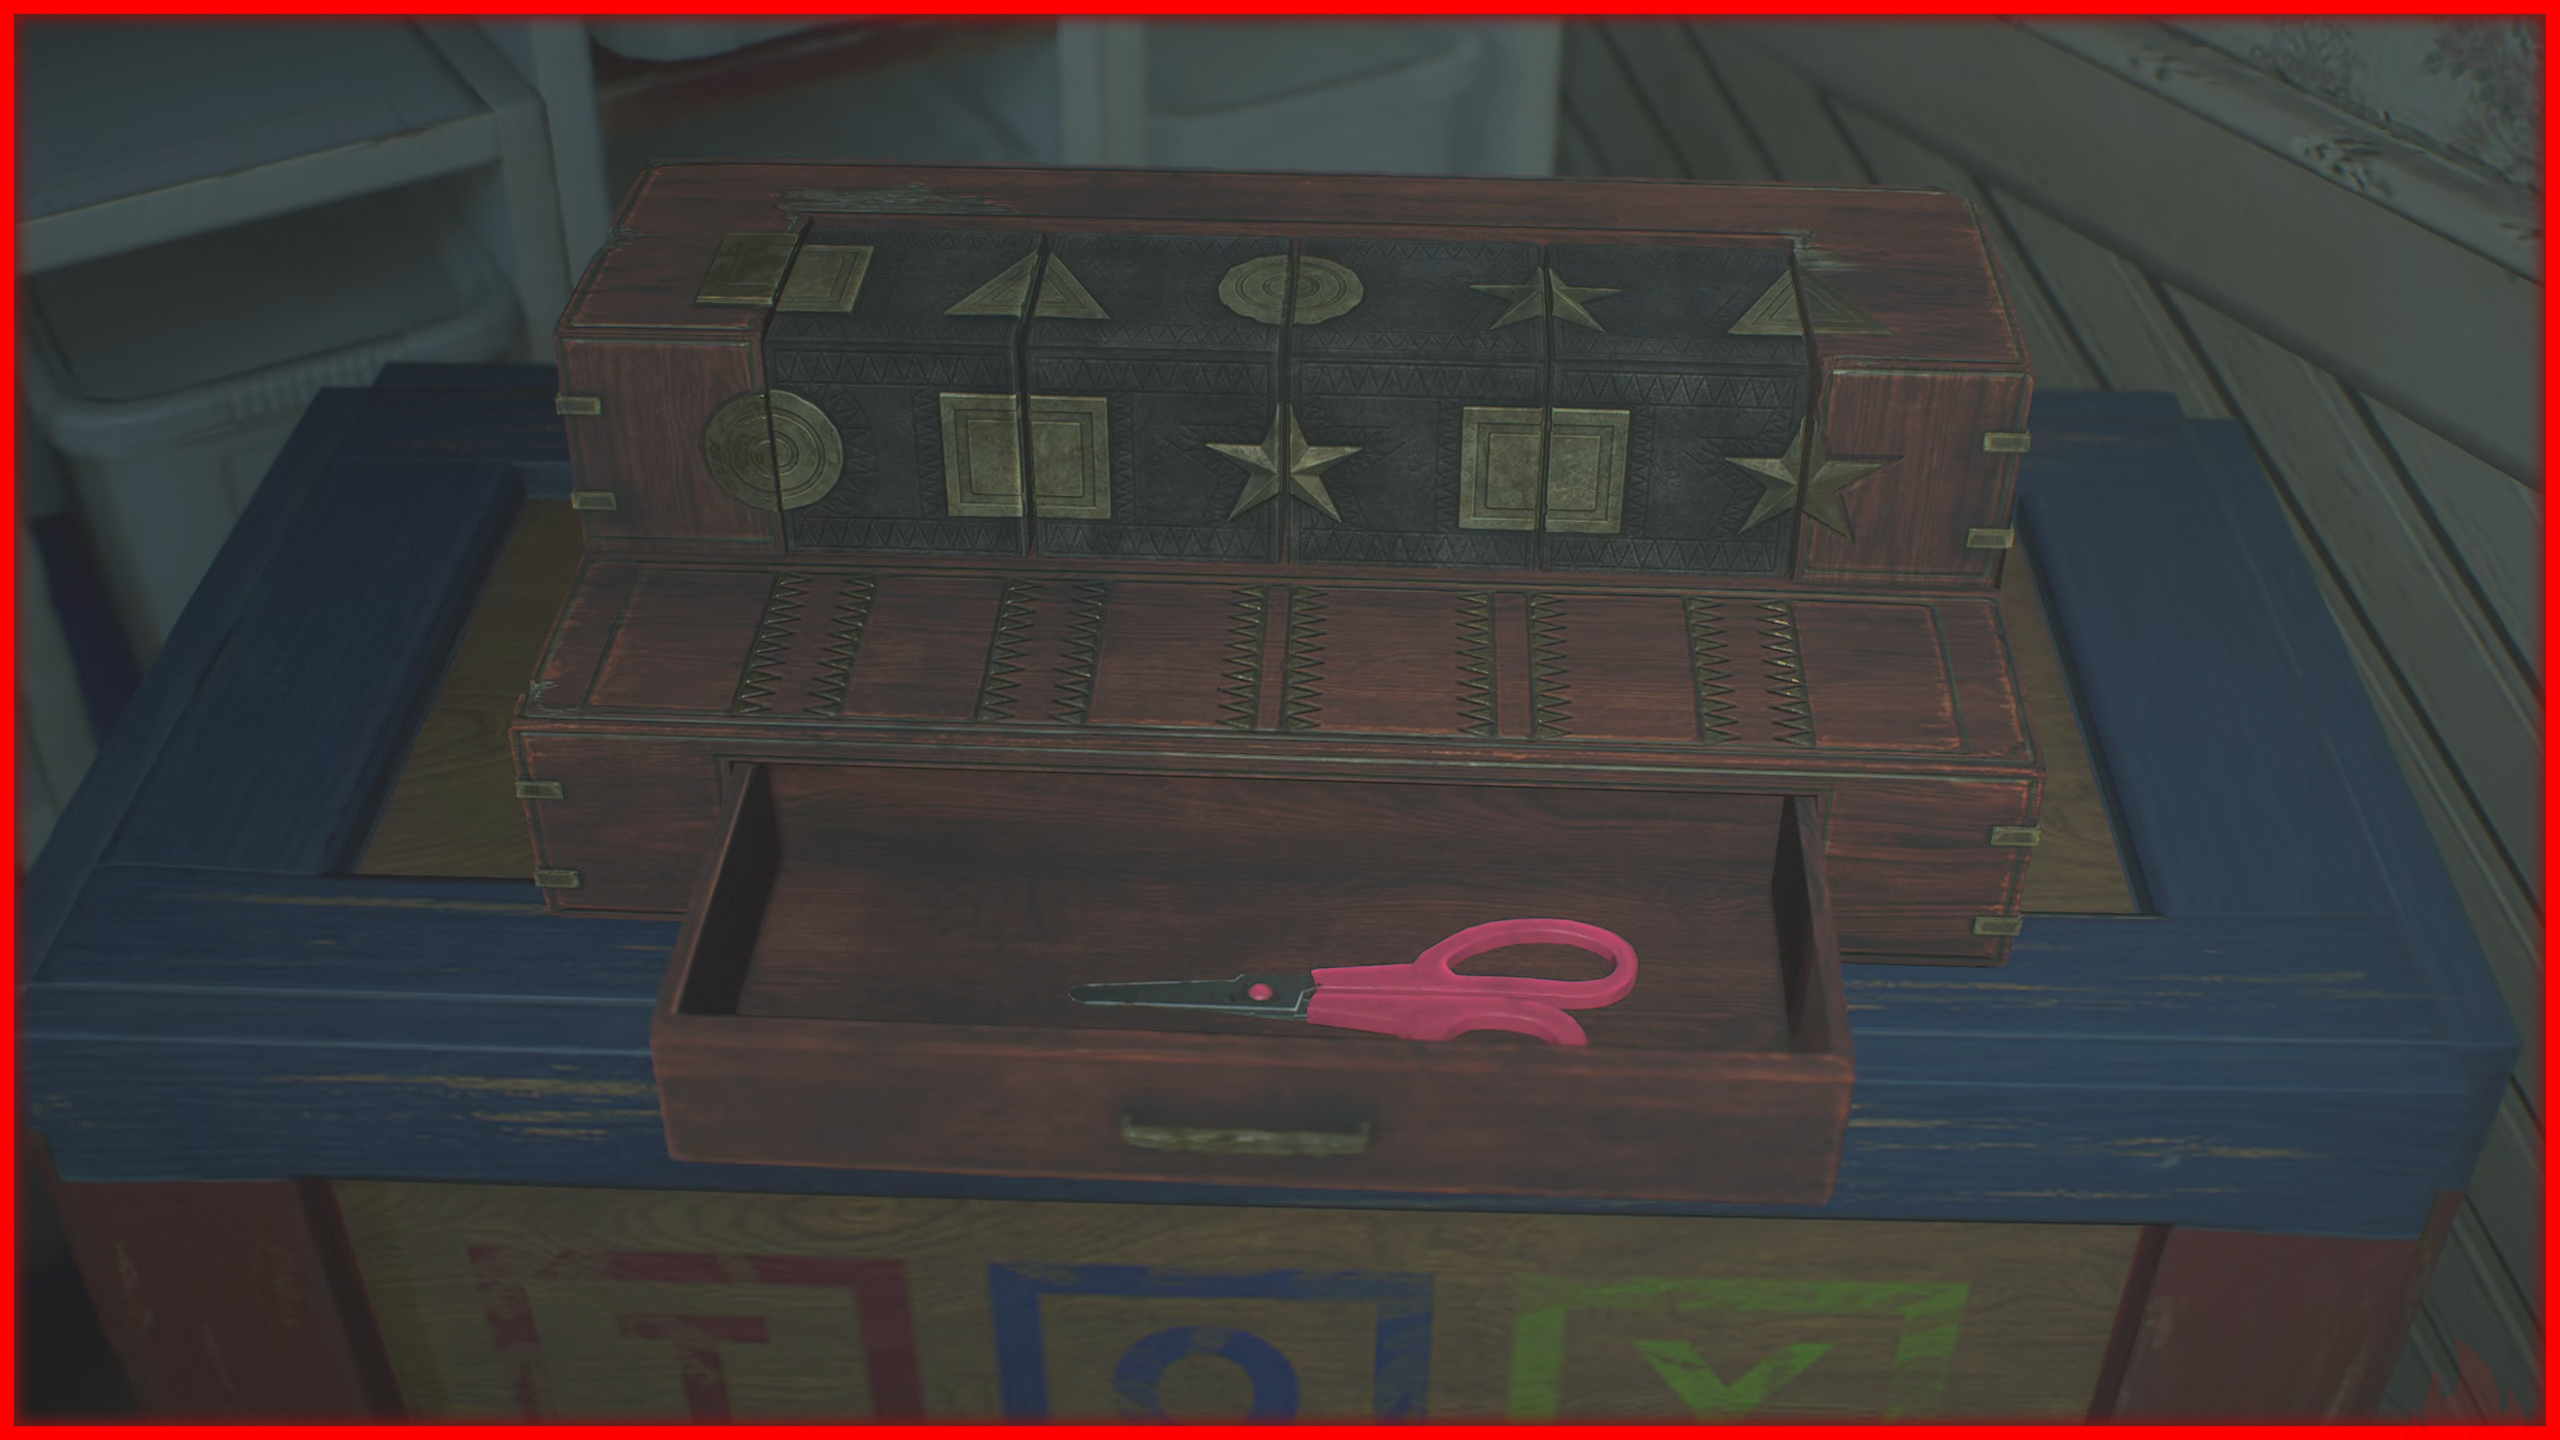
As Sherry’s gameplay starts, head right, grab the stuffed toy, check its back for a block, and place it in the corner to trigger the puzzle.
The piece positions are randomized for each player, but the solution pattern is the same. To make it easier, memorize the fastest method to solve it, then quit the game and reload your save, whenever you press “Continue” the puzzle solution for your save remains the same, and the timer resets.
Puzzle solution:
Gotcha! ❌
 This can be done on any difficulty, and it’s recommended to use infinite ammo weapons.
 Once the fight begins, activate the crane and attack the boss until he drops to his knees. Take advantage of the moment to stab him while he’s down.
On the fourth time he falls, activate the crane again to knock him off. You can also use the flash grenade found in the area to stun him.
In the Blink of an Eye ❌
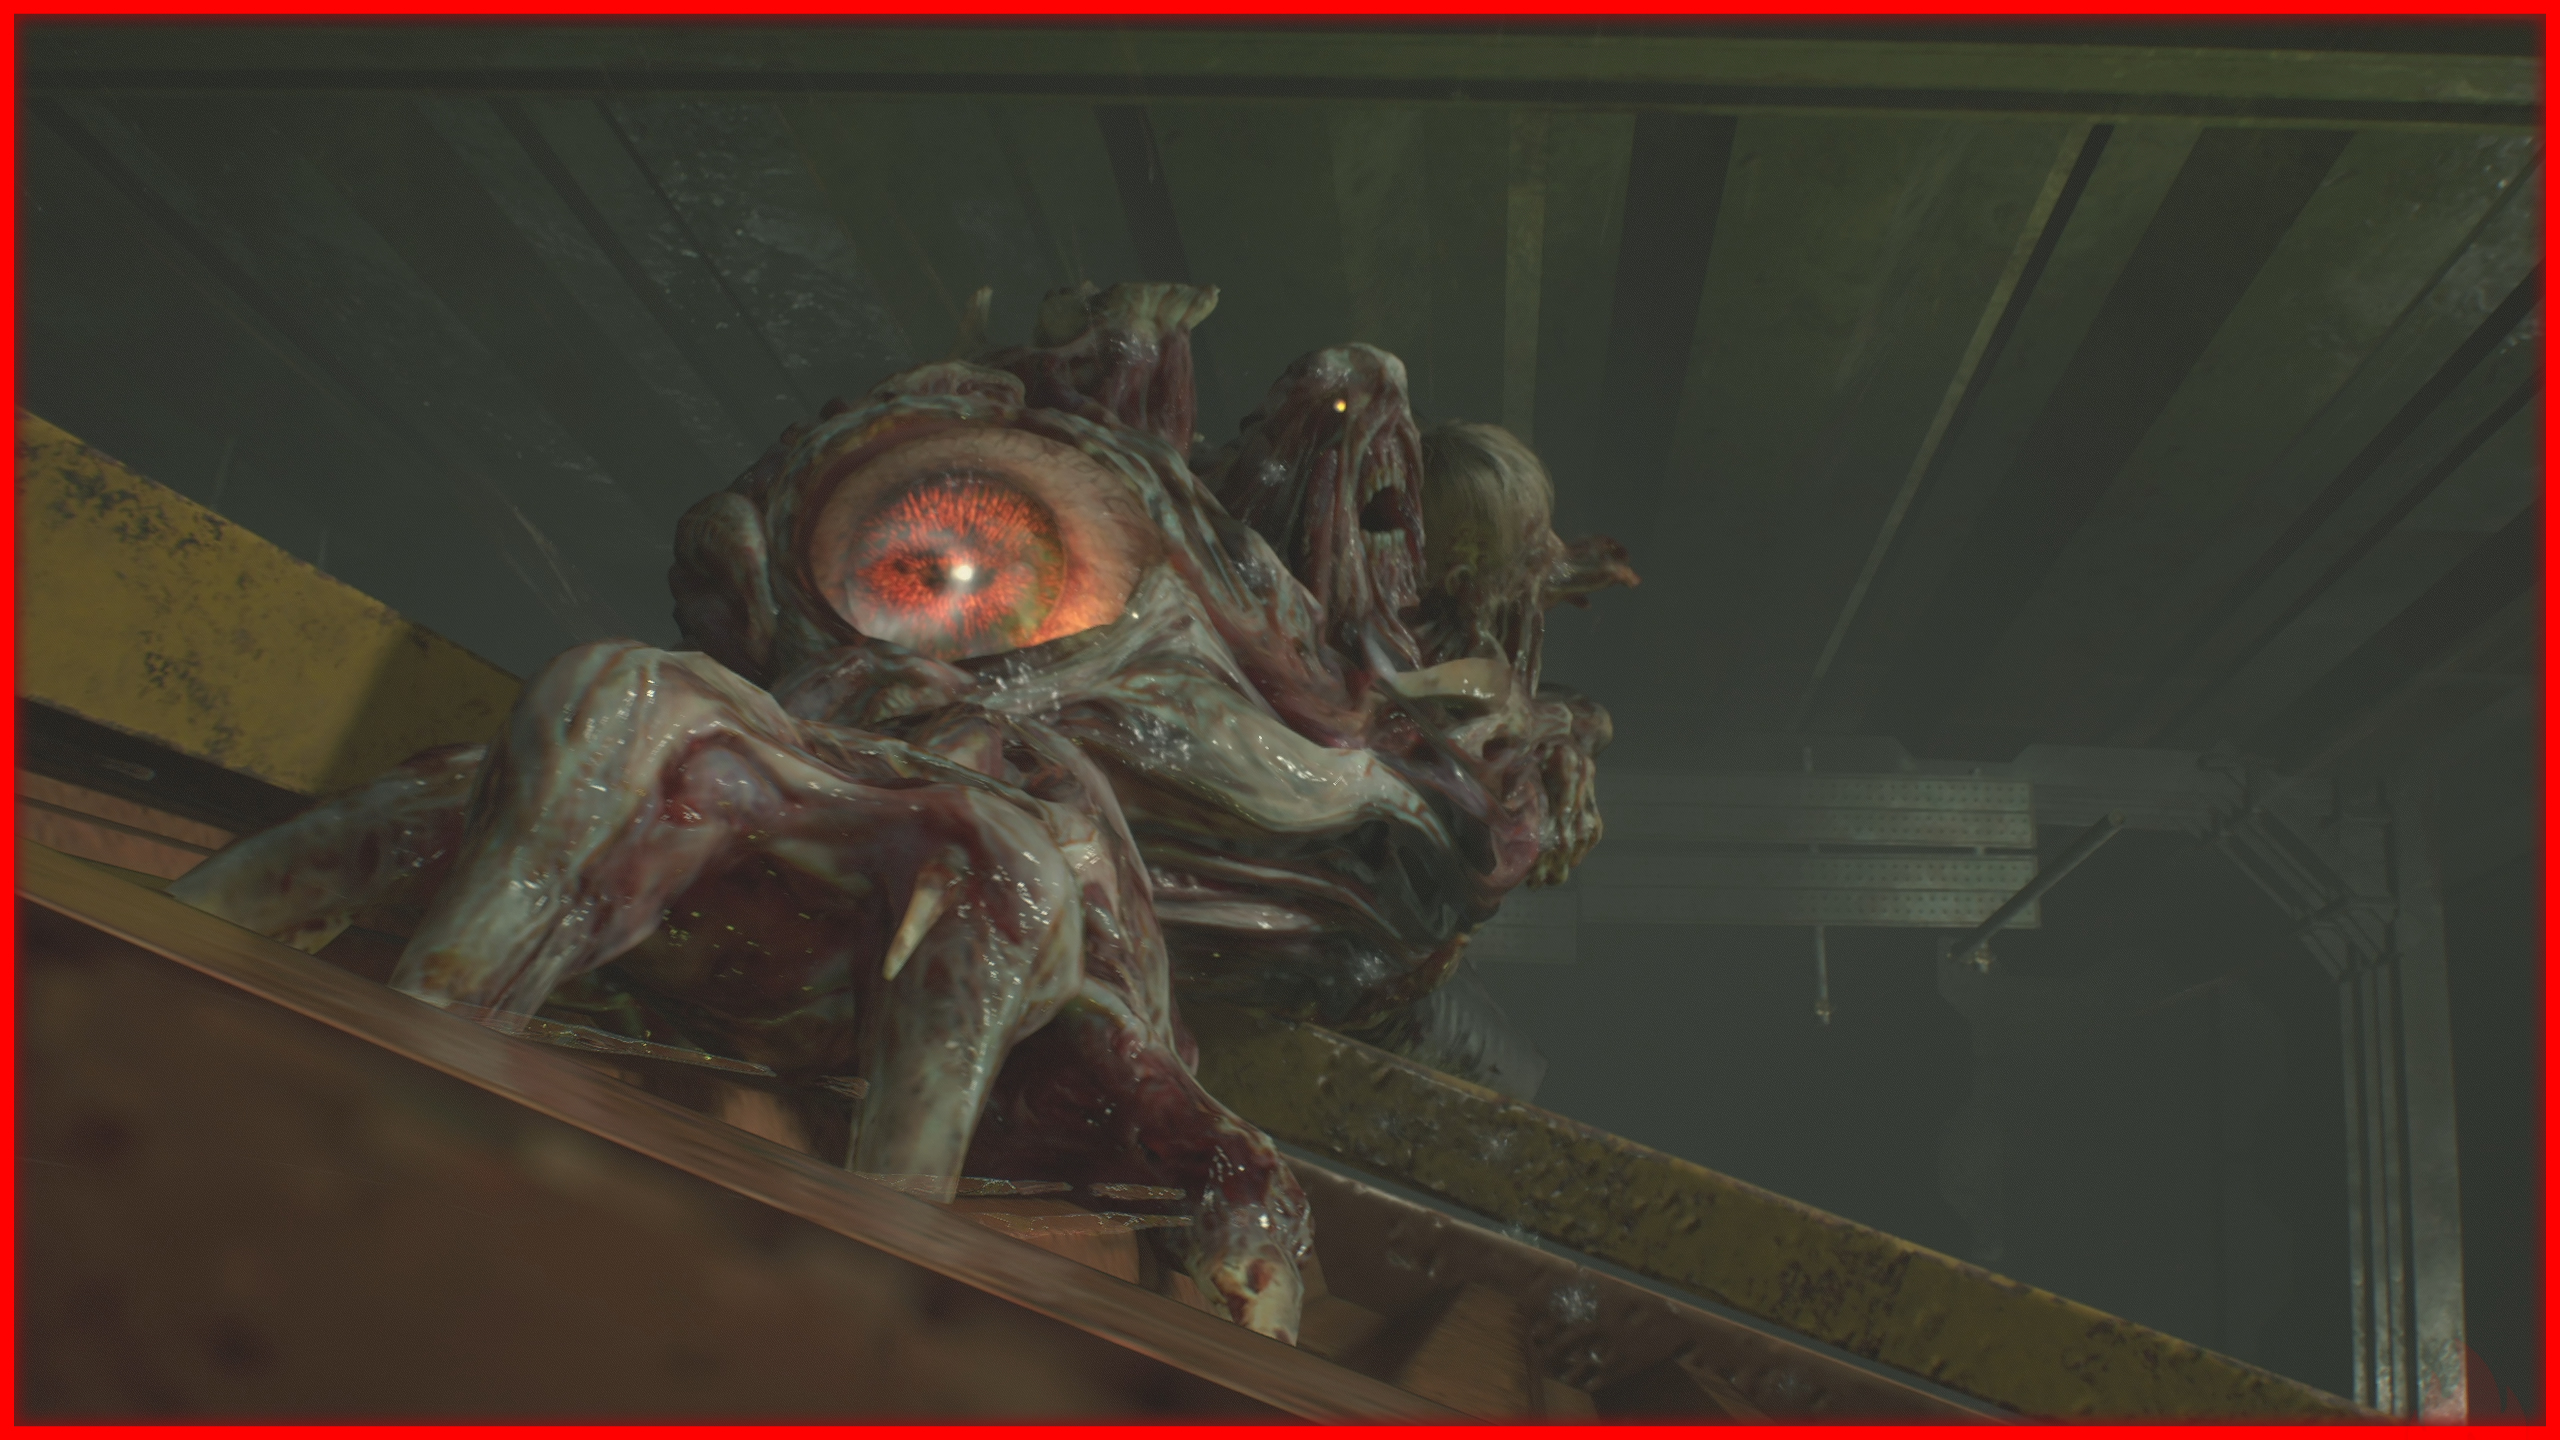
 The Super Tyrant is a boss that appears in Leon’s campaign. You’ll need to deal significant damage and dodge his attacks until a cutscene triggers, revealing the Rocket Launcher. Defeat him with more than 5 minutes remaining on the detonation timer.
This can be done on any difficulty. It’s recommended to use the upgraded Lightning Hawk along with the Shotgun or any infinite ammo weapon.
With Time to Spare ❌
 The Stage 4G is a boss that appears in Claire’s campaign. You must defeat it with more than 4 minutes remaining before the detonation.
This can be done on any difficulty. Use the Minigun available before the fight along with the Grenade Launcher or any infinite ammo weapon. Aim for the eyes on its chest to deal extra damage.
Customizer ❌
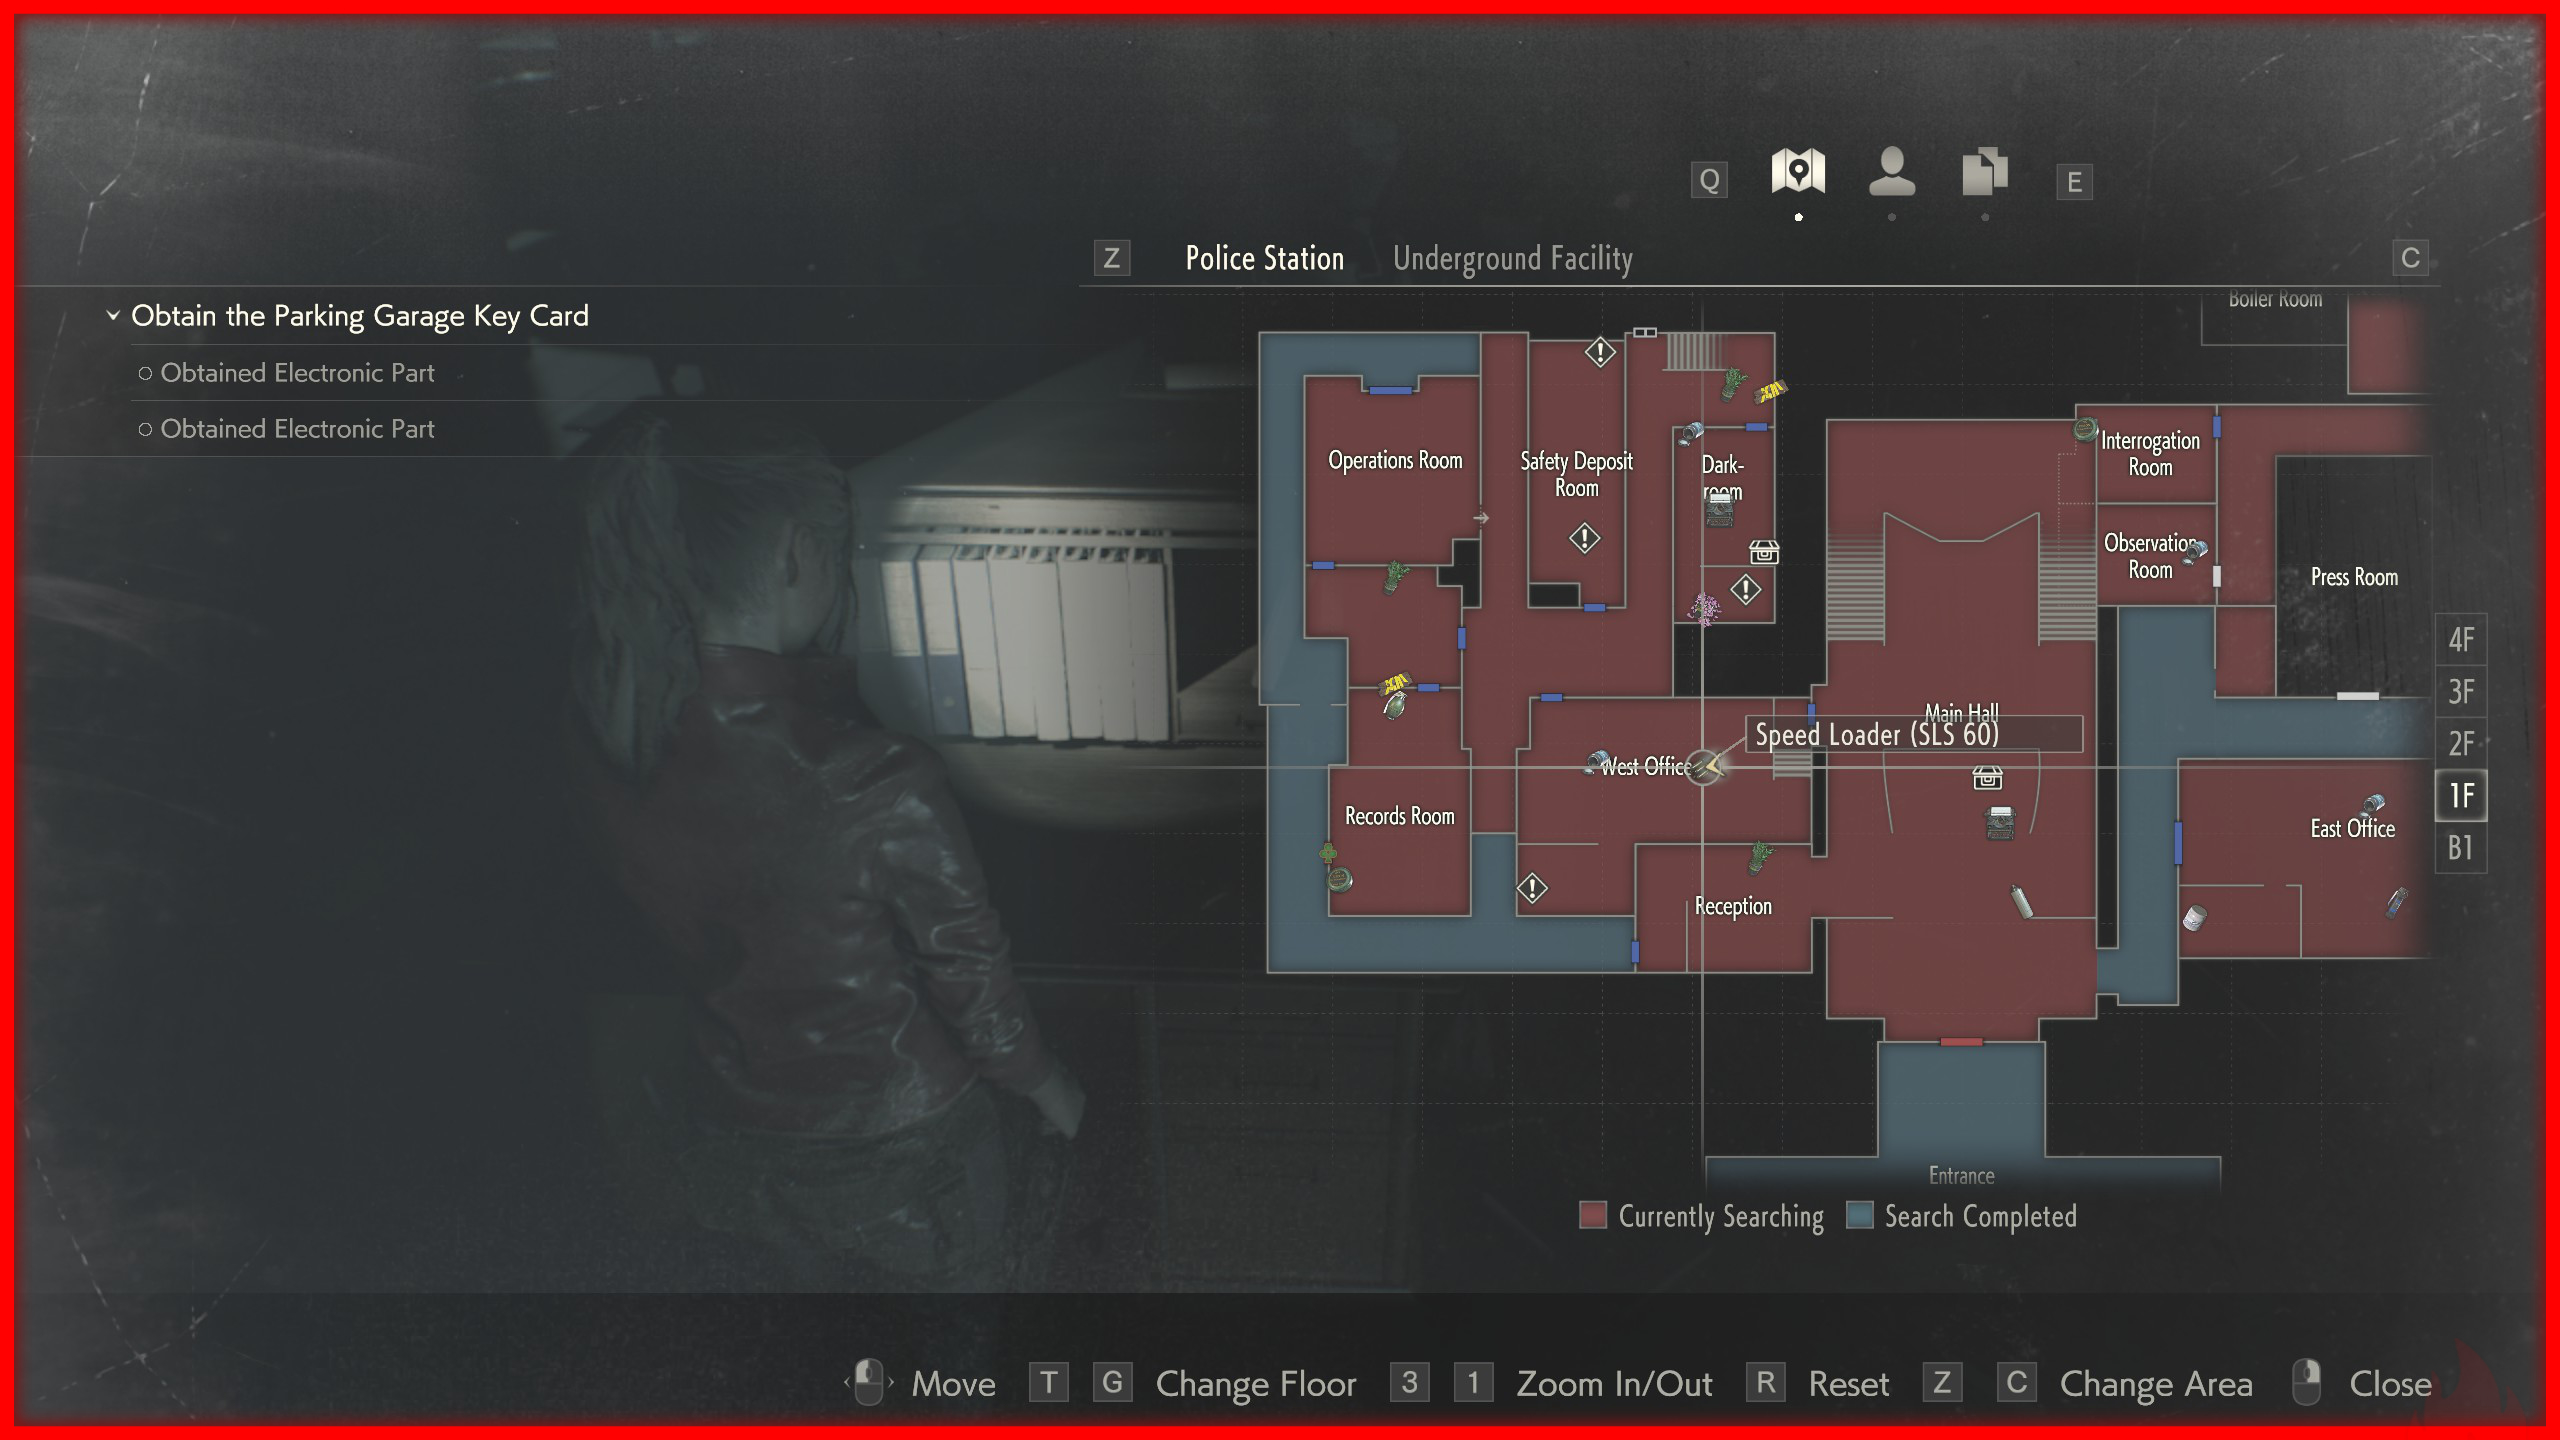
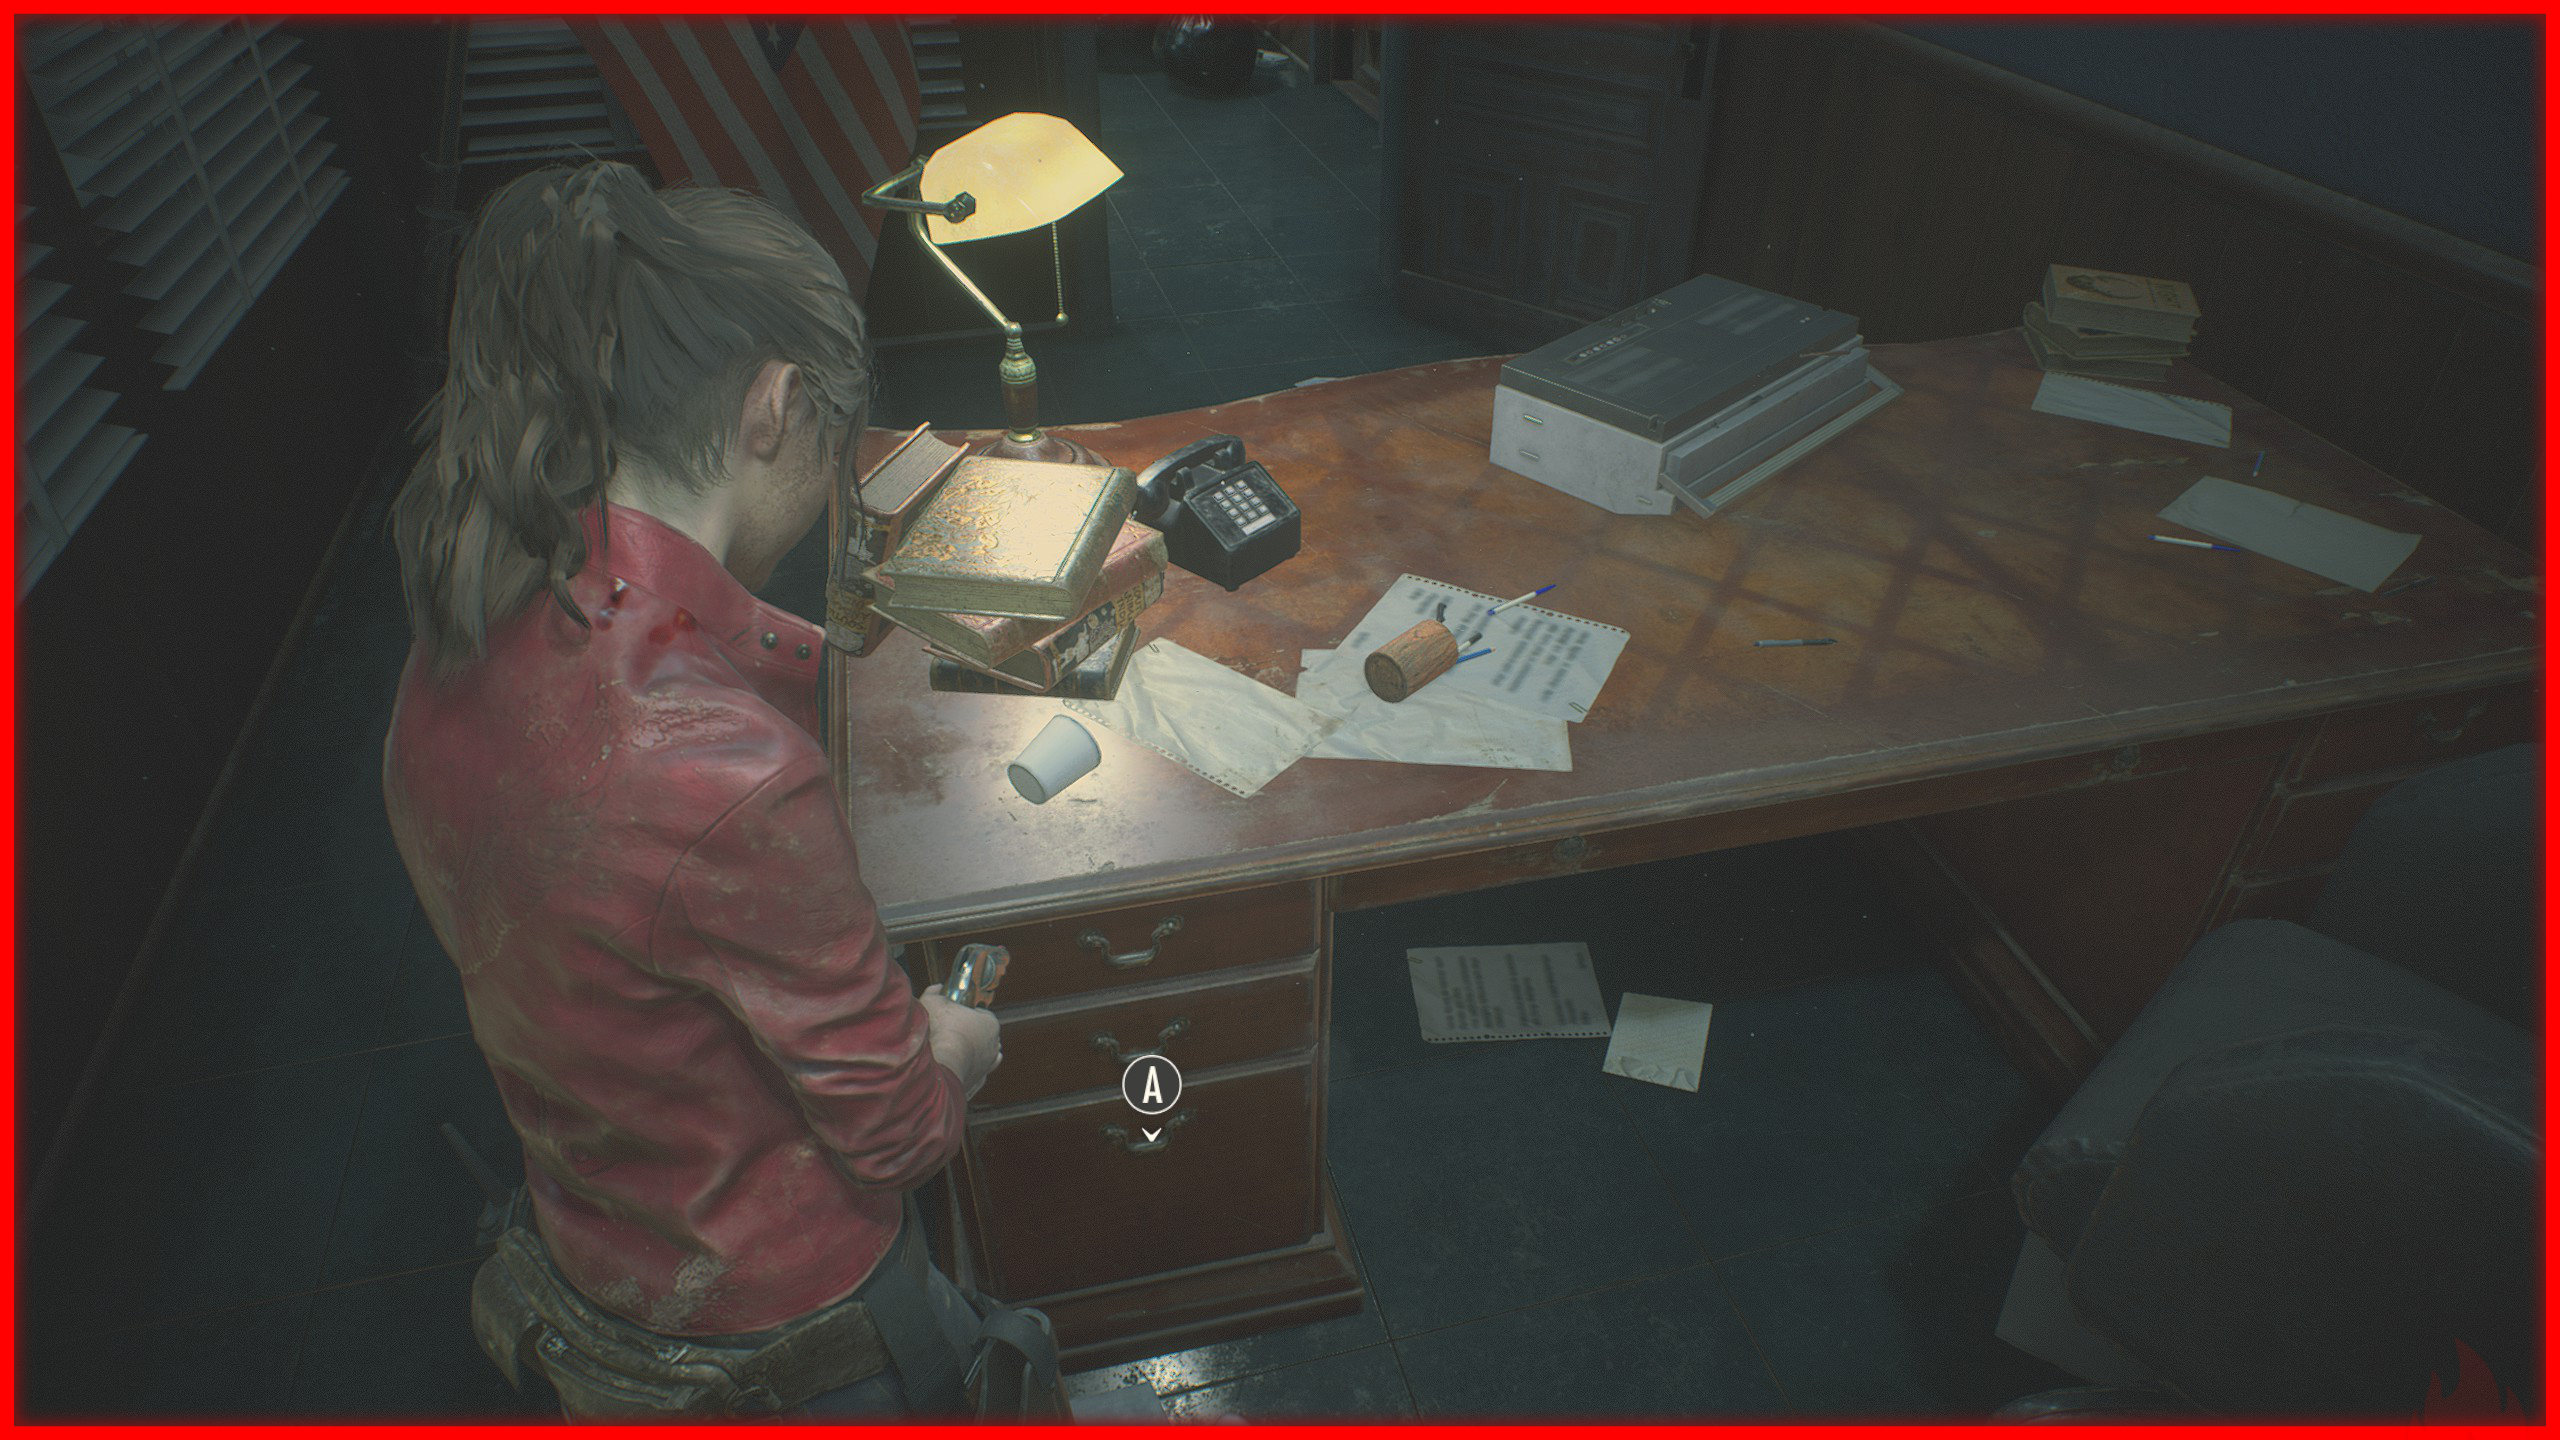
 Obtained by upgrading a weapon. You can find multiple Weapon Custom Parts throughout the campaign, the first one available is an upgrade for the SLS 60, located inside Leon’s desk in the West Office.
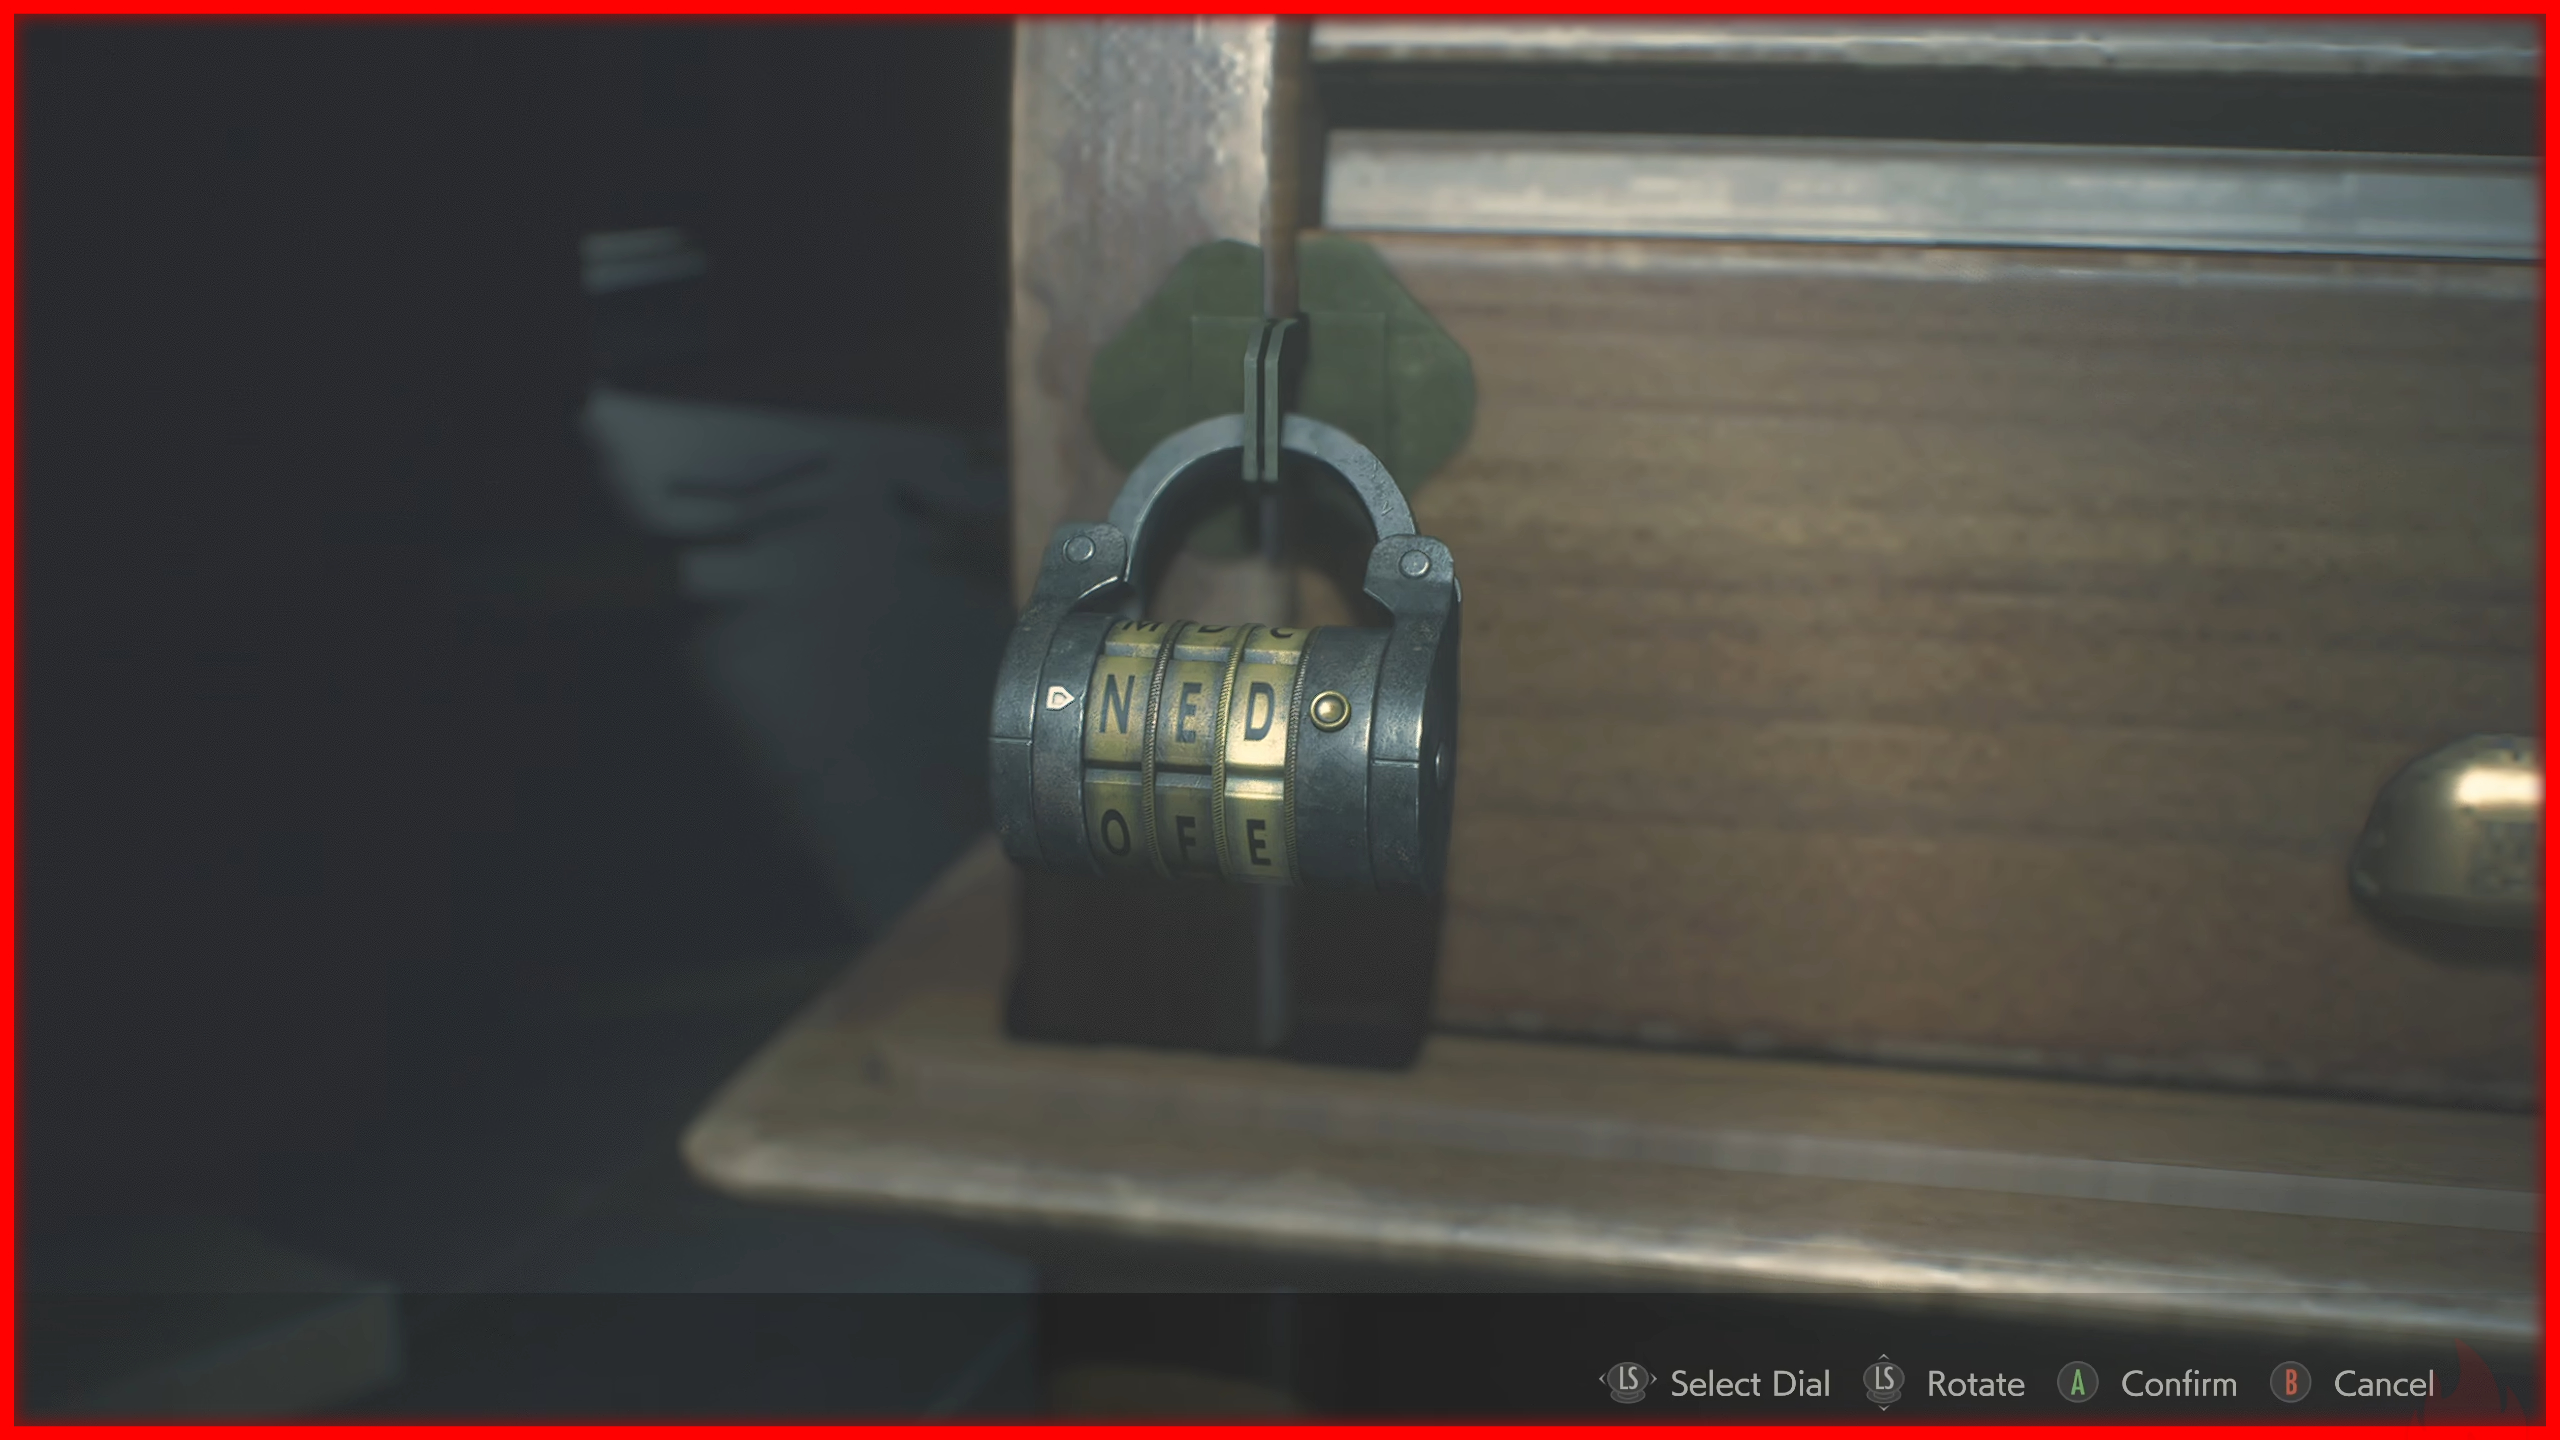
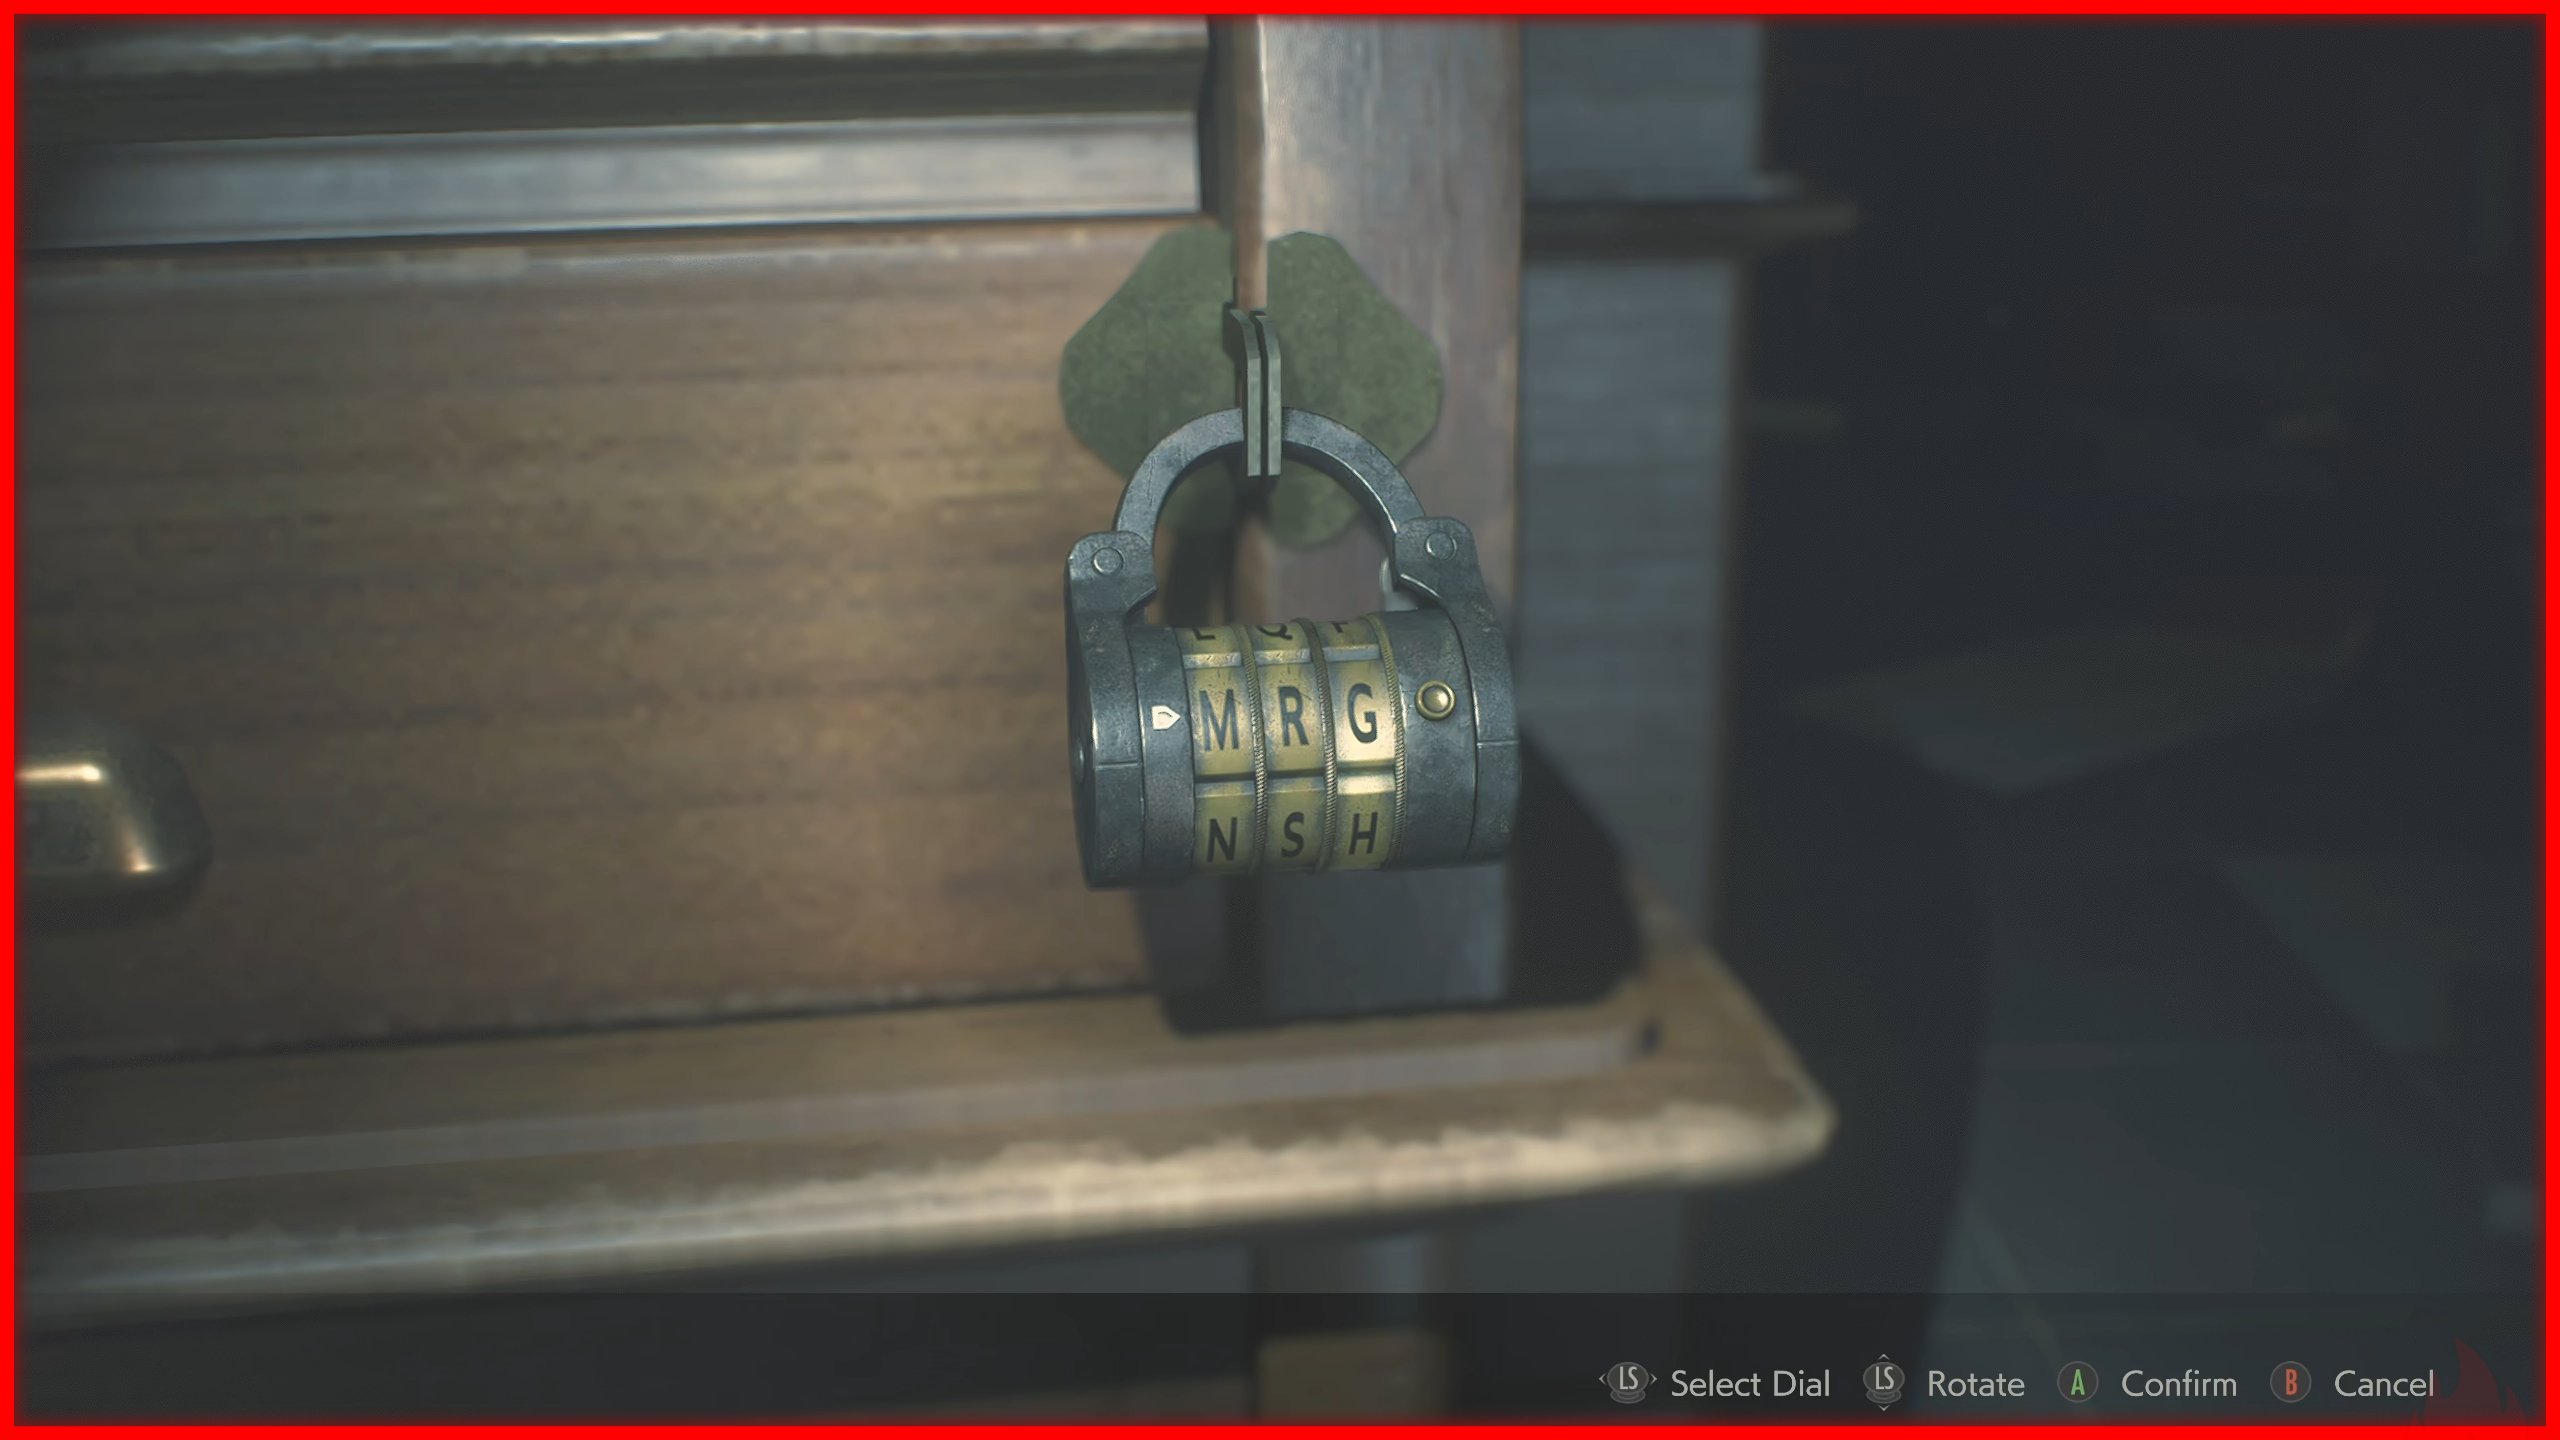
After interacting with the file, enter the combinations NED and MRG to unlock the desk and obtain the Speed Loader. Combine it with the SLS 60 to earn the achievement.
A Vault-like Mind ❌
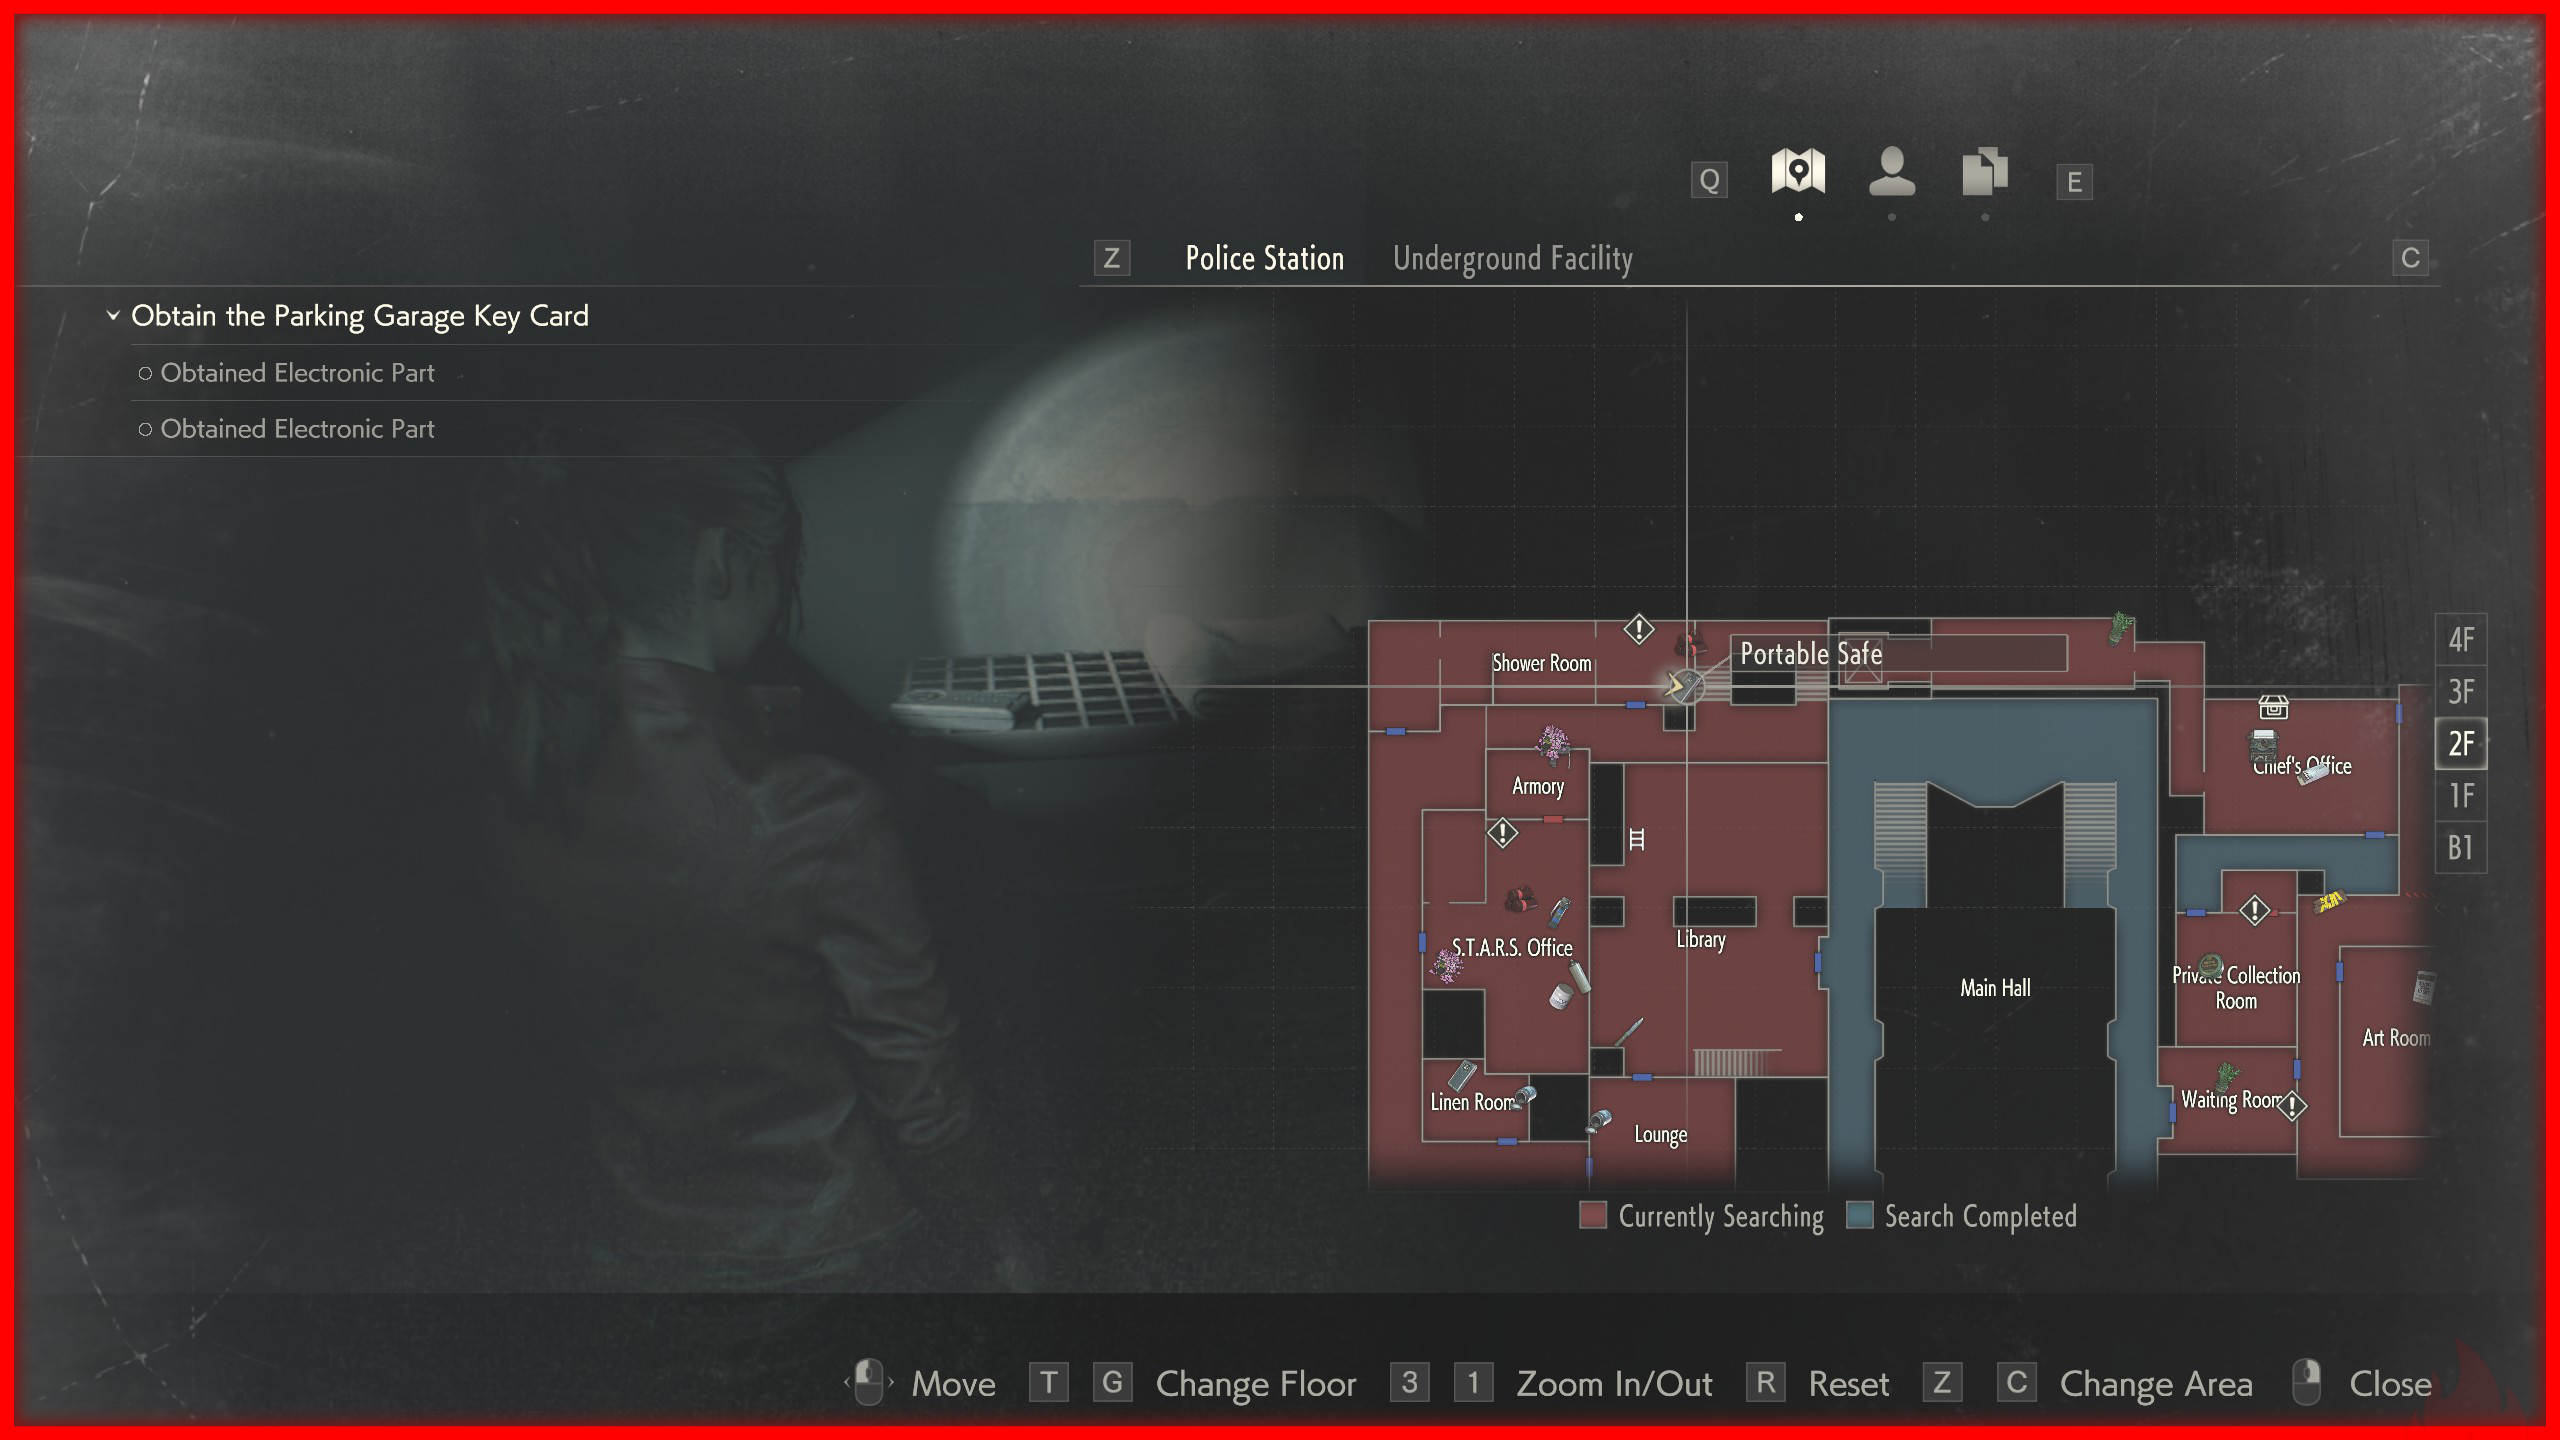
 There are two Portable Safes in the game. In Scenario A, one can be found in the Shower Room and the other in the Linen Room. You’ll need to press the buttons in a specific sequence to unlock them the pattern is random for each player, so press the buttons based on the order in which the lights turn on. Open at least one to earn the achievement.
Police Station 2F - Shower Room:
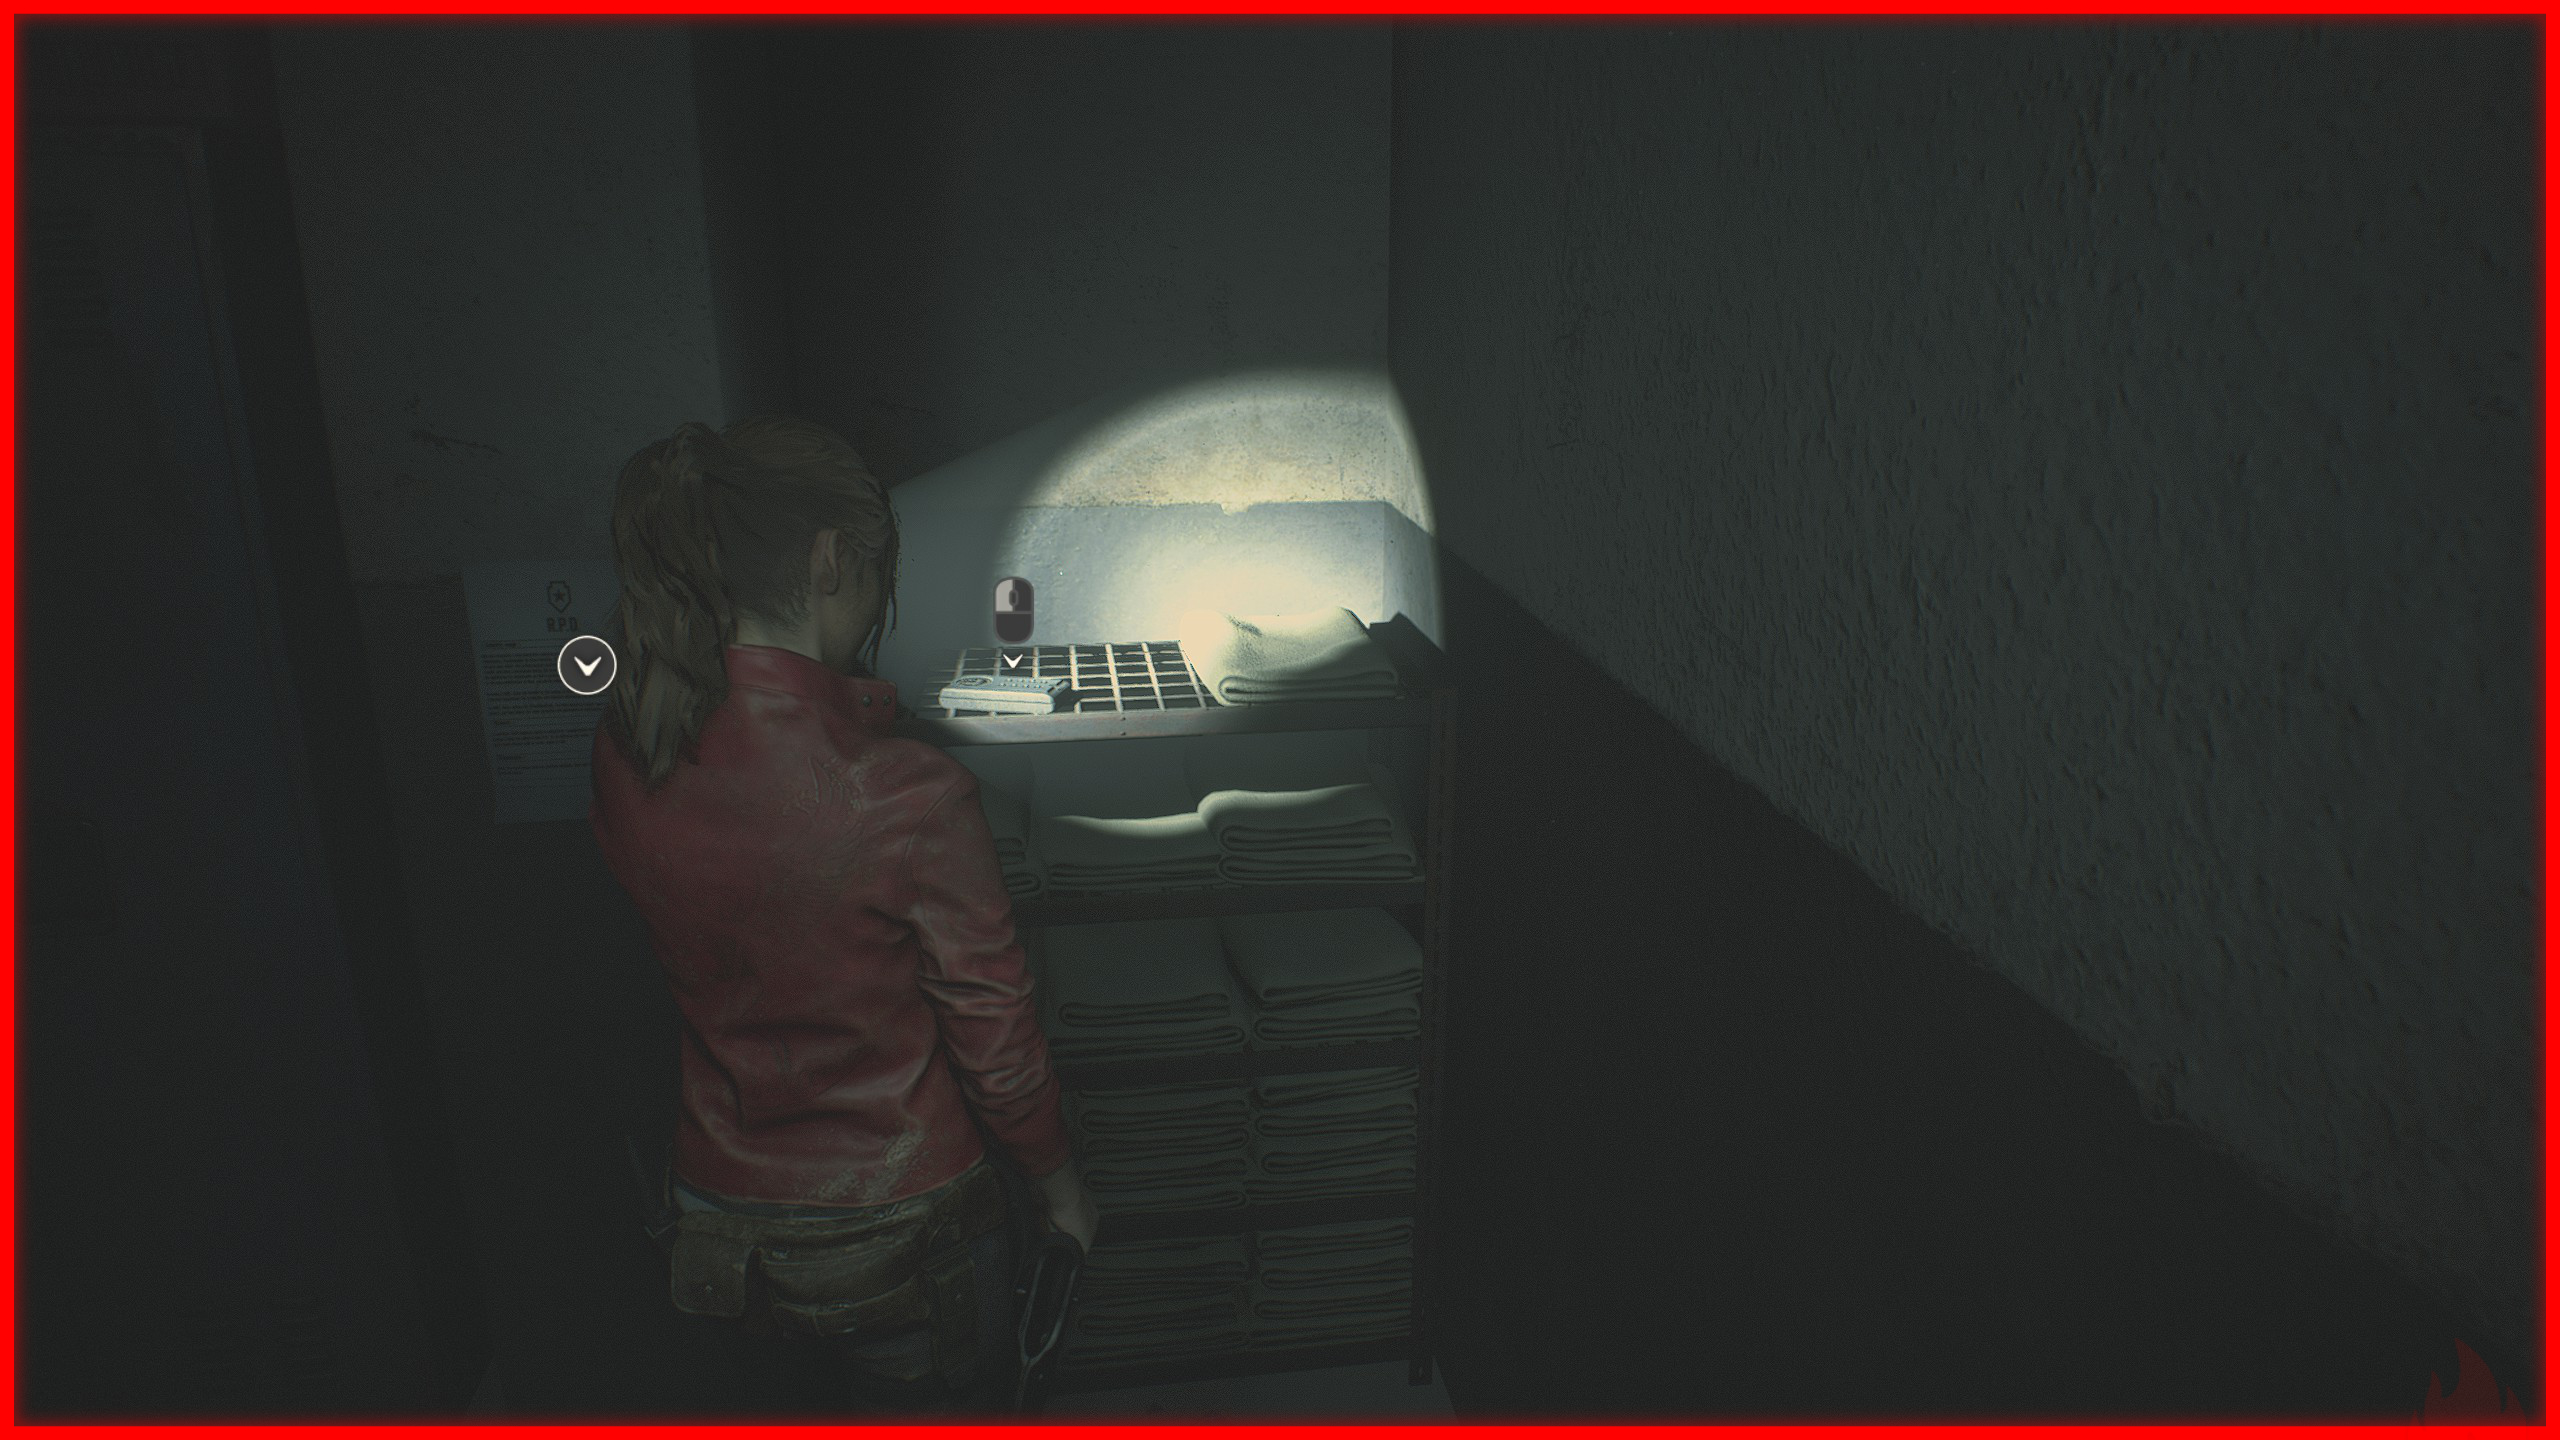 Police Station 2F - Linen Room (Needs Diamond Key):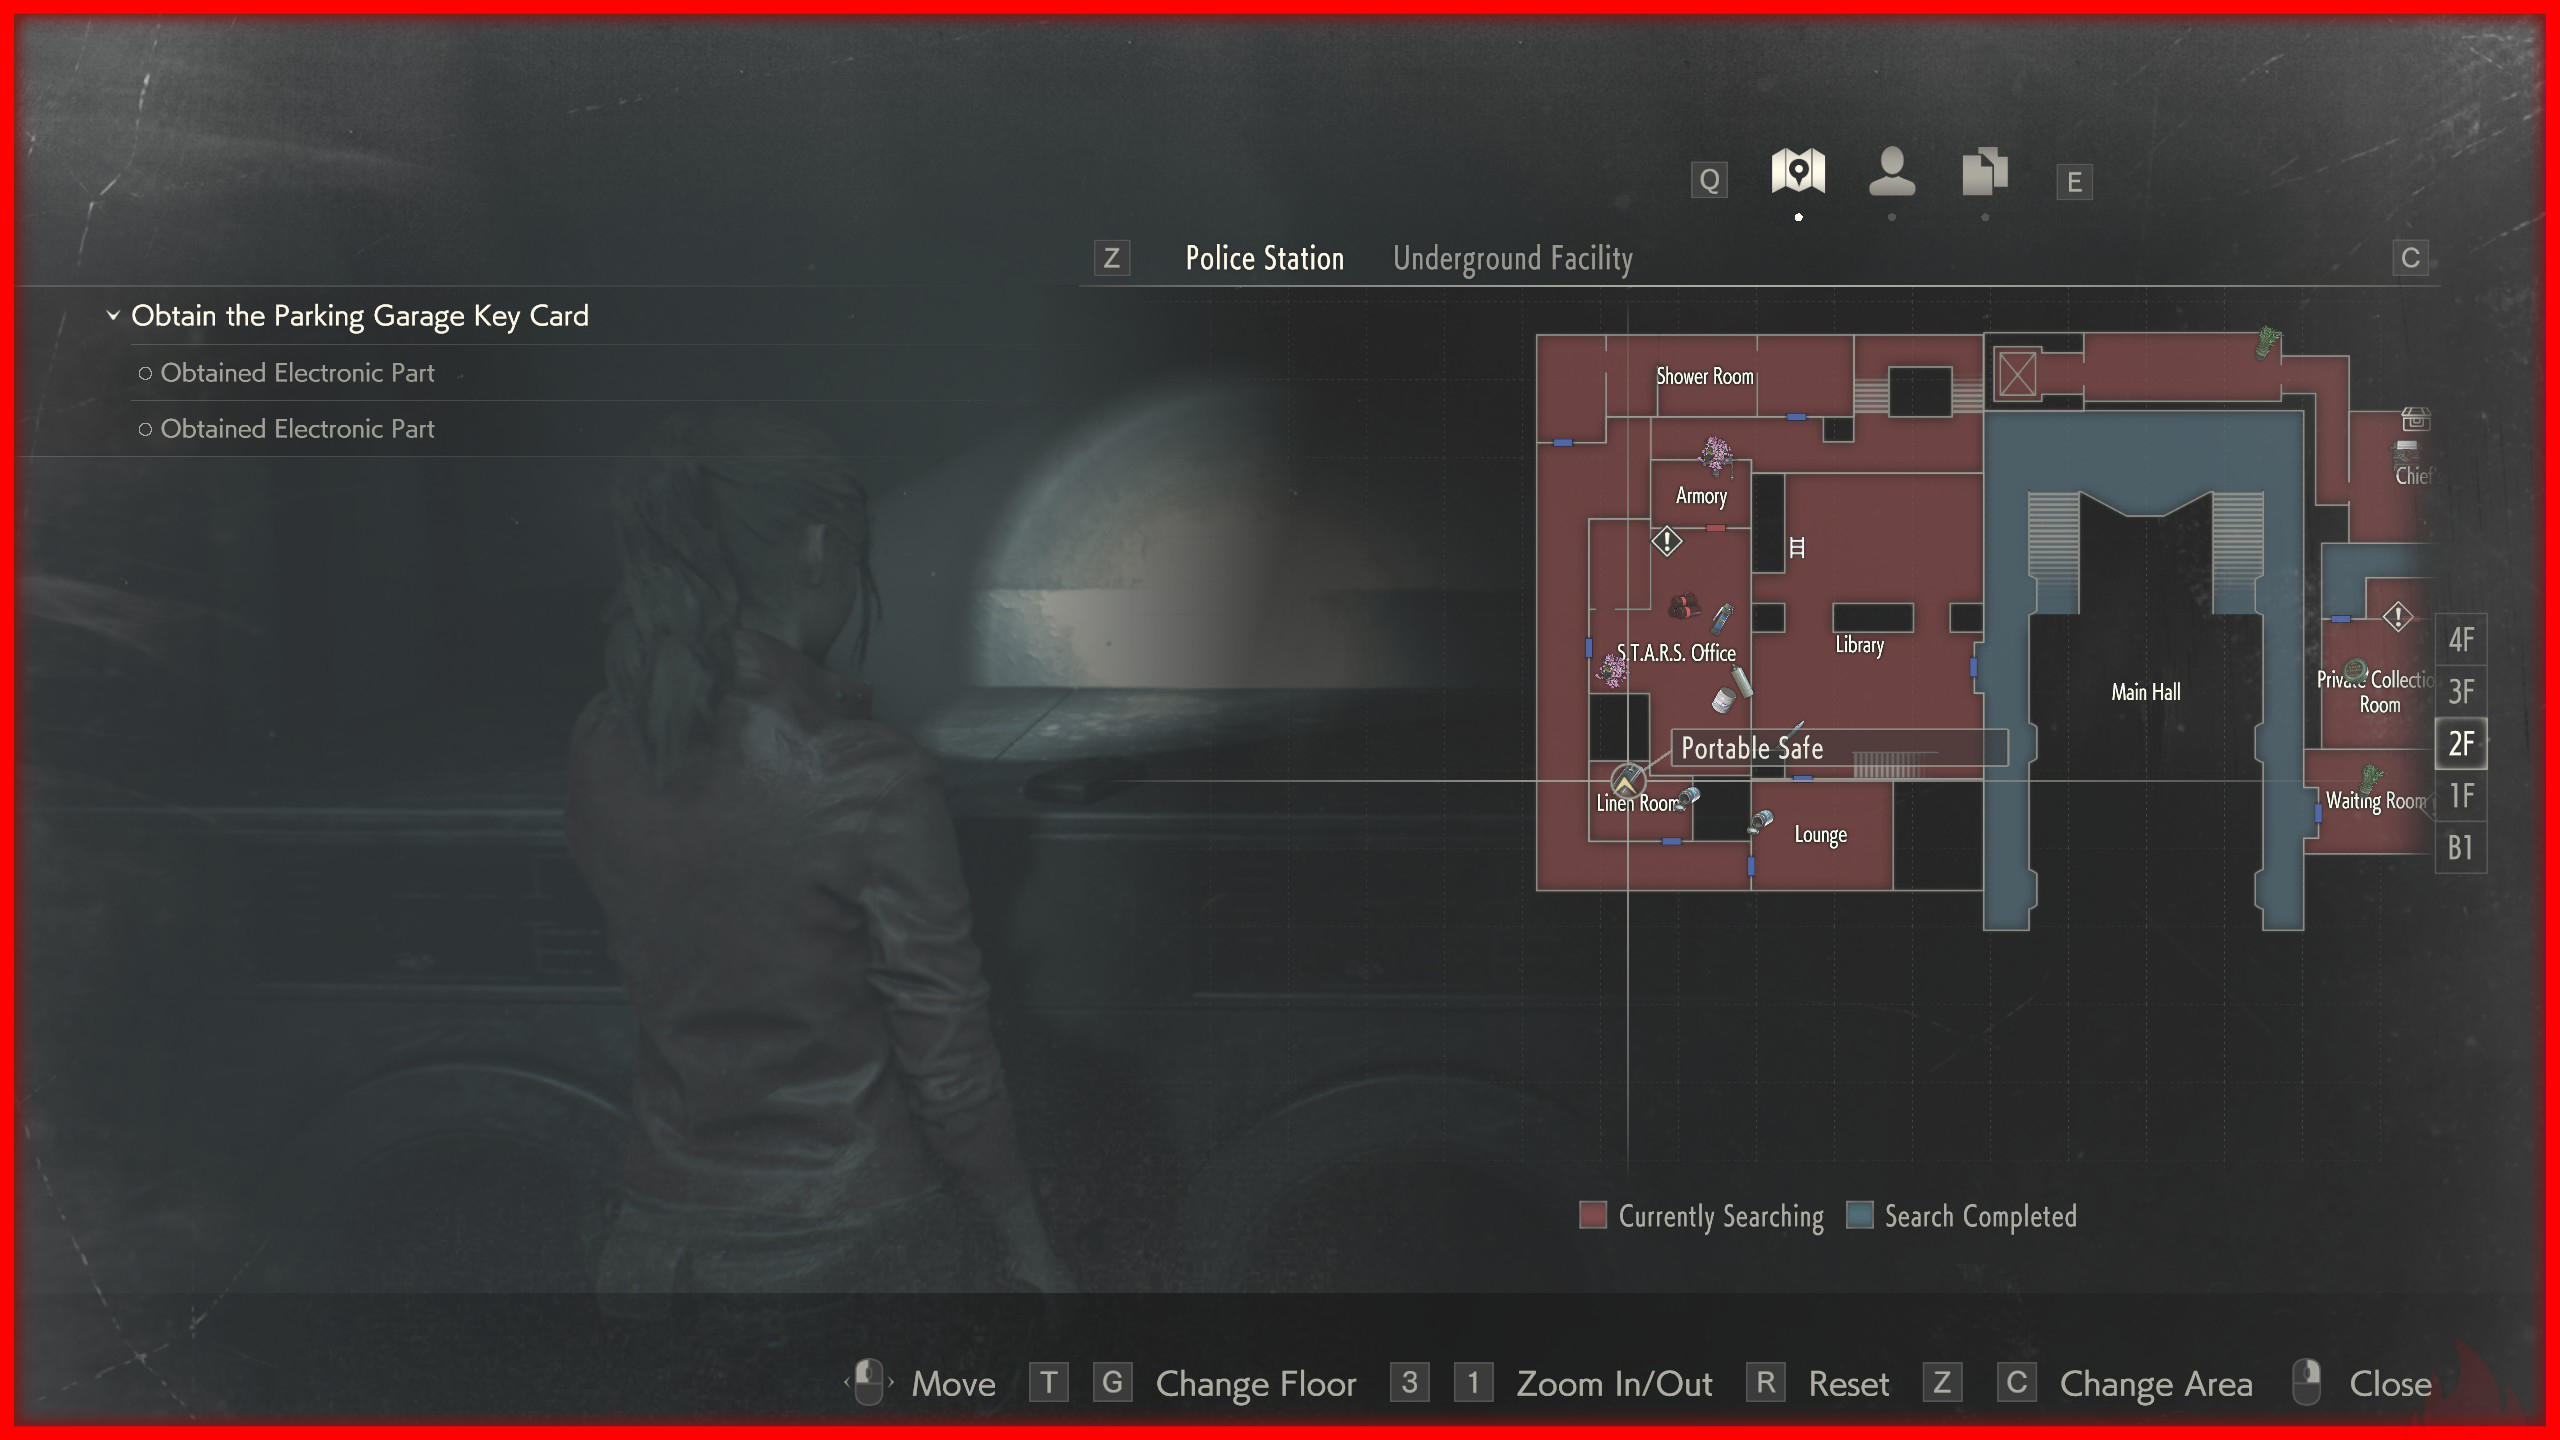
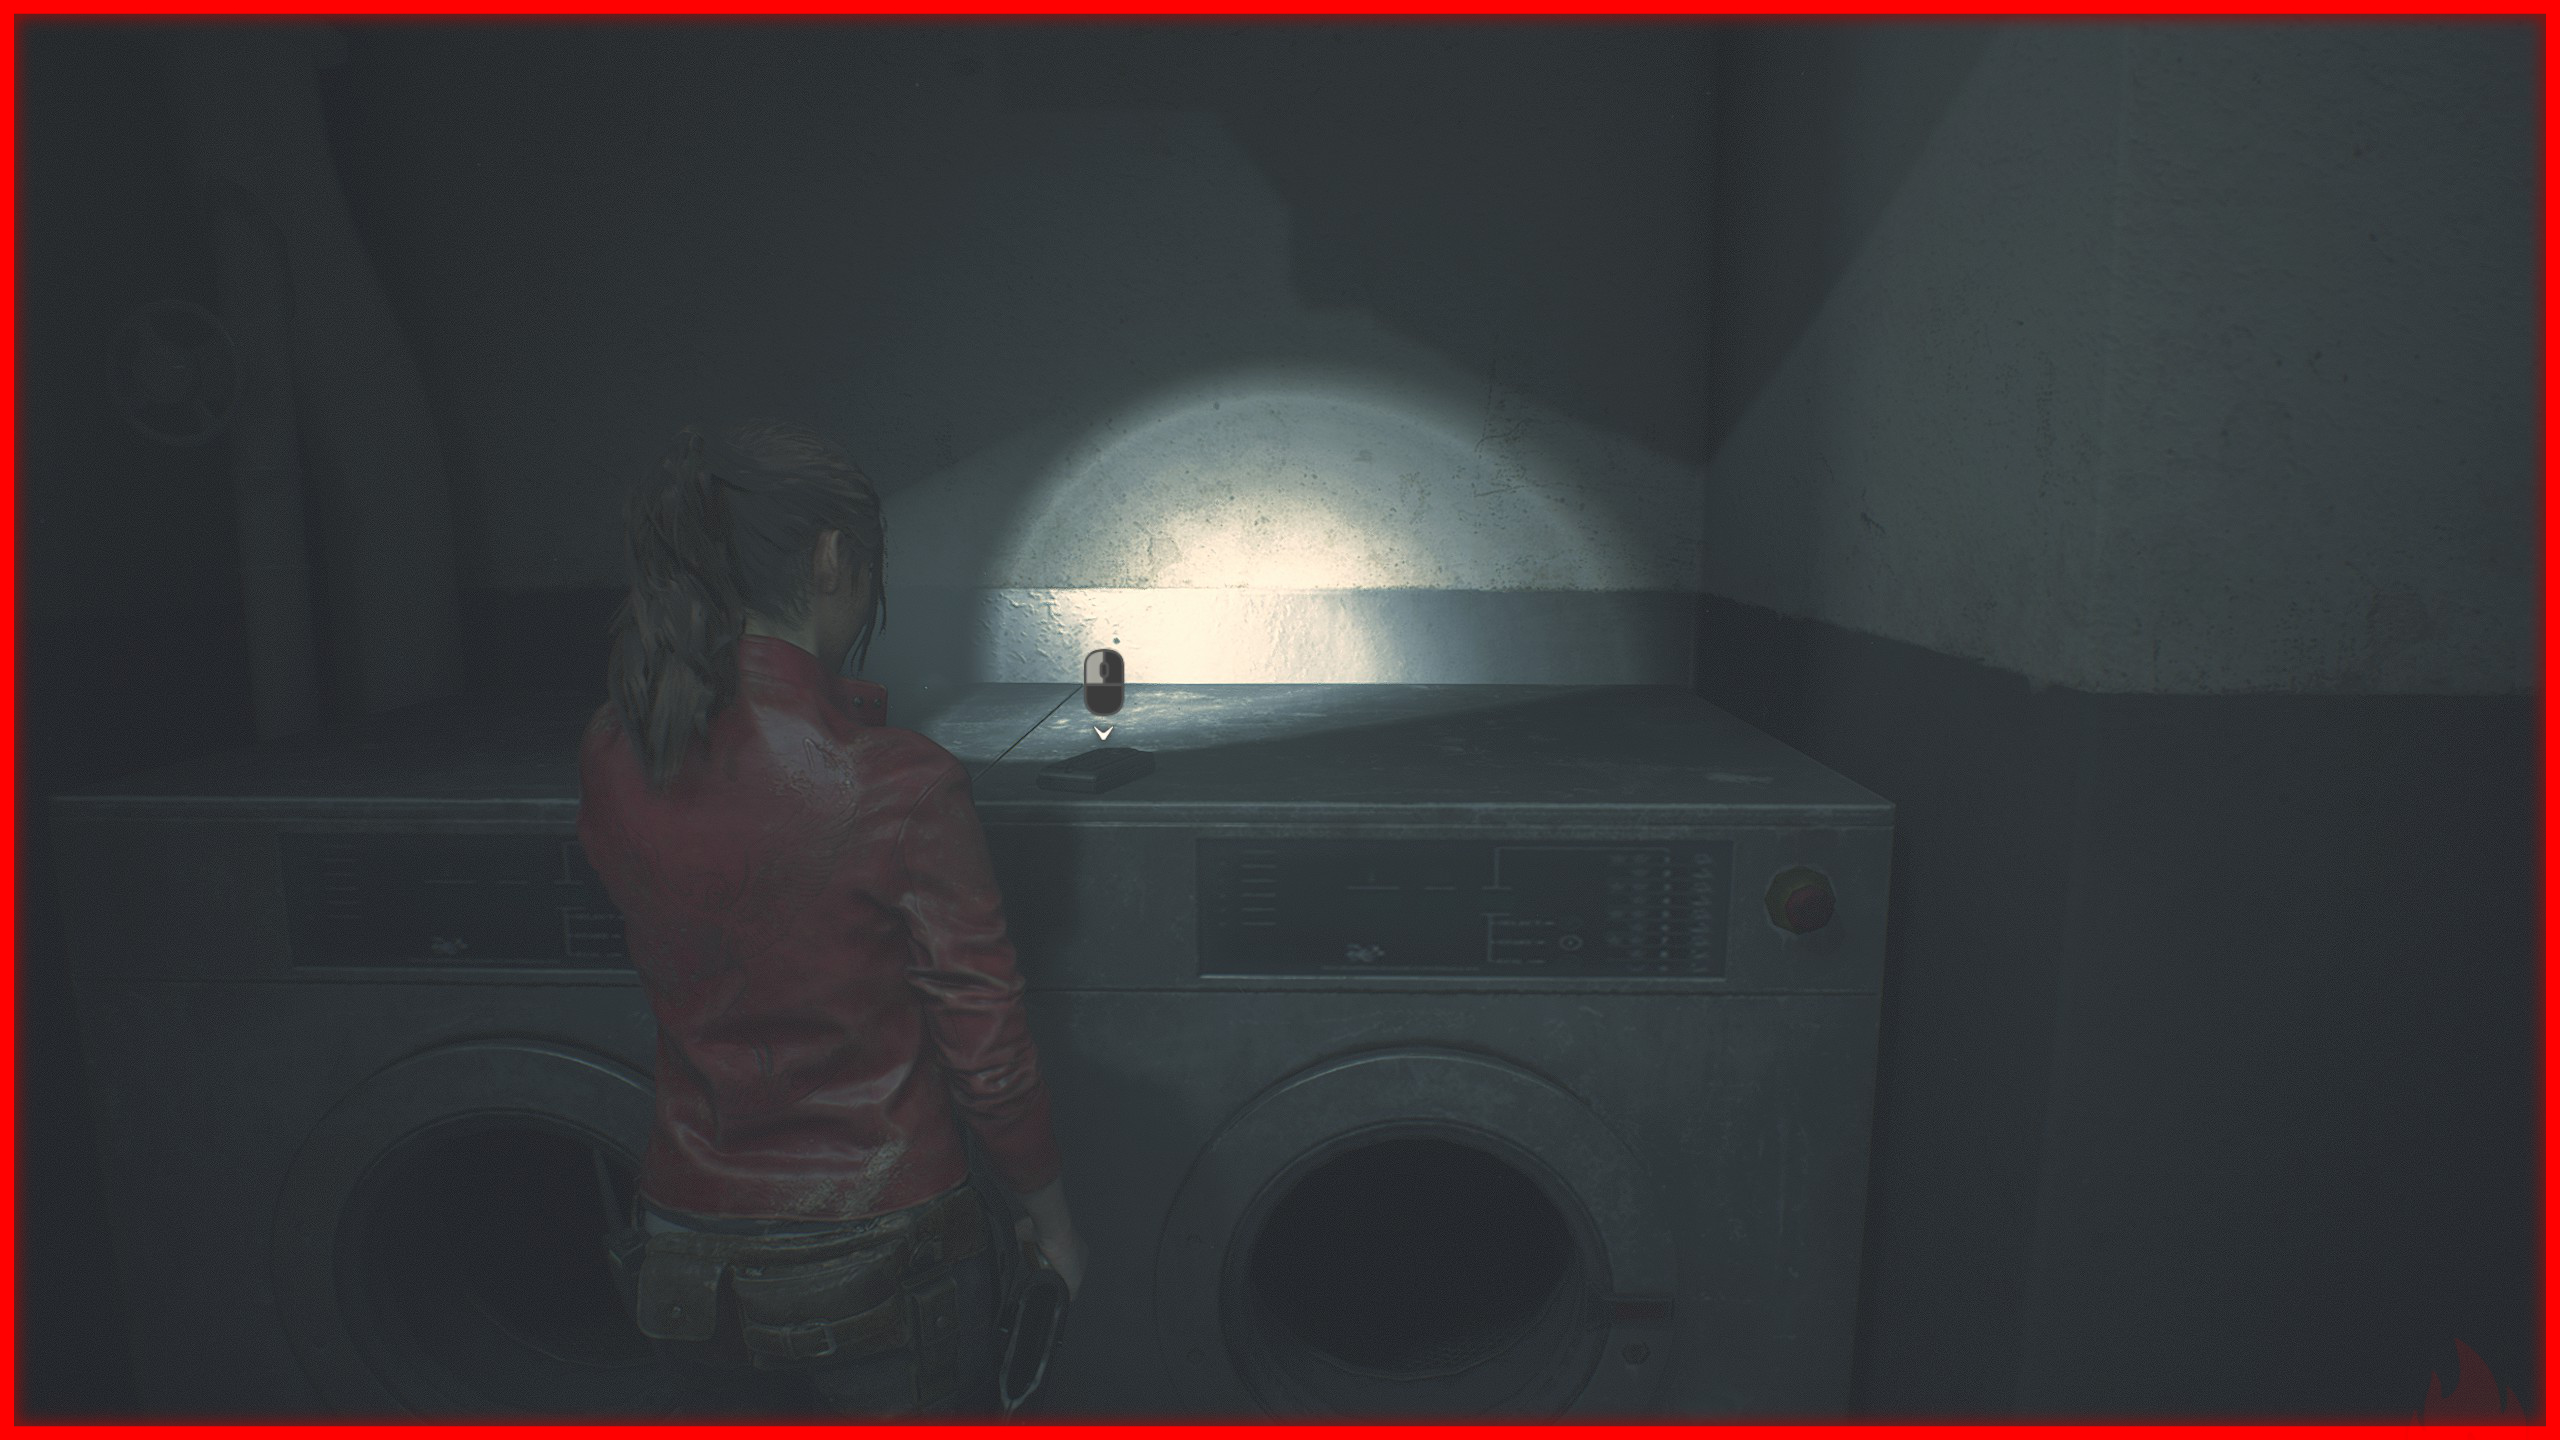
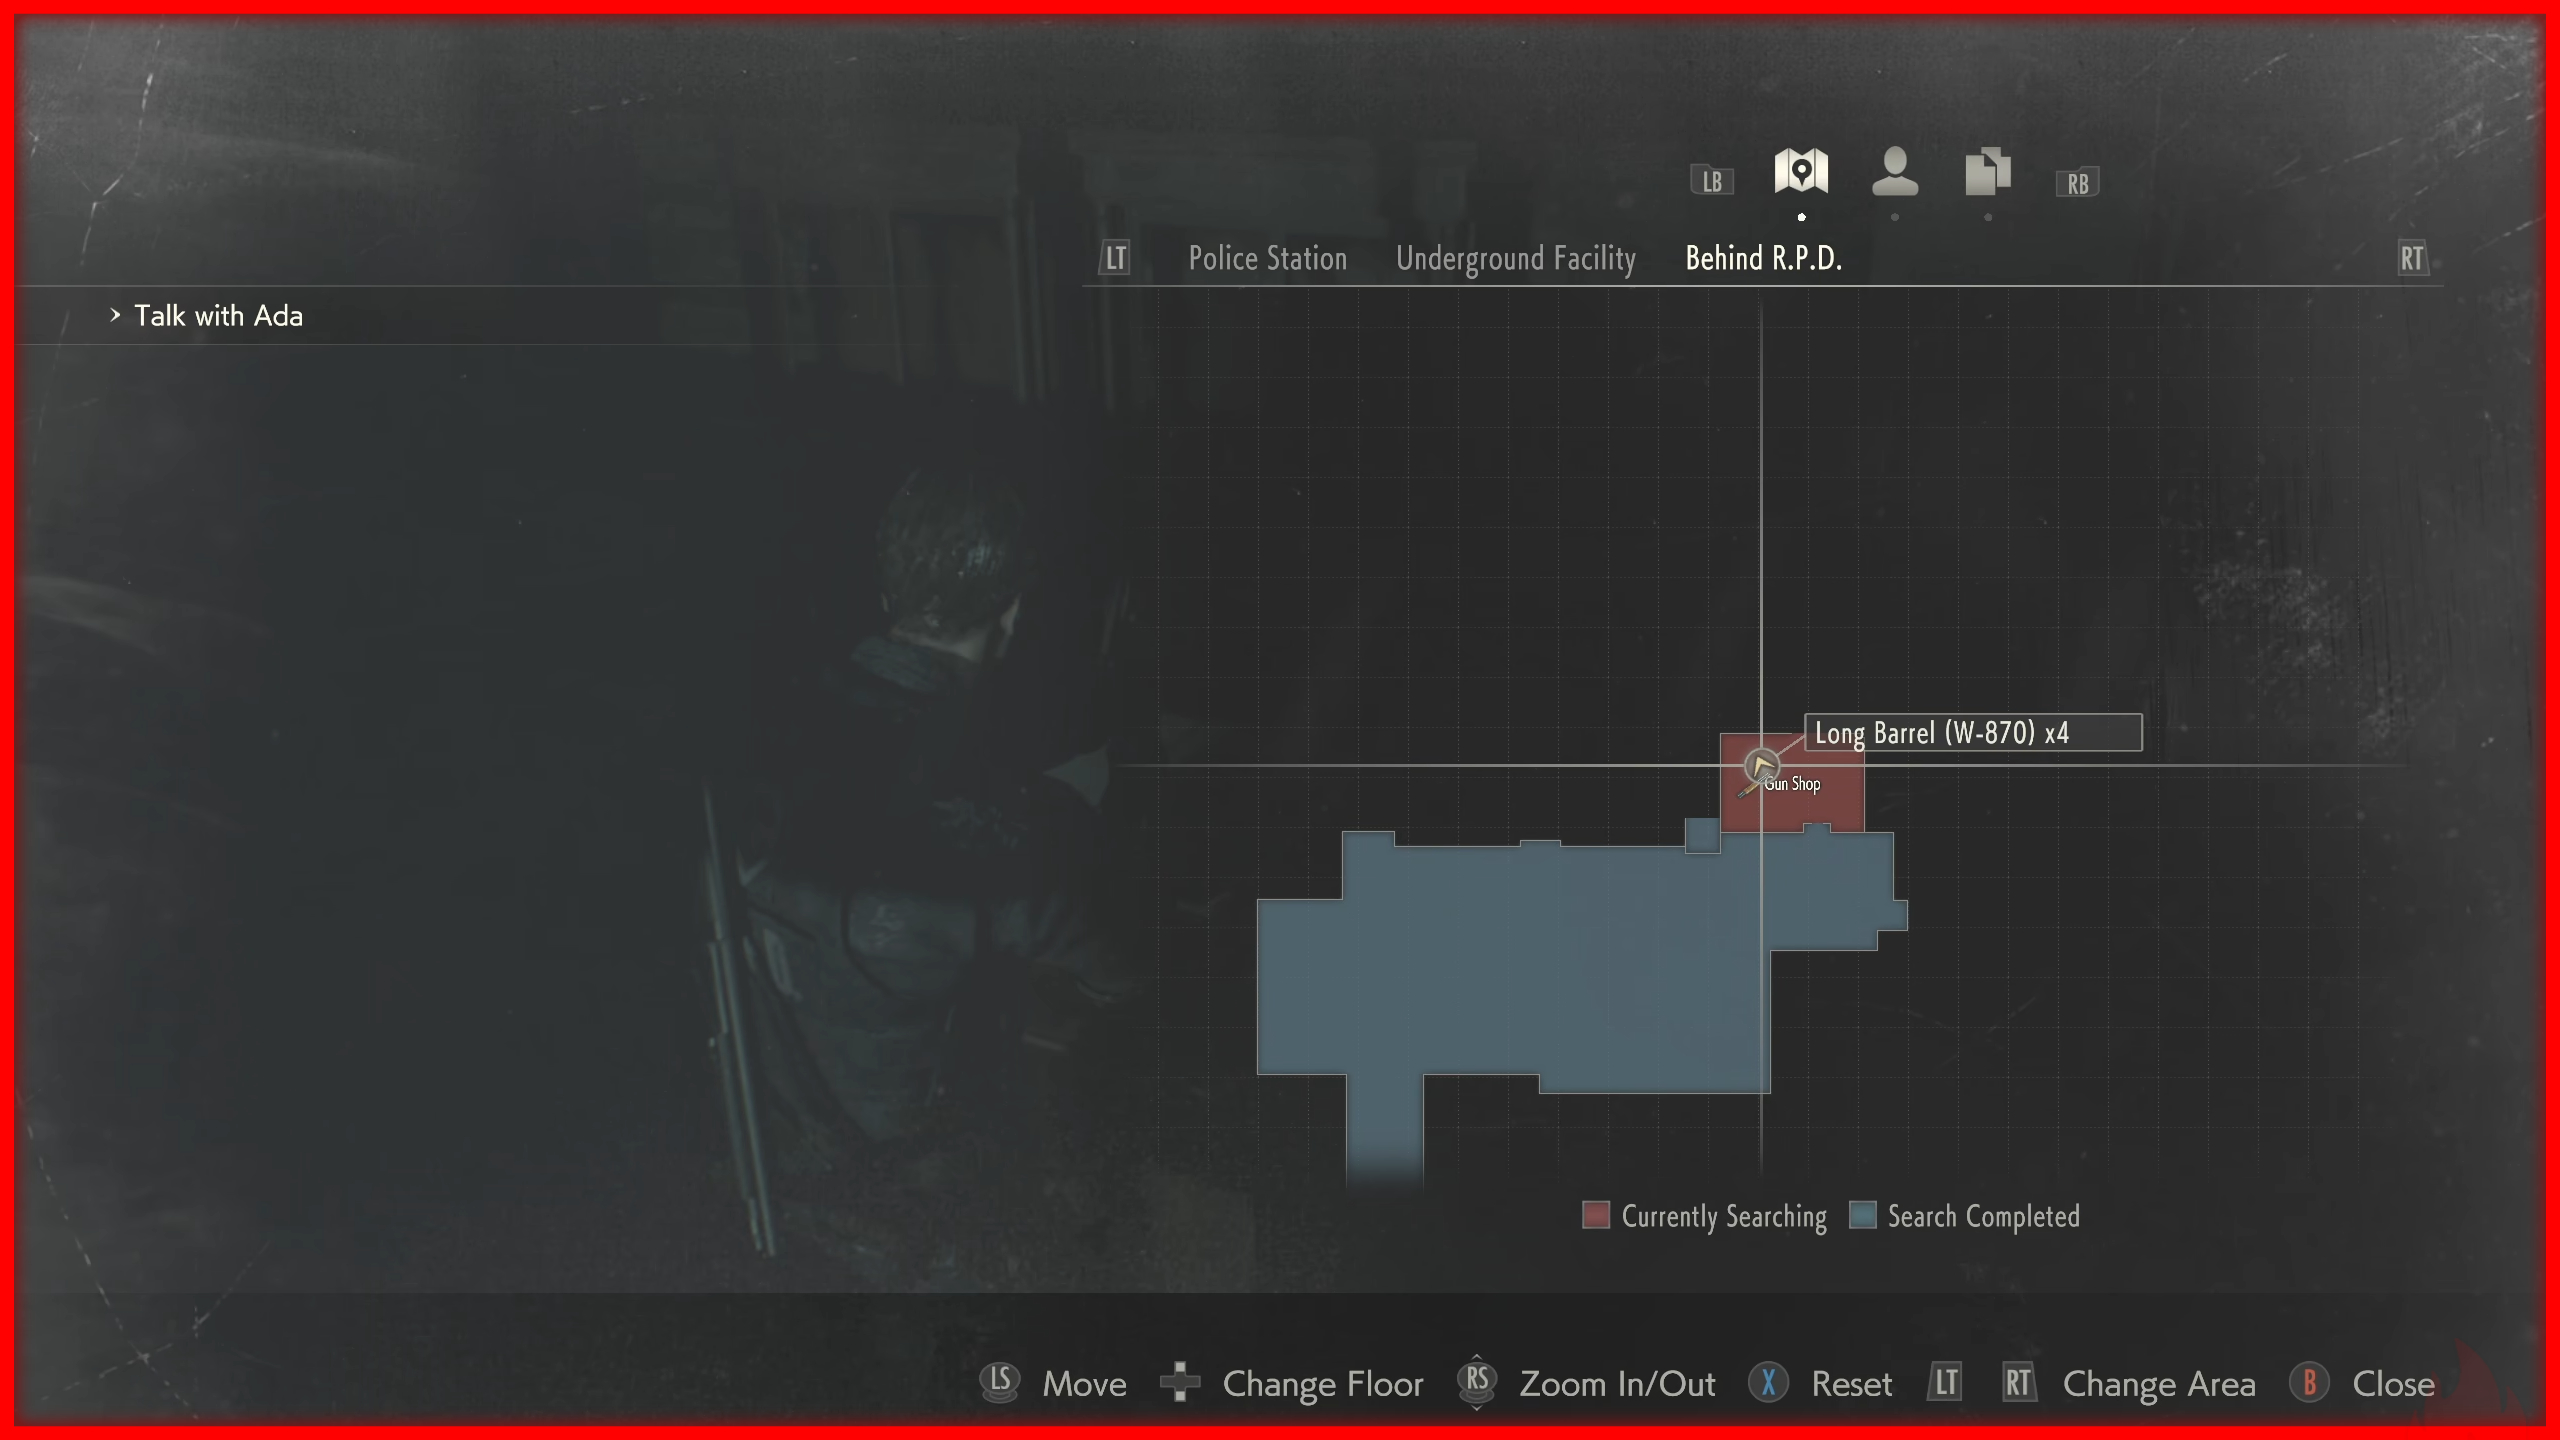
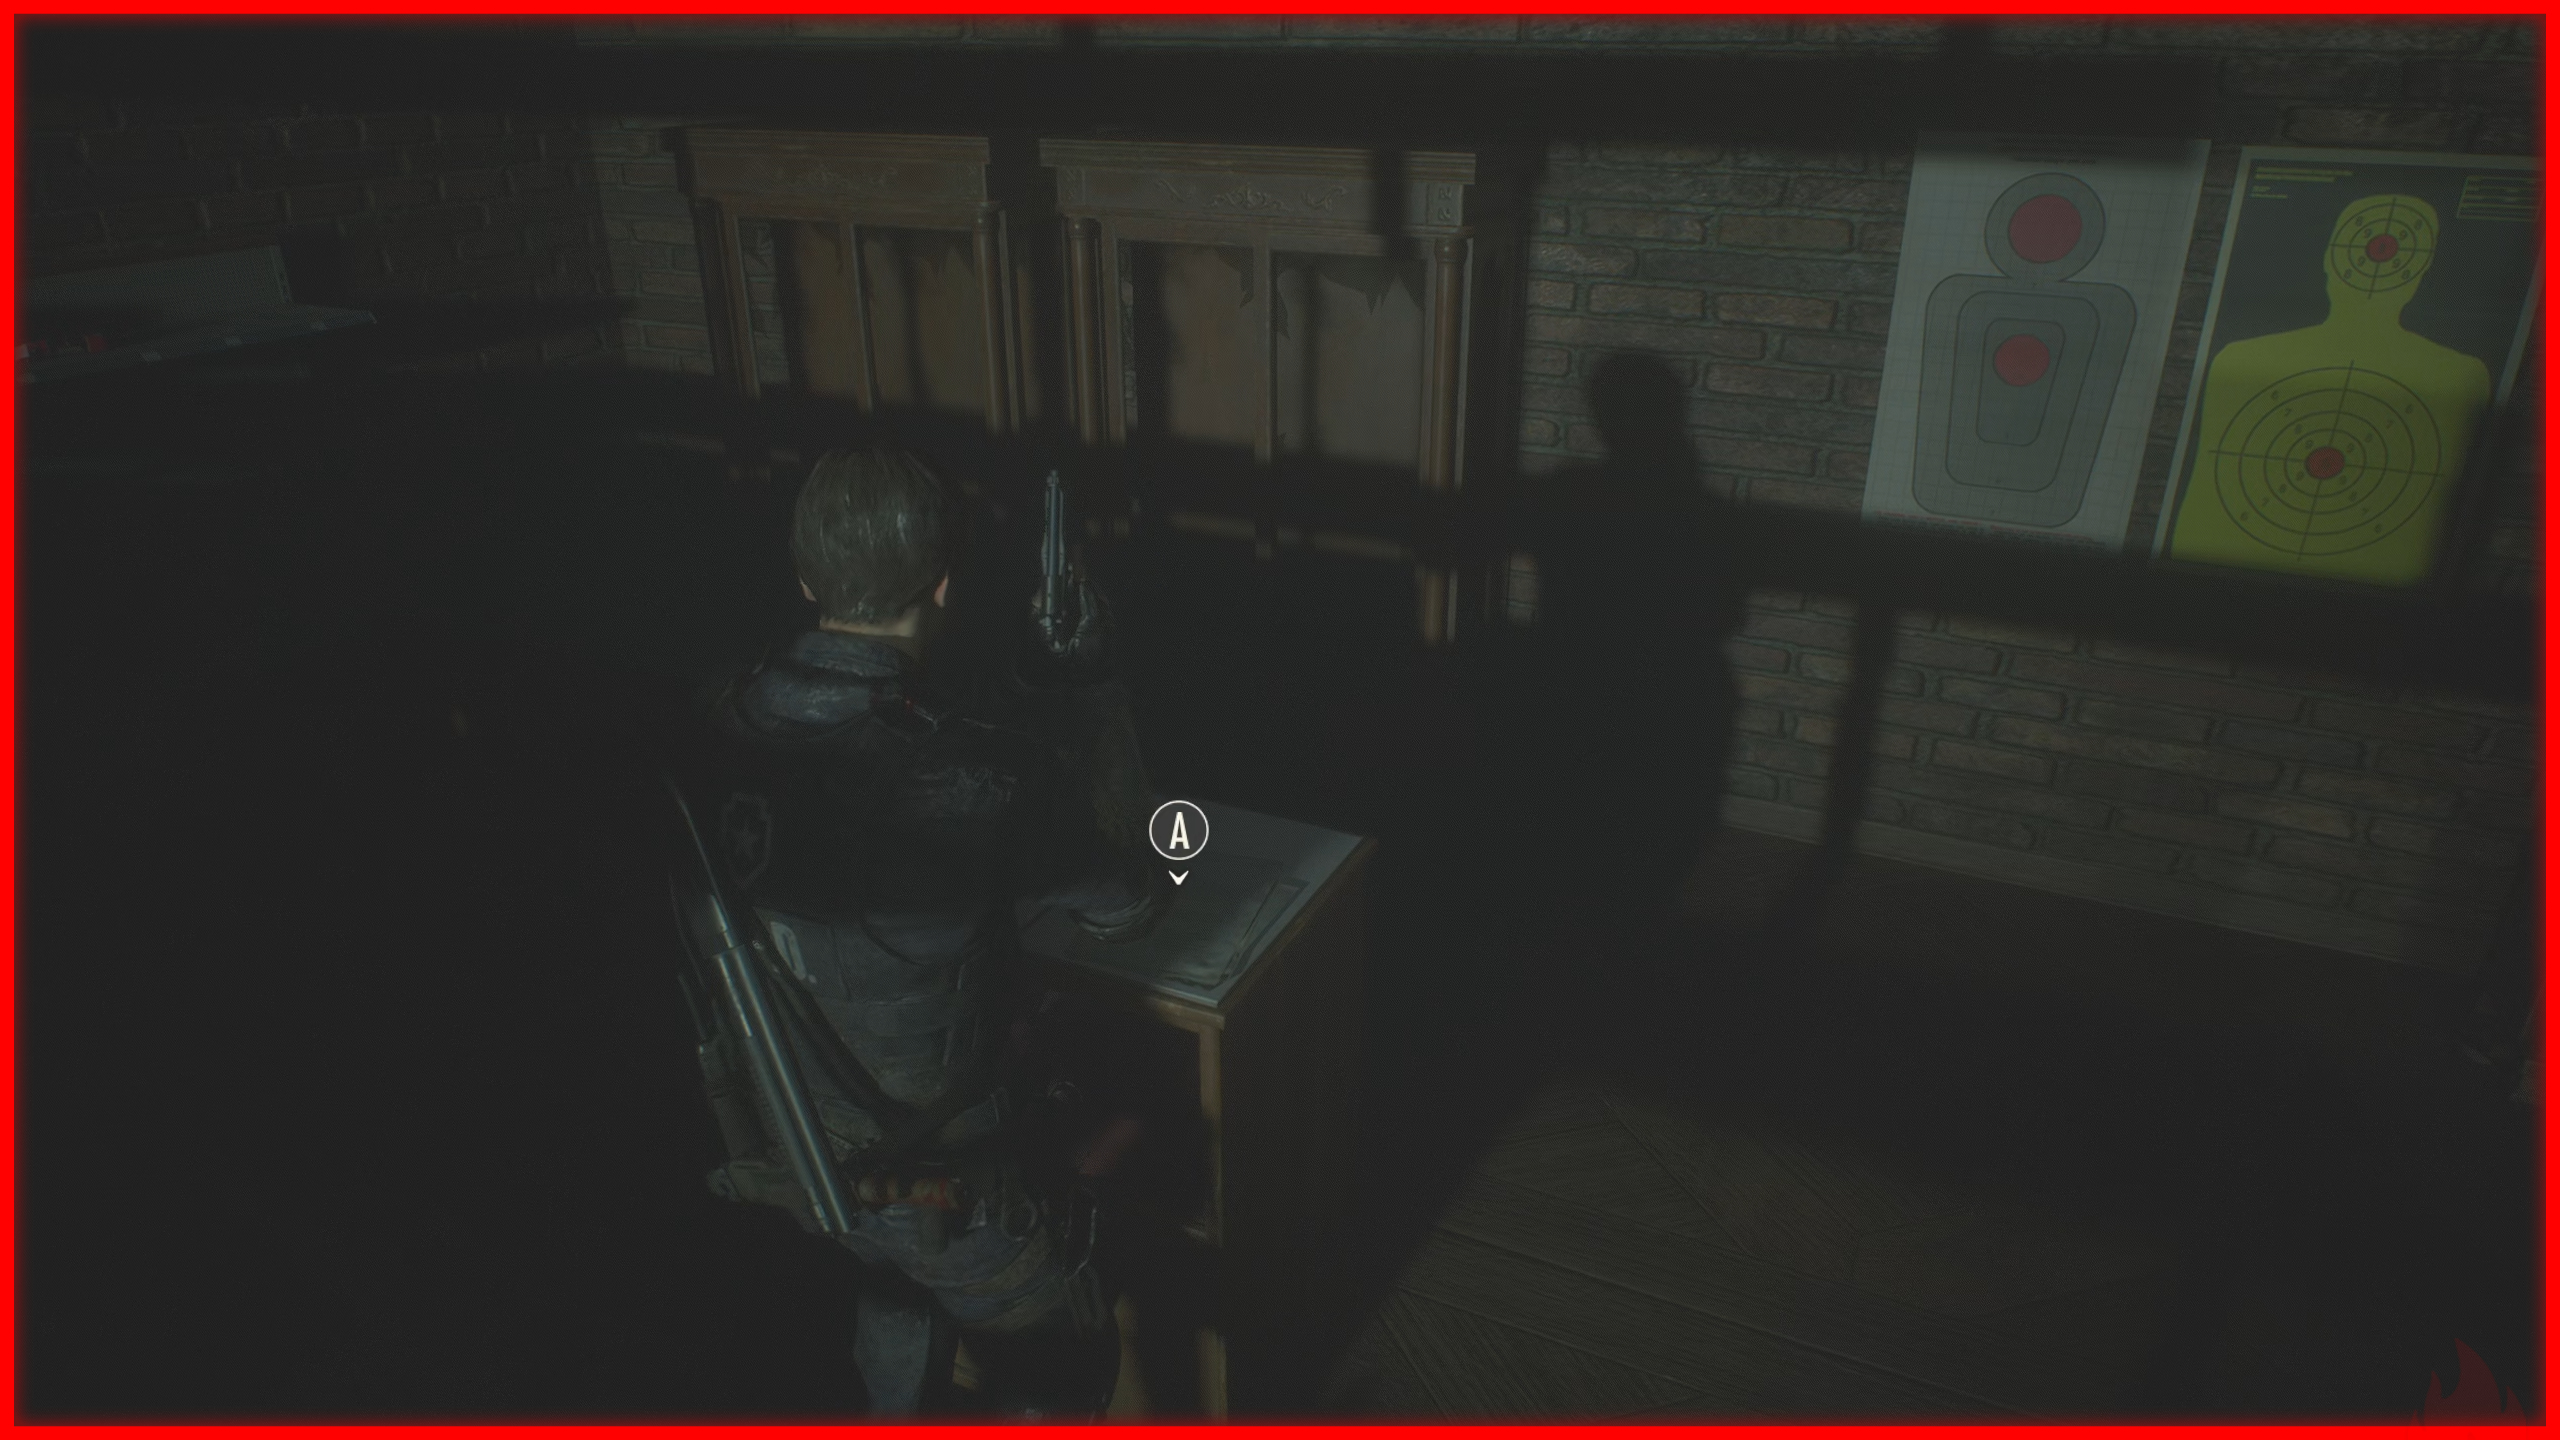
Chasing Jill ❌
 This achievement is only available in Leon’s campaign.
The letter left by Jill can be found inside the Gun Shop Kendo, which becomes accessible after leaving the Police Station through the parking garage. Simply read the letter to earn the achievement.
First Break-In ❌
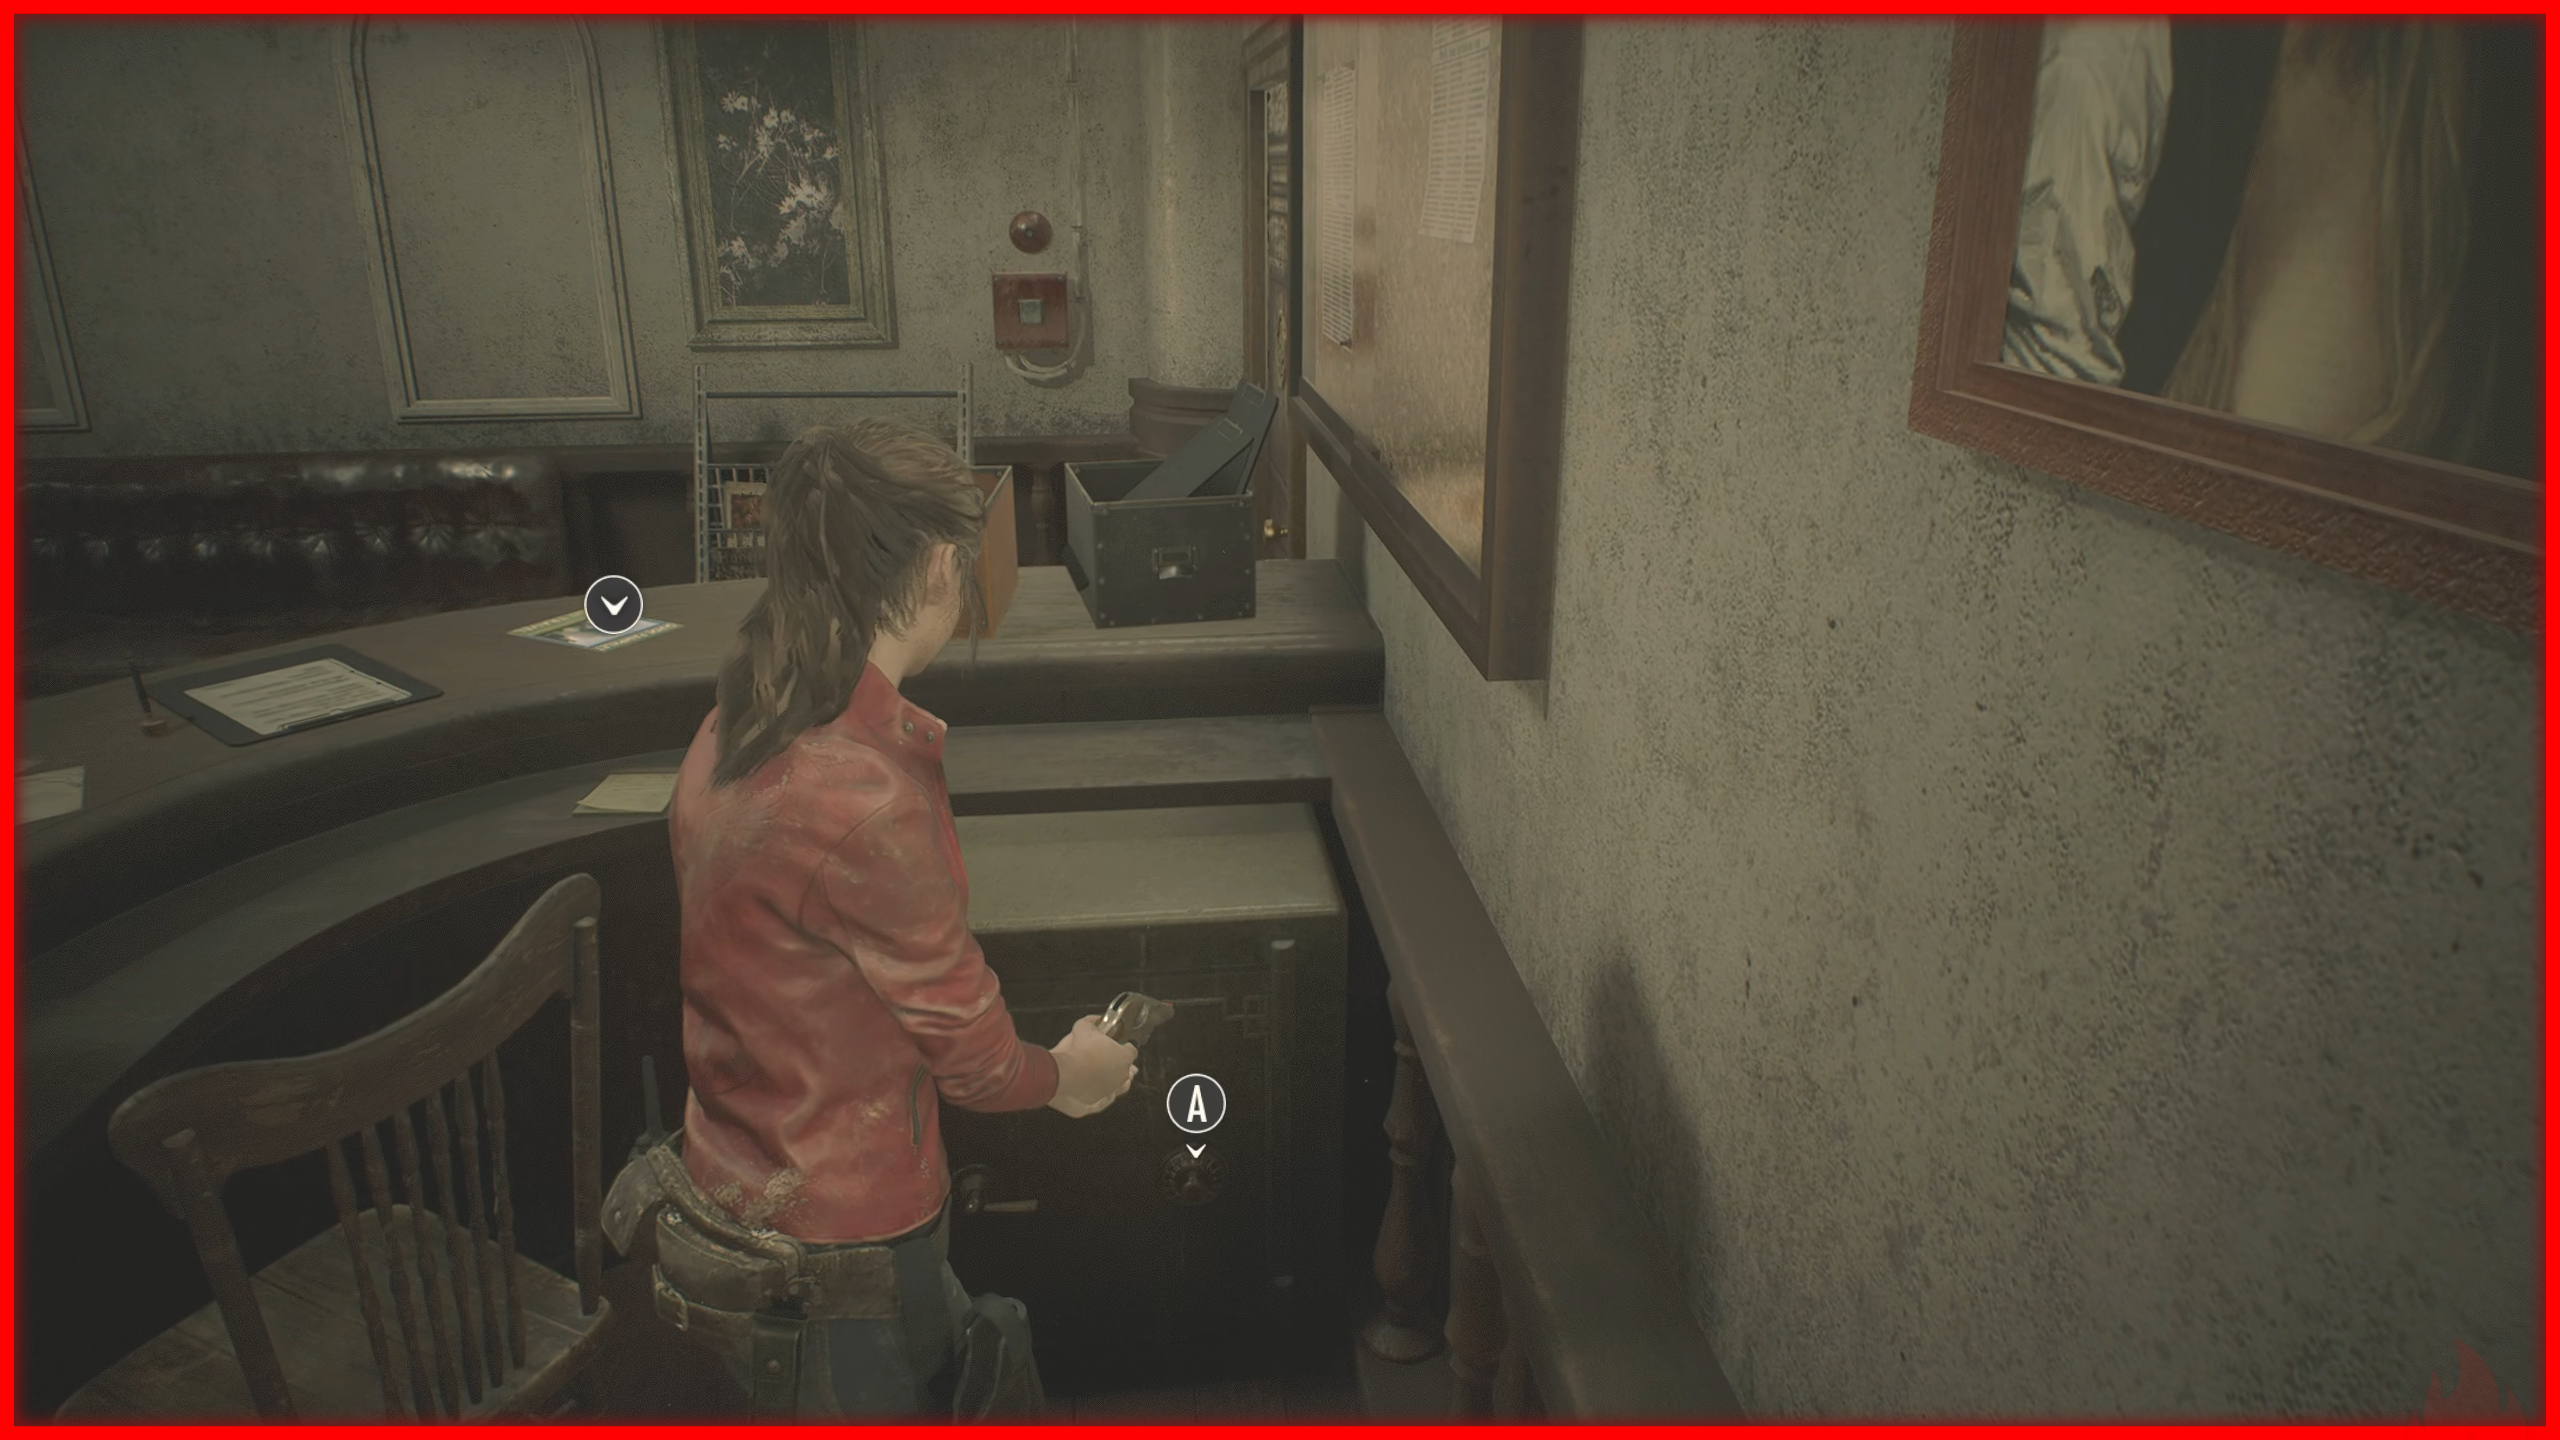
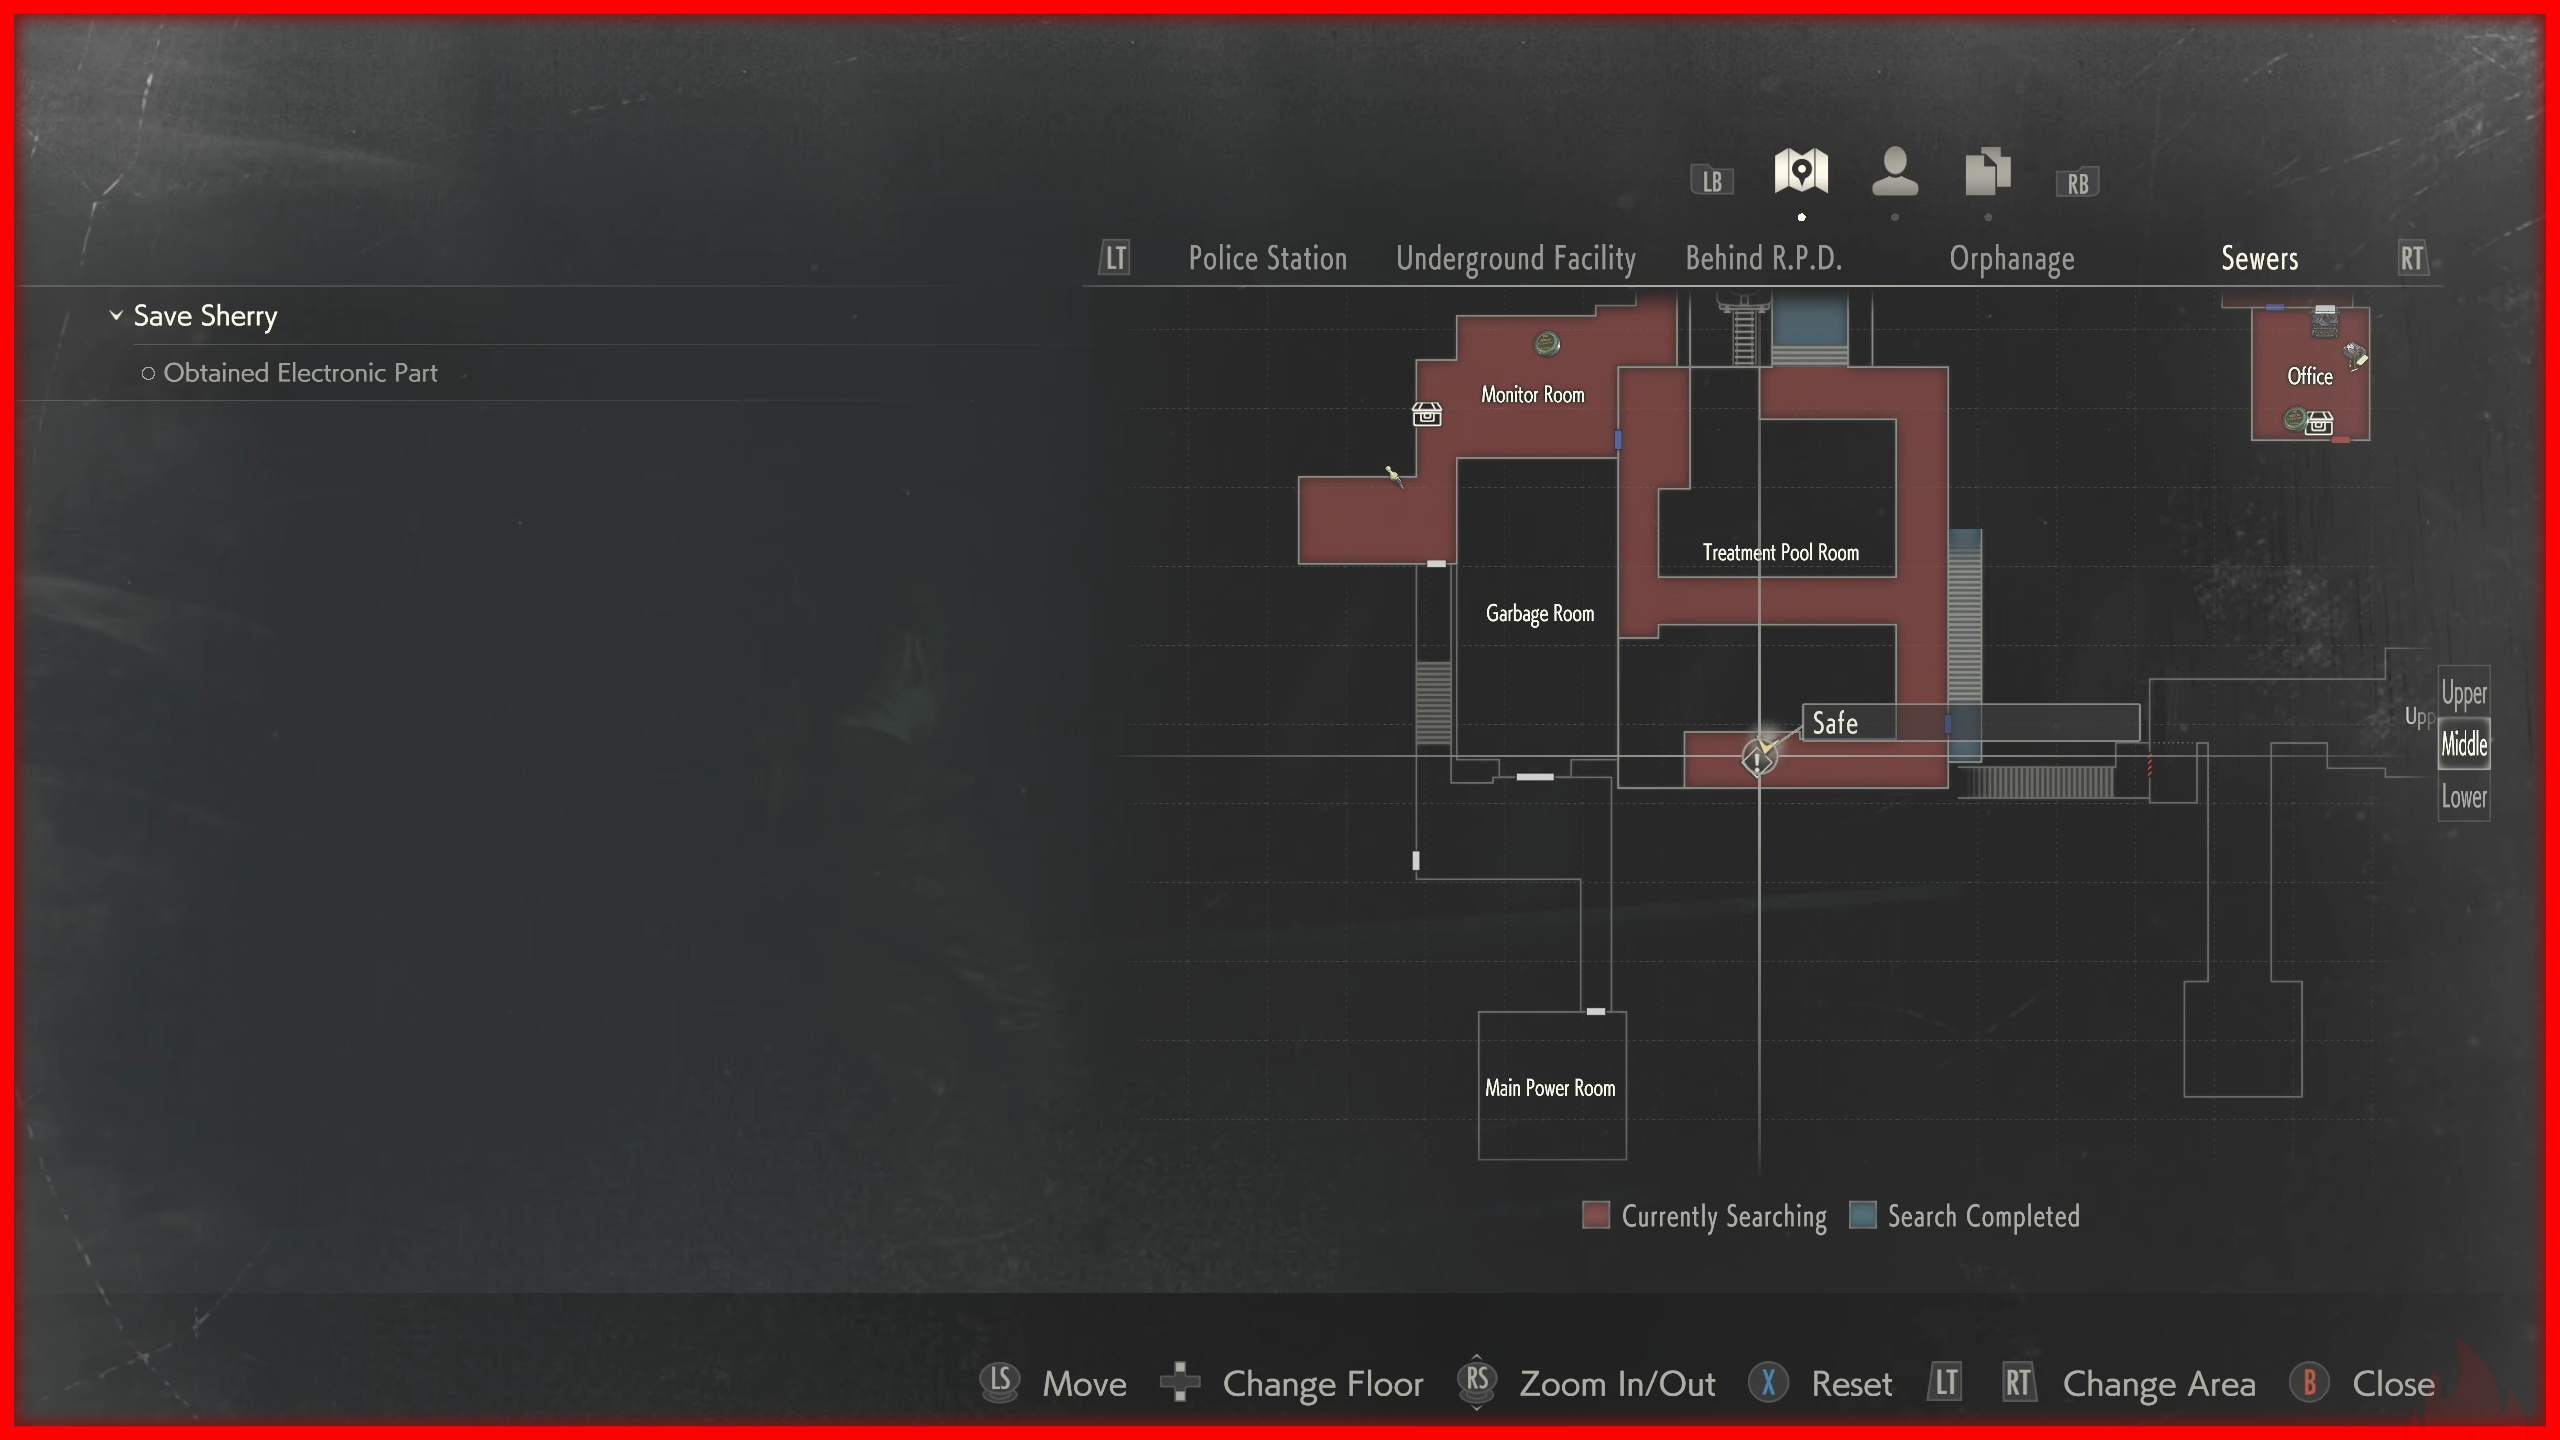
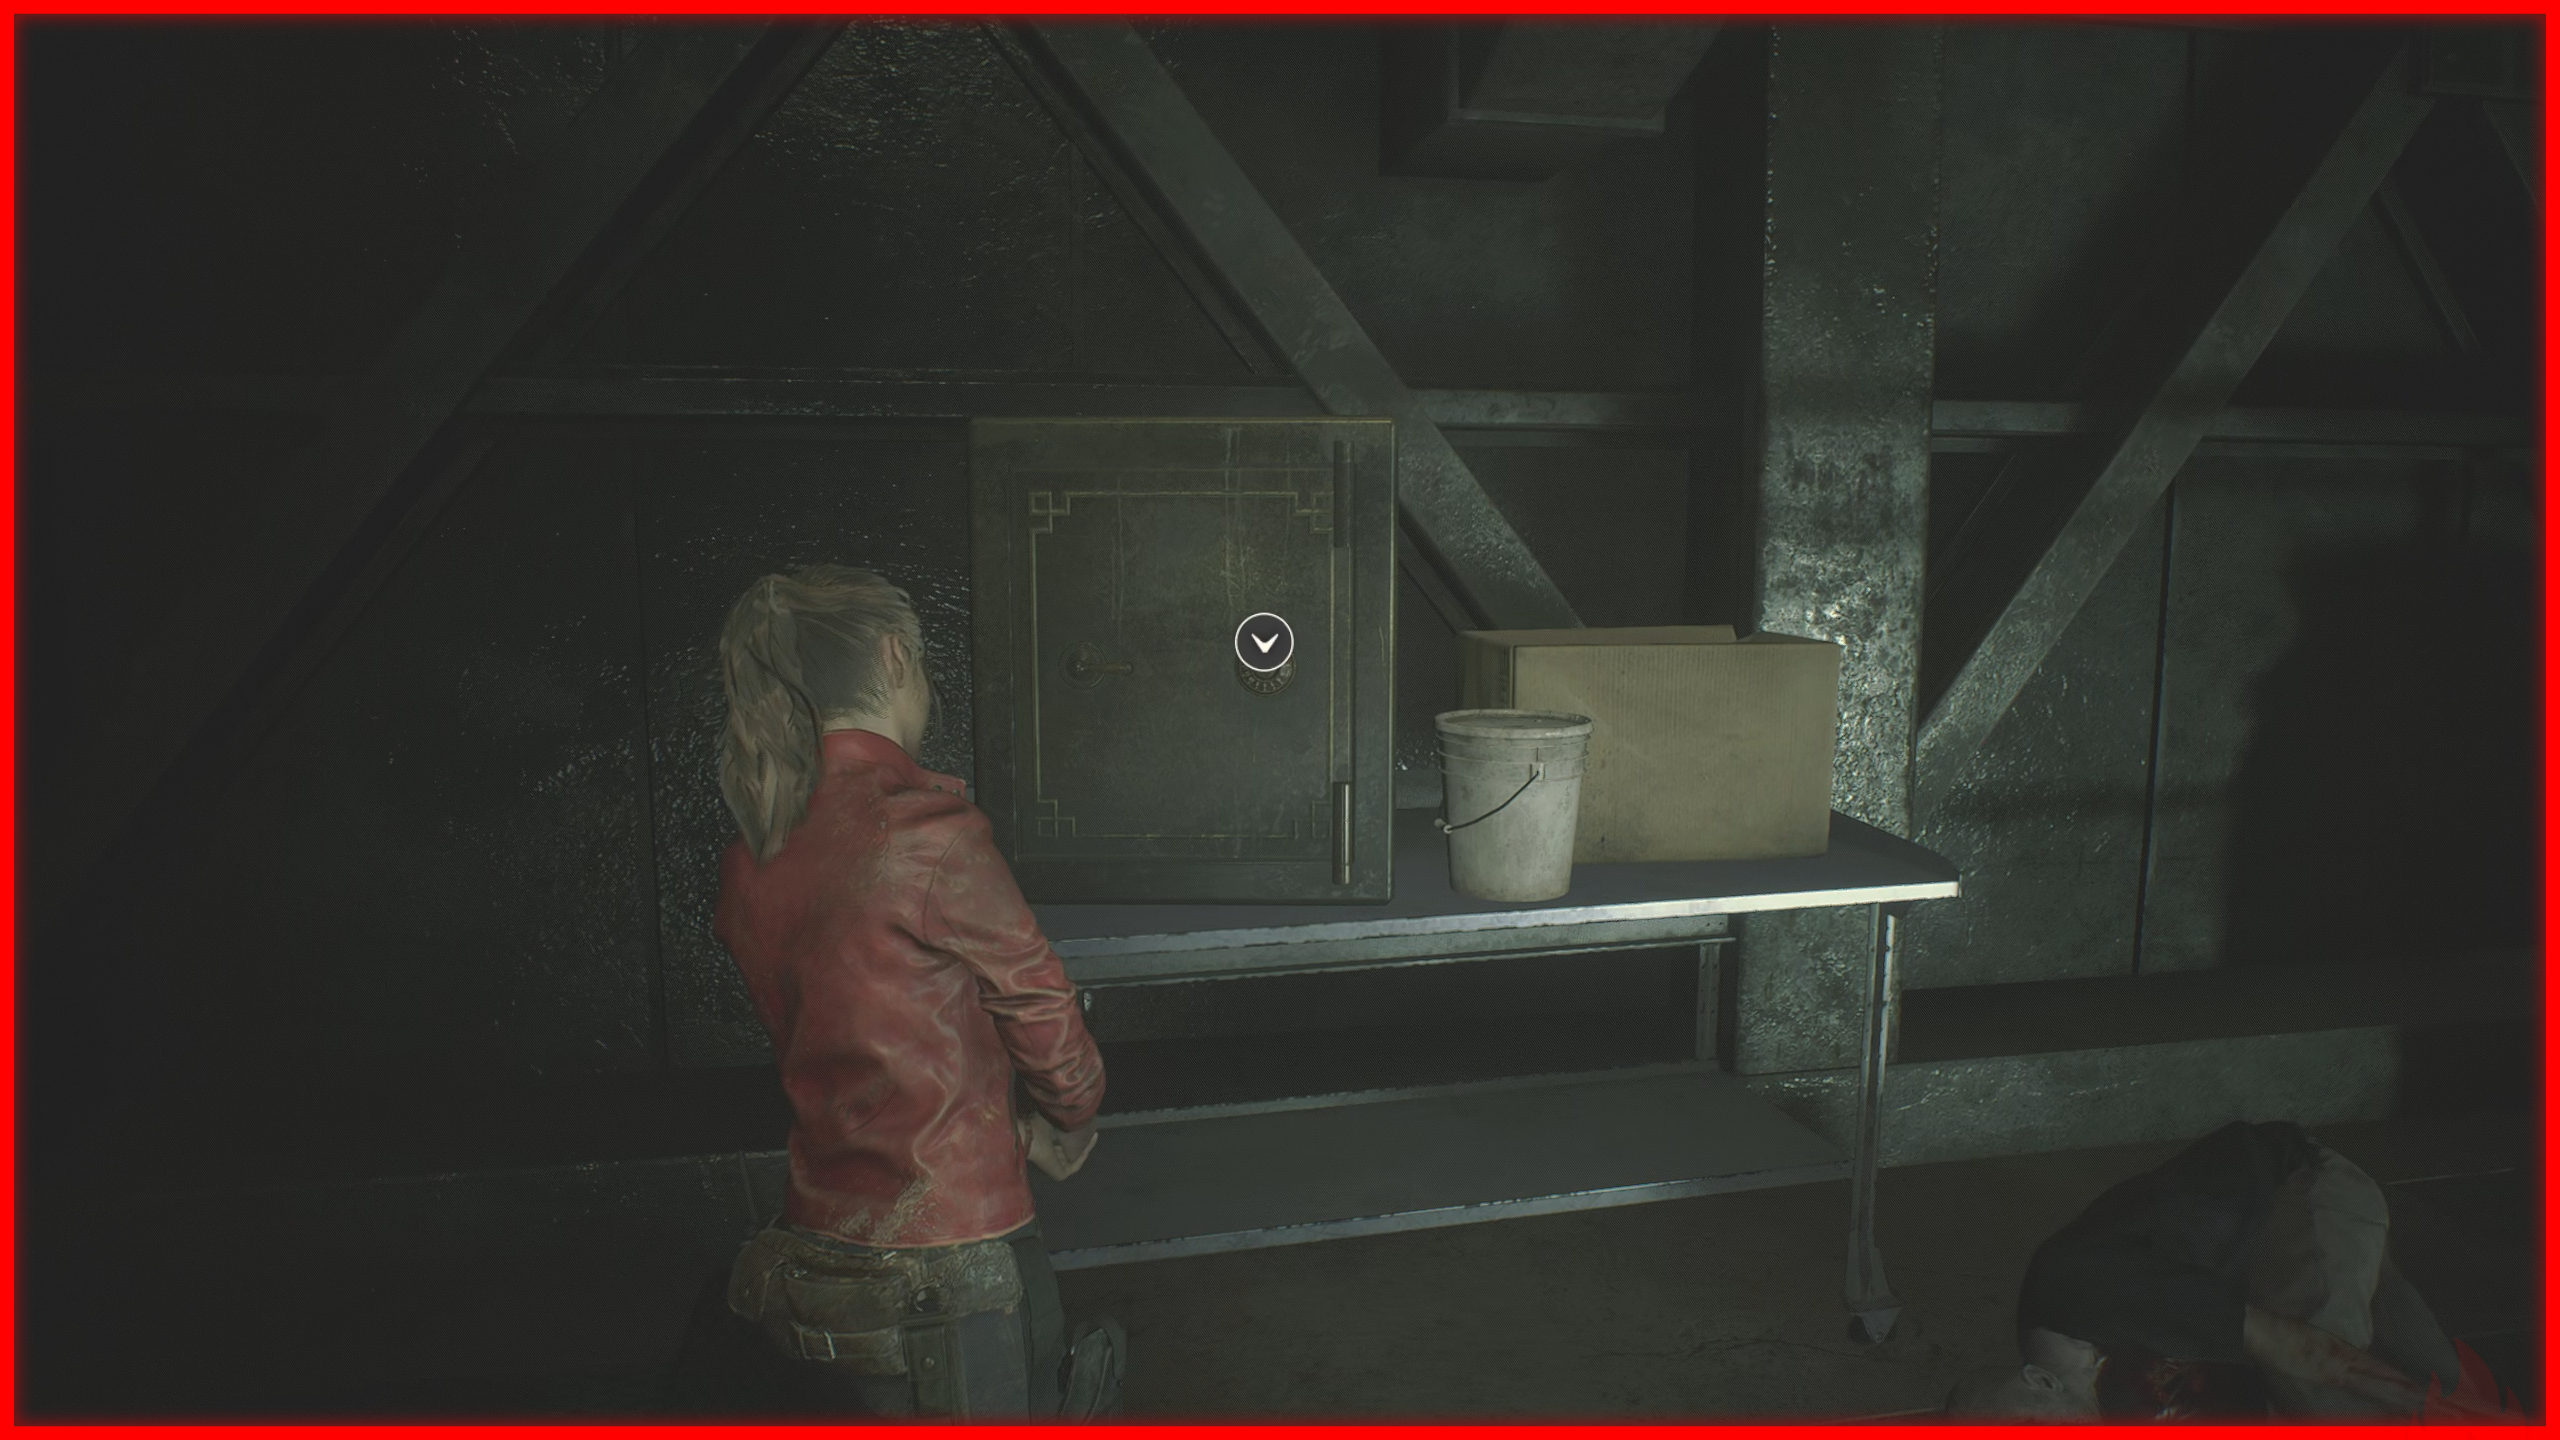
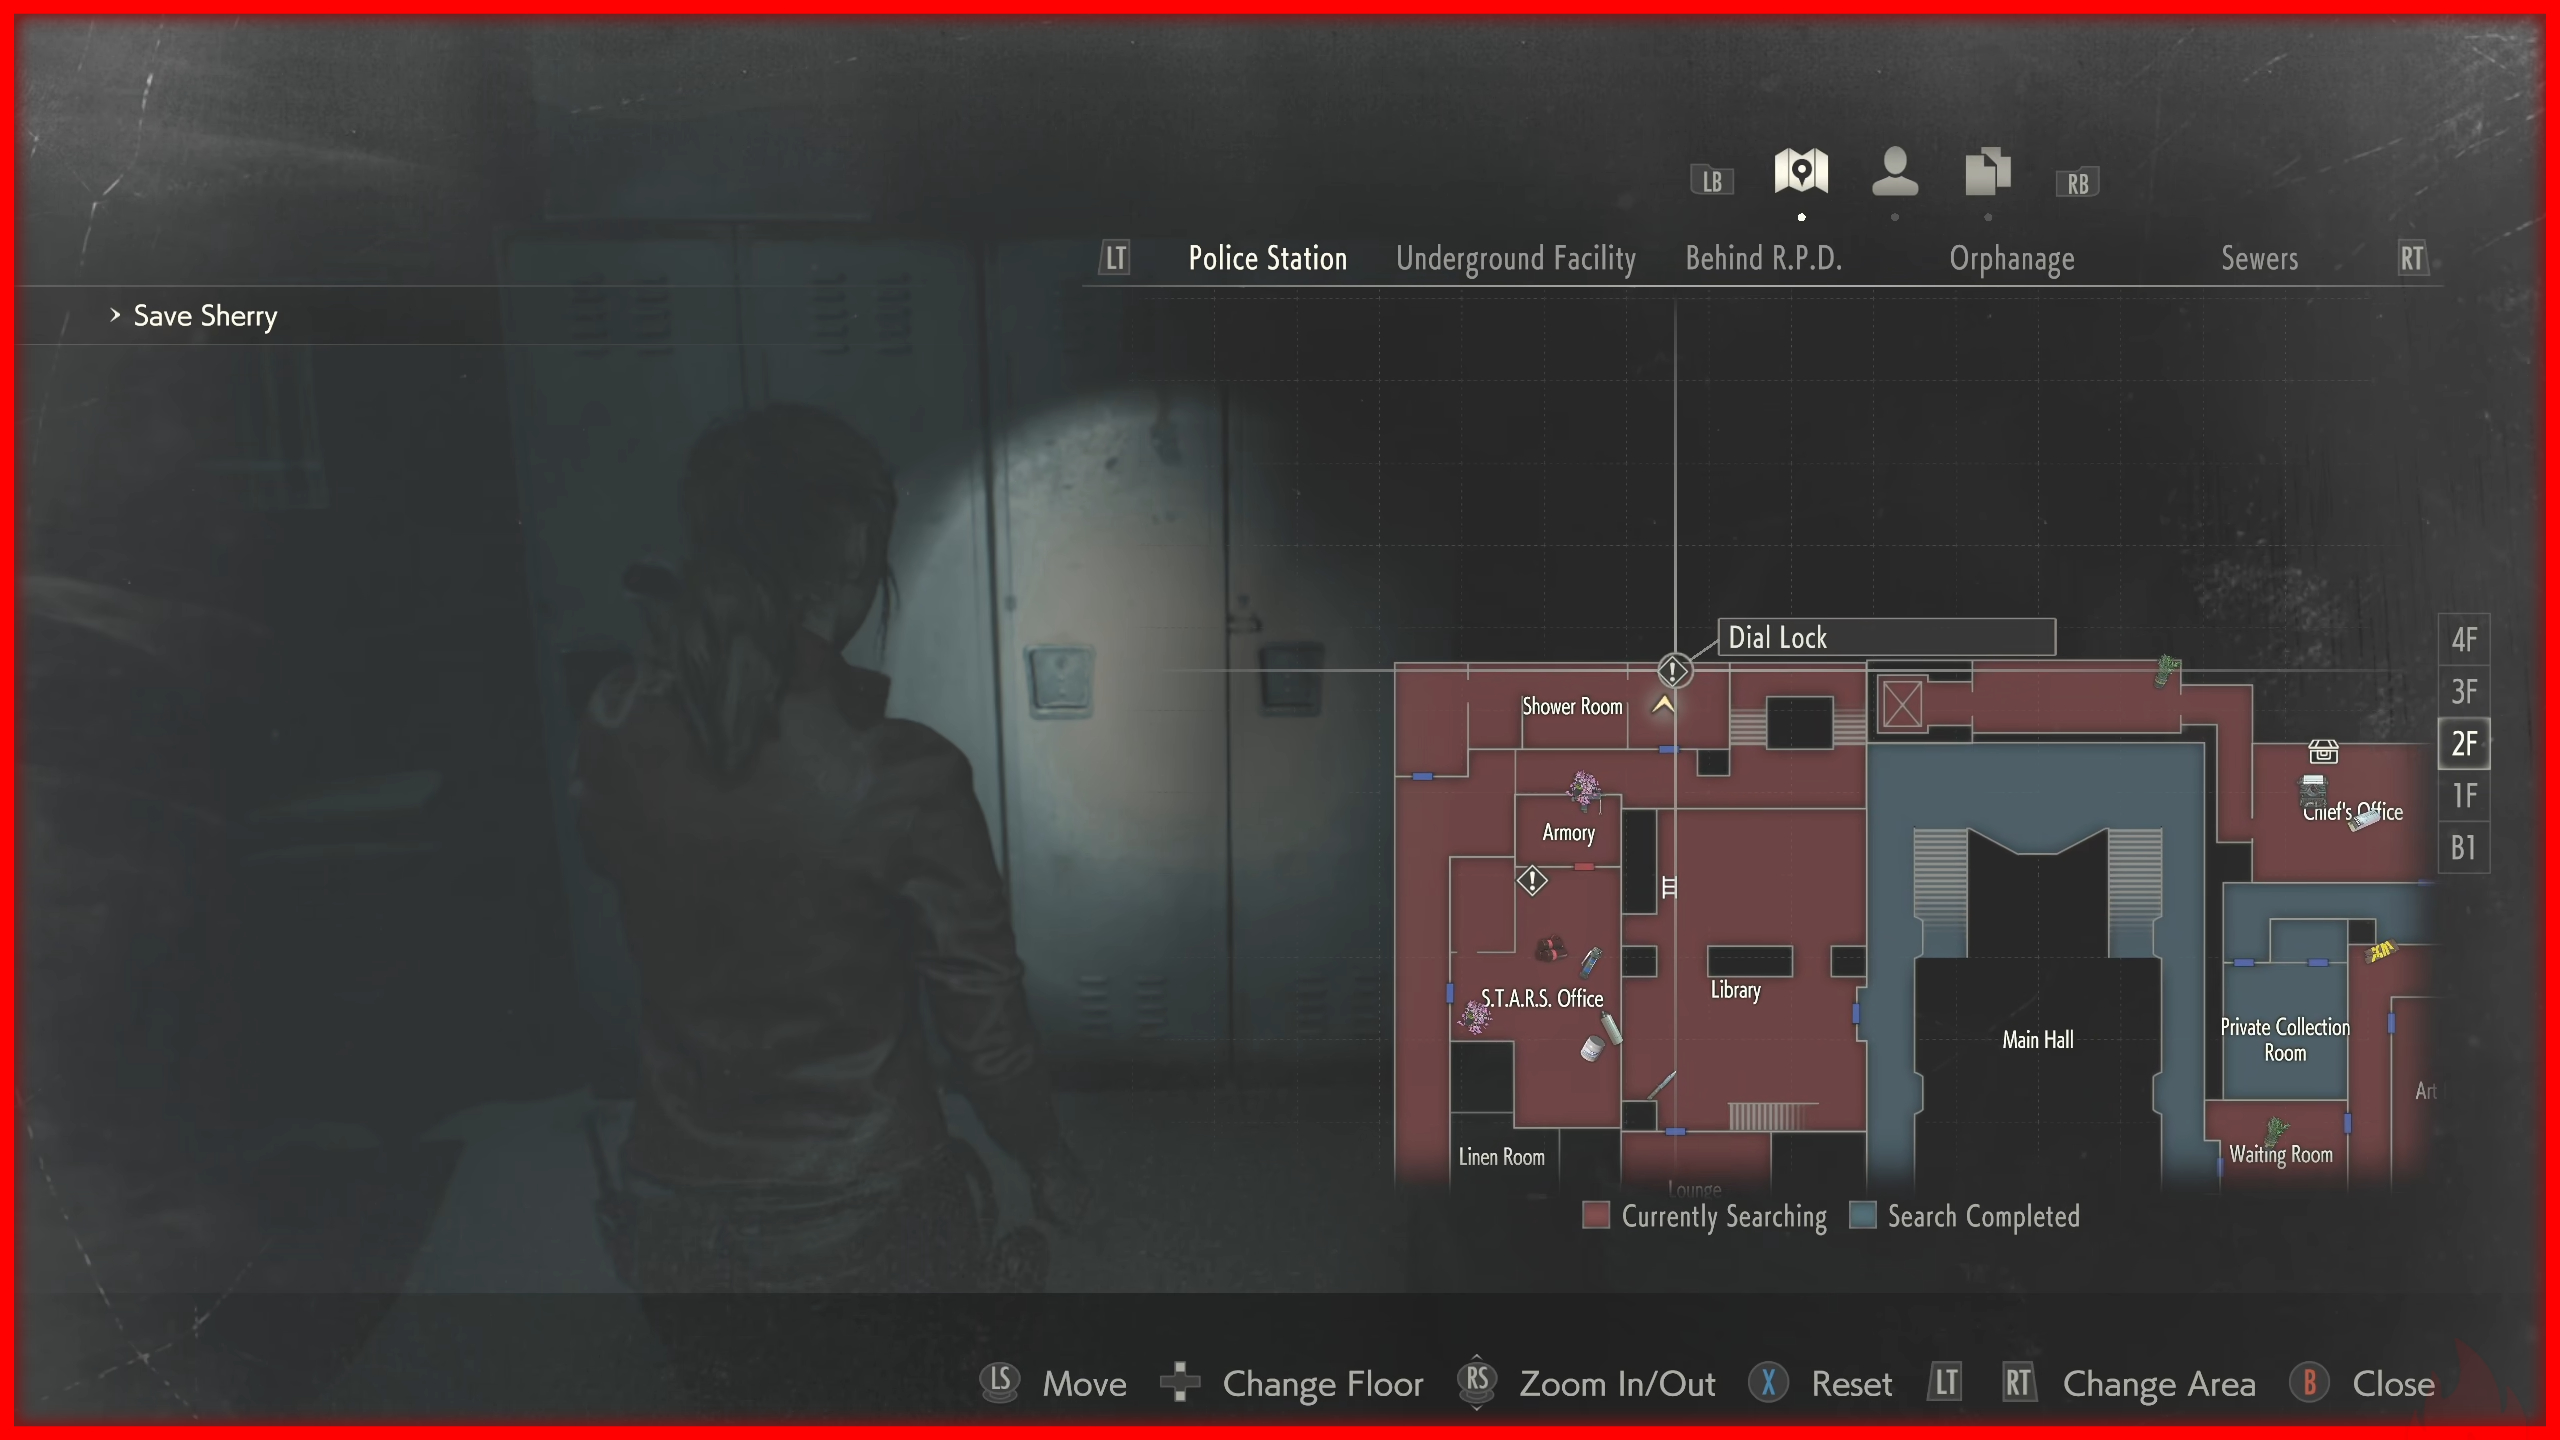
 Obtained by opening a safe. See the achievement below for the locations of all safes.
Master of Unlocking ❌
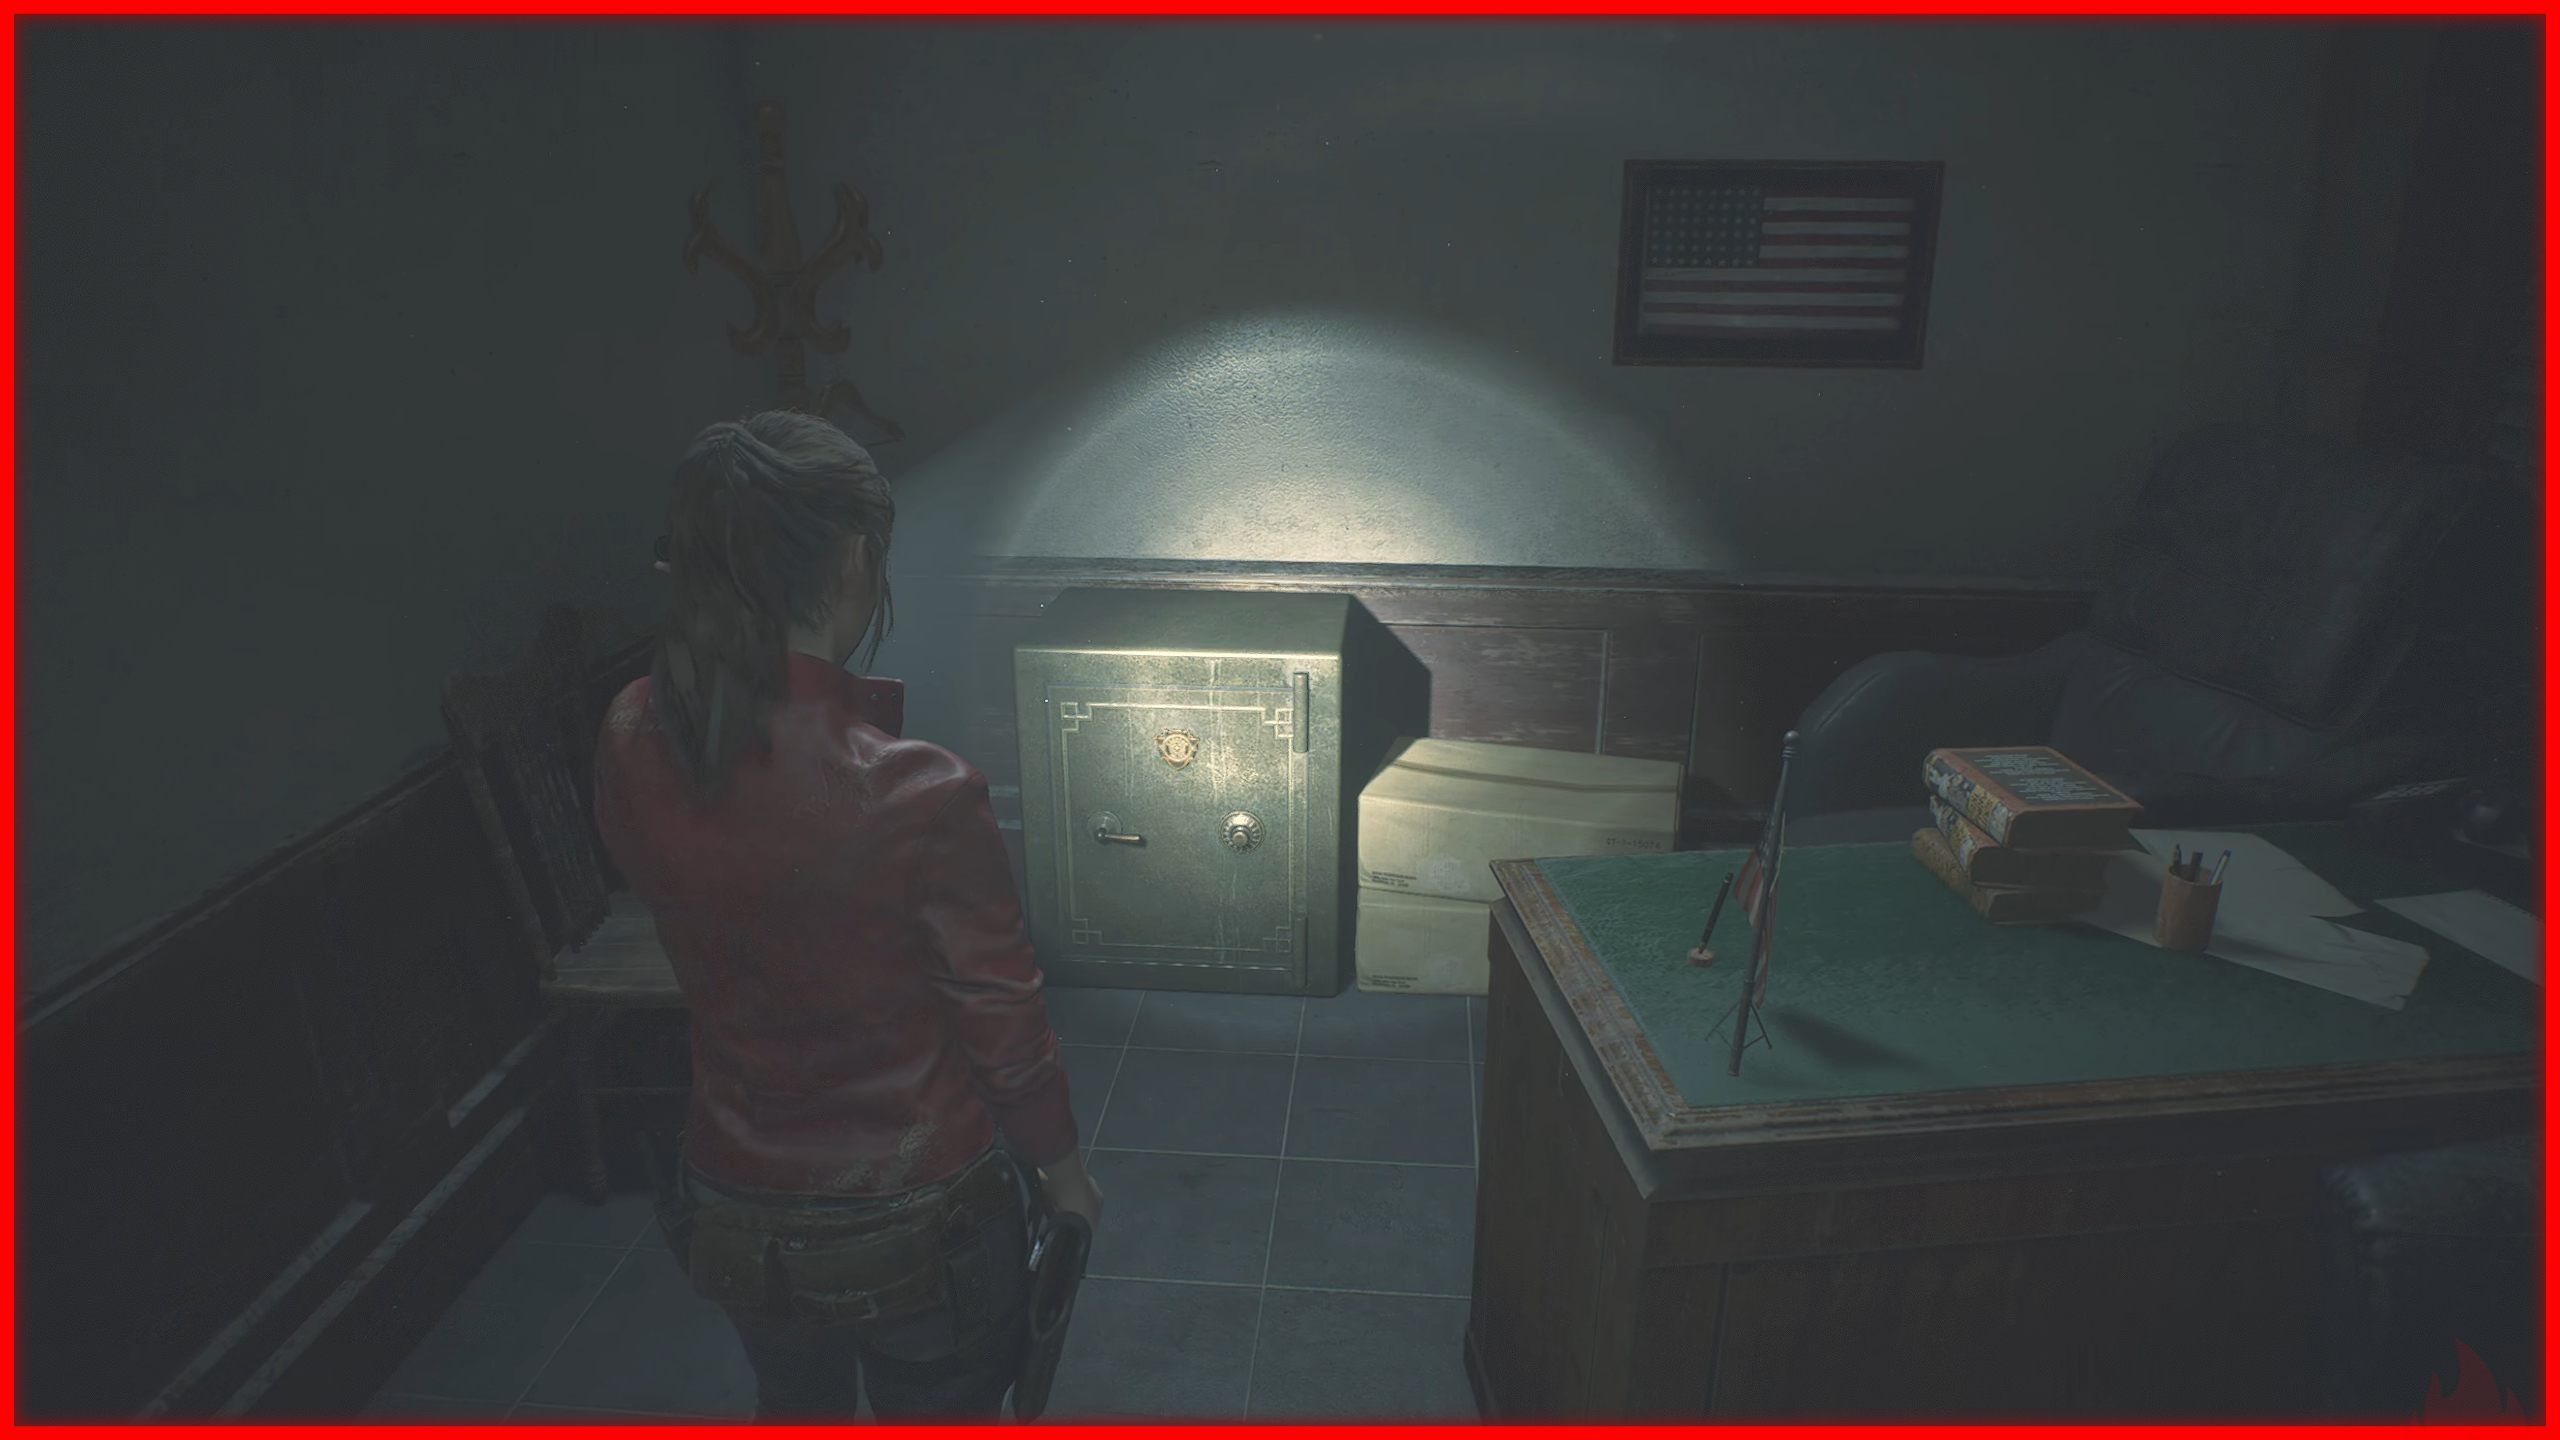
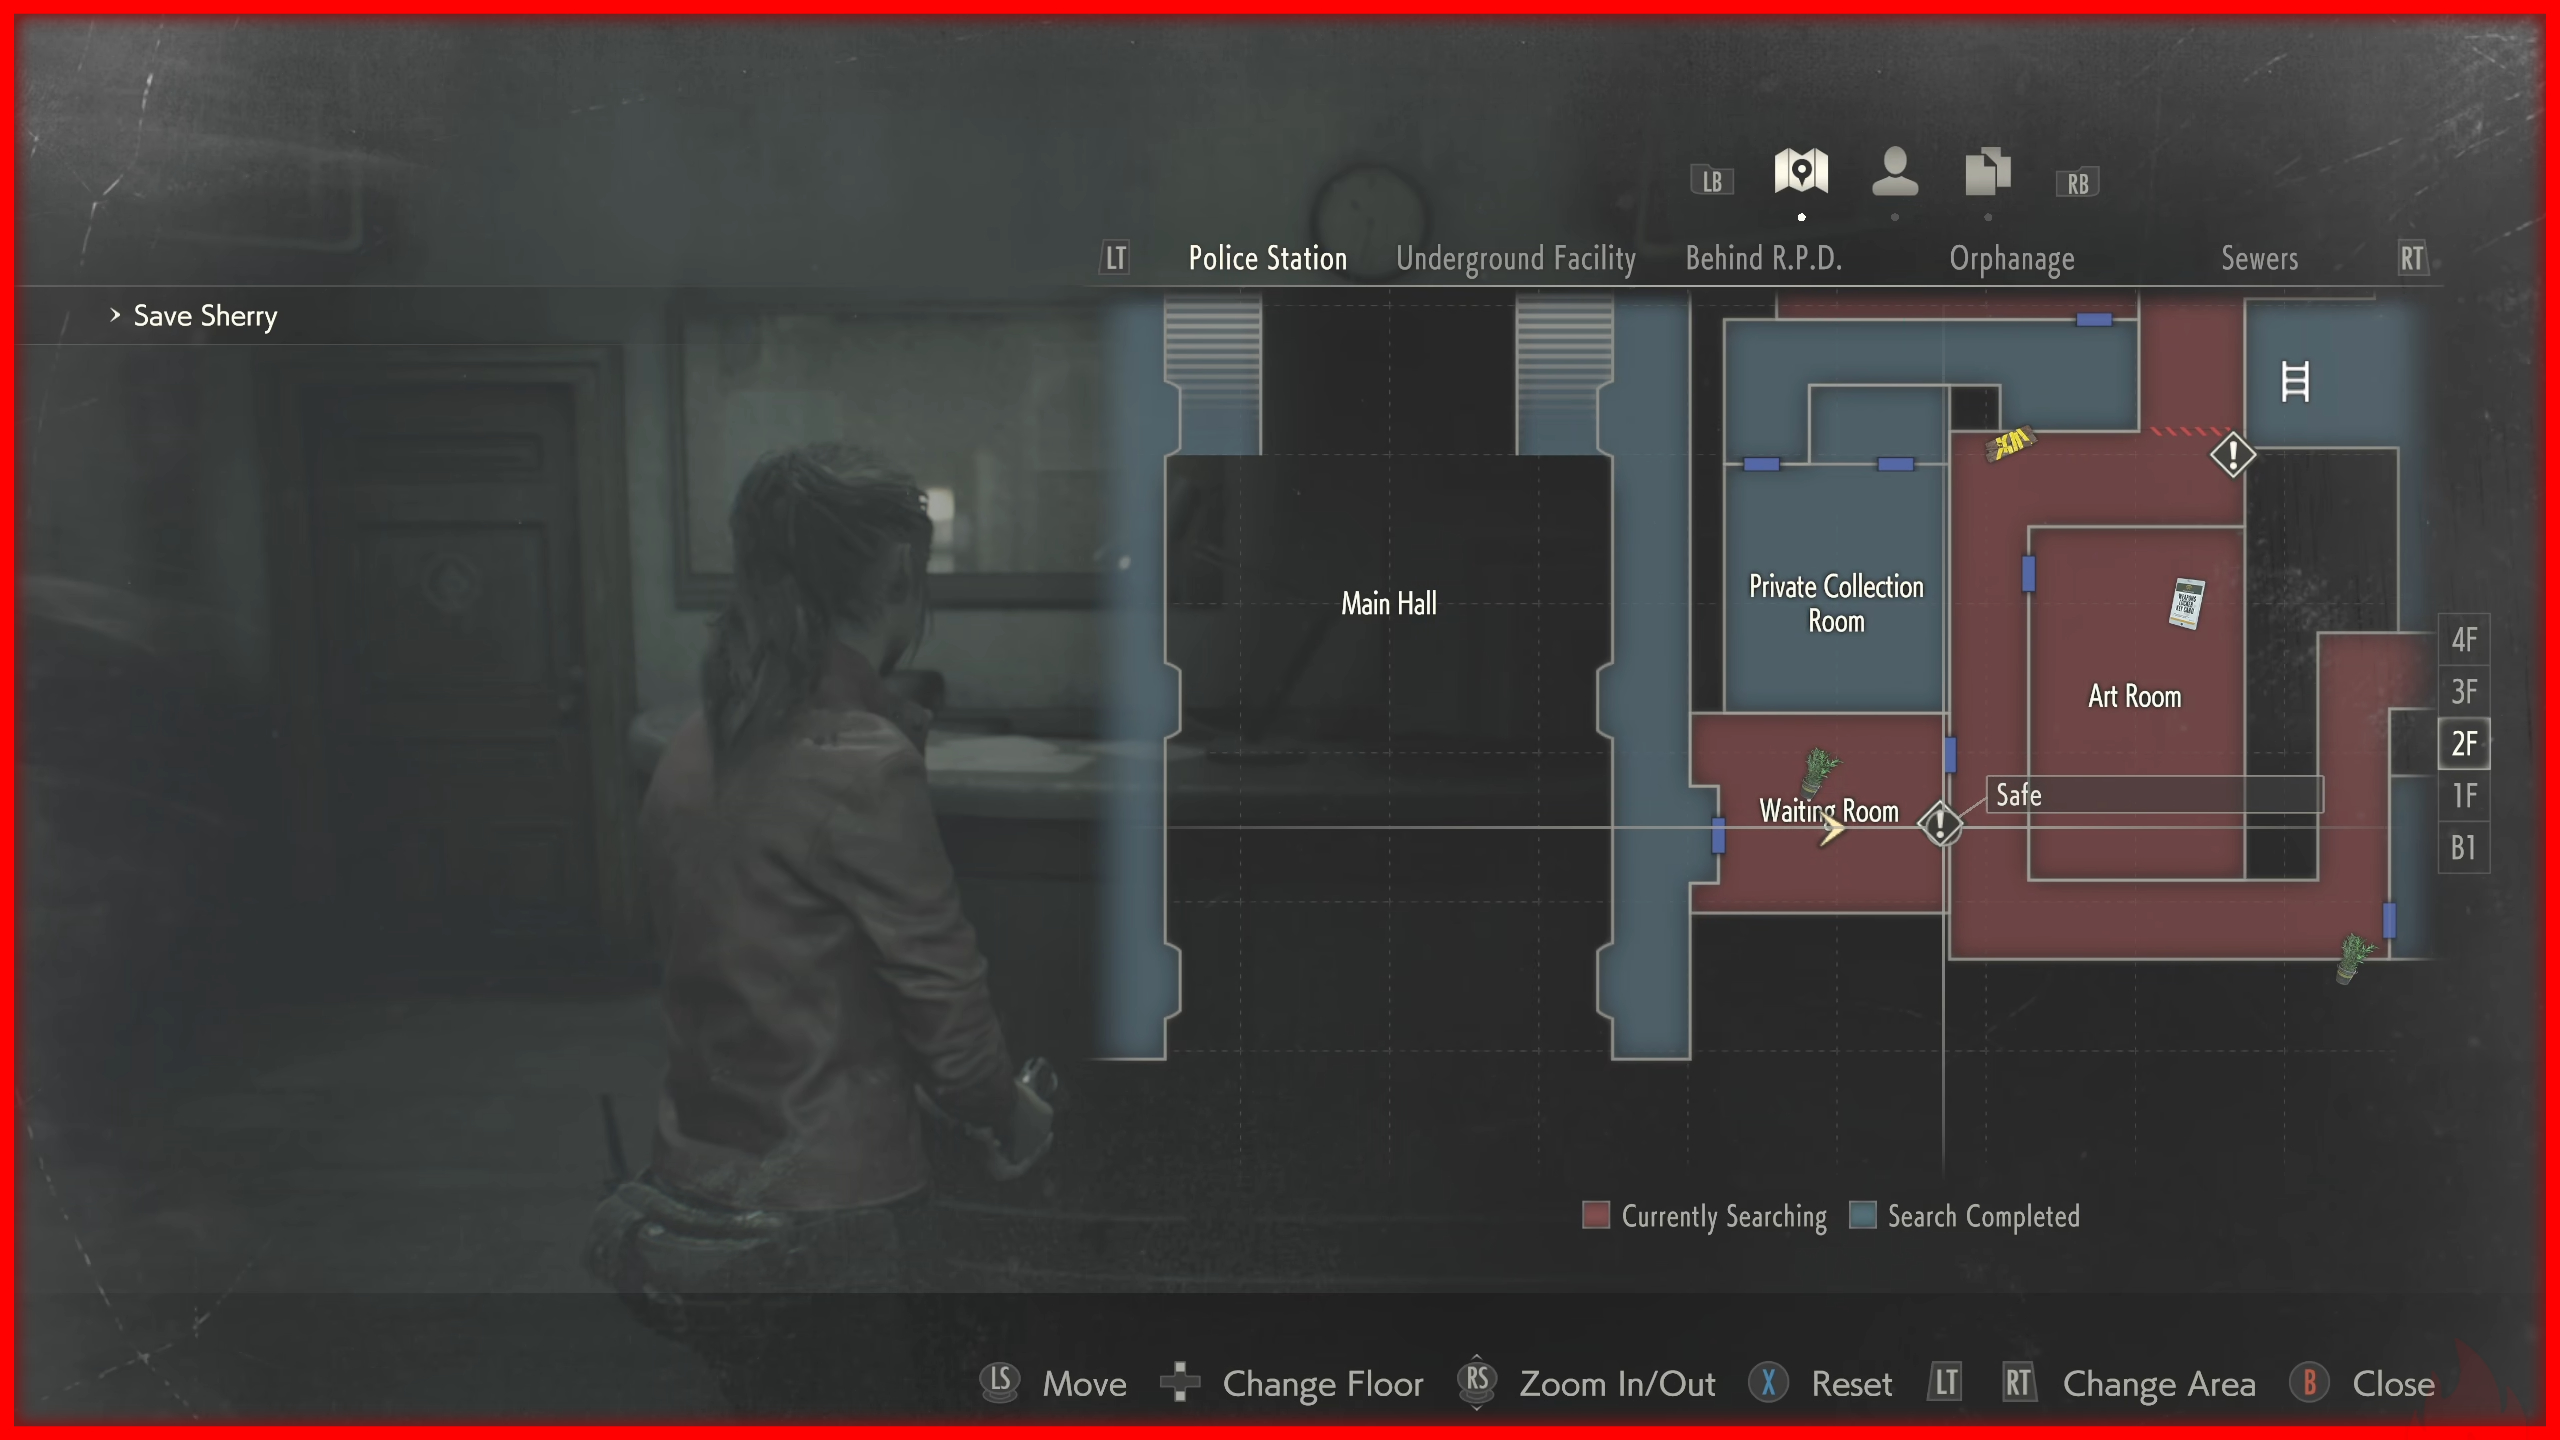
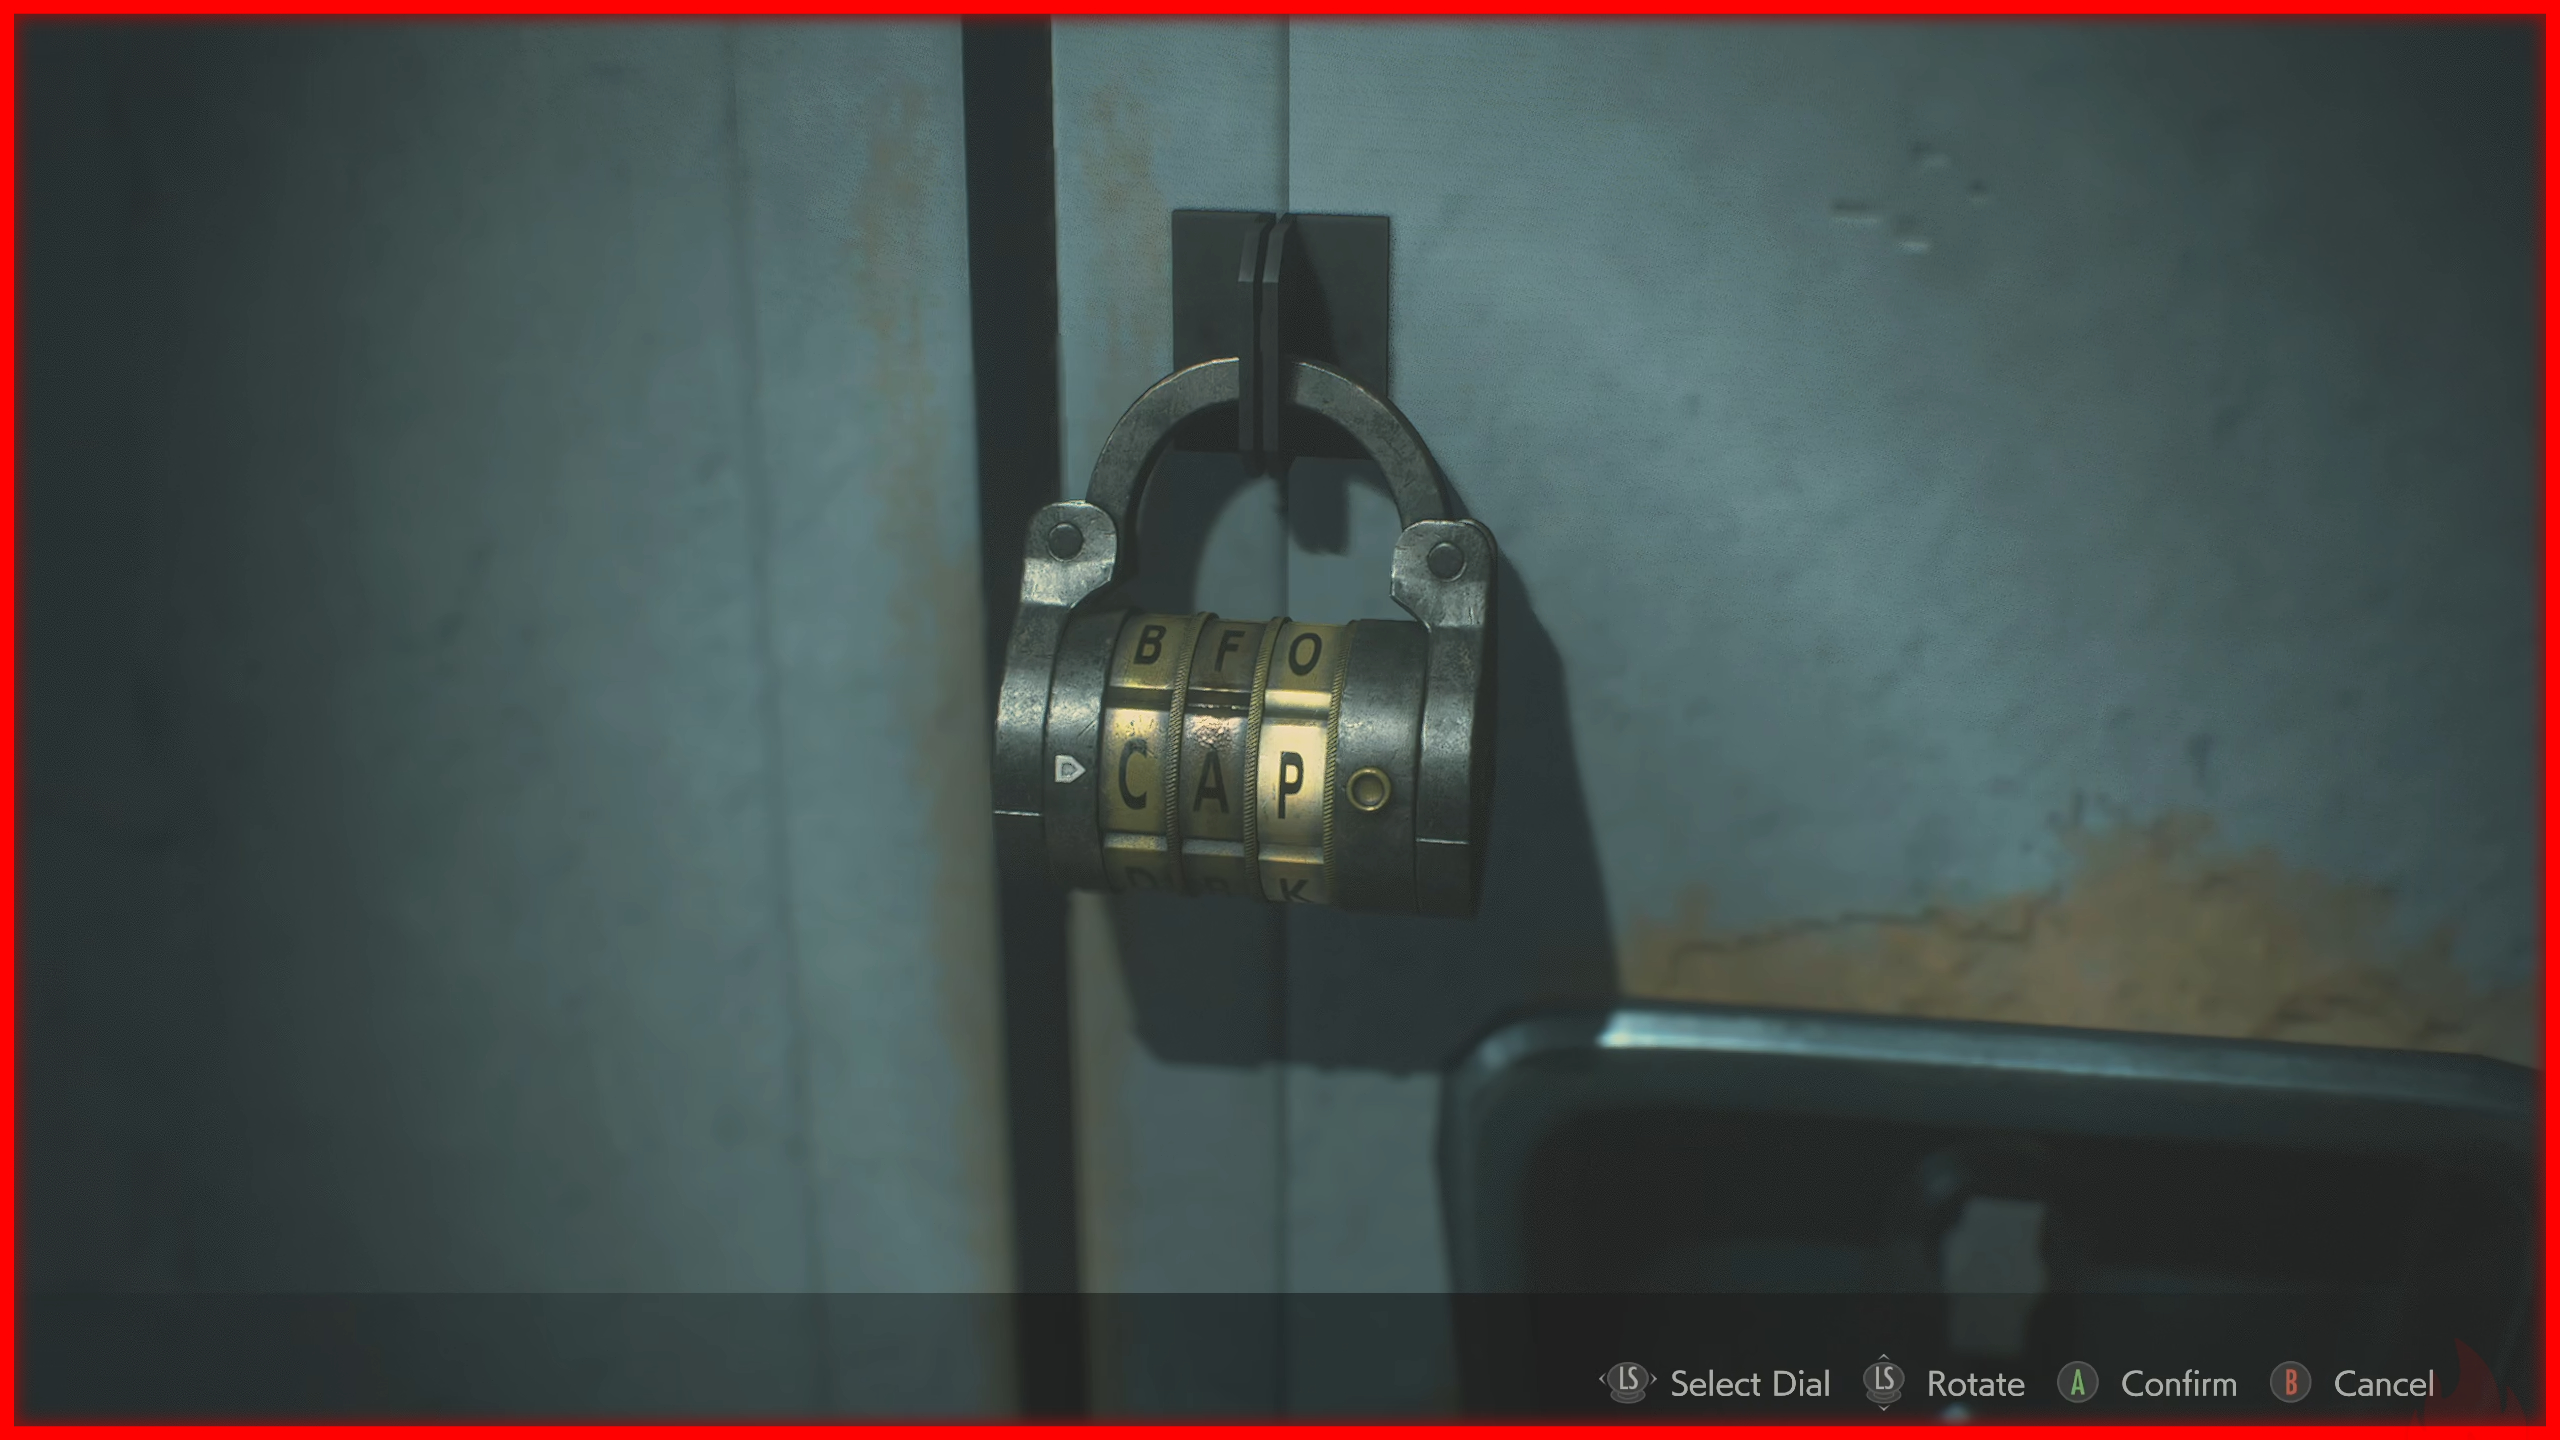
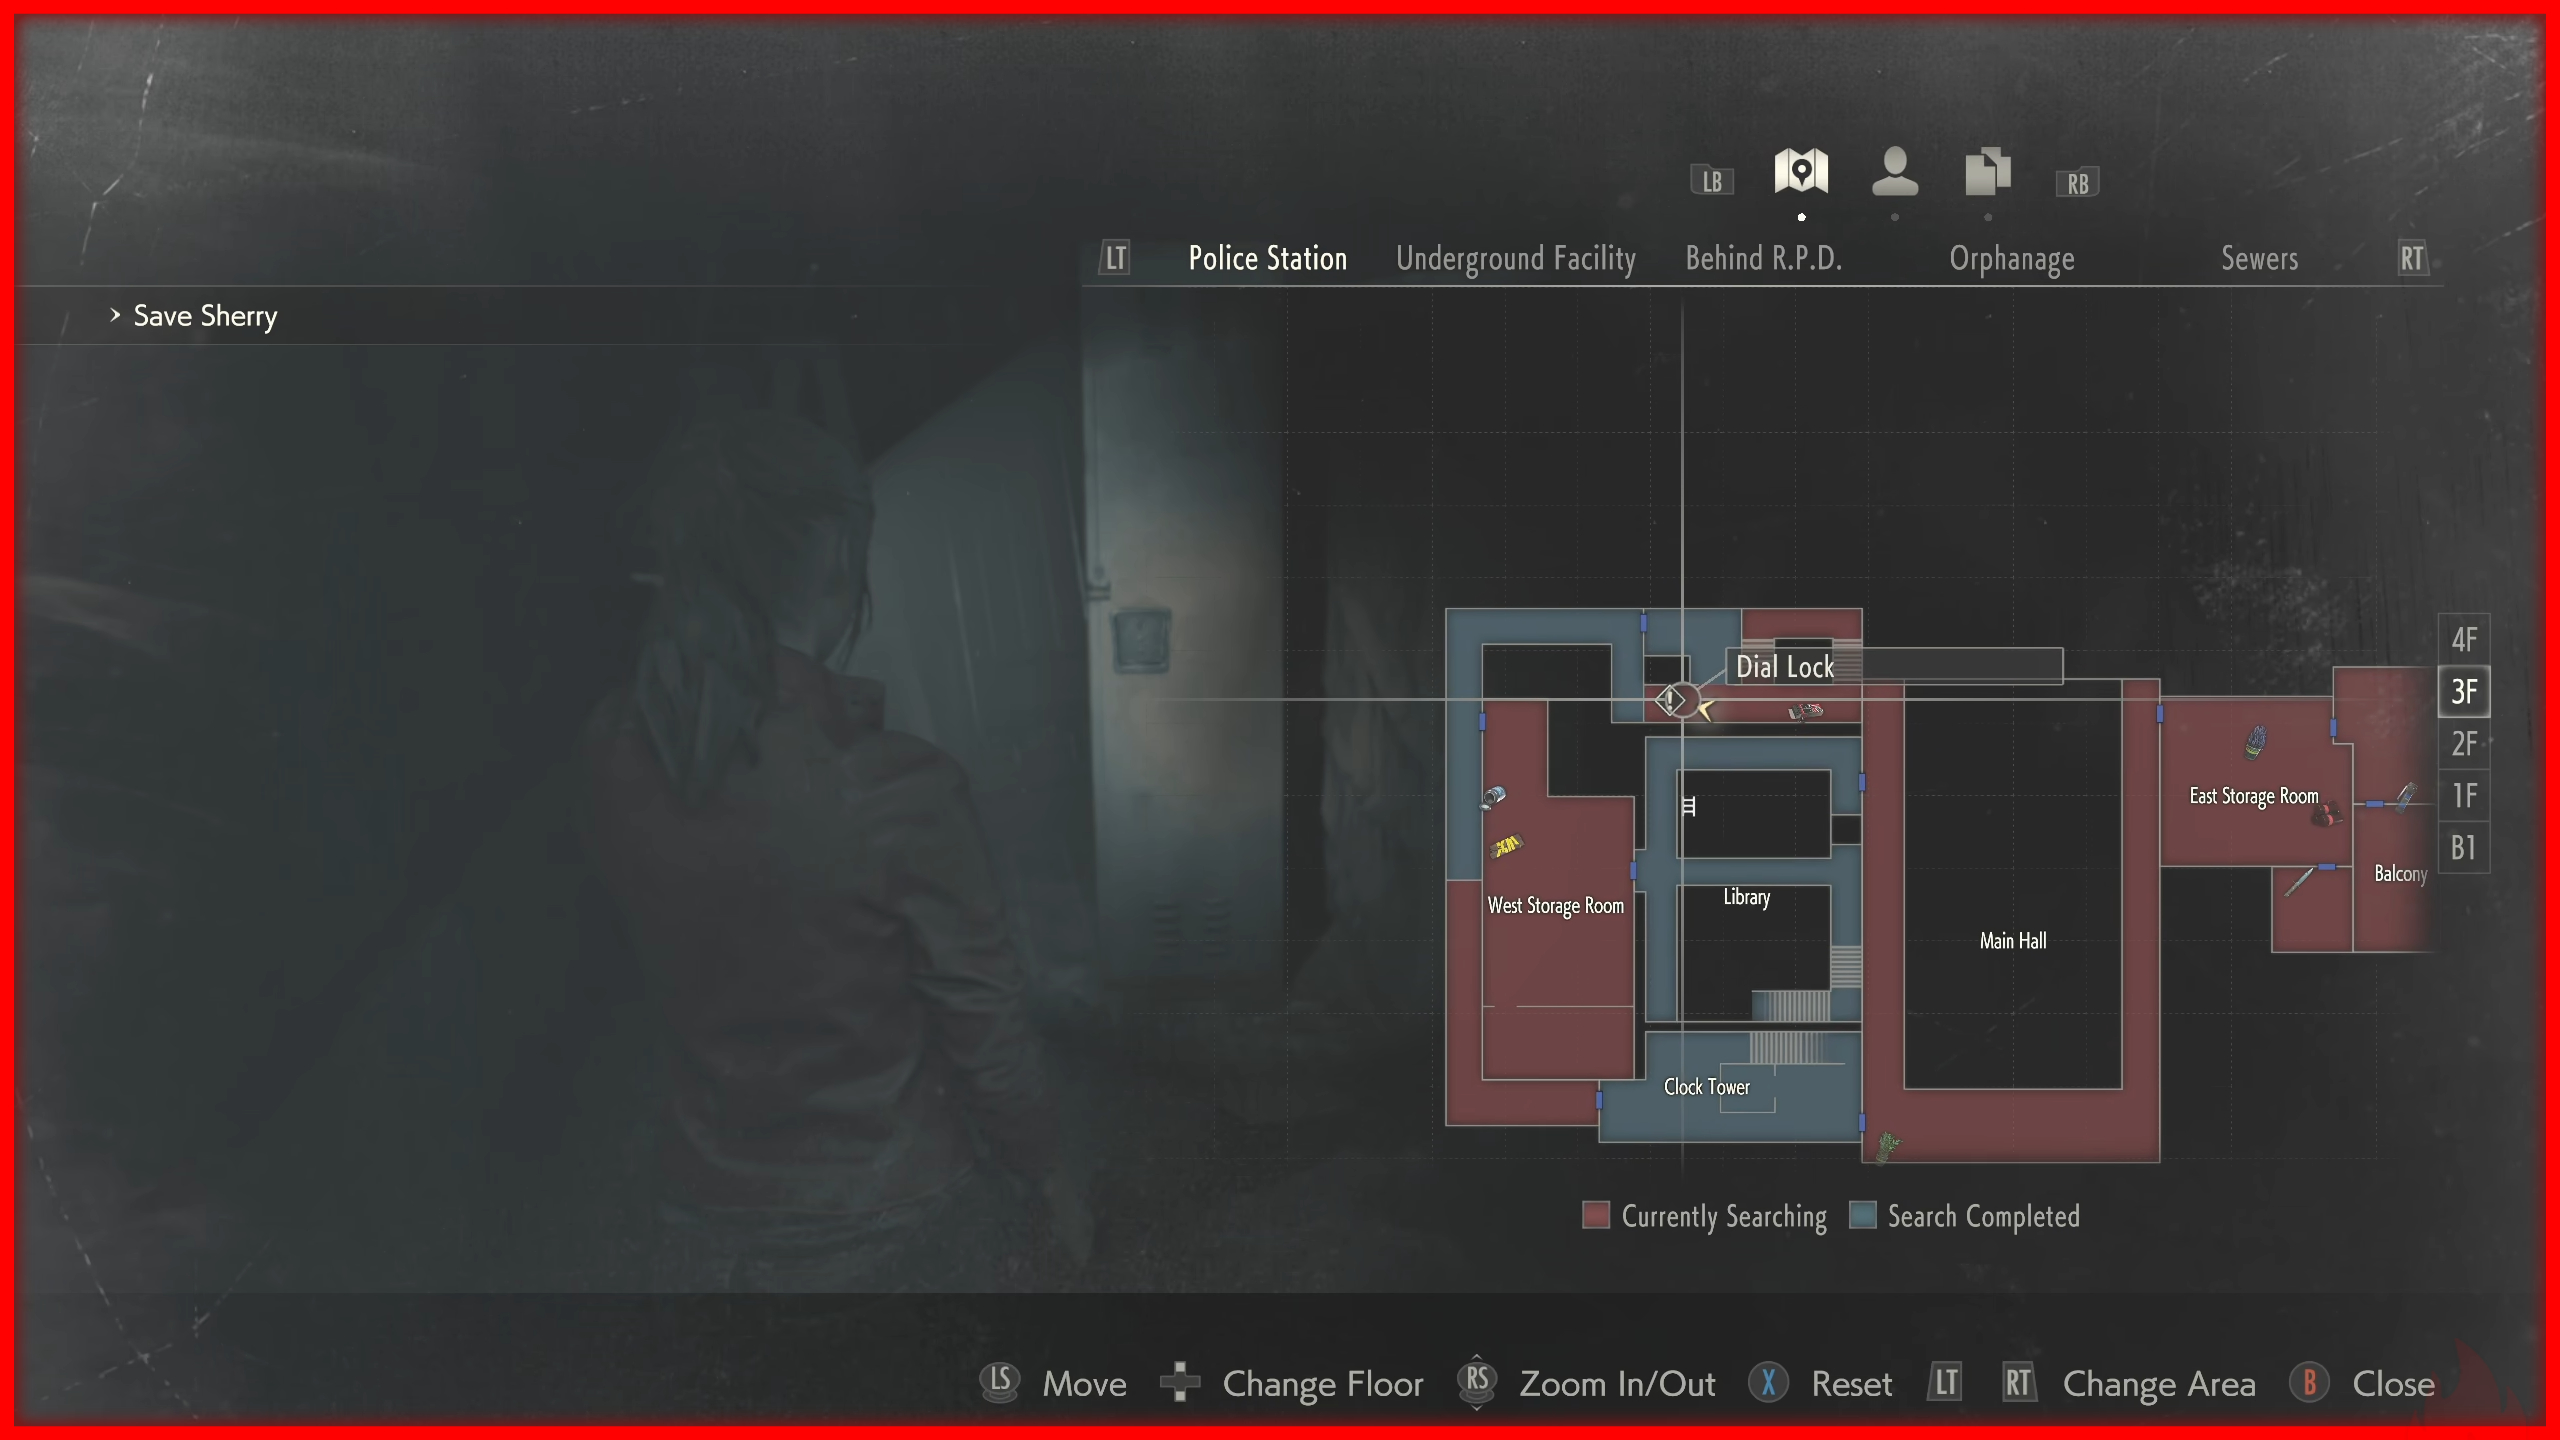
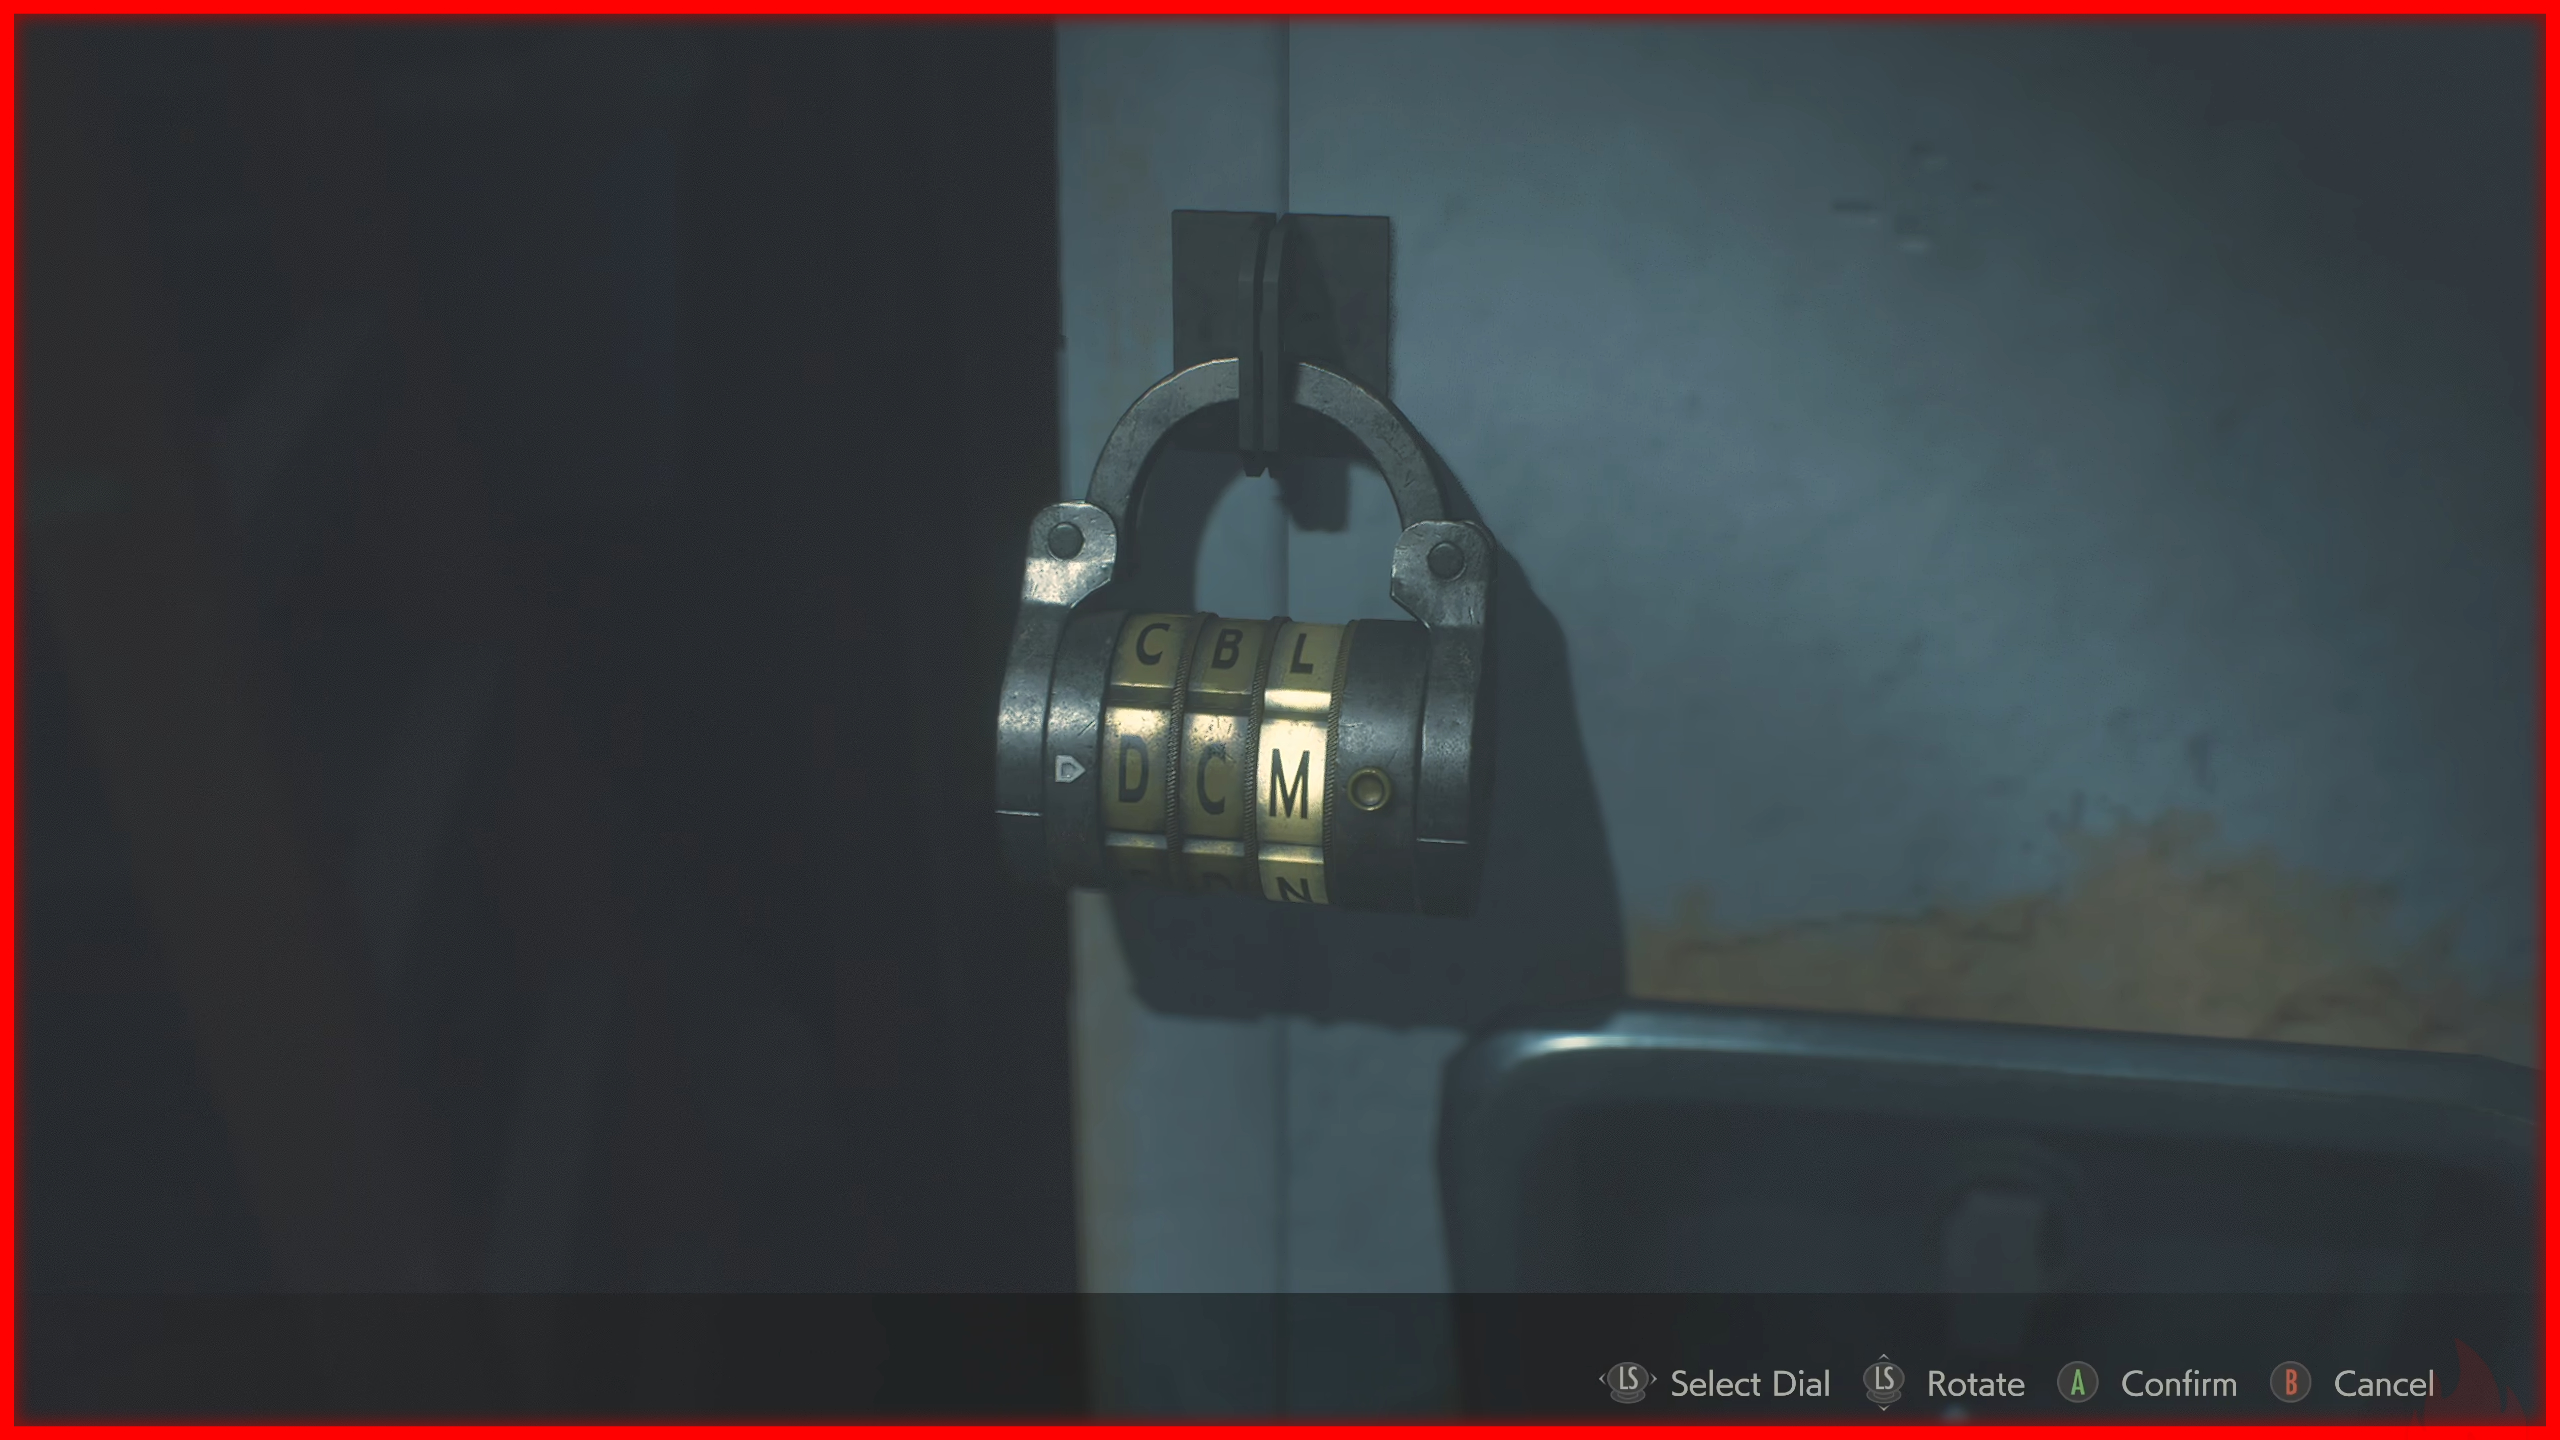
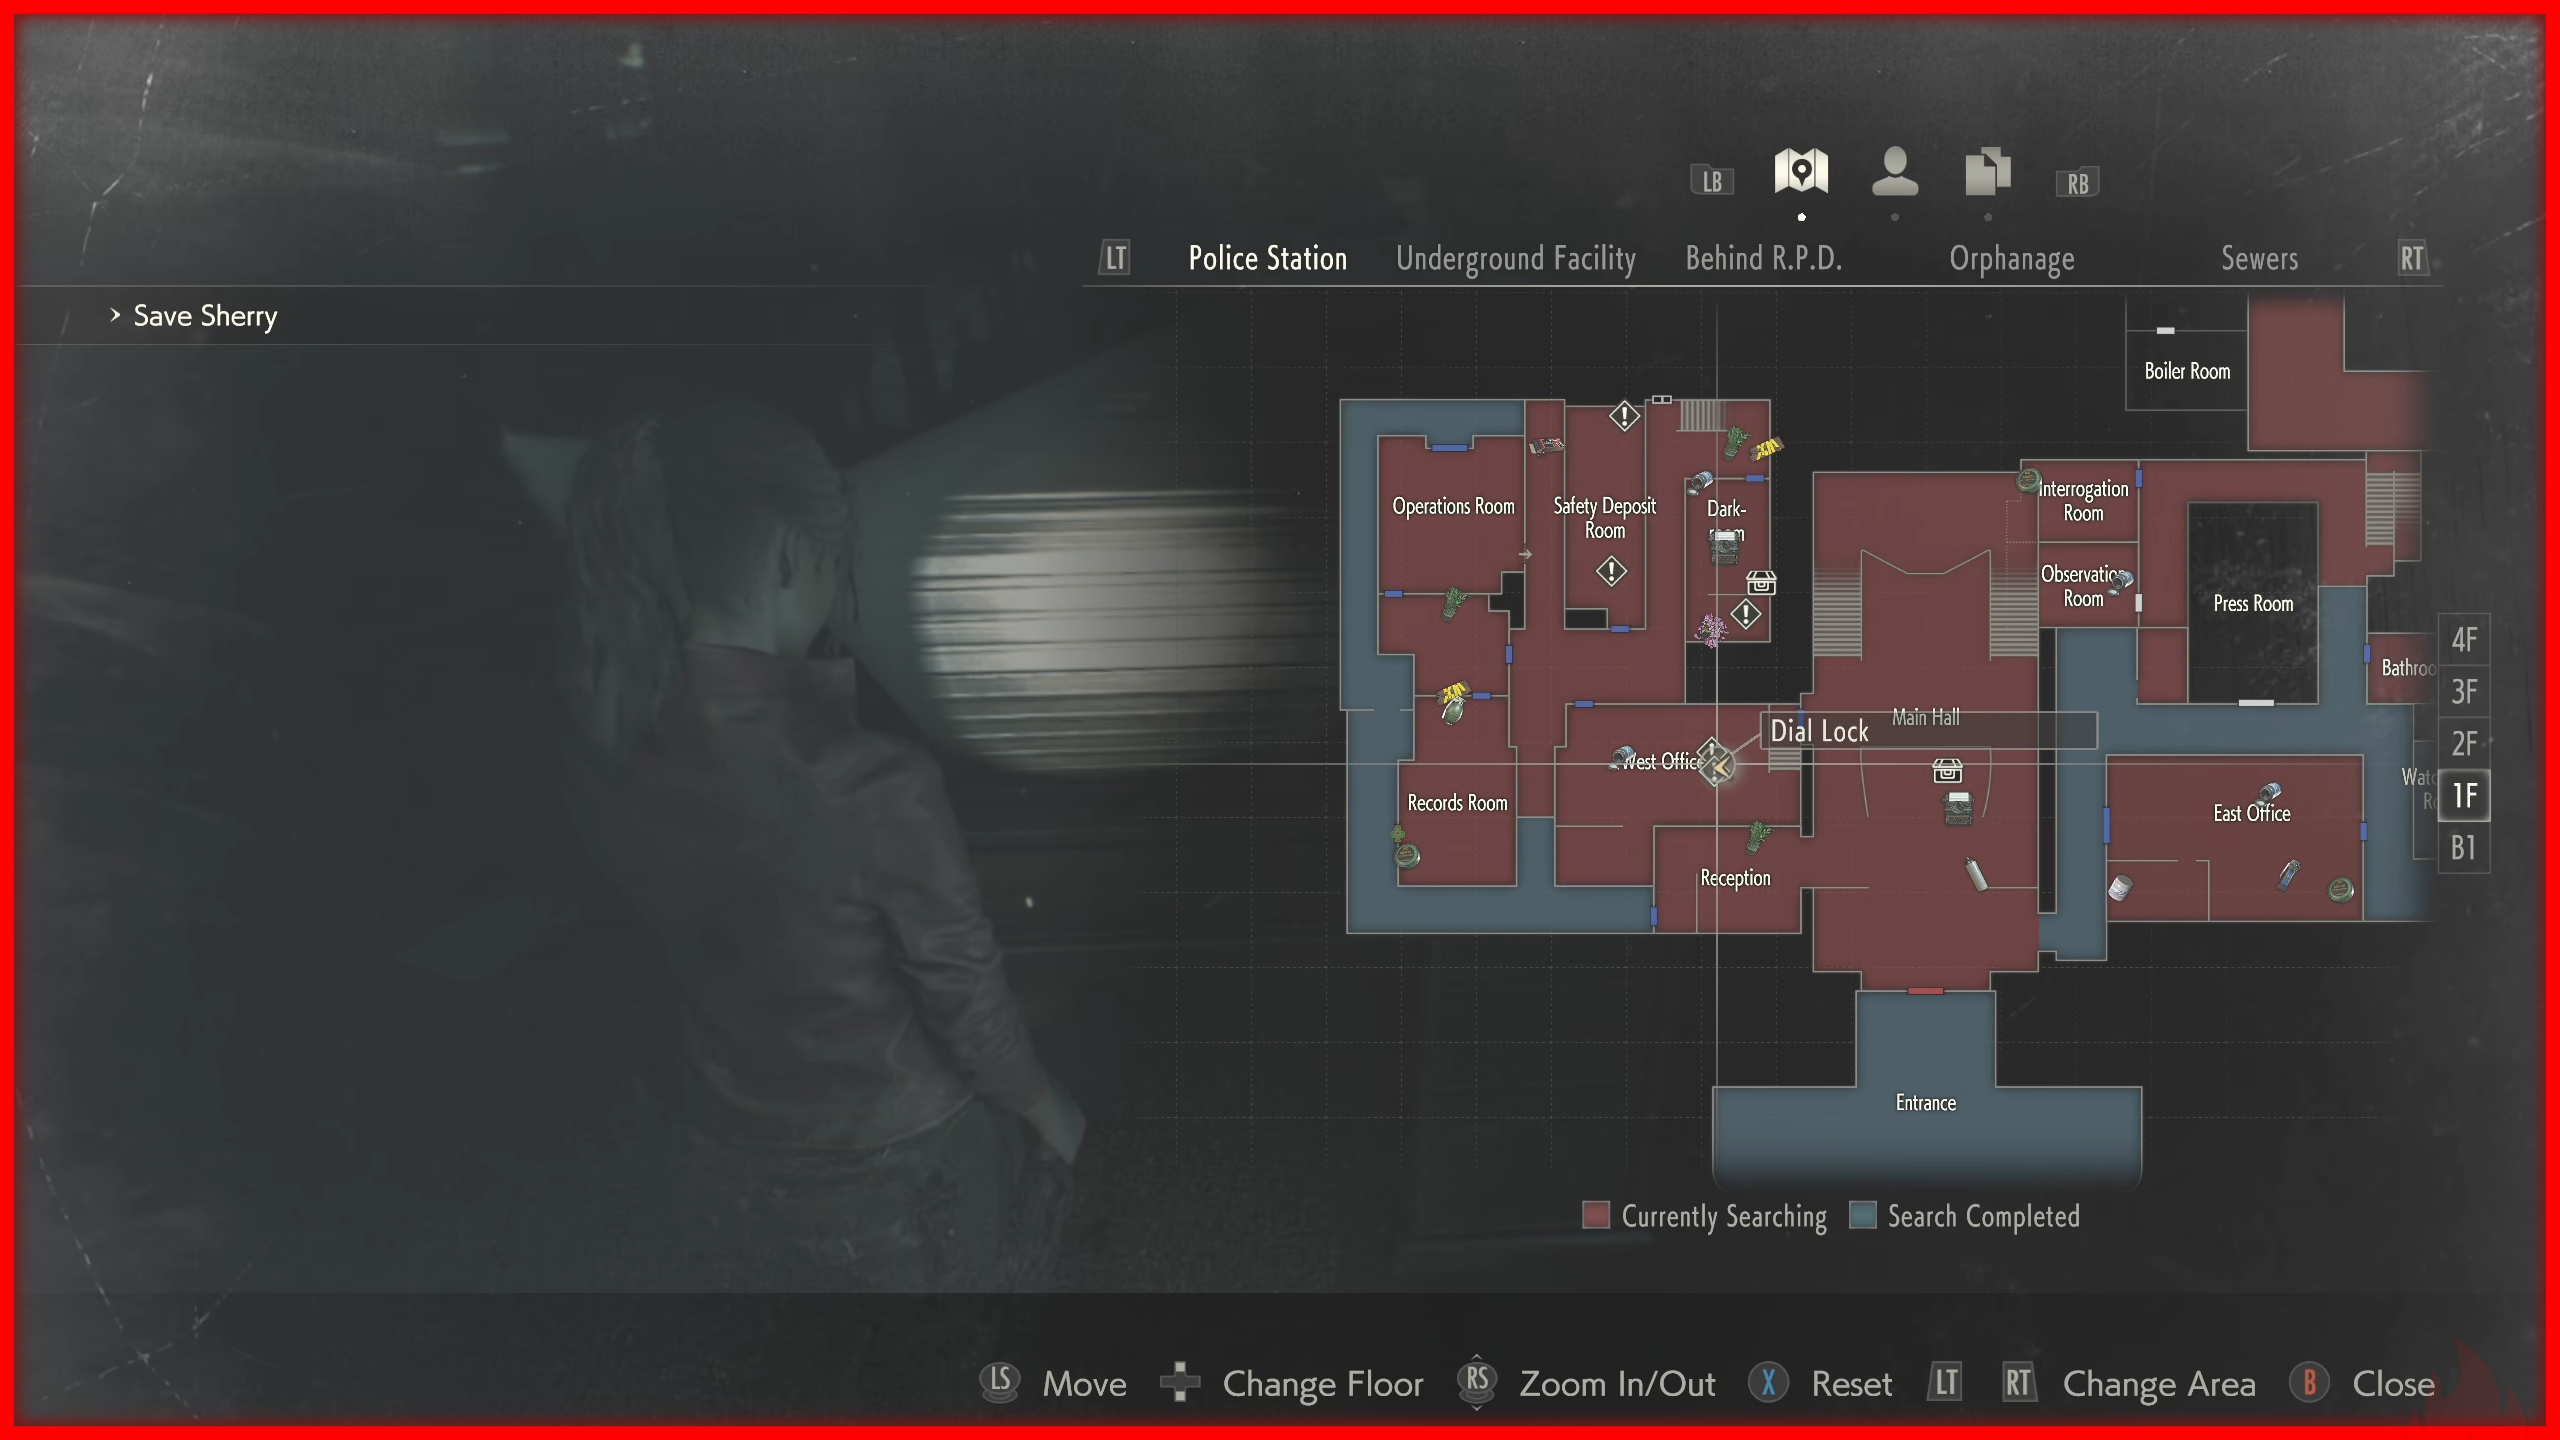
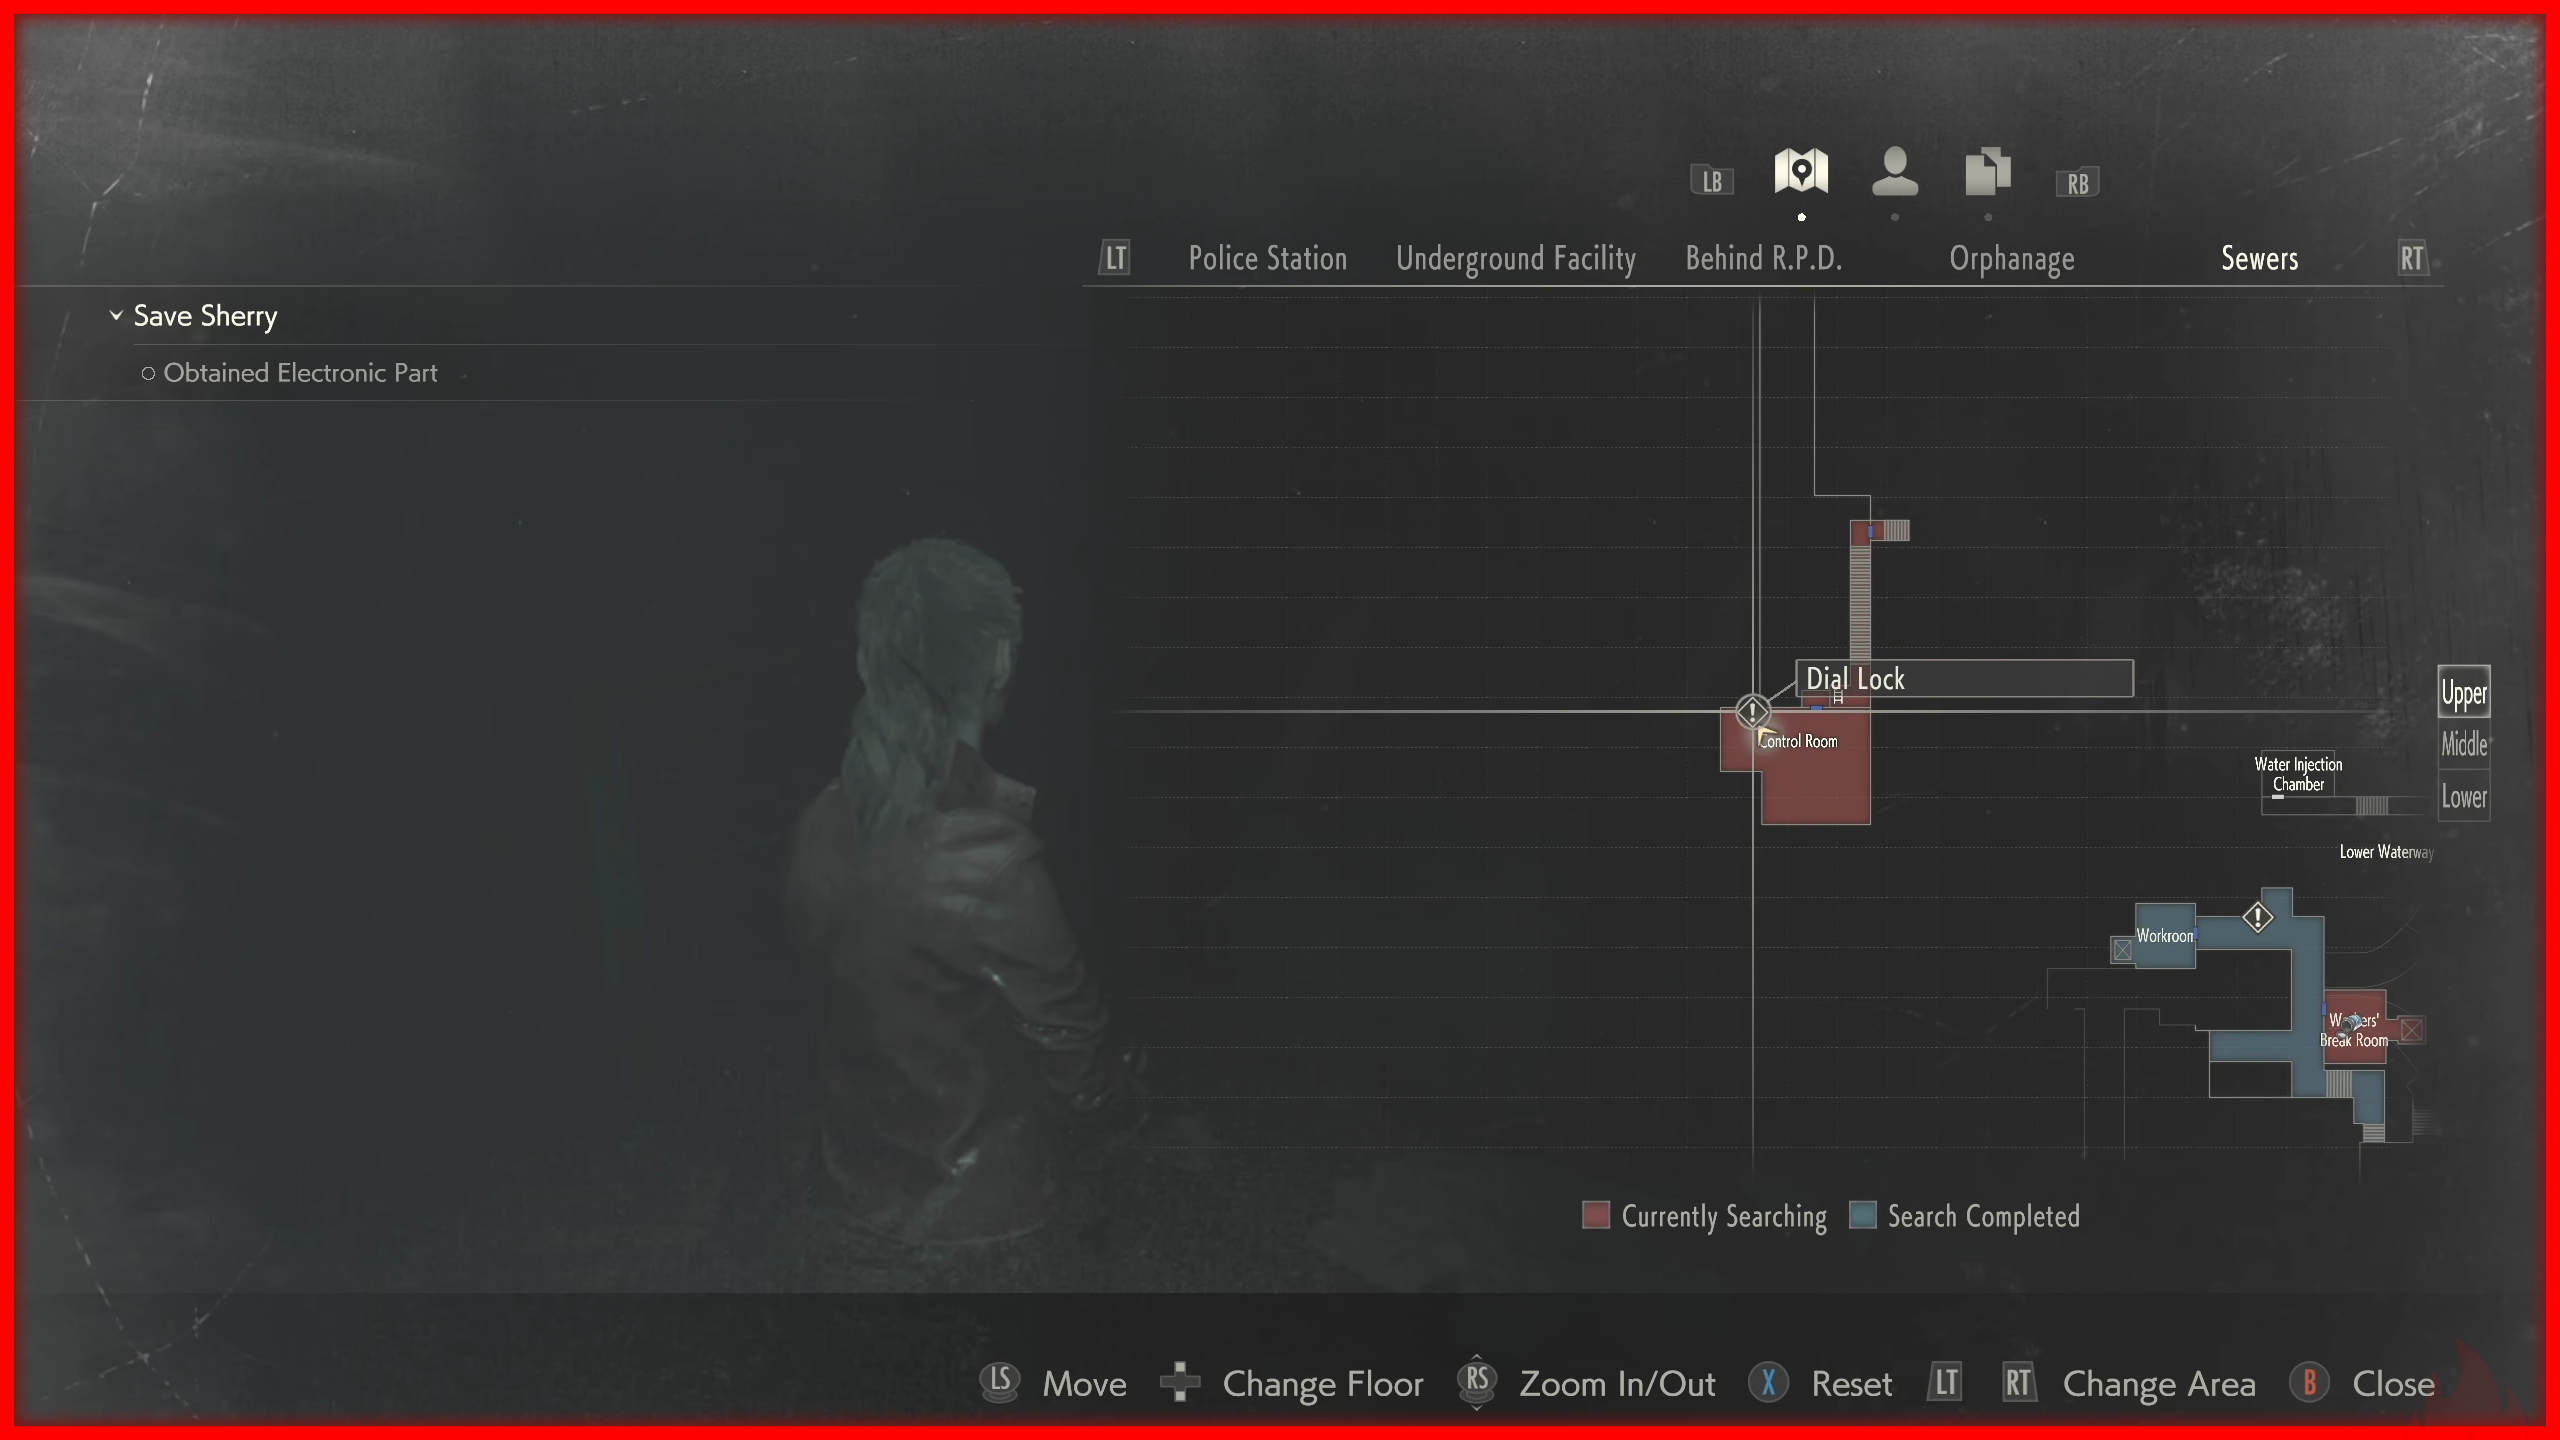
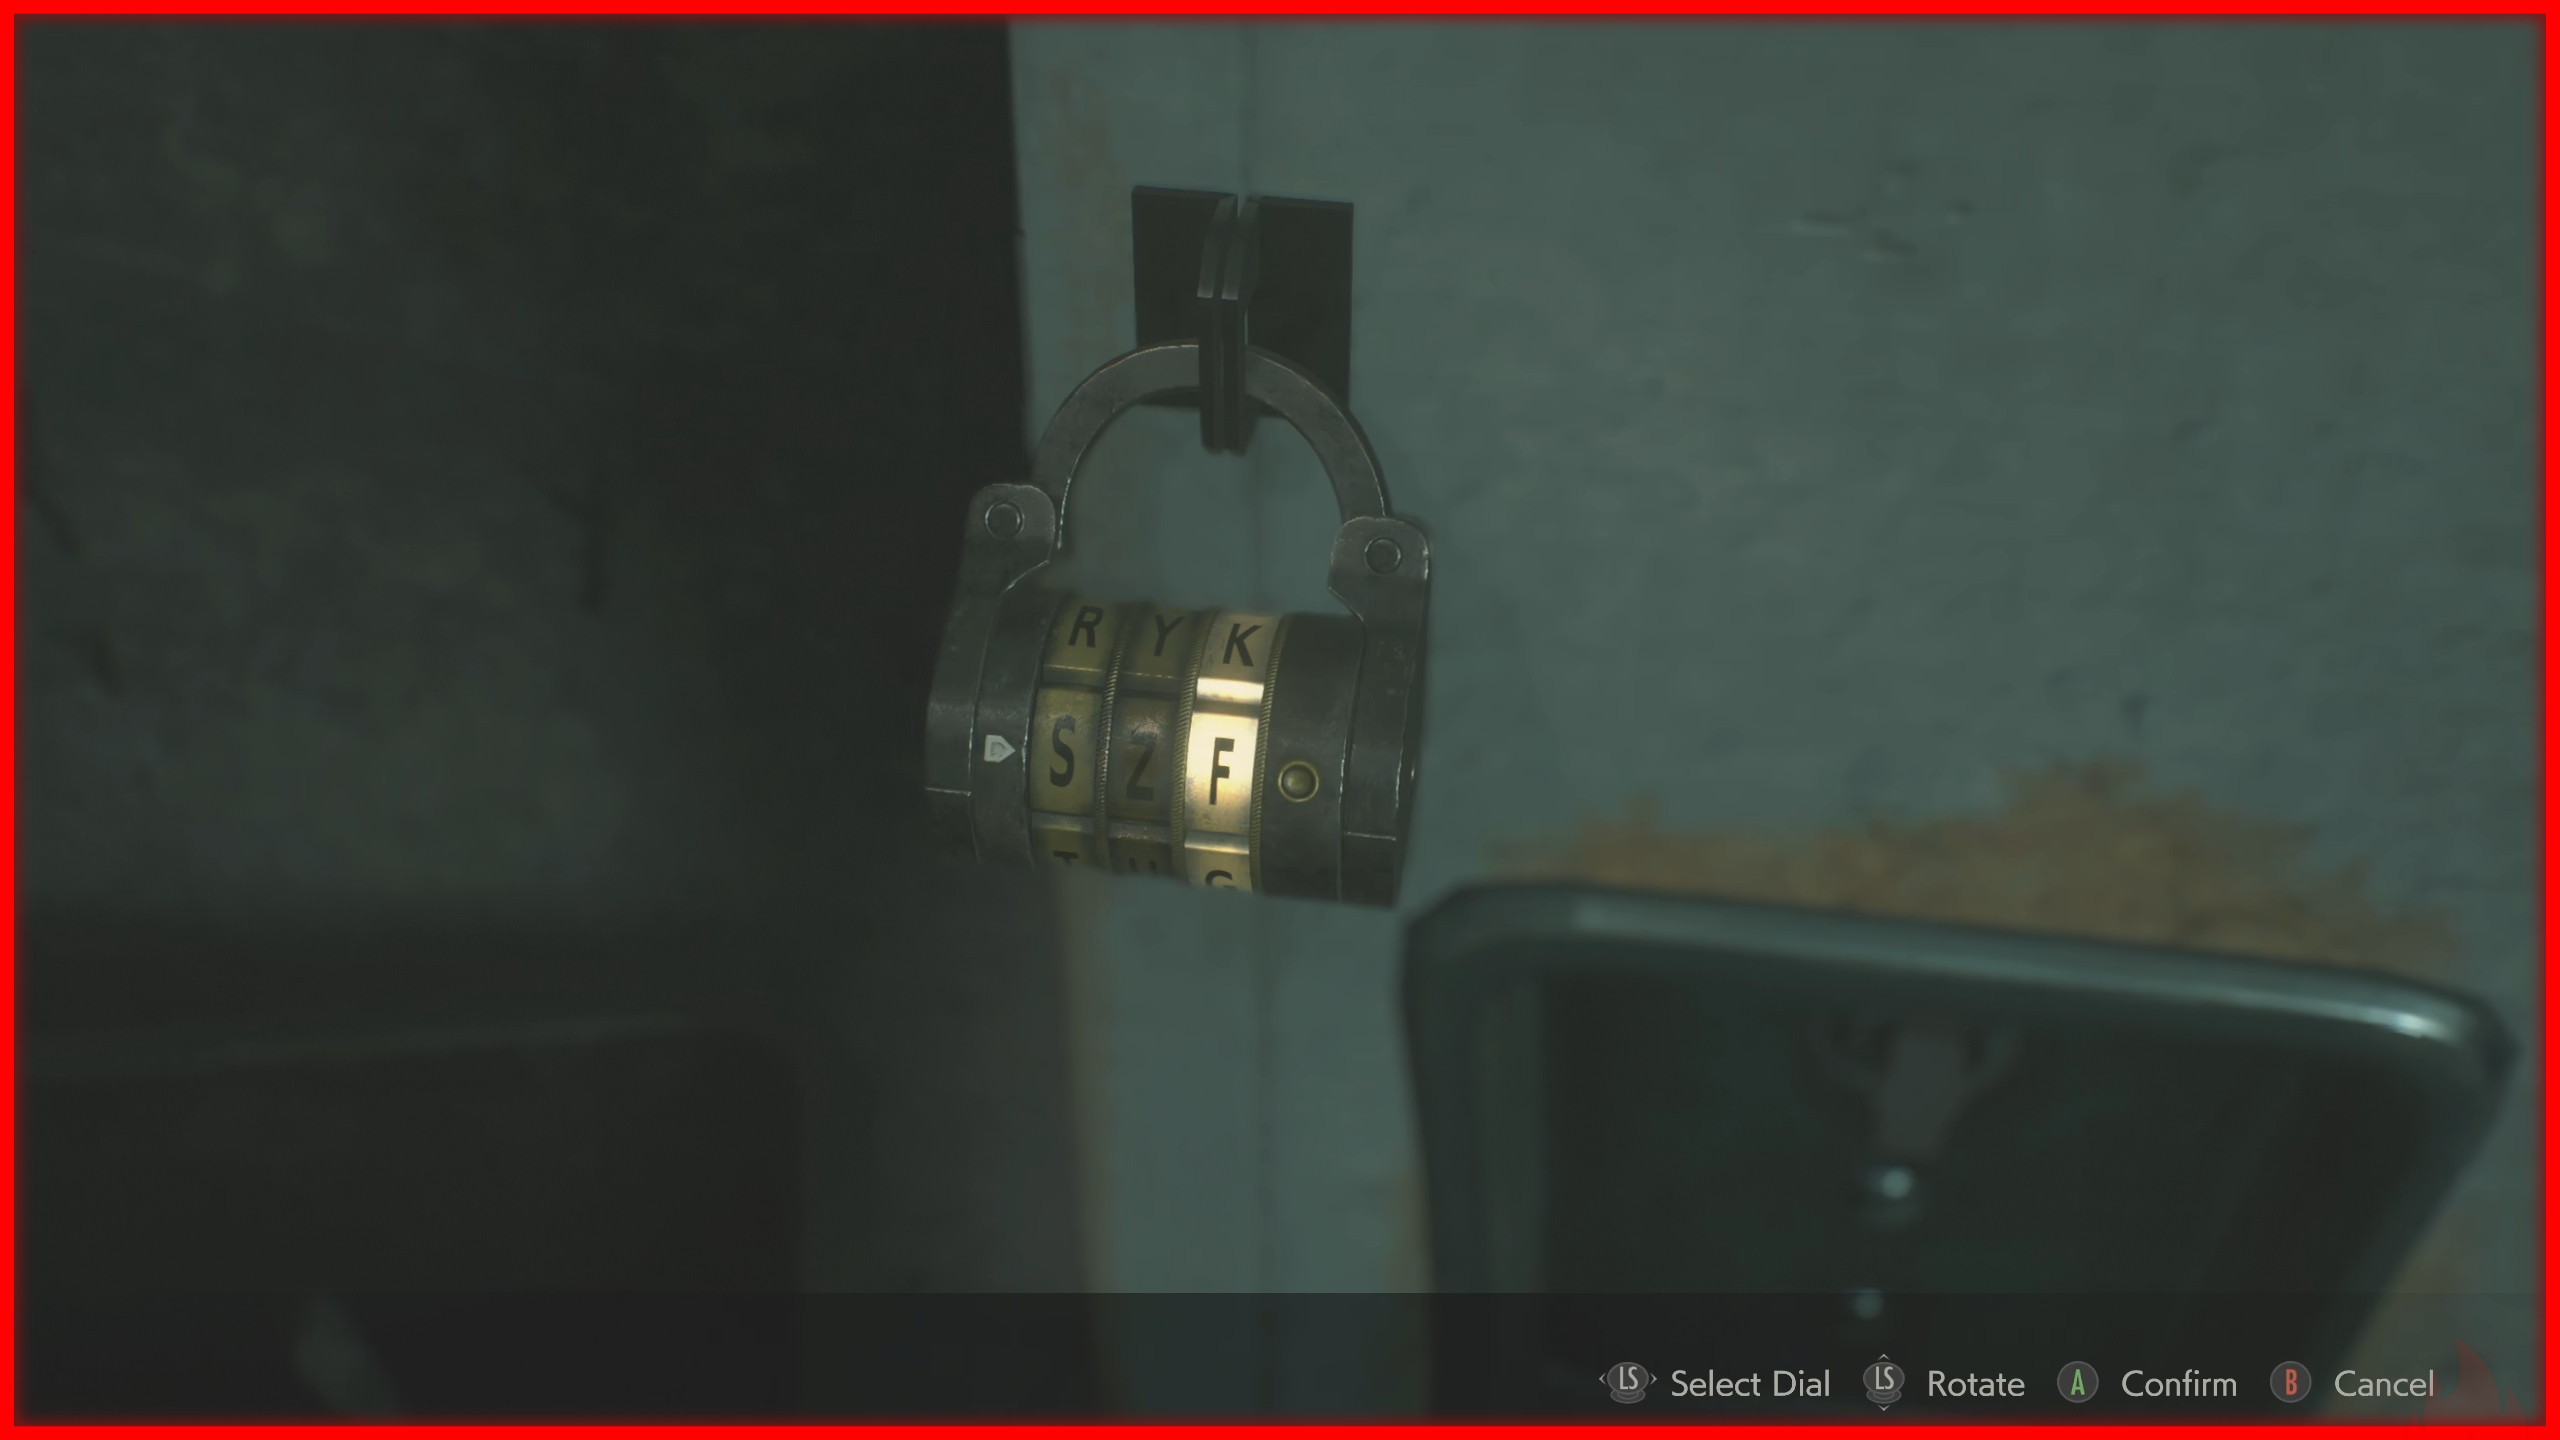
 There are 3 safes and 5 locks in the game. Open them all to earn the achievement.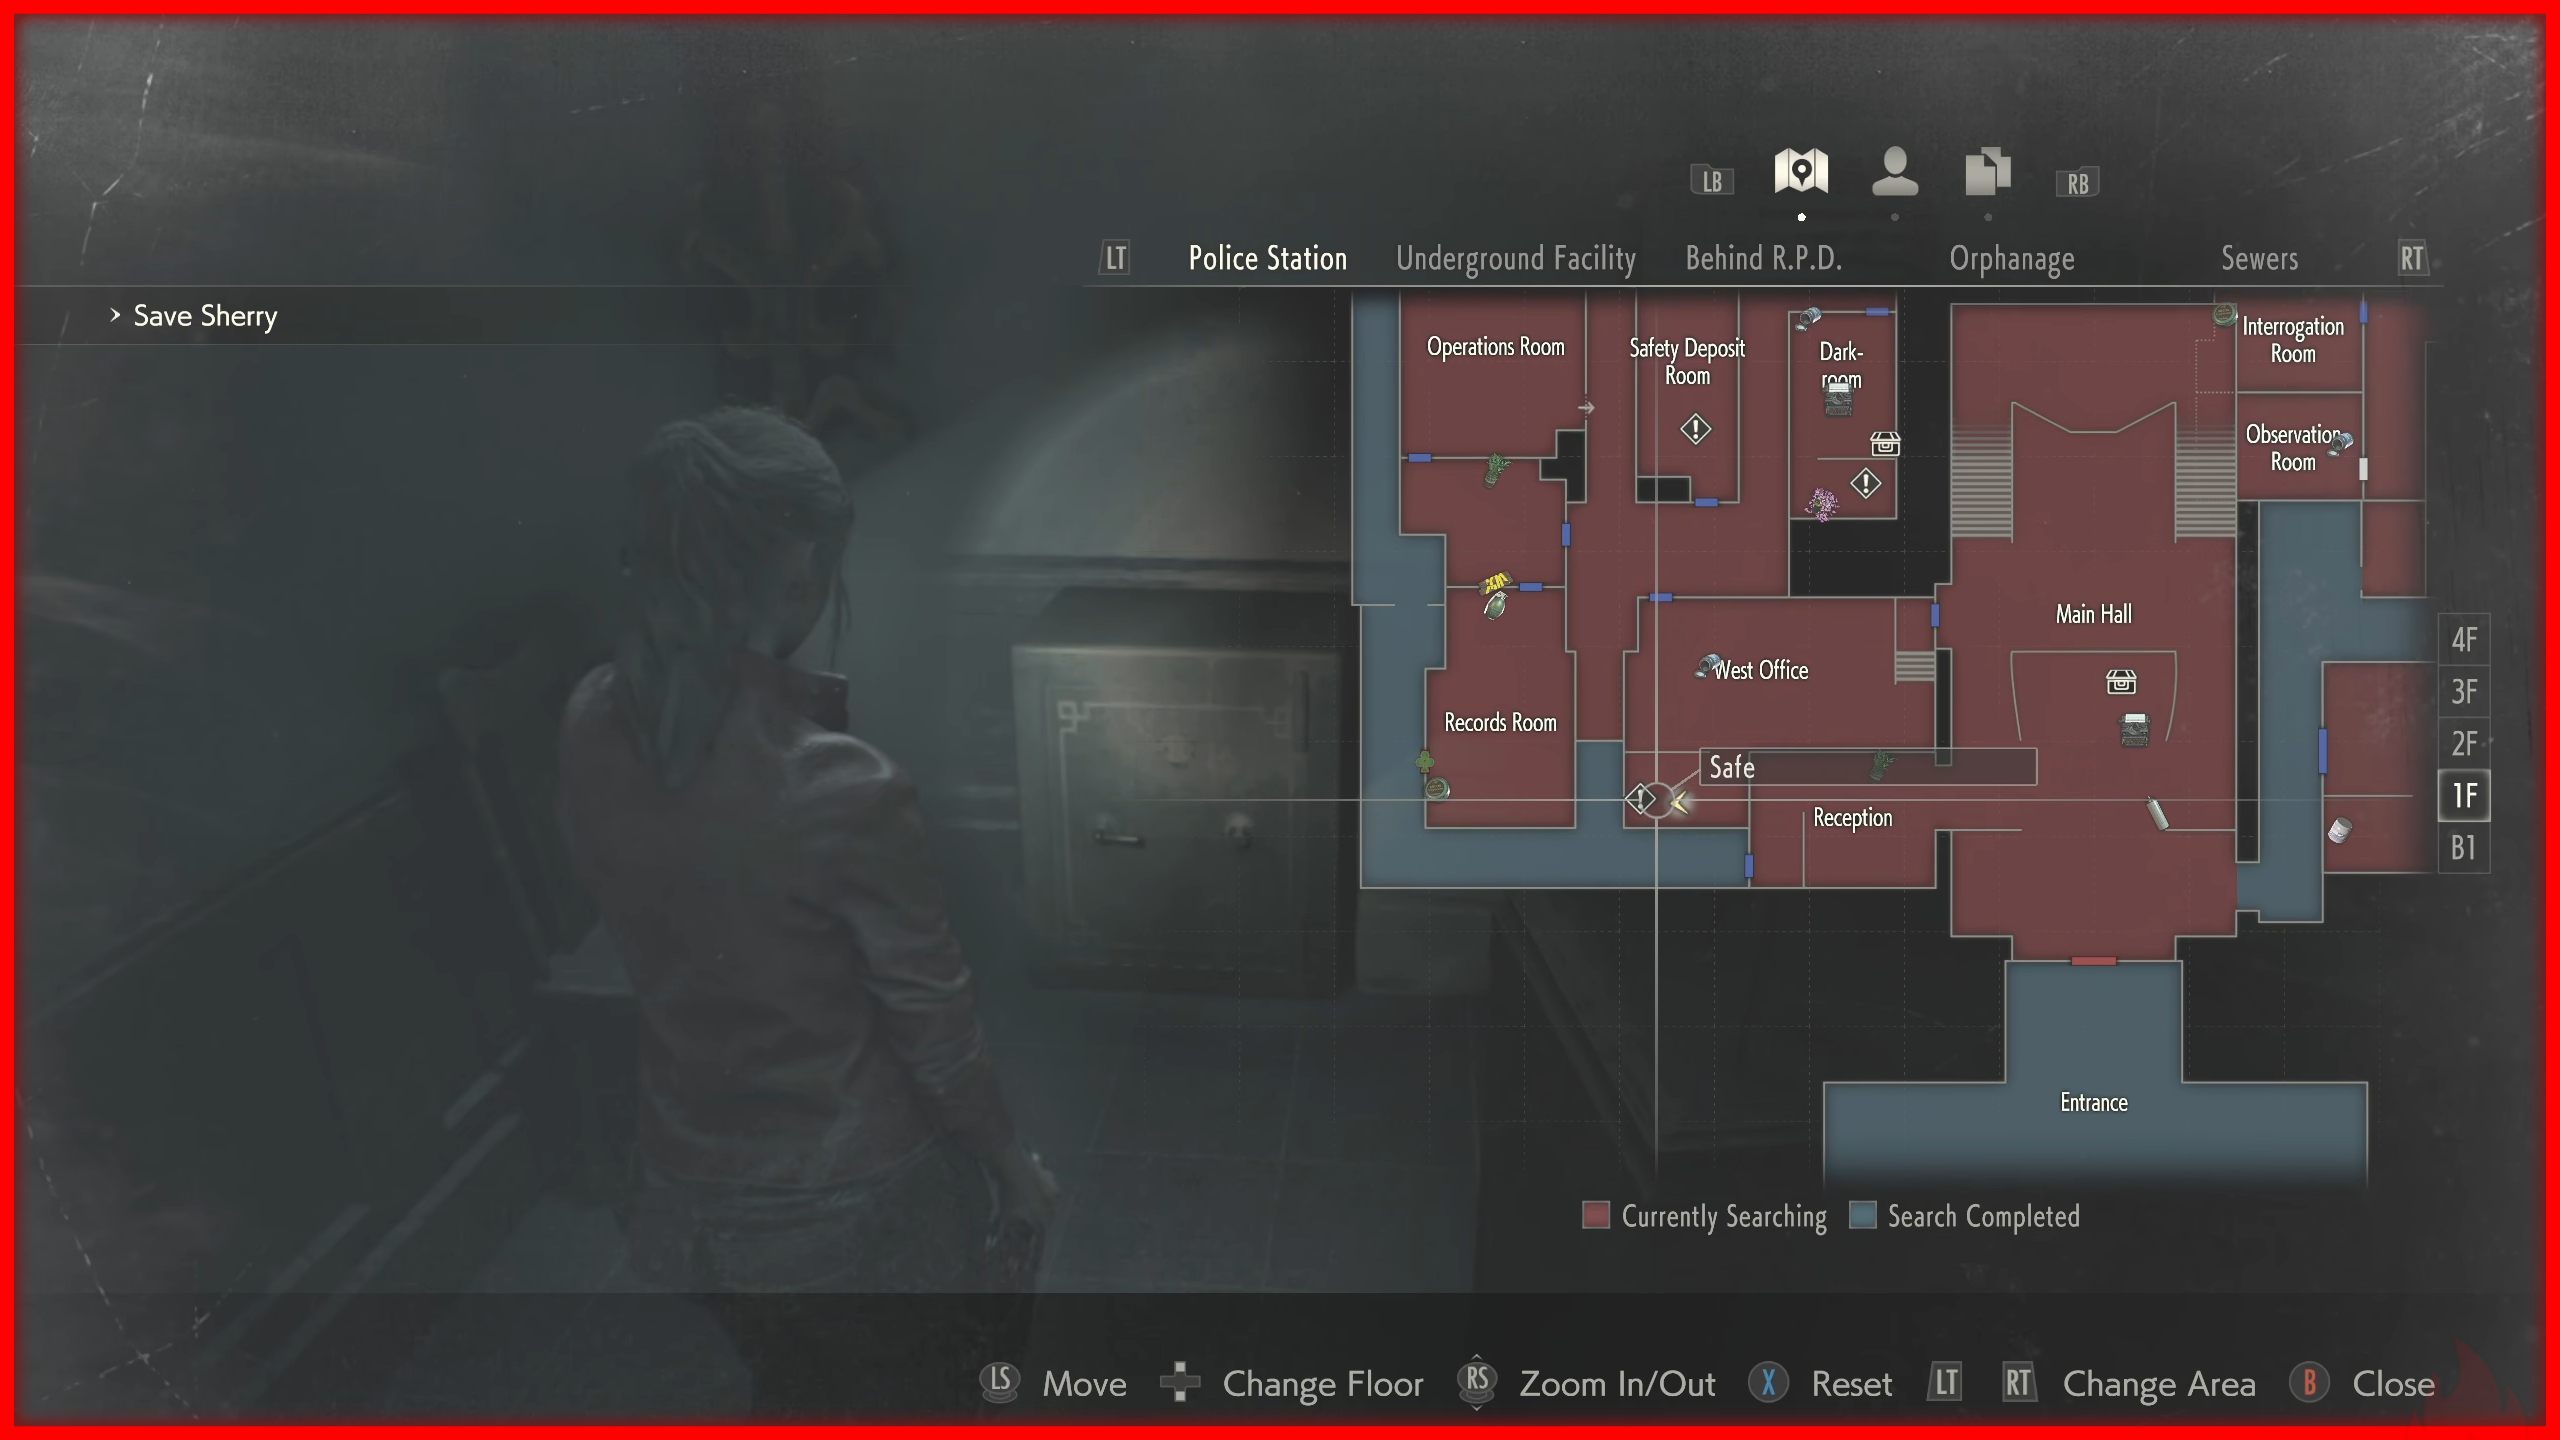
Hip to Add Squares ❌
 Obtained by acquiring an additional inventory slot. See the achievement below for the locations of all inventory upgrades.
A Waist of Space ❌
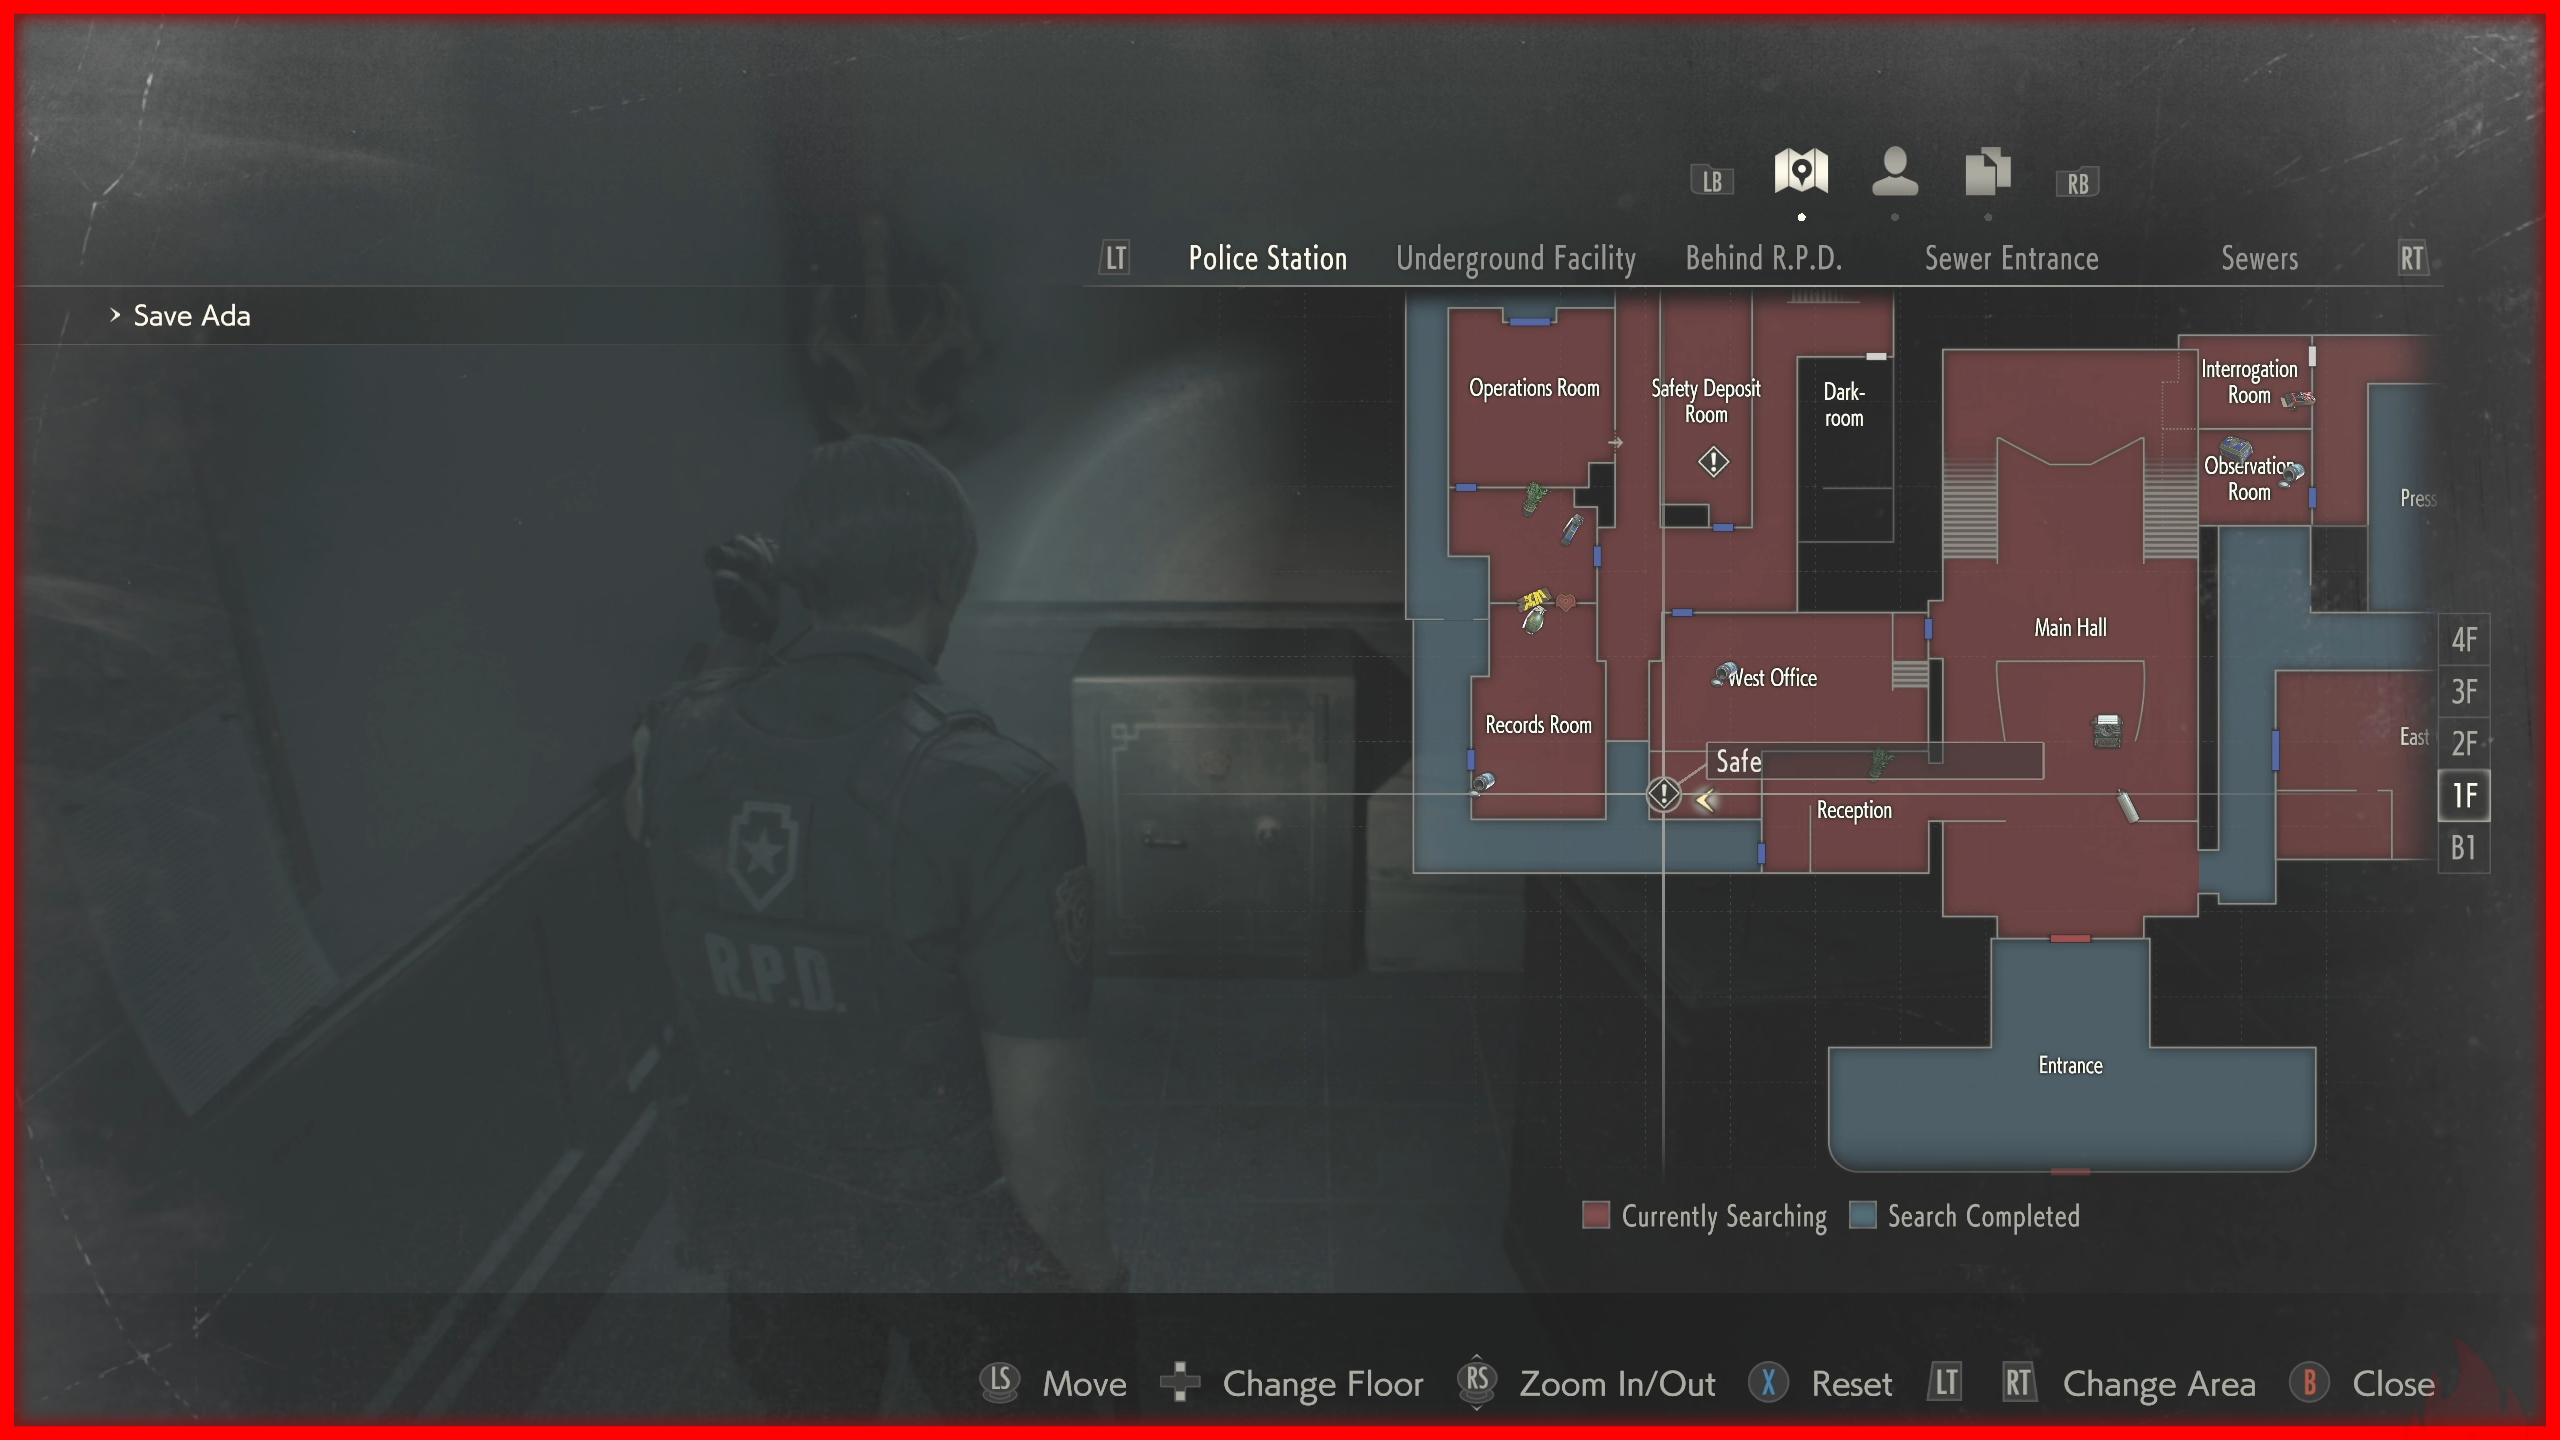
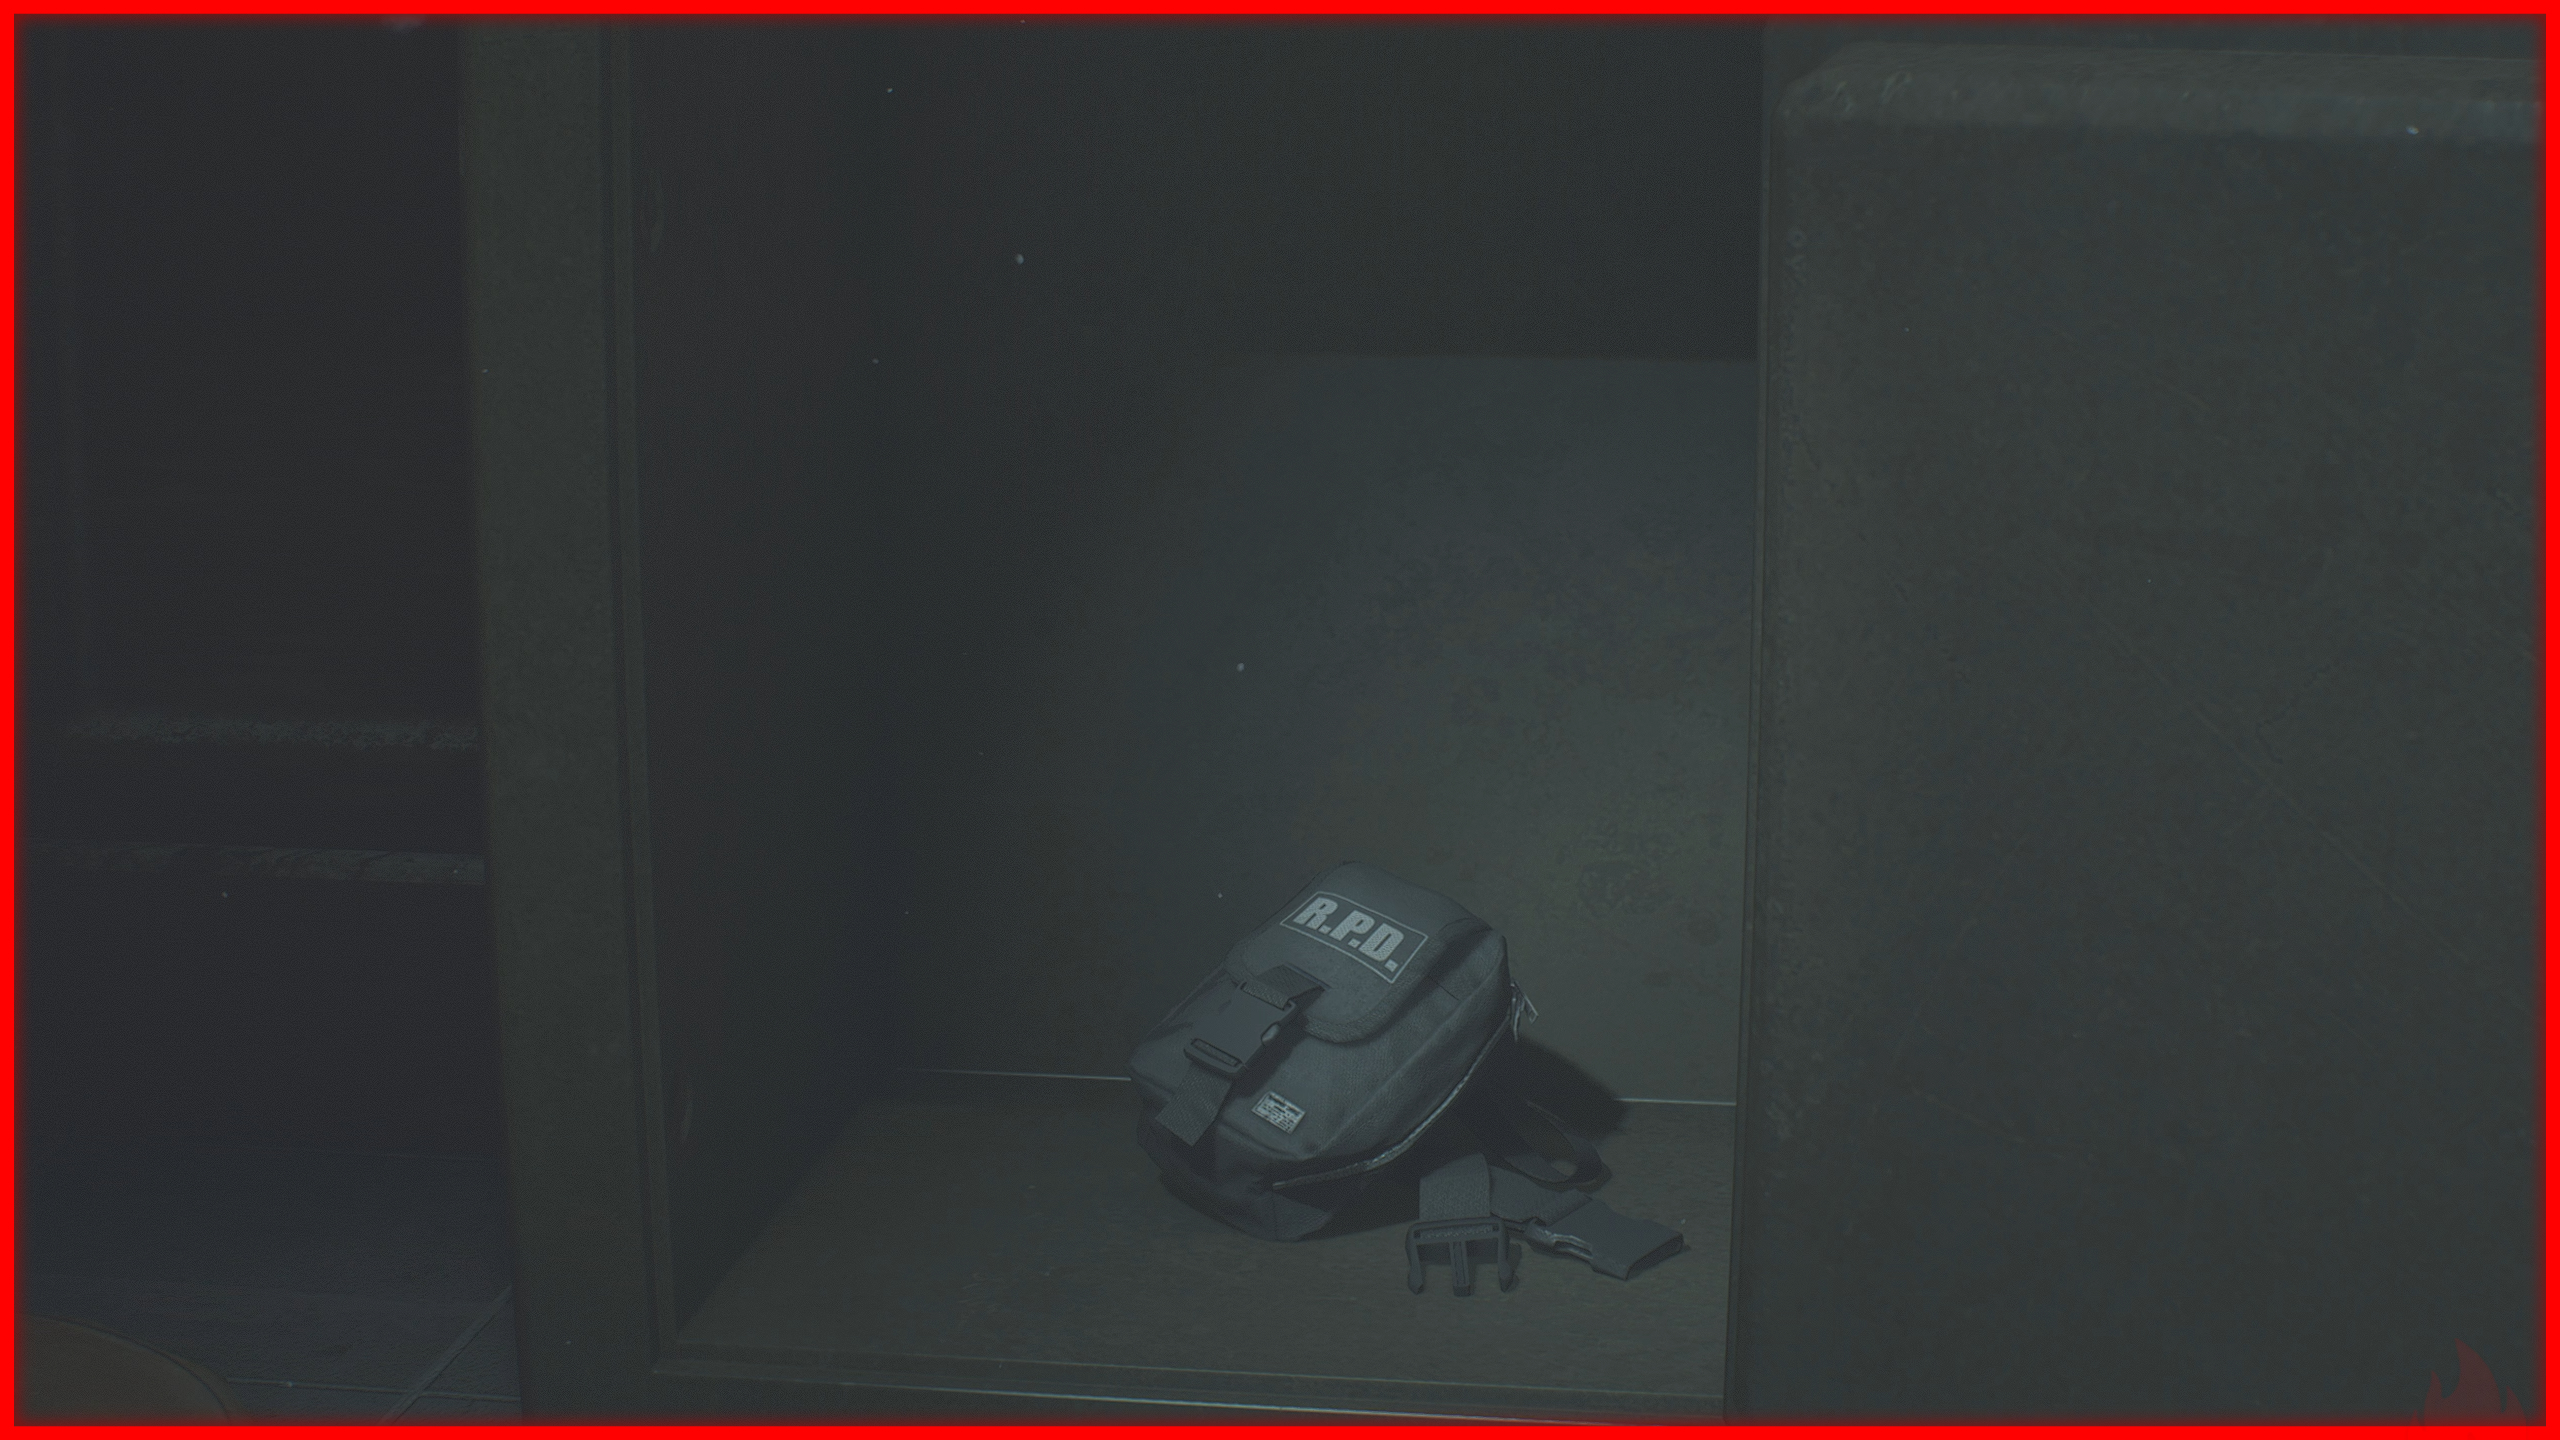
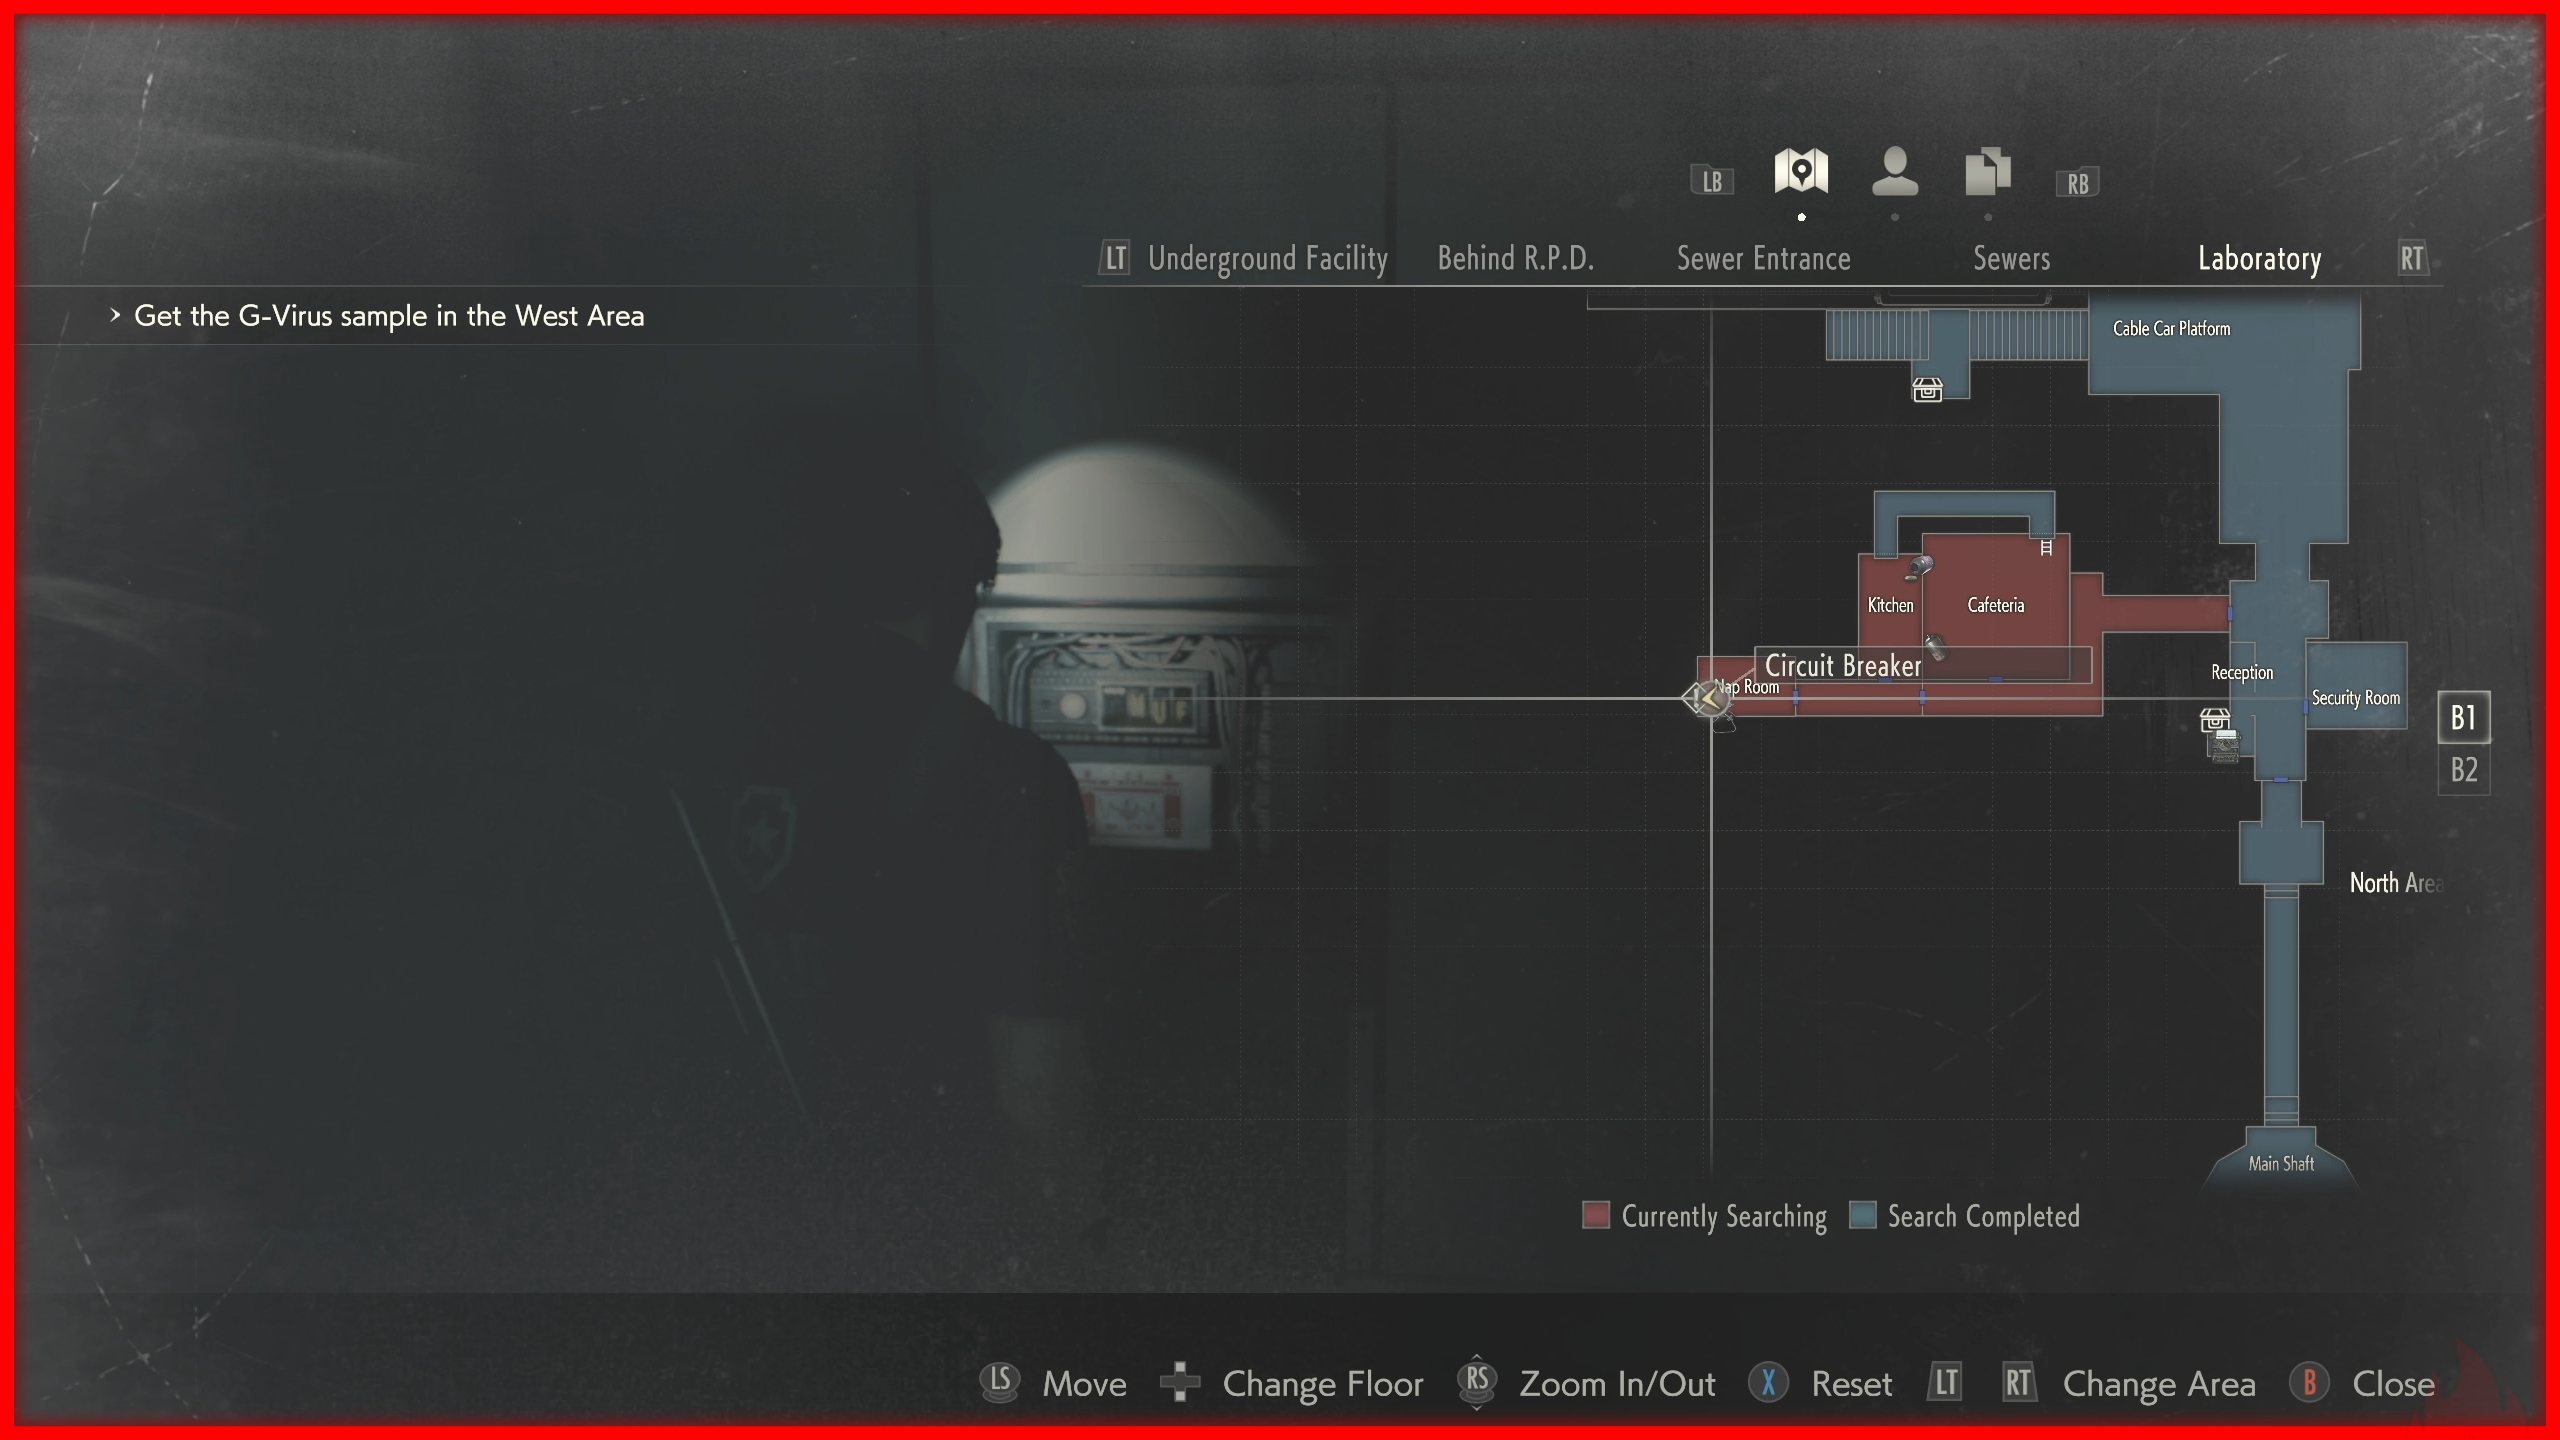
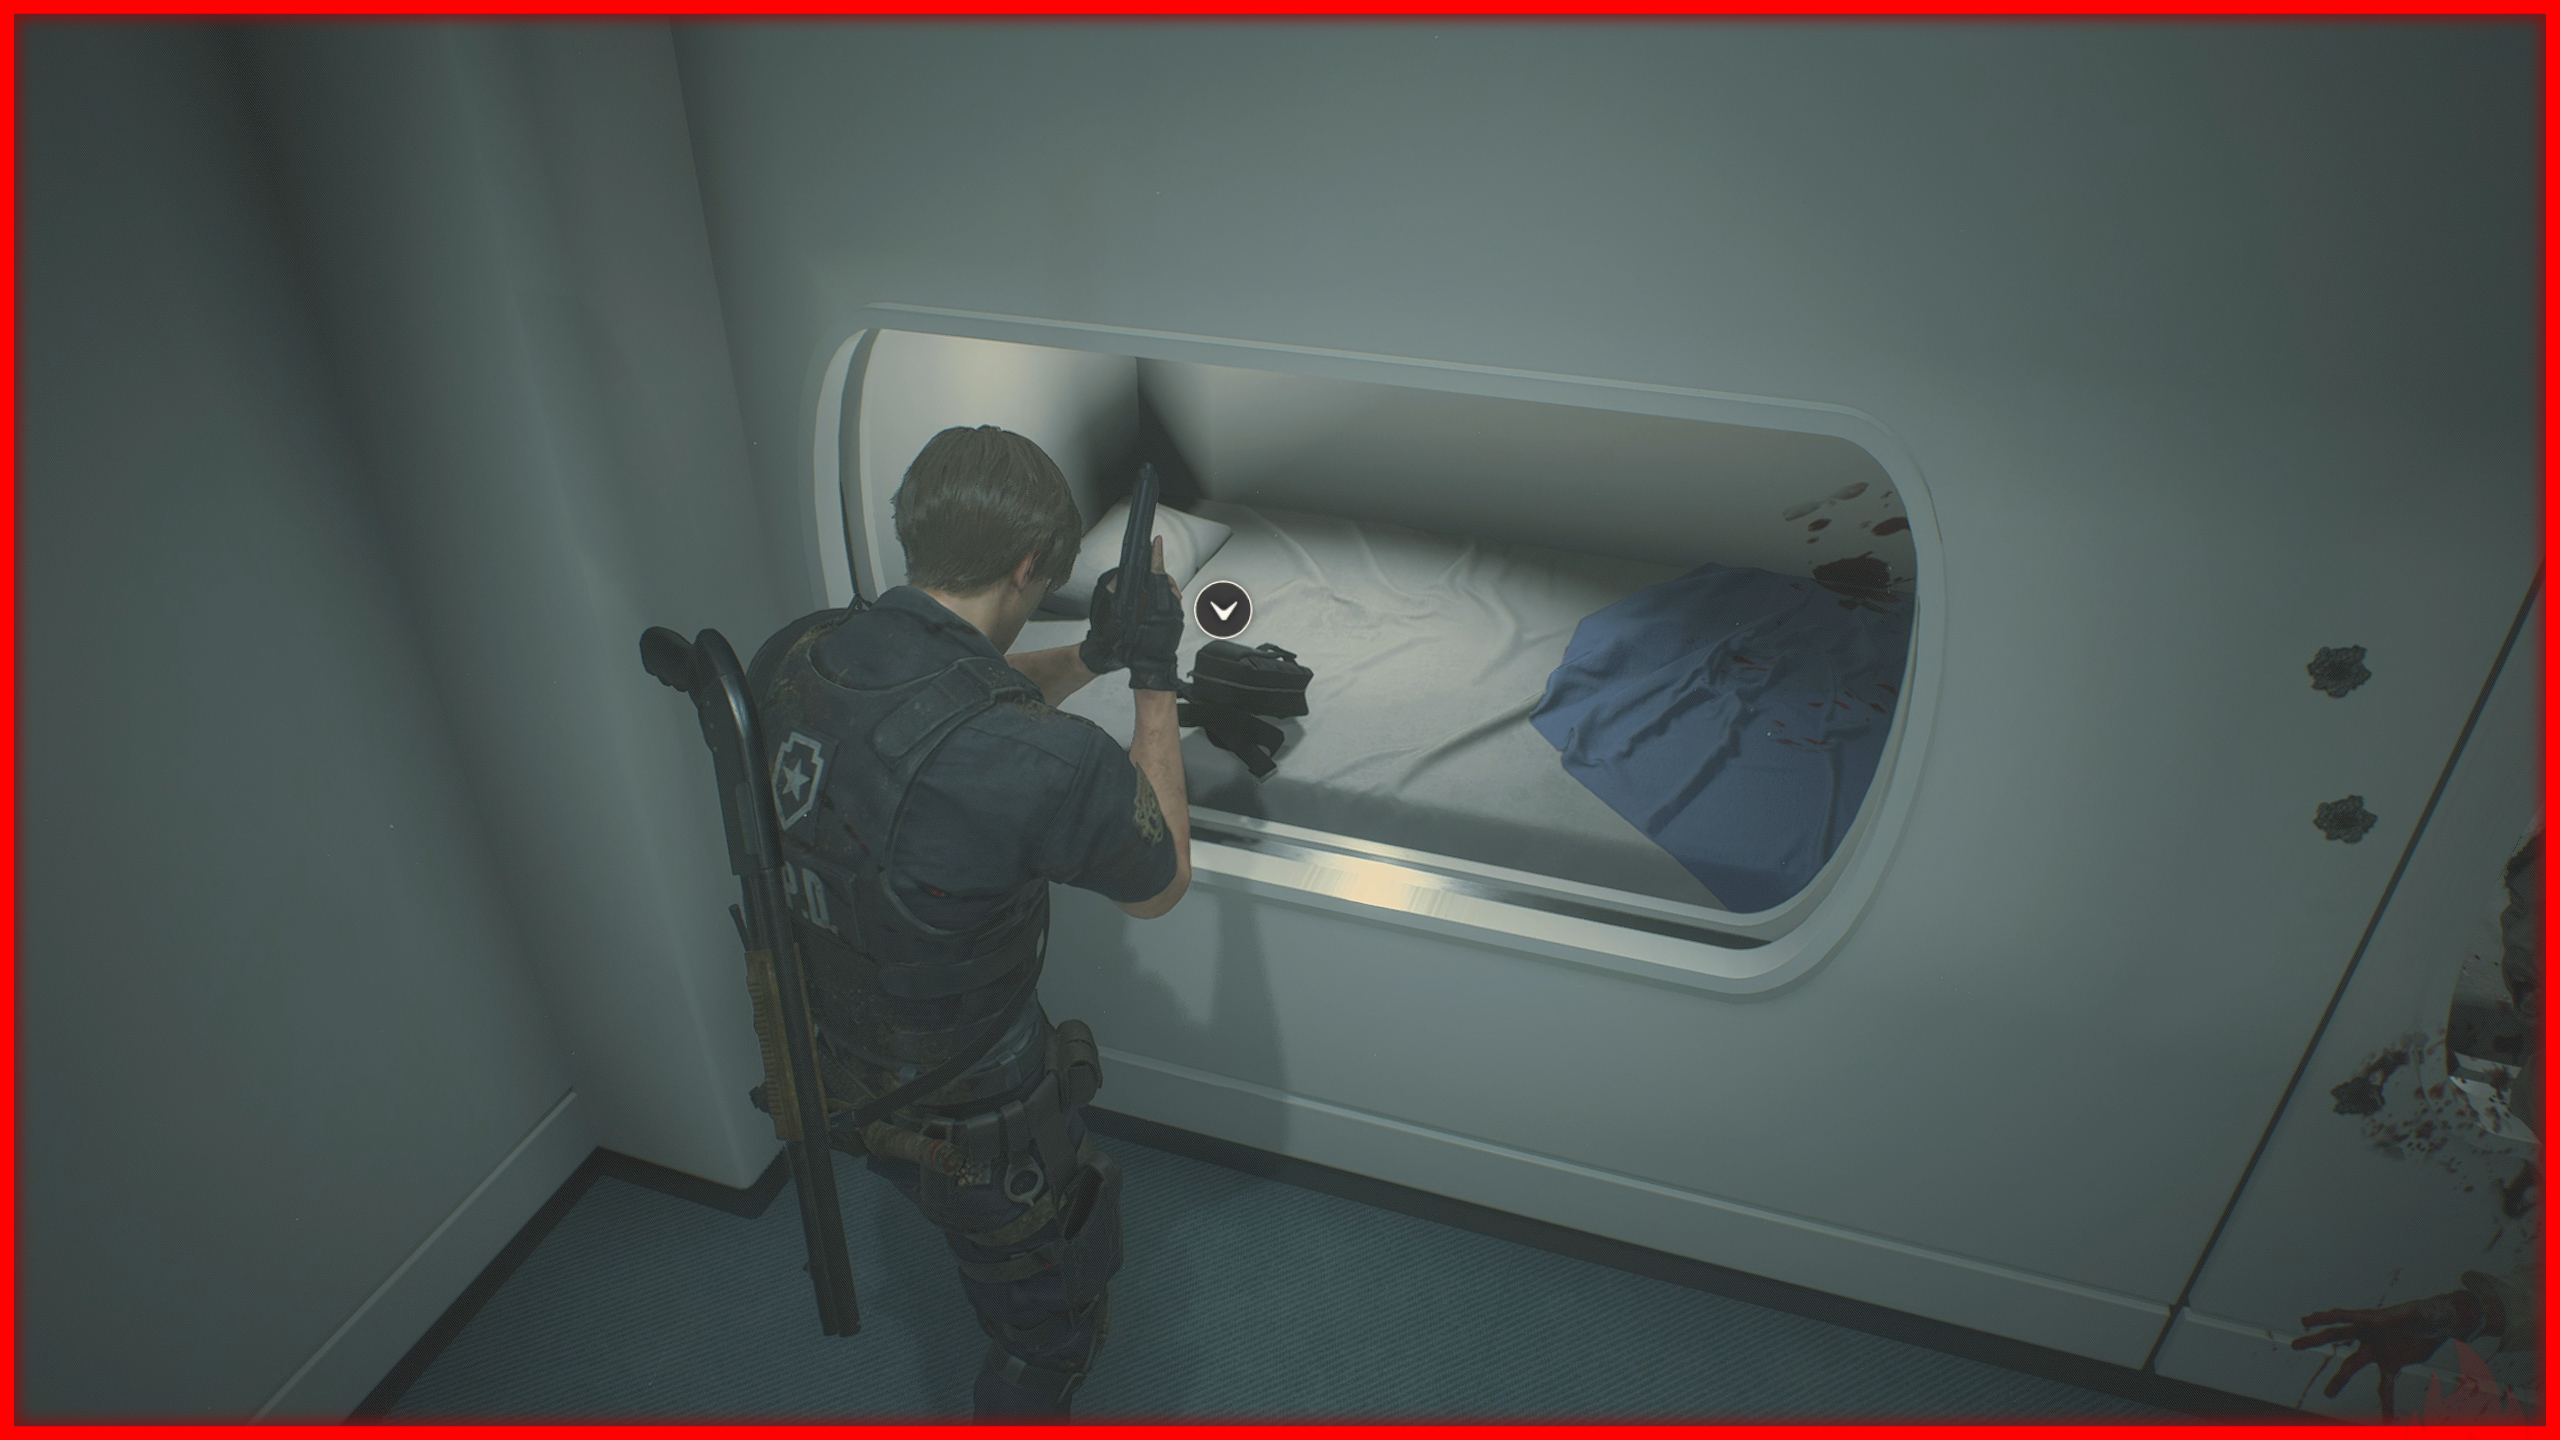
 You must find all 6 Hip Pouches in a single playthrough. This achievement cannot be obtained on Hardcore difficulty.
Below are the Hip Pouch locations for Scenario A.
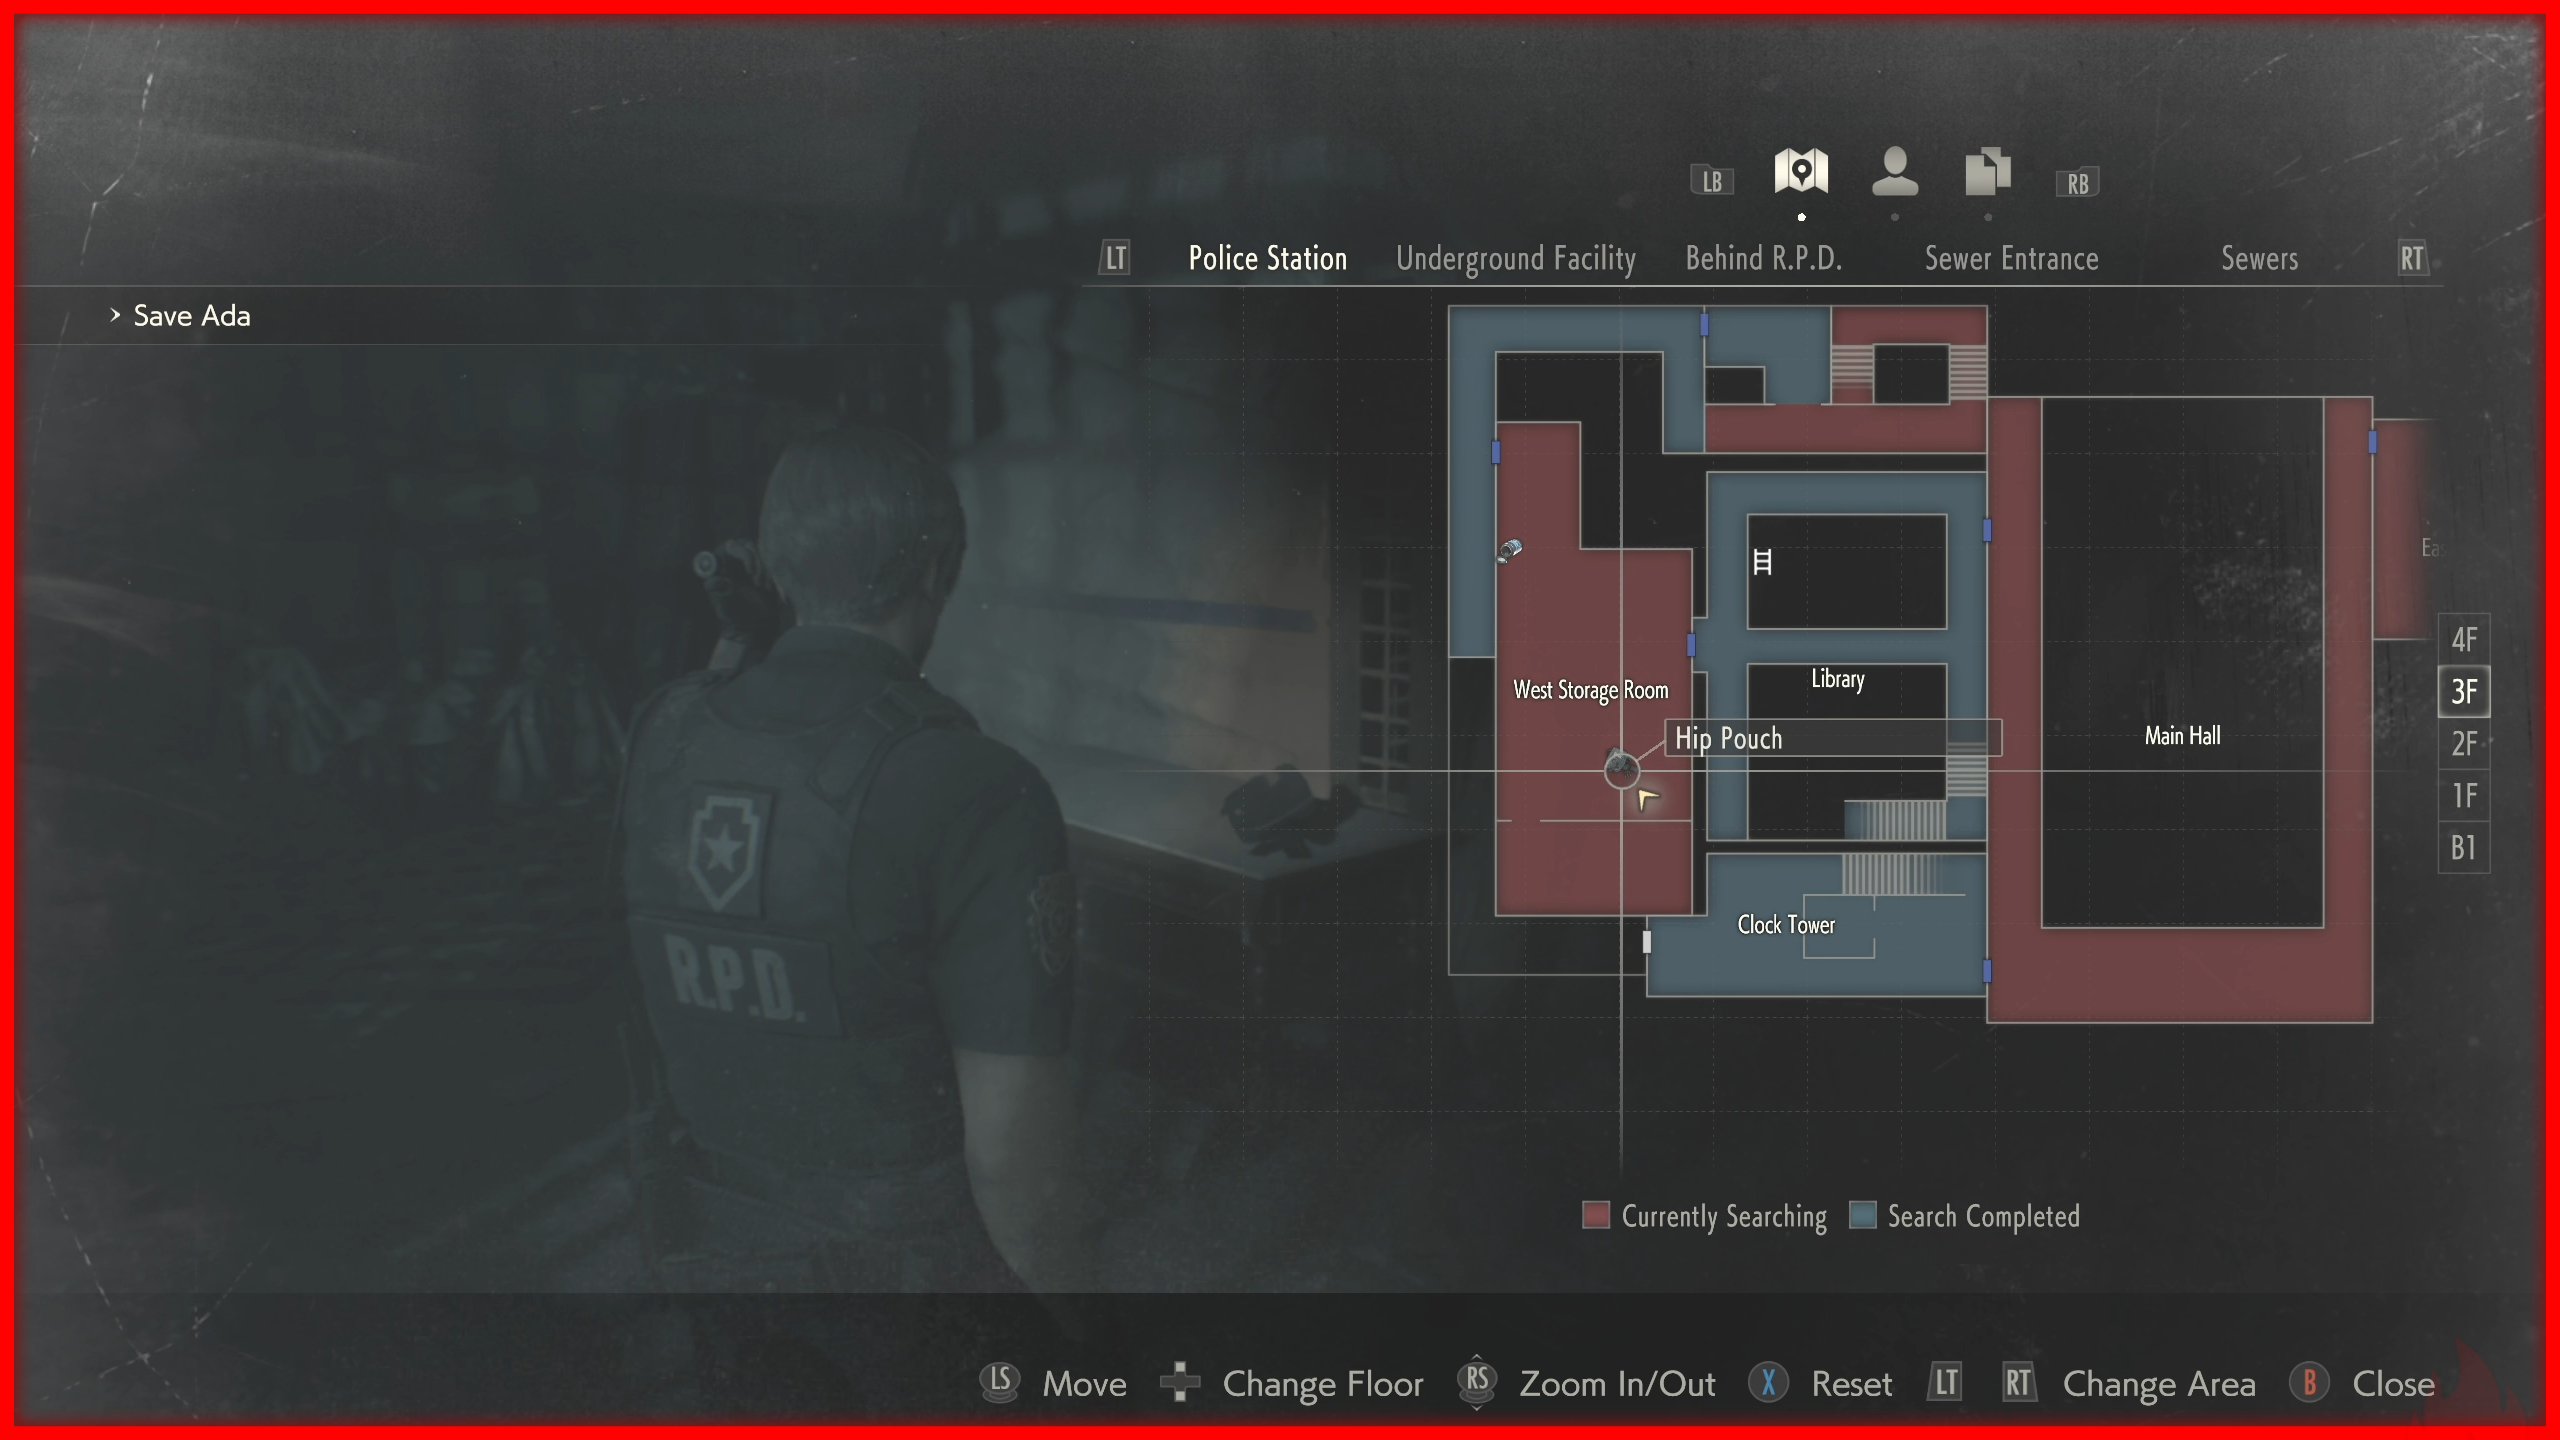
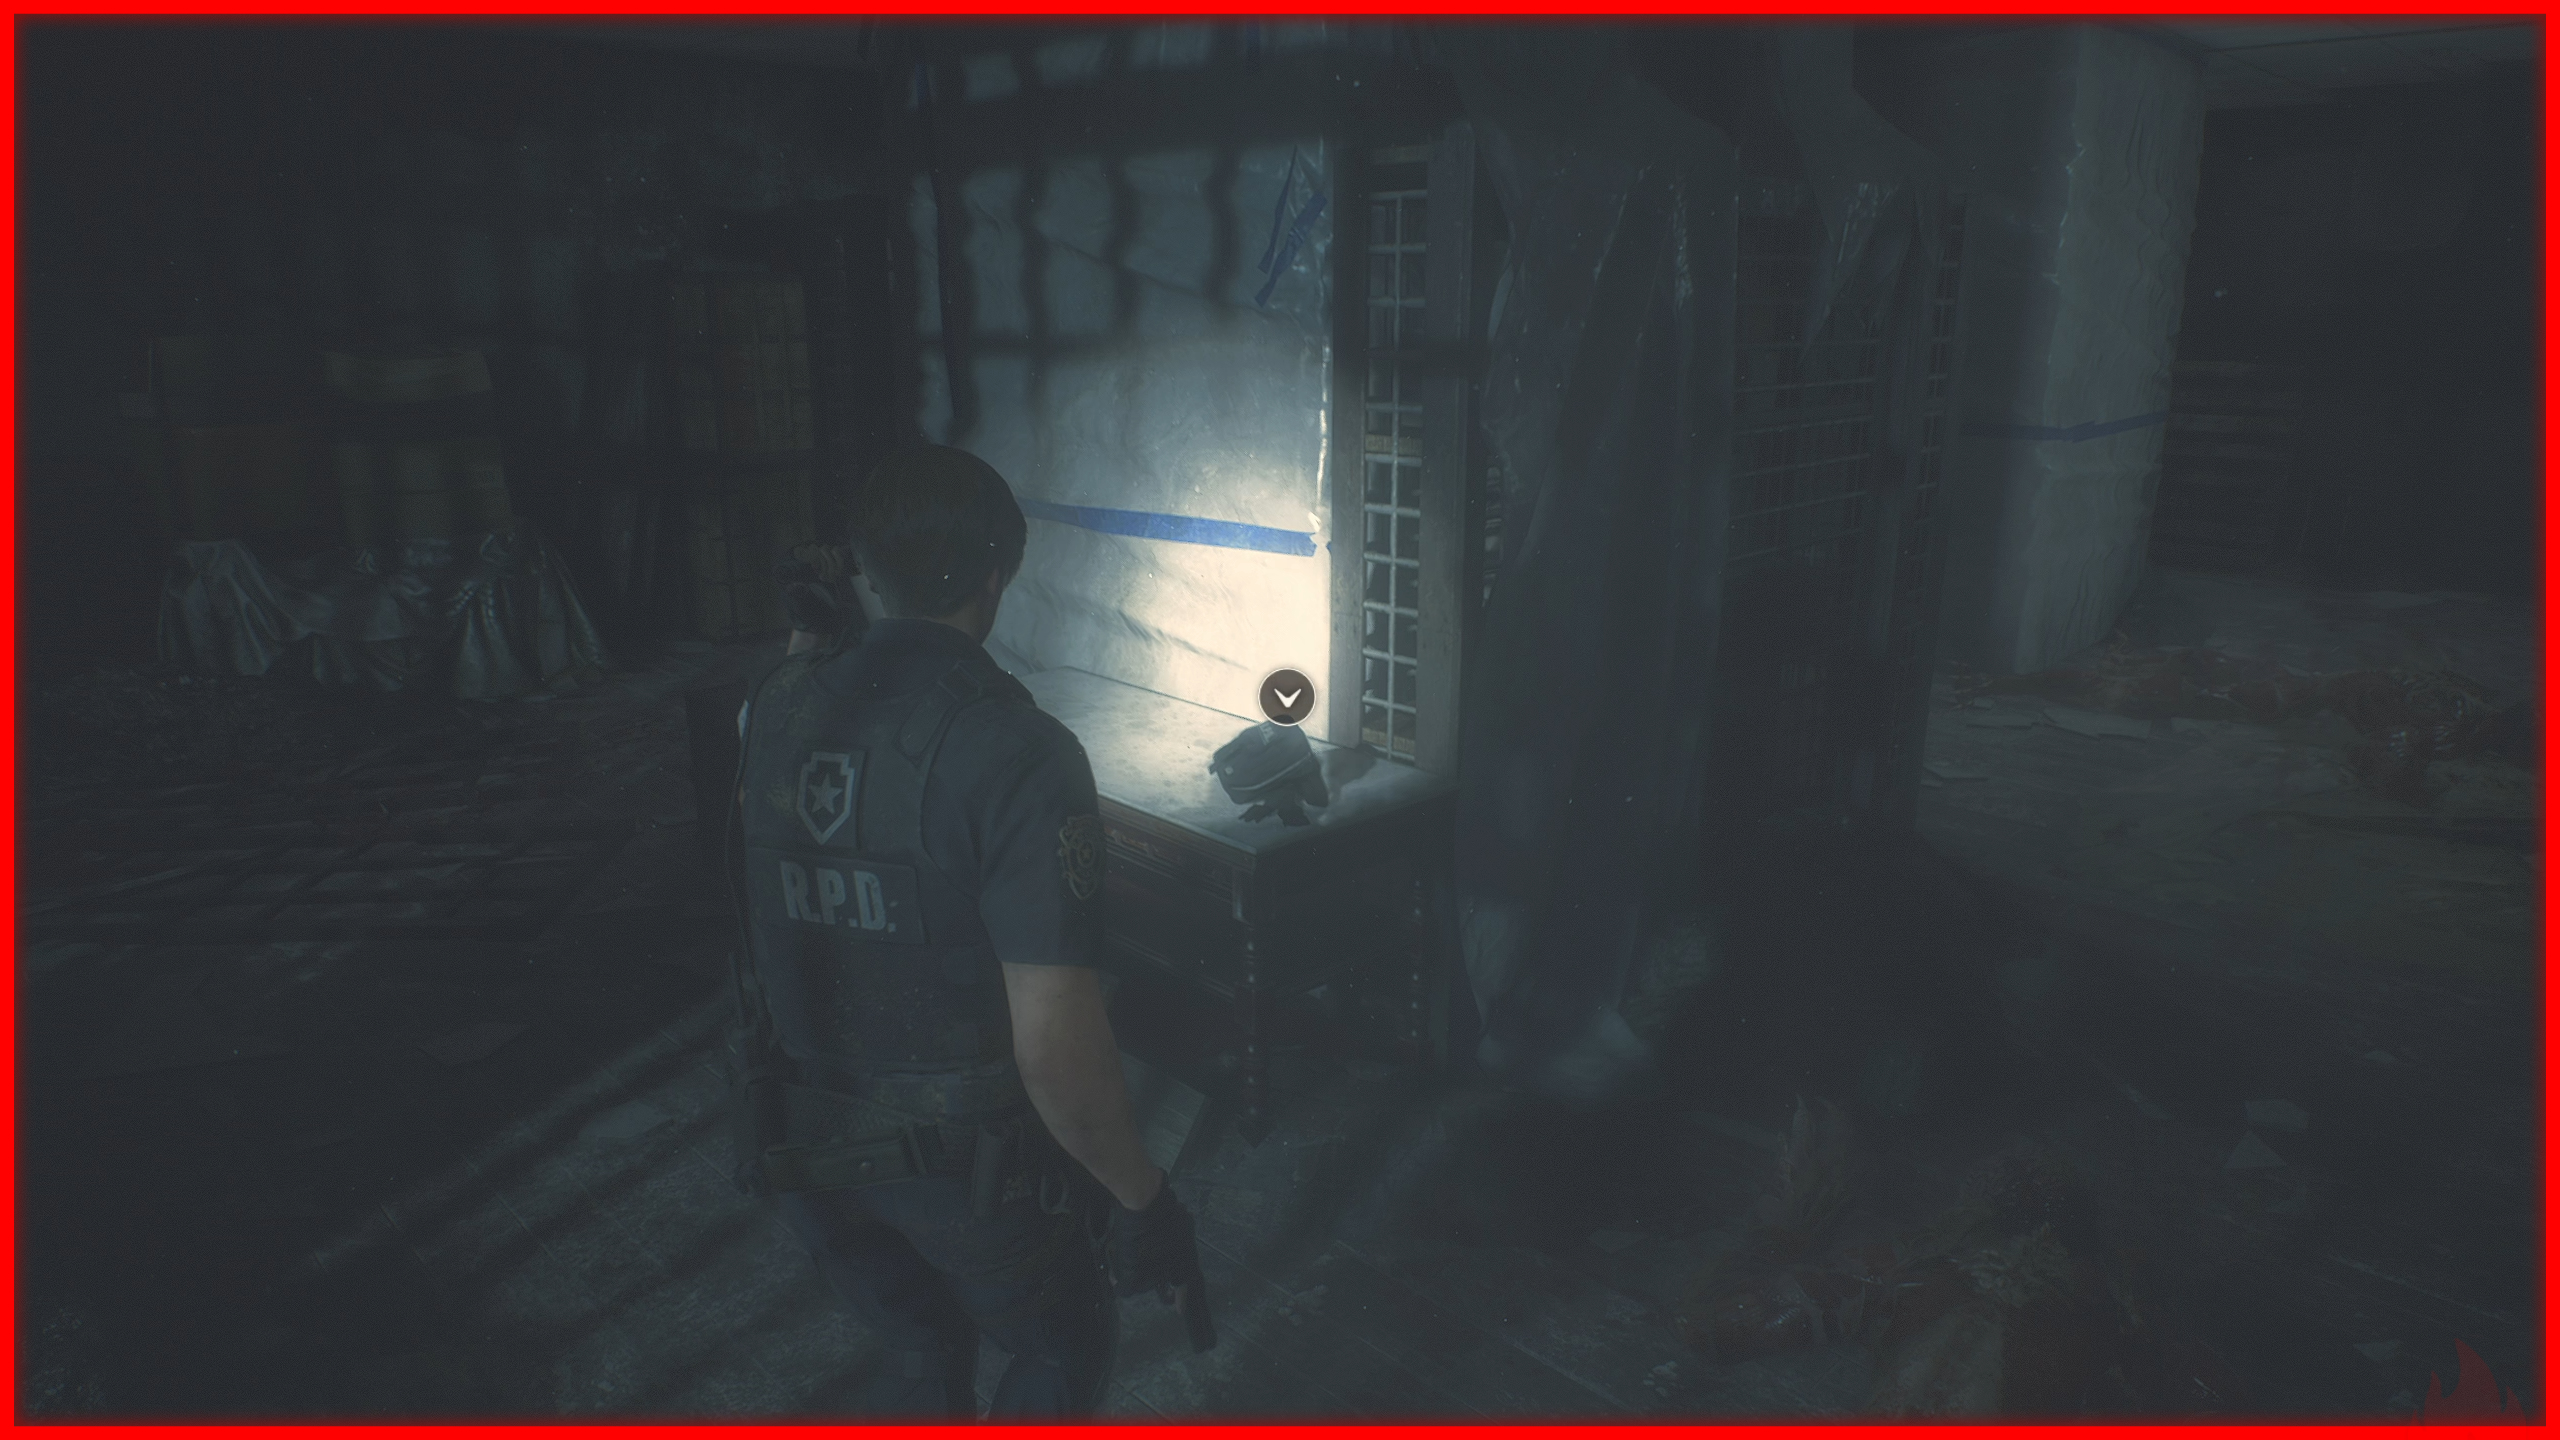
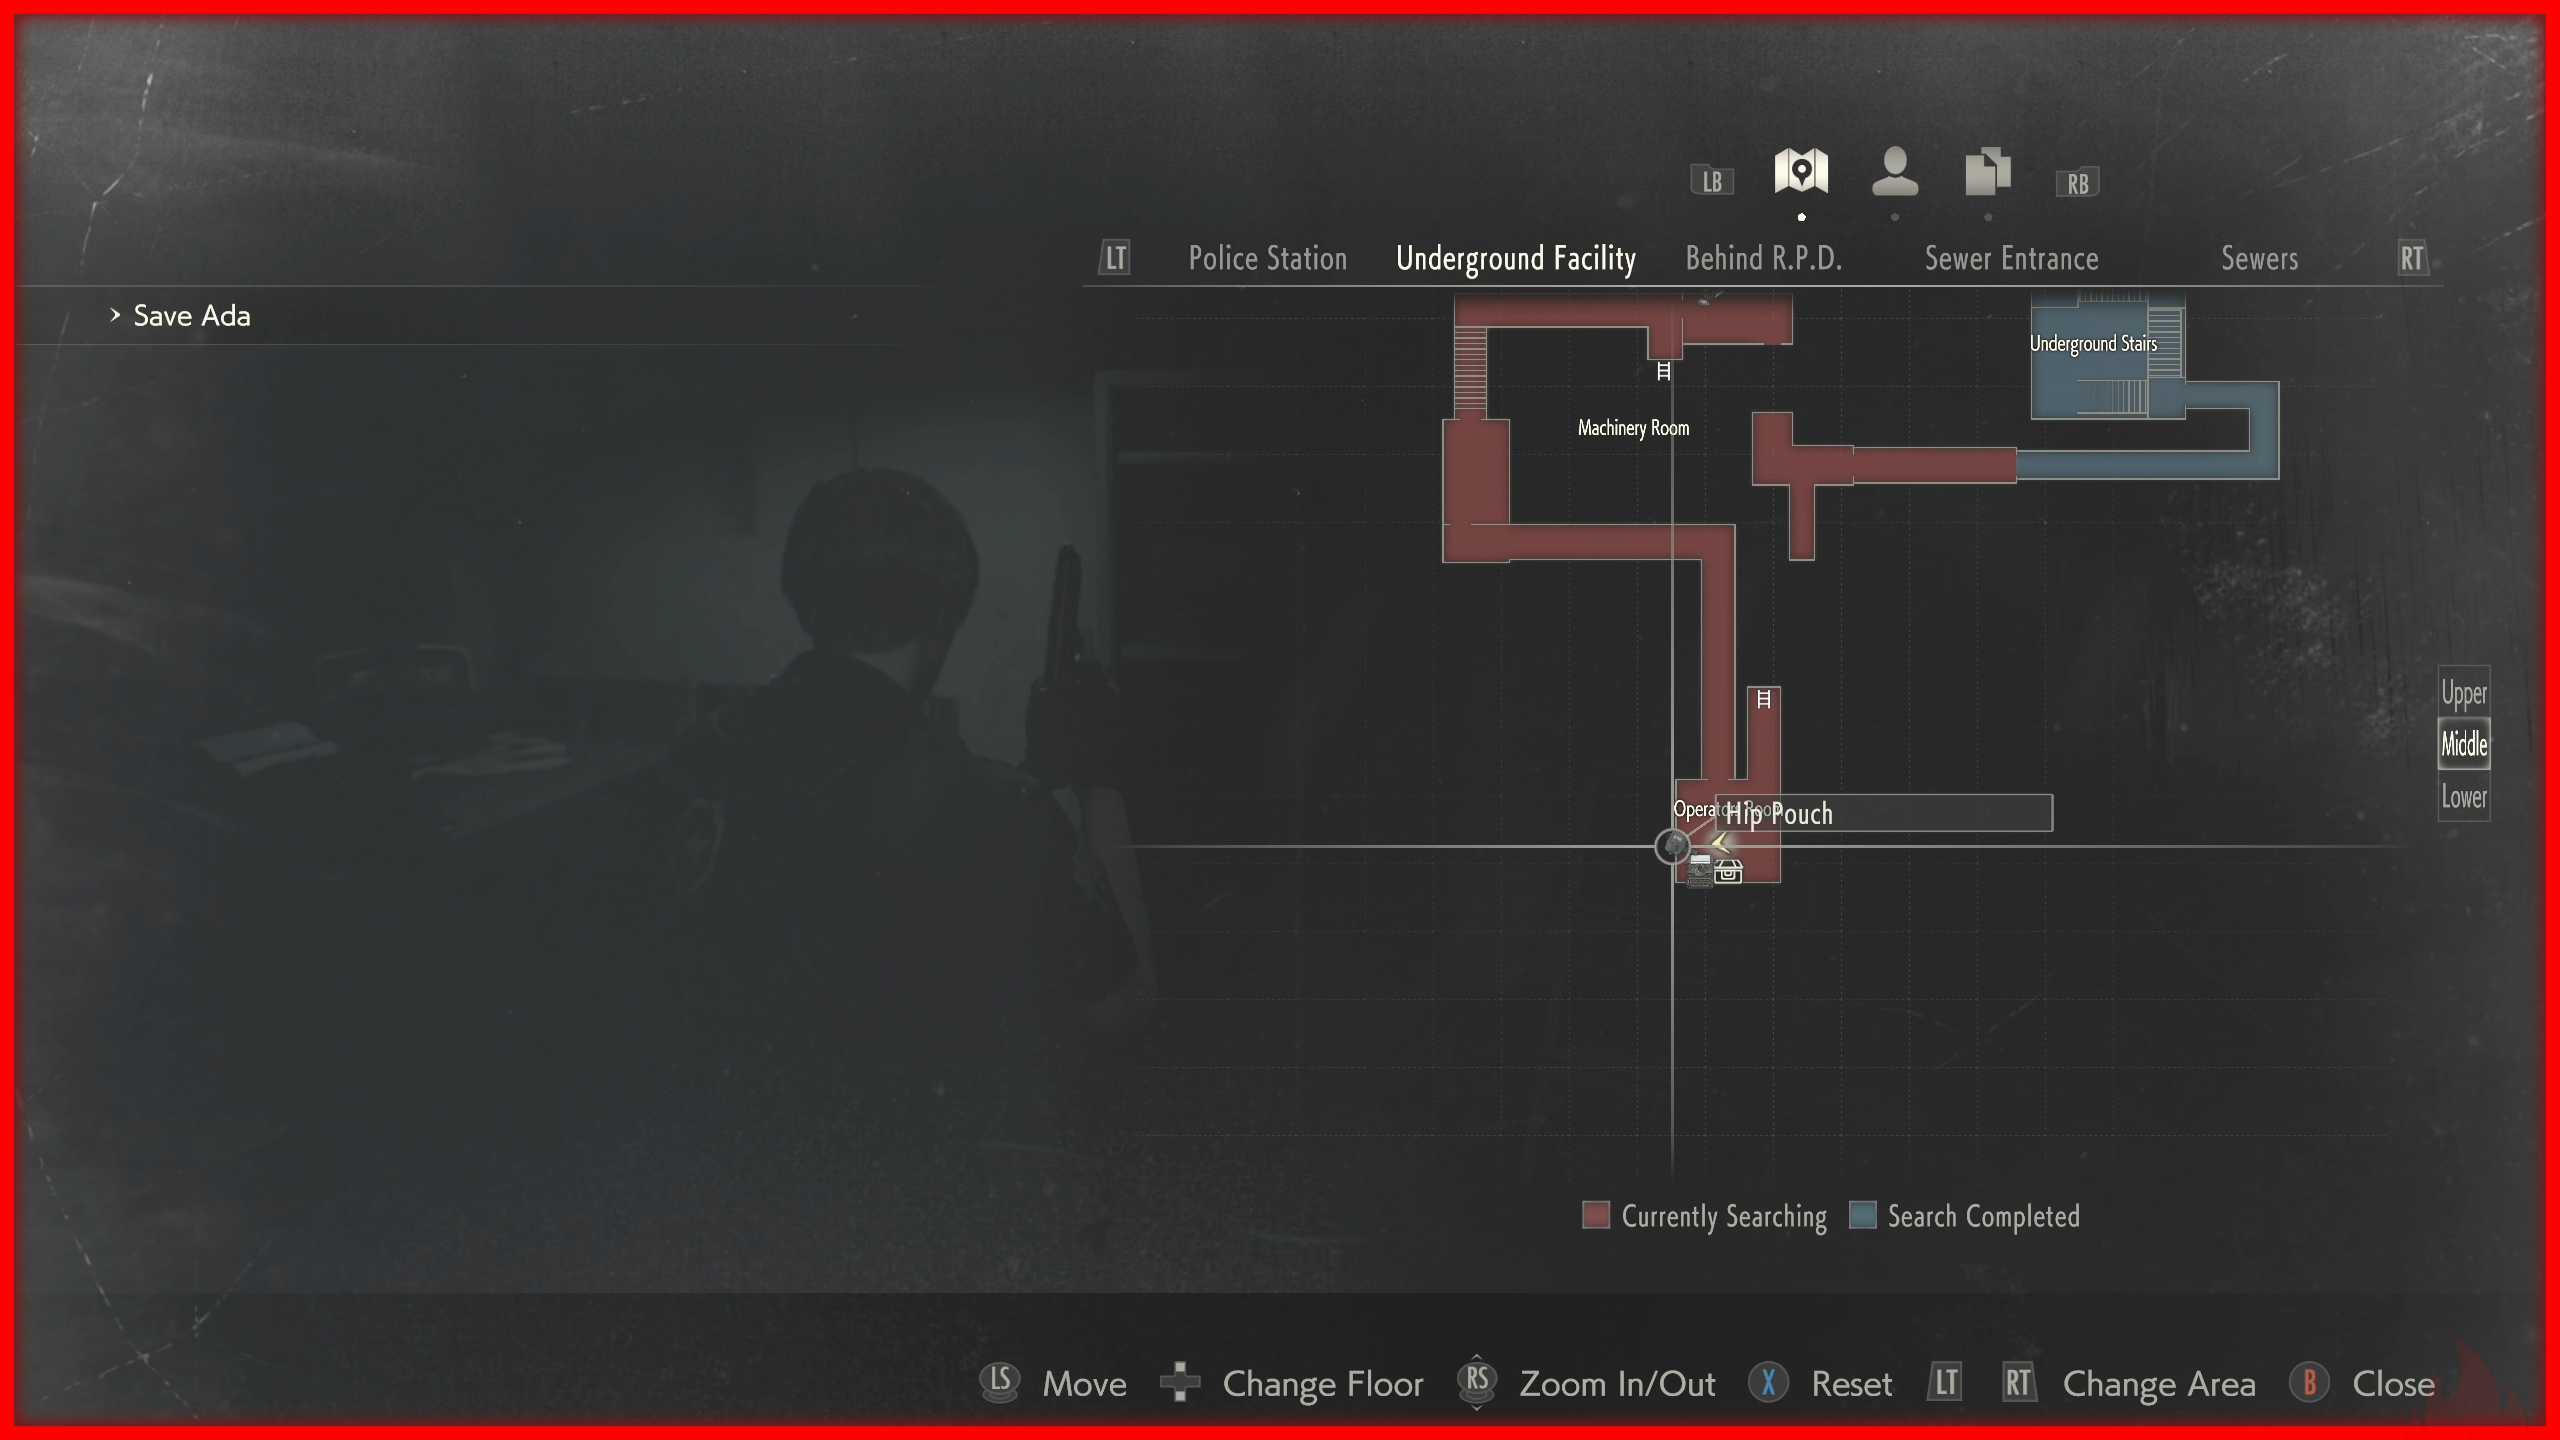
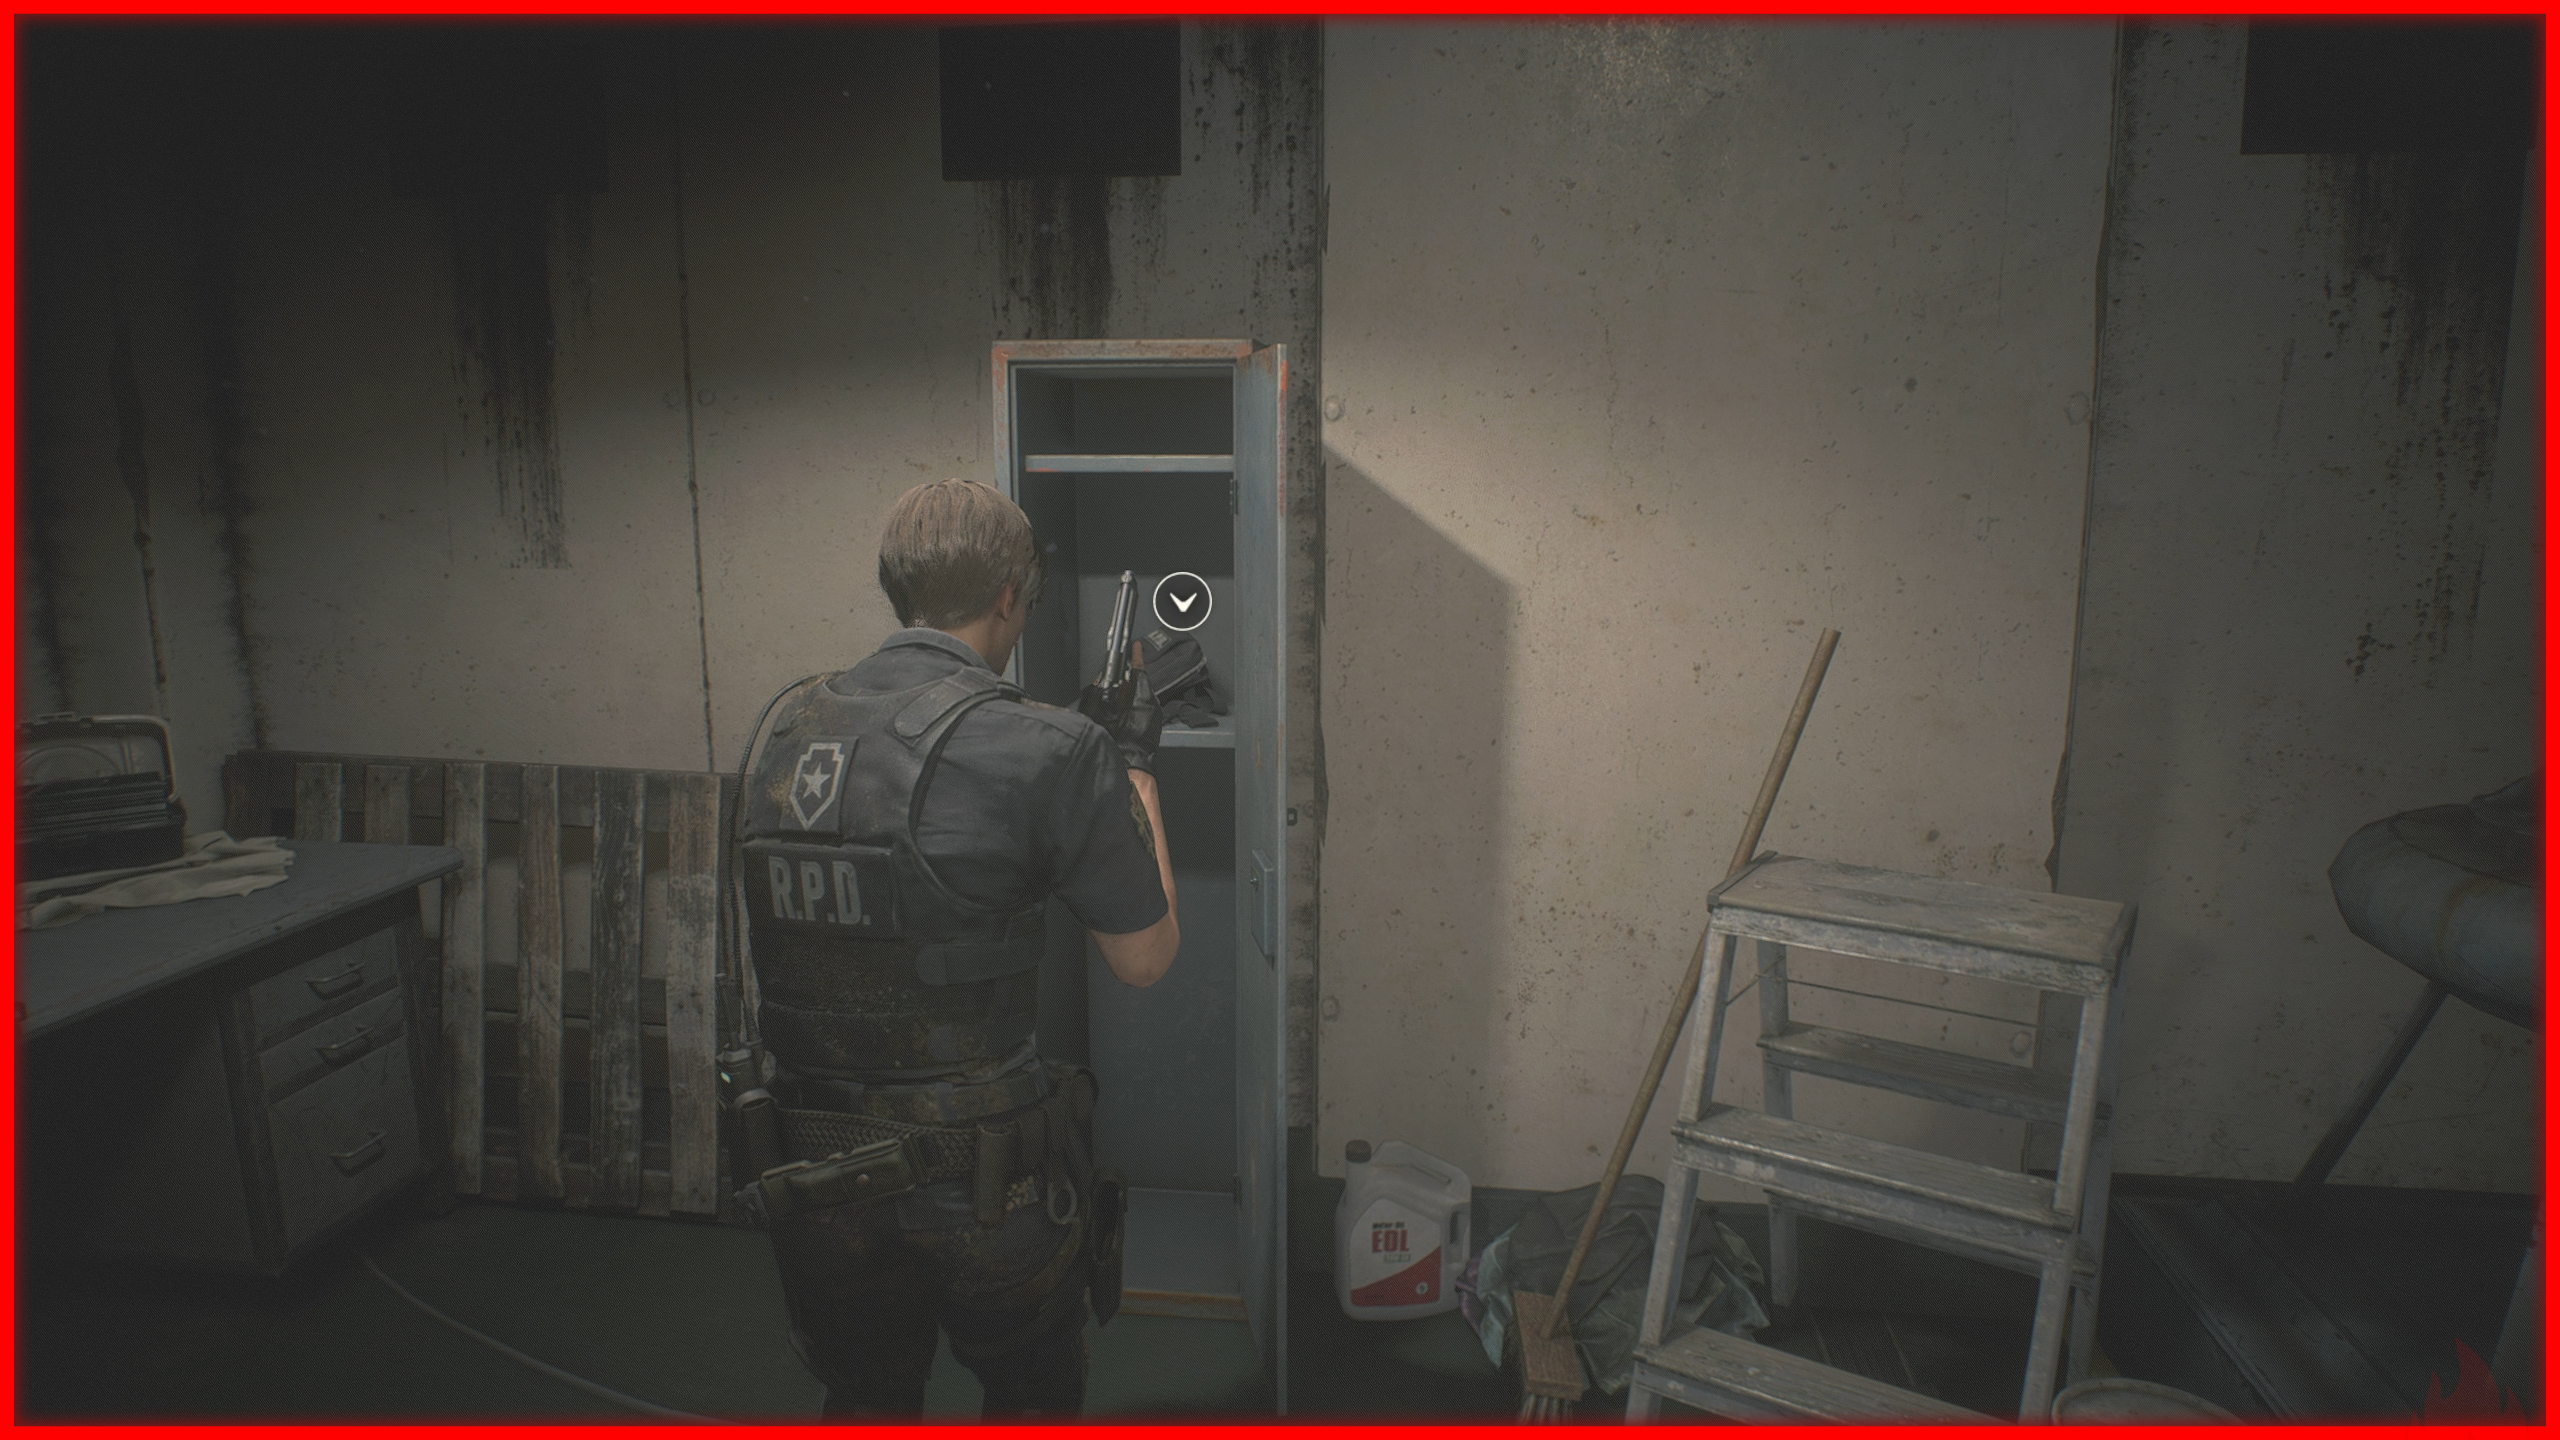
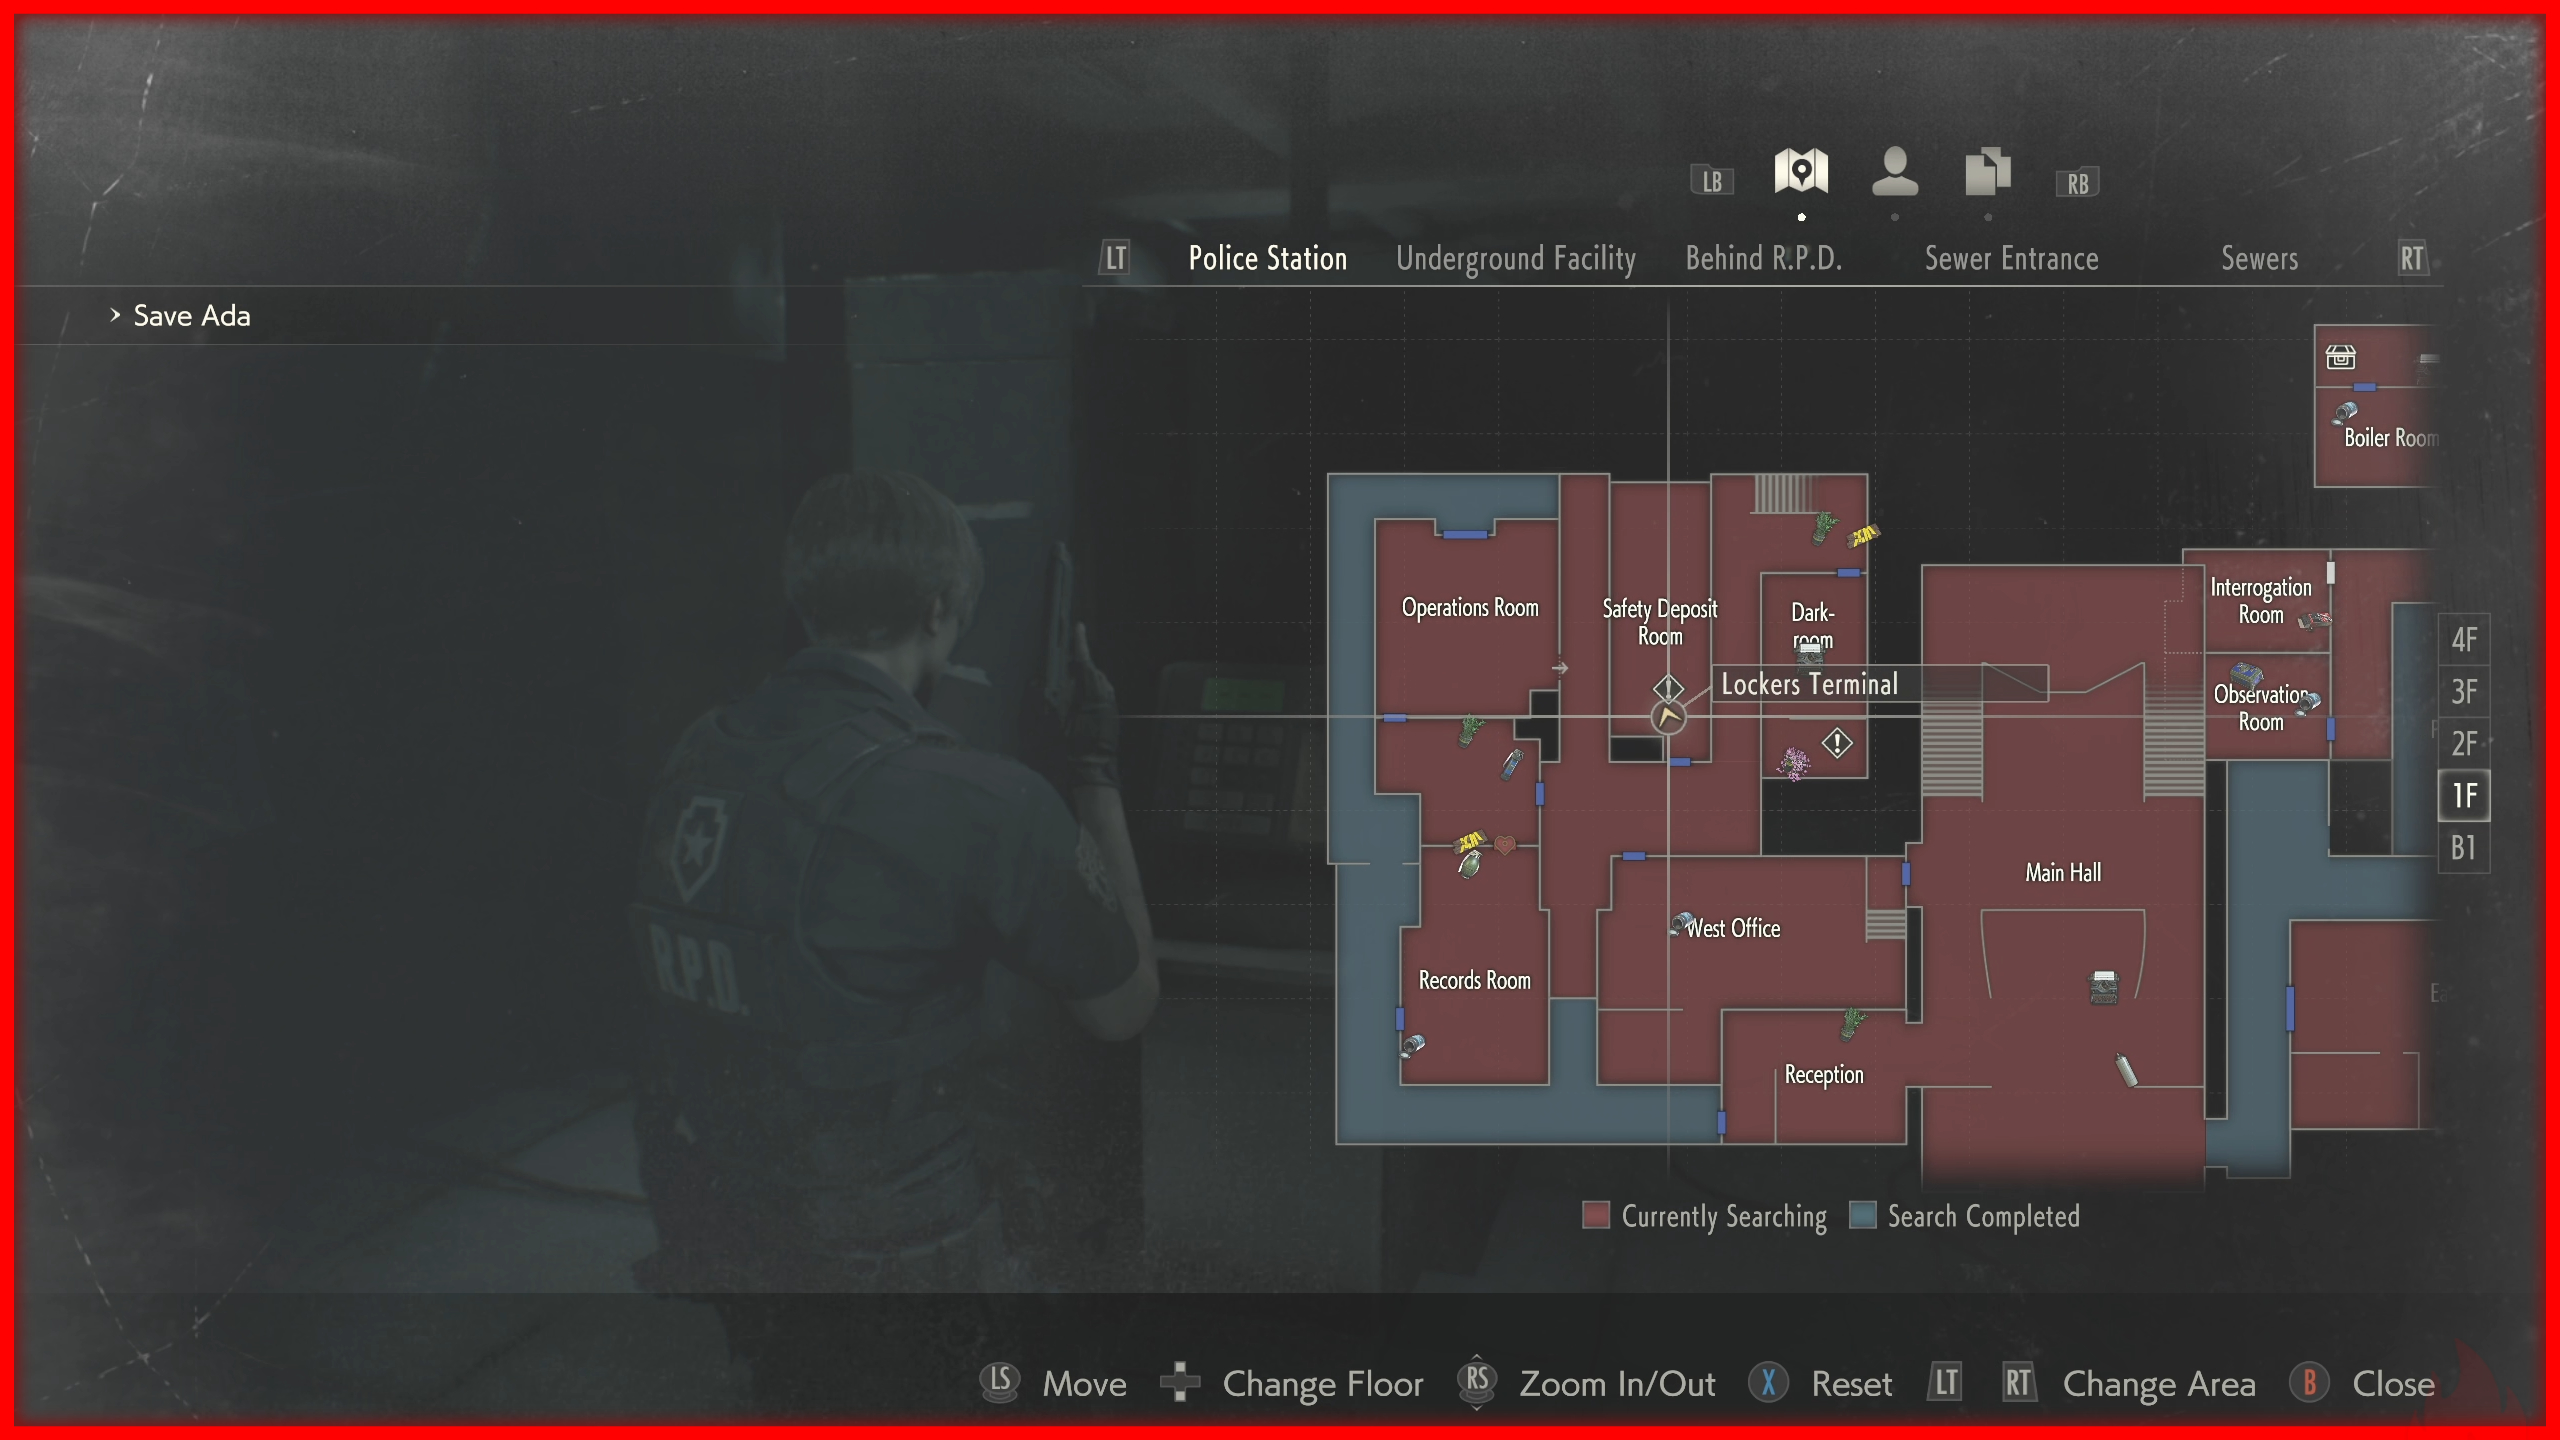
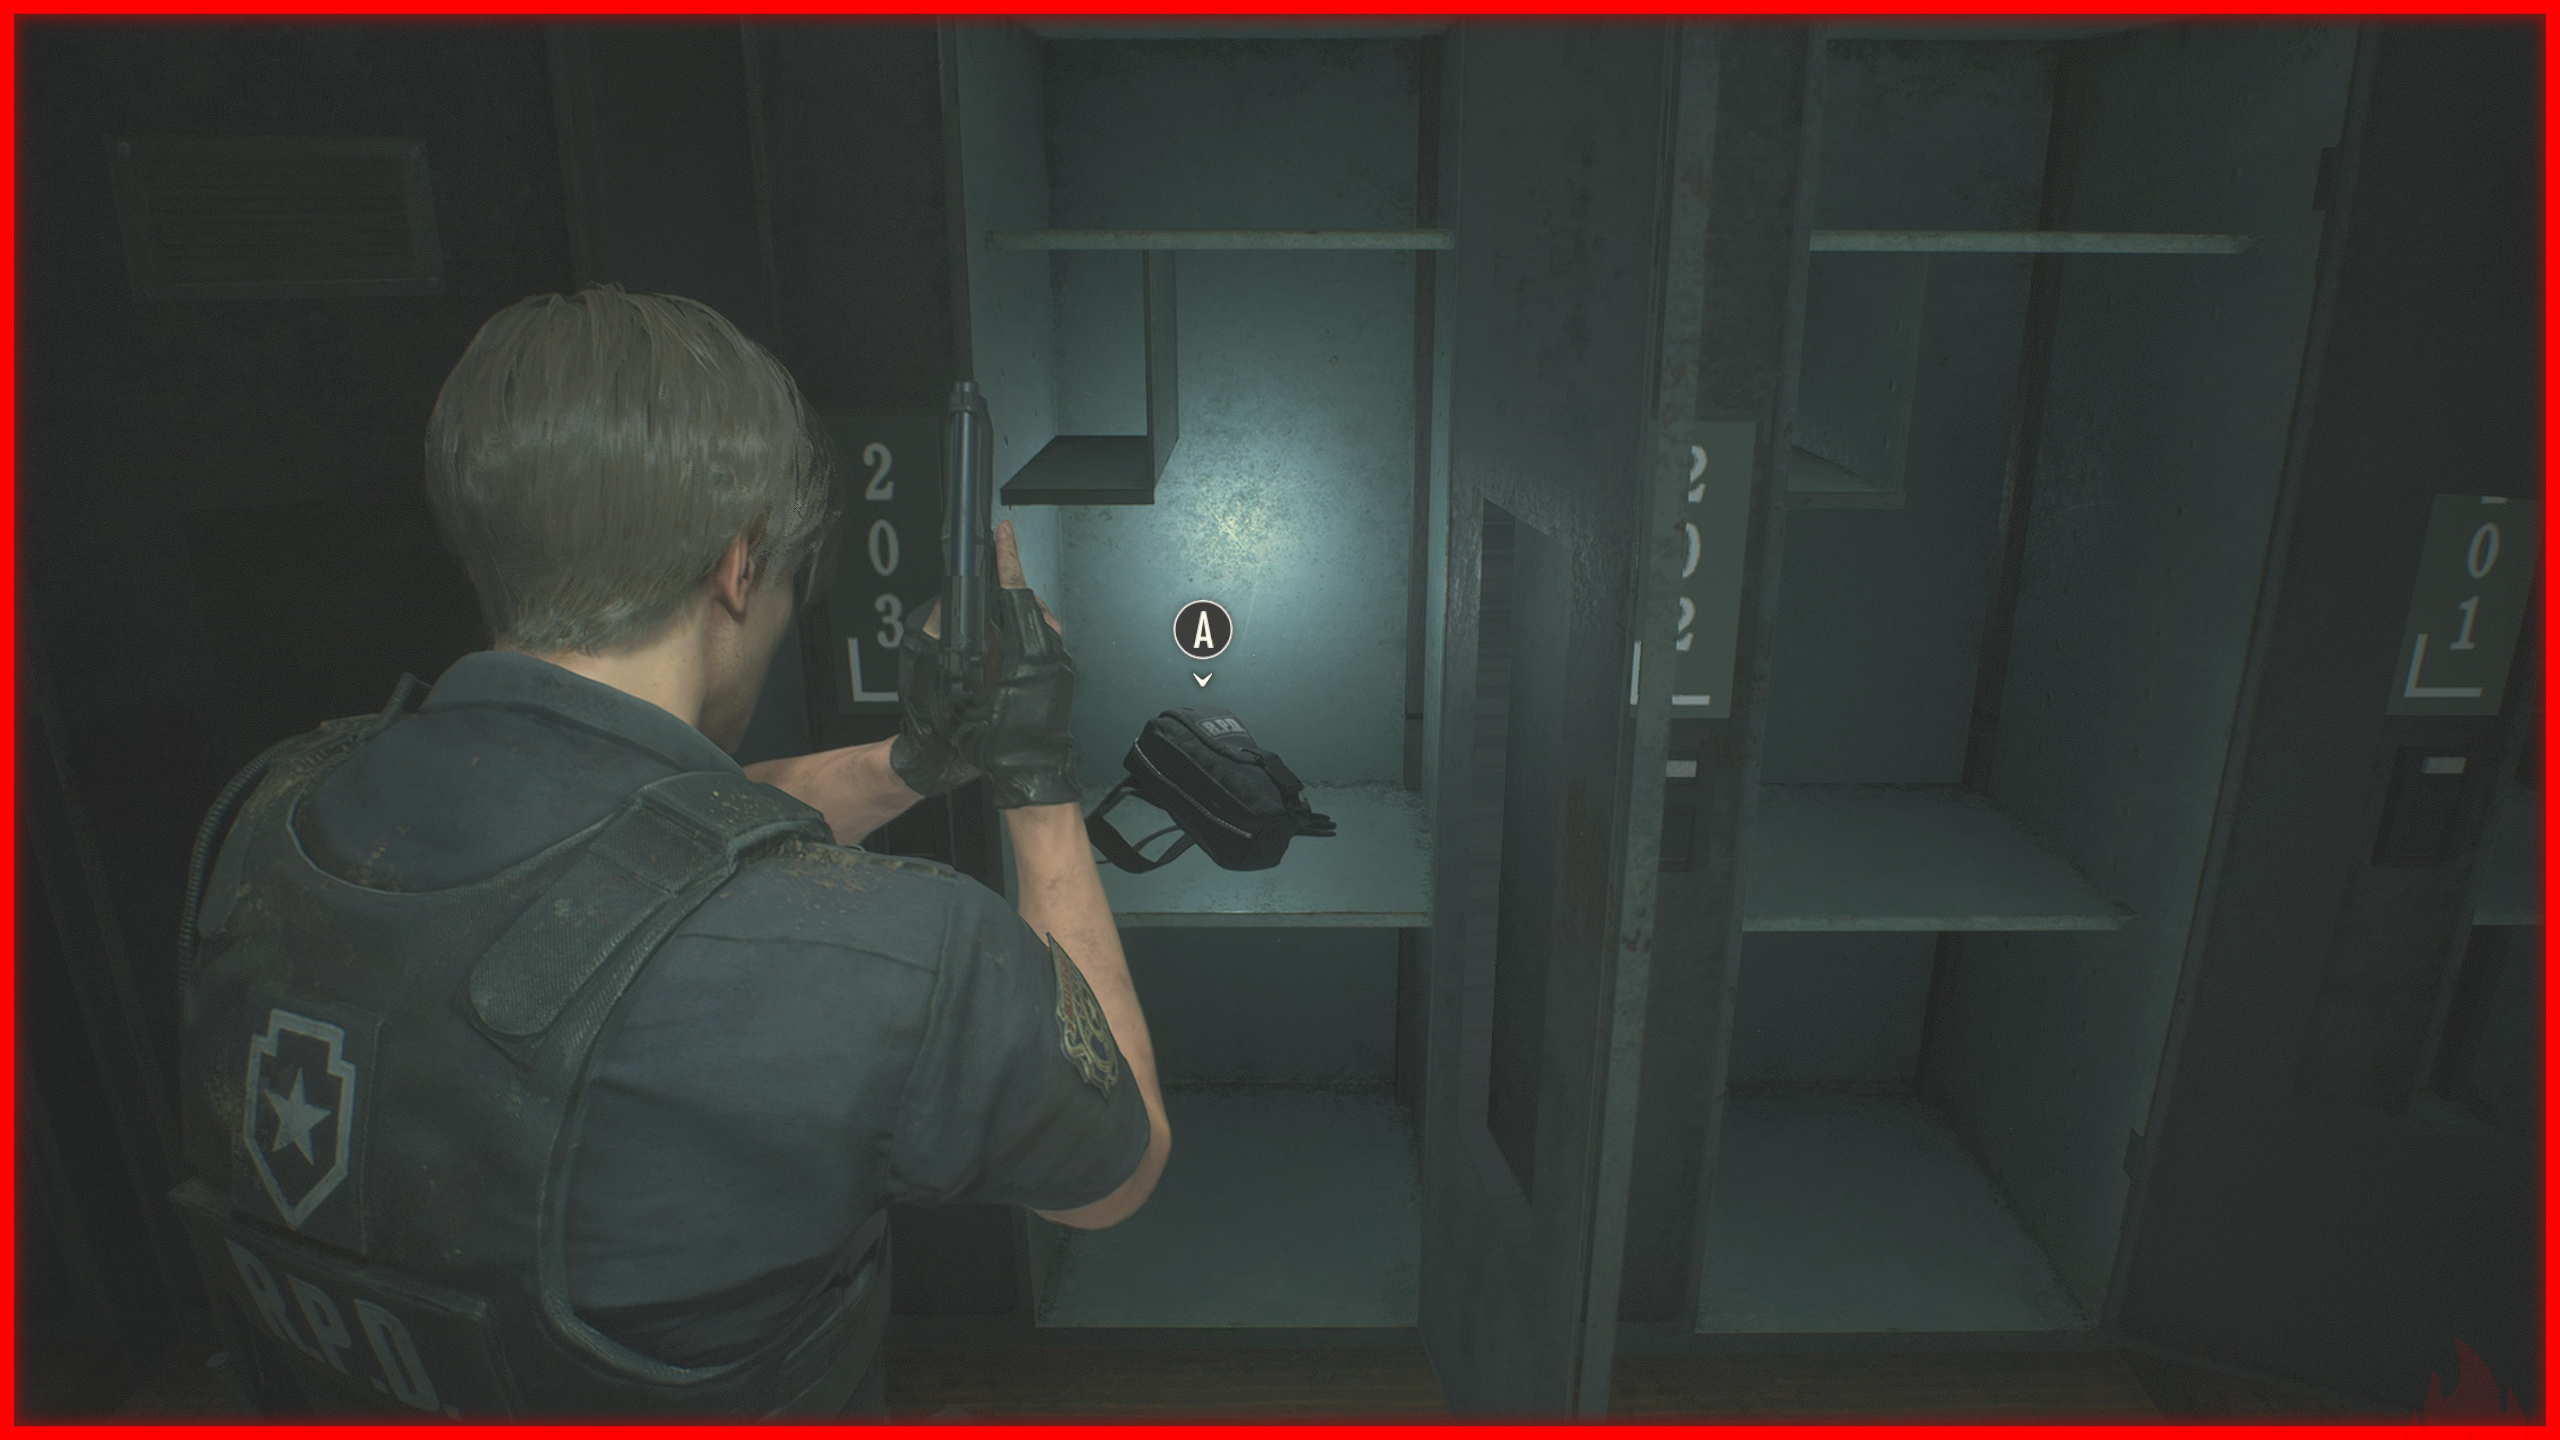
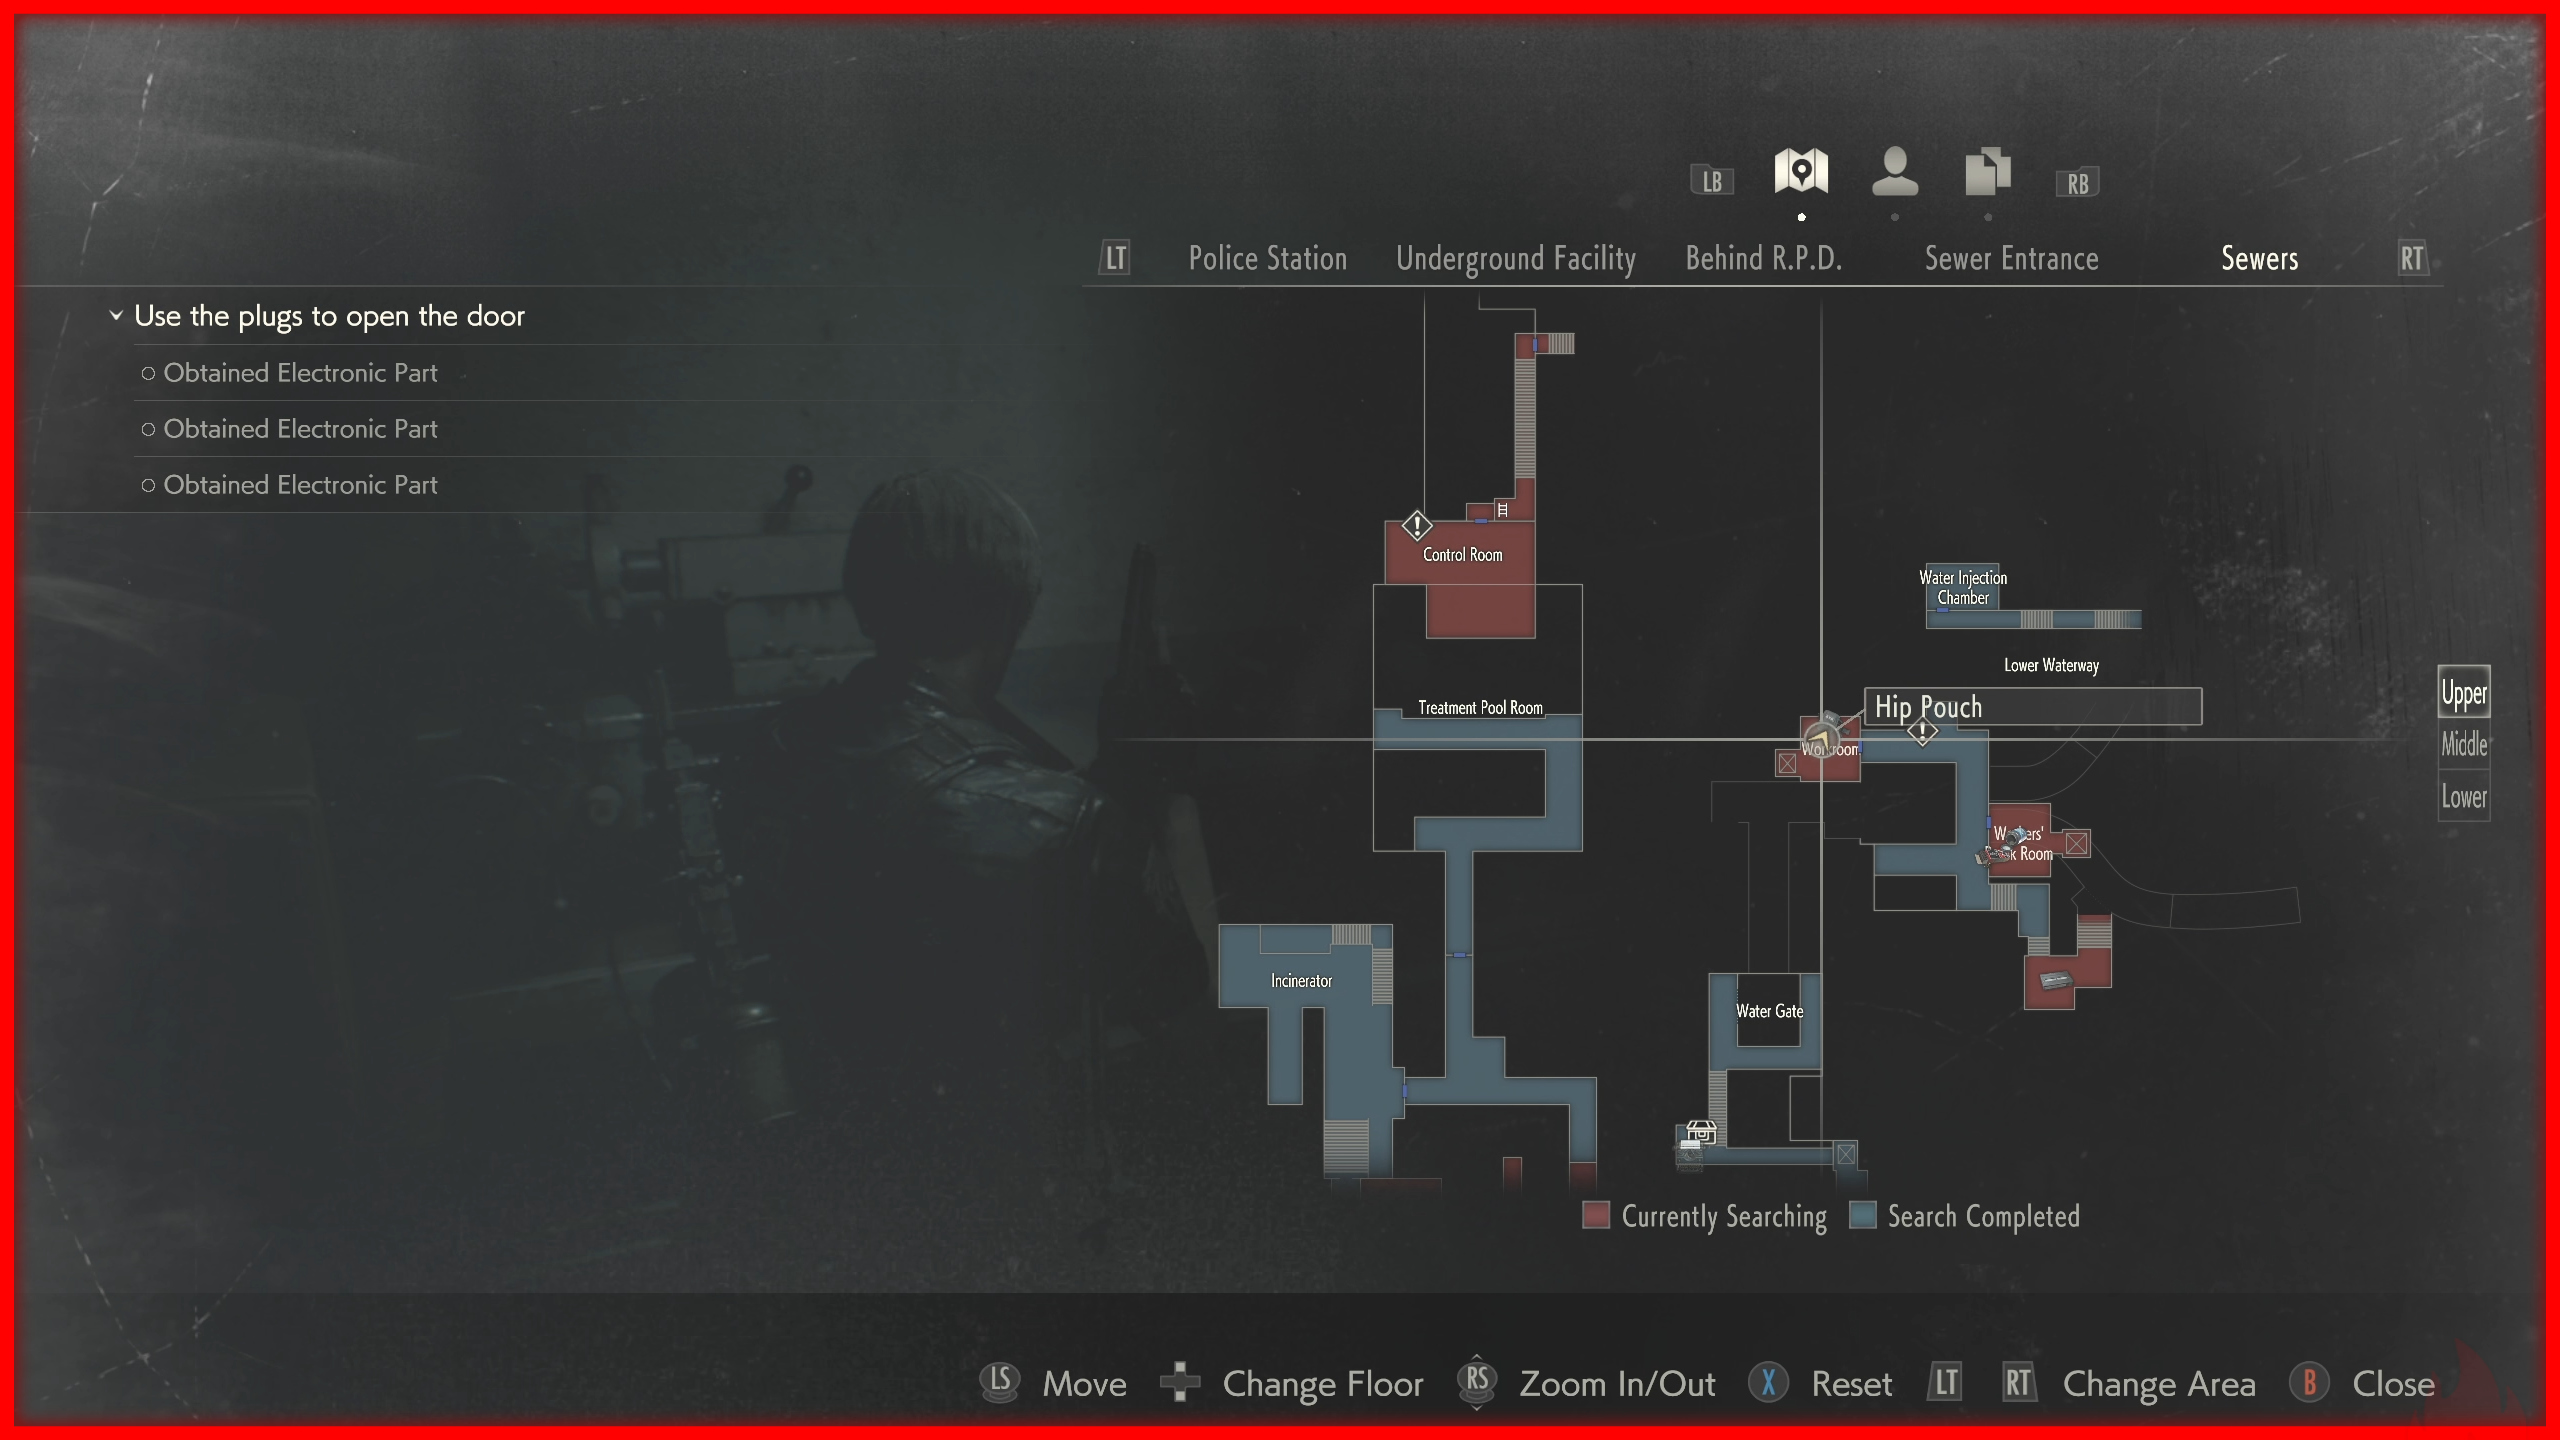
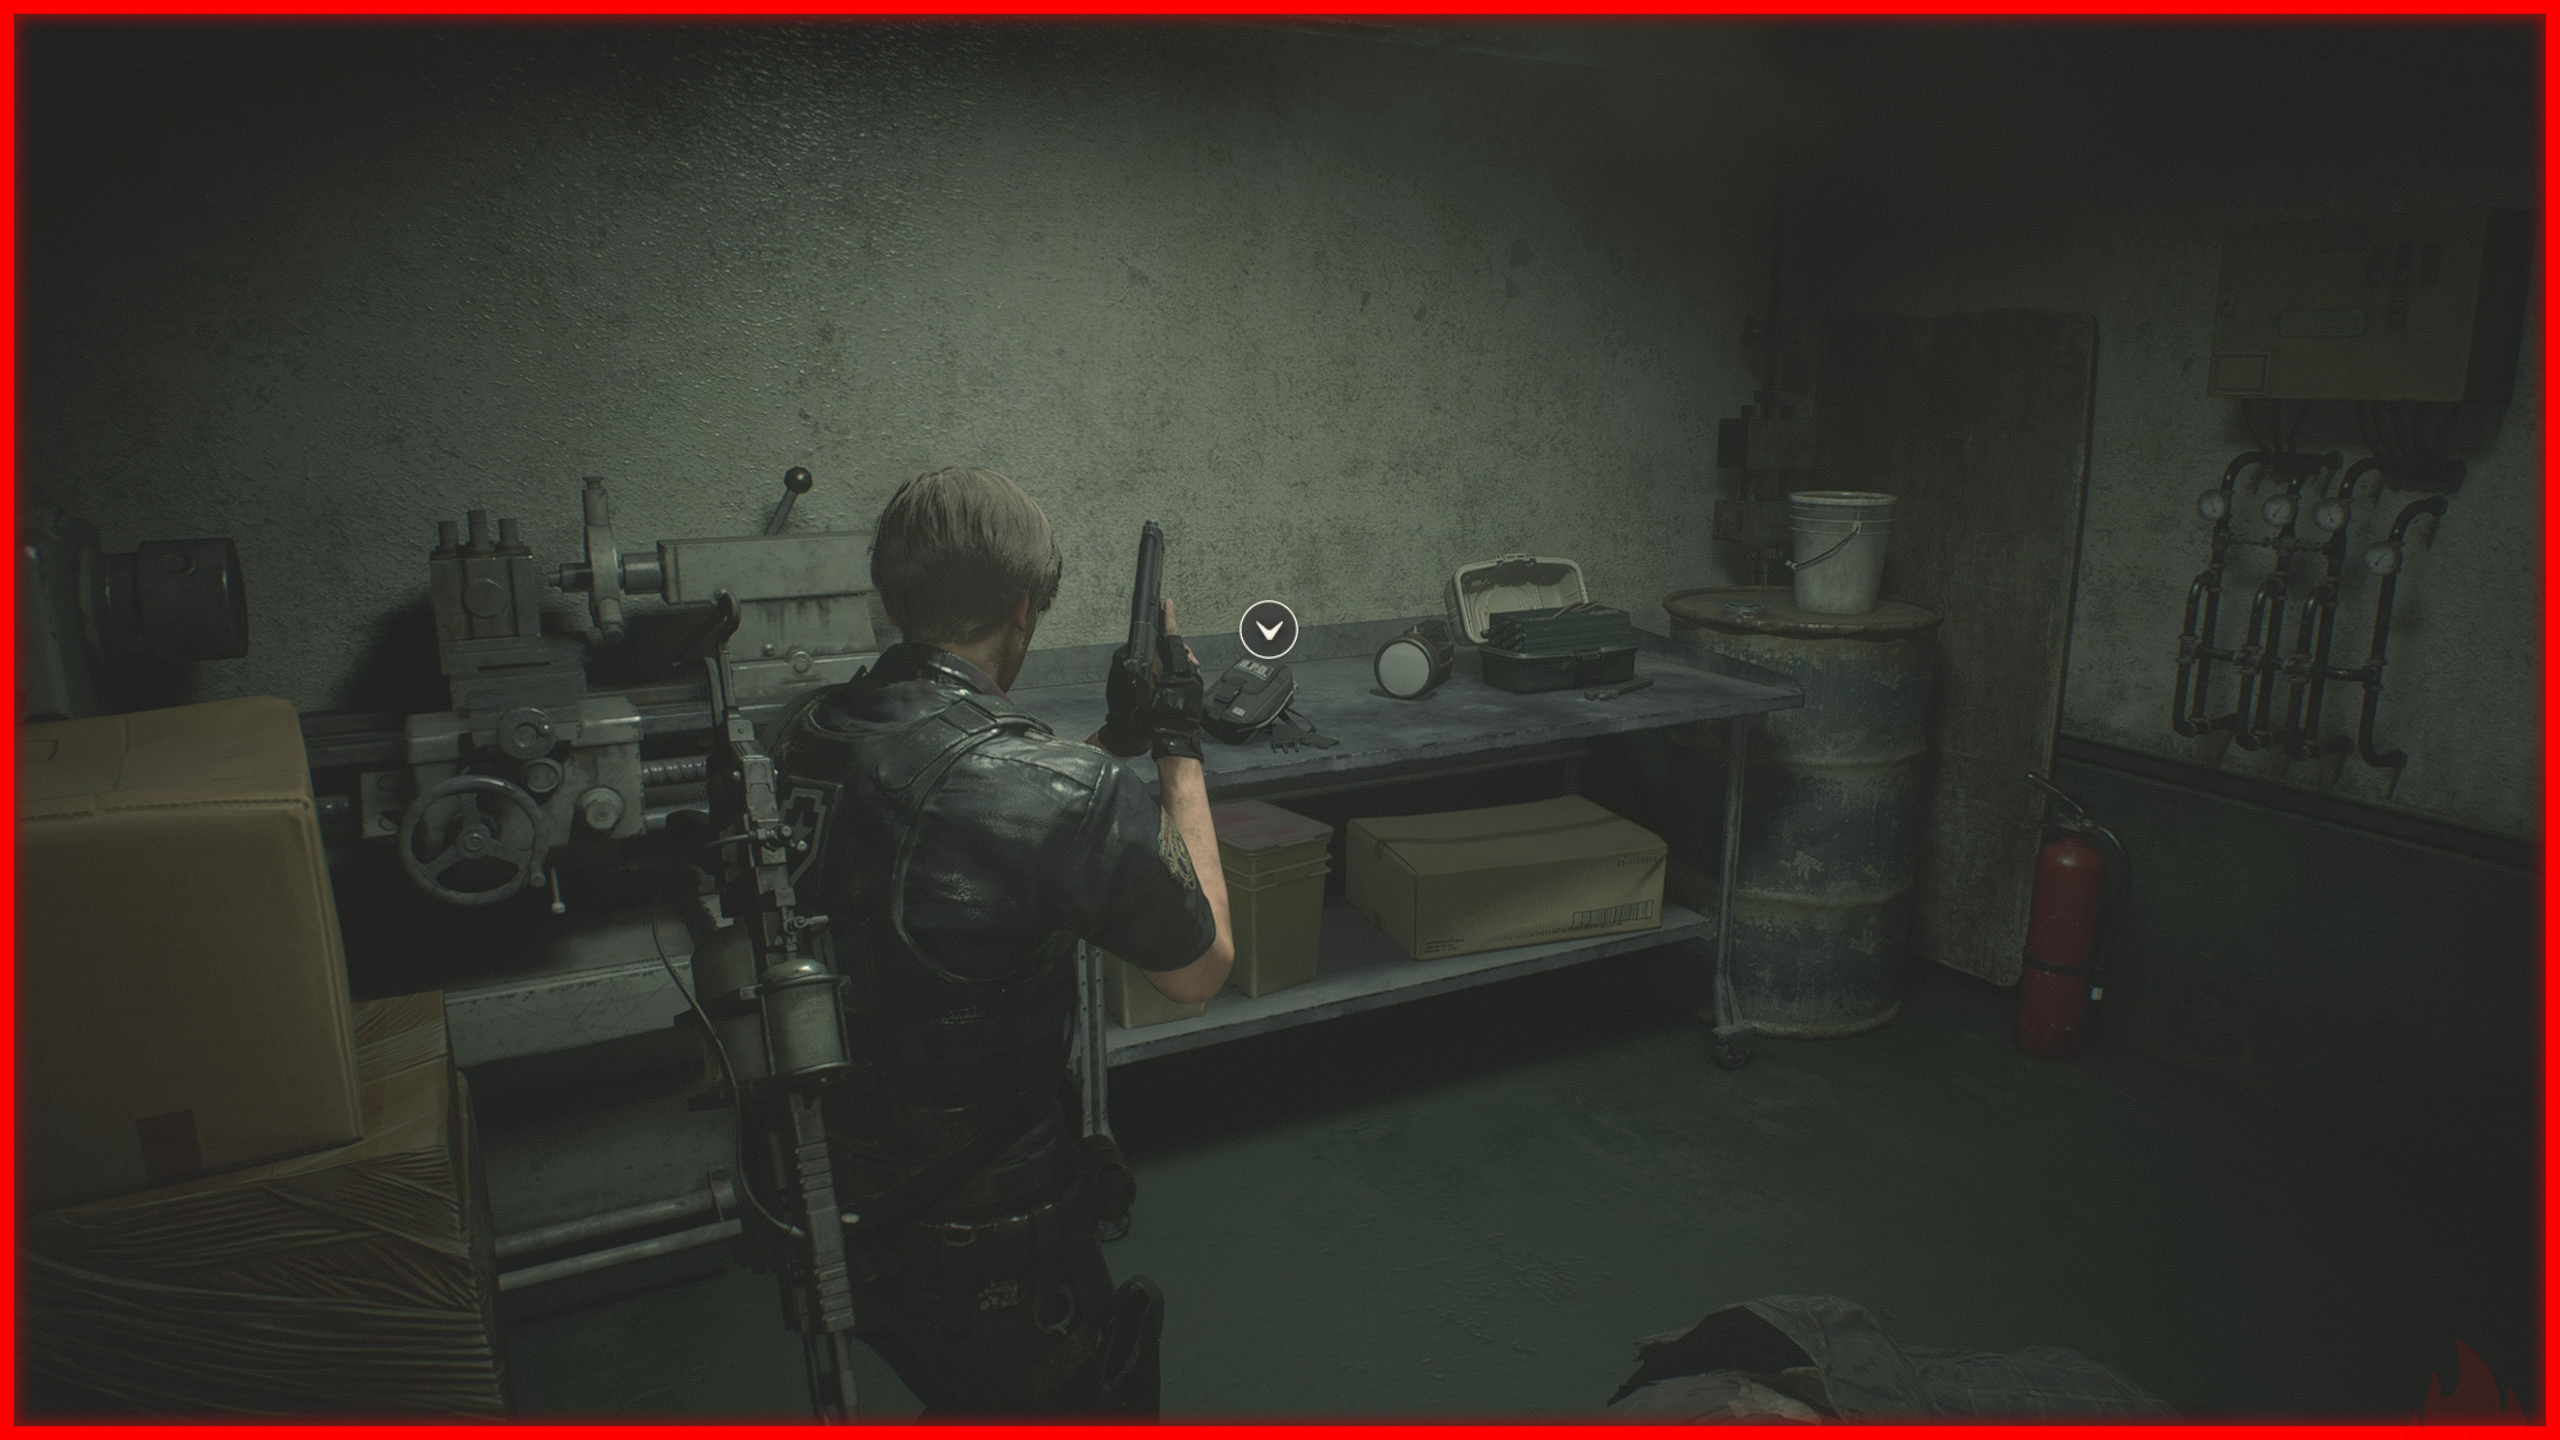
Treasure Hunter ❌
 To obtain this achievement, you need to find two hidden items that become accessible only after acquiring the Roll Film.
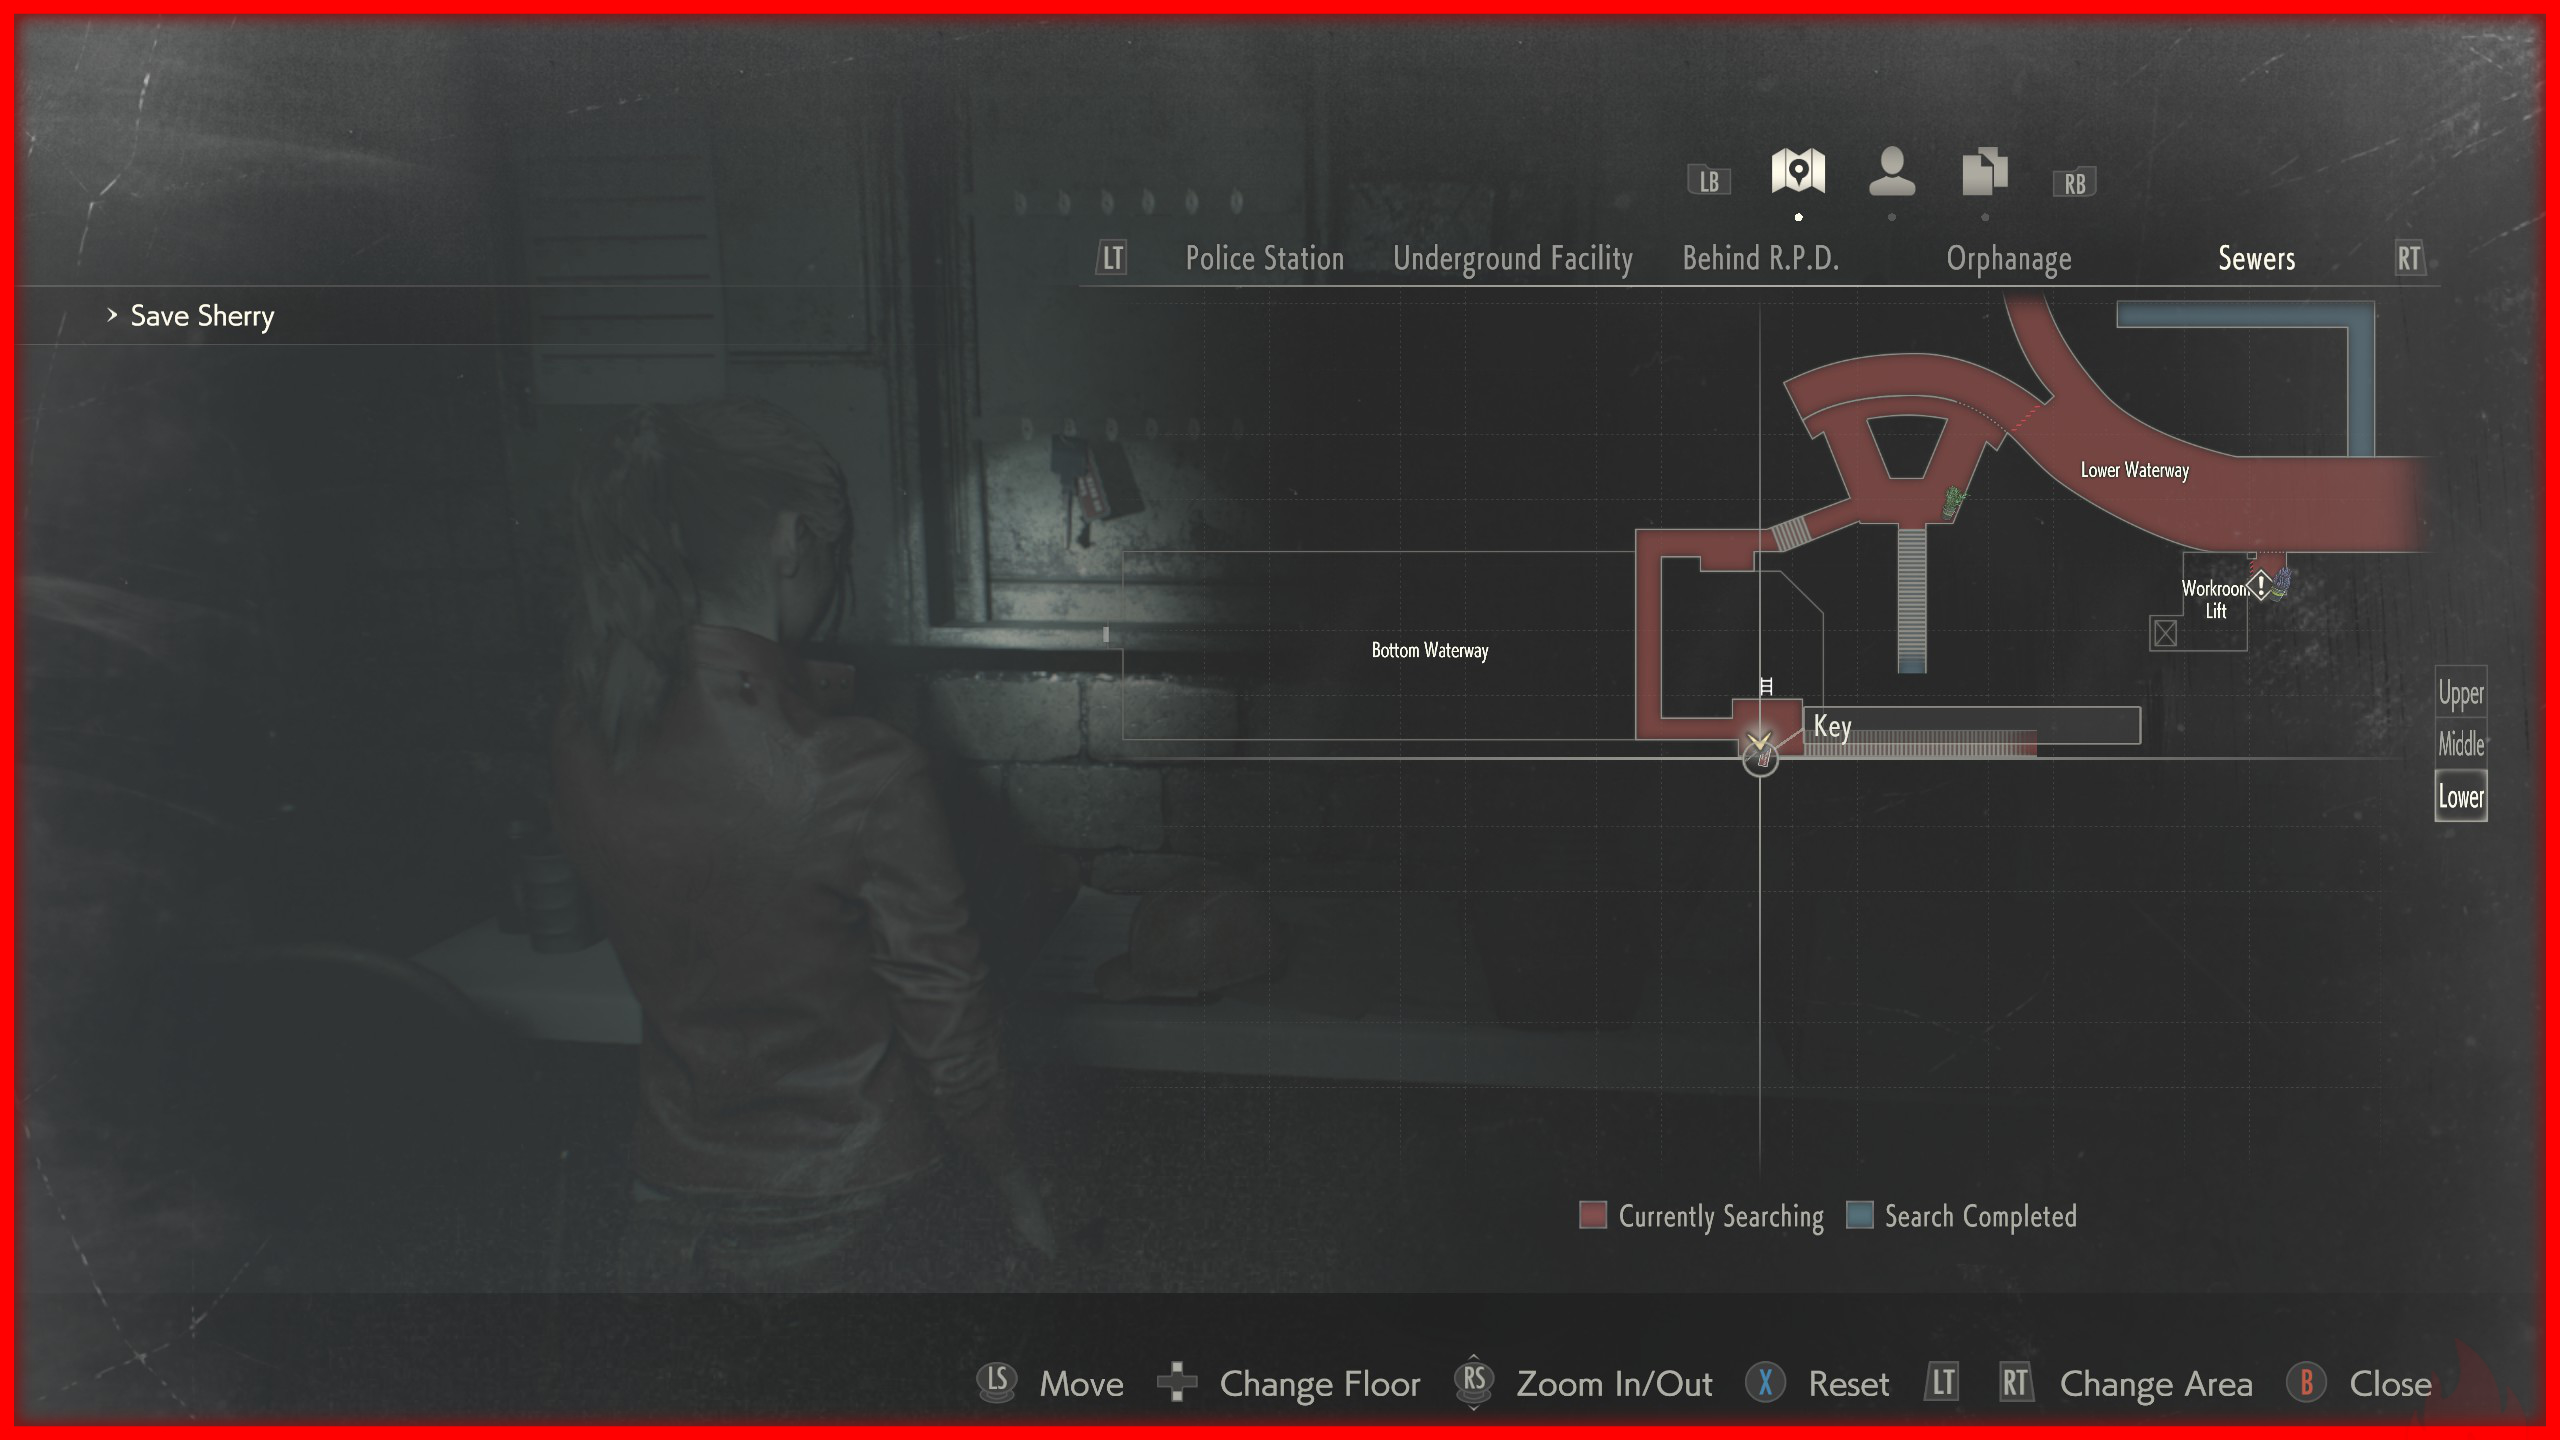
In the Sewers, after obtaining the T-Bar Valve Handle, head to this location and pick up the Sewers Key.
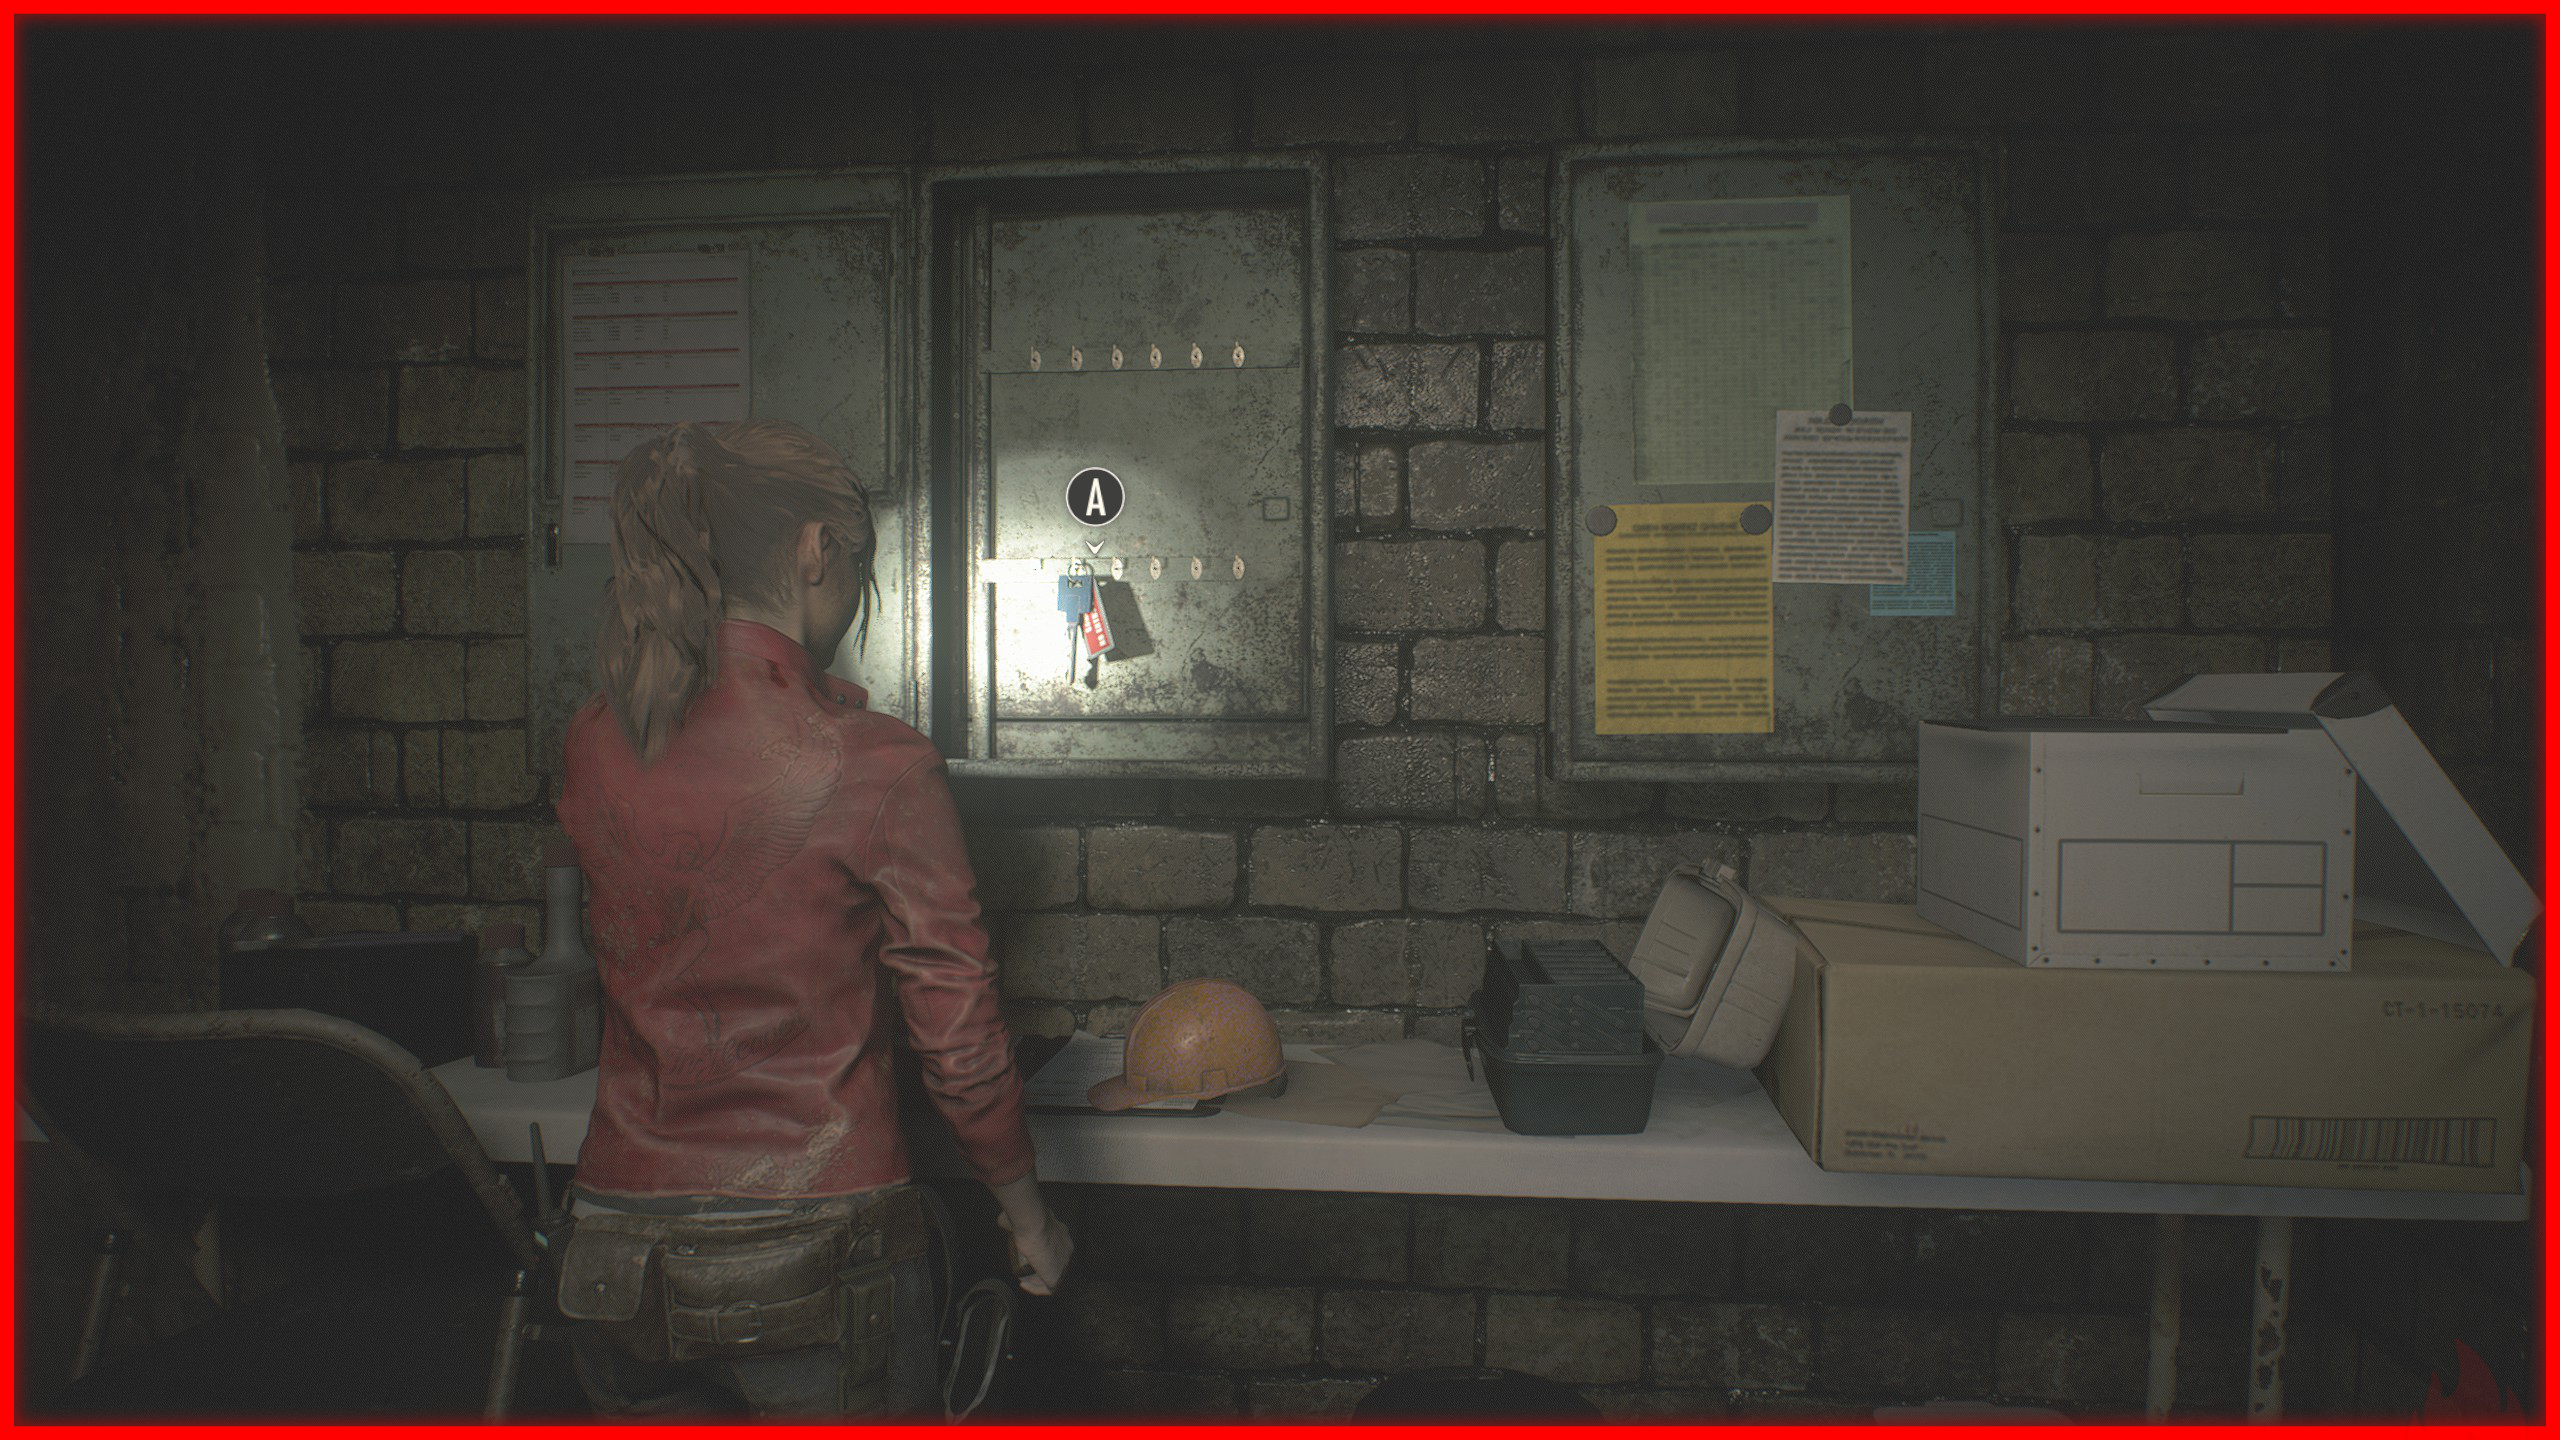 Then, go to the Workroom and collect the Roll Film.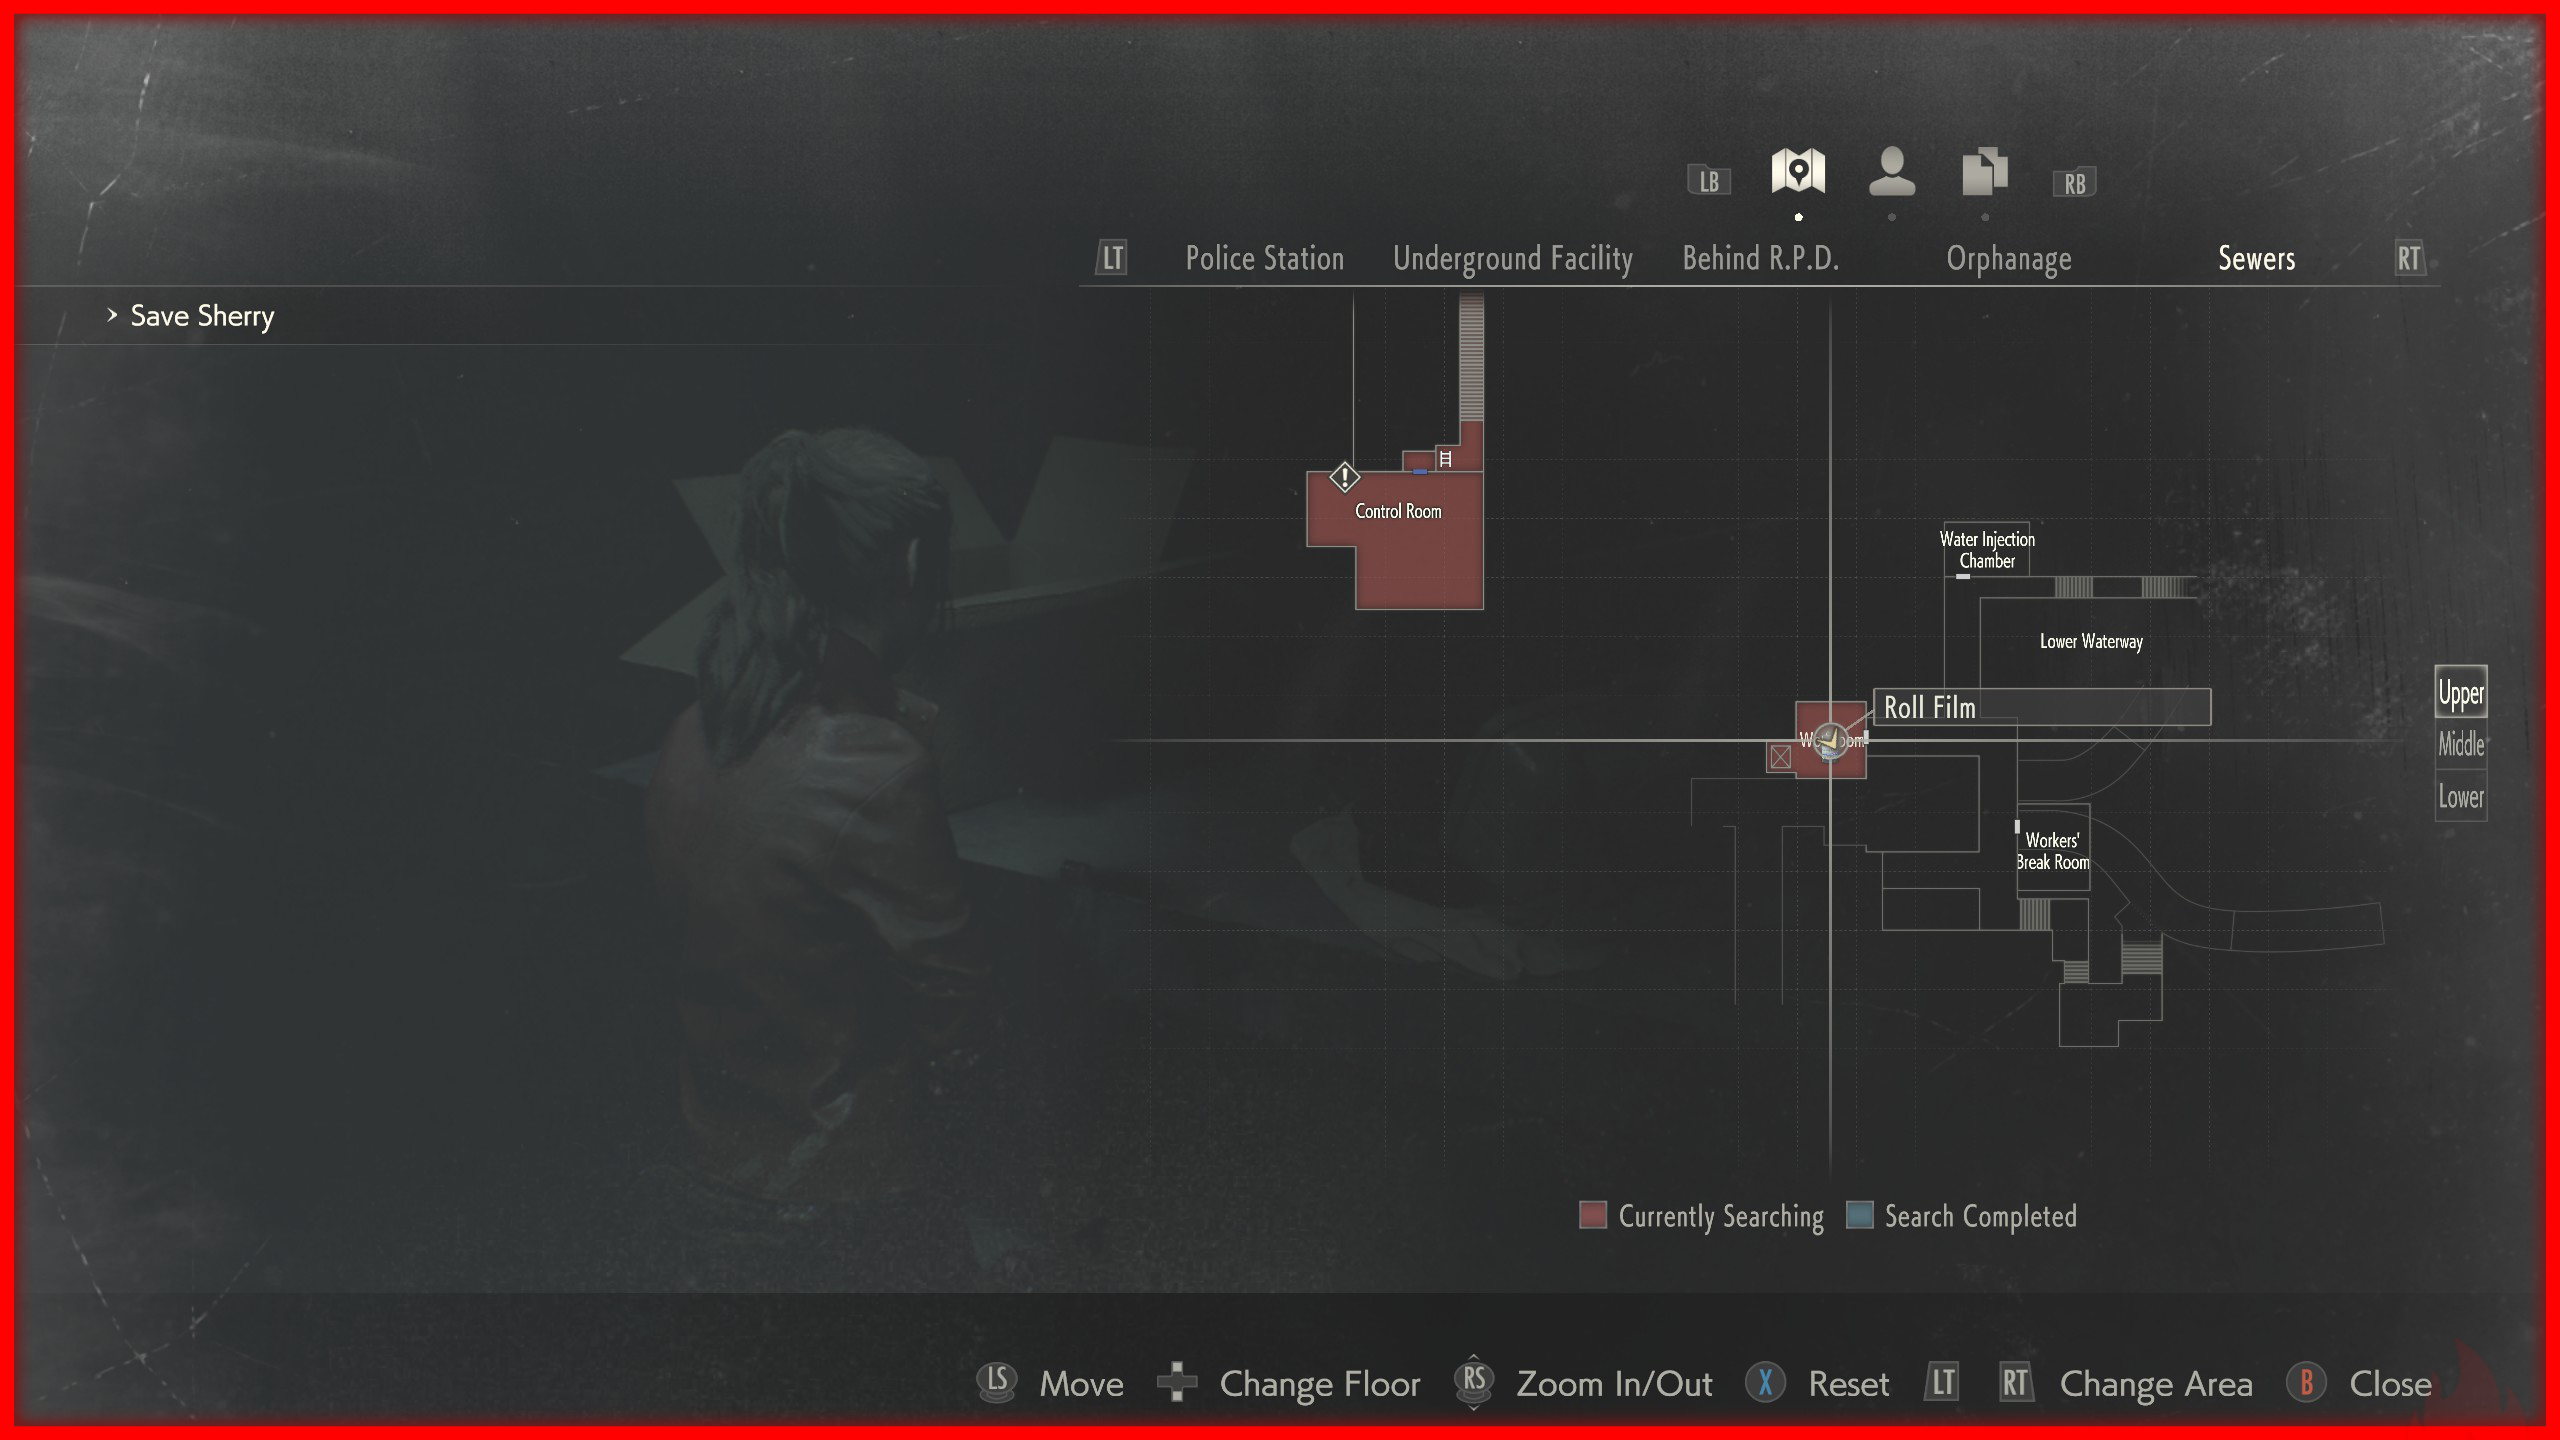
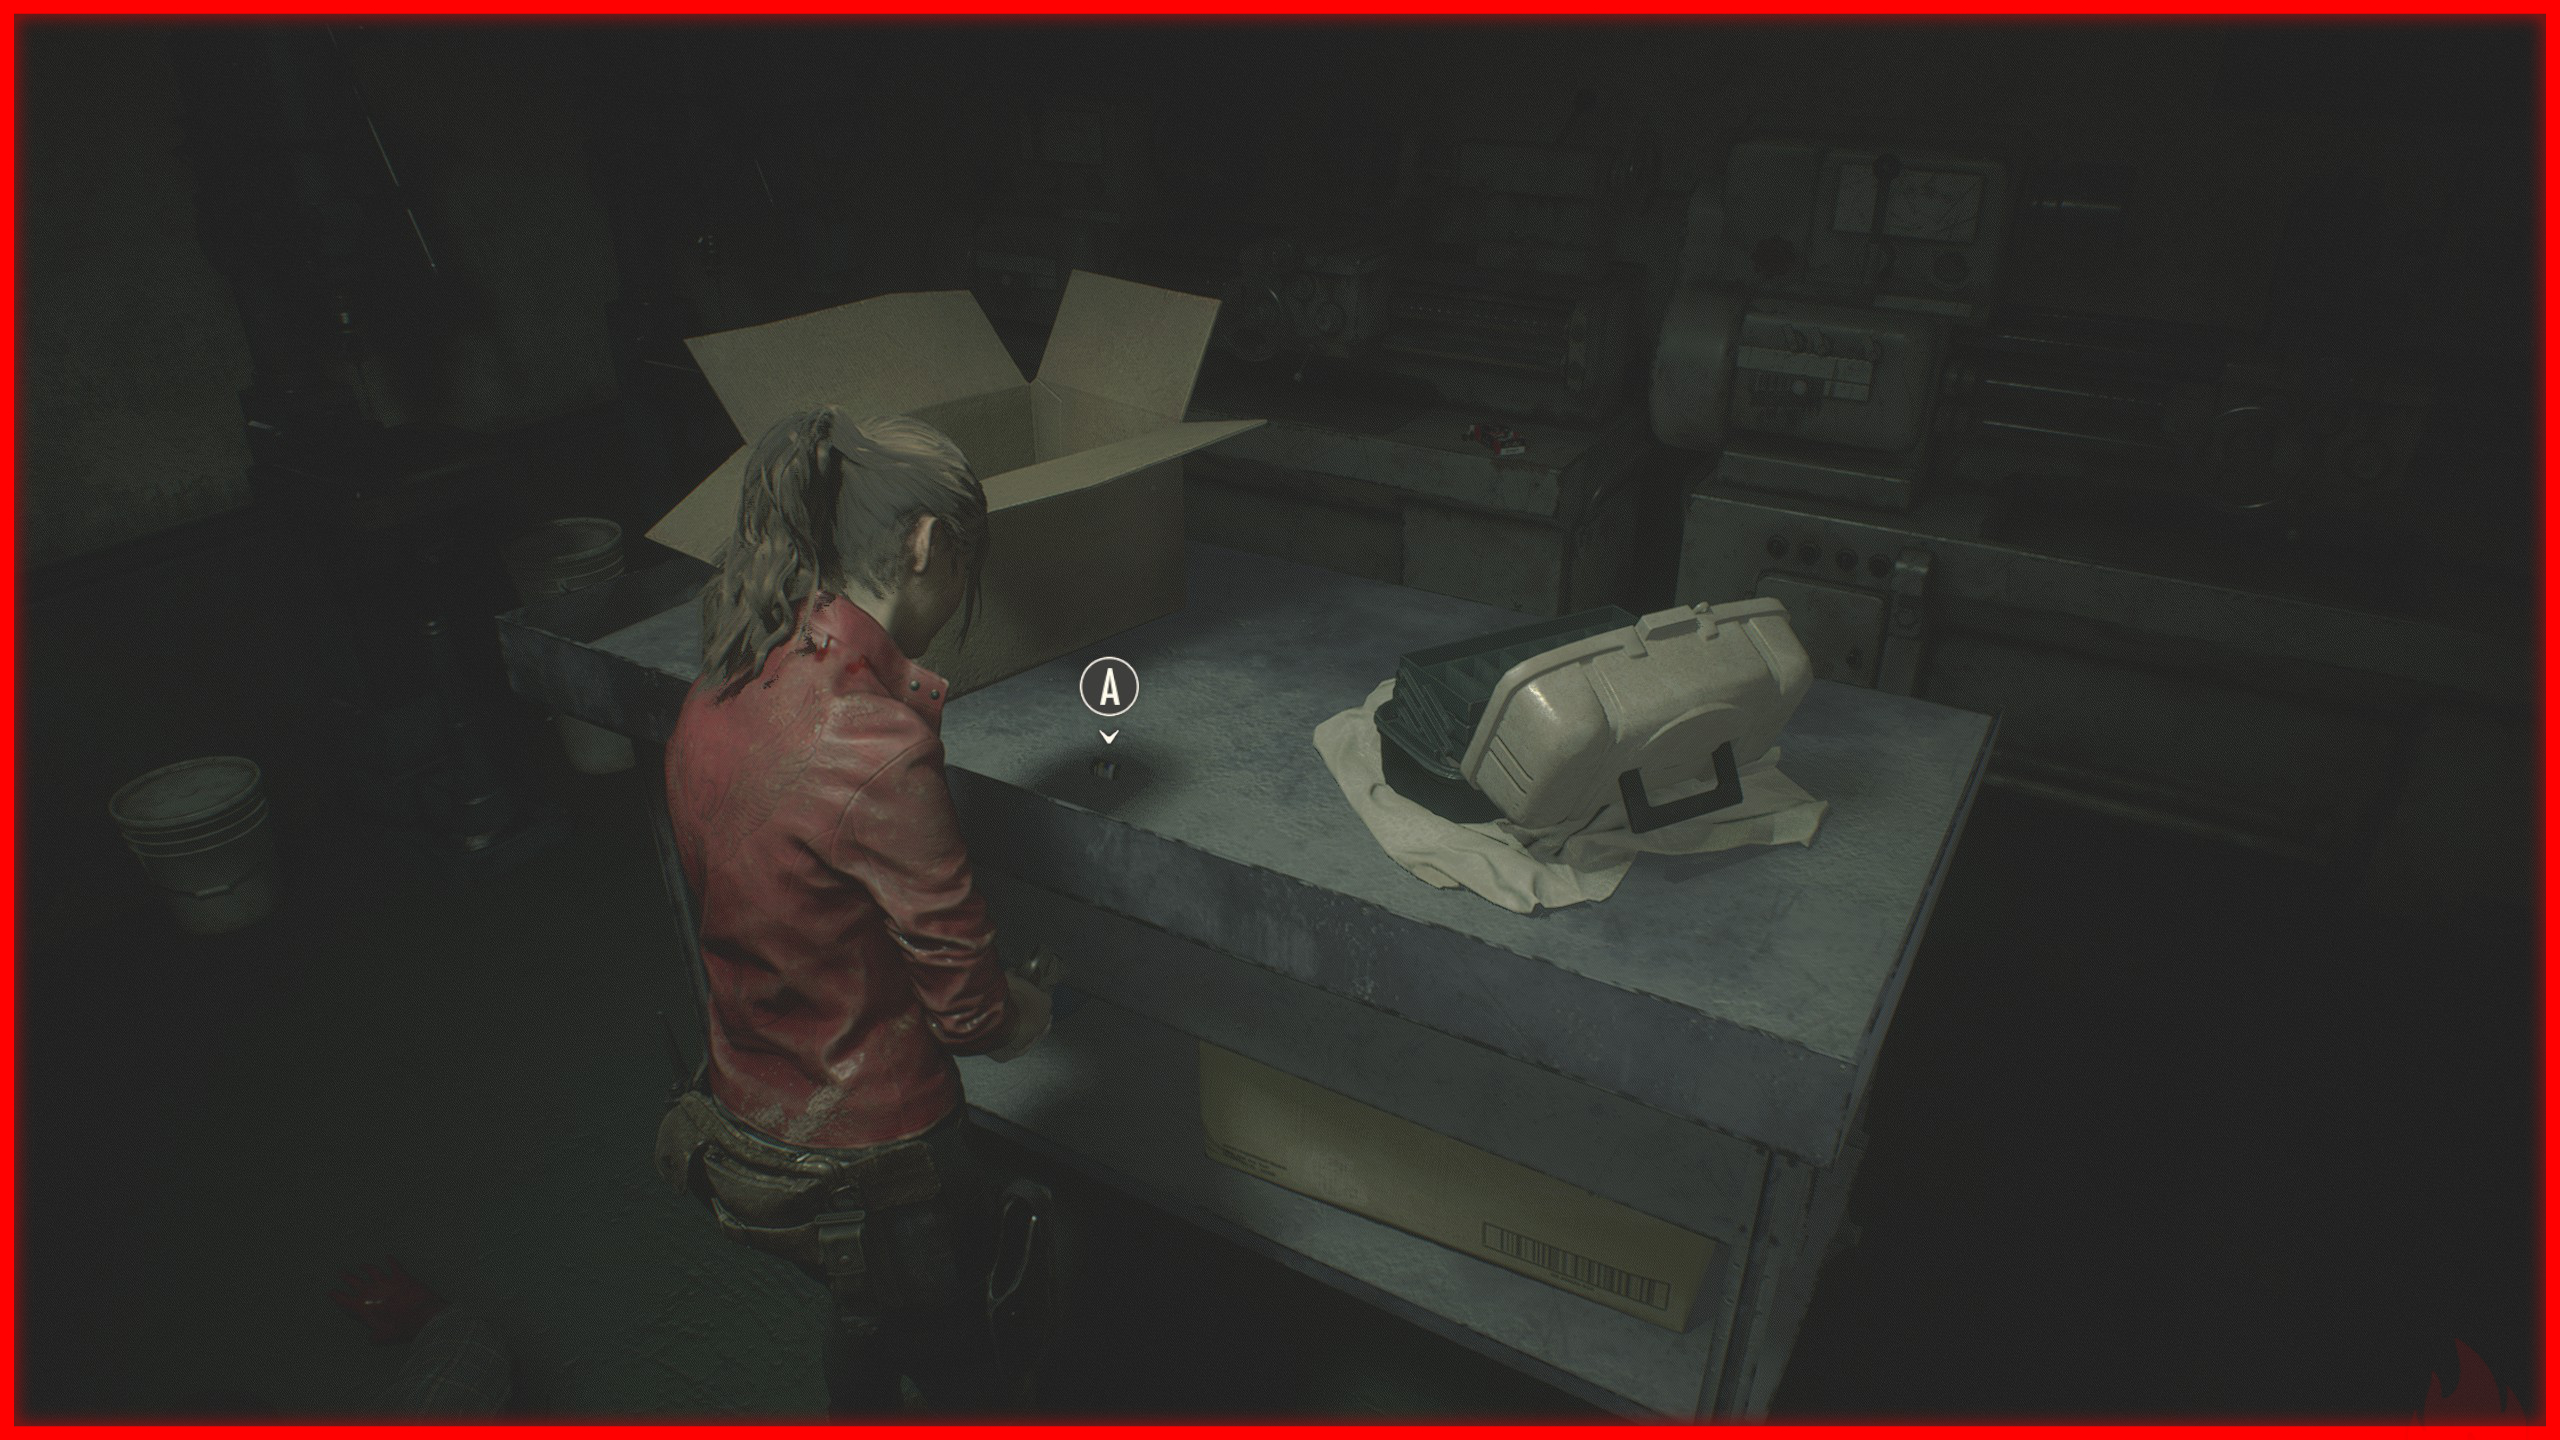 In the same area, use the Sewers Key to access a hidden elevator located behind a locker.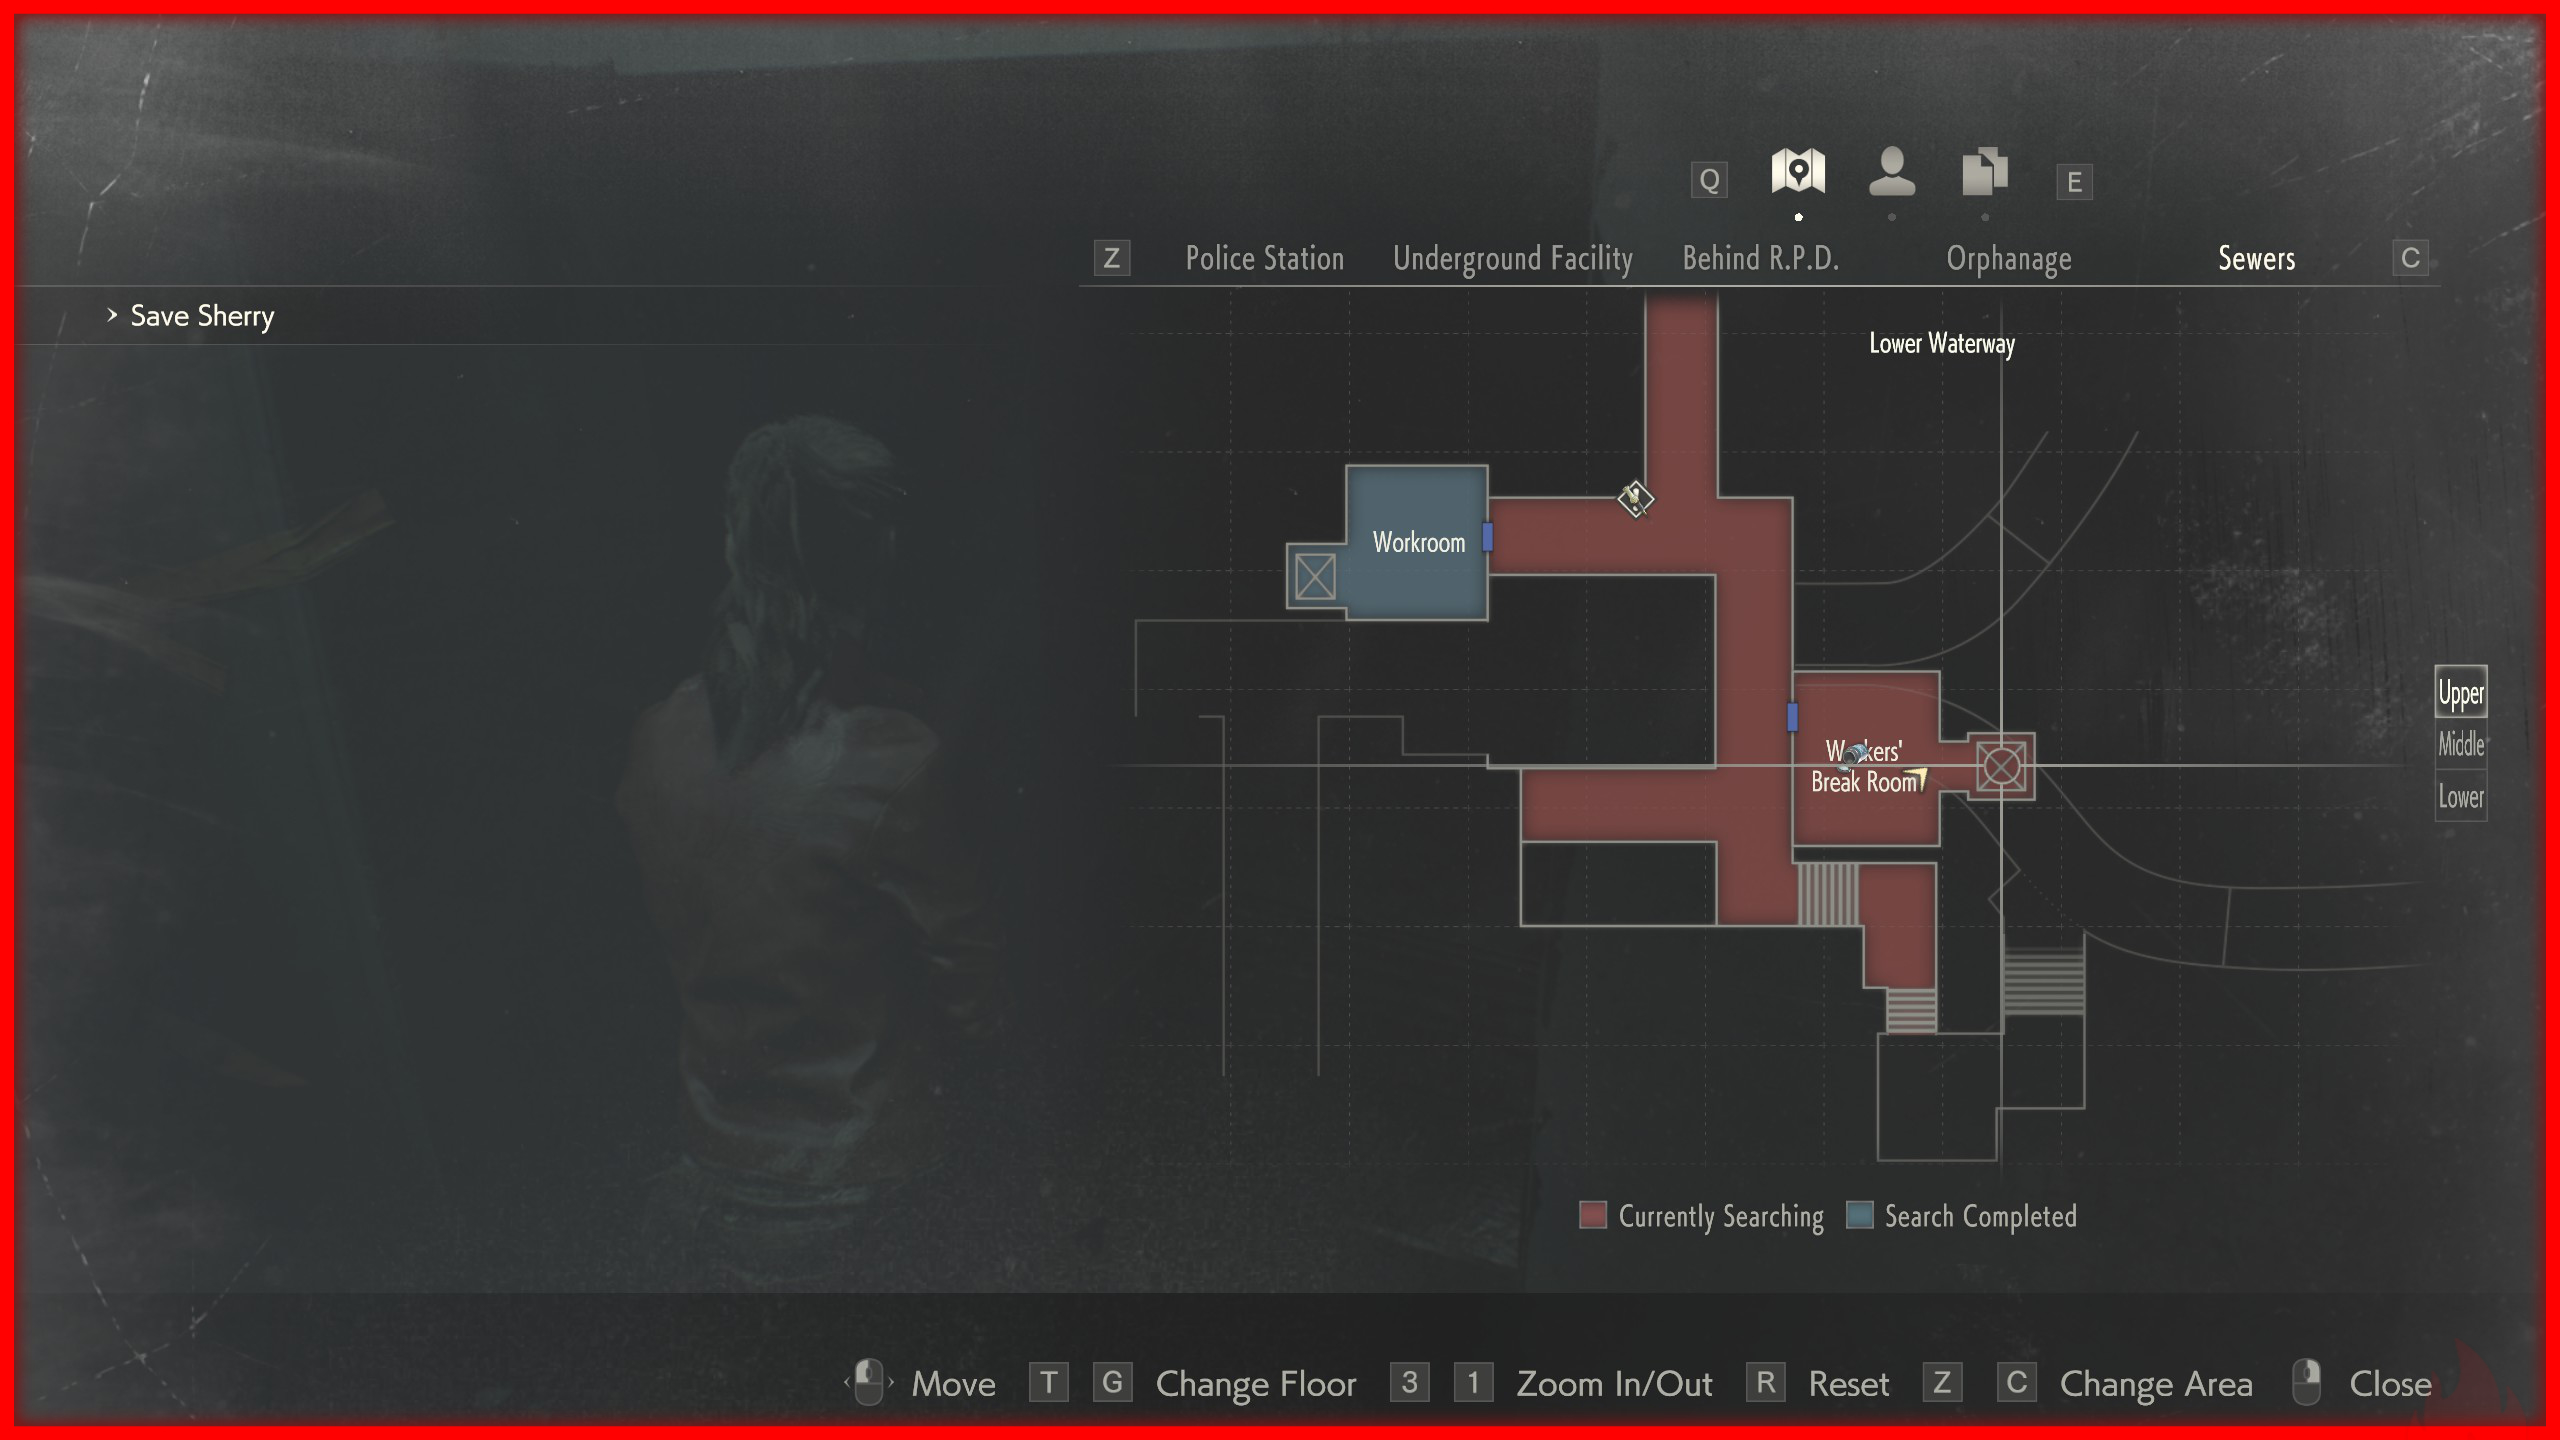
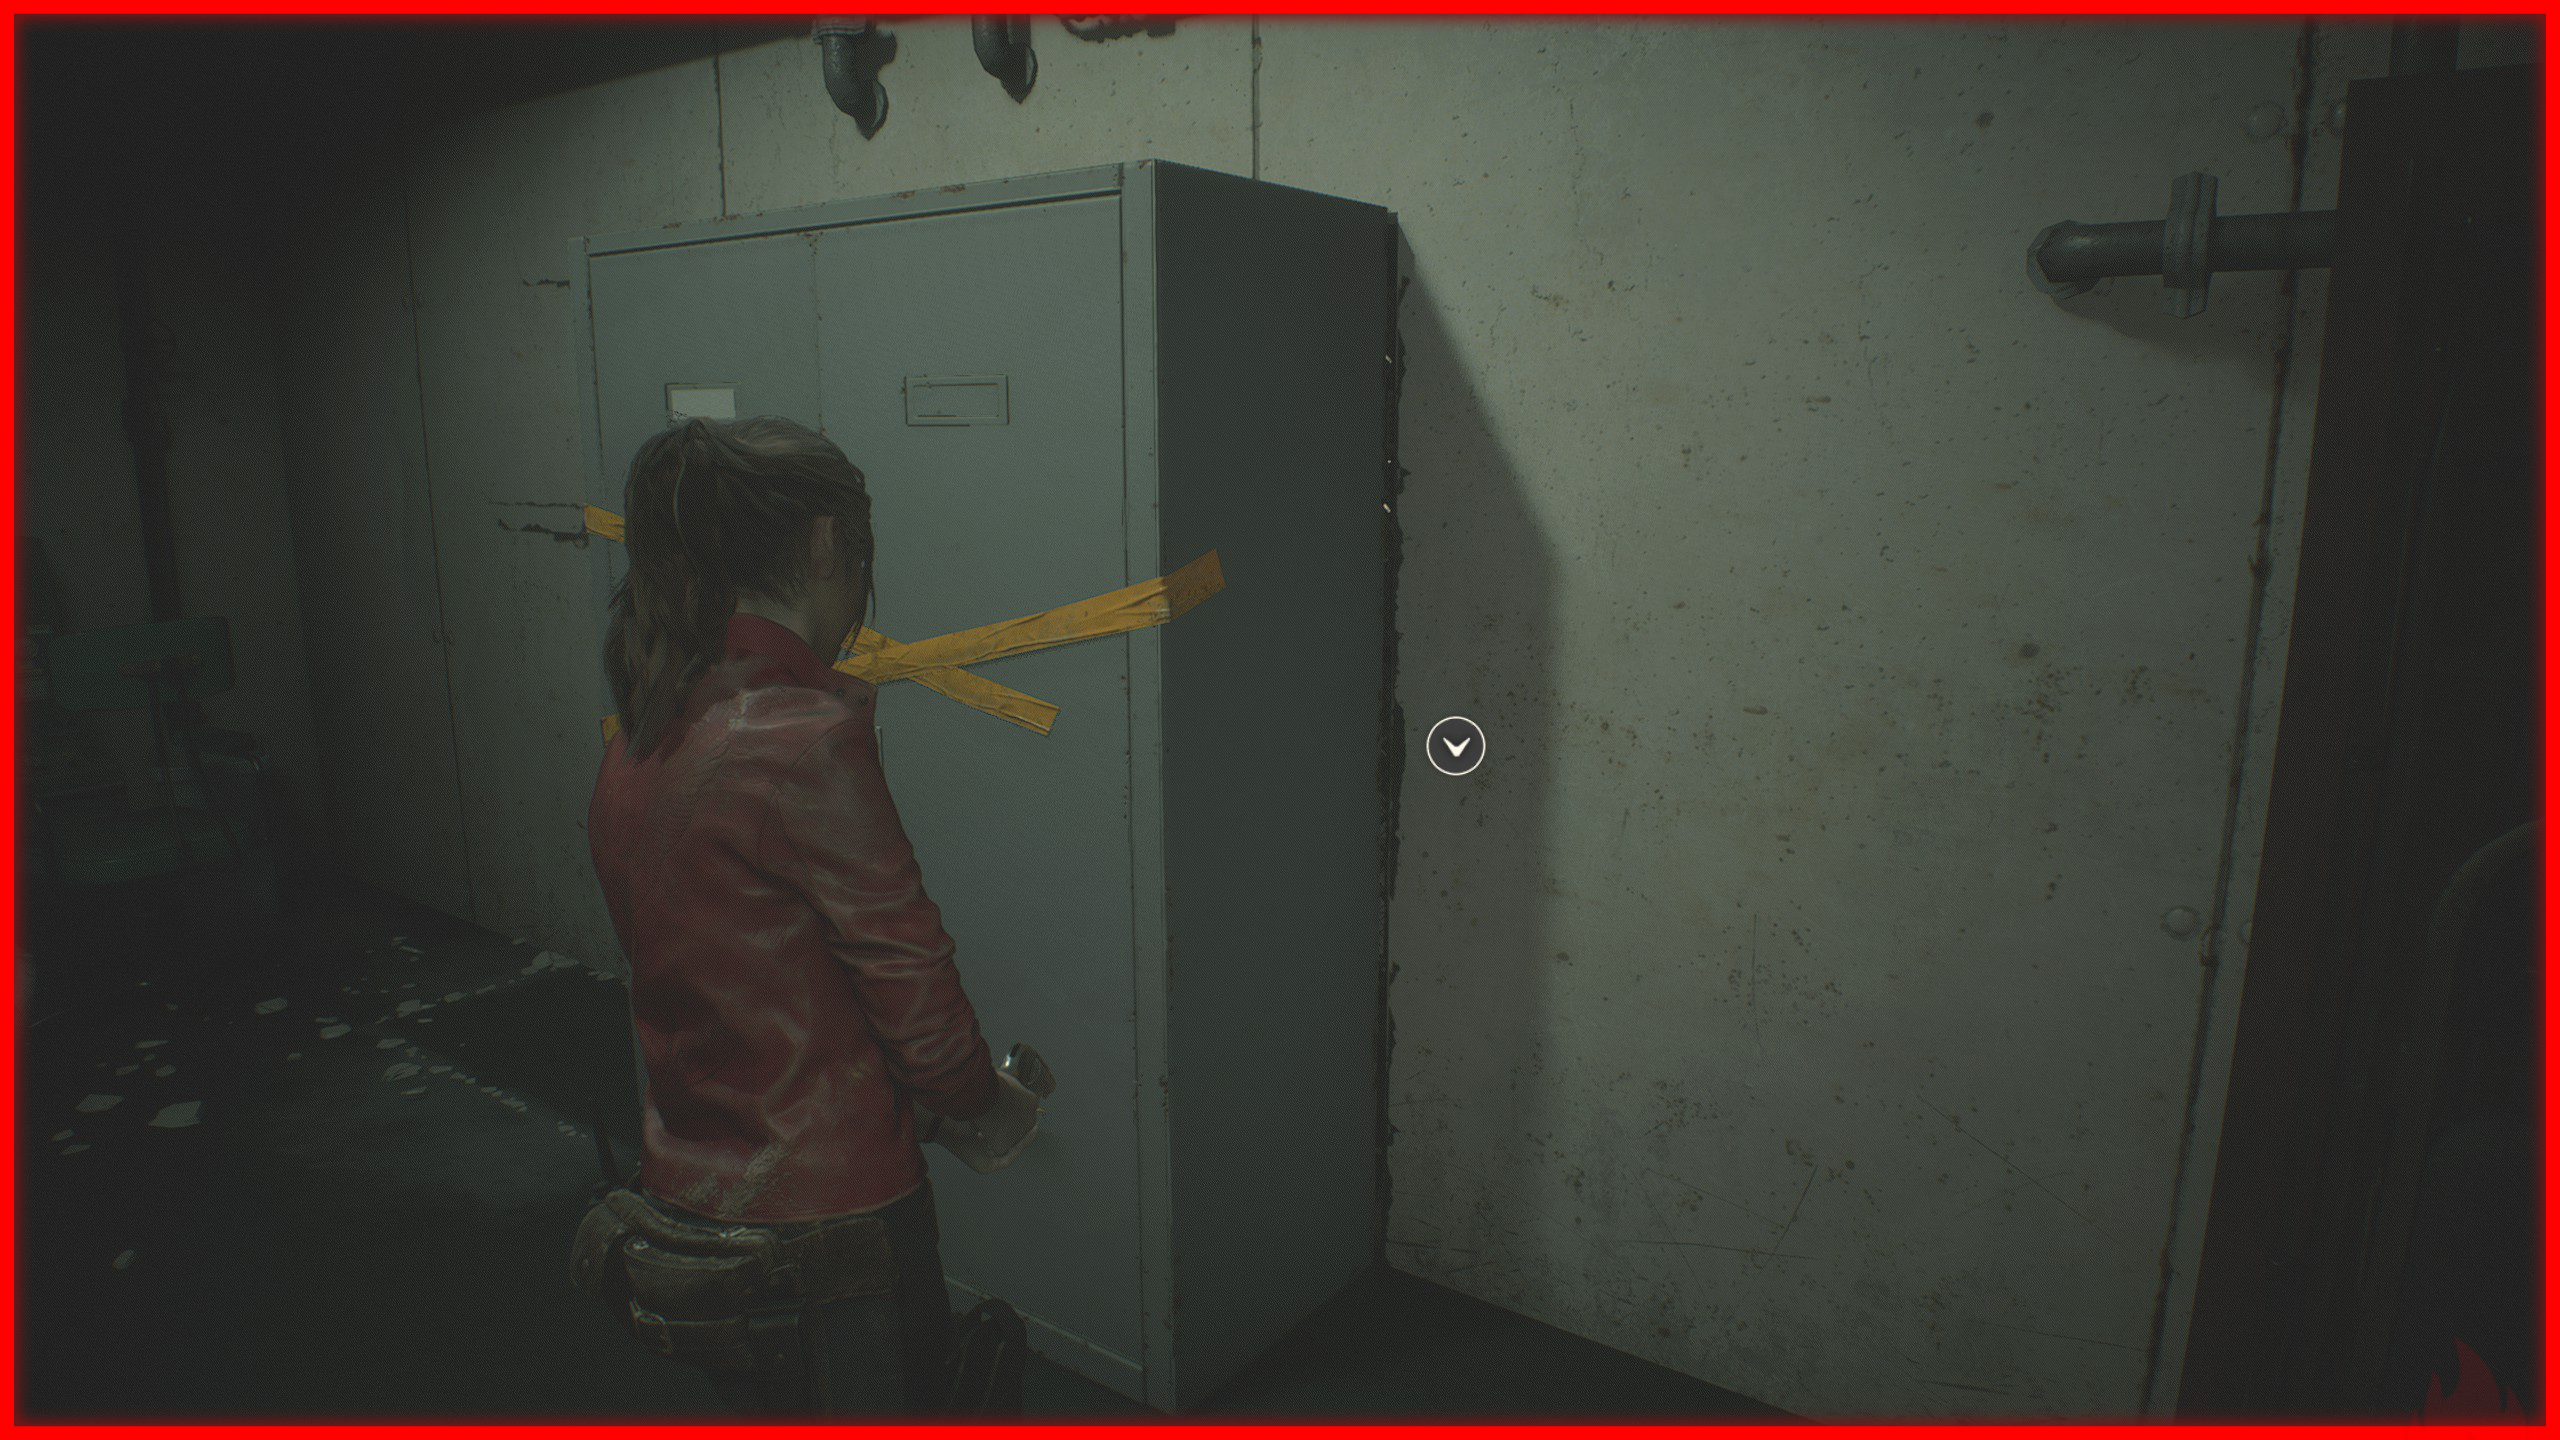 Return to the Police Station and go to the Darkroom to develop the film, revealing clues to the locations of the two hidden items(The items are different depending on whether you’re playing as Claire or Leon, but their locations remain the same).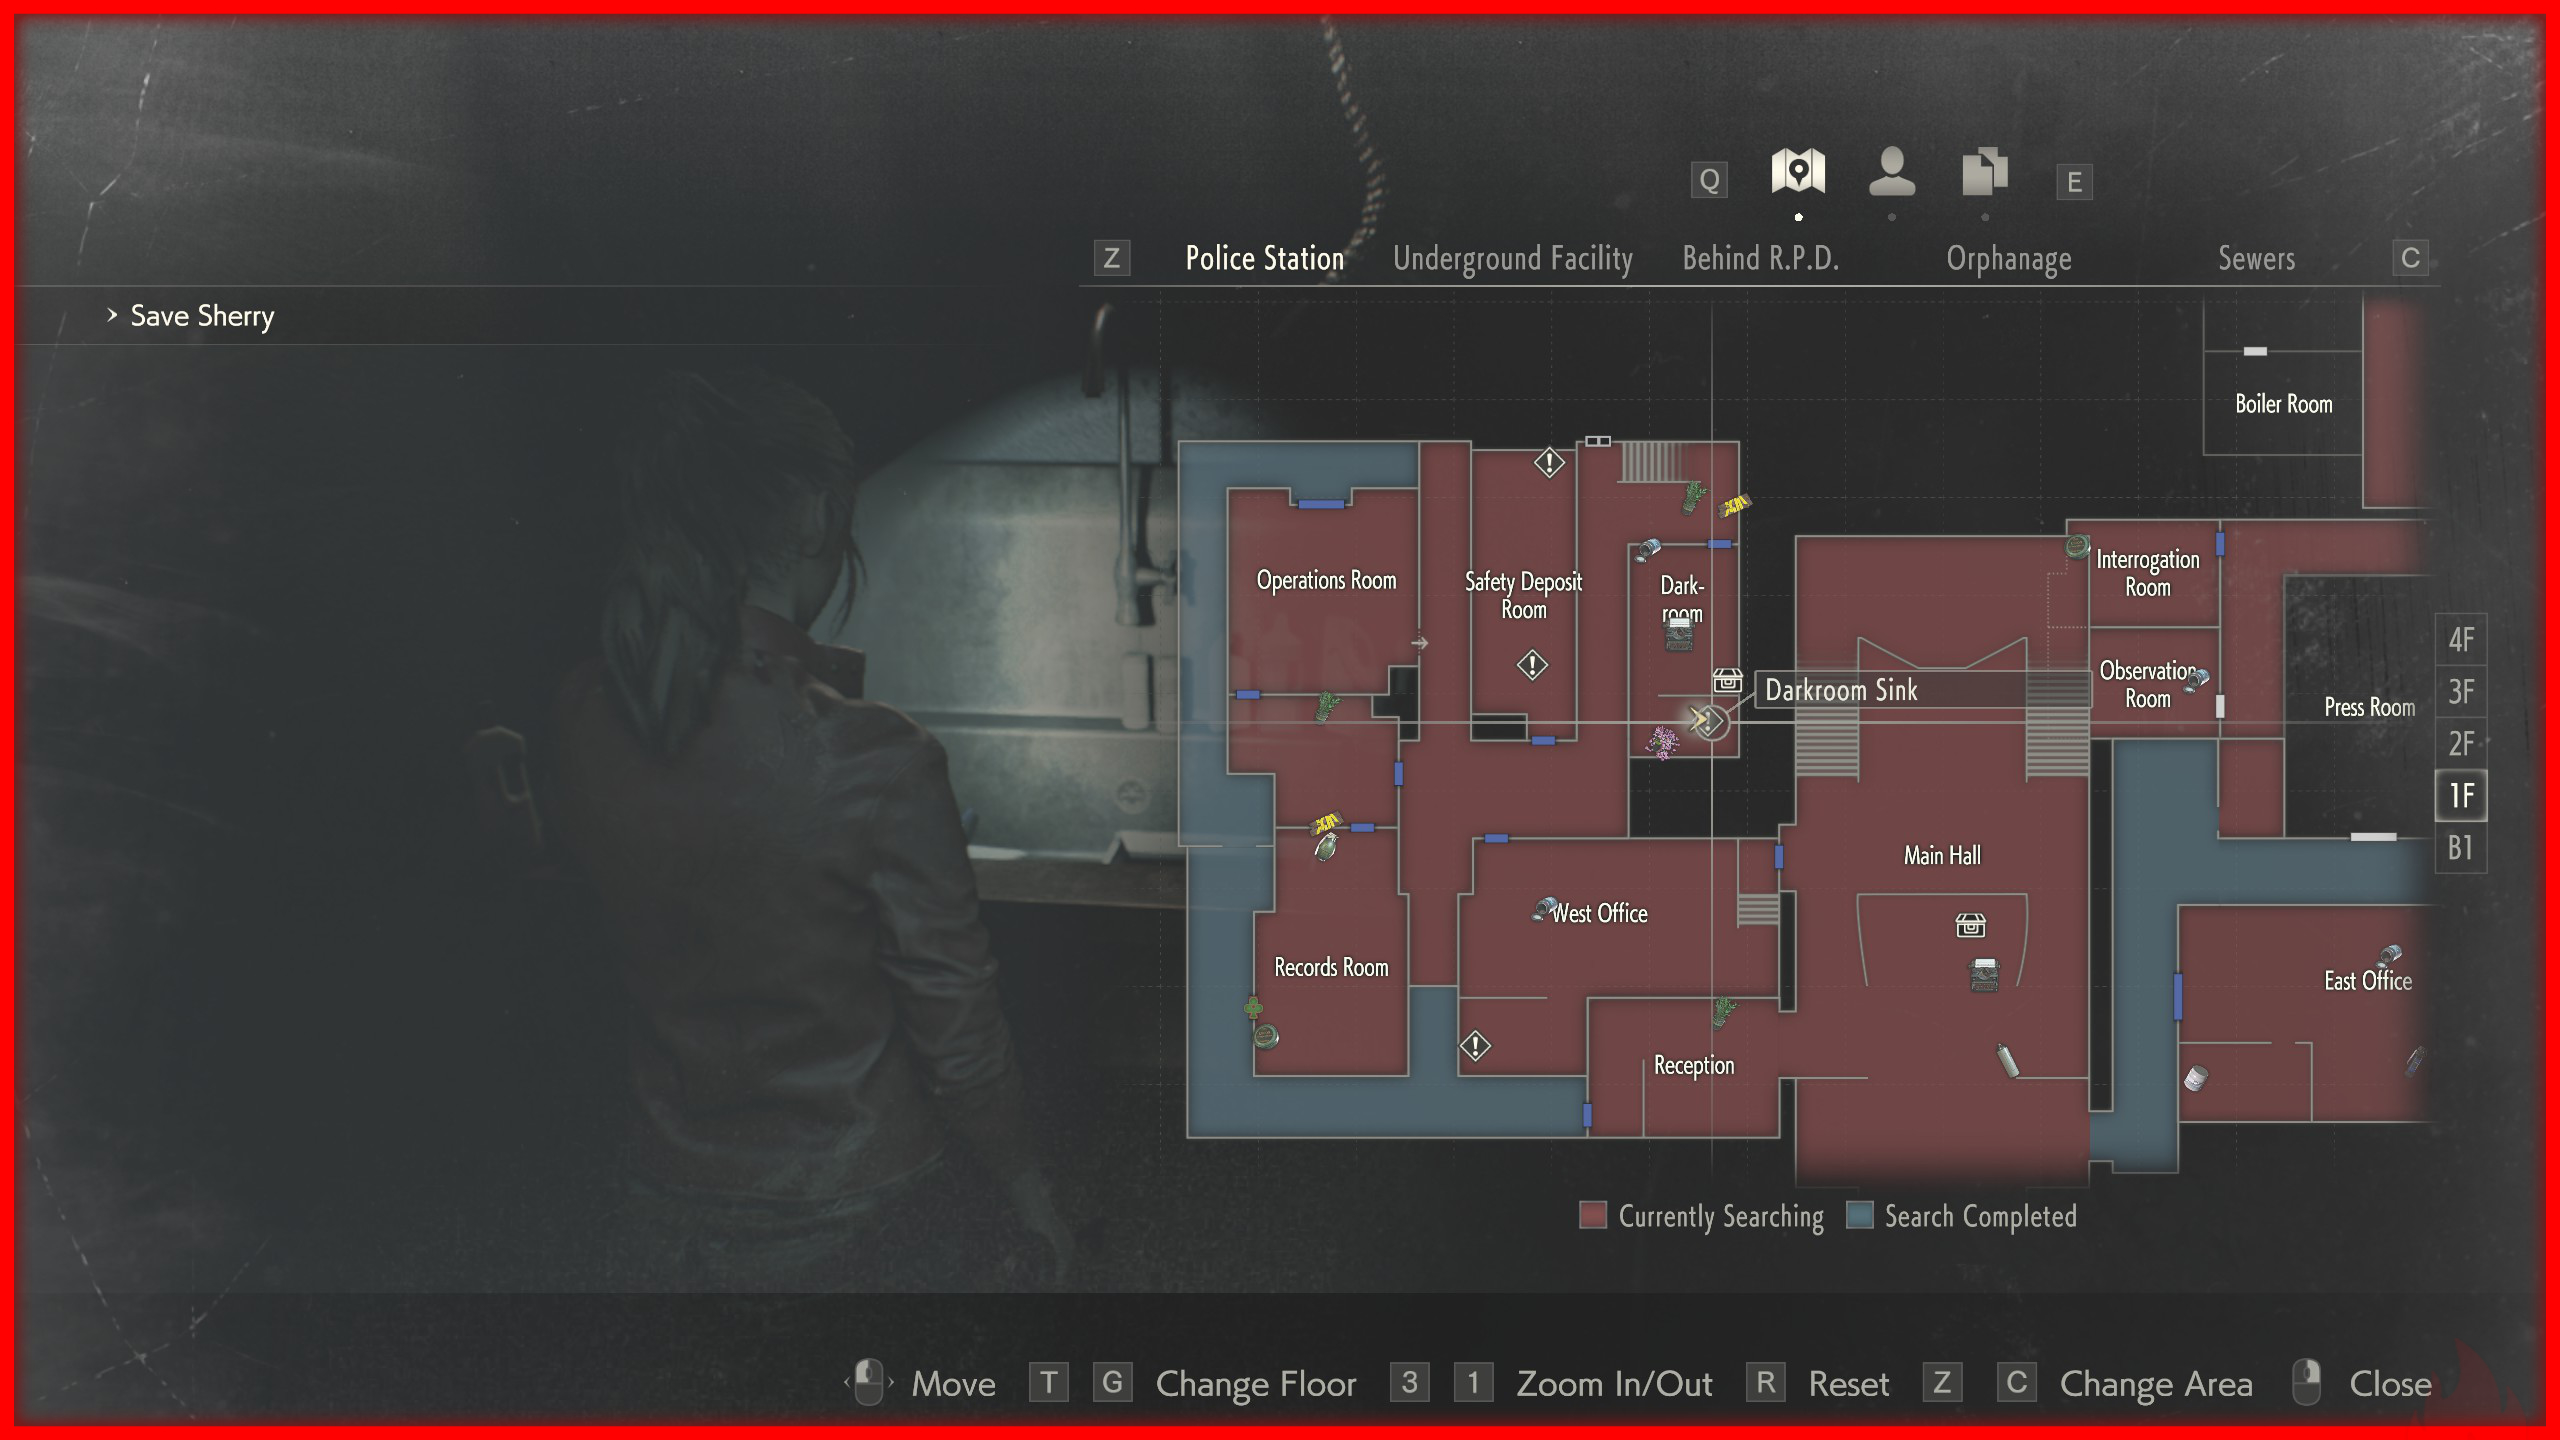
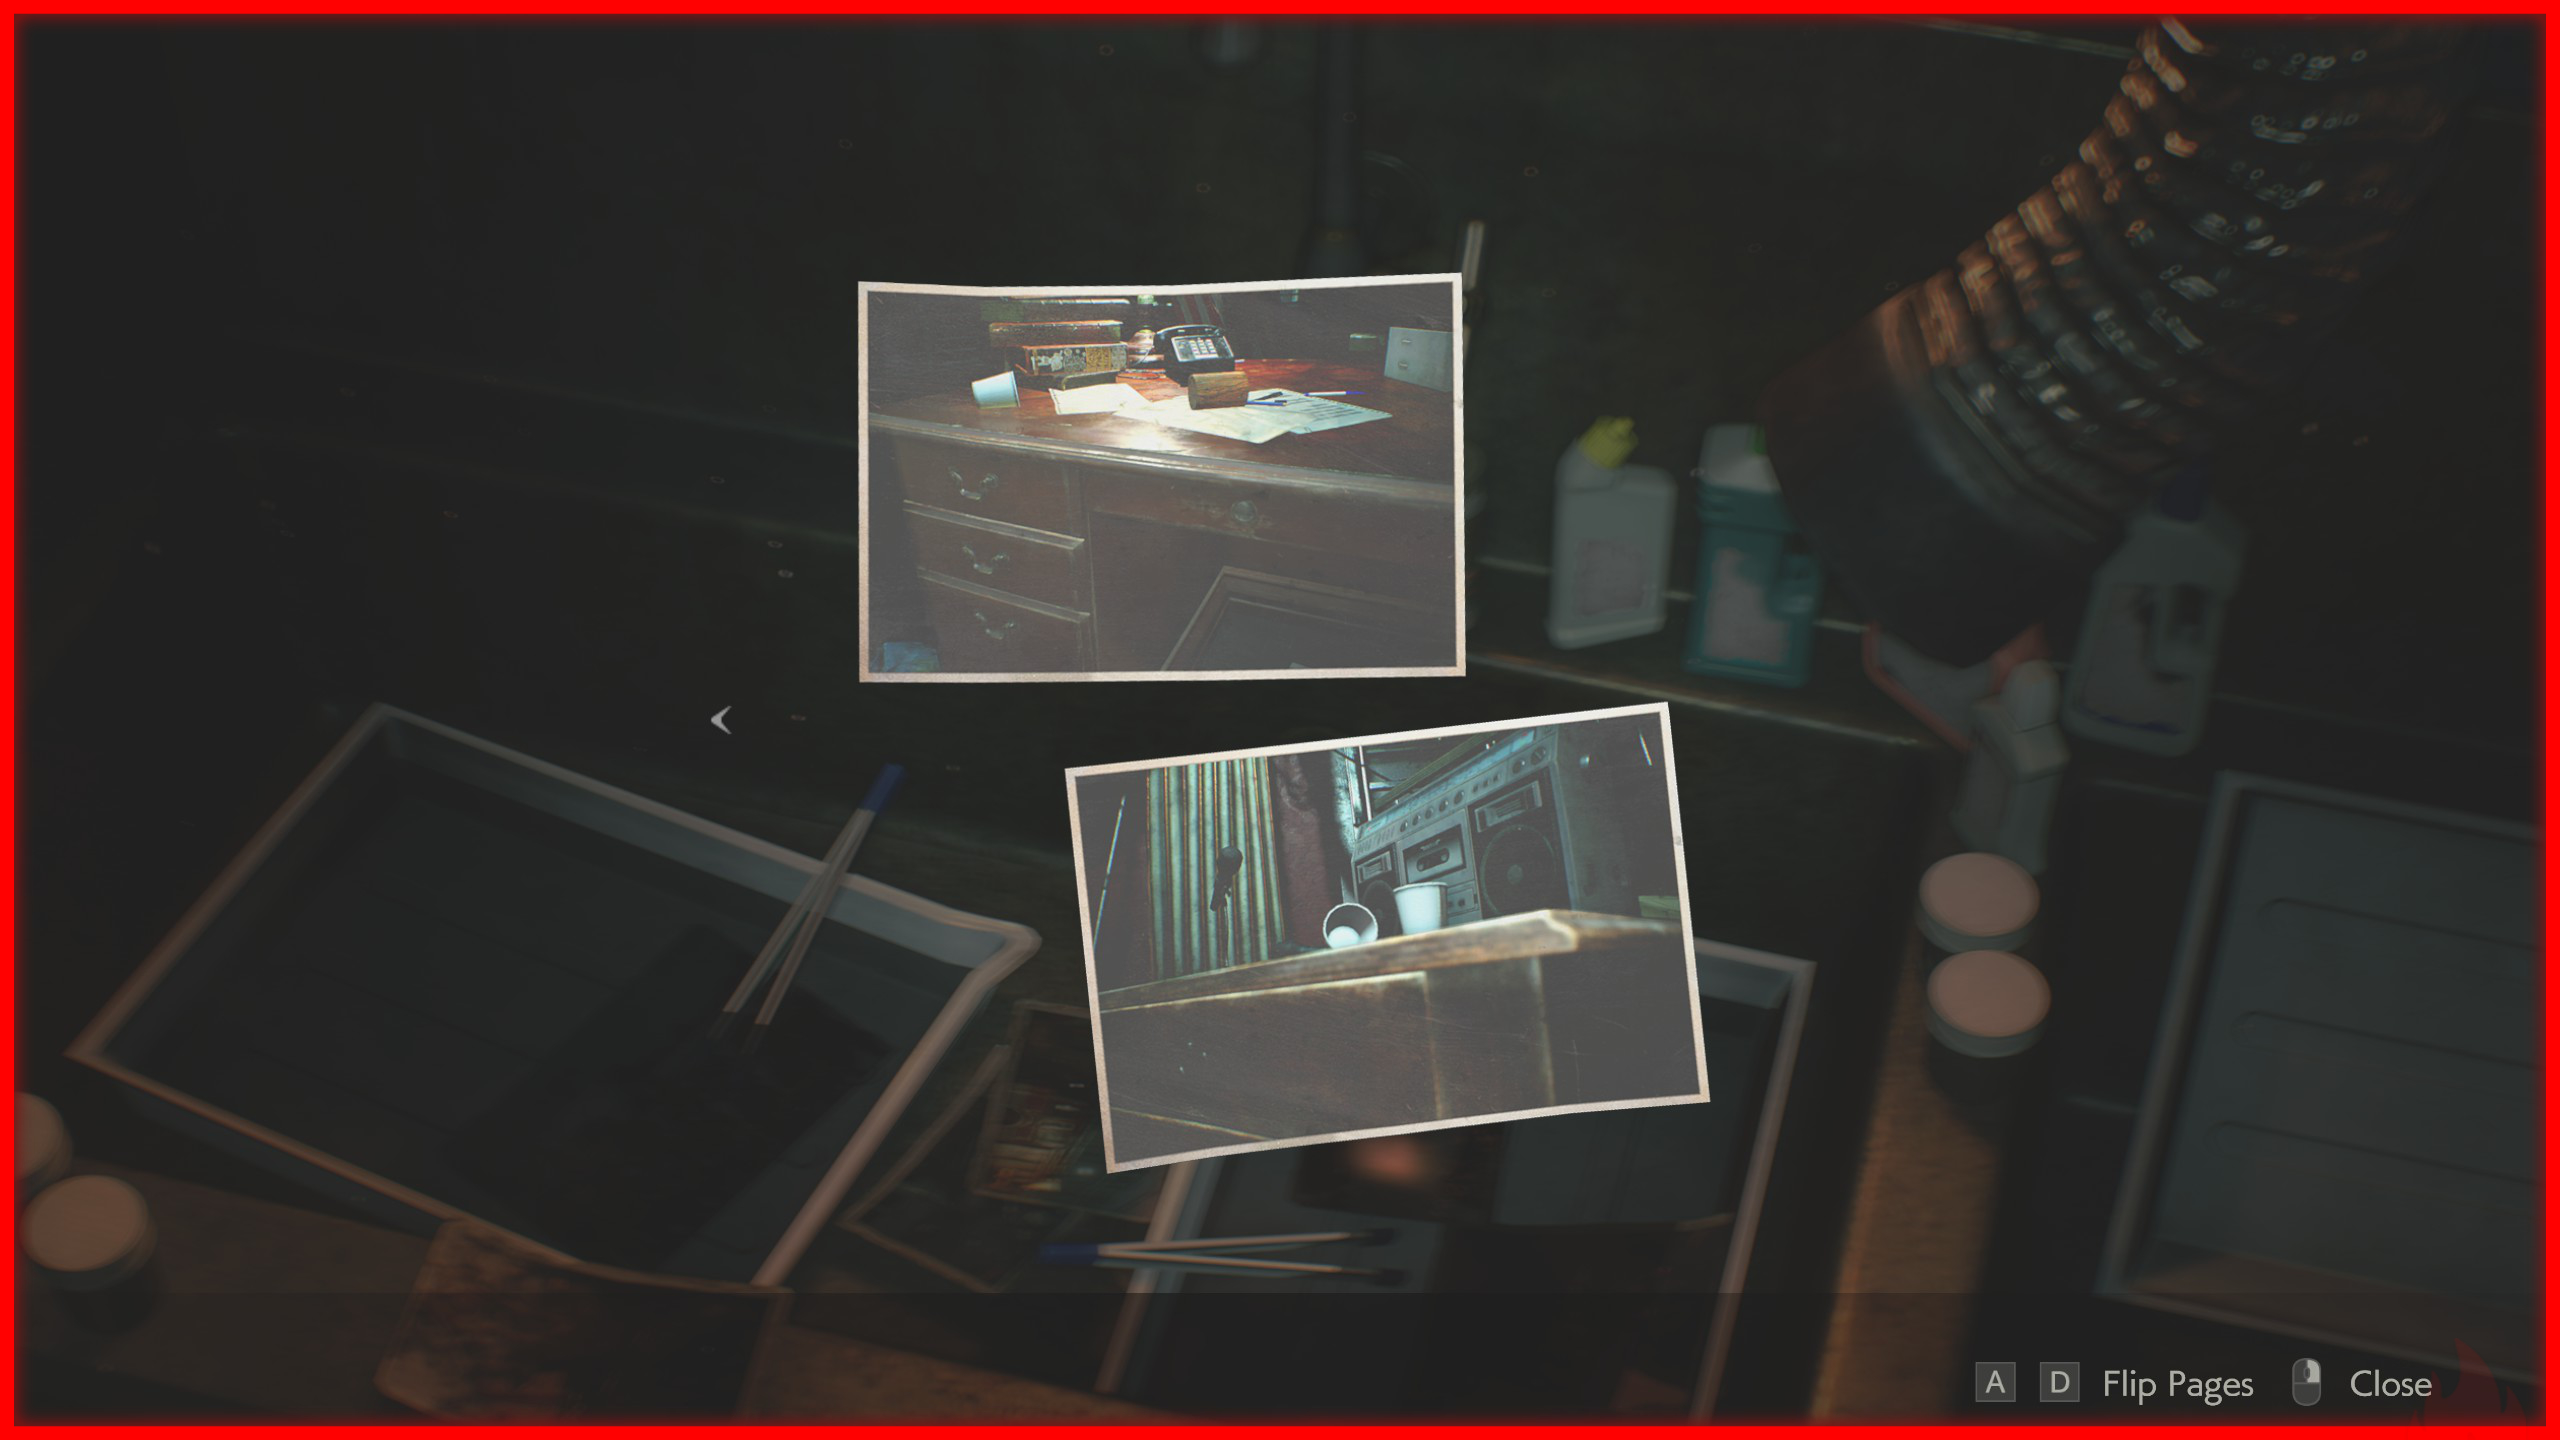 Police Station 2F - STARS Office: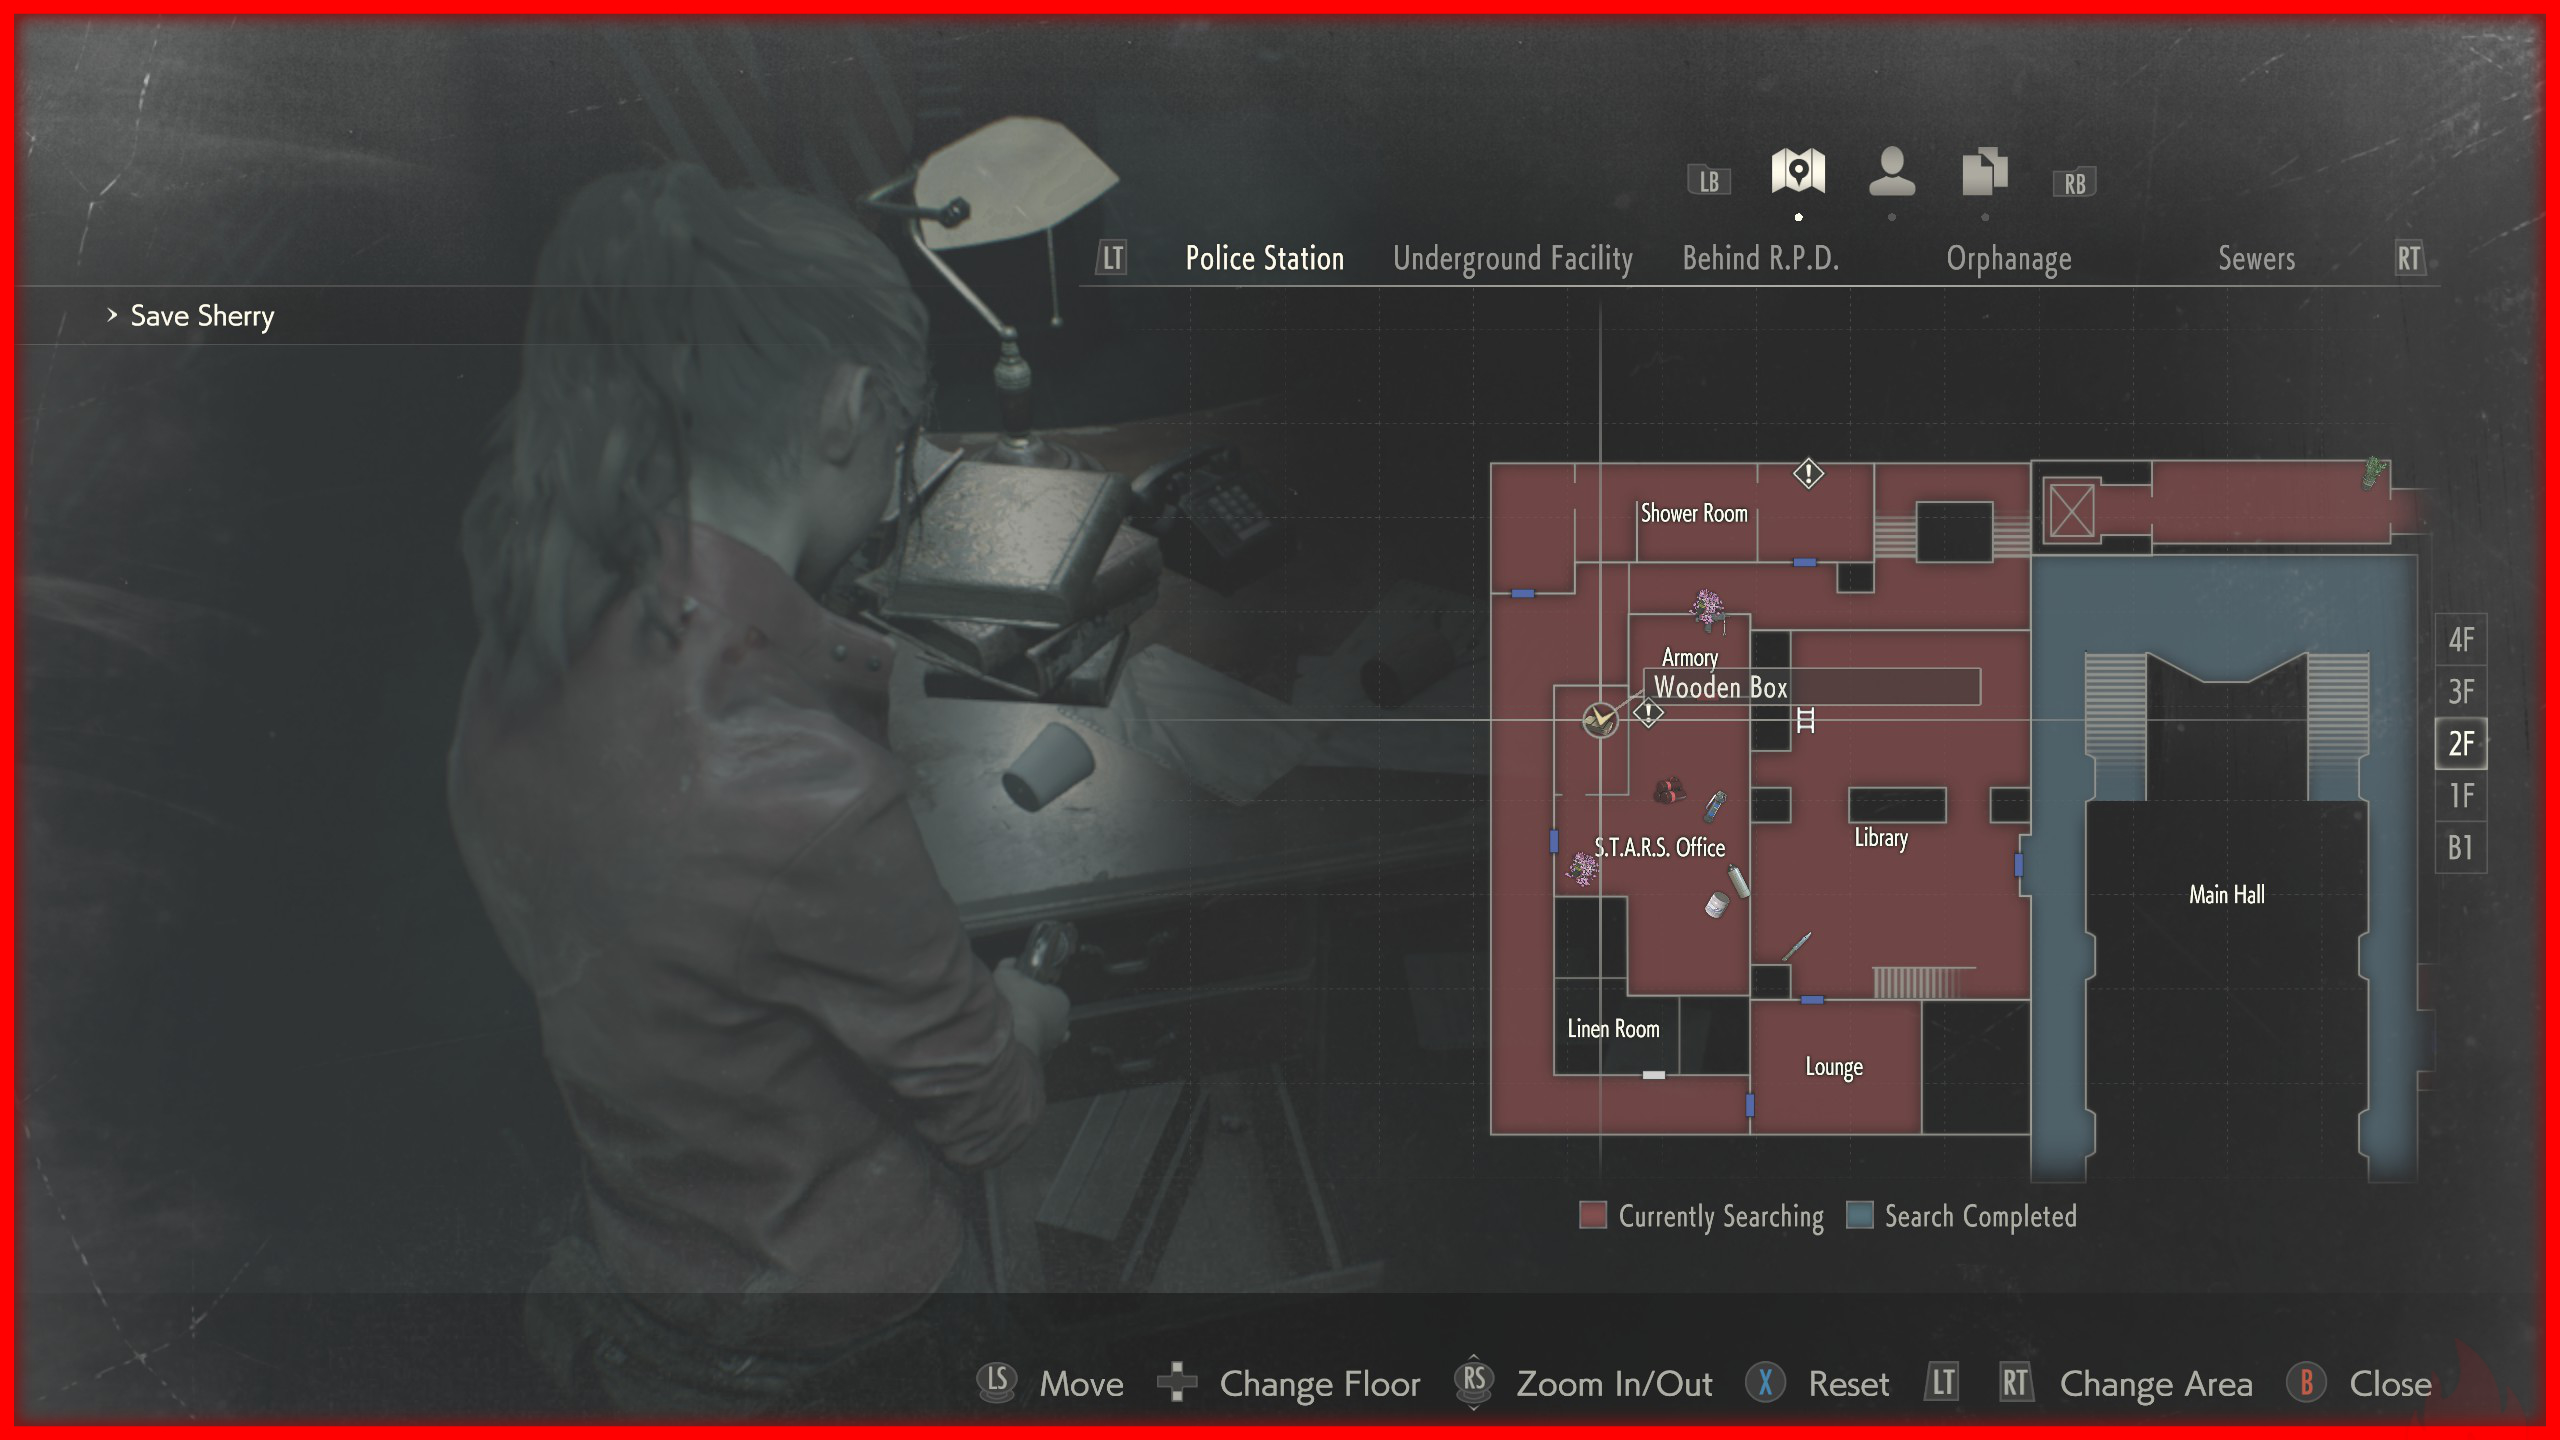
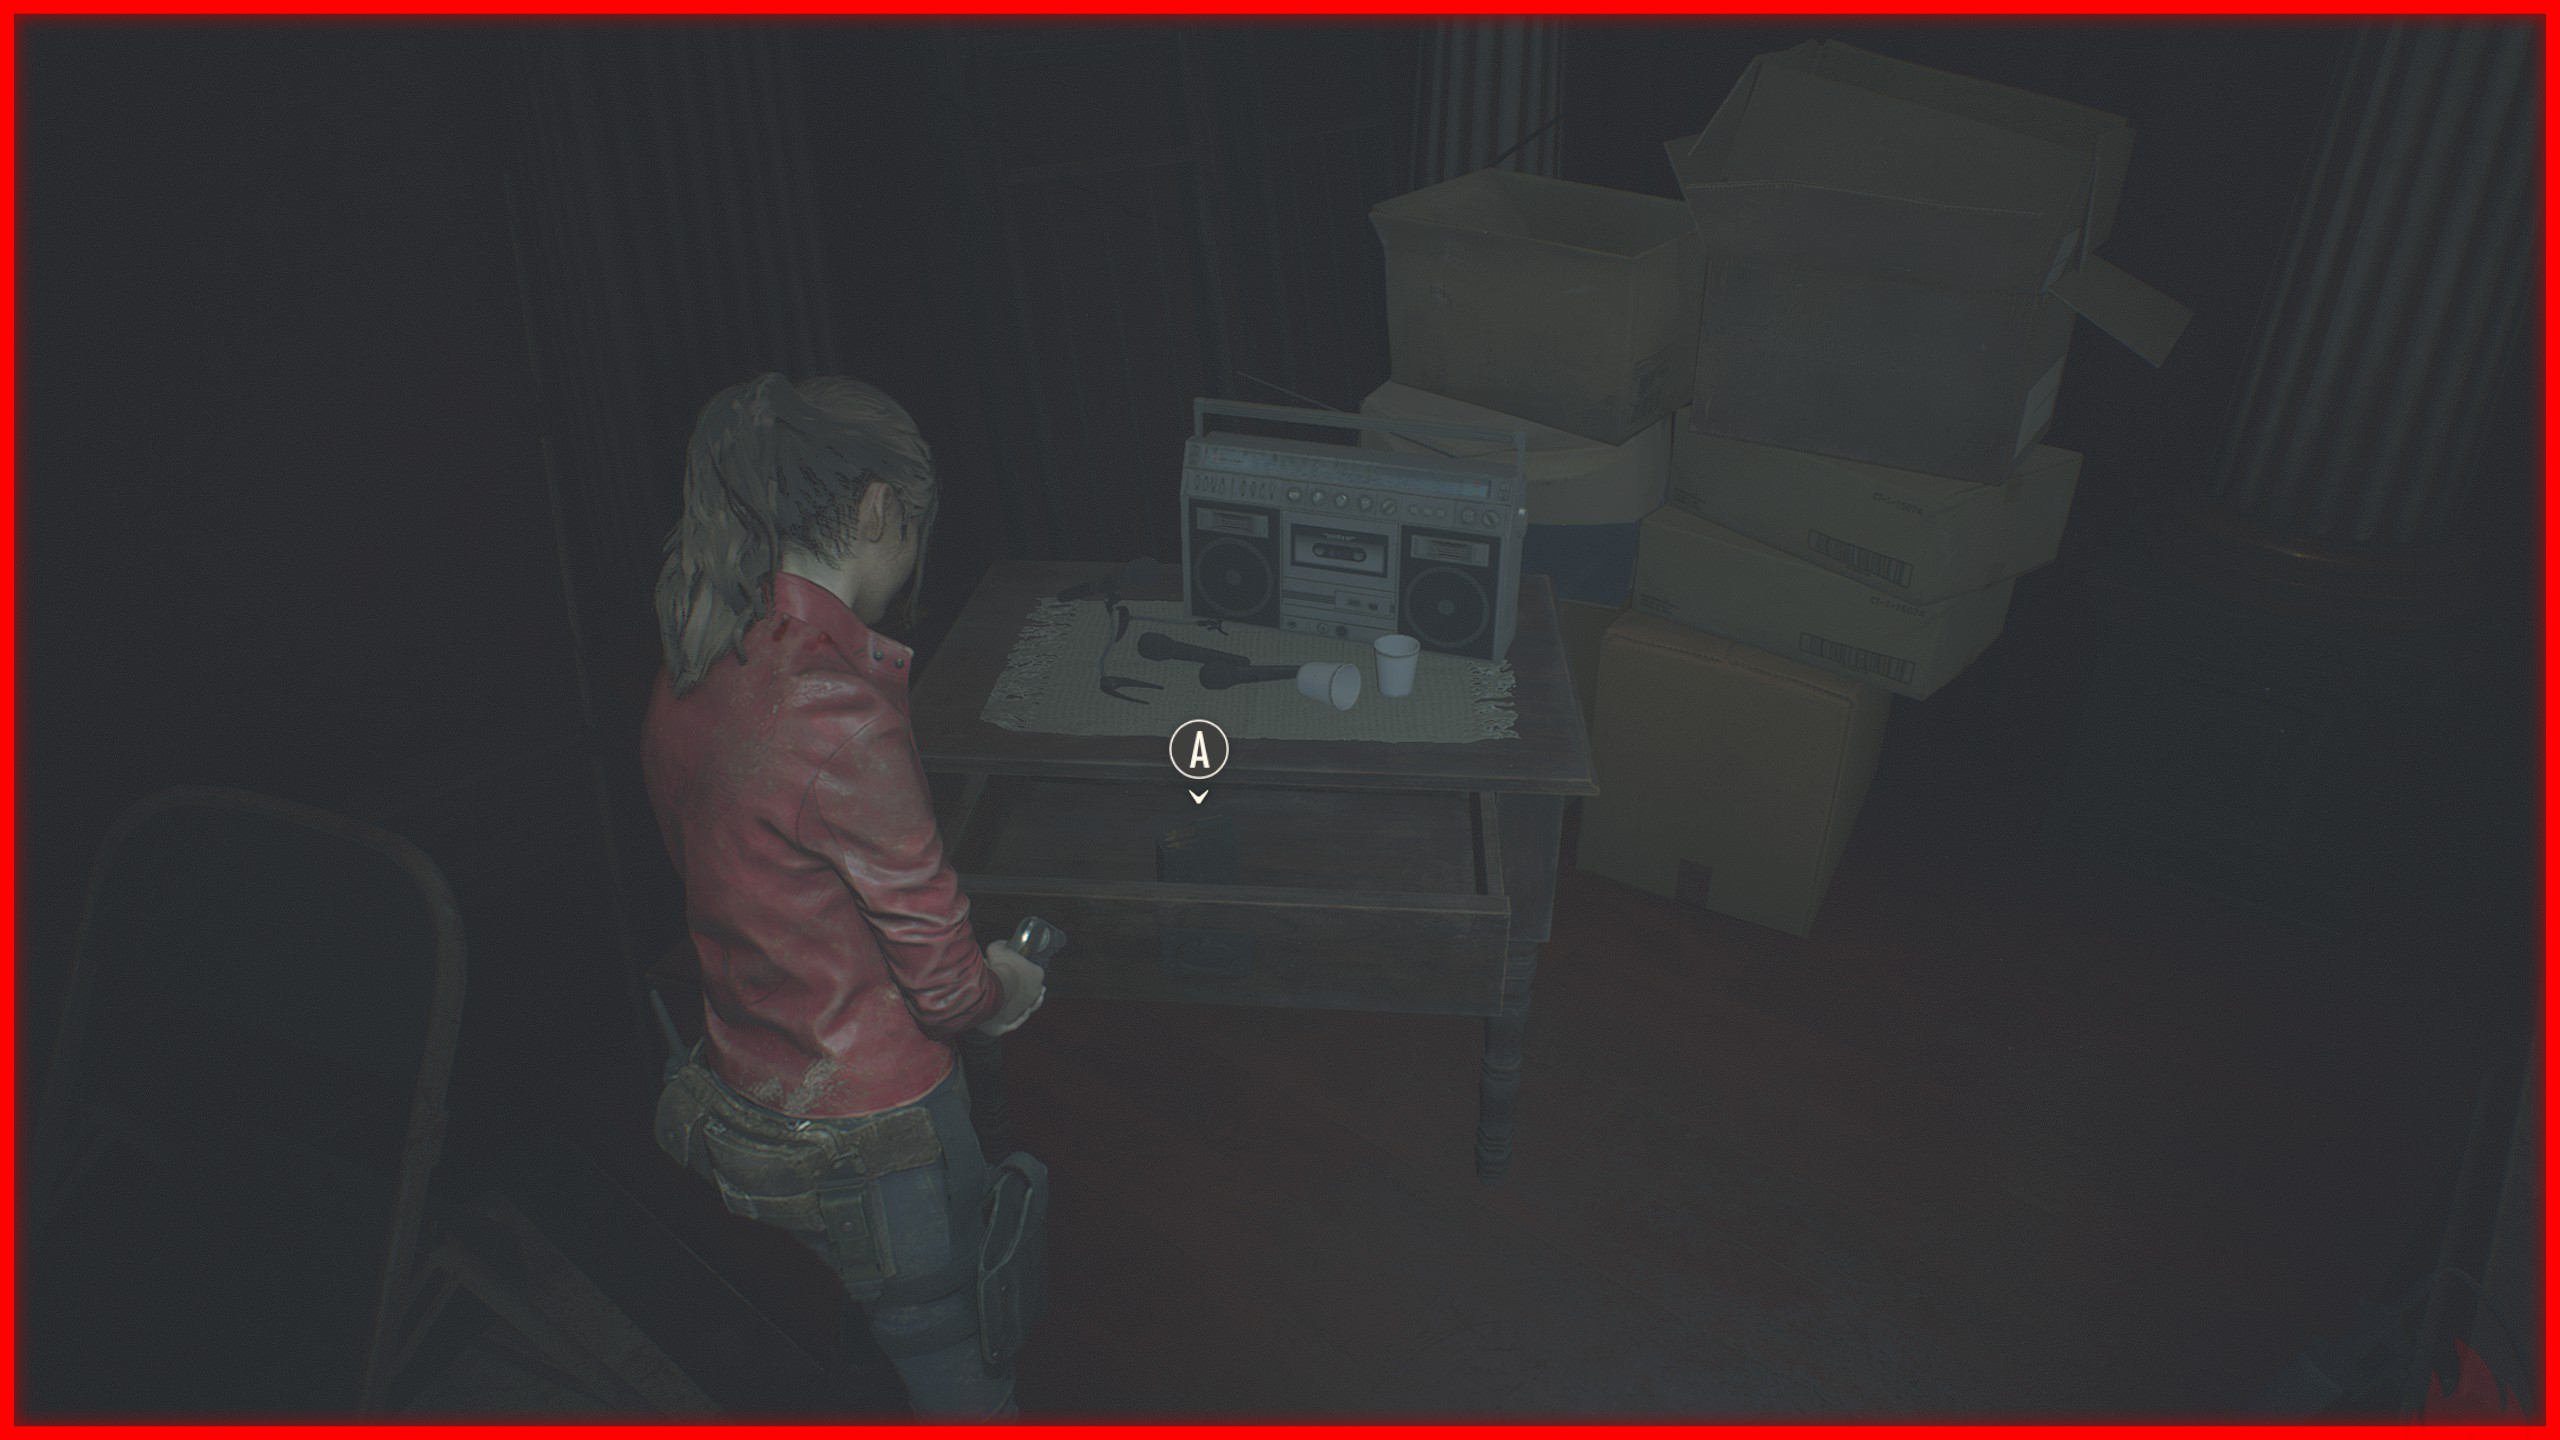
 Police Station 1F - Press Room: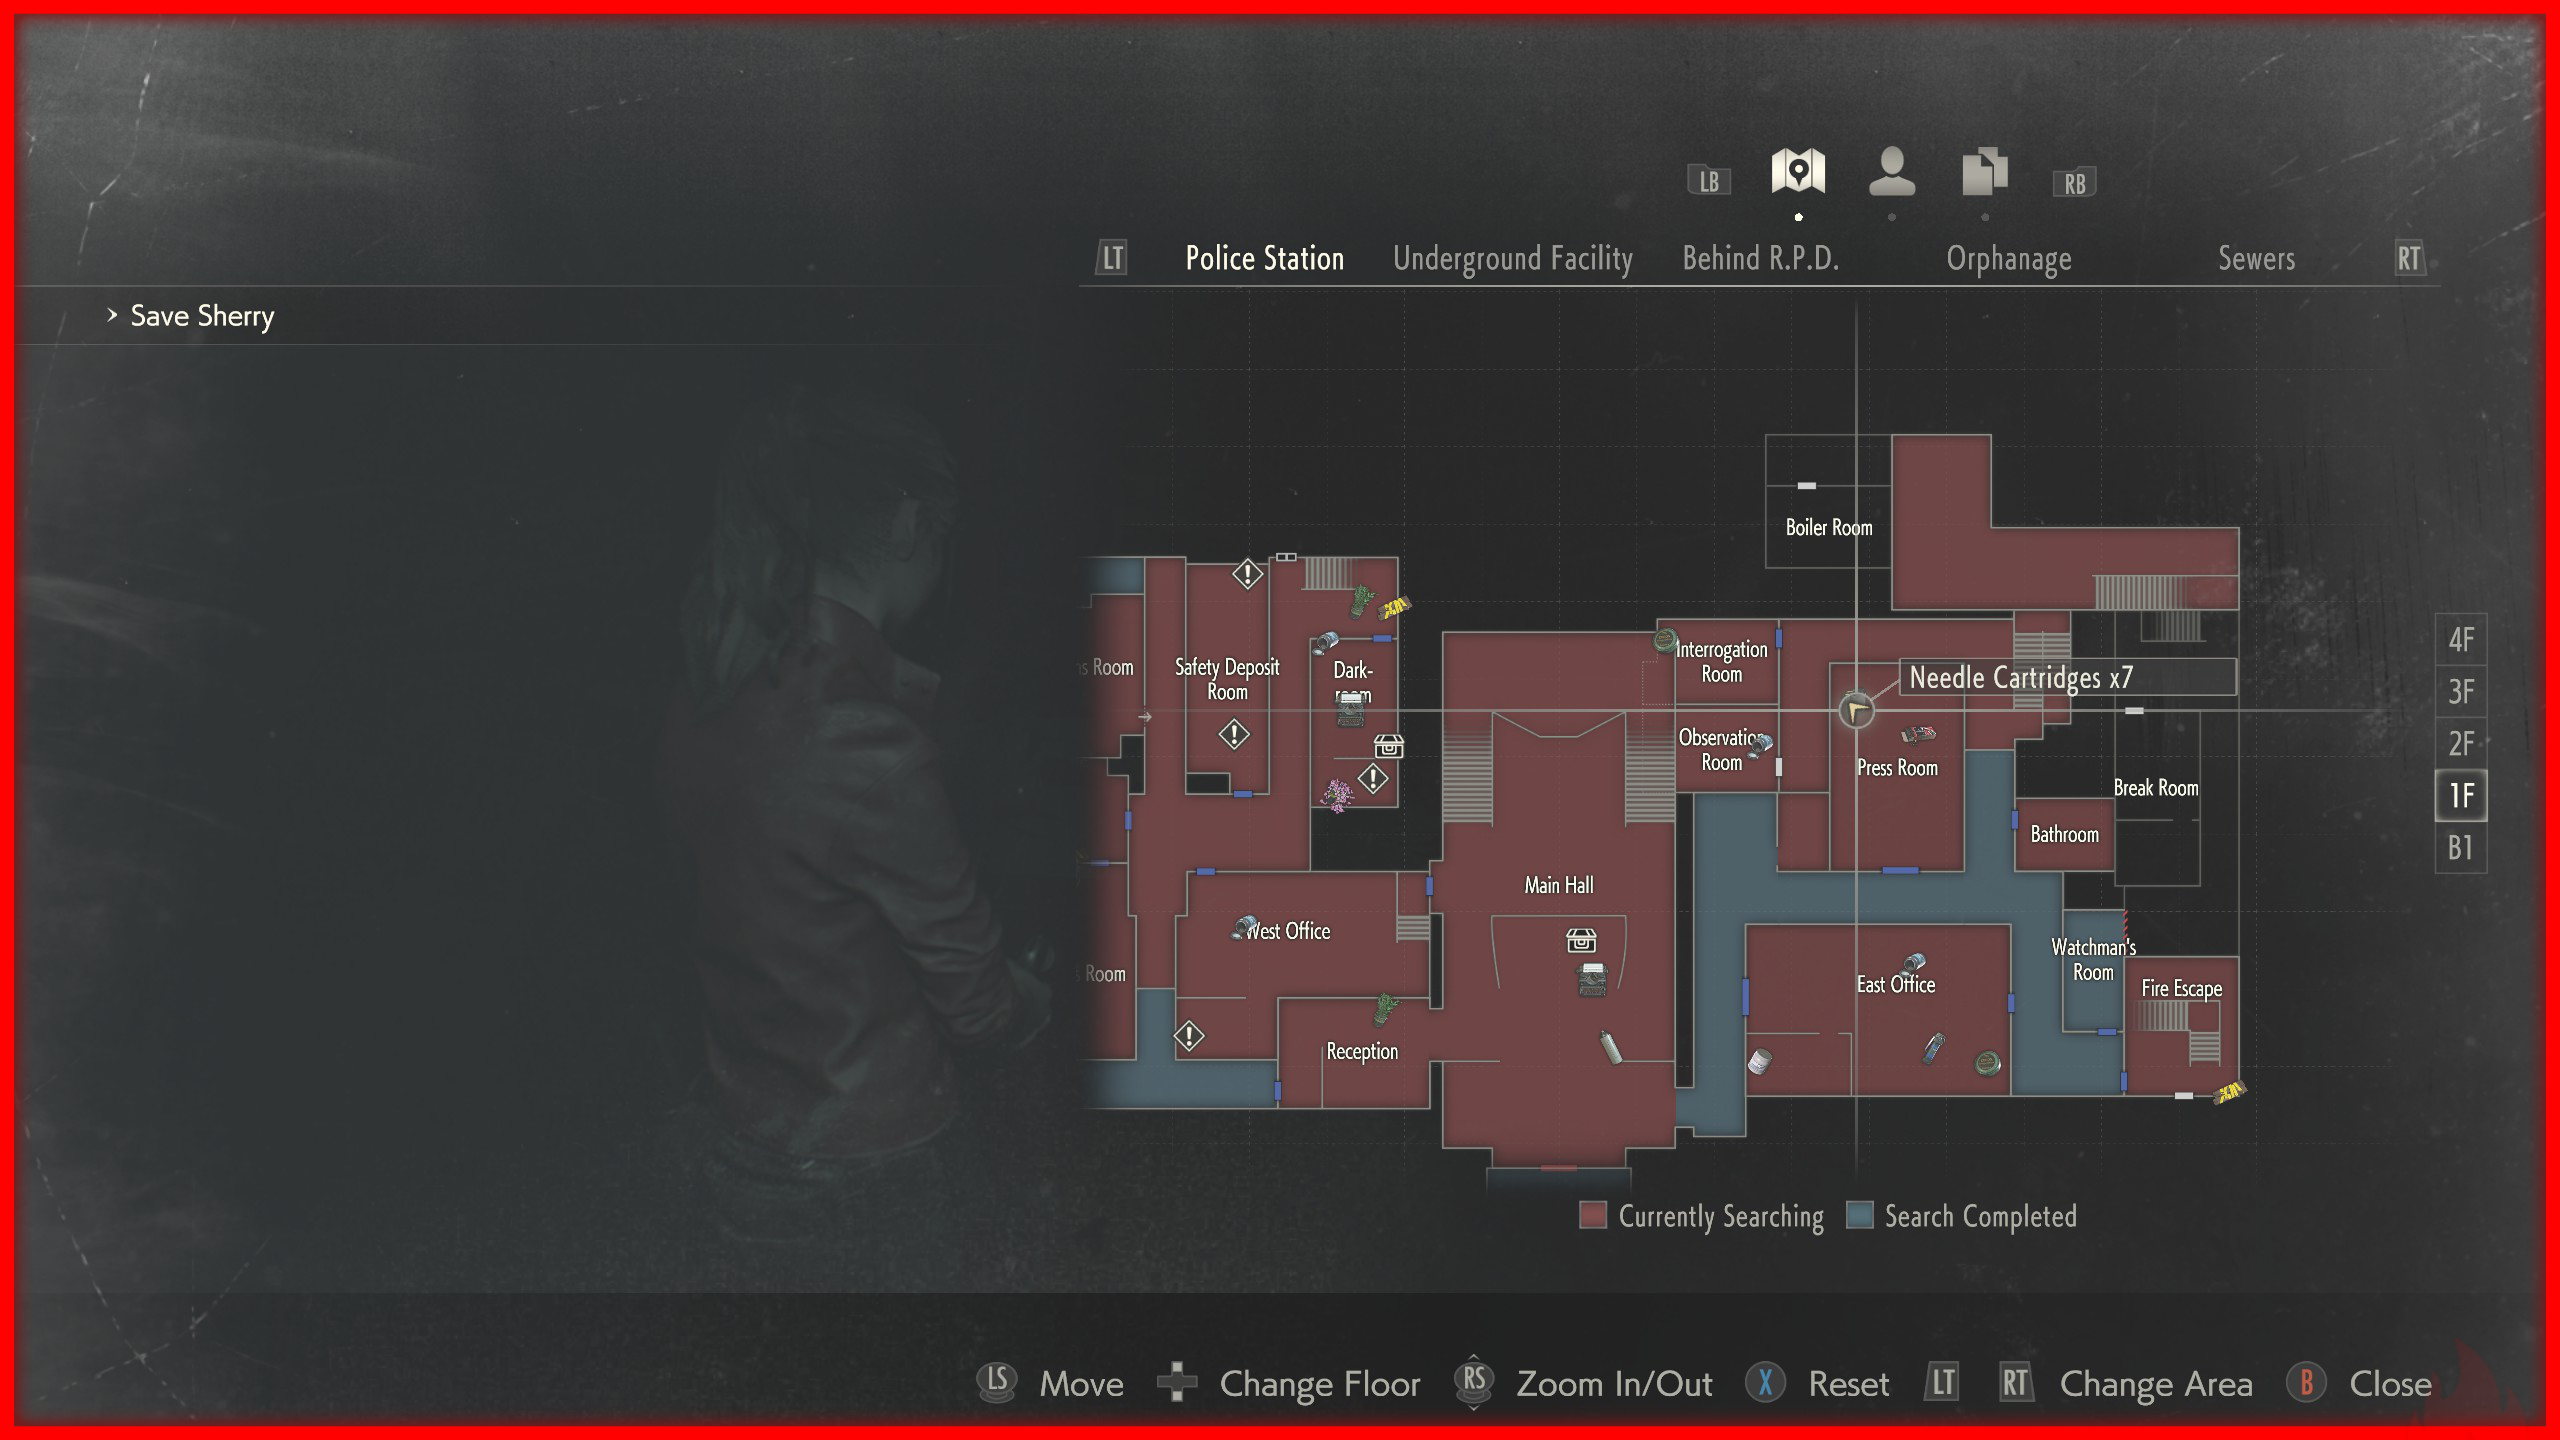
Vermin Extermination ❌
 Obtained by destroying a Mr. Raccoon. See the achievement below for the locations of all Mr. Raccoons.
Complete Vermin Extermination ❌
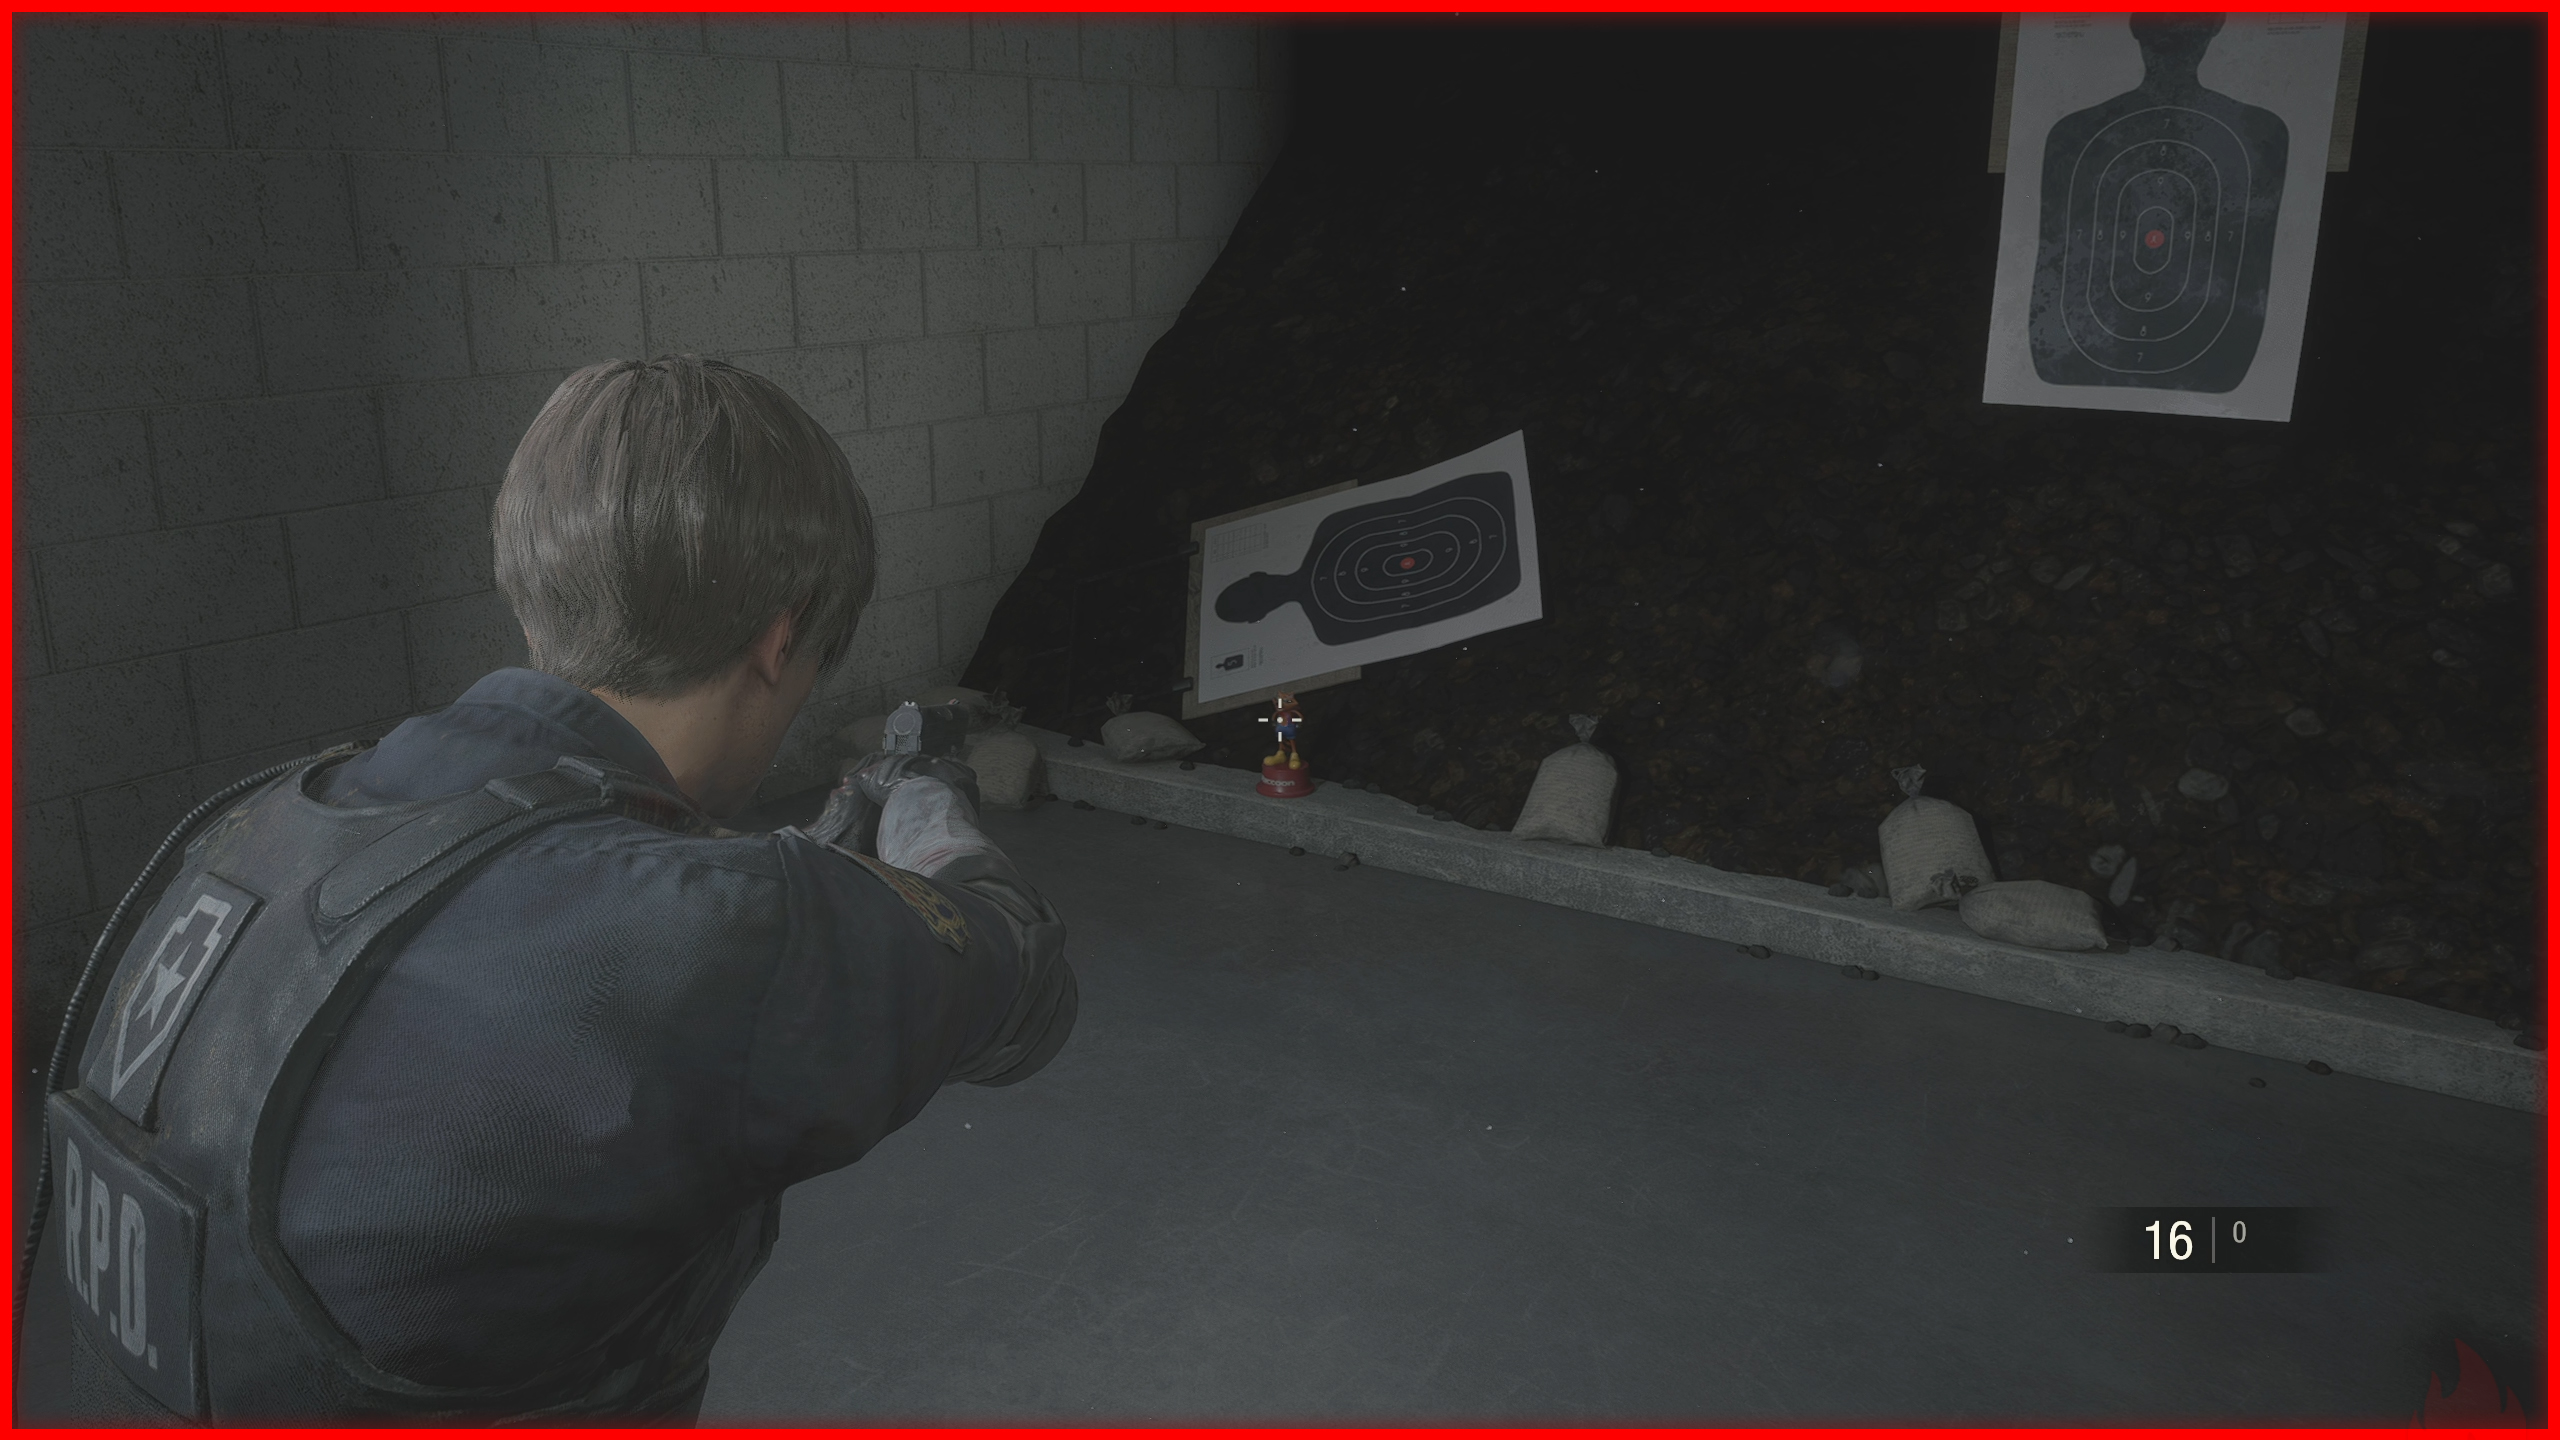
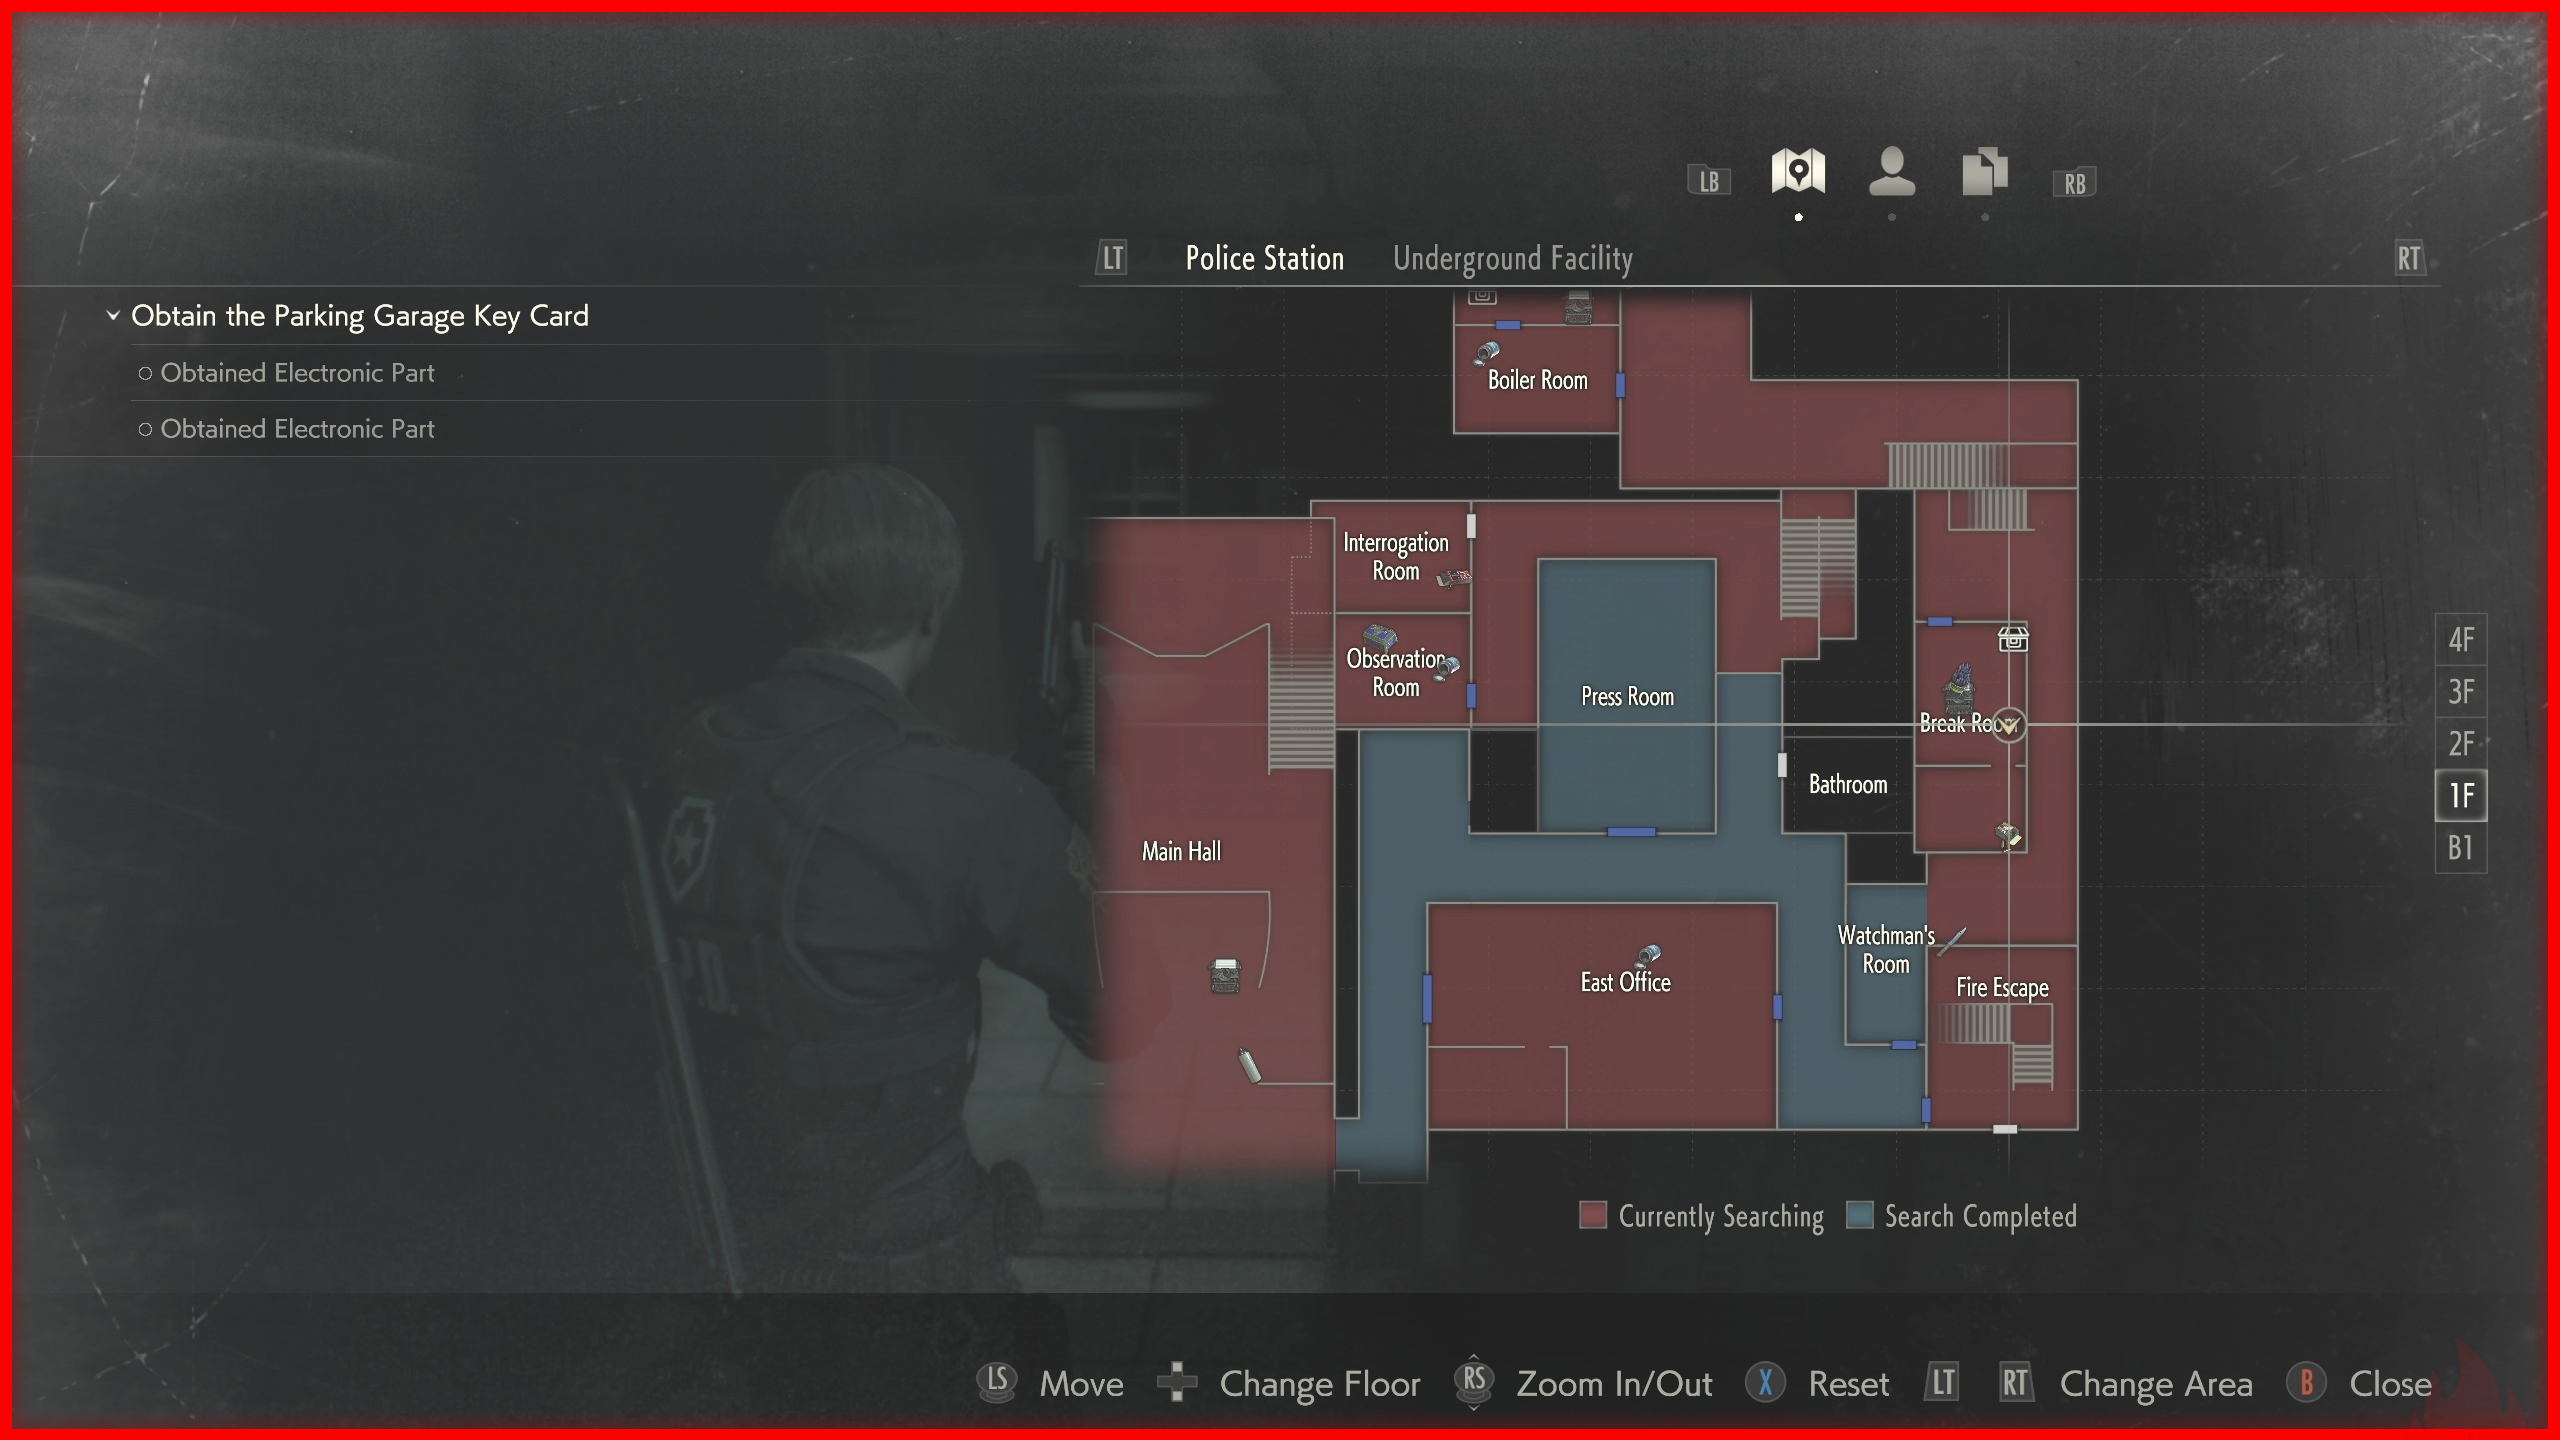
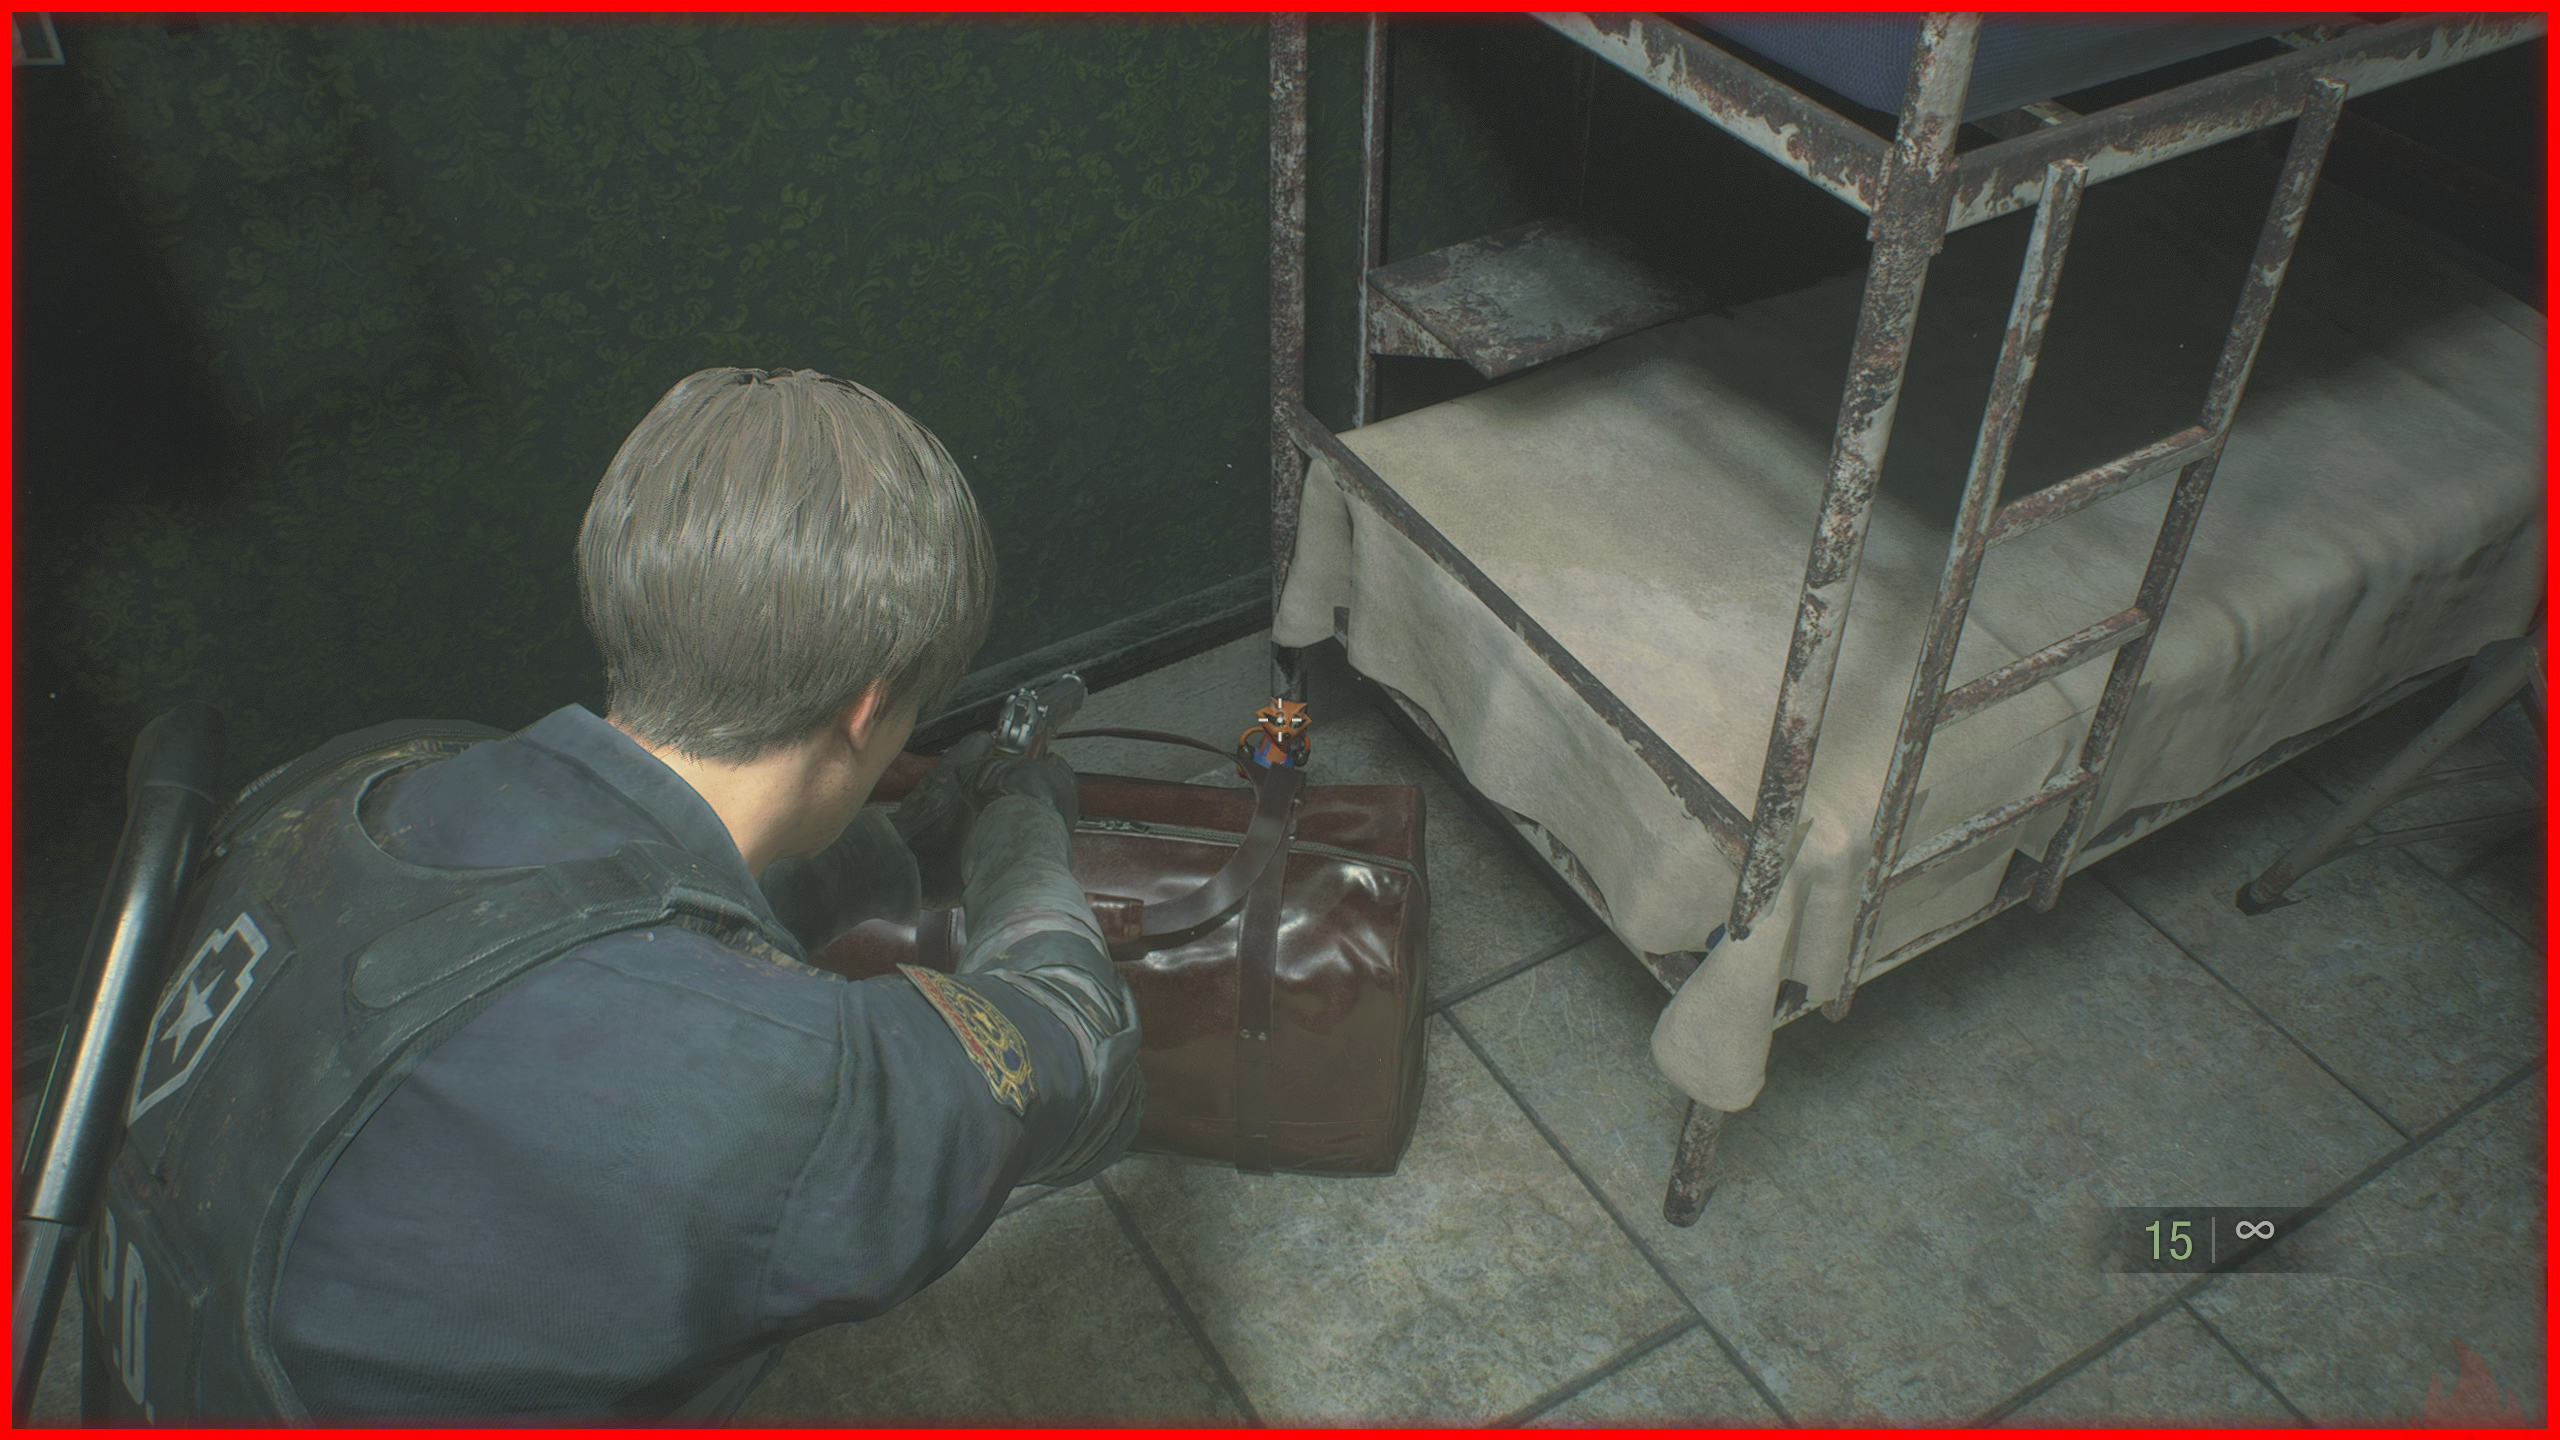
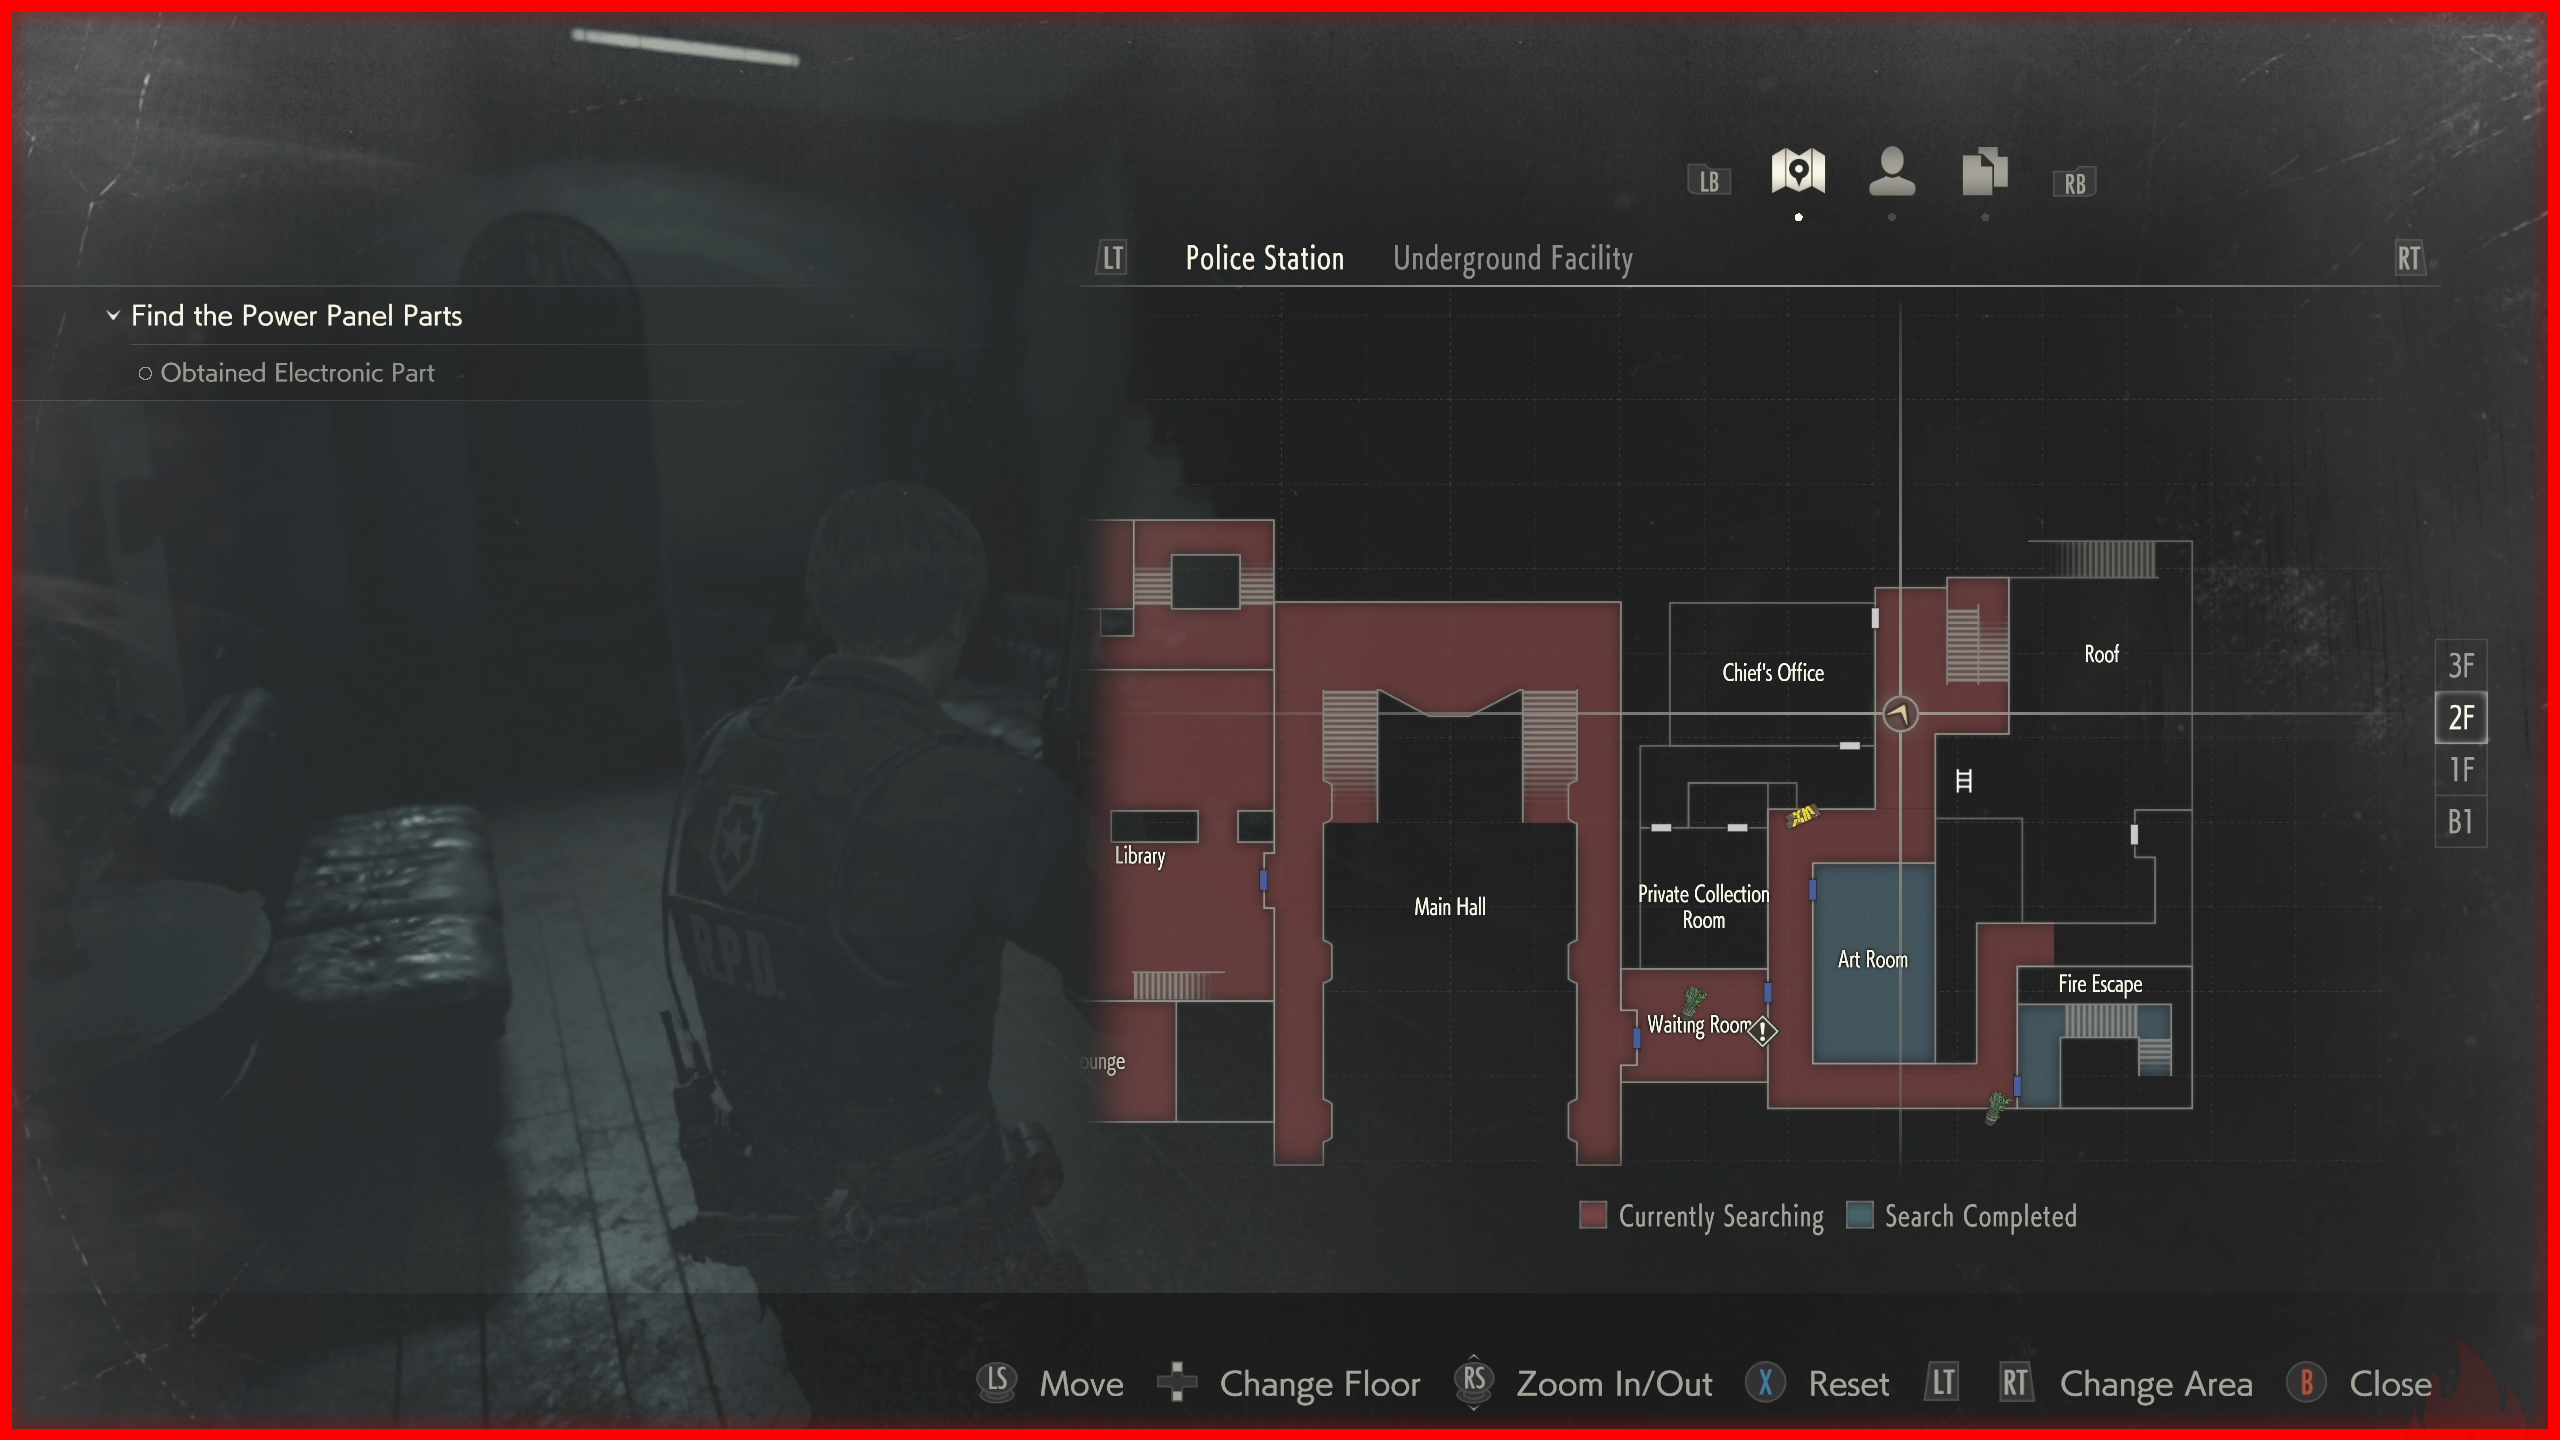
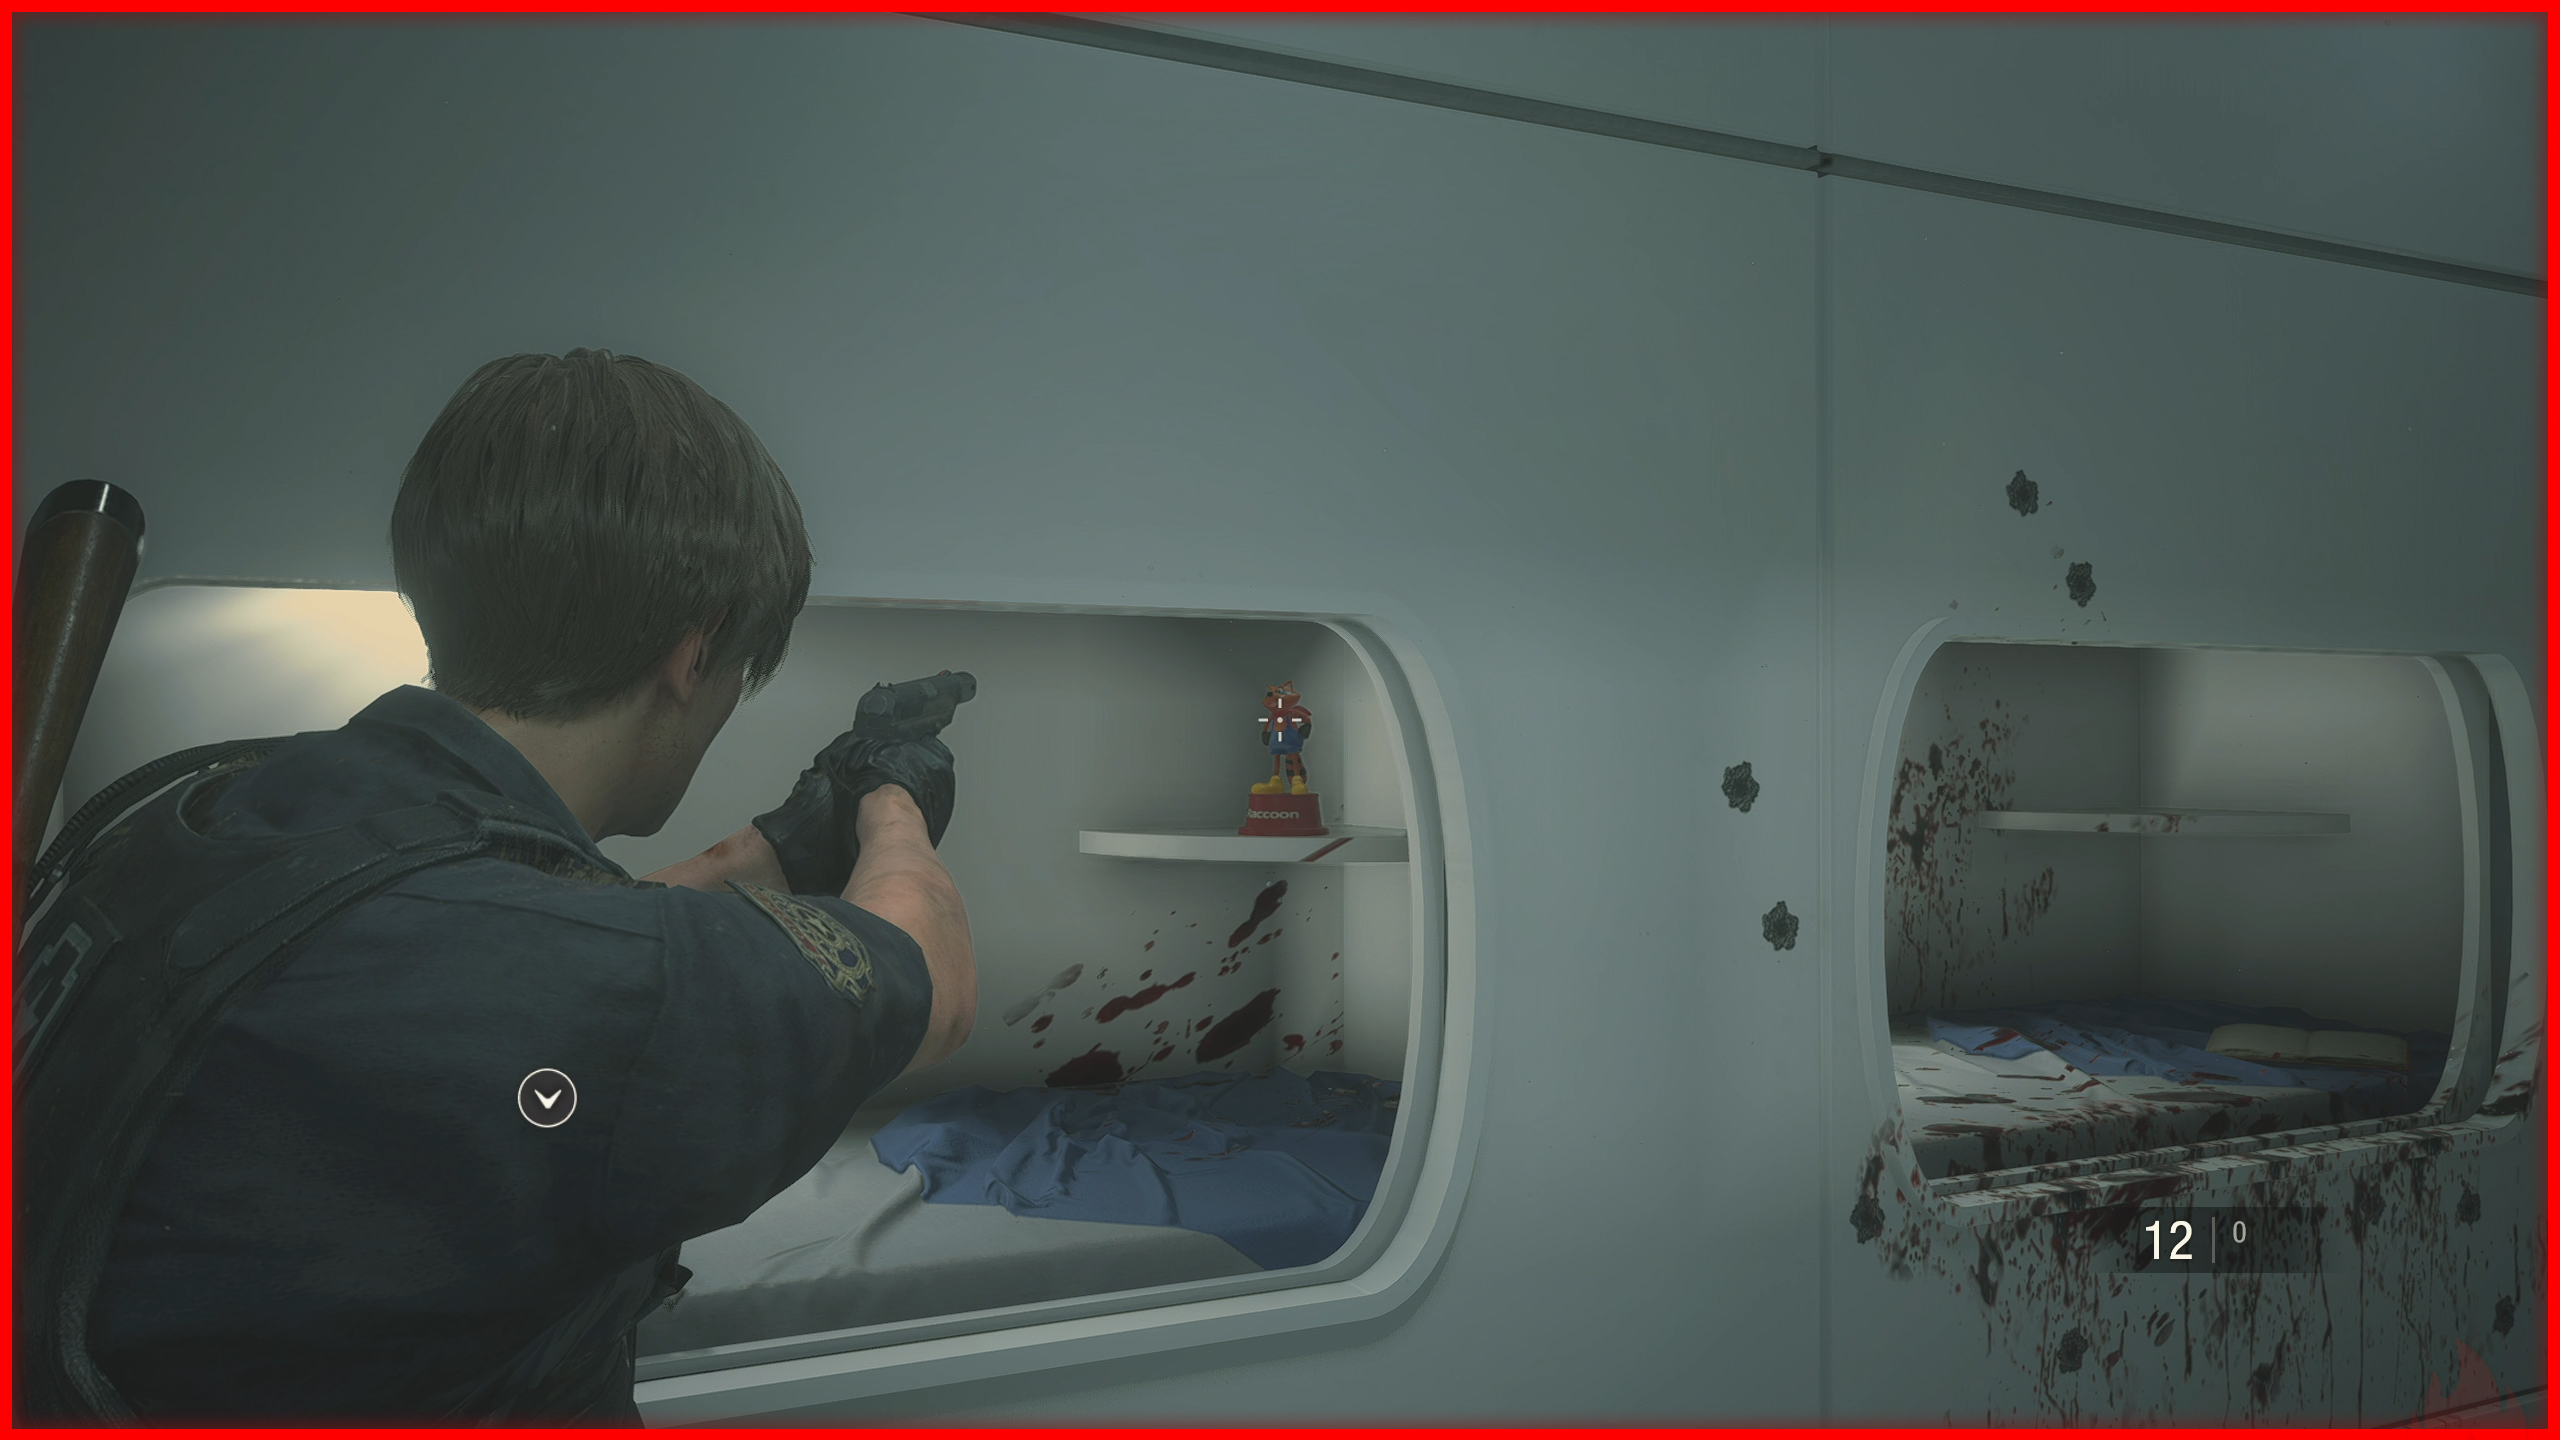
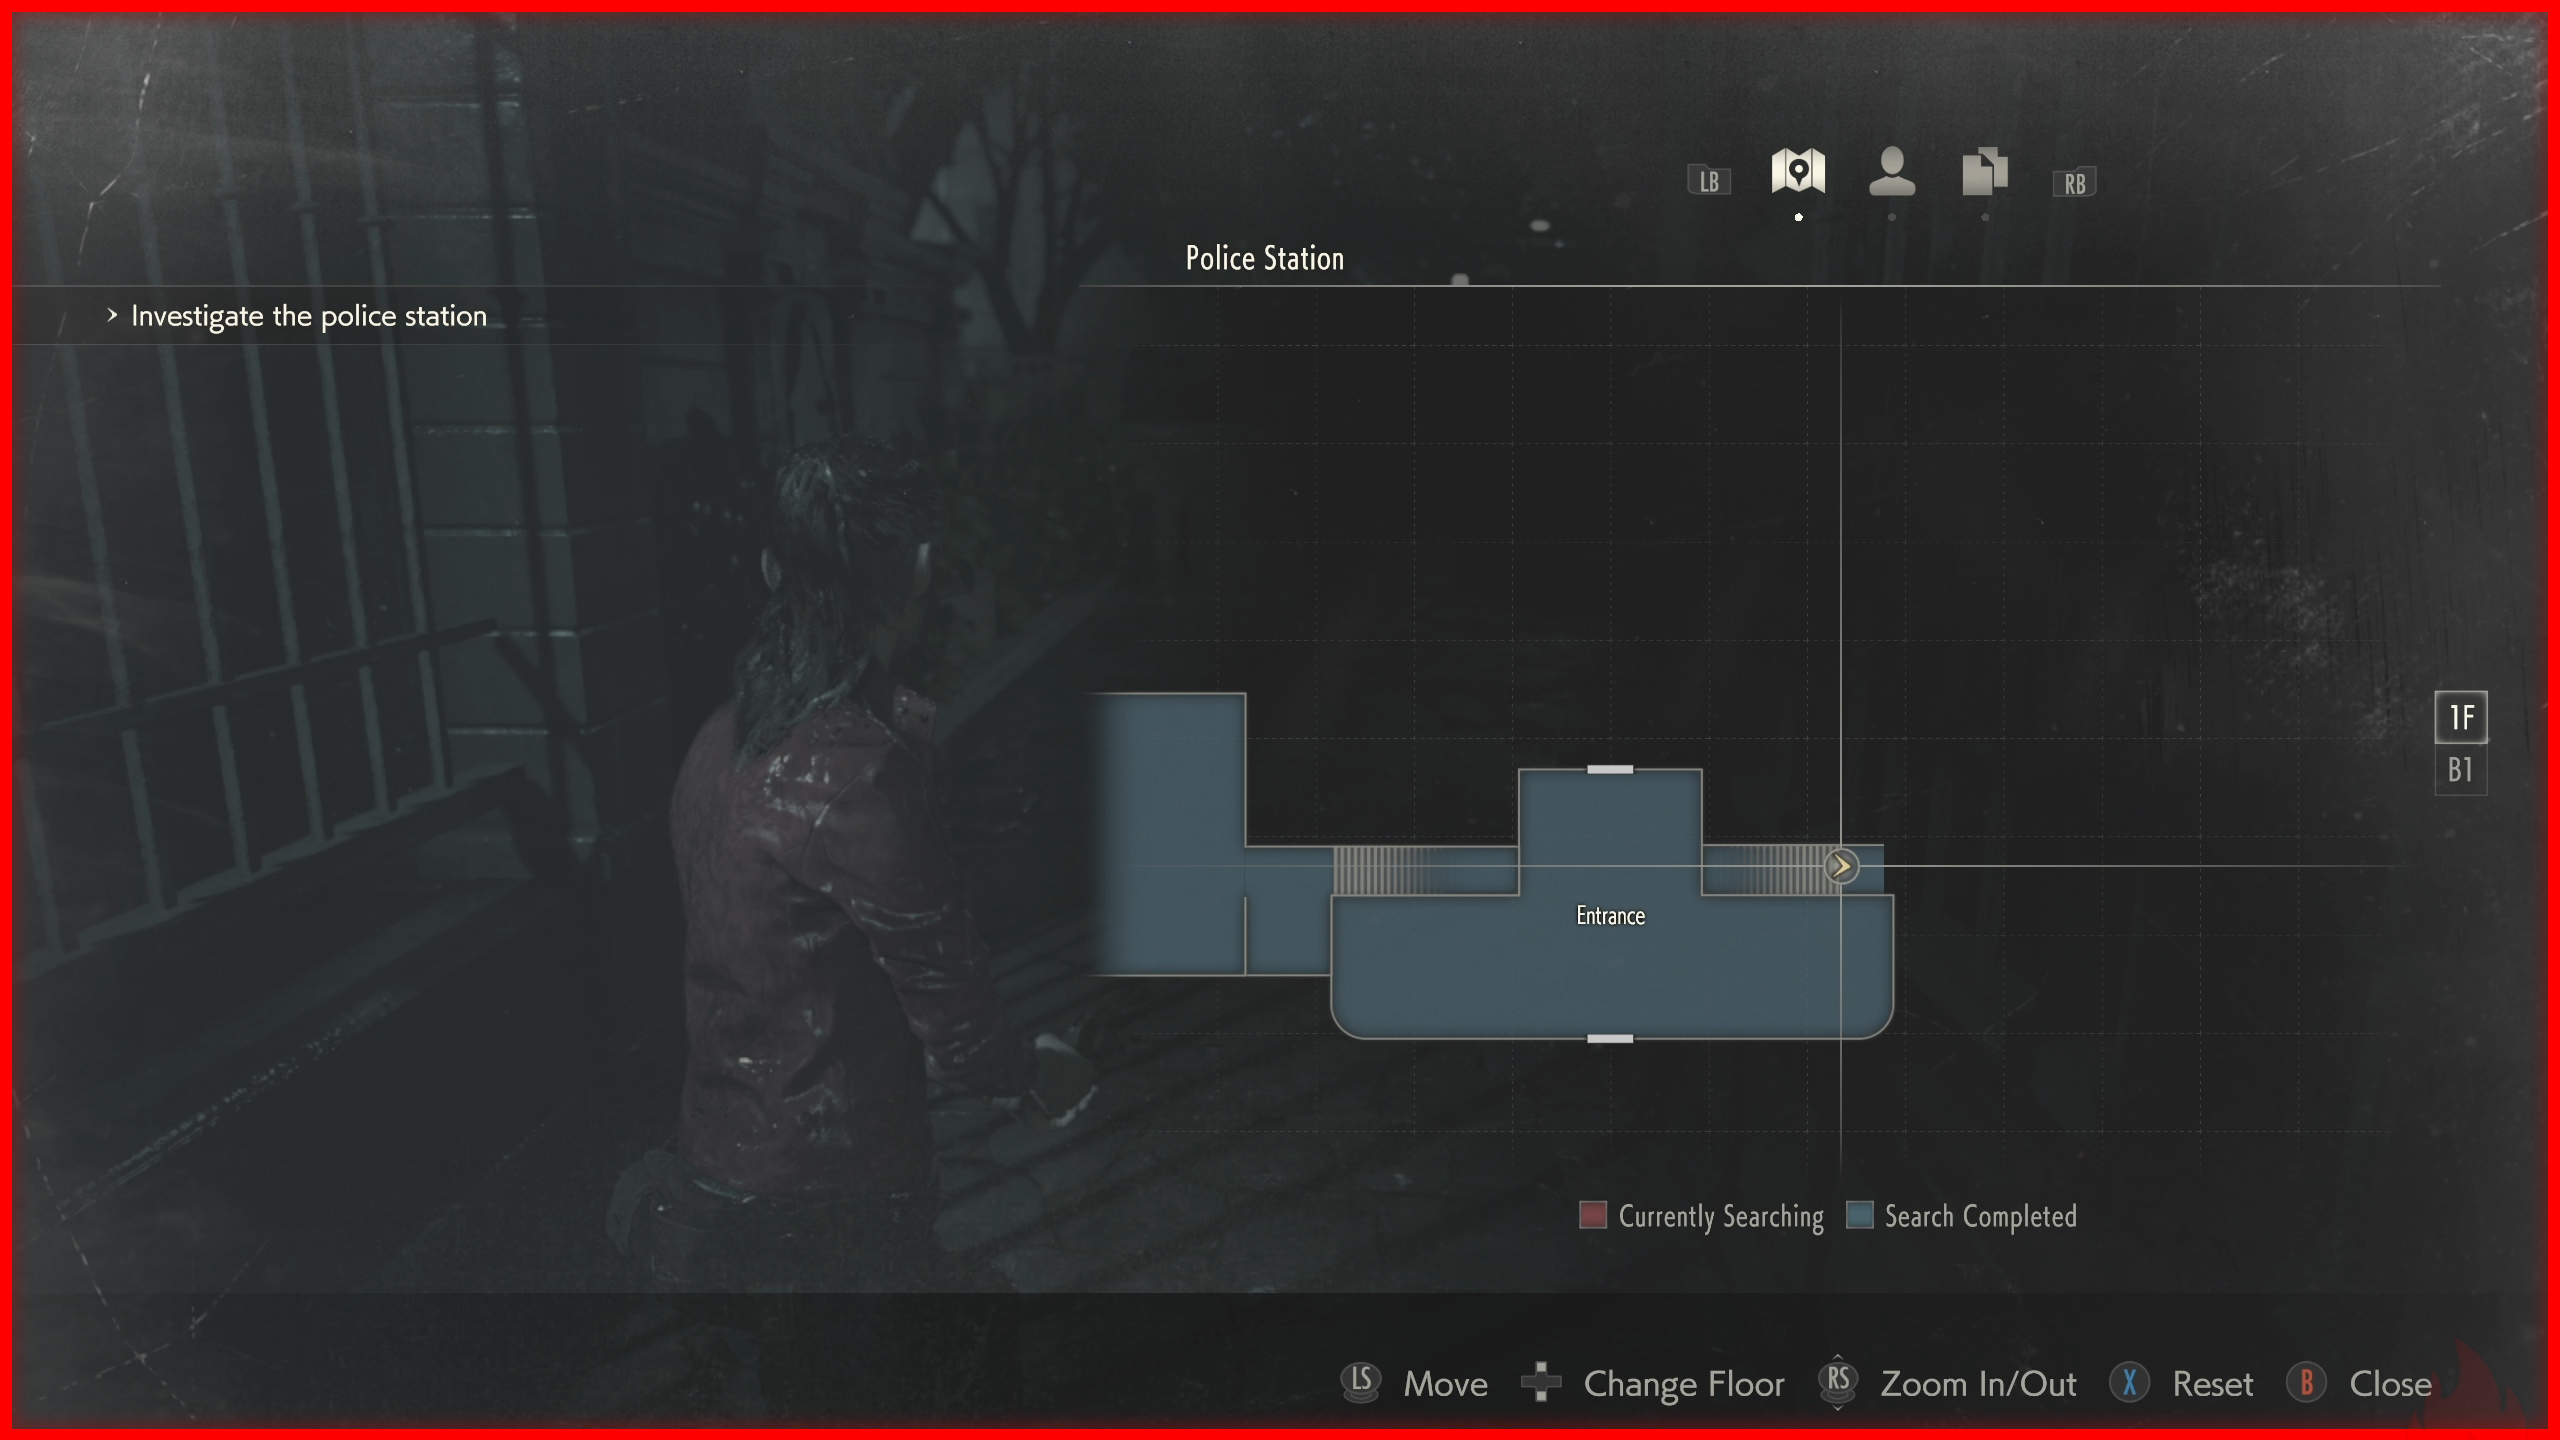
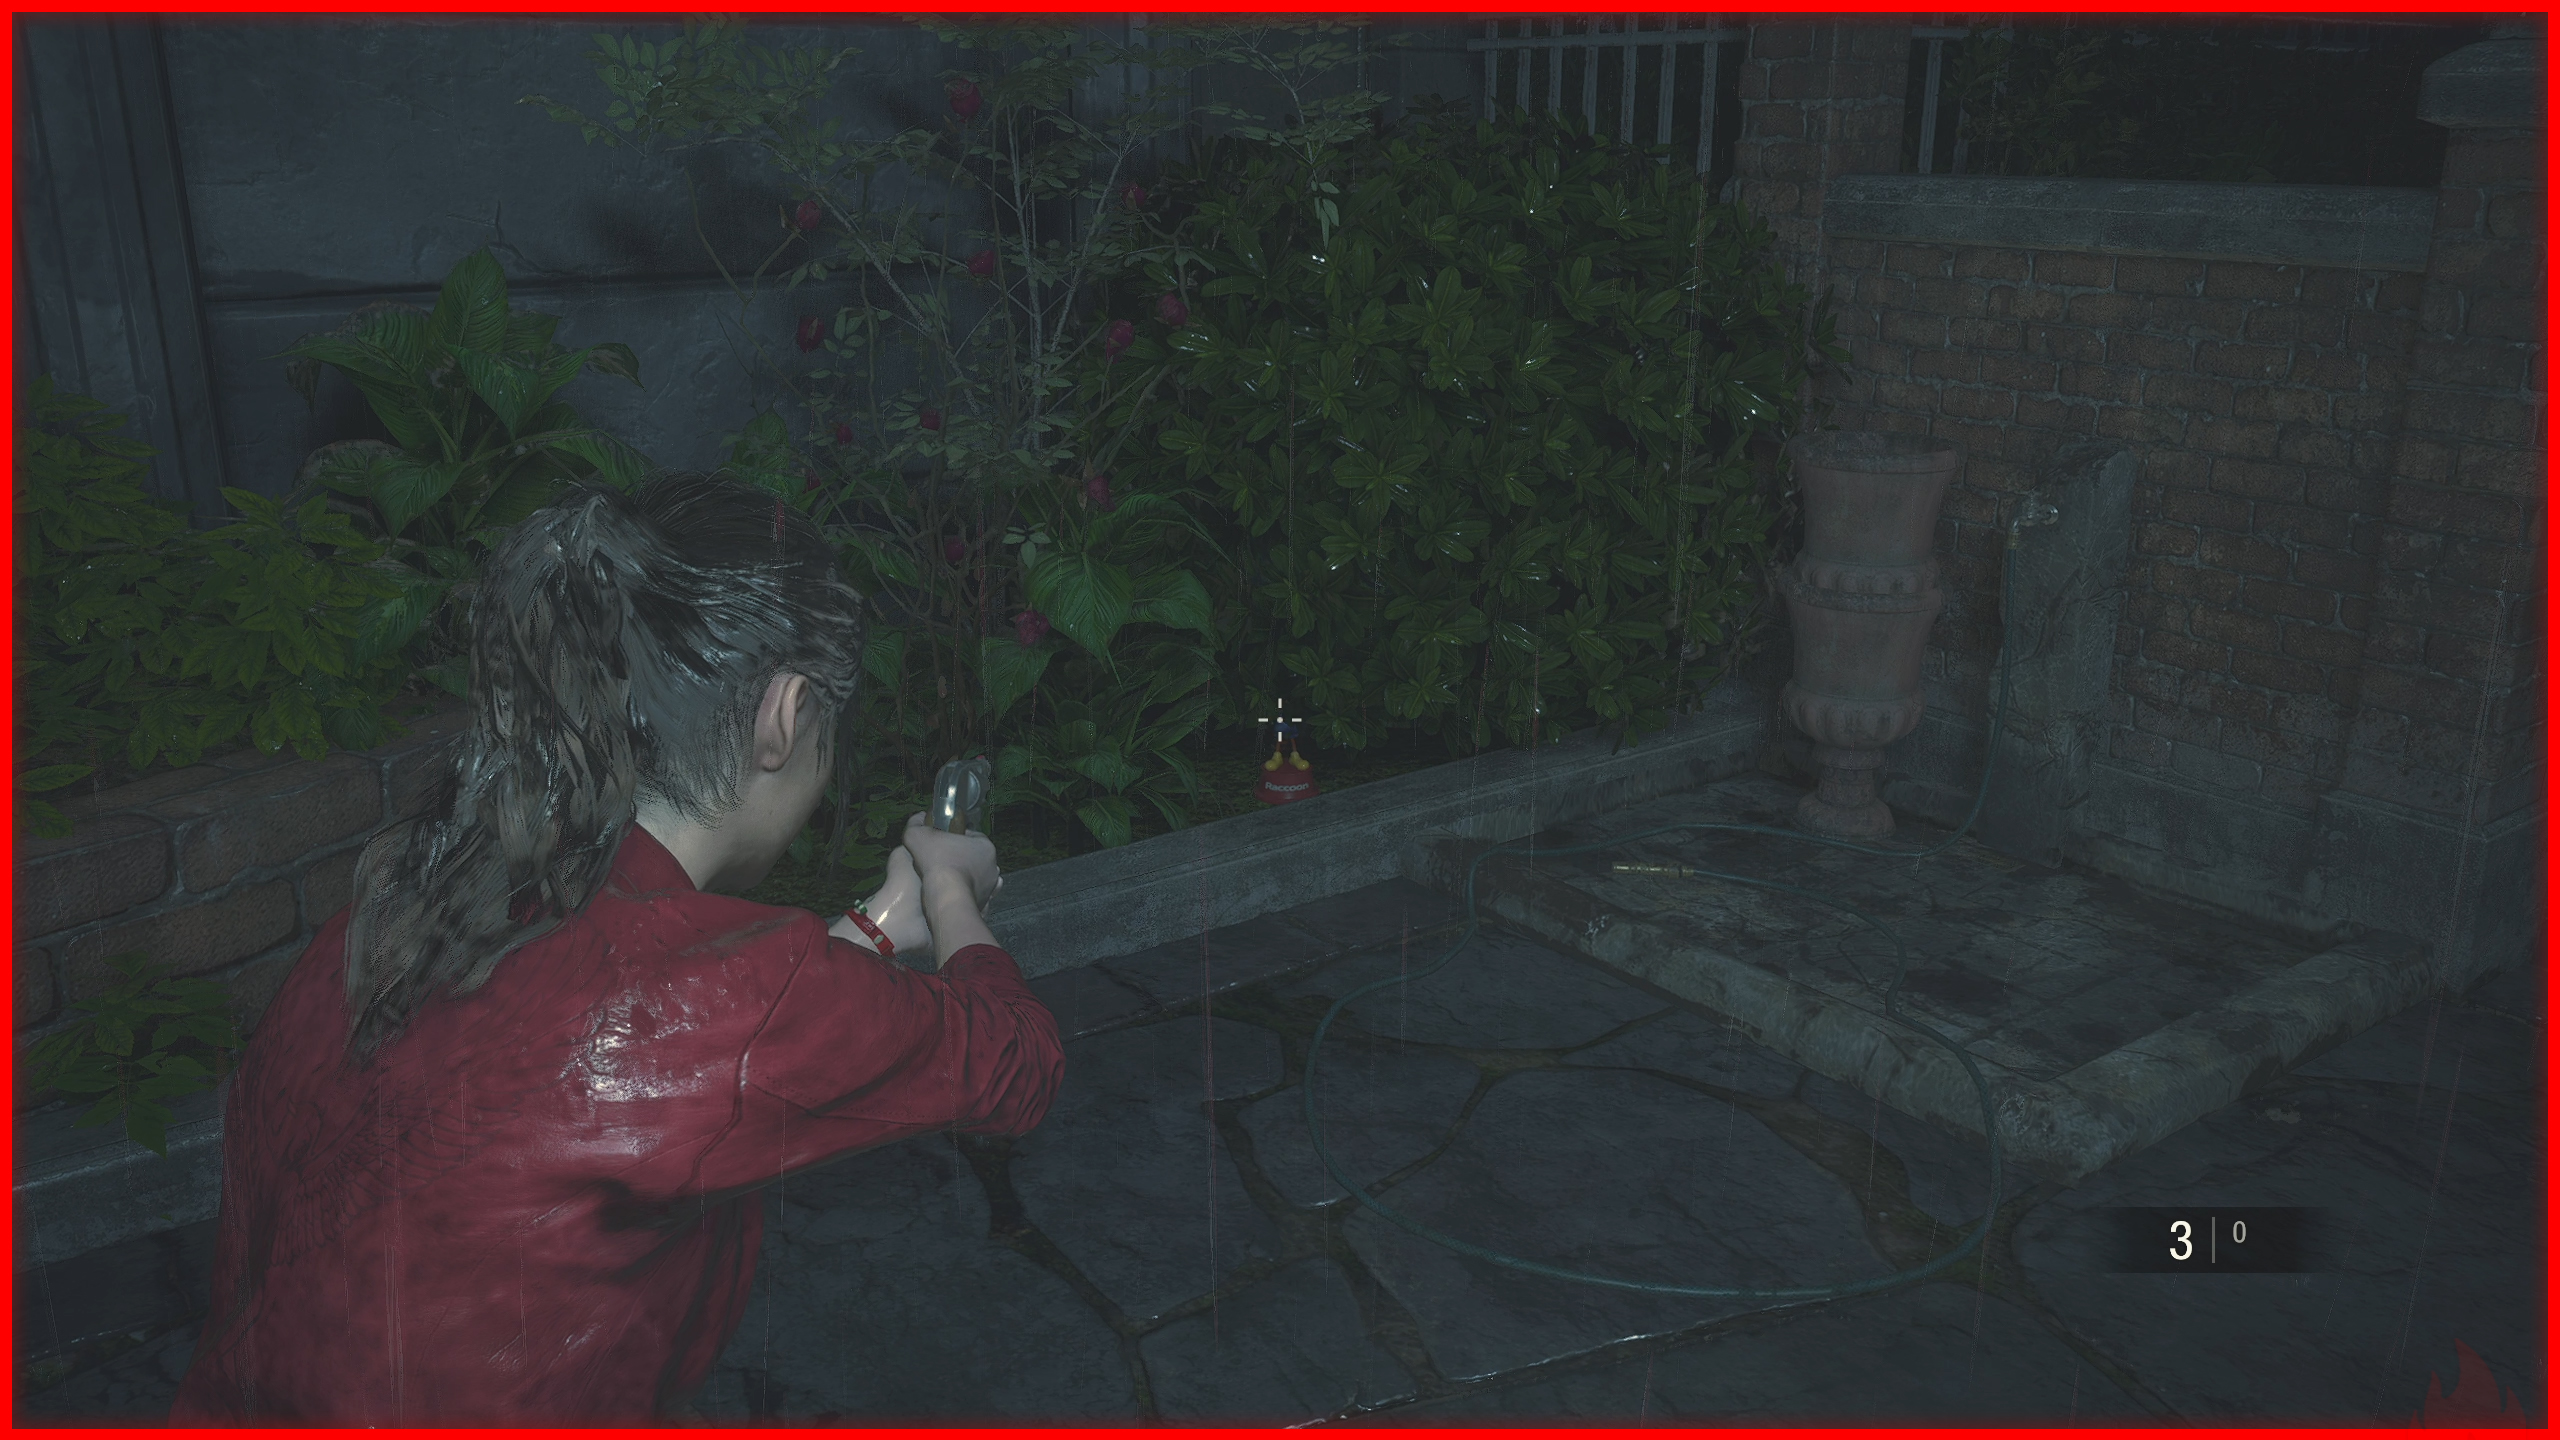
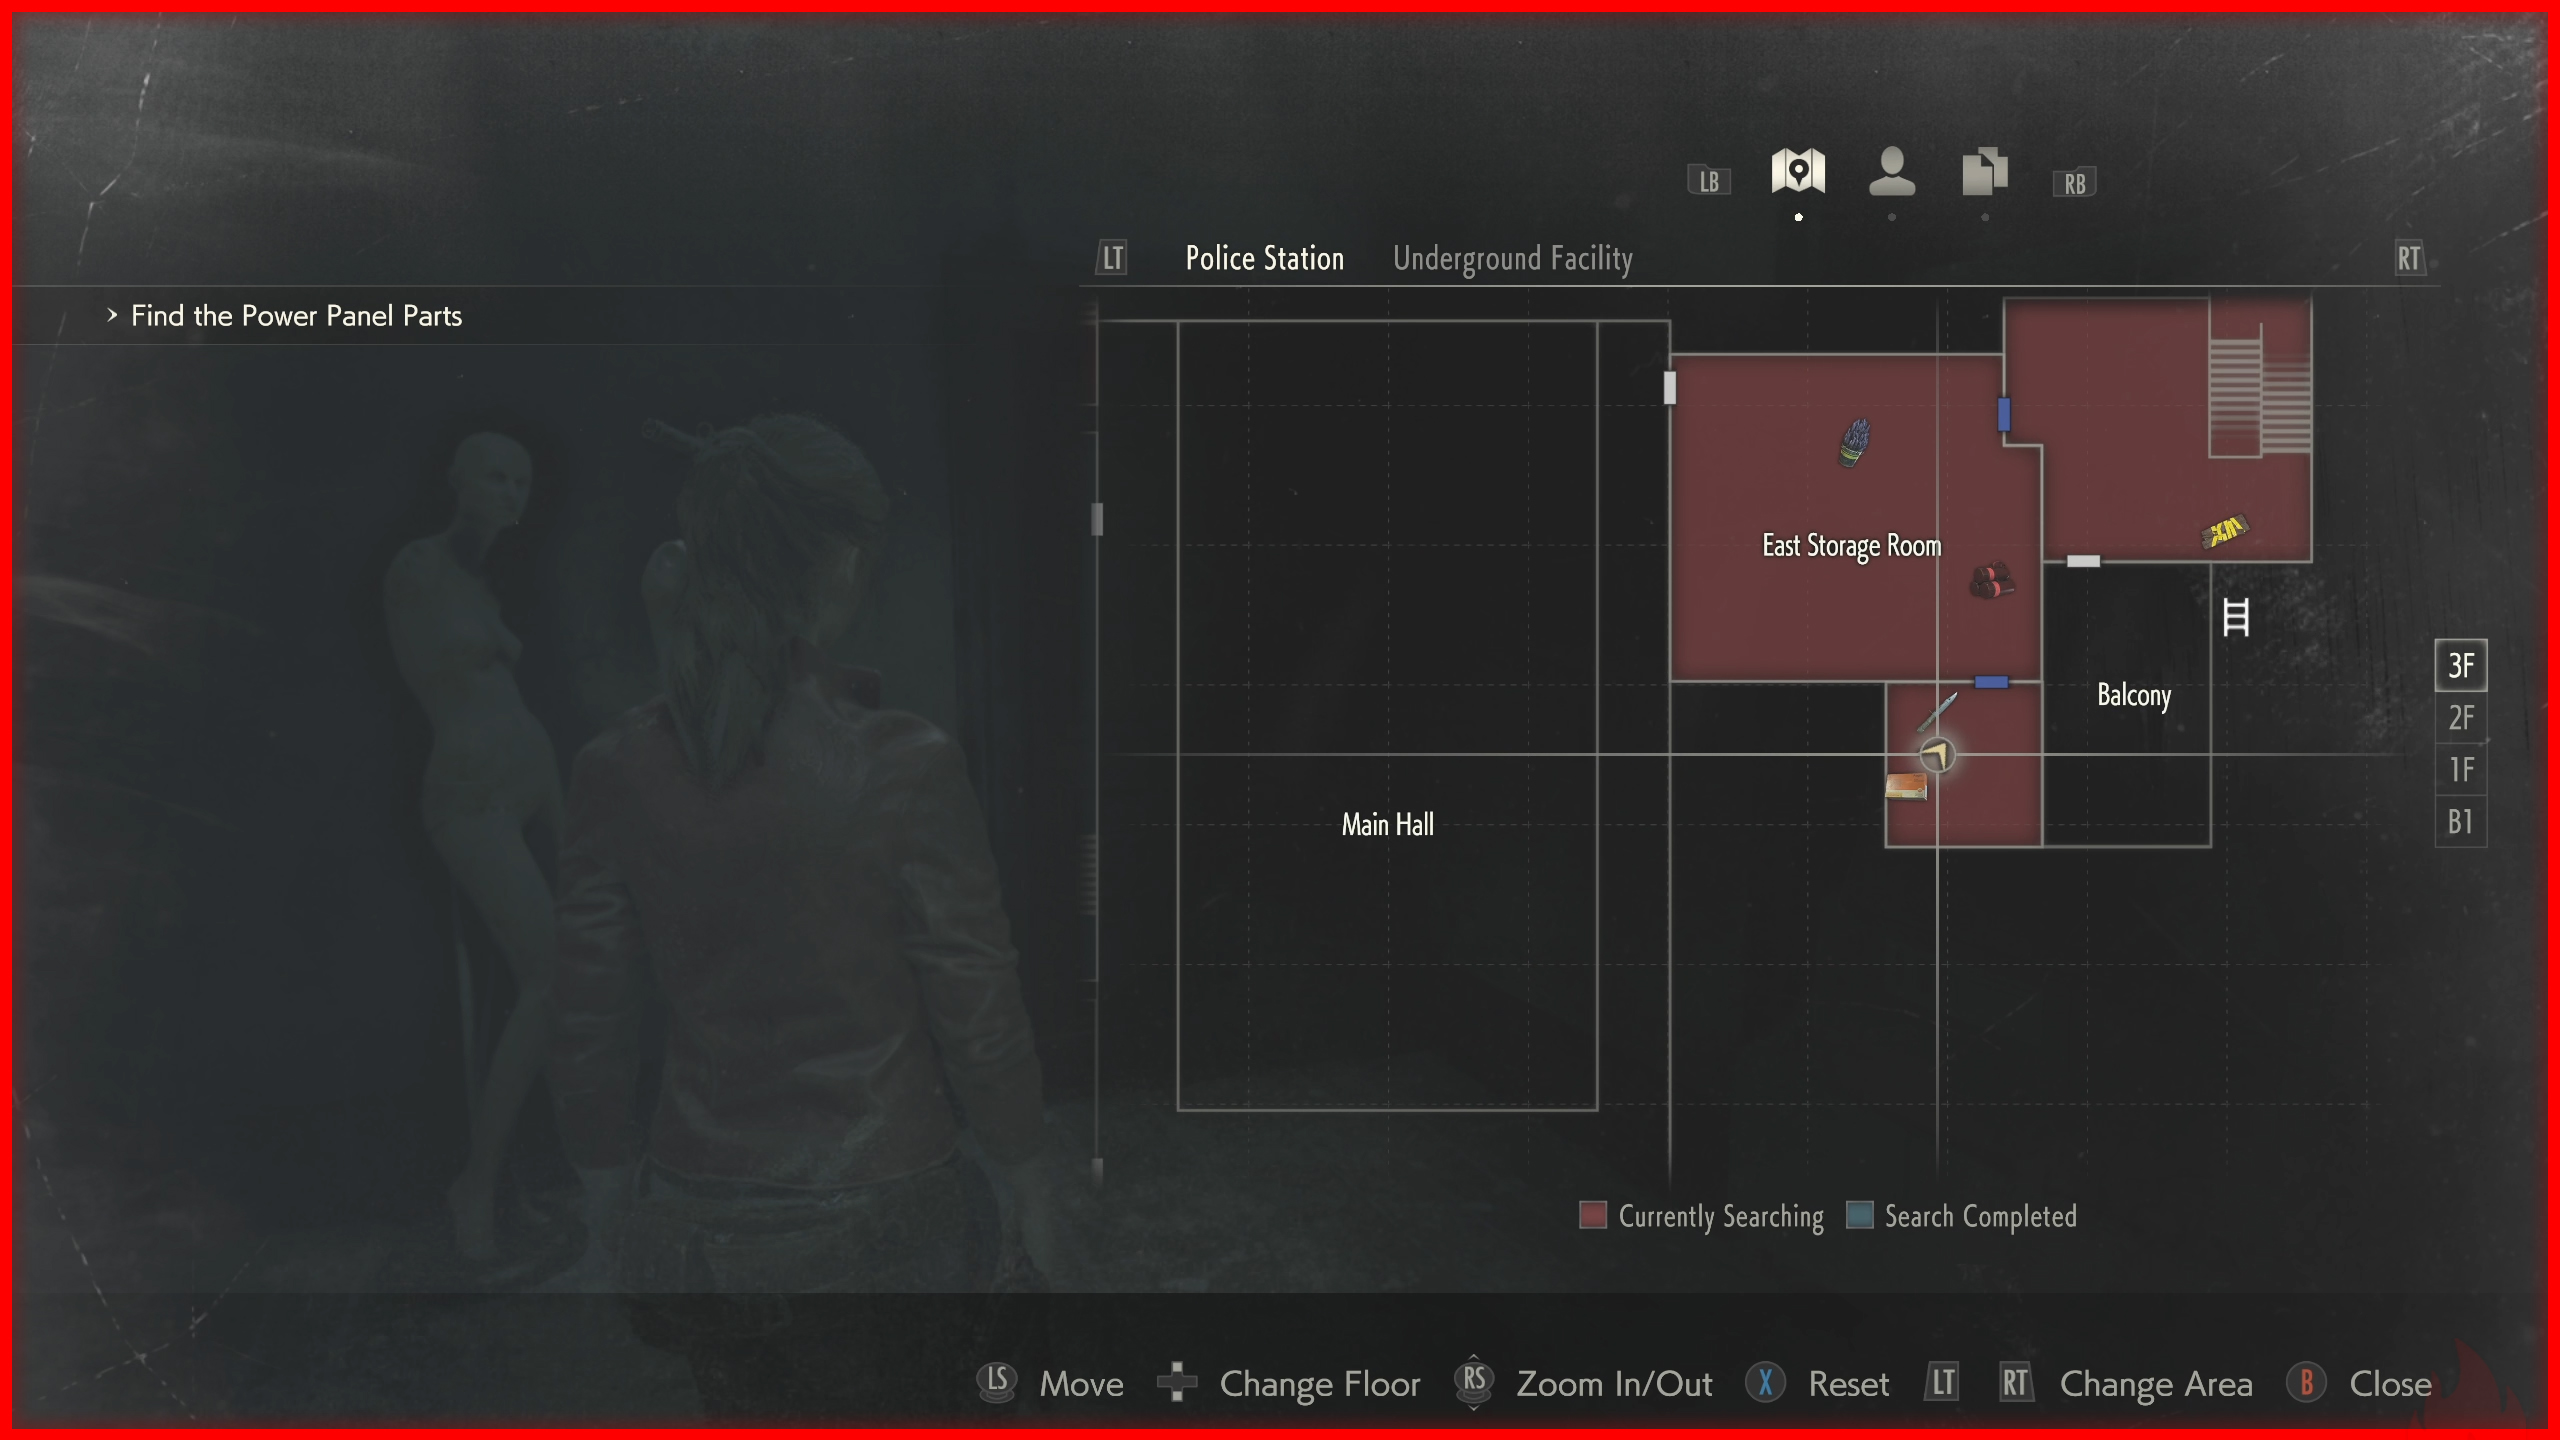
 There are 15 Mr. Raccoons scattered throughout Leon’s and Claire’s campaigns.
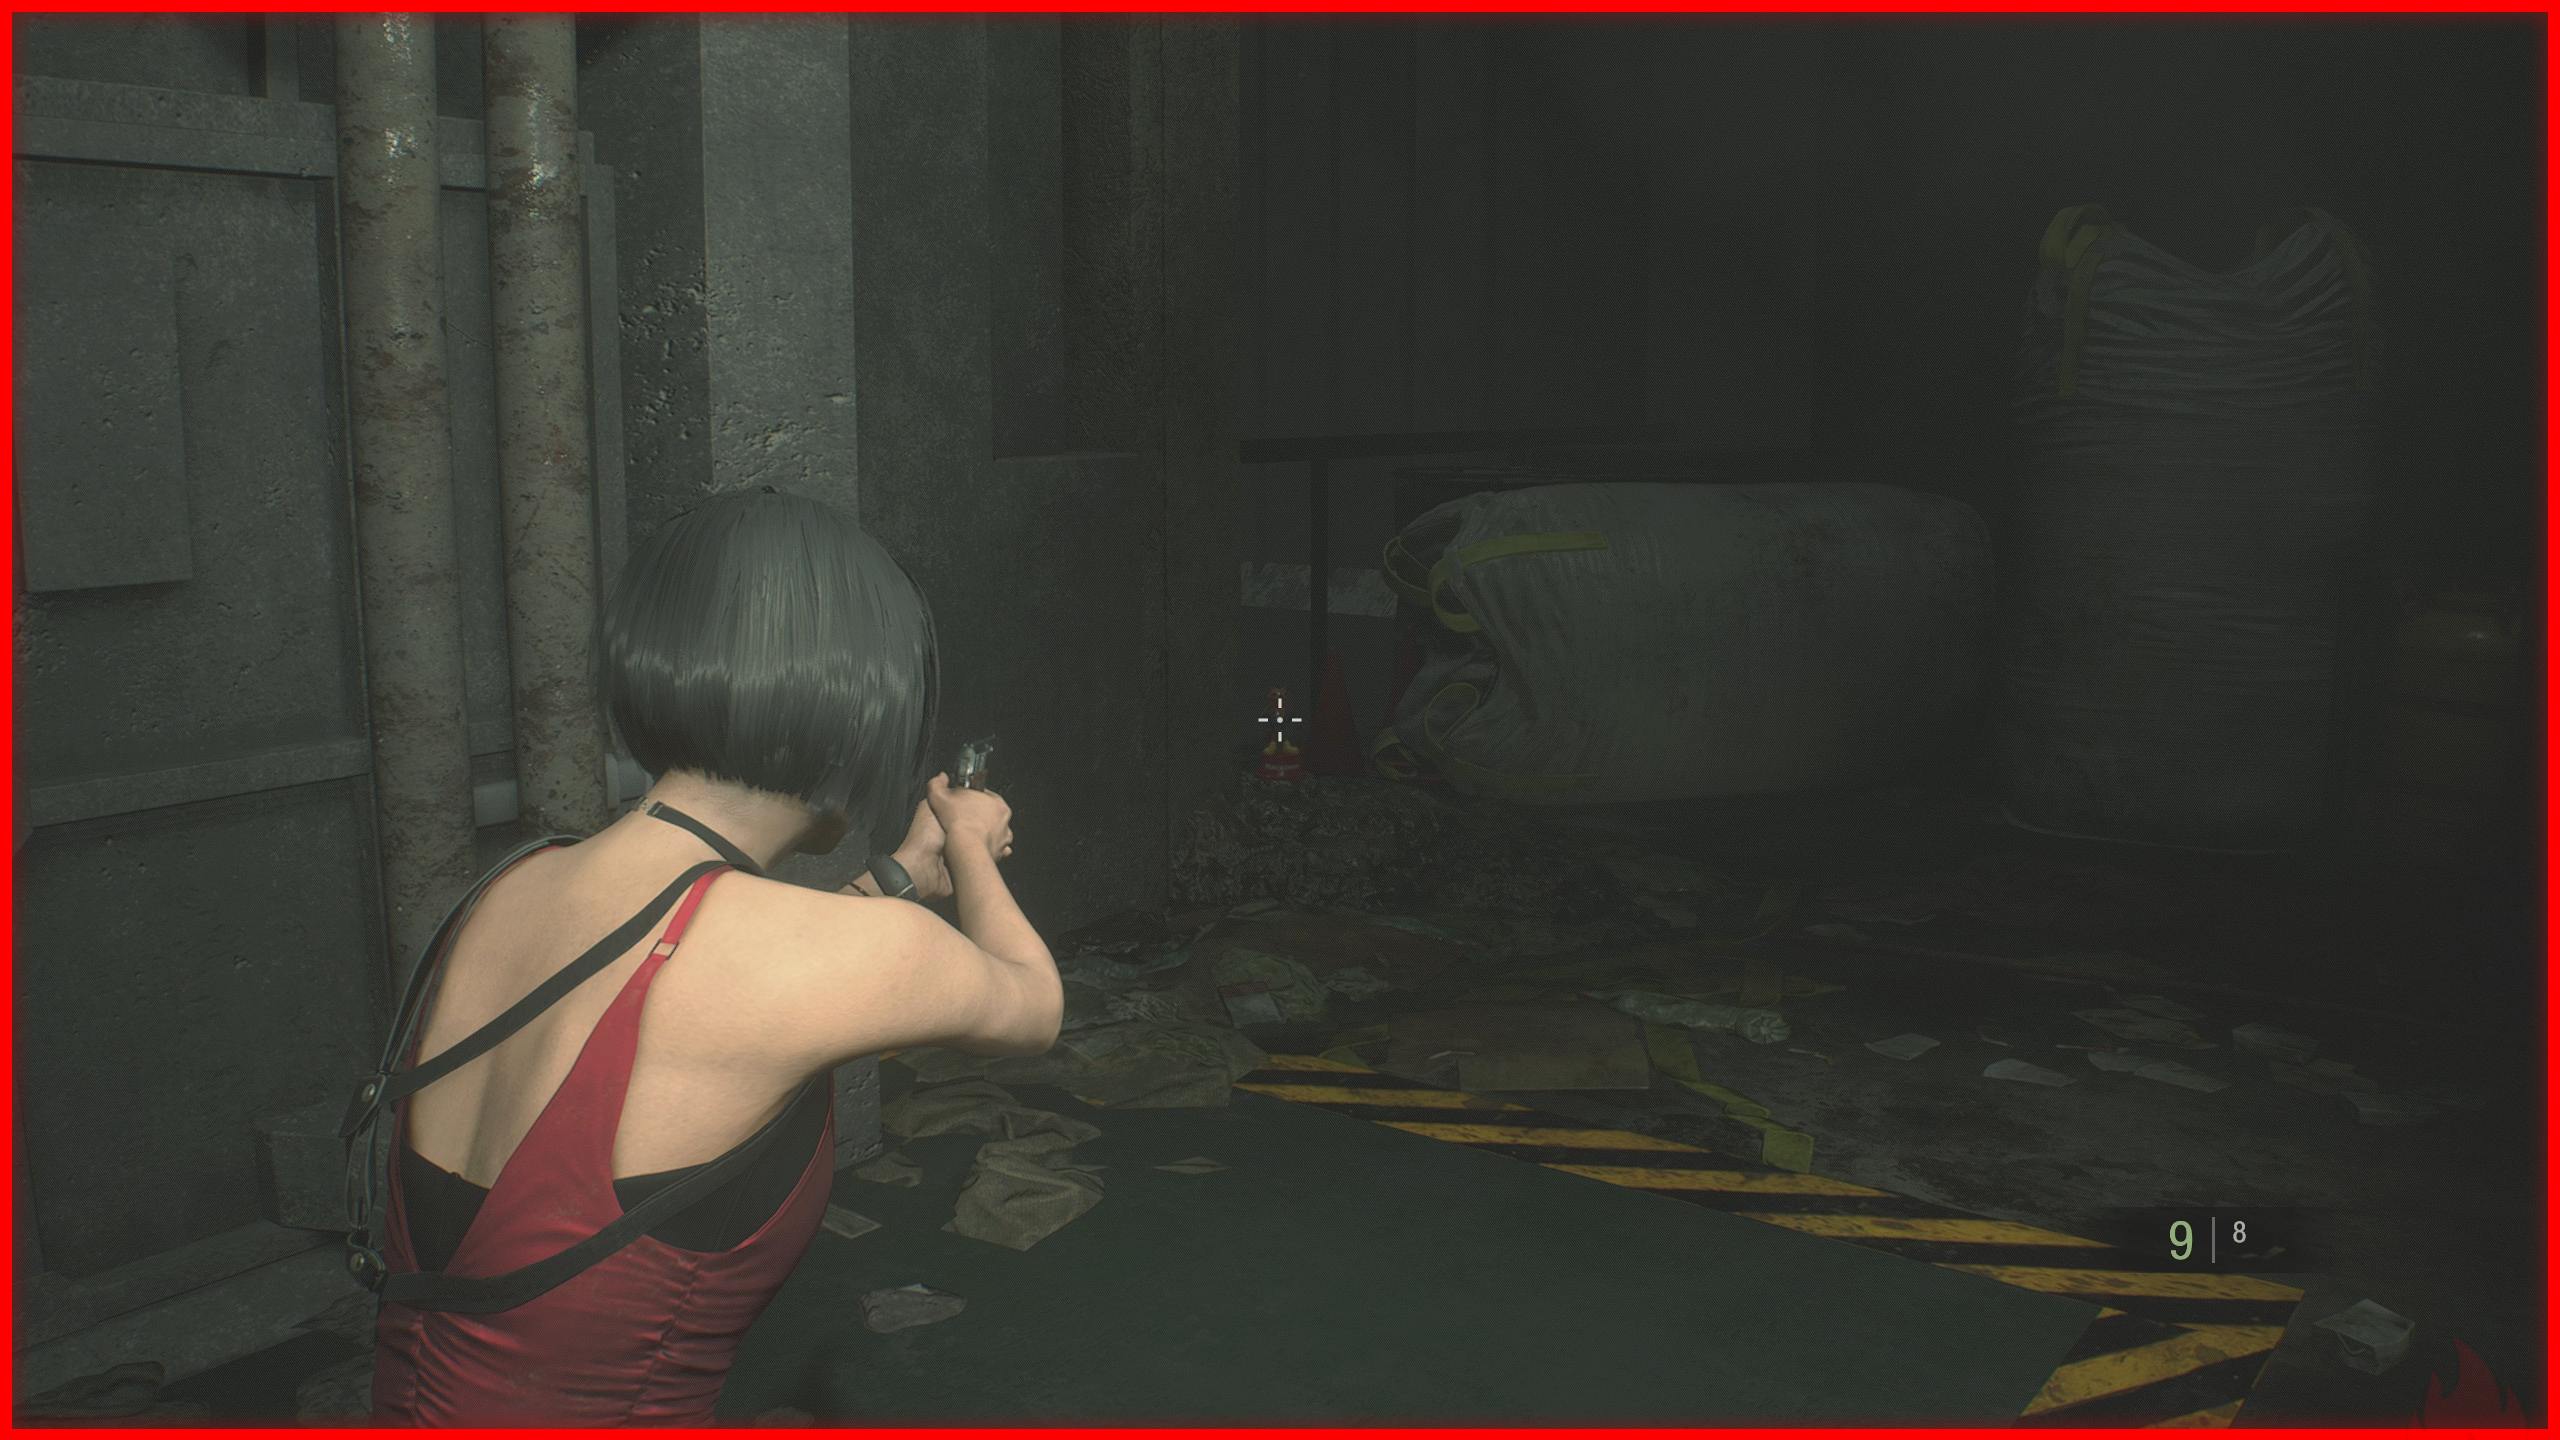
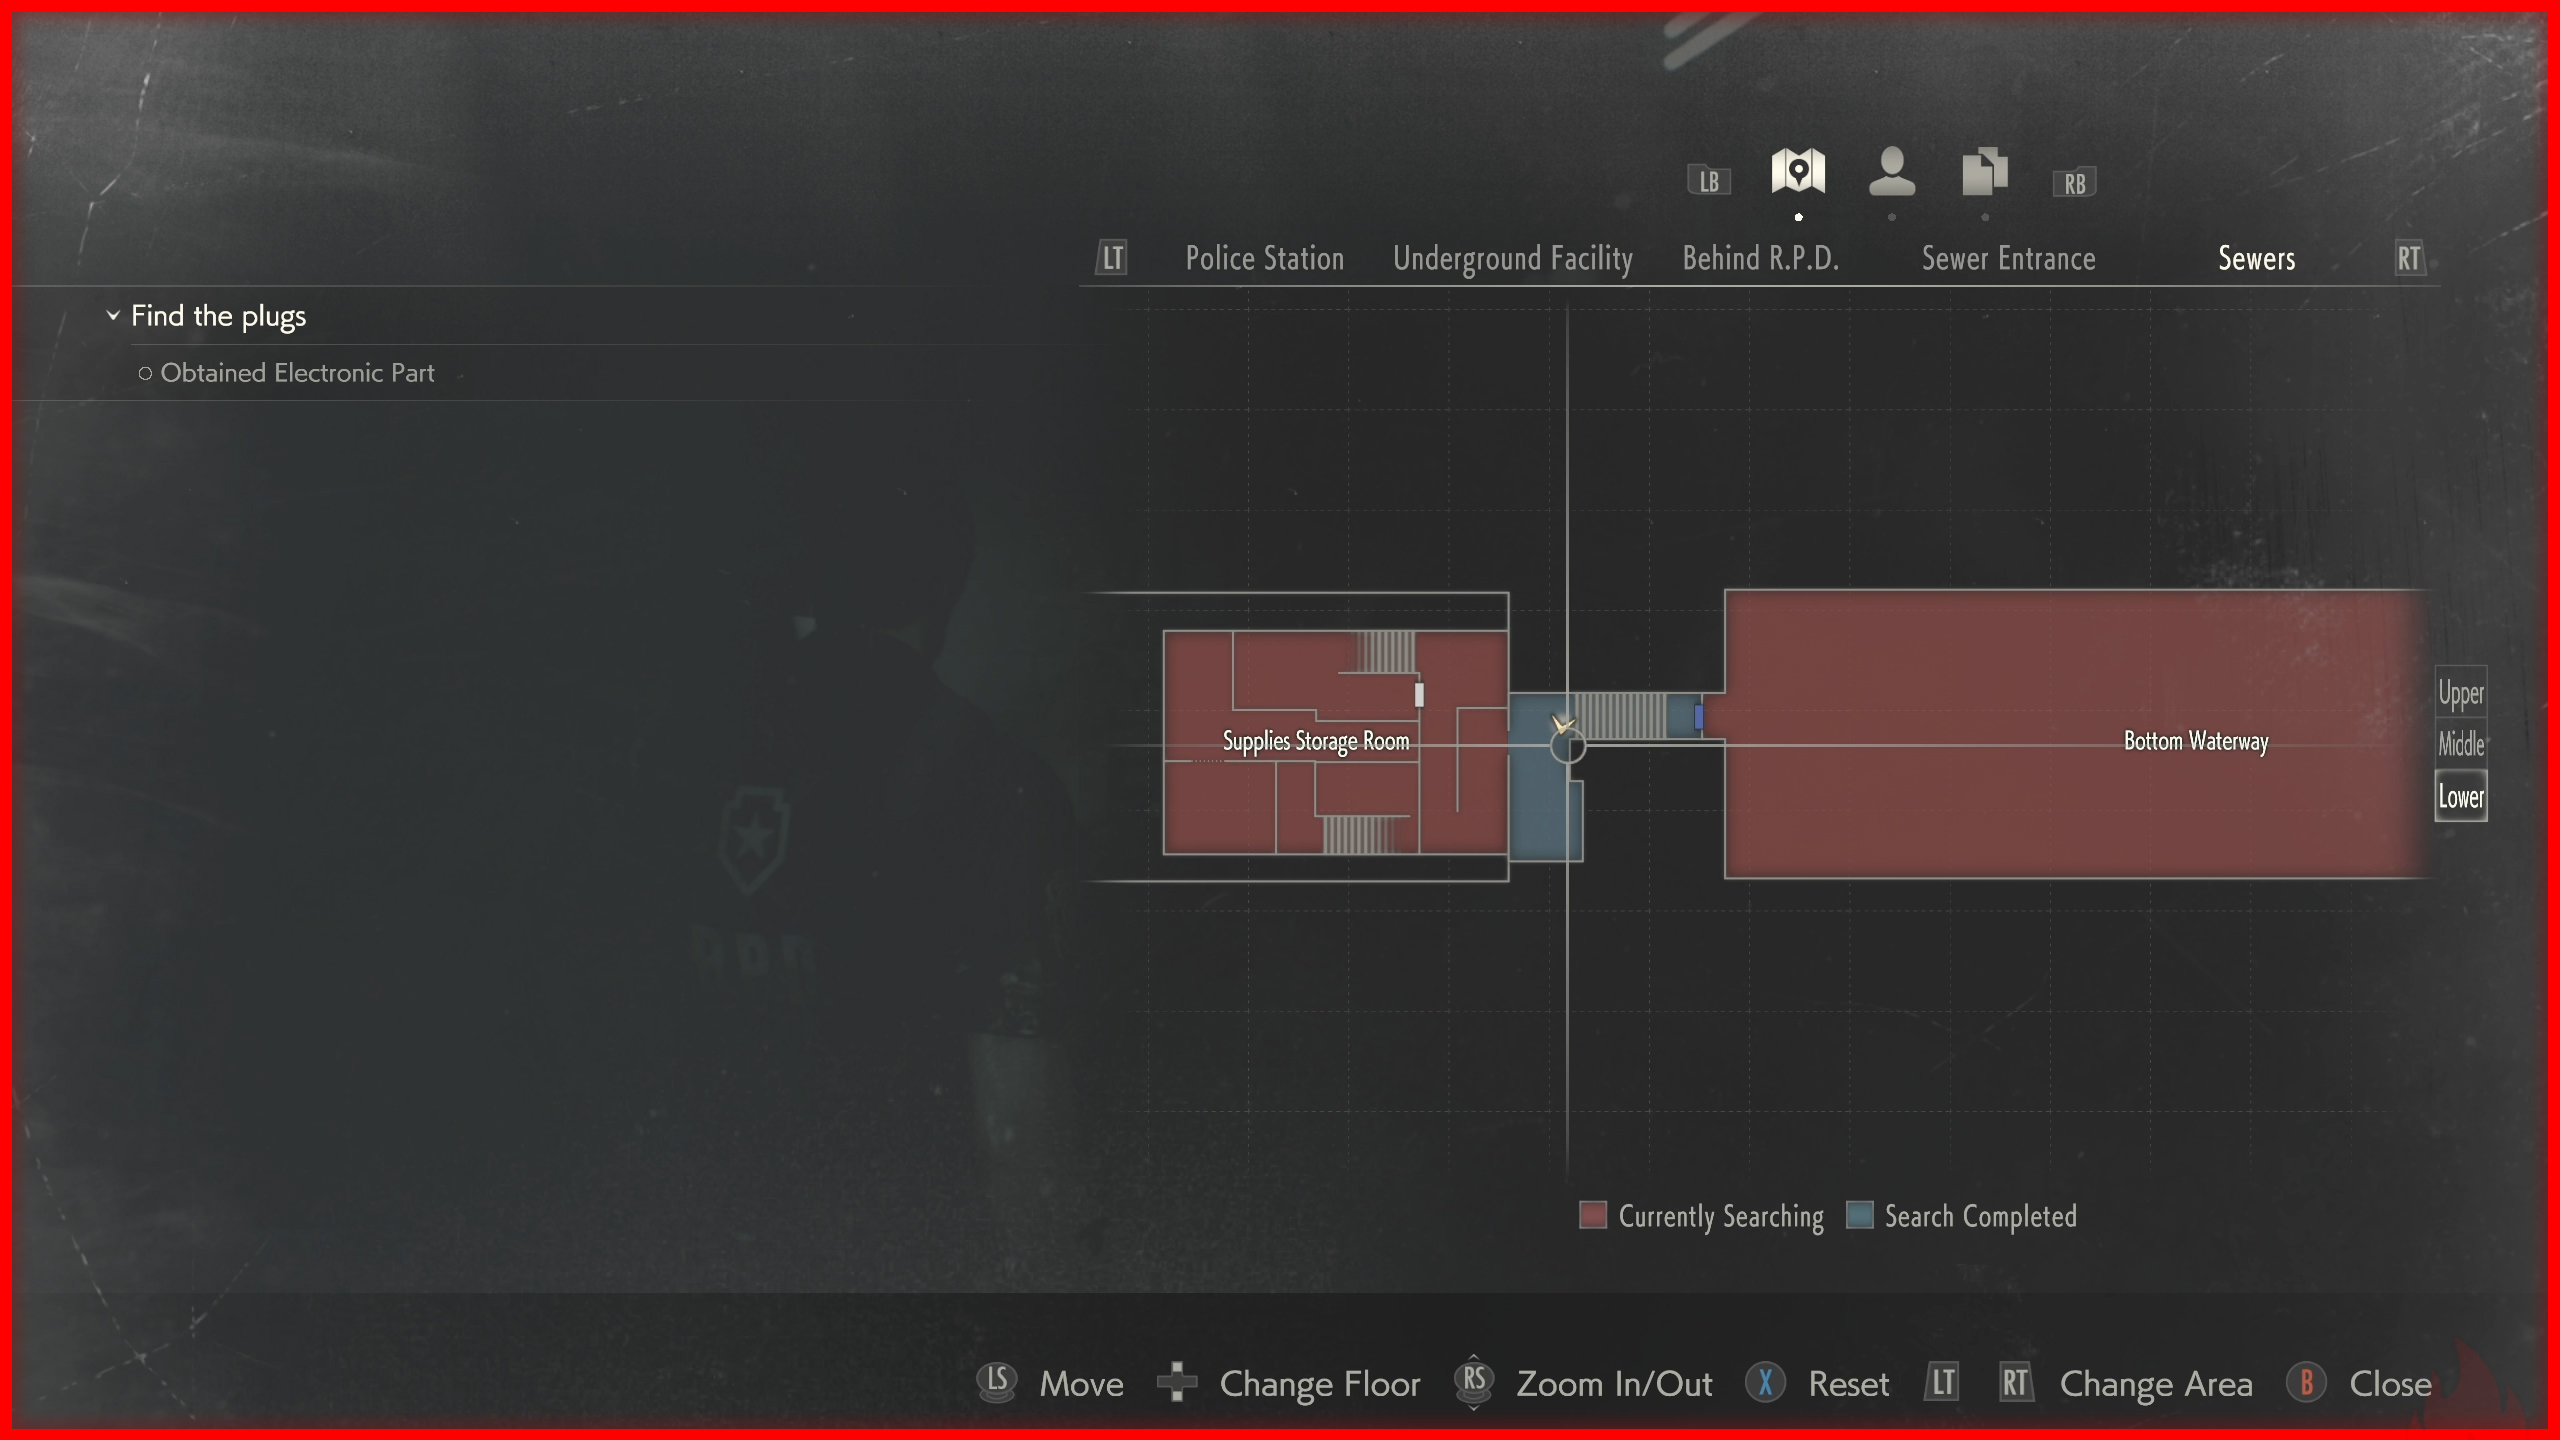
Below are the locations of each one.
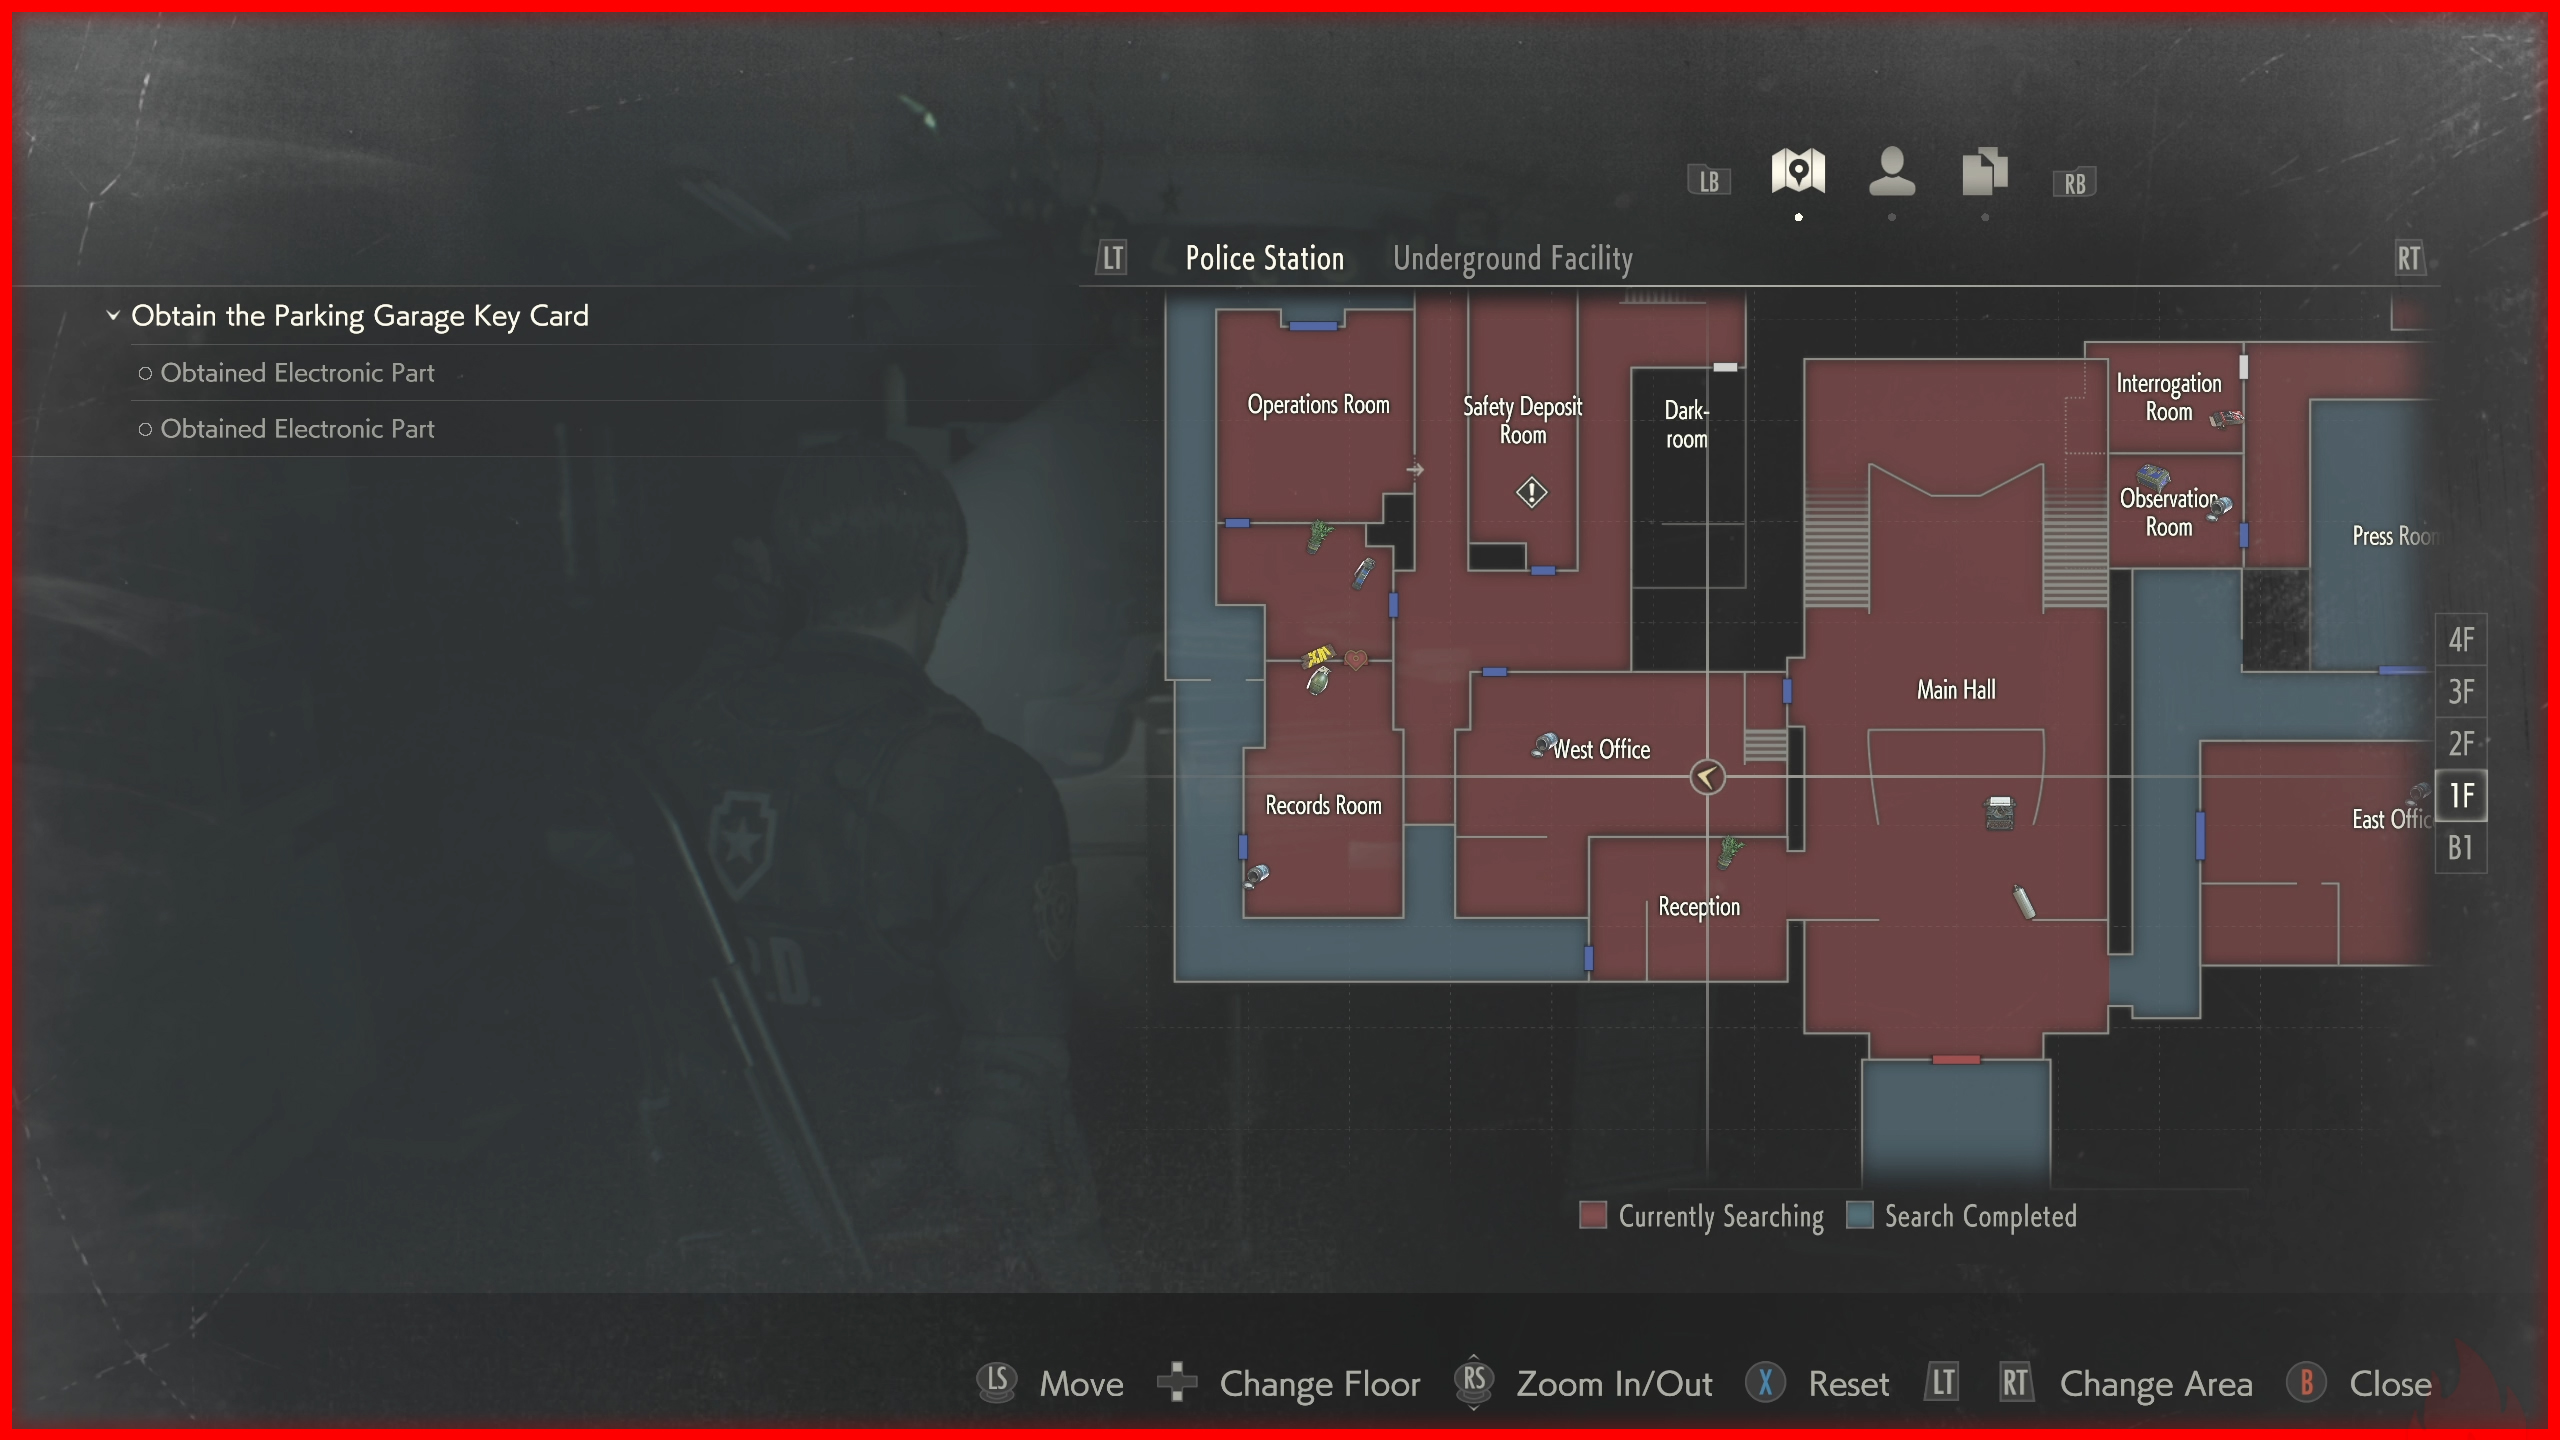
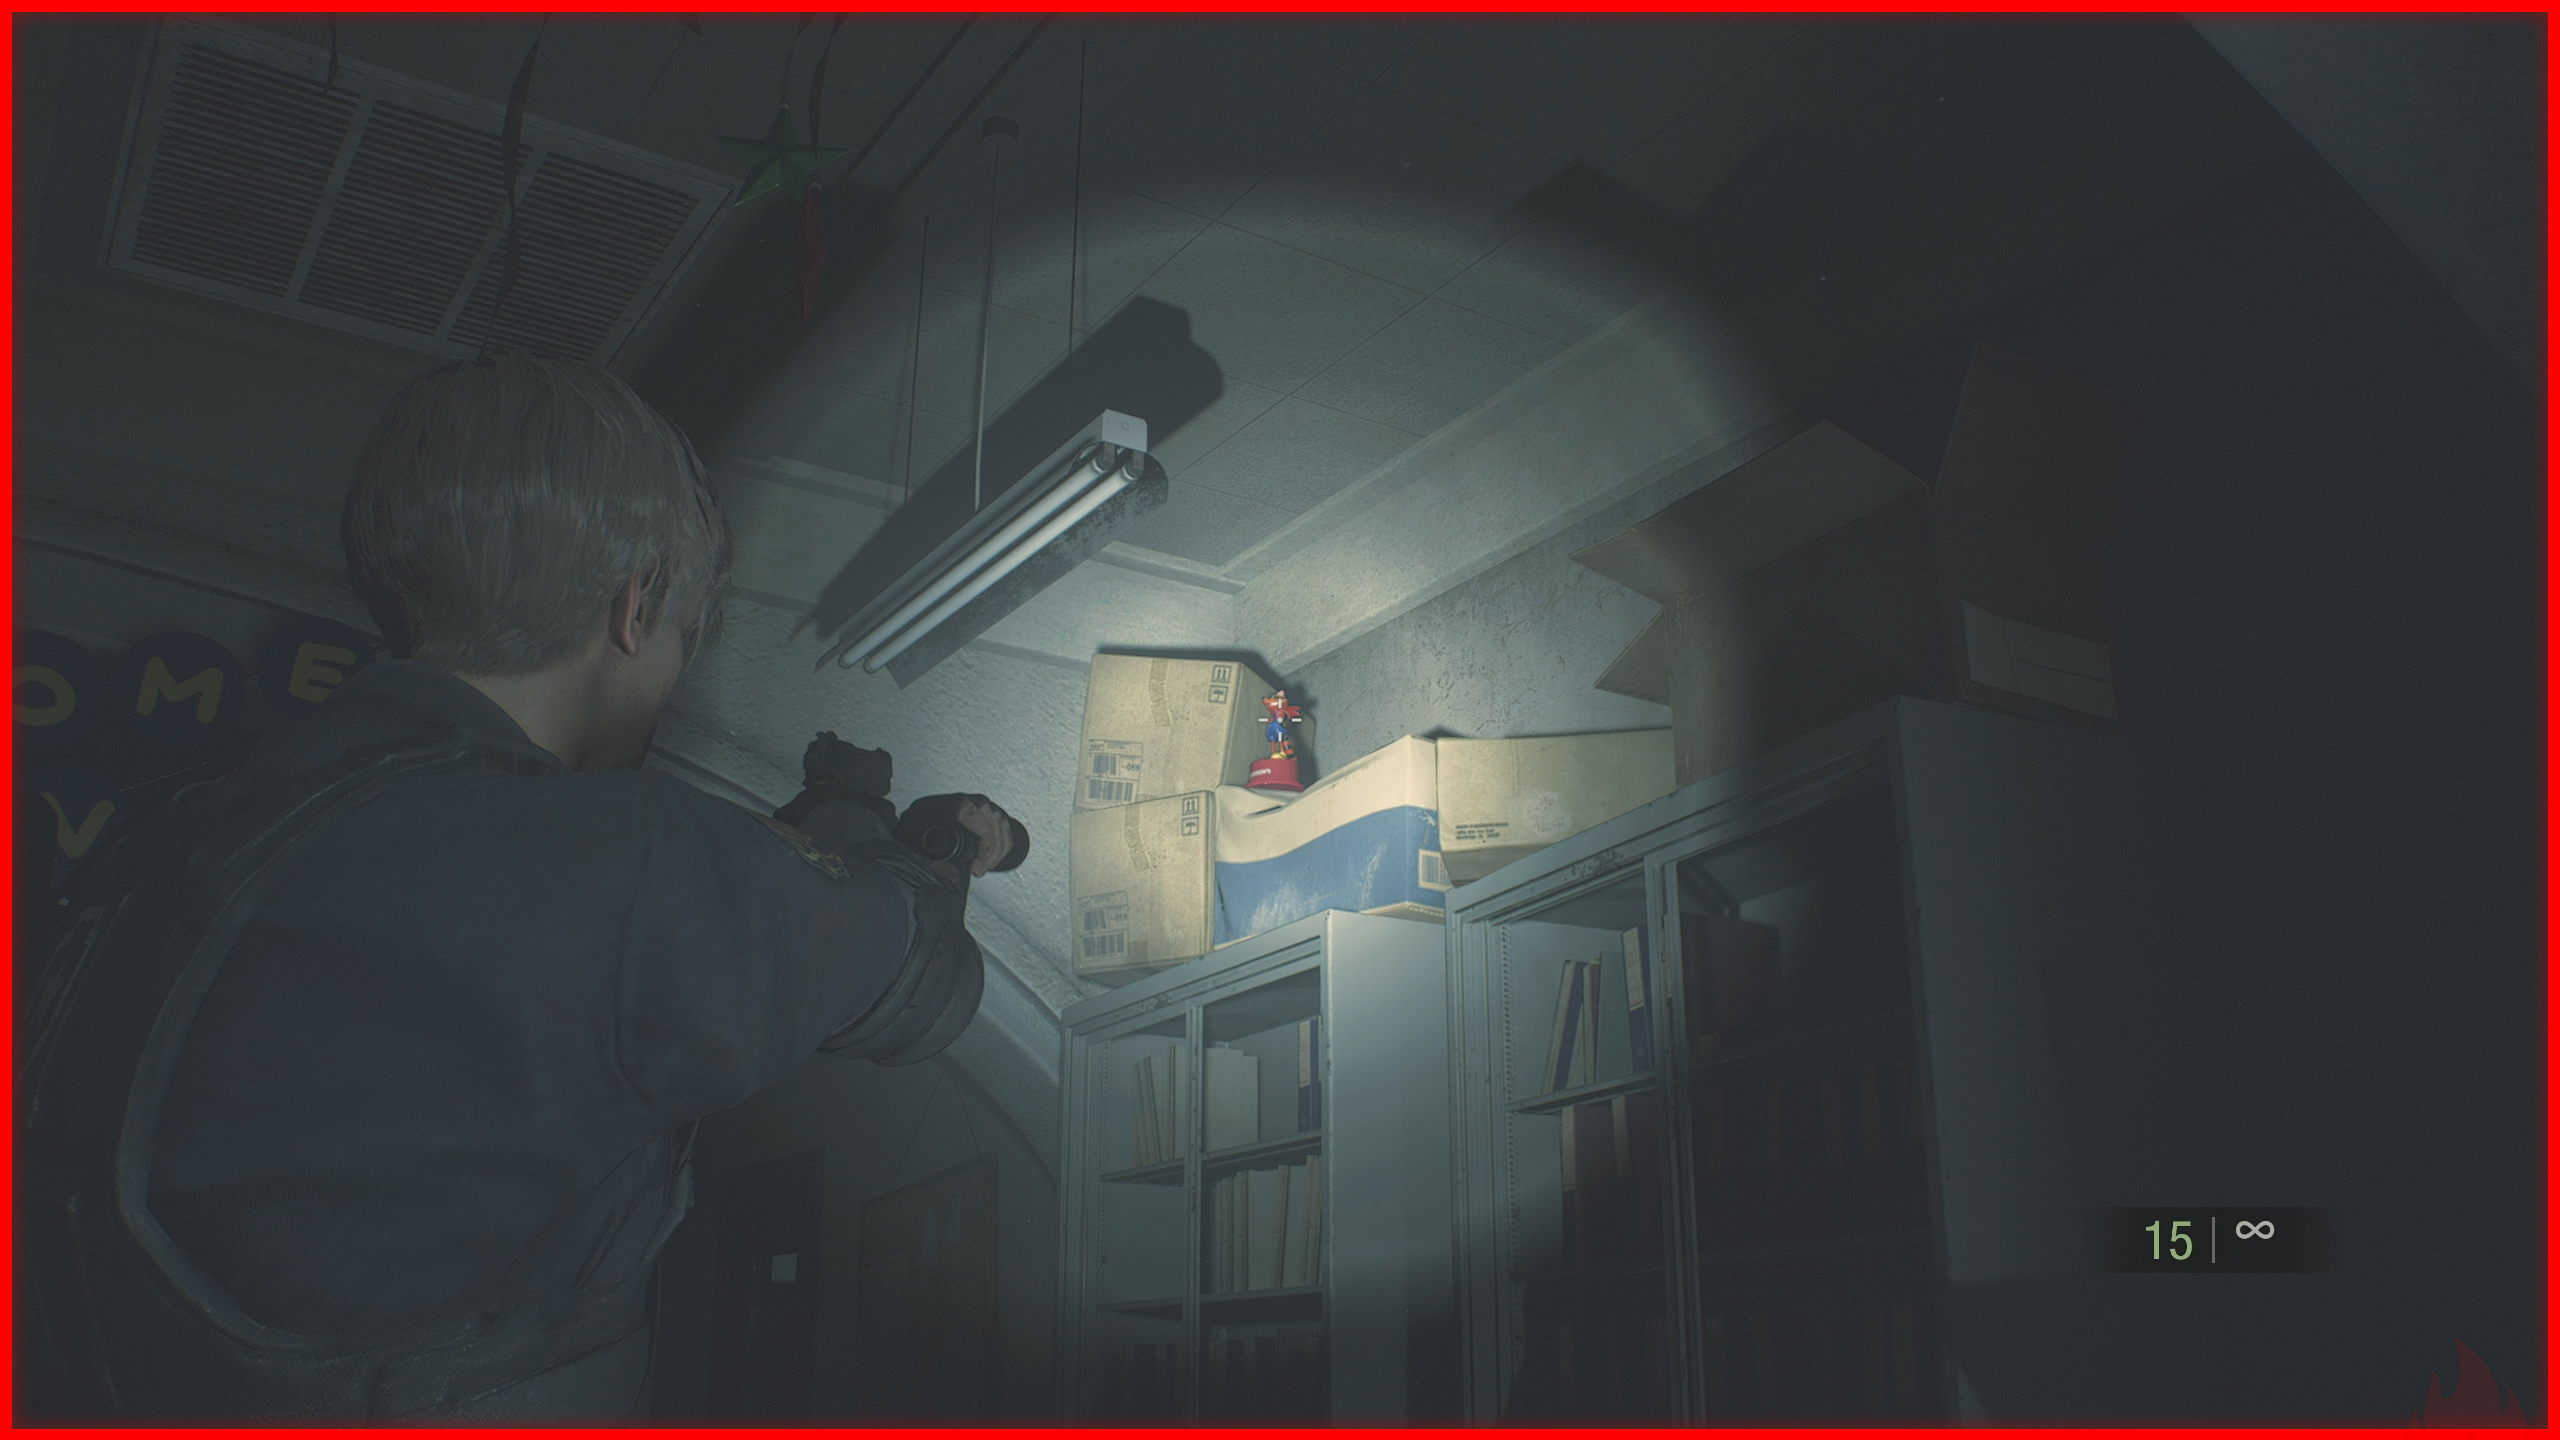
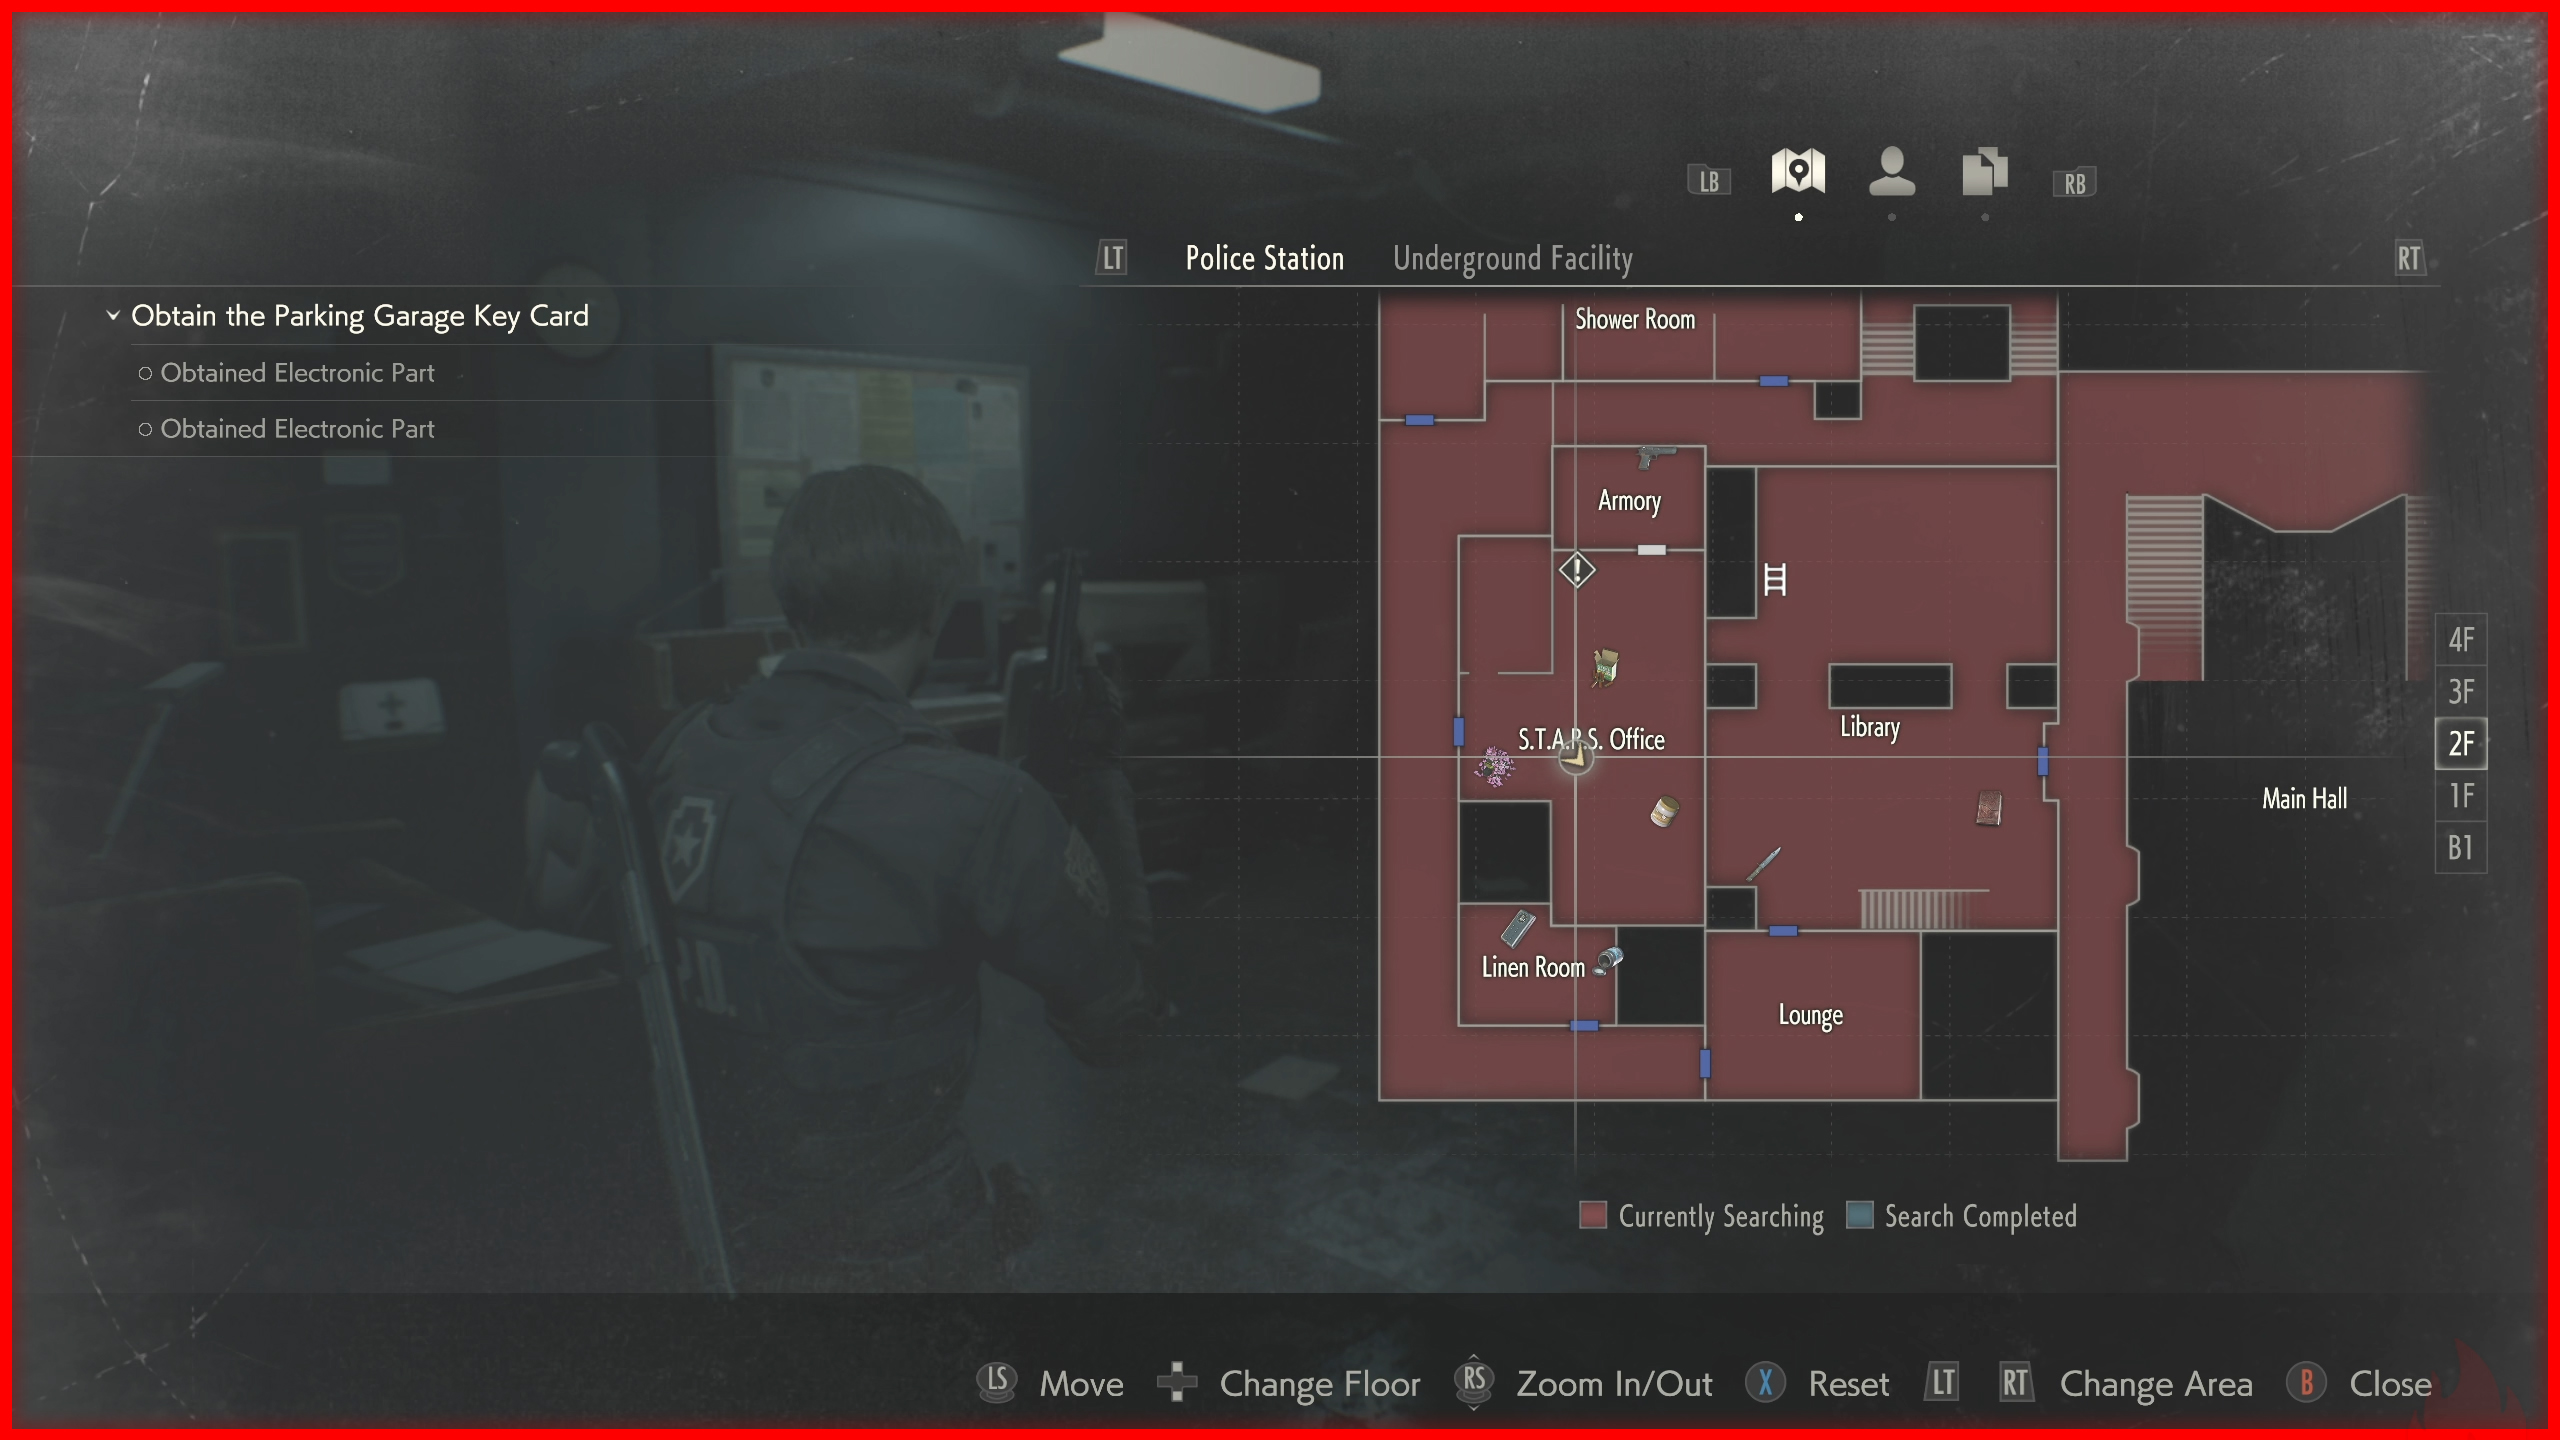
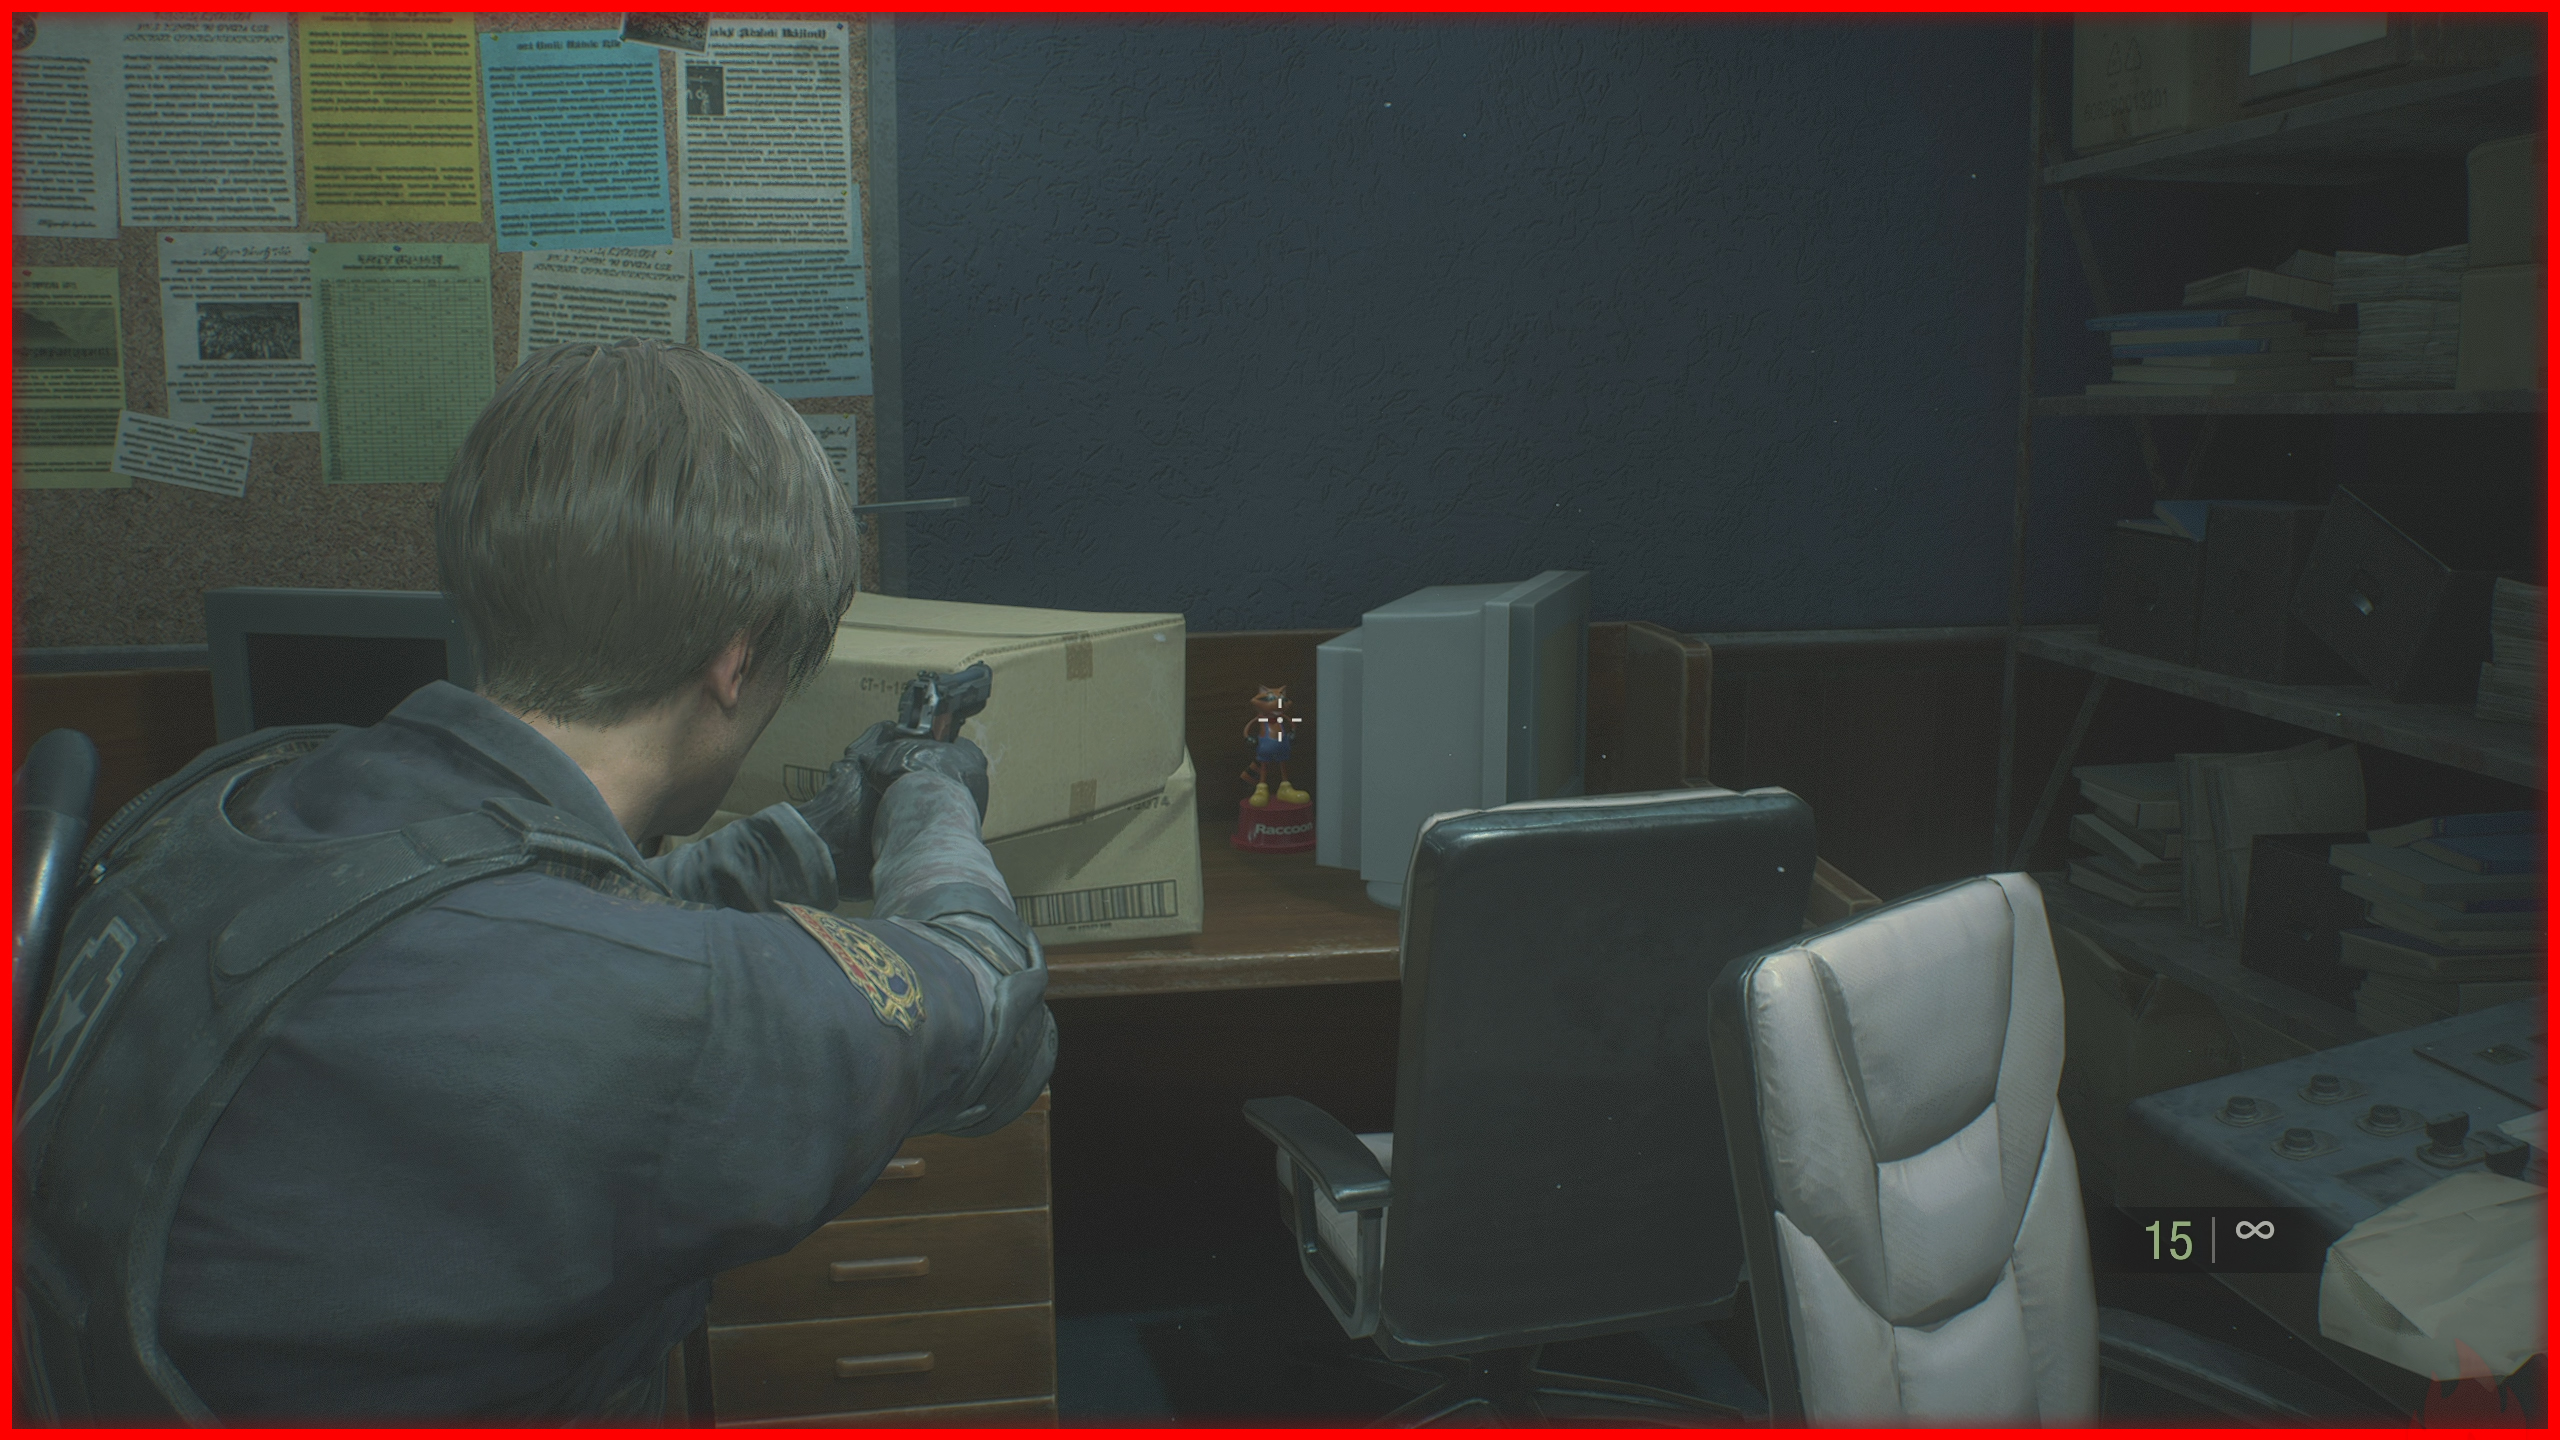
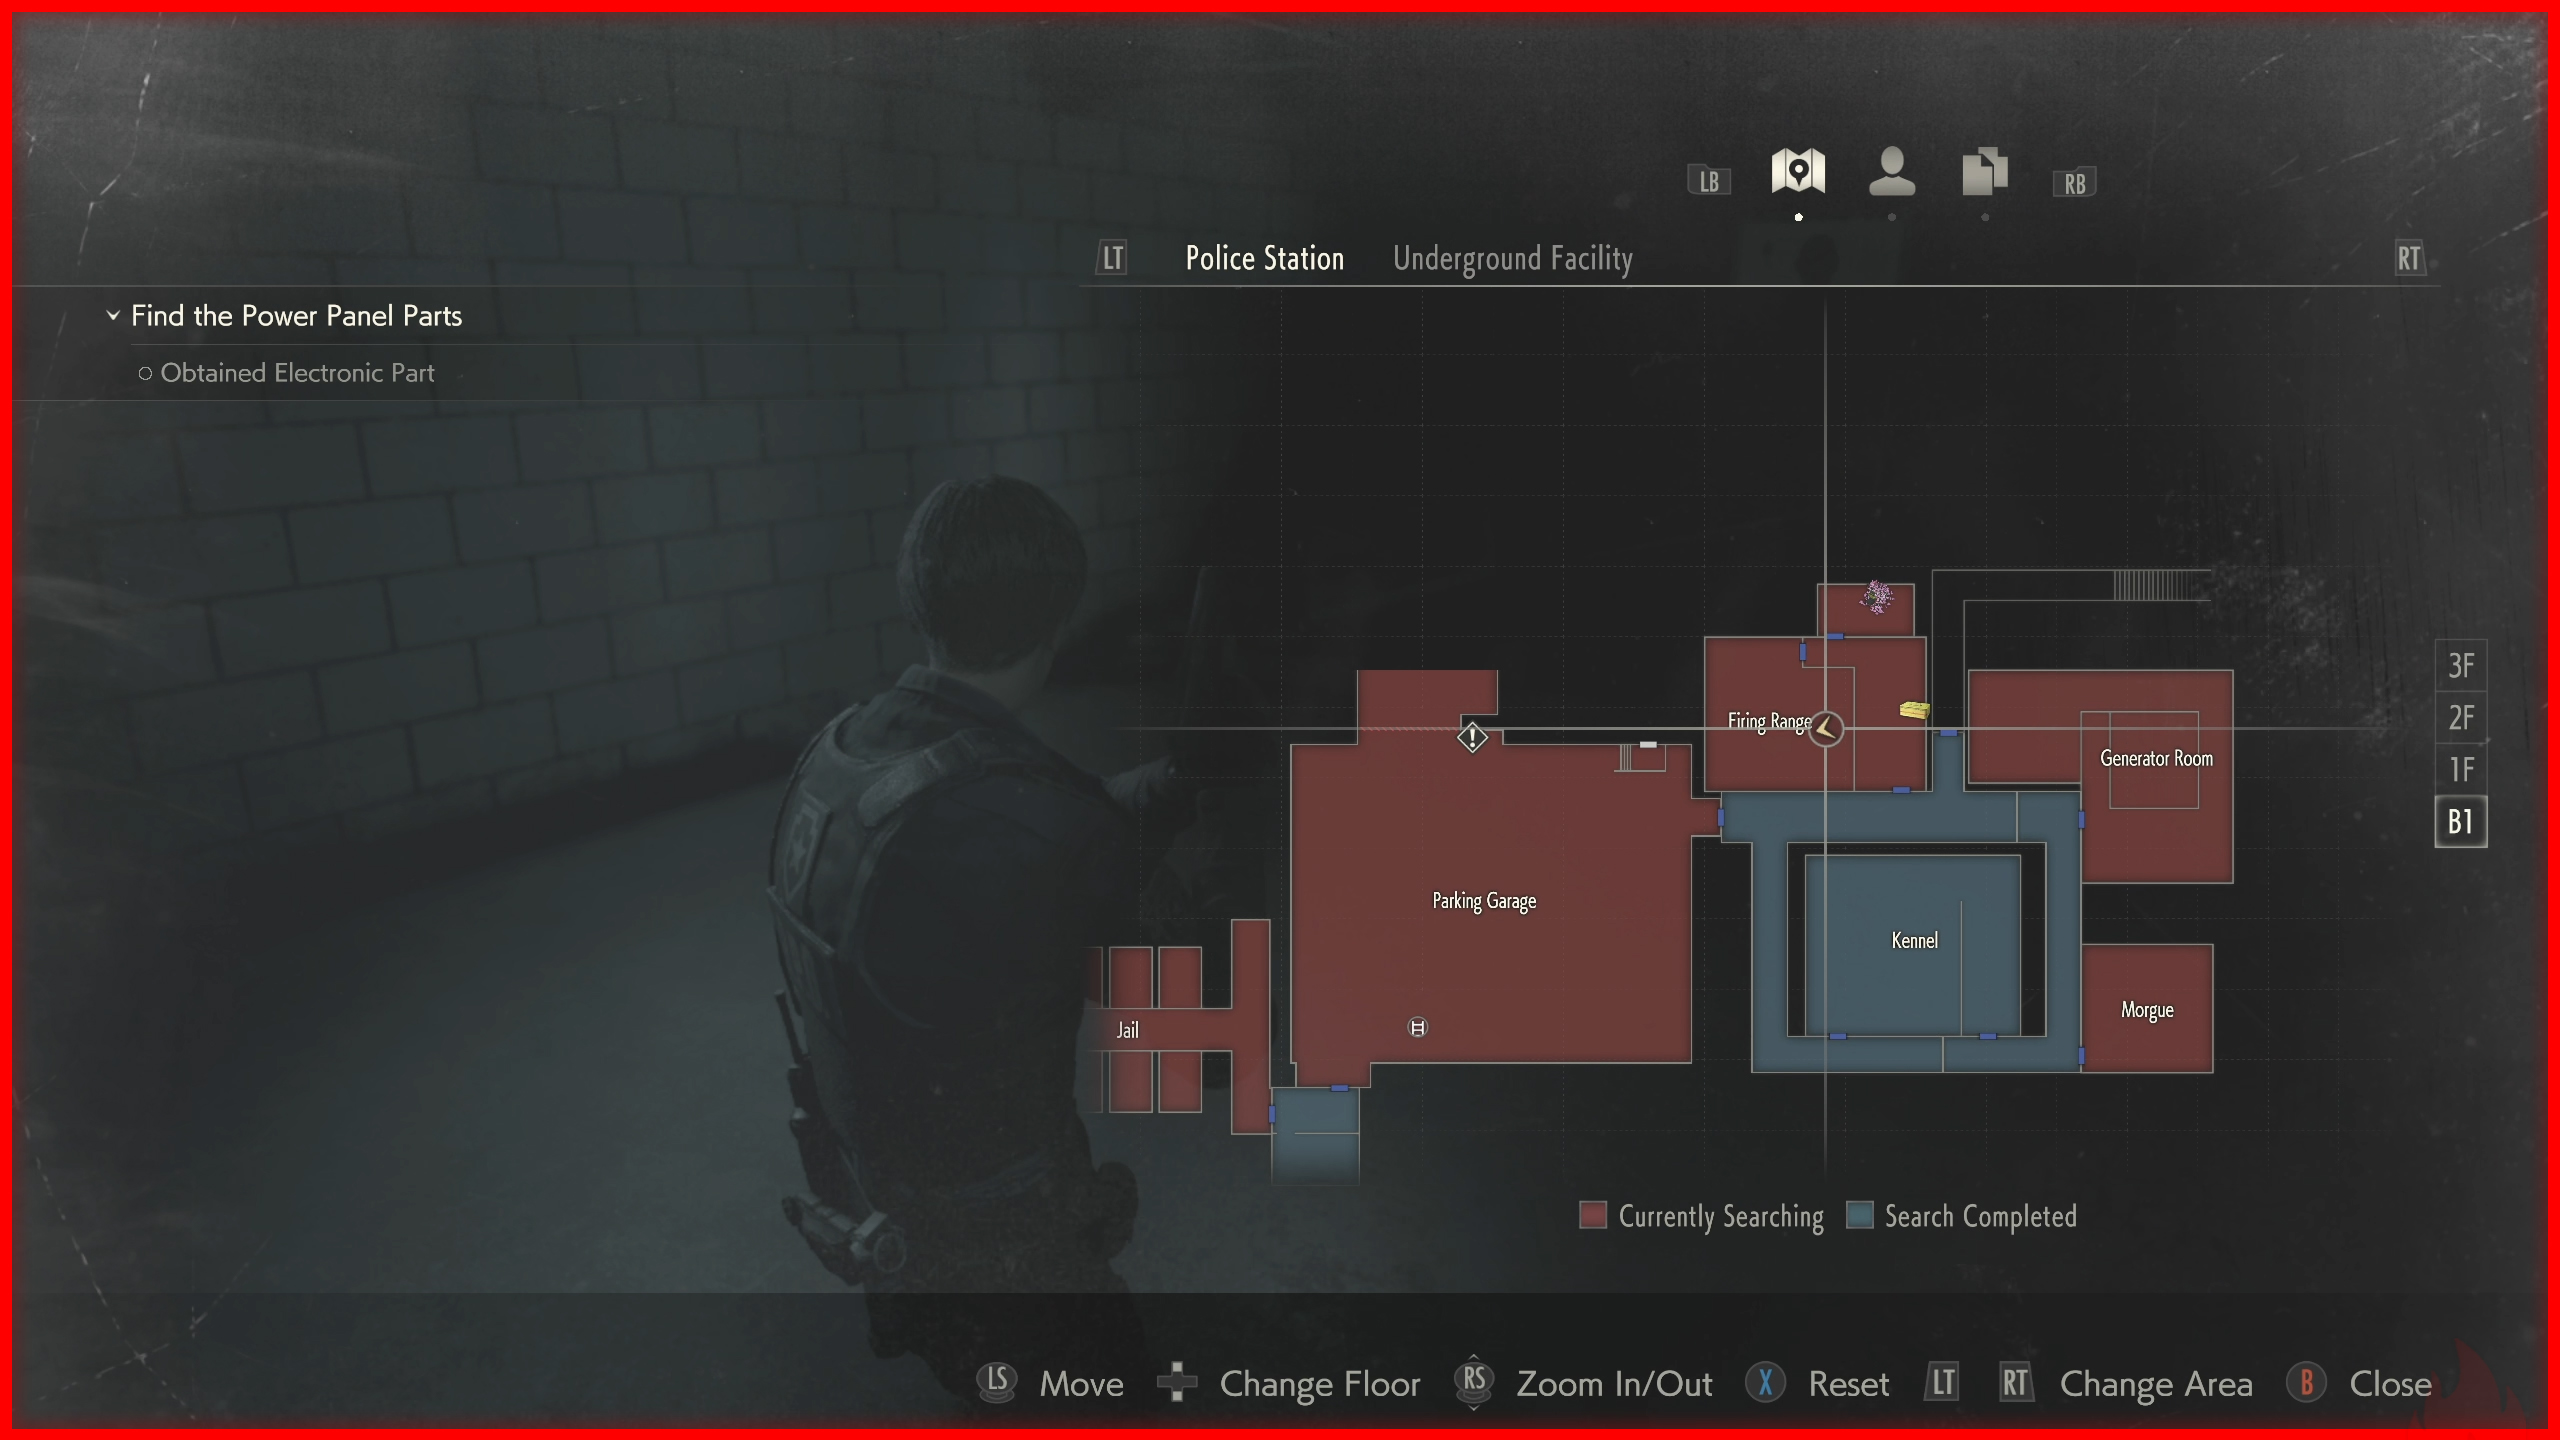
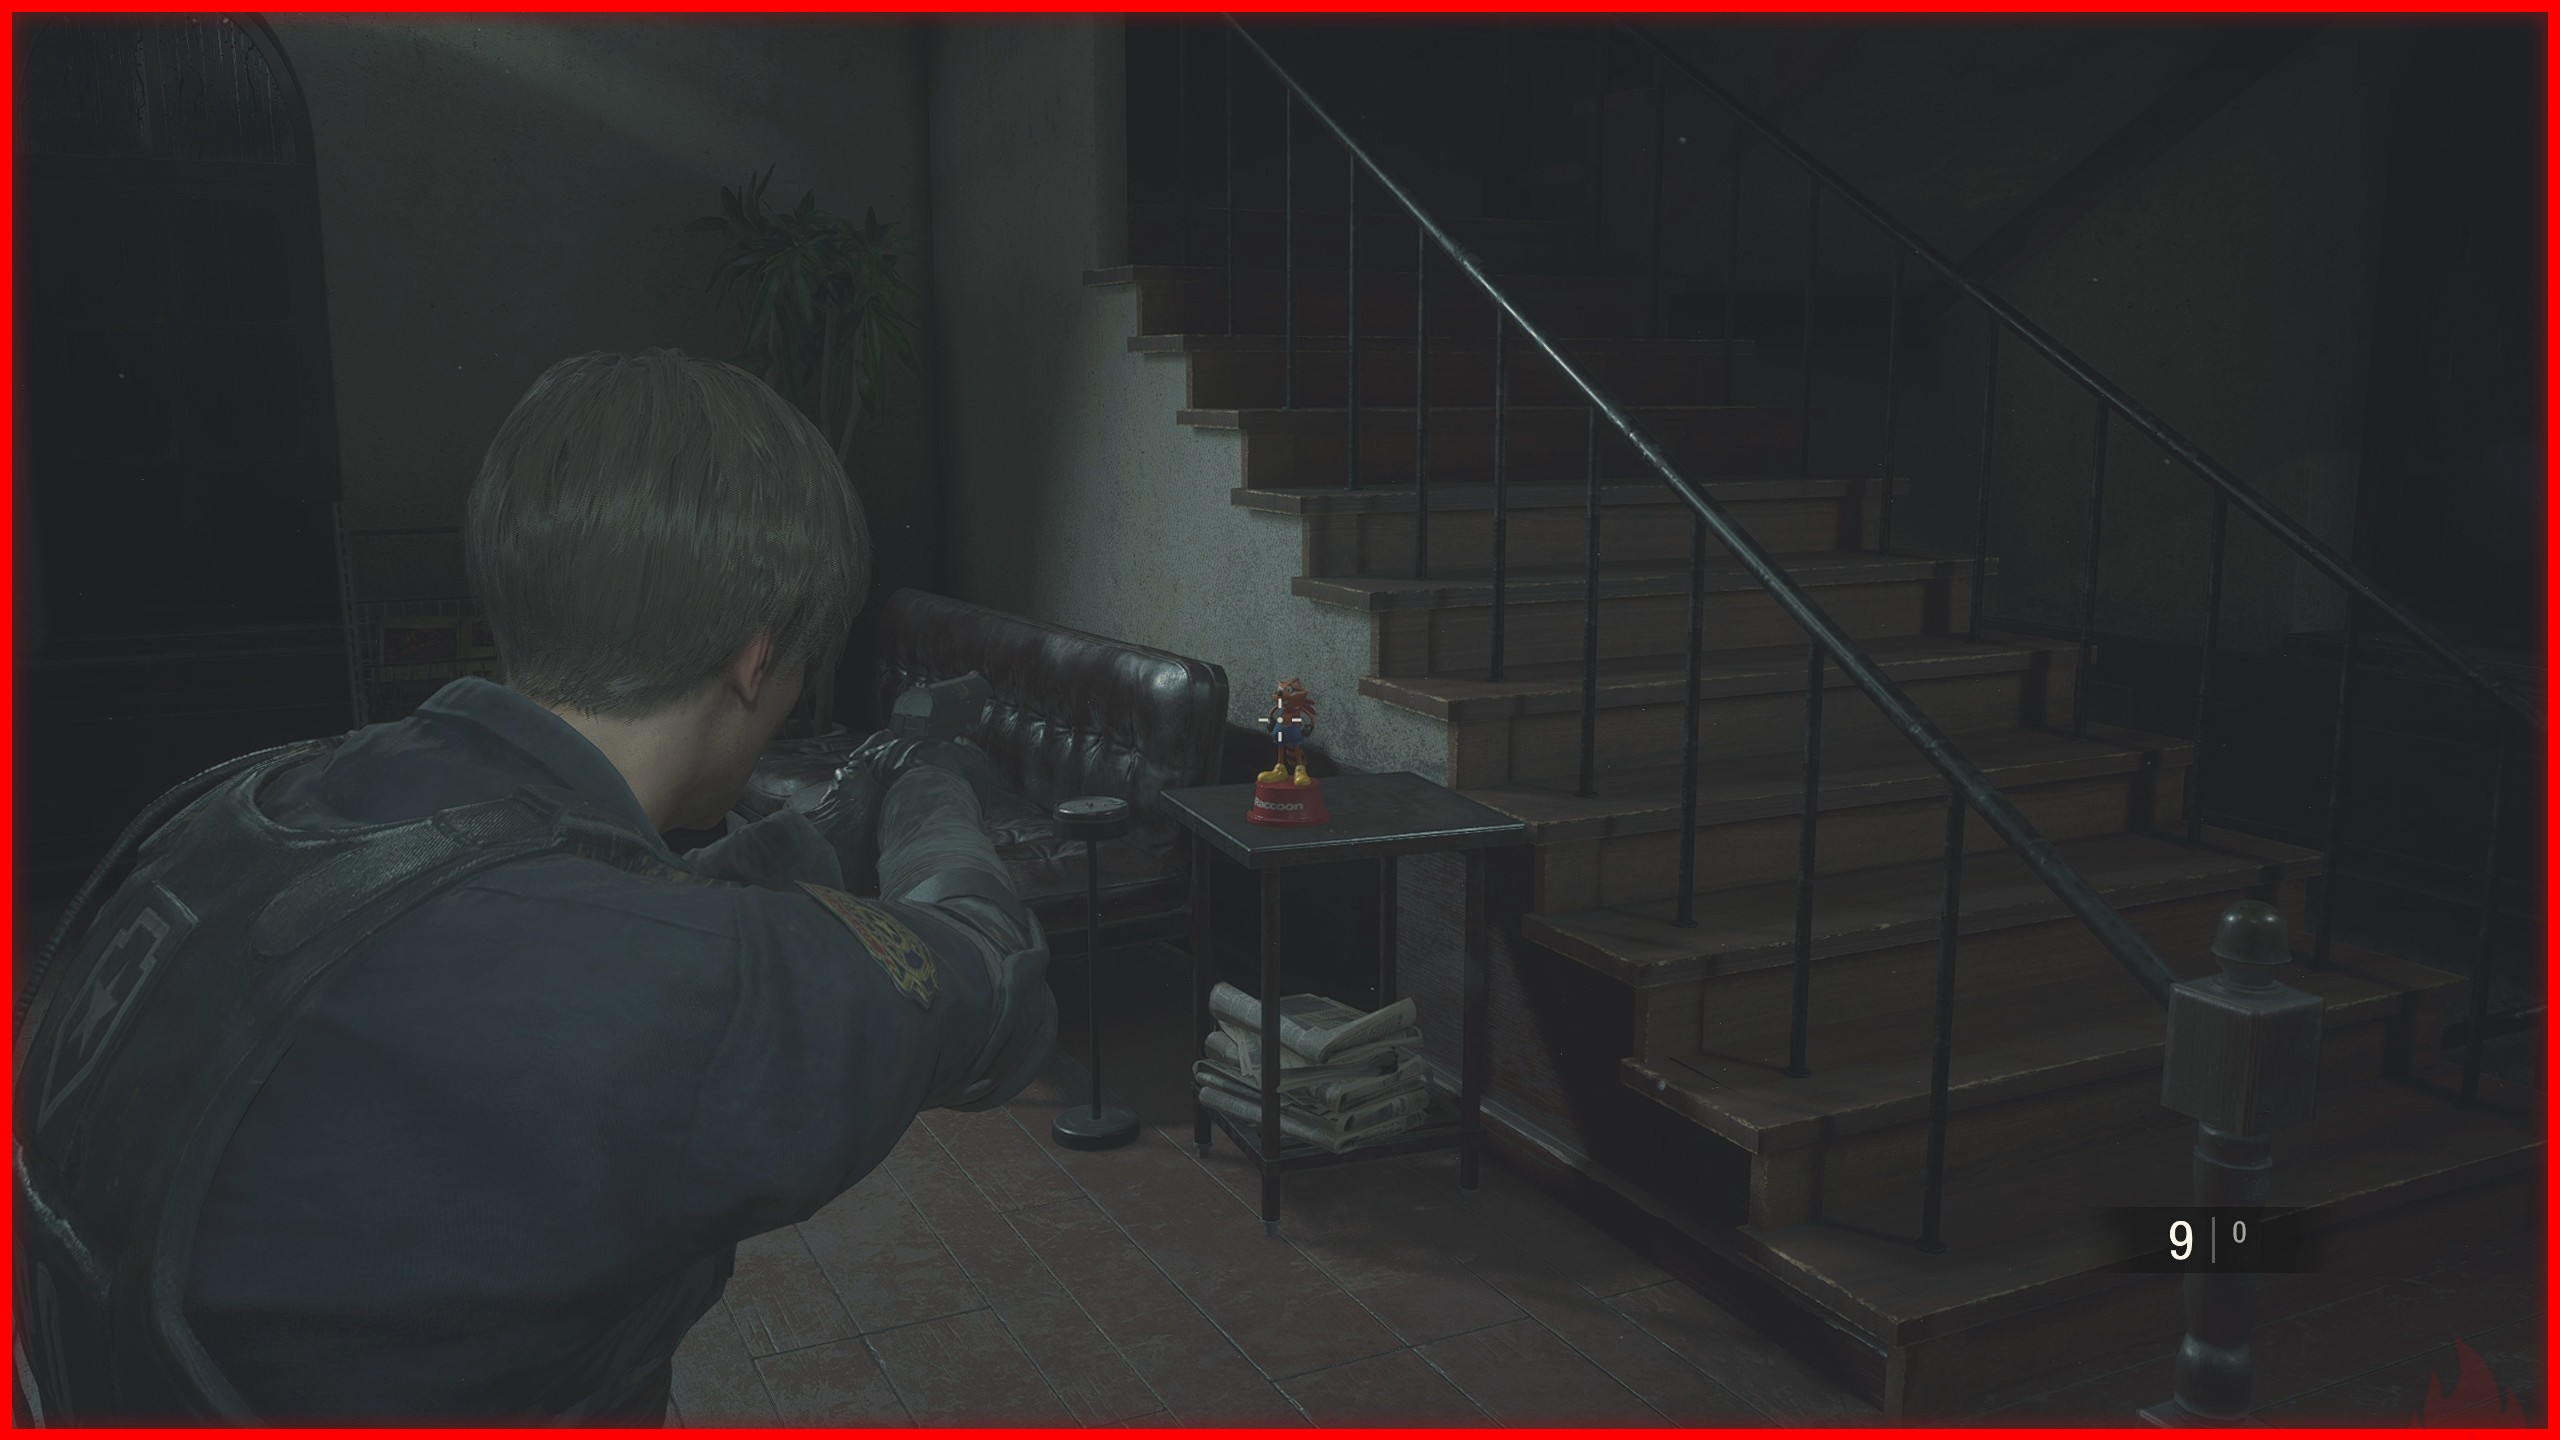
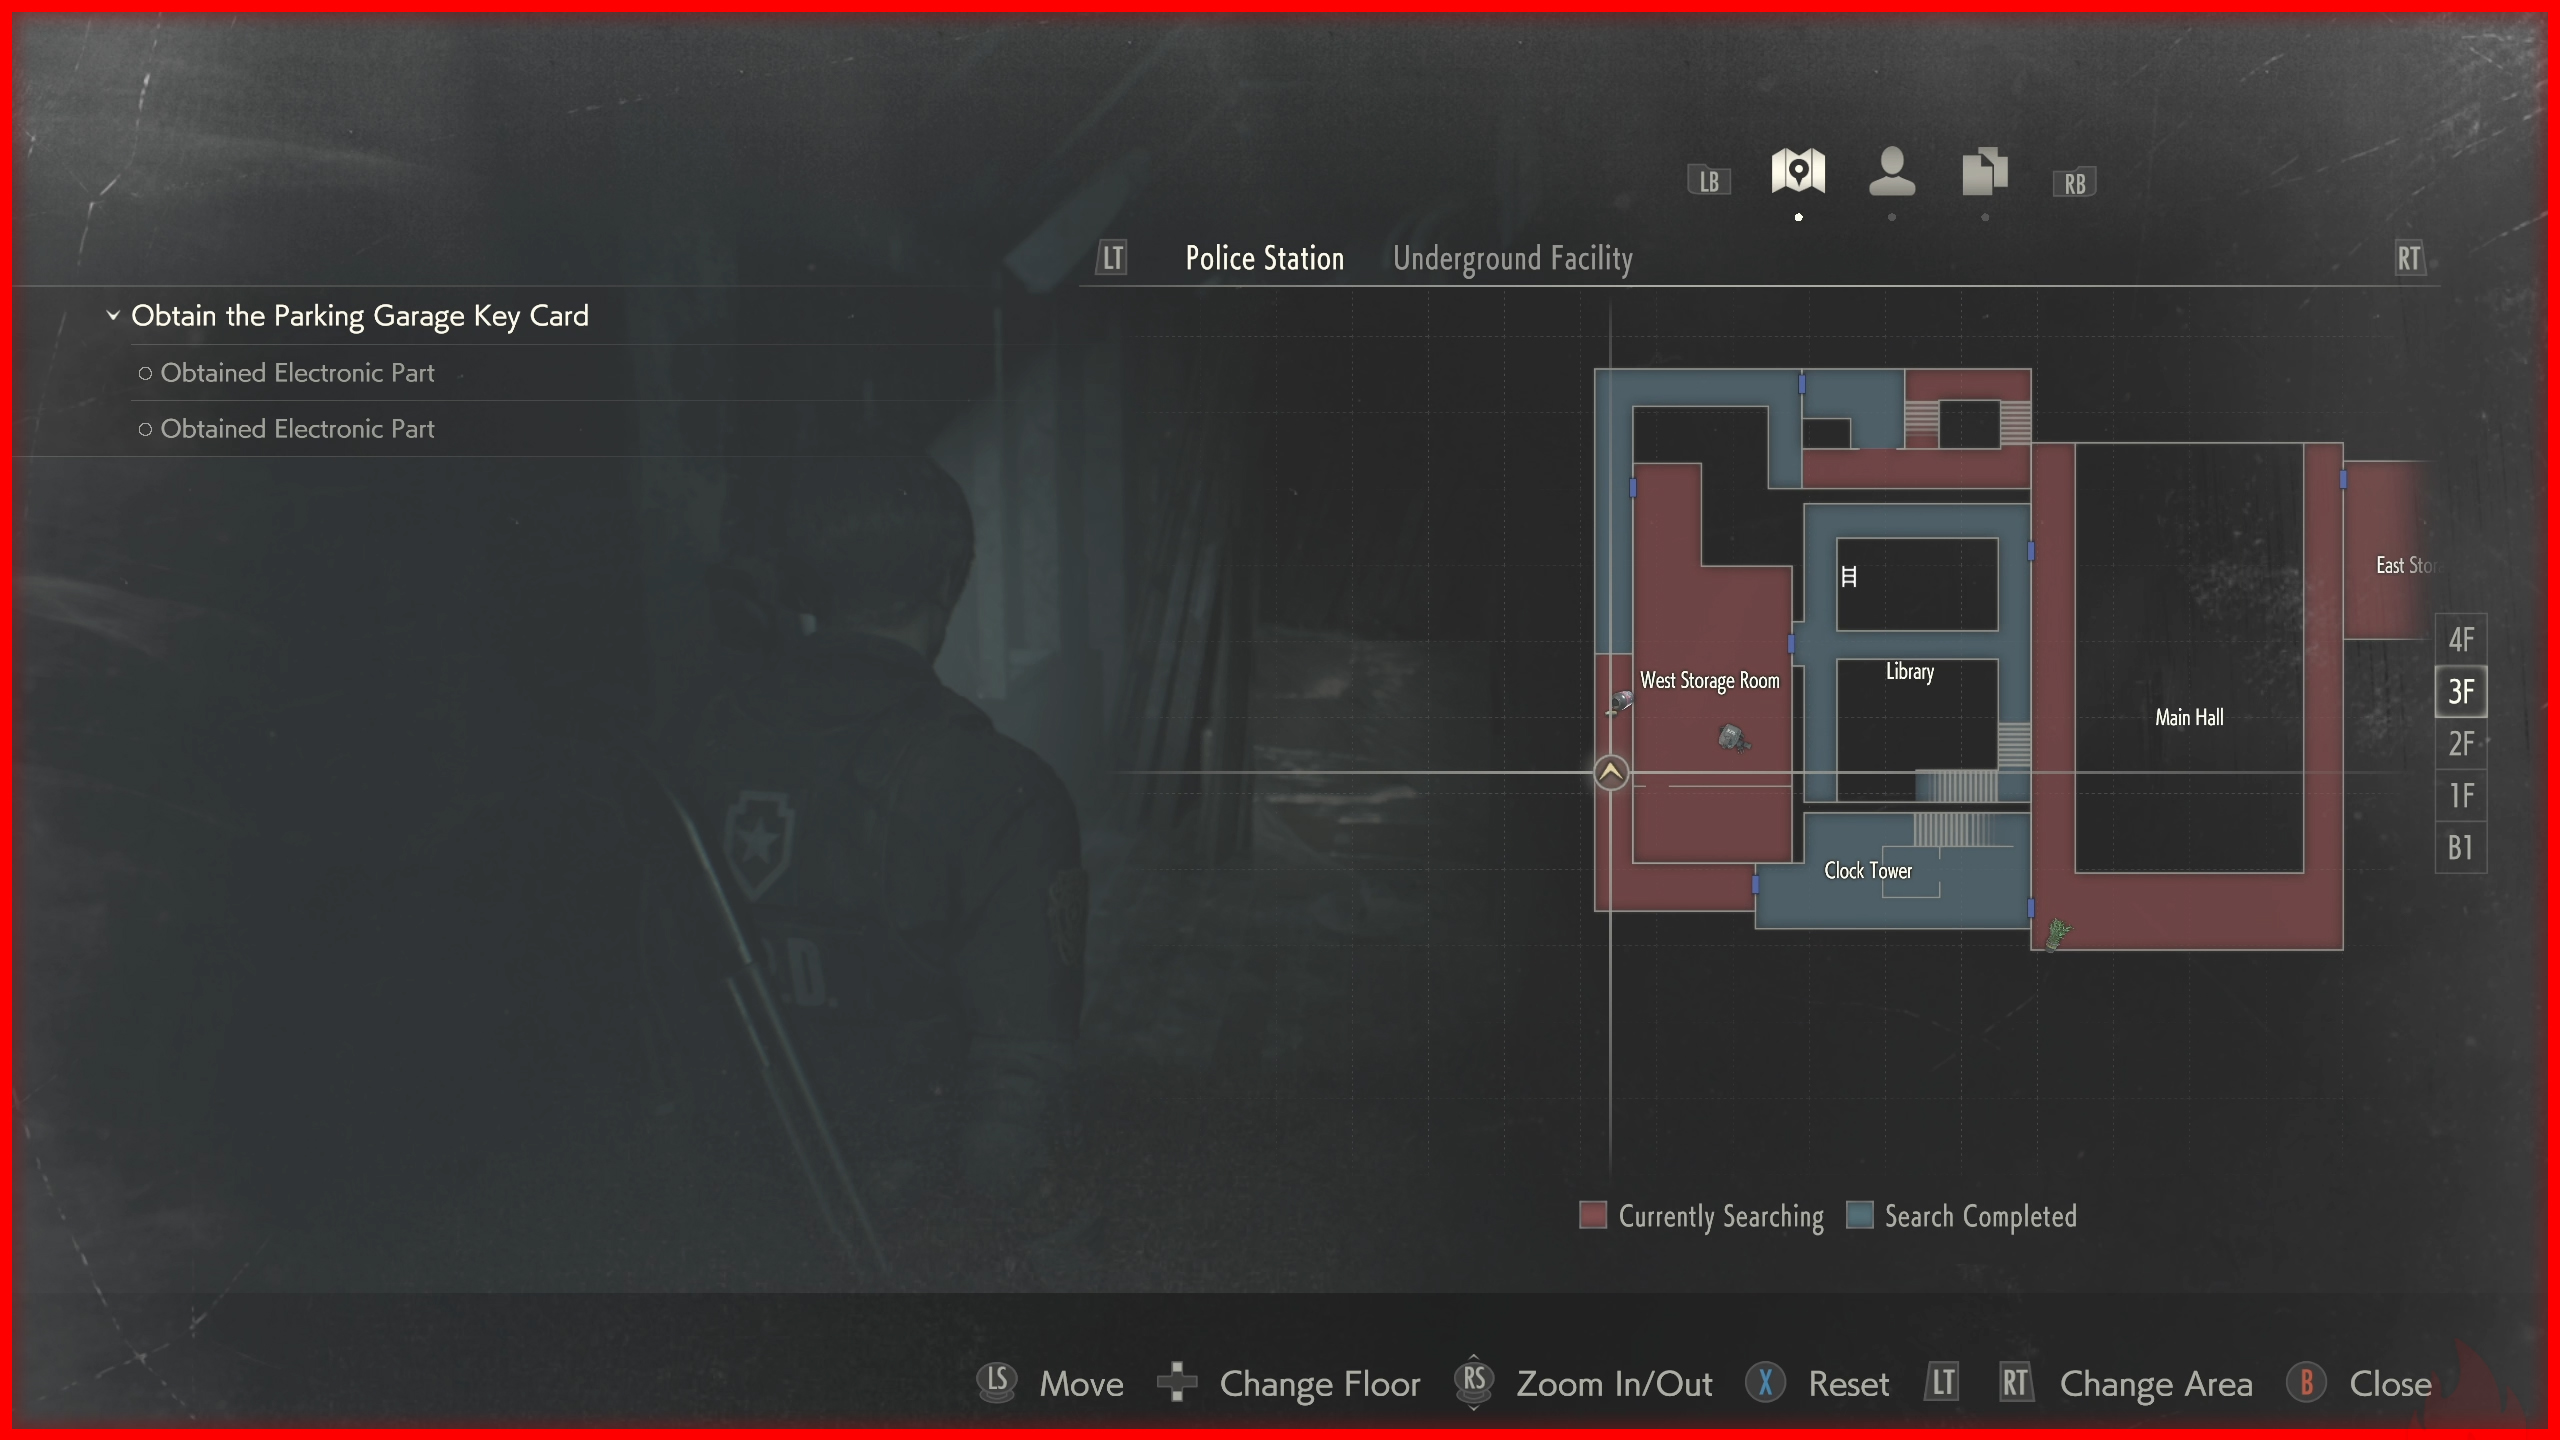
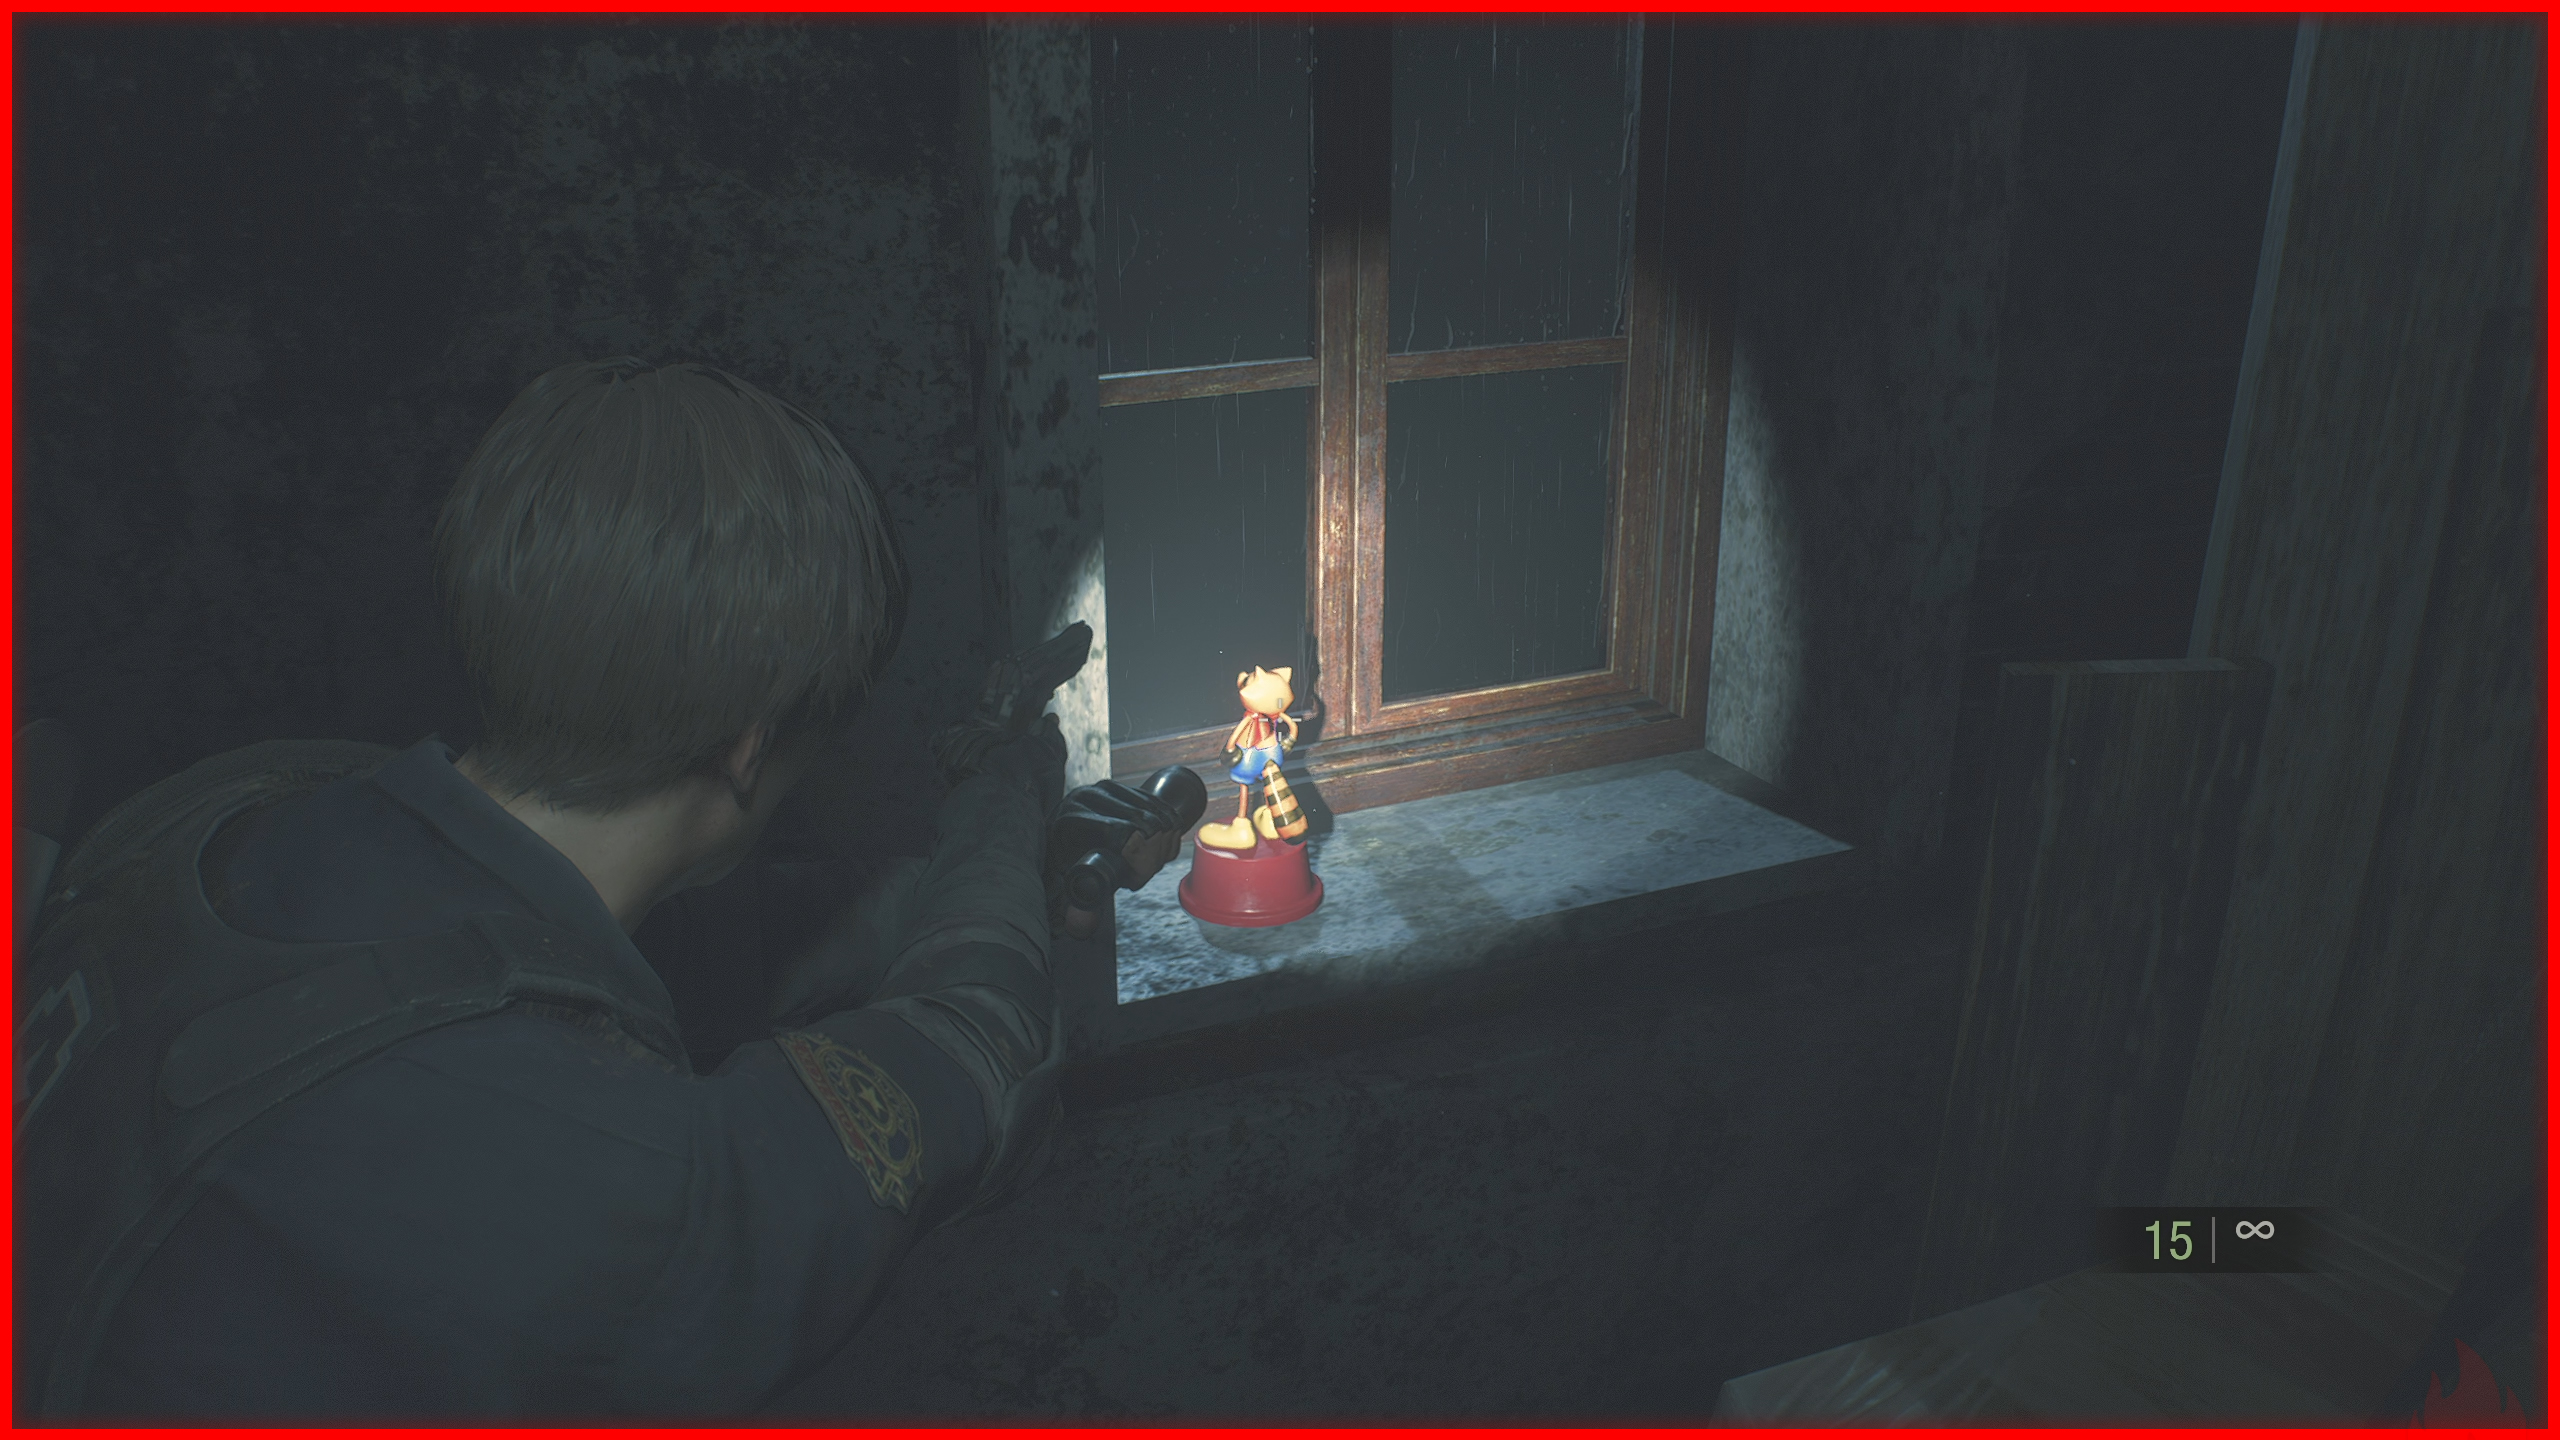
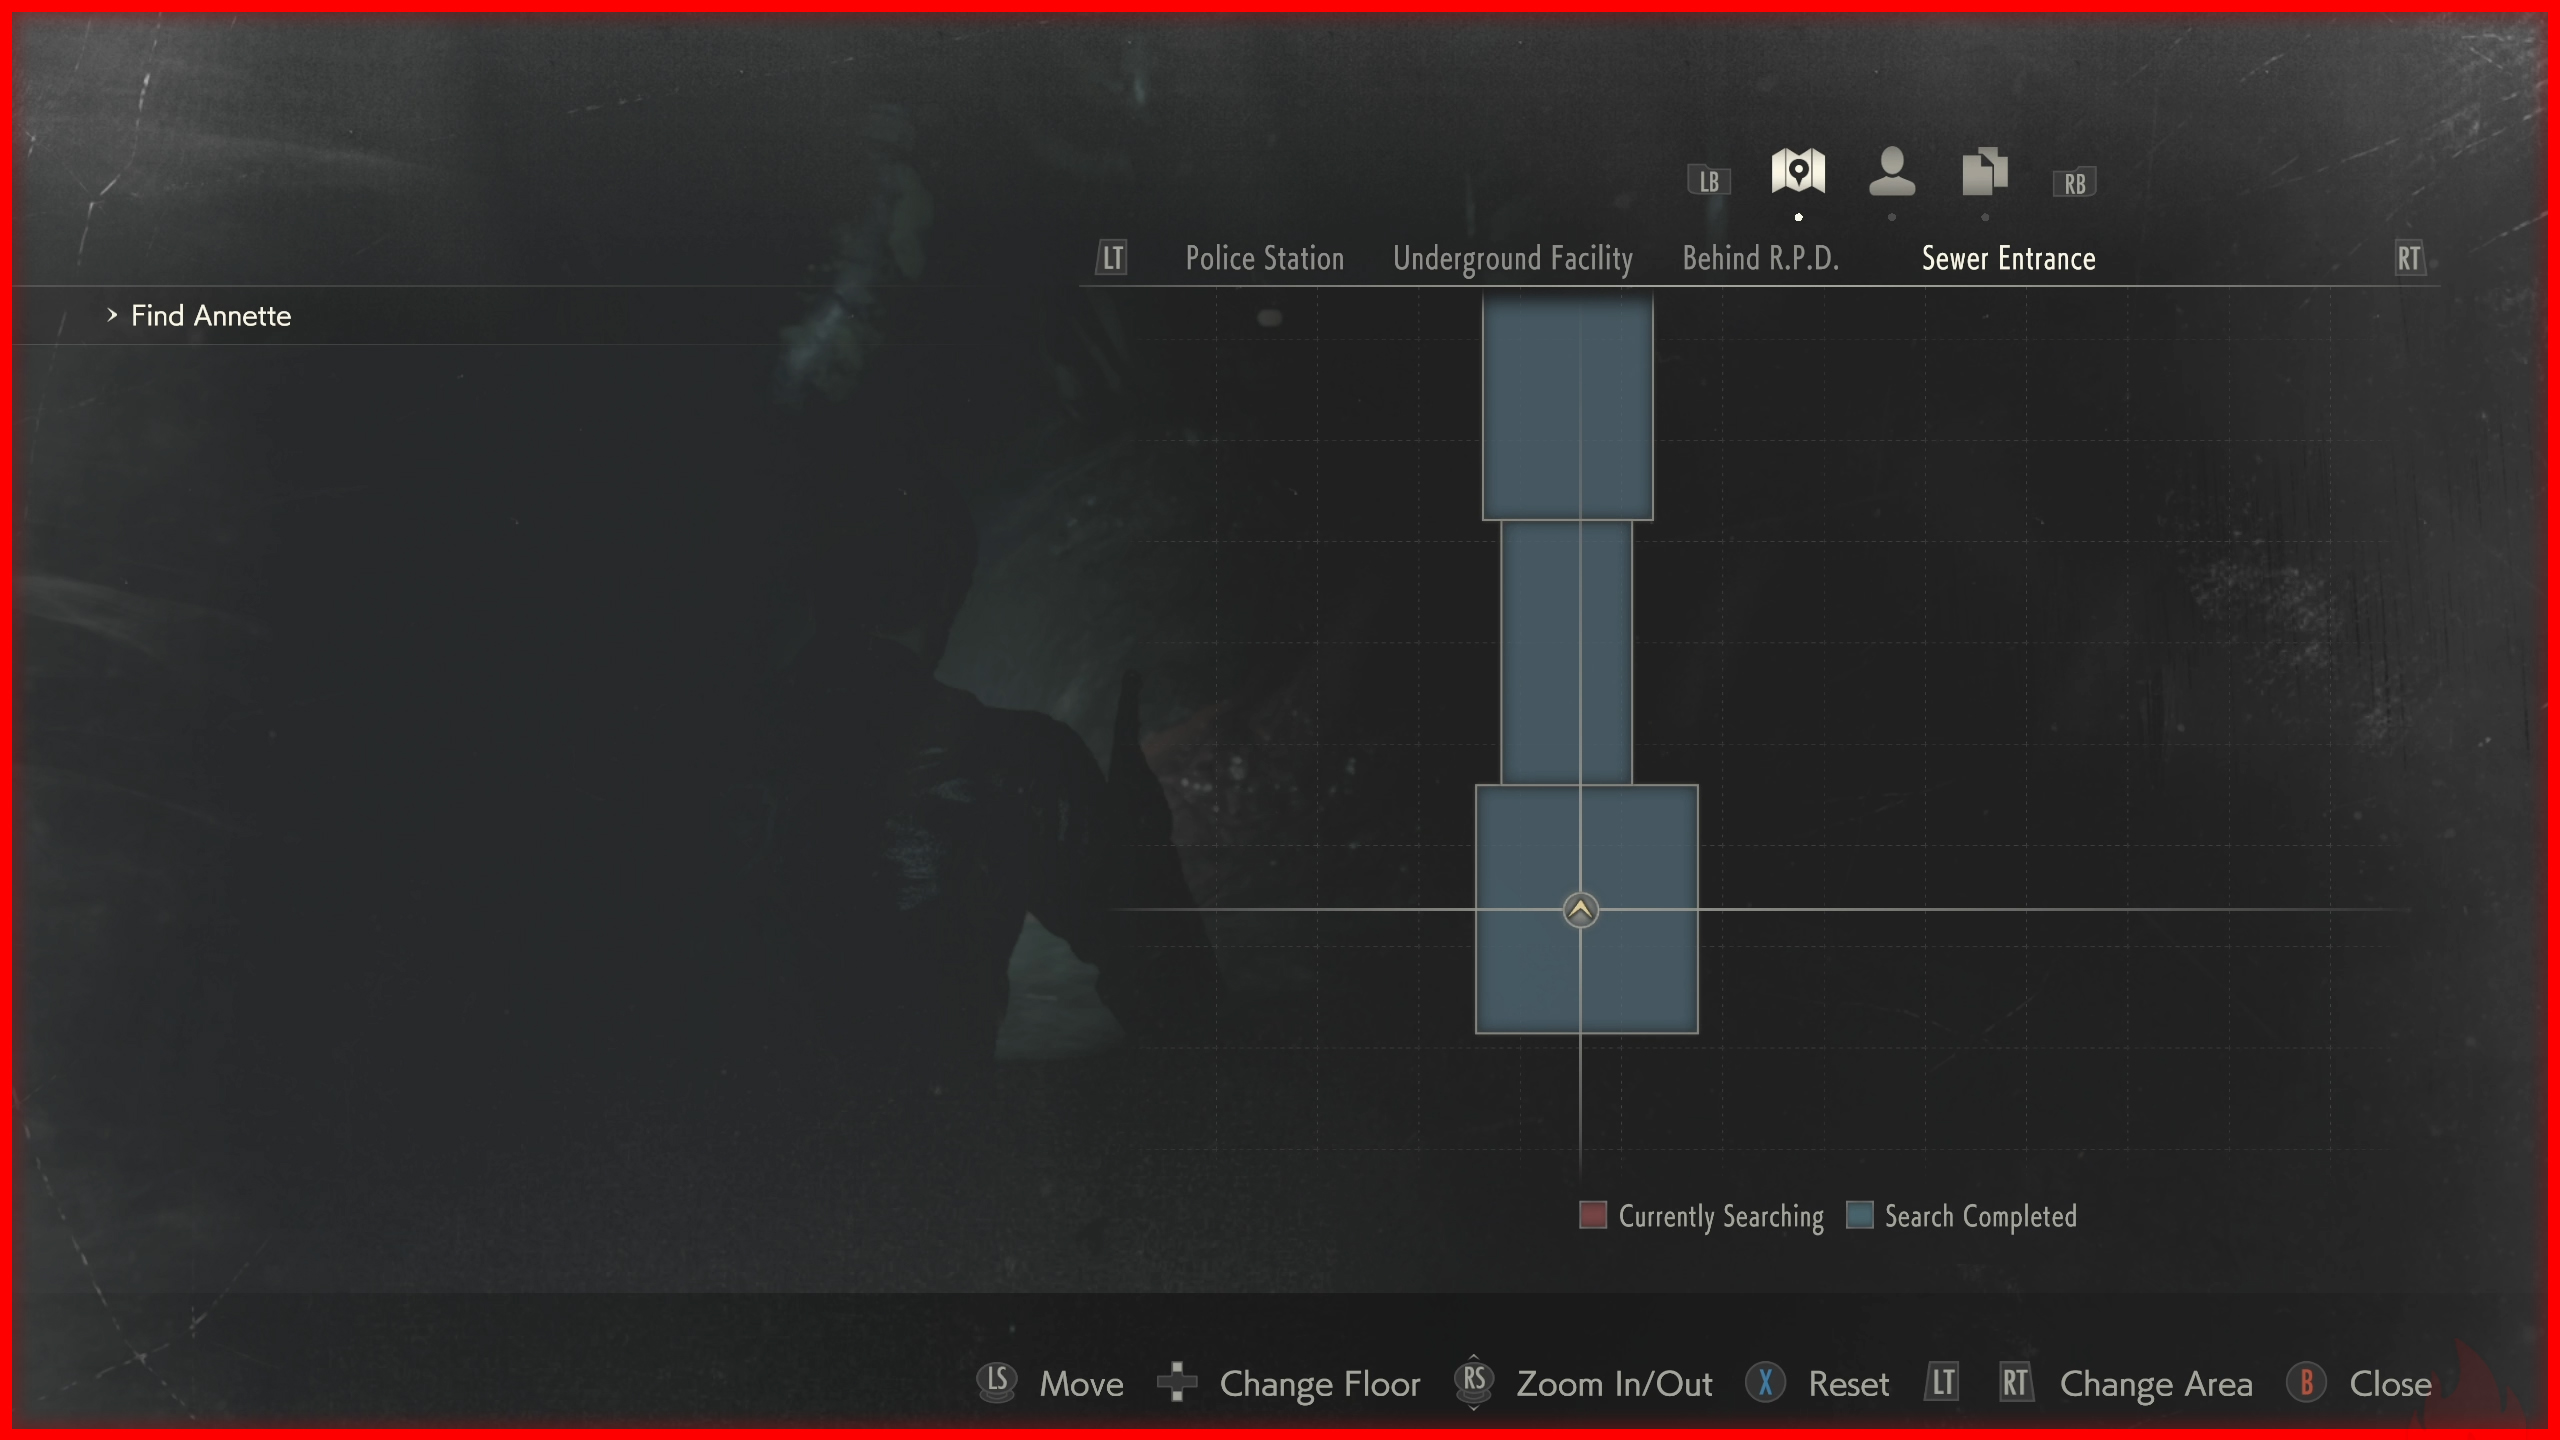
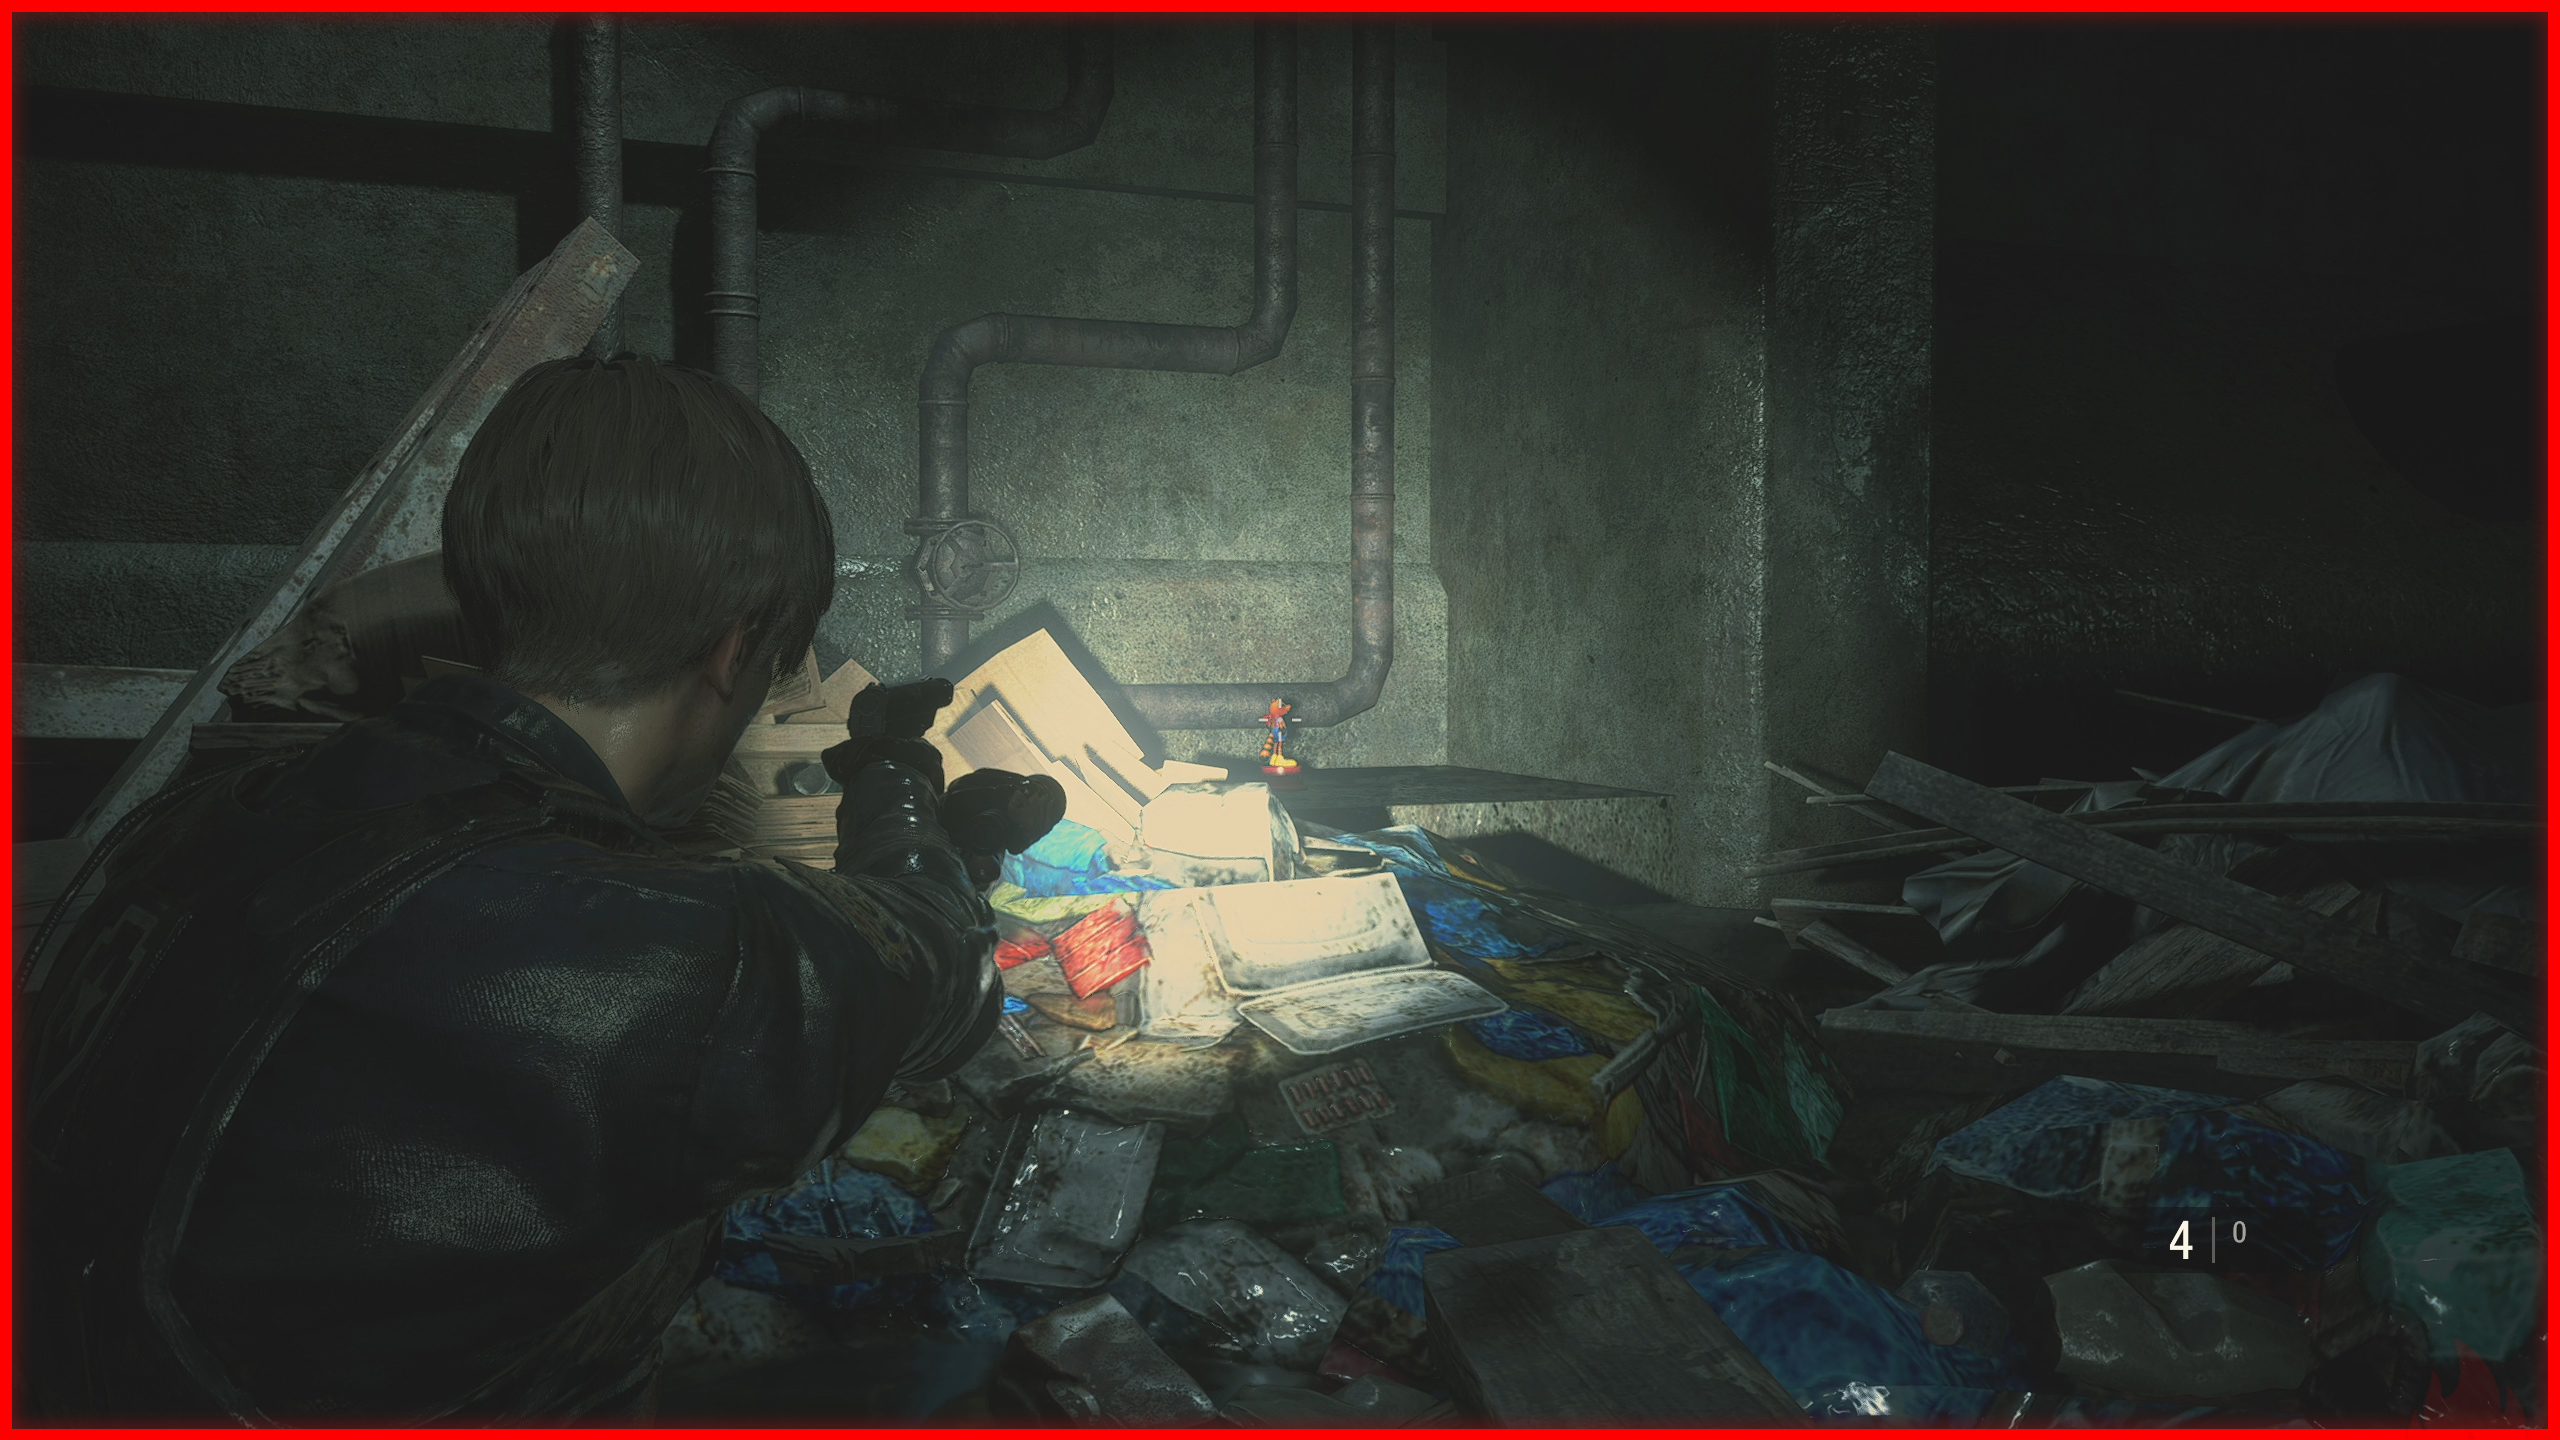
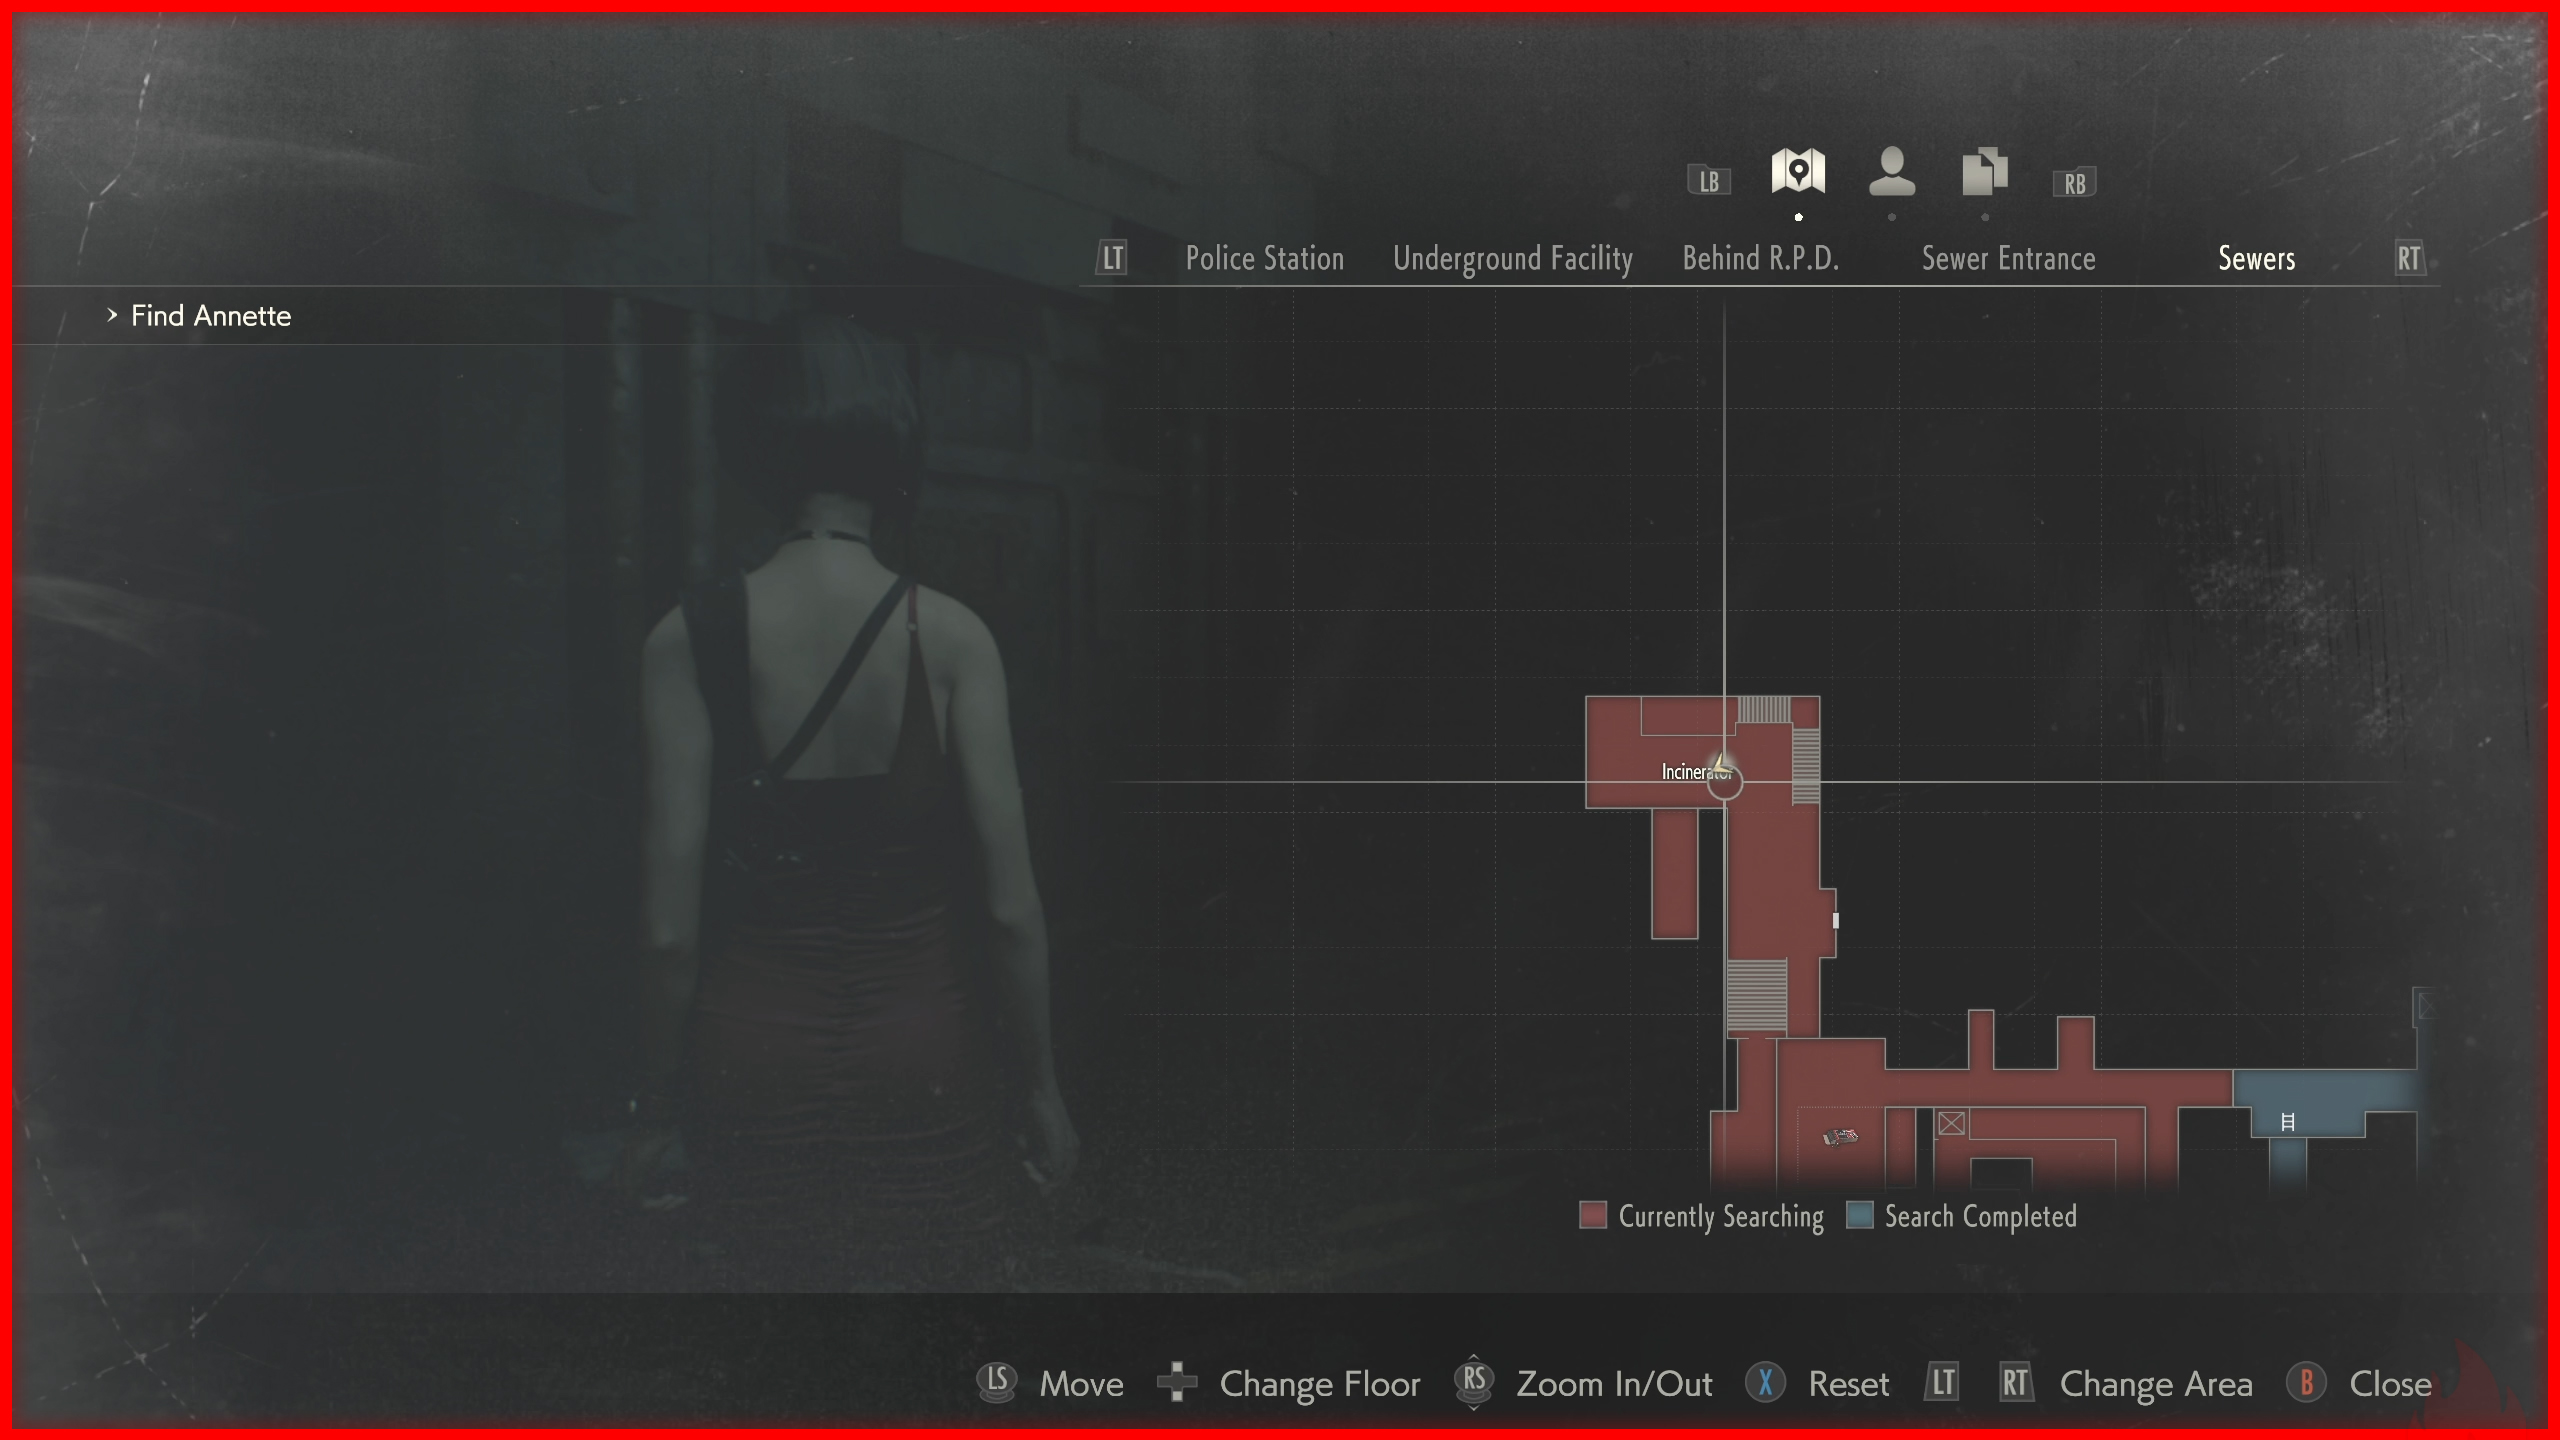
As Ada, found in the Incinerator Room beside the large incinerator.
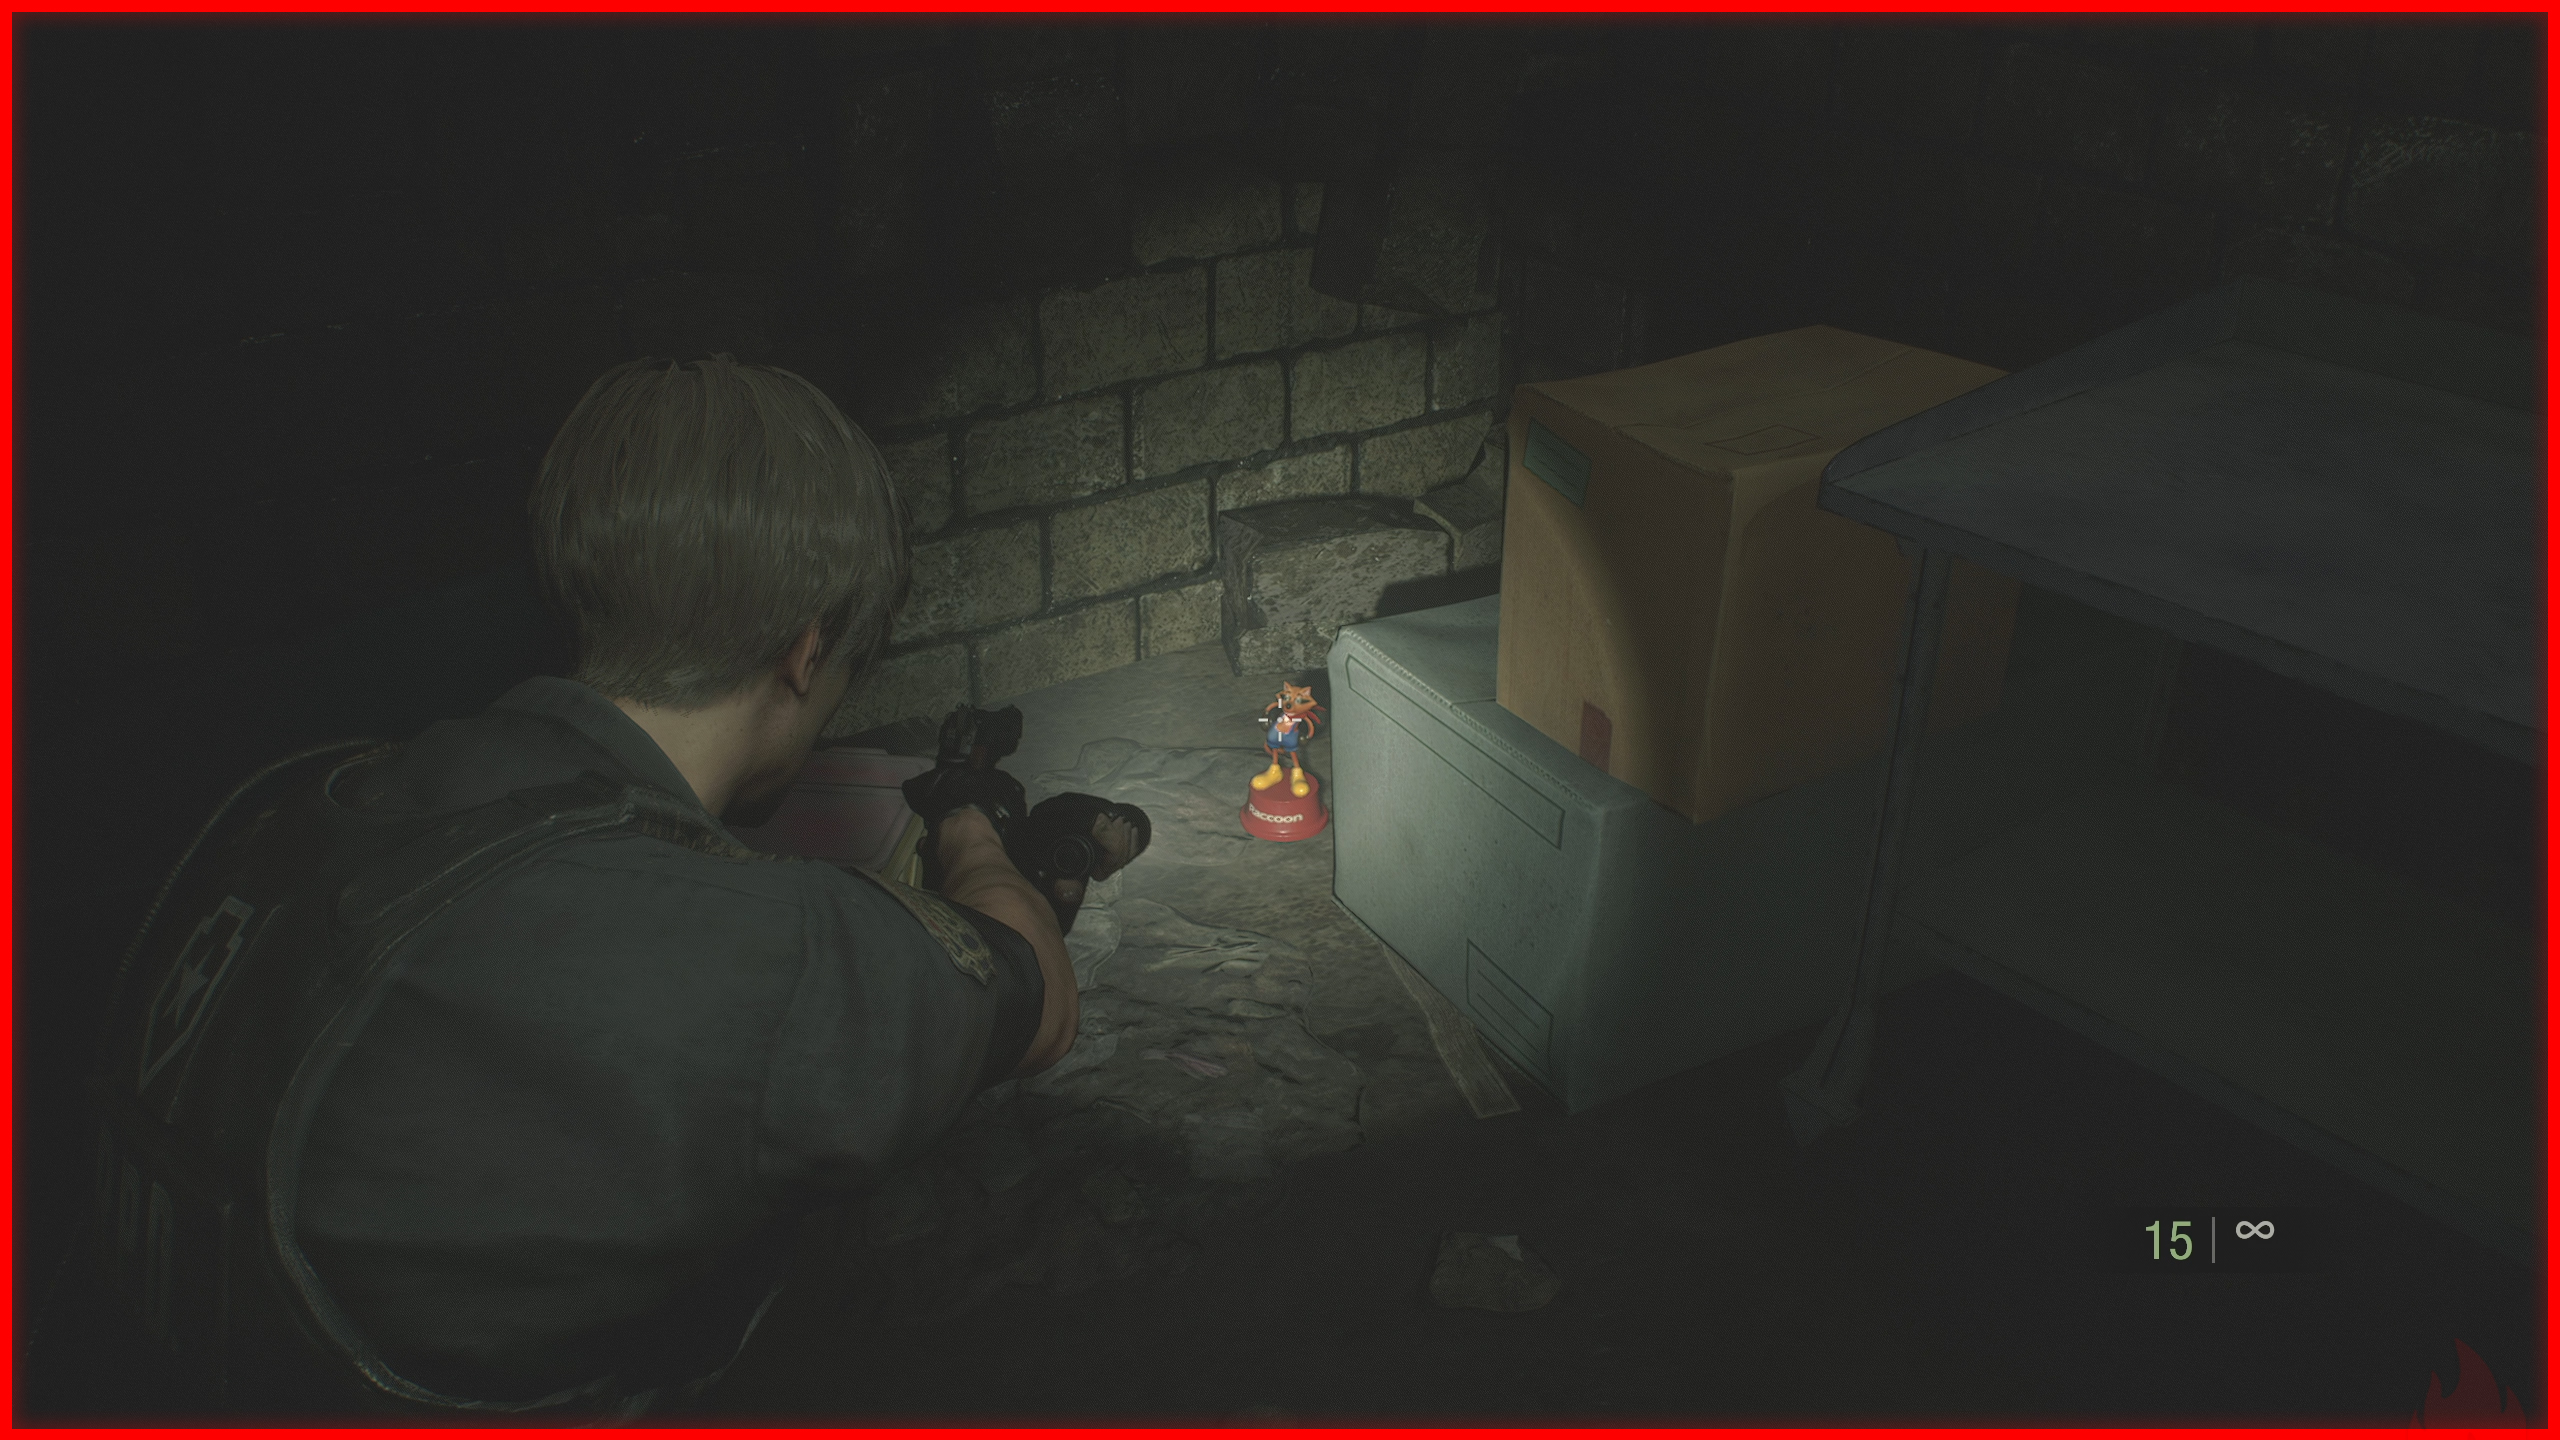
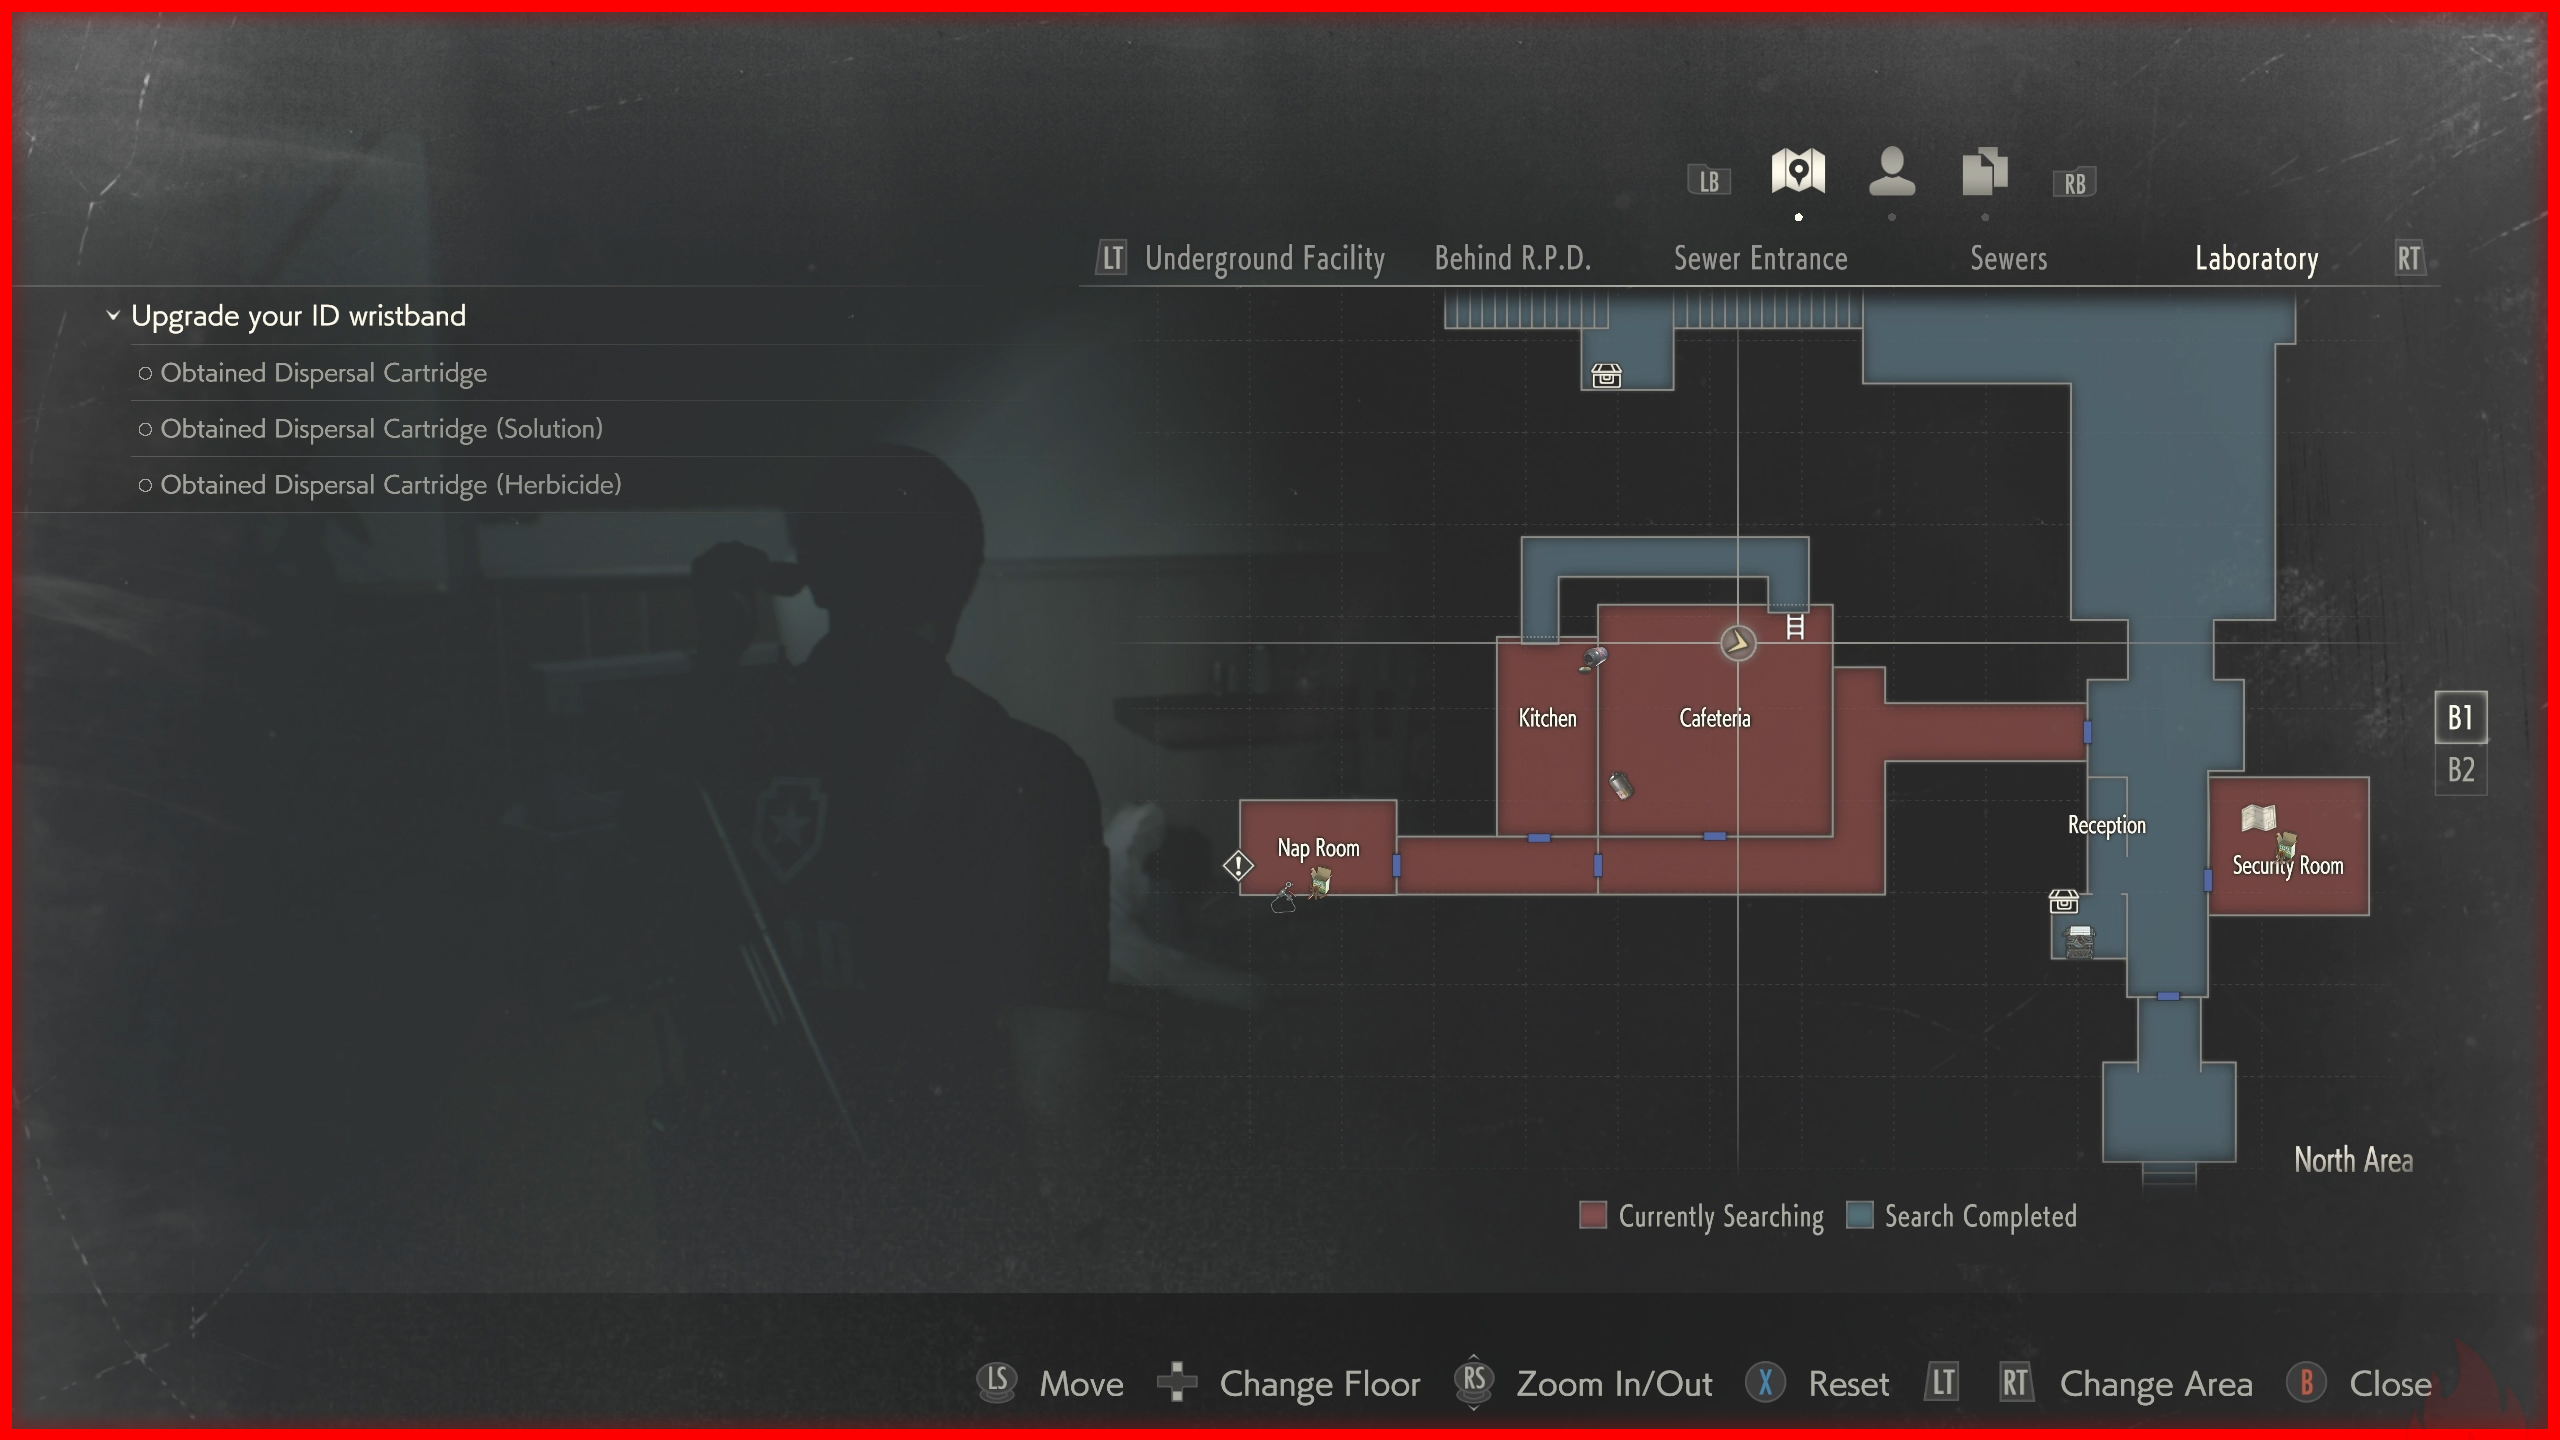
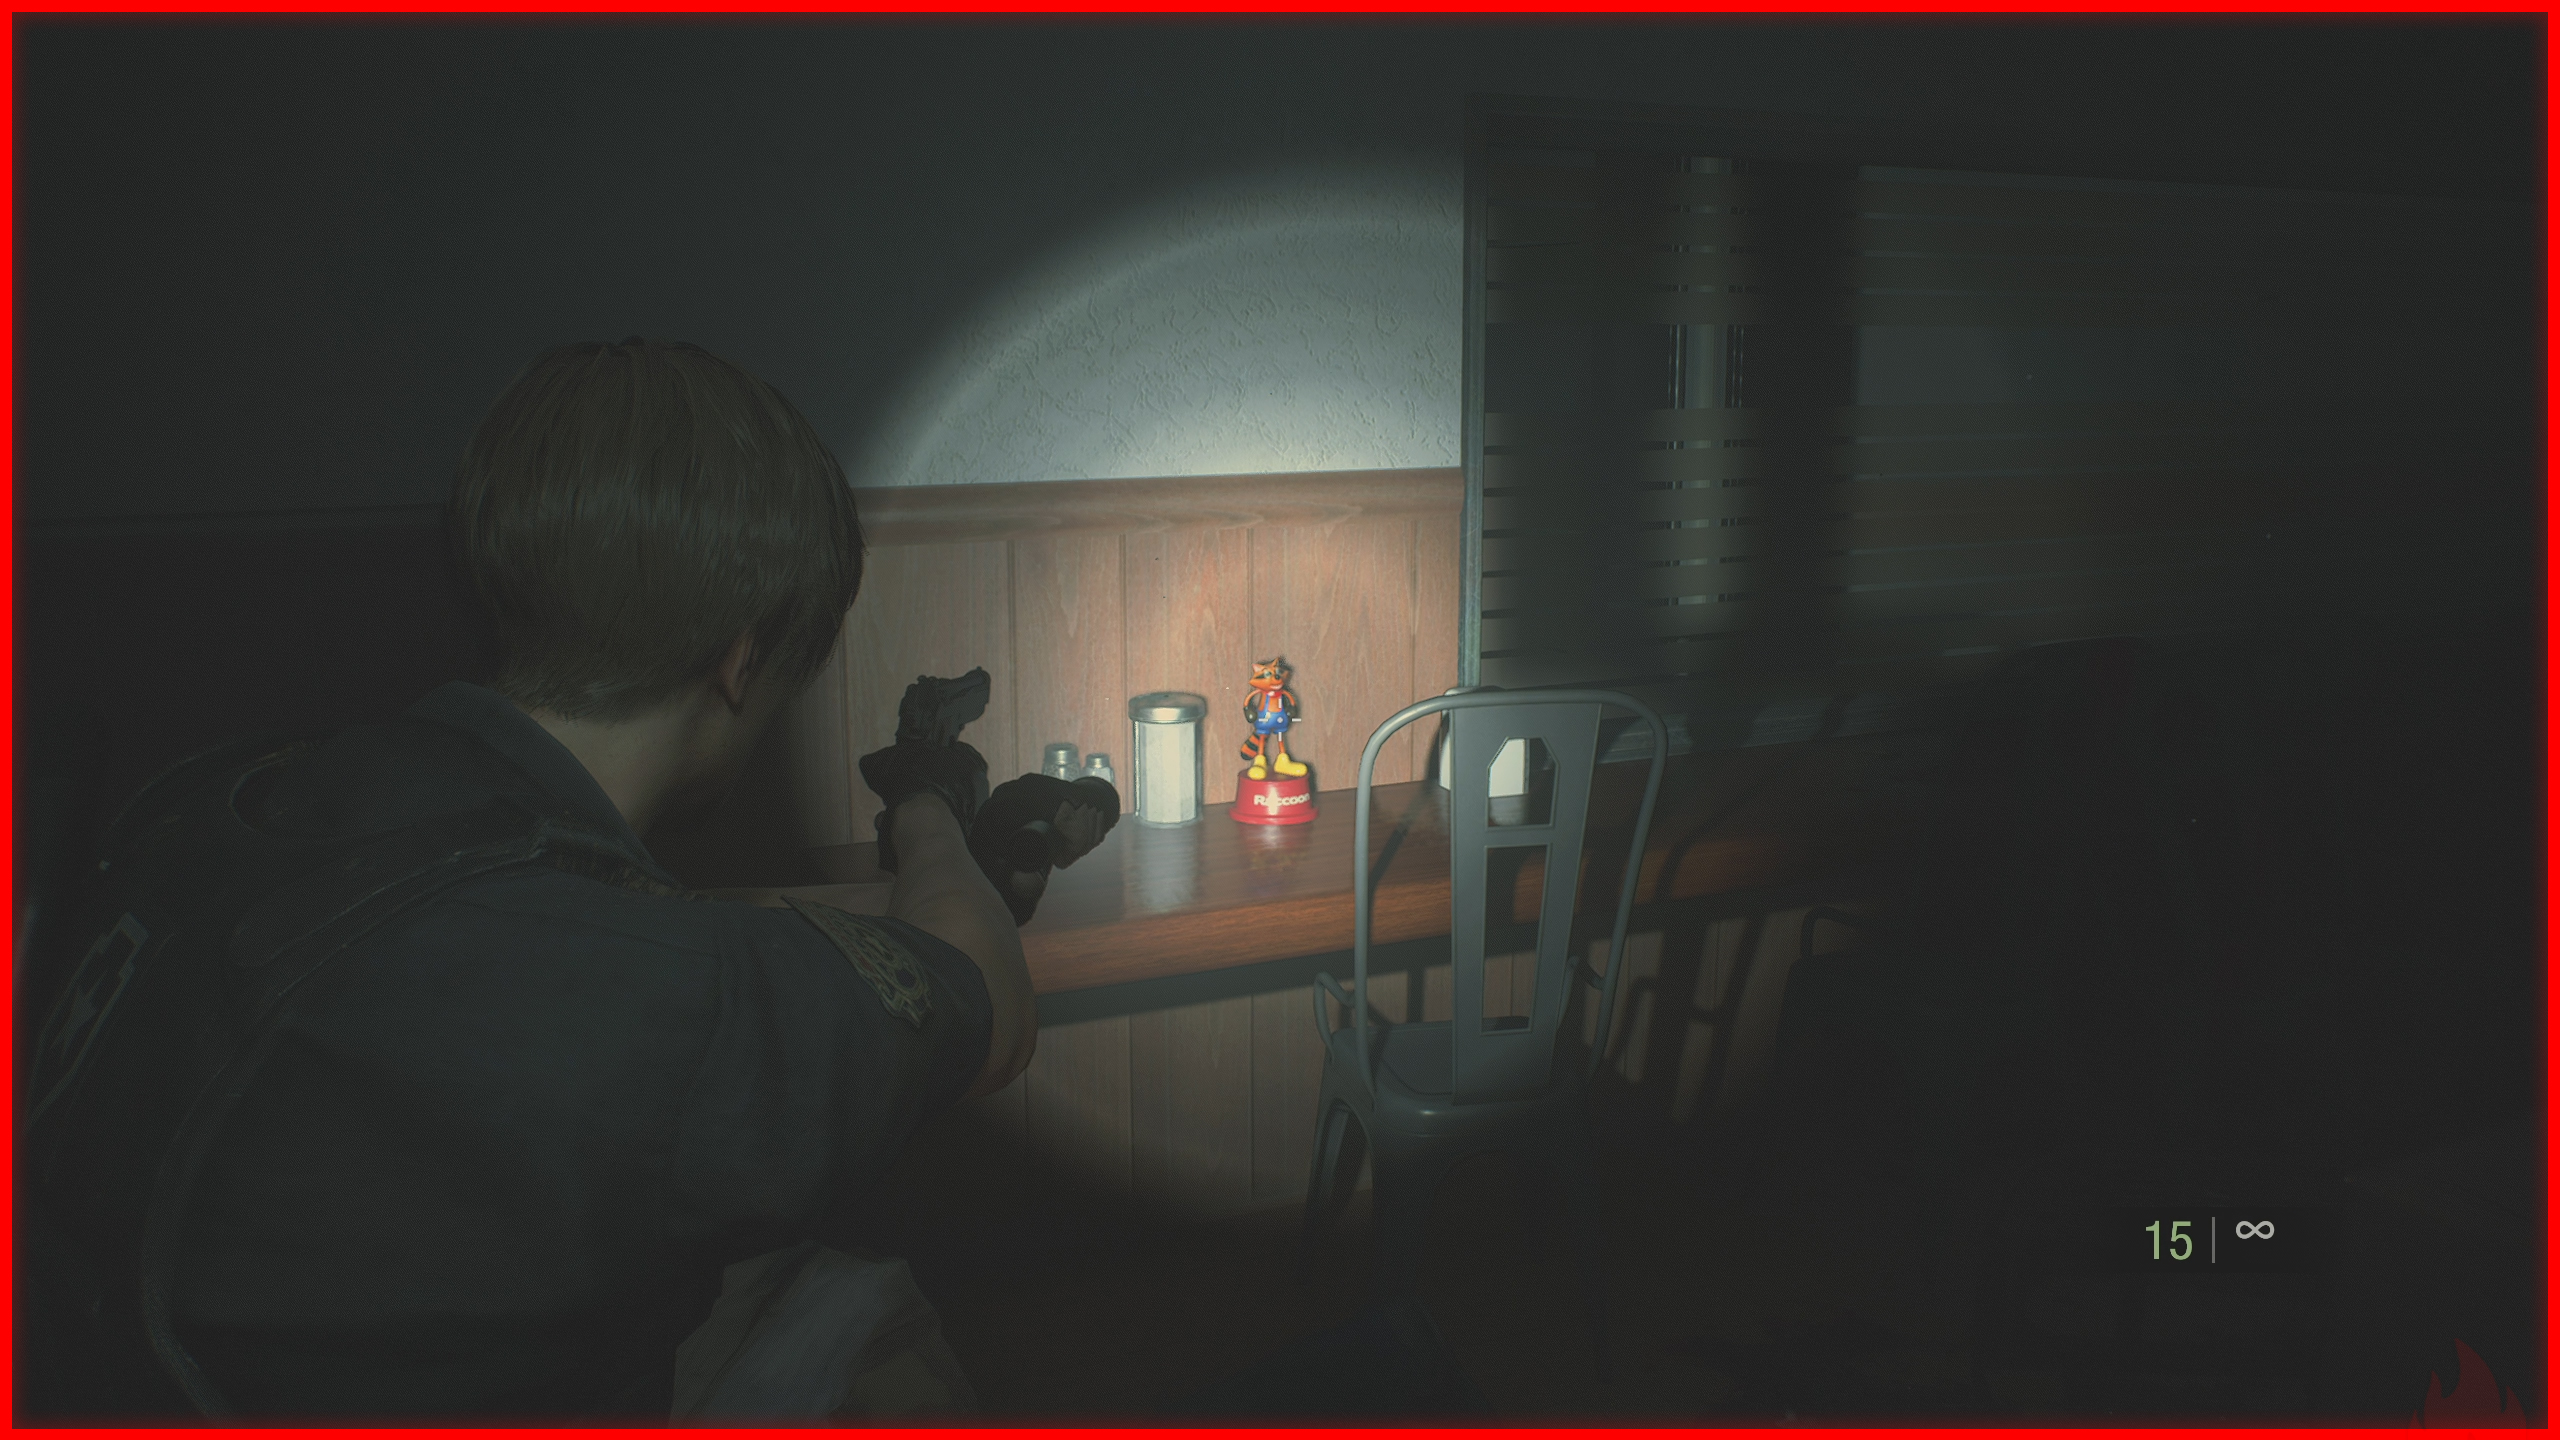
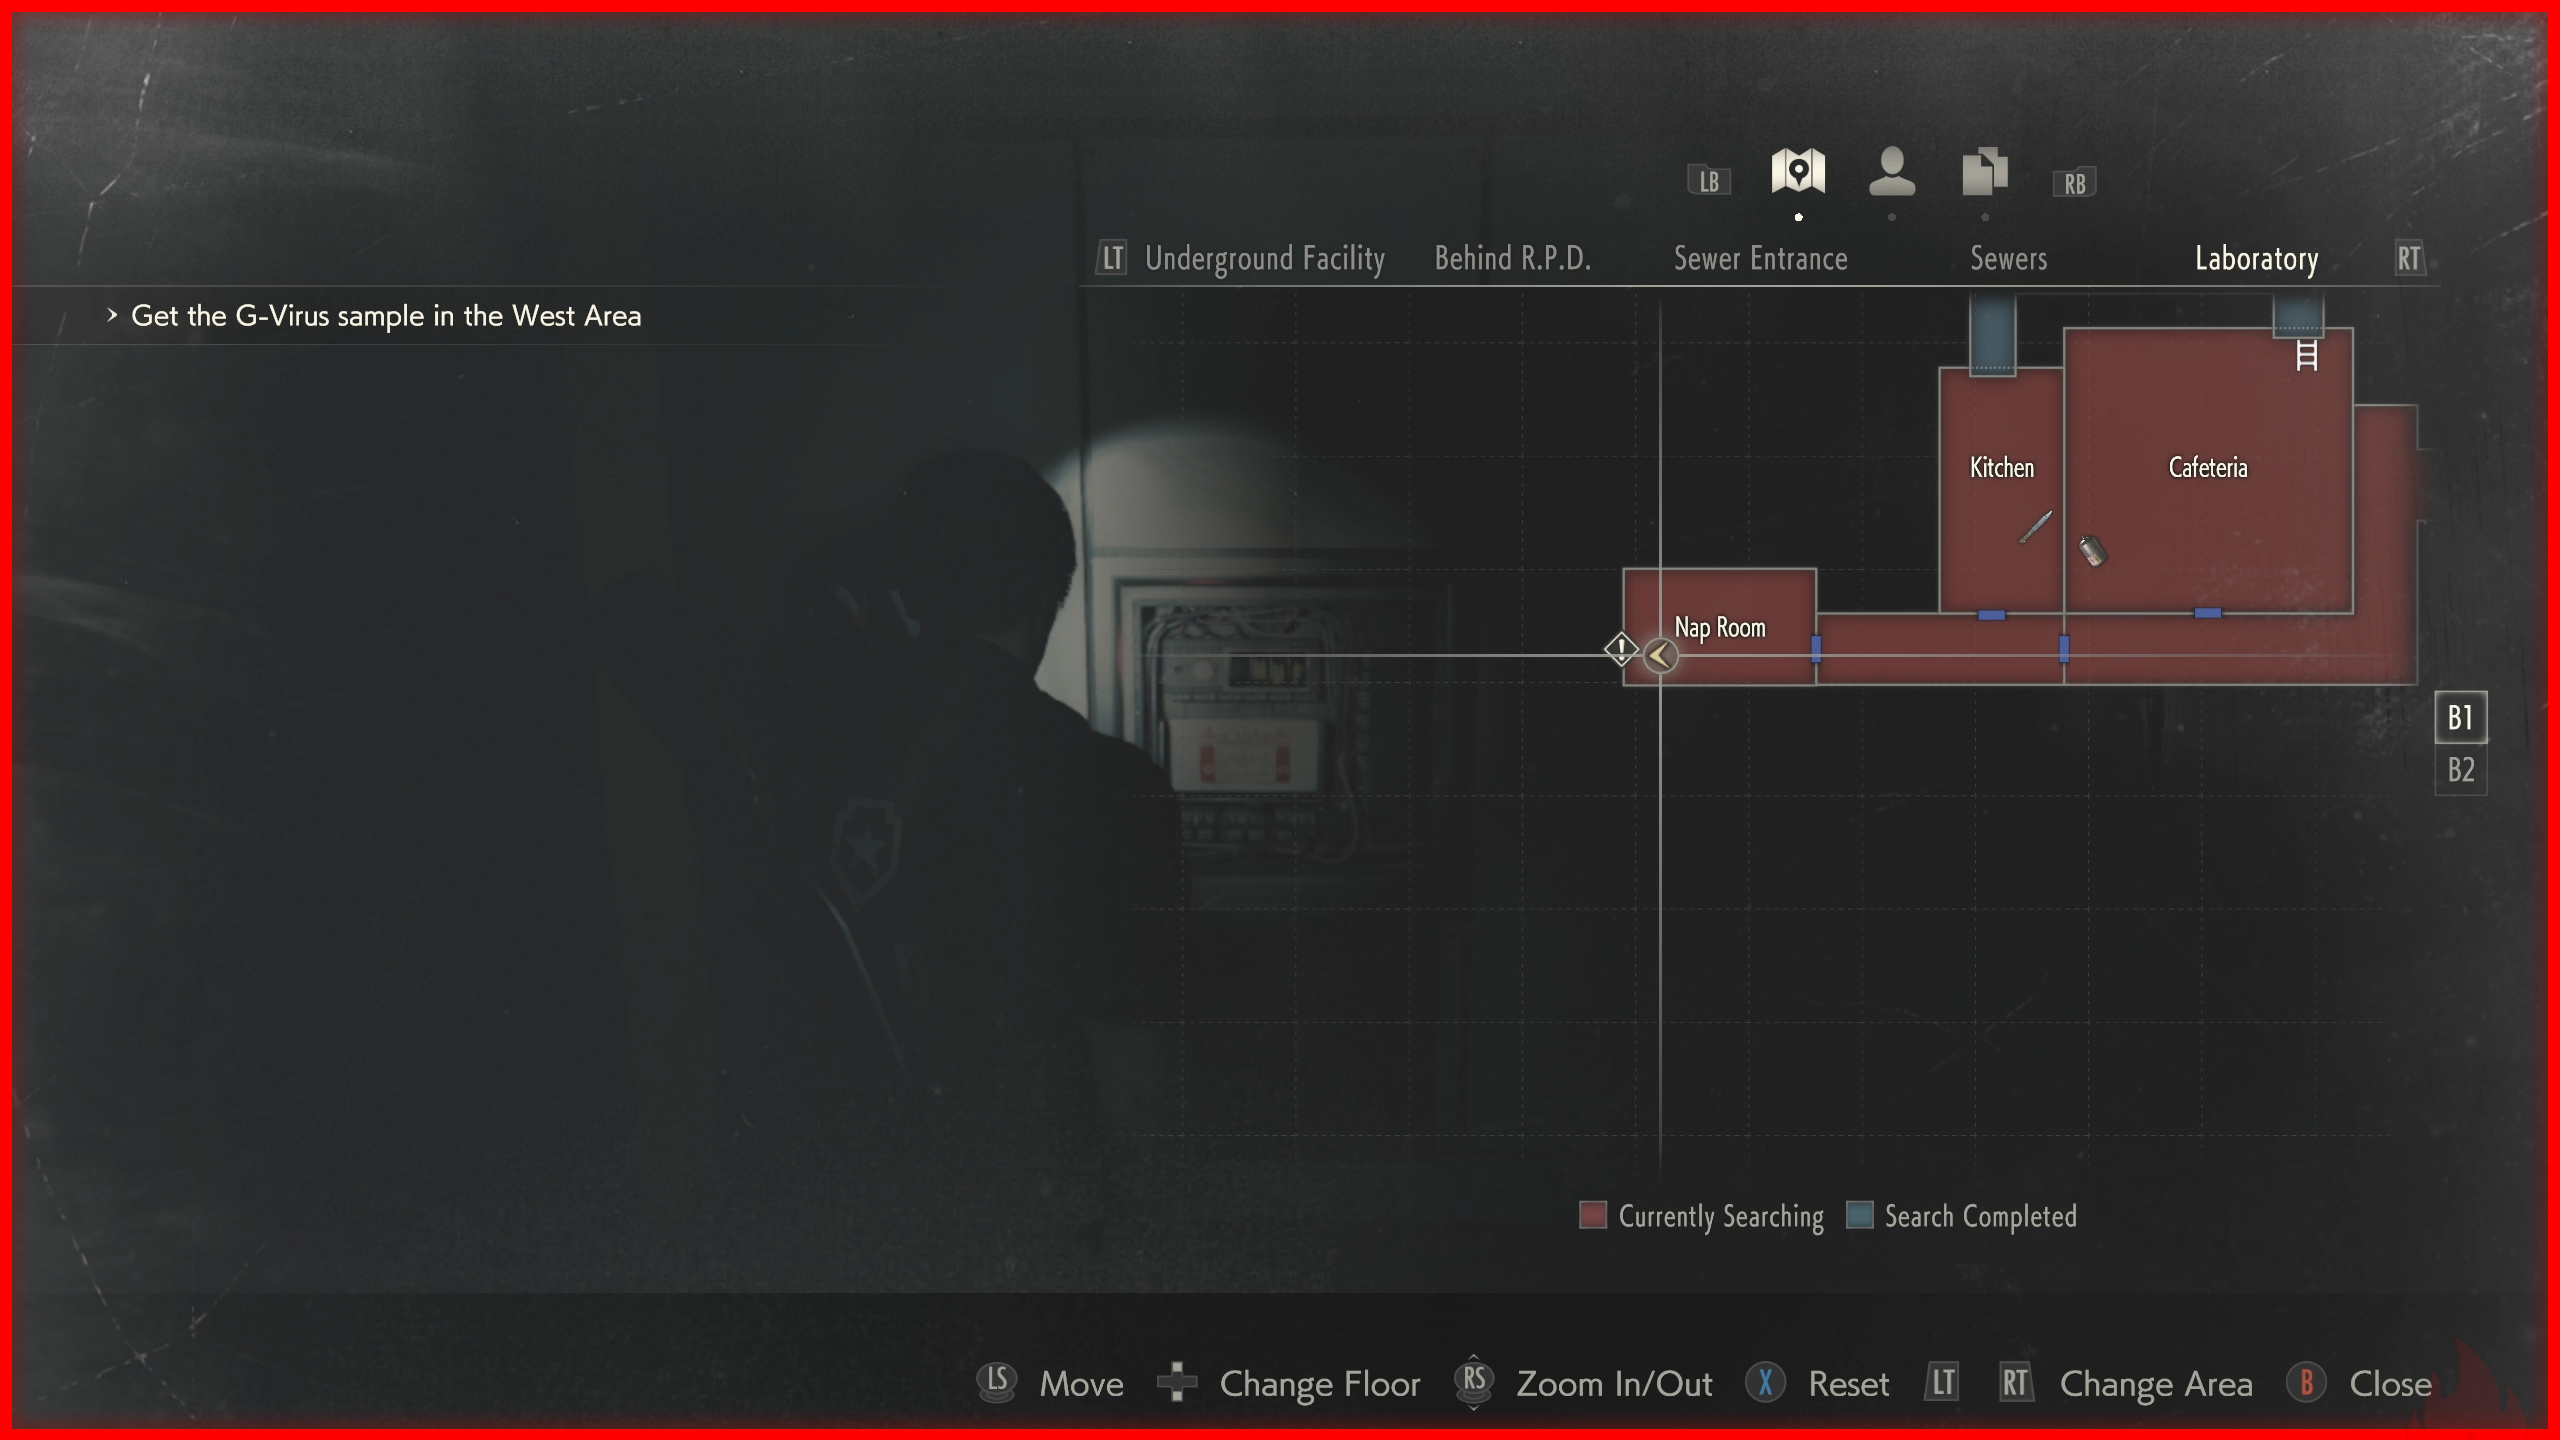
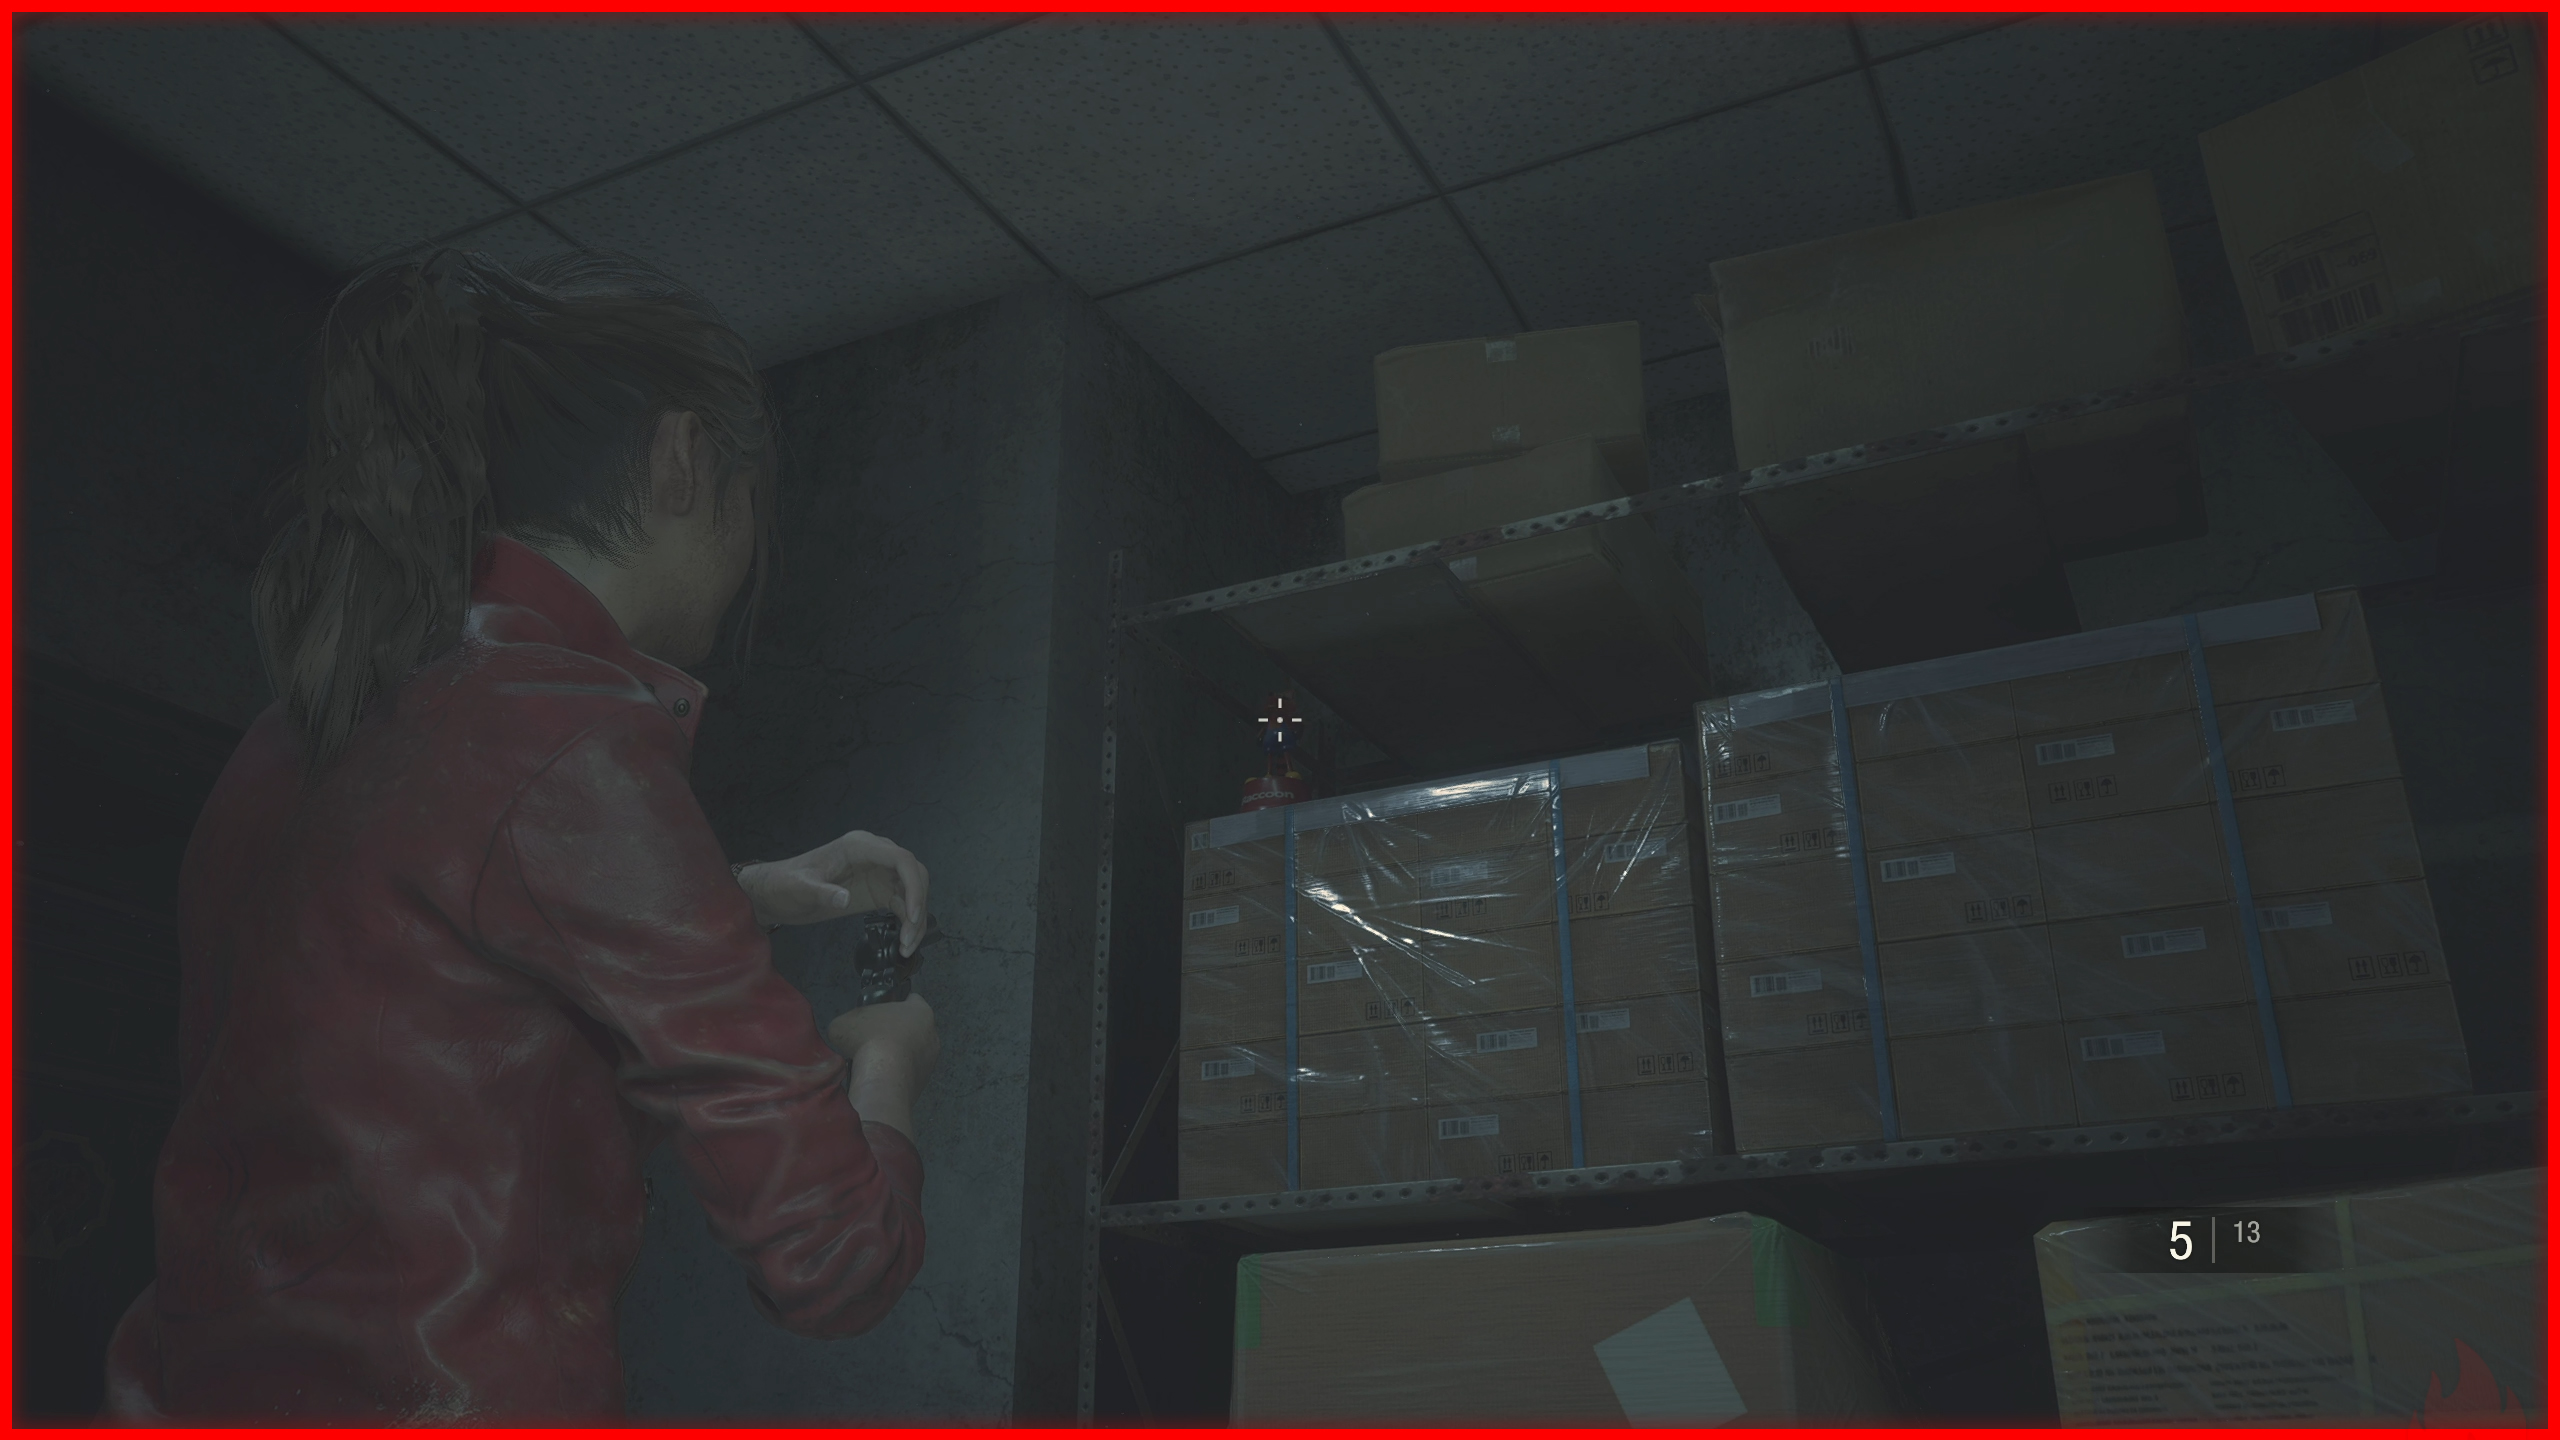
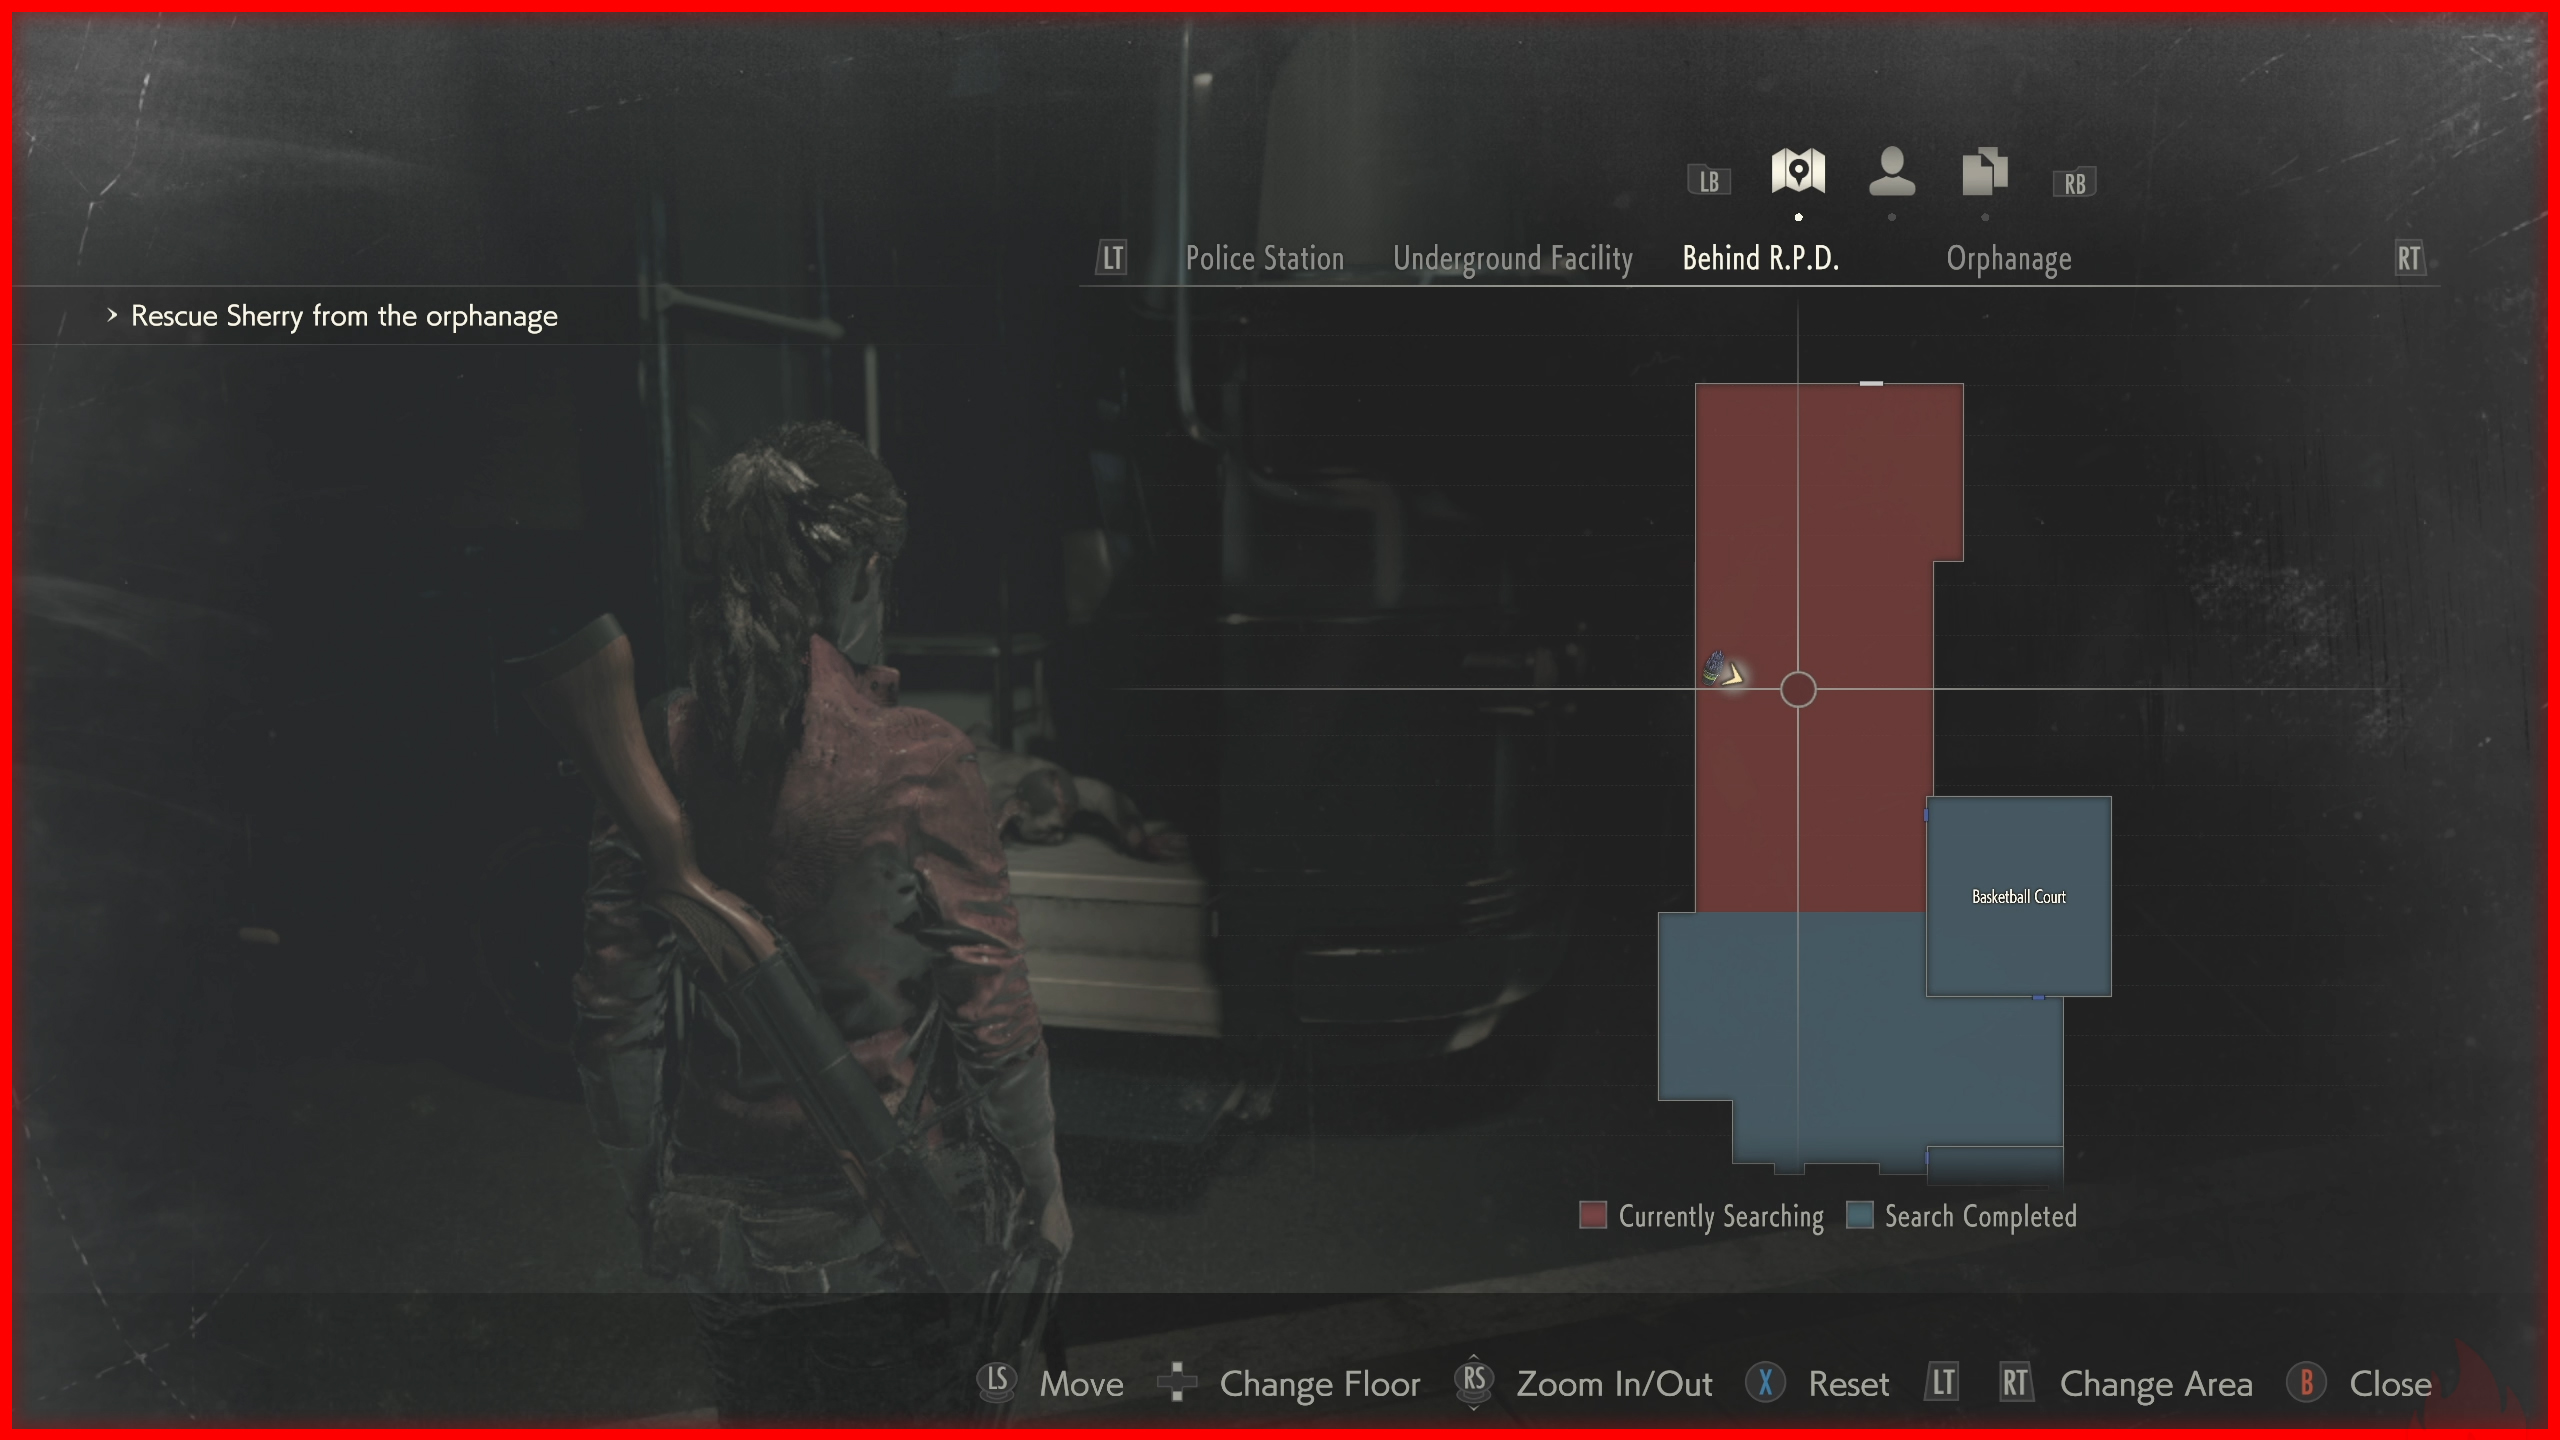
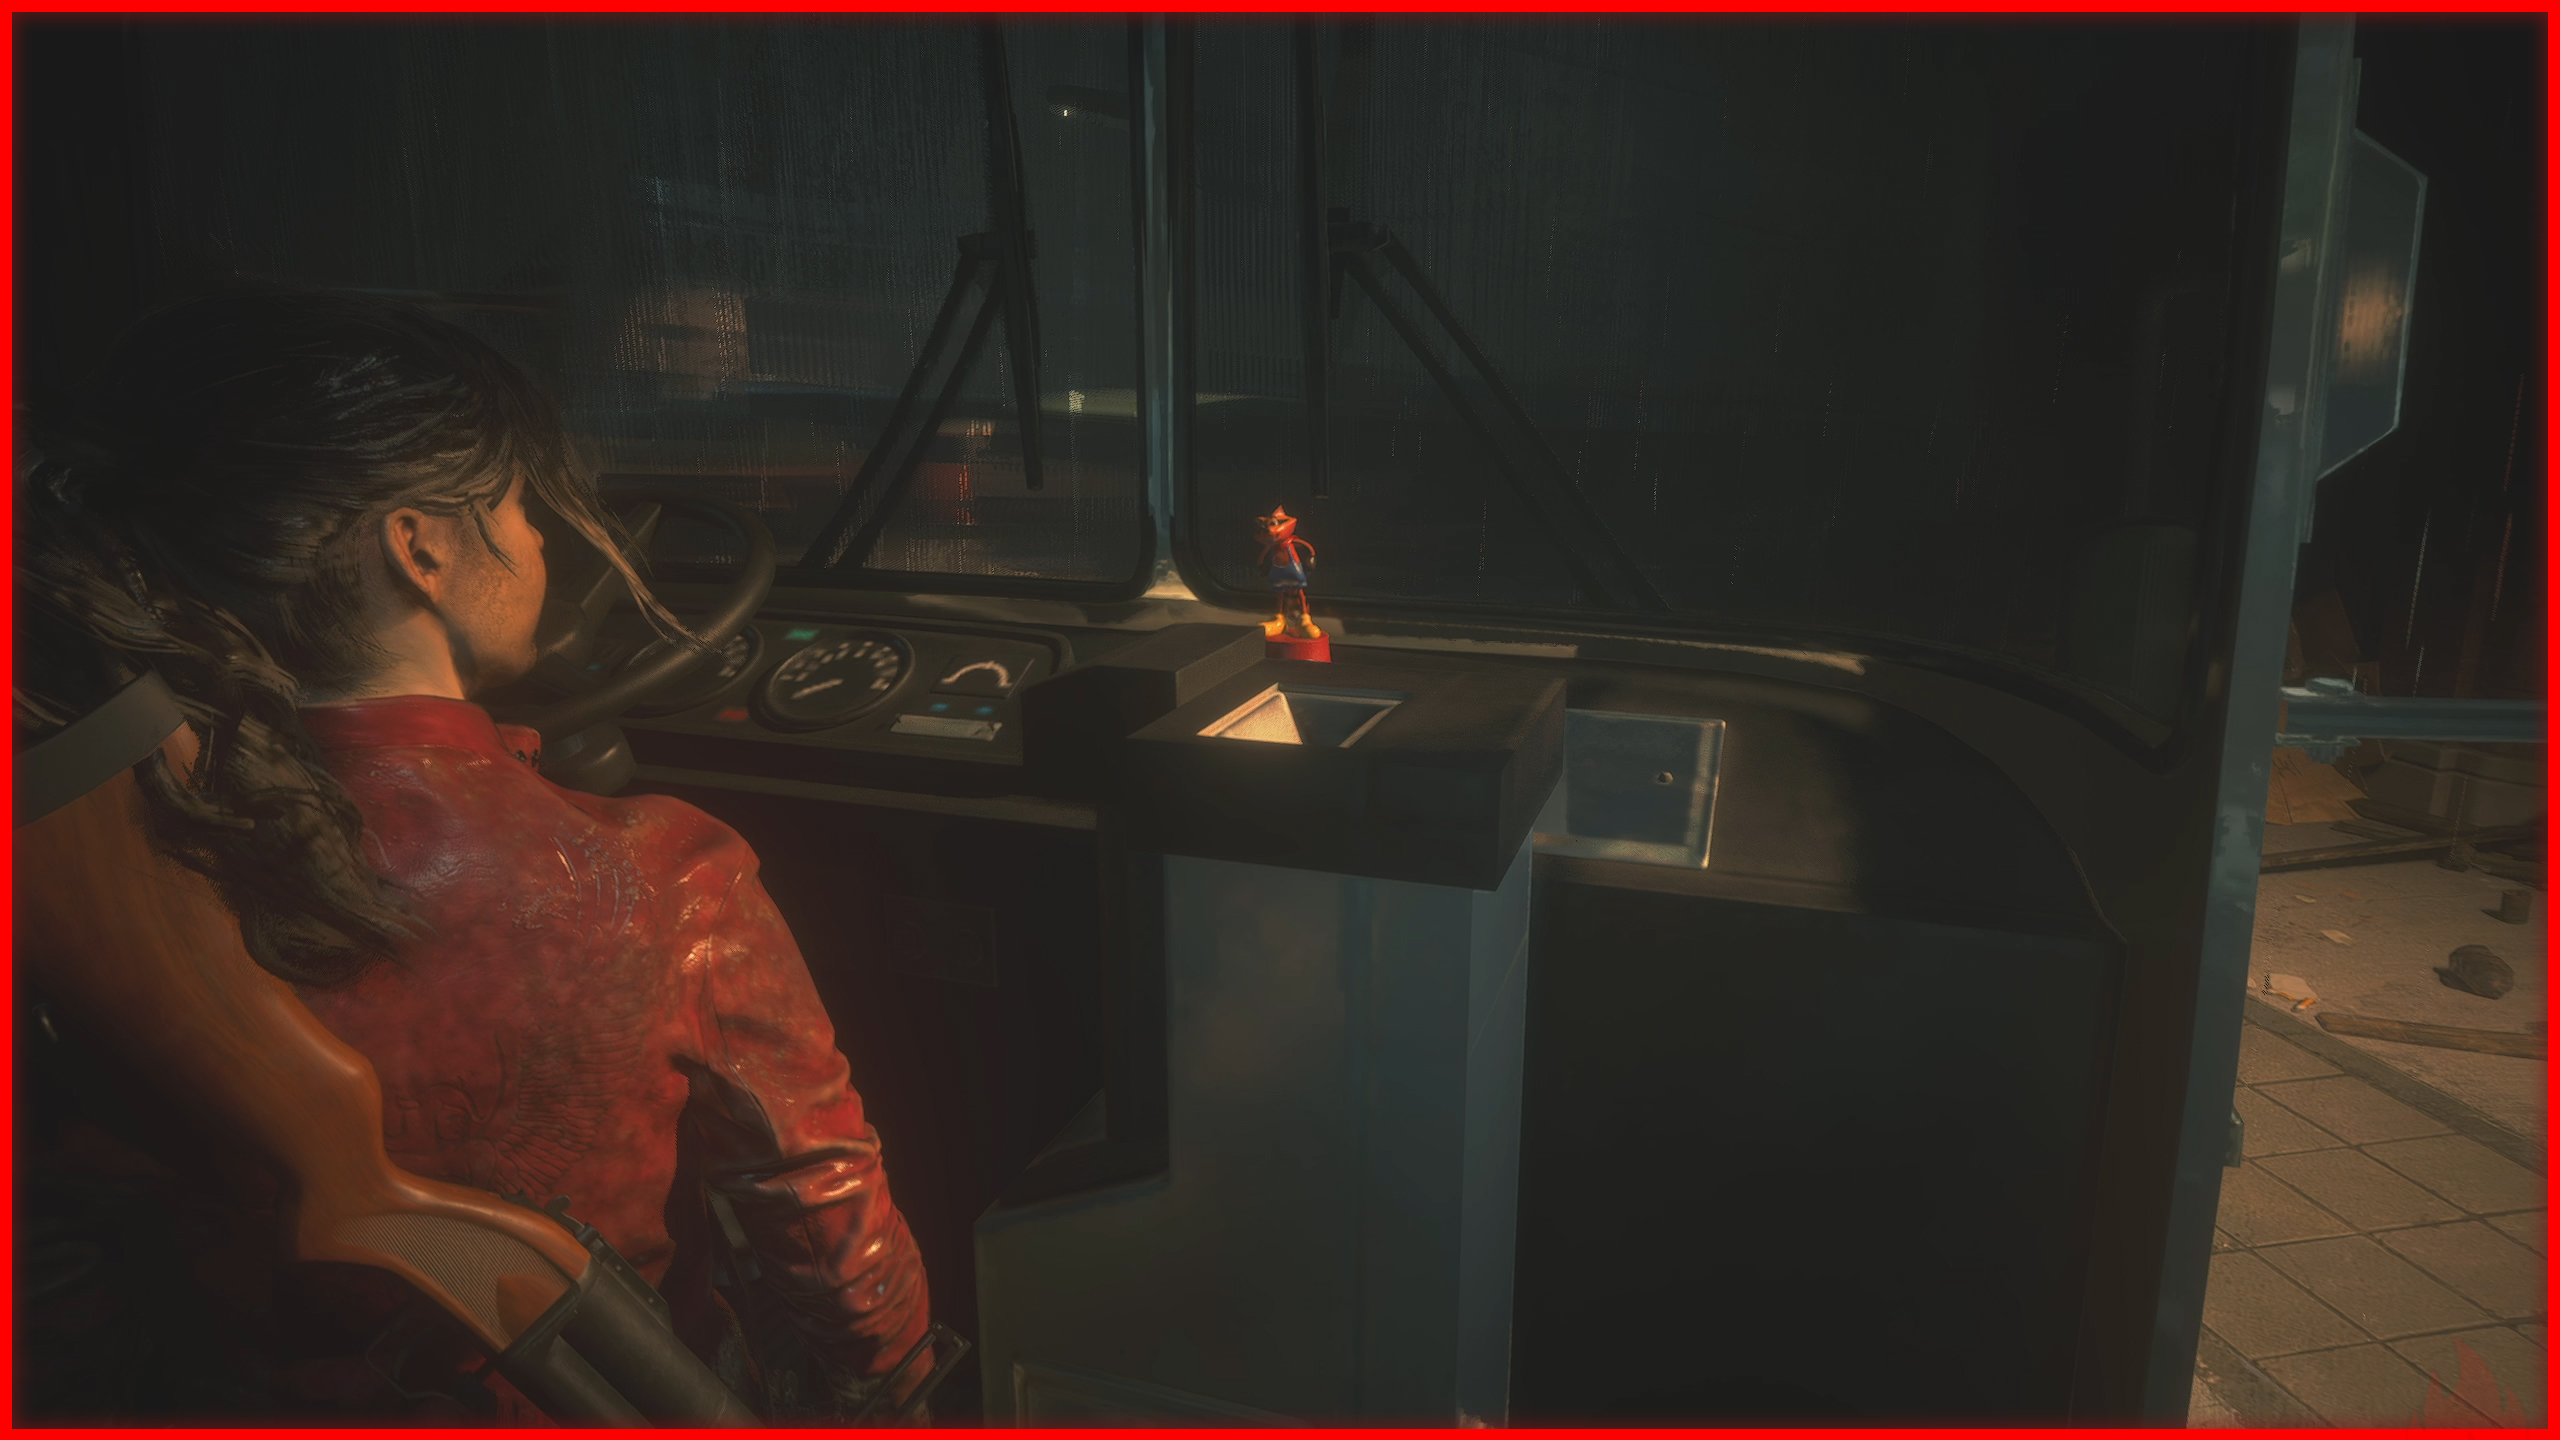
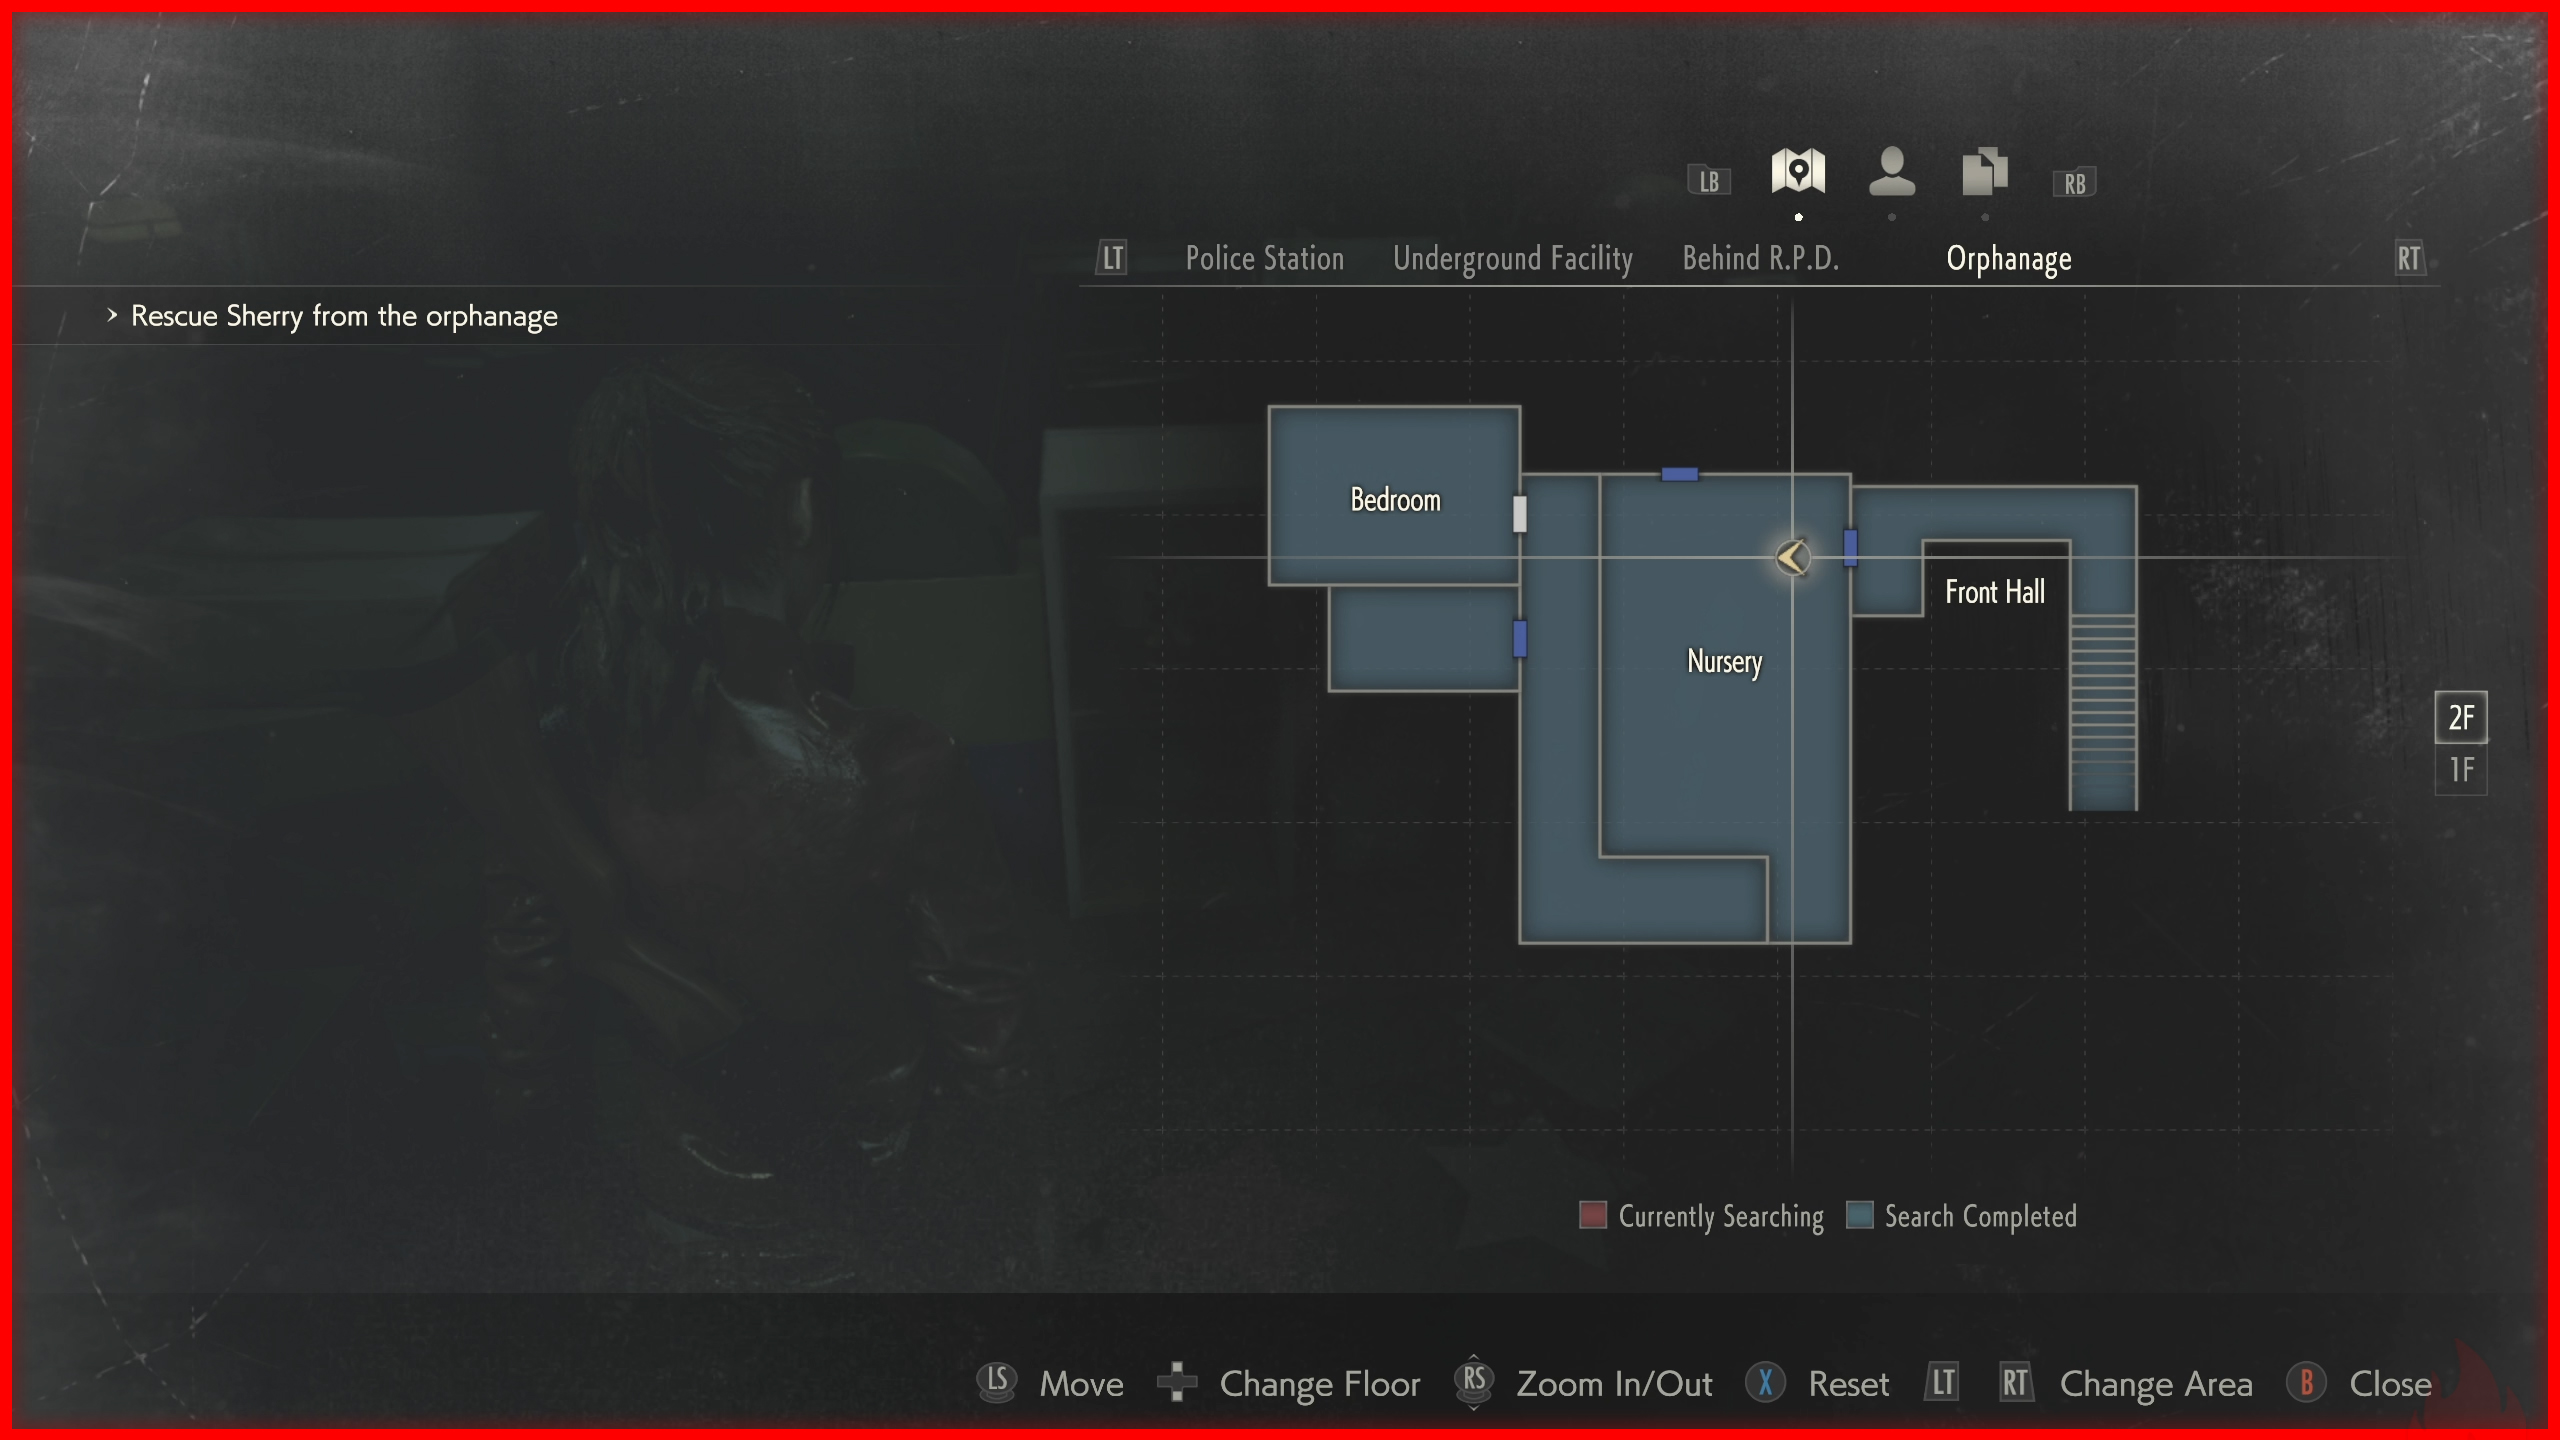
Lore Explorer ❌
 There are 58 files scattered across the game’s four scenarios. Each time you read a file, it’s automatically saved in the Records menu.
Below is a video showing the location of all files.
Leon "S." Kennedy ❌
 To earn an S Rank, the only factor that matters is completion time:
Hardcore Mode: Under 2 hours 30 minutes.
Hardcore Mode: Under 2 hours.
Hardcore Rookie
 In Hardcore mode, enemies are stronger and your saves are limited. I recommend saving only before boss fights and conserving as much ammo as possible. It’s also a good idea to earn an S Rank on Standard mode first so you can unlock the infinite-ammo handgun.
If you own the “All In-game Rewards Unlocked” DLC, this mode becomes much easier just use the infinite ammo weapons to complete the game comfortably.
Sizzling Scarlet Hero ❌
 To earn an S Rank, the only factor that matters is completion time:
Hardcore Mode: Under 2 hours 30 minutes.
Hardcore Mode: Under 2 hours.
Hardcore College Student
Just like in Leon’s campaign, the steps are exactly the same. In Hardcore mode, enemies are stronger and your saves are limited. I recommend saving only before boss fights and conserving as much ammo as possible. It’s also a good idea to earn an S Rank on Standard mode first so you can unlock the infinite-ammo handgun.
If you own the “All In-game Rewards Unlocked” DLC, this mode becomes much easier just use the infinite ammo weapons to complete the game comfortably.
Frugalist ❌
 Can be obtained on any difficulty. To make it easier, use infinite ammo weapons and create save files before each boss fight.
If you prefer, you can also try earning it alongside the Minimalist achievement.
Minimalist ❌
 Can be obtained on any difficulty. It’s recommended to play on the easiest difficulty and focus on collecting all Hip Pouches to expand your inventory. Avoid picking up unnecessary items and choose your two-slot weapon carefully.
A Small Carbon Footprint ❌
 I recommend doing this achievement in the 2nd Run, since it’s shorter. You can play on any difficulty and use infinite ammo weapons. Avoid taking unnecessary routes or going back to the item box too often.
You can check how many steps you’ve accumulated by pausing the game and going to Records, under the last option. You can also view puzzle solutions in the Extras section of this guide.
Grim Reaper
 The 4th Survivor mode becomes available once you beat any B scenario (2nd run). You need to make your way back from the Sewers to the Police Station, fighting through multiple enemies while playing as HUNK.
Got 'Em ❌
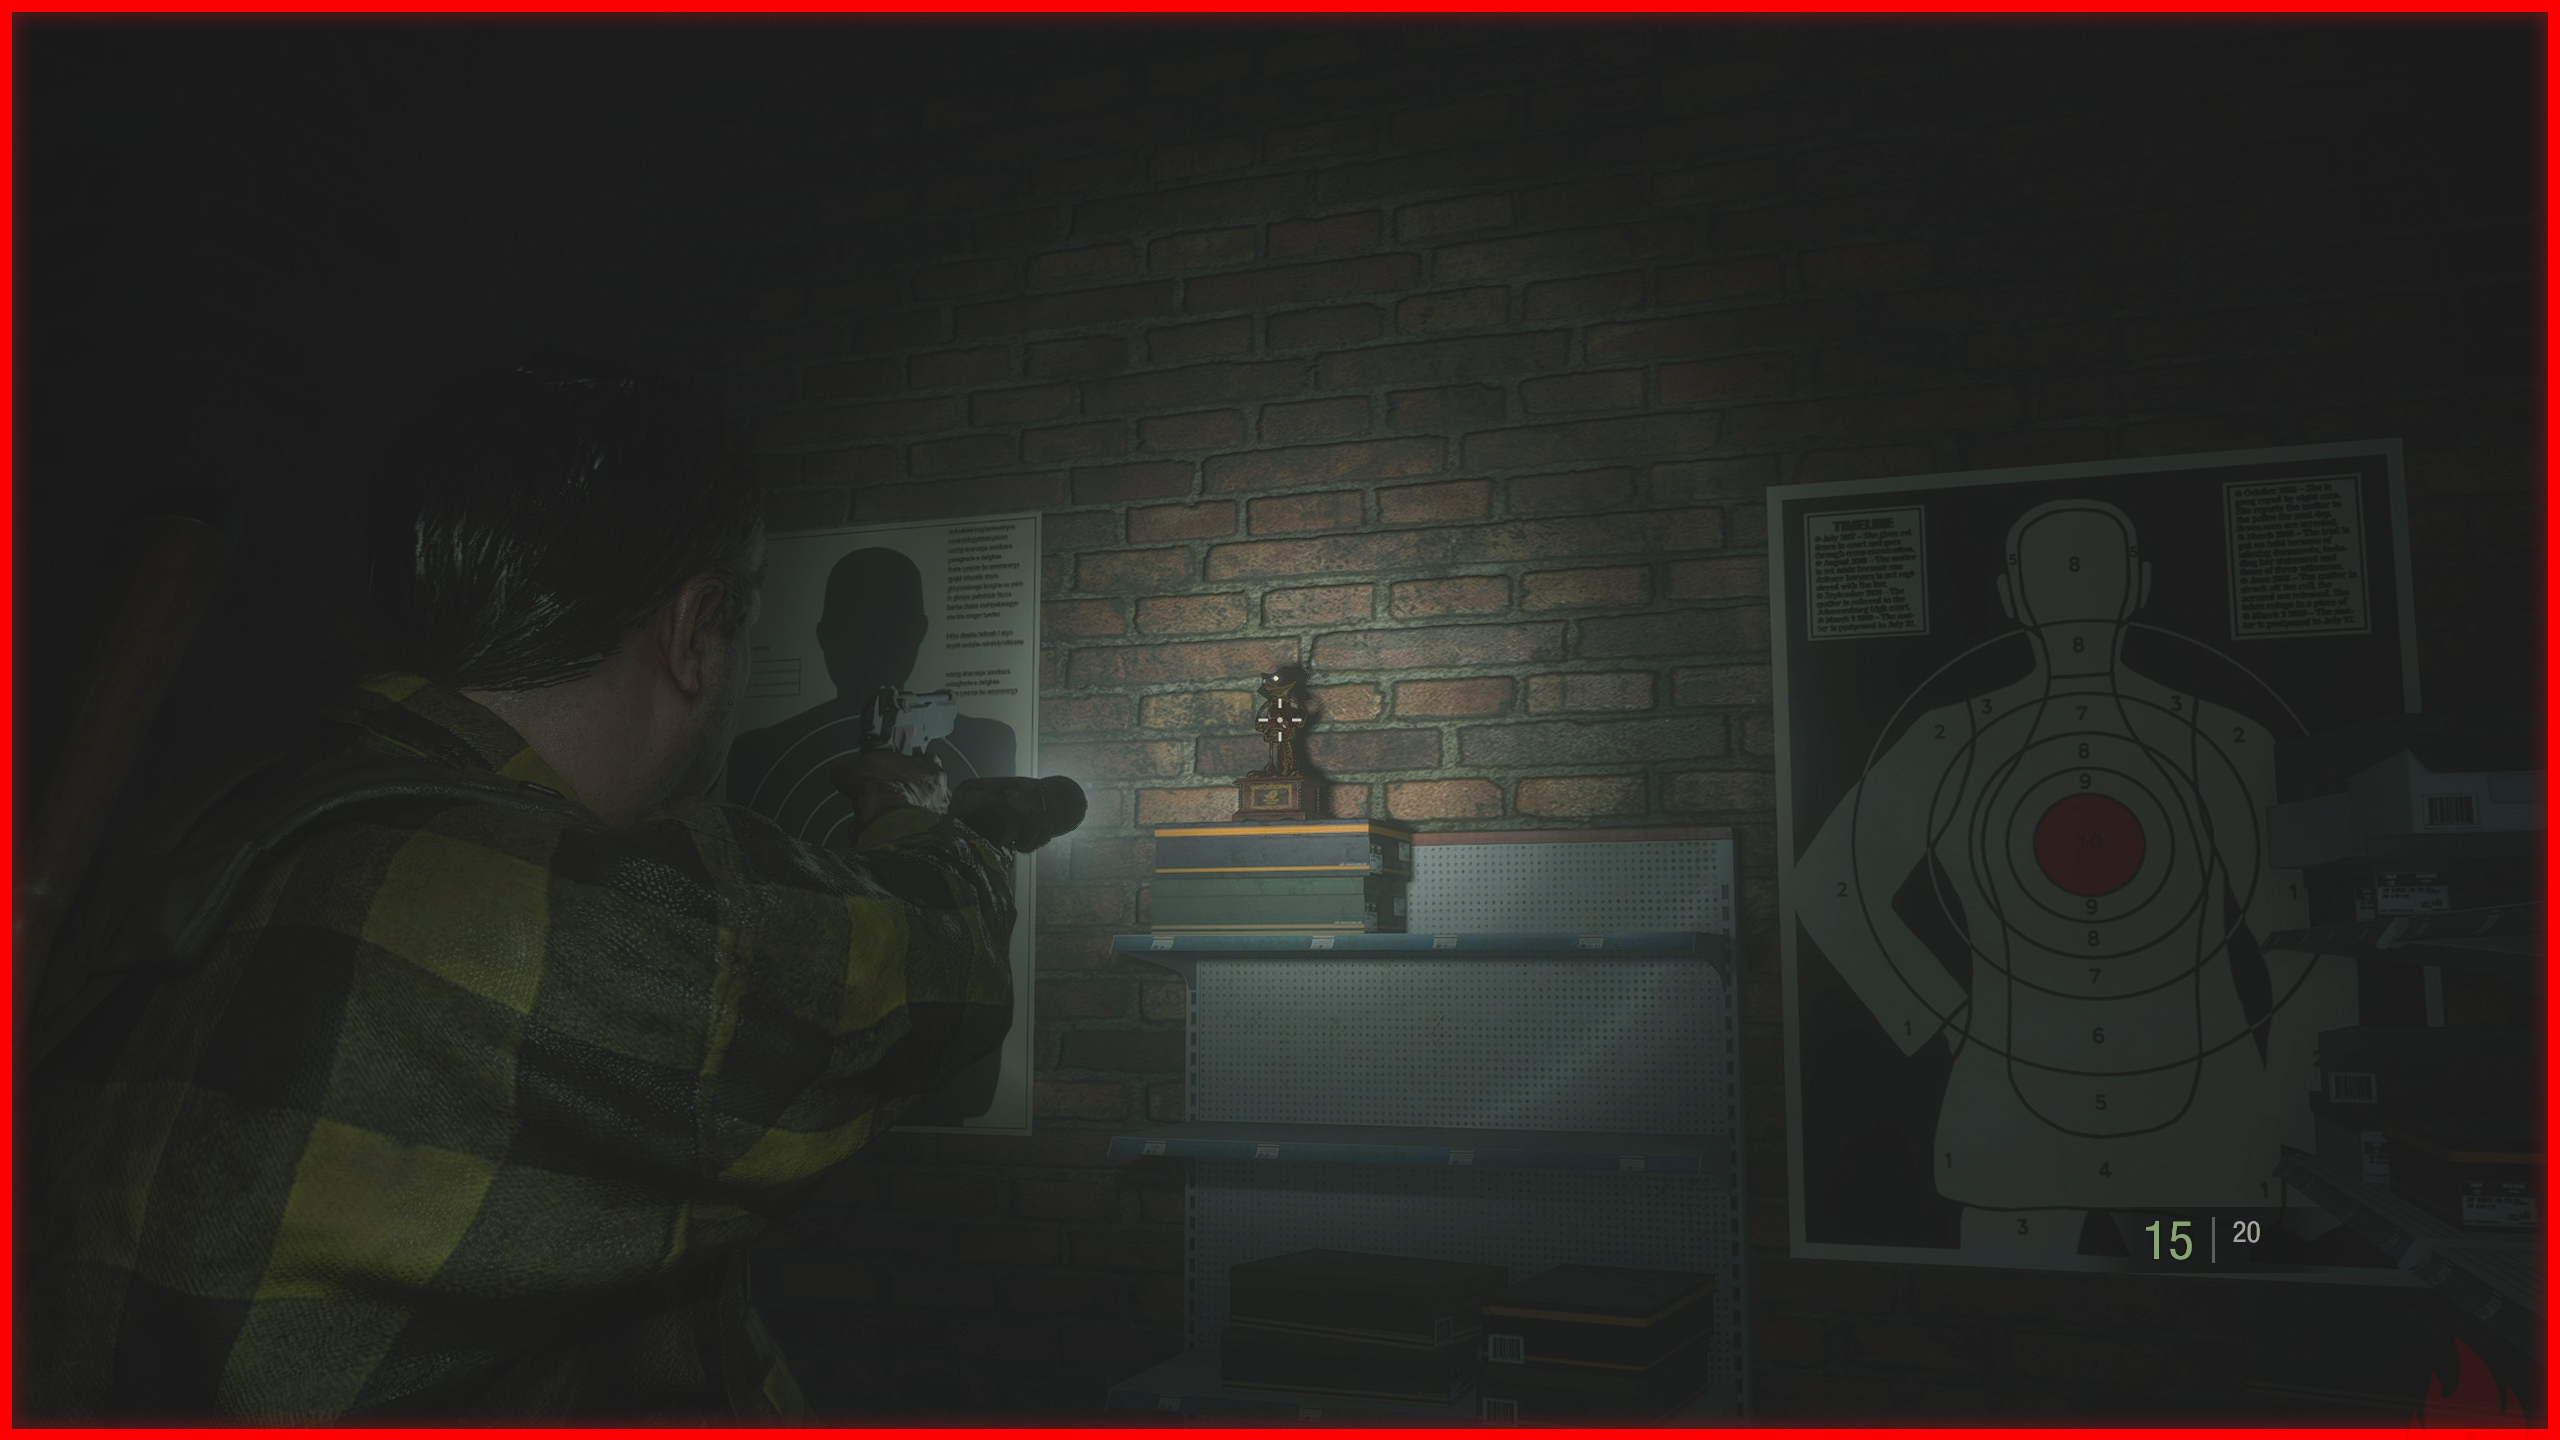
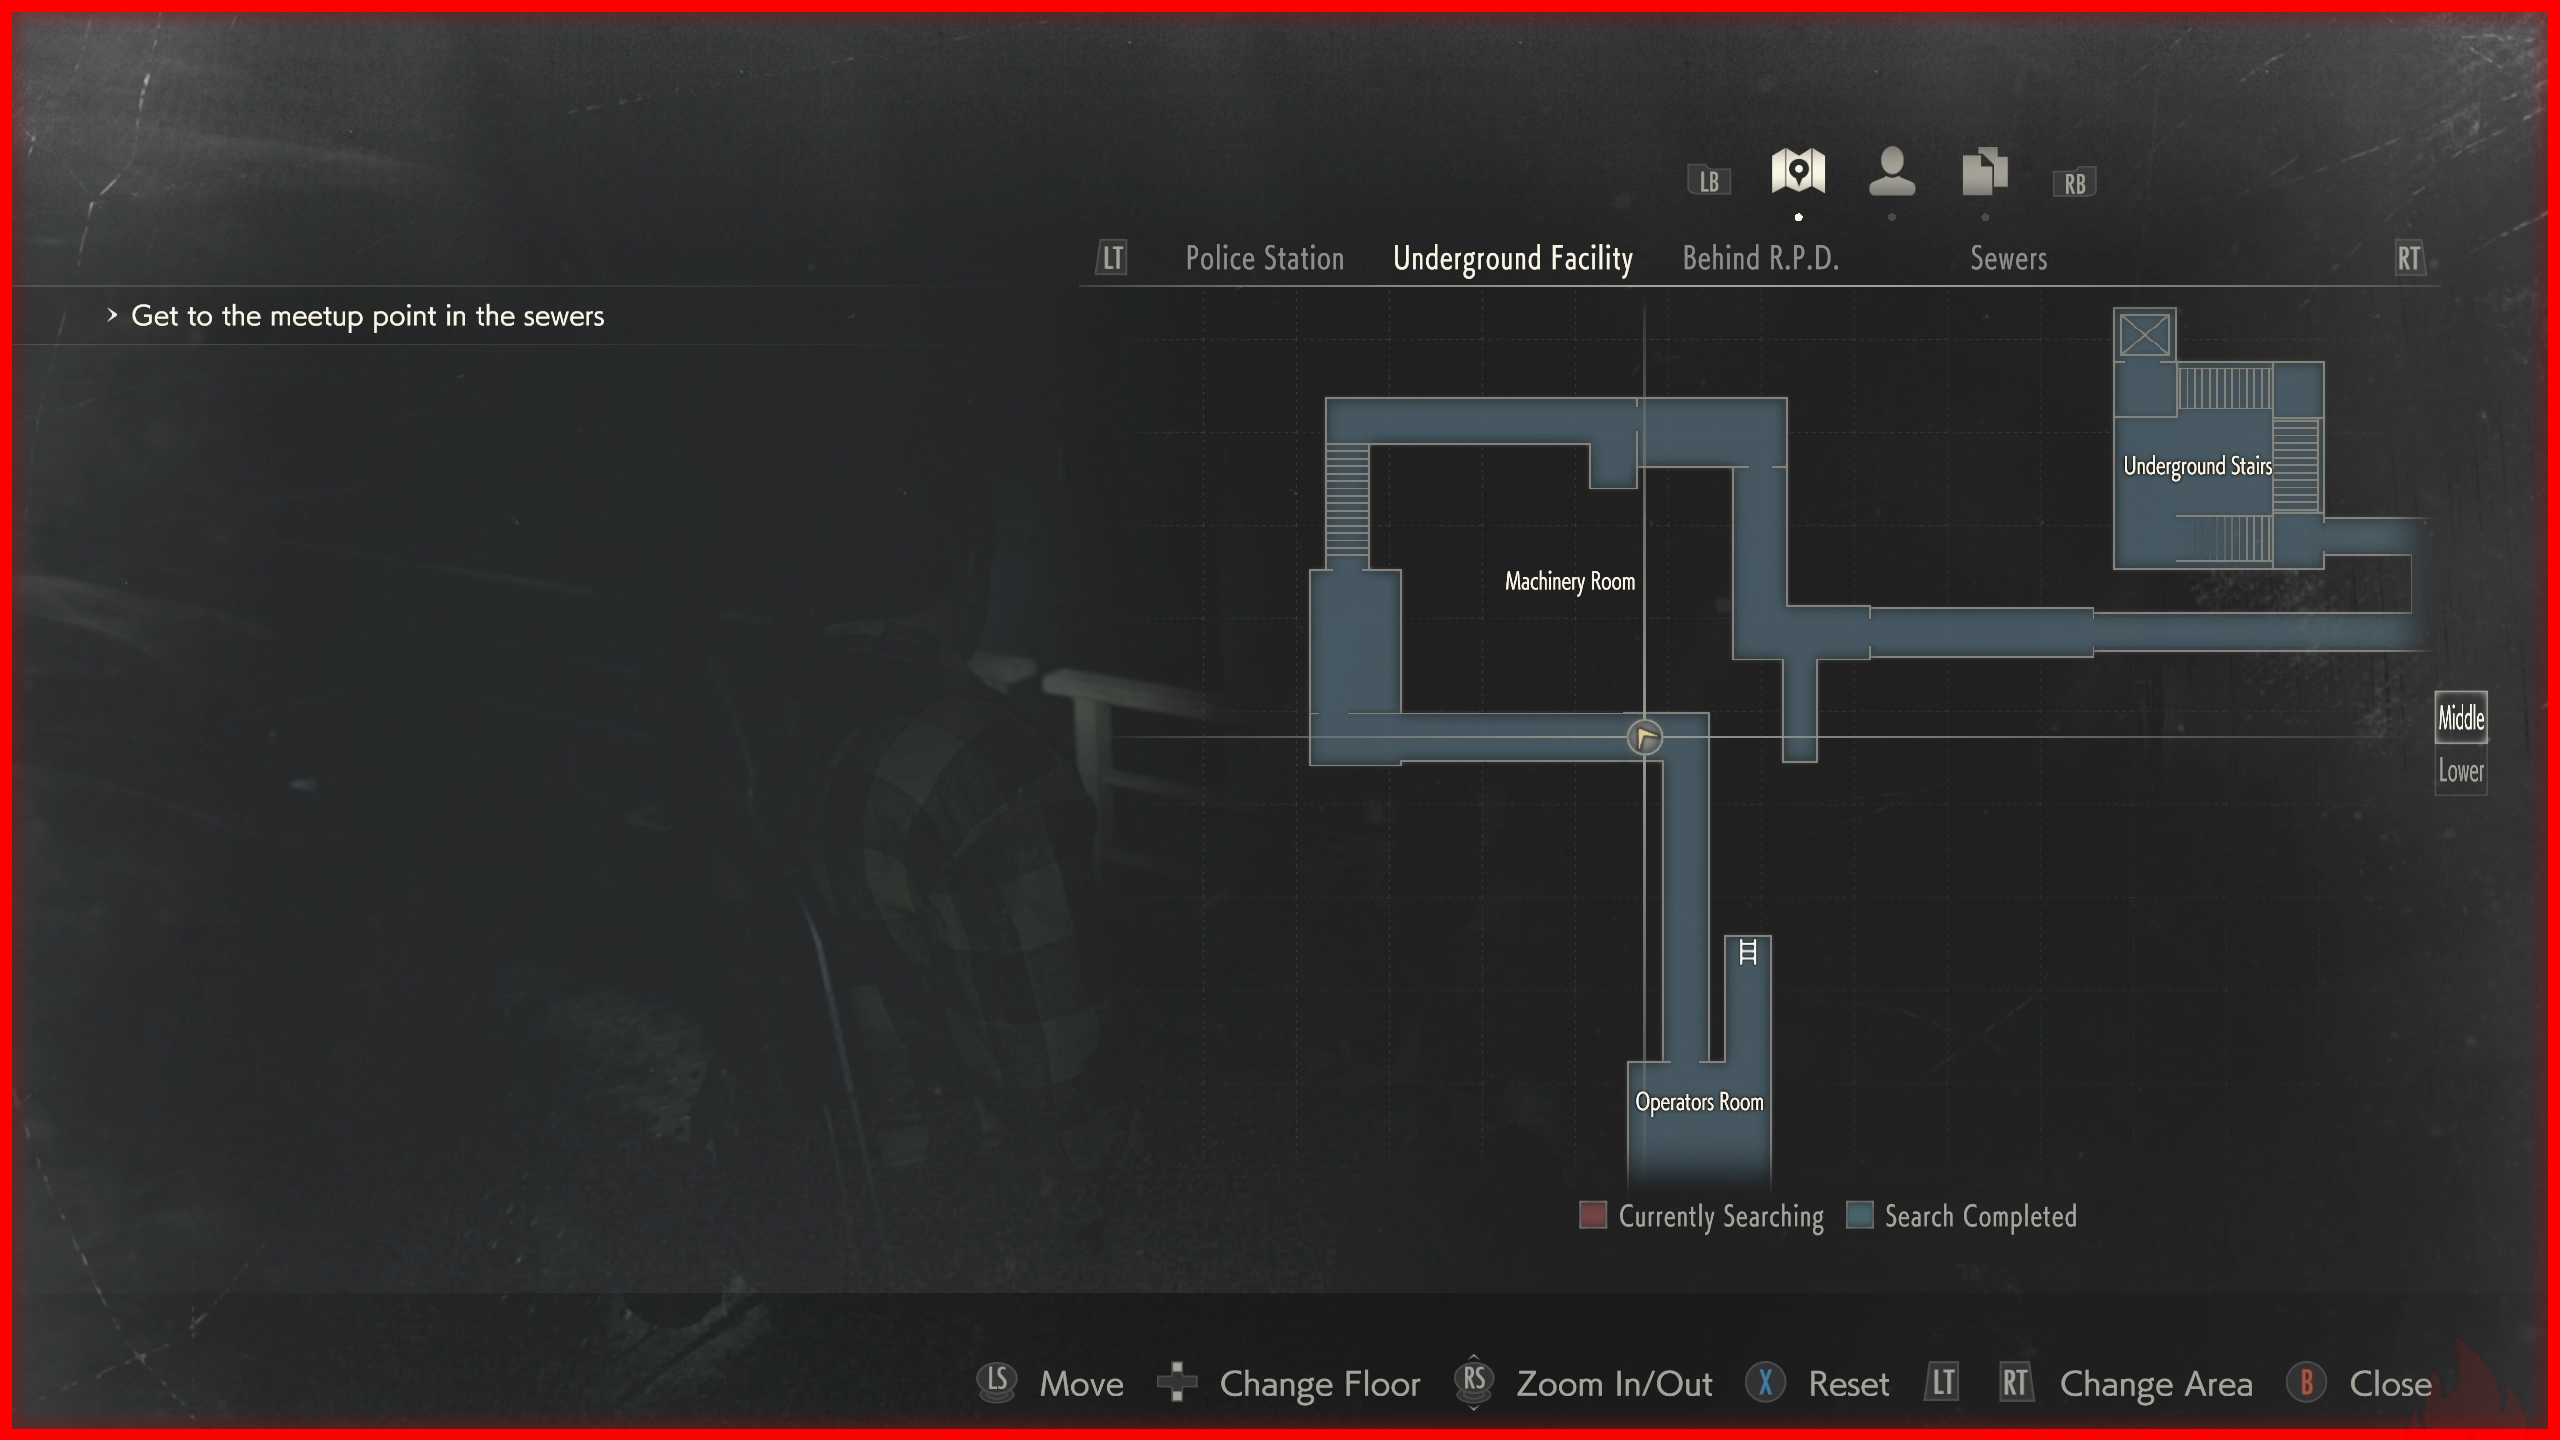
 The Ghost Survivors mode was added to the game later and features four challenges with different characters. In this mode, the Mr. Raccoons are scattered across the various challenges.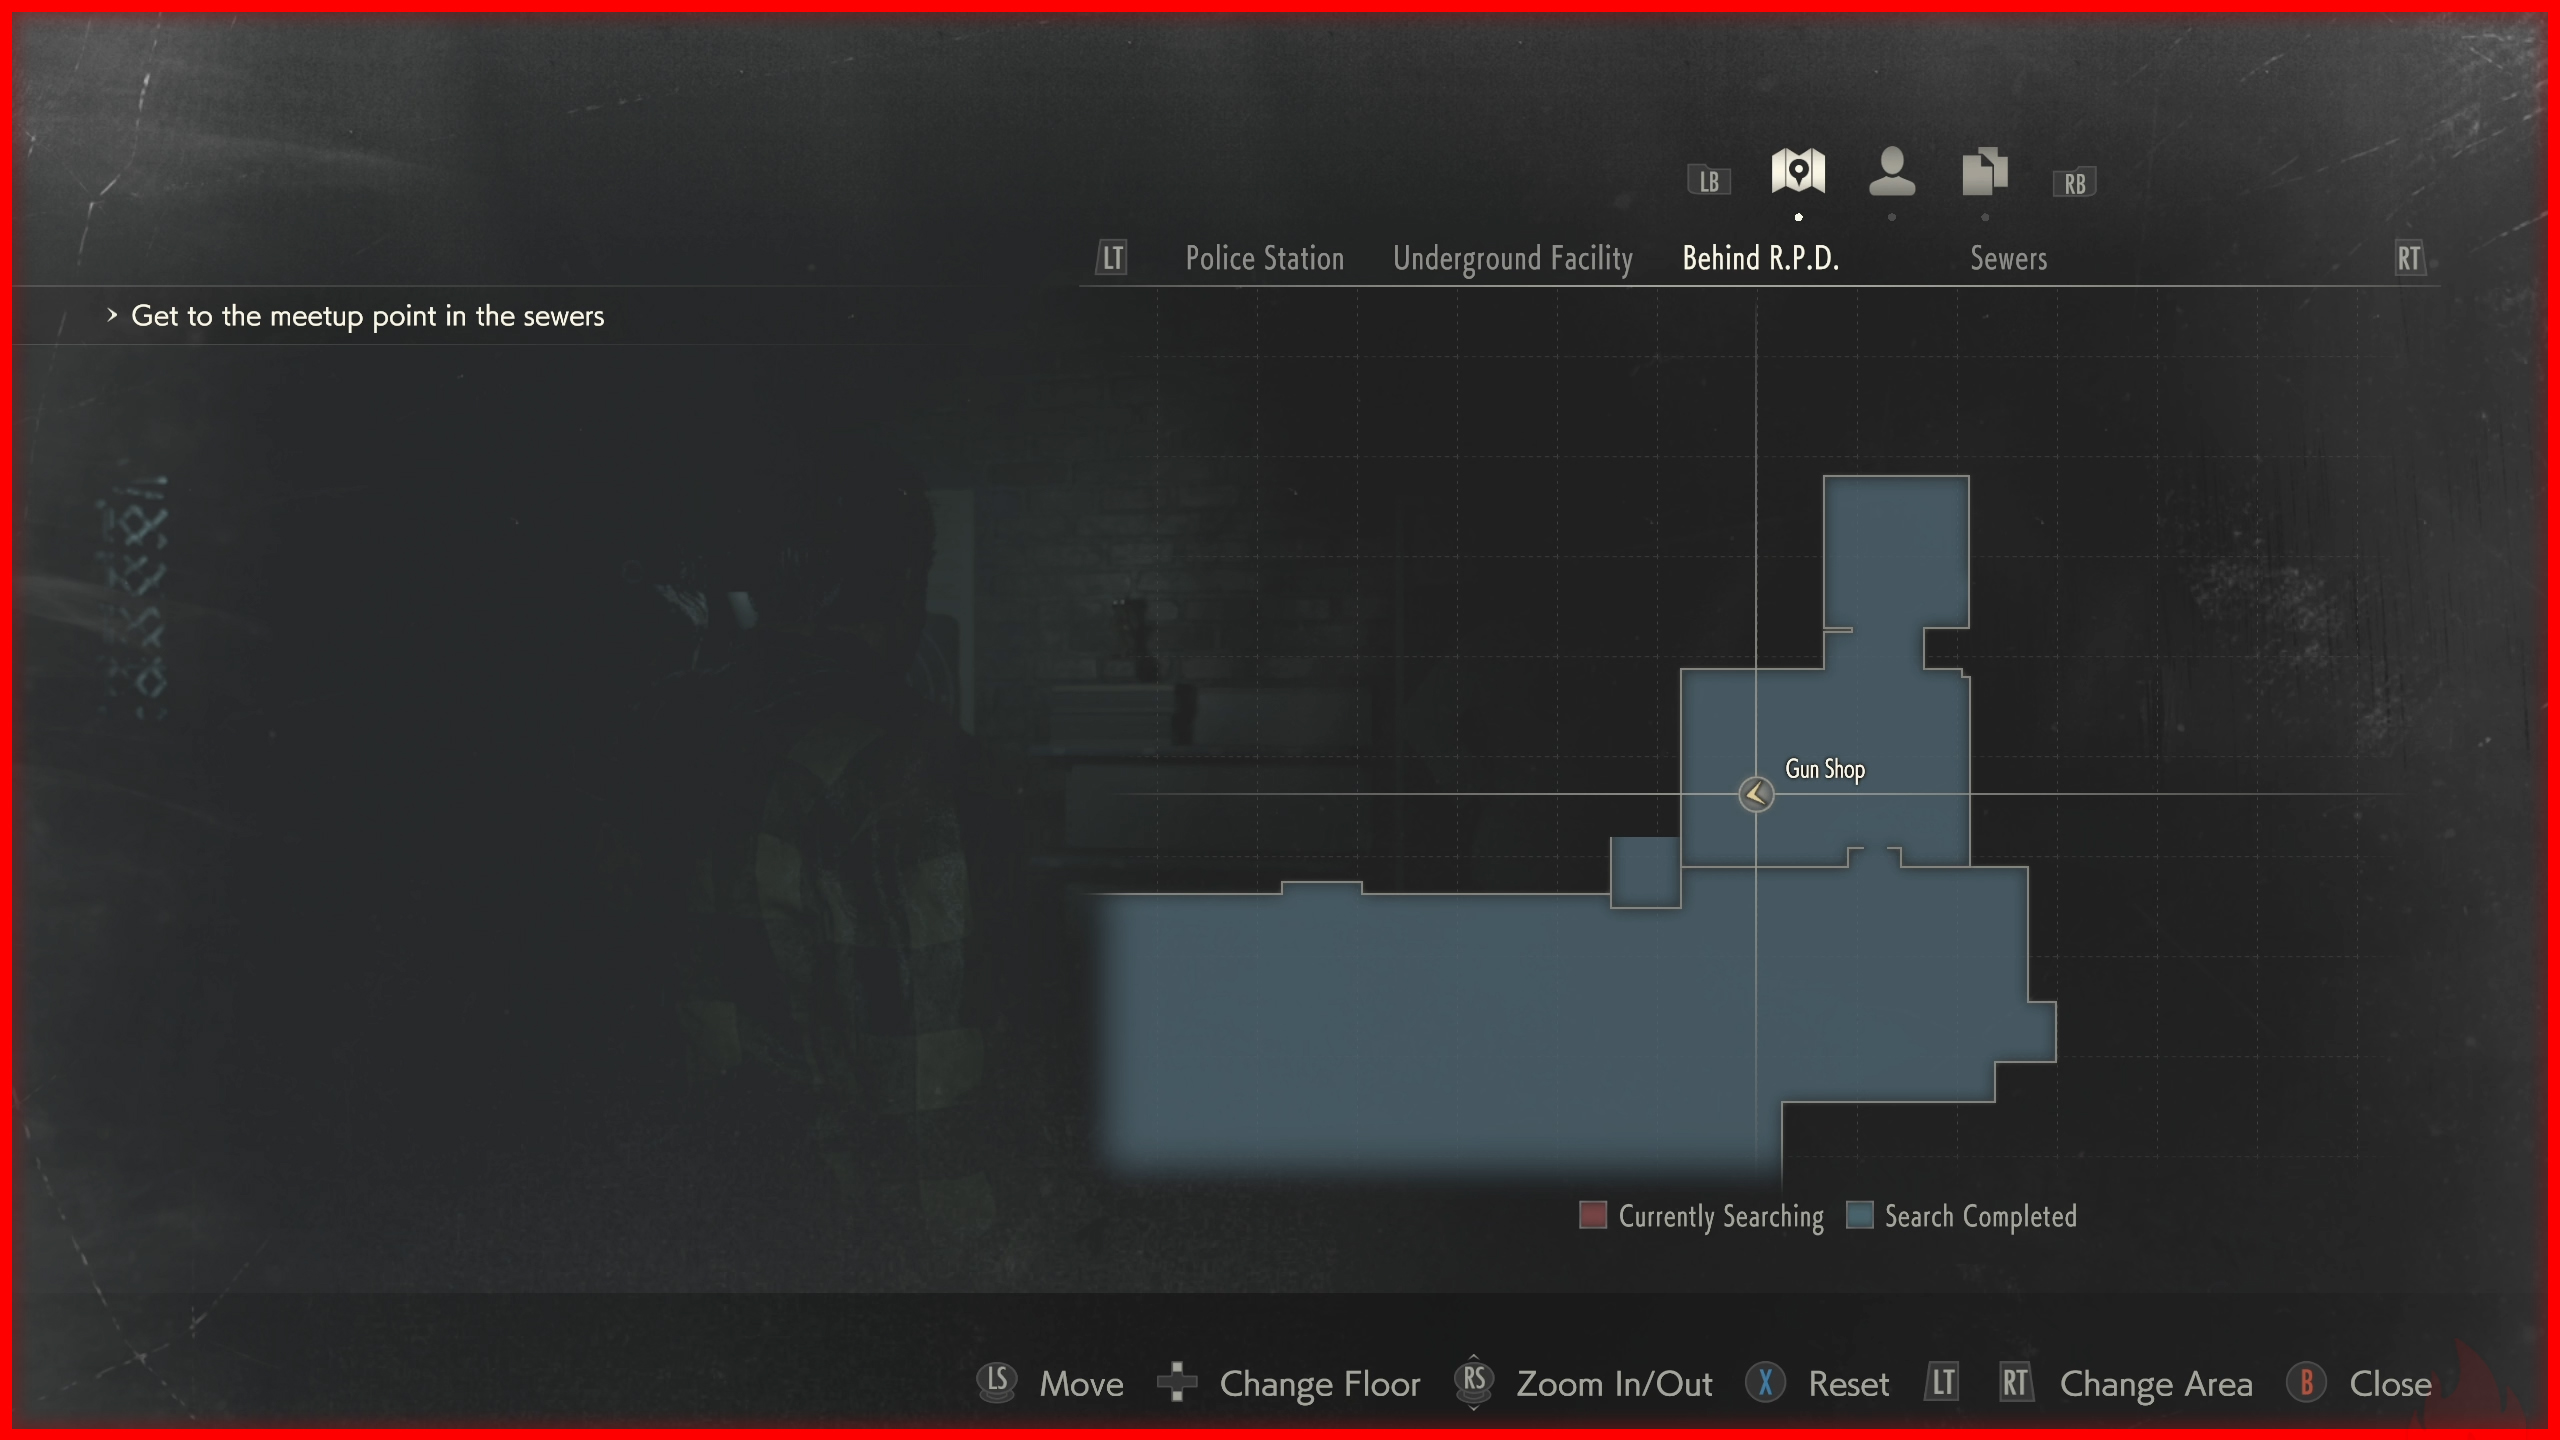
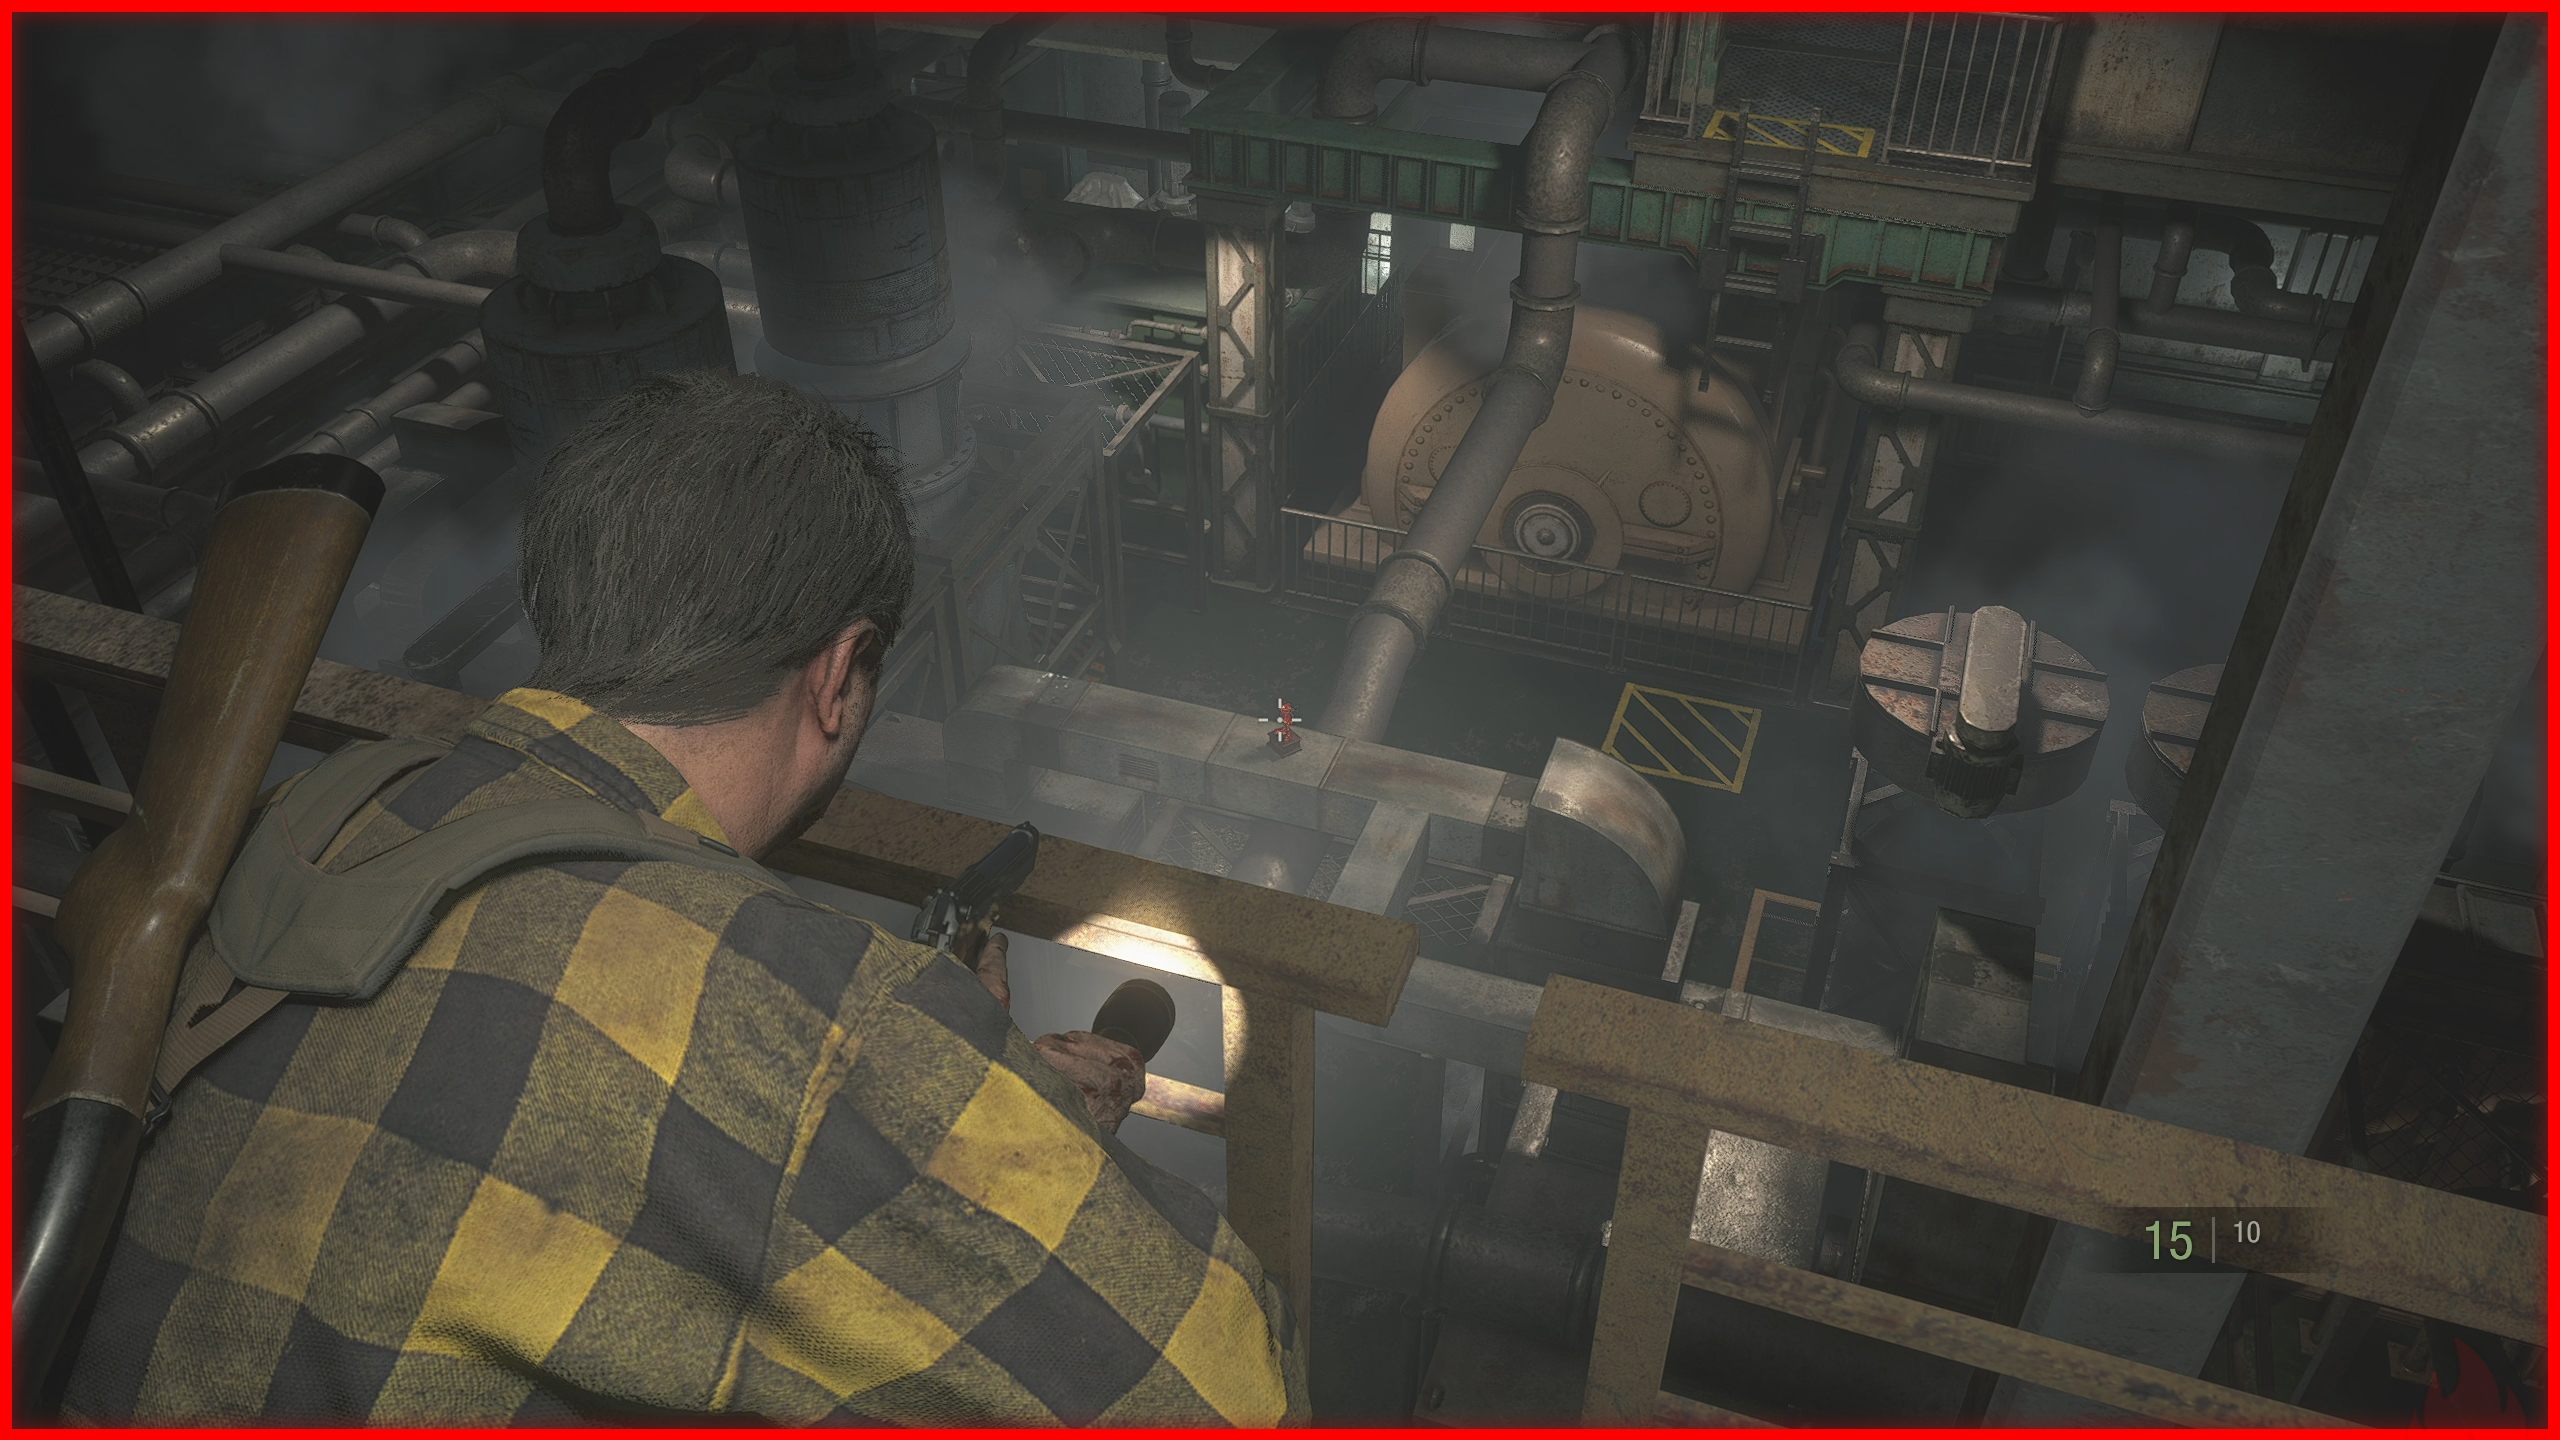
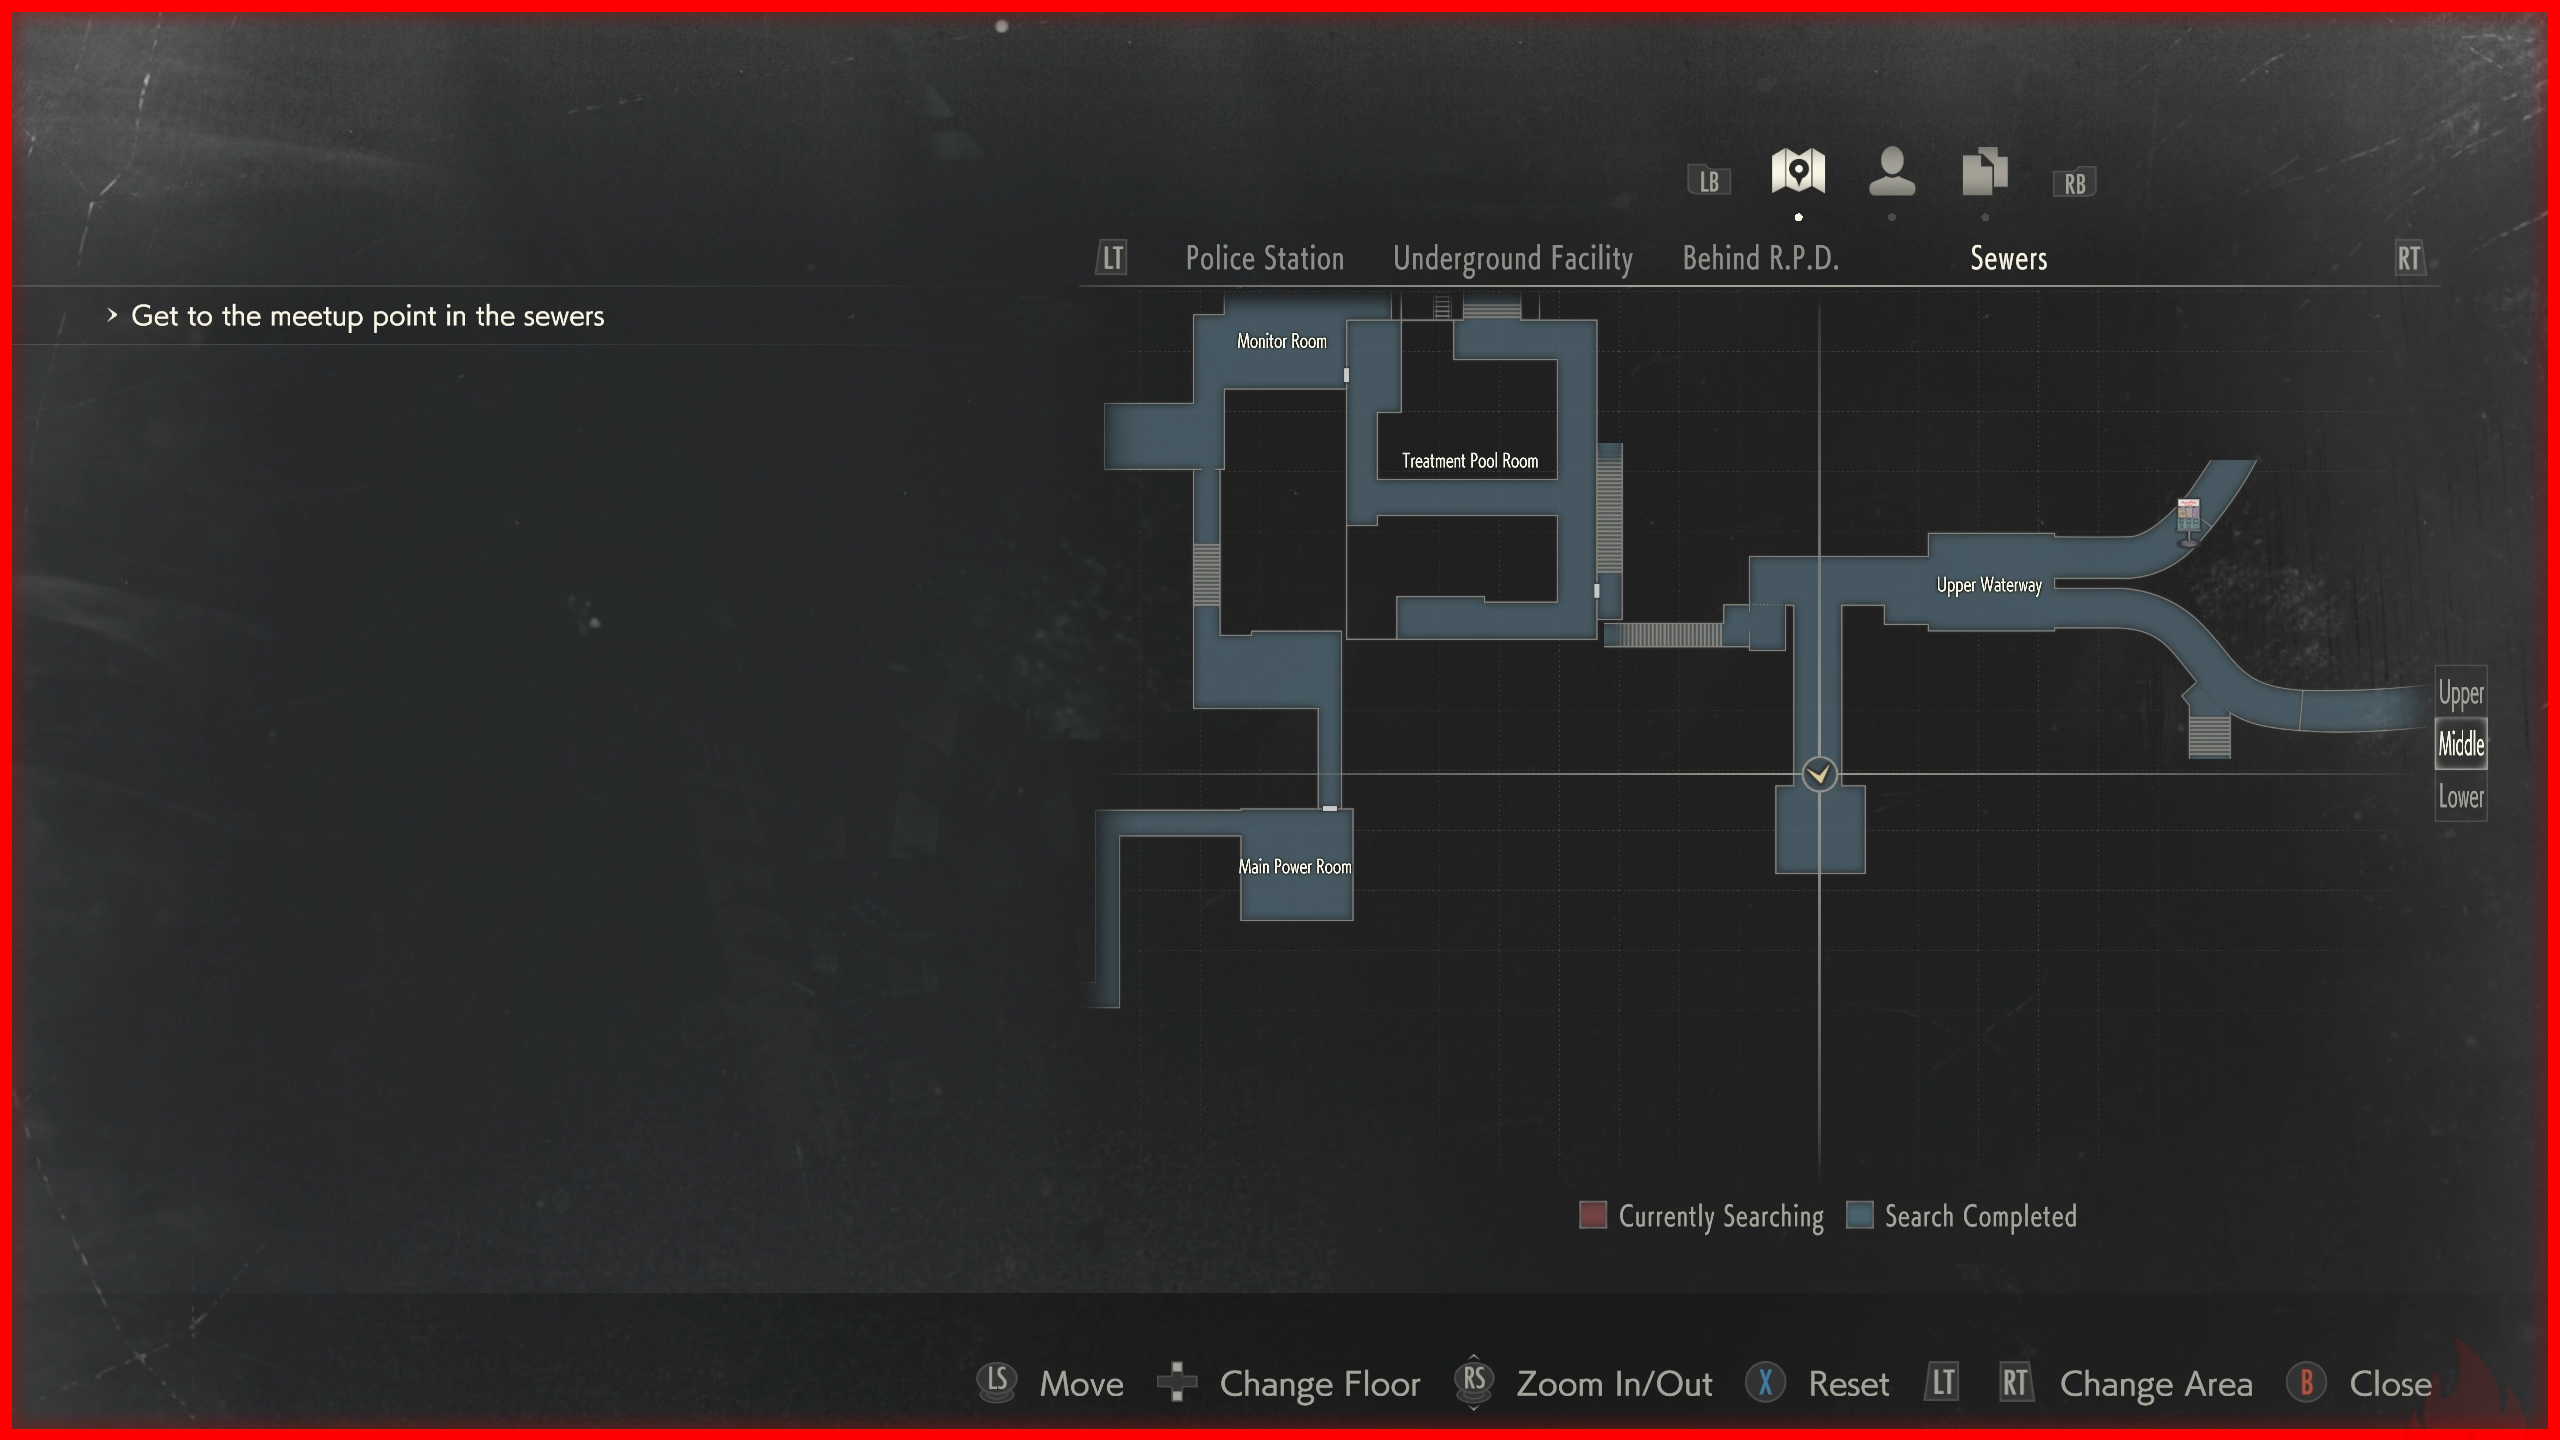
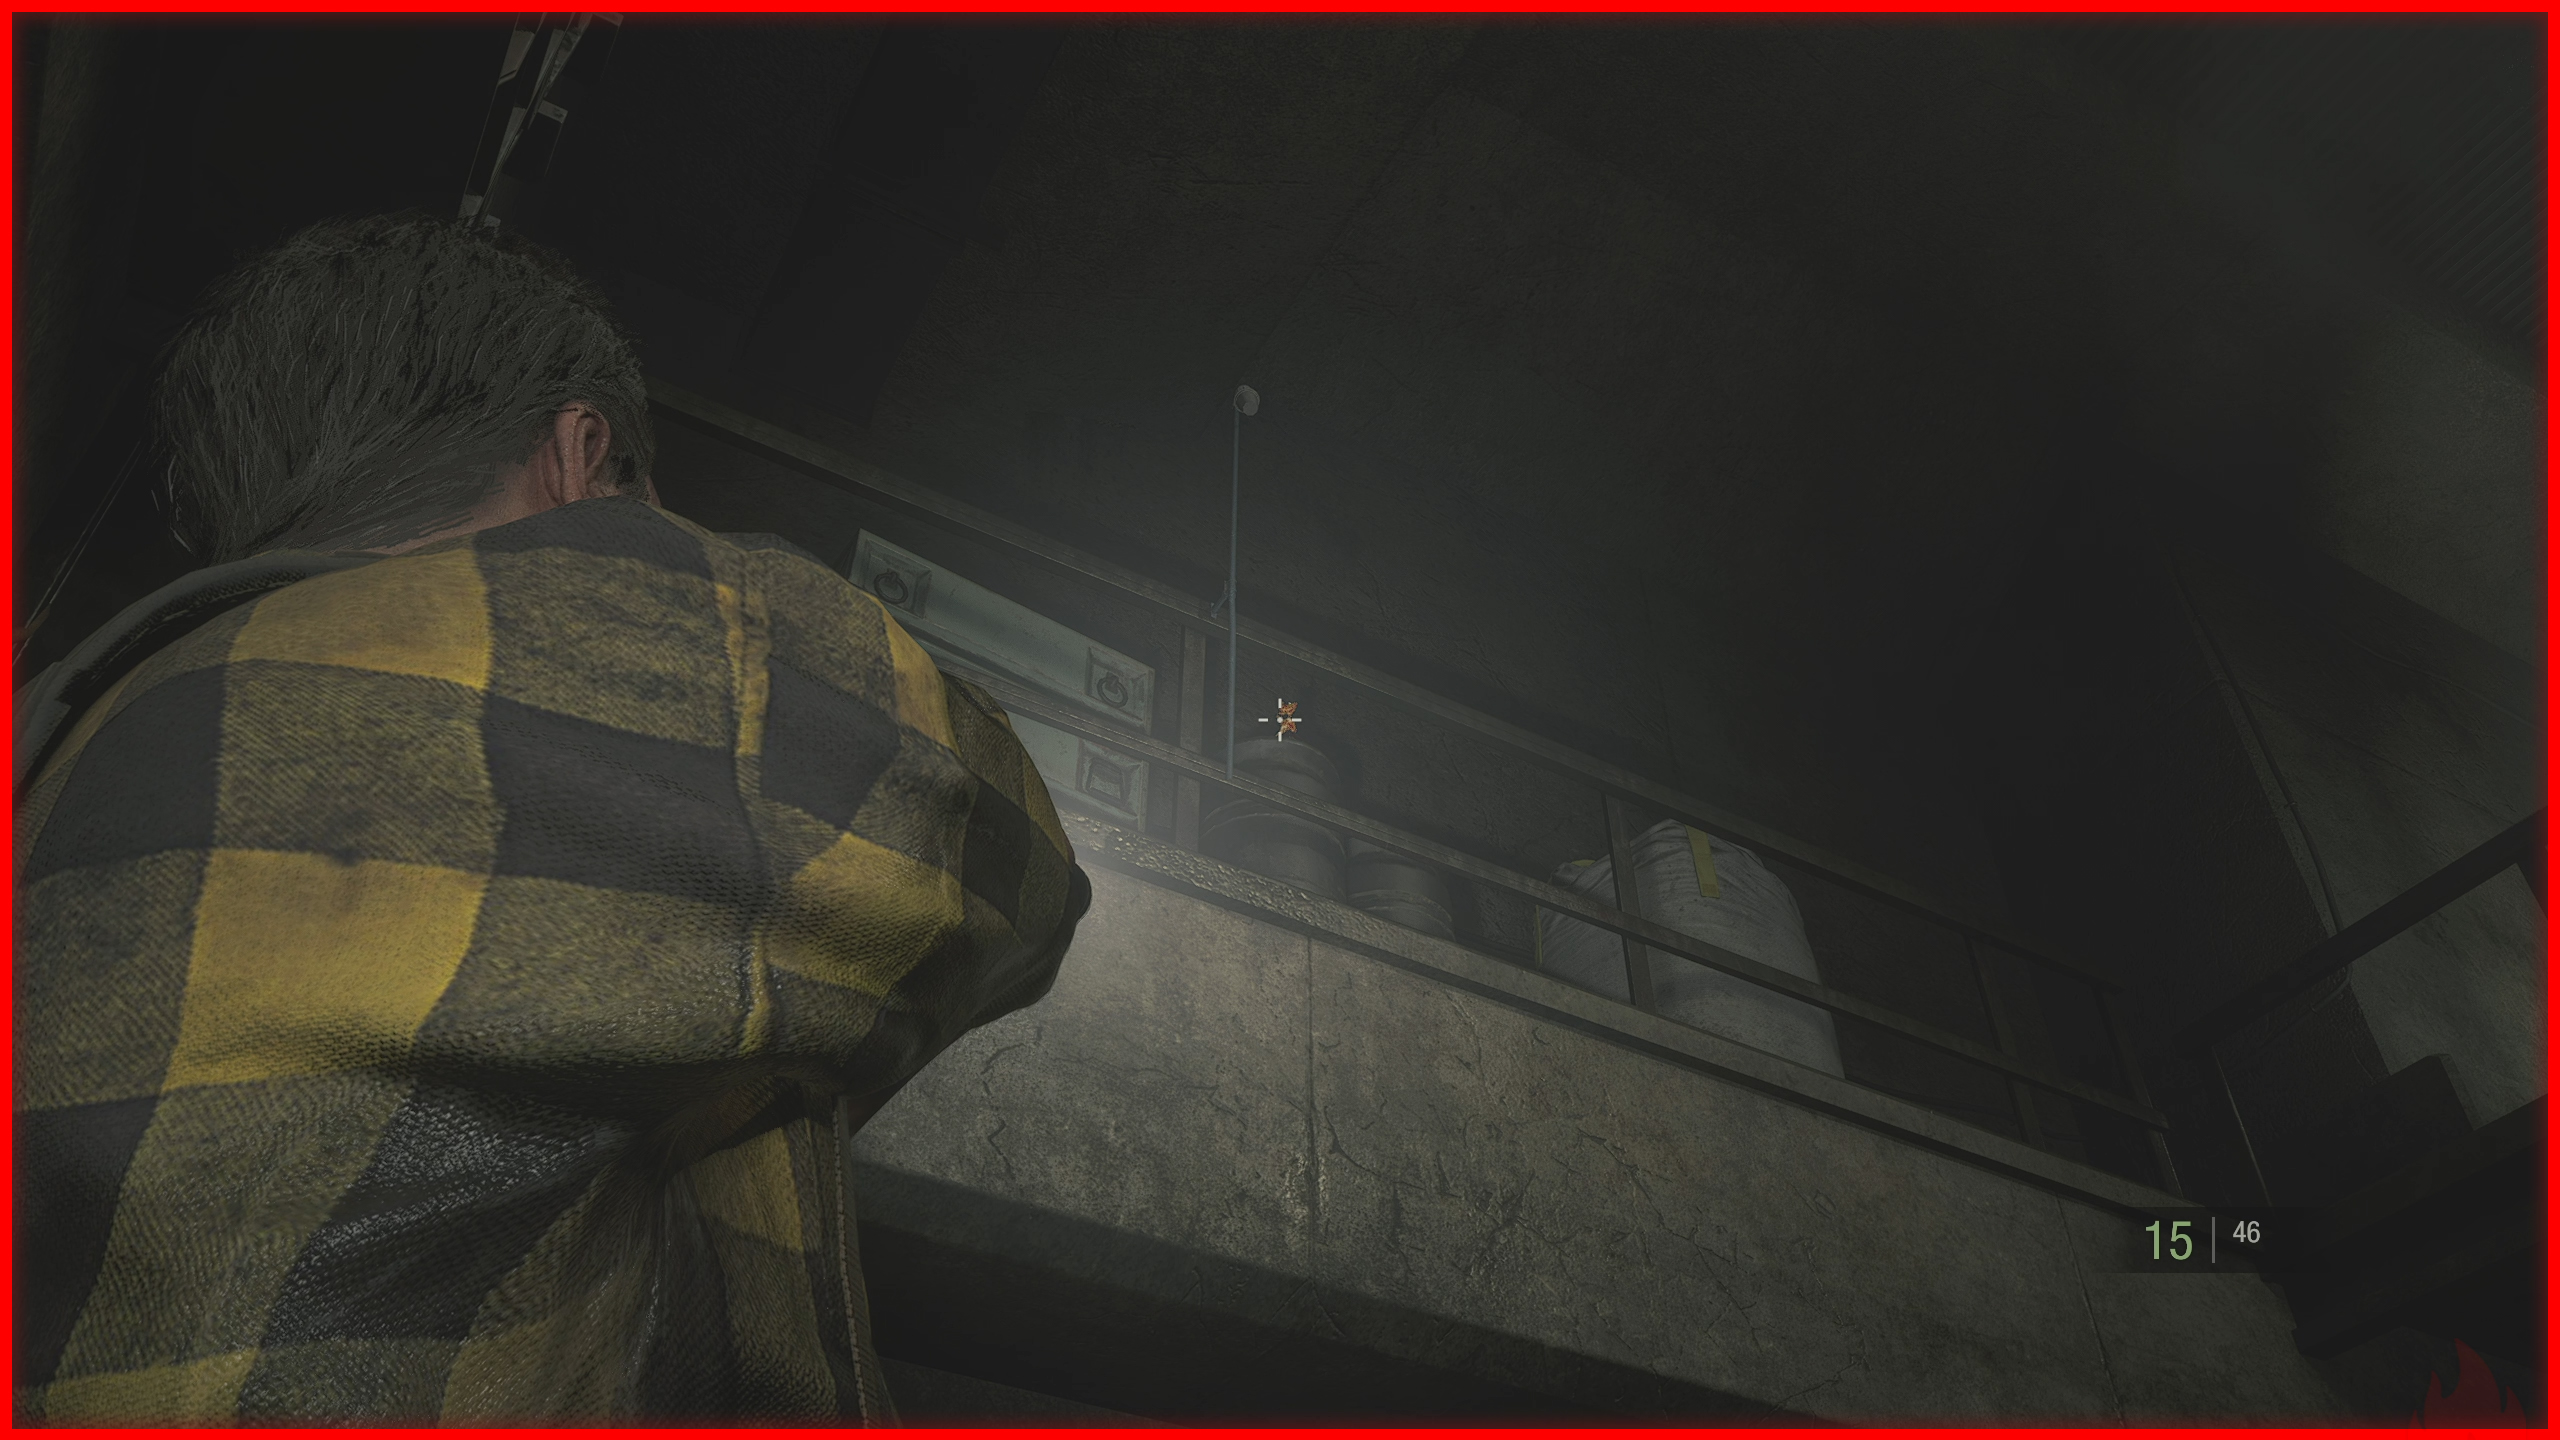
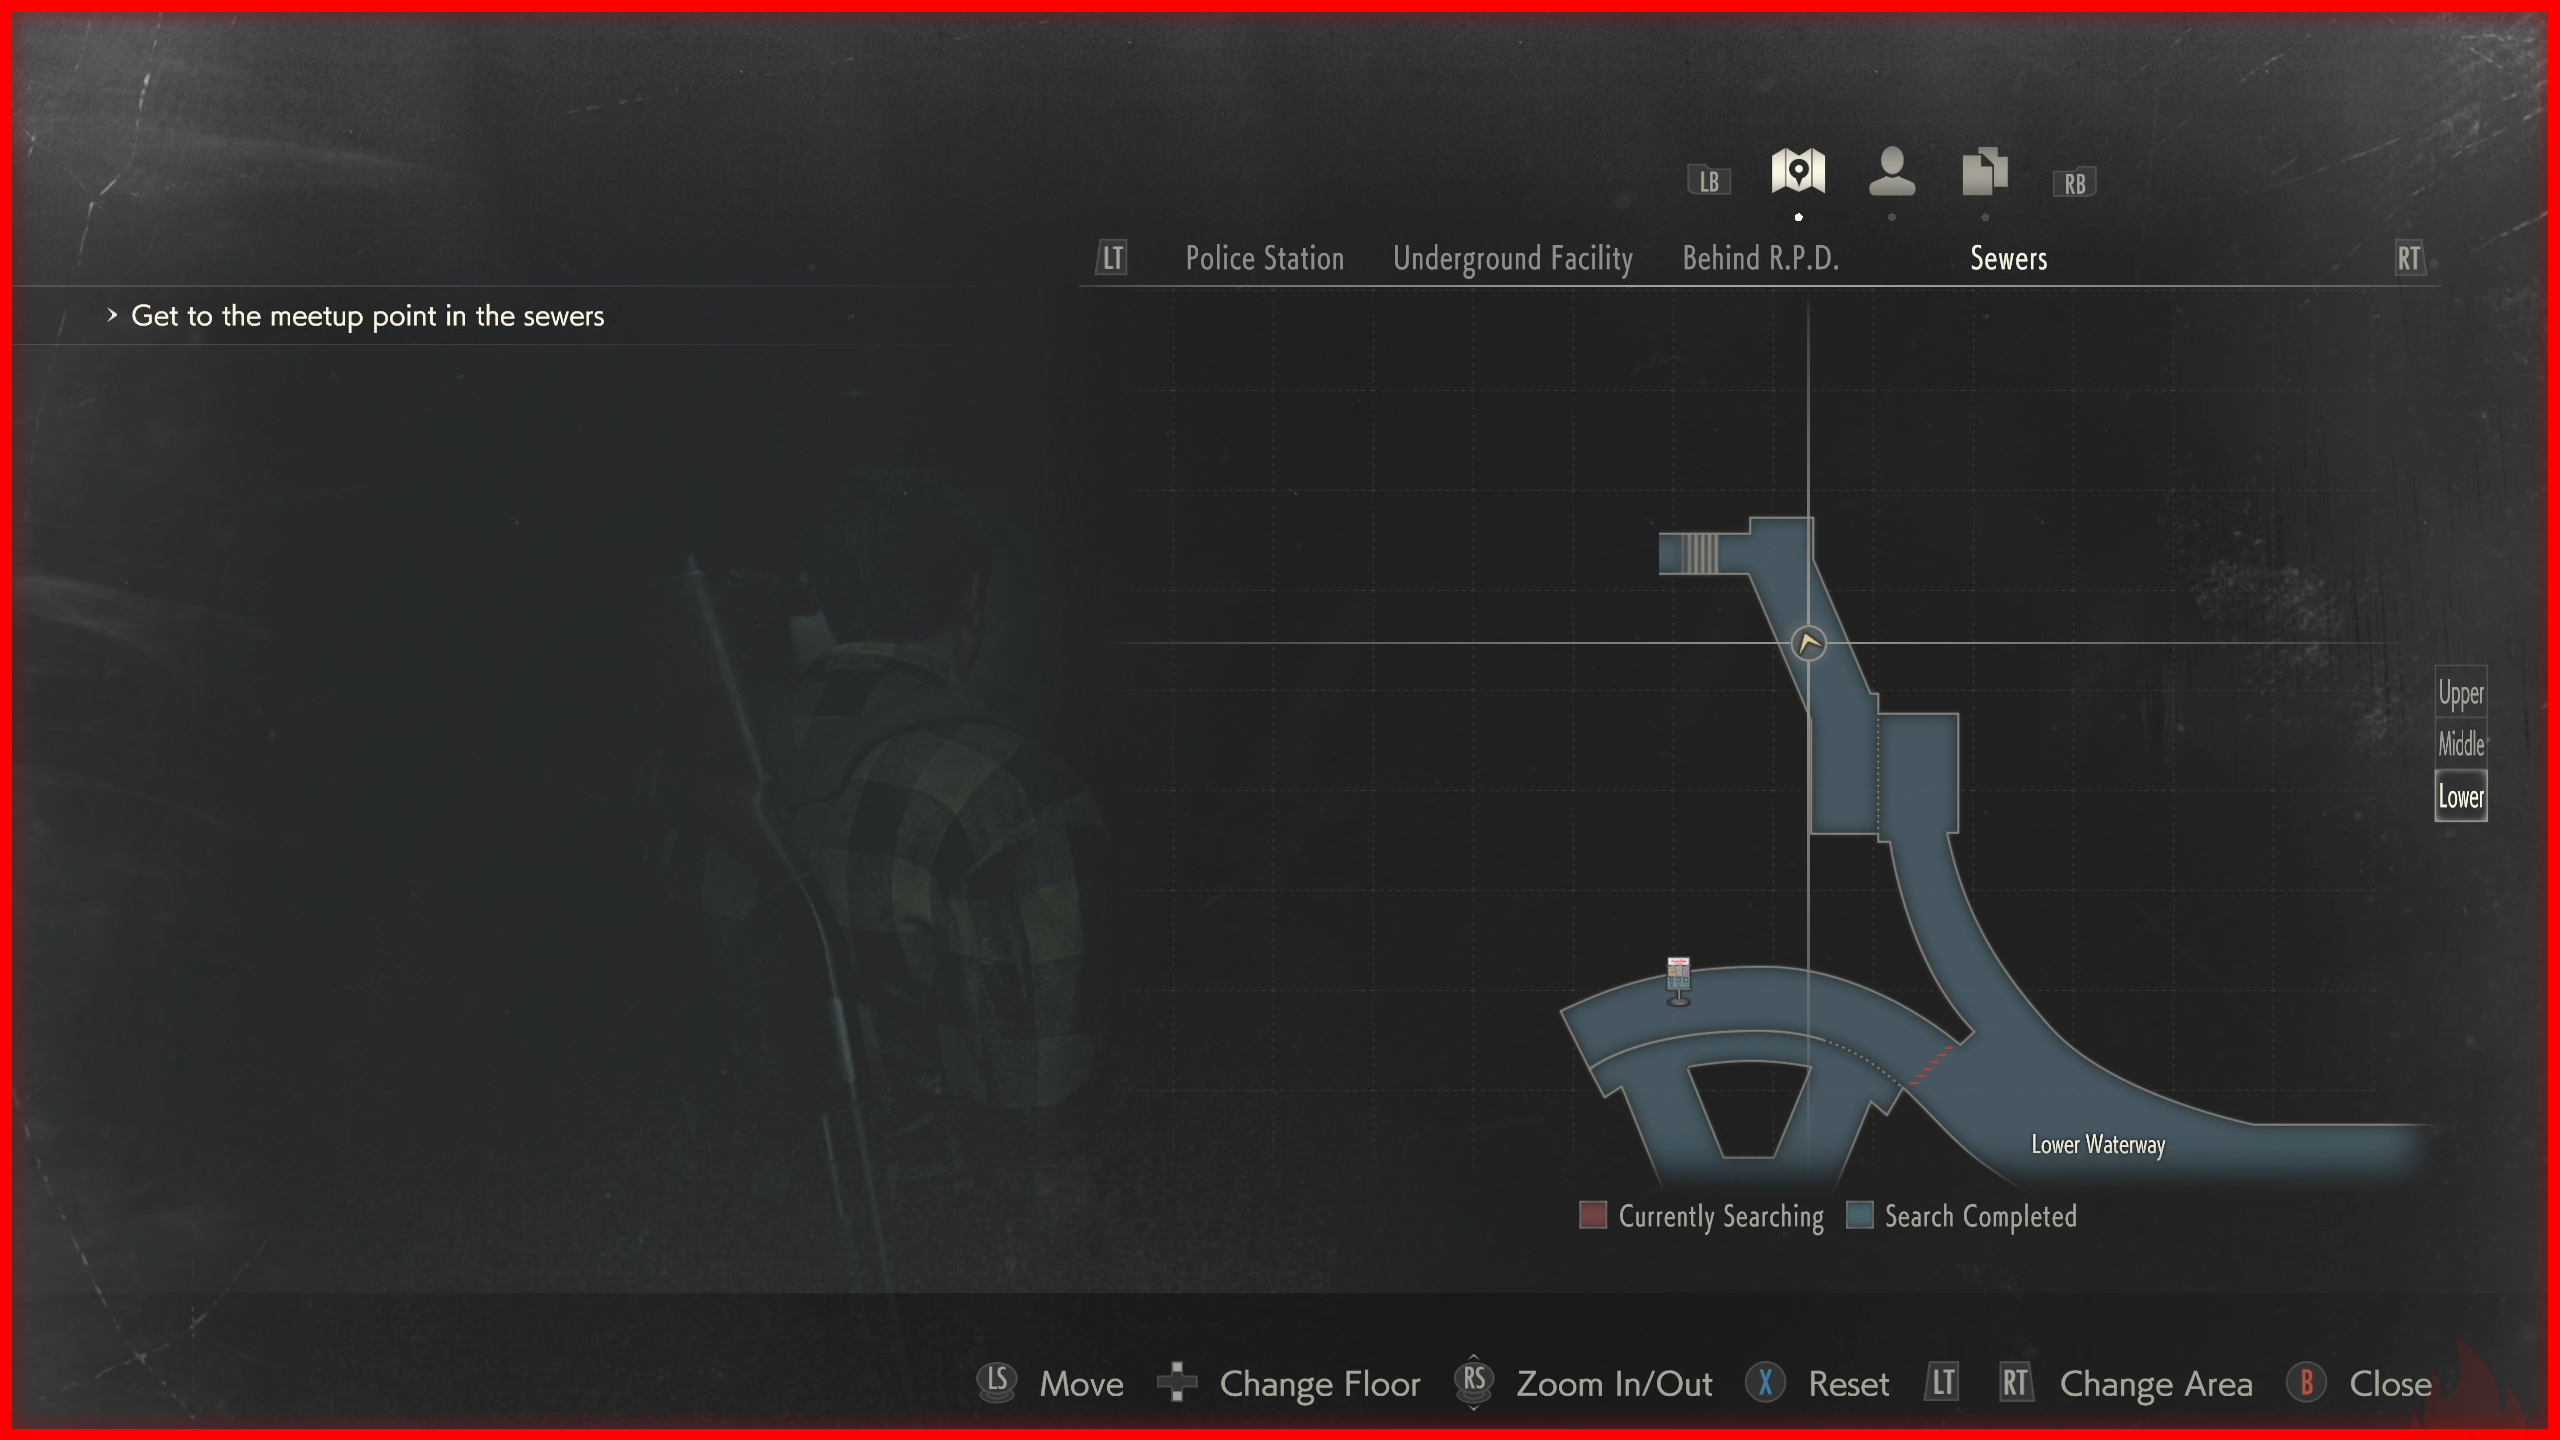
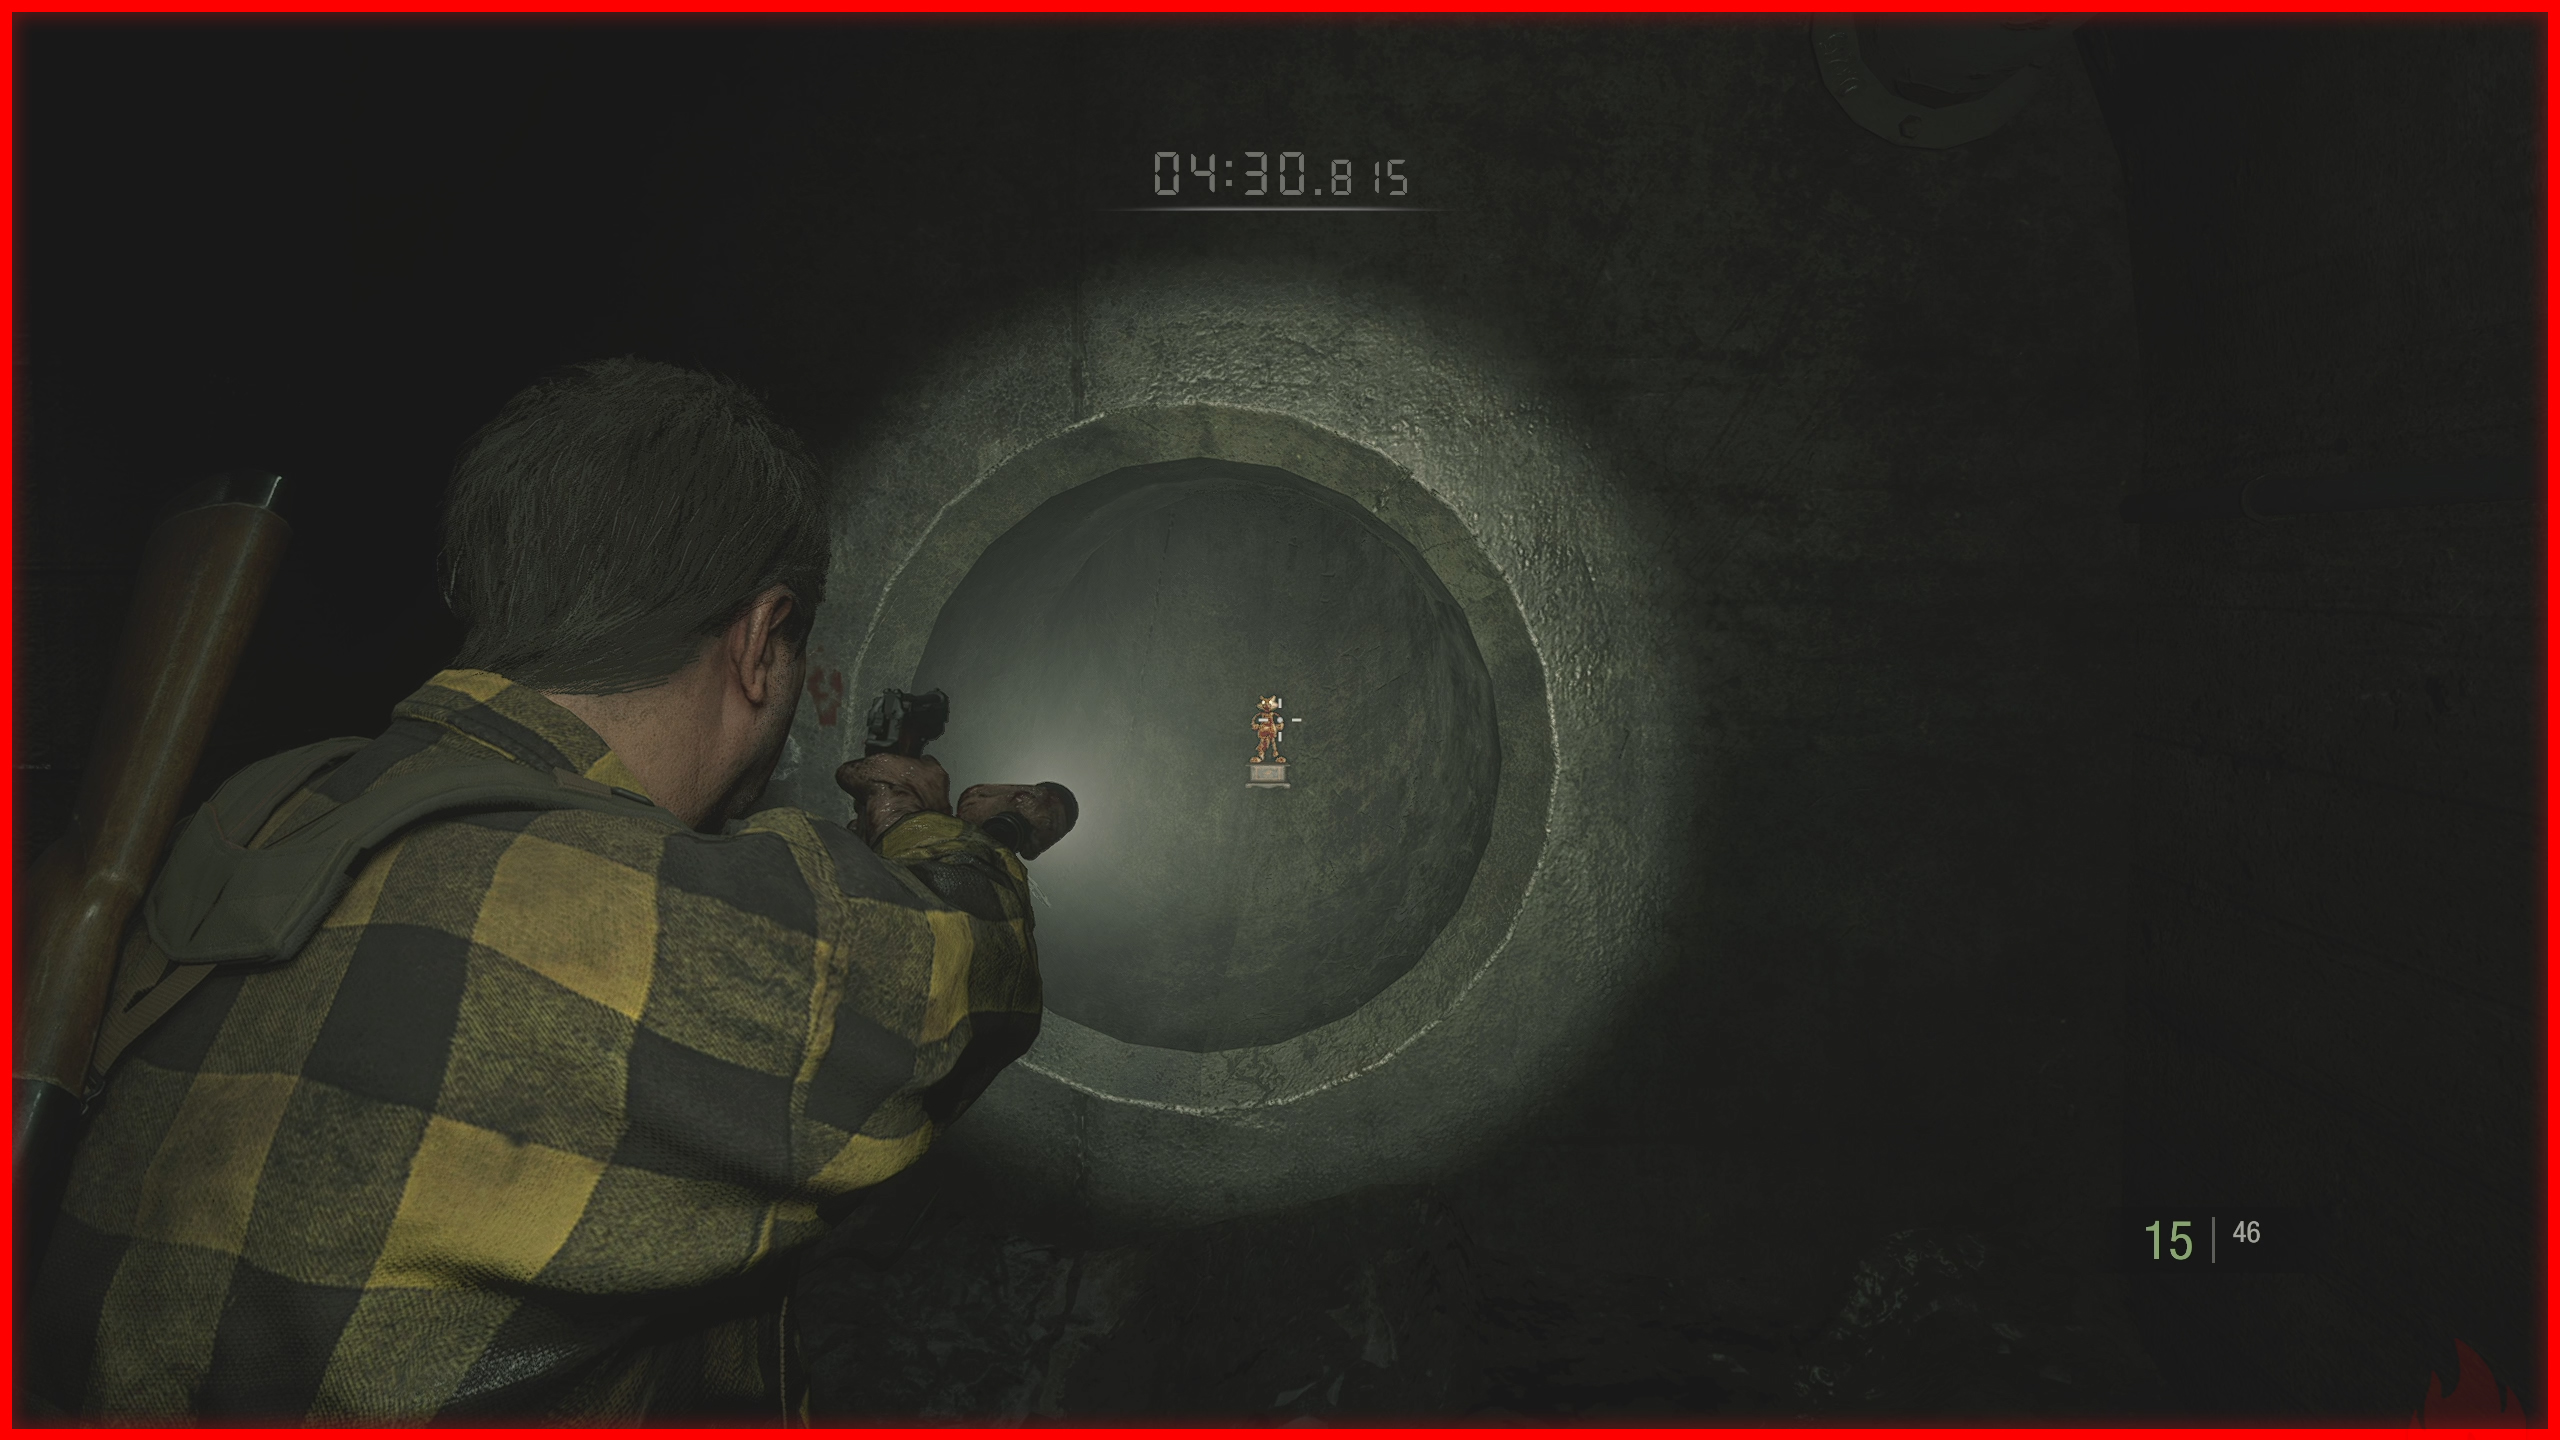
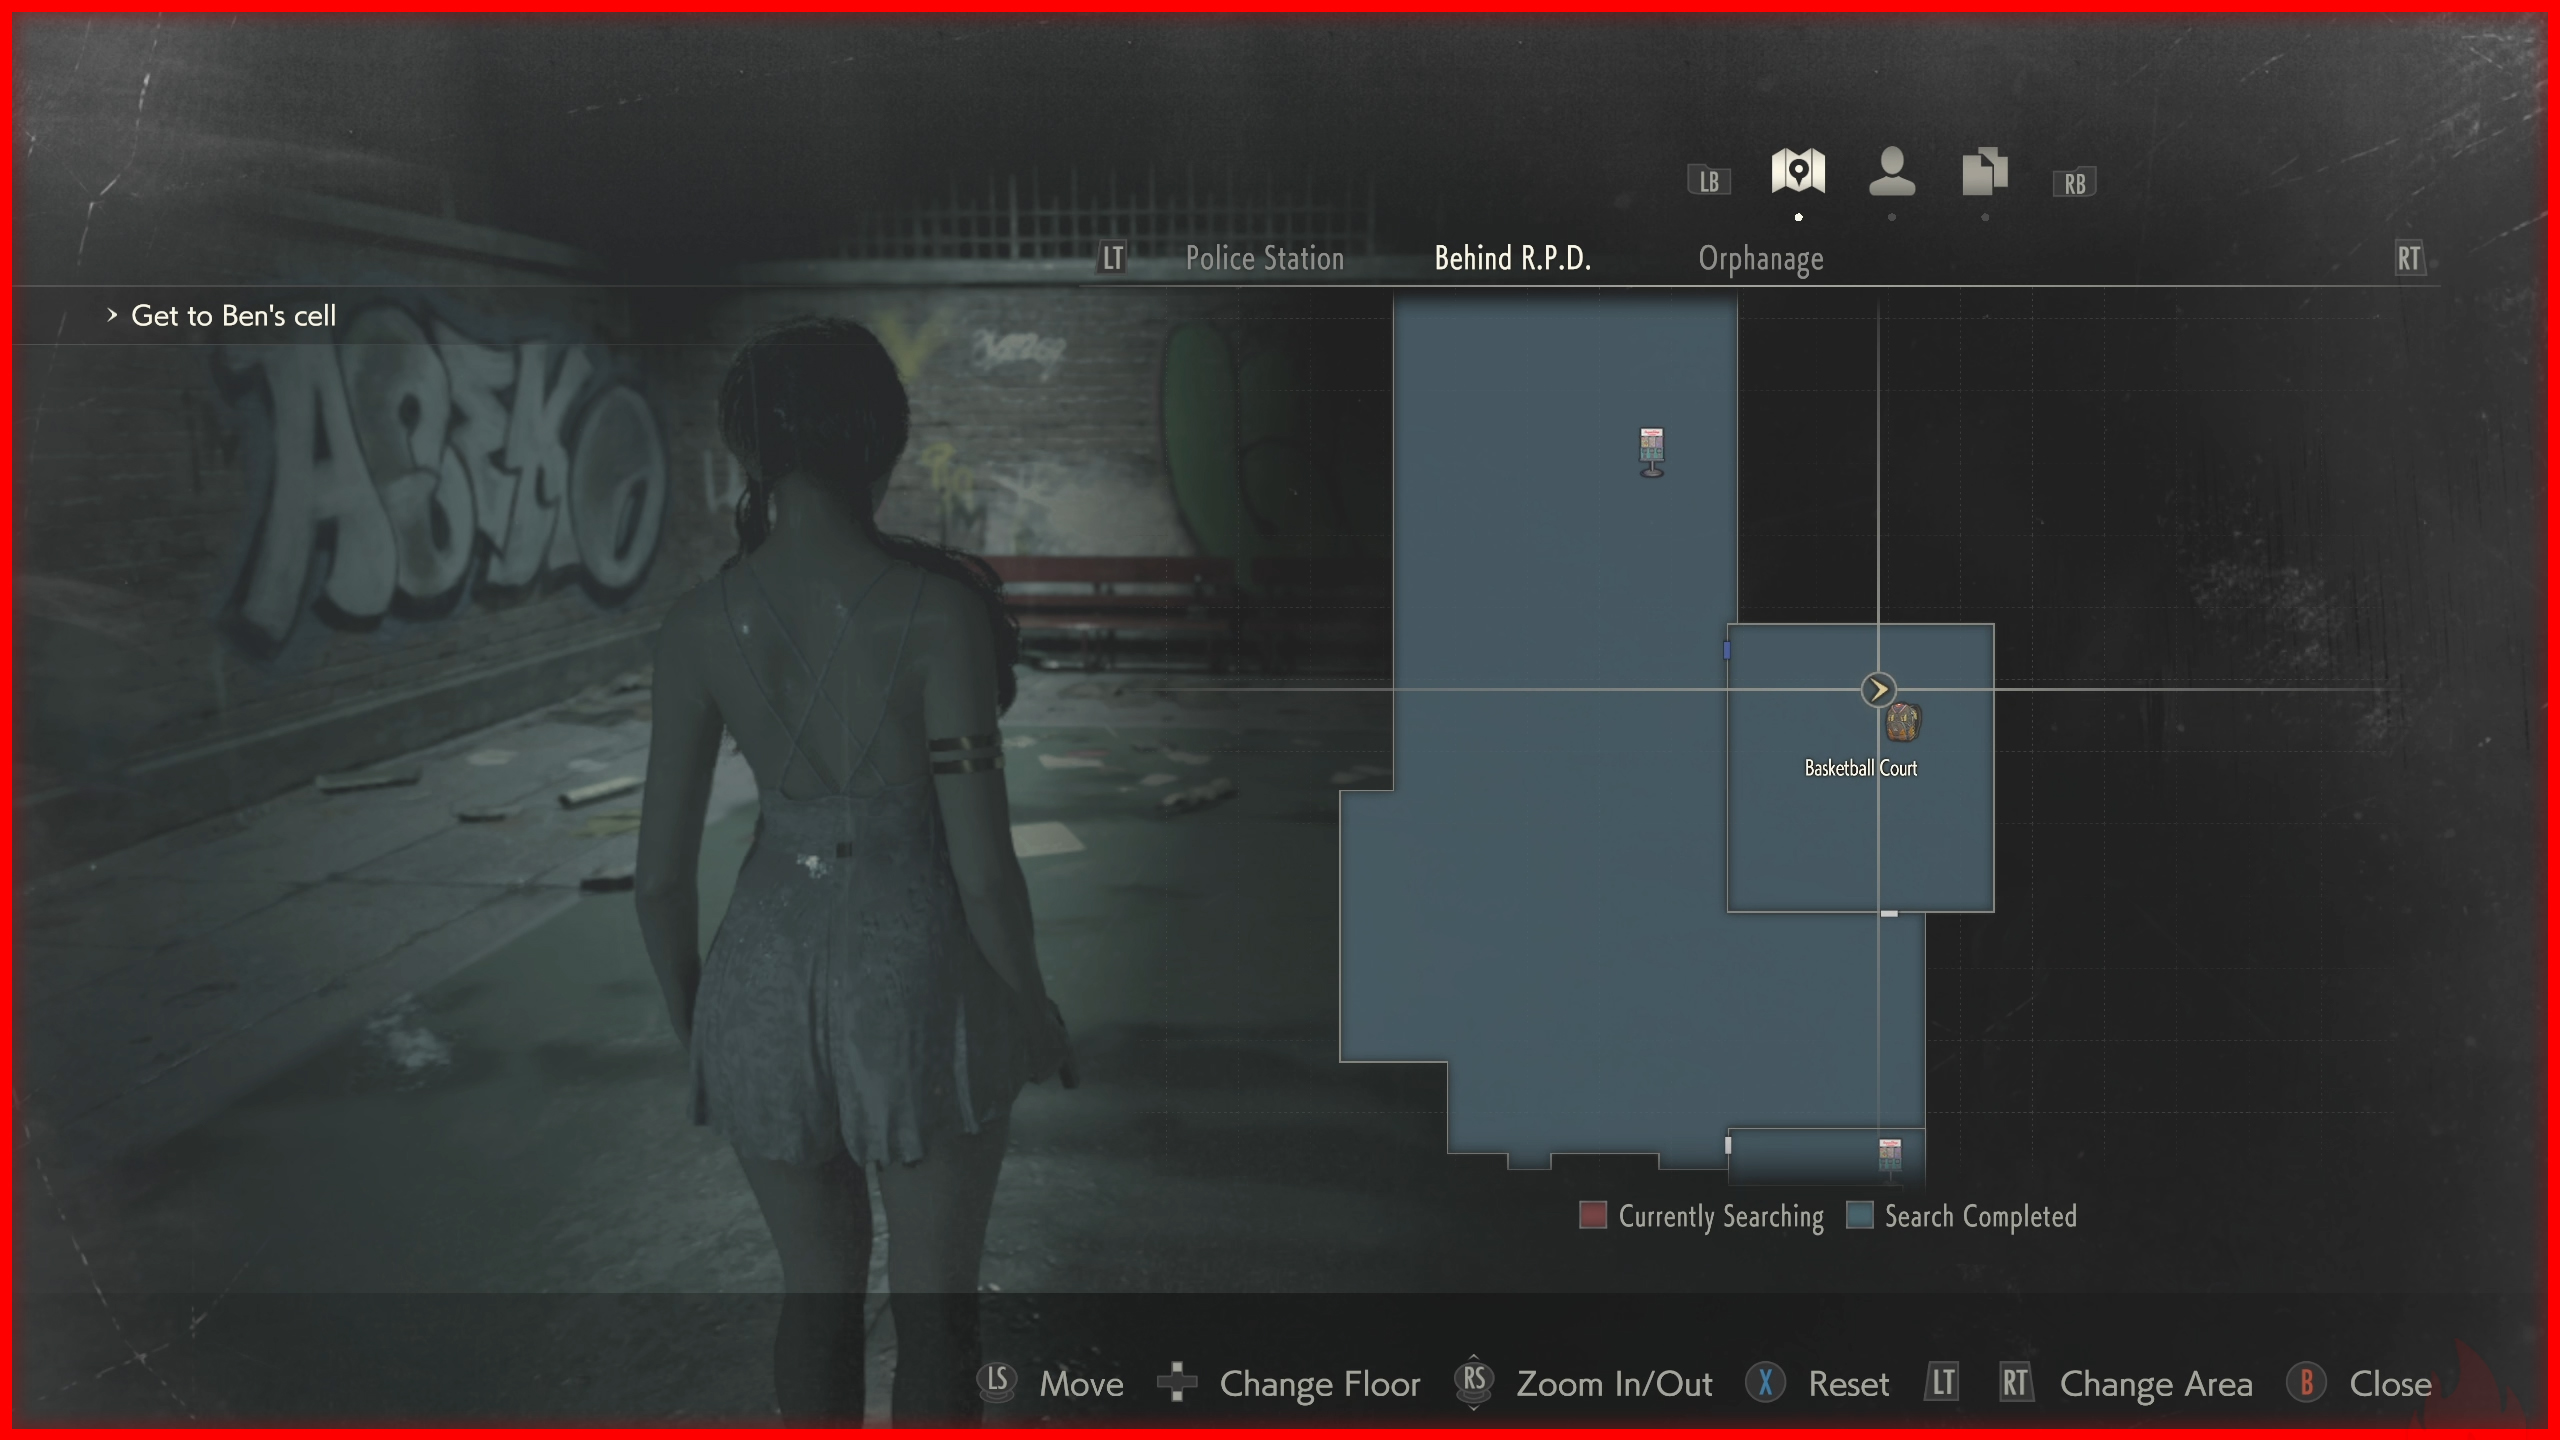
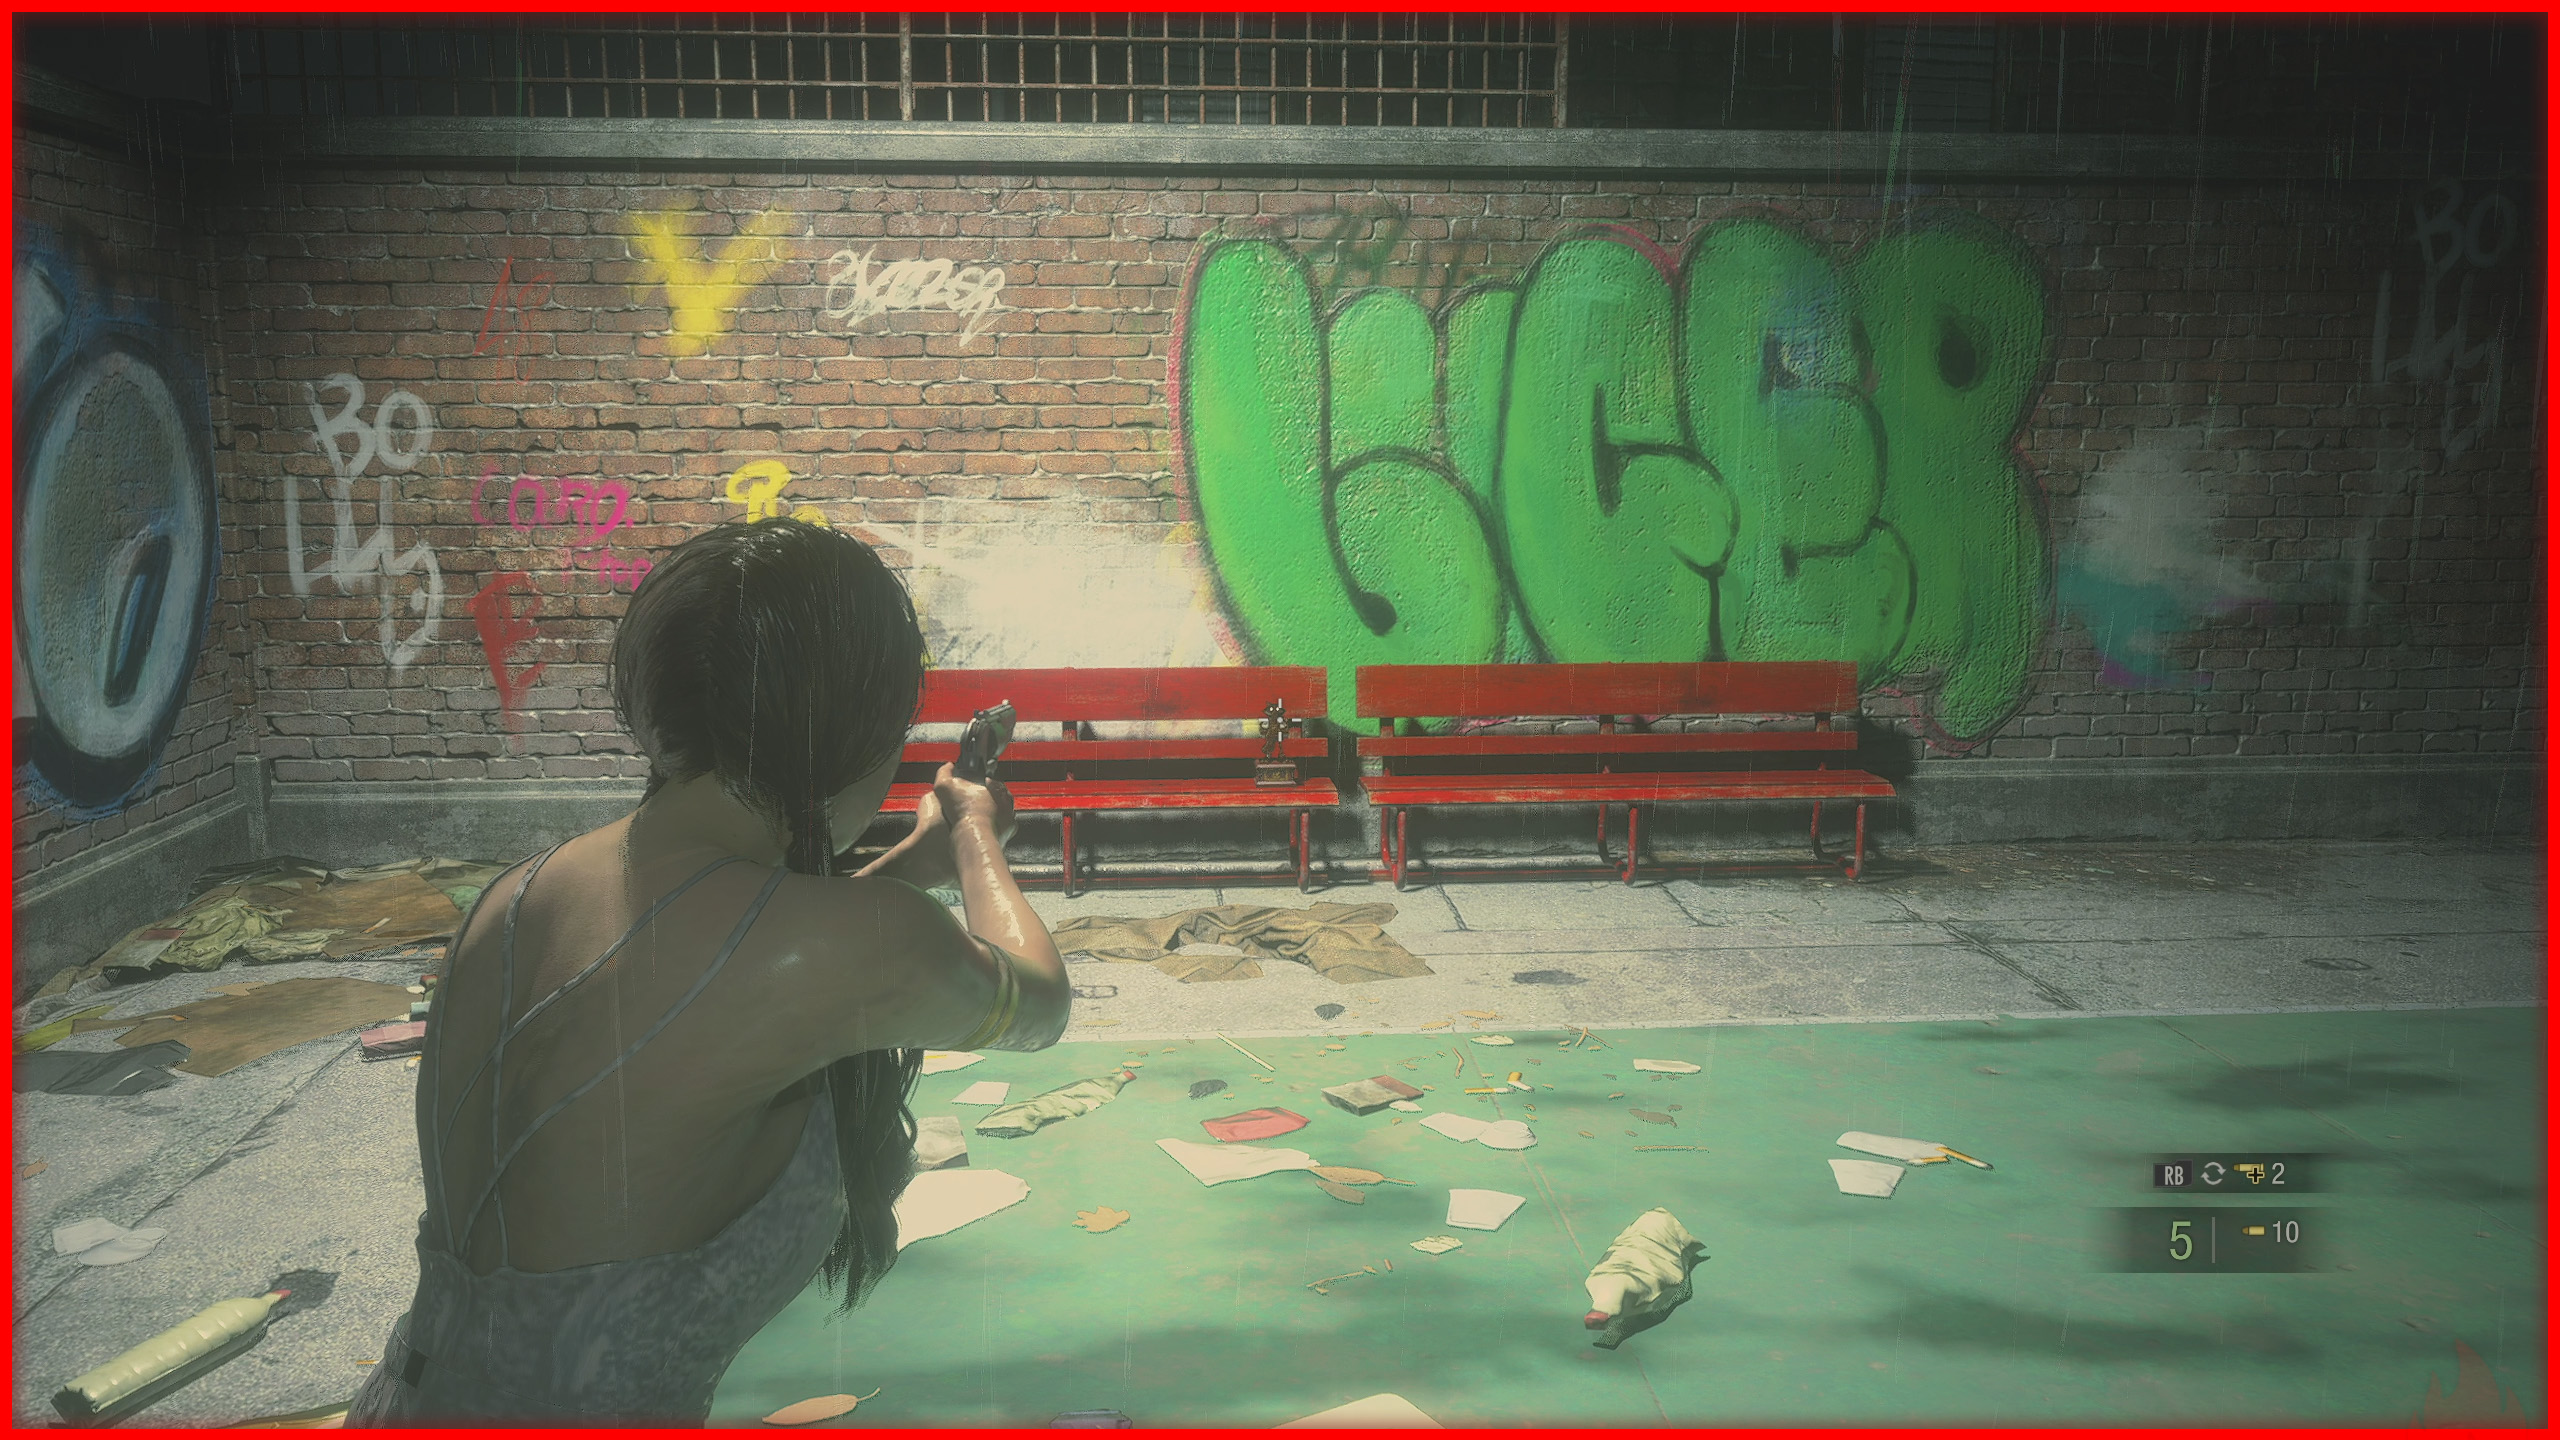
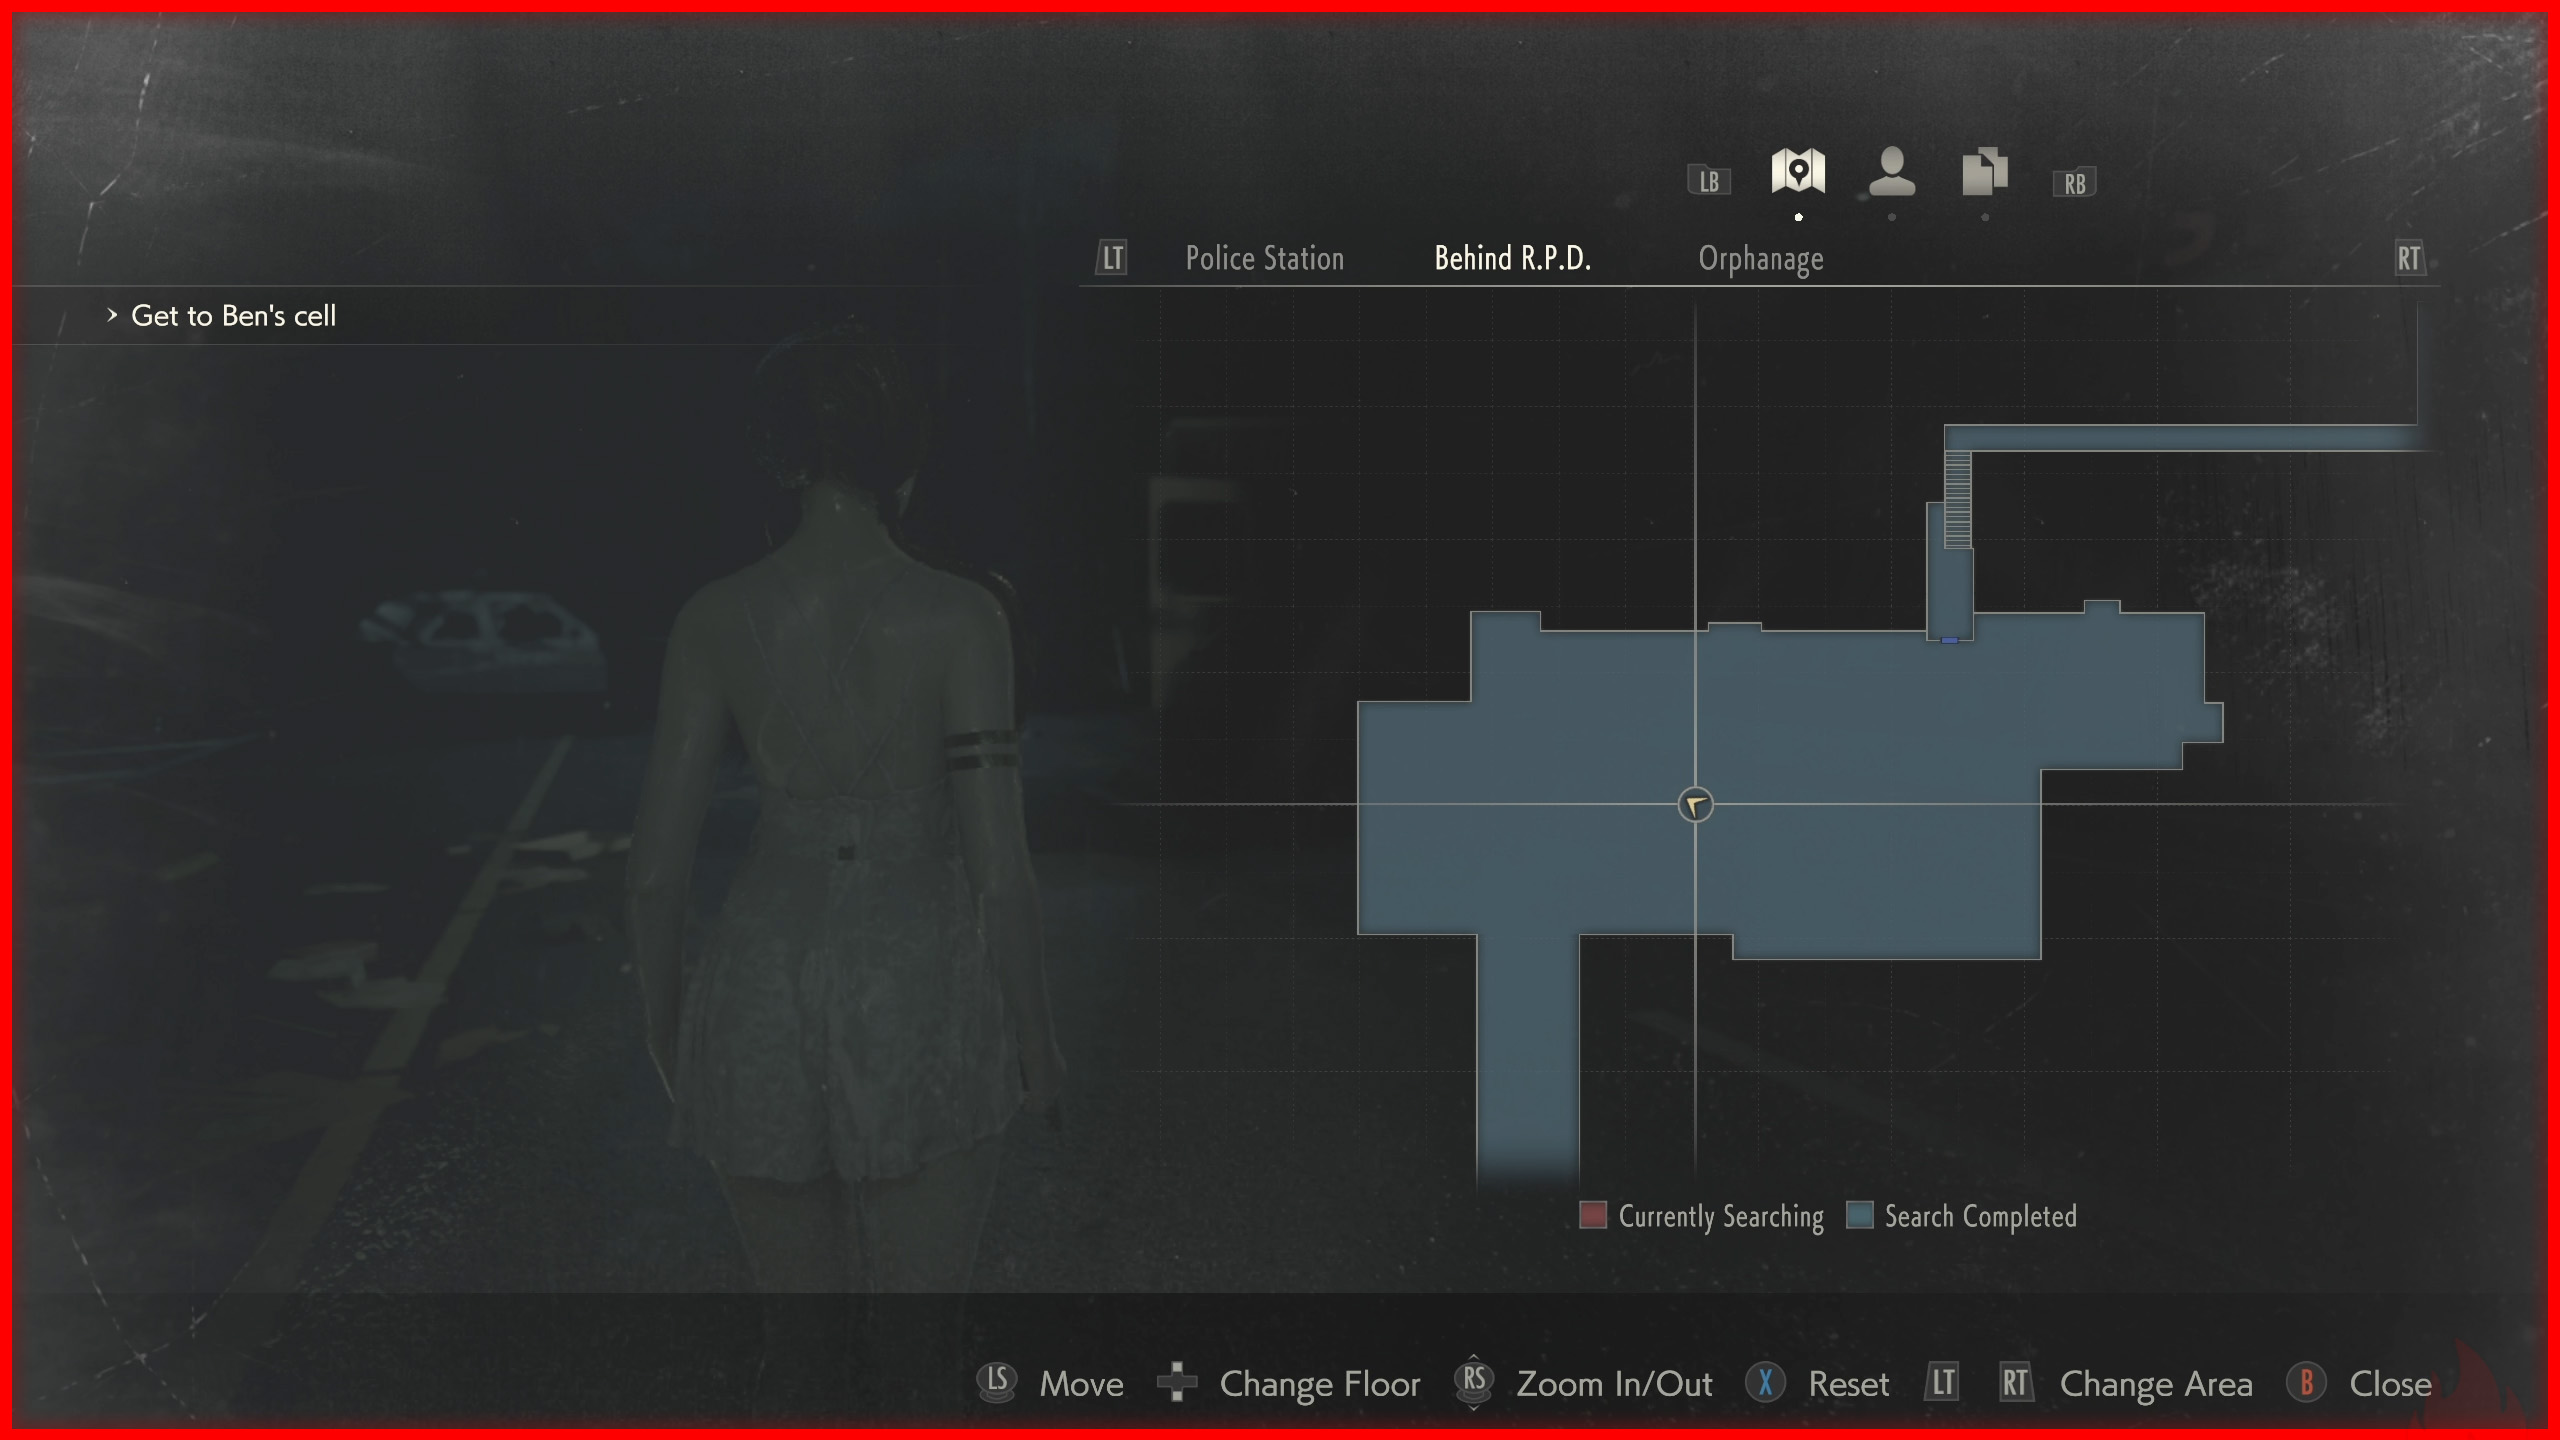
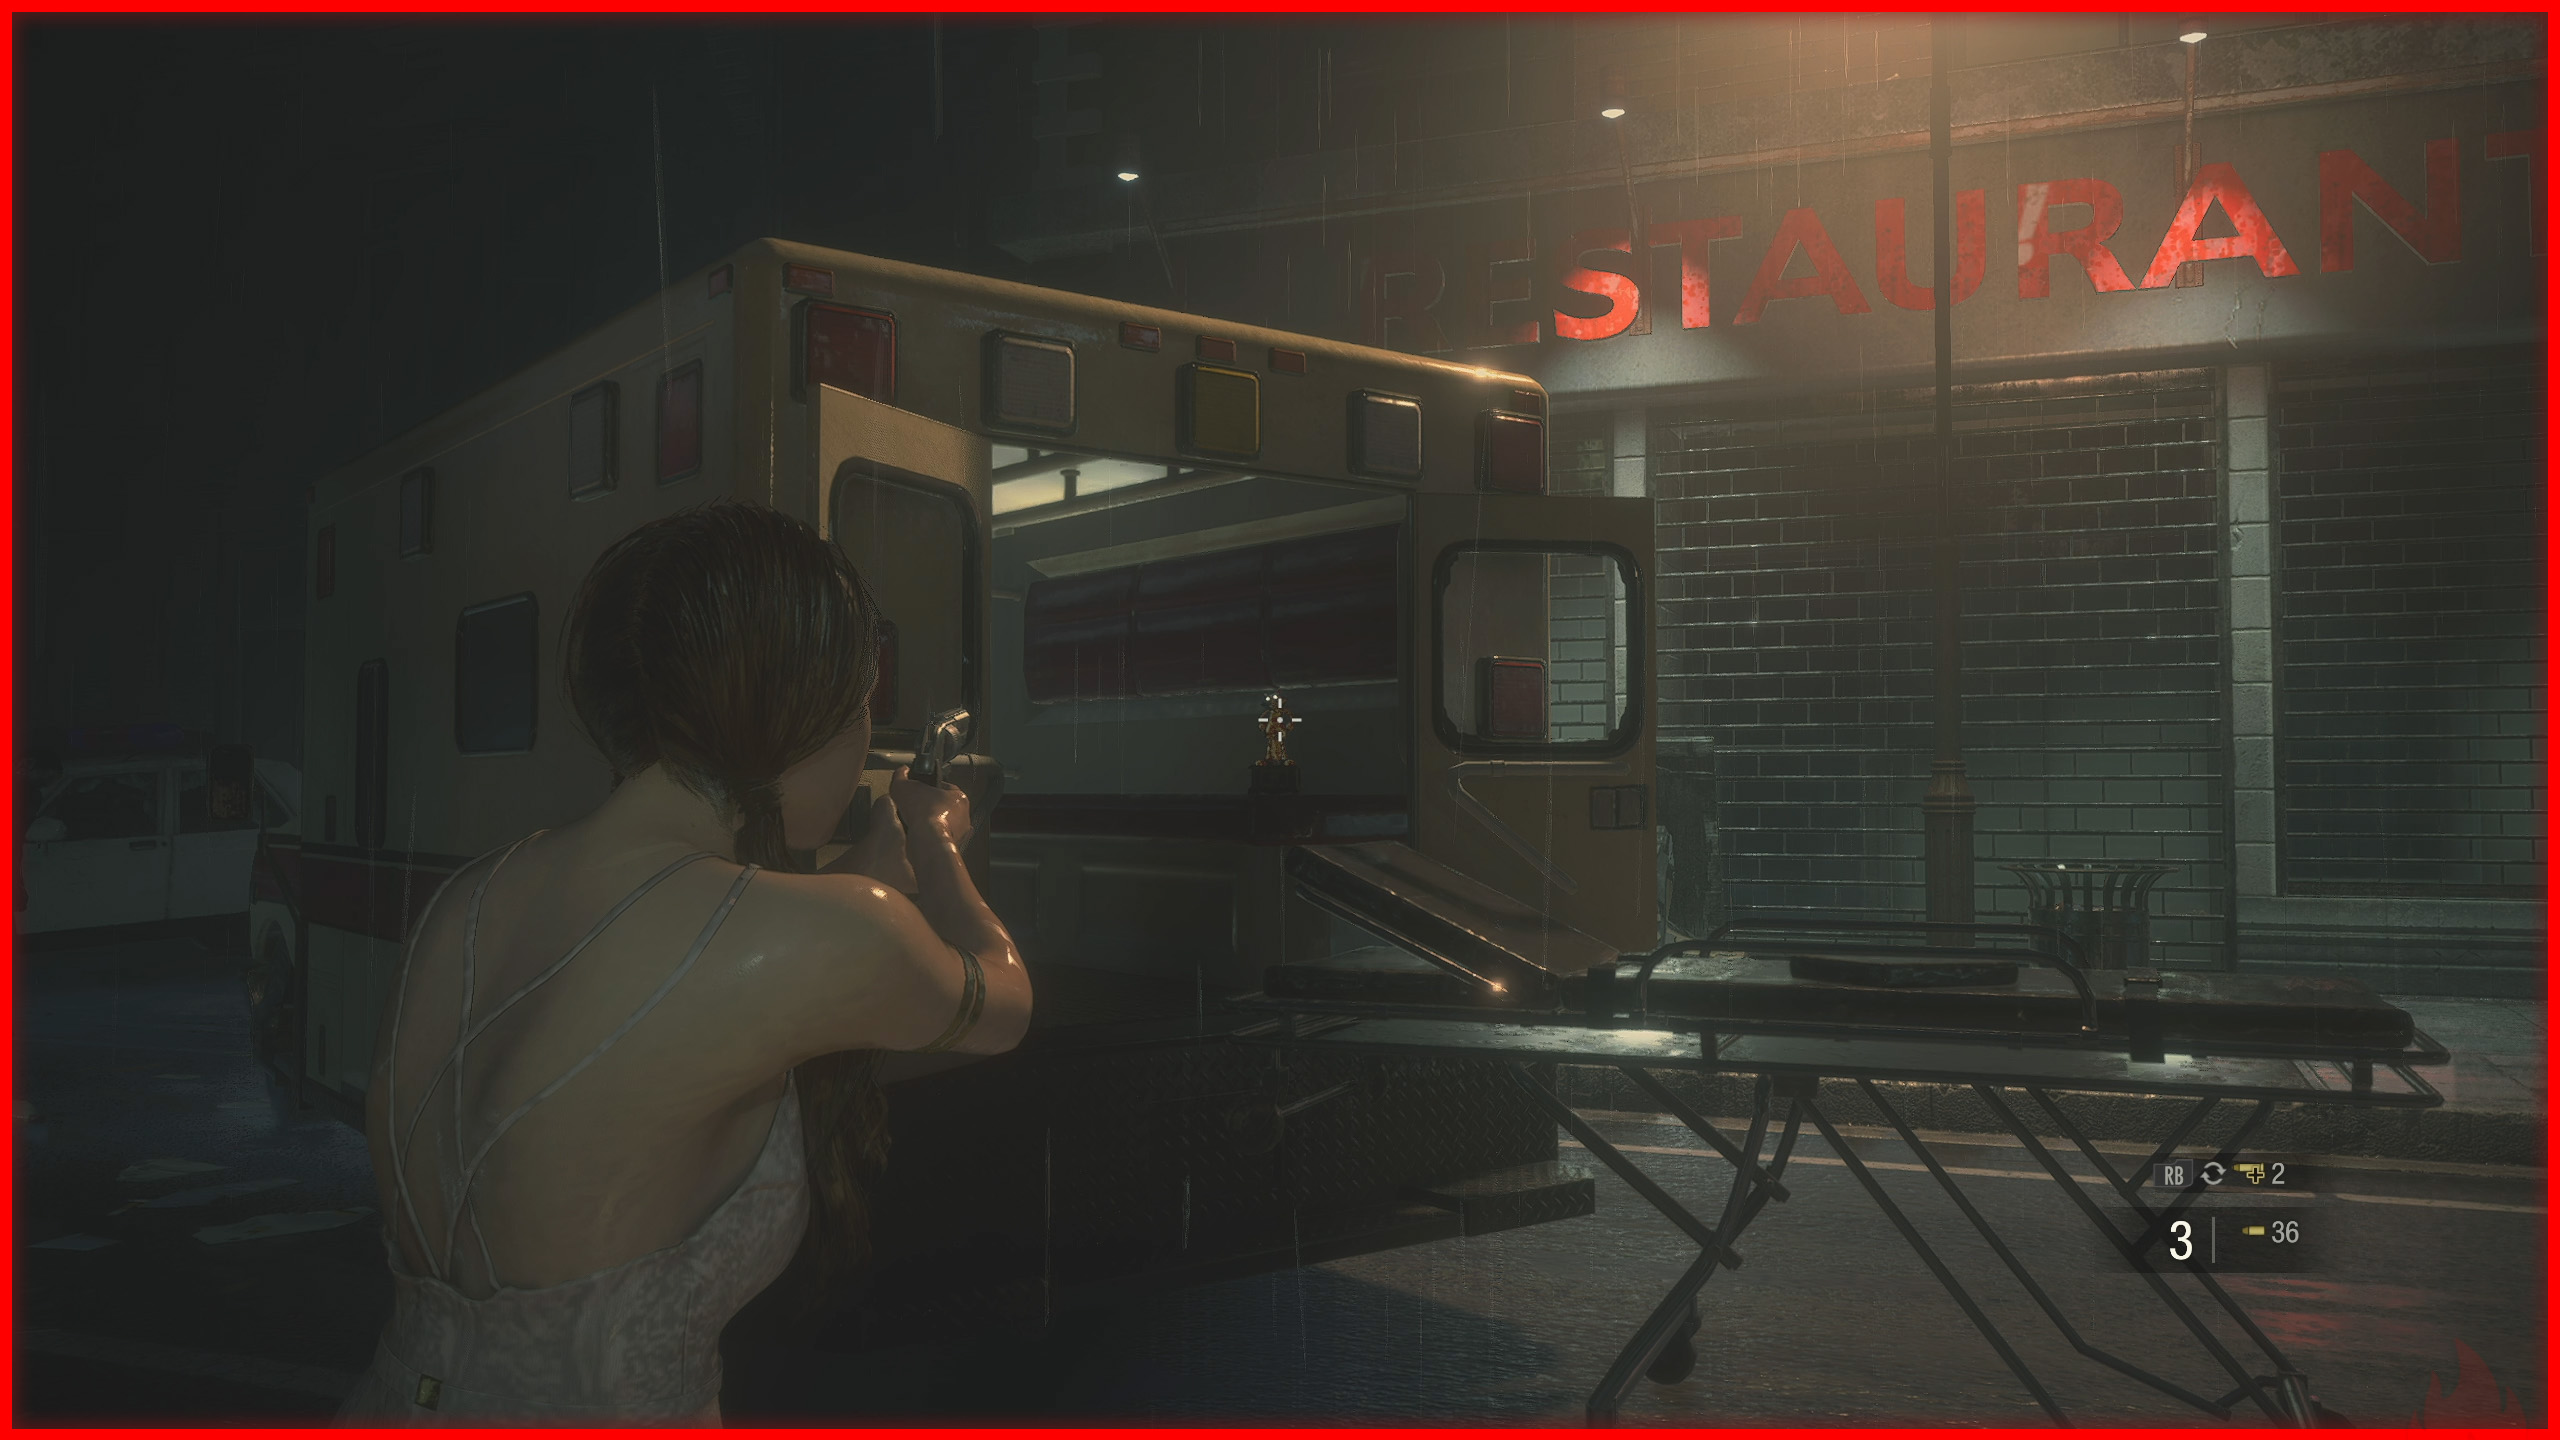
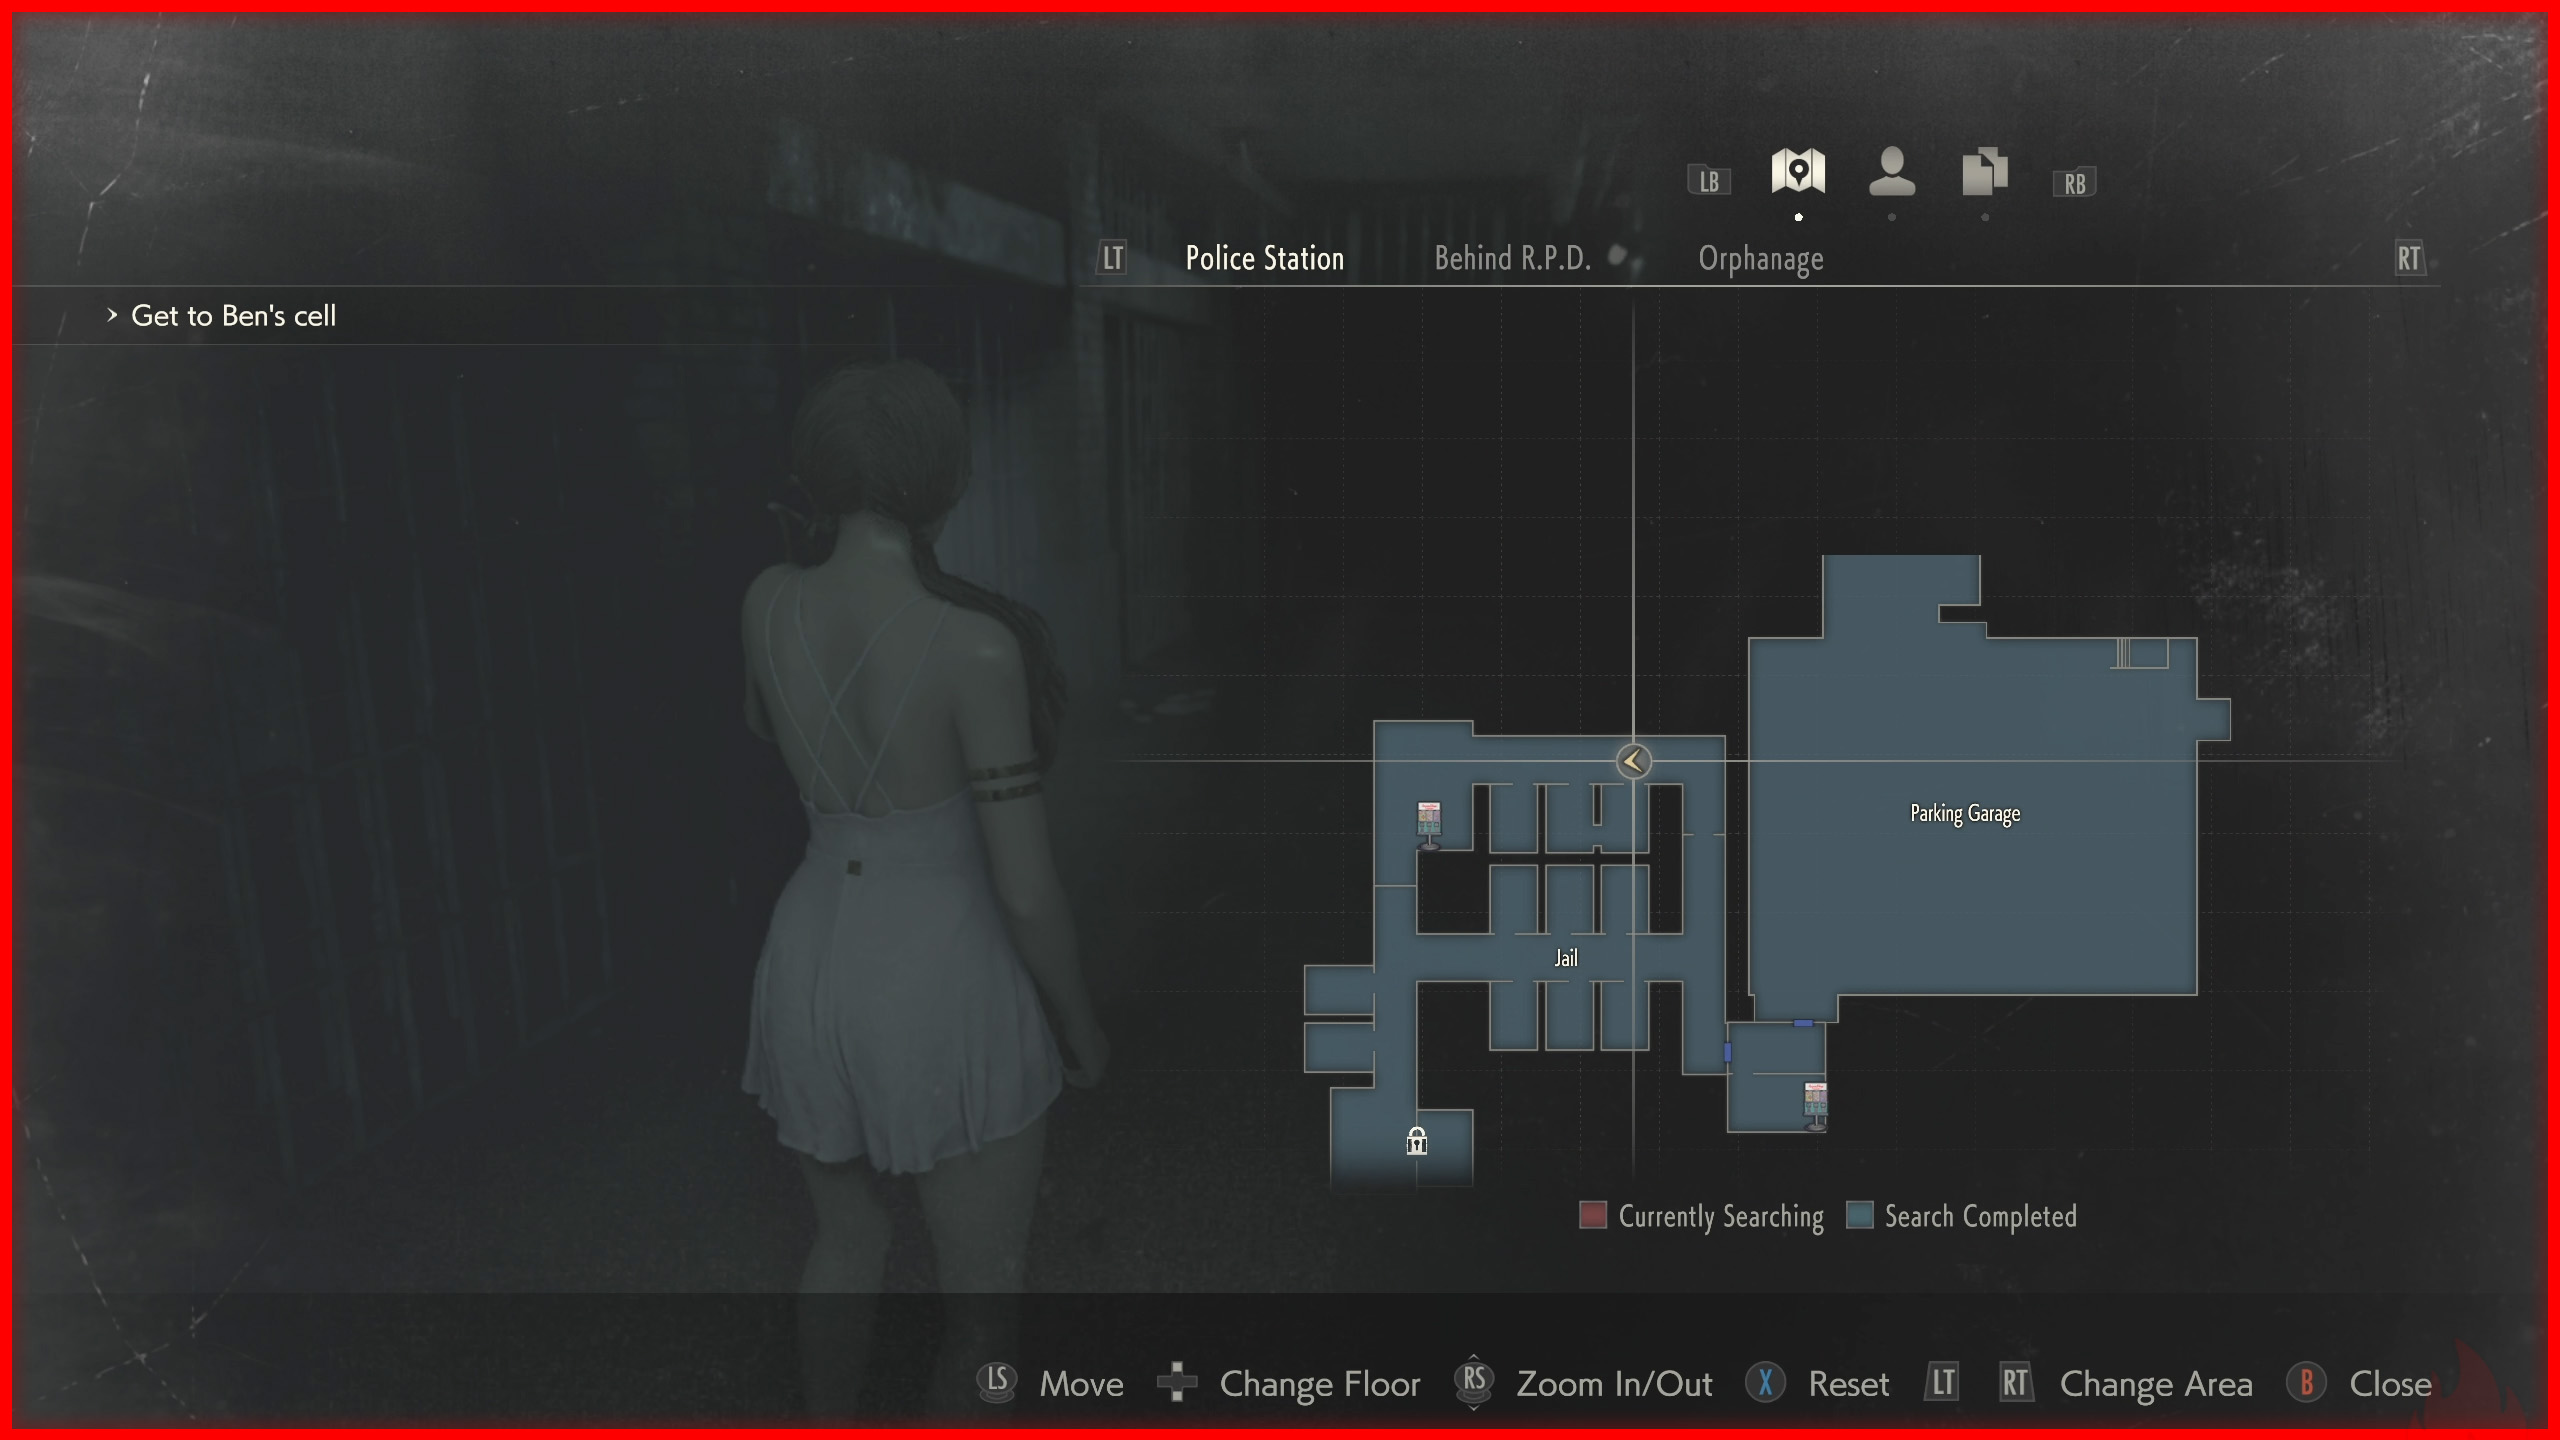
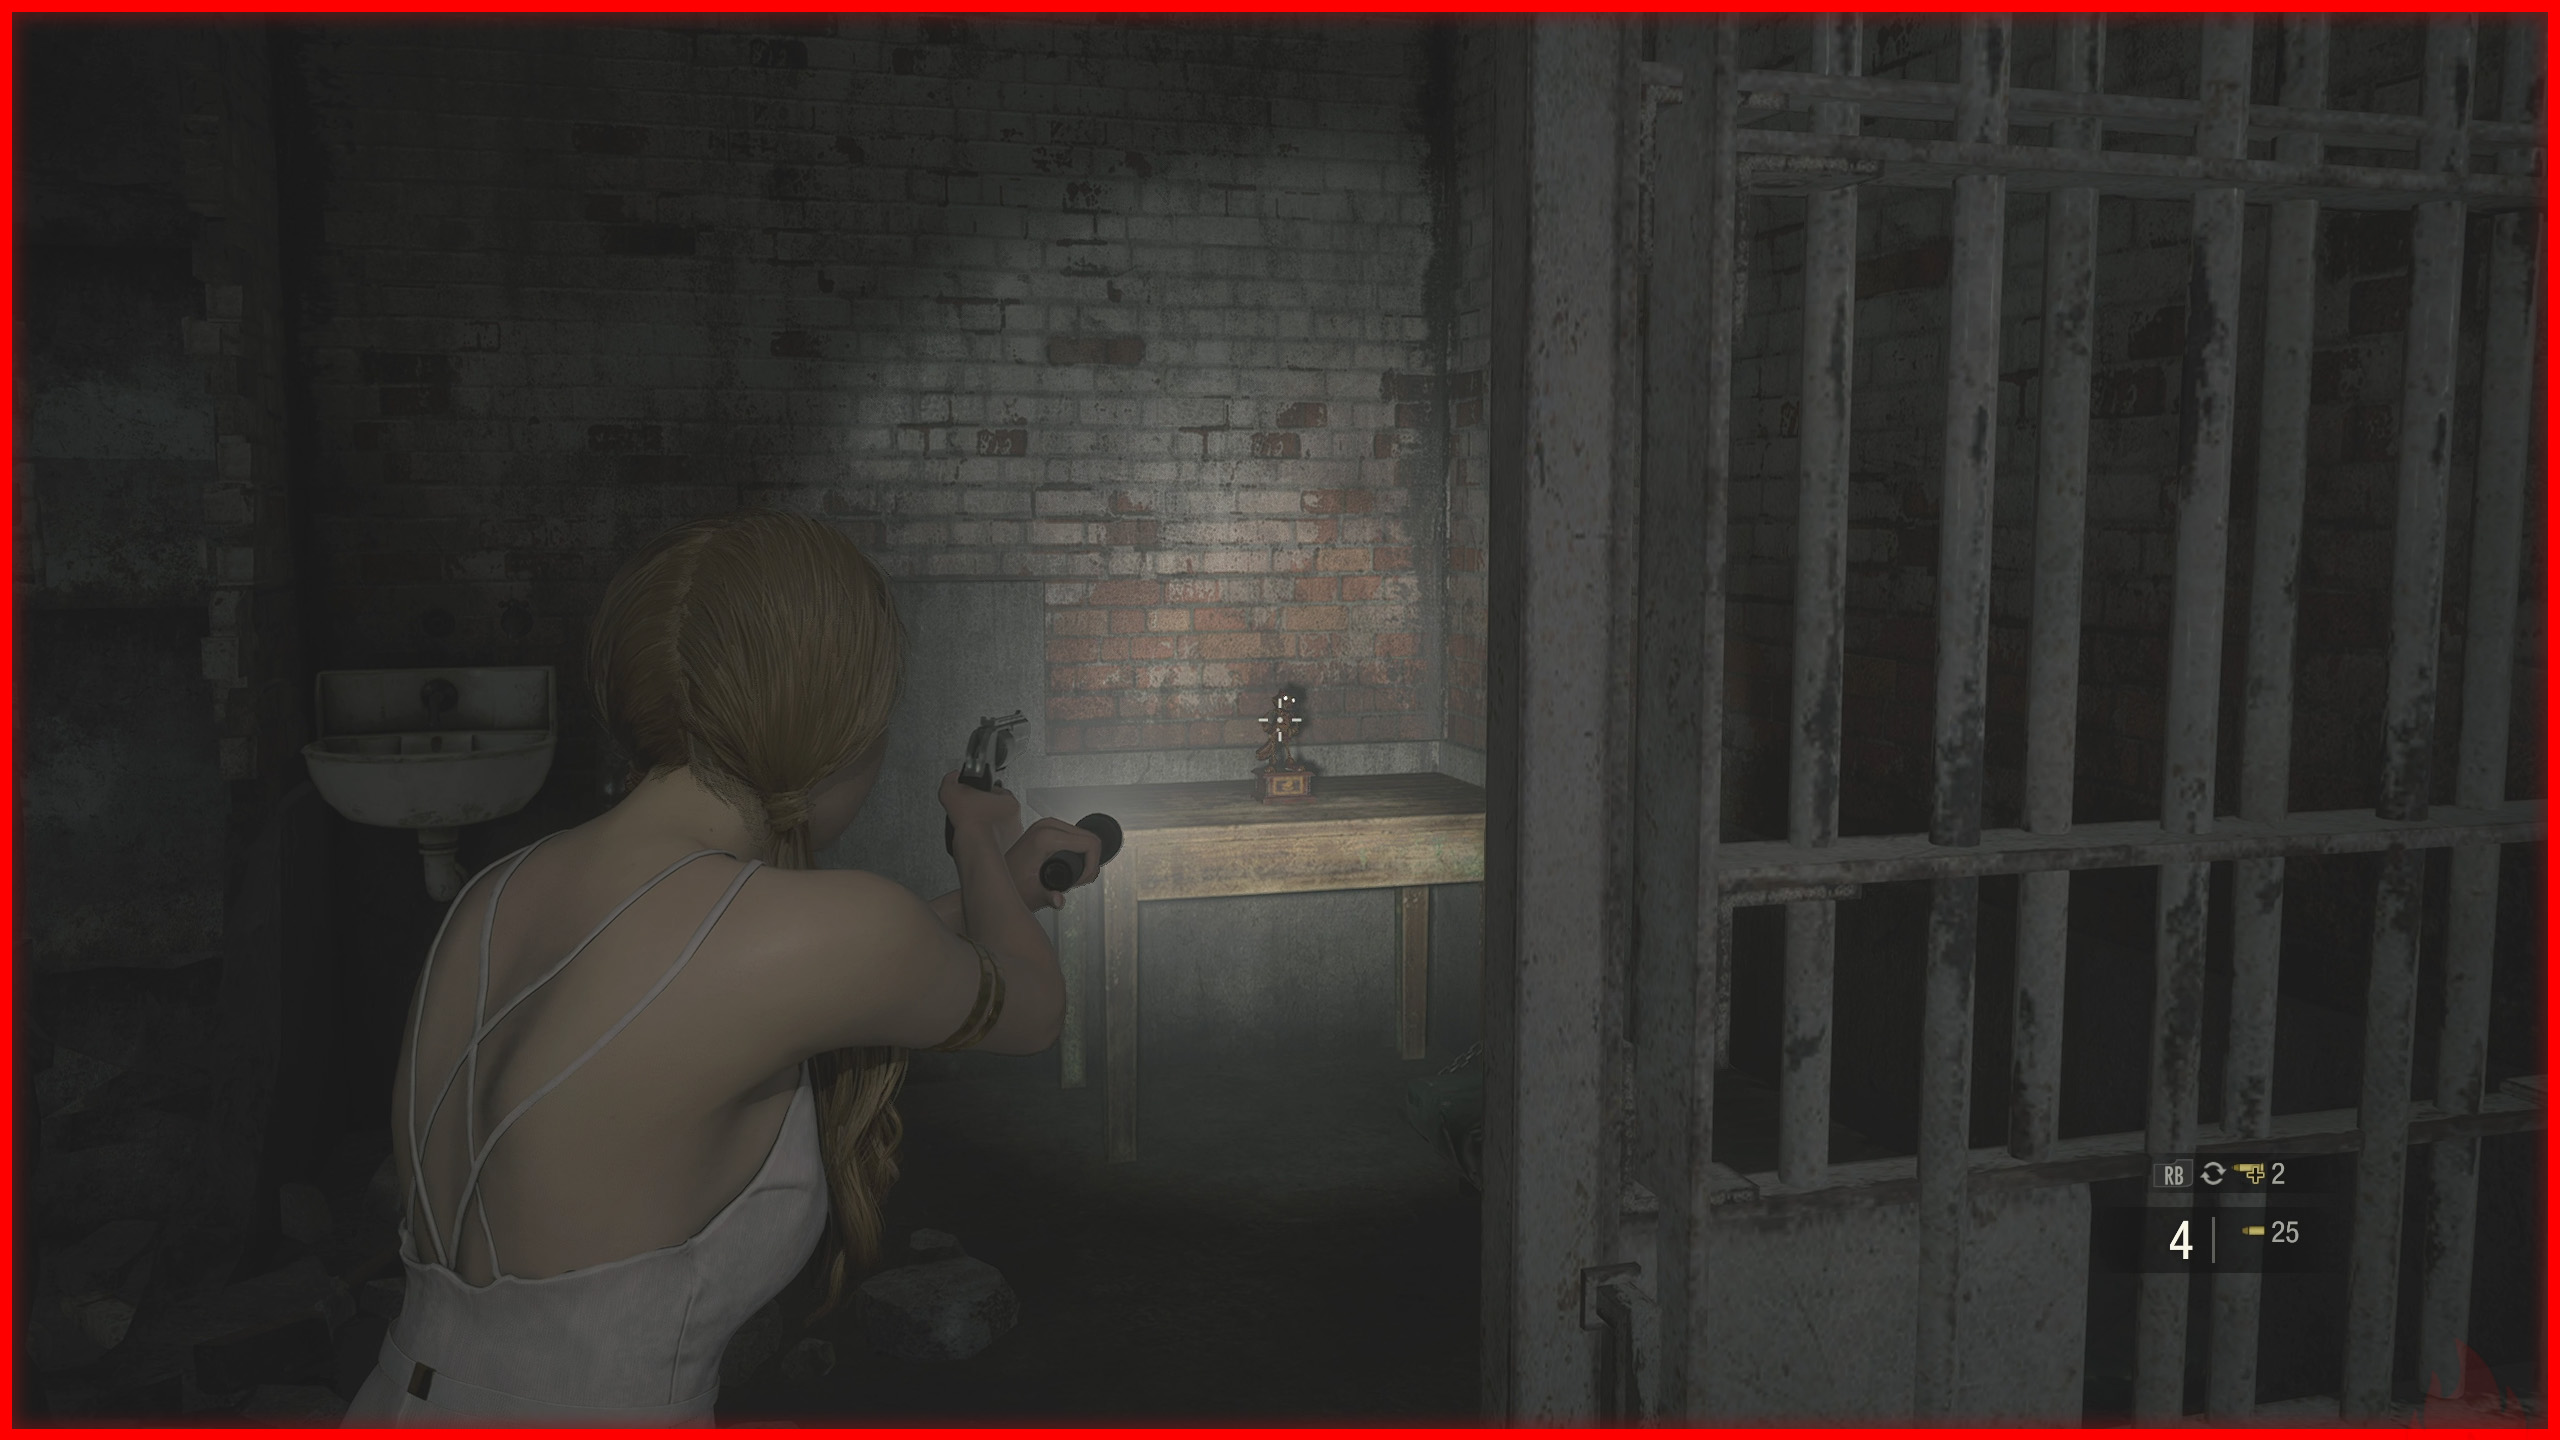
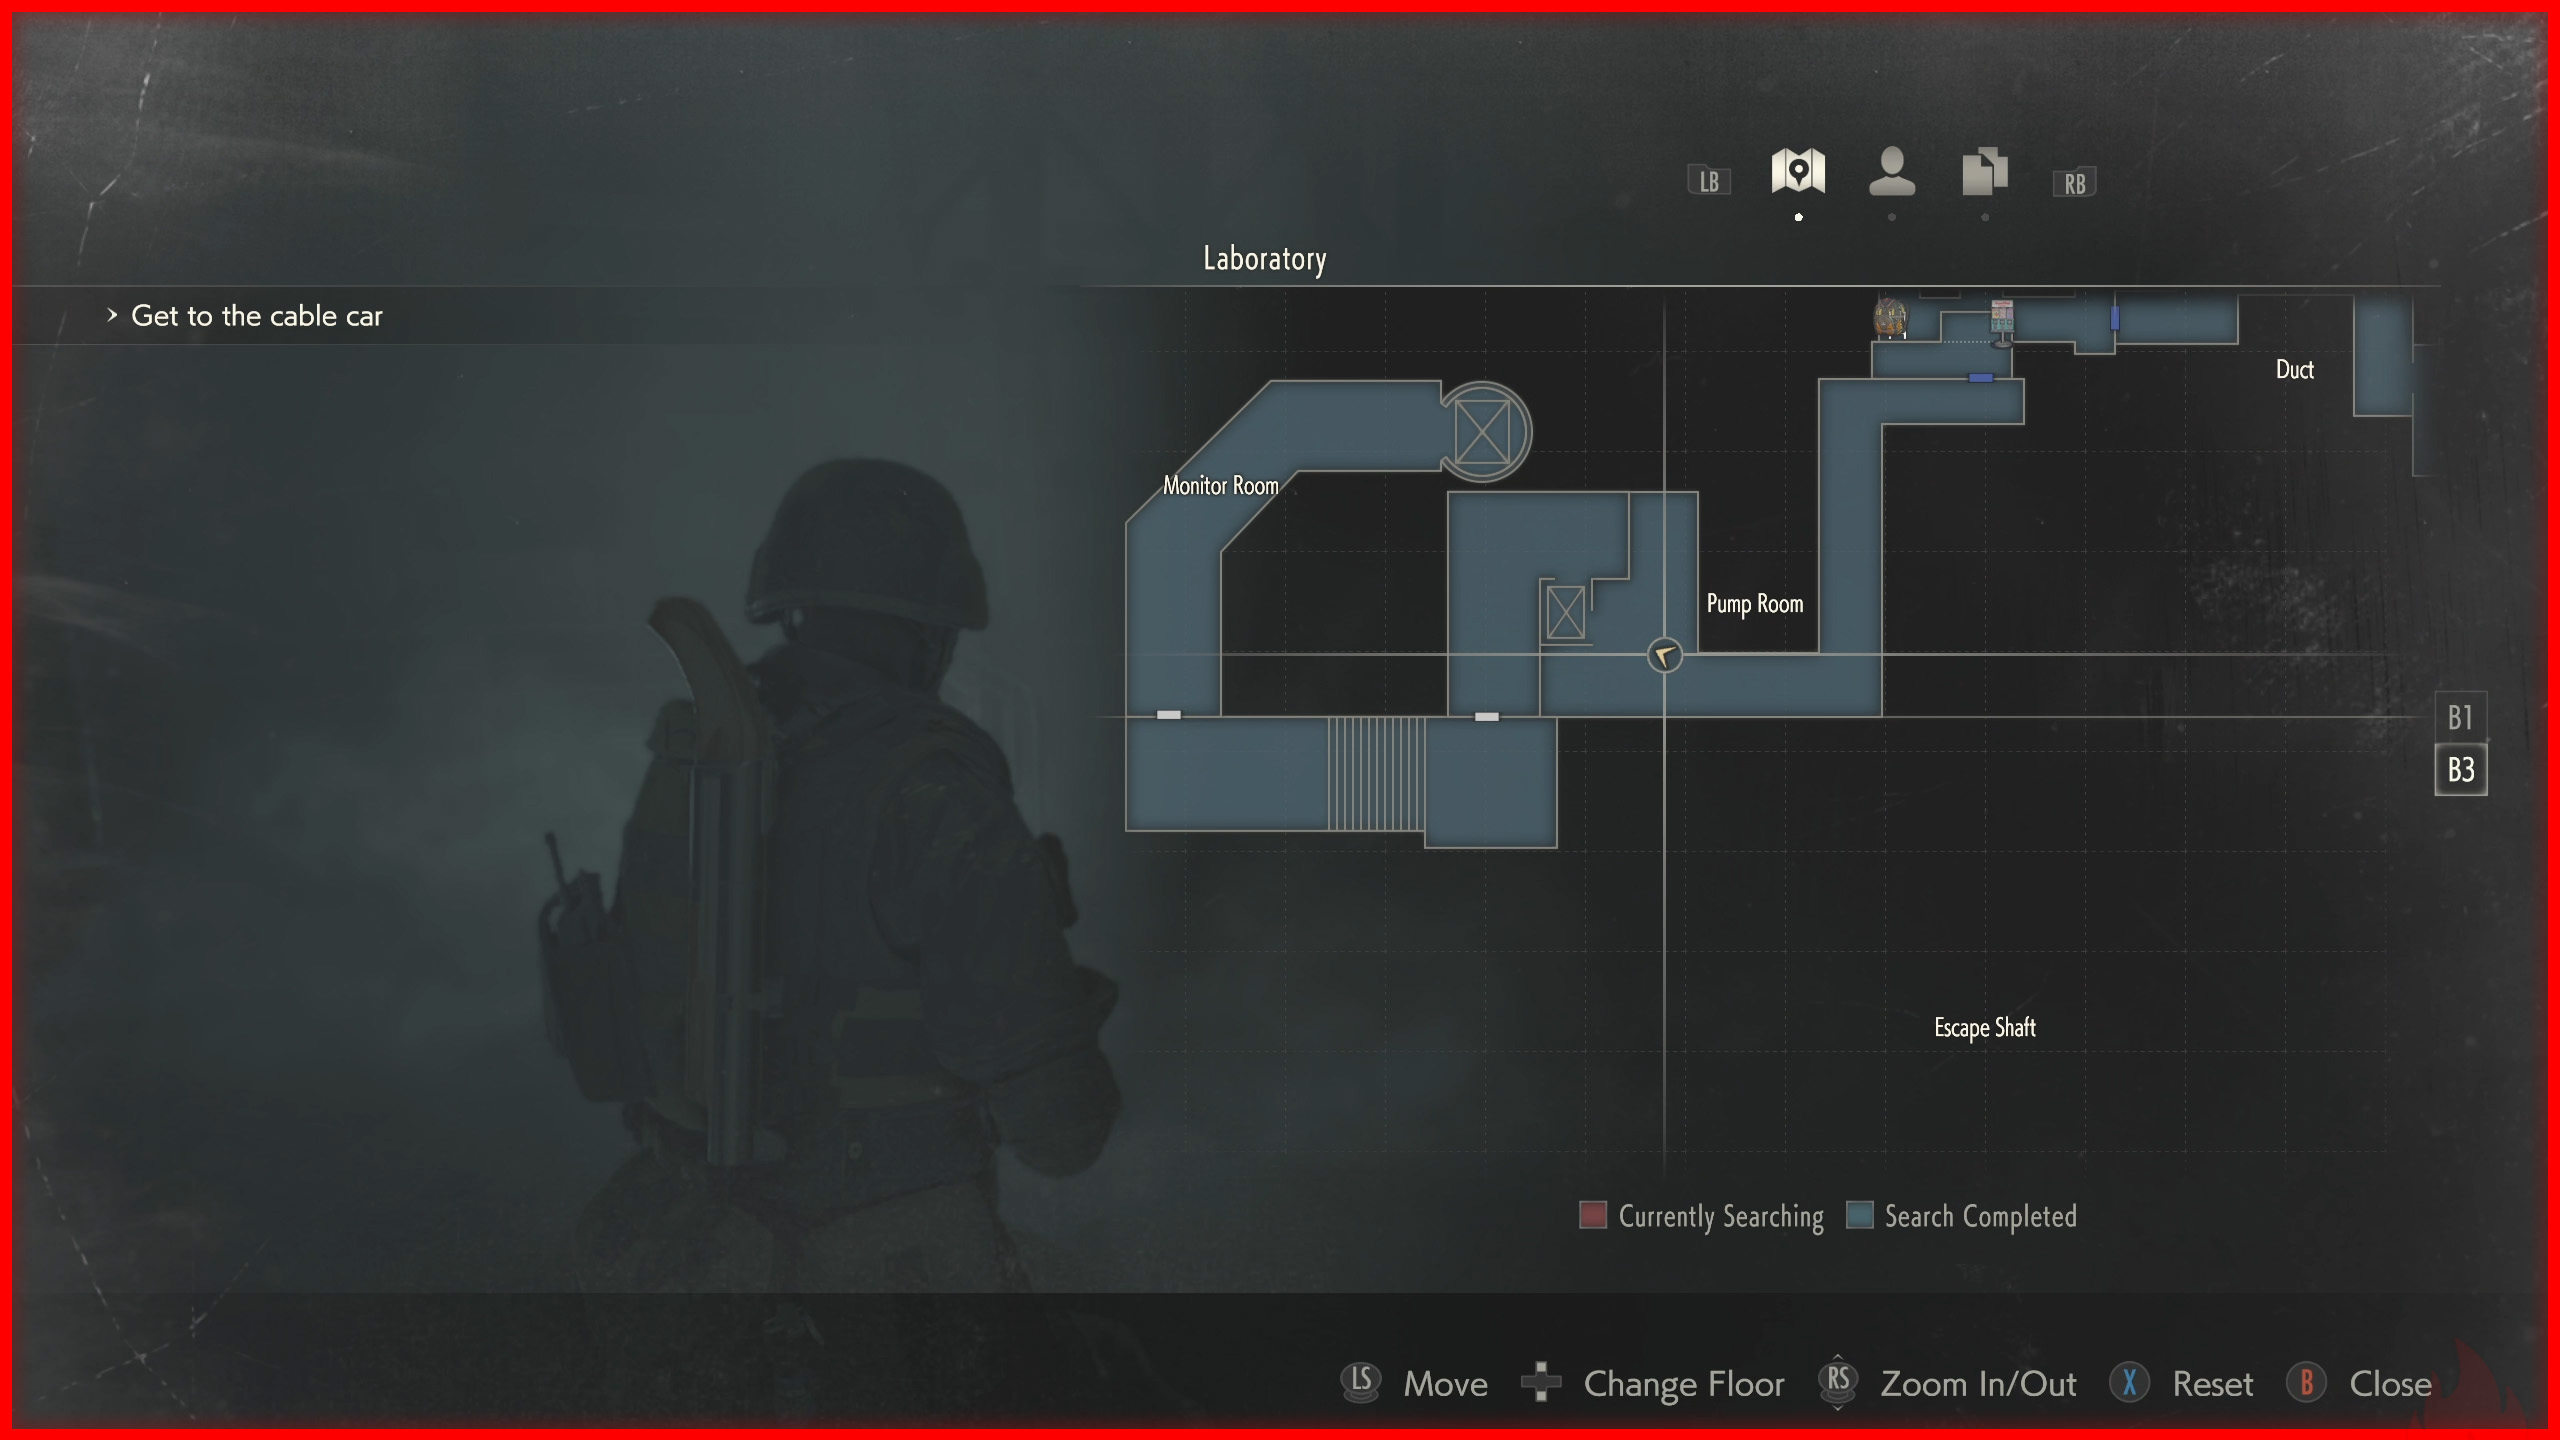
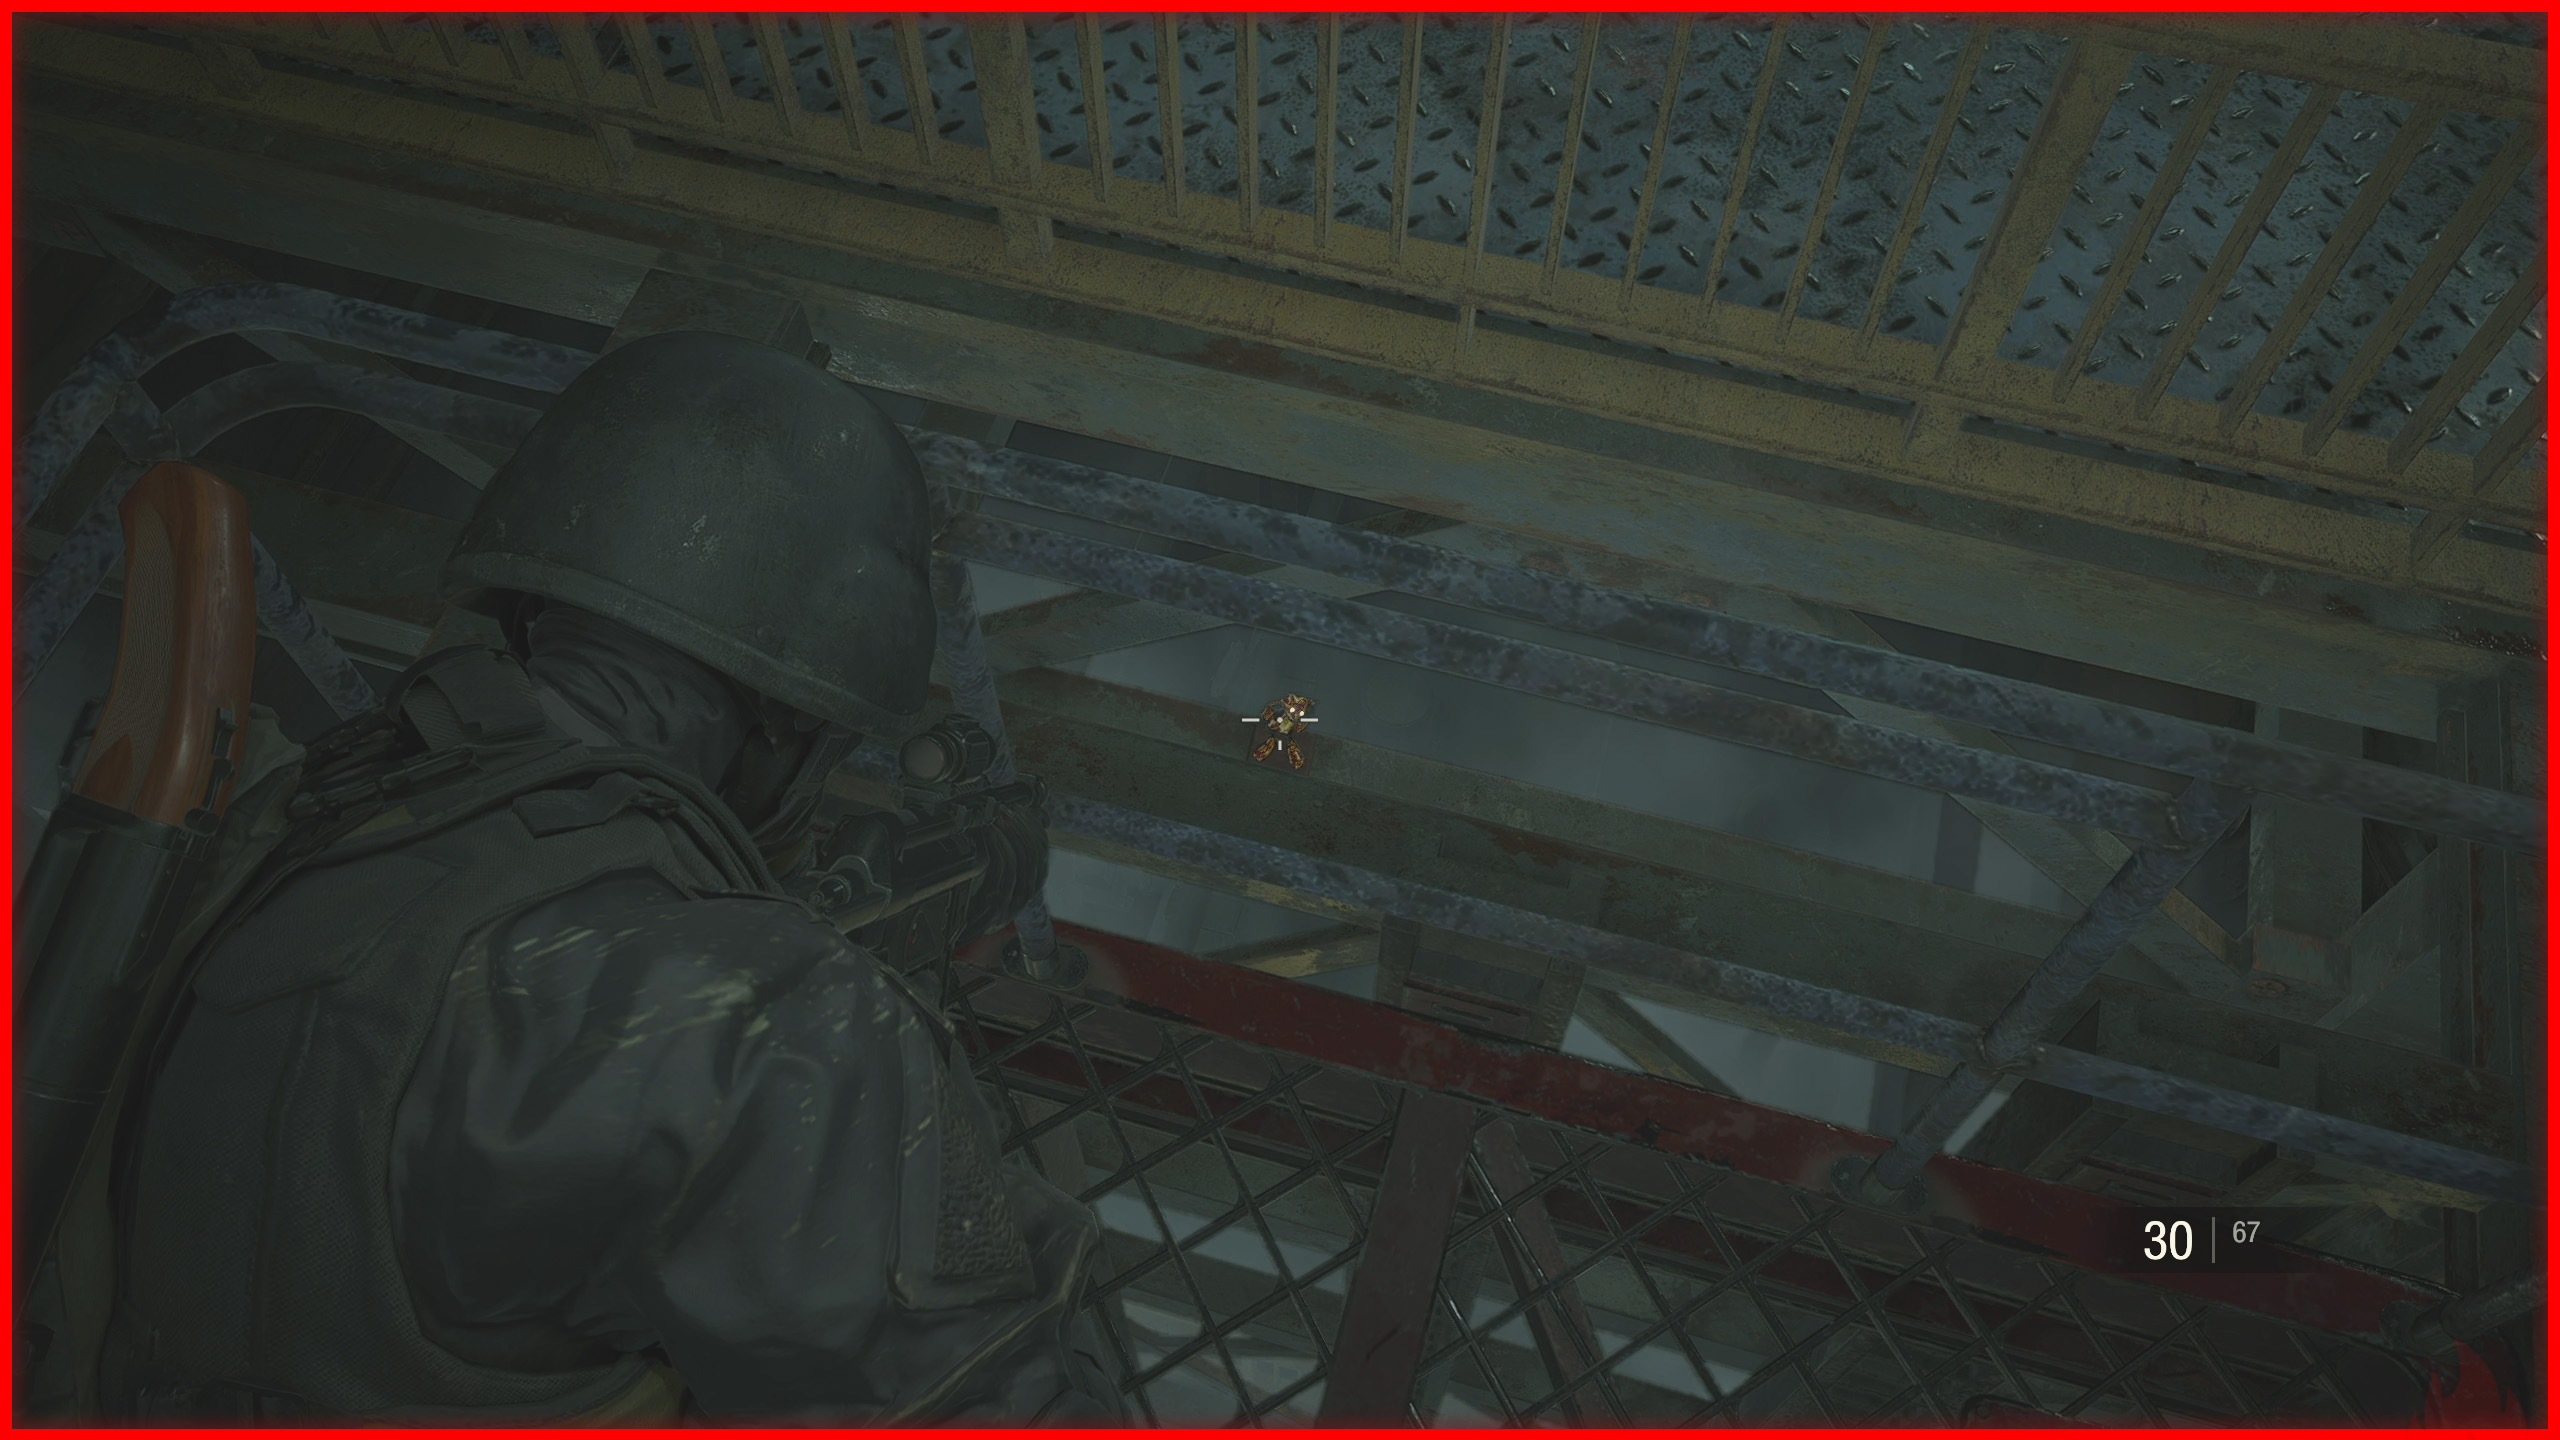
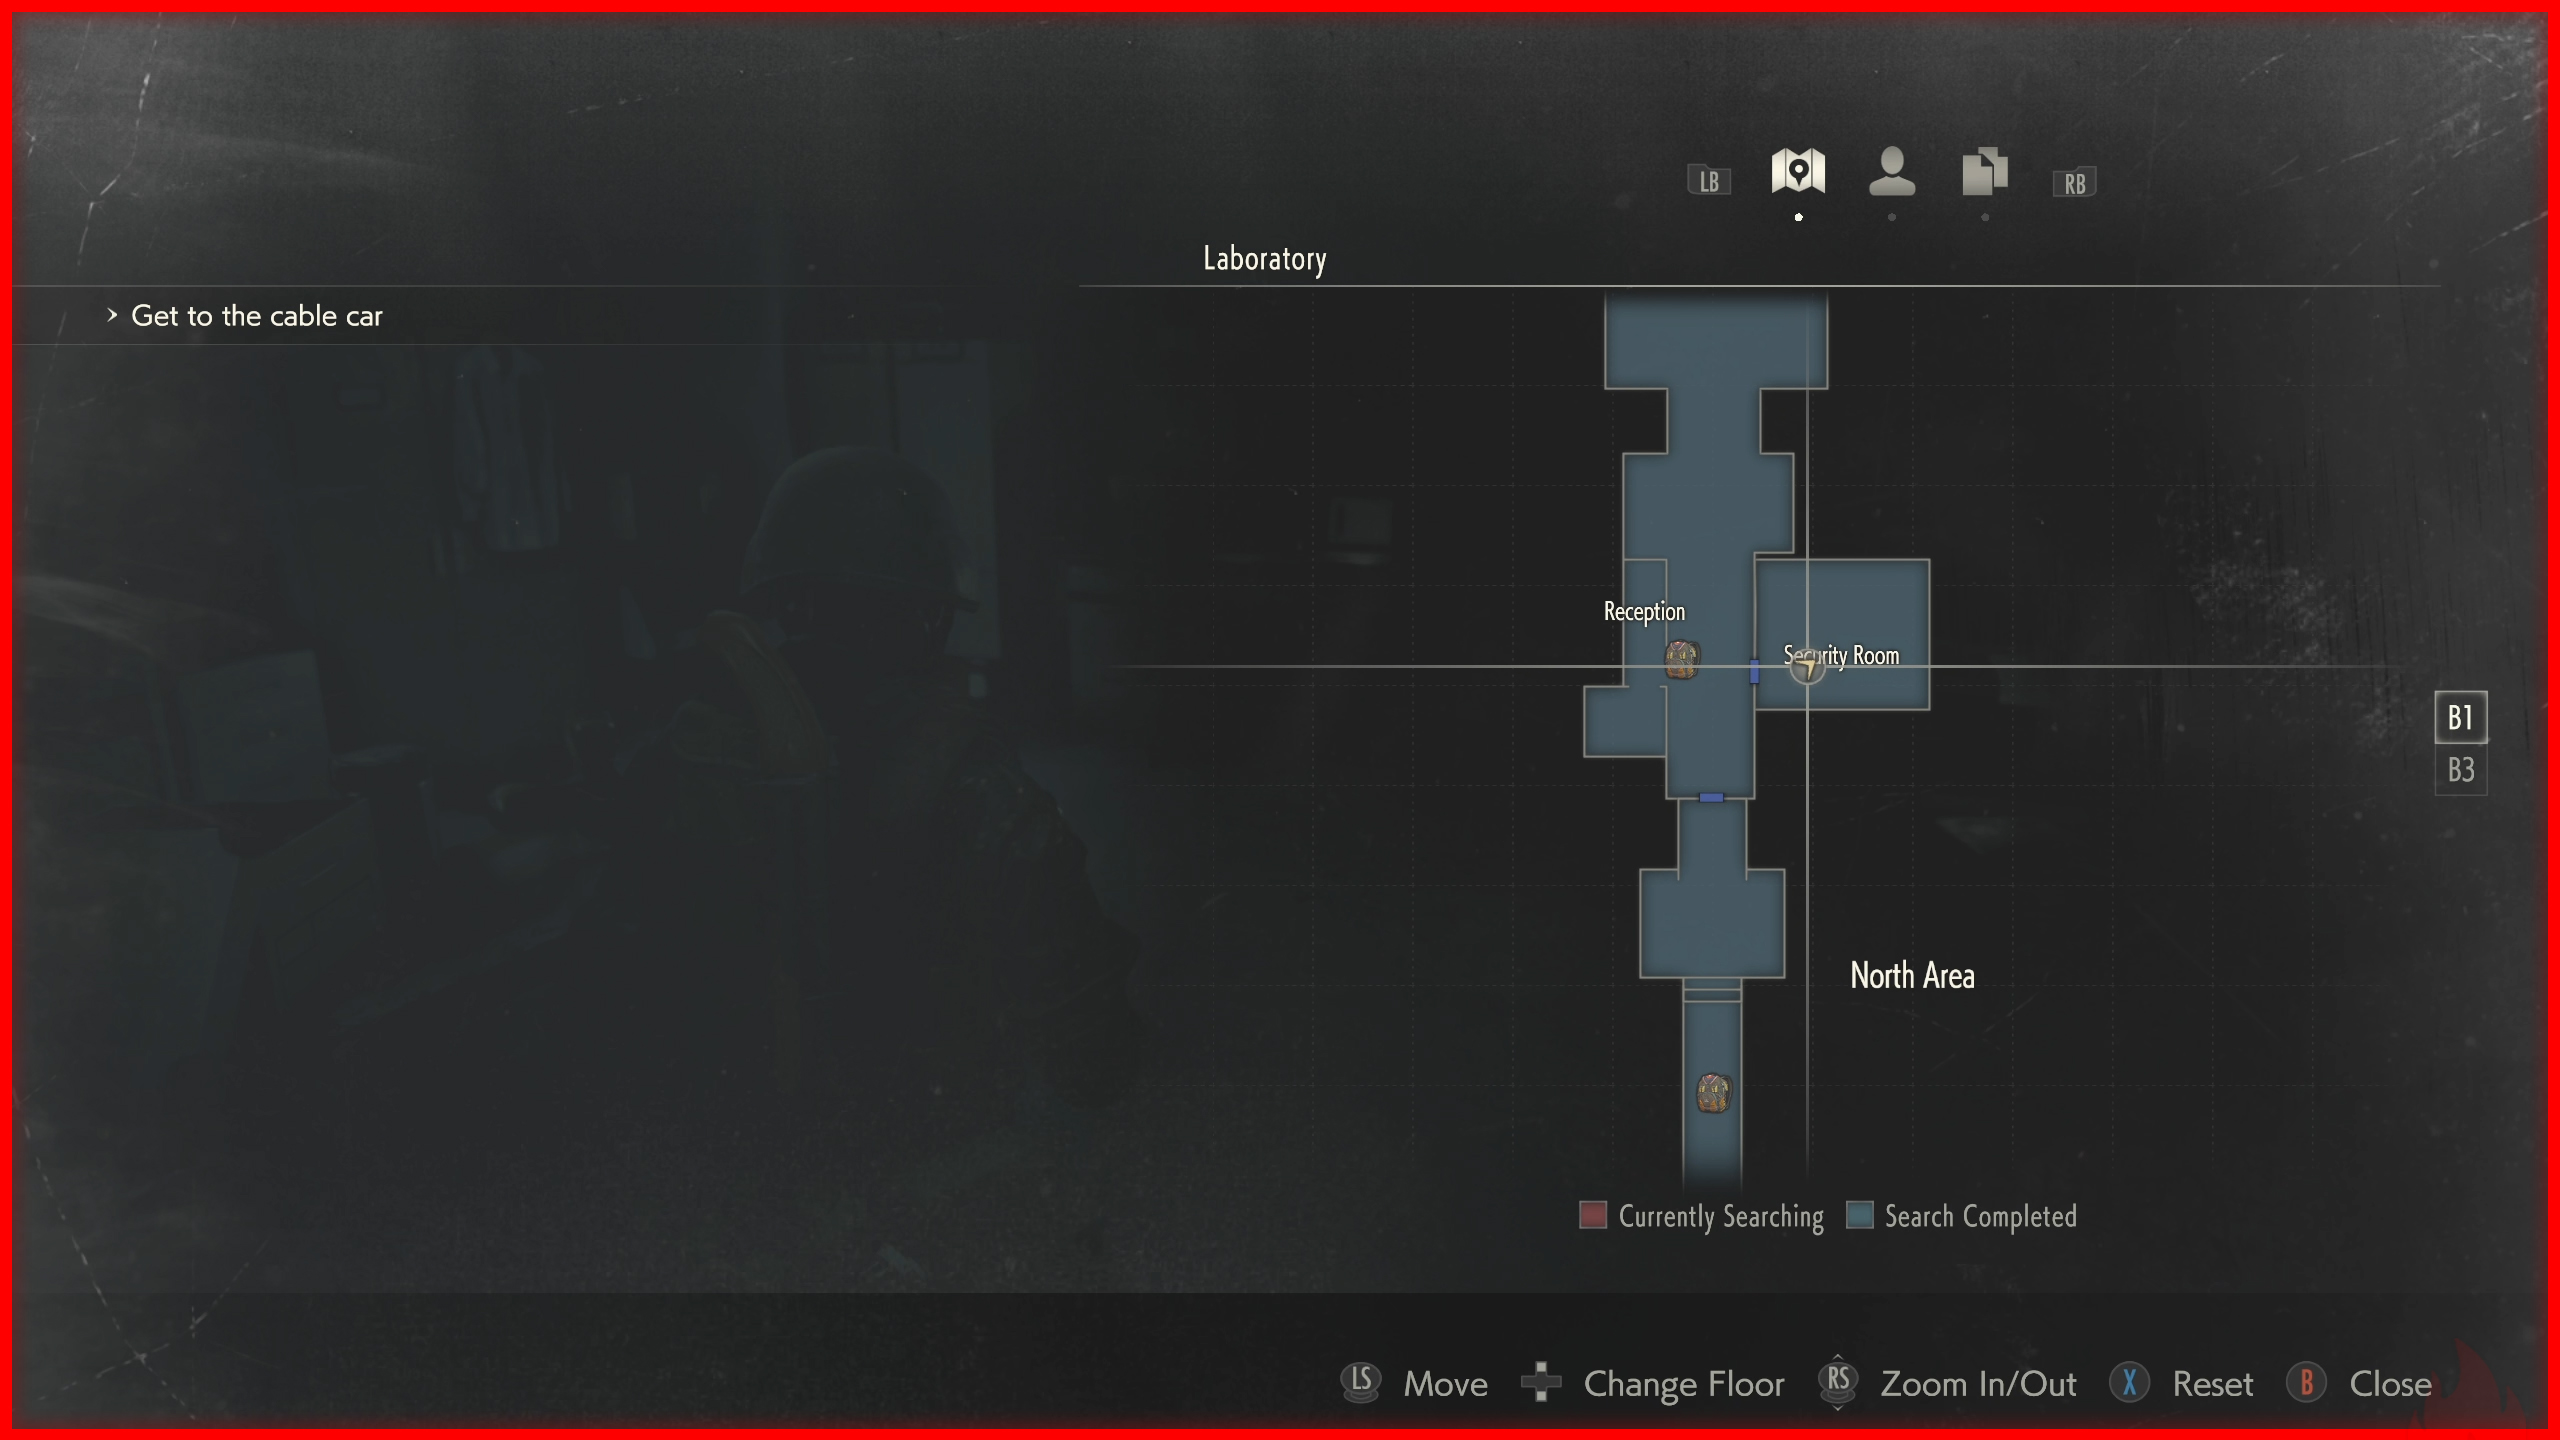
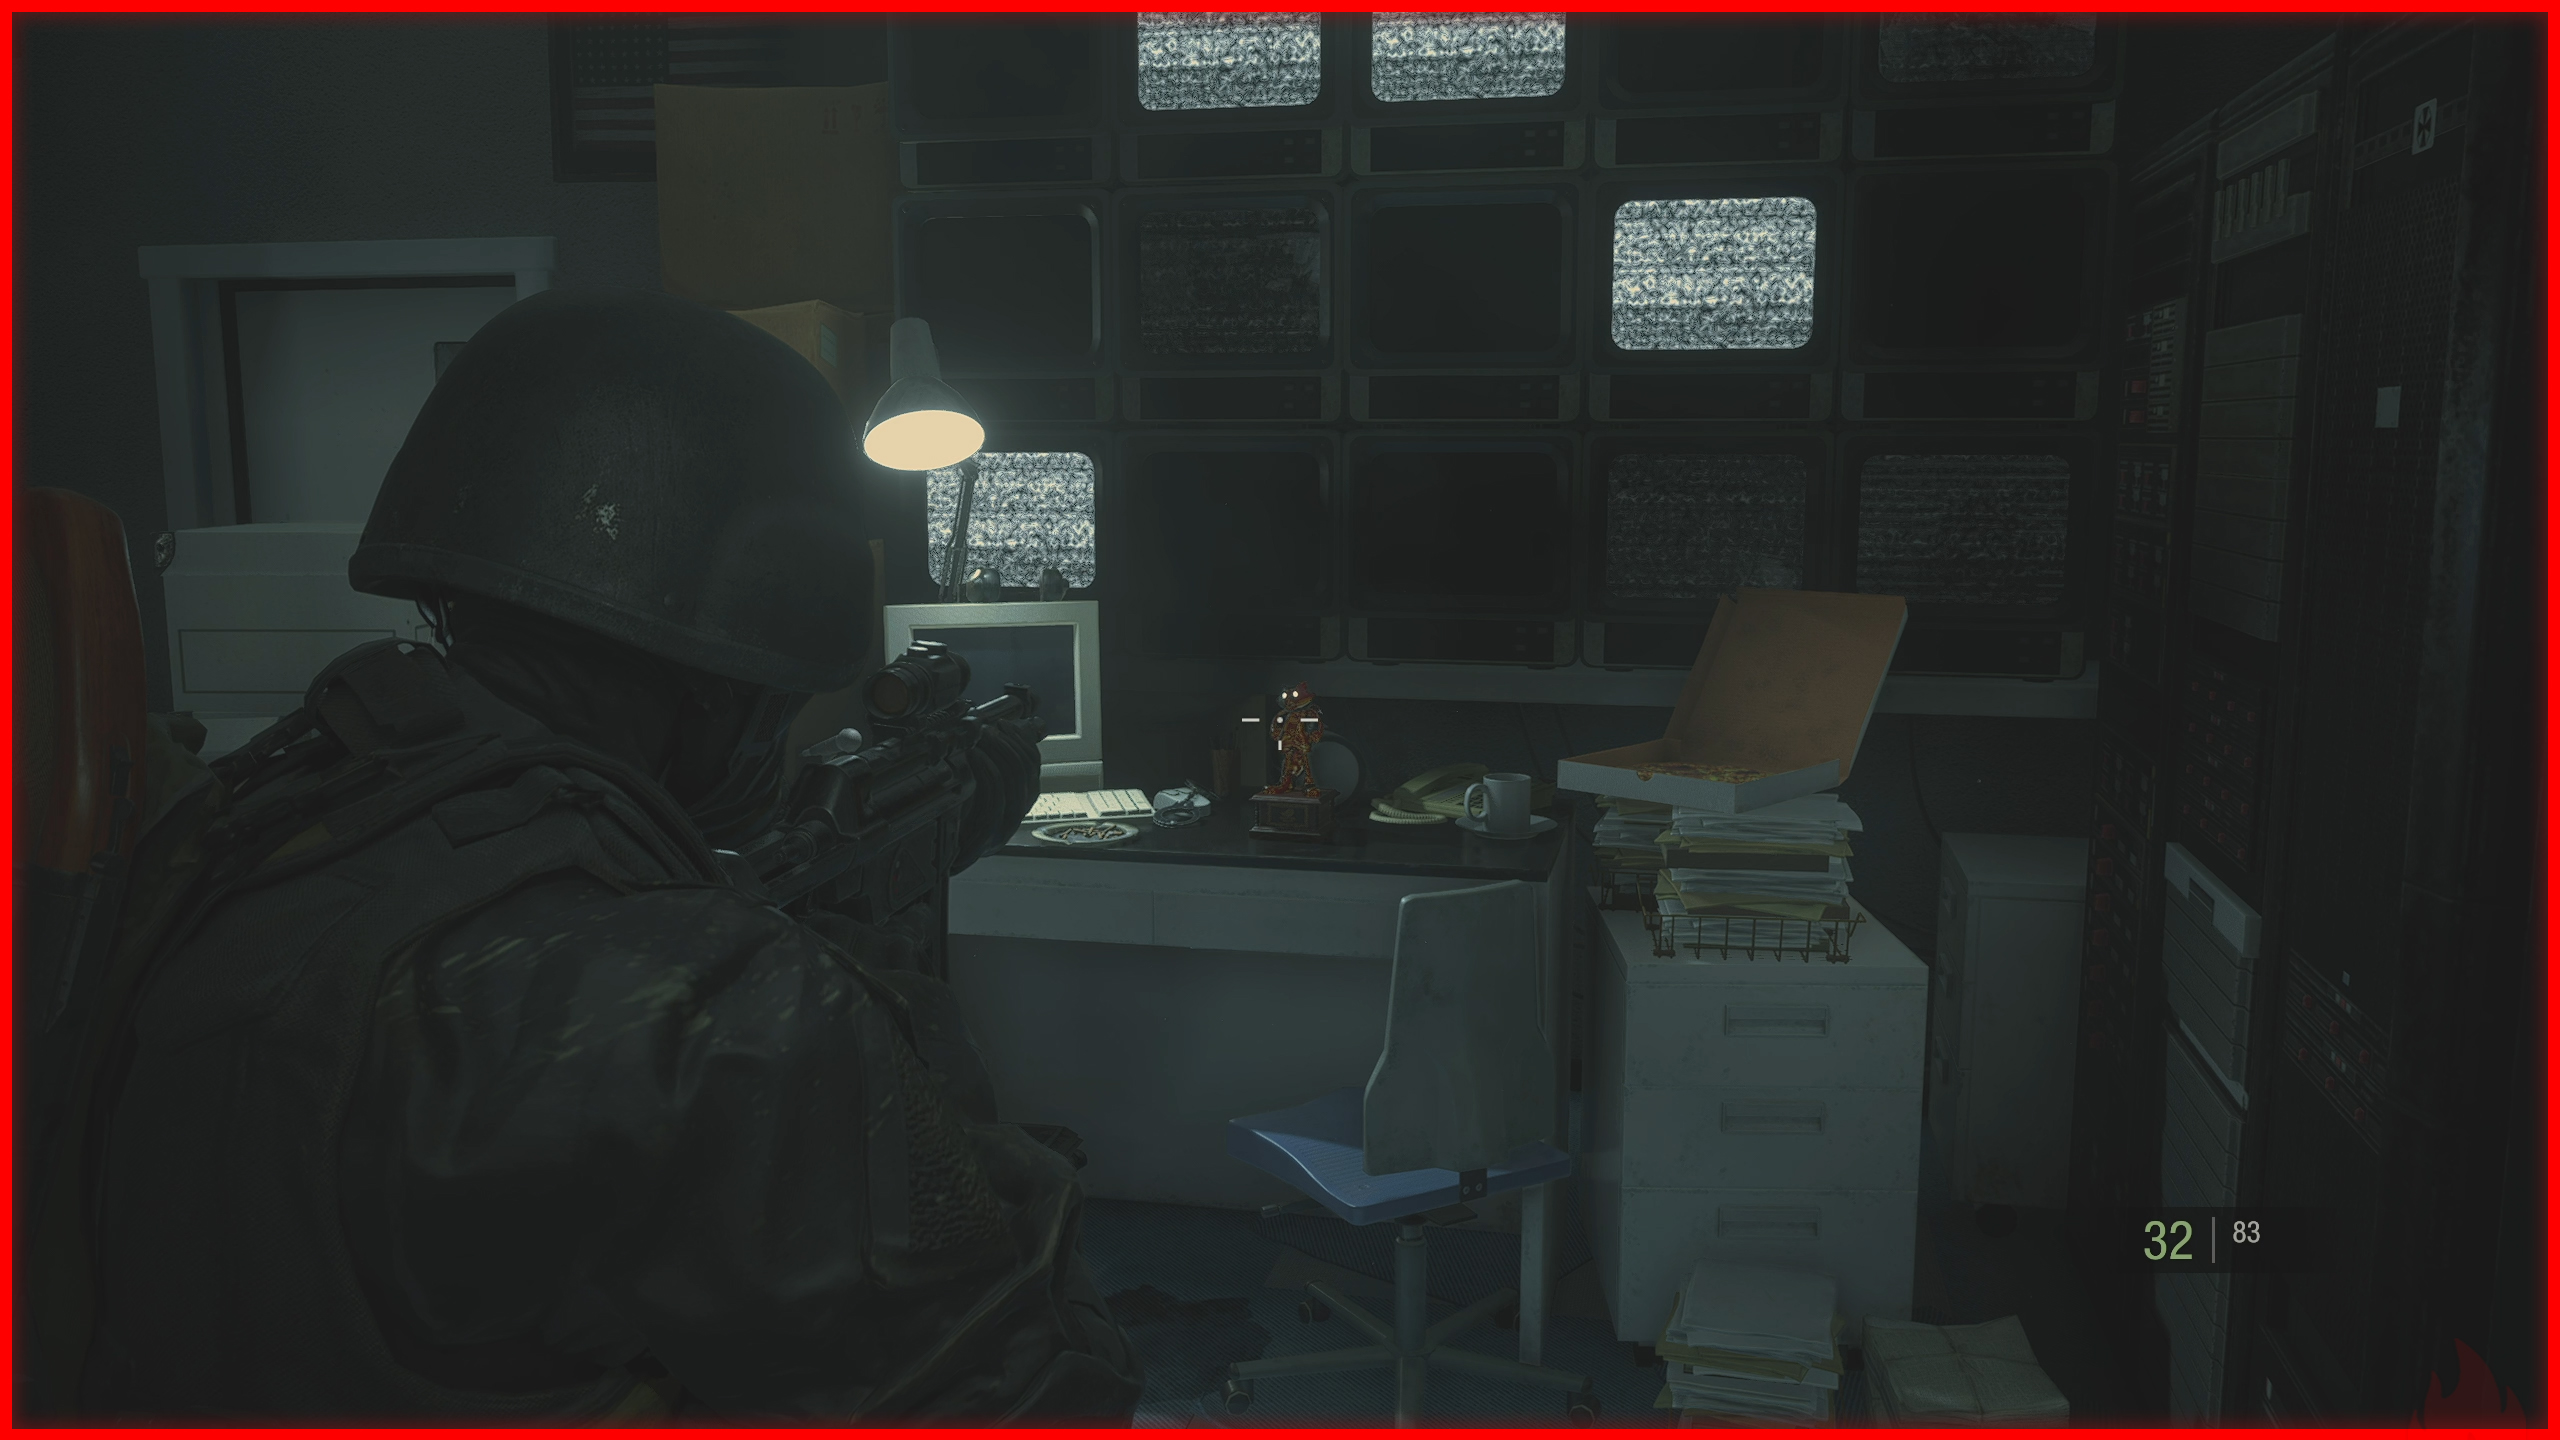
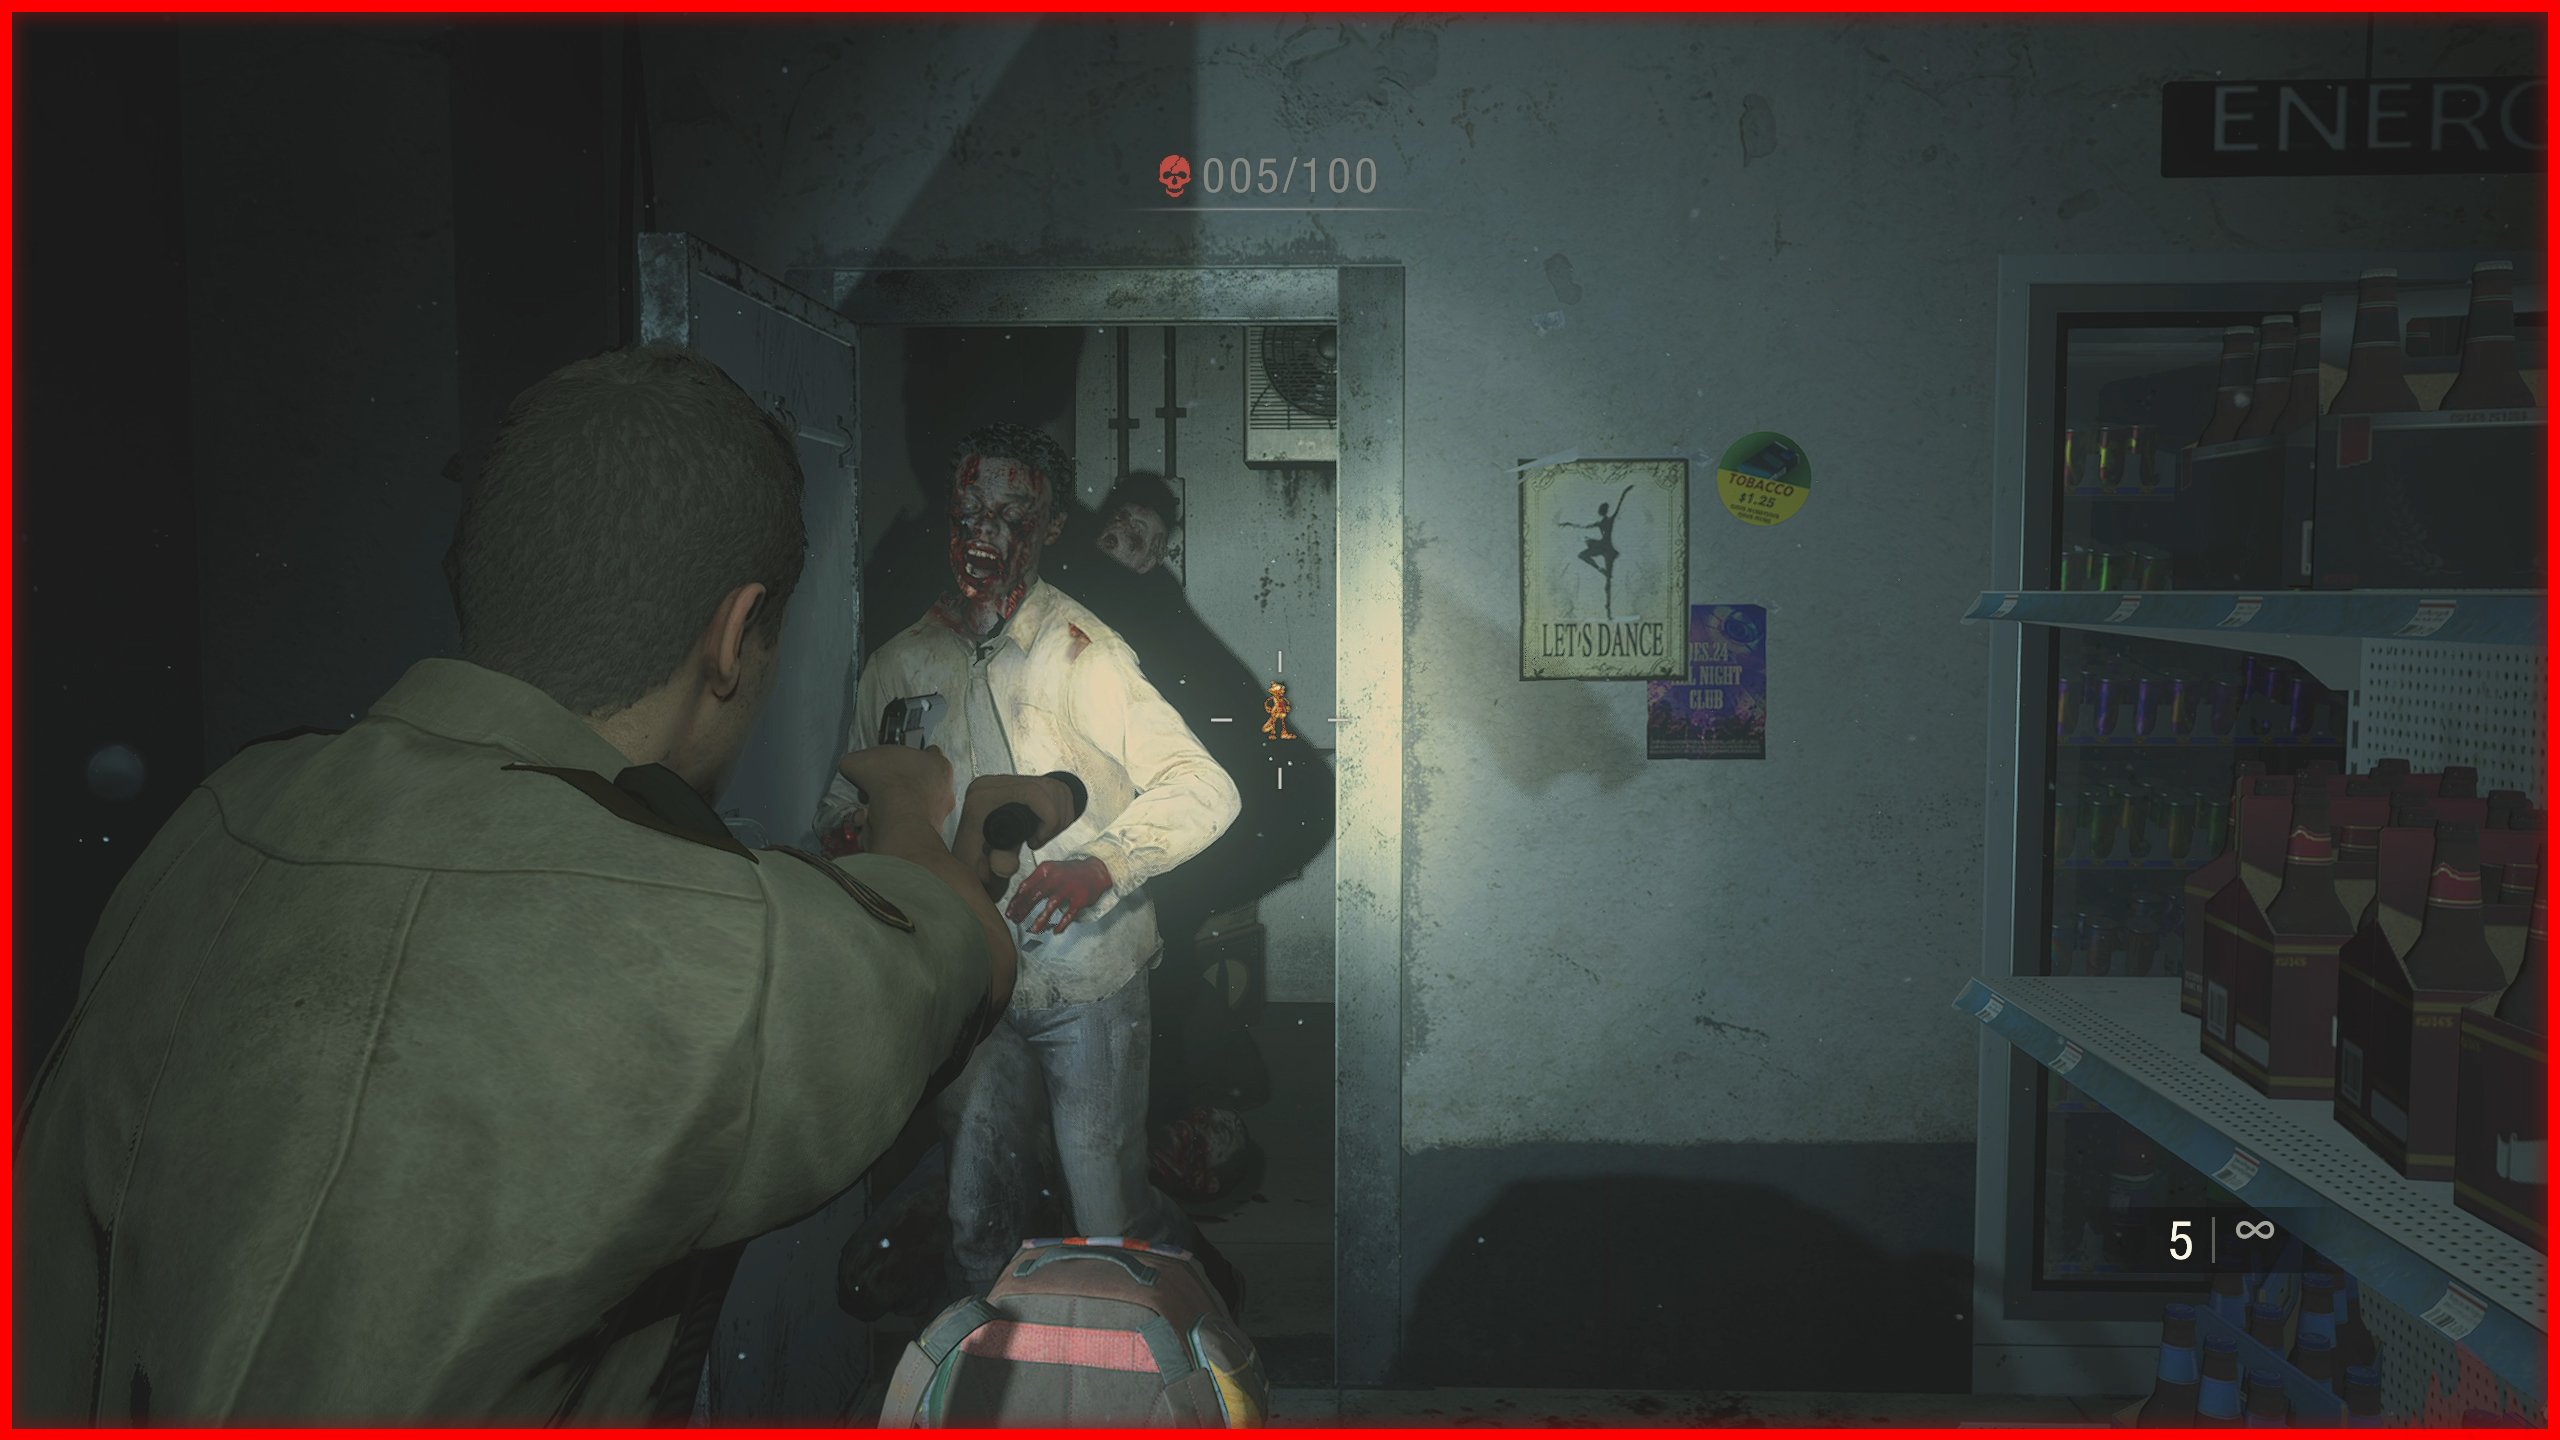
Hell of a Sheriff
 In this extra mode, you must defeat 100 enemies. It may seem difficult at first, but with practice you can do it. Below are some tips that can help:
- Use only your handgun to kill regular zombies.
- Don’t shoot explosive tanks immediately. Kill the zombie carrying them and the tank will drop on the ground, save them for stronger enemies.
- Use the middle corridor to maneuver around zombies, and avoid getting cornered.
Puzzle Solutions
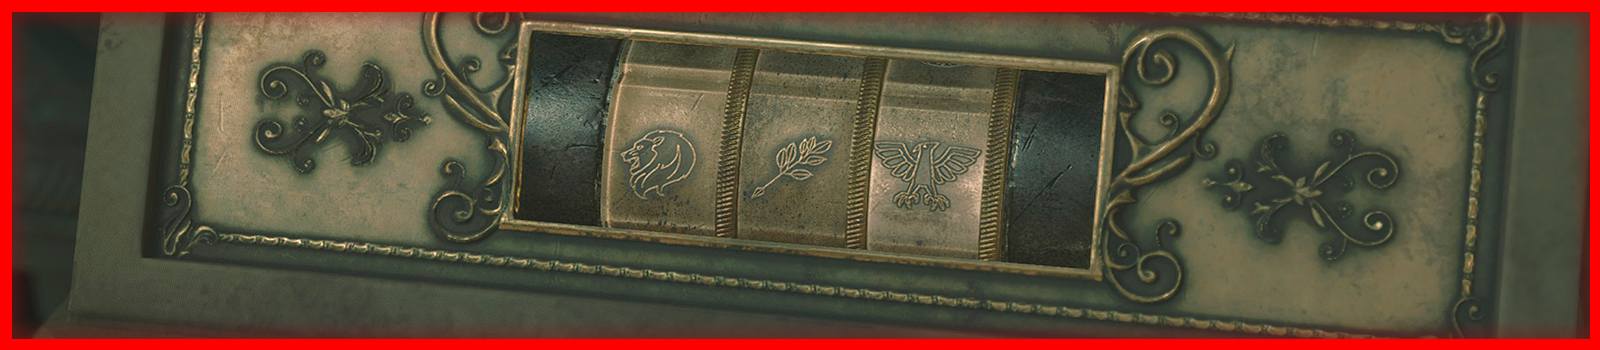 Unicorn Statue: Fish, Scorpion, Aquarius
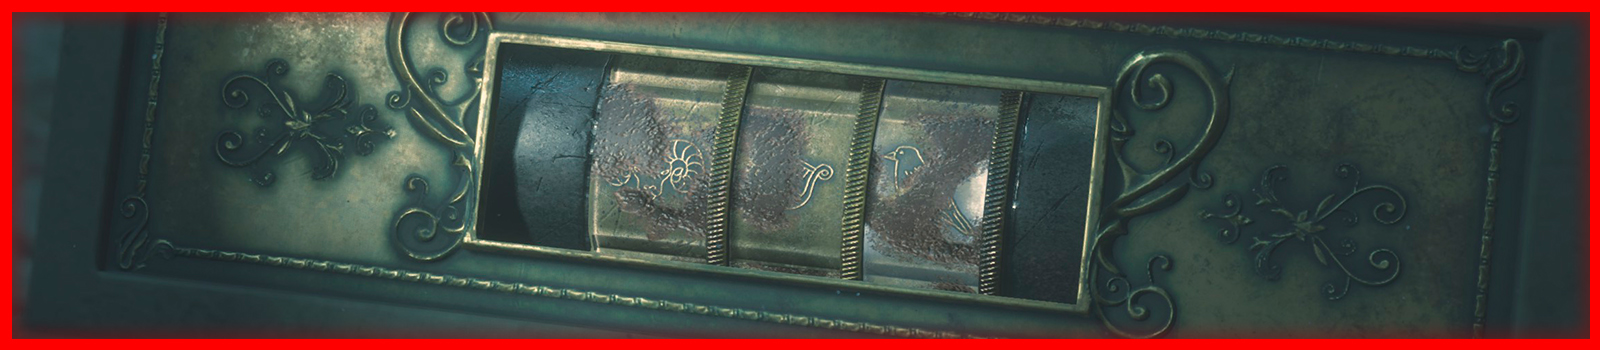
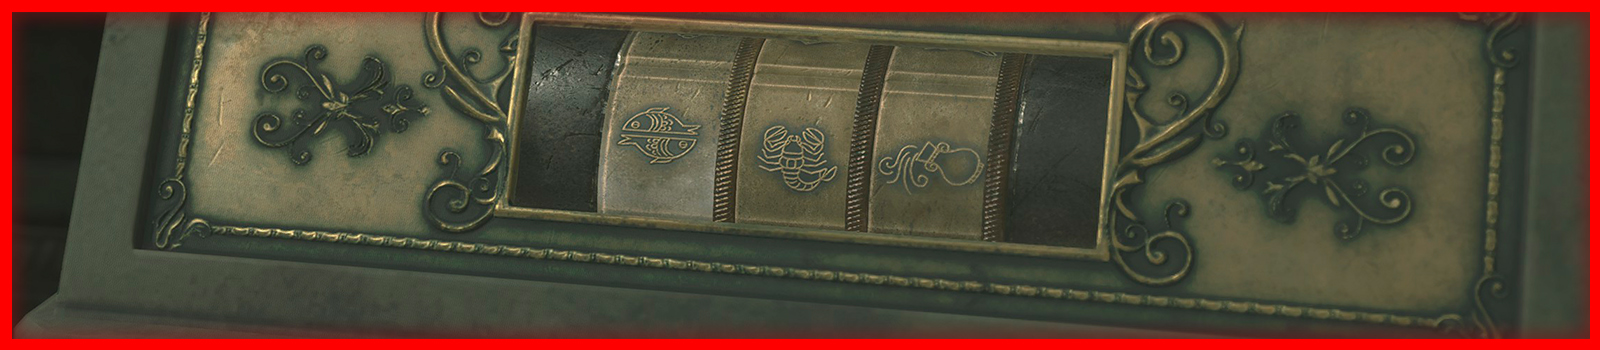 Maiden Statue: Woman, Bow, Snake
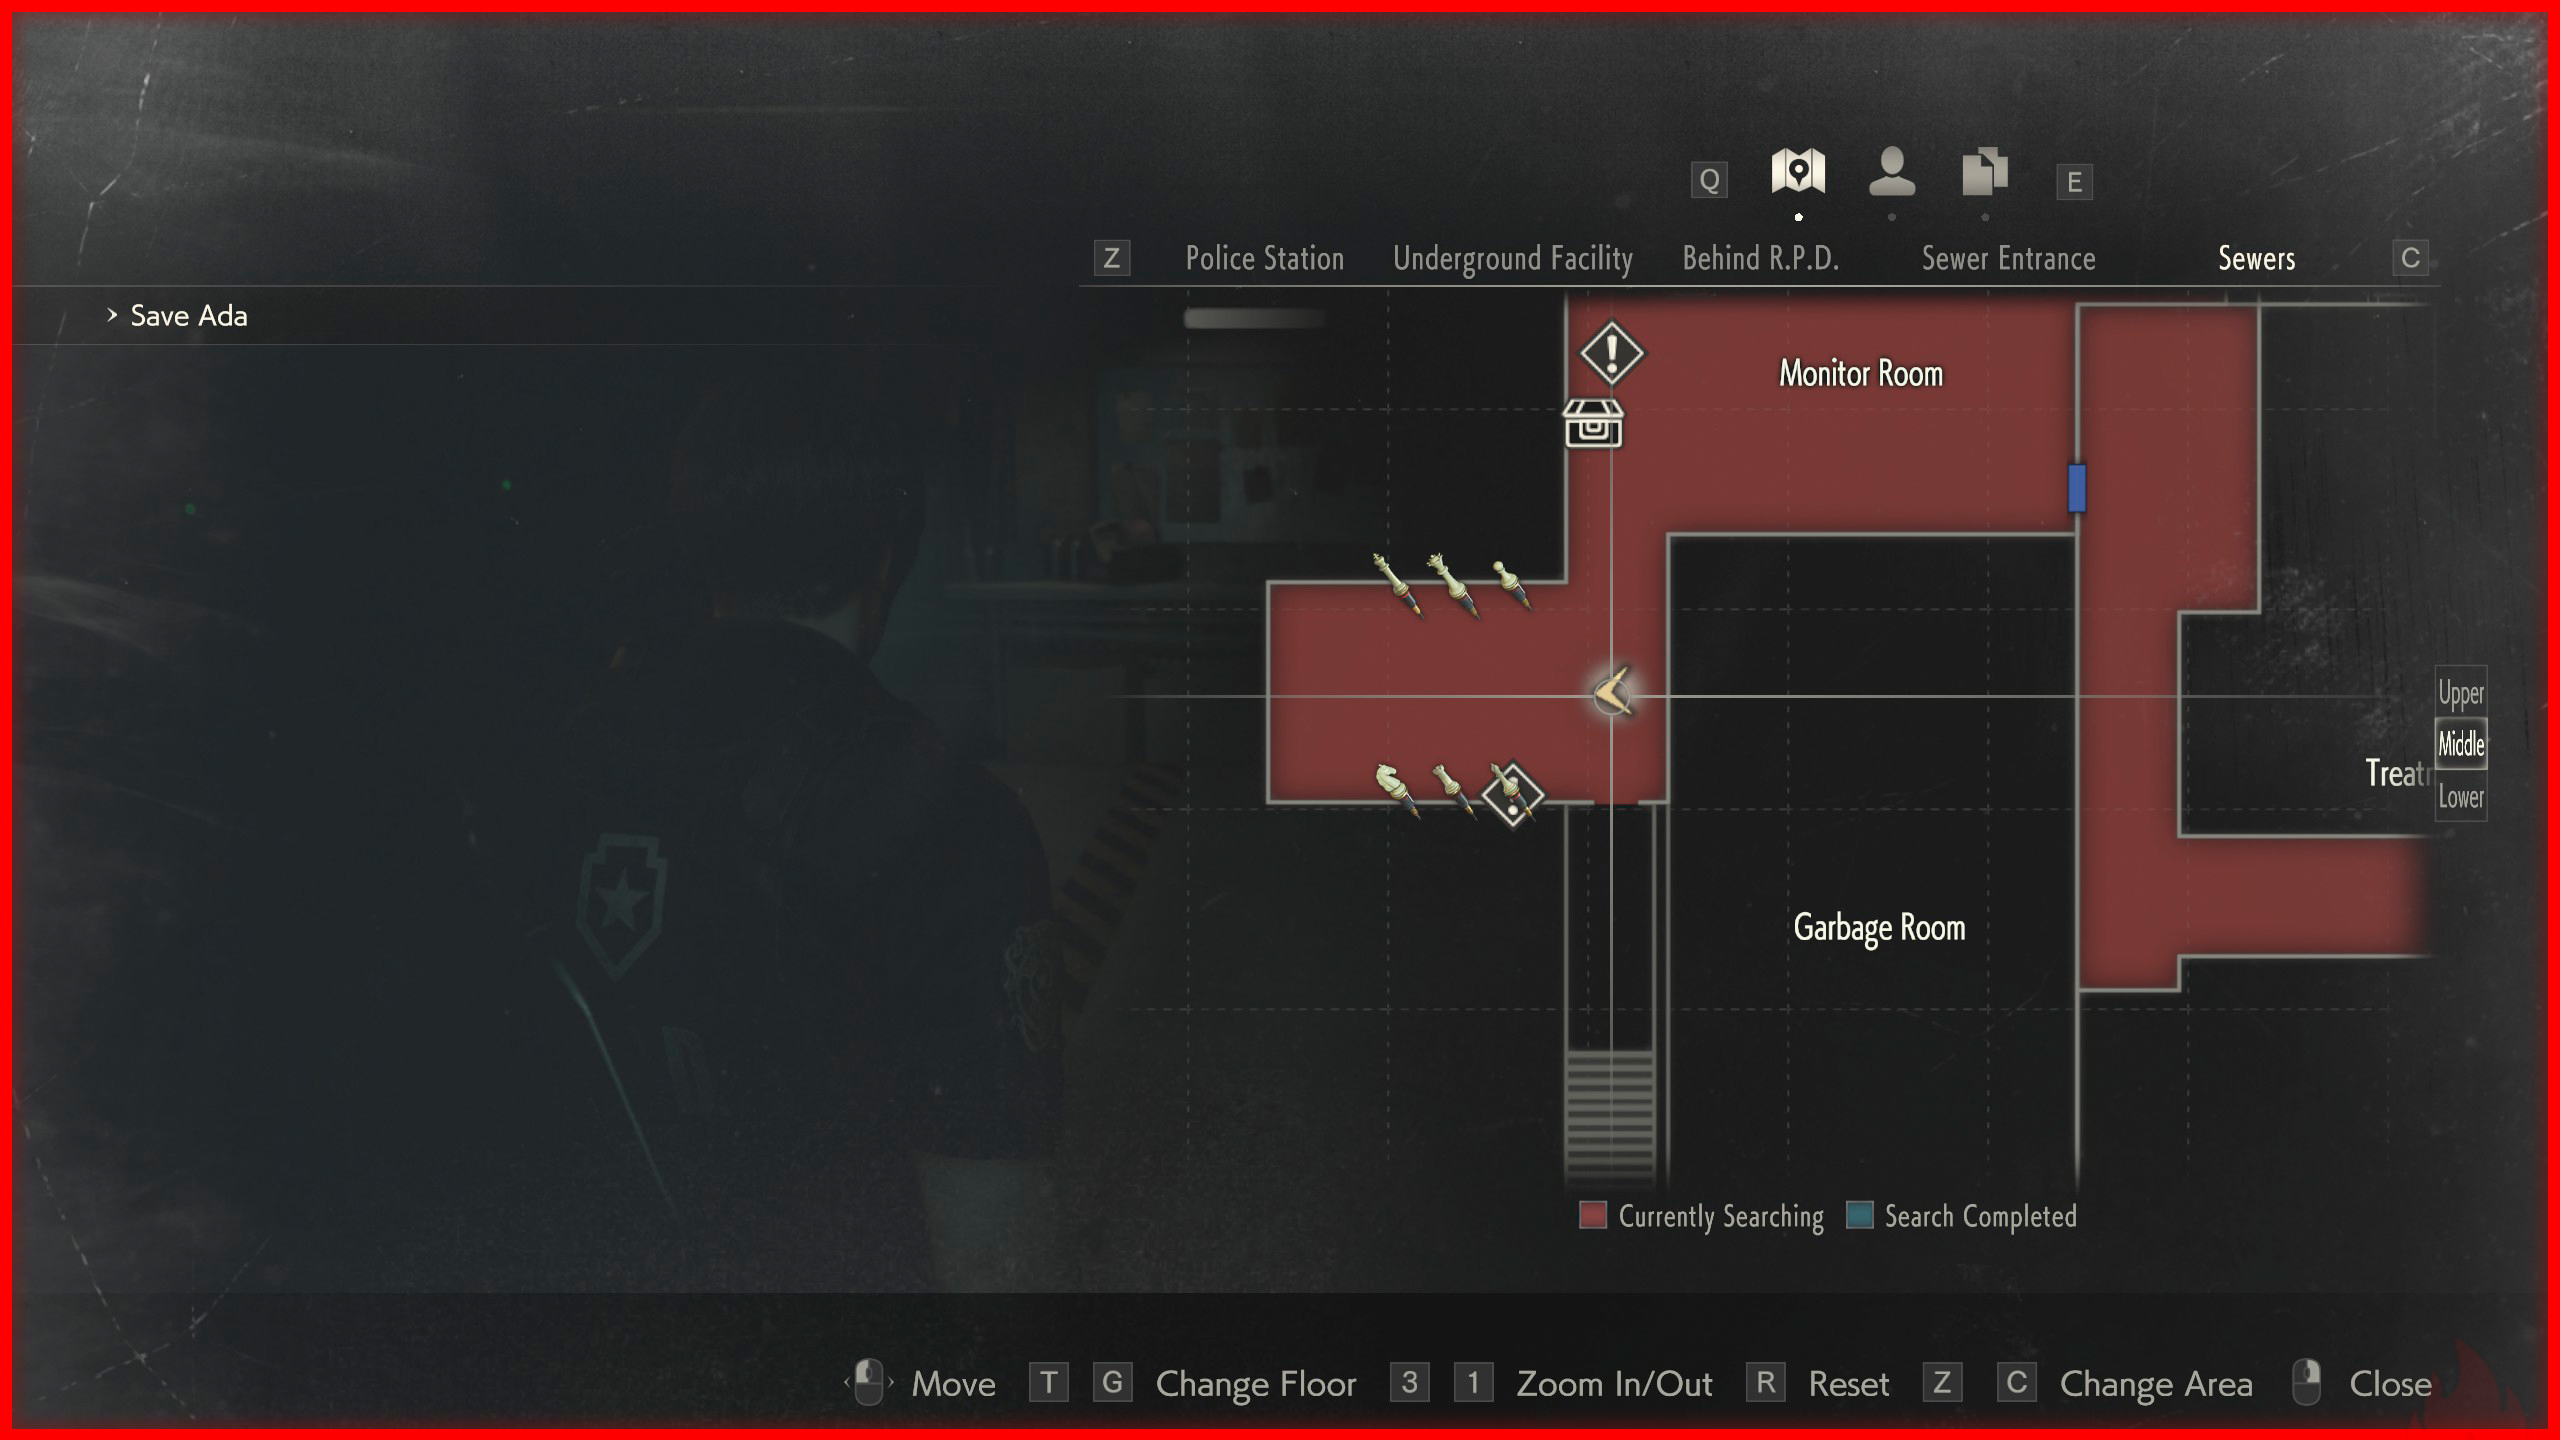
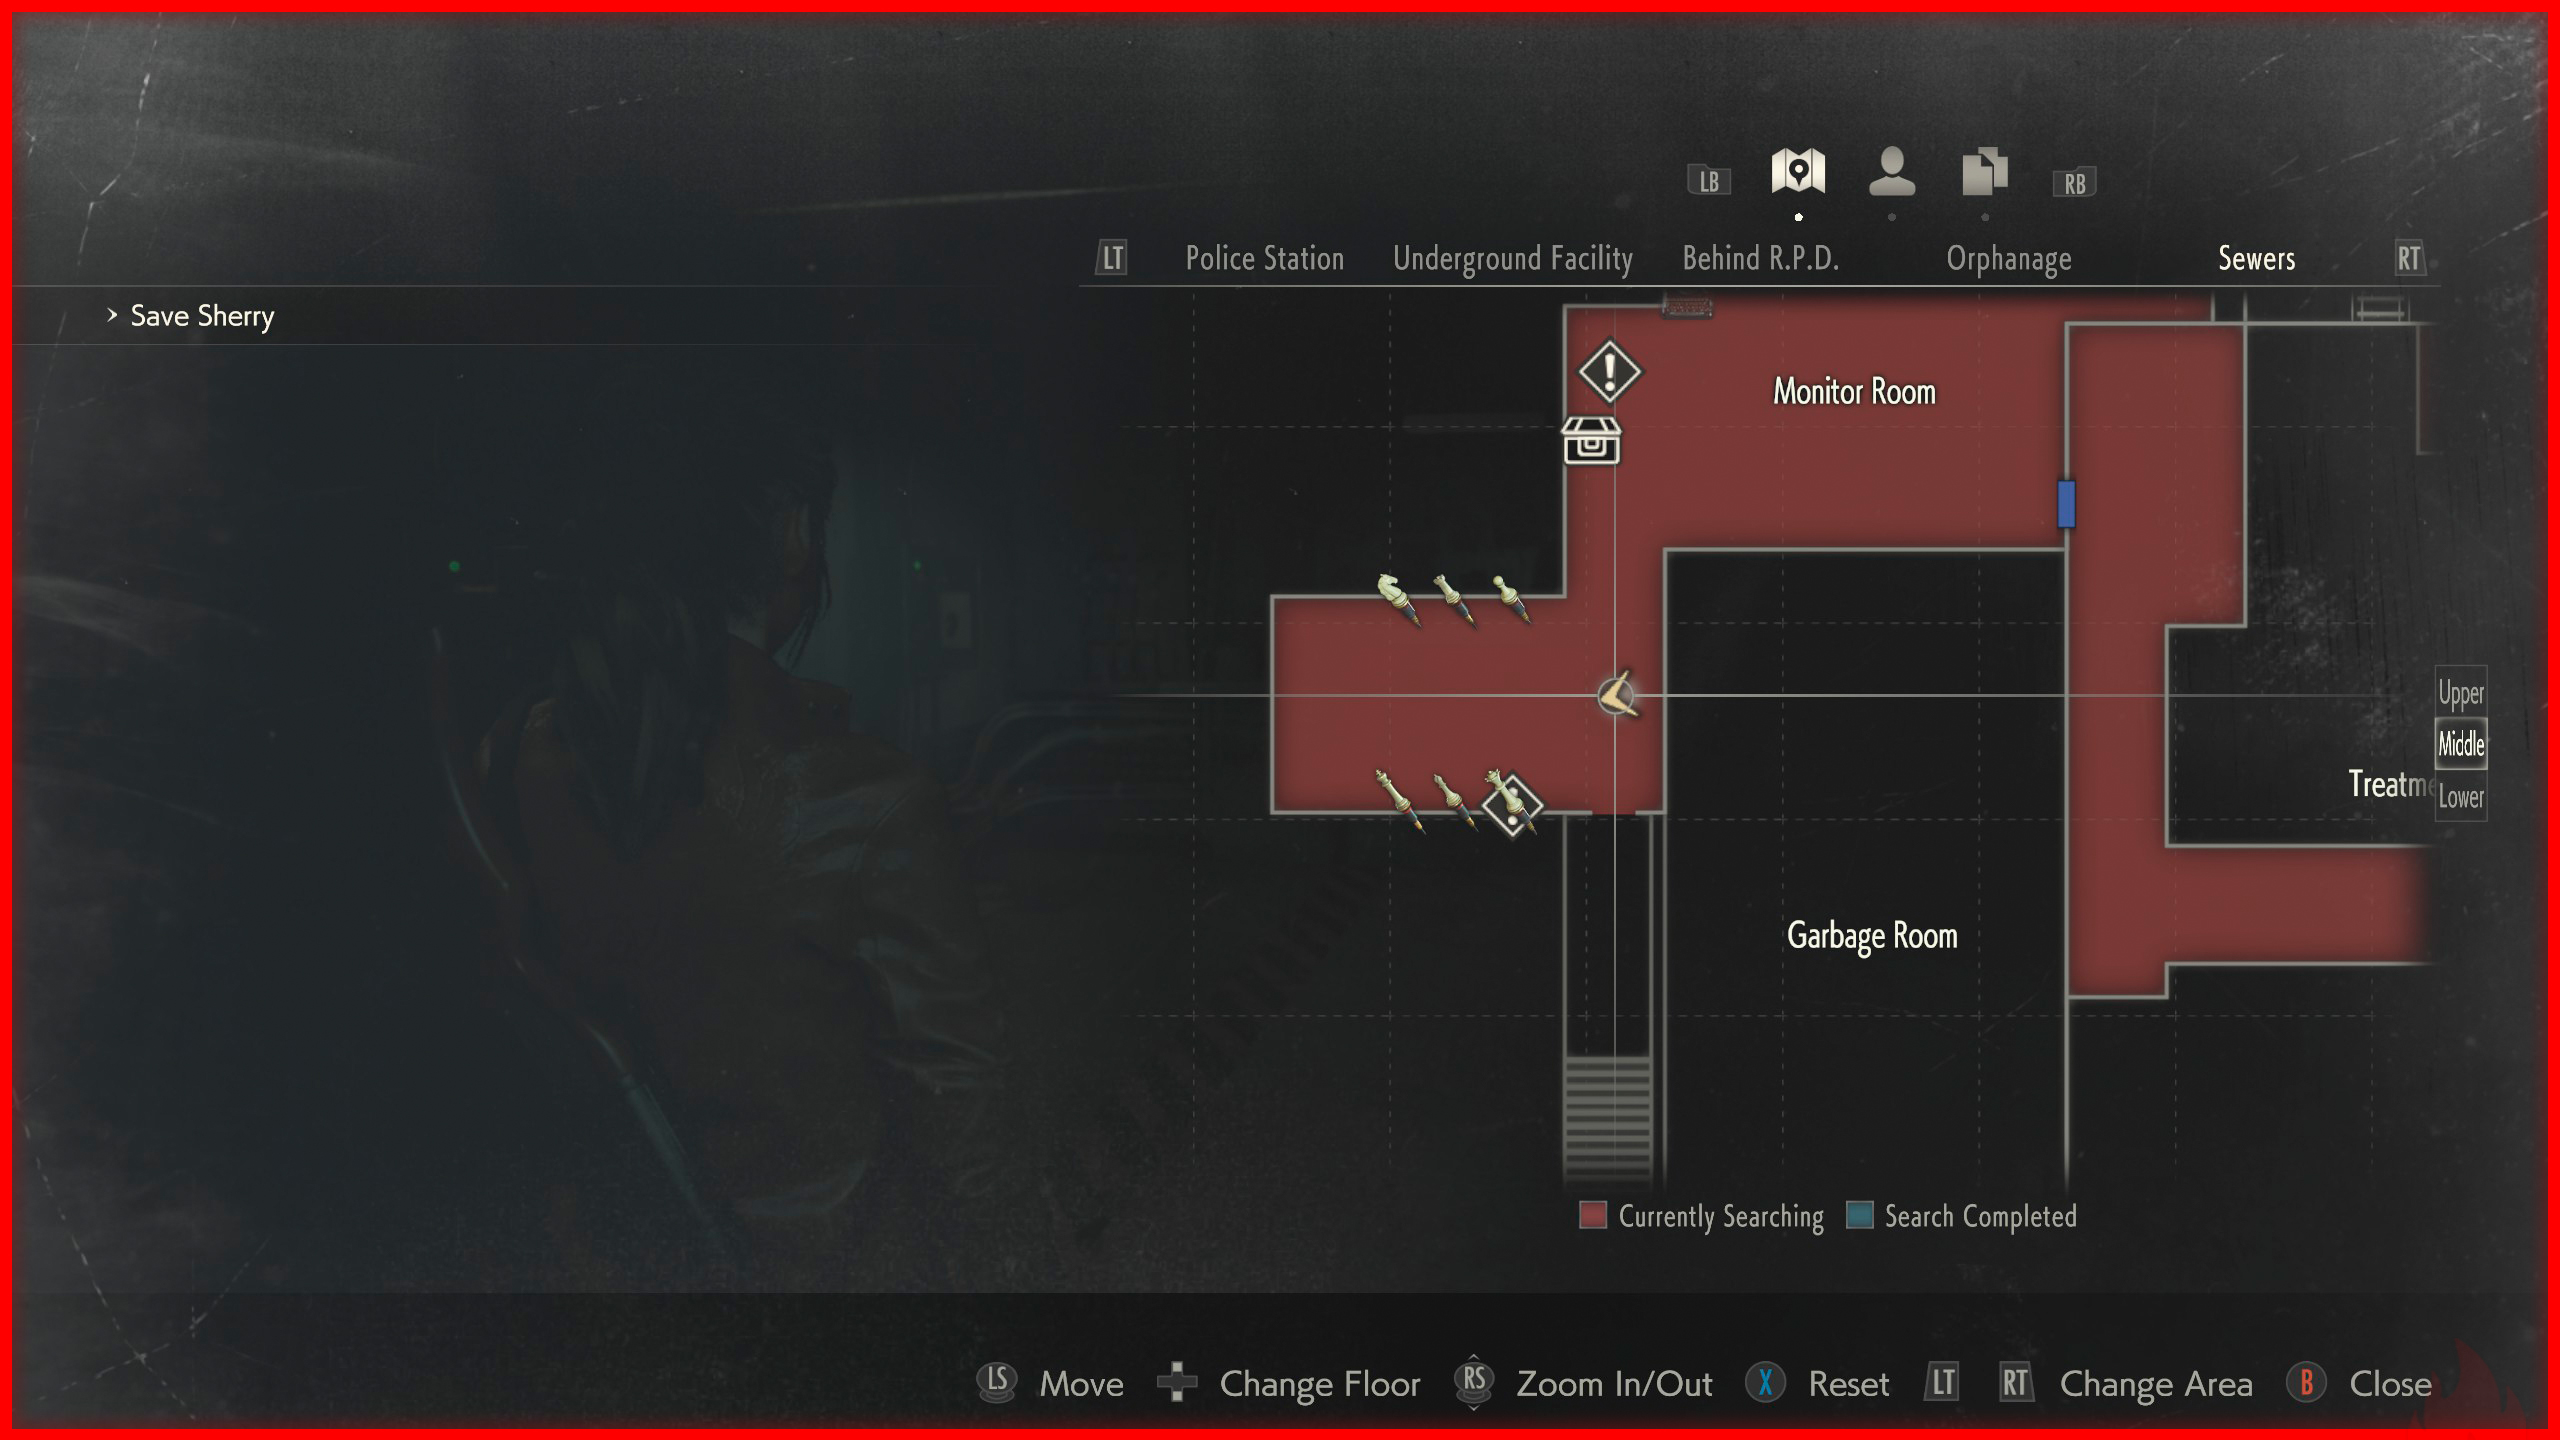
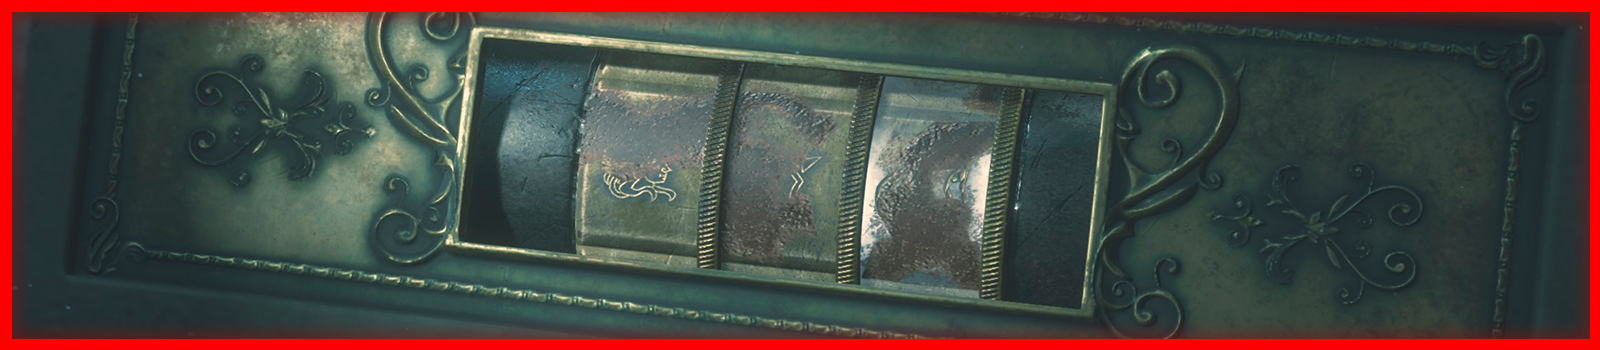 Chess Plug Puzzle: Right Wall = King, Queen, Pawn. | Left Wall = Knight, Rook, Bishop.
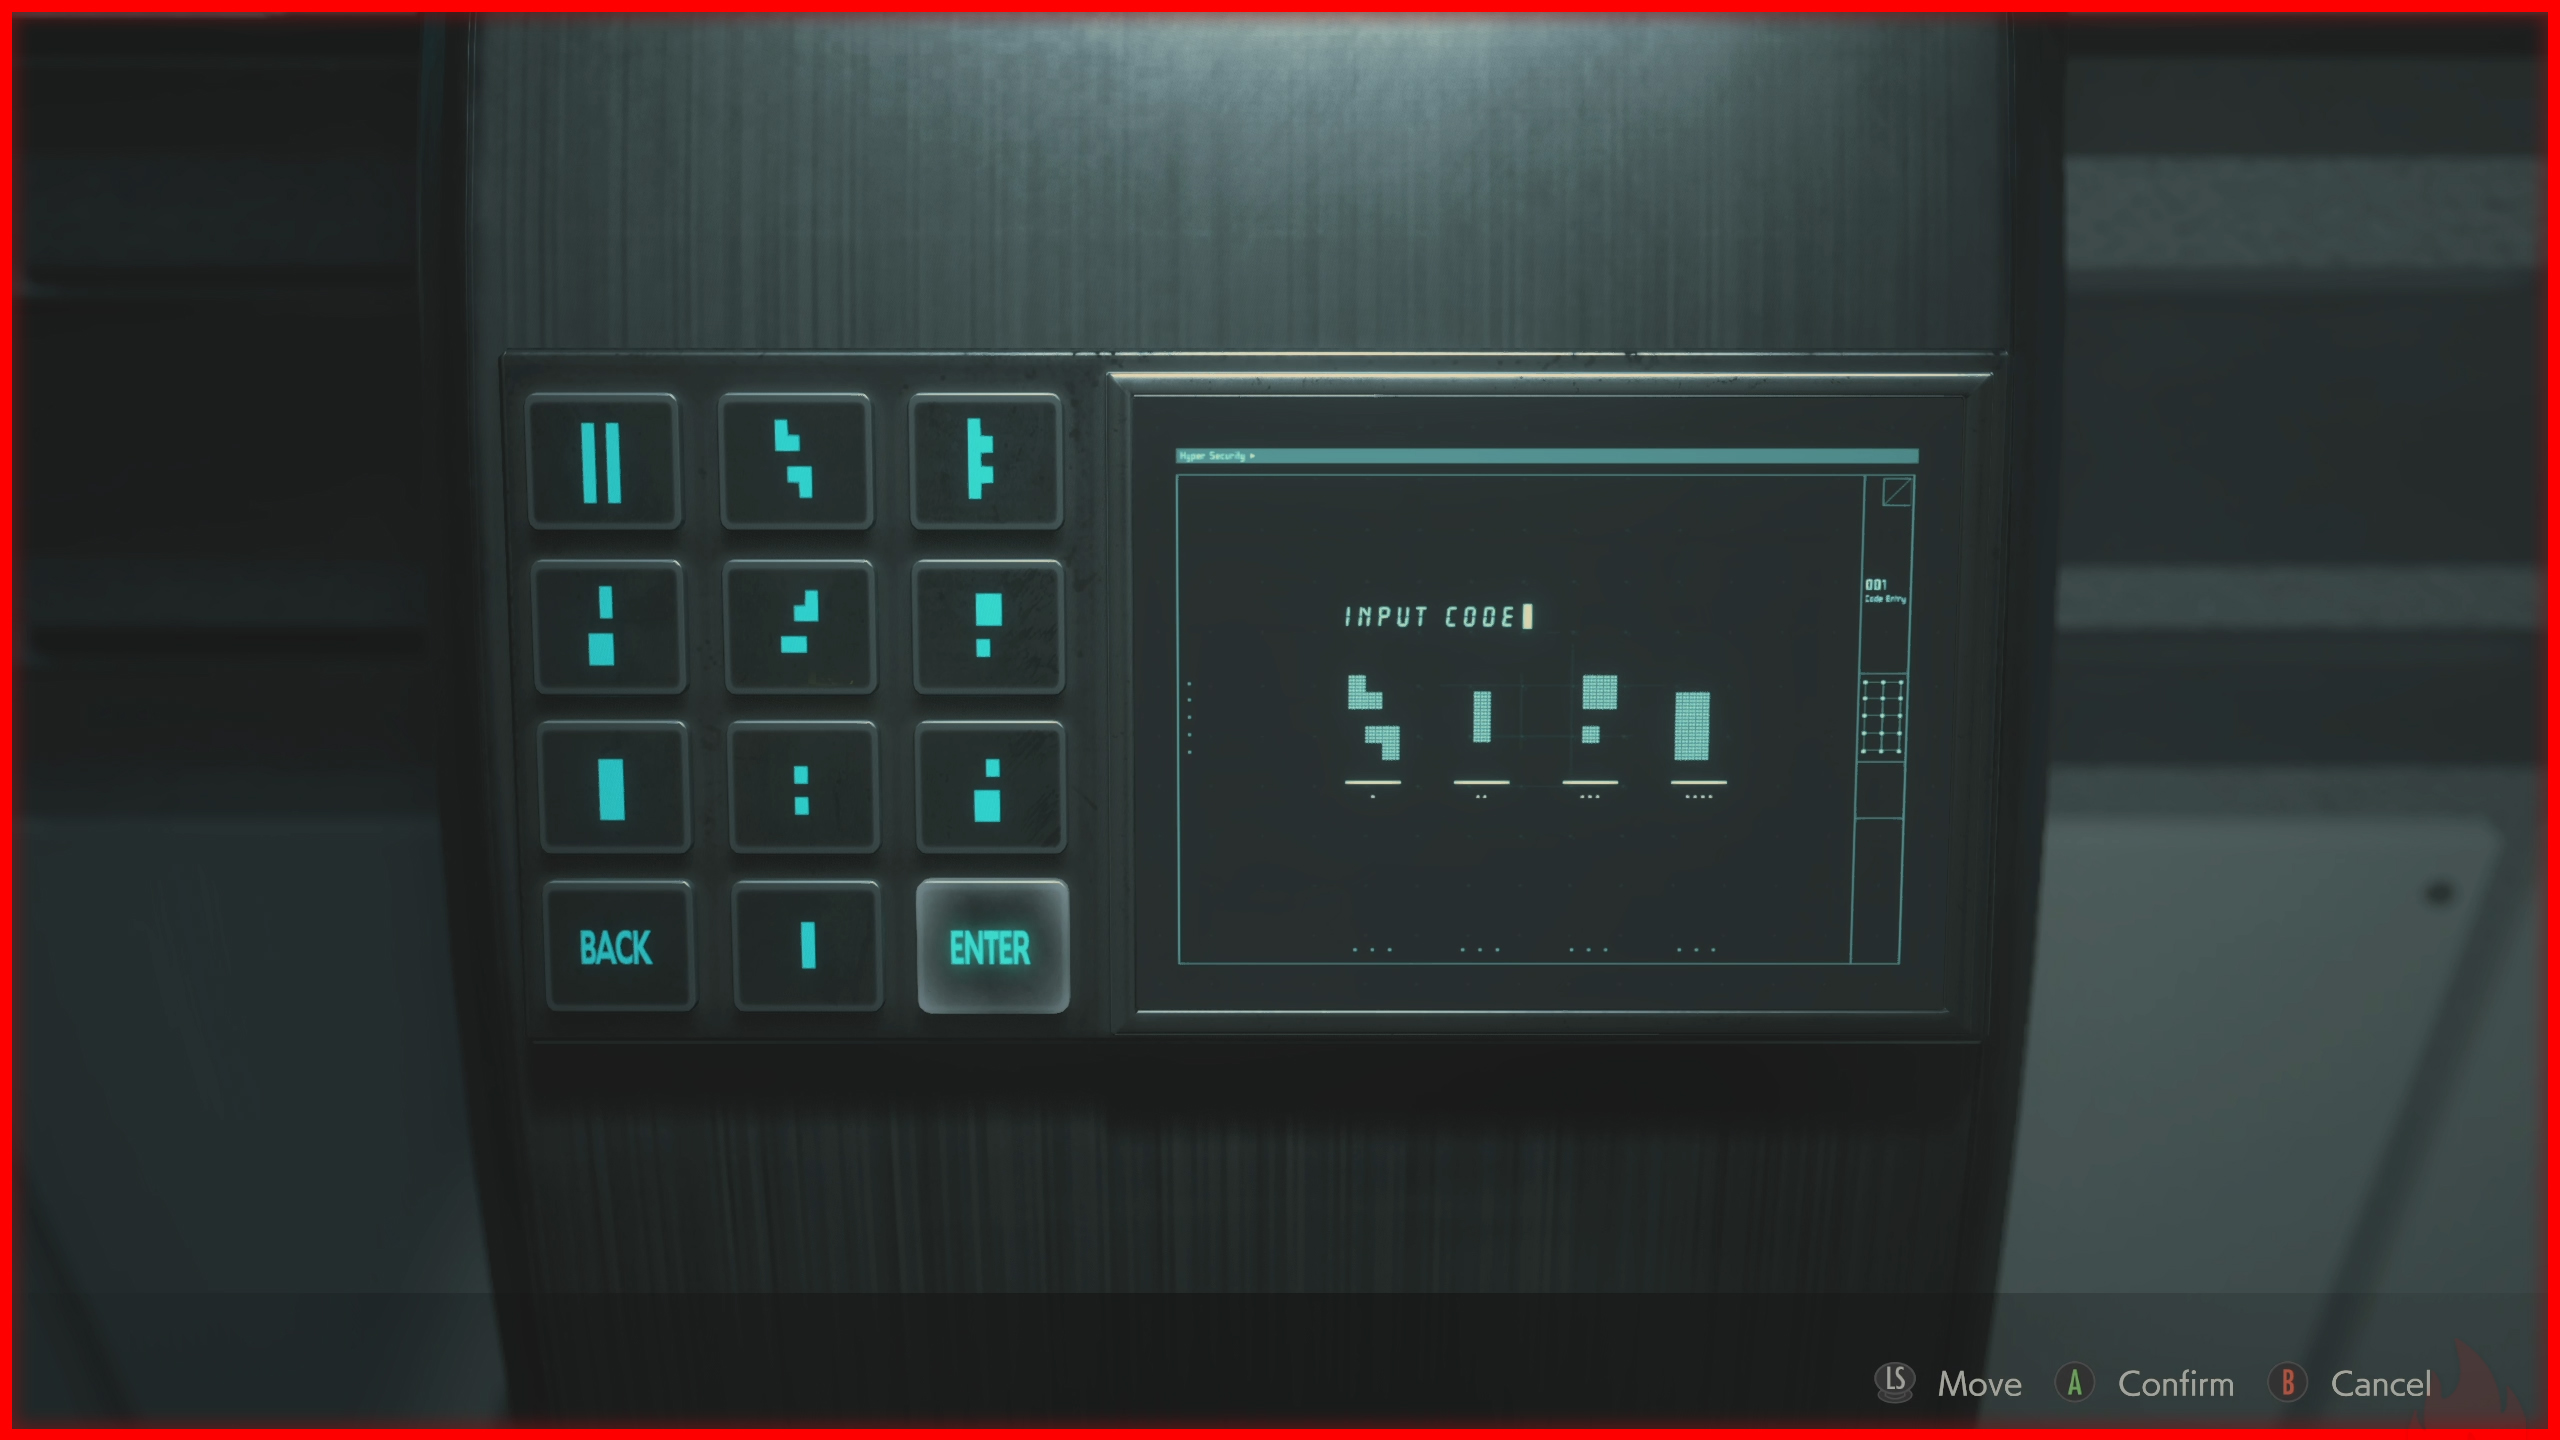
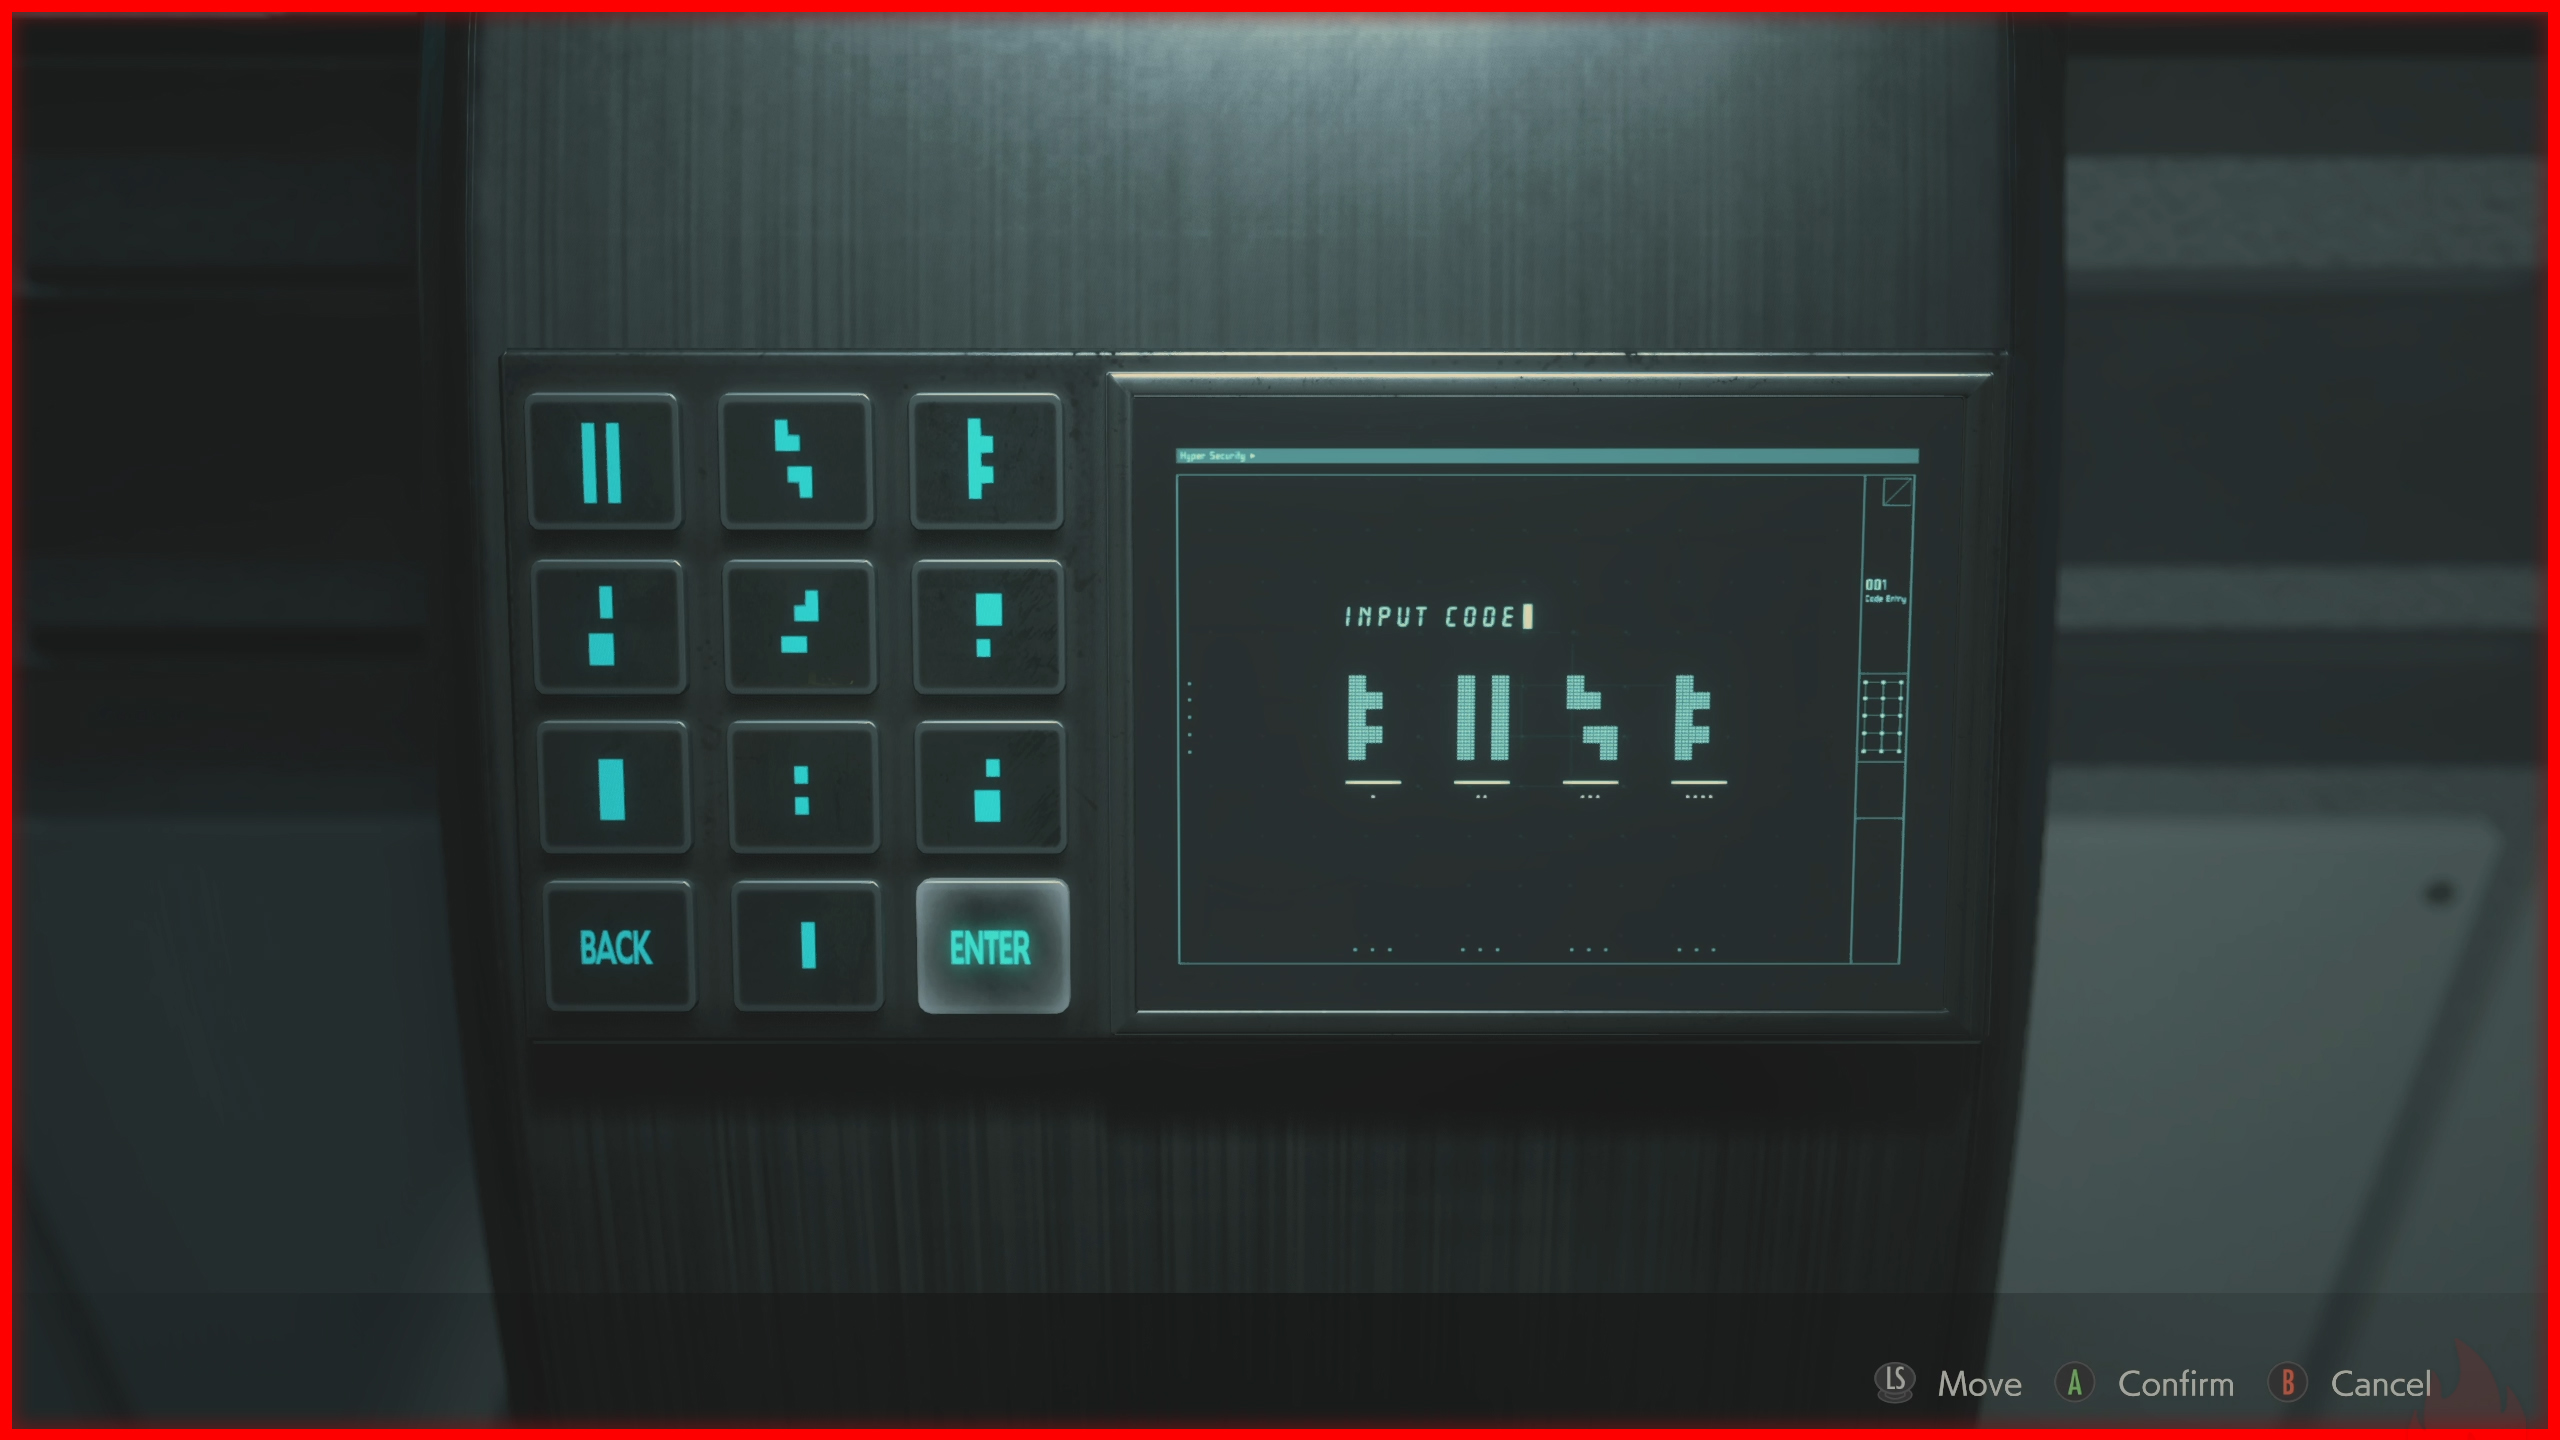
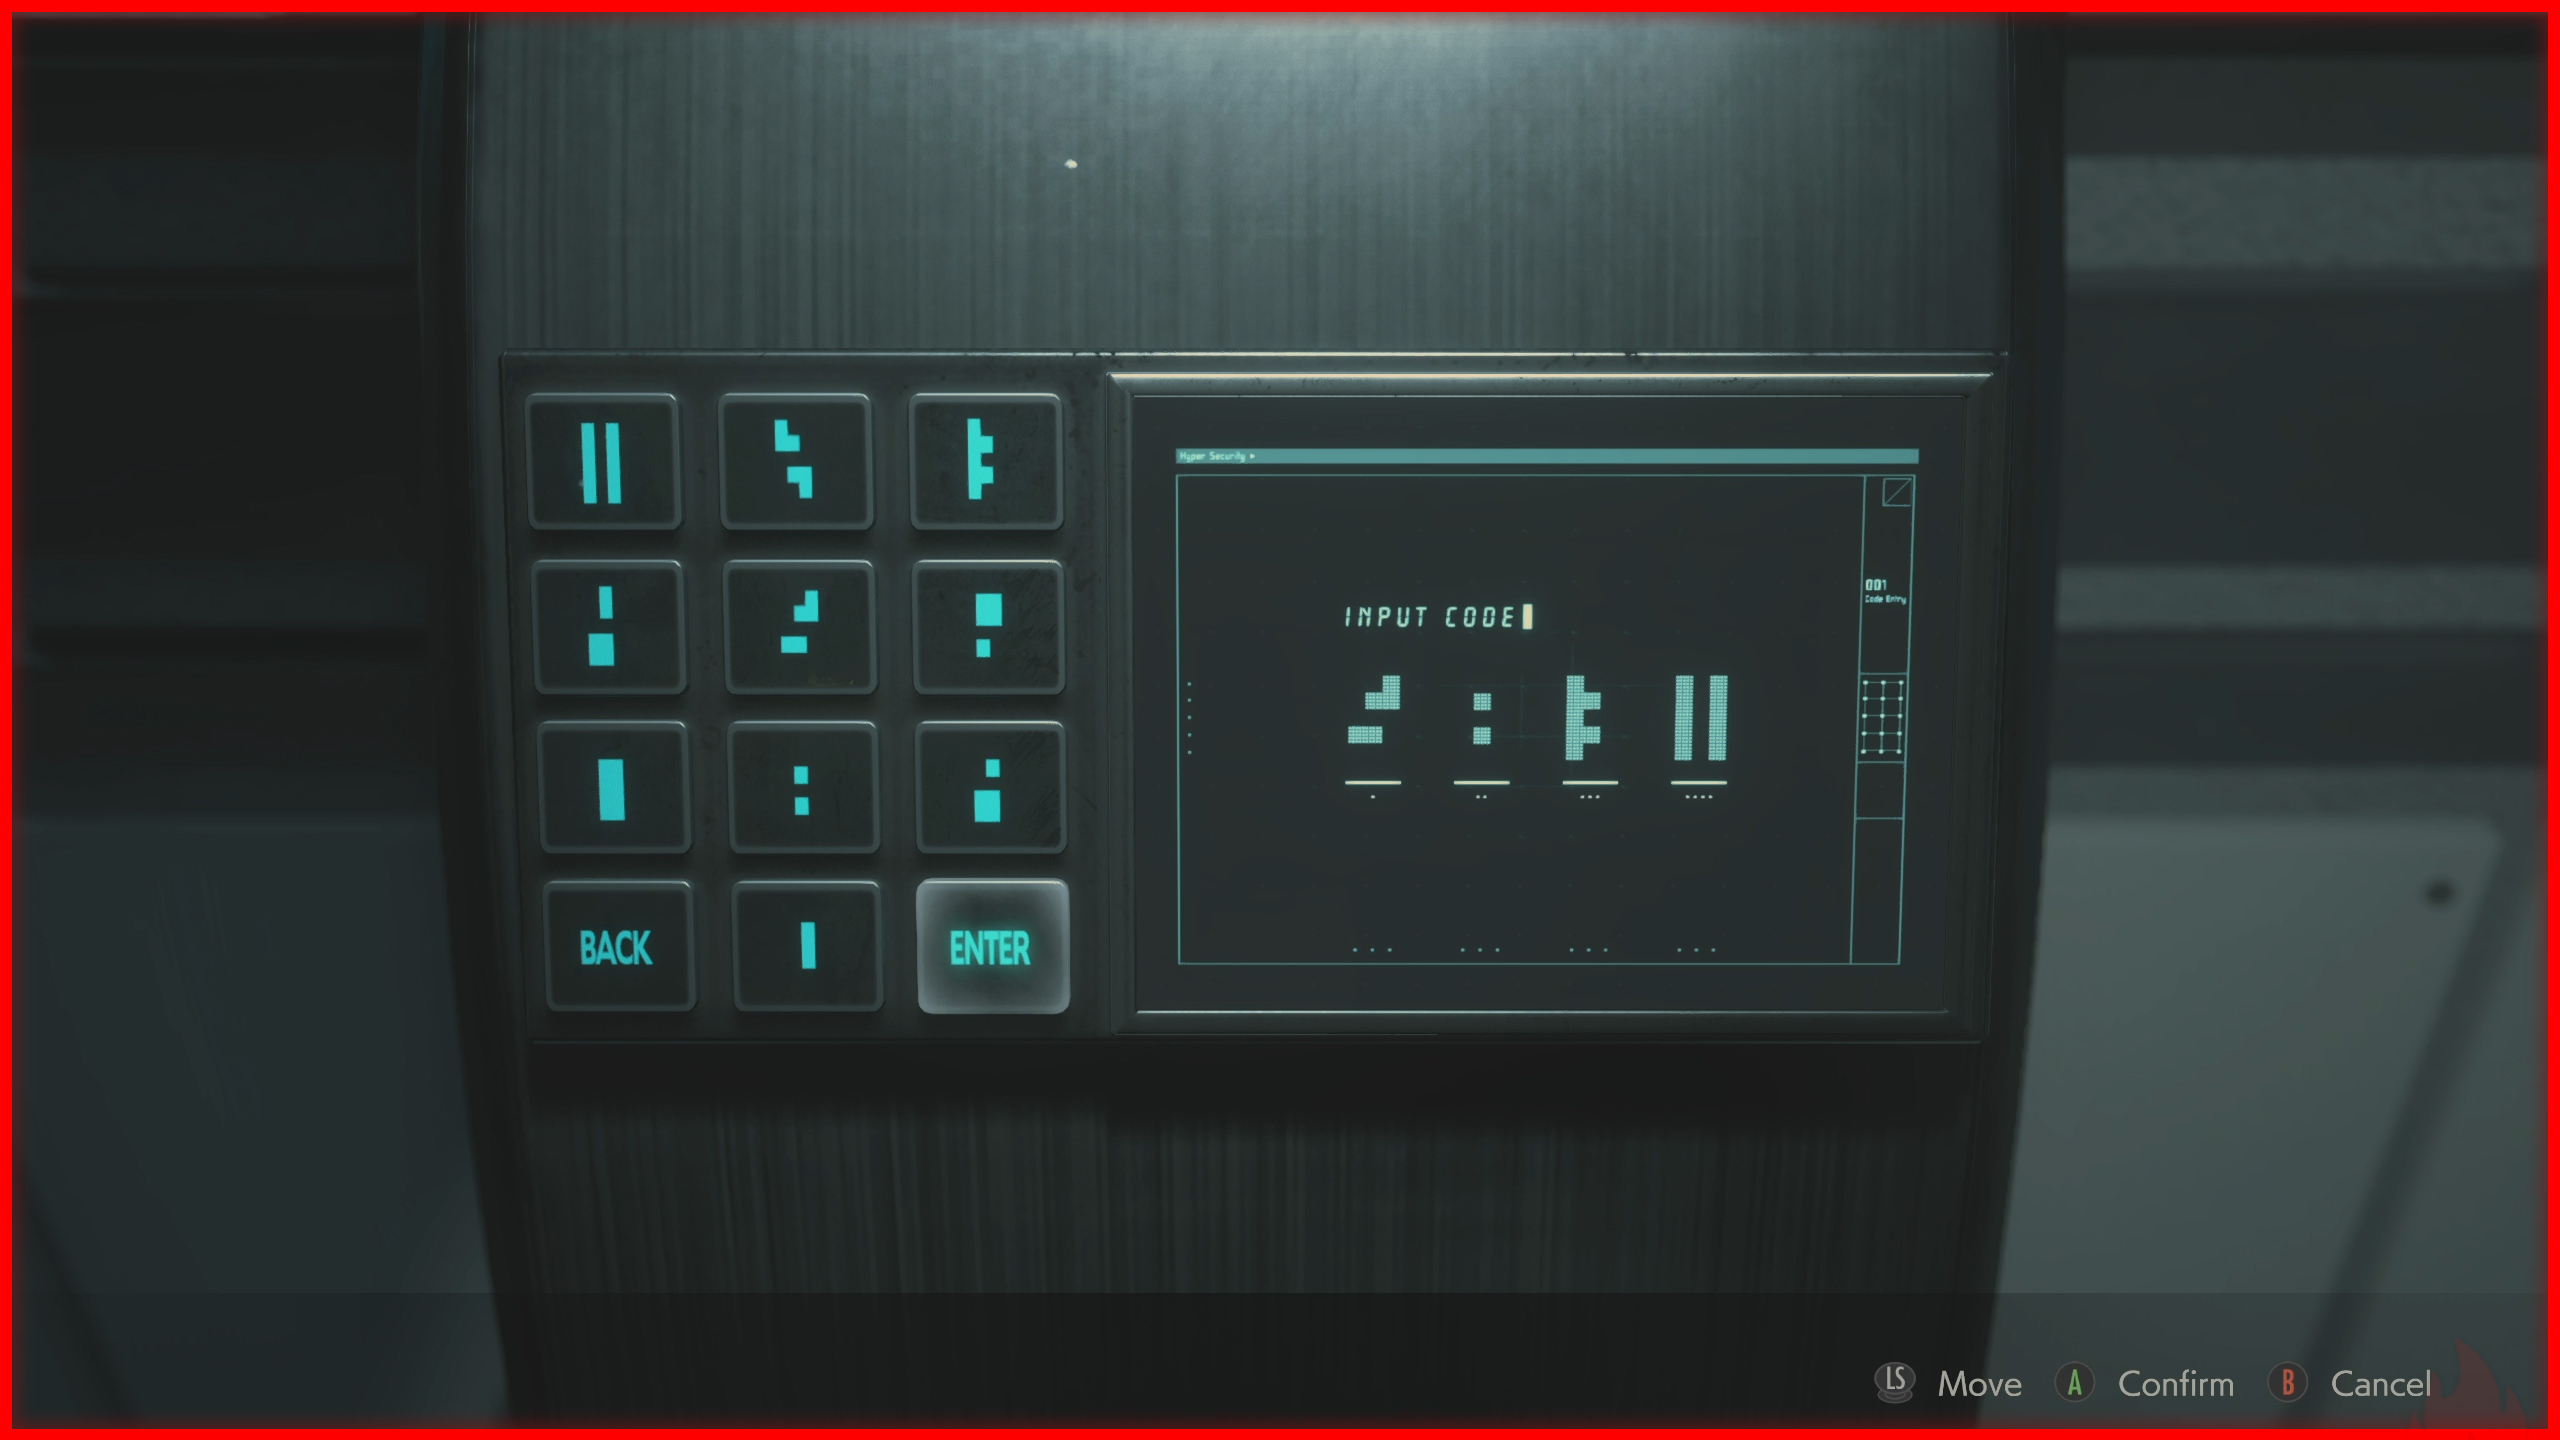
 Lab Greenhouse Control Terminal Codes:
Drug Testing Lab
 Stairs leading down to Laboratory B2.
 Dispersal Cartridge Mixture: Red, Green, Blue, Red, Green, Blue, Red, Green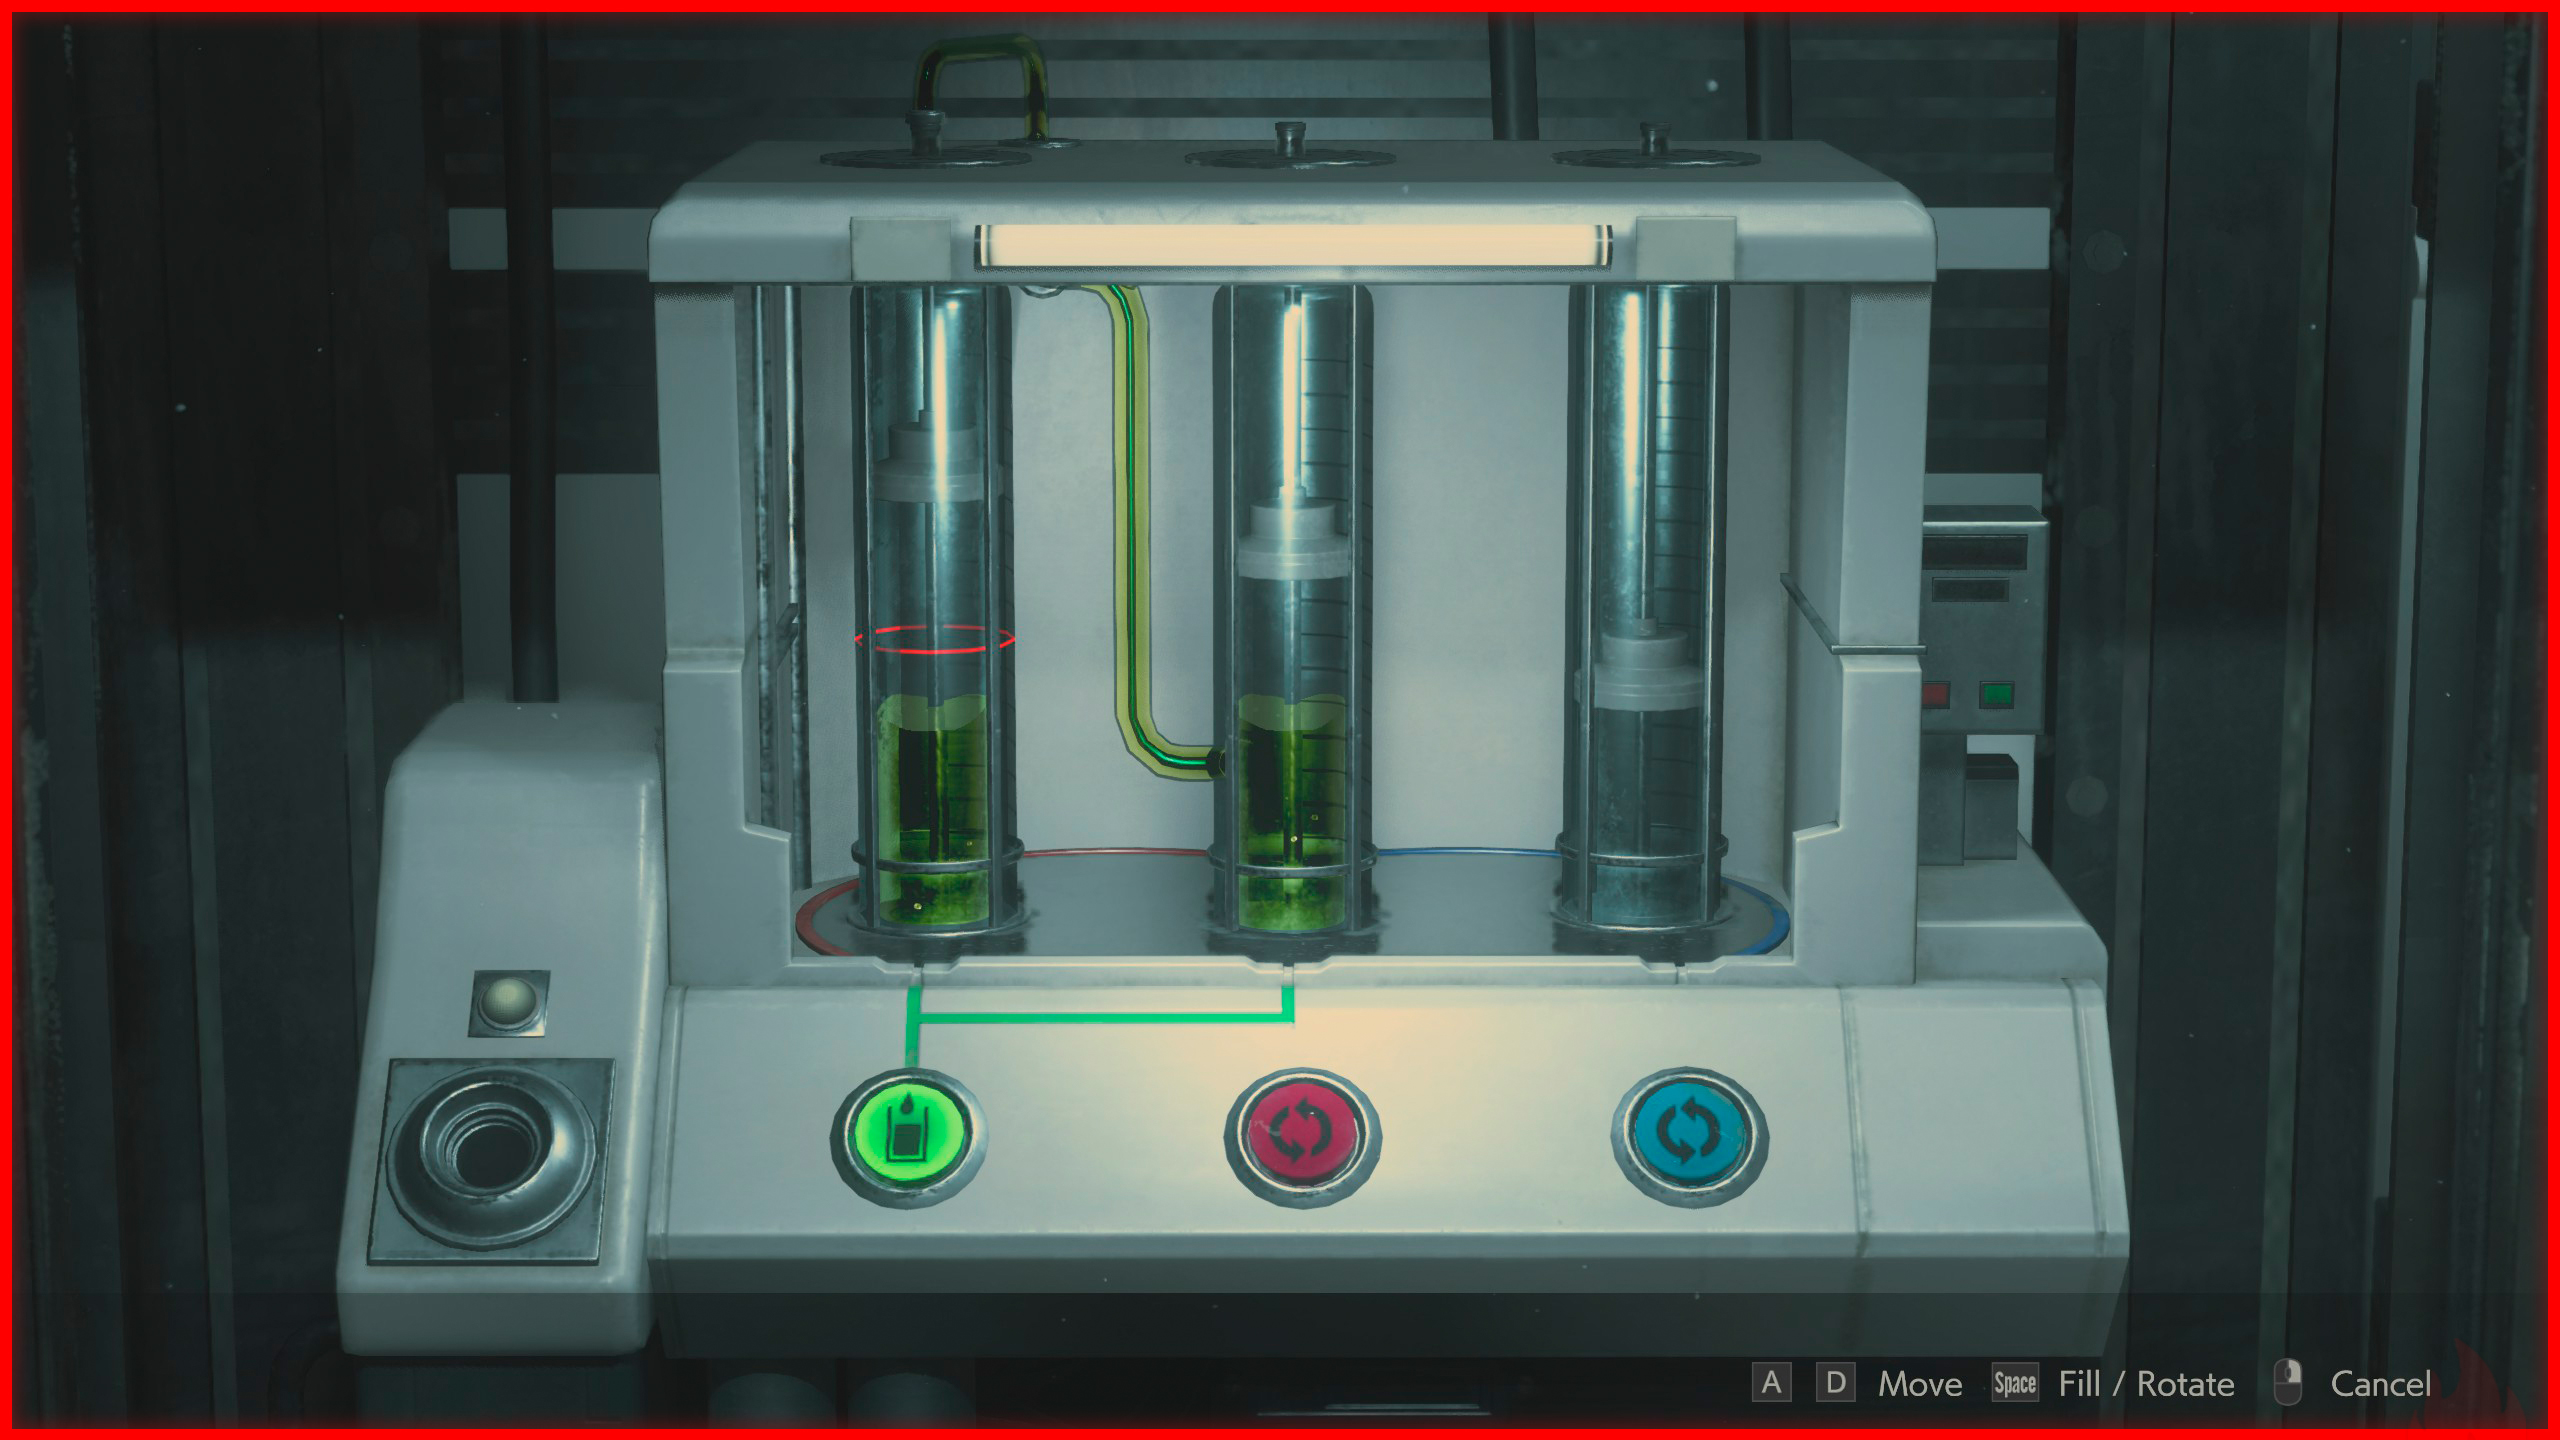
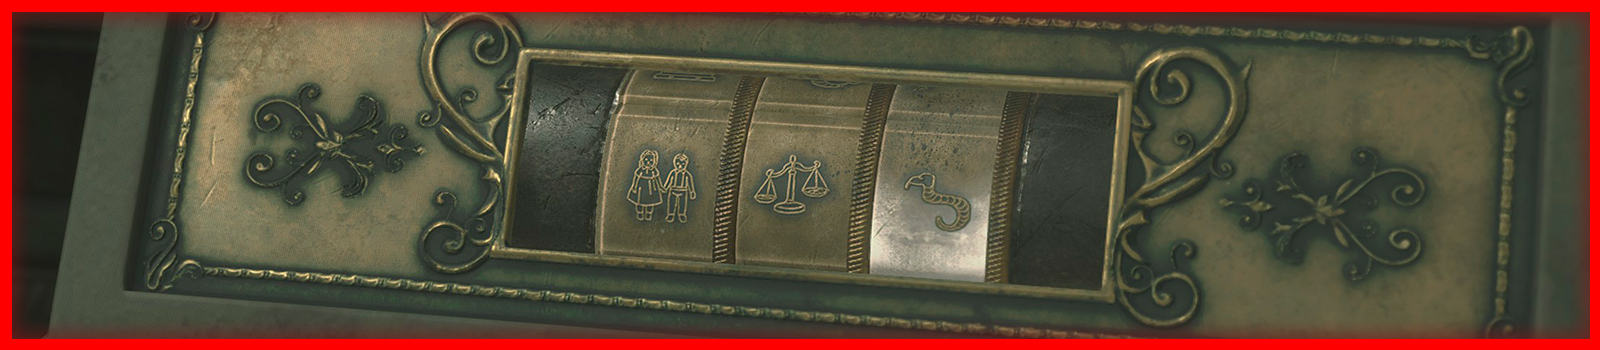 Unicorn Statue: Twins, Scale, Worm
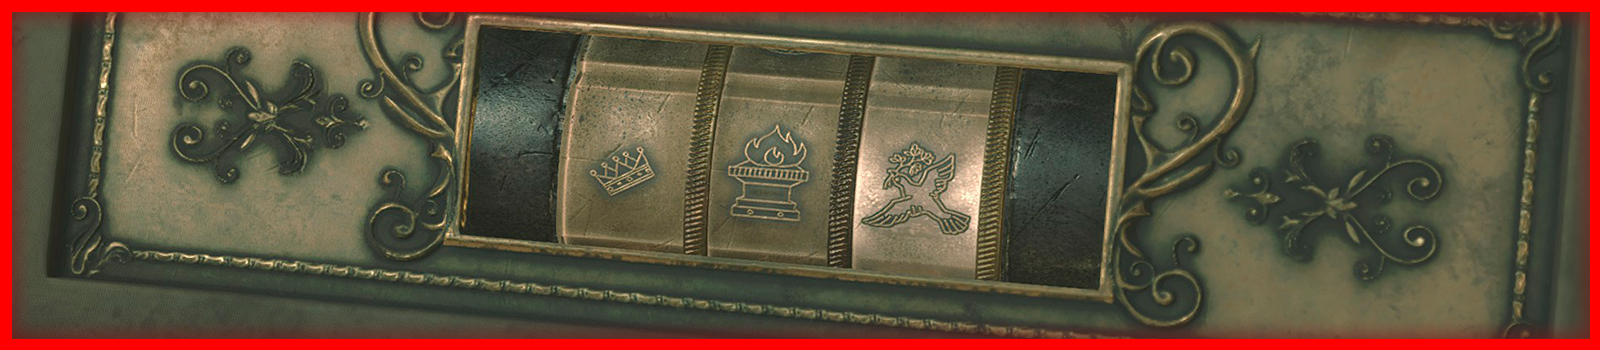 Maiden Statue: Ram, Harp, Bird
 Chess Plug Puzzle: Right Wall = Knight, Rook, Pawn | Left Wall = King, Bishop. Queen
 Lab Greenhouse Control Terminal Codes:
Drug Testing Lab
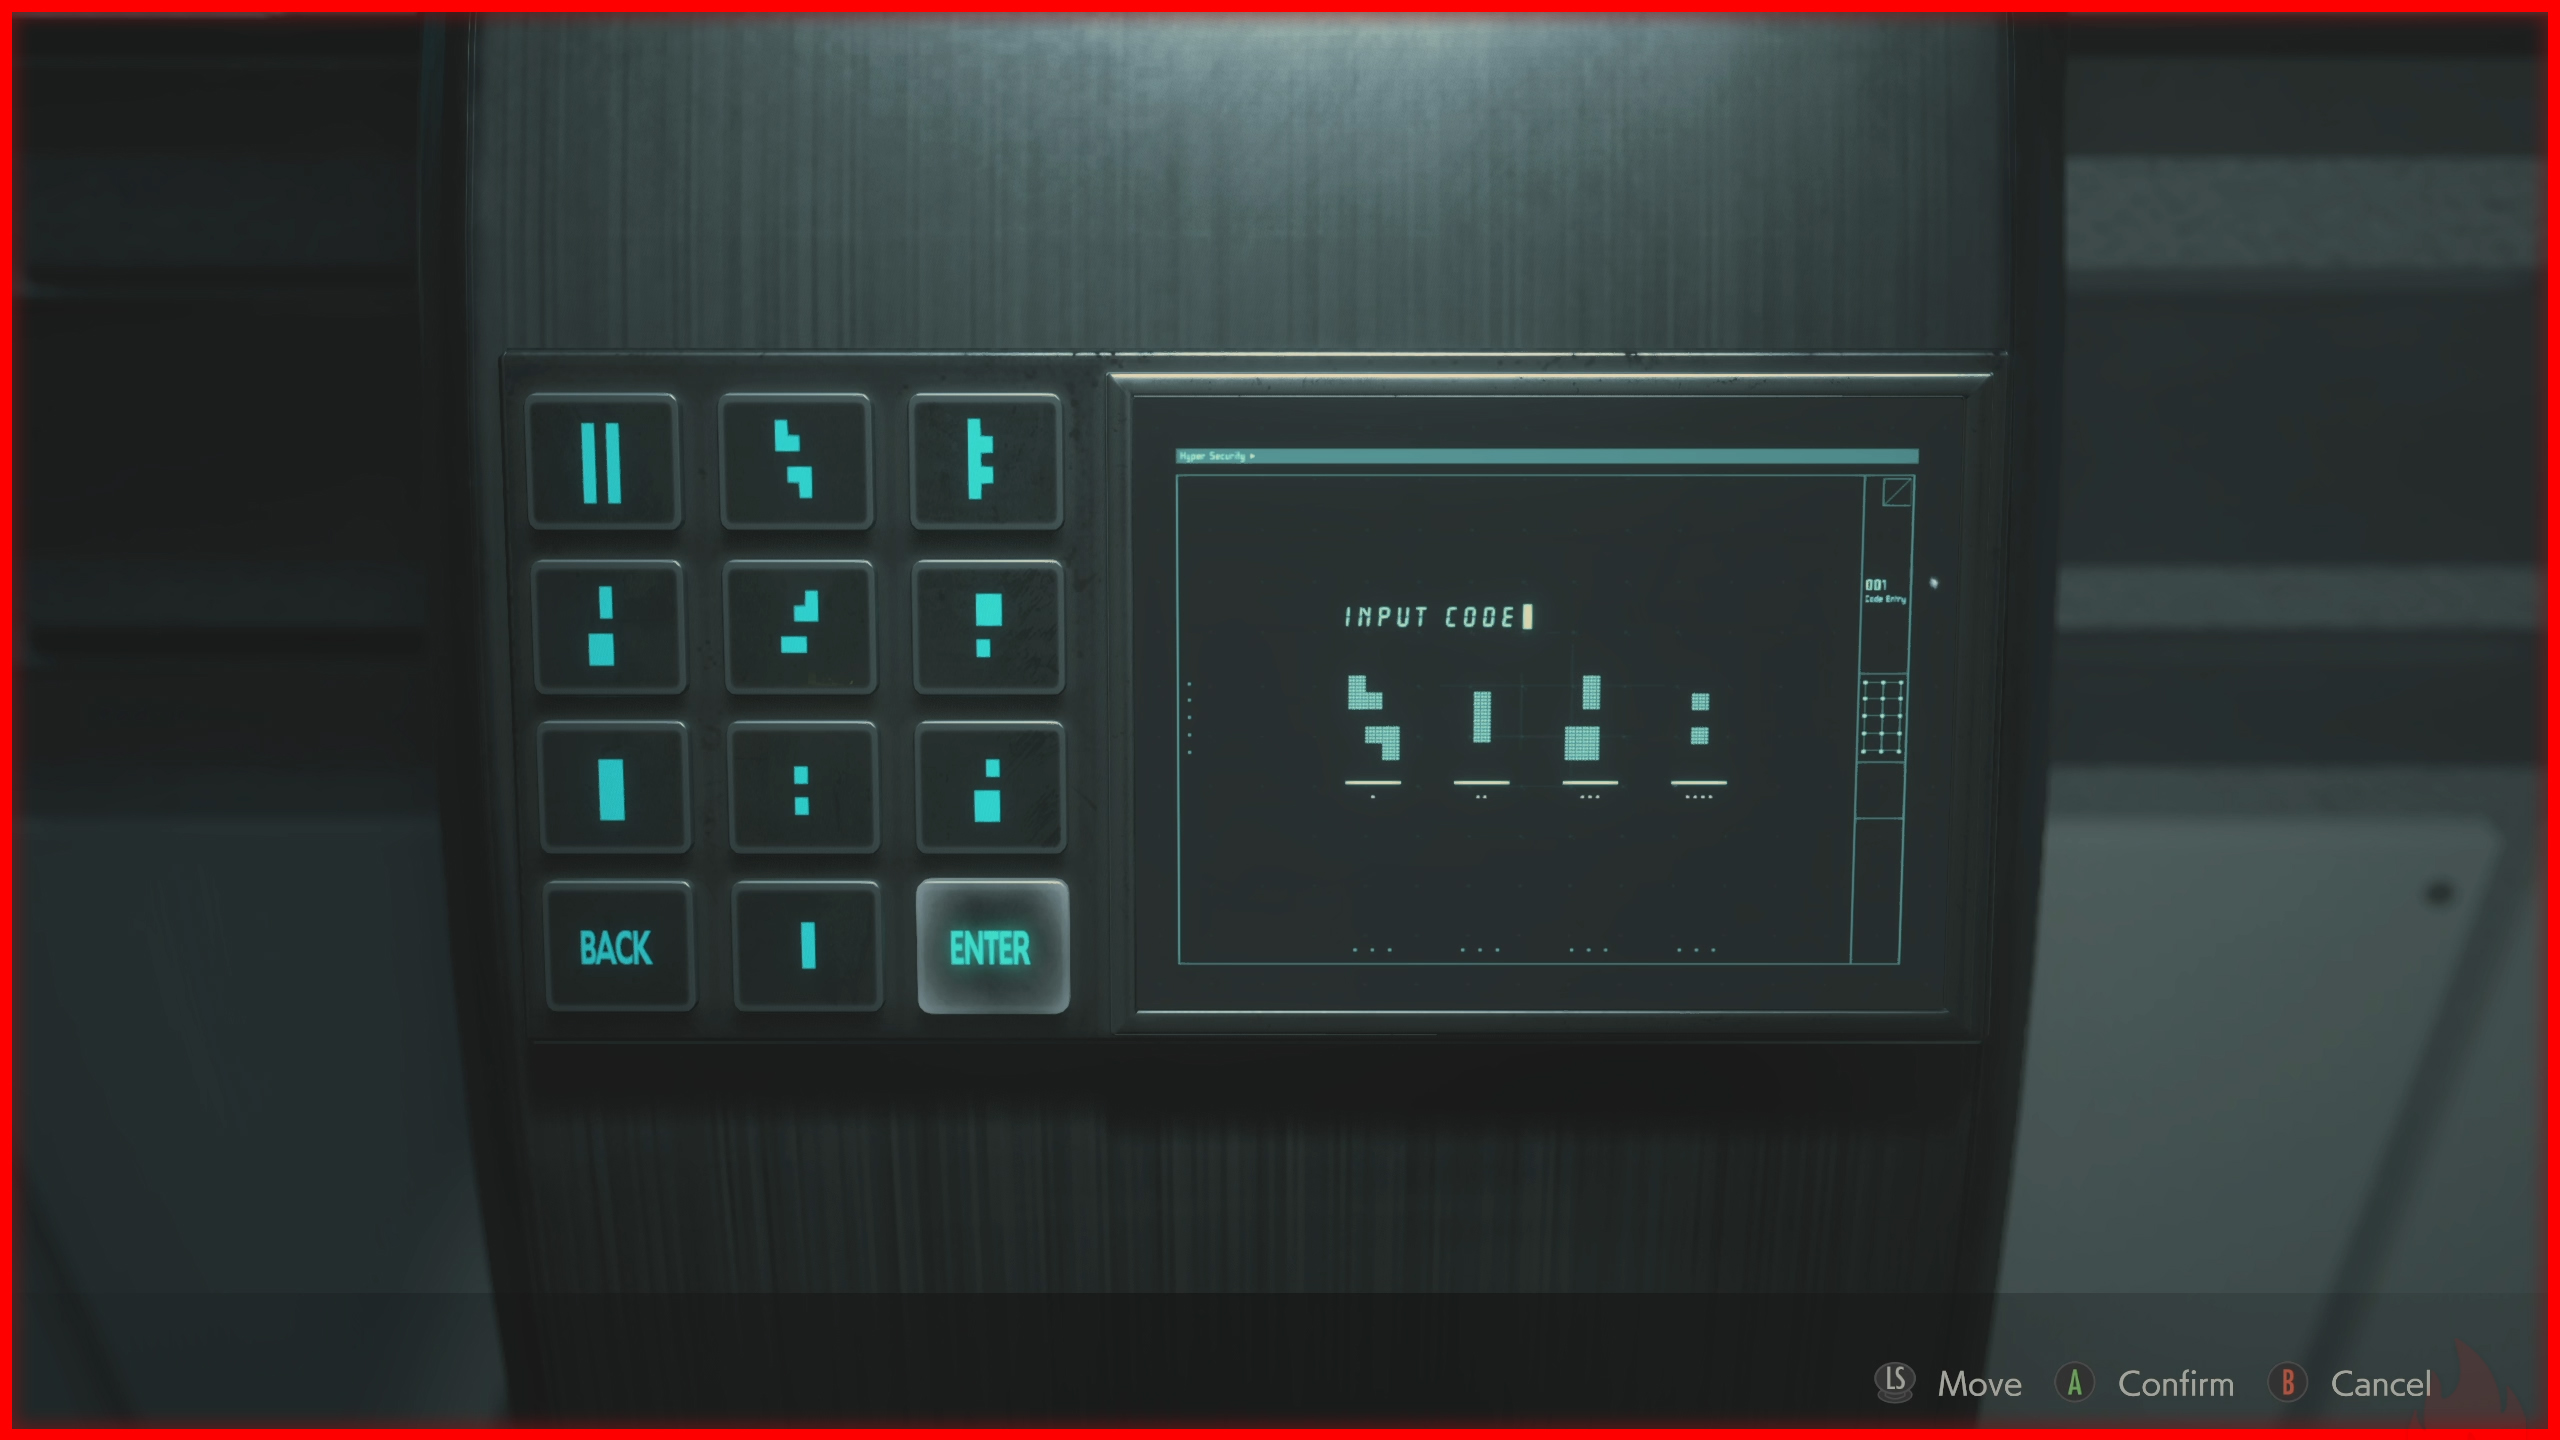 Stairs leading down to Laboratory B2.
 Dispersal Cartridge Mixture (colored buttons): Blue, Red, Green, Red, Blue, Red, Blue, Green, Blue, Red, Green.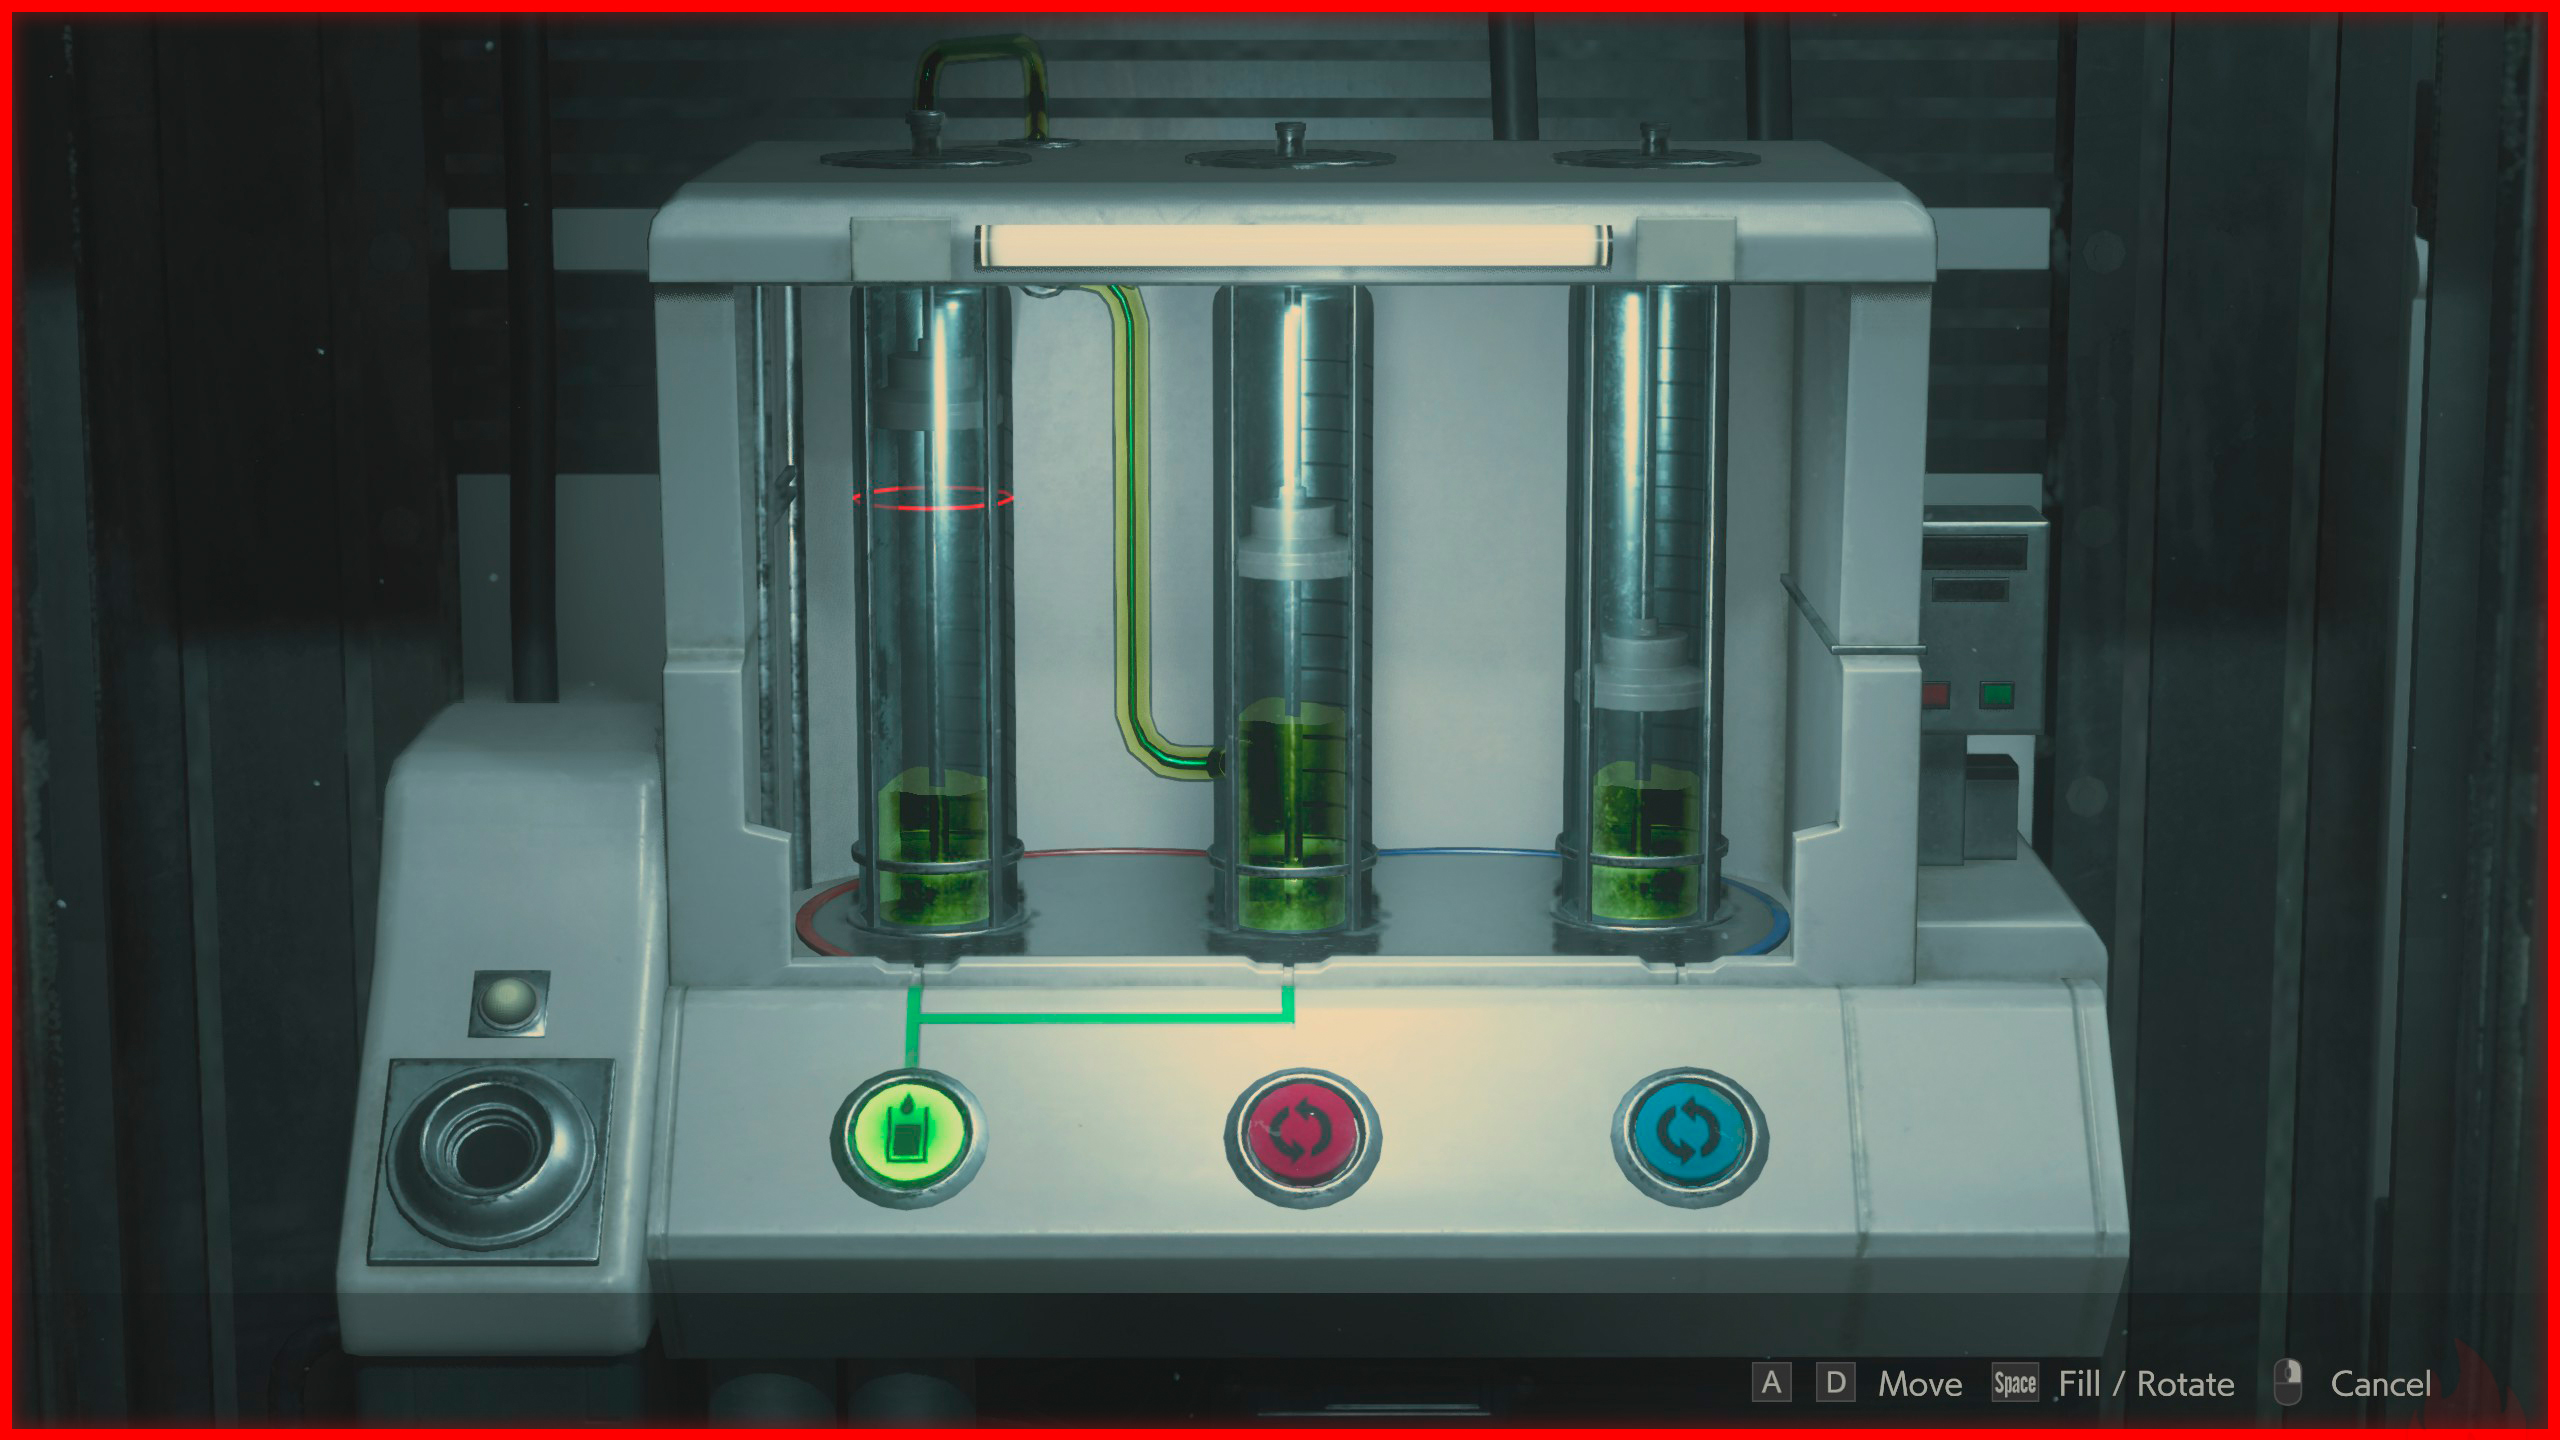
End
My other guides:
https://steamcommunity.com/sharedfiles/filedetails/?id=3564612330
https://steamcommunity.com/sharedfiles/filedetails/?id=3493898673
If you enjoyed this guide or found it helpful, please subscribe to my youtube channel.

Beat Resident Evil 2's achievements?
Flex it — let your friends know you pulled it off.
- Коды от сейфов и замков/ Codes for safes and locks★ 5 (186)50k views472 ♥1 minRussianUpdated 7 Nov, 2025
- Коды, Головоломки, Секреты и Вопросы - Ответы★ 5 (1.2k)43k views2.2k ♥14 minRussianUpdated 8 Jan, 2020
- Resident Evil 2: Достижения и Коллекции★ 5 (1.8k)41k views3.5k ♥34 minRussianUpdated 29 Jun
- 100% Достижения + DLC★ 5 (1.2k)39k views2.5k ♥7 minRussianUpdated 26 Mar, 2023
- Русификатор «Resident Evil 2»★ 5 (523)34k views921 ♥2 minRussianUpdated 21 Jun, 2025
- RE2: Коды и загадки★ 5 (343)30k views892 ♥1 minRussianUpdated 3 Mar



- Upgrading to PremiumTeam Fortress 2★ 5 (20k)1441k views11k ♥6 minUpdated May 11, 2022
- No More Room in Hell Official ManualNo More Room in Hell★ 5 (2.8k)569k views2.1k ♥29 minUpdated Apr 22, 2019
- NMRiH Community Hosting GuidesNo More Room in Hell★ 5 (526)351k views653 ♥1 minUpdated Aug 10, 2022
- How to 'Git Gud' Soon™MORDHAU★ 5 (2k)318k views3k ♥68 minUpdated Nov 16, 2024
- Лучшие кооперативные игры SteamPAYDAY 2★ 5 (1.5k)315k views2.1k ♥56 minRussianUpdated Apr 27, 2025
- Desert Eagle Heat Treated | Blue GemCounter-Strike 2★ 5 (1.6k)292k views1.5k ♥2 minUpdated Jan 16





This guide was created by its original author on the Steam Community. Are you the author and want it removed? Request removal.