RWR weapons: Best bang for the buck
Intro
The guide is made for online co-op gamemode, also called "Invasion".
There, you have your own soldier progression:- XP (rank)
- RP (Resource Points)
- your personal Stash
The Rare guns have scarcity, since you don't respawn with them after dying!
And losing Rare gear is a normal occurence in RWR.
This guide will help you in building up your firepower, especially if you're just starting.
Experienced players are also encouraged to try out cost-effective loadouts, that allow for much more action packed and care-free gameplay.
If you want to deep dive into how guns work and their full stats, then go to the official wiki page:
https://runningwithrifles.fandom.com/wiki/Weapons_and_equipment
Ways to get guns (overview)
There's 4 main ways to obtain weapons & equipment:
- The supply of available items is infinite.
- If a weapon is in stock, after dying you'll respawn with it again (with few exceptions).
- A) basic faction weapons
The same primary weapons that regular AI soldiers use, plus basic rocket launchers.By default you only have your own faction weapons in Armory, but weapons from another faction can be unlocked by selling 5 of them to the Armory, each unlock lasts for 4 hours.
- B) advanced weaponry (special unlocks)
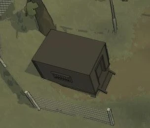
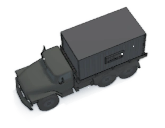
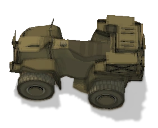
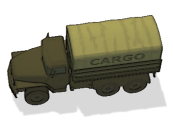
Includes 3 ARs, 3 single-shot GLs, deployable stationary weapons, SMAW & few other things. You need to capture enemy Cargo Truck and move it to an Armory structure under your control:
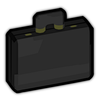
Or you loot Briefcase from a dead soldier and sell it to any Armory:
Both of these actions will unlock a random advanced weapon / equipment (from the fixed list), which will be announced in chat. Each unlock lasts for 4 hours. - C) stealth weaponry (special unlocks)
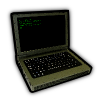
Includes 3 faction Suppressed SMGs, MK23 SOCOM, APR, Black Ops Vest. You loot Laptop from a dead soldier and sell it to any Armory:
This action will unlock a random stealth gear (will be announced in chat). Each unlock lasts for 4 hours.
Suppressed SMG of your faction is available by default. - D) fixed faction weapons
Faction-specific 3 pistols and 3 machine pistols (secondary slot).
These can't be unlocked for another faction.
How they look like:
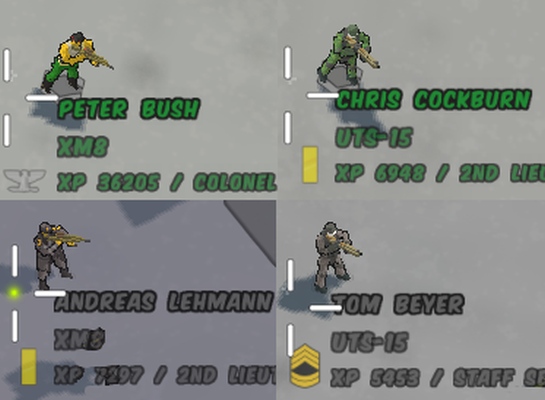
^Greenbelts Officer, Greenbelts EOD elite, Graycollars Officer, Graycollars EOD elite.
Officers can spawn with various Rare weapons, but most commonly AKS-74U / F2000 / XM-8 / P90.
EOD elites can spawn with various Rare shotguns, most commonly UTS-15.
The trading process is very manual: you make a deal in chat, you meet, the guy throws the gun on the ground, you throw down RP, you swap places and each gets their stuff.
To bring RP with you, go to Armory:
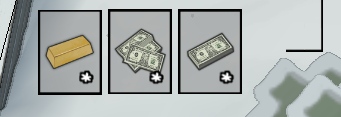
and take the required RP amount with Gold Bars / Dollars. A few caveats:
- Trading is based on the goodwill of the participants, there's no repercussion for thieves or scammers (rule #14).
- Prefer trading in a quiet place and where Armory & Stash are close to each other.
Avoid crowded areas for making the exchange. - Know the price range of items you buy or sell.
This guide will give you a good price range for each gun listed.
If someone asks from you more than what's recommended here, look for a better deal. You can check common prices for weapons in RWR Discord[discord.com]. There is a channel made for trading (at the bottom), and they also have a price list[discord.com] from Asia community (direct link to google doc[docs.google.com]).
Example of a typical in-game trade:
- You: Buying Steyr AUG 300 RP
... - Dude: I have AUG
- You: How many guns?
- Dude: 5 AUG's
- You: buying 5
you open the map and find where the Dude is and where its best to trade.
you bring 1500 RP to the trading spot, and you trade. - You: TY
- Dude: TY
Sell the box to Armory and get a random reward.
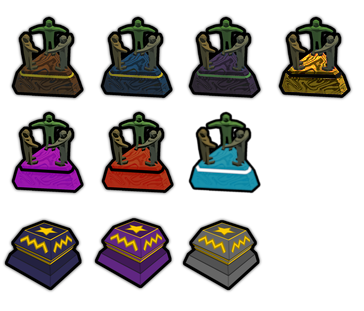 Lottery is about buying Tickets from the Ice Cream Van and selling them back to get a random reward.
Ice Cream Van have a chance to spawn on map start:
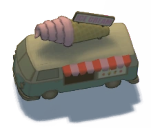
If you want to know more:
https://runningwithrifles.fandom.com/wiki/Boxes
https://runningwithrifles.fandom.com/wiki/Lottery_Ticket
Combat Basics (pt.1)
Here are general principles of combat (based on Assault Rifles usage).
As infantry, you should hit enemies as fast and accurate as you can, while avoiding getting hit yourself.
Going from worst to best accuracy:
Running -> Walking -> Standing -> Crouched -> Over-cover -> Prone
(also indicated by the crosshair size)
Choosing the right stance depends on range:
Crouch to hit enemies at close-medium range, go prone for medium-long range.
Also may depend on how big the target is:
Prone enemies (machinegunners), or enemies standing behind cover - appear as smaller targets and require higher accuracy to hit them.
How far enemy can see you is tied to your stance. Even in the midst of a big battle, you could stay undetected if you're crouched or prone. Night time further decreases enemy detection range.
Choose the right tempo depending on the situation and your gun stats.
Each gun has Recoil - as you continue firing, your bullet spread will grow (indicated by the crosshair size).
Each gun has Recoil Recovery - affects how fast the gun recovers back to full accuracy after you stop firing.
With an Assault Rifle or SMG do a short burst / single shot, then wait to regain full accuracy, then shoot again, repeat. Thats the common usage.
Full auto and long bursts are rarely useful for ARs / SMGs, only in close range scenarios (0-15 meters), or when firing at a compact blob of enemies.
Machineguns on the other hand, have very bad accuracy and recoil stats (with rare exceptions), and therefore full auto and long bursts are the primary ways of shooting.
Simple to say, hard to master.
You don't just need to hit the enemy, each bullet impact rolls its "kill probability", a chance to deal damage. Kill probability is an inherent weapon stat.
Also, the bullets will begin to lose their effectiveness at certain range, with a linear decrease in Kill probability.
These ranges are shown as Fall-Off Start and Max range (in meters) - which are inherent weapon stats too.
- "Ok, but how much 30 meters really is on my screen?"
click anywhere on the ground, and you'll be given the distance in meters to that point.
Its important to have a feeling of your effective range and that of your enemies.
When you use a shotgun or SMG, you want to be closer to enemies, than when using an Assault Rifle or Sniper Rifle.
(choose your weapon to best suit the map features or the battlefield situation)
On the other side, enemy shotgunners are deadly at close range, harmless at medium & long range. Riflemen are dangerous at close-medium range, harmless at long range. Snipers, stationary MGs and vehicles are dangerous at all ranges, and should be taken out asap.
A) If you shoot at them, they'll usually run away or get to the closest cover. If they recieve no more fire, after a few seconds they start to move freely, usually running towards your position.
Two important details for suppressing fire:- Your gun caliber doesn't matter.
- What matters is where you shoot, and the time passed since the last suppressing shot.
If you want to focus on suppression, shoot single shots or 2 round bursts and aim to affect multiple directions, do a sweep through enemy positions, and keep repeating.
B) If you shoot, but not in their direction, they'll get aggroed and quickly come to check exactly where you fired from.
AI soldiers can hear you from far away, much further than their seeing range.
Its very common to get surprise attacked and killed by roaming enemies, while you were focusing on someone else.
- Stance, keeping low (lowering your detectability)
- Suppressing fire (preventing enemies from advancing)
- Cover
2 ways of using cover:
A) Horizontal cover.
Stick to a barrier while crouched, press fire and your soldier will automatically stand up to shoot where you aim, and hide back down when you stop shooting.
You present yourself as a much smaller sized target for enemies, you're not invulnerable, but a lot more survivable.
Snipers are still dangerous, as are enemies in close range, especially shotgunners.
If you're getting overwhelmed by the weight of enemy fire, shoot a short burst, wait for enemies to stop returning fire, then shoot again. Like a peek-a-boo. Enemy AI is reactive when you peek above cover, but quickly stops shooting when you hide back.
Shooting over-cover has its own accuracy modifier, somewhere between Crouched and Prone accuracy.
Example images:
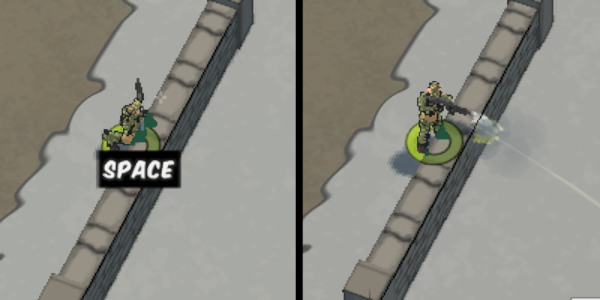
^ solid indestructable cover as part of the map, includes sandbag / concrete / brick walls, rocks, etc.
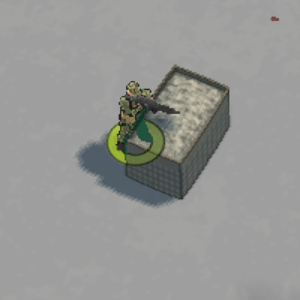

^ cover blocks that can be placed by players, they have health and take damage from explosives.
B) Vertical cover.
While near a building corner, a tall wall or a rock, use your movement keys to peak from cover. This is a manual technique, and needs good precision with your WASD keys and timing with the Shoot button.
Lets say we are facing 5 enemies.
One approach is to turn a 1 vs 5 into a series of 1 vs 1's - by opening yourself to one enemy's line of sight at a time, killing them, then peeking some more, and so on.
Another approach is to quickly swing out from cover, do a short burst and quickly hide back before enemies can hit you back. A common tactic when using shotguns in urban close combat.
Because you challenge enemies in their view range and expose your full height, its highly recommended to wear a Vest (armor).
Example image:
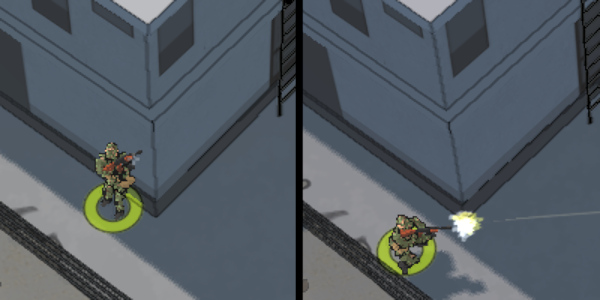
^ corners of buildings, tall walls, big rocks, etc
Combat Basics (pt.2)
Awareness is based upon 2 things:
A) Check the far edges of your view range regularly.
If you place the cursor on your soldier (on the center), you won't see far enough in any direction to effectively react to enemies. You need to scan the battlefield by moving your cursor to the far edges.
Here's how far you can see in each direction (flat terrain):- 33m while looking straight Down or Up
- 51m while looking straight Left or Right
- 54m while looking diagonally Down-Left, Down-Right
- 68m while looking diagonally Up-Left, Up-Right
B) Know what to expect outside of your view range.
Because there's no fog of war, it can give a false sense of security.
The enemies hearing range is huge, a lot bigger than your Up or Down view range. You may check your sides, see nothing, shoot one soldier and suddenly you're getting rushed by 10-15 dudes that appeared out of nowhere.
Enemy vehicles can arrive very fast, just obliterating you with seemingly no possible counterplay.
It all comes down to map knowledge: the paths that enemy infantry and vehicles usualy take, the respawn points for soldiers and respawn timers for vehicles.
As your team takes more zones, the same total enemy count is being condensed to fewer bases. So you progressively encounter more and more enemies the less bases the enemy team has.
Positioning:
Good positioning is based on knowing what the enemy is doing, and also what your team is doing.
Apes are simply stronger together.
Usually there's a single front-line that is getting pushed by 80% of players, join them if you want to contribute and survive more easily.
However, in some cases it's more beneficial to push two different fronts with an equal divide in forces.
After reaching 10k XP you can command up to 10 AI soldiers:
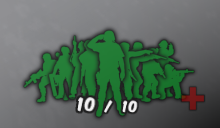
Note: the higher rank players have priority in filling their squad: the game assigns AI soldiers to them first, and the game may even take your soldiers and transfer them over to other players.
The higher your rank, the better you retain soldiers in your squad.
Squad leading tips:
Main thing to keep in mind, is that when you shoot somewhere, all your AI soldiers will carelessly run in that same direction:
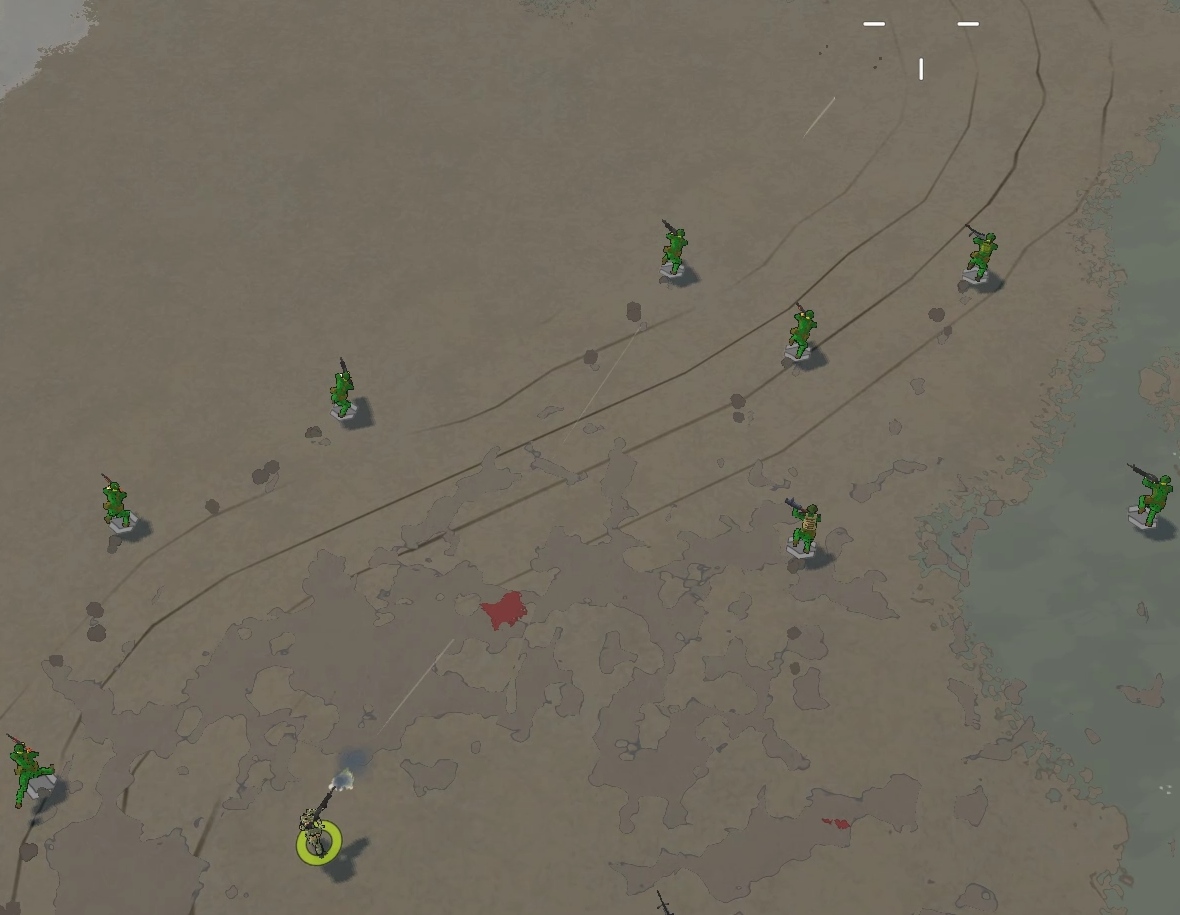
Naturally, you'll shoot at enemies, the enemies will be staying in cover, your AI squad rushes enemy positions in full height, and enemies easily cut down all your squadmates in seconds.
To avoid wasting your squad like this, you need to baby-sit them and use them defensively.
When a fight begins, and you started shooting enemies, quickly order your squad to hold position by clicking RMB (Right mouse button):
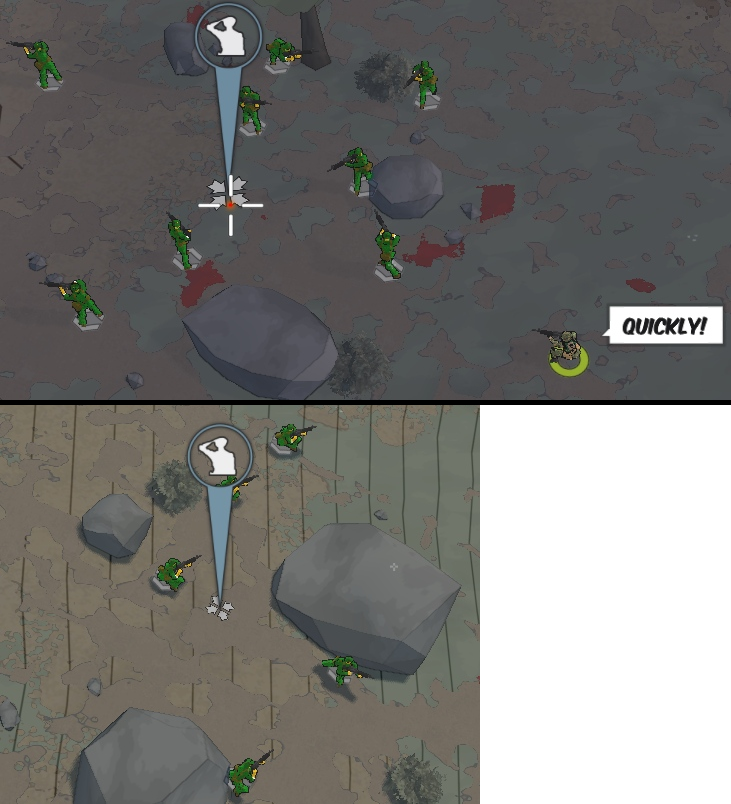
^ put your squad in a good position with cover. The better the position, the better their kill/death ratio will be against the enemies. In a battlefield sense, you want your squad to be:
- A) in the same line of fighting as you are, to engage enemies together.
- B) or you place them a bit behind you or to the side, to cover your blind spots against enemies that can creep up to you.
When the fight is over and you need to run a long way, you can press RMB on yourself and the squad will follow you again (default behaviour).
Keeping your squad alive is particularly useful for the process of capturing enemy zones or defending your zones from enemy capture.
Lastly, if you really need your soldiers to charge headlong into enemy positions, or quickly retreat from fighting, you double click RMB instead of a single click:
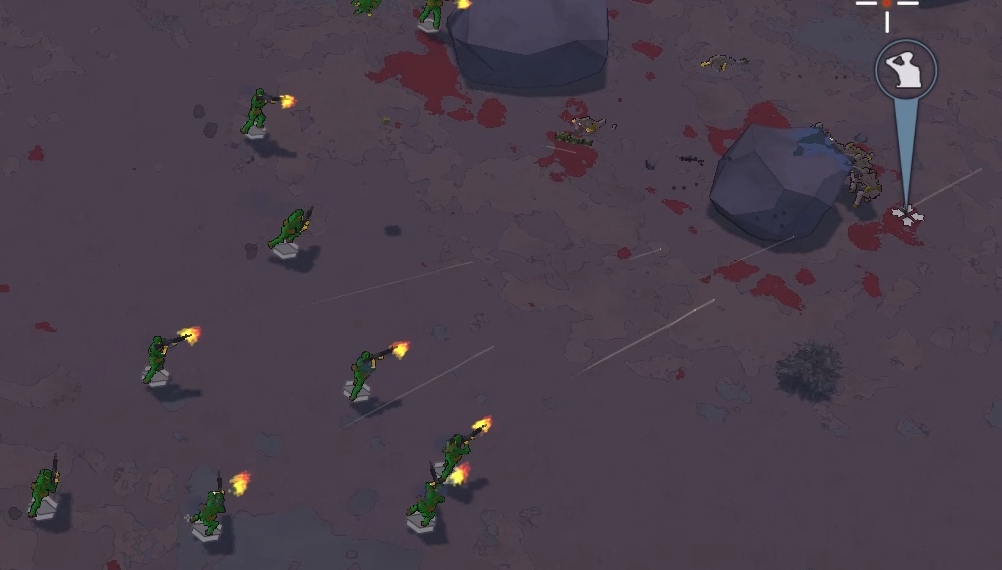
^ this will force your squadmates to ignore enemy suppressing fire, and they'll be running as fast as they can to the point.
Stationary Weapons:
You can place stationary MGs, Mortars, TOWs and order AI squadmates to enter them with RMB:
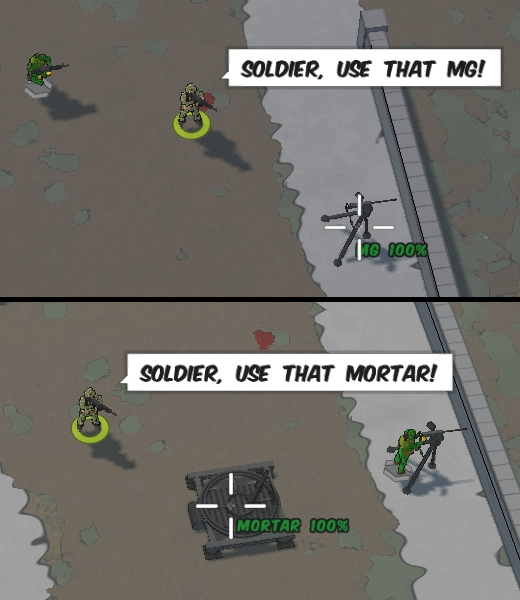
I'll cover the MG deploy in detail.
This is a force multiplier for a simple AI soldier.
In a proper position, one soldier behind the MG is like an additional player in your team.
2-3 MGs can clear entire enemy assaults by themselves.
The same battlefield rules apply: place MGs to cover most directions, make a combat line and don't overextend each position.
Use level geometry that funnels enemies in, so that a single MG isn't covering a very wide angle (will be vulnerable due to slow rotate speed). Or simply place multiple MGs with interlocking fields of fire.
And of course, horizontal cover is important for MG positions. Use the indestructable cover that's part of the map, or place cover blocks yourself.
---
Note: If you don't feel like putting the effort into commanding your squad, then you can just reduce your squad size to 0. Other players will get more soldiers to command or to crew their vehicles.
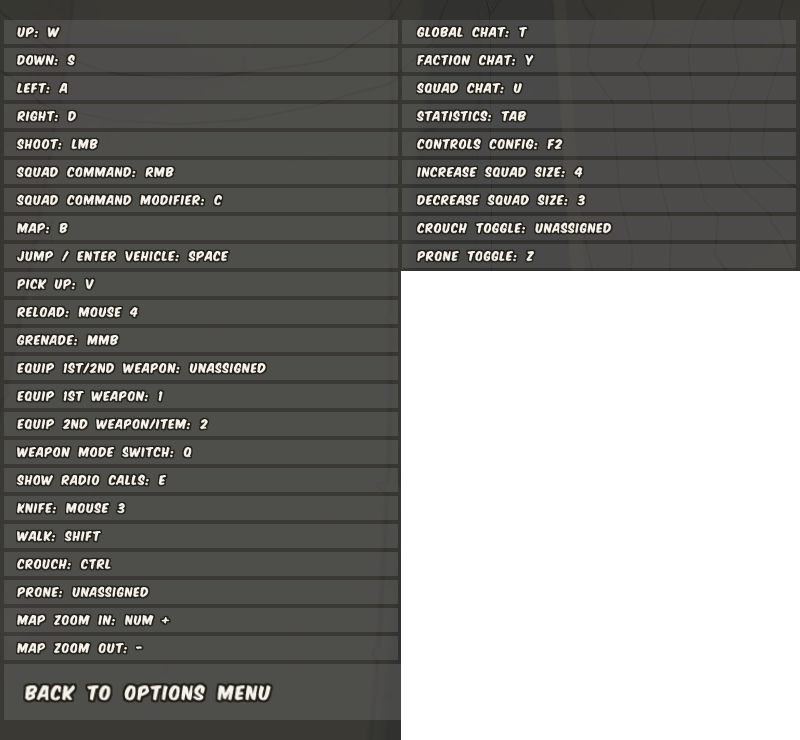 Reasons behind some of those keybinds:
you should be able to easily move in any direction (WASD) and do this action at the same time:
- Squad Command Modifier: C (used with vehicles, or for detonating C4)
- Pick Up: V (inventory)
- Reload: Mouse 4 (side mouse button)
- Grenade: MMB (middle mouse button)
- Knife: Mouse 3 (side mouse button)
- Crouch: Ctrl
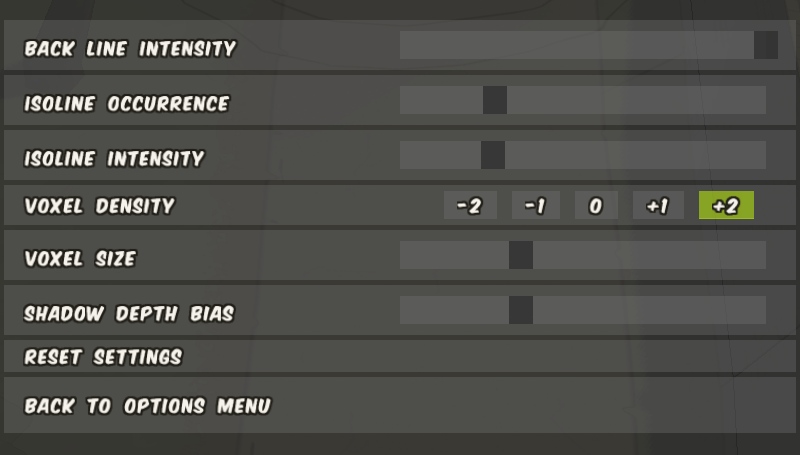 Copy Voxel settings if you want soldiers with more realistic proportions, not so chubby & cartoonish as the default.
Back Line Intensity is maxed to make navigating behind tall buildings as simple as possible. Options -> Preferences and Indicators:
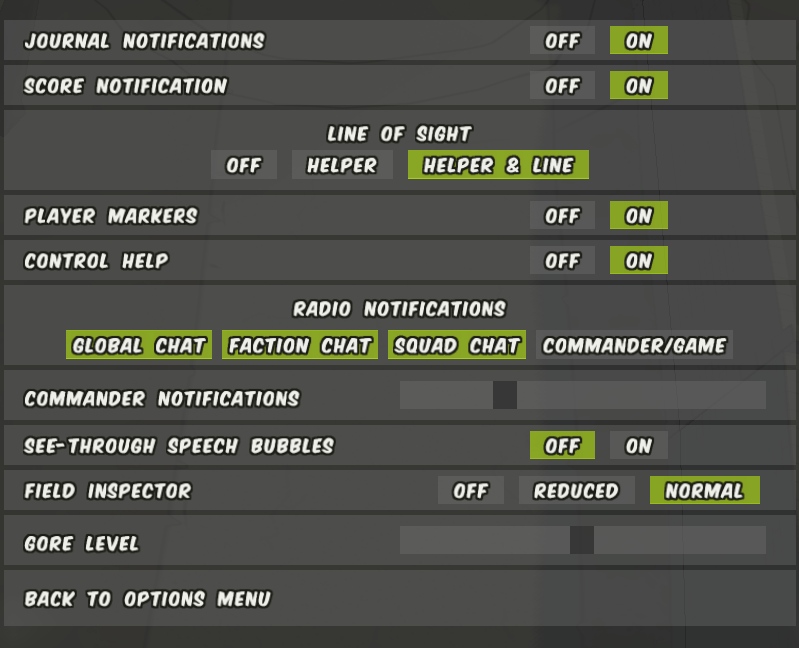 Line of Sight: set to Helper & Line for maximum clarity on where your bullets can hit.
Radio Notifications: disabled Commander/Game.
Commander Notifications: lowered the slider.
^ the message spam from AI commander is unbearable in my opinion.
When set to Helper & Line, the Line thing is too subtle and easily missed in action. You can replace the texture (los.png) with your custom version:
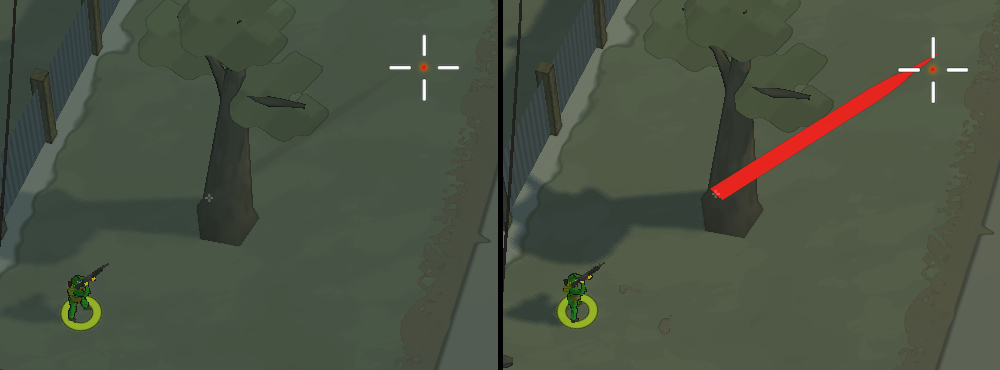 ^ left is default, right is modded.
Open path:
\Steam\steamapps\common\RunningWithRifles\media\packages\vanilla\textures
and backup los.png. Then replace it with a custom version. You can download the one i use here:
https://drive.google.com/file/d/1Bky4YF61QrEZRkvGSOZCMgvb7NPWJUL6
1. Assault Rifles
Most versatile weapon class, and probably the most powerful for general combat.
(RPM)
probability
Start (m)
Range (m)
M16A4 is clearly the best among basic faction rifles, simply because of better Recoil stats. Better Recoil & Recoil recovery means better sustained accuracy, or in other words: you can hit more bodies during the same period of time, compared to other rifles.
- At medium-long range (25-45 meters), fire with single shots. It can take many tries to kill an enemy, but you can shoot accurate single shots very rapidly.
- At medium range (20-30 meters), fire with 2-3 round bursts.
- At close range (0-15 meters), fire with long bursts / full-auto.
If you're a beginner, save at least 5 guns to your Stash. So you could unlock the M16A4 for the Armory whenever you want. After unlocking, don't forget to buy back 5 guns and move them to your Stash.
(RPM)
probability
Start (m)
Range (m)
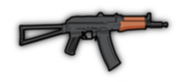
Huge upgrade from basic faction rifles.
Powerful bullet, with better Fall-off Start than faction rifles, but worse Max Range, resulting in a sharper decline. However, 38-42 meters effective range is more than enough for unscoped AR.
High Recoil, but also high Recoil Recovery.
At medium-long range (25-42 meters), fire with single shots or 2 round bursts. Its surprisingly good at that range, provided you master the firing tempo.
Available directly from Ice Cream Van for 200 RP, with infinite supply there.
Ice Cream Van have a chance to spawn on map start, in some random place.
Use GPS laptop to find it, or listen to ingame chat for player callouts, like: ICE here.
(RPM)
probability
Start (m)
Range (m)
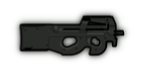
Despite being an SMG, the playstyle is very similar to ARs, because it has the same accuracy as a standard AR (like G36, AKS-74U, F2000), just a shorter effective range.
P90 is a beast at close and medium range. Not only it has a strong bullet with just enough effective range, but it also has 50 rounds in the mag and a very high Fire rate. Big magazine and fast reload - means its good for suppressing fire, better than many machineguns even.
In open areas, approach enemies while crouched to get inside your effective range of 33 meters.- Fire in quick 2-3 round bursts at medium range (20-33 meters).
- Fire longer bursts when shooting at close range (<20 meters).
- Fire full auto at very close range (<10 meters).
So you can shoot accurate 2-3 round bursts with very little time between them.
The P90 can give even the rarest guns a run for their money.
(RPM)
probability
Start (m)
Range (m)
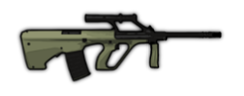
A rifle for long range combat.
If you'll fight at medium range (20-35 meters), the M16A4 will be better, not to mention the AKS-74U. Strengths:
- big magazine
- long effective range of the bullet & fast bullet speed
- slow Fire rate
- very bad Recoil stats
- just average bullet Kill Probability
It's a nice, affordable long range weapon, but if you want a higher performing gun for long range, check SCAR SSR or Stoner 62.
(RPM)
probability
Start (m)
Range (m)
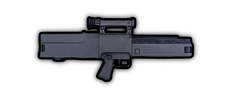
Very well rounded rifle, it's a straight upgrade from M16A4 in almost every stat.
Big 45 round magazine with fast reload.
G11 has two firing modes: full-auto and 3 round burst.
1) Full-auto mode.Has really good recoil stats, better than M16A4.
Same recommendations as M16A4:
- shoot single shots at 25-45 meters
- shoot 2-3 round bursts at 20-30 meters
- shoot long bursts / full-auto at 0-15 meters
2) 3 round burst mode.
It will shoot 3 bullets very fast, with 3000 RPM.
But the pause between the bursts is significant.
The recoil is very low in this mode, but recoil recovery is proportionally lowered too.
This fire mode allows putting 3 bullets in a very tight group, the practical Fire rate might be lower than in Full-auto mode, but it has a bit better sustained accuracy.
The usage becomes similar to DMRs and Sniper Rifles, shoot crouched/prone and wait for full accuracy recovery between bursts.
2. Machineguns
A specialized weapon class that usually has reduced mobility, stance requirements, inaccurate fire, but also high raw DPS and big magazine capacity. Used for defence, pushing through stalemates, crewing open vehicle seats. Less susceptible to high ping than other weapon types.
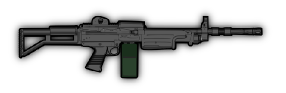
(RPM)
probability
Start (m)
Range (m)
IMI Negev is clearly the best among faction machineguns, simply because of longer effective range and higher Fire rate.
Most machineguns are so inaccurate that you should fire full auto with them and hope for good bullet spread RNG. But thanks to Negev's high Fire rate and powerful bullet, the gun is more reliable at killing enemies.
However, you can go through the full mag very quickly and get stuck reloading in a bad moment when large enemy assault encroaches on you. In those cases, focus on conserving ammo, suppress far enemies with 2 round bursts and kill rushing or flanking enemies with long bursts.
This MG can only fire while prone or over-cover (as all faction MGs), it's clunky to use. I recommend using such machineguns when you defend, or encounter a stalemate, or you're crewing the top gunner seat (on NOXE Ghost APC, Scoprio AXN tank). You can also carry a machine pistol (Steyr TMP) to have some firepower on the move.
If you're in the open and need to start shooting asap, first stop running, face your target, then go prone. If you run and press prone at the same time you'll be doing a dive into prone - which is a longer animation.
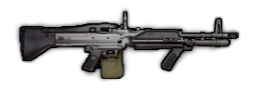
(RPM)
probability
Start (m)
Range (m)
M60 fully loses to IMI Negev in numerical stats. But it allows to fire from any stance, being from the "walk & fire" subclass of MGs. Strengths:
- a lot of damage potential inside one magazine
- no prone requirement
- if bullet spread RNG is good, the gun is good
- if bullet spread RNG is bad, the gun is bad
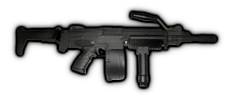
(RPM)
probability
Start (m)
Range (m)
Another "walk & fire" type machinegun.
Ultimax is unique because it has negative recoil and recoil recovery. If you keep shooting you gain accuracy, if you stop shooting you lose accuracy.
This is the gun that benefits from non-stop shooting (mag-dumping) the most in this game. At the beginning it is very inaccurate, but closer to the end of the 100 magazine it gets quite accurate.
Your stance still affects the accuracy, you'll be more accurate if you start from prone, or go into crouch. You can walk & shoot for the first 50 rounds, gain accuracy, then crouch for the remaining 50 rounds for even more accurate fire.
Ultimax has IMI Negev's reload speed: not fast, not slow. If you get caught without ammo in the mag, you can switch to secondary AR mode, it's a very quick swap and now you have 30 rounds to protect yourself.
Very nice bullet stats: good DPS, kill probability, long effective range.
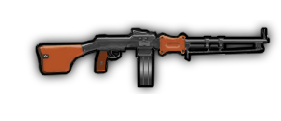
(RPM)
probability
Start (m)
Range (m)
RPD has two modes: normal (allows walking & firing), and with bipod (requires prone or over-cover to fire).
1) Bipod mode is the main selling feature of this gun. This mode has a reduced maximum bullet spread, meaning it is pretty accurate in full auto for a machinegun. The fire is pretty lethal at medium and medium-long range, despite just average Kill Probability, Fall-off and Fire rate.
Bipod mode also has the fastest reload among belt-fed MGs (the PKM animation). This is very good for managing enemy assaults or keeping pressure in the attack.
2) Normal mode is nice to have when you need to run a long distance (faster movement), when you need to skirmish or fight in close quarters.
Note however, that normal mode has 2nd slowest reload among belt-fed MGs (the M240 animation).
2. Machineguns (pt.2)
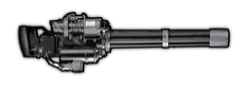
(RPM)
probability
Start (m)
Range (m)
Highest raw DPS among machineguns, very reliable at quickly taking out enemies at close and medium range.
The weight of fire is so big, that you can even beat enemies that are peaking above cover.
The maximum bullet spread is higher than normal machineguns and ARs, but you have such high Fire rate that the gun inaccuracy doesn't even matter.
Huge 1000 round magazine that allows to hold or push back an entire enemy force. While the reload is as fast as IMI Negev's.
WB-II is best suited for big fights, for breaking stalemates, at taking the last enemy bases, good for urban combat with lots of vertical cover and close-medium range fights. It is also the best cost-effective choice for top gunner seats (for vehicles like NOXE Ghost APC, Scorpio AXN tank).
Weaknesses:- Very slow movement speed.
You should carry a machine pistol in you secondary slot (like Steyr TMP). Run with machine pistol in hand and switch to WB-II to fight.When you need to push the front forward in an open area with no cover: keep low, always crouched, move with pistol in hand, get close for effective fire while mostly undetected (25-35 meters), switch to WB-II and clear some enemies, then switch to pistol, move a little further and repeat the process.
Note: equipping EOD armor with the minigun, while looking cool, is a noob trap in 90% of battlefield conditions (movespeed and stealth debuff). Carry three Vest Type II's instead.
- Overheat.
Avoid overheating the minigun, unless you need to defend yourself at close range. Manage enemy movement with optimal suppressing fire and use cover to give your gun some breaks between long bursts. - Can't fire over some cover, and can't go prone.
Many cases of horizontal cover just don't allow you to shoot over them with WB-II. But vertical cover always works, and the gun is incredible for stepping out and beating enemies in a firefight.
WB-II has quite a good skill ceiling. Positioning, use of cover and stealth, rapid reaction in close range fights - can make you an unstoppable force.
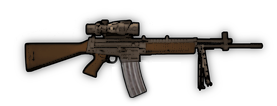
(RPM)
probability
Start (m)
Range (m)
Super different from typical machineguns.
This is actually a mix of an Assault Rifle and a Sniper Rifle, with some fire support features.
Compared to normal Assault Rifles, the Stoner 62 has lower standing and crouch accuracy, but much better prone and over-cover accuracy that's on par with Sniper Rifles.
While many machineguns force you to go prone to start shooting at all, with Stoner 62 you can choose to go prone / over-cover and delete many enemies with incredible speed.
Great Recoil stats, very powerful bullet, good Fire rate, 1.4x zoom, versatile.- For long range (30-60 meters), go prone or behind cover, fire single shots or 2 round bursts with maximum accuracy.
- For medium range (20-30 meters), you can take out enemies from crouched stance, do 2-4 round bursts. The crouched accuracy is not good, but the bullet is so strong that it makes up for it.
Still its best to use prone stance or cover, to waste less bullets and time per enemy. Avoid being prone for long if enemies come from multiple directions.
- For close range (0-15 meters), going prone isn't usually recommended. The closer you are, the longer burst you should do. Shoot crouched or standing / walking (at extreme close range).
3. Shotguns
Shotguns are high risk - average reward type of weapon.
One of the weaker weapon classes comparatively, not for beginners. You need to master the combat basics and be very precise with your controls to make shotguns worth using.
Their weakness is low effective range, which requires you to get right into enemies detection range, and enemy AIs are brutal in close quarter fights, unless you play perfect and wear Vests.
The strength of shotguns is high instant damage and high damage per magazine in close quarters, which in theory allows you to one-shot enemies at <15m range, one by one with the use of cover, and break through urban areas with confidence.
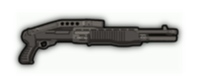
(RPM)
probability
Start (m)
Range (m)
Pump-action shotgun with powerful shot, but low magazine capacity and big pellet spread.
Rate of fire is low, so use of cover is very important to give yourself time to cycle the weapon in safety. With horizontal cover its simple, with vertical cover - peek out, do 1 shot and hide back, repeat.
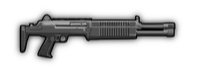
(RPM)
probability
Start (m)
Range (m)
Semi-automatic shotgun, good rate of fire, but the shot is weaker.
Better overall than SPAS-12.
Usually 2 shots is guaranteed to take down one enemy at close range.
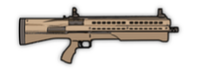
(RPM)
probability
Start (m)
Range (m)
UTS-15 is a big upgrade over SPAS-12.
A lot more ammo in the magazine and is more reliable at taking out enemies in 1 shot.
Big magazine gives you the ability to clear a lot of enemies in close quarters, and be an effective tip of the attack.
Note: UTS-15 pellet spread is bigger when you shoot while running, and tighter when you shoot crouched (as indicated by the crosshair size).
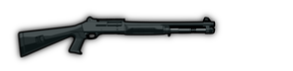
(RPM)
probability
Start (m)
Range (m)
Benelli M4 is a big upgrade over QBS-09.
The most well rounded and high performing shotgun for close range combat (<20 meters).
High rate of fire, big magazine and a powerful shot (a bit weaker than UTS-15) with relatively tight pellet group. With Benelli M4 you can do the highest shock damage in a short period of time (among shotguns), decimating enemies when storming their position.
Semi-automatic action also has the benefit of not slowing you down when you run and shoot. With pump-action you slow down to cycle the shotgun.
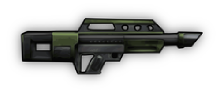
(RPM)
probability
Start (m)
Range (m)
Full-auto shotgun with magazine reload.
Plays more like a short range Assault Rifle or P90, with similar effective range and DPS.
Not bad Accuracy (tight pellet group) and good Recoil Recovery, so when shooting at medium ranges of 20-35 meters you should pace yourself and fire single shots with enough time between them to recover your accuracy.
In close range fights, a quick 2 round burst is usually enough to reliably kill one enemy.
Jackhammer is generally weaker than P90 due to low magazine capacity (lower damage per mag), and is less reliable at killing enemies at medium range due to less precision. The DPS of Jackhammer is good, but not great either.
3. Shotguns (pt.2)
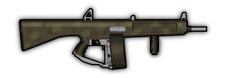
(RPM)
probability
radius (m)
speed (m/s)
Start (m)
Range (m)
Automatic shotgun, fires frag rounds (miniature grenades).
It's a peculiar weapon, takes certain playstyle to make it work.
The power level of AA-12 Frag is about the same as AKS-74U / Jackhammer, maybe slightly higher.
- Strong direct damage, instakills an unarmored soldier, and guaranteed to stun enemies in Vests (except enemies in EOD suits).
- A hit is guaranteed to deal damage (kill or strip one Vest layer), no Fall-off. Maximum range is 75m.
- A lot of damage potential in one magazine.
- Good Firerate for defeating enemies at close range.
- Can take out 2-3 enemies in one shot if they're closely packed.
Weaknesses:
- Inaccurate fire.
- Slower projectile speed (75 m/s vs standard 100 m/s).
- Slow reload (AA-12 animation).
How to use:
Treat it like a DMR / Sniper rifle with a faster Fire rate and Recoil Recovery. Rely on direct hits, because the blast radius is too low to use it like a grenade launcher.
Forget about full-auto, in 90% of cases anyway.
- For long range (30-50 meters), shoot from prone, spam single shots with enough time between them to recover full accuracy. With practice you'll get into rhythm and won't have to look at the crosshair.
- For medium range (20-30 meters), shoot crouched, but prone is still worth it for accuracy. Spam with single shots, and you can be a little faster, before the recoil is fully recovered.
- For close range (0-15 meters), start tapping the fire button even faster, or use full auto at very close ranges. Shoot crouched or while walking. If you start firing full auto on the run, the first shot won't be accurate at all.
4. Sniper Rifles
Marksman weapons for medium and long range combat.
Sniper Rifles are more deterministic than other weapon types, thanks to usually having 1.0 Kill probability (or close to that) and good precision. As such, higher skill ceiling, you're as good as your aiming skill. More susceptible to high ping than other weapon types.
(RPM)
probability
Start (m)
Range (m)
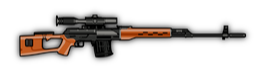
Semi-auto sniper rifle.
Better and more practical than other faction sniper rifles (which are bolt-action) thanks to higher Fire rate, better Recoil recovery and faster reload speed, with exactly the same accuracy.
Kill probability is slightly lower than 1.0, but 0.9 is still pretty reliable.- At long range (30+ meters), don't spam it, let your accuracy recover between shots. Prone stance is useful at very long ranges to have perfect precision.
- At medium range (20-30 meters), you can start shooting a bit faster, before the accuracy fully recovers. But prone enemies still require good accuracy.
- At close range (<15 meters), you should spam as fast as possible. But don't shoot while moving, stay crouched or at least standing still.
(RPM)
probability
Start (m)
Range (m)
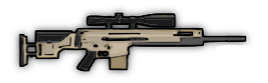
Semi-auto sniper rifle.
Clean and big upgrade over Dragunov SVD, and the usage tips are the same. You'll be more comfortable at close range thanks to higher Fire rate and bigger magazine.
5. Grenade Launchers
Grenade Launchers are explosive weapons that allow killing enemies behind cover. They're effective against groups of infantry that are being suppressed by your team.
You can also destroy deployable cover blocks and enemy vehicles, but it can take some time since these aren't anti-tank weapons, their explosive damage is relatively low.
(RPM)
damage
radius (m)
speed (m/s)
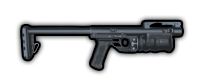
Single-shot grenade launcher.
Most likely the best among faction alternatives thanks to biggest Blast radius. The drawback is slower reload speed and slightly lower projectile range - complete opposite to GL06 (which is a worthy alternative).
Explosive damage will one-shot enemies without armor, or will strip one Vest layer.
Recommended secondary weapon: cheap machine pistol (like Steyr TMP) for self-defence and moving fast.
(RPM)
damage
radius (m)
speed (m/s)
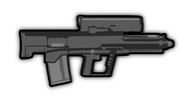
Air-burst grenade launcher.
The grenades explode in the air, above your target. When you shoot, the grenade flies almost in a straight line, and its destination is where you aim, just a little higher in altitude.
XM-25 completely nullifies horizontal, low cover for enemy infantry, and it kills them so easily behind most cover. Just aim straight at an enemy behind low cover.
Explosive damage will one-shot enemies without armor, or will strip one Vest layer.
Recommended secondary weapon: MP7, Desert Eagle Gold.
6. Suppressed weapons
Weapons for stealth operations.
Suppressed weapons don't draw aggro with sound. But they will still alert enemy squads when you shoot at them, and enemies in that squad will try to advance and check your position.
So in stealth there's 3 tactical approaches:- A) don't kill, avoid combat
- B) start shooting and kill everyone quickly
- C) start shooting and suppress all enemies to lock them down from moving
Suppressed weapons are usually much weaker than loud weapons of the same type and price, with less DPS and effective range. They suck for general combat (with rare exceptions), you shouldn't fight with silenced weapons on the same frontline as the main force. You better flank, inflitrate and destroy stationary weapons, Anti-Aircraft (AA) structures or steal / ambush enemy vehicles.
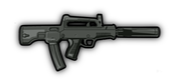
(RPM)
probability
Start (m)
Range (m)
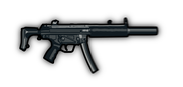
(RPM)
probability
Start (m)
Range (m)
Out of 3 faction suppressed SMGs, the QCW-05 and MP5SD are the better ones, each having their own advantages. If we compare:
- MP5SD has a better bullet, 0.4 vs 0.35 Kill probability. Though they're both much weaker than basic loud weapons that enemies use, so you should avoid getting detected and being shot at as much as possible.
- QCW-05 has much bigger magazine which allows to deal more damage per reload. Having 50 rounds is very good for suppression (crowd control). Also QCW-05 has slightly higher Fire rate that narrows the DPS difference at close range.
- MP5SD has a very fast reload animation, which is used for prone stance too. Most rifles & SMGs have a very slow reload when prone, using a specific prone animation. With MP5SD you are much less likely to get caught when reloading in prone position.
Suppresed SMG's have the same accuracy as the usual Assault Rifles, but much lower effective range.
At medium range (15-30 meters), fire single shots or 2-3 round bursts. It can take some tries to kill an enemy, but you have good accuracy and you should stay undetected with the use of Camouflage suit / Black Ops Vest.
At close range (0-15 meters), fire full auto or long bursts. Just don't expect to win against alerted enemies on equal footing.
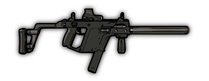
(RPM)
probability
Start (m)
Range (m)
KRISS Vector is a very nice upgrade in Kill probability, effective range and Fire rate (good for close range DPS) over faction suppressed SMGs.
Big weakness is low magazine capacity, but it shouldn't matter much if you play stealth properly and don't over-extend.
Such high Fire rate makes shooting single shots tricky, so stick to 2-3 round bursts for medium range.
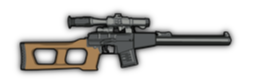
(RPM)
probability
Start (m)
Range (m)
VSS Vintorez is a rifle, extremely powerful in suppressed category, and pretty lethal even compared to loud guns.
Long effective range, powerful bullet, good Recoil stats, big magazine.
The drawback is low initial accuracy. To alleviate that, shoot from prone at 25+ meters.
VSS fires in full-auto, but don't spam it at medium and long range, shoot single shots with slow enough pace to keep it accurate.
7. Secondary pistols
Pistols and machine pistols for your secondary slot.
Useful for self-defence / close range combat when you carry a Grenade Launcher, or slow firing Sniper Rifle, or prone-only Machinegun.
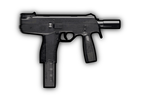
(RPM)
probability
Start (m)
Range (m)
Full-auto machine pistol, cheap and decent. Best among alternatives from other factions.
Inaccurate at medium range, so you should fire long bursts / full-auto like an MG.
Good at close and close-medium range, where its on par with a standard faction AR.
Steyr TMP can't be unlocked for Green or Brown faction, its only available for Graycollars Armory. Save 5-8 guns to your Stash for later use.
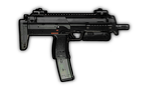
(RPM)
probability
Start (m)
Range (m)
(very low spawn chance)
Full-auto machine pistol.
Huge upgrade over Steyr TMP. It even beats a lot of Assault Rifles at medium range.
MP7 has an unique trait: it remains fairly accurate when you fire full-auto (at maximum crosshair size).- At the end of medium range (27-35 meters), shoot with 3 round bursts.
- At close and close-medium range (0-25 meters), shoot with long bursts or full-auto.
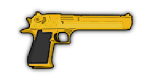
(RPM)
probability
Start (m)
Range (m)
Semi-automatic pistol for long range, basically a pocket Dragunov SVD.
Don't forget to crouch or prone for long range shooting.
8. Secondary equipment
Various support equipment for secondary slot.
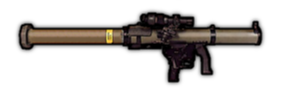
capacity
(RPM)
damage
radius (m)
speed (m/s)
The best anti-tank weapon that can be bought from Armory.
There are a few better Rocket Launchers from other sources, but their supply is limited, they're collectables. So SMAW is the most practical choice for anti-tank use.
SMAW is a huge upgrade over faction Rocket Launchers due to multiple factors:- Can carry 3 rockets instead of just 2
- More damage (per rocket)
- Better accuracy
- Has a good scope
- Faster rocket speed
Tips for combating vehicles using Rocket Launchers.
There's 2 main approaches to destroying Tanks / APCs / Light vehicles:
- Stay outside detection range of the enemy vehicle. Be crouched, maybe carry 1 Black Ops Vest with you, wear it for night time.
- Vehicles have long sight ranges, longer than AI soldiers with unscoped guns.
- Approach enemy vehicle from the Left, Right or Diagonally, never engage directly from Top or Bottom (explained in Combat Basics).
- Don't stay close to the roads or paths that enemy vehicles drive through, they can suddenly appear and insta kill you.
- Shooting a rocket adds recoil (crosshair gets bigger) that is slow to subside. If you shoot another rocket right away, it will be inaccurate. It takes 3-4 seconds to recover full accuracy.
- Use vertical cover (buildings, large rocks) to hide from the vehicle's line of sight.
- When the vehicle turret looks away from you, peek out and shoot 1 rocket, then quickly hide back.
- Tank turrets rotate the slowest, APC's a bit faster, MG turrets rotate the fastest. Don't underestimate mounted MGs.
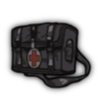
capacity
speed modifier
Used for reviving wounded players. Also useful for increasing your movement speed, helpful when you have a bulky primary weapon (and don't really need a machine pistol). Though be careful, as you can easily do more harm than good. Don't just run towards wounded as soon as you notice them. Check:
- Enemy count and pressure, are they breaking through;
- Your teammates in the area, how much firepower they output to keep enemies under control.
Using the medikit is a long process, enemies can easily rush in and kill both of you with bullets or grenades. It is often more beneficial to simply keep fighting, ignore the wounded (even if you have a medikit!), stabilize the frontline or push it forward, so that wounded players can crawl back and get revived by AI soldiers or by other players. Or simply bleed out, respawn and retrieve their gear much more easily (while you hold the front).
So i don't think most people should be medics, 1/3 - 1/4 of players is enough. Instead of medikit you can take the SMAWs or Cover Deploy. A few SMAW users can prevent a lot of trouble by eliminating enemy Tanks quickly, before they roll you over and force you to abandon the wounded and the dead (with rare guns on them).
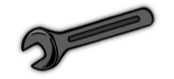
capacity
speed modifier
vehicle HP
This is for vehicle enjoyers, for drivers and turret gunners. In RWR you have 3 tools for repairing vehicles: Small wrench, Large wrench, Welding torch.
- Welding torch is the best, but it's a rare drop (expensive), and it gets destroyed if you die.
- Large wrench is second best, and its average repair speed is 40% faster than with the Small wrench.
Large wrenches are only available from Supply Quads, which are pre-spawned on some maps, but you can also airdrop one for 350 RP. I recommend keeping 50-60 Large wrenches in your Stash, its convenient.
capacity
speed modifier
Points
A simple Cover deploy, but can be a game changer in the right place and the right time.
Bullets can't destroy it, only explosives or vehicles can. Its tall and will make it really hard for enemies to hit you when you fire above the cover.
Strategically, its useful in 2 scenarios:- On maps where you need to capture the center point and hold it.
- When you push through heavy resistance, and need to secure your gains.
In coop servers, it can be a feast or famine situation.
During defend maps, the players riddle the ground with cover to an absurd degree, that sometimes benefits the enemy.
But on normal maps, during stalemates, not a single cover is being deployed.
9. Secondary equipment - deployable weapons
Deployable weapons have incredible firepower, and usually should be crewed by AIs to free up players to do other things.
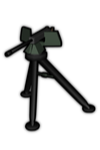
(RPM)
probability
Start (m)
Range (m)
Cheapest and most widely useful stationary weapon. Incredibly good for defense or for stabilizing gains in the attack.
Usually, you want MGs to be operated by AI soldiers.
Read more in Combat Basics -> 8) Your AI Squad.
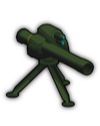
(RPM)
damage
radius (m)
speed (m/s)
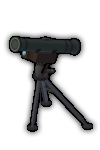
Specialized anti-tank stationary weapon, useful in defense type maps that have respawning enemy vehicles (Vigil Island, Dry Enclave).
A bit niche, but can be incredible in the right position. Give it a long sight line, aimed straight along the road to avoid misses at fast moving vehicles. Place a few cover blocks and order AI to enter the TOW.
(RPM)
damage
radius (m)
speed (m/s)
Hornet is the most powerful stationary weapon that can be placed.
It can eliminate infantry and vehicles with great efficiency, flying over obstacles, at long range, and one Hornet can cover a wide angle (120°).
Mostly placed for defence, useful with AI gunner, but a player gunner can be a lot more beneficial.
The effectiveness is somewhat dependant on having enough suppressing fire from your team or stationary MGs, to stop enemies from advancing and to make them grouped.
Vehicles on the move will likely dodge the Hornet fire (when AI is operating the Hornet), so you should hide Hornets behind indestructable cover or on top of buildings, or place TOWs instead (for anti-vehicle defense).
10. Throwables
capacity
damage
radius (m)
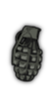
Simple, cheap, very effective with a high skill ceiling.
Explodes in huge 6m radius, killing unarmored soldiers or stripping 2 layers of Vest.
They're very fast to throw, they can augment your main assault weapon better than underbarrel attachments or secondary weapons.
Enemy AIs in RWR can be very dangerous in close quarter combat. Hand grenades are perfect for safely eliminating enemies at close and close-medium range without endagering yourself to direct bullet fire. Don't save the grenades, you can buy or loot them very easily. You can even put 20-30 grenades into Stash, to have more places to replenish.
Hand grenades can overcome very large differences in height - you can throw them onto the roof of a building while standing at its base. Grenade launchers can't do that.
Hand grenades can also reach a pretty long distance away, you'd be surprised.
capacity
damage
radius (m)
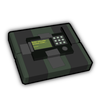
This throwable is for more experienced players. It allows ambushing enemy vehicles and sometimes Elite soldiers, especially useful against EOD elites with shotgun & shield. C4s can be thrown from the tops of buildings to explode enemies that gathered below.
Single C4 will destroy any vehicle (with exception of the Darkcat).
In order to ambush vehicles, know where they're usually moving through and have a weapon with fast movement speed. When you hear a vehicle approaching, go out and place the C4 along its possible path, then hide (while possibly dodging incoming fire) and detonate when the vehicle gets inside 6m blast radius.
To detonate the C4 you can click on it, but i recommend using the "Squad Command Modifier" + "Grenade" combo.
C4 is also the primary way of destroying enemy structures (Jammers, AA emplacements, Prison bus and Prison door). And can be used to remove metallic fences.
11. Armor (Vests)
Body armor that protects you from bullets and explosives.
The Vests that are mentioned here are single-use items, when damaged you just throw them away and buy a replacement. You can wear one Vest on yourself, and have up to 2 in the backpack without encumbrance penalties (at >20% backpack load you start to lose movement speed and accuracy).
For detailed information on how Vests absorb damage, check the wiki:
https://runningwithrifles.fandom.com/wiki/Weapons_and_equipment#Armors/Camouflage_suits
speed modifier
encumbrance
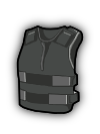
Unlocked from 1,000 XP, it remains the most commonly used armor, even by veterans with more than 1,000,000 XP, simply because it's widely available and doesn't have apparent weaknesses (just a small movement speed debuff).
The Vest has 3 layers. It can take 2 instances of damage with you being unharmed, but at the 3rd instance of damage the Vest is deleted and you become wounded.
- First damage dealt by a bullet will strip one layer, but will not stun you. Your armor will look like this on your HUD:
- 2nd damage dealt by a bullet will strip another layer and will stun you. Your armor will look like this:
- If you get damaged again by a bullet, the Vest will be deleted and you'll become wounded, lying on the ground:


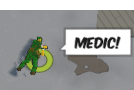
As you see, Vest Type II doesn't give a lot of protection, but you can compensate this by carrying spare Vests in your backpack, and quickly changing them in combat.
If you want to survive, avoid getting stunned like the plague. If you get your top 2 layers removed in a close - medium range fight, consider yourself dead. Enemy soldiers could make themselves a coffee, read newspaper, call their mom, and still have the time left to throw a grenade that will finish you off.
When the 1st layer is removed, replace your Vest with a fresh one from your backpack as soon as possible. Hold Inventory key ("Pick Up") and simply click on the new Vest. The process is quick and you can even do it on the run.
A hand grenade or mortar shell will strip 2 layers of Vest, so you can only withstand the explosion if you have your Vest Type II at full condition.
Save 20-30 Vests to your Stash, to have more points on the map where you can restock.
Note about RP costs for new players: while constant buying and replacing damaged Vests can be costly, don't worry and just generate more RP. Three main ways are:- Being in the zone when it's being captured by your faction;
- Looting valuables[runningwithrifles.fandom.com] and selling them to Armory;
- You can also sell Rare weapons looted from Elite soldiers, if you don't need them yourself.
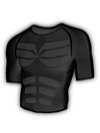
speed modifier
range
encumbrance
This is a more specialized armor, used for:
- stealth operations, compliments Camouflage suit;
- general combat, compliments Vest Type II;
- fast and risky gameplay, carrying exclusively Black Ops Vests.
Black Ops has less protection than Vest Type II, especially from explosives - one hand grenade or mortar shell insta-kills you.
First layer can absorb one damage from a bullet without stunning you, which makes this Vest not a bad alternative to Vest Type II for close range fighting.
You run faster (7% speed difference) and have -25% detection range modifier during night time.
The reduced detection at night is the main selling point. In general combat, it allows you:- much more aggressive approaches towards enemy positions; eliminating enemy infantry with deadly fire and hand grenades, while they don't even see you.
- defeating vehicles with more confidence: shooting SMAWs while undetected, or ambushing with C4 explosives / EMP grenades.
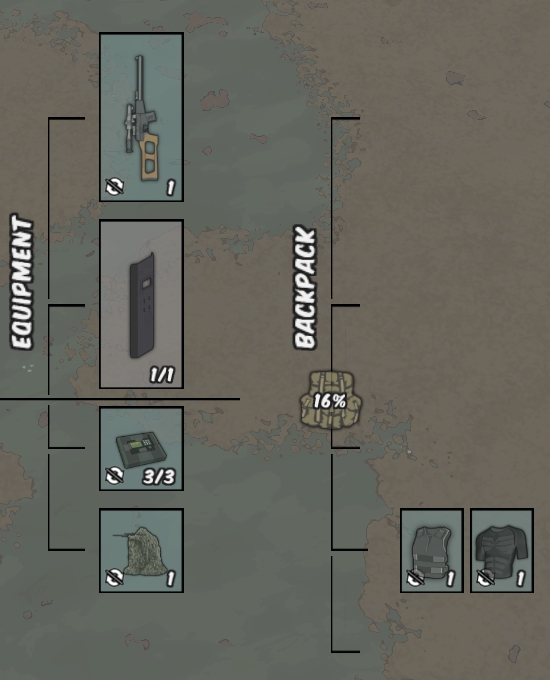
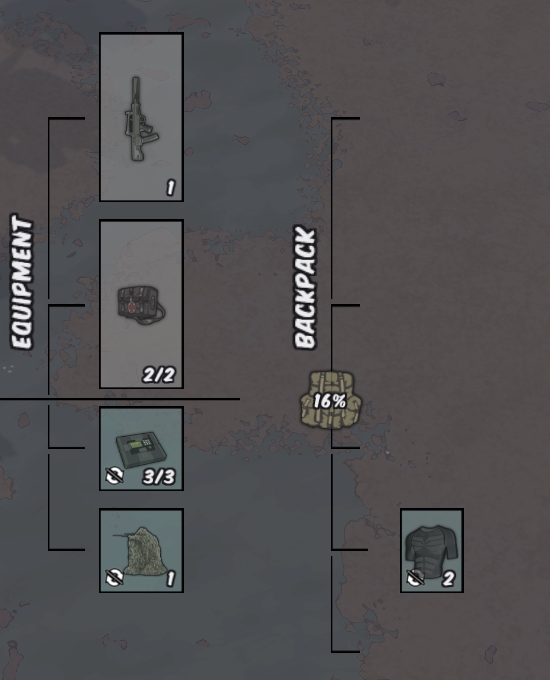
Loadout examples
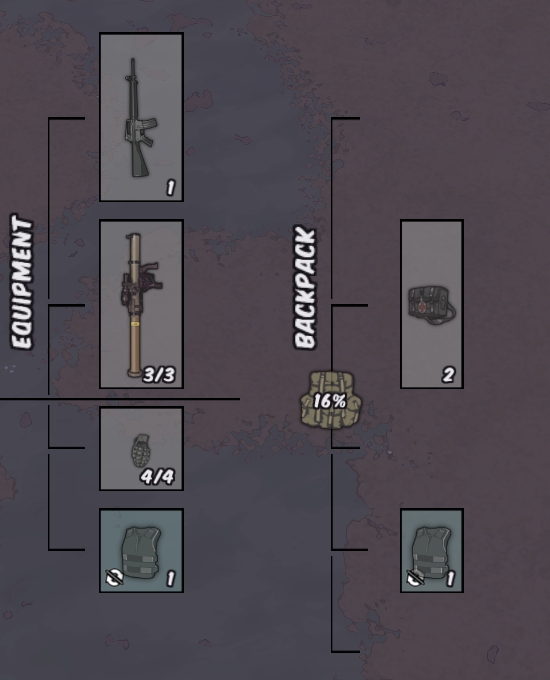
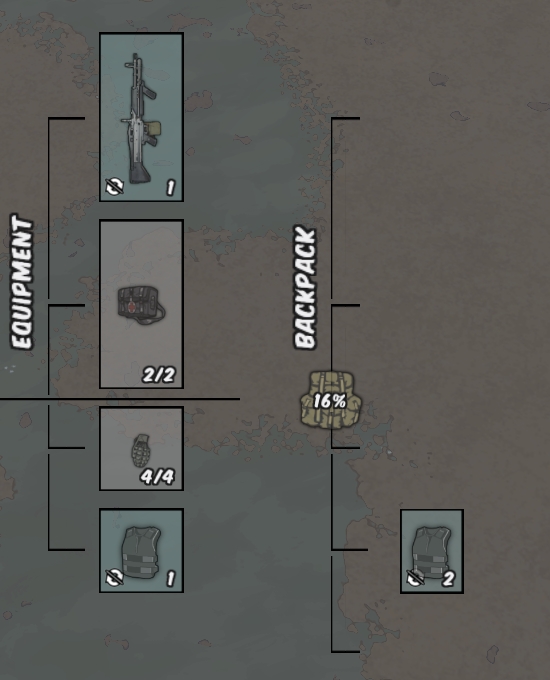
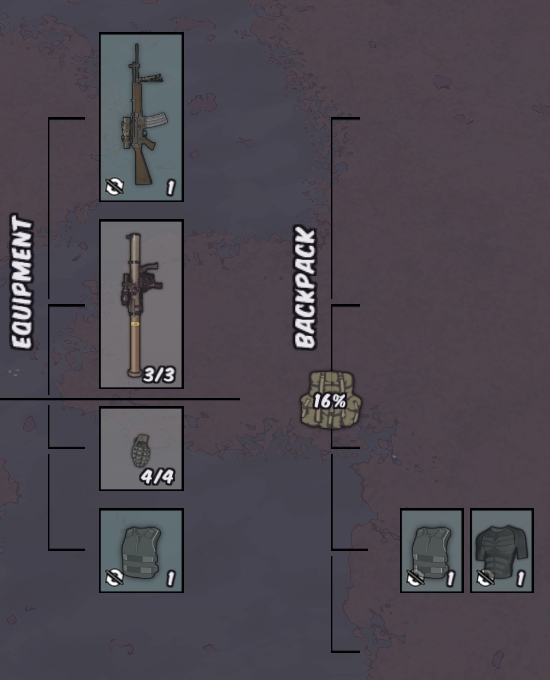
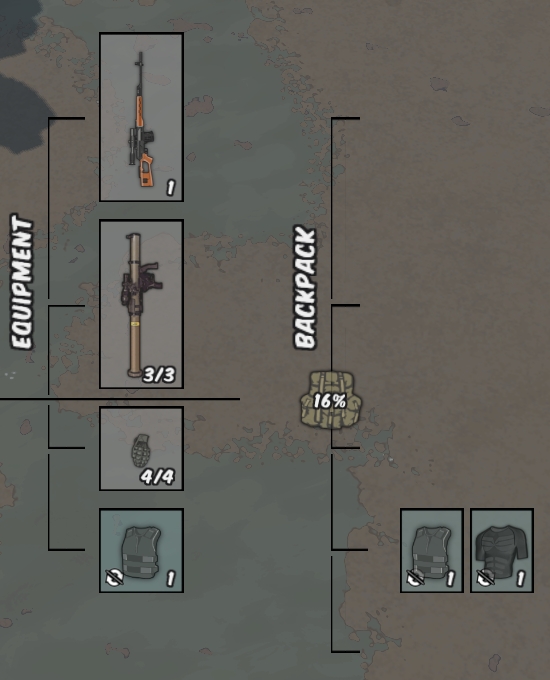
Here are optimal, generalized loadouts. They can be further fine-tuned for certain situations.
Mix & match, experiment to find what you enjoy and what works for you.
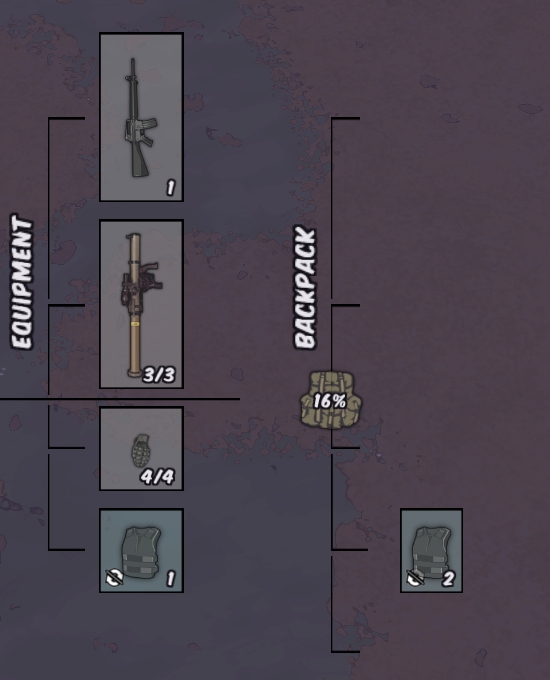
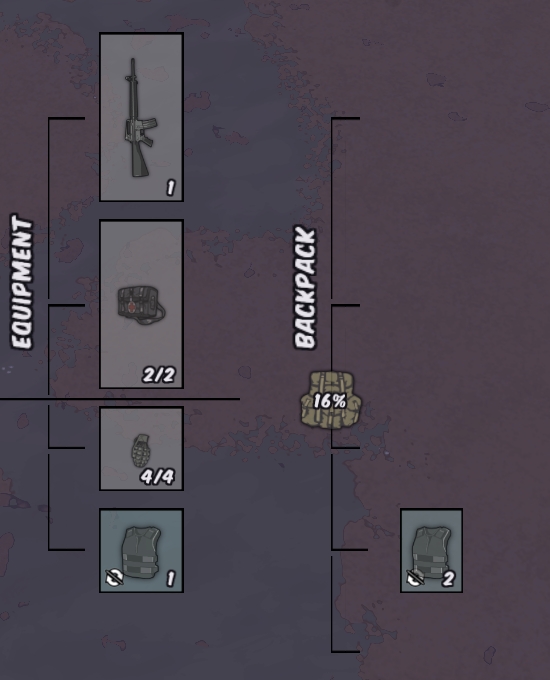
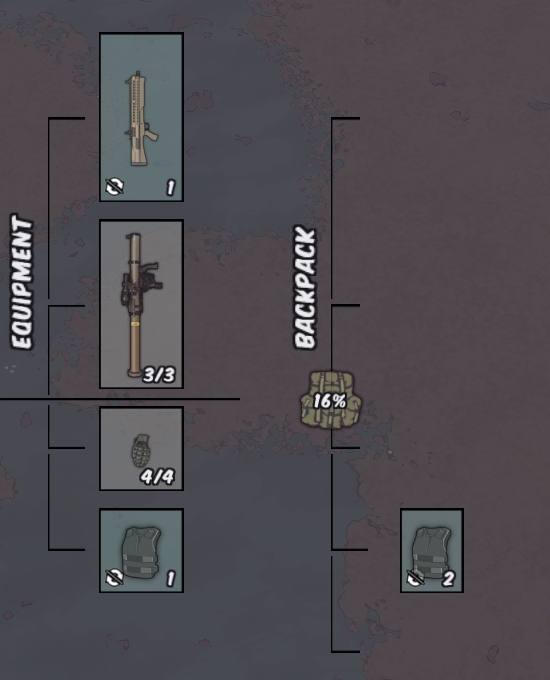
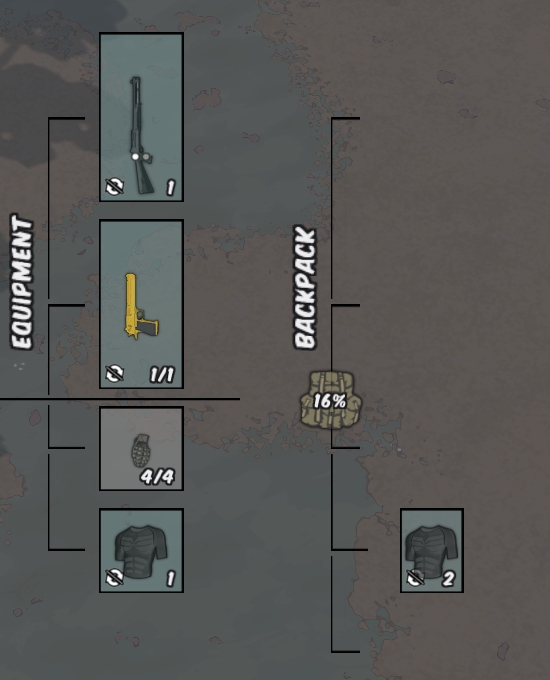
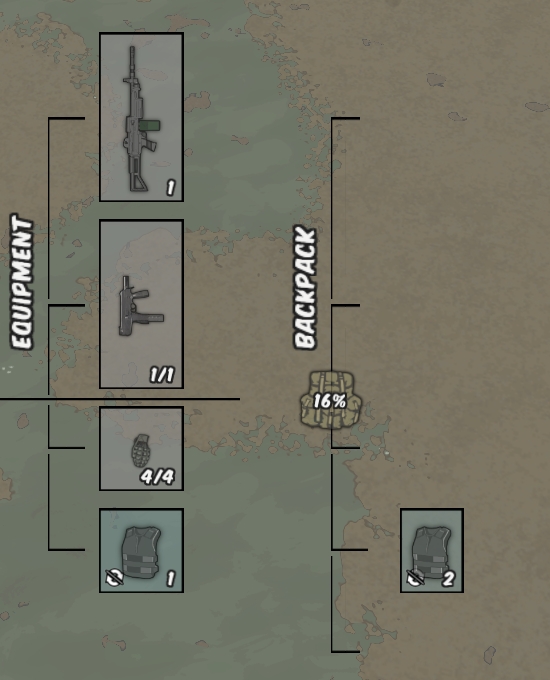
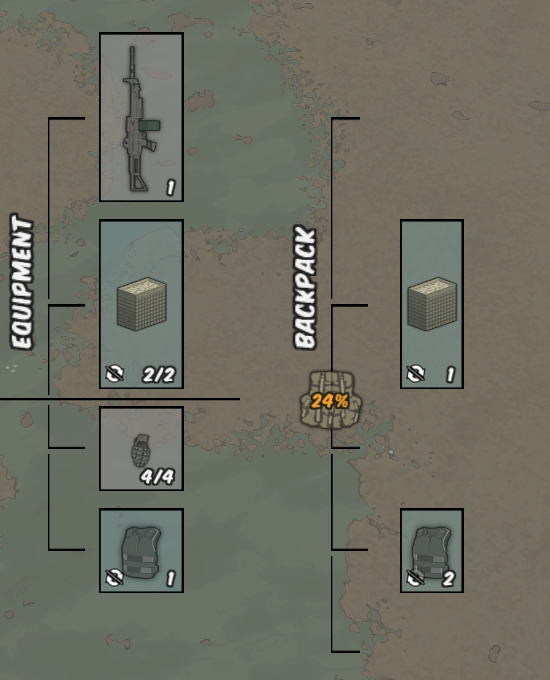
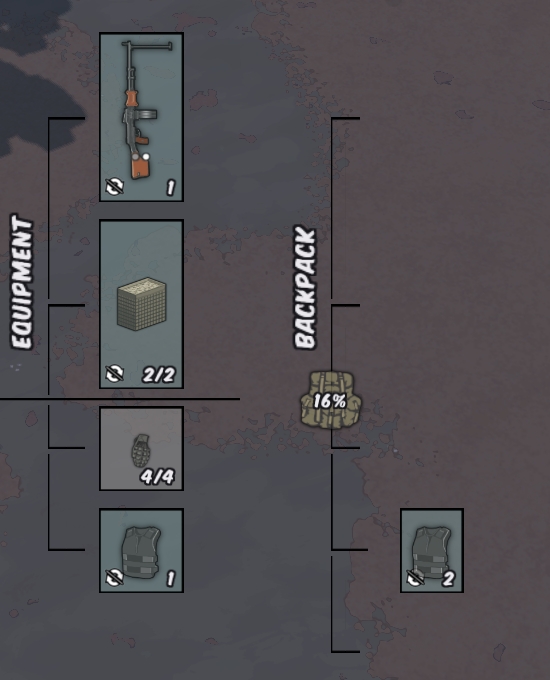
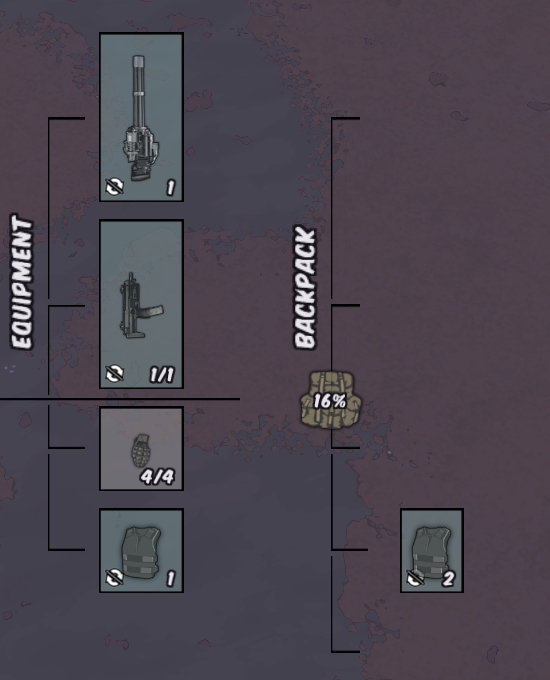
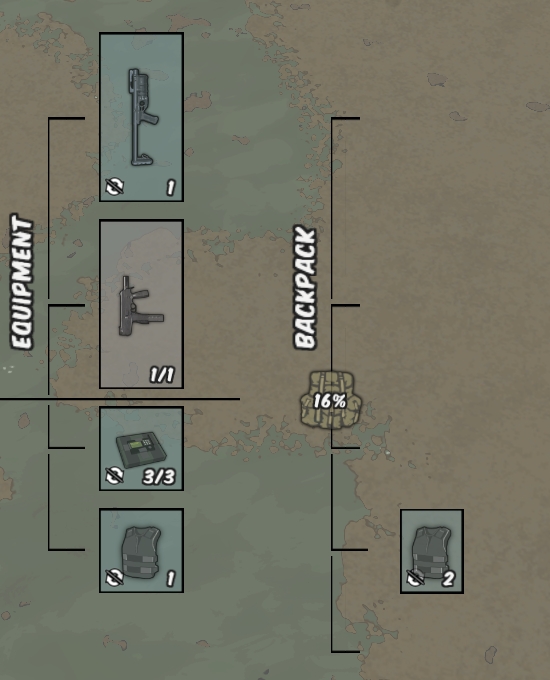
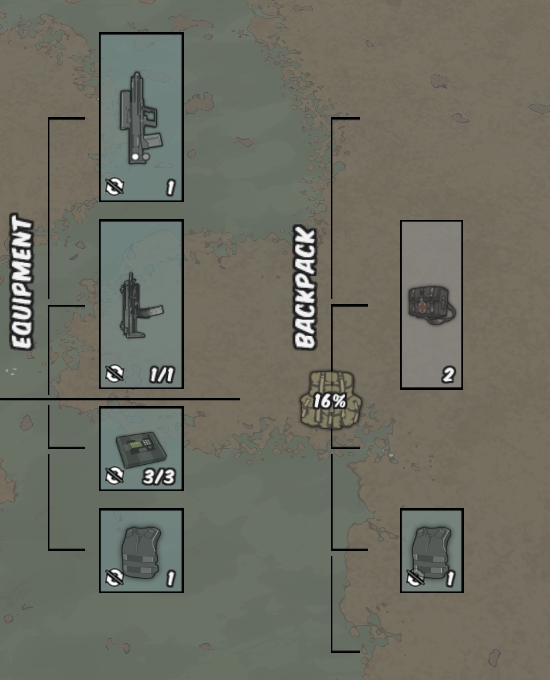
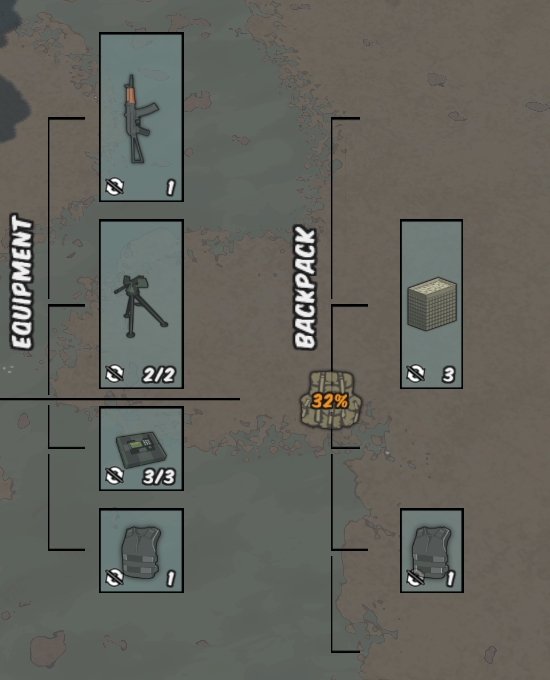
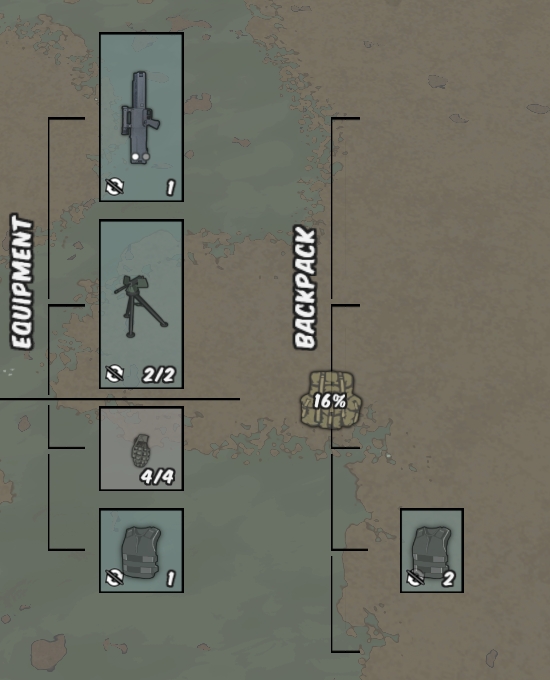
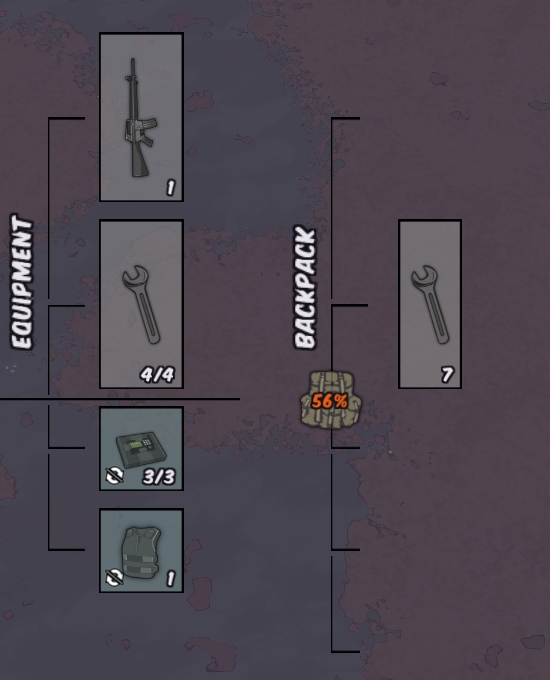
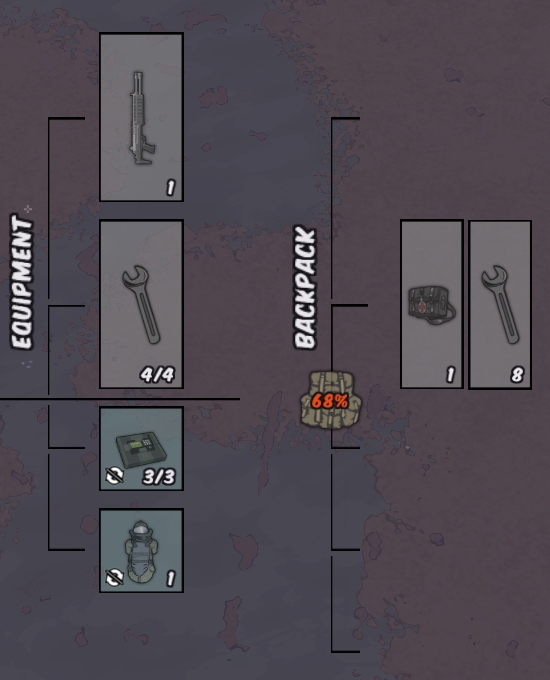
- Opt_0™: Starter Guide to RUNNING WITH RIFLES.★ 5 (472)28k views457 ♥33 minUpdated 23 Mar, 2023
- Secret Crates and Cars in RWR / The Tracker challenge guide★ 5 (1k)26k views2k ♥4 minUpdated 27 Jun, 2020
- Private to Commander: Guide to Running With Rifles★ 5 (460)25k views454 ♥78 minUpdated 27 Jan, 2020
- Running With Rifles: Weapons and Equipment Guide★ 5 (186)13k views352 ♥78 minUpdated 18 Jul, 2021
- 【中文指南】如何在潜行中把作者充满恶意的设计按在地上摩擦★ 5 (570)13k views531 ♥1 minSimplified ChineseUpdated 1 Oct, 2018
- Single player chat codes★ 5 (226)11k views528 ♥4 minUpdated 18 Aug, 2020


- Upgrading to PremiumTeam Fortress 2★ 5 (20k)1441k views11k ♥6 minUpdated May 11, 2022
- No More Room in Hell Official ManualNo More Room in Hell★ 5 (2.8k)569k views2.1k ♥29 minUpdated Apr 22, 2019
- NMRiH Community Hosting GuidesNo More Room in Hell★ 5 (526)351k views653 ♥1 minUpdated Aug 10, 2022
- How to 'Git Gud' Soon™MORDHAU★ 5 (2k)318k views3k ♥68 minUpdated Nov 16, 2024
- Лучшие кооперативные игры SteamPAYDAY 2★ 5 (1.5k)315k views2.1k ♥56 minRussianUpdated Apr 27, 2025
- Desert Eagle Heat Treated | Blue GemCounter-Strike 2★ 5 (1.6k)293k views1.5k ♥2 minUpdated Jan 16





This guide was created by its original author on the Steam Community. Are you the author and want it removed? Request removal.