[UPDATED] All Cursed Possessions (All Spawn Locations, Every Map)
Overview
This guide pertains to Phasmophobia v.0.8.1.3, and may become inaccurate in future versions. Information subject to change. If something in this guide is found to be inaccurate or outdated, I apologize, and encourage posting corrections and updates in the comments below.
Quickly, if you are also looking for tips to correctly identify the ghost type, I also created a guide to hopefully help with that as well, linked below.
https://steamcommunity.com/sharedfiles/filedetails/?id=2945652612
I also created a guide covering all the equipment types, uses and tiers added in the Ascension Update overhaul, so if you're curious about the new systems or want to learn the basics, check it out.
https://steamcommunity.com/sharedfiles/filedetails/?id=3020898653
In total, there are currently 7 unique cursed possessions in the game, and with standard difficulties (EXCEPT for Insanity), 1 of them will spawn on the map every match. This can be modified using custom difficulty settings.
Using any cursed possession will end the set up/grace period at the start of an investigation
They also have the chance to trigger a cursed hunt. Cursed hunts last longer than a standard hunt, which is roughly 20 seconds longer than usual.
Any hunt after a cursed hunt is triggered will be longer for the rest of the match. The extended duration depends on current difficulty and map size. Additionally, the amount of time at the beginning of a hunt that the ghost will remain stationary and invisible before going after you, also known as the hunting grace period, will be reduced to 1 second. Standard hunting grace period durations are:- Amateur = 5, Intermediate =4, Professional = 3, Nightmare = 2
Finding the cursed item can be an easy way to get 3 star photos. Taking a picture of the item itself will yield a 3 star, as well as any interaction resulting from it (throwing things, etc, as well as each answered question with the Ouija Board).
Additionally, by using a cursed possession once in game, that item will permanently be on display in any lobby you host going forward, located in the back of the warehouse, by the skeleton display case, and any other trophy you may have acquired thus far. Note: For the summoning circle, all candles must be lit to count as a proper use.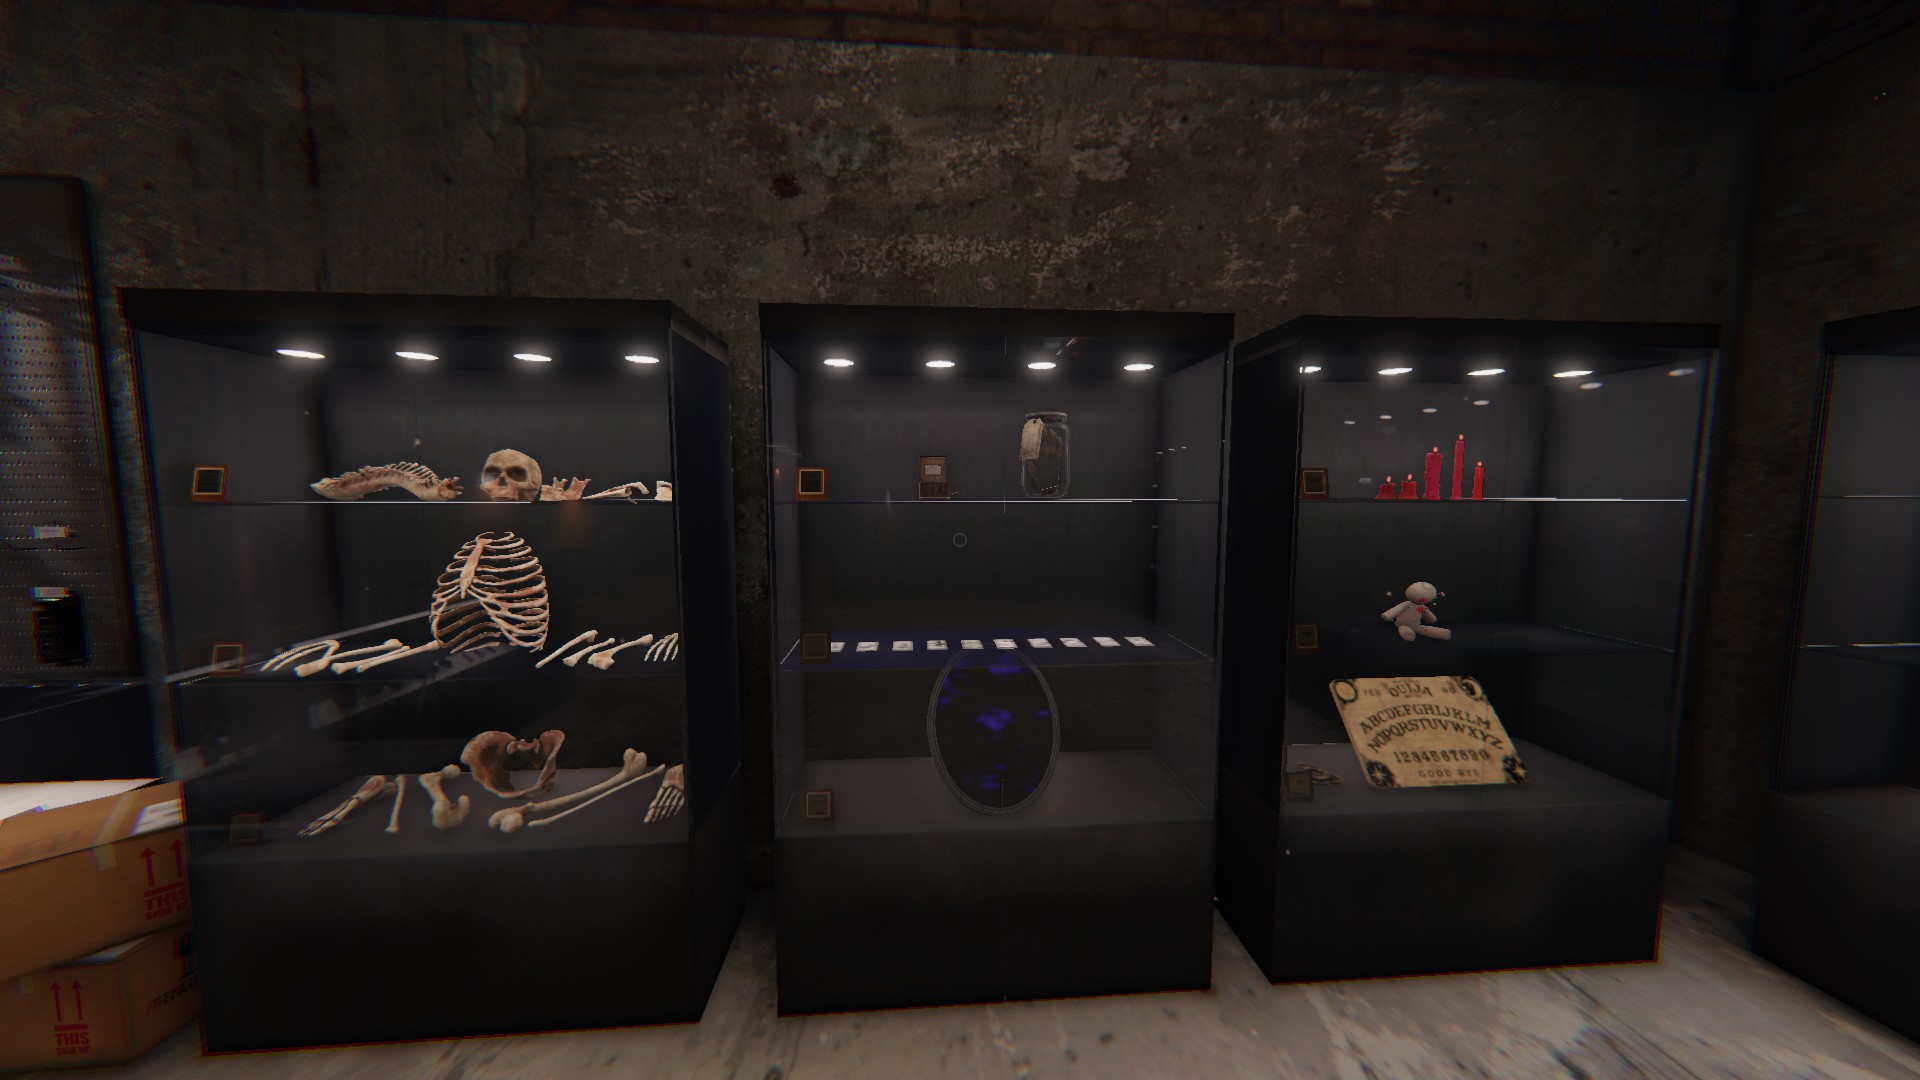
Music Box
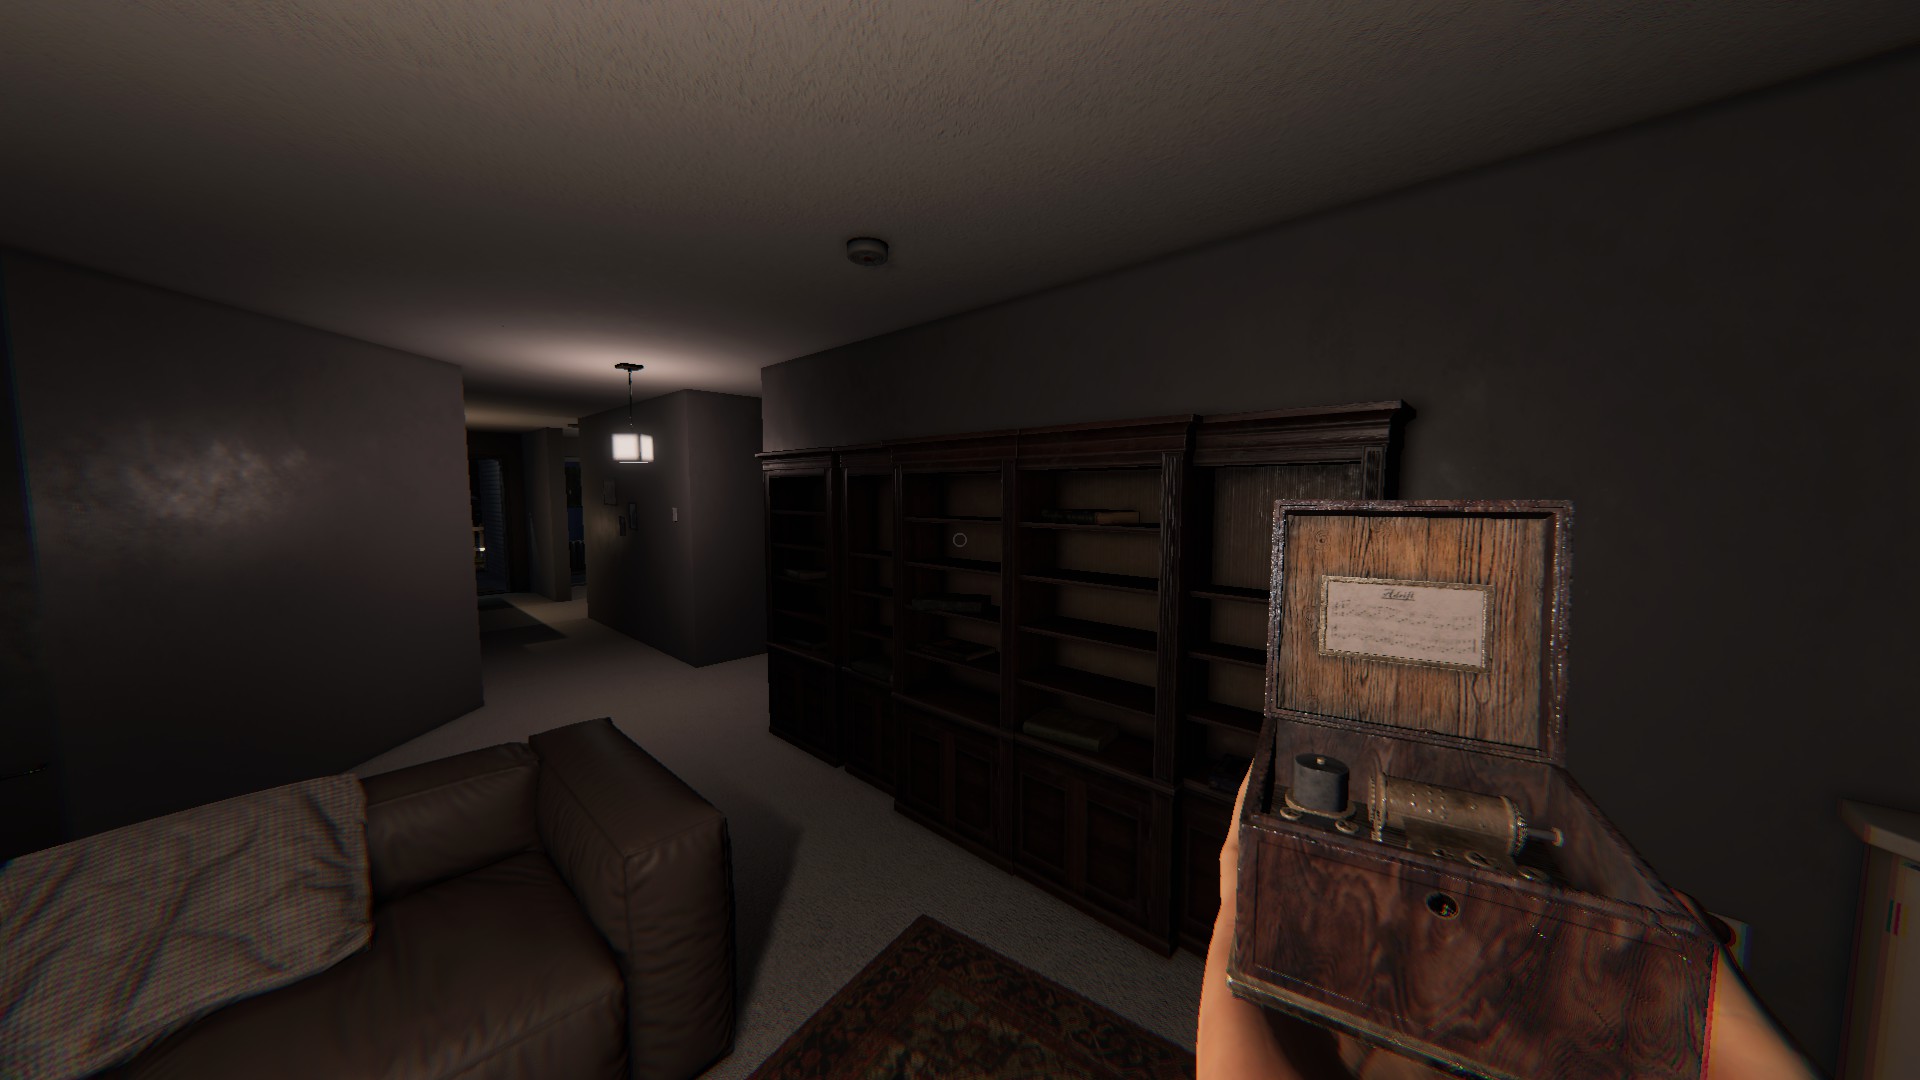
- Holding the box while active drains sanity,
~2.5% per second, up to 75% - When activated, it will play music for 30 seconds. Wherever the ghost is, it will begin
to sing along to the song. This can be helpful for identifying the ghost room early game. - Bringing the active music box within 5 meters of the ghost will cause it to manifest, and go to the box. If the ghost is walking for longer than 5 seconds, or if the ghost touches the box, it will trigger a hunt.
- Additionally, if you use the music box in the room where the ghost is, because you broke the proximity, it will hunt you, and with no real heads up either.
- If the music box is ever dropped or thrown while it is active, it will instantly trigger a hunt. This can happen accidentally while cycling through equipment.
- Always place it on a floor or surface by looking at it to get an outline, then pressing your secondary interact key (typically "F" by default)
- If you are not holding the music box while the song is playing, you can walk right up to where the ghost is singing, without worrying about a proximity.
- Note: The ghost can still go right into an event, hunt, or interaction right afterwards depending on its behavior and your sanity levels.
- For all the above reasons, I recommend activating and then gently setting down the music box in a room you know is safe before exploring the map.
Voodoo Doll
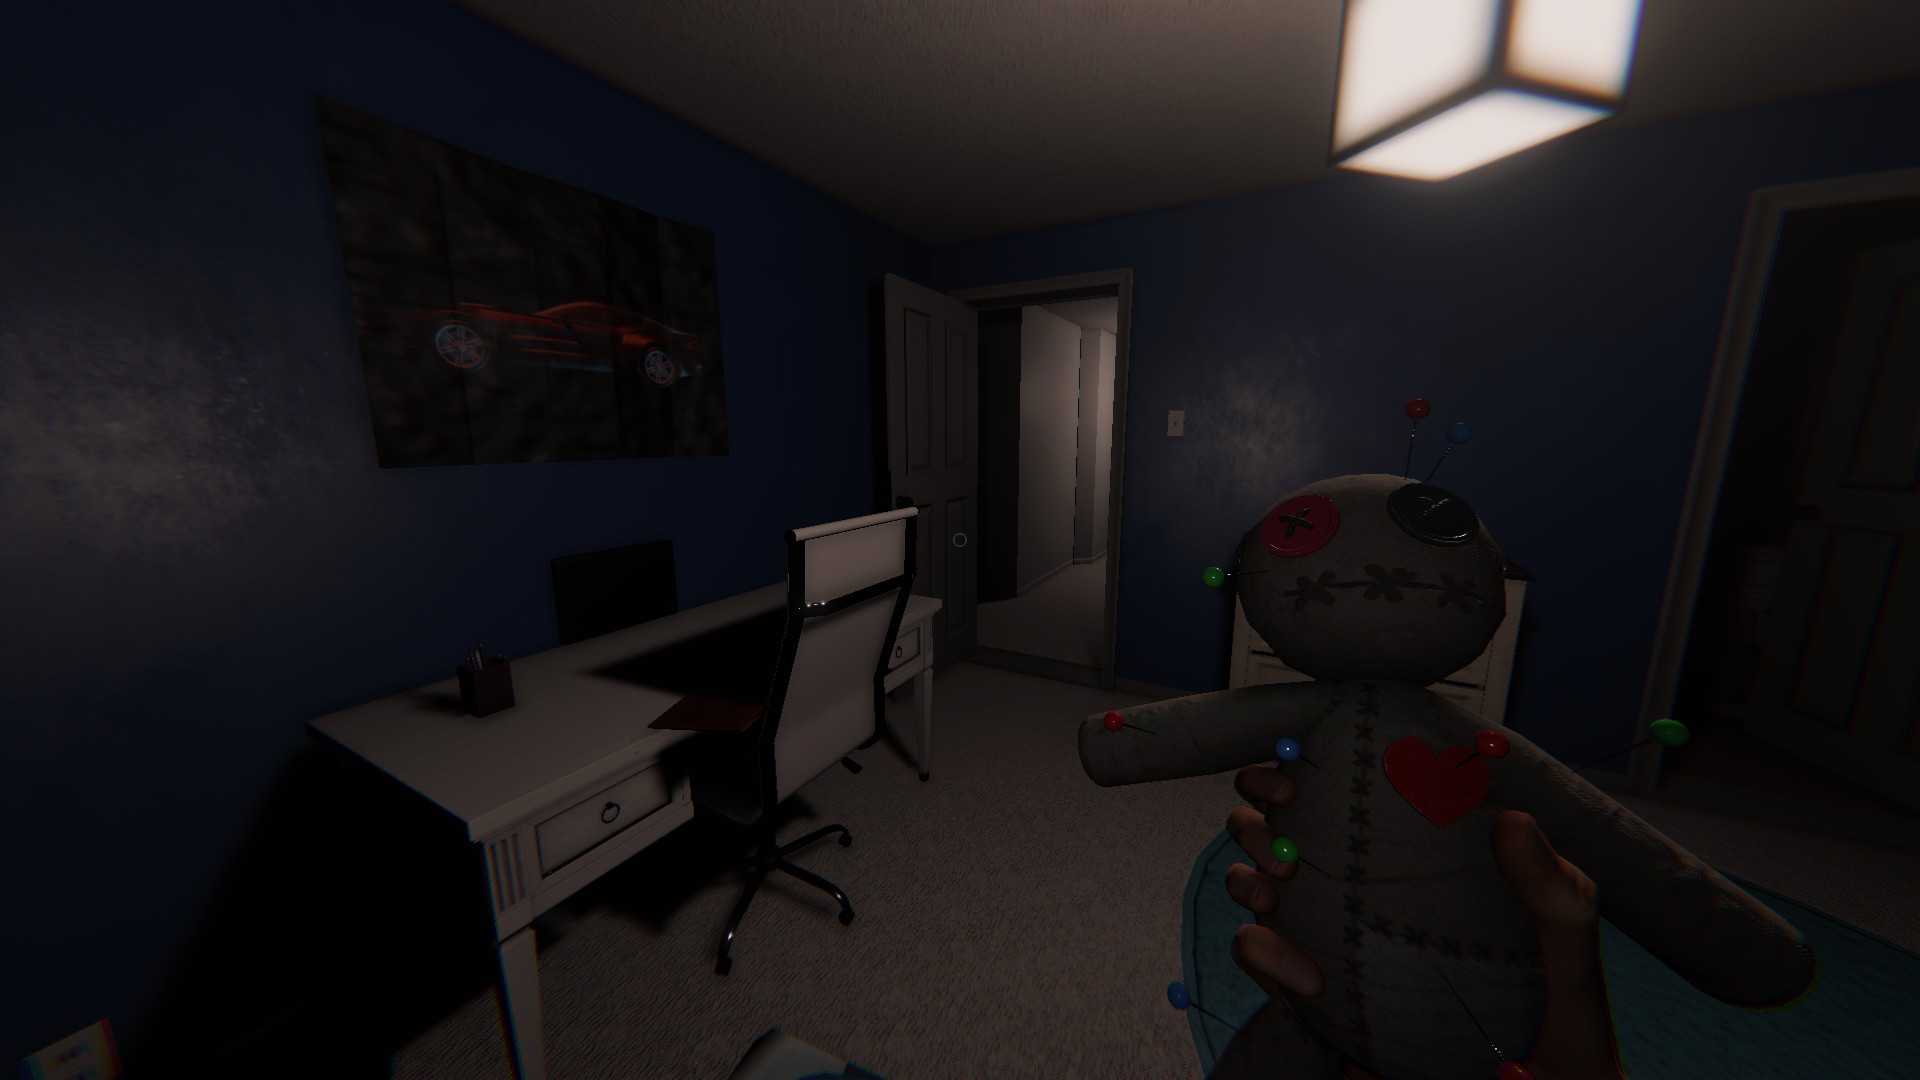
- Each pin causes 10% sanity loss
- 1 of the 10 pins will instantly triggering a cursed hunt. You can tell this happens when the pin that goes into the heart is pressed. Which pin is pulled is completely random.
- If you try to use this item at 0% sanity, all charges will instantly deplete, and a cursed charge will initiate.
- Can force ghost interactions in the vicinity of the ghost (light switch interactions, doors, burners, throwing an item, etc).
- Good for forcing EMF reading evidence for specific objectives
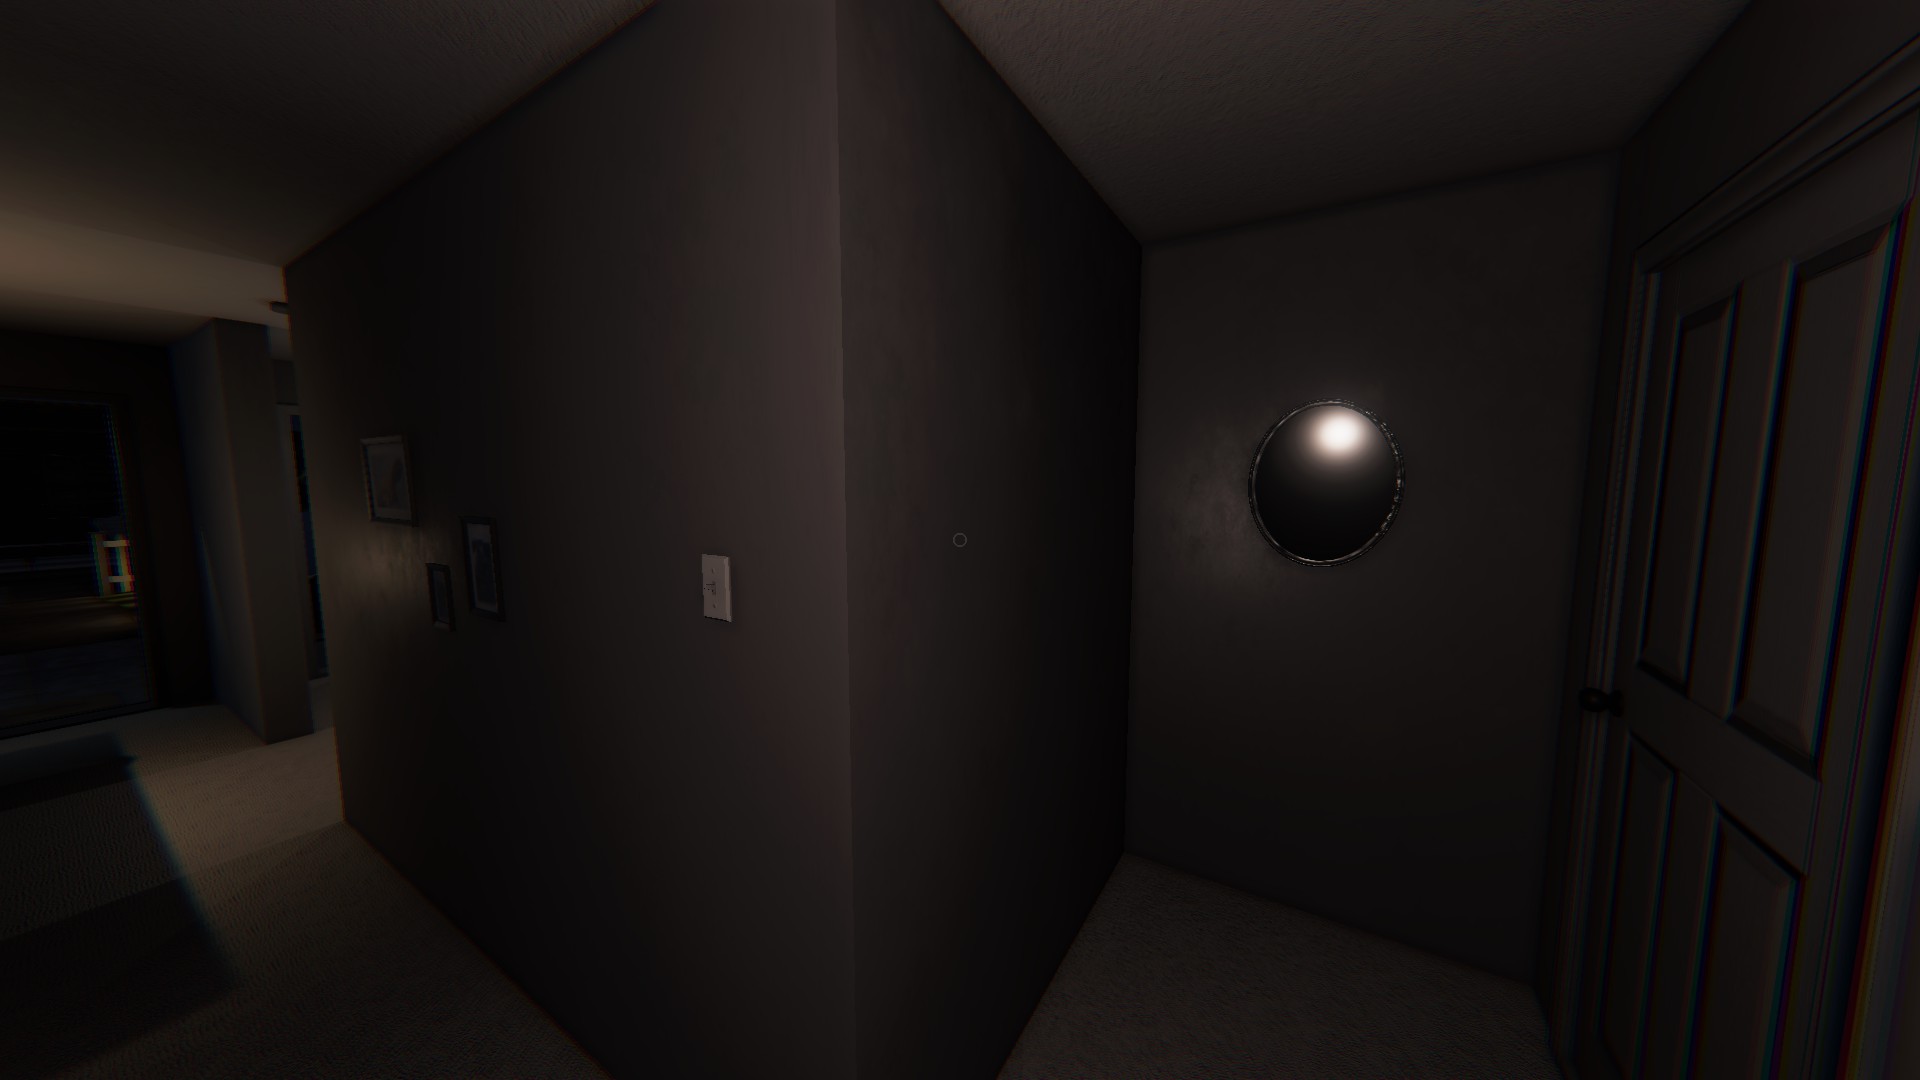
Black Mirror
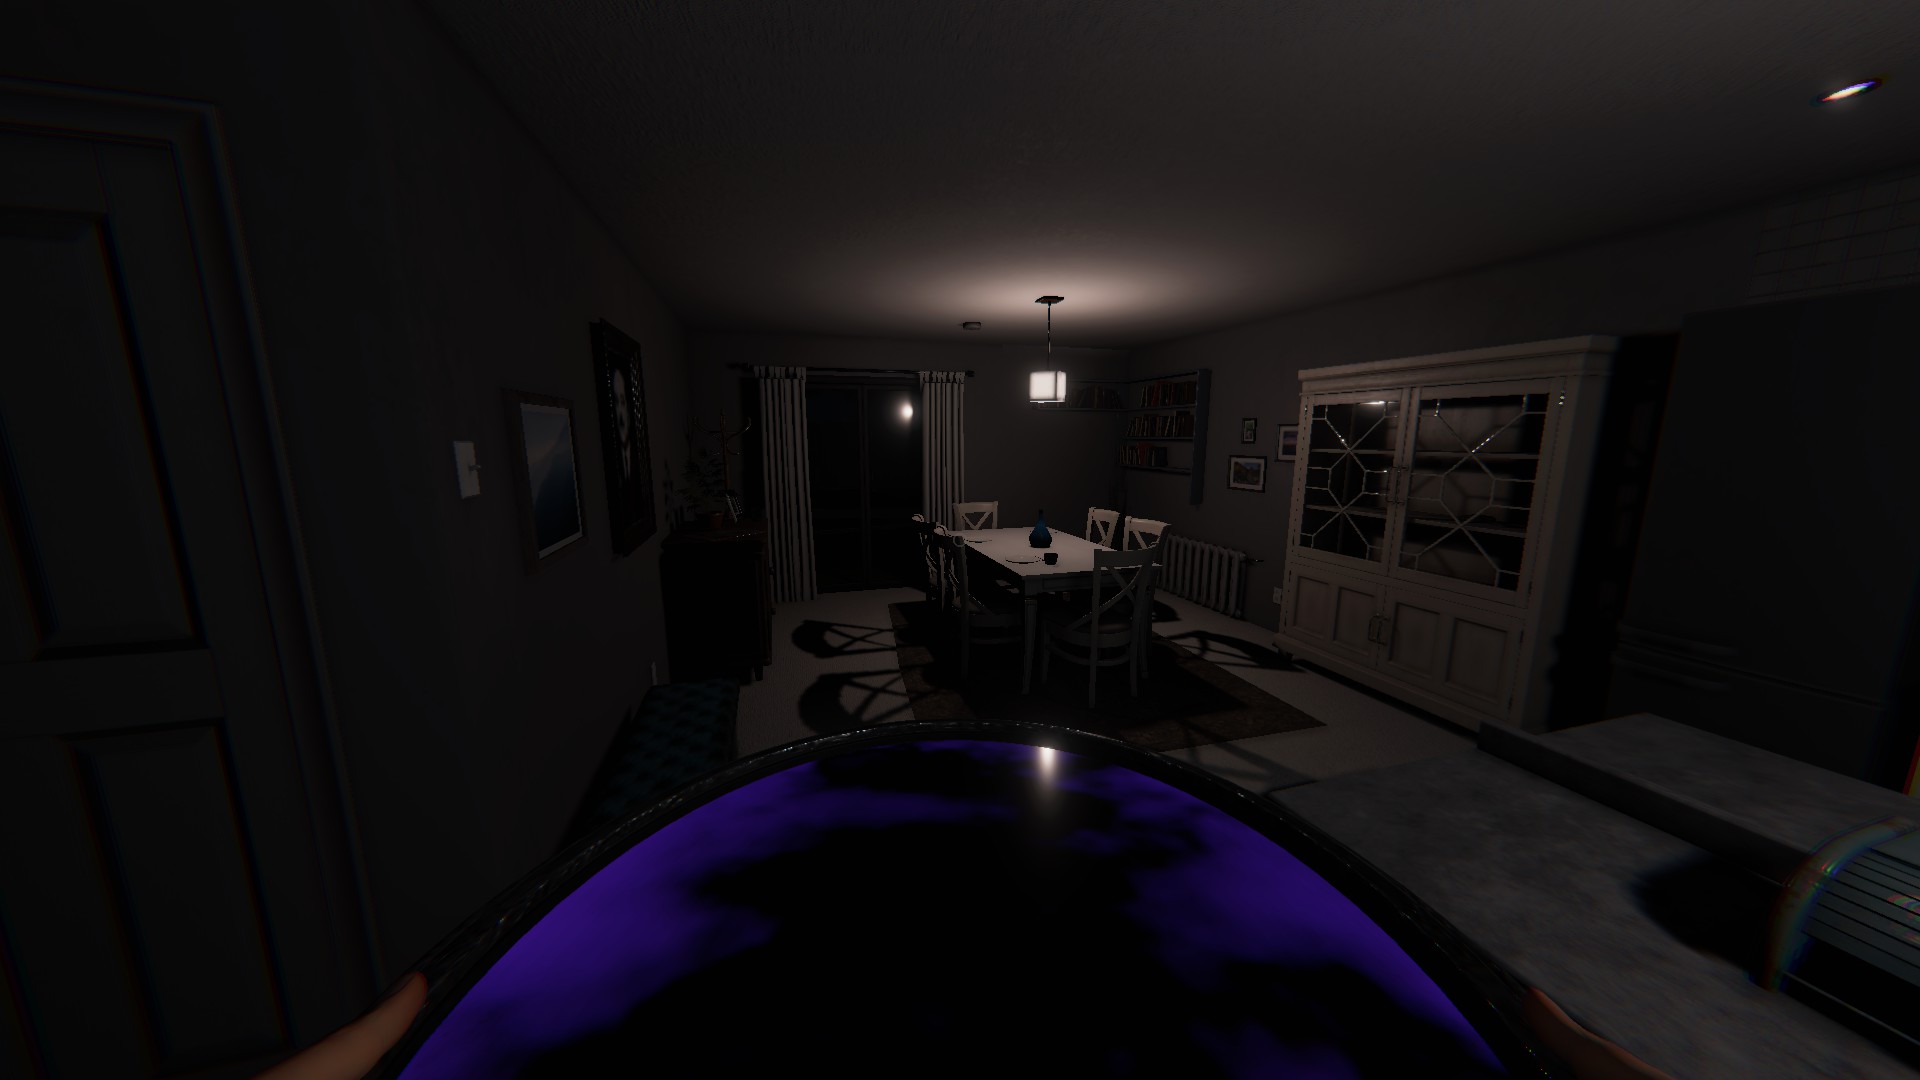
- 20% instant loss when used, -10% per second
- Looking into the mirror will reveal the current favorite room of the ghost, NOT neccesarily the current location of the ghost
- Looking at the mirror while at 0% will break the mirror and trigger a cursed hunt.
- Breaking the mirror during a hunt will cause the next hunt to be a cursed hunt
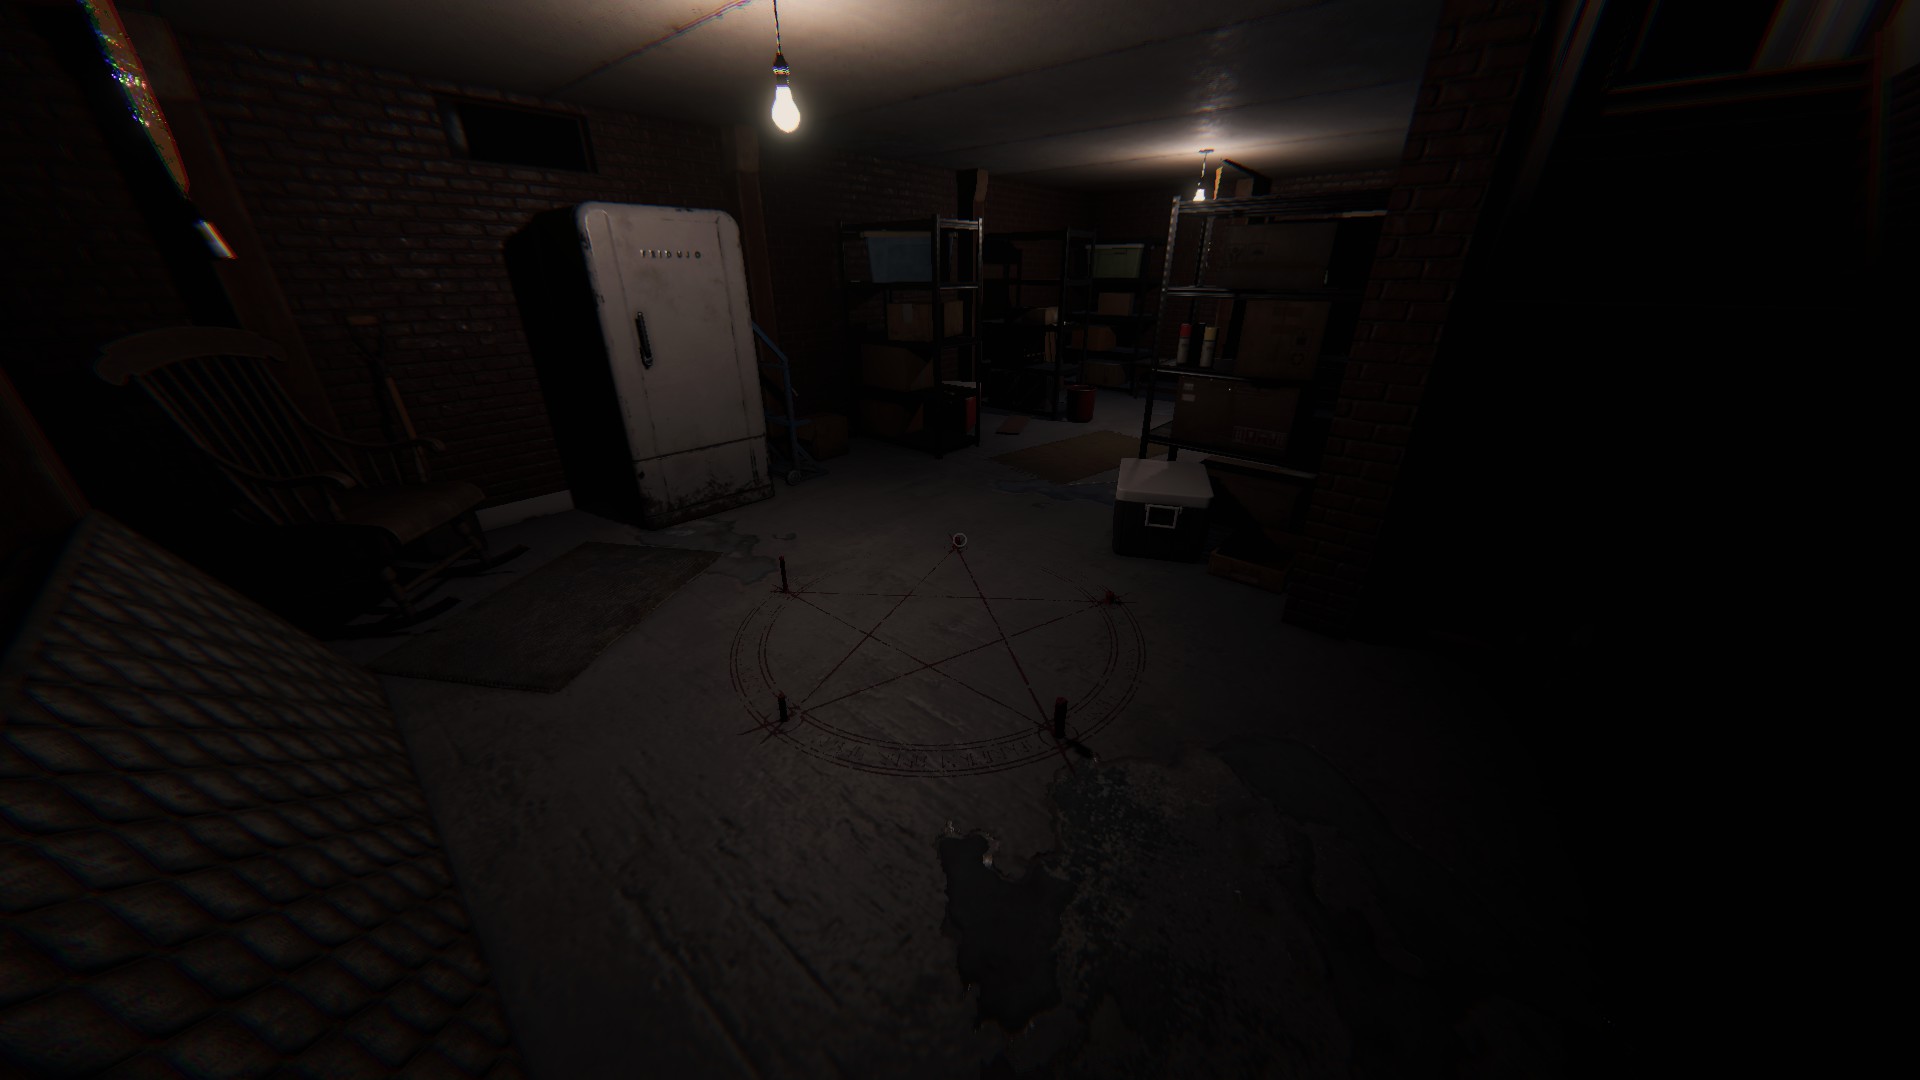
Summoning Circle
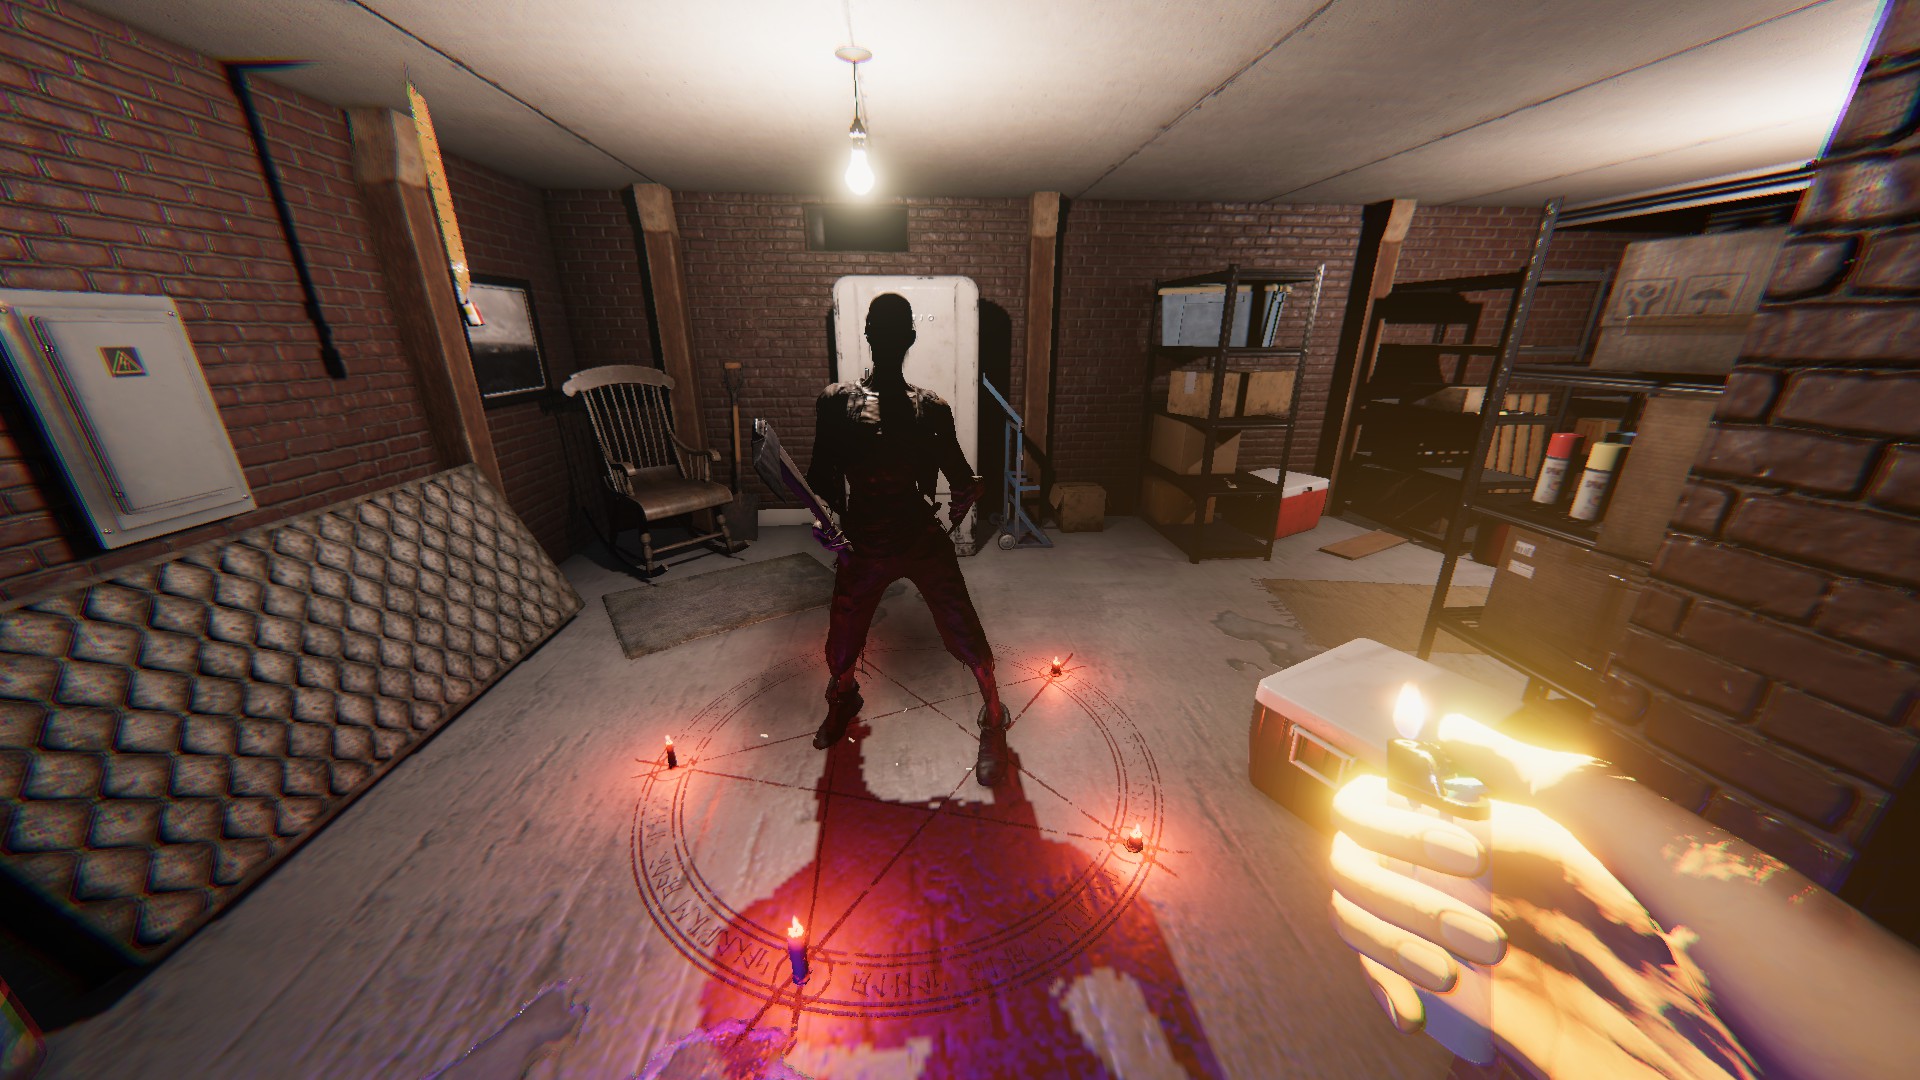
- 16% per candle, maximum 80%
- Using a lighter to light all 5 candles in the circle will cause the ghost to be spawned in the circle, momentarily trapping it for a few seconds. Then a cursed hunt will be triggered
- Activating the last candle while a hunt is active will teleport the angry ghost to your current location, and will likely result in instant death
- NOTE: Do NOT step in the circle once it is fully lit, or you will get killed
- Can only be activated once per match
- Good for getting 3 star ghost photos for specific objectives, as well as ghost event objectives
- Can also pair with motion sensors, EMF reader and salt for easy objectives or 3 star pictures.
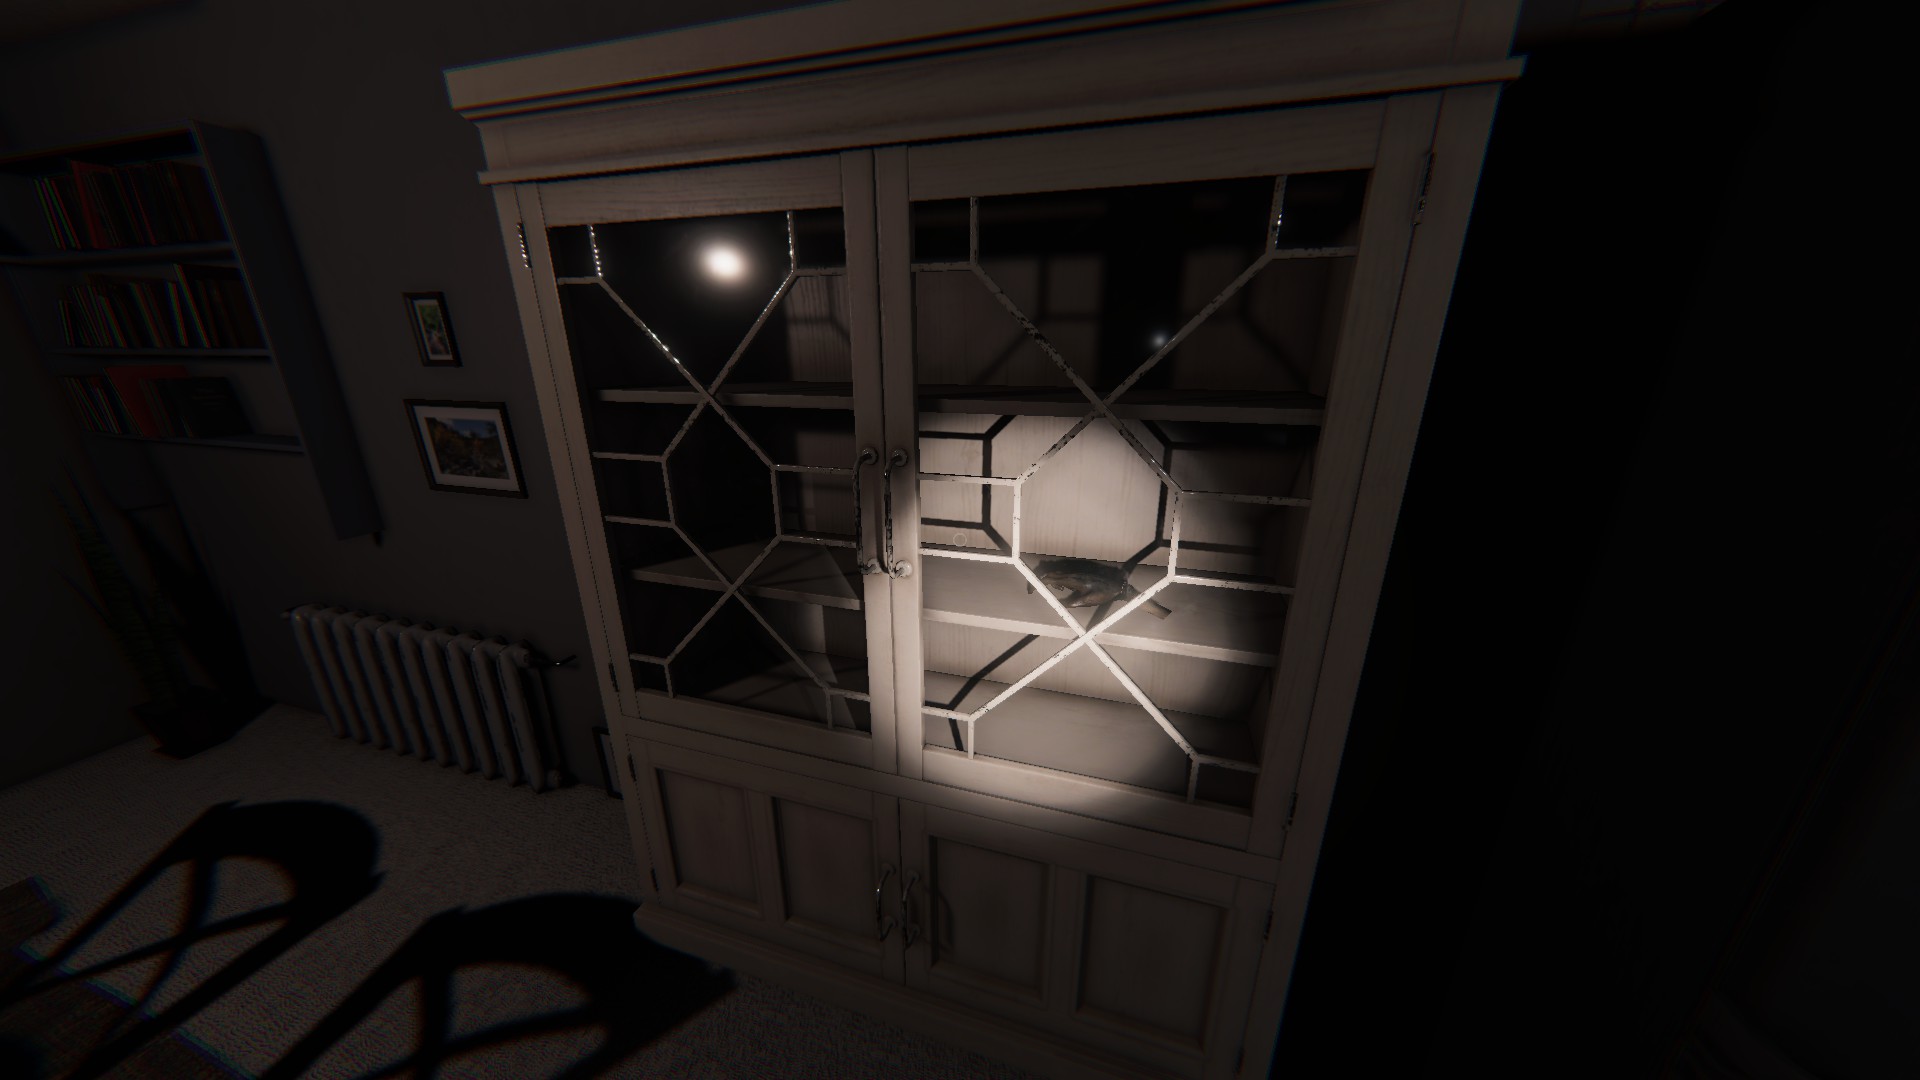
Monkey Paw
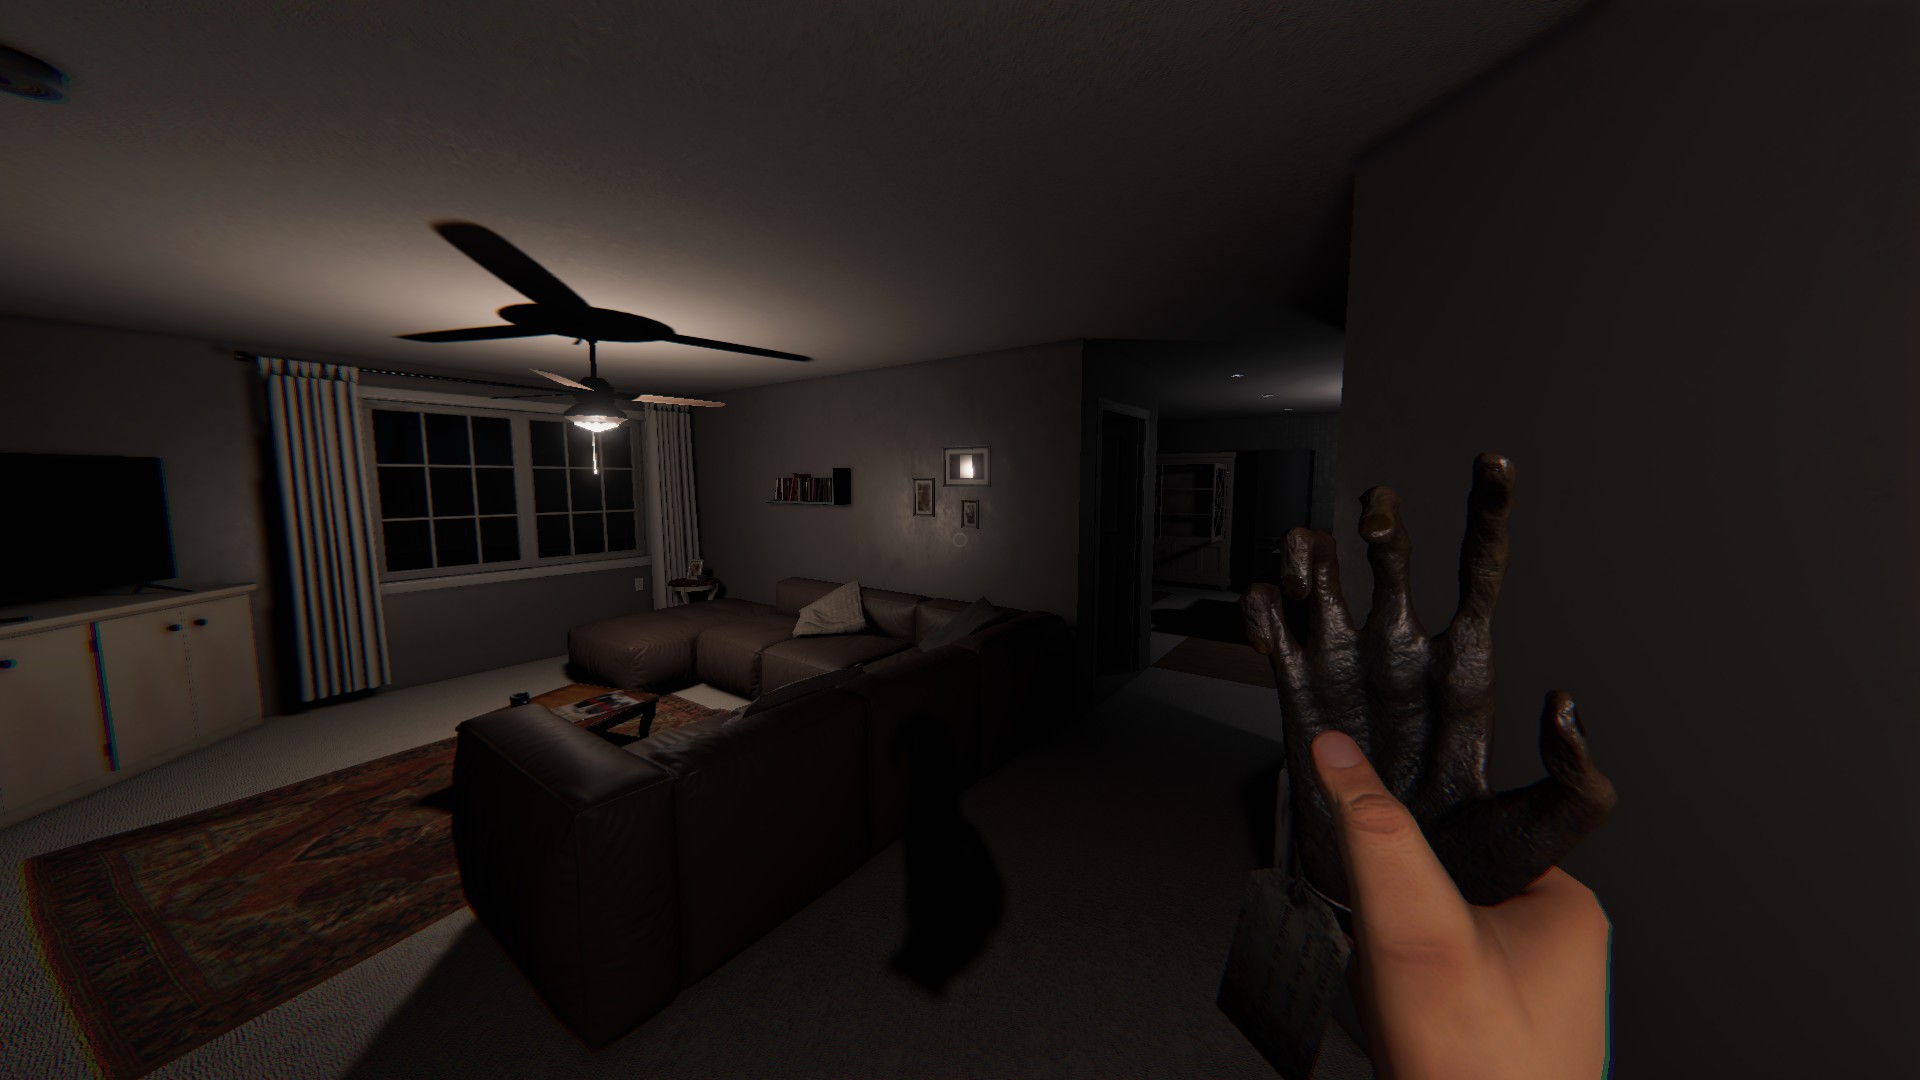
- Uses in-game voice recognition to respond to specific verbal inputs/wishes.
- Each wish can only be granted once per investigation
Difficulty Multiplier 2-2.9x = 4 wishes
Difficulty Multiplier 3x + = 3 wishes
There is already a really helpful guide on Steam made by the user "Ararin" that fully covers all the wishes and their consequences. I am linking their guide, and highly encourage you to leave positive ratings on that guide.
https://steamcommunity.com/sharedfiles/filedetails/?id=2944439416
- Enabling the "text" Voice Recognition Mode in the options menu will display all 10 questions on screen when right clicking with the item in hand
- On the map "Sunny Meadows", there are 10 tags hidden around the map that can be collected and added to your journal as optional collectibles. All 10 wishes are available without collecting these tags
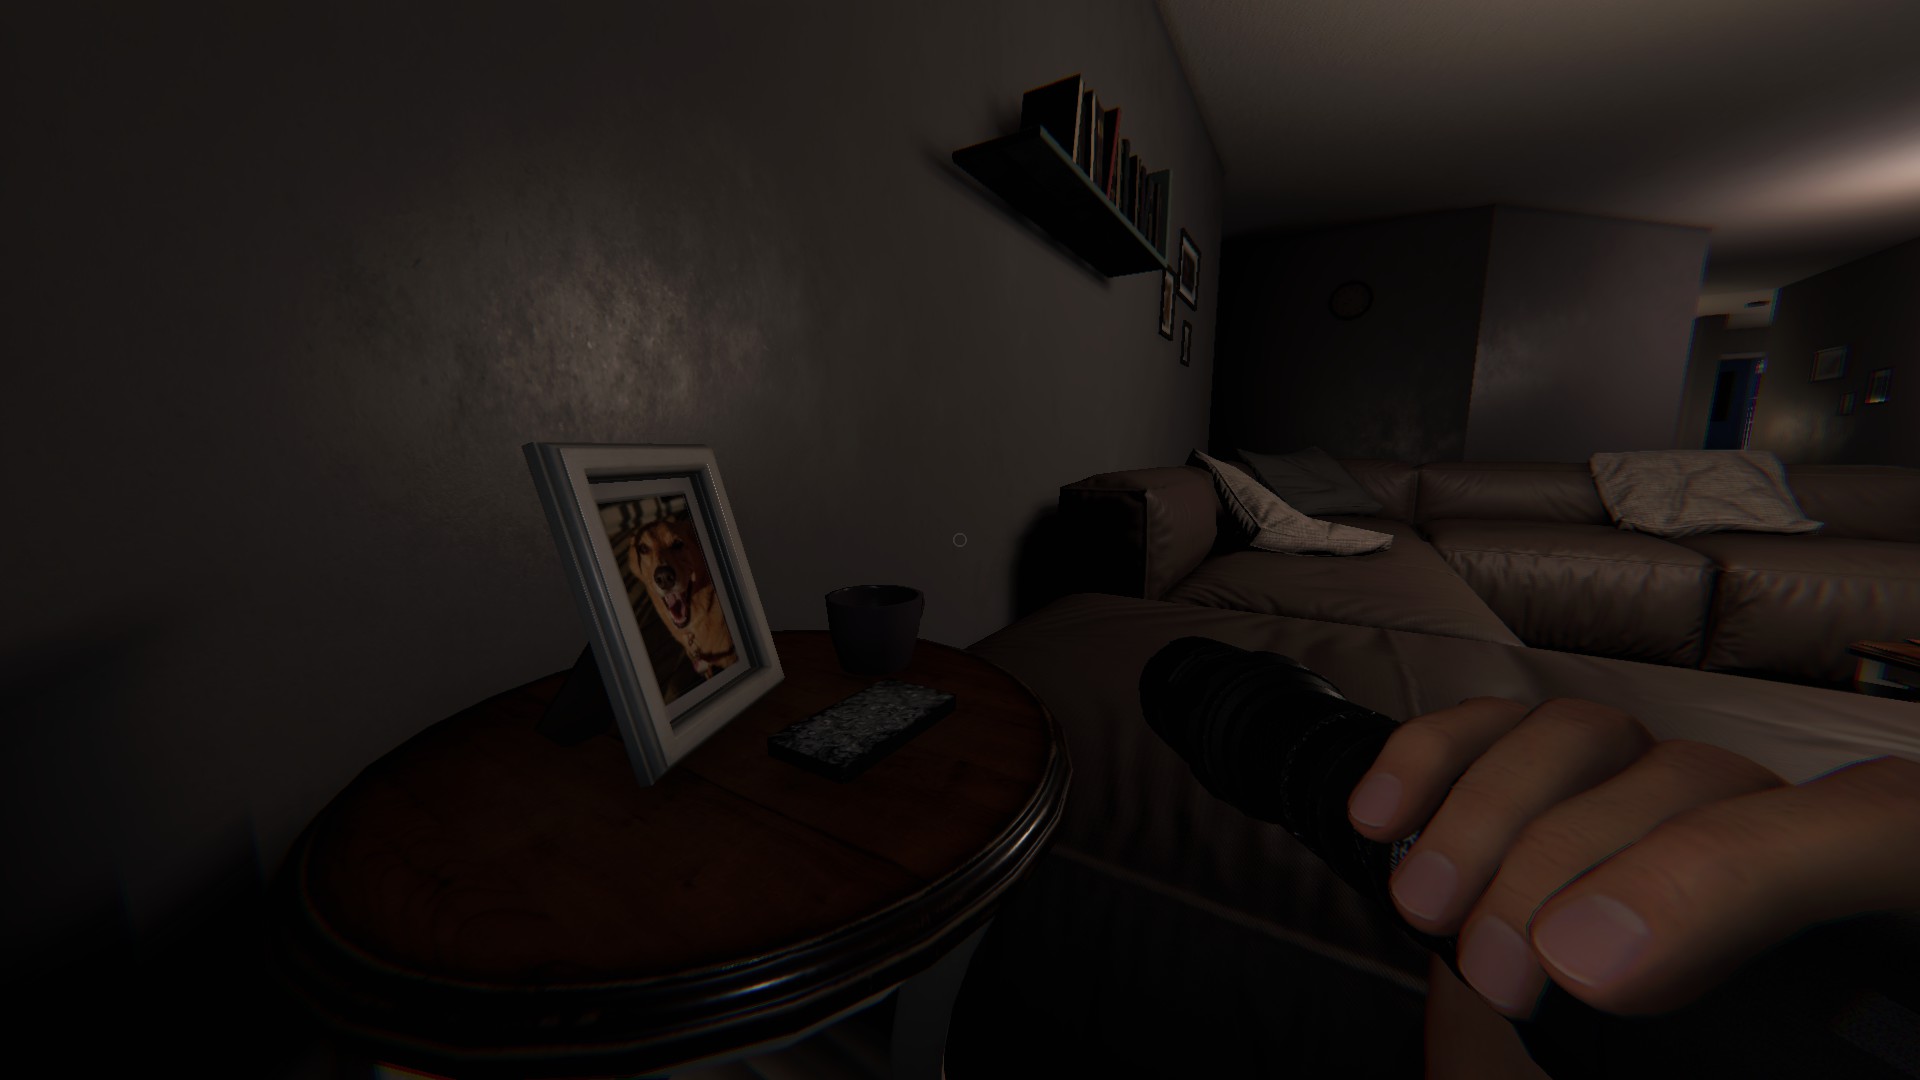
Tarot Cards
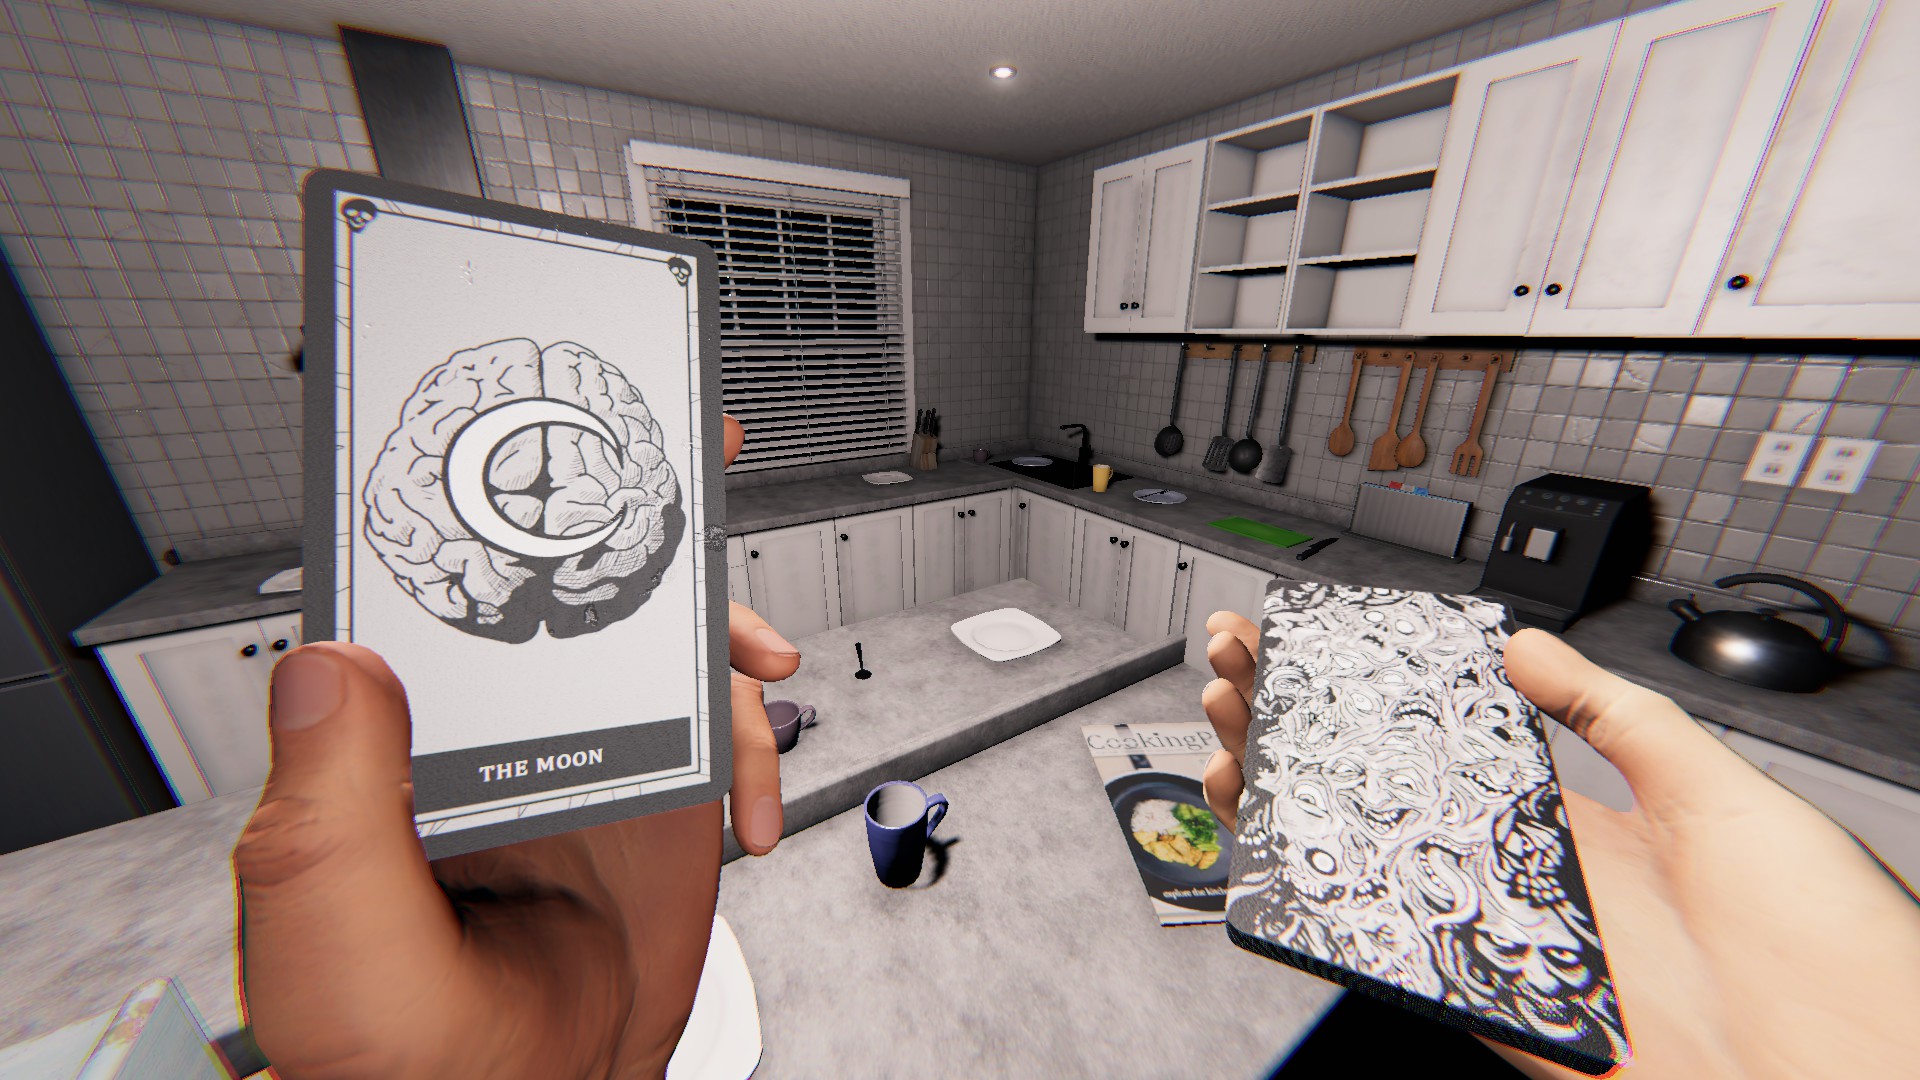
- A deck of 10 cards, each with a unique effect. One of each card is not guaranteed, as each type of card has a fixed probability
- Unfortunately, in the current build, you can be a chicken with these, by essentially burning them at the front door, risk free
- Pulling a new card will negate the effects of the previous, if applicable (ie. Hermit --> Death)
- The Hermit (?) - This will prevent the ghost from wandering for roughly 60 seconds. HOWEVER, a hunt IS still possible during this duration
- The Tower (?) - Causes 20 seconds of increased ghost activity wherever the ghost is located (throwing an item, interacting with lights, burners, etc.)
- The Moon (5%)- Immediately drops your sanity to 0%
- The Sun (5%) - Immediately puts your sanity to 100%
- The Wheel of Fortune (?) - Chance to increase (burns green) or decrease (burns red) your sanity by 25%
- The Devil (?)- This will trigger a ghost event, or hit you with an airburst, which will lower sanity. Will bring the ghost closer to you if you are trying to hide on the other side of the map from it
- Death (10%)- This will instantly trigger a hunt. Be aware of your proximity to the ghost/ghost room, as well as the nearest hiding spots when pulling cards. Or have a pair of smudge sticks on you!
- The High Priestess (2%)- If playing in multiplayer, this will revive a dead teammate at random. Note: you do not have to be physically near them to revive them (proximity is irrelevant). If no one is dead yet, it will be queued.
This means, that if you die during a hunt, only moments later, you will be resurrected at the place of your death. If you are playing solo, it should still queue this extra life. - The Hanged Man (1%)- If this card is pulled, it will instantly kill you.
- The Fool (2nd most common card in the deck, it will always get pulled if a hunt is active) - Initially shows a fake card, that does not take effect, then reveals it was only the fool, trying to send you on an emotional roller coaster
Ouija Board
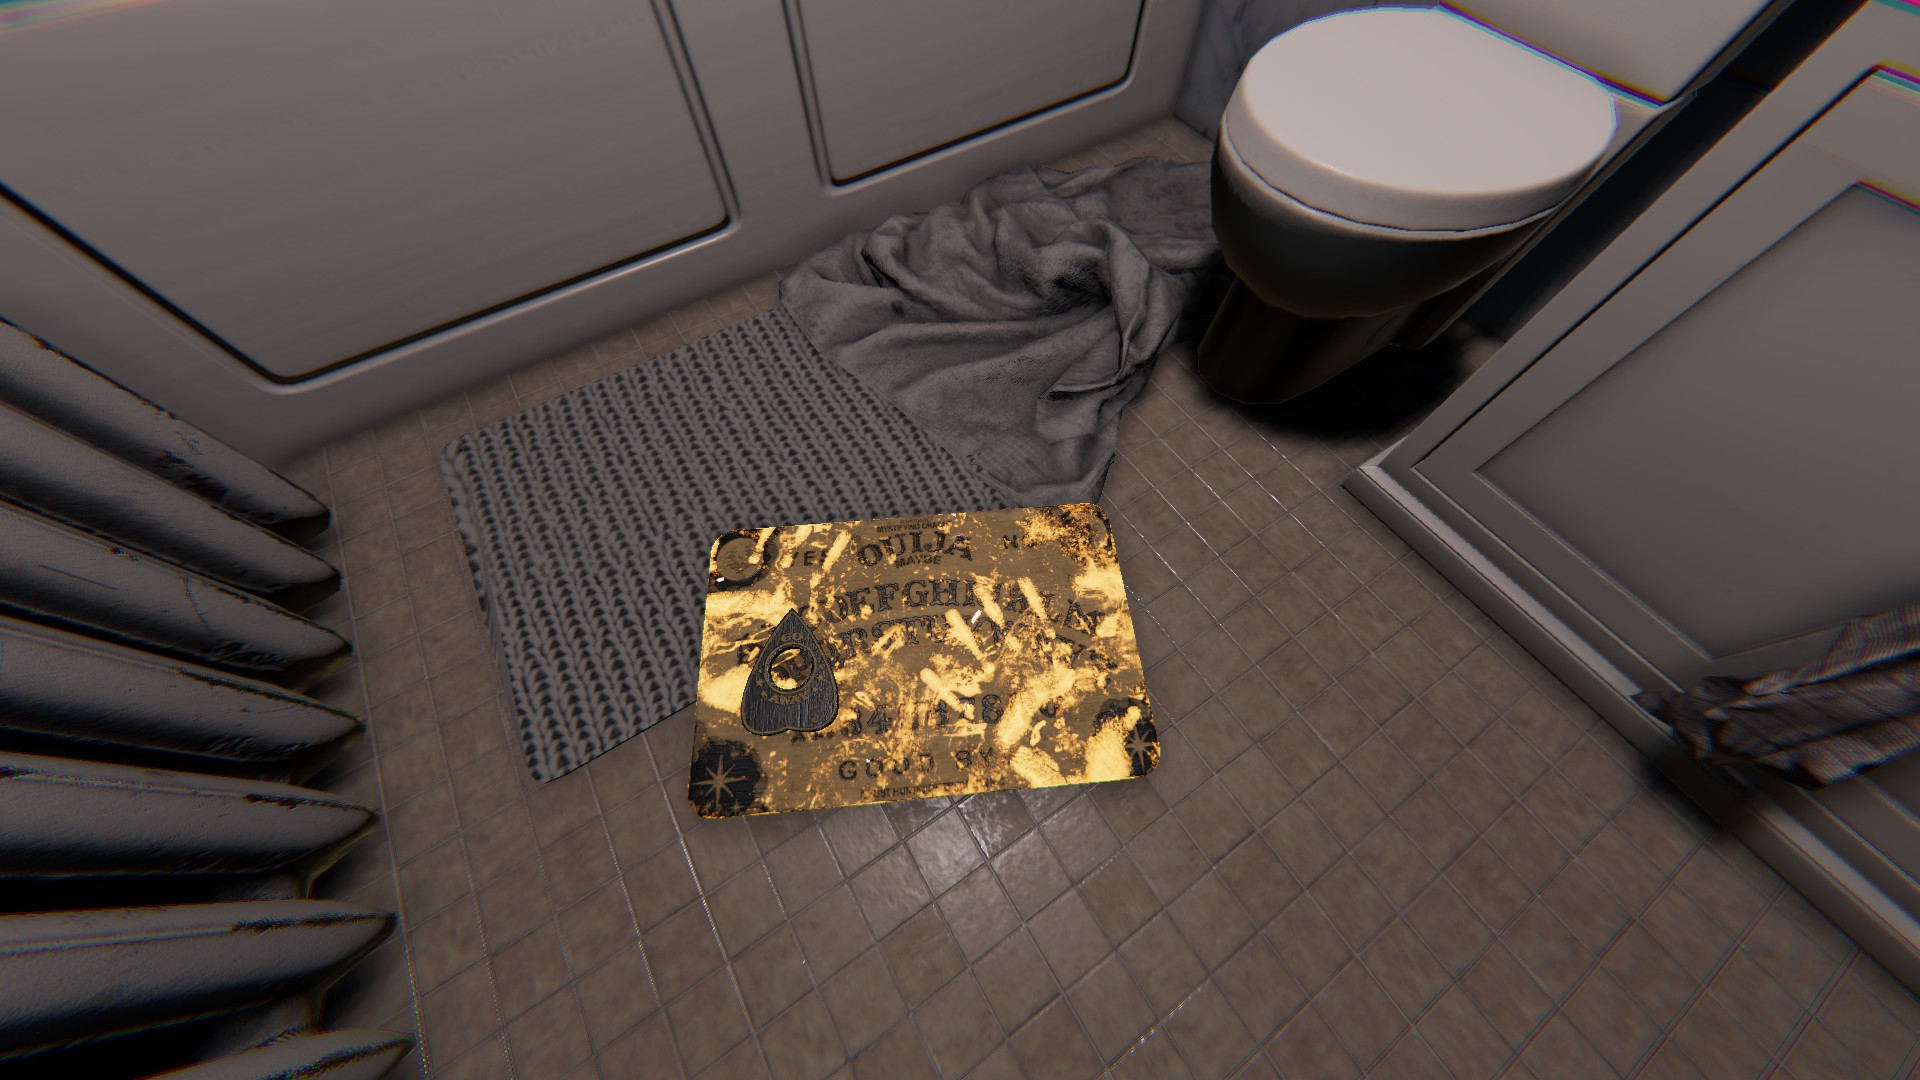 Right click to place the cursor on the board, then drop the item on the ground. The game will use in-game voice detection, similar to interacting with a spirit box. The cursor will move to give an answer if it detects a valid question.
Can determine player sanity (Helpful for
Right click to place the cursor on the board, then drop the item on the ground. The game will use in-game voice detection, similar to interacting with a spirit box. The cursor will move to give an answer if it detects a valid question.
Can determine player sanity (Helpful fornightmare +)
- "Am I insane?" (-5%)- If above 90% sanity = NO, if between 20-90% = MAYBE, if below 20% = YES
- "How insane am I?" (-5%)- If above 50% = NOT VERY, if between 25-50% = VERY, if less than 25% = INSANE
- "What is my sanity" (-5%)- If above 80% = HEALTHY, if between 60-80% = GOOD, if between 40-60% = AVERAGE, if between 20-40% = BAD, if less than 20% = AWFUL
- "Where is the bone?" (-50%) - spells out the room name
- "Where are you?" (-50%) - spells out room name of current location of ghost, not necessarily the favorite room
- "What is your favorite room?" (-50%) - spells out room name
- "(What/where) is your room?" (-50%) - spells out room name
- "Are you (here/close)?" (-20%) - YES or NO
- "Do you respond to everyone?" (-20%) - YES or NO
- "How many are in this room?" (-20%) - Number given includes the ghost
- "How many people are (present/ in this room/ here)?" (-20%)
- "How many ghosts are (present/ in this room/ here)?" (-20%)
- "Who is (in this room/here)?" (-20%)
- "Are (we/you) alone?" (-20%)
- "How old are you?" (-5%) NOTE: If the answer changes later in the game upon asking a second time, can determine if the ghost is a Thaye
- "Are you old?" (-5%)
- "Are you young?" (-5%)
- "What is your age?" (-5%)
- "What do you want?" (-5%)
- "Why are you here?" (-5%)
- "How did you die?" (-5%)
- "How long have you been dead?" (-5%)
- "How long ago did you die?" (-5%)
- "How long have you been here?" (-5%)
- "When did you die?" (-5%)
- "How many years ago did you die?" (-5%)
- "How do you feel?" (-5%)
- "Are you okay?" (-5%)
- "Am I pretty?" (-5%)
- "Are we friends?" (-5%)
- "Do you hate me?" (-5%)
- "Do you like jazz?" (-5%)
- "Knock knock" (-5%)
- "Marco" (-5%)
- "Hide and Seek" (-25%) - starts a 5 second countdown, and then triggers a cursed hunt
- Other questsions (-5%)
Helpful for getting EMF reading evidence (can read as an EMF 5 instead of the standard 2 if the ghost type supports it)
If you try to ask a question you don't have enough sanity for, the board will burn orange, break and a start a cursed hunt.
Once you are done using it, you need to say "Goodbye", or the board will burn orange, and break, starting a cursed hunt
It will also break if you walk away from an active board (~5m range)
Taking a photo after each question asked/response can count as a 3 star interaction
[/list]
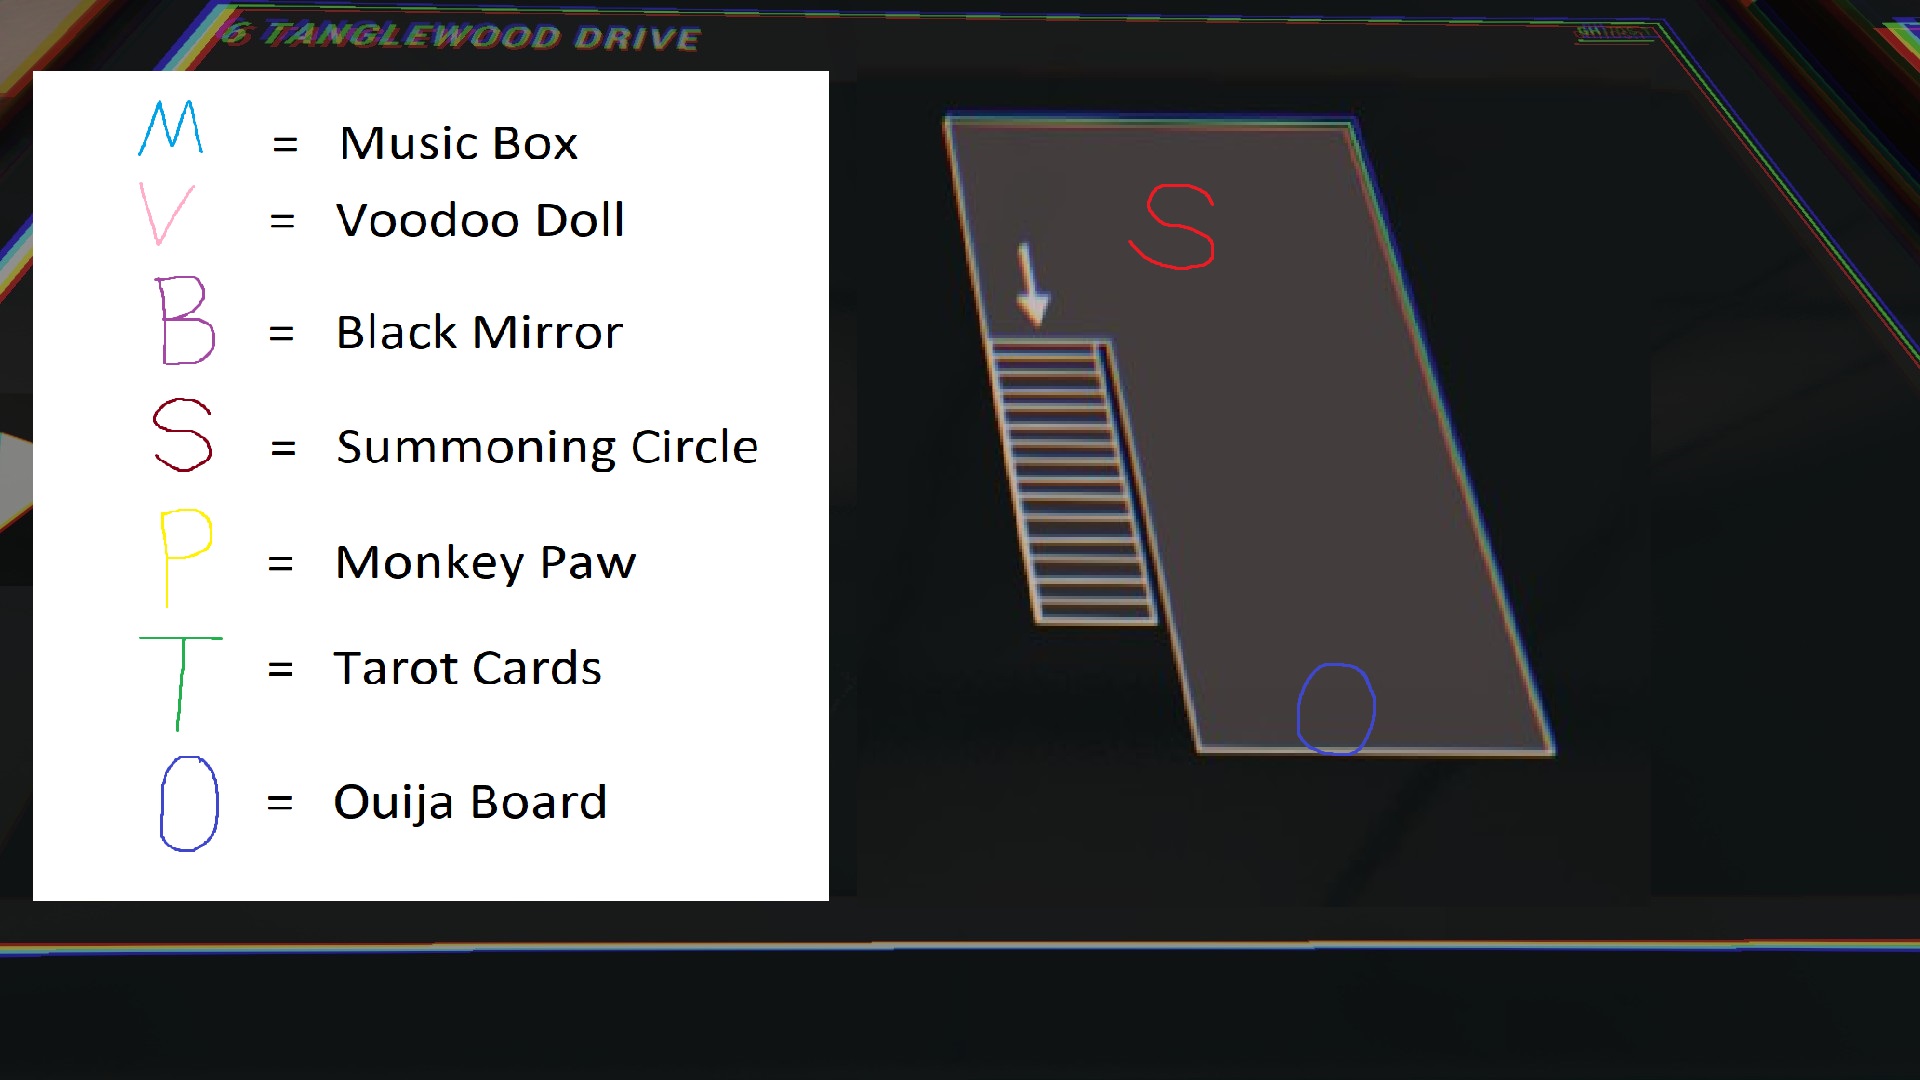
6 Tanglewood Drive
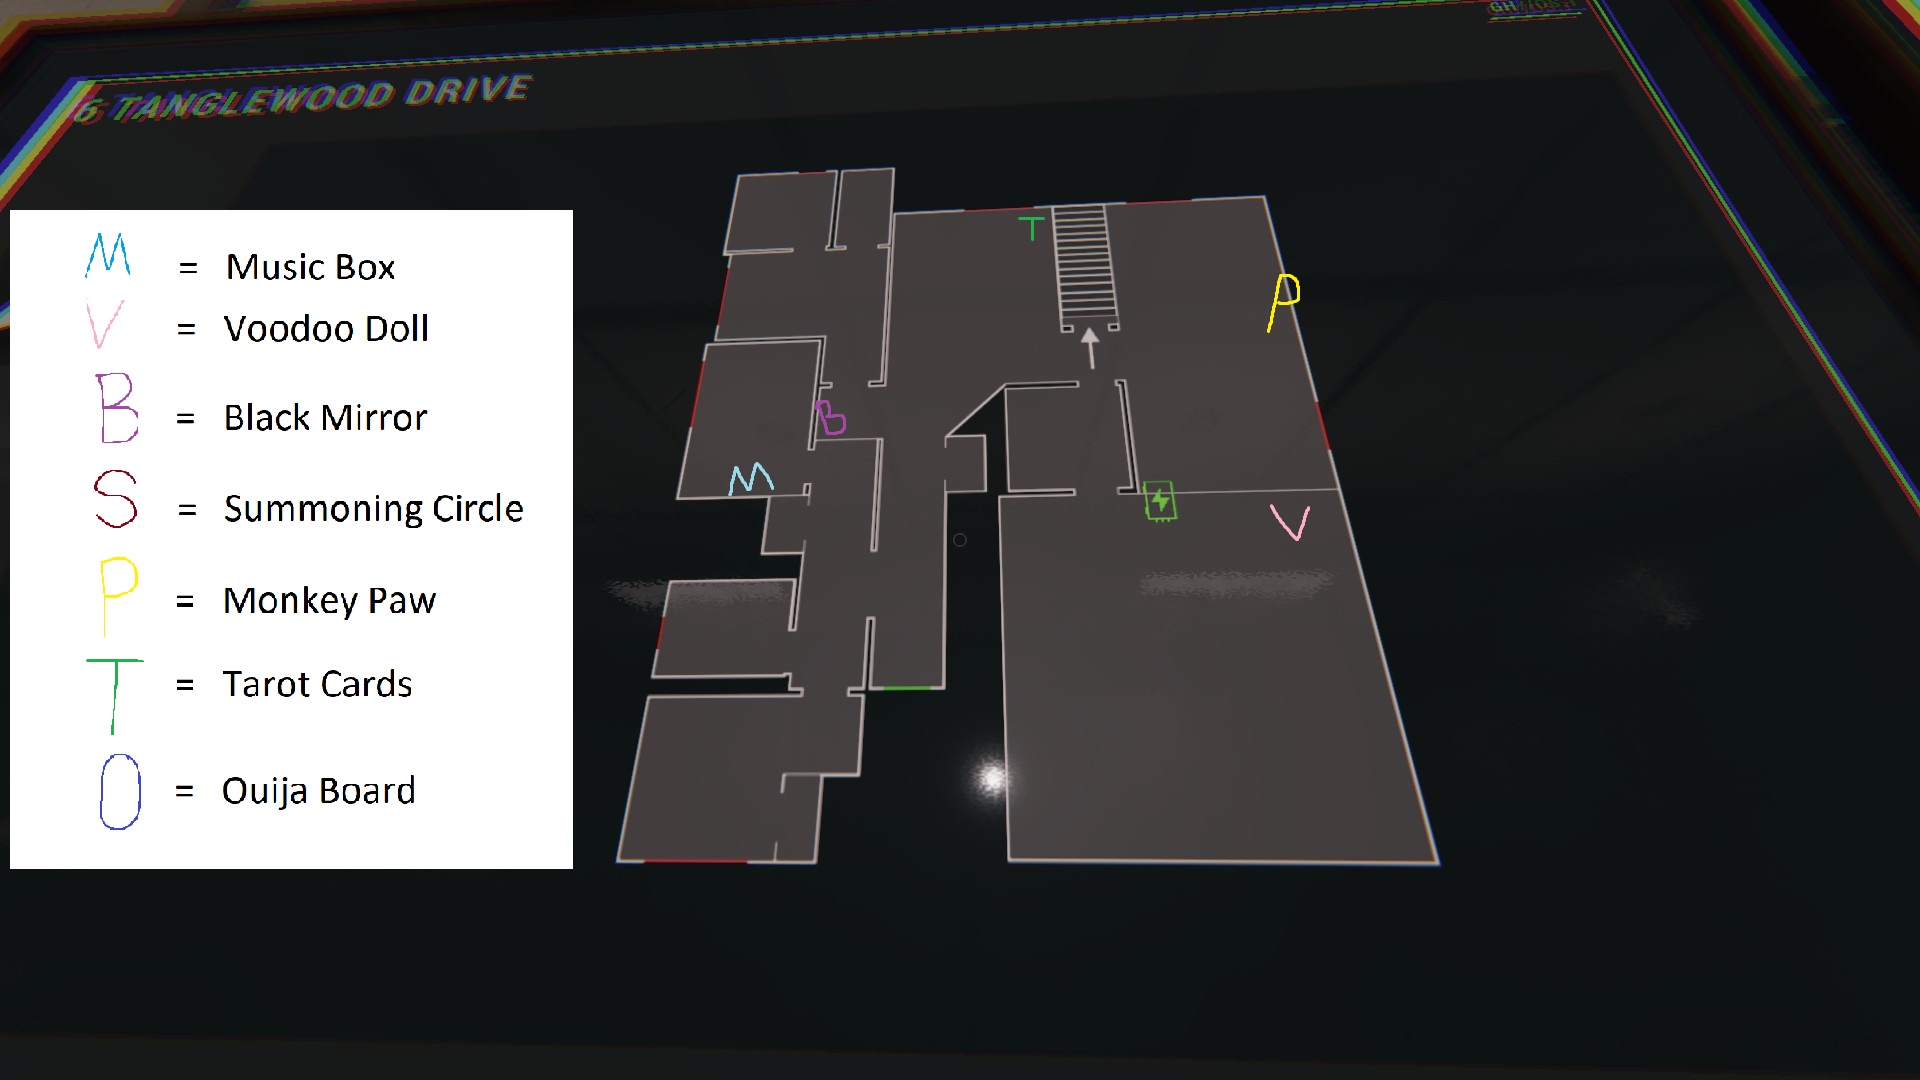
Basement:
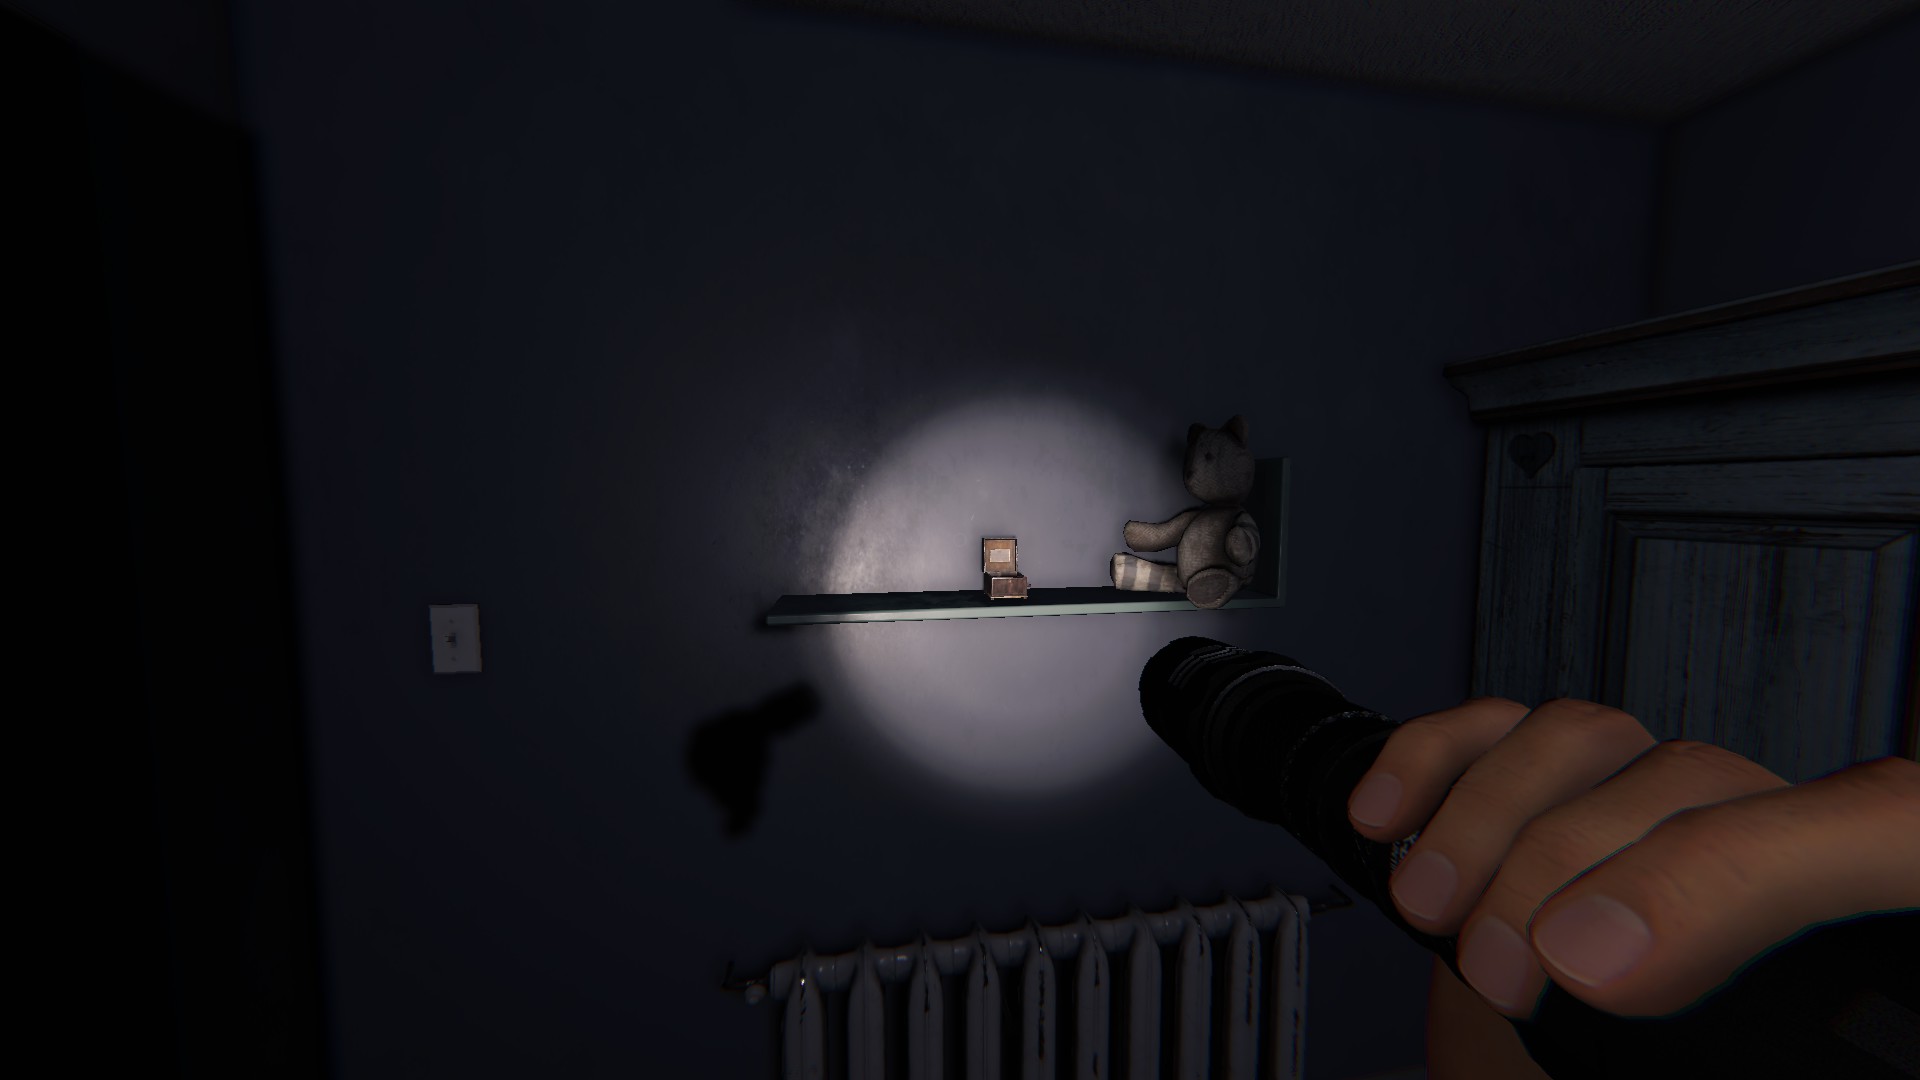
Music Box
In the Nursery/purple baby room/Nancy's Room, on the shelf by the light switch.
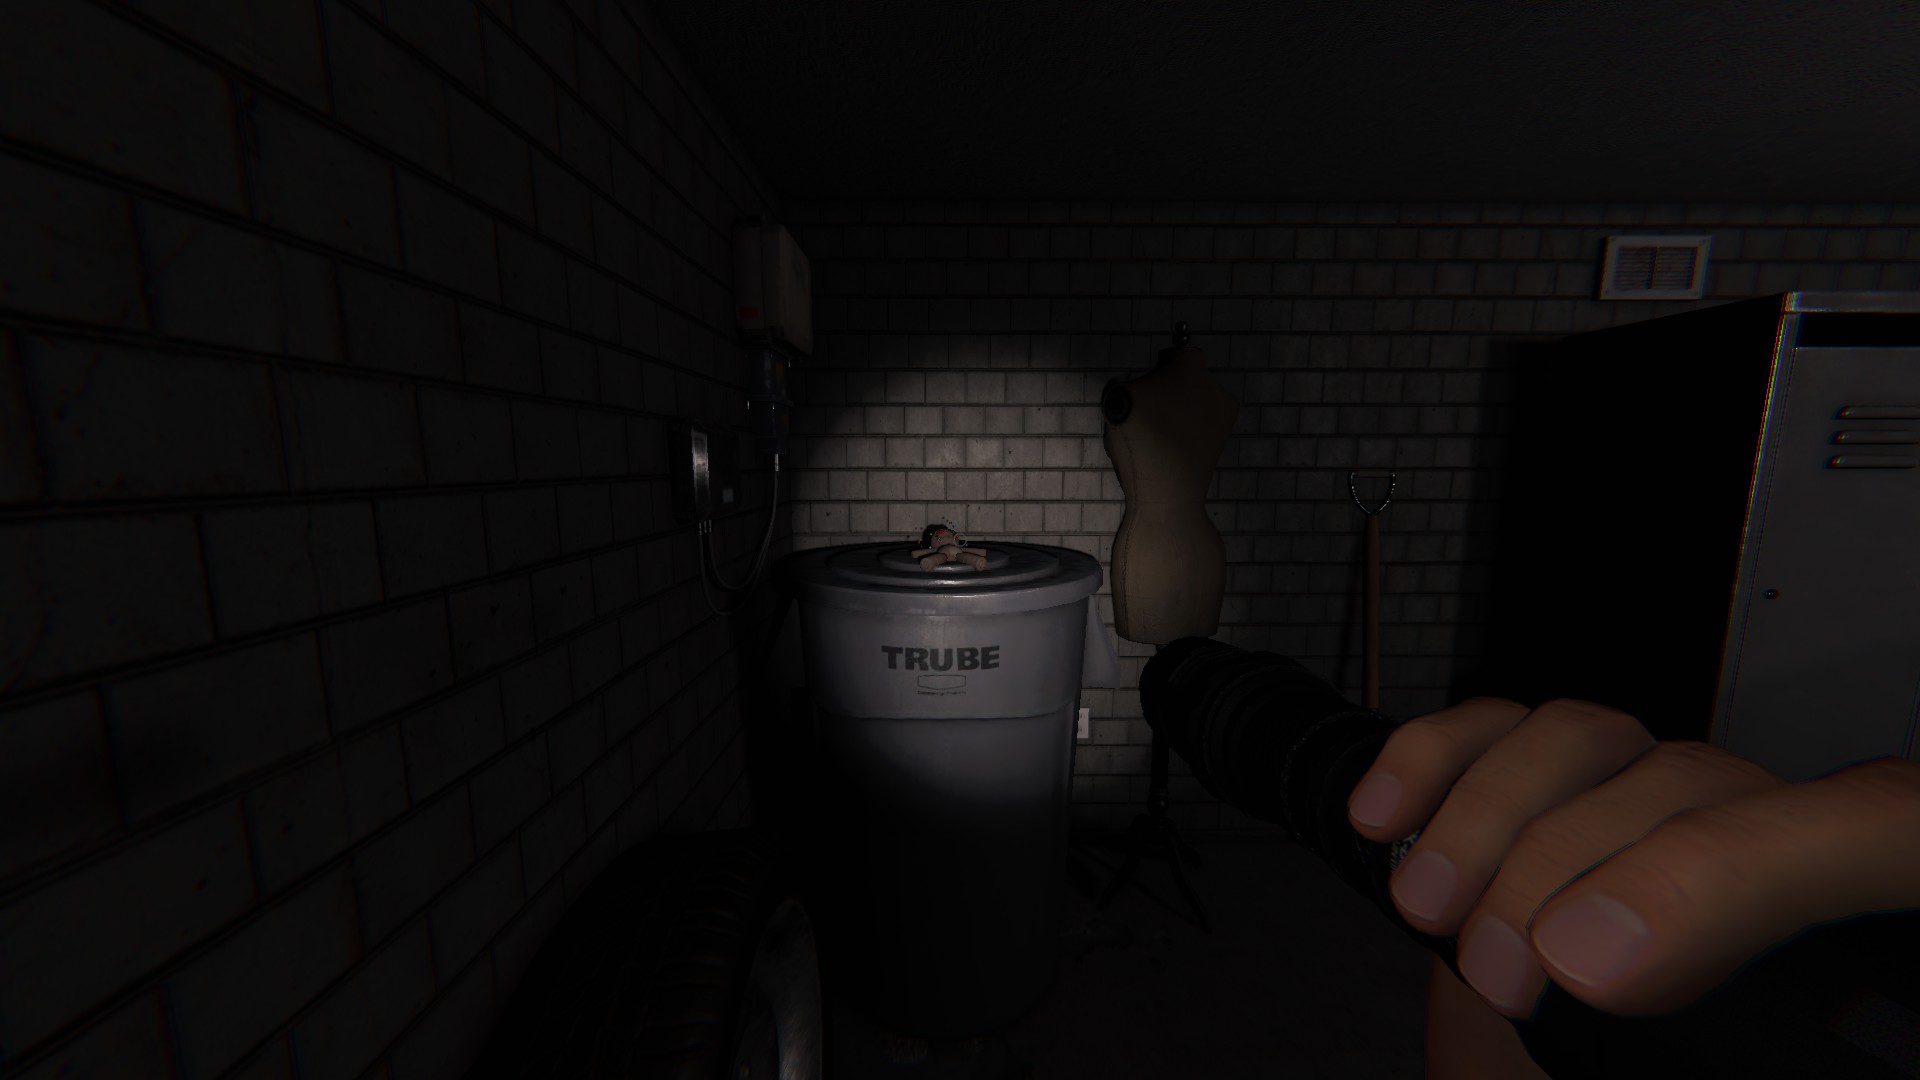
Voodoo Doll
In the corner of the garage, sitting on a garbage bin.
Black Mirror
Outside the green/teal/master bedroom door, by the living room hall alcove, on the wall
Summoning Circle
In the basement at the immediate bottom of the stairs
Monkey Paw
In the dining room, inside the glass display cabinet, on a shelf
Tarot Cards
In the living room/foyer, in the corner of the room by the couch, on a side table
Ouija Board
In the back of the basement, on a small table
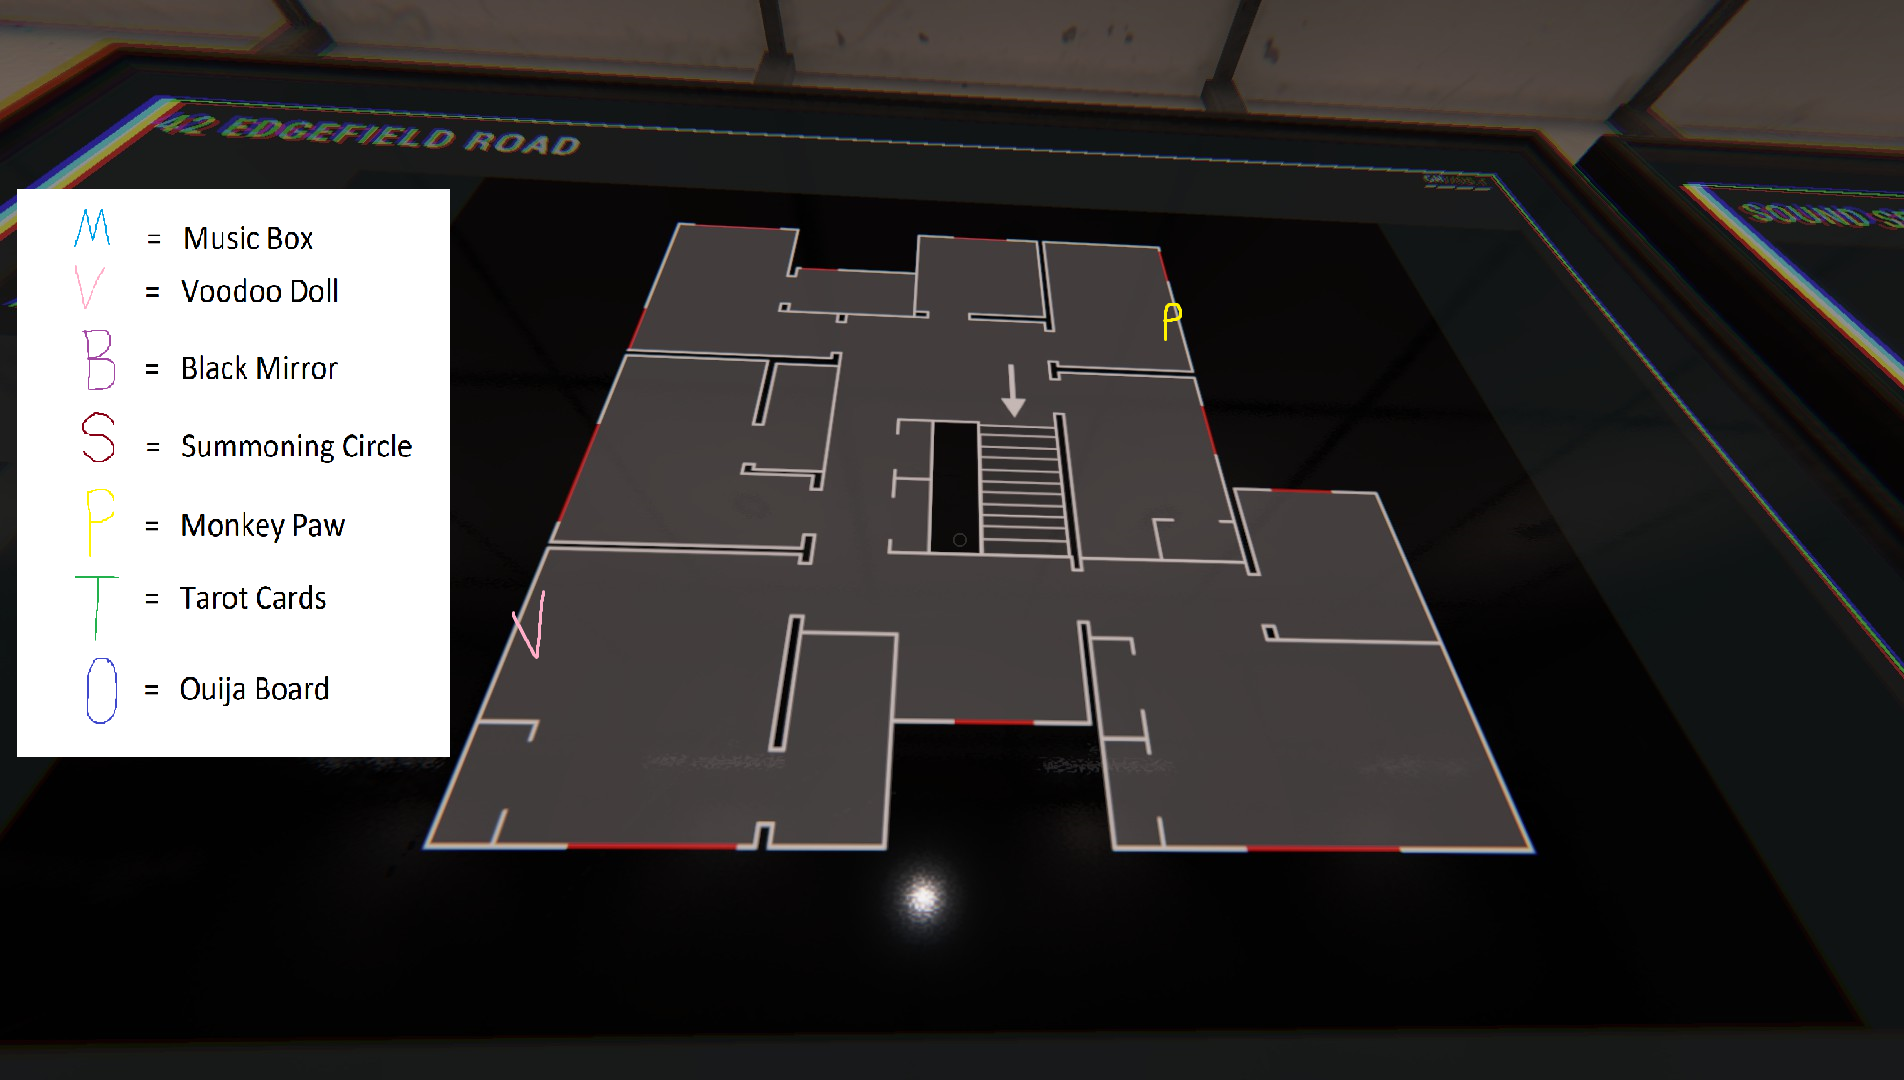
42 Edgefield Road
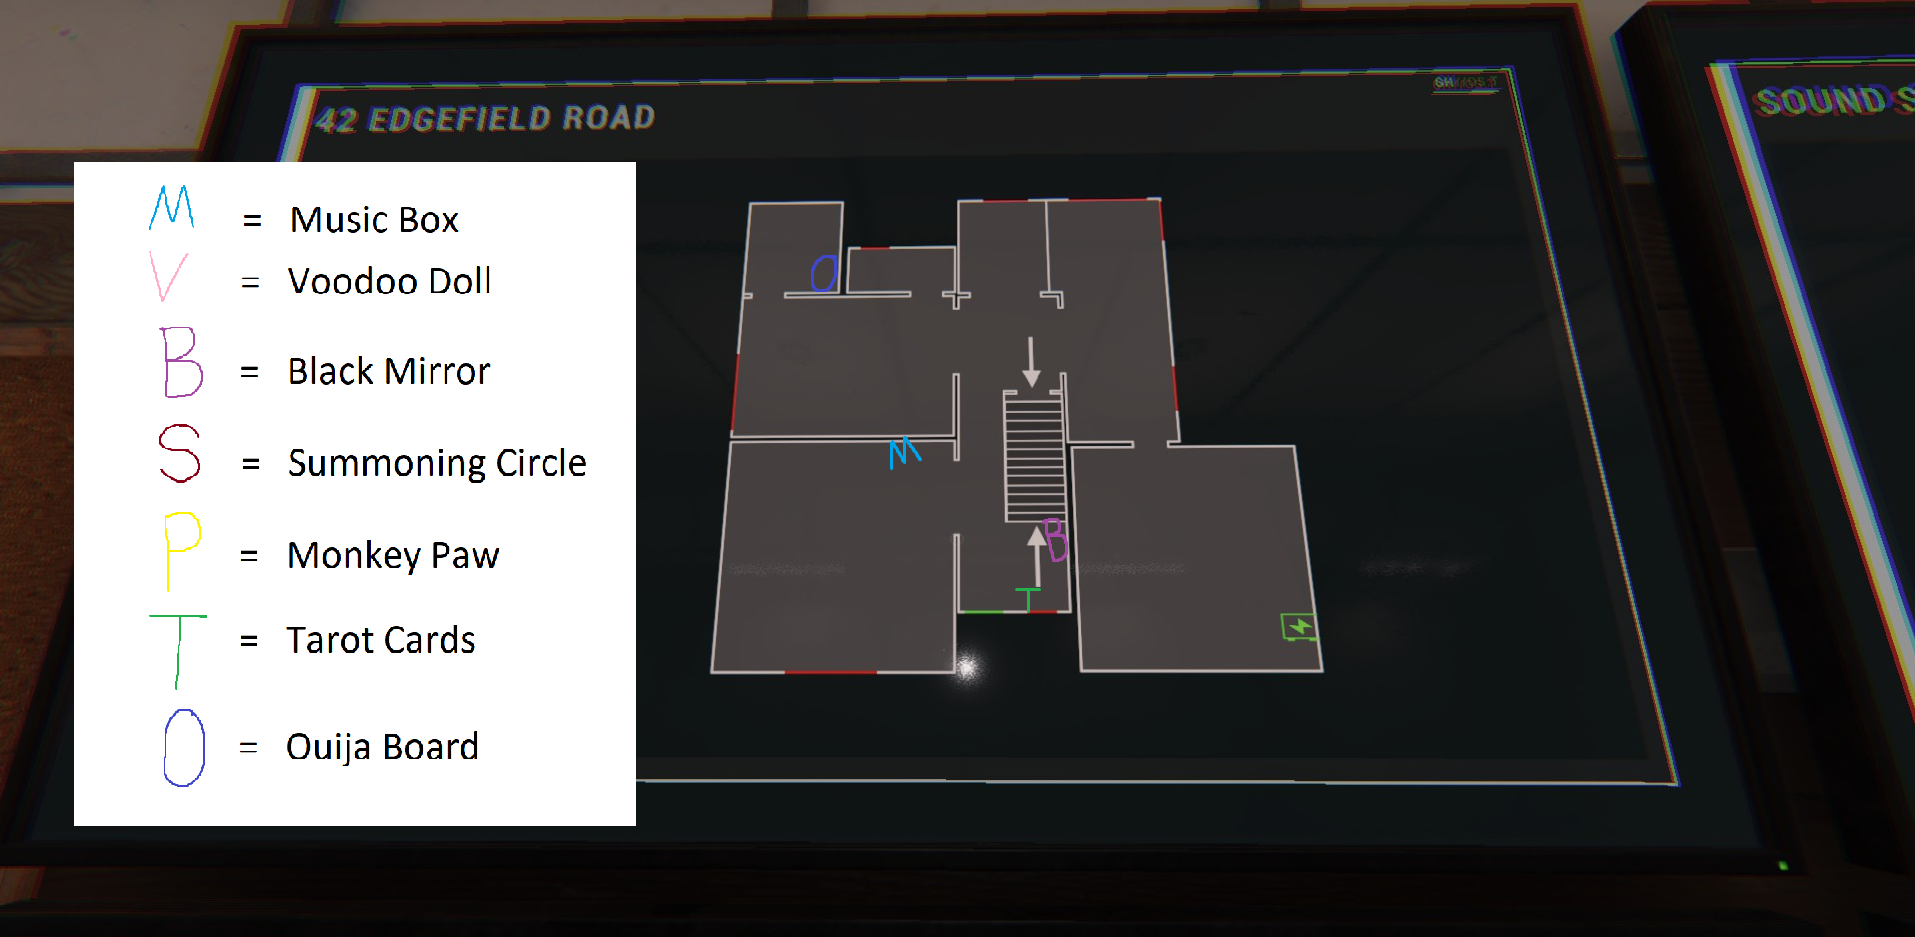 Upper Level:
 Basement: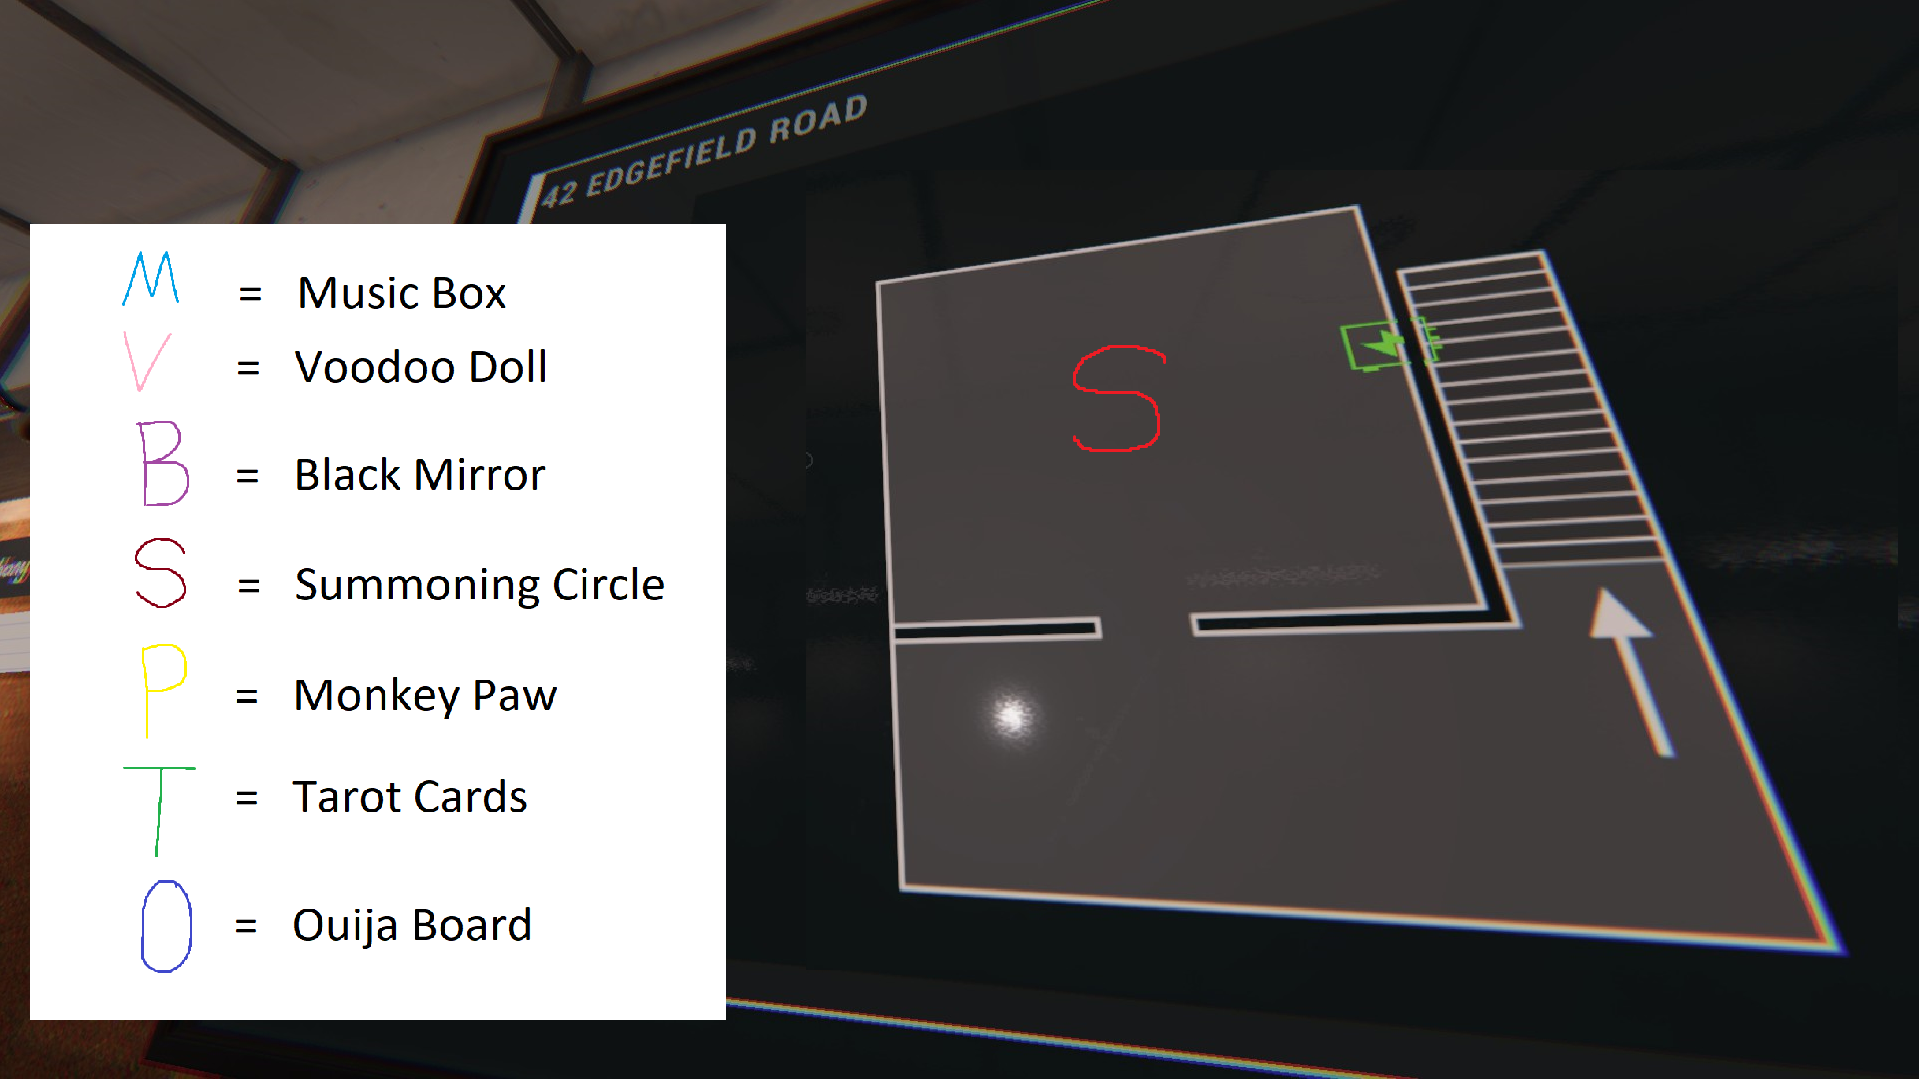
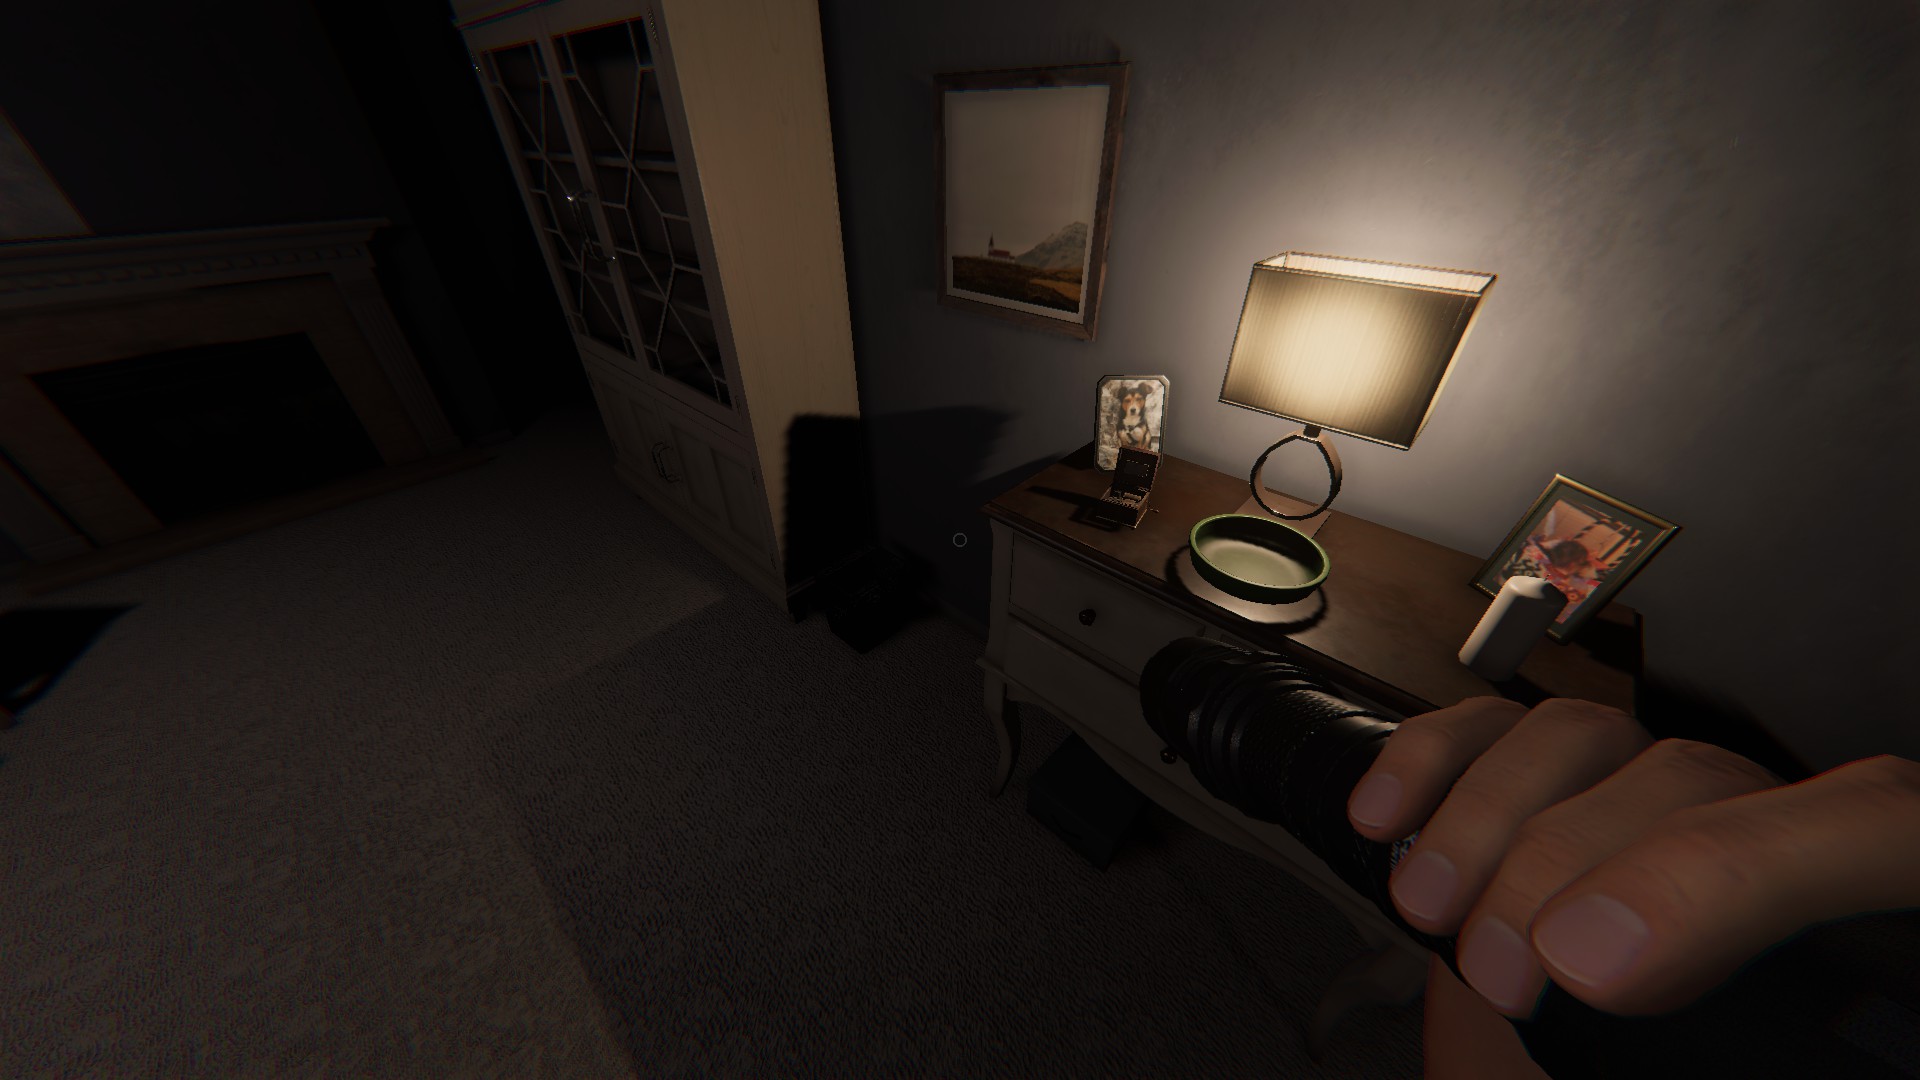
Music Box
First Room on the left, on a small table next to a lamp
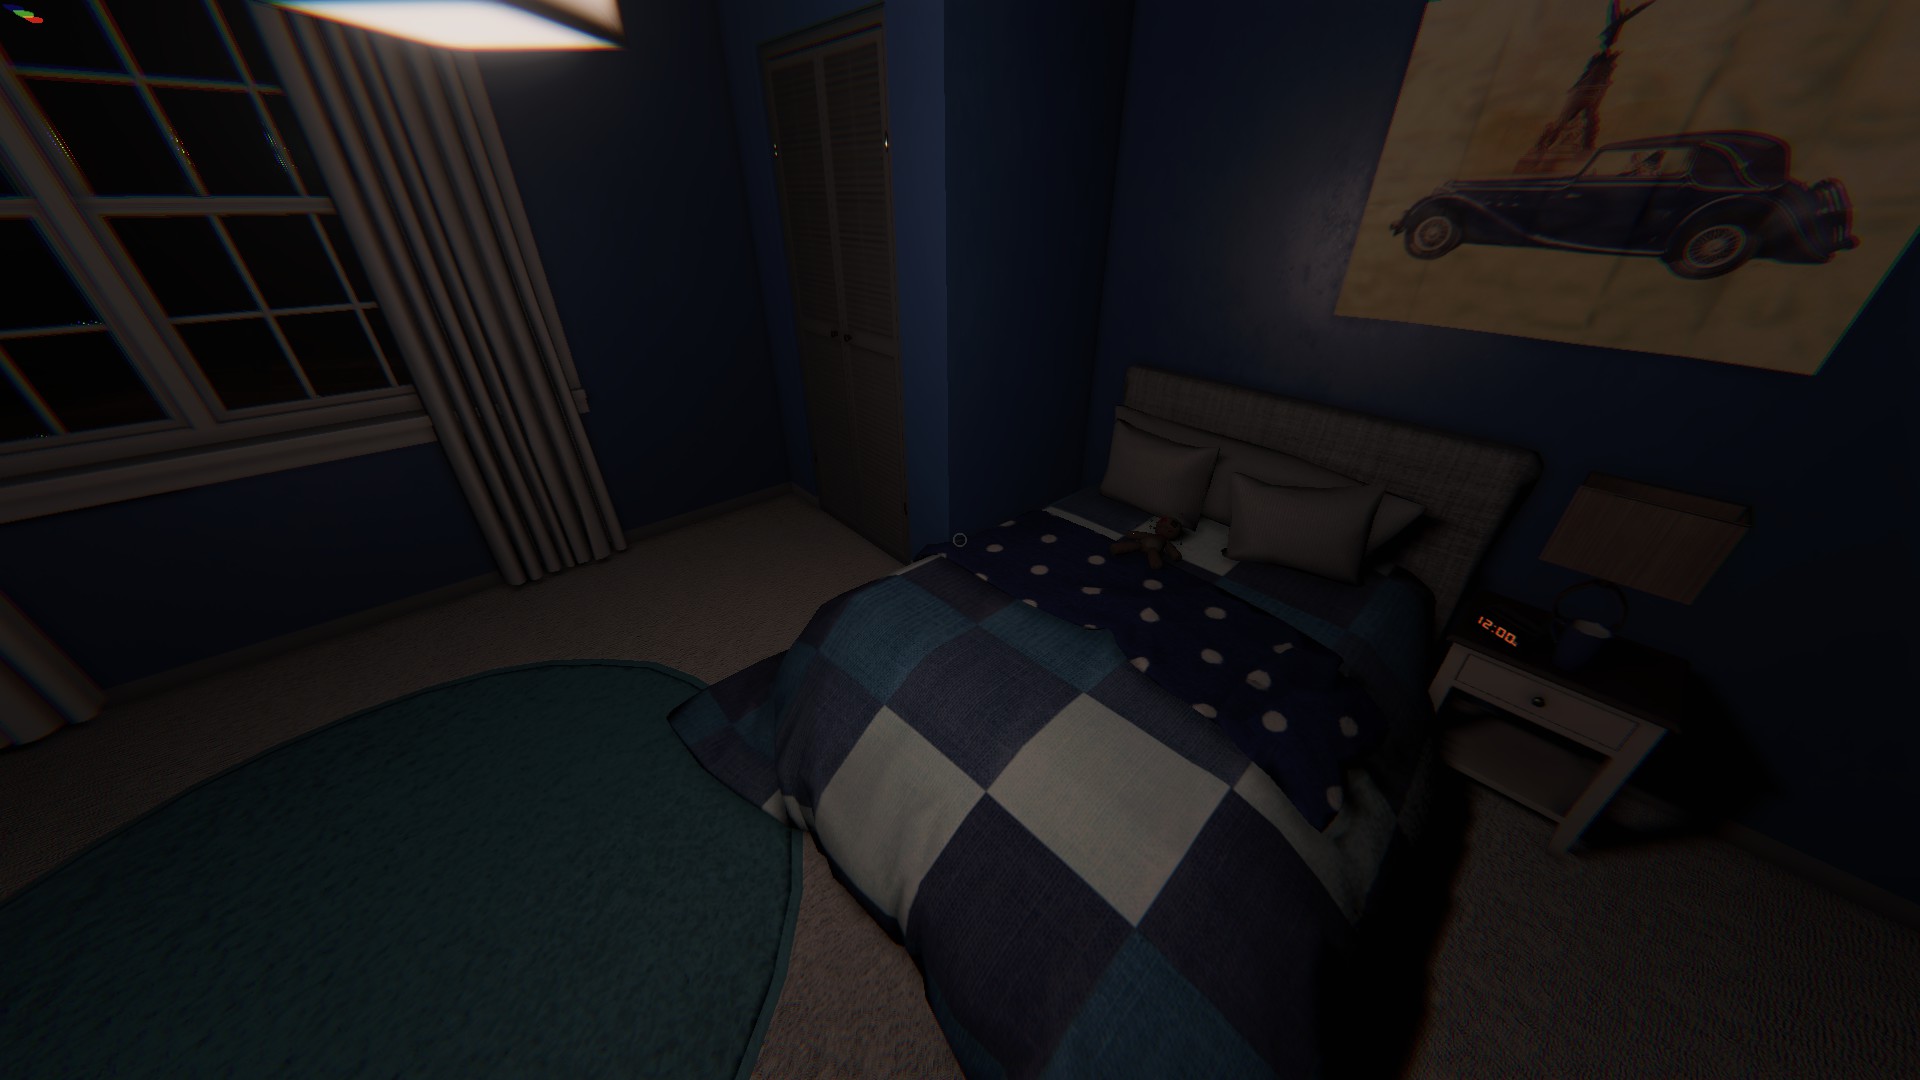
Voodoo Doll
Upstairs, in the blue bedroom, ontop of the bed
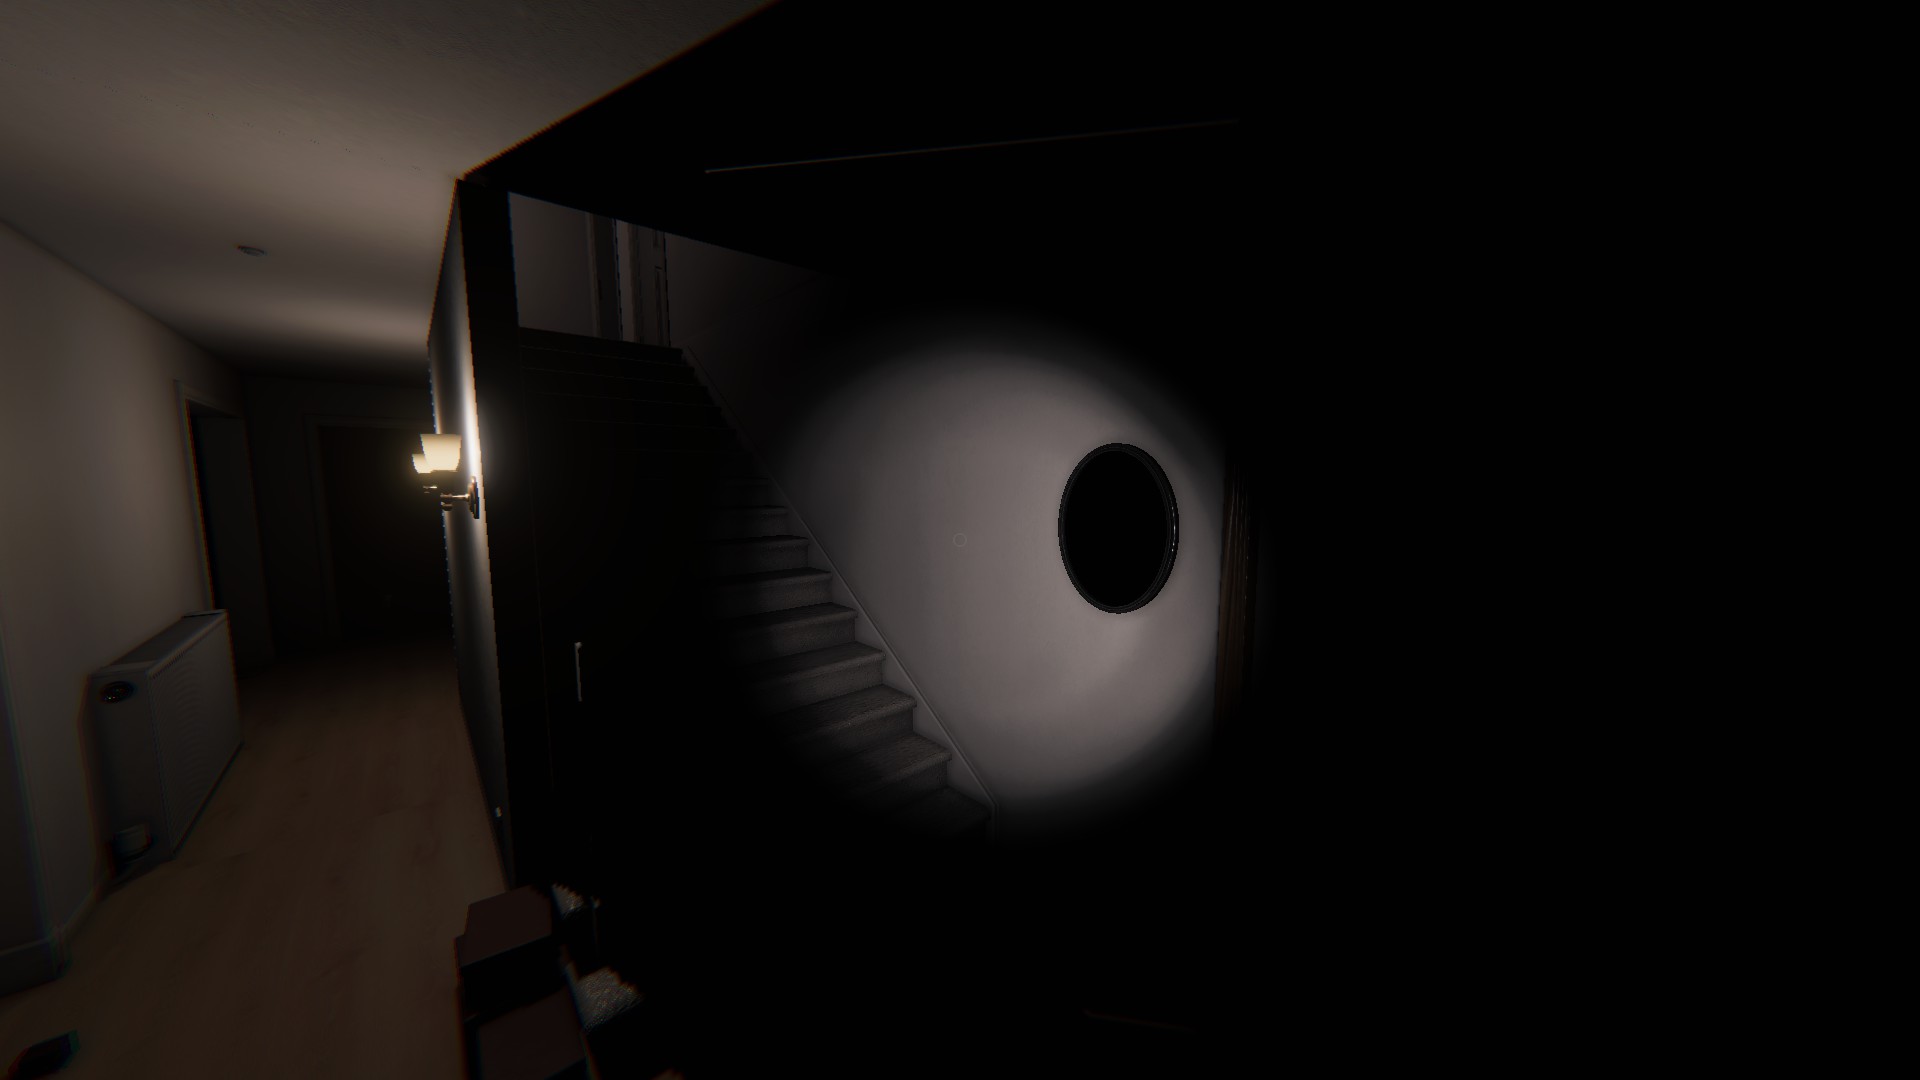
Black Mirror
By the front door, at the base of the stairs on the wall
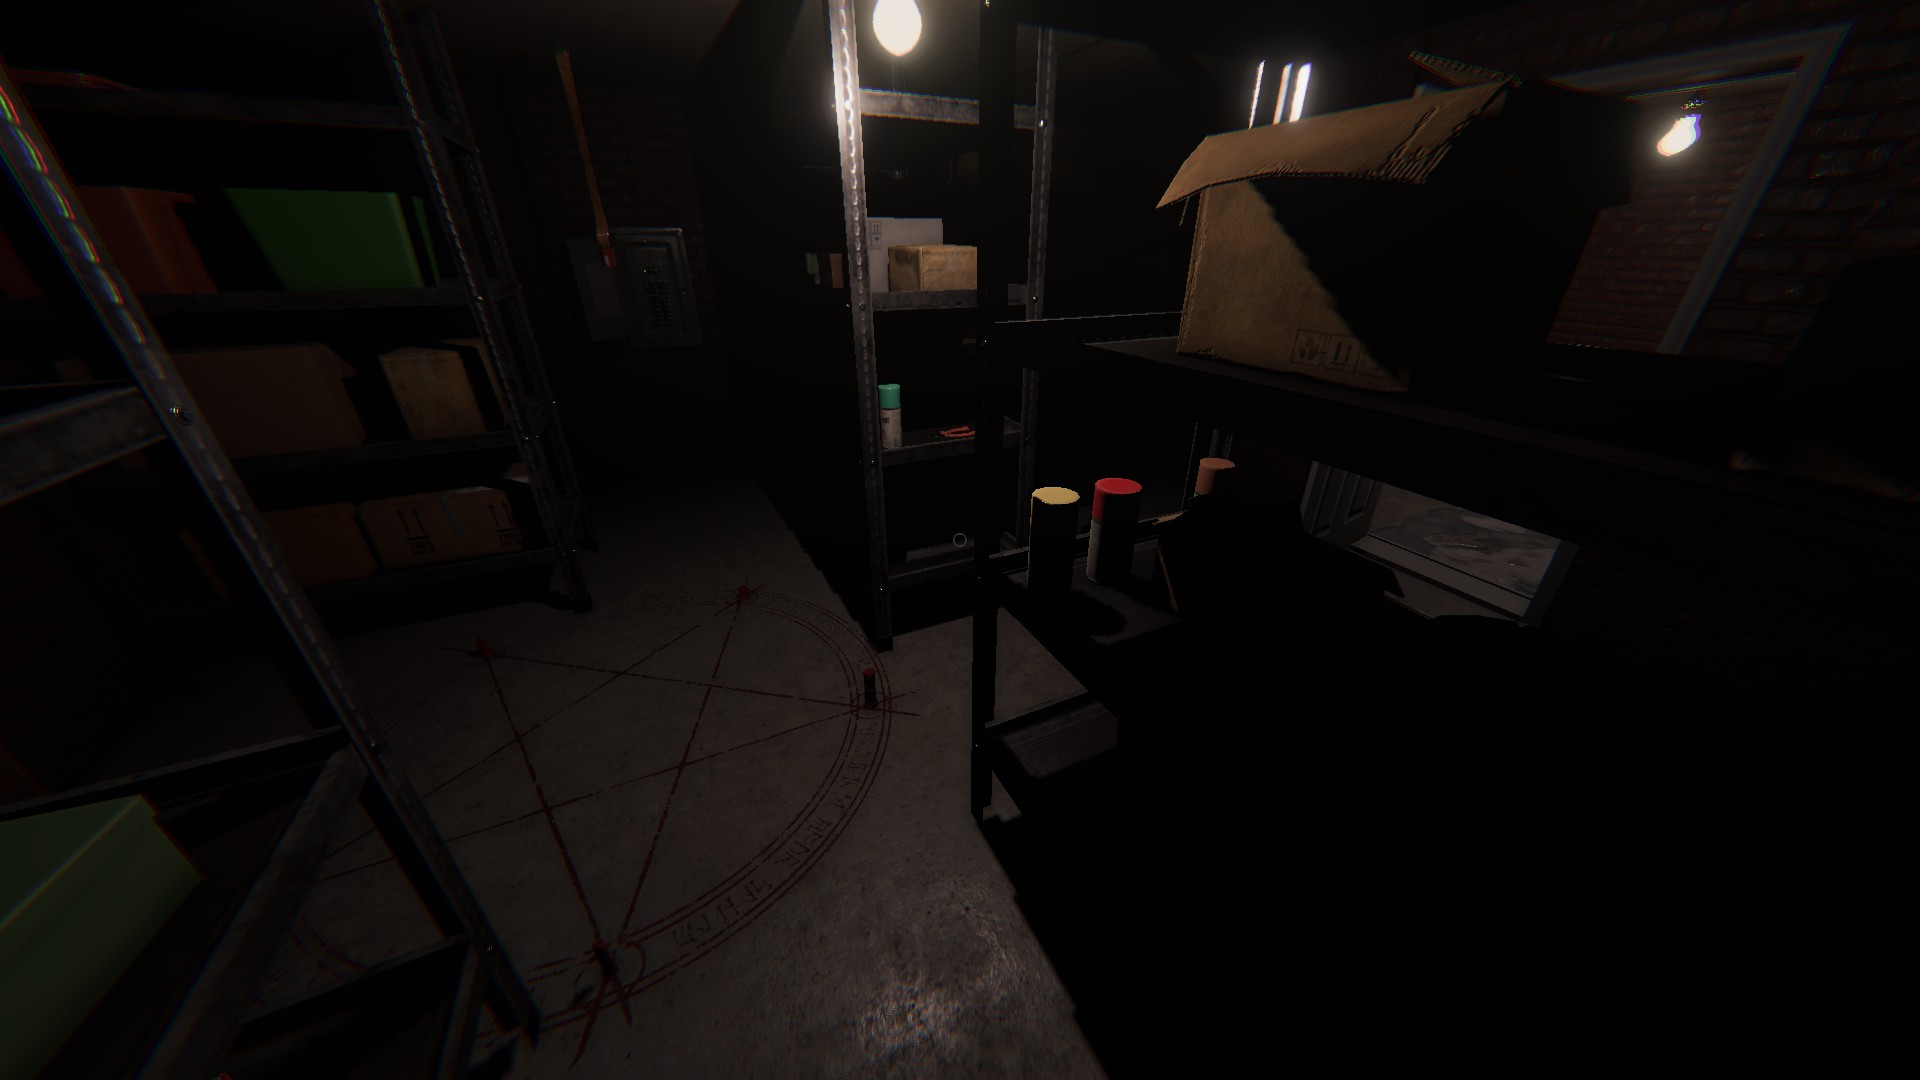
Summoning Circle
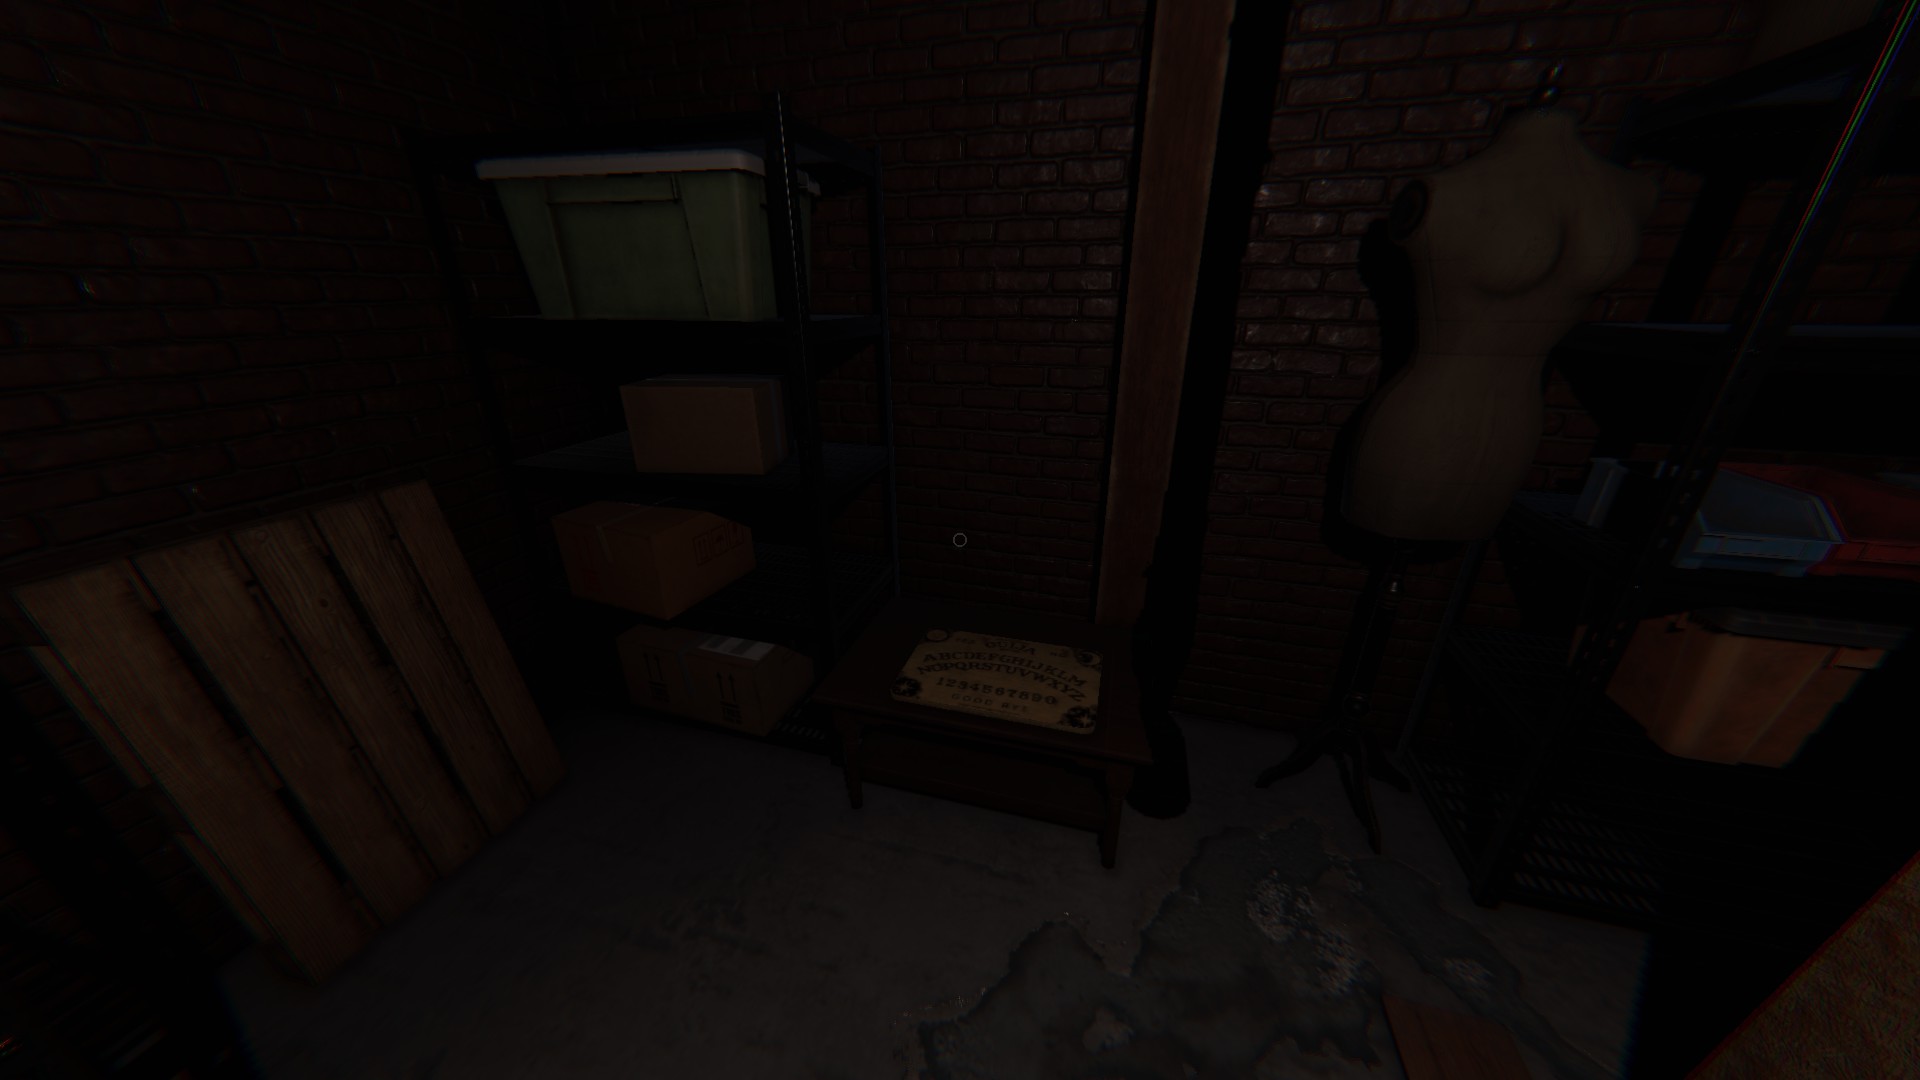
In the back of the basement, next to the possible fuze box location.
Monkey Paw
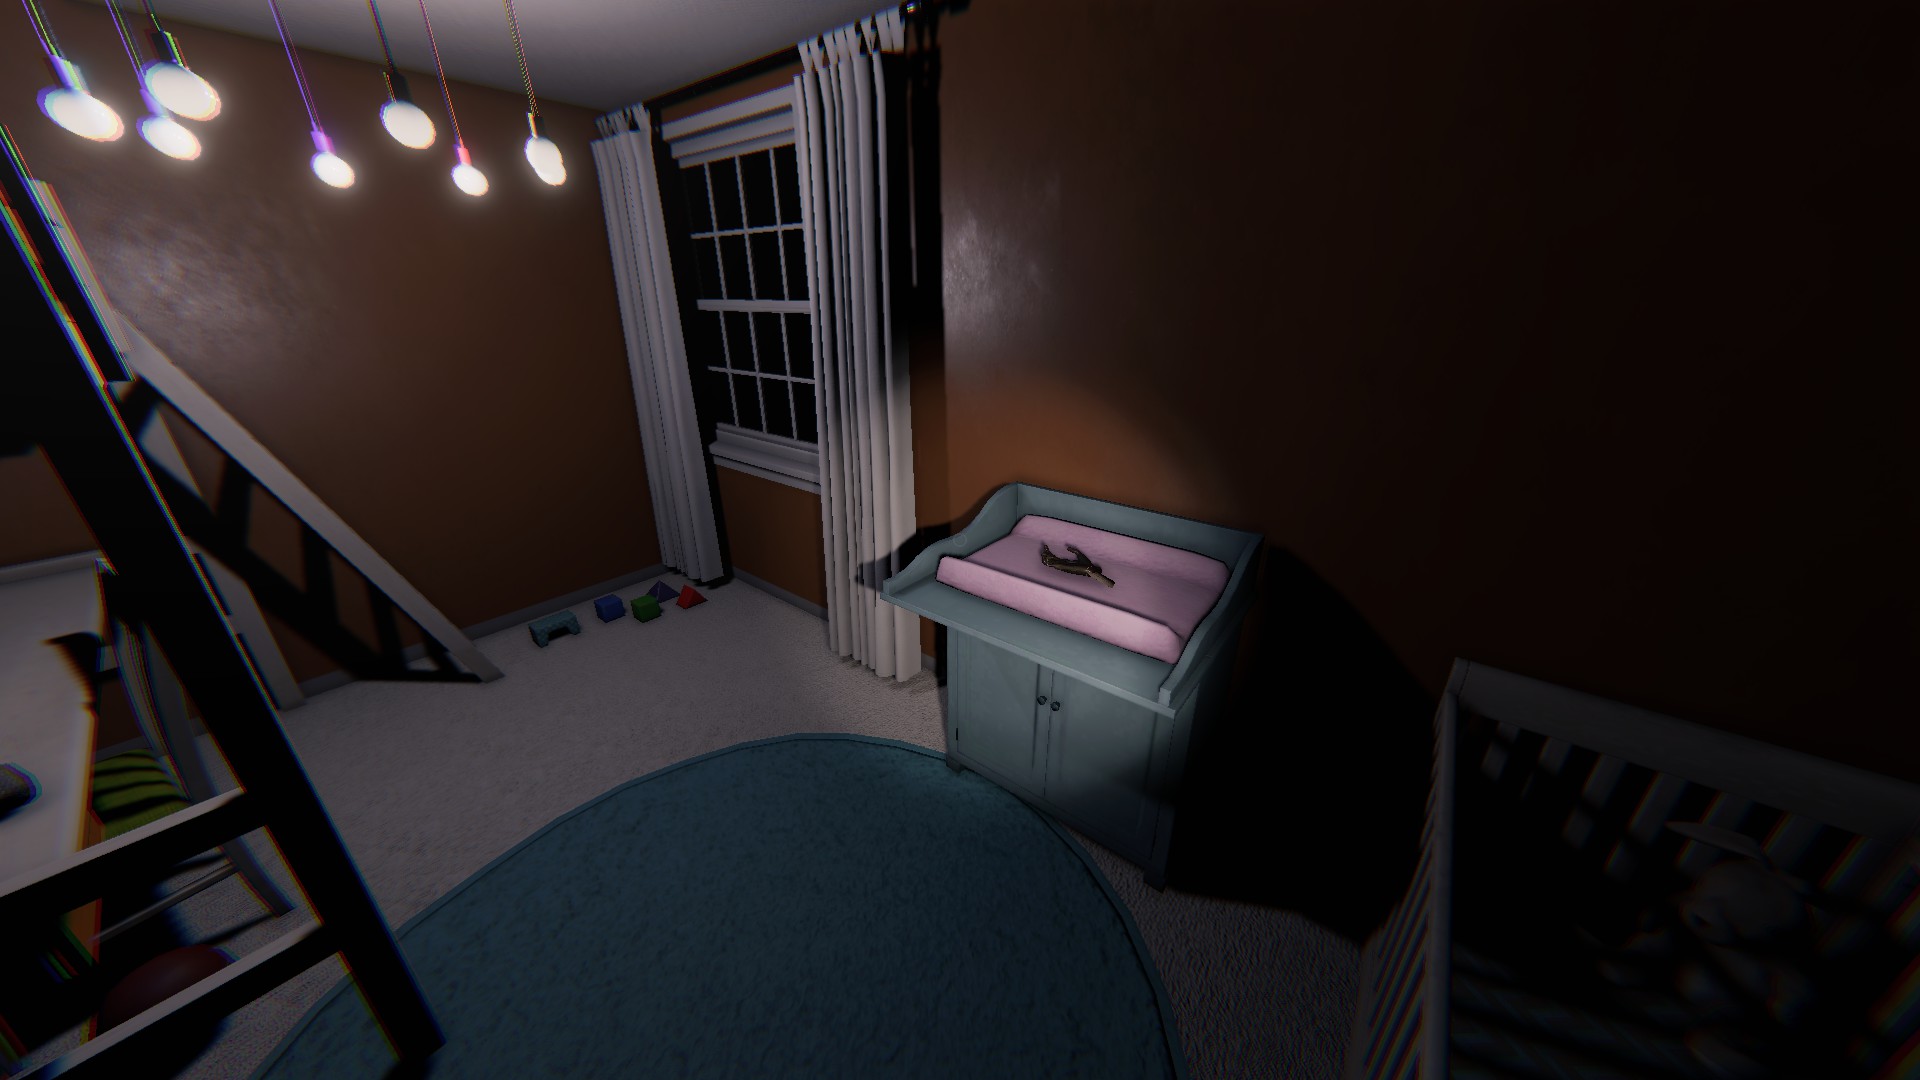
In the upstairs kid's room/orange bedroom, on the baby changing table
Tarot Cards
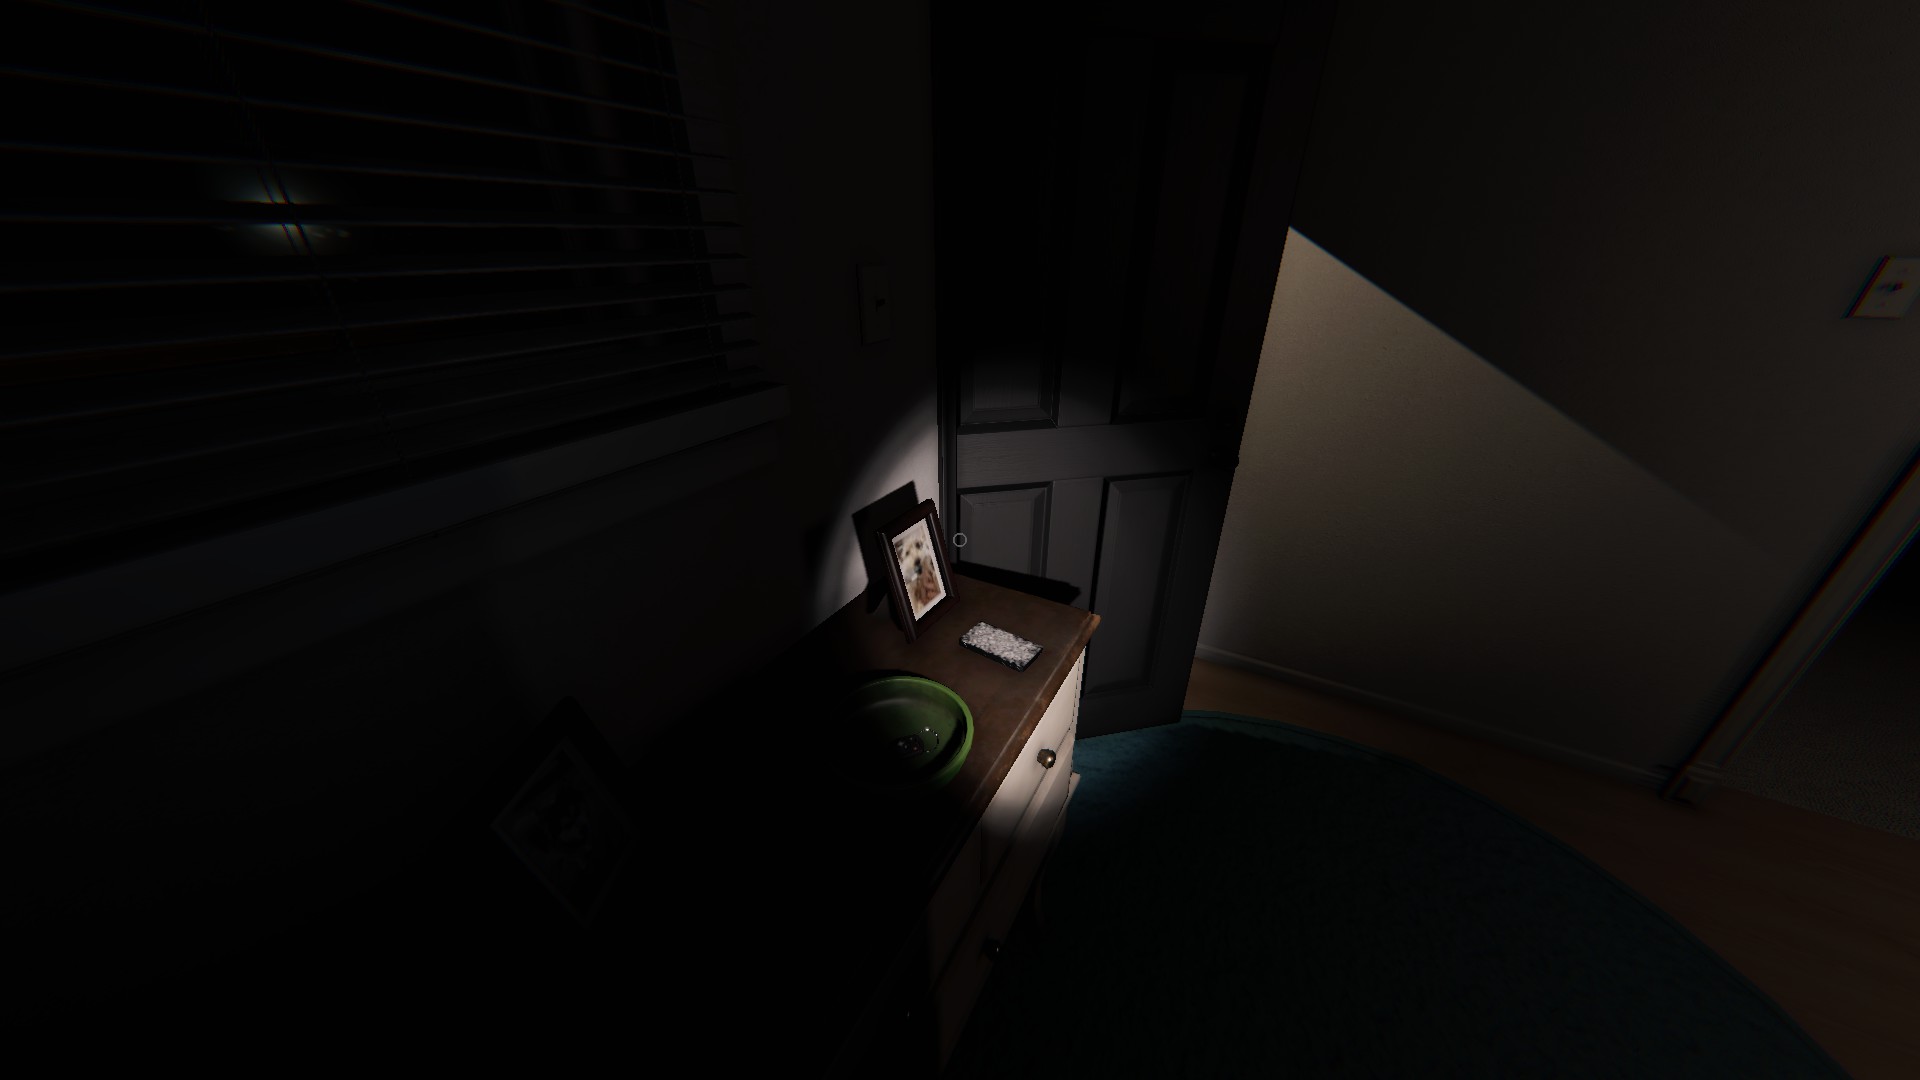
By the front door, on a small table, next to the key bowl
Ouija Board
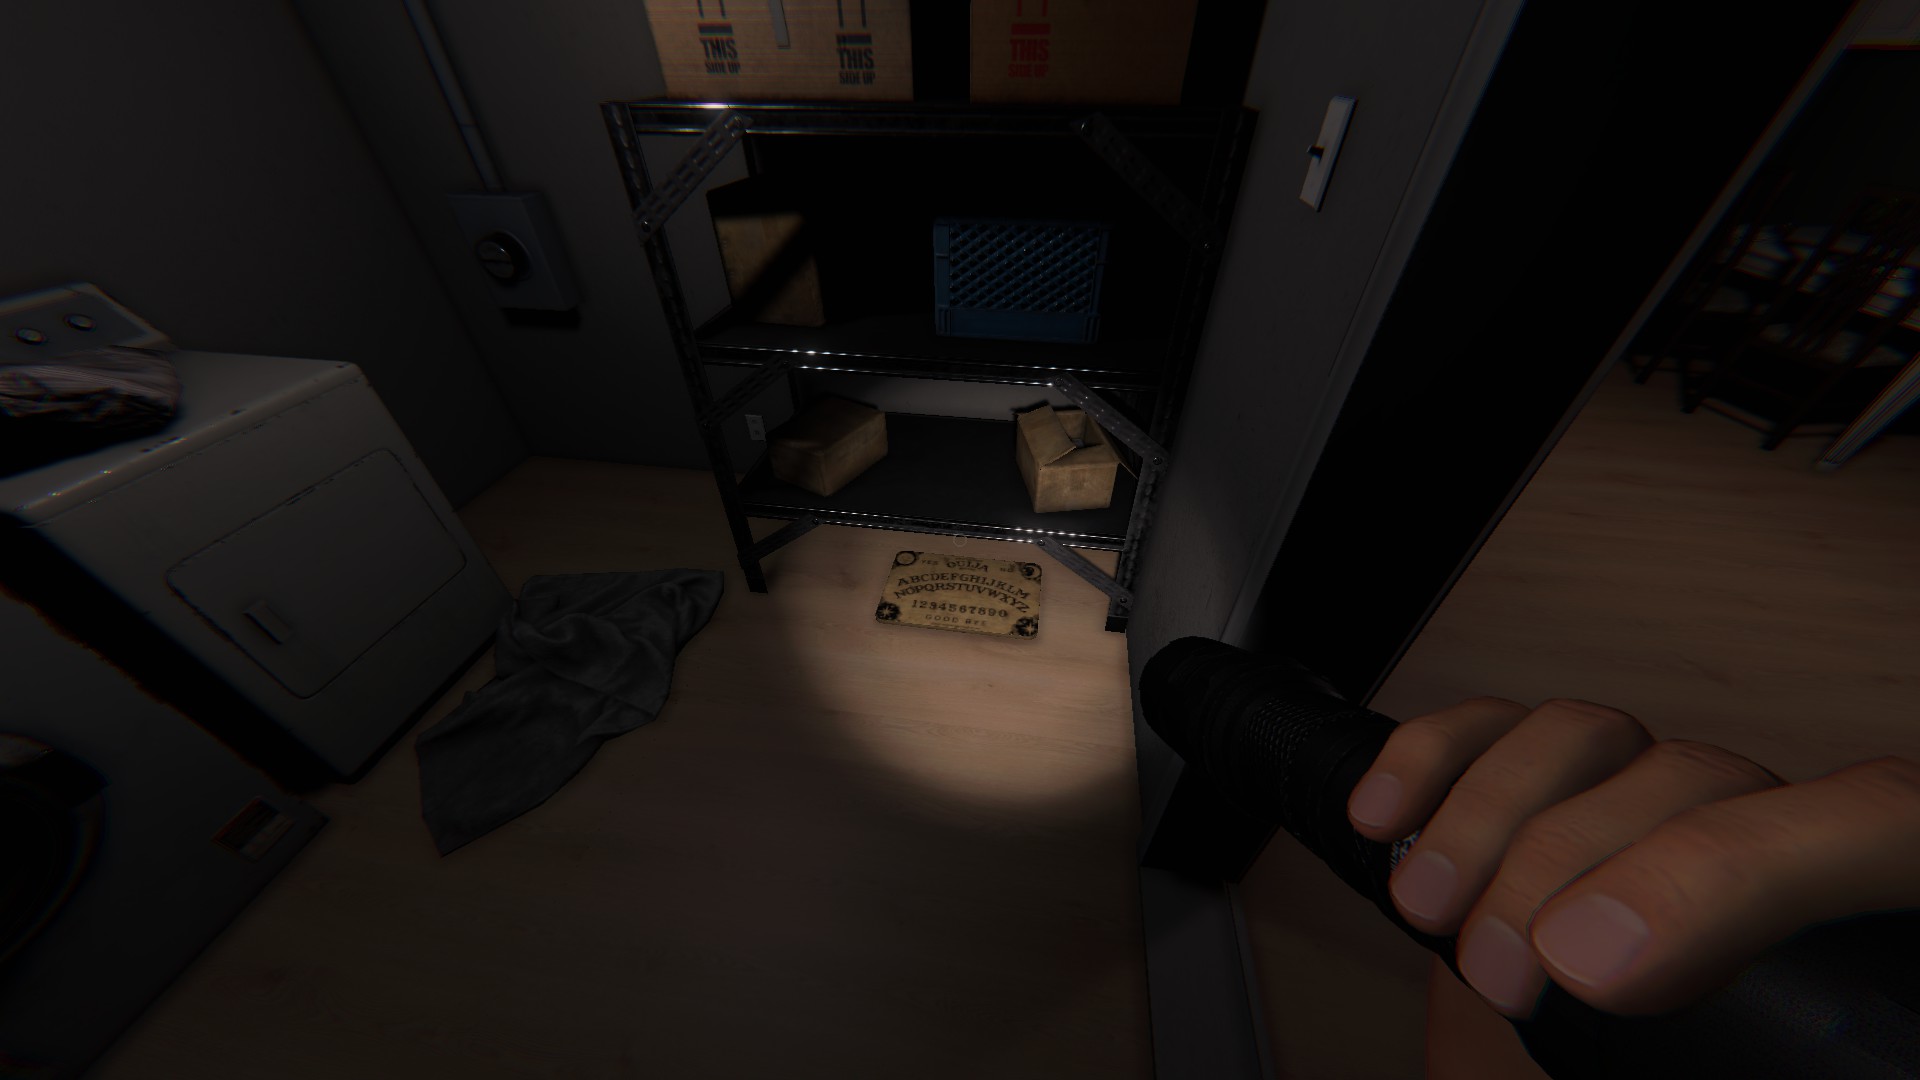
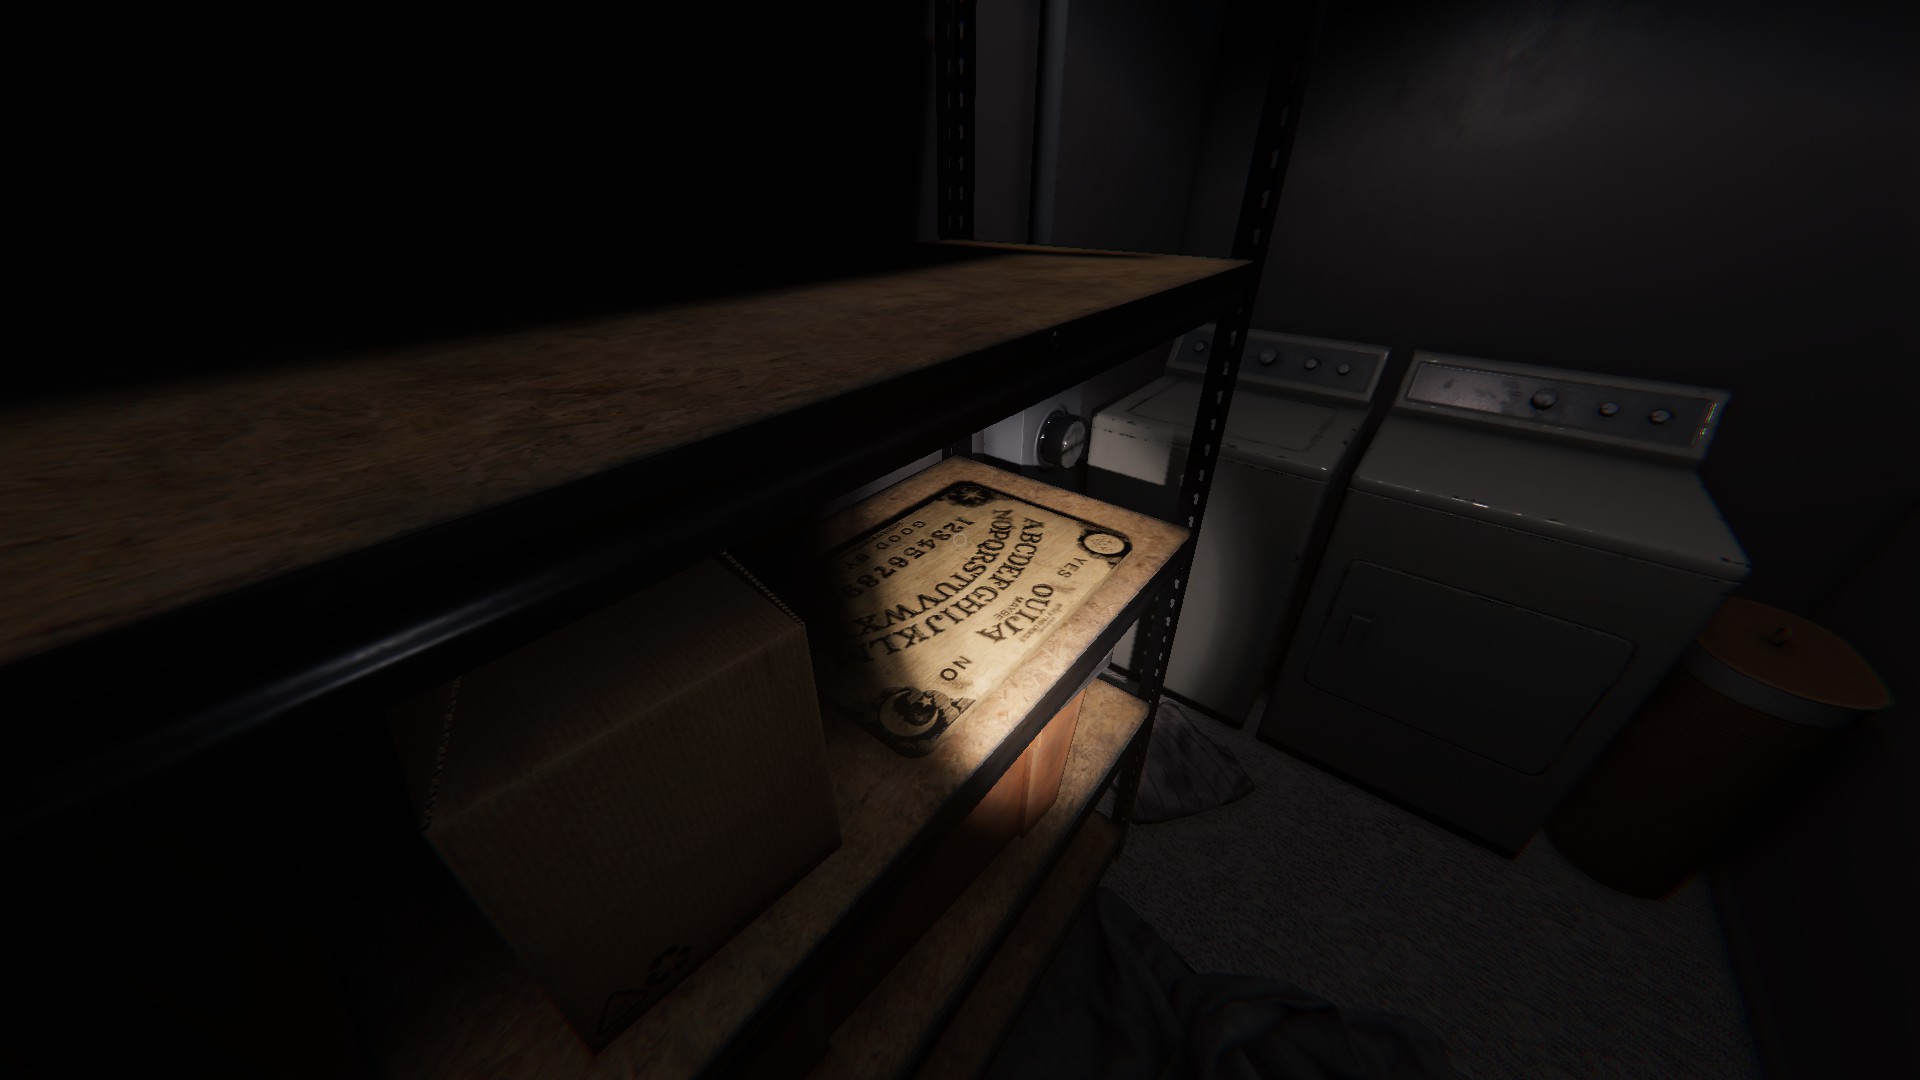
Off the back of kitchen, in the laundry room, under some shelves
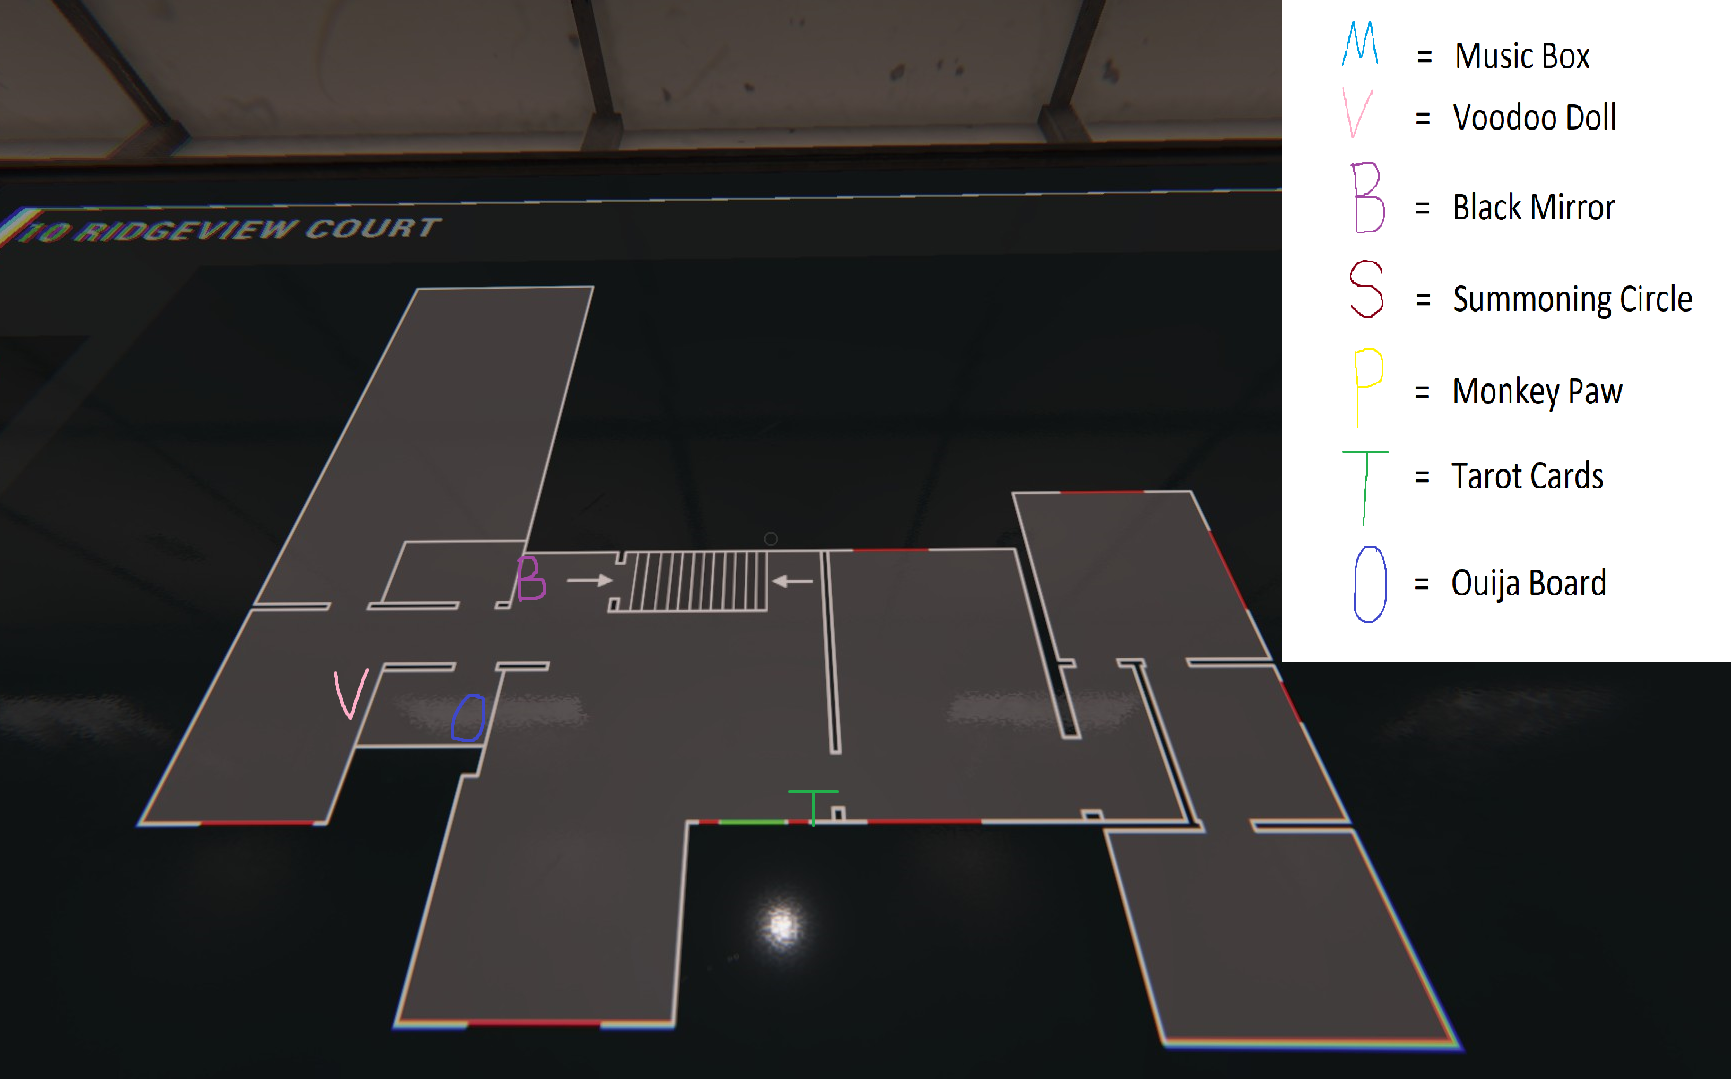
10 Ridgeview Court
 Upper Floor:
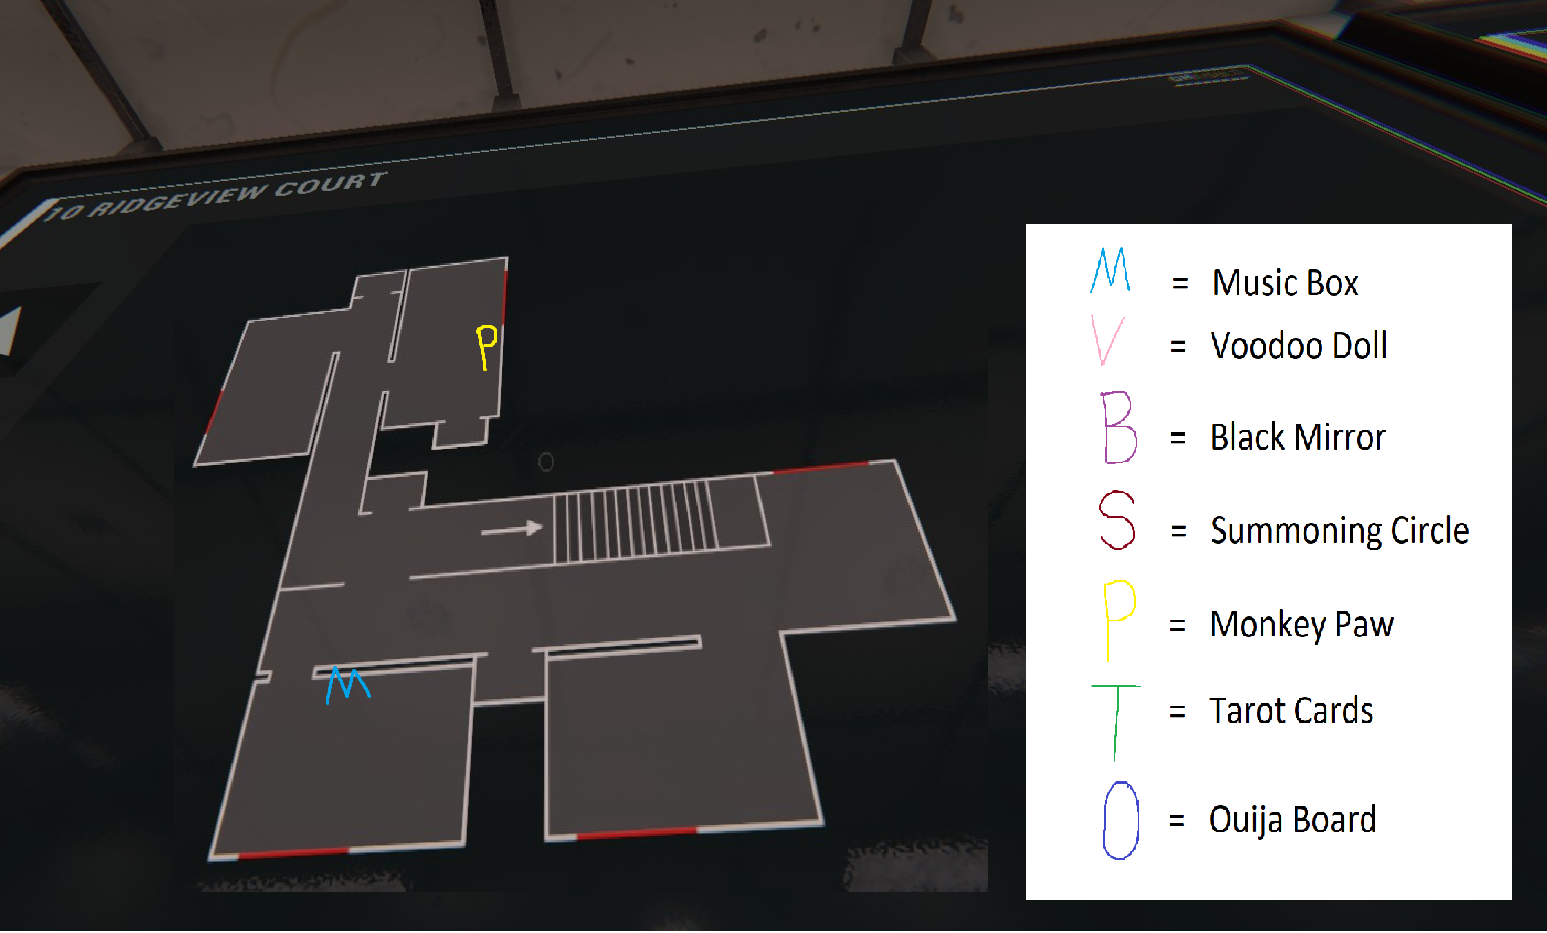 Basement: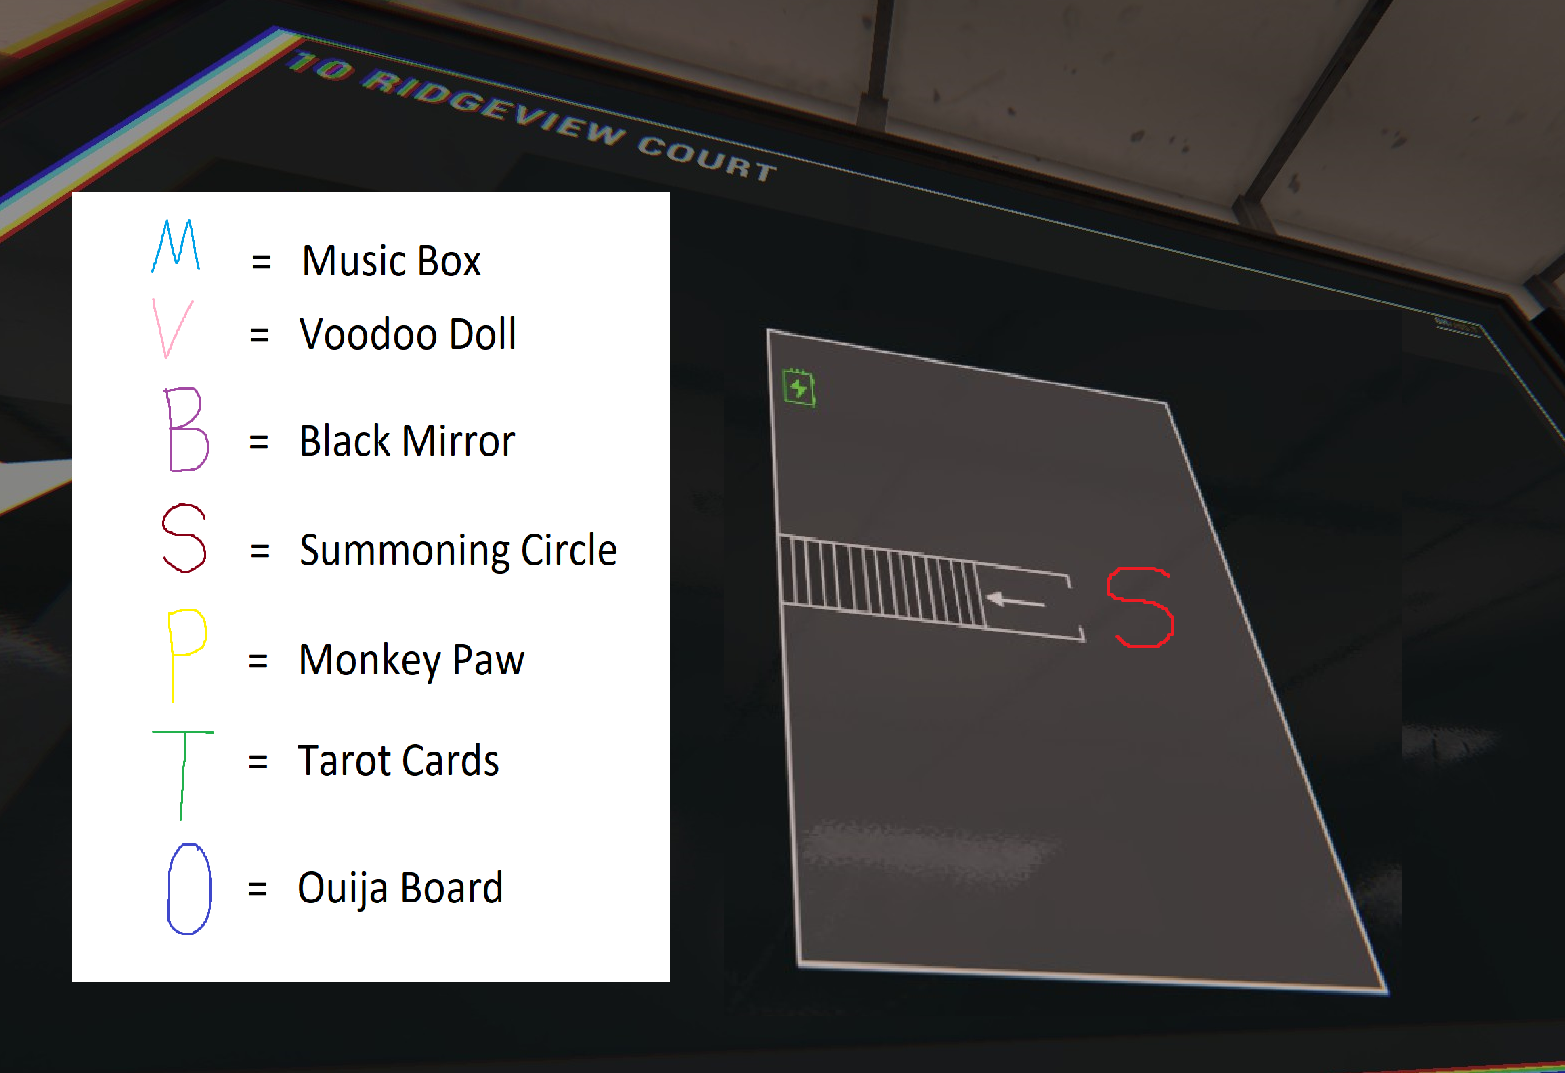
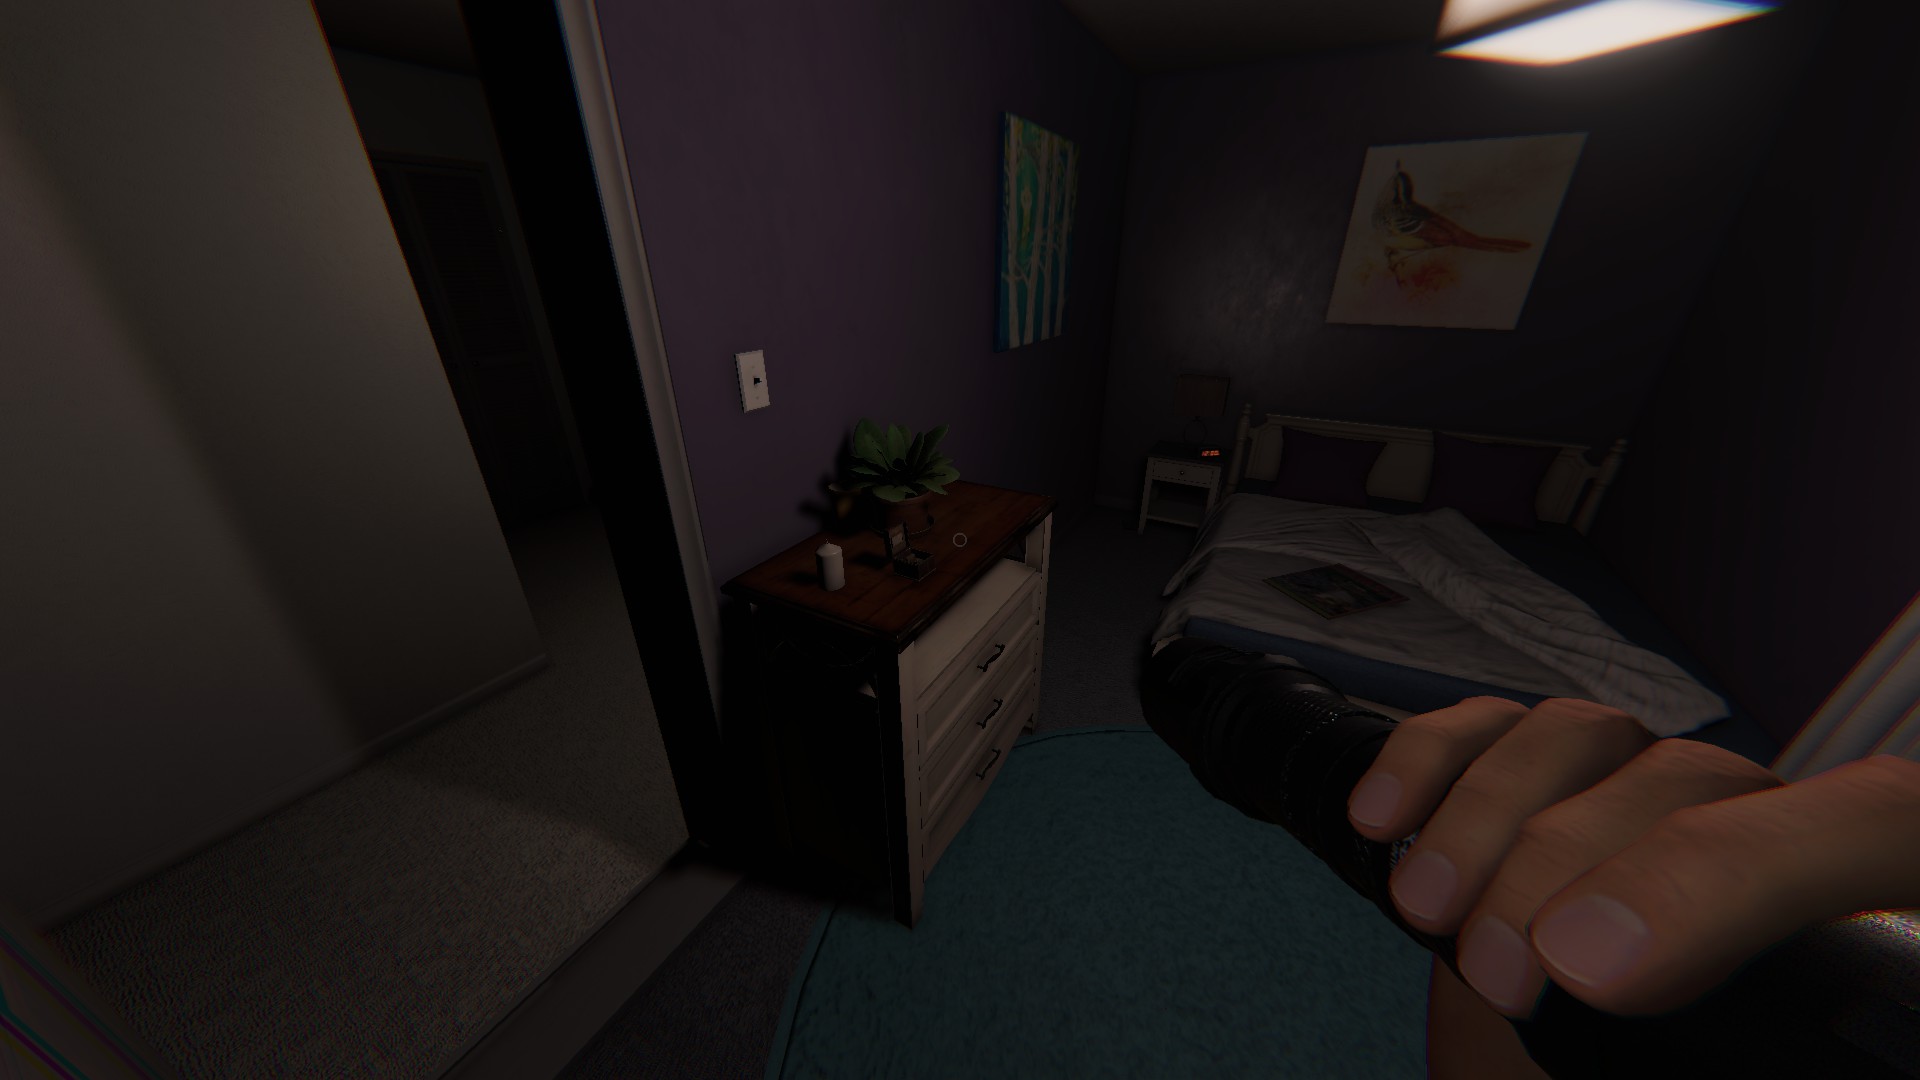
Music Box
Upstairs, in the purple bedroom, on the small table by the door
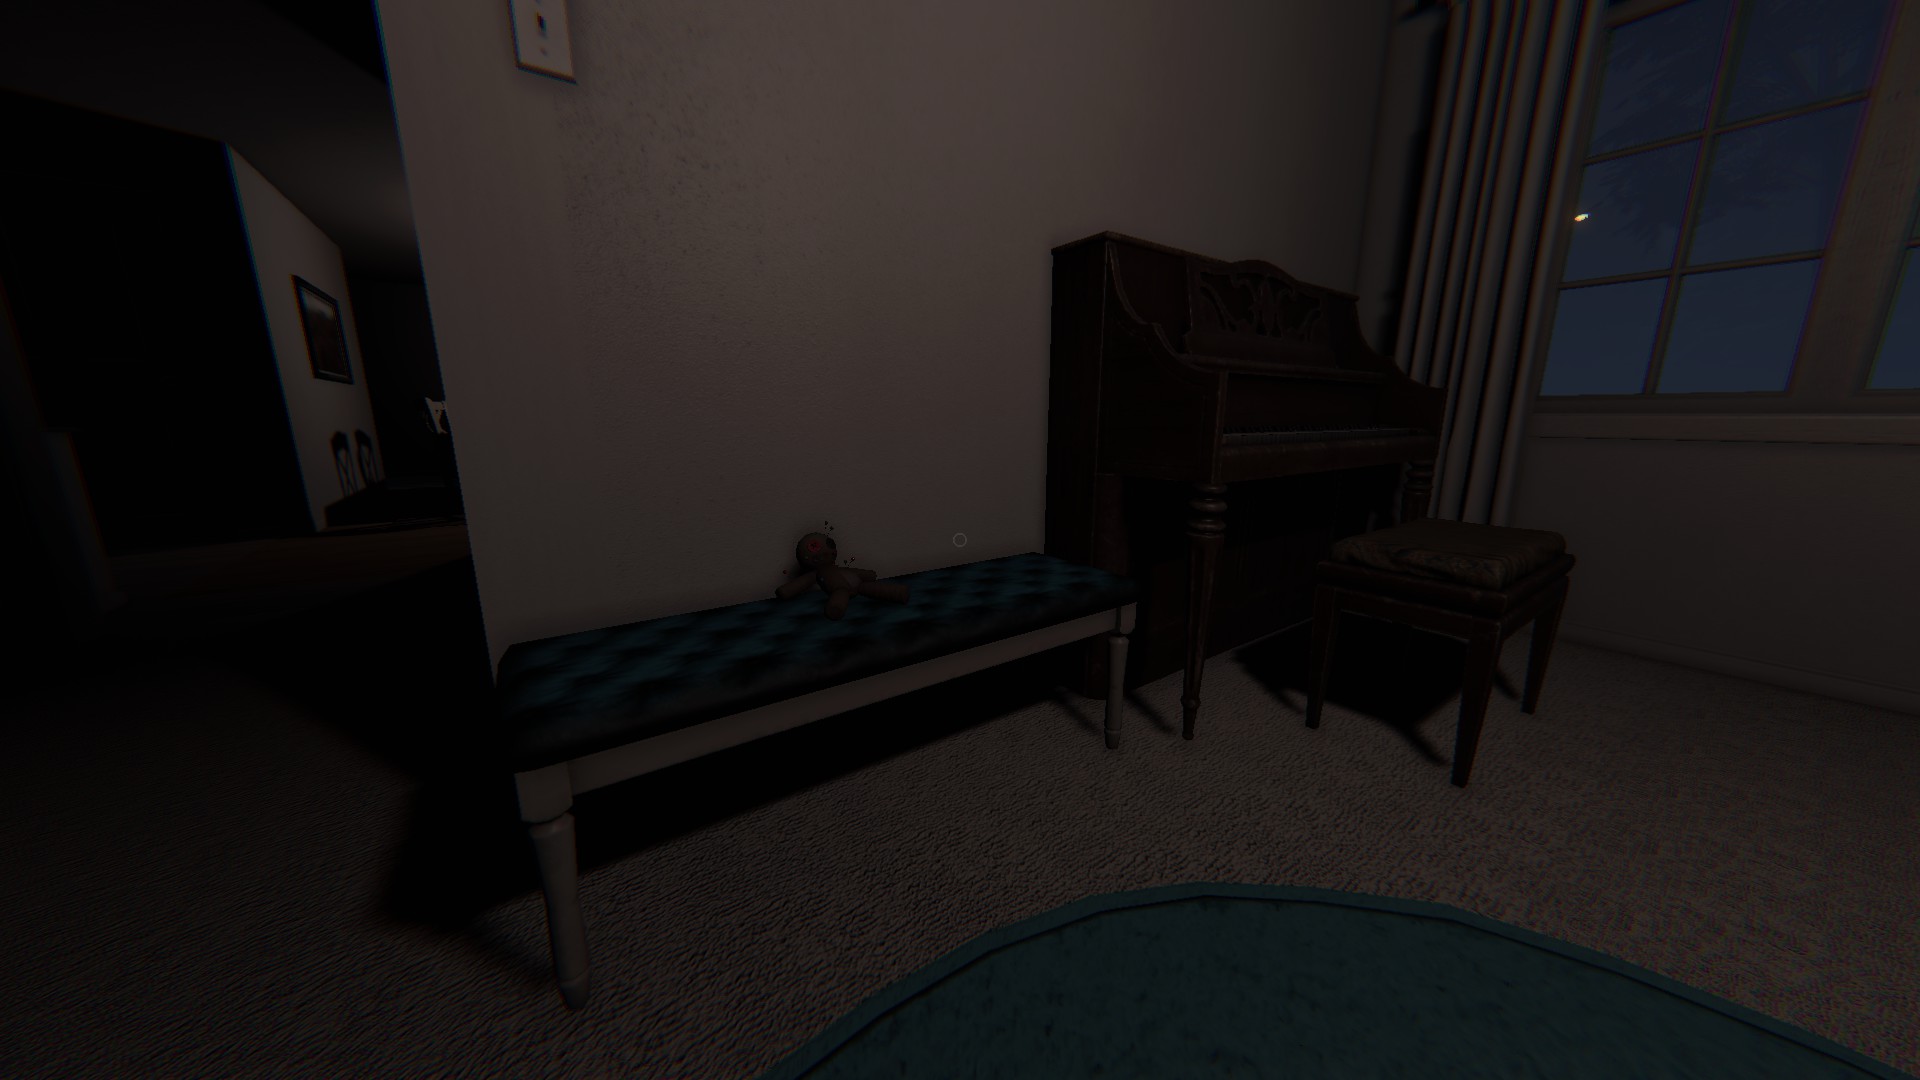
Voodoo Doll
On the bench, next to the piano
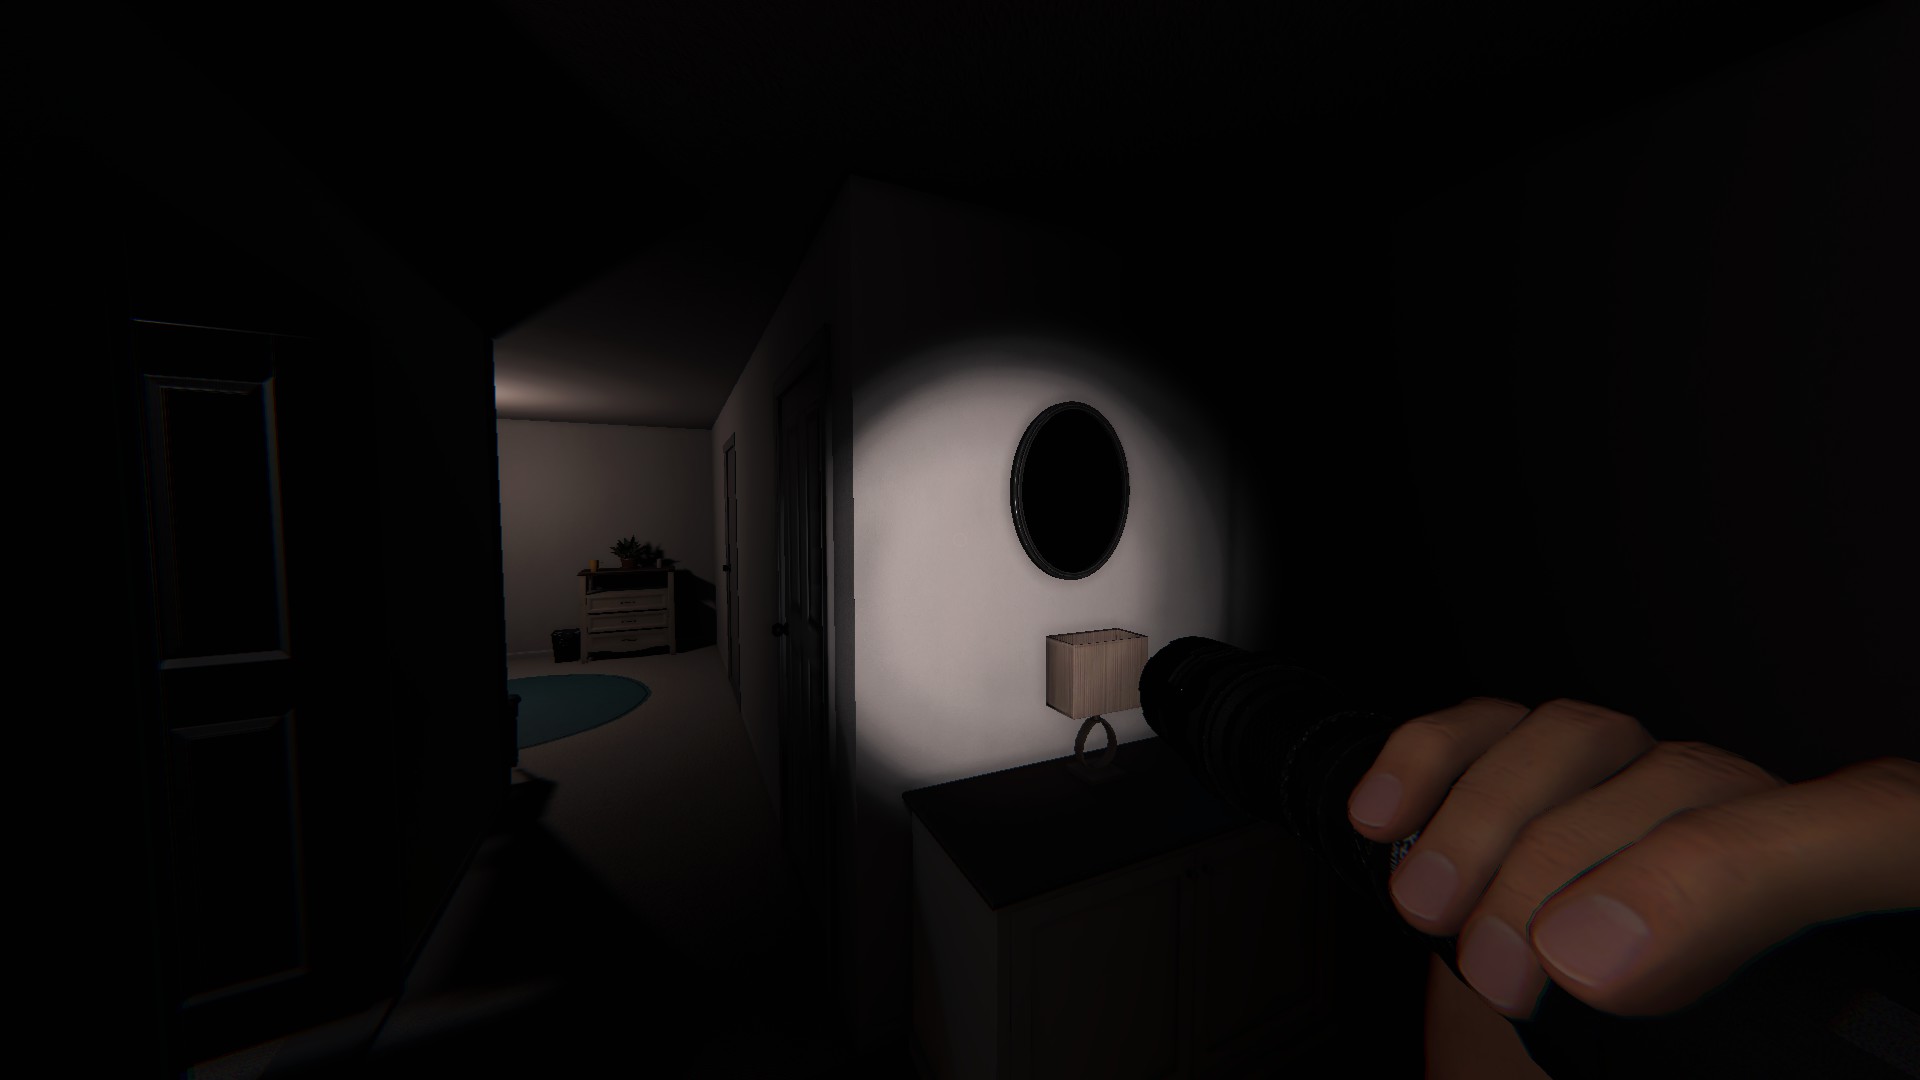
Black Mirror
Across from the basement stair case, on the wall
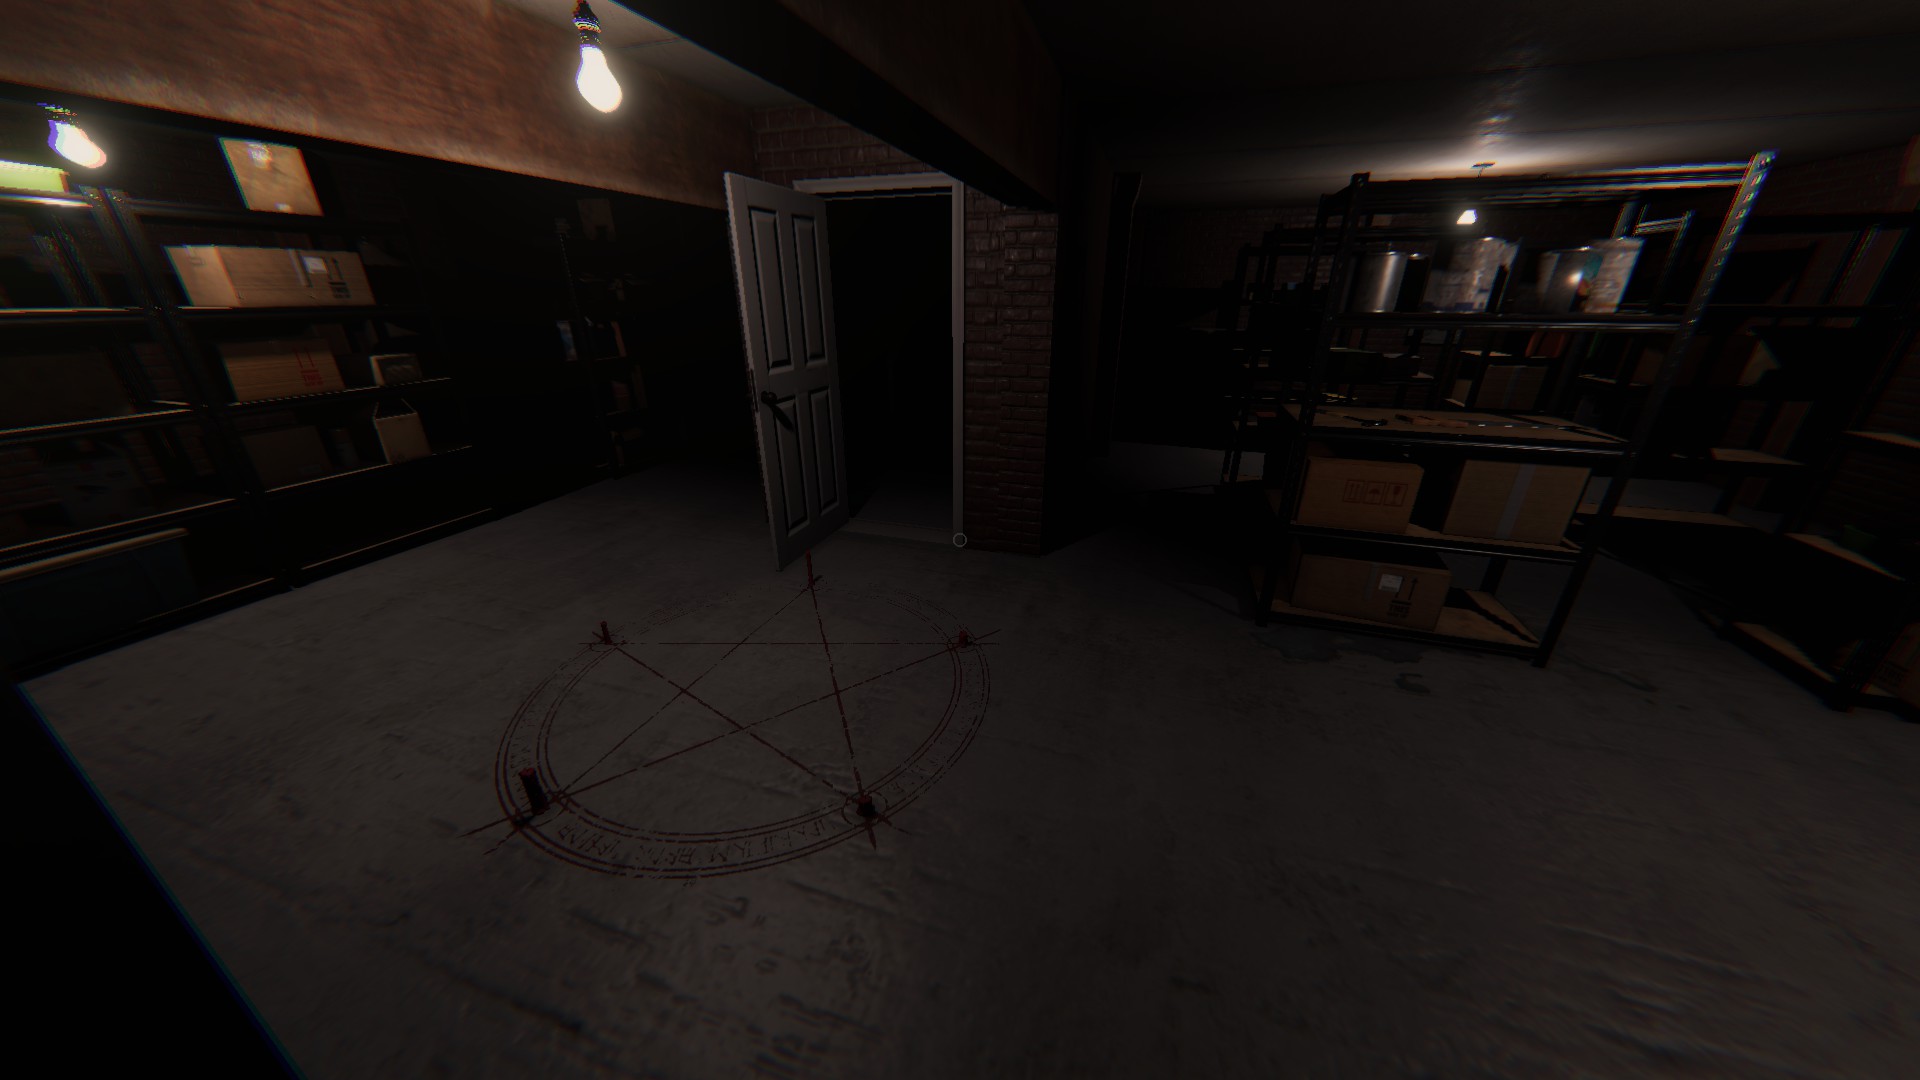
Summoning Circle
In the middle of the basement, at the bottom of the staircase
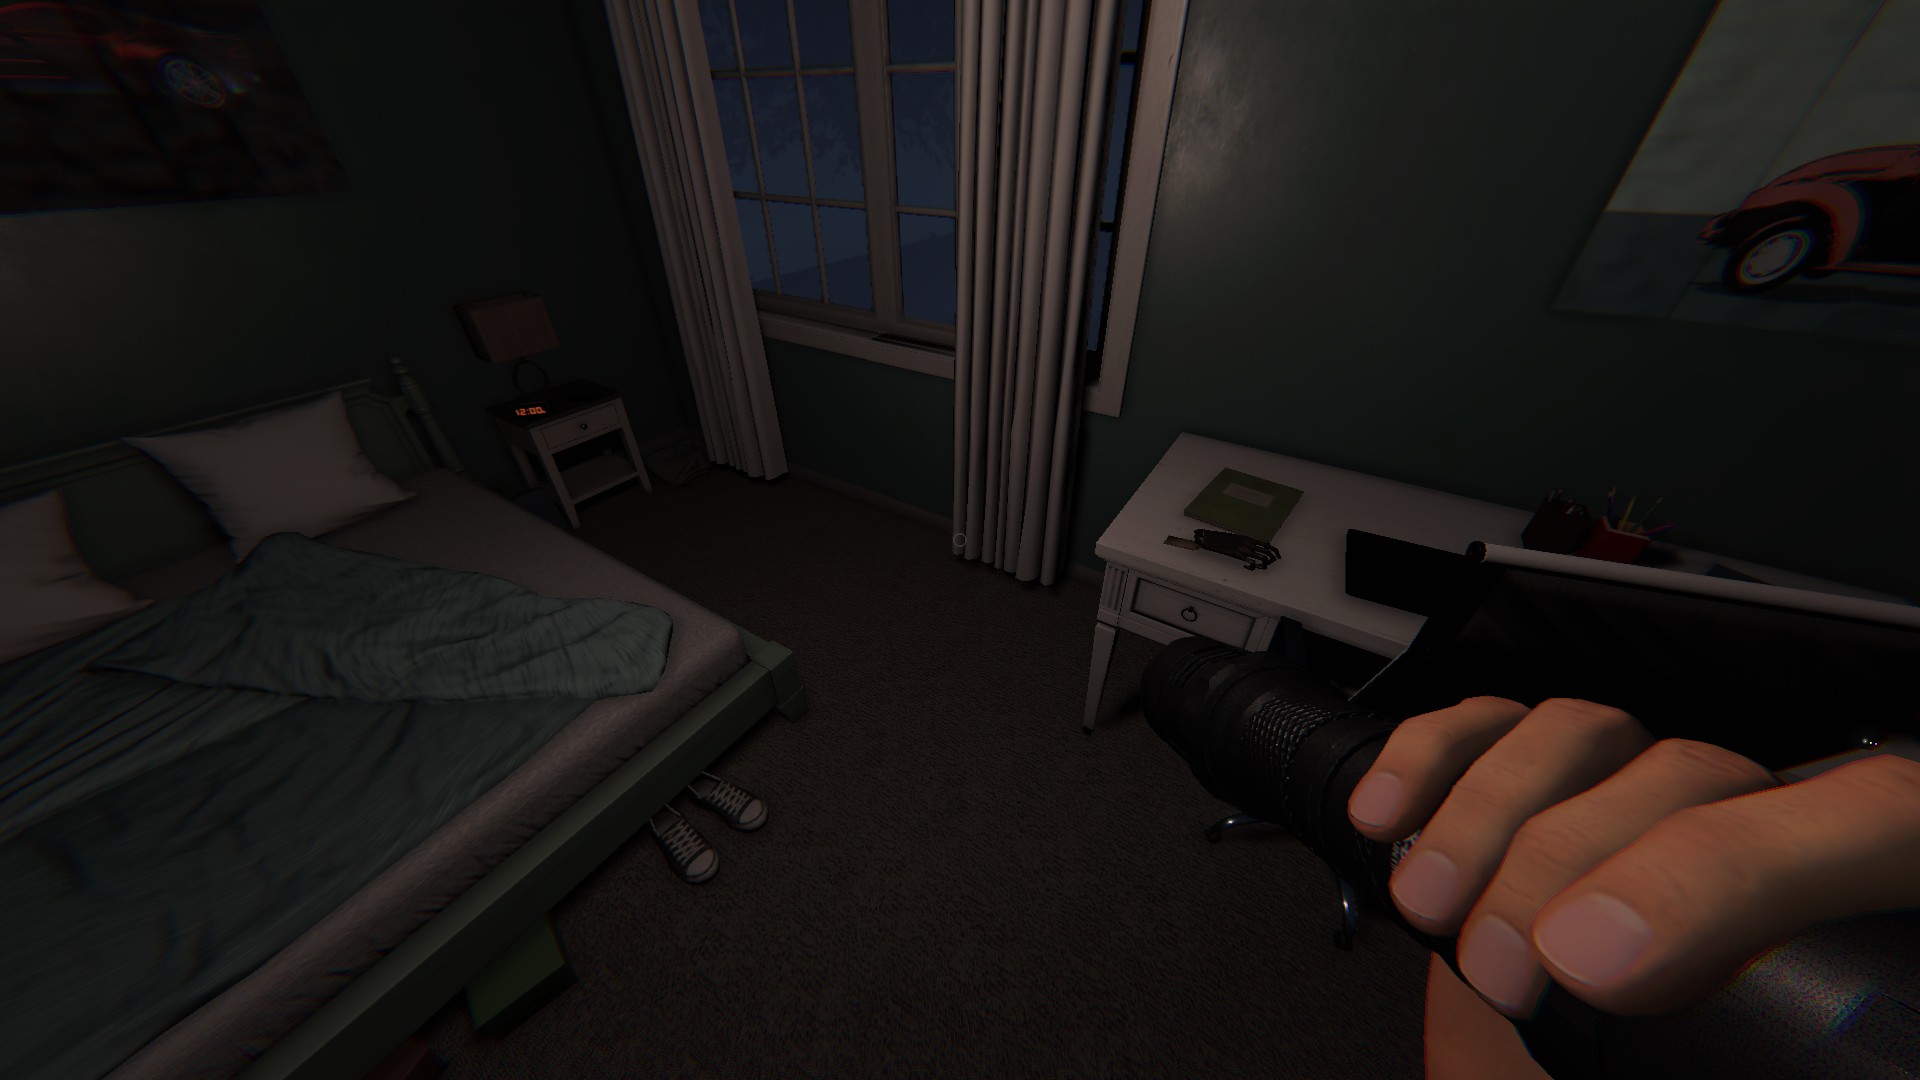
Monkey Paw
Upstairs, in the blue/teal bedroom, on the desk
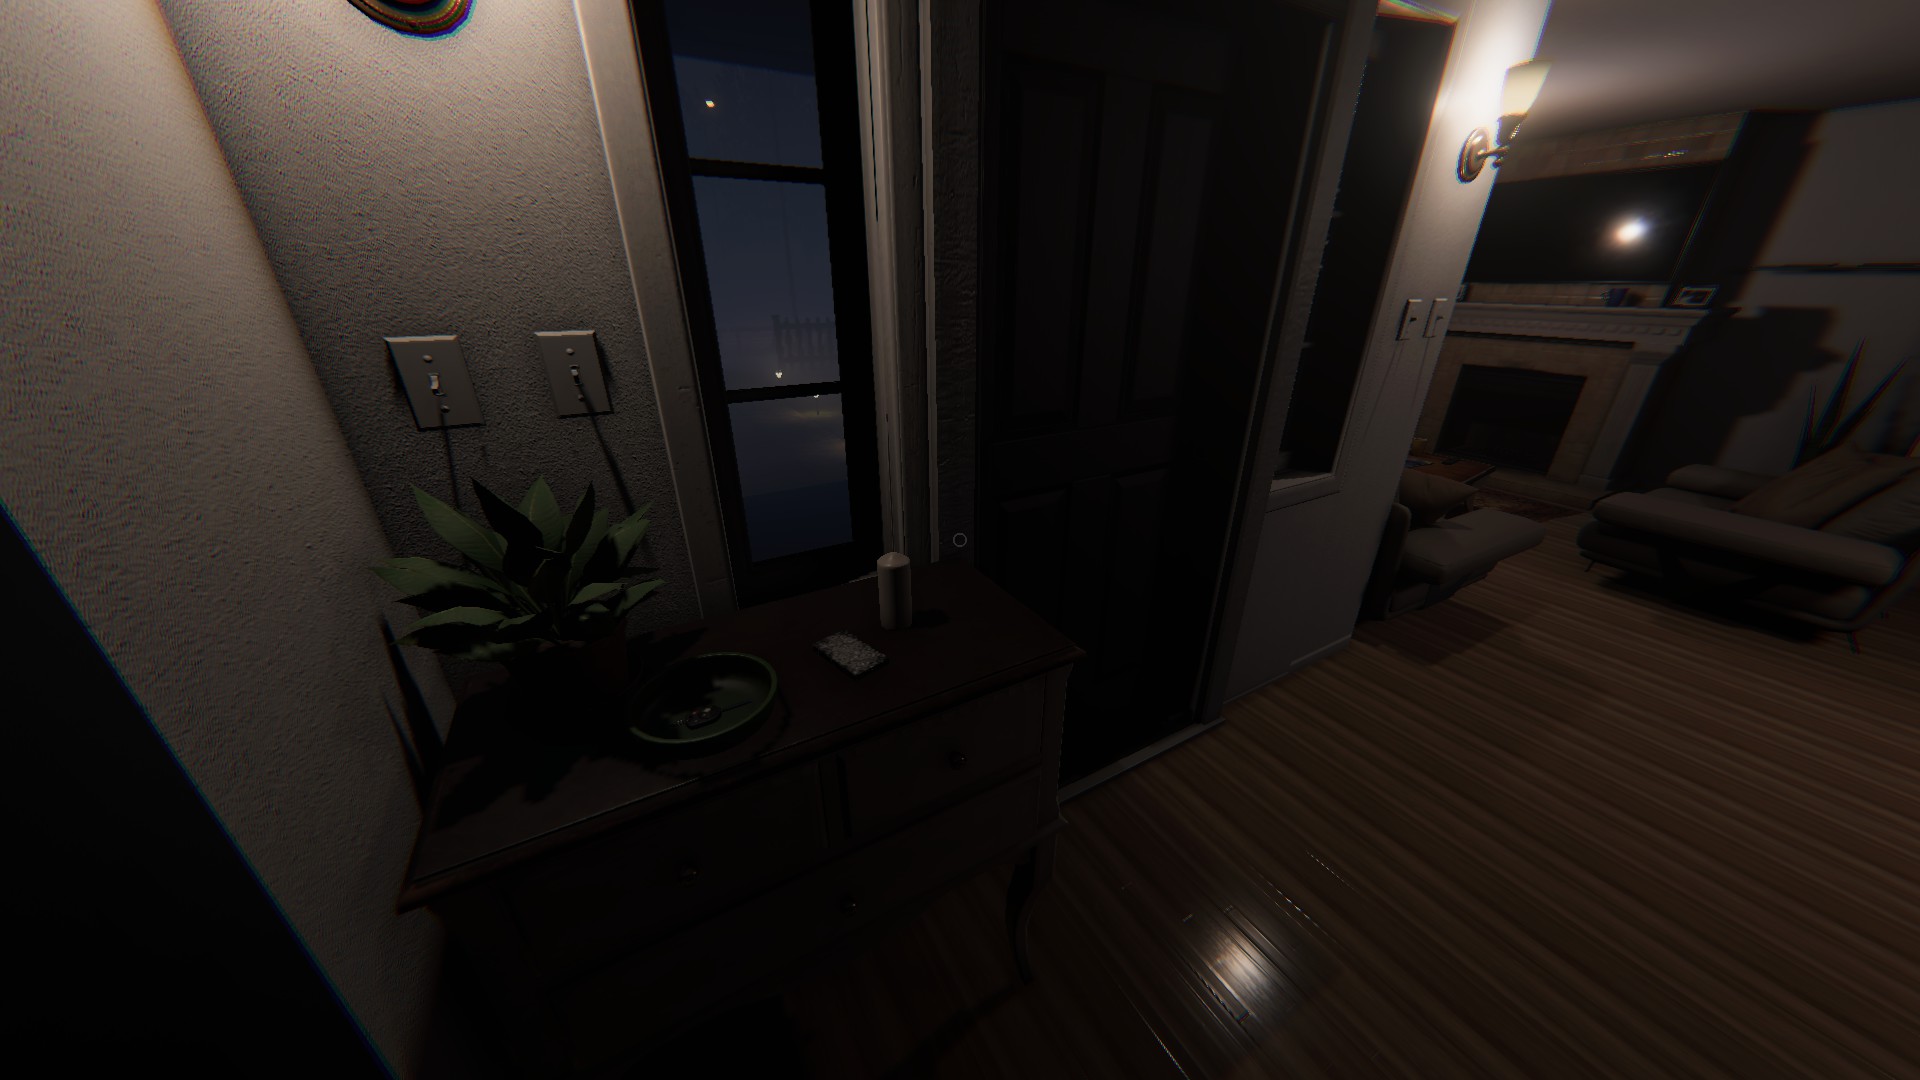
Tarot Cards
By the front door, on a small table next to the key bowl.
Ouija Board
Down the left hall, in the laundry room, on some shelves.
Grafton Farmhouse
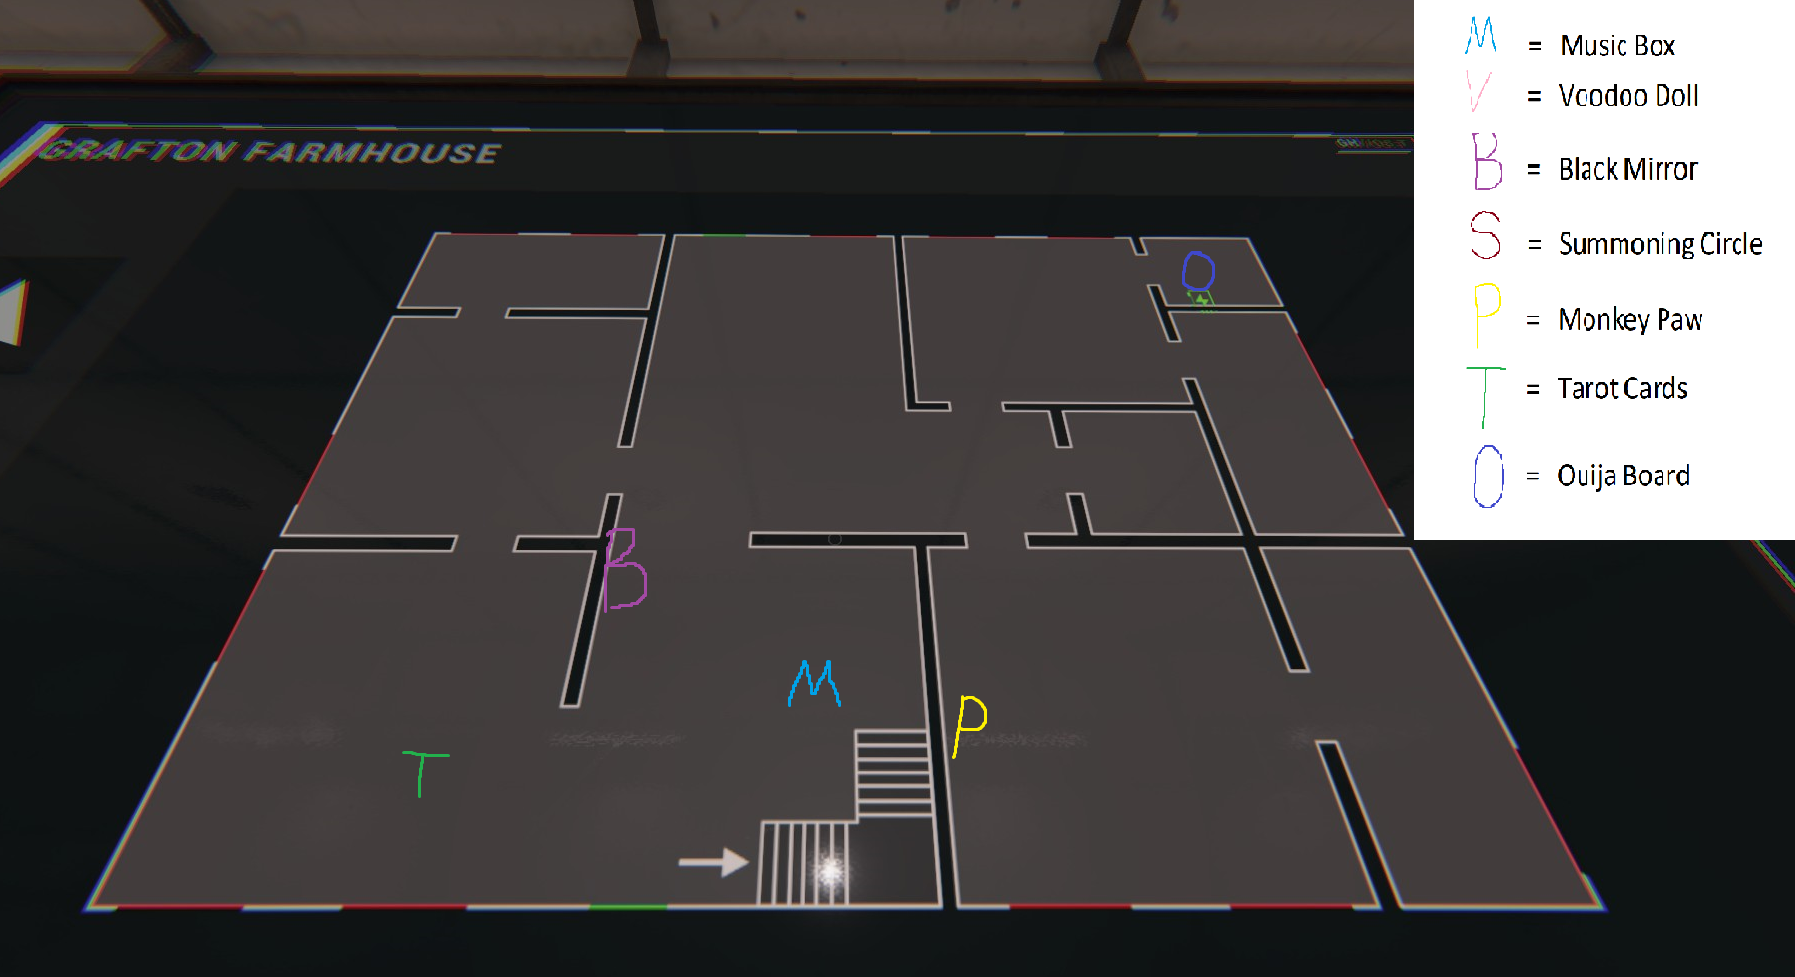 Upper Floor: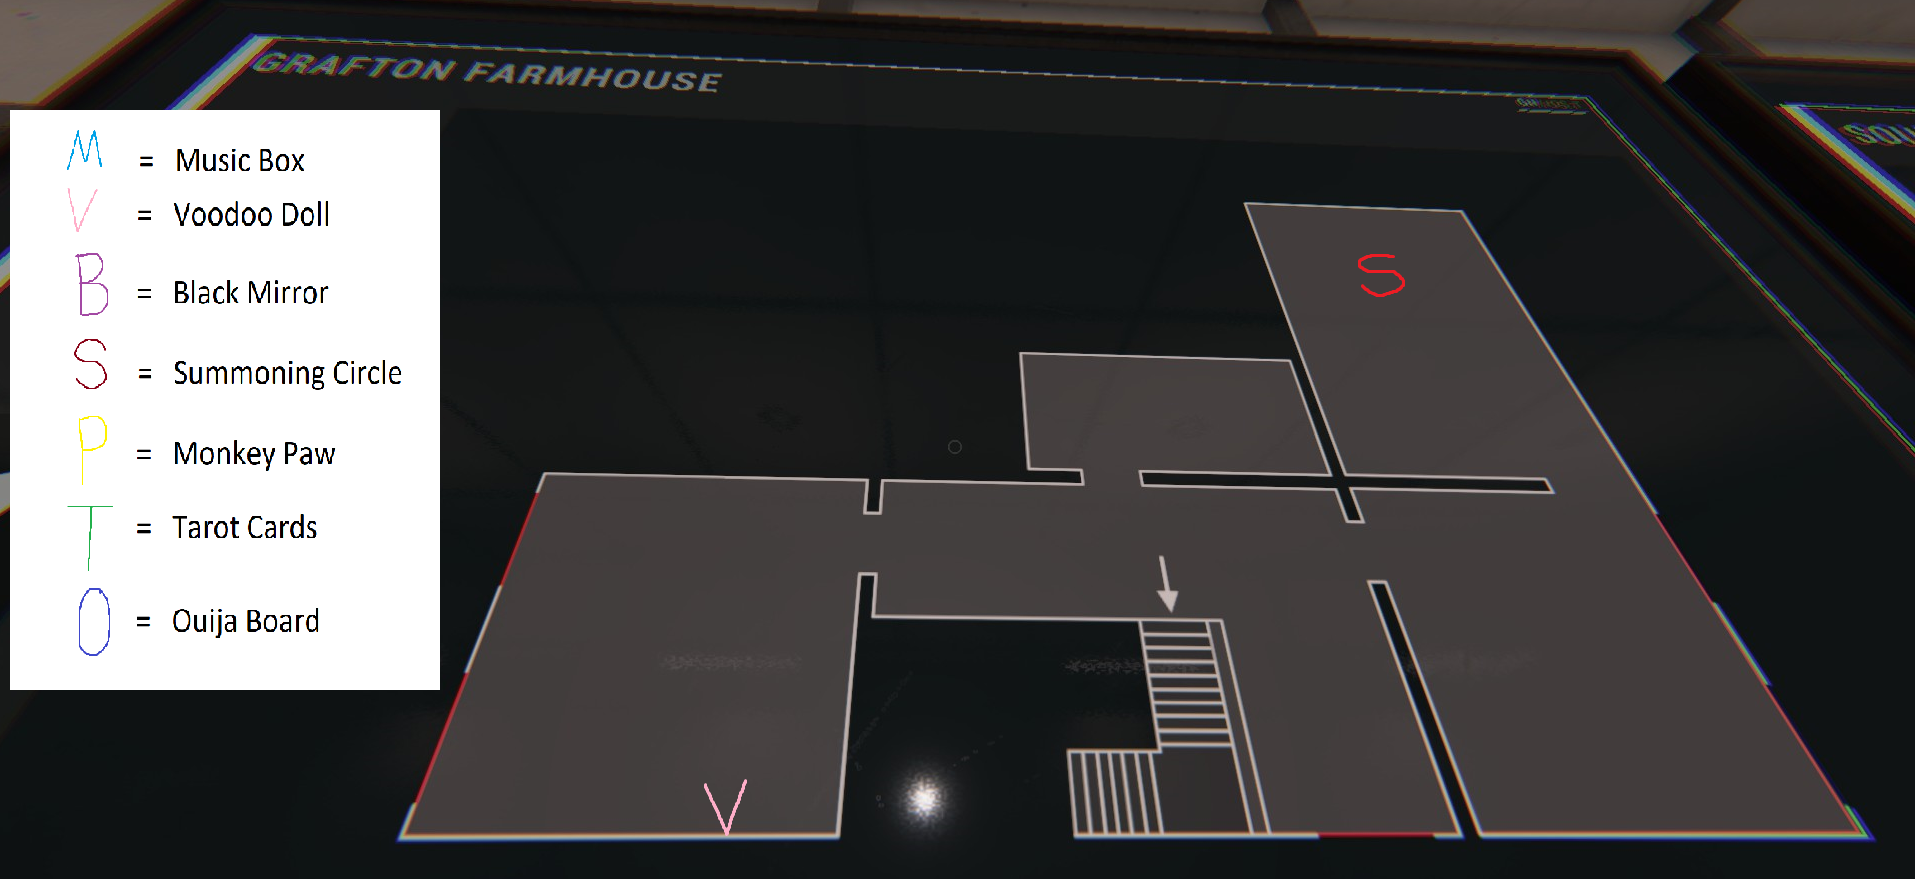
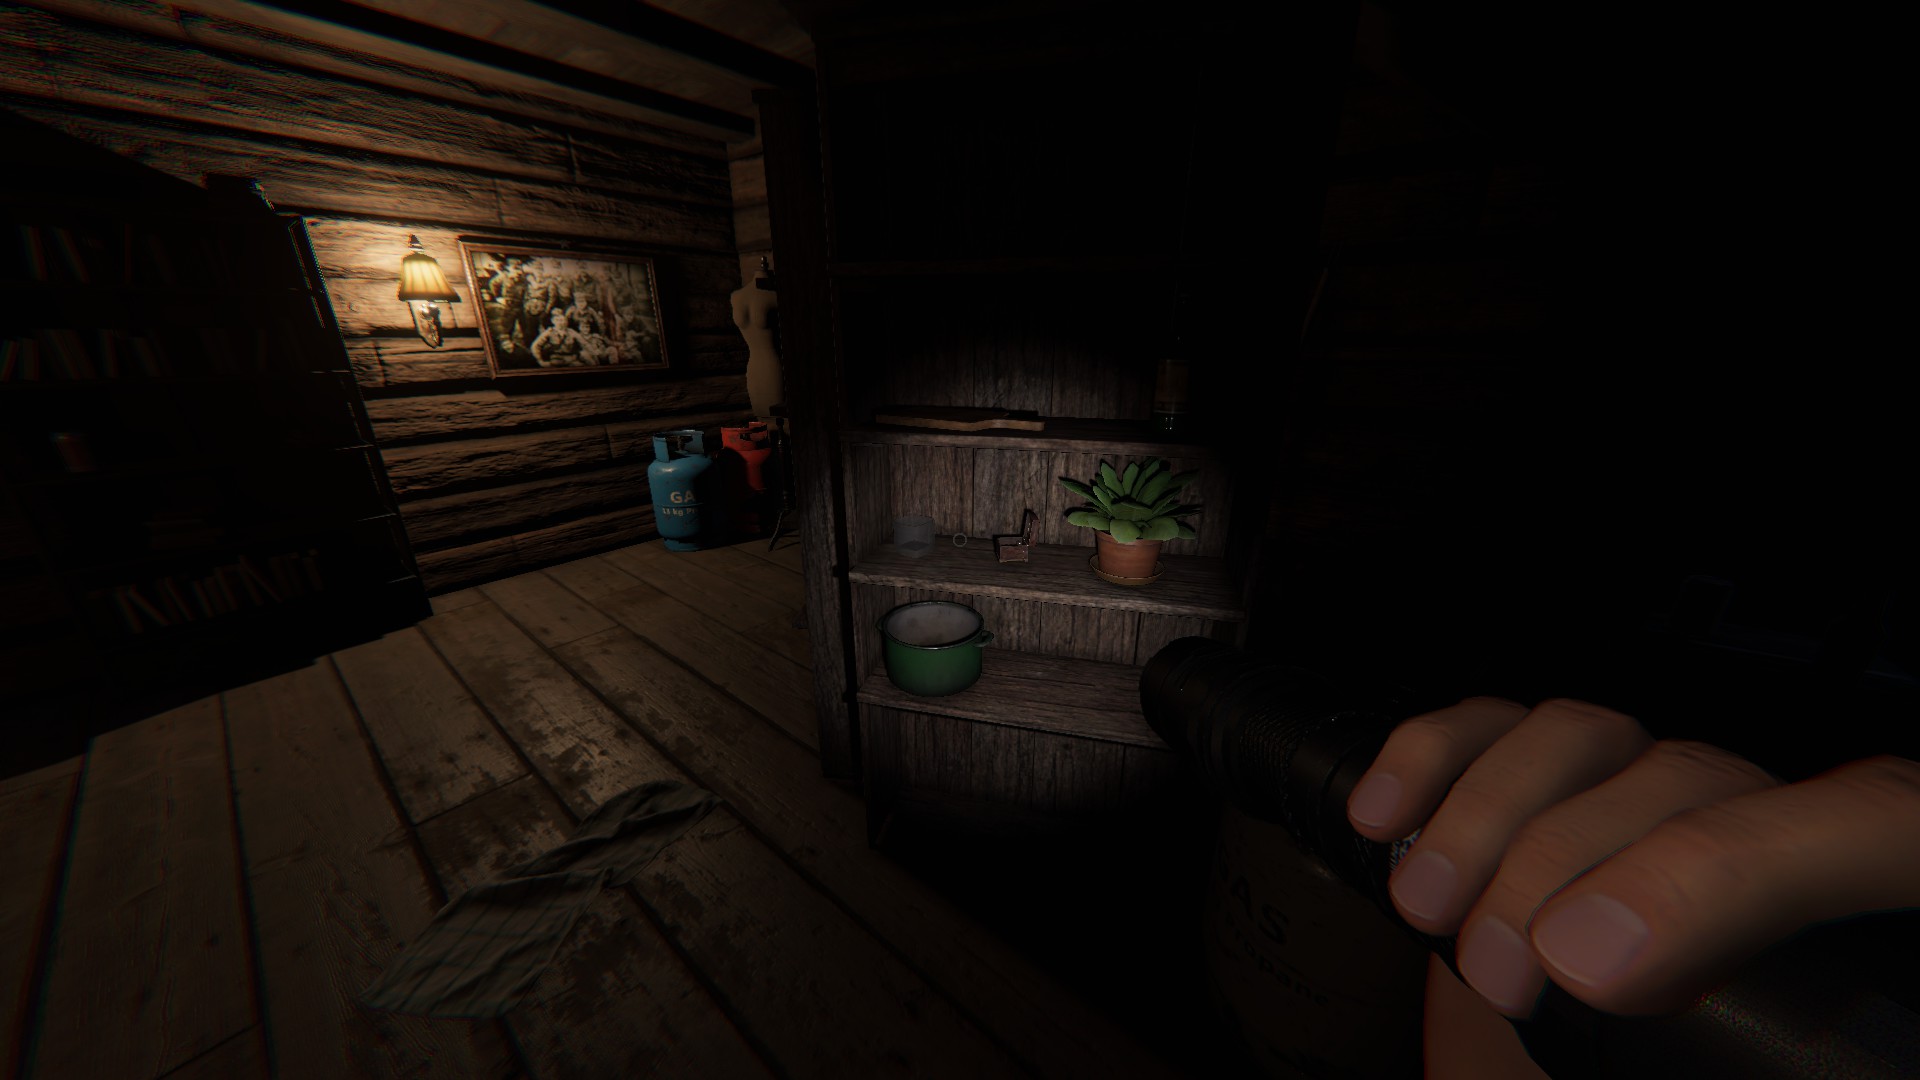
Music Box
In the entryway, on the right side under the stairs, on a book shelf
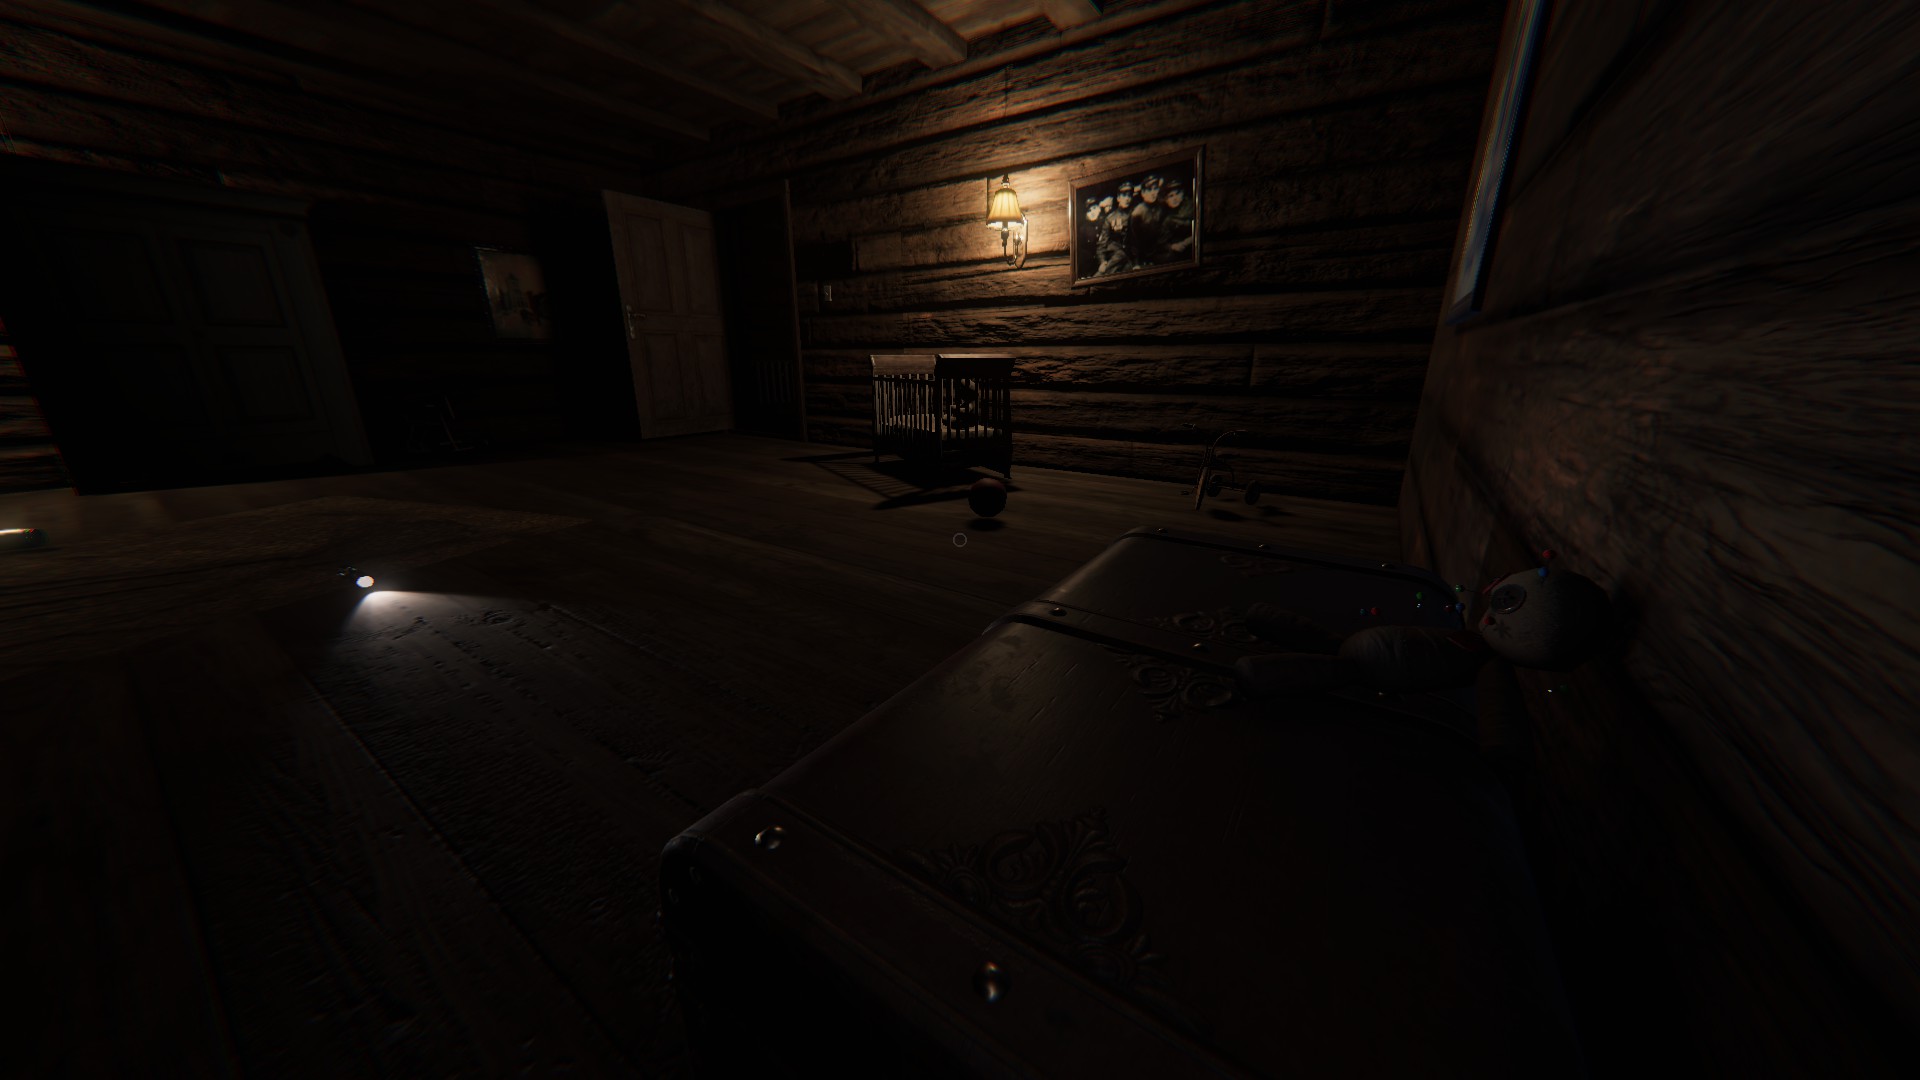
Voodoo Doll
On the top floor, in the room to the left of the stairs, sitting on a chest to the left of the bed.
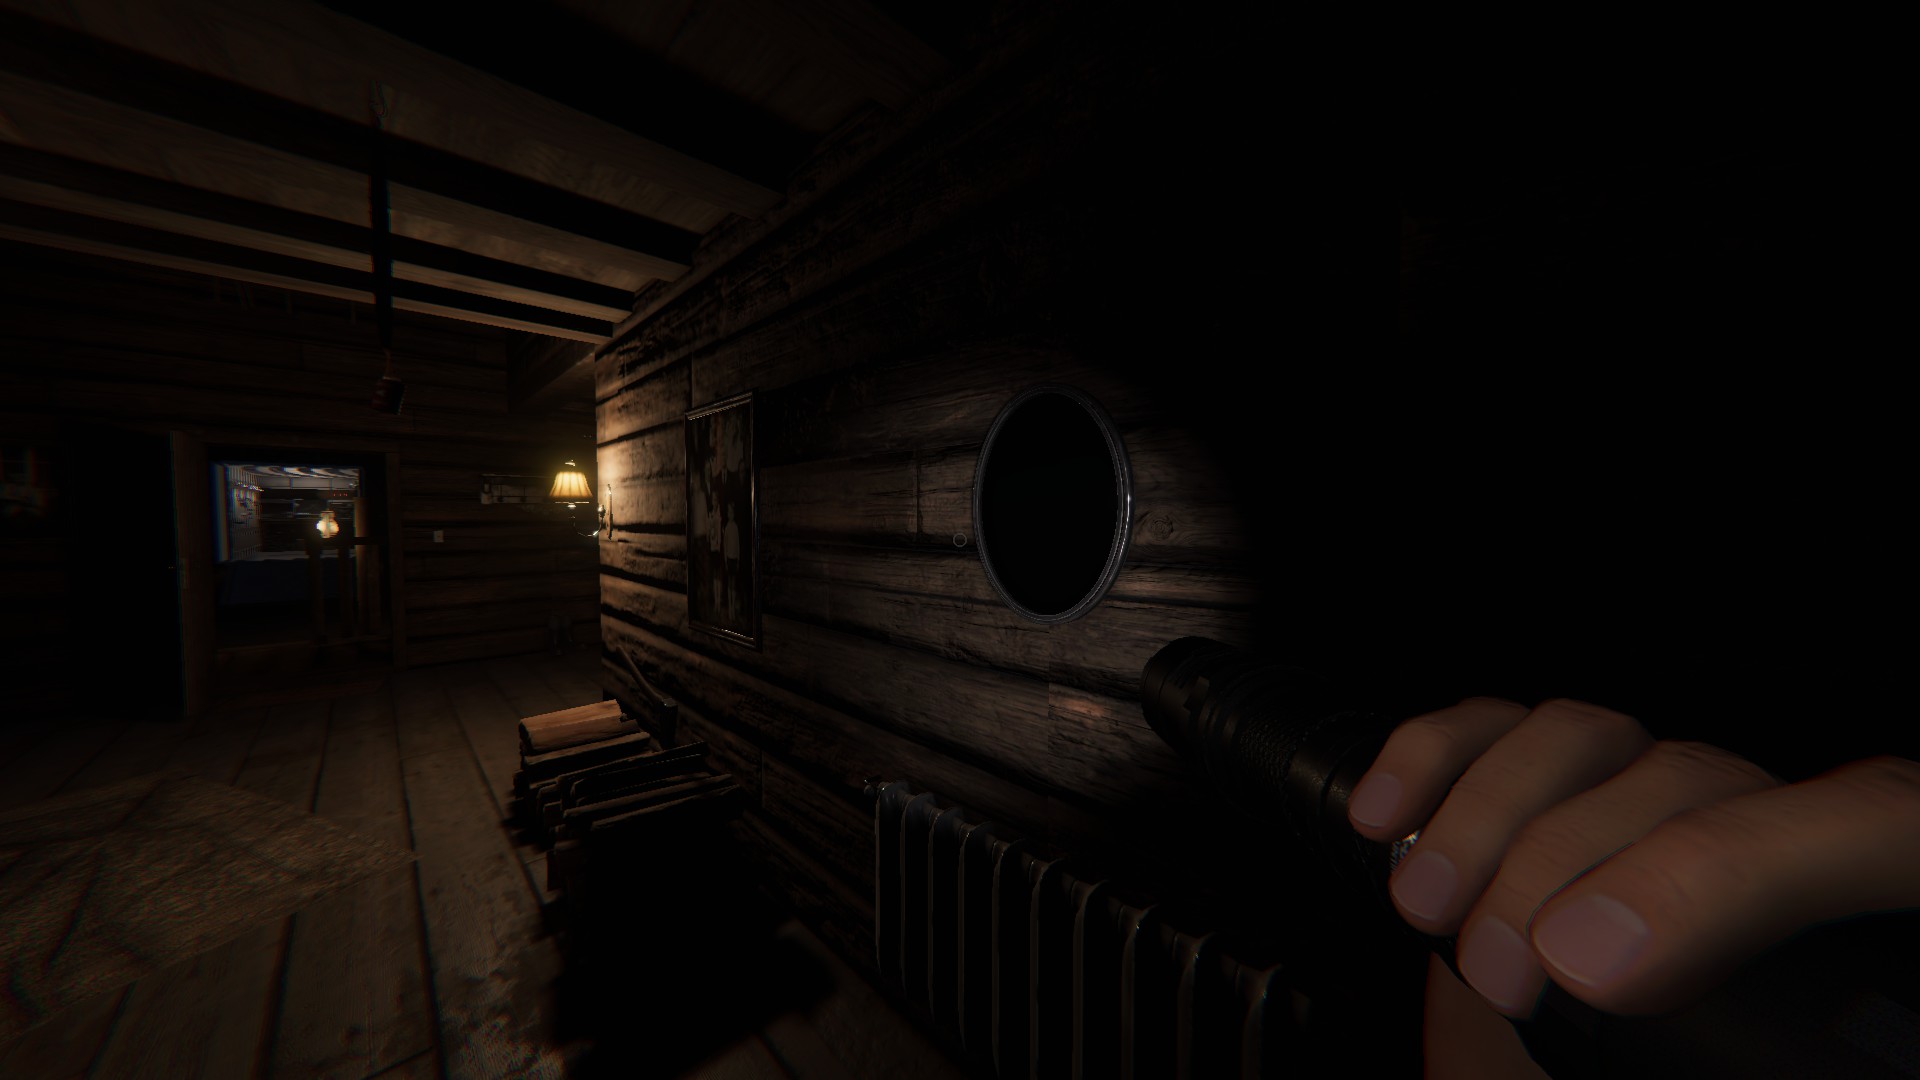
Black Mirror
Straight ahead of the front door, on the left wall
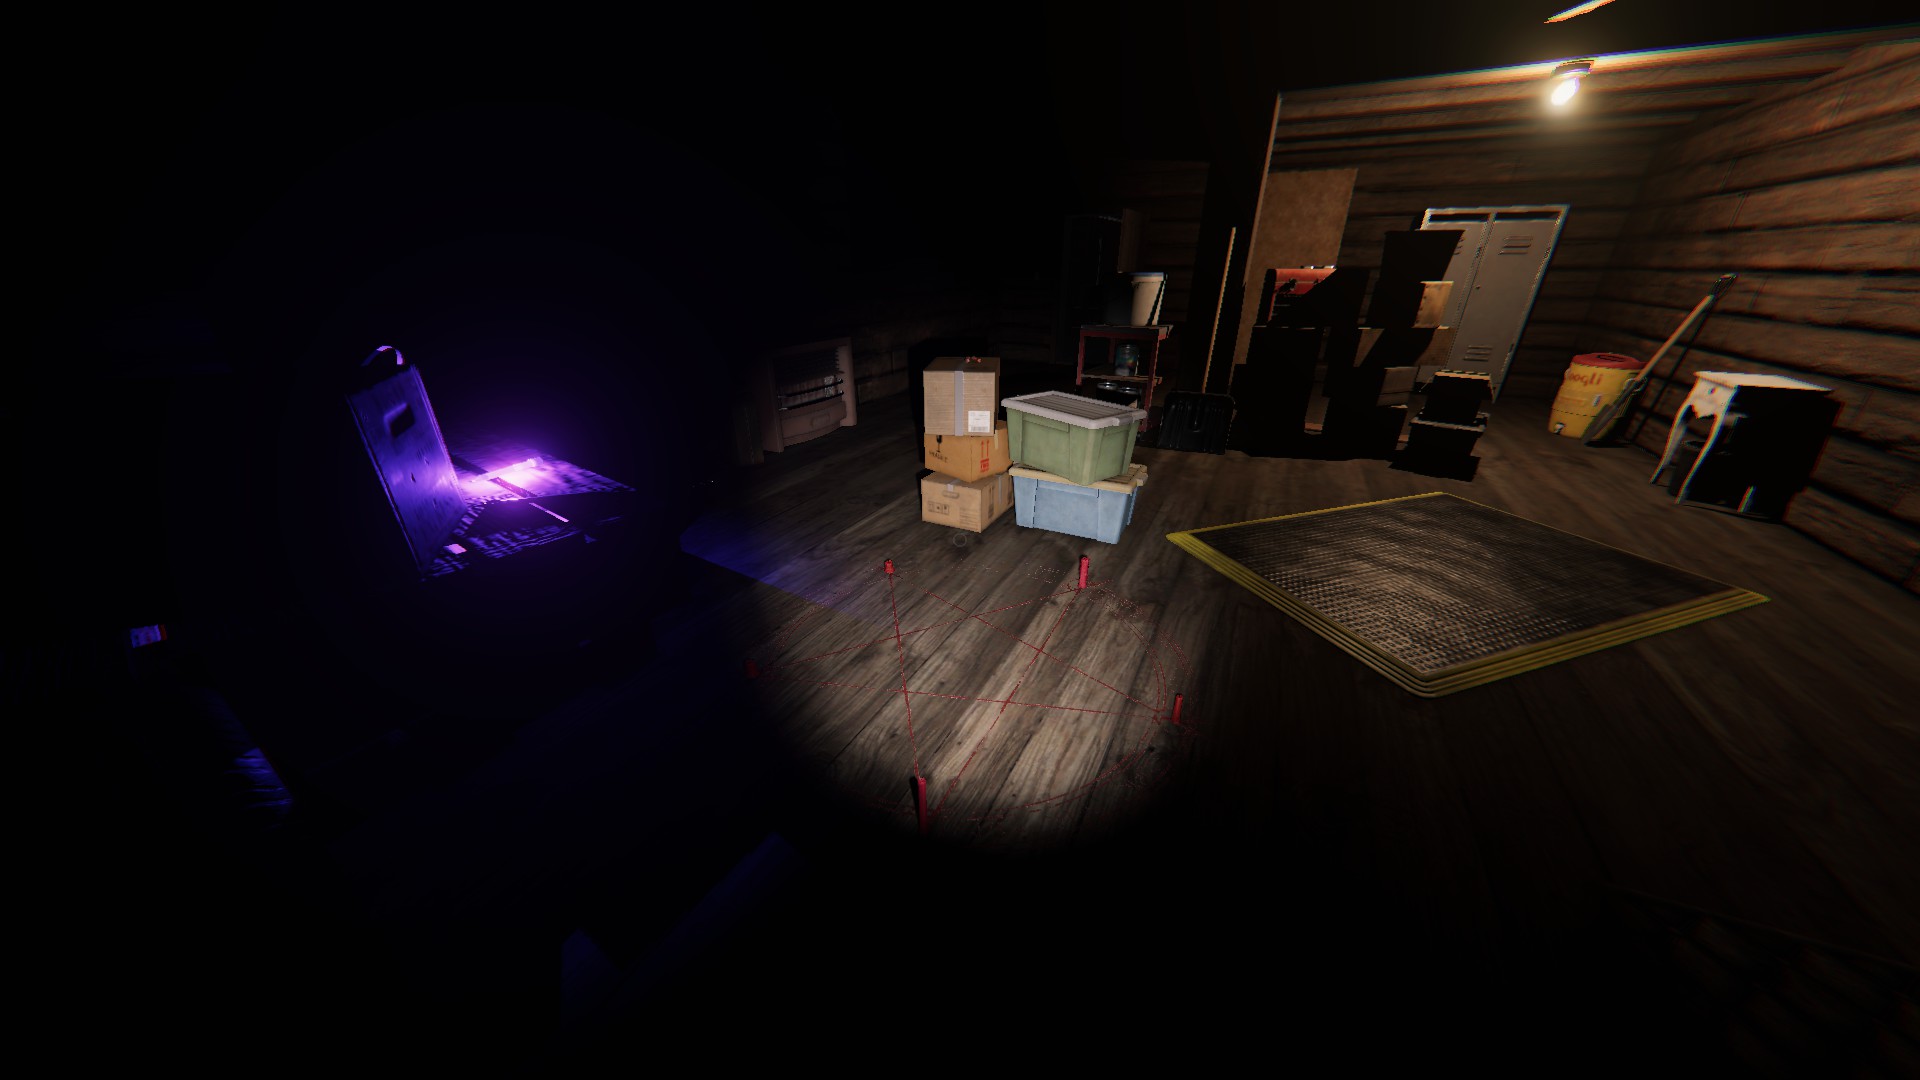
Summoning Circle
Back right of the second floor, in the storage room
Monkey Paw
In the double bedroom on first floor, on top of the desk in the corner
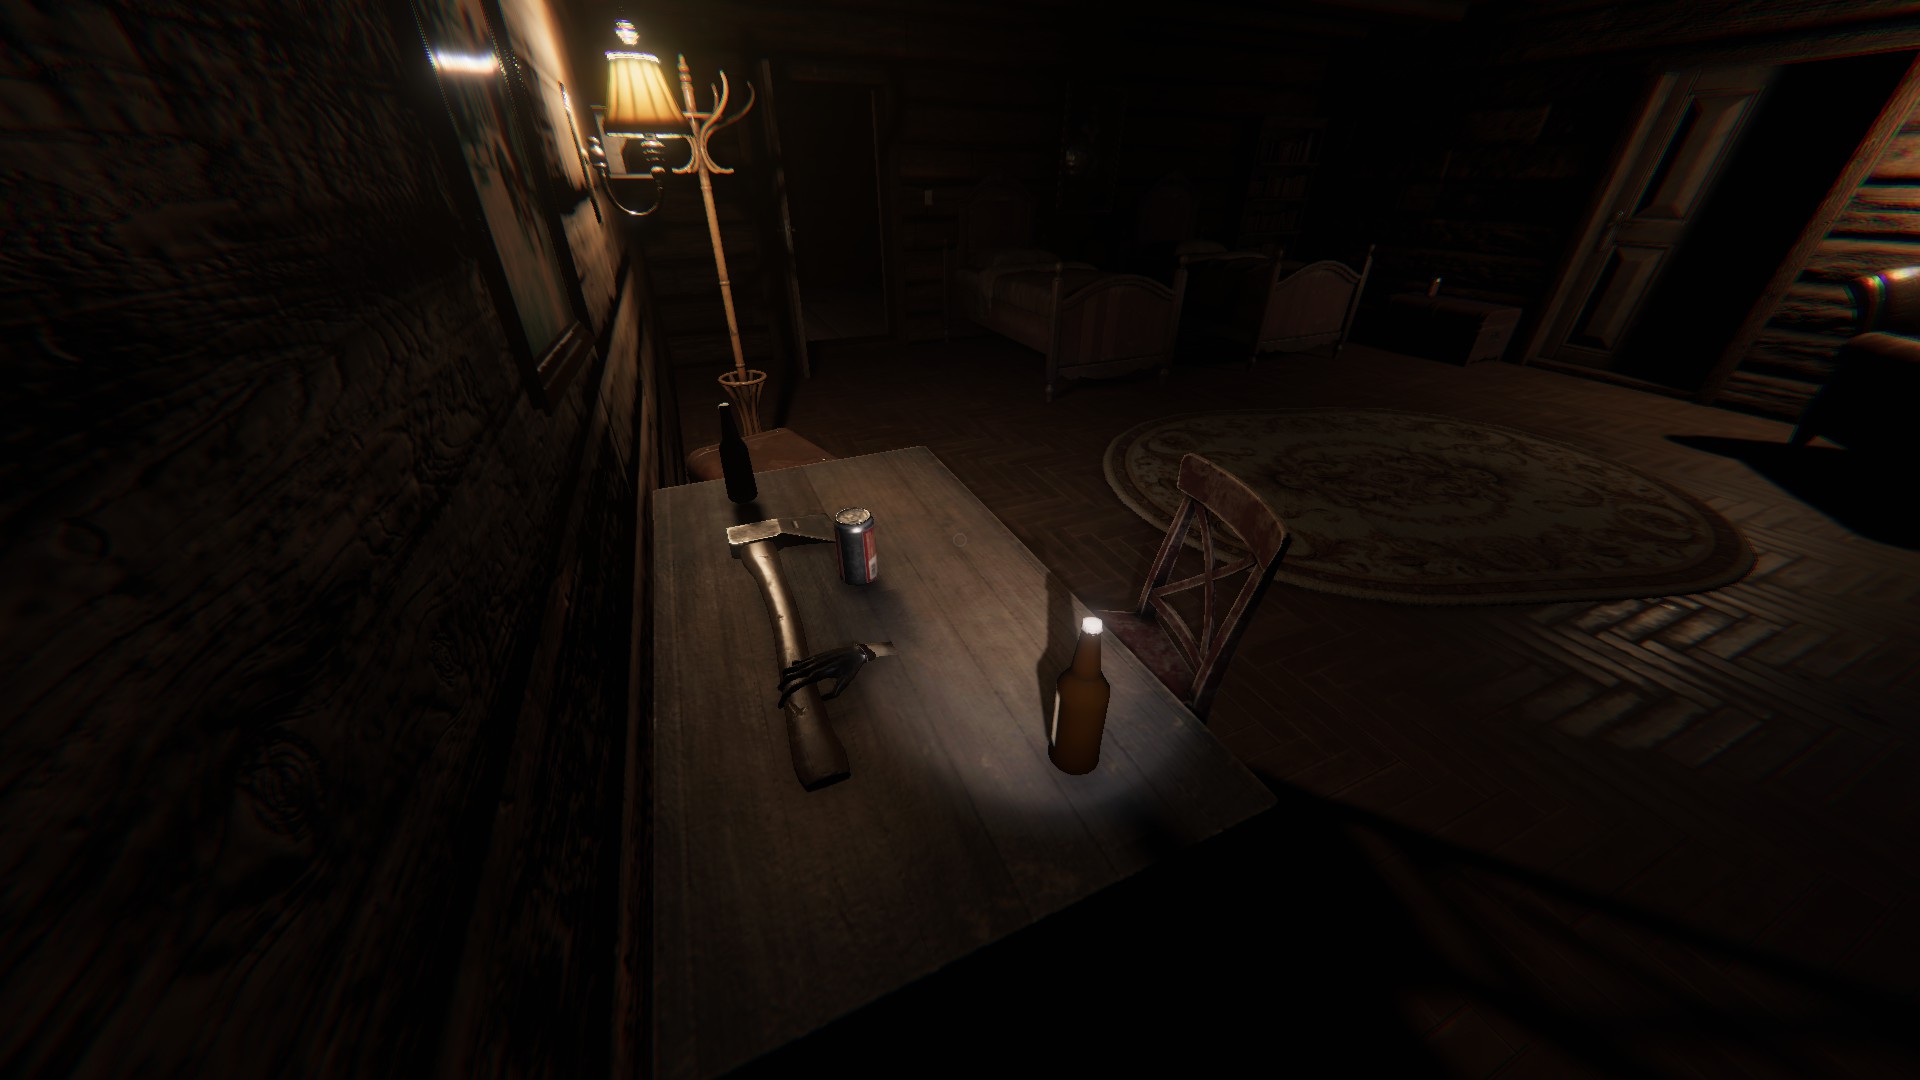
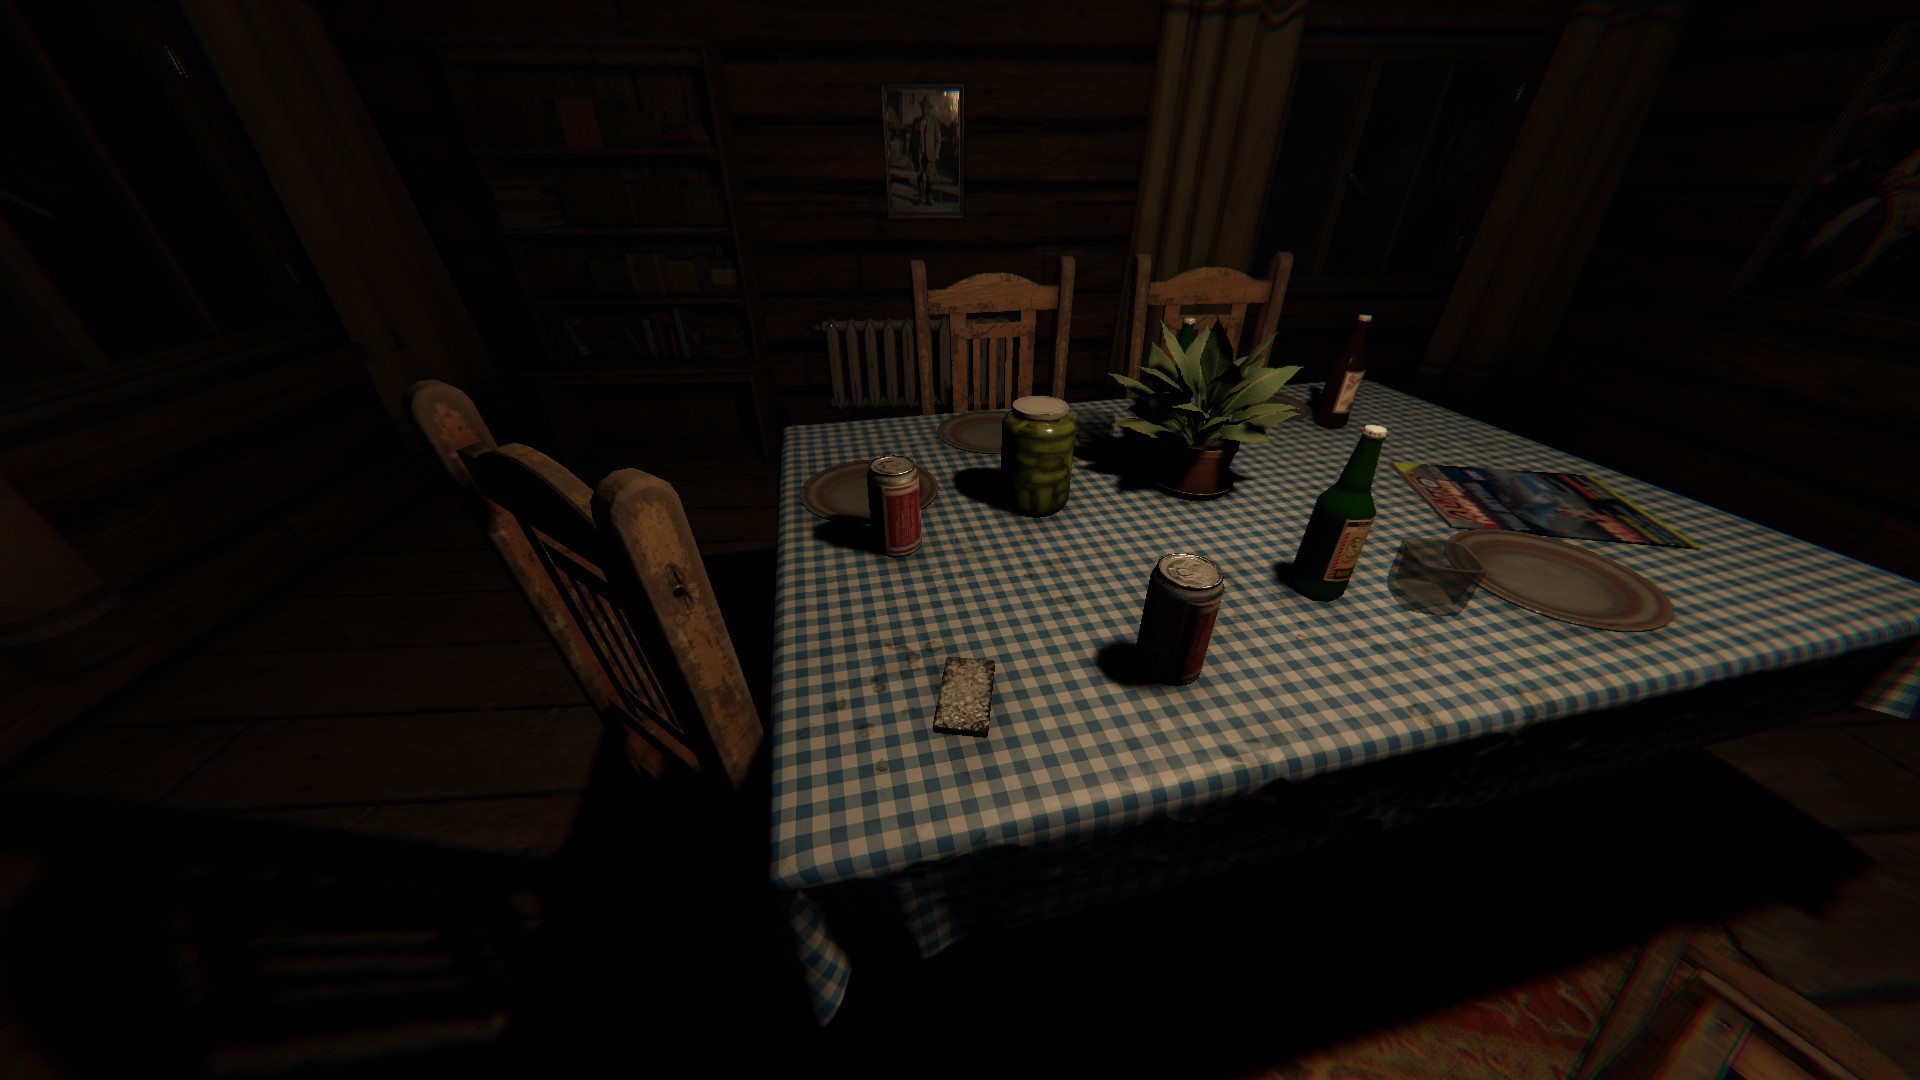
Tarot Cards
Immediately left of the front door, on the corner of the dining table
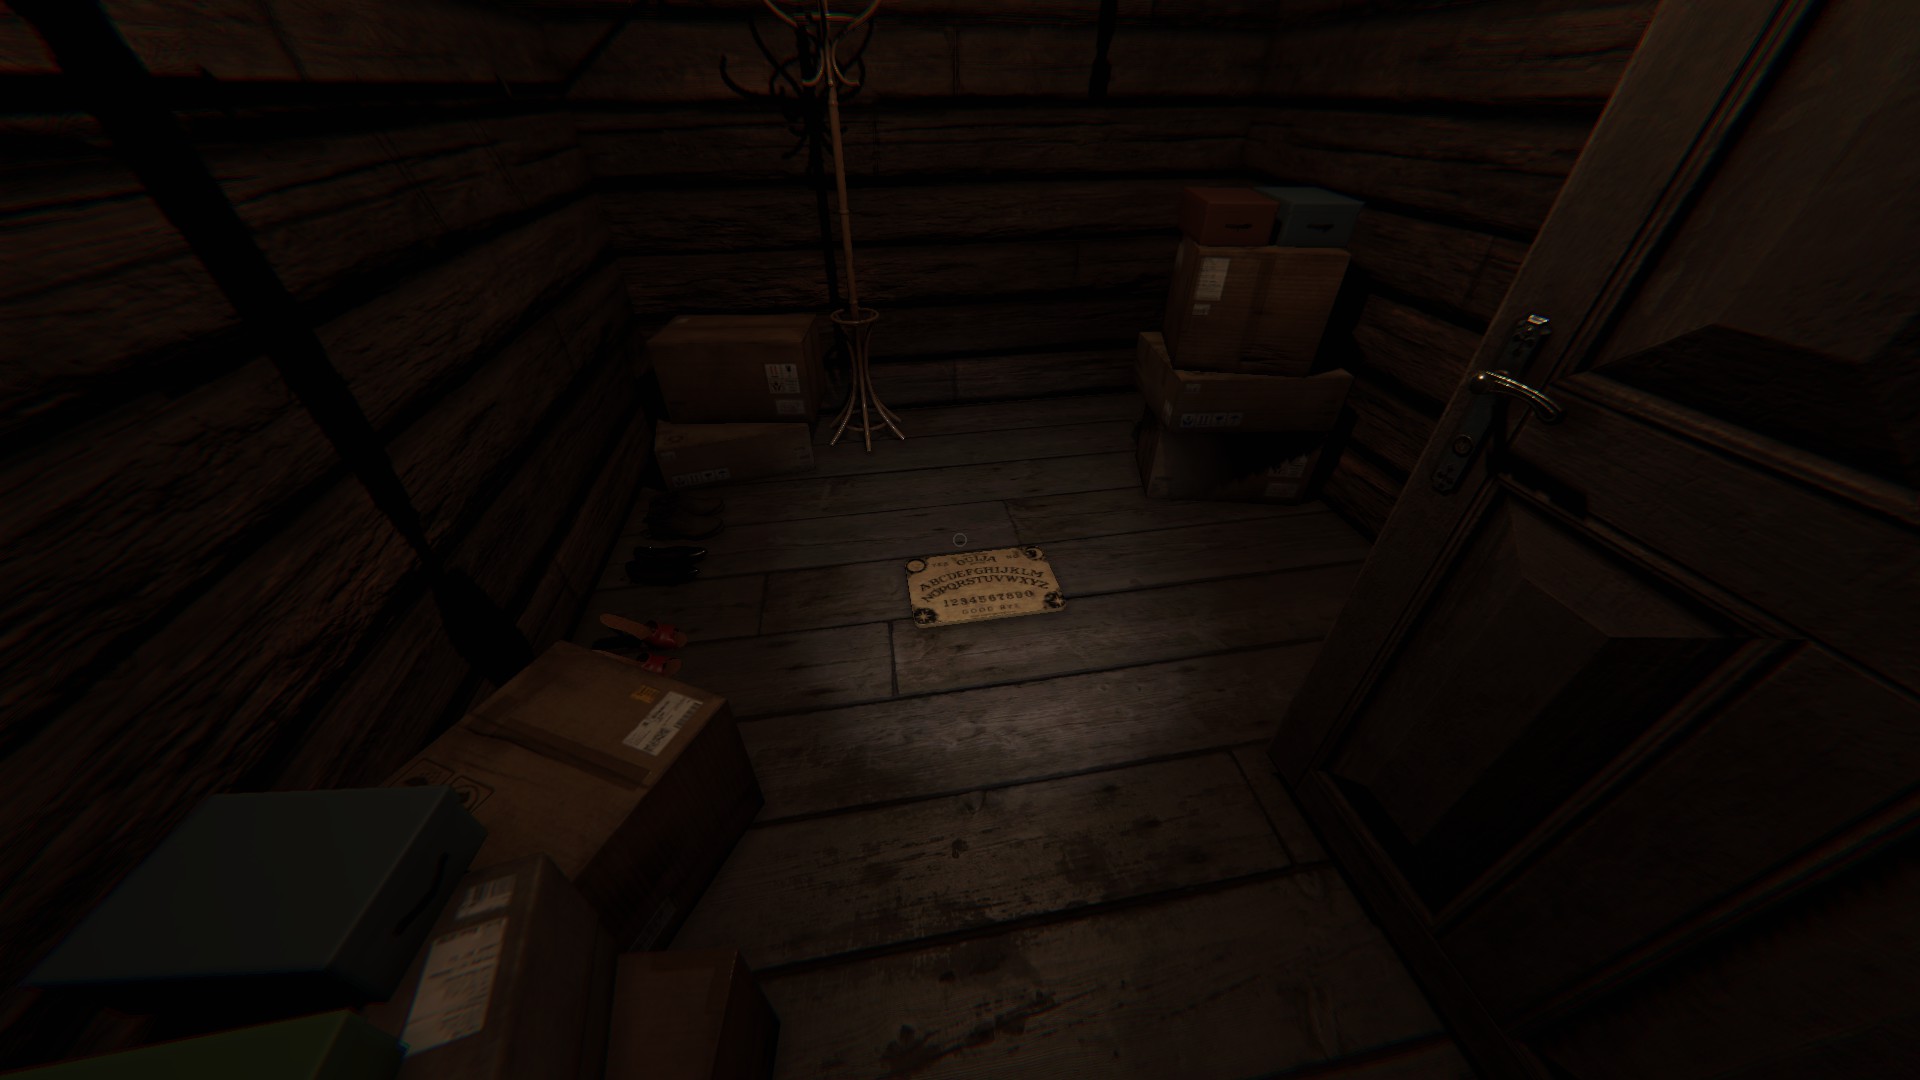
Ouija Board
In the back right of the first floor, off the bedroom, in the closet, on the floor
Bleasdale Farmhouse
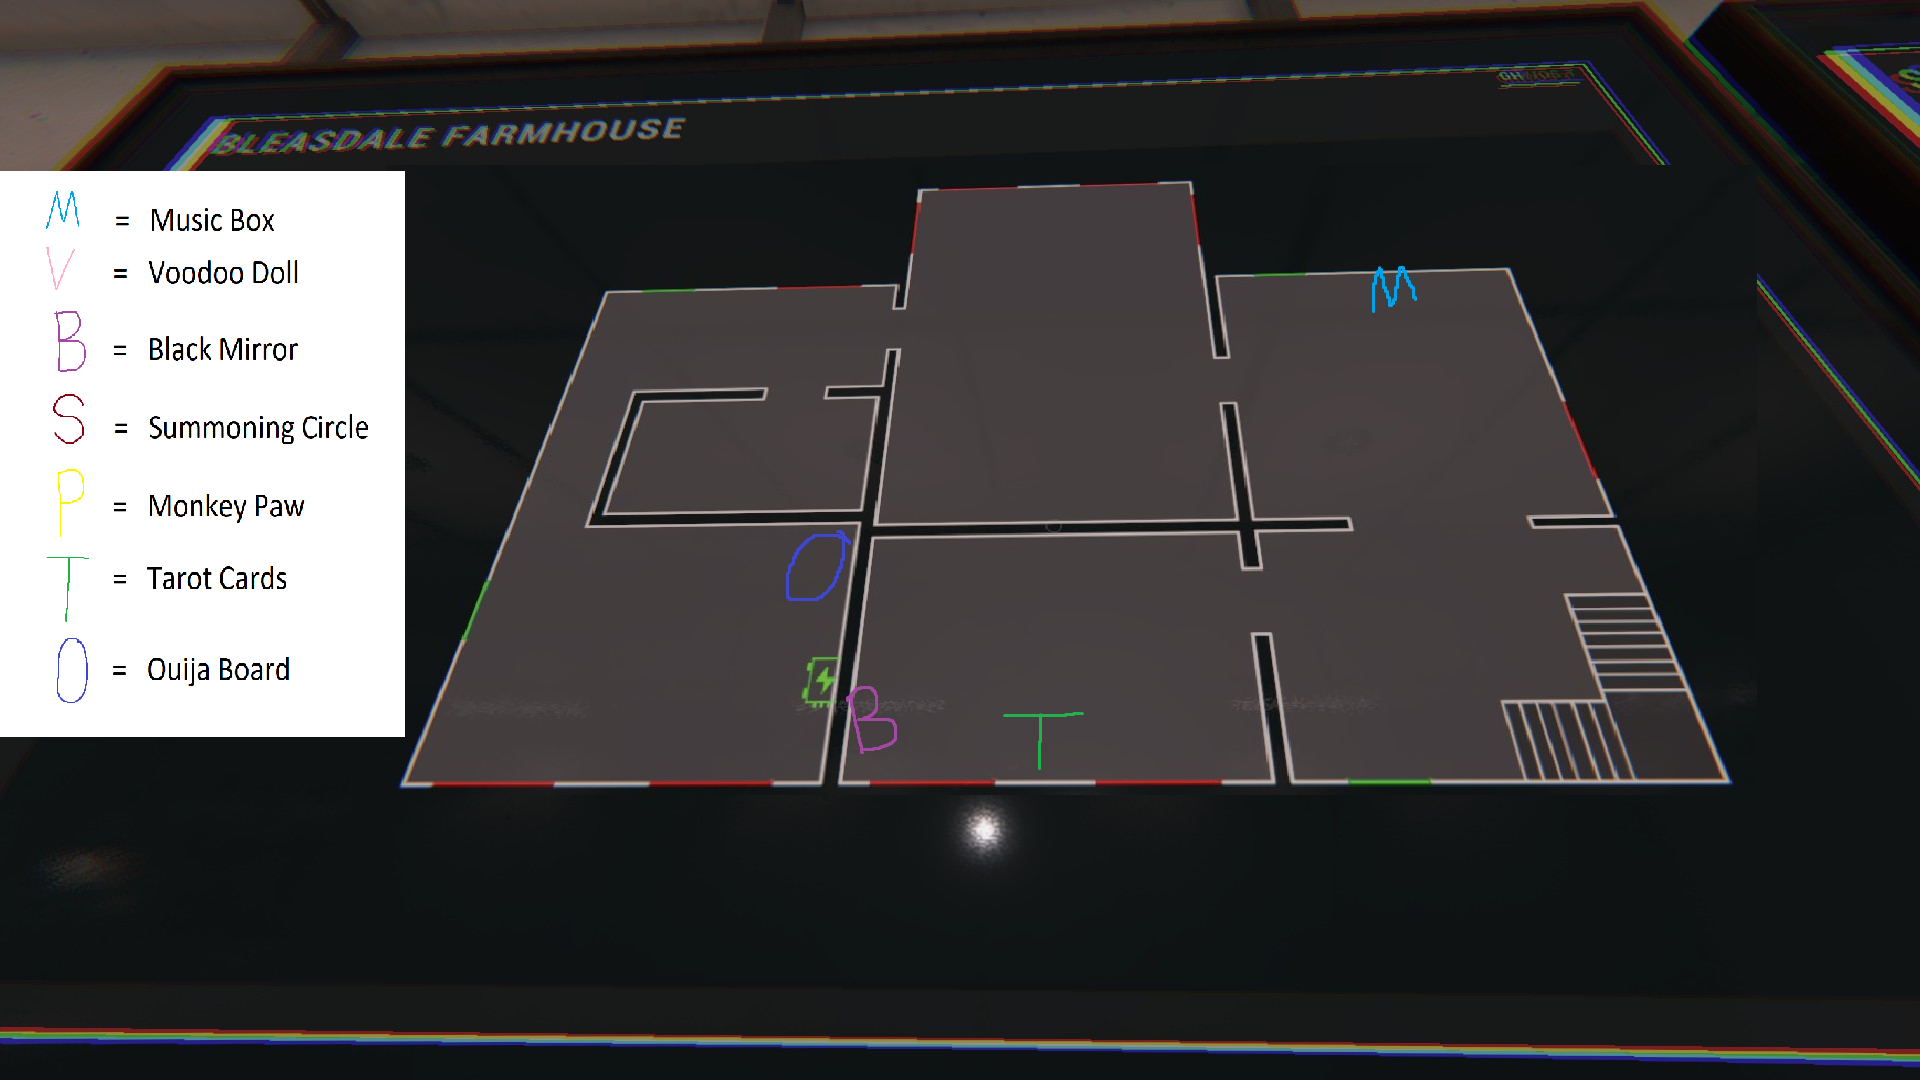 Upper Floor:
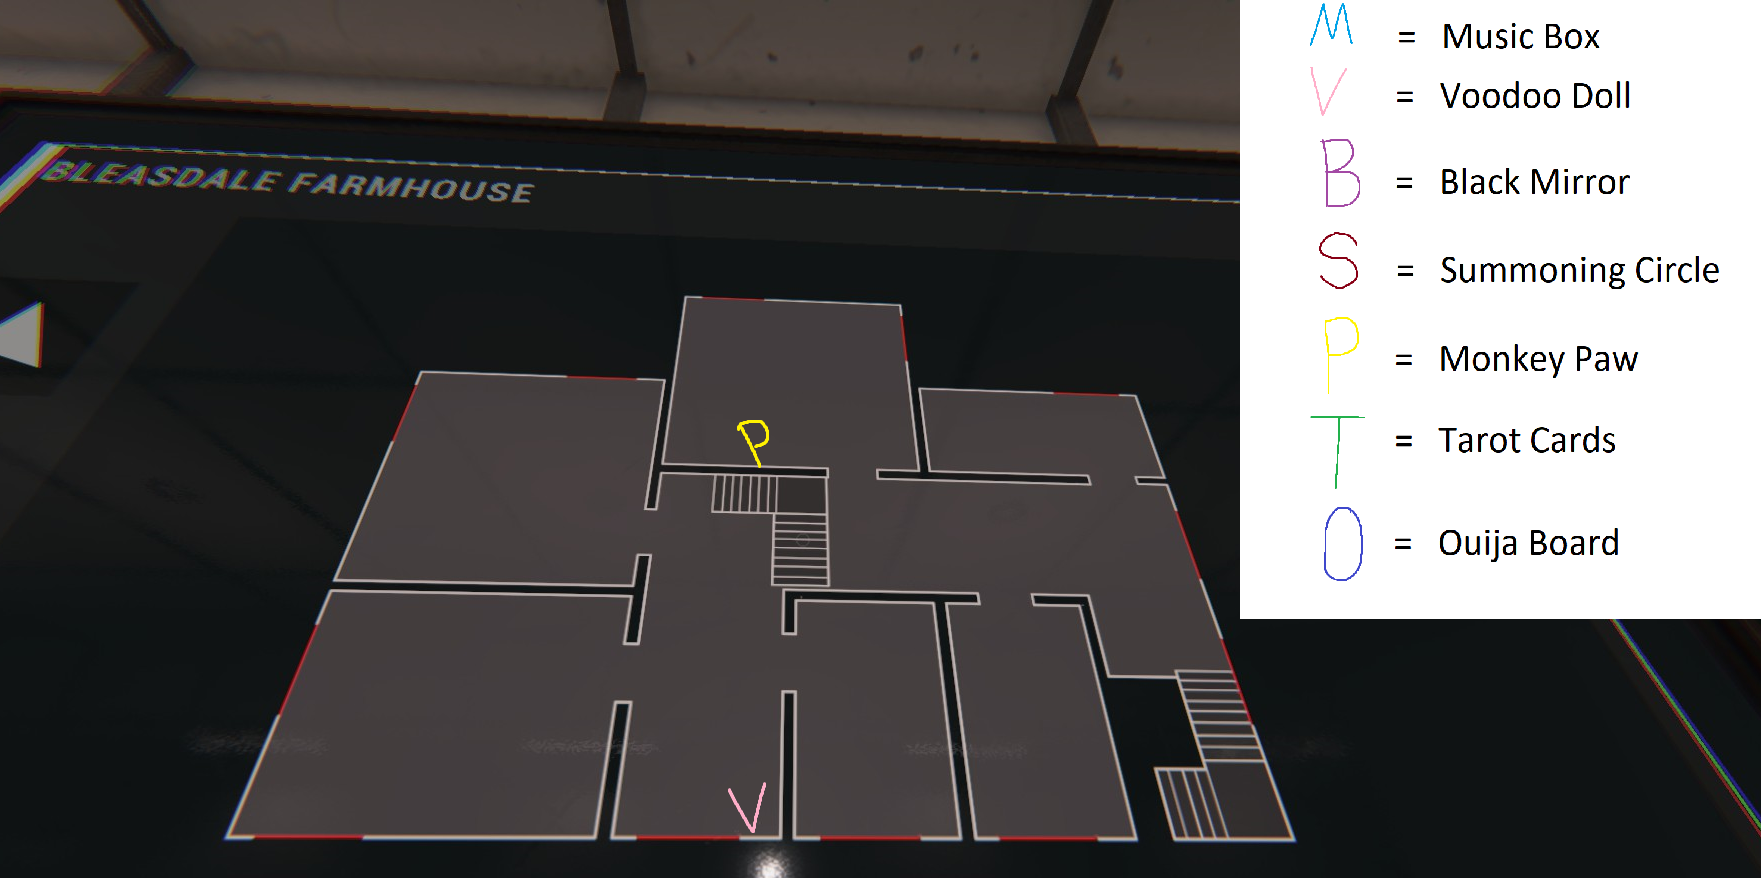 Attic: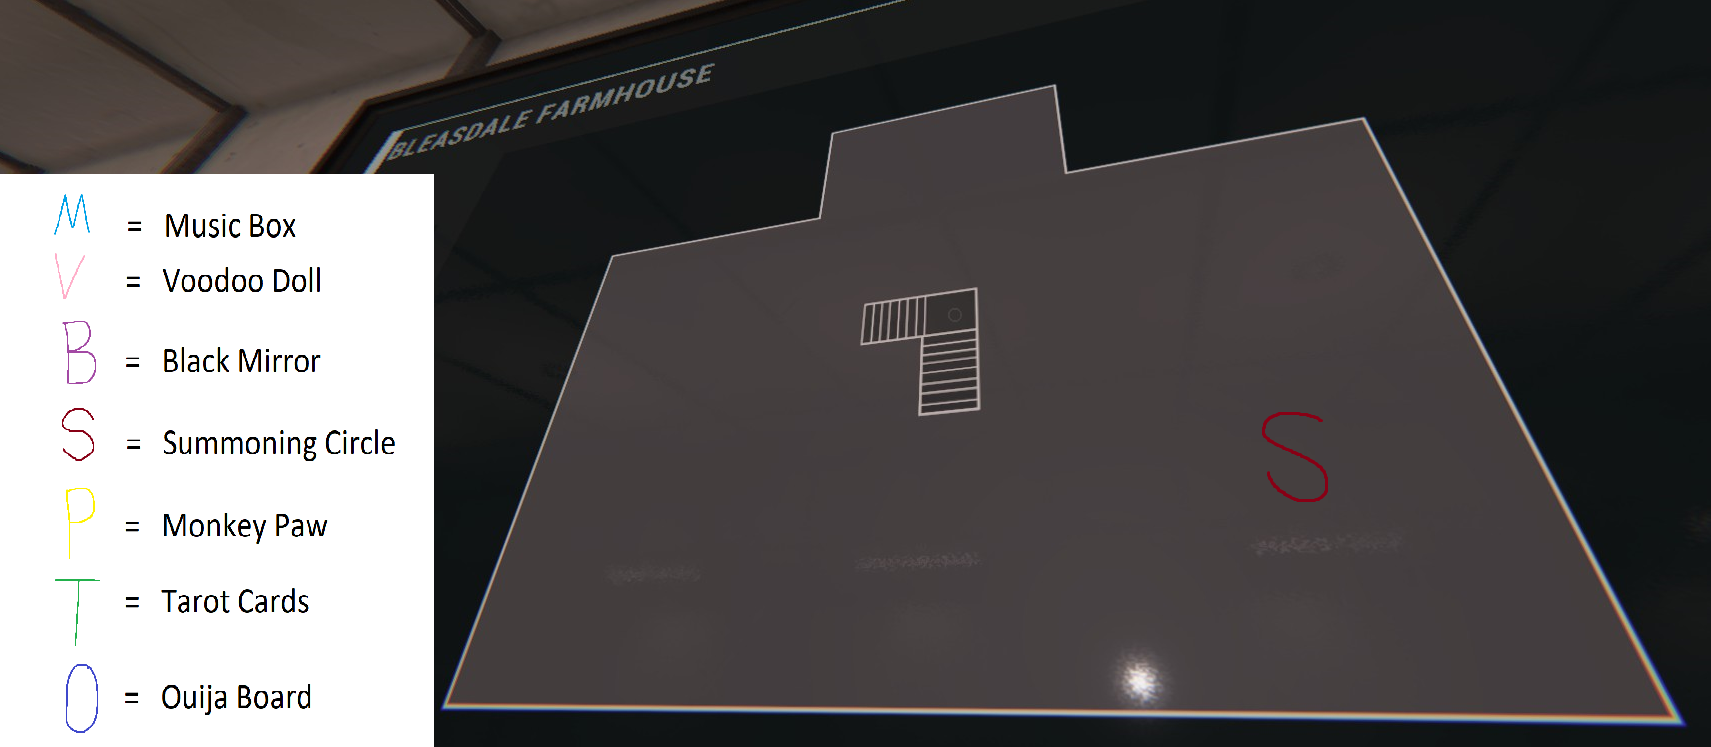
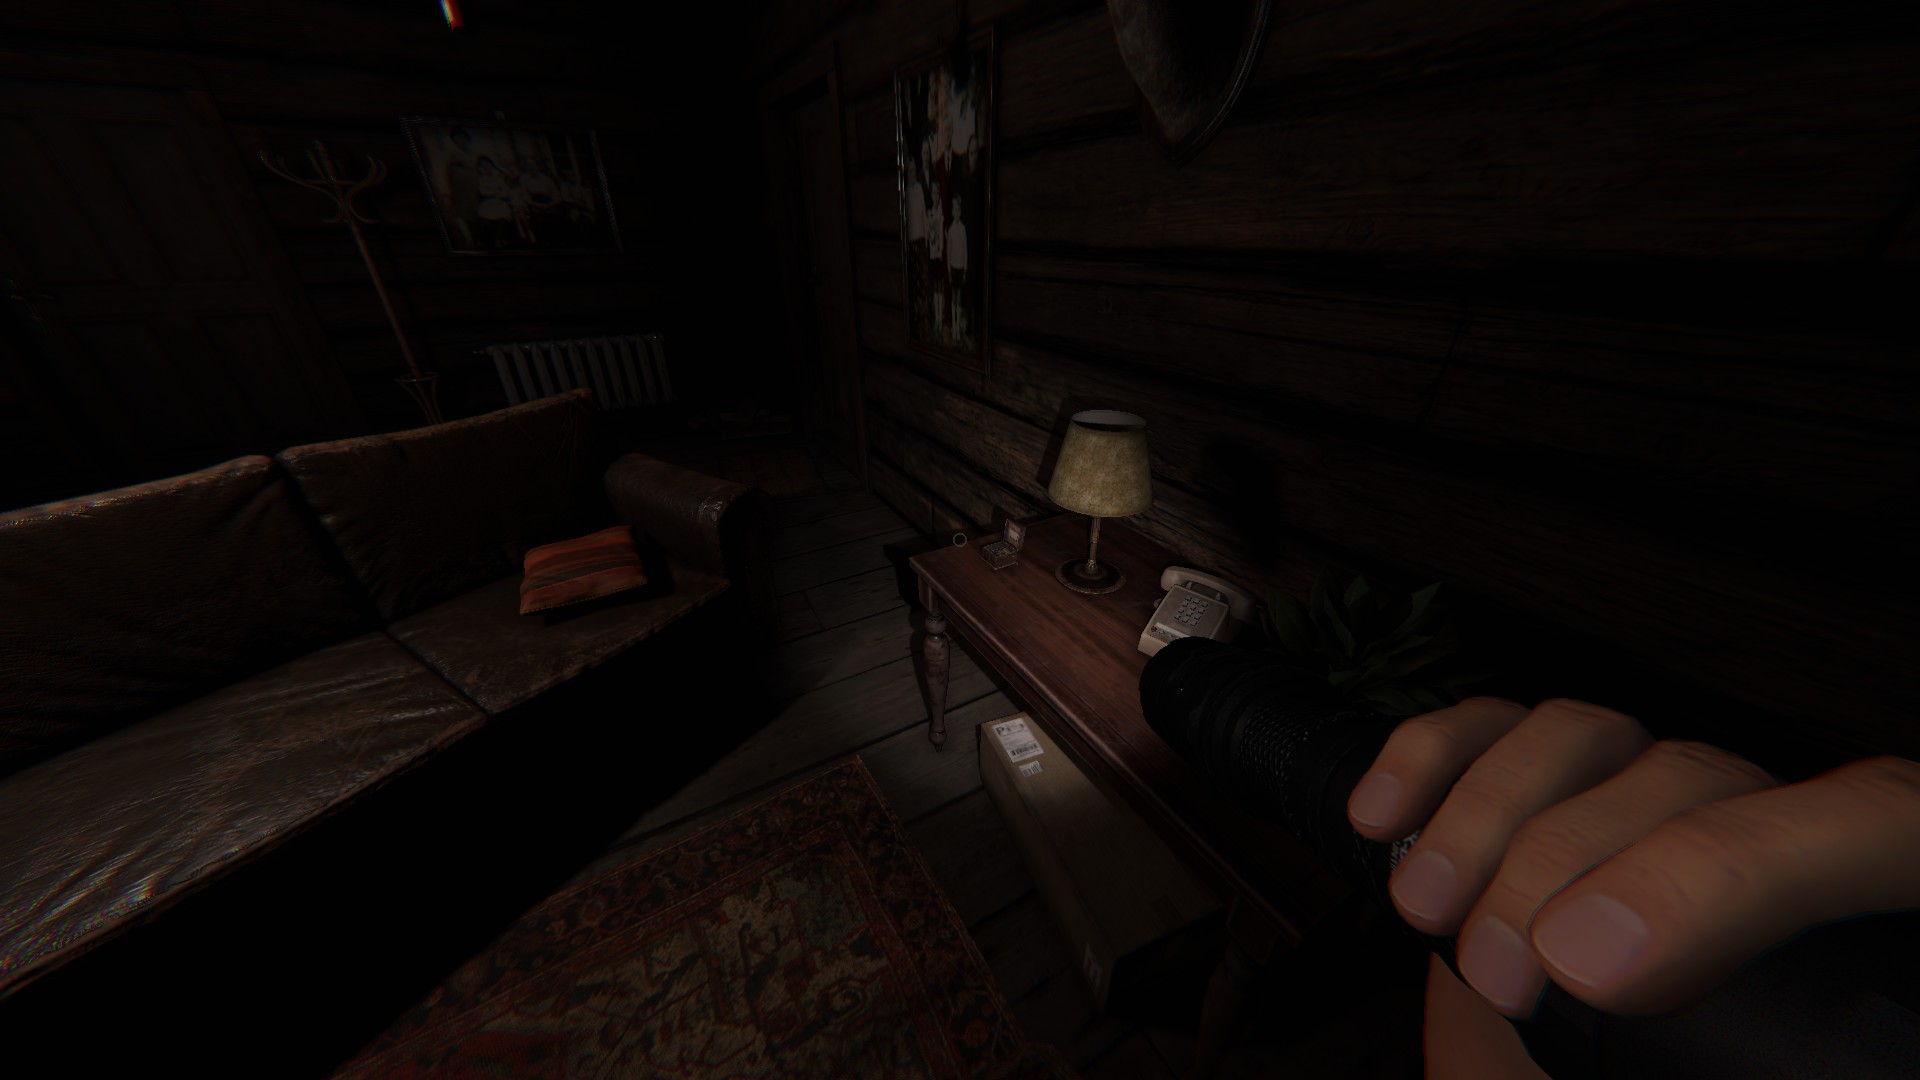
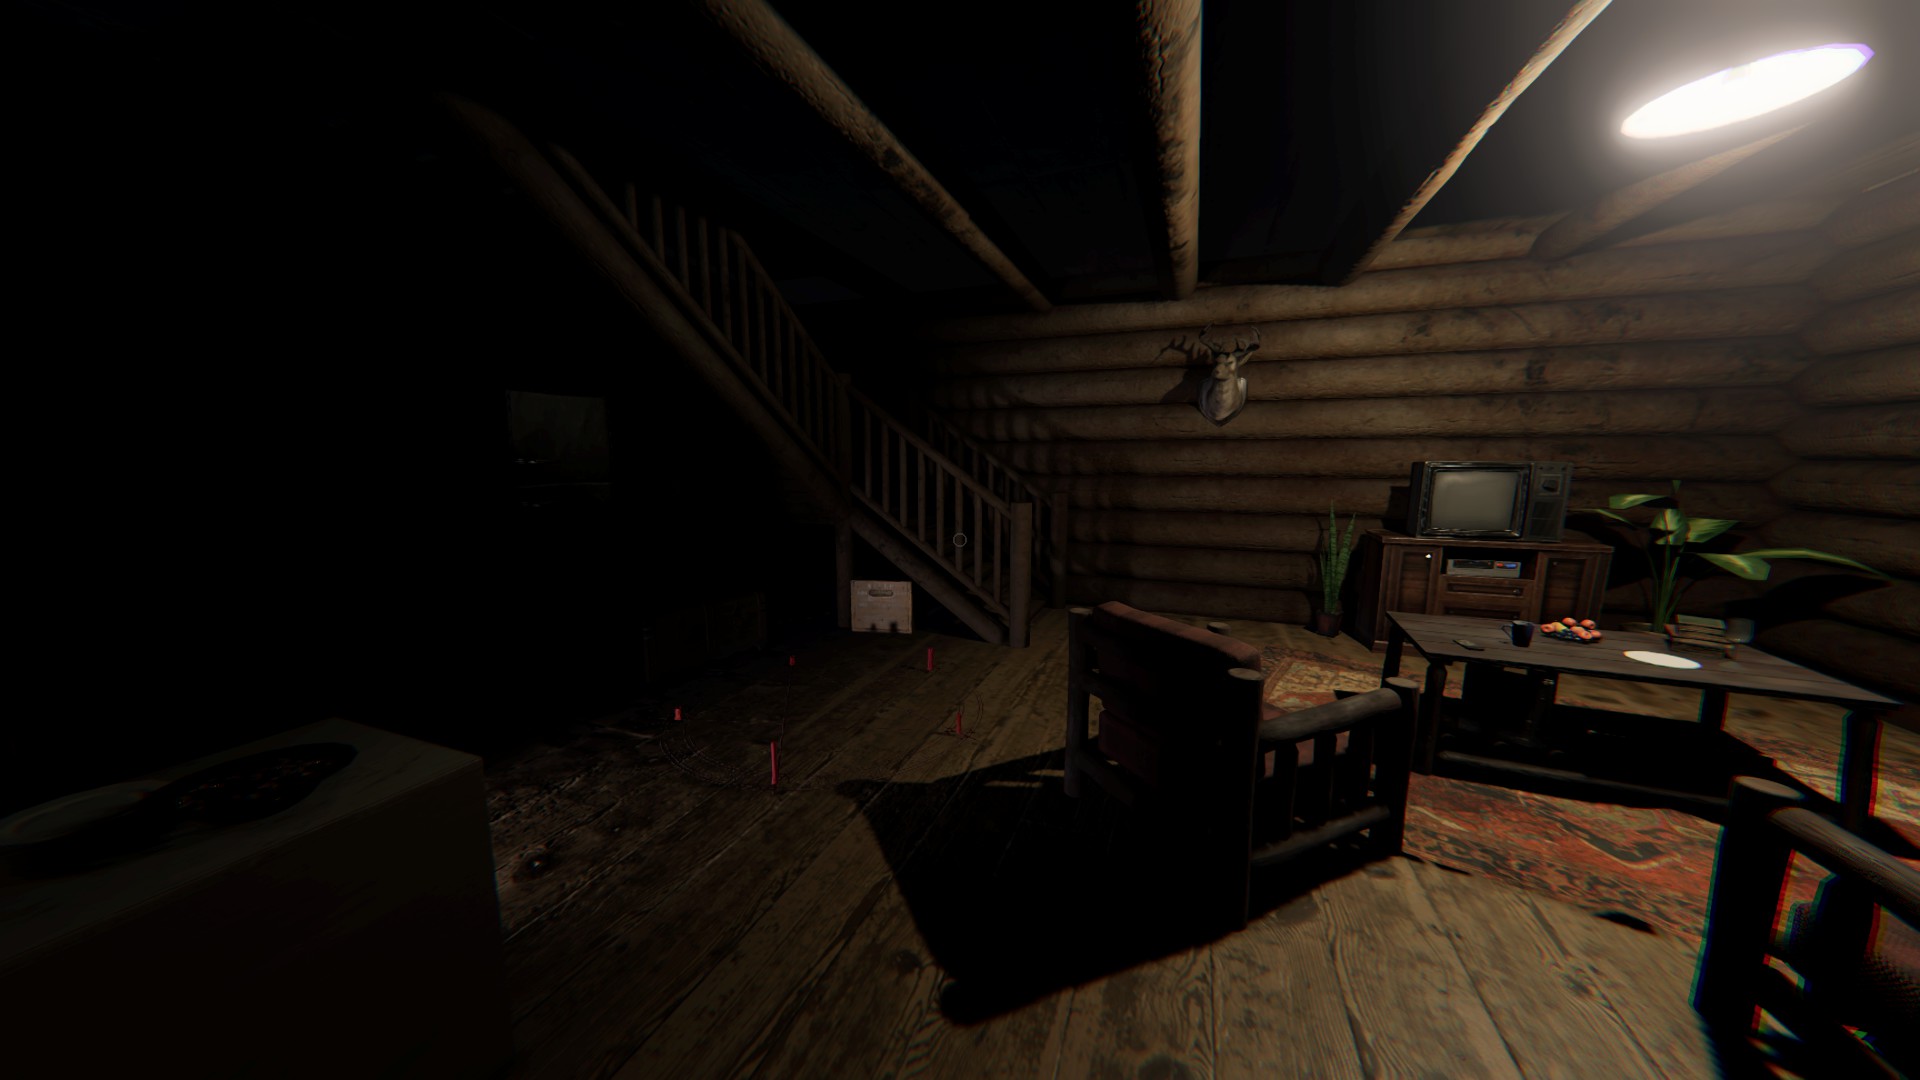
Music Box
Straight back from the front door, by the couch, on the table under the mounted deer head
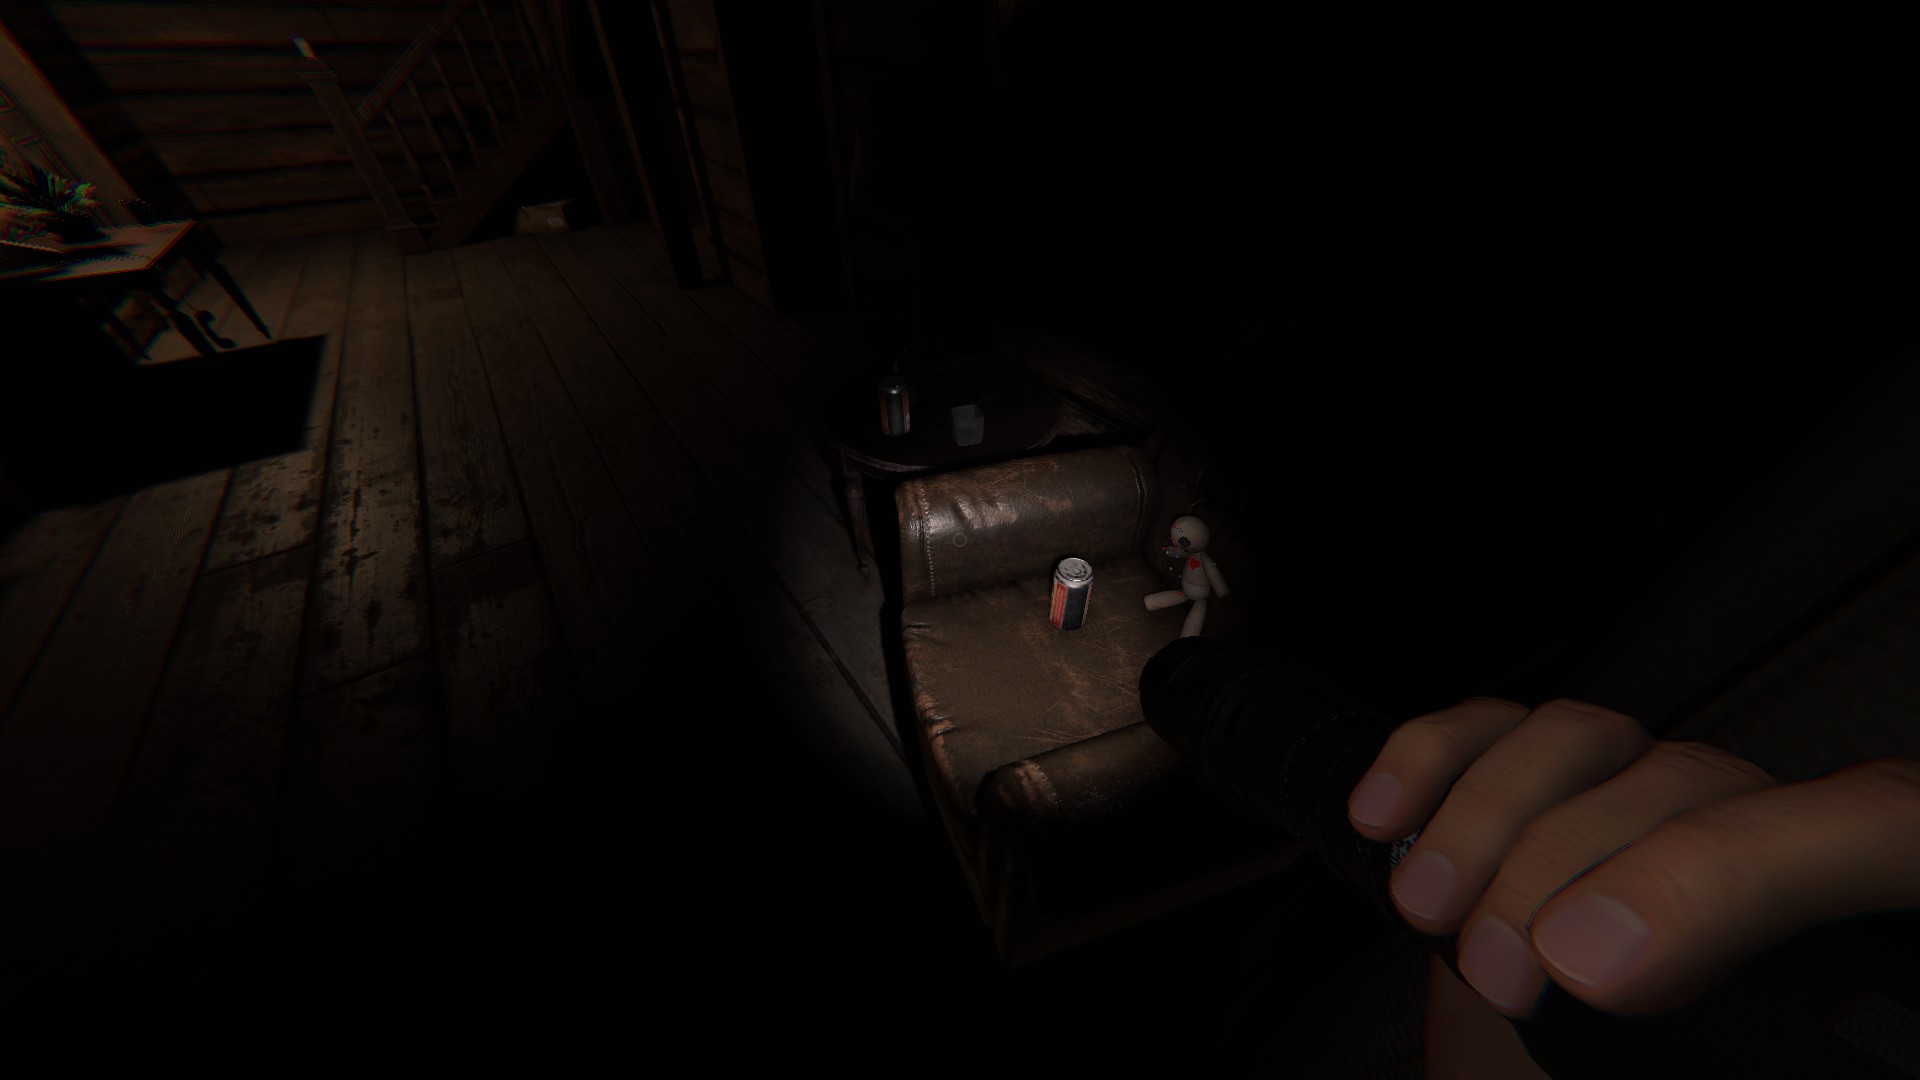
Voodoo Doll
On the second floor, across from the attic stairs, on a chair by the window overlooking the truck
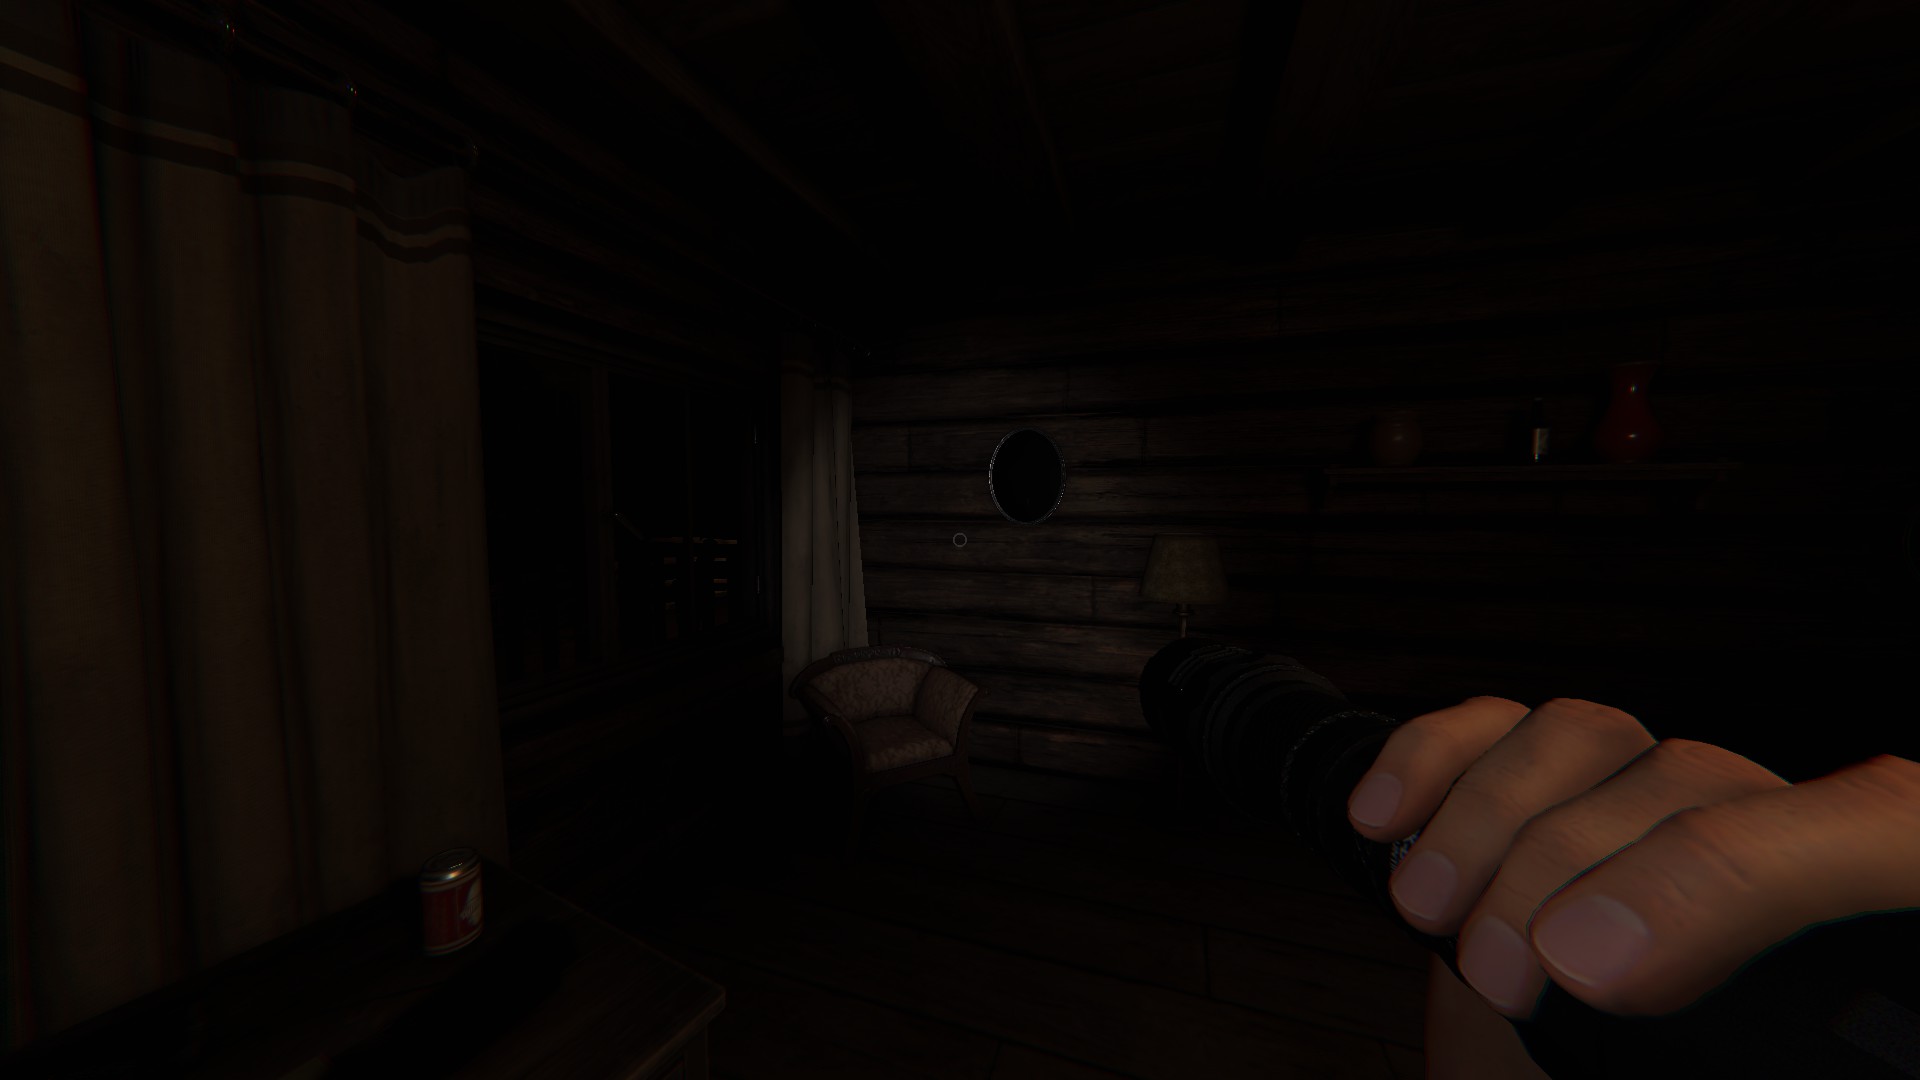
Black Mirror
In the first room on the left, above the chair in the corner, on the wall
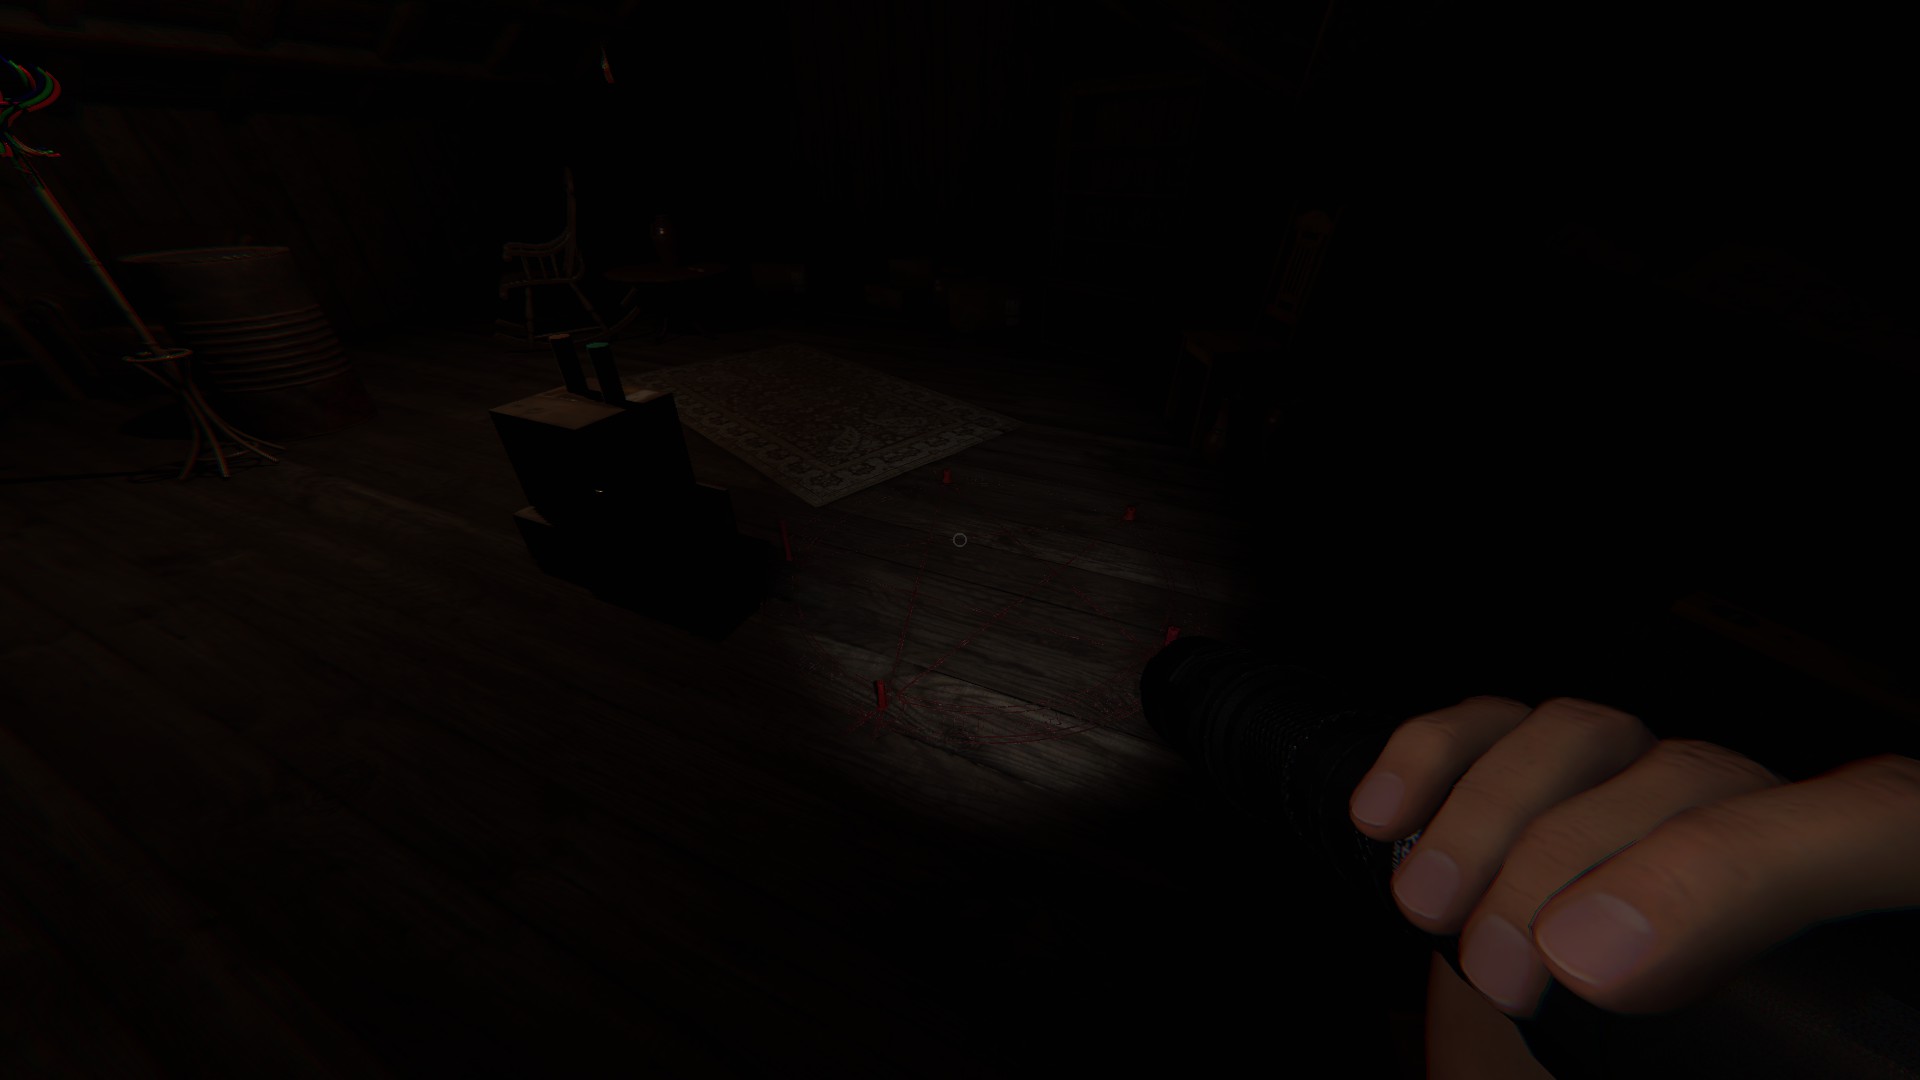
Summoning Circle
In the attic, on the left side of the staircase
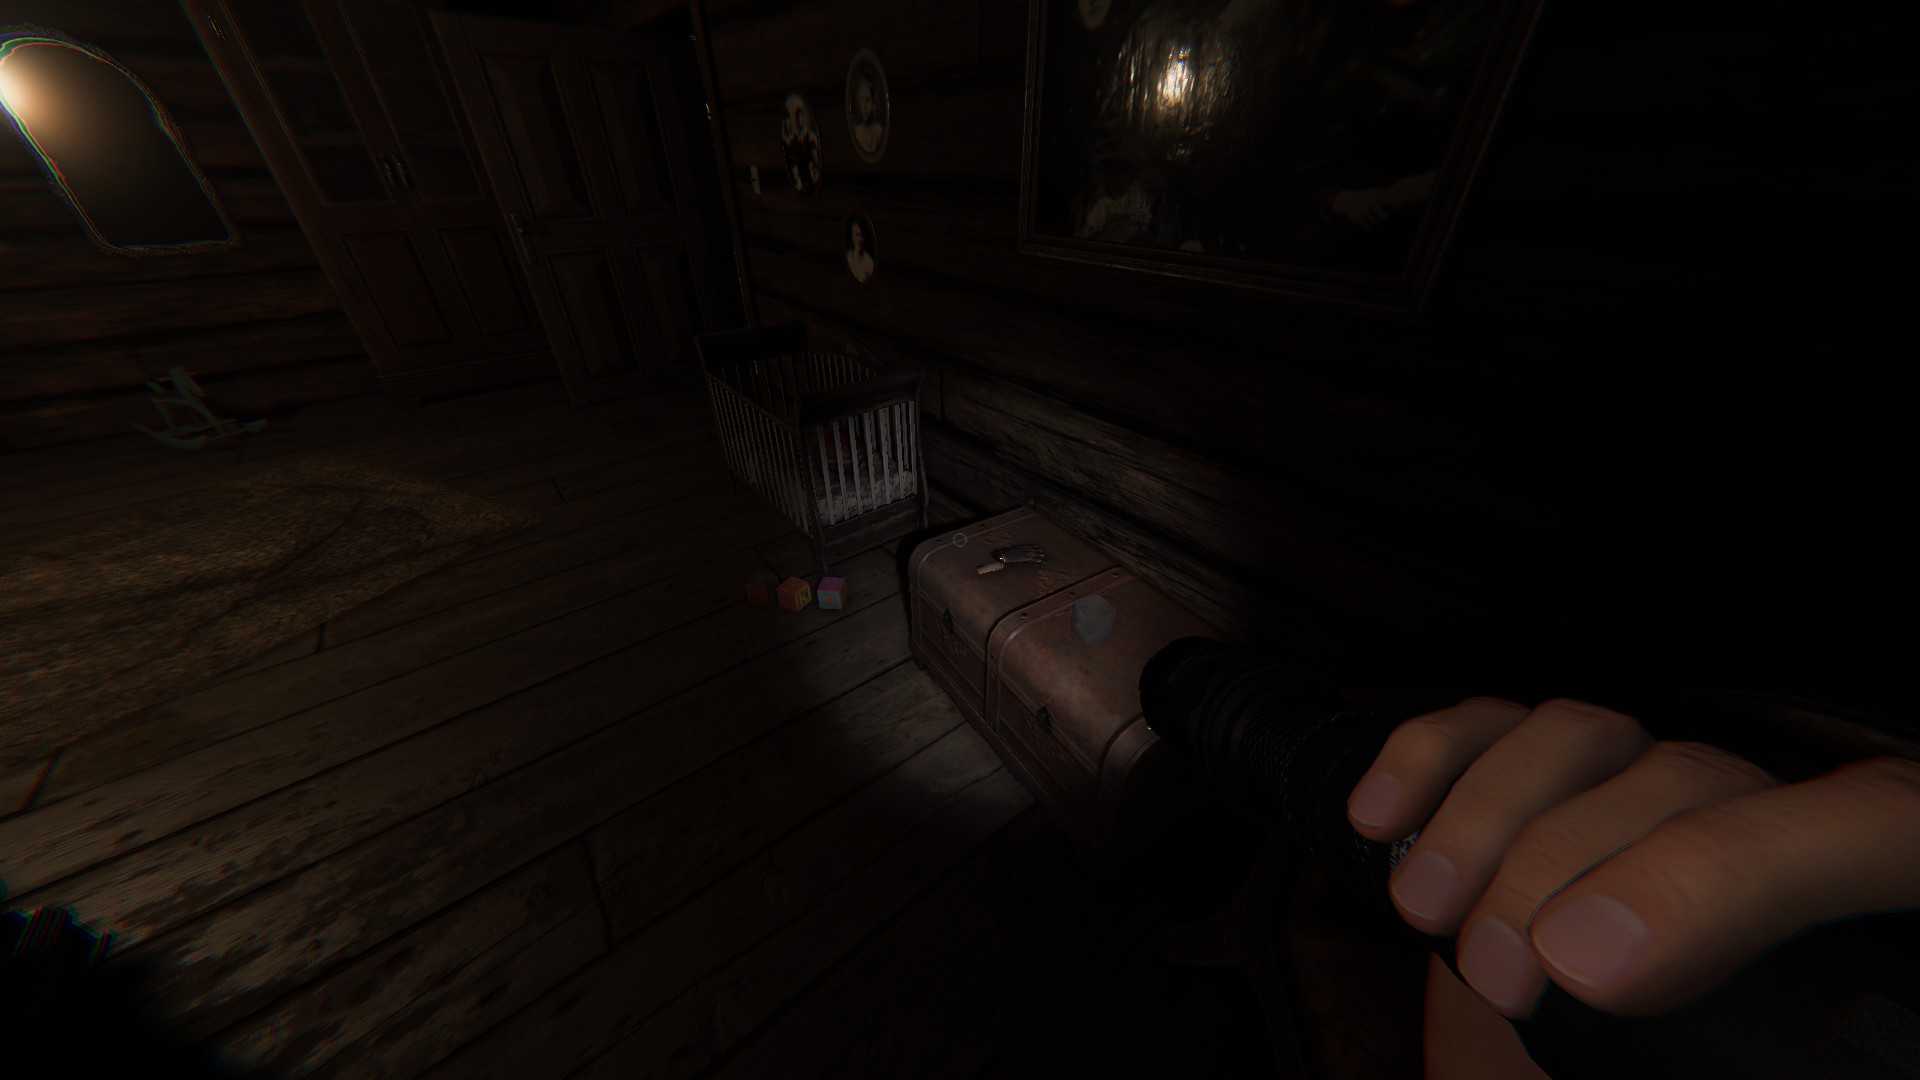
Monkey Paw
Second floor, in the bedroom second door on right side, on a chest next to the crib
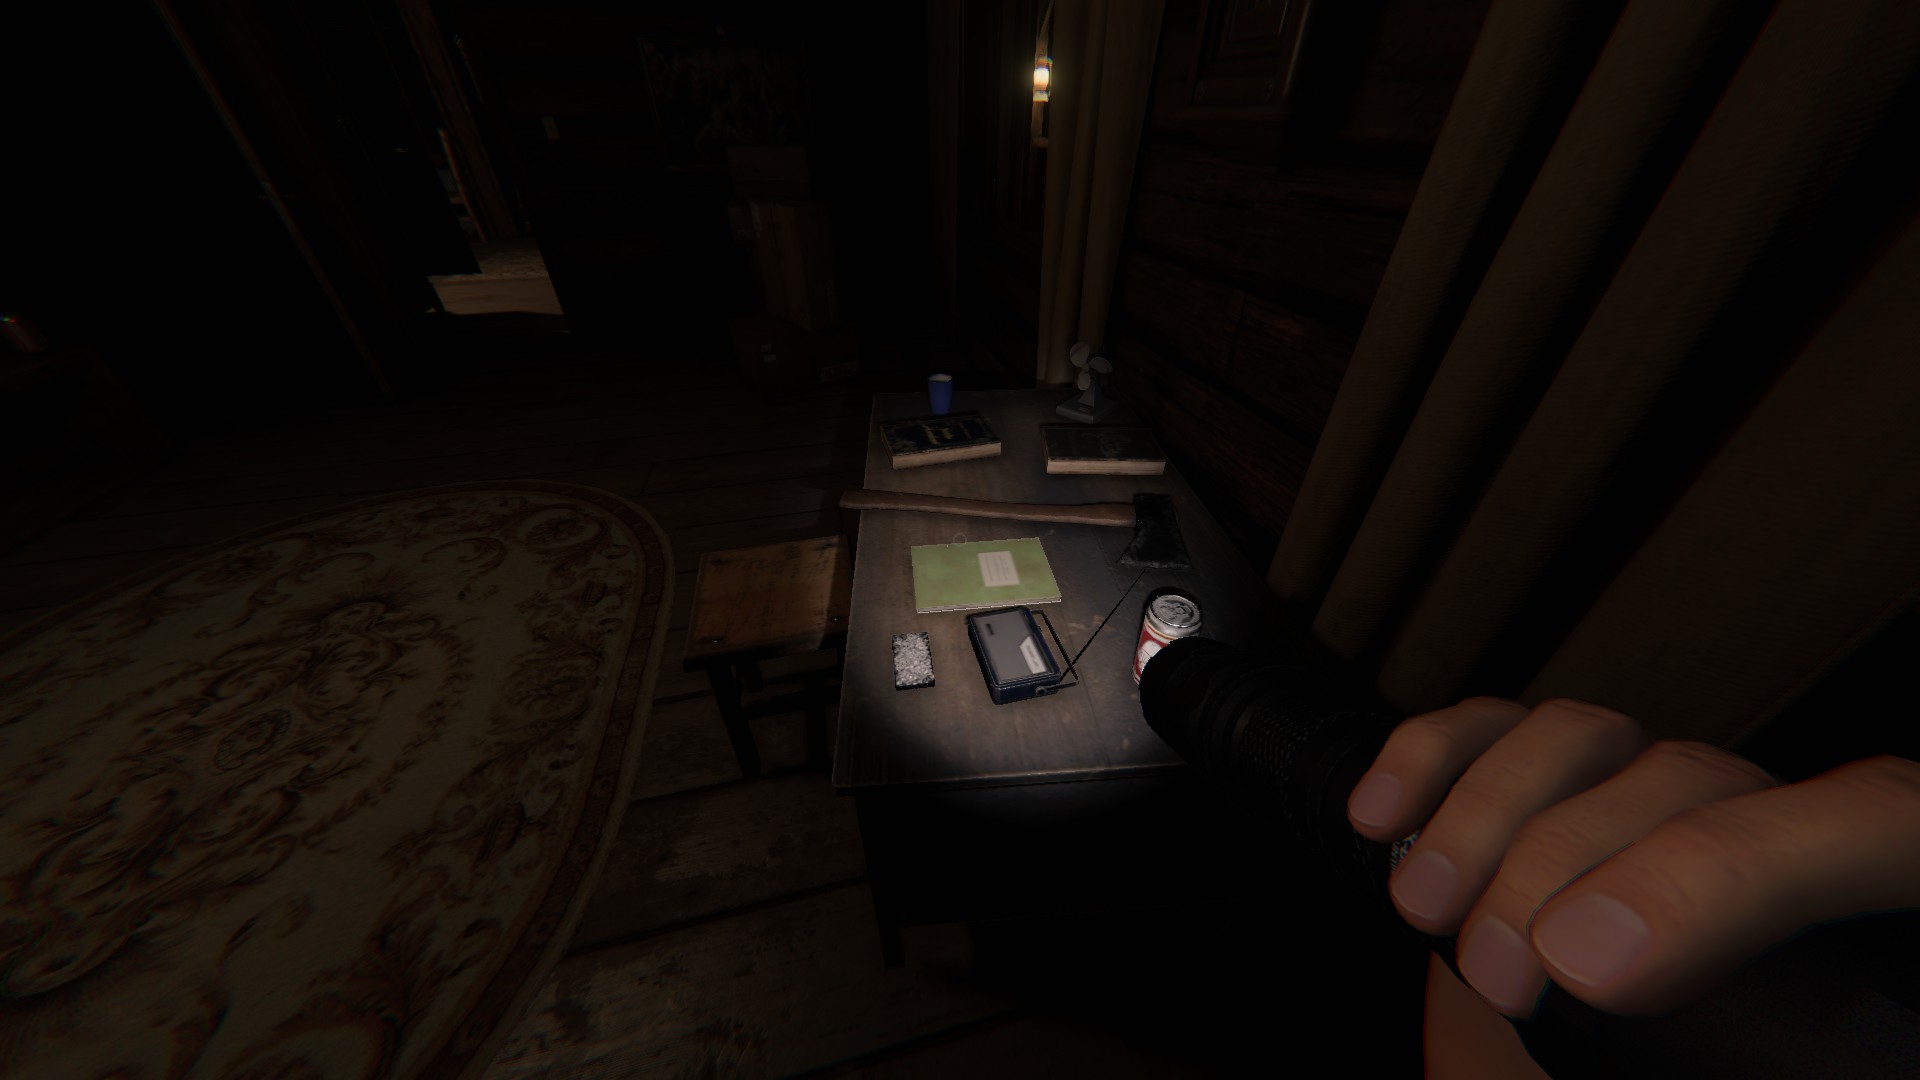
Tarot Cards
In the first room on the left, sitting on a desk
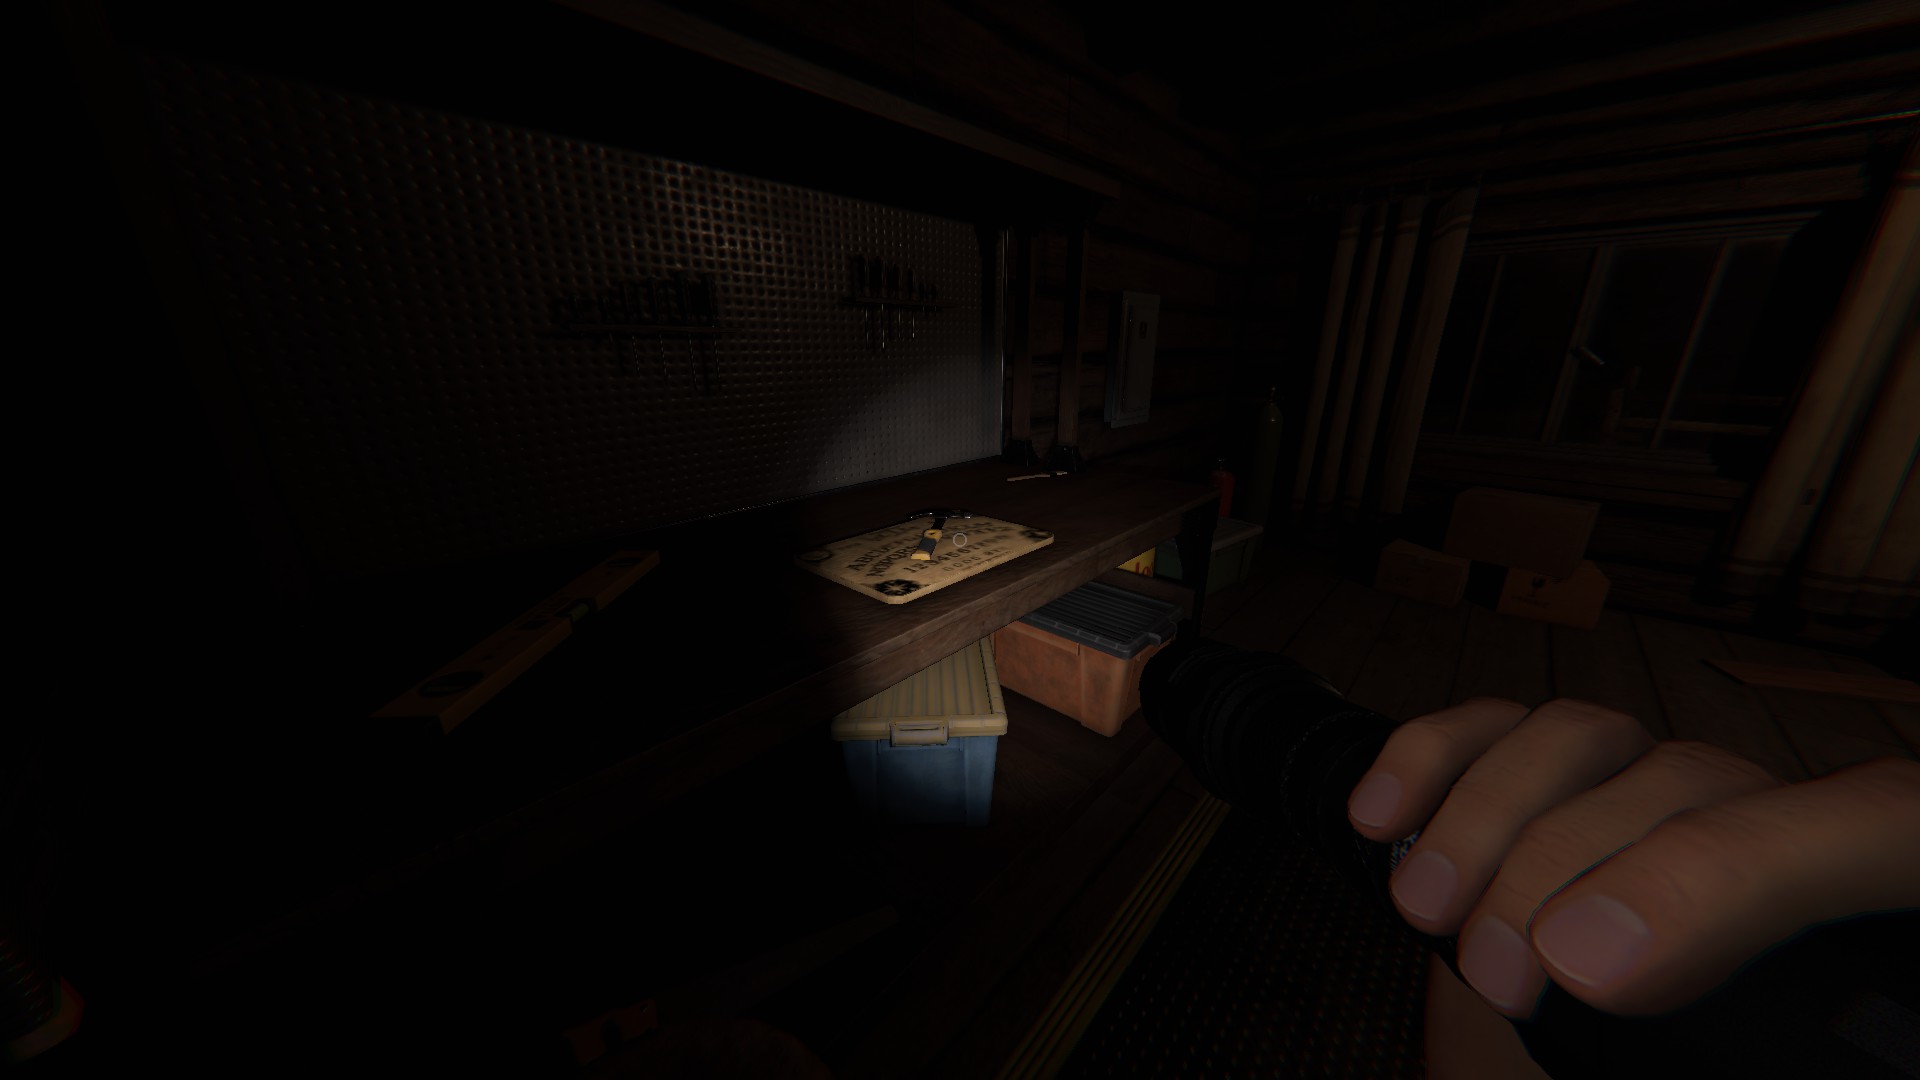
Ouija Board
In the workshop, next to the possible fuse box location, on the work table
13 Willow Street
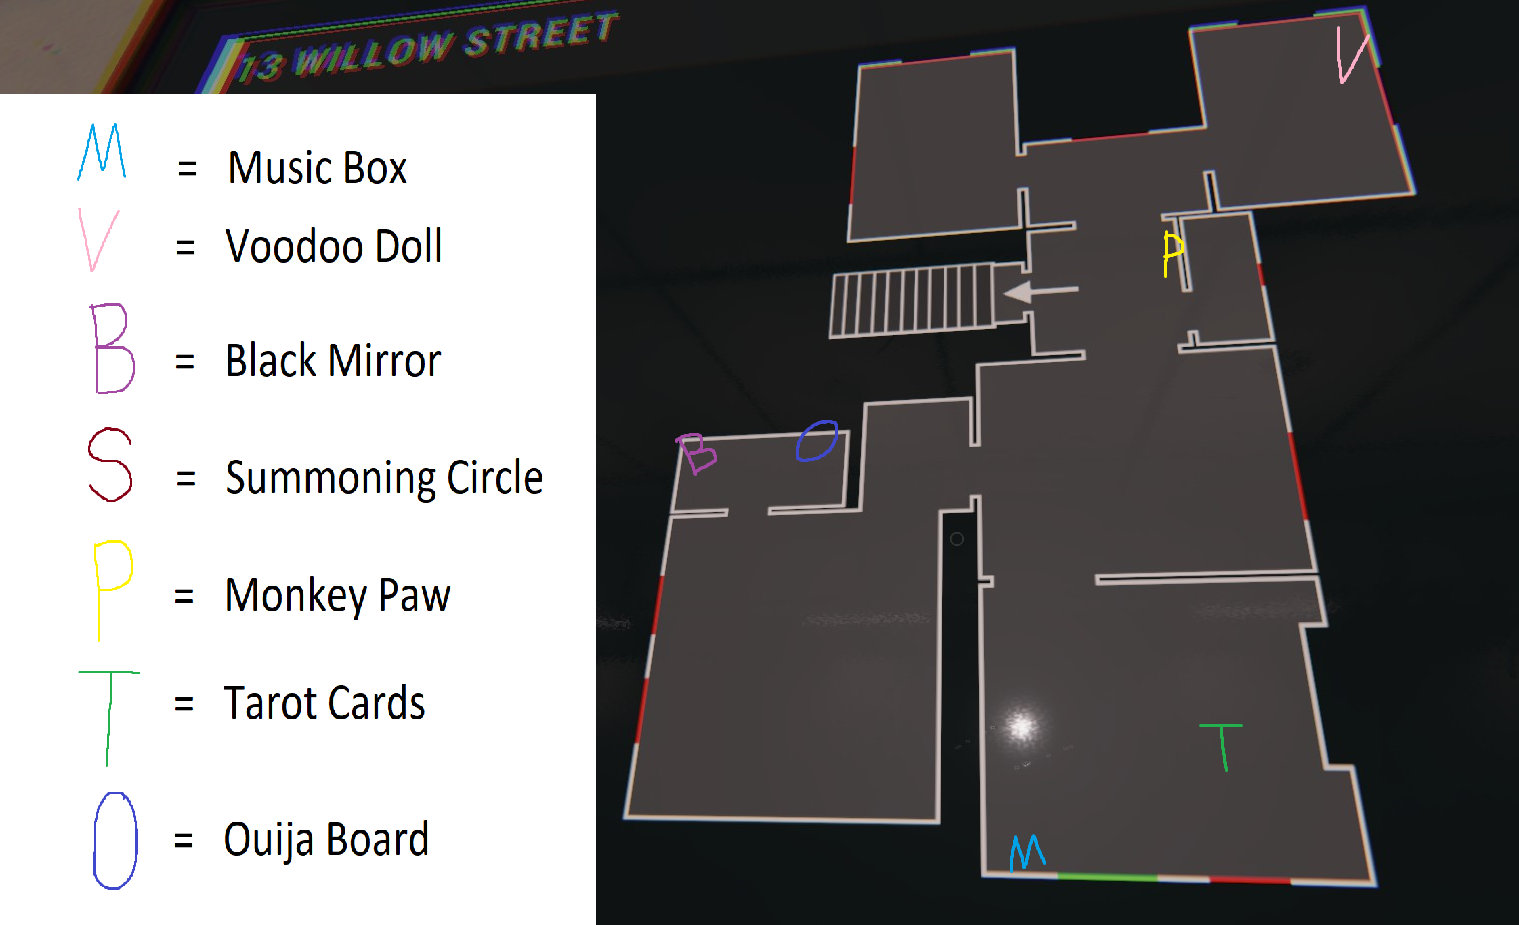 Basement: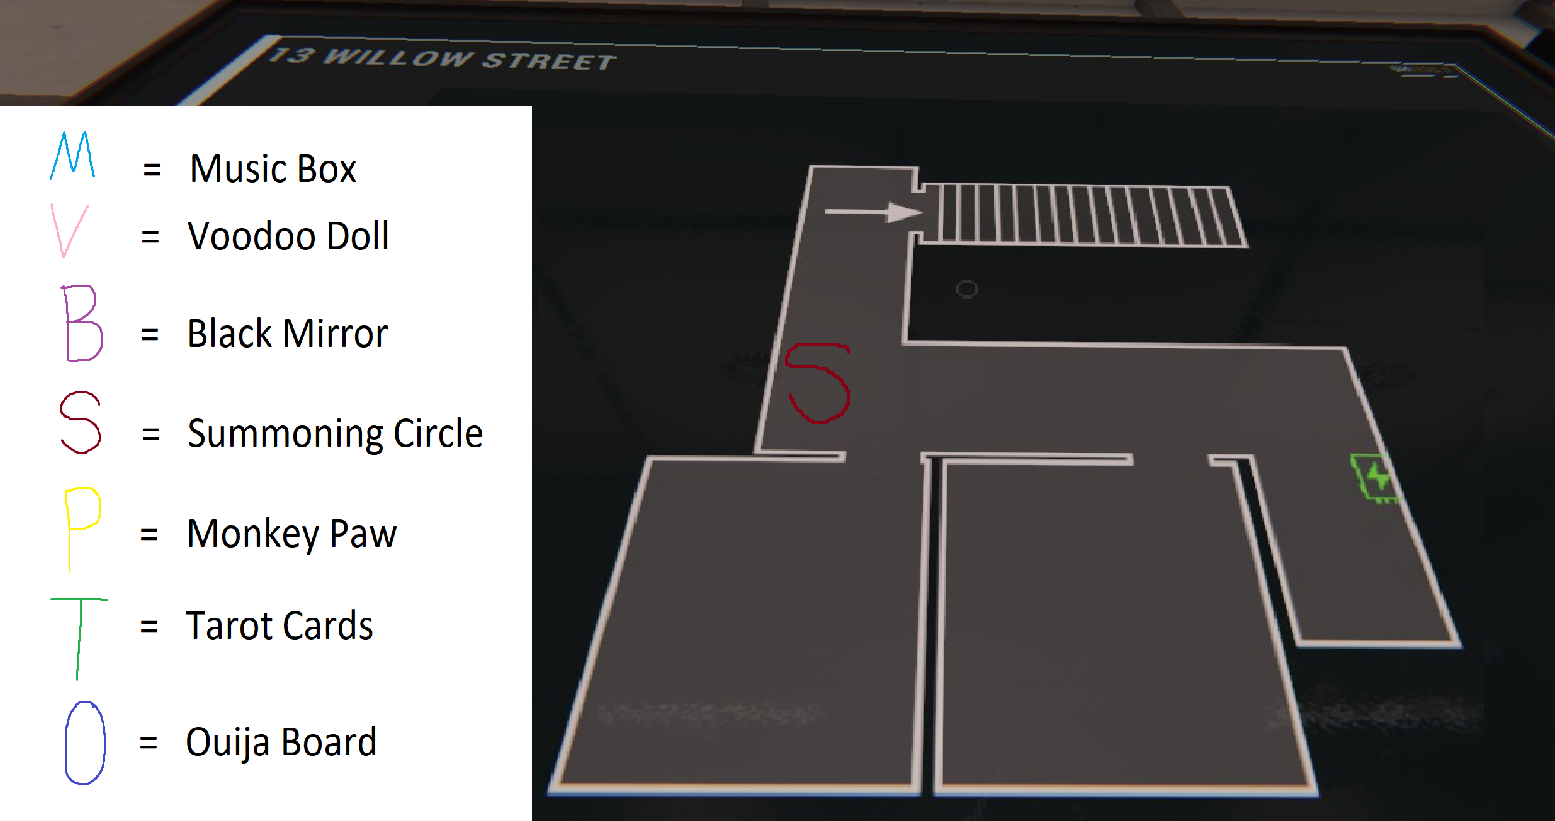
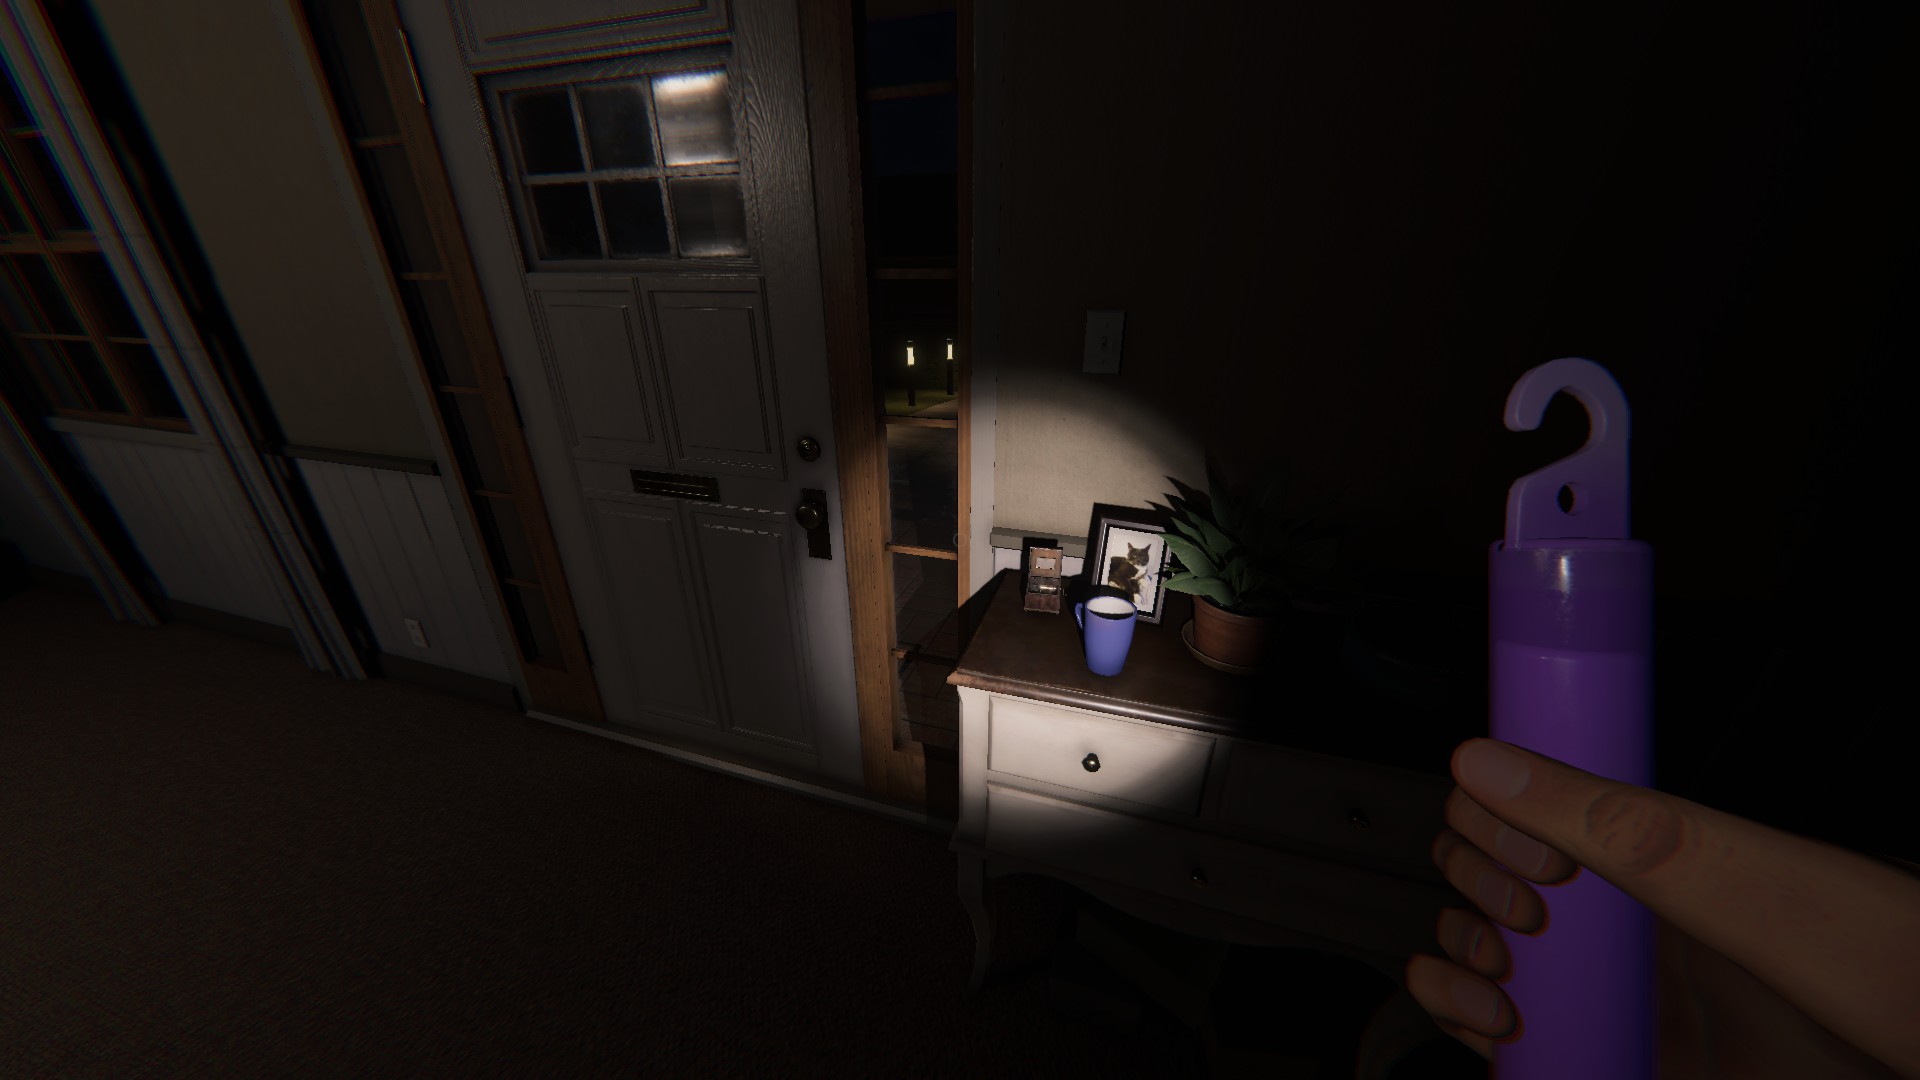
Music Box
Next to the front door, on a small table
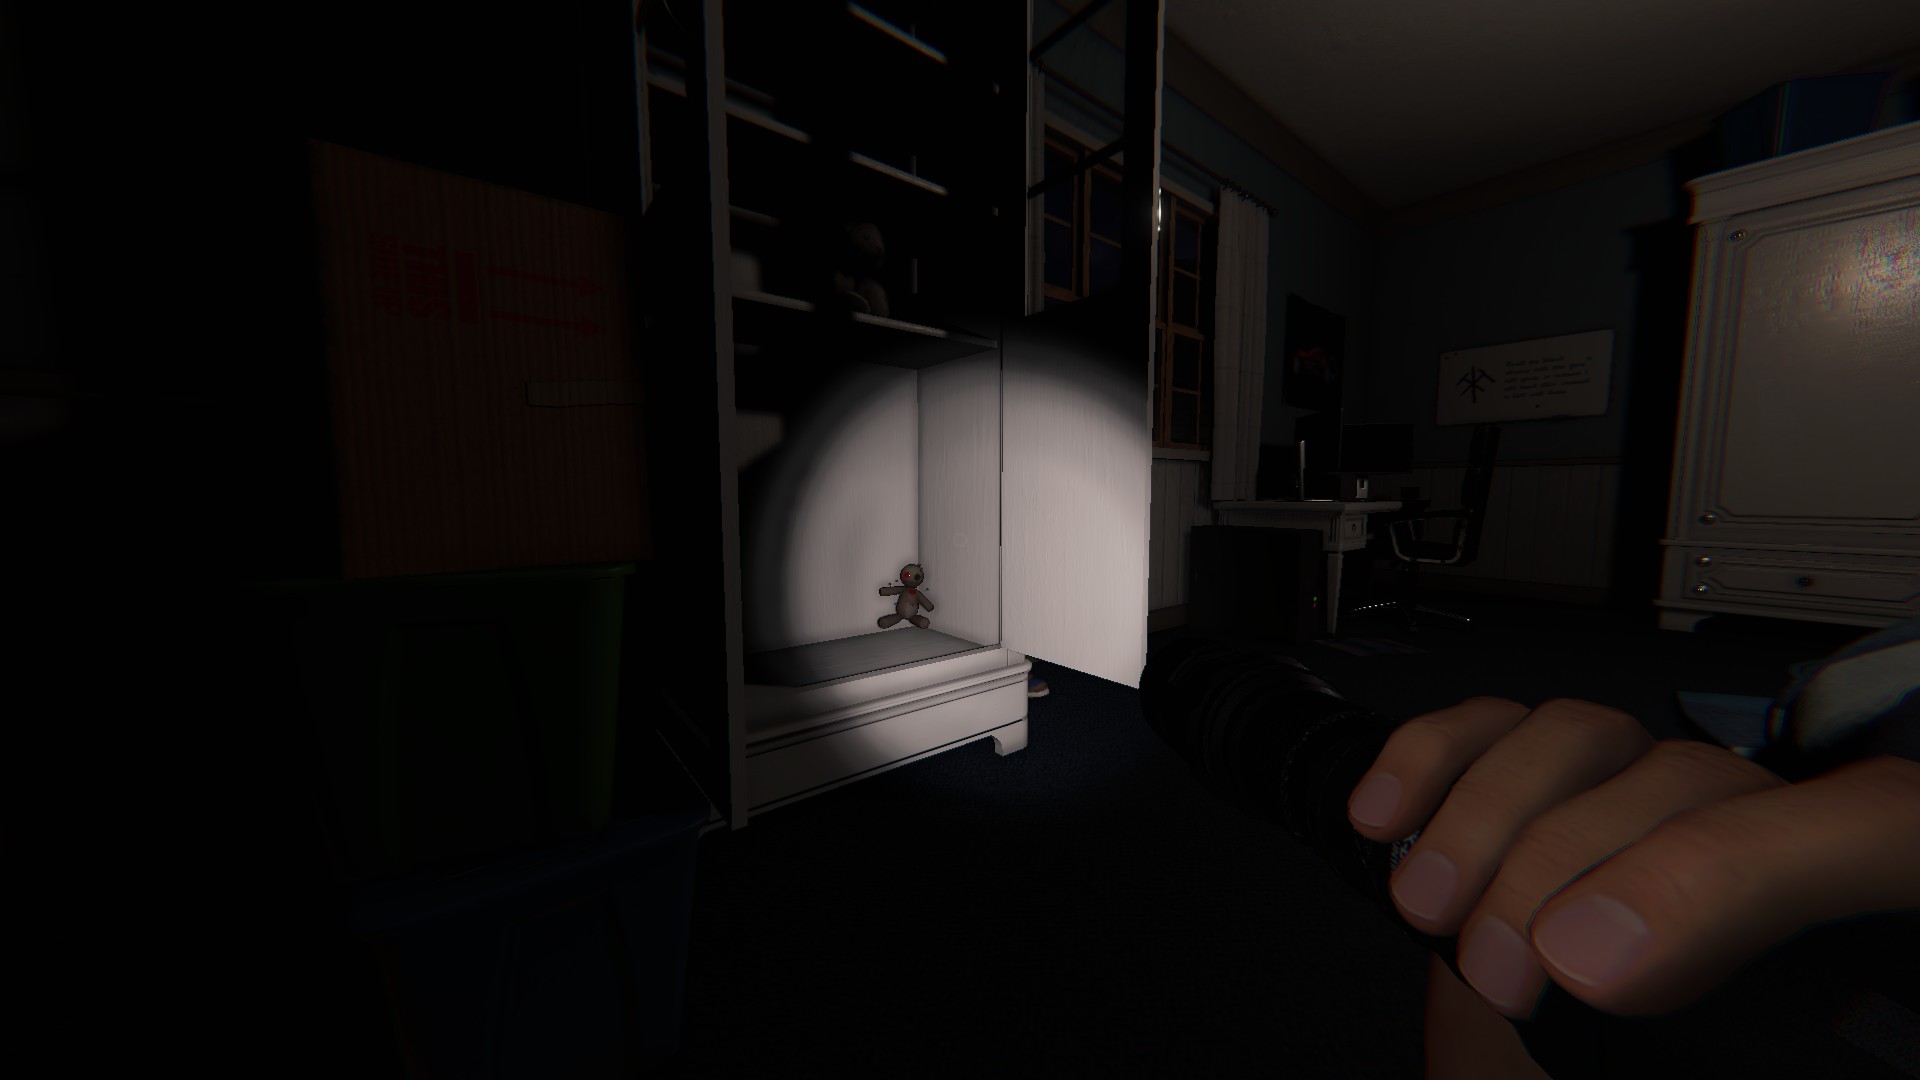
Voodoo Doll
In the blue bedroom, inside the glass display cabinet, must open door
Black Mirror
In the laundry room off of garage, sitting on the ground in the left corner
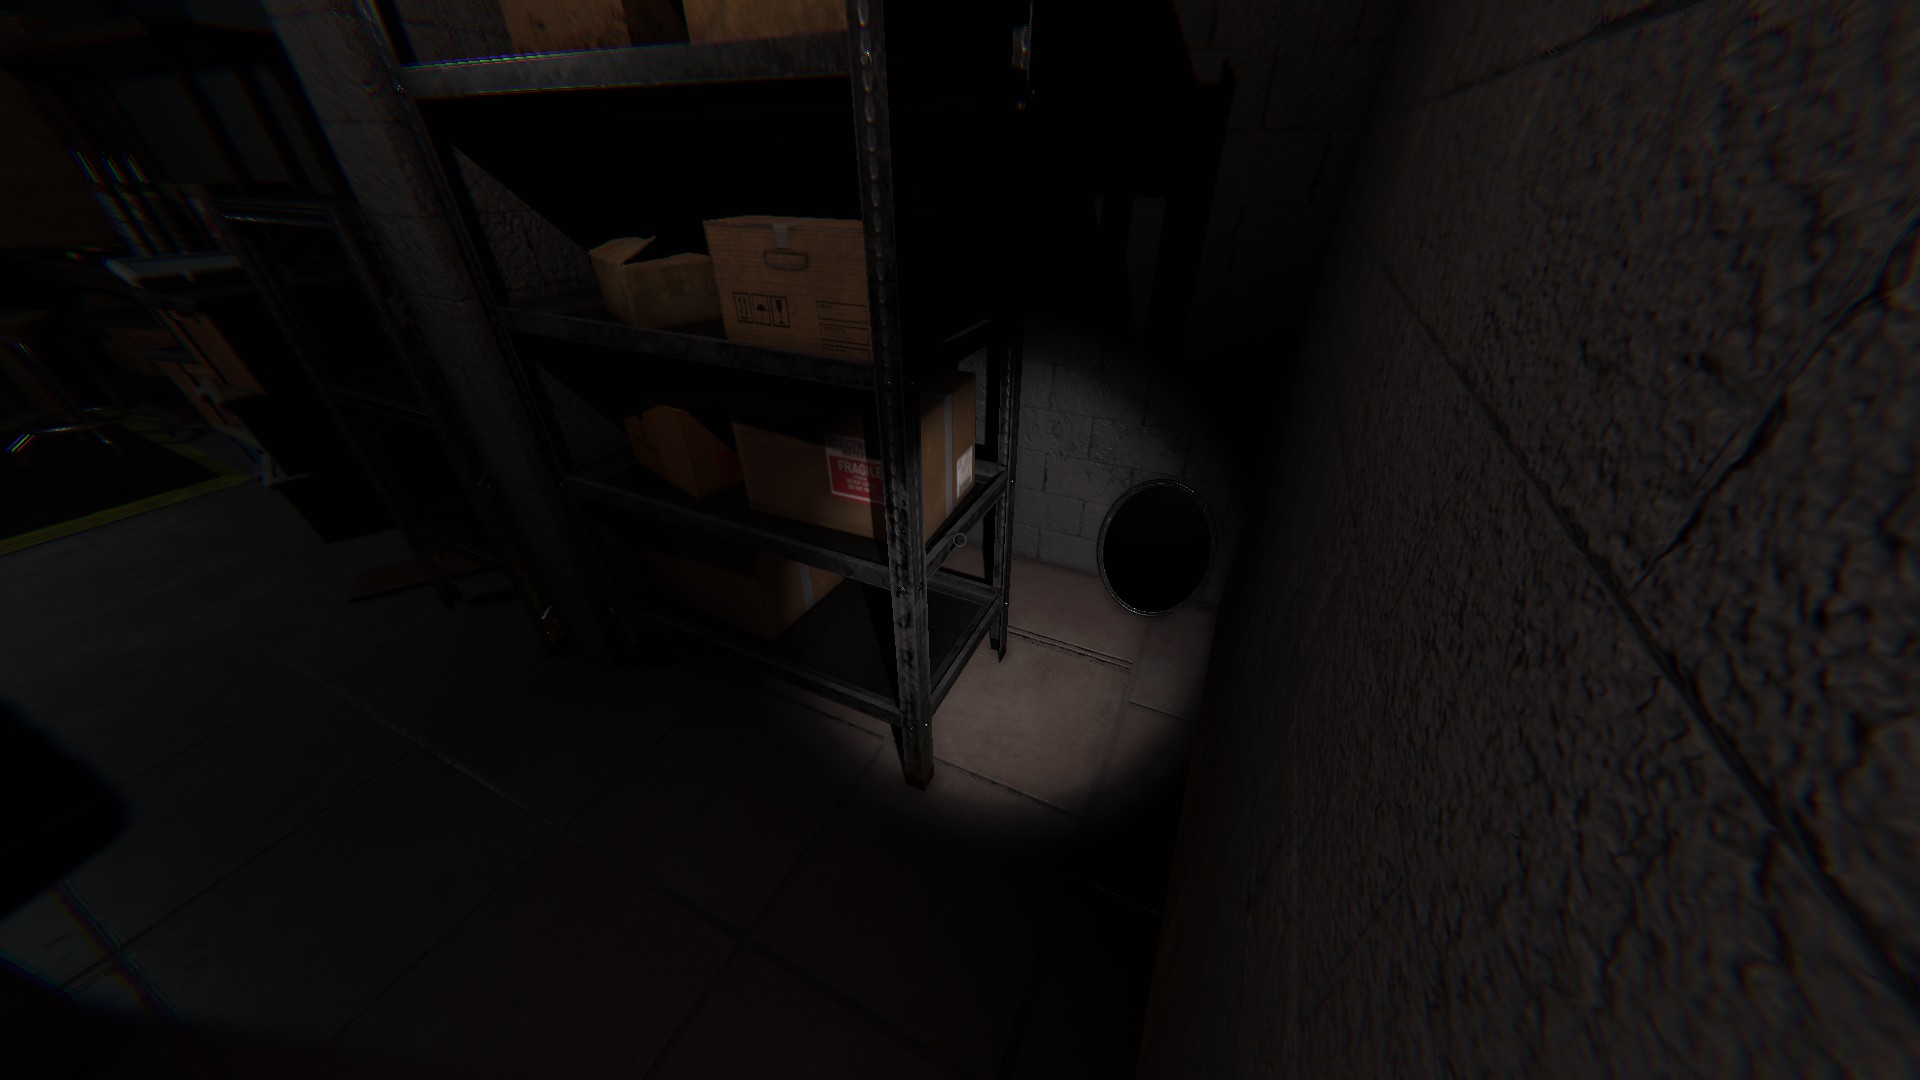
Summoning Circle
In the basement, on the 90 degree turn
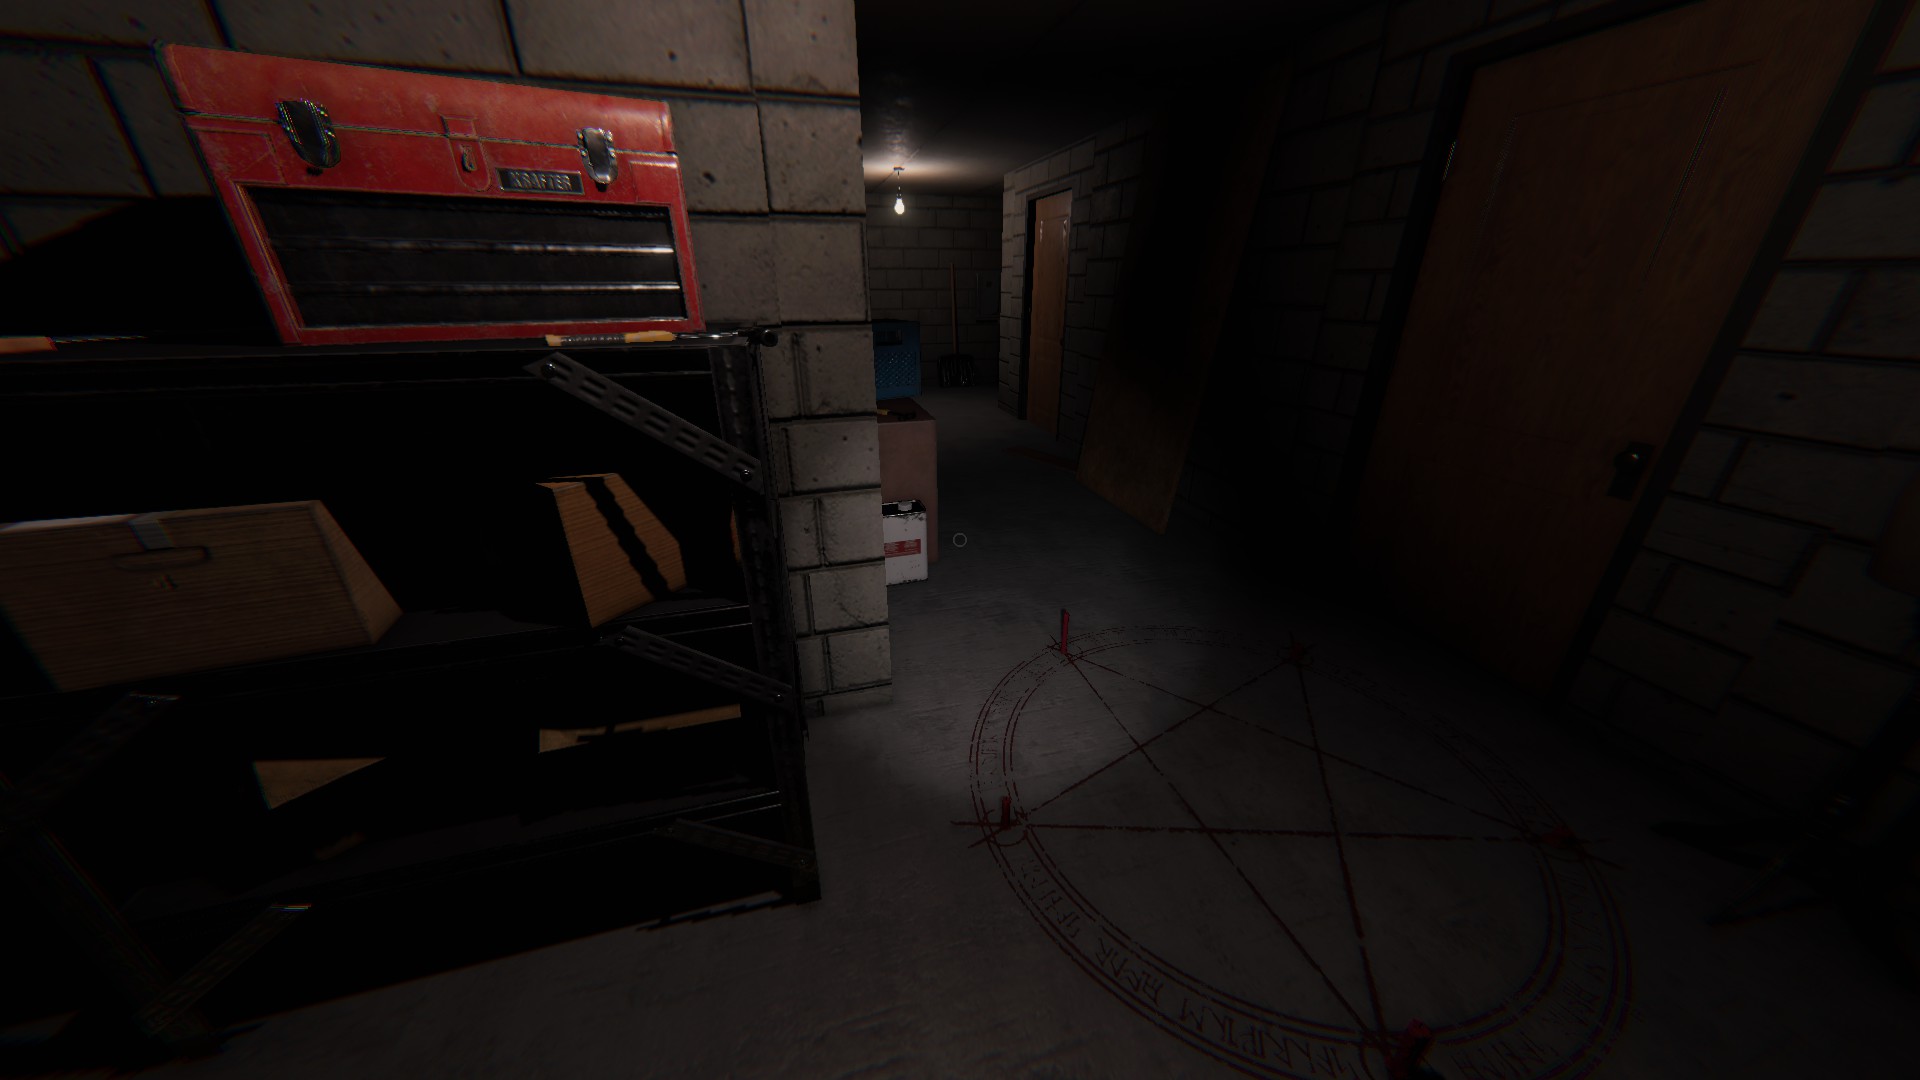
Monkey Paw
In the dining room, inside the glass display cabinet, on a shelf
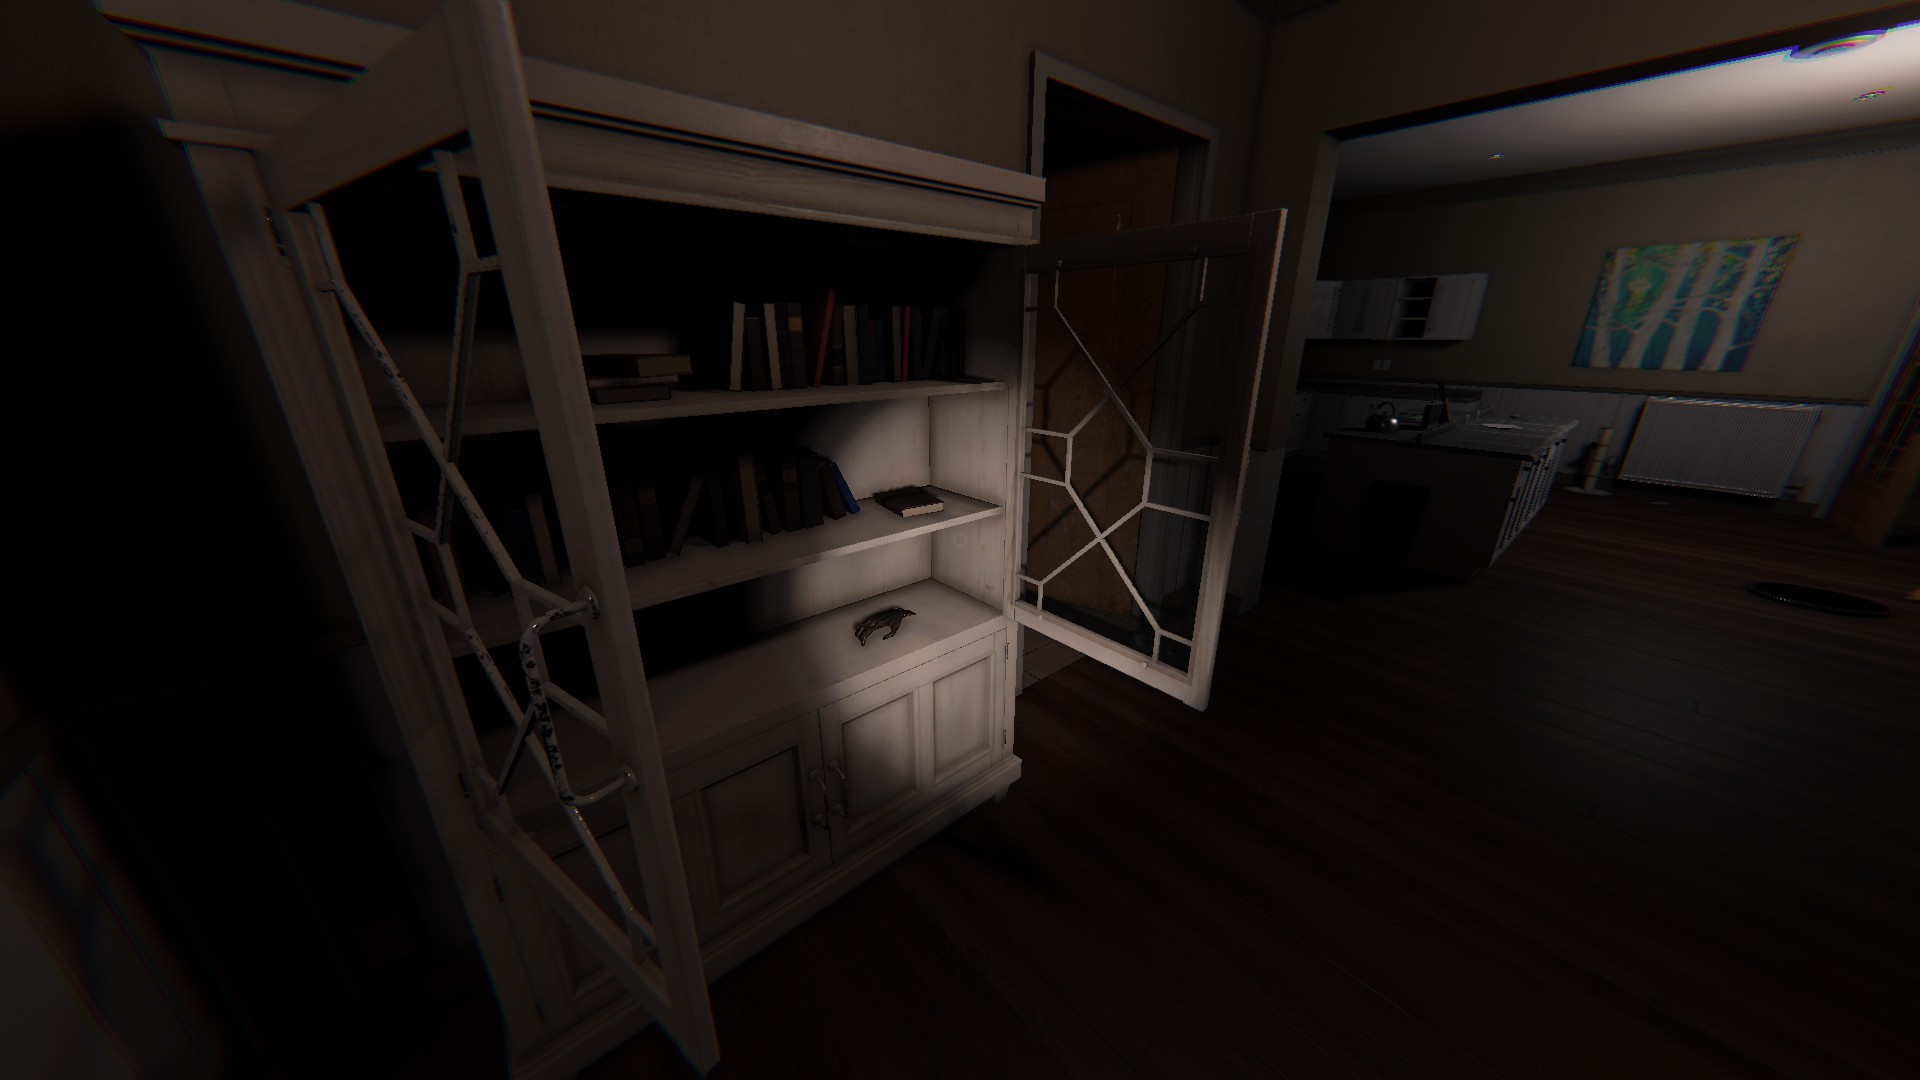
Tarot Cards
In the living room/foyer, on a side table next to the couch
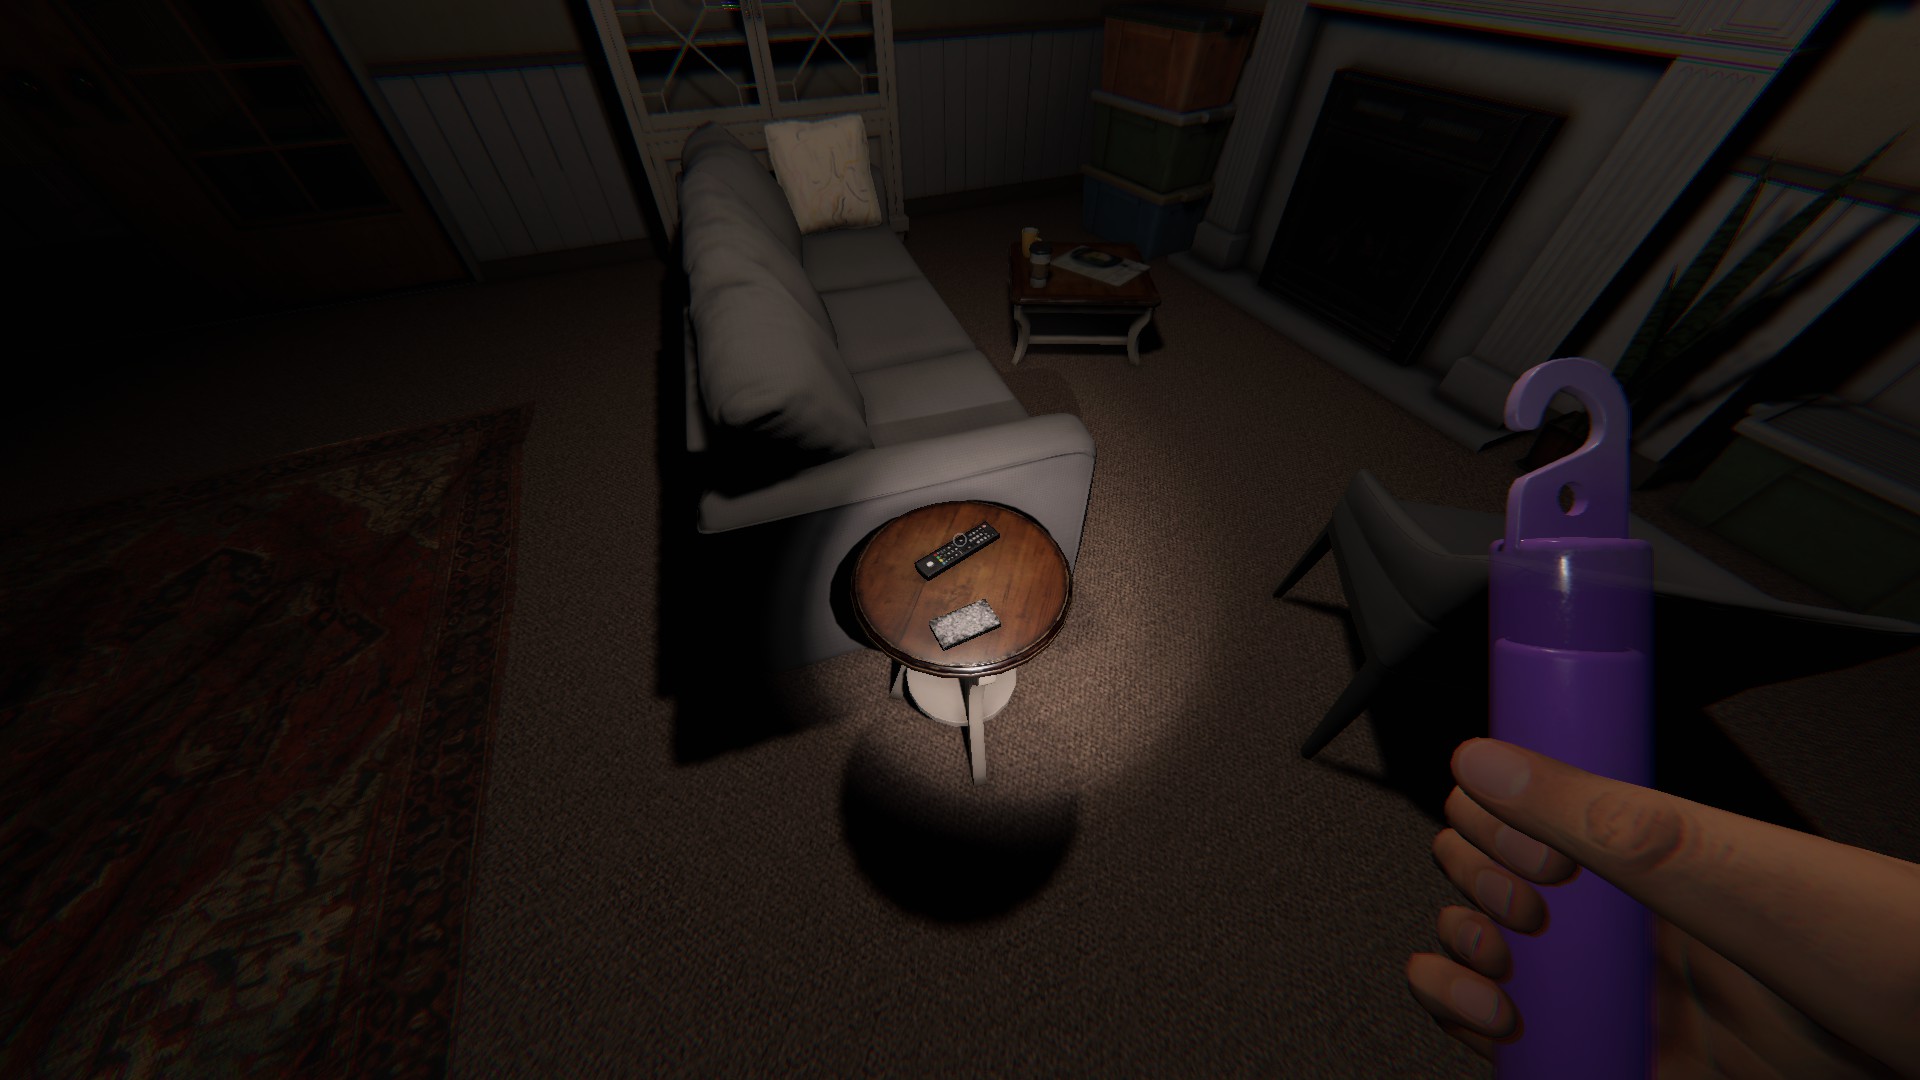
Ouija Board
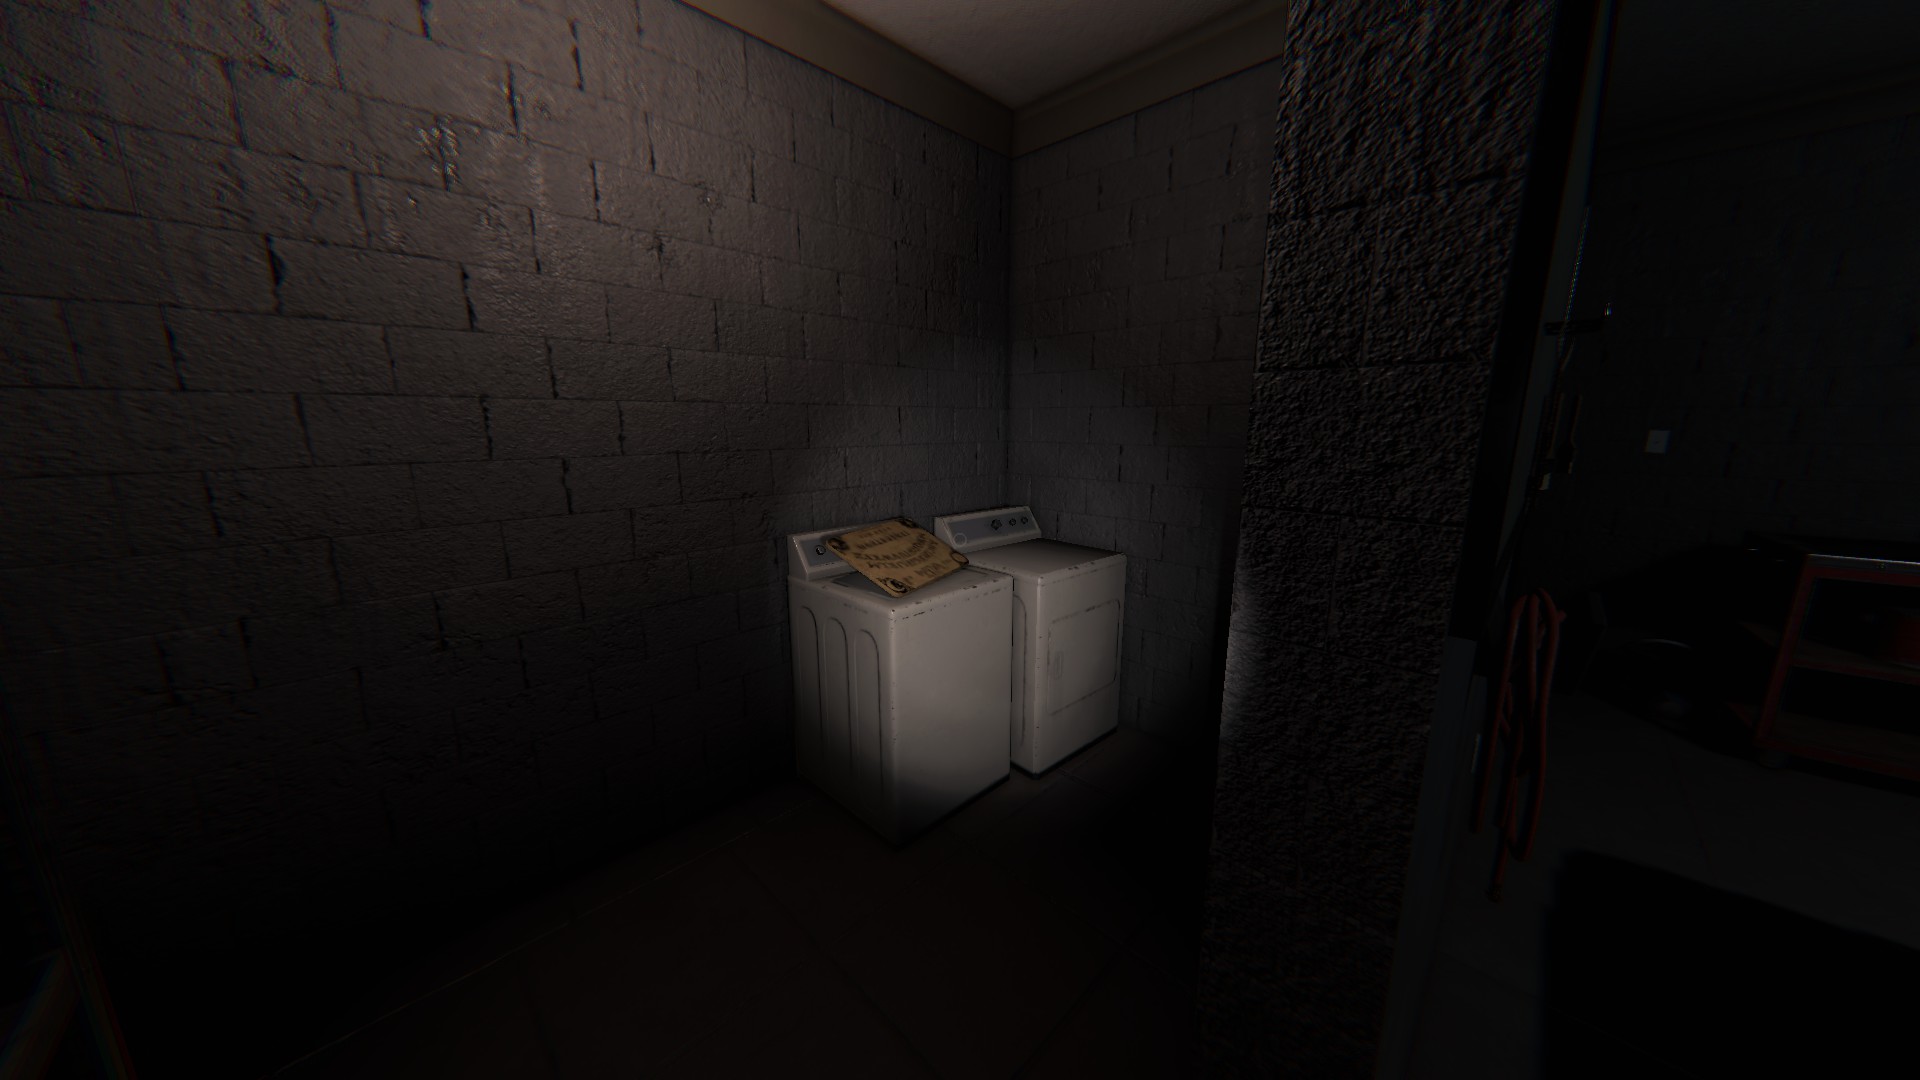
In the laundry room off of garage, sitting on the washing machine
Camp Woodwind
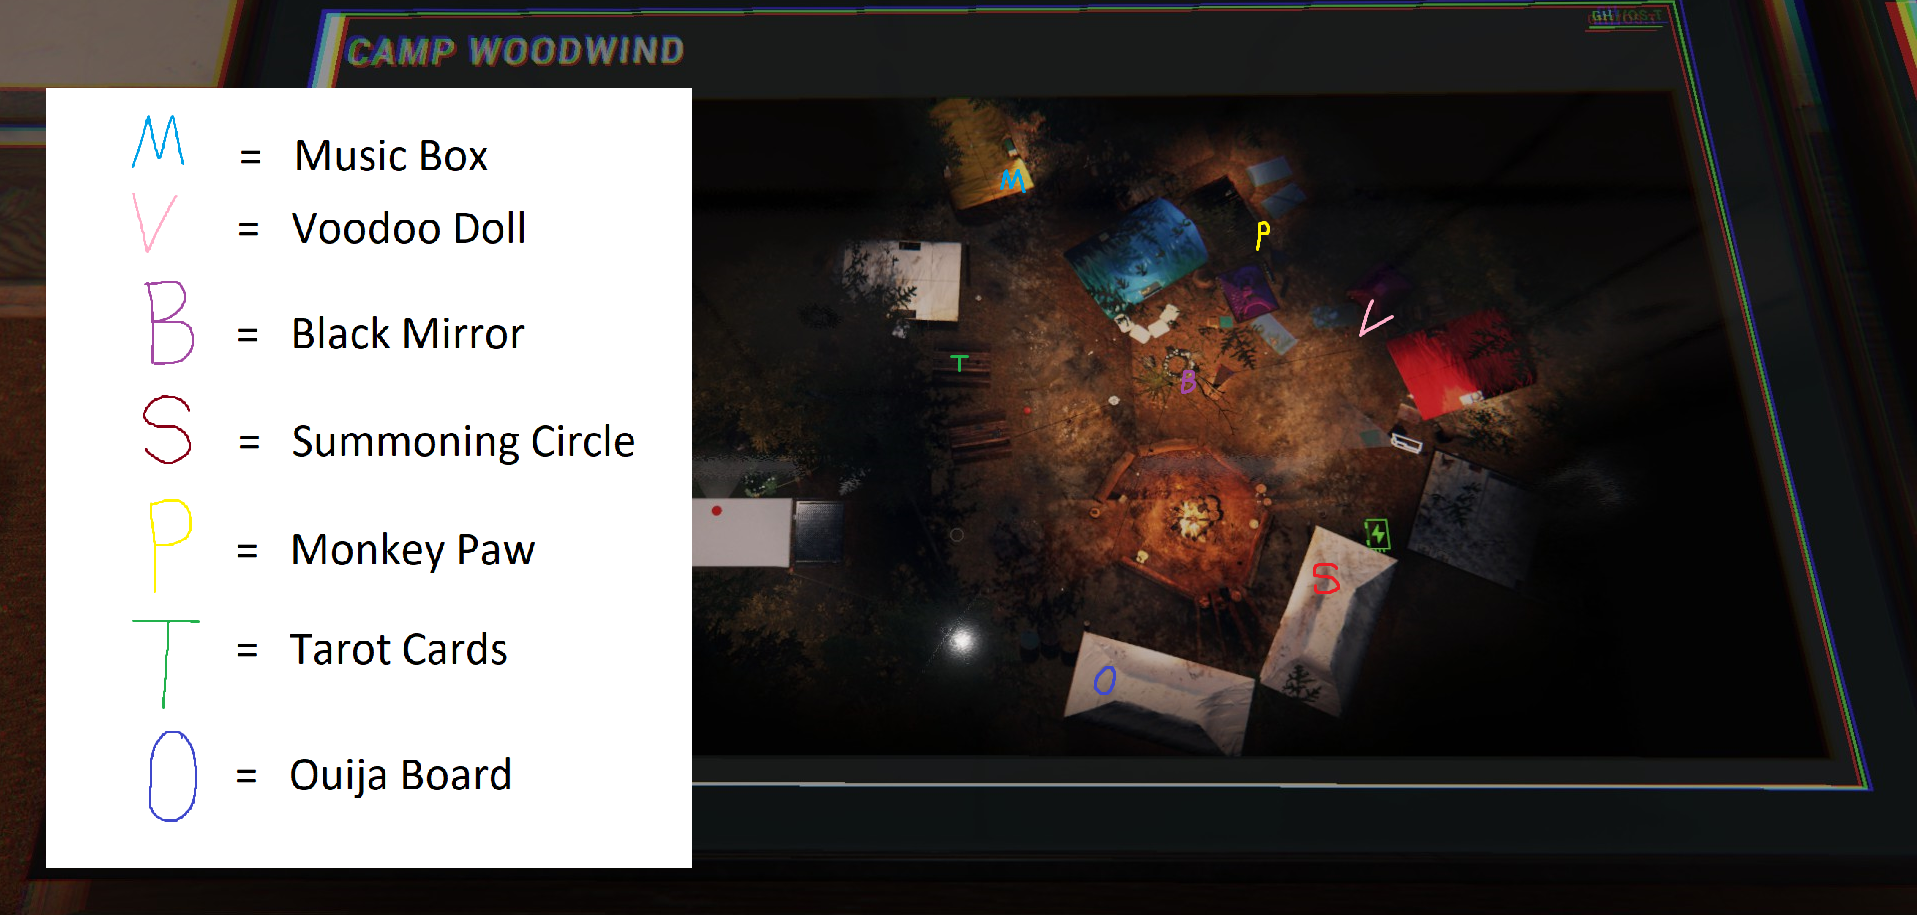
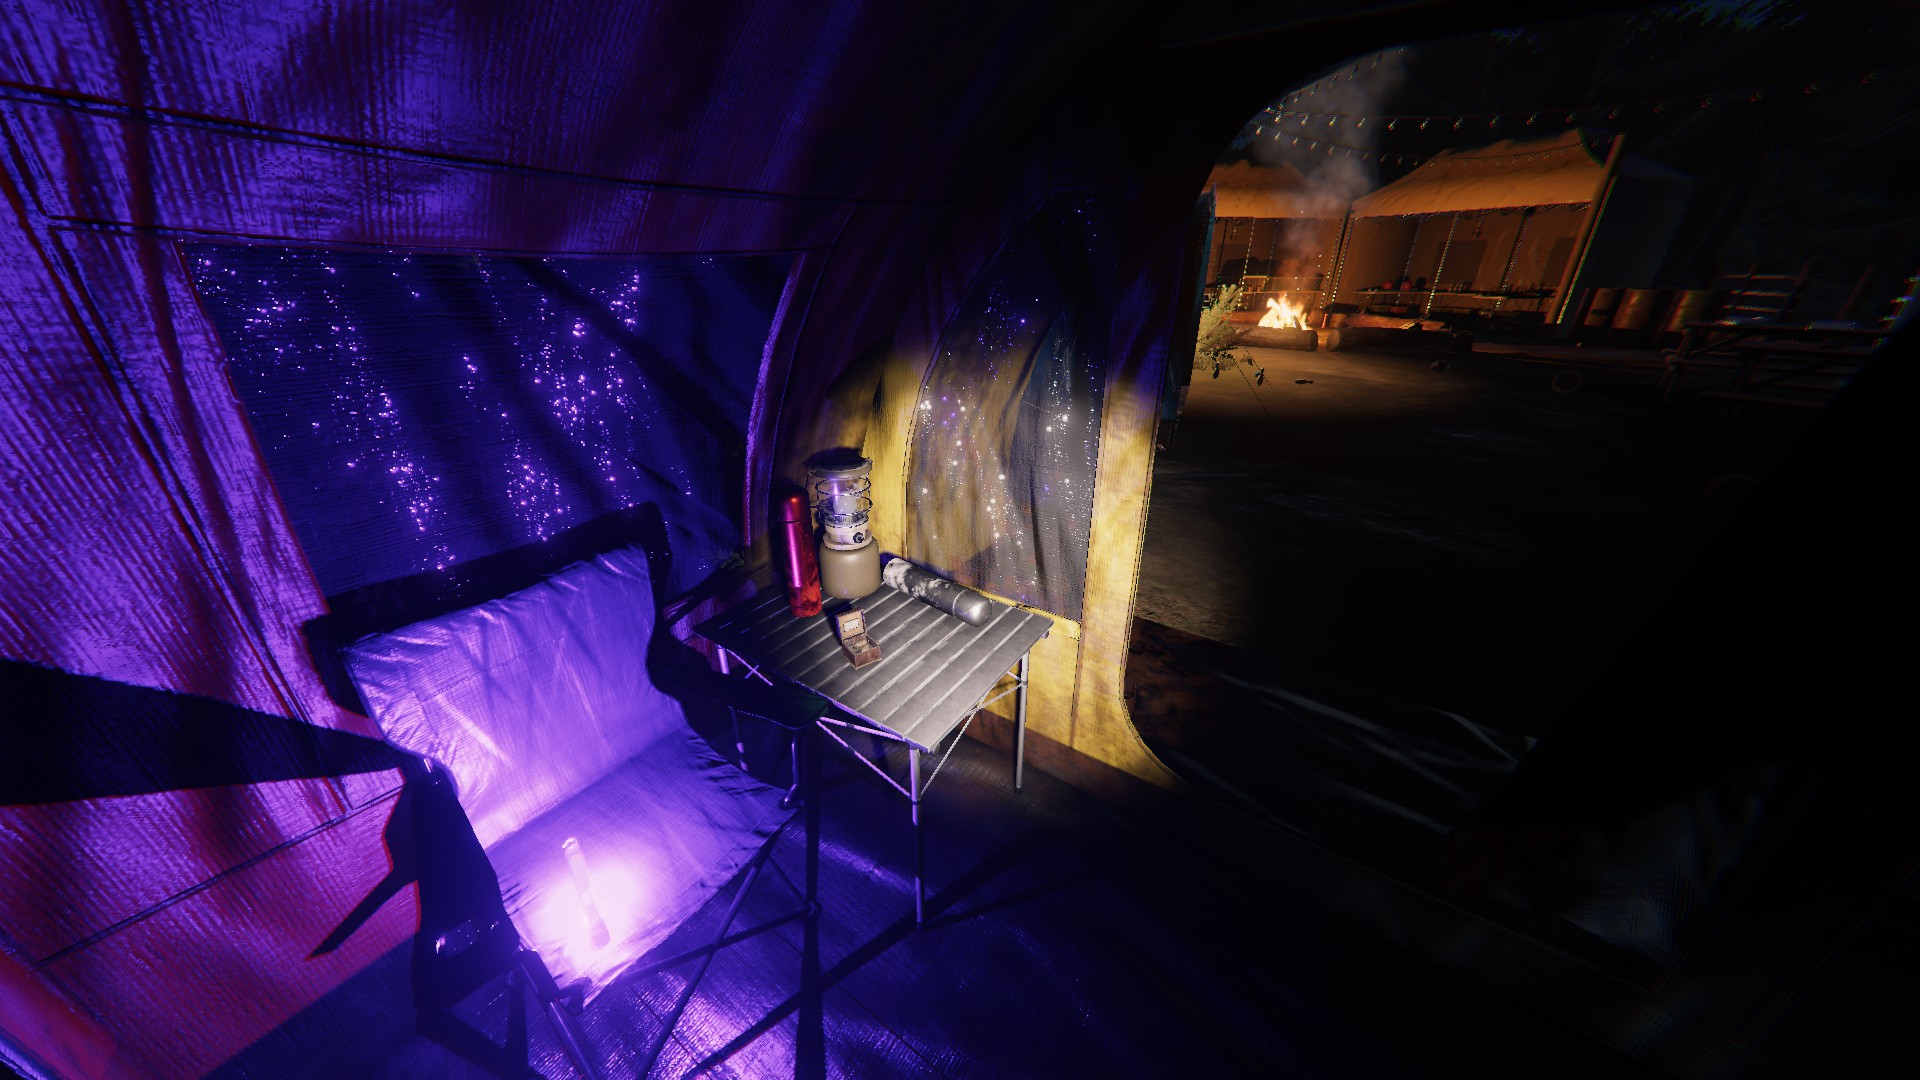
Music Box
Inside the yellow tent on the left side, on a small table by the entrance
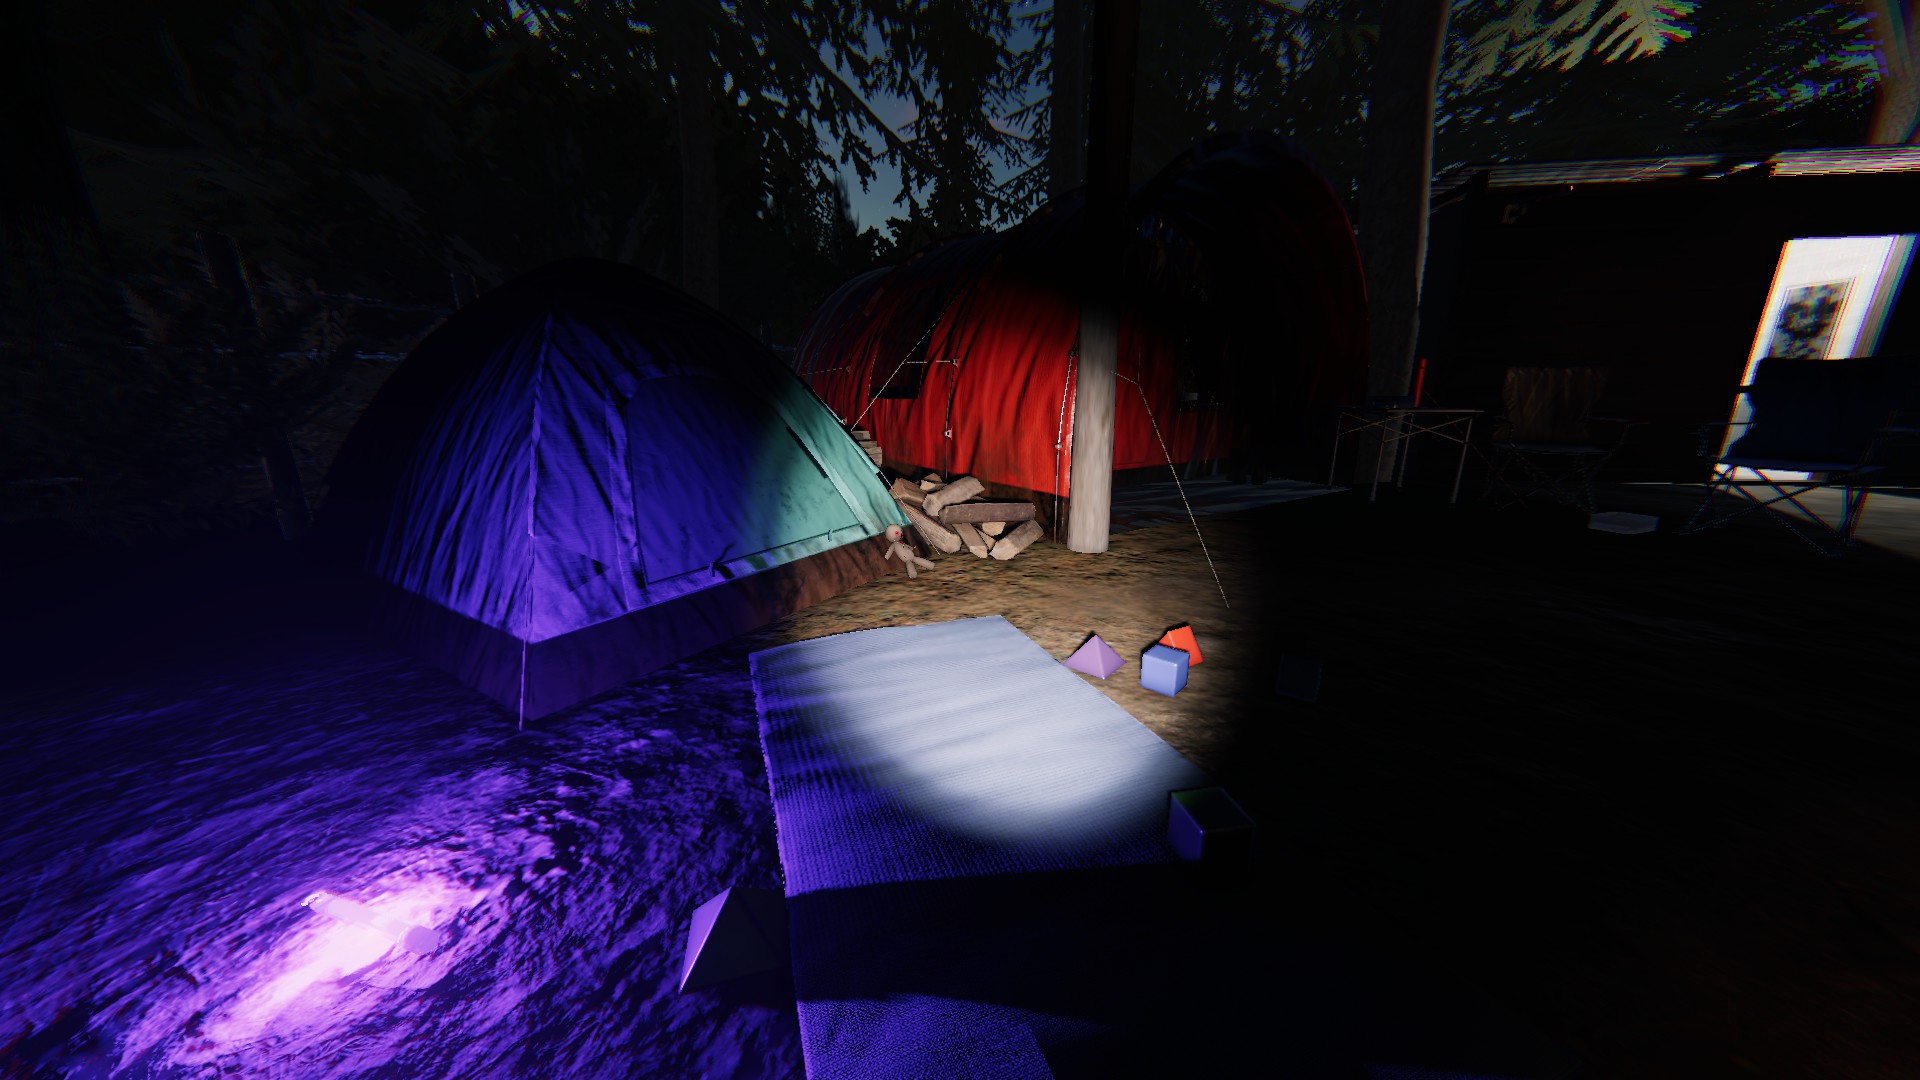
Voodoo Doll
To the left of the bathrooms, by the red and teal tent
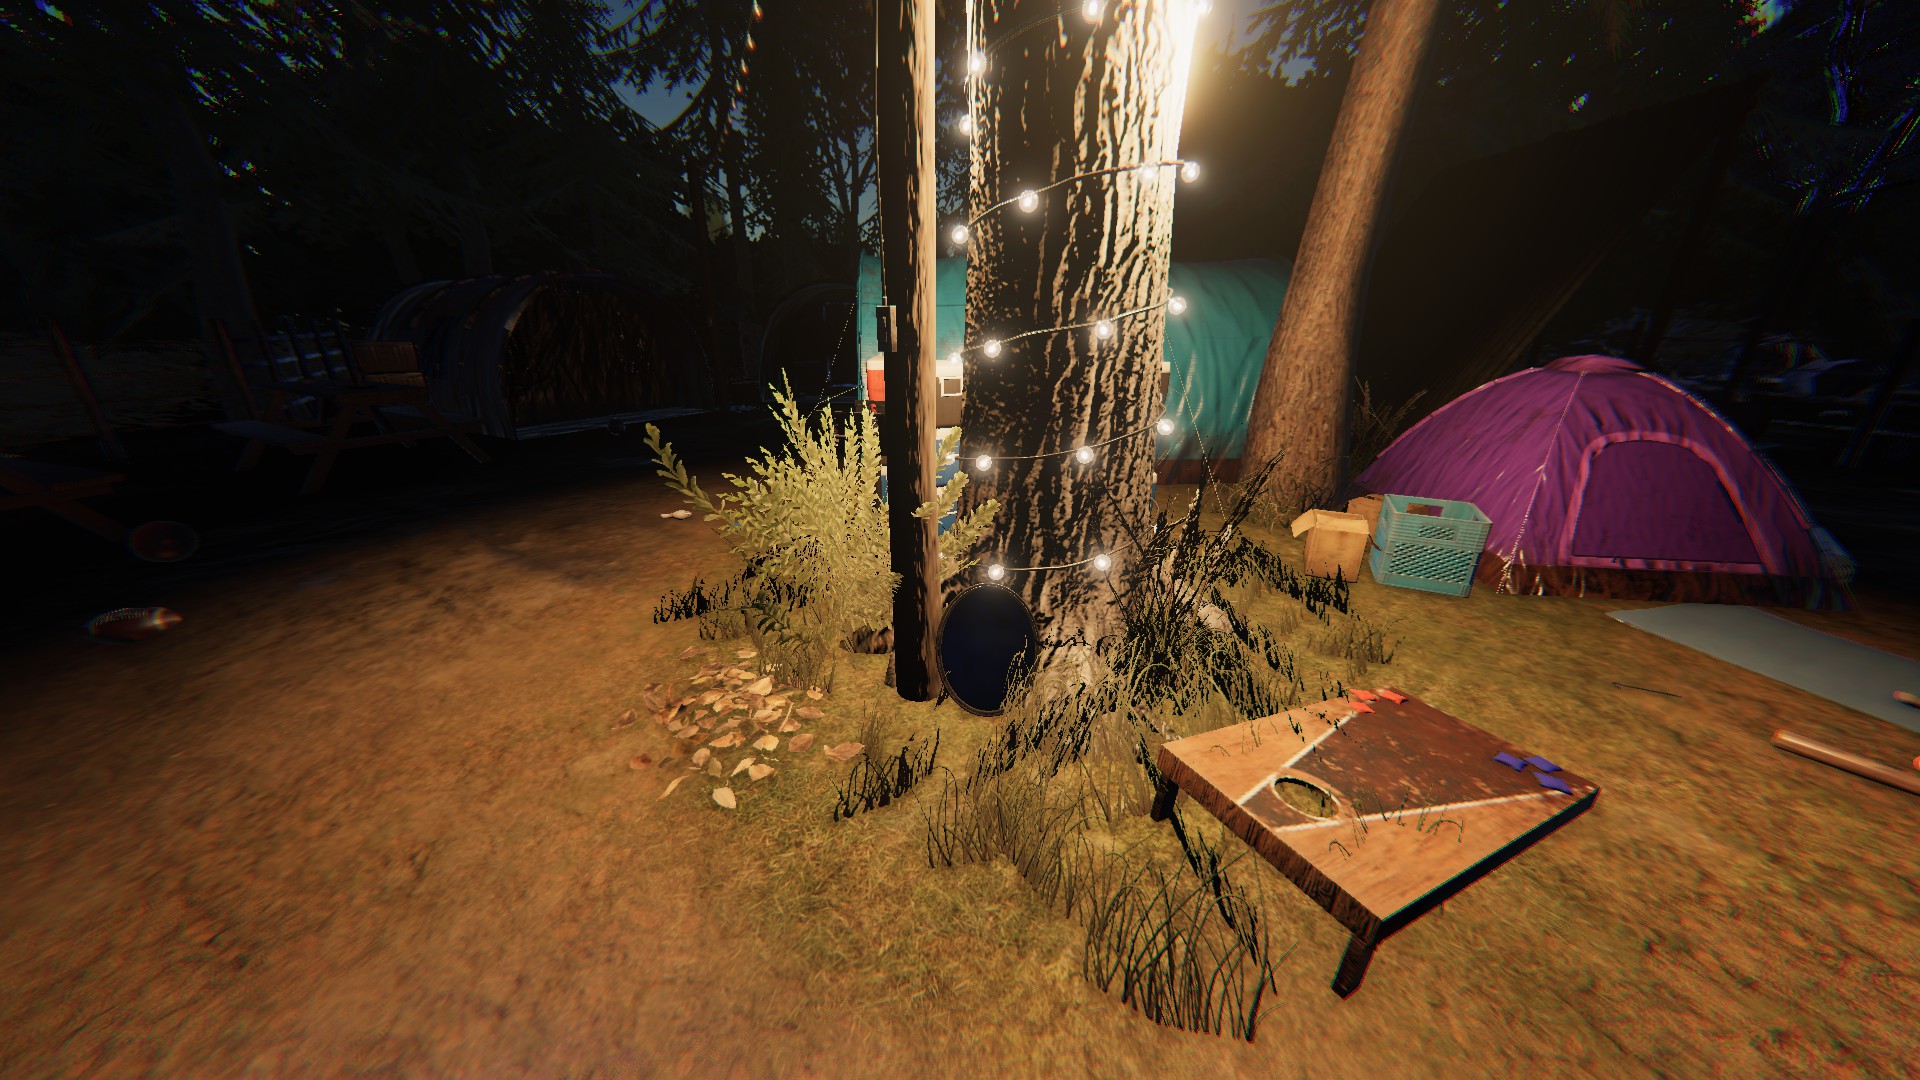
Black Mirror
In the middle of the map, at the base of the tree covered in string lights
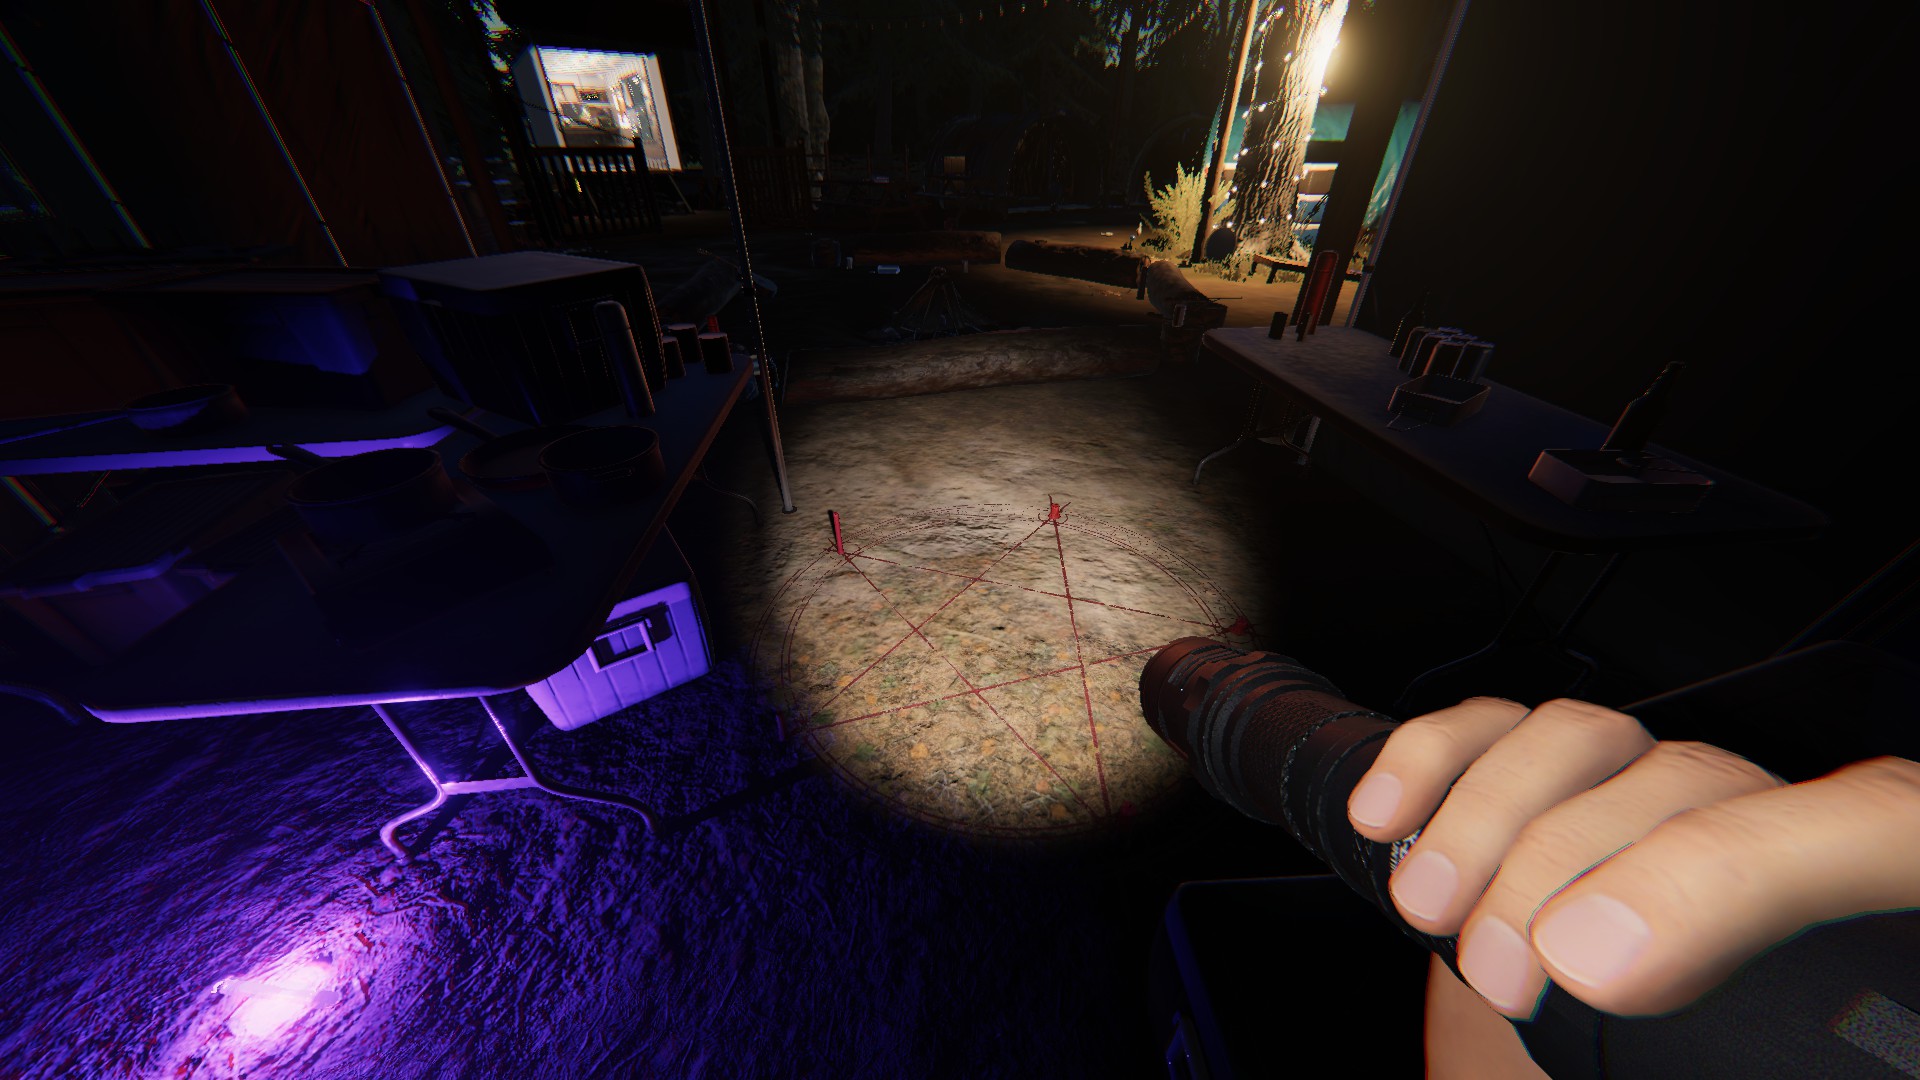
Summoning Circle
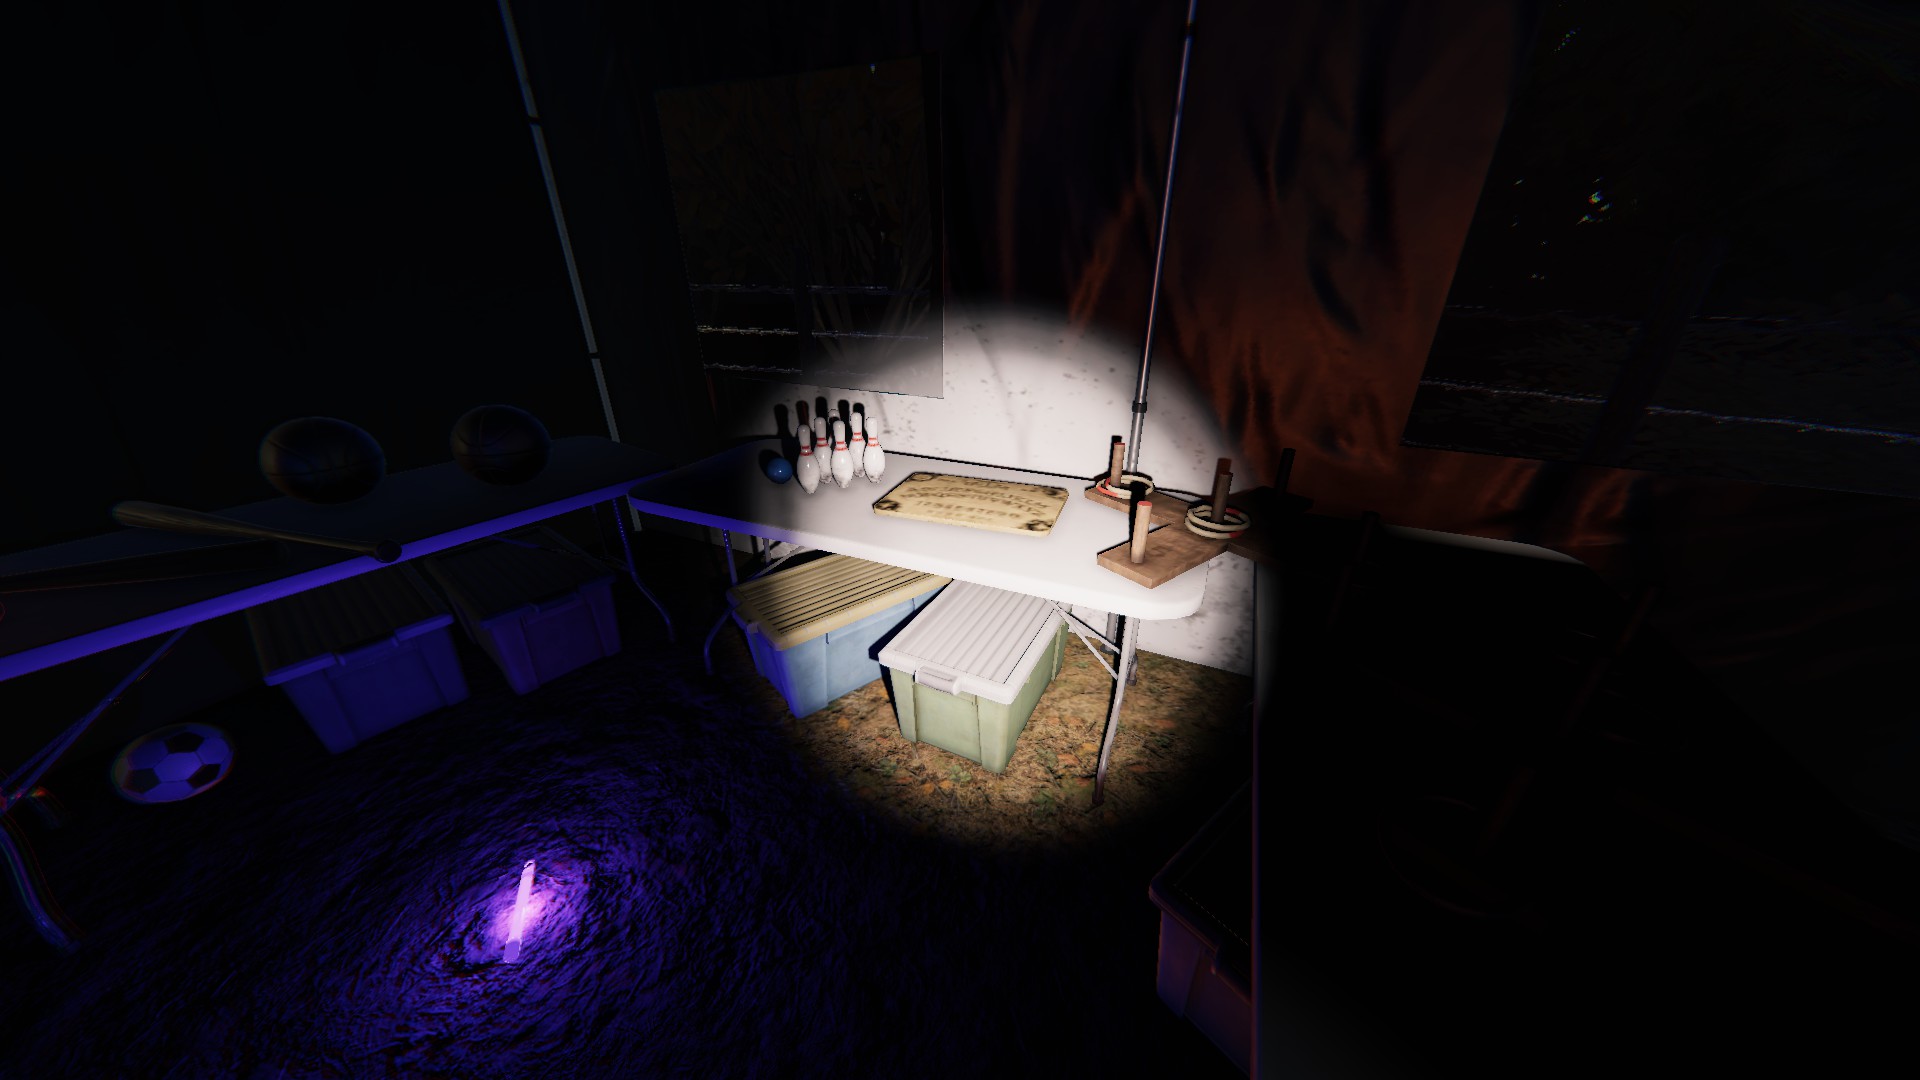
Straight back from the truck, by the folding tables with activities on them
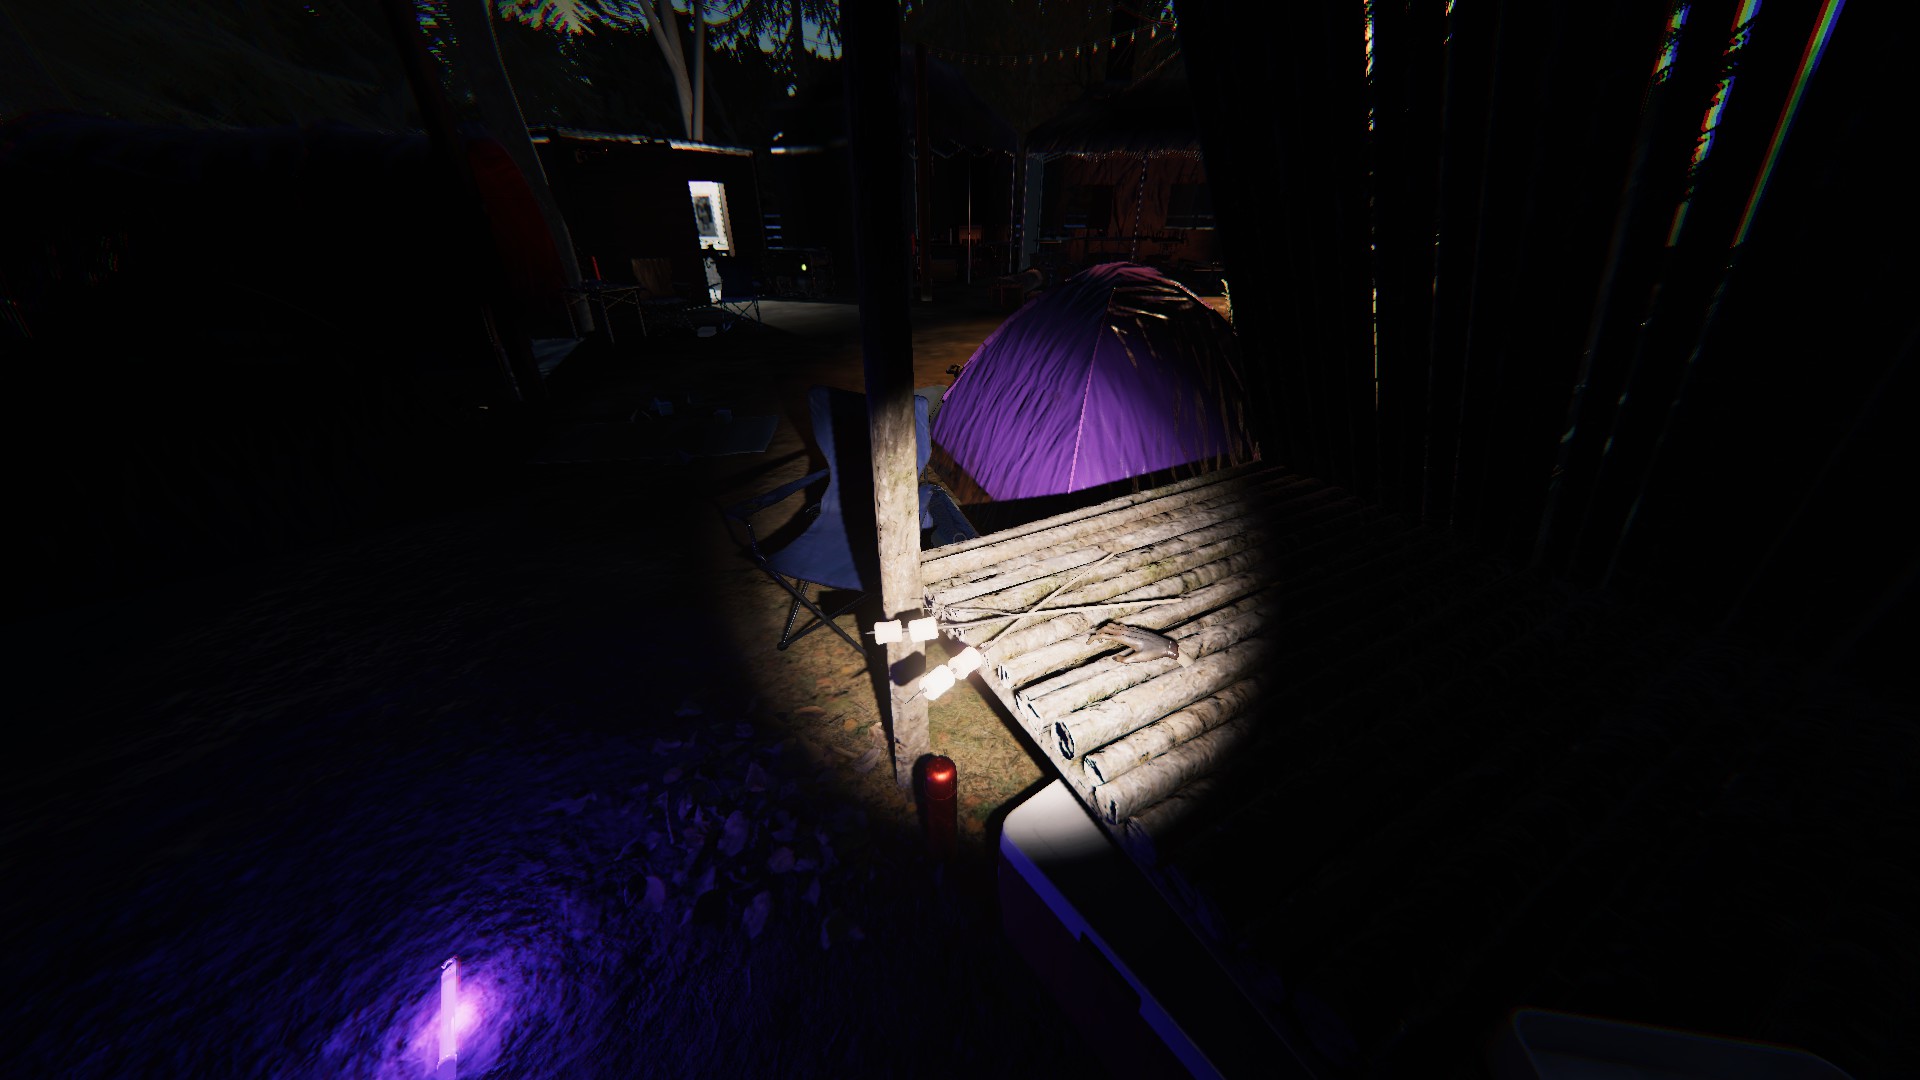
Monkey Paw
On the back curved path, on a wooden table
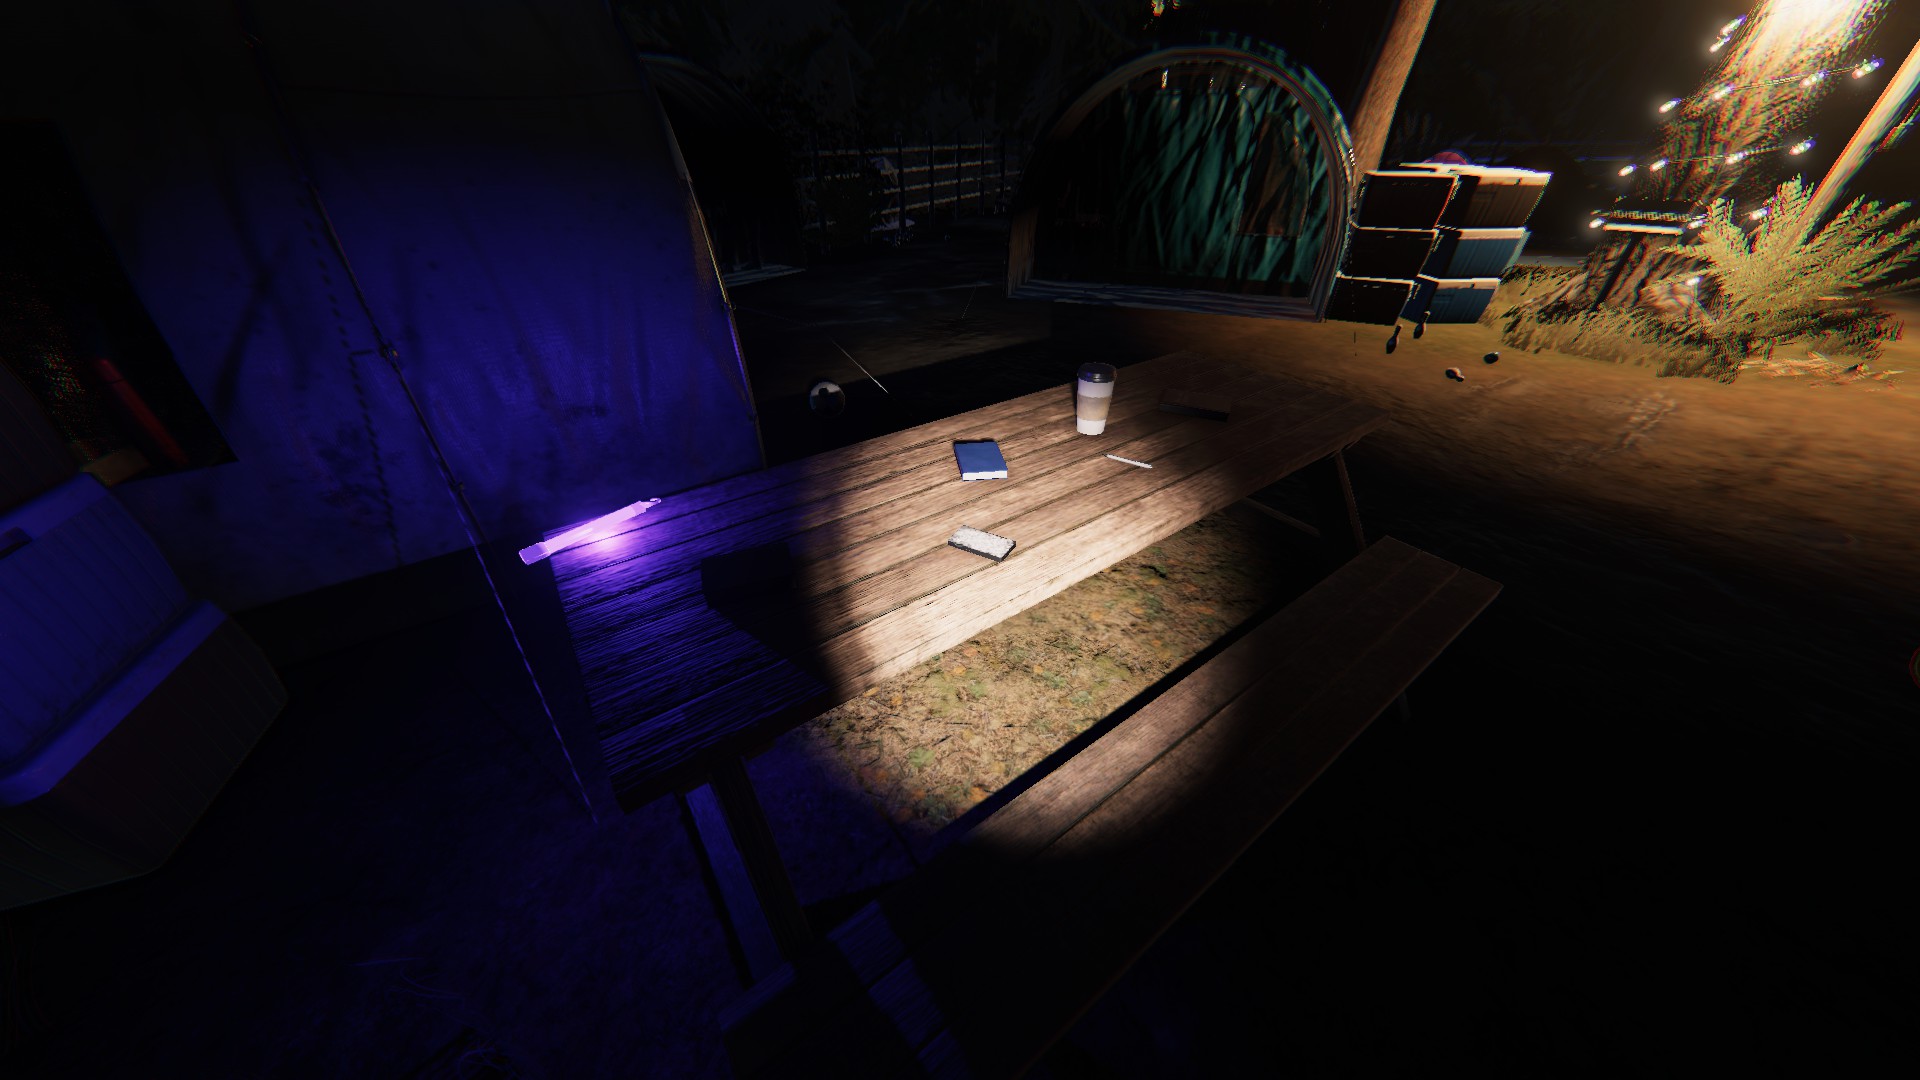
Tarot Cards
To the left of the front gate, sitting on the second picnic table
Ouija Board
To the right of the fire pit, on the folding tables
Brownstone High School
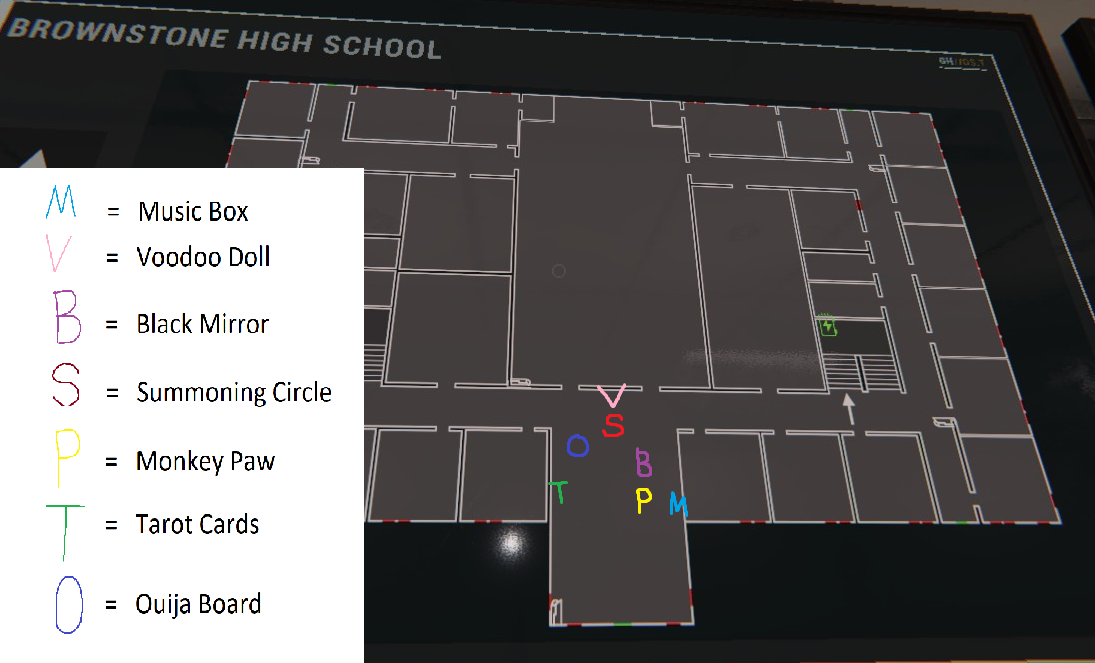 Luckily, just like Prison and Sunny Meadows, all the cursed possessions can be found in the entryway of the site, due to it being a larger map.
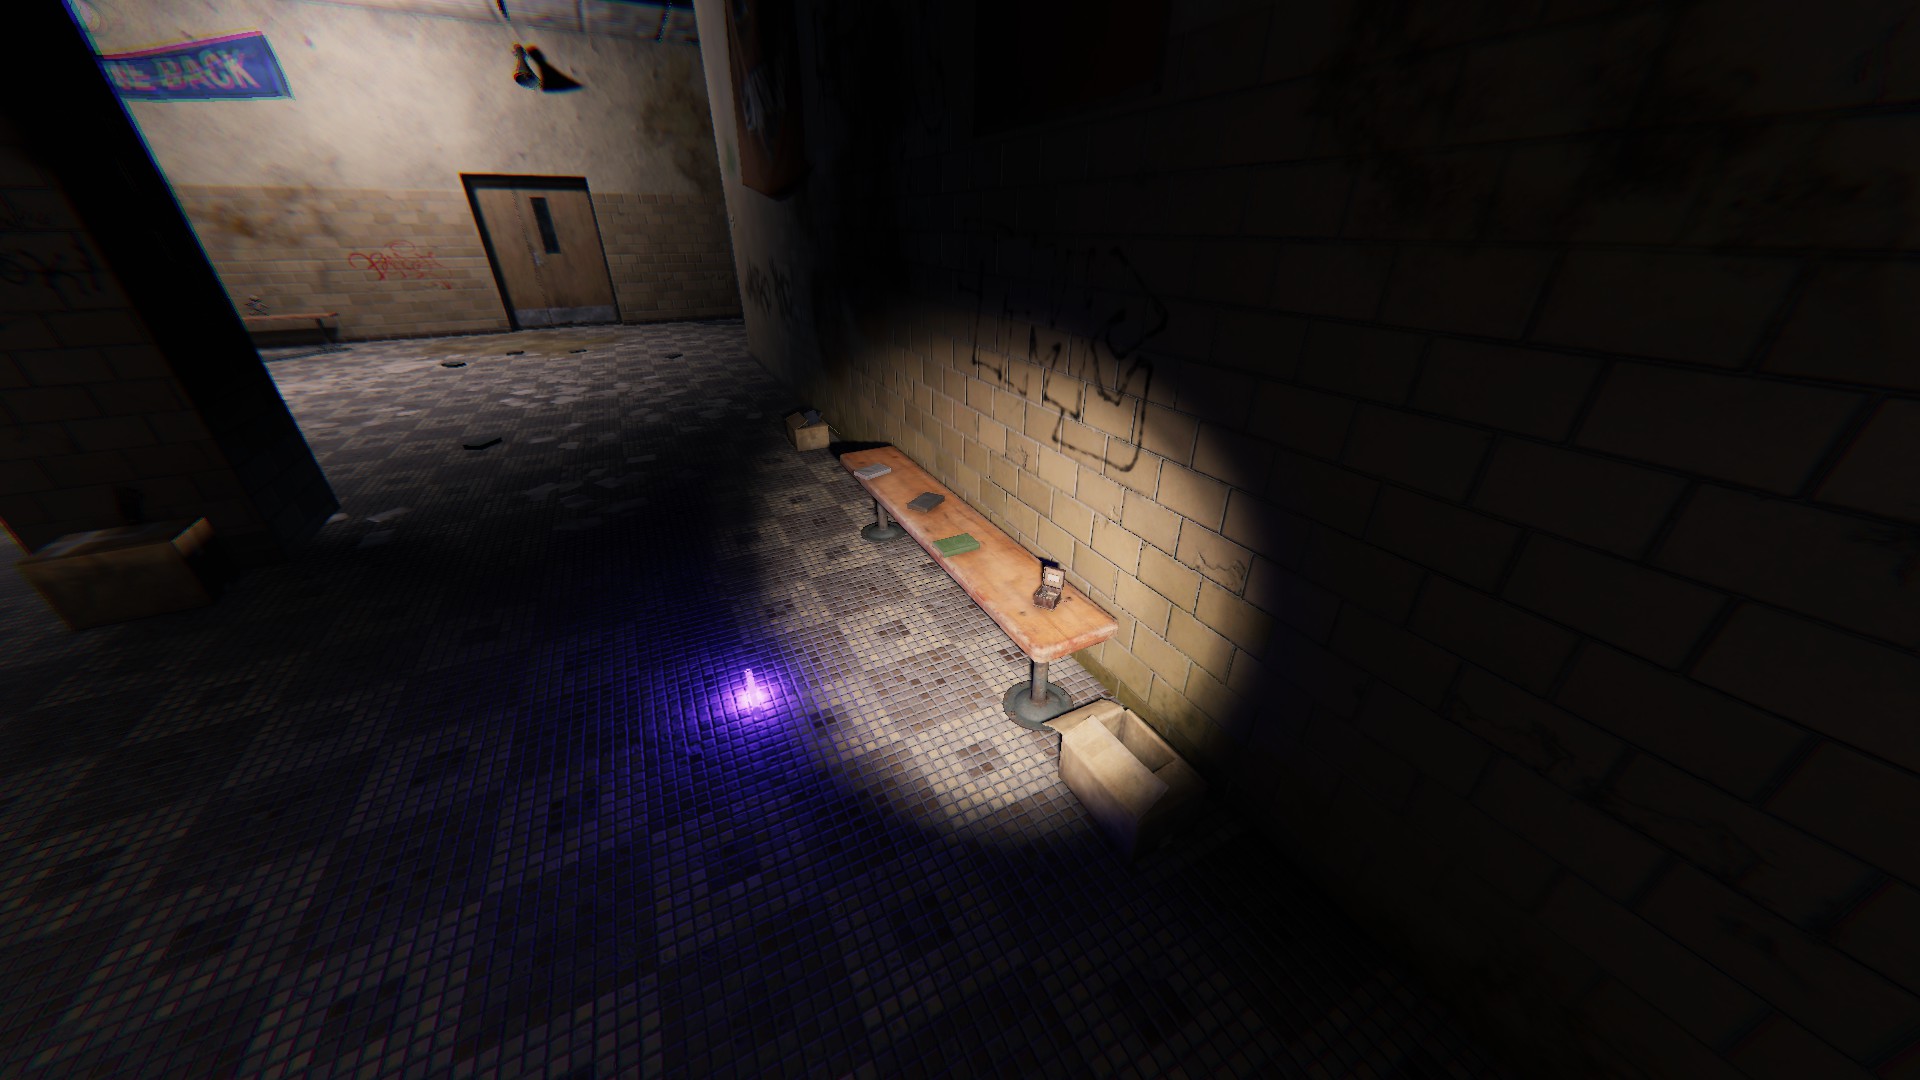
Music Box
Sitting on the right side 2nd bench
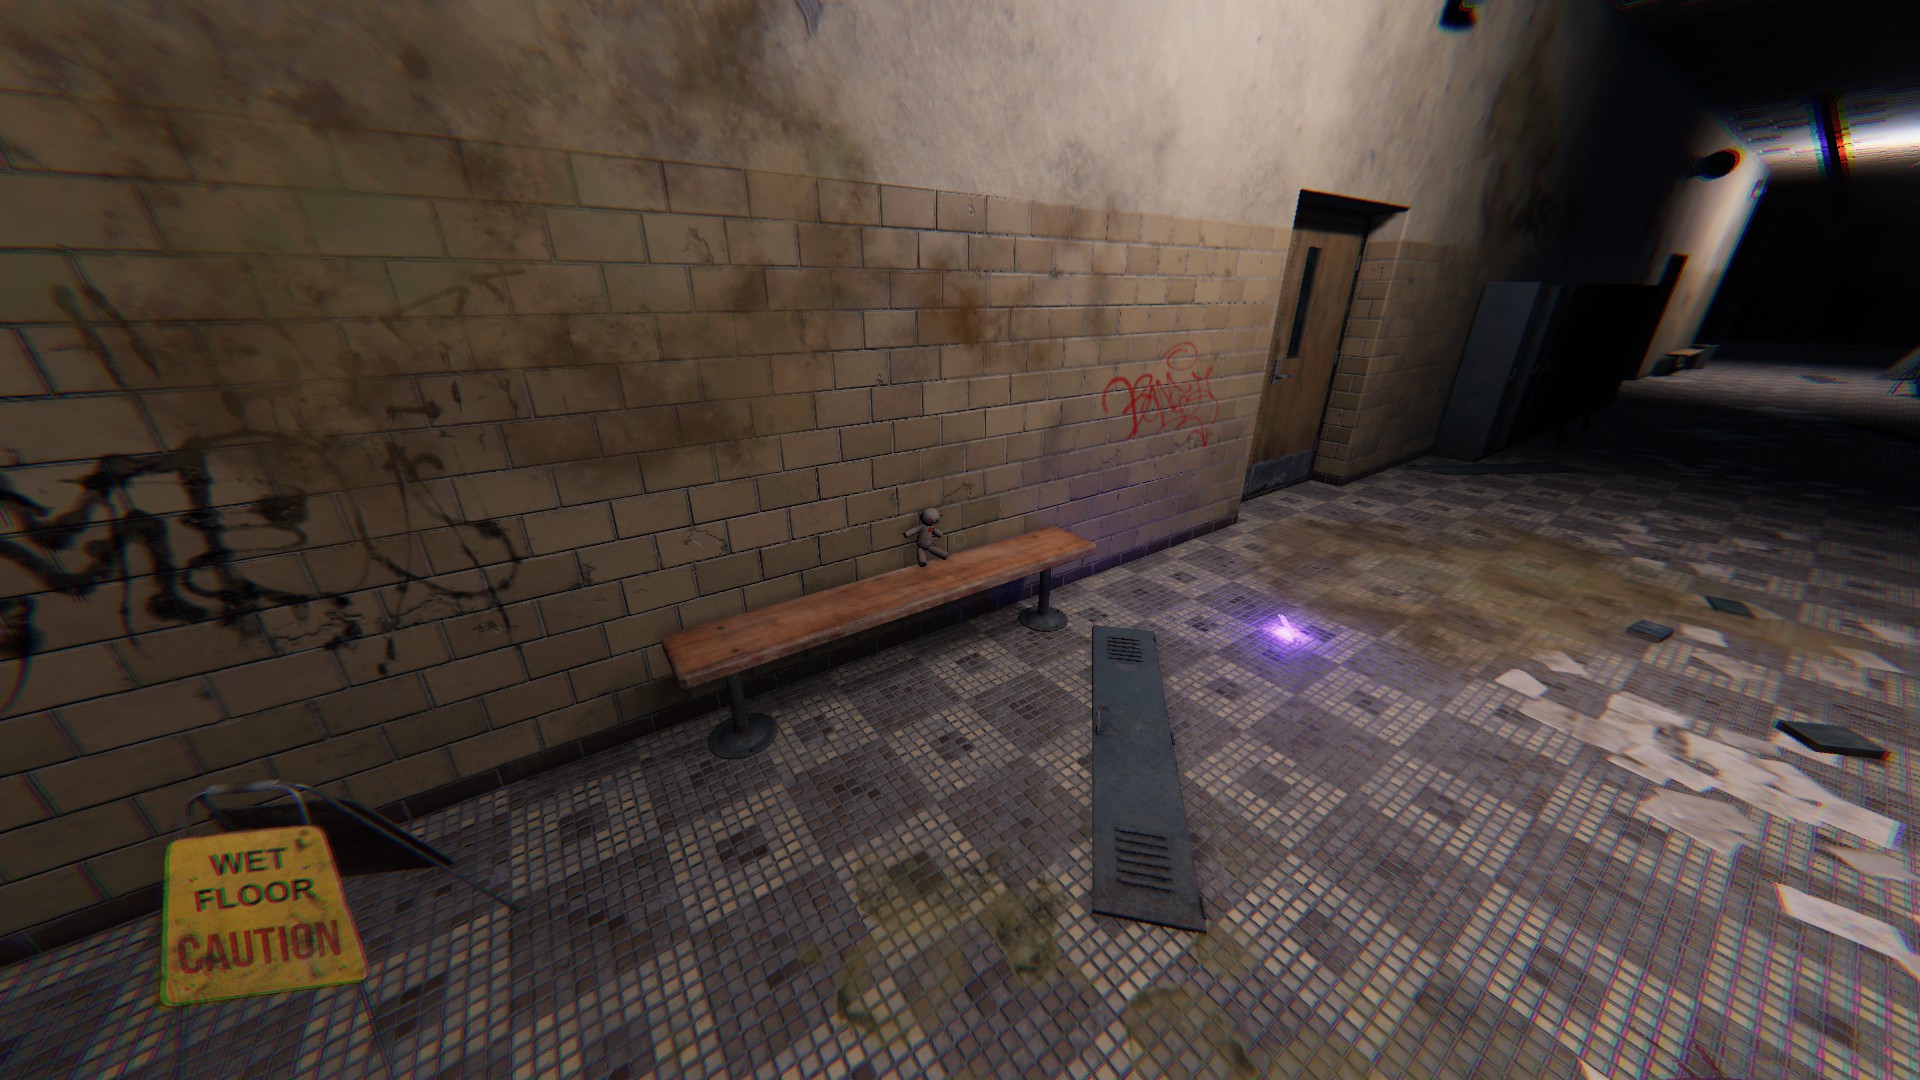
Voodoo Doll
Straight back, on a bench next to the wet floor sign
Black Mirror
Leaning against the back of the right pillar
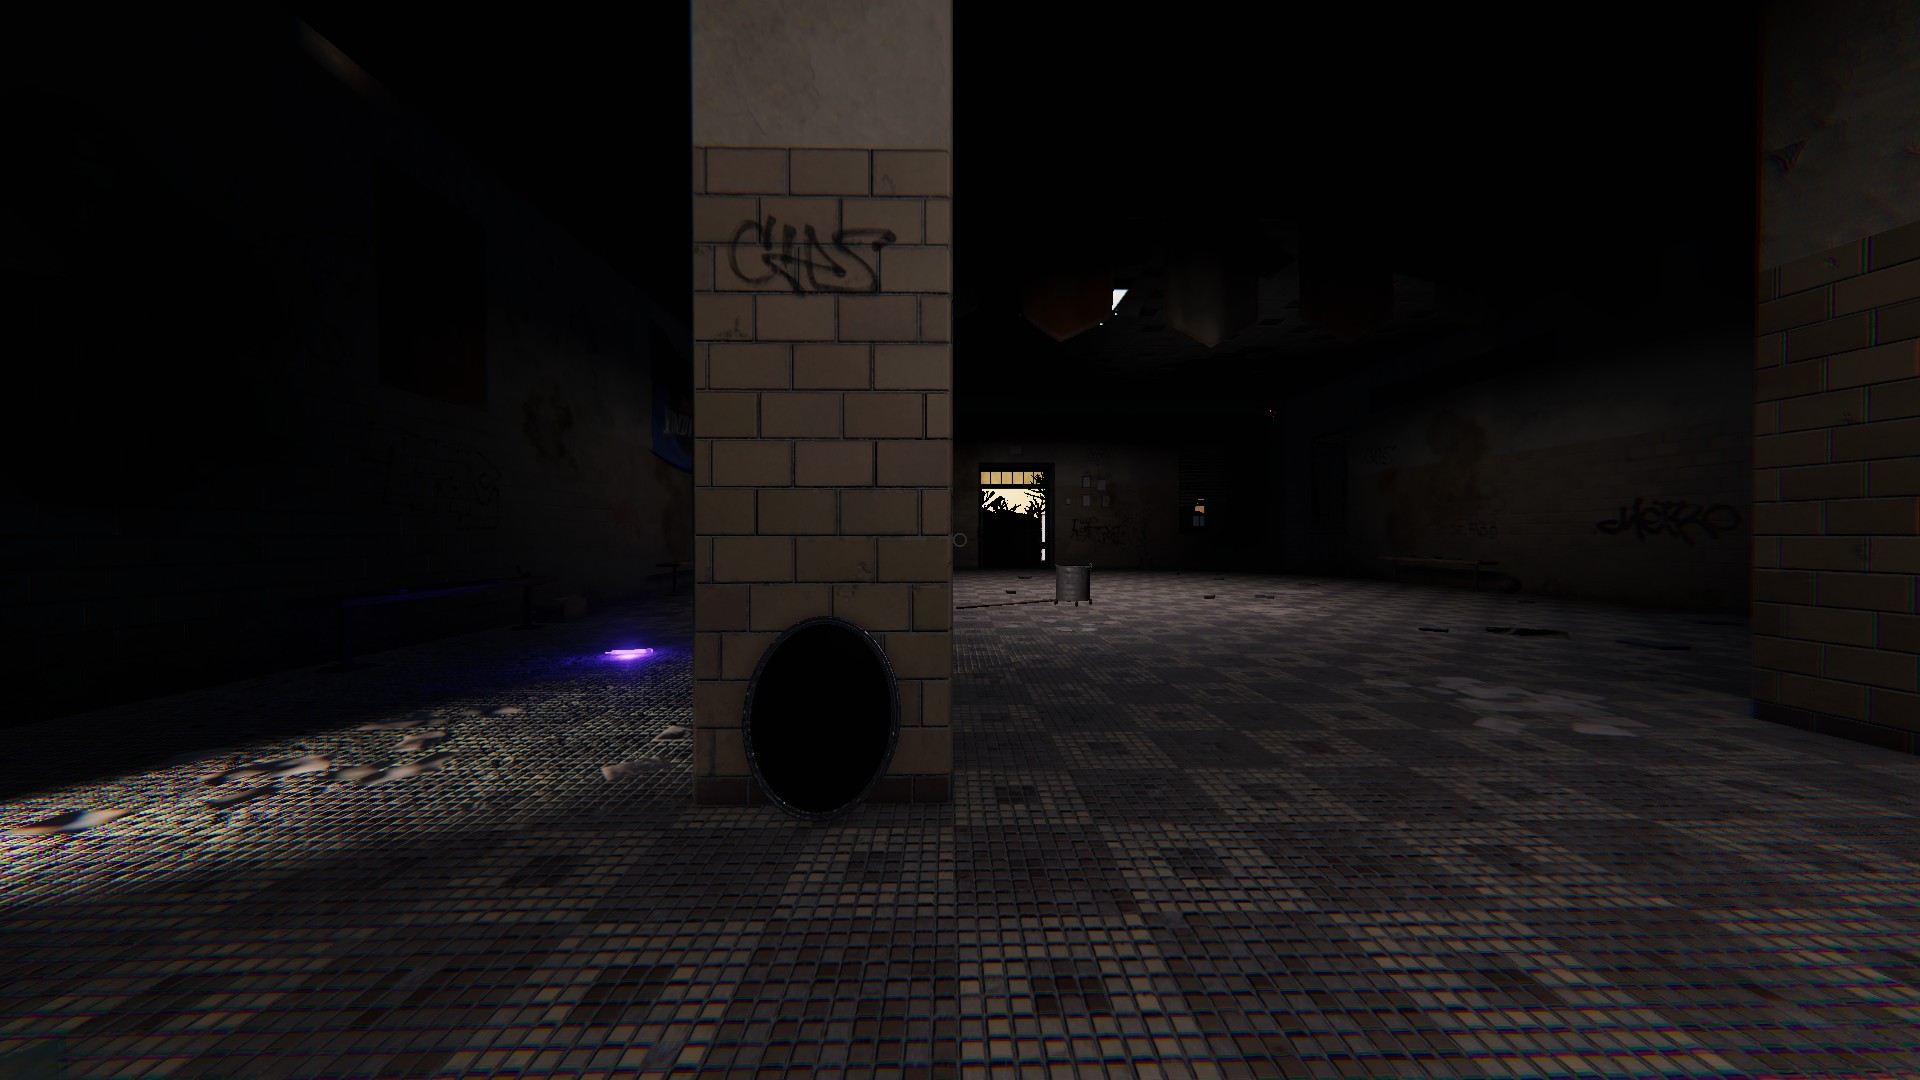
Summoning Circle
Straight back from the front door, by the wet floor sign
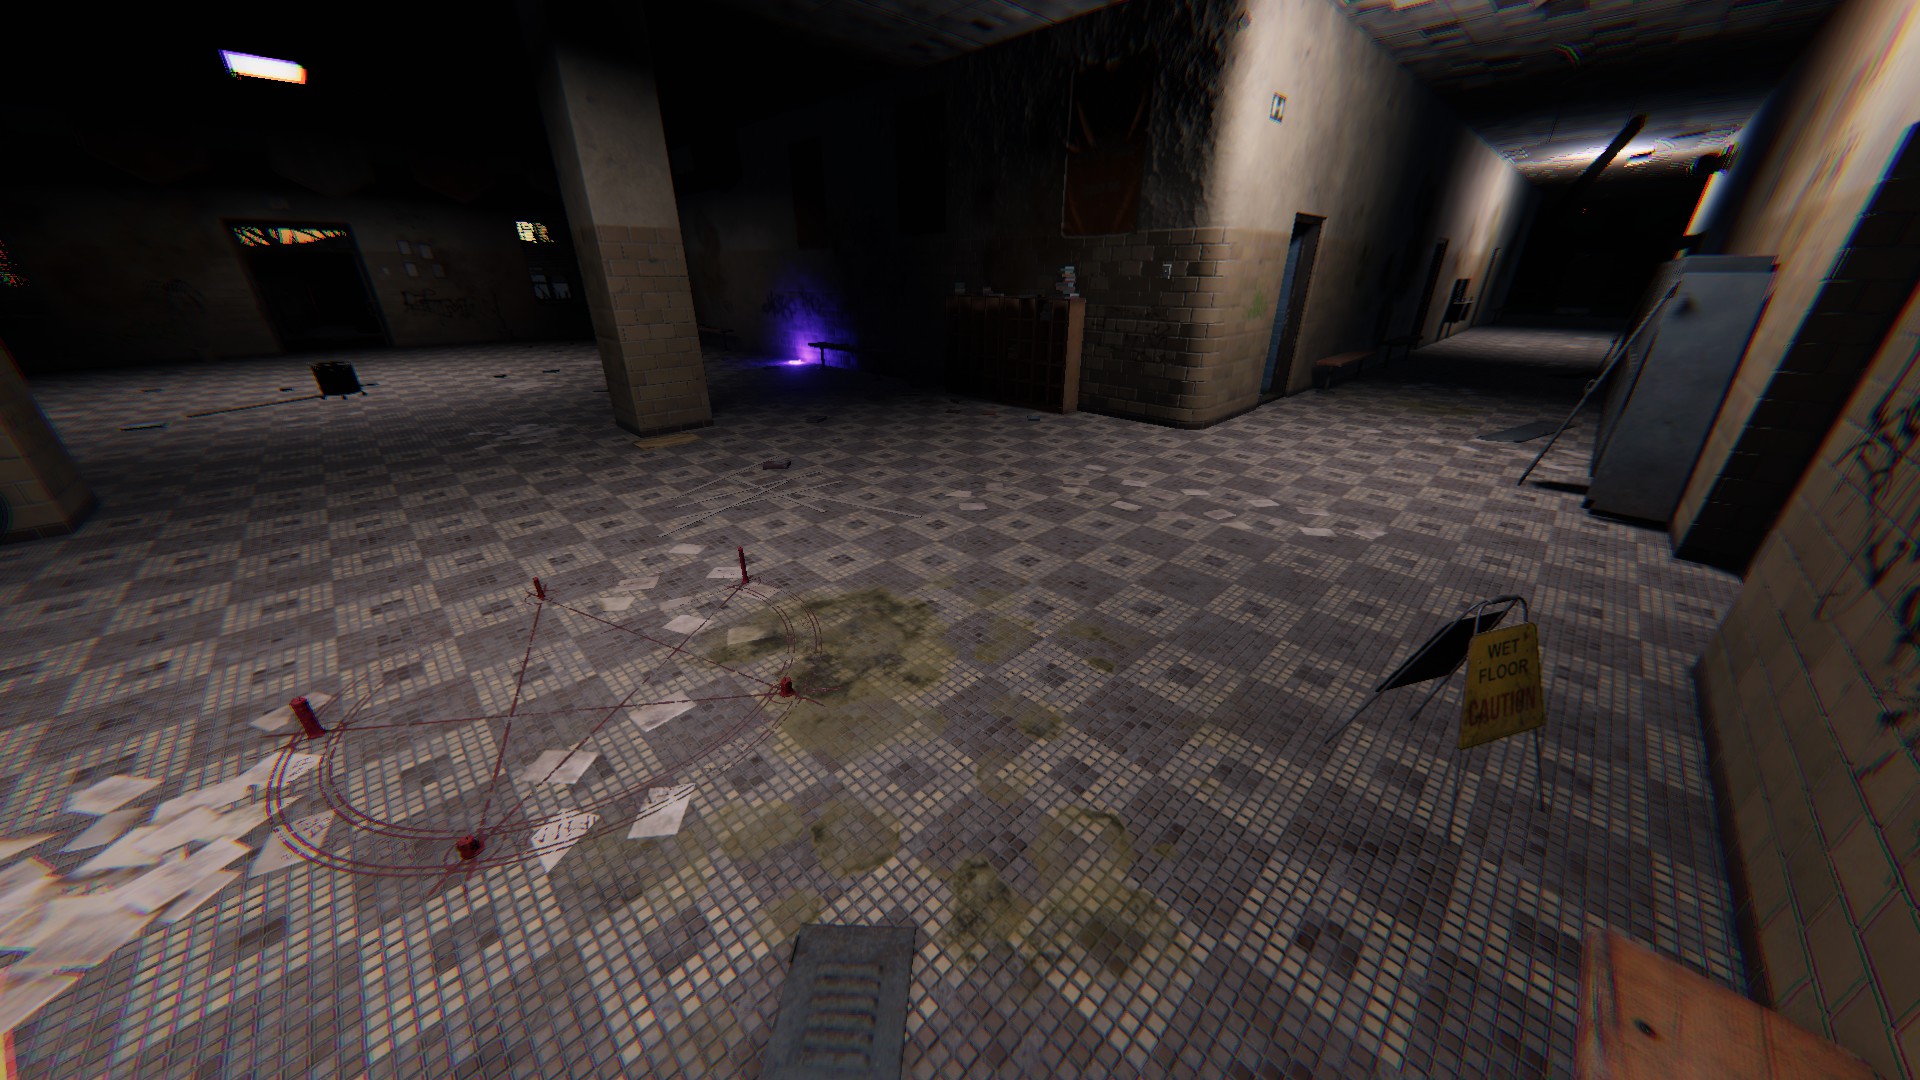
Monkey Paw
Sitting on a box, leaning against the front of the right pillar
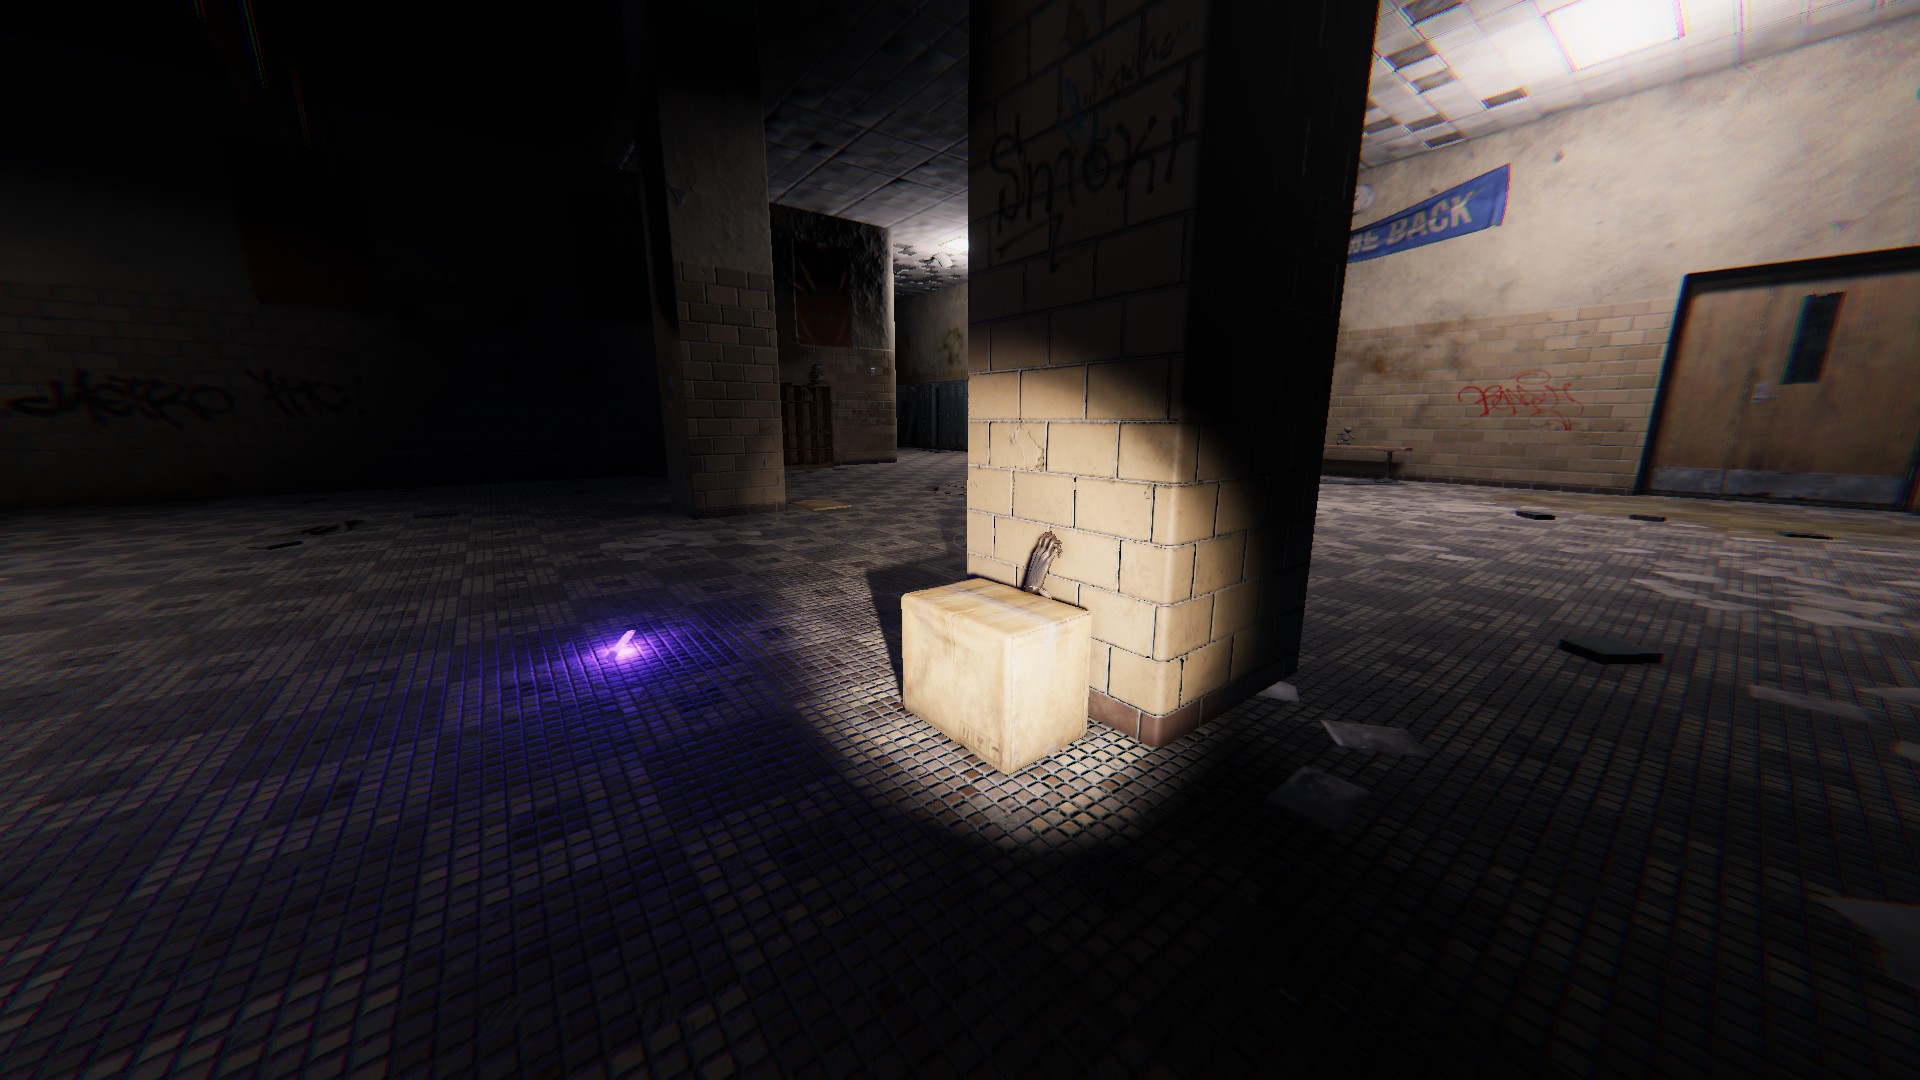
Tarot Cards
On the second bench on the left side
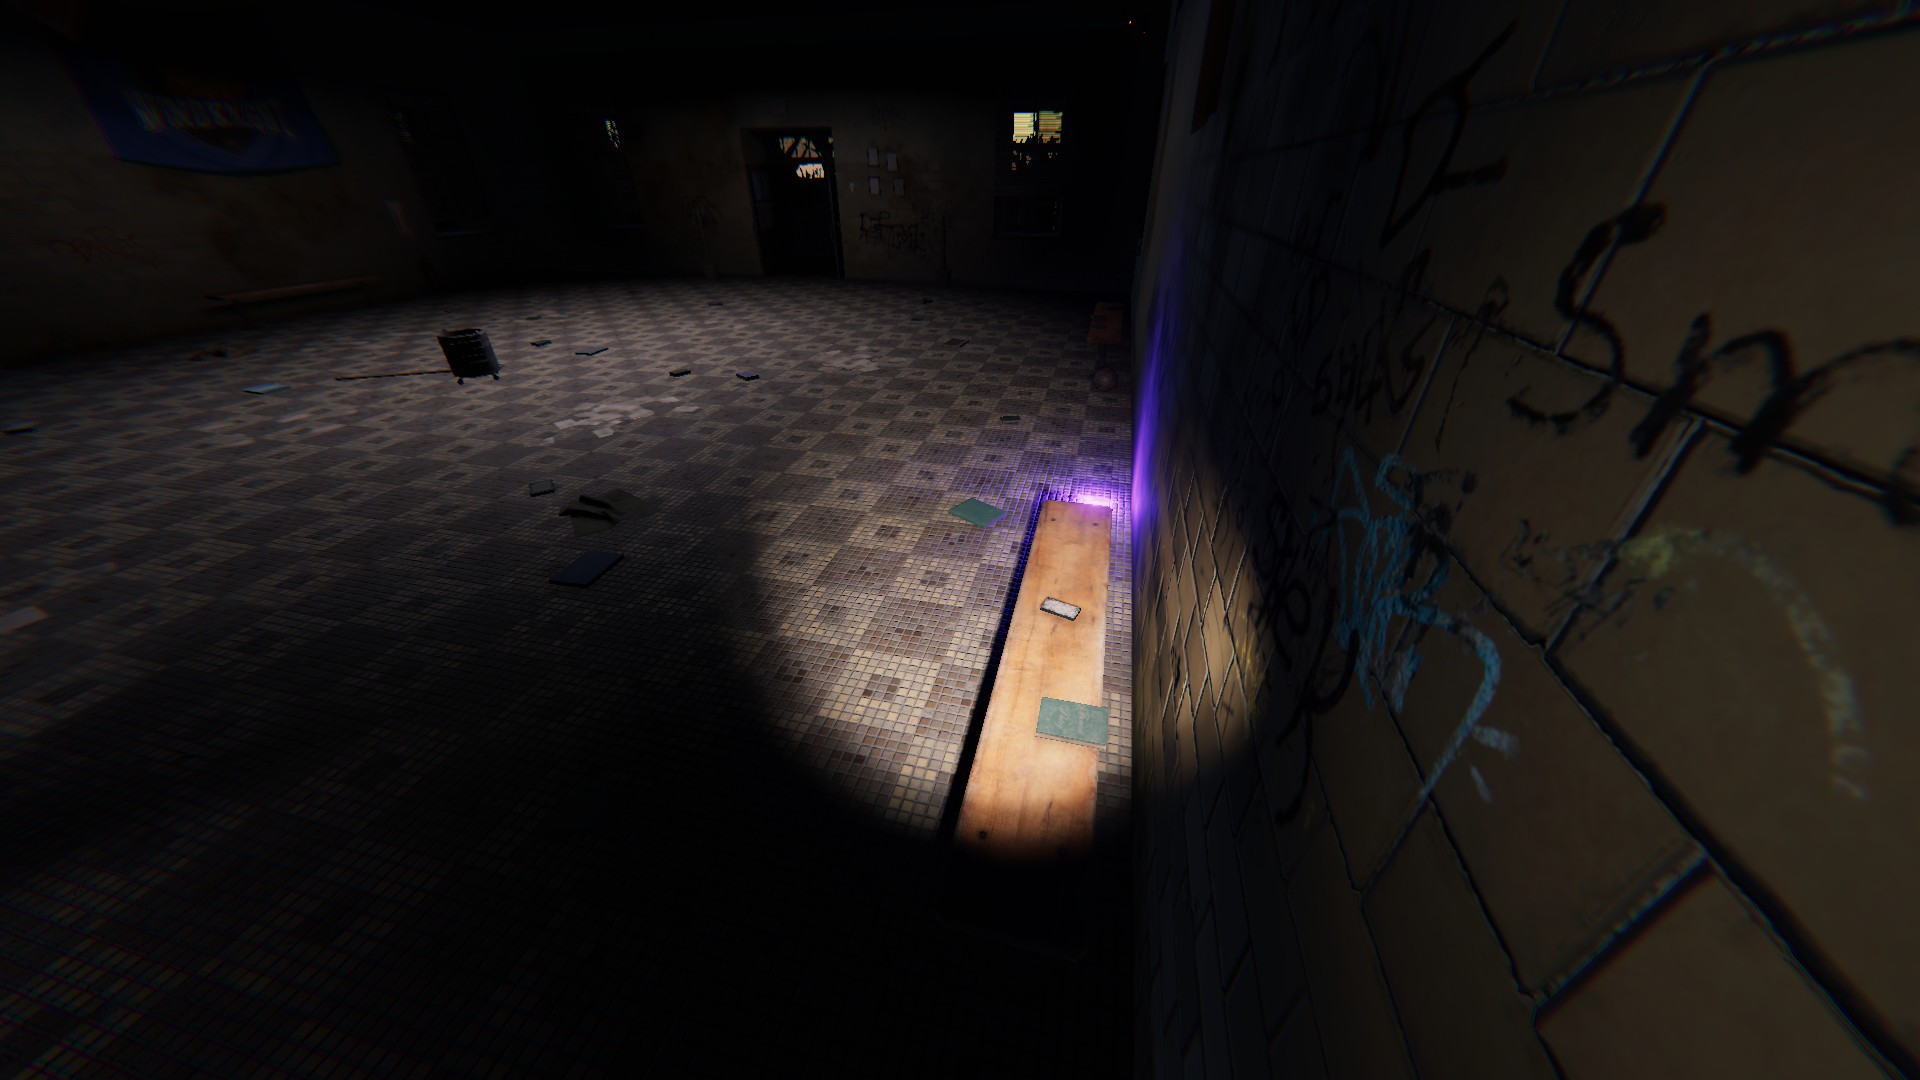
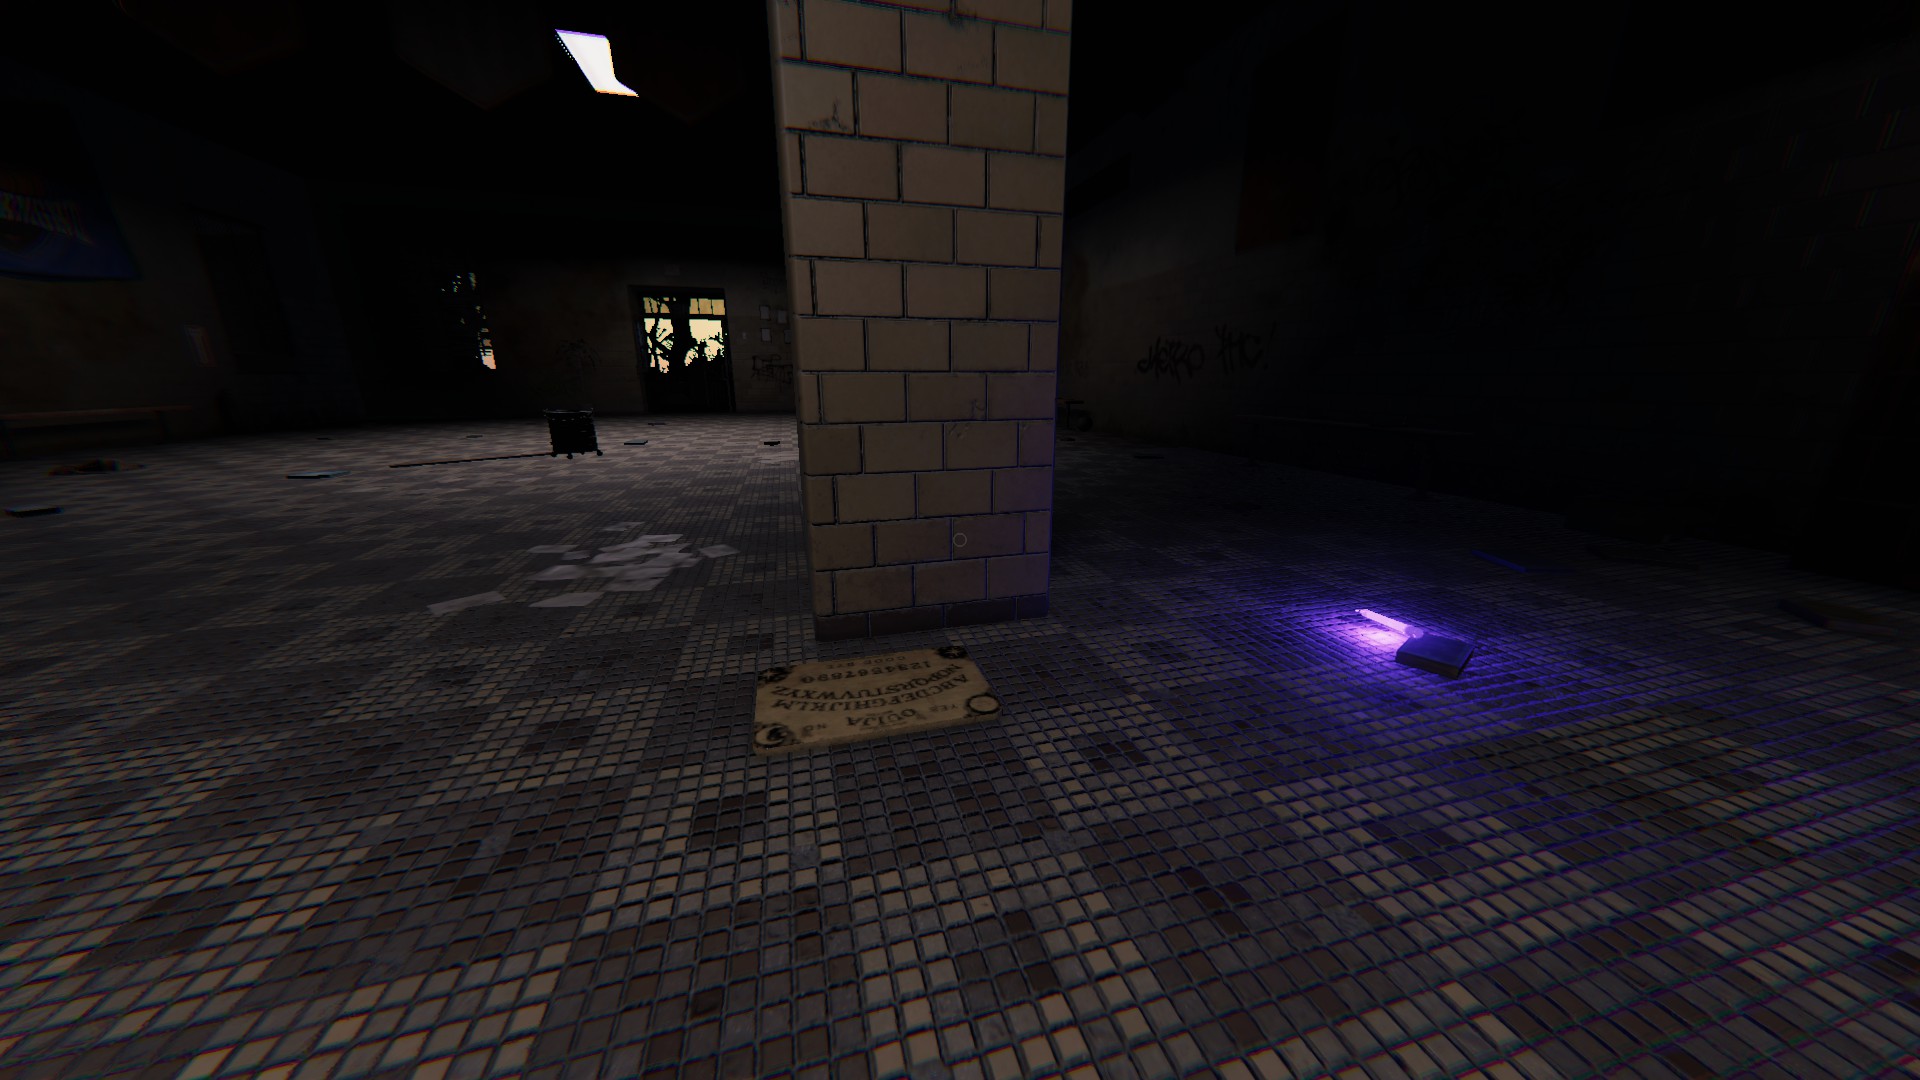
Ouija Board
On the ground, behind the left pillar
Prison
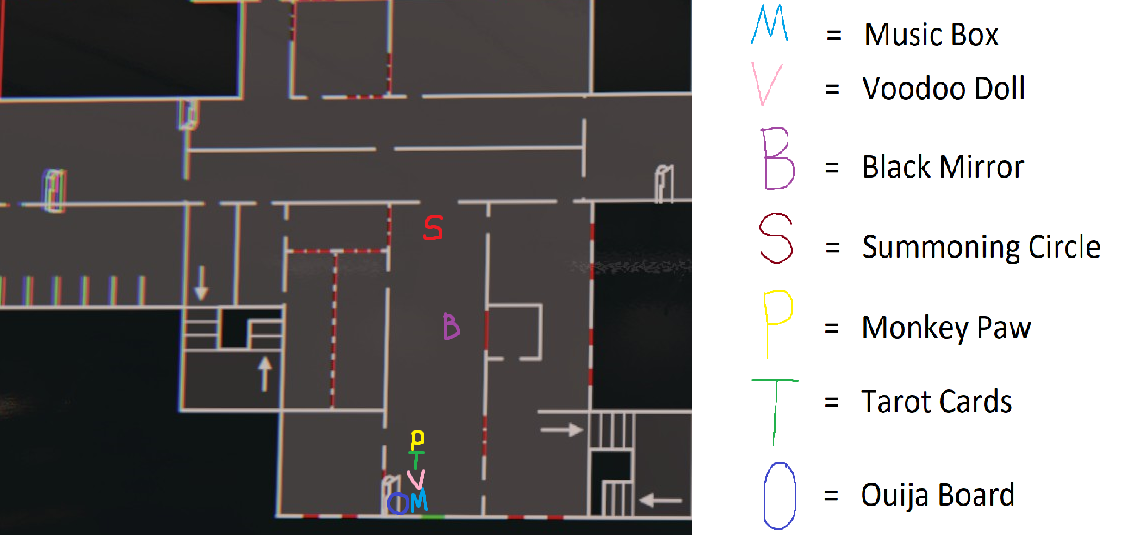 Similar to Brownstone Highschool and Sunny Meadows, due to the size of the map, the devs have placed all the cursed possessions in the main entry room.
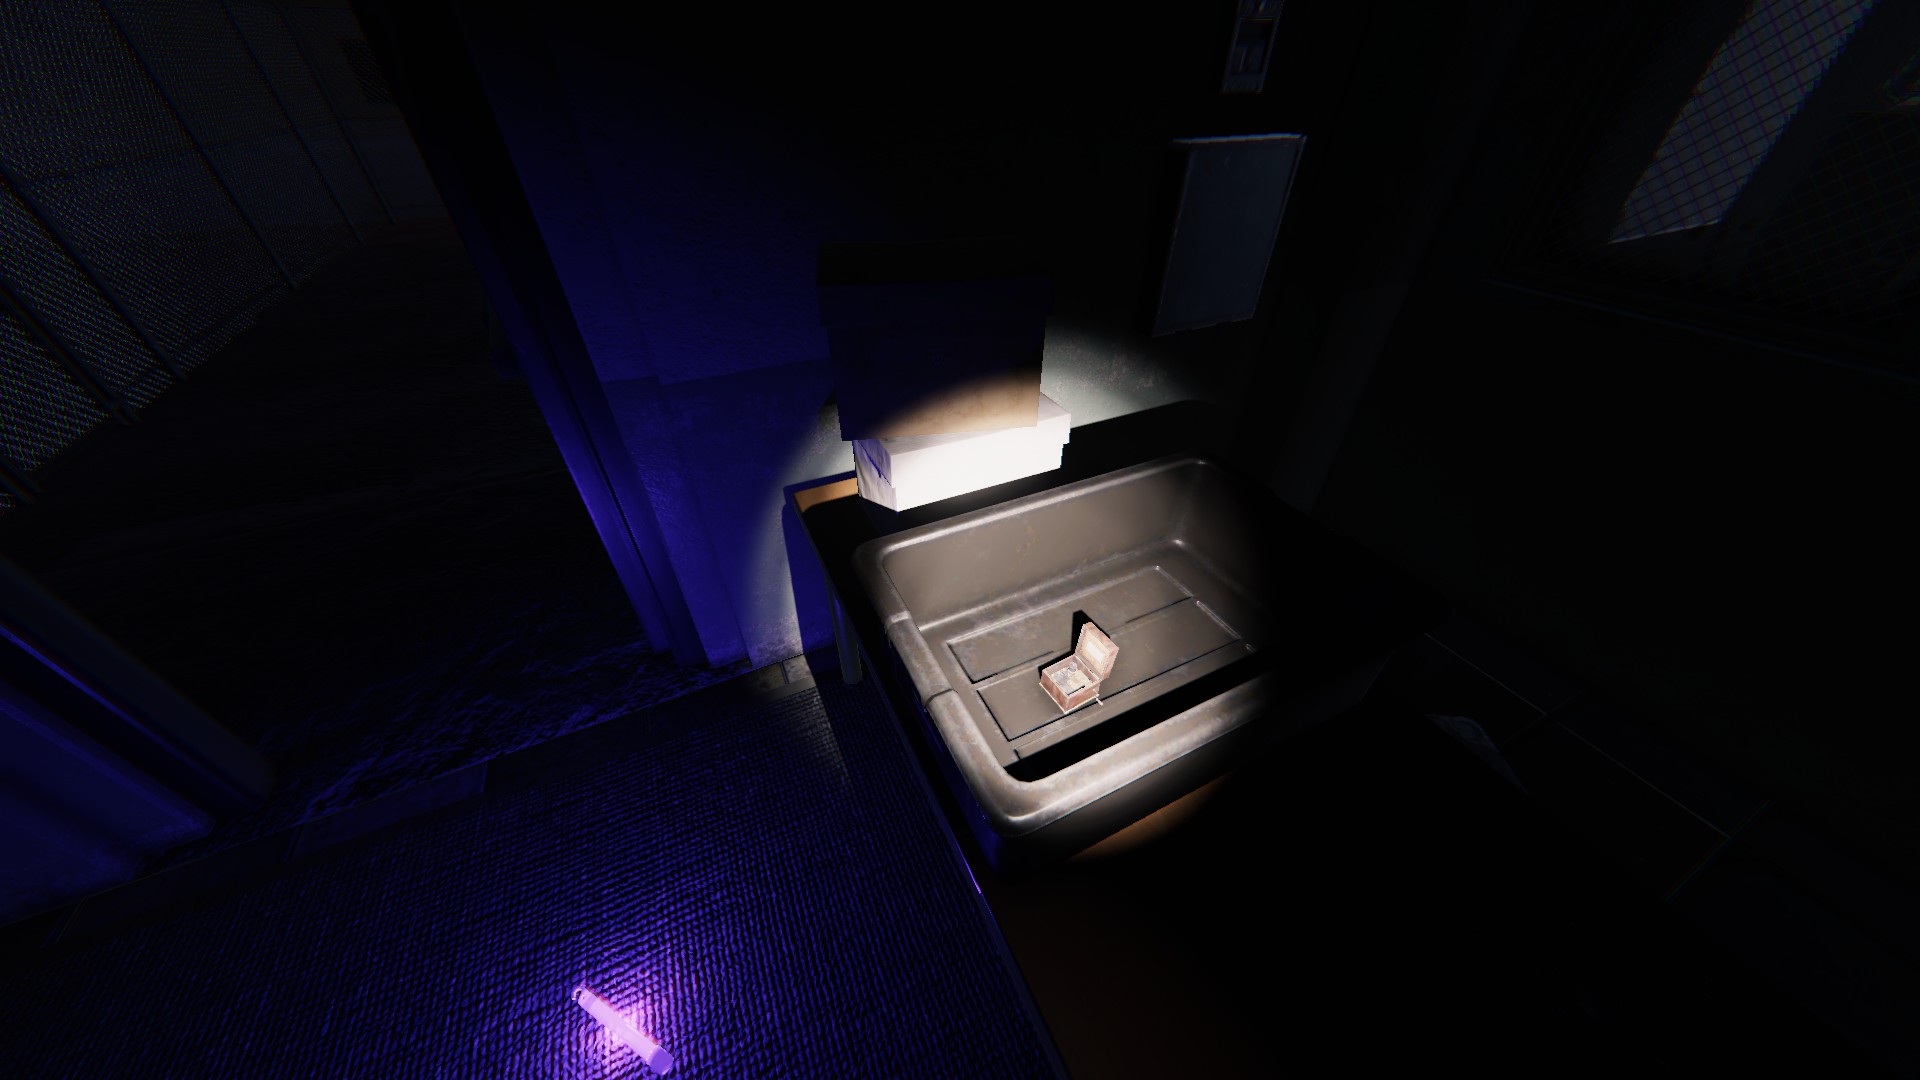
Music Box
Immediately through the front door, sitting on the left table, in the black bin/tub
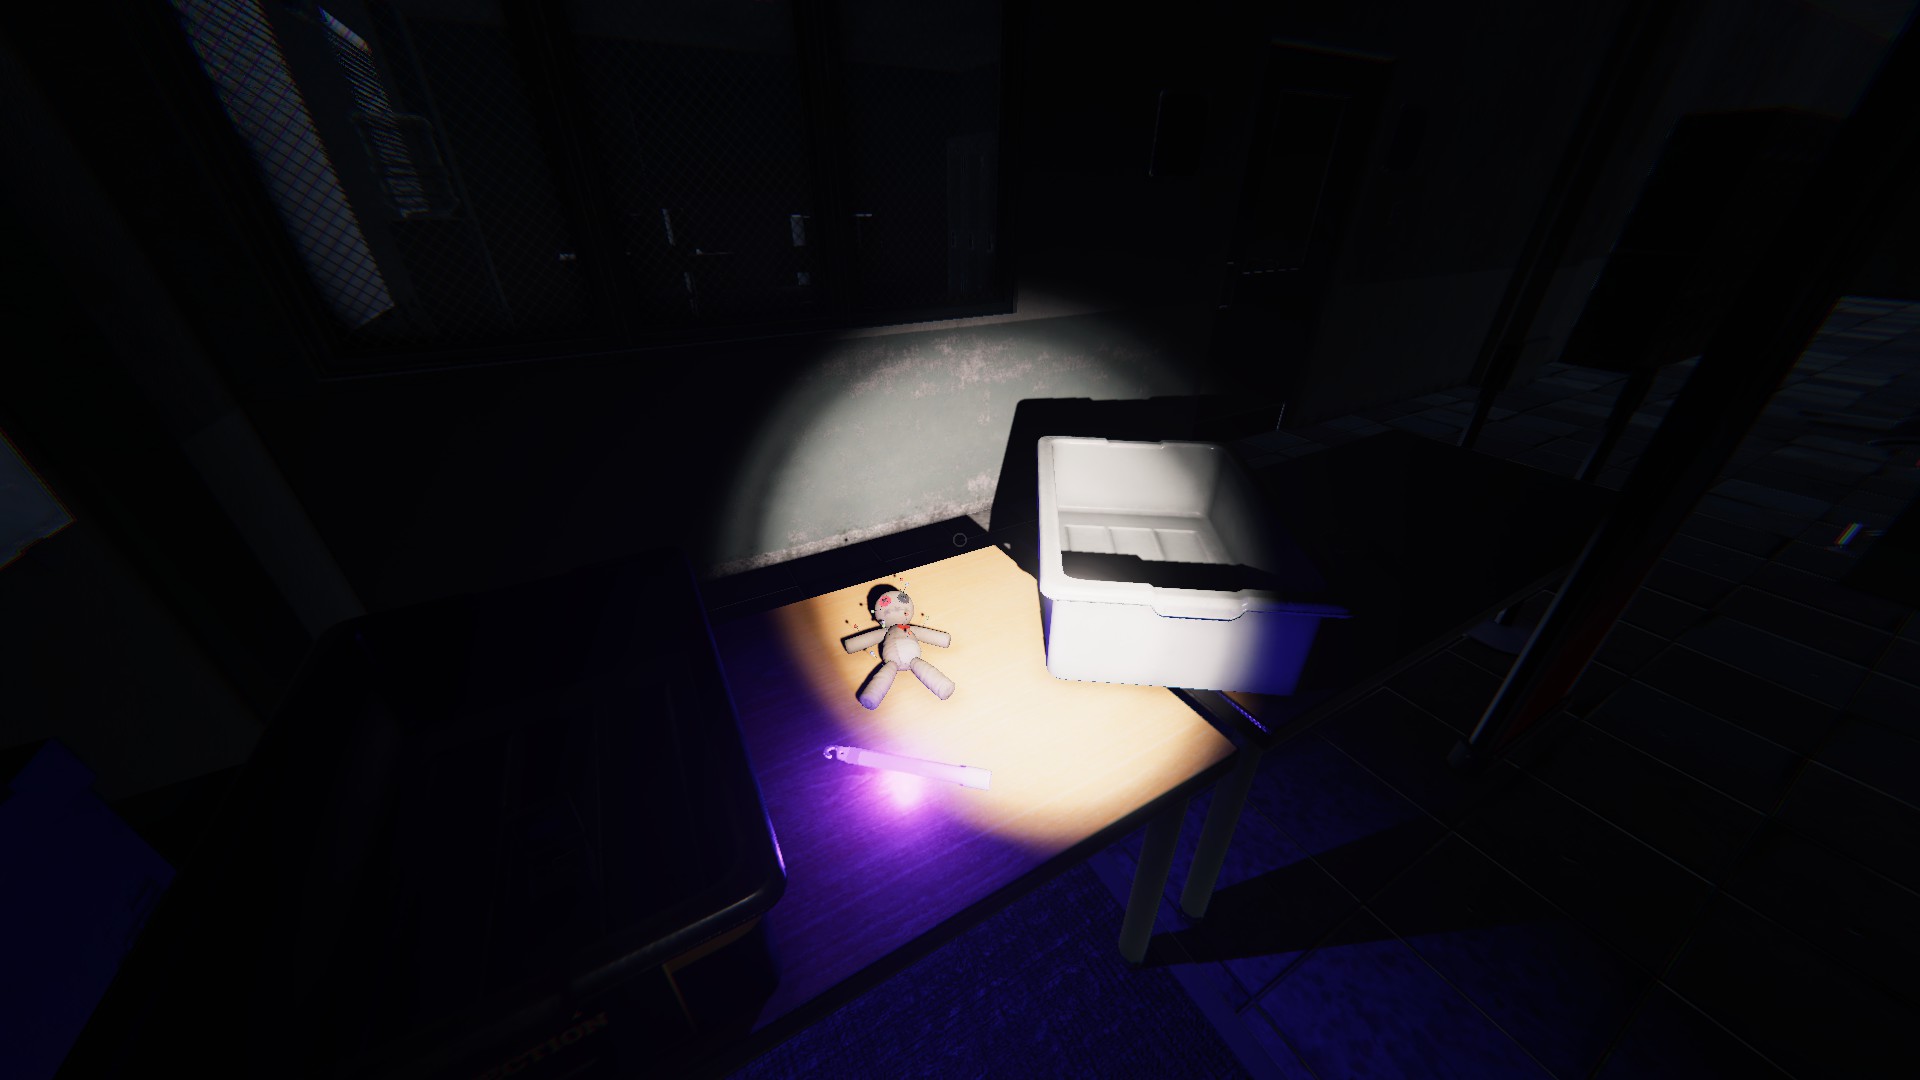
Voodoo Doll
Immediately through the front door, sitting on the left table in the open
Black Mirror
In the main lobby, under the center right row of chairs, further into the room
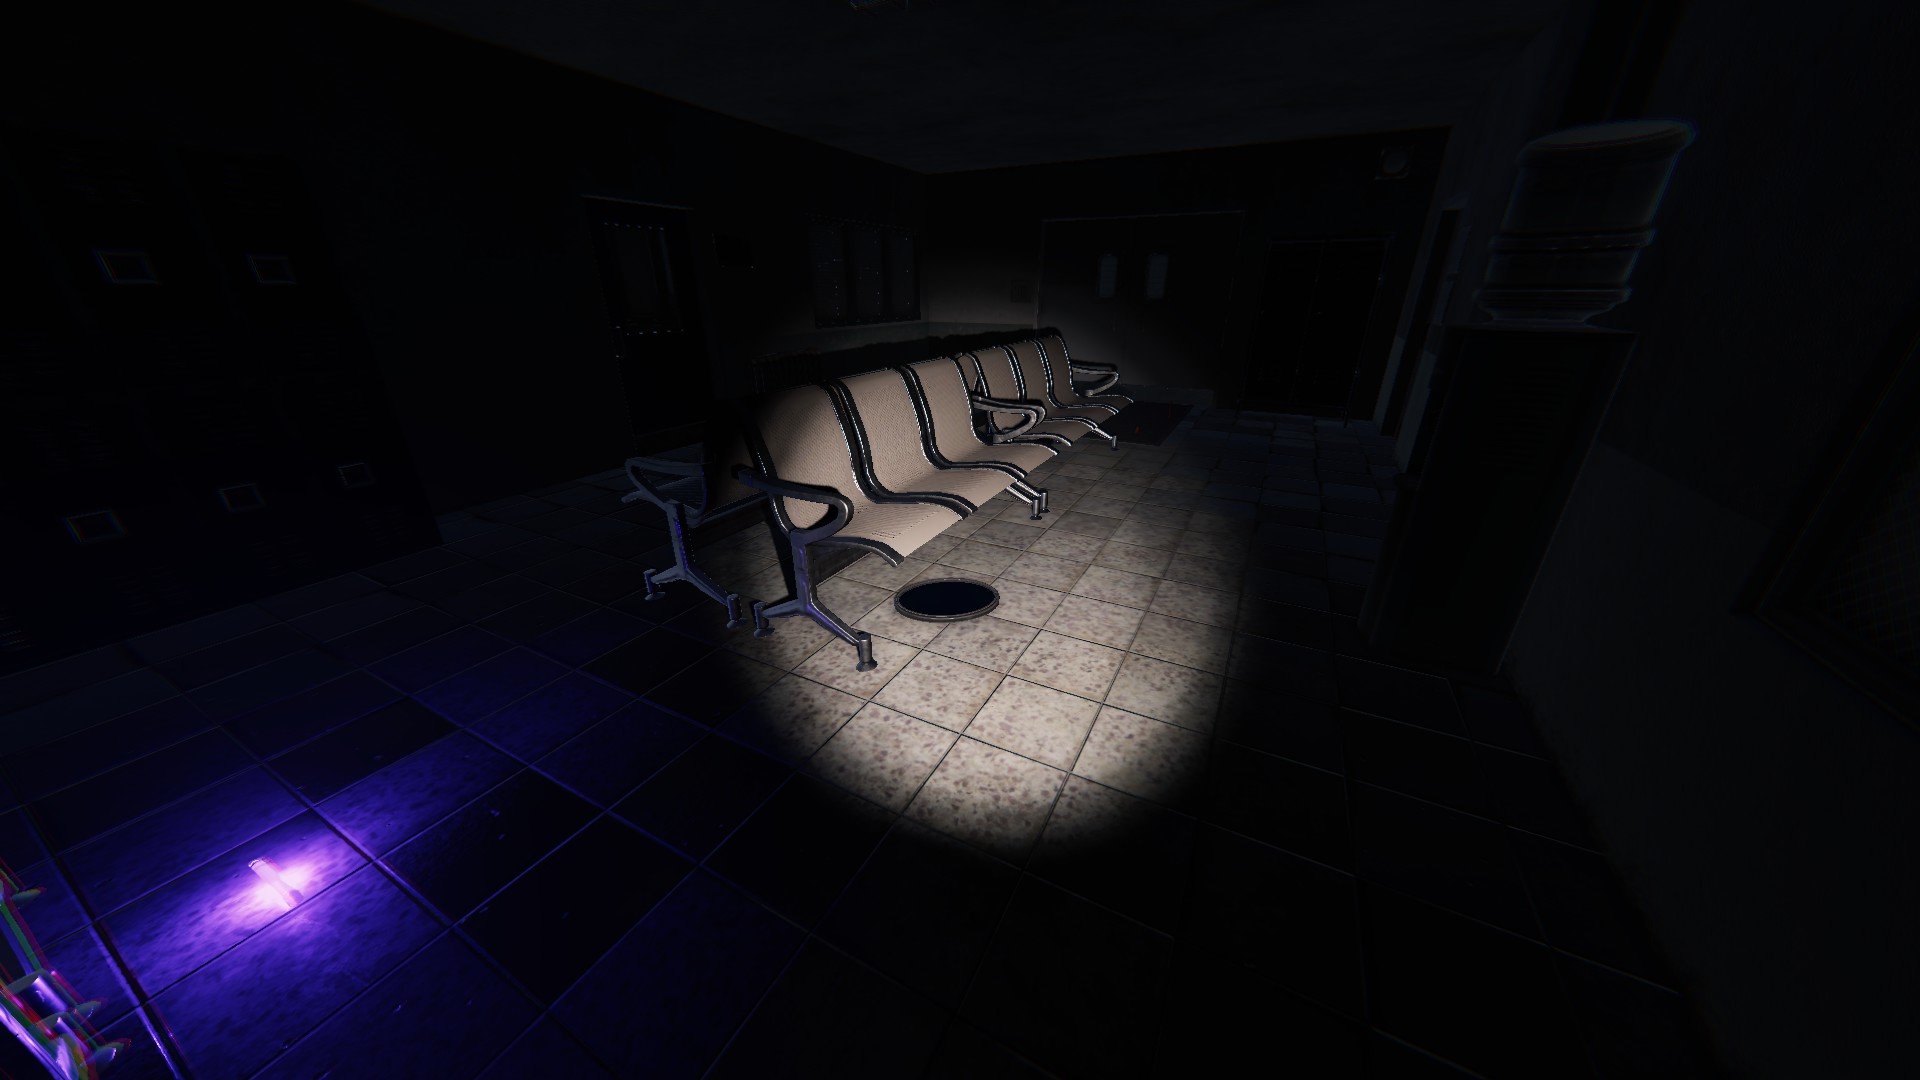
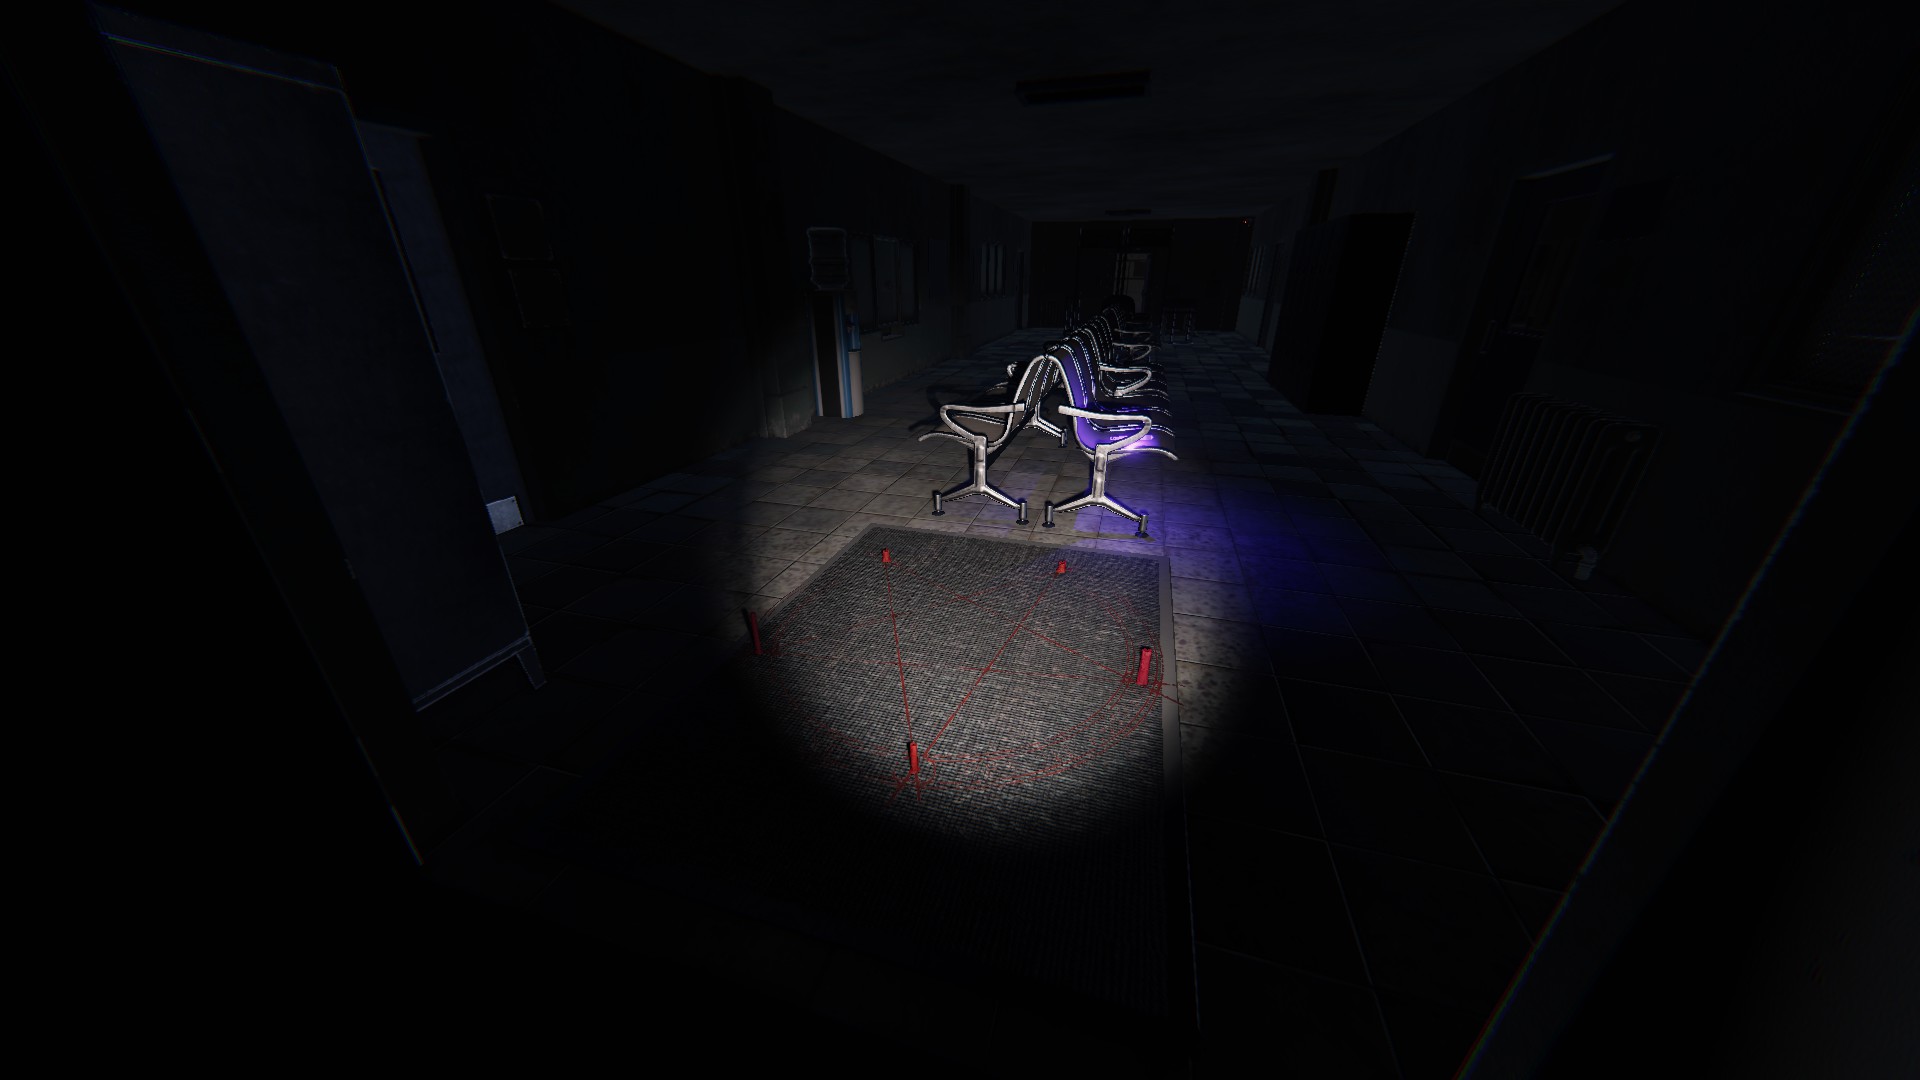
Summoning Circle
Straight back from the front door, in the back of the first room
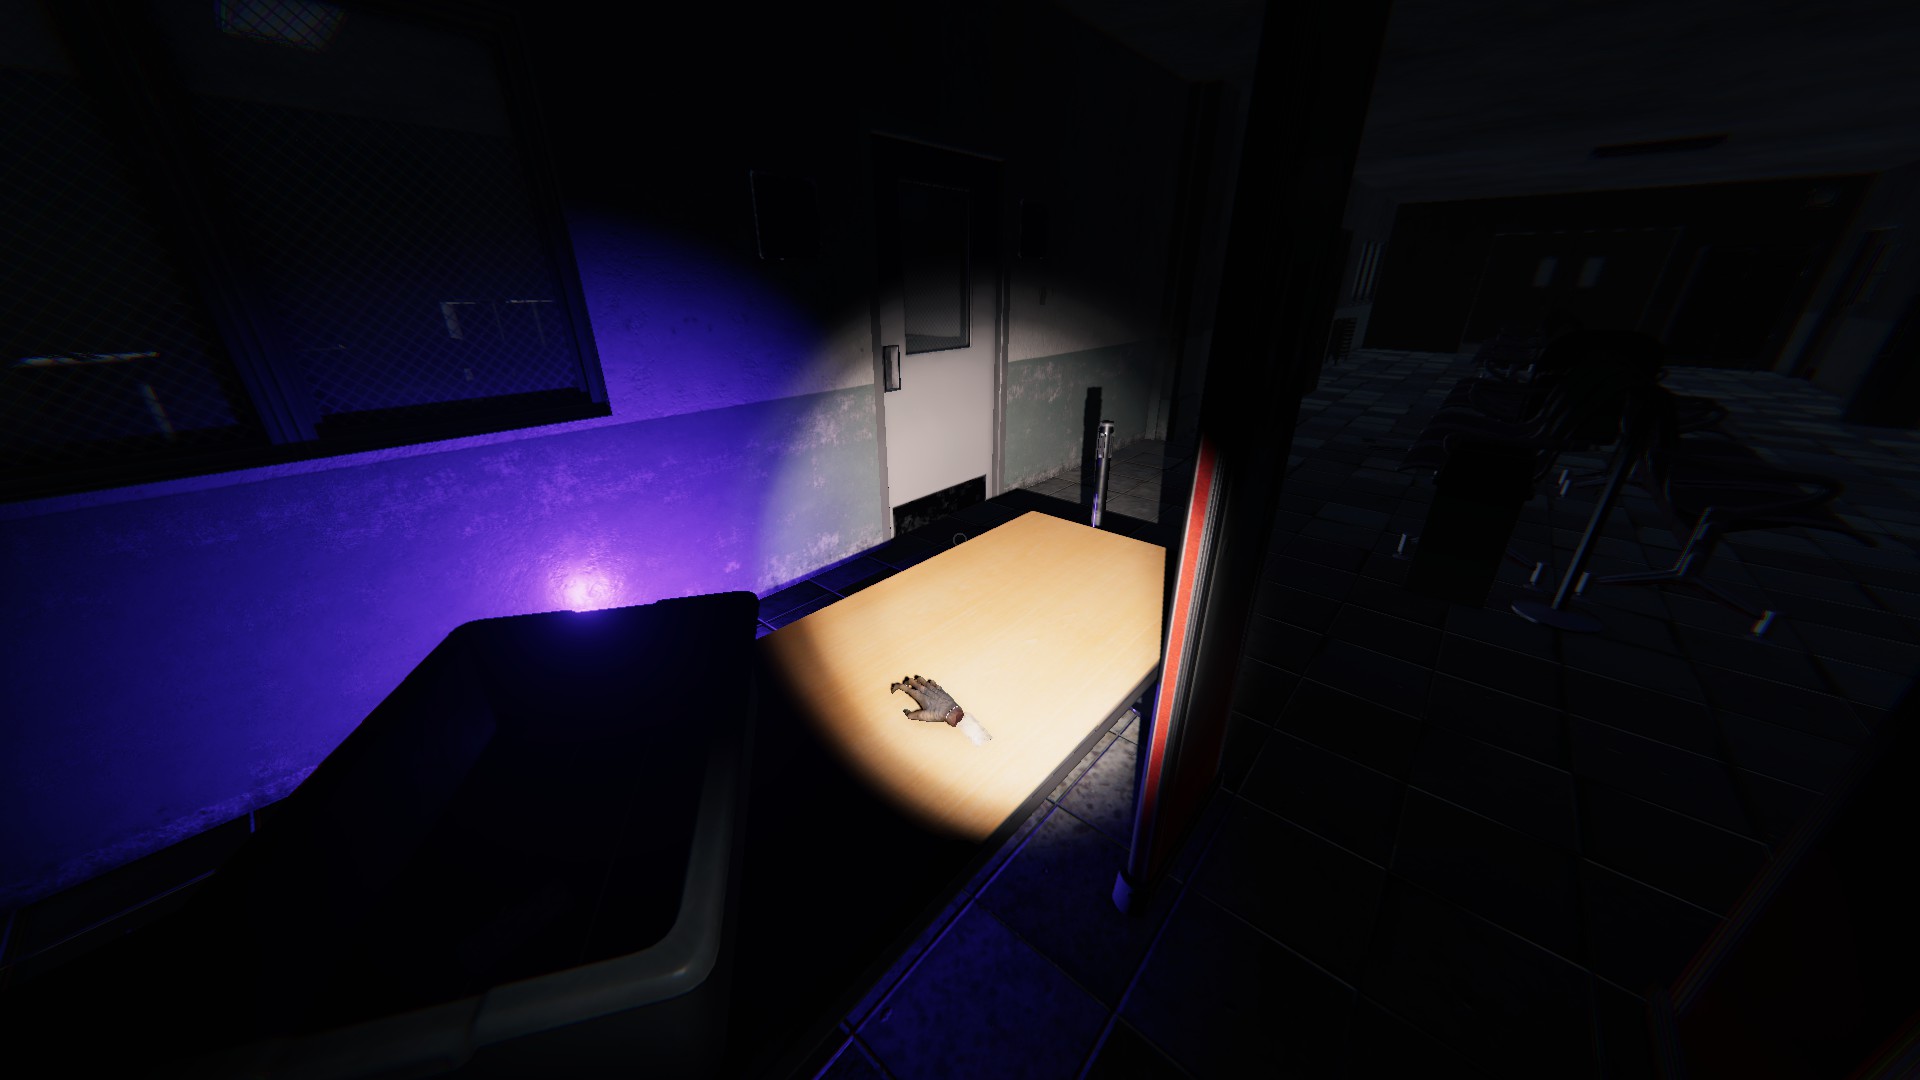
Monkey Paw
Immediately through the front door, on the left table, right next to the metal detector
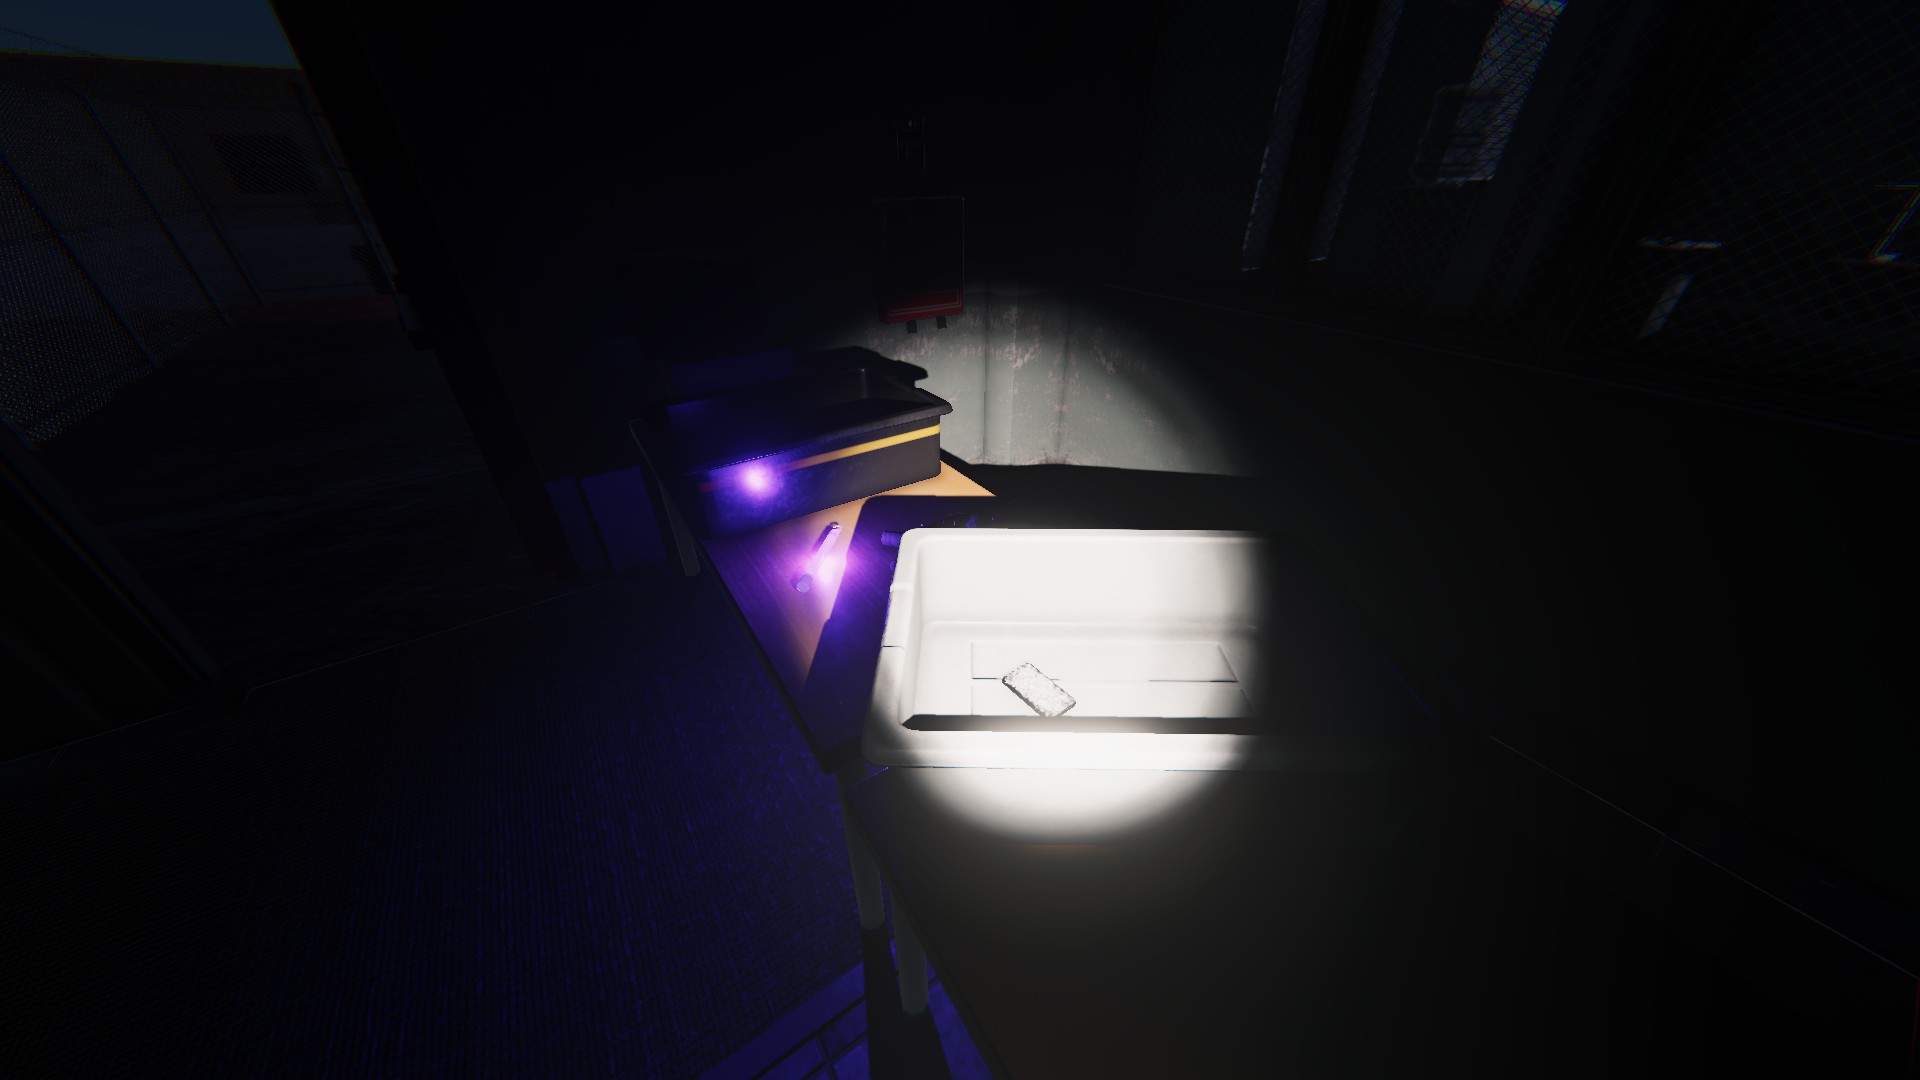
Tarot Cards
Immediately through the front door, on the left table, in a white tub/bin
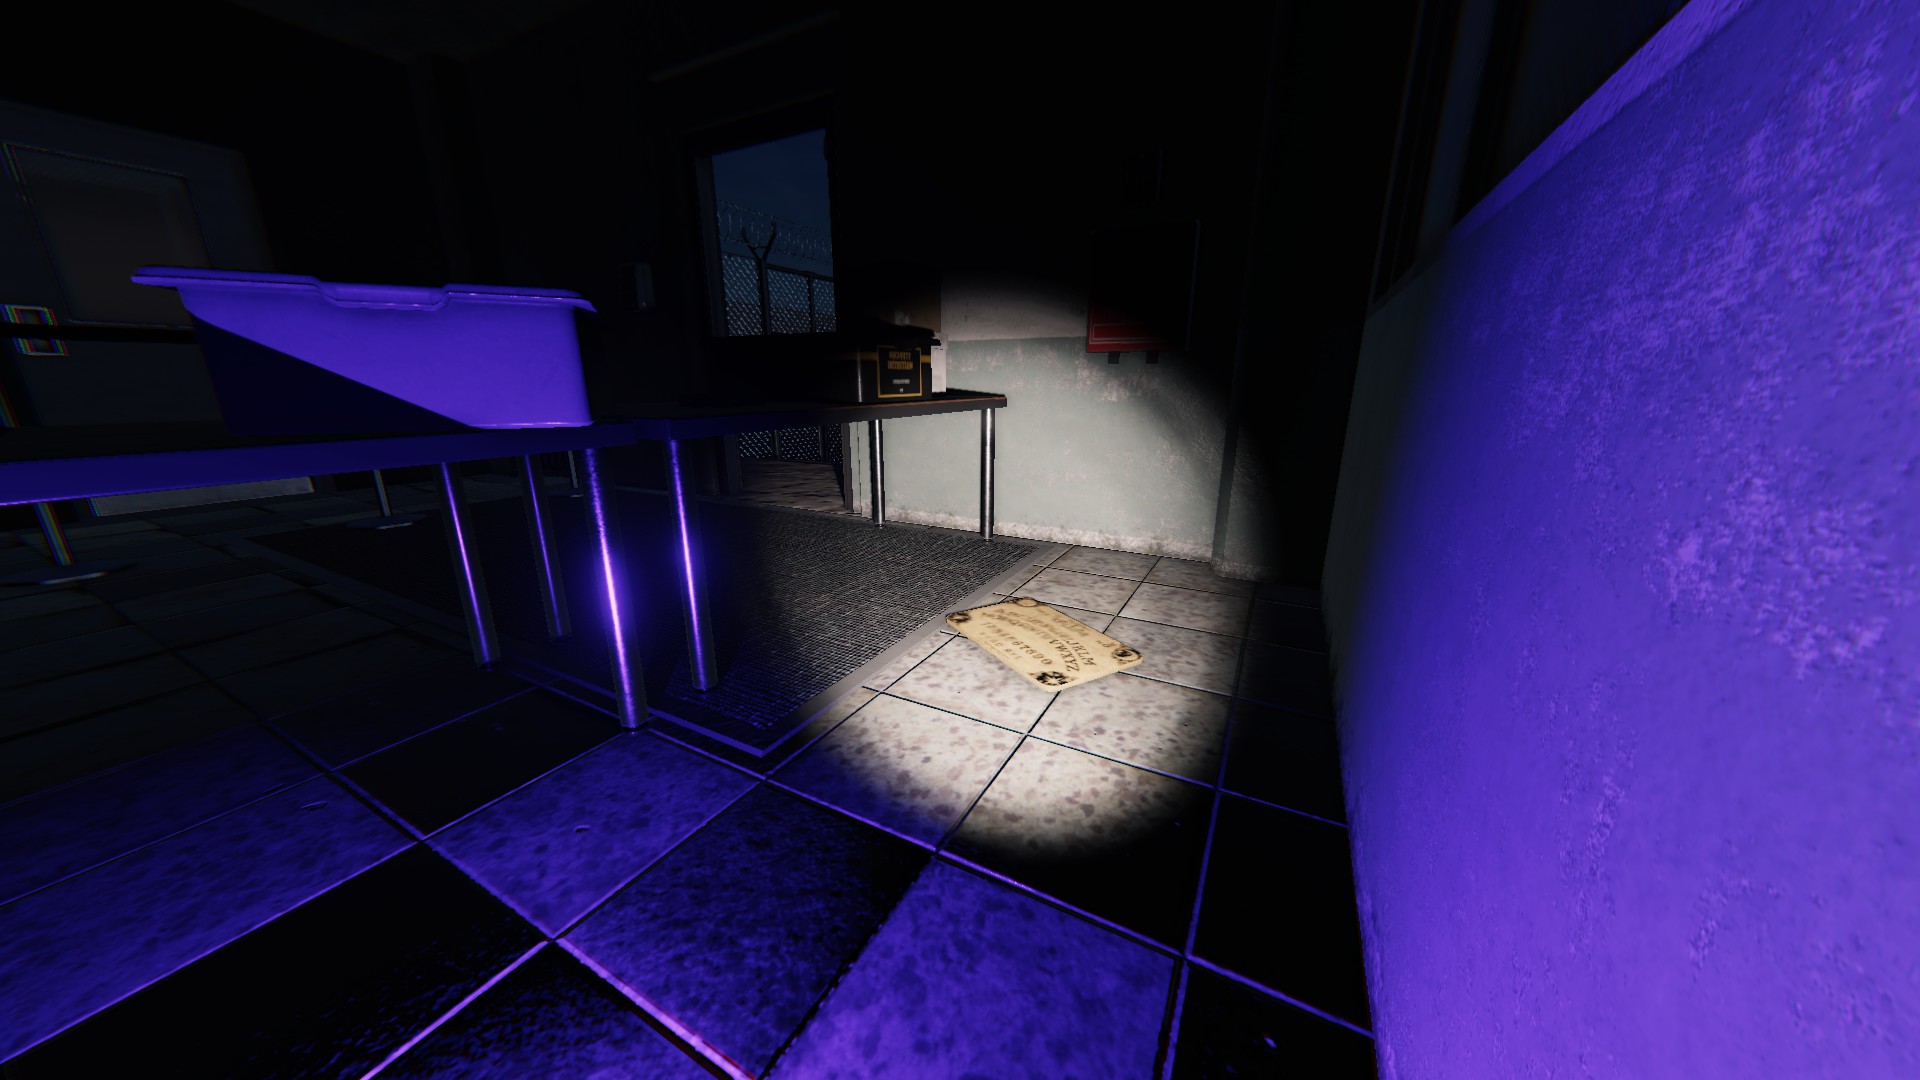
Ouija Board
The immediate left hand corner of the first room, behind the table with the other item spawns.
Sunny Meadows/Sunny Meadows Restricted
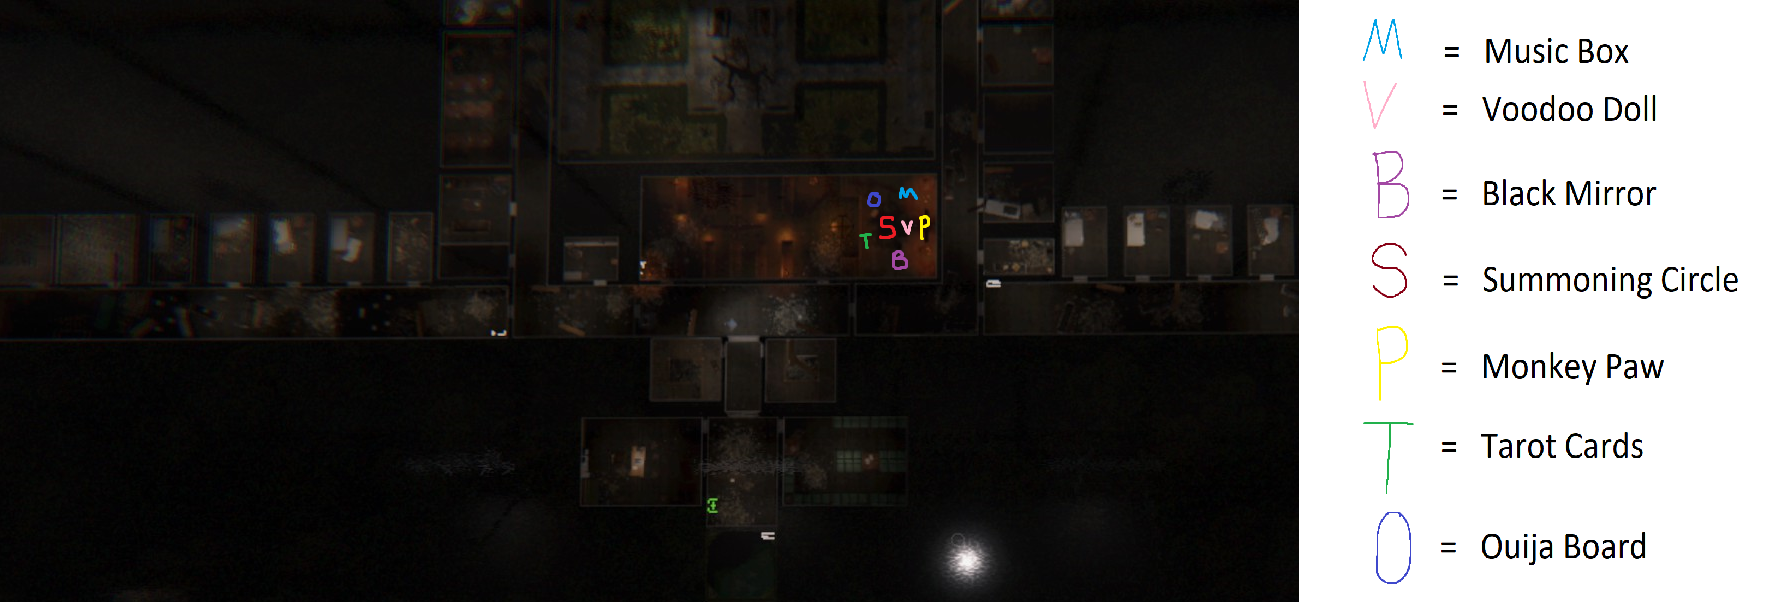
- Both variants of this map have all of the cursed possessions spawning in the same locations.
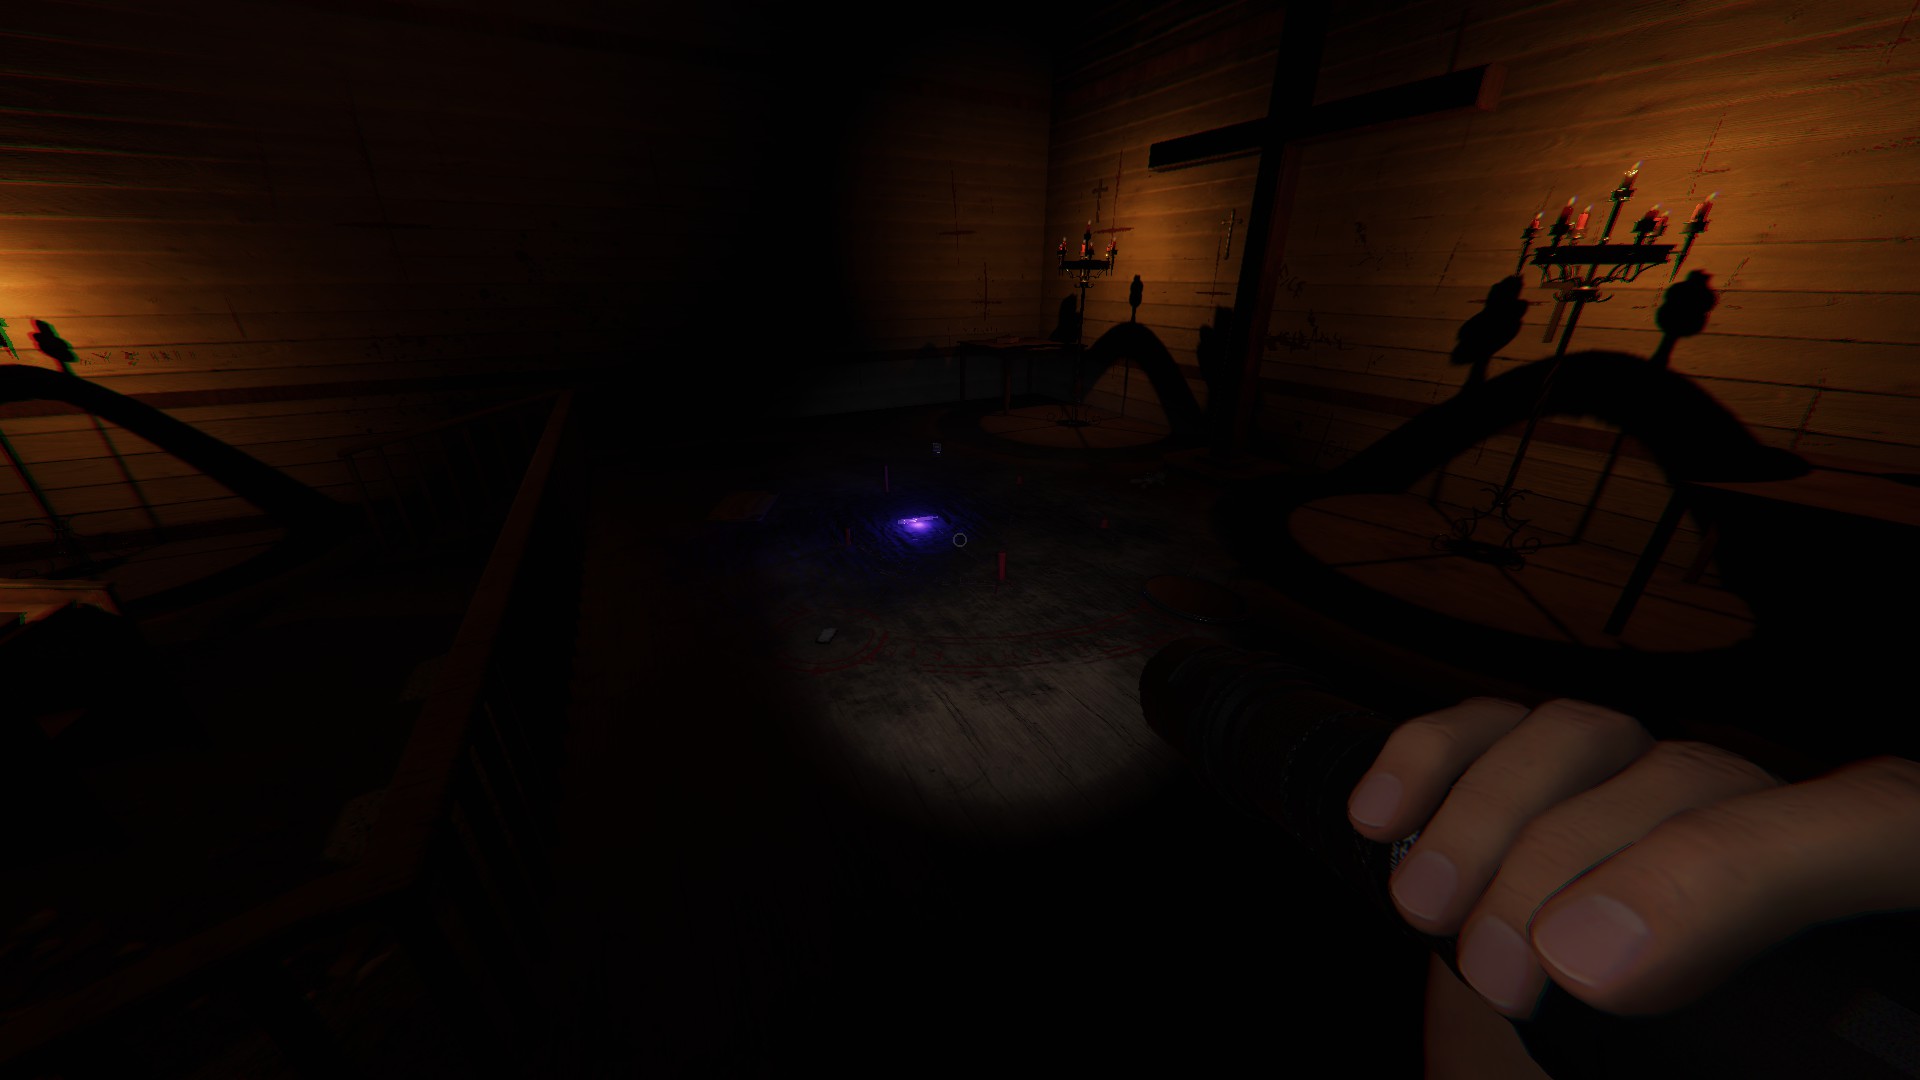
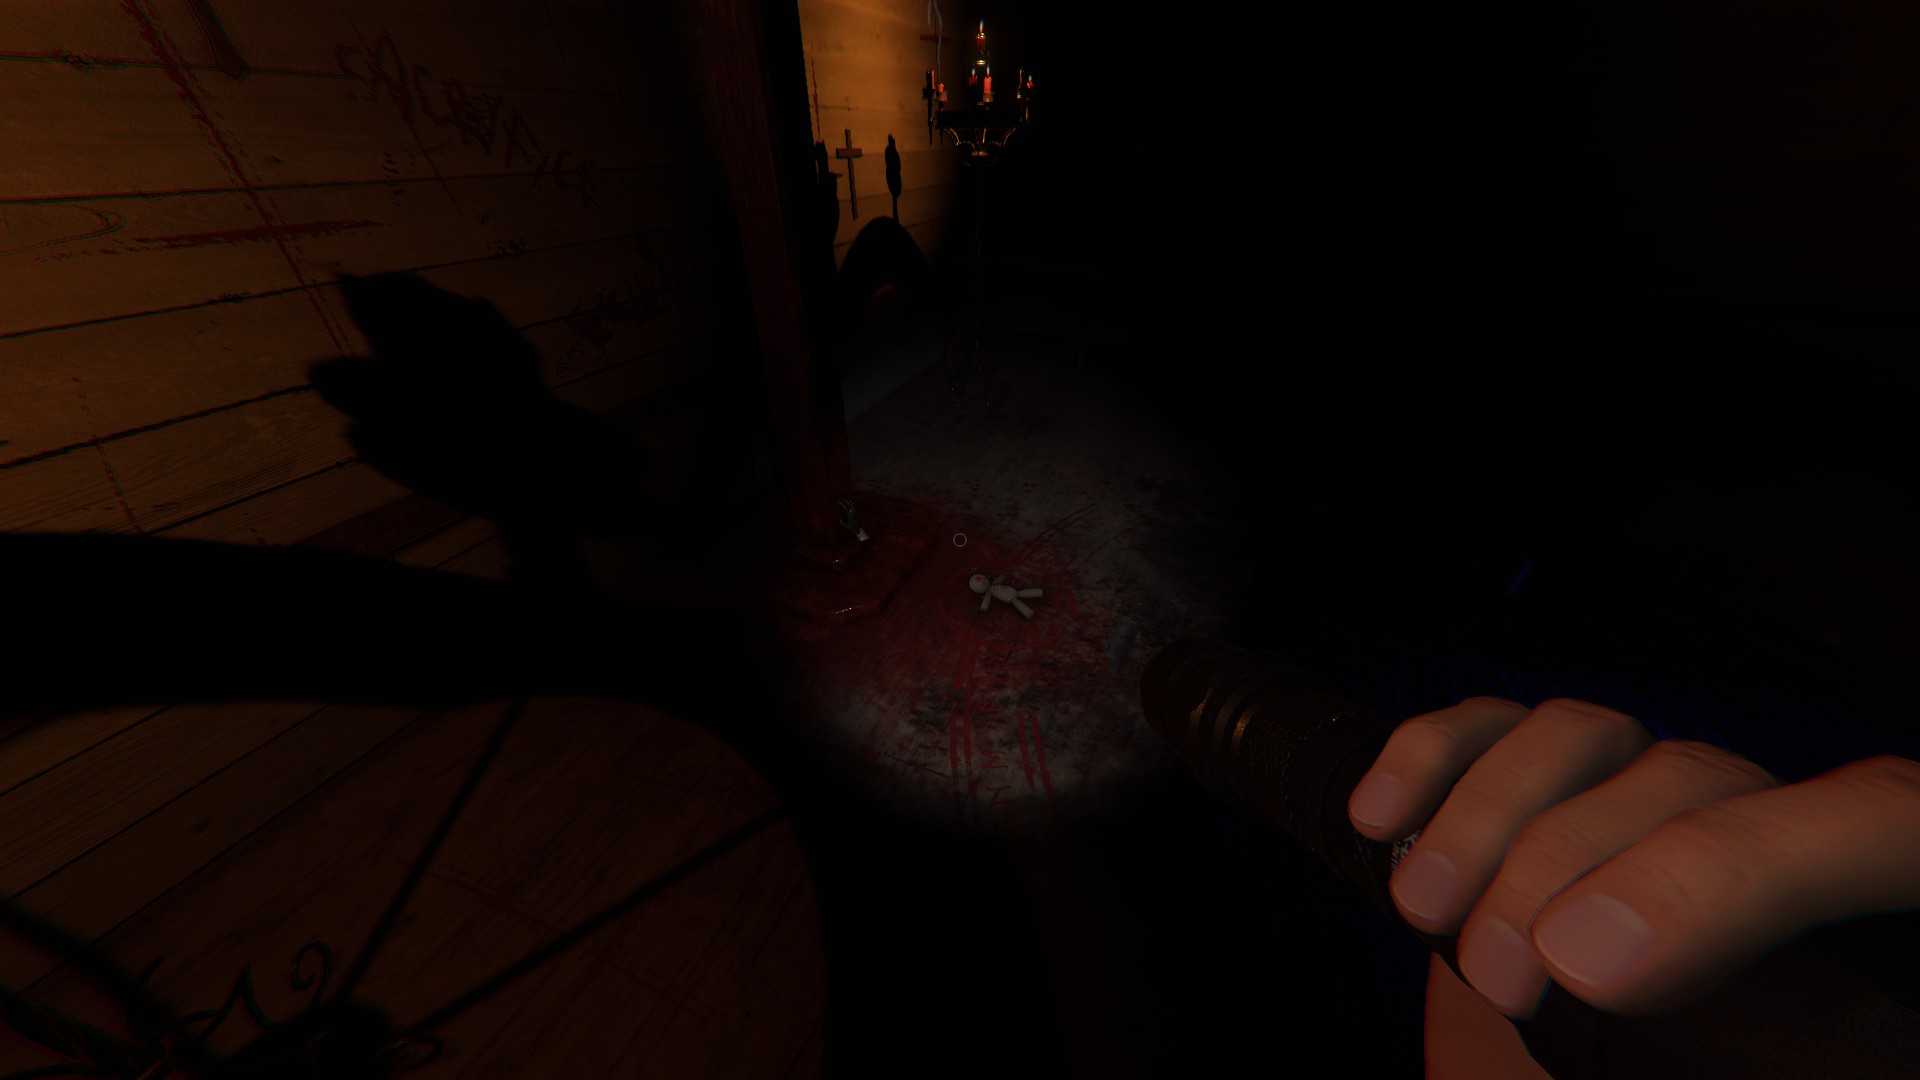
- Similar to Brownstone Highschool and Prison, because it is a larger map, all the cursed possessions can be found in the chapel, close to the front entry.
- All 7 items will spawn on the stage, in one of the slots on the circle, and the monkey paw spawning at the base of the cross on stage next to the circle.
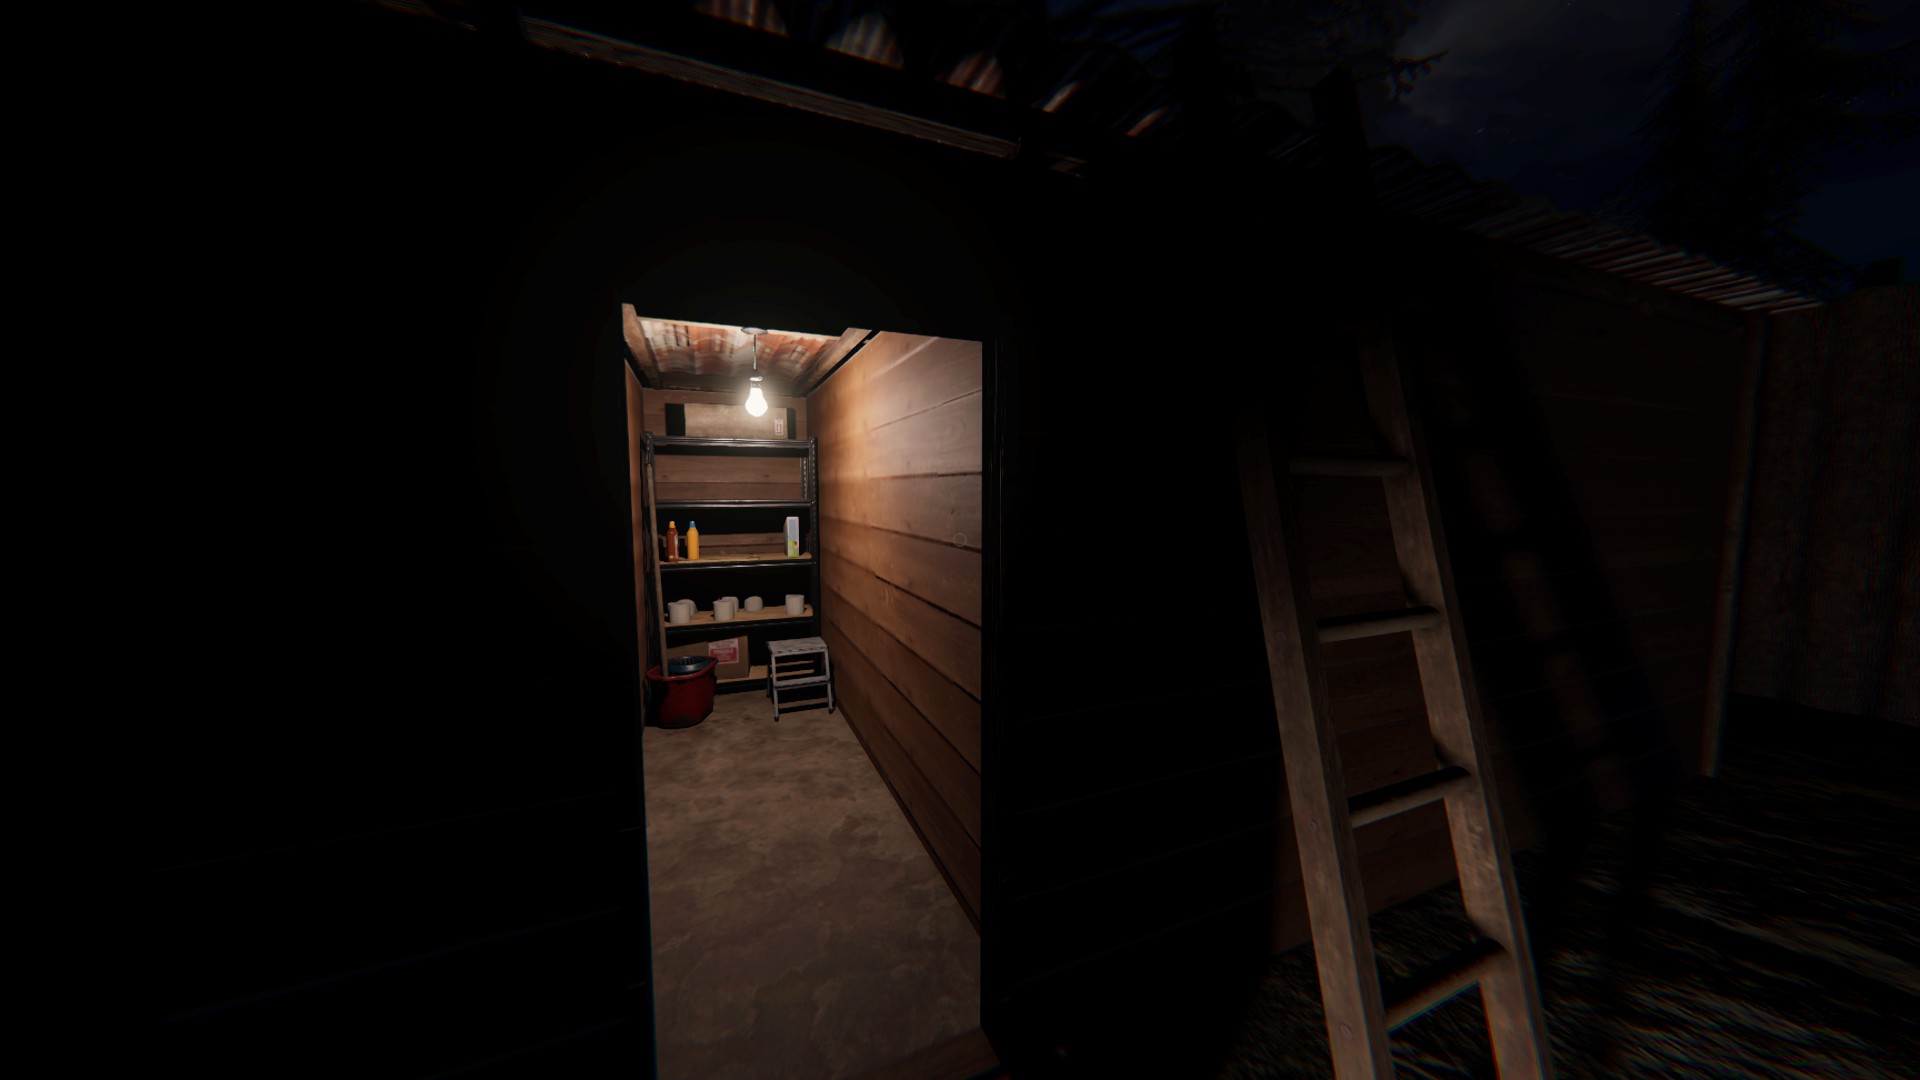
Maple Lodge Campsite (OLD)
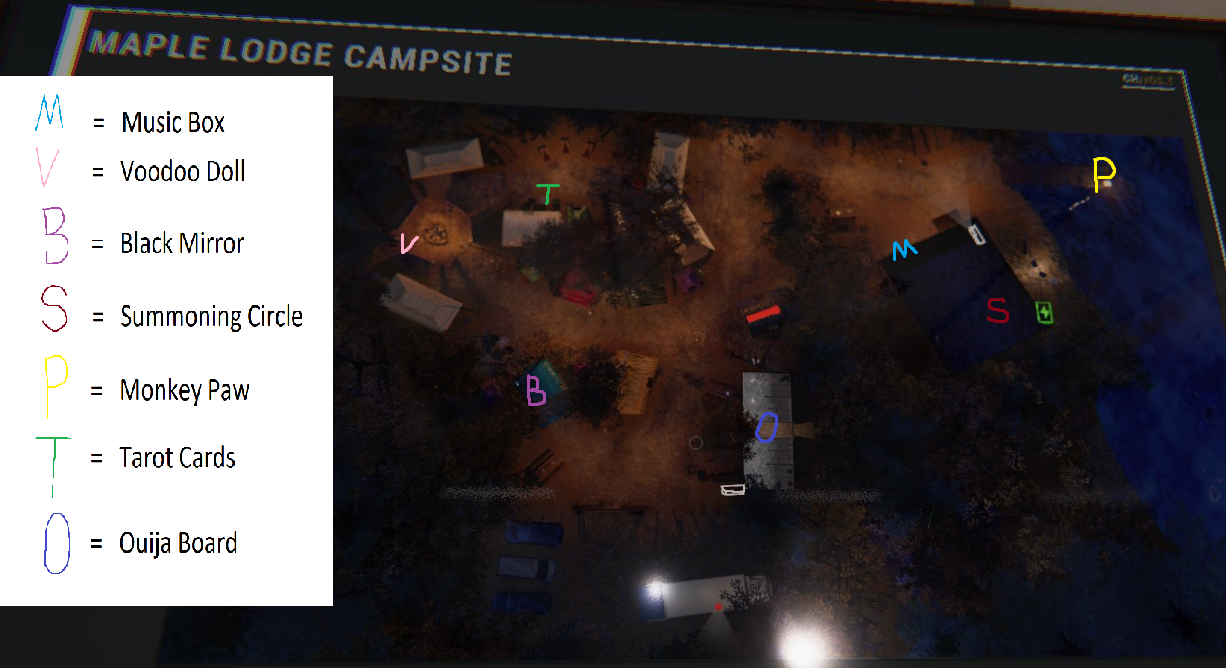
Music Box
Outside the cabin, on the small table by the front door
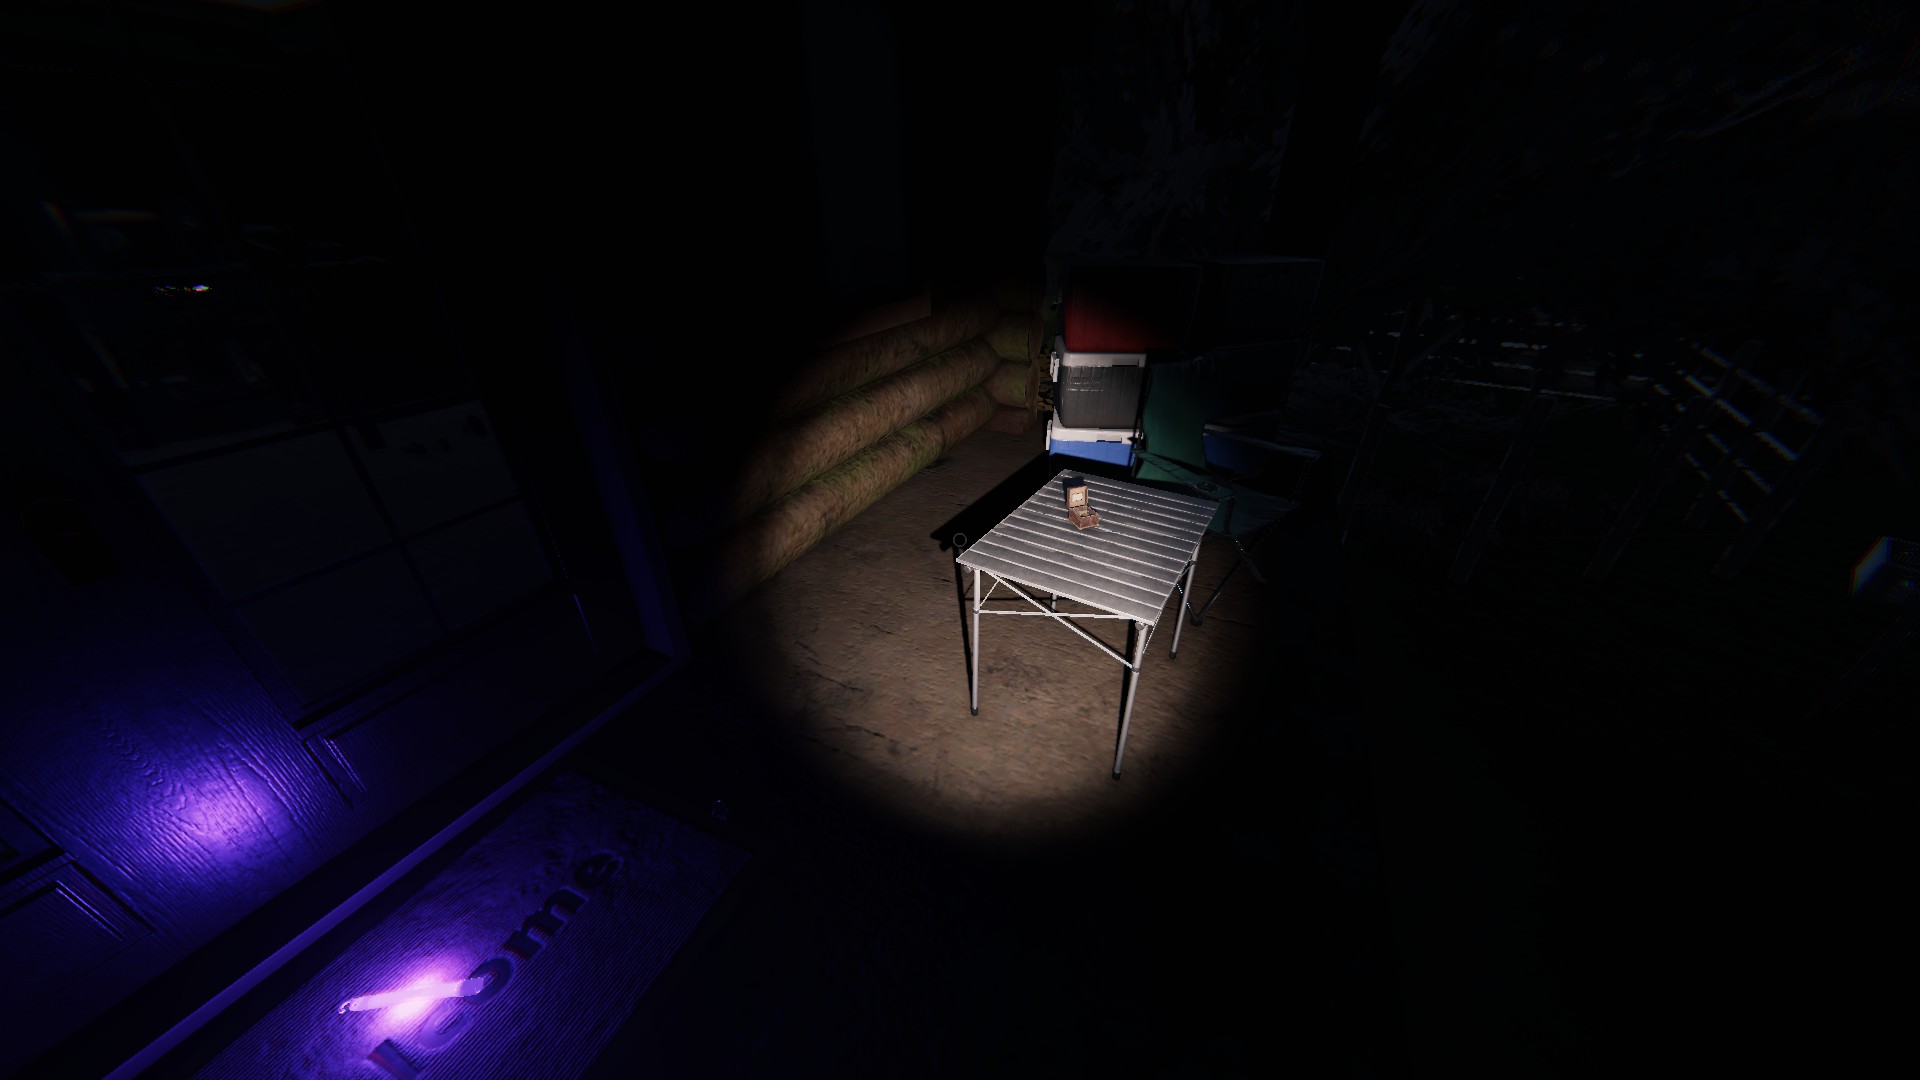
Voodoo Doll
By the fire pit, laying against a wooden log
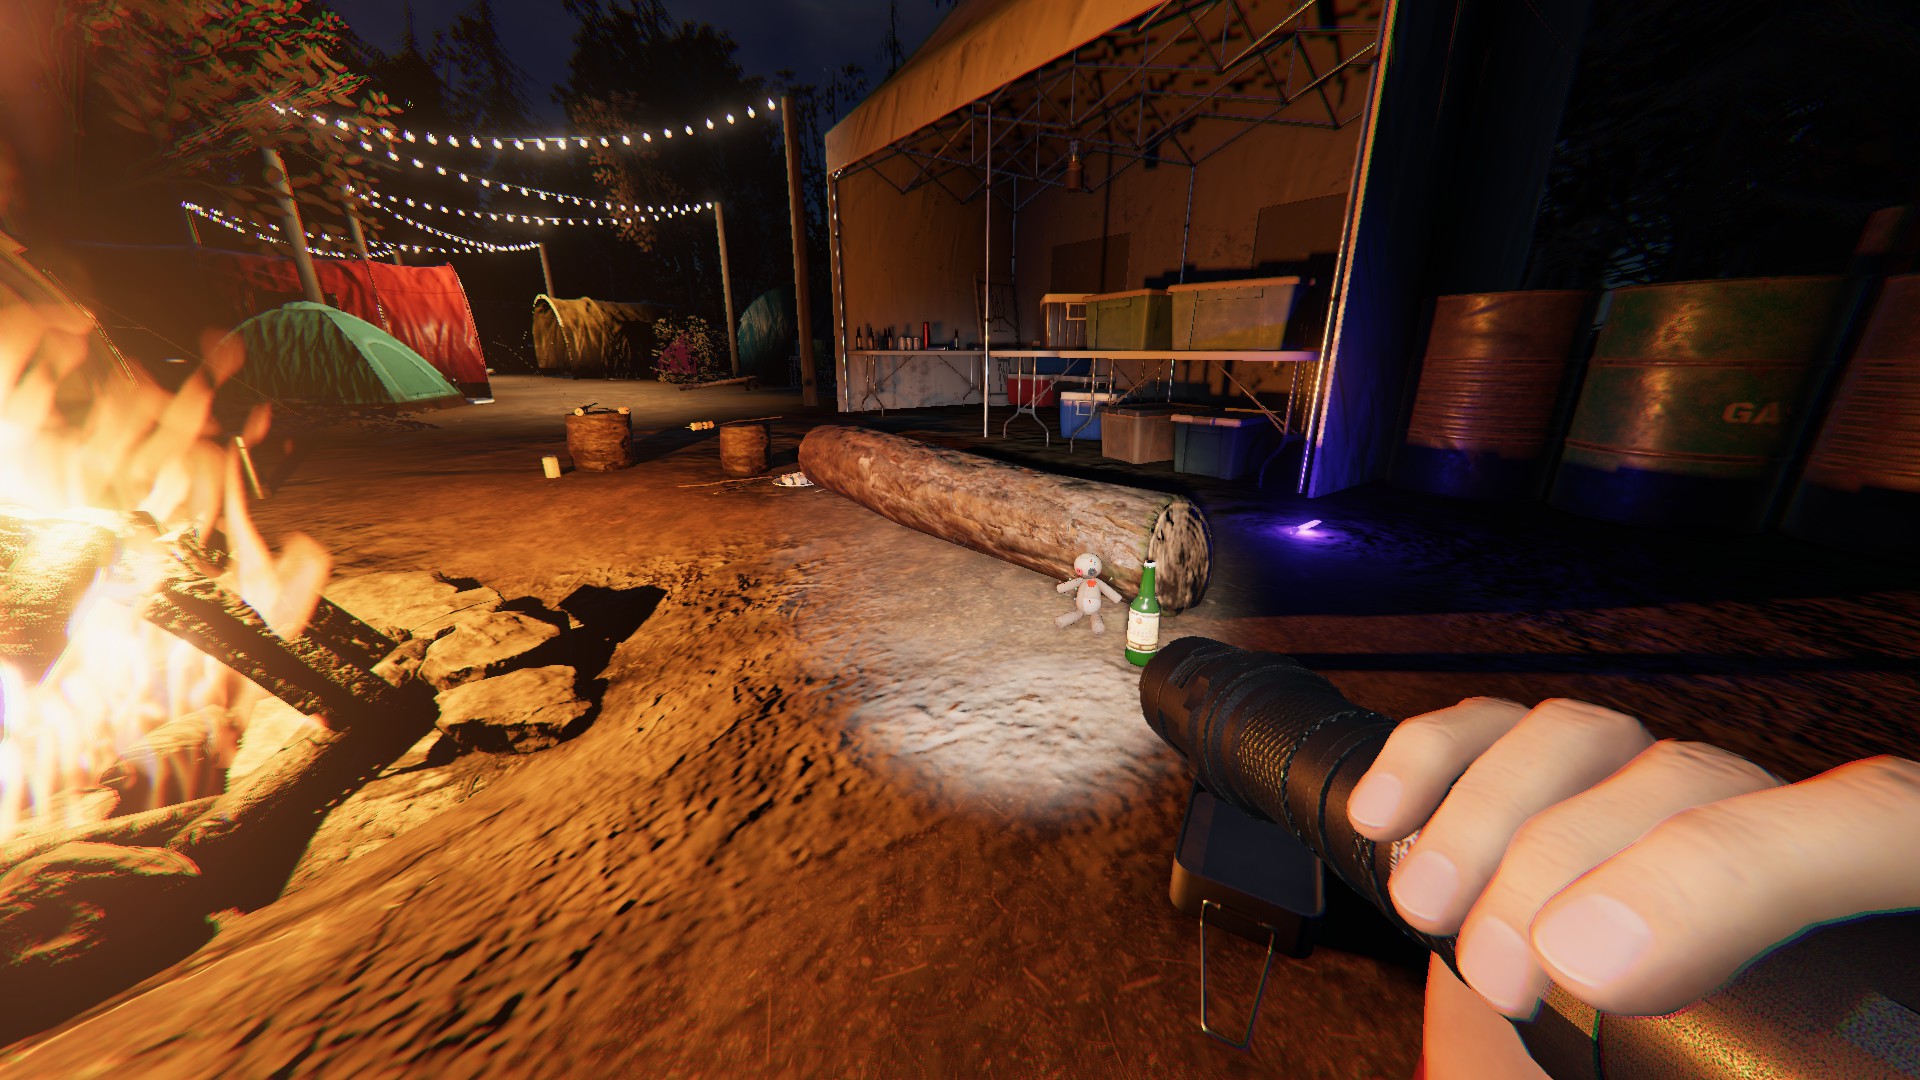
Black Mirror
Across from the main gate, in the blue tent, on the left side
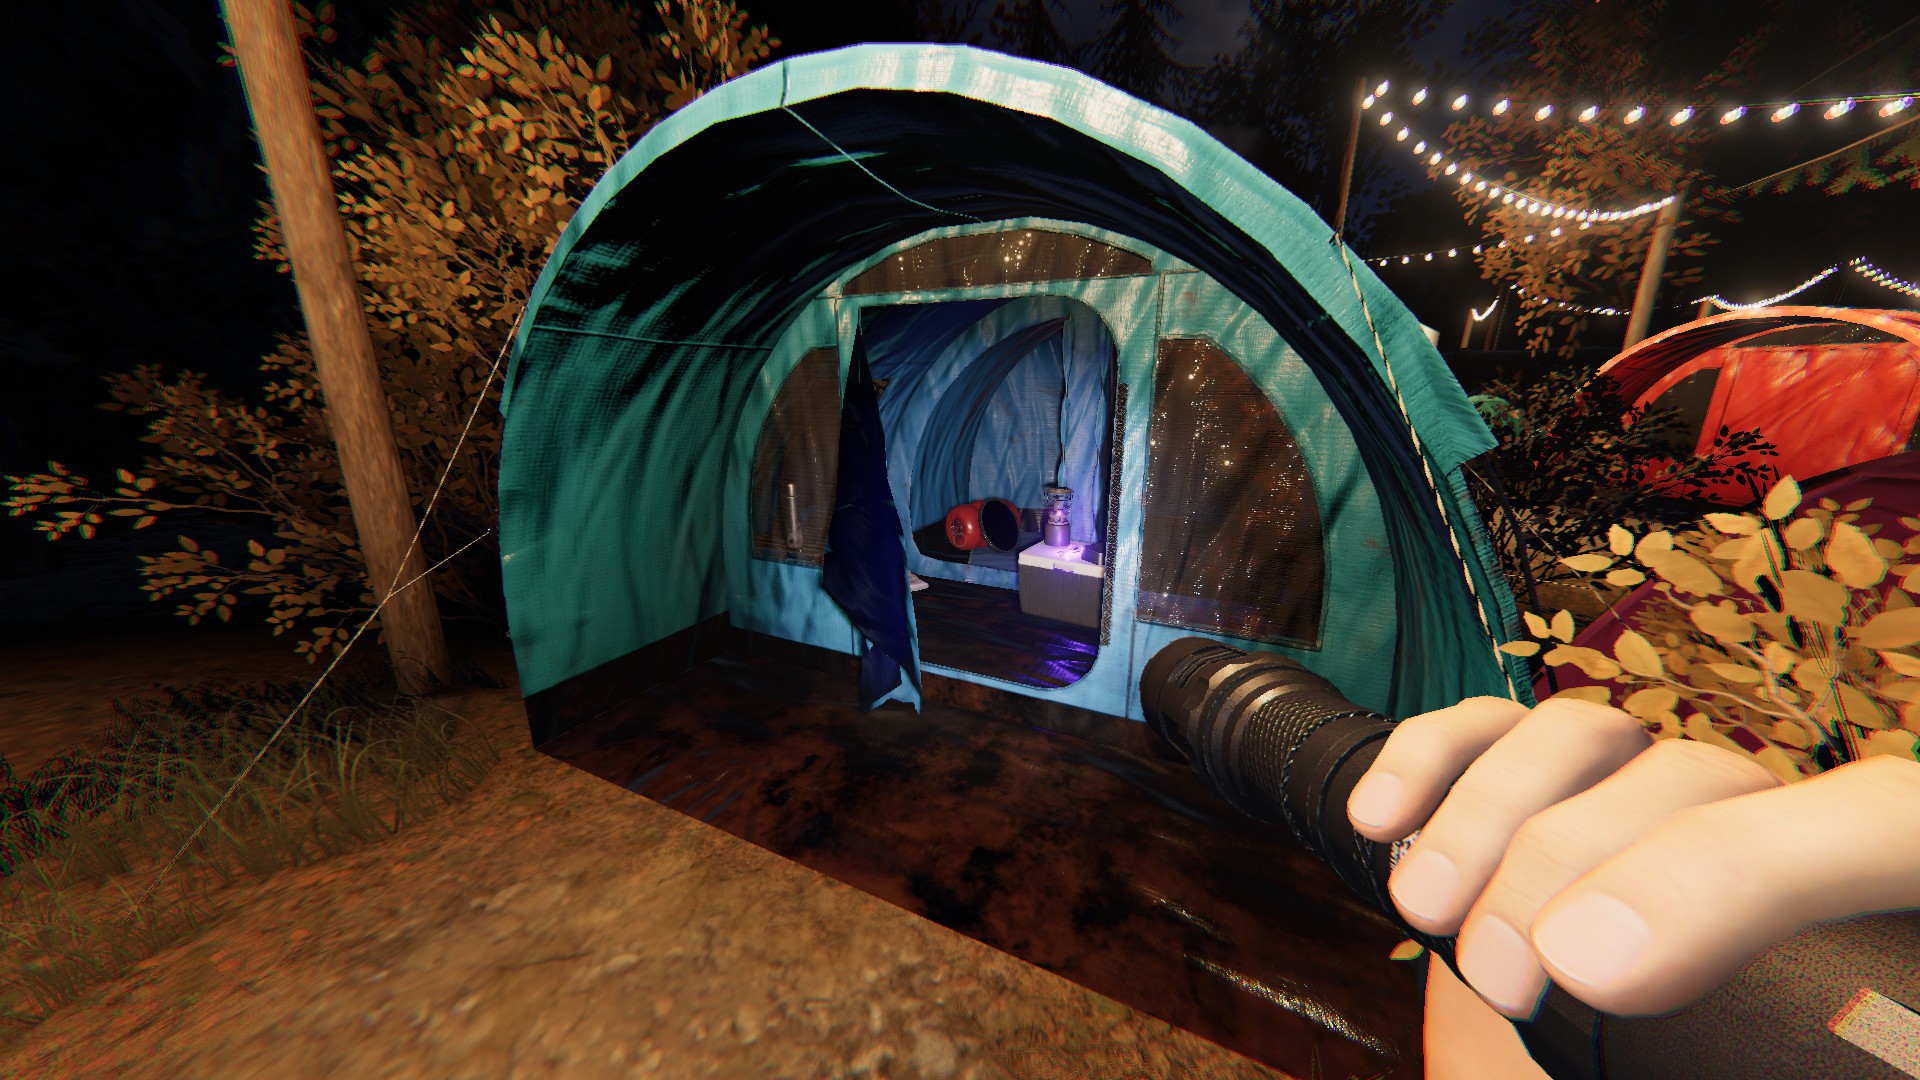
Summoning Circle
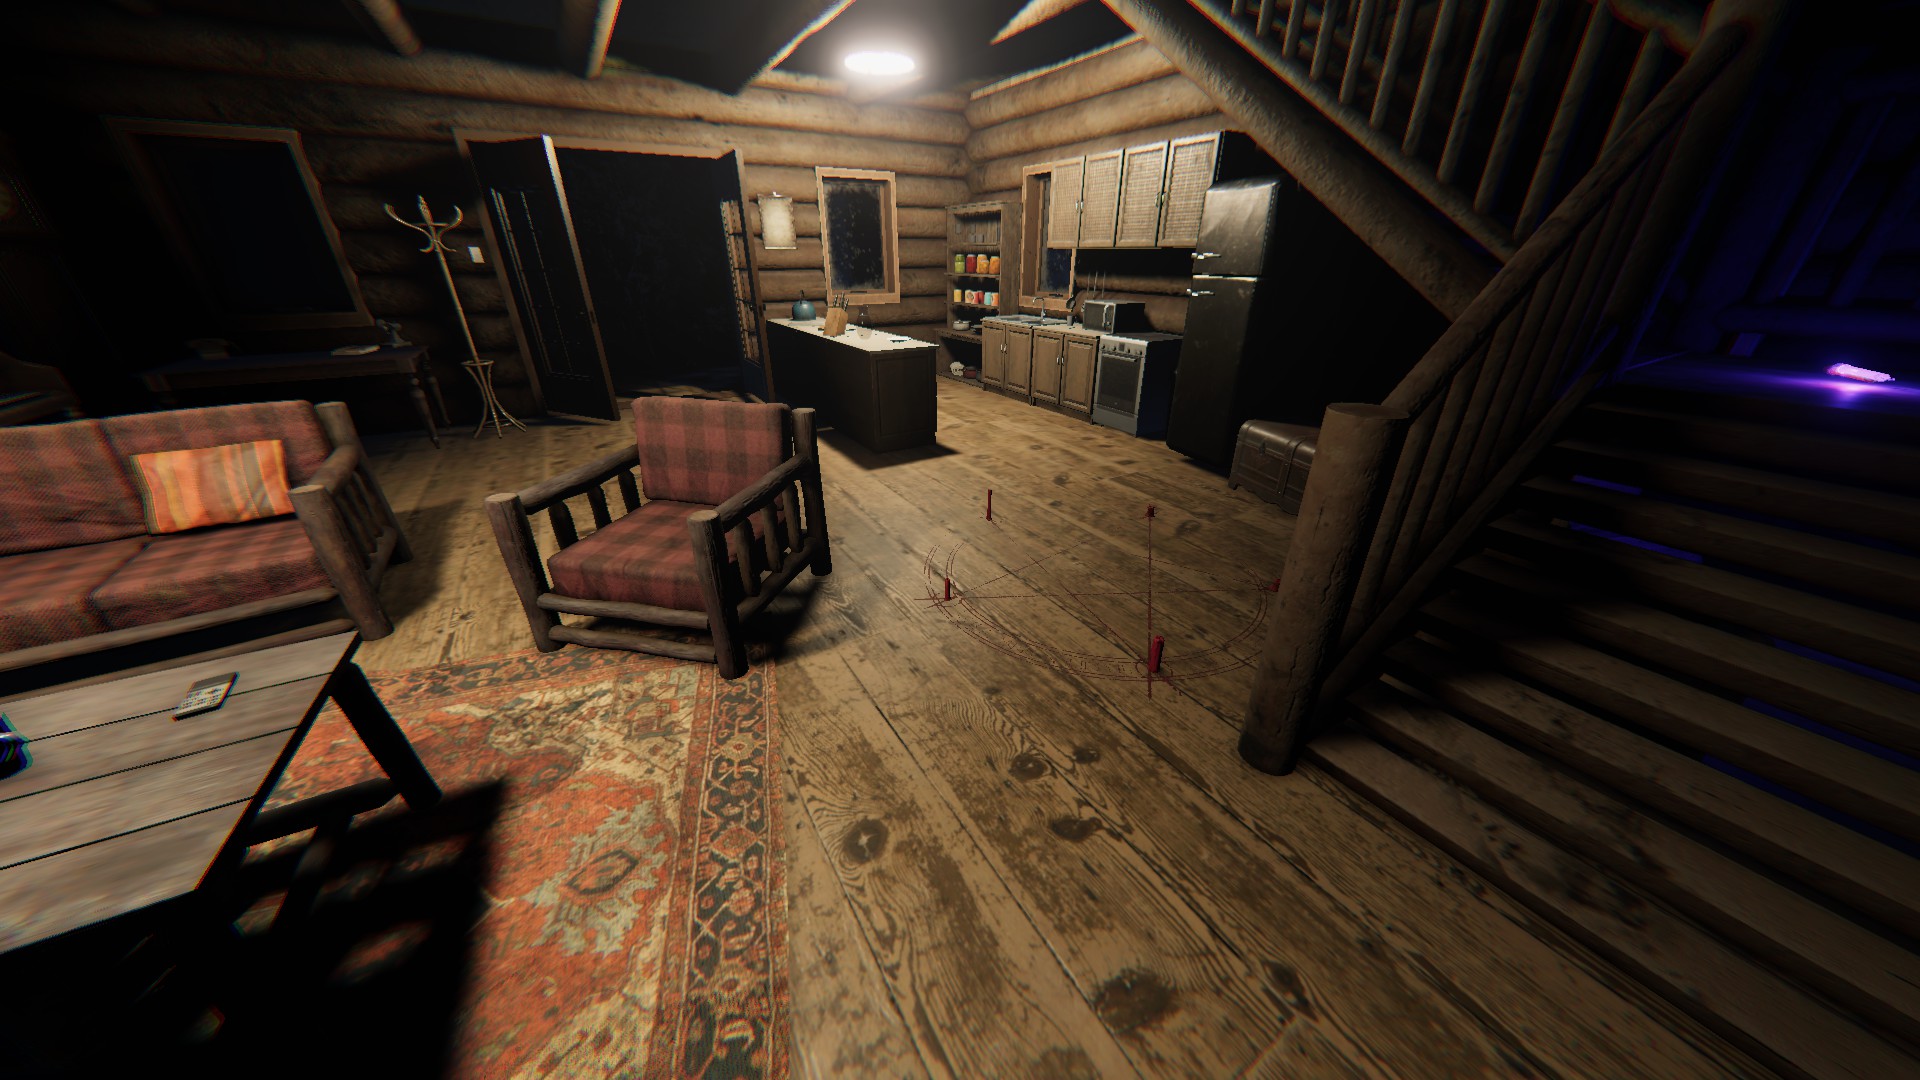
Inside the cabin, by the kitchen next to the stairs
Monkey Paw
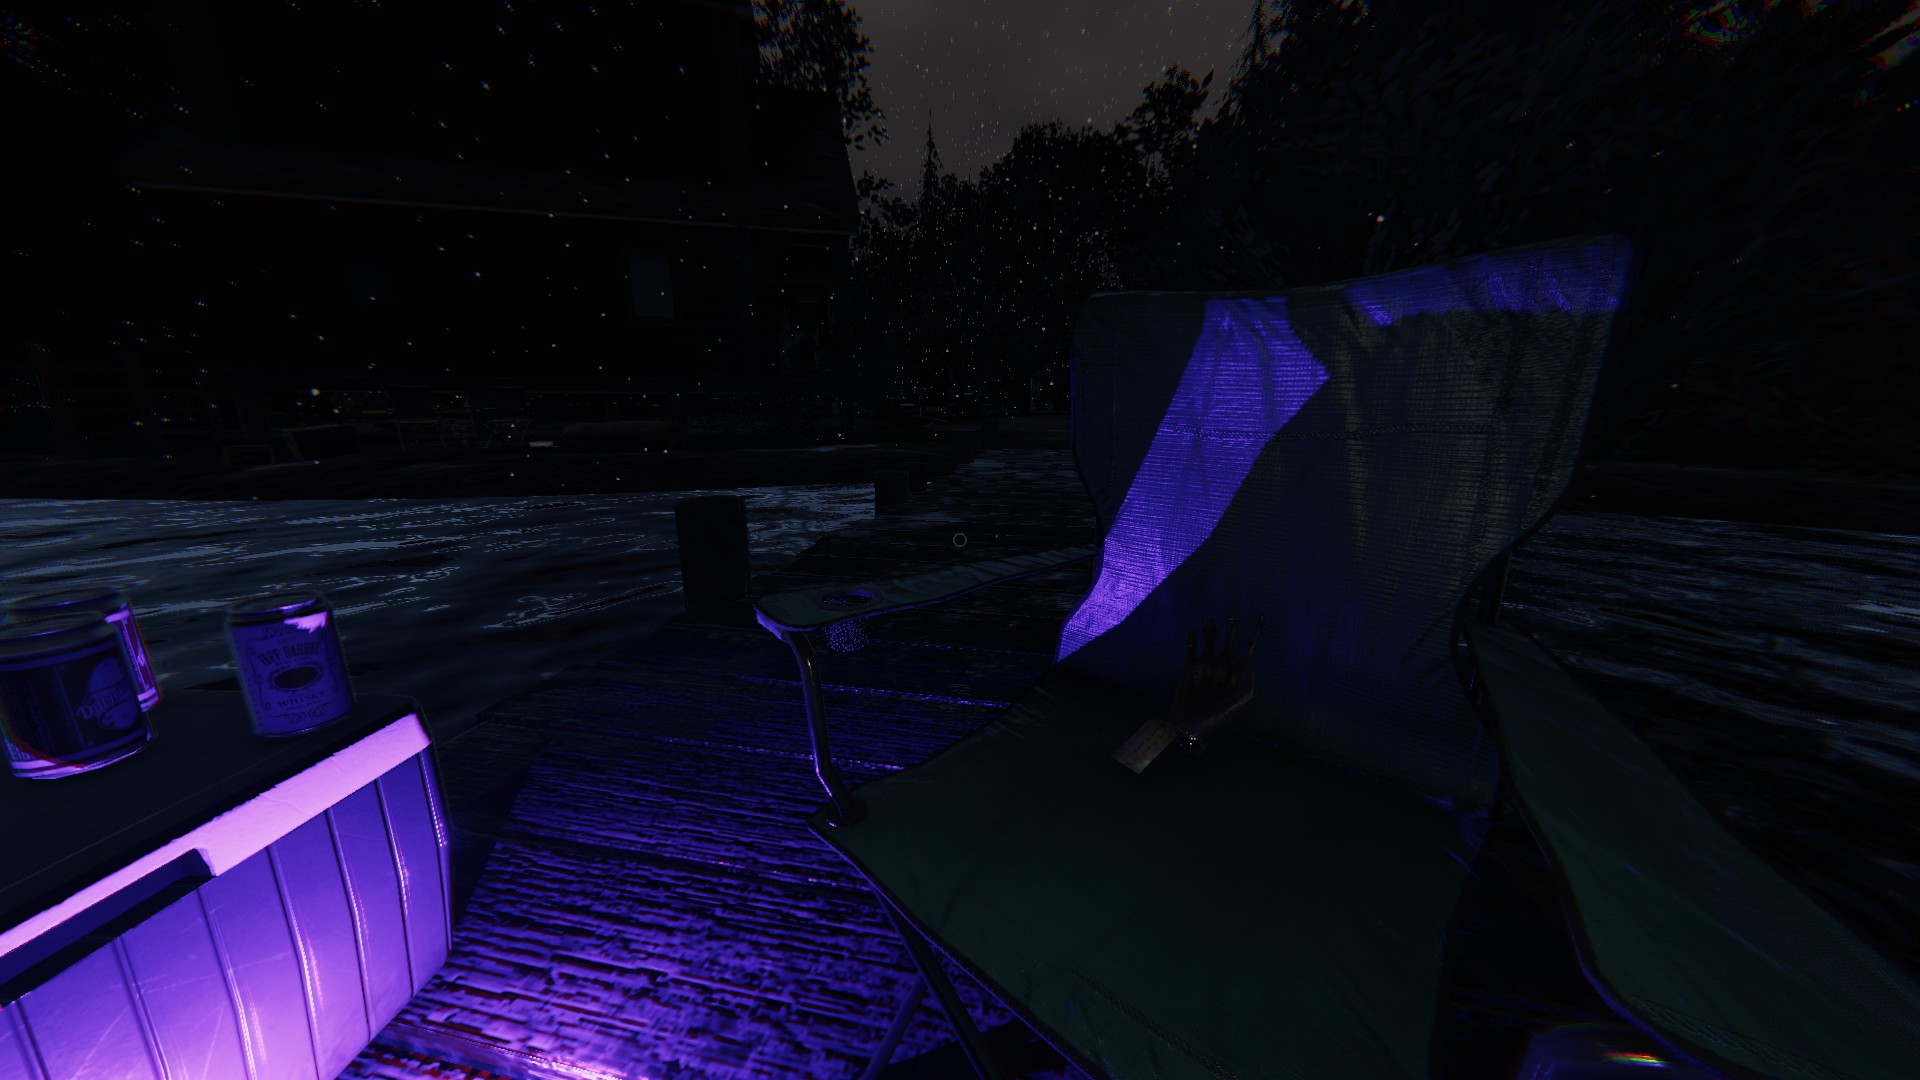
At the end of the dock, sitting on the chair
Tarot Cards
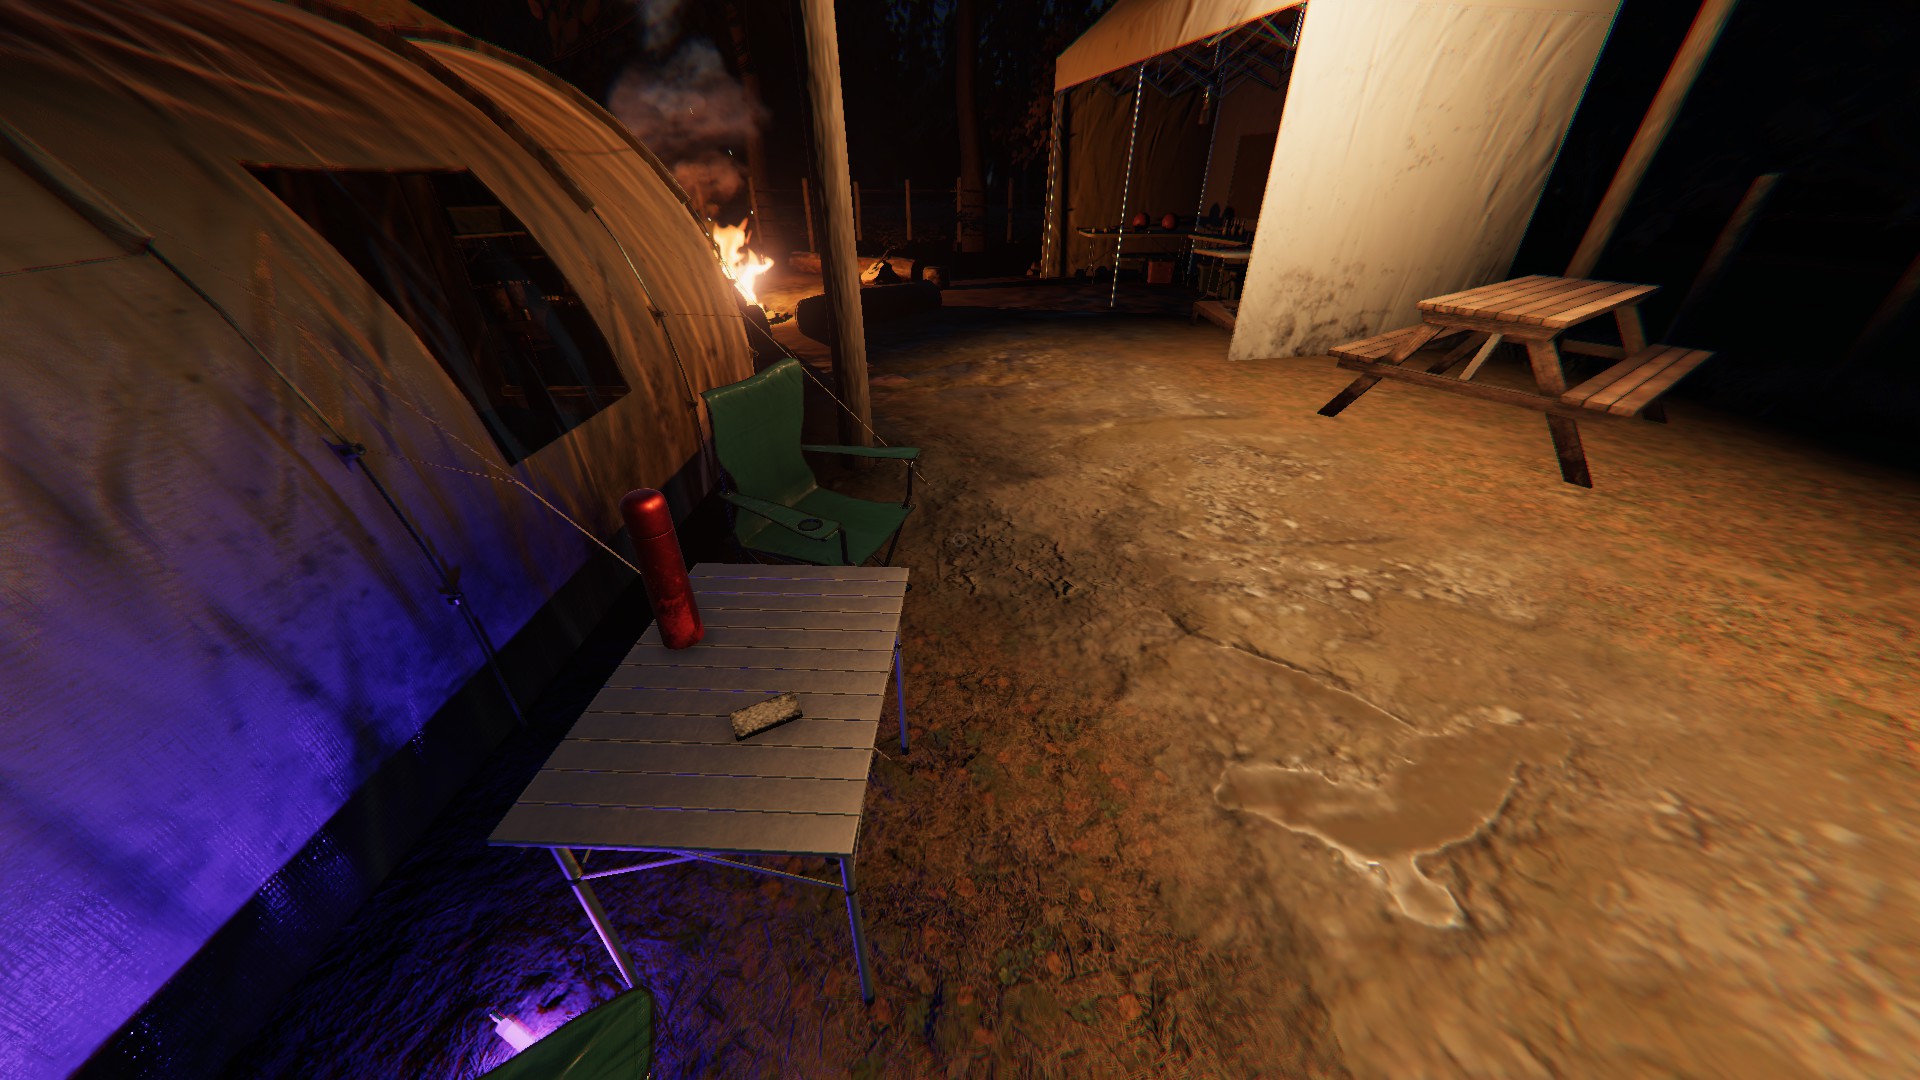
Past the fire pit, on a small table on the right side
Ouija Board
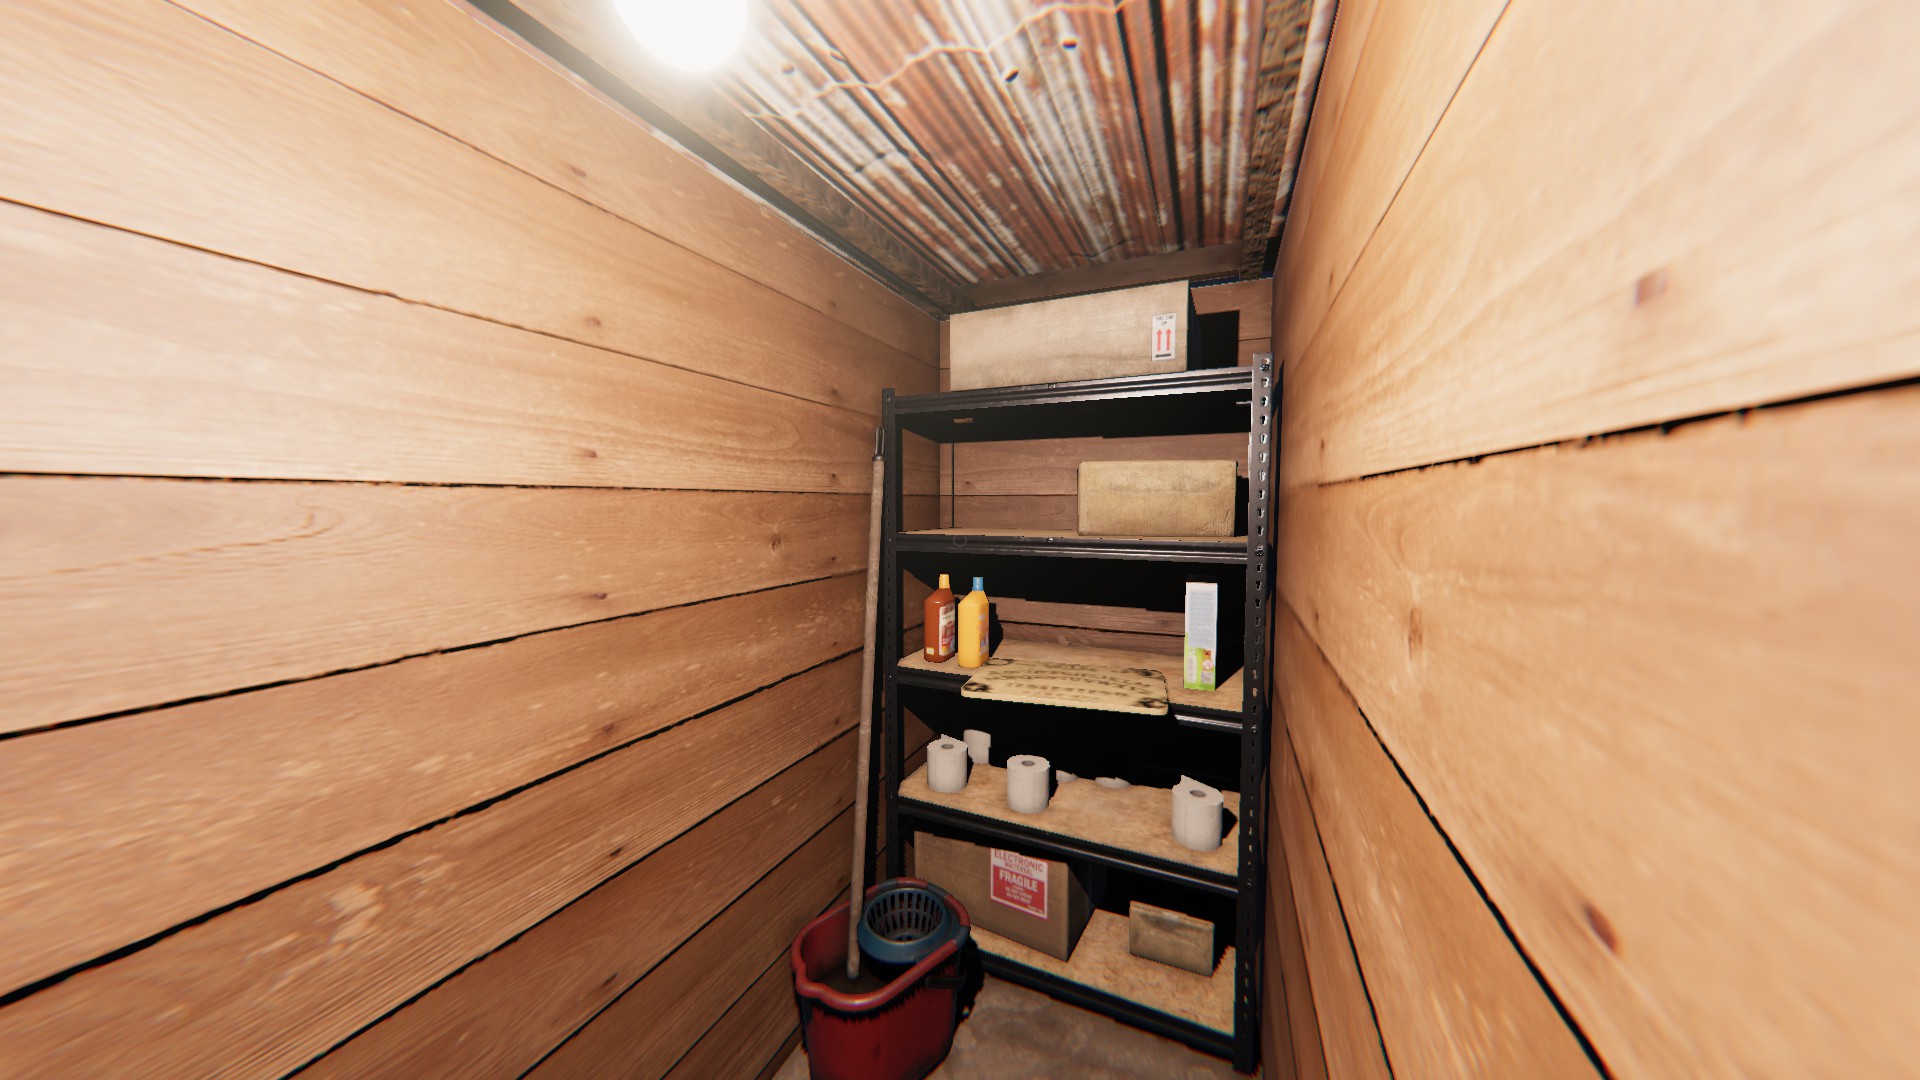
In the small alcove hallway behind the bathrooms building, on a shelf
Maple Lodge Campsite (NEW)
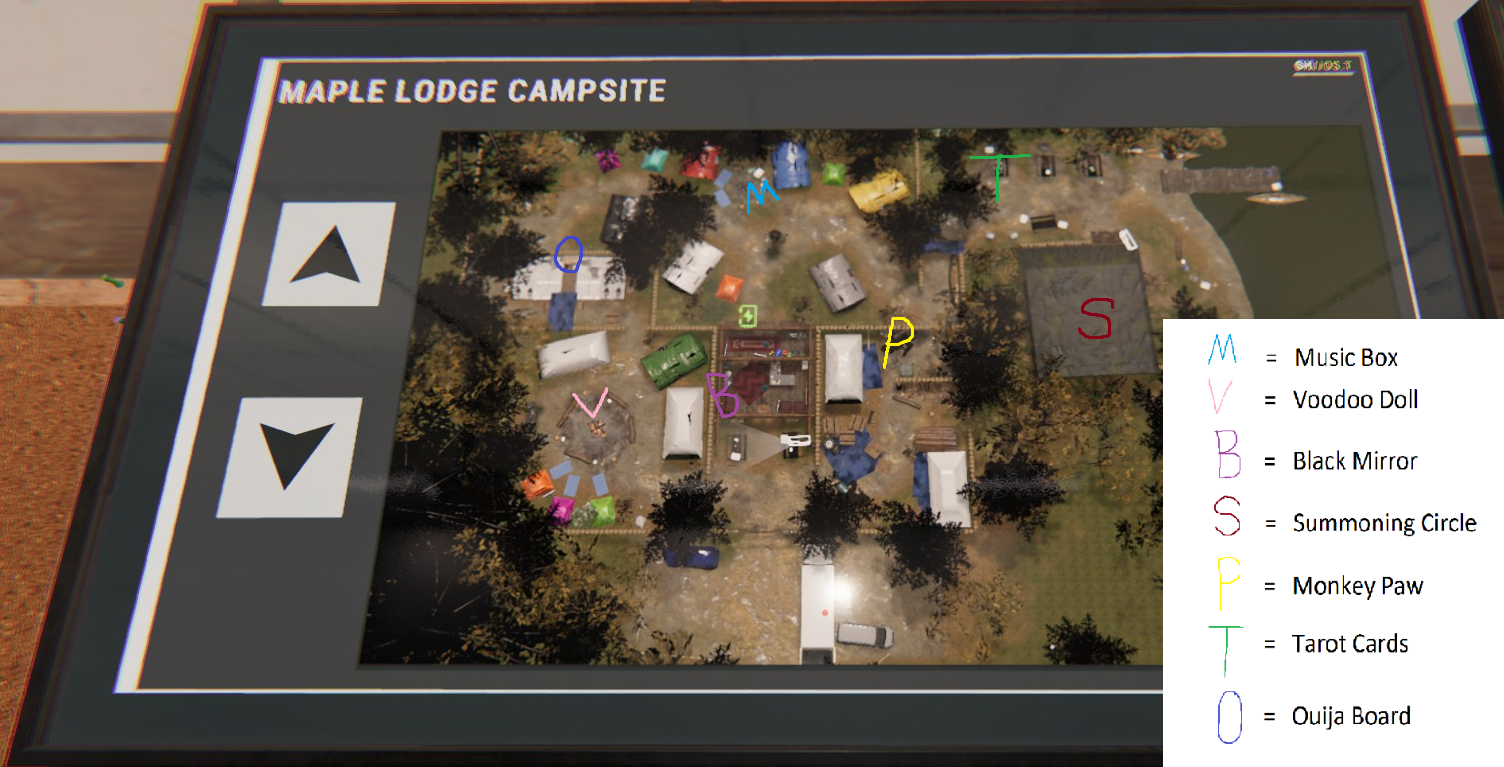 Music Box
At the campfire by the totem pole, sitting on a stump, straight back from spawn through the reception area
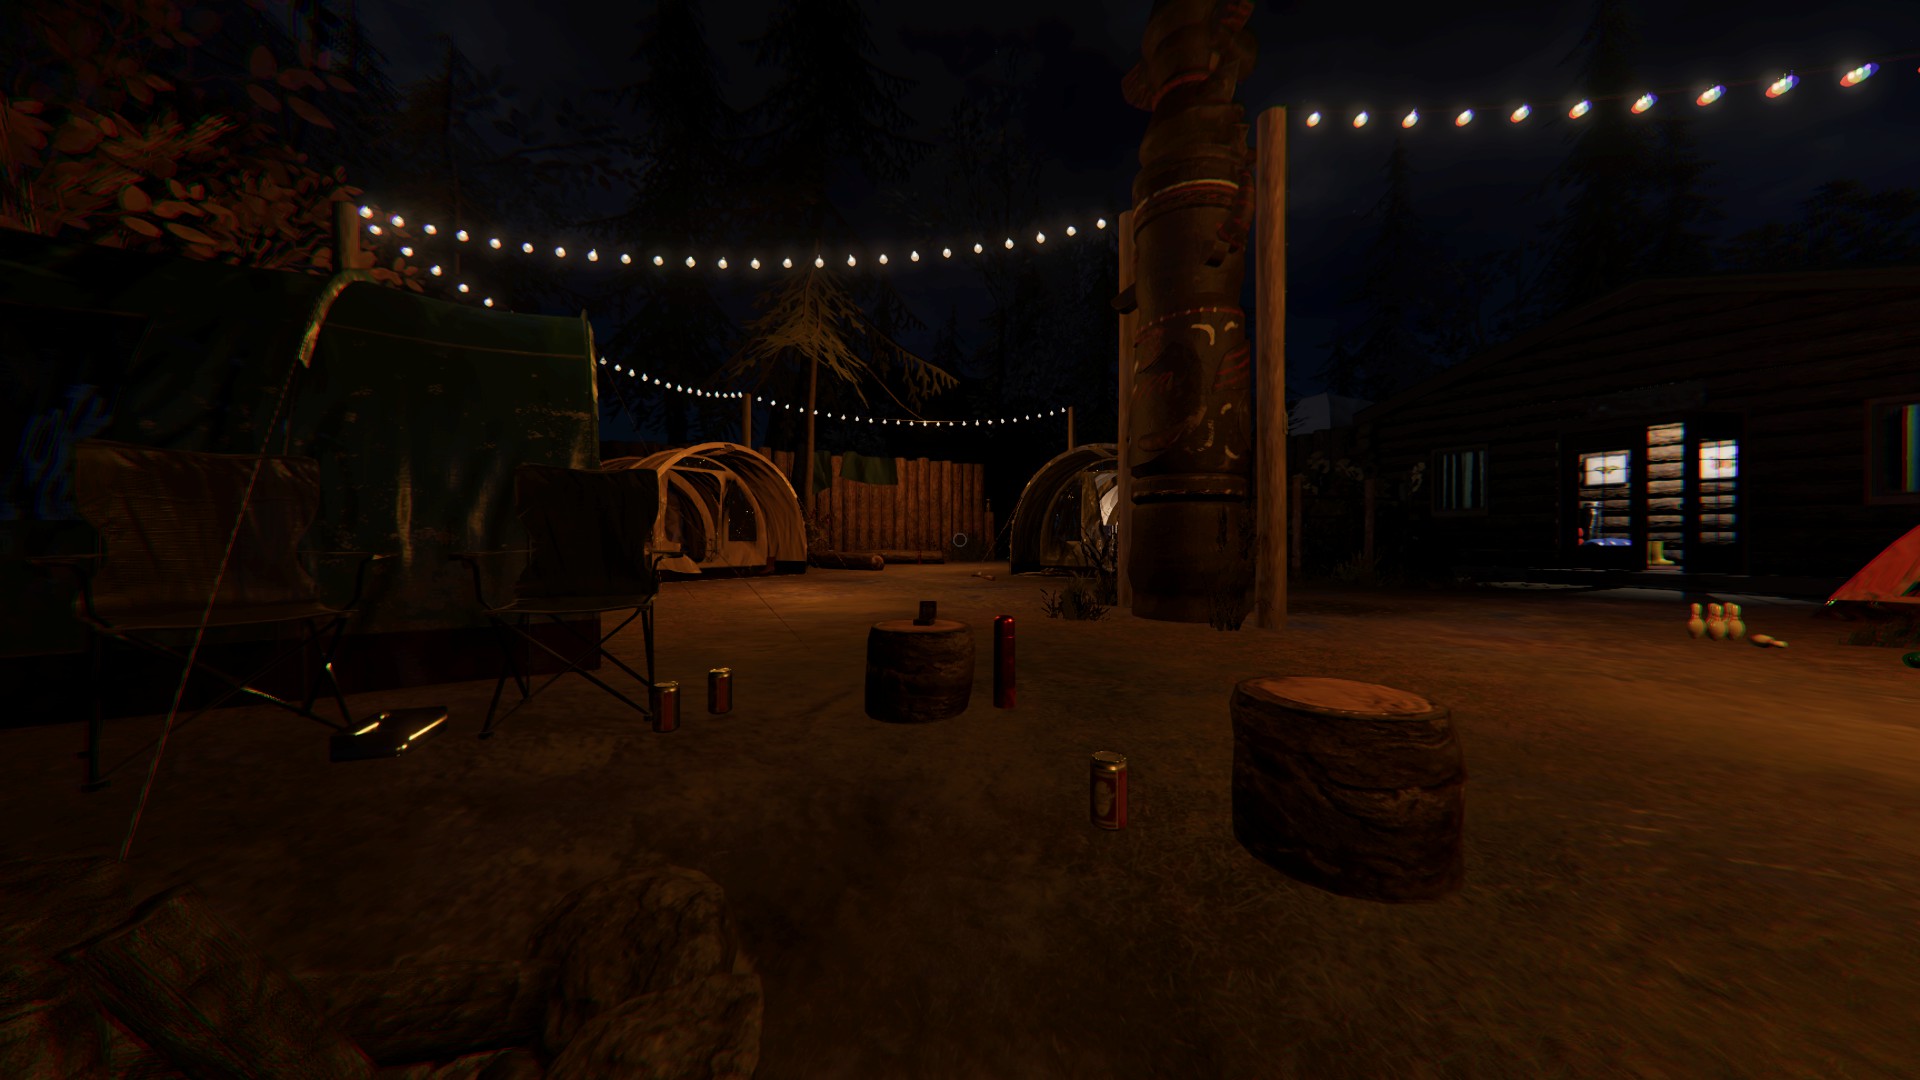
Black Mirror
In the immediate left hand side of the reception building above a couch
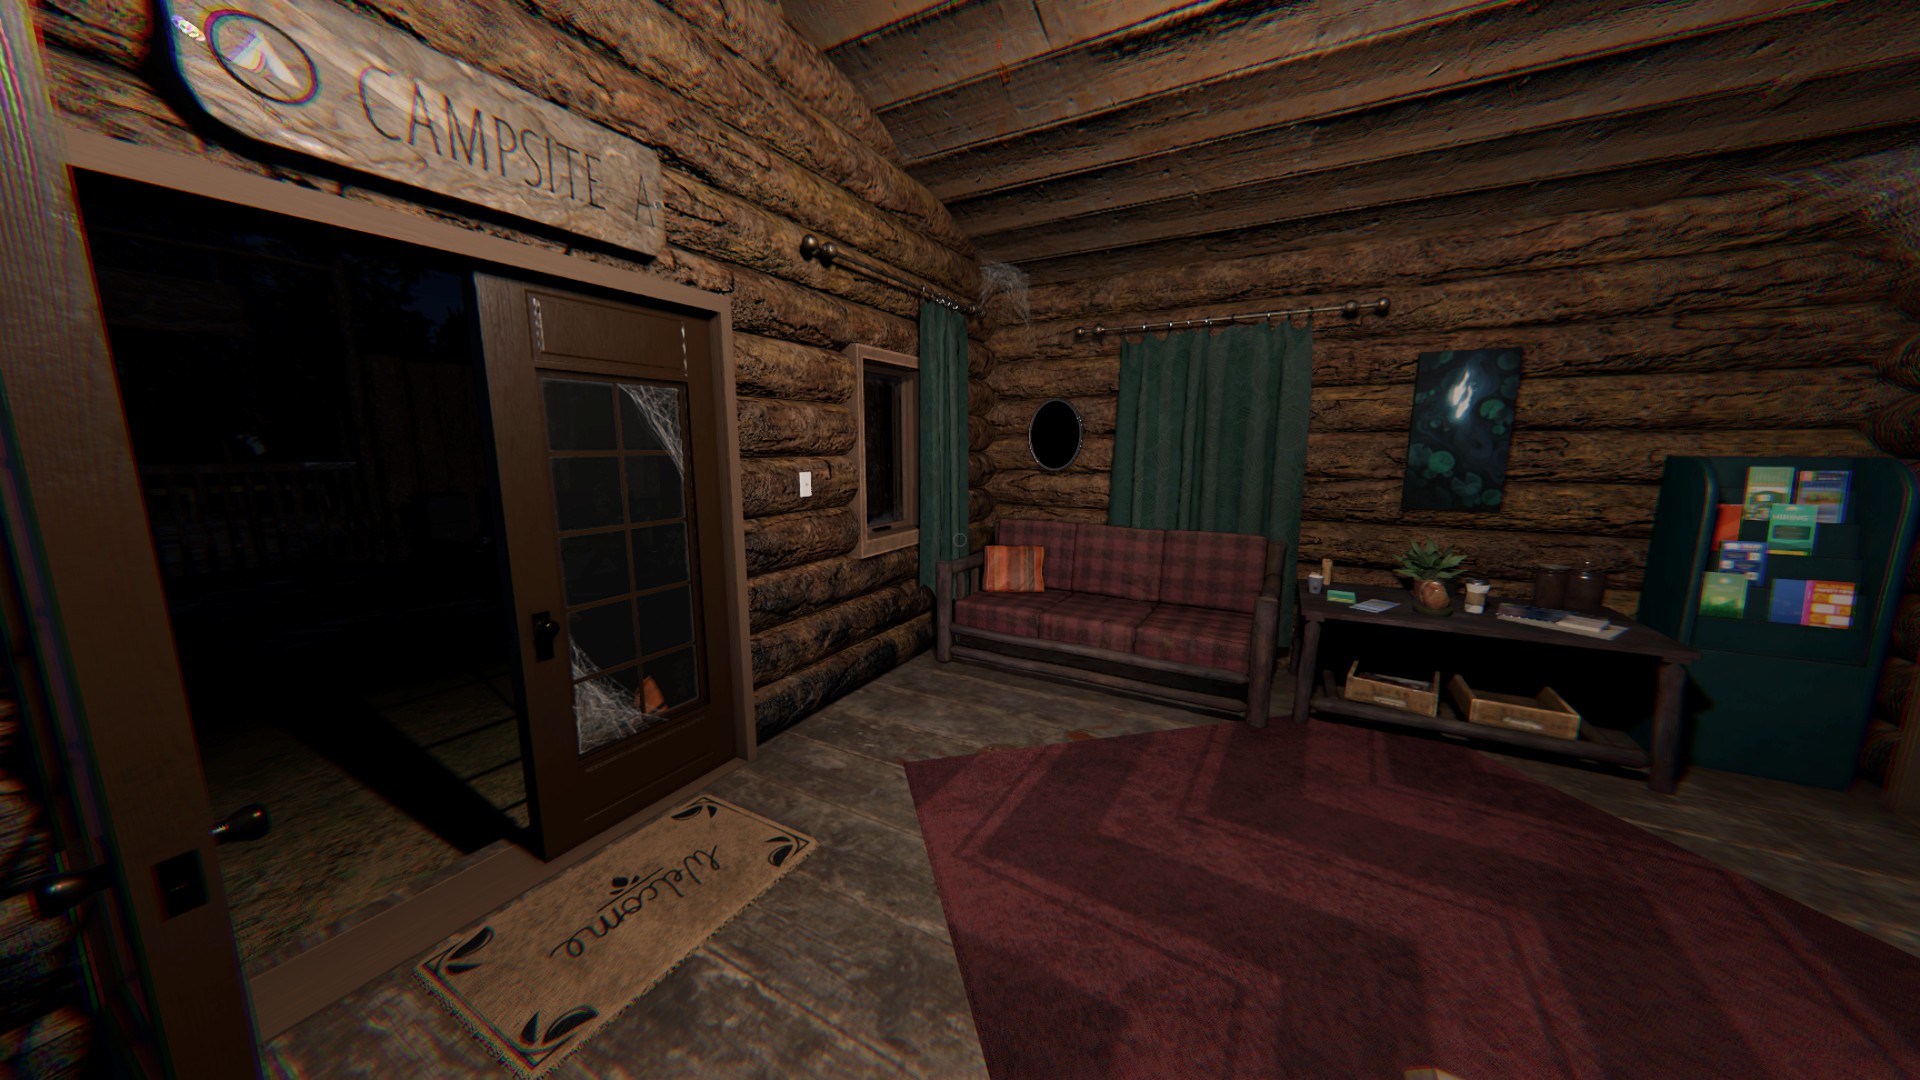
Voodoo Doll
On the left campsite from spawn, by the logs around the campfire
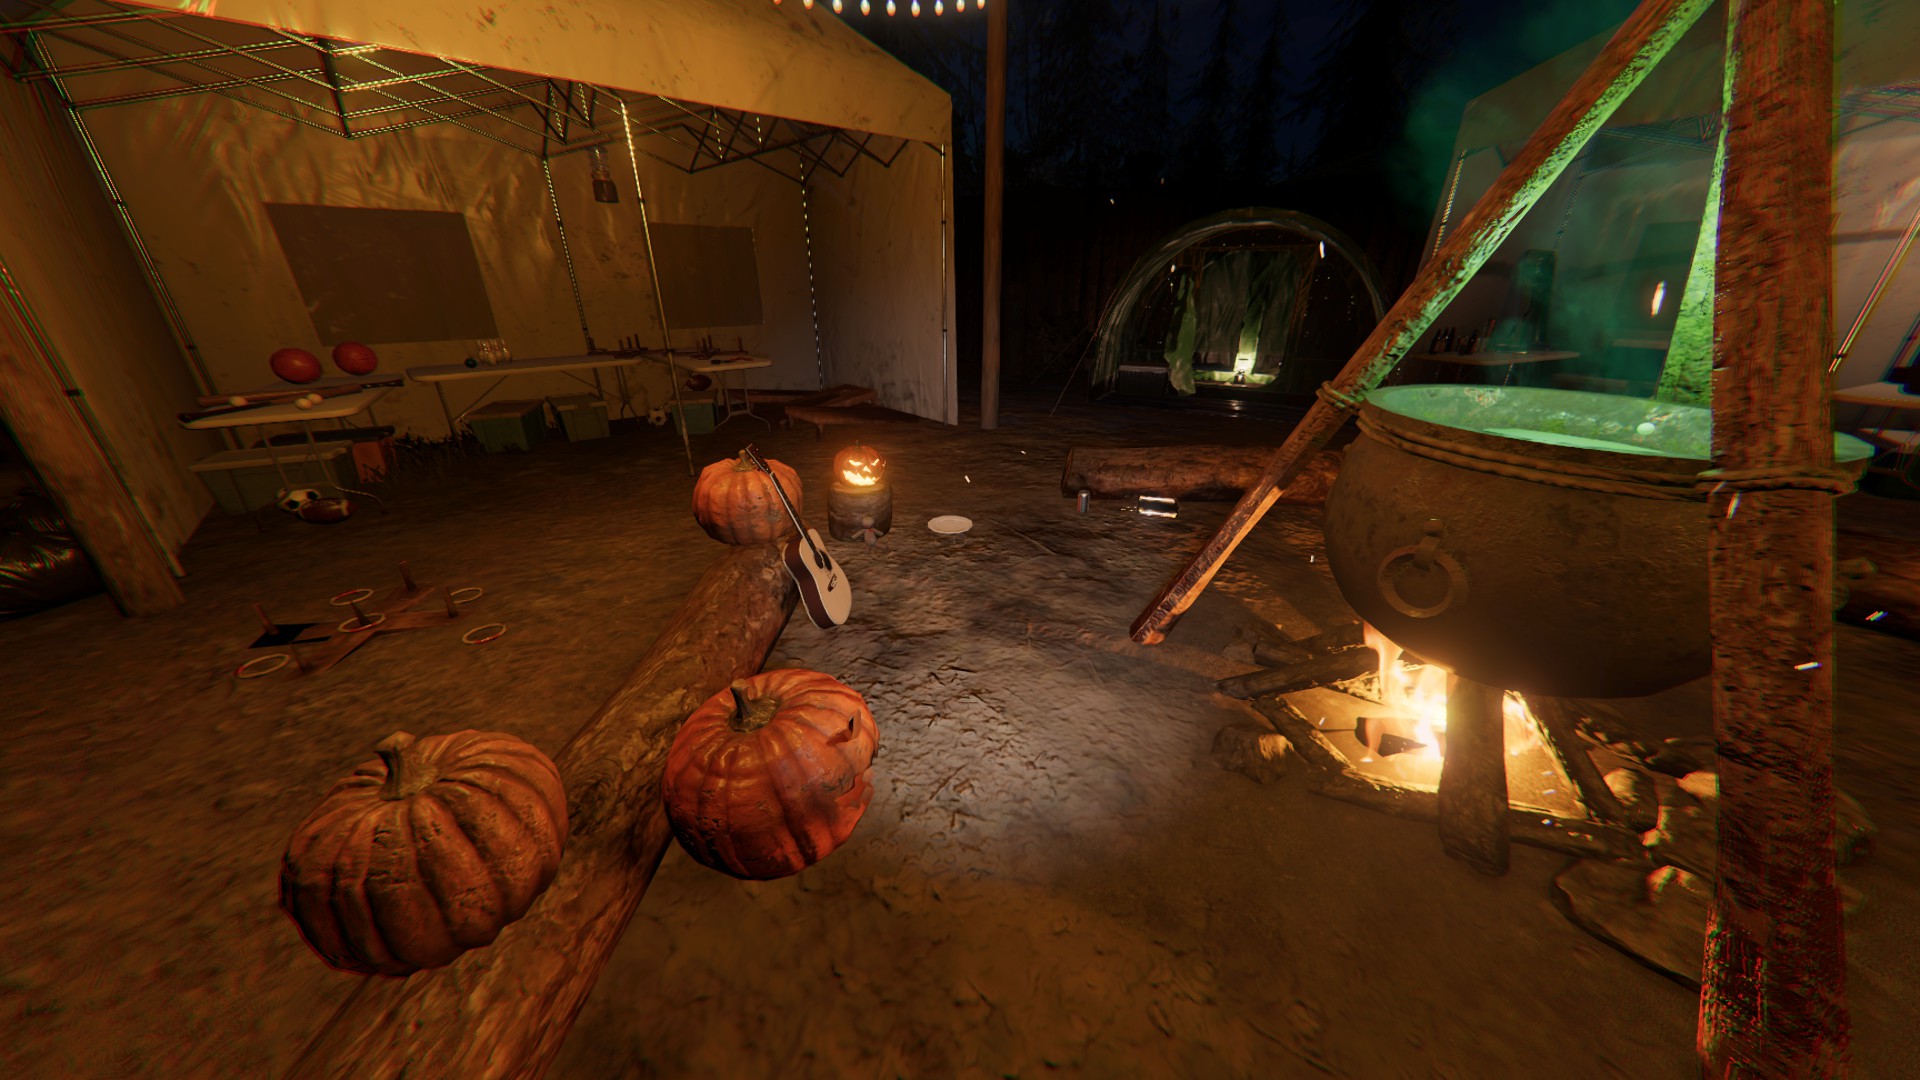
Summoning Circle
On the first floor of the cabin by the lake, at the base of the staircase. To unlock the cabin, pick up the key under the welcome mat at the front door of the cabin.
Monkey Paw
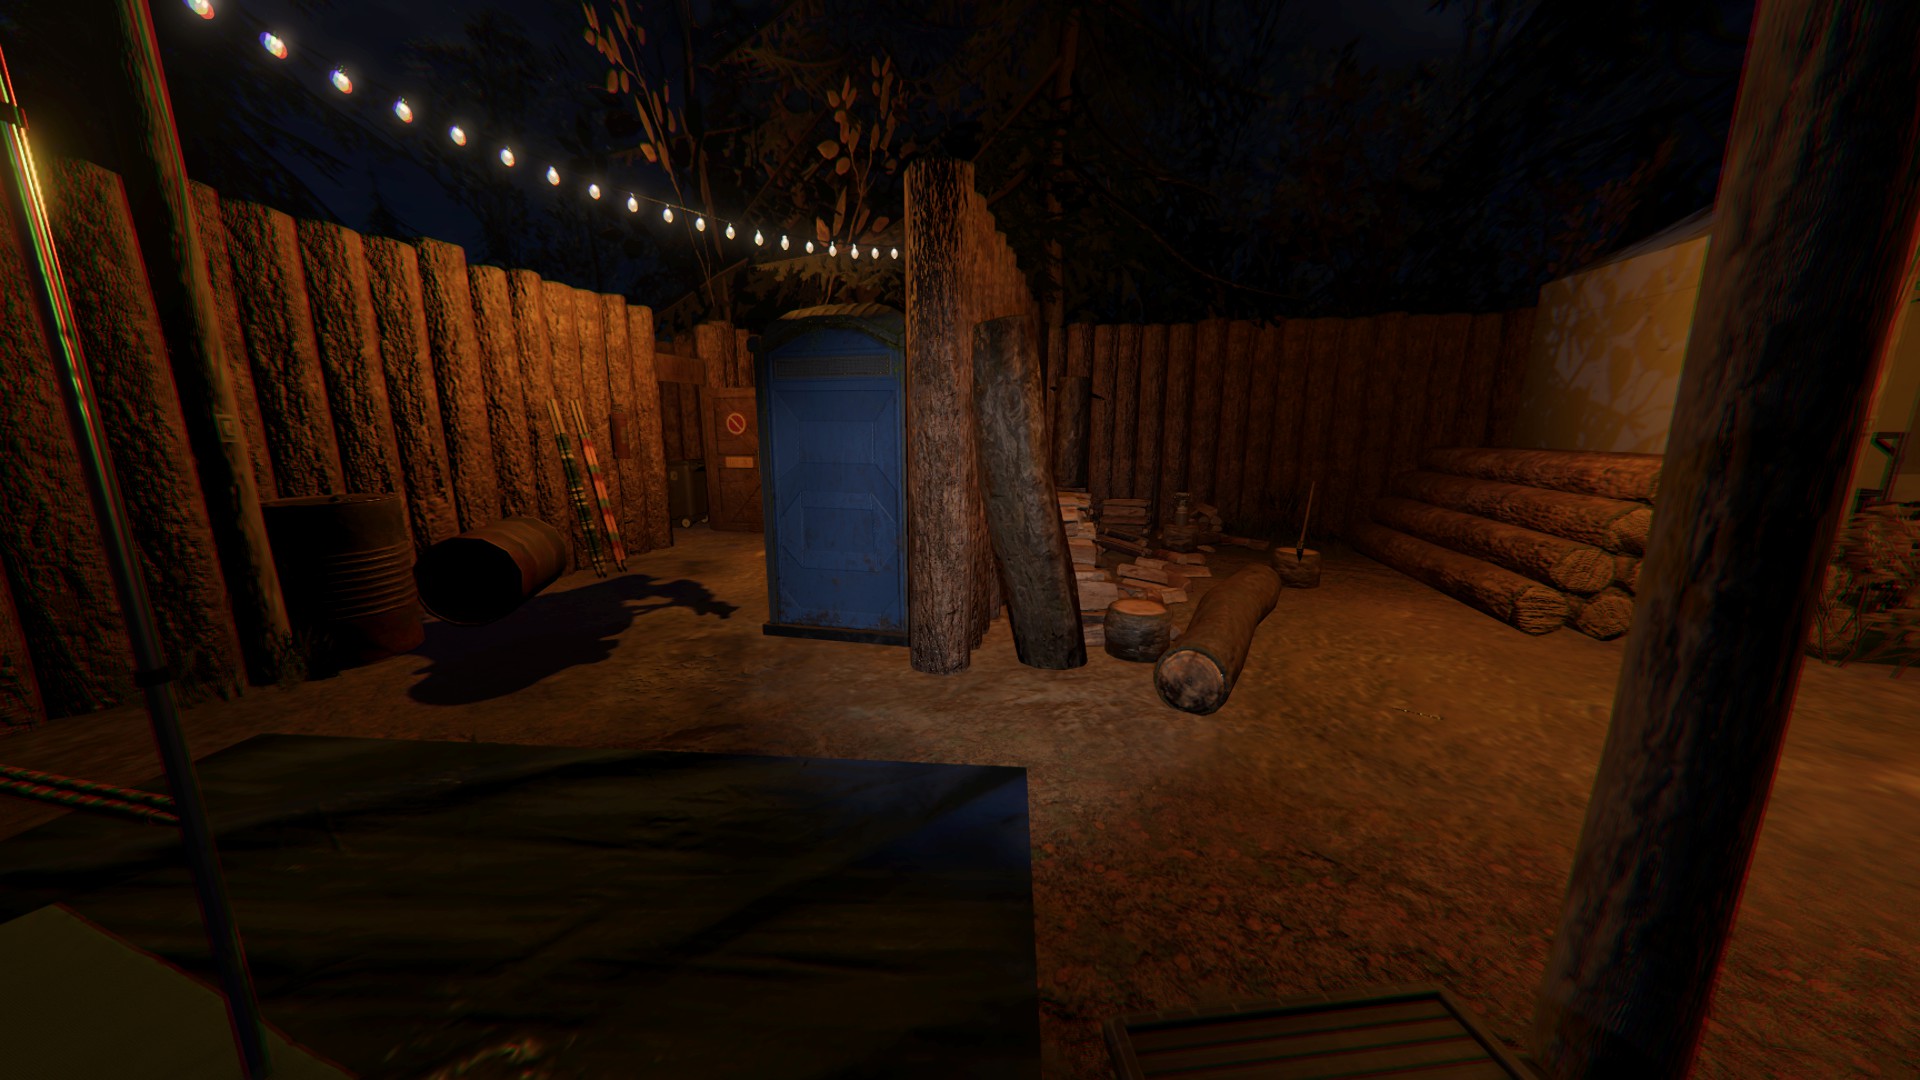
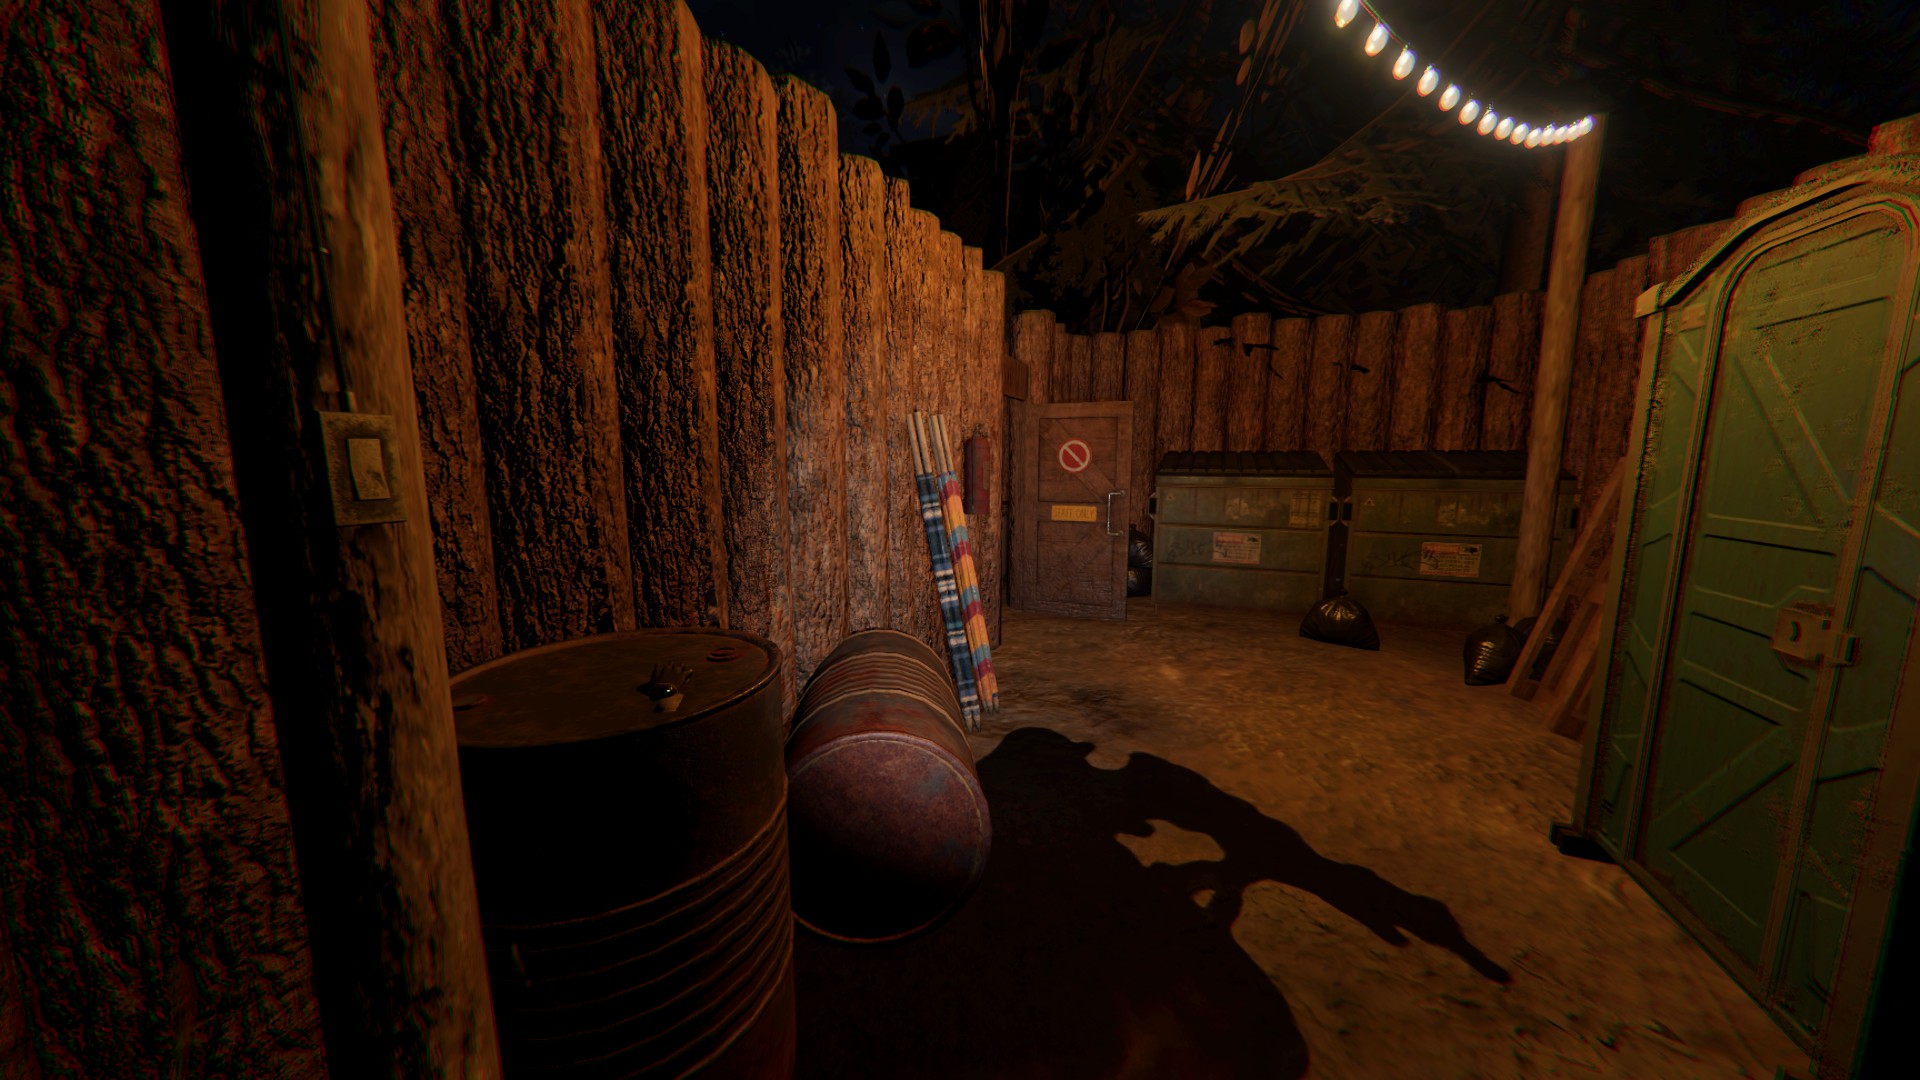
In the right hand area off of spawn, past the wood chopping area, on a barrel across from a porta-potty
Tarot Cards
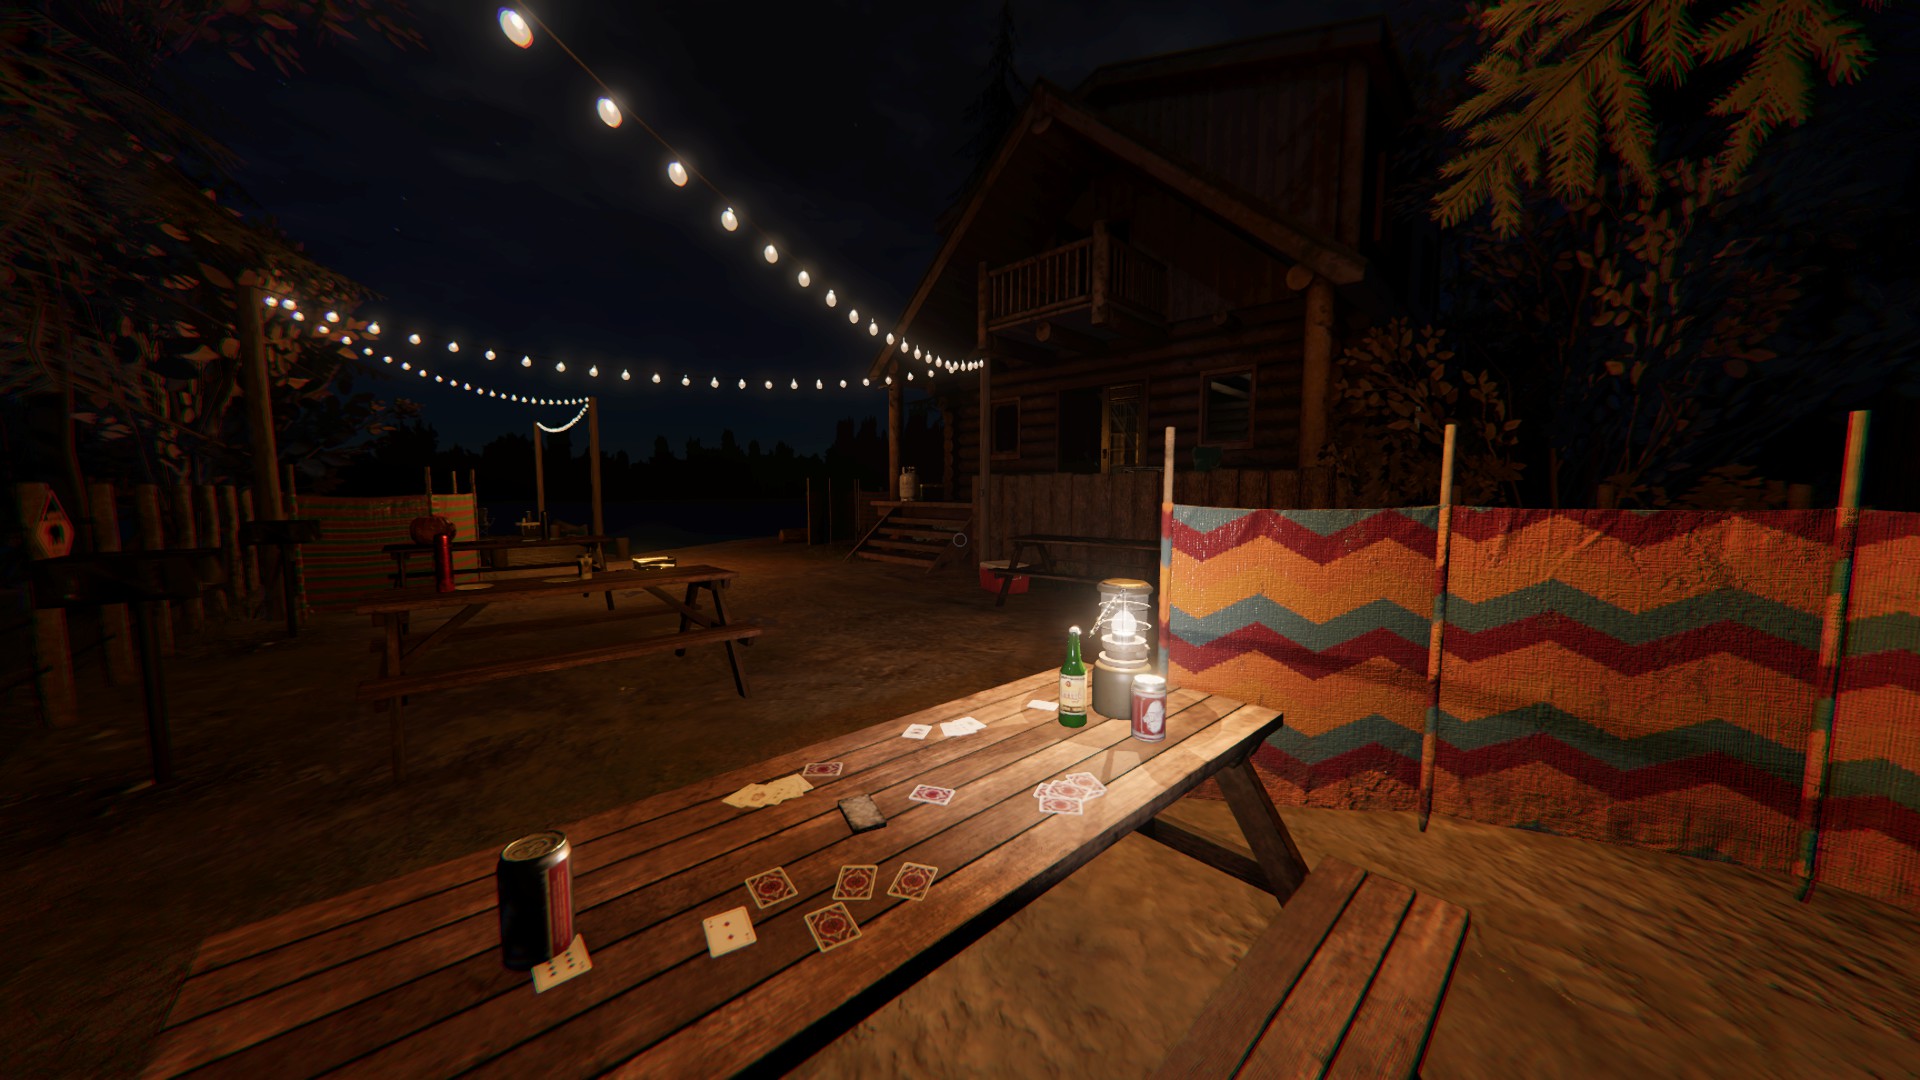
On the first picnic table outside the cabin by the lake
Ouija Board
In the alley/hallway on the backside of the restroom building in the back left of the map, on a shelf
Sources & Credit
https://www.youtube.com/watch?v=BnZF8NhJ7tM&list=PL01TrvZfeV6KyEDHdfFanJ5KtmbVYQQcd&ab_channel=AmberWixx
https://www.youtube.com/watch?v=sb7jJKbuOPU&ab_channel=ChickyTV
https://www.youtube.com/watch?v=982lURLany0&ab_channel=Psycho
- How to Talk to Ghosts, What to Say, What Questions to Ask★ 5 (1.9k)81k views3.2k ♥3 minUpdated 12 Jan, 2021
- Особенности призраков или как определить тип на КОШМАРЕ и ВЫШЕ★ 5 (1.2k)50k views2.8k ♥25 minRussianUpdated 25 Mar
- NO EVIDENCE CHALLENGE - Identify the ghost!★ 5 (467)36k views1k ♥42 minUpdated 16 Feb
- Ghost Handbook (Updated!)★ 5 (1.1k)31k views2k ♥12 minUpdated 28 Sep, 2025
- Phasmophobia Alan Wake Guide★ 5 (585)27k views482 ♥10 minUpdated 20 May
- Русские фразы на которые призрак реагирует👻★ 5 (541)24k views1.3k ♥5 minRussianUpdated 23 Jan, 2022

- Upgrading to PremiumTeam Fortress 2★ 5 (20k)1441k views11k ♥6 minUpdated May 11, 2022
- No More Room in Hell Official ManualNo More Room in Hell★ 5 (2.8k)569k views2.1k ♥29 minUpdated Apr 22, 2019
- NMRiH Community Hosting GuidesNo More Room in Hell★ 5 (526)351k views653 ♥1 minUpdated Aug 10, 2022
- Лучшие кооперативные игры SteamPAYDAY 2★ 5 (1.5k)315k views2.1k ♥56 minRussianUpdated Apr 27, 2025
- Desert Eagle Heat Treated | Blue GemCounter-Strike 2★ 5 (1.6k)292k views1.5k ♥2 minUpdated Jan 16
- Treasure Hunt Puzzle SolutionsTotal War: WARHAMMER II★ 5 (6.9k)281k views15k ♥3 minUpdated Aug 19, 2021






This guide was created by its original author on the Steam Community. Are you the author and want it removed? Request removal.