Vasari
Lore
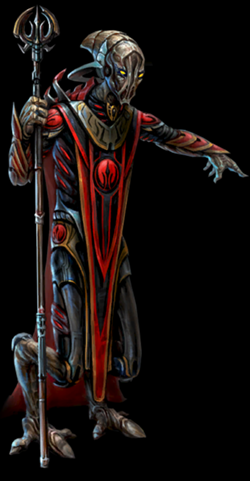
The ancient Vasari Empire once ruled over countless worlds. Beginning at the galactic core, the empire expanded uniformly, brought hundreds of alien races under its control, and showed no signs of slowing down.
Most species encountered were young enough to be subjugated peacefully, although, some resisted and were harshly enslaved. Those who had expanded into space were quickly exterminated. Once conquered, most species were integrated into the Vasari social structure as “valued citizens”. The Vasari locked each planet down and ruled from vast orbital structures, finding a minimal surface presence more effective for both production and the minimization of rebellion.
When the first of the inner planets fell, analysts initially assumed that the local species had somehow managed to rebel. They immediately requested a wing of the Dark Fleet to restore order but no status reports were ever received. Instead, three more planets dropped from the communications grid. The probability of multiple, simultaneous, and successful rebellions was exceptionally remote. Internal Intelligence concluded that a renegade force from within the Vasari engineered a revolt. As deliberations proceeded on how best to deal with the traitorous acts, another series of planets were lost, including their world of origin. The unknown enemy’s rate of expansion far exceeded even that of the entire Dark Fleet. As a last resort, the Dark Fleet Veerr brought the bulk of their forces back from the expansionary frontier and massed for a blind assault on whatever was eating its way out from the central worlds.
The inhabitants of a perimeter planet were surprised when a single warship of the Dark Fleet appeared out of Phase Space bearing signs of heavy damage. Their curiosity and confusion quickly gave way to fear when they boarded the ship and found the crew apparently mad with terror.
In a rare act of autonomy, the colony decided it would be best to take precautions and temporarily evacuate to a system far from the Empire.
The refugees waited for signs of a safe return but instead, the signal from their warning beacons ceased. The lifetimes of the warning beacons were used to estimate the speed of the threat. It would not be long before their current position would be compromised. Additional beacons were placed at their current location and the group moved on to a considerably further destination.
Settling for a time, the refugees started to build colonies, construct new ships, and extract resources. Ultimately, their goal was to uncover the nature of the threat, to research technologies that might aid in its destruction, and to restore the rule of the Empire.
For the next ten thousand years this pattern would repeat - the growing Vasari Exodus Fleet only ever a generation ahead of the relentless, unknown enemy.
When the Vasari arrived in Trader Space ten years ago, they were confident in their ability to quickly deal with the locals. Initially, the victories were painless – the scouts alone procured the initial settlements – but as time went on it became clear that the local space-faring species would not be so easy to eliminate.
Now, the Vasari are caught in a stalemate, and in some positions, on the verge of being pushed back. A state of panic ensues. Already too entrenched in this disastrous war, the Vasari are simply unable to withdraw without catastrophic losses. Even worse, the conflict is consuming resources faster than can be put into the reserve. They will not be able to fuel the next phase of their exodus and time is running out.
Tips
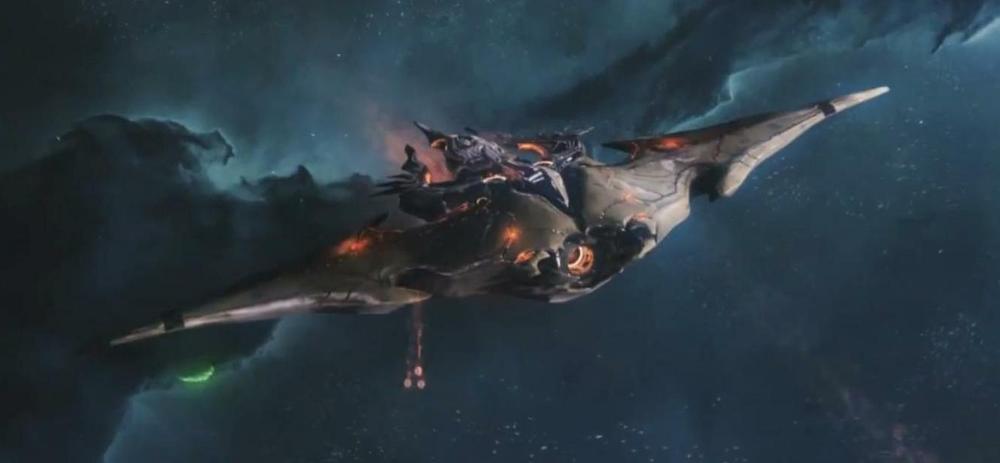
If your a new player to Sins of a Solar Empire then I want to take a moment and say welcome to one of the great RTS games out there.
Now for the tips I promised
- The Vasari are Phase experts
Capable of jumping to new stars and exploring wormholes before the other races.
Not only does this work for exploration but the Vasari's missles are capable of bypassing an enemies shields after researching Phase Miniaturization as well as detecting any enemy phase jumps where as the TEC and Advent can only detect the movements of enemies up to TWO phase jumps away from a planet they control - The Vasari's colony frigate doubles as a Starbase building frigate
This is unique to the vasari as the Advent and the TEC must research a new ship in order to build a starbase - Sivuskras Ruiner (aka the minelayer)
This a Vasari unique unit. While other races rely on constructor ships or drones to deploy spatial charges, the Vasari have a dedicated vessel for this task in the Sivuskras Ruiner. The mobility of Ruiner allows the Vasari to deploy minefields on any world - which can be a nasty surprise for unaware enemies jumping into a gravity well.
A vicious strategy is to combine the Sivuskras Ruiner with the Kostura Cannon or Stilakus Subverter. The Kostura or Subverter can stun enemy forces temporarily, preventing them from attacking. Use this to quickly lay mines around them. The enemy will be helpless to do anything and their entire fleet may be destroyed as a result. - The Vasari have 4 levels of research on mineral extration allowing them to amass metal and crystal faster than the other races
this can be really good if your on a team in online gameplay as you can "feed" your allies to help your team to victory. - The Vasari Starbase is the only starbase that's truly moblie
By this i mean that the starbase of the vasari can move around in it's orbit where the others are stationary and if you are playing as the rebel vasari your starbase can phase jump between planets that have a phase stablizor in it. - Phase Stablization
The Phase Stabilizer is the Vasari's unique tactical structure. It has the ability to allow fleets to do a phase jump from one point that has a Stabilizer to another in the same star system.
Also the vasari Starbase and Antorak Marauder capital ship (at level 6) can stablize any gravity well that it's in for a short time.
A strategy that i like to use is to have a level 6 or higher Antorak Marauder with a small to medium strike fleet positioned on a planet with a Phase Stabilizer and the Kostura Cannon (which i'll explain in a moment) for a blitz strike on an enemy planet. - The Kostura Cannon
This is one of the BFG's of the game while it is not like the TEC's Cannon which damages the planet or the Advent's cannon which spreads you culture on enemy planets. the Vasari's cannon is able to damage orbital structures, but even that's not the selling point on the Kostura Cannon. The Kostura Cannon is able to stablize phase space and disable enemy structure on an ENEMY planet for a short time allowing you to bypass all the enemy's defensive planets and jump steight to the heart of the enemies empire (assuming that their in the same star system as your fleet and Phase stablizer) or run sorties on enemy worlds that have a cannon on them as well or just to be a nuscience to your enemy. - Balance your fleet
Now while you may be thinking that building a fleet of Kanrak Assailant (the long range missle frigates) is a great idea since the vasari missles can bypass sheilds, well your right but as with any long range frigates they have low hull points and a fleet of carriers with fighters can take on the missle frigates. a well balanced fleet will incorporate most if not all of the vasari's ships Junsurak Sentinel for anti-strike craft, pleanty of Kanrak Assailant for range, several Ravastra Skirmisher (the basic light frigate) later replaced by the Skarovas Enforcer (the Heavy crusier) a couple of Serevun Overseer and several Stilakus Subverter (Defensive Support Cruiser and Offensive Support Cruiser respectivly) and your choise of capital ship of to lead it ( I prefer the Jarrasul Evacuator)
Ships
This section is dedicated to the ships and what they do and how many labs you need to get them. Please note the names if it says frigate then you need to look in the Frigate section of your ship factory if it says Cruiser you need to look in the cruiser section of your frigate factory.
let's begin.
The Basic Combat Units
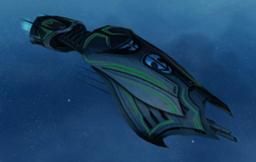
The Ravastra Skirmisher is the Vasari's Light Frigate.
No Weapons labs needed.
Strong vs. antifighter frigates, siege frigates, carrier cruisers and utility cruisers.
This is your basic combat frigate the Ravastra Skirmisher is more expensive than the light frigate of the other races but it's also tougher.
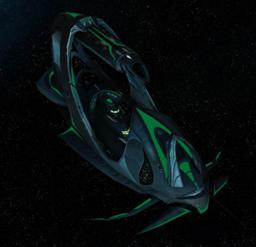
The Kanrak Assailant is the Vasari's Long Range Frigate.
You need 1 Weapons labs to research these.
Strong vs. light frigates
Even with basic Phase Missile upgrades, massed Assailants are probably the cheapest and most reliable way to destroy enemy capital ships, at least in the early-mid game.
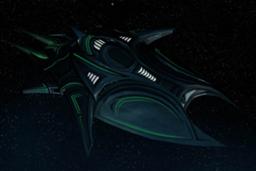
The Junsurak Sentinel is the Vasari's Anti-Strike Craft Frigate.
You need 2 Weapons labs to research these.
Strong vs. fighter strike craft.
Like all flak frigates, the Sentinel is effective both at attacking enemy strike craft and at engaging targets with Light Armor, such as long range frigates.
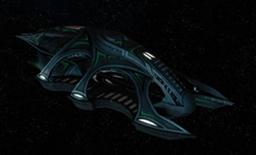
The Lasurak Transporter is the Vasari's Squadron Support Cruiser.
You need 3 Weapons labs to research these.
Strong vs. none.
Carriers can manufacture fighters to counter enemy bombers and lightly-armored targets like long range frigates, but watch out for flak, which can quickly decimate multiple squadrons of fighters.
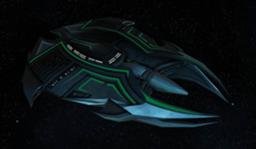
The Skarovas Enforcer is the Vasari's Heavy Combat Cruiser.
You need 5 Weapons labs to research these.
Strong vs. antifighter frigates, long range frigates, siege frigates, carrier cruisers, utility cruisers and capital ships.
The Enforcer is well-named, indeed. Serving as the Vasari's Heavy Combat Cruiser, the Skarovas Enforcer is meant to rip through the enemy lines, and keep them from escaping with its Inertial Field. However, the target has to be right next to the Enforcer before it can use its field, but that's precisely where you want to be, anyway. When activated, the Field reduces movement and acceleration by 100%, slowing its victims to a crawl, if not stopping them outright. They CAN still phase jump, however, so it's best to catch them mid-flight, deep within the planet's gravity well.
Non-Combat (Support) Units
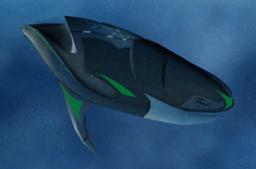
The Jikara Navigator is the Vasari's Scout Frigate.
No Weapons labs needed.
Slightly more expensive in both resource and fleet supply costs, the Navigator has a shining advantage over the other two scout frigates: it can crew neutral extractors. While this may not seem like a huge advantage at first, keep in mind that neutral extractors produce more resources than any other extractors and cannot be destroyed directly.
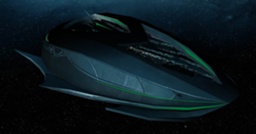
The Jarun Migrator is the Vasari's Colony Frigate and Starbase Construction Frigate.
No Weapons labs needed (except to research the ability to build star bases which require 2 weapons lab).
This is your non-capital colonization ship
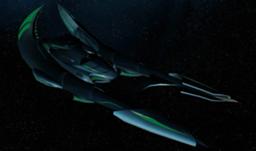
The Karrastra Destructor is the Vasari's Siege Frigate.
You need 1 Weapons labs to research these.
Functionally identical to the other two faction's planetary siege frigates, the Karrastra's sole purpose is to attack a planet. Unique to it is the positioning of its armament, allowing it to return fire on any defenders while it continues its siege, though its damage output makes this a token gesture. Late game research allows for it to attack from 40% further away than other siege frigates, allowing it to engage planets faster and stay out of range of some of their defenses.
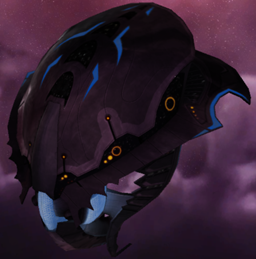
The Sivuskras Ruiner is the Vasari's Minelayer Cruiser.
You need 3 Weapons labs to research these.
The Sivuskras Ruiner is an odd ship - it doesn't directly attack, but instead acts as a minelayer for the Vasari. If upgraded, it can lay down Gravity Mines, which home in on their target - once they detonate, the enemy is unable to escape for a considerable period. The basic Explosive Mines, however, work much like the TEC's Proximity Mine Field or the Advent's Homing Mines, which deploy from Homing Mine Squadrons - once an enemy comes near, they blow up and deal damage.
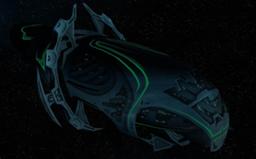
The Serevun Overseer is the Vasari's Defensive Support Cruiser.
You need 4 Weapons labs to research these.
While incapable of offensive abilities like its Advent and TEC counterparts, the Overseer is overwhelmingly good at protecting other ships. The method of this is not quite as direct as the Iconus Guardian's Shield Projection, but the ability to instantly restore a large amount of hull points to a friendly ship means that a small company of Overseers can keep a ship alive longer.
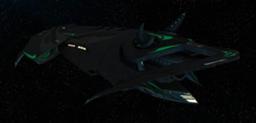
The Stilakus Subverter is the Vasari's Offensive Support Cruiser.
You need 5 Weapons labs to research these.
While only marginally effective in general combat, the Subverter shines when the battle is already won. The ability to disable shields is secondary to being able to tackle and hold down enemy frigates and cruisers while heavier ships pound them away to nothing. This tactic is especially useful against carrier cruisers who are notorious for hanging on the edge of a system, able to warp out at a second's notice.
let's begin.
The Basic Combat Units
The Ravastra Skirmisher is the Vasari's Light Frigate.
No Weapons labs needed.
Strong vs. antifighter frigates, siege frigates, carrier cruisers and utility cruisers.
This is your basic combat frigate the Ravastra Skirmisher is more expensive than the light frigate of the other races but it's also tougher.
The Kanrak Assailant is the Vasari's Long Range Frigate.
You need 1 Weapons labs to research these.
Strong vs. light frigates
Even with basic Phase Missile upgrades, massed Assailants are probably the cheapest and most reliable way to destroy enemy capital ships, at least in the early-mid game.
The Junsurak Sentinel is the Vasari's Anti-Strike Craft Frigate.
You need 2 Weapons labs to research these.
Strong vs. fighter strike craft.
Like all flak frigates, the Sentinel is effective both at attacking enemy strike craft and at engaging targets with Light Armor, such as long range frigates.
The Lasurak Transporter is the Vasari's Squadron Support Cruiser.
You need 3 Weapons labs to research these.
Strong vs. none.
Carriers can manufacture fighters to counter enemy bombers and lightly-armored targets like long range frigates, but watch out for flak, which can quickly decimate multiple squadrons of fighters.
The Skarovas Enforcer is the Vasari's Heavy Combat Cruiser.
You need 5 Weapons labs to research these.
Strong vs. antifighter frigates, long range frigates, siege frigates, carrier cruisers, utility cruisers and capital ships.
The Enforcer is well-named, indeed. Serving as the Vasari's Heavy Combat Cruiser, the Skarovas Enforcer is meant to rip through the enemy lines, and keep them from escaping with its Inertial Field. However, the target has to be right next to the Enforcer before it can use its field, but that's precisely where you want to be, anyway. When activated, the Field reduces movement and acceleration by 100%, slowing its victims to a crawl, if not stopping them outright. They CAN still phase jump, however, so it's best to catch them mid-flight, deep within the planet's gravity well.
Non-Combat (Support) Units
The Jikara Navigator is the Vasari's Scout Frigate.
No Weapons labs needed.
Slightly more expensive in both resource and fleet supply costs, the Navigator has a shining advantage over the other two scout frigates: it can crew neutral extractors. While this may not seem like a huge advantage at first, keep in mind that neutral extractors produce more resources than any other extractors and cannot be destroyed directly.
The Jarun Migrator is the Vasari's Colony Frigate and Starbase Construction Frigate.
No Weapons labs needed (except to research the ability to build star bases which require 2 weapons lab).
This is your non-capital colonization ship
The Karrastra Destructor is the Vasari's Siege Frigate.
You need 1 Weapons labs to research these.
Functionally identical to the other two faction's planetary siege frigates, the Karrastra's sole purpose is to attack a planet. Unique to it is the positioning of its armament, allowing it to return fire on any defenders while it continues its siege, though its damage output makes this a token gesture. Late game research allows for it to attack from 40% further away than other siege frigates, allowing it to engage planets faster and stay out of range of some of their defenses.
The Sivuskras Ruiner is the Vasari's Minelayer Cruiser.
You need 3 Weapons labs to research these.
The Sivuskras Ruiner is an odd ship - it doesn't directly attack, but instead acts as a minelayer for the Vasari. If upgraded, it can lay down Gravity Mines, which home in on their target - once they detonate, the enemy is unable to escape for a considerable period. The basic Explosive Mines, however, work much like the TEC's Proximity Mine Field or the Advent's Homing Mines, which deploy from Homing Mine Squadrons - once an enemy comes near, they blow up and deal damage.
The Serevun Overseer is the Vasari's Defensive Support Cruiser.
You need 4 Weapons labs to research these.
While incapable of offensive abilities like its Advent and TEC counterparts, the Overseer is overwhelmingly good at protecting other ships. The method of this is not quite as direct as the Iconus Guardian's Shield Projection, but the ability to instantly restore a large amount of hull points to a friendly ship means that a small company of Overseers can keep a ship alive longer.
The Stilakus Subverter is the Vasari's Offensive Support Cruiser.
You need 5 Weapons labs to research these.
While only marginally effective in general combat, the Subverter shines when the battle is already won. The ability to disable shields is secondary to being able to tackle and hold down enemy frigates and cruisers while heavier ships pound them away to nothing. This tactic is especially useful against carrier cruisers who are notorious for hanging on the edge of a system, able to warp out at a second's notice.
Capital Ships
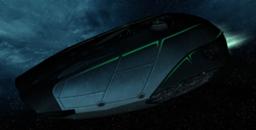
Jarrasul Evacuator
colony-class capital ship
As standard with the other "Mothership" Capital Ships, the Evacuator comes with the ability Colonize that allows the colonized planet/asteroid the ability to build structures 20% faster for 4/8/12 minutes at levels 1/2/3 respectively. The cooldown per level is 2/1.5/1 minute(s) at levels 1/2/3.
Gravity Warhead, the Jarrasul's second ability, works similarly to the Akkan Battlecruiser's Ion Bolt. It prevents the target from escaping, and its move and acceleration speeds are greatly reduced. Unlike Ion Bolt however, it does not fully disable the target ship and actually is an area of effect around the target, allowing the player to stop groups of enemies from fleeing.
Nano-Disassembler, the third ability, fires a small blob of nanites at the target, causing a loss of armor and dealing 25 damage per second. It lasts for 25/35/45 seconds and the armor penalty is -1.5/-3/-4.5 at levels 1/2/3. What makes this ability truly formidable is that the damage bypasses shields (so it is not reduced by shield mitigation) and is applied directly to the hull of the targeted ship.
The "Ultimate" ability of the Evacuator is Drain Planet, which does exactly what it says on the tin. The Jarrasul closes to within 6600 kilometers of the planet before firing an eerie green vortex, dealing 45 bombing damage per second while stealing 15 resources per second, over 30 seconds.
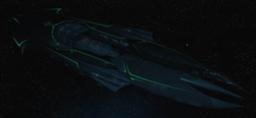
Skirantra Carrier
carrier-class capital ship
Though it might be tempting to get a Kortul Devastator as your first capital ship, the Skirantra's Repair Cloud probably makes the carrier a safer bet, as you can heal your ships if they're damaged. This is crucial early in the game, as the Vasari require more supply for their ships than the other races (excepting their Capital Ships, which remains the same), and thus cannot field as many at once.
Scramble Bombers is a "panic-button" ability. If you find yourself in a tight spot, say against another capital, you can briefly deploy an additional squadron of bombers to assist with the fight. Generally, this ability will eat up antimatter like nobody's business, and is something you may want to use carefully. On the other hand, selecting the Scramble Bombers ability early lets you focus most of your effort on fighters, and still field respectable numbers of bombers. This lets you field substantially more striking power than is normally the case, and is a powerful advantage early in the game.
Microphasing Aura allows all fighters, be they the Skirantra's or not, to instantly warp to a better spot in a given area around the Carrier.
Replicate Forces allows the Skirantra to make 3 copies of a targeted friendly unit for the next two-and-a-half minutes. Though it says it copies frigates, it works on cruisers, too! (this is because in terms of sins game mechanics, there is not actually a difference between frigates and cruisers, the term Cruiser is simply an arbitrary distinction which implies the ship is more powerful) If you have numerous Skarovas Enforcers, or Allied Kodiak Heavy Cruisers and/or Destra Crusaders in the vicinity, this can quickly give you the upper hand if you find yourself in a losing position. However, even if the replicated ships survive the duration, there is still a 30-second period you cannot use this ability.
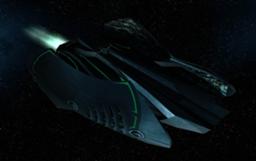
Kortul Devastator
battleships-class capital ship
The Kortul Devastator is a blunt instrument, efficiently deploying large quantities of firepower, but not offering any major strategic choices other than a full frontal assault. The Devastator can be effectively compared and contrasted to the Kol Battleship: both ships offer offensive and defensive abilities; both vessels have dedicated anti-fighter abilities; and both vessels have some degree of active shield regeneration. Here the resemblance ends: due to the Devastator's possession of a passive ability. To the unexperienced, this may appear to be a separation from Power Surge and it's astounding combat prowess, but the two abilities are intrinsically linked. Despite freeing antimatter for Power Surge and Jam Weapons, Disruptive Strikes is perhaps the primary purpose of this ship. It allows the Kortul to without question annihilate the antimatter reserves of other ships as a default. Power Surge, while it does significantly increase damage output, it should not be regarded as a damage buffing ability, but rather a regenerative ability that drastically improves the effectiveness of Disruptive Strikes. At maximum levels, Power Surge and Disruptive Strikes allows the Kortul to remove antimatter from enemy ships, making it superb at disabling the abilities of other capitals.
Power Surge greatly increases the ship's weapon fire and shield regeneration rate.
Jam Weapons disables weapons on all hostile fighters within radius, preventing them from attacking for a period of time.
Disruptive Strikes has a chance to increase the ability cooldowns and deplete antimatter when this ship's energy weapons hit enemy ships.
Volatile Nanites allows the Vasari fleet to distribute large quantities of damage amongst an enemy fleet in the late game. When combined with the Jarrasul Evacuator's Gravity Warhead, the Vasari can both keep a retreating fleet in range and simultaneously rip them to pieces.
Capital ships (part 2)
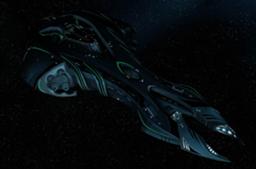
Vulkoras Desolator
Siege-class capital ship
The Vulkoras is a heavily armored siege engine, capable of clearing planets with shocking speed. It is arguably the most specialized capital ship in the game, and is nothing short of a giant wrecking ball for planets. The best way to use a Vulkoras is to try to sneak it behind enemy lines and destroy several of their planets before they can react. If you already have a high level Jerrasul Evacuator with the Drain Planet ability, you probably do not need a Vulkoras Desolator as well. However, pairing a Kortul with a Vulkoras in a fleet with Sentinel support can quickly destroy shield reliant fleets.
A very deadly type of rush is to build two Vulkoras capital ships at the start of the game and go straight for the enemy homeworld. The best way to counter a Vulkoras rush is to constantly scout your borders. If you see a Vulkoras coming, you can move your units to defend a planet before it gets there. If the Vulkoras arrives first, it may already be too late to save the planet. The weakness of the Vulkoras rush is that these capital ships do not get any strike craft until they reach higher levels, and cannot defend themselves from bombers.
The Phase Missile Swarm ability allows it to deal moderate damage to several targets. However, the maximum number of targets is small and the total damage is not very large, limiting its usefulness in larger battles. It's very useful against smaller groups of unsupported frigates, but not so much against larger or better supported forces.
A Vulkoras can Deploy Siege Platforms which will bombard an enemy planet for a short duration. As of version 1.18, this ability has a short cooldown and low antimatter cost, enabling a Vulkoras to very quickly deploy many platforms around a planet. The platforms can be killed to prevent further damage, but if they are not they can quickly lay waste to a planet.
Hit the Platform with the Skirantra Carrier's Replicate Forces ability. The planet in question will go down in a matter of seconds.
Assault Specialization passively increases the damage dealt by the Vulkoras to planets and structures, making it even more deadly when attacking undefended planets. This ability is always active and requires no antimatter.
The Vulkoras' ultimate is called Disintegration. It will literally suck hull, shield, and antimatter away from the target enemy and give it to the Vulkoras. This is particularly effective when used against starbases or enemy capital ships.
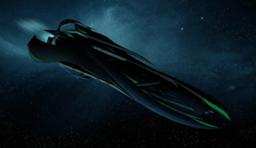
Antorak Marauder
Support-class Capital Ship.
The Antorak Marauder is the Support Capital Ship of the Vasari. Its abilities are aimed at assisting other ships in the fleet, so it should not be off on its own.
The first of the Marauder's abilities is Phase Out Hull. It selects a random enemy unit and phases out its hull for 6/8/10 seconds at levels 1/2/3, respectively. While phased out, the target ship cannot attack, nor can it be attacked (it becomes invulnerable). Though it would sound absurd to give an enemy invincibility, think about it - for the time their hull is phased out, they can't assist their allies in any way, shape, or form. Thus, use it to disrupt any channeled abilities. That said, this ability makes the Antorak very useful for destroying hostile scout ships - when assisted by a small group of frigates, it can use this ability to stop the ship while its buddies close the distance and attack when the duration ends. It is also good for stopping a ship from jumping to phase space. Using it every time a ship tries to charge up a phase jump allows the Antorak to keep a ship in a system and if time so there is a gap of time between uses the targeted ship can be attacked by your fleet. And since the cooldown time is less than the cast time the ability can be used as long as the Antorak has an adequate supply of antimatter.
However, it is usually a good idea to not put this ability on auto-fire, as it will use it on whatever the rest of the fleet is focusing on. This bad habit can really nerf the offensive abilities of your fleet.
Distort Gravity, the Marauder's second ability, GREATLY increases the movement and acceleration rates of all friendly ships within a 5000 kilometer radius. In addition, it makes all ships under its influence (including the Marauder itself!) immune to the effects of Phase Jump Inhibition, and allows the ships to jump from deeper within the gravity well. The Max Speed increase is 33%/66%/100% at levels 1/2/3, the acceleration increase is 50%/75%/100% at levels 1/2/3, and its Phase Departure range is -8%/-16%/-25% at levels 1/2/3.
The third ability, Subversion, is aimed at assisting with planetary sieges. Once the Marauder closes within 5000 km of a planet, it sends a strike team down to the surface, where they are free to cause havoc with the planet's infrastructure by increasing ship and structure build times for 5, 7.5, or 10 minutes, at levels 1, 2, and 3, respectively. The ship/structure build time increase is 50%/100%/150% at levels 1/2/3.
Once the Marauder reaches level 6, the ship can learn Stabilize Phase Space, which makes the ship a Phase Jump Stabilizer for the next 75 seconds.
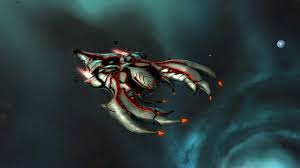
Rankulas
battleship-class capital ship
The Battle ship excels at maintaining a support fleet. The battleship's abblity to create a Combat Swarm and Repair Swarm can augment a smaller fleet, and allow the fleet to attack larger fleets. The Combat Swarm is akin to a Light Frigate in health and approximately 3/4 of that in damage. The Support Swarm is effectively a mobile repair platfrom, and is great at pro-longing the life of nearby ships without shields. The Assualt Swarm can only attack structures, but is extremely compotent at that role, able to outrange most targets while still dealing considerable damage. The Assault Swarm's beam weapon strips armour and then deals damage, meaning two of them can quickly take out a defense platform on their own.
As a starting Capital Ship, the Rankulas is a very effective pick. Between being able to rapidly build up support fleets, and at level four being able to deploy a single strike craft squadron, it can be left back while its creations harass (And eventually destroy) light enemy targets, while preserving its own health and shields. Generally, one should not leave it behind when engaging enemy Capital Ships: Its Swarms will rapidly contribute to their experience while dealing almost insignificant levels of damage. Instead, have the Rankulas close the gap and slug it out - it is a more than capable combatent in a stand-up fight.
Spawn Combat Swarm - This ability allows the Rankulas to create a swarm on nanites that are equvlant to a frigate in its comabt ability with. The swarm gains a damage bonus of 100%/125%/150%/200% at levels 1/2/3/4 respectivly these swarms last for 2 minuets and the Rankulas only has a cooldown of 30 seconds so it is possable for one Rankulas to keep 4 of these swarms going if it has adiquet anitmatter
Spawn Support Swarm - The Support Swarm acts as a healing frigate this swarm has no combat abilities it has strong healing powers able to heal 150/200/250/300 points of hull damage and add 2/4/6/8 points of armor at levels 1/2/3/4 respectivaly.
Spawn Assault Swarm - This Swarm is an anti structure swarm as with the Support Swarm this swarm has no combat abilities but is geared to destroy structures only this swarm is able to reduce the armor of sturctors by 2/3/5/6 and gains a damage bonus of 0%/10%/20%/30% at levels 1/2/3/4
Reassemble - This is the final ability of the Rankulas allowing it to condense all the nanite swarms in the orbit into one massive swarm, which gains strength for all nanites that is compressed into it.
Titans
Vorastra Titan
The Vorastra Titan is the Vasari Loyalist's Titan. The Vorastra can function as a mobile capital world, rendering the player "safe" from long-range nuclear weapons. It can also genuinely take on enemy planets all on its own, thanks to its ability to summon Dark Fleet ships, and its incredible damage output. This output is almost entirely forward facing, however, so like the Ragnarov, care should be taken to avoid being flanked by nimble foes. It should be noted that in a one-on-one Titan fight, the Vorastra is capable of focusing virtually all its weapons on one foe, making it exceptionally lethal in those circumstances.
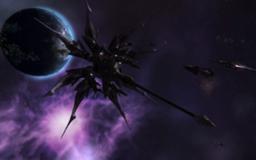
Kultorask Titan
The Kultorask Titan is the Vasari Rebel's Titan. The Kultorask contains the refugees of the Vasari and focuses on supporting the Vasari fleet ships and destroying large enemy fleets. A Kultorask can use Nano Leech to drain enemy ships of hull and antimatter to gain hull and antimatter lost. Nano Remit can restore all friendly ship's hull and antimatter from its own. A Kultorask with Nano Leech active against a moderate to large enemy fleet will restore over 1000 hull per second, making it the most difficult Titan to destroy in the hands of a skilled player.
Orkulus Star Base
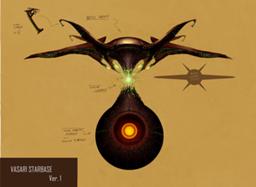
The Orkulus Star Base is the Vasari's Starbase. It is unique in the fact that it is built by the Jarun Migrator, the Vasari Colony Frigate, instead of having its own dedicated Starbase Construction Cruiser. With the need to constantly run from their unknown threat, the Orkulus has been made mobile by its creators, allowing it to fly about its gravity well, albeit slowly.
Upgrades
- Assault Systems (3 levels): Adds more weapons to the Orkulus. All Orkulus starbases start just with pulse gun-based attacks when they're first built (anti-heavy damage). The first upgrade will add "disintegration" weapons that are particularly effective against larger targets like capital ships, structures, or other starbases. The second level will add general-purpose phase missile weapons. The third level will increase the damage of all existing weapons systems and allow it to target more enemy units at one time.
- Defensive Enhancements (4 levels): Increases the hull, shield, and armor points of the Orkulus.
- Squadron Facilities (3 levels): Enables the Orkulus to support strike craft. The first upgrade allows for 4 squads, the second upgrade allows 8 squads, and the final upgrade allows 14.
- Enforced Loyalty (1 level): Prevents the loss of the planet due to bombardment. The enemy can still bombard it with siege frigates and Novaliths to reduce its population, but you will remain in control of the planet. All factions have some variation of this upgrade. (Requires 2 Lirtestra Weapons Labs)
- Merchant Cargo Bays (1 level): Adds a trade port to the Vasari starbase which produces more income than a regular Trade Port. (Requires 4 Lirtestra Weapons Labs and Off-World Exports from the Empire Tree from the Fortification Tree)
- Colony Pods (2 levels): Instantly adds 50 population, equivalent to 1.25 credits per second, to the starbase per level of upgrade. The trade port upgrade will always produce more money than this; however, colony pods are still a way of augmenting income. (Requires 3 Lirtestra Weapons Labs)
- Debris Vortex (2 levels): Adds an antimatter reserve to the Orkulus and allows use of this special ability. The starbase can literally absorb the wreckage of recently destroyed ships (friendly or enemy) to restore hull points to itself. (Requires 4 Lirtestra Weapons Labs)
- Phase Stabilizer (1 levels): Adds an antimatter reserve to the Orkulus and enables it to become a temporary Phase Stabilizer. It can be used as either a departure point or a destination, but you will need another phase stabilizer on the other side to use it. (Requires 6 Lirtestra Weapons Labs)
- Frontal Deflector Shield (2 levels): Adds an antimatter reserve to the Orkulus and enables it to activate frontal deflectors, greatly decreasing the damage it takes from enemies attacking it from the front. (Requires 5 Lirtestra Weapons Labs)
More Sins of a Solar Empire: Rebellion guides
- Installing Mods★ 5 (454)73k views1k ♥6 minUpdated Dec 23, 2017
- Getting Started with Sins of a Solar Empire: Rebellion★ 5 (1.3k)48k views1.8k ♥72 minUpdated May 2, 2021
- Sins of a Solar Empire Beginners Tutorial - Top 50 Tips, Tricks and Intel★ 5 (545)28k views881 ♥51 minUpdated May 28, 2015
- Zombie's List of Sin's Mods good enough to EAT!!★ 5 (293)24k views569 ♥9 minUpdated Jan 7, 2019
- Ultimate TEC Guide (& Tricks)★ 5 (275)14k views470 ♥109 minUpdated Apr 10, 2025
- 100% Achievement Guide★ 5 (316)9.9k views414 ♥17 min





This guide was created by its original author on the Steam Community. Are you the author and want it removed? Request removal.