Comprehensive Guide To The Binding Of Isaac
Introduction
Welcome to my guide! Like its description says, this guide will cover everything in The Binding of Isaac. Consider this a short, concise wiki of sorts. I will explain how each character works, how to get every achievement, how to fight bosses, explain every item in the game, and such.
To quickly find something specific, please press Ctrl+F and type in whatever you want into the search box.
Note: This guide is somewhat incomplete, but you can find most of the info you need. I plan on updating it soon, along with rewriting some stuff.
Update: Newcomer - Gamerguy902 is now in the contributers list, and has resumed the process of updating for this guide!
To quickly find something specific, please press Ctrl+F and type in whatever you want into the search box.
Note: This guide is somewhat incomplete, but you can find most of the info you need. I plan on updating it soon, along with rewriting some stuff.
Update: Newcomer - Gamerguy902 is now in the contributers list, and has resumed the process of updating for this guide!
Getting Familiar with The Binding Of Isaac
Before we start, you're obviously gonna have to get familiar with how Binding of Isaac works. If you're not brand new and have been playing for a few hours, feel free to skip this section.
For more detail, please visit Section 2.
To find out what all of these items are and what they do, please visit Section 4.
Note: Stats are actually much deeper than what you see on the stats screen. For example, Max's Head does not simply increase damage by 1 unlike what the stat screen tells you, but it also multiplies it by 1.65x. For the sake of simpleness, I will not use the actual stat numbers from the game's code, but I will still try to keep info as accurate as possible.
Read the Stats[bindingofisaac.wikia.com] page on the wiki to learn more.
Health

Health is the number of heart containers Isaac has. For example, if you have 3 heart containers, that means you have 3 health. More health means more hits that you can withstand. Health can be increased by various health up items, such as Dinner or <3. Health caps out at 12 heart containers, meaning that once you hit that cap, picking up any more health up items will be pointless. (Although they can still be used for Deals With The Devil) Due to a bug, Soul Hearts do not follow this rule, and can exceed the limit of 12 Heart Containers. However, they will not be visible on the HUD.
Speed

Speed is the speed which isaac moves at. A higher speed stat makes it easier to dodge enemy shots and can allow you to travel faster through rooms. Speed is increased by Speed Up pills, and some other items, such as The Belt or Roid Rage.
Rate Of Fire

Rate Of Fire (Also known as "Tears") is the rate at which Isaac fires tears. A higher tears stat will allow you to fire much more tears, and make charging up items like Brimstone much faster. Rate of fire can be increased by items such as the Wire Coat Hanger and Tears Up pills.
Damage

The Damage stat increases the damage Isaac's tears inflict. The higher your damage stat, the larger your tears and more damaging they will be. Once the Damage Stat exceeds 5, tears become blood tears. This is a cosmetic effect only. Damage can be increased by items such as the Pentagram.
Range

Range affects how far your tears will travel, and how long they will home on enemies with items such as Spoon Bender. This is arguably one of the less useful stats, as you do not need more than a full horizontal room's length.
1. Champion Enemies
All of the enemies in the game have a chance to be replaced by a "Champion" version of themselves, which makes them do 1 full heart of contact/projectile damage, turns them a unique color, and makes them much larger. As a reward for killing them, you can get a random Item, such as a bomb, or even a chest.
This also applies for most bosses, who will become stronger. Unlike champion enemies, they actually get a unique attribute added to them. For example, Green Larry Jrs shoot projectiles out of their mouths, unlike normal Larry Jrs.
2. Devil Rooms/Angel Rooms
Devil Rooms are rooms where you can give away heart container for powerful items. They have a 1% chance to spawn after a boss fight. This chance can be increased by doing specific things, such as not taking red heart damage on the boss, holding a Pentagram or a Book Of Belial etc.
Angel Rooms have a 50% chance to replace Devil Rooms when they spawn. Unlike Devil Rooms, they give you a free item for no health cost. Make sure to always enter them, as the items inside are almost always very useful.
3. Curses
Curses are a new game mechanic added with the Wrath Of The Lamb DLC. There are 3 different curses in the game. Curse of the Lost makes the floor become 1 category larger (The Caves becomes as large as The Depths etc.), Curse of the Labyrinth essentially combines 2 floors together, giving you 2 Boss Rooms and 2 Treasure Rooms. (Only 1 Shop is available, however). Curse of the Darkness removes your minimap, so you can't tell where the Secret Room and other stuff is. Using The World Tarot Card will have no affect.
I. Rooms
Rooms are randomly spawned in every floor. There are various types of rooms, such as Treasure Rooms where you can get a free items, Boss Rooms where you fight a boss, Challenge Rooms where you fight waves of enemies, Devil Rooms etc.For more detail, please visit Section 2.
II. Items
In The Binding Of Isaac, you can find many items in various places. Items are divided into three major parts, Activated Items, Collectibles, and Trinkets. Activated Items must be activated with Q to apply thier effect, and can only be used once. Some Collectibles, like Activated Items, need to be activated (with space, this time) to apply thier effect. Most collectibles, however, do not need to be activated, and place a permanent effect on Isaac, such as increasing his damage, changing his tears, giving him flight etc. Trinkets do the same thing, placing a passive effect on isaac, although only one can be carried at a time.To find out what all of these items are and what they do, please visit Section 4.
III. Bosses
At the end of each floor, you have to fight a boss in a room called the Boss Room. There are various bosses in the Binding of Isaac. The boss you will fight depends on what floor you currently are on. To see what these bosses are and how to fight them, visit Section 6.IV. Stats
Stats are an integral part of gameplay in The Binding Of Isaac. There are 5 different stats, which I will explain below.Note: Stats are actually much deeper than what you see on the stats screen. For example, Max's Head does not simply increase damage by 1 unlike what the stat screen tells you, but it also multiplies it by 1.65x. For the sake of simpleness, I will not use the actual stat numbers from the game's code, but I will still try to keep info as accurate as possible.
Read the Stats[bindingofisaac.wikia.com] page on the wiki to learn more.
Health
Health is the number of heart containers Isaac has. For example, if you have 3 heart containers, that means you have 3 health. More health means more hits that you can withstand. Health can be increased by various health up items, such as Dinner or <3. Health caps out at 12 heart containers, meaning that once you hit that cap, picking up any more health up items will be pointless. (Although they can still be used for Deals With The Devil) Due to a bug, Soul Hearts do not follow this rule, and can exceed the limit of 12 Heart Containers. However, they will not be visible on the HUD.
Speed
Speed is the speed which isaac moves at. A higher speed stat makes it easier to dodge enemy shots and can allow you to travel faster through rooms. Speed is increased by Speed Up pills, and some other items, such as The Belt or Roid Rage.
Rate Of Fire
Rate Of Fire (Also known as "Tears") is the rate at which Isaac fires tears. A higher tears stat will allow you to fire much more tears, and make charging up items like Brimstone much faster. Rate of fire can be increased by items such as the Wire Coat Hanger and Tears Up pills.
Damage
The Damage stat increases the damage Isaac's tears inflict. The higher your damage stat, the larger your tears and more damaging they will be. Once the Damage Stat exceeds 5, tears become blood tears. This is a cosmetic effect only. Damage can be increased by items such as the Pentagram.
Range
Range affects how far your tears will travel, and how long they will home on enemies with items such as Spoon Bender. This is arguably one of the less useful stats, as you do not need more than a full horizontal room's length.
V. Misc. Game Mechanics
1. Champion Enemies
All of the enemies in the game have a chance to be replaced by a "Champion" version of themselves, which makes them do 1 full heart of contact/projectile damage, turns them a unique color, and makes them much larger. As a reward for killing them, you can get a random Item, such as a bomb, or even a chest.
This also applies for most bosses, who will become stronger. Unlike champion enemies, they actually get a unique attribute added to them. For example, Green Larry Jrs shoot projectiles out of their mouths, unlike normal Larry Jrs.
2. Devil Rooms/Angel Rooms
Devil Rooms are rooms where you can give away heart container for powerful items. They have a 1% chance to spawn after a boss fight. This chance can be increased by doing specific things, such as not taking red heart damage on the boss, holding a Pentagram or a Book Of Belial etc.
Angel Rooms have a 50% chance to replace Devil Rooms when they spawn. Unlike Devil Rooms, they give you a free item for no health cost. Make sure to always enter them, as the items inside are almost always very useful.
3. Curses
Curses are a new game mechanic added with the Wrath Of The Lamb DLC. There are 3 different curses in the game. Curse of the Lost makes the floor become 1 category larger (The Caves becomes as large as The Depths etc.), Curse of the Labyrinth essentially combines 2 floors together, giving you 2 Boss Rooms and 2 Treasure Rooms. (Only 1 Shop is available, however). Curse of the Darkness removes your minimap, so you can't tell where the Secret Room and other stuff is. Using The World Tarot Card will have no affect.
I. Characters
There are seven characters in the Binding Of Isaac (Six if you don't have Wrath of The Lamb), all of them having unique designs and starter items. Every single character except Isaac requires you to complete a specific objective to unlock the character. Completing the game with a specific character unlocks a new item. To see what these are, please visit the Achievements section.

Unlock Requirement: N/A
Health:
Starting Item:
 (Only after completing the game with ???)
Stats: 2 Speed, 2 Rate Of Fire, 2 Damage, 2 Range
Isaac is the main character of the game, and the most well rounded. He has 2nd most health, which is helpful for Deals With The Devil. His stats are average, and good enough to last you for most of the game. His Dice unlock arguably makes him the best character in the game, allowing you to "re-roll" any bad items into good ones.

Unlock Requirement: Have 7 Heart Containers (Not counting Soul Hearts) in a single playthrough
Health:
Starting Item:

Stats: 1 Speed, 2 Rate Of Fire, 2 Damage, 2 Range
Magdalene, also known as Maggy, is the "tank" character of the game. She can take plenty of hits before dying, and her Yum Heart item allows here to regenerate any lost health quickly. However, her slow speed can be a big hindrance some times, thus making items like Roid Rage invaluable. Like Isaac, her high health pool makes Deals With The Devil much less risky compared to characters like Judas.

Unlock Requirement: Have 55 coins at once in a single playthrough
Health:
Starting Item:
Stats: 3 Speed, 2 Rate Of Fire, 3 Damage, 1 Range
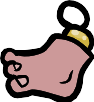
Cain is probably the best character before you get D6 Isaac. He has an ideal amount of speed, good damage, but less range. His 2 Heart Containers aren't exactly good for deals with the devil, but they make him considerably less risky than Judas. His 1 key can be helpful if you suddenly get an XL Floor in the Basement/Cellar. The Lucky Foot gives you many more pick ups, removes any negative pills (This allows some amazing synergy with Mom's Bottle of Pills or Mom's Coin Purse) and give you a higher chance at winning the Arcade Shell Game.
 [/previewicon]
Unlock Requirement: Kill Mom's Heart
Health:
Starting Item:

Stats: 2 Speed, 2 Rate Of Fire, 4 Damage, 2 Range
Judas is the character with the highest damage, but the lowest health in the game. Therefore, he is for more skilled players who are good at dodging. His high damage allows him to kill enemies very quickly, and his starter item, the Book Of Belial, makes bosses very easy as long as you don't get hit. Aside from his damage, all of his other stats are average. It is advisable to NOT make Deals With The Devil while playing Judas, unless you have a lot of hearts/soul hearts.

Unlock Requirement: Make 2 Deals With The Devil in one playthrough
Health:
Starting Items:


Stats: 3 Speed, 2 Rate Of Fire, 1 Damage, 2 Range
Eve, like Judas, is also a risky character. She has 3 points of speed (Although this is actually less than Cain's, but it is not possible to show it in-game), a 6.25% higher chance to find Soul Hearts, and the lowest damage in the game. The Dead Bird adds to her DPS, but it can sometimes be wonky and go after invincible enemies like Eternal Flies. Once she reaches half a heart, she goes into the ♥♥♥♥♥ Of Bablyon state, which increases her damage by 3 points. (2 points once you go into another room while still in the ♥♥♥♥♥ Of Babylon state).

Unlock Requirement: Kill Mom's Heart 10 times
Health:
Starting Item:

Stats: 2 Speed, 2 Rate Of Fire, 2 Damage, 2 Range
??? is the most unique character in the game in the sense that he has no Heart Containers and only 3 Soul Hearts. It is impossible to add any heart containers to ???'s health, and any Health Up items will instead give you a Soul Heart. ??? will simply walk over any normal red heart drops as if his health was full. Also, his starting item is virtually useless and should be replaced as soon as possible. To compensate, he can use many things in the game to his advantage. For example, once you pick up The ♥♥♥♥♥ Of Babylon item, it will always be active for the rest of the playthrough. Challenge Rooms and Boss Challenge rooms are always open for him, there's a greater chance for Devil/Angel Rooms to spawn, he can "Steal" from the devil by using invincibility items such as the Book of Shadows, and he can take Deals From The Devil for half a soul heart with The Wafer. Items like Little CHAD or Yum Heart become useless however, so you should try to re-roll them if you get the D6.

Unlock Requirement: Skip two Treasure Rooms and kill Mom
Health:
Starting Item:

Stats: 2 Speed, 1 Rate Of Fire, 2 Damage, 2 Range
Samson has the lowest fire rate in the game, and max shot speed. His Bloody Lust item can increase his damage for the current room by killing monsters. His extra Soul Heart is good at the start of the game, since you don't instantly die because of 1 heart damage and have more room to make mistakes.
Isaac
Unlock Requirement: N/A
Health:
Starting Item:
(Only after completing the game with ???)Stats: 2 Speed, 2 Rate Of Fire, 2 Damage, 2 Range
Isaac is the main character of the game, and the most well rounded. He has 2nd most health, which is helpful for Deals With The Devil. His stats are average, and good enough to last you for most of the game. His Dice unlock arguably makes him the best character in the game, allowing you to "re-roll" any bad items into good ones.
Magdalene
Unlock Requirement: Have 7 Heart Containers (Not counting Soul Hearts) in a single playthrough
Health:
Starting Item:
Stats: 1 Speed, 2 Rate Of Fire, 2 Damage, 2 Range
Magdalene, also known as Maggy, is the "tank" character of the game. She can take plenty of hits before dying, and her Yum Heart item allows here to regenerate any lost health quickly. However, her slow speed can be a big hindrance some times, thus making items like Roid Rage invaluable. Like Isaac, her high health pool makes Deals With The Devil much less risky compared to characters like Judas.
Cain
Unlock Requirement: Have 55 coins at once in a single playthrough
Health:
Starting Item:
Stats: 3 Speed, 2 Rate Of Fire, 3 Damage, 1 Range
Cain is probably the best character before you get D6 Isaac. He has an ideal amount of speed, good damage, but less range. His 2 Heart Containers aren't exactly good for deals with the devil, but they make him considerably less risky than Judas. His 1 key can be helpful if you suddenly get an XL Floor in the Basement/Cellar. The Lucky Foot gives you many more pick ups, removes any negative pills (This allows some amazing synergy with Mom's Bottle of Pills or Mom's Coin Purse) and give you a higher chance at winning the Arcade Shell Game.
Judas
[/previewicon]Unlock Requirement: Kill Mom's Heart
Health:
Starting Item:
Stats: 2 Speed, 2 Rate Of Fire, 4 Damage, 2 Range
Judas is the character with the highest damage, but the lowest health in the game. Therefore, he is for more skilled players who are good at dodging. His high damage allows him to kill enemies very quickly, and his starter item, the Book Of Belial, makes bosses very easy as long as you don't get hit. Aside from his damage, all of his other stats are average. It is advisable to NOT make Deals With The Devil while playing Judas, unless you have a lot of hearts/soul hearts.
Eve
Unlock Requirement: Make 2 Deals With The Devil in one playthrough
Health:
Starting Items:
Stats: 3 Speed, 2 Rate Of Fire, 1 Damage, 2 Range
Eve, like Judas, is also a risky character. She has 3 points of speed (Although this is actually less than Cain's, but it is not possible to show it in-game), a 6.25% higher chance to find Soul Hearts, and the lowest damage in the game. The Dead Bird adds to her DPS, but it can sometimes be wonky and go after invincible enemies like Eternal Flies. Once she reaches half a heart, she goes into the ♥♥♥♥♥ Of Bablyon state, which increases her damage by 3 points. (2 points once you go into another room while still in the ♥♥♥♥♥ Of Babylon state).
???
Unlock Requirement: Kill Mom's Heart 10 times
Health:
Starting Item:
Stats: 2 Speed, 2 Rate Of Fire, 2 Damage, 2 Range
??? is the most unique character in the game in the sense that he has no Heart Containers and only 3 Soul Hearts. It is impossible to add any heart containers to ???'s health, and any Health Up items will instead give you a Soul Heart. ??? will simply walk over any normal red heart drops as if his health was full. Also, his starting item is virtually useless and should be replaced as soon as possible. To compensate, he can use many things in the game to his advantage. For example, once you pick up The ♥♥♥♥♥ Of Babylon item, it will always be active for the rest of the playthrough. Challenge Rooms and Boss Challenge rooms are always open for him, there's a greater chance for Devil/Angel Rooms to spawn, he can "Steal" from the devil by using invincibility items such as the Book of Shadows, and he can take Deals From The Devil for half a soul heart with The Wafer. Items like Little CHAD or Yum Heart become useless however, so you should try to re-roll them if you get the D6.
Samson
Unlock Requirement: Skip two Treasure Rooms and kill Mom
Health:
Starting Item:
Stats: 2 Speed, 1 Rate Of Fire, 2 Damage, 2 Range
Samson has the lowest fire rate in the game, and max shot speed. His Bloody Lust item can increase his damage for the current room by killing monsters. His extra Soul Heart is good at the start of the game, since you don't instantly die because of 1 heart damage and have more room to make mistakes.
II-I. Rooms
Rooms
There are many unique Room types in the Binding Of Isaac, all of them serving different functions.
Regular Rooms
The most commonly encountered type of room. No special icon on the map, usually contains monsters.
Treasure Room


A room that contains a free item on a pedestal inside. It always requires a key to open, except when on the Basement 1. After The Depths, you can no longer encounter Treasure Rooms.
Shop


A Shop that contains a few pickups and one item costing 15 cents, or 7 cents if on sale. (If you don't have WotL installed, the Shop can contain many more items, and it is possible for there to be 2 items there at once). Every pickup except Hearts cost 5 cents, and 3 cents when on sale. Shops stop appearing after The Womb.
Please note that after The Caves 1, there is a chance for Greed/Super Greed, one of the Seven Deadly Sins, to appear inside.
Library

The Library is a room added in the Wrath of the Lamb. It has the same door as a Shop, but a different icon on the map, and can appear on any floor. It contains two books, chosen at random, and can contain any book in the entire game except The Bible. The Library has a 5% chance of spawning, and a 25% chance of spawning if you start the floor with a book in your spacebar slot.
Curse Room


Curse Rooms are a new room type added in Wrath Of The Lamb. It costs 1/2 heart to enter the room (1 heart in the womb and onwards) and 1/2 heart to leave, resulting in a total of 1 heart loss. If you have flight, entering will do no damage, but leaving will. It usually contains 1 or 2 Red Chests, that can give you 1-2 Soul Hearts, 2-3 Pills, 2 Spiders, 2 Troll Bombs, a Mega Troll Bomb, a Teleport to the Devil Room, 3 Blue Flies, or rarely, a Devil Room or Angel Room item.
Spike Sacrifice Room

Spike Sacrifice Rooms are a new room type added in Wrath Of The Lamb. They have no special door, and are found by the red blood splash icon on the map. Inside, there is a single spike tile in the middle, which you can use to damage Isaac. Once Isaac takes enough damage (Usually 4 hearts), a Chest will appear.
Challenge Room


This room requires you to be at full health to enter. (Or have enough Soul Hearts to compensate for the lost health) Inside, there can either be an item inside or a Chest/Golden Chest. Picking up the item/Opening the chest will trigger a fight that forces you to fight 3 waves of enemies, which are chosen depending on what floor you are on. It is advisable to always check these because even if you don't want to open the chests, it is possible that there will be an item inside and even if there isn't one, you don't have to fight the waves of enemies.
Always open for ???.
Boss Challenge Rooms


Unlike Regular Challenge Rooms, Boss Challenge Rooms require you to be at 1 heart of health or below. Soul hearts don't count. Inside, there will always be a Boss Room item. Picking up the item will make you fight 2 different bosses in a row which depend on what floor you are on.
Always open for ???.
Secret Room


The Secret Room is a a room that is present on every floor. It is usually found inbetween a "horseshoe" pattern of rooms. To access the Secret Room, you need to destroy its entrance with a bomb, upon which it will play a unique souund. Inside, there is a set amount of coins, a Slot Machine/Fortune Telling Machine, or a Secret Room item.
A variation added in the Wrath Of The Lamb DLC exists, called the Super Secret Room, which is adjacent to one room only. It has the same entrance appearance, but plays a different sound. Inside, you may find an Eternal Heart, a Trinket, a Fortune Telling Machine, 8 hearts, one or two Red Chests, or a Tarot Card.
I AM ERROR Room

The I AM ERROR room has a roughly 6.66% chance to teleport you to it when you use Telepills. Inside, there is a figure saying "I AM ERROR" as shown above, and there are either multiple chests, many different pills, an item for sale, or a free item. Once you are in the I AM ERROR room, you cannot get out unless you have another means of teleporting. Instead, you will have a trapdoor infront of you which will take you to the next floor.
Boss Room

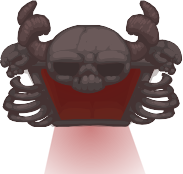
A room that always contains a boss inside. These bosses drop an item when killed. The boss depends on what Floor you are on. To see what these bosses are and how to defeat them, please visit Section 6.
Miniboss Room

Minibosses appear randomly in otherwise regular rooms of the Basement (Except for Greed, who replaces the contents of a Shop or Secret Room). They can only be spotted in advance with a Spelunker's Helmet or the Compass. Note that Miniboss rooms can only spawn in dead ends.
Devil Room
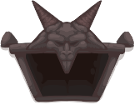
The Devil Room is a room where you can give away your Heart Containers for various items. The Devil Room has a 1% chance to spawn after you kill a boss. This chance can be increased by various ways, which include not taking any damage on a boss/floor, holding a Pentagram, holding a Book Of Belial etc. Alternatively, you can use The Joker Tarot Card which will automatically teleport you to a Devil Room/Angel Room. Once you get out, you will be at the start of the floor.
Angel Room


The Angel Room has a chance to replace the Devil Room. Unlike the Devil Room, the Angel Room does not require any hearts to pick an item up. It contains "Holy" items like the Guardian Angel, Scapular, The Relic etc, all of which are very useful.
Arcade

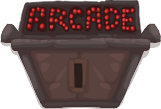
The Arcade is a special room that spawns only when you have 5 coins or more. See the section labeled "Arcade Rooms" for more detail.
II-II. "Structures"
Slot/Fortune Telling Machine
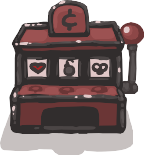

By bumping into a Slot Machine, you will deposit 1 coin and the game will roll for an item. It can be a Pretty Fly orbital, a key, a bomb, or a heart. Rarely, the machine can even blow up and give you the "A Dollar" item. A Fortune Telling Machine has a chance of spawning instead of a Slot Machine, and it functions differently. By depositing a coin it will either give you a fortune message that have no effect, a random trinket, a Soul Heart, a Tarot Card, or the Crystal Ball item. With the Lucky Foot item, the fortune messages get removed, thus giving you a LOT of Trinkets, Soul Hearts, or Cards.
Shell Game Beggar

Like the Slot Machines, you can bump into the beggar and give him a coin, then he will show you a random pick up or the Skatole item, and then he will shuffle the skulls very quickly. Then you can bump into one of the skulls and you might get rewarded. The base chance for winning is 33%, and roughly 66% with the Lucky Foot item. If you get the Skatole item, he will disappear.
Blood Donation Machine
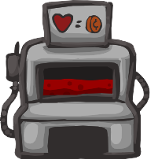
The Blood Donation machines give you 1-2 coins for every half-heart you give. (1 Heart in The Womb and onwards) If you give it enough hearts, it will eventually explode and give you the Blood Bag or IV Bag (IV Bag is Wrath of The Lamb only) item. It is possible to exploit this with items such as My Little Unicorn with the invincibility effect. Also, in The Womb, you have a longer invincibility perioud due to losing a whole heart, so you can use it 2 times for 1 heart only, as long as you're quick enough.
Beggar/Devil Beggar


Bumping into The Beggar gives him a coin, and he has a chance of dropping a random item (with the exception of coins), a trinket, a collectable, or nothing at all. This can be repeated until he drops a collectable, after which he will vanish. The Beggar will remain in the room until he drops an item or is blown up by a bomb. If blown up, he will drop a couple of random Pick Ups. He always gives a pickup or an item if he doesn't drop anything after giving him 7 coins the first time you start paying him (at the worst), and after that he will - at the worst - pay out every 5 coins. Devil beggars have a chance of spawning instead of a beggar, and will take half a heart (unless you are past the depths) instead of a coin, acting like a blood donation machine. If blown up, they drop two spiders.
Keystones

Blocks Isaac's movement, will consume a key and open up when walked over. Rarely drops a Pick Up when opened.
Rocks

Rocks (no picture) are obstacles commonly placed around the rooms, and will block Isaacs path (unless he has flight). They can only be removed by explosions. Sometimes, a Rock might appear with a dark blue tint, as well as a little "X" in the upper right corner. These are tinted rocks (pictured above without tint), and will drop various items when blown up. Tinted Rocks in The Womb and Utero are not distinguishable from other rocks. However, other rocks change shape when you exit and enter the room so you can tell when a rock is not tinted. Unbreakable rocks (no picture, sorry) are a gray, darker variation of rocks that can't be destroyed.
Pits

Pits are environmental tiles commonly found in The Caves/Catacombs and The Depths/Necropolis. They block Isaac's movements, and can only be crossed over by The Ladder, Flight, or by blowing up a Rock in front of them.
Poop


Poop (left) is a type of environmental object found in some rooms. Similar to Rocks, it will block the path of Isaac (unless he has Flight). It can be destroyed by shooting at it, and will rarely drop a random item when destroyed. Corny Poop (middle left) will have an Eternal Fly circling around it, which is invulnerable to damage until the poop is destroyed. It then turns into an Attack Fly with increased health and size. Gold Poop (middle right) is a rare form of poop that will drop 5-8 coins or the Counterfeit Penny Trinket (assuming it's unlocked). Red poop (right) can only be found in The Chest or dropped by the Carrion Queen. It will damage Isaac if he touches it, and will respawn a few seconds after being destroyed.
Fire


Touching a Fire (left) will damage the player, even if they possess a flight upgrade. They can be extinguished by shooting at them, and will sometimes drop a heart or coin when extinguished. Fires will never drop anything whn they are extinguished with an explosion. A Hellfire (right) acts the same as a Fire, but will periodically shoot at you.
By bumping into a Slot Machine, you will deposit 1 coin and the game will roll for an item. It can be a Pretty Fly orbital, a key, a bomb, or a heart. Rarely, the machine can even blow up and give you the "A Dollar" item. A Fortune Telling Machine has a chance of spawning instead of a Slot Machine, and it functions differently. By depositing a coin it will either give you a fortune message that have no effect, a random trinket, a Soul Heart, a Tarot Card, or the Crystal Ball item. With the Lucky Foot item, the fortune messages get removed, thus giving you a LOT of Trinkets, Soul Hearts, or Cards.
Shell Game Beggar
Like the Slot Machines, you can bump into the beggar and give him a coin, then he will show you a random pick up or the Skatole item, and then he will shuffle the skulls very quickly. Then you can bump into one of the skulls and you might get rewarded. The base chance for winning is 33%, and roughly 66% with the Lucky Foot item. If you get the Skatole item, he will disappear.
Blood Donation Machine
The Blood Donation machines give you 1-2 coins for every half-heart you give. (1 Heart in The Womb and onwards) If you give it enough hearts, it will eventually explode and give you the Blood Bag or IV Bag (IV Bag is Wrath of The Lamb only) item. It is possible to exploit this with items such as My Little Unicorn with the invincibility effect. Also, in The Womb, you have a longer invincibility perioud due to losing a whole heart, so you can use it 2 times for 1 heart only, as long as you're quick enough.
Beggar/Devil Beggar
Bumping into The Beggar gives him a coin, and he has a chance of dropping a random item (with the exception of coins), a trinket, a collectable, or nothing at all. This can be repeated until he drops a collectable, after which he will vanish. The Beggar will remain in the room until he drops an item or is blown up by a bomb. If blown up, he will drop a couple of random Pick Ups. He always gives a pickup or an item if he doesn't drop anything after giving him 7 coins the first time you start paying him (at the worst), and after that he will - at the worst - pay out every 5 coins. Devil beggars have a chance of spawning instead of a beggar, and will take half a heart (unless you are past the depths) instead of a coin, acting like a blood donation machine. If blown up, they drop two spiders.
Keystones
Blocks Isaac's movement, will consume a key and open up when walked over. Rarely drops a Pick Up when opened.
Rocks
Rocks (no picture) are obstacles commonly placed around the rooms, and will block Isaacs path (unless he has flight). They can only be removed by explosions. Sometimes, a Rock might appear with a dark blue tint, as well as a little "X" in the upper right corner. These are tinted rocks (pictured above without tint), and will drop various items when blown up. Tinted Rocks in The Womb and Utero are not distinguishable from other rocks. However, other rocks change shape when you exit and enter the room so you can tell when a rock is not tinted. Unbreakable rocks (no picture, sorry) are a gray, darker variation of rocks that can't be destroyed.
Pits
Pits are environmental tiles commonly found in The Caves/Catacombs and The Depths/Necropolis. They block Isaac's movements, and can only be crossed over by The Ladder, Flight, or by blowing up a Rock in front of them.
Poop
Poop (left) is a type of environmental object found in some rooms. Similar to Rocks, it will block the path of Isaac (unless he has Flight). It can be destroyed by shooting at it, and will rarely drop a random item when destroyed. Corny Poop (middle left) will have an Eternal Fly circling around it, which is invulnerable to damage until the poop is destroyed. It then turns into an Attack Fly with increased health and size. Gold Poop (middle right) is a rare form of poop that will drop 5-8 coins or the Counterfeit Penny Trinket (assuming it's unlocked). Red poop (right) can only be found in The Chest or dropped by the Carrion Queen. It will damage Isaac if he touches it, and will respawn a few seconds after being destroyed.
Fire
Touching a Fire (left) will damage the player, even if they possess a flight upgrade. They can be extinguished by shooting at them, and will sometimes drop a heart or coin when extinguished. Fires will never drop anything whn they are extinguished with an explosion. A Hellfire (right) acts the same as a Fire, but will periodically shoot at you.
III-I. Floors - The Basement
Floors
There are eleven different floors in The Binding Of Isaac, all of them having unique bosses and enemies. To see more details about them please visit sections 5 and 6.
The Basement/Cellar


The Basement is the first two floors in The Binding of Isaac. In the WoTL DLC, The Cellar will sometimes replace The Basement. Enemies that can be found in the Basement and Cellar are as follows.
Basement
Common Enemies
Pooter, Black Fly, Attack Fly, Moter, Eternal Fly, Sucker, Flaming Hopper, Pacer, Gaper, Horf, Gusher, Hopper, Mulligan, Mulligoon, Clot, Frowning Gaper
Other Enemies
Clotty (Uncommon)
I.Blob (Very Rare)
Normal Bosses
The Duke of Flies, Gemini, Monstro, Larry Jr.
Other Bosses
Famine (A Horseman of the Apocalypse - Unlockable)
Steven (Gemini's Alternate)
Embryo (Boss found in normal rooms)
Cellar
Common Enemies
Clot, Sack, Gaper, Mulligan, Mulliboom, Spider, Big Spider, Trite, Spit, Gusher, Frowning Gaper
Other Enemies
I.Blob (Very Rare)
Normal Bosses
The Duke of Flies, Widow, Pin, Blighted Ovum, Gurdy Jr.
Other Bosses
Famine (A Horseman of the Apocalypse - Unlockable)
Embryo (Boss found in normal rooms)
III-II. Floors - The Caves
Under Construction
IV-I. Items
Here comes the huge part of the guide. Items are an integral part of gameplay in The Binding of Isaac. They modify a character's stats, grant or modify abilities, and many other things. Items dropped in the Binding of Isaac NEVER disappear over time; a coin dropped will remain where it was dropped until you pick it up or leave the floor. A dropped item can be left in its place to be collected at a later time.
Items in general are classified into a number of distinct types and groups. Some items are passive, which add an effect permanently to Isaac, while others only activate when used. We will be going over each type in the next few subsections of the guide. Here is a quick summary of each type.
Activated Items
 Activated Items fill your Q slot. Only one can be carried at a time. An activated item can be used by pressing Q, though unlike items in the spacebar slot, activated items do notrecharge over time. Each item has a unique effect.
Trinkets
 Trinkets fill their own slot and are passive items that affect Isaac in unique ways. Only one can be carried at a time (Unless the player has Mom's Purse, which allows Isaac to hold two Trinkets at once); taking another will replace the current trinket and drop the old one.
Collectibles
 There are many different collectible items in the game. Certain collectibles change the appearance of your character when they are acquired. Collectibles you've found can be seen in the Collection page. Some collectibles go into your spacebar slot, and can be activated by pressing space. The items can then recharge. Normally, they charge a number of bars after every room you clear—some items charge one bar at a time, others charge faster. Note that only rooms where the doors close until they are cleared count—Bosses, arenas, enemy rooms, etc.
Items
There are three items (excluding troll bombs), each of which are found commonly throughout the game in various places and are listed below. Each set of pictures is ordered from most common to rarest.
Keys


Keys can be used to unlock locked doors and chests, and can be used to remove keystones. A Golden Key has a 1/50 chance to replace a normal Key when one is dropped. When picked up, a special sound effect is played and the Key icon on the HUD gets a Golden Key next to it. When Golden Keys are held, any object that is opened will not deplete Isaac's current supply of Keys, effectively giving him an infinite supply of Keys. The Golden Key is removed upon going to the next floor.
Coins


Coins are the basic form of currency in the Binding of Isaac. They can be gathered in the form of Pennies, Nickels, Dimes.
Bombs


Bombs can be placed at Isaac's feet by pressing E, Shift, or Ctrl and will detonate after 2 seconds, destroying rocks and doing a significant amount of damage. The item to the right gives you two bombs when obtained.
Troll bombs


A Troll Bomb is a bomb that has a 10% chance to replace normal Bombs. They cannot be picked up, and will explode a few seconds after being dropped. They also have an increased blast radius compared to regular Bombs. Super Troll Bombs (right) will follow Isaac over obstacles and actively chase him until they explode. They have a 1/50 chance of spawning instead of a Bomb, but are more commonly found in Red Chests.
Items in general are classified into a number of distinct types and groups. Some items are passive, which add an effect permanently to Isaac, while others only activate when used. We will be going over each type in the next few subsections of the guide. Here is a quick summary of each type.
Activated Items
Activated Items fill your Q slot. Only one can be carried at a time. An activated item can be used by pressing Q, though unlike items in the spacebar slot, activated items do notrecharge over time. Each item has a unique effect.Trinkets
Trinkets fill their own slot and are passive items that affect Isaac in unique ways. Only one can be carried at a time (Unless the player has Mom's Purse, which allows Isaac to hold two Trinkets at once); taking another will replace the current trinket and drop the old one.Collectibles
There are many different collectible items in the game. Certain collectibles change the appearance of your character when they are acquired. Collectibles you've found can be seen in the Collection page. Some collectibles go into your spacebar slot, and can be activated by pressing space. The items can then recharge. Normally, they charge a number of bars after every room you clear—some items charge one bar at a time, others charge faster. Note that only rooms where the doors close until they are cleared count—Bosses, arenas, enemy rooms, etc.Items
There are three items (excluding troll bombs), each of which are found commonly throughout the game in various places and are listed below. Each set of pictures is ordered from most common to rarest.
Keys
Keys can be used to unlock locked doors and chests, and can be used to remove keystones. A Golden Key has a 1/50 chance to replace a normal Key when one is dropped. When picked up, a special sound effect is played and the Key icon on the HUD gets a Golden Key next to it. When Golden Keys are held, any object that is opened will not deplete Isaac's current supply of Keys, effectively giving him an infinite supply of Keys. The Golden Key is removed upon going to the next floor.
Coins
Coins are the basic form of currency in the Binding of Isaac. They can be gathered in the form of Pennies, Nickels, Dimes.
Bombs
Bombs can be placed at Isaac's feet by pressing E, Shift, or Ctrl and will detonate after 2 seconds, destroying rocks and doing a significant amount of damage. The item to the right gives you two bombs when obtained.
Troll bombs
A Troll Bomb is a bomb that has a 10% chance to replace normal Bombs. They cannot be picked up, and will explode a few seconds after being dropped. They also have an increased blast radius compared to regular Bombs. Super Troll Bombs (right) will follow Isaac over obstacles and actively chase him until they explode. They have a 1/50 chance of spawning instead of a Bomb, but are more commonly found in Red Chests.
IV-II. Activated Items (Tarot Cards and Pills)
Activated Items fill your Q slot. Only one can be carried at a time. An activated item can be used by pressing Q, and unlike Items in the spacebar slot, they do not recharge over time, and are a one use item.
Pills
There are a number of different pill styles and effects. At the start of the game, each type is randomly assigned an effect, which remains bound to that pill style for the remainder of that game. Pills start unidentified and are identified once used, unless the player has the PHD item, which identifies pills after a short delay. Picking up a pill or card while you already have one causes the old one to be dropped.
Tarot Cards
Tarot Cards are unidentified when dropped and immediately identified when picked up. Each card has a unique and pre-determined effect. Picking up a pill or card while already carrying one causes the old one to be dropped. The list below shows what each Tarot Card does.

Teleports Isaac to the starting room of the current floor. Useful when you reach a dead end and don't want to walk all the way back.

Gives Isaac homing tears for the current room. Basically, a one-time use Telepathy For Dummies.

Causes Mom's foot to stomp down, doing severe damage to enemies. Best saved for Boss Rooms.
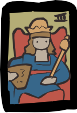
Gives Isaac the ♥♥♥♥♥ Of Babylon effect for the current room. This WoB effect has higher damage than the actual item's effect.

Instantly teleports Isaac to the Boss Room. Extremely useful if you already found the Treasure Room, are doing a no-damage challenge run, doing a speedrun, or doing a "No Treasure Rooms" challenge.
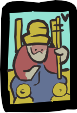
Spawns two Soul Hearts on the floor.

Spawns two Red Hearts on the floor.

Gives Isaac the My Little Unicorn Effect upon activation, which turns him invincible and able to damage enemies by touch.
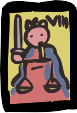
Spawns a Key, a Bomb, a Half-Heart, and a Coin.

Teleports Isaac to the Shop. Acts as a random teleport in The Womb and onwards, due to there being no Shop.

Spawns a Slot Machine. If used in the Boss Room, the "Dead Cat" glitch can be abused. (See Dead Cat description for details)
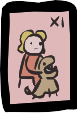
Makes Isaac become larger, gives a new heart container (Soul Heart for ???) for that room only, and increases damage by 1. If used with ???, the Soul Heart you are given will be permanent.
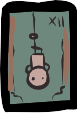
Makes Isaac lose his body (Similar to the Transcendence item) and gain flight for the current room.
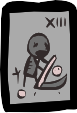
Damages all the enemies in the room. Very useful in the Mom fight, due to multiple segments being damaged.
Using this item 5 times over multiple playthroughs will unlock the Necronomicon item, which has the same effect as this card.
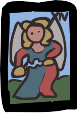
Spawns a Blood Donation Machine in the current room.

Gives Isaac the Book Of Belial effect for the current room, which increases damage by 2.
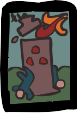
Spawns Troll Bombs all around the room, similar to the Anarchist's Cookbook item.

Instantly teleports Isaac to the Treasure Room. Acts as a random teleport in The Womb and onwards.

Teleports Isaac to the Secret Room.

Fully heals Isaac, reveals the entire map, and damages any enemies/bosses in the room significantly. The best Tarot Card in the game, save it for the final bosses if you can.

Spawns a beggar. Can be used in places like the Curse Room, Angel Room, or Devil Room to give you items specific to that room's Item Pool.

Reveals the entire map, including rooms like the Treasure Room or Boss Room.
Pills
There are a number of different pill styles and effects. At the start of the game, each type is randomly assigned an effect, which remains bound to that pill style for the remainder of that game. Pills start unidentified and are identified once used, unless the player has the PHD item, which identifies pills after a short delay. Picking up a pill or card while you already have one causes the old one to be dropped.
Tarot Cards
Tarot Cards are unidentified when dropped and immediately identified when picked up. Each card has a unique and pre-determined effect. Picking up a pill or card while already carrying one causes the old one to be dropped. The list below shows what each Tarot Card does.
0 The Fool
Teleports Isaac to the starting room of the current floor. Useful when you reach a dead end and don't want to walk all the way back.
I The Magician
Gives Isaac homing tears for the current room. Basically, a one-time use Telepathy For Dummies.
II The High Priestess
Causes Mom's foot to stomp down, doing severe damage to enemies. Best saved for Boss Rooms.
III The Empress
Gives Isaac the ♥♥♥♥♥ Of Babylon effect for the current room. This WoB effect has higher damage than the actual item's effect.
IV The Emperor
Instantly teleports Isaac to the Boss Room. Extremely useful if you already found the Treasure Room, are doing a no-damage challenge run, doing a speedrun, or doing a "No Treasure Rooms" challenge.
V The Hierophant
Spawns two Soul Hearts on the floor.
VI The Lovers
Spawns two Red Hearts on the floor.
VII The Chariot
Gives Isaac the My Little Unicorn Effect upon activation, which turns him invincible and able to damage enemies by touch.
VIII Justice
Spawns a Key, a Bomb, a Half-Heart, and a Coin.
IX The Hermit
Teleports Isaac to the Shop. Acts as a random teleport in The Womb and onwards, due to there being no Shop.
X Wheel Of Fortune
Spawns a Slot Machine. If used in the Boss Room, the "Dead Cat" glitch can be abused. (See Dead Cat description for details)
XI Strength
Makes Isaac become larger, gives a new heart container (Soul Heart for ???) for that room only, and increases damage by 1. If used with ???, the Soul Heart you are given will be permanent.
XII The Hanged Man
Makes Isaac lose his body (Similar to the Transcendence item) and gain flight for the current room.
XIII Death
Damages all the enemies in the room. Very useful in the Mom fight, due to multiple segments being damaged.
Using this item 5 times over multiple playthroughs will unlock the Necronomicon item, which has the same effect as this card.
XIV Temperance
Spawns a Blood Donation Machine in the current room.
XV The Devil
Gives Isaac the Book Of Belial effect for the current room, which increases damage by 2.
XVI The Tower
Spawns Troll Bombs all around the room, similar to the Anarchist's Cookbook item.
XVII The Stars
Instantly teleports Isaac to the Treasure Room. Acts as a random teleport in The Womb and onwards.
XVIII The Moon
Teleports Isaac to the Secret Room.
XIX The Sun
Fully heals Isaac, reveals the entire map, and damages any enemies/bosses in the room significantly. The best Tarot Card in the game, save it for the final bosses if you can.
XX Judgement
Spawns a beggar. Can be used in places like the Curse Room, Angel Room, or Devil Room to give you items specific to that room's Item Pool.
XXI The World
Reveals the entire map, including rooms like the Treasure Room or Boss Room.
IV-III. Trinkets
There are 33 Trinkets in The Binding Of Isaac. This section will explain what all of them are and what they do.


Trinkets
???'s Soul
Spawns a transparent Brother Bobby that moves around the room independently, firing homing shots with max speed. Other familiars follow ???'s Soul instead of Isaac.
Ace Of Spades
Increases chances of Tarot Card drops.
Bloody Penny
Collecting coins has a 50% chance to drop a half heart. Very effective with Blood Donation Machines.
Burnt Penny
Collecting coins has a 50% chance to drop a Bomb.
Cain's Eye
Going to the next floor has a 25% chance to reveal where special rooms are. (Boss Rooms, Challenge Rooms, Treasure Rooms etc.) Kind of a useless trinket.
Cancer
Doubles your rate of fire. Very effective with the Thin Odd Mushroom or Number One.
Child's Heart
Increases chances of Heart drops. Very effective with the Mitre.
Counterfeit Penny
Has a 50% chance to increase the value of a Coin by 1 when picked up. Can be found in Golden Poop.
Cursed Skull
Teleports you when you get down to a half heart. Always teleports ???.
Curved Horn
Increases damage when held. The increase seems to be about 3 points of damage.
Eve's Bird's Foot
Has a small chance to spawn the Dead Bird when Isaac gets hit.
Flat Penny
Has a 50% chance to spawn a key when a coin is picked up.
Fish Head
Spawns Blue Flies whenever Isaac gets hit. Basically the trinket version of the Infestation item.
Goat Hoof
Increases speed. Great with Maggy.
Isaac's Head
Gives Isaac's Head to you as a familiar, which shoots normal tears that can pierce through enemies.
Isaac's Fork
Clearing a room gives a 10% chance to heal Isaac by a half heart. A gulping sound and a "Heart Up" icon will appear when the effect occurs.
Judas' Tongue
All Devil Room items cost 1 heart. The 3 Soul Heart deals are not affected.
Left Hand
All chests are turned into Red Chests. Always dropped by Ultra Pride.
Liberty Cap
Entering a room has a 25% chance to activate an Odd Mushroom effect. Due to a bug, this can sometimes give you The Compass effect, which can be exploited by constantly entering and exiting a room.
Lucky Toe
Increases the chance of a Pickup spawning when you complete a room.
Maggy's Faith
Gives you an Eternal Heart at the start of every floor.
Match Stick
Increases the chance of Bomb drops.
A Missing Page
Getting hit has a 5% chance to induce the Necronomicon effect. Terrible trinket, really.
Mom's Pearl
Increases the chance of hearts being replaced by Soul Hearts by 10%. Stacks with Eve's base Soul Heart bonus and the Mitre.
Pinky Eye
Tears have a 10% chance to be replaced by Poison tears. This is actually a pretty good trinket when paired with items like the Inner Eye/Mutant Spider or Number One.
The Polaroid
Will give you a shield like the Book Of Shadows does for a small duration when Isaac gets down to a half heart. Always activates for ???, making it very useful. Also, if you are at a half heart but have many Soul Hearts, the effect will also always activate. This trinket is necessary to access The Chest when you kill Isaac.
Push Pin
Tears have a 10% chance to be replaced by Spectral tears.
Red Patch
Getting hit has a small chance to induce the Razor Blade effect, increasing damage.
Rusted Key
Increases the drop rate of keys. Works well with Guppy's Tail.
Safety Cap
Increases drop rate of pills. Great with the Lucky Foot/Cain or the PhD item.
Samson's Lock
Has a small chance to induce the Bloody Lust effect when you kill an enemy, but with 2 points of damage instead of 1. Using it with Bloody Lust allows you to get more damage a lot more quickly.
The Tick
Reduces health of bosses by roughly 15% and heals a full heart when you enter a Boss Room. Cannot be swapped with any other trinket, so you need Mom's Purse if you want to pick up any other trinket. This will probably prevent you from going to The Chest, so be careful!
Umbilical Cord
Spawns a Little Steve familiar when you go down to a half heart, only for that room. Worst trinket in the game.
IV-IV. Collectibles
There are 195 items in The Binding Of Isaac, all of them having unique functions. The items shown here are sorted by their position on the Wrath Of The Lamb Collection Grid.
Item
Location(s)
About
The Sad Onion

Treasure Rooms, Golden Chests
Roughly doubles Isaac's current fire rate. Essentially a permanent version of the Cancer trinket. Great item.
The Inner Eye

Treasure Rooms
Allows Isaac to fire 3 tears at once. Sets fire rate to minimum, but it can be increased to fire the 3 shots more often. Should be avoided if you have tear changing items such as Dr. Fetus or Brimstone, as it only slows down your fire rate and does nothing else. One of my favorite items, personally.
Spoon Bender

Treasure Rooms
Makes Isaac's tears purple and allows them to home in on enemies. Not really that good of an item, as the homing effect is pretty weak.
Max's Head

Treasure Rooms
Increases damage by 1 and multplies it by 1.5x.
My Reflection

Treasure Rooms
Reduces range of tears, and makes them come back to you. Terrible item, really.
Number One

Treasure Rooms
Sets range of "tears" to minimum, and maxes fire rate. Becomes even better with the Cancer trinket.
Blood Of The Martyr

Treasure Rooms
Turns tears red and increases damage by 1. (It appears as 2, however) With the Book Of Belial, it will give it a 1.5x damage multiplier whenever it is activated.
Brother Bobby

Treasure Rooms, Devil Rooms
A blue familiar that fires normal tears. Not really that good, but he adds extra firepower to characters like Eve, so he's better than nothing. You should always re-roll him if found in the Devil Room.
Skatole

Arcade Shell Game
Makes all attack flies and Pooters harmless. Boom Flies still damage you and can explode, but they move much slower. Since Peep's eyes share the Boom Flies' AI, they are also slowed down.
Cube Of Meat

Always dropped by a Harbinger in a Boss Room
Has 4 levels. At the first level, it functions as an orbital that blocks shot and damages enemies when they get close. At level 2, it replaces the orbital with a Meat Boy head that fires blood tears. At level 3, it turns the Meat Boy head into a small Meat Boy that damages enemies on touch, he can also push around dropped bombs, which can be troublesome. At level 4, his size and damage increases. To unlock, you must kill mom at least once.
Halo Of Flies

Treasure Rooms
Picking this item up gives Isaac two pretty fly orbitals. These block shots and kill any other flies that touch them. Pretty good item early on, since it can reliably block shots. When paired with Guardian Angel, this makes fights a lot easier, since shots will rarely hit you, especially in the Isaaac/??? fight.
1 Up

Secret Rooms
Gives Isaac an extra life. Dying will cause you to respawn right outside the room you died in, with full heart containers. Very useful item.
Magic Mushroom

Treasure Rooms
Increases all stats except Rate of Fire. Damage is multiplied by 1.5x. Also adds a new heart container.
The Virus

Treasure Rooms, sometimes dropped by Lust
Makes Isaac automatically poison enemies upon touching them. Any other forms of damage will not poison enemies. Has amazing synergy with the Book Of Shadows and any other invincibility-granting items, as touching enemies will poison enemies without you taking any damage. This item also slightly reduces speed (Roughly 1/3rd of a whole bar), but this is an unlisted effect.
Roid Rage

Treasure Rooms
Increases Speed, but not range, unlike what the item says. The speed increase is pretty large, and makes Isaac a bit hard to control, so it's best to pick this item up if you have flight. Otherwise, just re-roll it unless you're playing as Maggy.
<3

Treasure Rooms, sometimes dropped by Gluttony
Adds a heart container and restores all health. Can be a lifesaver if you kill Gluttony while low on hearts.
Raw Liver

Secret Rooms
Adds two heart containers and restores all health. One of the rarer items in the game.
Skeleton Key

Treasure Rooms
Instantly gives you 99 keys. This item isn't really THAT good since you never need so many keys, but you don't have to worry about finding keys for Treasure Rooms/Shops/Golden Chests. Also, it comes in real handy in The Chest. If you have a Bombs Are Key pill, you can easily get 99 Bombs.
A Dollar

Slot Machine drop
Instantly gives you 99 coins. Not really that useful from The Womb and onwards where you won't need coins most of the time, but it's still pretty useful. Works very well with the Money = Power item. Also, it unlocks Cain upon pickup if you haven't unlocked him already, which is neat.
A Quarter

Treasure Rooms, Devil Rooms, sometimes dropped by Super Greed
Gives you 25 coins upon pickup. To unlock, complete The Womb 4 times.
Boom!

Treasure Rooms
Gives you 10 bombs upon pickup. Not really that good of an item, but it's better than nothing. Should be re-rolled if you have the D6.
Transcendence

Secret Room
Gives Isaac flight. To unlock, complete The Womb 2 times.
Collectibles Part 2
The Compass

Treasure Rooms, Shop
Shows the location of all special rooms on the map. (Boss Rooms, Treasure Rooms, Shop, Challenge Room etc.) Has good synergy with the Treasure Map.
Lunch

Dinner
Dessert
(no image)
Breakfast

Rotten Meat
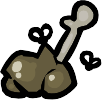
Dinner
Dessert
(no image)
Breakfast
Rotten Meat
Boss Rooms, Golden Chests (Rotten Meat only)
Adds a new heart container.
Wooden Spoon

Boss Rooms, Golden Chests
Increases speed.
PhD

Treasure Rooms
Restores two hearts, turns all negative pills into positive pills, and identifies them after a short delay. Less useful if you have the Lucky Foot or are playing as Cain.
The Belt

Treasure Rooms, Boss Rooms, Golden Chests
Increases speed by 2.
Mom's Underwear

Boss Rooms, Treasure Rooms
Increases range by 1.
Mom's Heels

Boss Rooms, Treasure Rooms
Increases range by 2, making it better than the Underwear and Lipstick.
Mom's Lipstick

Boss Rooms, Treasure Rooms
Increases range by 1.
Wire Coat Hanger!

Boss Rooms, Treasure Rooms
Increases rate of fire by 2.
Rosary

Treasure Rooms
Gives 3 soul hearts upon pickup, and makes it more likely for the Bible to spawn in the Shop. Also, it can apparently increase chances of an Angel Room spawning, but this is just a rumour. Good with Eve, as you can go into the ♥♥♥♥♥ Of Babylon state, and pick this item up and greatly reduce the risk of running around with a half-heart.
Bible
(No Image)
(No Image)
Treasure Rooms, Angel Rooms, Shops
Grants Isaac flight upon activation that room only. Crappy item, since it takes so long to recharge and because flight in a single room isn't very useful. However, it instantly kills Mom, Mom's Heart, and It Lives! upon use, making it useful for the no damage runs. This also unlocks the Halo item. Using it in the Satan, Isaac, or ??? instantly kills you unless you have the Wafer item. Recharges every 6 rooms.
Book Of Belial
Treasure Rooms, Devil Rooms for 1 heart, Secret Rooms, Judas' starting item
Adds 2 points of damage upon activation. Damage also gets multiplied by 1.5x if the player has the Blood Of The Martyr item. One of the better spacebar items, as it allows most bosses to go down really quickly, and it has a relatively short recharge time. Recharges every 3 rooms. Unlocked by completing The Womb once.
The Necronomicon

Treasure Rooms, Devil Rooms
Damages all the enemies in the current room. This item kind of sucks, as its damage is really low, so it will only kill your average low health enemies only. Bosses are barely even damaged by it, and the recharge time is quite long. Recharges every 6 rooms. Unlocked by using the Death tarot card 4 times. Does not have to be in a single playthrough.
X-Ray Vision

Treasure Rooms
Automatically opens entrances to secret rooms and super secret rooms. Quite a useful item, since it saves you on bombs a lot.
The Poop
Treasure Rooms, ???'s starting item
Spawns a pile of poop when used. As it name suggests, it's the worst item in the game. Has virtually no use besides using it in every single room, hoping for coins/hearts. Reroll it whenever you see it. Recharges in every room. Unlocked by completing The Womb 10 times.
Mr. Boom

Treasure Rooms, sometimes dropped by Wrath
Drops a large bomb identical to the Mr. Mega item, that has an increased blast radius. Not a very useful item, but it can add a little bit more firepower and save you some bombs that would rather be used on bosses. Recharges every 2 rooms.
Tammy's Head

Treasure Rooms, Golden Chests
Fires tears in 8 directions when activated. The tears take the effect, damage, and color of Isaac's current tears. For example, using it with Mom's Contacts will allow the tears that come from Tammy's Head to petrify monsters. It's actually a pretty decent item, and it recharges every room, but in general you shouldn't switch to it from better spacebar items like The Nail or The Dice.
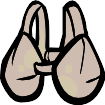
Mom's Bra
Treasure Rooms
Petrifies all enemies in the currenty room for 5 seconds, like the Mom's Contacts item. Not a very good item, should only be picked up if you have something truly awful like the Poop or don't have a Spacebar item at all. Recharges every 3 rooms.
Kamikaze!

Treasure Rooms
Recharges instantly. Makes Isaac to take one heart of damage and cause a large explosion. Terrible item, really. However, due to a bug, you can use it for no damage at all if you use it while running towards a wall. For more detail, see this video made by the Youtube user, James Katzaman:
Mom's Pad

Treasure Rooms
Causes all of the enemies in the current room to move away from Isaac for 5 seconds. This can glitch up bosses like Fistula, which can potentially end your current run. Recharges every 3 rooms.
Bob's Rotten Head

Secret Rooms, sometimes dropped by Sloth
Drops a large poison bomb. Recharges every 3 rooms.
Collectibles Part 3
Character limits etc.
Pills

Found: Dropped from Red Chests, can replace other pick ups with the D20, randomly dropped from completing a room, naturally found in the I AM ERROR room
Pills are pick ups that have a random effect, which are listed below. Pills can be changed to always having a positive/neutral effect with the PhD or Lucky Foot item. All pills are marked with the name "???" until you use them, or if you have the PhD item. Please note that pill color does not give the same effect every playthrough. For example, a blue pill could be a Tears Up in your current run, or a Range Down in your next.
Health Up (Adds an empty heart container)
Luck Up
Full Health
Pretty Fly
Range Up
Speed Up
Balls Of Steel (Adds 2 soul hearts)
I found pills (Changes Isaac face, no other effect)
Friends til' the end! (Spawns 3 Blue Flies)
Explosive Diarhhea (Causes Isaac to leave a trail of bombs for a short amount of time. Not obtainable if you have Wrath Of The Lamb due to a bug. Can still be obtained in the base game without WotL, or if you have the Most Unholy Edition aka v1.50)
Bad Gas (Causes Isaac to fart, similar to the Bean item)
Bombs are key (Switches your bombs and keys. For example, if you have 10 bombs and 5 keys, using this pill will give you 10 keys and 5 bombs)
Health Down (Turns into a Health Up if you have only 1 heart container)
Luck Down
Bad Trip! (Turns into a Full Health pill if you have only 1/half-heart left. If you're playing as ???, this pill will kill you even if you are at 1/half Soul Heart.)
Range Down
Speed Down
Teleport!

Found: Treasure Rooms
Unlock Requirement: N/A
Recharge Time: 2 rooms
Randomly teleports Isaac when activated, similar to Telepills. Cannot take you into the I AM ERROR room.
My Little Unicorn

Found: Treasure Rooms, Secret Rooms
Unlock Requirement: N/A
Recharge Time: 6 rooms
When activated, causes Isaac to flash in multiple colors and get a unicorn's horn on his head for the duration of the item. He becomes immune to all forms of damage and can damage enemies simply by touching them. However, Isaac cannot fire during the duration of the item. Works amazingly well with Mom's Knife, because you can still damage enemies with the Knife. This can kill almost all bosses very quickly.
Yum Heart
Found: Treasure Rooms, Maggy's starting item, sometimes dropped by Super Lust
Unlock Requirement: Unlock Maggy/Have 7 or more heart containers in a single playthrough
Recharge Time: 4 rooms
Restores a heart when activated. Pretty decent item, and can be abused with the Habit to make you virtually invincible if you have The Wafer.
Lucky Foot
Found: Treasure Rooms, Devil Rooms for 1 heart, Cain's starting item
Unlock Requirement: Unlock Cain/Have 55 or more coins in a single playthrough
Increases chances of a pickup dropping after clearing a room, removes the fortune messages from Fortune Telling Machines, and increases chances of winning the Shell Game in the Arcade. This is unrelated to the Luck stat, which increases your chances of getting a tooth shot, and things like that.
Doctor's Remote

Found: Treasure Rooms
Unlock Requirement: N/A
Recharge Time: 3 rooms
Creates a marker upon usage, which eventually drops a missile on it. (Identical to the Epic Fetus item.) Not really that good of an item, should usually be re-rolled.
Cupid's Arrow

Found: Treasure Rooms
Unlock Requirement: N/A
Allows Isaac's tears to pierce through enemies. This removes the knockback effect of tears, which may or may not be useful. Pretty good item.
Shoop Da Whoop!

Found: Treasure Rooms, sometimes dropped by Envy
Unlock Requirement: N/A
Recharge Time: 3 rooms
Upon usage, Isaac charges his lazer, eventually firing a blue Brimstone-like beam that pierces enemies. Another one of those meh items that you should re-roll.
Steven

Found: Dropped by Steven, Golden Chests
Unlock Requirement: N/A
Increases damage by 2. A somewhat rare item. You can easily get it if you found Little Steve in a treasure room before fighting Steven, or re-rolling Little Steve, which occassionally turns him into Steven.
Pentagram

Found: Boss Rooms
Unlock Requirement: N/A
Increases damage by 2 and increases chances of Devil Rooms to appear.
Dr. Fetus

Found: Treasure Rooms
Unlock Requirement: Complete The Womb 5 times.
Instead of firing tears, Isaac fires bombs. The bombs explode quickly and are infinite. Also, increases the chances of Mr. Mega and Bobby-Bomb appearing in a Treasure Room. One of the best items in the game, although it's a little hard to use.
Magneto

Found: Treasure Rooms
Unlock Requirement: N/A
Causes pick-ups to move towards Isaac. (Including Troll Bombs!) These can go through any obstacle, such as rocks, pits, spikes, or whatever. It's a pretty decent item, but it becomes considerably less useful after The Caves/Catacombs or The Depths/Necropolis.
Book Of Revelations

Found: Shops, Libraries
Unlock Requirement: Kill a Harbinger
Recharge Time: 6 rooms
Gives Isaac a Soul Heart upon usage. Also, turns the next boss into a Harbinger, assuming it's not a fixed boss like Mom. This item does not always turn the next boss into a Harbinger in an XL floor. Very useful with The Habit. Increases the chances of a Devil Room spawning.
Treasure Map

Found: Shops, Secret Rooms
Unlock Requirement: N/A
Shows every room in the map, including the Secret Room. Special rooms such as Boss Rooms do not have their icon shown and appear as regular rooms until you reach them. Works well with The Compass.
Mom's Eye

Found: Treasure Rooms
Unlock Requirement: N/A
Firing tears has a chance to fire a tear from the back of Isaac's head. This item kind of sucks, to be honest.
Lemon Mishap

Found: Treasure Rooms
Unlock Requirement: N/A
Recharge Time: 2 rooms
Activating this item causes Isaac to spill Lemonade, leaving a small puddle of creep. One of the worst items in the game, due to it's low damage and laughably small range.
Distant Admiration

Found: Treasure Rooms
Unlock Requirement: N/A
Isaac gets circled by a red attack fly. This attack fly flies farther away than orbitals, but closer than the Forever Alone attack fly. In my opinion, this item is not as good as Forever Alone, because you need to take risks by getting in close to deal damage.
Pills
Found: Dropped from Red Chests, can replace other pick ups with the D20, randomly dropped from completing a room, naturally found in the I AM ERROR room
Pills are pick ups that have a random effect, which are listed below. Pills can be changed to always having a positive/neutral effect with the PhD or Lucky Foot item. All pills are marked with the name "???" until you use them, or if you have the PhD item. Please note that pill color does not give the same effect every playthrough. For example, a blue pill could be a Tears Up in your current run, or a Range Down in your next.
Positive Effects
Tears Up (Rate Of Fire increase)Health Up (Adds an empty heart container)
Luck Up
Full Health
Pretty Fly
Range Up
Speed Up
Balls Of Steel (Adds 2 soul hearts)
Neutral Effects
Telepills (Random teleport, has a 6.66% chance to teleport Isaac into the I AM ERROR room)I found pills (Changes Isaac face, no other effect)
Friends til' the end! (Spawns 3 Blue Flies)
Explosive Diarhhea (Causes Isaac to leave a trail of bombs for a short amount of time. Not obtainable if you have Wrath Of The Lamb due to a bug. Can still be obtained in the base game without WotL, or if you have the Most Unholy Edition aka v1.50)
Bad Gas (Causes Isaac to fart, similar to the Bean item)
Bombs are key (Switches your bombs and keys. For example, if you have 10 bombs and 5 keys, using this pill will give you 10 keys and 5 bombs)
Negative Effects
Tears DownHealth Down (Turns into a Health Up if you have only 1 heart container)
Luck Down
Bad Trip! (Turns into a Full Health pill if you have only 1/half-heart left. If you're playing as ???, this pill will kill you even if you are at 1/half Soul Heart.)
Range Down
Speed Down
Teleport!
Found: Treasure Rooms
Unlock Requirement: N/A
Recharge Time: 2 rooms
Randomly teleports Isaac when activated, similar to Telepills. Cannot take you into the I AM ERROR room.
My Little Unicorn
Found: Treasure Rooms, Secret Rooms
Unlock Requirement: N/A
Recharge Time: 6 rooms
When activated, causes Isaac to flash in multiple colors and get a unicorn's horn on his head for the duration of the item. He becomes immune to all forms of damage and can damage enemies simply by touching them. However, Isaac cannot fire during the duration of the item. Works amazingly well with Mom's Knife, because you can still damage enemies with the Knife. This can kill almost all bosses very quickly.
Yum Heart
Found: Treasure Rooms, Maggy's starting item, sometimes dropped by Super Lust
Unlock Requirement: Unlock Maggy/Have 7 or more heart containers in a single playthrough
Recharge Time: 4 rooms
Restores a heart when activated. Pretty decent item, and can be abused with the Habit to make you virtually invincible if you have The Wafer.
Lucky Foot
Found: Treasure Rooms, Devil Rooms for 1 heart, Cain's starting item
Unlock Requirement: Unlock Cain/Have 55 or more coins in a single playthrough
Increases chances of a pickup dropping after clearing a room, removes the fortune messages from Fortune Telling Machines, and increases chances of winning the Shell Game in the Arcade. This is unrelated to the Luck stat, which increases your chances of getting a tooth shot, and things like that.
Doctor's Remote
Found: Treasure Rooms
Unlock Requirement: N/A
Recharge Time: 3 rooms
Creates a marker upon usage, which eventually drops a missile on it. (Identical to the Epic Fetus item.) Not really that good of an item, should usually be re-rolled.
Cupid's Arrow
Found: Treasure Rooms
Unlock Requirement: N/A
Allows Isaac's tears to pierce through enemies. This removes the knockback effect of tears, which may or may not be useful. Pretty good item.
Shoop Da Whoop!
Found: Treasure Rooms, sometimes dropped by Envy
Unlock Requirement: N/A
Recharge Time: 3 rooms
Upon usage, Isaac charges his lazer, eventually firing a blue Brimstone-like beam that pierces enemies. Another one of those meh items that you should re-roll.
Steven
Found: Dropped by Steven, Golden Chests
Unlock Requirement: N/A
Increases damage by 2. A somewhat rare item. You can easily get it if you found Little Steve in a treasure room before fighting Steven, or re-rolling Little Steve, which occassionally turns him into Steven.
Pentagram
Found: Boss Rooms
Unlock Requirement: N/A
Increases damage by 2 and increases chances of Devil Rooms to appear.
Dr. Fetus
Found: Treasure Rooms
Unlock Requirement: Complete The Womb 5 times.
Instead of firing tears, Isaac fires bombs. The bombs explode quickly and are infinite. Also, increases the chances of Mr. Mega and Bobby-Bomb appearing in a Treasure Room. One of the best items in the game, although it's a little hard to use.
Magneto
Found: Treasure Rooms
Unlock Requirement: N/A
Causes pick-ups to move towards Isaac. (Including Troll Bombs!) These can go through any obstacle, such as rocks, pits, spikes, or whatever. It's a pretty decent item, but it becomes considerably less useful after The Caves/Catacombs or The Depths/Necropolis.
Book Of Revelations
Found: Shops, Libraries
Unlock Requirement: Kill a Harbinger
Recharge Time: 6 rooms
Gives Isaac a Soul Heart upon usage. Also, turns the next boss into a Harbinger, assuming it's not a fixed boss like Mom. This item does not always turn the next boss into a Harbinger in an XL floor. Very useful with The Habit. Increases the chances of a Devil Room spawning.
Treasure Map
Found: Shops, Secret Rooms
Unlock Requirement: N/A
Shows every room in the map, including the Secret Room. Special rooms such as Boss Rooms do not have their icon shown and appear as regular rooms until you reach them. Works well with The Compass.
Mom's Eye
Found: Treasure Rooms
Unlock Requirement: N/A
Firing tears has a chance to fire a tear from the back of Isaac's head. This item kind of sucks, to be honest.
Lemon Mishap
Found: Treasure Rooms
Unlock Requirement: N/A
Recharge Time: 2 rooms
Activating this item causes Isaac to spill Lemonade, leaving a small puddle of creep. One of the worst items in the game, due to it's low damage and laughably small range.
Distant Admiration
Found: Treasure Rooms
Unlock Requirement: N/A
Isaac gets circled by a red attack fly. This attack fly flies farther away than orbitals, but closer than the Forever Alone attack fly. In my opinion, this item is not as good as Forever Alone, because you need to take risks by getting in close to deal damage.
Collectibles Part 4
Book Of Shadows

Found: Treasure Rooms, Shops, Devil Rooms
Unlock Requirement: N/A
Recharge Time: 3 rooms
Gives Isaac a shield of invincibility for 10 seconds, where he can still fire tears and do damage. Great item. Also works amazingly well with Mom's Knife or The Virus, because these items can deal large amounts of damage to enemies up close.
Wiggle Worm

Found: Treasure Rooms
Unlock Requirement: N/A
Makes Isaac's tears fire in a wave pattern, and prevents them from being "angled". Increases Rate Of Fire by 1. Has some pretty crazy synergies with certain items.
The Ladder

Found: Shops
Unlock Requirement: N/A
Allows Isaac to walk over a single Pit/gap without flight. Becomes virtually useless after The Womb, as there are no Pits in The Womb or onwards.
Tarot Card

Pick Up that can have 22 different effects.
Charm Of The Vampire

Found: Treasure Rooms
Unlock Requirement: N/A
Gives Isaac a half-heart upon killing 13 monsters. Not really the most useful item out there, but it can be abused with Globins/Gazing Globins by making them go into their broken form, waiting for them to regenerate, and then breaking them again. Since this counts as a kill, you can cheese them until you have full hearts.
The Mark

Found: Devil Rooms
Unlock Requirement: N/A
Increases damage by 2, increases speed by 1, and adds a Soul Heart. Like The Pact, picking this up with only 2 hearts will kill you, unlike other Devil Room items.
Battery

Found: Shops
Unlock Requirement: N/A
Gives you a free charge for a spacebar item after every 15 seconds when you are fighting monsters. Maxes at 3 charges. This item is largely useless with quick-recharging items like The Bean or Mr. Boom, but works very well with items like The Book Of Revelations or The Nail that recharge slowly.
Steam Sale

Found: Sometimes dropped by Greed, Shops
Unlock Requirement: N/A
Reduces all of the prices in the Shop by 50%. Items cost 7 cents, all 5 cent pickups cost 3 cents, and Red Hearts cost 2 cents.
Anarchist's Cookbook

Found: Treasure Rooms, Sometimes dropped by Pride
Unlock Requirement: N/A
Recharge Time: 3 rooms
Spawns multiple troll bombs in random areas around the room. These can help clear out rocks and damage enemies. Since the explosions cause troll bombs to push away each other, it's possible for you to get hit too, so be careful!
The Hourglass

Found: Treasure Rooms
Unlock Requirement: N/A
Recharge Time: 2 rooms
Slows down all enemies and projectiles in the room for 7.5 seconds.
Sister Maggy

Found: Treasure Rooms, Devil Rooms
Unlock Requirement: N/A
A familiar that fires blood tears. These blood tears are stronger than Brother Bobby's regular tears.
Technology

Found: Treasure Rooms, Devil Rooms
Unlock Requirement: N/A
Gives Isaac fast-firing lasers instead of tears. These lasers can pierce through enemies and have infinite range. Quite a useful item.
Chocolate Milk

Found: Treasure Rooms, Golden Chests
Unlock Requirement: N/A
Isaac can charge his tears to make them larger. Larger tears do more damage and have more knockback. This item makes it impossible to fire tears continously by holding down a directional key, so you have to mash a key to fire small shots quickly. This can be quite tiring, but you'll get used to it.
Growth Hormones

Found: Treasure Rooms, Challenge Rooms
Unlock Requirement: N/A
Increases Damage by 2 and Speed by 1.
Mini Mush

Found: Treasure Rooms
Unlock Requirement: N/A
Increases Speed and Range by 1. Does not shrink Isaac's hitbox.
The Pact

Found: Devil Rooms
Unlock Requirement: N/A
Increases Damage by 1 and Rate Of Fire by 0.7. Adds 2 Soul Hearts. If you find this item for a 3 Soul Heart cost, make sure to pick it up, as it will essentially cost only 1 Soul Heart. Like the Mark, picking this item up and causing Isaac to go to 0 health will automatically kill him, unlike other Devil Room items.
Dead Cat

Found: Devil Rooms, Red Chests
Unlock Requirement: N/A
Sets your maximum Heart Containers to 1, and gives you 9 lives. Heart Containers can be increased, but will be reset to 1 once Isaac loses a life.
This item is really bad, honestly. However, it's basically 9 free lives with Judas/Samson. You can also use it to abuse Devil Room deals to get as many items as possible. If you don't mind exploiting glitches, then you can use the extra lives to get multiple items from bosses. What you have to do is:
1. Kill a boss with Dead Cat, pick up the reward, but don't enter the trapdoor.
2. Kill yourself with something like a Bomb, which will cause you to respawn outside the room.
3. Enter the Boss Room again
The boss will be revived, with the trapdoor still open. You can kill the boss again to get another free item. This can be repeated over and over again as long as you have extra lives.
Lord Of The Pit

Found: Devil Rooms
Unlock Requirement: N/A
Gives Isaac black wings, which allow him to fly over all environmental tiles. Also increases speed by 1.
The Nail

Found: Devil Rooms
Unlock Requirement: N/A
Recharge Time: 6 rooms
Upon activation, Isaac gains a Soul Heart, gets 1 more point of damage, and has his speed reduced by 1. He can also destroy rocks by simply walking over them. Essentially a better version of the Book Of Revelations.
We Need To Go Deeper!

Found: Devil Rooms, Secret Rooms
Unlock Requirement: N/A
Recharge Time: 6 rooms
Creates a trapdoor to the next floor upon activation, which can be entered at any time. Does not work in the Cathedral, Sheol, or The Chest. If used in The Womb/Utero, it will always take you to Sheol.
Deck Of Cards
Found: Treasure Rooms
Unlock Requirement: N/A
Recharge Time: 6 rooms
Gives Isaac a random Tarot Card upon activation.
Found: Treasure Rooms, Shops, Devil Rooms
Unlock Requirement: N/A
Recharge Time: 3 rooms
Gives Isaac a shield of invincibility for 10 seconds, where he can still fire tears and do damage. Great item. Also works amazingly well with Mom's Knife or The Virus, because these items can deal large amounts of damage to enemies up close.
Wiggle Worm
Found: Treasure Rooms
Unlock Requirement: N/A
Makes Isaac's tears fire in a wave pattern, and prevents them from being "angled". Increases Rate Of Fire by 1. Has some pretty crazy synergies with certain items.
The Ladder
Found: Shops
Unlock Requirement: N/A
Allows Isaac to walk over a single Pit/gap without flight. Becomes virtually useless after The Womb, as there are no Pits in The Womb or onwards.
Tarot Card
Pick Up that can have 22 different effects.
Charm Of The Vampire
Found: Treasure Rooms
Unlock Requirement: N/A
Gives Isaac a half-heart upon killing 13 monsters. Not really the most useful item out there, but it can be abused with Globins/Gazing Globins by making them go into their broken form, waiting for them to regenerate, and then breaking them again. Since this counts as a kill, you can cheese them until you have full hearts.
The Mark
Found: Devil Rooms
Unlock Requirement: N/A
Increases damage by 2, increases speed by 1, and adds a Soul Heart. Like The Pact, picking this up with only 2 hearts will kill you, unlike other Devil Room items.
Battery
Found: Shops
Unlock Requirement: N/A
Gives you a free charge for a spacebar item after every 15 seconds when you are fighting monsters. Maxes at 3 charges. This item is largely useless with quick-recharging items like The Bean or Mr. Boom, but works very well with items like The Book Of Revelations or The Nail that recharge slowly.
Steam Sale
Found: Sometimes dropped by Greed, Shops
Unlock Requirement: N/A
Reduces all of the prices in the Shop by 50%. Items cost 7 cents, all 5 cent pickups cost 3 cents, and Red Hearts cost 2 cents.
Anarchist's Cookbook
Found: Treasure Rooms, Sometimes dropped by Pride
Unlock Requirement: N/A
Recharge Time: 3 rooms
Spawns multiple troll bombs in random areas around the room. These can help clear out rocks and damage enemies. Since the explosions cause troll bombs to push away each other, it's possible for you to get hit too, so be careful!
The Hourglass
Found: Treasure Rooms
Unlock Requirement: N/A
Recharge Time: 2 rooms
Slows down all enemies and projectiles in the room for 7.5 seconds.
Sister Maggy
Found: Treasure Rooms, Devil Rooms
Unlock Requirement: N/A
A familiar that fires blood tears. These blood tears are stronger than Brother Bobby's regular tears.
Technology
Found: Treasure Rooms, Devil Rooms
Unlock Requirement: N/A
Gives Isaac fast-firing lasers instead of tears. These lasers can pierce through enemies and have infinite range. Quite a useful item.
Chocolate Milk
Found: Treasure Rooms, Golden Chests
Unlock Requirement: N/A
Isaac can charge his tears to make them larger. Larger tears do more damage and have more knockback. This item makes it impossible to fire tears continously by holding down a directional key, so you have to mash a key to fire small shots quickly. This can be quite tiring, but you'll get used to it.
Growth Hormones
Found: Treasure Rooms, Challenge Rooms
Unlock Requirement: N/A
Increases Damage by 2 and Speed by 1.
Mini Mush
Found: Treasure Rooms
Unlock Requirement: N/A
Increases Speed and Range by 1. Does not shrink Isaac's hitbox.
The Pact
Found: Devil Rooms
Unlock Requirement: N/A
Increases Damage by 1 and Rate Of Fire by 0.7. Adds 2 Soul Hearts. If you find this item for a 3 Soul Heart cost, make sure to pick it up, as it will essentially cost only 1 Soul Heart. Like the Mark, picking this item up and causing Isaac to go to 0 health will automatically kill him, unlike other Devil Room items.
Dead Cat
Found: Devil Rooms, Red Chests
Unlock Requirement: N/A
Sets your maximum Heart Containers to 1, and gives you 9 lives. Heart Containers can be increased, but will be reset to 1 once Isaac loses a life.
This item is really bad, honestly. However, it's basically 9 free lives with Judas/Samson. You can also use it to abuse Devil Room deals to get as many items as possible. If you don't mind exploiting glitches, then you can use the extra lives to get multiple items from bosses. What you have to do is:
1. Kill a boss with Dead Cat, pick up the reward, but don't enter the trapdoor.
2. Kill yourself with something like a Bomb, which will cause you to respawn outside the room.
3. Enter the Boss Room again
The boss will be revived, with the trapdoor still open. You can kill the boss again to get another free item. This can be repeated over and over again as long as you have extra lives.
Lord Of The Pit
Found: Devil Rooms
Unlock Requirement: N/A
Gives Isaac black wings, which allow him to fly over all environmental tiles. Also increases speed by 1.
The Nail
Found: Devil Rooms
Unlock Requirement: N/A
Recharge Time: 6 rooms
Upon activation, Isaac gains a Soul Heart, gets 1 more point of damage, and has his speed reduced by 1. He can also destroy rocks by simply walking over them. Essentially a better version of the Book Of Revelations.
We Need To Go Deeper!
Found: Devil Rooms, Secret Rooms
Unlock Requirement: N/A
Recharge Time: 6 rooms
Creates a trapdoor to the next floor upon activation, which can be entered at any time. Does not work in the Cathedral, Sheol, or The Chest. If used in The Womb/Utero, it will always take you to Sheol.
Deck Of Cards
Found: Treasure Rooms
Unlock Requirement: N/A
Recharge Time: 6 rooms
Gives Isaac a random Tarot Card upon activation.
Collectibles Part 5
Monstro's Tooth

Found: Treasure Room
Unlock Requirement: Kill all of the bosses in The Basement
Recharge Time: 3 rooms
Upon activation, Monstro jumps down from above and lands on a random enemy. If there are no enemies in the room, Monstro will attack Isaac instead, similar to the High Priestess Tarot Card. This is actually a pretty good item, because it can damage Monsters and Bosses quite heavily during the earlier floors.
Loki's Horns

Found: Treasure Room
Unlock Requirement: Kill all of the bosses in The Depths
Isaac has a chance to randomly fire shots in a plus (+) pattern whenever he fires a tear.
Little Chubby

Found: Treasure Room
Unlock Requirement: Kill all of the bosses in The Caves
A miniature version of the boss Chub follows Isaac, which will charge at enemies by following Isaac's tears. It does high damage and pierces through all enemies. Once it reaches a wall, it comes back to Isaac and recharges for a few seconds before it can charge again.
Spider's Bite/Radioactive Spider

Found: Secret Room
Unlock Requirement: Complete The Basement
Gives Isaac's tears a chance to slow down enemies and their shots for 2.5 seconds.
Small Rock

Found: Tinted Rocks
Unlock Requirement: Destroy 50 rocks. Does not have to be done in a single playthrough
Increases Damage by 2, Rate Of Fire by 1, and decreases Speed by 1. Found exclusively in Tinted Rocks, so make sure to blow them up if you can.
Spelunker Hat

Found: Treasure Room
Unlock Requirement: Complete The Caves
Reveals Secret Rooms on the map when you are infront of them, but does not open them, unlike the X-Ray glasses. Also reveals Mini-Boss rooms that contains one of the Seven Deadly Sins inside.
Super Bandage

Found: Boss Room
Unlock Requirement: Kill all 4 Harbingers in one playthrough. You don't actually need a Level 4 Meat Boy.
Adds a Heart Container and 2 Soul Hearts.
The Gamekid

Found: Treasure Room
Unlock Requirement: Visit the Arcade 10 times, does not have to be in a single playthrough.
Recharge Time: 6 rooms
Makes all enemies in the current room run away from Isaac, while Isaac becomes invincible and can only damage enemies by touch. (Similar to My Little Unicorn) Killing 2 enemies in a single room will give a Half-Heart.
Sack Of Pennies

Found: Treasure Room
Unlock Requirement: Kill Mom's Heart with Cain.
Drops a Coin upon the completion of every 2 rooms. The coins can be Nickels and Dimes.
Robo-Baby

Found: Treasure Room
Unlock Requirement: Kill Mom's Heart with Judas
Gives Isaac a familiar that fires Technology-like lasers.
Little C.H.A.D.

Found: Treasure Room, Guaranteed drop from the boss C.H.A.D.
Unlock Requirement: Kill C.H.A.D.
Drops a half-heart after completing 3 rooms. The half-heart drops cannot be replaced by Soul Hearts or Eternal Hearts, making this item completely useless for ???.
The Book Of Sin

Found: Treasure Room, Devil Room
Unlock Requirement: Kill all of the Seven Deadly Sins. This does not have to be done in a single playthrough
Recharge Time: 6 rooms
Drops a free pickup upon activation. (Bomb, Heart, Key, Coin, Pills, or Tarot Cards) These pickups can be replaced by their counterparts, such as Red Hearts being replaced by Soul Hearts, or Coins being replaced by Nickels.
The Relic

Found: Treasure Room, Angel Room
Unlock Requirement: Complete The Womb with Maggy.
Drops a Soul Heart after completing 5 rooms. Extremely useful for all characters.
Little Gish

Found: Treasure Room, Guaranteed drop from the boss Gish
Unlock Requirement: Kill Gish
A familiar that shoots tar shots. These can slow enemies and their projectiles upon hit for 2.5 seconds.
Little Steve

Found: Treasure Room, Guaranteed drop from the boss Steven
Unlock Requirement: Kill Steven
Familiar that shoots purple homing tears, similar to the ones Isaac fires with the Spoon Bender/Telepathy For Dummies item.
The Halo

Found: Treasure Room, Angel Room
Unlock Requirement: Kill Mom/Mom's Heart by using The Bible item
Increases all stats including Heart Containers by 1.
Mom's Bottle Of Pills

Found: Treasure Room
Unlock Requirement: Use Blood Donation Machines 20 times. Does not have to be done in a single playthrough
Recharge Time: 6 rooms
Gives Isaac a random Pill upon activation. Works best with the PhD item or Cain, as you can't get negative Pills with them.
The Common Cold

Found: Treasure Room, Devil Room
Unlock Requirement: Collect two of either Roid Rage, The Virus or Growth Hormones in one playthrough.
Gives Isaac's tears a small chance of poisoning enemies with each hit.
The Parasite

Found: Treasure Room, Devil Room
Unlock Requirement: Collect two "dead items" (Bob's Rotten Head, Dead Cat, Max's Head, Tammy's Head) in one playthrough.
Causes Isaac's tears to split upon hitting a solid object or enemies. Works best with a high range stat.
The Dice
Found: Treasure Room, Isaac's starting item upon beating the game as ???
Unlock Requirement: Kill Mom's Heart/It Lives with ???.\
Allows the "re-rolling" of items on pedestals, turning them into another item upon activation. The items re-rolled draw from the item pool of the current room. This also applies to Devil Room items for sale.
Mr. Mega

Found: Treasure Room
Unlock Requirement: Destroy 30 Tinted Rocks. Does not have to be done in a single playthrough.
Gives 5 Bombs, and increases the blast radius + damage of dropped bombs. This also applies to the bombs fired by Dr. Fetus.
Found: Treasure Room
Unlock Requirement: Kill all of the bosses in The Basement
Recharge Time: 3 rooms
Upon activation, Monstro jumps down from above and lands on a random enemy. If there are no enemies in the room, Monstro will attack Isaac instead, similar to the High Priestess Tarot Card. This is actually a pretty good item, because it can damage Monsters and Bosses quite heavily during the earlier floors.
Loki's Horns
Found: Treasure Room
Unlock Requirement: Kill all of the bosses in The Depths
Isaac has a chance to randomly fire shots in a plus (+) pattern whenever he fires a tear.
Little Chubby
Found: Treasure Room
Unlock Requirement: Kill all of the bosses in The Caves
A miniature version of the boss Chub follows Isaac, which will charge at enemies by following Isaac's tears. It does high damage and pierces through all enemies. Once it reaches a wall, it comes back to Isaac and recharges for a few seconds before it can charge again.
Spider's Bite/Radioactive Spider
Found: Secret Room
Unlock Requirement: Complete The Basement
Gives Isaac's tears a chance to slow down enemies and their shots for 2.5 seconds.
Small Rock
Found: Tinted Rocks
Unlock Requirement: Destroy 50 rocks. Does not have to be done in a single playthrough
Increases Damage by 2, Rate Of Fire by 1, and decreases Speed by 1. Found exclusively in Tinted Rocks, so make sure to blow them up if you can.
Spelunker Hat
Found: Treasure Room
Unlock Requirement: Complete The Caves
Reveals Secret Rooms on the map when you are infront of them, but does not open them, unlike the X-Ray glasses. Also reveals Mini-Boss rooms that contains one of the Seven Deadly Sins inside.
Super Bandage
Found: Boss Room
Unlock Requirement: Kill all 4 Harbingers in one playthrough. You don't actually need a Level 4 Meat Boy.
Adds a Heart Container and 2 Soul Hearts.
The Gamekid
Found: Treasure Room
Unlock Requirement: Visit the Arcade 10 times, does not have to be in a single playthrough.
Recharge Time: 6 rooms
Makes all enemies in the current room run away from Isaac, while Isaac becomes invincible and can only damage enemies by touch. (Similar to My Little Unicorn) Killing 2 enemies in a single room will give a Half-Heart.
Sack Of Pennies
Found: Treasure Room
Unlock Requirement: Kill Mom's Heart with Cain.
Drops a Coin upon the completion of every 2 rooms. The coins can be Nickels and Dimes.
Robo-Baby
Found: Treasure Room
Unlock Requirement: Kill Mom's Heart with Judas
Gives Isaac a familiar that fires Technology-like lasers.
Little C.H.A.D.
Found: Treasure Room, Guaranteed drop from the boss C.H.A.D.
Unlock Requirement: Kill C.H.A.D.
Drops a half-heart after completing 3 rooms. The half-heart drops cannot be replaced by Soul Hearts or Eternal Hearts, making this item completely useless for ???.
The Book Of Sin
Found: Treasure Room, Devil Room
Unlock Requirement: Kill all of the Seven Deadly Sins. This does not have to be done in a single playthrough
Recharge Time: 6 rooms
Drops a free pickup upon activation. (Bomb, Heart, Key, Coin, Pills, or Tarot Cards) These pickups can be replaced by their counterparts, such as Red Hearts being replaced by Soul Hearts, or Coins being replaced by Nickels.
The Relic
Found: Treasure Room, Angel Room
Unlock Requirement: Complete The Womb with Maggy.
Drops a Soul Heart after completing 5 rooms. Extremely useful for all characters.
Little Gish
Found: Treasure Room, Guaranteed drop from the boss Gish
Unlock Requirement: Kill Gish
A familiar that shoots tar shots. These can slow enemies and their projectiles upon hit for 2.5 seconds.
Little Steve
Found: Treasure Room, Guaranteed drop from the boss Steven
Unlock Requirement: Kill Steven
Familiar that shoots purple homing tears, similar to the ones Isaac fires with the Spoon Bender/Telepathy For Dummies item.
The Halo
Found: Treasure Room, Angel Room
Unlock Requirement: Kill Mom/Mom's Heart by using The Bible item
Increases all stats including Heart Containers by 1.
Mom's Bottle Of Pills
Found: Treasure Room
Unlock Requirement: Use Blood Donation Machines 20 times. Does not have to be done in a single playthrough
Recharge Time: 6 rooms
Gives Isaac a random Pill upon activation. Works best with the PhD item or Cain, as you can't get negative Pills with them.
The Common Cold
Found: Treasure Room, Devil Room
Unlock Requirement: Collect two of either Roid Rage, The Virus or Growth Hormones in one playthrough.
Gives Isaac's tears a small chance of poisoning enemies with each hit.
The Parasite
Found: Treasure Room, Devil Room
Unlock Requirement: Collect two "dead items" (Bob's Rotten Head, Dead Cat, Max's Head, Tammy's Head) in one playthrough.
Causes Isaac's tears to split upon hitting a solid object or enemies. Works best with a high range stat.
The Dice
Found: Treasure Room, Isaac's starting item upon beating the game as ???
Unlock Requirement: Kill Mom's Heart/It Lives with ???.\
Allows the "re-rolling" of items on pedestals, turning them into another item upon activation. The items re-rolled draw from the item pool of the current room. This also applies to Devil Room items for sale.
Mr. Mega
Found: Treasure Room
Unlock Requirement: Destroy 30 Tinted Rocks. Does not have to be done in a single playthrough.
Gives 5 Bombs, and increases the blast radius + damage of dropped bombs. This also applies to the bombs fired by Dr. Fetus.
V. Enemies
Enemies
Regular Flies
Easy enemies that do no damage on contact. Can be killed with one tear unless you're playing as Eve. However, if they fly around Poop, they can take a bite and transform into Pooters.
Attack Flies

Fast moving flies that do damage on contact. If you have the Skatole, they will transform into normal after a split second. Be careful not to get swarmed by them.
Pooters & Fat Flies


Slow moving flies that do no contact damage, but fire fast moving shots. Fat Flies fire two shots instead of one, which can be dodged easily by simply standing still. Having the Skatole item prevents them from firing at you.
Moters

Two attack flies joined together. They behave in the same way as normal attack flies, but have slightly increased health and split into two attack flies after taking enough damage.
Horfs

Heads of frowning Gapers that float still in a single place. Getting close up to them will cause them to fire a single shot at you, like Pooters. Every character except Cain has higher range than a Horf, so killing them is easy as long as you stay out of their line of sight.
Gapers & Frowning Gapers


Weak enemies that follow Isaac around the room. Frowning Gapers have increased speed once they open their eyelids. If they have no way to reach Isaac, they stand still in one place.
Killing a Gaper/Frowning Gaper has a chance to turn them into Pacers/Gushers.
Pacers & Gushers


Pacers slowly walk around the room aimlessly, being able to do damage to Isaac only by contact. They're very easy to kill. Gushers also behave in the same way as Pacers, but they also fire shots aimless, short-range shots from their head that are easy to avoid.
Hoppers & F. Hoppers


Headless enemies that hop towards Isaac. They have low health and are easy to kill. A Hopper can turn into a F. Hopper if it touches a fire, which gives it highly increased health and allows it to hop for very long distances. Make sure to extinguish any fires before they touch them!
Spiders

Weak enemies that have erratic movement patterns. They can be dangerous in closed spaces or in large quantities, but are otherwise easy to kill.
B. Spiders

Strong enemies that move around in the same way as regular spiders, but spawn two Spiders with decreased health upon death. Basically, they're the Spider version of Moters.
Trites

Large spiders with an average amount of health. They hop around the room in a the same speed as F. Hoppers, but with less frequency. Be careful when they're in large quantities!
Clotties

Semi-fast moving enemies that fire shots in a + pattern. The best way to deal with them is to "swoon" your tears at them by moving around a room. Or, if you have a high range stat, you can stand at the edge of a room and fire your tears without getting hit, as their shots have limited range.
Mulligans, Mulligoons, & Mullibooms



Weak enemies that try to move away from Isaac. Mulligans and Mulligoons can explode themselves, which will fire a 4 directional shot (For Mulligans) or a 6 directional shot (For Mulligoons). Killing a Mulligan spawns 3-6 flies, which can include Attack Flies and Pooters. Killing a Mulligoon will automatically fire 4 shots in a cross pattern, and drop a Troll Bomb. Mulligoons, on the other hand, run towards Isaac instead of running away from him, and cause a large explosion upon contact or dying. This explosion does only a half-heart of damage instead of a full heart.
VI-I. Bosses (Basement)
There are many bosses in The Binding Of Isaac that you have to fight. Each floor has its specific set of bosses. Bosses found in normal rooms are NOT included, but a list including which floor in the boss section has info about it.
Bosses found in normal rooms:
Embyro (Minibosses)
The Duke Of Flies

The Duke of Flies has 3 different attacks. His first attack spawns 3 Attack Flies, his 2nd attack spawns a Large Attack Fly (Suckers if you're fighting the Green Champion version, Moters if you're fighting the Orange Champion version), and for his last attack, he moves all the Flies he's spawned away from himself. (6-directional shot if you're fighting a Champion version)
The Duke Of Flies has a very small amount of health, so he can go down easily. What you need to look out for are his flies. They can swarm you easily if you're not careful, and they will block your shots, thus saving the Duke from any damage he could've received. If you have 4 points of damage, this fight will be quite easy since you can kill his Attack Flies with 1 hit. If you feel too pressured from the Flies, drop a bomb and they'll be quickly killed.
Monstro

Monstro has a low amount of health and easy-to-dodge attacks. He can use short jump to catch up to you, jump far up into the sky (which causes a splash of blood shots when he lands), and he can also cough up random sized shots at you. Monstro isn't too difficult to deal with, just move around the whole room while hitting him with tears, and he'll go down in no time.
Larry Jr.

Larry Jr. can spawn in multiples. He doesn't try to hit you directly, but you can eventually get hit if you get trapped by the poop he drops, so make sure to destroy it. If you have really low damage, try to destroy his middle segments, because if he only has 1 segment left, it automatically gets destroyed. Piercing upgrades can help A LOT in this fight, since they will hit every single one of his segments and cause large amounts of damage. Bombs also work very well in this fight, so a single well placed bomb can destroy every Larry Jr. at once.
Gemini

Gemini is two twins attached together, who both take 50% of the total boss health bar. Gemini can be difficult if you have low speed, but if you have the usual 2 points of speed, you can just keep on moving away from the large twin, Suture, while shooting tears until he eventually dies. Make sure to watch out for the smaller twin, Contusion, shooting fast tears. Once the large twin dies, the small twin becomes angry and starts chasing you without firing any shots. He becomes highly susceptible to knockback, meaning that your tears will make him bounce around the room much more.
Steven

Unlike Gemini, Steve and Little Steve aren't attached by a cord, so dodging Little Steve's tears will be a bit more difficult. Steven himself function identically to the Suture, so you can use the same strategy you used for the Gemini boss fight. Be careful though, when Steven is killed, he shoots very fast 6 directional shots that are hard to dodge, so try to kill him when he gets close to a rock. As for Little Steven, he will automatically detach from Steven after a certain amount of time, instead of detaching when you kill him. After that, he functions just like Contusion. He also fires the fast 6 directional shots when he dies, so be careful.
Steven always drops the Little Steve or Steven item upon death. These cannot be re-rolled.
Famine

Note: This boss is unlocked after your first time killing Mom
Famine is one of the Four Horsemen Of The Apocalypse. His initial phase involves him spawning Pooters and charging when you get infront of him. His own charge can kill the Pooters he spawns. Once he gets down to 33% health, his body will be destroyed with only his head remaining. Now he will no longer spawn Pooters or charge at you, and will instead start shooting 3 fast tears.
Bosses found in normal rooms:
Embyro (Minibosses)
Widow
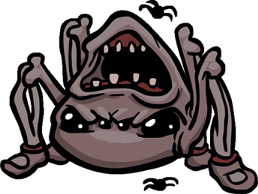
Like the Duke Of Flies, Widow has a small amount of health. She mainly attacks by her long-distance jumps, which can be hard to predict. She can also spawn Creep that can slow you down, which also spawns a Web Sack. Other than that, she can also cough out 2-3 Spiders. These Spiders get killed when she hops on them. In higher floors like The Cathedral where multiple Widows can spawn, they can damage themselves by jumping on top of eachother, which can be used to your advantage.
Pin

Pin can attack you by jumping towards you after coming out of the ground, which will also shoot 4 shots if you are close to his tail. He can also come out of the ground with only his upper body showing, and then he will fire an IPECAC shot at you.
The Blighted Ovum

The dead version of Gemini. The fight remains mostly the same, but the larger twin is faster and leaves a red trail of creep behind, and the twins are no longer attached. The smaller twin does nothing and cannot be damaged until you get infront of him, which will make him fire a blood beam from his mouth. There isn't much strategy here, just circle around the room and keep on hitting the larger twin. Like Steven, both of them will explode into a fast 6 directional shot, so be careful.
Gurdy Jr.

A smaller version of the boss Gurdy. Unlike her mother, Gurdy Jr. is not a stationary boss. She can charge at you and move around the room while hitting walls. She can also spawn Pooters and fire 6 directional shots. This boss is quite difficult, but you can power through it, just don't get too close to her, since her charge attack is quite unpredictable.
The Duke Of Flies
See Above
Famine
See Above
The Basement
Bosses found in normal rooms:
Embyro (Minibosses)
The Duke Of Flies
The Duke of Flies has 3 different attacks. His first attack spawns 3 Attack Flies, his 2nd attack spawns a Large Attack Fly (Suckers if you're fighting the Green Champion version, Moters if you're fighting the Orange Champion version), and for his last attack, he moves all the Flies he's spawned away from himself. (6-directional shot if you're fighting a Champion version)
The Duke Of Flies has a very small amount of health, so he can go down easily. What you need to look out for are his flies. They can swarm you easily if you're not careful, and they will block your shots, thus saving the Duke from any damage he could've received. If you have 4 points of damage, this fight will be quite easy since you can kill his Attack Flies with 1 hit. If you feel too pressured from the Flies, drop a bomb and they'll be quickly killed.
Monstro
Monstro has a low amount of health and easy-to-dodge attacks. He can use short jump to catch up to you, jump far up into the sky (which causes a splash of blood shots when he lands), and he can also cough up random sized shots at you. Monstro isn't too difficult to deal with, just move around the whole room while hitting him with tears, and he'll go down in no time.
Larry Jr.
Larry Jr. can spawn in multiples. He doesn't try to hit you directly, but you can eventually get hit if you get trapped by the poop he drops, so make sure to destroy it. If you have really low damage, try to destroy his middle segments, because if he only has 1 segment left, it automatically gets destroyed. Piercing upgrades can help A LOT in this fight, since they will hit every single one of his segments and cause large amounts of damage. Bombs also work very well in this fight, so a single well placed bomb can destroy every Larry Jr. at once.
Gemini
Gemini is two twins attached together, who both take 50% of the total boss health bar. Gemini can be difficult if you have low speed, but if you have the usual 2 points of speed, you can just keep on moving away from the large twin, Suture, while shooting tears until he eventually dies. Make sure to watch out for the smaller twin, Contusion, shooting fast tears. Once the large twin dies, the small twin becomes angry and starts chasing you without firing any shots. He becomes highly susceptible to knockback, meaning that your tears will make him bounce around the room much more.
Steven
Unlike Gemini, Steve and Little Steve aren't attached by a cord, so dodging Little Steve's tears will be a bit more difficult. Steven himself function identically to the Suture, so you can use the same strategy you used for the Gemini boss fight. Be careful though, when Steven is killed, he shoots very fast 6 directional shots that are hard to dodge, so try to kill him when he gets close to a rock. As for Little Steven, he will automatically detach from Steven after a certain amount of time, instead of detaching when you kill him. After that, he functions just like Contusion. He also fires the fast 6 directional shots when he dies, so be careful.
Steven always drops the Little Steve or Steven item upon death. These cannot be re-rolled.
Famine
Note: This boss is unlocked after your first time killing Mom
Famine is one of the Four Horsemen Of The Apocalypse. His initial phase involves him spawning Pooters and charging when you get infront of him. His own charge can kill the Pooters he spawns. Once he gets down to 33% health, his body will be destroyed with only his head remaining. Now he will no longer spawn Pooters or charge at you, and will instead start shooting 3 fast tears.
The Cellar
Bosses found in normal rooms:
Embyro (Minibosses)
Widow
Like the Duke Of Flies, Widow has a small amount of health. She mainly attacks by her long-distance jumps, which can be hard to predict. She can also spawn Creep that can slow you down, which also spawns a Web Sack. Other than that, she can also cough out 2-3 Spiders. These Spiders get killed when she hops on them. In higher floors like The Cathedral where multiple Widows can spawn, they can damage themselves by jumping on top of eachother, which can be used to your advantage.
Pin
Pin can attack you by jumping towards you after coming out of the ground, which will also shoot 4 shots if you are close to his tail. He can also come out of the ground with only his upper body showing, and then he will fire an IPECAC shot at you.
The Blighted Ovum
The dead version of Gemini. The fight remains mostly the same, but the larger twin is faster and leaves a red trail of creep behind, and the twins are no longer attached. The smaller twin does nothing and cannot be damaged until you get infront of him, which will make him fire a blood beam from his mouth. There isn't much strategy here, just circle around the room and keep on hitting the larger twin. Like Steven, both of them will explode into a fast 6 directional shot, so be careful.
Gurdy Jr.
A smaller version of the boss Gurdy. Unlike her mother, Gurdy Jr. is not a stationary boss. She can charge at you and move around the room while hitting walls. She can also spawn Pooters and fire 6 directional shots. This boss is quite difficult, but you can power through it, just don't get too close to her, since her charge attack is quite unpredictable.
The Duke Of Flies
See Above
Famine
See Above
VI-II. Bosses (Caves)
Under Construction
Bosses foundin normal rooms:
Embyro (Minibosses)
Fistula (Caves)
Larry Jr. (Basement)
Peep
 The most annoying boss in The Caves. Peep can jump around the room which will fire 8 fast moving shots when he lands, leave a trail of yellow creep, or fire a 6-way burst of pee-shots. When he gets to 66% and 33% health respectively, one of his eyes pops out of his sockets. It moves around the room like a Boom Fly, doing a half heart of damage on touch. These eyes will only go away once Peep is killed. The best way to deal with Peep is to hide behind rocks (If there are any) to block his shots. After enough practice, he will become relatively easy.
Gurdy

Gurdy is a large, stationary boss with a lot of health. She can spawn Pooters/Attack Flies and Boils, or fire 5 shots from her mouth. Gurdy isn't too hard, just destroy the Boils she spawns and ignore the flies. Her 5 shot attack can be easily dodged since it is very predictable. Piercing upgrades and explosives are quite helpful against Gurdy.
Chub

Chub is a large maggot that can spawn smaller maggots (Chargers) to assist her. Her only direct form of attack is charging at Isaac, which is easy to avoid. Her charging attack can kill the smaller chargers if they are infront of her. You can also place a bomb when she is charging at Isaac, which will make her swallow it and then have it explode in her mouth.
Fistula
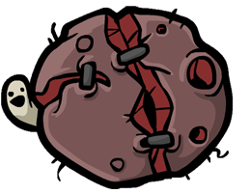 Fistula is a large hunk of flesh with its only attack being contact damage. The fight begins with a large Fistula slowly floating around the room. A couple of tears will eventually make it split into 3 medium Fistulas, who will have increased speed. Destroying each one will split them into to small Fistulas, who move around the fastest, Killing the small Fistulas will spawn a Charger. The fight ends when you kill the last small Fistula. When Fistula is encountered in a room with pits, killing a small Fistula while it is floating over a pit will not spawn a Charger, making the fight easier.
Pestilence
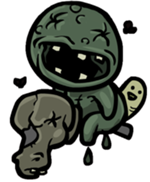 Note: This boss is unlocked after your first time killing Mom
Pestilence is one of the Four Horsemen Of The Apocalypse. He leaves a trail of green creep whereever he goes, fires IPECAC shots that also leave a trail of creep, and spawns Chargers. When he goes down to 50% health, he loses his head and starts spawning Flies instead of Chargers. A glitch in Wrath Of The Lamb makes it so that Pestilence will fire 2 IPECAC shots at the boss door with no animation playing, which can easily damage you if you don't take care.
Bosses found in normal rooms:
Fistula (Caves)
The Carrion Queen
 The dead version of Chub. She still charges at you, but no longer spawns Chargers. Instead, she spawns Red Poop which damages the player when touched, similar to Fireplaces. You can't damage Carrion Queen from the front, so you need to get behind her and hit her exposed part. Like Chub, you can make her swallow a Bomb, which will damage her. When she gets to 33% health, she will start moving around in 8 directions instead of 4, and will no longer leave Red Poop.
The Husk

The dead version of the Duke Of Flies. He now moves all around the room instead of moving slowly, but he still has low health. He can spawn flies as usual, cough out blood like Monstro, and spawn 2 Spiders.
The Hollow

The dead version of Larry Jr. Now, he moves all around the room like Carrion Queen. The fight is still the same, and like the Larry Jr. fight, bombs or piercing items will help greatly. This fight can be a bit difficult in a room with lots of rocks, so be careful.
Gurdy Jr.
A smaller version of the boss Gurdy. Unlike her mother, Gurdy Jr. is not a stationary boss. She can charge at you and move around the room while hitting walls. She can also spawn Pooters and fire 6 directional shots. This boss is quite difficult, but you can power through it, just don't get too close to her, since her charge attack is quite unpredictable.
Blighted Ovum
The dead version of Gemini. The fight remains mostly the same, but the larger twin is faster and leaves a red trail of creep behind, and the twins are no longer attached. The smaller twin does nothing and cannot be damaged until you get infront of him, which will make him fire a blood beam from his mouth. There isn't much strategy here, just circle around the room and keep on hitting the larger twin. Like Steven, both of them will explode into a fast 6 directional shot, so be careful.
Pestilence
See above.
The Caves
Bosses foundin normal rooms:
Embyro (Minibosses)
Fistula (Caves)
Larry Jr. (Basement)
Peep
The most annoying boss in The Caves. Peep can jump around the room which will fire 8 fast moving shots when he lands, leave a trail of yellow creep, or fire a 6-way burst of pee-shots. When he gets to 66% and 33% health respectively, one of his eyes pops out of his sockets. It moves around the room like a Boom Fly, doing a half heart of damage on touch. These eyes will only go away once Peep is killed. The best way to deal with Peep is to hide behind rocks (If there are any) to block his shots. After enough practice, he will become relatively easy.Gurdy
Gurdy is a large, stationary boss with a lot of health. She can spawn Pooters/Attack Flies and Boils, or fire 5 shots from her mouth. Gurdy isn't too hard, just destroy the Boils she spawns and ignore the flies. Her 5 shot attack can be easily dodged since it is very predictable. Piercing upgrades and explosives are quite helpful against Gurdy.
Chub
Chub is a large maggot that can spawn smaller maggots (Chargers) to assist her. Her only direct form of attack is charging at Isaac, which is easy to avoid. Her charging attack can kill the smaller chargers if they are infront of her. You can also place a bomb when she is charging at Isaac, which will make her swallow it and then have it explode in her mouth.
Fistula
Fistula is a large hunk of flesh with its only attack being contact damage. The fight begins with a large Fistula slowly floating around the room. A couple of tears will eventually make it split into 3 medium Fistulas, who will have increased speed. Destroying each one will split them into to small Fistulas, who move around the fastest, Killing the small Fistulas will spawn a Charger. The fight ends when you kill the last small Fistula. When Fistula is encountered in a room with pits, killing a small Fistula while it is floating over a pit will not spawn a Charger, making the fight easier.Pestilence
Note: This boss is unlocked after your first time killing MomPestilence is one of the Four Horsemen Of The Apocalypse. He leaves a trail of green creep whereever he goes, fires IPECAC shots that also leave a trail of creep, and spawns Chargers. When he goes down to 50% health, he loses his head and starts spawning Flies instead of Chargers. A glitch in Wrath Of The Lamb makes it so that Pestilence will fire 2 IPECAC shots at the boss door with no animation playing, which can easily damage you if you don't take care.
The Catacombs
Bosses found in normal rooms:
Fistula (Caves)
The Carrion Queen
The dead version of Chub. She still charges at you, but no longer spawns Chargers. Instead, she spawns Red Poop which damages the player when touched, similar to Fireplaces. You can't damage Carrion Queen from the front, so you need to get behind her and hit her exposed part. Like Chub, you can make her swallow a Bomb, which will damage her. When she gets to 33% health, she will start moving around in 8 directions instead of 4, and will no longer leave Red Poop.The Husk
The dead version of the Duke Of Flies. He now moves all around the room instead of moving slowly, but he still has low health. He can spawn flies as usual, cough out blood like Monstro, and spawn 2 Spiders.
The Hollow
The dead version of Larry Jr. Now, he moves all around the room like Carrion Queen. The fight is still the same, and like the Larry Jr. fight, bombs or piercing items will help greatly. This fight can be a bit difficult in a room with lots of rocks, so be careful.
Gurdy Jr.
A smaller version of the boss Gurdy. Unlike her mother, Gurdy Jr. is not a stationary boss. She can charge at you and move around the room while hitting walls. She can also spawn Pooters and fire 6 directional shots. This boss is quite difficult, but you can power through it, just don't get too close to her, since her charge attack is quite unpredictable.
Blighted Ovum
The dead version of Gemini. The fight remains mostly the same, but the larger twin is faster and leaves a red trail of creep behind, and the twins are no longer attached. The smaller twin does nothing and cannot be damaged until you get infront of him, which will make him fire a blood beam from his mouth. There isn't much strategy here, just circle around the room and keep on hitting the larger twin. Like Steven, both of them will explode into a fast 6 directional shot, so be careful.
Pestilence
See above.
VI-III. Bosses (Depths)
The Depths
Monstro II
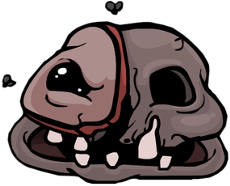 The dead version of Monstro. His attacks are the same as Monstro, but with different effects. The multi-sized blood shots he fires are now Brimstone lasers, and now he spawns 2 suckers/fires large 8 directional shots when he lands from long jump. Monstro II can be tough due to his large amount of health and because of all the shots fire by the Suckers, but you can easily exploit his AI by moving from left to right. He will keep on trying to fire his Brimstone lasers, but will miss every time due to how predictable and slow it is.
Gish
 The alternate version of Monstro II. His behaviour is largely the same, but he has different attacks. The Brimstone lasers are replaced with an IPECAC-like projectile, which causes an explosion that leaves tar. This tar will slow down Isaac when he walks over it. His jump attack will sometimes spawn 2 Clots when he lands and leave a puddle of tar. This boss also has a lot of health, but he rarely manages to hit you, making the fight quite easy.
Gish always drops the Little Gish item on death.
Loki
 Loki usually attacks by firing 4 shots in a cross pattern, then firing 4 shots in an X pattern, and then finally firing 4 shots in a cross pattern again. His other attack is firing 8 shots in all 8 directions at once. Other than that, he can occassionally teleport himself to a random place in the room, or spawn a Boom Fly that can damage him if killed quickly enough.
 Loki isn't much of a threat on his own, unless you encounter him as a miniboss with another Loki. Then you have to dodge a lot more, making the fight significantly more difficult.
War
 War is the 3rd Harbinger, and also one of the toughest. In his first phase, he attacks by charging (Like Famine) 3 times through the room, going in a different direction each time. He also fires a hard to predict 8 directional shot, but it can be avoided by hiding behind a rock. Lastly, he can spawn multiple troll bombs (Similar to the Anarchist's Cookbook item) in random places around the room. Once his health reachs 50%, he loses his horse and starts following Isaac at a very fast speed, like a Globin. Hitting him with tears will slow him down, giving you more breathing room. Also, he can sometimes stop running towards Isaac for a second by doing a "falling down" pose, allowing you to get more hits off.
 Mom
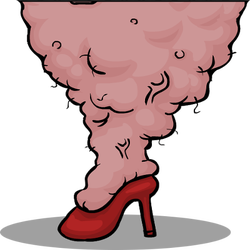 The "final" boss of the game, Isaac's mother. The fight starts out with Mom stomping her foot down in the middle of the room. This stomp attack causes one full heart of damage to Isaac. She can reveal her Eye through a Boss Room door, which does nothing and allows you to get some free hits on her. A Boss Room door can also show a lump of her flesh, which spawns a random enemy from The Basement. Standing to close to the Boss Room door can cause her to attack with her hand. This attack is very unpredictable, so you should be careful and try to stay away from the doors. She will constantly stomp at the place where Isaac is standing, but this attack can be easily avoided due to how predictable it is. This fight can be quite difficult due to all of the enemies spawning and the pressure from staying away from the doors and dodging her foot, so good luck!
Using The Bible in this fight will instantly kill Mom and unlock the Halo item.
VII. Achievements
There are 84 achievements in The Binding Of Isaac; 52 in the vanilla game and 32 added from the Wrath Of The Lamb DLC.
Note: If you aren't unlocking achievements in Steam, go to your Binding Of Isaac folder, delete Flashachievements.exe, right click on Binding Of Isaac from your library, click on properties, and then verify integrity of game cache. Your achievements will be unlocked once you open up BoI.


Note: If you aren't unlocking achievements in Steam, go to your Binding Of Isaac folder, delete Flashachievements.exe, right click on Binding Of Isaac from your library, click on properties, and then verify integrity of game cache. Your achievements will be unlocked once you open up BoI.
Vanilla Isaac Achievements
The Radioactive Spider
Complete The Basement 2.
Monstro's Tooth
Defeat all of The Basement 2 bosses, The Duke Of Flies, Gemini, Monstro, and Larry Jr.
The Spelunker
Complete the Caves 2.
Lil' Chubby
Kill all of The Caves bosses, Chub, Gurdy, Peep, and Fistula.
I Killed Mom!
Kill Mom in The Depths 2.
Loki's Horns
Defeat all of The Depths 2 bosses, Monstro II, Loki, and Mom.
Small Rock
Destroy 50 rocks. Does not have to be in the same playthrough. This can be easily gotten by destroying large clusters of rocks, if you have spare bombs. Also, there are multiple rooms in The Womb with nothing but a huge amount of rocks in them, which you can destroy.
The Bean
Destroy 50 piles of Poop. Since poop is most commonly found on the Basement, you can destroy every pile of poop you see, and then restart. Alternatively, you can let Larry Jr. spawn large amounts of poop and then destroy them yourself.
Mom's Bottle of Pills
Use Blood Donation Machines 20 times. Does not have to be in the same playthrough. This is quite easy with Maggy, due to her large number of heart containers and the Yum Heart.
The Gamekid
Enter the Arcade 10 times. Does not have to be in the same playthrough. Since the Arcade only spawns when you enter a floor with 5 coins or more, you should avoid spending all of your coins in the shop.
The Common Cold
Collect two of the syringe items, Roid Rage, The Virus, and Growth Hormones in a single playthrough.
Mr. Mega
Destroy 30 Tinted Rocks/X-Marks-The-Spot rocks. Does not have to be in a single playthrough. This also unlocks the boss Conquest.
The Book Of Sin
Kill all of the Seven Deadly Sins. Does not have to be in a single playthrough. To see what The Seven Deadly Sins are and how to defeat them, please visit Section 6. (BSES)
Mom's Contacts
Collect Mom's Eye, and then collect any Mom item. (Mom's Underwear, Mom's Heels, etc.)
The Parasite
Collect two dead things in one playthrough. (Such as Bob's Rotten Head, Tammy's Head, etc.)
The Necronomicon
Use the XIII Death Tarot Card four times. Does not have to be in the same playthrough.
The Halo
Kill Mom, Mom's Heart, or It Lives! with The Bible item. (You have to activate it during the fight) Getting items like The Rosary can greatly increase the chance of The Bible appearing in the Shop, so make sure to pick them up.
Super Bandage
Get 4 Cubes Of Meat in a single playthrough. The Cube Of Meat can only be gotten from the Four Horsemen Of The Apocalypse. The Book Of Revelations gurantees the next boss to be a Harbinger (Cannot replace set bosses like Mom however).
The Pinking Shears
Die 100 times. This achievement can come to you naturally, but if you want it immediately, you can intentionally die over and over again in The Basement/Cellar while playing Judas, which will net you 100 deaths quite quickly.
Maggy's Wig
Unlock Maggy by having 7 or more Heart Containers in a single playthrough. Soul Hearts do not count.
Cain's Eyepatch
Have 55 or more coins in a single playthrough. This achievement can be gotten very easily if you blow up the Slot Machine and get the "A Dollar" item, which instantly gives you 99 coins.
Judas' Fez
Kill Mom's Heart.
Eve's Dead Bird
Make two Deals With The Devil in a single playthrough.
???
Kill It Lives!/complete The Womb 10 times.
Little Steve
Kill the boss Steven.
Little C.H.A.D.
Defeat the boss C.H.A.D.
Little Gish
Kill the boss Gish.
Transcendence
Complete The Womb for the second time.
The Nail
Complete The Womb for the third time.
A Quarter
Complete The Womb for the fourth time.
Dr. Fetus
Complete The Womb for the fifth time.
Everything's Terrible!
Complete The Womb for the sixth time. Once you get this achievement/secret, bosses will spawn as champions a lot more, you will get less hearts from killing them, you will have a higher chance of getting curses, certain enemies will spawn a floor earlier, and there will be more champion enemies present.
The Wafer
Complete The Womb for the seventh time.
Money = Power
Complete The Womb for the eigth time.
VII. Achievements - Part 2
It Lives!

Complete The Womb for the ninth time. This will permanently replace Mom's Heart with the boss It Lives!
The Relic

Complete The Womb 2 with Maggy.
Sack Of Pennies

Complete The Womb 2 with Cain.
Robo-Baby

Complete The Womb 2 with Judas.
Razor Blade

Complete The Womb 2 with Eve.
The D6

Complete The Womb 2 with ???
Golden God

Get every item and secret in the game. This can only be unlocked alongside Platinum God if you have Wrath Of The Lamb installed.
Basement Boy

Complete The Basement without taking damage.
Spelunker Boy

Complete The Caves without taking damage.
Dark Boy

Complete The Depths without taking damage. The hardest of the X Boy achievements, especially if you have WotL installed. Good luck!
Mama's Boy

Complete The Womb without taking damage.
Mom's Knife

Kill Satan with Isaac.
Guardian Angel

Kill Satan with Maggy.
Bomb Bag

Kill Satan with Cain.
Monster Manuel

Kill Satan with Judas.
Demon Baby

Kill Satan with Eve.
Forget Me Now

Kill Satan with ???.
Lump Of Coal

Kill Krampus in the Devil Room.
Samson's Lock

Skip 2 Treasure Rooms and kill Mom. You can open them and see what's inside, but you cannot pick the item up.
Bloody Lust

Kill Mom's Heart with Samson.
Blood Rights

Kill Satan with Samson.
The D20

Kill Isaac with Isaac.
Celtic Cross

Kill Isaac with Maggy.
Abel

Kill Isaac with Abel.
Curved Horn

Kill Isaac with Judas.
Sacrificial Knife

Kill Isaac with Eve.
Rainbow Baby

Kill Isaac with ???.
Bloody Penny

Kill Isaac with Samson.
The Candle

Complete Challenge 1.
Lucky Toe

Complete Challenge 2.
Burnt Penny

Complete Challenge 3.
Guppy's Tail

Complete Challenge 4.
Fish Head

Complete Challenge 5.
Epic Fetus

Complete Challenge 6.
SMB Super Fan!

Complete Challenge 7.
The Spider Butt

Complete Challenge 8.
Counterfeit Penny

Complete Challenge 9.
Dad's Key

Kill ??? with any character.
Guppy's Hairball

Turn Isaac into Guppy by collecting any 3 Guppy-related items. (Dead Cat, Guppy's Tail, Guppy's Paw, Guppy's Head)
The Polaroid

Kill Isaac 6 times.
Daddy Long Legs

Complete Challenge 10. (Locked until you kill Isaac)
Isaac's Head

Kill ??? with Isaac.
Maggy's Faith

Kill ??? with Maggy.
Cain's Eye

Kill ??? with Cain.
Judas' Tongue

Kill ??? with Judas.
Eve's Bird's Foot

Kill ??? with Eve.
???'s Soul

Kill ??? with ???.
Samson's Lock

Kill ??? with Samson.
Left Hand

Kill Ultra Pride.
Platinum God!

100% the game. (Get all items and Secrets)
IX. Credits
Edmund McMillen and Florian Himsl, for making such a great game.
The Binding Of Isaac wiki for providing almost all of the pictures shown here. (Doomspeaker, to be specific. <3 you, Doomspeaker!)
Ultimate177 from reddit, for providing the floor pictures.
The Binding Of Isaac wiki for providing almost all of the pictures shown here. (Doomspeaker, to be specific. <3 you, Doomspeaker!)
Ultimate177 from reddit, for providing the floor pictures.
More The Binding of Isaac guides
- Achievement Guide for The Binding of Isaac★ 5 (1k)39k views1.5k ♥9 minUpdated Sep 29, 2018
- The Bindening™: A Comprehensive Guide to Everything Isaac★ 5 (2.1k)32k views2.8k ♥155 minUpdated Jul 4, 2015
- Unlocking Broken Achievements [Windows/Mac]★ 5 (565)31k views506 ♥6 minUpdated Mar 12, 2021
- «The Binding of Isaac»: руководство по достижениям★ 5 (1.2k)25k views1.4k ♥11 minRussianUpdated Sep 26, 2014
- How to use an XBOX controller in The Binding of Isaac★ 5 (232)21k views224 ♥1 minUpdated Jul 20, 2014
- Achievement Guide for The Wrath of the Lamb★ 5 (440)19k views671 ♥7 minUpdated Sep 29, 2018


This guide was created by its original author on the Steam Community. Are you the author and want it removed? Request removal.