Guide for Independent Suspension
What is Independent Suspension?
 Independent suspension is a form of suspension where each wheel will move up and down on their own, not directly connected to another wheel. Most modern vehicles, especially those that go offroad, have this (vehicles that use an axle at the back don't). Those that do generally also keep their wheels perpendicular to the ground no matter the leveling. Other guides I have found that conform to this generally don't provide structual stability or a semi-realistic look. That is my hope in creating this guide, to provide these things.
How To Complete
The steps involved are actually rather simple, it just becomes a little meticulous to repeat it over and over. Because it would be extremely hard to understand simply through words, I added nice little pictures to help you along the way.
Directly above or one block above the start block, place a wooden block/ballast. Place a wooden block/ballast 5 blocks away from the start block, another ane block under that one, and another two blocks away and one under the start block. In the image to the right below, I used more blocks to represent the distance. Damn, I used the word block a lot there.
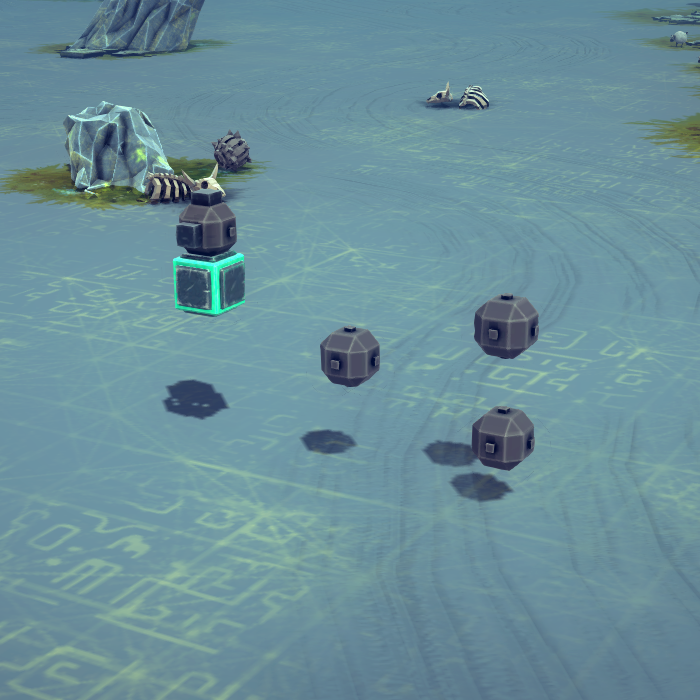
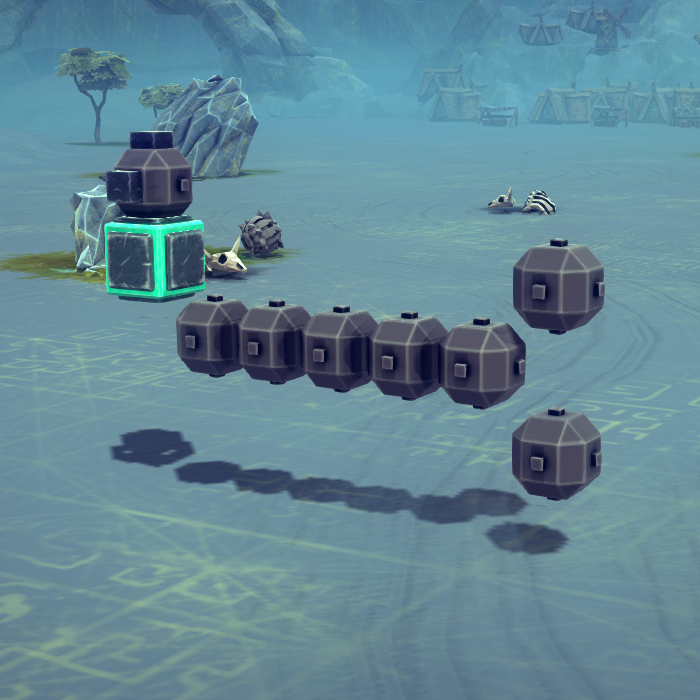
Next, place a motor wheel to the right-most lowest block and from that a large powered wheel. The smaller wheel will be for turning and the larger for movement, so adjust the bindings and speed accordingly. Next, apply hinges such as the image shows below, as well as a suspension block above the central hinge. The suspension can be changed to meet your preferences as well.
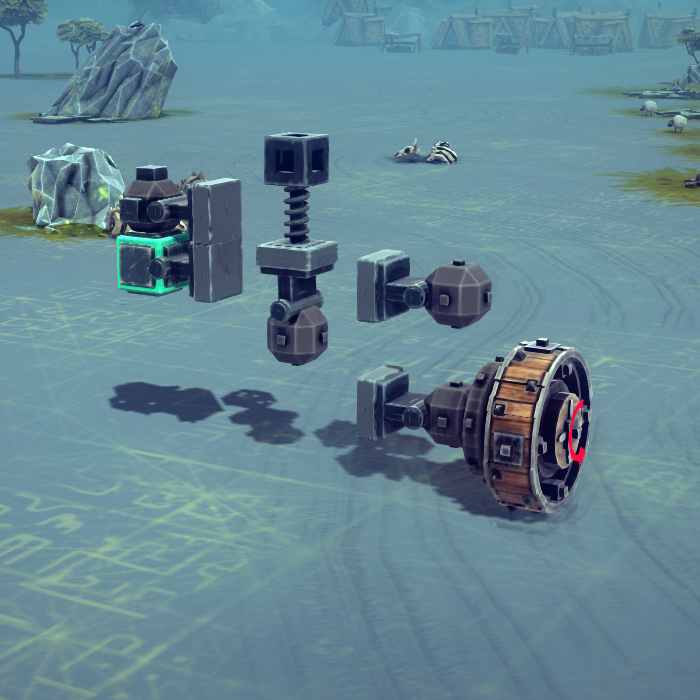
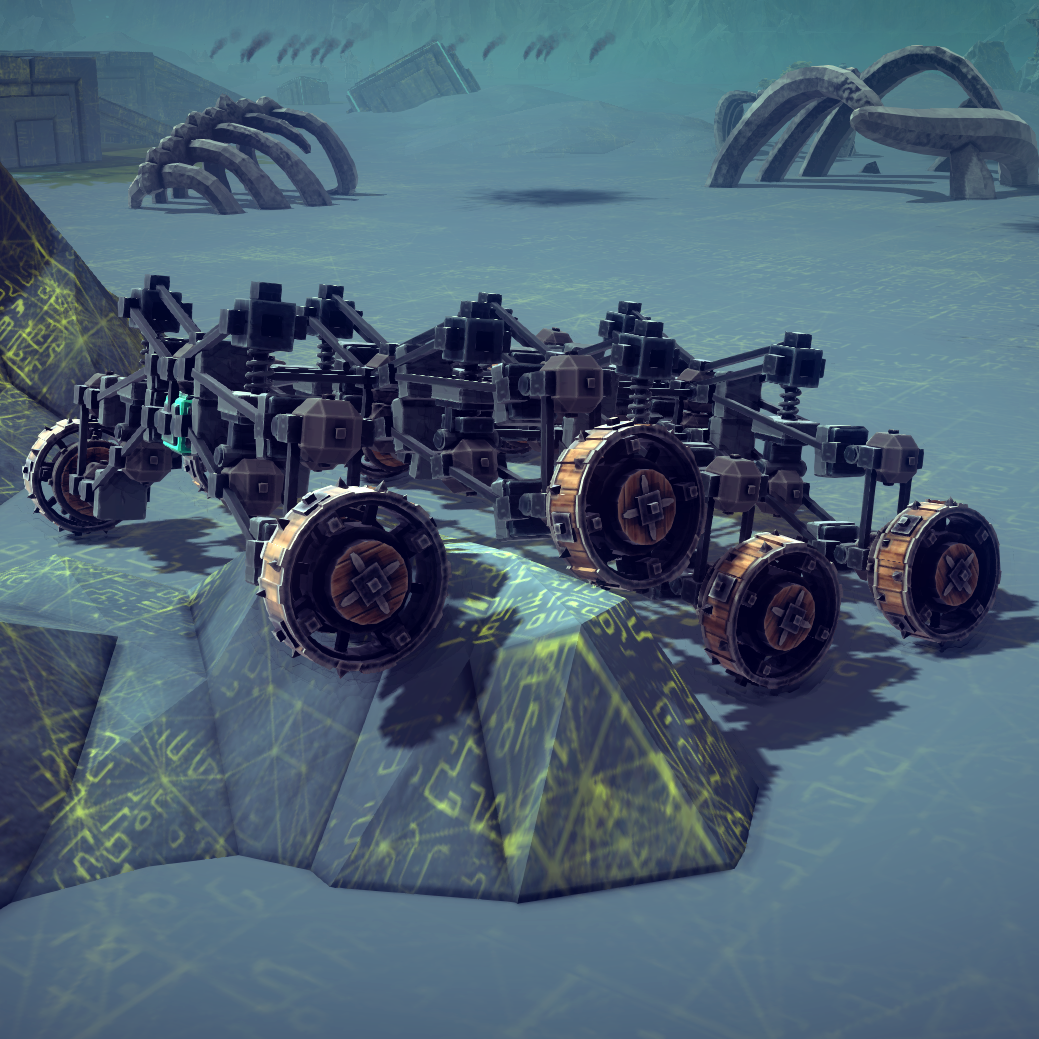
Apply braces to connect the hinges (make sure you don't connect the wrong hinges or the hinges to blocks), the suspension piece to the left-most blocks, and each left-most block to the other, and each right-most to the other as well. Make sure to connect the central block to each hinge. Finally, repeat this process upon the other side and repeat all previous steps to create more wheel pairs.
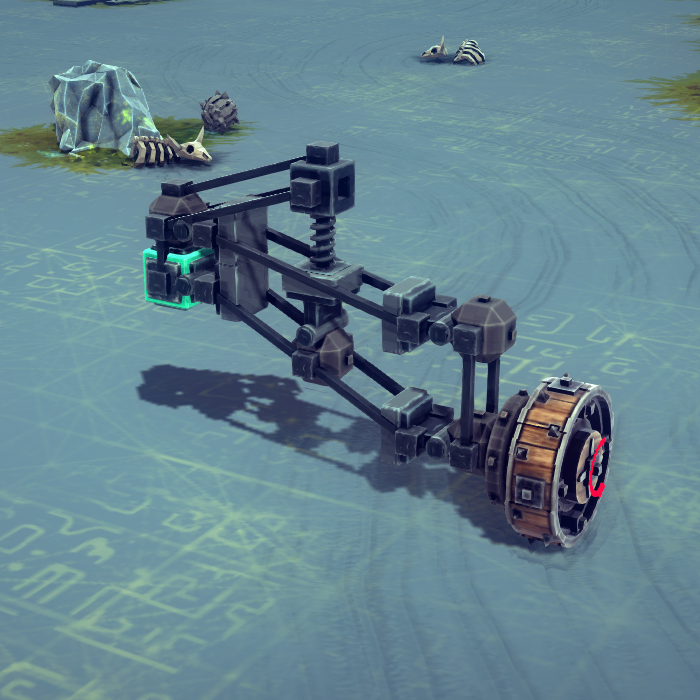
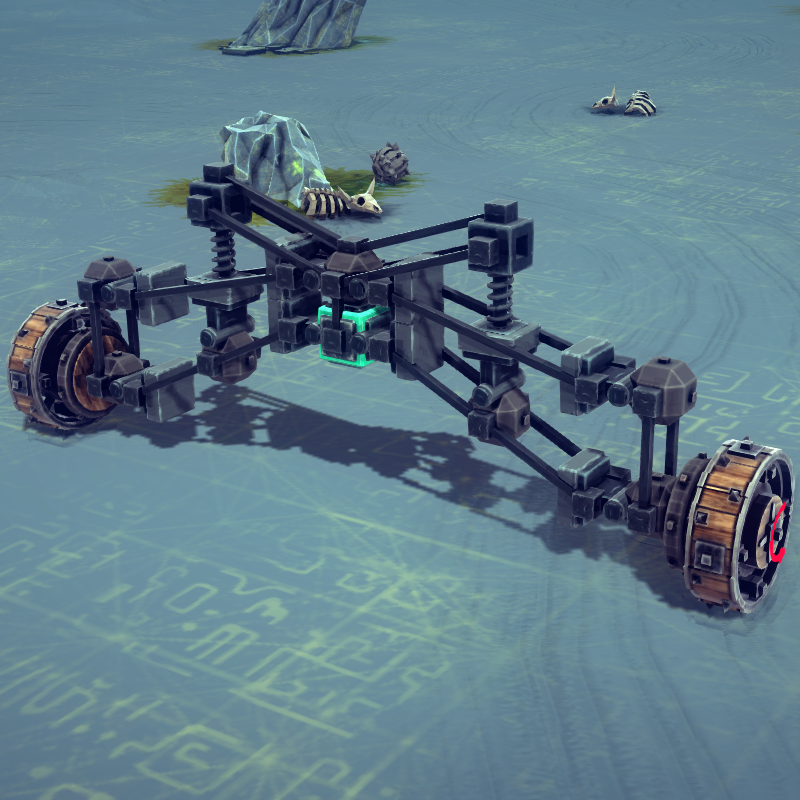
You may give it your own personal features, and please, enjoy. Give me a comment on what I should change and link me screenshots of your creations!
- Fast Steering Catapult★ 5 (311)29k views313 ♥1 minUpdated 11 Mar, 2022
- Machines to complete all 54 zones!★ 5 (471)21k views931 ♥2 minUpdated 26 Aug, 2021
- How to Build a Plane in Besiege [Basic Vanilla]★ 5 (327)19k views637 ♥5 minUpdated 5 Jul, 2018
- Getting started in Besiege★ 4 (122)17k views128 ♥5 minUpdated 5 Feb, 2015
- Comprehensive Realistic Helicopter Tutorial★ 5 (346)17k views644 ♥21 minUpdated 24 Mar, 2017
- Besiege -初心者向けガイド-★ 5 (770)14k views1.1k ♥2 minJapaneseUpdated 22 Aug, 2015




- Upgrading to PremiumTeam Fortress 2★ 5 (20k)1441k views11k ♥6 minUpdated May 11, 2022
- No More Room in Hell Official ManualNo More Room in Hell★ 5 (2.8k)569k views2.1k ♥29 minUpdated Apr 22, 2019
- NMRiH Community Hosting GuidesNo More Room in Hell★ 5 (526)351k views653 ♥1 minUpdated Aug 10, 2022
- ULTIMATE GUIDE FOR GAME DEV TYCOONGame Dev Tycoon★ 5 (5.8k)326k views10k ♥4 minUpdated 23 Jan, 2014
- How to 'Git Gud' Soon™MORDHAU★ 5 (2k)318k views3k ♥68 minUpdated Nov 16, 2024
- Лучшие кооперативные игры SteamPAYDAY 2★ 5 (1.5k)315k views2.1k ♥56 minRussianUpdated Apr 27, 2025






This guide was created by its original author on the Steam Community. Are you the author and want it removed? Request removal.