Increase performance using FSR 2.0 regardless of your GPU
Step One: Downloading the necessary files
Download the mod here[www.nexusmods.com] (you may or may not need to register an account on NexusMods first)
Step Two: Extracting the file
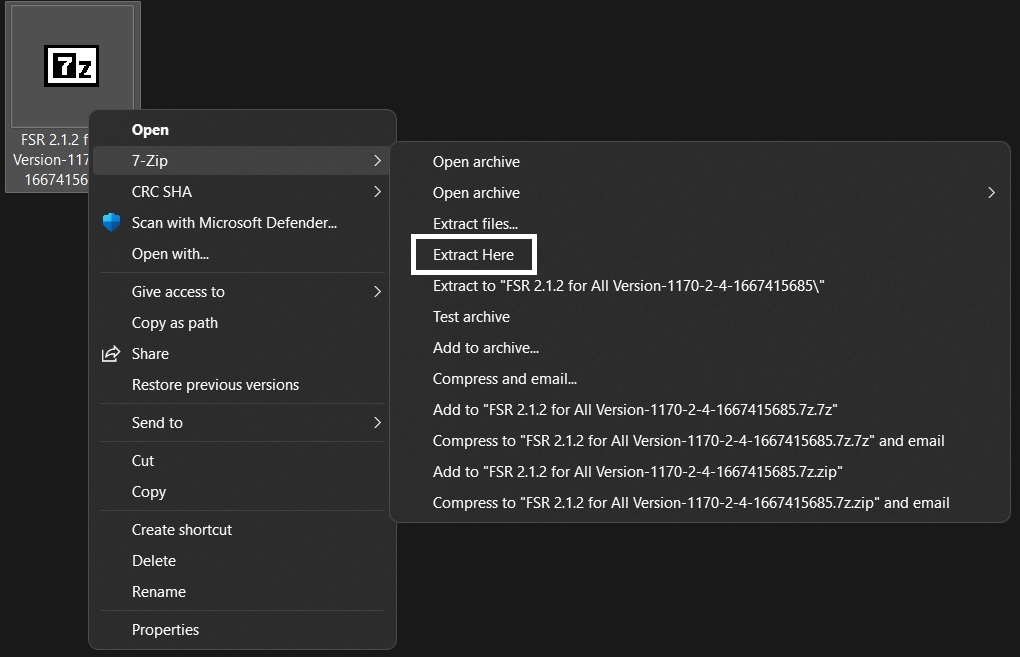
Step Three: Installing and enabling the mod
You should now have 6 files as shown below.
Let's open the game's main directory, where the executable is located.
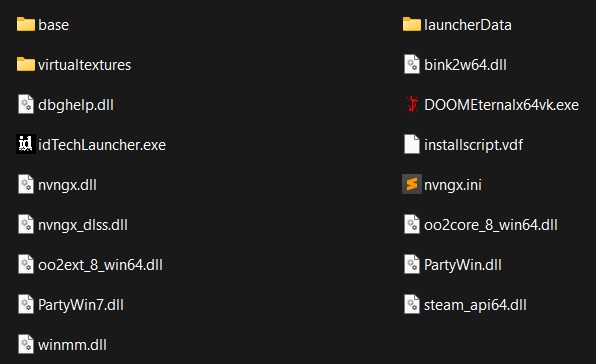
Simply drag and drop "nvngx.ini", "nvngx.dll", and "winmm.dll" from your download onto the game's folder, as shown above.
You may have noticed that there's also a couple of regedit files. You will need to open "EnableSignatureOverride.reg" and accept the administrator changes, this is what tricks the game into allowing you to use DLSS, which we have already replaced with FSR 2.0.

If you wish to revert the installation for whatever reason, simply open the "DisableSignatureOverride.reg" file, and delete the aforementioned files.
Let's open the game's main directory, where the executable is located.
Simply drag and drop "nvngx.ini", "nvngx.dll", and "winmm.dll" from your download onto the game's folder, as shown above.
You may have noticed that there's also a couple of regedit files. You will need to open "EnableSignatureOverride.reg" and accept the administrator changes, this is what tricks the game into allowing you to use DLSS, which we have already replaced with FSR 2.0.
If you wish to revert the installation for whatever reason, simply open the "DisableSignatureOverride.reg" file, and delete the aforementioned files.
Conclusion: Configuring the mod
If you have done everything correctly, you should now be able to turn on FSR through the DLSS option in-game! Feel free to mess with the sharpness settings, and push the graphics settings higher, as you will now have more VRAM available.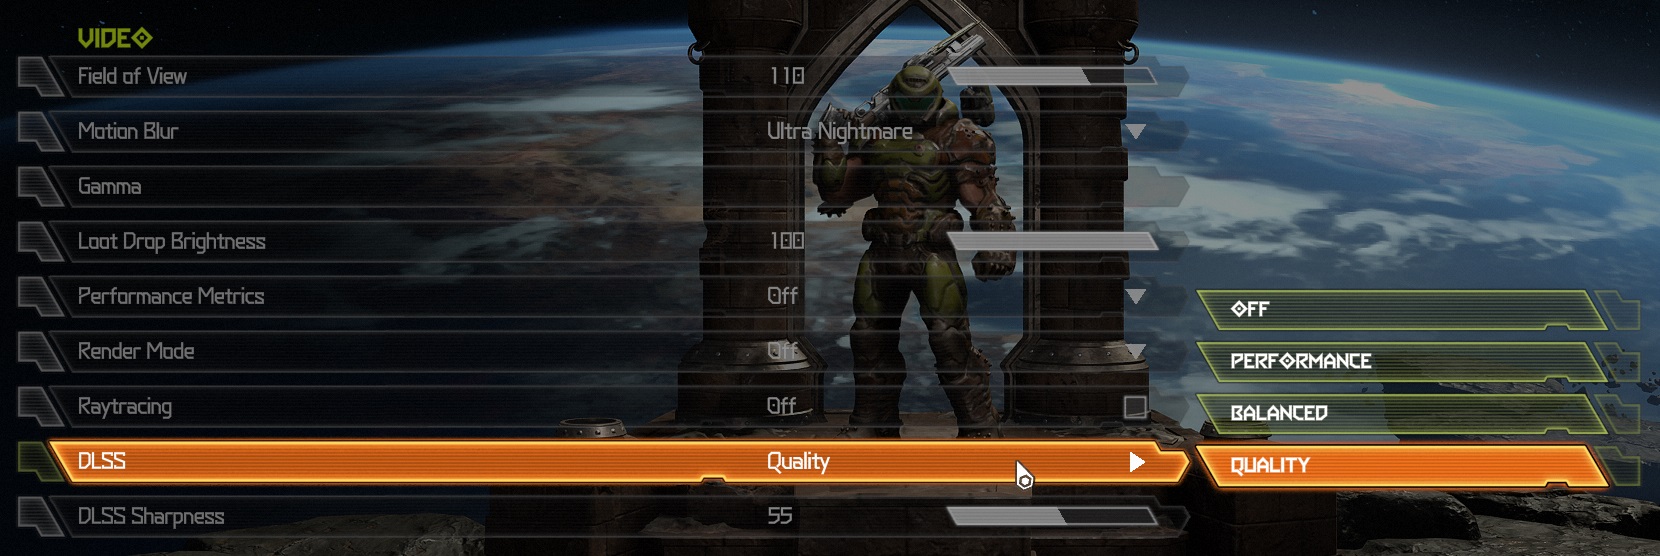
Credits

More DOOM Eternal guides
- DOOM Eternal 100% Achievement Guide★ 5 (677)39k views1.6k ♥15 minUpdated Apr 9, 2024
- DOOM Eternal Written Guide/Walkthrough for all collectables and secrets inc DLC.★ 5 (1.7k)36k views3.9k ♥129 minUpdated May 22, 2025
- Секреты Doom Eternal★ 5 (874)32k views1.7k ♥23 minRussianUpdated Apr 17, 2023
- Console Commands for DOOM Eternal★ 5 (213)29k views502 ♥18 minUpdated Mar 30, 2021
- Collectibles and Secrets Guide 100% DOOM Eternal★ 4 (370)26k views589 ♥1 minBulgarianUpdated Apr 2, 2021
- DOOM for Dummies [Tweaks, Fixes, Problem solving] [EN]★ 5 (720)23k views878 ♥15 minUpdated Jun 18, 2020




This guide was created by its original author on the Steam Community. Are you the author and want it removed? Request removal.