Настройка нормального освещения и камеры в игре.
НАСТРОЙКА ОСВЕЩЕНИЯ
Для того чтобы убрать замыленность картинки и сделать освещение более естественным, а линии объектов более четкими, скачиваем программу SweetFX 1.5.1 по ссылке ЗДЕСЬ [sweetfx.thelazy.net]
Извлекаем из архива папку SweetFX в которой находятся файлы и папка с таким же названием, и кидаем содержание (это папка SweetFX и несколько файлов 'd3d9.dll; dxgi.dll; d3d9.fx; dxgi.fx; и т.д.) в дерикторию с игрой, например: D:\Games\steamapps\common\KOAReckoning
После чего в файле настроек SweetFX, 'SweetFX_settings.txt' , выставляем следующие значения:
/*-----------------------------------------------------------.
/ Choose effects /
'-----------------------------------------------------------*/
USE_SMAA_ANTIALIASING 1 // [0 or 1] SMAA Anti-aliasing : Smoothens jagged lines.
USE_LUMASHARPEN 1 // [0 or 1] LumaSharpen : Also sharpens the antialiased edges which makes them less smooth - I'm working on fixing that.
USE_TECHNICOLOR 1 // [0 or 1] TECHNICOLOR : Attempts to mimic the look of an old movie using the Technicolor three-strip color process (Techicolor Process 4)
USE_DPX 1 // [0 or 1] Cineon DPX : Should make the image look like it's been converted to DXP Cineon - basically it's another movie-like look similar to technicolor.
USE_VIBRANCE 1 // [0 or 1] Vibrance : Intelligently saturates (or desaturates if you use negative values) the pixels depending on their original saturation.
USE_CURVES 1 // [0 or 1] Curves : Contrast adjustments using S-curves.
============================================================================
/*-----------------------------------------------------------.
/ SMAA Anti-aliasing settings /
'-----------------------------------------------------------*/
SMAA_THRESHOLD 0.05 // [0.05 to 0.20] Edge detection threshold
SMAA_MAX_SEARCH_STEPS 64 // [0 to 98] Determines the radius SMAA will search for aliased edges
SMAA_MAX_SEARCH_STEPS_DIAG 16 // [0 to 16] Determines the radius SMAA will search for diagonal aliased edges
SMAA_CORNER_ROUNDING 25 // [0 to 100] Determines the percent of antialiasing to apply to corners.
// -- Advanced SMAA settings --
COLOR_EDGE_DETECTION 1 // [0 or 1] 1 Enables color edge detection (slower but slightly more acurate) - 0 uses luma edge detection (faster)
SMAA_DIRECTX9_LINEAR_BLEND 0 // [0 or 1] Using DX9 HARDWARE? (software version doesn't matter) if so this needs to be 1 - If not, leave it at 0.
/*-----------------------------------------------------------.
/ LumaSharpen settings /
'-----------------------------------------------------------*/
// -- Sharpening --
sharp_strength 2.05 // [0.10 to 3.00] Strength of the sharpening
sharp_clamp 0.05 // [0.000 to 1.000] Limits maximum amount of sharpening a pixel recieves - Default is 0.035
// -- Advanced sharpening settings --
pattern 2 // [1|2|3|4] Choose a sample pattern. 1 = Fast, 2 = Normal, 3 = Wider, 4 = Pyramid shaped.
offset_bias 1.0 // [0.0 to 6.0] Offset bias adjusts the radius of the sampling pattern.
// I designed the pattern for offset_bias 1.0, but feel free to experiment.
// -- Debug sharpening settings --
show_sharpen 0 // [0 or 1] Visualize the strength of the sharpen (multiplied by 4 to see it better)
/*-----------------------------------------------------------.
/ TECHNICOLOR settings /
'-----------------------------------------------------------*/
TechniAmount 0.11 // [0.0 to 1.0]
TechniPower 2.8 // [0.0 to 8.0]
redNegativeAmount 0.88 // [0.0 to 1.0]
greenNegativeAmount 0.88 // [0.0 to 1.0]
blueNegativeAmount 0.88 // [0.0 to 1.0]
/*-----------------------------------------------------------.
/ Cineon DPX settings /
'-----------------------------------------------------------*/
Red 8.0 // [1.0 to 15.0]
Green 8.0 // [1.0 to 15.0]
Blue 8.0 // [1.0 to 15.0]
ColorGamma 2.5 // [0.1 to 2.5] Adjusts the colorfulness of the effect in a manner similar to Vibrance. 1.0 is neutral.
DPXSaturation 3.0 // [0.0 to 8.0] Adjust saturation of the effect. 1.0 is neutral.
RedC 0.36 // [0.6 to 0.2]
GreenC 0.36 // [0.6 to 0.2]
BlueC 0.34 // [0.6 to 0.2]
Blend 0.2 // [0.0 to 0.1] How strong the effect should be.
/*-----------------------------------------------------------.
/ Vibrance settings /
'-----------------------------------------------------------*/
Vibrance 0.15 // [-1.0 to 1.0] Intelligently saturates (or desaturates if you use negative values) the pixels depending on their original saturation.
/*-----------------------------------------------------------.
/ Curves settings /
'-----------------------------------------------------------*/
Curves_contrast 0.10 // [-1.0 to 1.0] The amount of contrast you want
// -- Advanced curve settings --
Curves_formula 2 // [1|2|3|4|5|6|7] The constrast s-curve you want to use.
Результат можно посмотреть на скриншотах ниже (до и после):
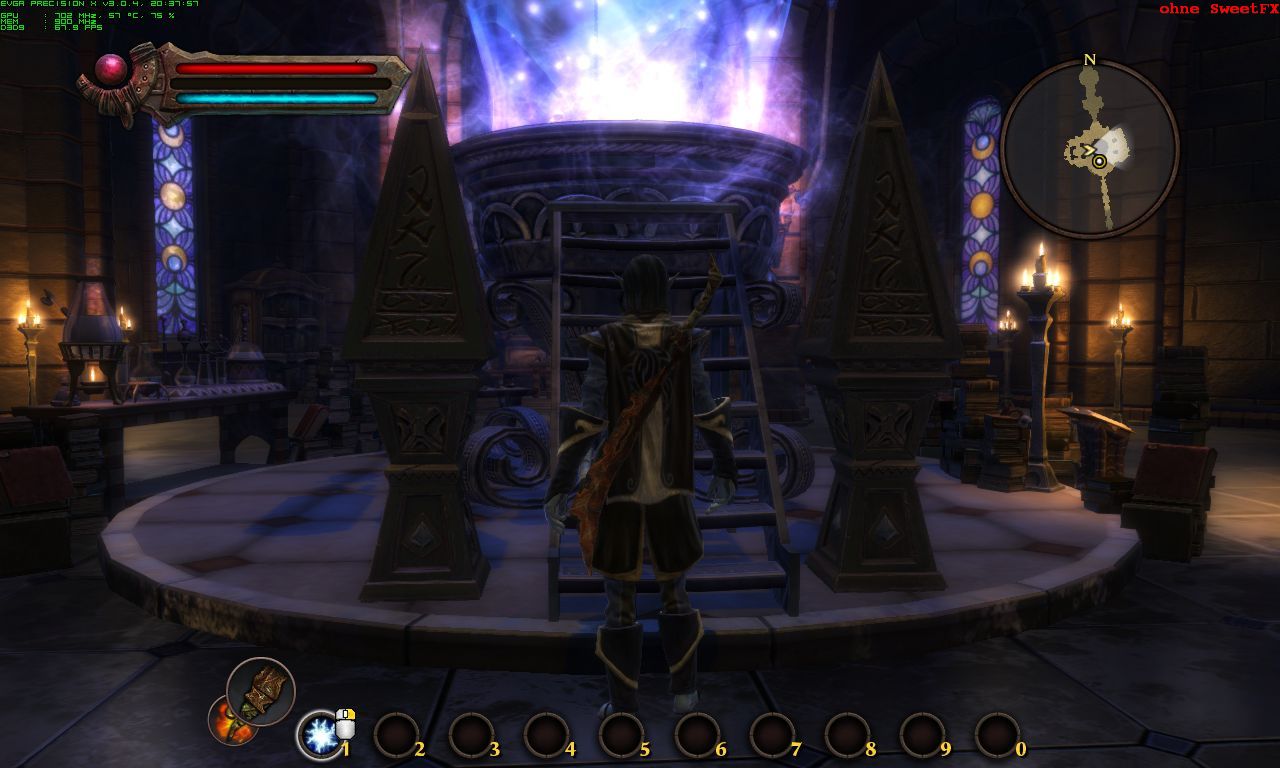
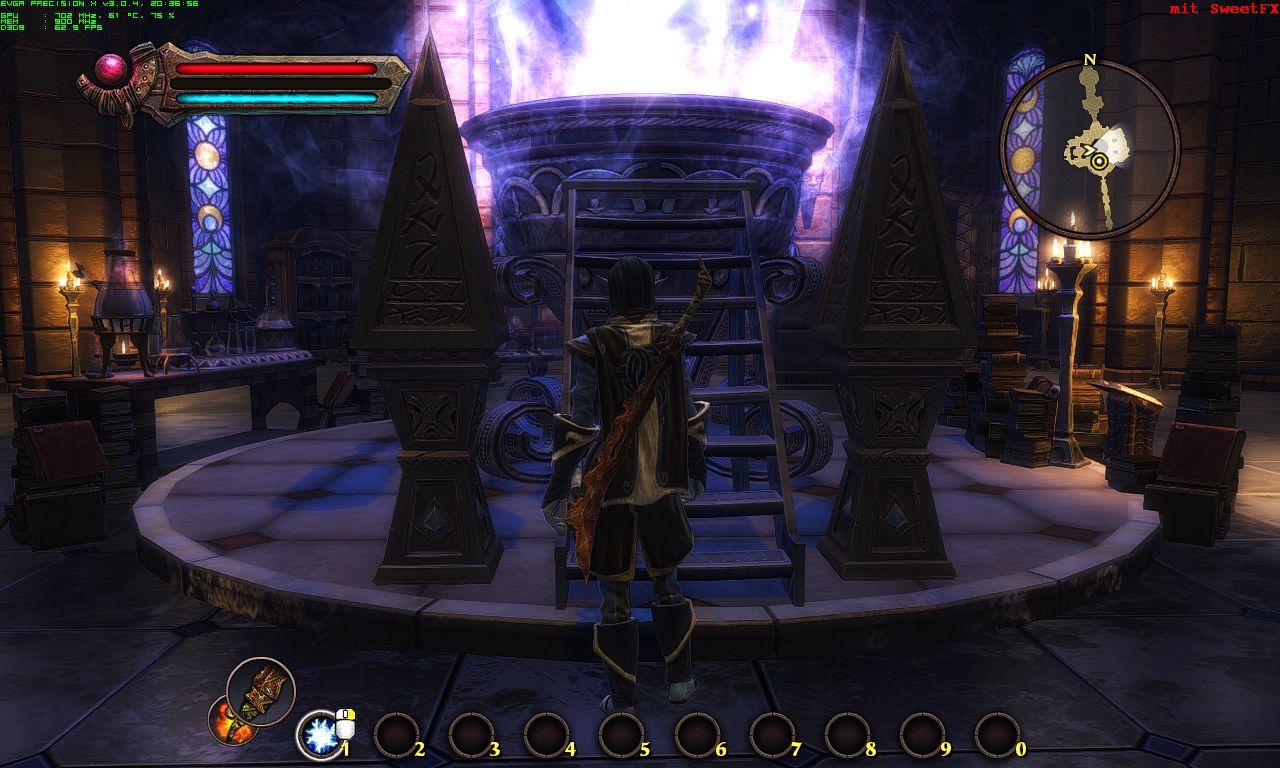
Если не нравятся такие настройки можете сами выбрать из готовых на сайте ЗДЕСЬ [sfx.thelazy.net]
Извлекаем из архива папку SweetFX в которой находятся файлы и папка с таким же названием, и кидаем содержание (это папка SweetFX и несколько файлов 'd3d9.dll; dxgi.dll; d3d9.fx; dxgi.fx; и т.д.) в дерикторию с игрой, например: D:\Games\steamapps\common\KOAReckoning
После чего в файле настроек SweetFX, 'SweetFX_settings.txt' , выставляем следующие значения:
/*-----------------------------------------------------------.
/ Choose effects /
'-----------------------------------------------------------*/
USE_SMAA_ANTIALIASING 1 // [0 or 1] SMAA Anti-aliasing : Smoothens jagged lines.
USE_LUMASHARPEN 1 // [0 or 1] LumaSharpen : Also sharpens the antialiased edges which makes them less smooth - I'm working on fixing that.
USE_TECHNICOLOR 1 // [0 or 1] TECHNICOLOR : Attempts to mimic the look of an old movie using the Technicolor three-strip color process (Techicolor Process 4)
USE_DPX 1 // [0 or 1] Cineon DPX : Should make the image look like it's been converted to DXP Cineon - basically it's another movie-like look similar to technicolor.
USE_VIBRANCE 1 // [0 or 1] Vibrance : Intelligently saturates (or desaturates if you use negative values) the pixels depending on their original saturation.
USE_CURVES 1 // [0 or 1] Curves : Contrast adjustments using S-curves.
============================================================================
/*-----------------------------------------------------------.
/ SMAA Anti-aliasing settings /
'-----------------------------------------------------------*/
SMAA_THRESHOLD 0.05 // [0.05 to 0.20] Edge detection threshold
SMAA_MAX_SEARCH_STEPS 64 // [0 to 98] Determines the radius SMAA will search for aliased edges
SMAA_MAX_SEARCH_STEPS_DIAG 16 // [0 to 16] Determines the radius SMAA will search for diagonal aliased edges
SMAA_CORNER_ROUNDING 25 // [0 to 100] Determines the percent of antialiasing to apply to corners.
// -- Advanced SMAA settings --
COLOR_EDGE_DETECTION 1 // [0 or 1] 1 Enables color edge detection (slower but slightly more acurate) - 0 uses luma edge detection (faster)
SMAA_DIRECTX9_LINEAR_BLEND 0 // [0 or 1] Using DX9 HARDWARE? (software version doesn't matter) if so this needs to be 1 - If not, leave it at 0.
/*-----------------------------------------------------------.
/ LumaSharpen settings /
'-----------------------------------------------------------*/
// -- Sharpening --
sharp_strength 2.05 // [0.10 to 3.00] Strength of the sharpening
sharp_clamp 0.05 // [0.000 to 1.000] Limits maximum amount of sharpening a pixel recieves - Default is 0.035
// -- Advanced sharpening settings --
pattern 2 // [1|2|3|4] Choose a sample pattern. 1 = Fast, 2 = Normal, 3 = Wider, 4 = Pyramid shaped.
offset_bias 1.0 // [0.0 to 6.0] Offset bias adjusts the radius of the sampling pattern.
// I designed the pattern for offset_bias 1.0, but feel free to experiment.
// -- Debug sharpening settings --
show_sharpen 0 // [0 or 1] Visualize the strength of the sharpen (multiplied by 4 to see it better)
/*-----------------------------------------------------------.
/ TECHNICOLOR settings /
'-----------------------------------------------------------*/
TechniAmount 0.11 // [0.0 to 1.0]
TechniPower 2.8 // [0.0 to 8.0]
redNegativeAmount 0.88 // [0.0 to 1.0]
greenNegativeAmount 0.88 // [0.0 to 1.0]
blueNegativeAmount 0.88 // [0.0 to 1.0]
/*-----------------------------------------------------------.
/ Cineon DPX settings /
'-----------------------------------------------------------*/
Red 8.0 // [1.0 to 15.0]
Green 8.0 // [1.0 to 15.0]
Blue 8.0 // [1.0 to 15.0]
ColorGamma 2.5 // [0.1 to 2.5] Adjusts the colorfulness of the effect in a manner similar to Vibrance. 1.0 is neutral.
DPXSaturation 3.0 // [0.0 to 8.0] Adjust saturation of the effect. 1.0 is neutral.
RedC 0.36 // [0.6 to 0.2]
GreenC 0.36 // [0.6 to 0.2]
BlueC 0.34 // [0.6 to 0.2]
Blend 0.2 // [0.0 to 0.1] How strong the effect should be.
/*-----------------------------------------------------------.
/ Vibrance settings /
'-----------------------------------------------------------*/
Vibrance 0.15 // [-1.0 to 1.0] Intelligently saturates (or desaturates if you use negative values) the pixels depending on their original saturation.
/*-----------------------------------------------------------.
/ Curves settings /
'-----------------------------------------------------------*/
Curves_contrast 0.10 // [-1.0 to 1.0] The amount of contrast you want
// -- Advanced curve settings --
Curves_formula 2 // [1|2|3|4|5|6|7] The constrast s-curve you want to use.
Результат можно посмотреть на скриншотах ниже (до и после):
Если не нравятся такие настройки можете сами выбрать из готовых на сайте ЗДЕСЬ [sfx.thelazy.net]
НАСТРОЙКА КАМЕРЫ
Загружаем Widescreen Fixer по ссылке ЗДЕСЬ [www.widescreenfixer.org]
Запускаем его и в выпадающем списке программ выбираем нашу игру.
Далее нажимаем на шестеренку напротив названия игры. Если игра стимовская то в появившемся окне выбираем steam версию, если Орига или пиратка, то выбираем Origin. Я играю на 21 дюймовом мониторе в разрешении 1920x1080. Лучшие настройки для меня это: 170 FOV и Bezel-Corrected Resolution 5760x1080.
Далее нажимаем "сохранить настройки" и "закрыть окно".
После чего сворачиваем программу и запускаем нашу игру.
Загружаем сохранение и нажимаем кнопку * (умножение на дополнительной клавиатуре).
Если же вы хотите назначить сами нужную вам кнопку, то во вкладке настроек Widescreen Fixer
есть пункт "Hotkey", в котором вы сами можете назначить клавишу для запуска программы.
После того как камера в игре поменялась, вы можете ее зафиксировать, чтобы она не менялась во время прыжков или переходов в другие локации, при помощи двойного нажатия на кнопку вид от плеча, по умолчанию кнопка "\" на клавиатуре. Ниже приведены скрины до и после:
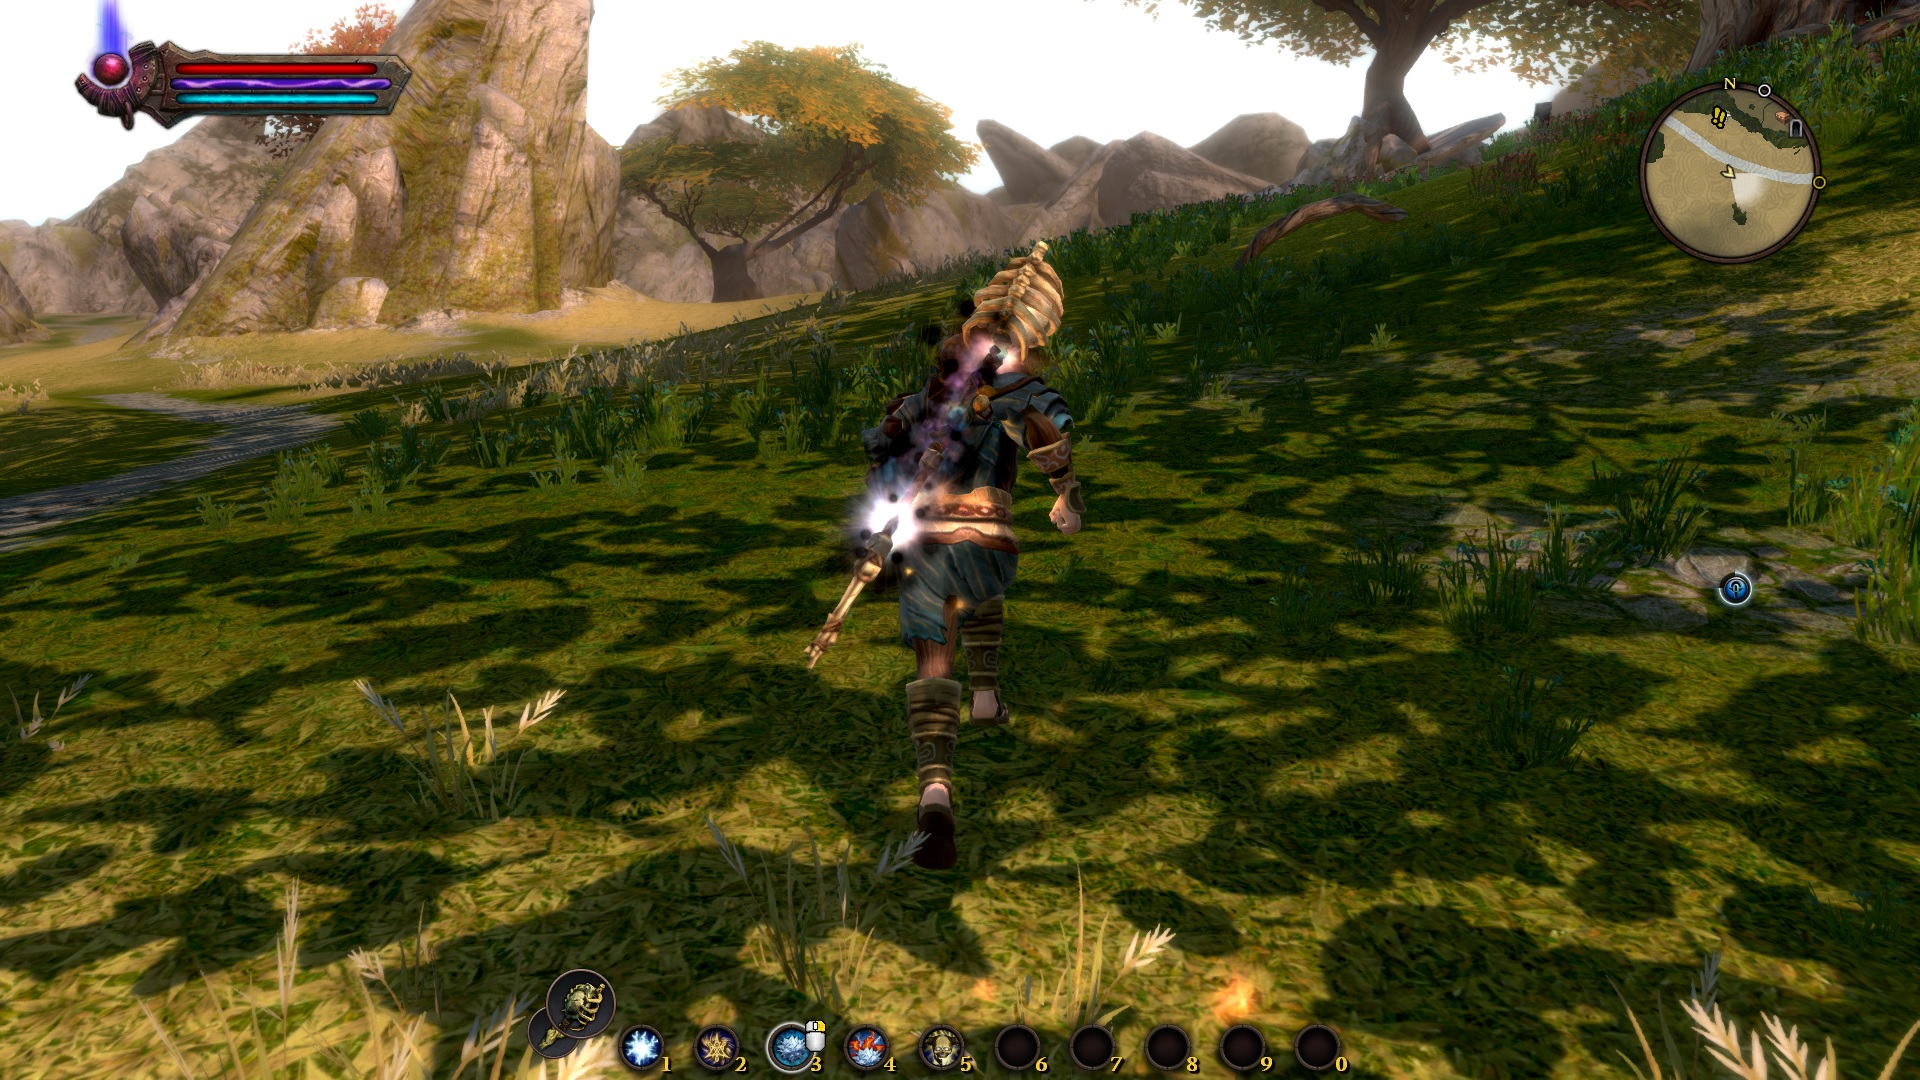
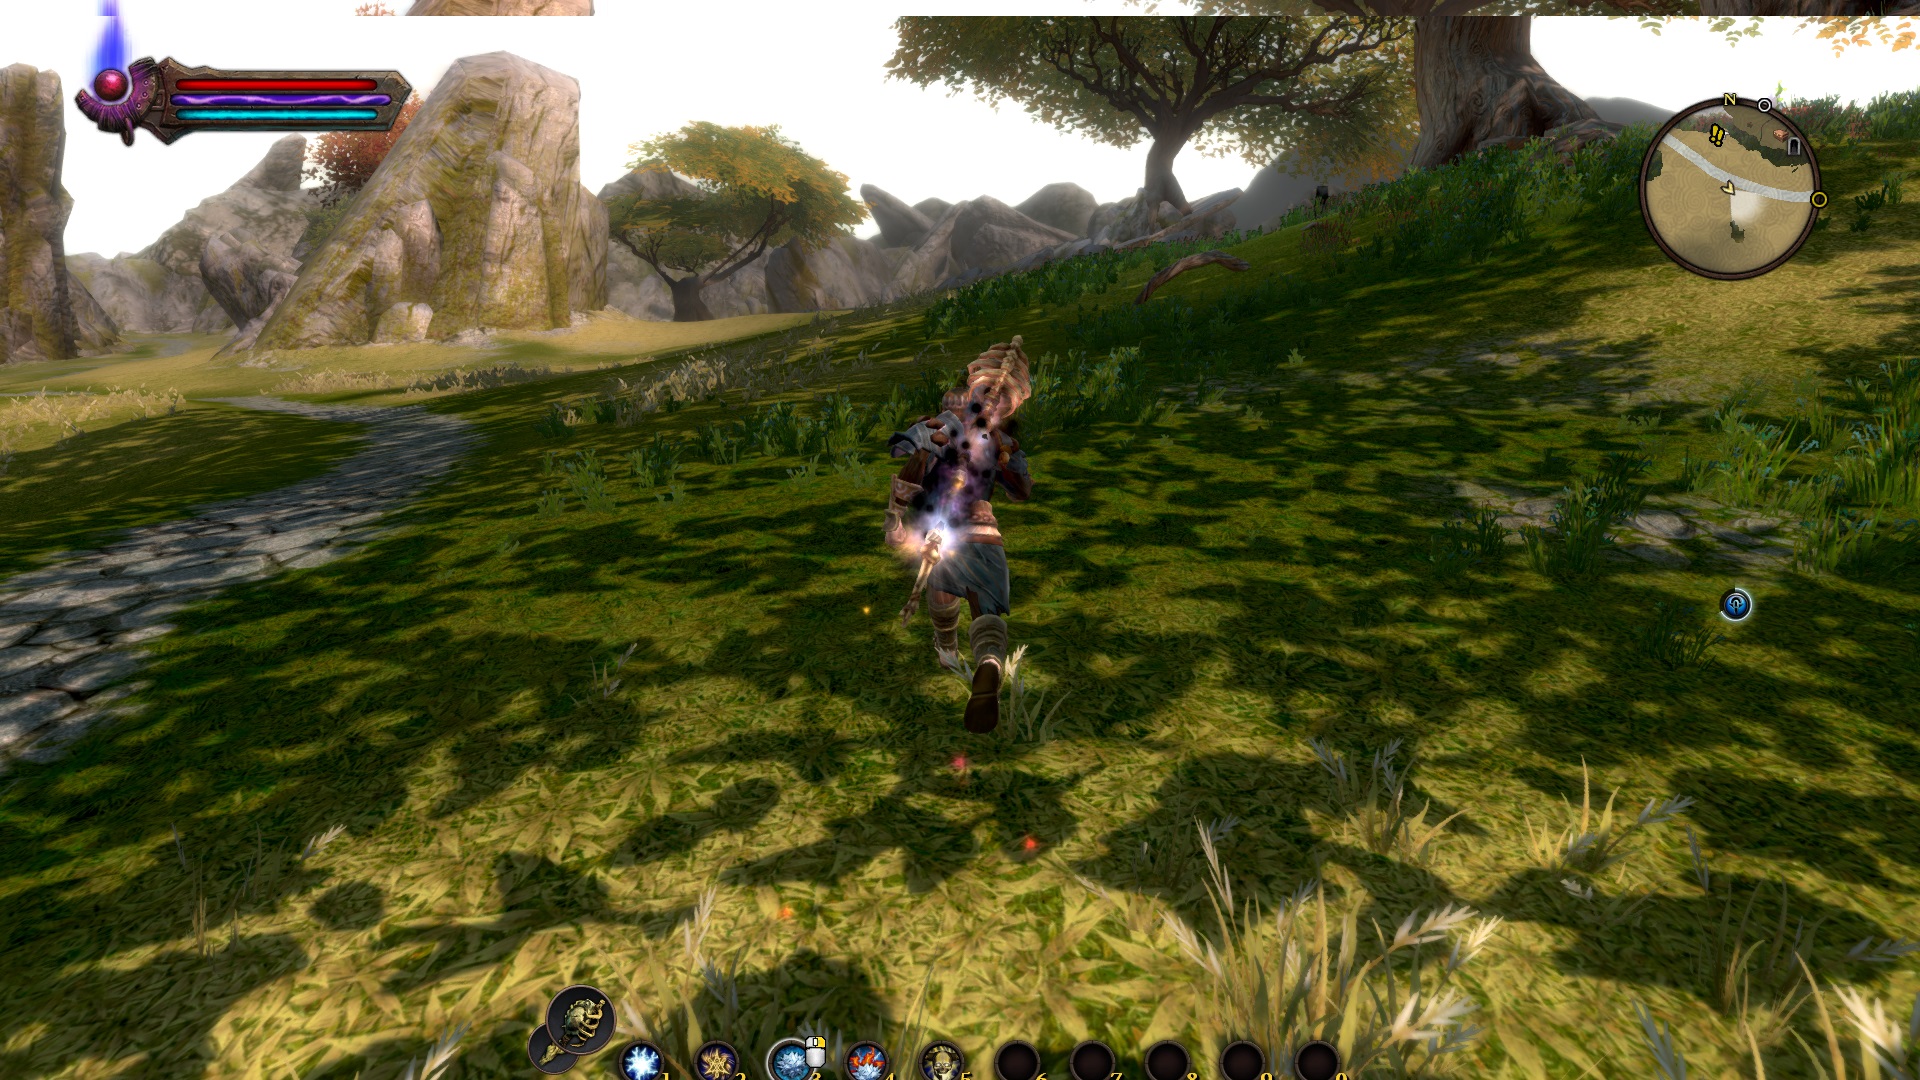
Запускаем его и в выпадающем списке программ выбираем нашу игру.
Далее нажимаем на шестеренку напротив названия игры. Если игра стимовская то в появившемся окне выбираем steam версию, если Орига или пиратка, то выбираем Origin. Я играю на 21 дюймовом мониторе в разрешении 1920x1080. Лучшие настройки для меня это: 170 FOV и Bezel-Corrected Resolution 5760x1080.
Далее нажимаем "сохранить настройки" и "закрыть окно".
После чего сворачиваем программу и запускаем нашу игру.
Загружаем сохранение и нажимаем кнопку * (умножение на дополнительной клавиатуре).
Если же вы хотите назначить сами нужную вам кнопку, то во вкладке настроек Widescreen Fixer
есть пункт "Hotkey", в котором вы сами можете назначить клавишу для запуска программы.
После того как камера в игре поменялась, вы можете ее зафиксировать, чтобы она не менялась во время прыжков или переходов в другие локации, при помощи двойного нажатия на кнопку вид от плеча, по умолчанию кнопка "\" на клавиатуре. Ниже приведены скрины до и после:
Приятной вам игры.
More Kingdoms of Amalur: Reckoning™ guides
- Backpack Upgrade Locations★ 5 (743)27k views1.1k ♥1 minUpdated Sep 6, 2016
- Skill Maxing★ 5 (424)24k views974 ♥4 minUpdated May 4, 2016
- How to easily craft overpowered gear★ 5 (178)19k views358 ♥5 minUpdated Jul 1, 2019
- KOA 100% Achievement Guide★ 5 (877)19k views927 ♥20 minUpdated Apr 10, 2022
- Fixing The Camera & Beefing Up Your Graphics!★ 5 (250)18k views366 ♥4 minUpdated May 14, 2022
- Kingdoms of Amalur: Reckoning™ - 100% Achievement Guide and Roadmap (DLC included; Re-Reckoning-Ready)★ 5 (541)15k views928 ♥44 minUpdated Dec 25, 2025


This guide was created by its original author on the Steam Community. Are you the author and want it removed? Request removal.