An Unofficial Loop Hero Manual, Mechanics Guide + Sheets!
Welcome
A minimalist and retro Role-Playing and Strategy game incorporating elements of multiple other genres to create a unique gaming experience. You'll uncover the mysteries of a world forgotten, build a town, meet refugees and of course, create your own paths so you can fight monsters.
Crowdfunded media company Noclip has put on an excellent documentary about the origins of Loop Hero here.
- The discord.[discord.com] You have a question? Well you can ask below and I'll answer it but the discord is pretty nice too :)
- The Fandom wiki.[loophero.fandom.com].
08/16: I've added u/feuerschein latest contributions to the Loop Hero community which he graciously posted on Reddit; specifically, a new section for the damage formula, as well as more details in the chapter just before it about the interaction between types of damage and Swarm enemies.
01/31: Added detailed rogue trophies mechanics based on u/feuerschein's post here, it's in the class mechanics section. Added an overdue blurb about restoring saves using the built-in save restore system to the restore section.
2022/01/23: Added the tiles needing to be placed to spawn chapter bosses courtesy of geoffhom down in the Mechanics:Information section. Switch Version -> Big bug fixing update approved!
12/12: Switch Version released on the 9th! There's no change AFAIK. A minor issue has been noted in which gold cards can only be accessed using the (left) analog stick. I'm sure this will be fixed shortly if not already! If you're new to Loop Hero, enjoy your time :)
25/6: New Patch 1.101. Fixes a few issues with the rogue reloading mid-adventure. Added an effect to Gift of Blood. Formula at the bottom under Traits and Monster Abilities.
20/6: A small blurb about a specific damage formula in the mechanic statistic, link to third hand formula and some data. A note about summoning ranged skeleton.
Manual: The basics
 Perhaps you've just downloaded the demo (still available here[steamdb.info]), or you bought the whole thing, either way is good and now is a great time to get started. Let's fire it up either from a client such as Steam or directly from your desktop by clicking its icon.
  You'll be greeted with a menu such as the one on the right. There's a lot to unpack here. I suggest you click that shiny "Start" button and get right into the action.
A short in-game cinematic will play.
As the cinematic play, as any other time a dialogue option might appear, you can press anywhere with your mouse or gamepad to advance, the back button to read the previous test or the ...X button to quickly go to the end.
For the purpose of this guide only the mouse and keyboard interface will be mentioned for brevity from now on.


 To your upper left is a bar indicating the time of day. Usually it goes forward from left to right as you walk or fight. Once the bar is full a new day begin. Many things can happen on a new day, but for us, in the immediate, this mean the appearance of a new monster, a slime.
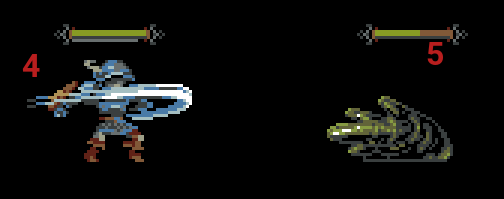 Fighting is hands-off. Automatic. Your hero select an enemy to attack randomly and will fight it until one of you or the monster dies. Then he repeat the process, while enemies largely do the same.
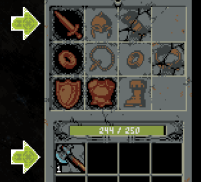 To equip an item, click on it, then click again the slot you want to equip it in. You might notice you can't unequip it afterward. This is normal; in Loop Hero items are equipped only once. The only way to remove it is by equipping a new item instead which will destroy the old one.
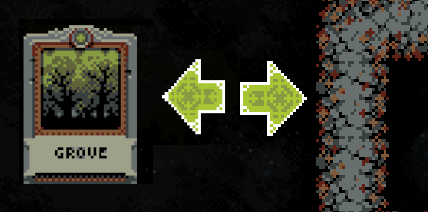 In Loop Hero worlds are created one tile at a time using cards acquired in various ways but usually by killing monsters. To place a tile with ease, first switch to Planning mode (Right-Click or Spacebar) then select where you want to place it. The game will helpfully light up the squares in which you can place the tile.
 To your upper right is your character resource stash. Resources are acquired in many ways. Stepping on particular tiles. Fighting monsters. Created with Alchemy. In this tutorial, we obtain one Pebble from placing a Rock tile and one Branch from placing a Forest tile. Resources will be used later to build up your town.
Important: There are two type of resources. The Small pieces and the Whole resources. This goes for almost all resources. Many smalls make one big, automatically. From Pebble to Stone, from Branches to Wood.
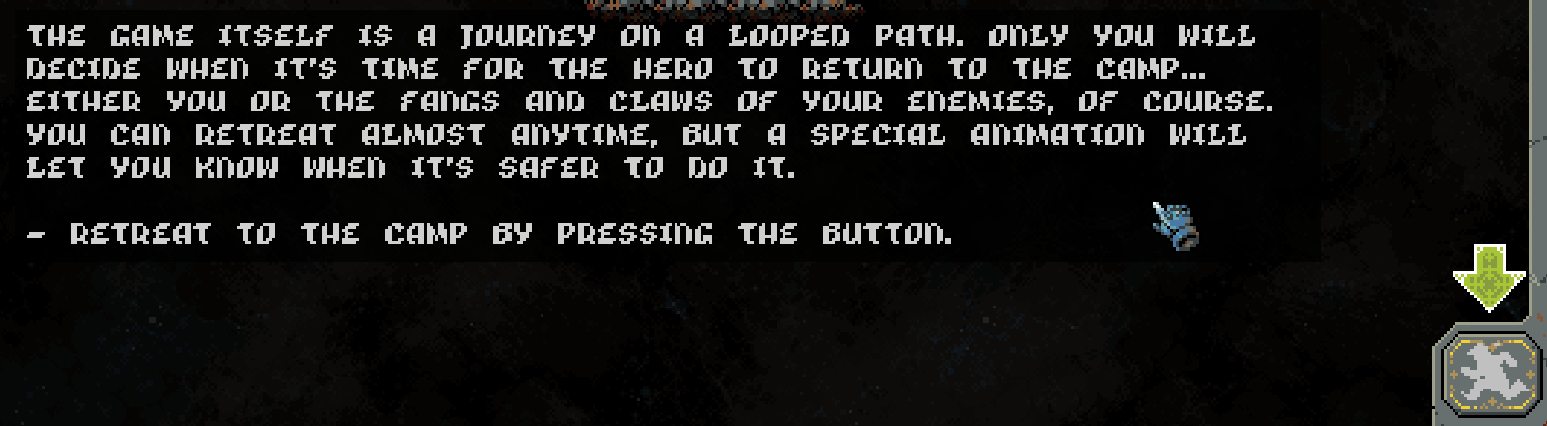
Manual: More Tutorials
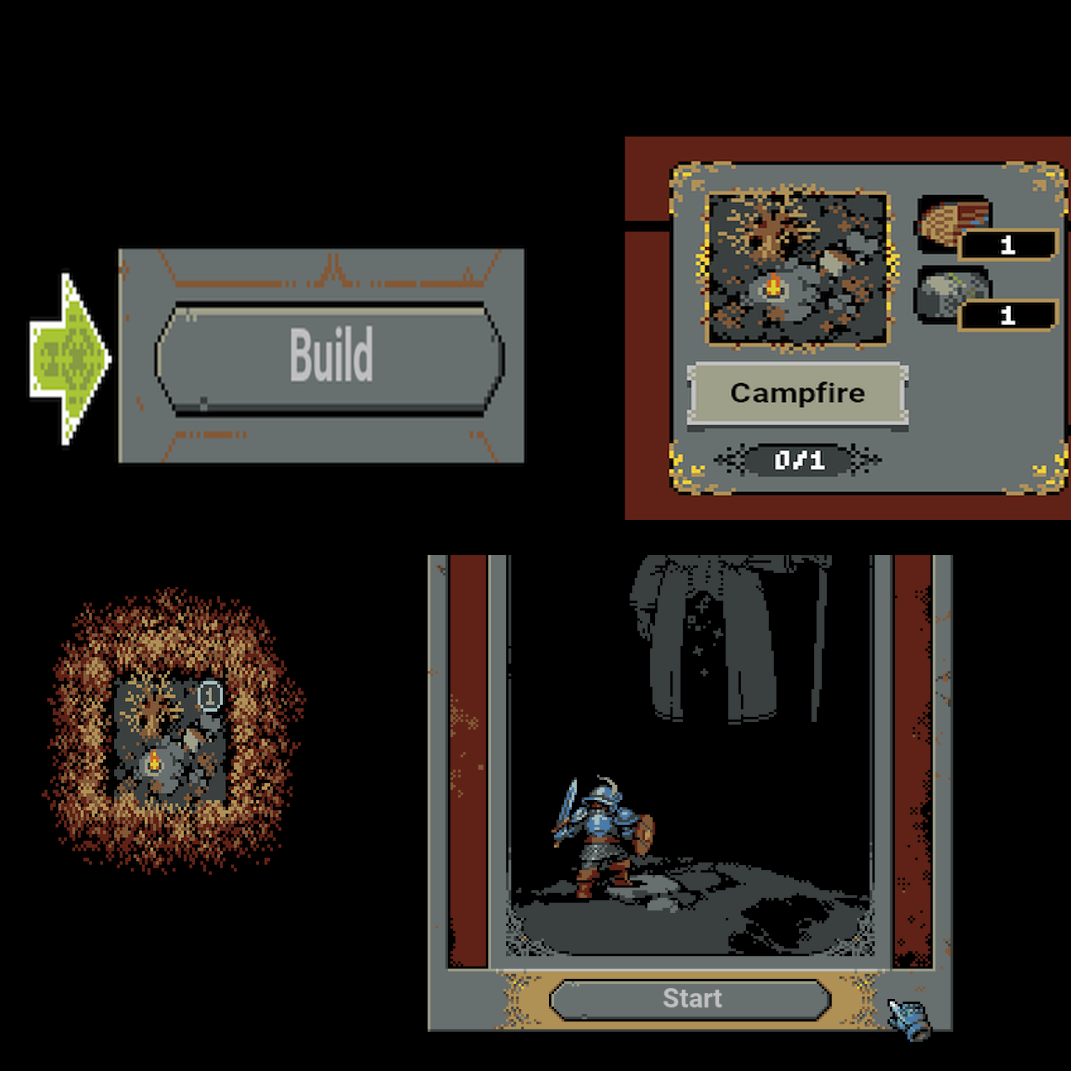
After every adventure comes a time to relax and build. This time is no different and as soon as you finish your first tutorial you will reach a void and get the opportunity to create a campfire. As this segment is very short I will skip it for now and revisit it in the next chapter. You can always skip ahead if you want to know more about town building but for now, let's continue the tutorial with your first real adventure.
Leaving town toward the wilderness a new random map path is created. The goal, ideally, is to fill the Boss meter up to full by placing tiles, which will make the Boss appear. You can find the meter to the top left of your screen just under your you Daytime meter. It looks like this.

Let's take a look at what such a map could look like. As you can see we've already killed our first Slime which rewarded us with good loot to begin our adventure. Click the image to make it bigger!
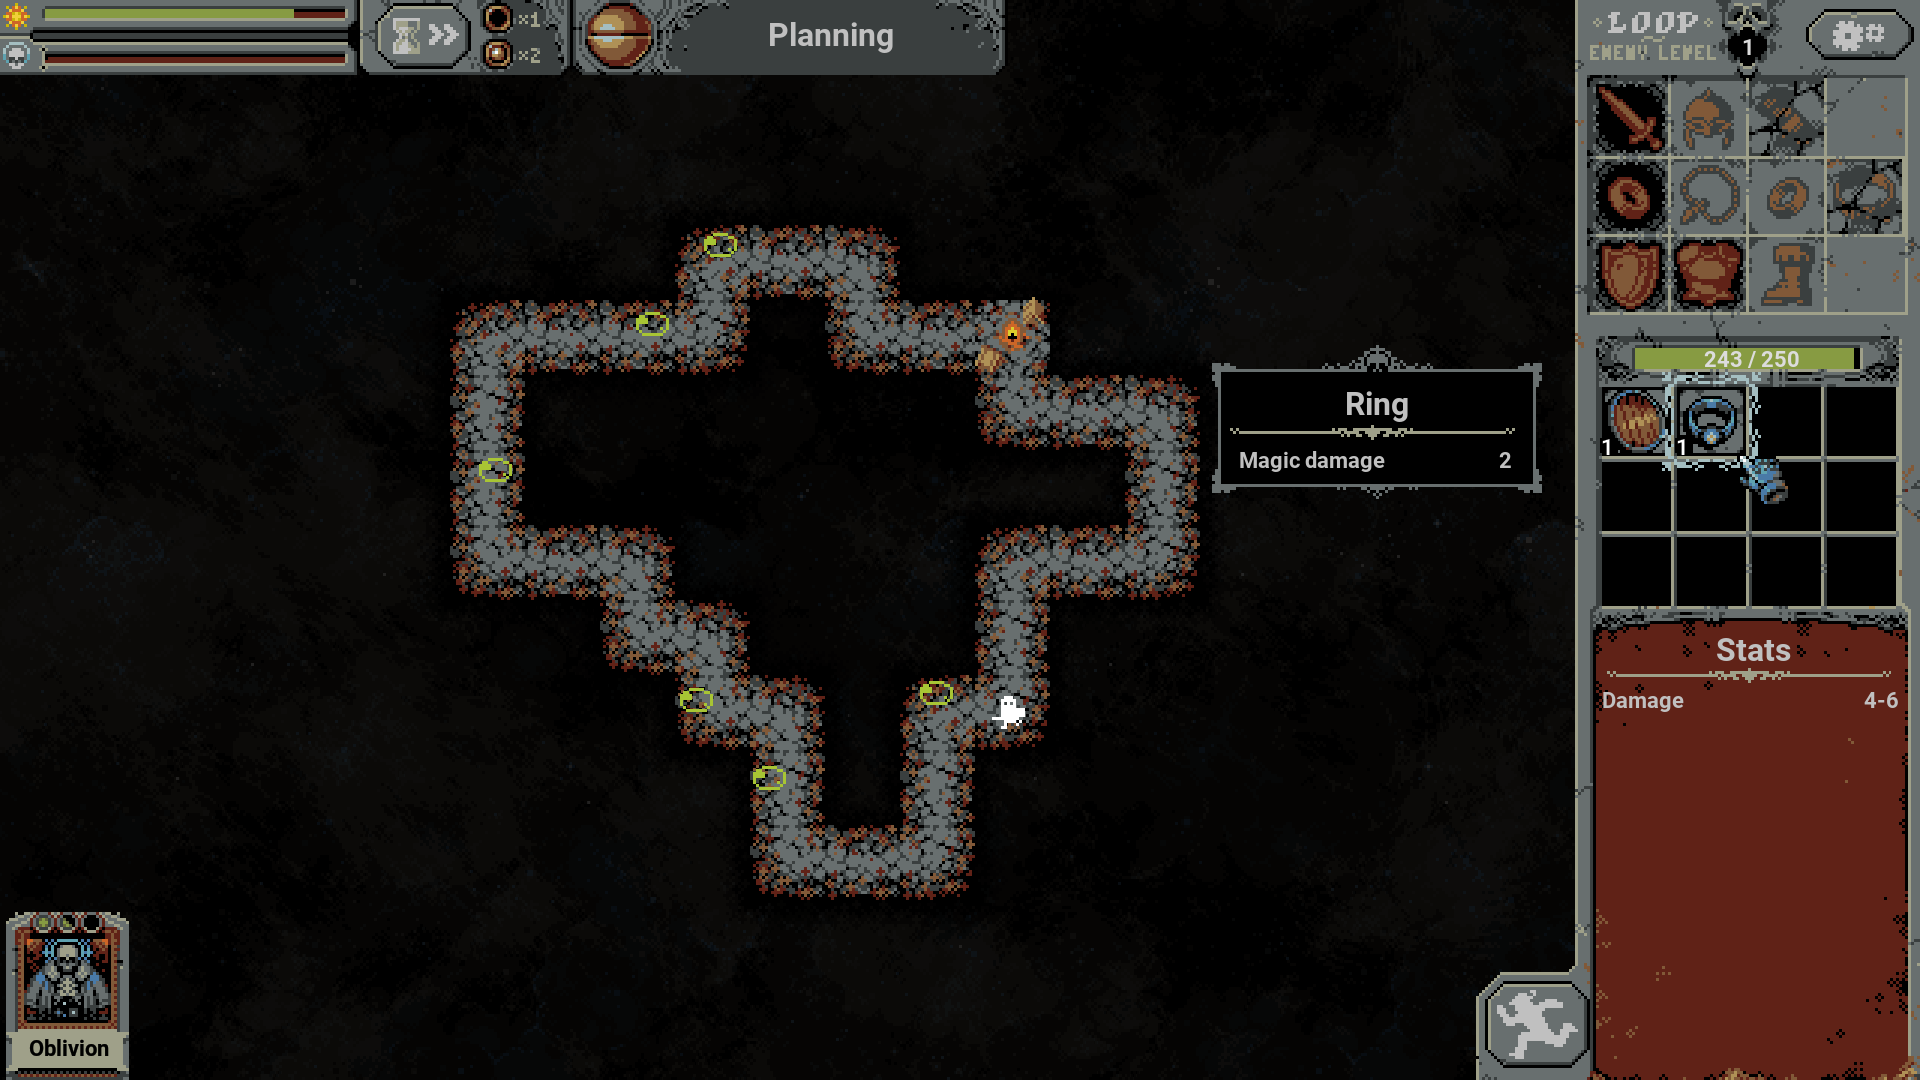 On the left is a shield. Shields are the cornerstone of our young Fighter's Defense. Do not underestimate Defense! The rule of thumb is that every point of Defense reduce damage by one.* When multiple monsters attack you at once this can stack up particularly fast! When it comes to shield, pay particular attention to how much Defense it gives you as it's by far the main source of it!
On the right, highlighted by our cursor, is a Magic Ring. Rings offer your hero all sort of effects! Stats and effects are discussed later, but for now, take a closer look and notice it says "Pure damage". That's. Awesome. Defense might be king of survival but, for now anyway, Pure damage is king of damage. It completely ignores monster Defense... what a good start!
- Kill monsters, get cards as loot, create more tiles and more monsters!
- Equip your strongest, highest level weapons
- Equip items with strong Defense
- Equip magic items with Pure Damage if you find them
- Keep your monsters separated
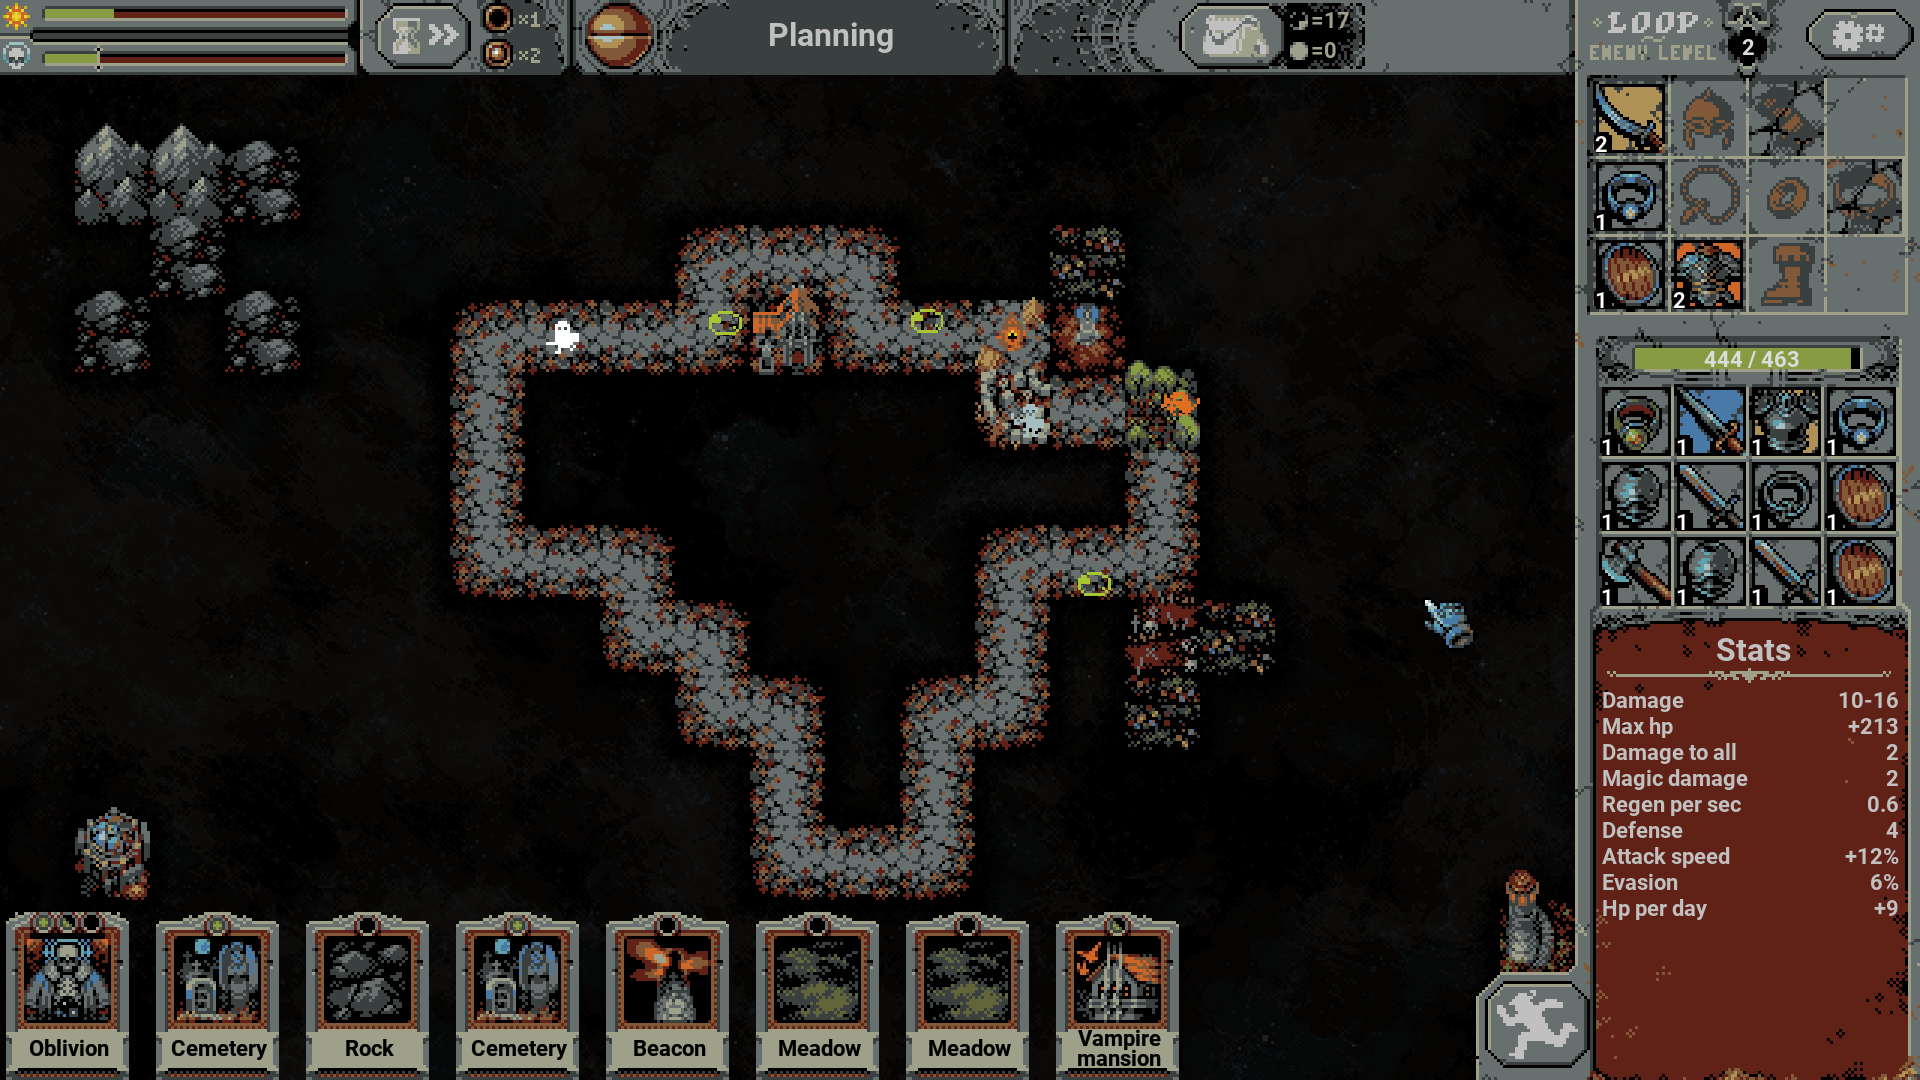 Let's equip this good stuff and go for another loop or two. We'll kill many Slimes and loot them for Cards and Equipment. Let's take a look at our map again near the end of Loop 2. So much has changed, it almost makes you wish I had taken an intermediary screenshot! No matter, we'll break it down in small chunk and see what's what.
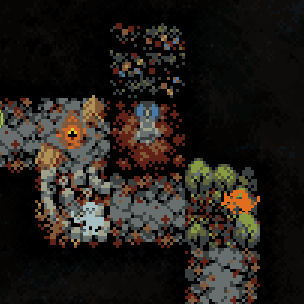 First is our Camp. As you might have noticed by now, your Camp remain safe, free of monster and a source of Healing whenever you reach it.
Right to the south of it is a Cemetery. Cemetery creates strong Skeletons for you to fight every few days. Be careful not to fight more than one at once if you can! The reward for fighting Skeletons are items with many magic properties.
To the right of the Cemetery is a Grove. Many Ratwolves lurks in Groves, and they love to spread around up to one tile away. The last thing we want right now is fight BOTH a Ratwolf and a Skeleton... which is why they are spaced away by one entire tile.
Let's ignore the lantern and notice the meadows instead. These give you health upon every new day and when placed near other non-meadows tiles... they bloom for even more health!
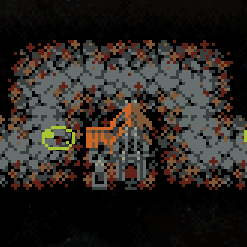
Far to the left of our camp is a lonely Vampire Mansion. Lonely, because it will only come into play whenever you fight any Slime appearing nearby. Vampires aren't too though and if you feel adventurous you can place them near your other monsters... but there's a risk. Vampire makes every monster gain Health upon hitting! So I placed it near a Slime and you can be sure more Slimes will spawn soon nearby so that you can fight those Vampires with easy Slimes henchmen.
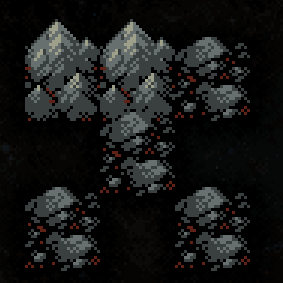
To the upper left are rocks and mountains. By placing them in a 3 by 3 grid they will evolve into a Peak, which give as much HP as 9 mountains AND spawn a creature for you to fight for more Cards and Loot. To the south of our camp is a Battlefield. Battlefield will create a Chest every time you start a new loop. Try to keep it as few tiles ahead as possible after your camp if you can, since the level of the loot scale with the level of the loop. If you kill a chest right after passing your camp you will likely get a strong item easily! One might want to combine it with a Vampire mansion so you get to fight "only the Vampire" but there's a small amount of risk as sometime the chest... can be more than it seems.
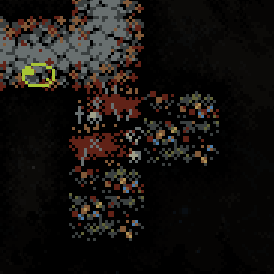
The Boss of the first chapter is one though cookie. He hit hard, has a lot of HP and special abilities.
A lot could be said and a lot could be spoiled but discovery is part of the fun so just know that the game has special dialog just in case you lose, which you might, unless you're either very brave, very lucky or just very experienced at video games!
I'll give you a pro-tip though. Place one Beacon which cover only the squares including your Campsite. Beacons are normally a boost to enemies... but not to Bosses!
Finally, here's an extra hidden tip for those who wants it:
The Lich use Pure damage, which (like your own sources of Pure Damage), completely ignore Defense. Use Evasion!
On this you might want to finish the tutorial or take a look at the next section which deal with more in-depth look at equipment. At any time you can also go back to the town, if you do it at the camp, you keep all your resources while you'll lose some items if you leave far from your camp and almost all of them if you die.
*(See mechanics chapter for the exact formula... high defense entities don't care for the 1 damage = 1 defense rule! Not one bit!)
Manual: Items and Stats
Every Hero needs them. Destructive weapons. Protective regalia. Items of power.
Loop Hero is no different. What are those items, how do you obtain them and how, exactly, do they work? Let's take a look.
There are of course some exceptions. A notable one is that you can start with some items if you upgrade your town. You can also get items as rewards for hunting monsters, known as quests. You'll need to unlock Villages by building up your town for this. Finally sometime you don't get the items right away. You might have to kill monsters, get their trophies and THEN reach the end of the loop to get your hand on new items. No matter; there will be lots of monster slaying involved if you want your loot.
- Item Slot: Most class start with 4. The fighter has: Sword, Ring, Shield and Armor.
- Type: A mace is different than a sword. Armor have their own visual types.
- Level: An higher level mean more damage on your weapon, more defense on your shield, etc.
- Rarity: That's the color of their background. Blue is better. Yellow is great. Orange is best.
Additionally there are some basic rules to understand as to how you acquire items namely:
- Some monsters drop different Rarity and Level of loot.
- Every monster can drop every Item Slot and Type of items.
- Some monsters can focus on dropping more or less of some Type.
- Monsters will never drop an Item Slot which you can't equip.
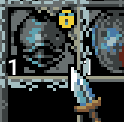 Perhaps your strategy call for holding on to some specific item, or, for any other reason, you'd like to hold on to an item and not have it destroyed by the memory grinder. In which case you can right-click it in your inventory which will "lock it" in place until either equipped or unlocked by right-clicking it again.
Listed in a rough order of importance of a new player using a fighter.
So if you don't know what to use, try use the stuff that's on top of their relevant category.
- Pure damage: Damage which completely ignore Defense.
- Damage to all: Damage which applies to all enemies including your target.
- Counter: When you get hit, you hit back.
- Attack speed: Reduce the time between your attacks.
- Defense: Block some damage. Very roughly 1 HP to 1 Def. (See mechanics for more accuration information!)
- Vampirism: Restore X% amount of health from your attacks and counters.
- Evade: When you would get hit, you don't get hit.
- Regen per sec: Restore health over time both in combat and out.
- Max HP: Add to your Maximum HP
There are, additionally, stats specific to unlockable classes as well as various other stats. We won't touch on them right now.
Manual: Cards and Tiles
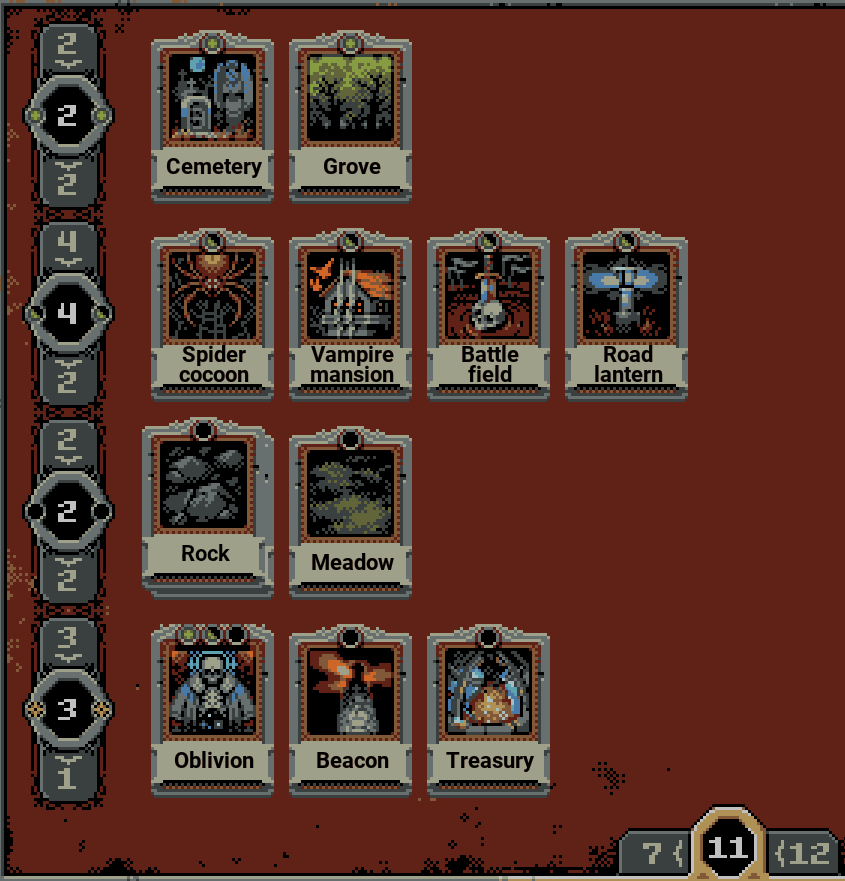 Perhaps you've finished the tutorial, are still right in it or just need a reminder, but in any case, when starting out a new game of Loop Hero you start out with a deck of basic cards. You can see them on the right here. We'll go over those basics cards, one at a time, but first some explanations.
There are 5 categories of card. Those are not the real name of their categories but in order those are:
- Path cards. They go... on the path.
Denoted by a full green circle on their art. - Sides. They must be placed right next to the paths. Half green circle.
- Wilderness. Placed in the nothingness filling up the map. Empty circle.
- Special. Basically the same as Wilderness cards... but different.
- Gold. They're literally made out of gold.
Example: You must pick at least 2 but no more than 4 Sides cards.
Example 2: Your deck must consist of a total of at least 7 cards but no more than 12.
Those limits will increase as you obtain more cards.
Finally, not all cards follow the placement rules. By example, rivers, an unlockable Wilderness card, can follow paths and even cross them.
Without further ado...

Manual: Monster Academy
Behind the scene every creature is assigned a certain number of Health, Attack and Defense. This number is then multiplied by the loop number.
You inflict damage to the enemy roughly equal to your Weapons Damage minus your enemy Defense.*
The enemy attack damage is equal to their Attack minus your own Defense.
For the most part, combat is that simple.
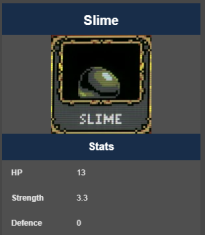 Let's take for example Slimey over here with its stats shamelessly plundered from the Loop Hero wiki.[loophero.fandom.com]. The following examples are real, don't try it at home, etc...
You begin a new expedition. You look down your path. You see slimes. It's always slimes.
Slimey is... doing whatever slimes do. He looks at you, probably impressed. While you, being the brave Hero that you are, will stumble upon Slimey and fight him sooner than later. The combat will go something like this.
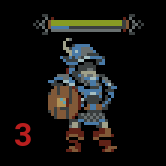 You'll bravely hit Slimey a few times with your stick until you inflict 13 point of damage which will kill him. That stick do 5 damage, so that's about 3 hits to his 13 HP. In the meantime Slimey will oh so cruelly fight back inflicting between 3 and 4 point of damage to you, the undefended hero, per each of his hits. You win, obviously. Cue victory music, a shower of cards, epic loot and more importantly... a shield with 4 Defense! Our naked hero promptly equip his shield.
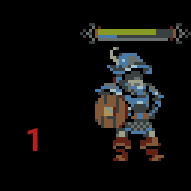 Fast forward to our next gooish encounter. As before, hit, get hit, but this time there's a noted difference. Our hero only take 1 (and rarely 2) point of damages per vicious Slime hit. Why not zero you might ask? Because there is a hidden damage formula which says this is how it works. The rule of thumb stated before, where 1 point of Defense protect against 1 point of damage, is just that, a rule of thumb. Damage cannot be completely avoided by Defense alone.
You have: A Stick which does about 5 damage and a Shield which provide 4 Defense.
The Slime Soldier has roughly*: 36 HP and 9.9 point of damage. Still 0 defense. They are literally liquid ¯\_(ツ)_/¯
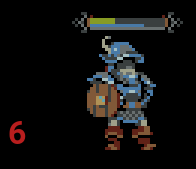 As you start your next fights, you realize the balance of power is starting to shift. The Slimes, quite furious now, hit you for an average of 6 damage. Sometime 5, sometime 7. You're still hitting them for a formidable 5 damage... but Slimes can take a lot more hits with all their HP. Your health is low and if you can't find sometime better than a stick and a shield to fight with you'll be in real trouble...
*Many other factors influence the actual stats of monsters including by example which Chapter you are in, which cards you play, etc.
Currents Hero stats:
14-22 Damage (Weapon add to base unarmed damage)
9 Defense
Current Slime stats:
53 HP
13.29 Damage
0 Defense
As you can see, our hero was on the receiving hits for 5, 5 and 7 damage. This mean our 9 Defense protected us for a little less than 8 damage per hit... Not bad!
On the other hand our little slime was completely obliterated. It's time for a better opponent. Hopefully.
Out of the corner of your eye you spot him:Shia LaBoeuf. A Goblin Leader.
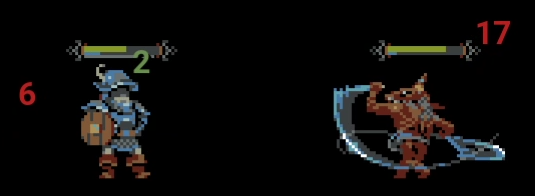 Fight... again!
Your stats are unchanged:
14-22 Damage
9 Defense
Goblin Leaders Stats at Loop 4
61 HP
16.11 Damage
3 Defense
Before we recap what happened in the battle lets take do some math.
We do an average of 18 damage to a Goblin with 3 points of Defense so we can expect around 15 damage to be inflicted on the Goblin. While the Goblin Leader does 16 Damage to our 9 defense, meaning we expect to take roughly 7 Damage.
Note: Our Hero noticed he had a better shield in his bag and equipped it during the fight. Damage was unchanged. That was very smart of him but not so much of me. We'll discard those two hits.
The Goblin Leader inflicted: 9 6 6 7 7 7 9... for an average of 7.3 damage as predicted.
The Hero inflicted: 17 19 16 14 21... for an average of 17.4, again, roughly as predicted.
The good thing is their appearance are entirely up to you!
*(This as well as the example given in this chapter are oversimplifications. The 1 defense = 1 less damage mostly apply at low defense value. The enemies in the chapter have low defense! The exact formula can be found in the mechanics chapter below.)
Manual: Town and Crafting
Between adventures you can rest here. The town is a gathering point for refugees and craftsmen of all kind. When you fight monsters or explore the world you gain materials that you can use here to expand you Town with new buildings, learn new cards and create useful items for your townspeople which will help you on your epic quests. Like cheese!
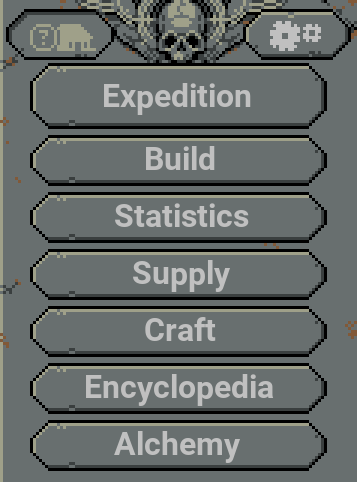 Take a loot at everything there is to be unlocked. Many options will be missing at first. As you expand and build, those options will appear. From the very beginning we can Build. We've already built a campfire before back in the tutorial. For now let's try and build something new. A kitchen would be lovely. First, click on Build to your upper right. Right under the scary skull.
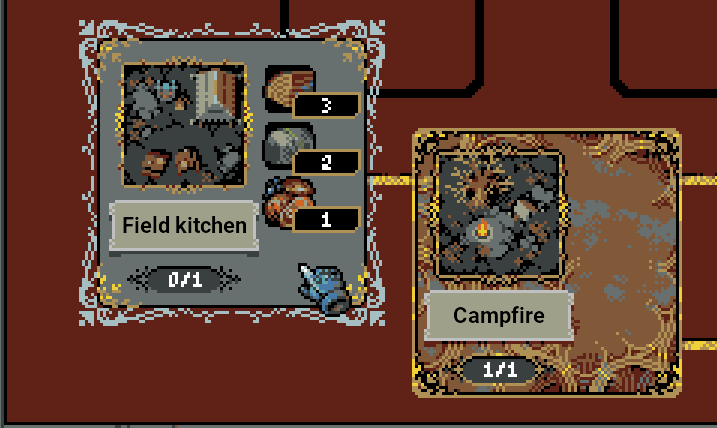
Then, we'll click on the Field Kitchen. Hopefully we have enough resources to build it. Otherwise, we might have to go and fight a few more monsters in an expedition. If you do have the materials, we'll next place the building itself. Somewhere cozy, preferably and with a good view.
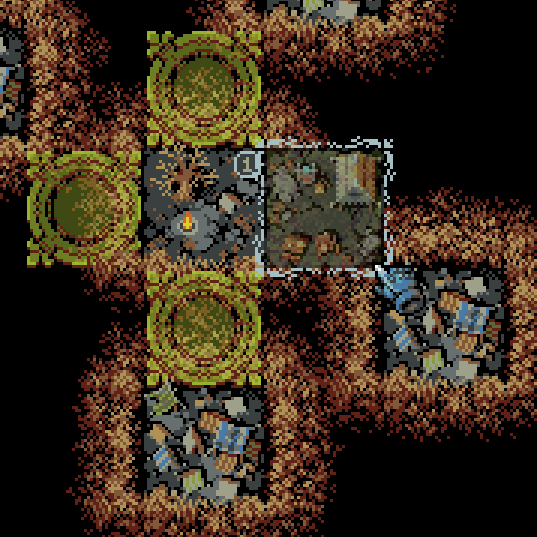 Here. Perfect. You have built your first addition to the town itself. There will be many more to come. Farms. A Smithy. Everything an adventurer need.
Perhaps now is a good moment to take a break and familiarize ourselves with the Statistics menu. It's right there under the Build option. There's not going to be a lot in there yet! We just started out. Nor is it a particularly useful option, to be honest. It's just information, after all. Still, it's nice to know that there's somewhere out there dutifully taking notes of your accomplishments.
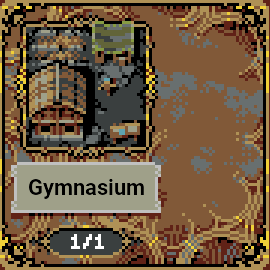 The Gymnasium
This reward you with the Village card. Village are handy tiles you can place to heal yourself when you reach them, and obtain monster killing quests for item rewards.
More importantly Gymnasium carry your characters to the next level! That is to say, from now on, killing monsters will reward you with Experience (XP). When your Experience Bar is filled, you'll get to pick one Trait to empower your hero. Do take note that as mentioned earlier, in the combat section, the hero doesn't level up the way a monster do. A hero who LEVEL UP only get stronger based on the Trait itself. Those Gymnasium levels don't add to stats or anything like that, they just give you the one trait.
The bar will be located right under your HP.
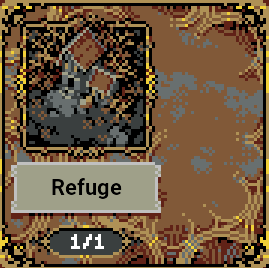 The Refuge
Placed next to your Field Kitchen (if there's no place, you can make some by tearing down a building nearby it) the Refuge serve one purpose: Unlock an additional class for your hero, namely, the Rogue!
Rogues focus on one thing: Damage! They destroy their enemies before they have the chance to hurt him too much.
How to play Rogues in a nutshell:- Kill many small monsters! They don't hurt much and they drop trophies.
- Trophies are your way to get new items when reaching your camp.
- You get a small amount (5%) of Vampirism but you can't get more at first.
- You'll need to find other ways to keep your health high!
- Offense is your best Defense... focus on your Critical Hit Chance!
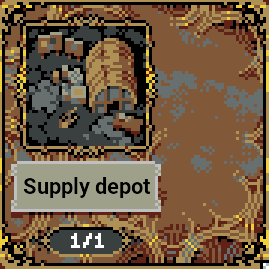 The Supply Depot
Unlocks your ability to craft and find useful items for your town (and thus, you!).
We'll be going over those next.
Also unlocks the Ruins card. More details on those in the companion sheets!
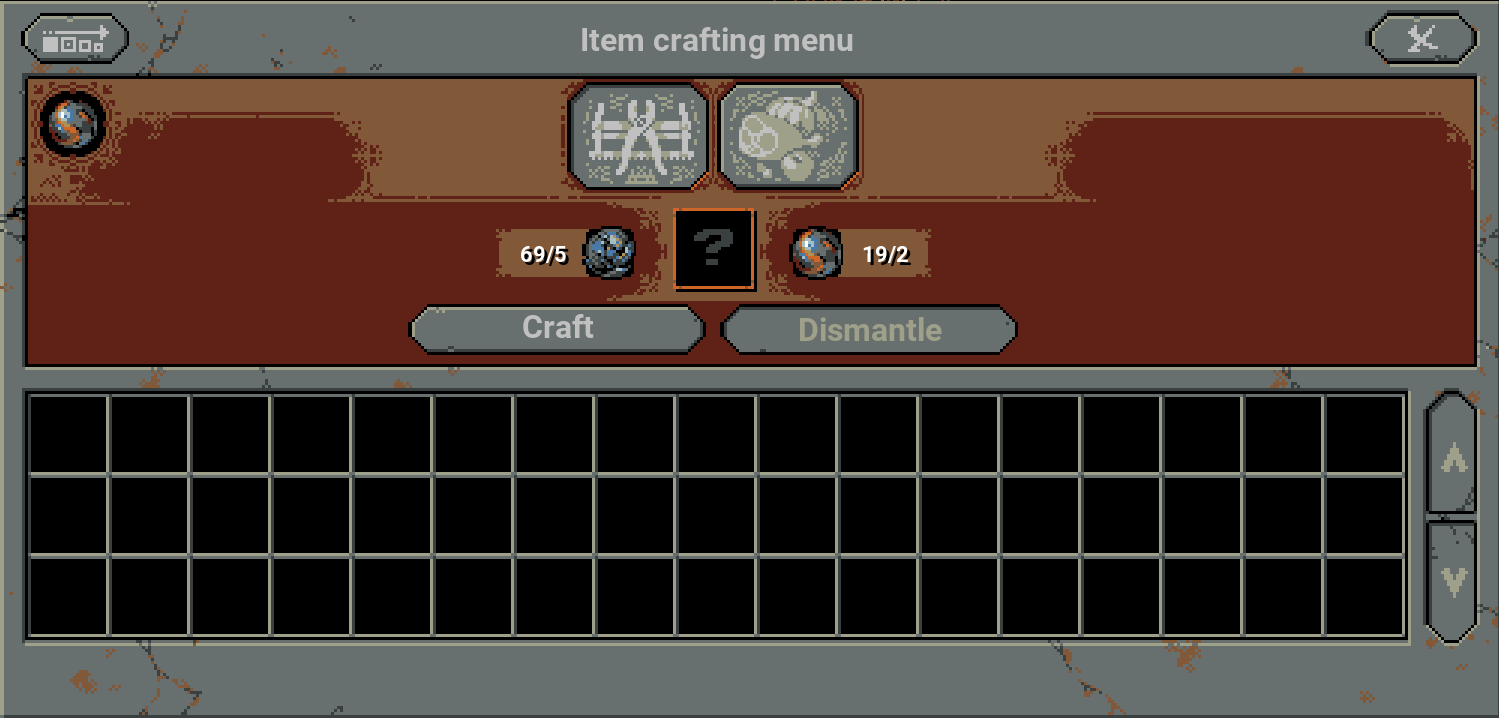 Above are some crafting options. If you have a Farm already you can cook some Food. If you have a Smithy, you can create Tools. First click either option then, if you have the materials to create them, on the Craft button.
  I did and I created... a Frying Pan!
If you don't have the materials or get something else, don't worry about it, you can pretend you created that Frying Pan as you click on the Supply menu item next and keep reading ;)
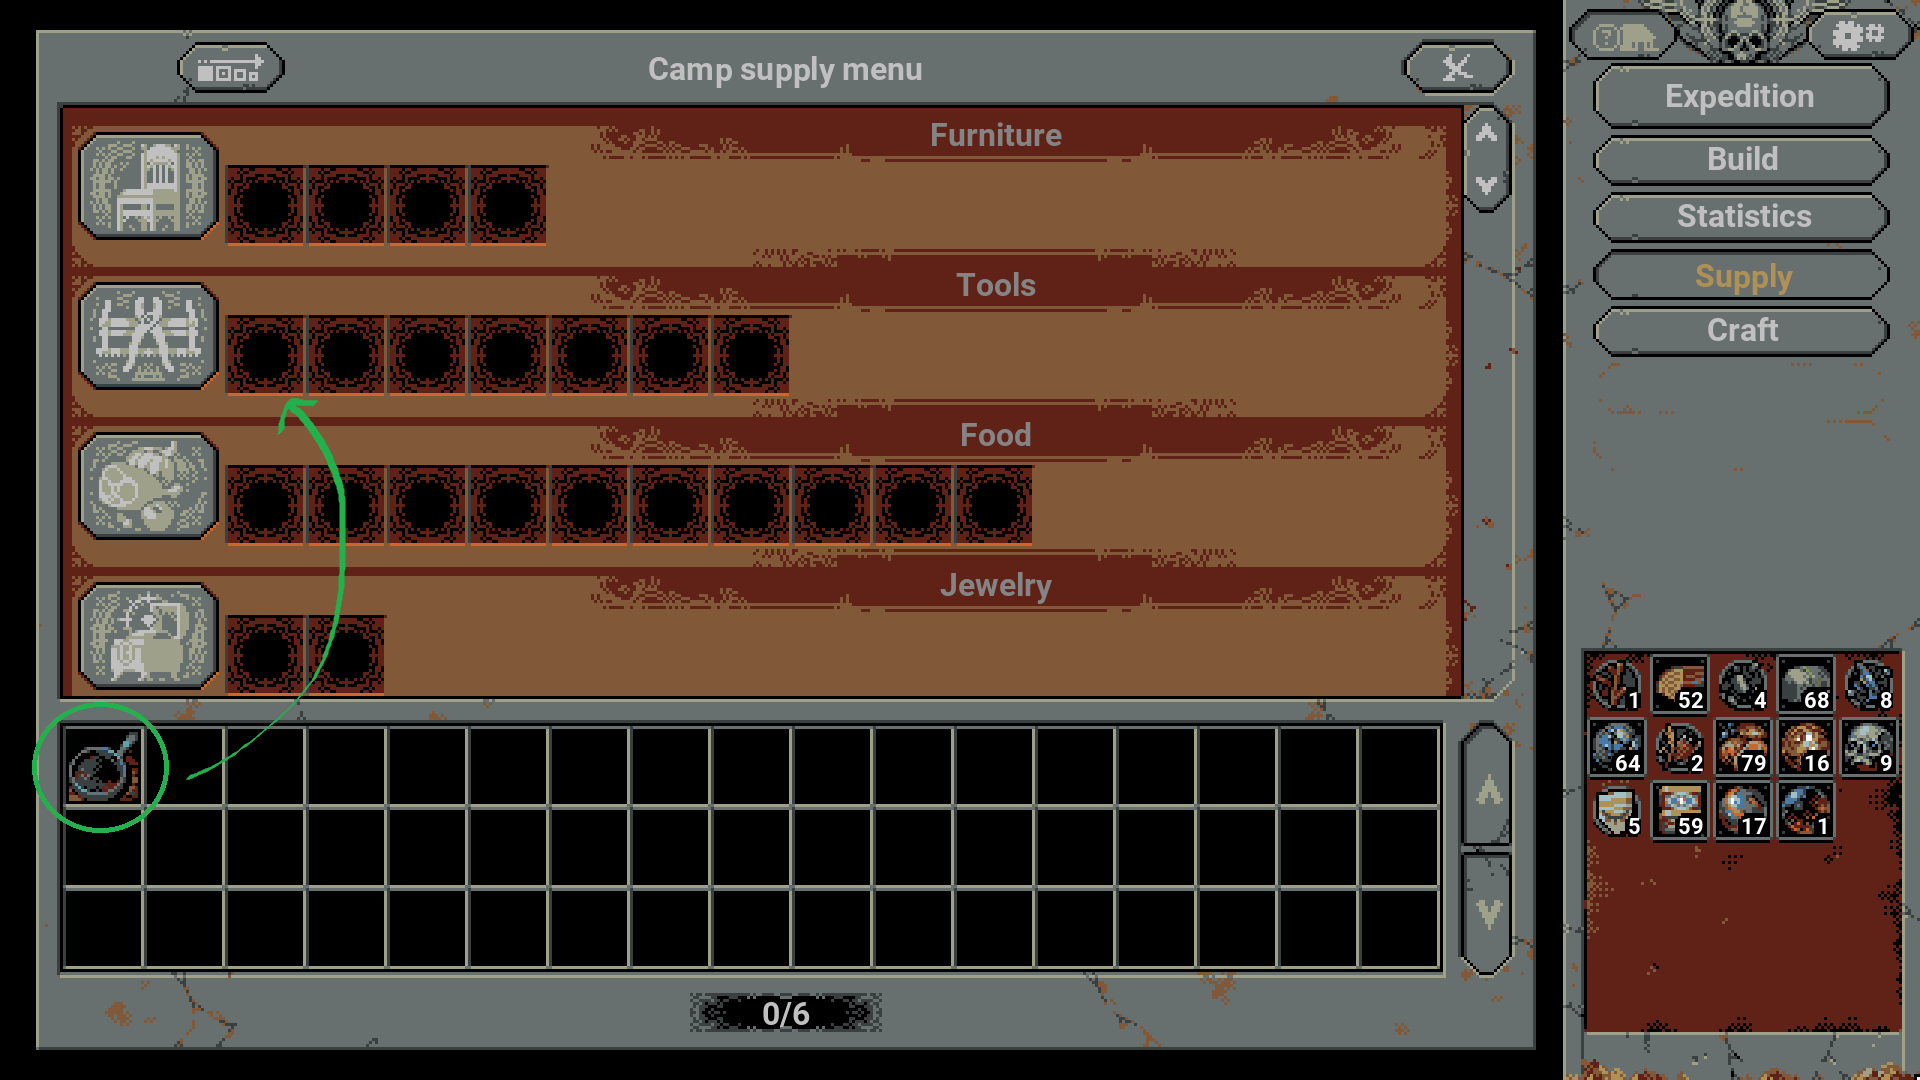 Notice our pan at the bottom? For now let's just ignore the rest and focus on clicking on the Pan and then moving it up to an equipped position down at the top, by clicking one of the available square where the arrow is pointing.
Once equipped it will be used on your adventures. Items down are not in use until equipped at the top. Items are the top can be unequipped by Right-Clicking them.
I also want you to pay particular attention to the number at the bottom of your Supply screen. Those are your "Maximum Supplies". You don't need only the free space the squares provide above but also the Maximum Supplies as pointed down below. What are either of those anyway?
You might have noticed some weird symbol whenever you click on any of your town buildings. They look like this.

The first four numbers in grey represent the Black Squares you can see at the top of your Supply menu. That's Furniture, Tools, Food and Jewelry supplies respectively.
The number in red add to your maximum amount of supplies equipped at the same time.
You'll need both. To get more slots, create and upgrade more buildings! Houses (starting with mud huts) are the main way to increase your maximum slots for supplies.
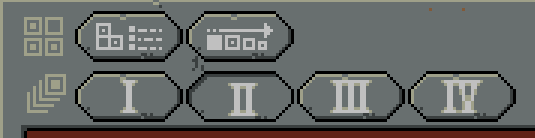 You can now configure and use up to four different sets of supplies to use with your various heroes. Simply click on the roman numerals at the top of the supply menu to switch between sets.
Manual: Traits
Traits are interesting and varied abilities, or perks, granted to your character to specialize, empower and otherwise amaze yourself and the monsters you will fight. Perhaps a wolf companion will join on your adventure to attack and absorb the hits of your enemies or you might get the ability to heal on every counter-attack!


In addition to those five traits each class has ten traits unique to them which you can see here (spoiler-free with only classes traits)[docs.google.com].
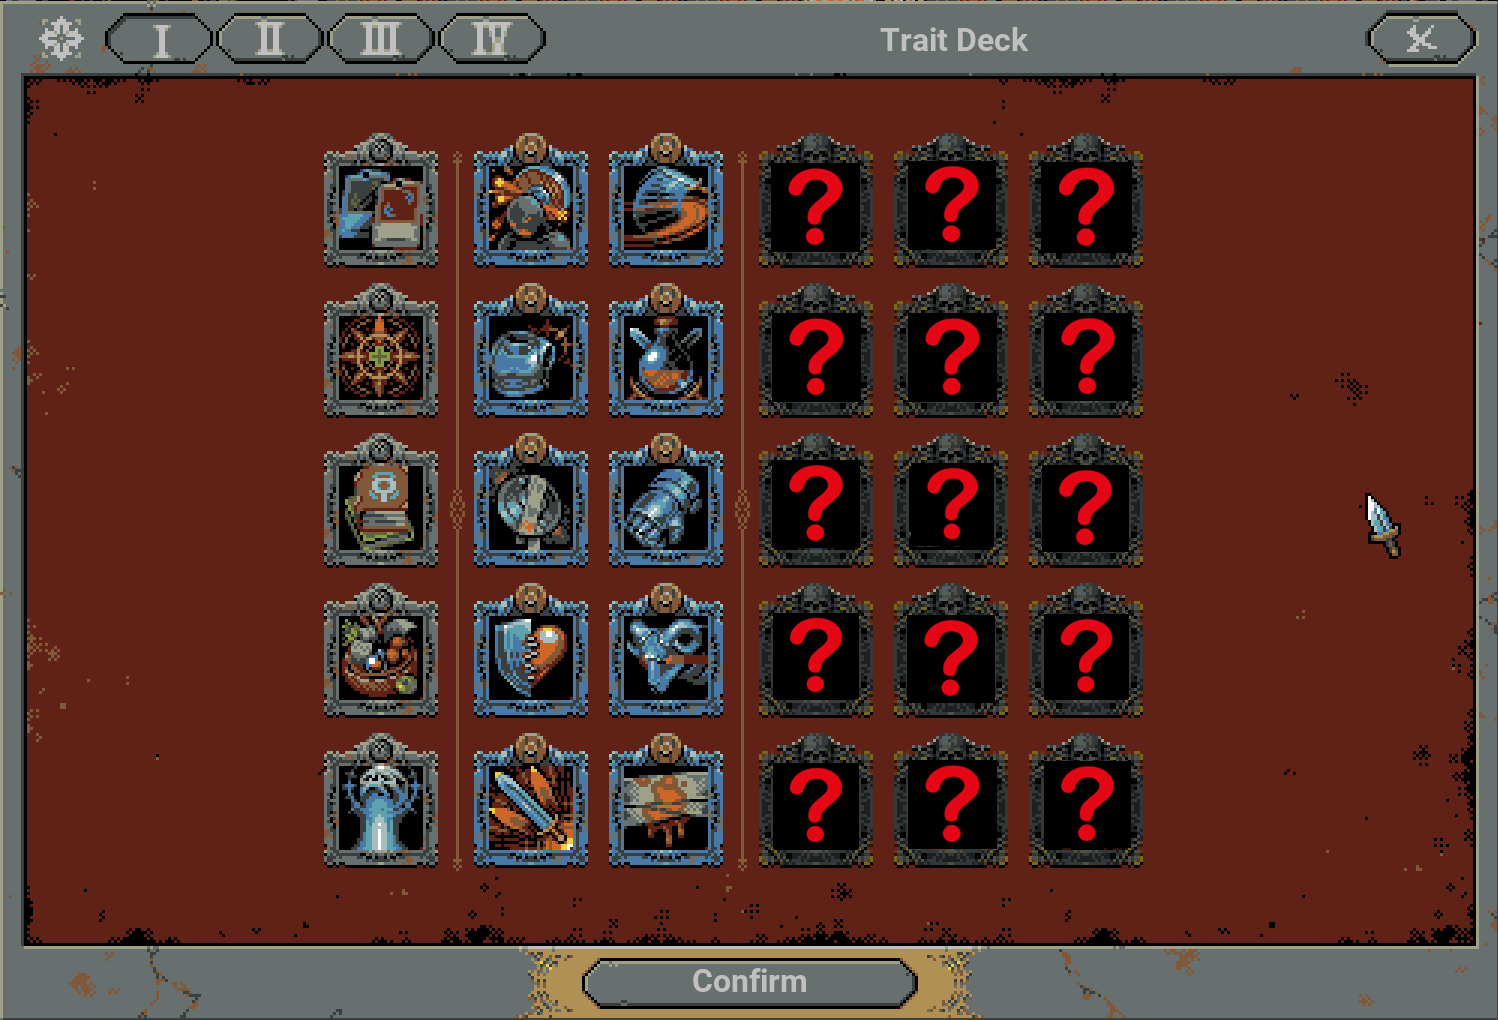
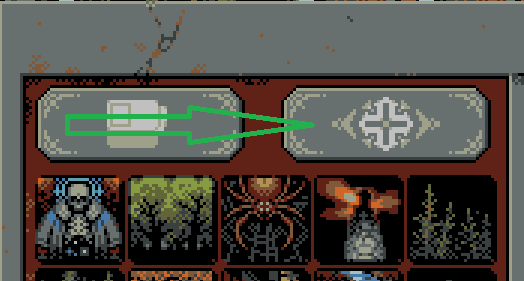 You might not want to use every acquired Boss trait on every adventure, with every class. Sometime you might want to be stronger or more defensive. Perhaps you need a trait for a specific strategy. In which case you can turn them on and off at ease on the trait page from the expedition menu. Simply click the ones you want until they light up! Or alternatively click the ones you don't want until they are dimmed. Keep in mind you cannot select or deselect your Base or Class traits.
Manual: Bosses Tips and Hints
- Bosses get stronger, like monsters, as the number of loops improve. Try not to face the Boss until you're easily killing the monsters; likewise if you're having trouble with the monsters, consider that you're behind in the "difficulty curve" and that it might be best to run away and fight another day.
- Don't be afraid to delay the appearance of a Boss for another loop or two of preparation. Pay attention to the Boss counter to the top left and when it start getting too full slow down and then stop laying new tiles before it fills up completely.
- You can hover any enemy or Bosses to find out their stats and special powers.
- The Lich create Palaces which make him stronger. Try to place map tiles where the Palaces would appear and use Oblivion on any Palace which do appear.
- Notice that the Lich stats say that it does "Pure Damage". This is important.
- Place a Beacon covering the Boss. It will buff you by a lot but not the Lich!
- Place a Blood Grove or Hungry Grove covering the Lich. It will take away a chunk of its health making the fight much easier.
- Traits which add extra HP (Article of Protection) and which Stun an enemy on hit (Shield-Master) are very good in boss Fights.
- Pure Damage completely ignore Defense which mean your Defense is completely useless against the Lich. Likewise, Pure Damage will be very useful to help you defeat the Lich.
- Using many items with Evasion make the Lich MUCH easier to defeat!
-
Not exactly a "newbie tip", but... Because the Lich uses Pure damage, exquisite mirrors can reflect his damage back at him. A high number of mirrors can trivialize the fight even more than usual
- The Priestess main defense mechanism is her buff called "Iconostasis". This take the form of 5 Stained-Glassed Windows when at full strength, which offer her 100% chance to avoid an attack. Missing while trying to hit her directly will remove one Window ("Reflect") and reduce her chance to avoid attack by 20%. Attacks which go through and Damage All do not break a shield.
- Hits which are "reflected" by the Windows still apply Damage All. Remember that if you're a Rogue your Damage All can Critical and also apply Vampirism but the Fighter has also had excellent result with the Damage All strategy particularly at low loops level.
- Like her Windows, her Angels are untargetable, while also being Invincible. They hit hard but their attacks can be turned into a weakness: Every Counter from their attacks will apply your Damage All to the Priestess. You can also Evade Angels hits.
- Attack Speed and any extra attacks are king against the Priestess.
- Sources of Extra attacks: Pets, Skeleton, Outposts, Lightning Bolts from the Storm Temple
- Advanced sources of Extra attacks: Reflected Ranged Attacks with the "Their own perils" perk, Countered Lightning Bolts from using the Storm Temple along with Mirrors, the 3 quick attacks from "Lightning Strike" trait.
- There are three mechanisms central to the Hunter.
- He'll force you to change target every 2 shots.
- His Pets will "phase out" once they have been hit 3 times, forcing you to change target then come back to attack you with a big critical attack.
- Killing any of the trio will Heal and give a Damage Buff to the other two.
- He'll force you to change target every 2 shots.
- The Hunter will die first most of the time. The Pet will usually give you the most trouble. Avoid activating their "phase then critical hit" ability too often by hitting them with huge hits boosted with a lot of Pure Damage and Critical Hits.
- Defense won't help you against big Critical Hits. Evasion will shine again.
- Stay alive.
- Omega is a test of endurance. His damage is relatively "low" Damage-Per-Second but it will easily crush your Defense. Again, Evasion will trump Defense. He'll randomly and temporarily remove an item from your inventory. Be sure not to rely too much on any one item.
The stat-disabling effect of the third strike can (obviously) only target stats that you actually have, however it doesn't openly appear to have any particular weighting other than ignoring the +Max HP stat, mercifully. This means, though, that equipping a single example of supply items such as the shoe nails, smoked ham, and blacksmith's hammer can grant you an entirely new stat category on their own depending on your class/loadout, which can then be disabled instead of a stat you were actually using. It's not a huge advantage, but it can certainly help when you lose your 1 point of retaliation damage instead of your 7 max skeletons.
Also, he has a considerable amount of physical armor. Note the point about the lightning damage formula. My fastest Omega kill so far was a complete accident where I ended up having three storm temples targeting the camp tile, and he died in about 5 hits.
Mechanics: Statistics and Combat
- Pure damage: Damage Bracket which completely ignore Defense.
- Damage all: Damage Bracket which applies to all enemies including your target.
- Your enemy can evade it.
- Many are strong or immune against it, Swarm are weak against it.
- Defense apply fully to it unless on your main target.
- Does not add Damage from Supplies.
- Drain HP with Vampirism from all targets.
- Deal its damage even if you're Entangled.
- Your enemy can evade it.
- Counter: When you get hit by a monster, you hit the monster back.
- After every Counter your attack bar is reset to zero.
- Spend 25 stamina. Can fully Counter, for free, when Out of Stamina.
- 15 frames delay (one quarter of a second) between getting hit and countering.
- After every Counter your attack bar is reset to zero.
- Attack speed: Reduce the time between your attacks. Mechanics below.
- Critical Chance%: Give your character a chance to critical hit.
- Critical Damage: Make the critical hit themselves hit harder.
- Defense: Block 1 HP for 1 Def before cap/diminishing returns (See next chapter for accurate formula!)
- Vampirism: Restore X% amount of health from your attacks and counters.
What works and what doesn't work with Vampirism:
Pure Damage: Work with Vampirism
Damage All: Work with Vampirism Single Target and/or Adds
Retribution: Does not use Vampirism
Test 1/Test 2 + Sheet[docs.google.com] - Evade: When you would get hit, you don't get hit, at the cost of Stamina. Can still Evade when out of Stamina, but at a reduced rate (50% but need to be tested).
- Regen per sec: Restore health over time both in combat and out.
Regen always ticks for 1 HP but at reduced intervals of time with increasing Regen amount
60 frames = 1 tick at 1 Regen Per Second.[docs.google.com]
Regen intervals are halved out of combat.
Survivalist double the 1.
No effects from either Beacon or Temporal Beacon.Monster regeneration: Equal to their regeneration * loop. Every second.
- Max HP: Add to your Maximum HP
- Pure HP: Add temporary HP at the beginning of every fight. Defense doesn't apply to Pure HP.
- Hp per day: From Meadows and Supplies. Self-explanatory.
- Retaliation damage: Enemies are damaged by this amount when attacking you. Fully affected by Defense.
- Max Skeletons: Need at least a few skeletons but maxing is not a priority.
- Skeleton Level: Skeleton scale like monsters because they are monsters. Without levels, they are nothing. This matter a lot.
- Summon Quality: Allow for the stronger versions of skeletons to spawn. See Bestiary[docs.google.com] for their stats. Tertiary stat.
Pure Damage: A Bracket of Damage which Ignore Defense. Nothing else. Reflect will still reflect, etc.
Retaliation: Deal damage to the enemies when they attack you. Fully affected by Defense.
Damage All: A Bracket of Damage which is added to both your target and all other main screen enemies.
A very few sets of enemies either take less (such as Skeletons) or more (Swarm type enemies) damage from it. Tested with secondary enemies which are fully affected by Defense, drastically reducing its utility, particularly considering some enemies are completely immune to it in later chapters thanks to special abilities.
As for its exact interaction with Swarms, it is somewhat counter-intuitive at least for your main target. u/feuerschein has all the information here:So, if a swarm is the primary target of your attack, it is affected by both Normal damage and DtA. However, your ATK power for the sake of damage calculation will be only half of the sum of normal damage and DtA. If a swarm is a secondary target, it'll only be affected by Damage to all. Your ATK power will be your Damage to all doubled.For example, should you fight two ghosts of a ghost and have 100 normal damage and 200 DtA, your attack against the primary target will be 150, but your attack against secondary will be a whooping 400.
Starts at 100, regenerate 15 points per second and gain 10 point when hit.
25 are spent on attacks/counter-attacks and 10 points on Evading a hit.
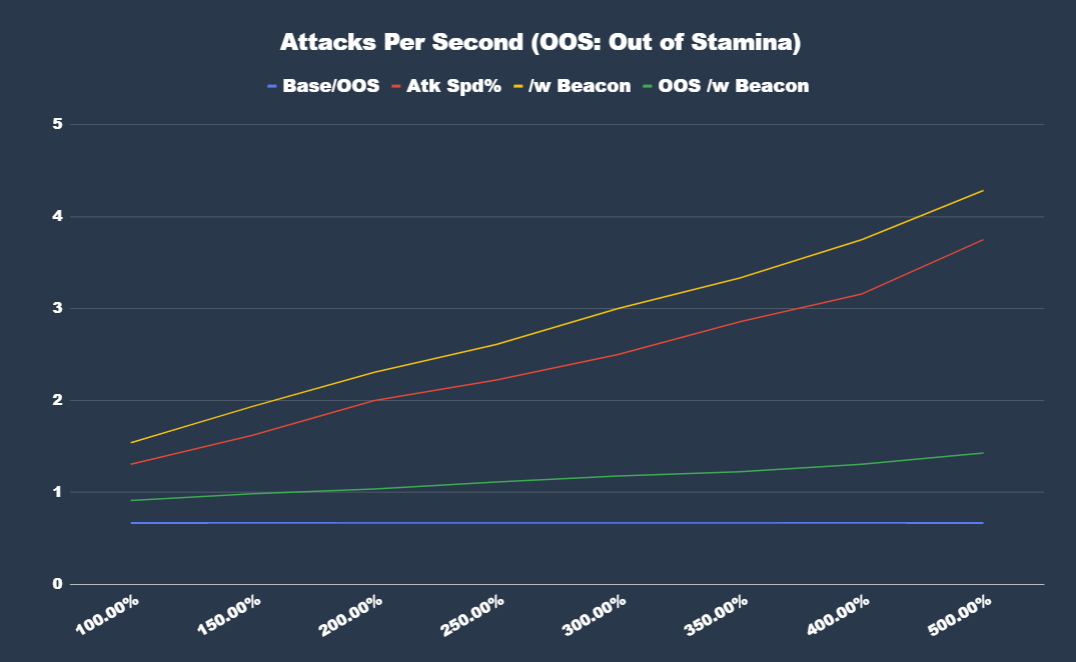
When out of stamina, you use your base attack speed and evade is halved.
Unless you're under the effect of a Beacon, in which case, you get to use some of your attack speed even when out of Stamina[docs.google.com].
Per the devs here[imgur.com] and the in-game debuff info.
The in-game debuff says -70% attack speed when out of stamina but this could be wrong, in testing all speed up to 500% obtained from weapon and forest was lost[docs.google.com].
Multiply with the base which is (after rounding) .6667/seconds for Fighter. This is 90 frames.
Example at 12% attack speed: 0.66 * 1.12 = 0.74 attack per second
Beacons stack multiplicatively with Gear+Tile value.
Zetajezu Attack Speed Buff and Debuffs. It can be seen here.[docs.google.com].
The following is a chart based of basic Attack Speed interactions based on some of my tests here.[docs.google.com]
Monster scale their stats such as HP and Strength linearly, plus a small percentage bonus noted on the expedition screen. Example: 10hp -> 20.2 hp -> 30.5hp.
Strength is a monster Damage stat subject to some randomization and attack speed
Many monsters have an amount of Regeneration and/or Evade
Enemy scaling explained
So after a fair bit of "mathing" I figured out the formula behind enemy scaling in the game. Seems to also work for friendlies (Necro skelies, Archers, Rogue Wolf).FORMULA:
base * growth(n) * difficultymod growth(n) = growth(n-1)+(1+(n-1)*(loopmod * 2) growth(1) = 1
Loopmod = 0.02/0.03/0.04/0.04 Based on chapter
Difficultymod = 0.95/1/1.05/1.1 Based on chapter
For HP the value is ceiled, while STR rounds it to two decimals. For some enemies/loops using ROUNDUP(val,2) in excel gave values off by 0.01, but close enough.
Graph of Chapter 4 slime for loop1-15[i.imgur.com]
Mechanics: Damage Formula
This section is credited to u/feuerschein, he has posted his research here.
Damage reduction by armor applies to normal damage, damage to all, retaliation damage. If half of your attack power is higher than enemy defense+0.5, then defense is flat reduction:DMG = ATK - DEF
If half of your attack is equal to or lower than enemy defense+0.5, then the following formula applies:
DMG = (ATK/2)*[20.3125/(18.75+DEF-ATK/2) - 1/12]
The damage is rounded. The damage cannot be lower than 1.
... as well as this helpful simplification:
To give you the feel of the formula: if your ATK/2 is equal to DEF, the damage reduction is 50%; if your ATK/2 is lower than DEF by 16, the damage reduction is 75%; if your ATK/2 is lower than DEF by 53, the damage reduction is 90%; when DEF-ATK/2 is 225 - this is absolute zero, your attack power no longer matters.
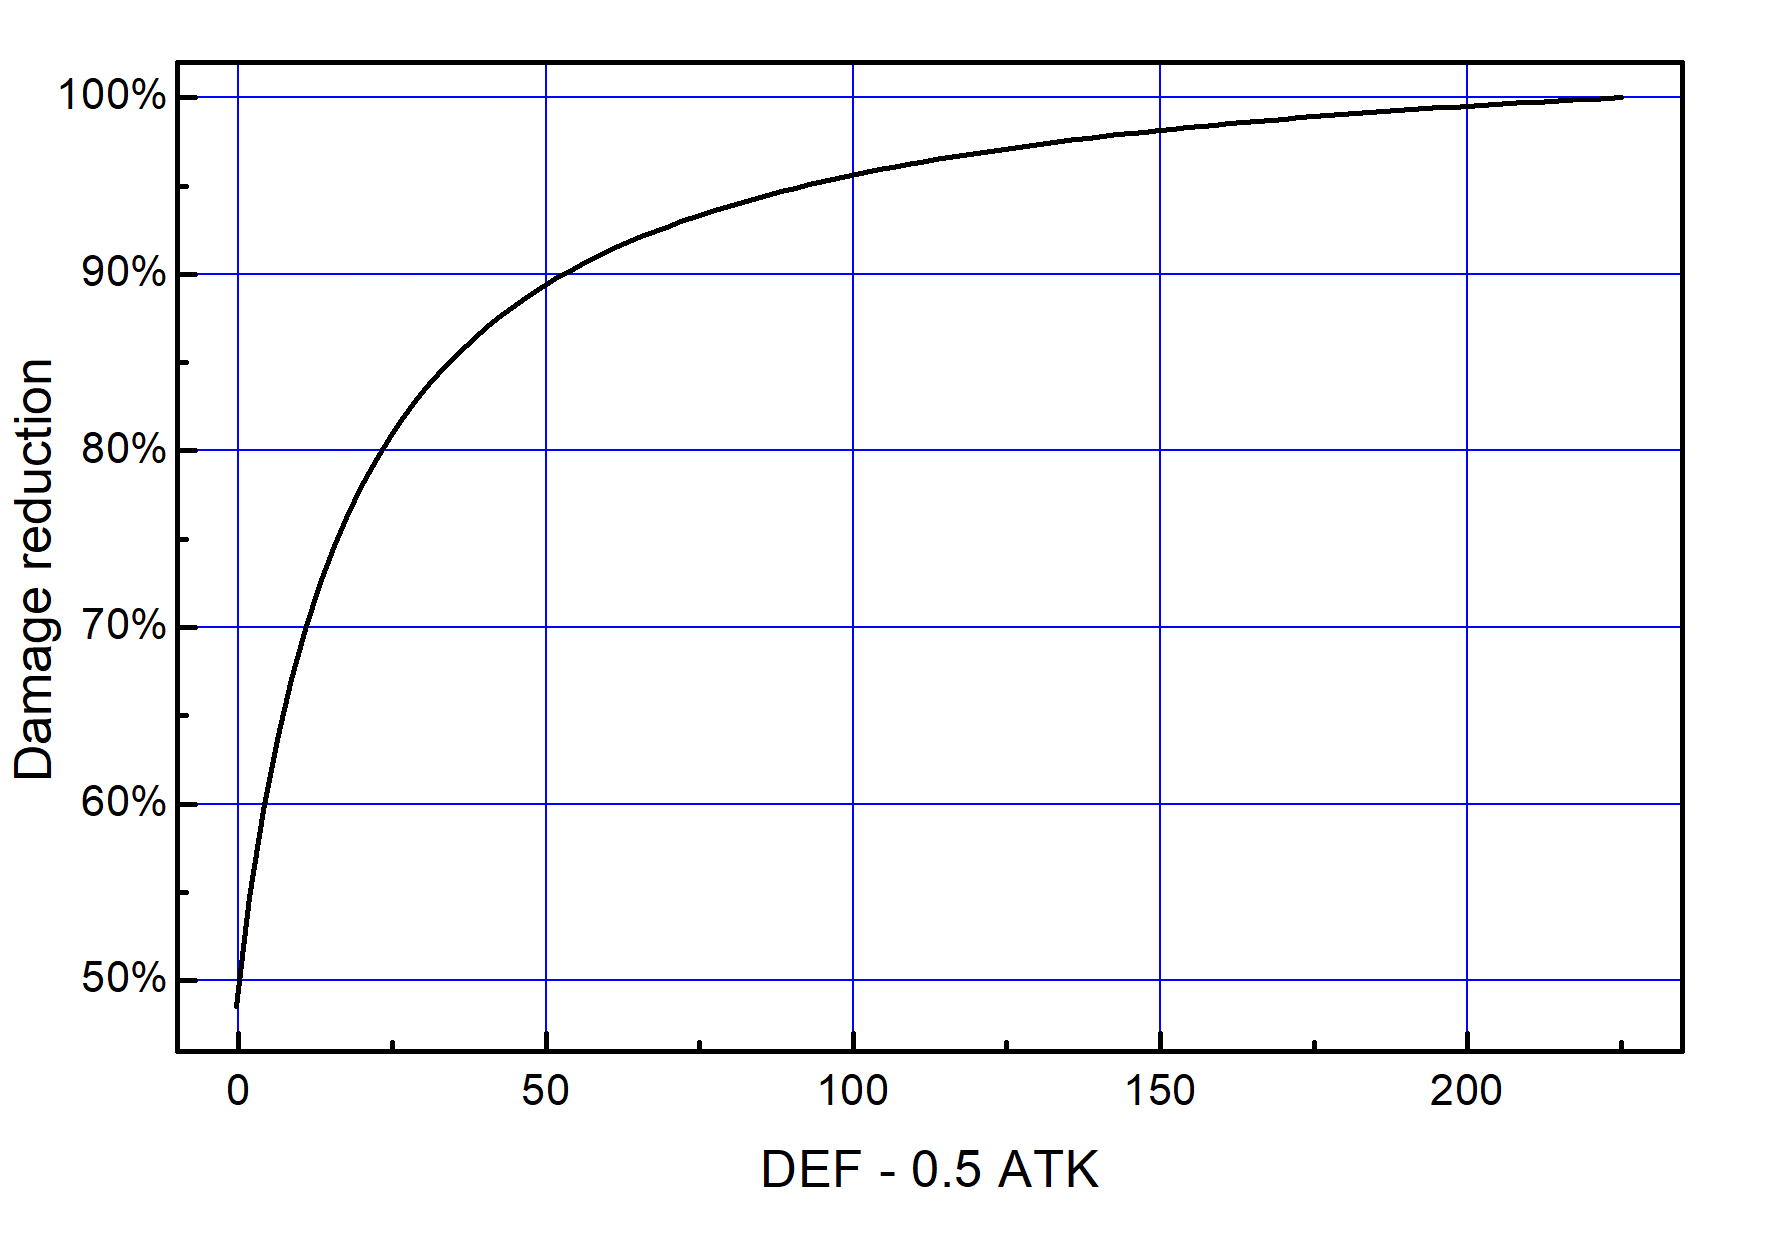 His table demonstrates this.
If your equipment is up to your loop level, while facing monsters with either low def (or no defense like slimes) and you're at what is considered an early loop (very roughly anything below loop ~15) you generally don't need to concern yourself too much with this equation if you mind your choice of tiles.
As we see below, at Chapter 4, with an enemy with strong base defense, the old rule of thumb of "1 def = 1 less damage" go out the window pretty fast.
Loop 20 Skeletons: with a defense of 97, it can expect to face a loop appropriate Hero attack of ~100. Half of the Hero attack is 50 which result in a DR of ~90% for the Skeleton. In-game this mean on average 12.5 damage on each strike. Terrible but within reasonable parameters. Our Hero should plow through the 330HP of such a skeleton in about 26 hits so... we'll be here for a while.
Loop 30 Skeletons: with a defense of ~164, it can expect to face a loop appropriate Hero attack of ~140. Half of the Hero attack is 70, which result in a DR a wee bit over ~95%. In-game this mean roughly 8 damage to a skeleton 566HP. You should destroy the Skeleton in roughly oh gawd why does he have so much HP hits.
In reality, it's not that bad at those loop ranges; there are many force multipliers and ways to get weapon over your loop level... a fighter has infinitely scaling attack over time... rogues have a huge upper range of damage with extra crit and crit damage. It does however paint a picture of what happen if you fast-forward a thousand loop. If it's not a monster with forever defense of 0 (about 12 monsters, including Slime and Flesh Golem by example) there will come a loop where your damage will reach the minimum of ~1. Thanks to enemies scaling much faster than the Hero, this can come quickly indeed for some high defense monsters.
(My own old data can be found here[imgur.com] and here.[docs.google.com])
Mechanics: Classes
Typical gear prioritization: Critical Hit % > At least one stacked offensive stat > Preferably one stacked defensive stat
Depends on what you get. Rogues can't be too picky. Remember Damage All and Pure Damage are stats which benefit from their Stacking Bonus.
Which itself stack additively: 1.10, 1.20, 1.30.
Example: You have 4 items with Evade totaling 40 (before bonus). Boot's built-in evasion make up 15. First, boot's built-in evasion don't matter here so you have a Total of Bonus Stats of 25.
This leave you with 3 items with Bonus Stats, meaning 2 extras. A bonus of 1.20.
Bonus Stats Total of 25
Multiplied by 1.20 = 30
Add the boot built-in evasion = 45
Relevant testing.[docs.google.com]
By default, you obtain 11 items of grey quality of level=loop*0.8.
Each trophy acquired is assigned to one random item either raising its quality (40% chance) or increasing its level (60%) in a range.
Quality is grey to orange.
Level bonus range is base loop*0.8 -> 0.9 -> 1.0 -> 1.1 -> 1.2 -> 1.3 -> 1.33
If the random bonus would raise an attribute above the maximum it is wasted.
The talent Picky concentrate the bonuses on fewer items for better or worst.
Jeweler's Lens have no impact on this system.
The trophy count impacts lvl and quality in probabilistic manner. If you have 200 trophies the expected number of buffs will be 98, while the maximum is 99. So at 200 the expected outcome is that one of your items is yellow in quality or has slightly lower level (1.3x loop instead of 1.33x). The graph linking the mean amount of buffs to the trophy count is in the second link in the OP.The effect of trophies has severe diminishing returns past about 150. Trophy count of 150 nets 94.5 buffs on average, 300 - 98.96, so there is absolutely no need to go the extra mile if this is otherwise detrimental to the strategy.
The optimal amount of trophies to get blue gear is about 28, yellow is 49, orange - how high you can possibly get it, but 150 will do the trick.
Backups of u/feuerschein's research here[imgur.com])
(older and wrong but self-acquired mechanics here[imgur.com])
Typical gear prioritization: Skeleton Level > Max Skeleton (at least +2) > Summon Quality > Survival stats and attack speed as needed.
- It takes 34 frames to summon your first skeleton. Roughly half a second.
- It takes 226 frames to summon the following skeletons. Roughly 4 seconds.
- Attack Traits such as Lightning Strike and Hunter's Mark. The latter doesn't apply its icon.
- Mirrors and their reflection of Pure Damage.
- Oasis Attack Speed Reduction (at least on sheet, need to confirm)
- More to be tested.
- Beacon Attack Speed bonus (1.013 untested)
- Dunes/Deserts HP reduction. (1.013 untested)
- Attack Speed, Regen Per Second
- Supplies which add +Damage (Skinner's Knife, Garlic, etc).
- Loop and Chapter monster scaling.
- Burned Forests Pure Damage.
- Traits such as Blind fury (4 quick attacks on 20% HP)
- More to be tested.
- Summon Quality is the chance to summon one of the 3 special skeletons.
- Skeleton Guard grab enemy aggression with its "First Target" ability.
- Skeleton Mage has Pure Damage.
- There is some quirk related to Summoning Skeletons. The first hit of Skeletons do not always use the normal attack speed. Regular Skeletons tend to get their first hit much faster than normal.
- While not unique to the Necromancer, due to their particular vulnerability, it is worth noting that Defense does not apply to a Necromancer Pure HP bar should they get a Shield, which in most case, they probably should not due to the huge hit to Skeleton Level by using The Arsenal.
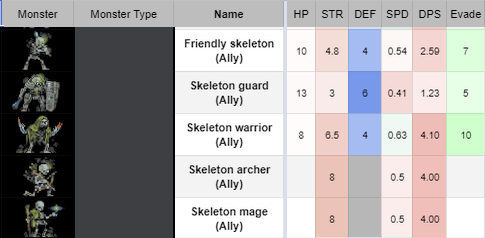
Temporary Skeleton Stats Chart Below. Skeleton follows the normal monster progression AKA multiply the HP, Strength and Defense stats by (Skeleton Level Value + 1)
Mechanics: Items, Cards and Supplies
Explained by example. All values noted can be seen in the game files and are tested to a somewhat reasonable degree[docs.google.com].
Value types for a test subject: Ratwolf.
Item Chance: 40%
Chance that the item will be Equipment instead of a Card.
Item Minimum: 1
This mean this monster will always drop at least 1 item.*
Almost all enemies have at least minimum 1. Even Slimes. Some, such as Mosquitoes, Goblin and Fishmen have 0.
If playing the Rogue equipment drops are baubles instead (unless "tier 0" like chests).
Quests award real Items for Rogues.
Item Maximum: 2
This mean this monster will drop up to 2 items.*
A common value. Most monster have either 1 or 2 as their Item Maximum
Average Items gained from killing a Ratwolf: 1.5
Self-explanatory.
*Minimum and maximum are interchangeable in the game files.
Higher is better. Need further research (did some of my own[docs.google.com]) or Dev answer.
Ratwolves have Item Level +2. At Loop 20 to 24 all of their items varies from Loop Level to Loop Level +5
Skeletons have Item Level +1. At Loop 20 to 24 this mean a range of -3 to +3 from Loop Level.
Some monsters have increased chance to drop items with specific affixes. Mosquitoes have an affinity with Vampirism for example (need more testing, it would need to be class tested etc...[docs.google.com])
Monsters have "Loot Tiers". [docs.google.com]For example, our Ratwolf here has a 2% chance to drop a Yellow Item.
The following is a table of most non-spoiler enemies, click to enlarge (gone while I edit it)
Some monsters like Chest (not to be confused with Mimics) have 100% Item Chance and will never drop any Card.
While Tomes have only 15% item chance to drop Equipment on an item by item basis making them great to farm Cards.
With 15-25 item drops with a 50% Item Chance, the Frog King has the highest possible Card Drop chance total in the game.
In practical terms this mean that inserting a card with a huge card weight, such as a Wilderness card by example, reduce your odds of drawing every other cards you placed in your deck.
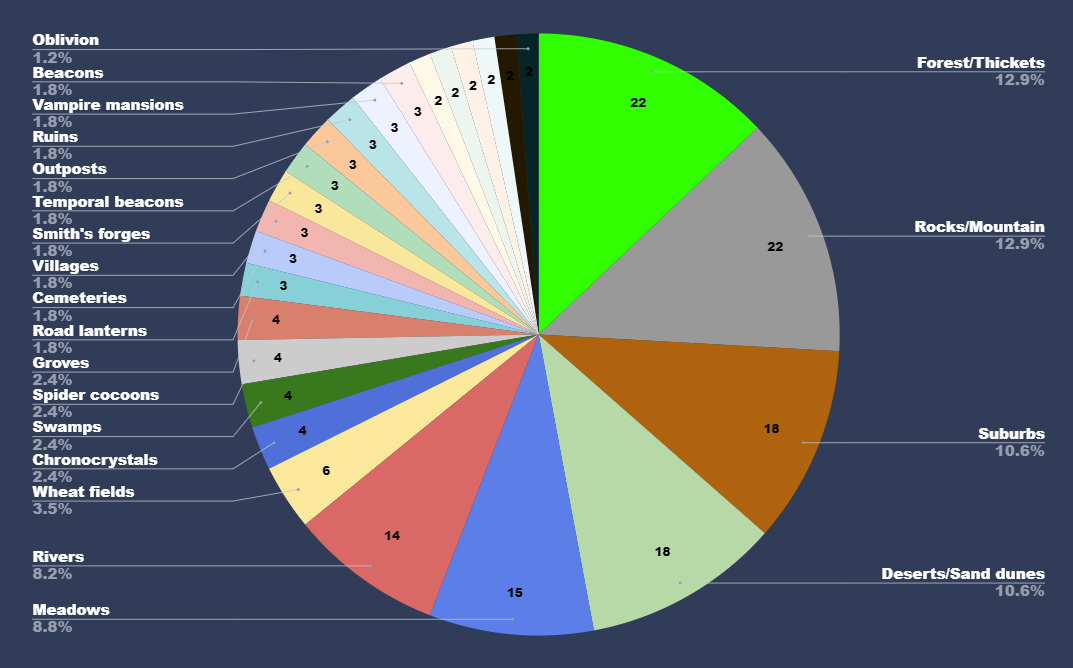
Examples of a high weight card are Suburb, which have a weight of 18 while a small card weight would be Oblivion which has a weight of only 2.
Weights are not to be confused by probability. By example a deck consisting of only Suburbs and Oblivion would have a 10% chance to be drawn while the Suburbs would have 90%.
In simple math you add the total weight of your chosen cards to get your total weight.
Then divide one cards weight by that that total weight.
Again with the example above: 20 total weight. 2 / 20 equal 0.10 so 10% for Oblivion.
The entire deck is used every time MINUS 20% of the cards which are randomly removed after every shuffle (AKA you're either just starting a new map or you're done using up all the cards).
(I assume, but can't confirm, that's its not their type, the number of encounter or the other (types of) items you might have acquired)
The exact kind of drop, assuming it's not completely random as is most likely, is untested.
On average, in testing, a full clear (33 tiles filled with 4 monsters) will reward one random(?see above) supply. Any supply drop is random and they can stack.
Mechanics: Cards
- Villages Heal HP (15+5*loop) and Quests reward 1 item equivalent to a monster with -2 level loot/up to tier 3
- Count's Land Heal (15+20*Loop) and Quests reward 1 item equivalent to a monster with -2 level loot and up to tier 4. If destroyed with Oblivion and rebuilt as a Ransacked village it will turn into another Count's land in only 1 turn.
- Wheat Fields add a stacking Heal HP (5*loop) to either a Village or Count's Land
- Removing Swamps doesn't change the swamp count until your next Witch Hut.
- It's possible to get 2 potions at once if you're crossing 2 Witch Huts.
- Each Witch Hut Placed reduce your max potion count by 1 down to 0.
- This can reduce your current potion count. Removing the Hut doesn't increase your current count back. It does increase your maximum count as expected.
- Lowering max count below zero cannot be exploited to raise max count higher than normal.
Witch priority list:
- Cast Totem if a free spot exist (1 per fight). 5 frames charge-up.
- If 5th hit, cast Blood Donation (10% max HP damage) on hero, then heal same amount on random enemy. Takes 5 frames (after the blue circle is filled) to damage followed by 5 frames to heal.
- Cast Heal on hurt enemy. If no hurt enemy exist cast Heal on a hero or pet. Prioritize same hurt enemy if possible (max 2 per fight per target). Takes 5 frames to heal+debuff followed by another 5 frames for the green healing numbers to actually show up.
- Does nothing AKA the "side-glance".
- The bonus is 1.20*Defense.
- Takes item from your inventory starting from the bottom right.
- Holding an item with your cursor doesn't prevent an item from being taken.
- Neither does right-clicking an item.
- Fighting the forge monster can trigger a boss.
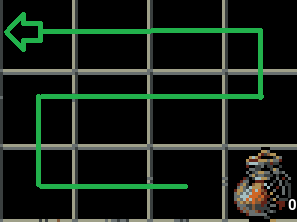
- Blood groves placed next to another Blood grove (but not adjacent to a Forest/Thicket/Grove) become Hungry groves.
- BG placed next to a Burned forest (but not adjacent to a Forest/Thicket/Groves) become Hungry groves.
- BG which have all their adjacent Forests/Thickets/Groves removed by Oblivion become Hungry Groves.
- BG which have all their adjacent Forests/Thickets turn into Burned forest do not automatically become Hungry Groves
- Hungry groves become Blood groves when a Forest/Thicket is placed next to them even if that Forest/Thicket automatically become a Burned Forest.
Hungry grove have a better aura and also now auto-kill flesh golems and prevent them from using their invincibility ability.
Blood groove and hungry groove stop all on death enemy ability from triggering. Skeleton cannot became cracked or resist death. Ghouls cannot resist death. Scorn Worm cannot escape. Vampire Mage and Watcher Mage cannot became tome. Ghost cannot spawn.
It also removes corpses so Ghouls cannot eat corpses.
Flesh golem from chapter 2 can resist until they give one last hit. Under hungry groove, they can be killed before they give that last hit. I like to point too that hungry grove doesn't eat the flesh golem same as any other creature. They simply remove the invulnerability from their ability. You still need one last hit after their ability trigger. It just you don't keep attacking them, get retaliation damage and their last attack(this is the only part that can hurt a lot) before the battle end.
The lightning from storm temples scales based on the armor of whoever's getting hit, with
a formula of [8 + 2*loop + (Defense * number of temples)]. Certain enemies, such as skeletons, rapidly gain armor as the loops progress and eventually end up with some seriously high numbers. ...which the temple then turns into damage. 2-3 temples is enough for the lightning to one-shot skeletons on loops well into the early 20's
Sound pretty lame, and even hurtful, but it's a little more than it seem as per this testing[docs.google.com].
- It stack multiplicatively with your tiles+equipment Attack Speed.
- It applies to you and your skeletons but not the boss during boss fights.
- It even speed up your Attack Speed when you're out of Stamina which is something no amount of Attack Speed normally would (might be a bug and reported as such but for now it works)
Even if they don't spawn they won't until the next 7 tiles (untested).
Spirits 33% chance to spawn is fixed regardless of how many ziggurats and spirits exist.
Mechanics: Gold Cards
The card sections contain mechanic information which are either interesting, unclear or outright unexplained. For more general information see the companion sheets :)[docs.google.com]
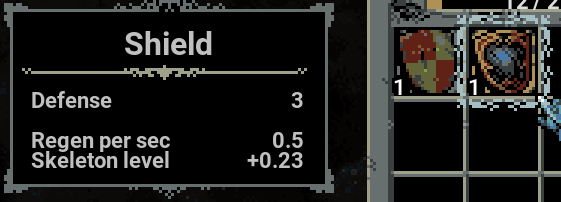 As a short and simple example let's take a loot at this extra Necromancer shield.
Under normal circumstances the stats of such an item would be: roughly 4 defense then exactly 0.6 regeneration, 0.27 skeleton level. Out of these only Skeleton Level are exactly 15% lower but at higher gear level the numbers get closer and closer to 15% as rounding and flooring become less of an issue.
Base VS Bonus Values: This should be a topic on its own but items are made up of both a big Base Stat (eg.: HP to an armor) and smaller random Bonus Affixes. Bonus Affixes are everything that gets rolled on the items. (It's all* in the .ini file in your game folder.) You can't just ask yourself do the overall +% outweigh the -%. Some Base have no Bonus equivalent and vice versa. You have to look at individual Base Stats of the items and what it adds or retract to your character.
Test 1 for general base fighter values[docs.google.com] / Test 2 for Necromancer specific values[docs.google.com]
It depends on some factors:
A) Do you love the extra base value the extra item give you?
Rogue get a huge survivability boost with the Amulet and another Item Slot to stack their Class Bonus.
Warriors gain a huge amount of Retribution through their Helmet.
Necro get... Defense. Which doesn't apply to hits absorbed by their Magic HP.
B) Can you afford to lose either some Base weapon strength for the Fighter/Rogue or Skeleton Lvl for the Necromancer?
Rogue is a dynamite of damage already, as mentioned the Fighter get more damage overall thanks to Retribution while the Necromancer get a huge hit to their Skeletons.
C) How does this compare to the added benefit of the other Gold Cards?
The Crypt can build up into some good maximum HP without a drawback for the Necromancer.
Mechanics: Traits, Monster Abilities
Works even when a hit is Evaded and on Counters.
Does not apply Damage All or Pure Damage nor can it apply on more than 1 target at a time.
Testing: A displayed debuff number of 100 strip an added 1000 defense in roughly 10 hits by example.
Mechanics: Information and Modding
You can change some speed settings but this will break the game in more ways than one, I do not recommend, as broken values are bound to eventually make their way into your saved files. Which would ruin your day since it might not load anymore and/or start the zombie apocalypse.
The passing of days is a bar, which fills slowly and tick 100 times before the new day.
One tick is equal to 6 frames (again and from now on at 60 fps) out of combat and 48 frames while in combat.
Combat begin immediately, on the first frame, after the monster disappear and the combat screen start appearing. This mean that by the time the combat is fully "loaded" some progress will already have been made on the attack bars of combatants.
Time can go backwards in some circumstances but it cannot fully switch to the previous day.
At worst, the time bar stay unfilled (base 0) until time go forward again.
- Paths are made up of 34 tiles.
- Tile placement required to trigger the appearance of the boss per chapter, thanks to geoffhom:
- 89
- 113
- 164
- 202 (for the final boss)
- 89
- More info about the boss spawning mechanics in this useful reddit post by geoffhom. Backup[imgur.com]
- Treasuries give real items to Rogue when transforming, Villages reward with real items.
- Experience gain is calculated as base monster xp + 3 per extra monster. Quests don't impact XP. Example: Killing the first slime (4 base xp) in a 3 slime battle award 10xp, the second slime 7xp and the third 4xp.
- Monsters XP are usually equal to the monster's Item Tier X 4.
- Zero milestone (the gold card) make the tiles near it be weaker and vice-versa, pay attention to the in-battle buff which appear where the ghost and other areas appear.
Goblins don't appear to be able to spawn on villages. The same goes for spiders and battlefield chests, and presumably also things like flesh golems and living armor. Placing a village on the only exit for a goblin camp will prevent it from spawning anything.
- Extra monster trick: By purposefully keeping your damage low you can drag out fights to pass time and make more monsters spawns.
- If you use an app that maximize your windows (such as Borderless Gaming) you can have the game keep going when you alt-tab.
Something interesting I found is if you pick the resource reward at end of boss fight, it doesn't go into your resources in the top right but instead it went to the recap screen that appeal when you die or decide to retreat. This is useful to know that you don't risk losing materials if you decide continue the loop unless you die or fail to retreat on the campfire.
Fixes: Restoring Corrupted Games
Debug retreat and backup loading! - Now if you hold "load"/"continue" button in the main menu, you'll get two new buttons - "debug retreat" and "load backup". First allows you to abandon the expedition on that save and return to camp. But you will lose all your resources from that expedition, so use it in emergency cases only. And backup loads the previous version of your camp.
The games keep two backups of your saves which can be restored if your newest save has been corrupted and/or won't load.
In windows, they can be found in such a folder as: <drive>:\Users\<userprofile>/AppData/Local/Loop_hero/<numbers>
Fill in the blanks and show hidden folders as needed.
loop_save0, loop_save1 and loop_save2 are save slots 1, 2 and 3.
Whereas loop_save0.bk and loop_save0.bk1 are the two backups of save slots 1 by example.
Delete or backup your corrupted save slot then replace them with a backup by removing the ".bk" or ".bk1" part of the file name of one the backups.
Secrets
An hidden multi-boss encounter: First combine 6 tiles providing Area of Effect such as the Blood Grove, Hungry Groves, Bookery, Abandoned Bookery, etc...
This will make sparks appears on a tile subjected by those 6 auras.
Cast Oblivion on one of those tiles. Spacer for more spoiler.
The reward for winning is a jump to the main menu.
If u beat the secret dev fight when you jump to main menu u still keep the resources."
Fighting a slimy being: Fill your entire path with Swamps and nothing but swamp. All the paths tiles. (Except for your camp should you have removed it via bugs!).
Then a green being will appear, which you can fight. Spacer for more spoilers.
Reward is a whole bunch of cards.
Can be repeated with the help of an oblivion on any of your swamp and replacing with another swamp. Can stack multiples of "the green being" on the same tile that way, if that same tile is chosen randomly again.
Known Issues
- Spawning a Forge monster activate a boss if the next placed tile would do it. -saintzach (beta v2)
- Summary of effects cut-off in some resolutions. Tested[imgur.com] to happen at 1920x1080 in fullscreen+2x window. -gibibi (beta v2)
- Oblivion activating a boss if the next placed tile would do it (1.013, beta v3)
- River Source won't visually transform into Oasis if placed first before a desert/dunes and won't transform at all if placed after one of them. (1.013, beta v3)
- Gift of Blood still presumably bugged or with effect unknown. (1.013)
- Loop Hero - a Community Knowledge Book★ 5 (1k)54k views1.6k ♥8 minUpdated 8 Mar, 2021
- Cards / Tiles combo [Update 1.102]★ 5 (556)37k views1.3k ♥5 minUpdated 9 Jul, 2021
- Warrior Guide for Infinite Loops★ 5 (311)31k views1k ♥9 minUpdated 17 Mar, 2021
- Rogue Guide for Infinite Loops★ 5 (357)30k views1.1k ♥10 minUpdated 17 Mar, 2021
- Loop Hero комбинации карт + секретные боссы★ 5 (440)24k views751 ♥3 minRussianUpdated 16 Mar, 2021
- Maximizing Attack Speed With Thickets★ 5 (540)23k views1.3k ♥2 minUpdated 2 Sep, 2025





- Upgrading to PremiumTeam Fortress 2★ 5 (20k)1441k views11k ♥6 minUpdated May 11, 2022
- No More Room in Hell Official ManualNo More Room in Hell★ 5 (2.8k)569k views2.1k ♥29 minUpdated Apr 22, 2019
- NMRiH Community Hosting GuidesNo More Room in Hell★ 5 (526)351k views653 ♥1 minUpdated Aug 10, 2022
- How to 'Git Gud' Soon™MORDHAU★ 5 (2k)318k views3k ♥68 minUpdated Nov 16, 2024
- Лучшие кооперативные игры SteamPAYDAY 2★ 5 (1.5k)315k views2.1k ♥56 minRussianUpdated Apr 27, 2025
- Desert Eagle Heat Treated | Blue GemCounter-Strike 2★ 5 (1.6k)293k views1.5k ♥2 minUpdated Jan 16





This guide was created by its original author on the Steam Community. Are you the author and want it removed? Request removal.